- contact@scarhandpainting.com


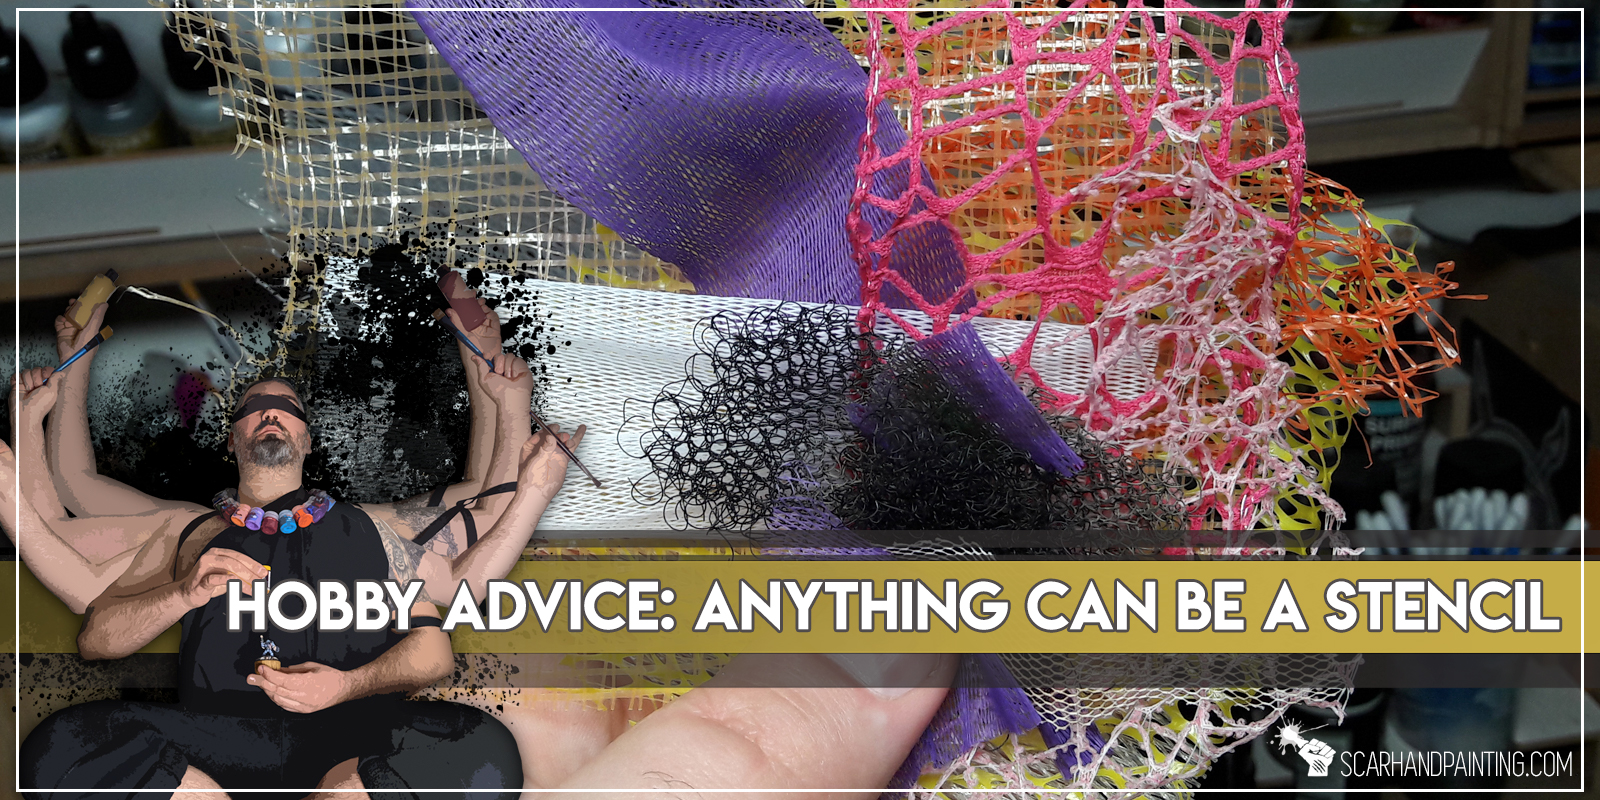
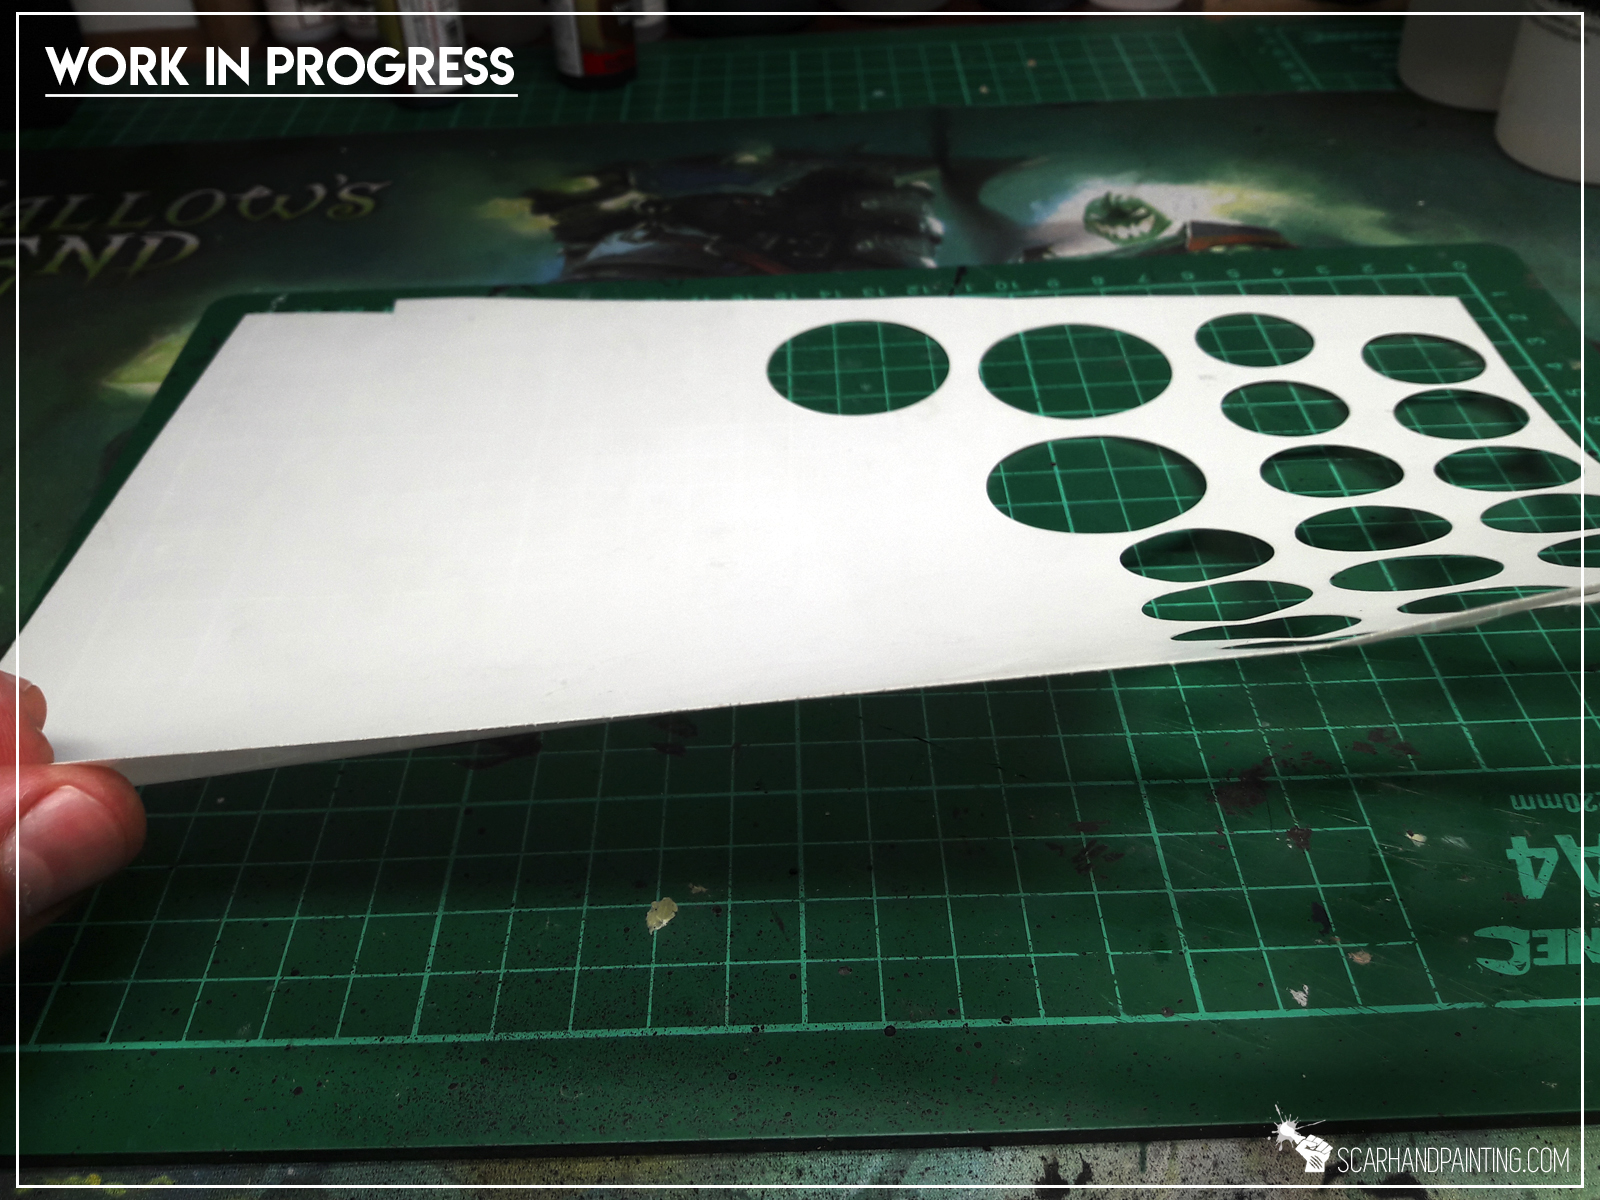
Let’s talk Stencils. There’s just so many awesome airbrush stencils out there. The world around us is filled with them, even though we’re used to pass them by without further notice…
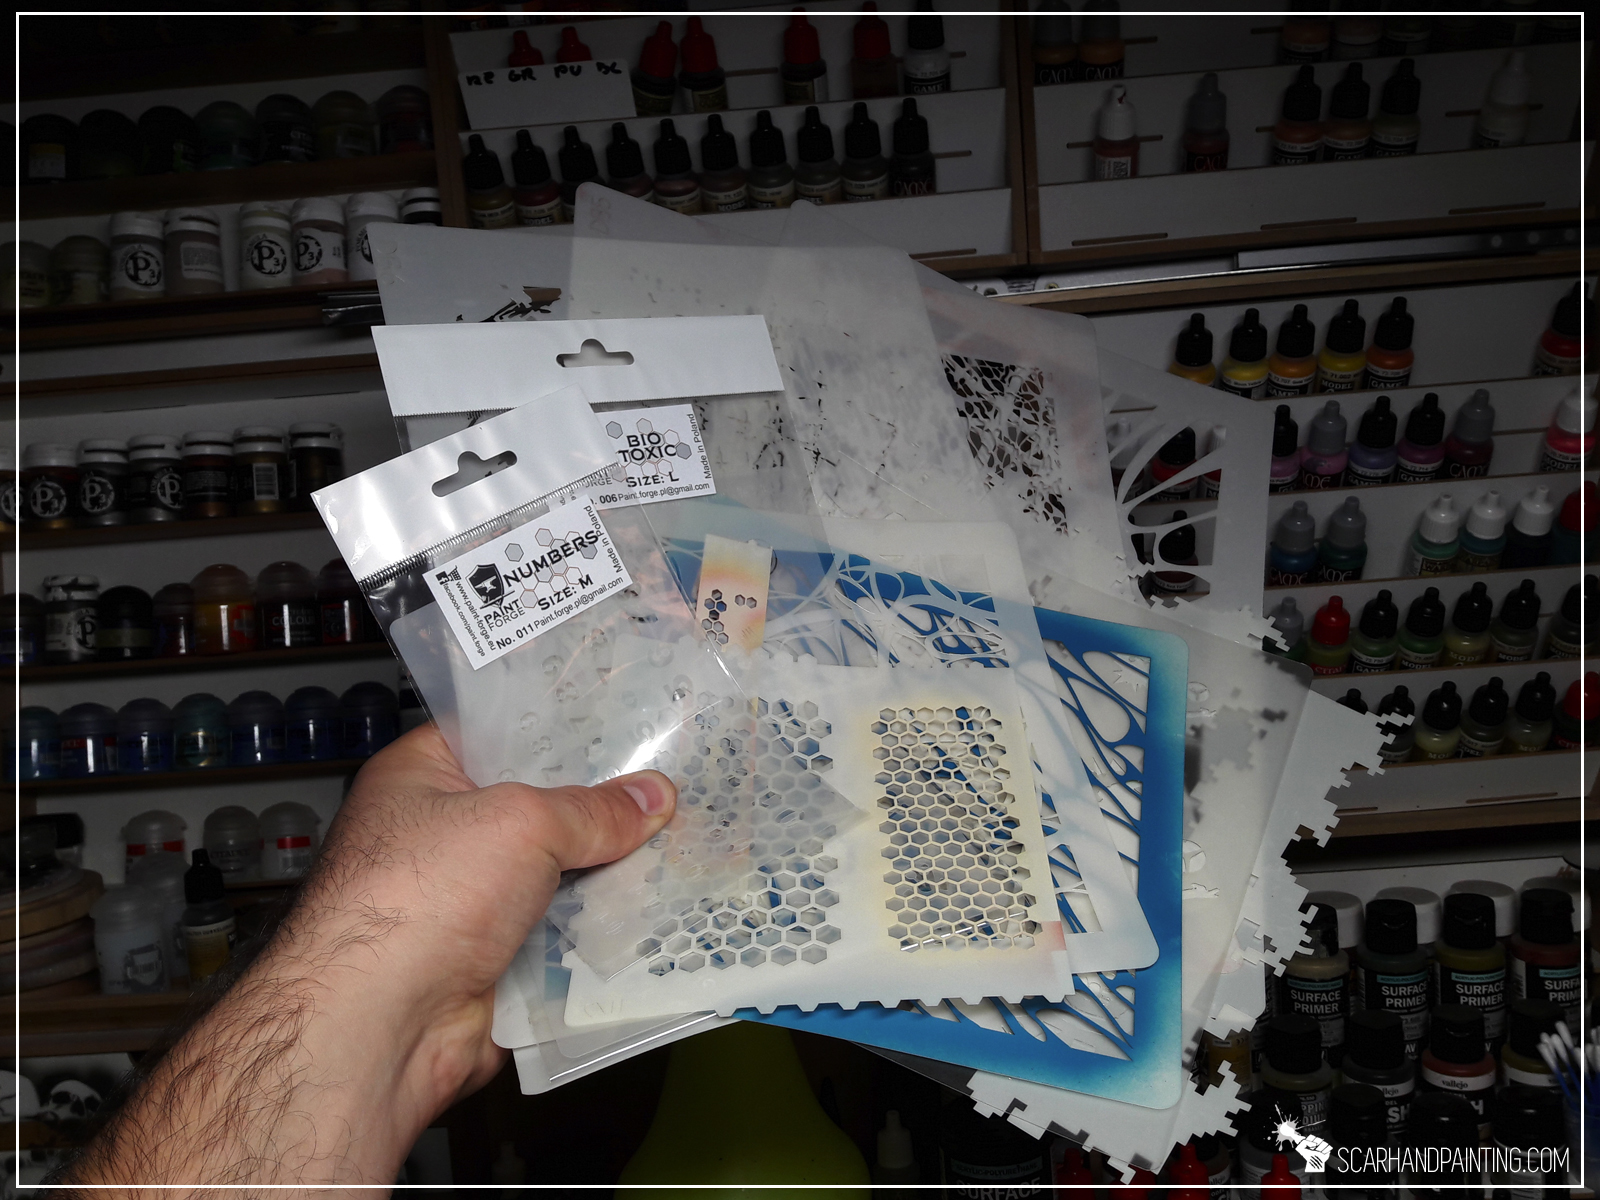
No, I ain’t talking about these! These are all professional stencils, some of which are crazy expensive! Nope – I’m talking about all the stencils that you might already have at home and not know about it! Some may be found in the kitchen, some inside your bathroom, some can even now be in your reach, across the hobby desk!
“But Maciej, you resourceful genius” I hear you say “how come?!”
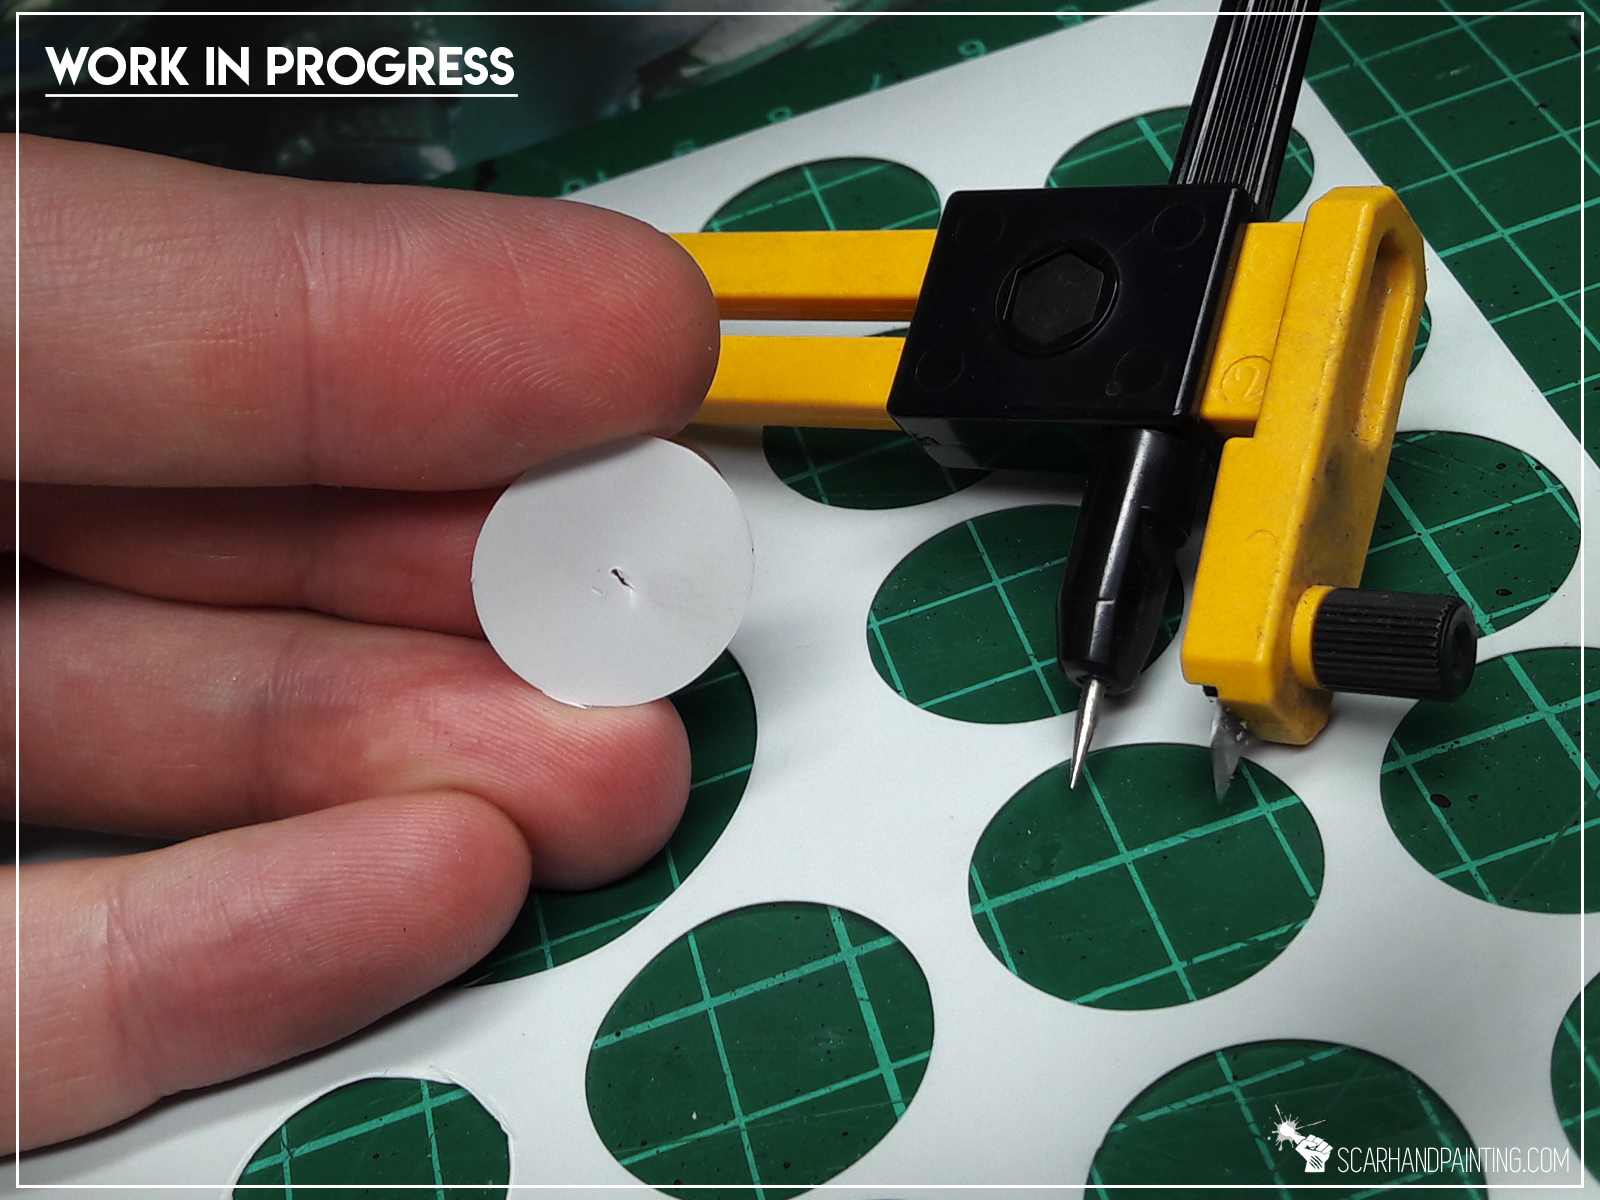
Here’s the thing: “Anything can be a stencil!” Still don’t believe me? Check these out!
Dirty, dusty effect – why not?


Still haven’t used, but I know there will come a time to do it 😛

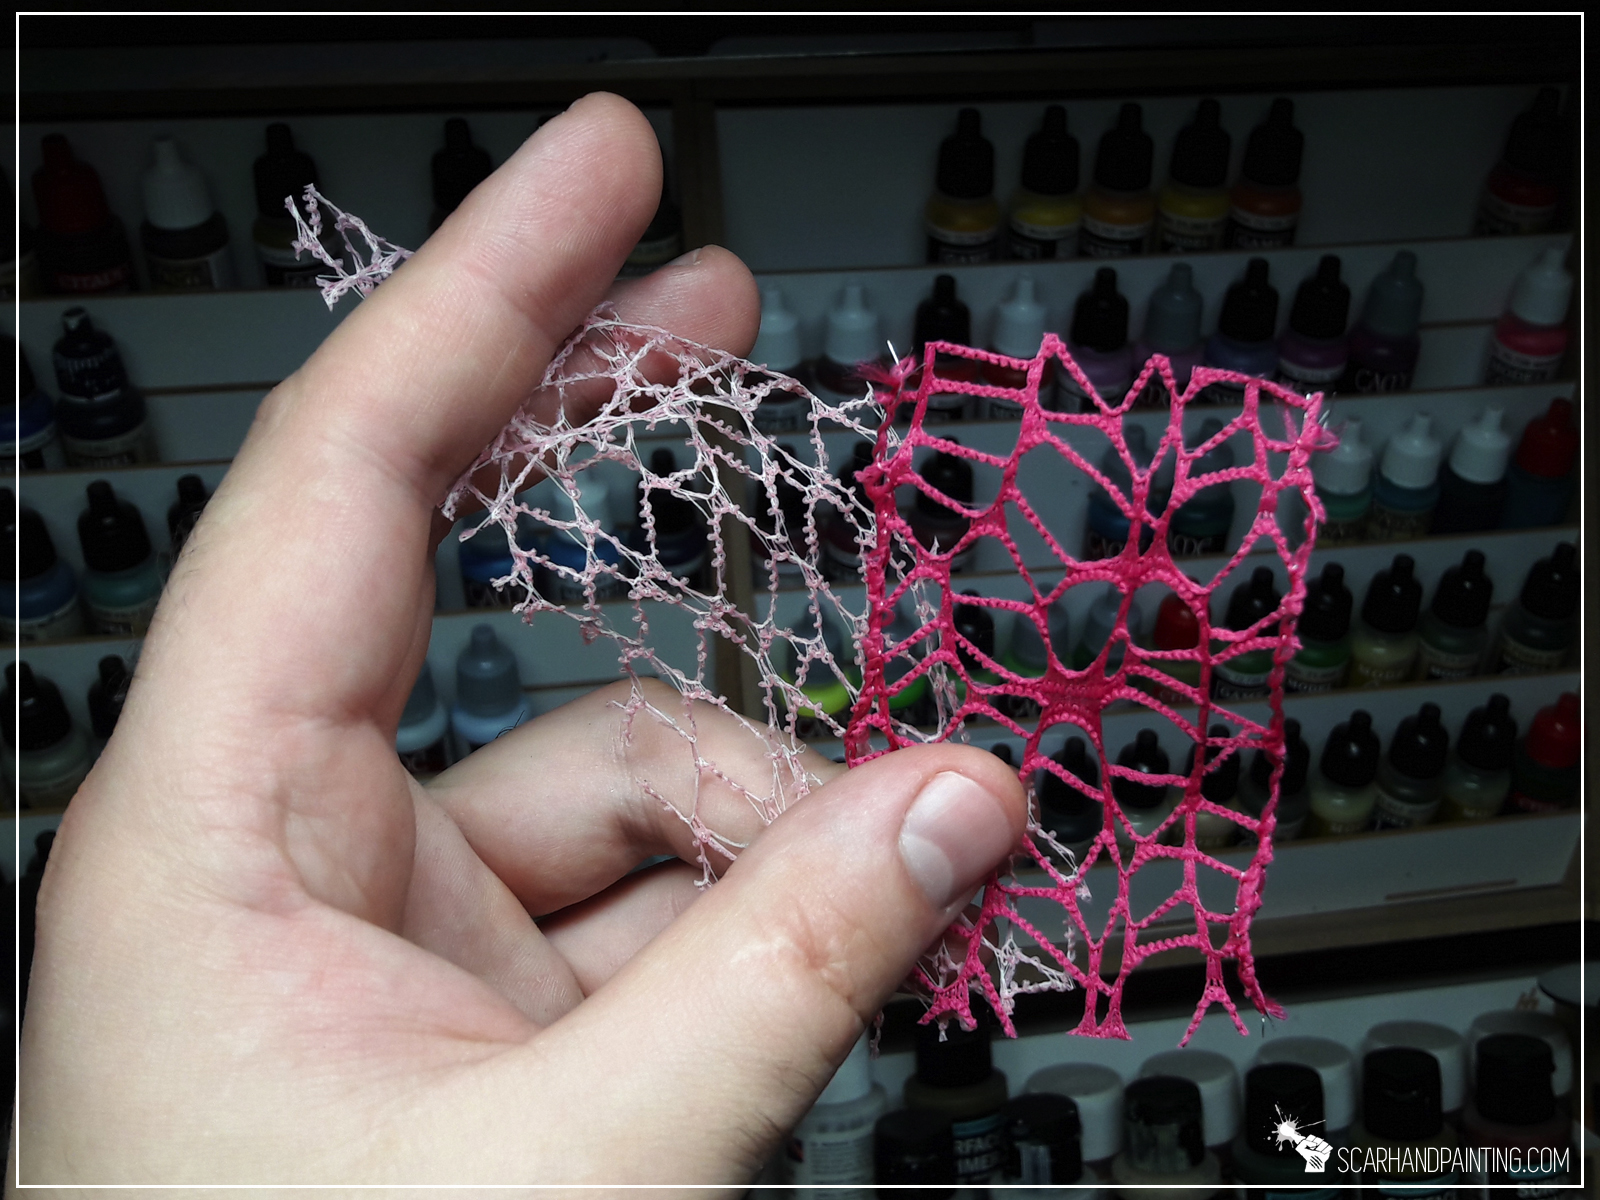
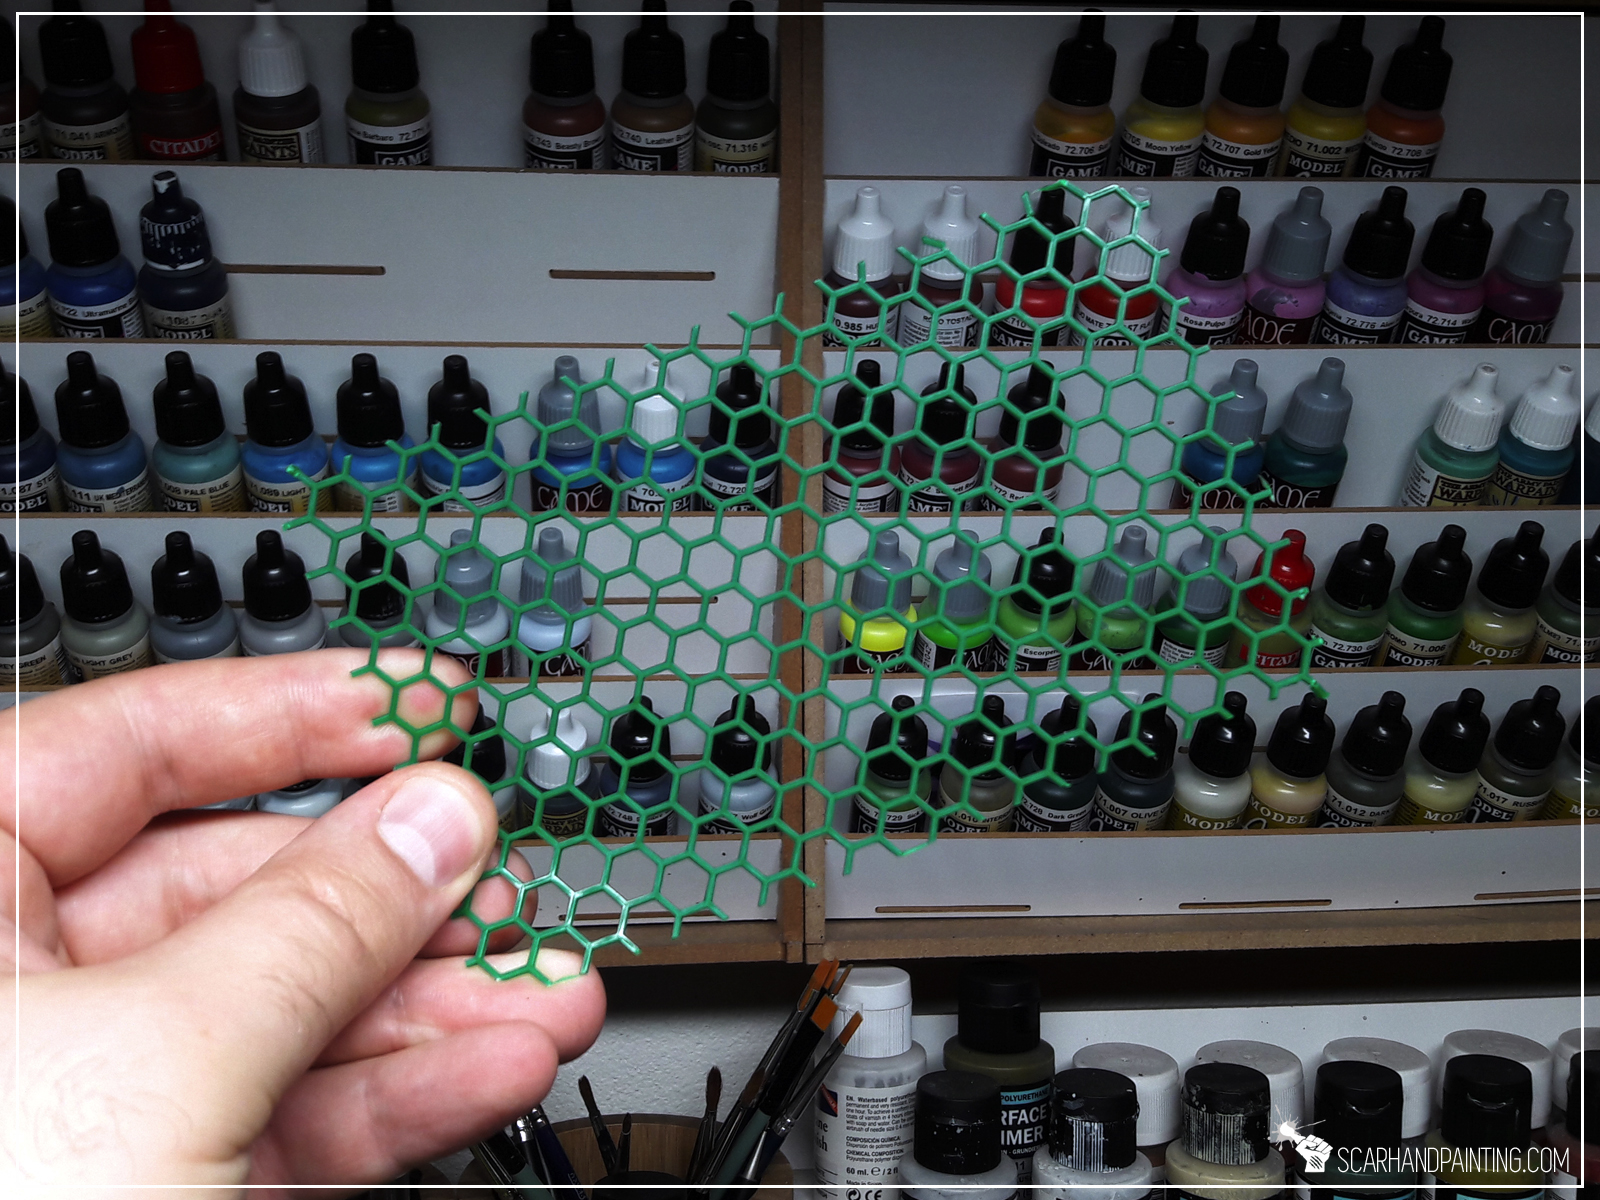
Cuz there’s never enough hex in your life!
I call upon thee God of Thunder!


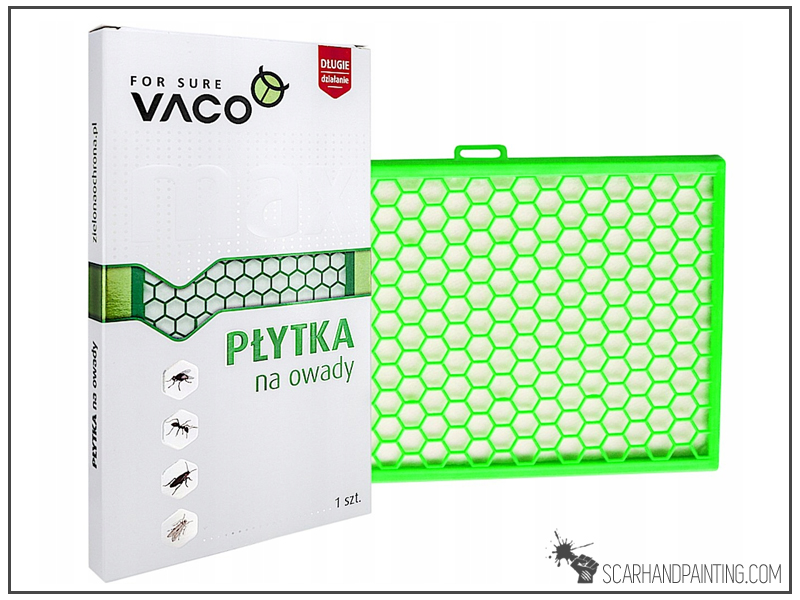
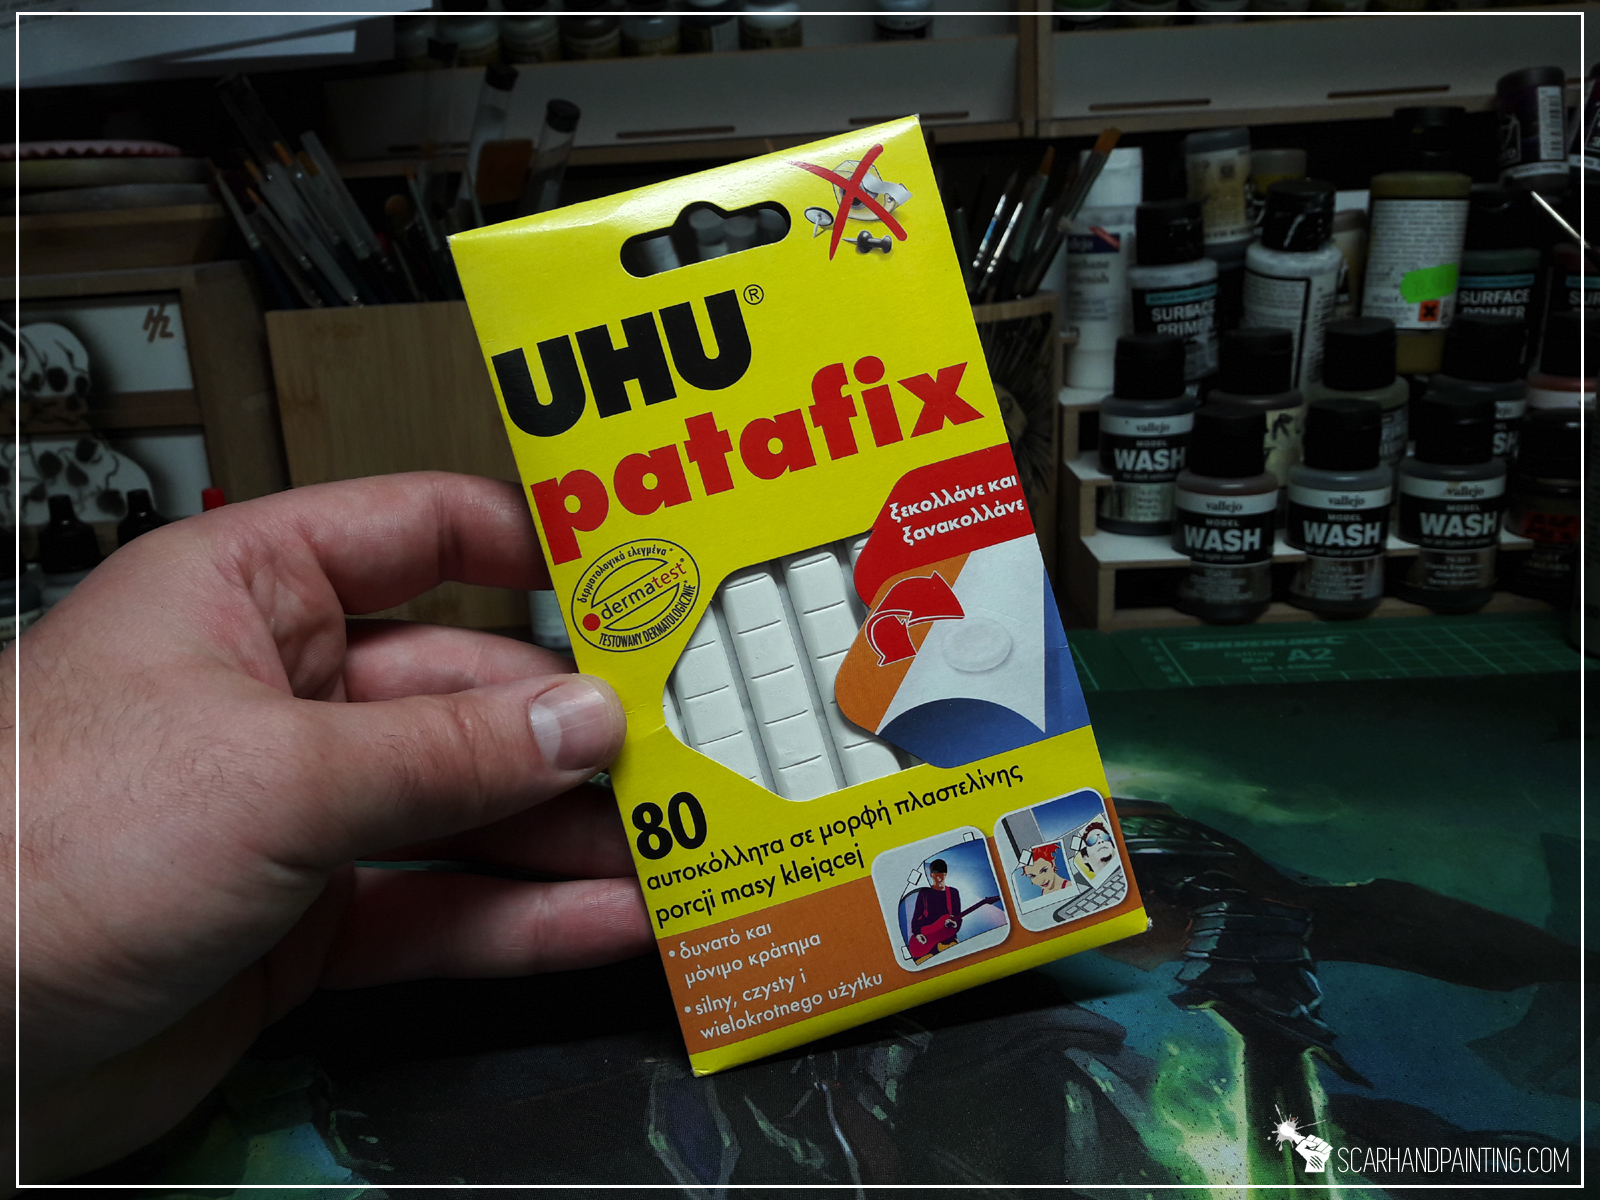
Not a stencil, but totally worth consideration 😉
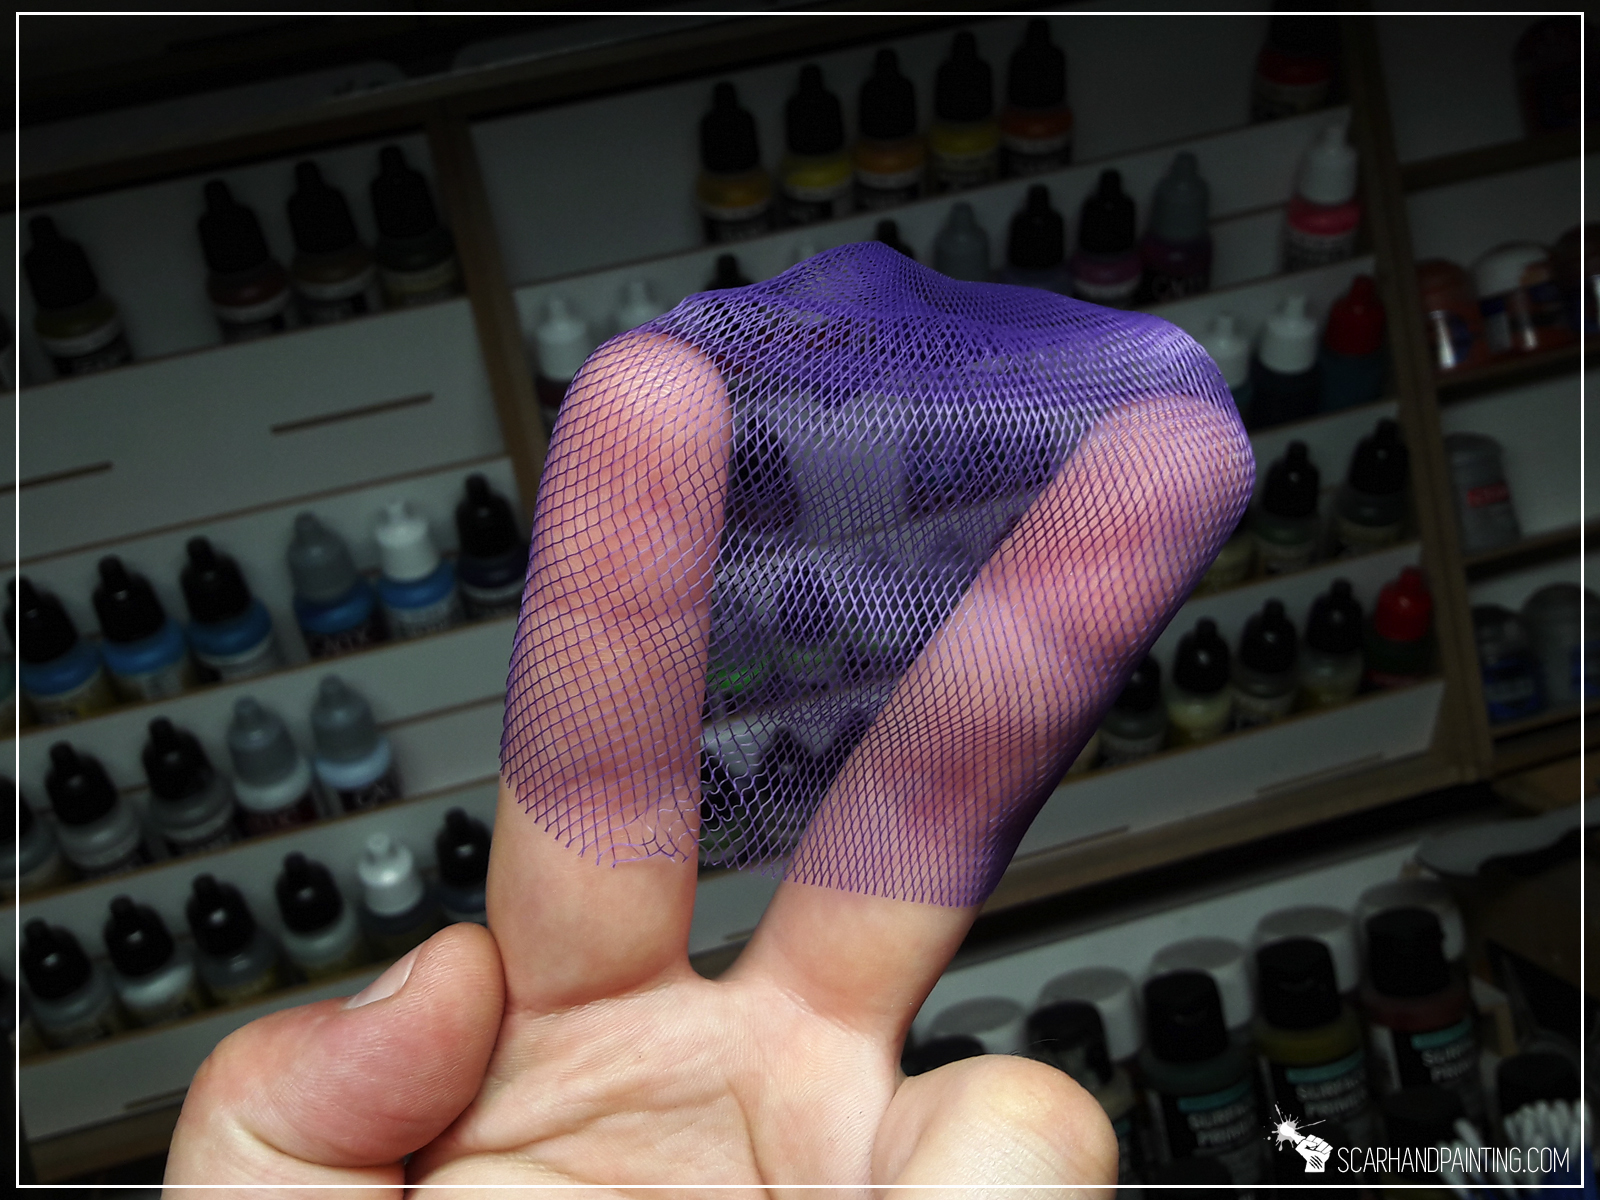
My favorite source of elastic, detailed stencils.


Feel inspired to rampage across your home and try to find as many stencils as possible? Feel like “gonna catch them all!”? I wish you good hunt!
PS: What are yours favorite DIY stencils? Let me know in the comments or under THIS facebook post 😉

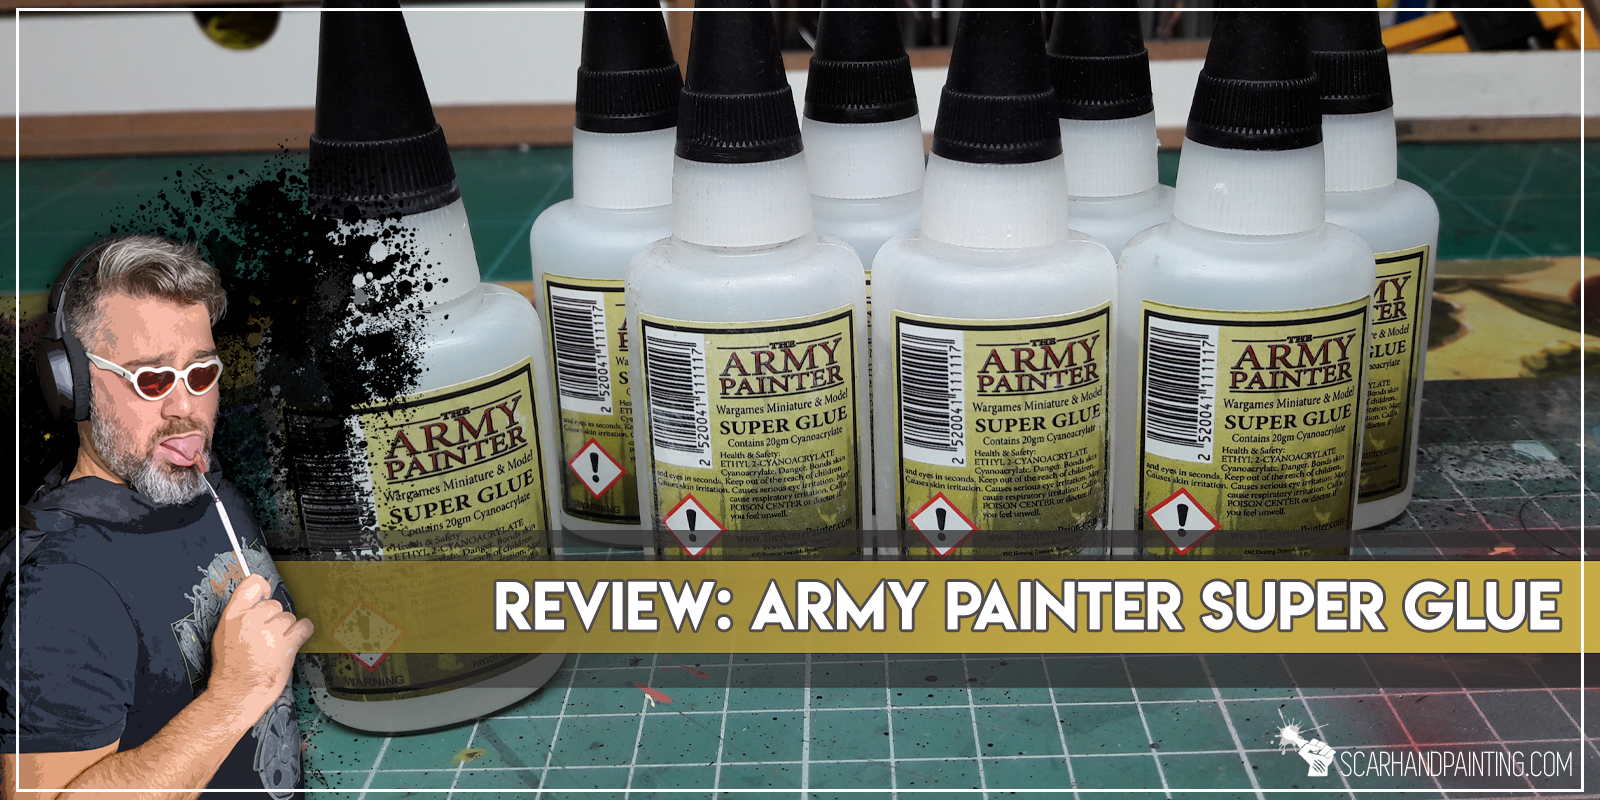
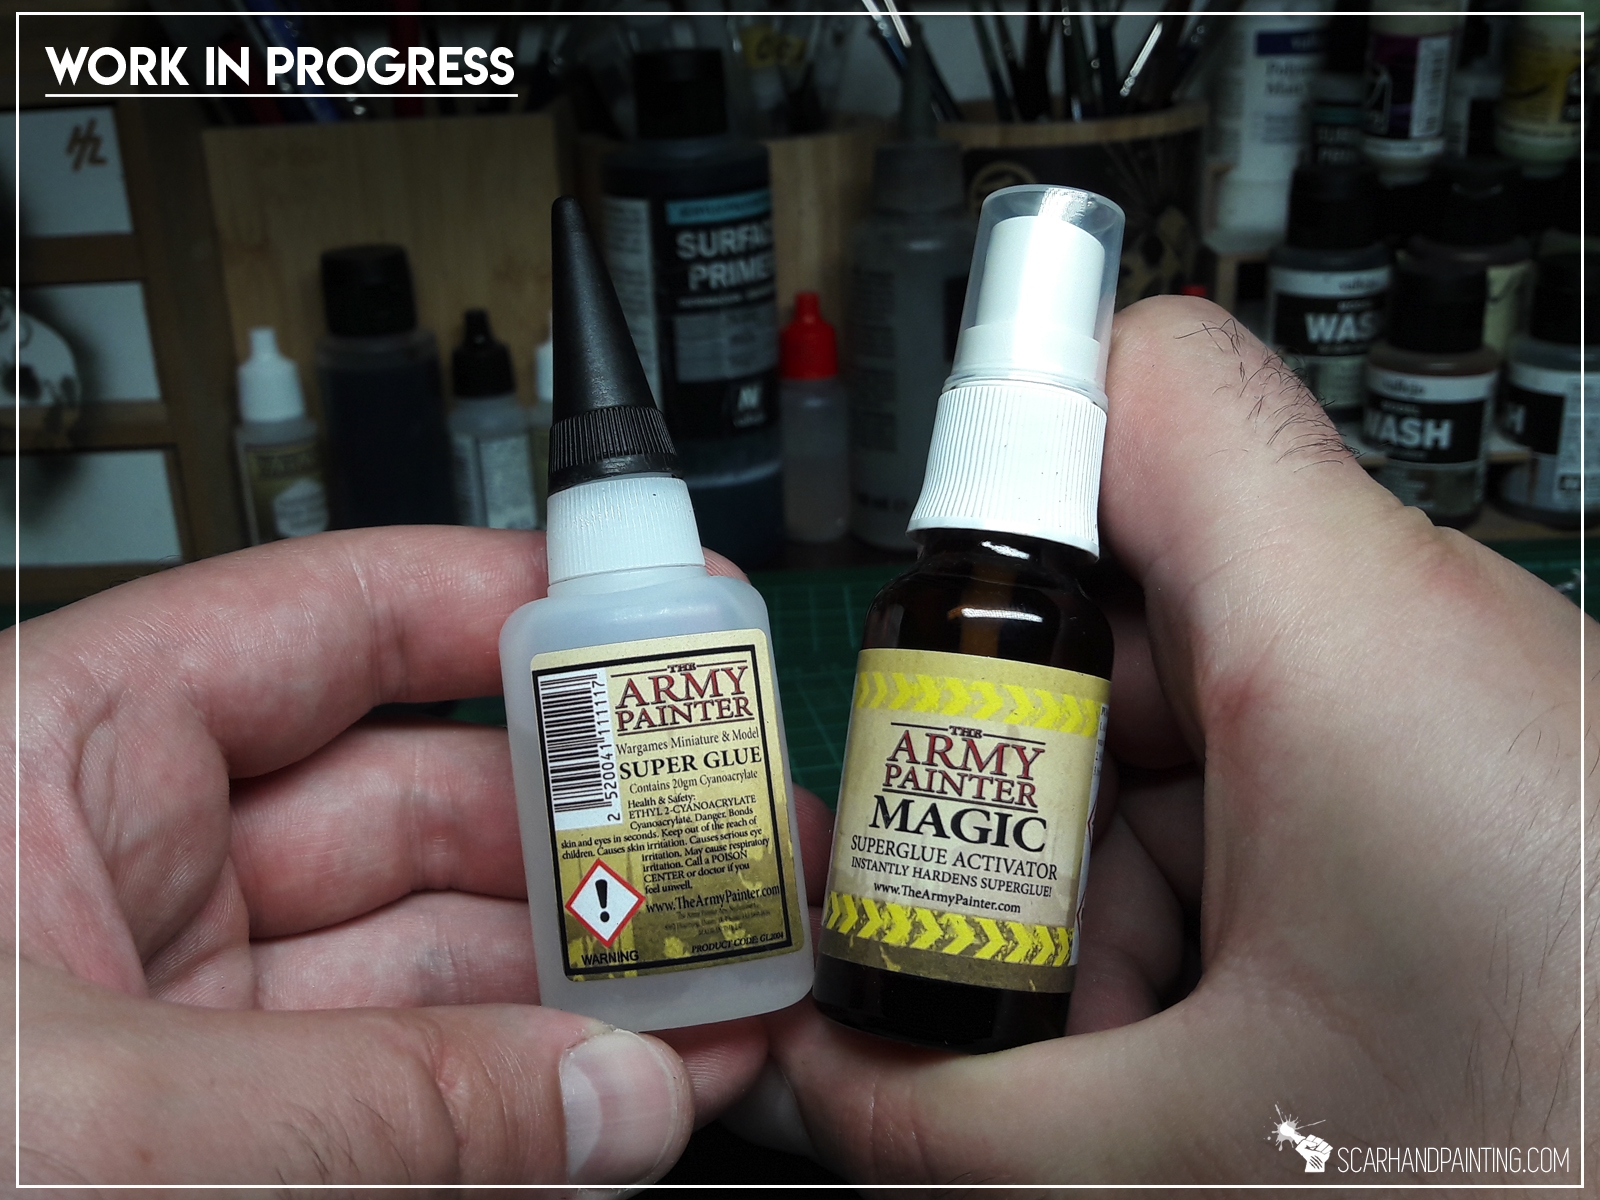
Today is a special day. The Army Painter – a worldwide supplier of hobby products, such as paints, colour primers, glues, brushes, tufts and more, is now twelve years old! It’s hard to believe that the company which entered the market in 2007th introducing a medium sized offer of hobby products grew to be a giant we know today. I remember when Army Painter appeared for the first time in a hobby store I ran. Easy to say I fell in love with some of their products and stuck with AP to this day.
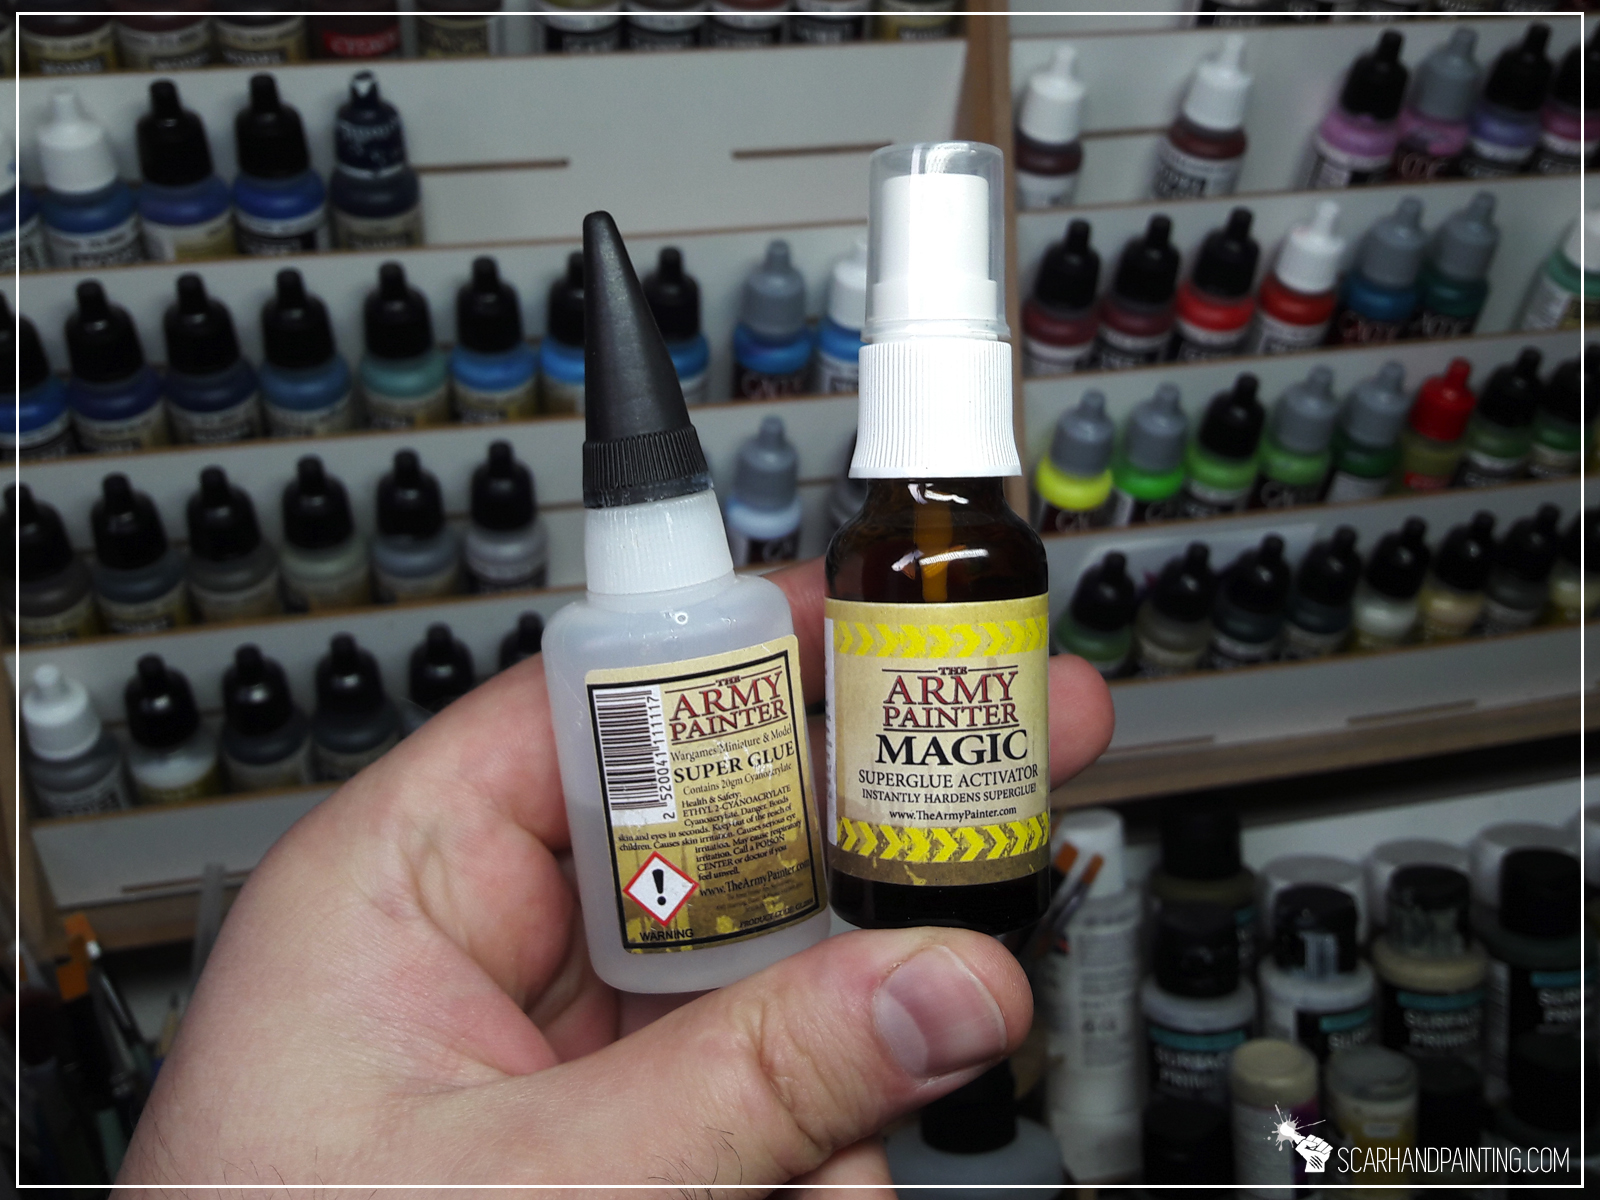
So, let’s celebrate Army Painter’s 12th birthday with a review of my favorite AP product of all time – the Army Painter Super Glue!
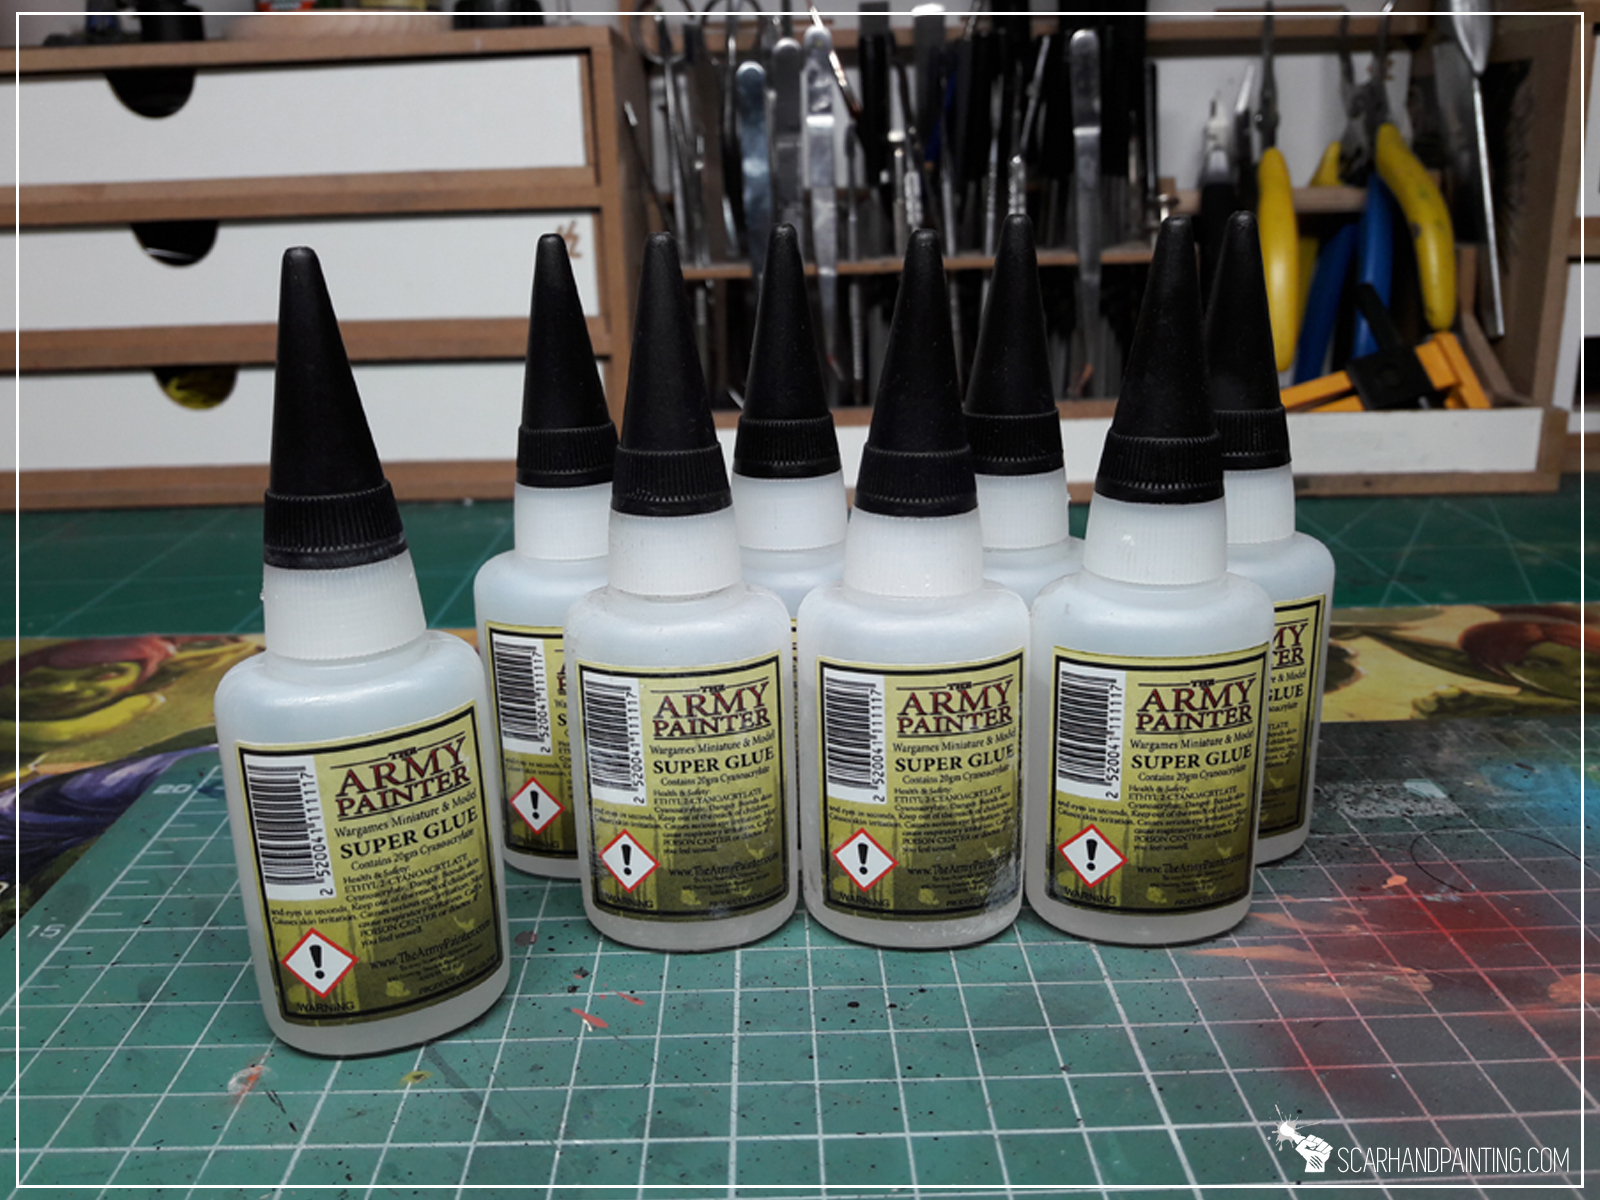
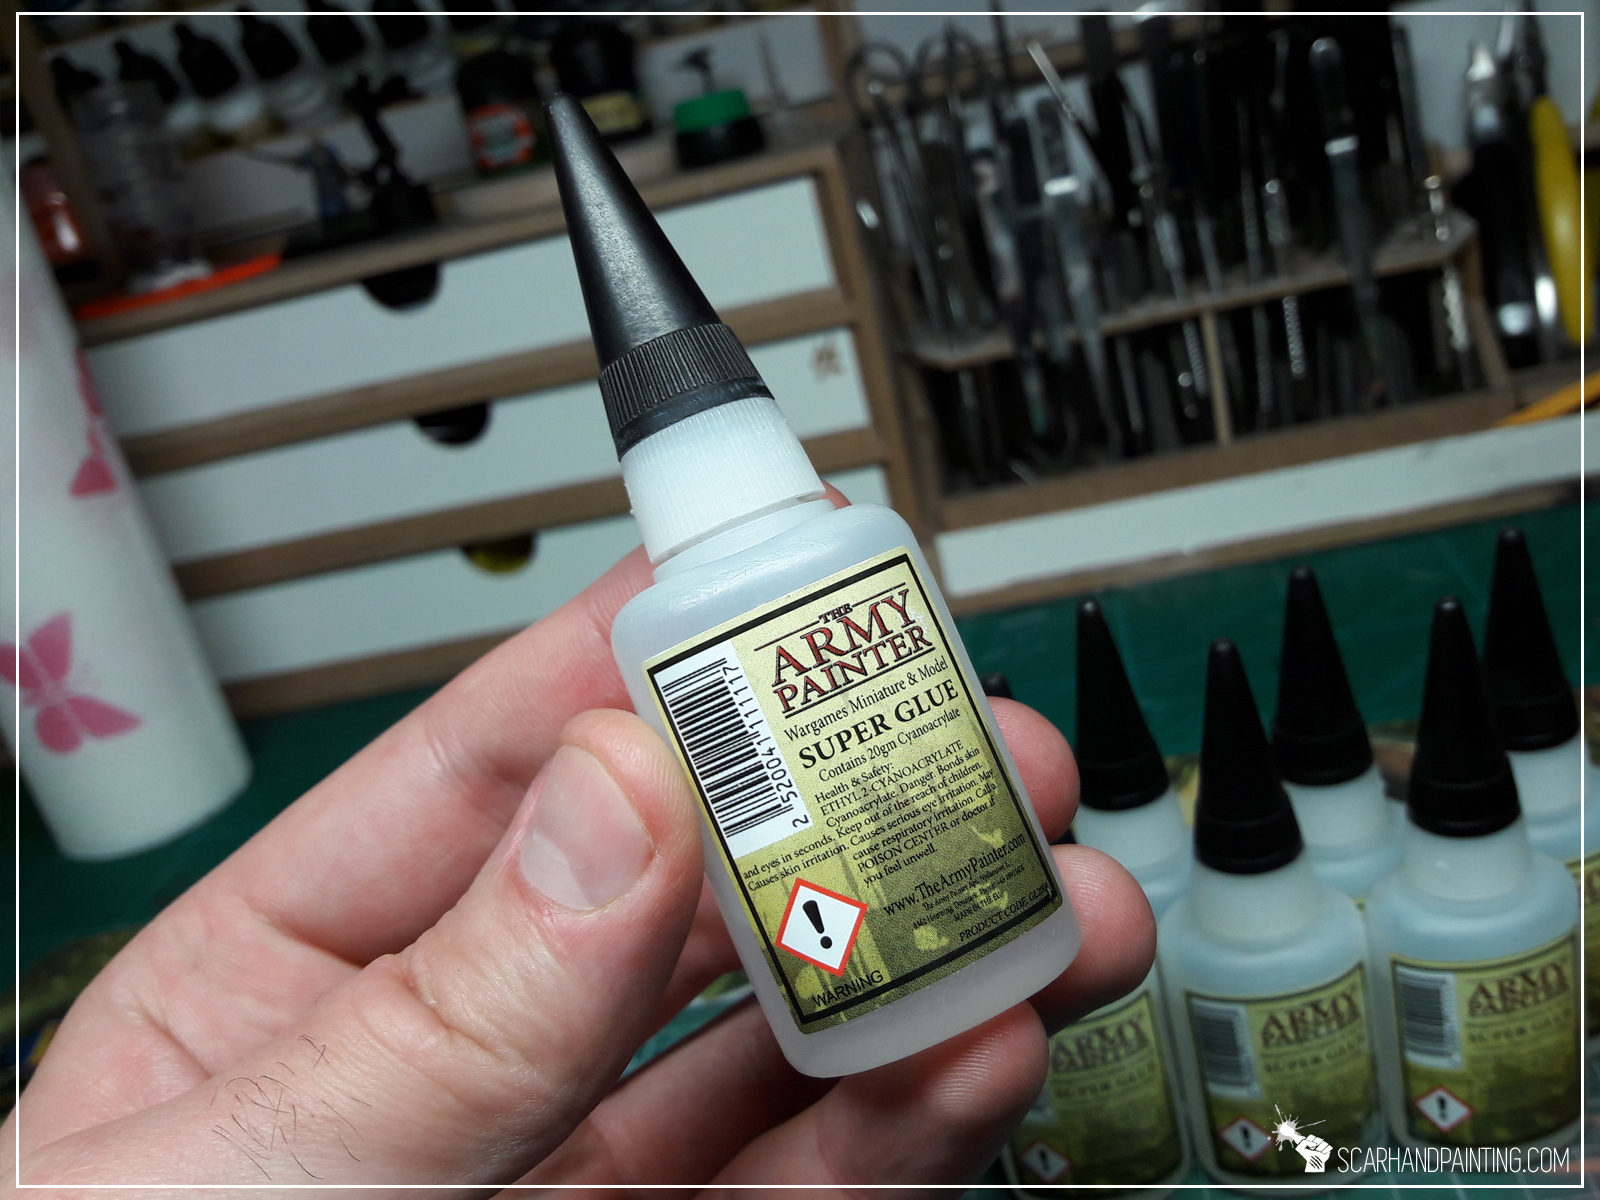
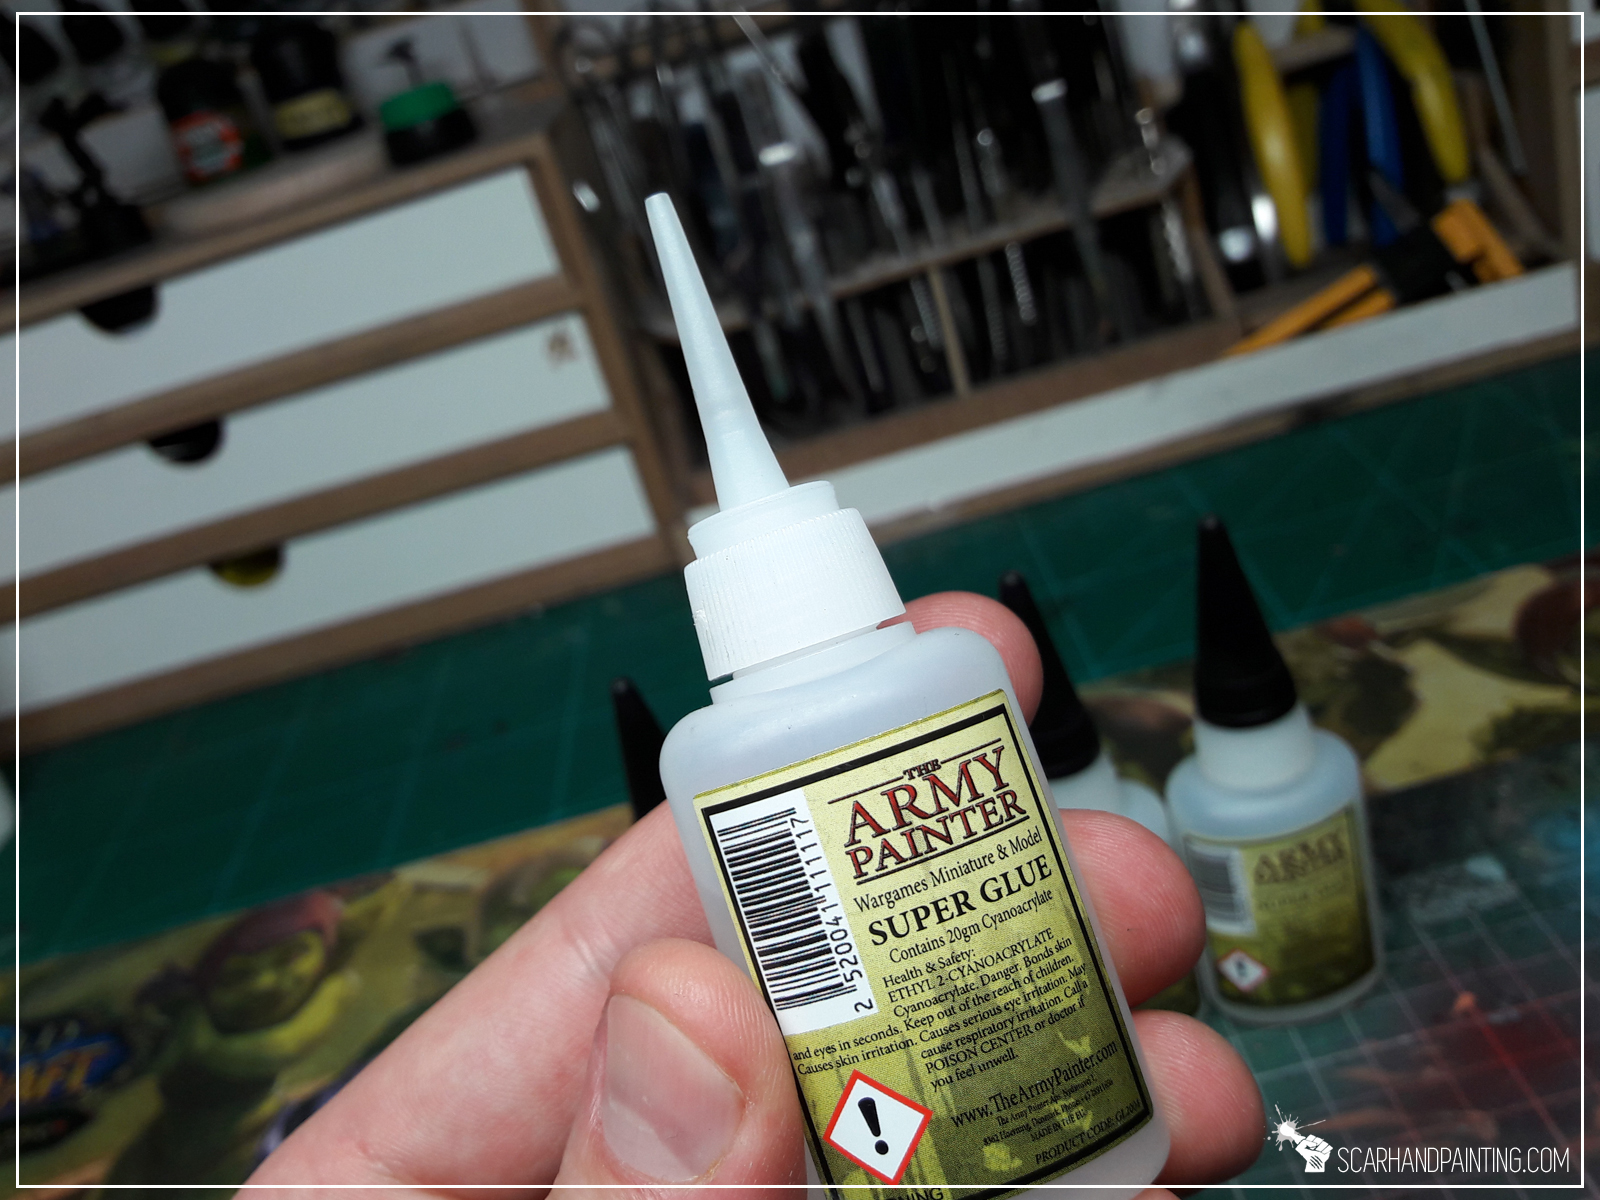

The Army Painter Super Glue comes at a suggested price of 4,99€. Compared to a small tube of glue this might come across as expensive, but taking into account how much stuff you’ll be able to glue with a single bottle of AP’s glue and the fact it will stay functional long after first use – it’s totally worth it! Not to mention Games Workshop glue, which comes in four 5ml tubes, that once opened don’t stand a chance against Army Painter’s king of a glue!
I simply love this glue. I use it for twelve years now and used up more than a hundred bottles. I prefer it over any other Cyanoacrylate glue and I totally recommend you to try it out. I just can’t imagine hobbying without it. For me it’s essential.
Best to ask in your local hobby store, but if you want to support the great company Army Painter had become – head to Army Painter Website and order from them directly.
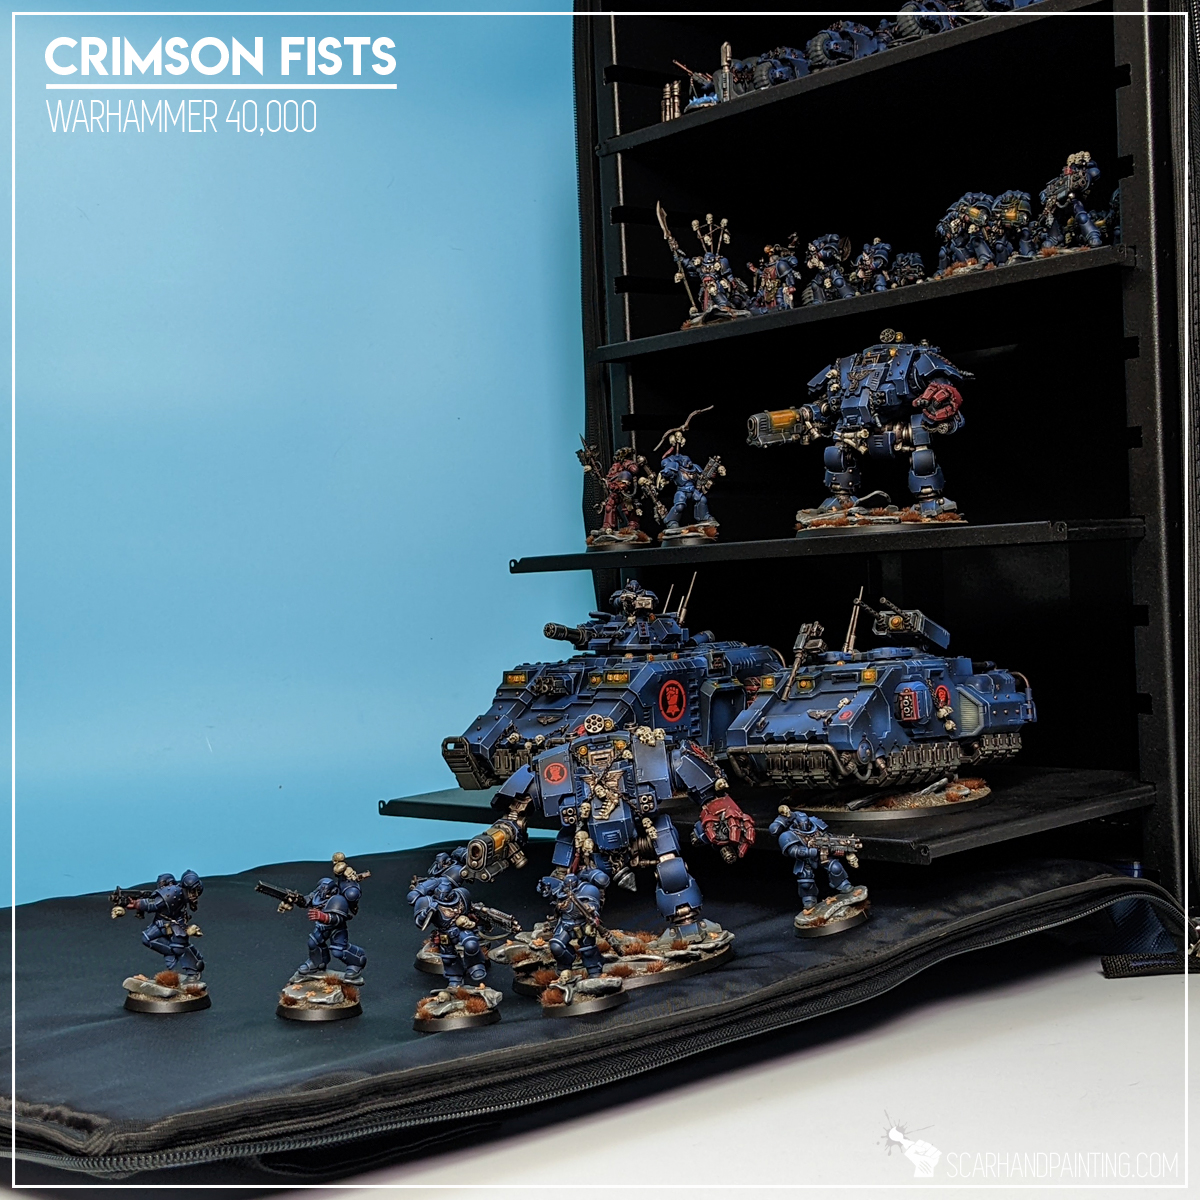
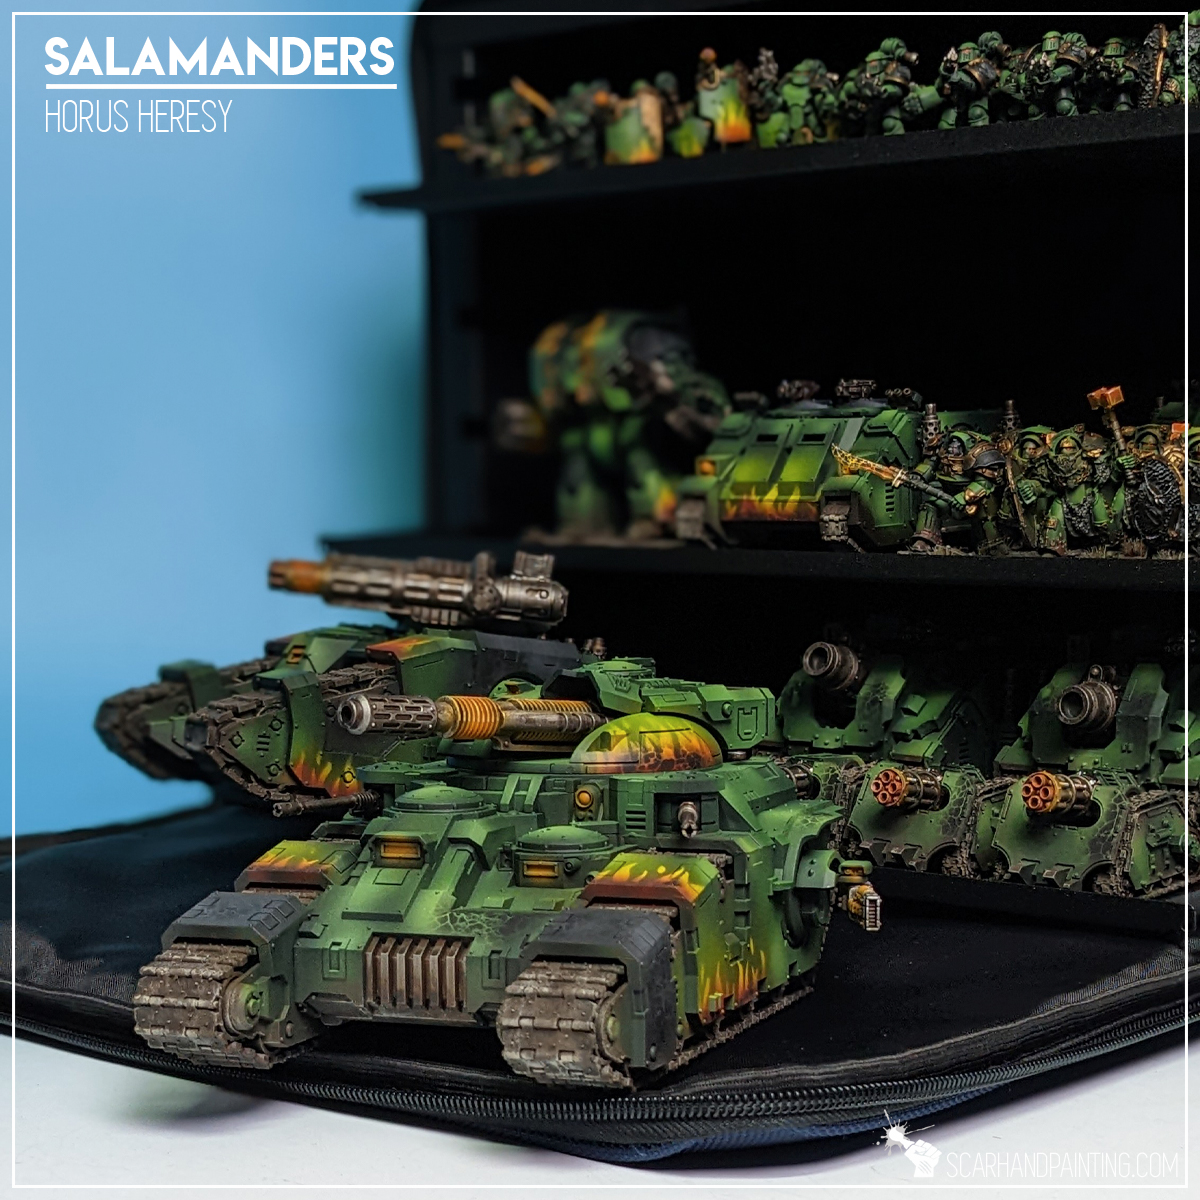
Moving painted miniatures to a tournament or painting competition can be a real challenge. I bet that every single miniatures painter had one or more miniatures damaged while being transported. Sad truth is that no matter what we do, situations like these happens. Still, when it comes to safe transportation of our beloved miniatures, we’re not completely helpless.
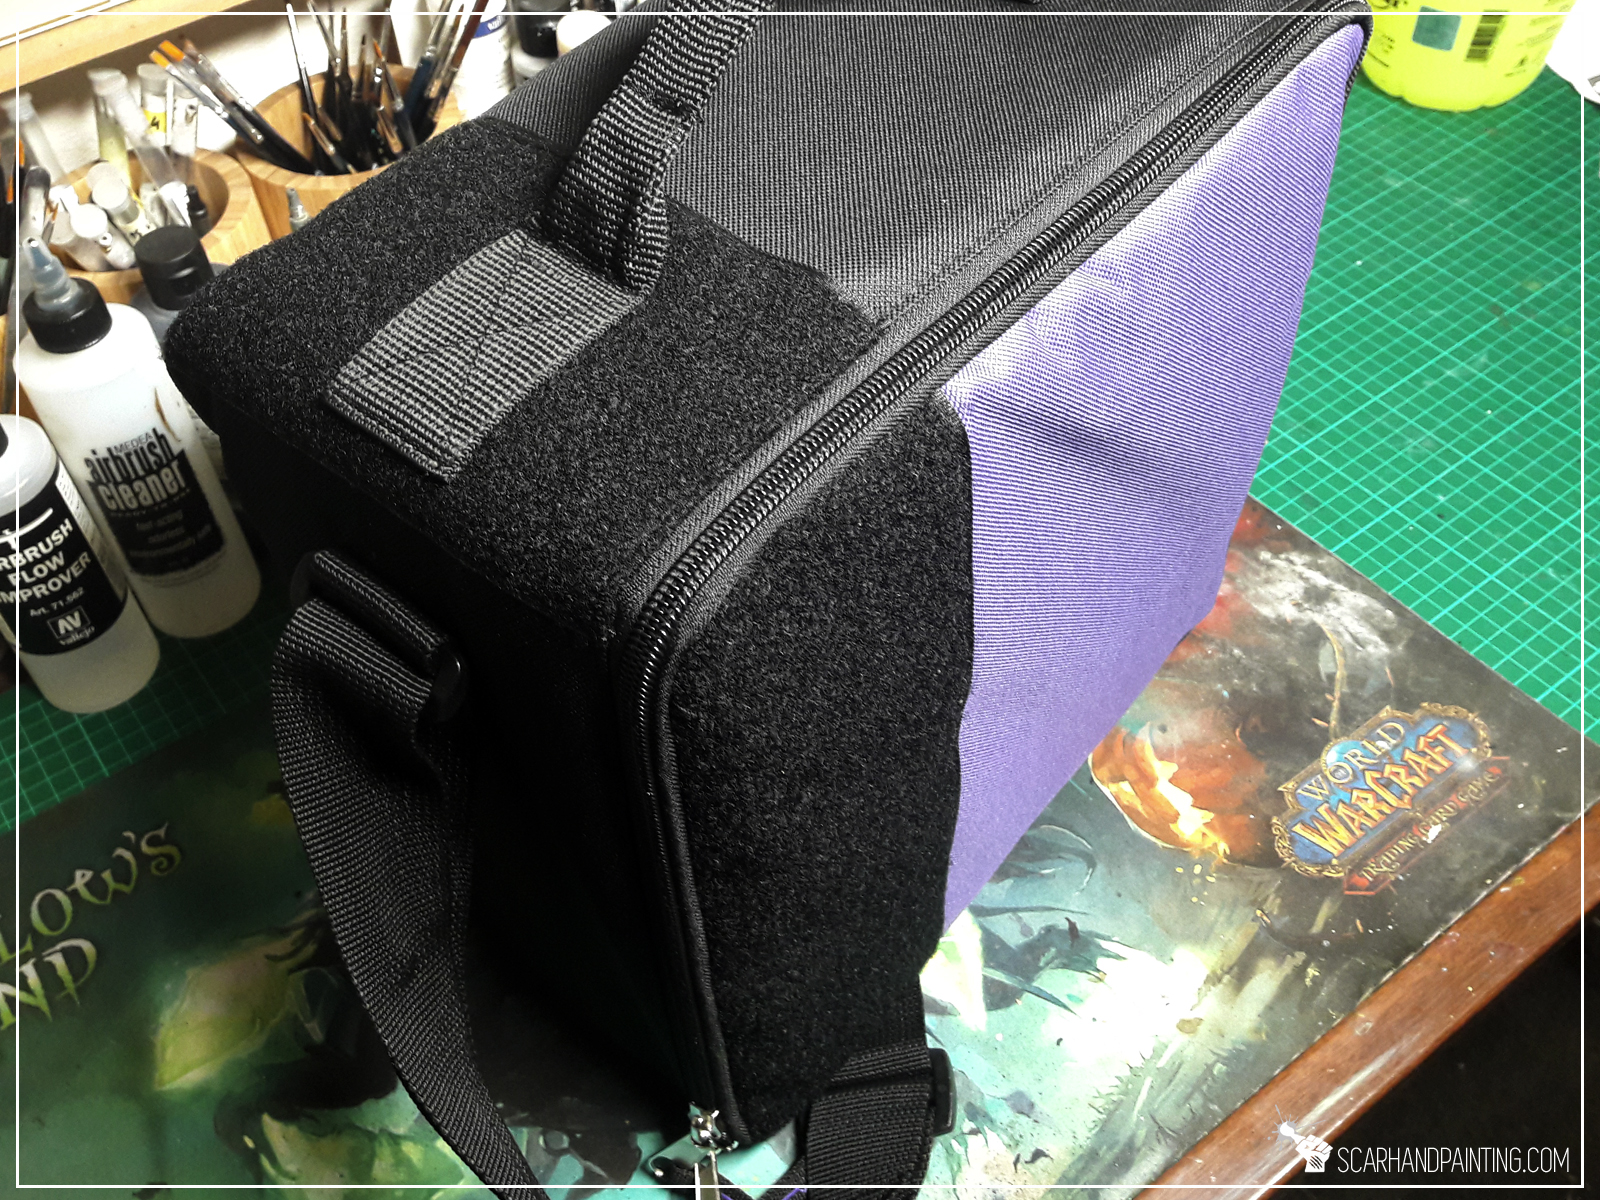
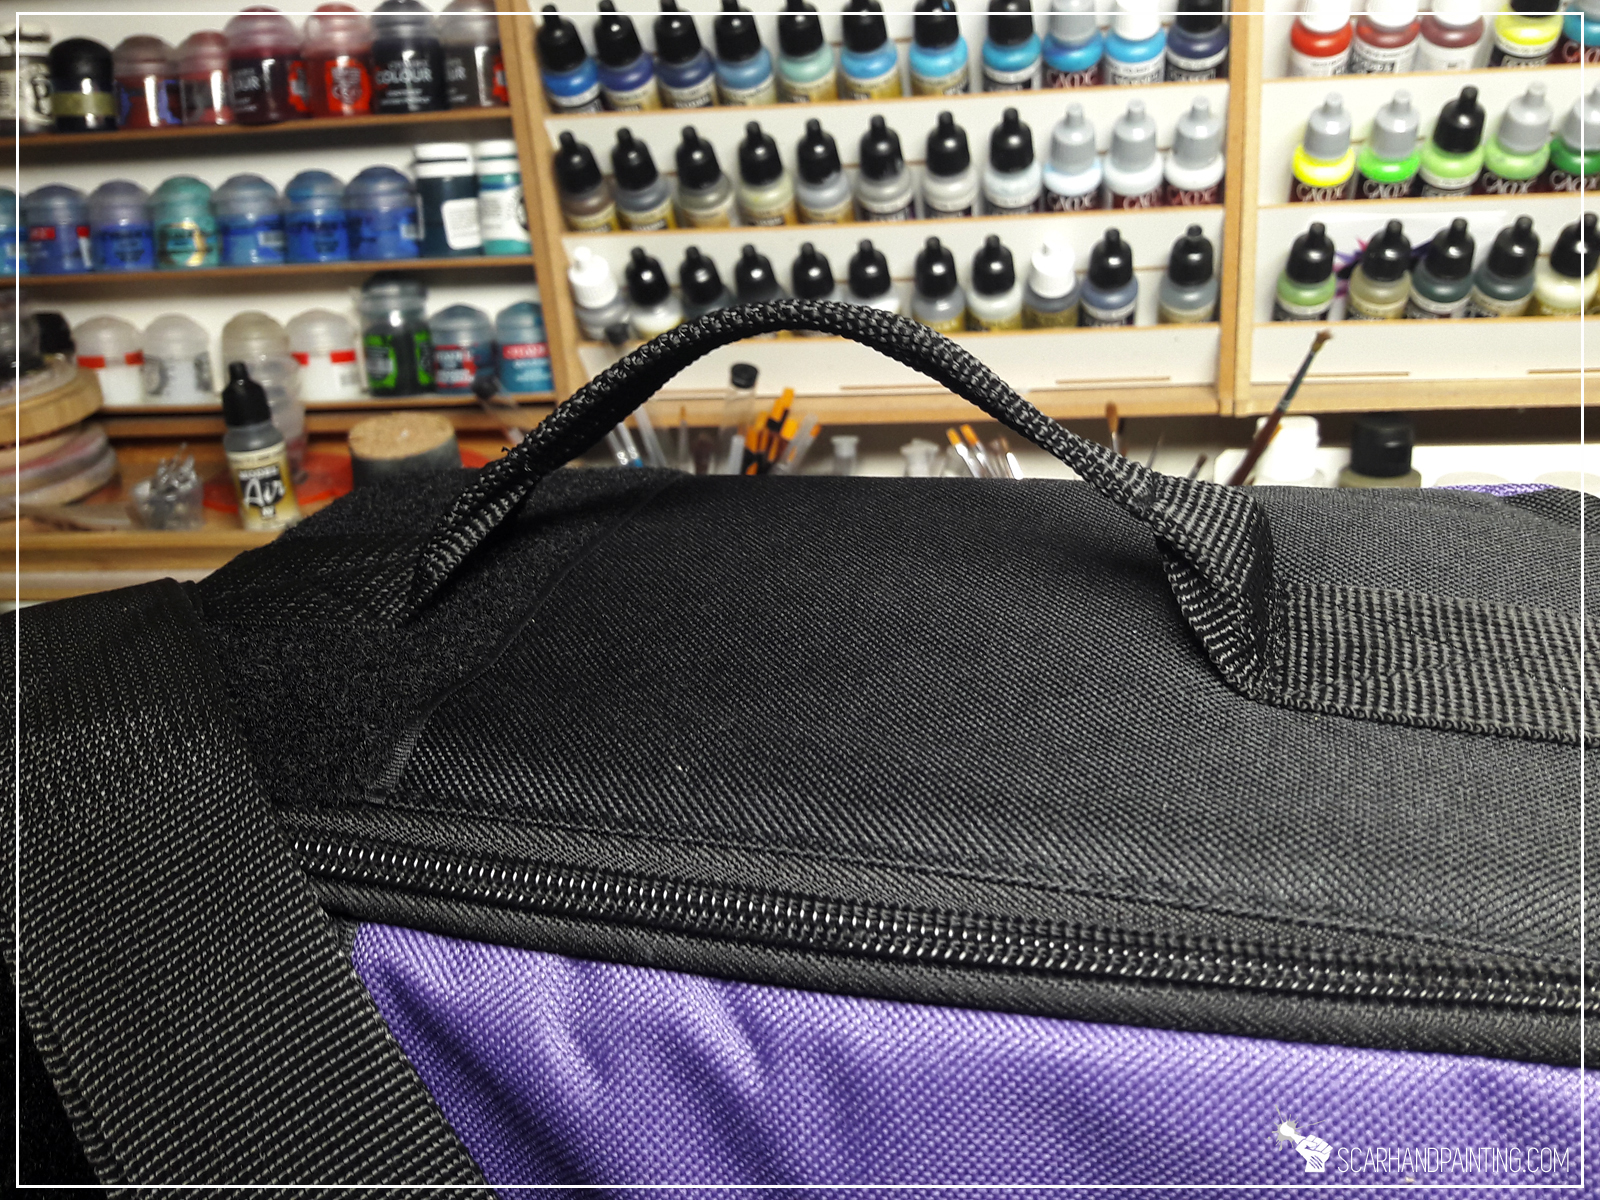
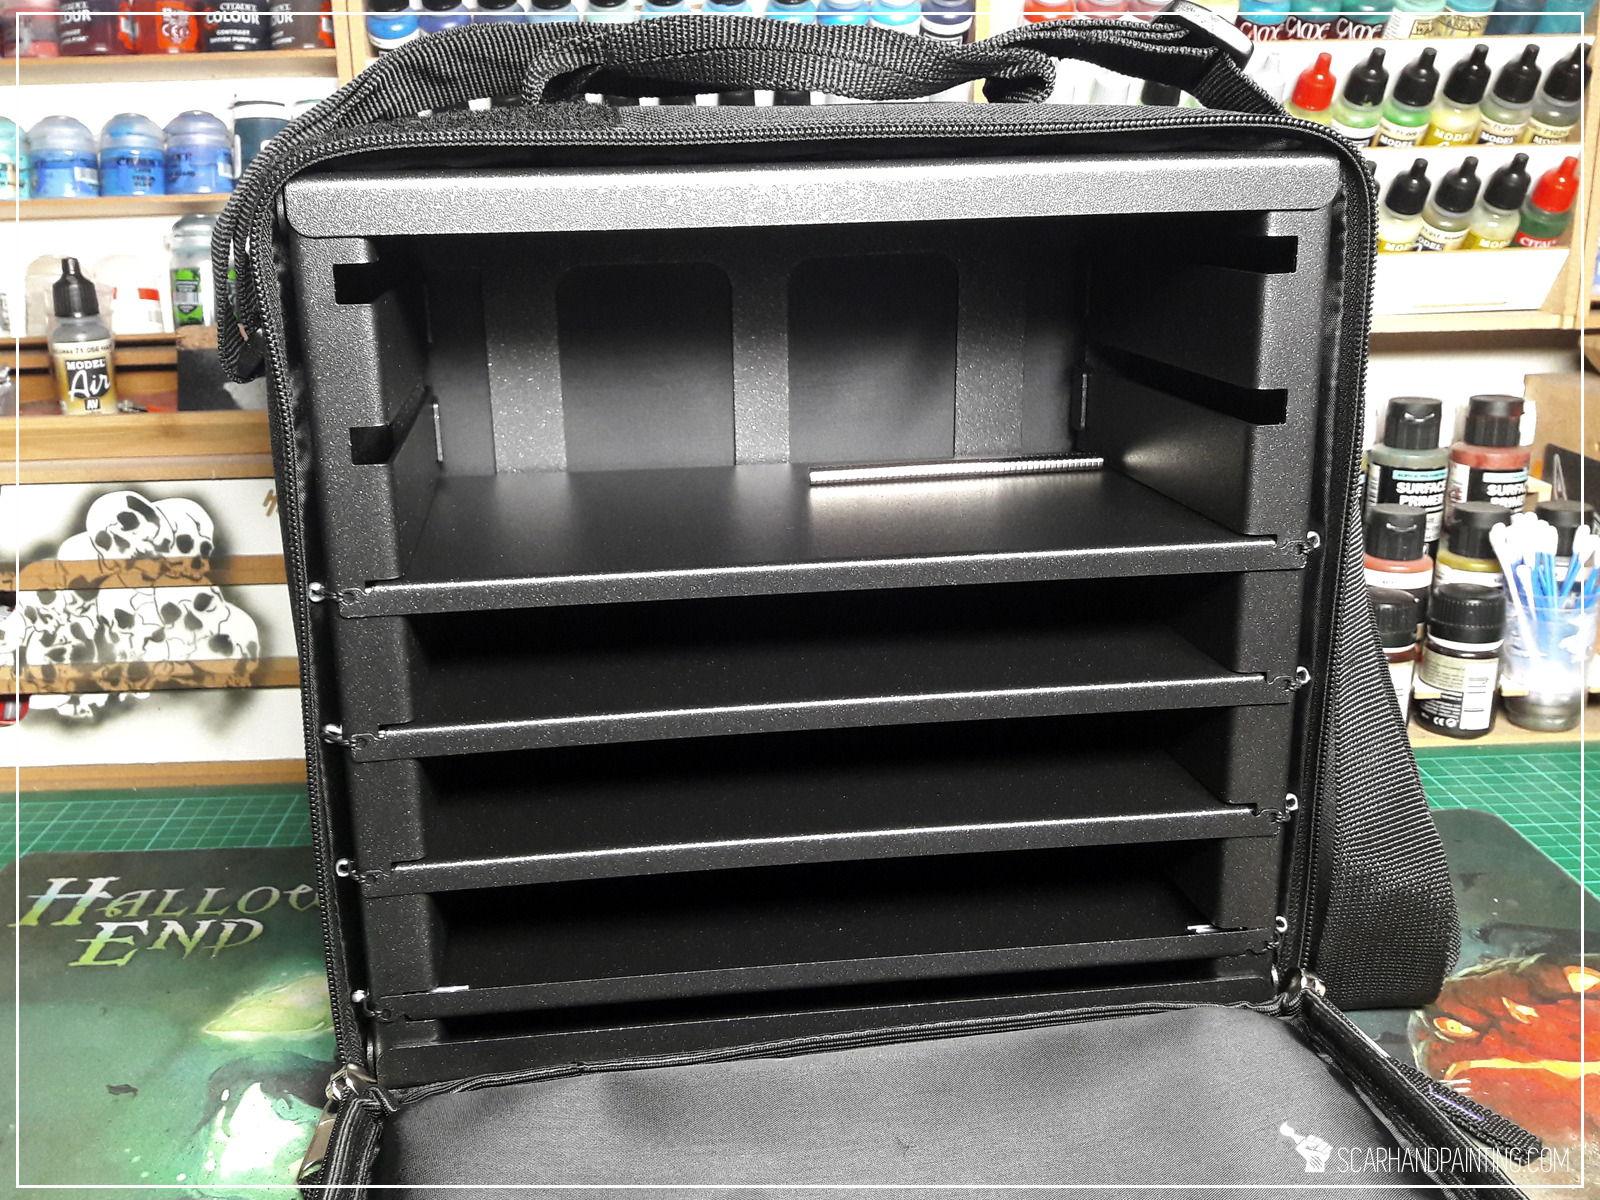
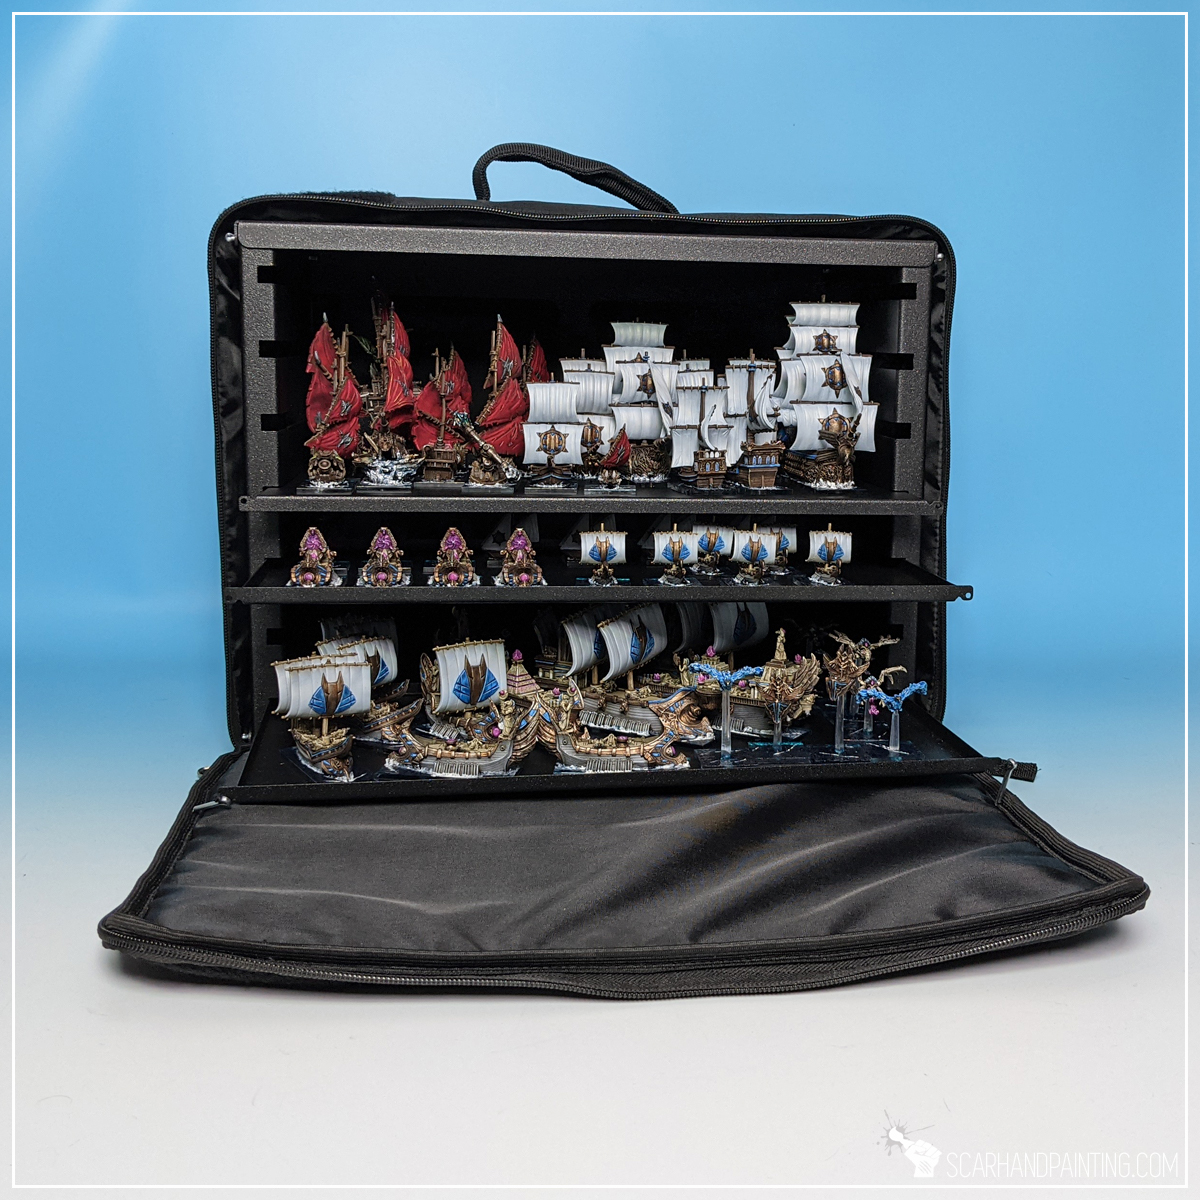
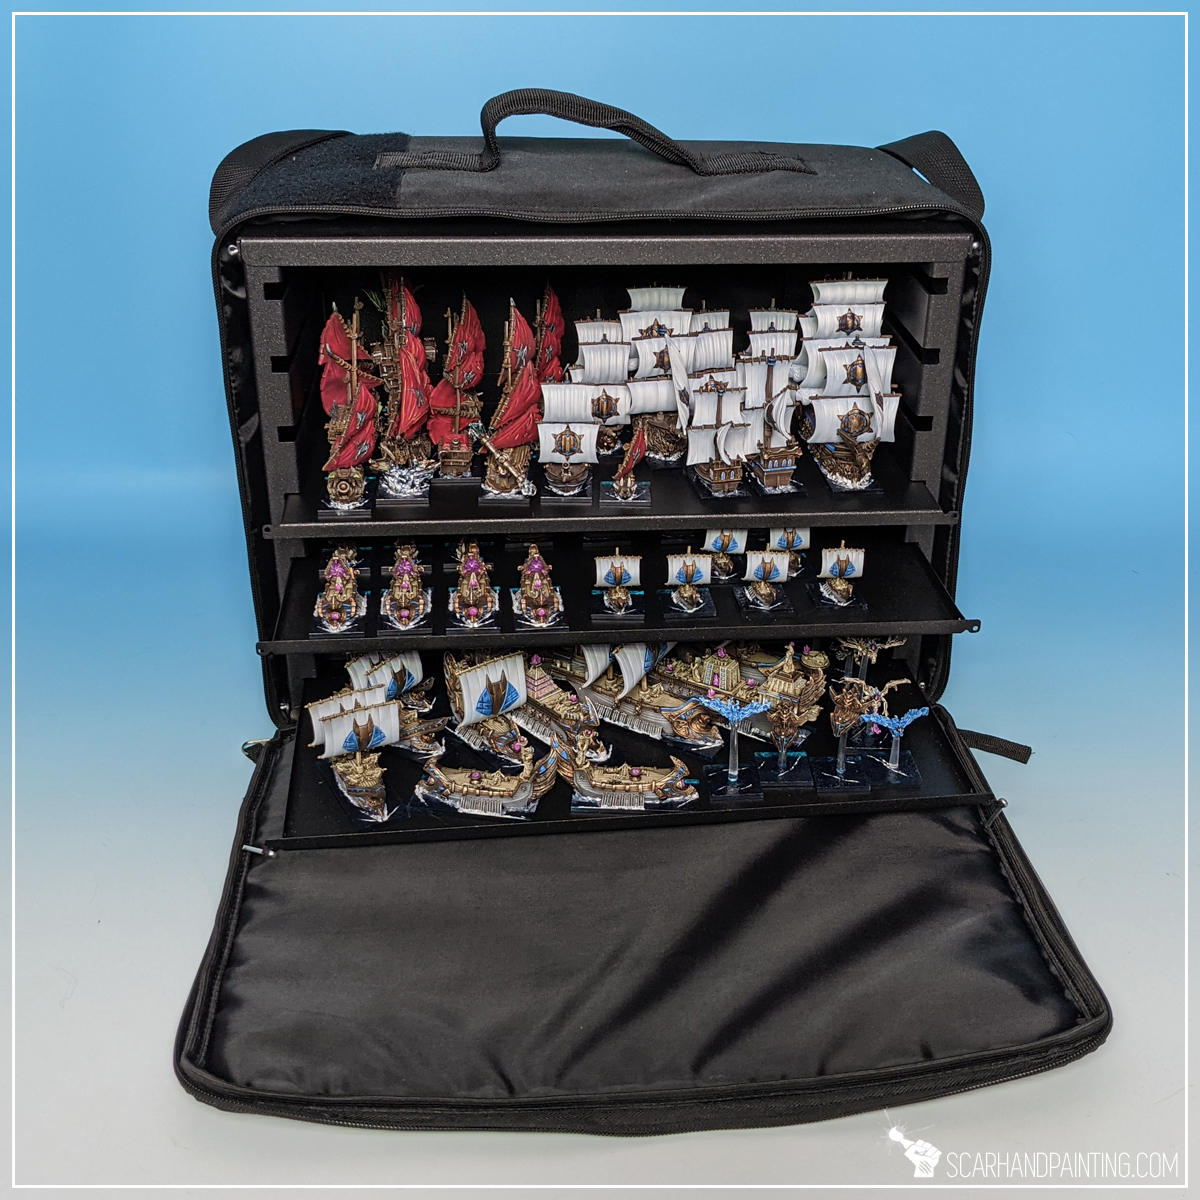
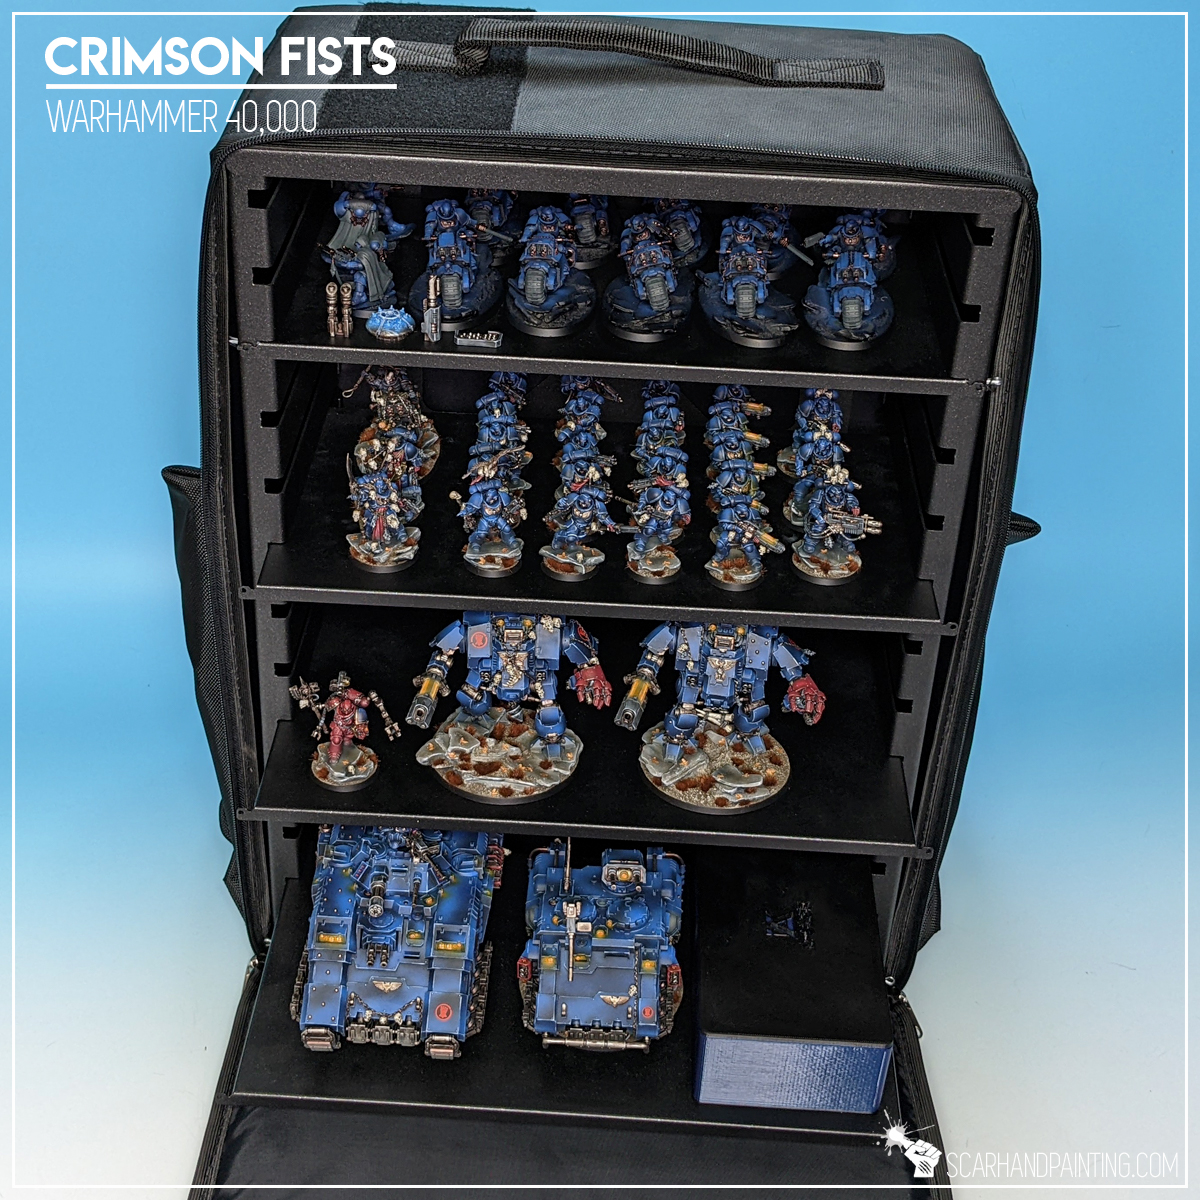
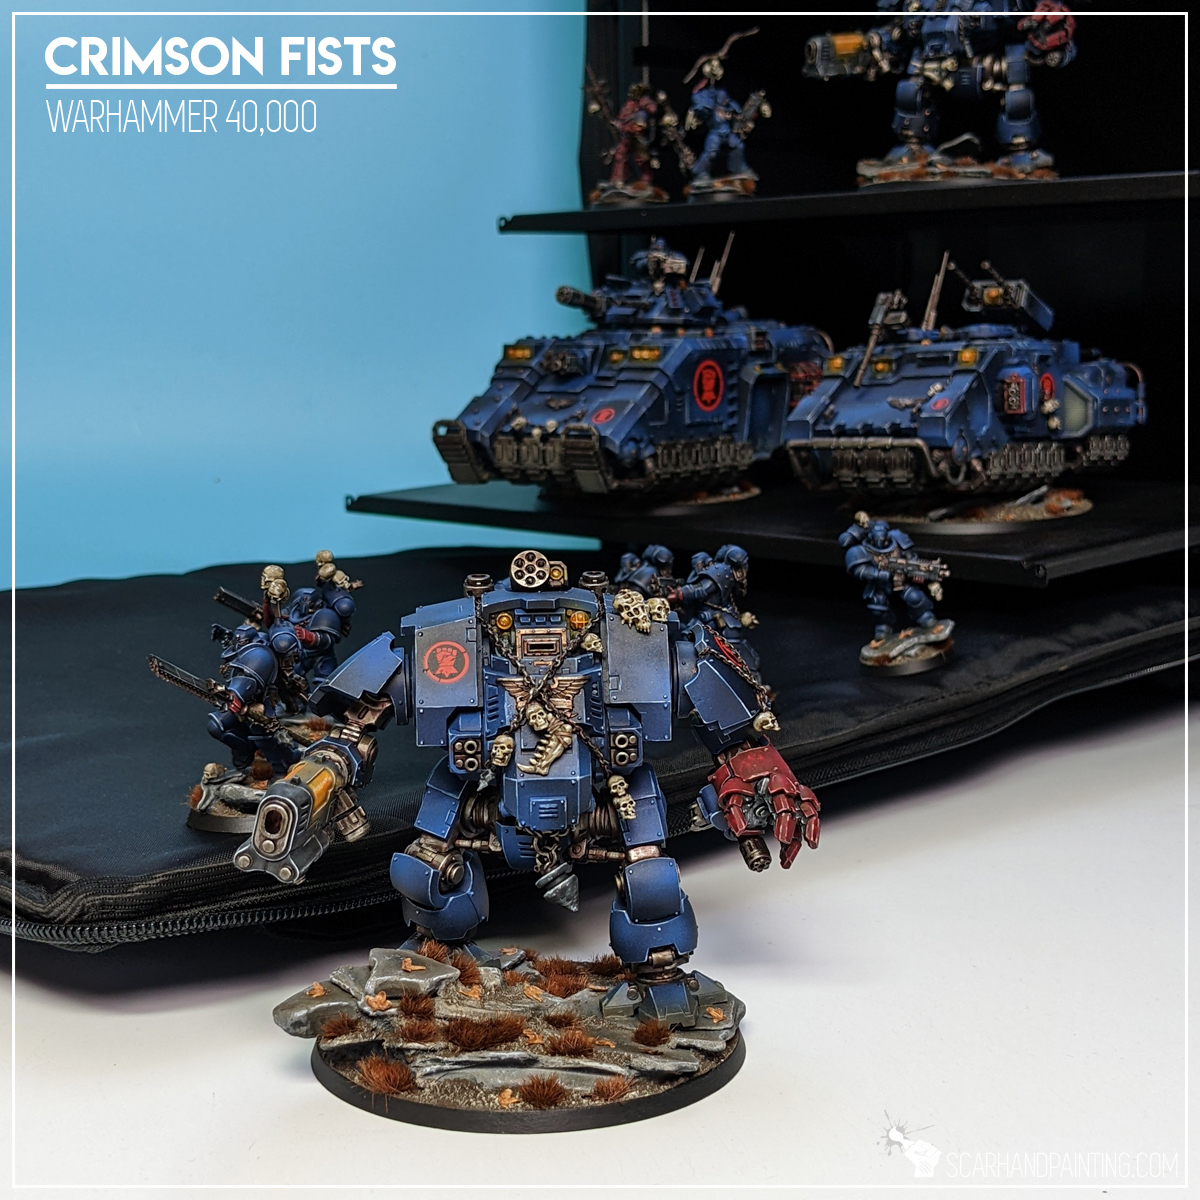
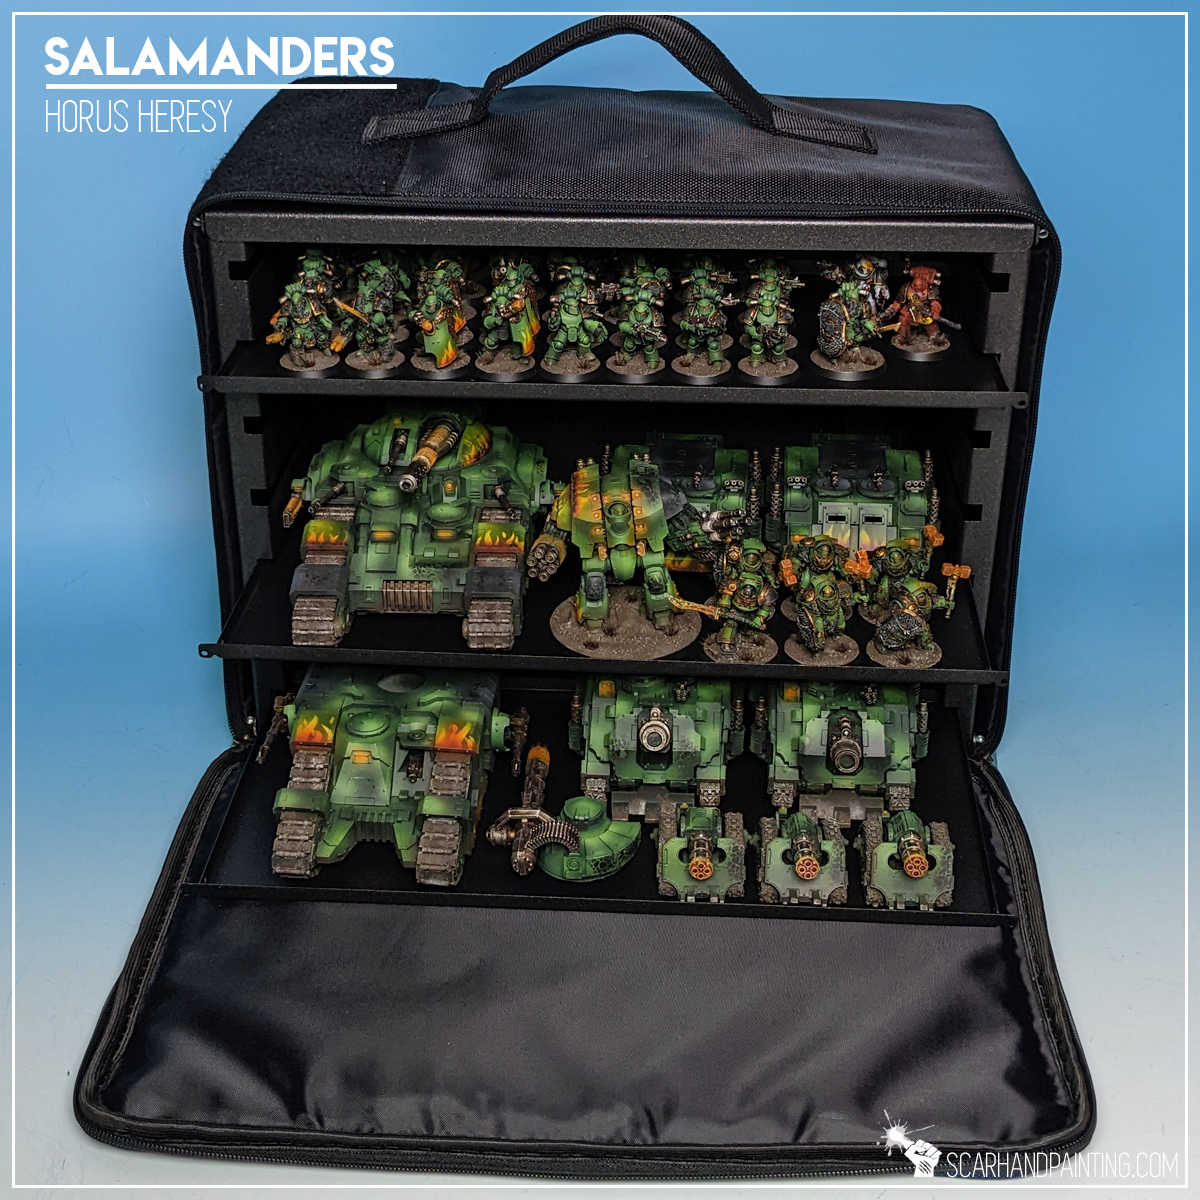
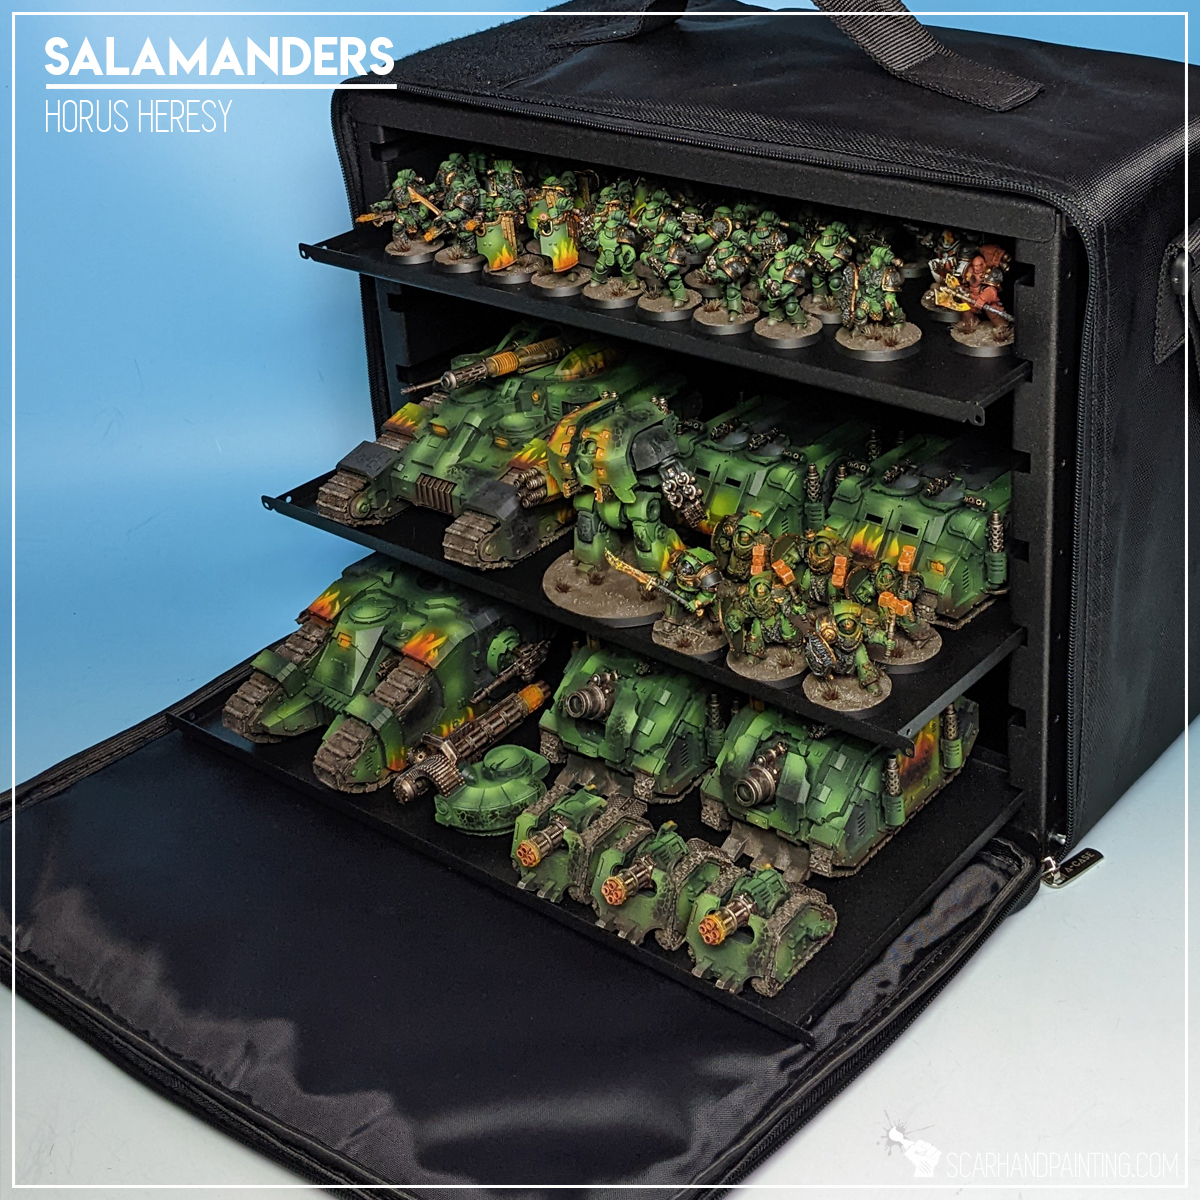
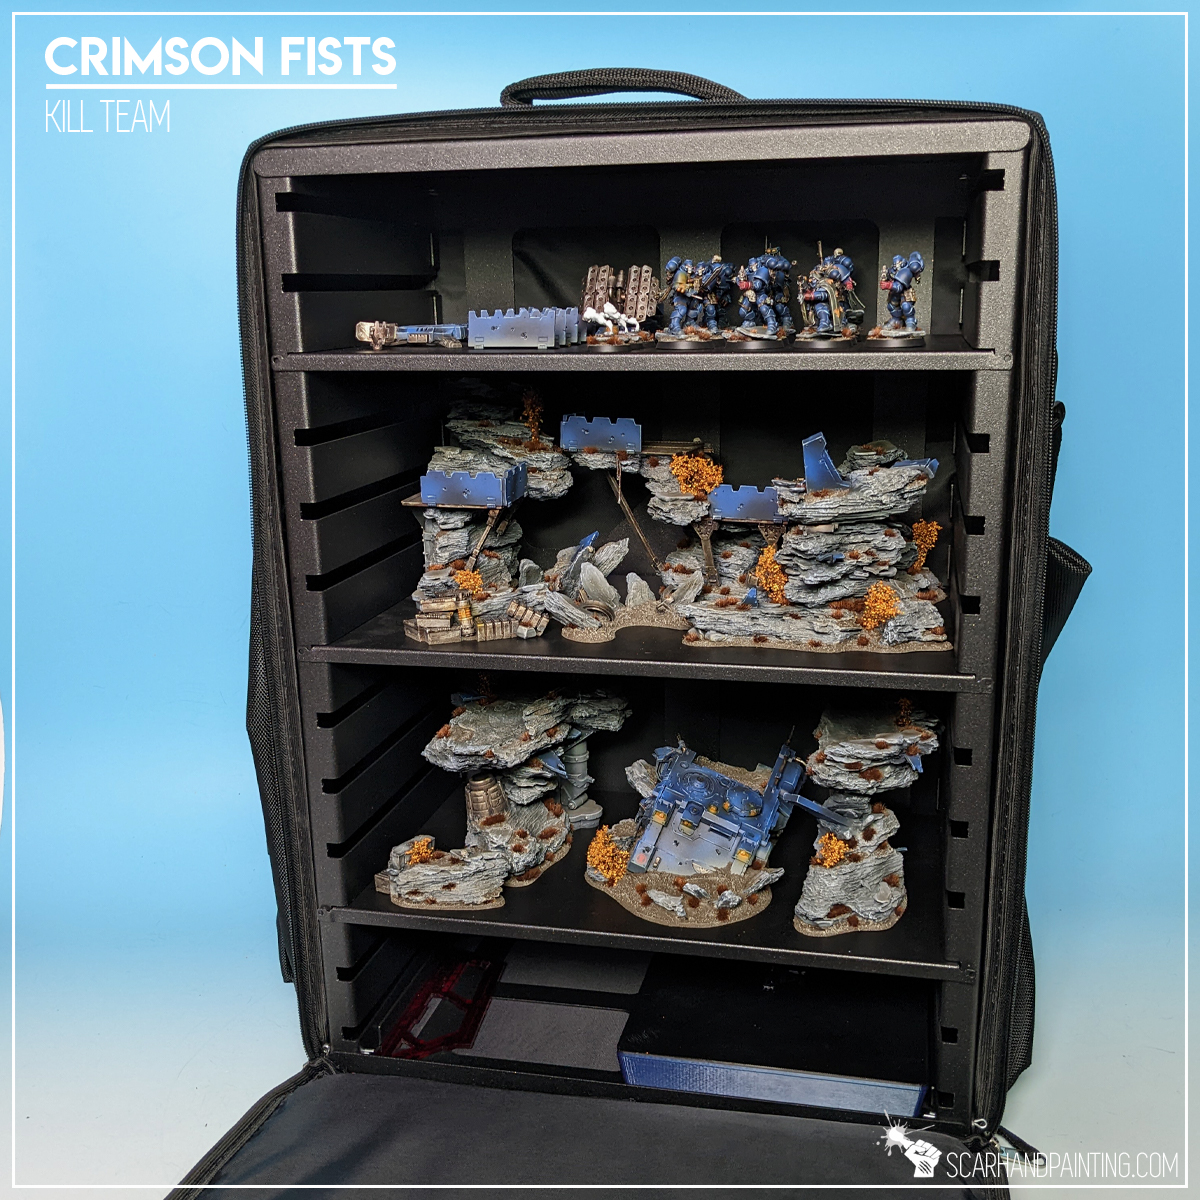
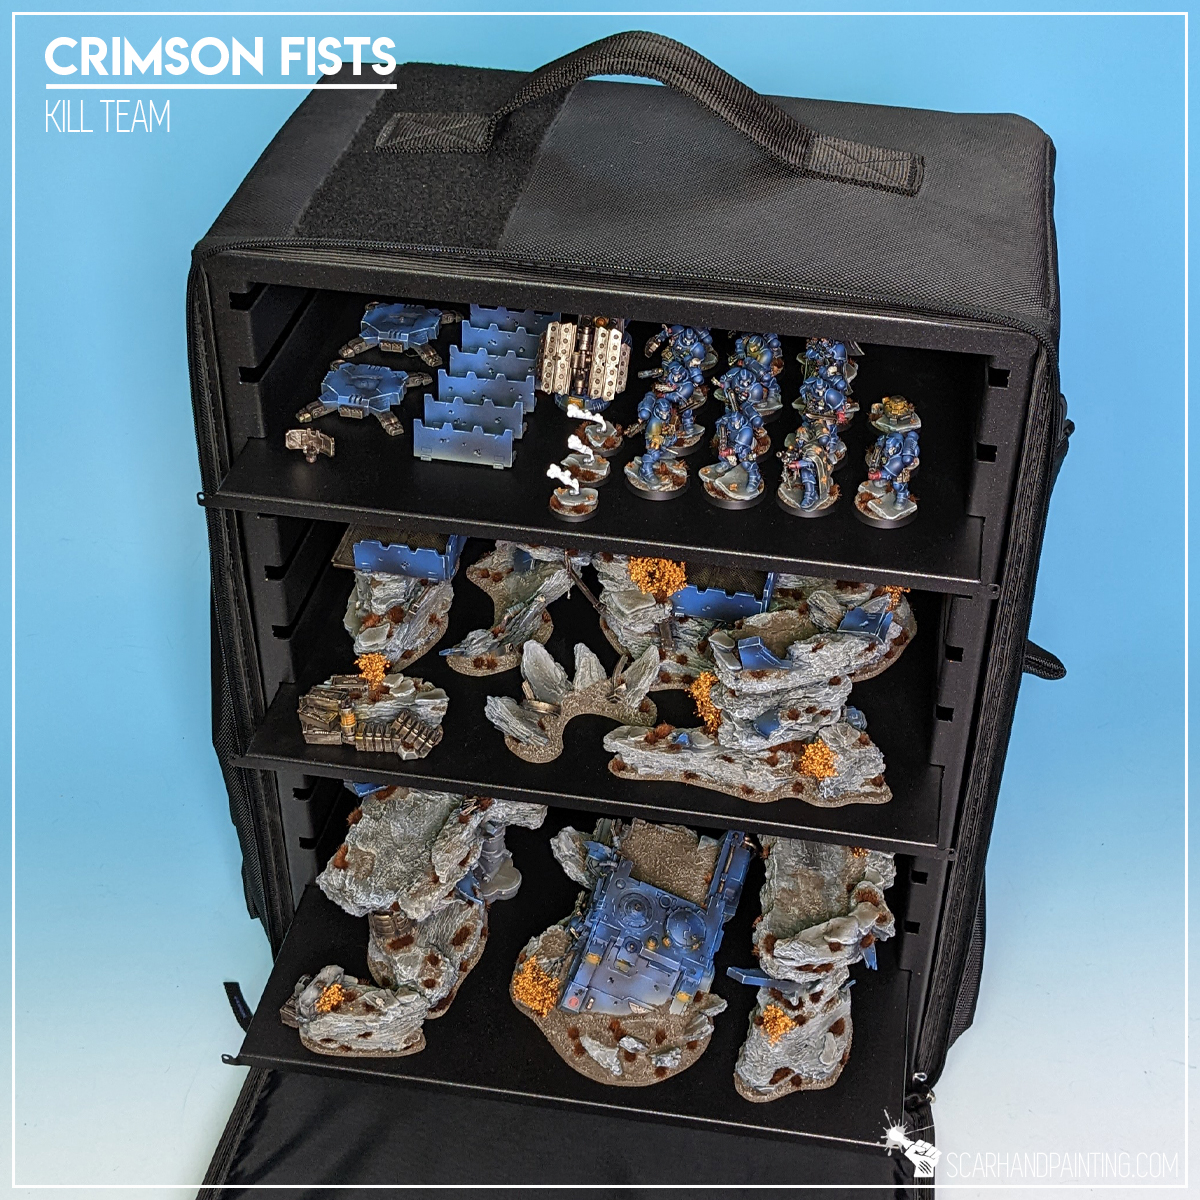
In the world of miniatures painting there are two well established ways of professional miniatures transportation, both with their own pros and cons: Foam Bags and Magnetic Bags. Today I would like to talk a bit about the latter and present to you the A-Case Hybrid Series from A-Case, one of the leading companies in the market.


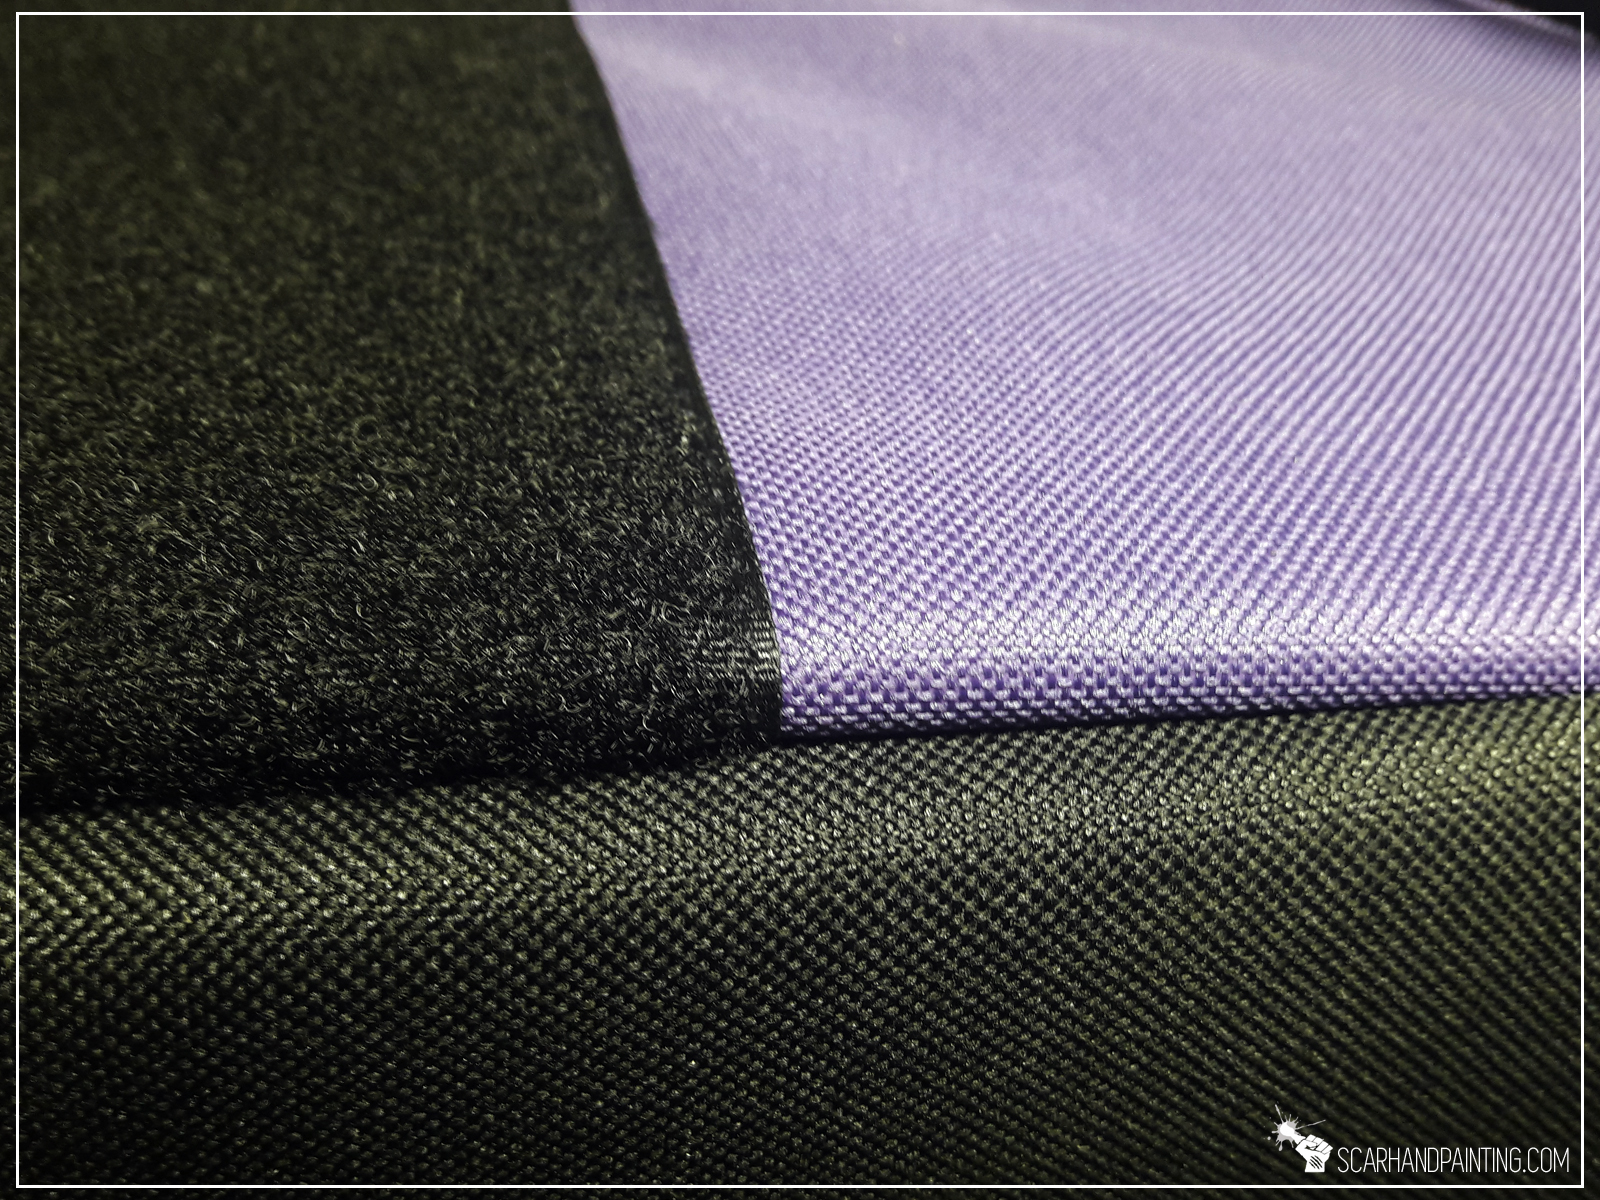
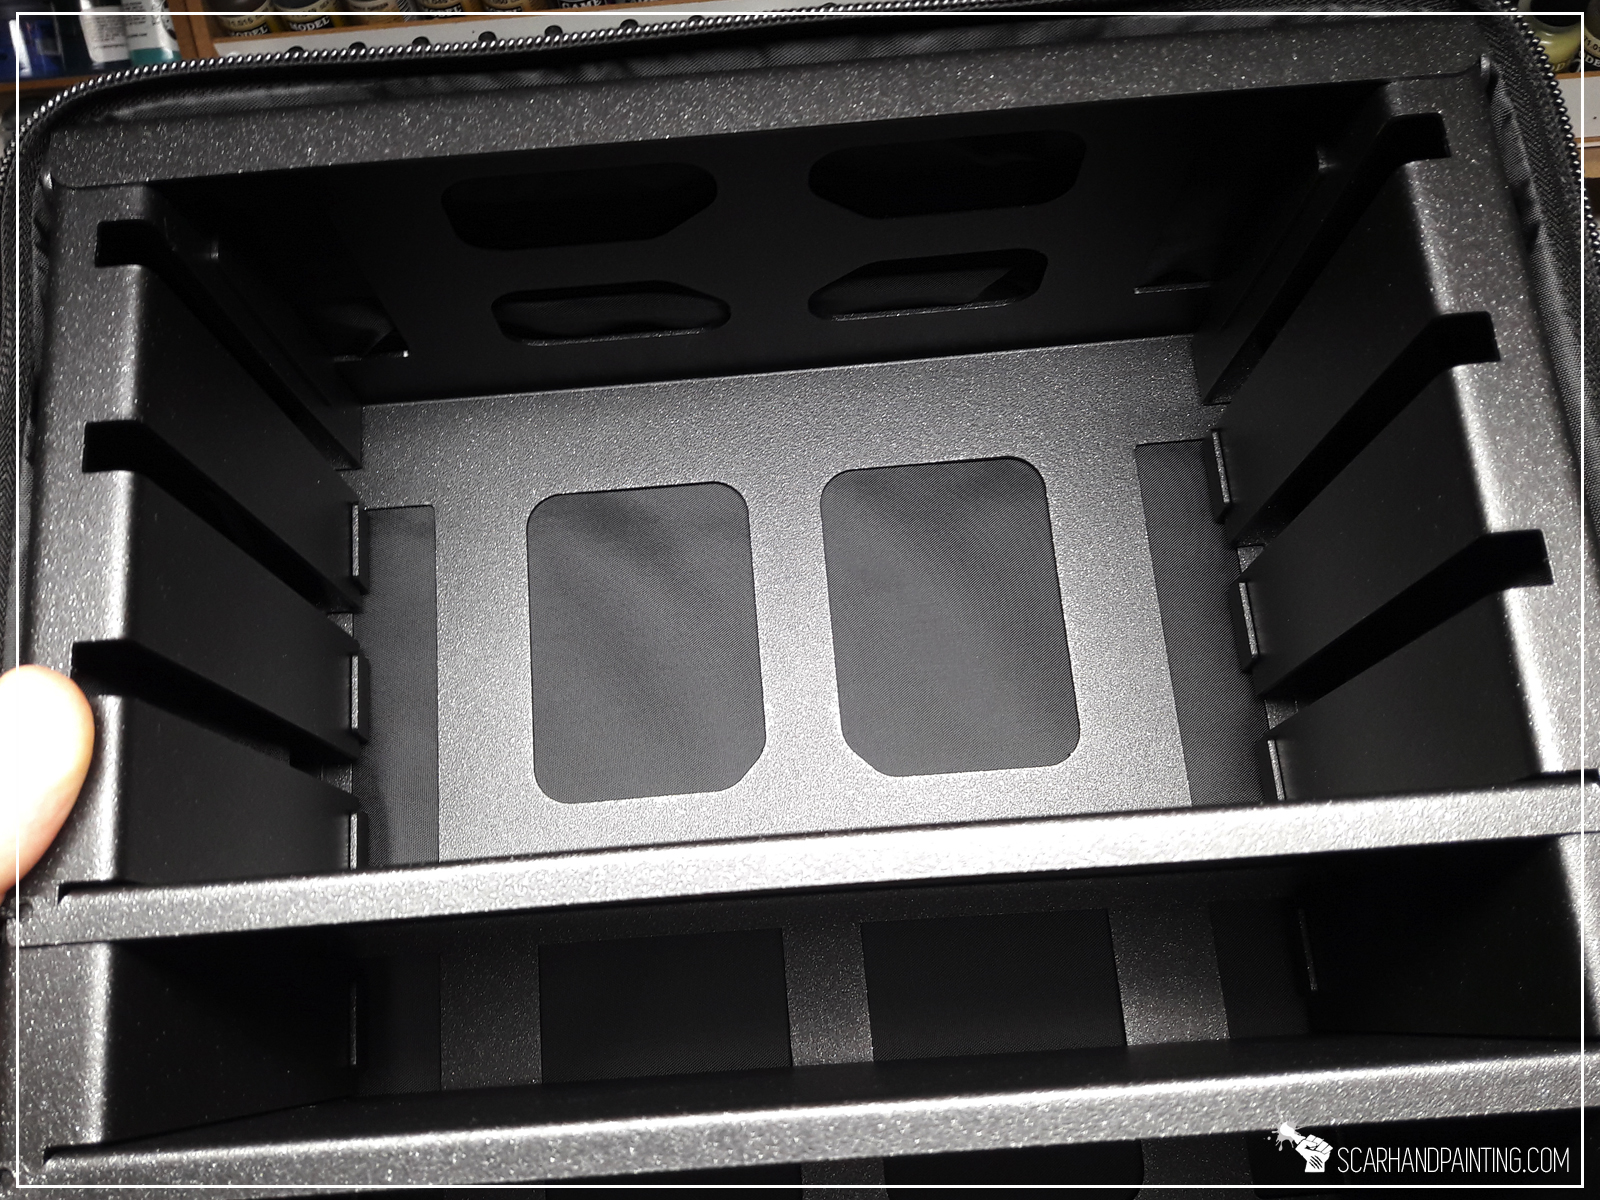
During my years as a hobby store manager and a hobbyist, I’ve seen my share of transportation bags. This imho allows me to say that when it comes to quality A-Case is king. Everything fits, everything is smooth, no thread going wild along the stitches, inner metal casing of great quality plus the overall feel of an exclusive product.
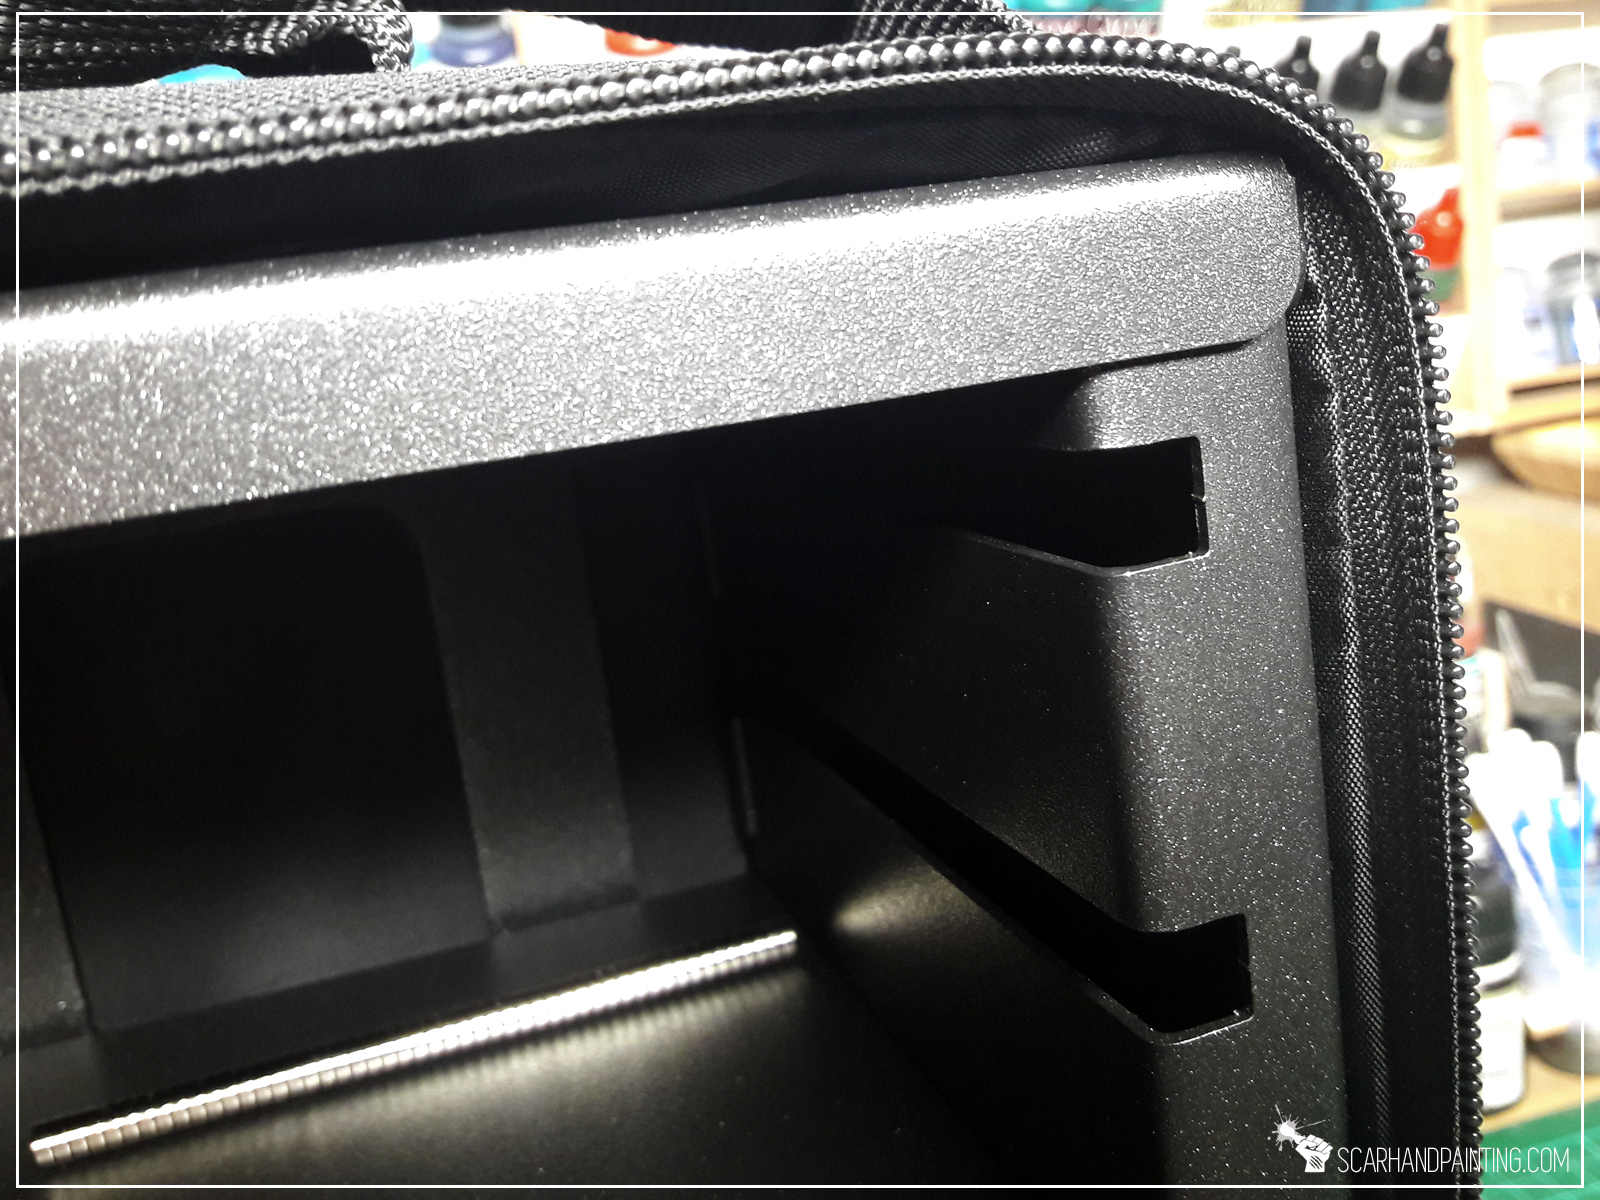
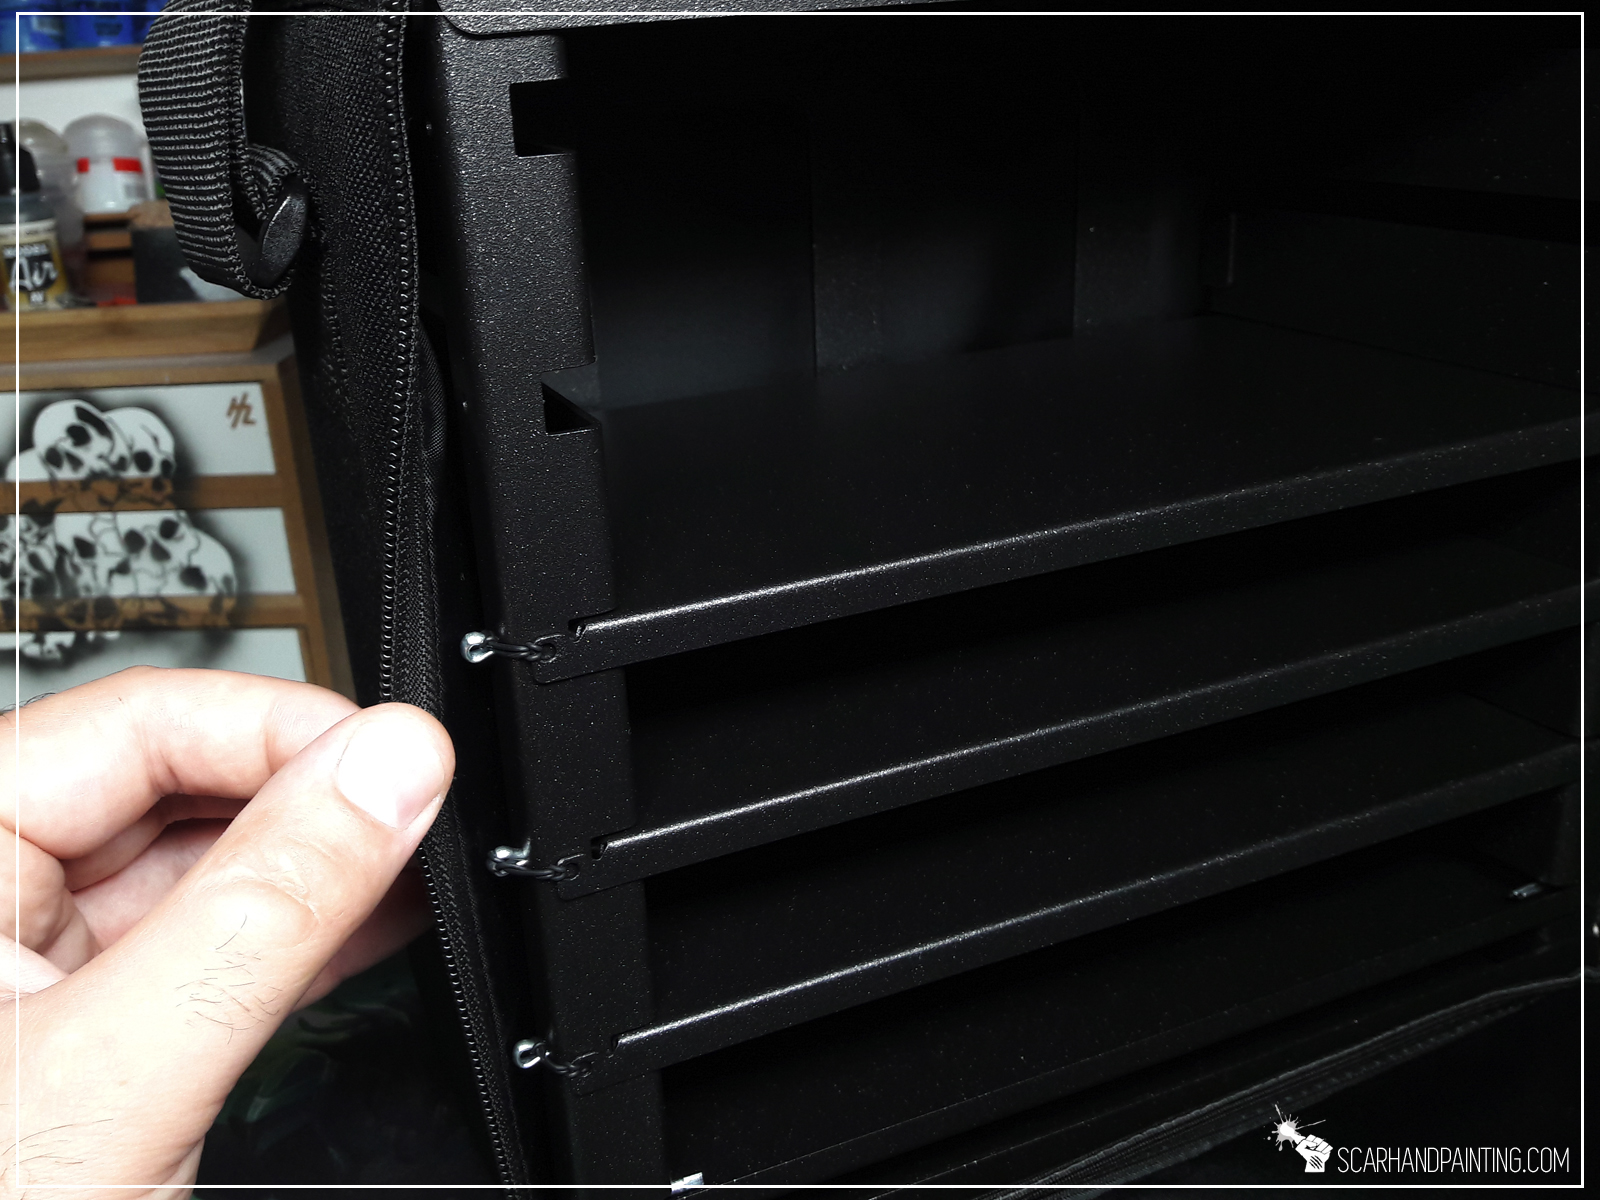
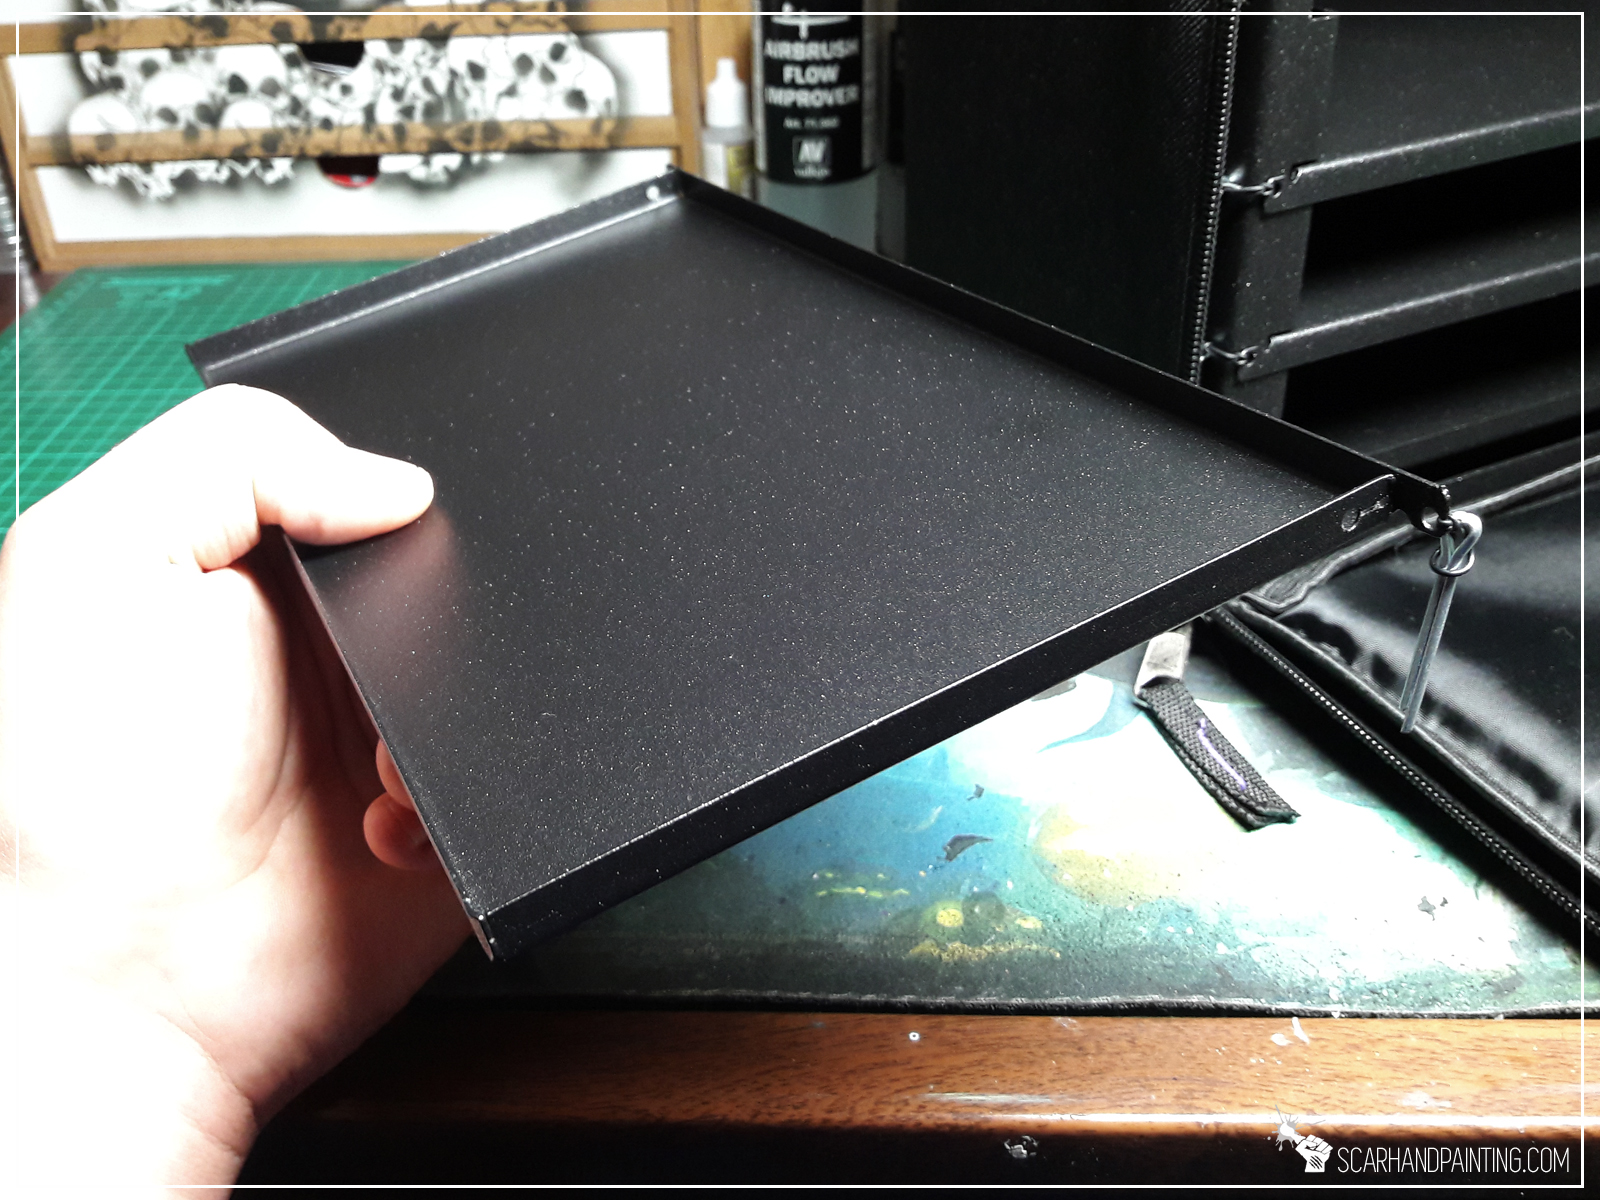
New A-Case Hybrids saw a lot of improvements compared to previous series, such as a much sturdier construction, reinforced trays, strapped side pins to keep the trays in place and more.
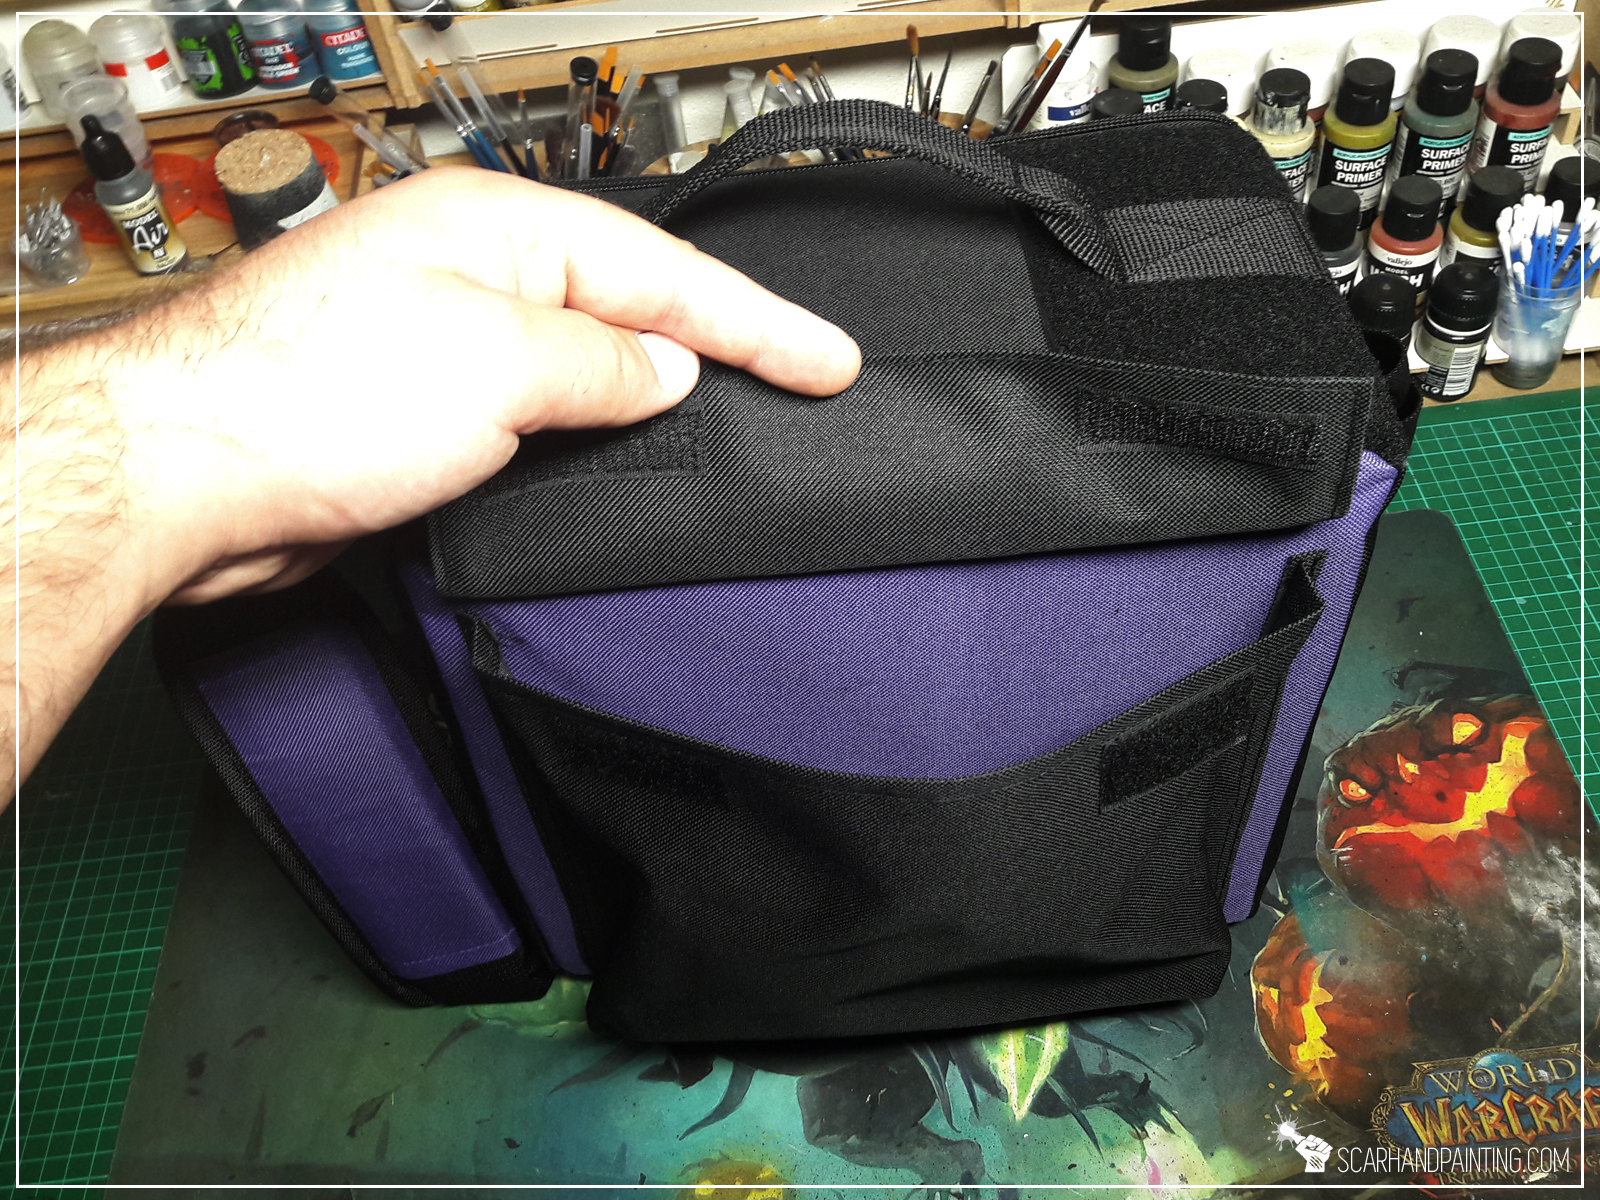


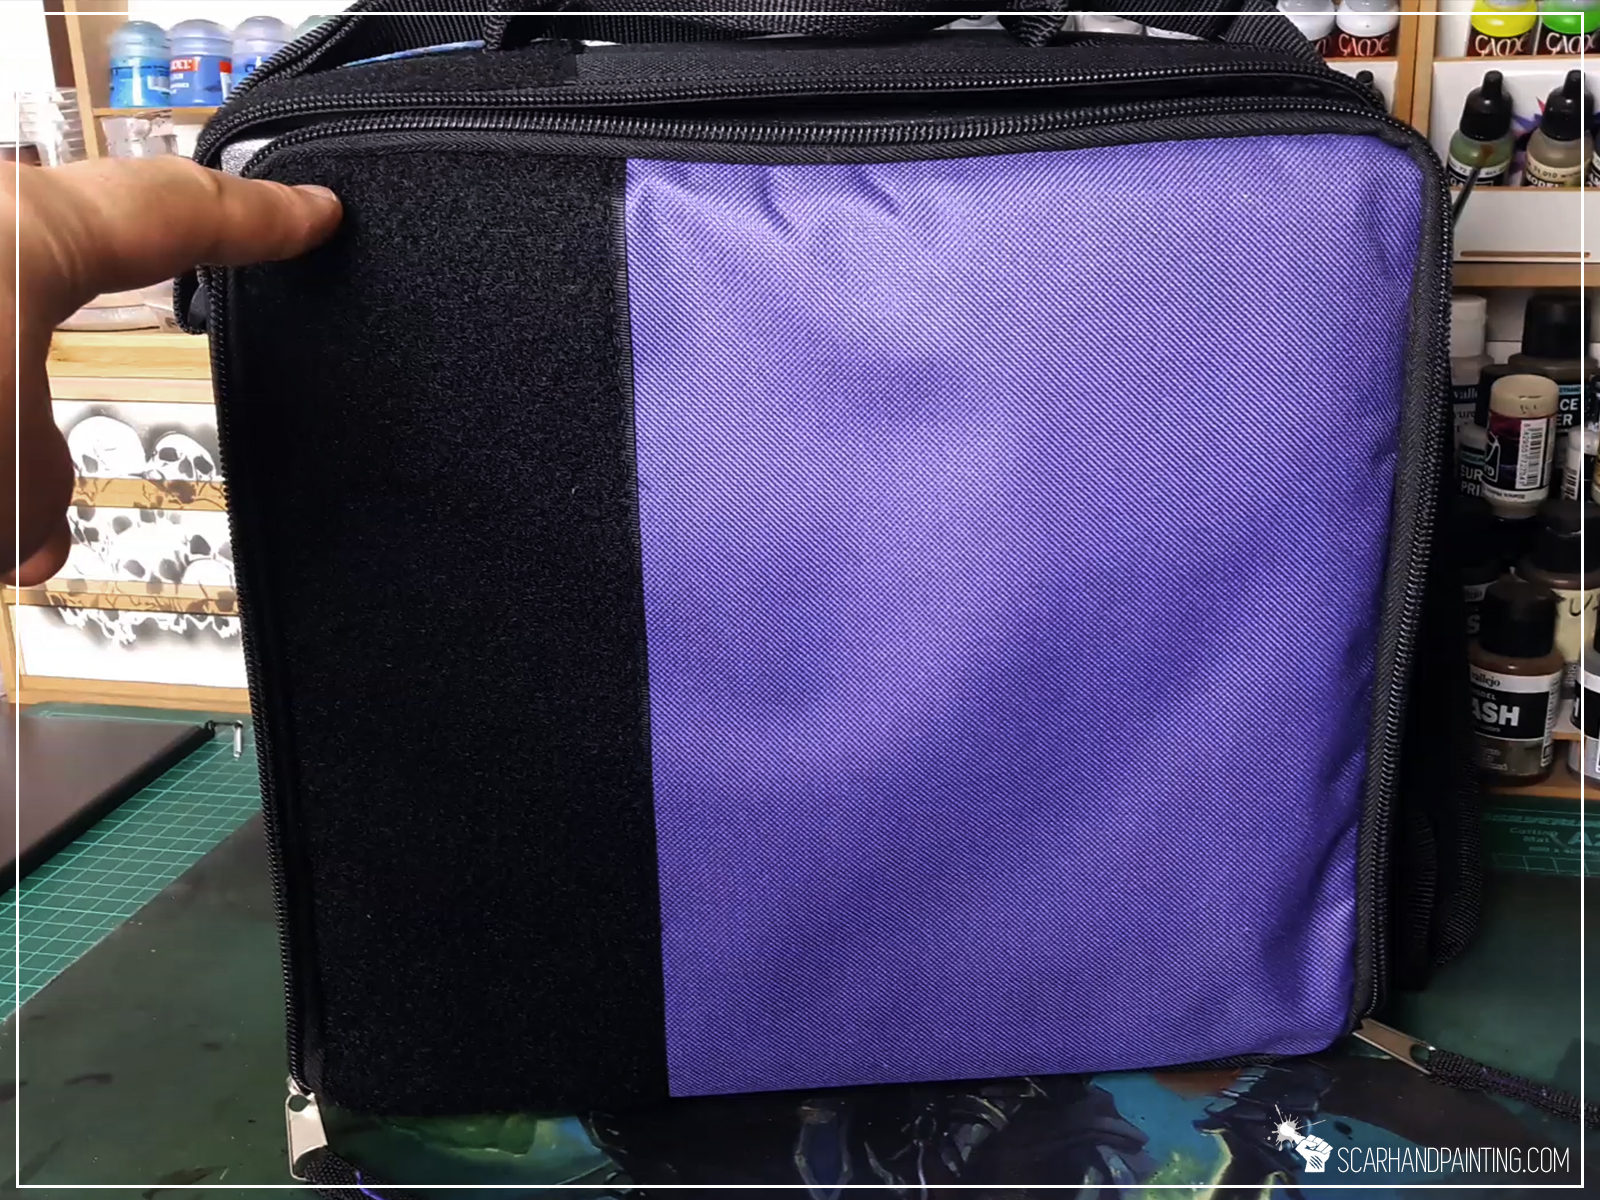
I know this part is totally subjective, but Dayum! The new case looks so good! Everything from design, through quality makes it feel prestigious, both in the inside and the outside. To be fair the sole look is what made me crave a Magnetic Case of my own when I scrolled through facebook and saw it time and time again. Just couldn’t resist. At least now you know why I’m so hyped about it.
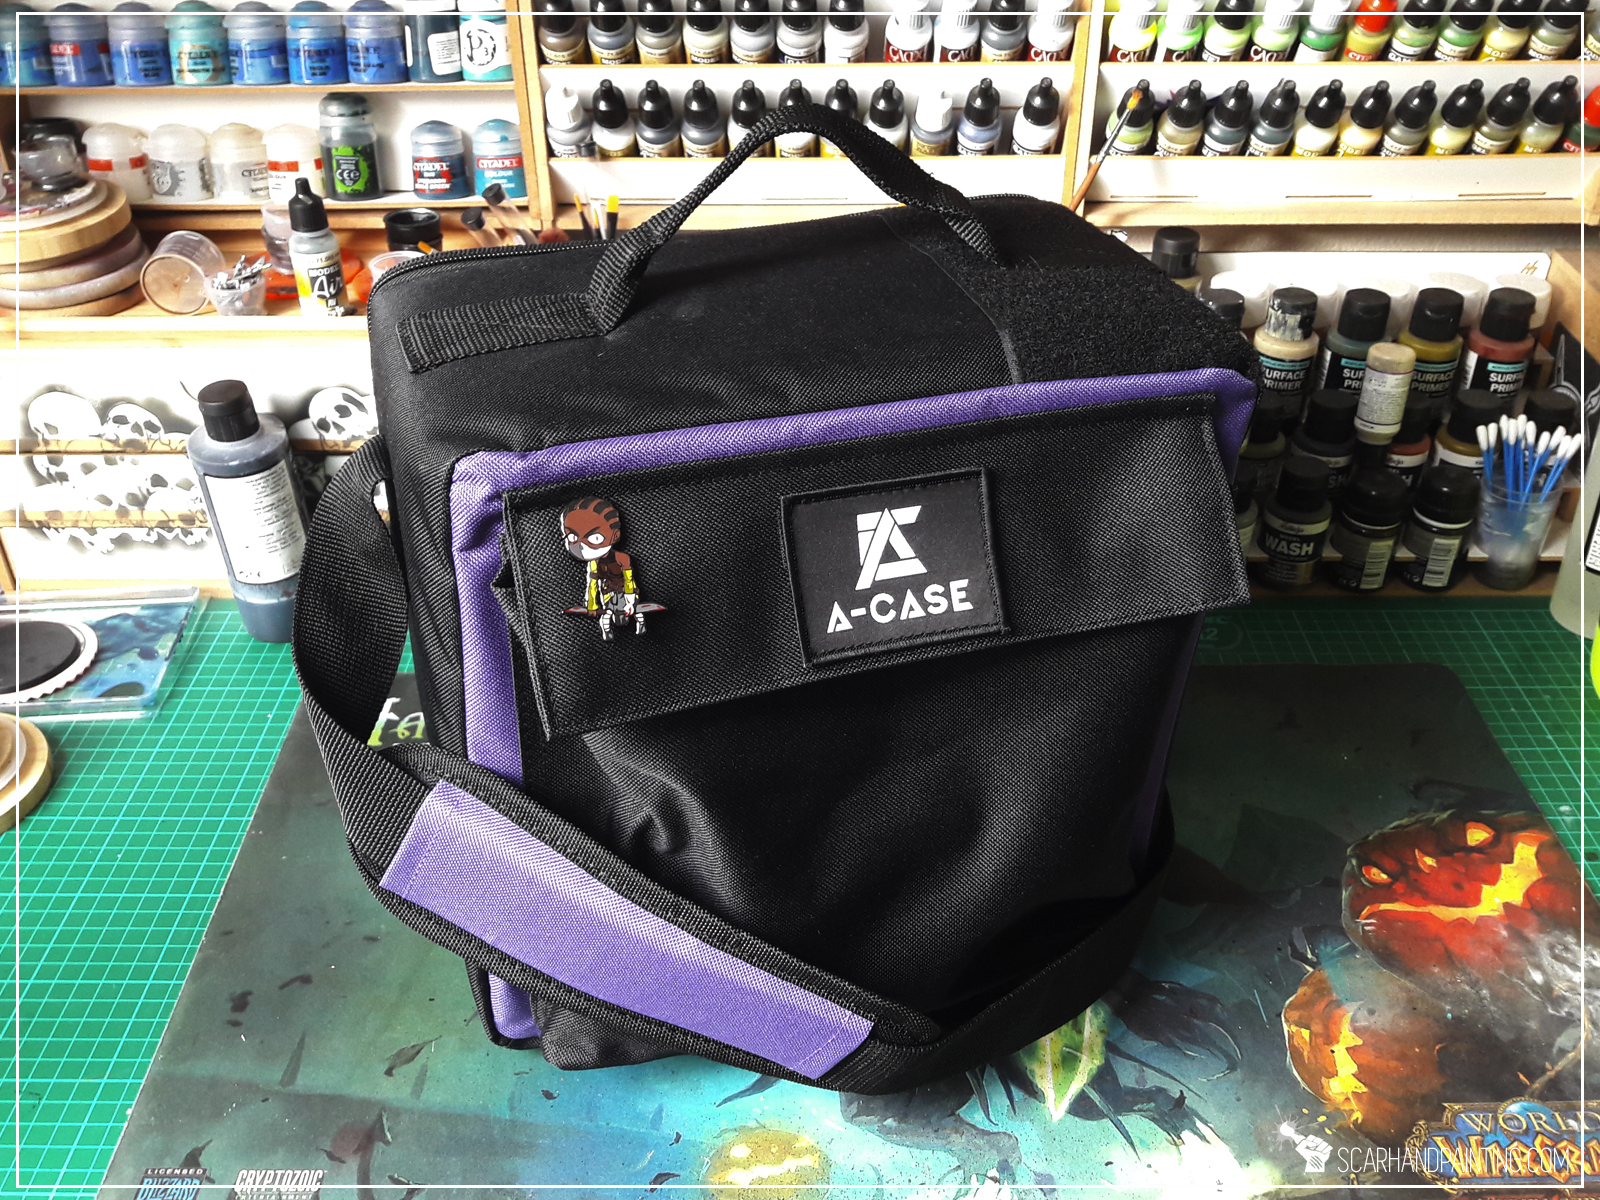


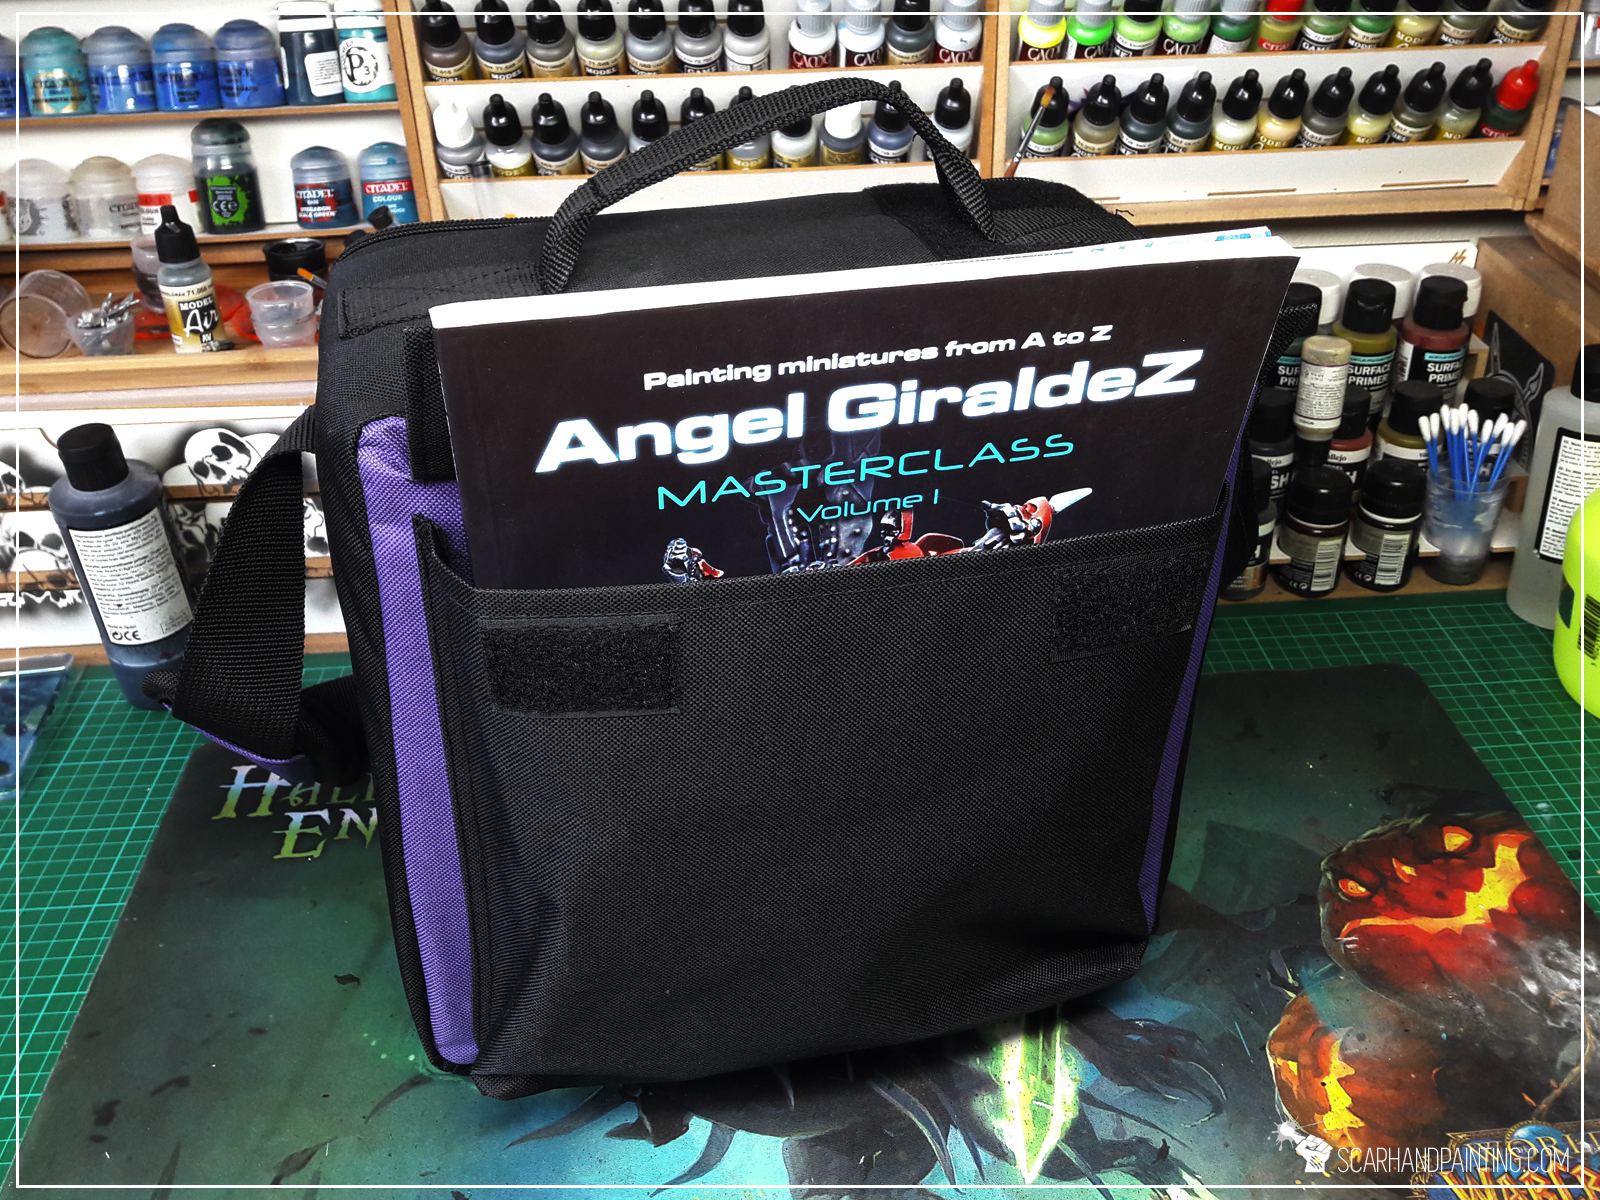
Coming from a position of an orthodox foam fan I have thoroughly tested this carrying case during last month. Apart from obvious features like light weight, comfort of use, adjustable strap with a shoulder pad, handle, large pocket and removable trays the Hybrid has some cool features that improve on the case’s functionality. A Velcro strap on top and at the front allows to attach badges, while water resistant material will keep your miniatures safe in case of bad weather. My favorite though are side pins to immobilize the trays in place. In previous series these might get lost but now attached with flexible straps they will follow the trays around.

It’s not easy to compare A-Cases to other transportation cases as there’s really no high tier competition in the market. Yes, there are some magnetic cases out there (Battle Foam, Tablewar etc.) but most is just out of this league. The A-Case is more expensive than foam counterpart, but it offers a totally different method of miniatures transportation. One that does not involve your paint job touching anything, even as soft as foam. One that allows you to transport large quantity of miniatures in a rather small bag. Most importantly one that is durable and will last for years to come. In addition A-Case offers free shipping around the world and in some cases (like US) that means huge savings.
For me the pricing of this exclusive product seem fair. Taking the cost of miniatures and time/money spent on painting into consideration, it seems like a reasonable price for solid, comfortable and very aesthetic protection.


To summarize, if you’re looking for a solid and comfortable way to transport your miniatures – A-Case is the thing. It looks great, it is very comfortable to use, made of high quality materials and with utmost care for detail. A bit on the expensive end of the hobby, although still reasonably priced. Personally I love it, as A-Case totally revolutionized my approach to Magnetic transportation and ended twenty years of my foam addiction.
A-Case Hybrid Series is available at:
A-Case website,
A-Case Facebook,


I hope you find this review interesting. Be sure to let me know your thoughts in the comments at Facebook or Instagram. I would also appreciate if you considered sharing this content with your friends, who might find it useful. Finally if you are looking for a professional miniatures painting service, be sure to contact me with this contact form. I always reply within 24 hours, after which please check out your spam folder.
In this step-by-step tutorial I’m going to show you how to base miniatures.

Basing miniatures is an overall easy thing, still every now and then I stumble upon hobbyists asking on how to properly do it. Let’s start the answer with: “There’s no one proper way, but there are certainly plenty of bad ways to base miniatures.” A quick example of a “bad way” would be if you glued irregular sand on top of a base and tried to glue a miniature on top of it with cyanoacrylate glue. Glue would go on a rampage all over the sand while it won’t hold the miniature in place due to insufficient area of contact. Another example of a “bad way” would be gluing a miniature on top of a painted base without a pin resulting in miniature being glued to paint rather than the base. This can only end badly for the miniature and your paint job. Ok, so what are the “proper ways”? Here’s three major techniques I use:

Some miniatures seem stable and have a large, flat area at the bottom be it giant feet, or an underside of a robe. In this case I usually go with with no pin at all and trust in the vast area of contact to keep the miniature in place.
Here’s how I go about it:
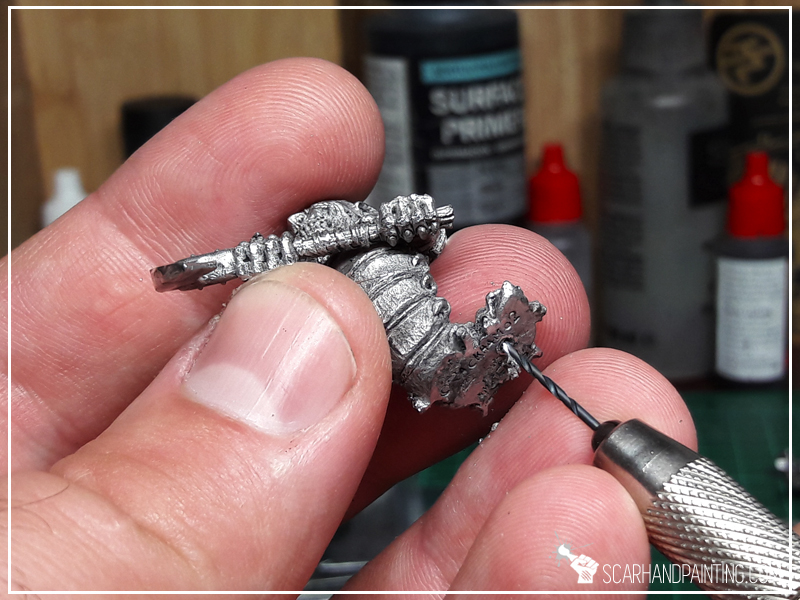
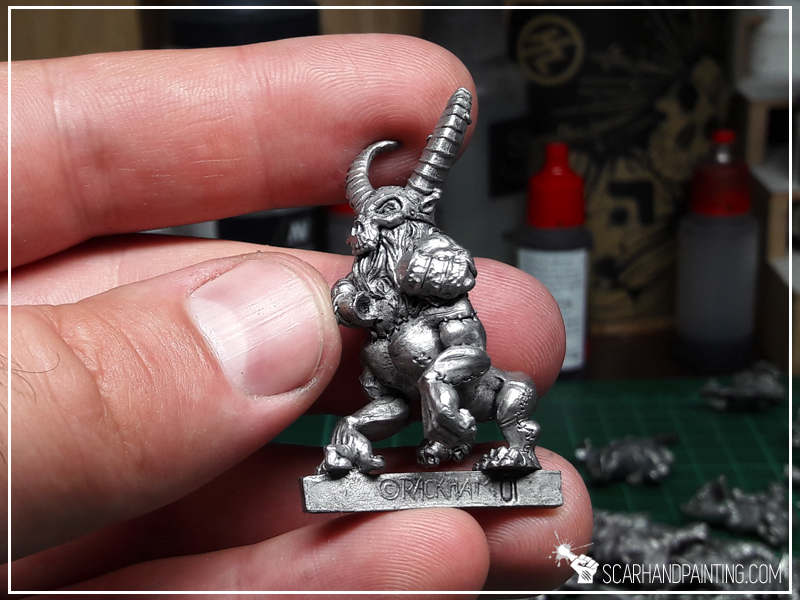
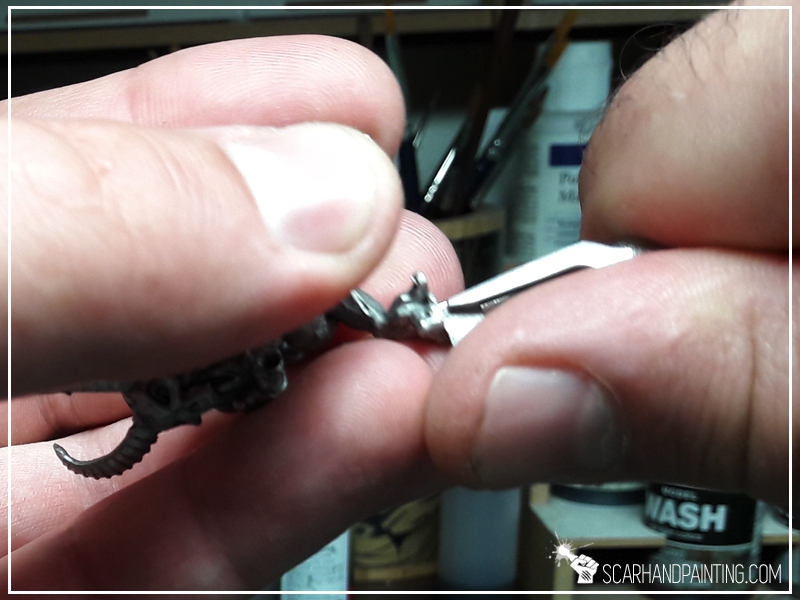
I use this method in case of wobbly miniatures with small area of contact that for some reason don’t have the rail. Such miniatures require to be pinned to the base to ensure their safety and durability. Note that pinning requires additional tools as well as proper pins. Alongside a trusted hand drill you can also purchase original hobby pins, but these are expensive. Depending on how thick is the miniature I use either paperclips or a thin steel wire.
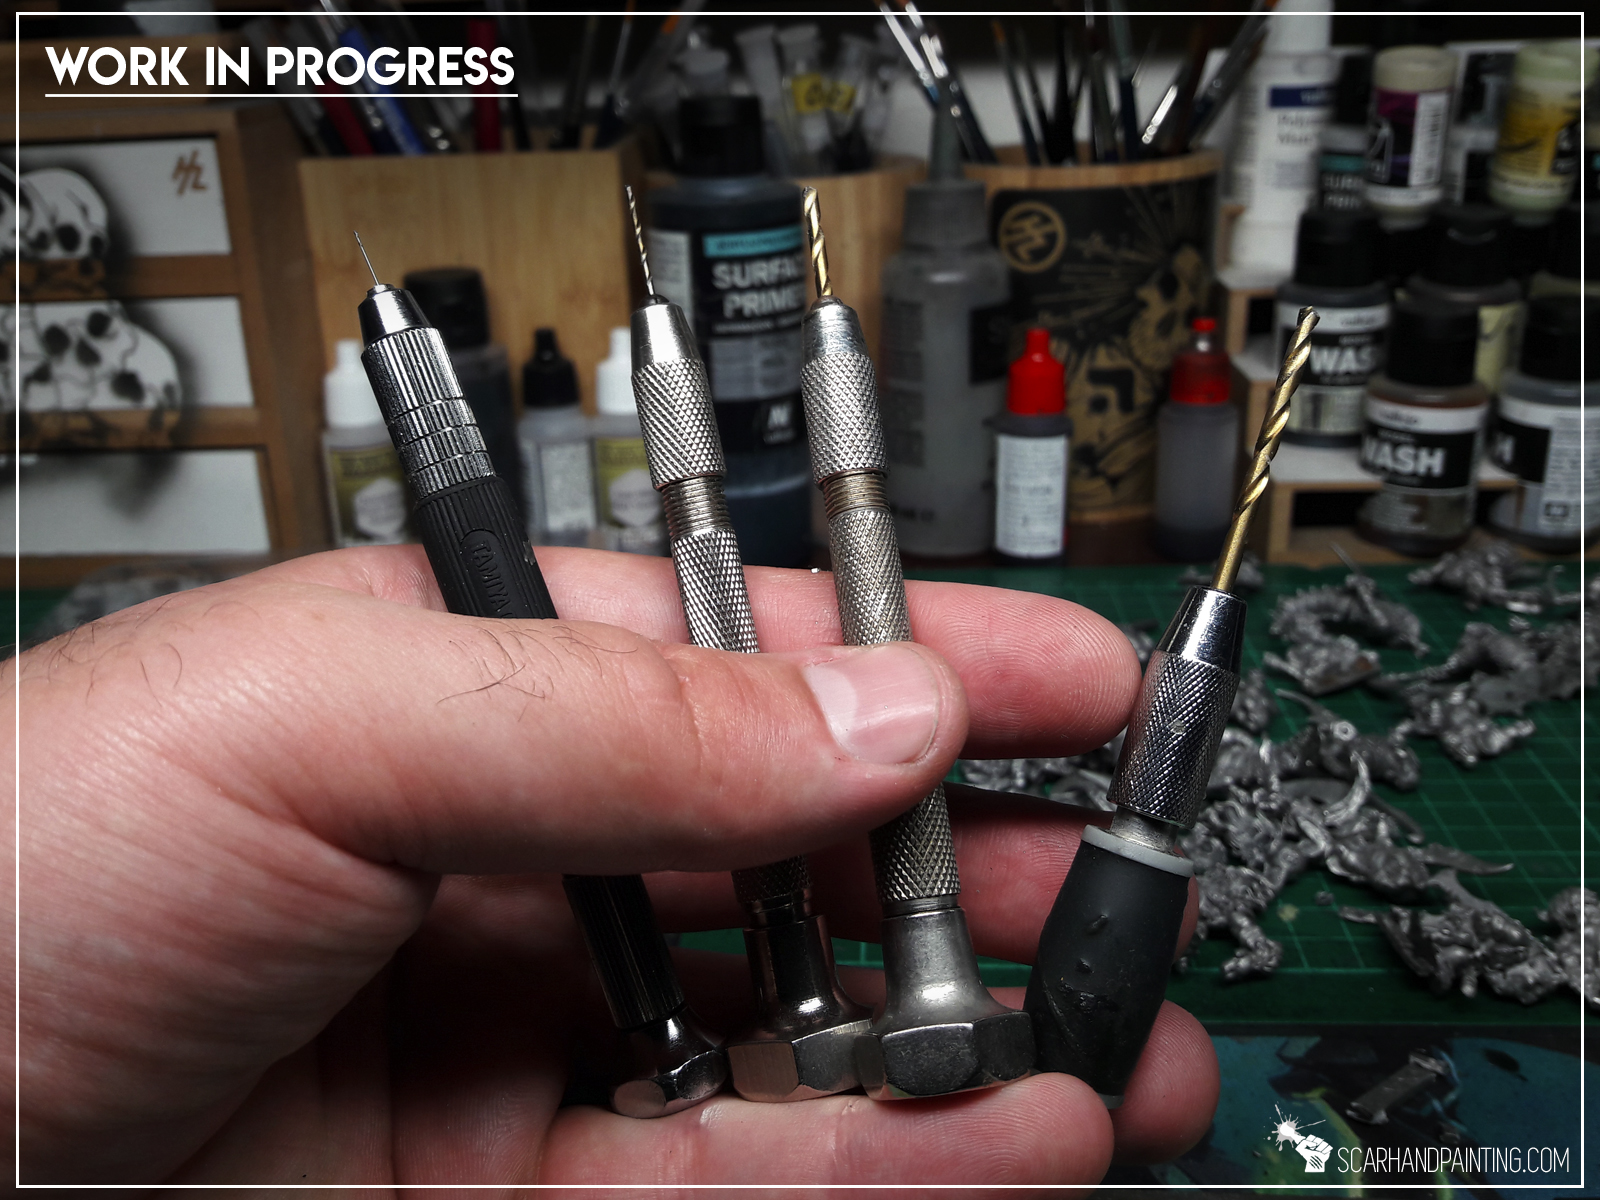

The steps I undertake to pin a miniature:
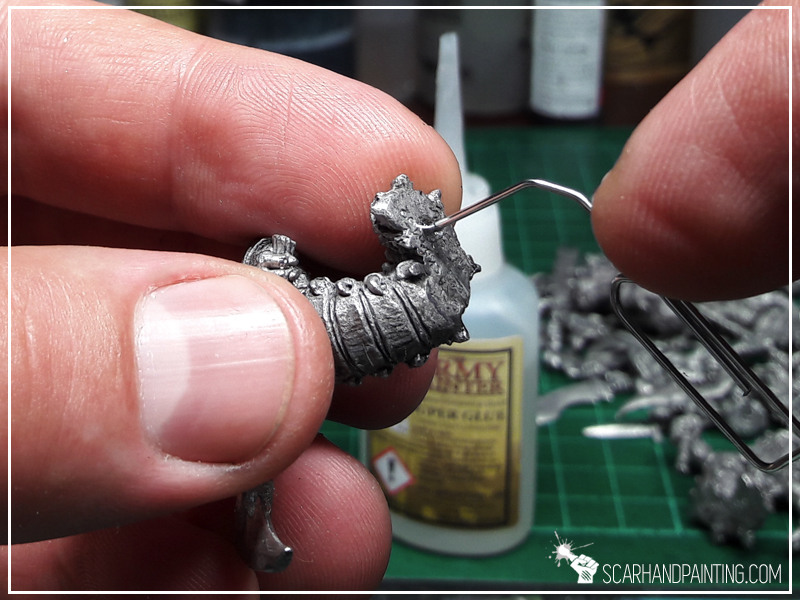


This is my favorite method. I believe that a natural part of the miniature is better at holding it in place rather than a smooth steel pin.
This is what I do:


From all the other methods this one works the best for me. Plus it’s faster than normal pinning. Just remember, there’s no one proper method. If you feel like a miniature might use a pin – Just follow your guts on this and pin it. Better safe than sorry.
I might drop another article on basing miniatures in the future. Maybe some Painting Philosophy type with insight on why I paint my miniatures based and not separately. If you think it’s an interesting topic and/or if you liked this article – consider letting me know in the comments or at my Facebook profile… or even share if you think the article deserves it. 😉
PS: Check this stuff out! It blown my mind! XD
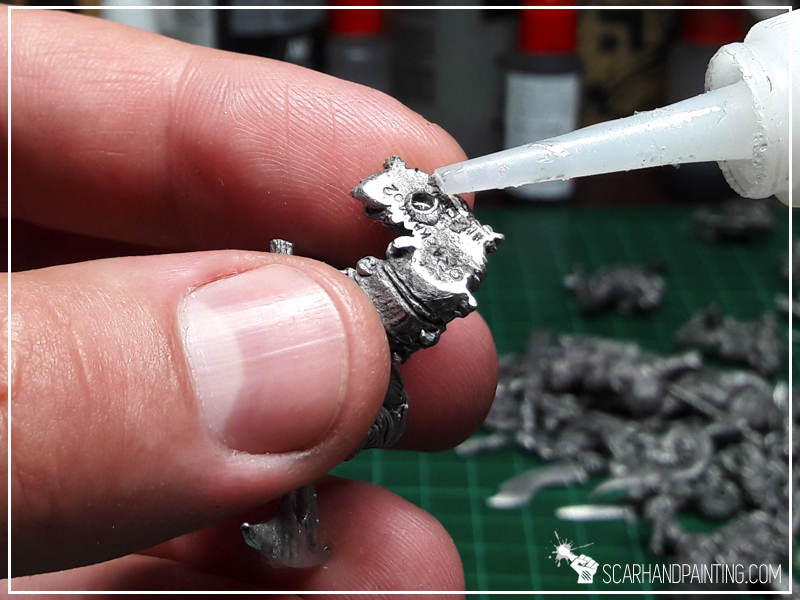
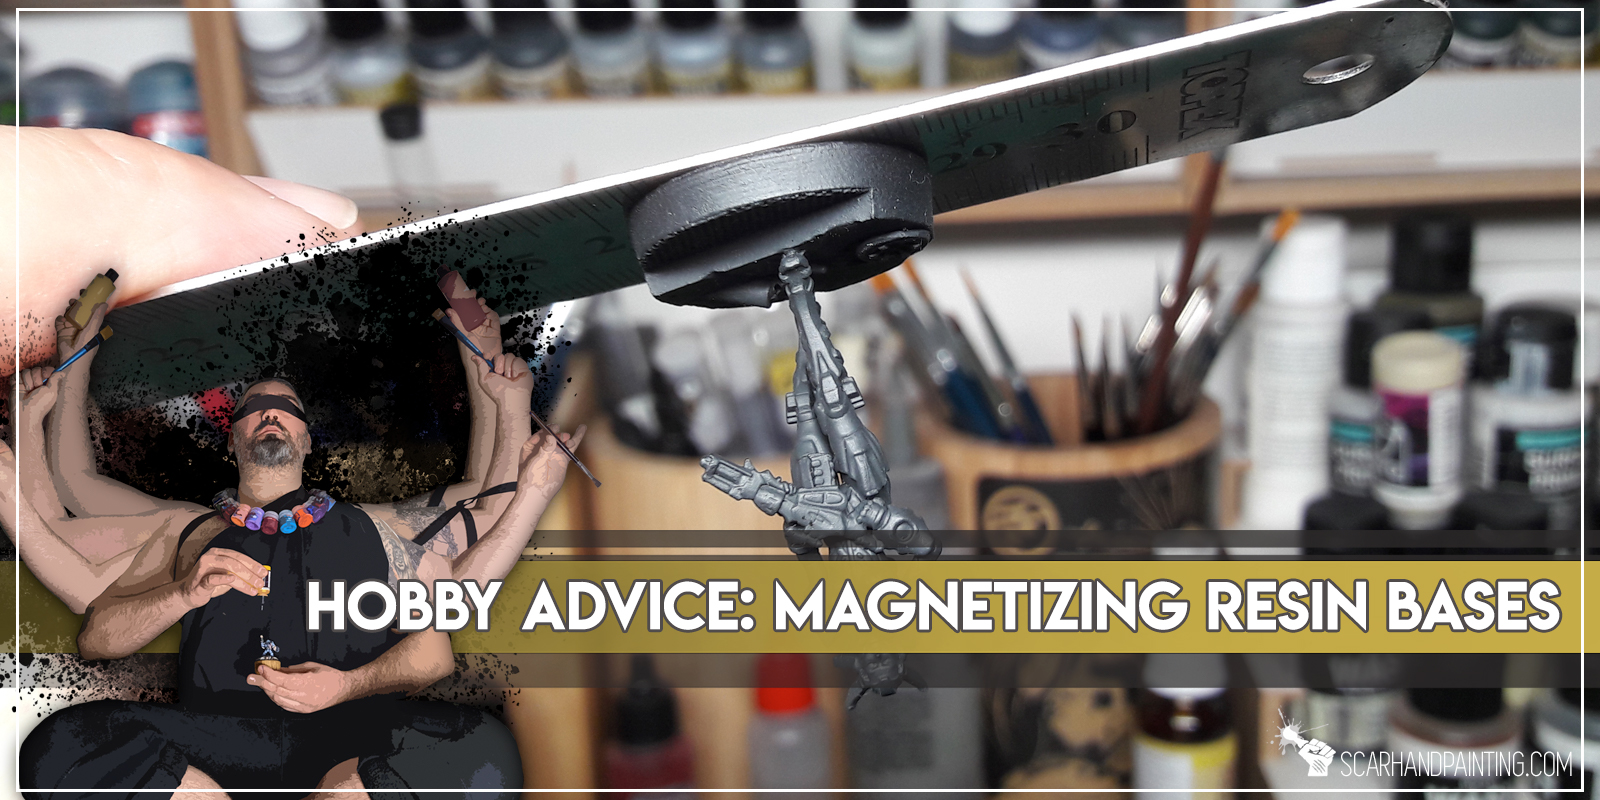
In this step-by-step tutorial I’m going to show you how to magnetize resin bases – easy and fast!
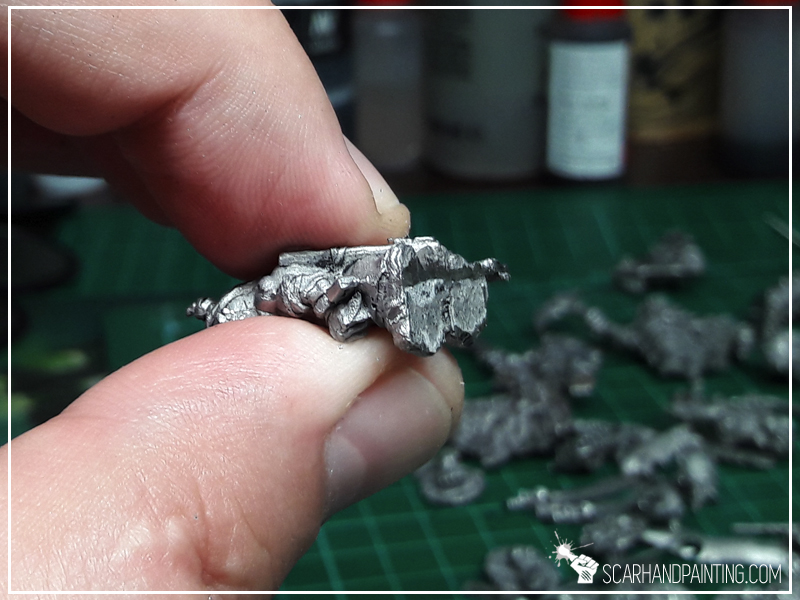
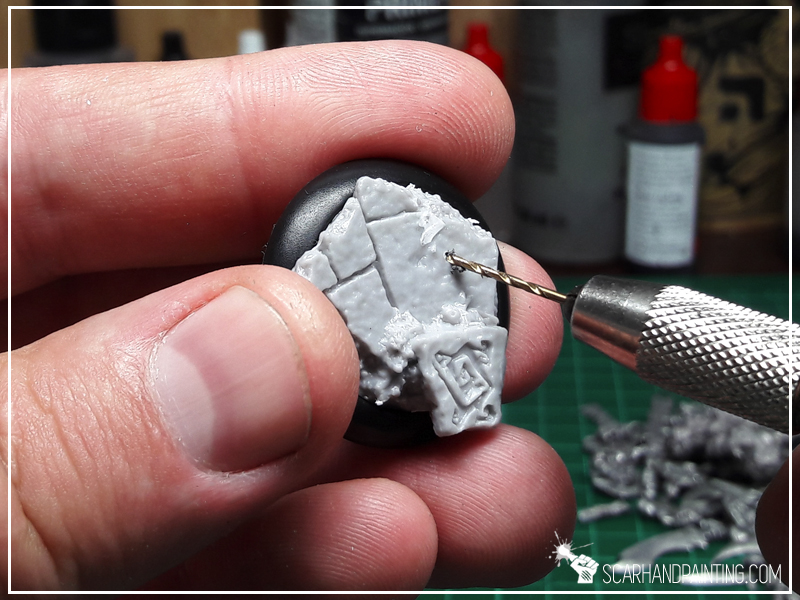
Magnetizing entire army for an upcoming delivery of a brand new A-Case carrying bag seem like a great opportunity for a tutorial, doesn’t it? The thing about resin bases is that they rarely come with magnet holes at the underside and even when they do (for example Warsenal) it’s still better to drill your own precise holes. Below are some of the shortcuts and hacks I use when magnetizing resin bases.
Step One: Drilling

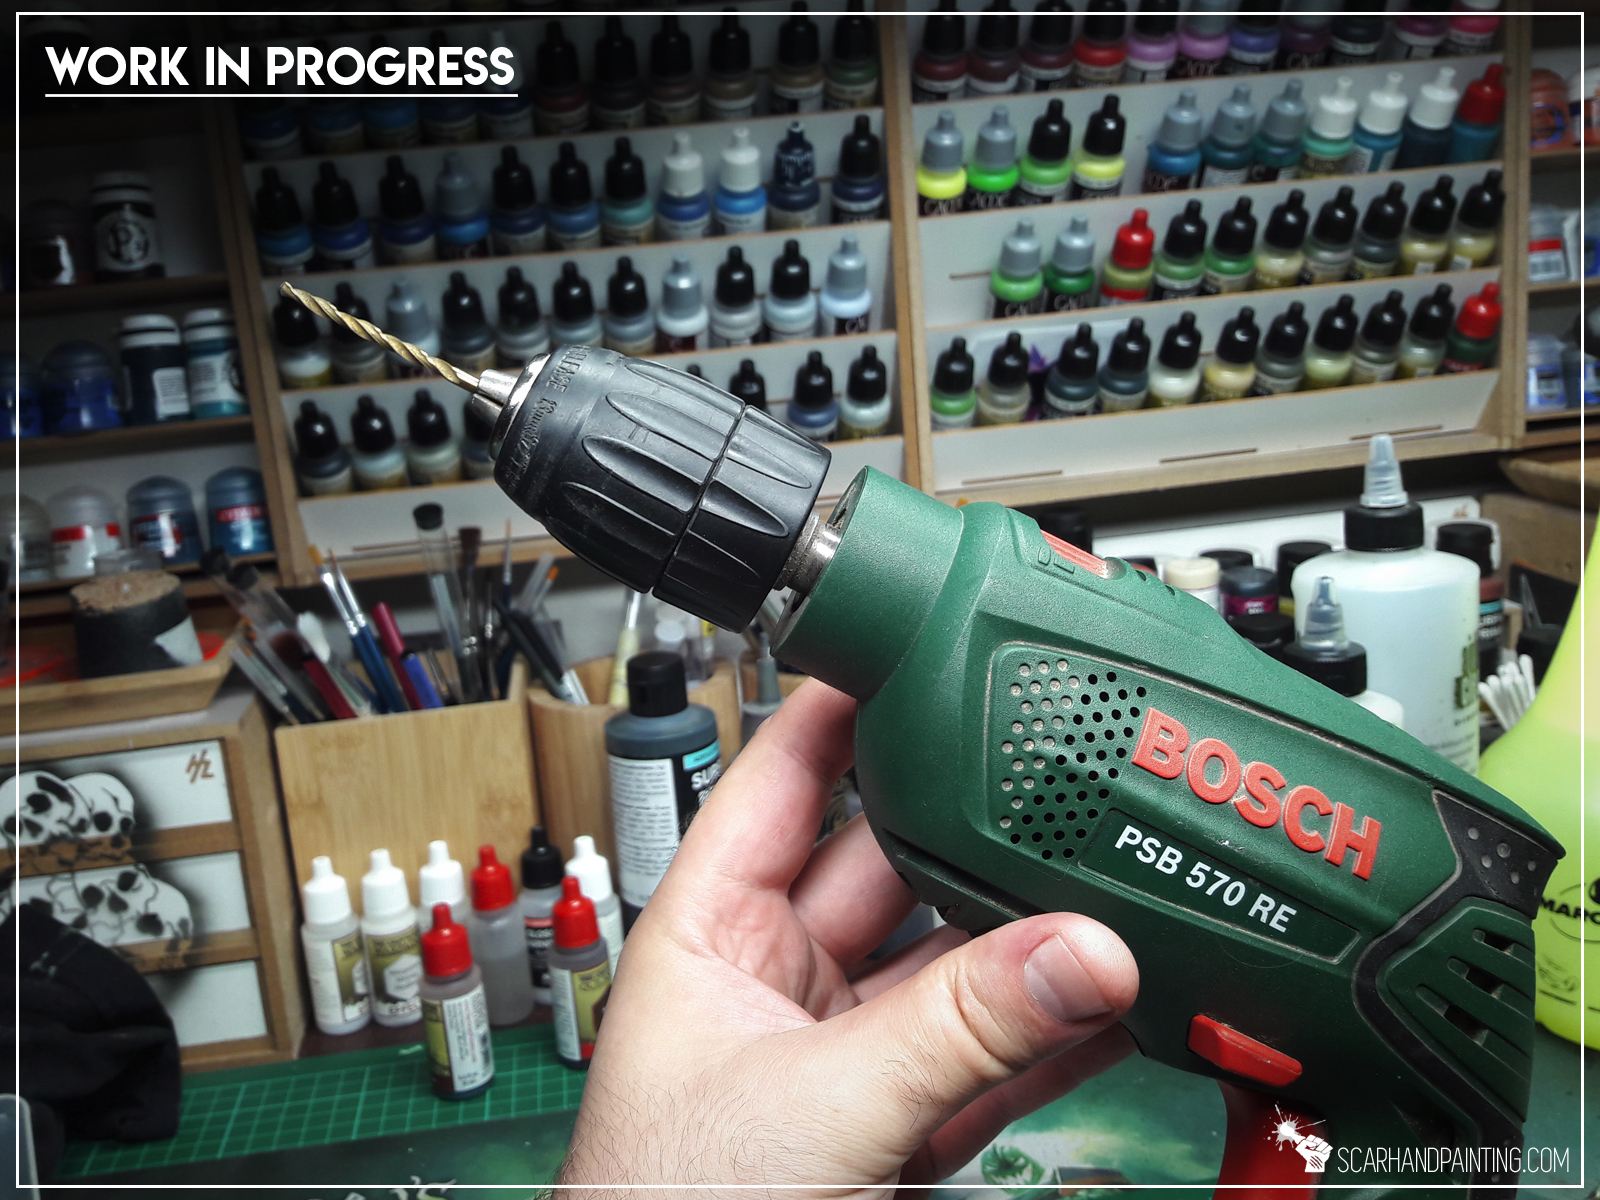
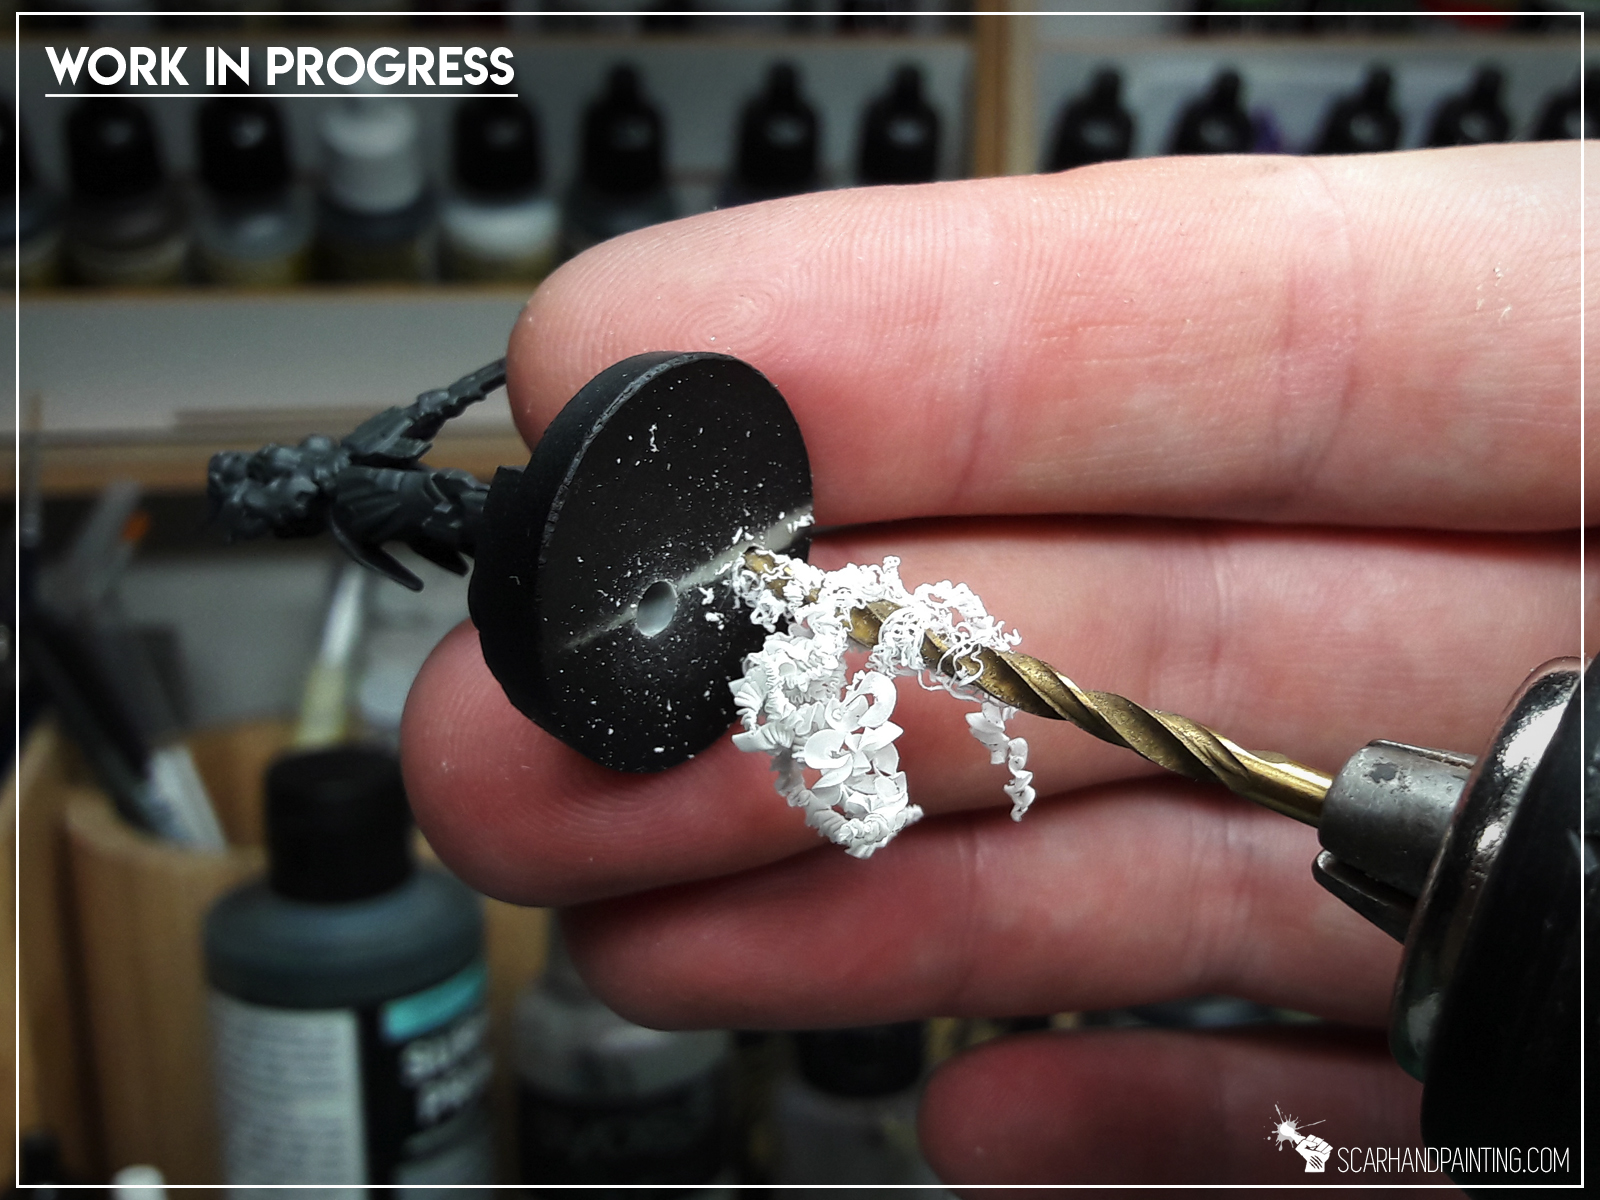
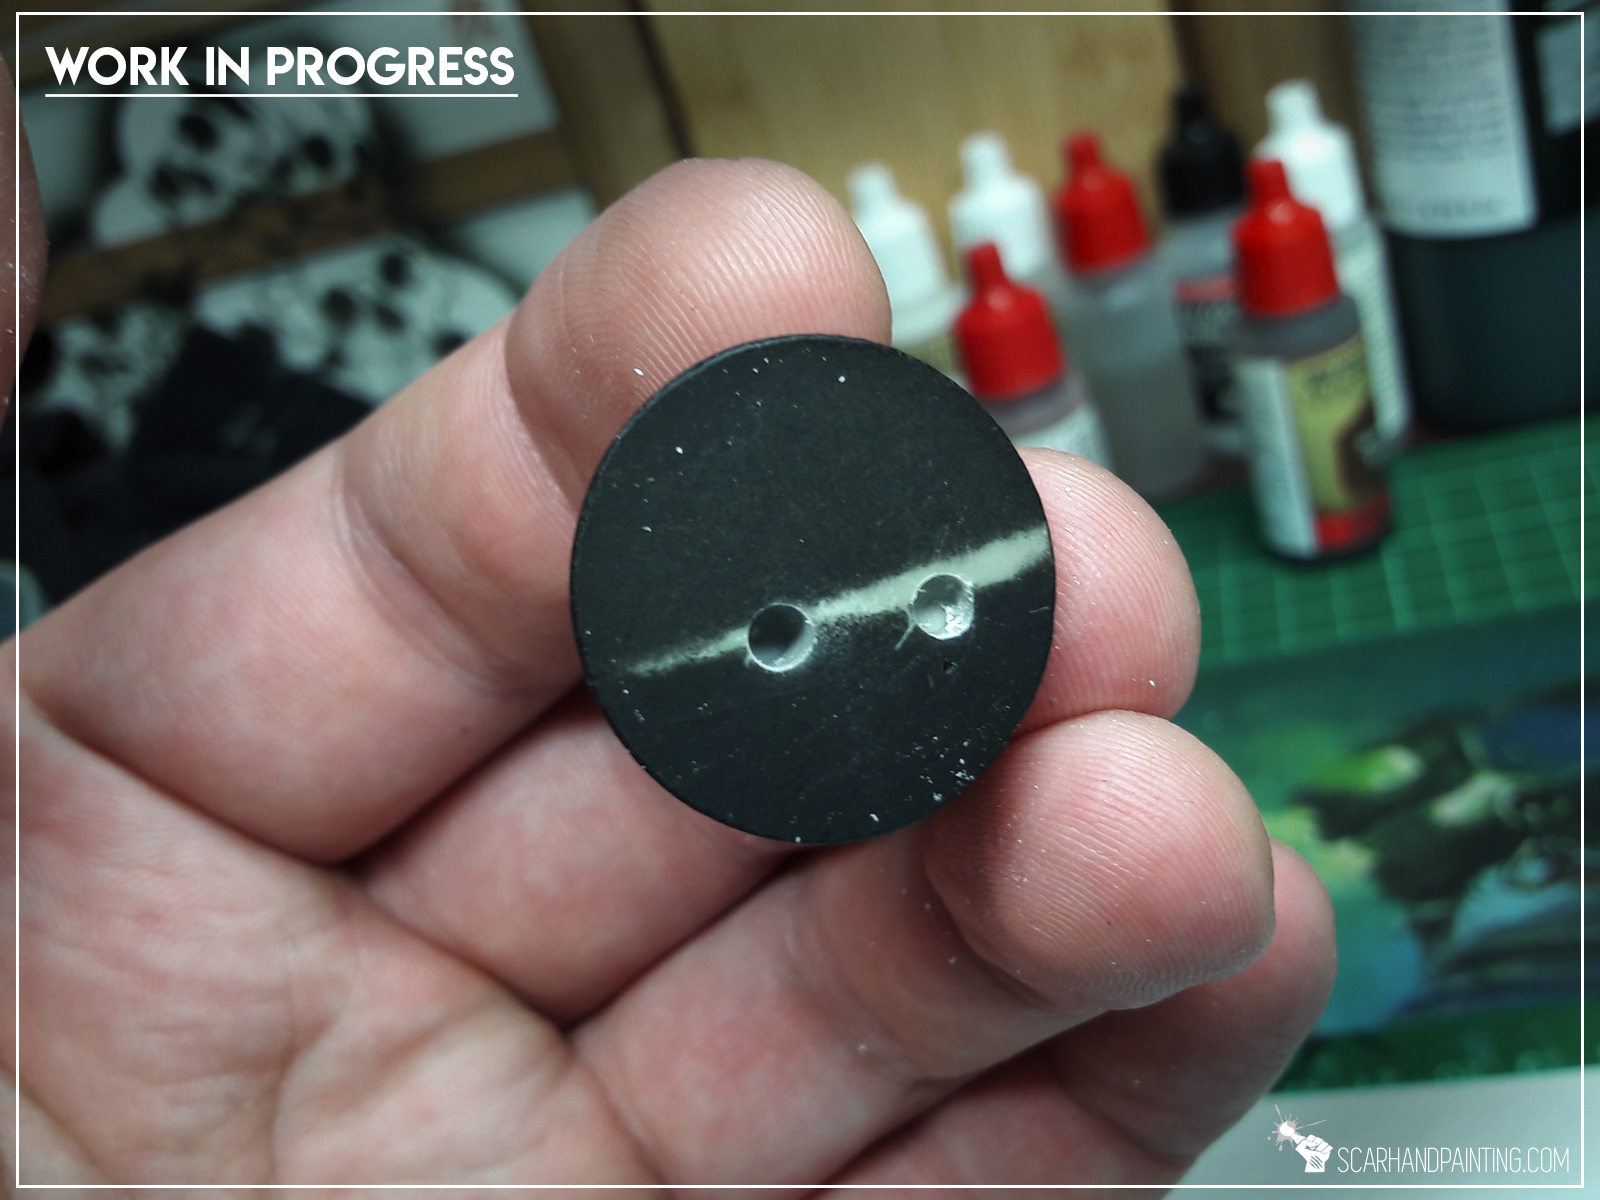
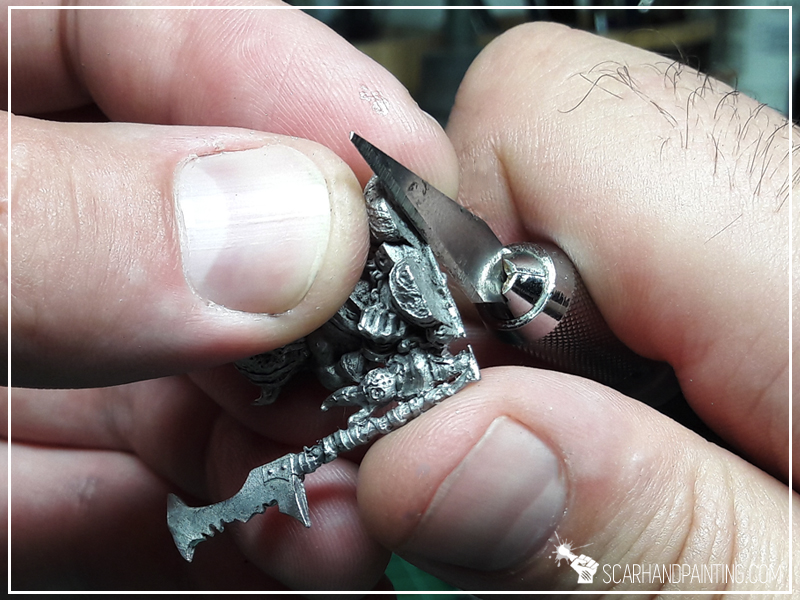
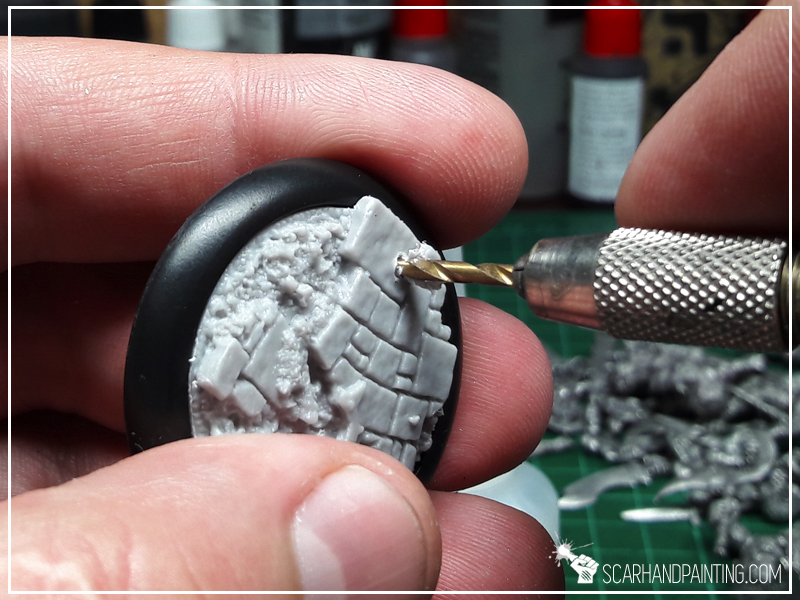
Tip number one would be to use a drill that is the size of the magnet you want to put into the base. This would usually be too big to use in a hand driller, thus we land on Tip number two – use a regular driller instead! I know this might come up as crude and a bit scary, especially when we’re talking fully painted miniatures, but with just a bit of focus it goes smooth. To ensure your miniature’s safety, hold the base firmly and avoid holding the miniature itself.
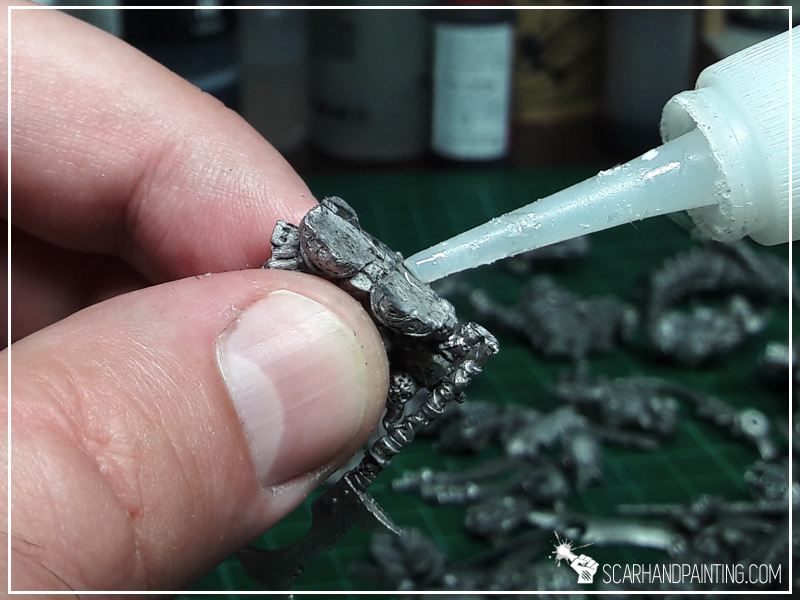
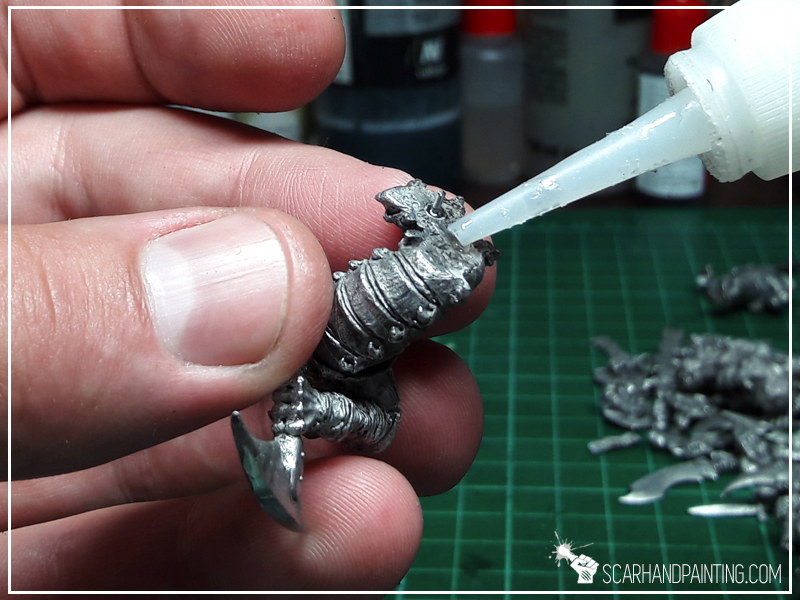
Step two: Inserting Magnets
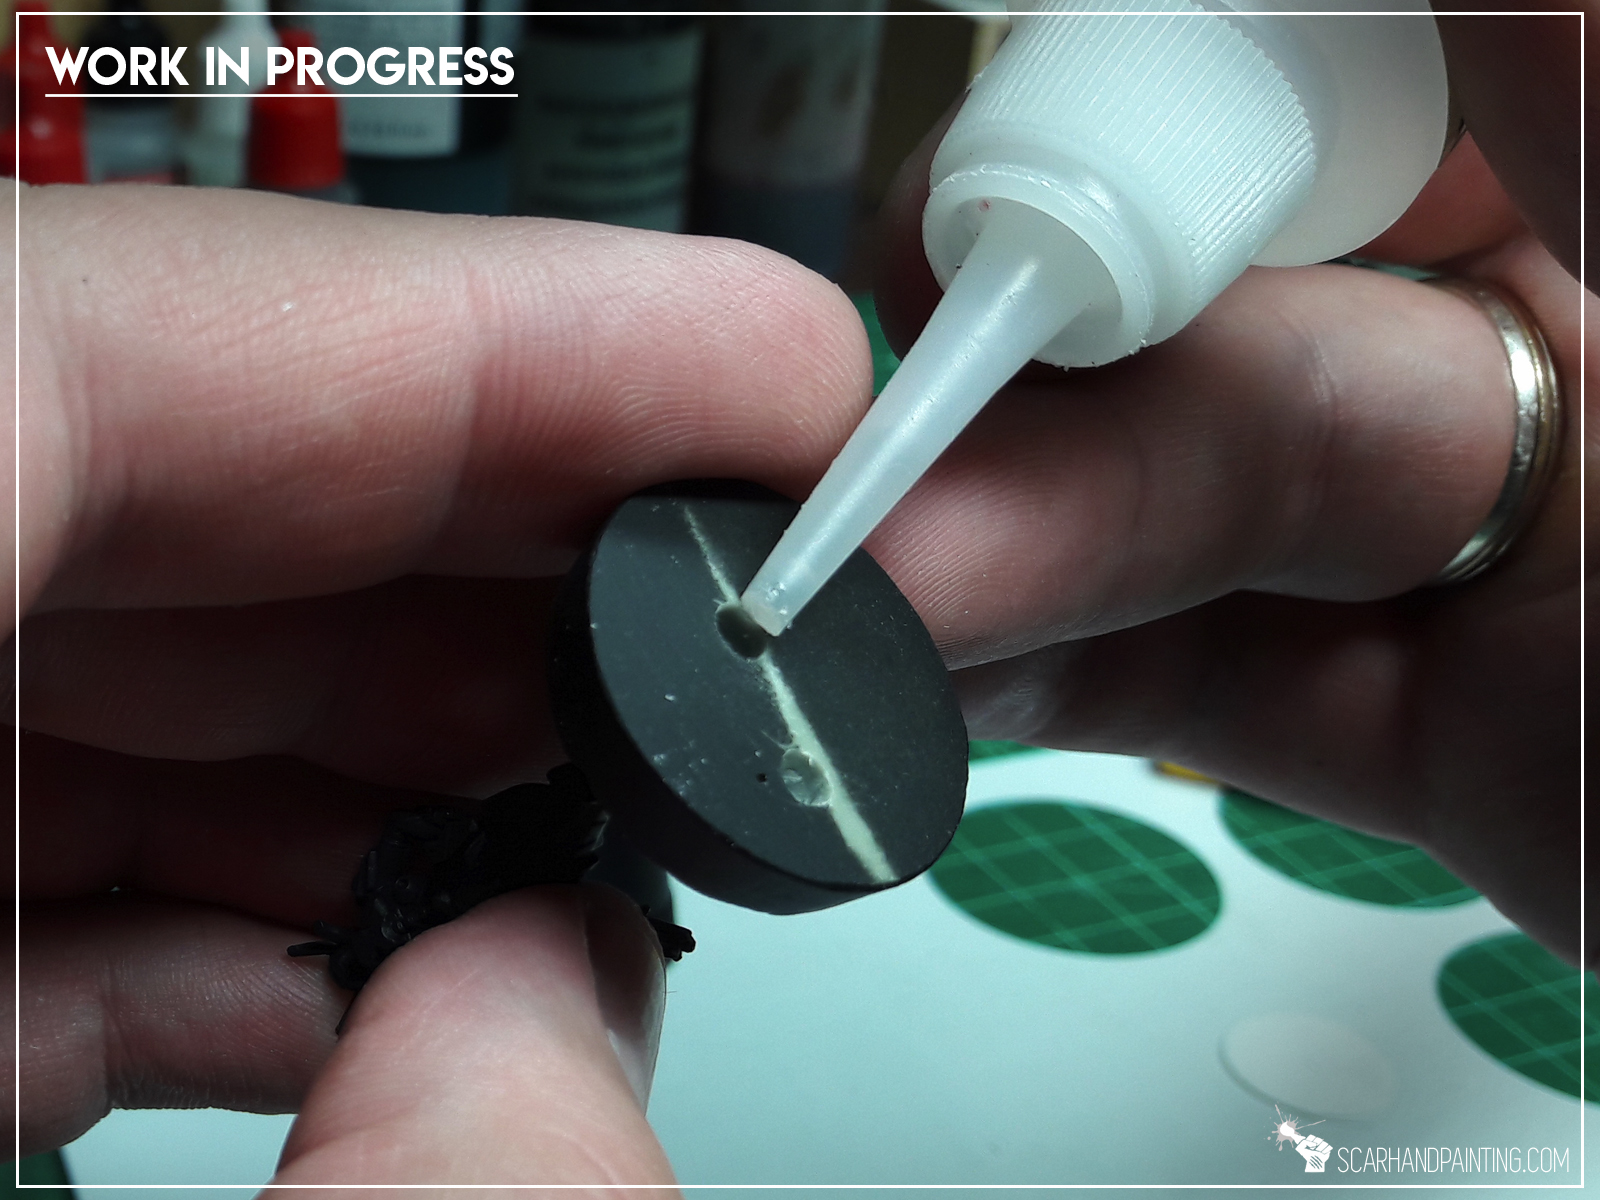

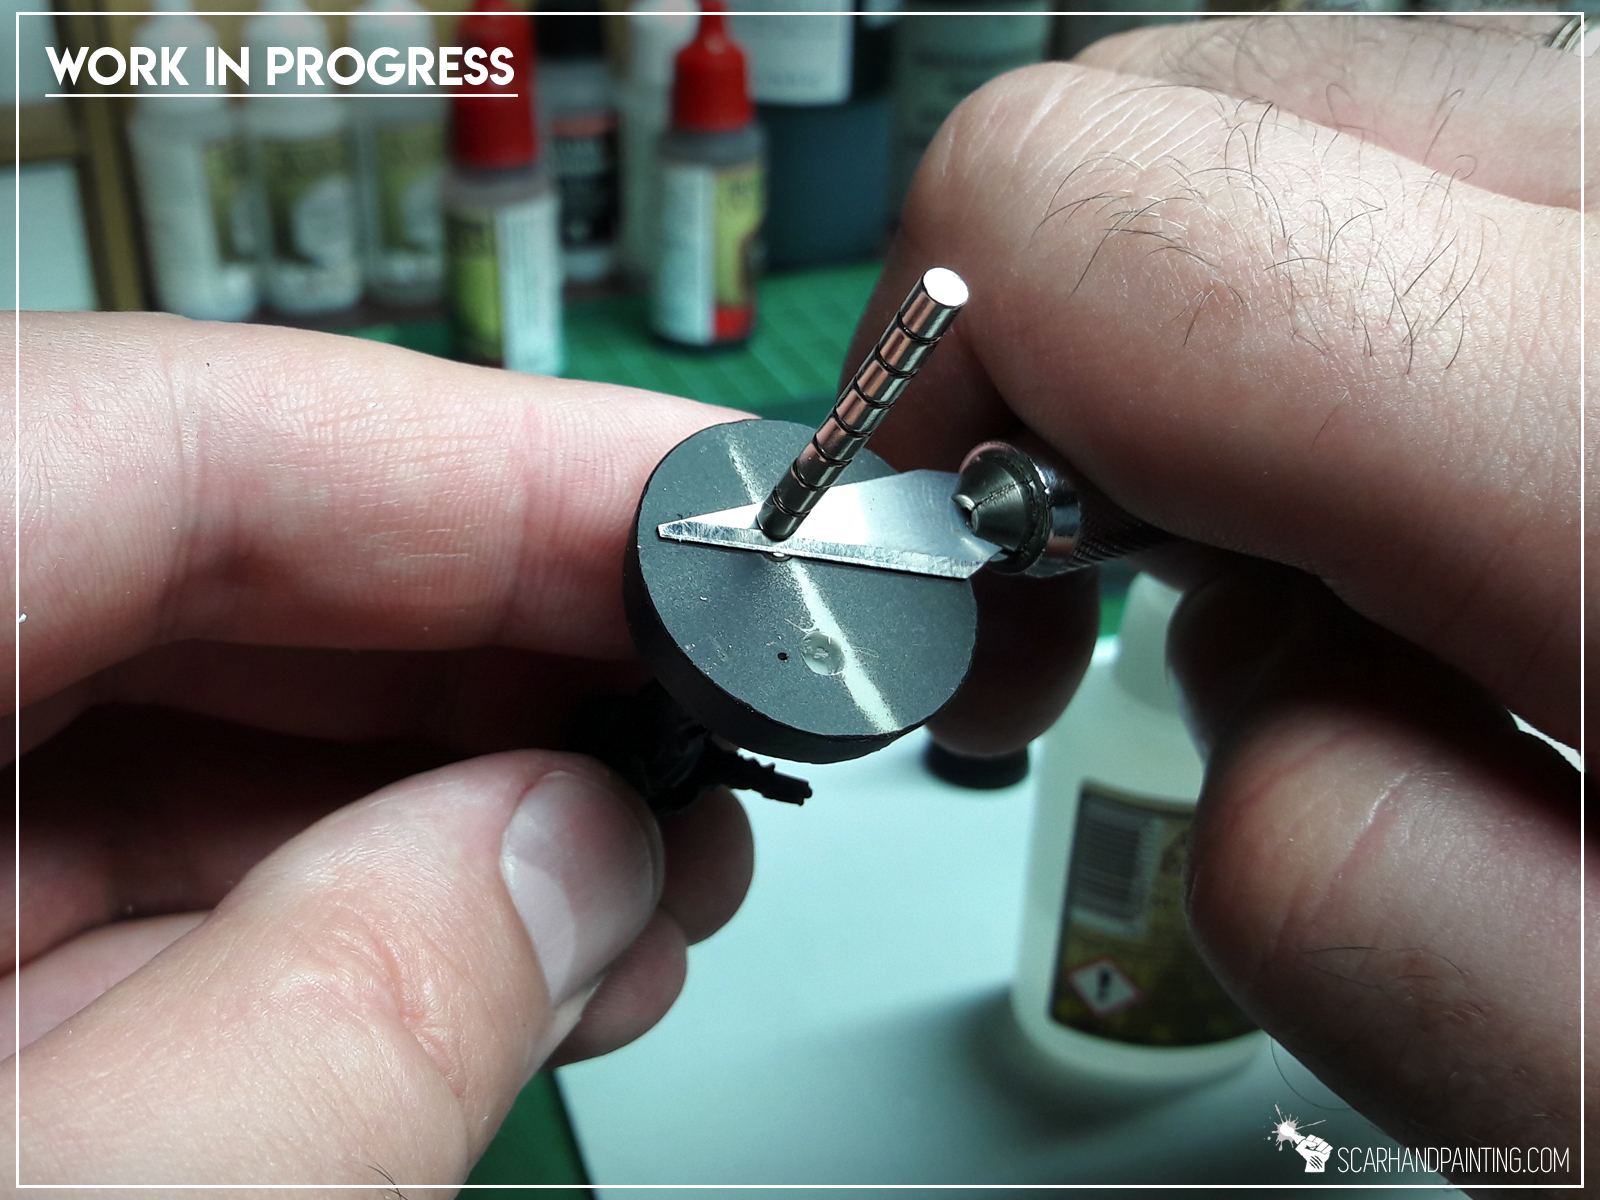

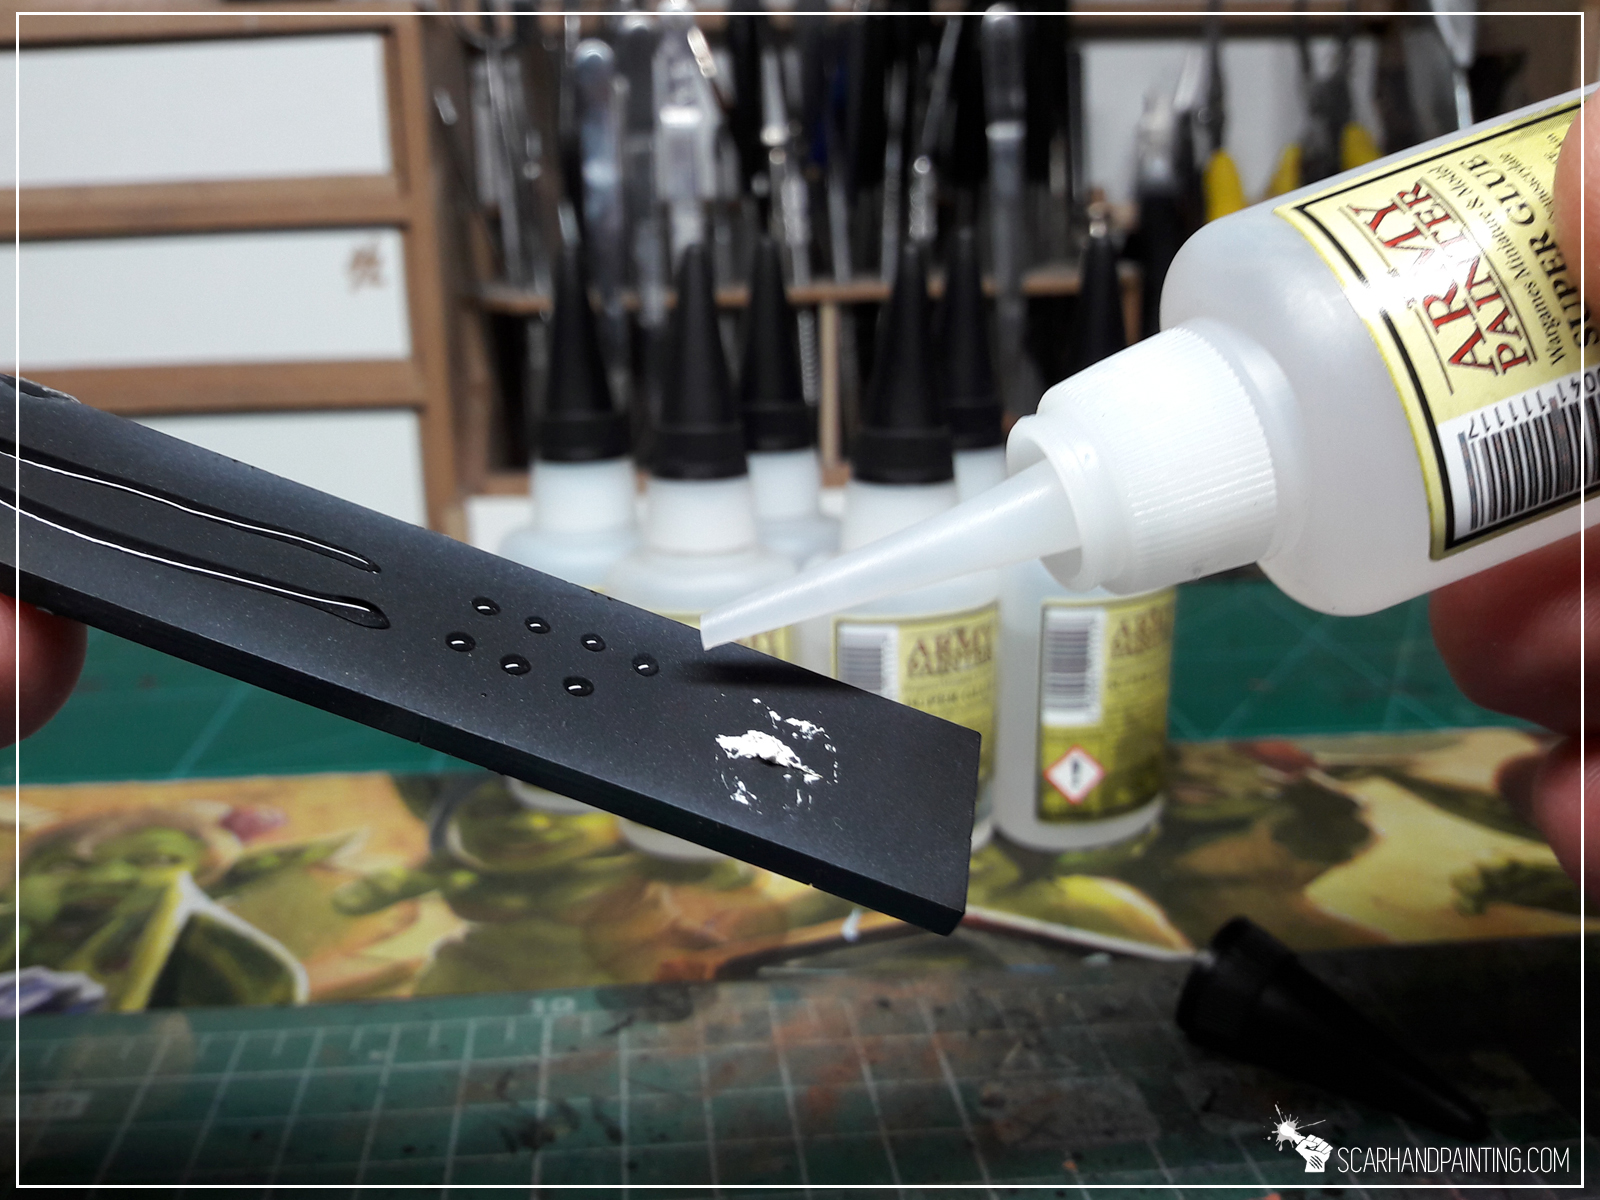
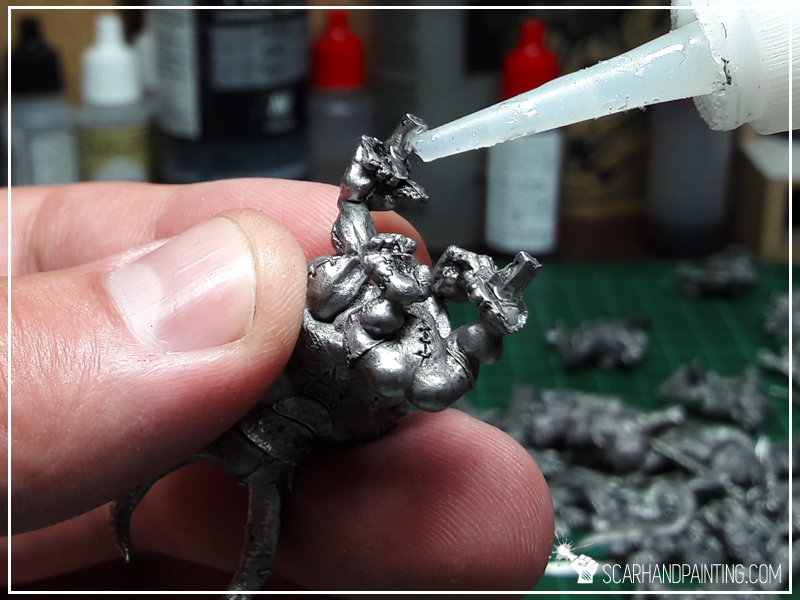
I recommend Army Painter Super Glue, or any similar glue to mount the magnets firm inside the holes. Tip number three would be to use a hobby knife. This way you can “cut off” a bottom magnet from the stack and simply insert it into the hole, using blades side to push the magnet in until it’s parallel to the bases bottom line.
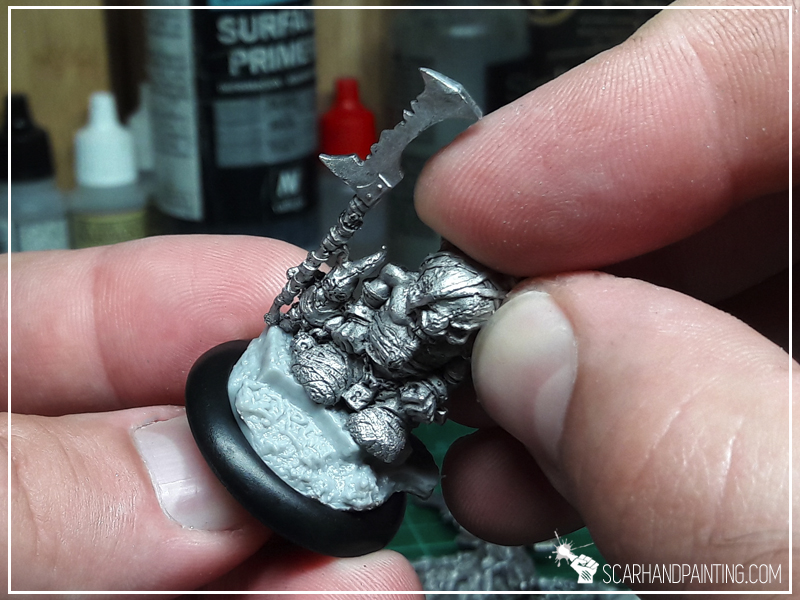
Step three: Sealing Magnets
You can skip on this one, but if you want your magnets to hold firm inside the base and for the miniature to come off the case with it’s base attached you might consider this Hack. Simply glue a circle of paper thin plasticard on top of the magnets. This barrier won’t be as thick as to significantly weaken the pull, but will definitely make the transition onto and out off the metal surface smoother. It will also keep the magnets inside the holes – no matter what.
Do you find this article helpful? Please consider sharing it and/or dropping me some feedback down below or at my Facebook profile!

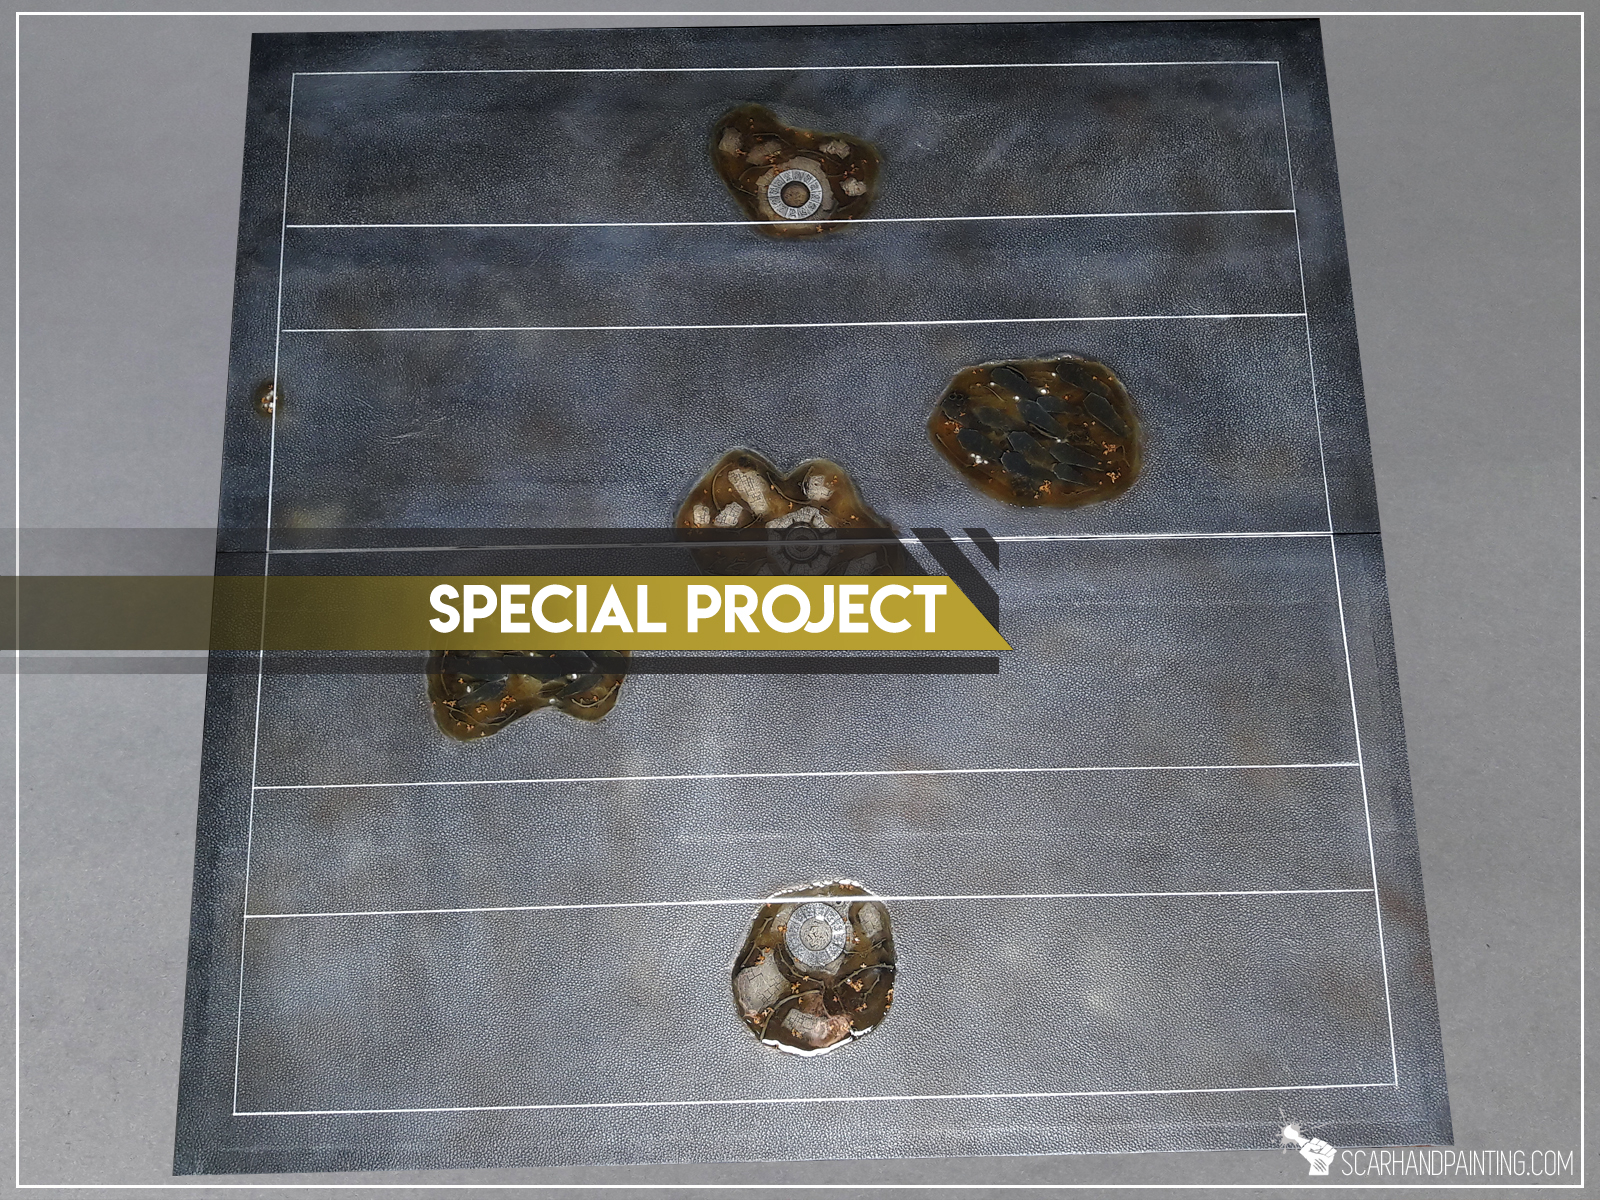
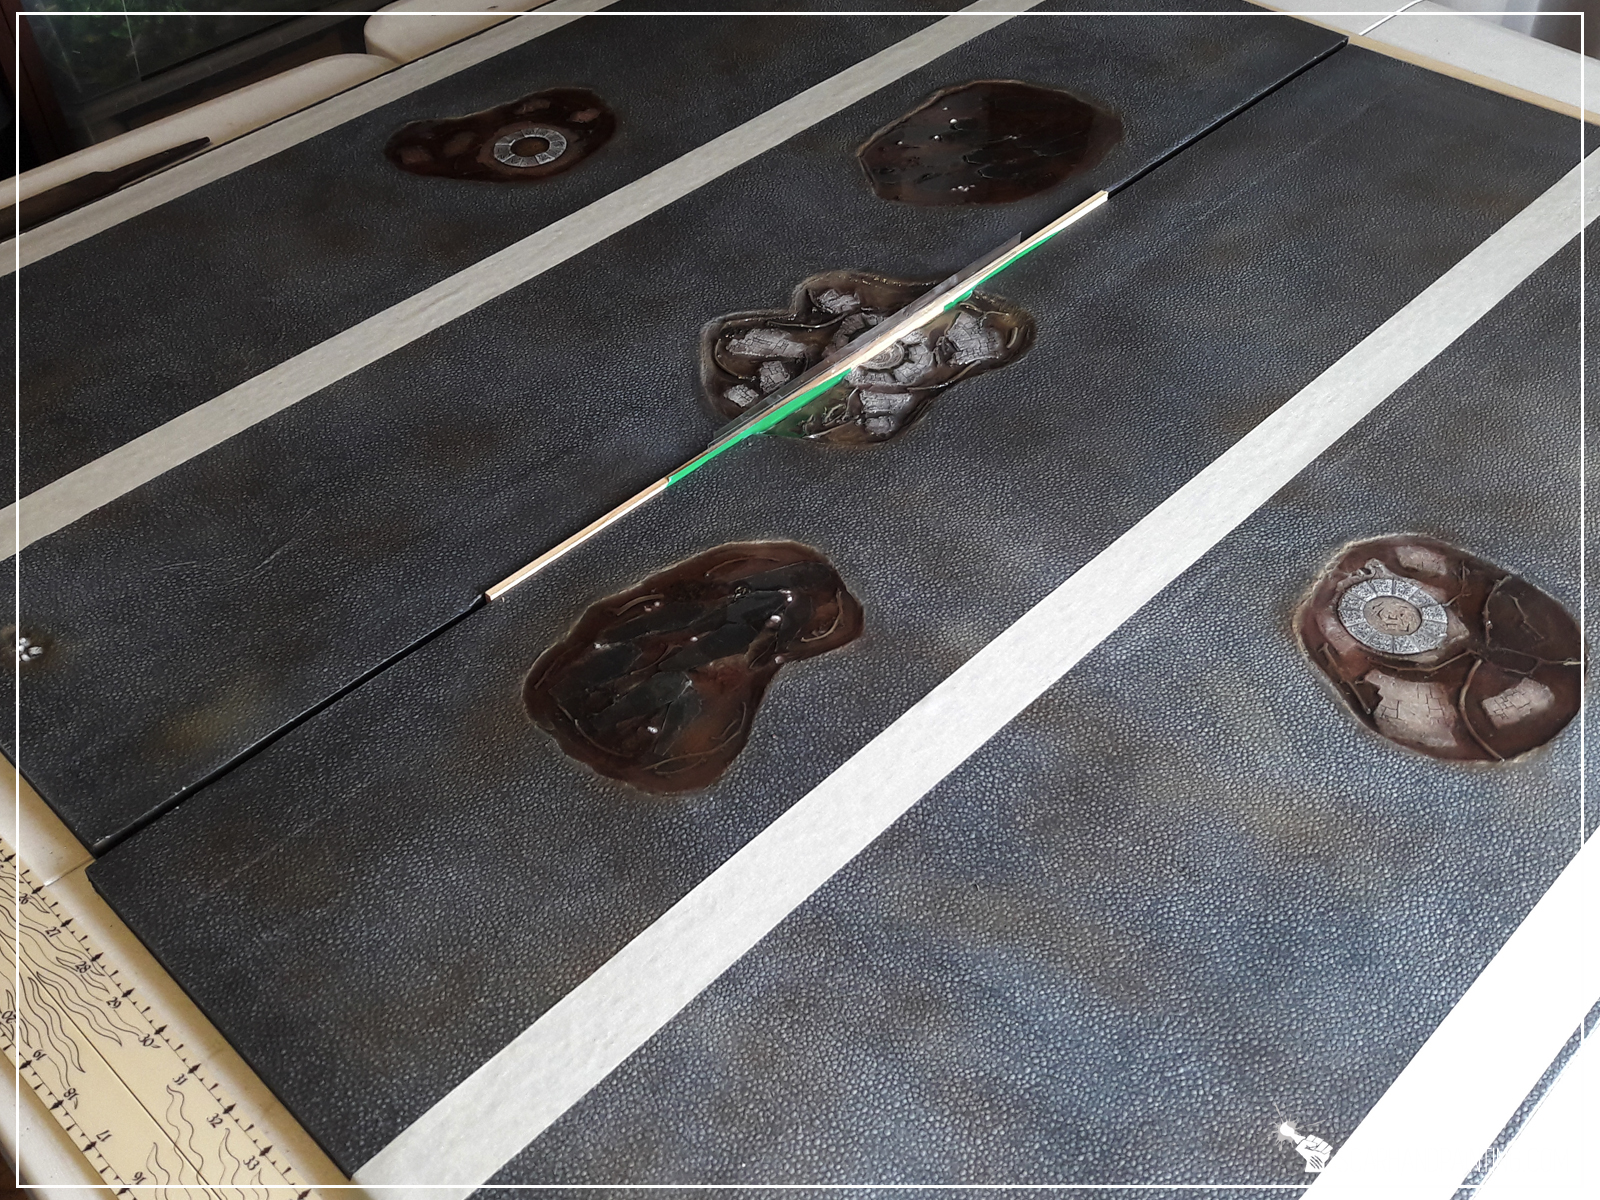
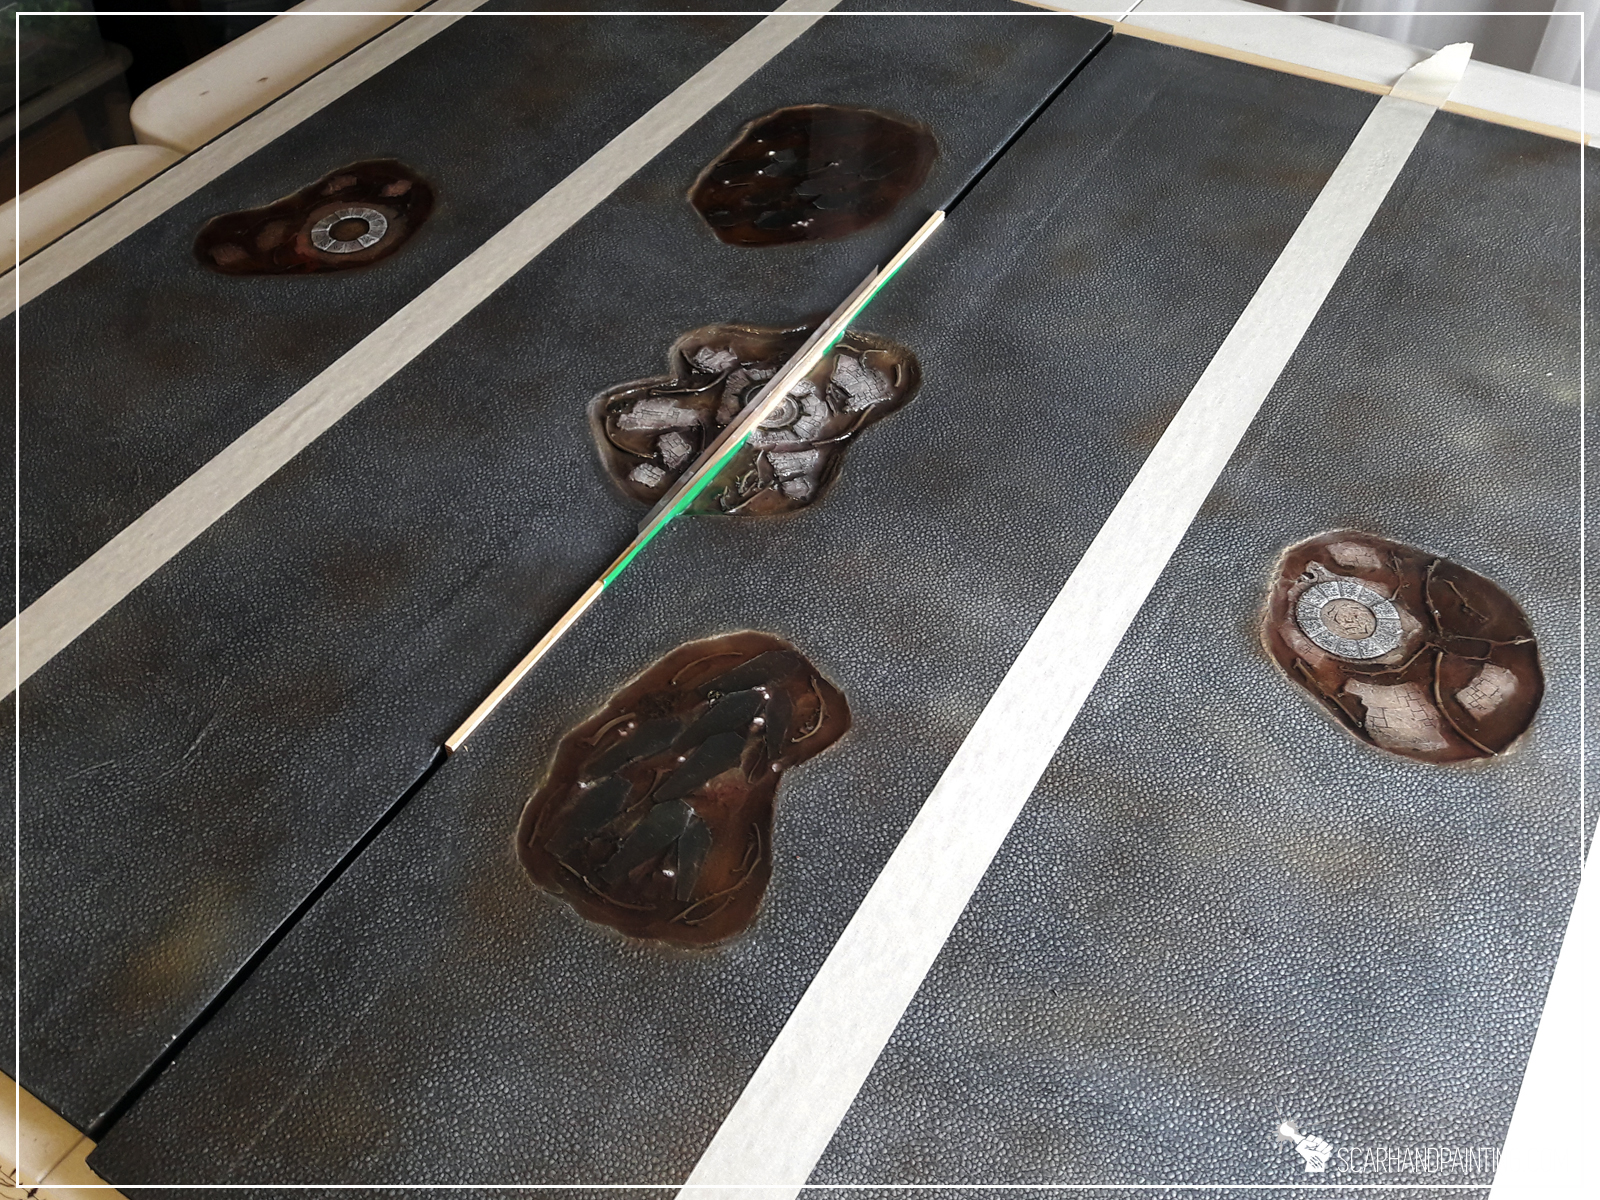
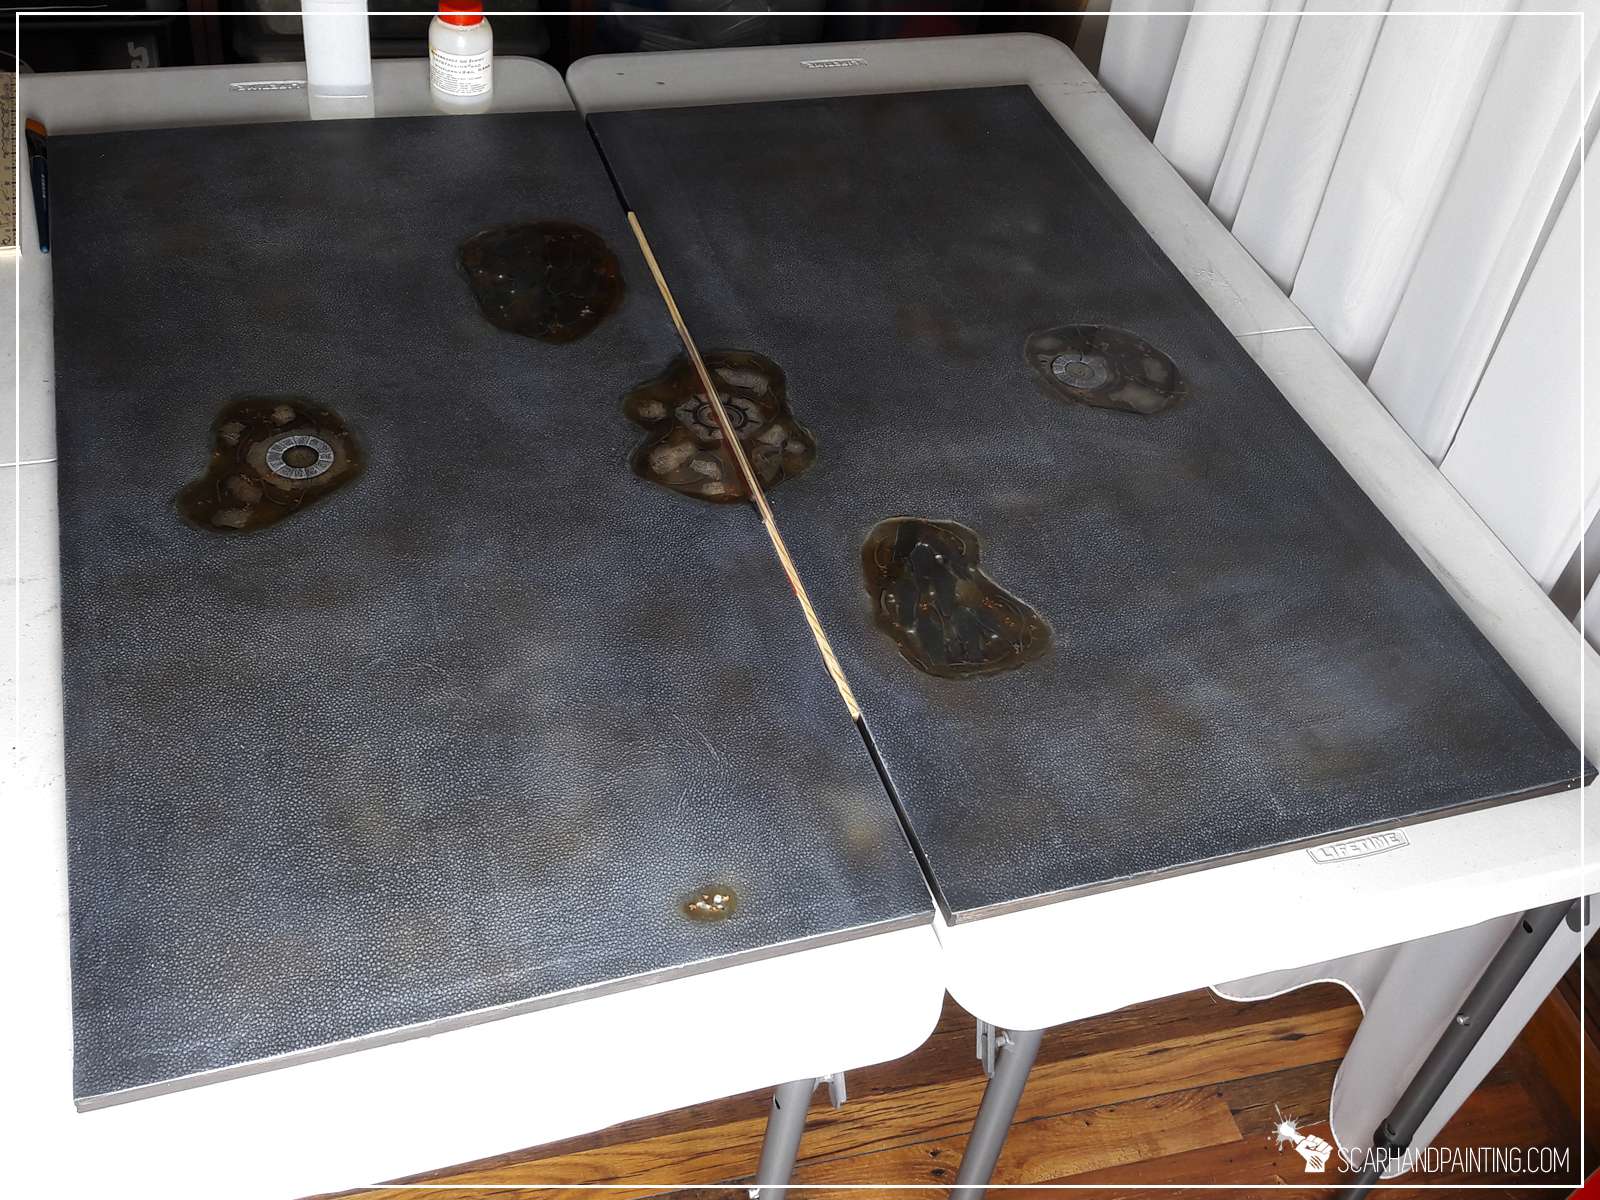
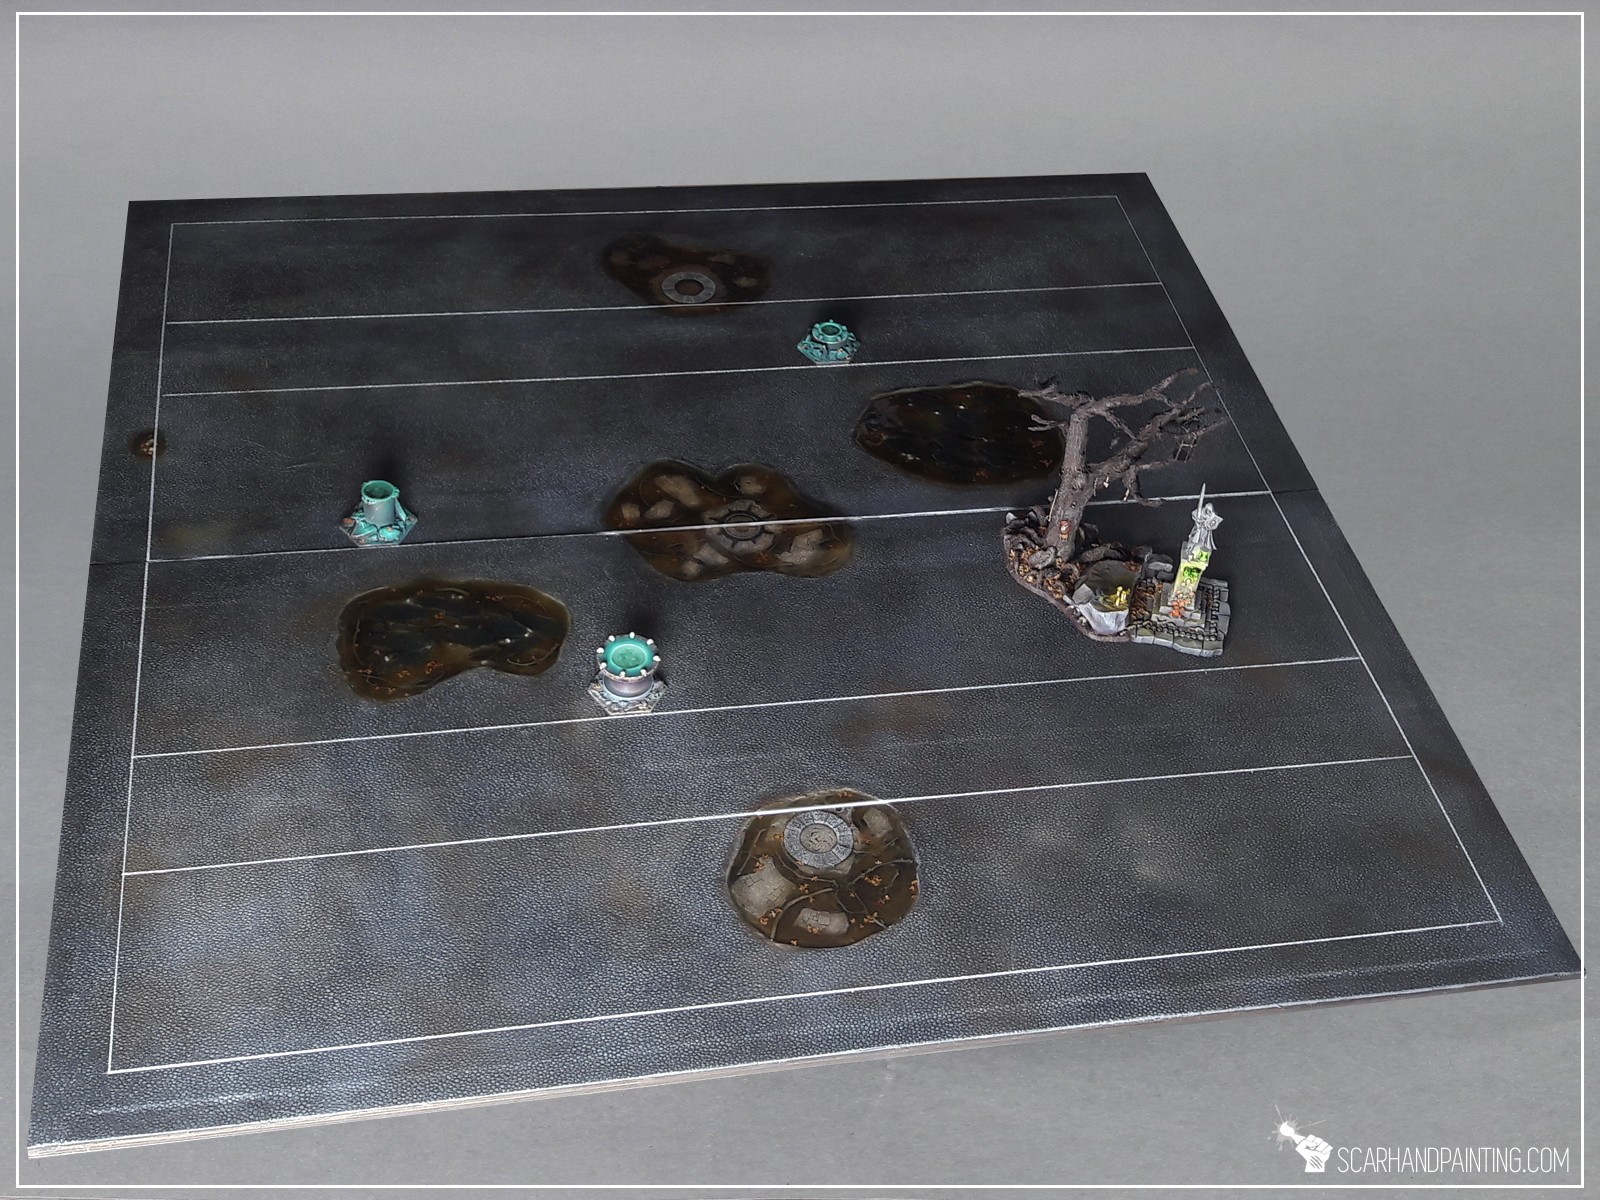
Welcome to second part of the “Mortician’s Pitch” Special Project part 1 article in witch I take you on a ride from bare meshed wood planks to a finished Guild Ball pitch. Stick around and see how “Mortician’s Pitch” came to being.
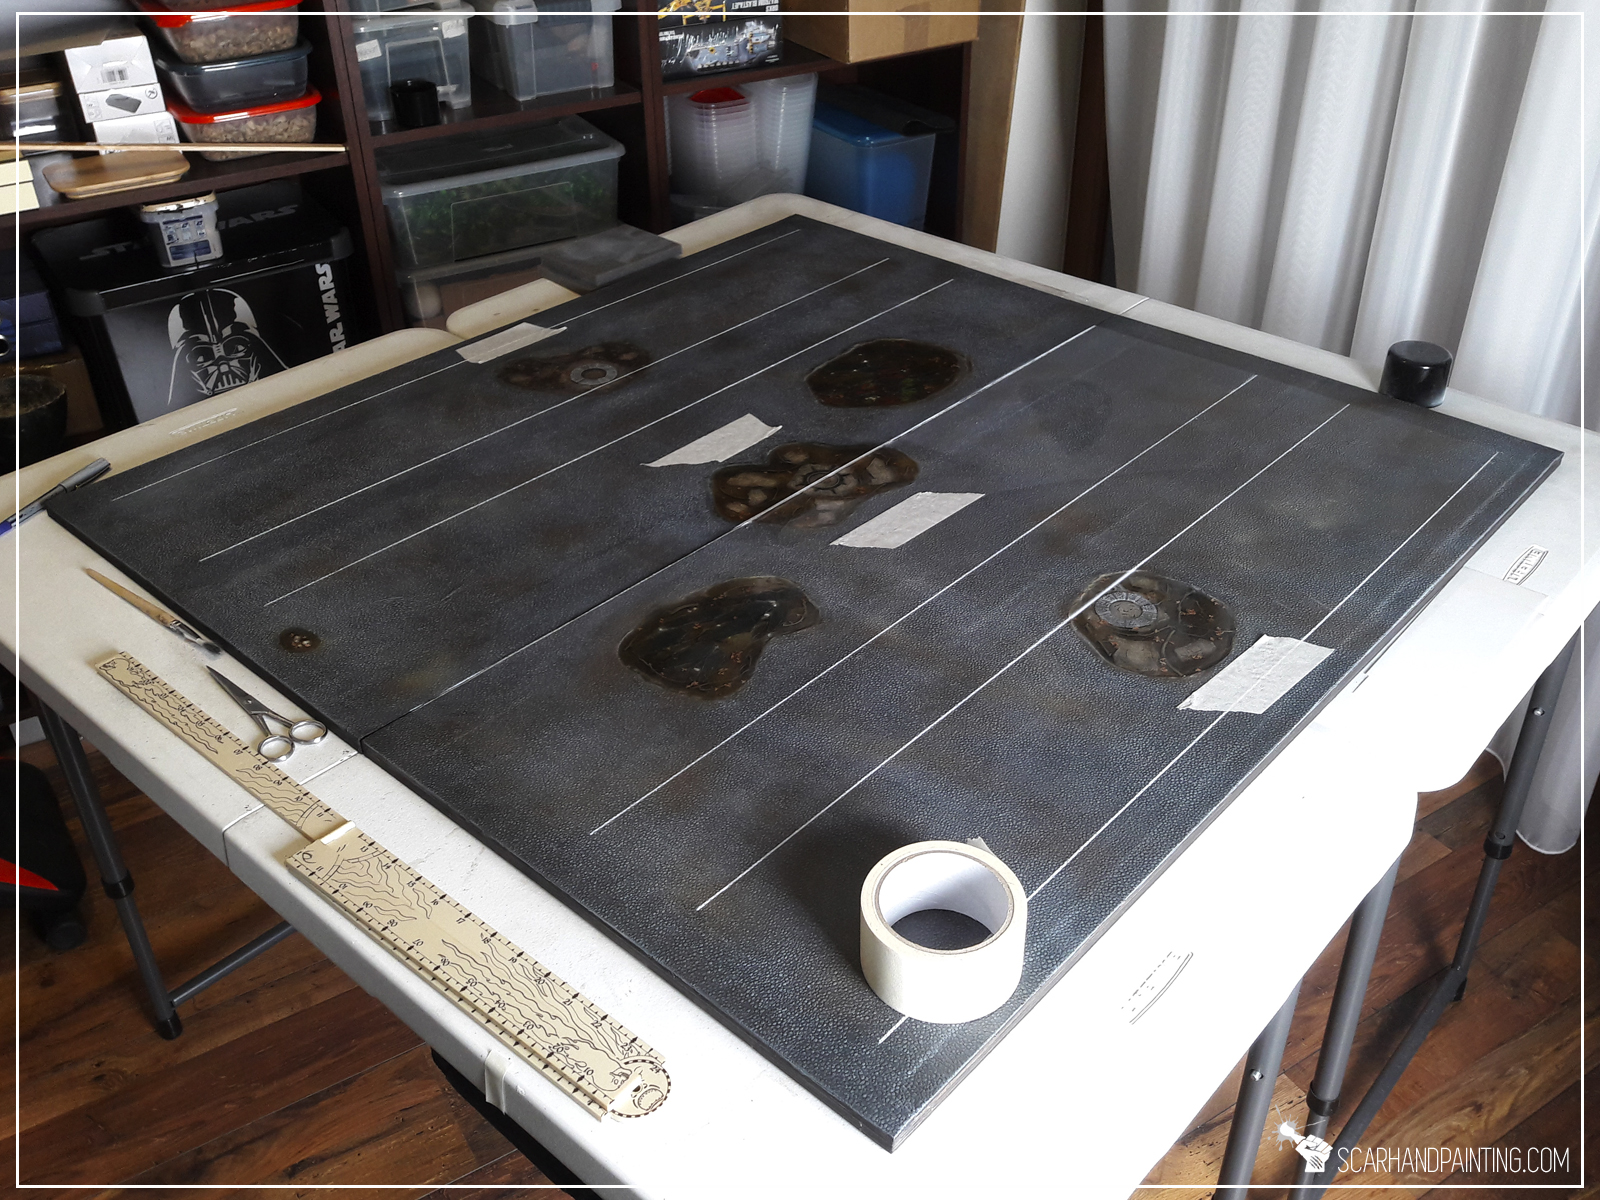
Let’s pick up where the previous article ended: Two thin coats of black wall paint followed up by a Chaos Black sprayed undercoat. All to reinforce the surface and prep it for a paint job. The paint job itself was divided into three parts: “paving stones”, “grave holes” and “pitch lines”.
This part was pretty easy. A solid coat of Vallejo 74.603 German Panzer Grey, followed by a 1:1 mix with Vallejo 74.601 Grey drybrush and then with pure Vallejo 74.601 Grey drybrush. All done with a 4″ wide brush. With these three layers done some brown haze was airbrushed here and there with Vallejo Air 71.133 Dirt and Vallejo Air 71.042 Cam. Black Brown.

Next part was to paint the insides of the detailed holes. I airbrushed most of it with a mix of browns, and then grays. A soft bright grey drybrush over stone elements, one layer highlight of the coffins and bony paint job of skulls – all complicated a bit due to the sheer size of the board pieces, but other than that simple and easy. That is because I planed for water effect to be darkened with few drops of brown ink. Paint job just didn’t need to be intricate.


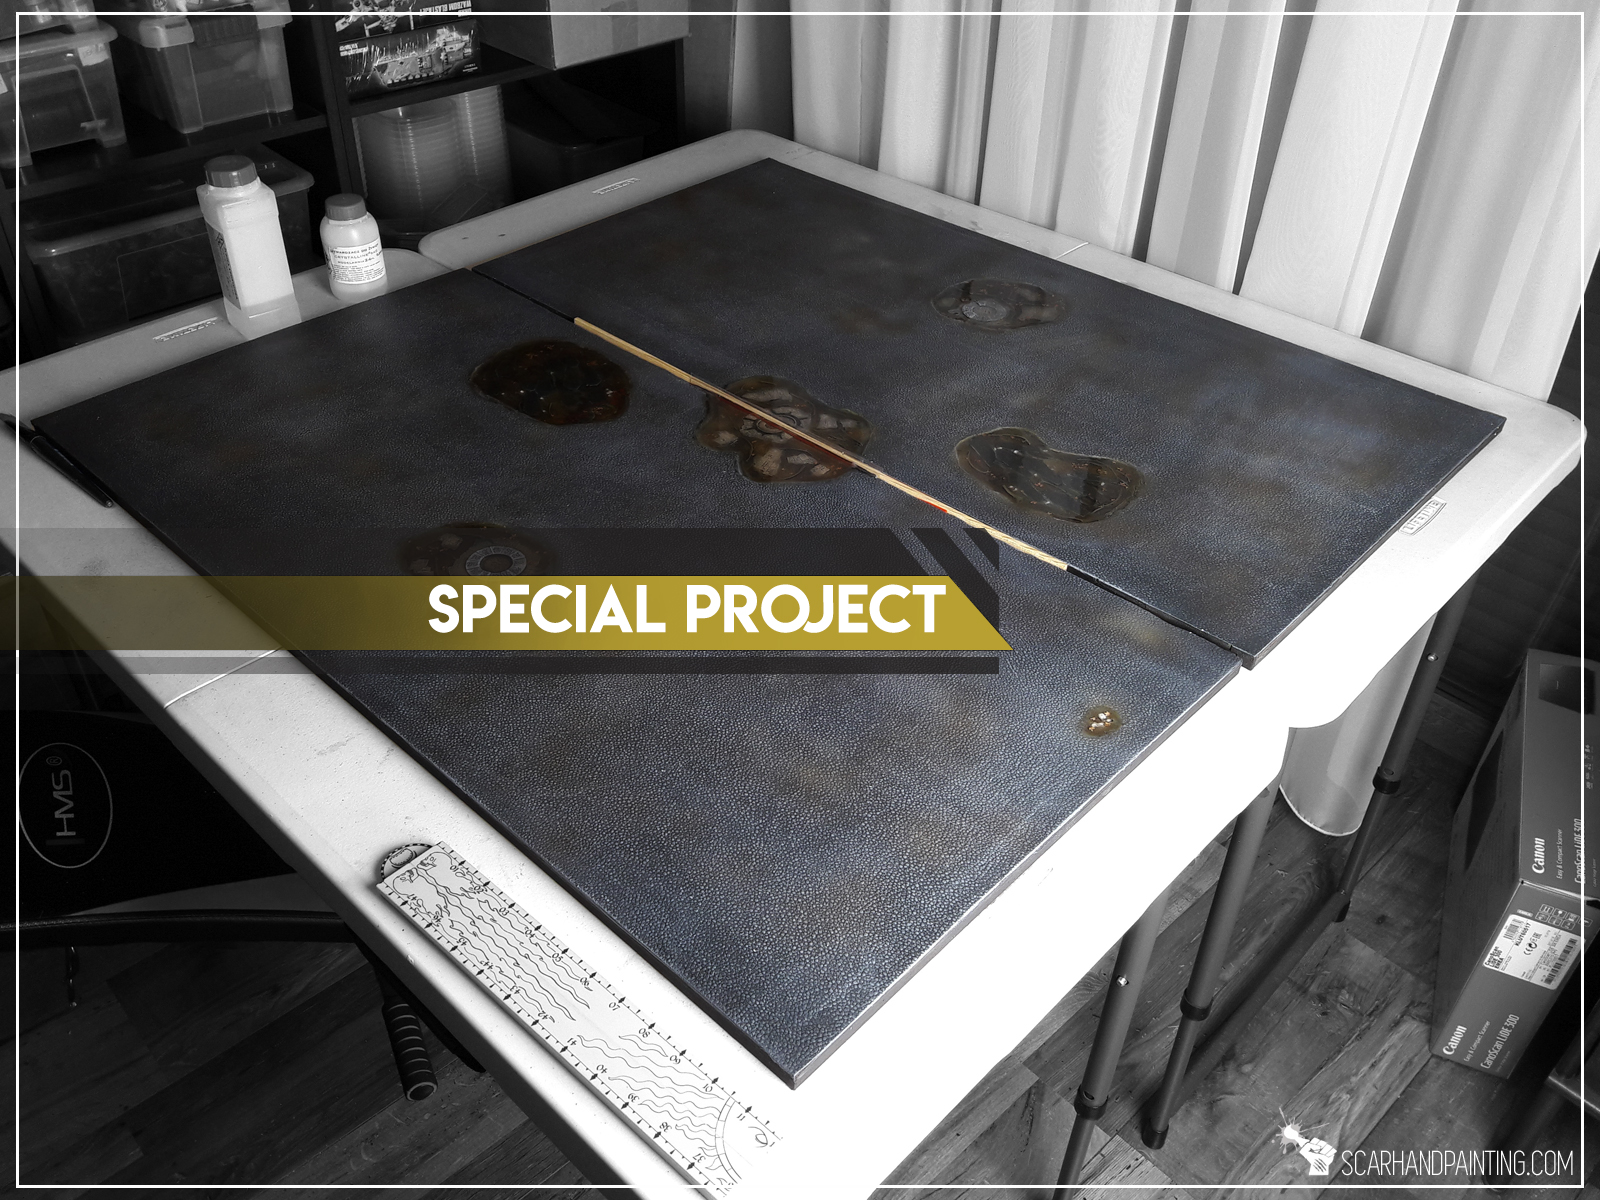
Most dangerous part of the project was Resin. Working with resin is very difficult. The thing is messy AF, sticky, gotta be carefully prepared and poured in, but most importantly – a single tiny hole and entire thing ends up on the floor and all over the underside of a project. I know this, because it happened in the past with. More so, a tiny drop on your hand and you can be sure of glossy stains everywhere! With Mortician’s Pitch I actually came prepared. I prepped solid plastic barriers for the half-holes at the middle of the board. I also sealed any potential holes with a thin layer of PVA glue. The resin got poured in and the long wait started…
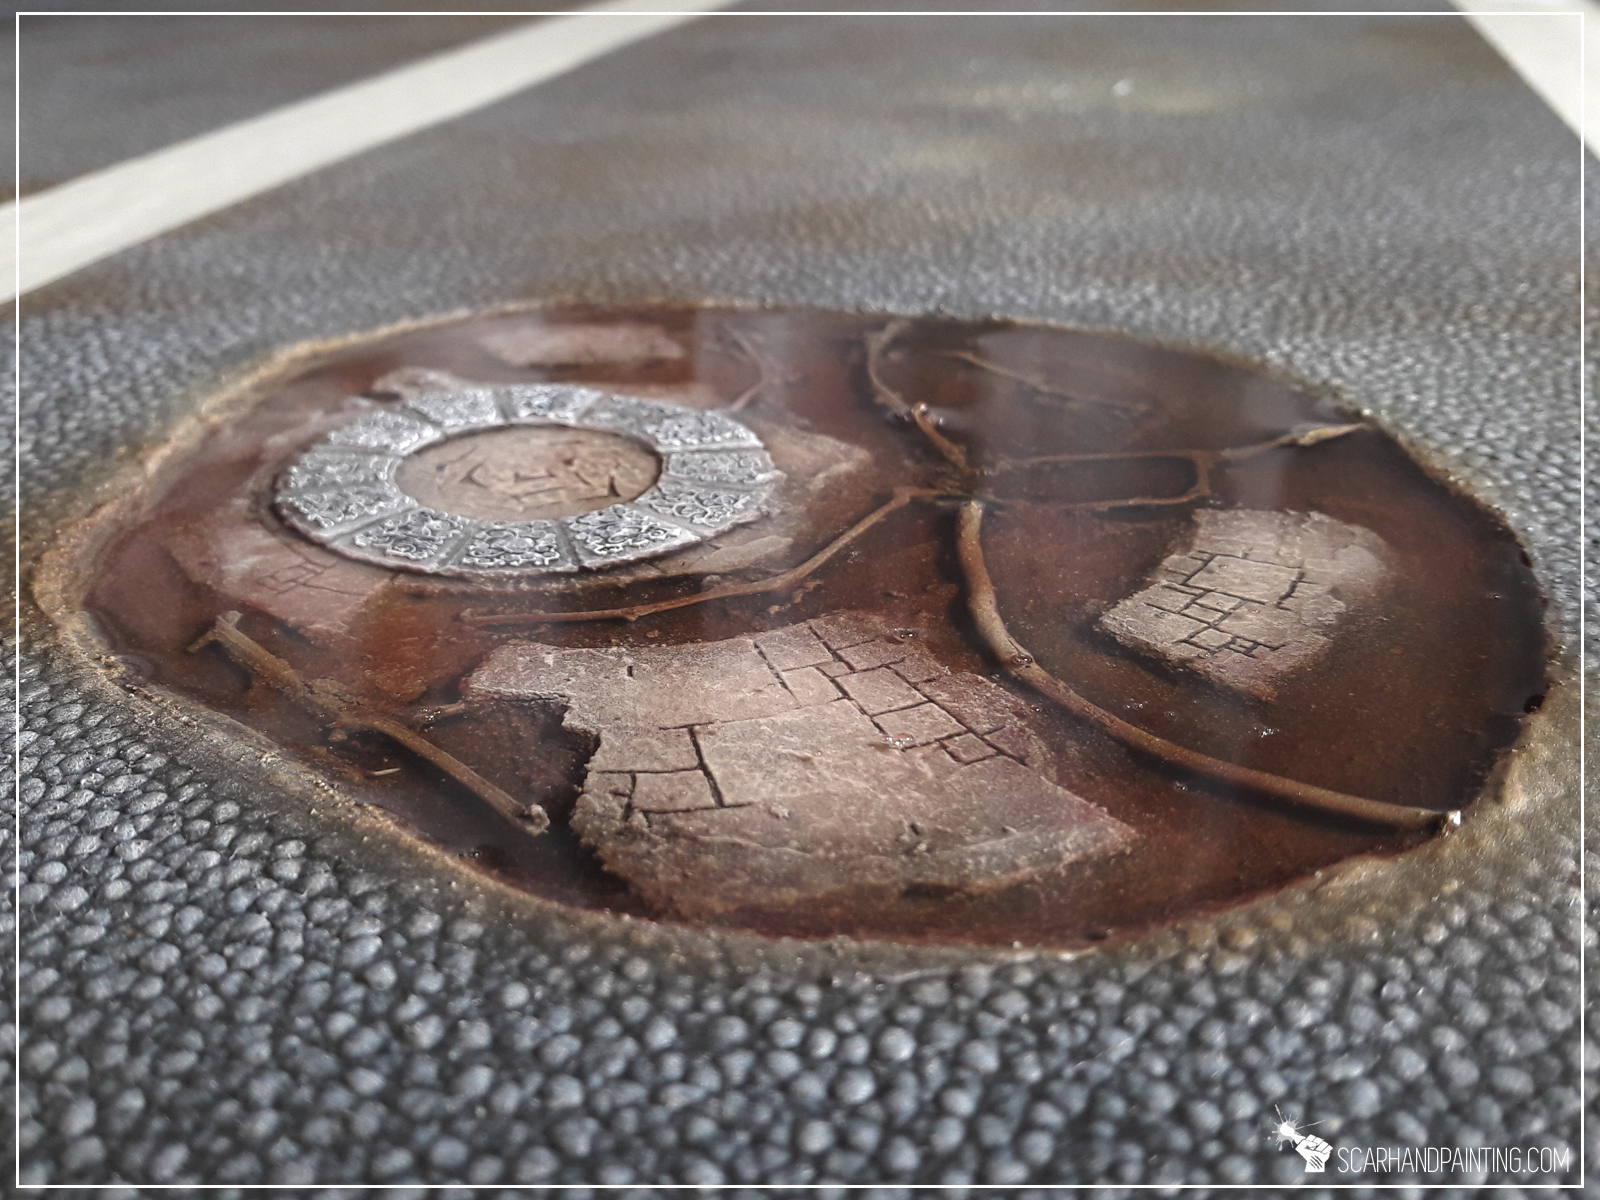


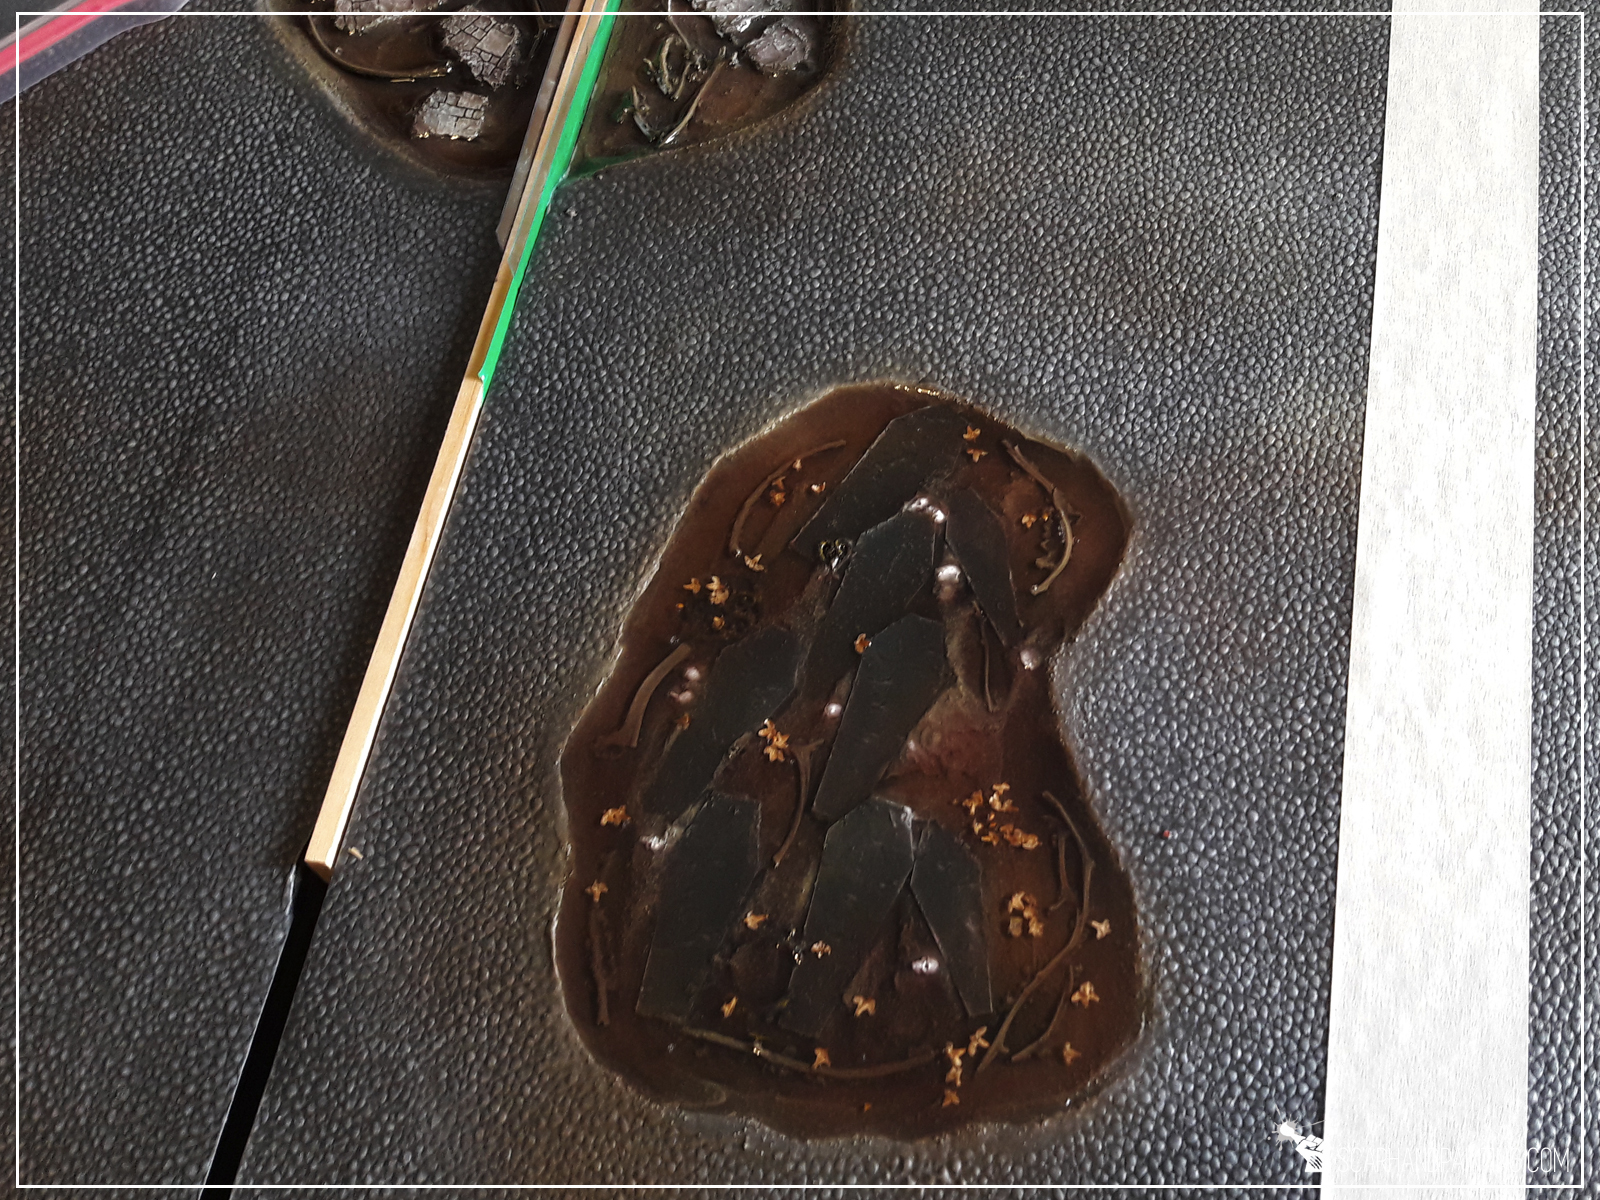

… and it all went to shit when over 24hrs later I realized that resin is still sticky. I gave it another day to coagulate with no positive result. If you worked with resin you probably know what that means – if resin is still sticky after 48 hours it will stay this way forever. I must had messed up proportions when mixing two ingredients with colored ink. A revitalization process started, with me spooning gummy “goo” out, carefully not to damage paint job underneath. Was very difficult and took few days to accomplish, but I finally landed at a point where it was possible to apply another (this time properly mixed) layer and seal it.
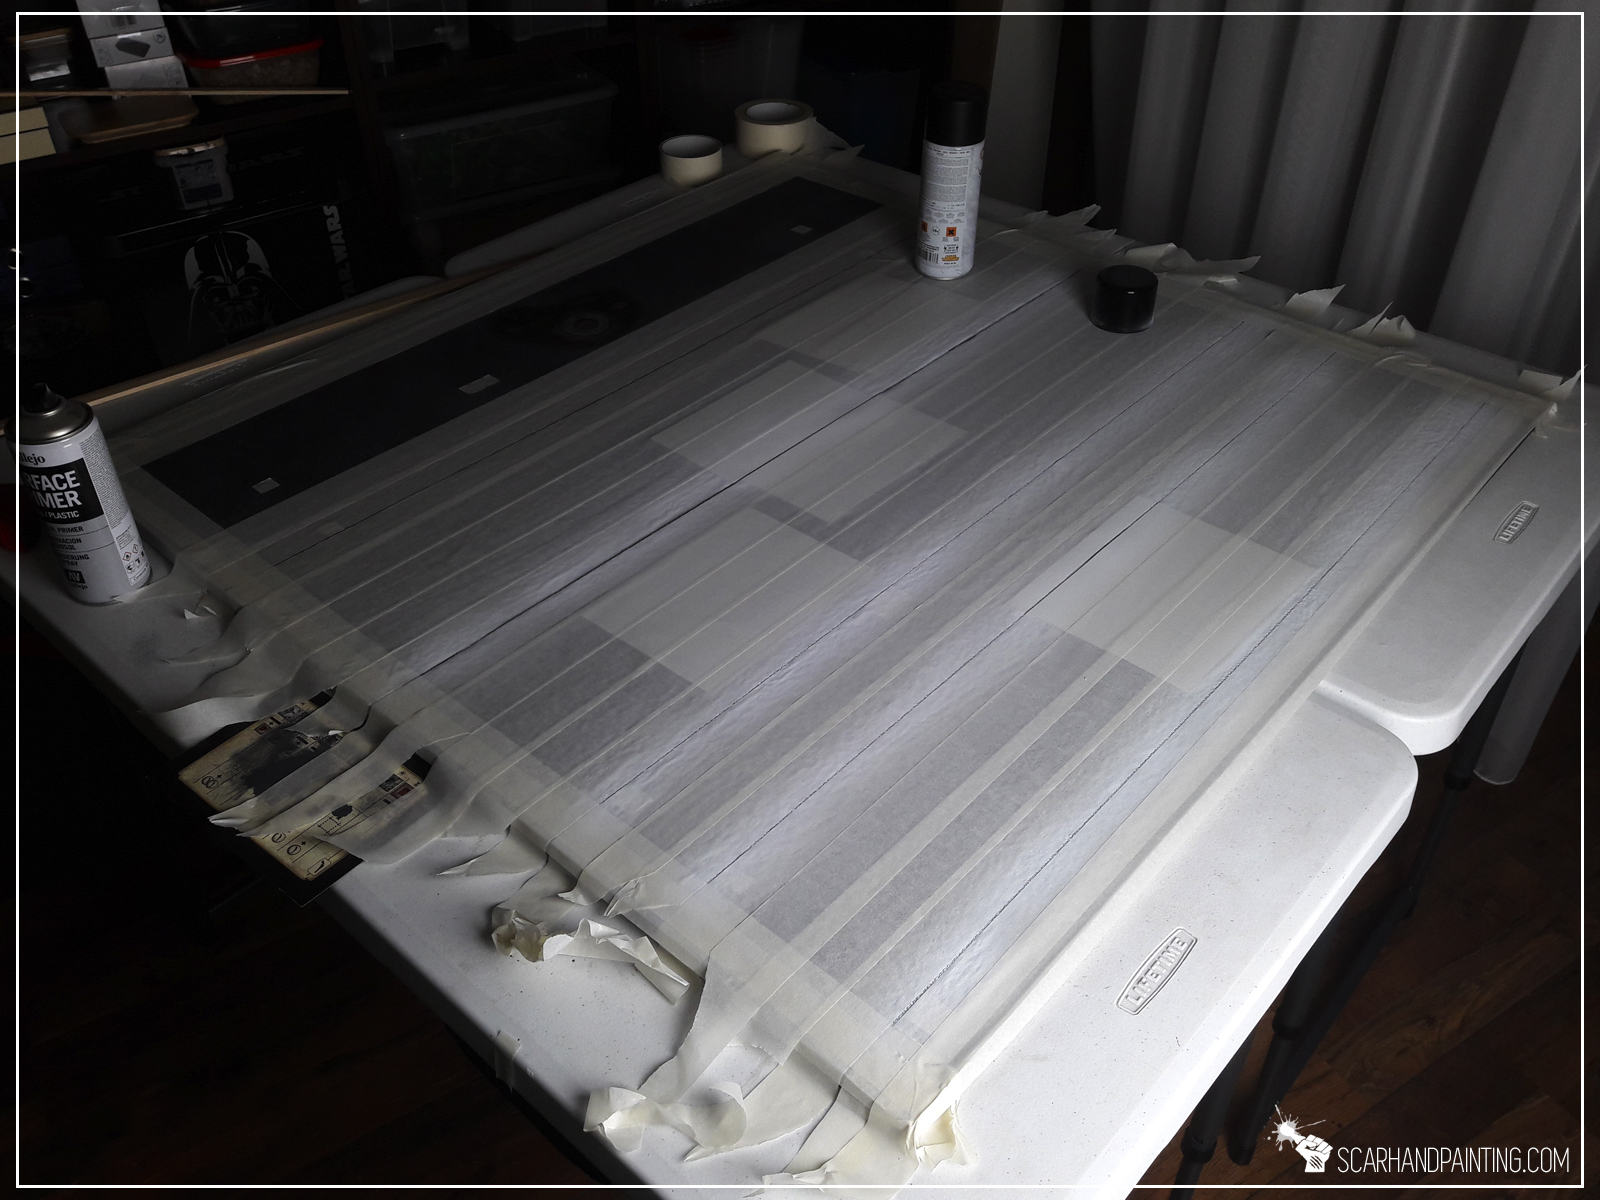
Last part of the paint job, finally possible due to resin being properly hard. I carefully measured distances around the board, covered resin parts with paper thin plasticard and used painting tape to mask most of the board. I then airbrushed the lines with pure white paint.
Revealing the final effect was hell of an excitement. Now I gotta play some games on this troublesome new board!


I hope you like the article. Don’t be a stranger and let me know what you think either in the comments or at my Facebook page.

My hype for Guild Ball is pretty strong. The game looks like a lot of fun and miniatures have a great feel to them, that makes me want to leave everything else and just start painting. My Mortician’s team being currently on hold I decided to focus all the Guild Ball related inspiration around another project – Mortician’s Pitch.
At first I thought about something blunt, like cobblestone texture with pitch features airbrushed on top. Thing would be both playable and looking nice. It all changed once I accidentally bumped into this magnificent piece of scenery by Brokentoad. Those half buried coffins almost catapulted me out of a chair. Such a nice idea. I knew I will order this piece, but first I just had to implement a similar feature to the project. This made “Mortician’s Pitch” evolve from a simple flat cobblestone into a more 3d design. Still, how to insert irregular shapes on top of what is meant to be a playable surface… and then I thought about clear resin…
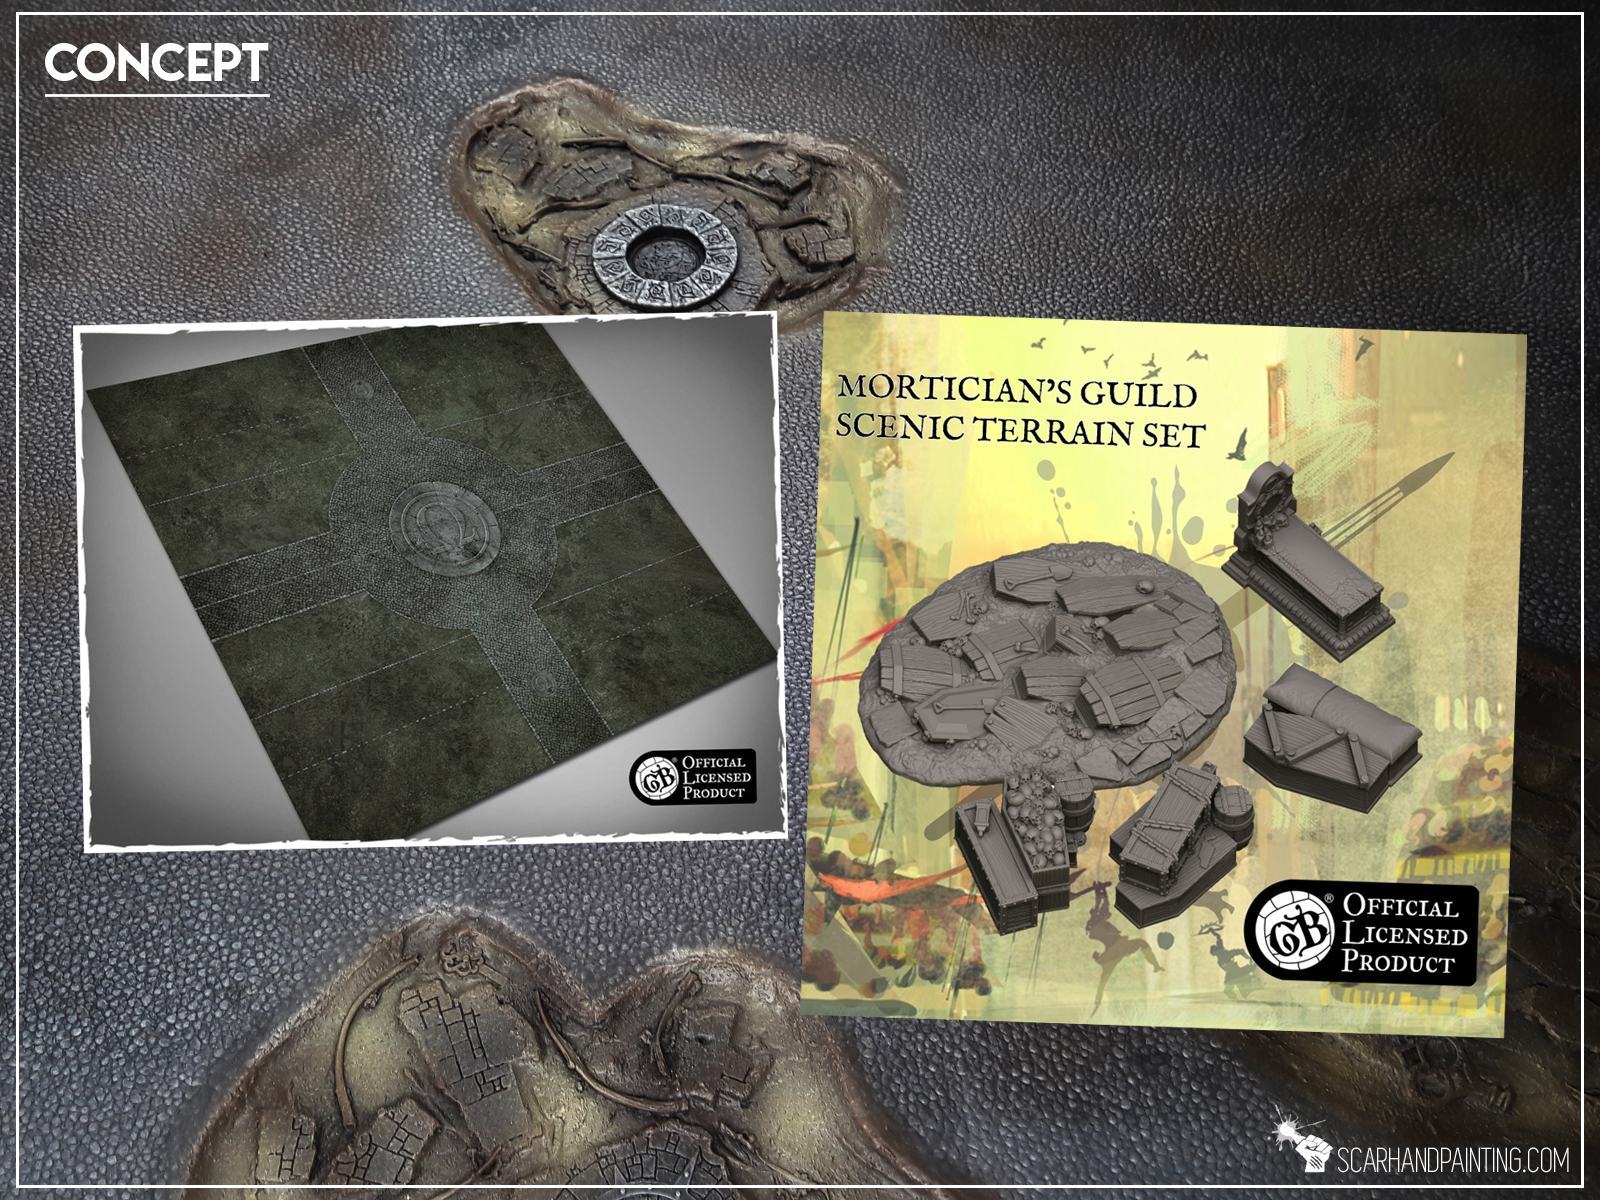
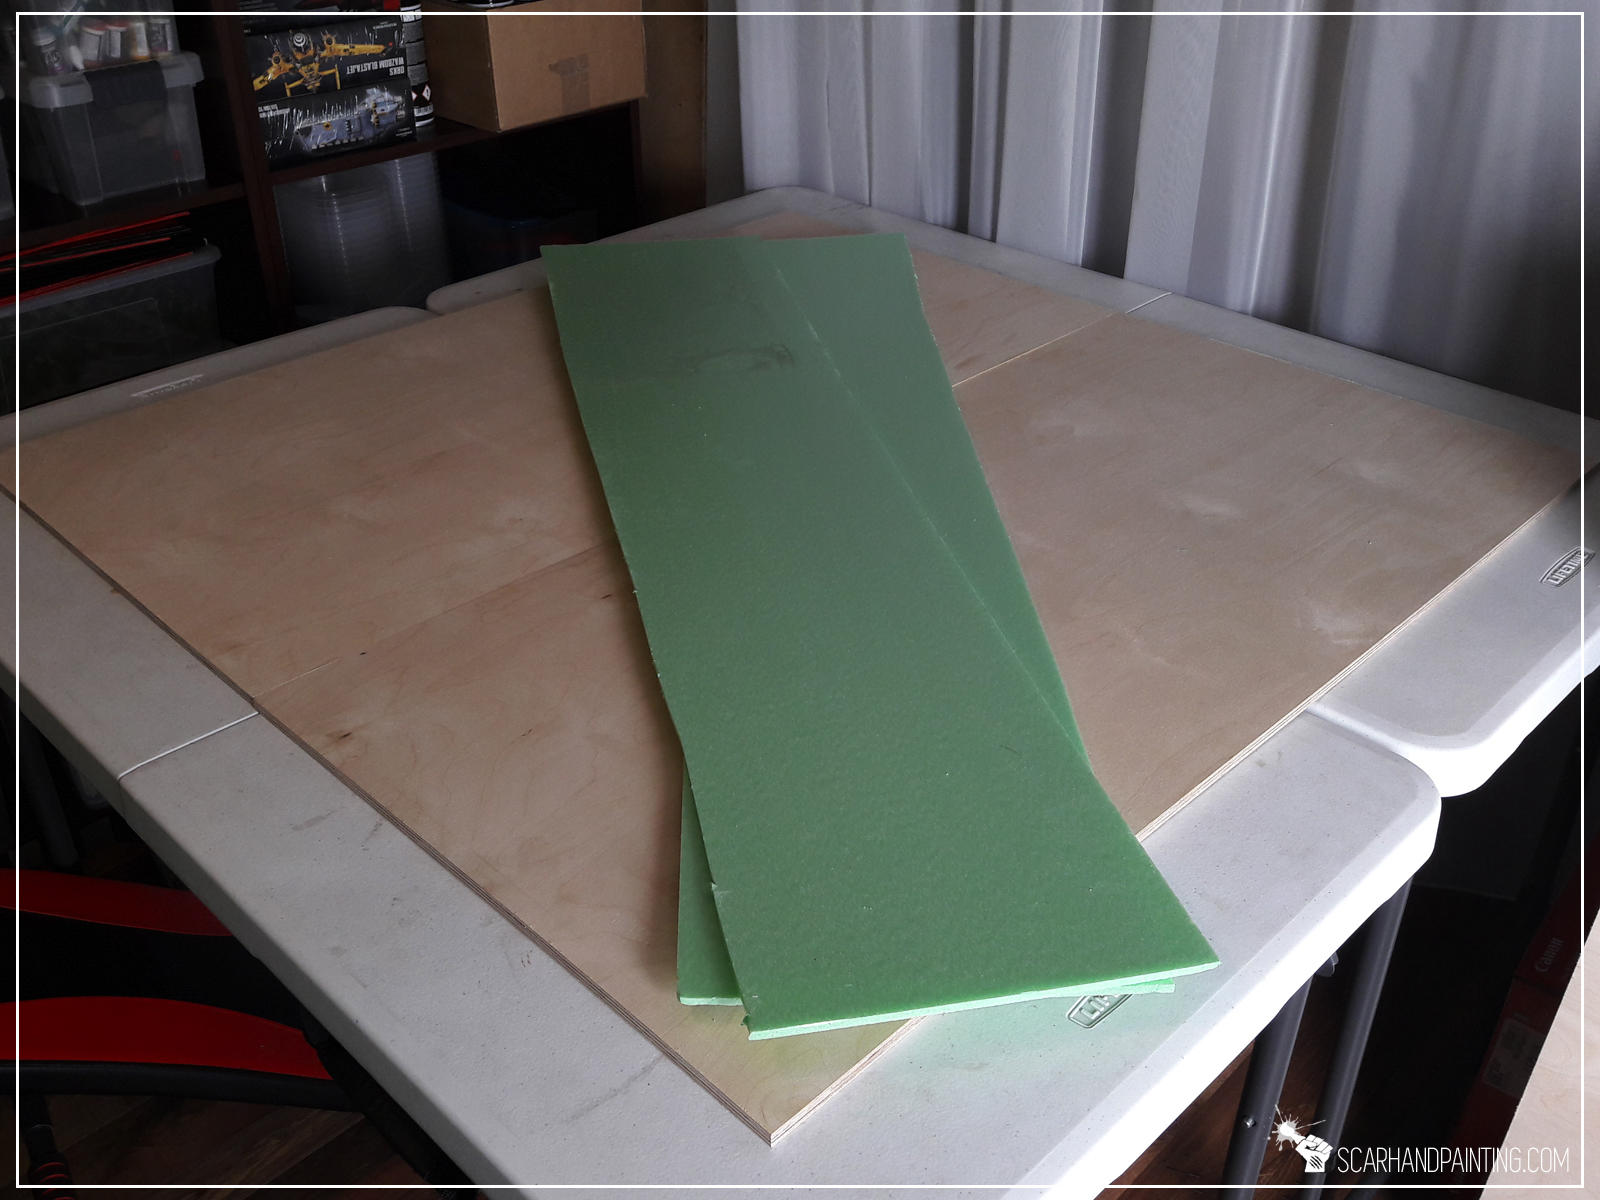
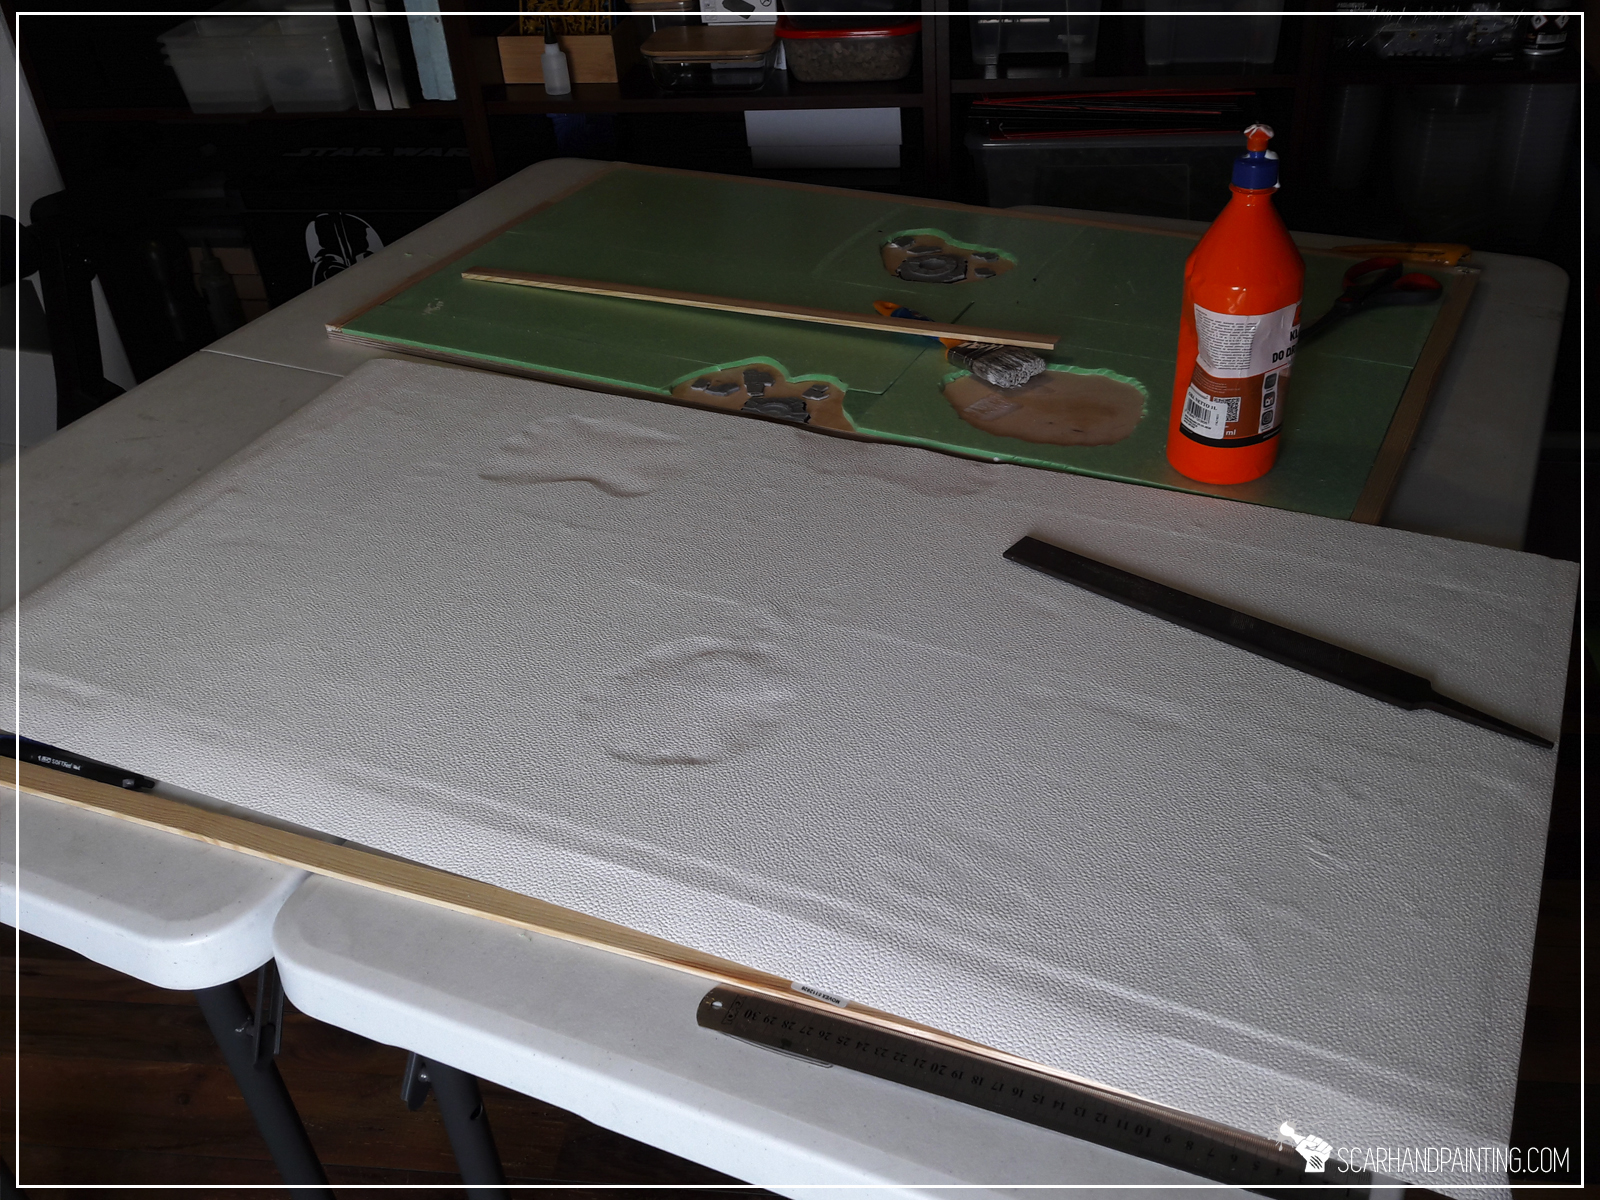
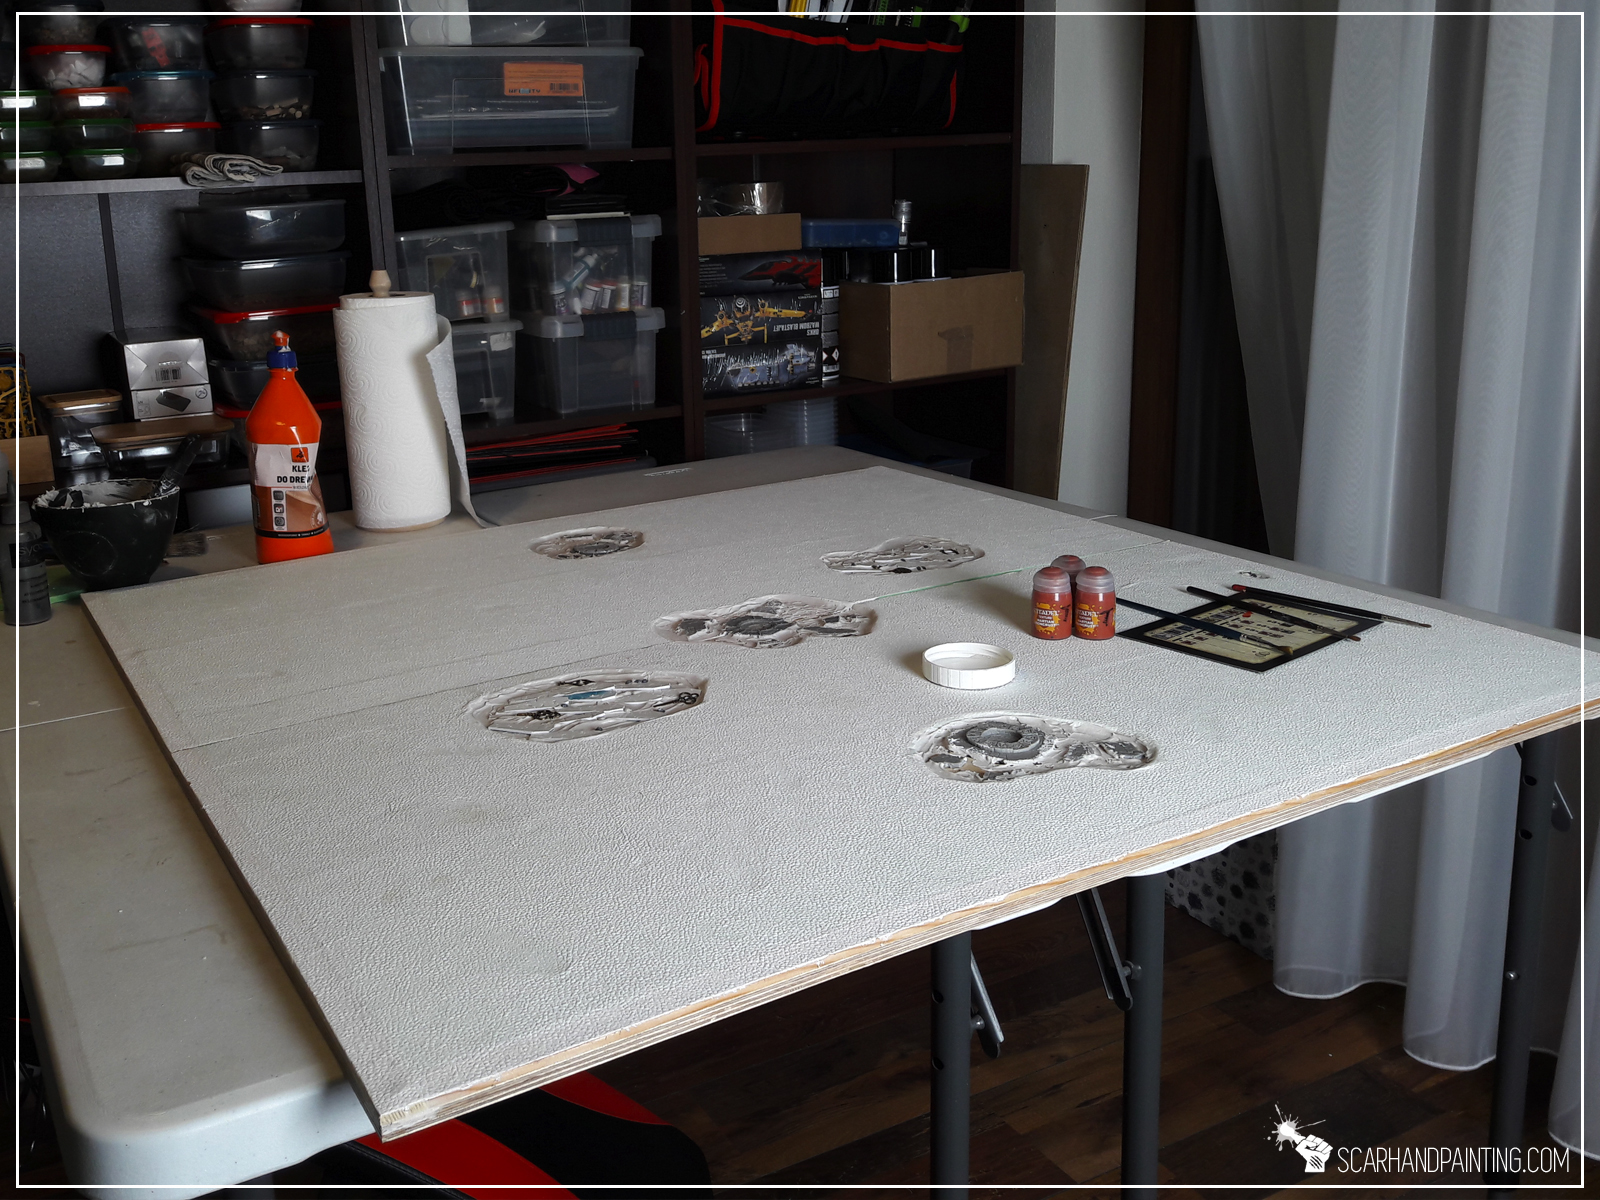
Off course a man gotta pick a right spot to dig a grave, not to mention placing an entire graveyard. I decided to go with two 10mm thick, 100x50cm wide meshed wood planks as a base for the pitch. These are a bit wider than necessary, but playing different games throughout the years taught me to leave some spare space around the proper gaming area. This way if anything gets damaged it wouldn’t impact playability of the board. 10mm thickness means these would stay flat and be durable enough to withstand any random fuckups that might happen some day.
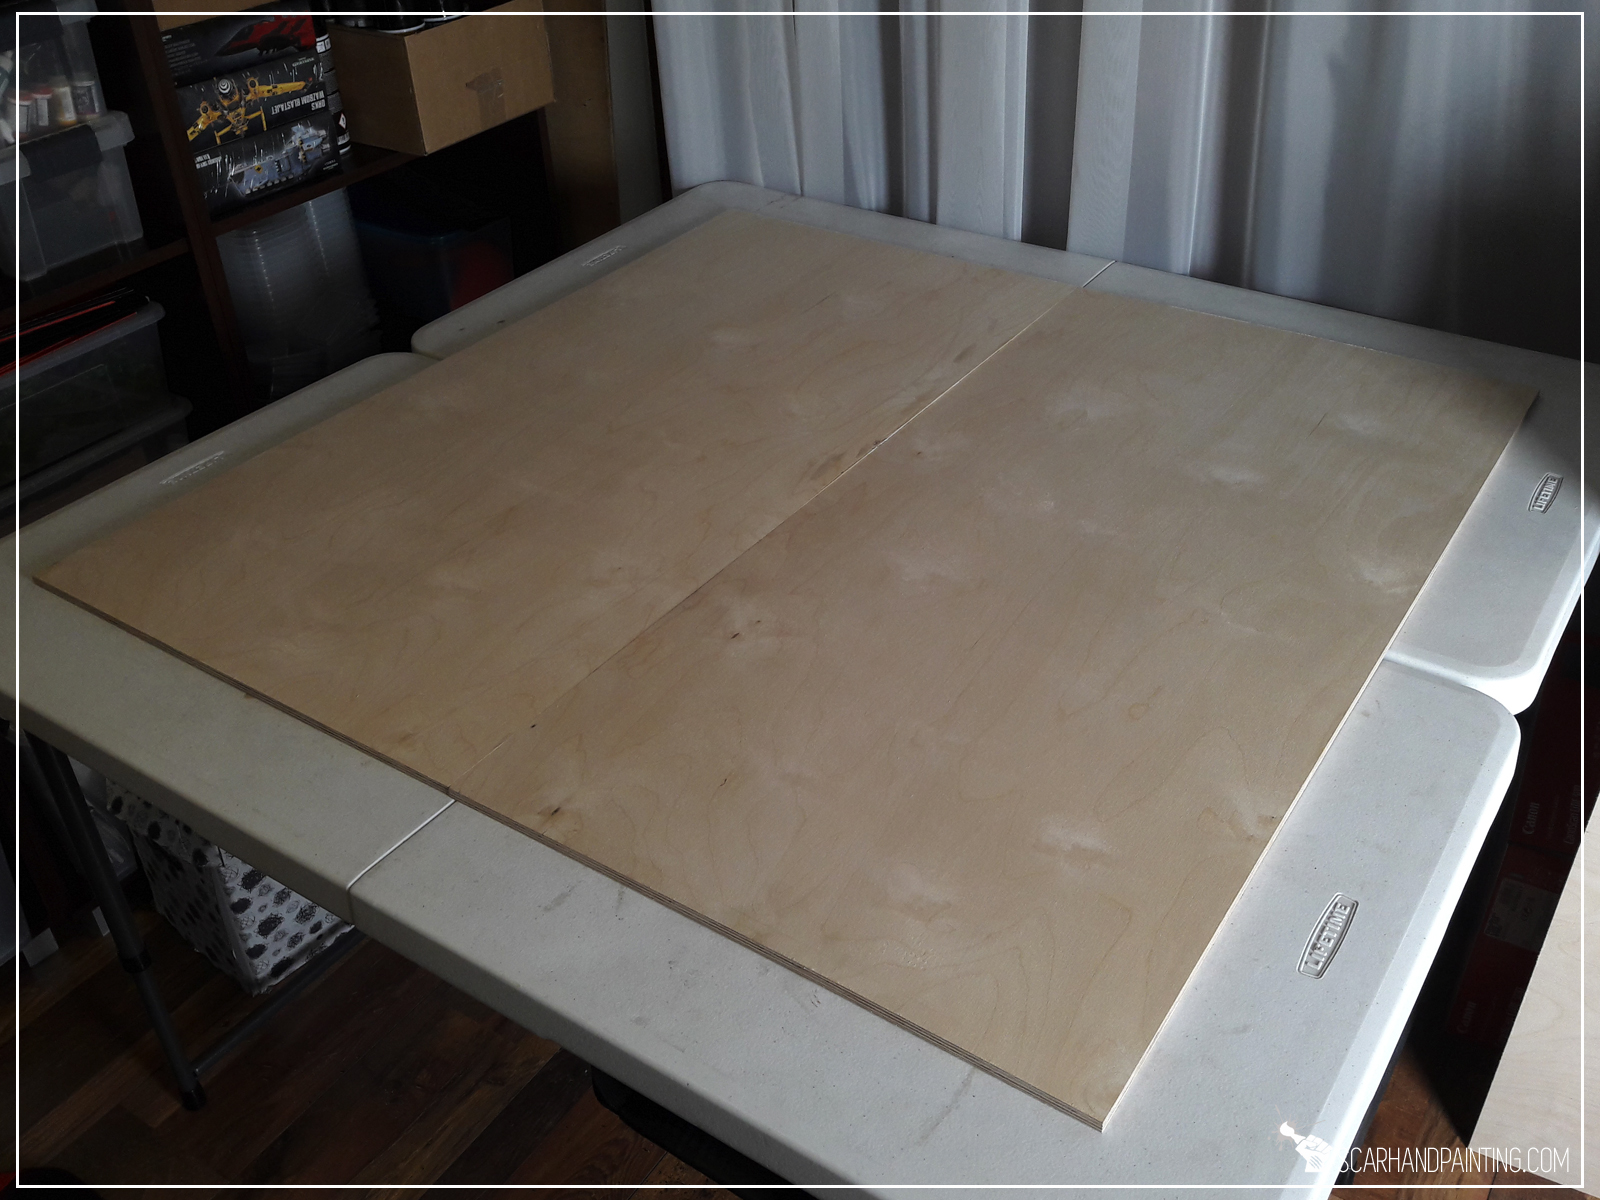
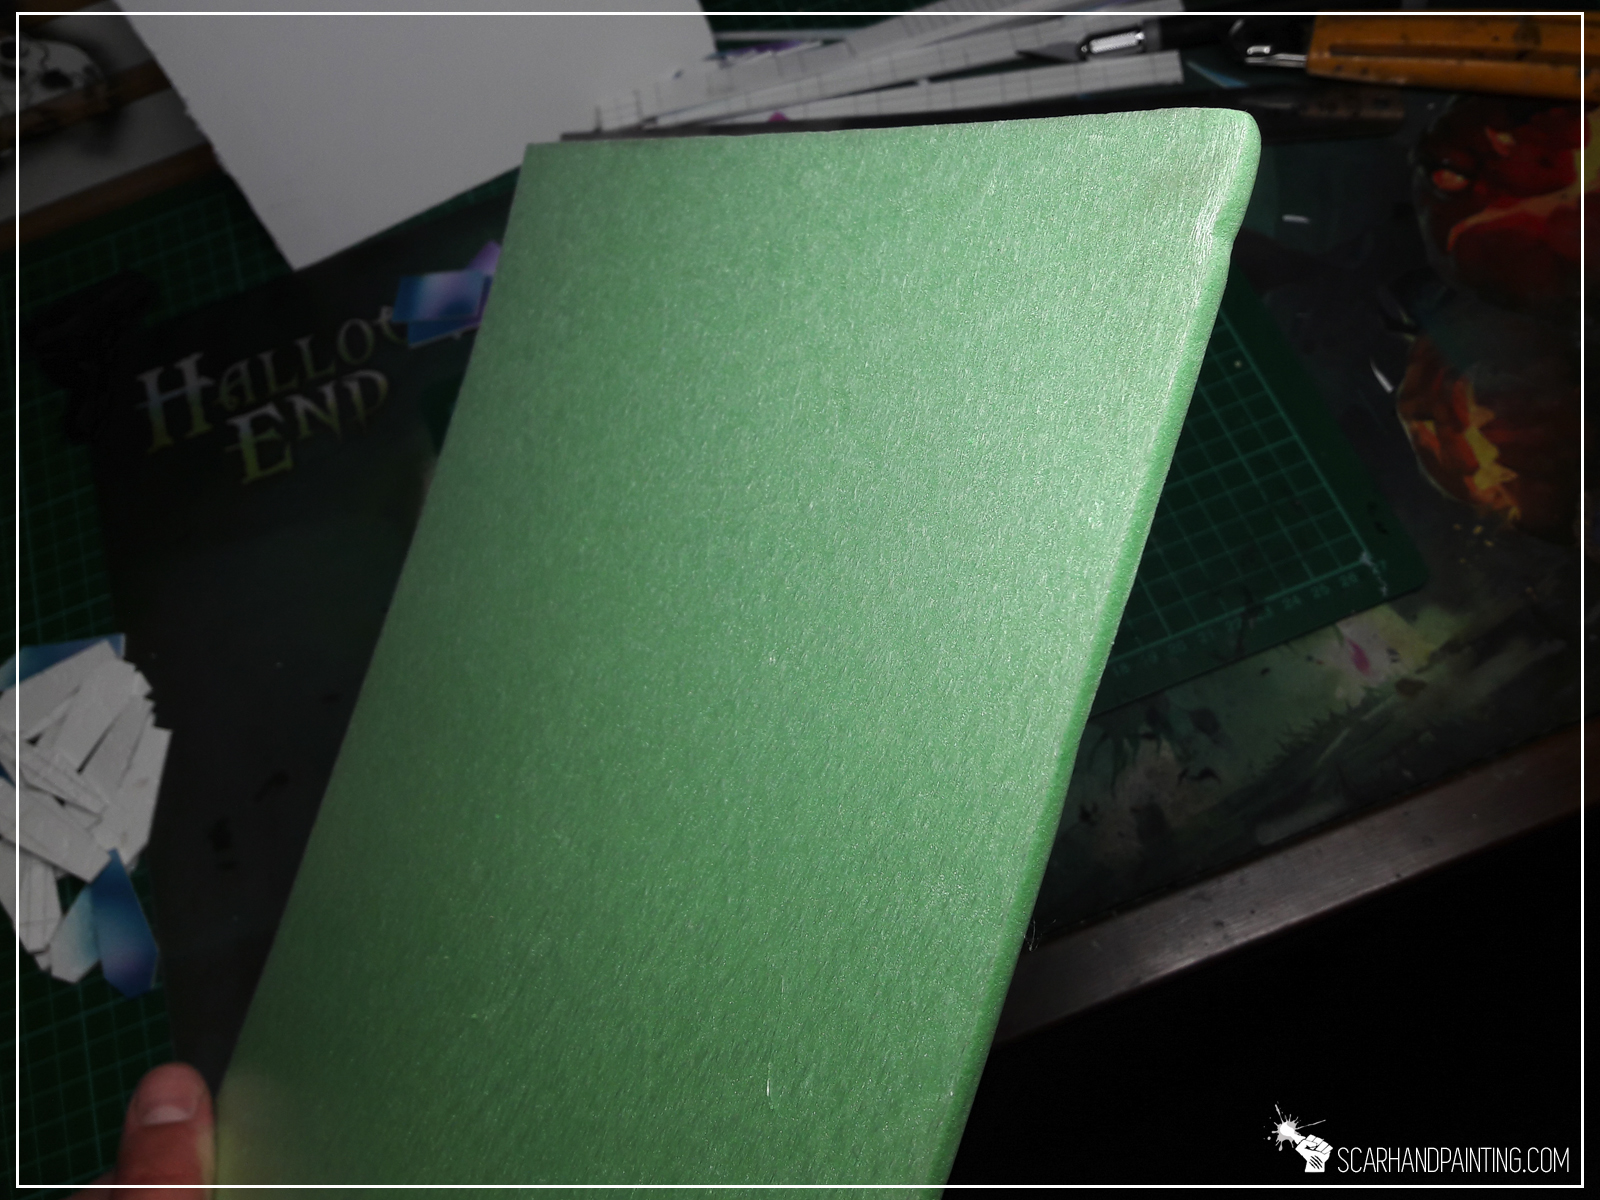
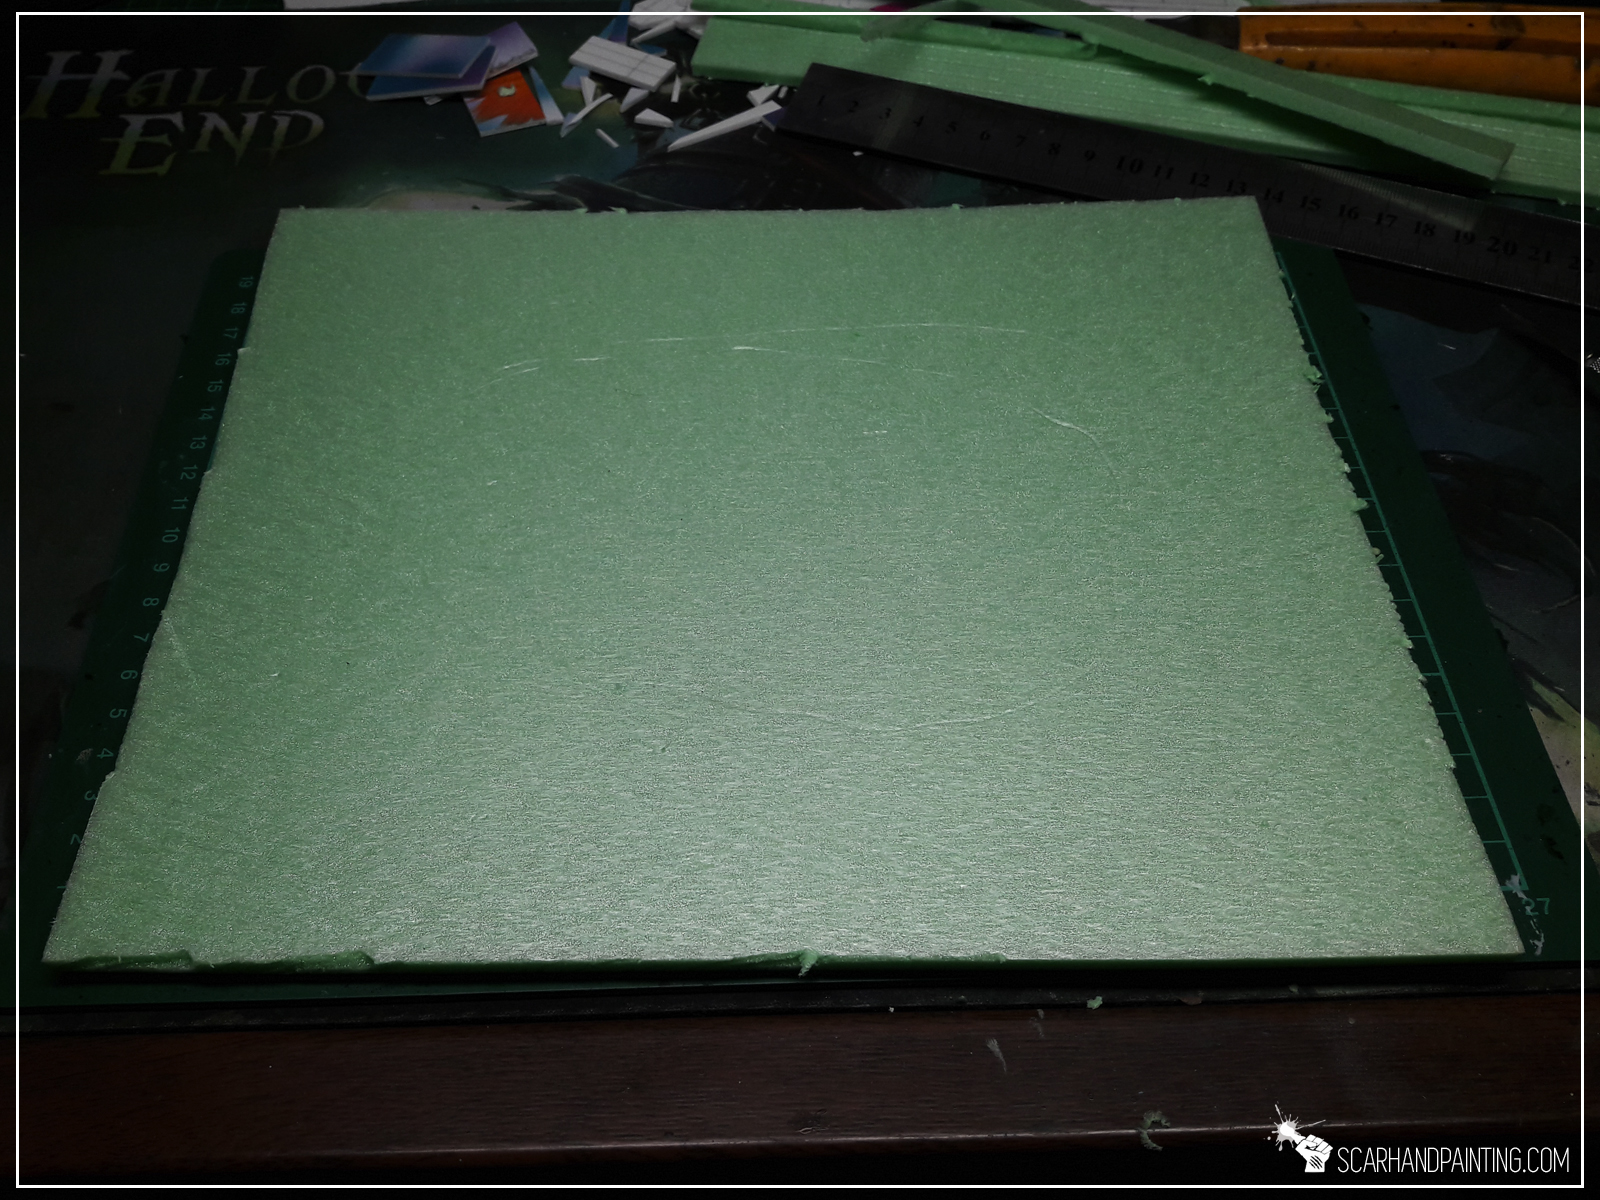
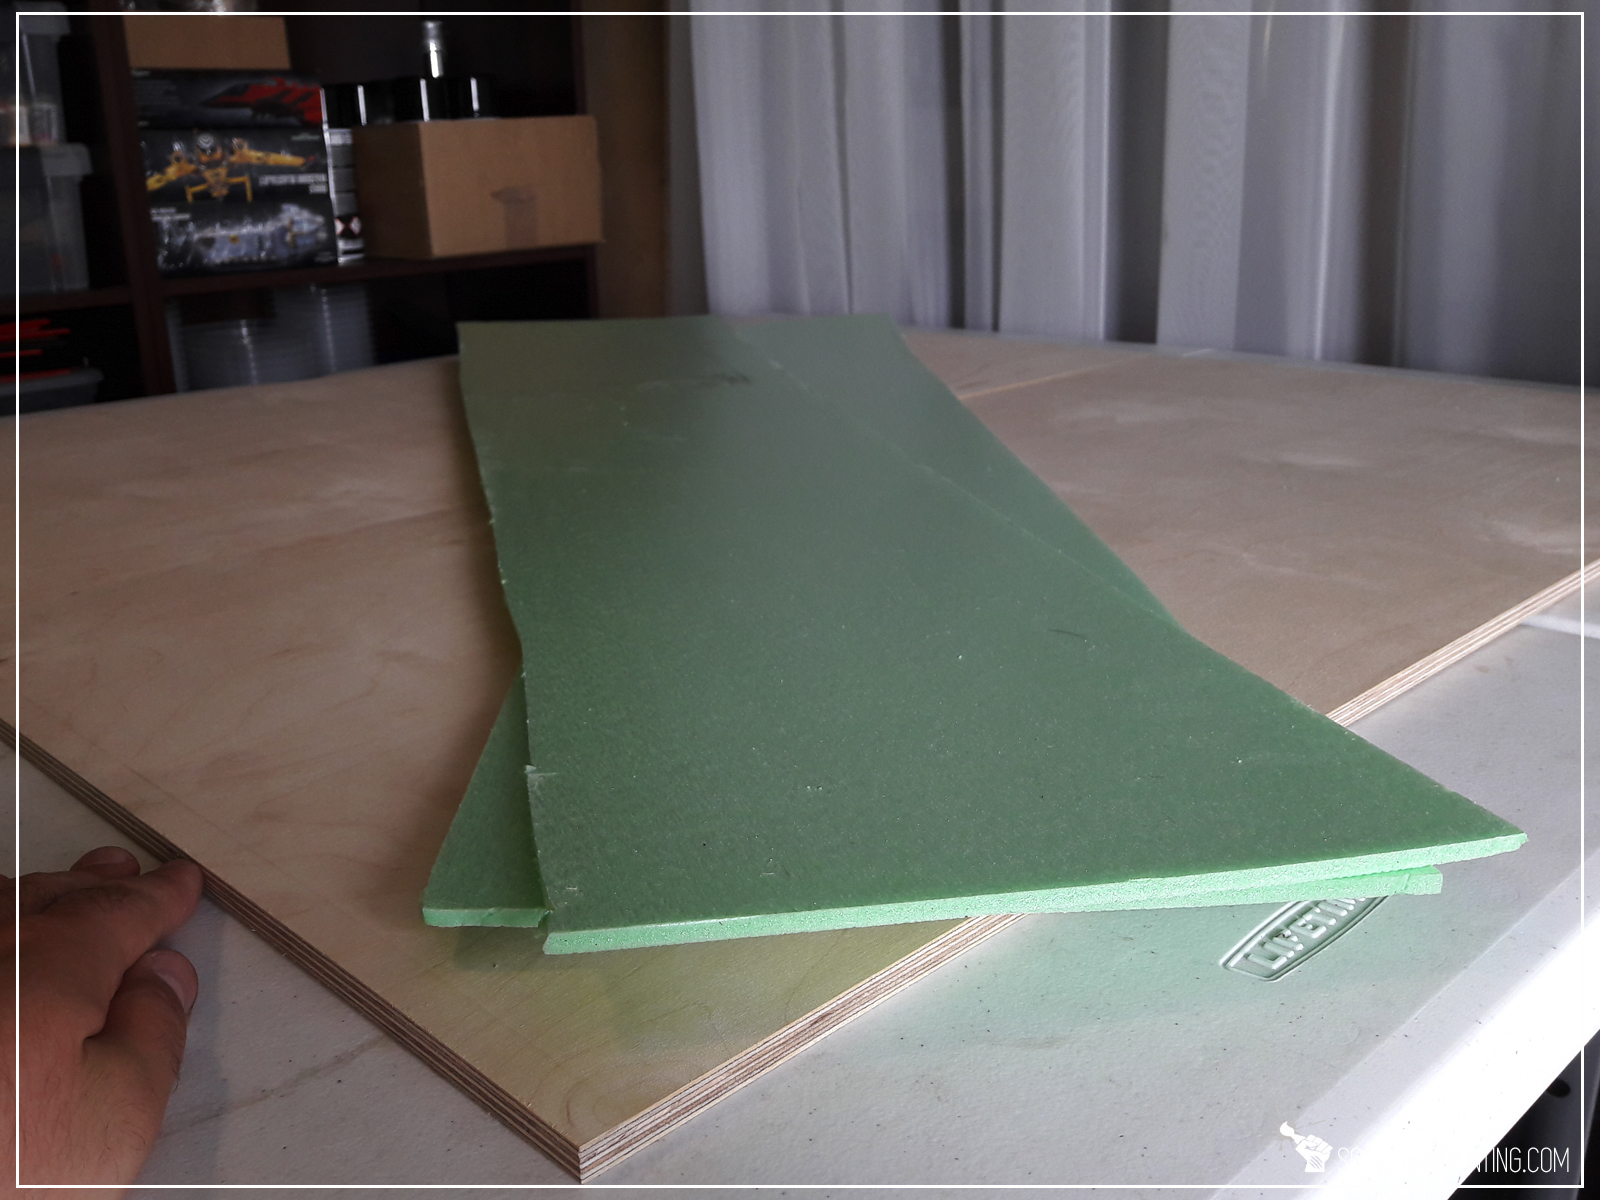
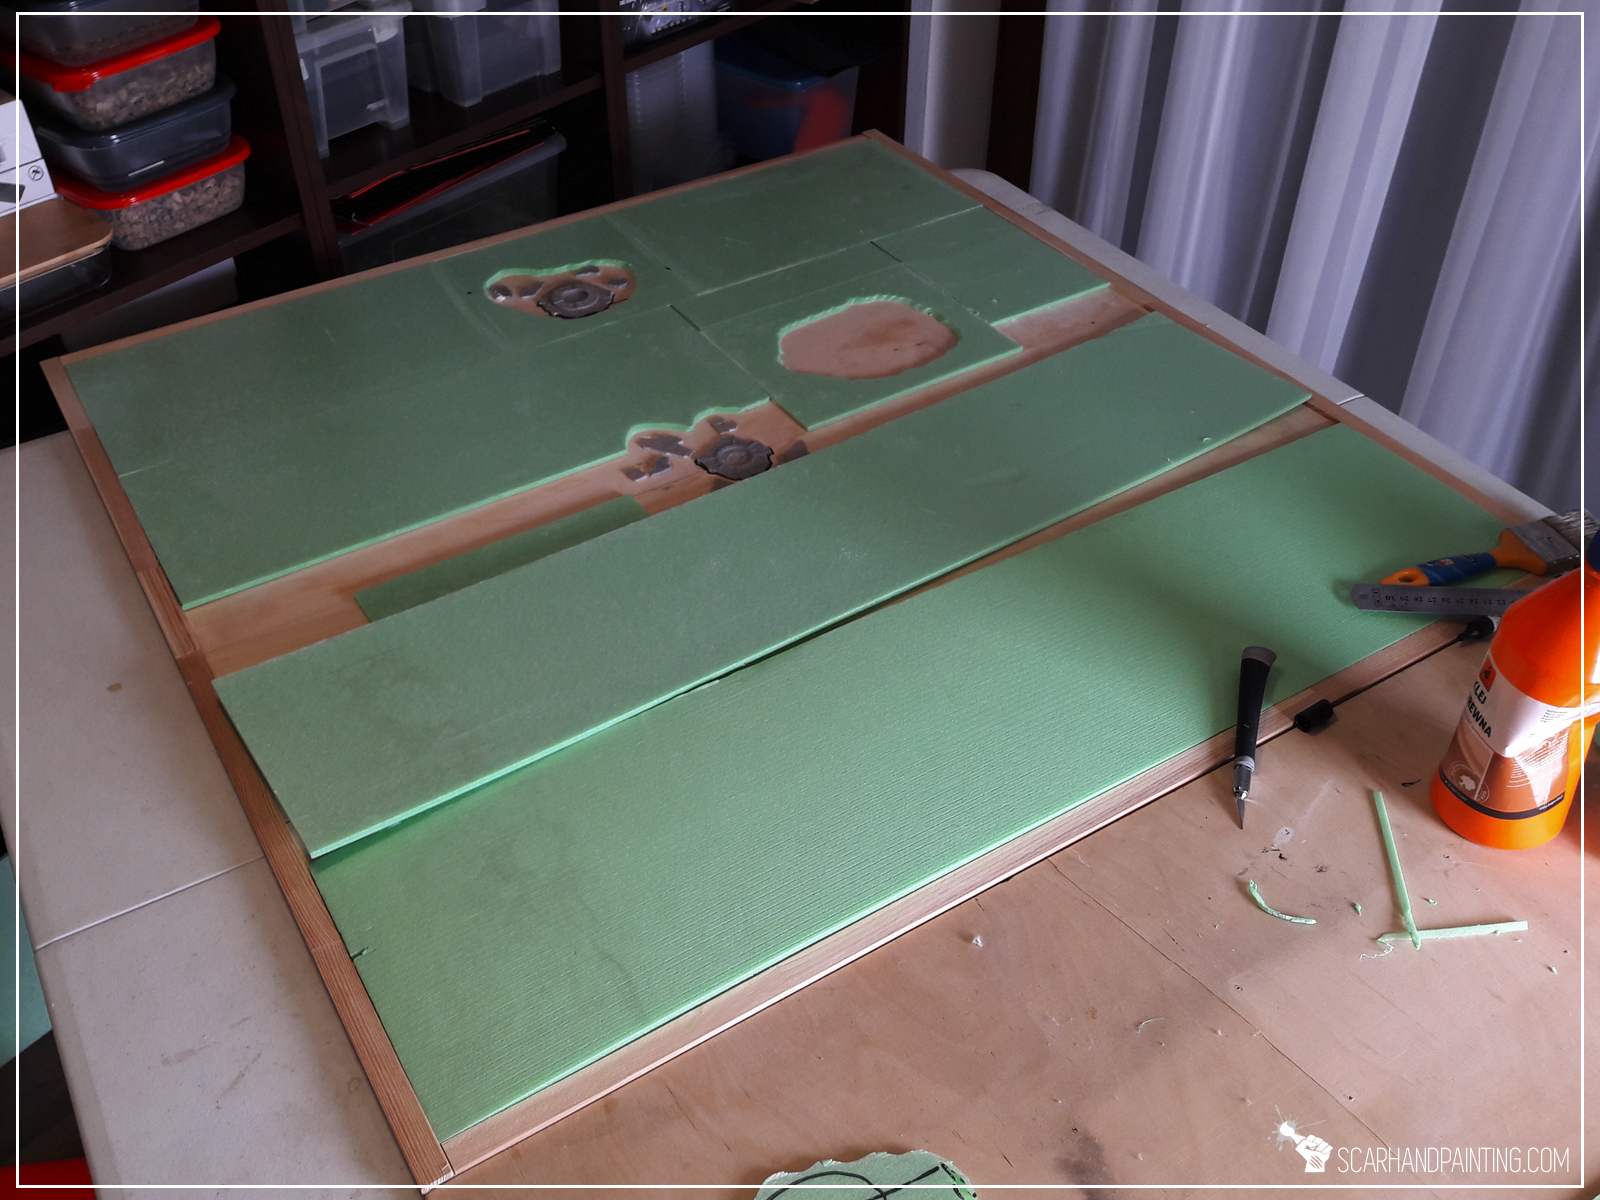
In order to allow me to “work” with the surface and nest any 3d elements I chose to cover the boars with additional layer of 5mm thick styrofoam.

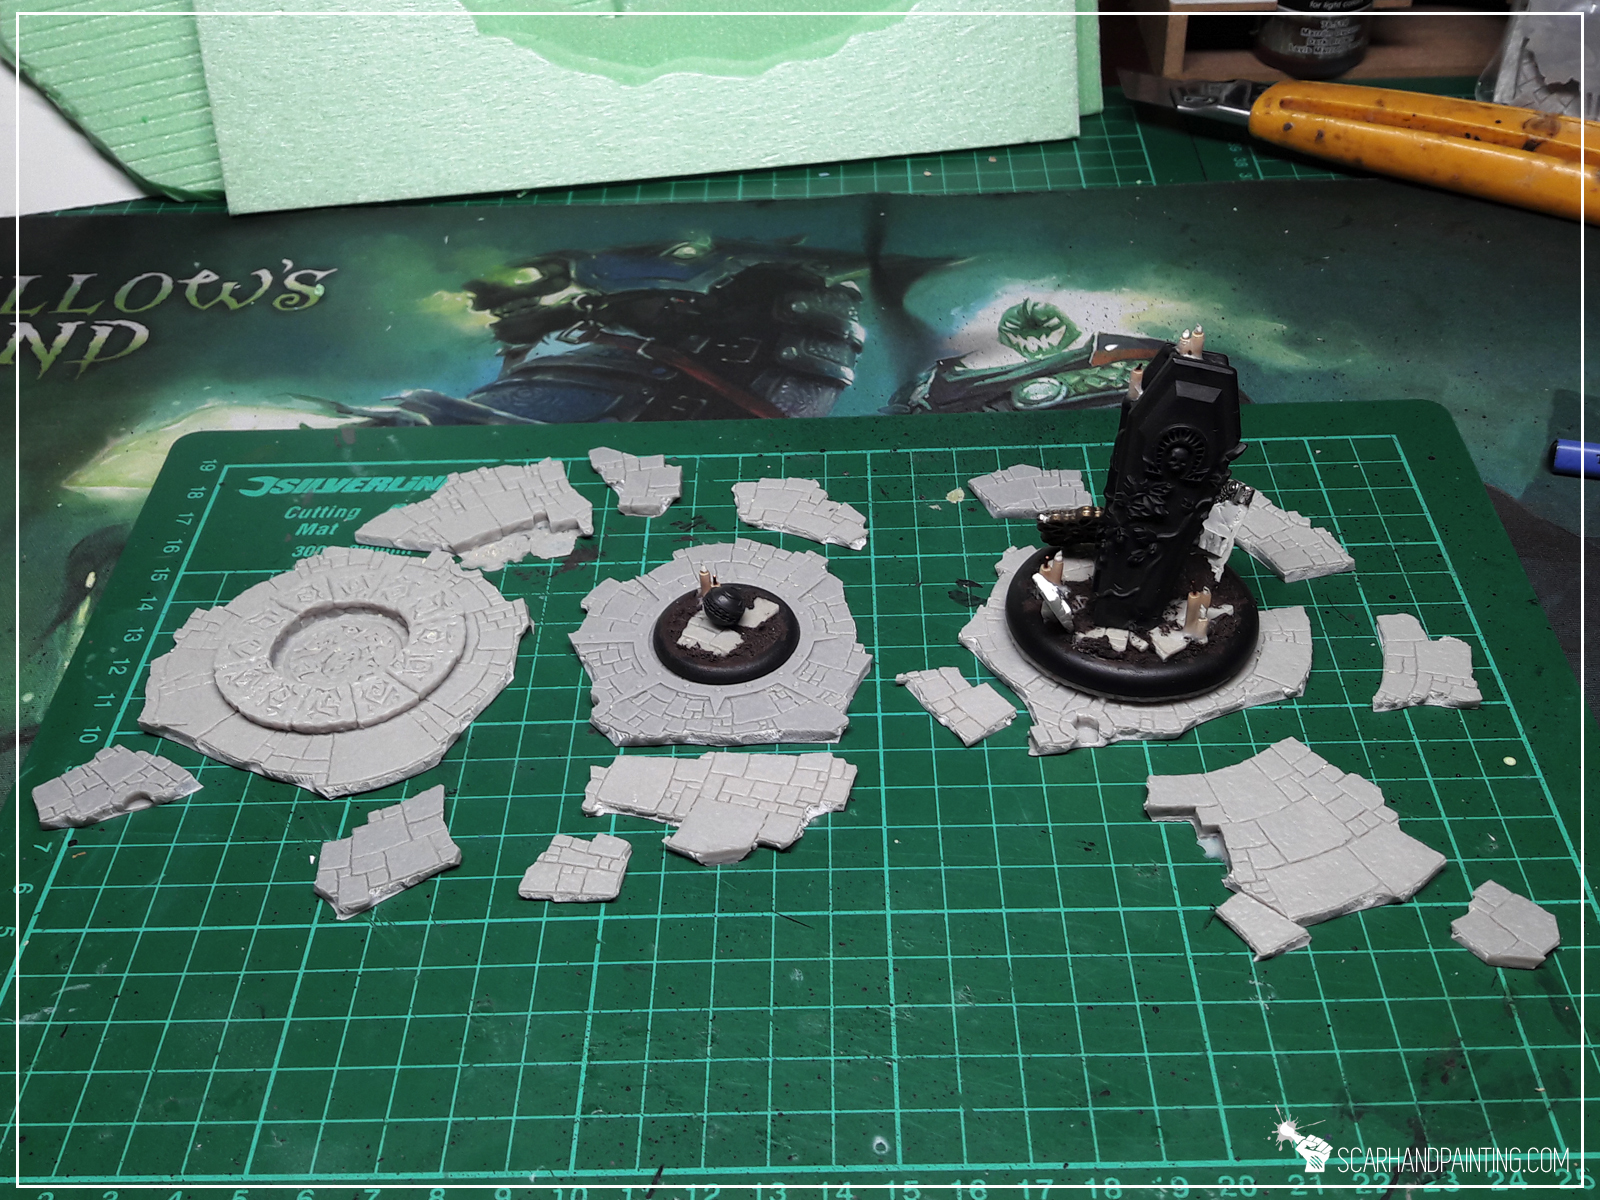
I carefully planned the layout of the board. Figured that it would be cool to have goals and the middle point of the pitch additionally detailed. I have a huge amount of random stuff scattered around my hobby room and as it happened I had a perfect match for these features.
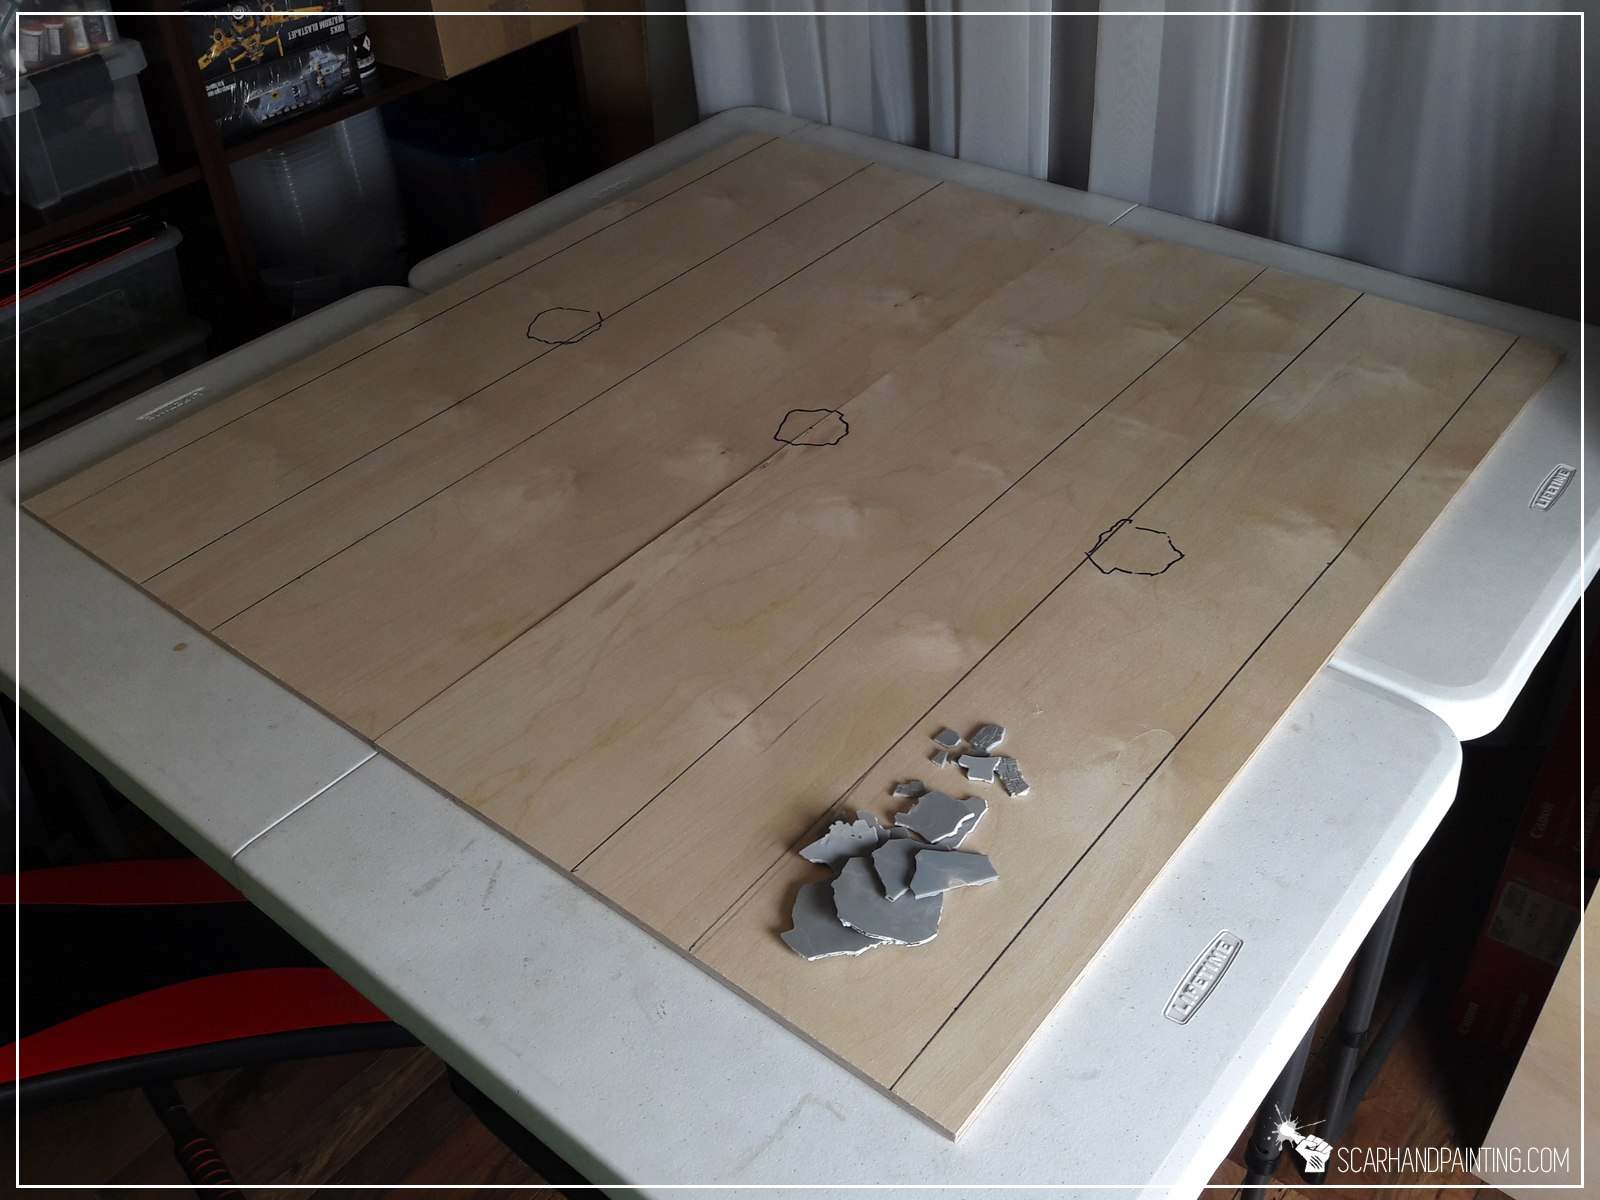
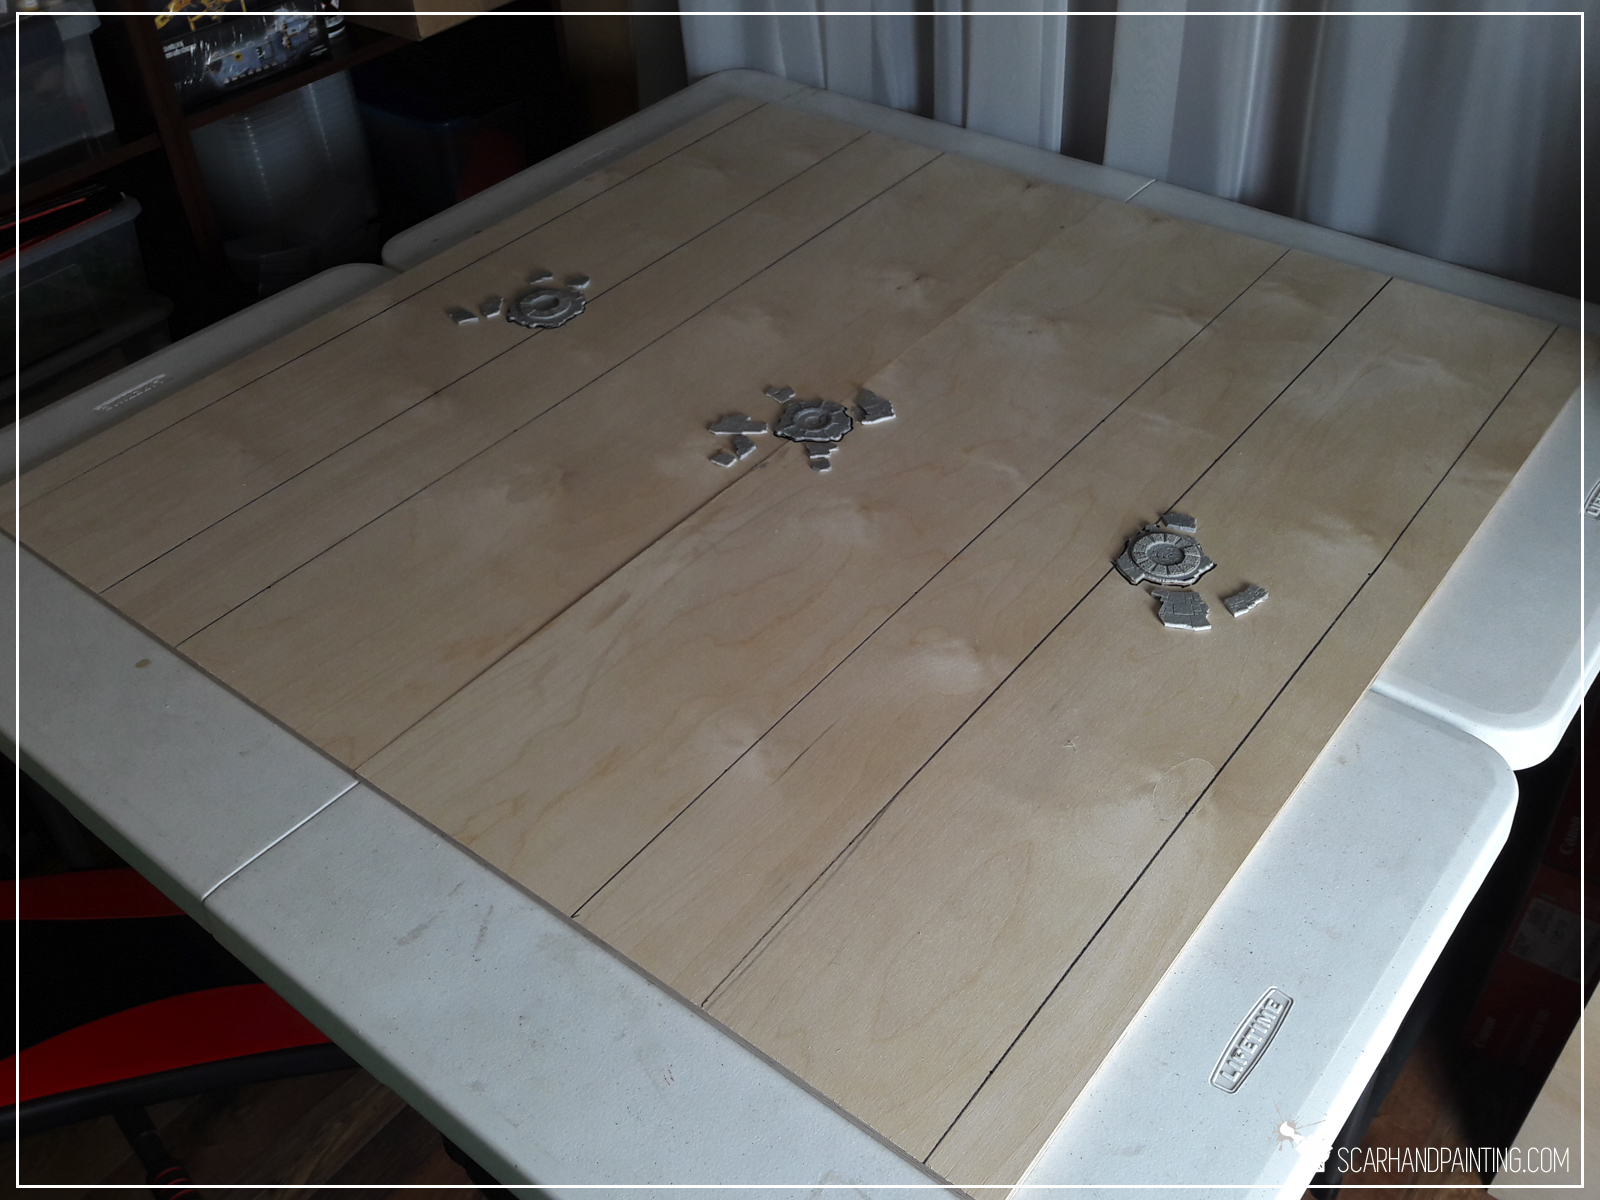
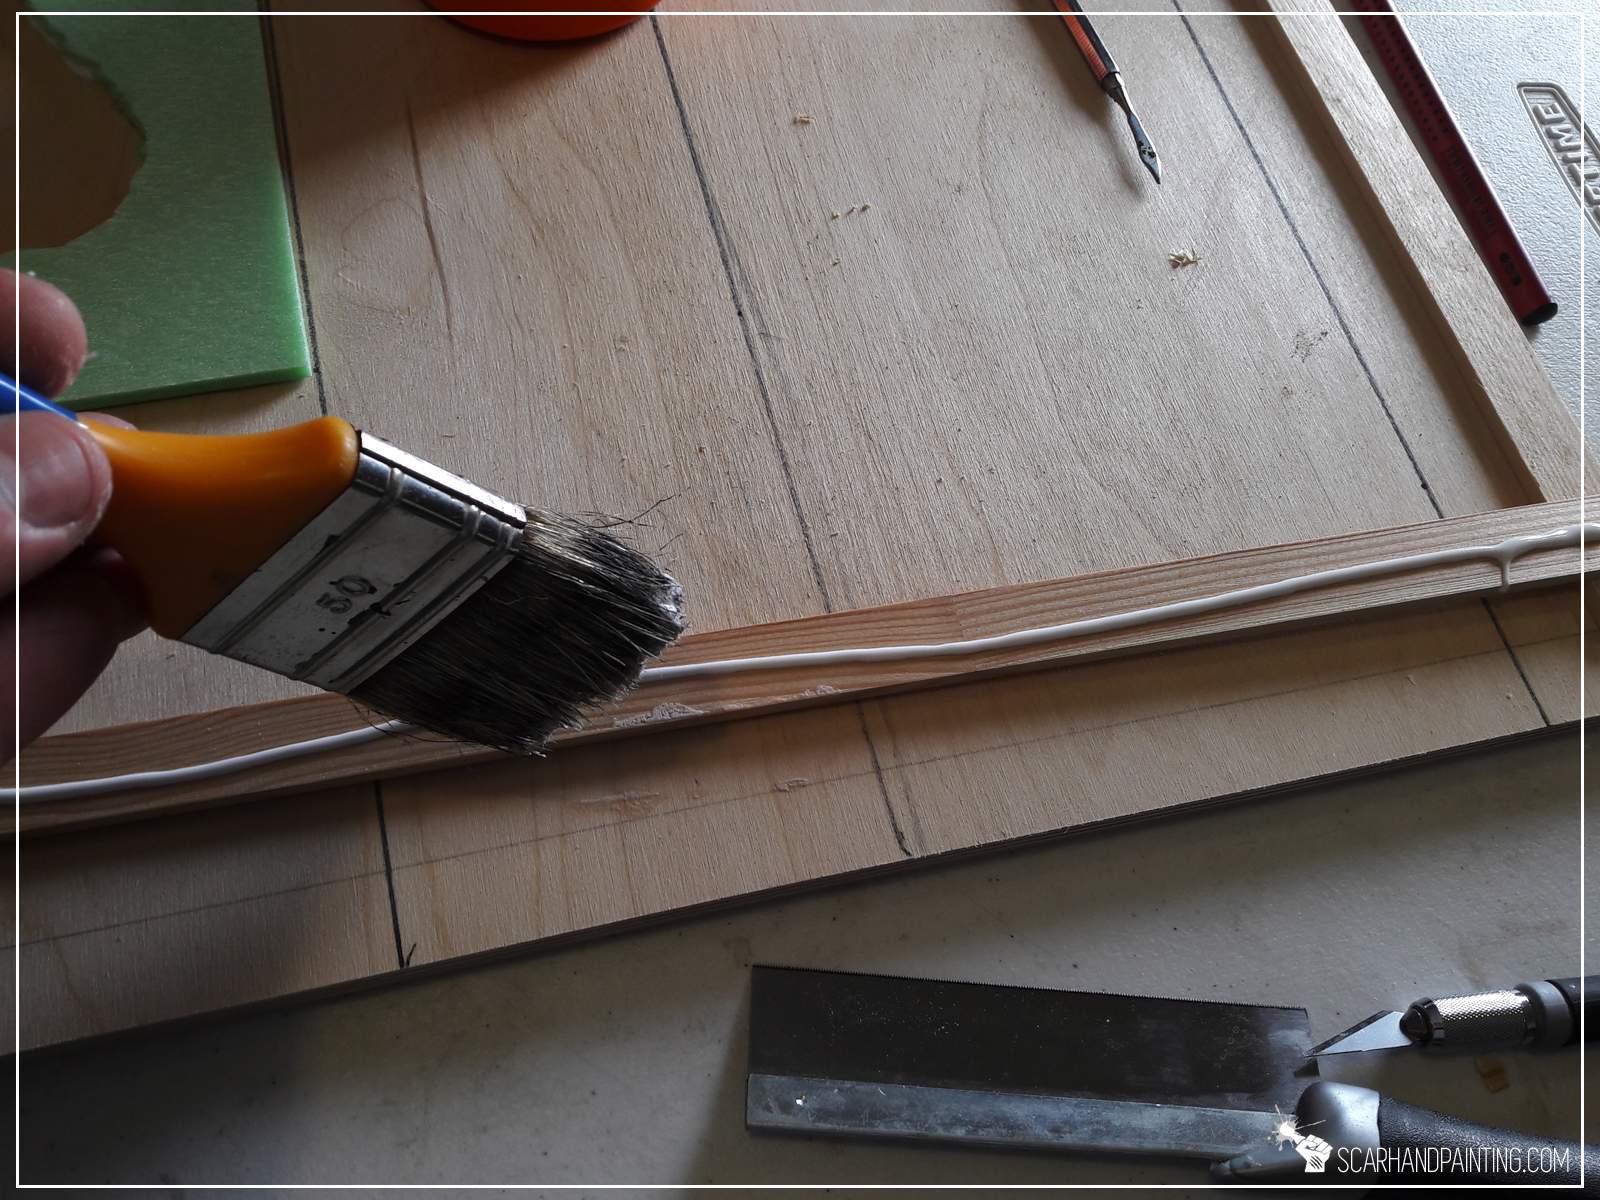
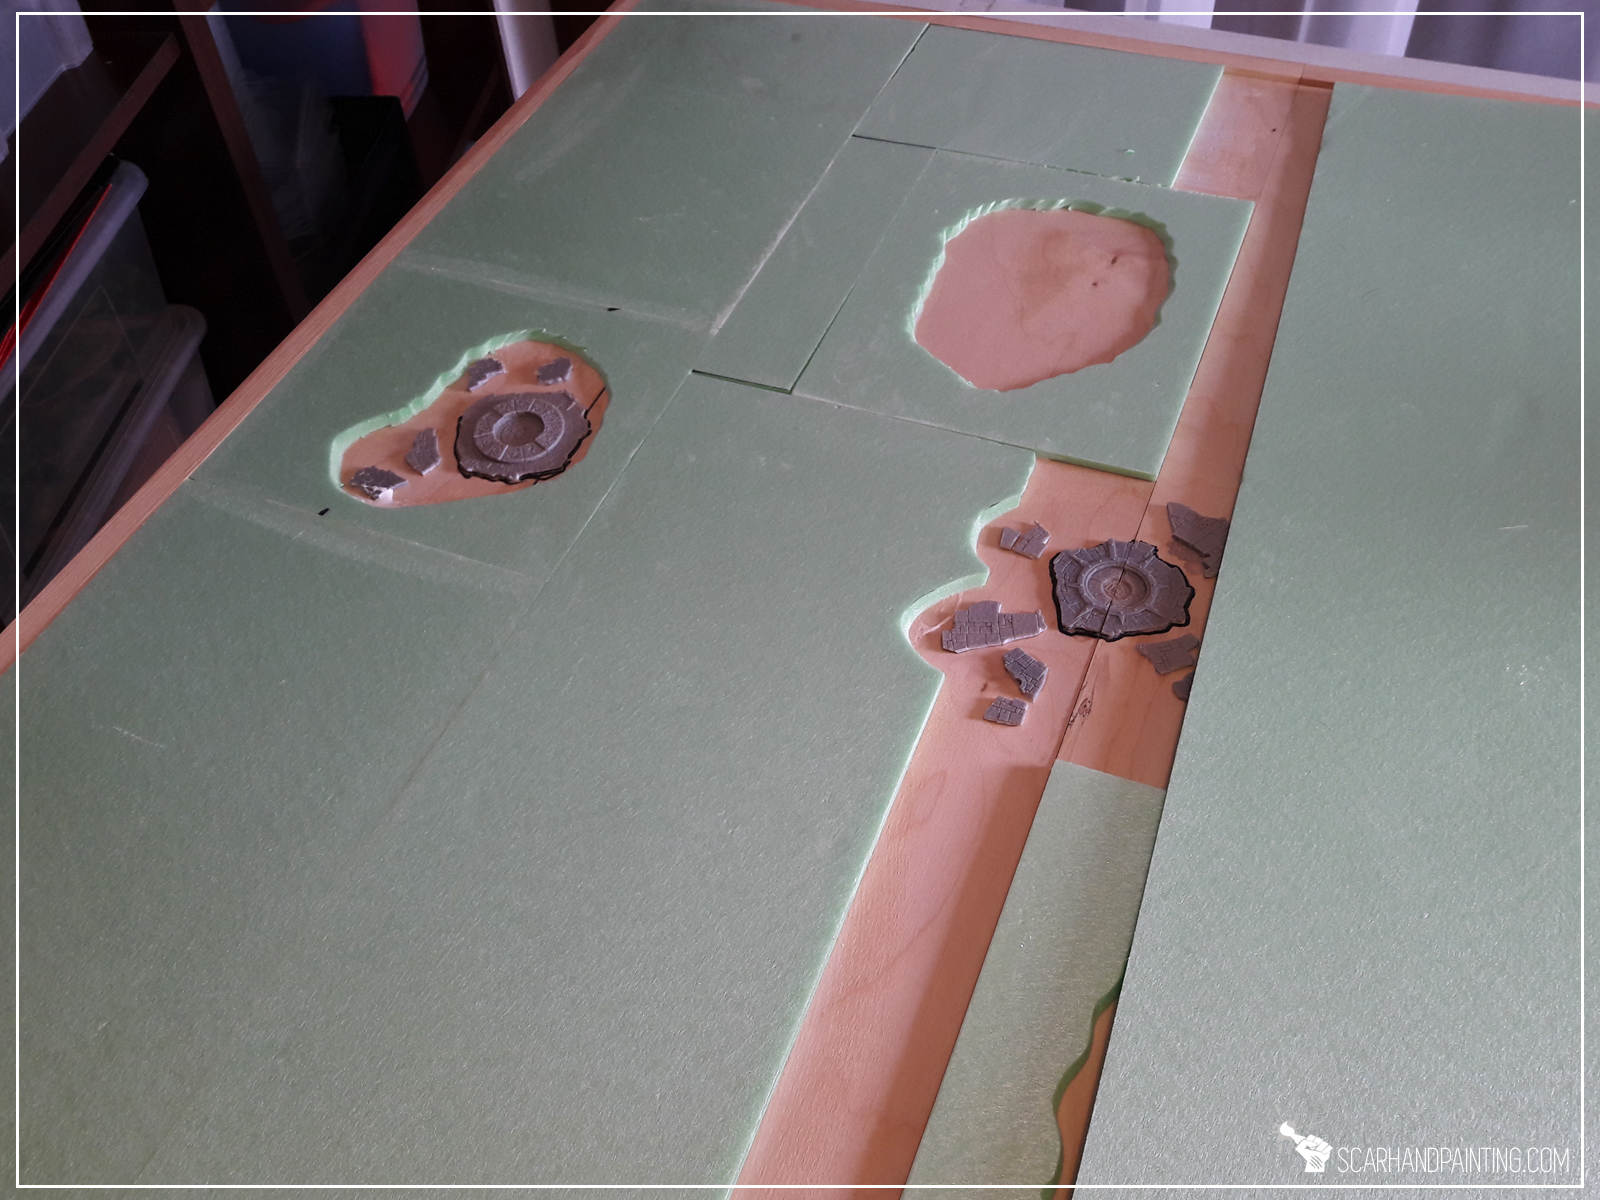
With goals in place I covered entire board with styrofoam, leaving only certain spots to reveal detailed elements from underneath. I also left two holes for the most important feature – coffins. Additionally I reinforced the edges of the board with thin planks of wood – just in case. I just like my scenery durable and sturdy.


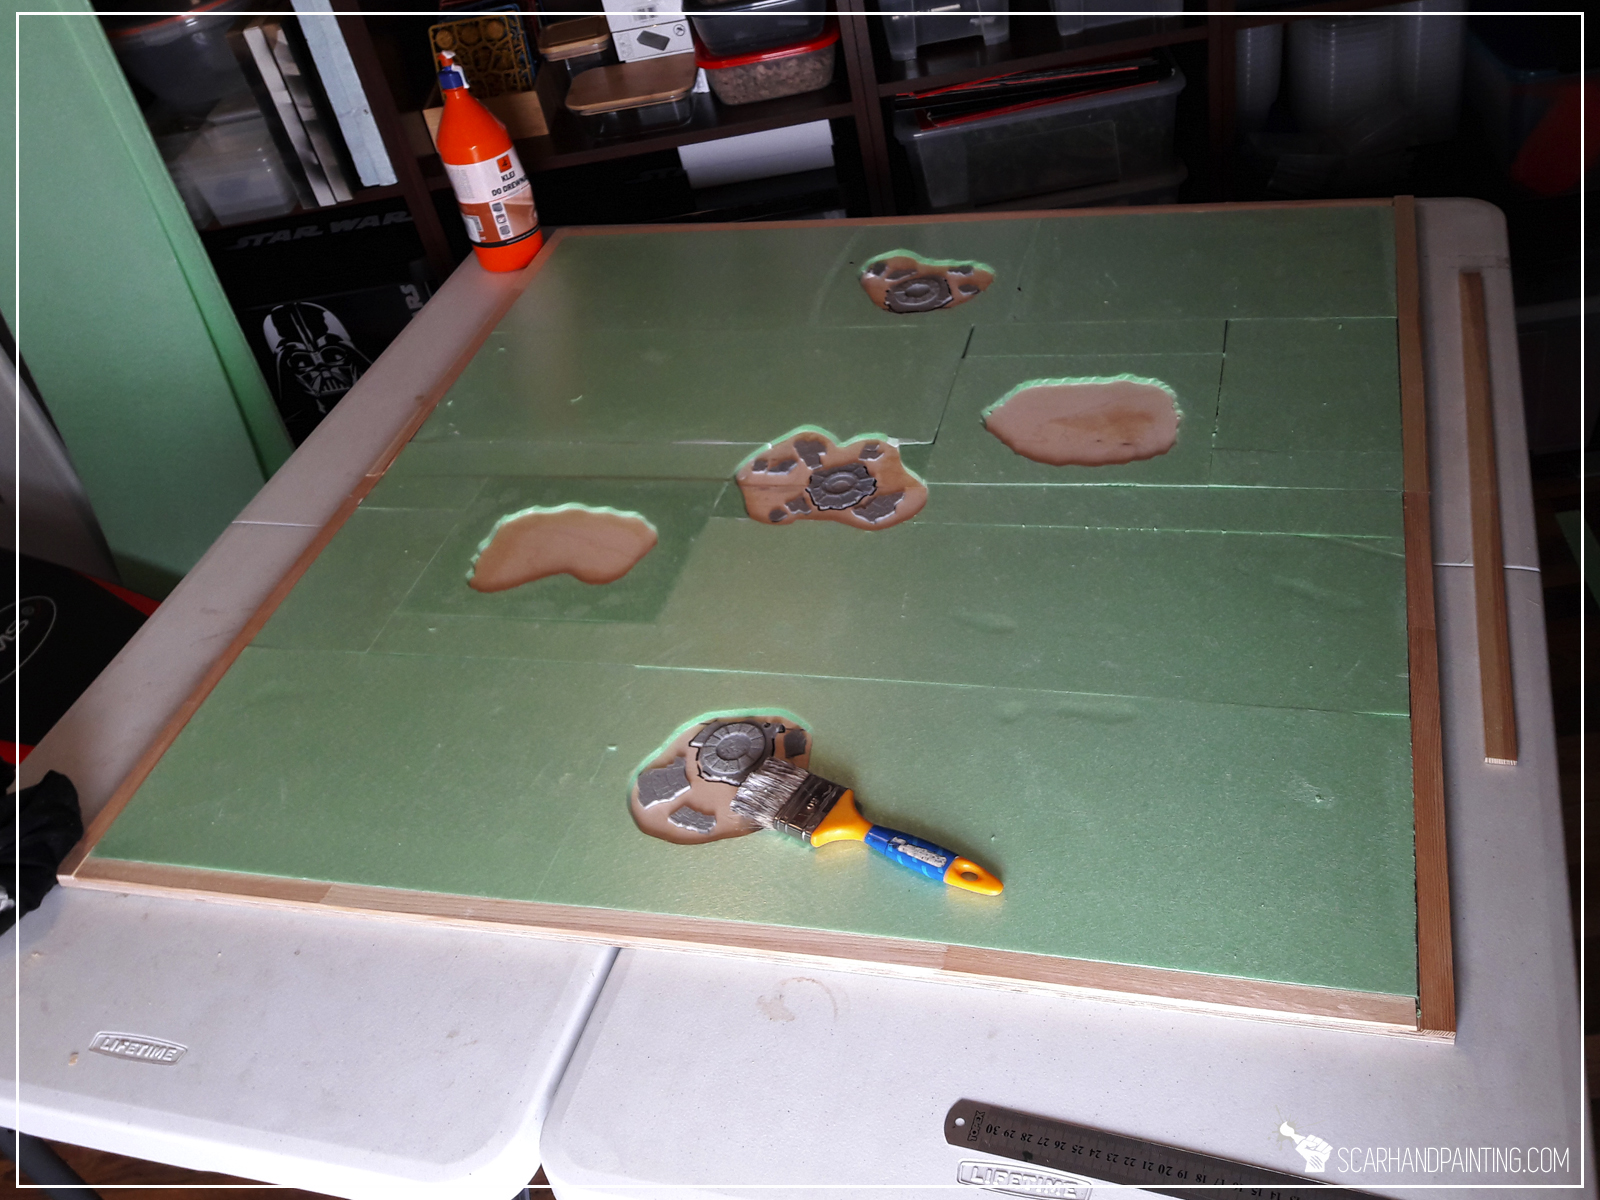

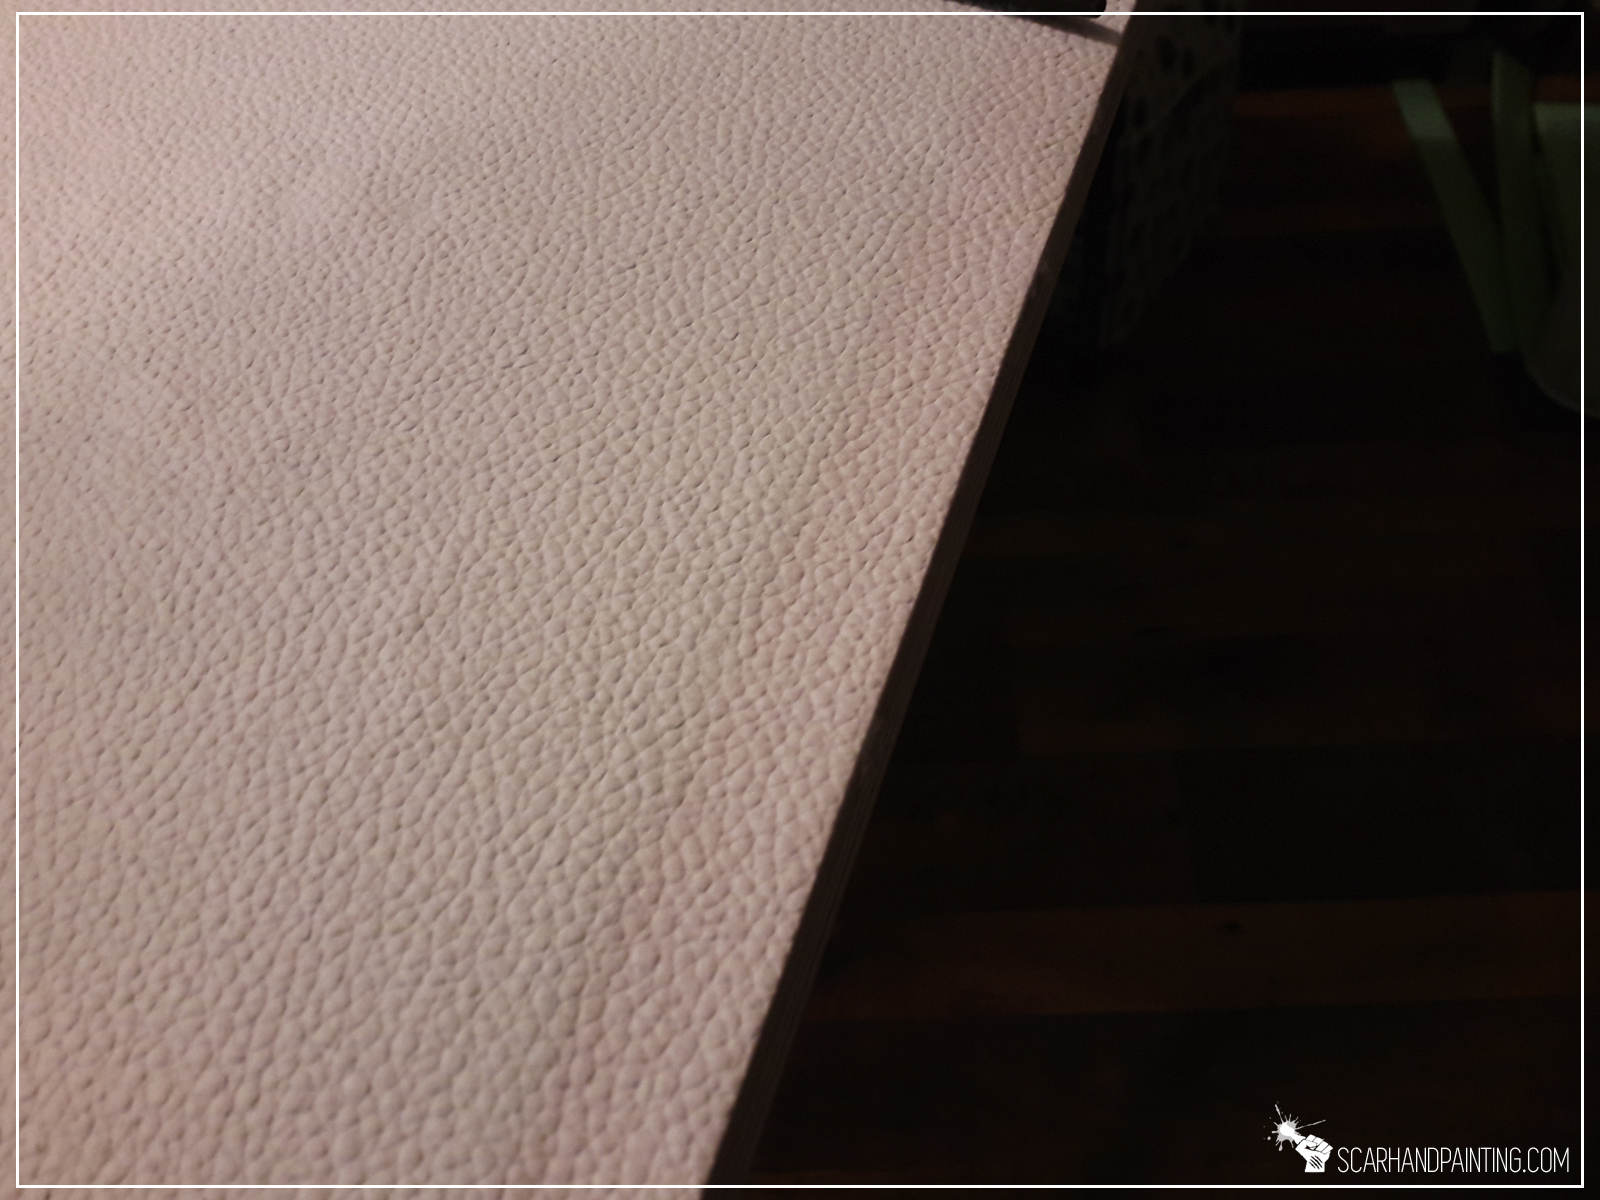
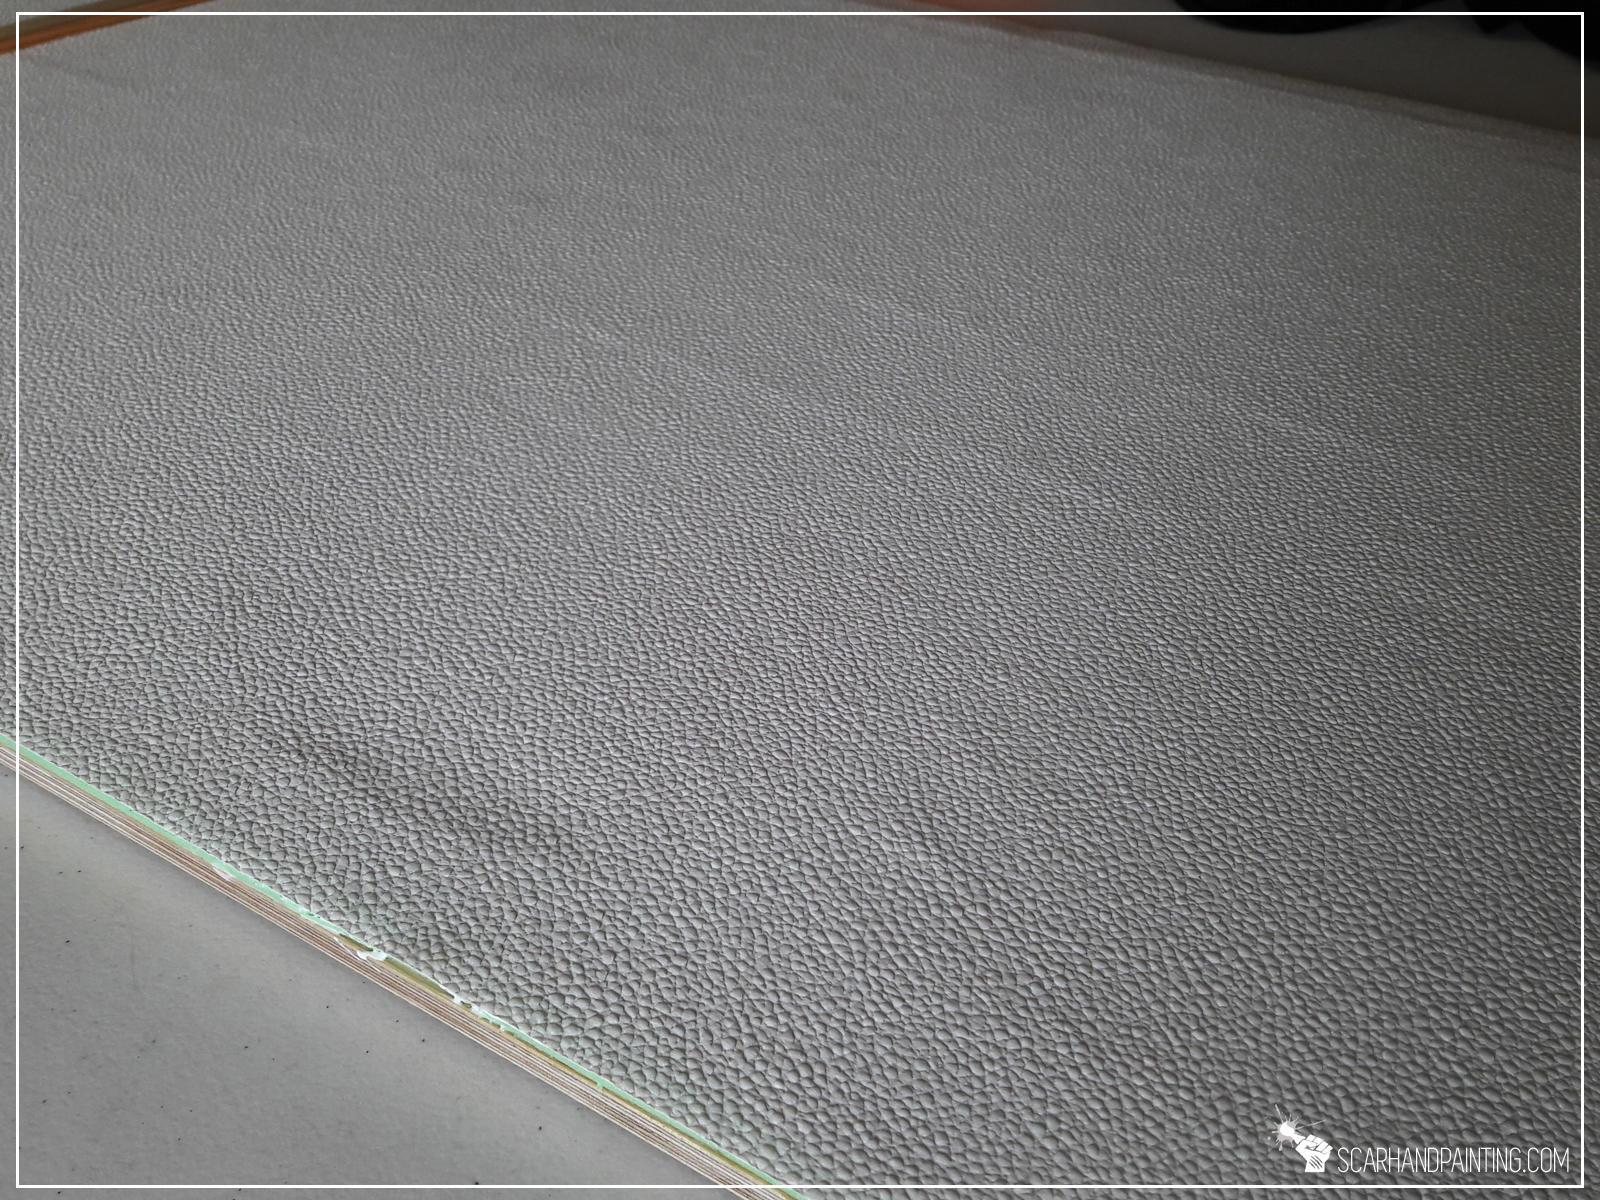
For base texture I picked a trusted wallpaper that helped me with other fantasy projects in the past. Being easy to work with a wallpaper is a great way to texturize large areas, plus it helps keep wobbling models safe in case of a fall.
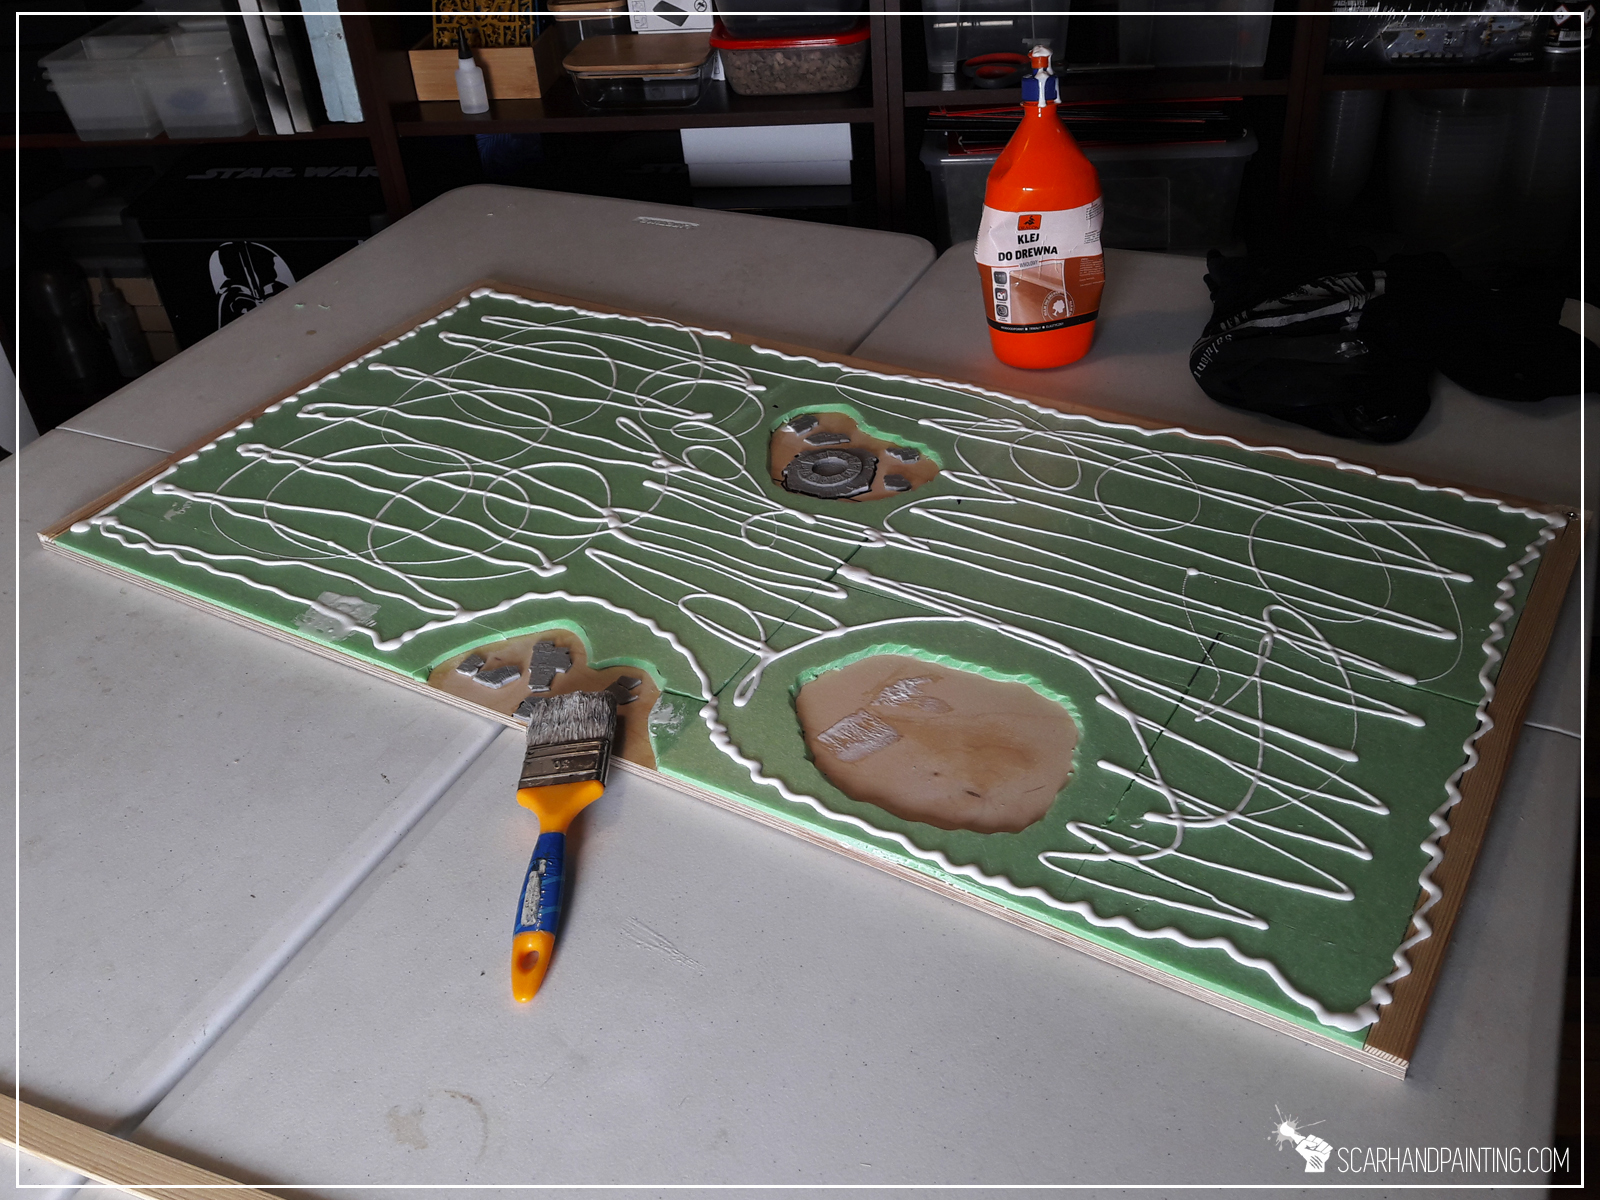
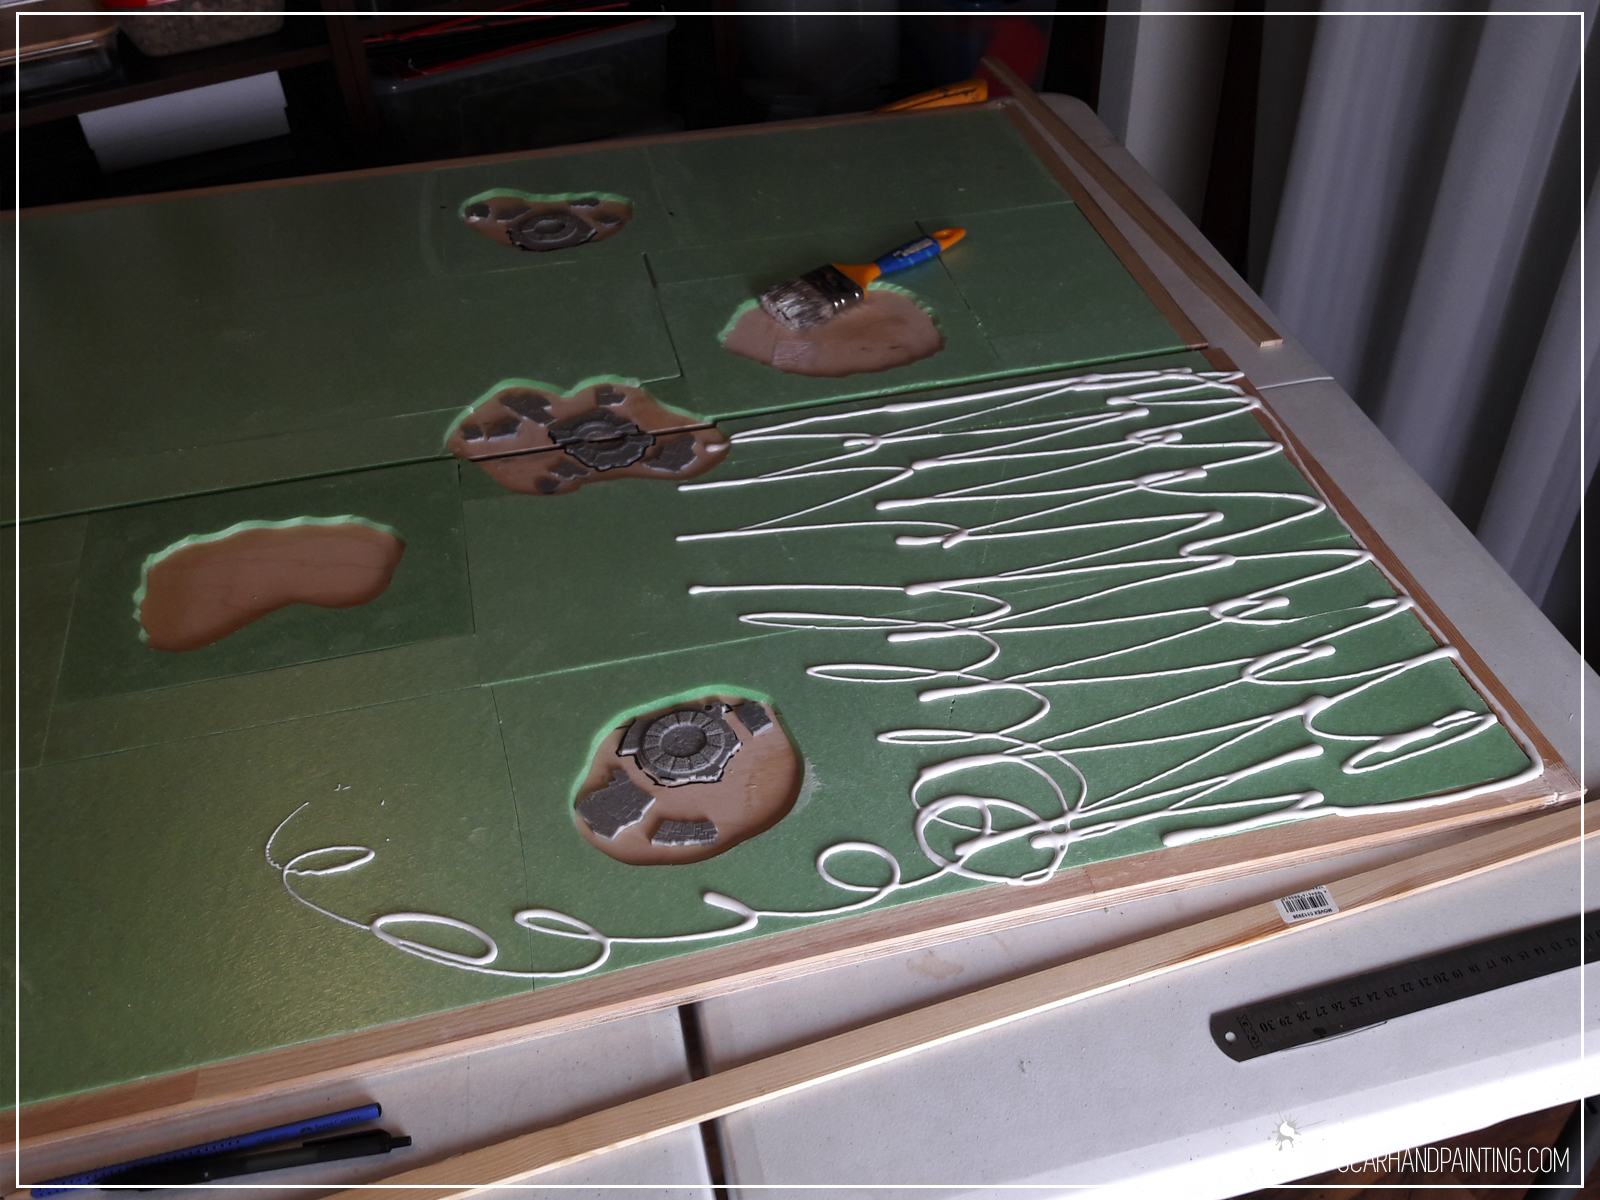

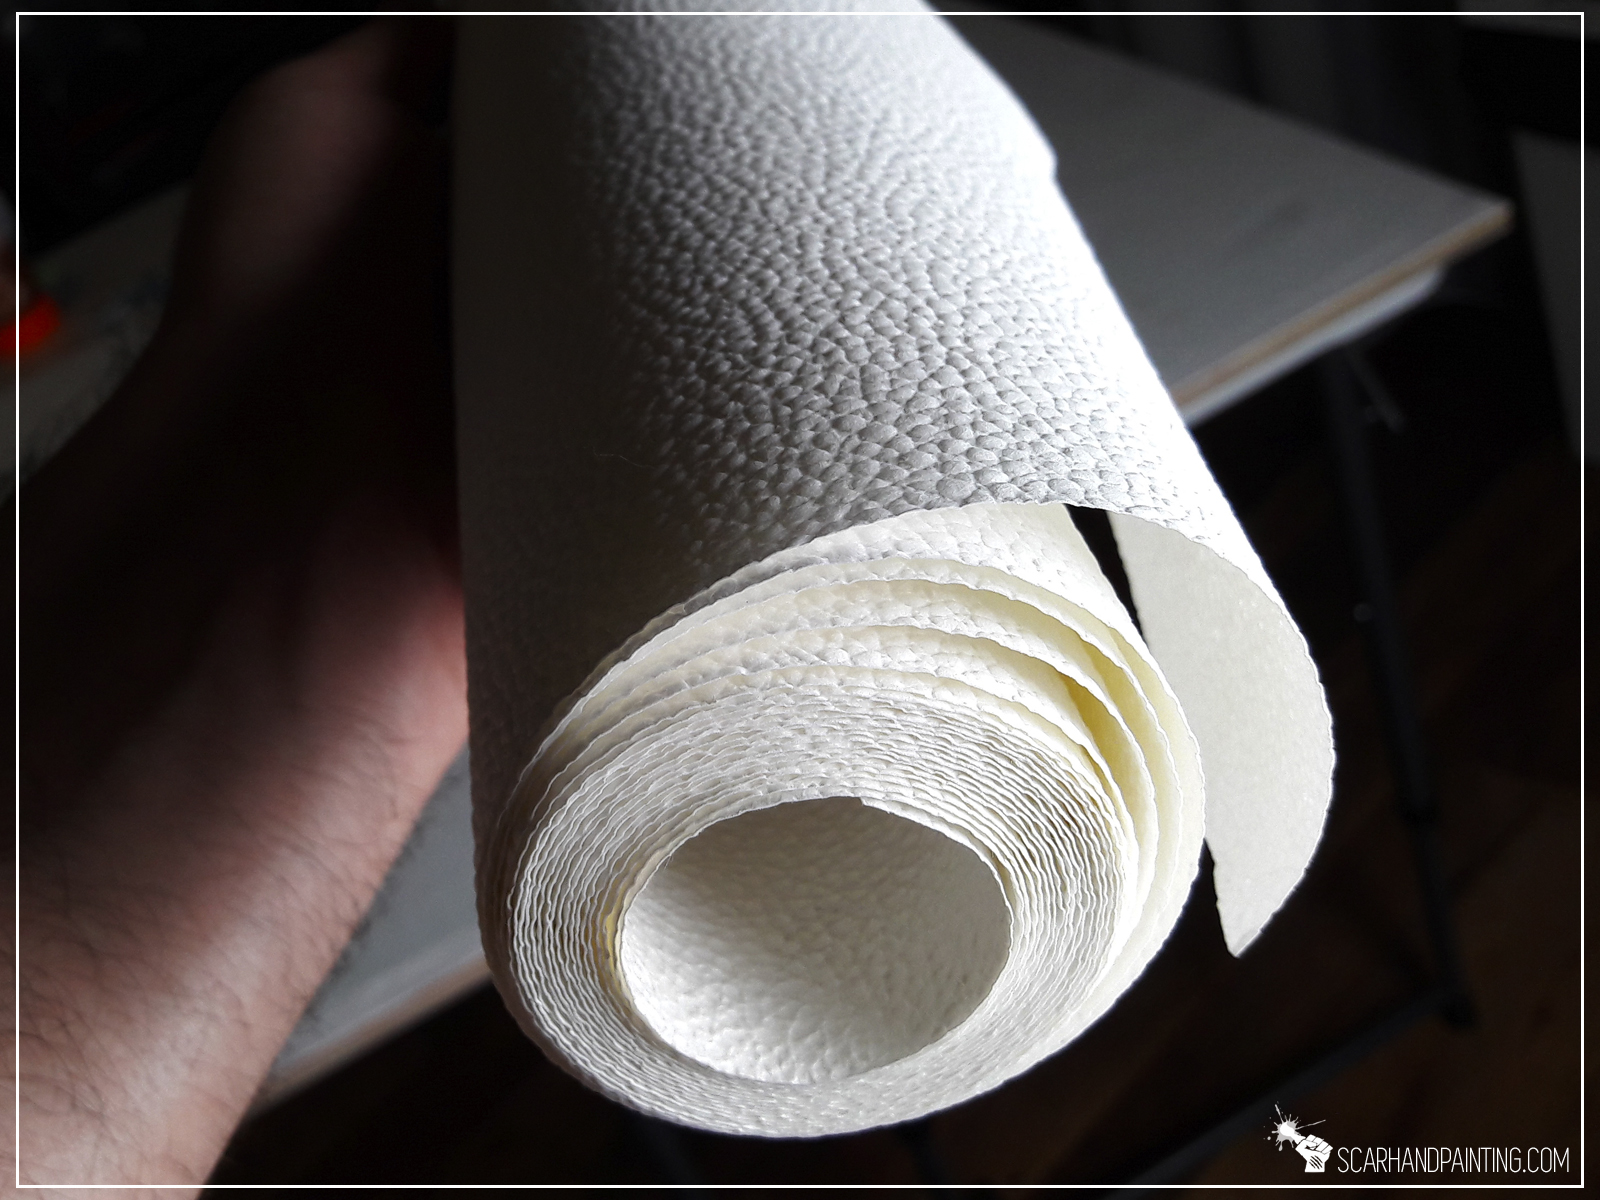
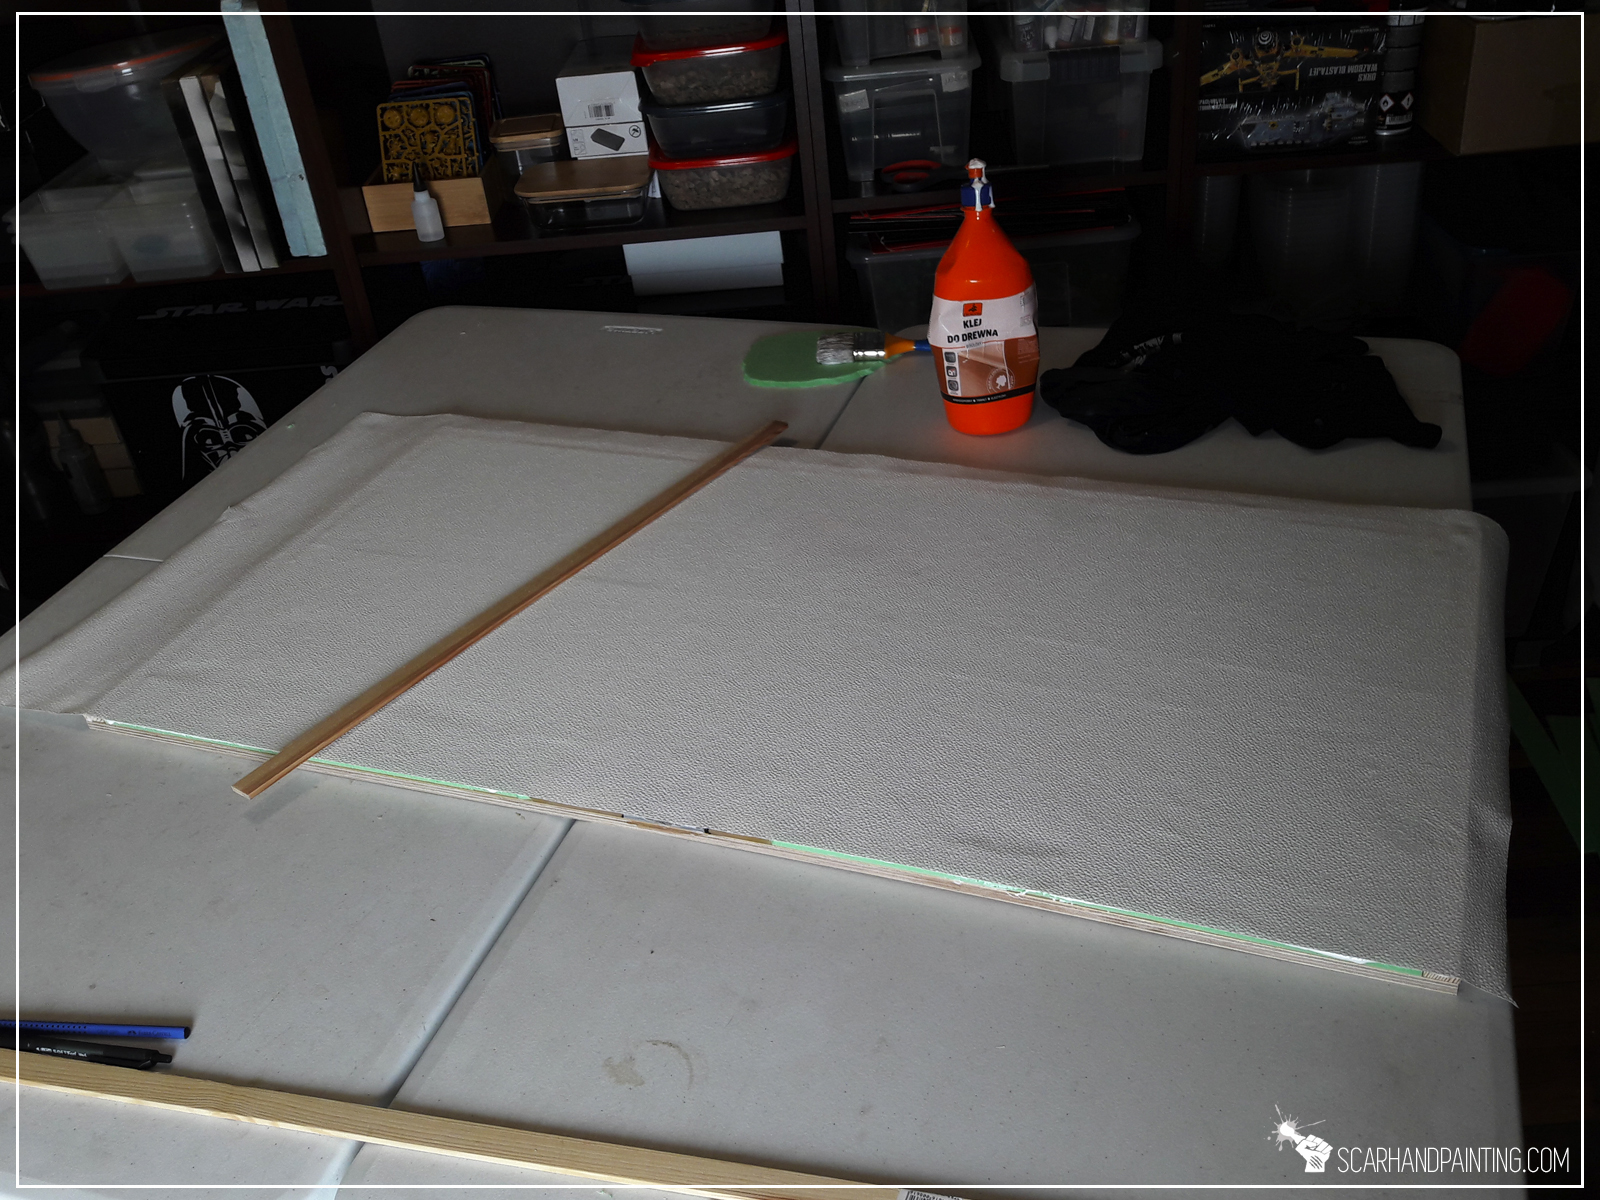
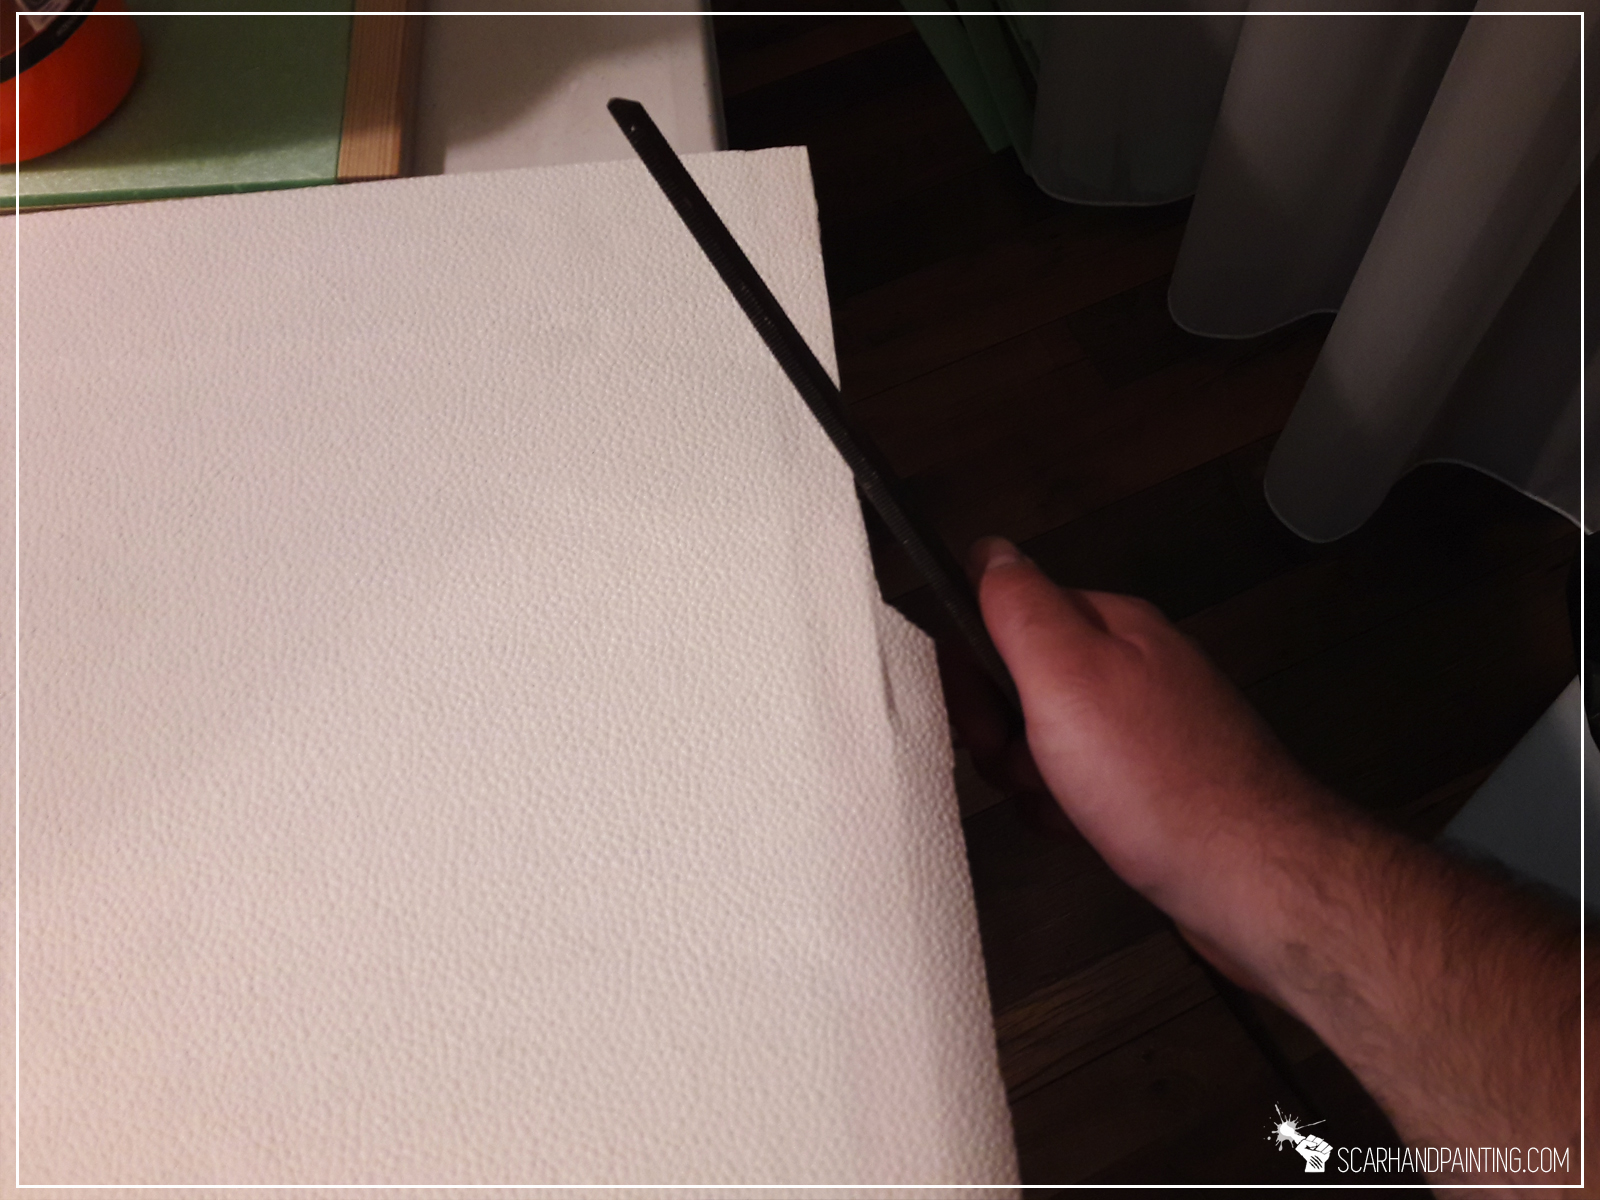
I glued the wallpaper on top of entire board. No measuring required – I removed excess wallpaper with a giant file. Fast & simple.
I uncovered all the detailed features by cutting the wallpaper around them, leaving approximately 1-2cm surplus, to then cut it into smaller strips to be glued inside the holes.

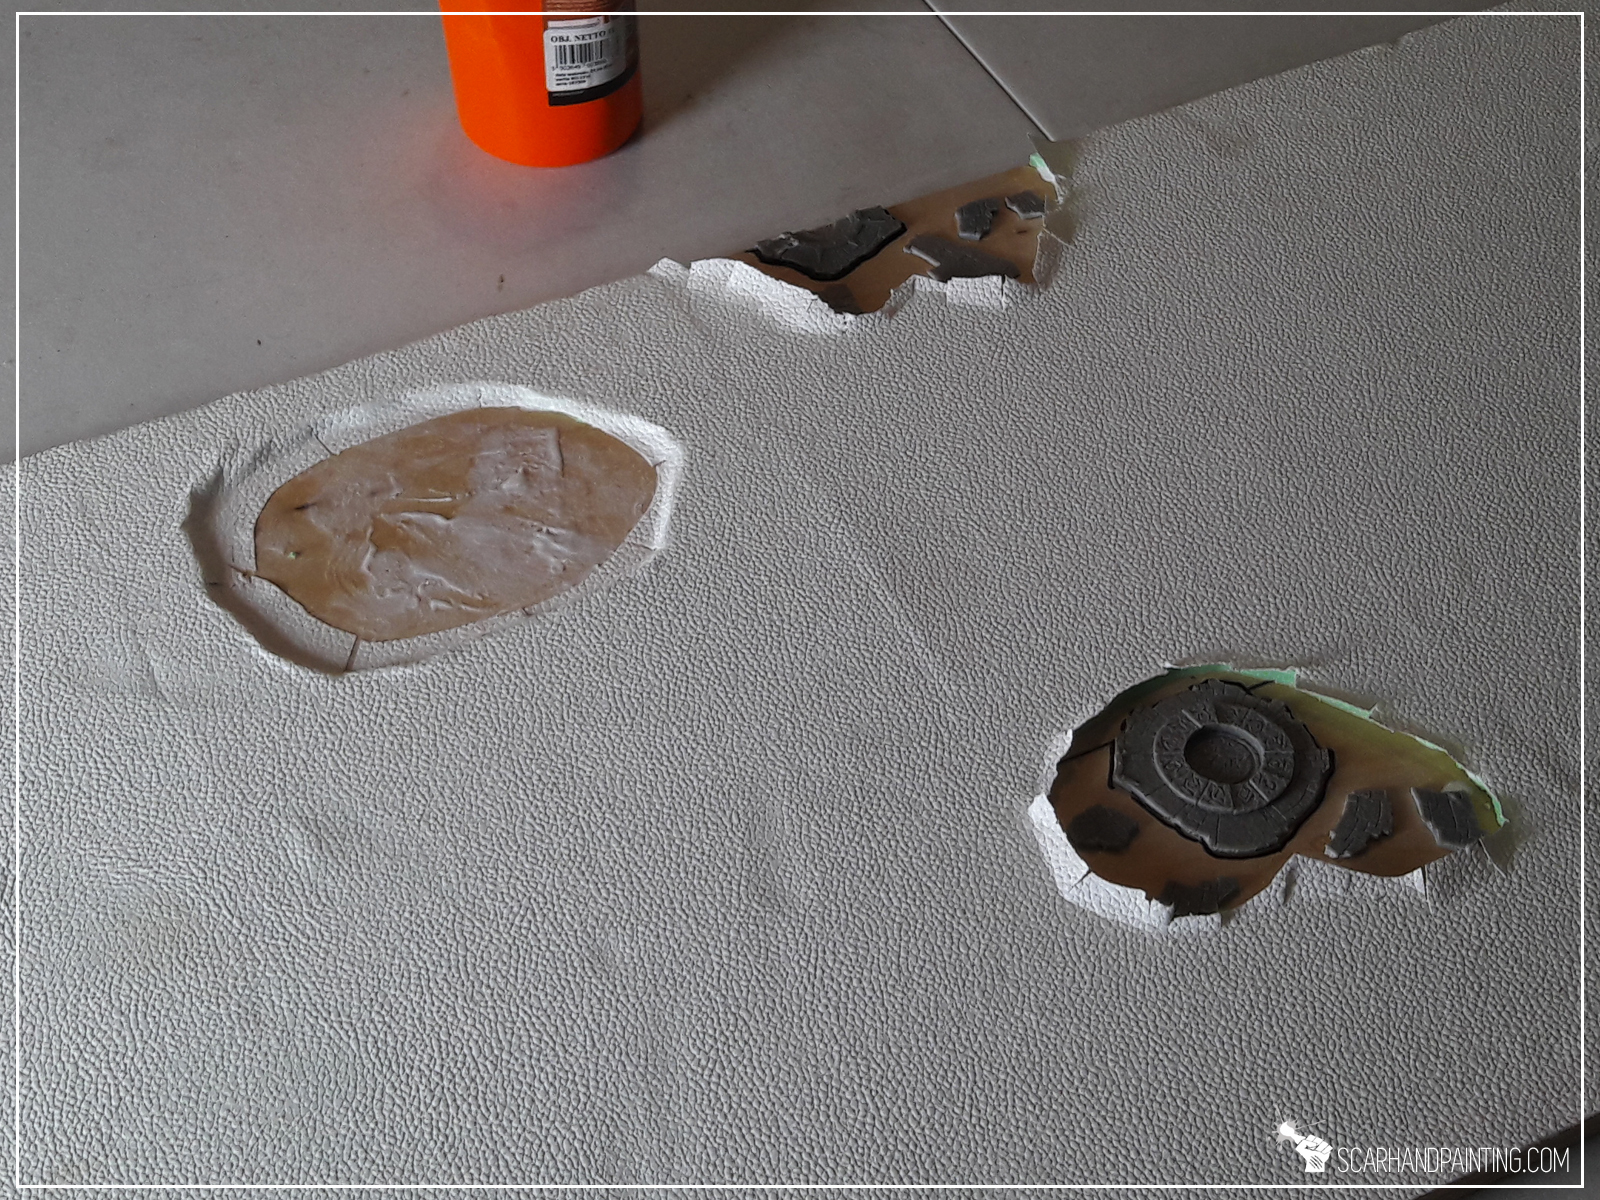

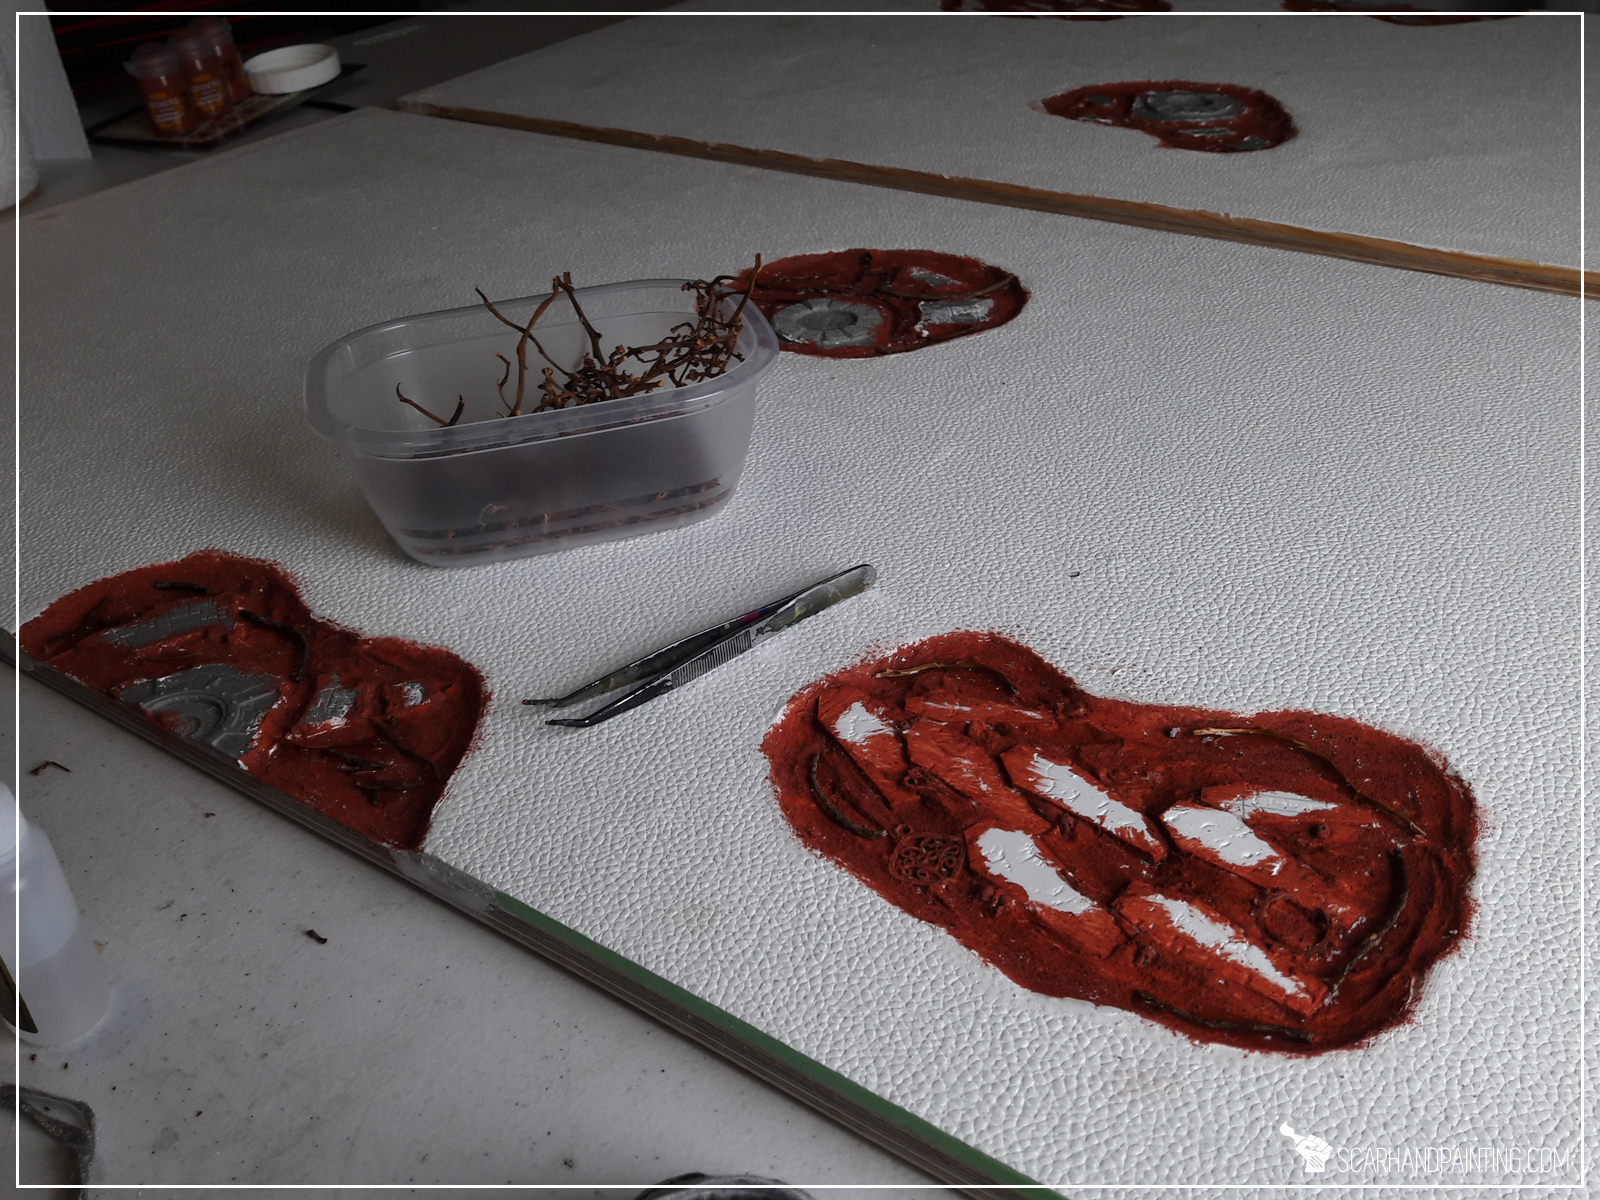
Now was the time to bring in all the coffins. These were made using 3mm thick plasticard. In projects like this I tend to save time and leave perfect measurements out. Once I measured and cut out a single coffin, I then used it as a template to cut all the rest. Fast & simple yet again.


These then got texturized using a medium sized stone. Plasticard is a durable material, but with enough force it gives in and stones are great to provide an uneven texture.


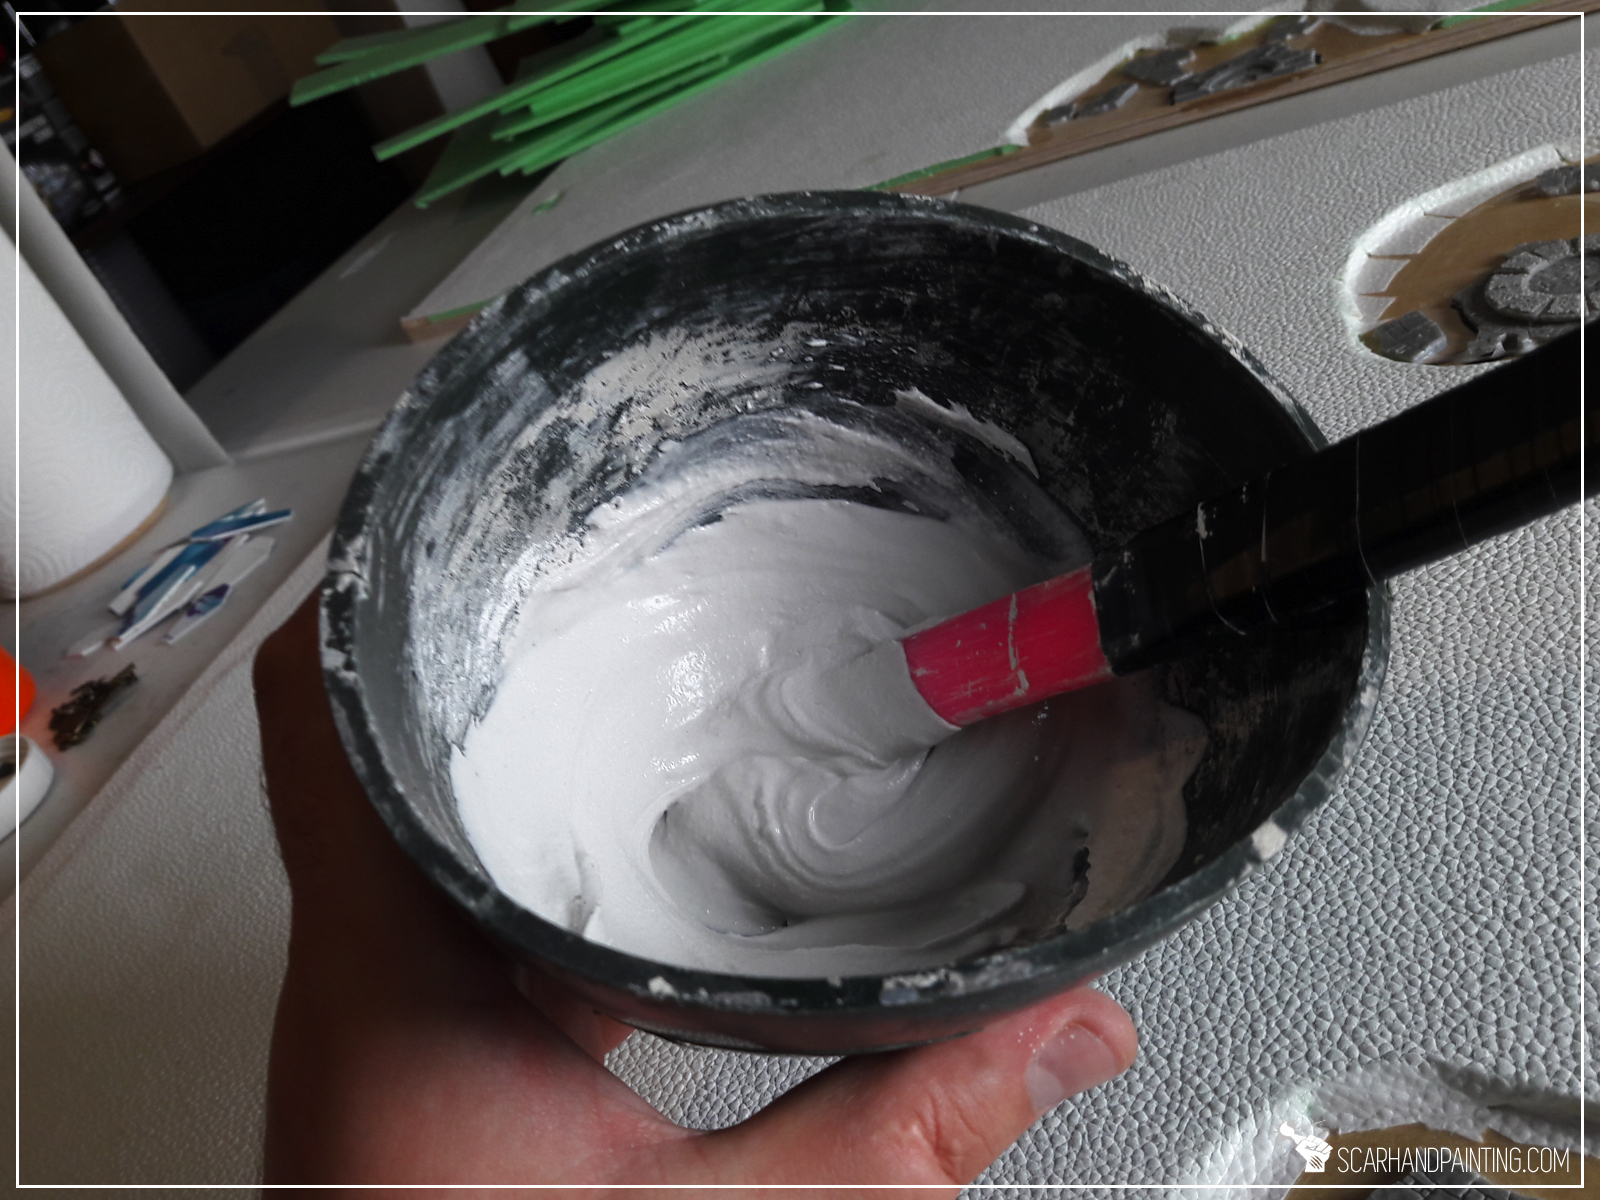
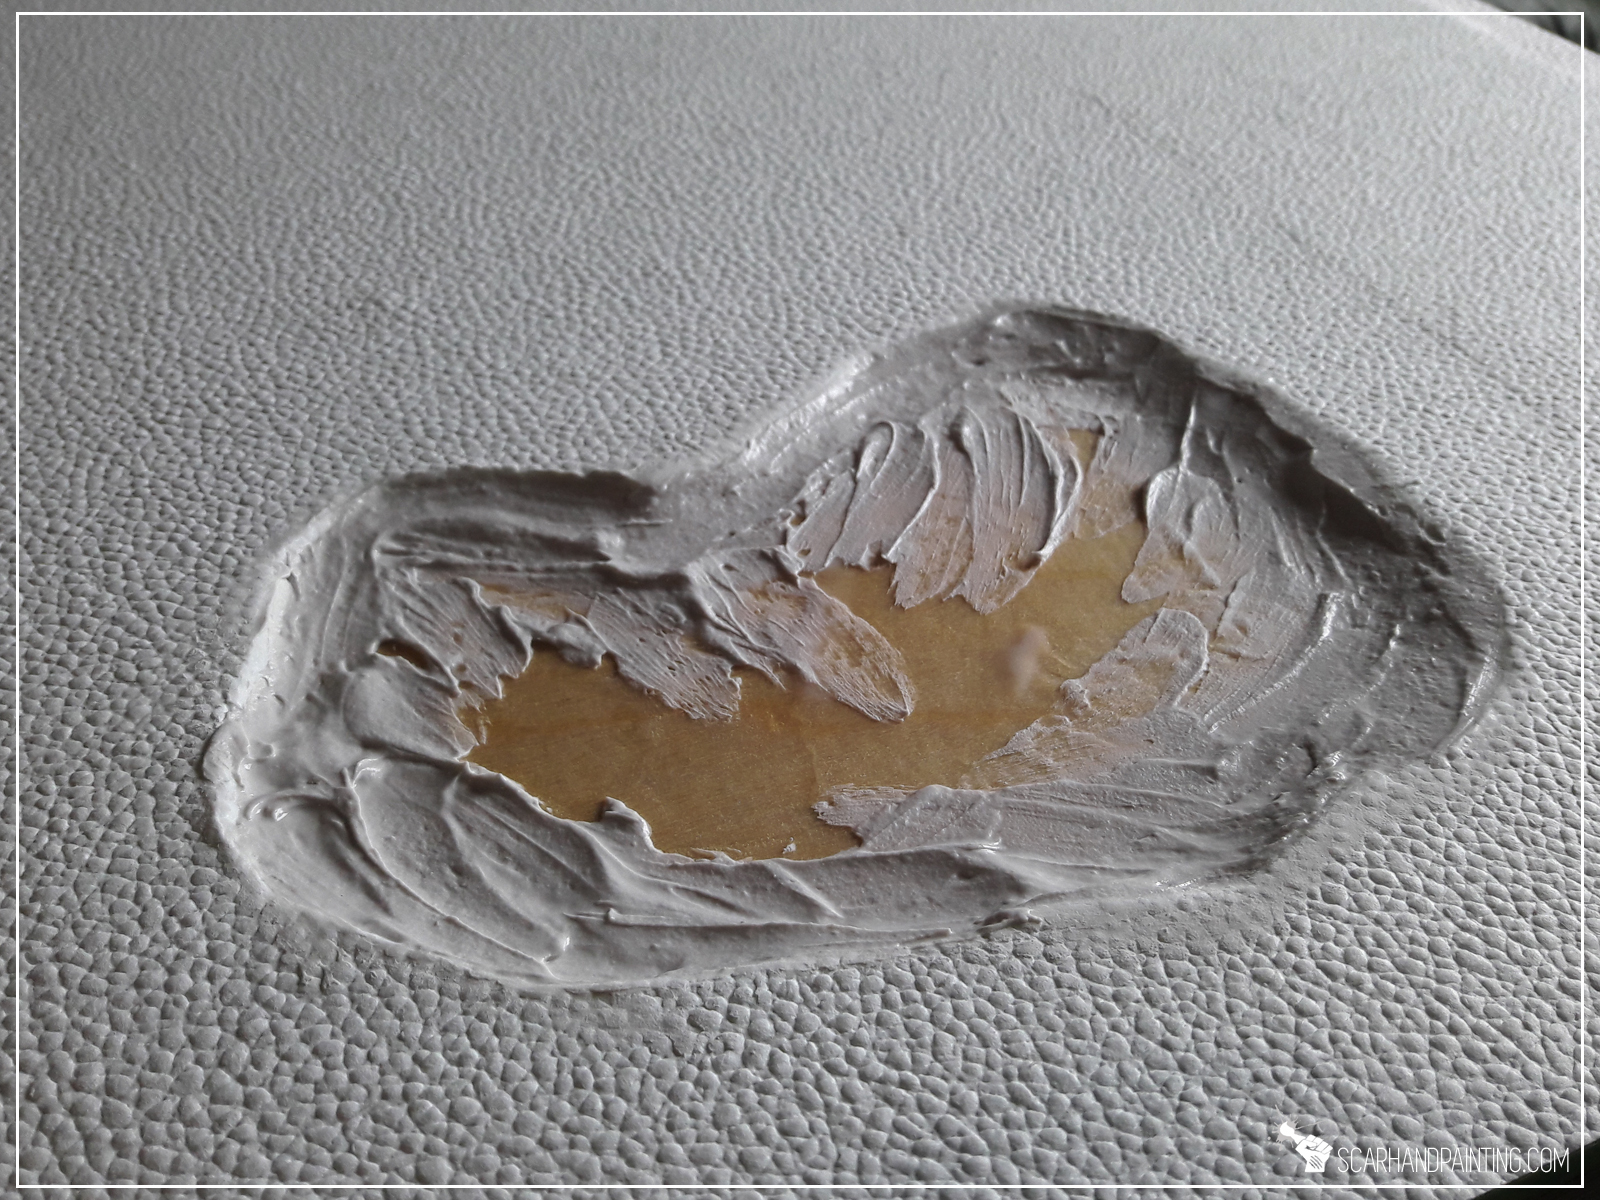
Next step was to insert the coffins and some additional detail elements into the holes. I used white plaster to partially fill the holes, then arranged all the detail inside.
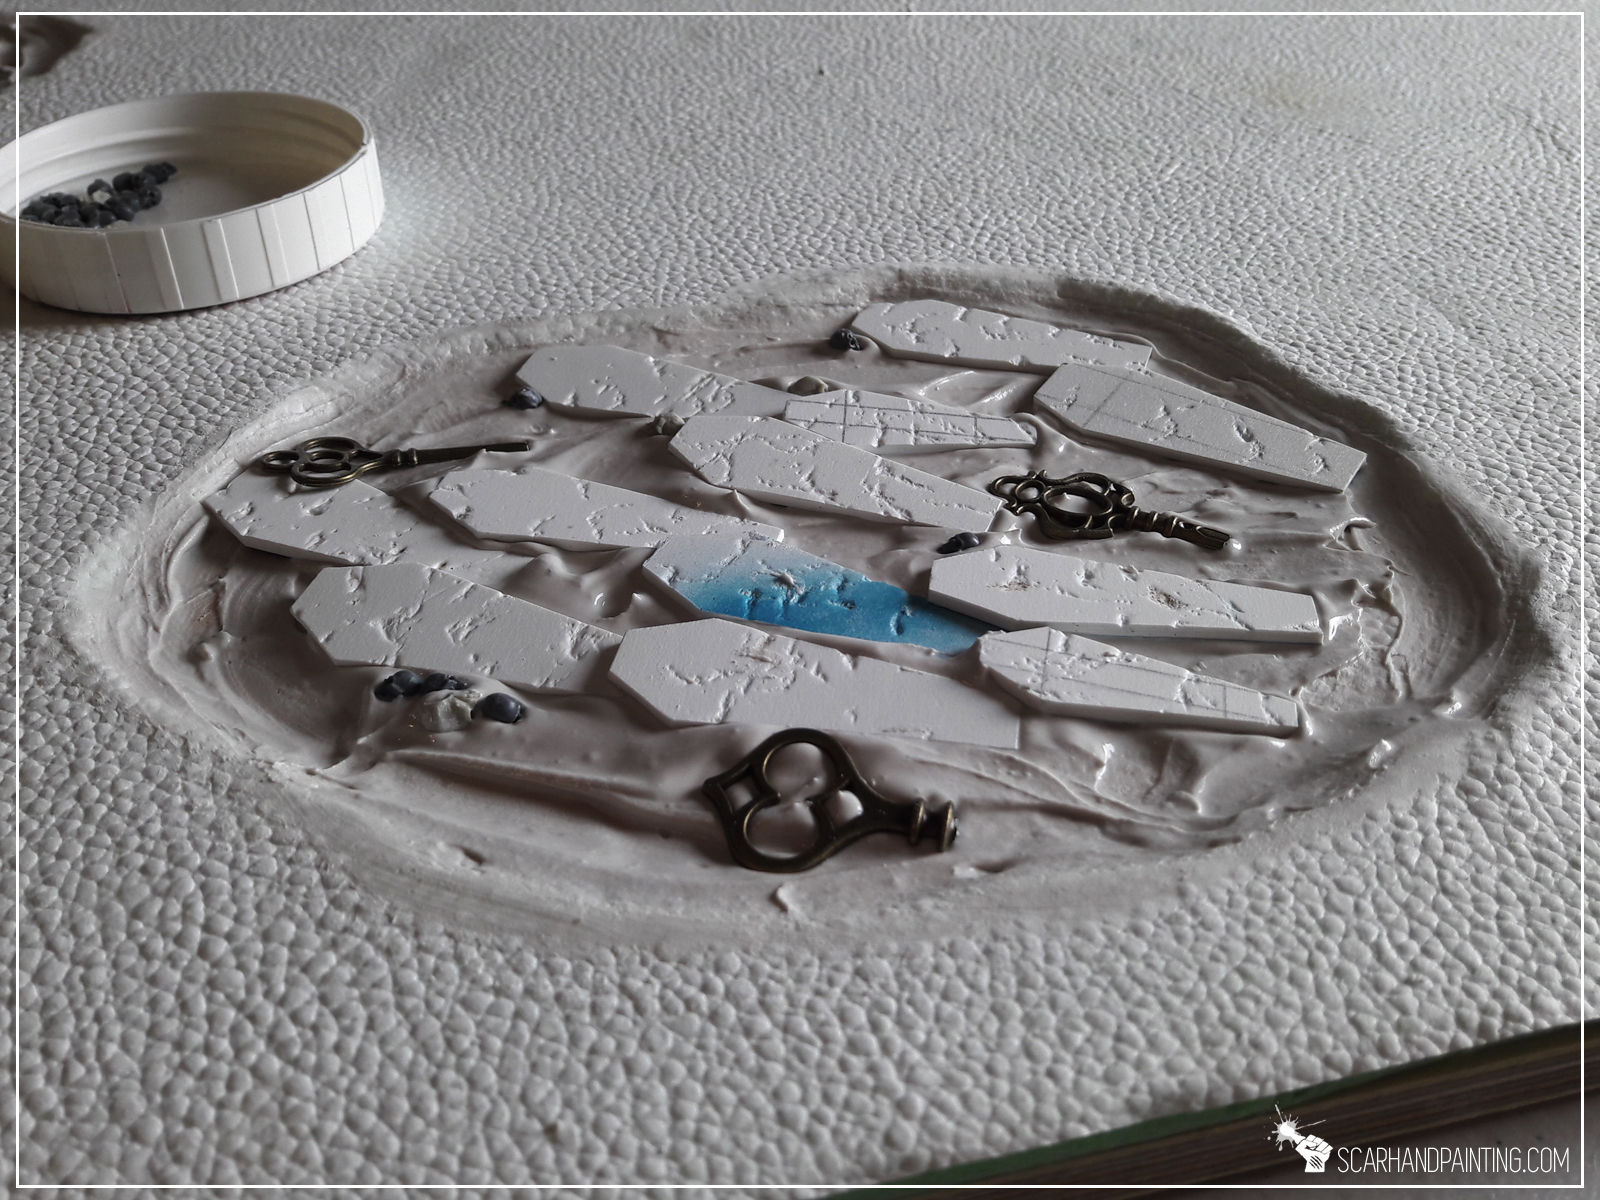
With all the features arranged to my liking I textured the insides of the holes with Games Workshop Martian Ironcrust texture paint. Once dried I placed some dry twigs here and there and sealed everything with PVA glue. This last step was very important to ensure resin stays in once used.

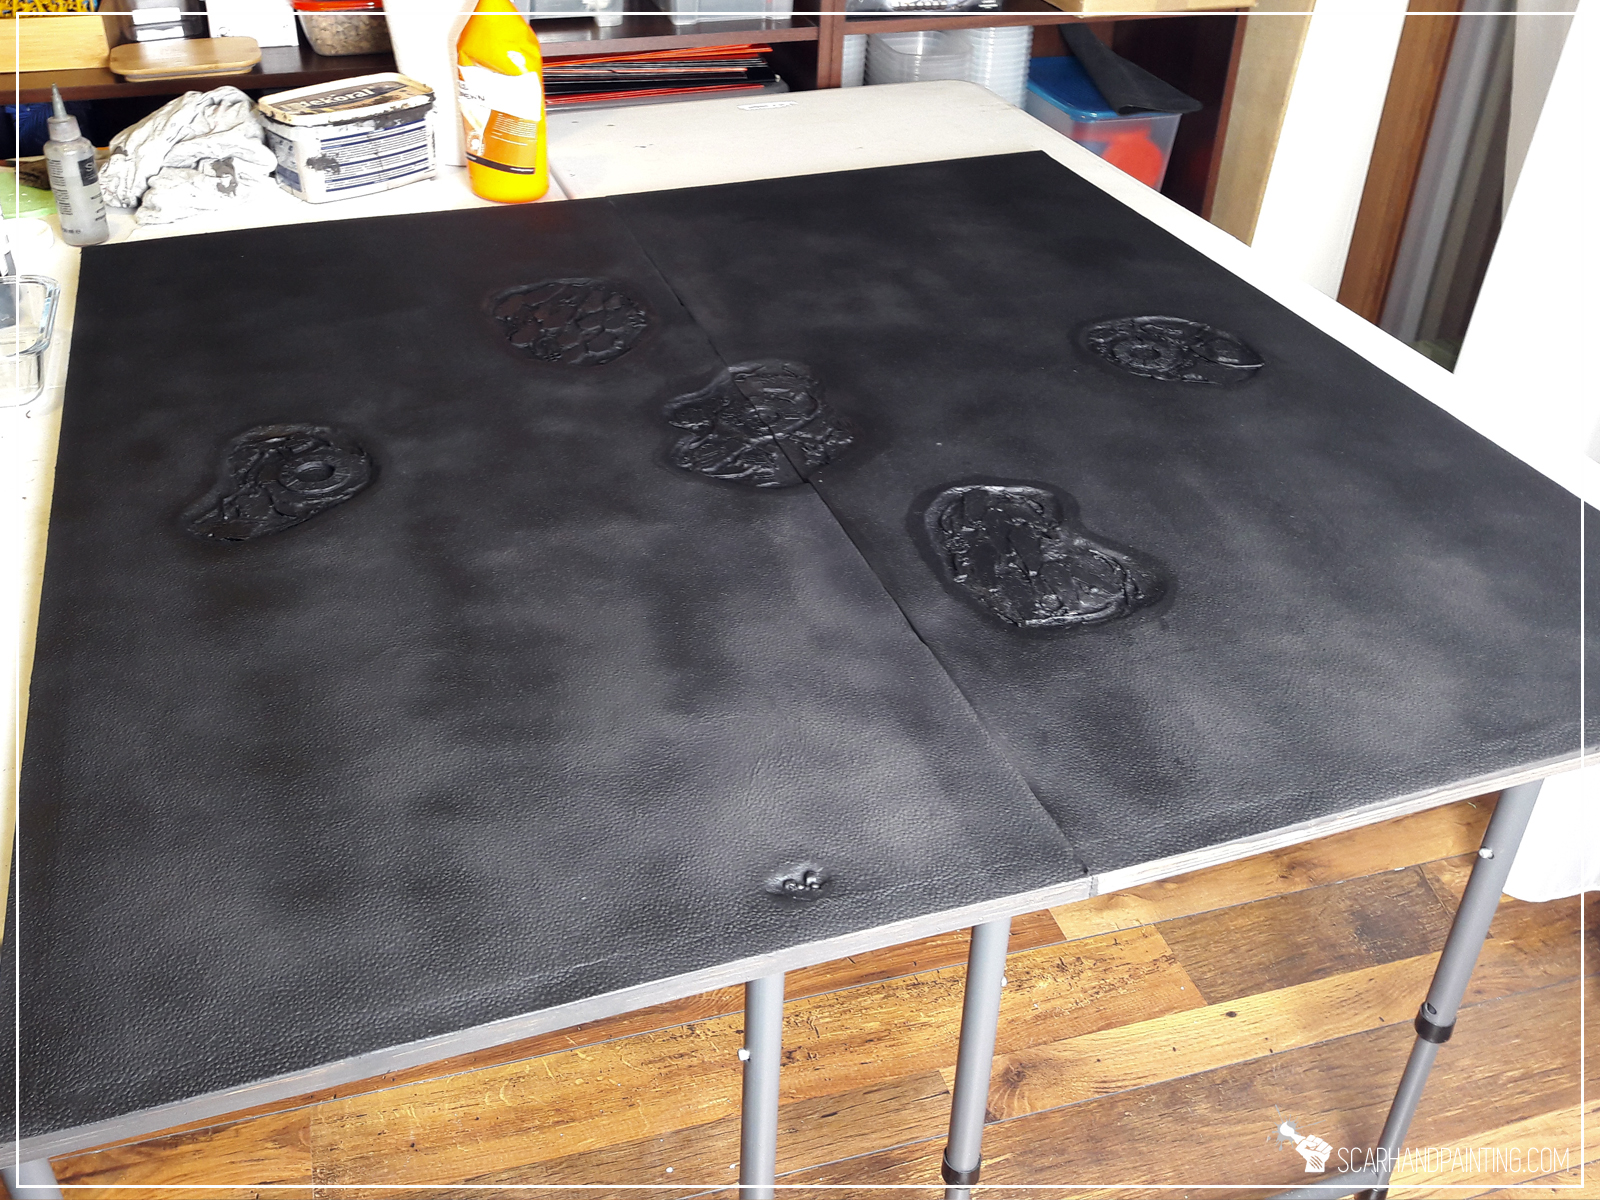
Everything modeled it was time to undercoat entire board with trusted acrylic black paint. Two thin layers of a black wall paint followed by a spray coat of Chaos Black.
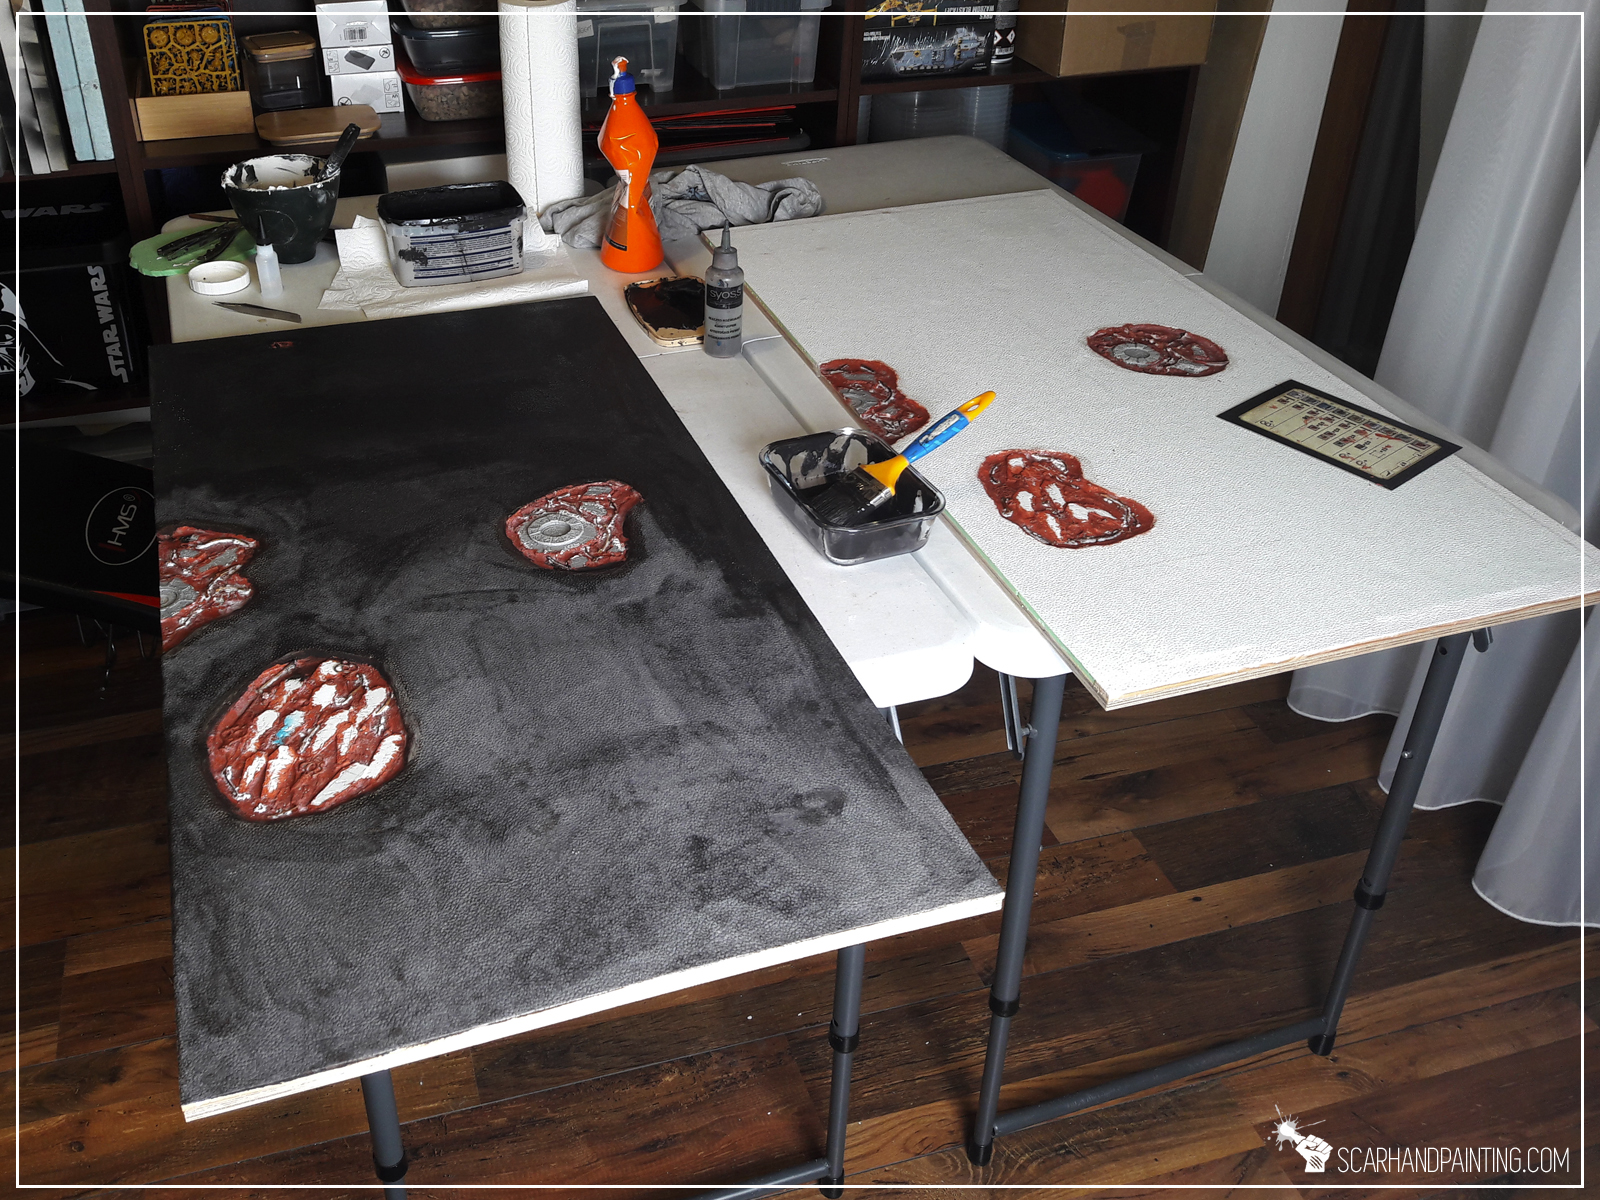
This project was planned to last approximately 48hrs, but working with clear resin can sometimes lead to unexpected (and messy) complications. More than a week into the project and some of the resin didn’t coagulate properly. I decided to scrape it off and apply another layer. This is also why I decided to divide this article into two. Undercoat seems like a great place to finish part one.
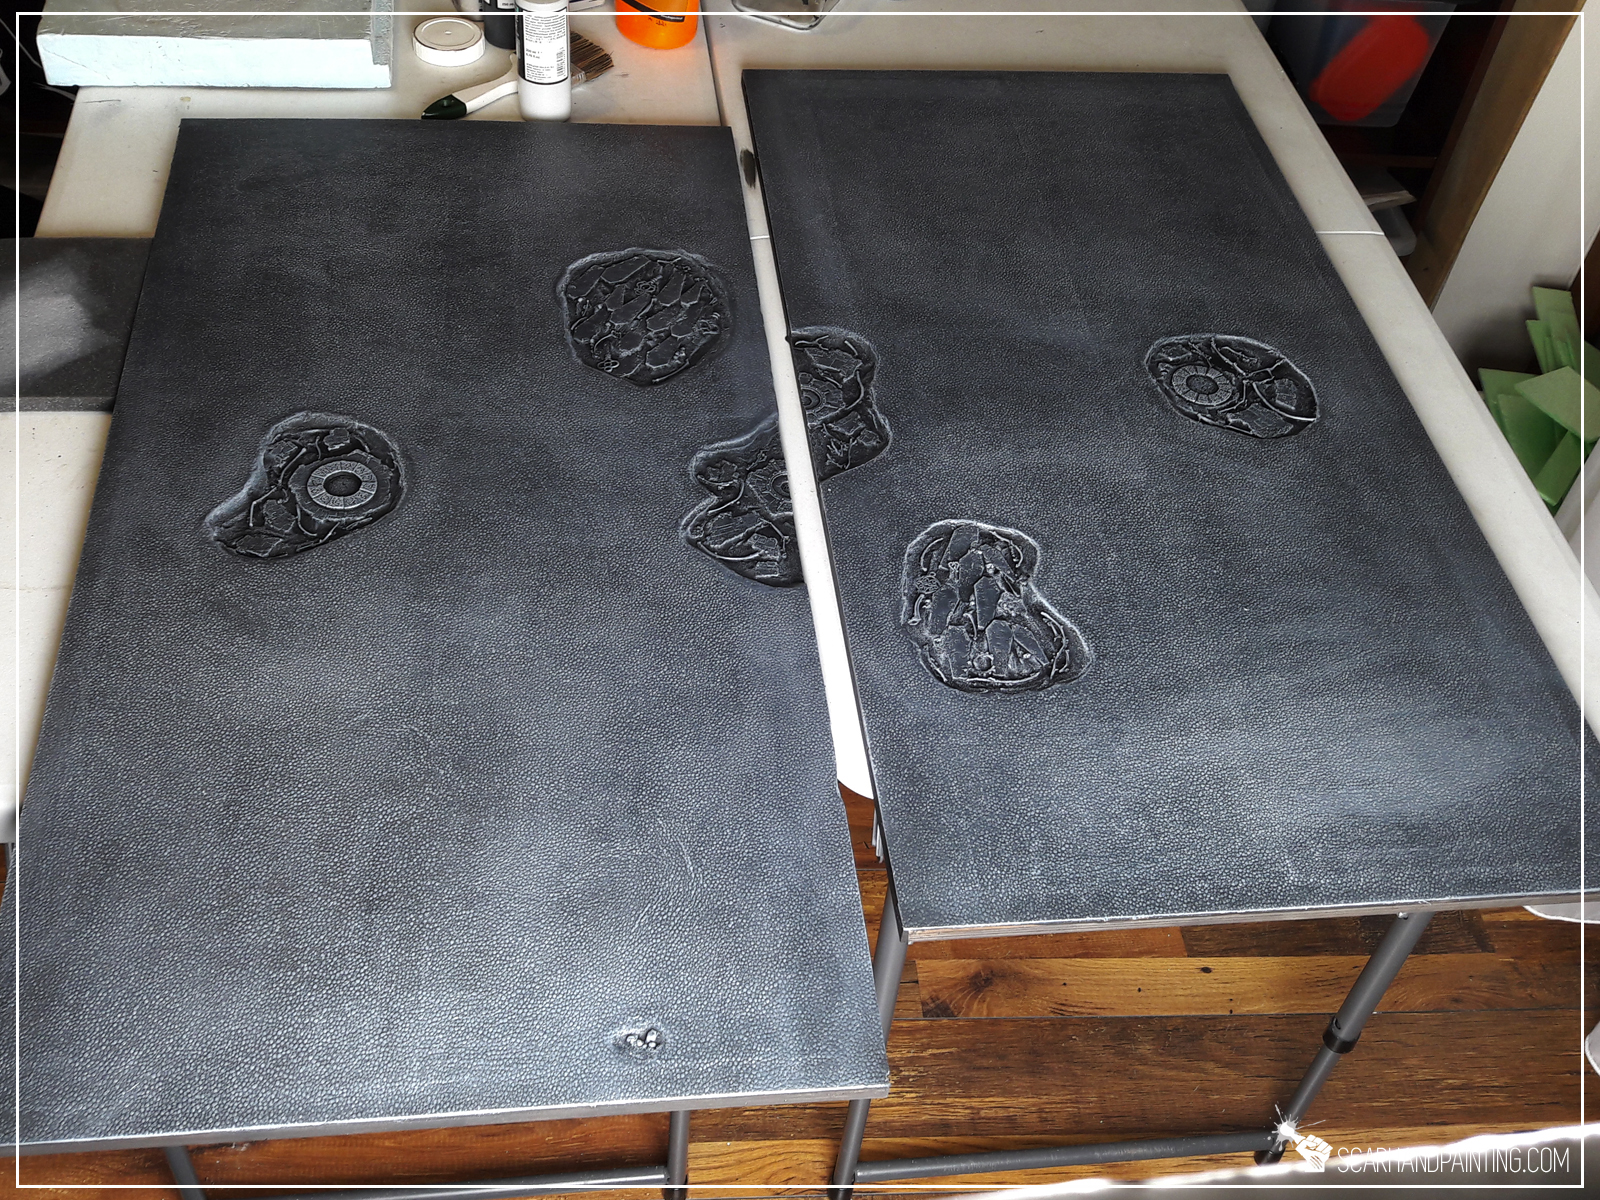
If you like the article and find it interesting – be sure to let me know either in the comments or at my Facebook page. See you in the next article, hopefully soon. Here’s a little sneak peek:

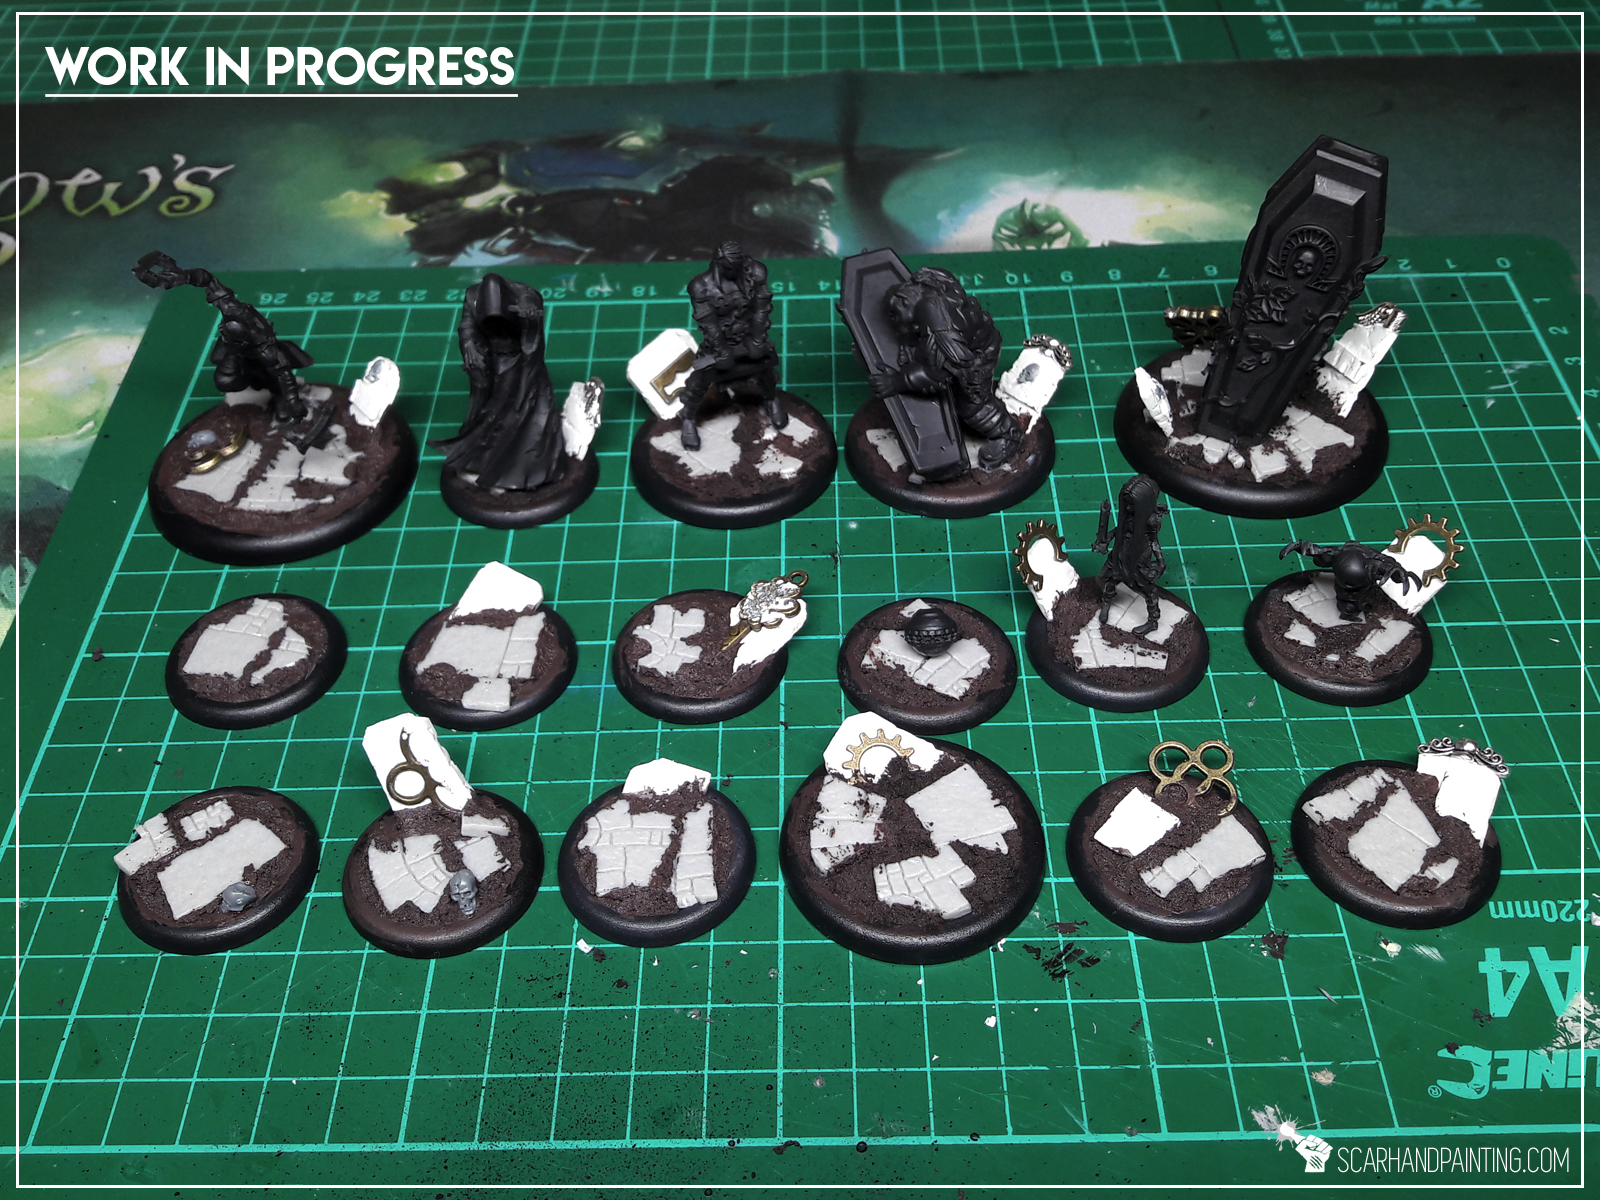
In this step-by-step tutorial I’m going to show you how to create gravestones. Please treat this article more like an inspiration, rather than tutorial.

I recently started collecting Guildball and decided to create graveyard themed bases for my Mortician’s. In the miniatures world gravestones are a rare bitz to come across. Sure there are some graveyard themed miniatures sets but getting them just for the sake of gravestones seem like a ludicrous idea – at least for me. Cuz why not just make your own? It is pretty simple you know…
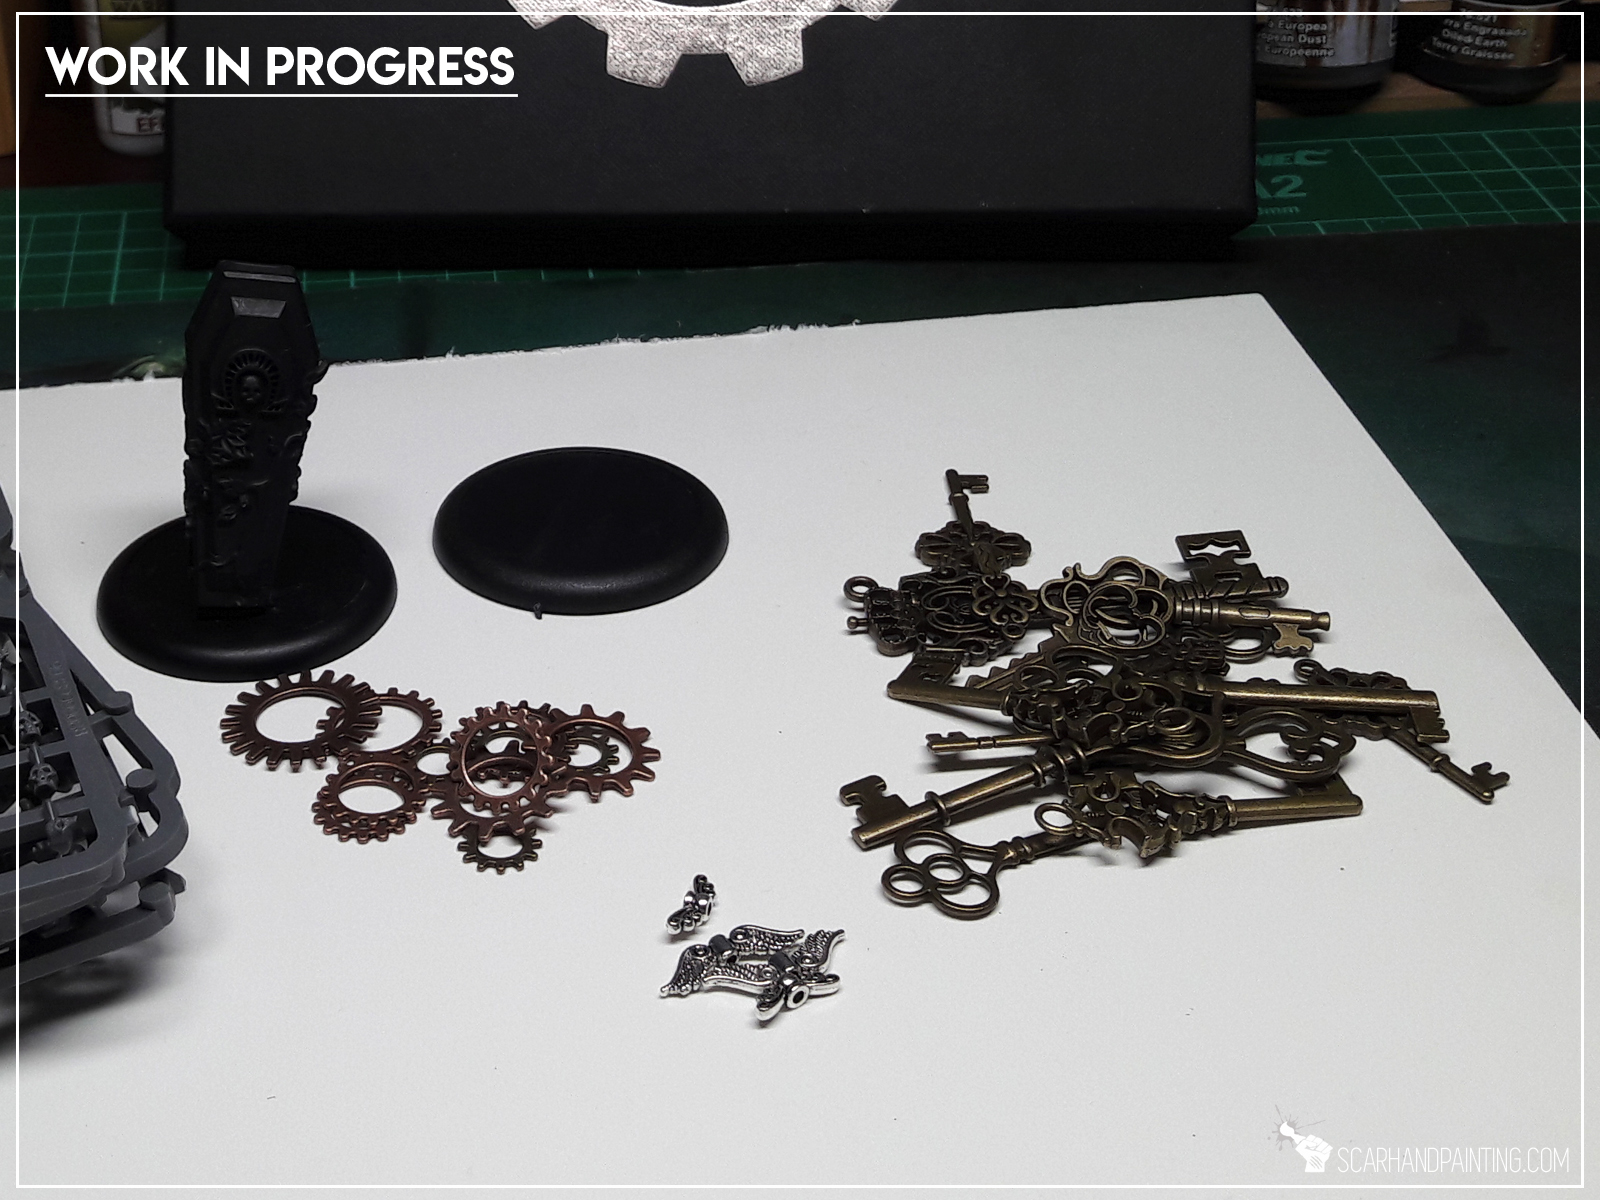
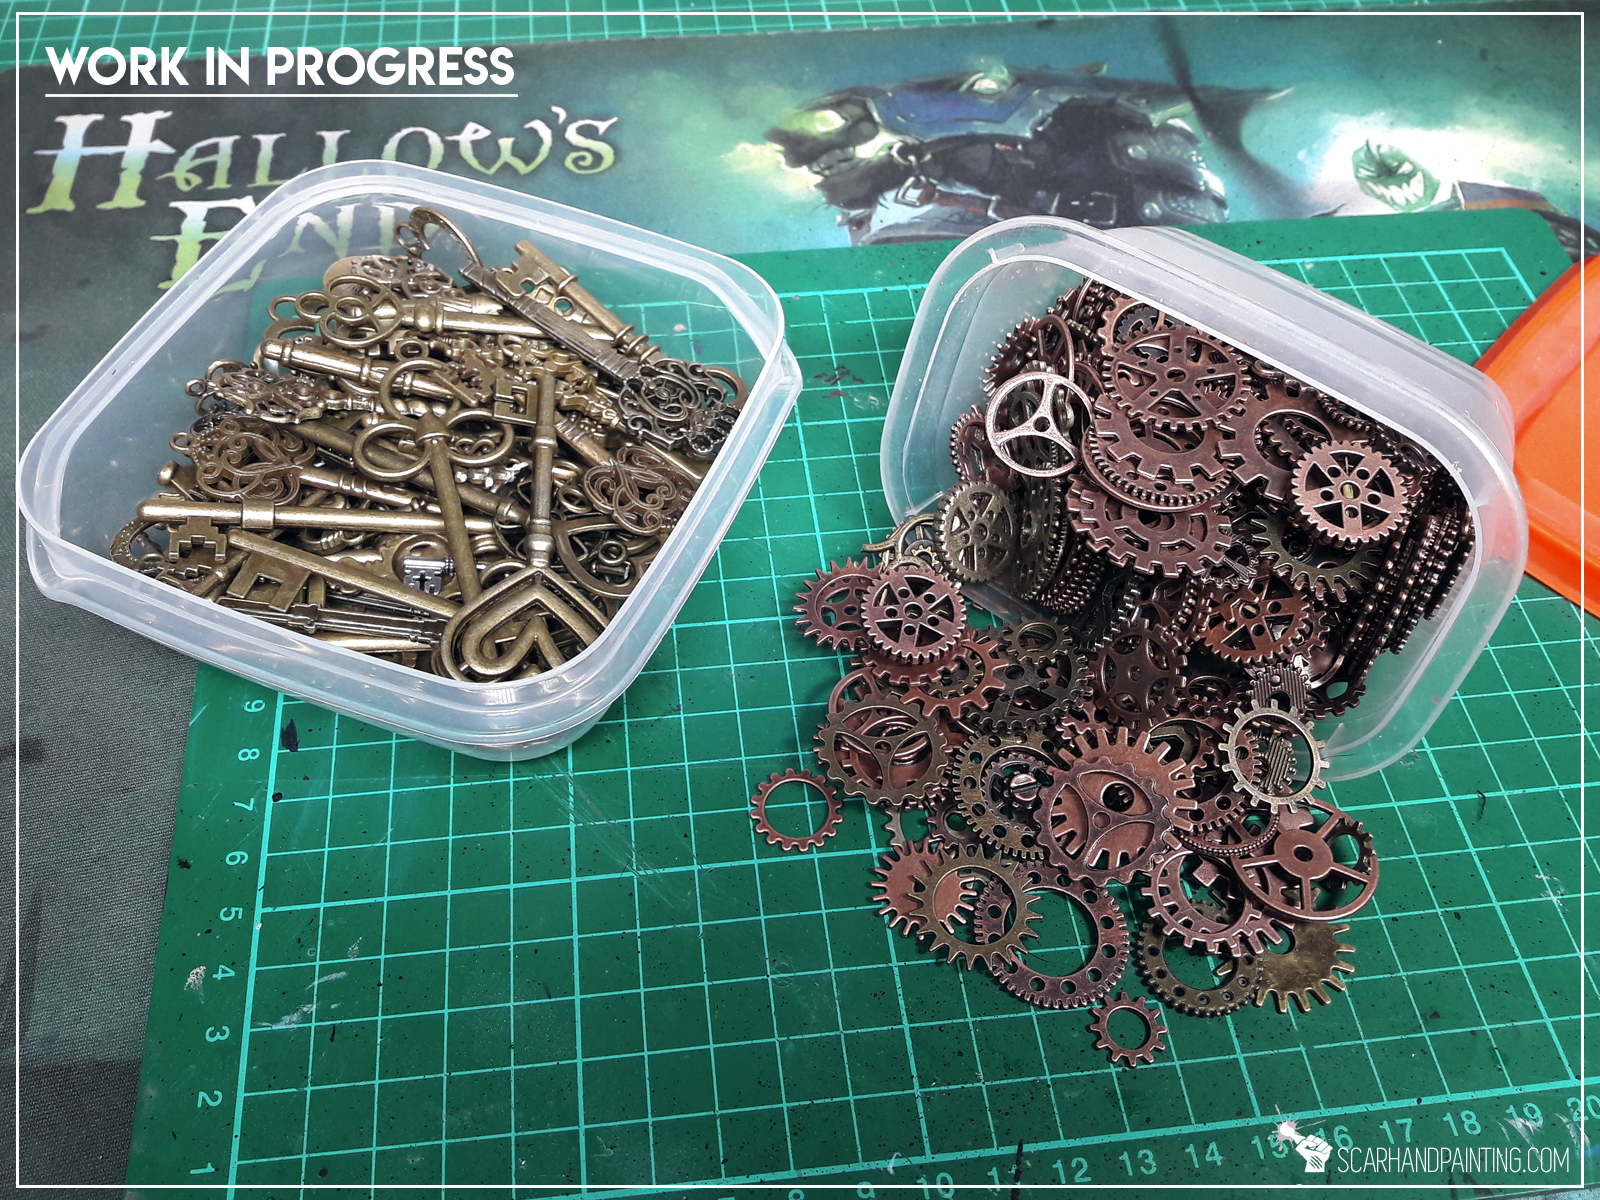
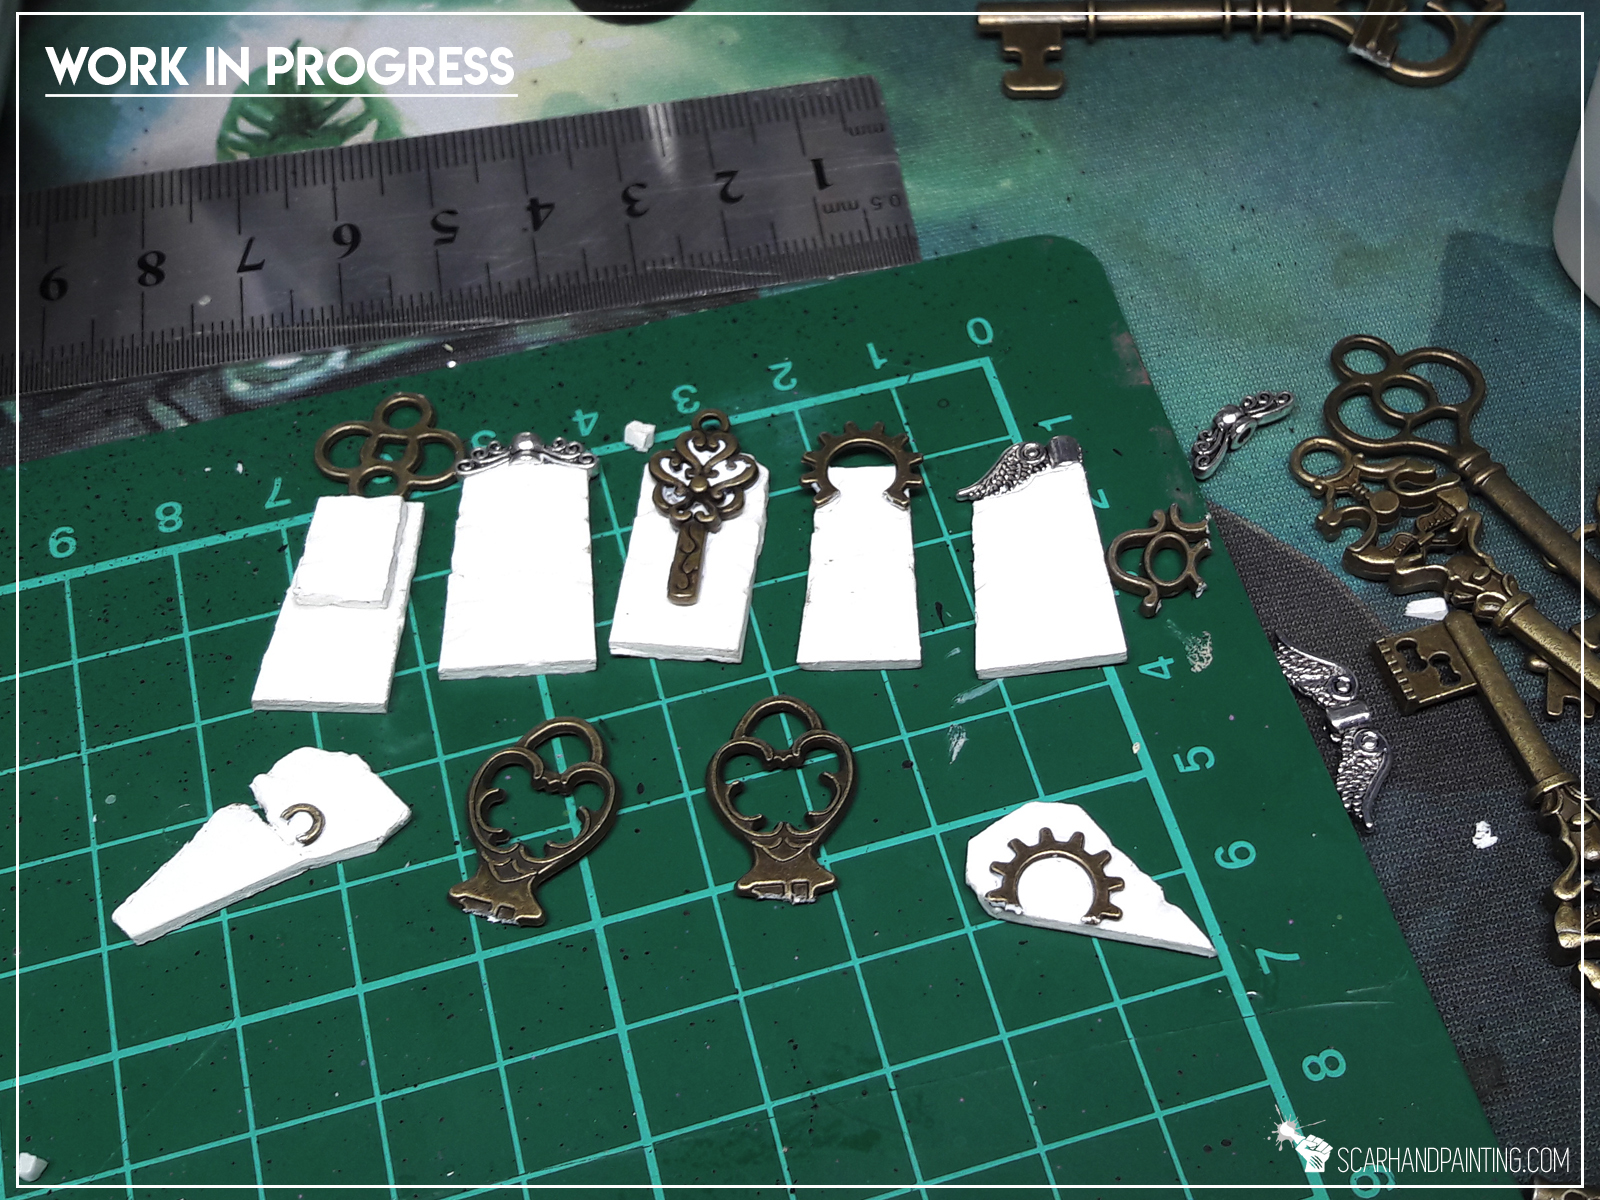
Before we get into it, let’s talk all the charms, decorative beads and bronze gears. Ever heard of Aliexpress? Just search for “decorative charms bronze” and prepare yourself for a mind blowing experience – cause miniatures modelling would never be the same from now on…
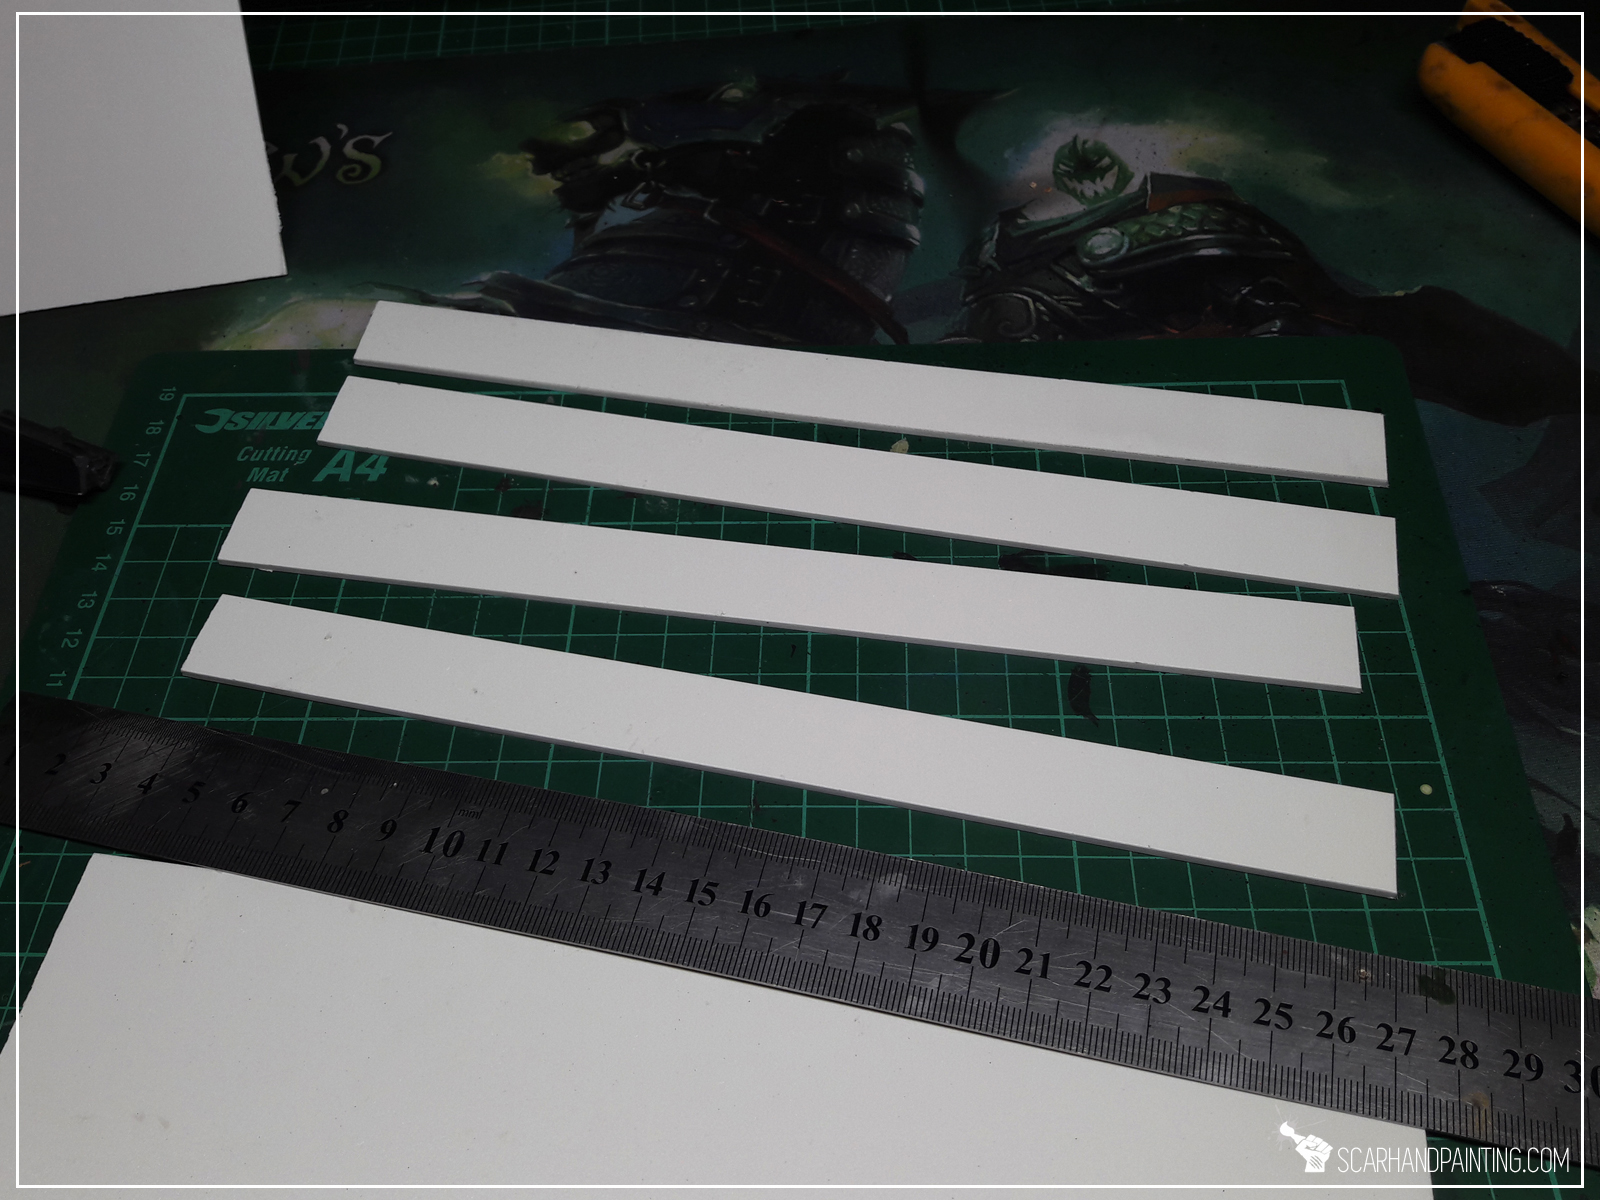
Step one: Cutting plasticard
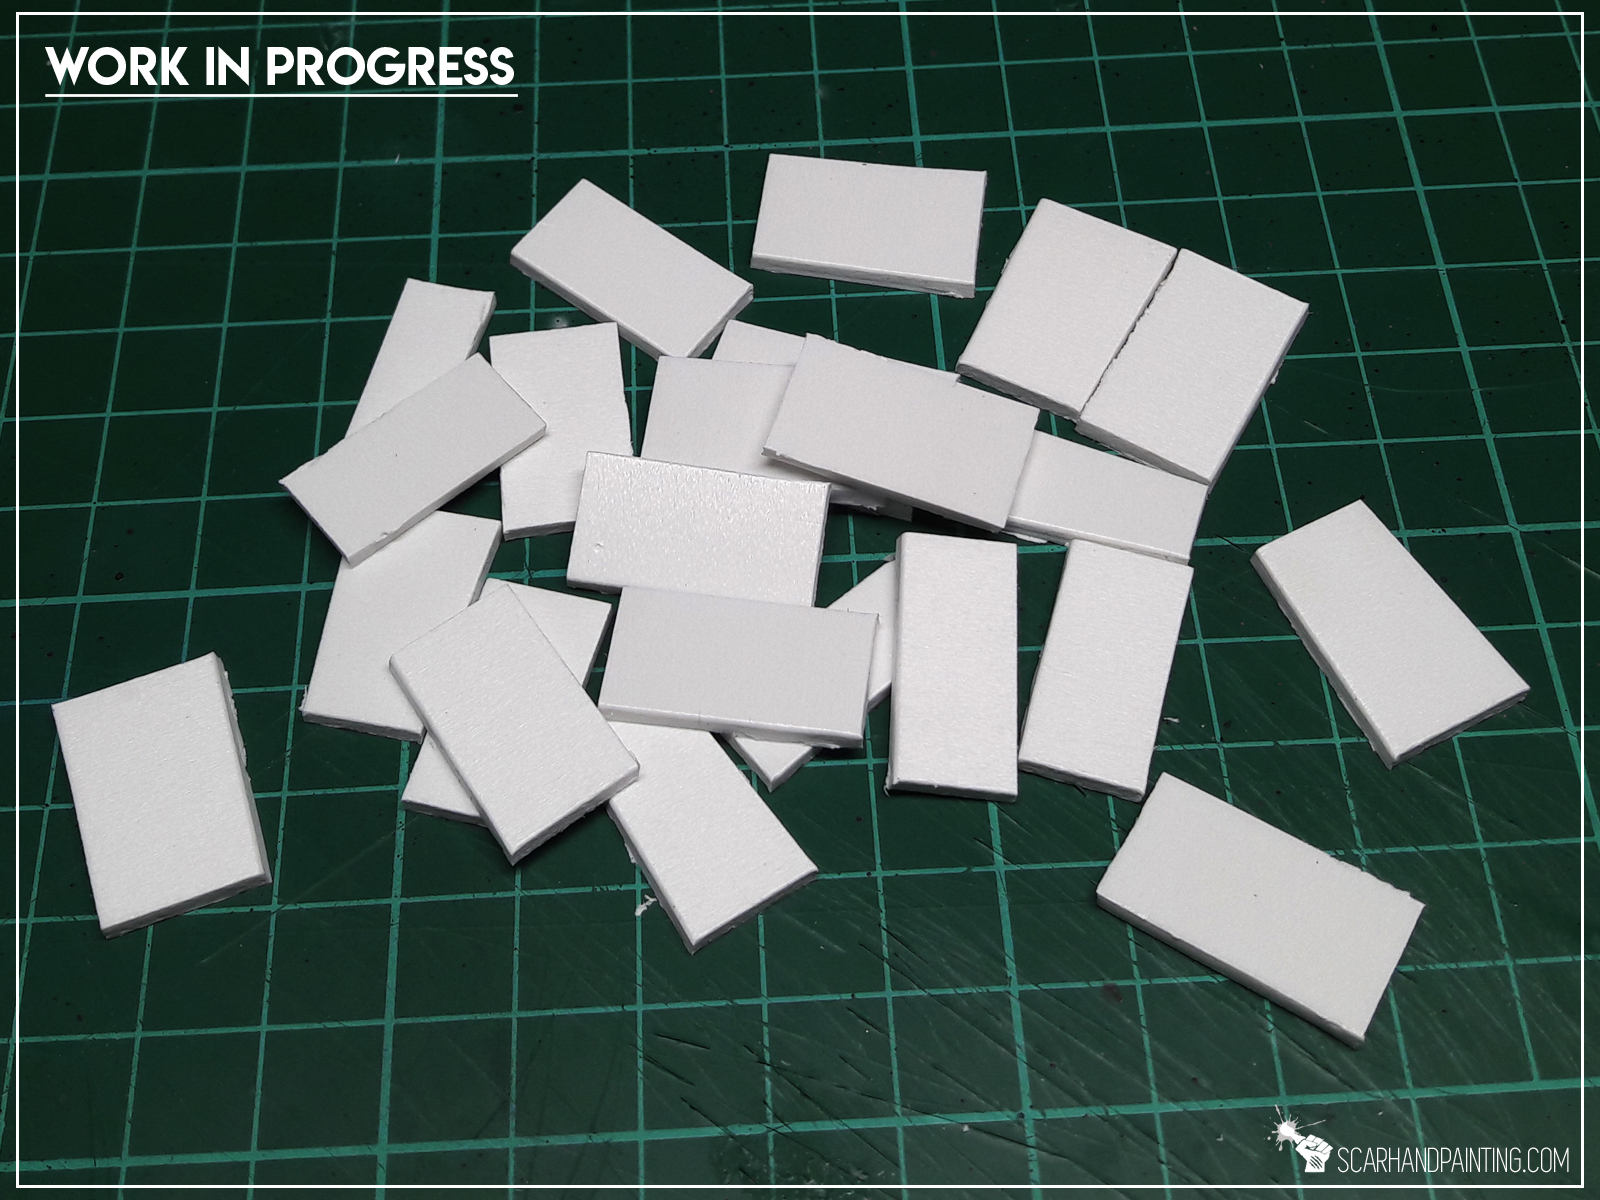
Using a hobby knife I cut 2mm plasticard into pieces of more or less gravestone size and shape.
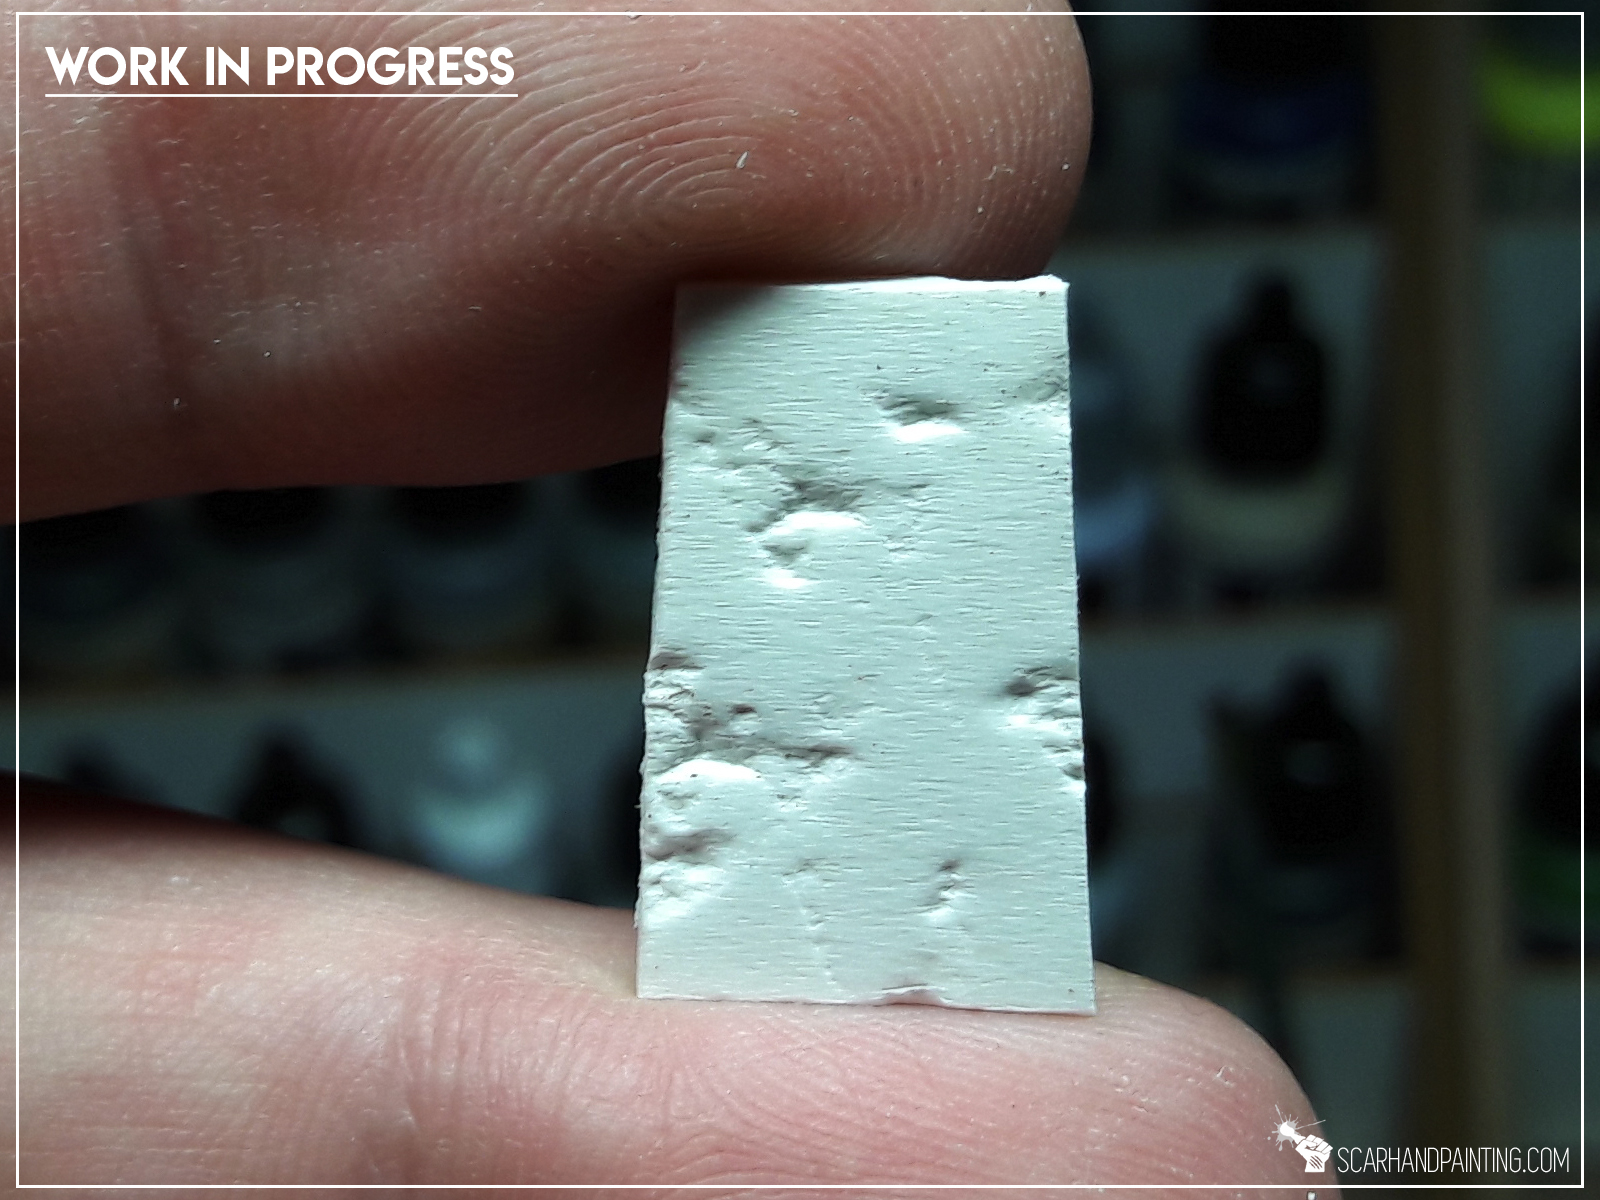
Step two: Applying texture
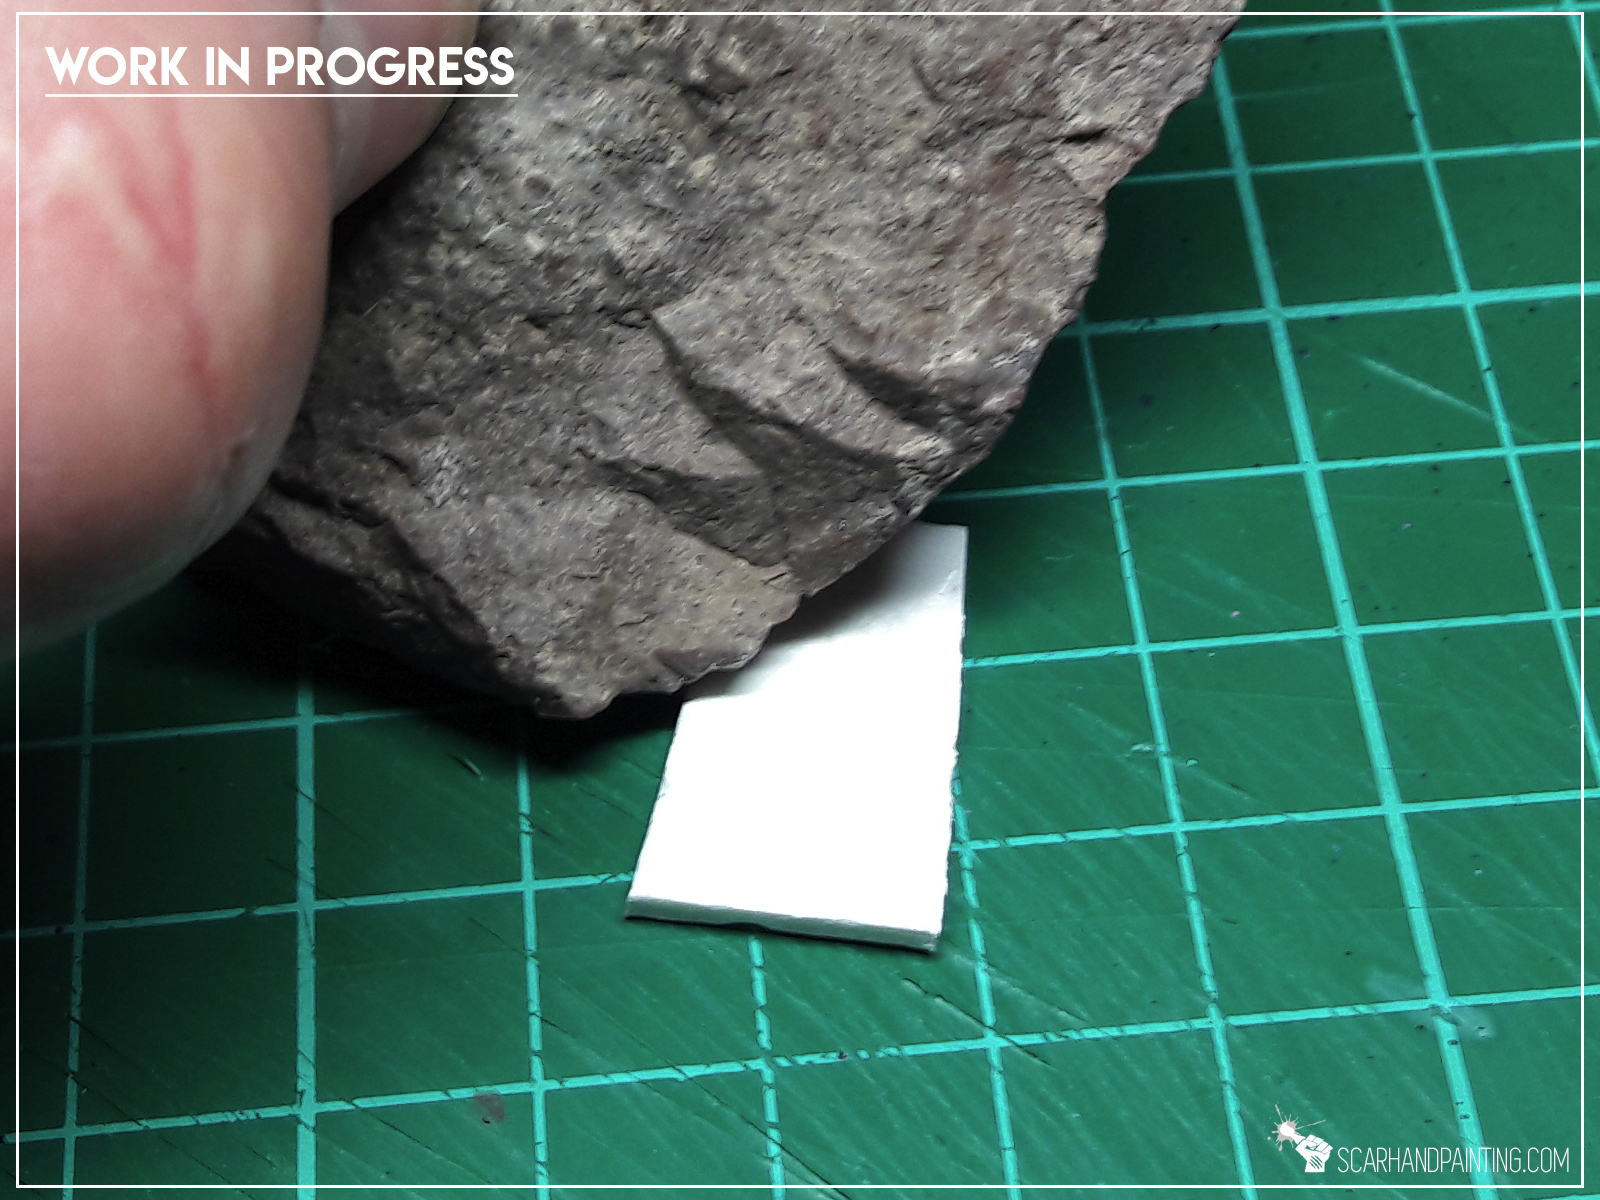
I then “textured” each gravestone with a rock. I know how it sounds, but yeah – I simply rock’n’rolled on top of the plasticard to create an uneven texture.
Step three: Detail

With basic gravestones done I added some detail. I glued plasticard and some of the bronze charms on top and on the sides.
Good to know: Bronze charms are easy to work with. They can be broken into smaller pieces with tweezers and just a bit of force.
Well… that’s all. Job done! That was easy, wasn’t it? Plus it costed barely couple bucks for an entire graveyard worth of material! Not that I need as much 😛

Now just waiting for all the Mortician’s to show up. Can’t wait to get these painted!
You find this article helpful? Don’t be a stranger and drop me a comment below!
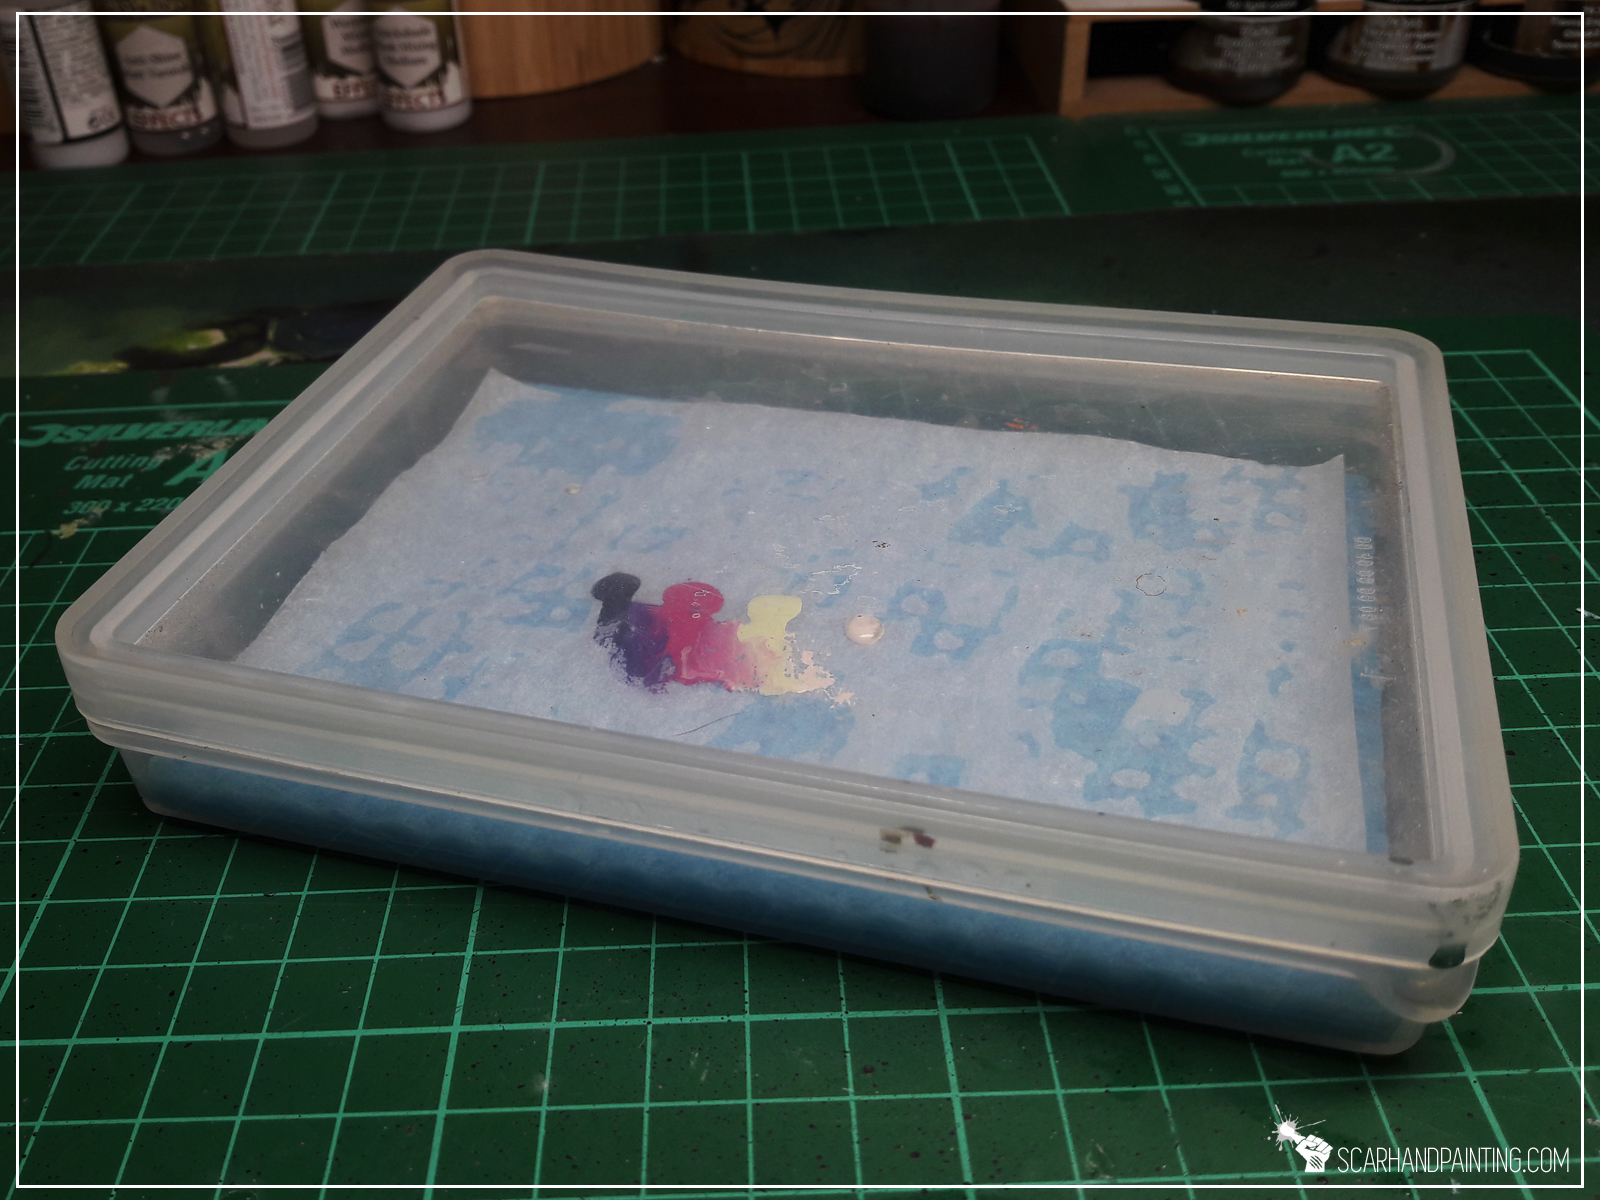
Wet Palette – a hobby tool every or at least a vast majority of pro painters has. A Wet Palette is simply a piece of parchment sitting on a wet sponge that keeps your paints thin and allows you to “save” a certain colour mix to go back to without the necessity to mix the paints anew in hope to achieve same results. In this article I will show you how to make your own Wet Palette.
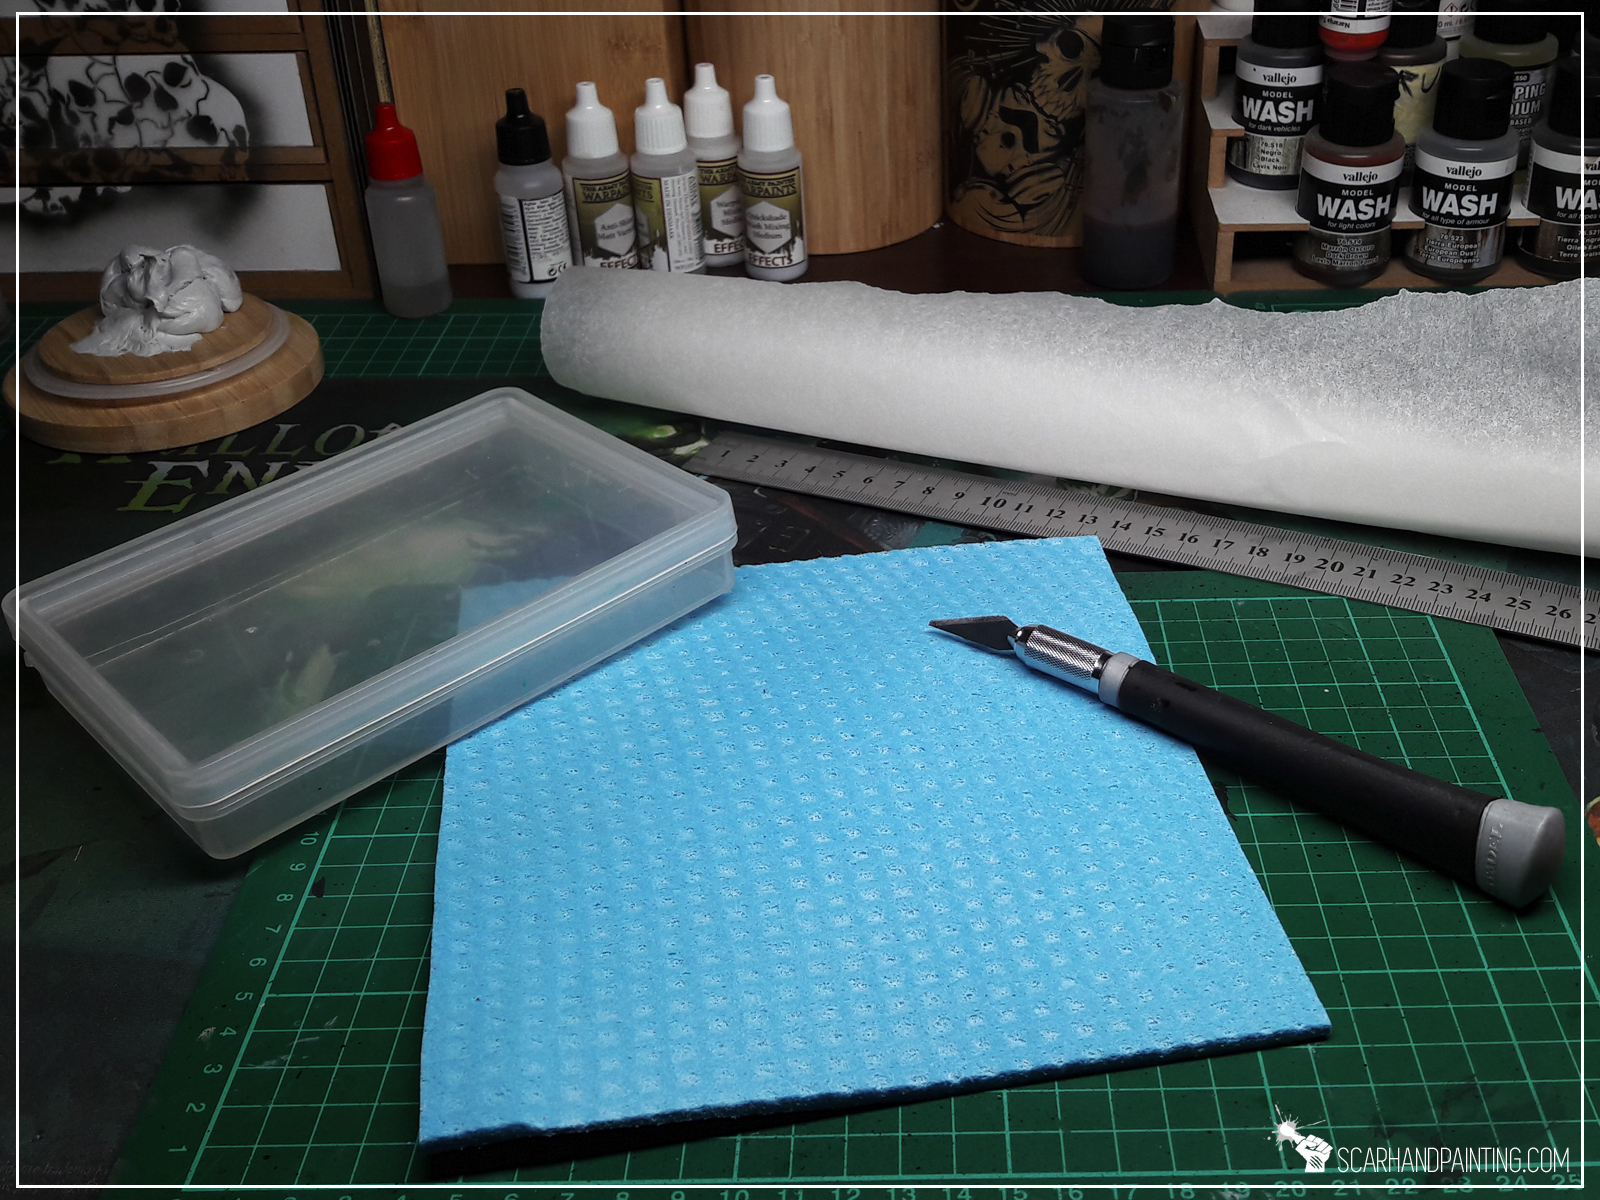

Picking a right box for the job is very important. For best results it should be hermetic, rather shallow and as wide and long as you prefer. I know a very good painter who uses a Ferrero Rocher box, I preffer to use a more hermetic and smaller Games Workshop Turf box. It suits my needs better, as I don’t use Wet Palette too often. Either way…
Step one:

I measured the insides of my box of choice and cut a piece of kitchen sponge to be approximately 5mm smaller. This is to leave some space for a sponge that might grow a bit once filled with water.

Step two:
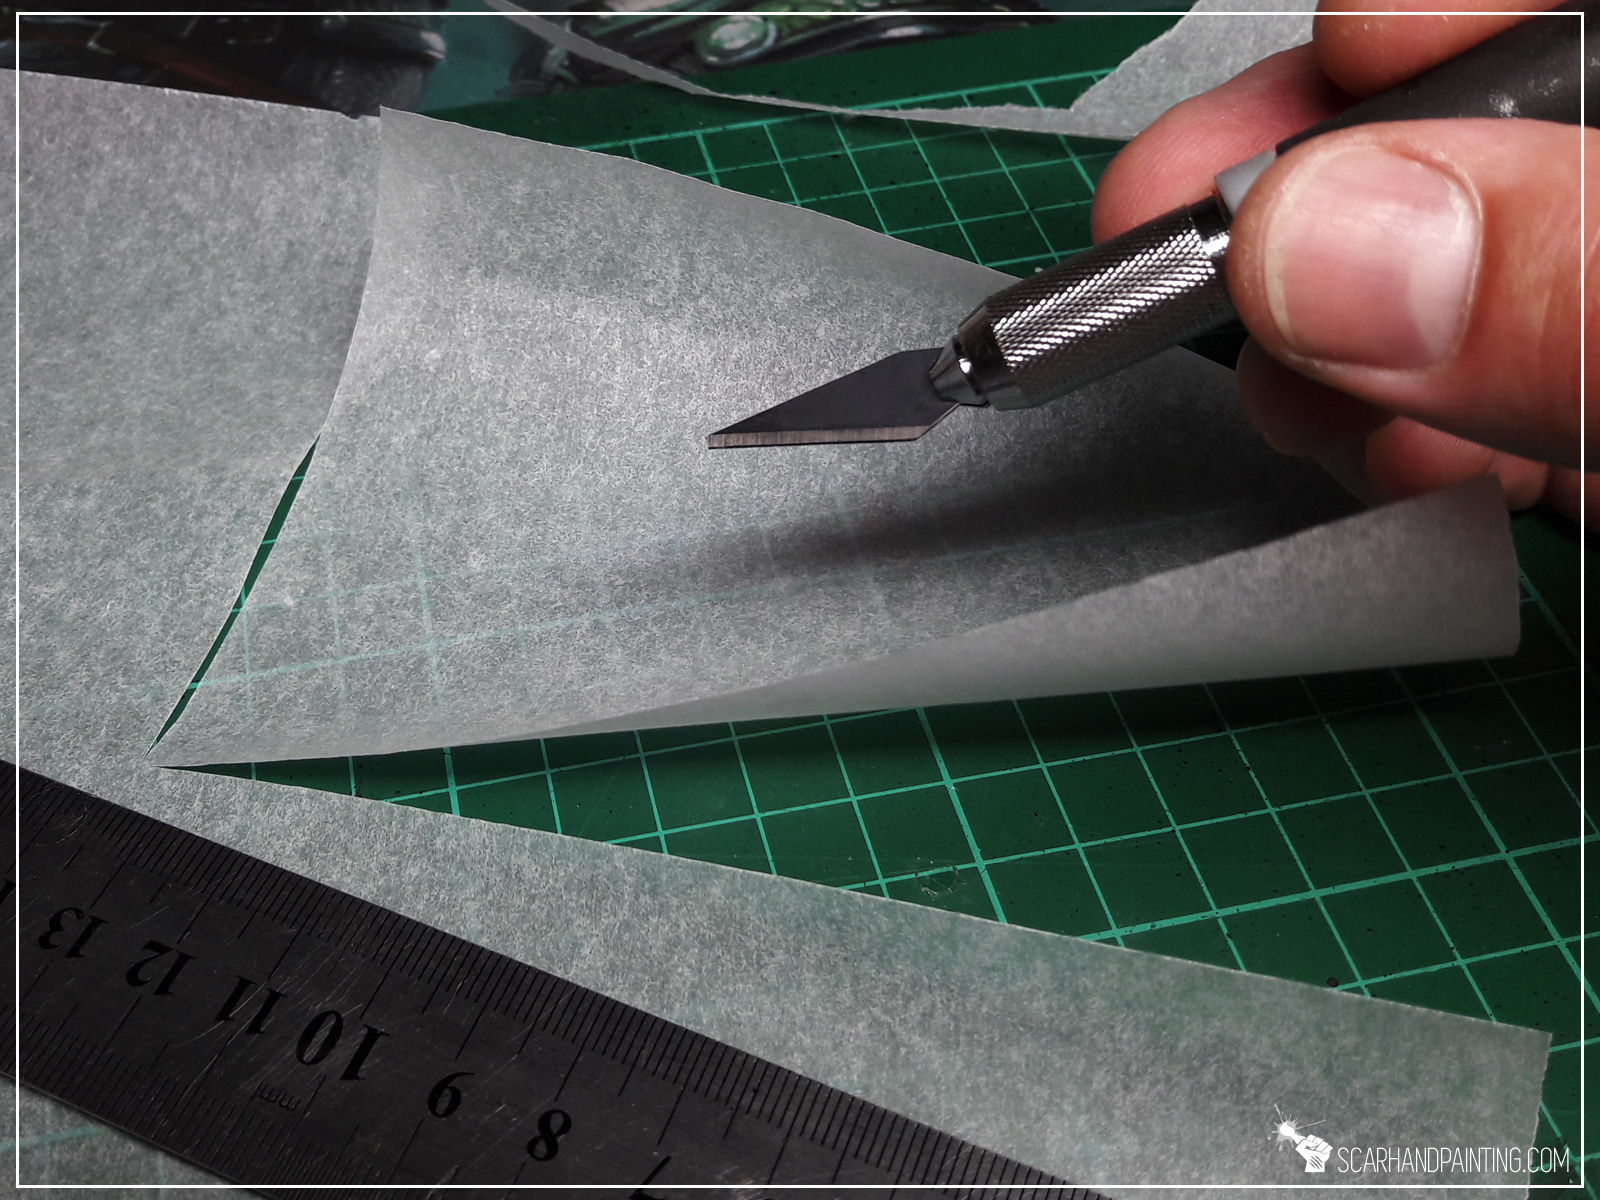
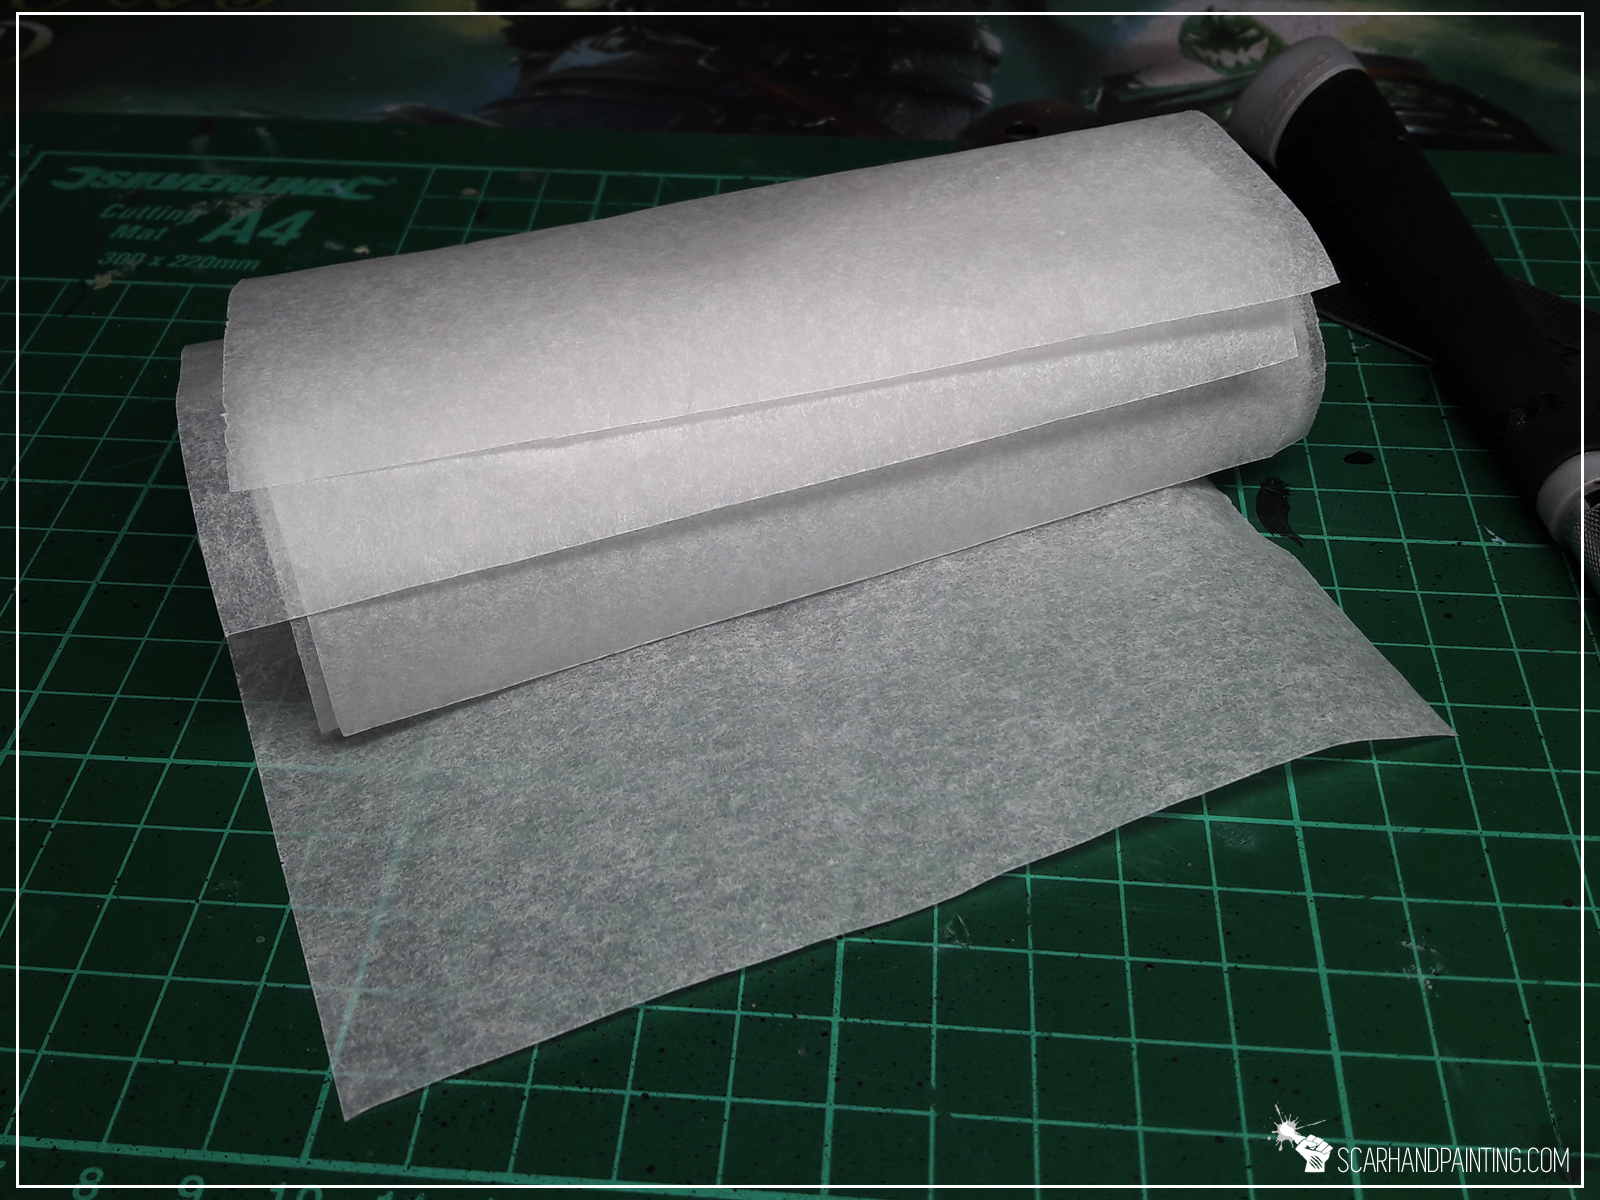
Next I cut a piece of baking paper to fit the sponge, again leaving about 5mm space between the edge of the sponge and the paper itself.
Step three:

I filled the “palette” with water until the sponge couldn’t take anymore. The key is to avoid water outside the sponge.
Step four:
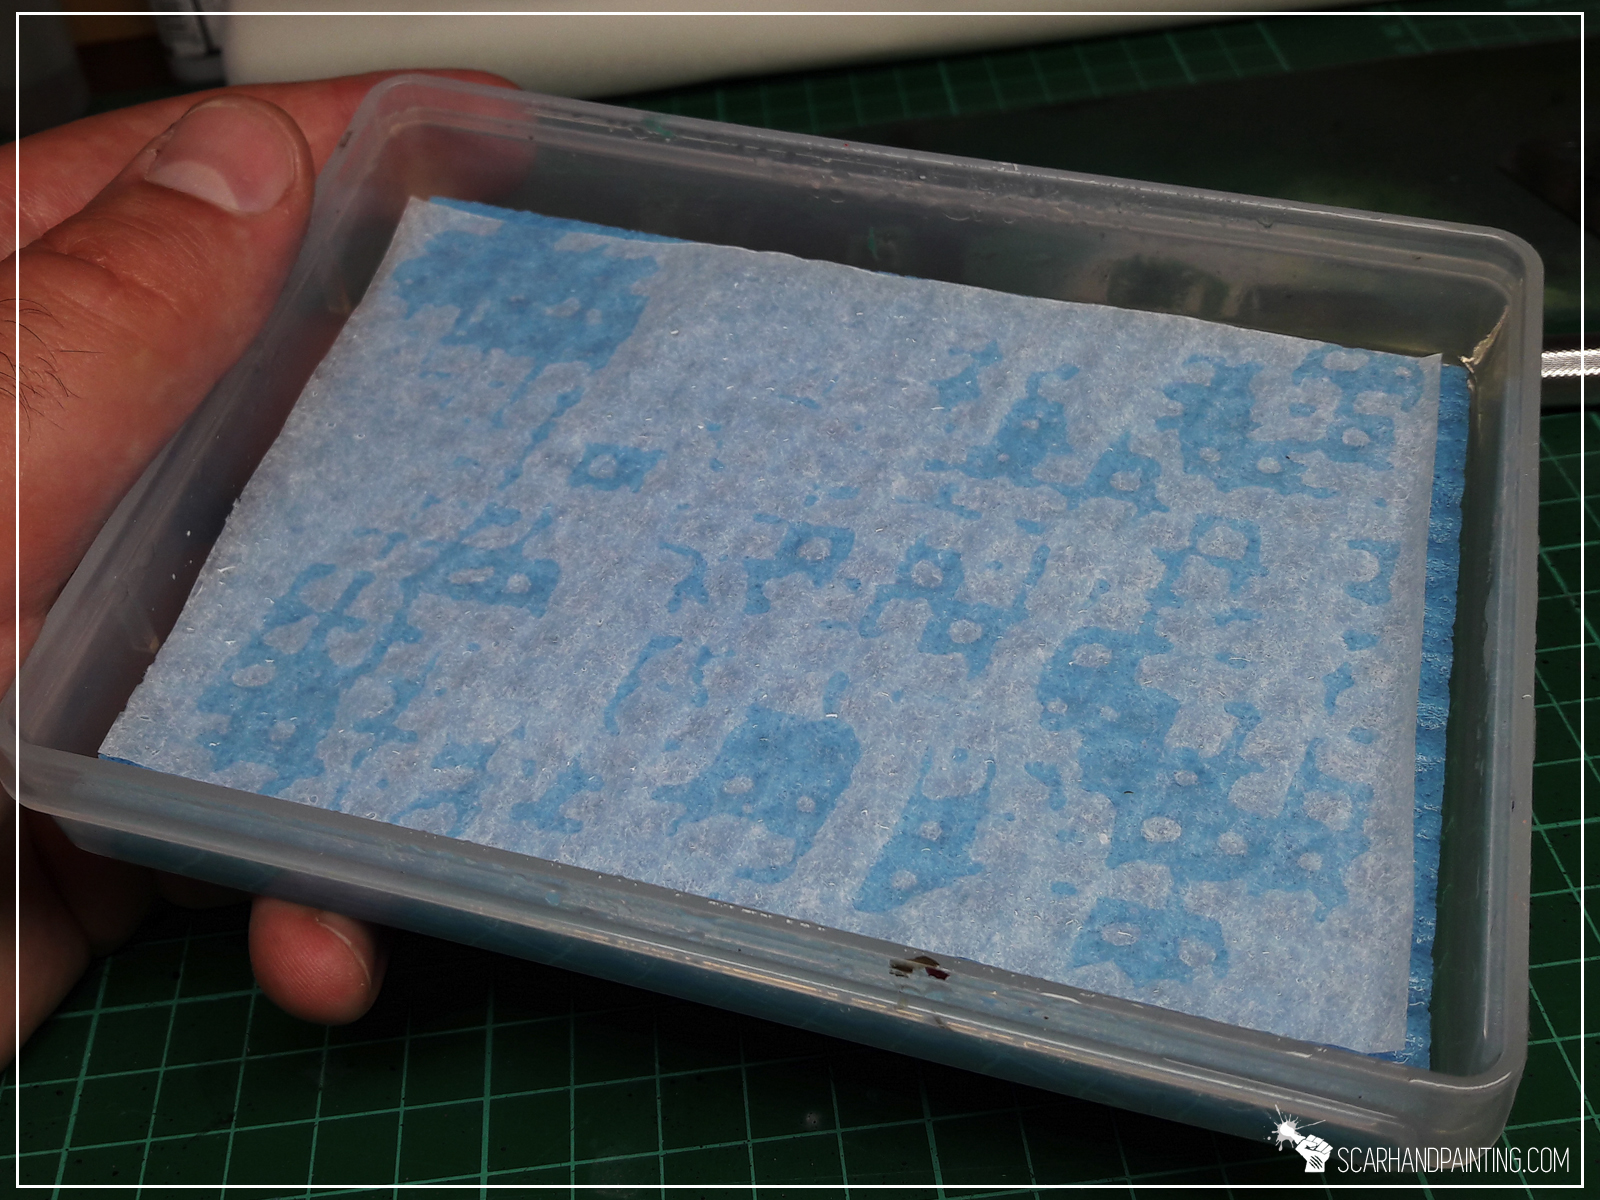
I then put a piece of baking paper on top of the sponge and held it in place, so that it took a little bit of water and flattened. That’s actually it – Wet Palette complete and ready for action!
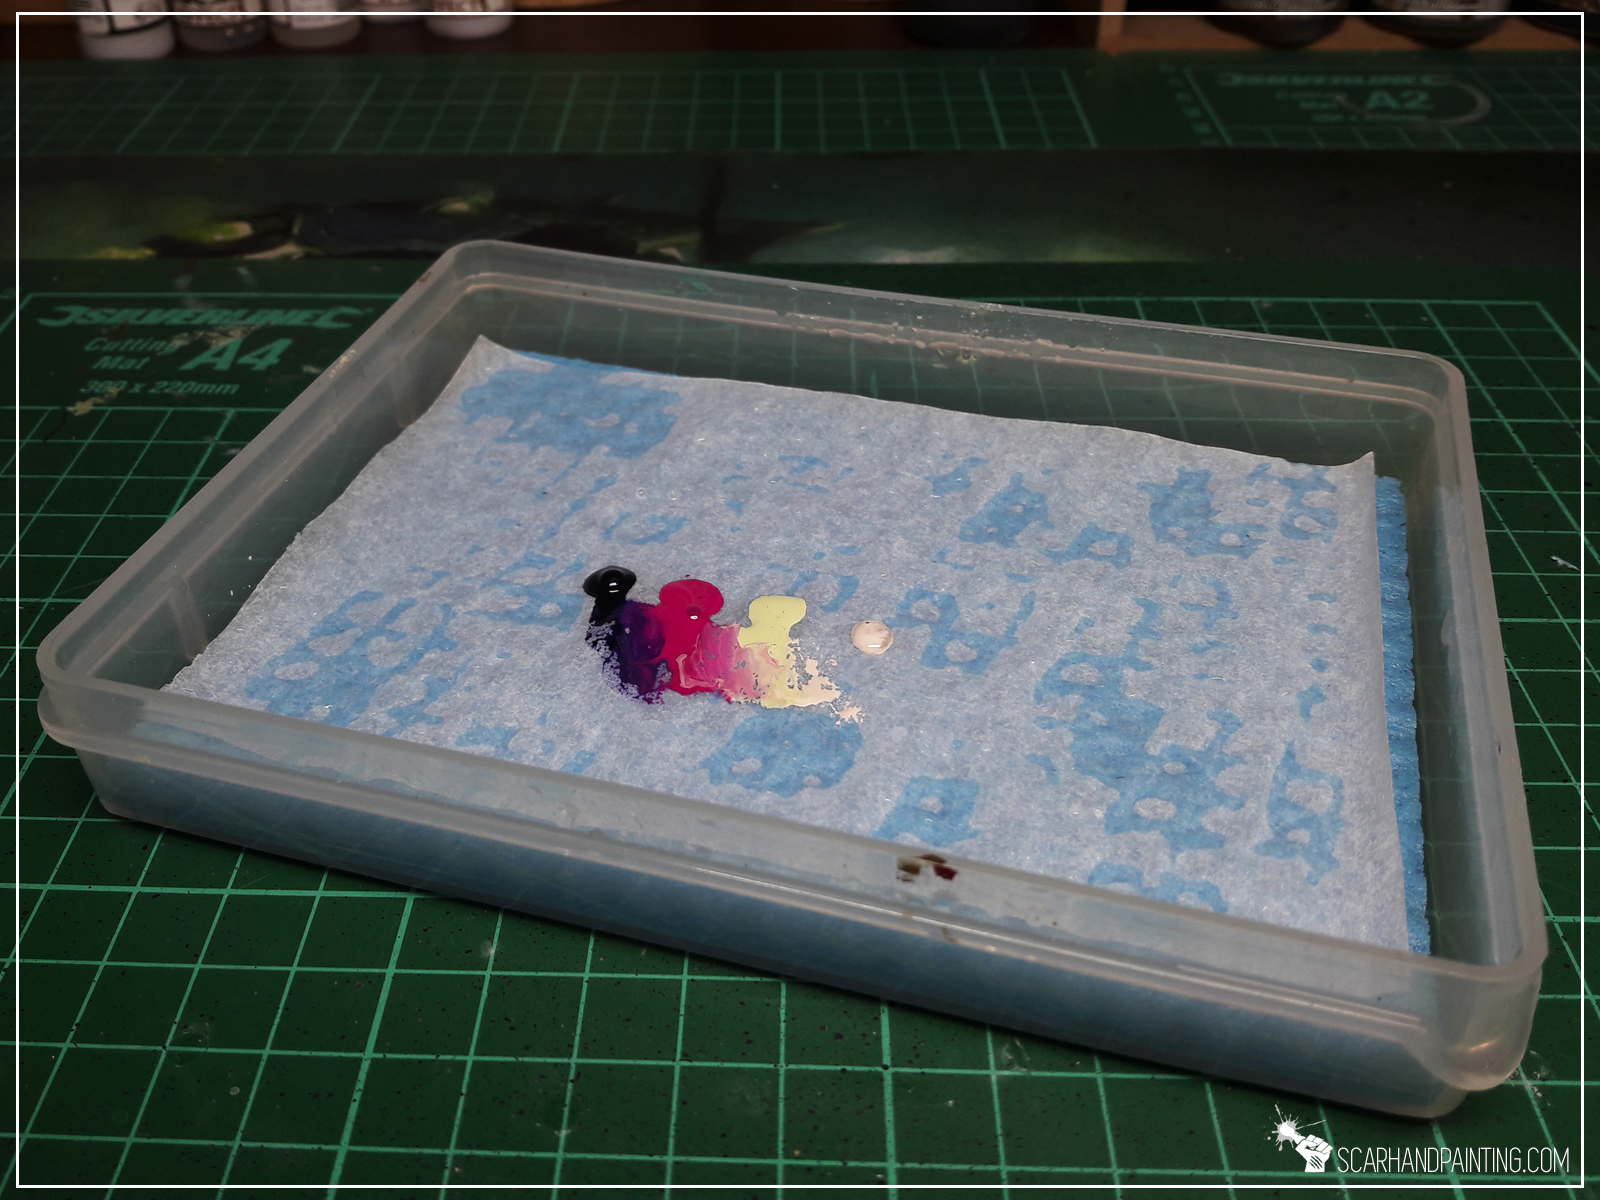
Now I can “save” the paints for later use…
Important tip: You will be switching the piece of baking paper every now and then, but I advise you to occasionally switch the sponge too. Depending on what kind of soft sponge you’ll use it might get smelly after long use. It’s because nowadays kitchen sponges are made out of algae and similar organic material. Just saying 😉
You find this article helpful? Don’t be a stranger and drop me a comment below!

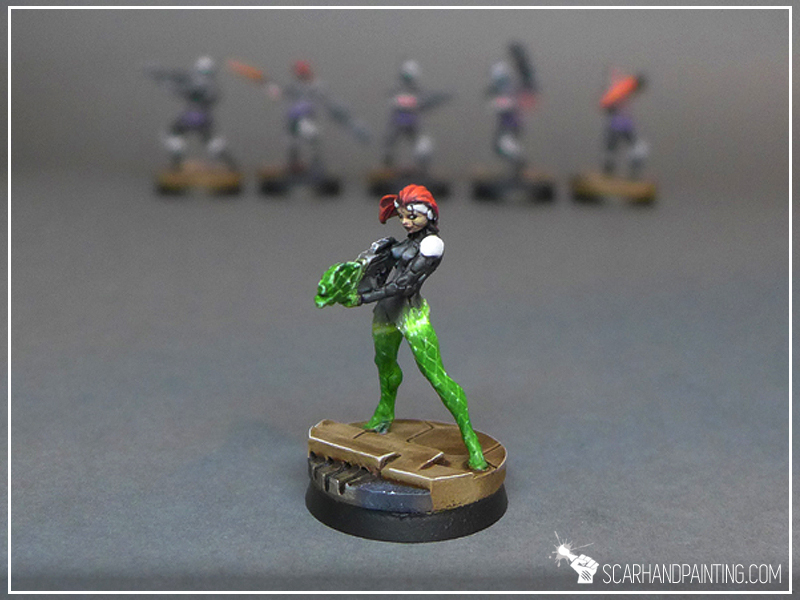
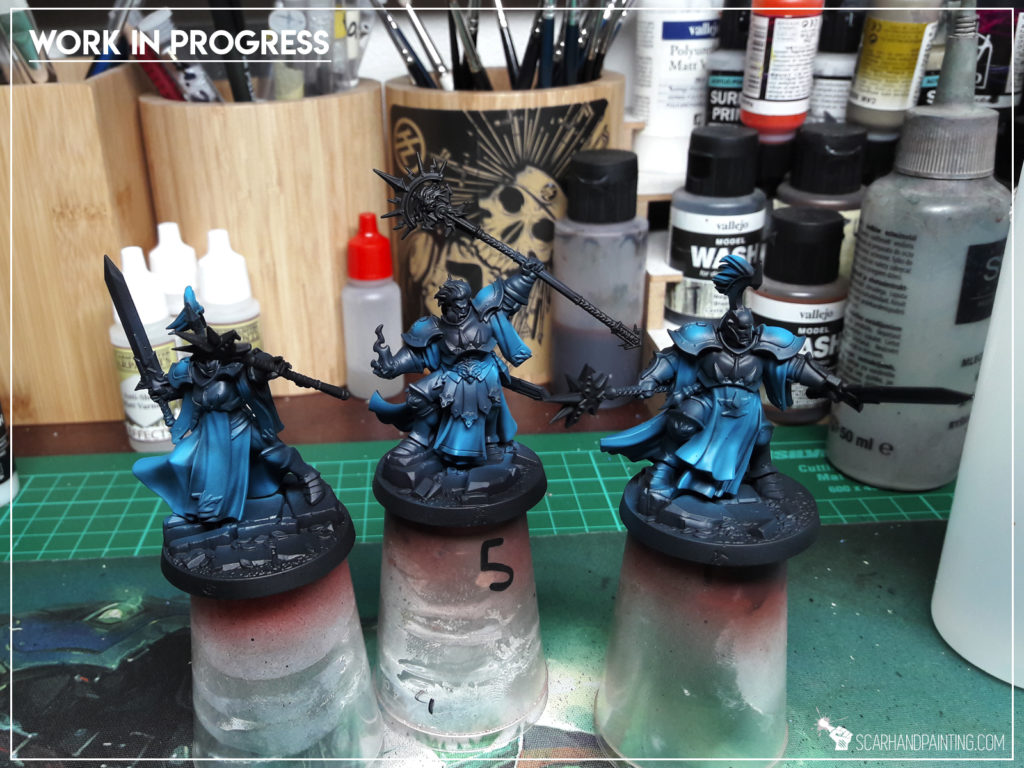
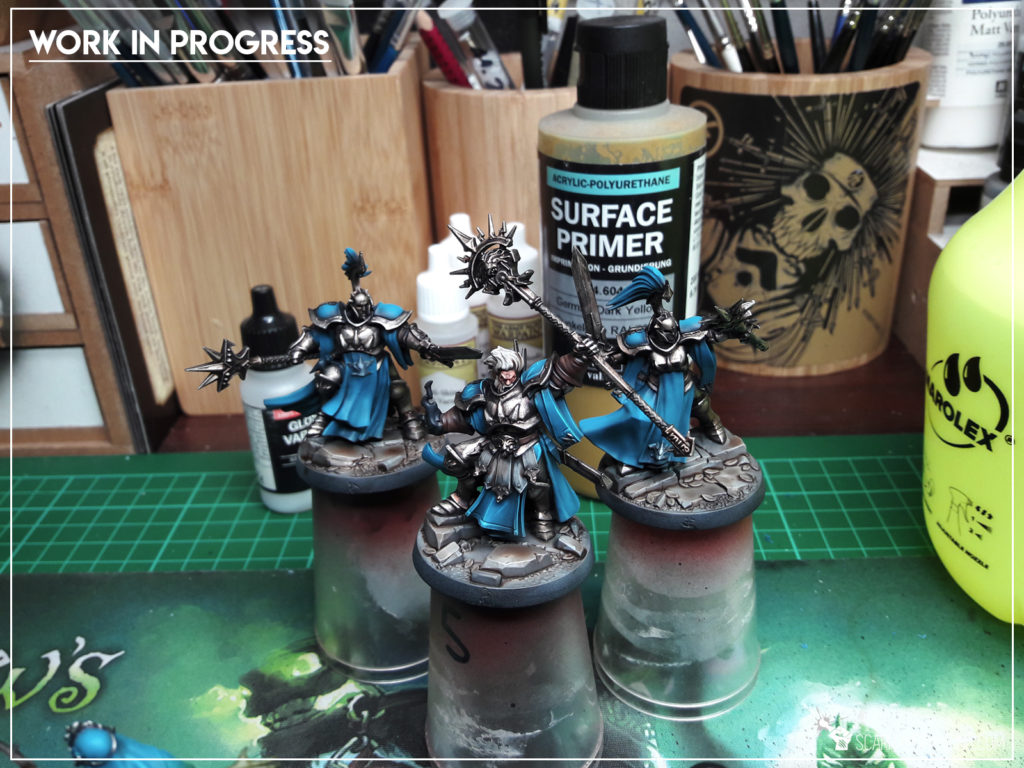
Here are some Colour Recipes for Haqqislam from Gallery: Shadespire Stormsire’s Cursebreakers. Please take note that this is a simple colour scheme, not covering multiple overlapping layers and blends in between, that lead to the final product. It is supposed to be used as guideline not a step-by-step.
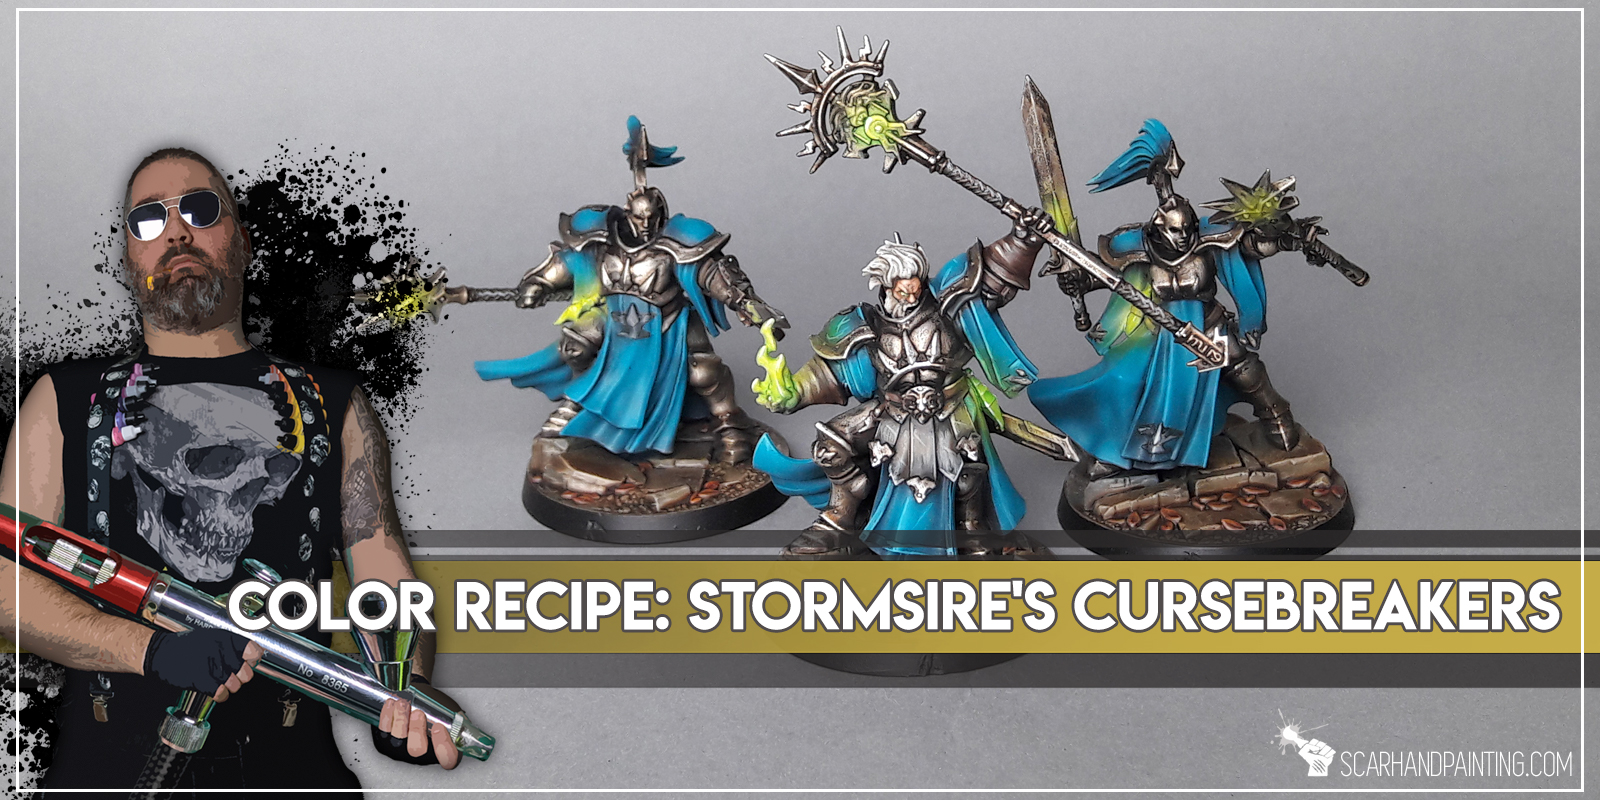
TURQUISE clothes:
Coal Black (P3), *
Turquise (Val), *
Mix Turquise (Val) 2:1 White, *
Arcane Blue (P3), l&p
METAL armour:
See: Tutorial: Painting “Five Layers” Metal
Warplock Bronze (GW),
Gun Metal (AP), flbr
Shining Metal (AP), flbr
Strong Tone Ink (AP),
Shining Metal (AP), l&p
GREEN light:
Duck Egg Green (Val),*
Light Livery Green (Val),
Waywatcher Green (GW),
Off White (Val), l&p
Grey handles:
Panzer Dark Grey (Val),
Fenrisian Grey (GW),
Dark Tone Ink (AP),
Off White (Val), l&p
BASES:
Medium Sea Grey (Val), *
Light Grey (Val)*,
Pale Grey (Val),*
Mix Strong Tone Ink (AP) 1:1 Soft Tone Ink (AP),
Off White (Val), l&p
Dirt (Val), bl
Mix Strong Tone Ink (AP) 1:1 Soft Tone Ink (AP), bl
l&p – lines and points,
p – points,
bl – blend,
gl – glaze,
drbr – drybrush,
flbr – flatbrush,
lobr – loaded brush,
stpl – stippling,
*Airbrushed (with multiple layers and mixes)