- contact@scarhandpainting.com


In this Step-by-Step tutorial I would like to take you on a spin with some Micro Art Studio’s Corregidor Bases. Guys from MAS did a fantastic job painting this product, but I have my own way which I would like to share with you. Buckle up and let’s get to it!
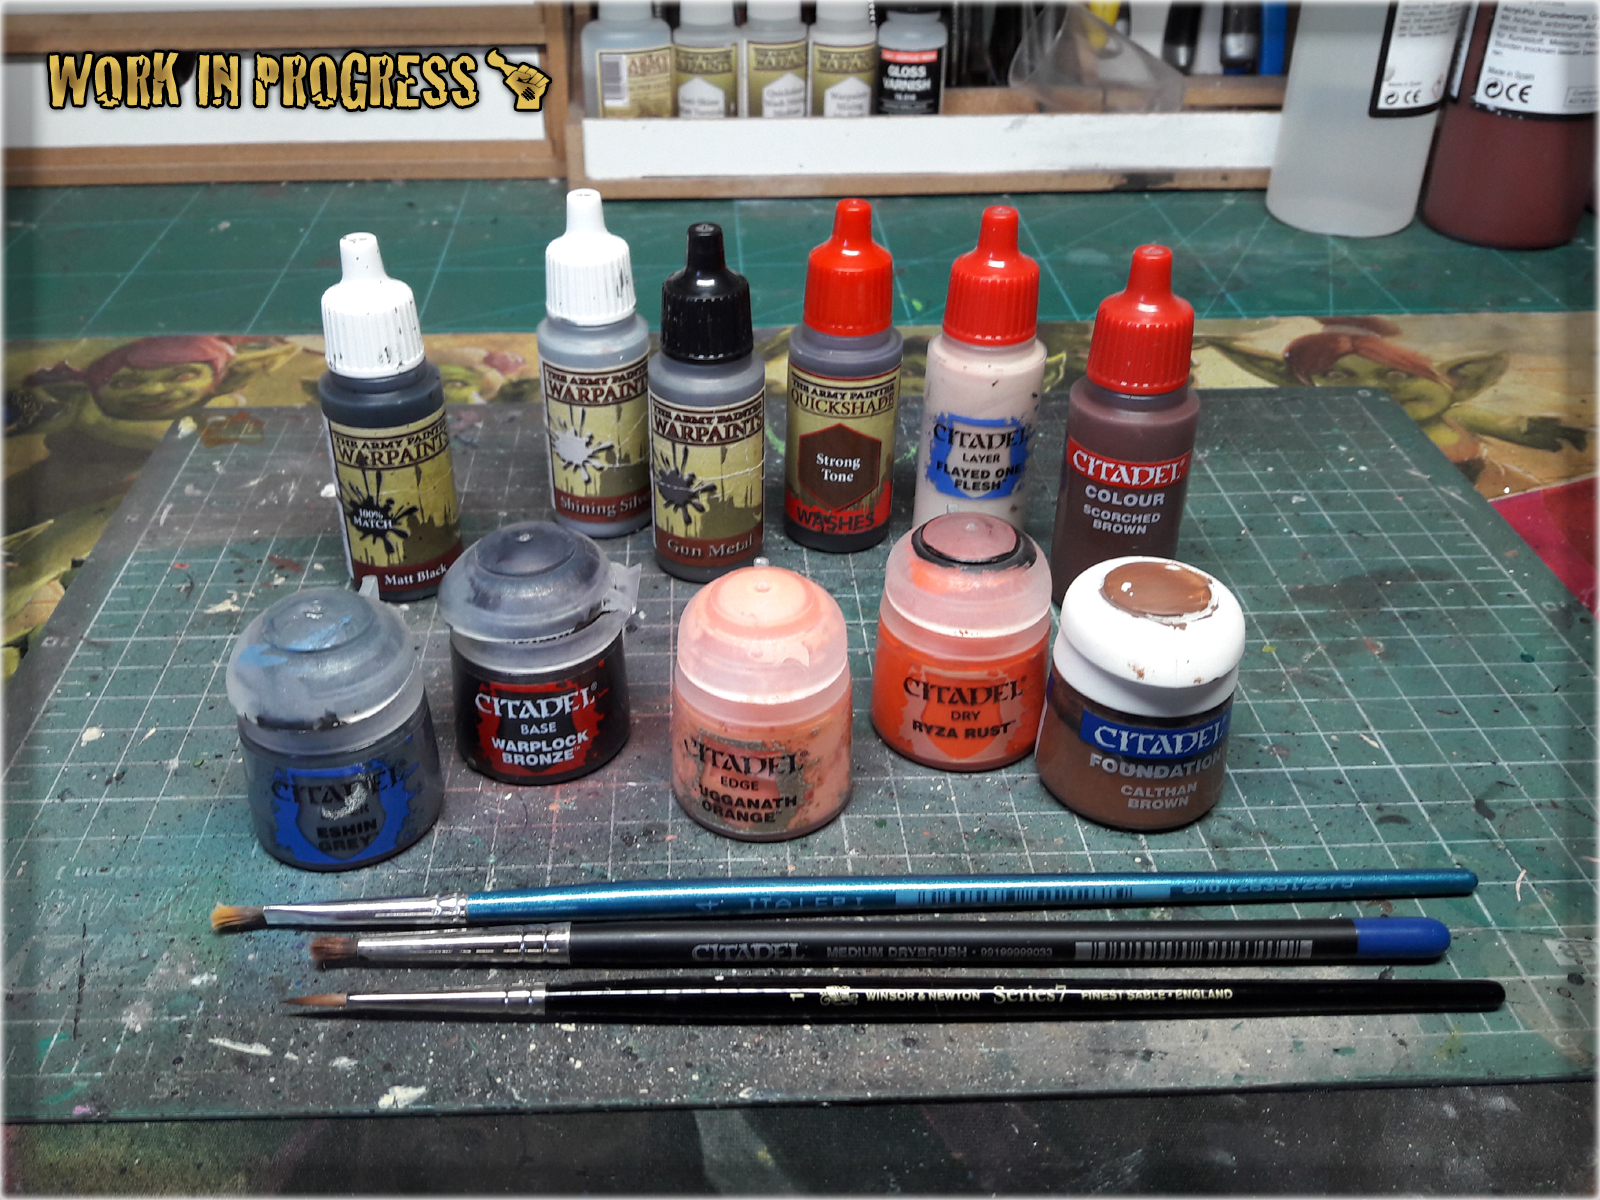
* Regular Brush,
* Stippling Brush,
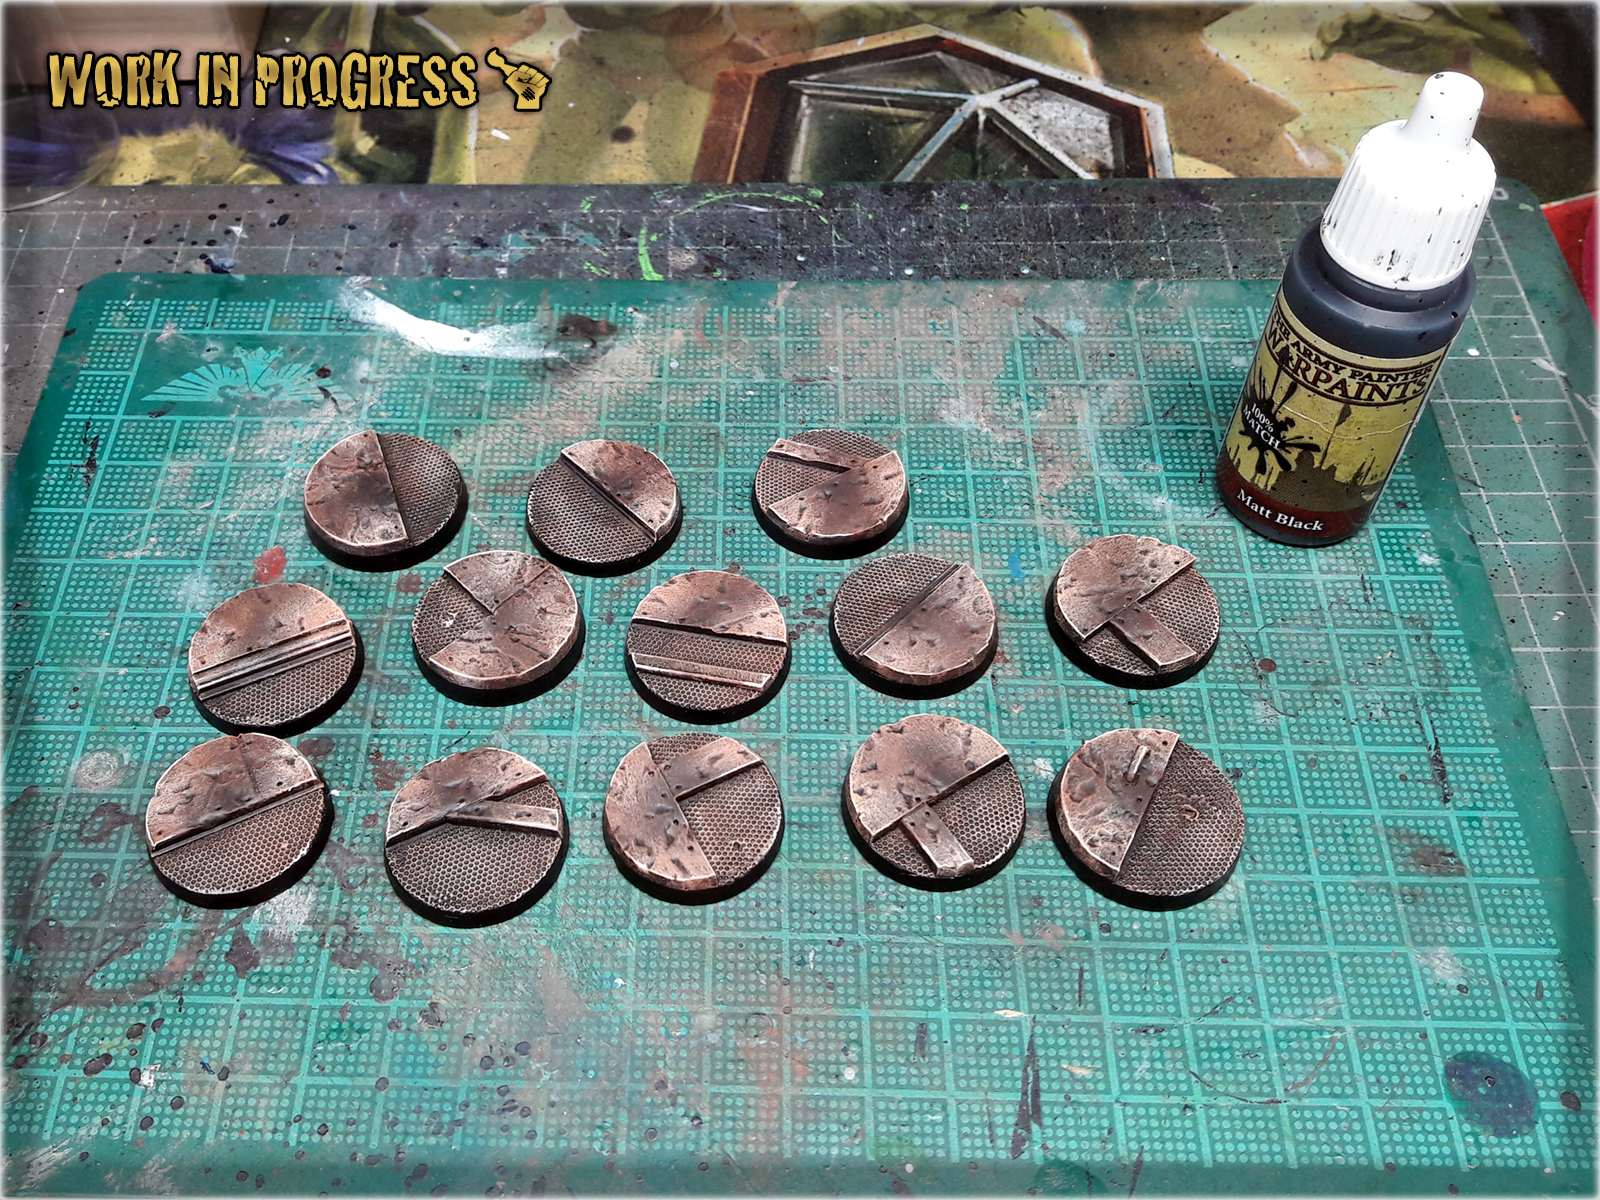
* Black,
* Tin Bitz / Warplock Bronze (GW)
* Eshin Grey (GW),
* Strong Tone Ink (AP),
* Gun Metal (AP),
* Shining Silver (AP),
* Scorched Brown (GW),
* Calthan Brown (GW),
* Ryza Rust (GW),
* Lugganath Orange (GW),
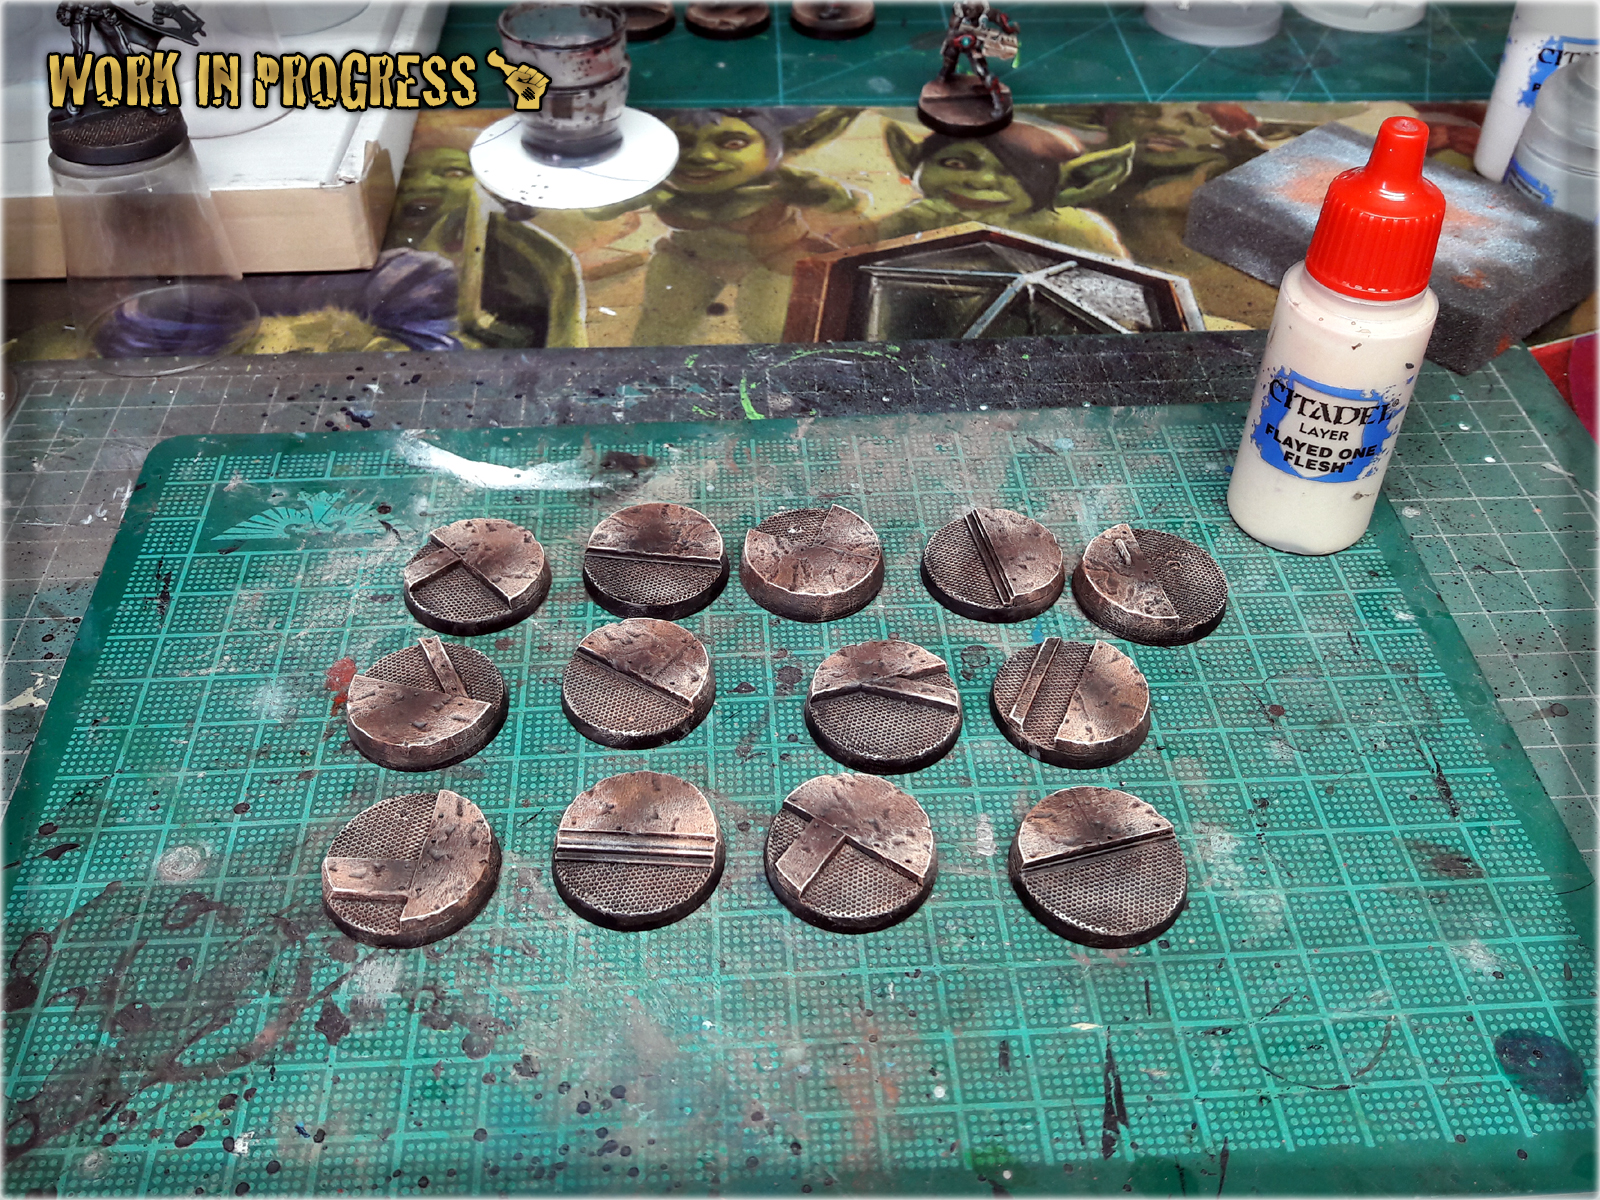
* Flayed One Flesh (GW),
! You can achieve similar results using different paints as long as you followTutorial's basics. For example Eshin Grey (GW) might be switched for Panzer Dark Grey (Val).
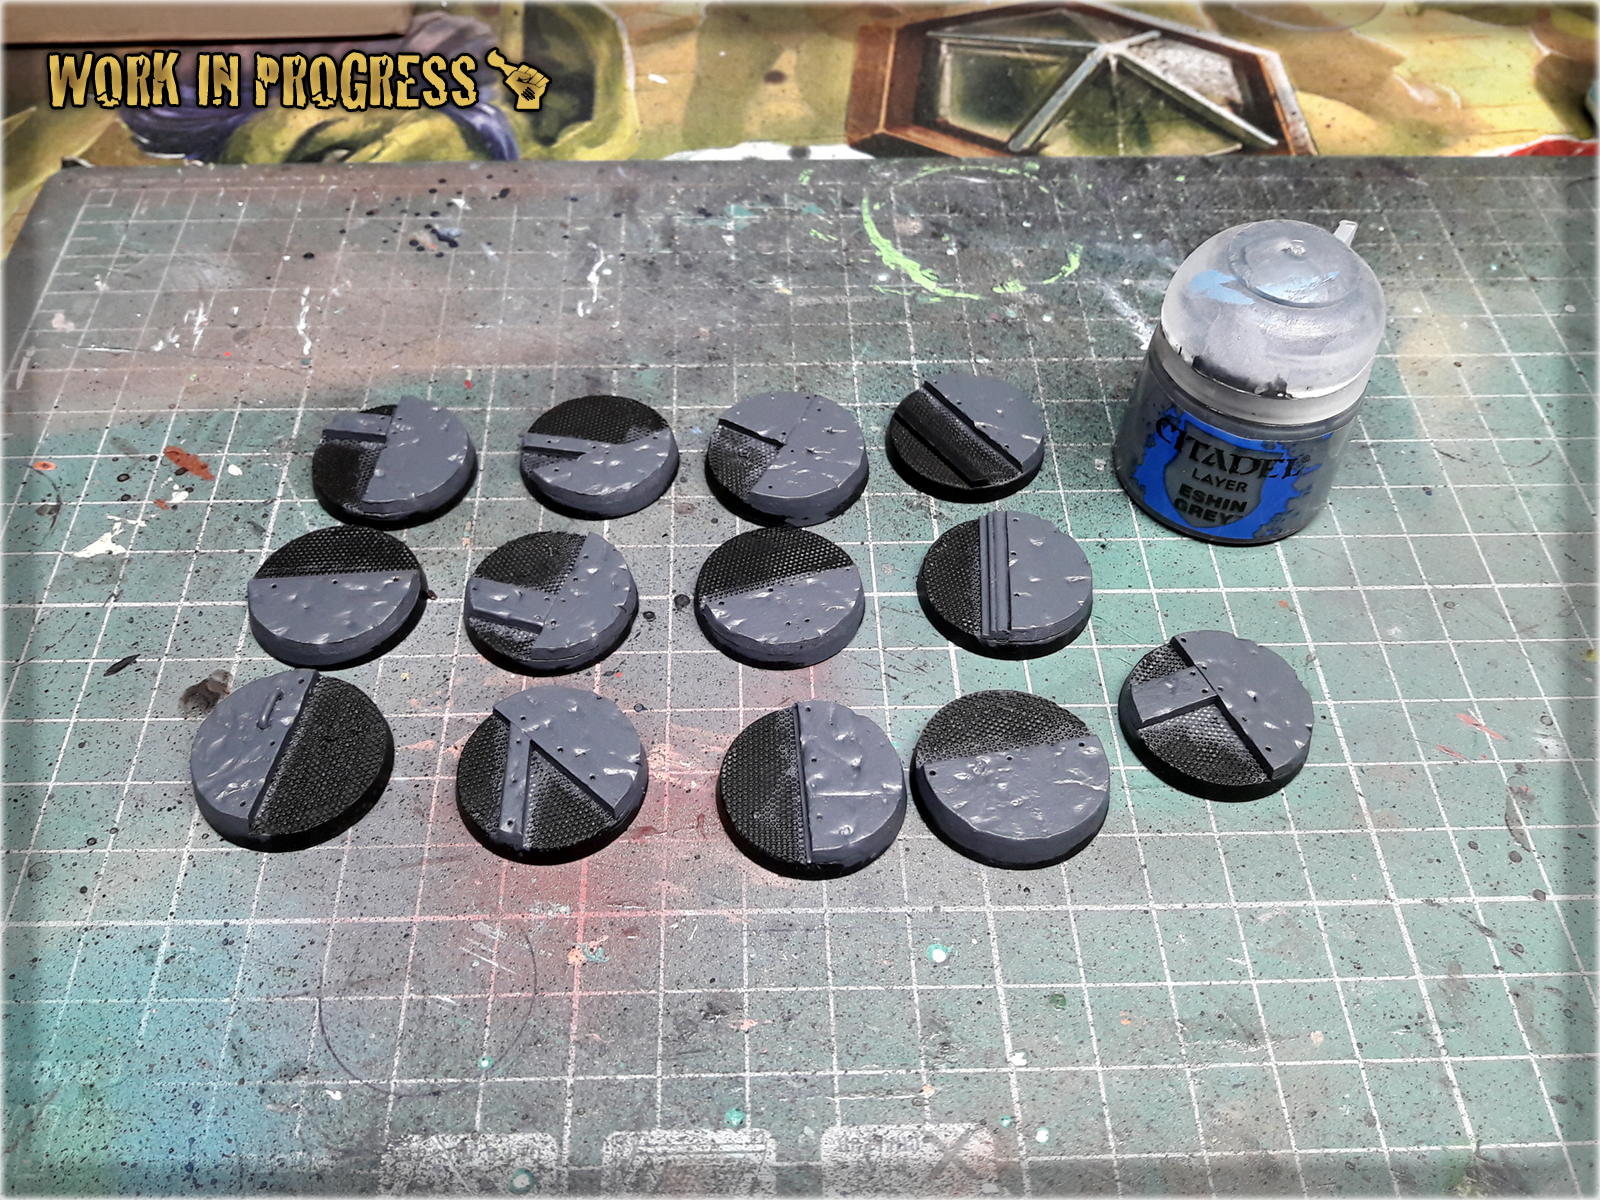
1 I started by applying a layer of Eshin Grey (GW) to all raised areas of the base, over Black undercoat. Just a hint that applying two slightly diluted layers goes much faster and produces a similar result.
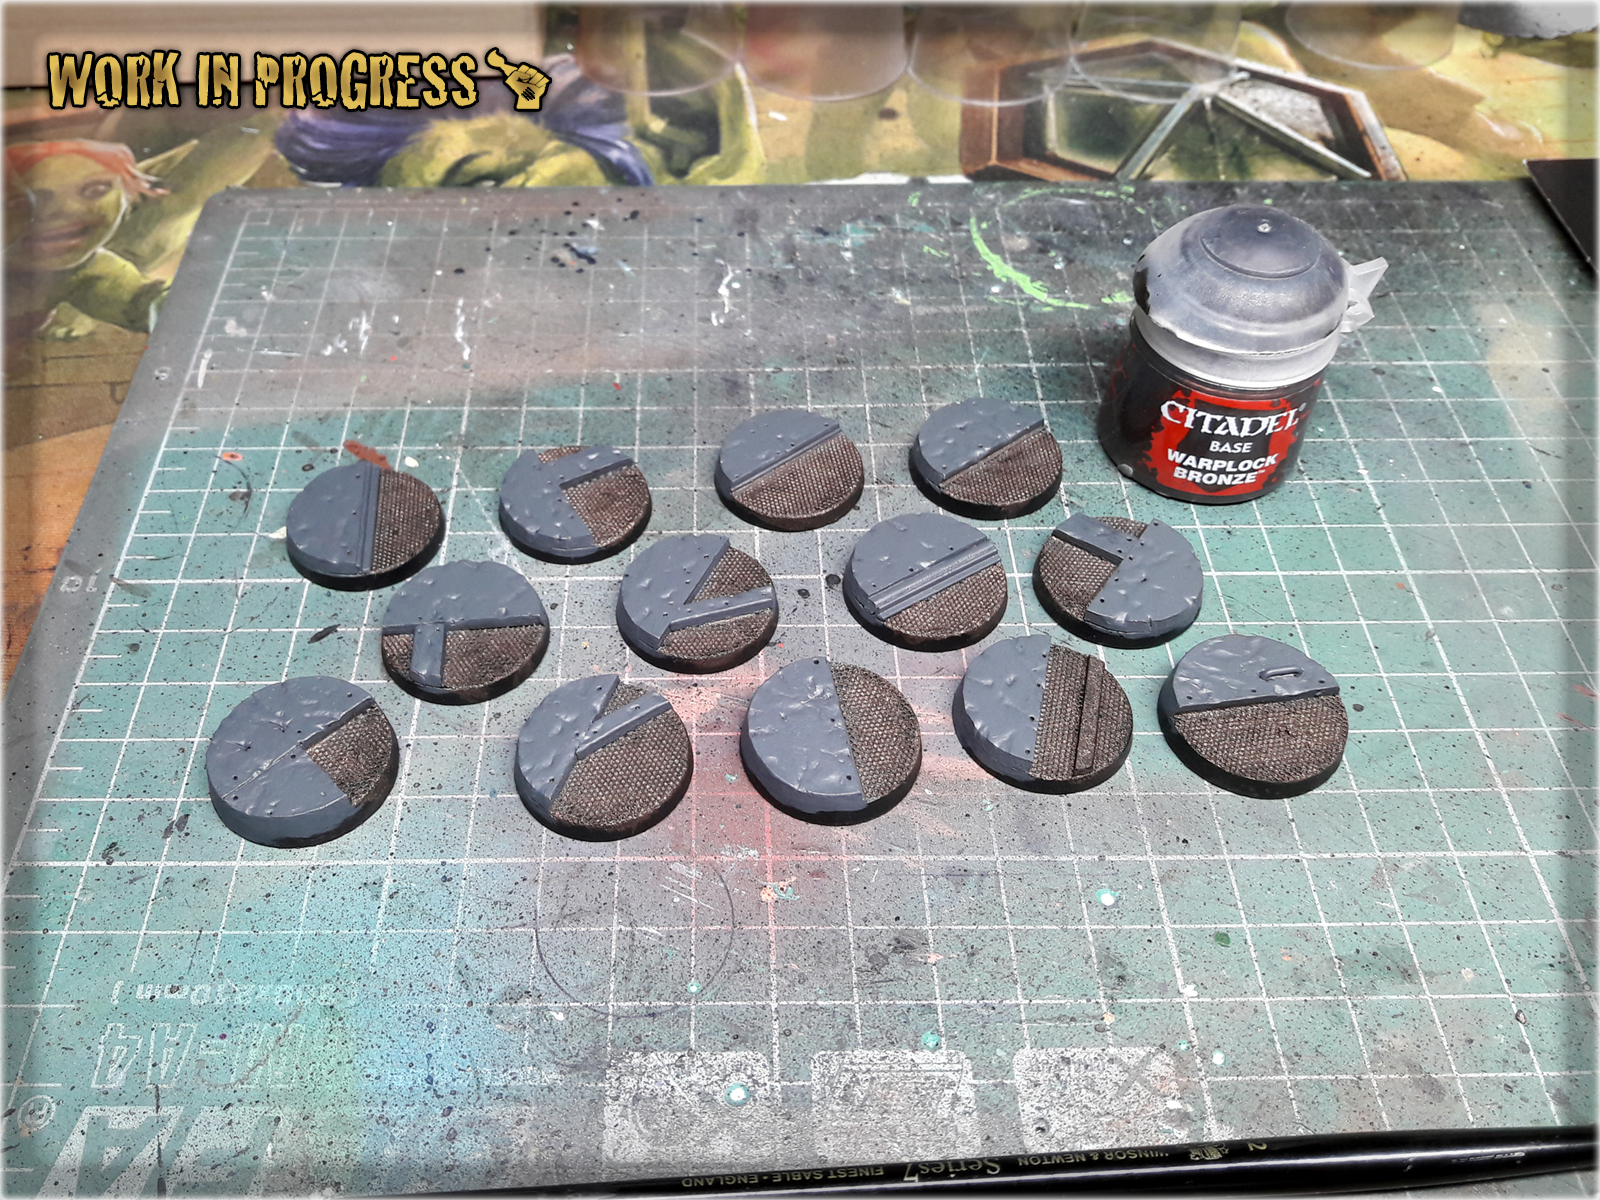
2 I then moved to the mesh areas and painted them with Warplock Bronze (GW). Once again this paint might be diluted but this time no need to apply two layers - one will suffice.
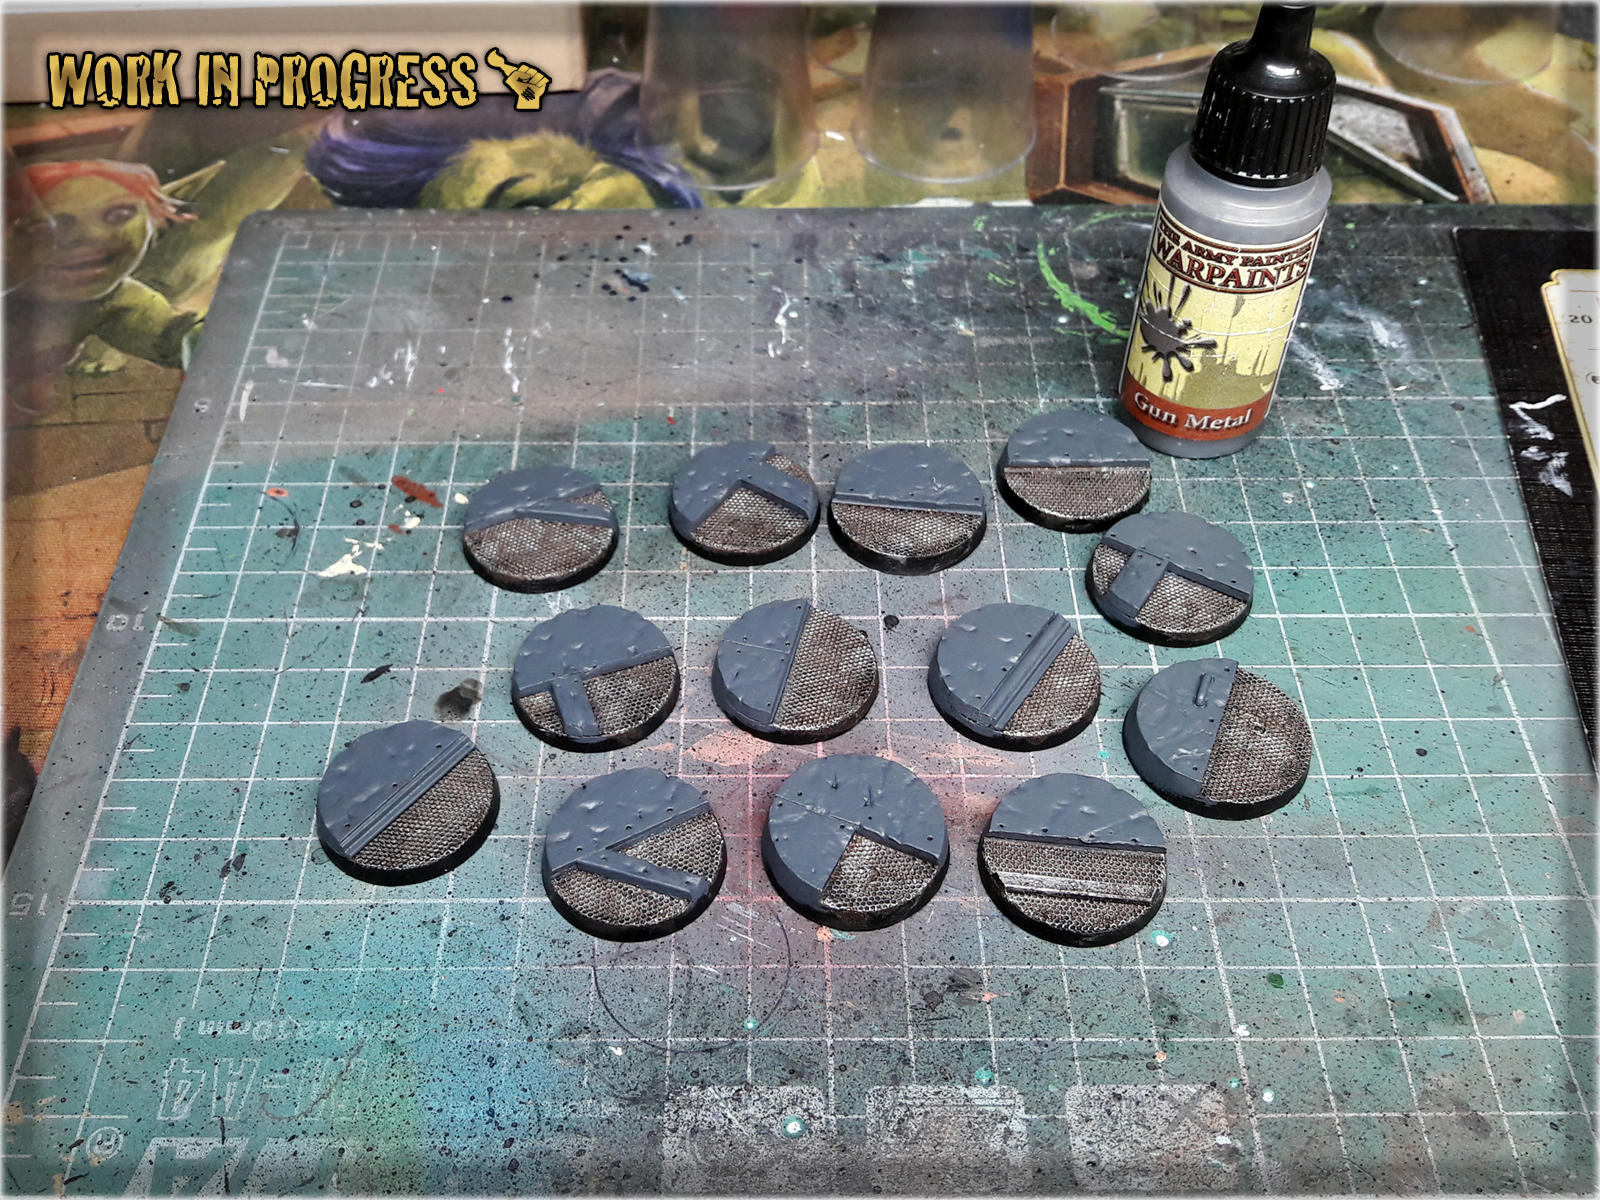
3 Once Warplock Bronze dried out, I applied a layer of Gun Metal (AP). For best results I did this with regular brush and using a Flatbrush technique following:
Five Layers Technique – Metal basis
4 Next Shining Silver (AP) came in. I applied one layer over Gun Metal with regular brush, Flatbrushing.

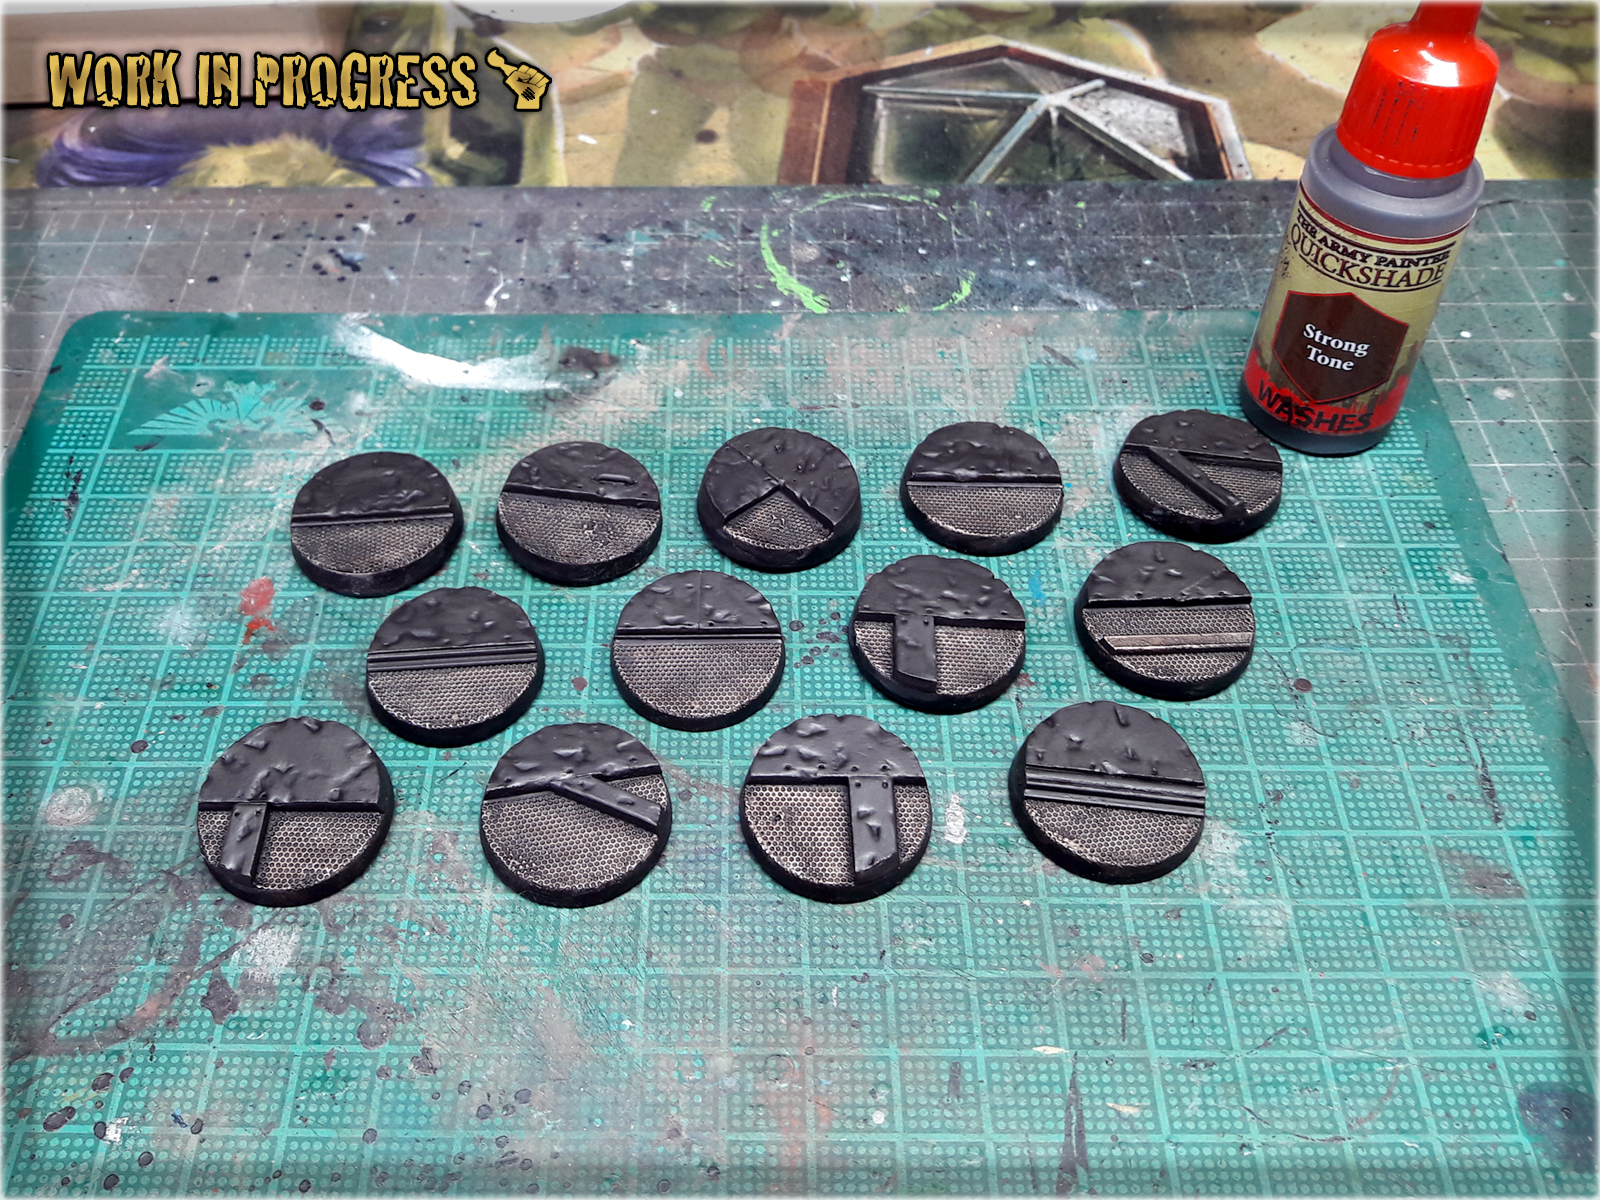
5 I then applied a wet, thick layer of Strong Tone Ink (AP) over entire base. Once it dried out - I applied another, identical layer. (Picture seem grey'ish - in real life this would look more brown and juicy)

! orem ipsum dolor sit amet, Integer commodo tristiqu odio, aliquet ut. Maecenas sed justo imperdiet bibendum. Vivamus nec sapien imperdiet diam. Aliquam erat volutpat. Sed onsectetur suscipit nunc et rutrum. Lorem ipsum dolor sit amet,volutpat. Sed onsectetur suscipit nunc et rutrum. Lorem ipsum dolor sit amet, volutpat.
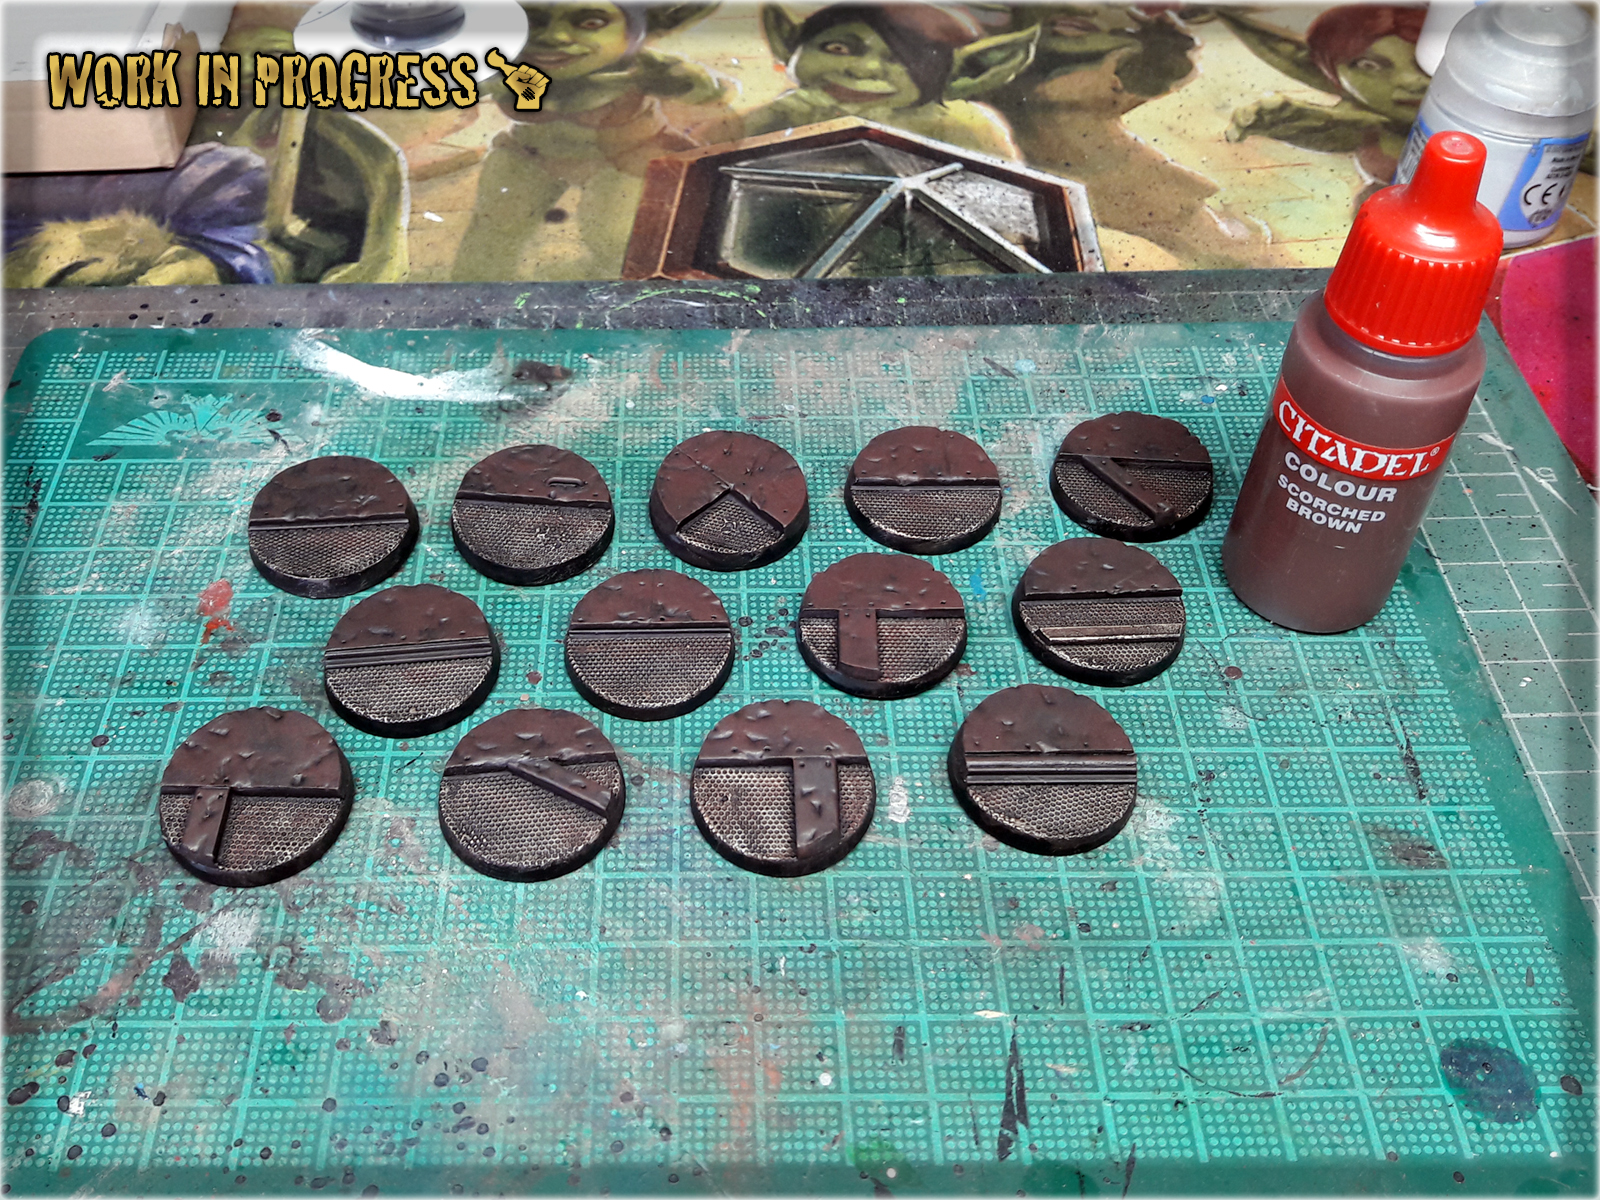
1 Using either a Stippling brush or a well used up large brush I applied stains of Scorched Brown (GW) over all raised areas. Was carefull not to use too much paint.
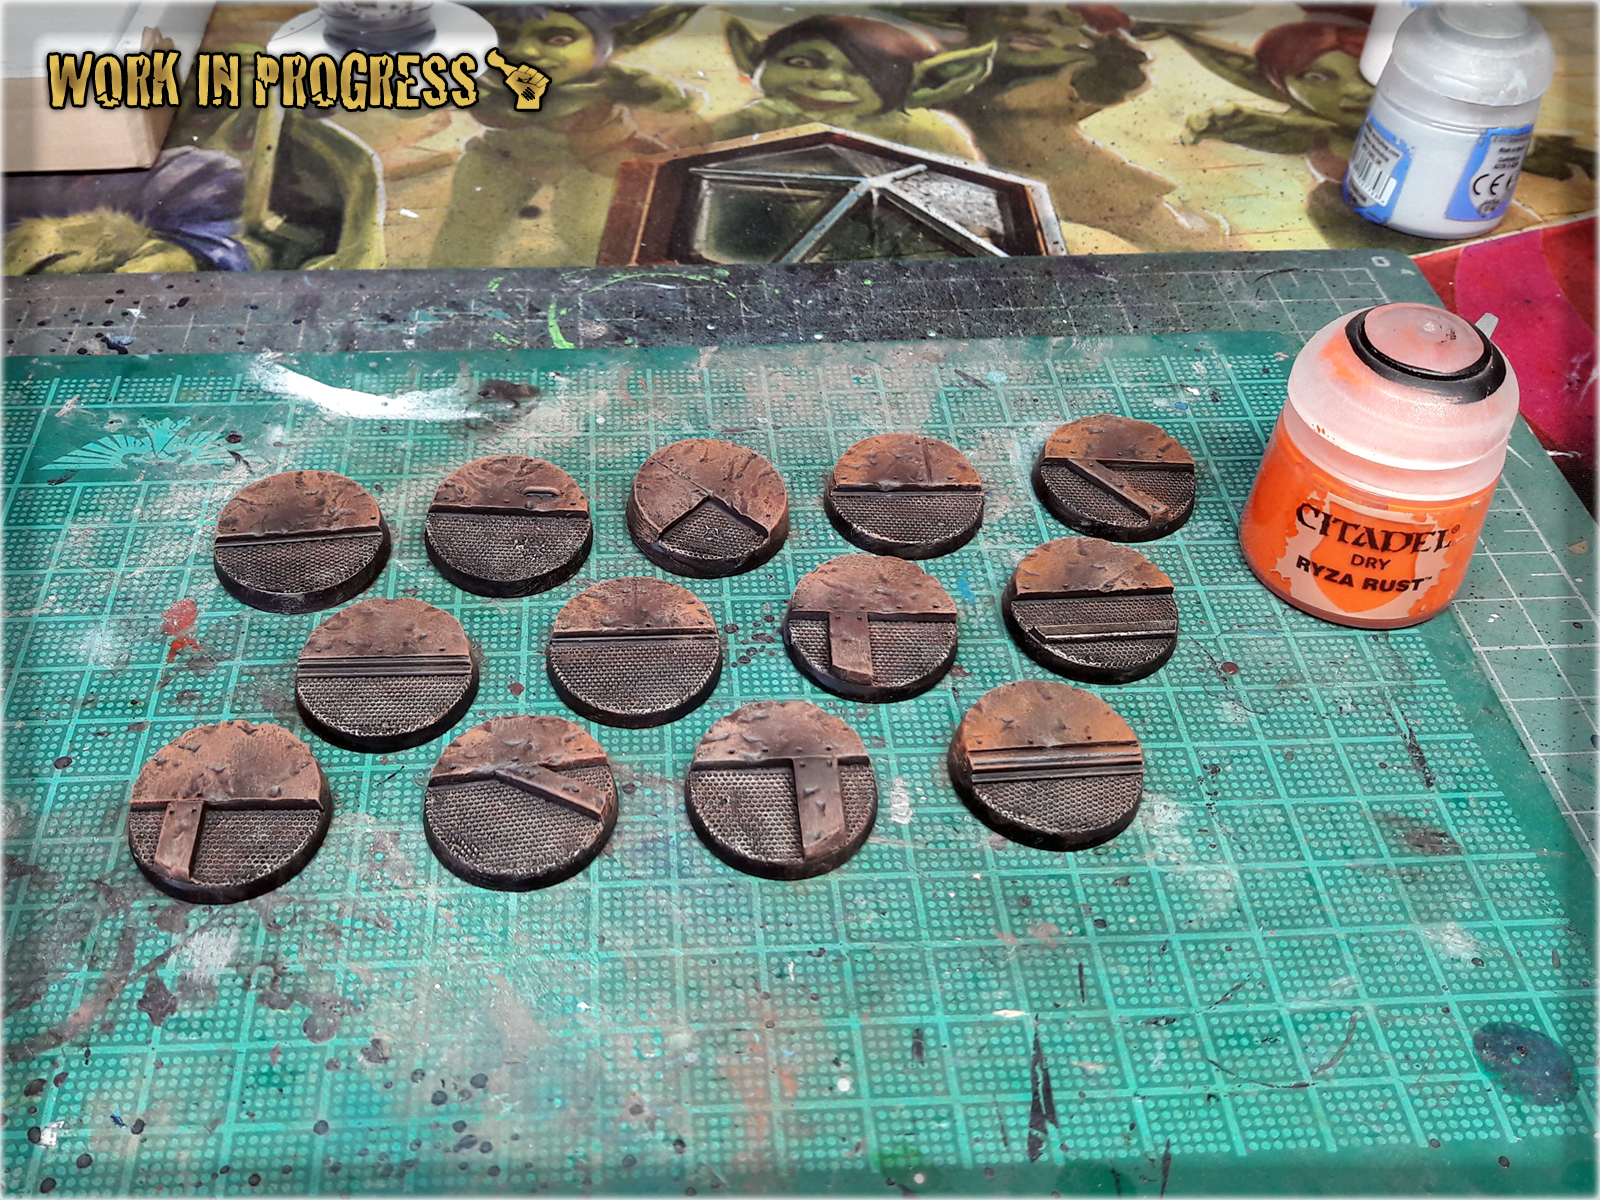
2 I then drybrushed edges and some large parts of raised areas using Calthan Brown (GW).

3 Next I Stippled some Ryza Rust (GW) on top of previous layer, ensuring to leave some Calthan Brown visible.
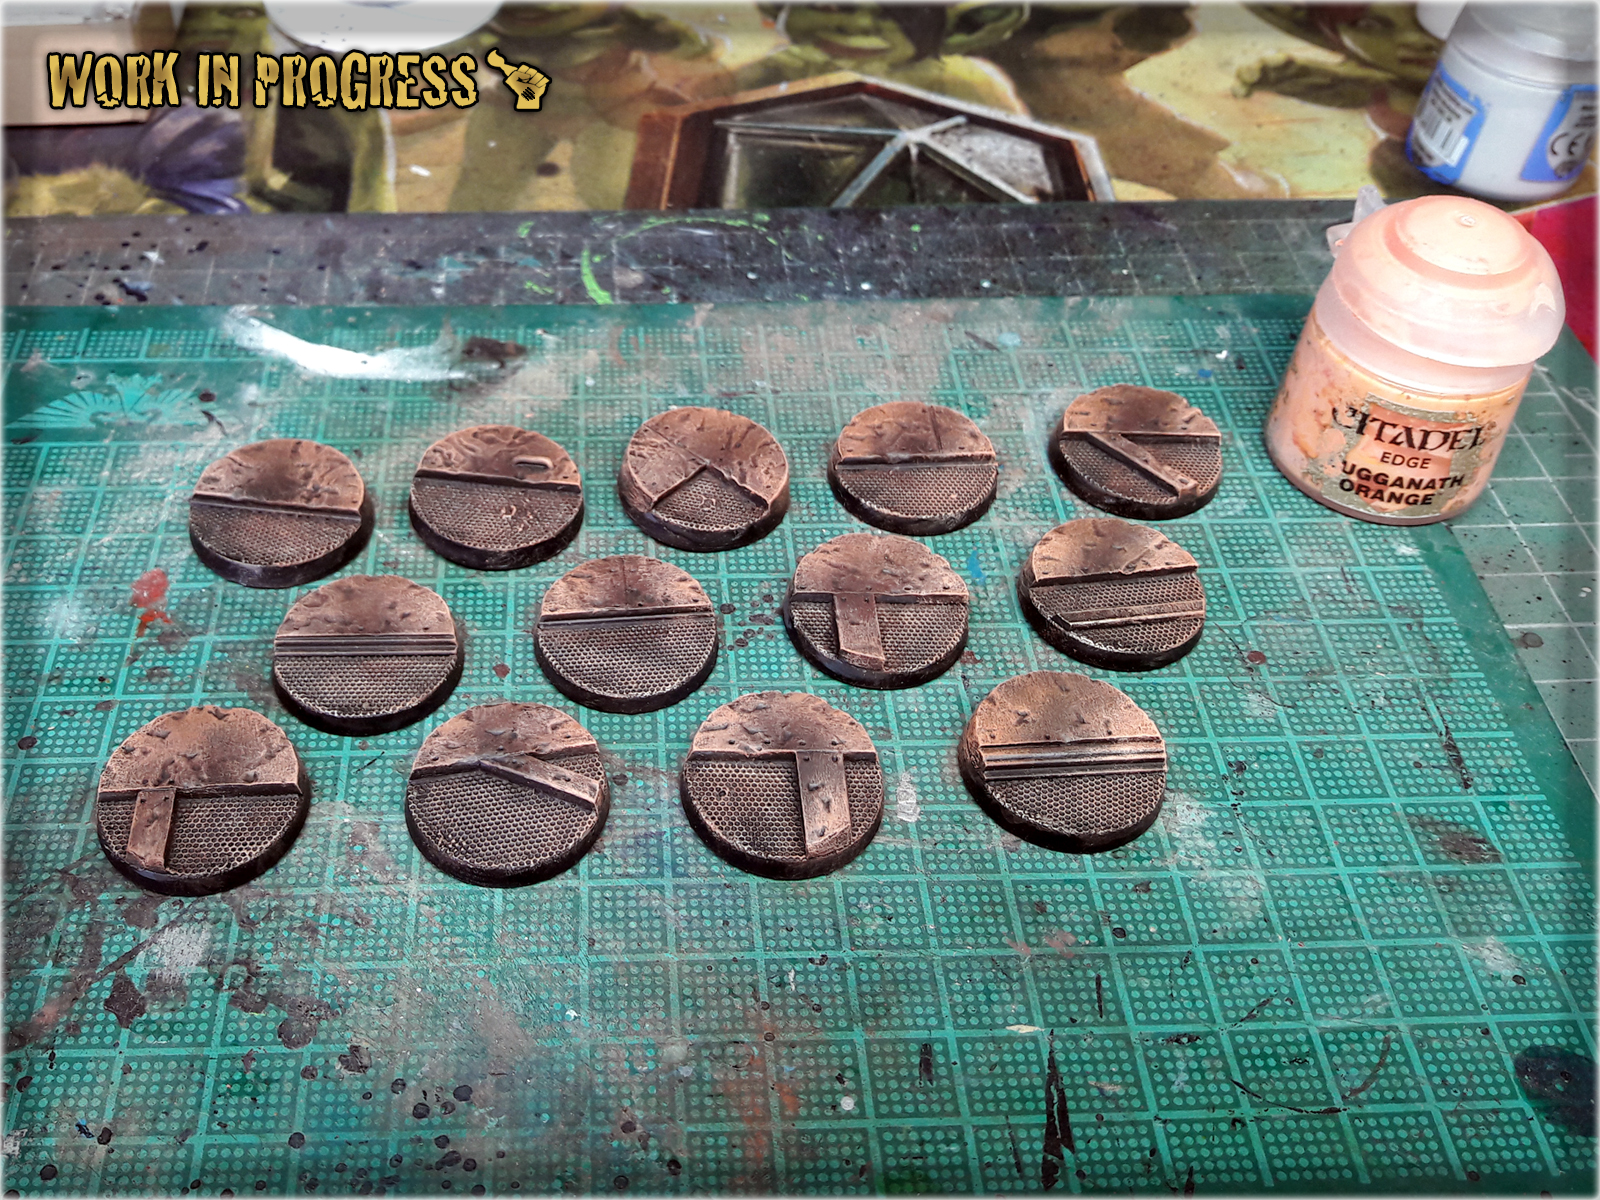
4 Same technique, different paint. I stippled Lugganath Orange (GW) on top of Ryza Rust layer, leaving previous layer visible on the sides of the new one.
! From this layer onward I usually paint over both raised and mesh areas. For the purpose of this Tutorial I left mesh parts clean, but do not be alarmed if you see pictures of my own bases with a less differentiated colour scheme.
5 Flayed one Flesh (GW) followed. This time I Drybrushed over Lugganath Orange layer and then used regular brush to paint thin lines on the edges.
6 Adding a final touch I painted edges smooth Black to add contrast and keep the paint job clean.
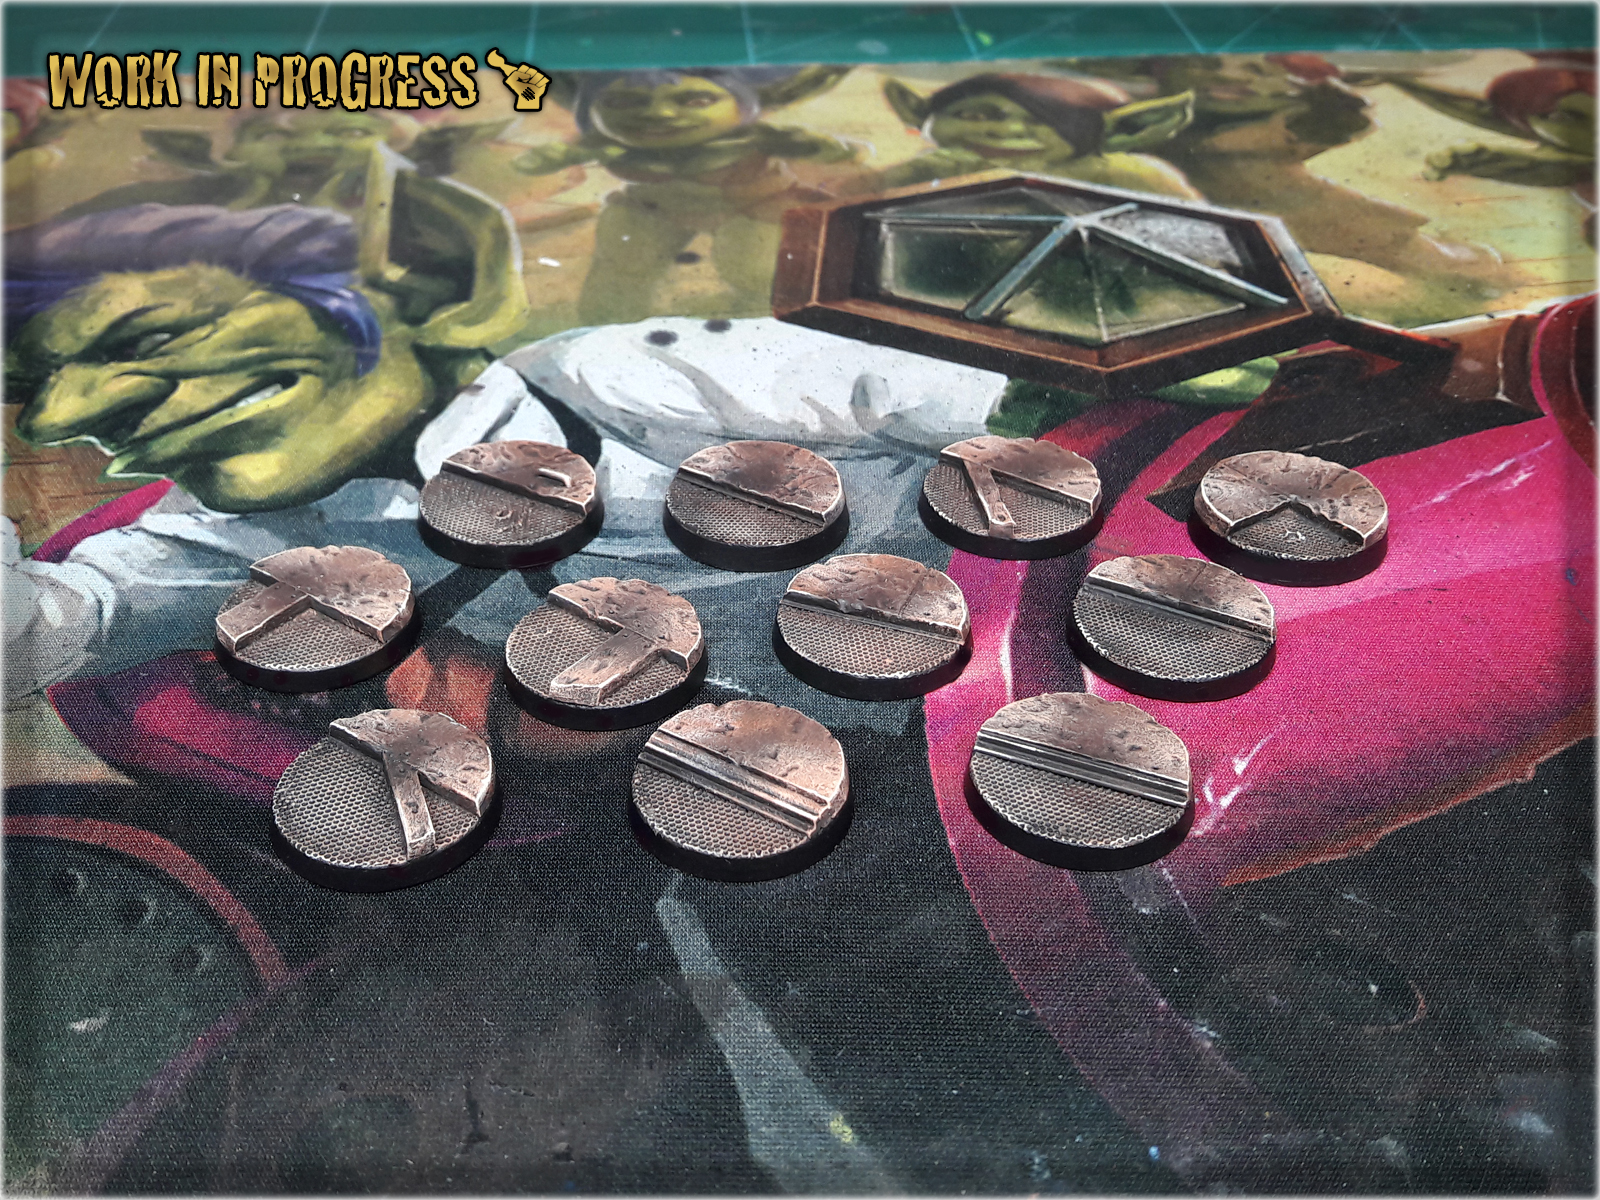
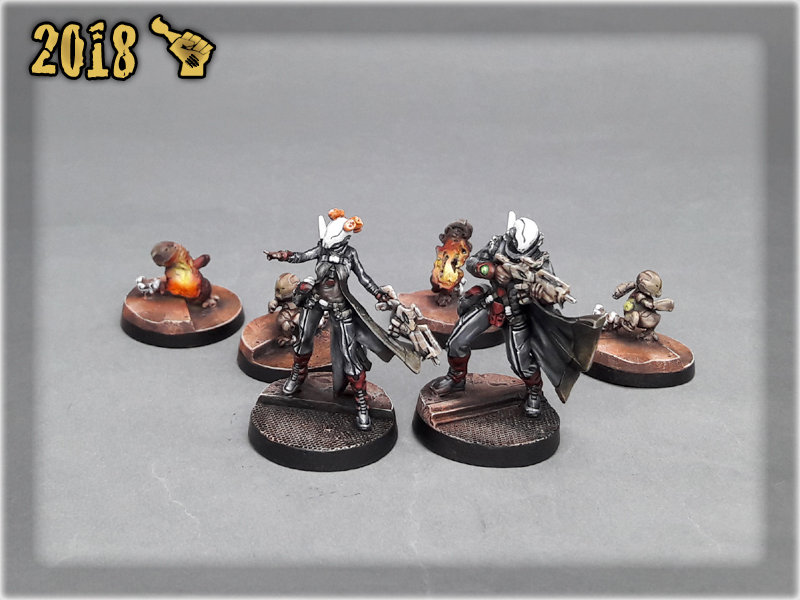
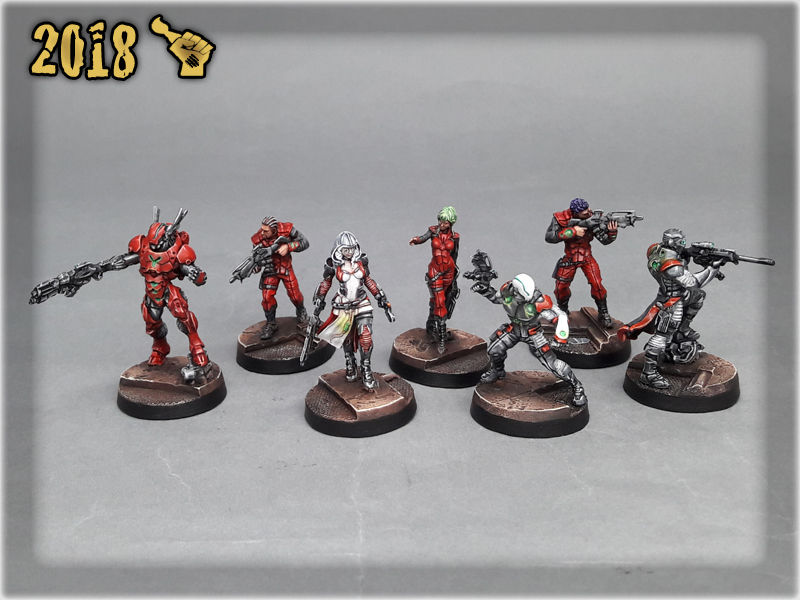
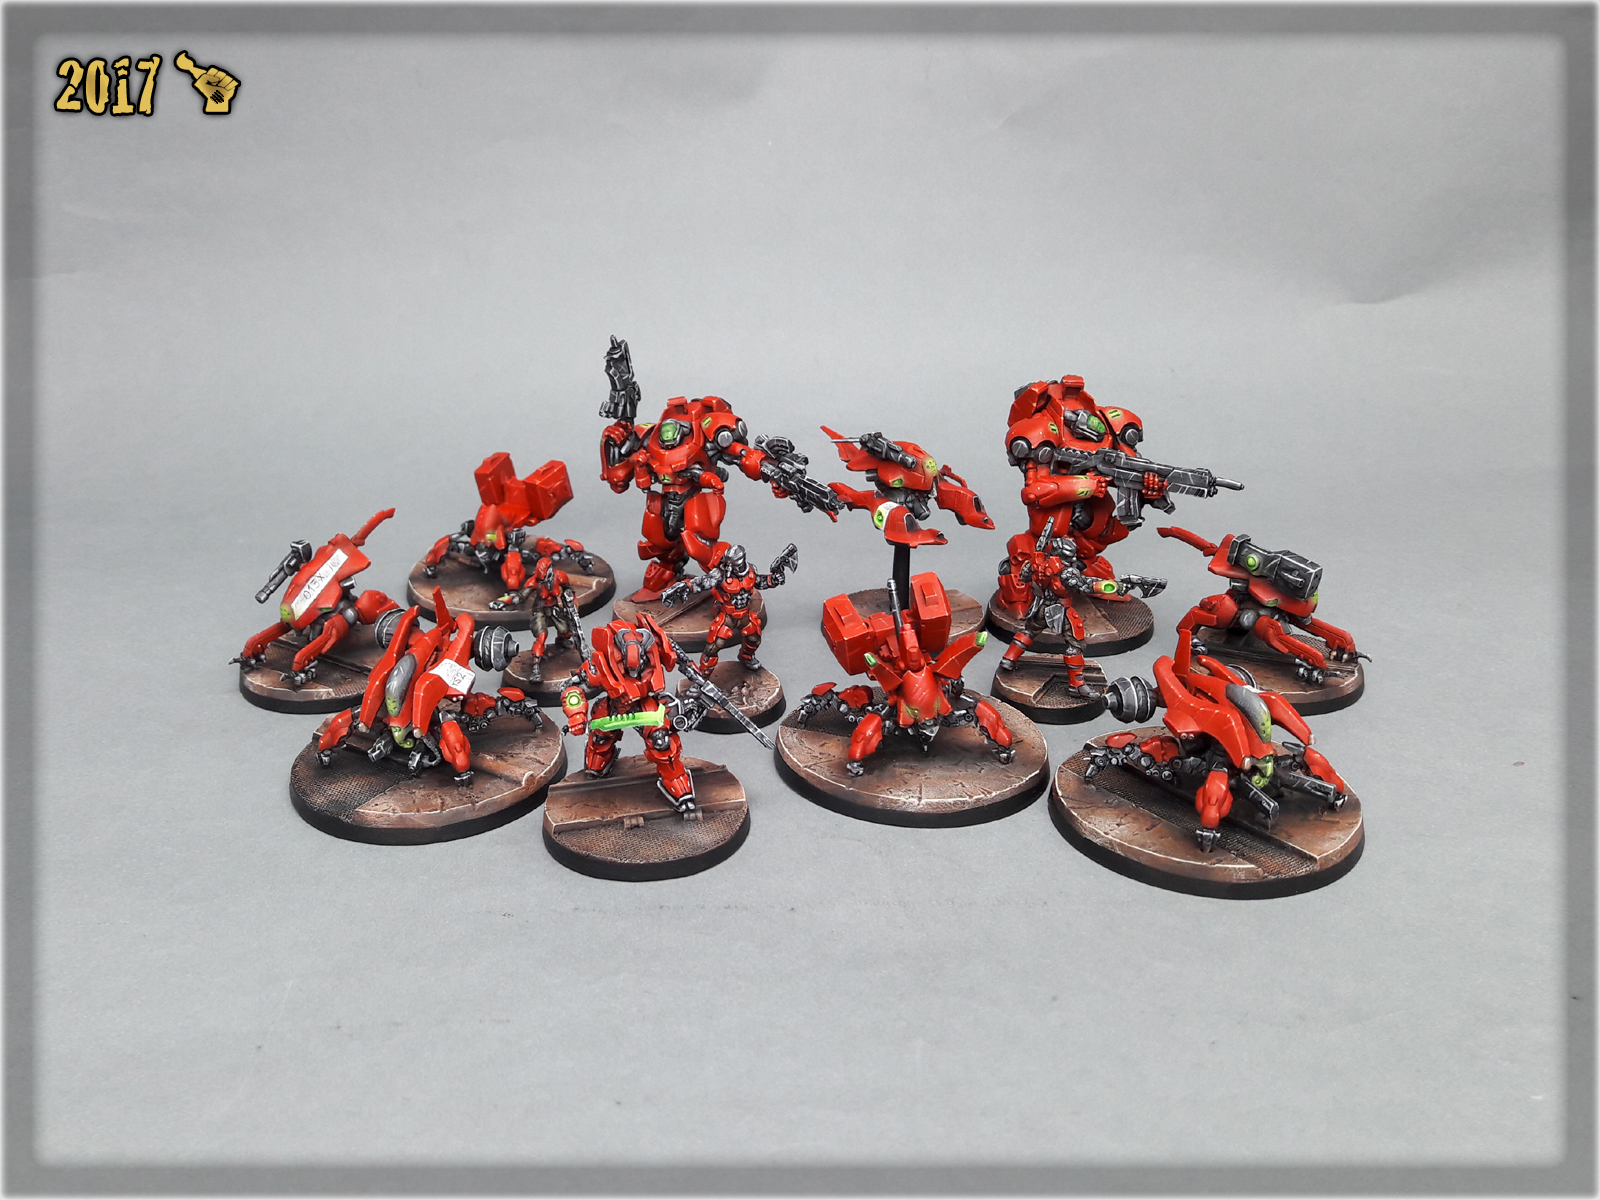
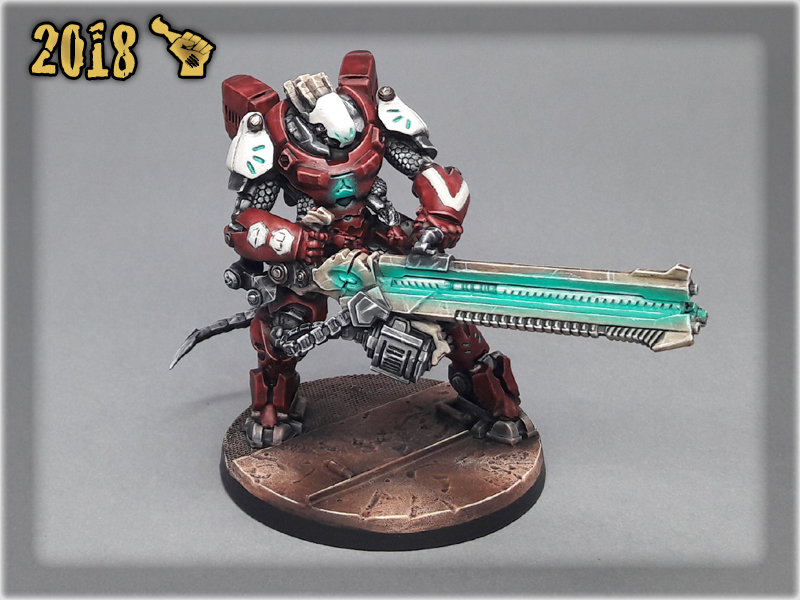
That’s it – you have followed me on my short journey from black undercoat to finished Corregidor Bases. Below you will find some examples of finished Corregidor Bases. Each bunch turns out slightly different from the rest. That’s because a slight difference in surface coverage or layer to layer proportion might result in change of how eye can see these bases. Either way – here they are: