- contact@scarhandpainting.com


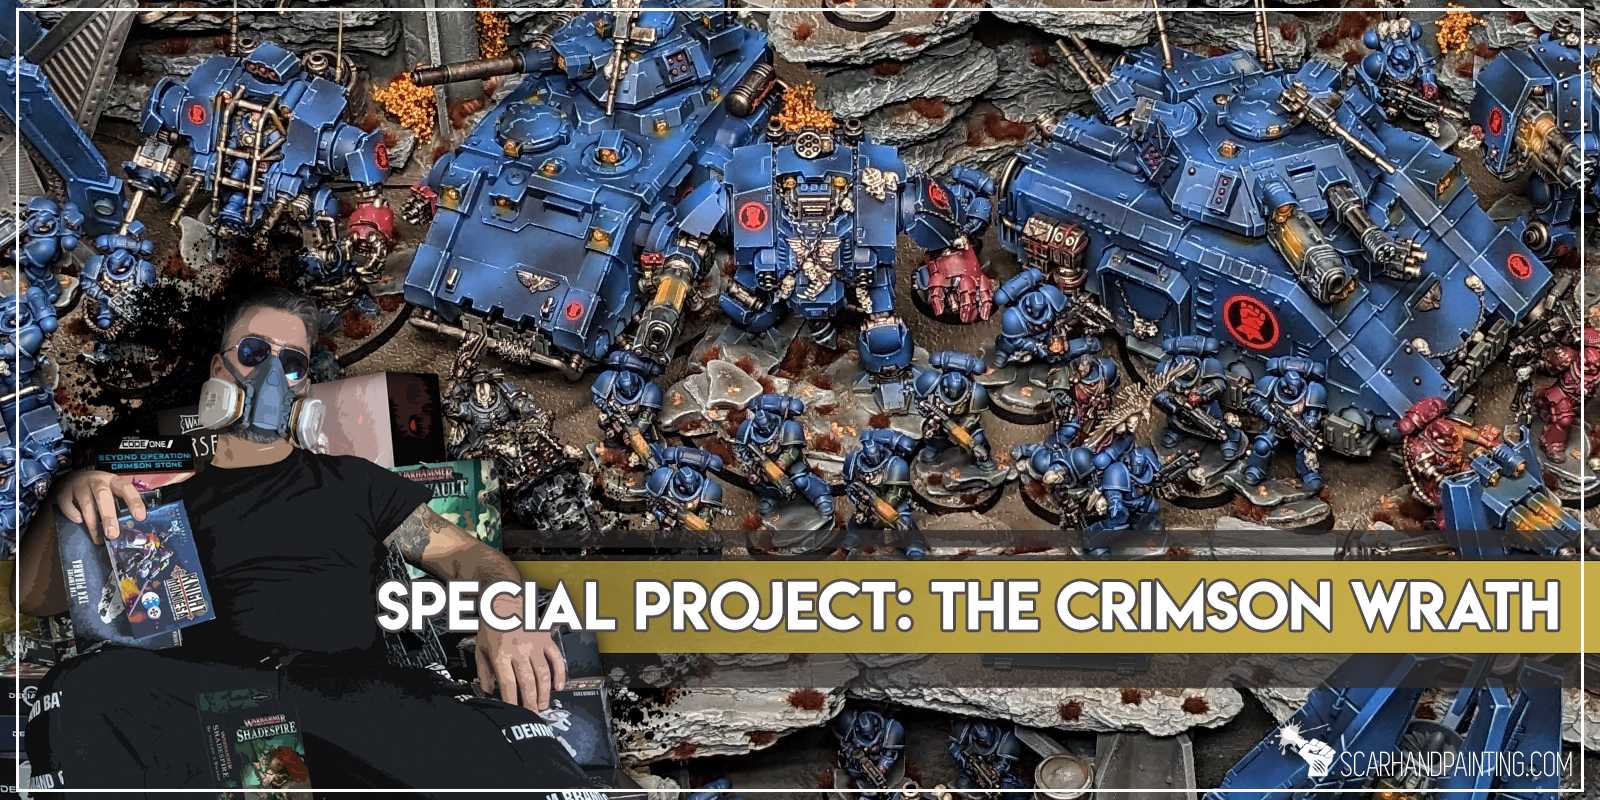
Armies On Parade – a yearly contest held by Games Workshop, pitting lovingly crafted Warhammer armies from across the globe against each other. I always admired all the stunningly painted pieces of art presented in the content with a mix of awe and jealousy. Deep down I felt (and still feel) the ceiling is just too high for me to reach. Then again the entire theme of this competition seems to be fun and participation, sharing our hobby joy, rather than trying to win against the very pinnacle of talented people out there. This year, seven days before the very deadline, I have decided to unleash my Crimson Fists and join the challenge!
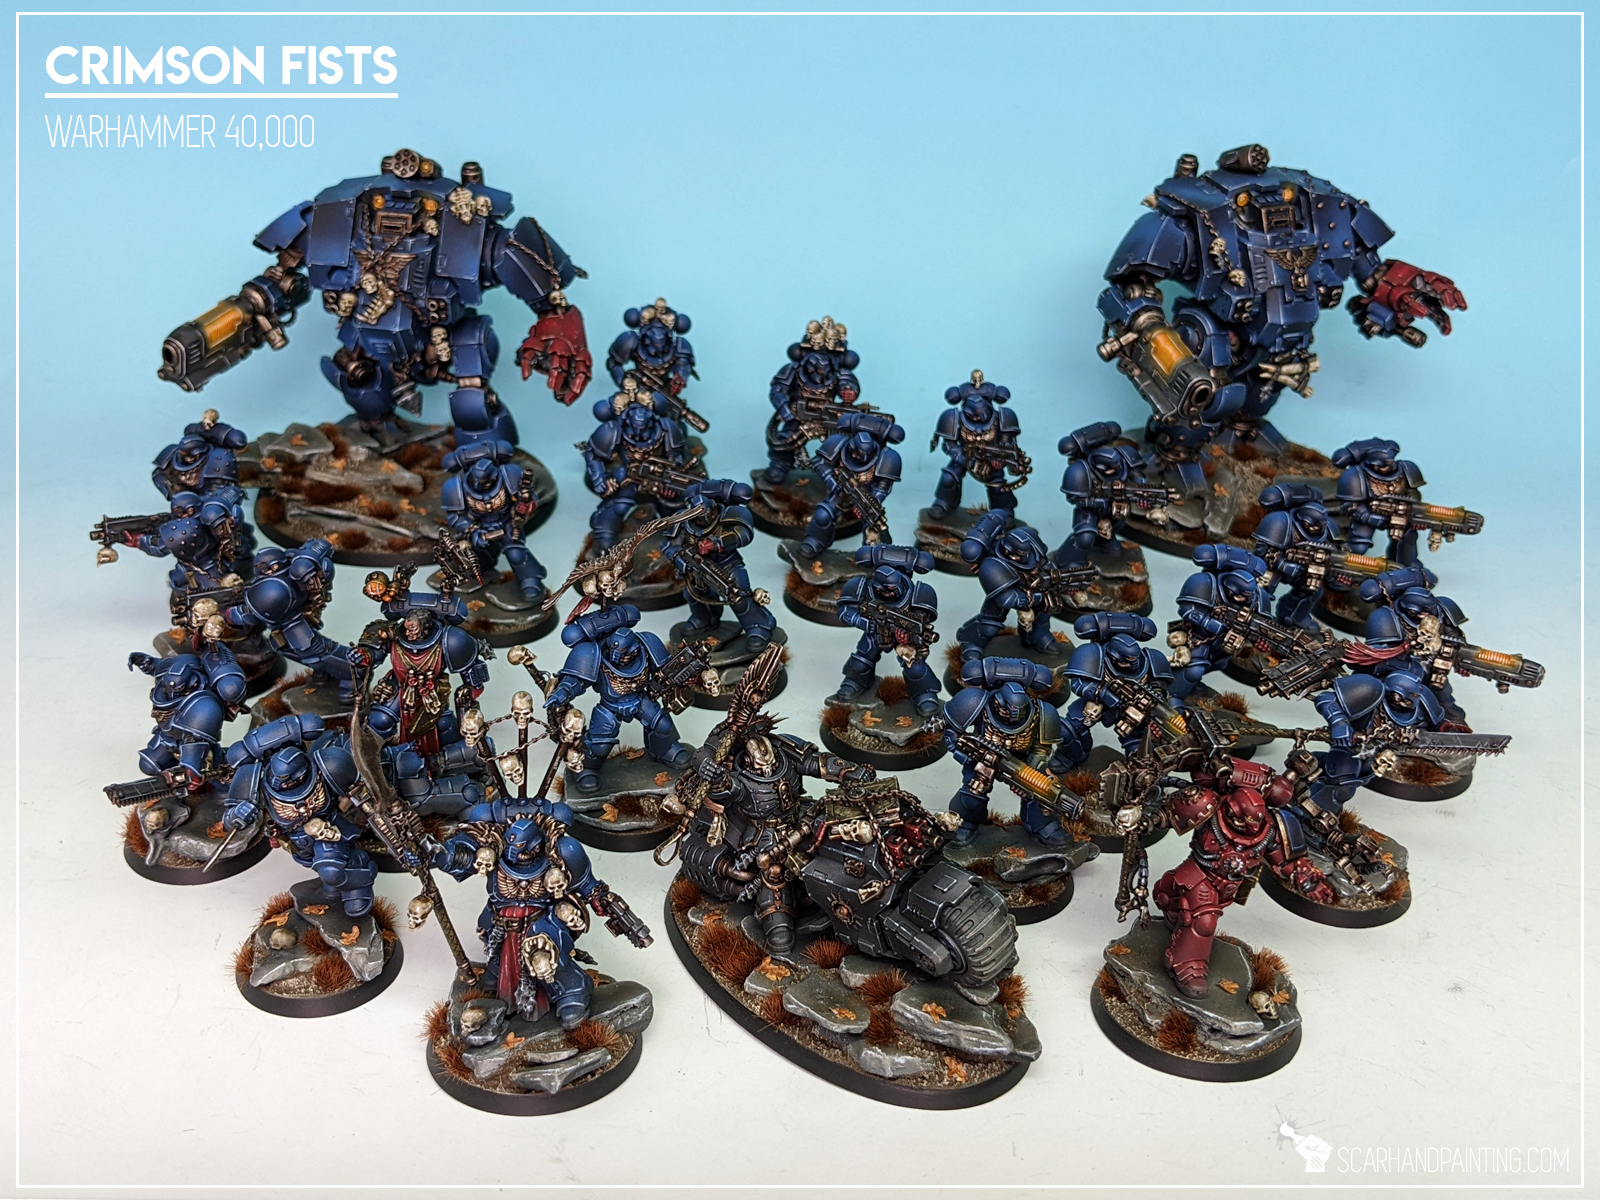
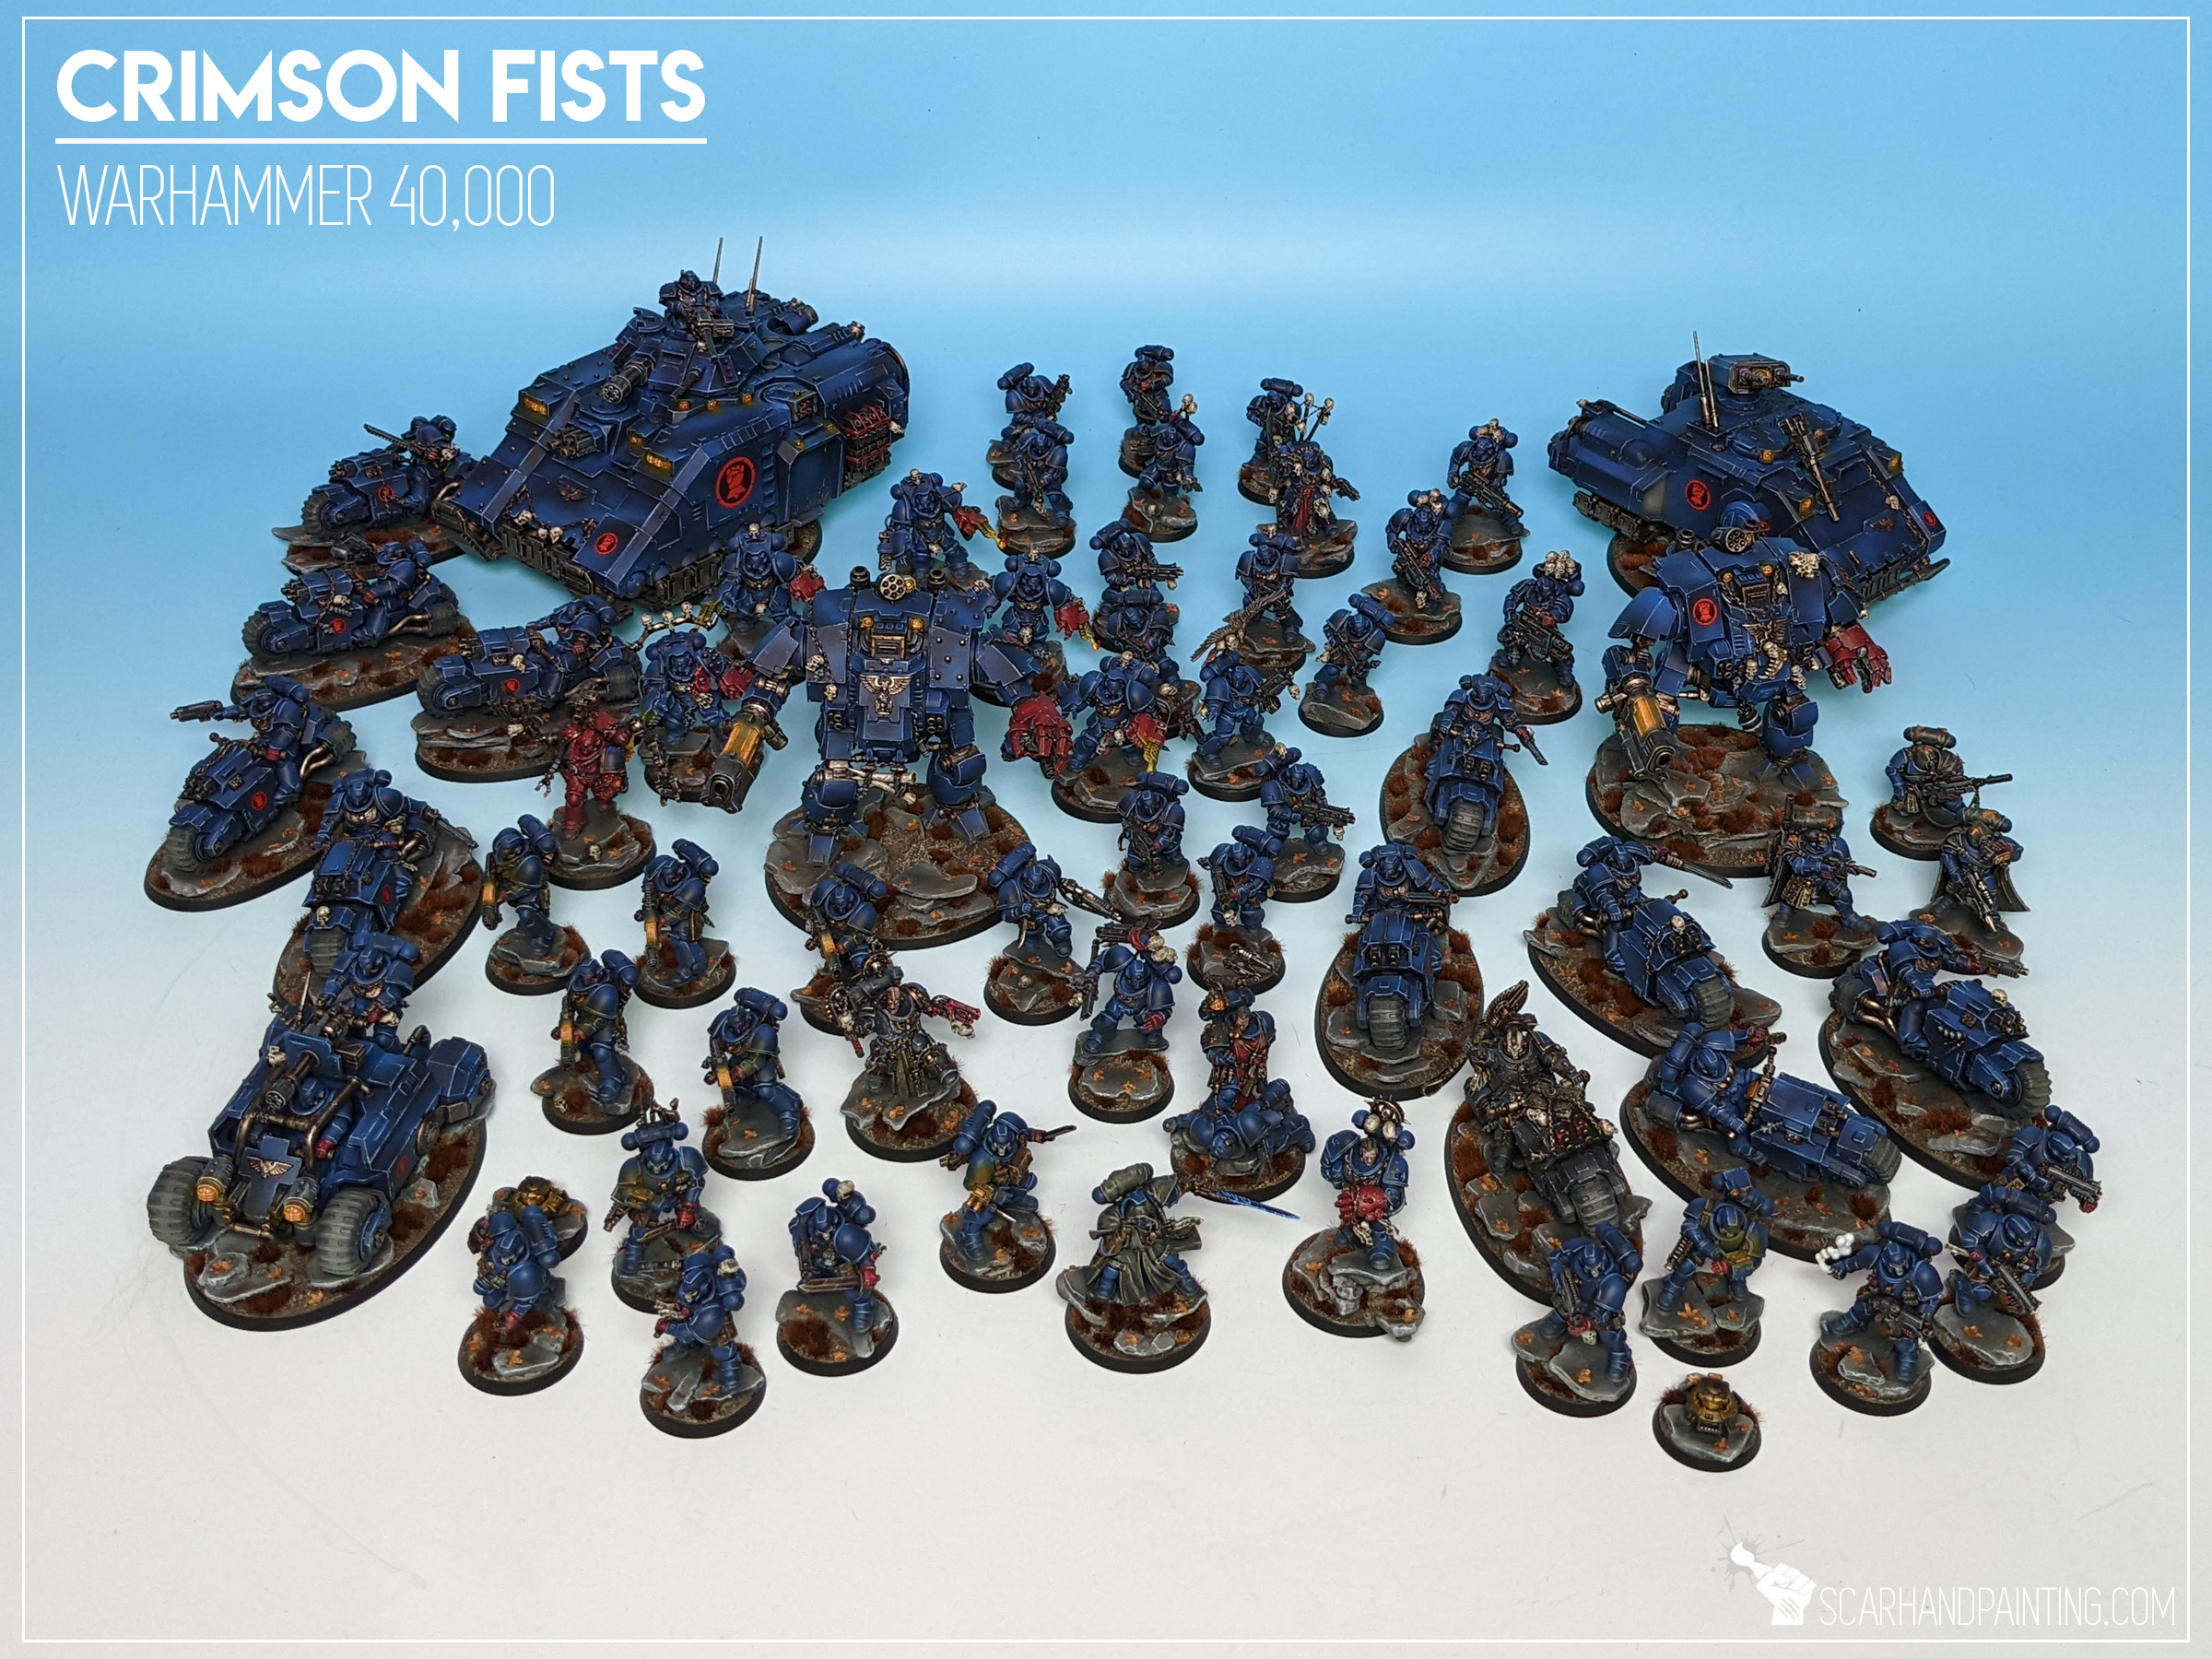

Like all of my hobby projects, the Crimson Fists collection started out of nowhere. I was ‘divorced’ with Warhammer 40,000 for about ten years, after abandoning a huge Space Marines army back at the down of the sixth edition. The new Primaris Marines grew on me and for a long time I felt like it’ll be fun to start a new army. One day something broke and I went for it, getting just enough carefully selected boxes to build a solid 2000 points list. I had many ideas on where to take my miniatures, including multiple made up Chapters and color schemes. In the end, remembering the wrathful charge of the Crimson Fists from the “Crimson Tears” Soul Drinkers novel, I decided to follow up on a youthful dream of a Crimson Fists collection. Contrary to my usual practices of fast bulk painting to play, I focused on small numbers, cherishing the process and pouring my heart and soul into each and every miniature. I steadily grew the collection, adding a few units at a time, prioritizing unit diversity rather than chasing the meta. As it happens, expanding a collection by adding one or two units every month, allows for some awesome hobby experience – but also expands the available toolset to breathe fresh air into the gaming experience. With a lively, positive local community around the corner, I’m having the time of my life with miniatures games right now and am speaking from over 25 years of wargaming experience behind my belt.
Easy to say that having a main, living project – a growing collection to add to and have fun with, might have saved me as a hobbyist. I love my Crimson Fists army and it is for this reason that I chose to honor it by preparing a special diorama.

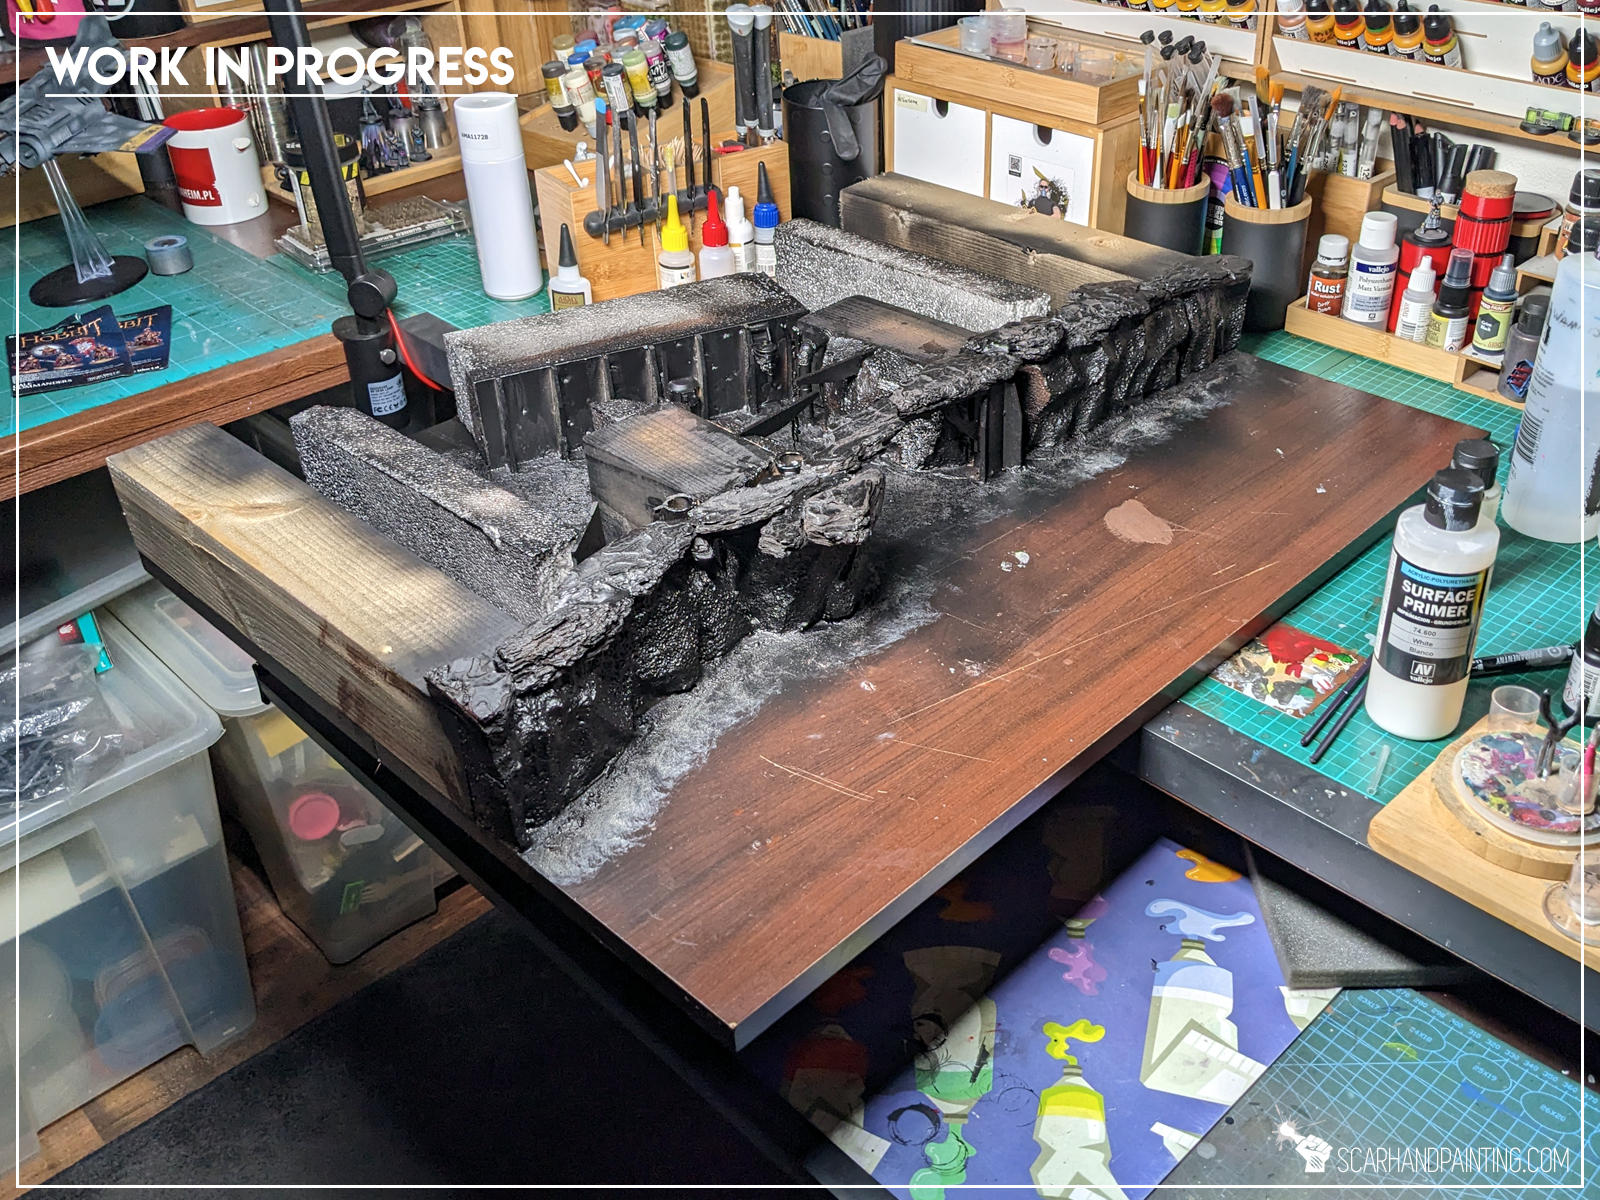
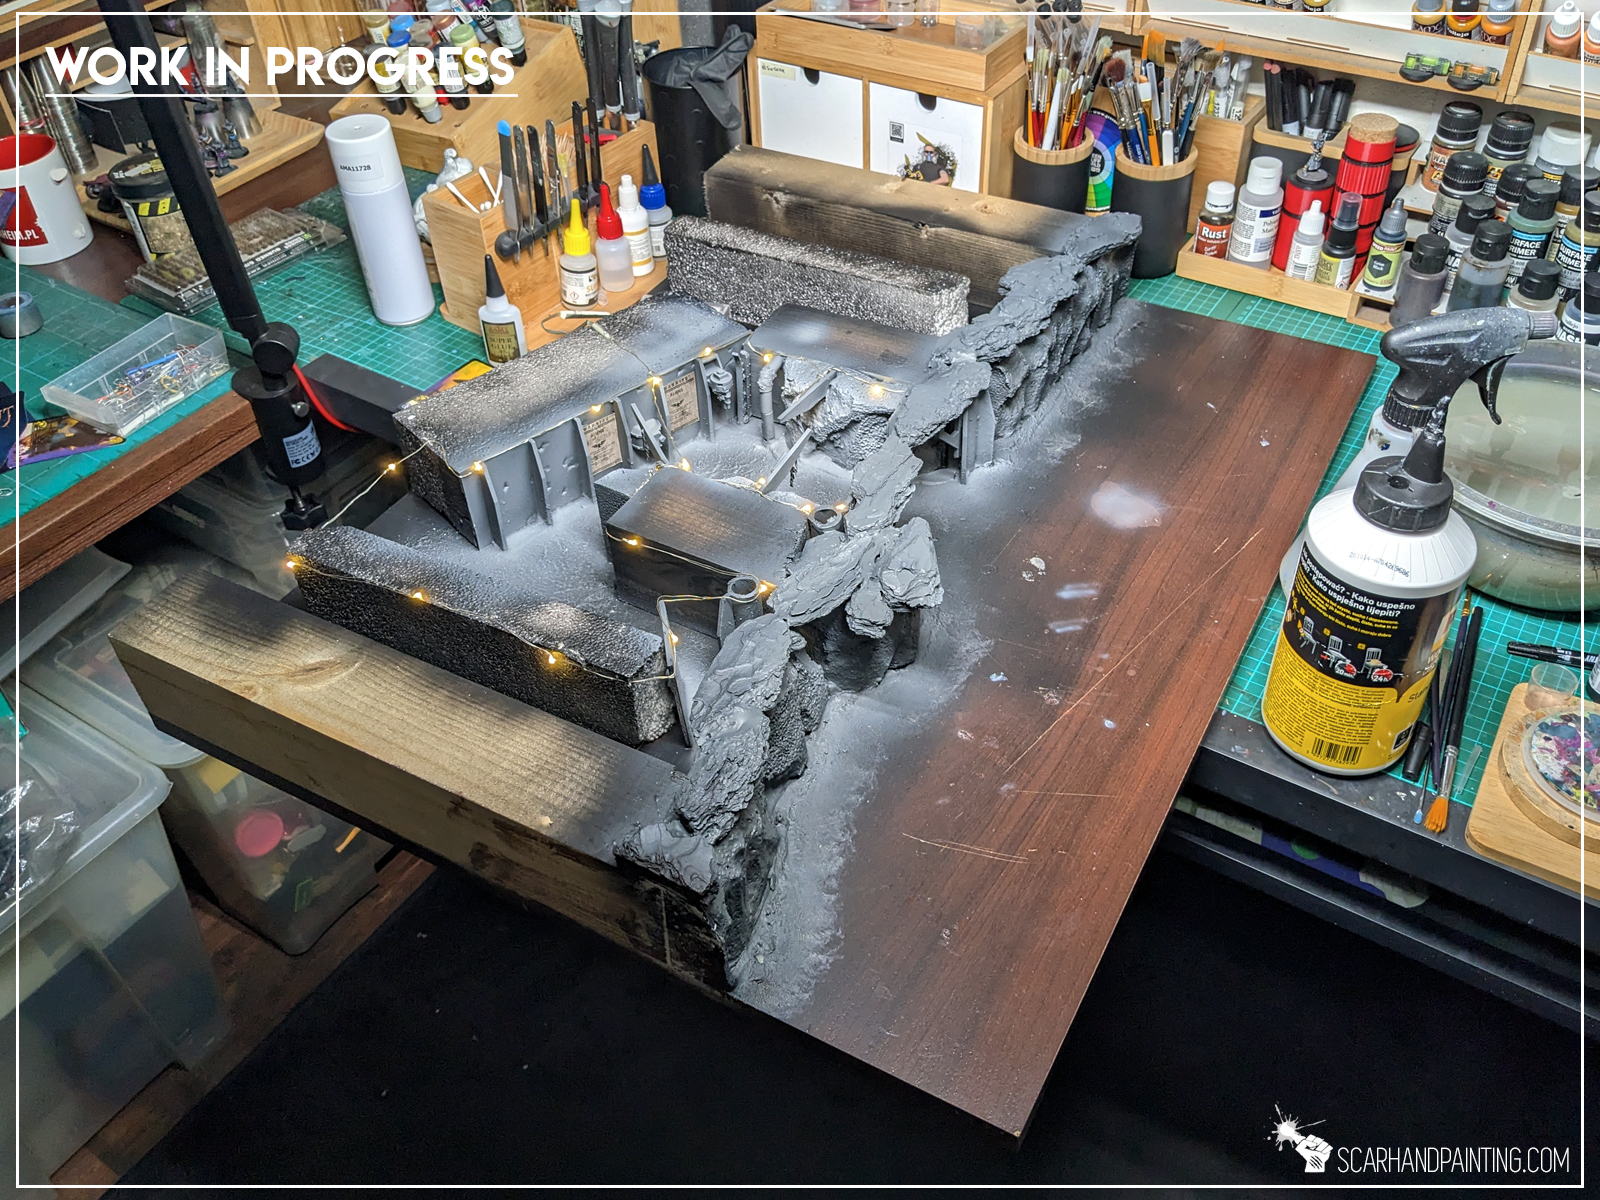
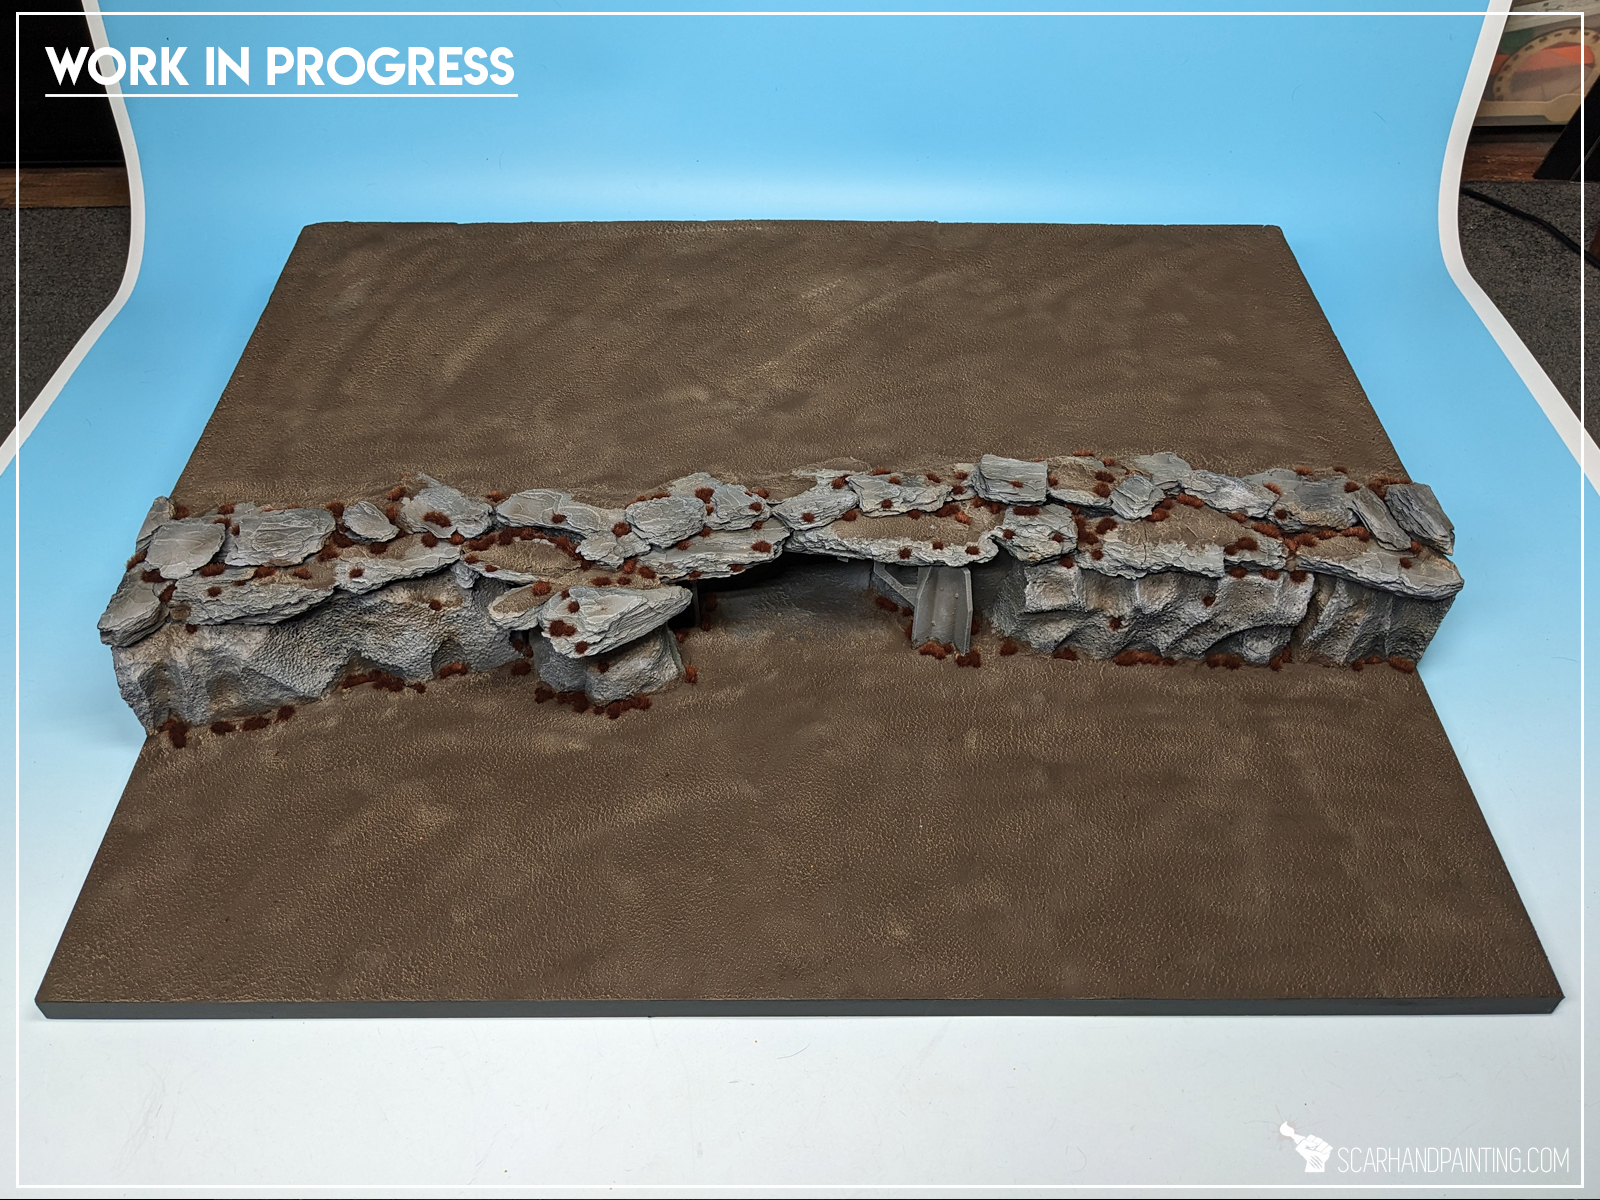
Once I’ve committed I had a really bad time sleeping – multiple ideas ferociously fighting with one another inside my head. I spent almost four hours laying in bed, trying to fall asleep, grinding thoughts on how to better present the army. In the end I chose to focus on a two level base with a part of an exposed ground level and a large vantage point. I have been building advanced Crimson Fists themed scenery for the last year and figured a relatively simple base would allow me to use everything I have to build an interesting background and add detail.
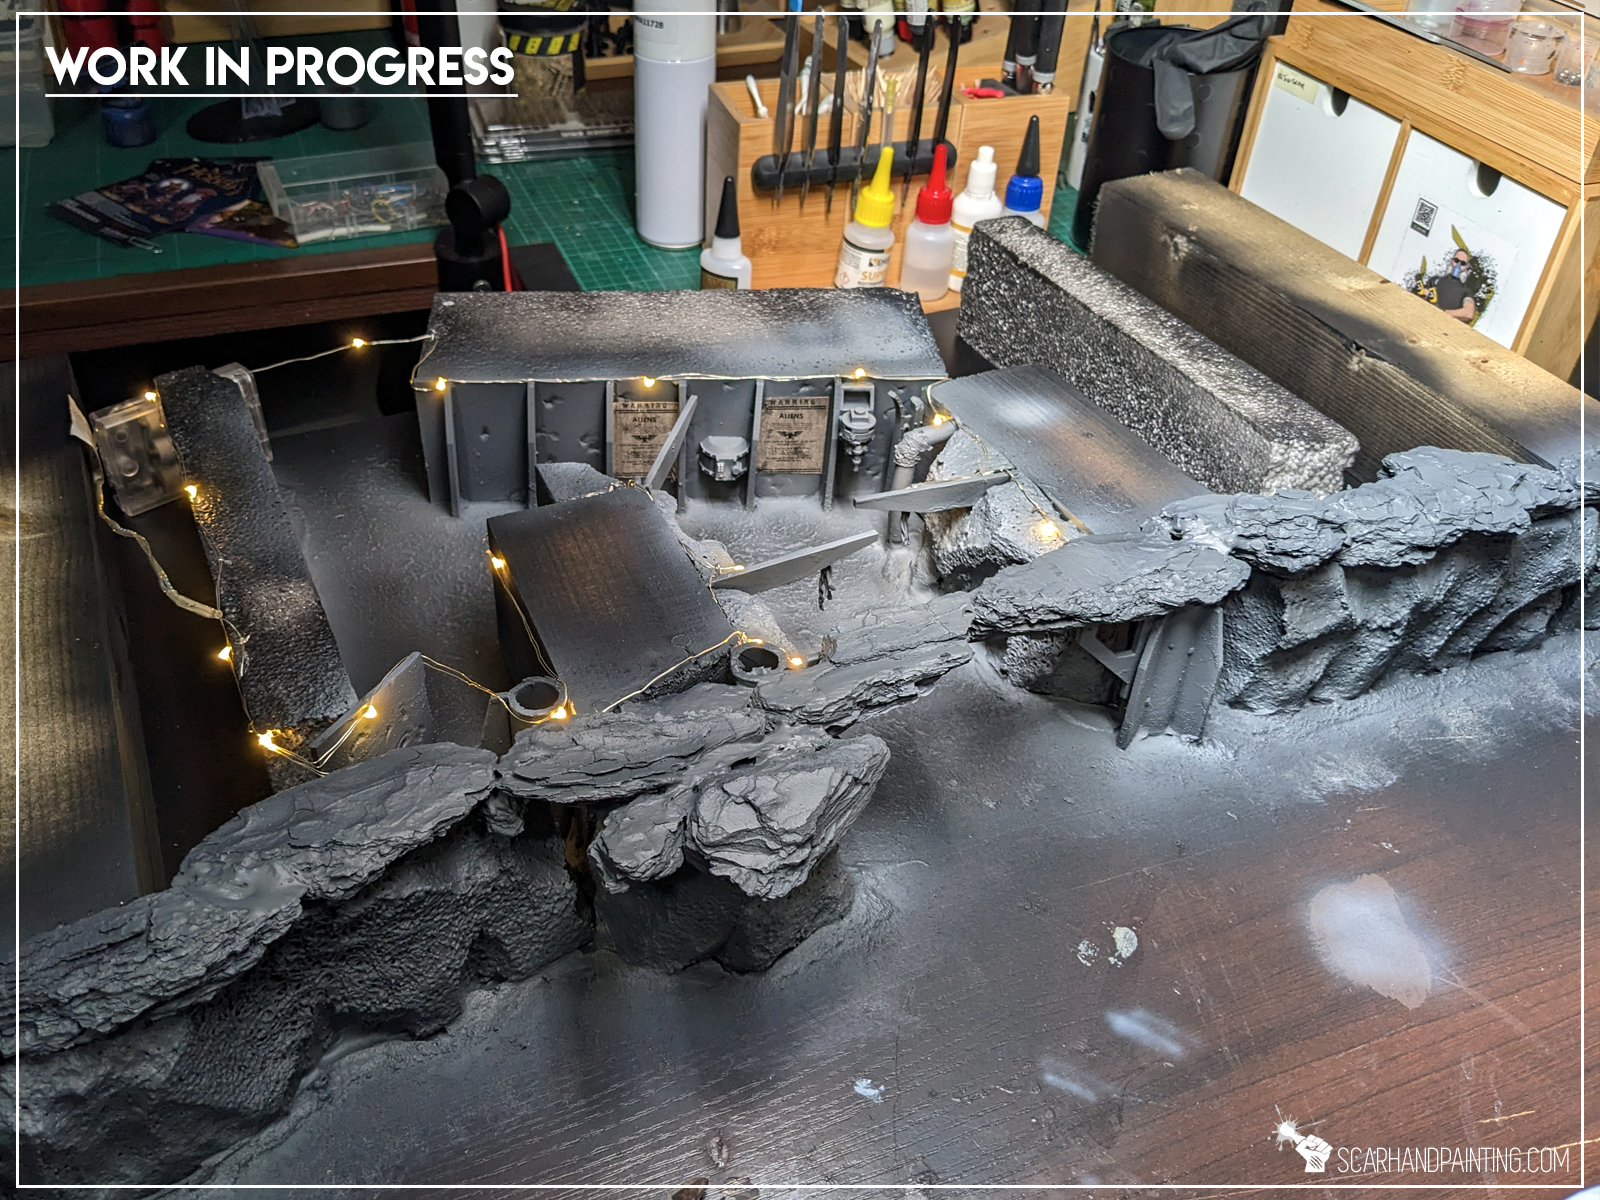
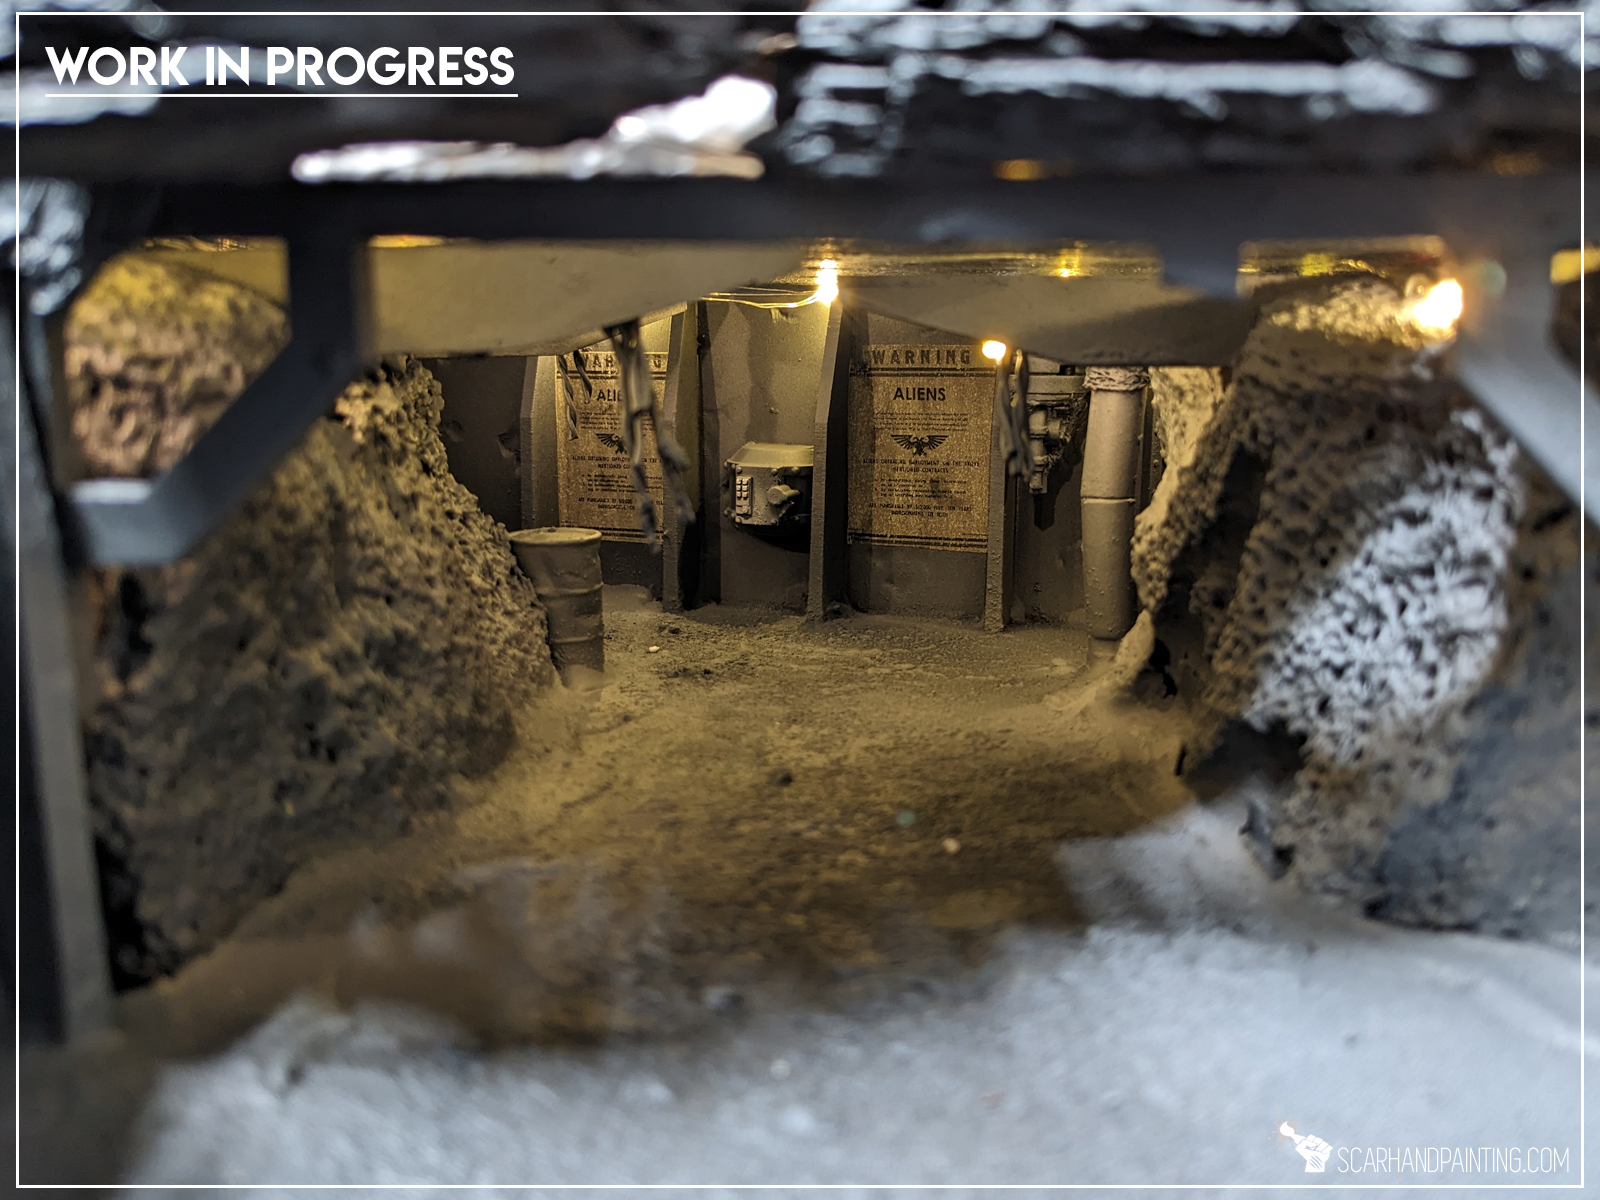
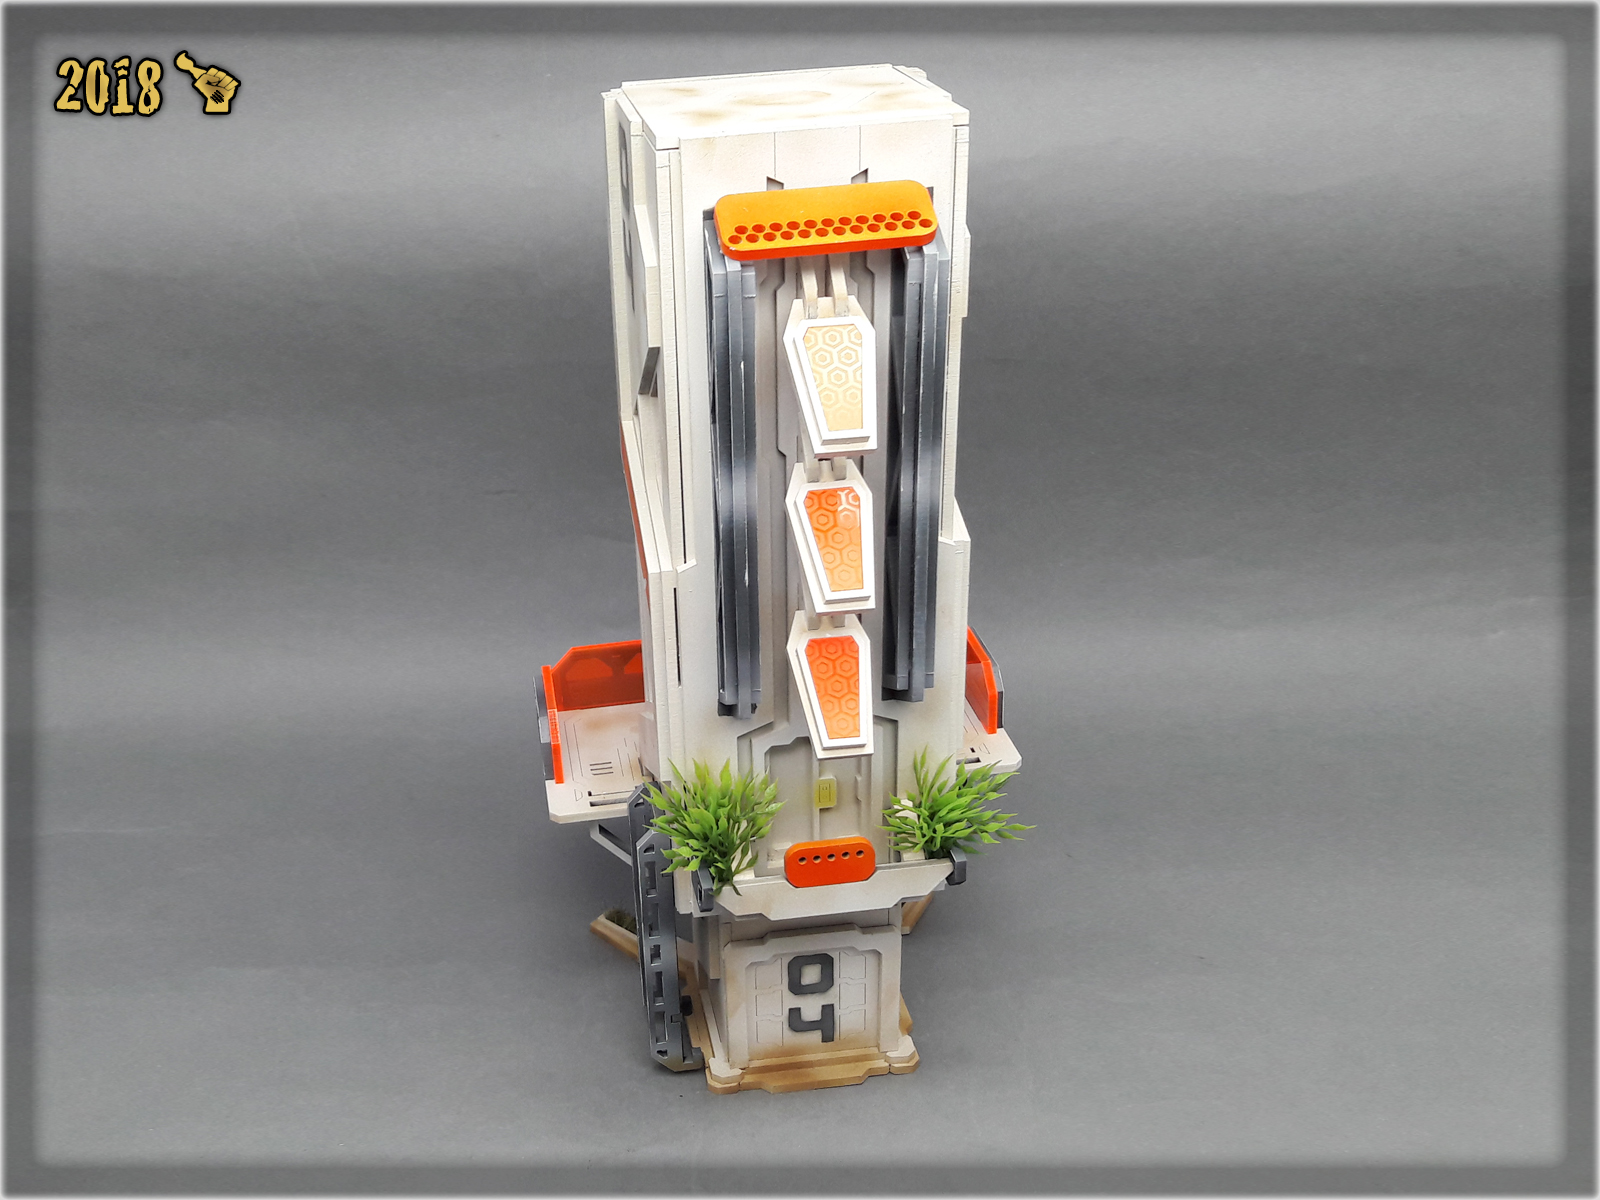
To spice things up I have added a decrepit bunker complex entry tunnel and taken it a little bit further with a set of small lights spread across its length. Because there was an entire vantage level coming in on top – I had to finish painting the tunnel before starting to work on the exterior area.
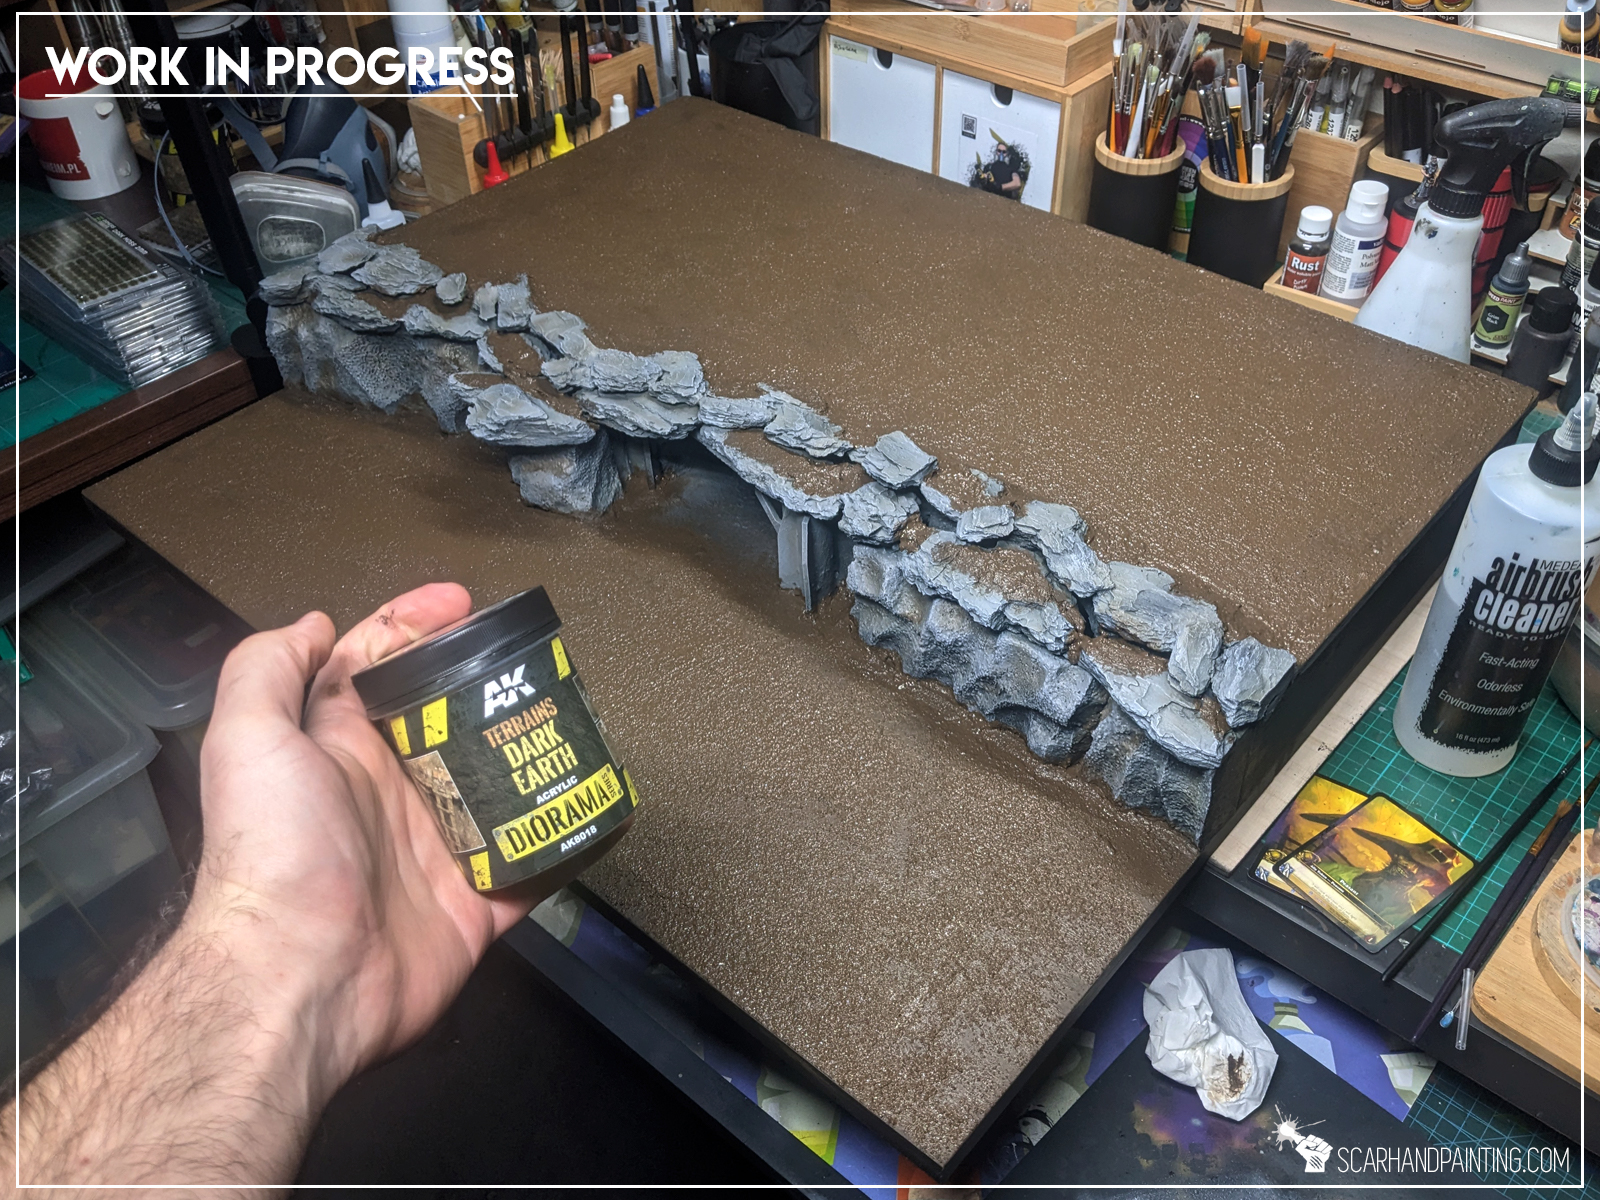
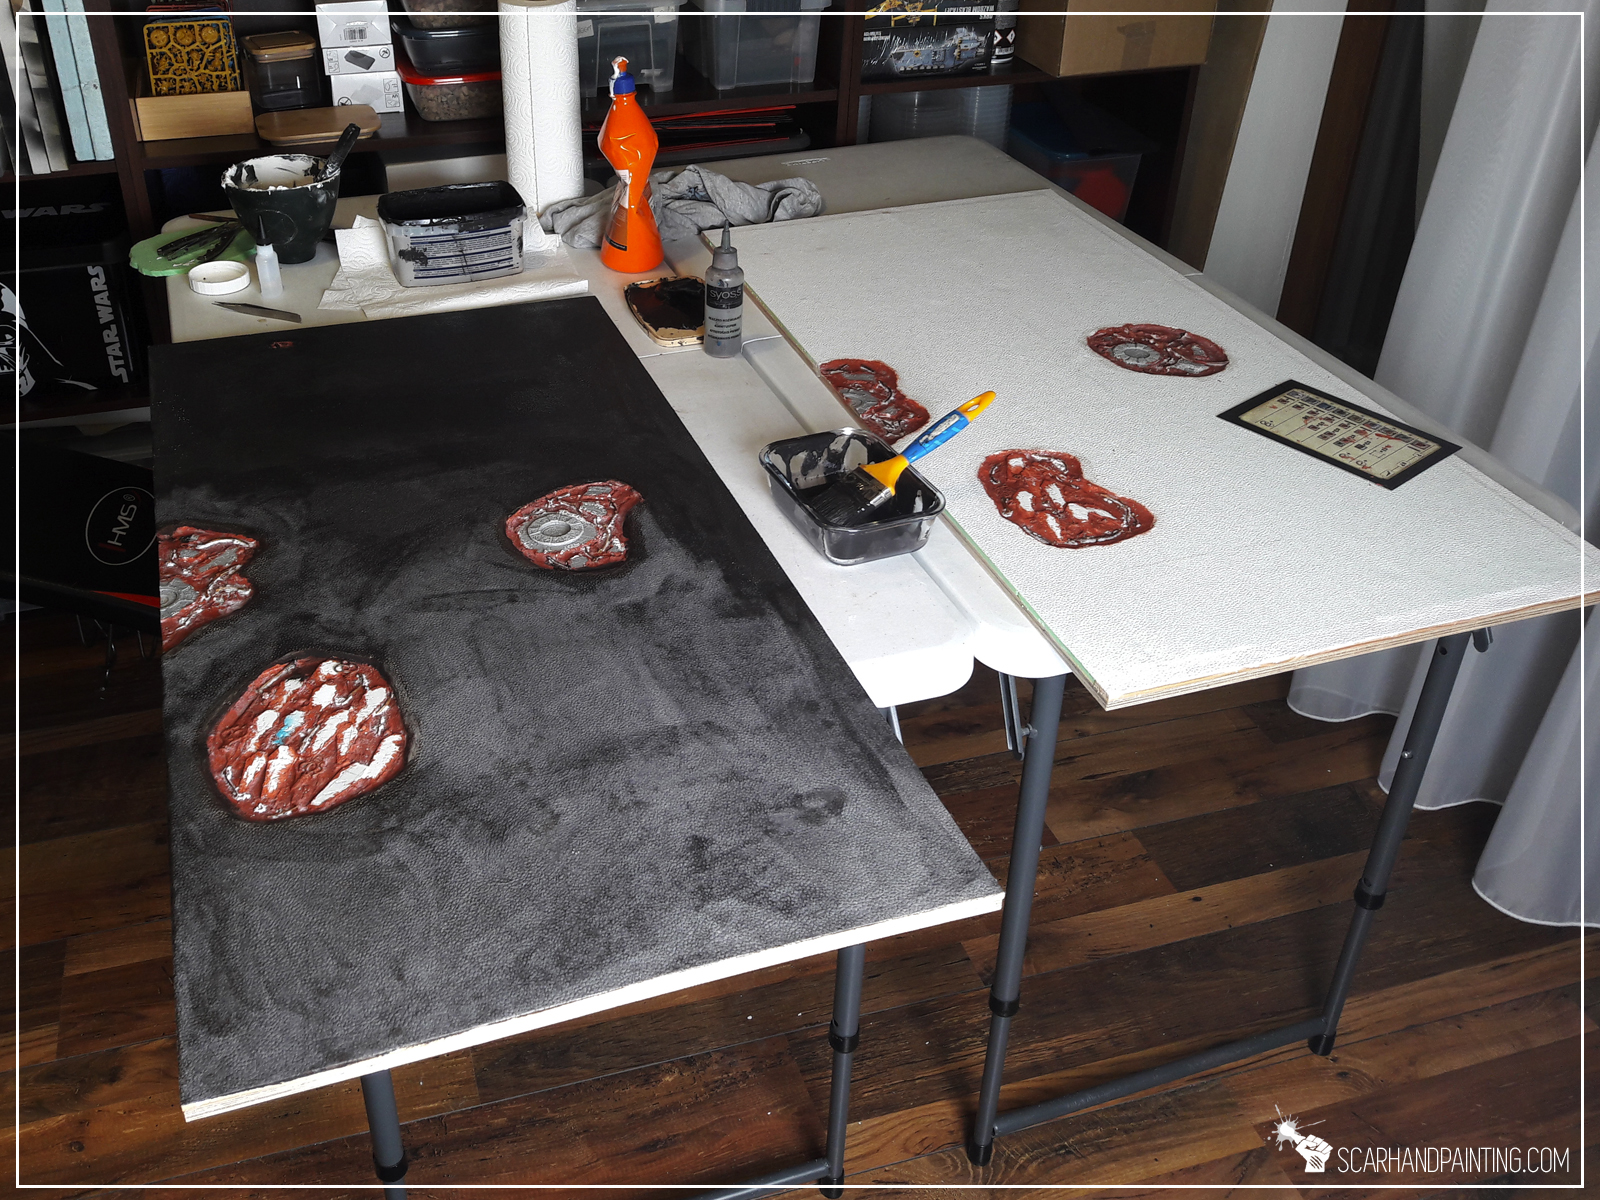
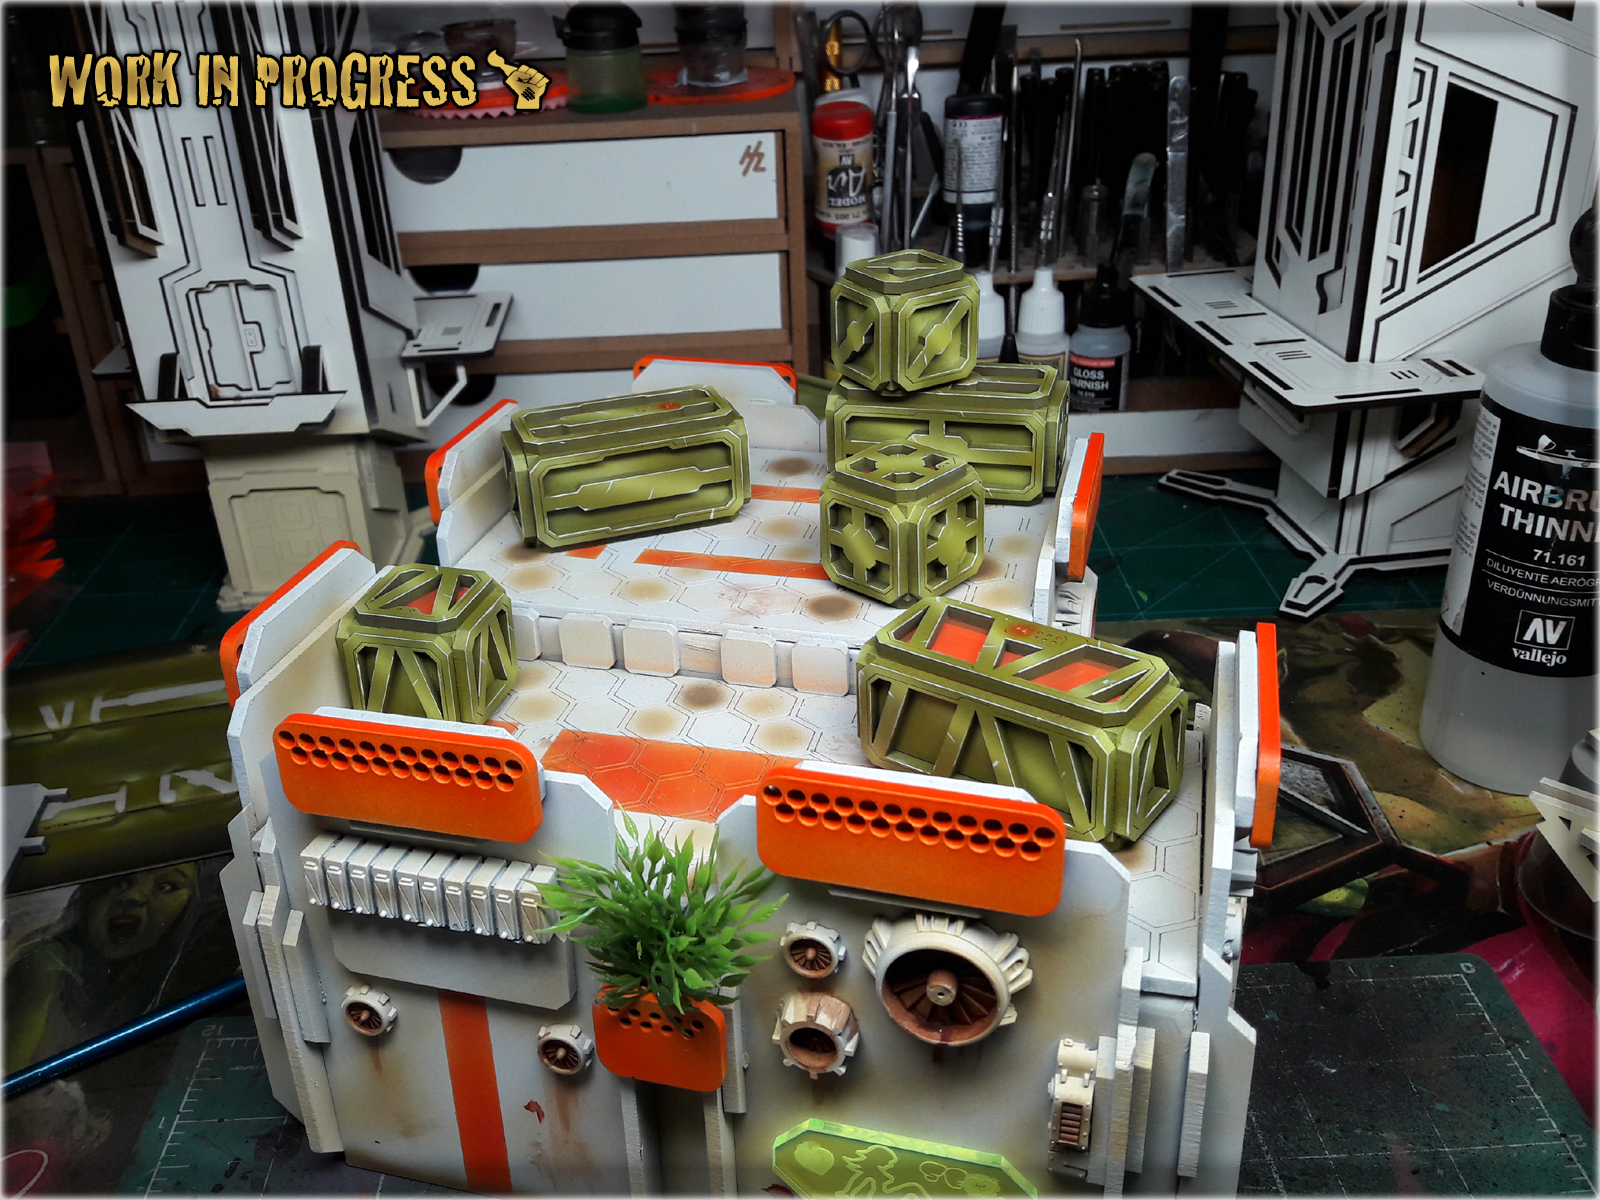
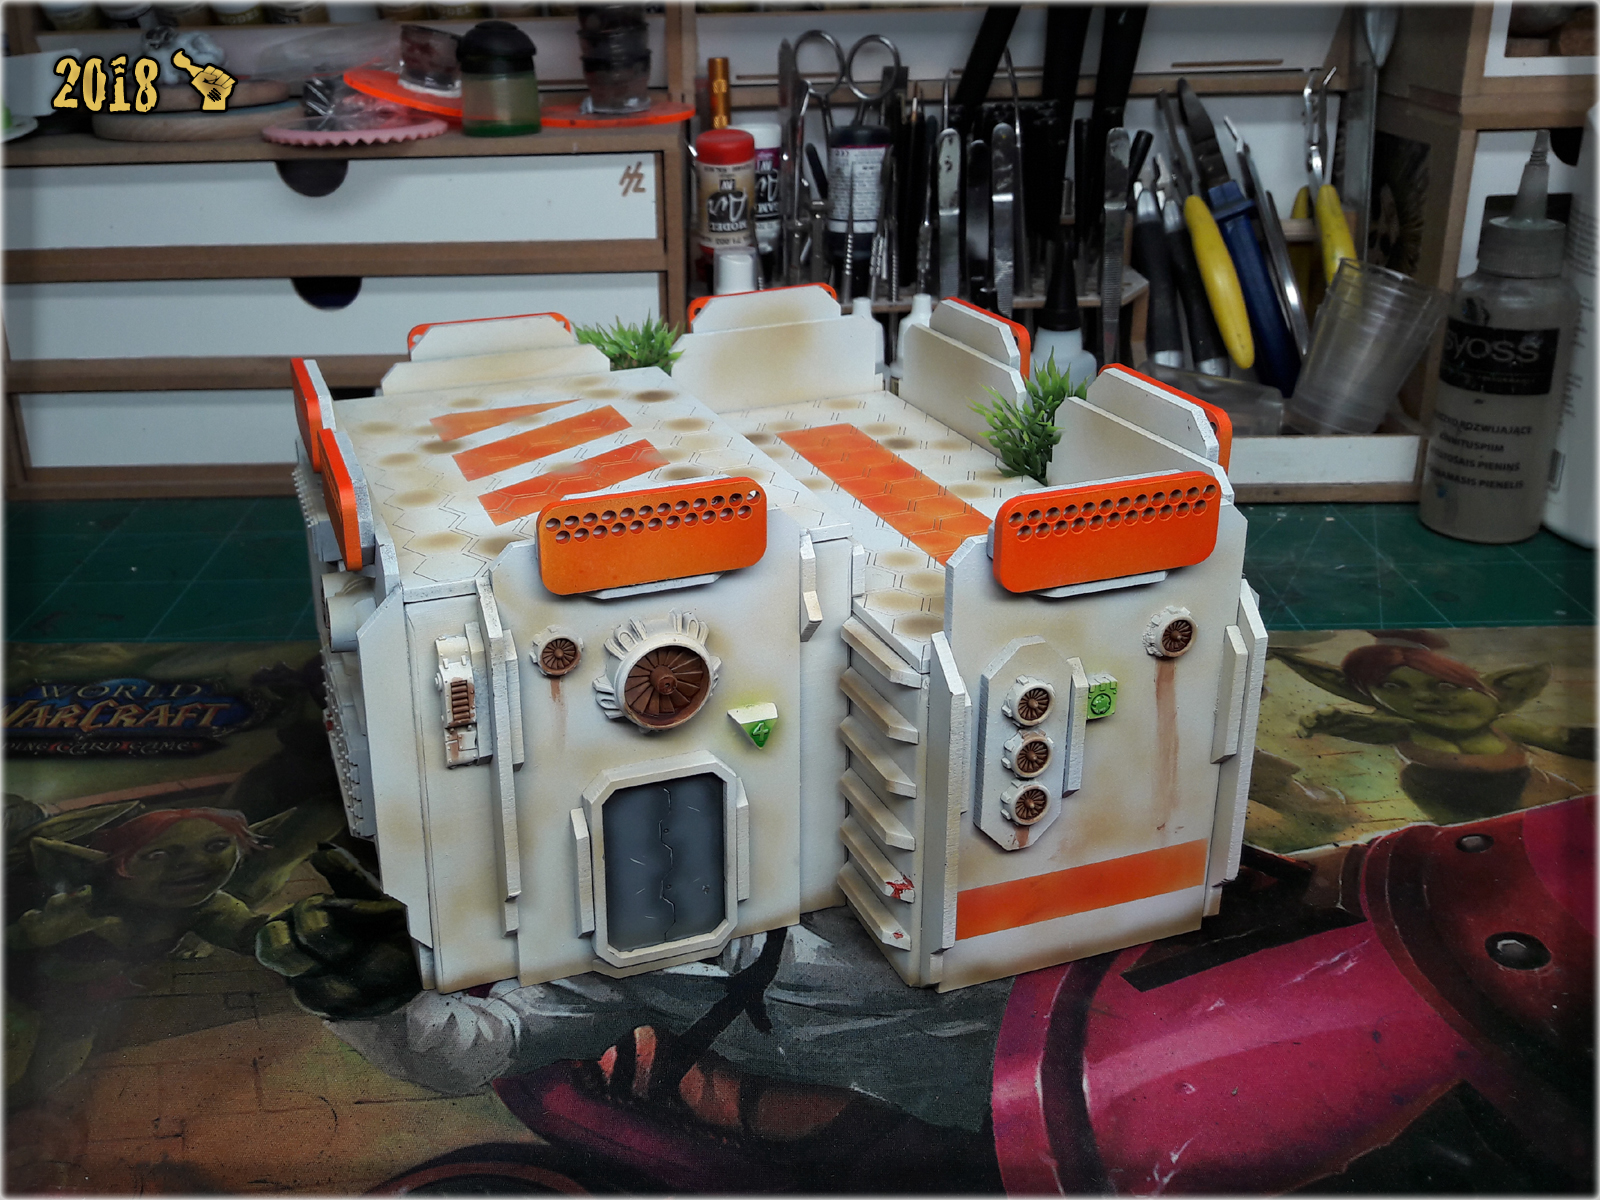
It took me about four hours from laying a wooden worktop on the ground to sealing the vantage floor on top of the finished tunnel. What was left was the exterior and this part was rather easy in comparison. It took less than two hours of the actual work (and a lot of AK Interactive’s Dark Ground texture paint apart from other hobby materials) to see the thing completed.
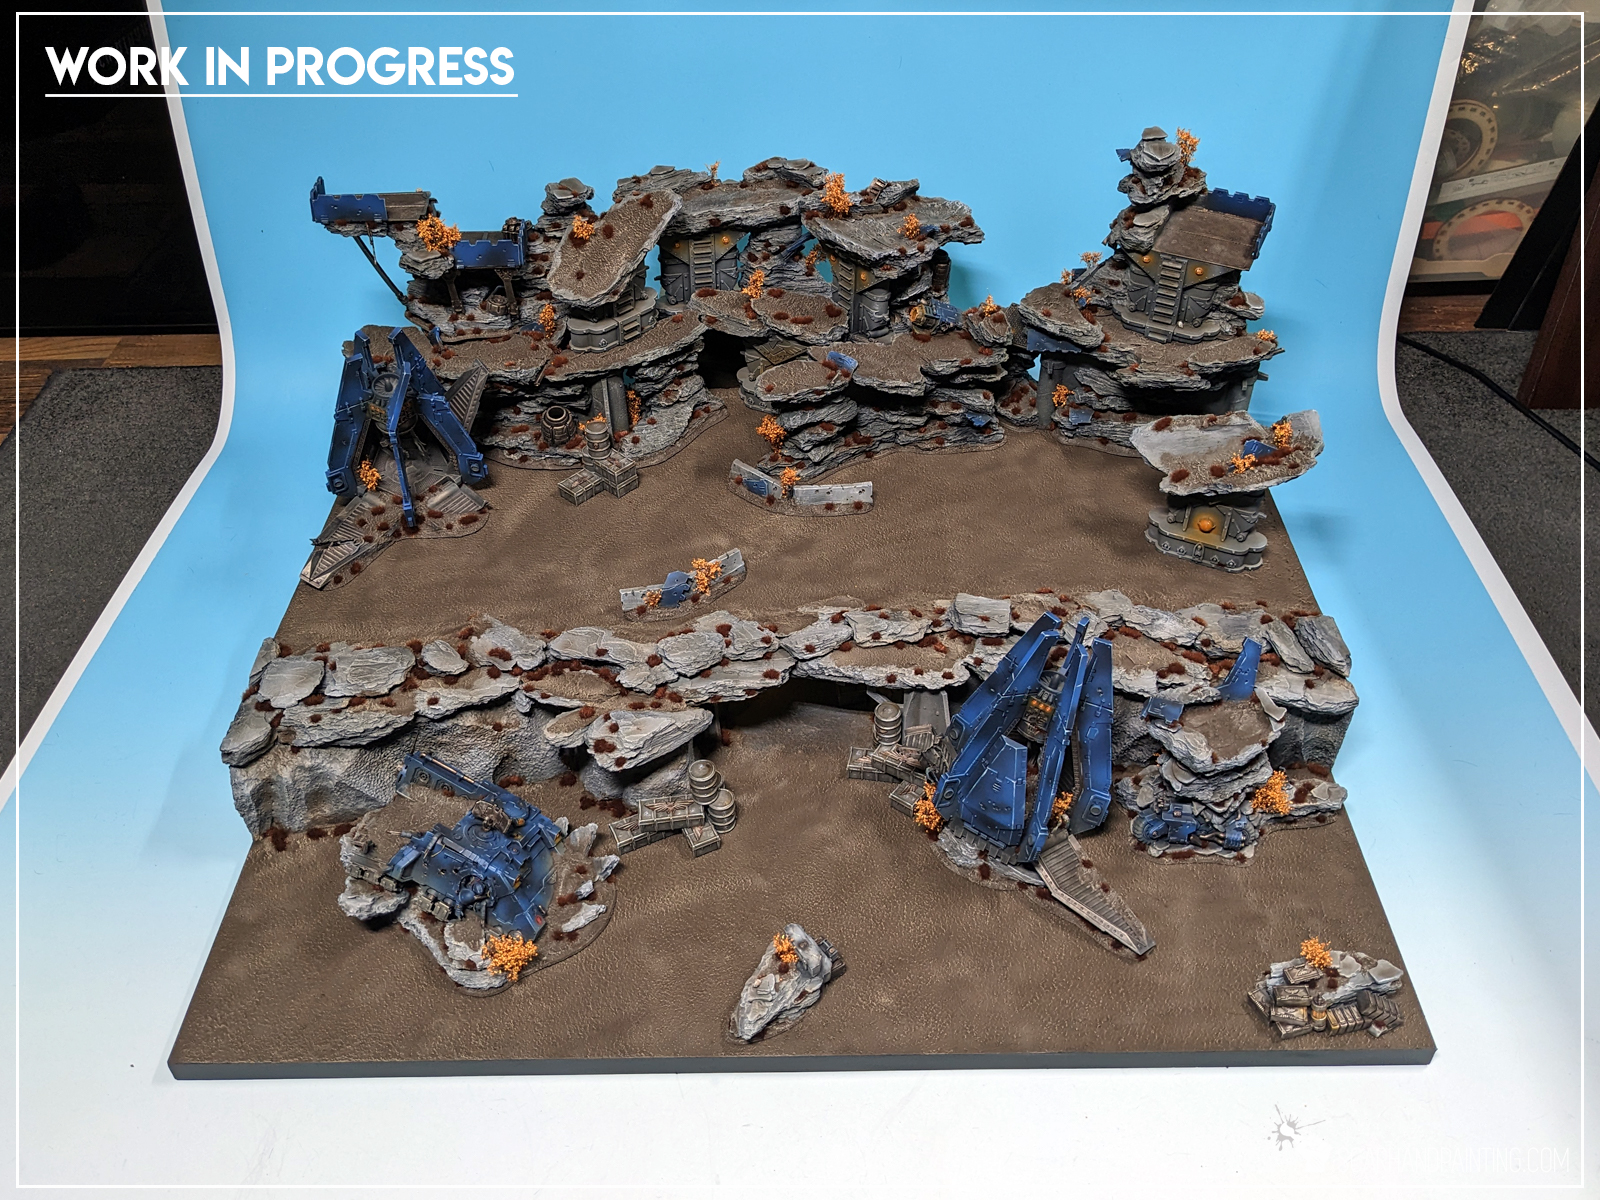
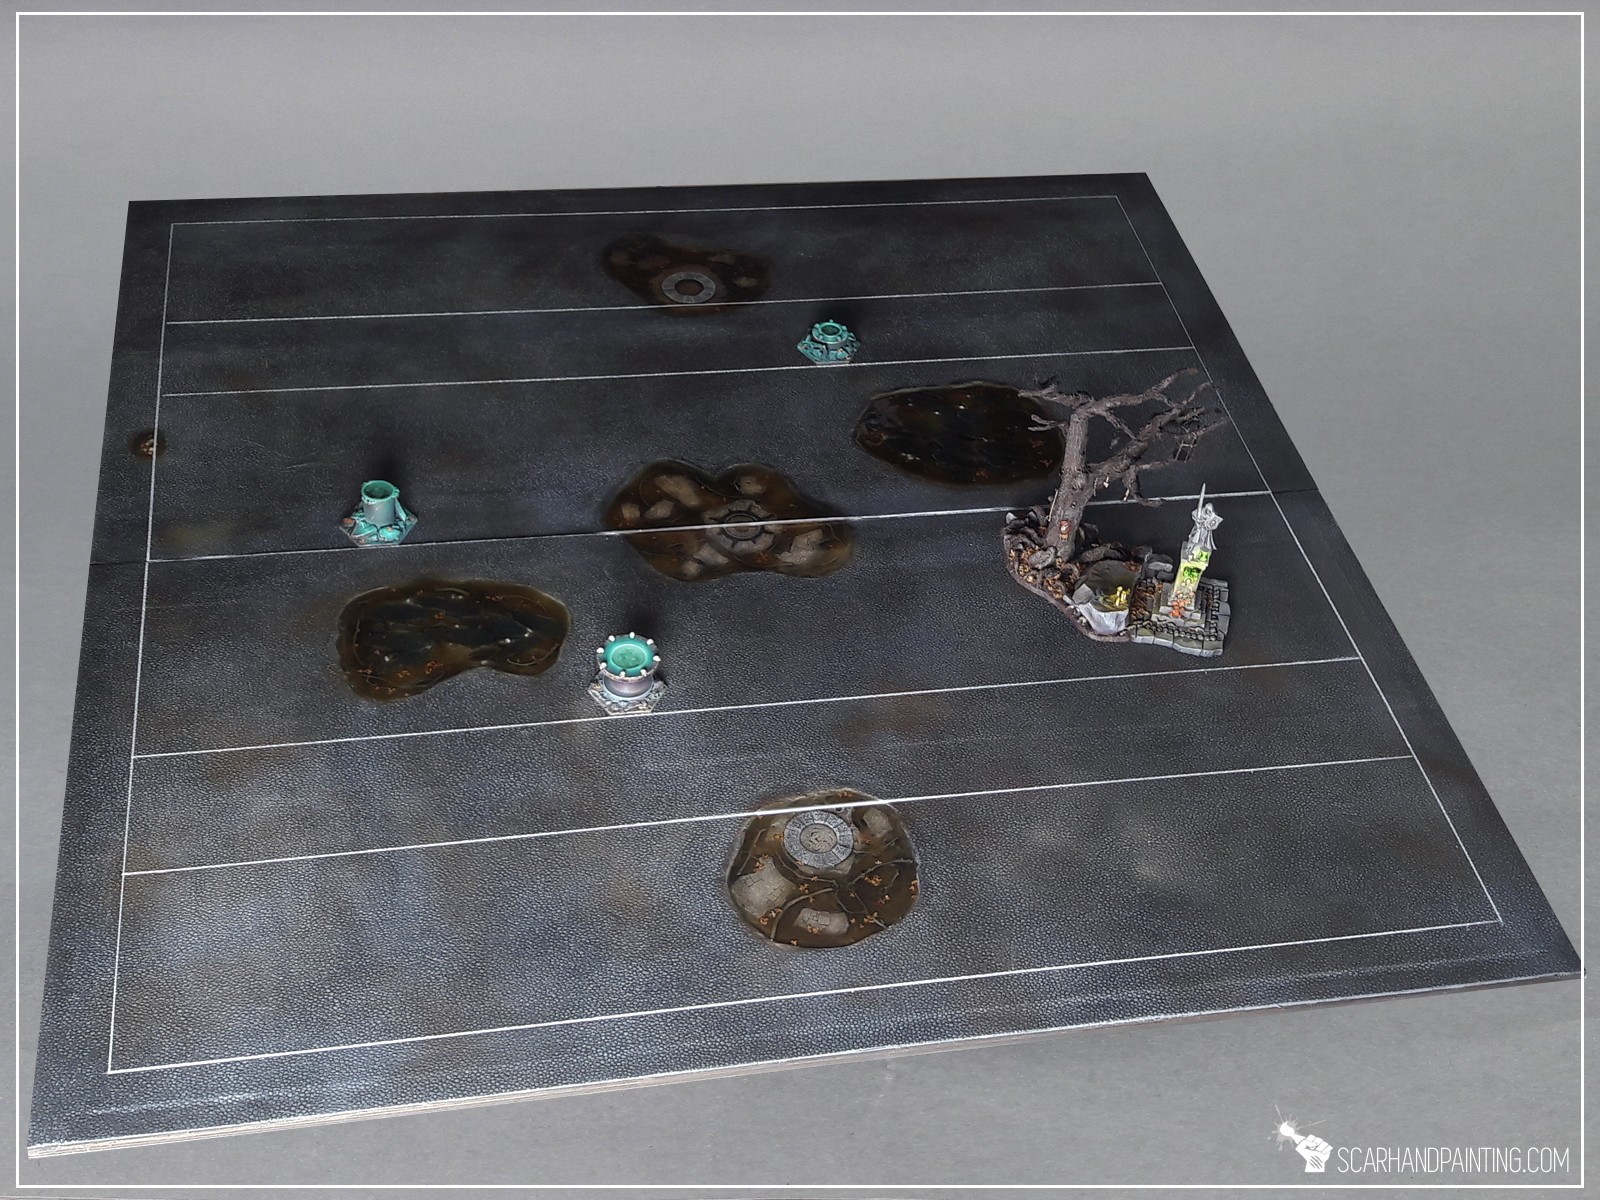
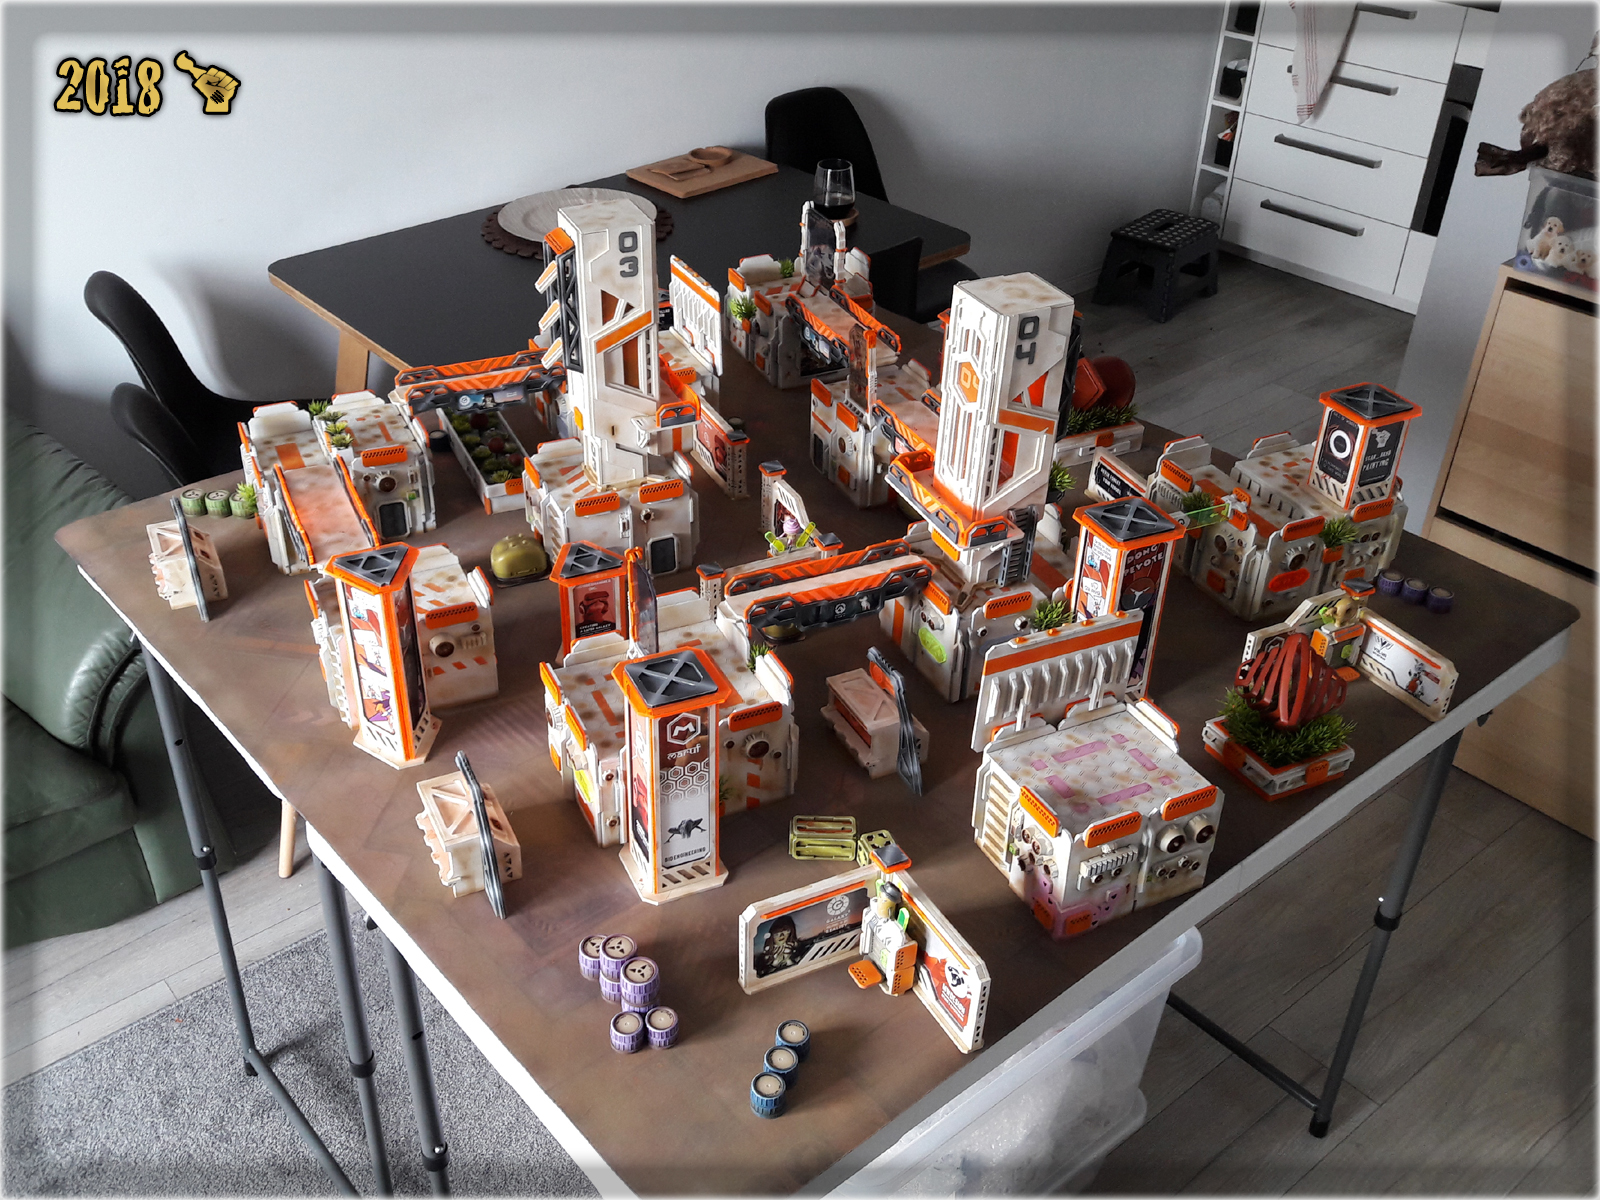
Once the painting process was finished, I was left with the tedious and challenging process of setting up the background, planning the scene and breathing some life into it. I always admired cinematic shots from White Dwarf magazines – never would I ever dared to imagine I would be taking one myself 🙂
It took a lot of time and hard decision making on which units to include and which ones had to be cut, but in the end I finally had my epic, cinematic shot. Or at least a test shot to be precise.
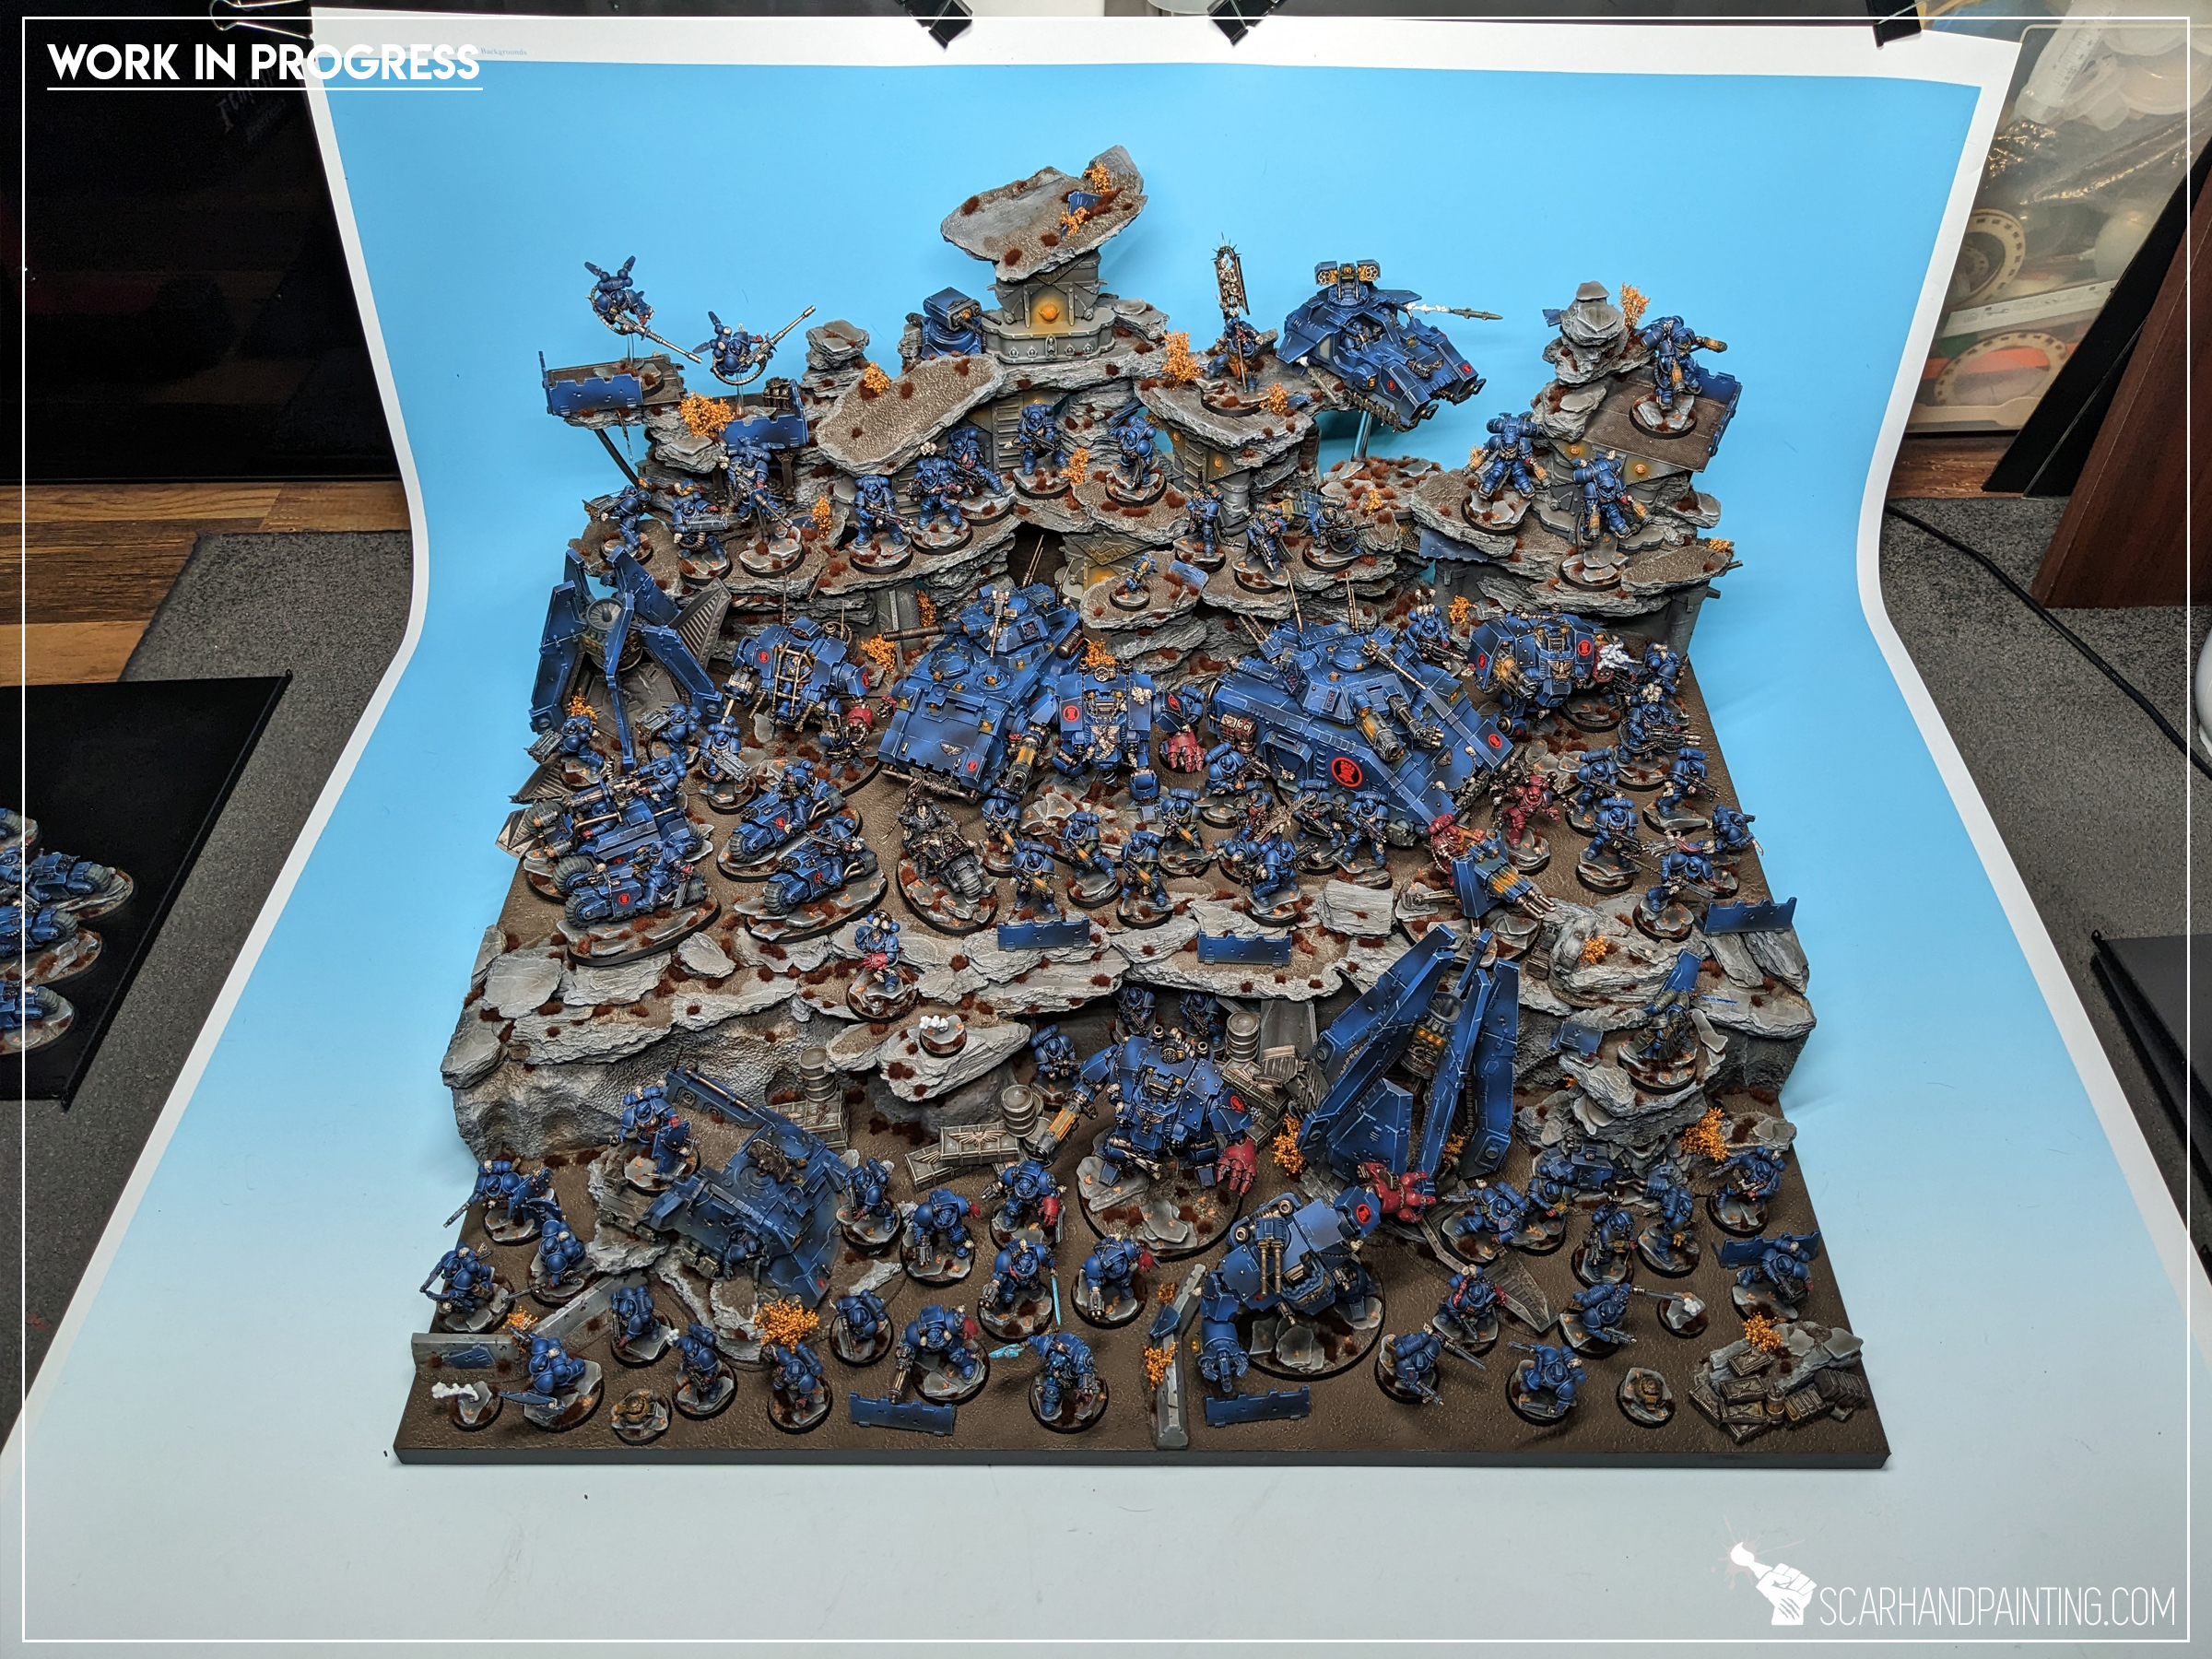
Now all is in the hands of Games Workshop’s team. Let’s see if I can get as much as a shout out from them. Keep your fingers crossed for me mates!
I hope you’ve enjoyed this article. Be sure to let me know your thoughts in the comments below or via Facebook or Instagram. I would also appreciate it if you considered sharing this content with your friends, who might find it interesting. Finally if you are looking for a professional warhammer 40k miniatures painting service, be sure to contact me with this contact form. I always reply within 24 hours, after which please check out your spam folder.

I have been a huge fan of everything Pirates since early childhood. It started with LEGO Pirates back when it was still a brand new hotness, then continued to grow throughout the years. Once I moved to Miniatures Wargaming I dipped my toes in a range of Naval warfare games, Dreadfleet being the latest. Years went on, games rose and sunk, all the while I craved to find that ultimate Naval warfare experience – with beautiful miniatures and all the sassy fantasy vibes… and I did!
At the end of cursed year 2020 Mantic Games released their own naval game Kings of War: Armada. A wide range of artfully designed, beautifully detailed and perfectly themed “Tiny Resin Ships“. I fell for this game head over heels. Got all four available fleets and started expanding collection, feeding a typical hobby hype frenzy. Once I run out of ships I set my sights on a grand new project: Scenery set. But not any scenery set – an ultimate, well crafted and detailed set to match with the ships. Here’s where story of the “Kraken Islands” begun…
I set sails and ventured into the unknown, experimenting with stuff I had at home. Few hours of work saw a first pair of islands done. The process (that you can follow in it’s entirety here) was rather simple and the result looked pretty decent. It increased my hype and sealed the deal – I was about to make more islands!
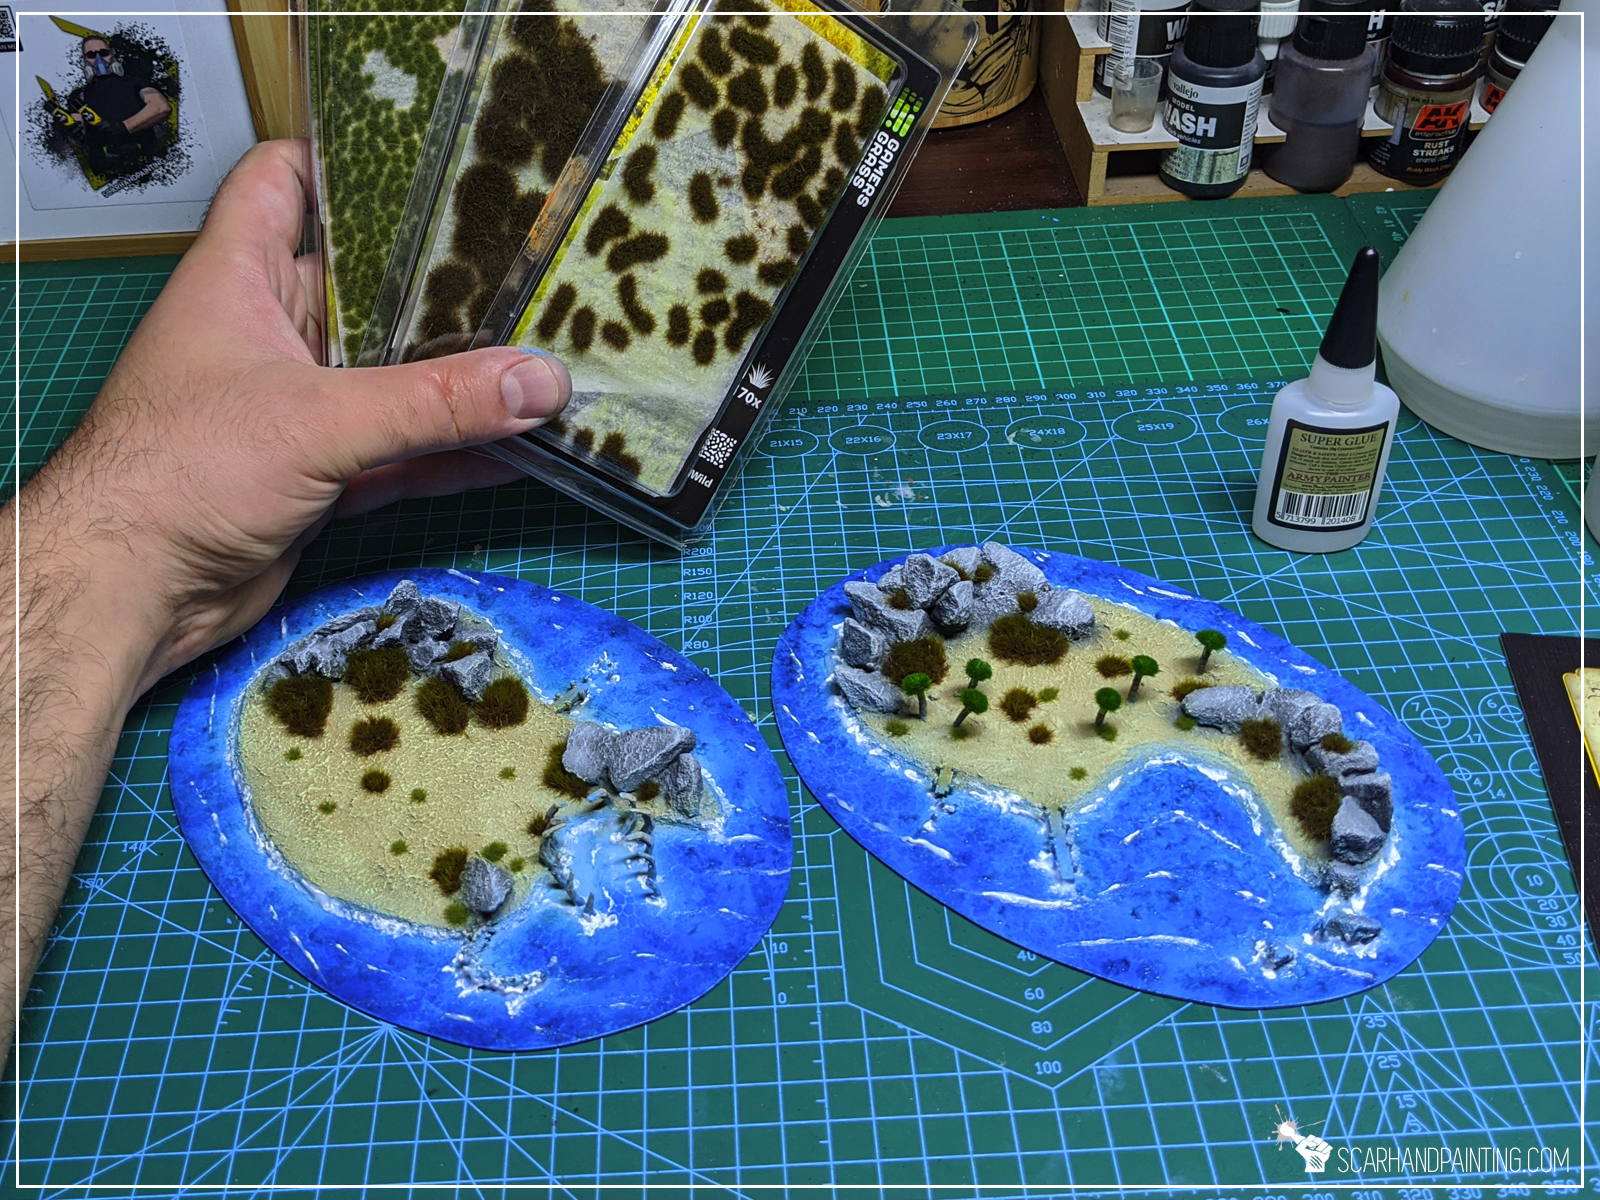
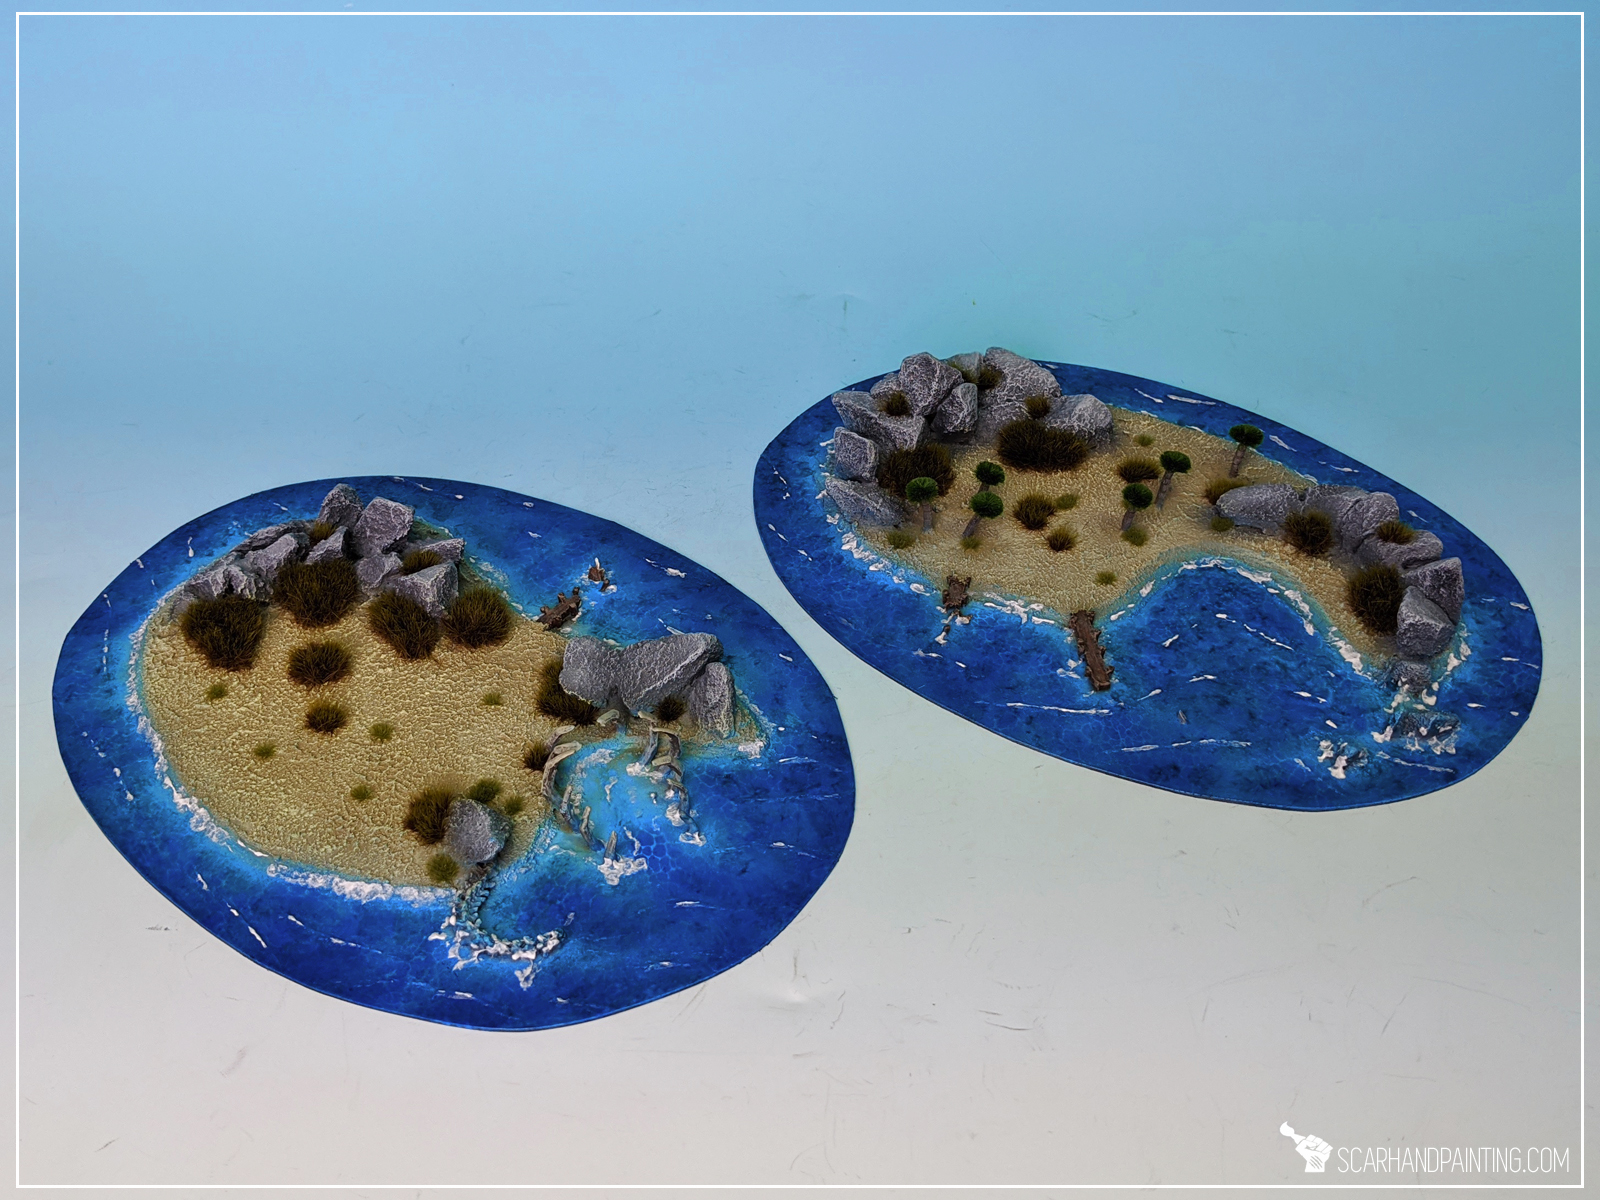
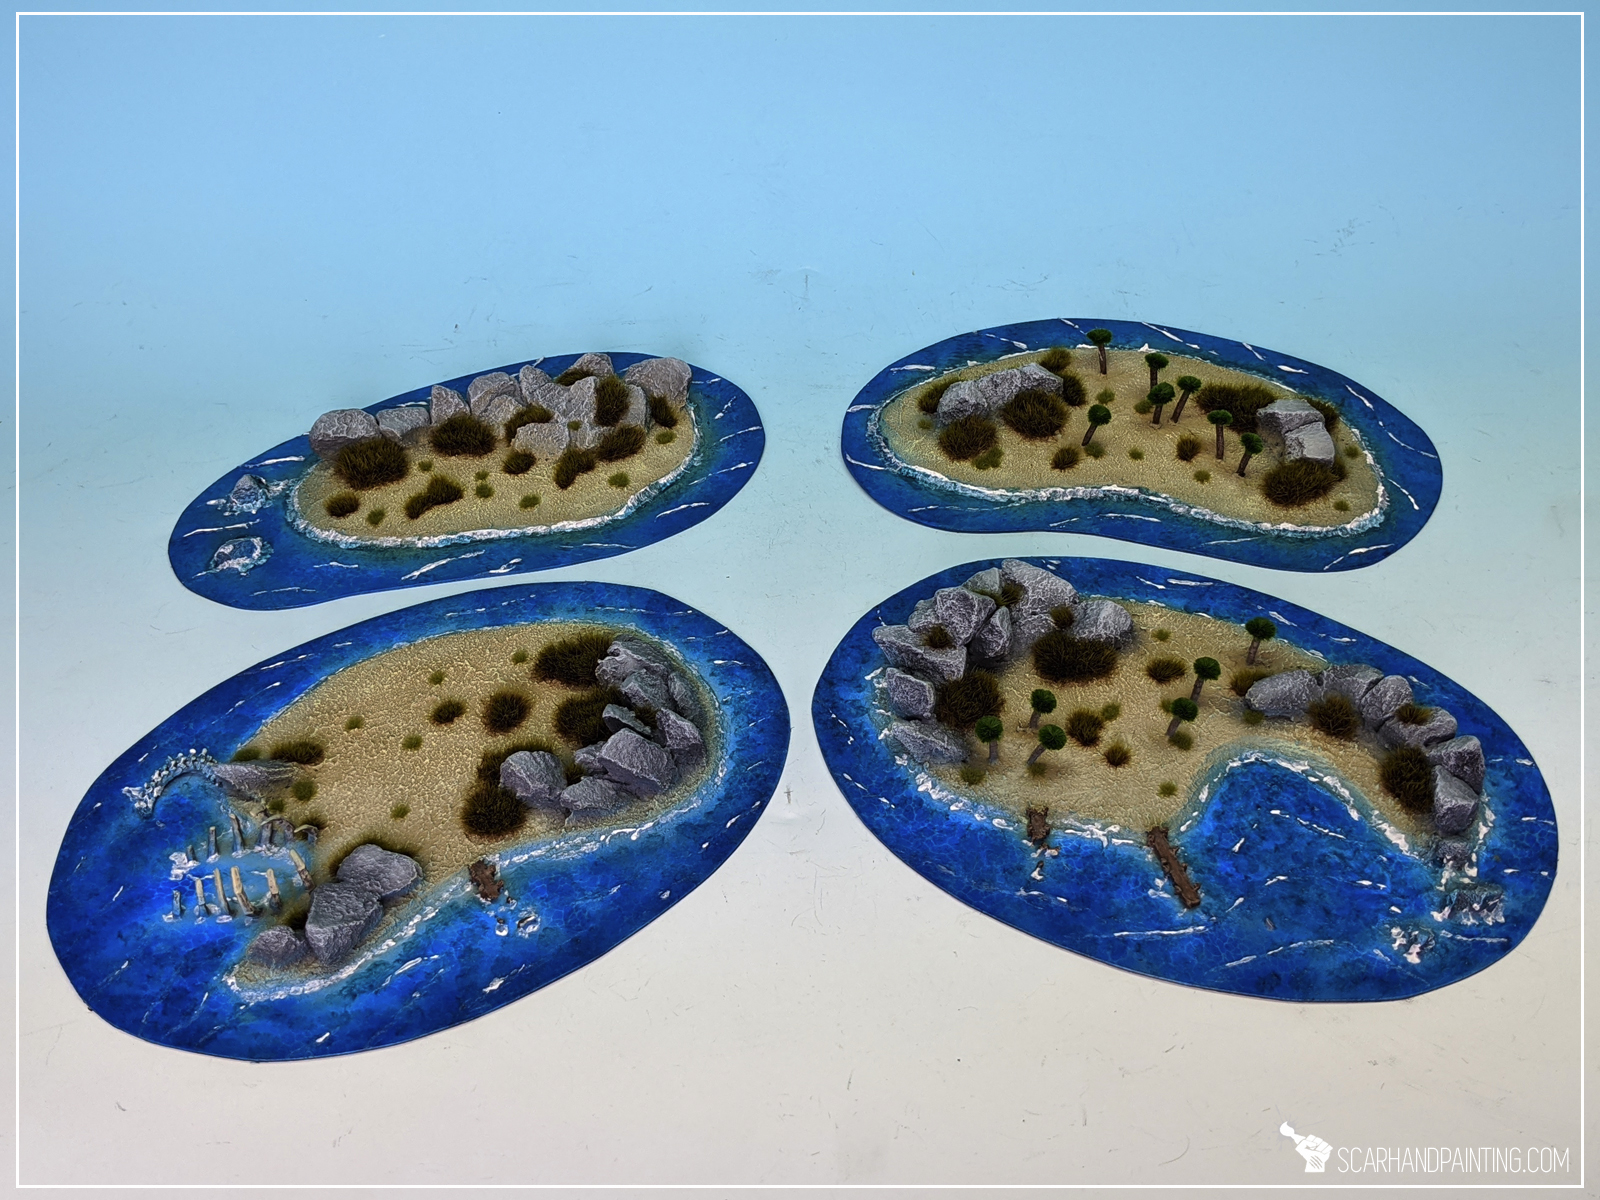
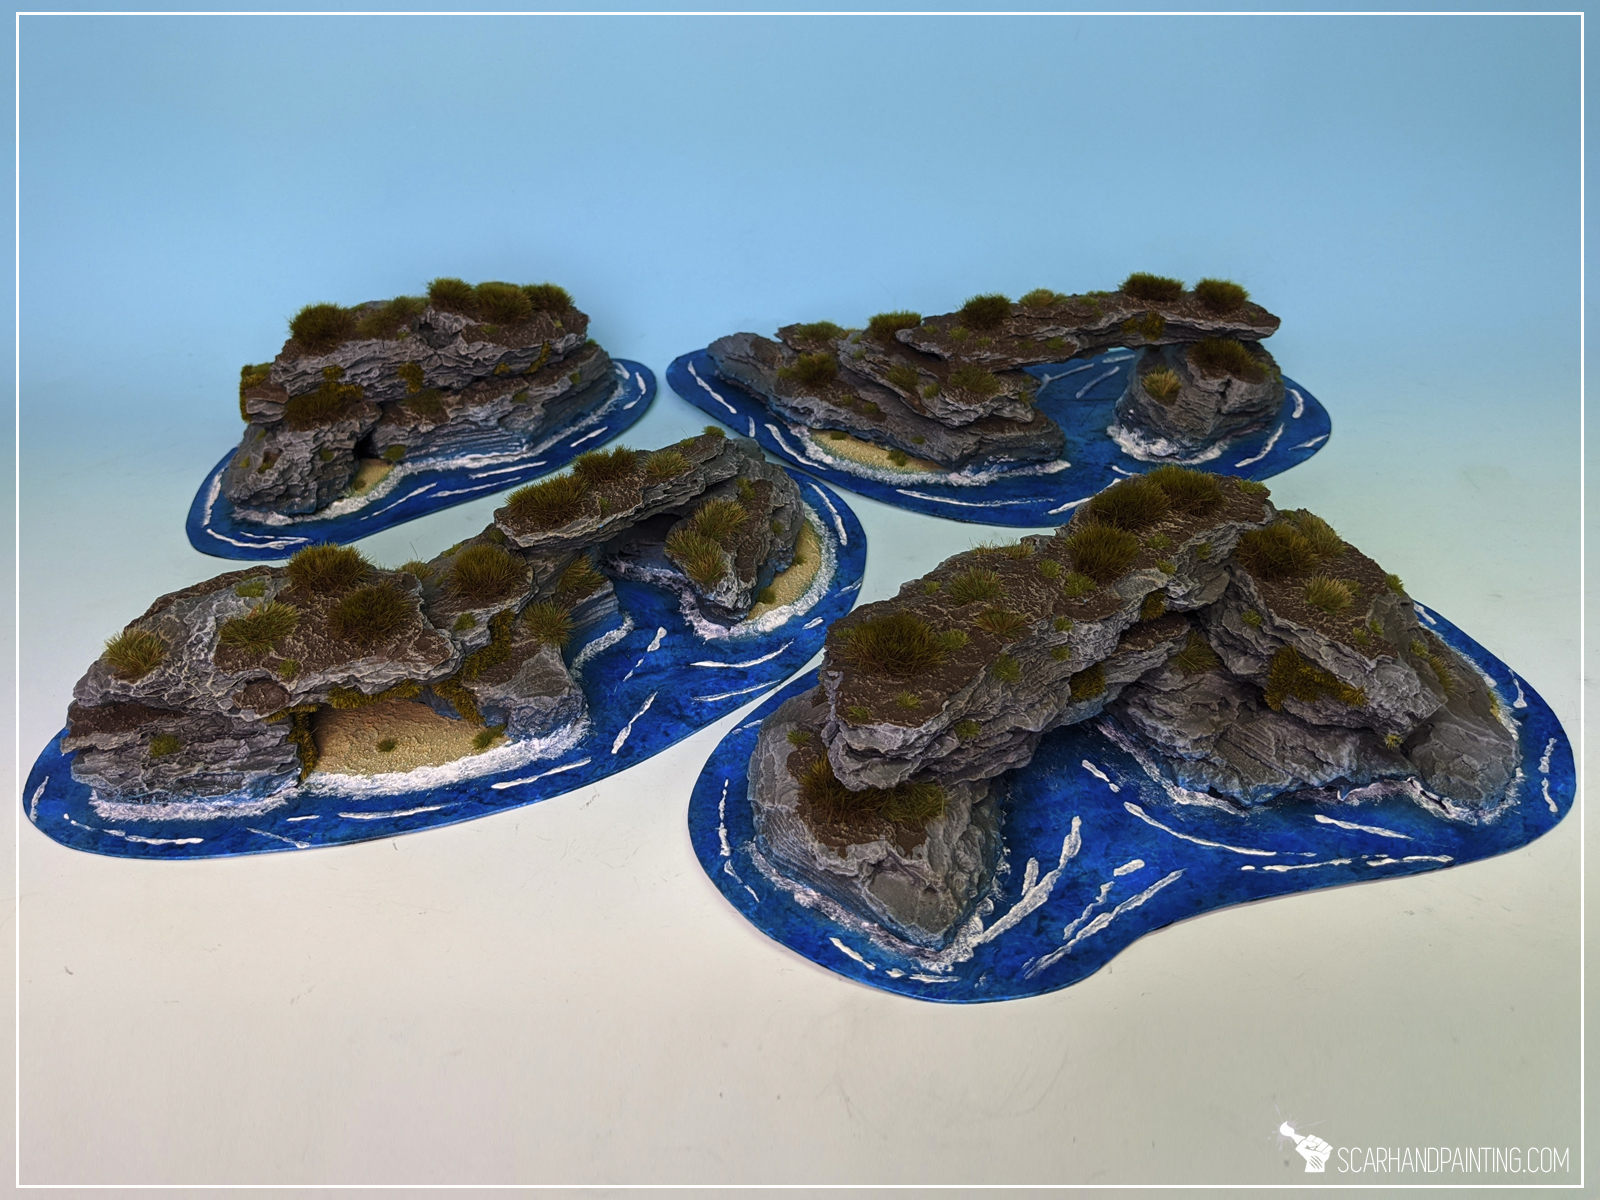
As time passed, new islands joined the collection. First another pair in a similar theme to the first one, next a set of rocks to add verticality and diversity on the gaming board. The scenery seemed fine as a gaming set, but felt far from an “ultimate set”.

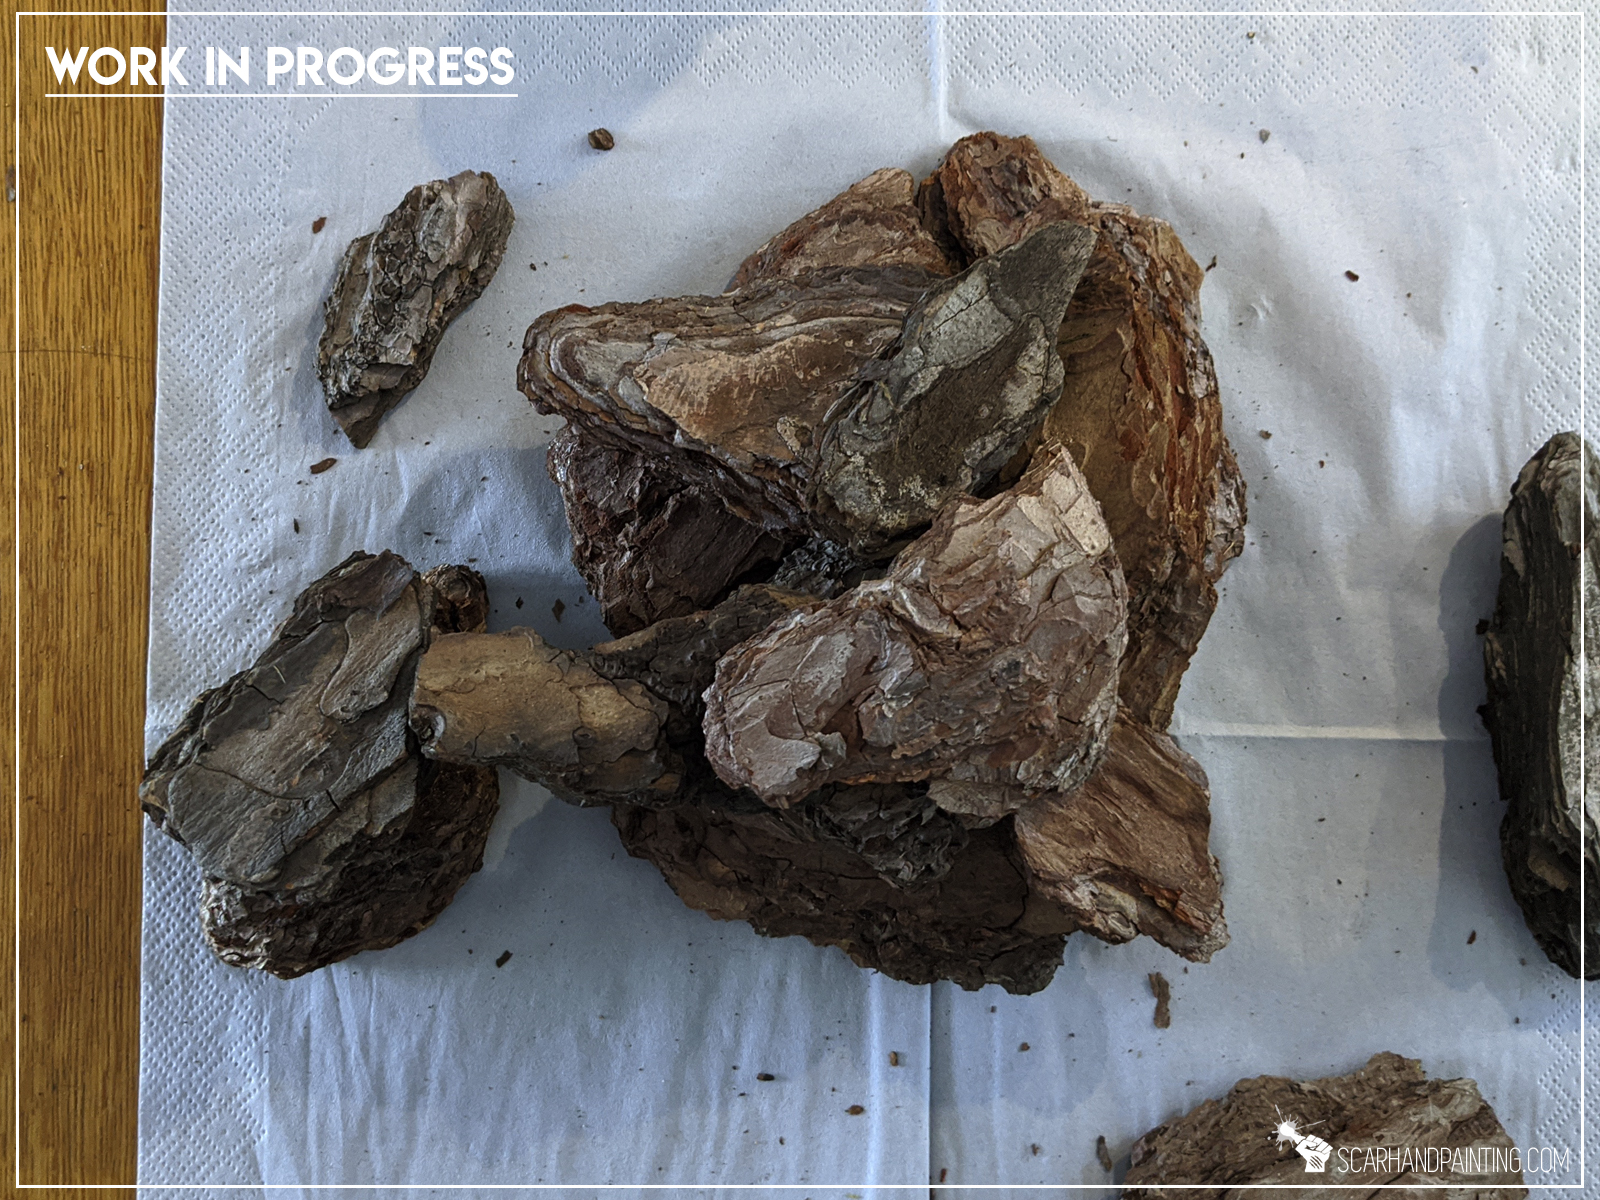
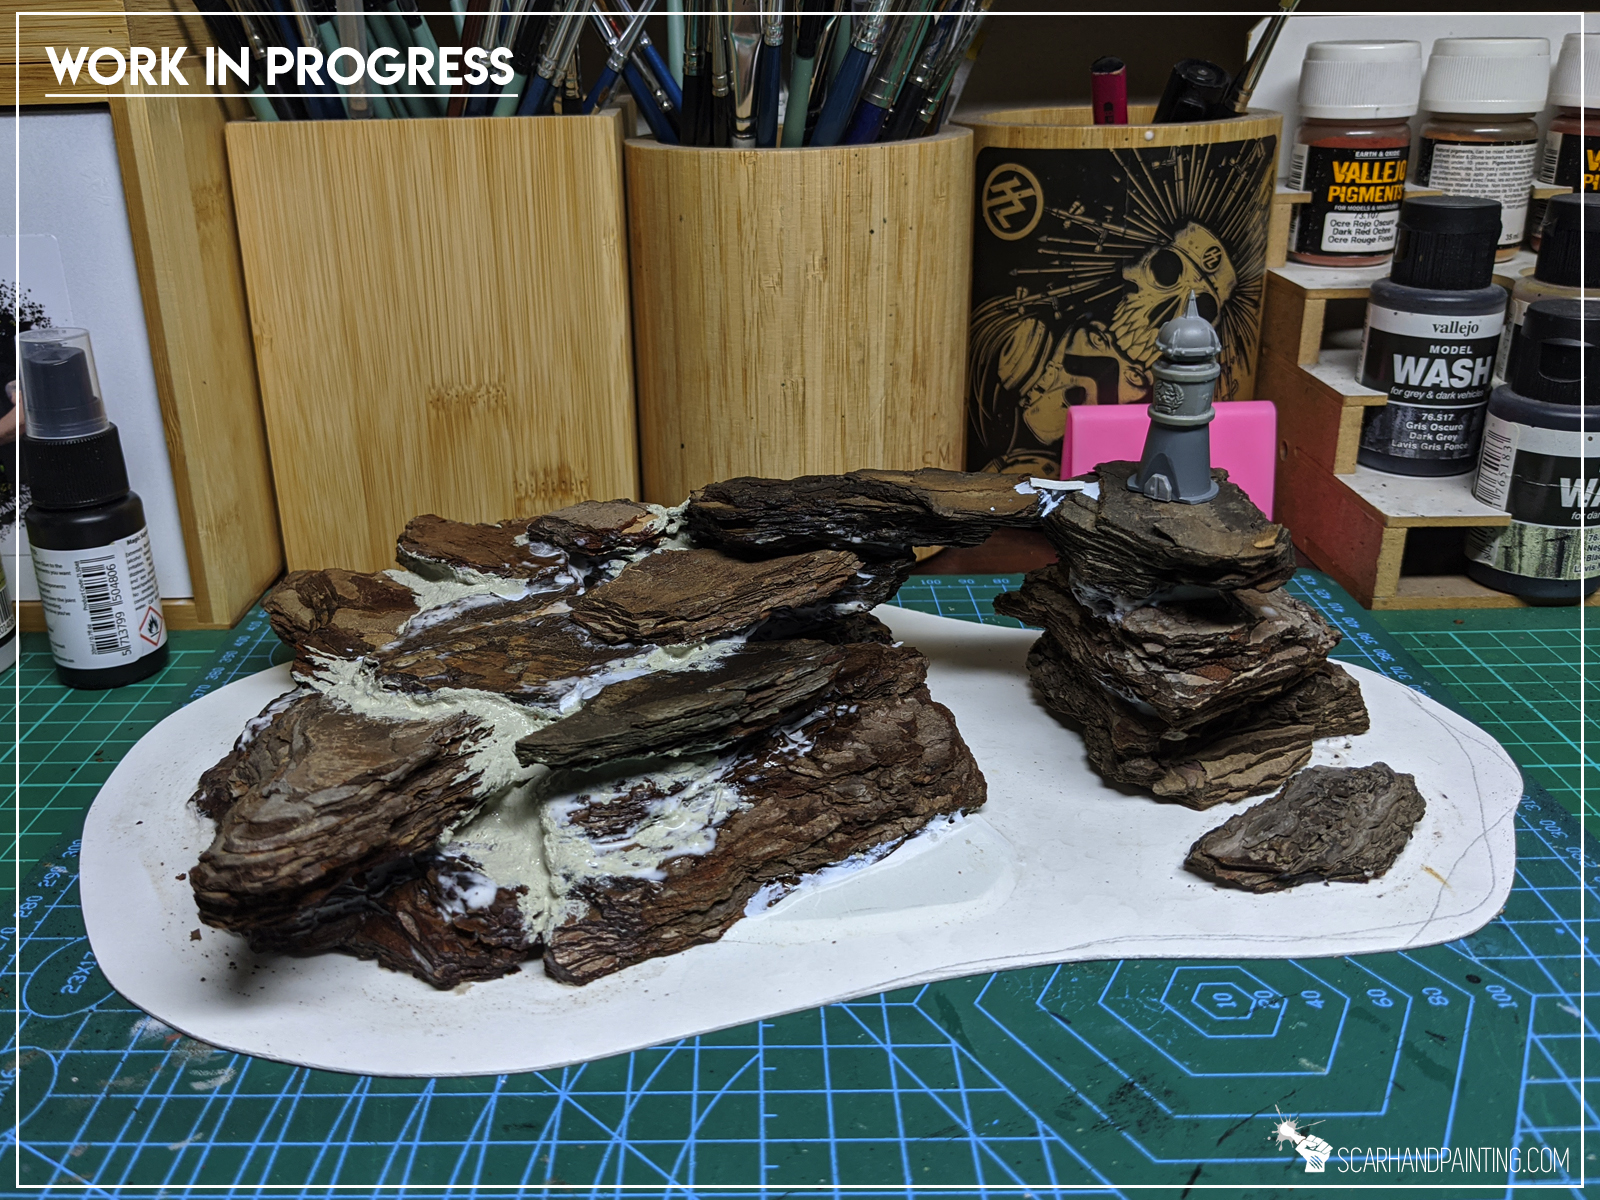
Armed with experience from previous endeavor and nagged by a creative muse – I gathered a crew and set sails in search of ultimate Armada scenery once again. This time around I aimed at larger, multi level, more interesting islands. Scenery pieces that could tell a story. For this purpose I decided to dump plasticard in favor of bark. More so, I spent over half an hour to dug up some old sculpts, made years back for unfinishedTM 3d Settlers of Catan board project. These costed me a lot of work back in the days and I was happy to use them for such a cool project.
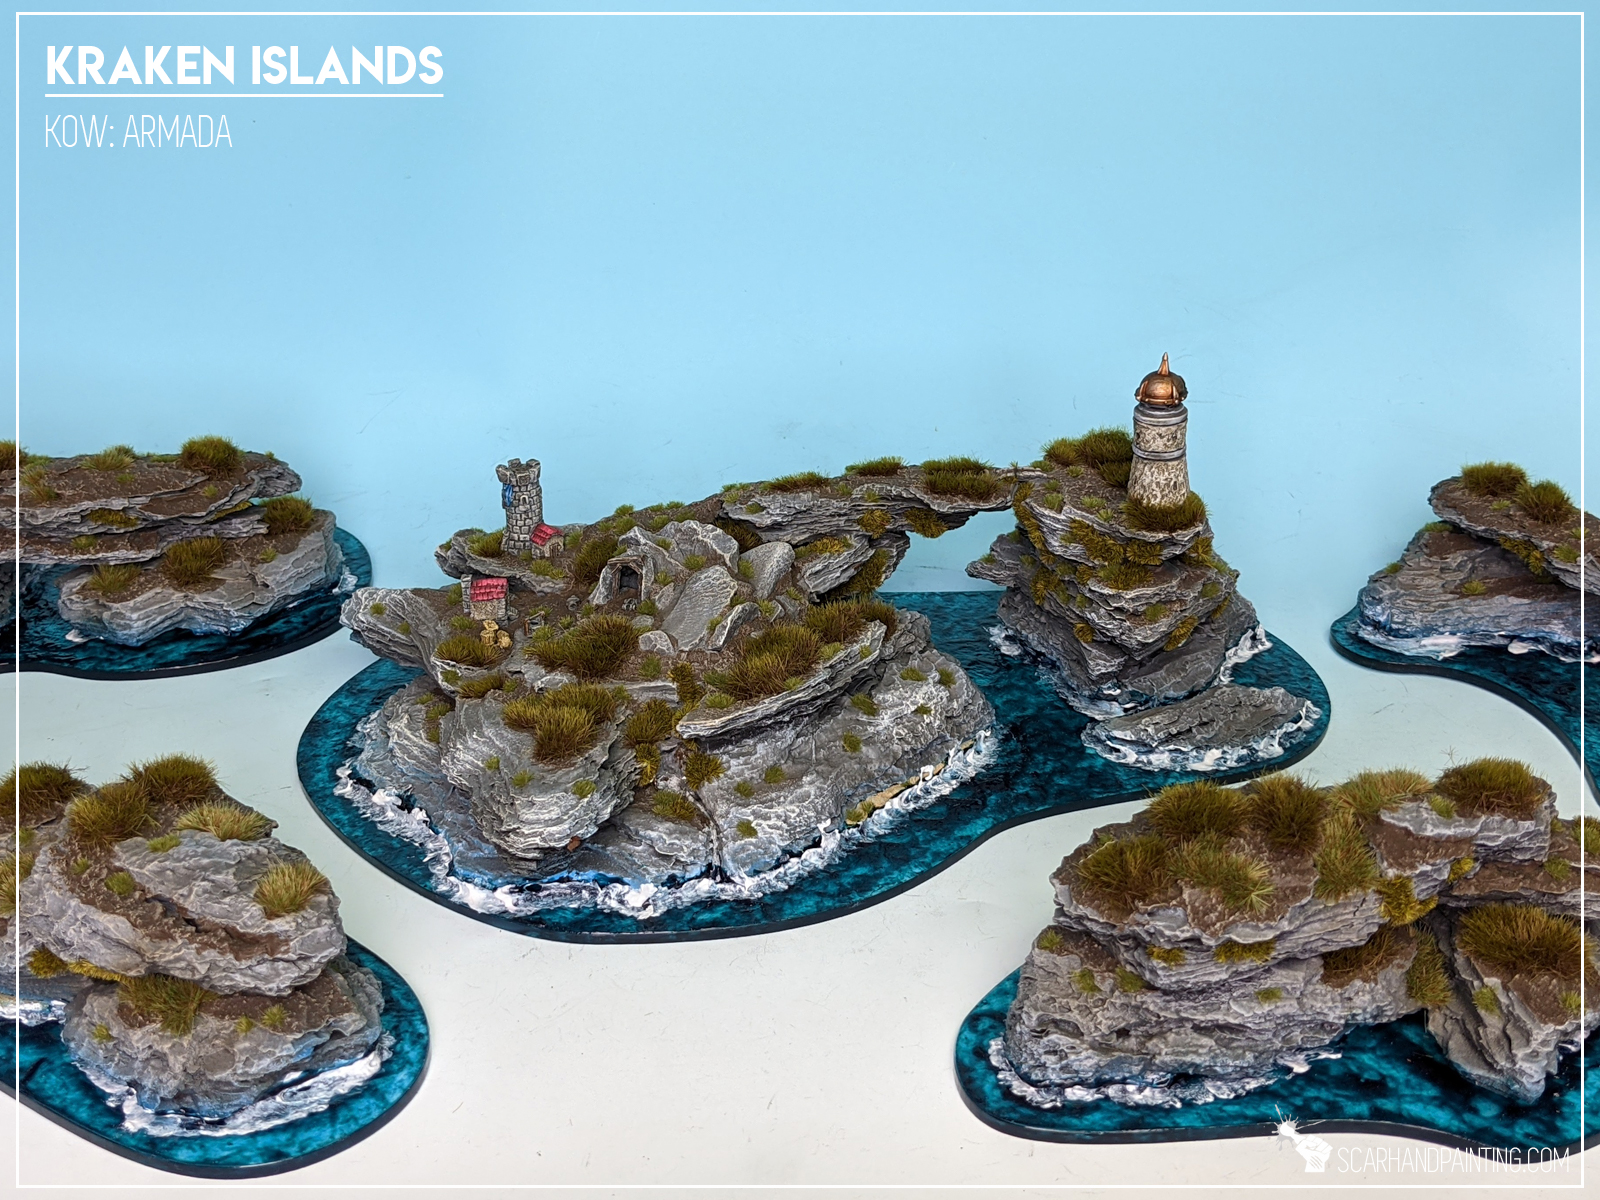
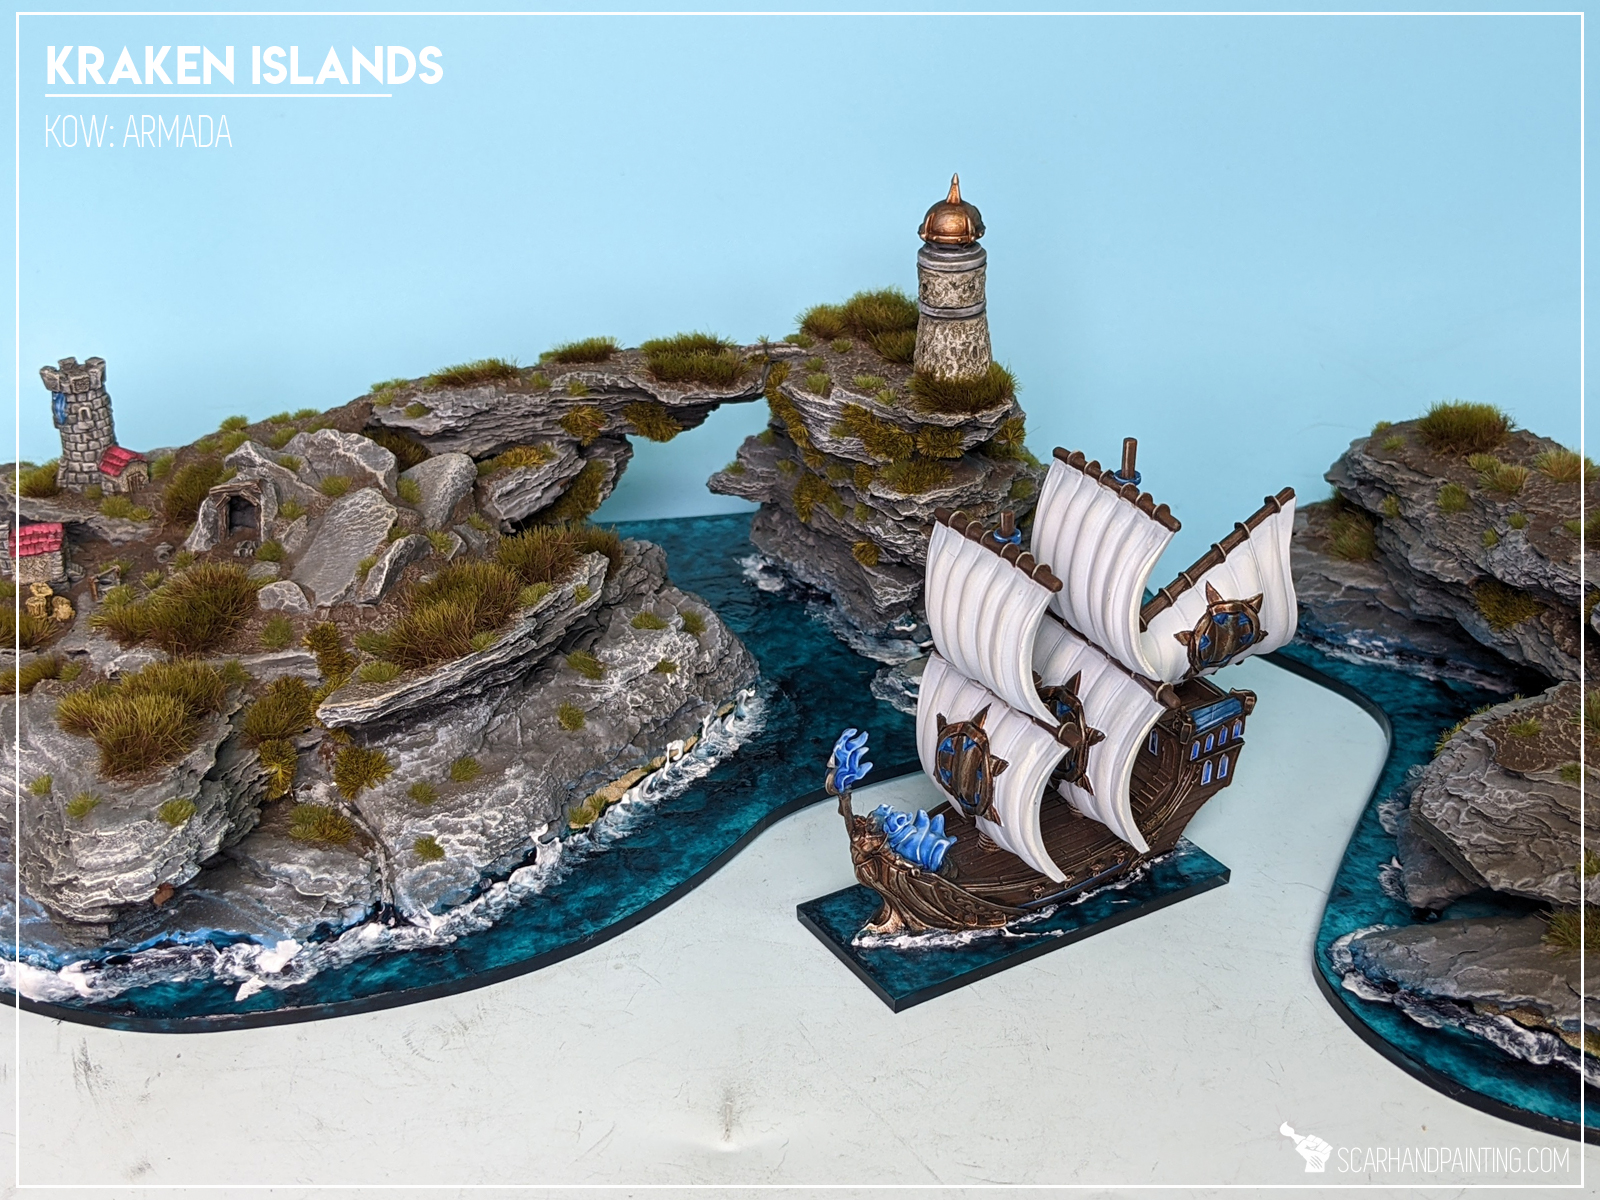
It took me two days to finish a first amongst the new islands. “Lighthouse Island” looked pretty dope as a centerpiece and set the direction for the upcoming series.

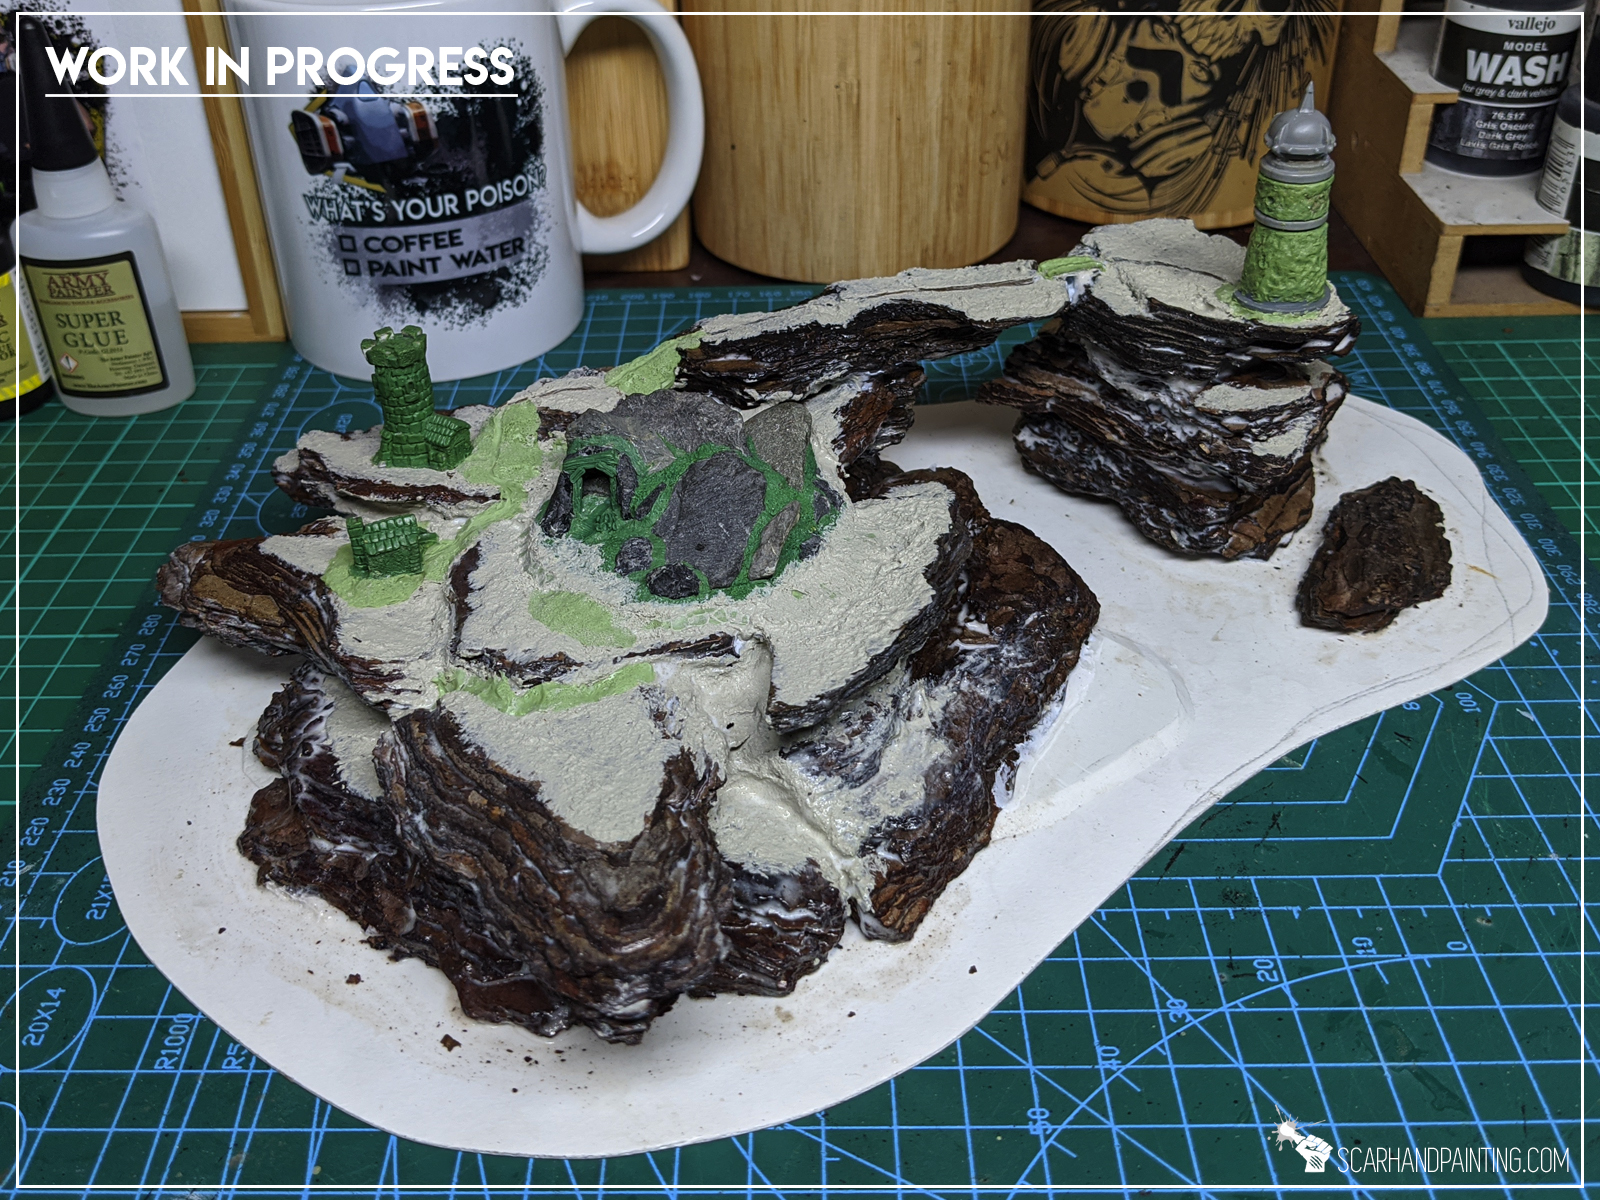
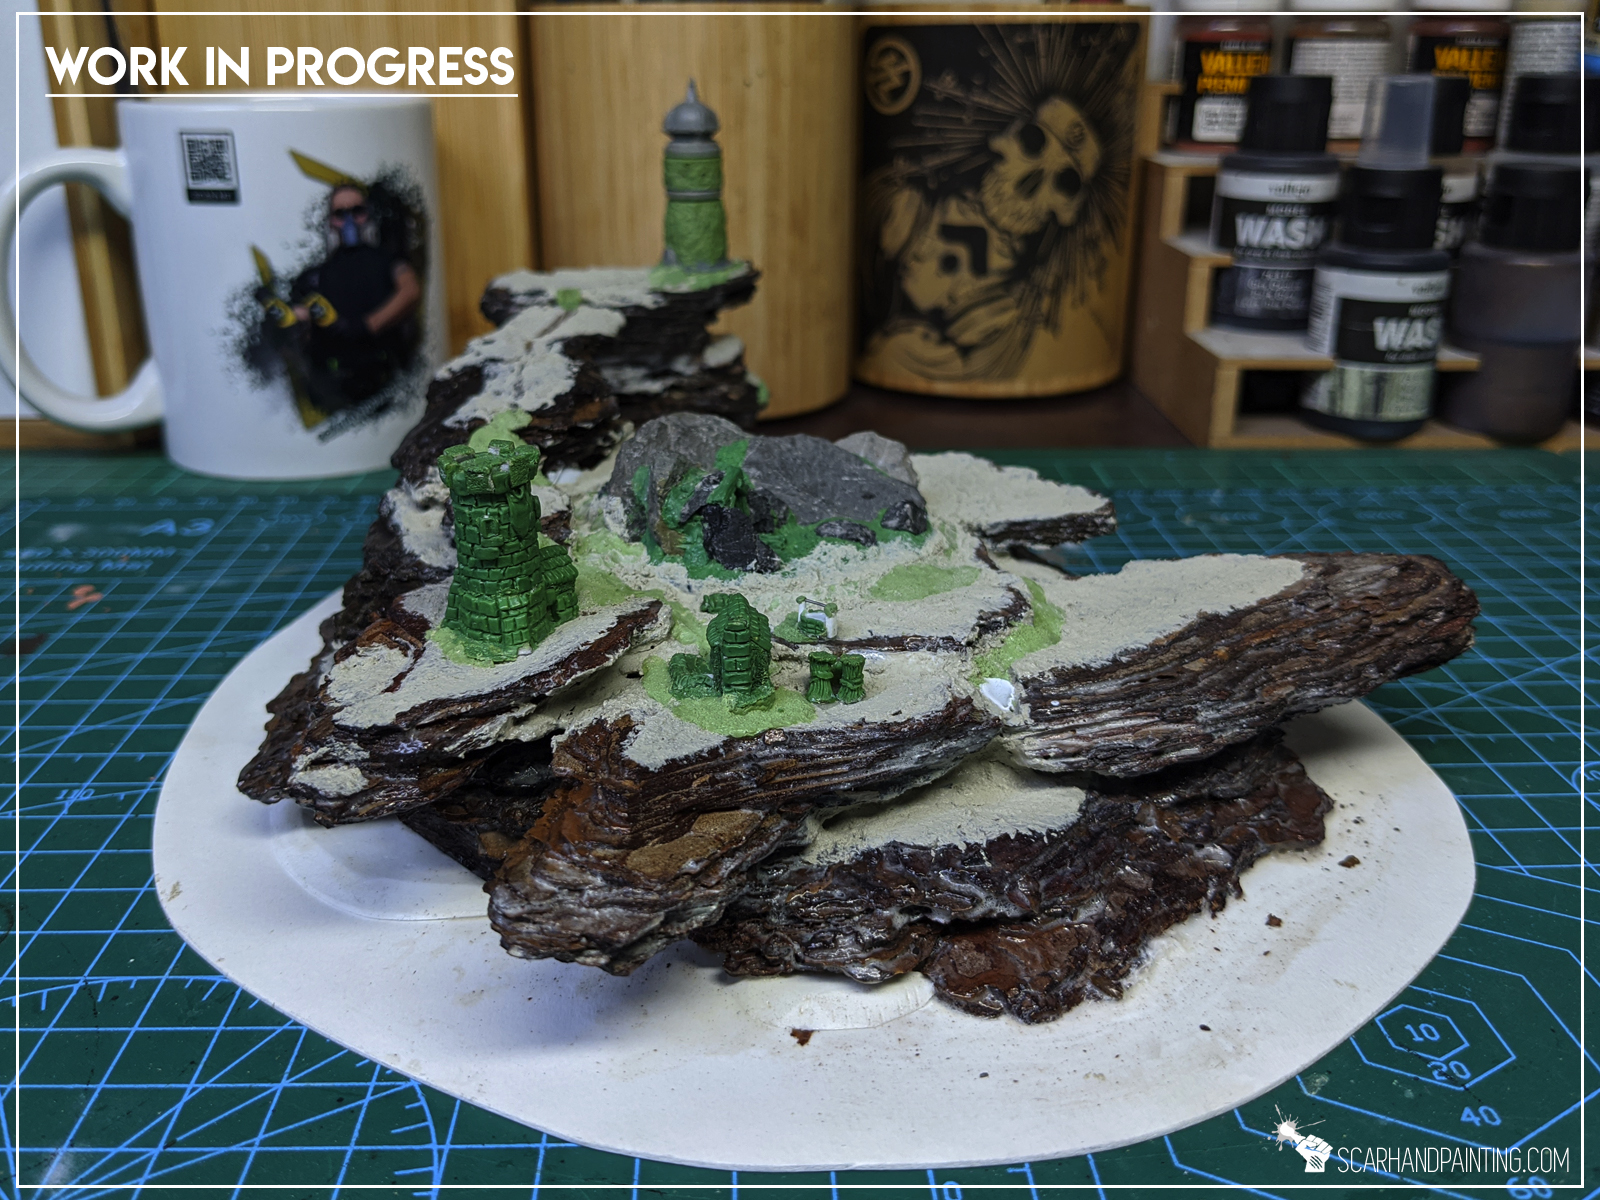

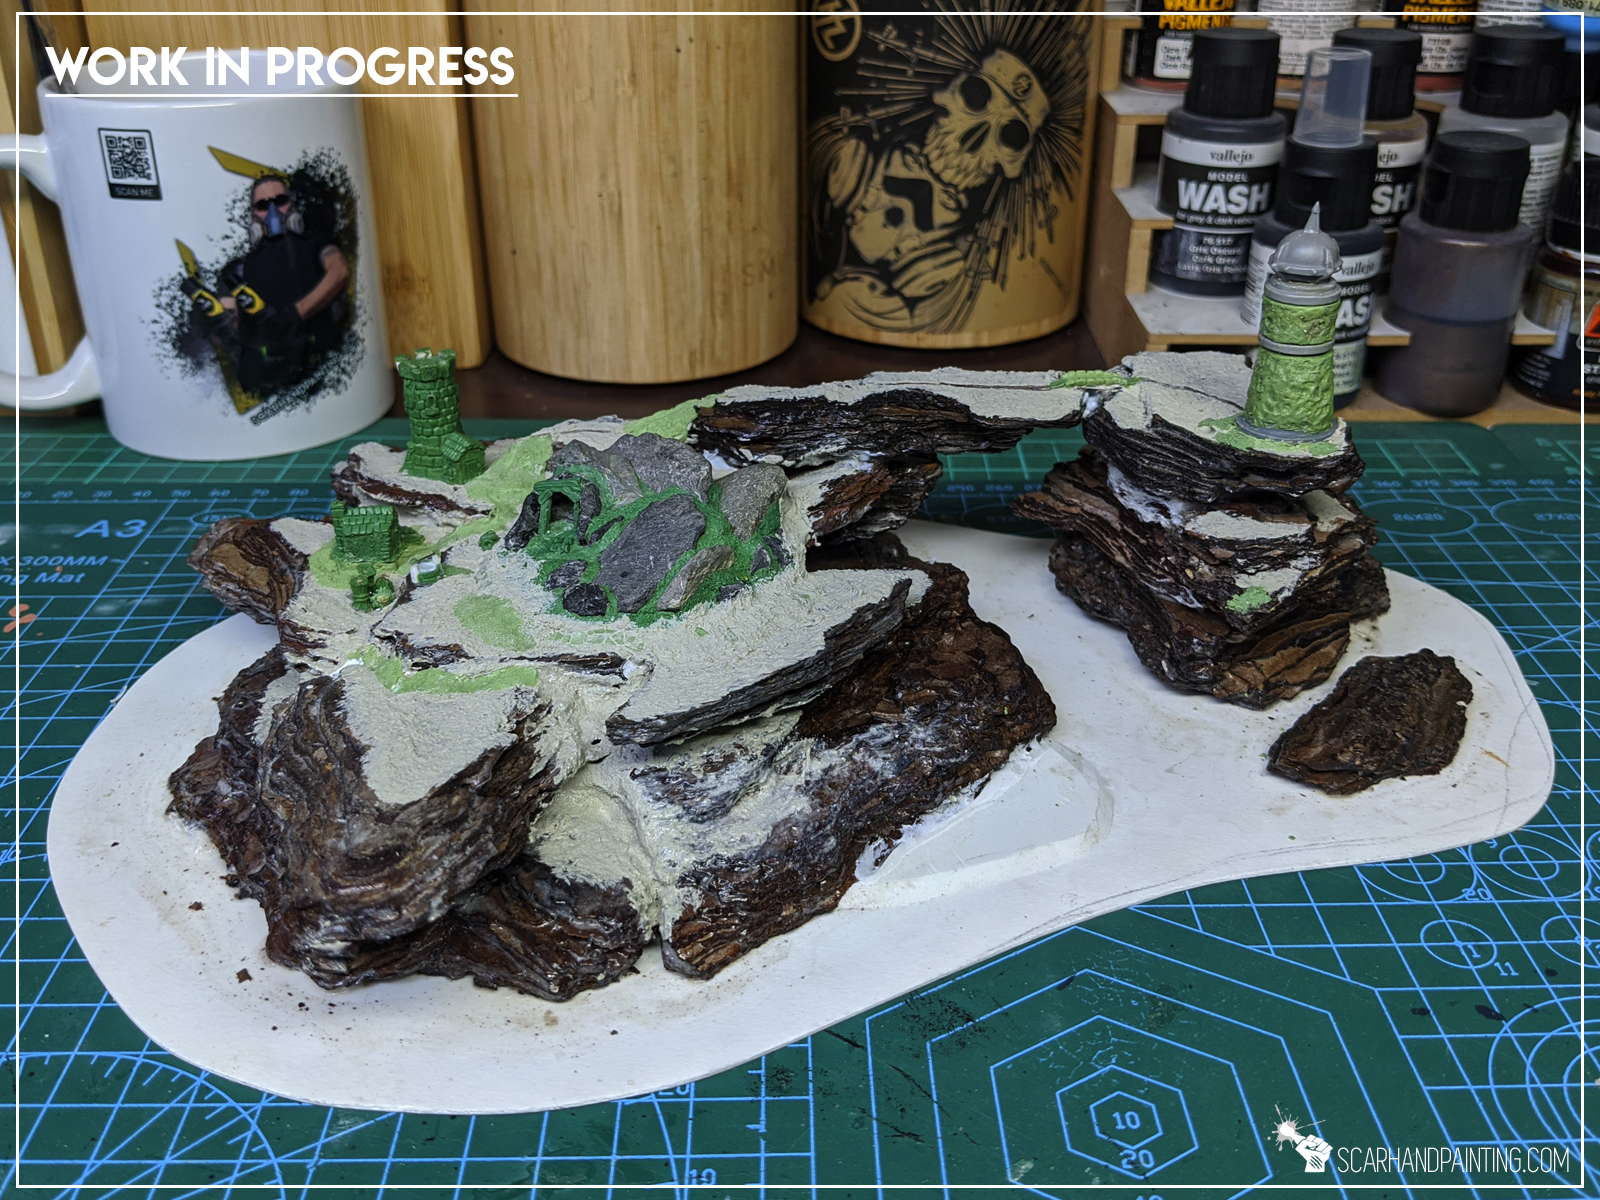
The work continued and soon “Wizard Island”, “Volcano Island” and a series of smaller “Wild Islands” followed. The set looked great and brought a feeling of satisfaction. It definitely sated my hunger for Armada scenery. For the time being at least…


Having few games on the set and using it as a background for Fleets photographic sessions brought a creeping feeling of unease. Sure the islands looked cool and I already put a lot of effort into them, but something just felt off. It took a while to pinpoint the exact issue – bases just didn’t fit the fleets theme. They had to go.
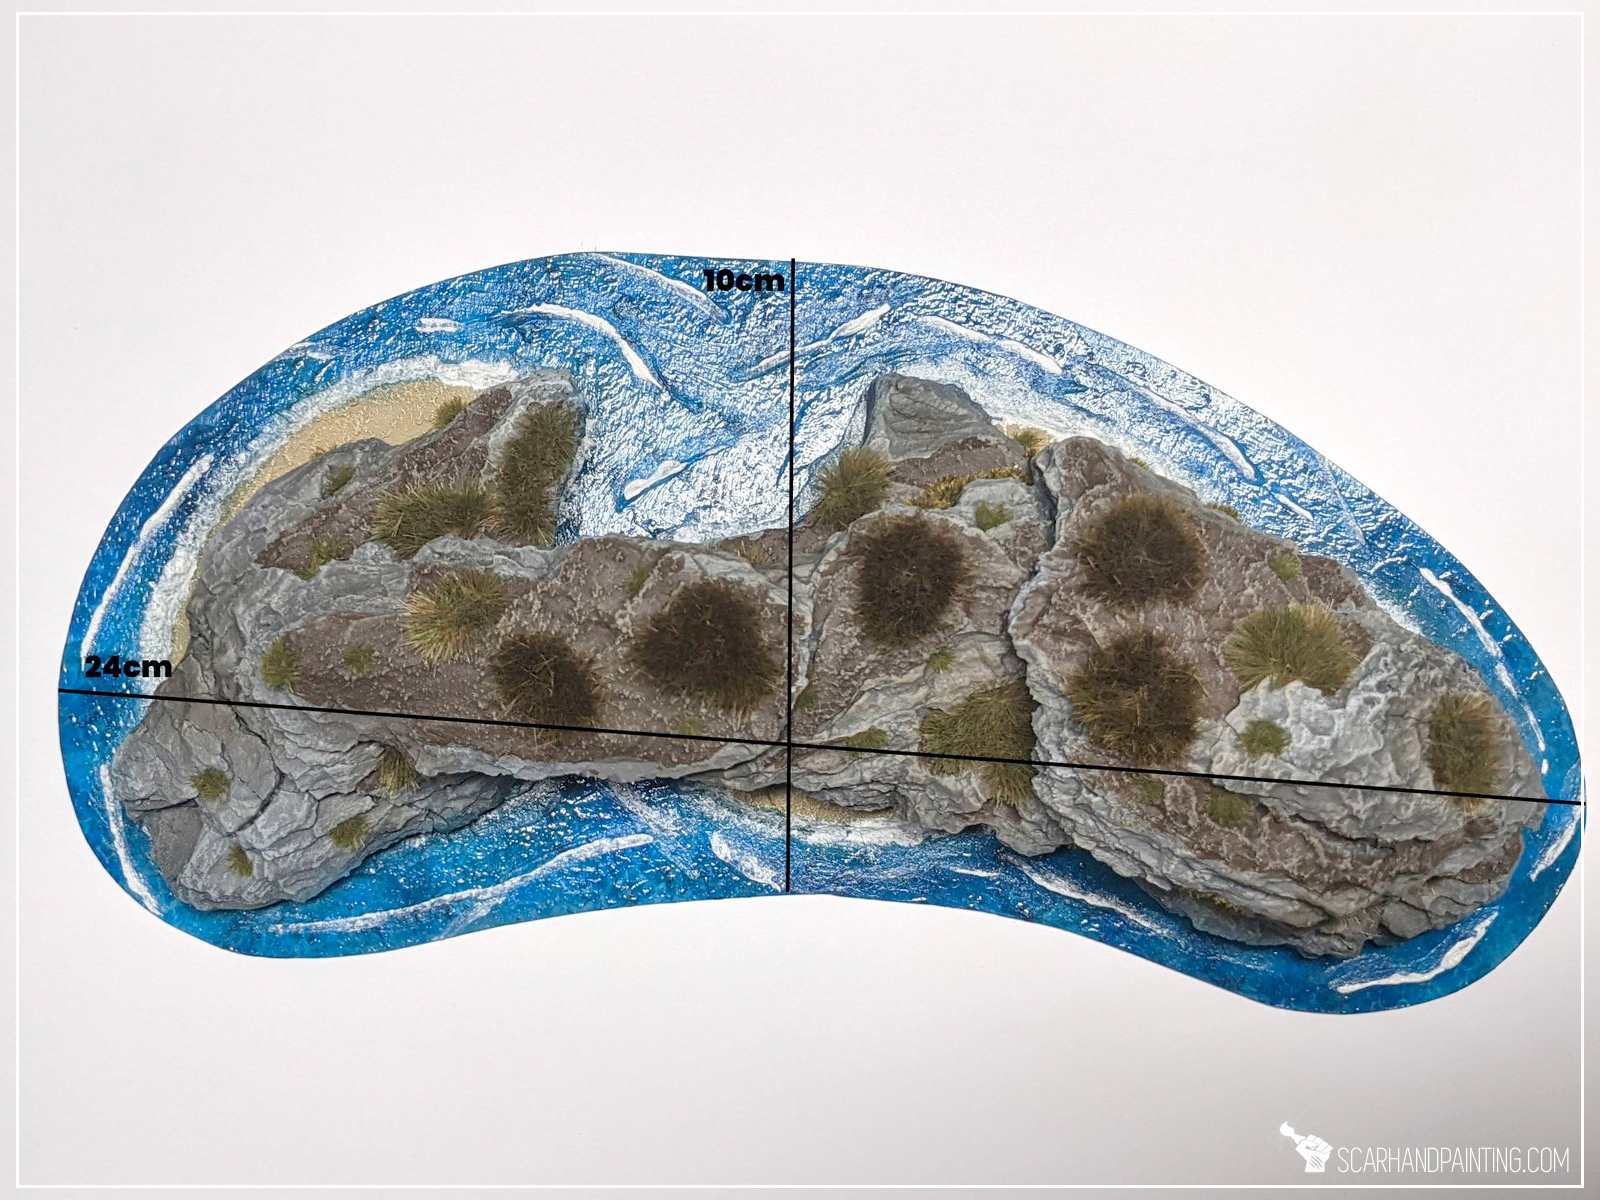
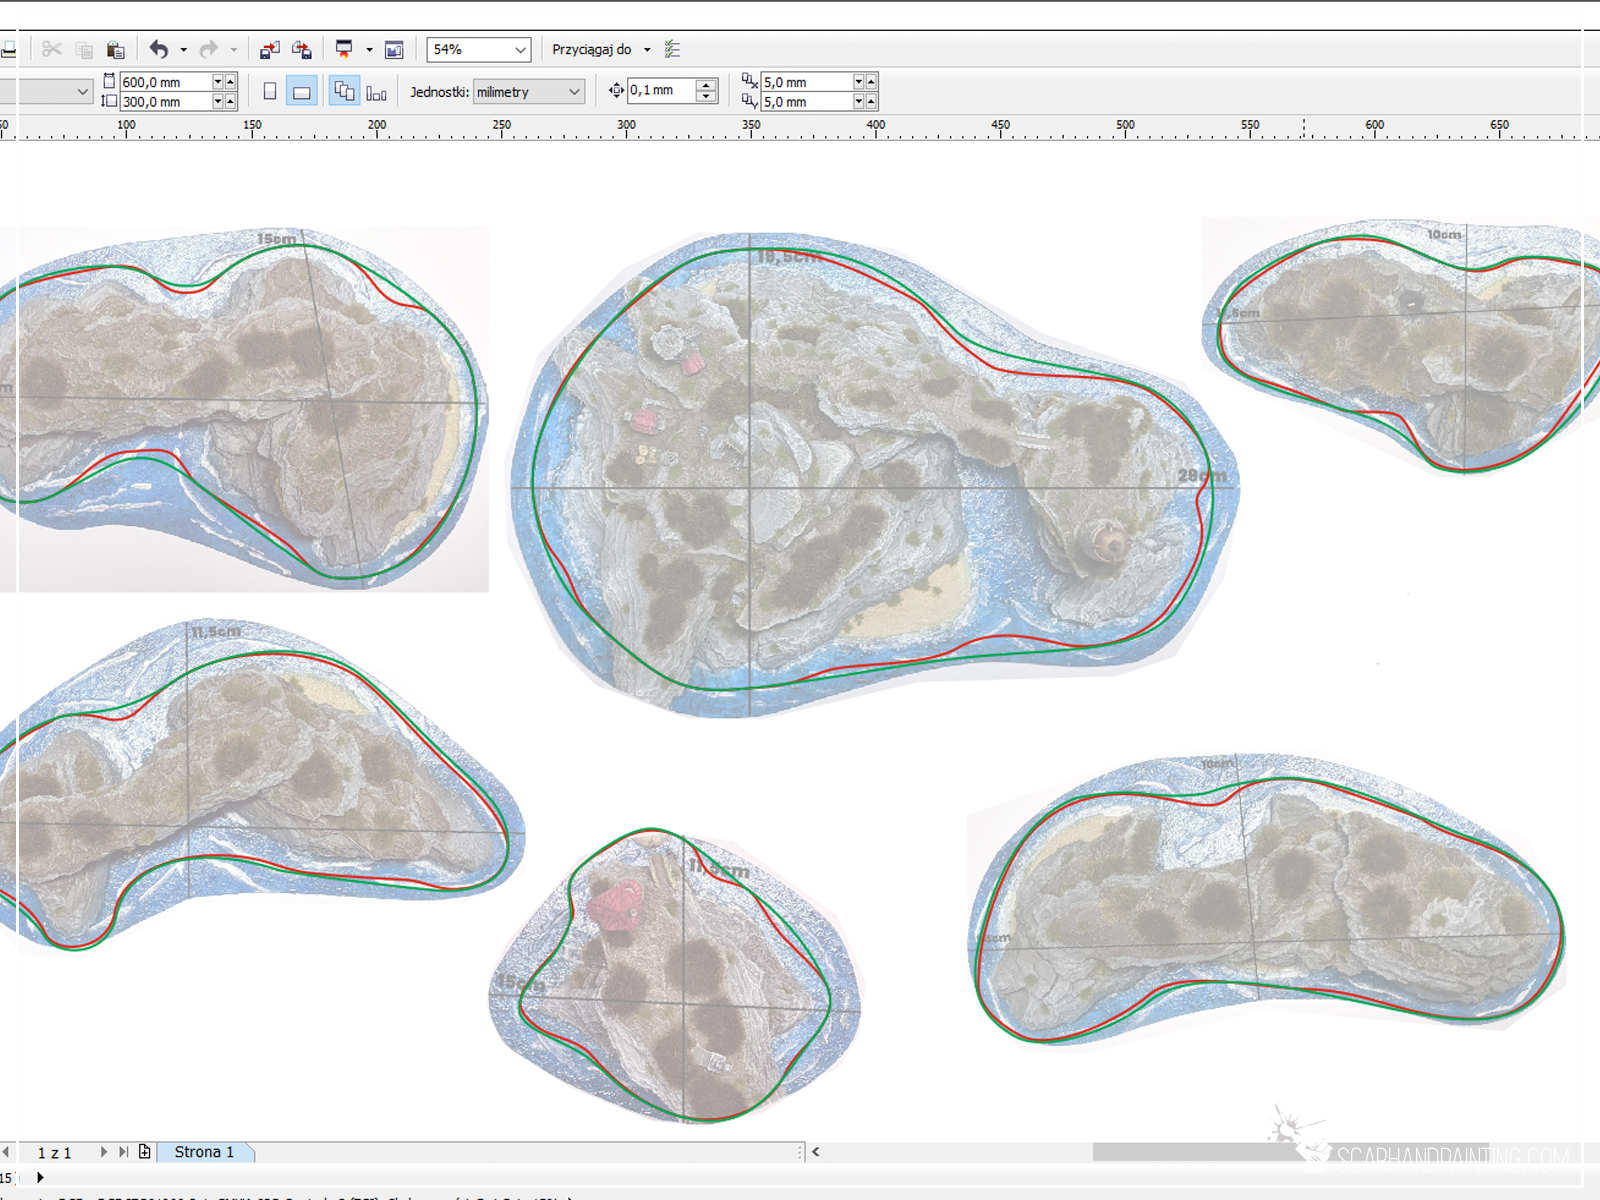
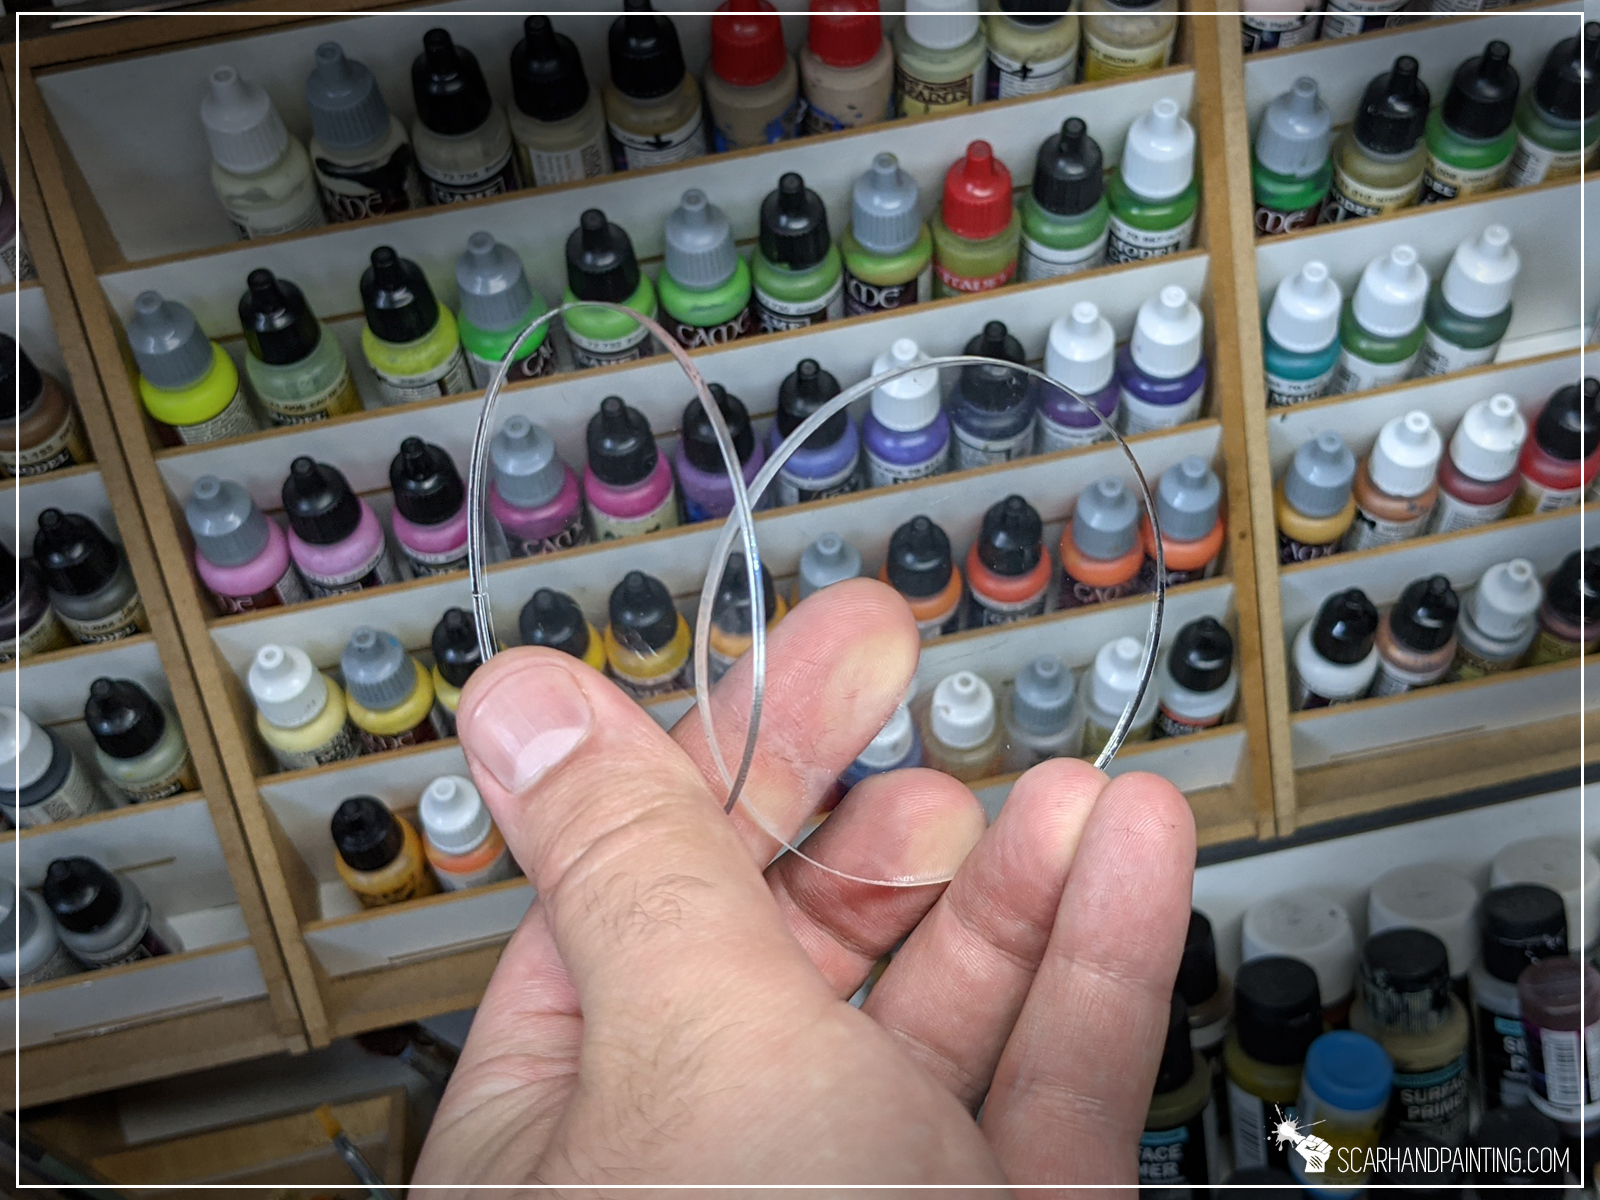
Once I set my mind on something I go for it all speed ahead! I have contacted a friend from Micro Art Studio to help me out. He used a set of size comparison pictures I took and established dimensions for acrylic bases. Time stretched as I impatiently awaited delivery. Finally – they got here (like few days later) and I let the barbarism of removing previous bases, take control of me. Pulling off huge chunks of painted plasticard, all the while protecting detail from getting damaged, was the hard part. In contrast, basing went smooth and easy.


After an intense day of thorough rebasing I had it! The final form of the Kraken Islands was there for me to behold. And it seems I’m done with the project… For the time being at least…

See full gallery at: GALLERY KRAKEN ISLANDS
Thanks for reading. Be sure to let me know what you think of the project. Consider sharing this article with someone who likes hobbying around with miniatures. Find me on Facebook and Instagram. Most importantly have a great hobby time!
Welcome to second part of the “Mortician’s Pitch” Special Project part 1 article in witch I take you on a ride from bare meshed wood planks to a finished Guild Ball pitch. Stick around and see how “Mortician’s Pitch” came to being.
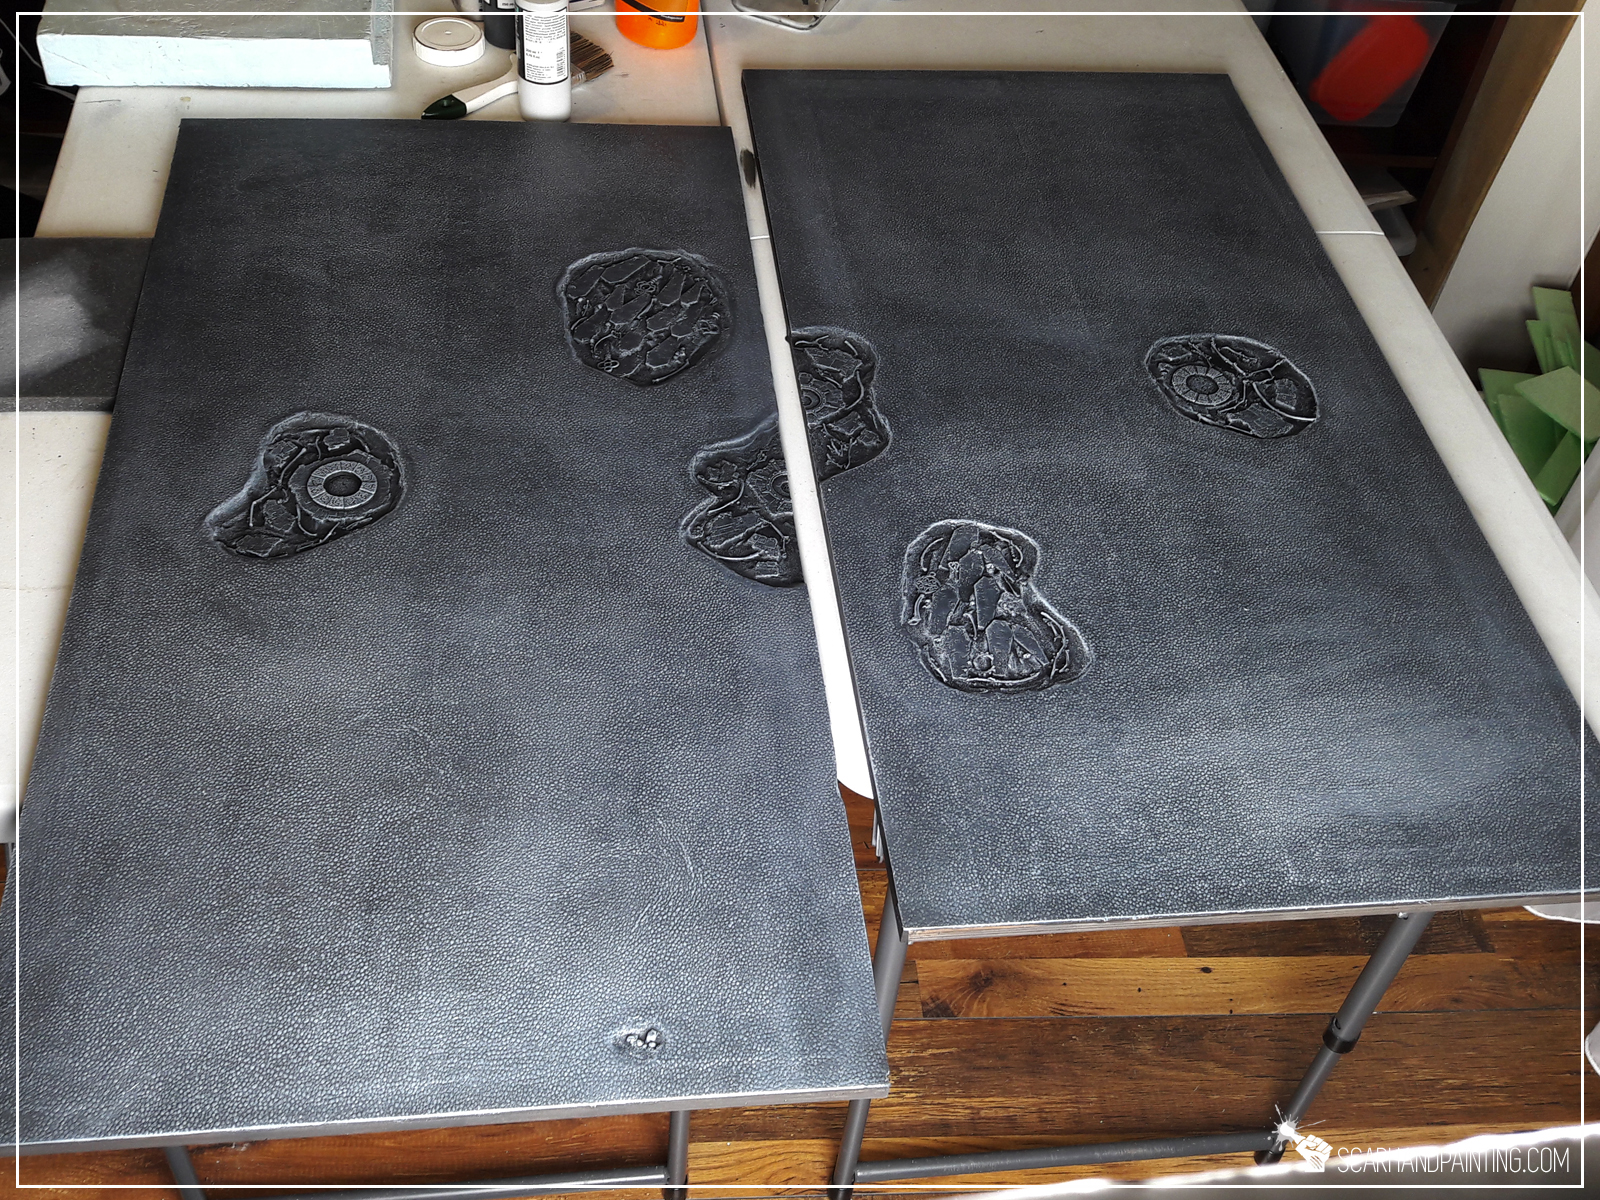
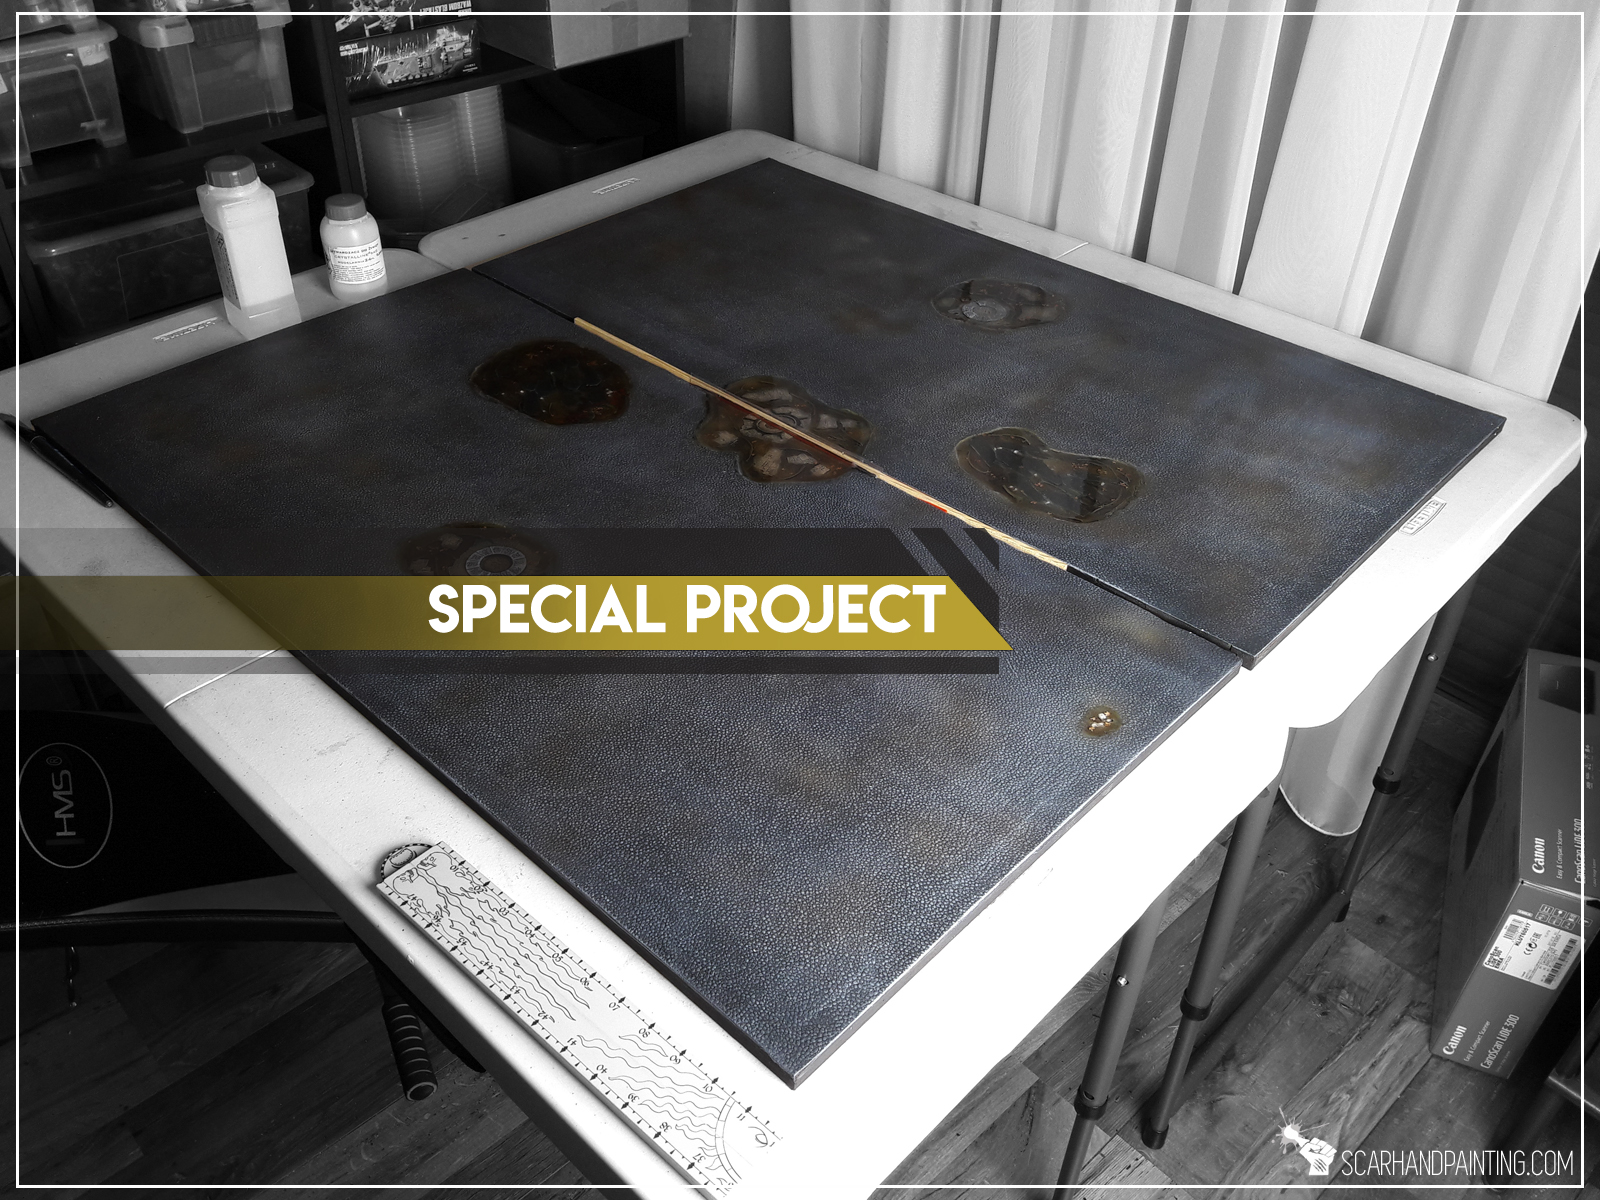
Let’s pick up where the previous article ended: Two thin coats of black wall paint followed up by a Chaos Black sprayed undercoat. All to reinforce the surface and prep it for a paint job. The paint job itself was divided into three parts: “paving stones”, “grave holes” and “pitch lines”.
This part was pretty easy. A solid coat of Vallejo 74.603 German Panzer Grey, followed by a 1:1 mix with Vallejo 74.601 Grey drybrush and then with pure Vallejo 74.601 Grey drybrush. All done with a 4″ wide brush. With these three layers done some brown haze was airbrushed here and there with Vallejo Air 71.133 Dirt and Vallejo Air 71.042 Cam. Black Brown.

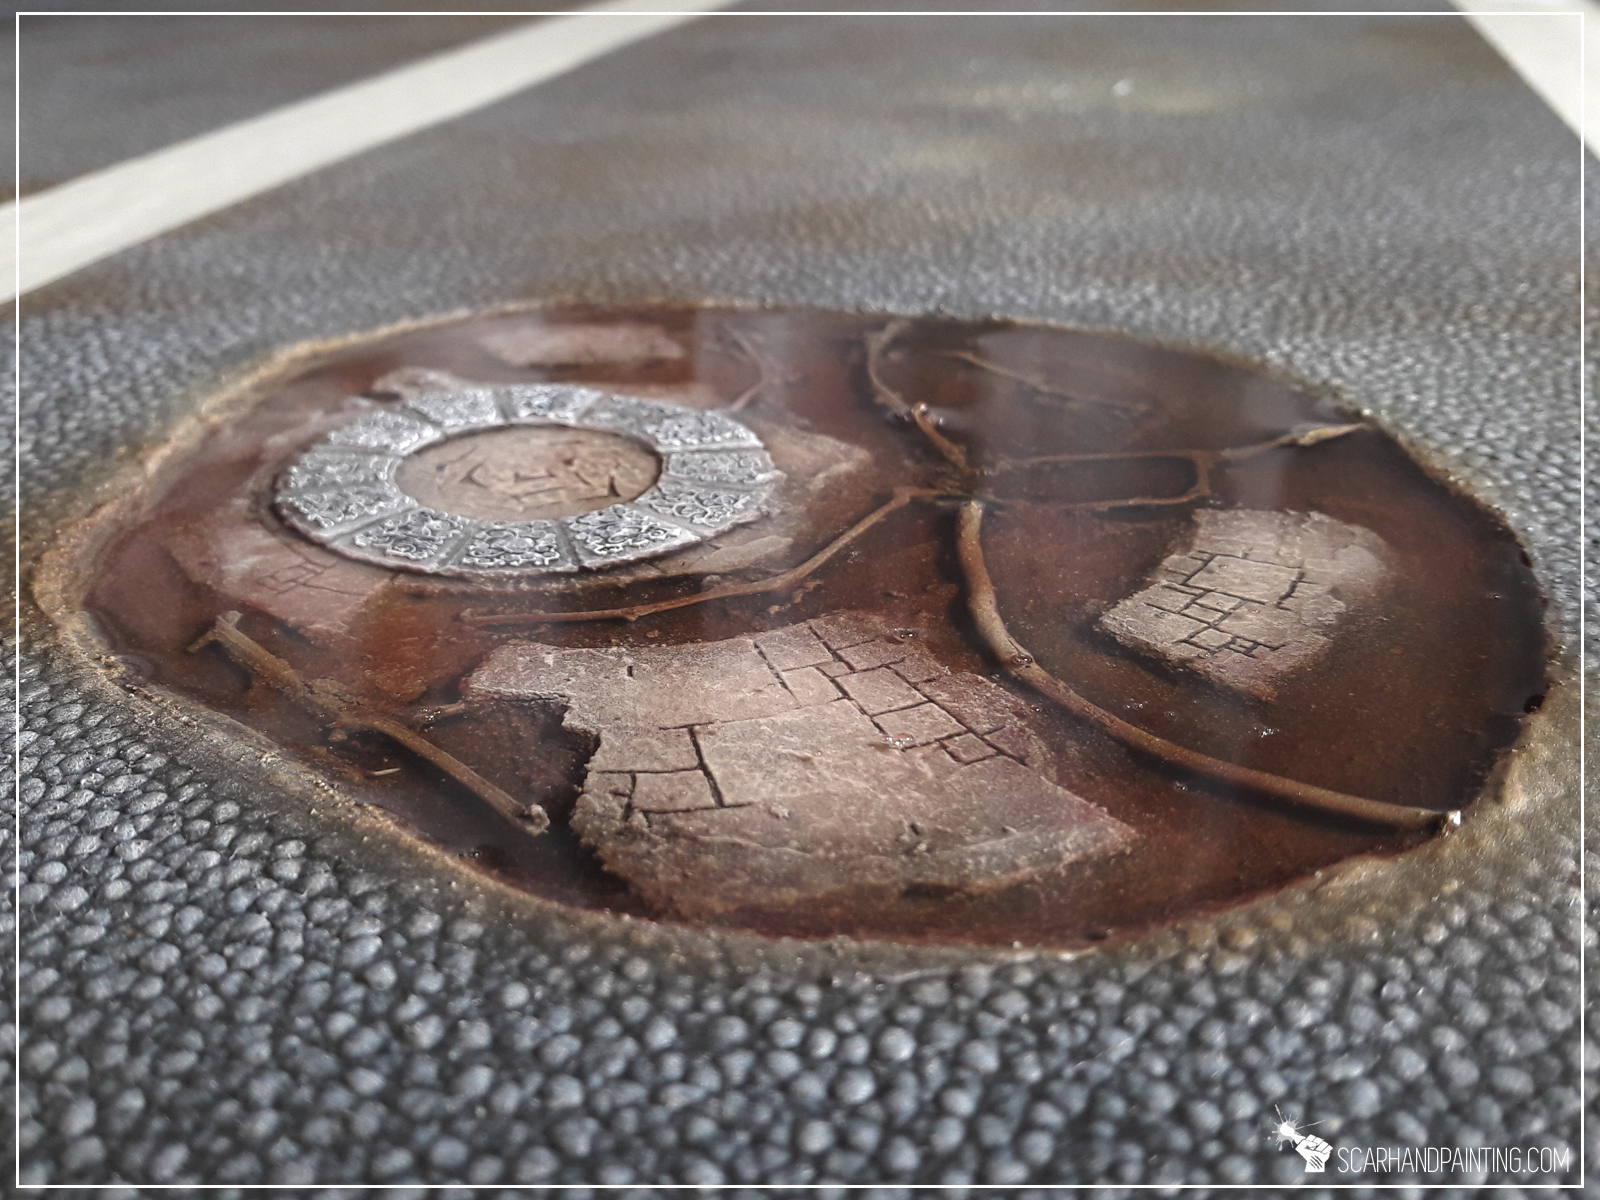
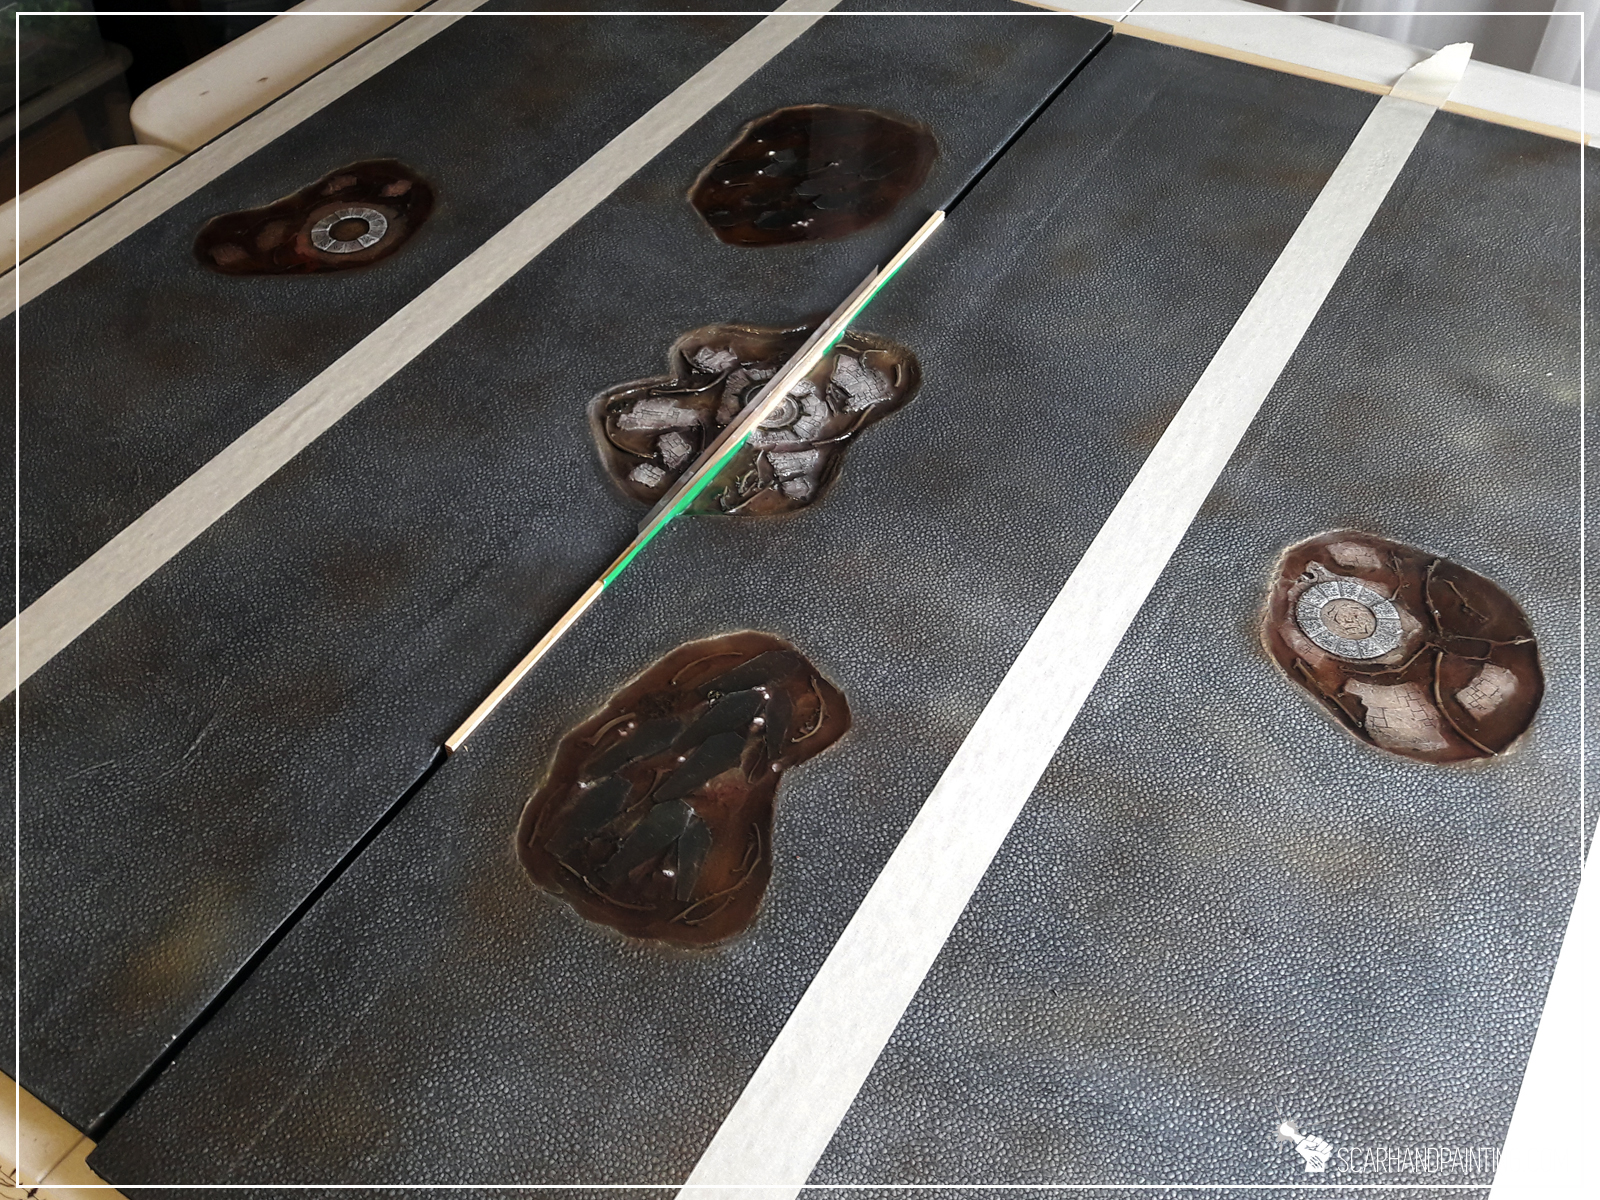
Next part was to paint the insides of the detailed holes. I airbrushed most of it with a mix of browns, and then grays. A soft bright grey drybrush over stone elements, one layer highlight of the coffins and bony paint job of skulls – all complicated a bit due to the sheer size of the board pieces, but other than that simple and easy. That is because I planed for water effect to be darkened with few drops of brown ink. Paint job just didn’t need to be intricate.


Most dangerous part of the project was Resin. Working with resin is very difficult. The thing is messy AF, sticky, gotta be carefully prepared and poured in, but most importantly – a single tiny hole and entire thing ends up on the floor and all over the underside of a project. I know this, because it happened in the past with. More so, a tiny drop on your hand and you can be sure of glossy stains everywhere! With Mortician’s Pitch I actually came prepared. I prepped solid plastic barriers for the half-holes at the middle of the board. I also sealed any potential holes with a thin layer of PVA glue. The resin got poured in and the long wait started…


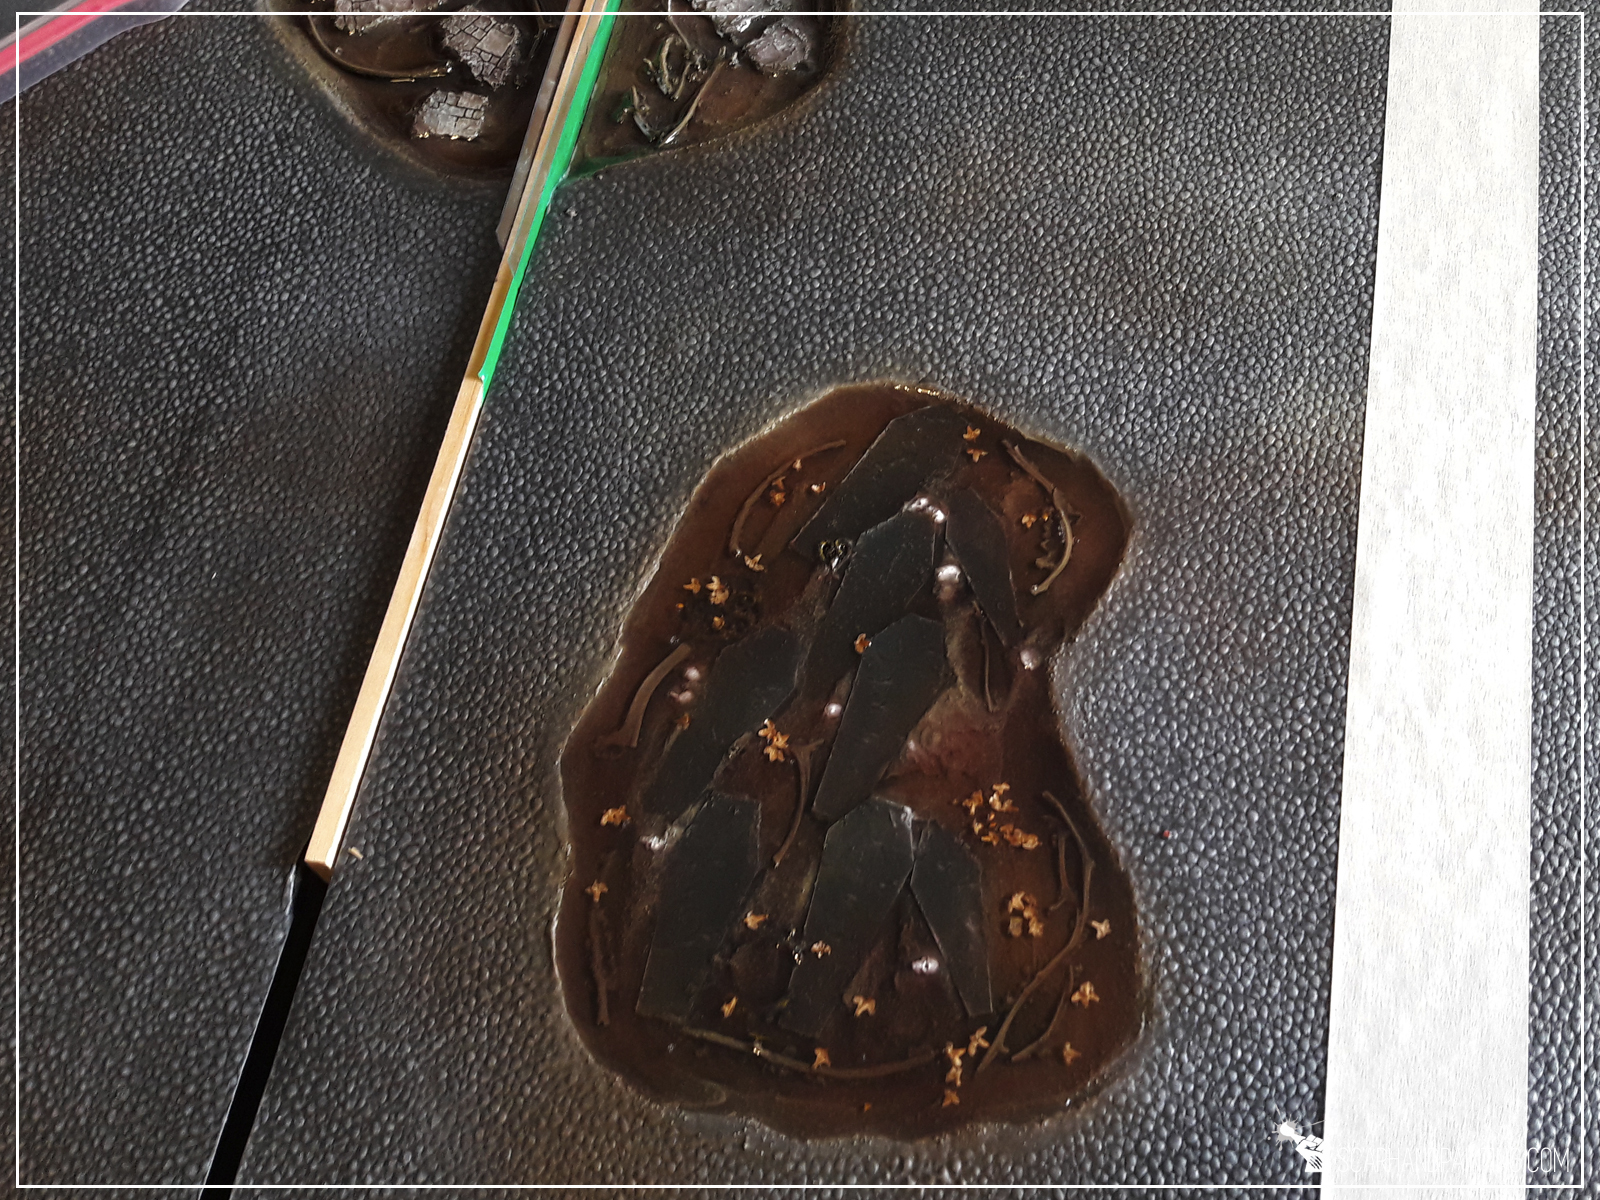
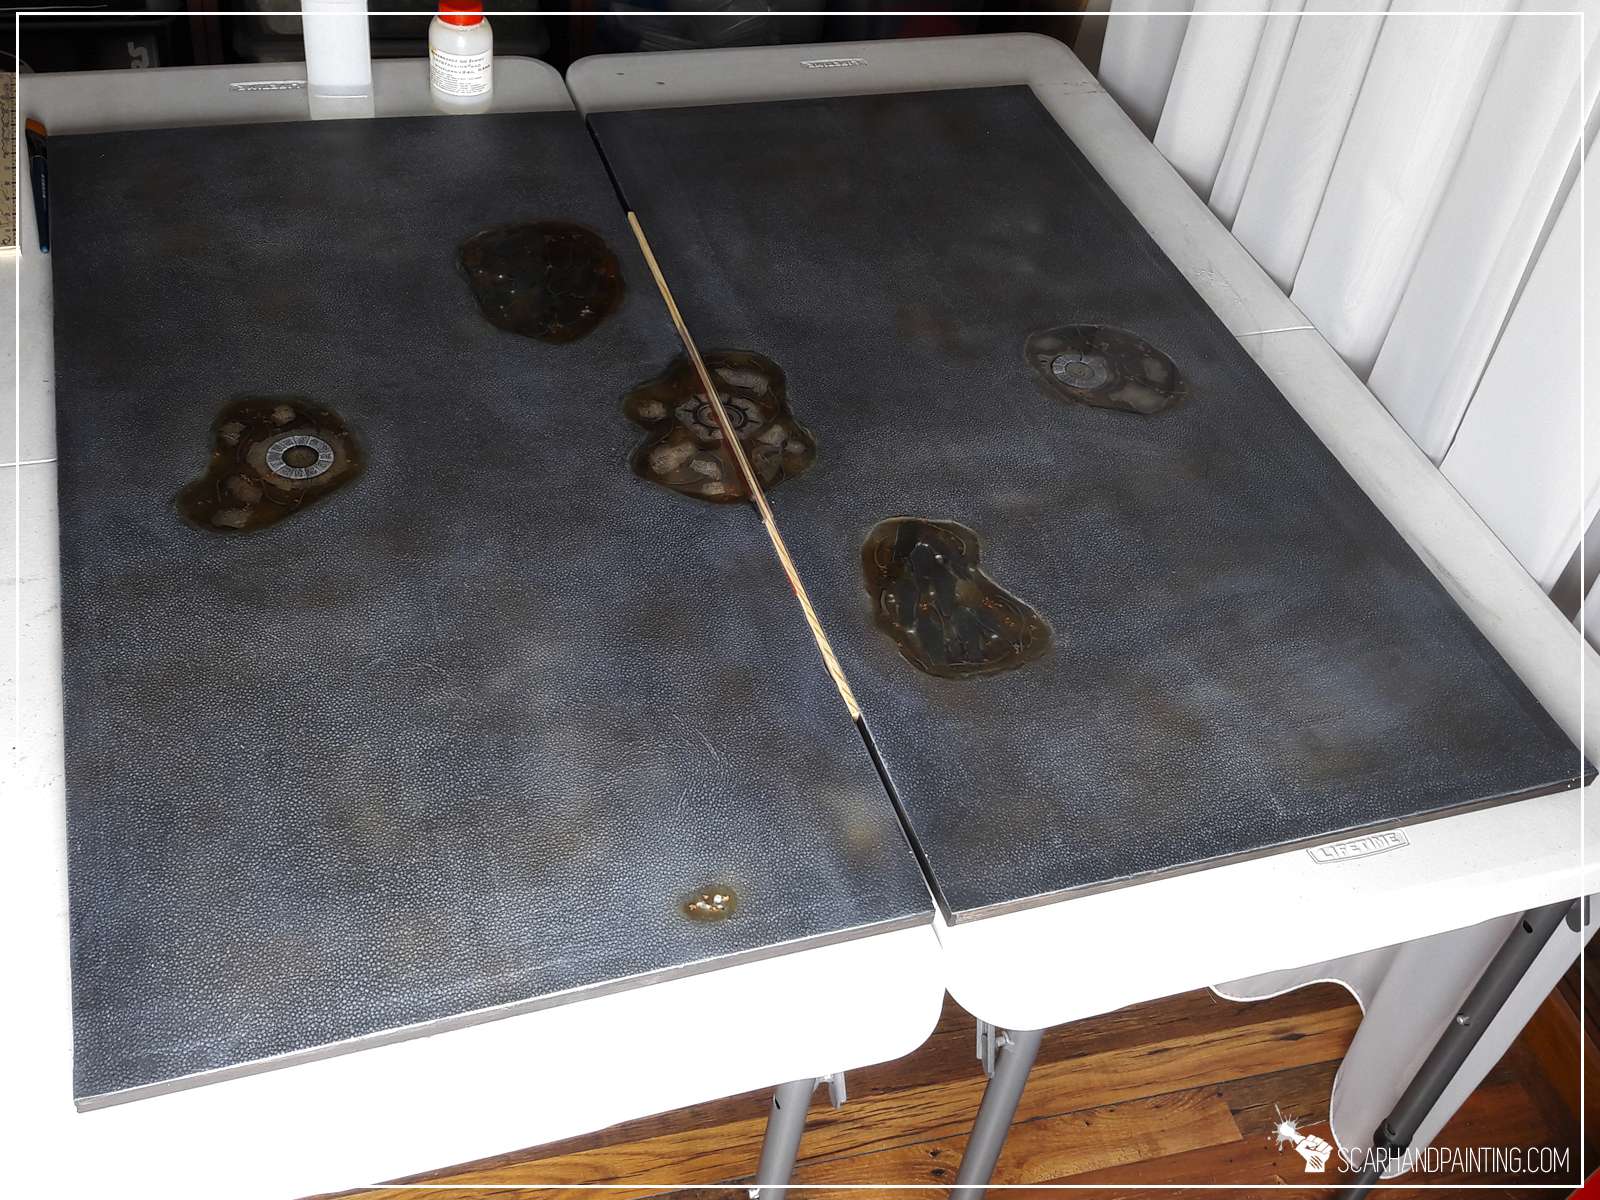

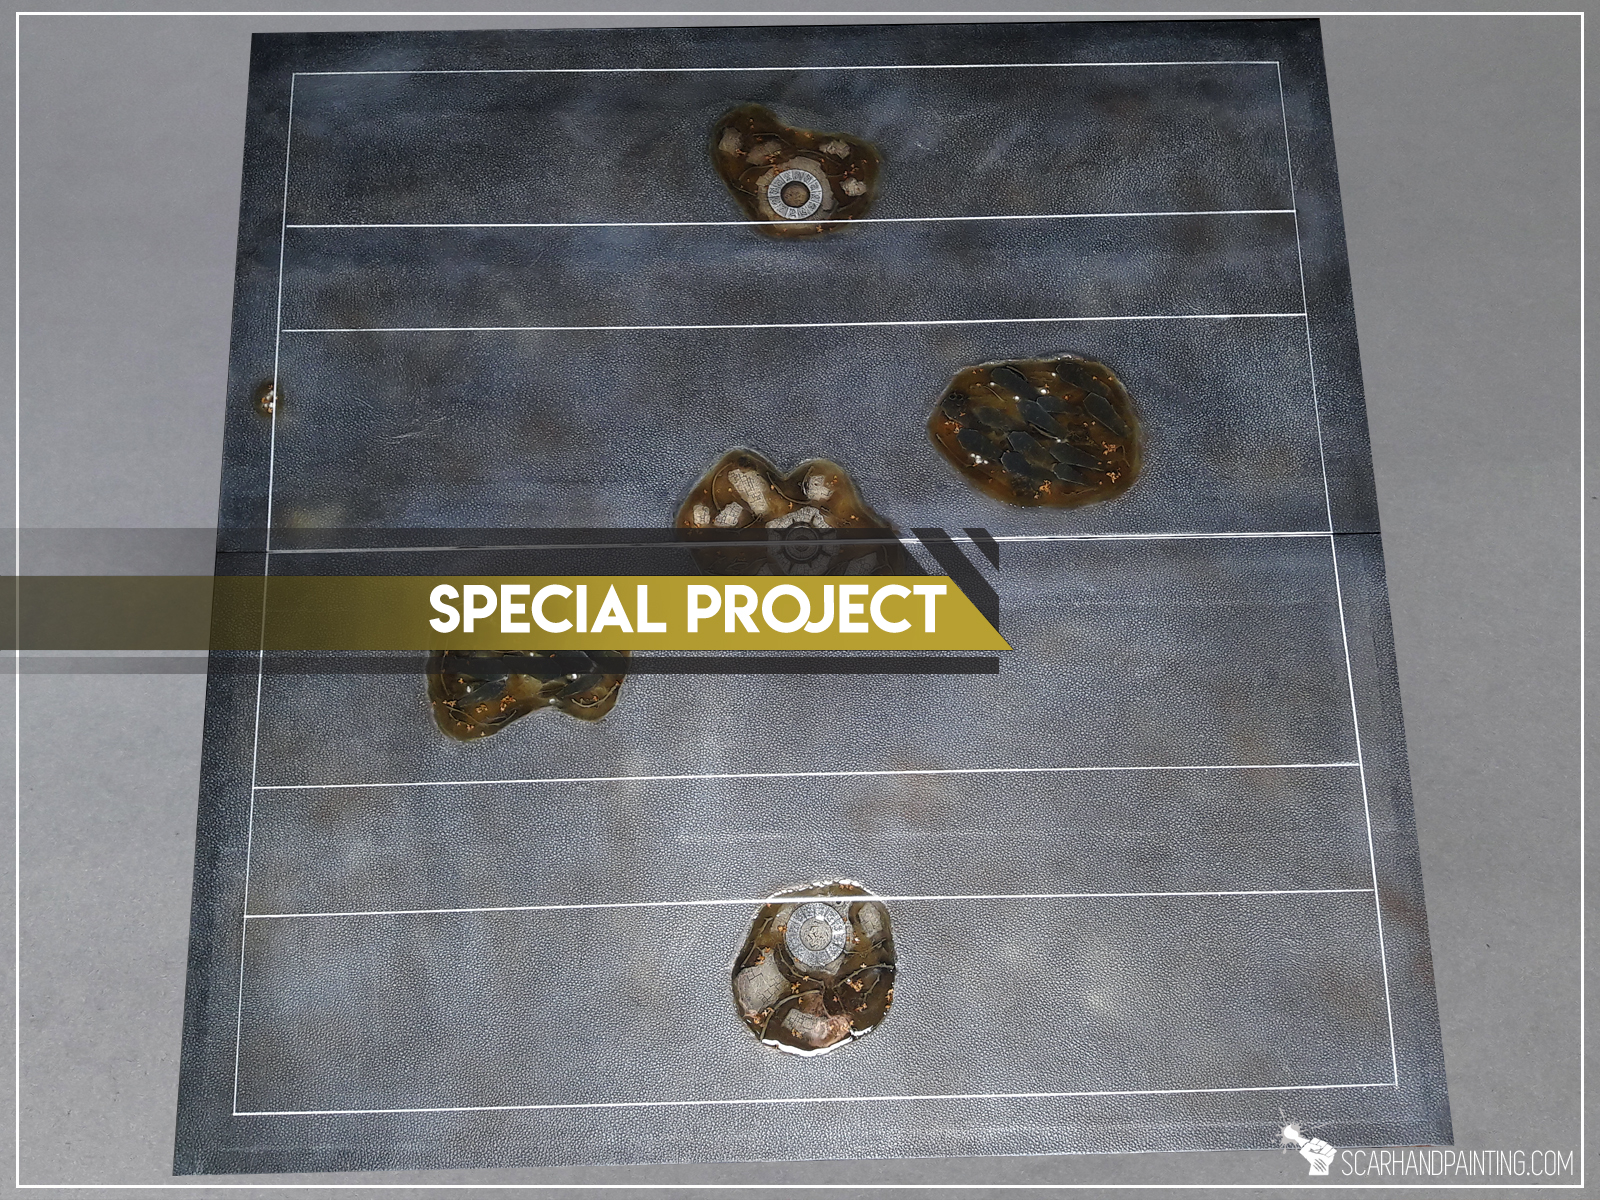
… and it all went to shit when over 24hrs later I realized that resin is still sticky. I gave it another day to coagulate with no positive result. If you worked with resin you probably know what that means – if resin is still sticky after 48 hours it will stay this way forever. I must had messed up proportions when mixing two ingredients with colored ink. A revitalization process started, with me spooning gummy “goo” out, carefully not to damage paint job underneath. Was very difficult and took few days to accomplish, but I finally landed at a point where it was possible to apply another (this time properly mixed) layer and seal it.
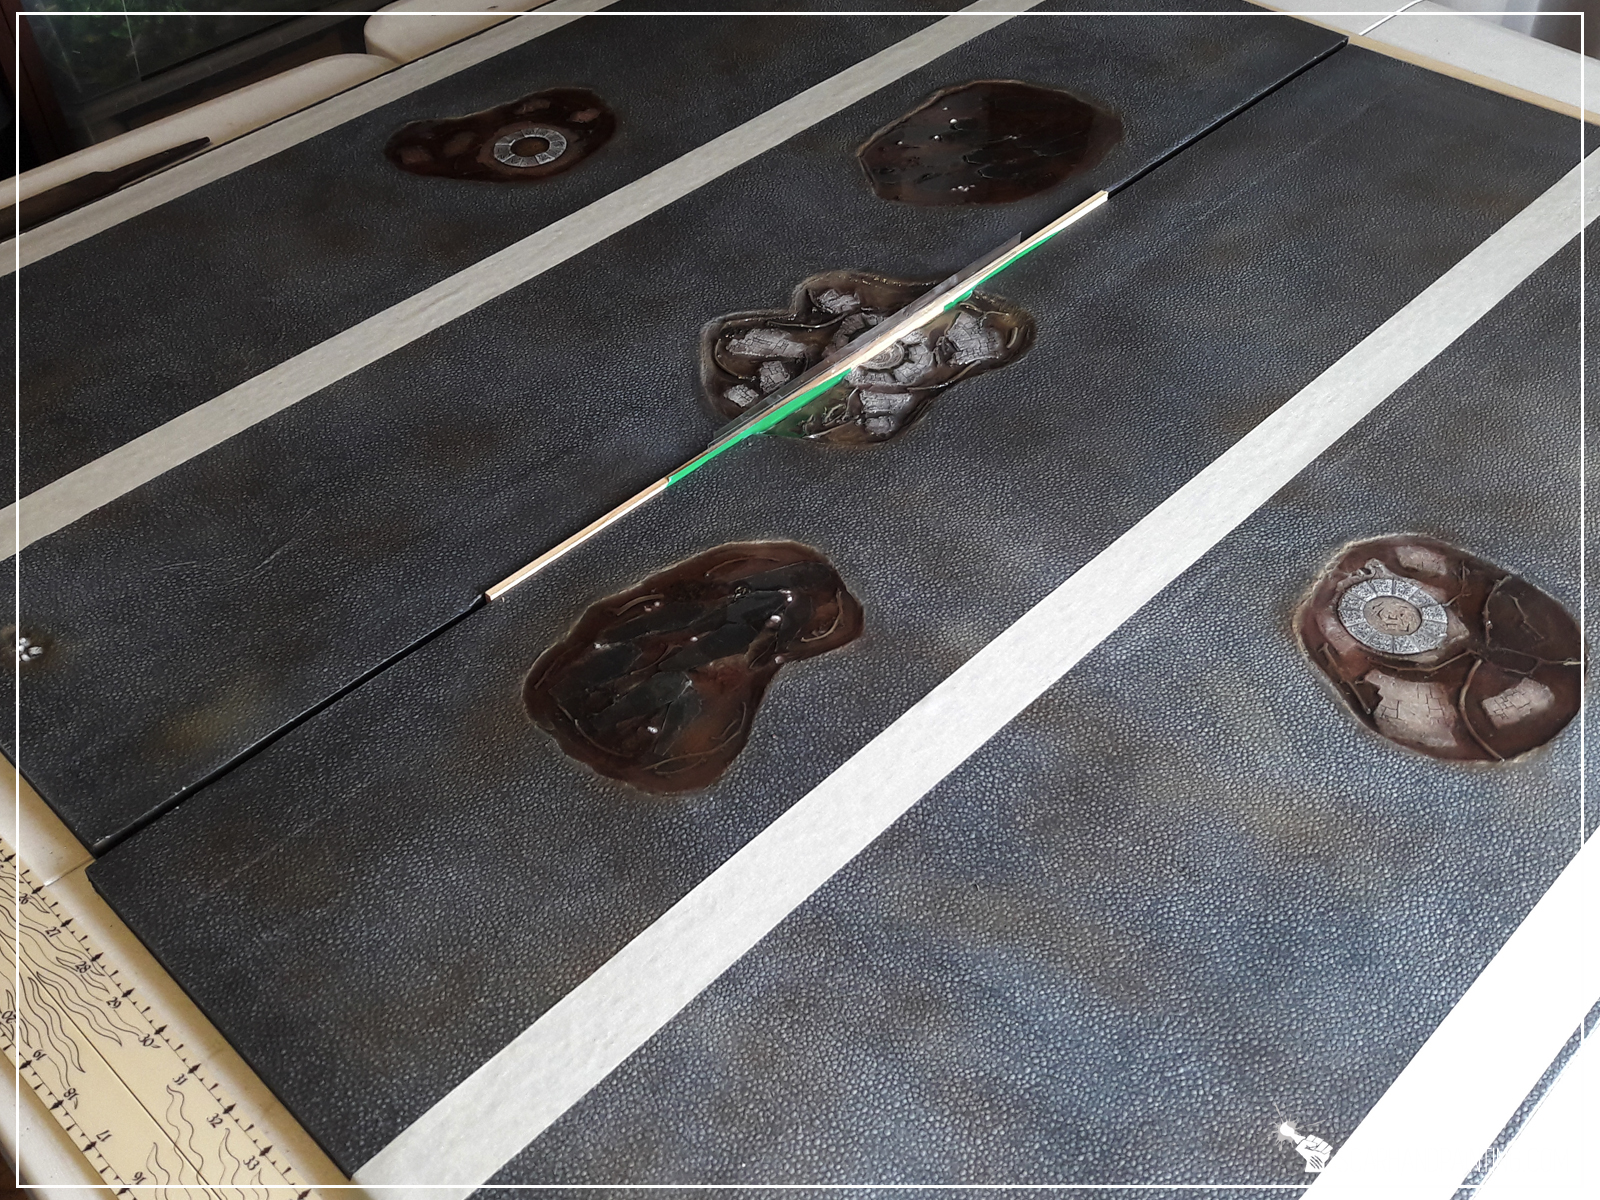
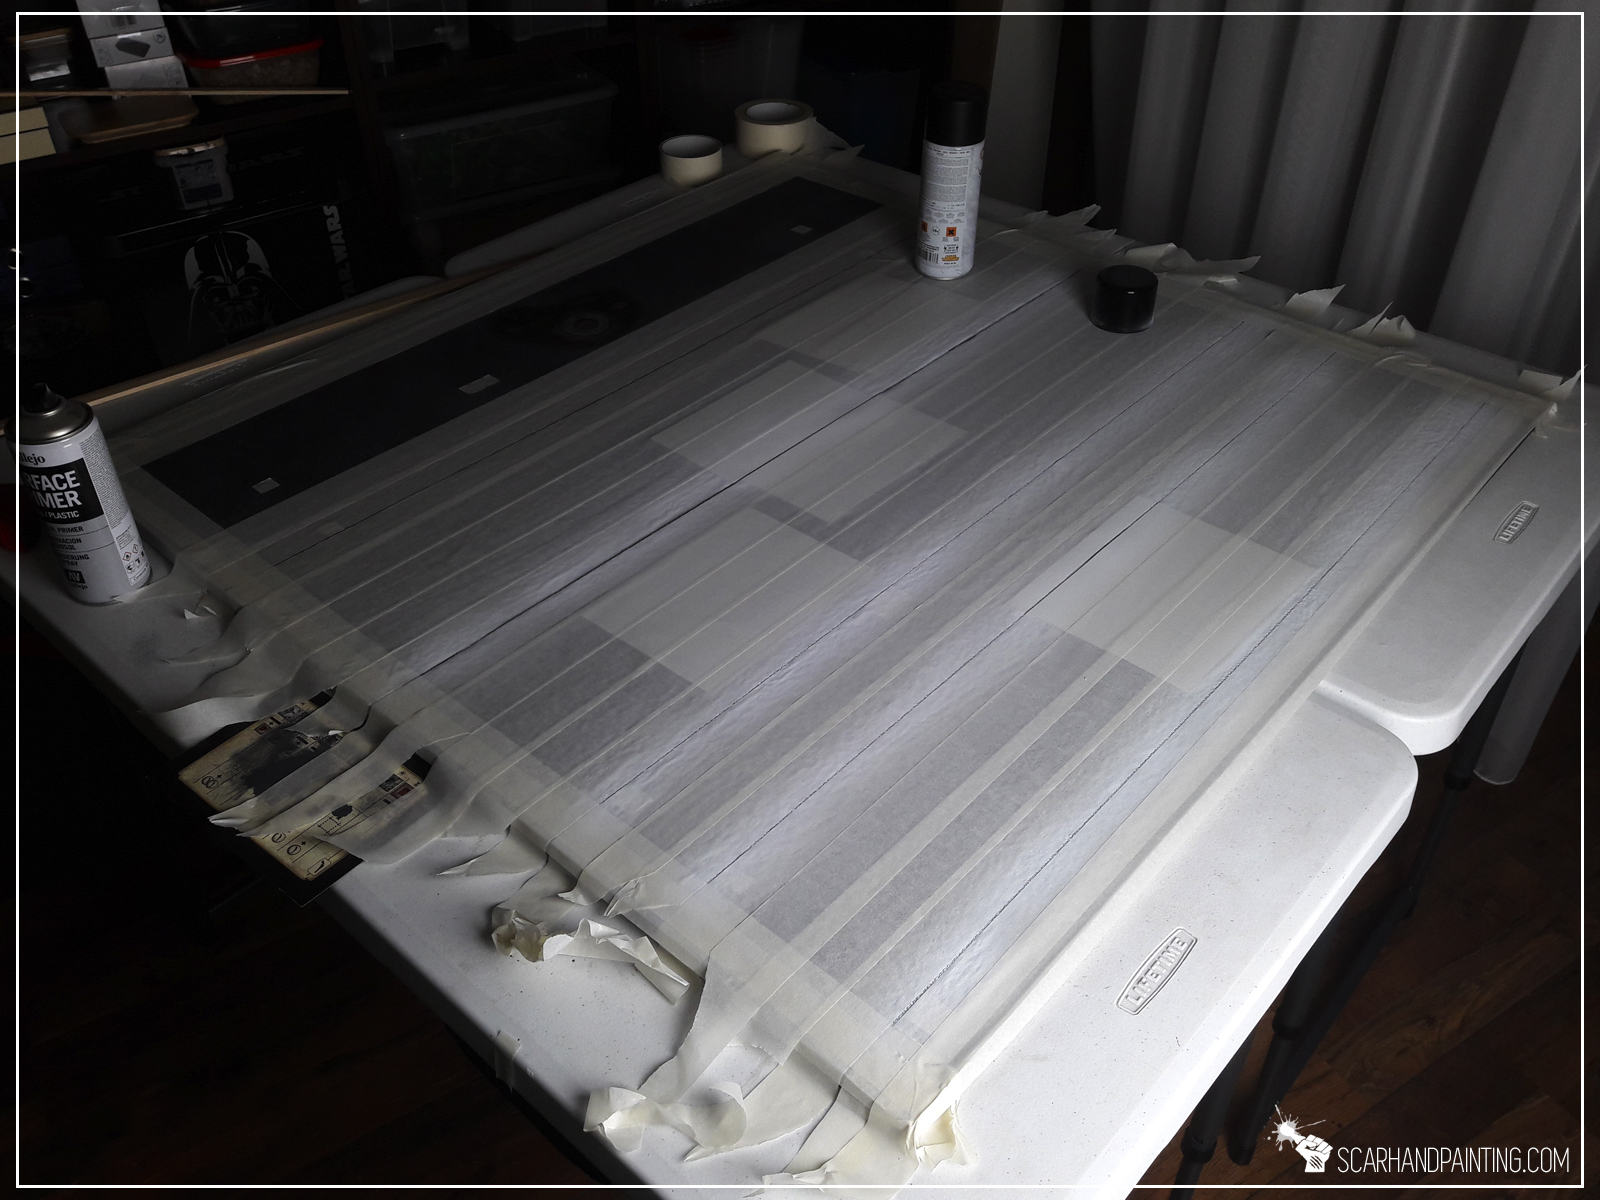
Last part of the paint job, finally possible due to resin being properly hard. I carefully measured distances around the board, covered resin parts with paper thin plasticard and used painting tape to mask most of the board. I then airbrushed the lines with pure white paint.
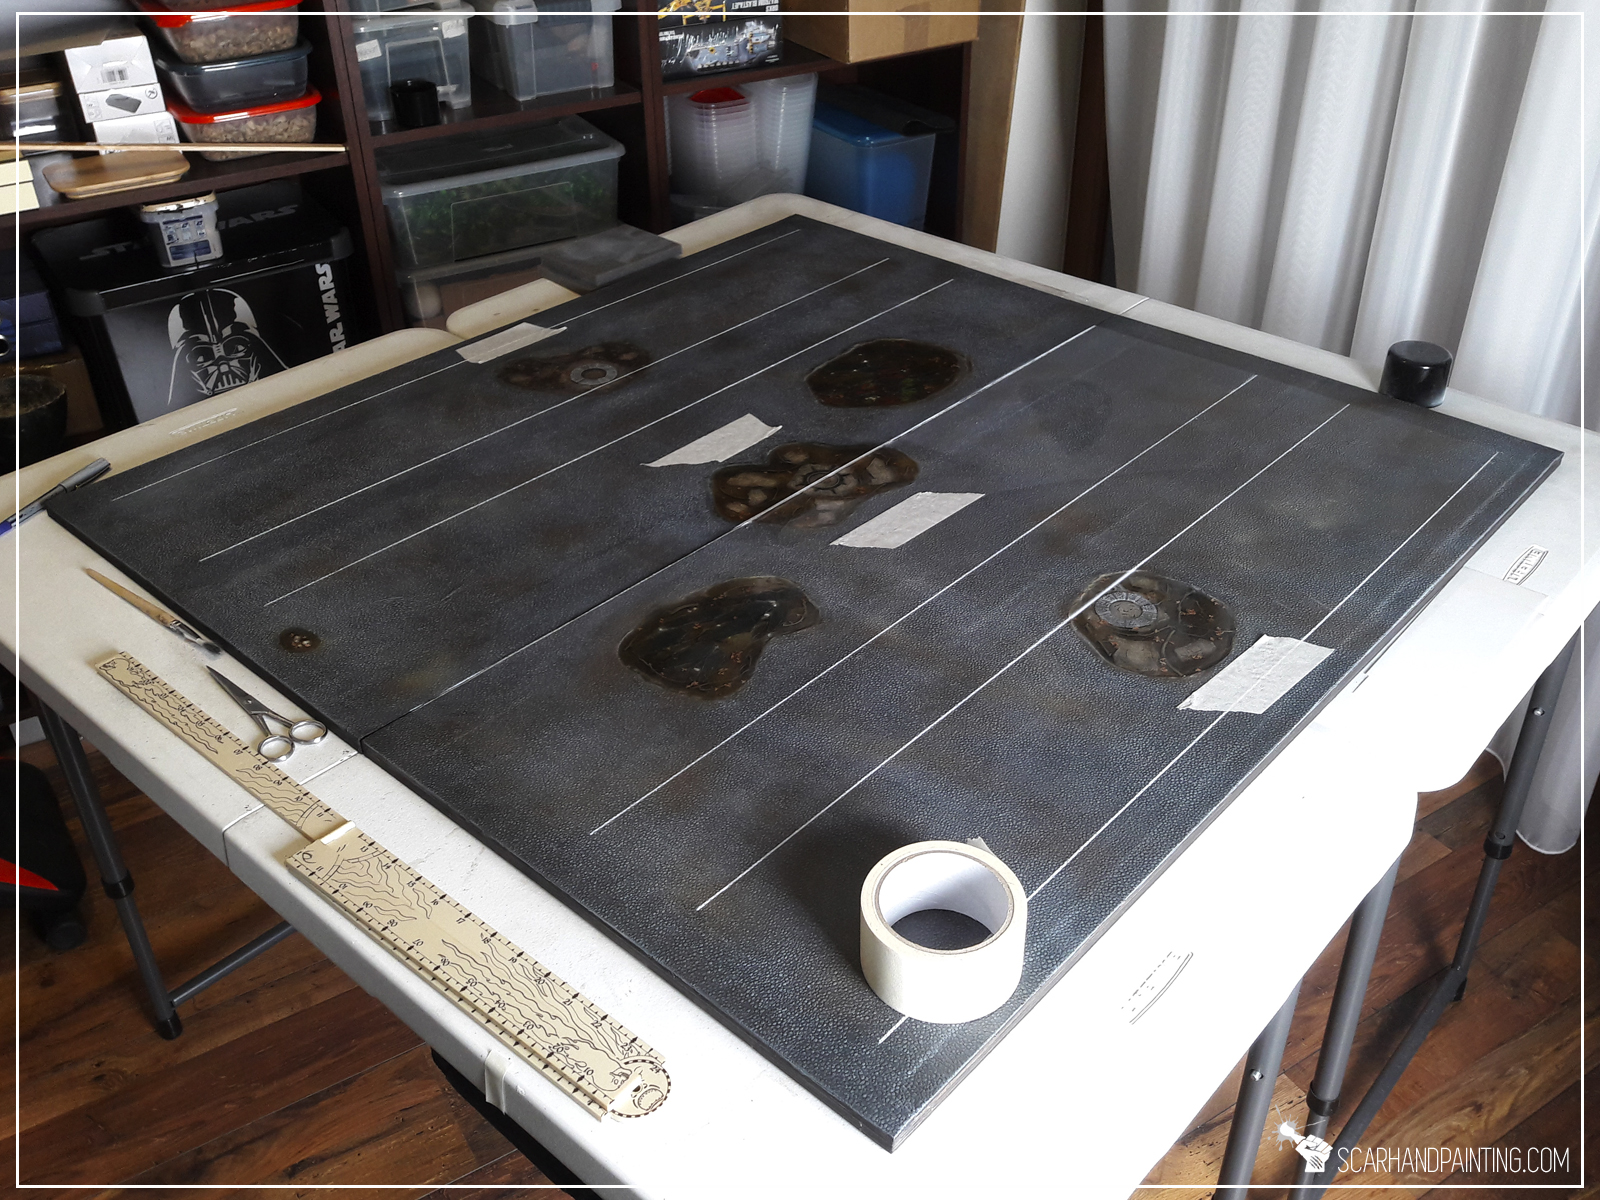
Revealing the final effect was hell of an excitement. Now I gotta play some games on this troublesome new board!


I hope you like the article. Don’t be a stranger and let me know what you think either in the comments or at my Facebook page.

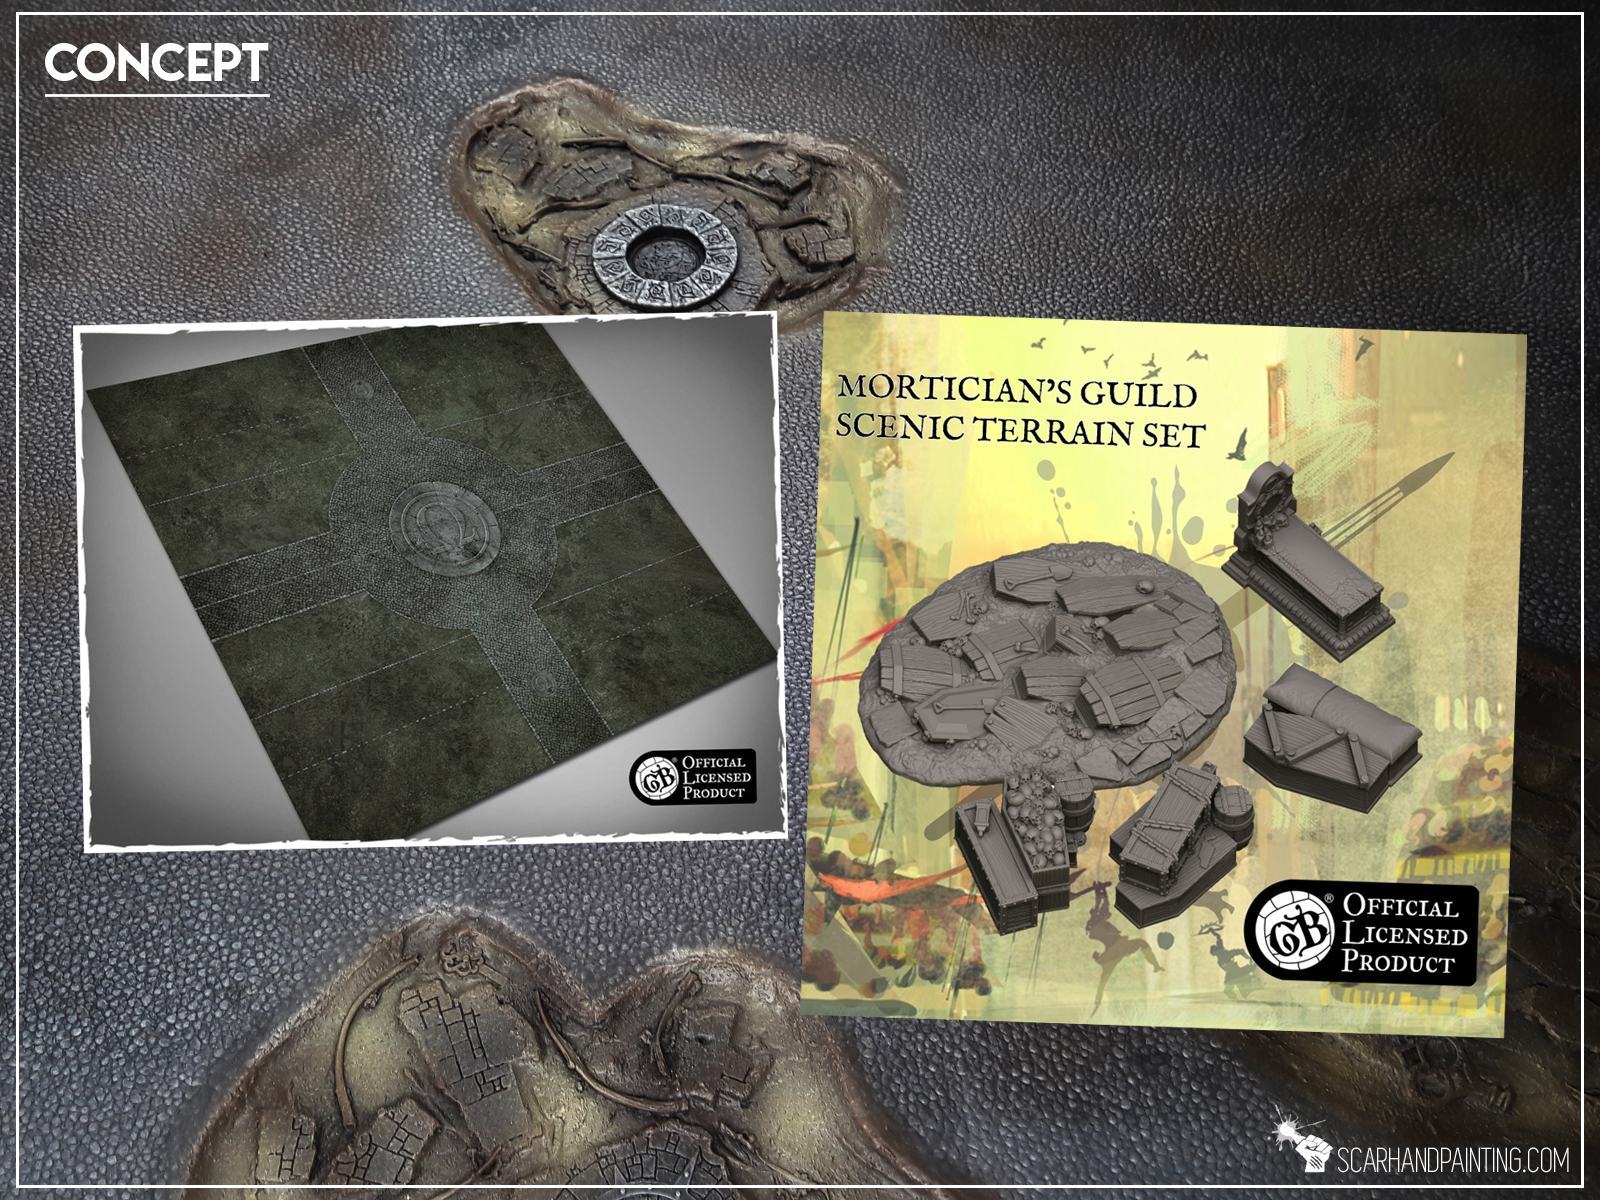
My hype for Guild Ball is pretty strong. The game looks like a lot of fun and miniatures have a great feel to them, that makes me want to leave everything else and just start painting. My Mortician’s team being currently on hold I decided to focus all the Guild Ball related inspiration around another project – Mortician’s Pitch.
At first I thought about something blunt, like cobblestone texture with pitch features airbrushed on top. Thing would be both playable and looking nice. It all changed once I accidentally bumped into this magnificent piece of scenery by Brokentoad. Those half buried coffins almost catapulted me out of a chair. Such a nice idea. I knew I will order this piece, but first I just had to implement a similar feature to the project. This made “Mortician’s Pitch” evolve from a simple flat cobblestone into a more 3d design. Still, how to insert irregular shapes on top of what is meant to be a playable surface… and then I thought about clear resin…
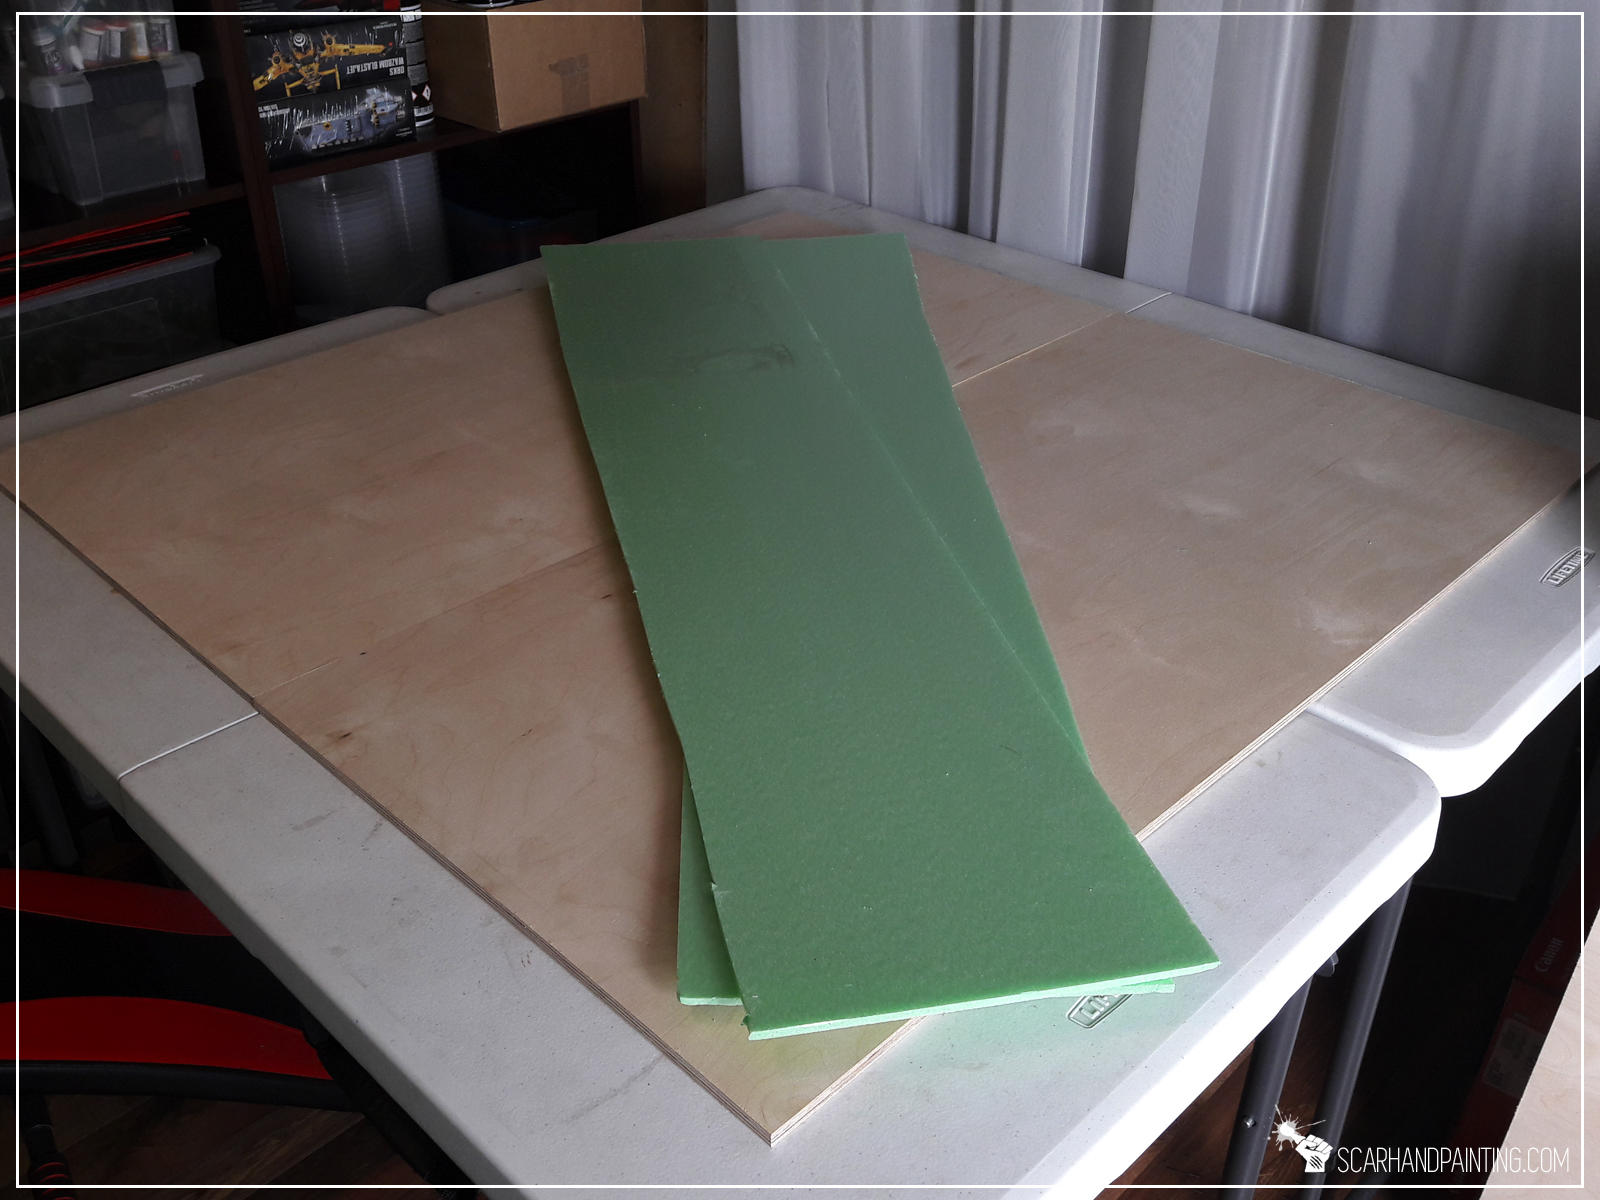
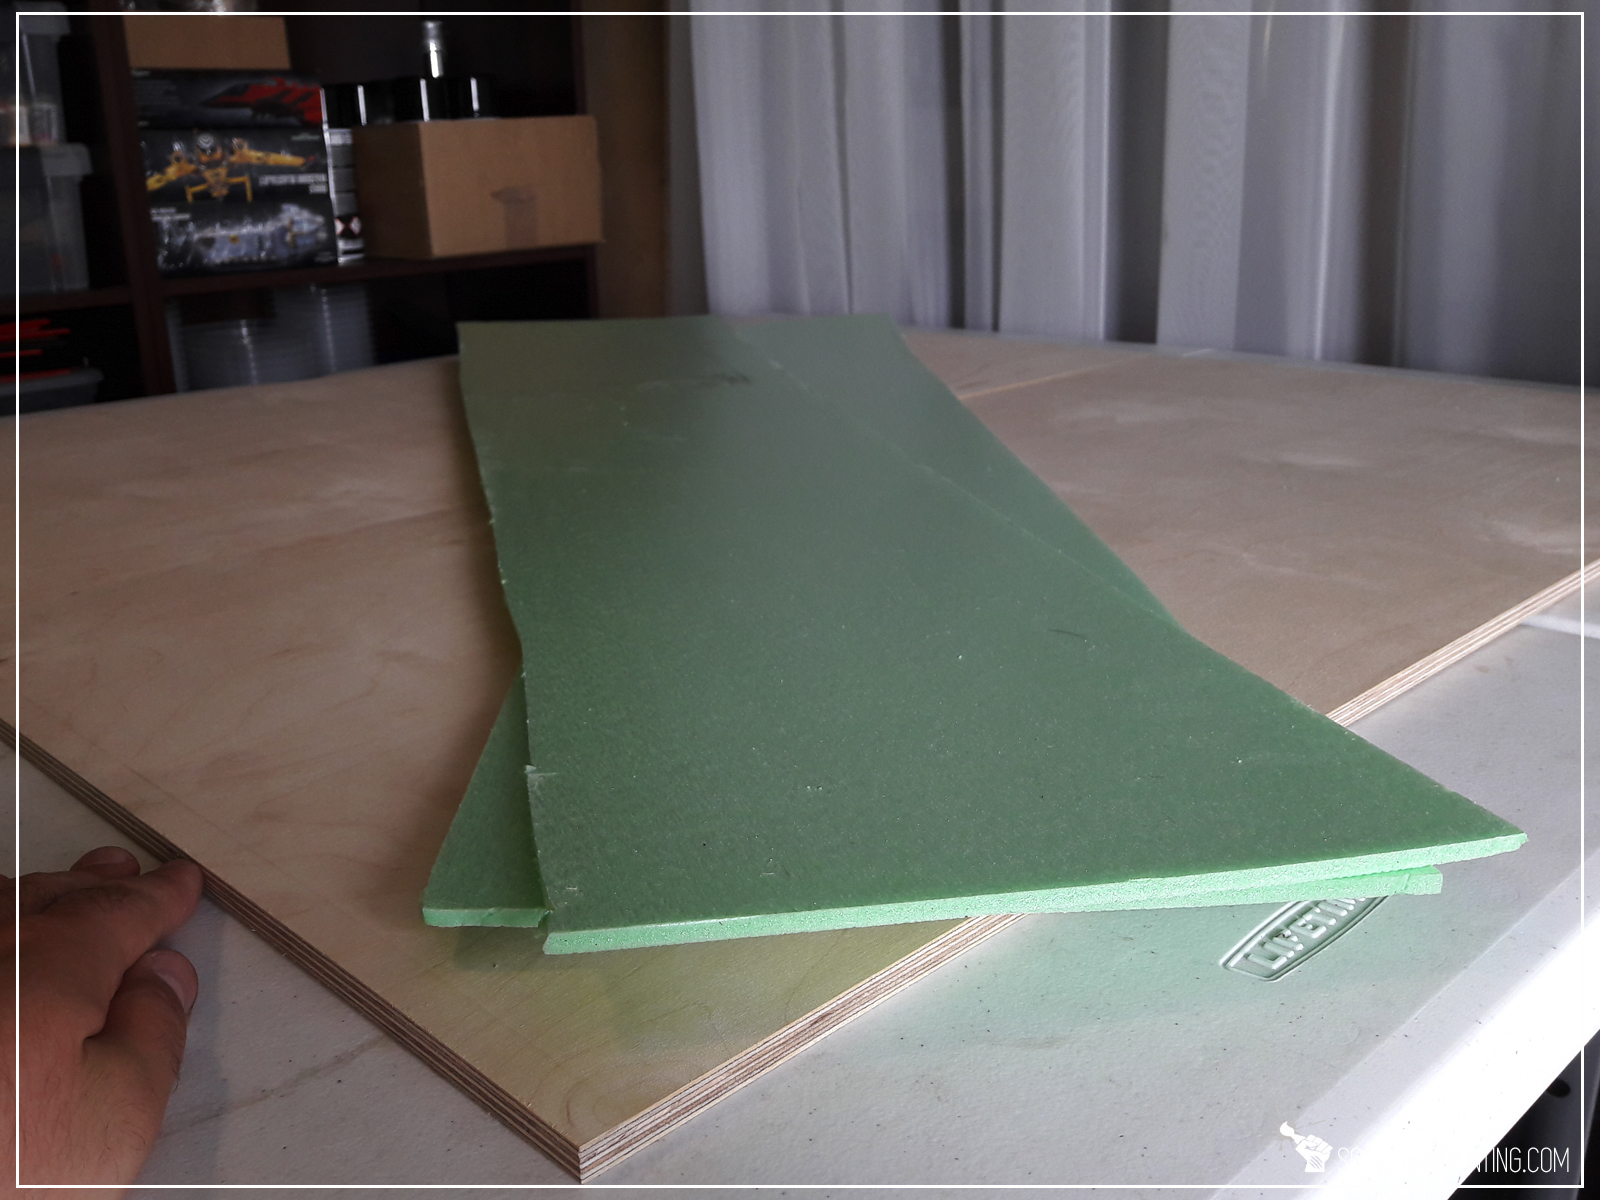
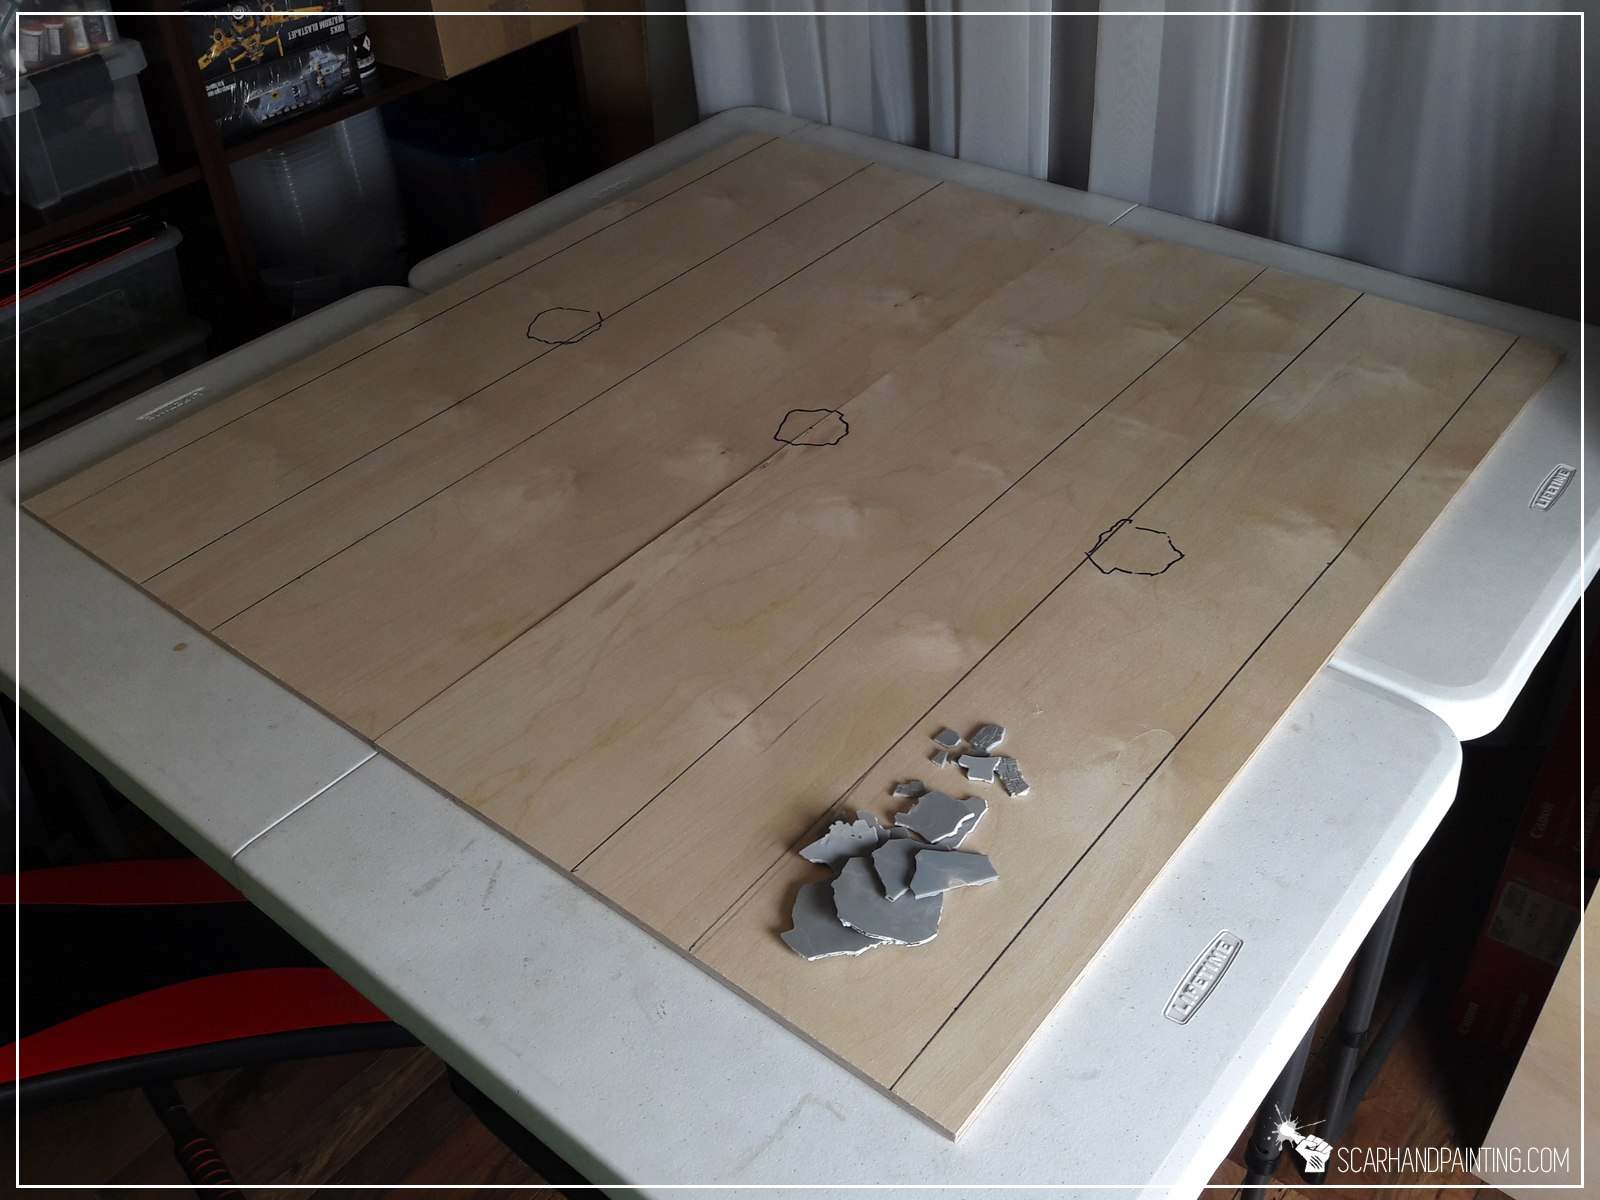
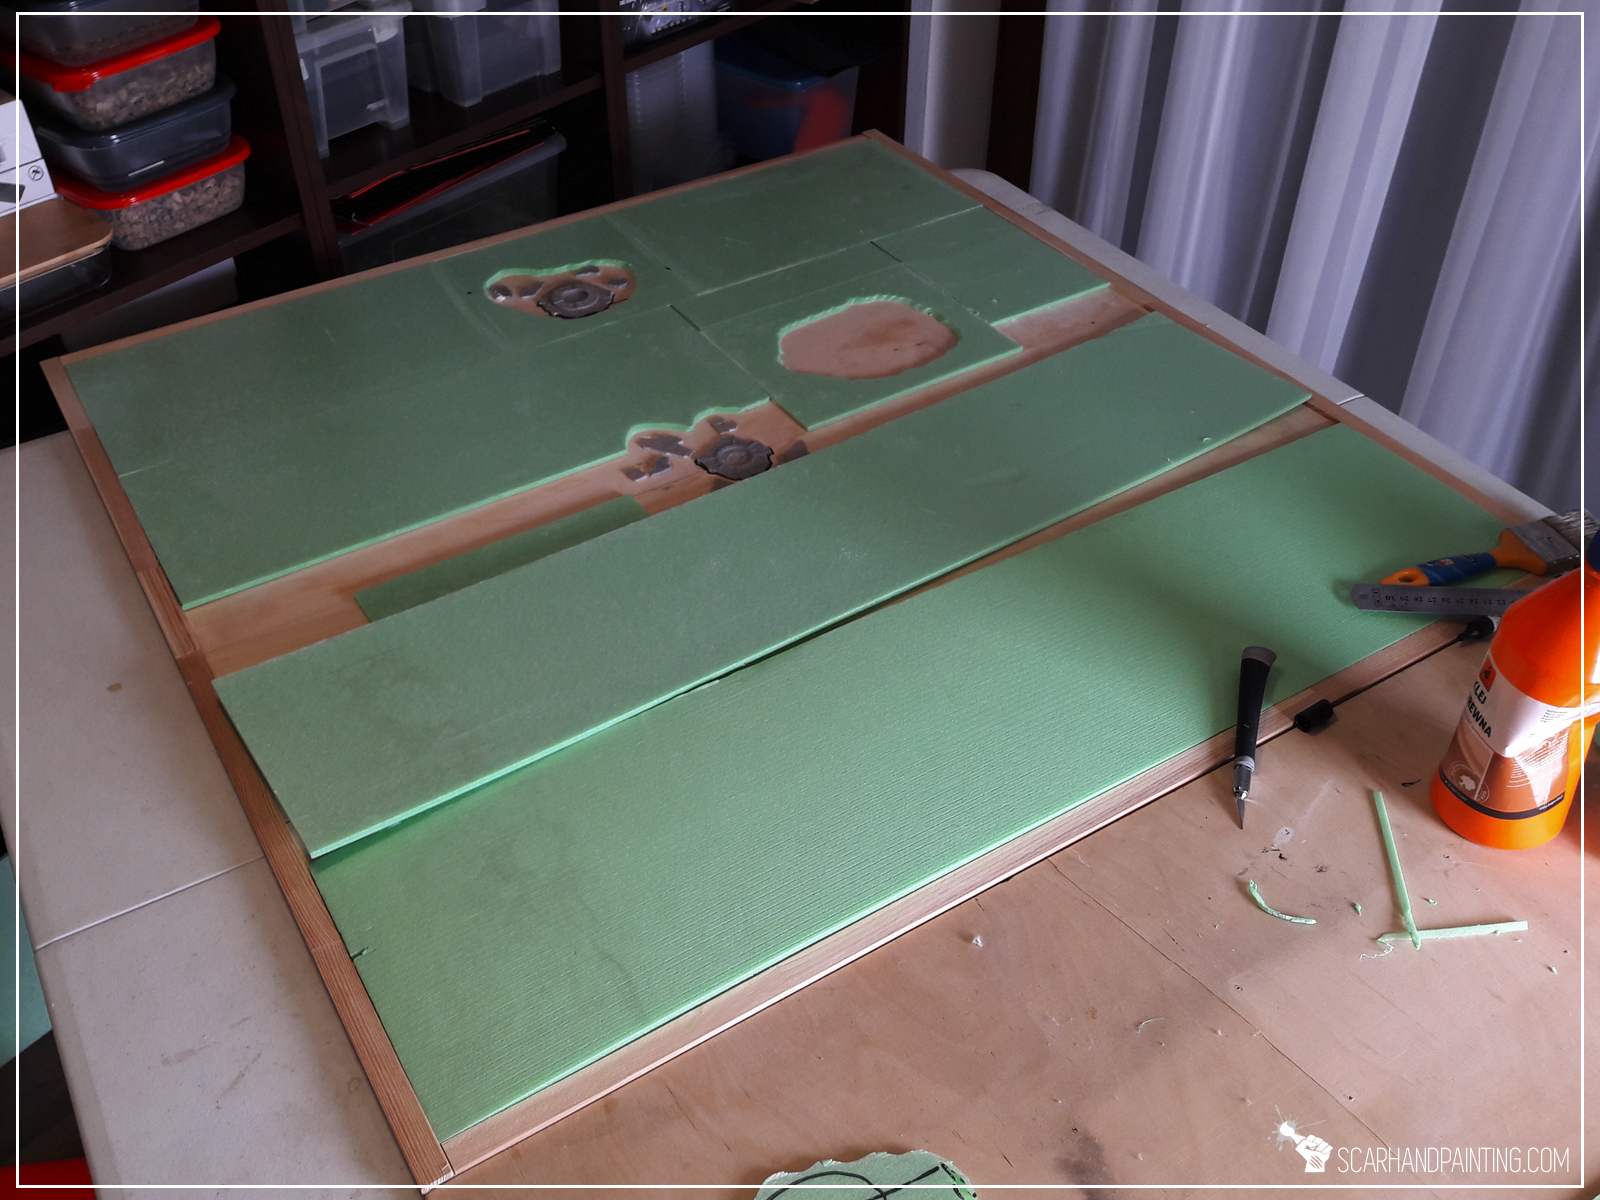
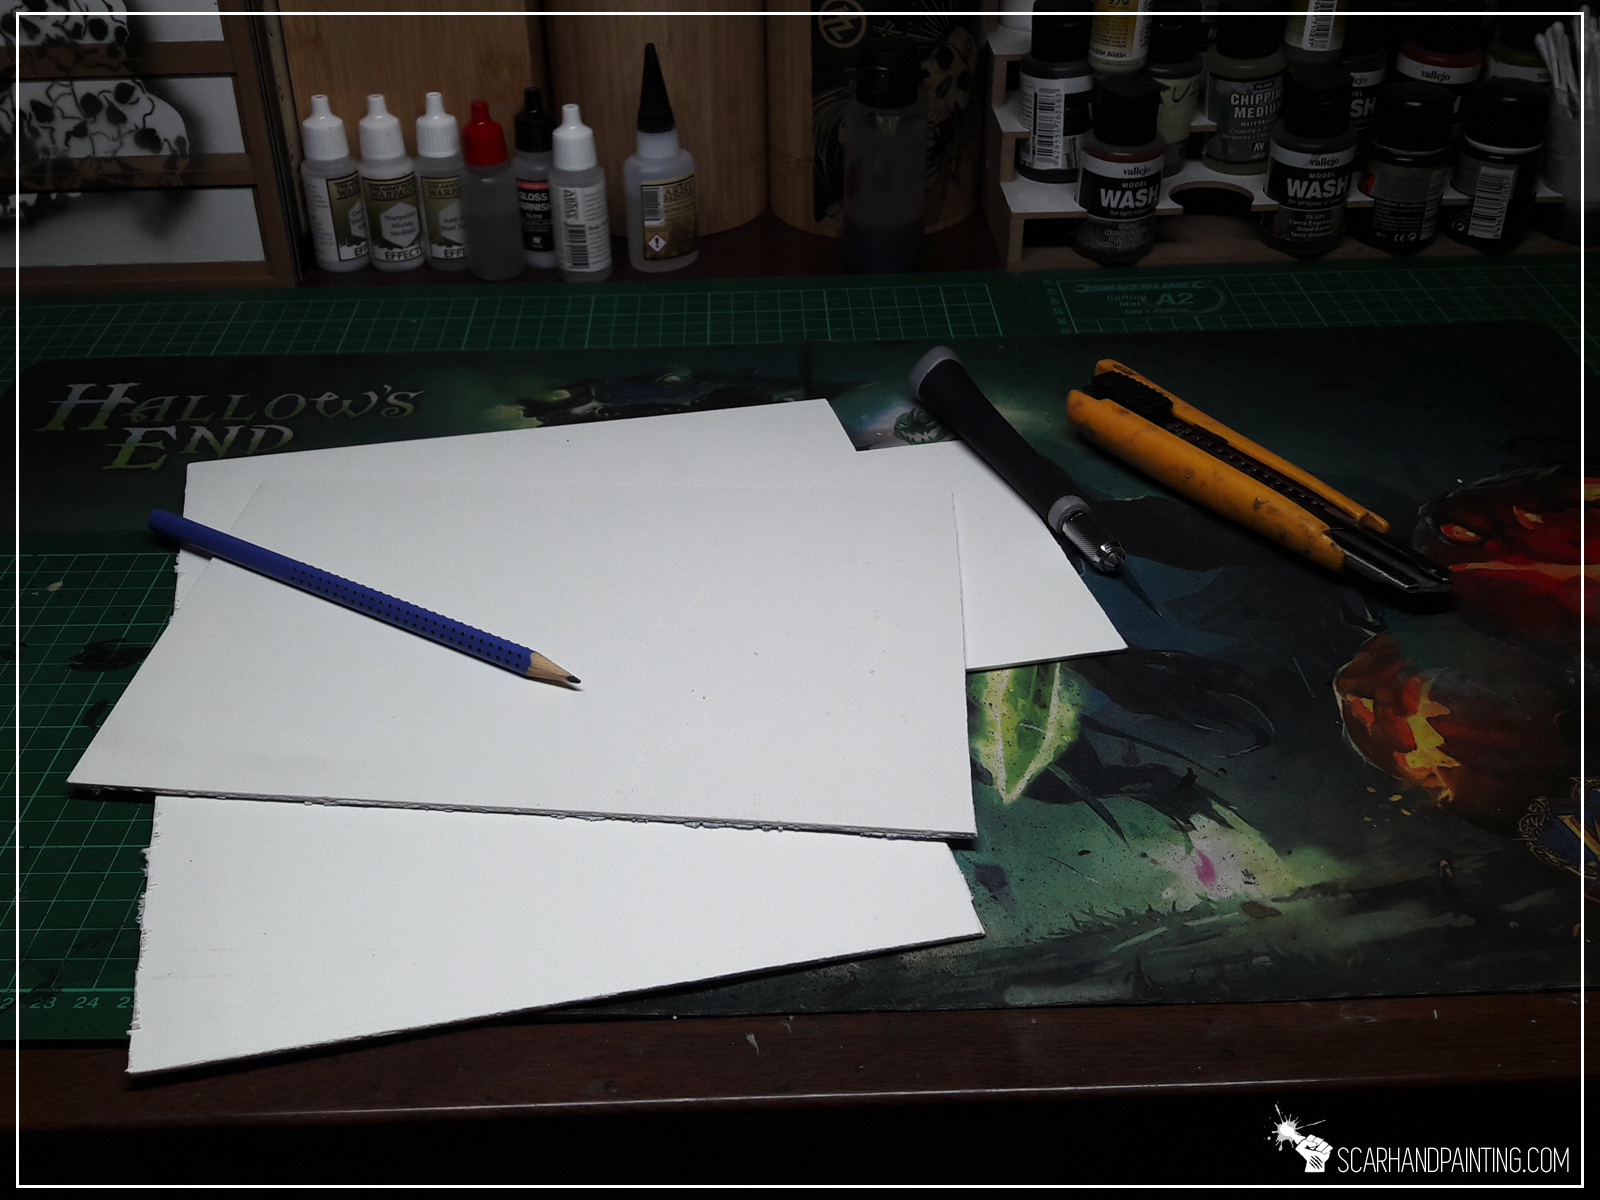
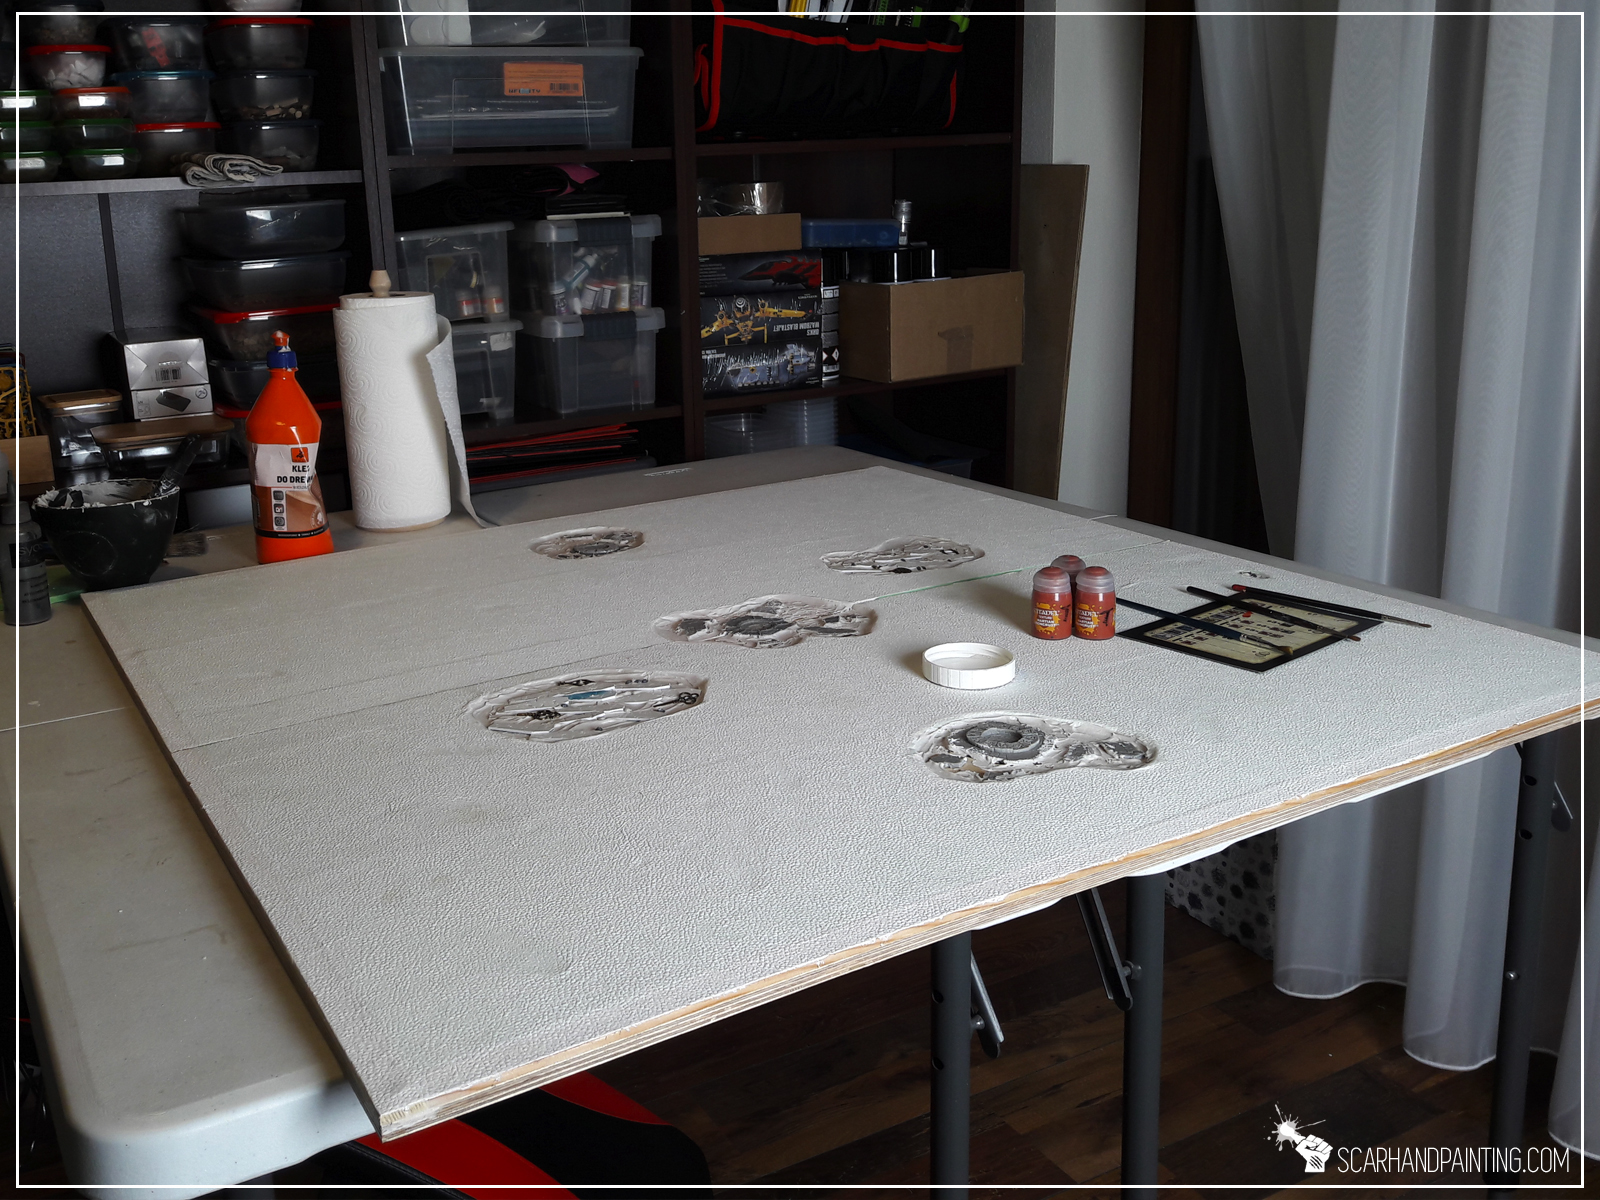
Off course a man gotta pick a right spot to dig a grave, not to mention placing an entire graveyard. I decided to go with two 10mm thick, 100x50cm wide meshed wood planks as a base for the pitch. These are a bit wider than necessary, but playing different games throughout the years taught me to leave some spare space around the proper gaming area. This way if anything gets damaged it wouldn’t impact playability of the board. 10mm thickness means these would stay flat and be durable enough to withstand any random fuckups that might happen some day.
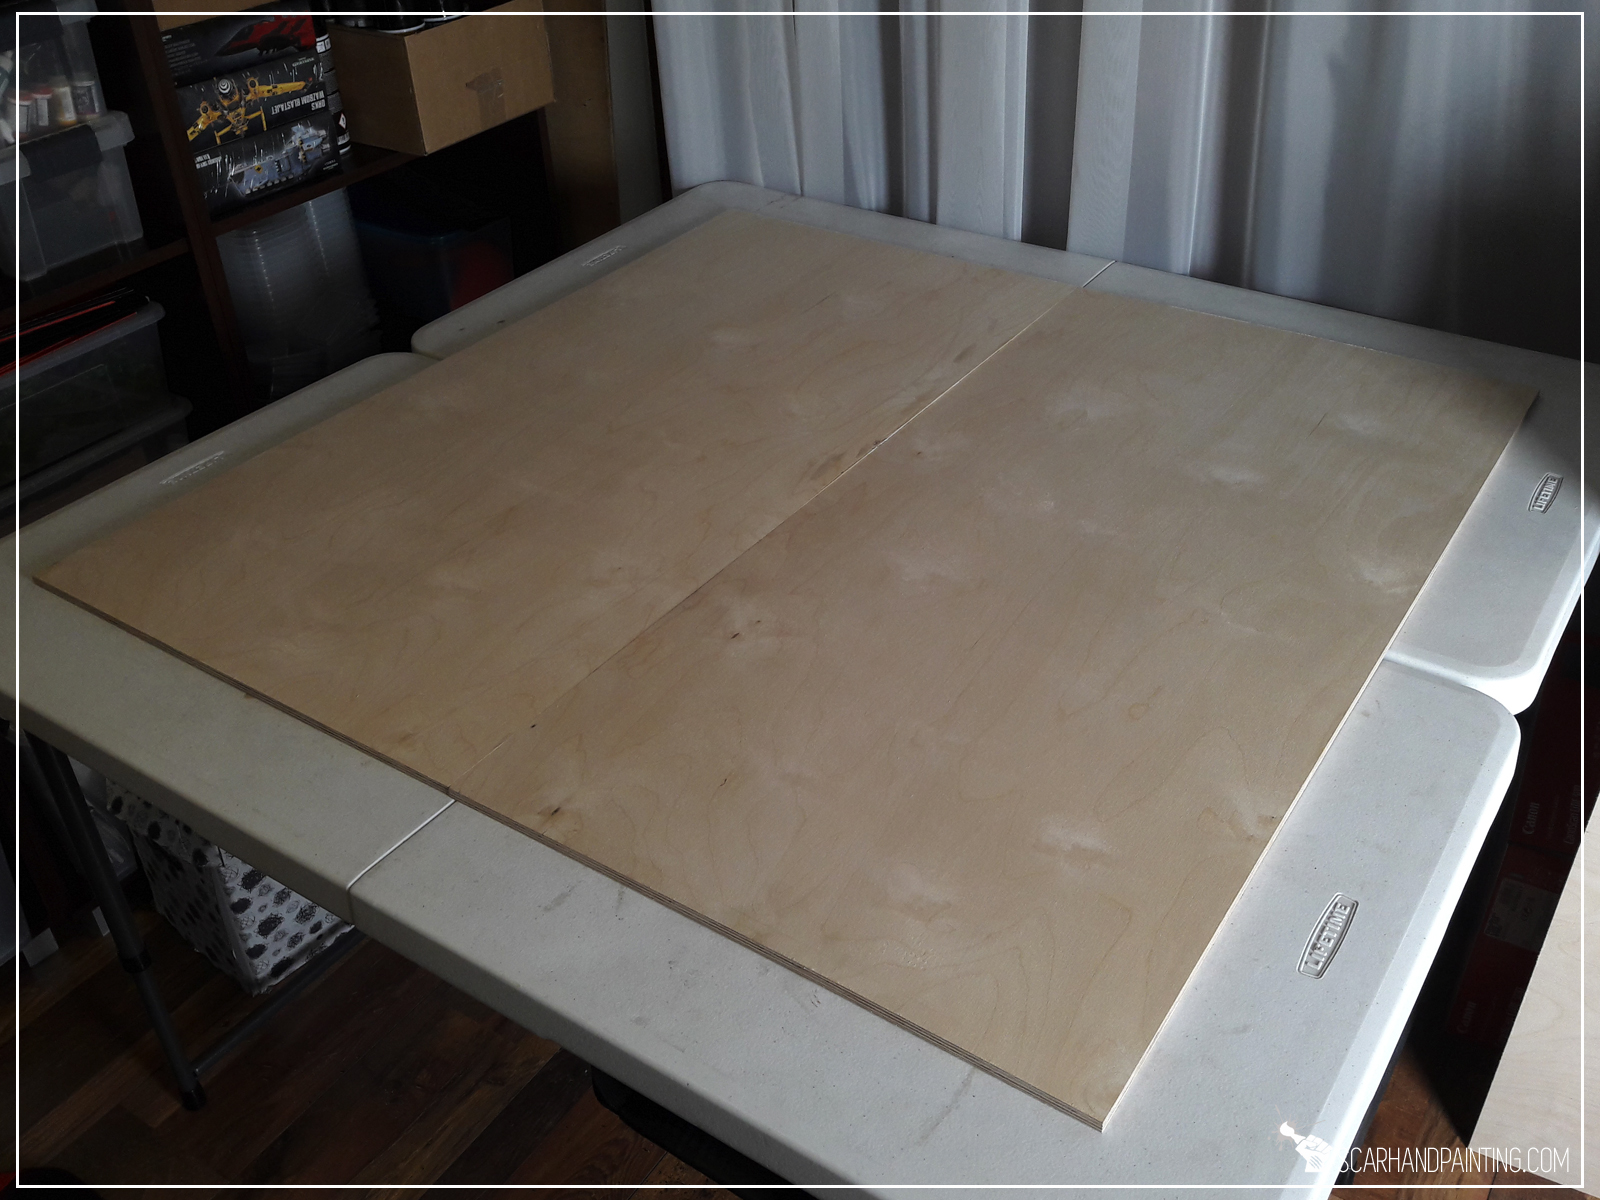
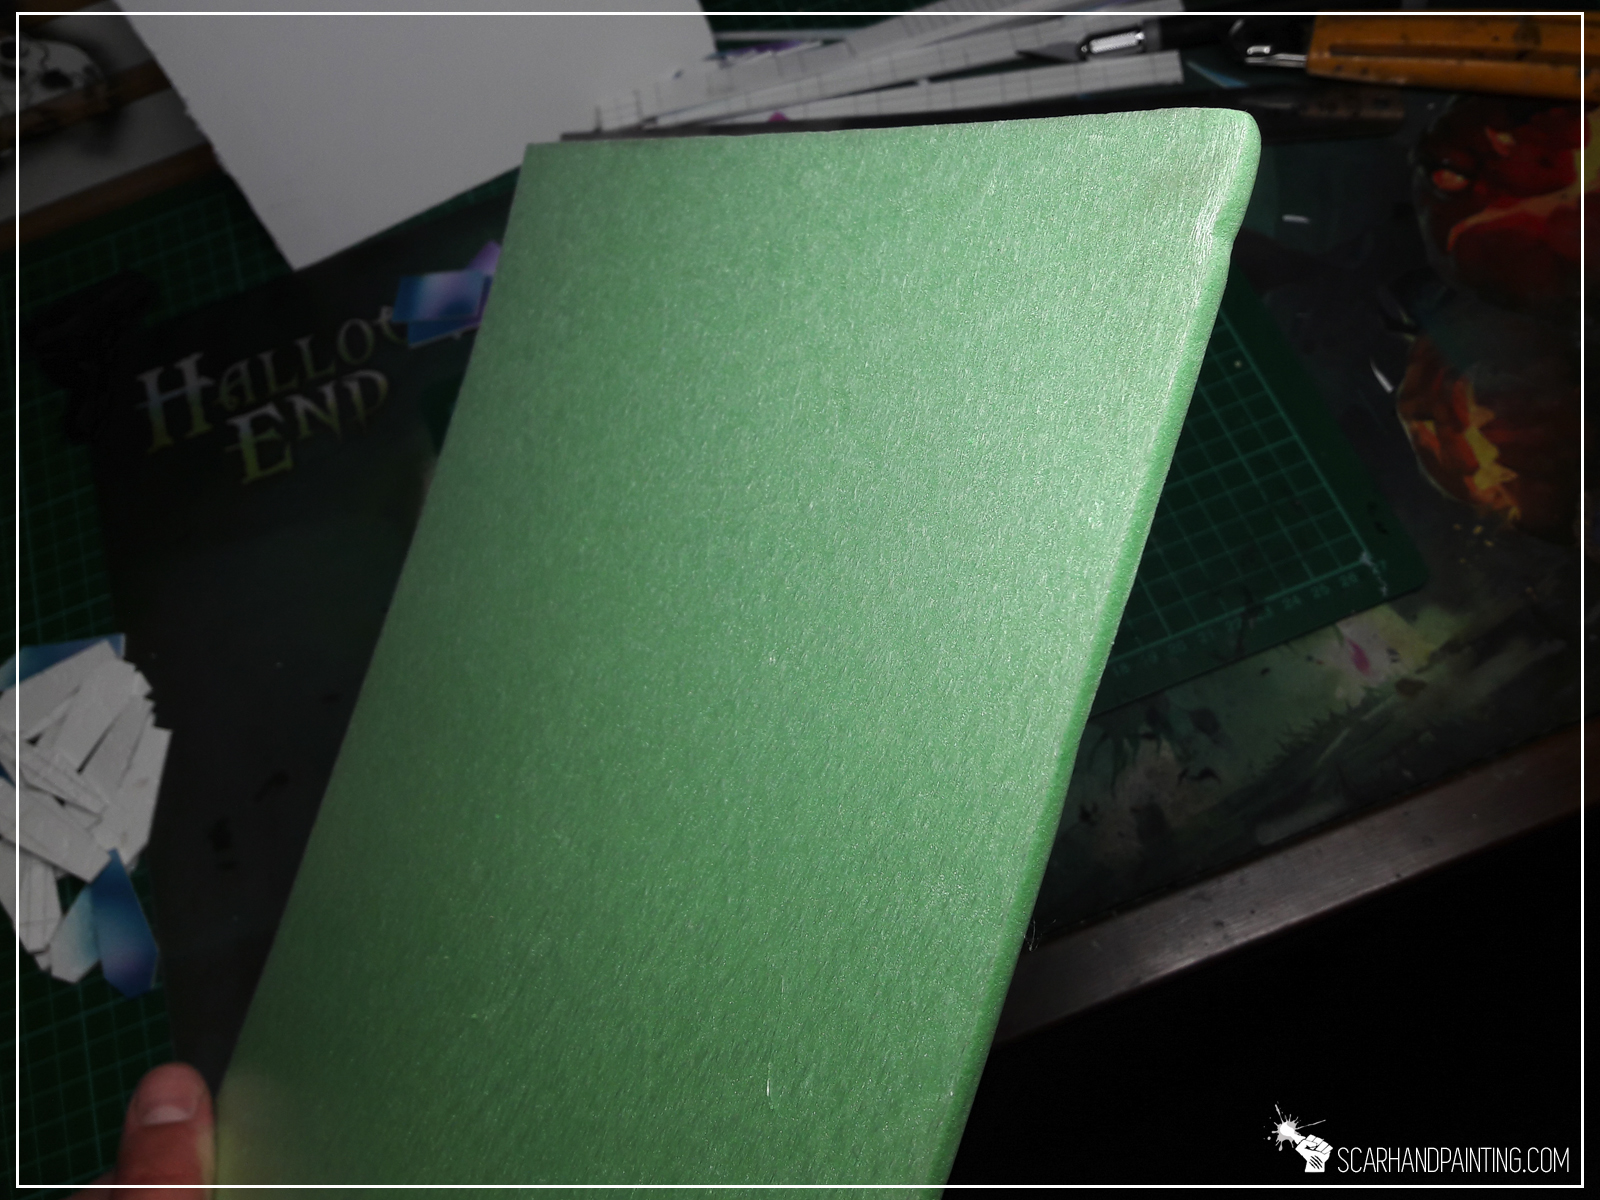
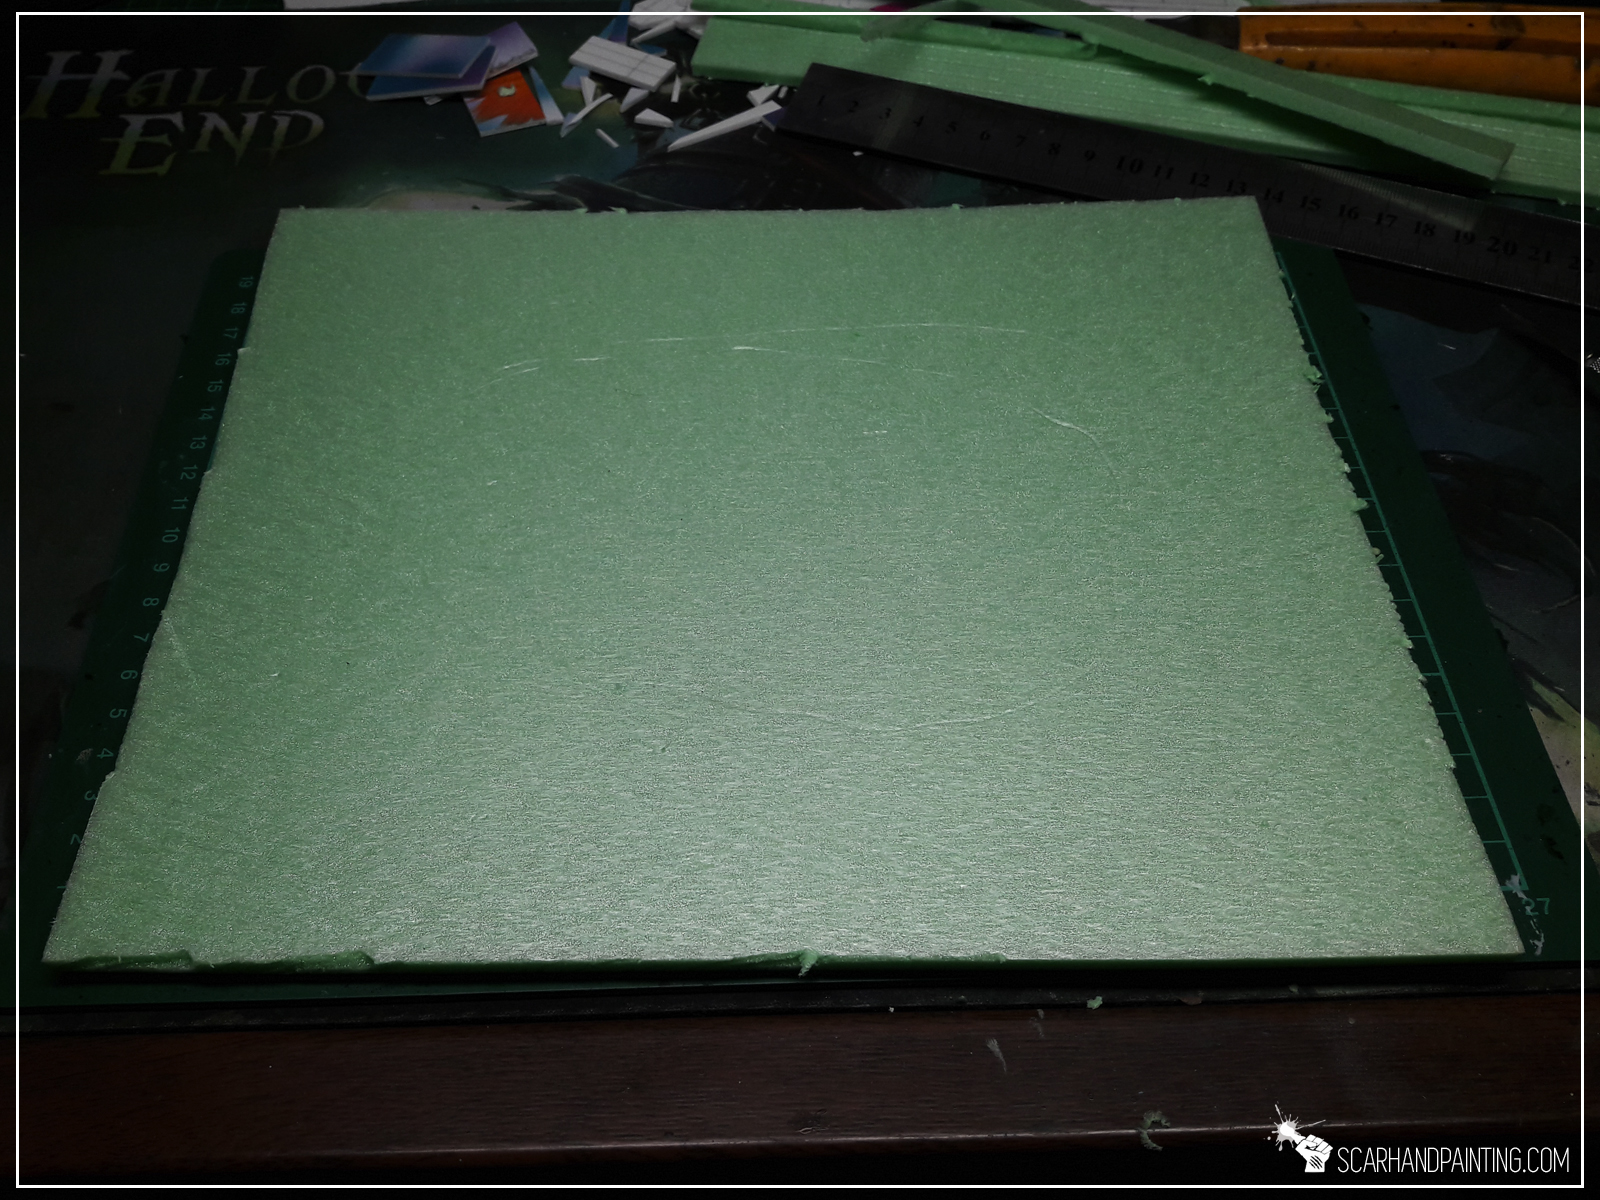
In order to allow me to “work” with the surface and nest any 3d elements I chose to cover the boars with additional layer of 5mm thick styrofoam.

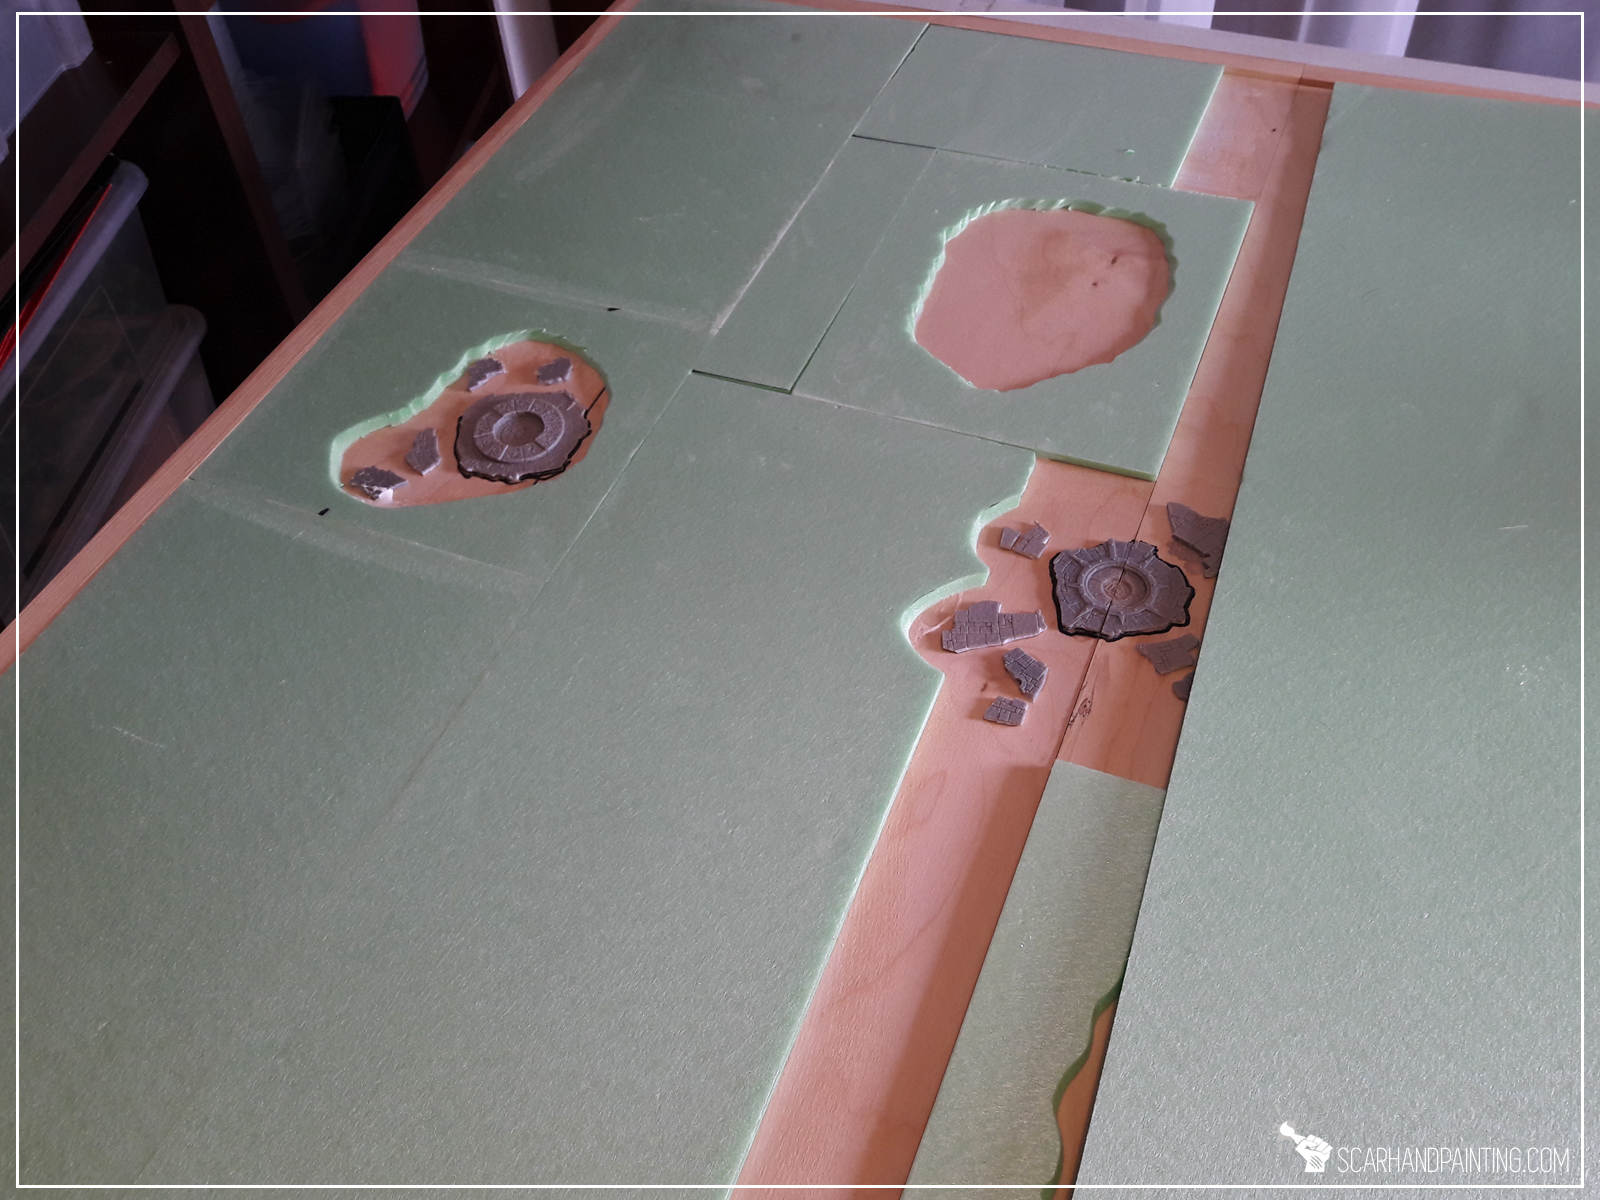
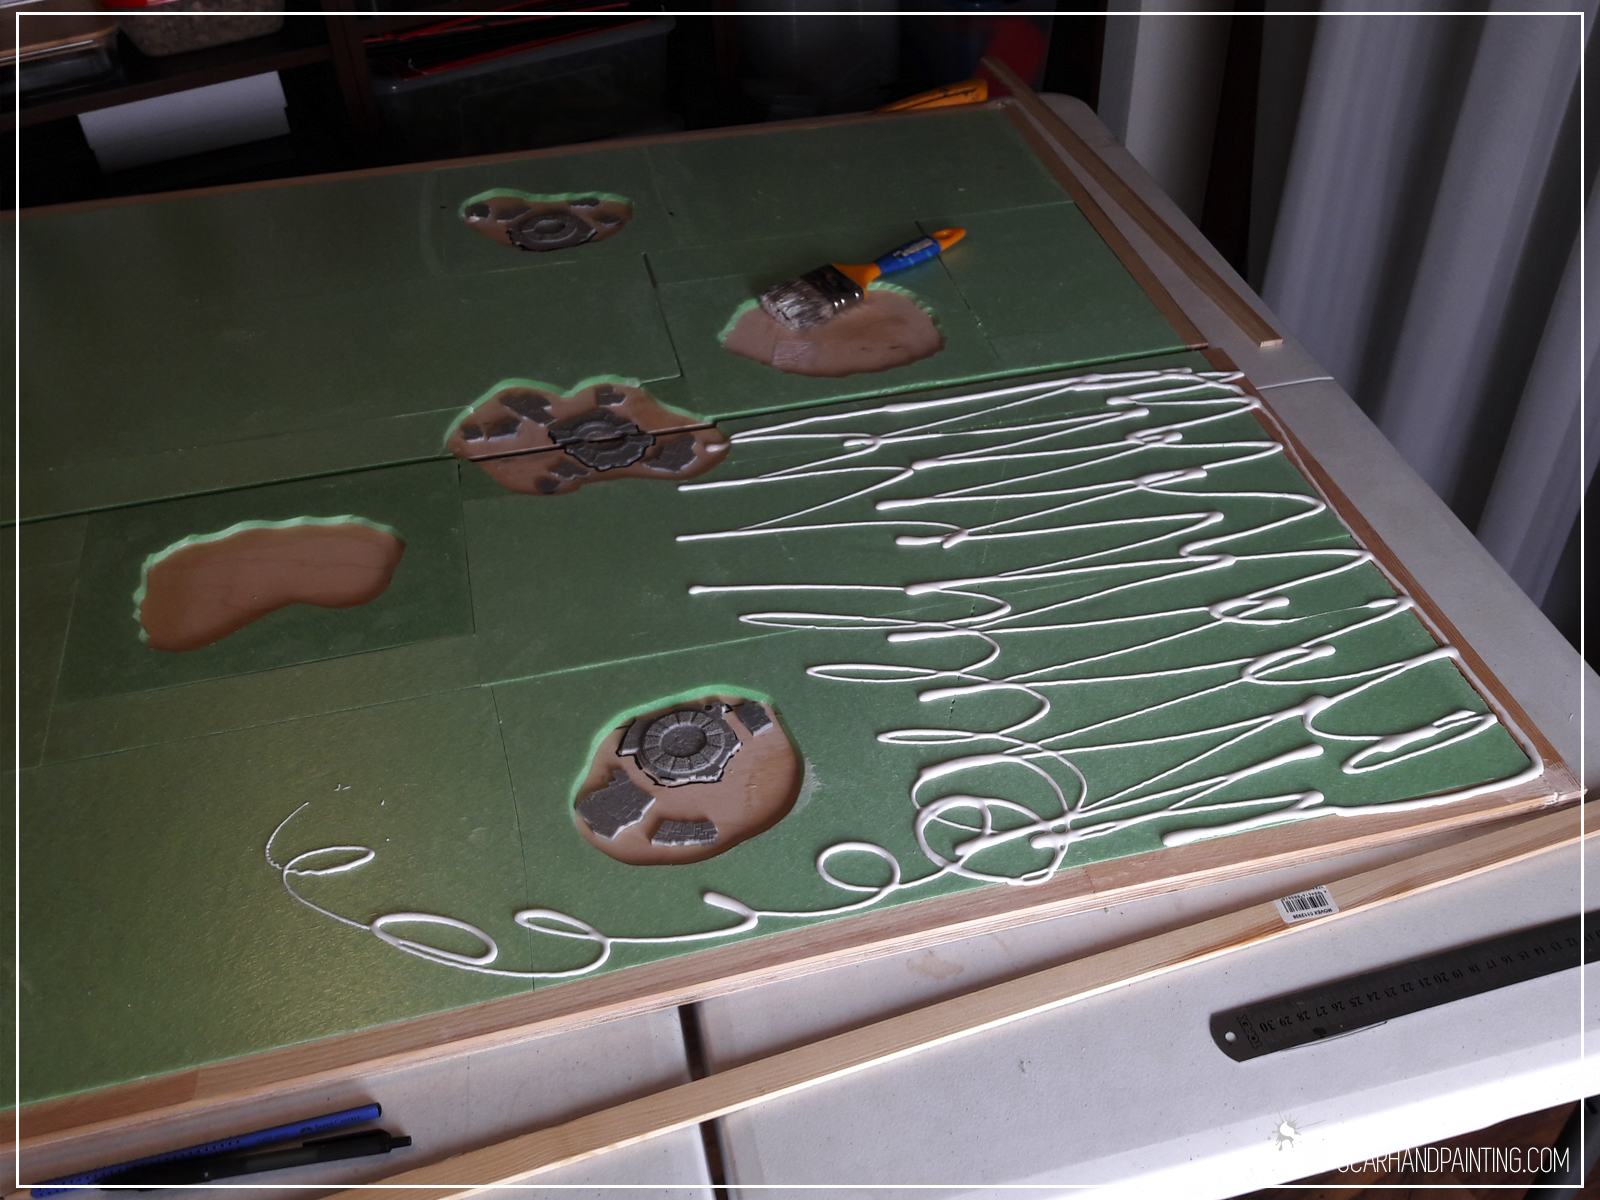
I carefully planned the layout of the board. Figured that it would be cool to have goals and the middle point of the pitch additionally detailed. I have a huge amount of random stuff scattered around my hobby room and as it happened I had a perfect match for these features.
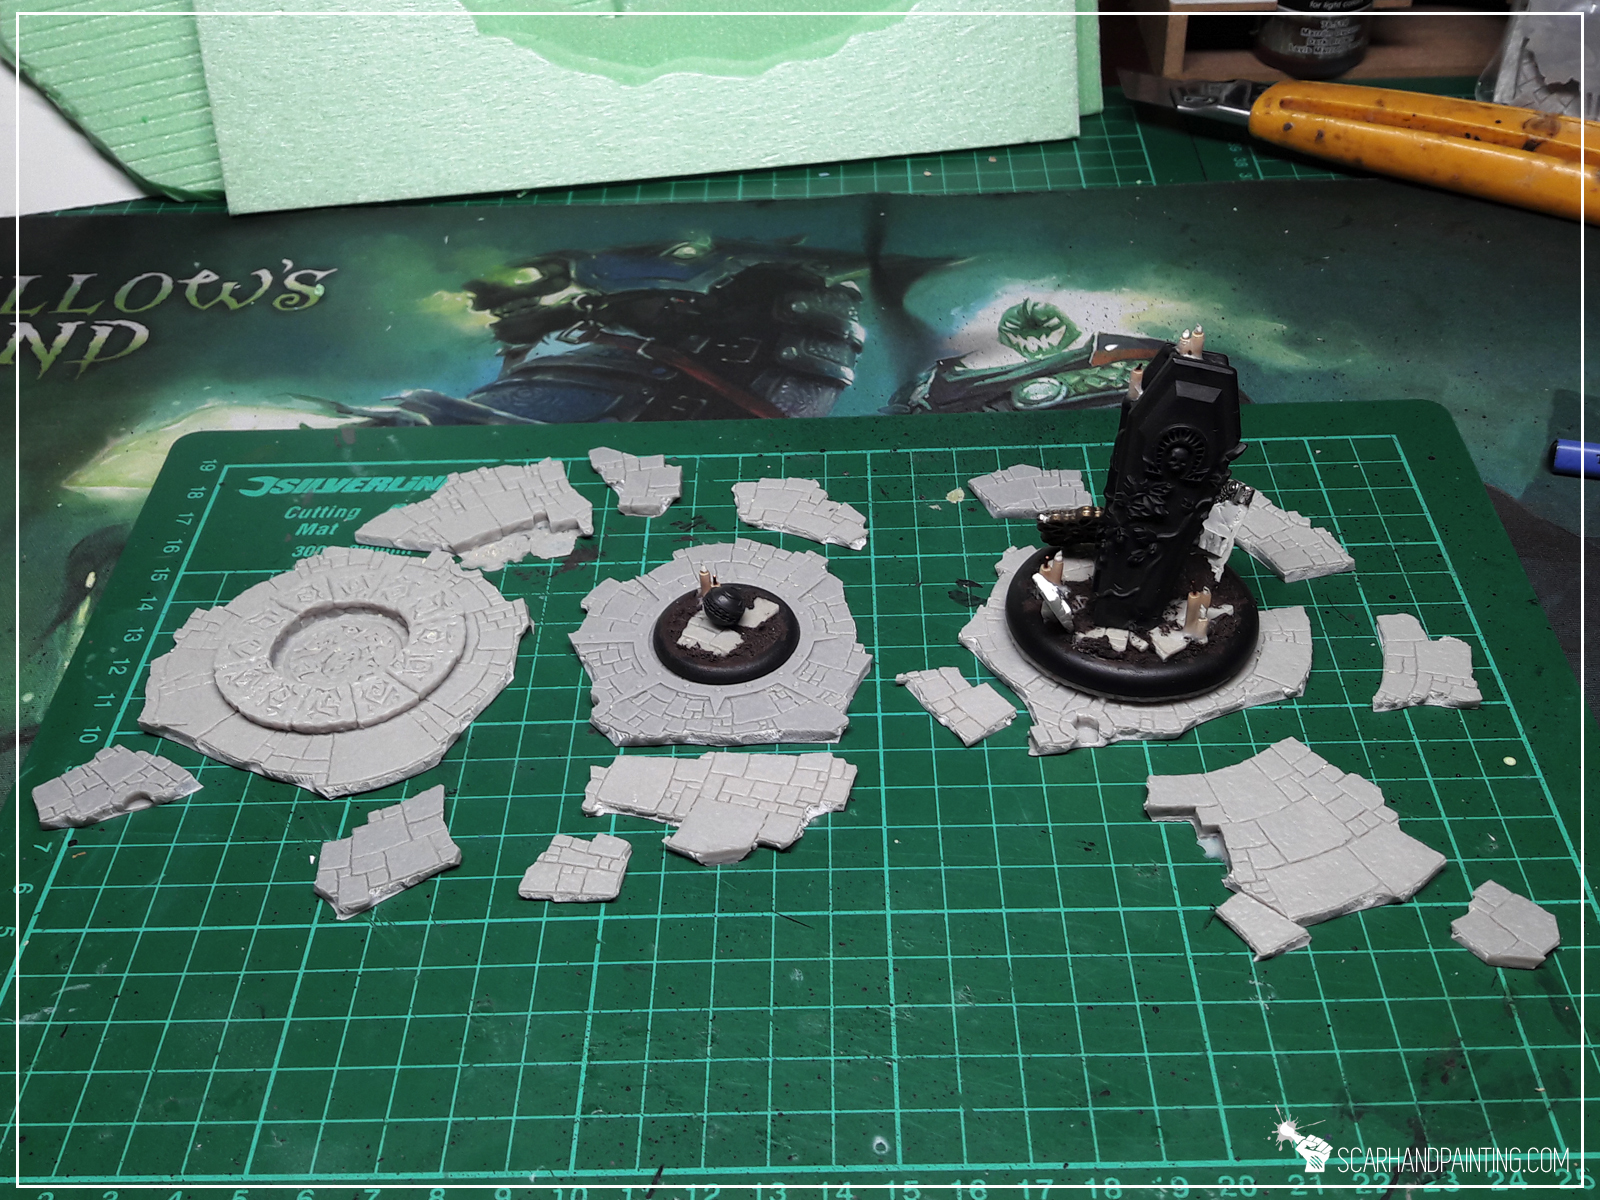
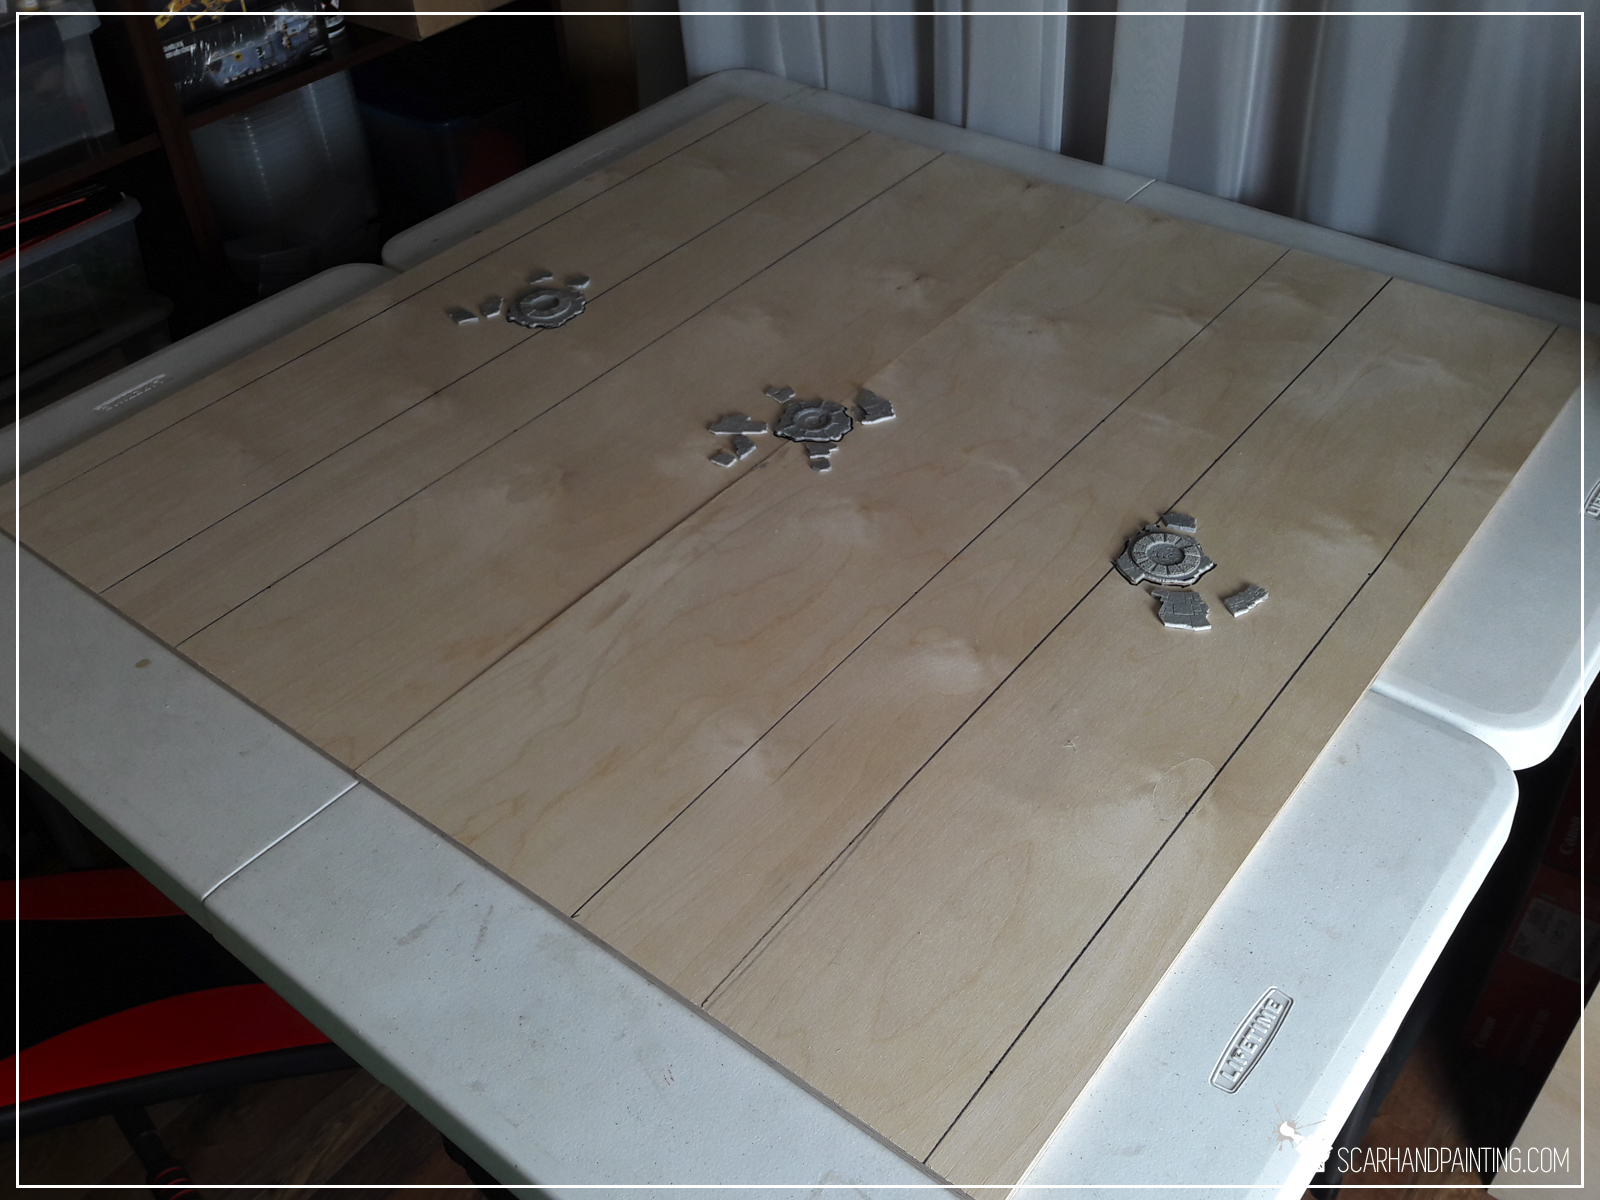
With goals in place I covered entire board with styrofoam, leaving only certain spots to reveal detailed elements from underneath. I also left two holes for the most important feature – coffins. Additionally I reinforced the edges of the board with thin planks of wood – just in case. I just like my scenery durable and sturdy.

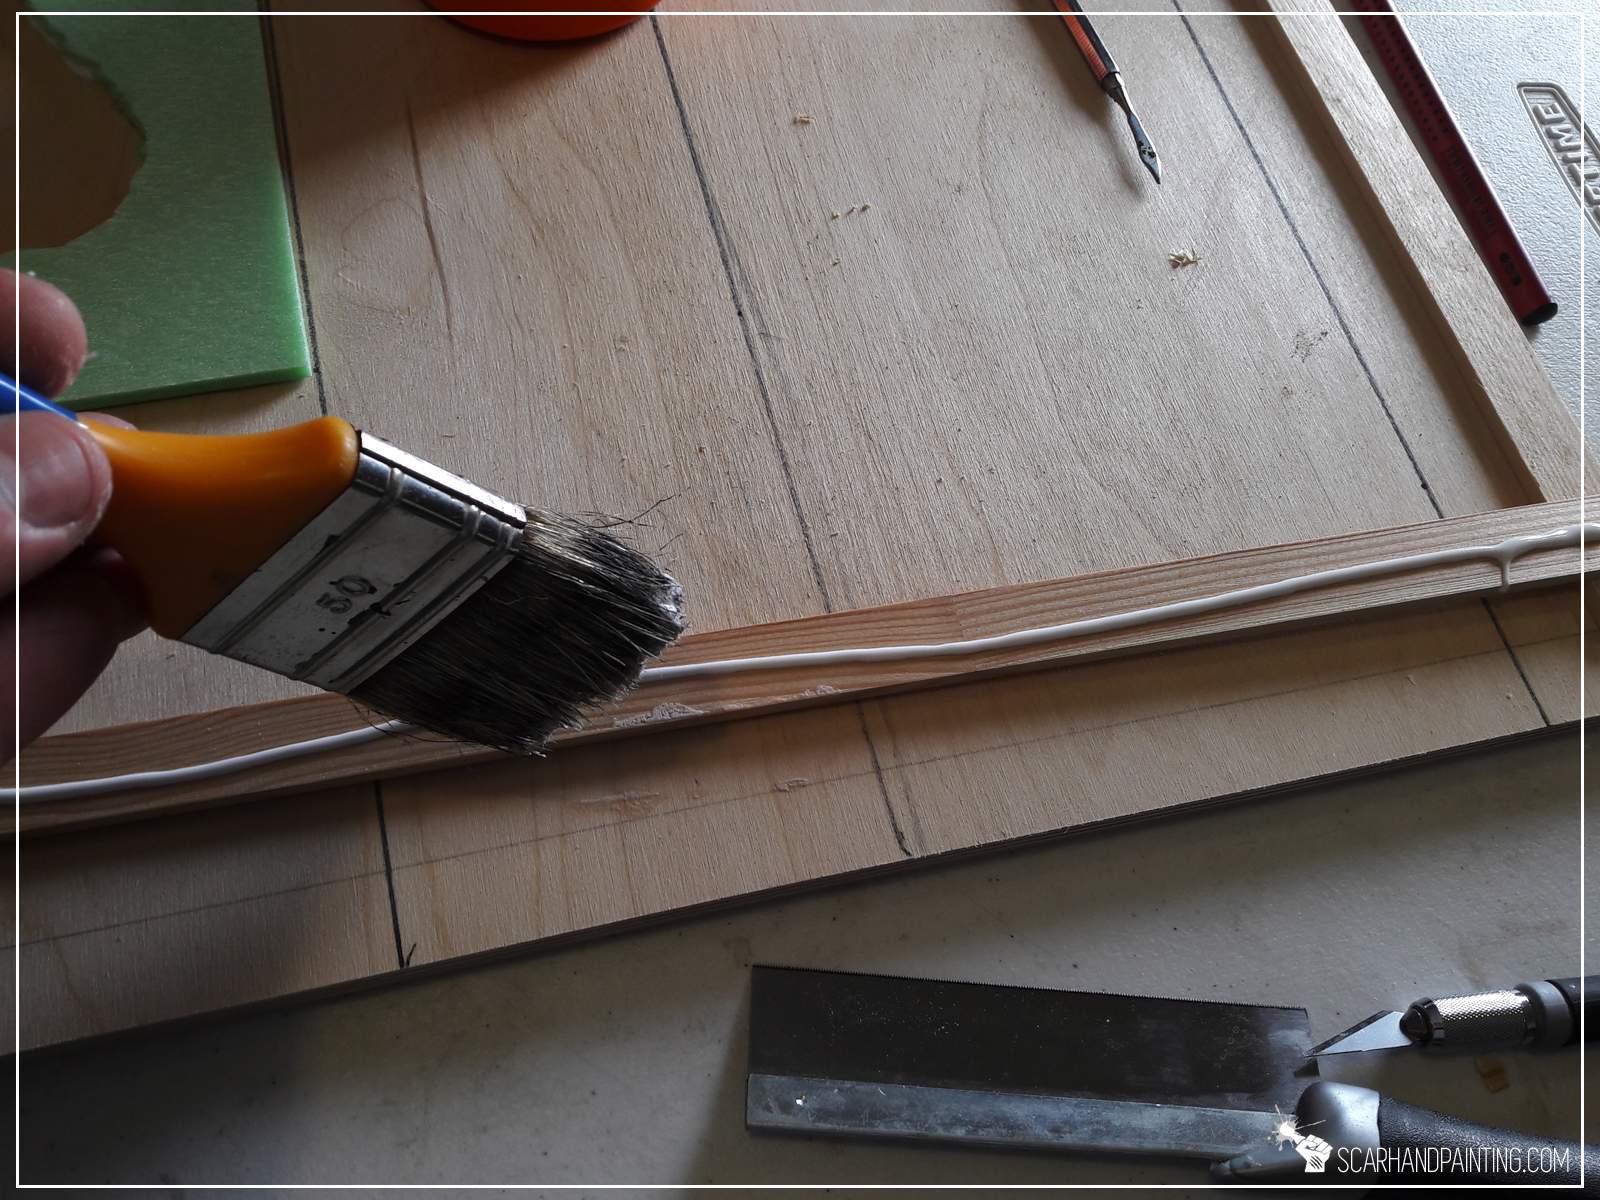


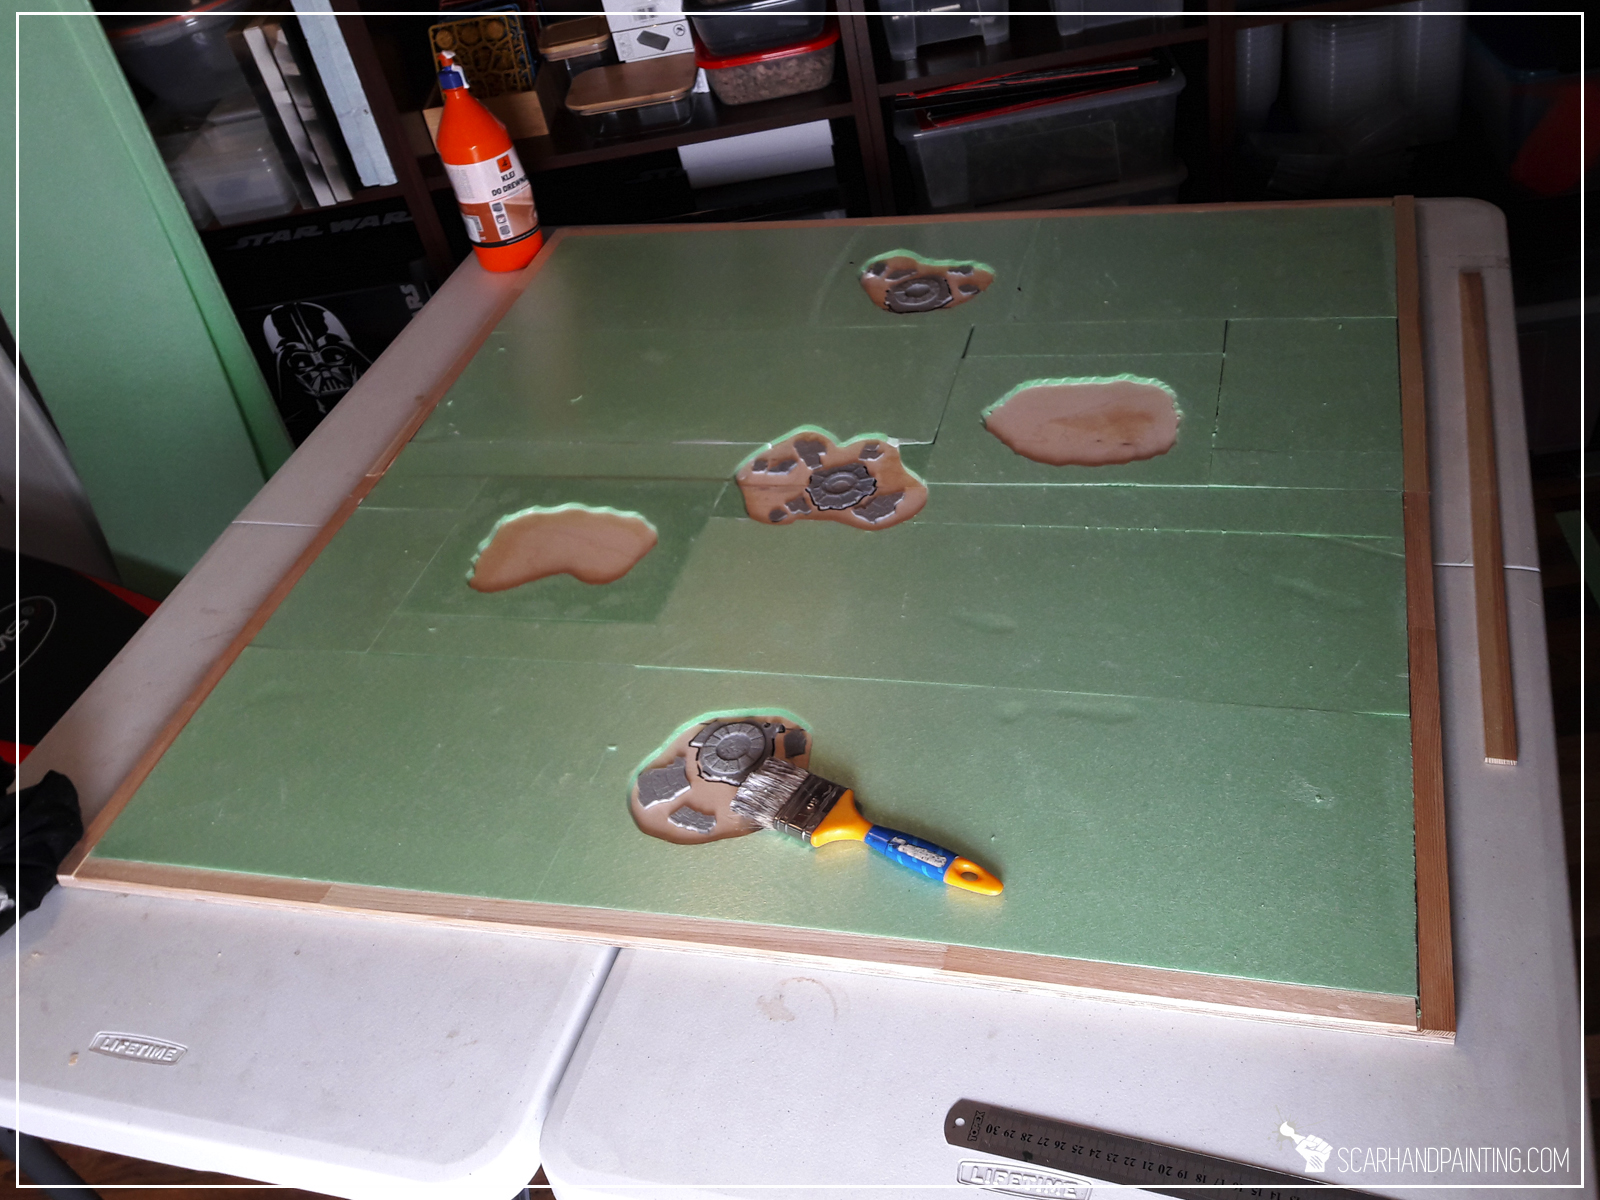

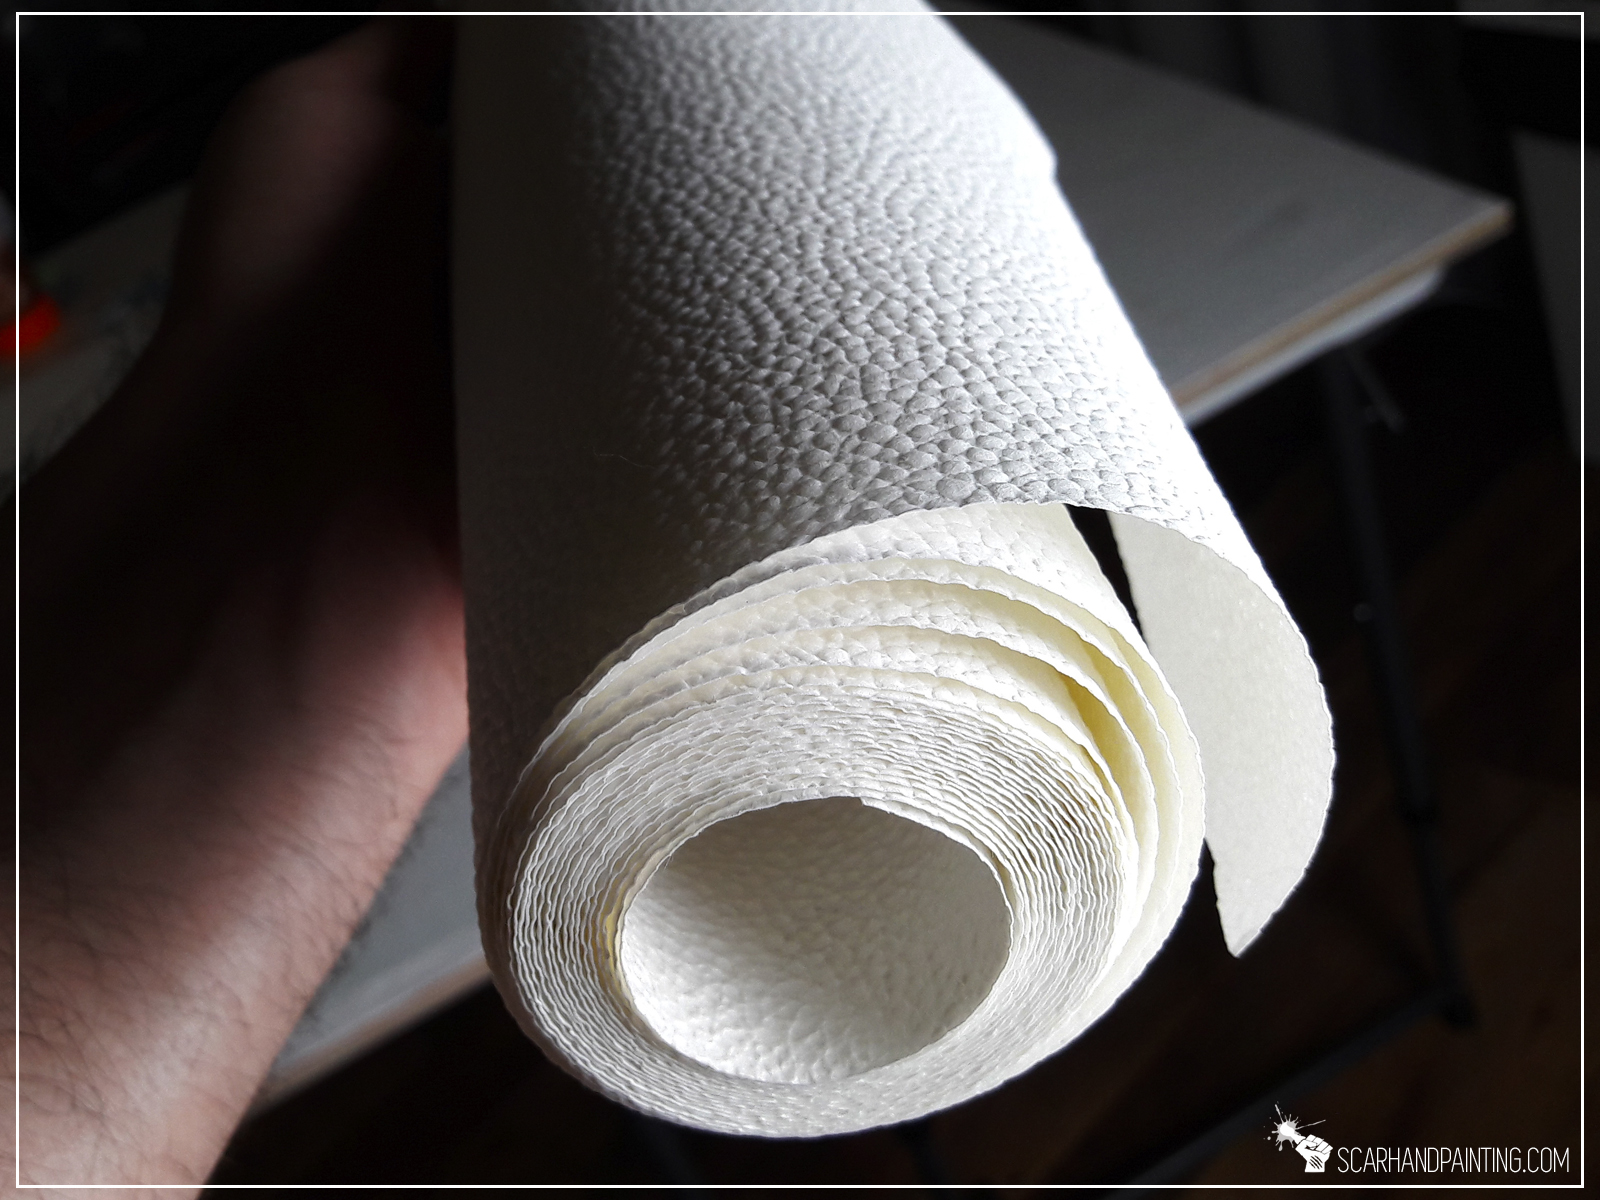
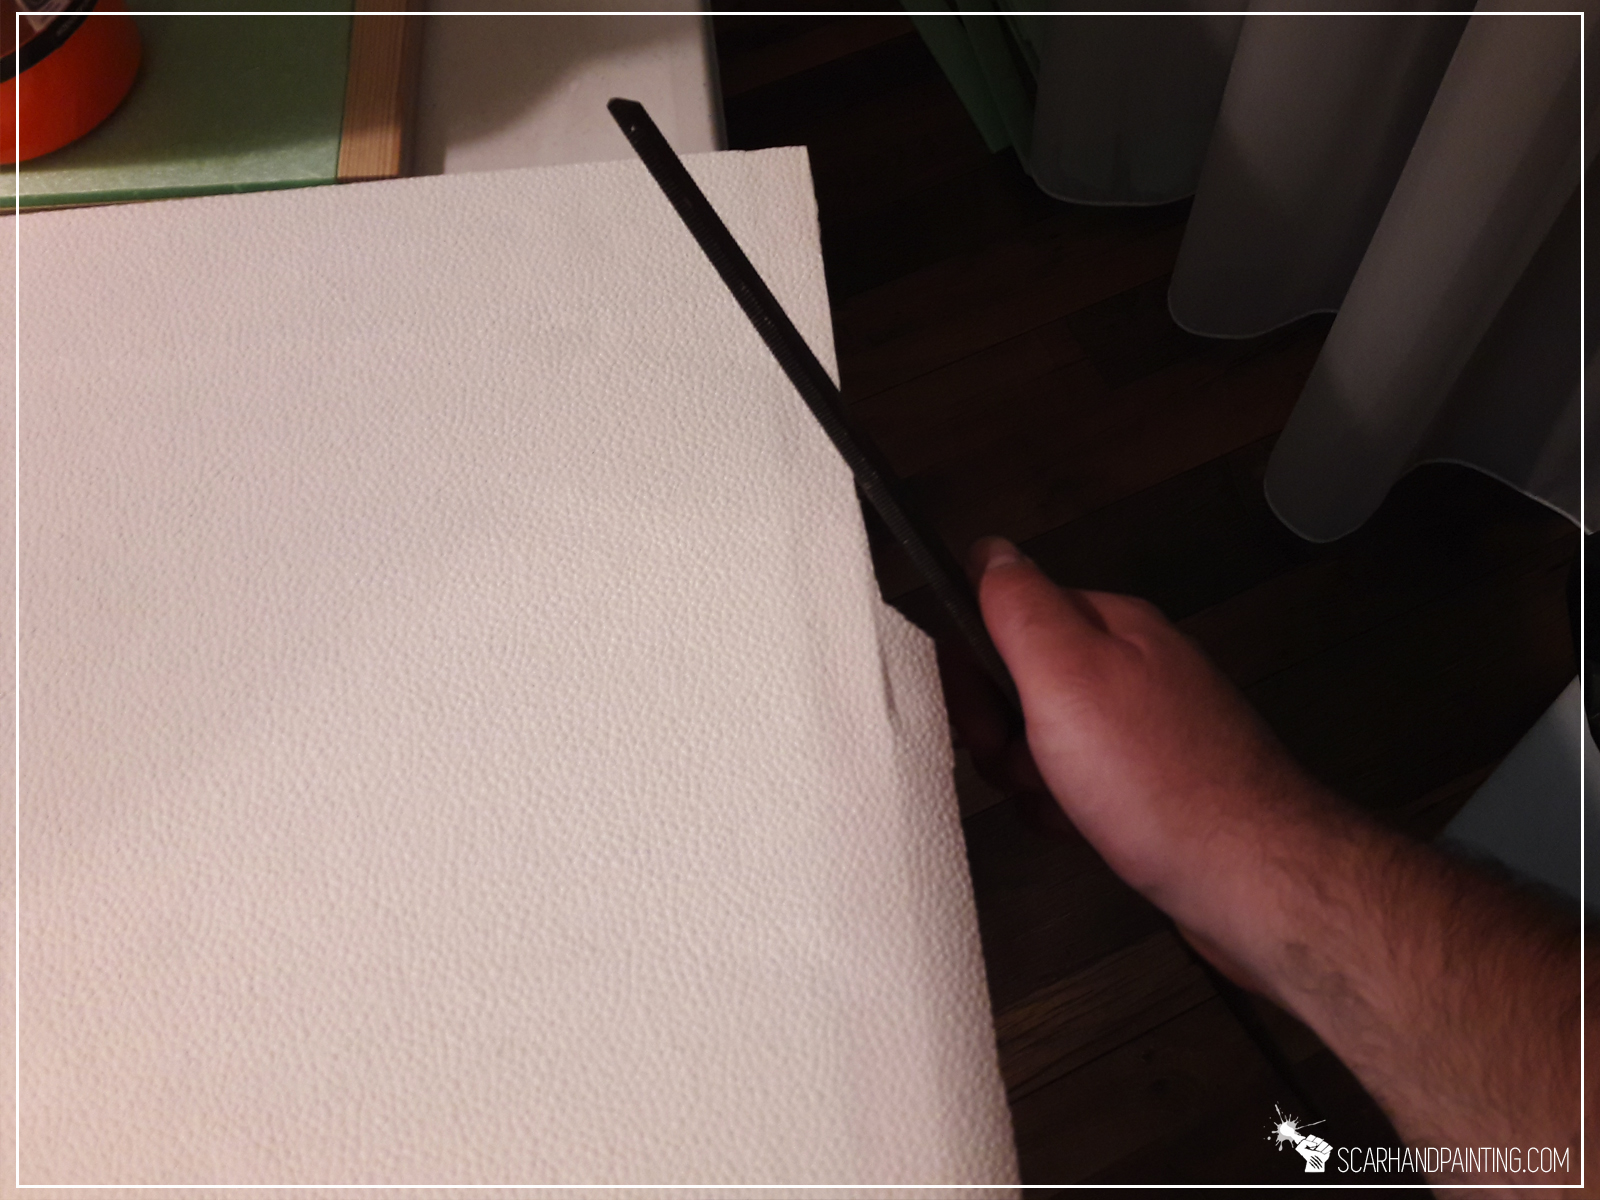
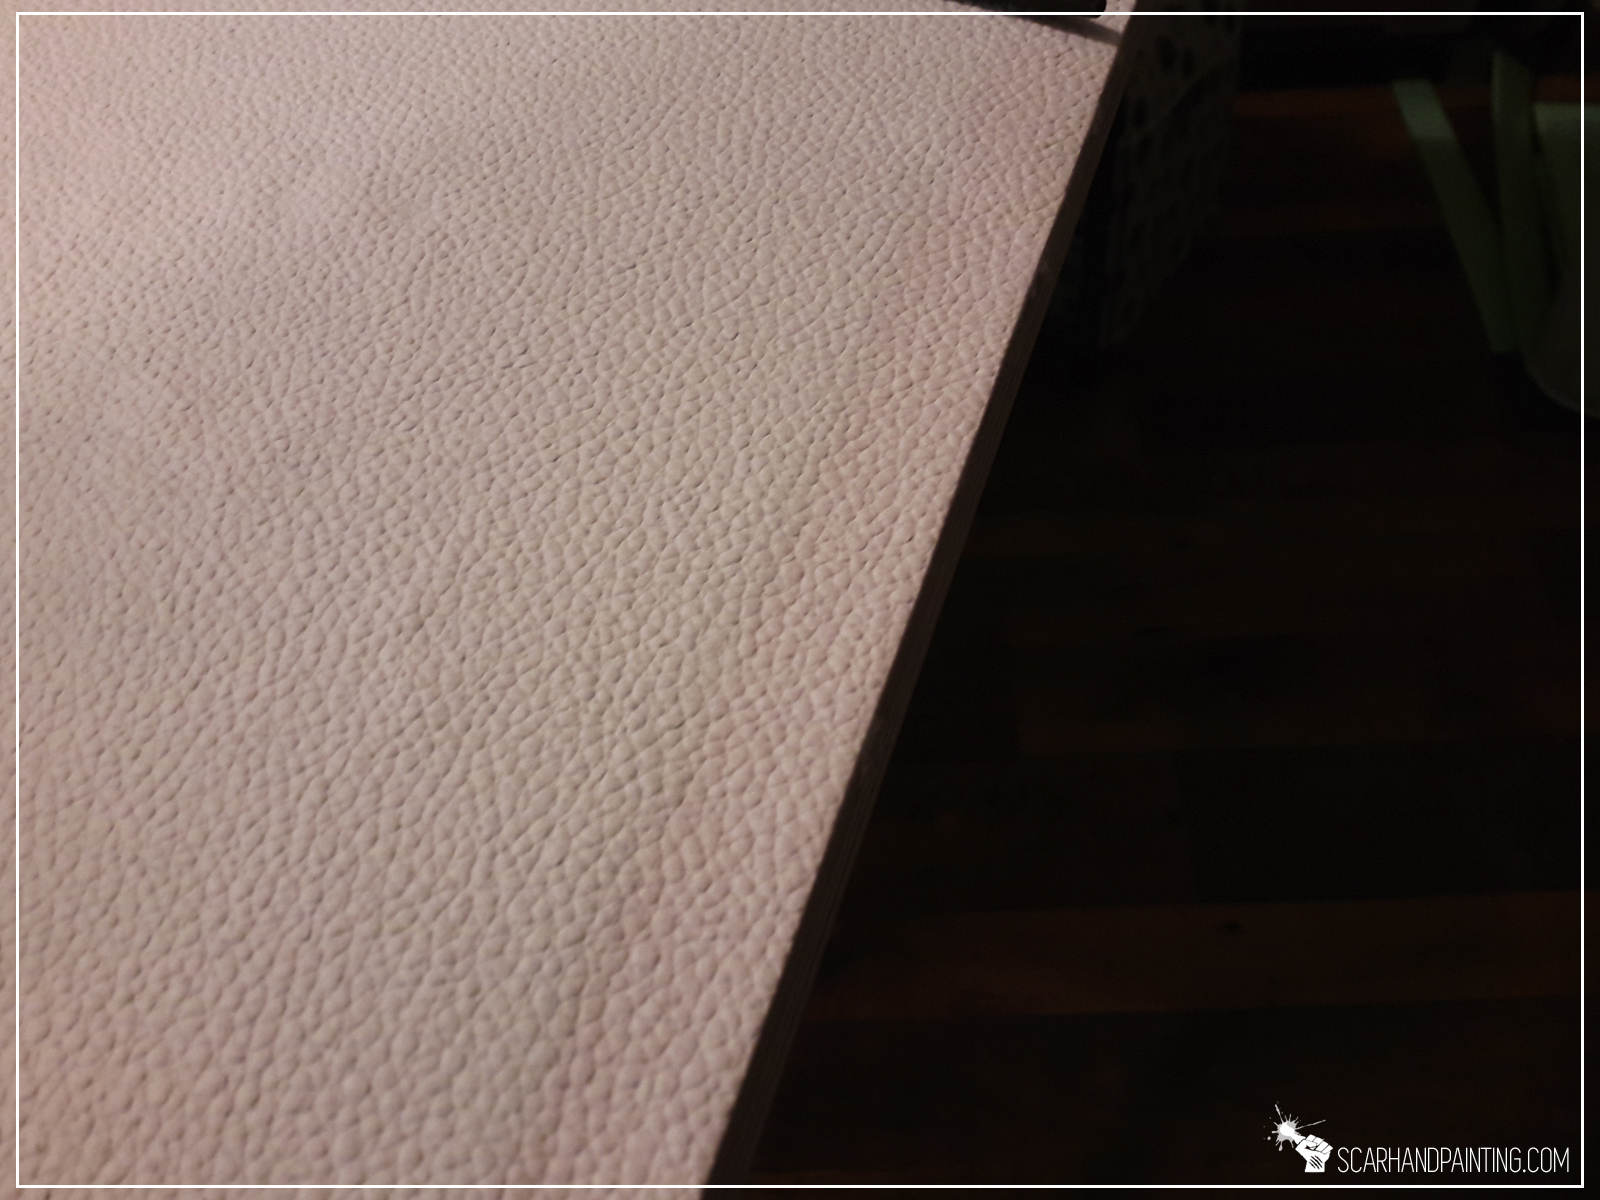
For base texture I picked a trusted wallpaper that helped me with other fantasy projects in the past. Being easy to work with a wallpaper is a great way to texturize large areas, plus it helps keep wobbling models safe in case of a fall.

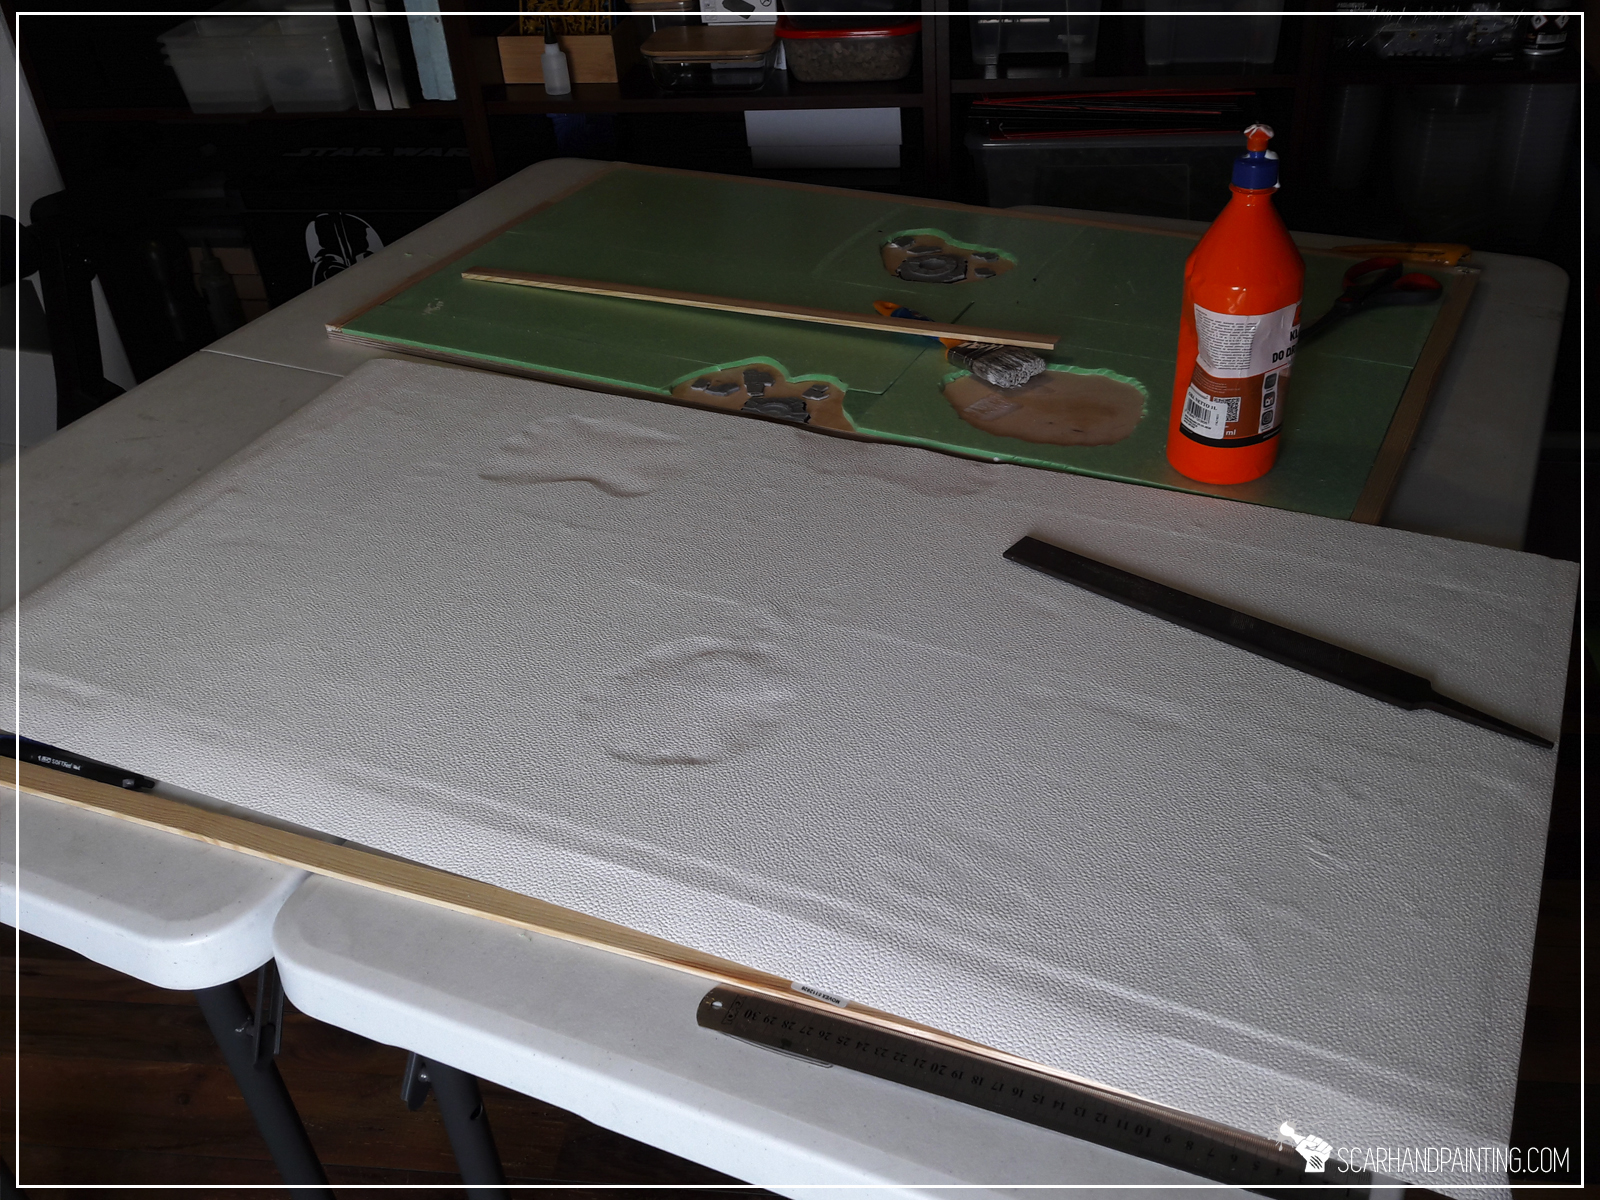
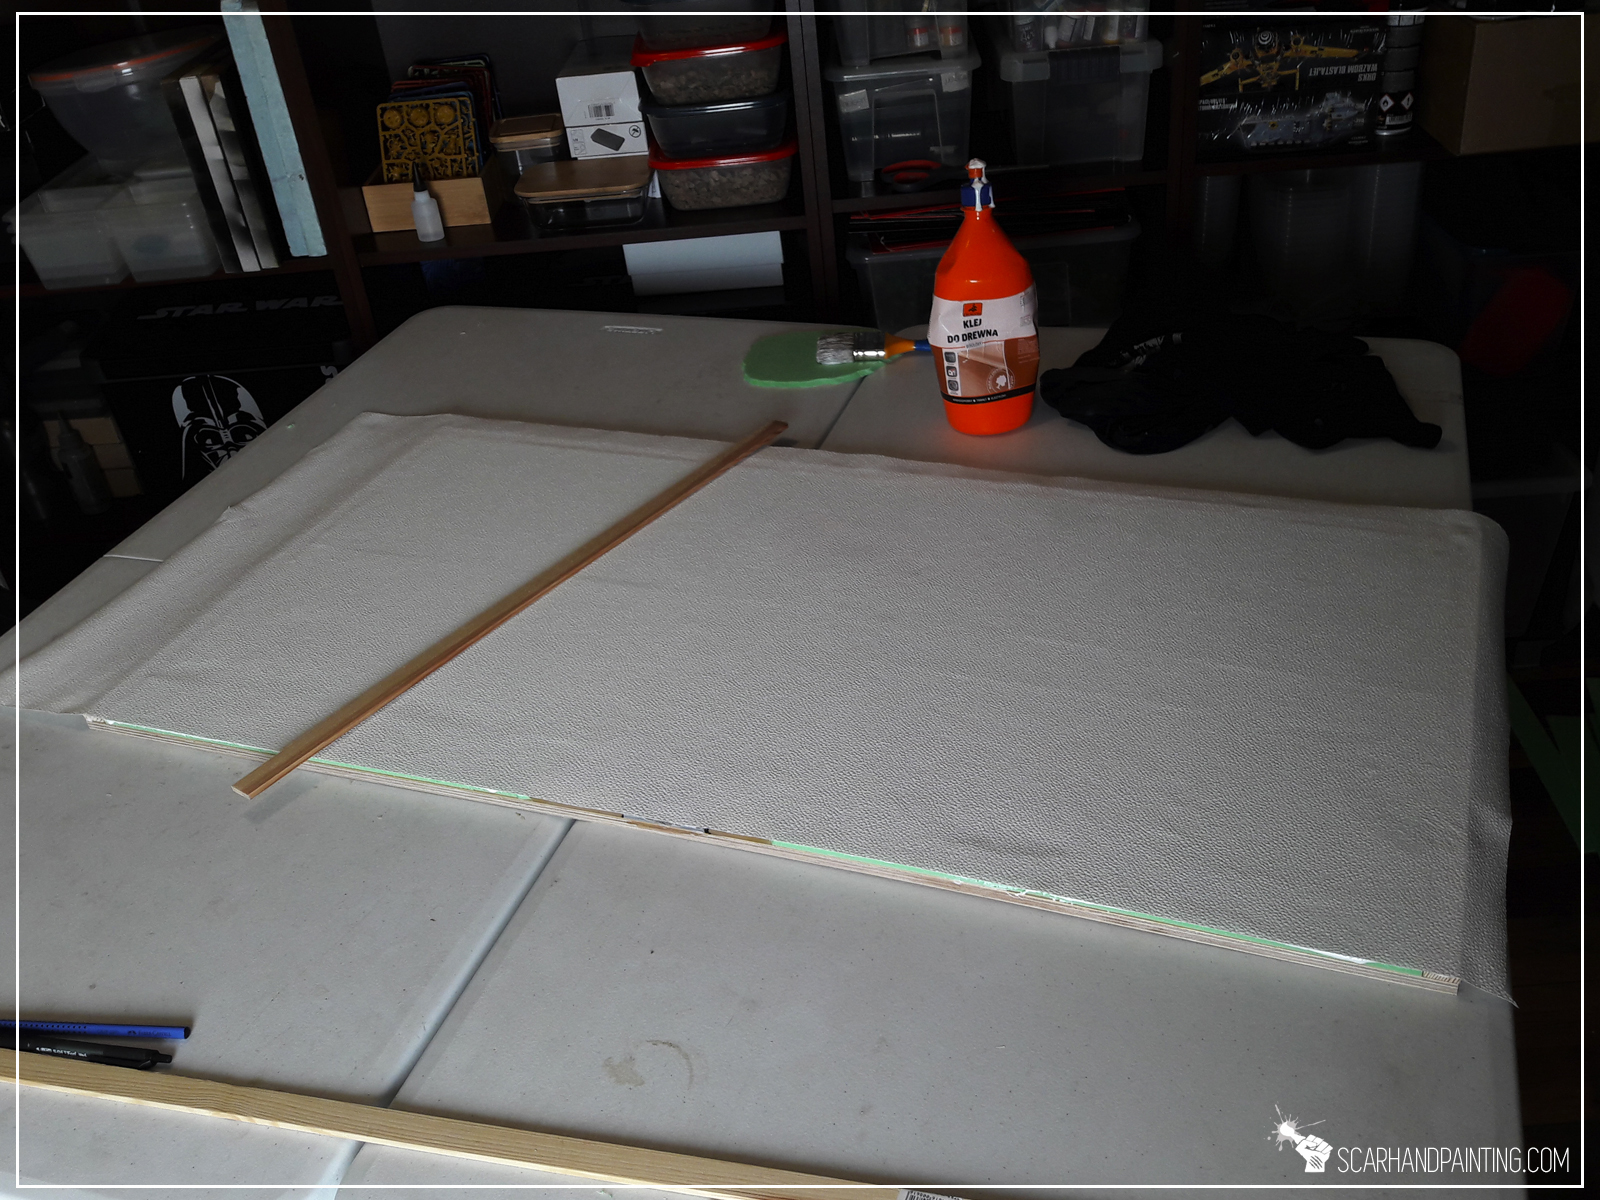
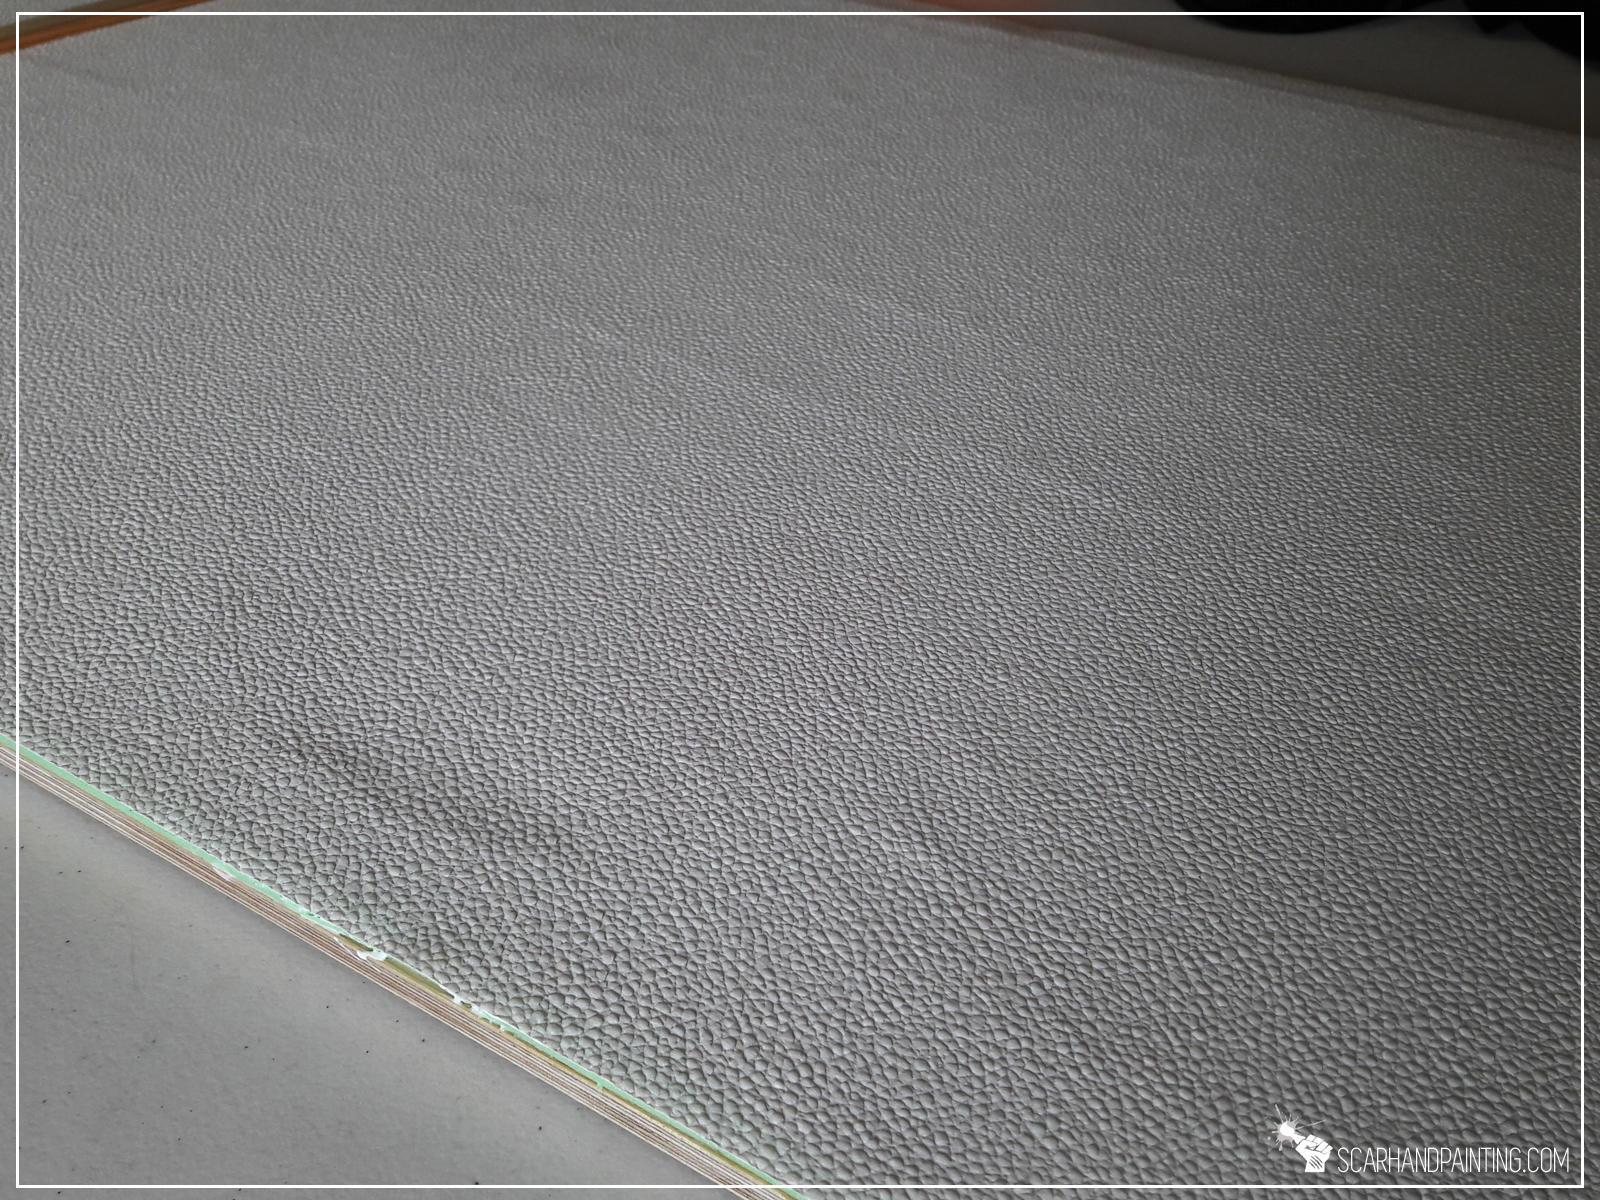
I glued the wallpaper on top of entire board. No measuring required – I removed excess wallpaper with a giant file. Fast & simple.
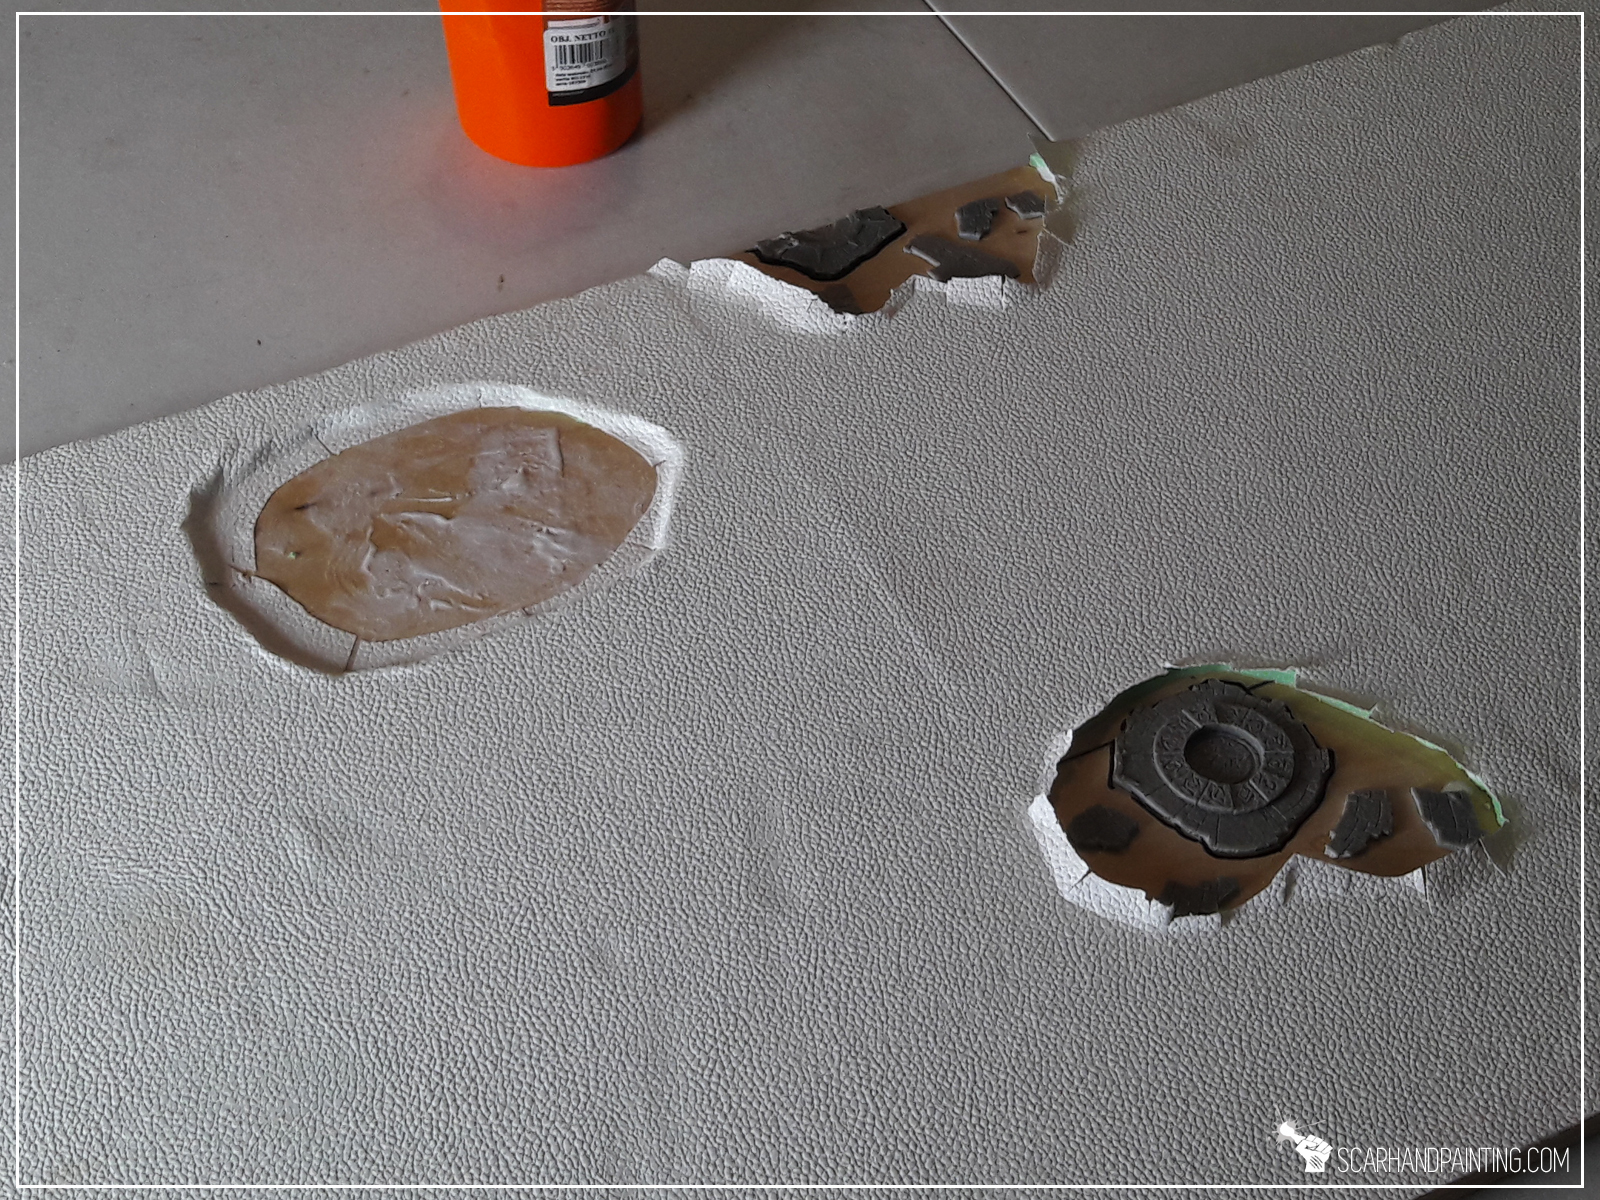
I uncovered all the detailed features by cutting the wallpaper around them, leaving approximately 1-2cm surplus, to then cut it into smaller strips to be glued inside the holes.


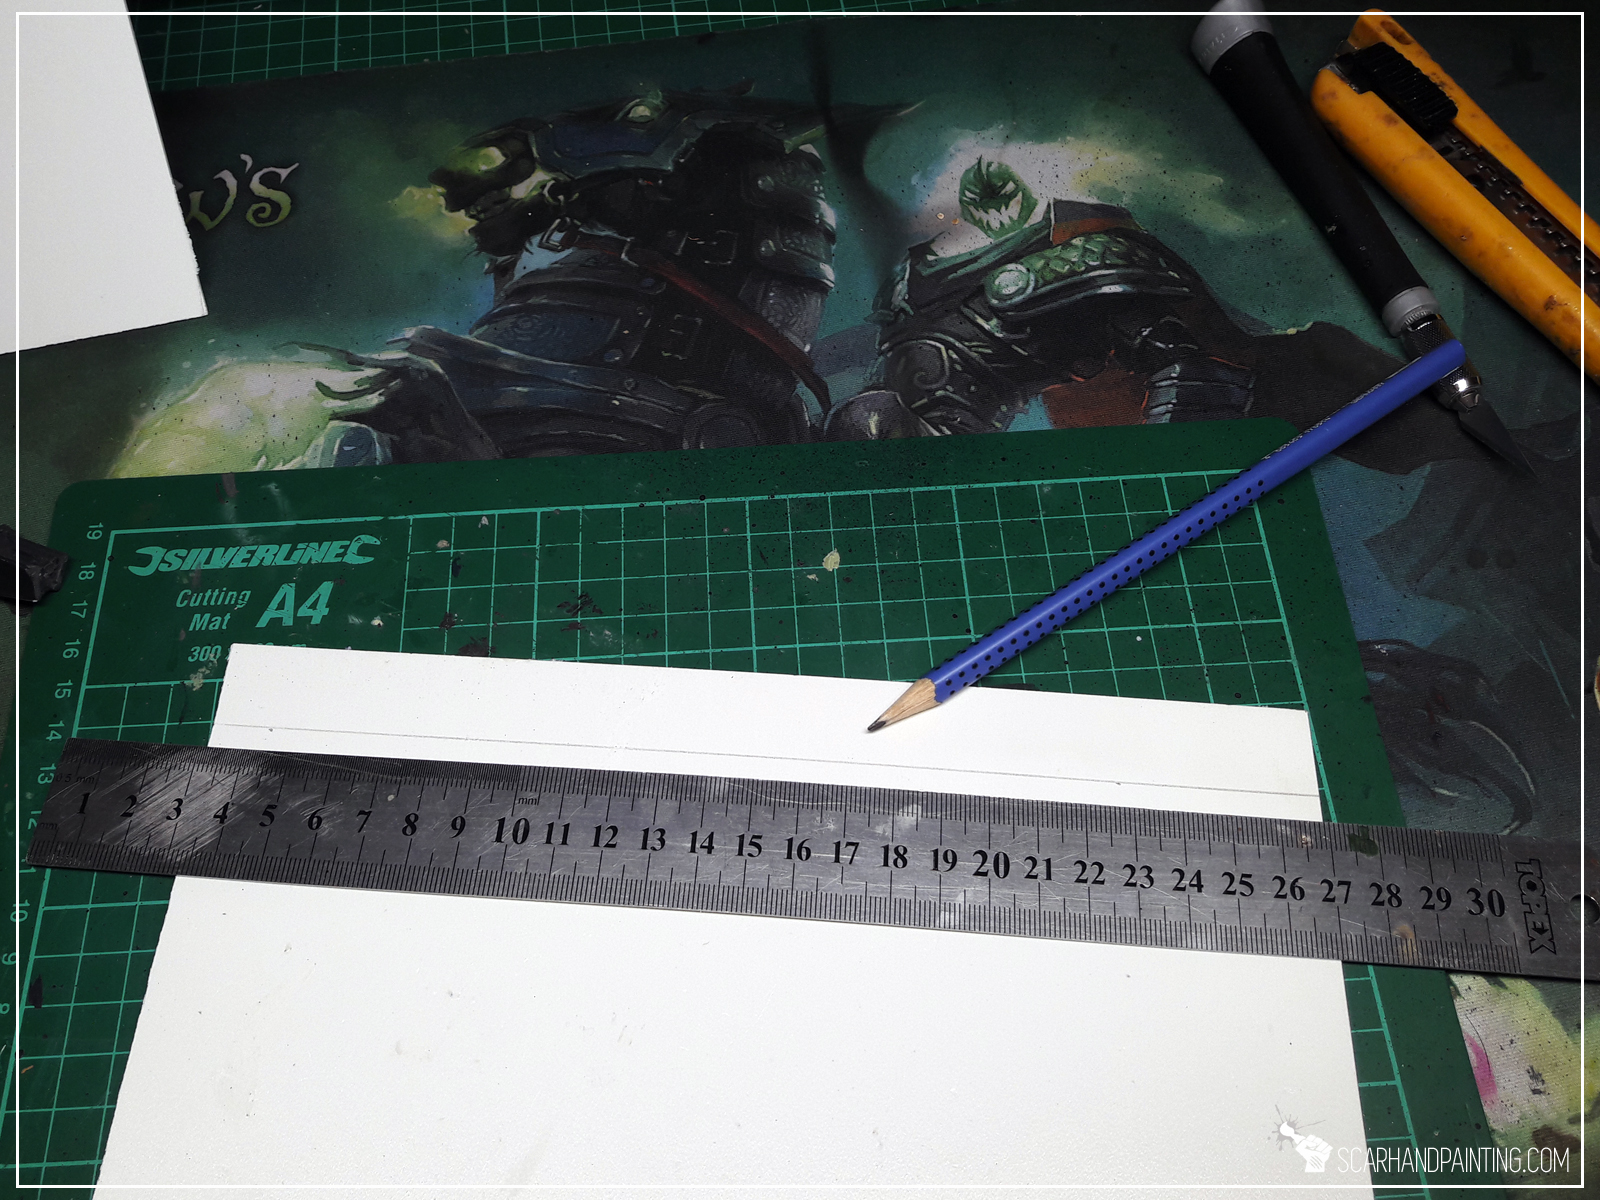
Now was the time to bring in all the coffins. These were made using 3mm thick plasticard. In projects like this I tend to save time and leave perfect measurements out. Once I measured and cut out a single coffin, I then used it as a template to cut all the rest. Fast & simple yet again.
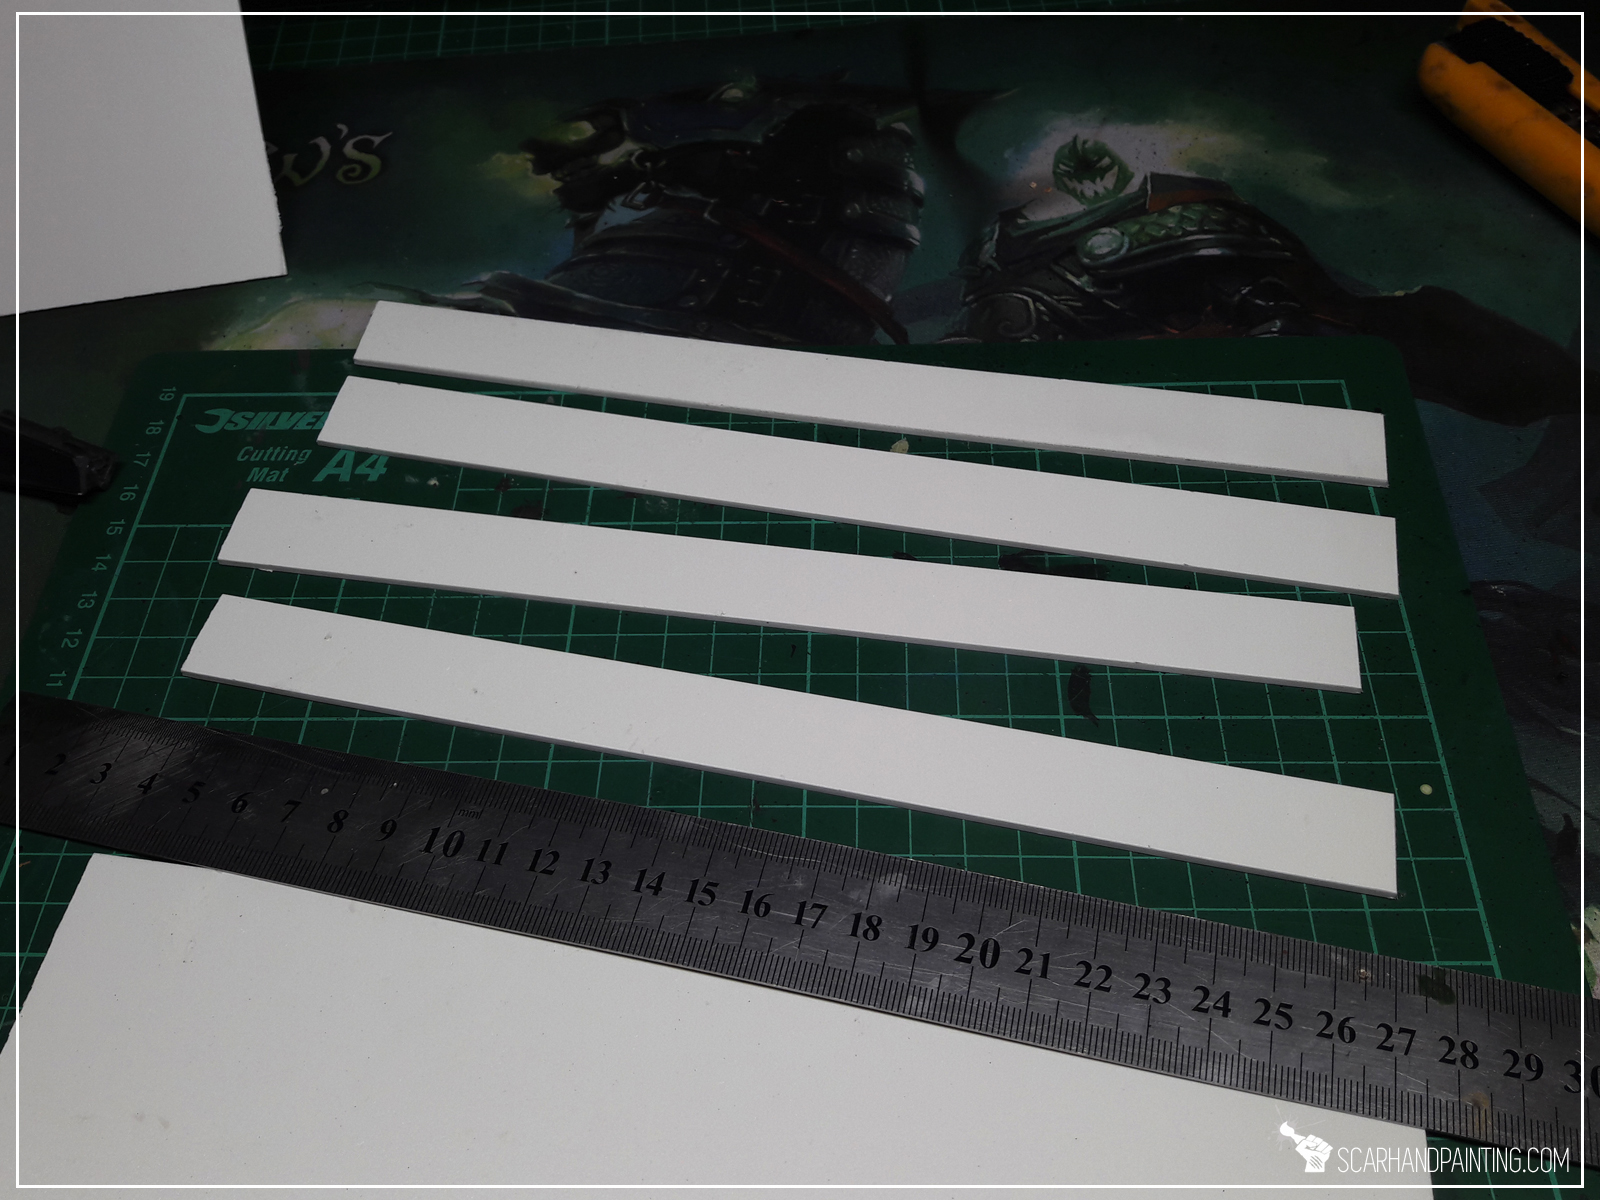


These then got texturized using a medium sized stone. Plasticard is a durable material, but with enough force it gives in and stones are great to provide an uneven texture.


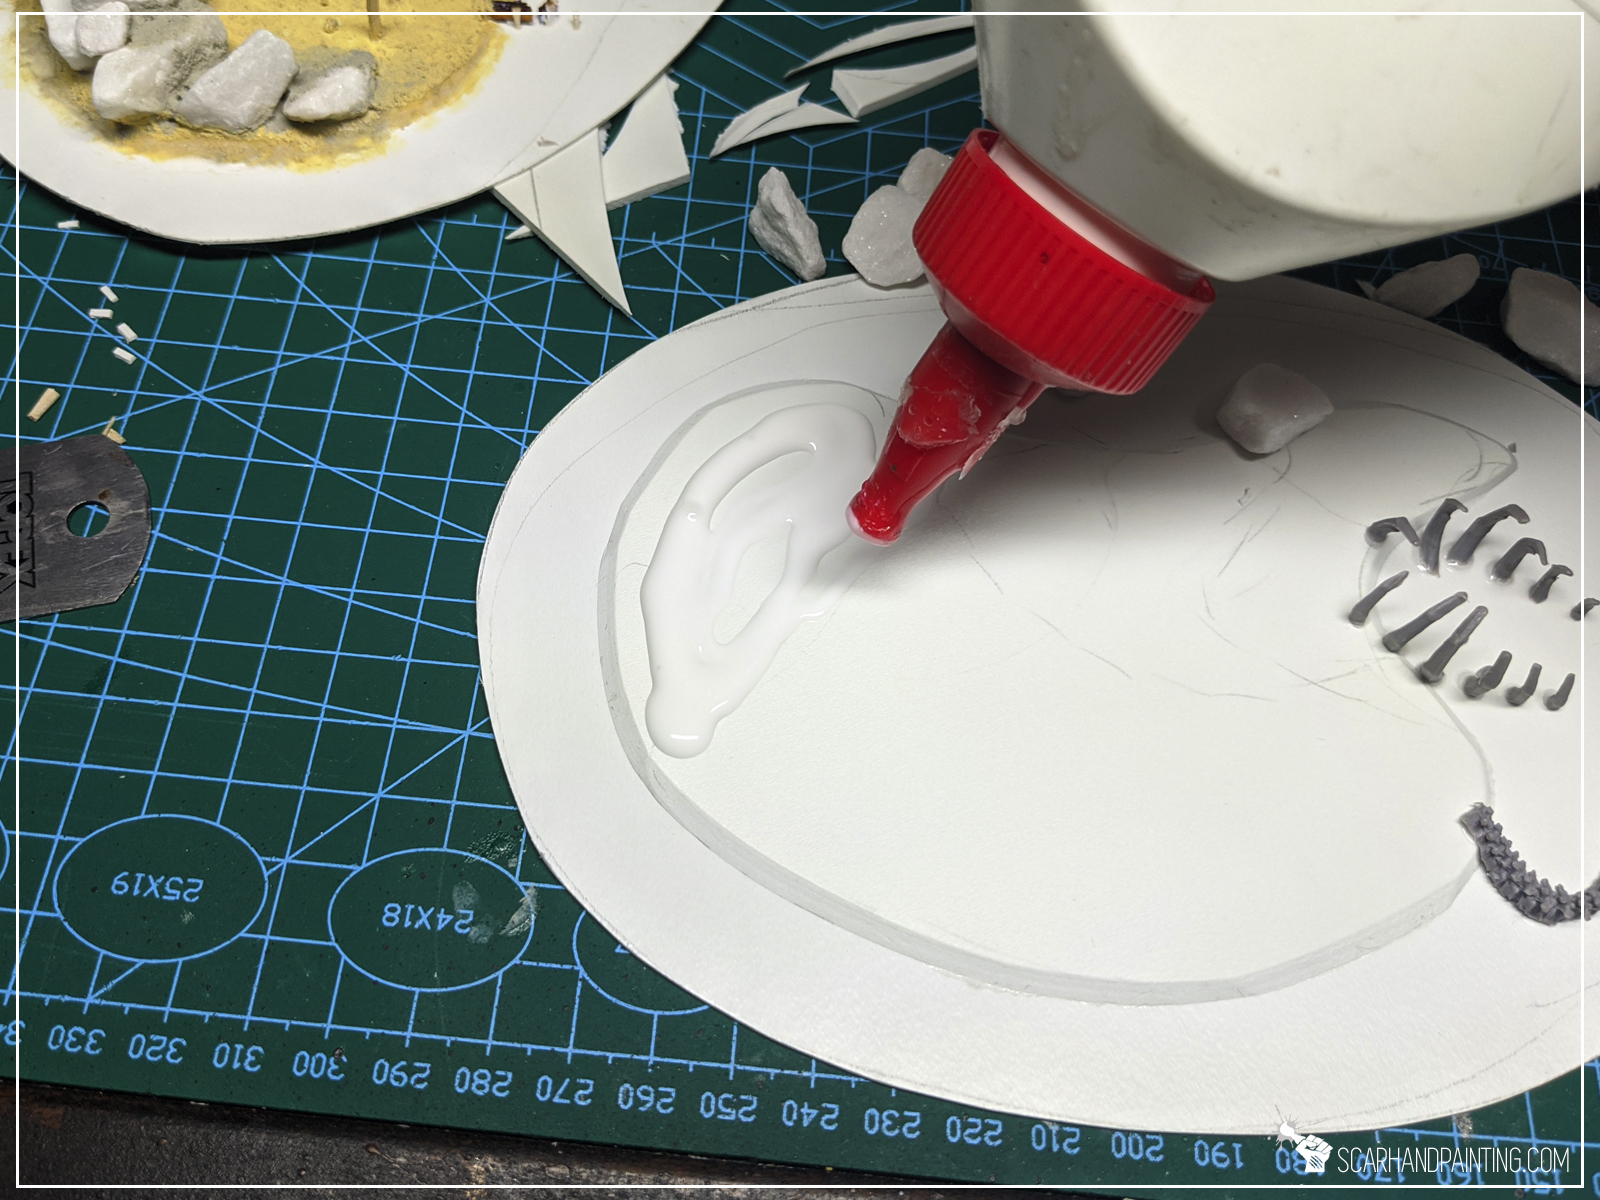
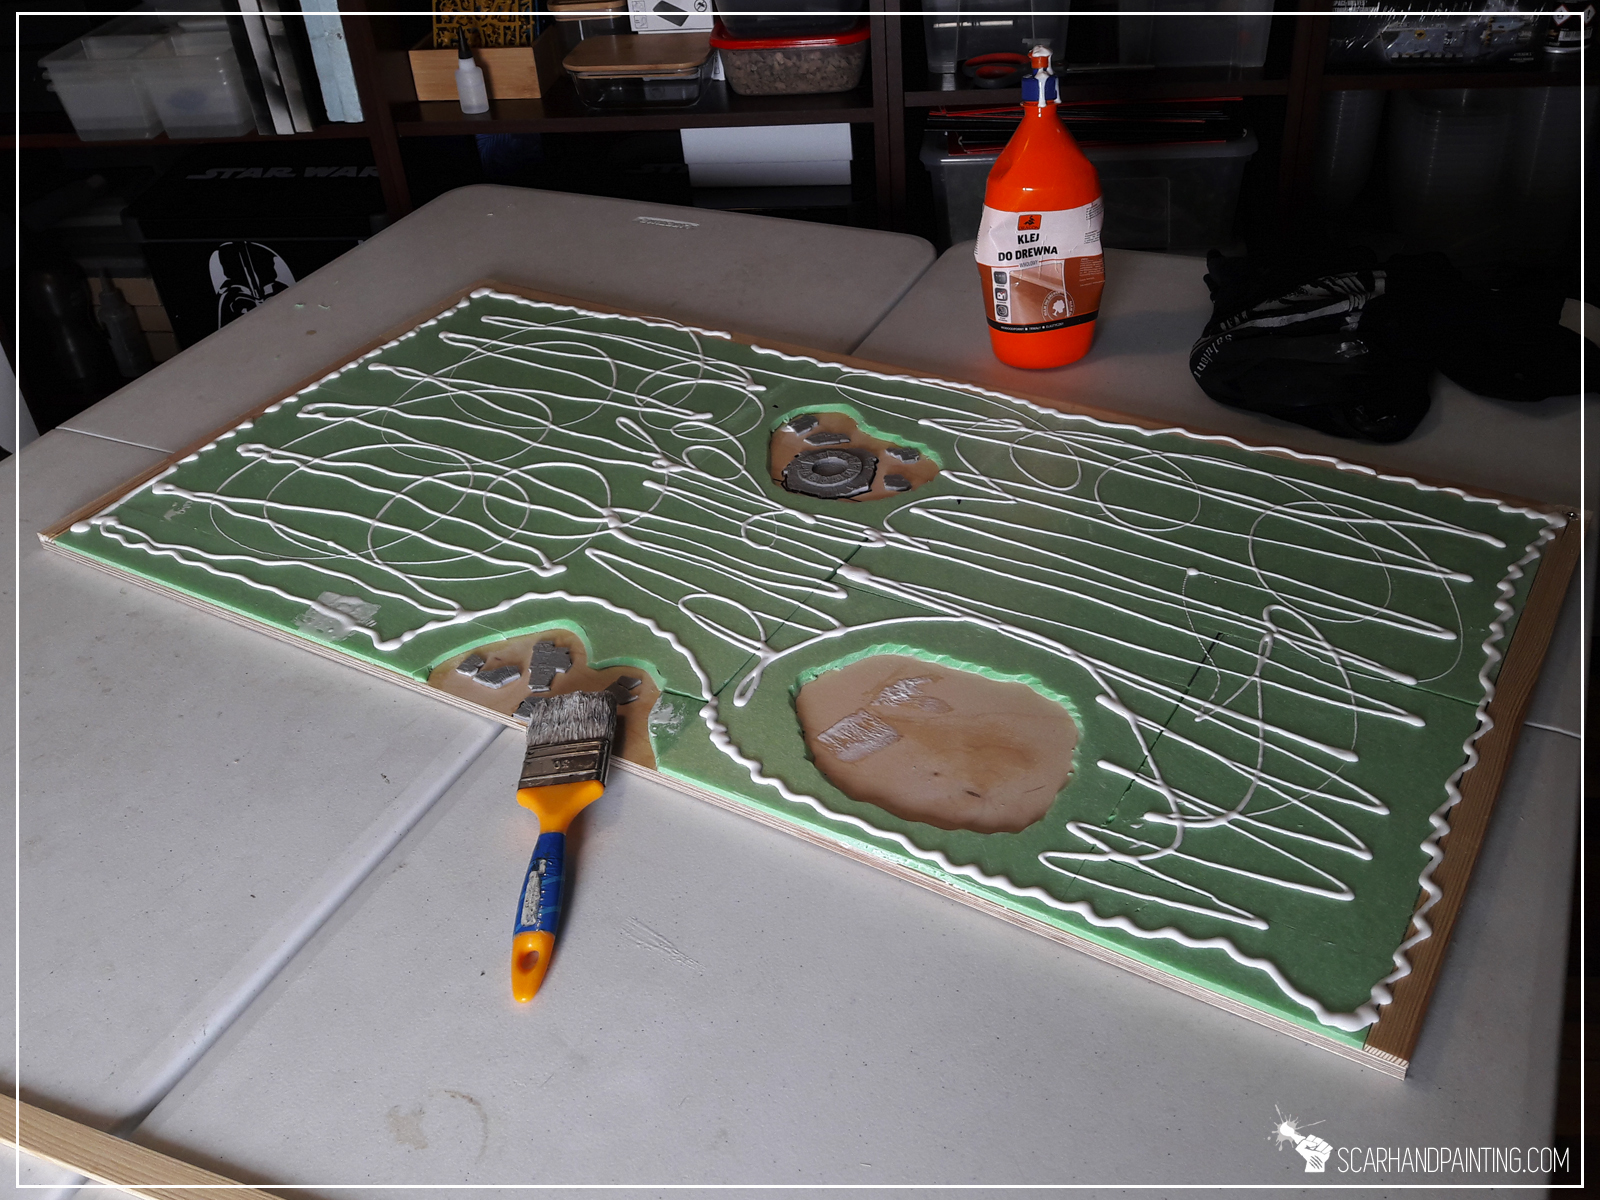
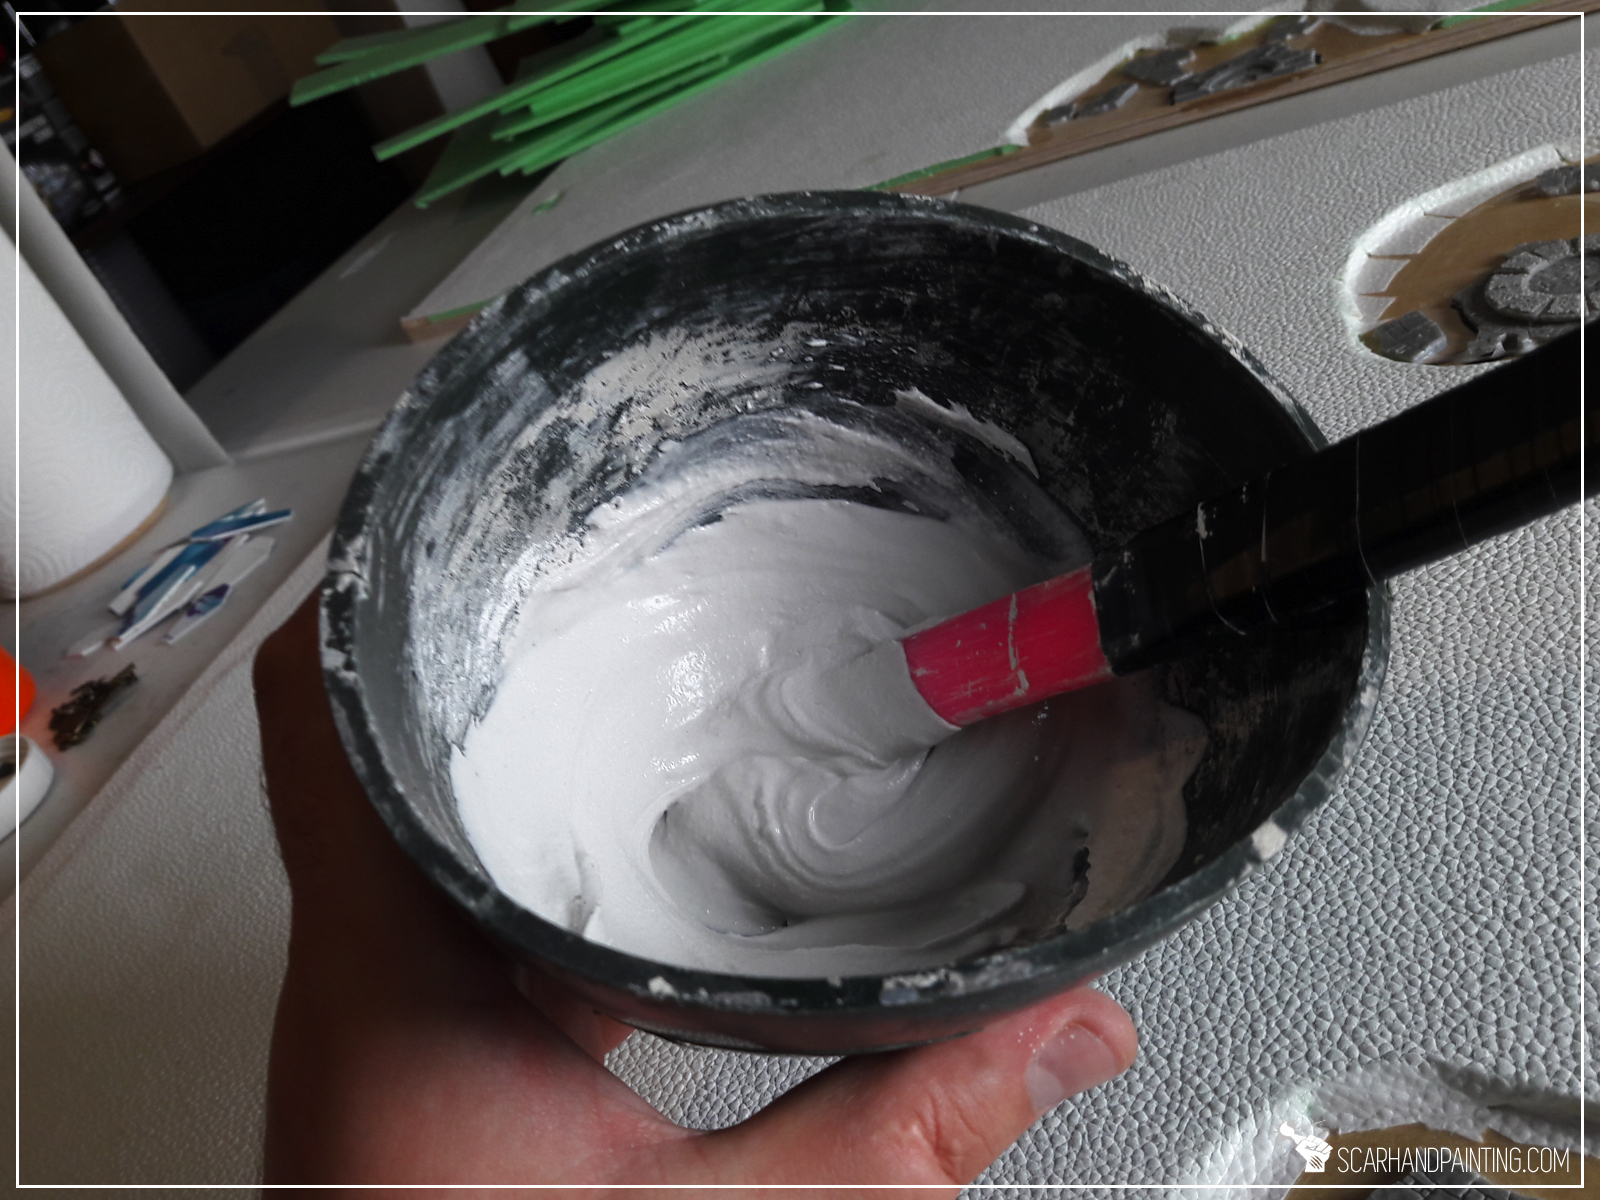
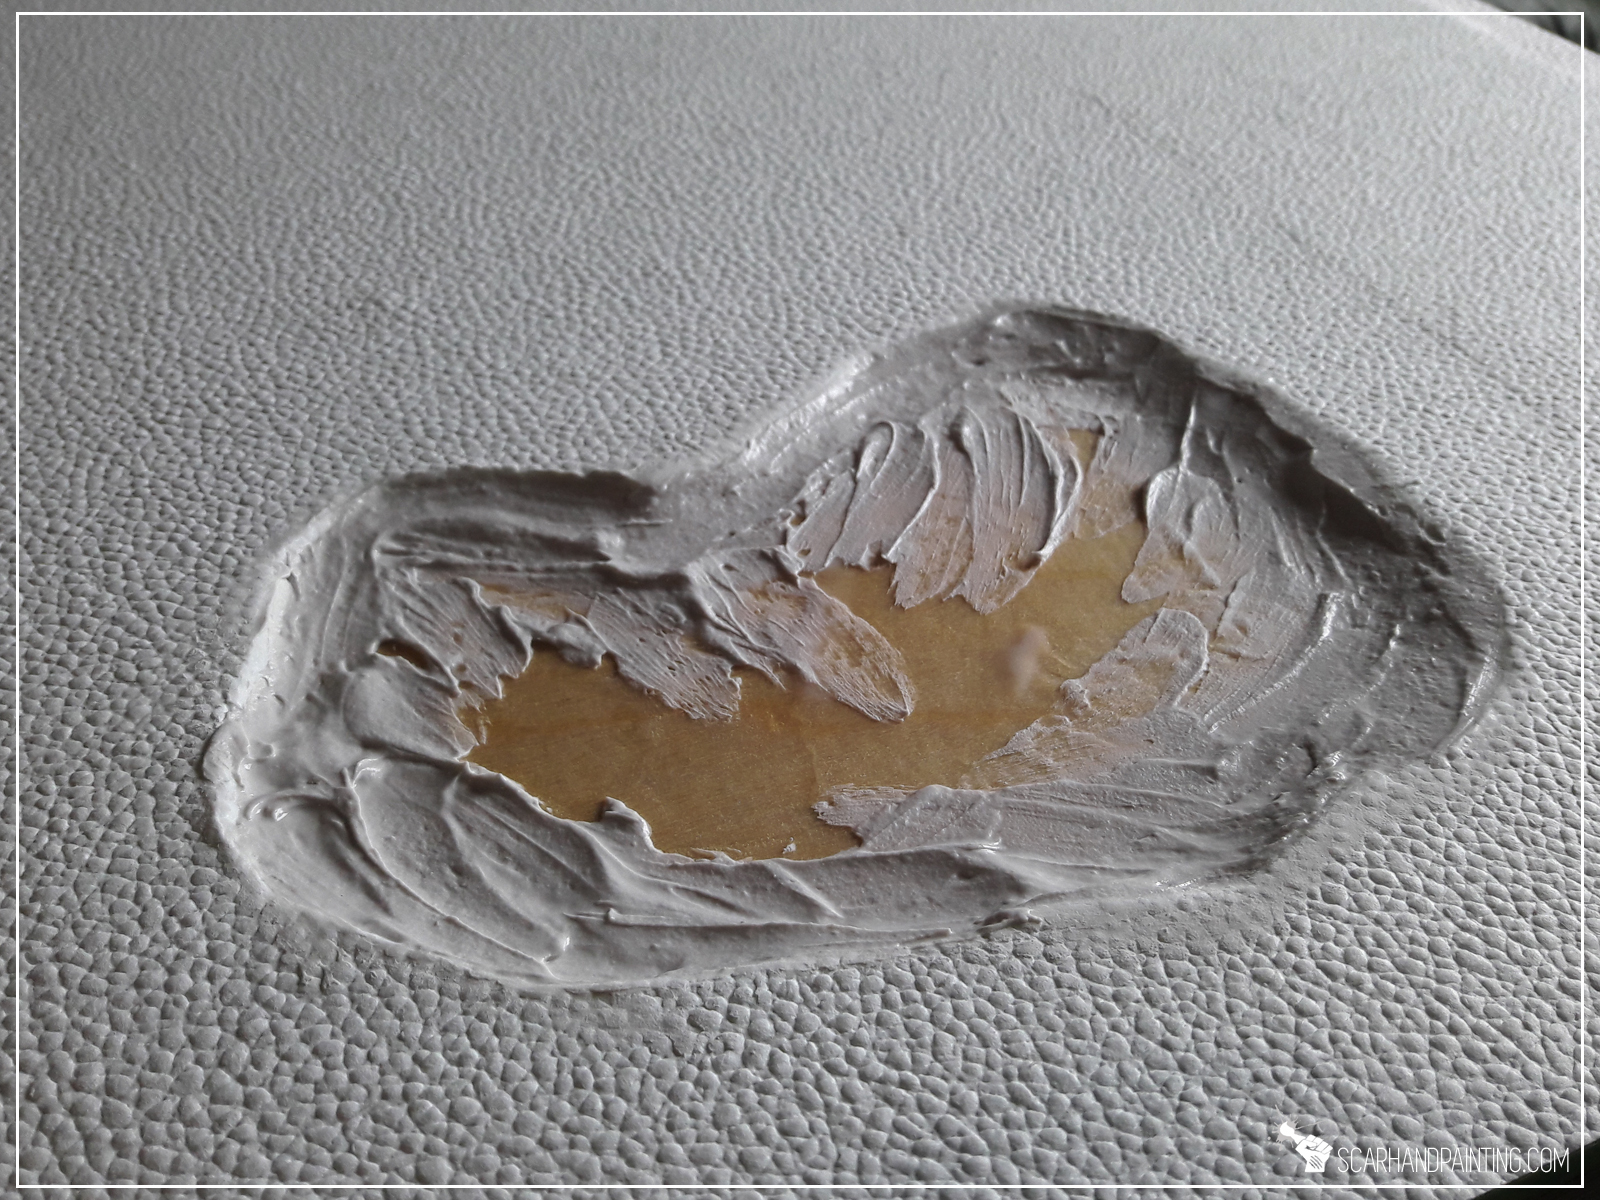
Next step was to insert the coffins and some additional detail elements into the holes. I used white plaster to partially fill the holes, then arranged all the detail inside.
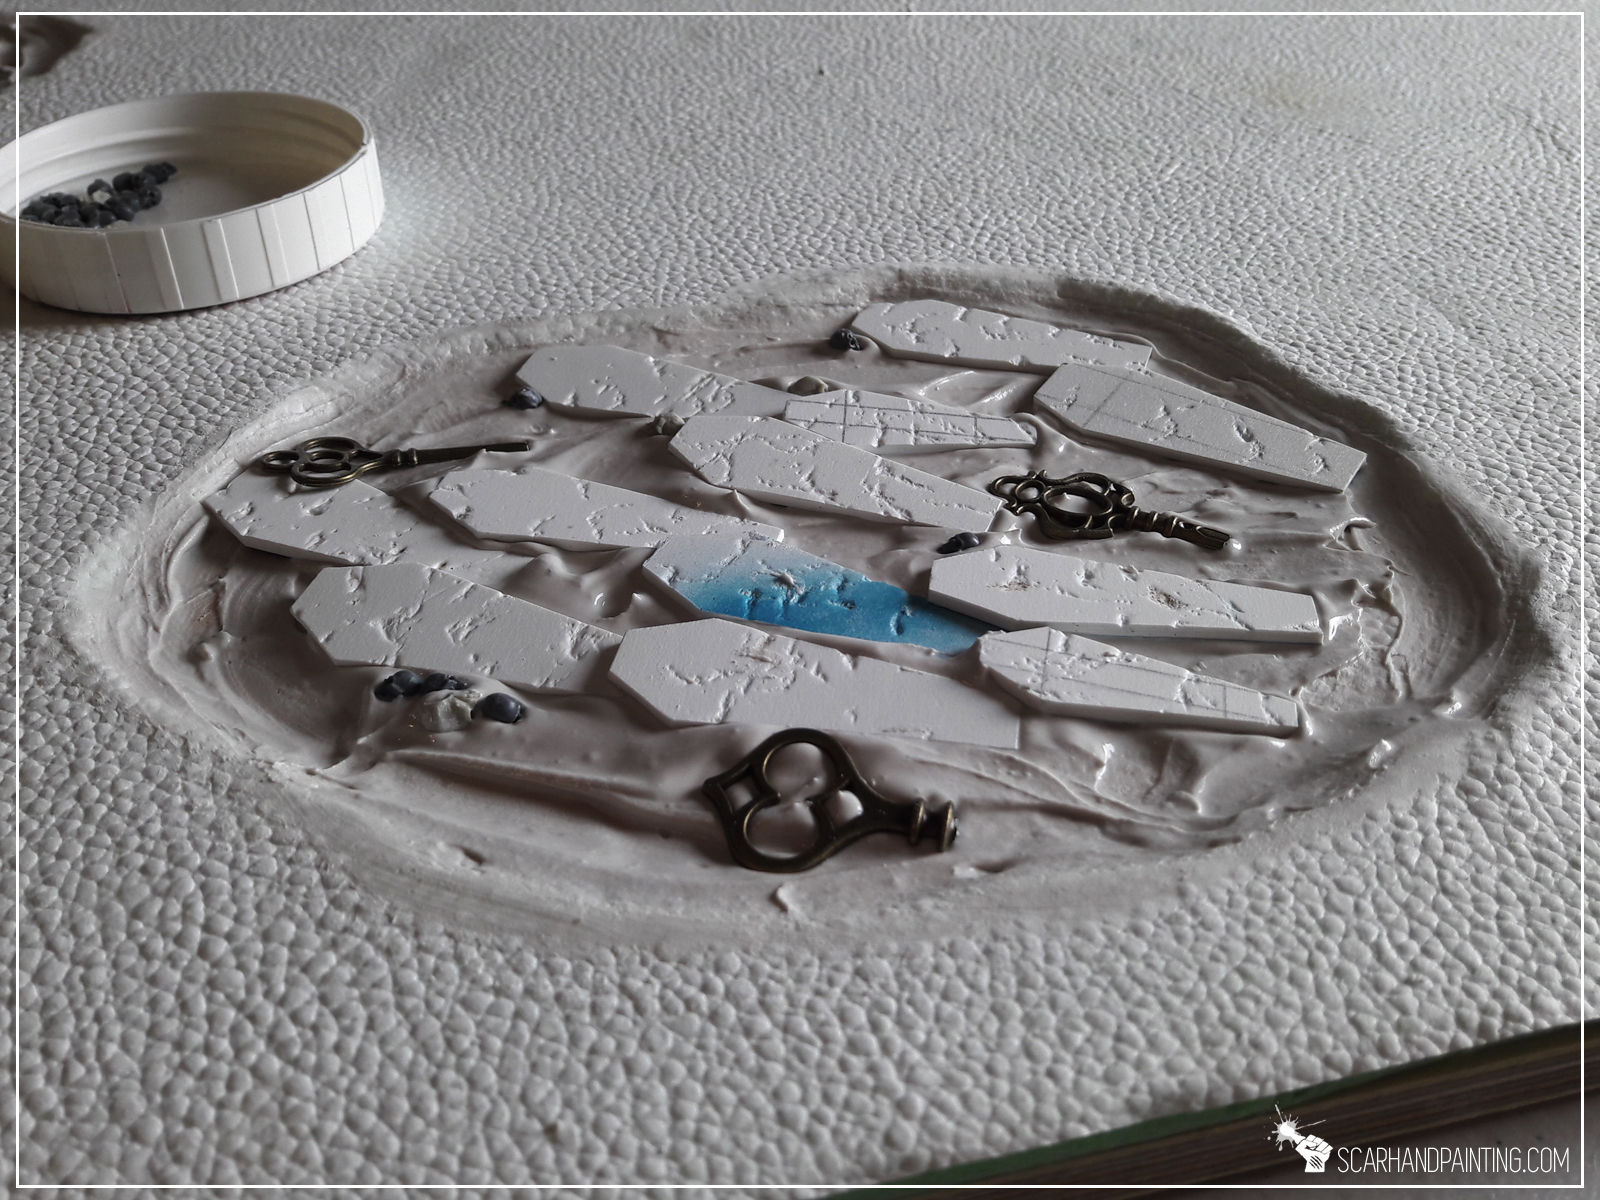
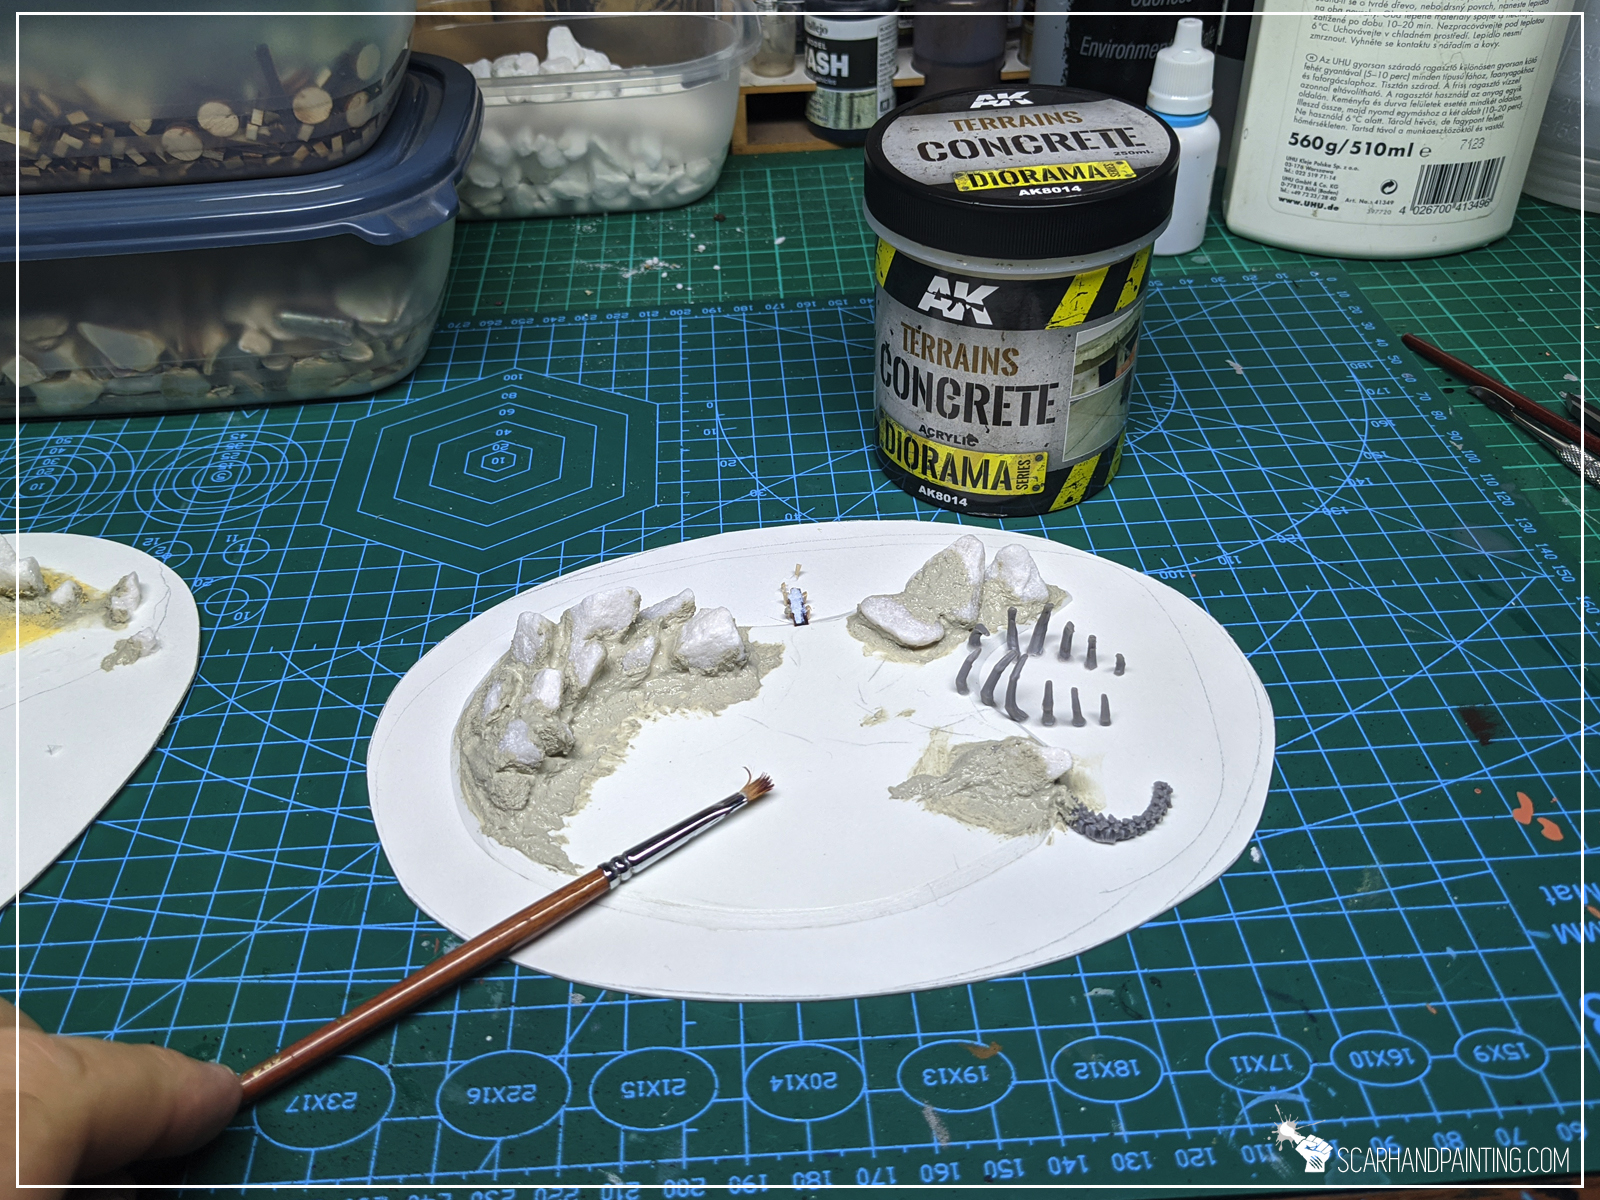
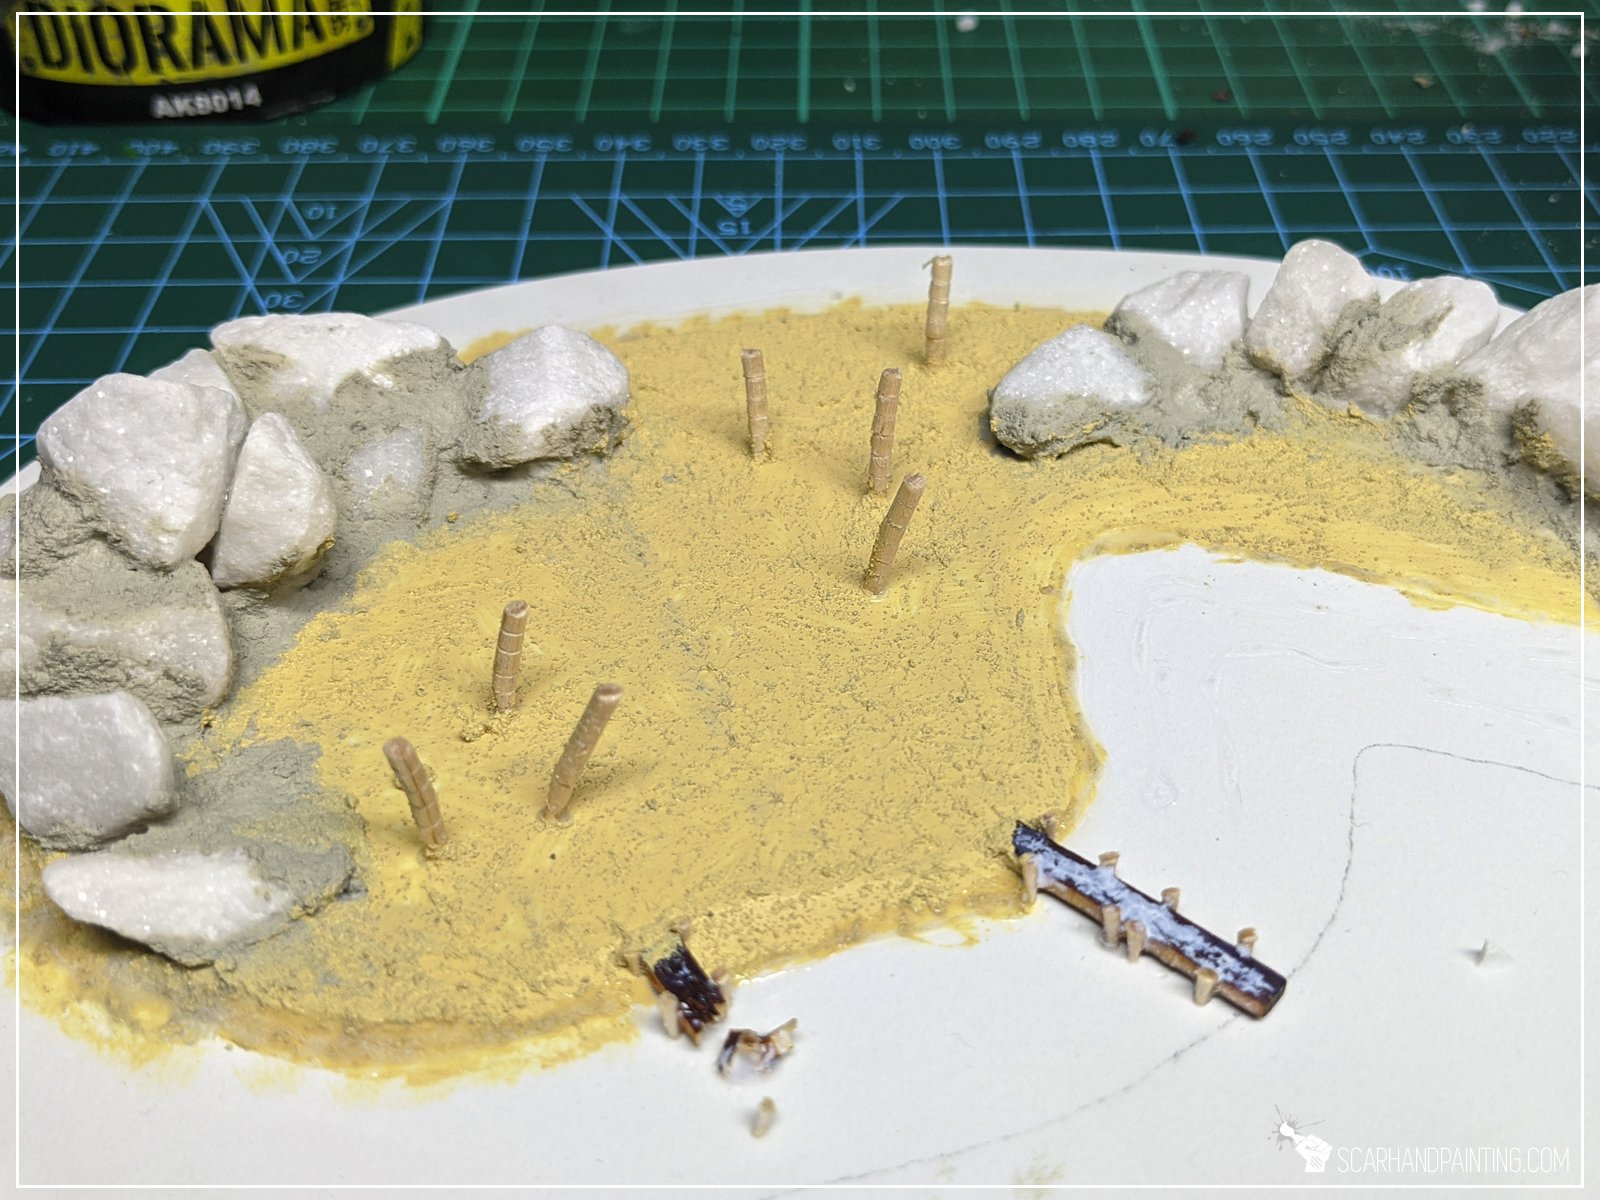
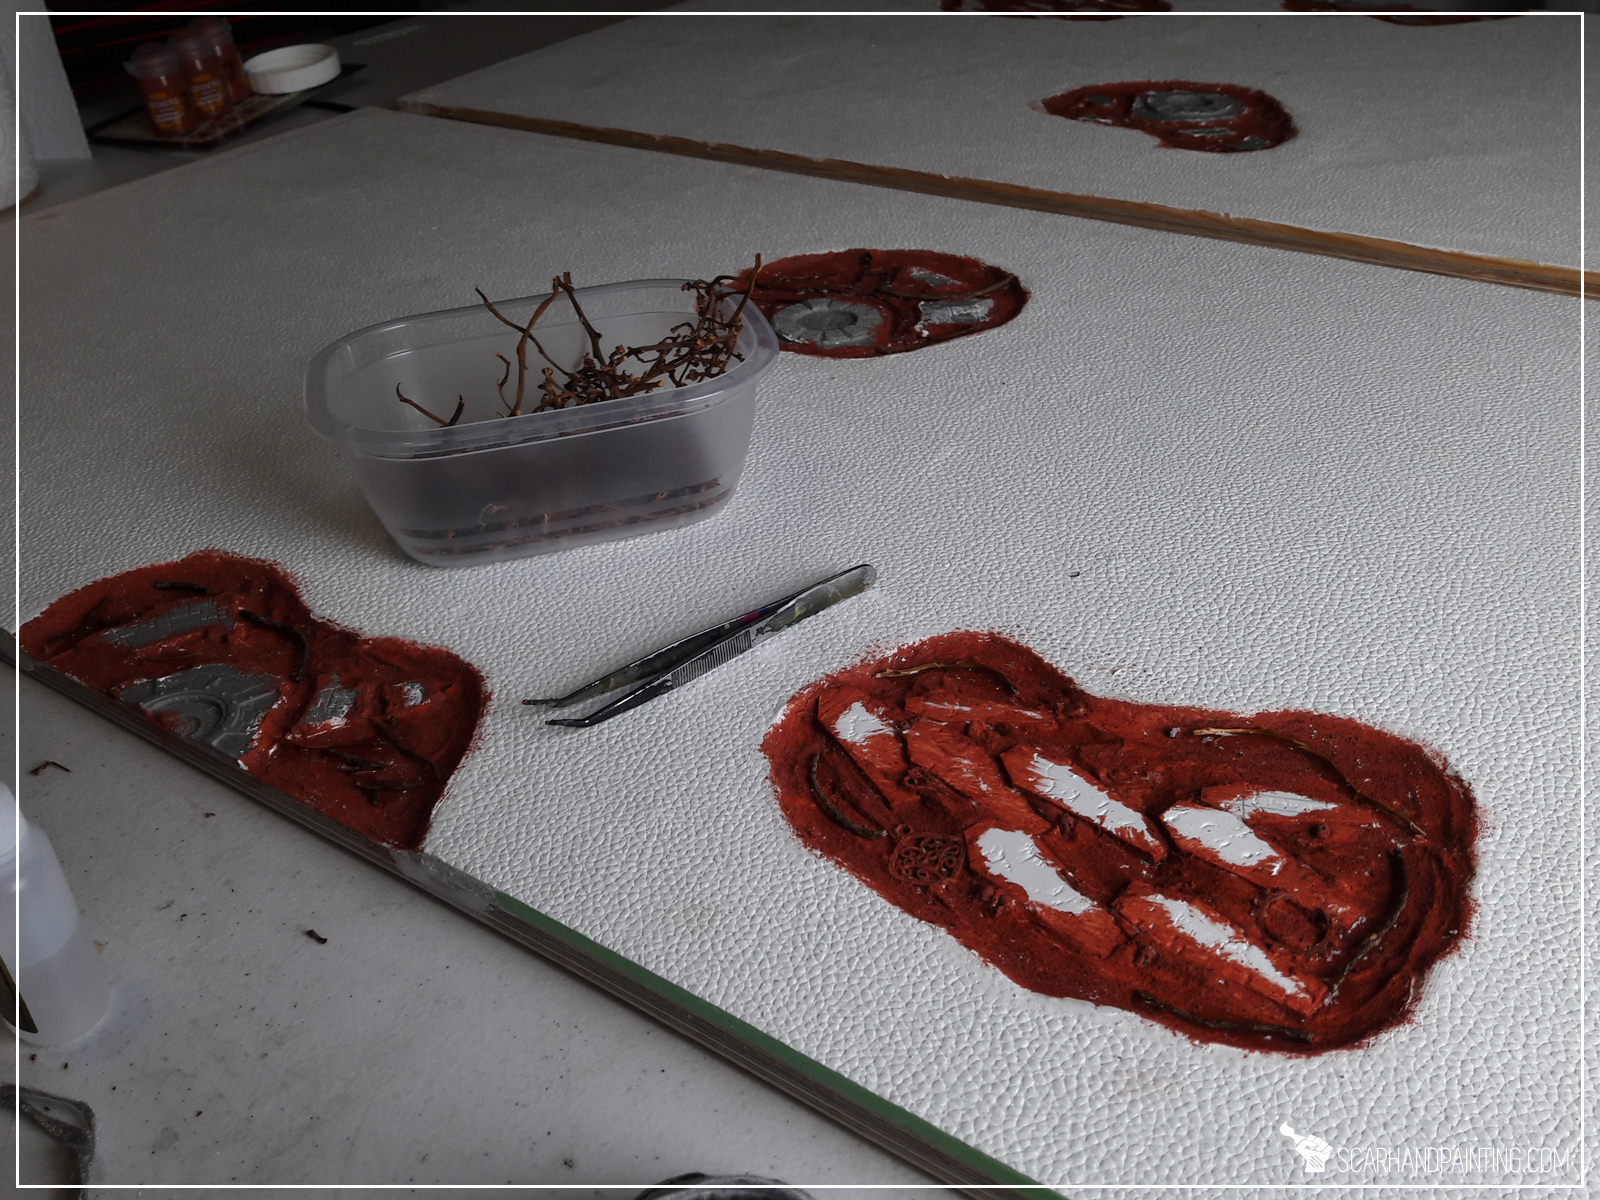
With all the features arranged to my liking I textured the insides of the holes with Games Workshop Martian Ironcrust texture paint. Once dried I placed some dry twigs here and there and sealed everything with PVA glue. This last step was very important to ensure resin stays in once used.

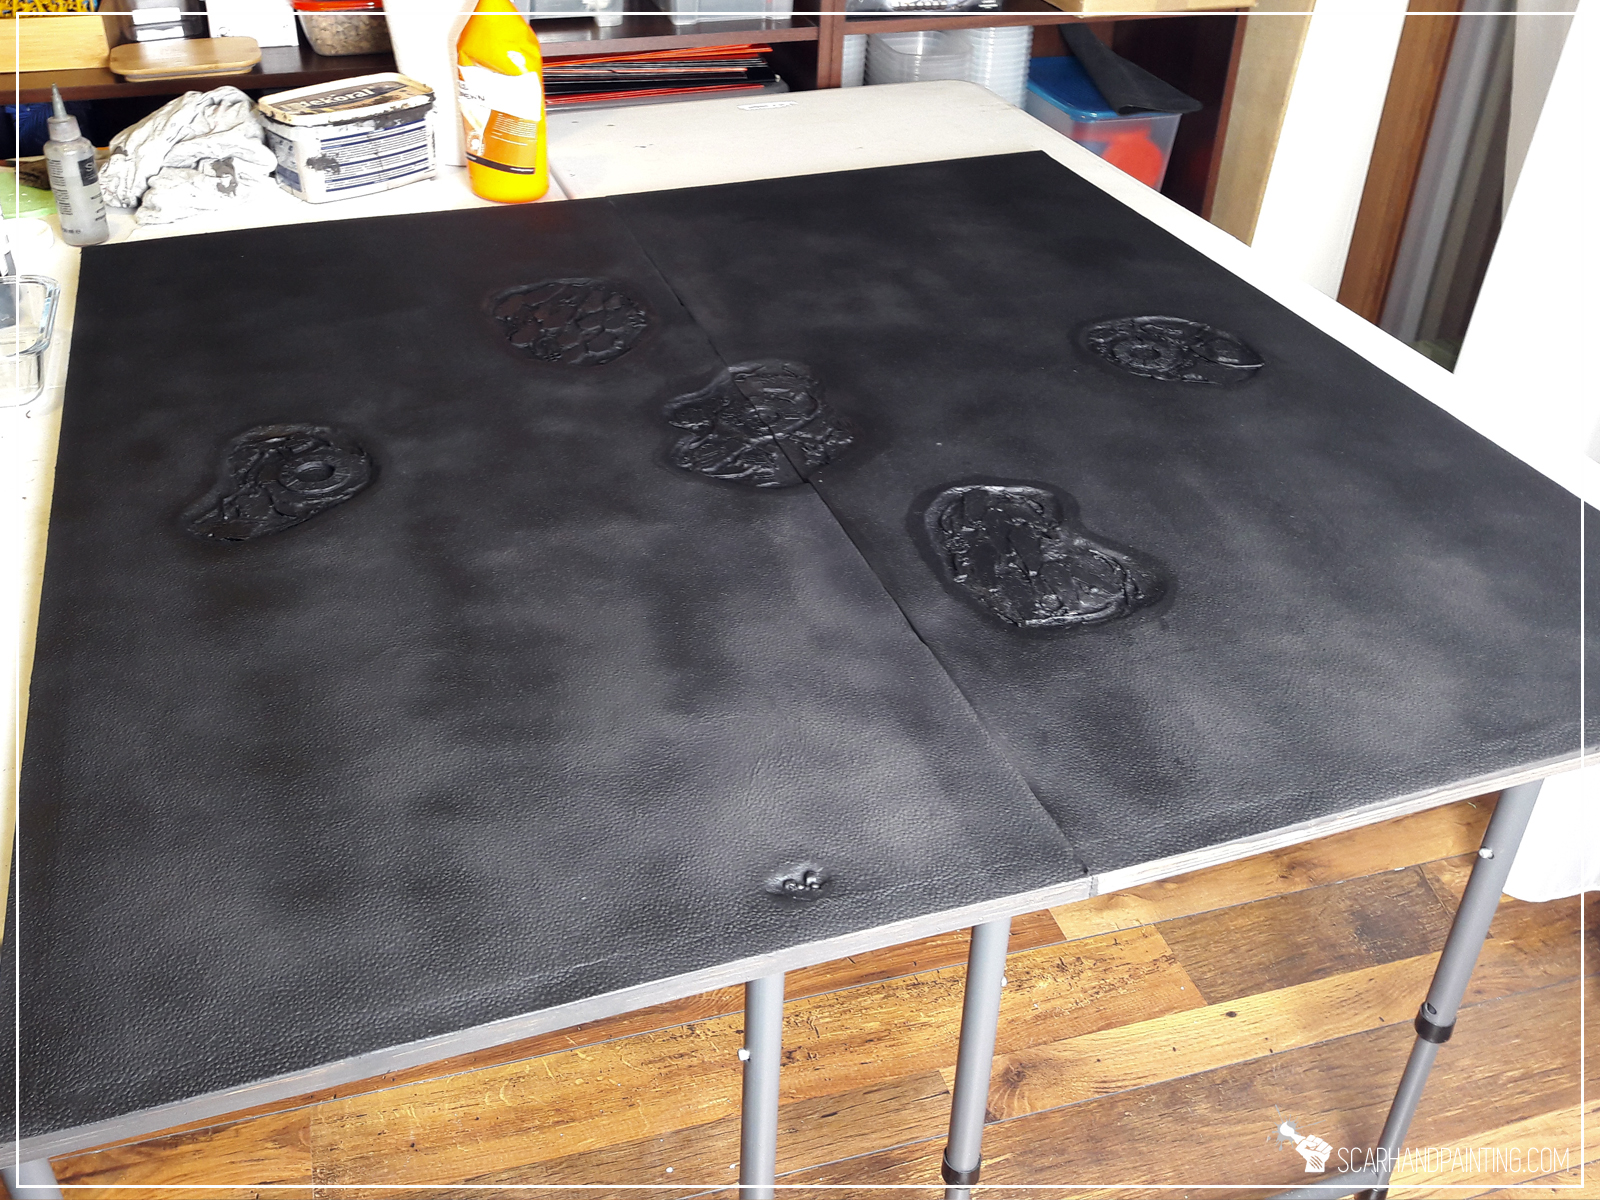
Everything modeled it was time to undercoat entire board with trusted acrylic black paint. Two thin layers of a black wall paint followed by a spray coat of Chaos Black.
This project was planned to last approximately 48hrs, but working with clear resin can sometimes lead to unexpected (and messy) complications. More than a week into the project and some of the resin didn’t coagulate properly. I decided to scrape it off and apply another layer. This is also why I decided to divide this article into two. Undercoat seems like a great place to finish part one.
If you like the article and find it interesting – be sure to let me know either in the comments or at my Facebook page. See you in the next article, hopefully soon. Here’s a little sneak peek:
The idea of introducing cars to my Infinity gaming board is one to haunt me for quite some time now. Many times I found myself in a toy store, standing before a toy car shelf and trying to pick a right car to fit Infinity the Game scale and sci-fi theme. Easy to say that all my efforts were futile, thus I postponed the idea time and time again, slowly loosing hope. This state of things changed drastically just few days ago…
I was visiting the post office, when all of a sudden I saw it! The postal worker was playing with an ideal toy car. Wait!? She wasn’t playing at all! That was a PC Mouse! Imagine my shock, when that realization struck me. Shaped like a car, with lights glowing bright, the PC Mouse was just perfect!
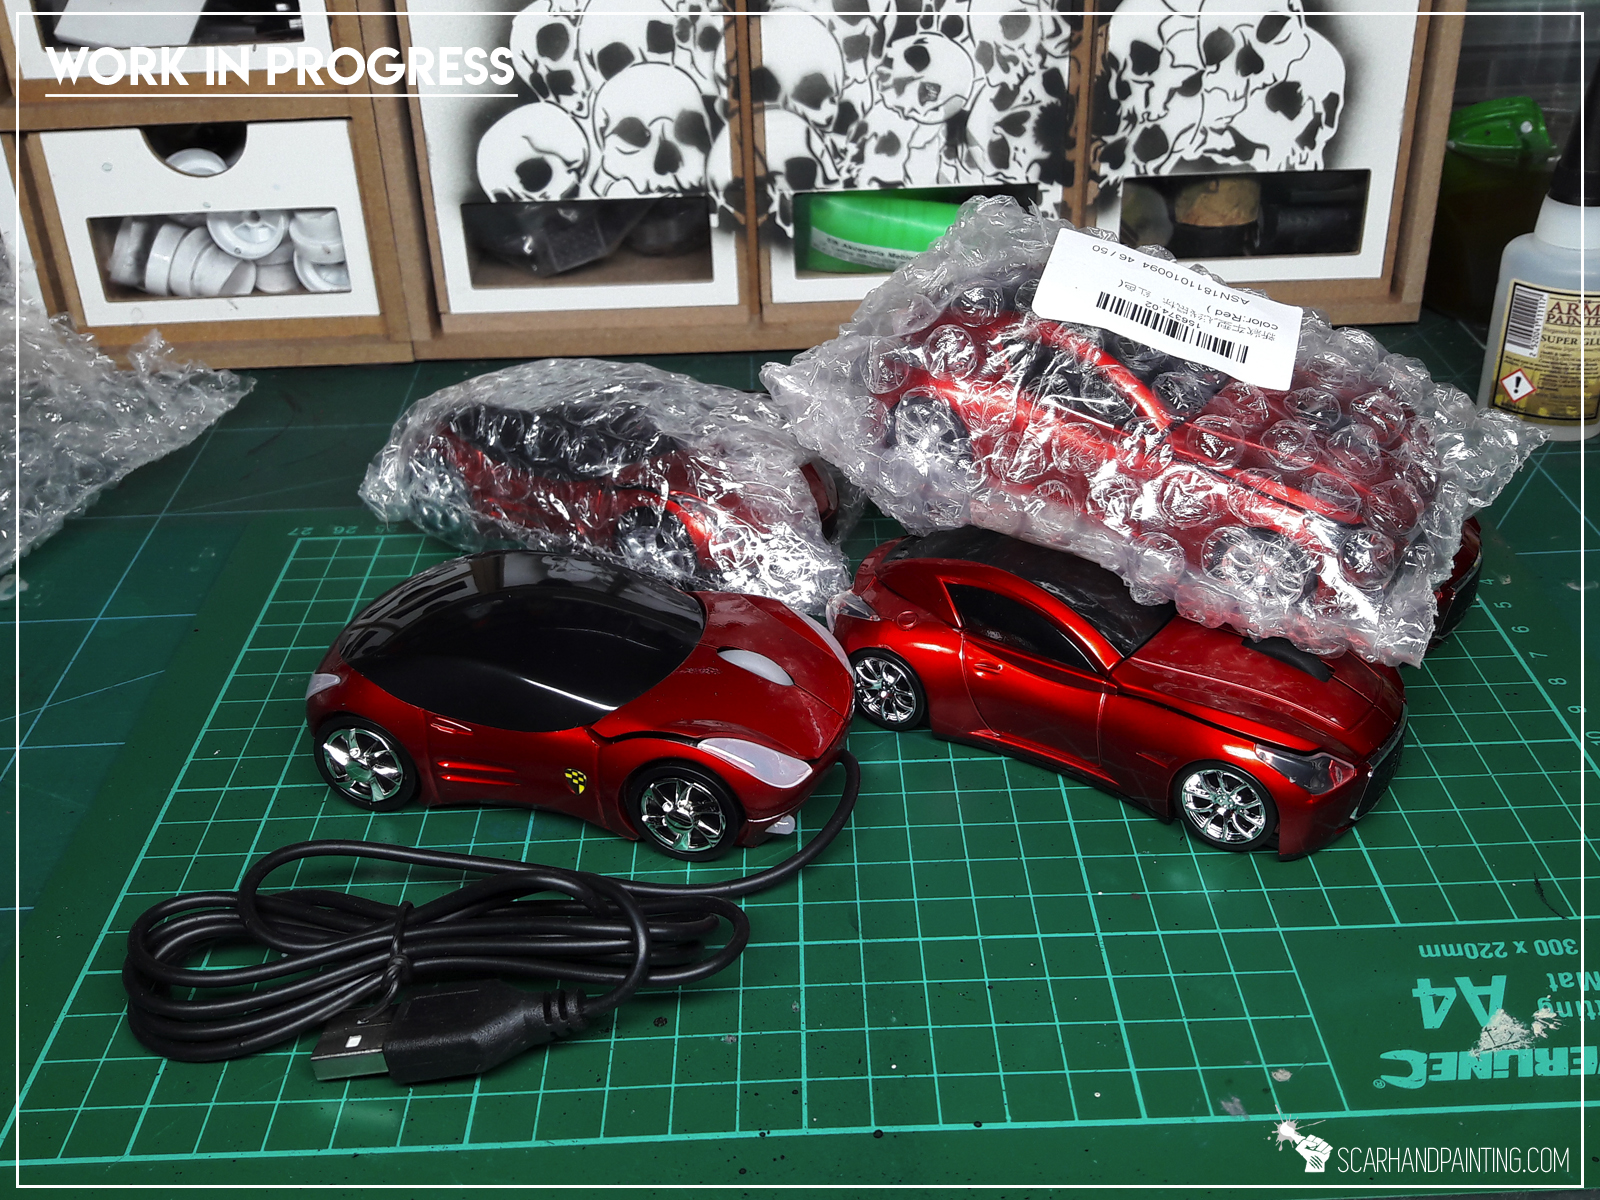
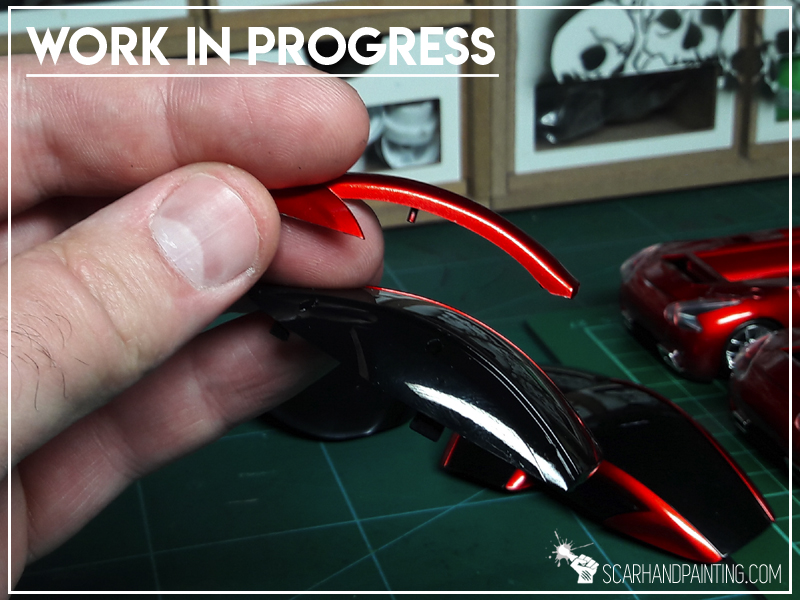
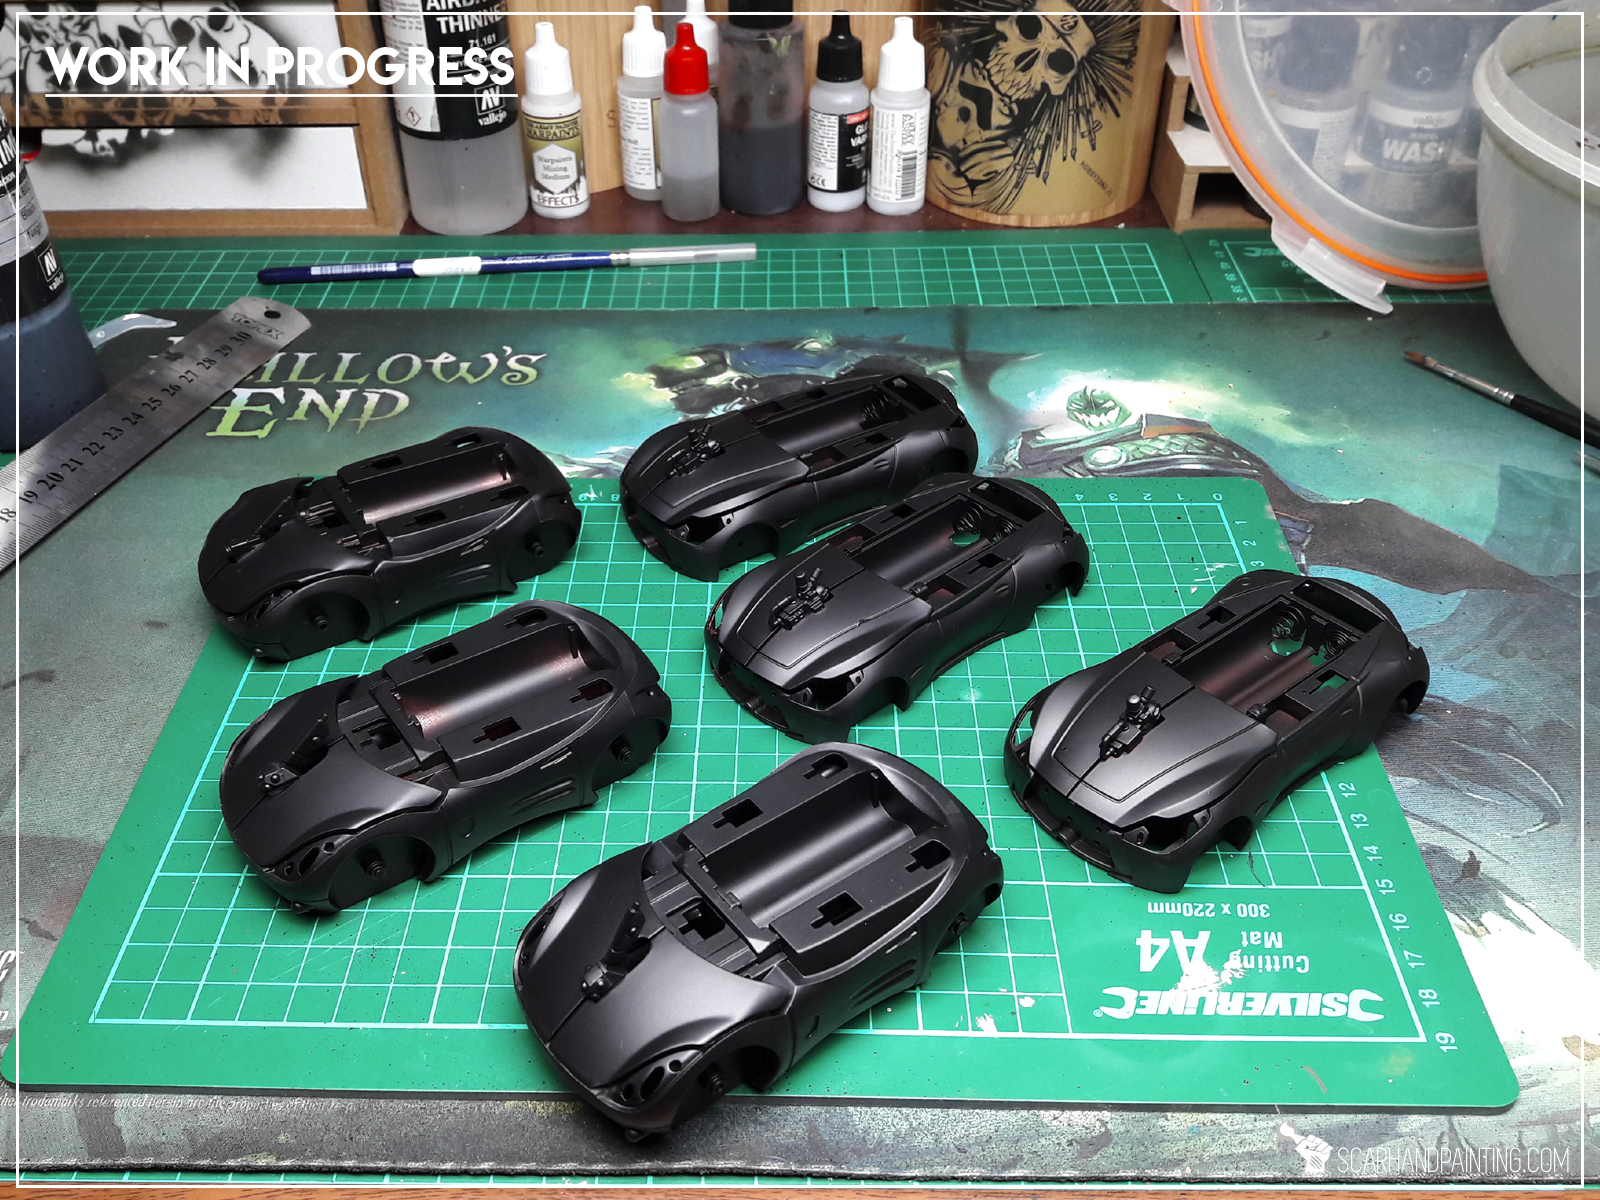
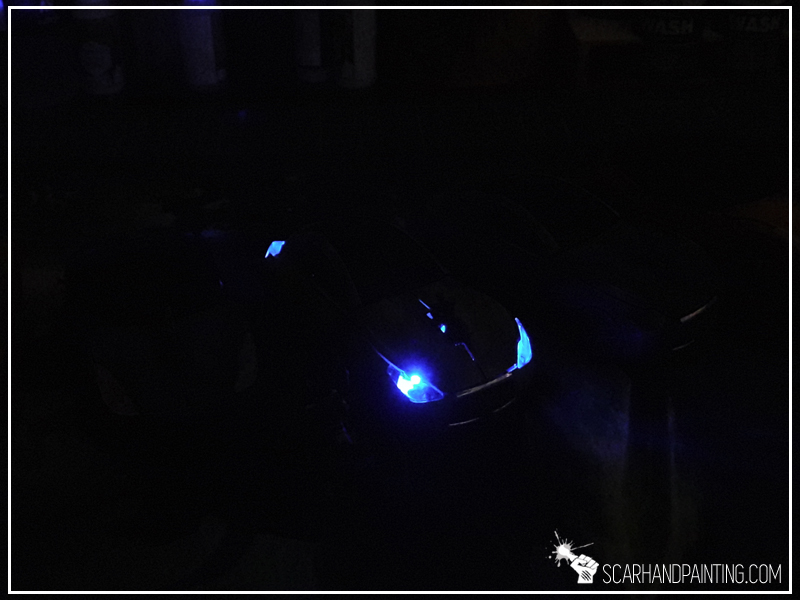
Two days later I was in possession of half a dozen PC Mouse cars. This was where “Infinity Cars” Special Project actually started. After a good look at the cars features I figured that apart of awesome futuristic design, the cars had translucent light covers, black mirrored glass, chrom elements plus some of them had battery powered interior glowing lights. These were key features I wanted to transfer onto final form. I started dismantling the cars to pieces…
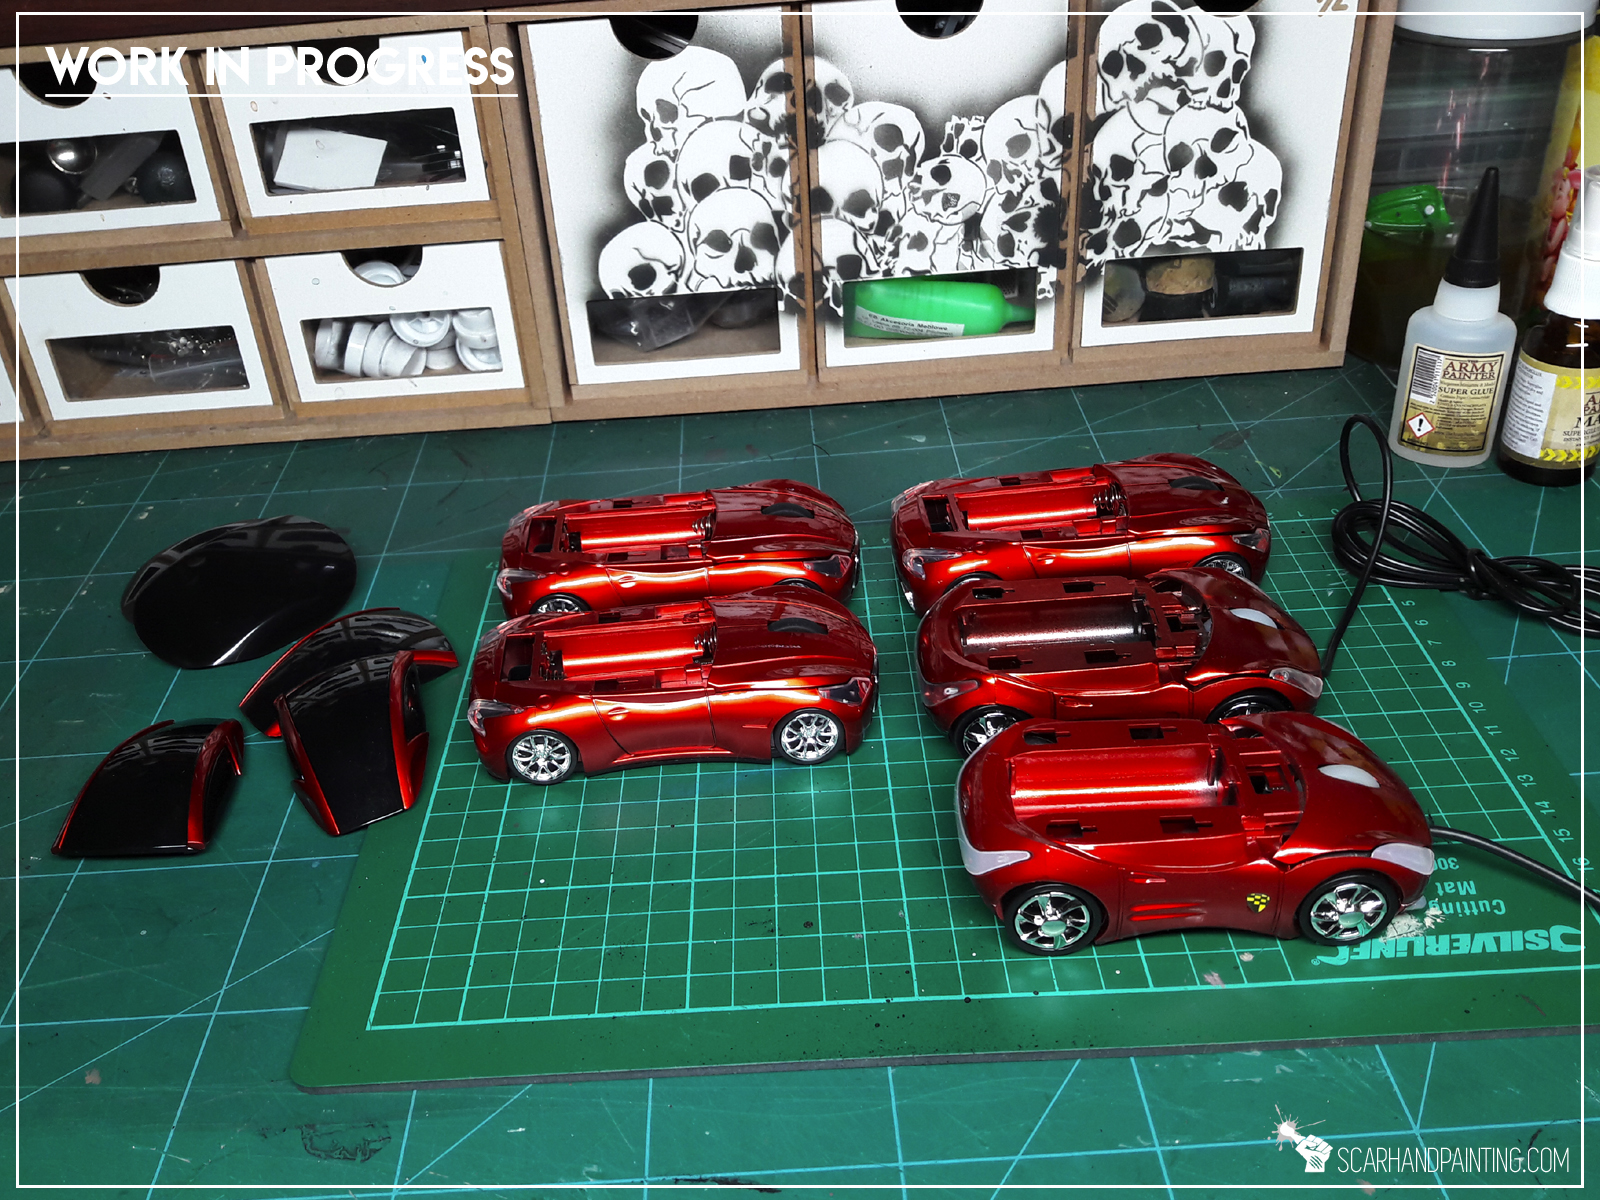

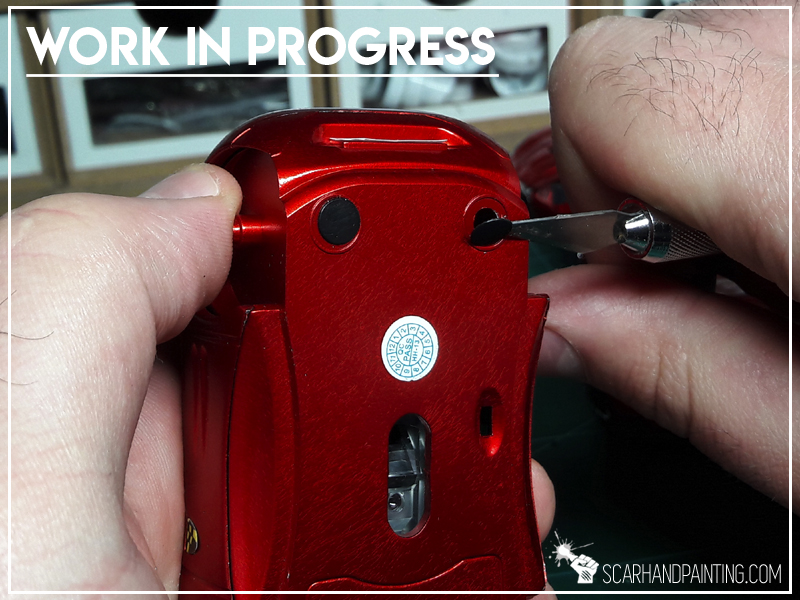
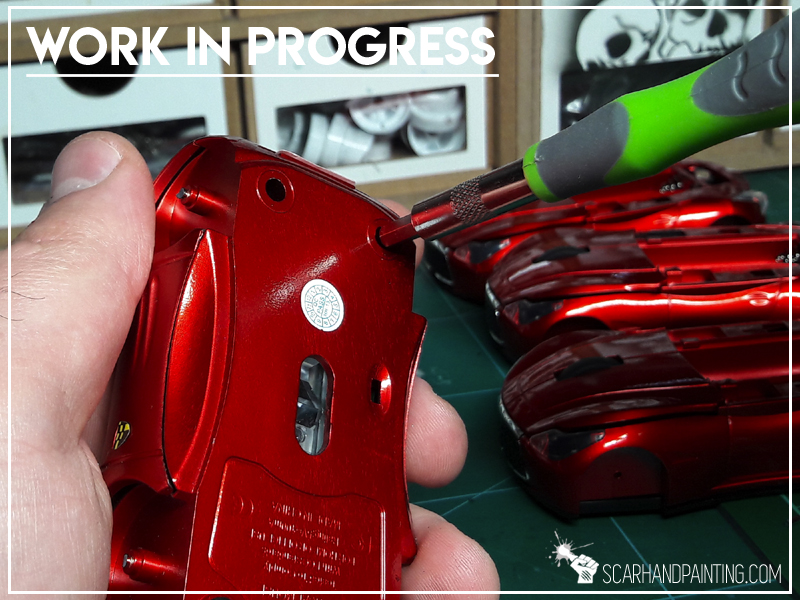

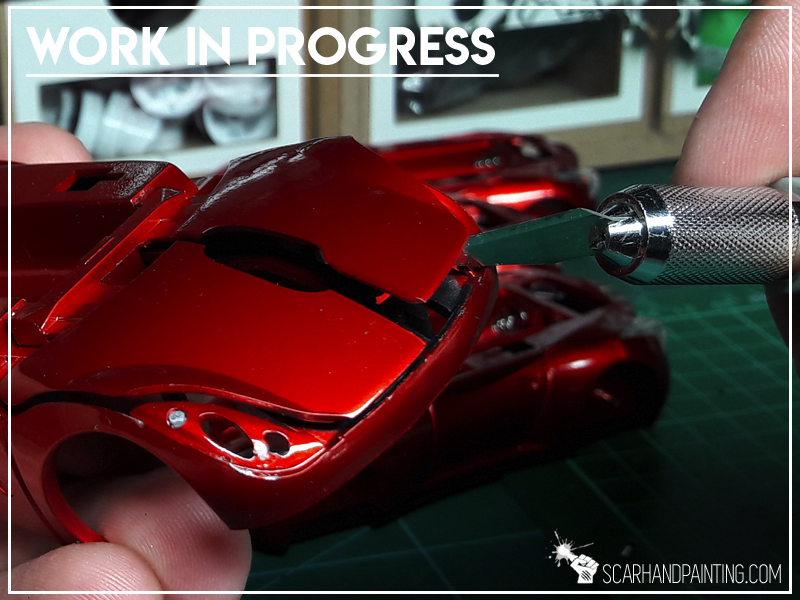
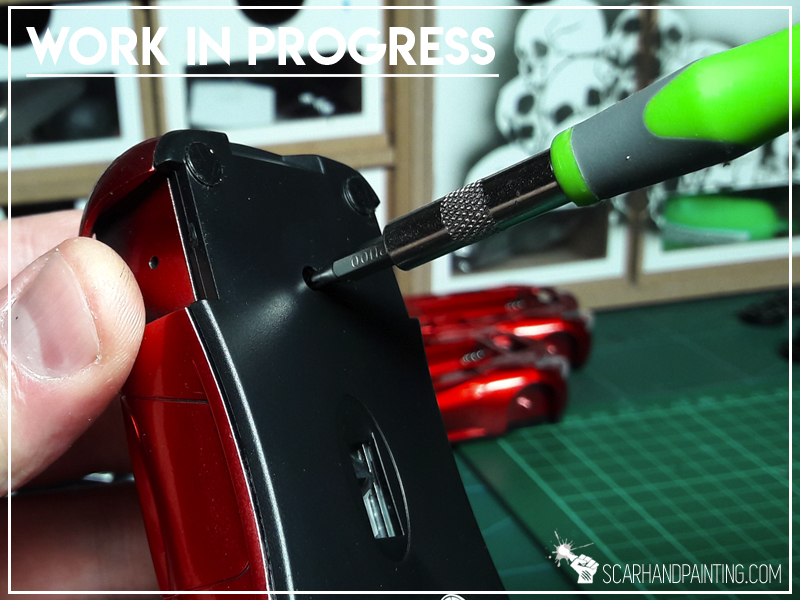

It didn’t took long, as parts came off pretty easily. Depending on a car type there were either one or two screws that needed handling, other than that I only needed to pull parts gently for them to come apart.
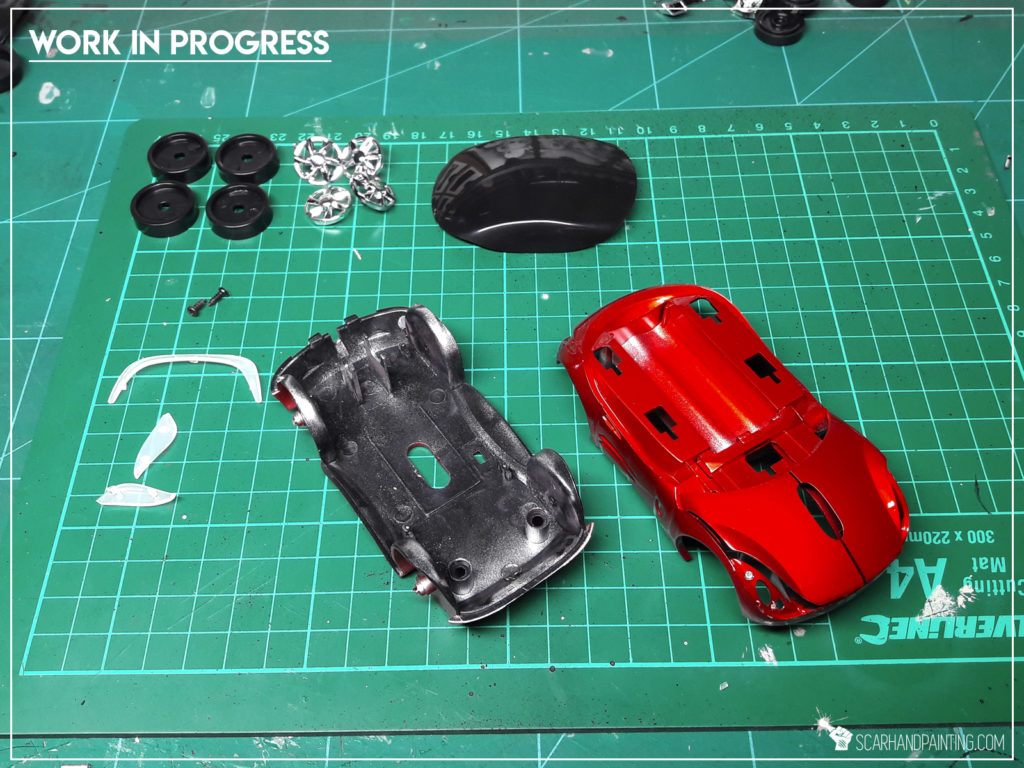

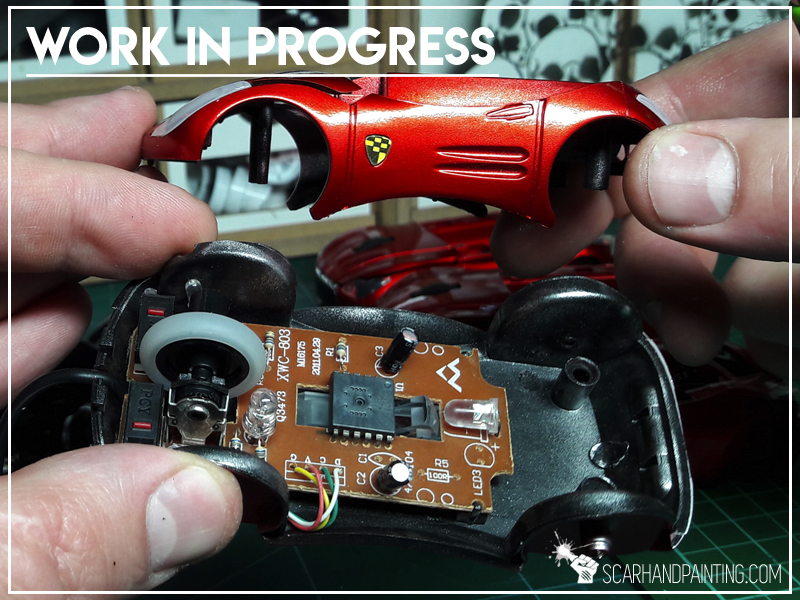
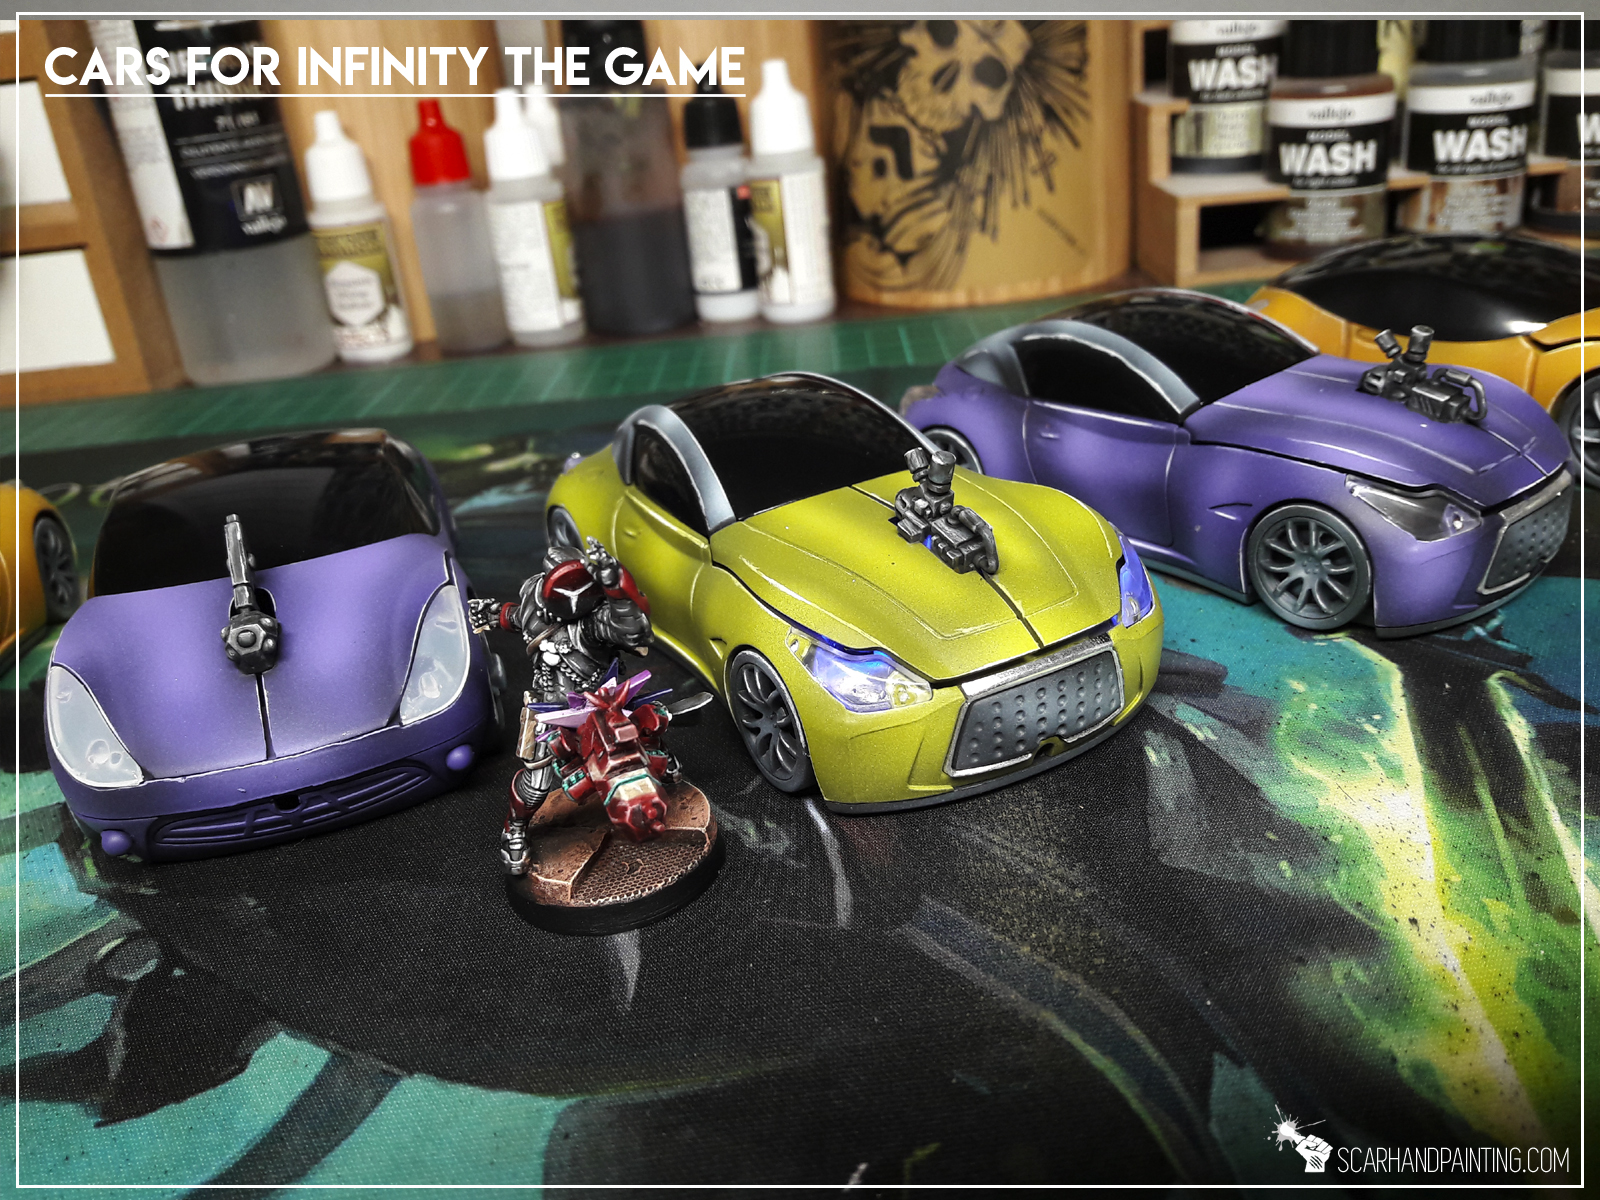
Every piece being separated, I prepared everything for a proper paint job. I didn’t modify the cars too much. Removed “scroll buttons” and glued in some Warhammer 40k bitz to add Sci-fi looks instead, glued left and right buttons firm, removed “the insides” of cable mouses. Didn’t even bother to strip the paint.
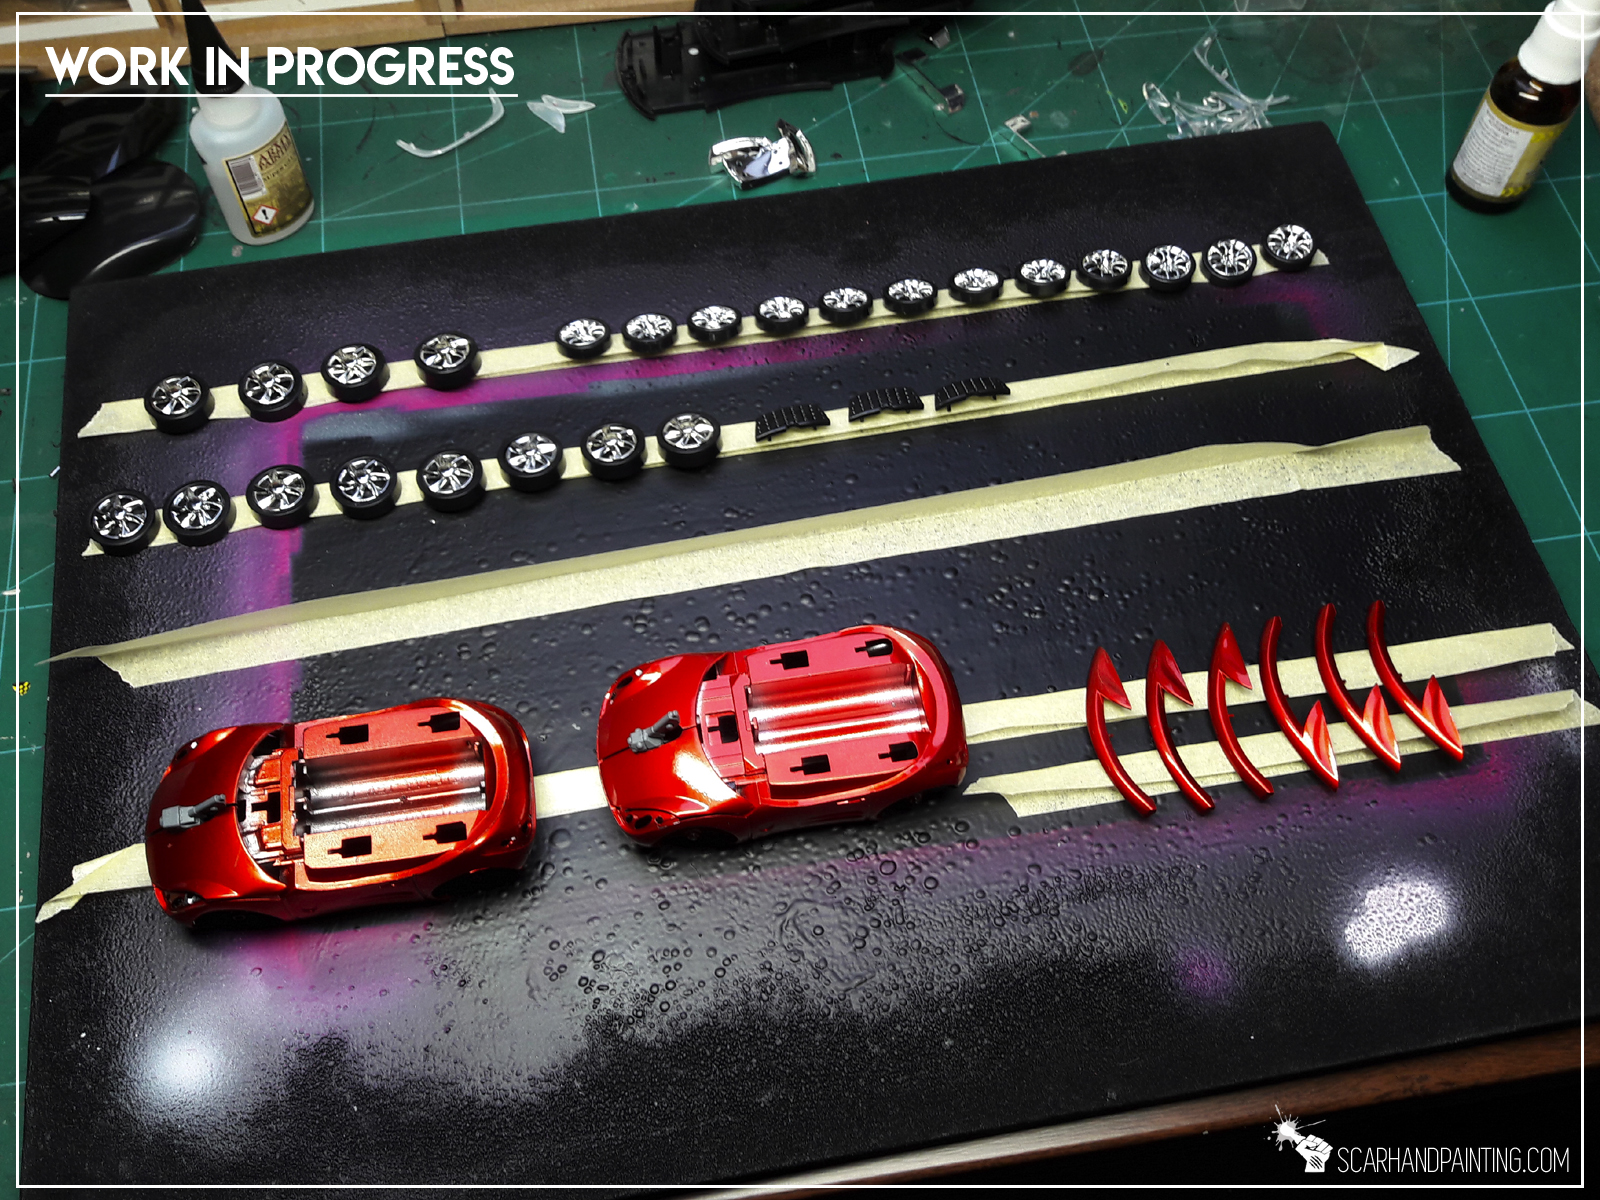
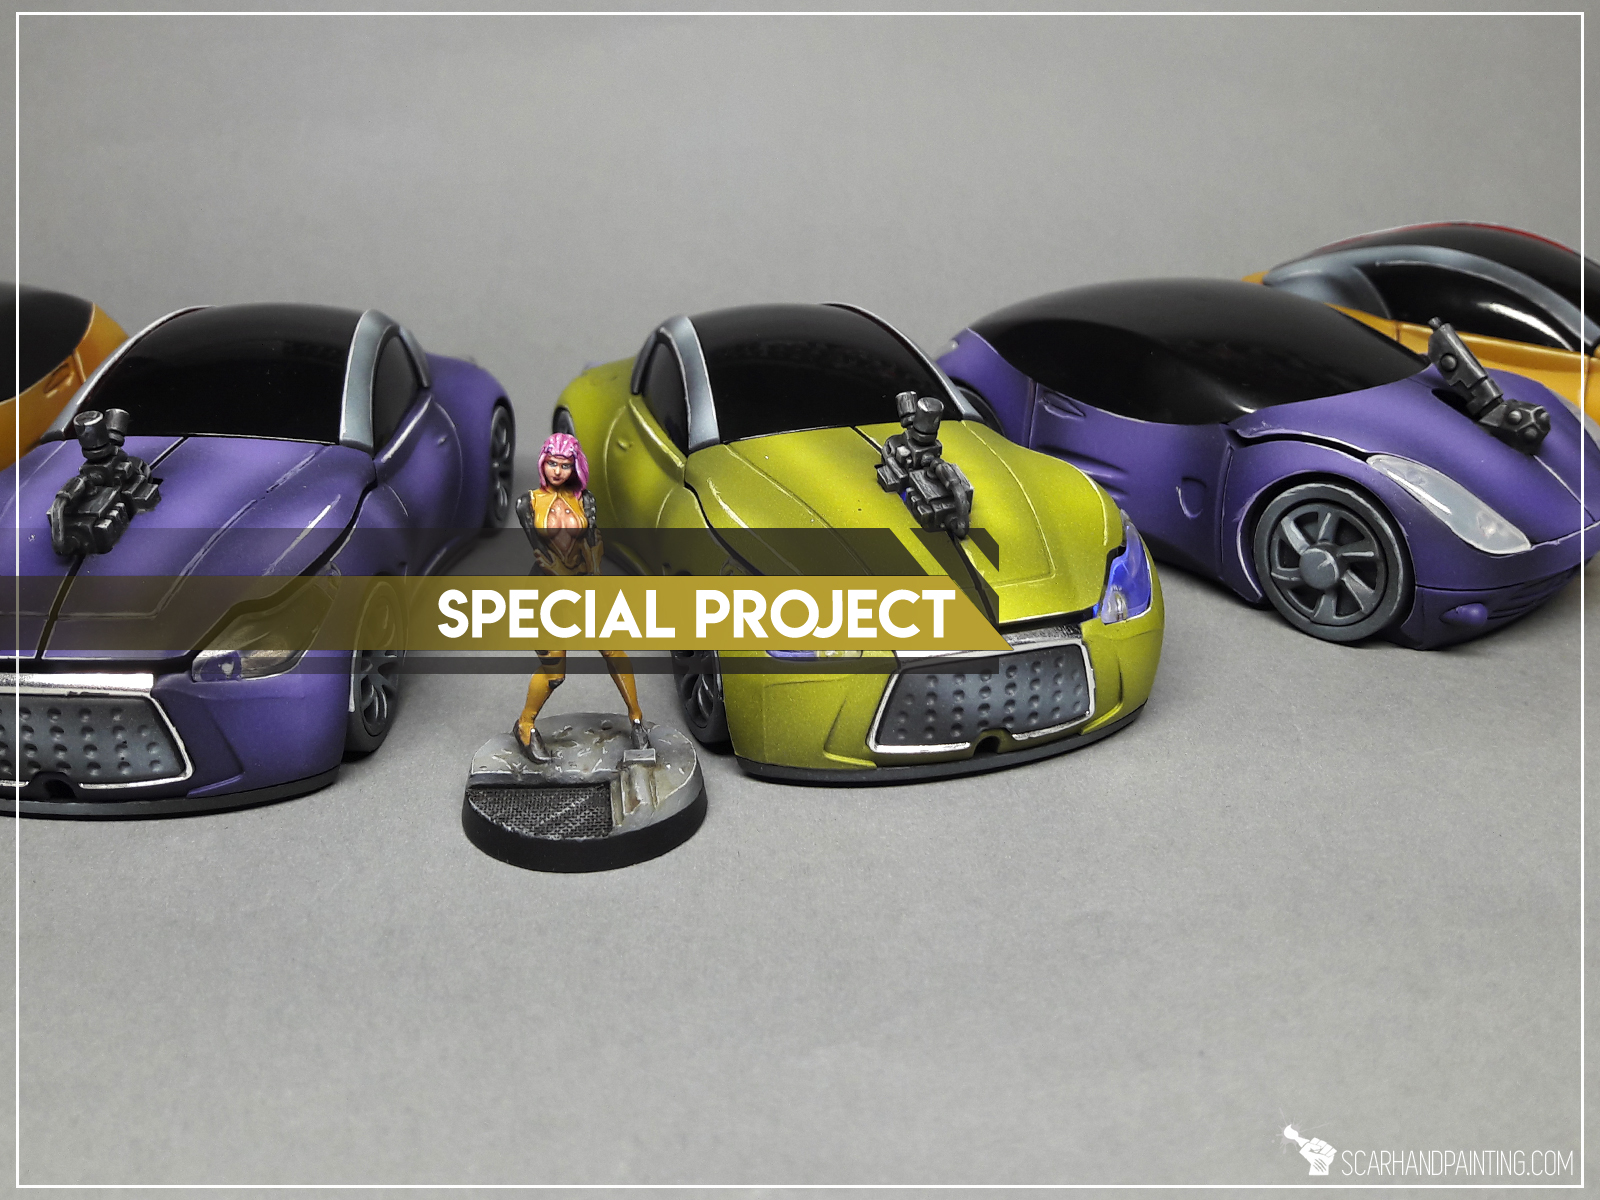
Afterwards the cars got undercoated and soon after I applied a paint job with bright, juicy colours. I decided to keep the paint job simple, with no decals, freehands and other stuff that could have spoiled the perfect shape of these futuristic cars bodies. These are scenery pieces after all, too much is not always same as better.

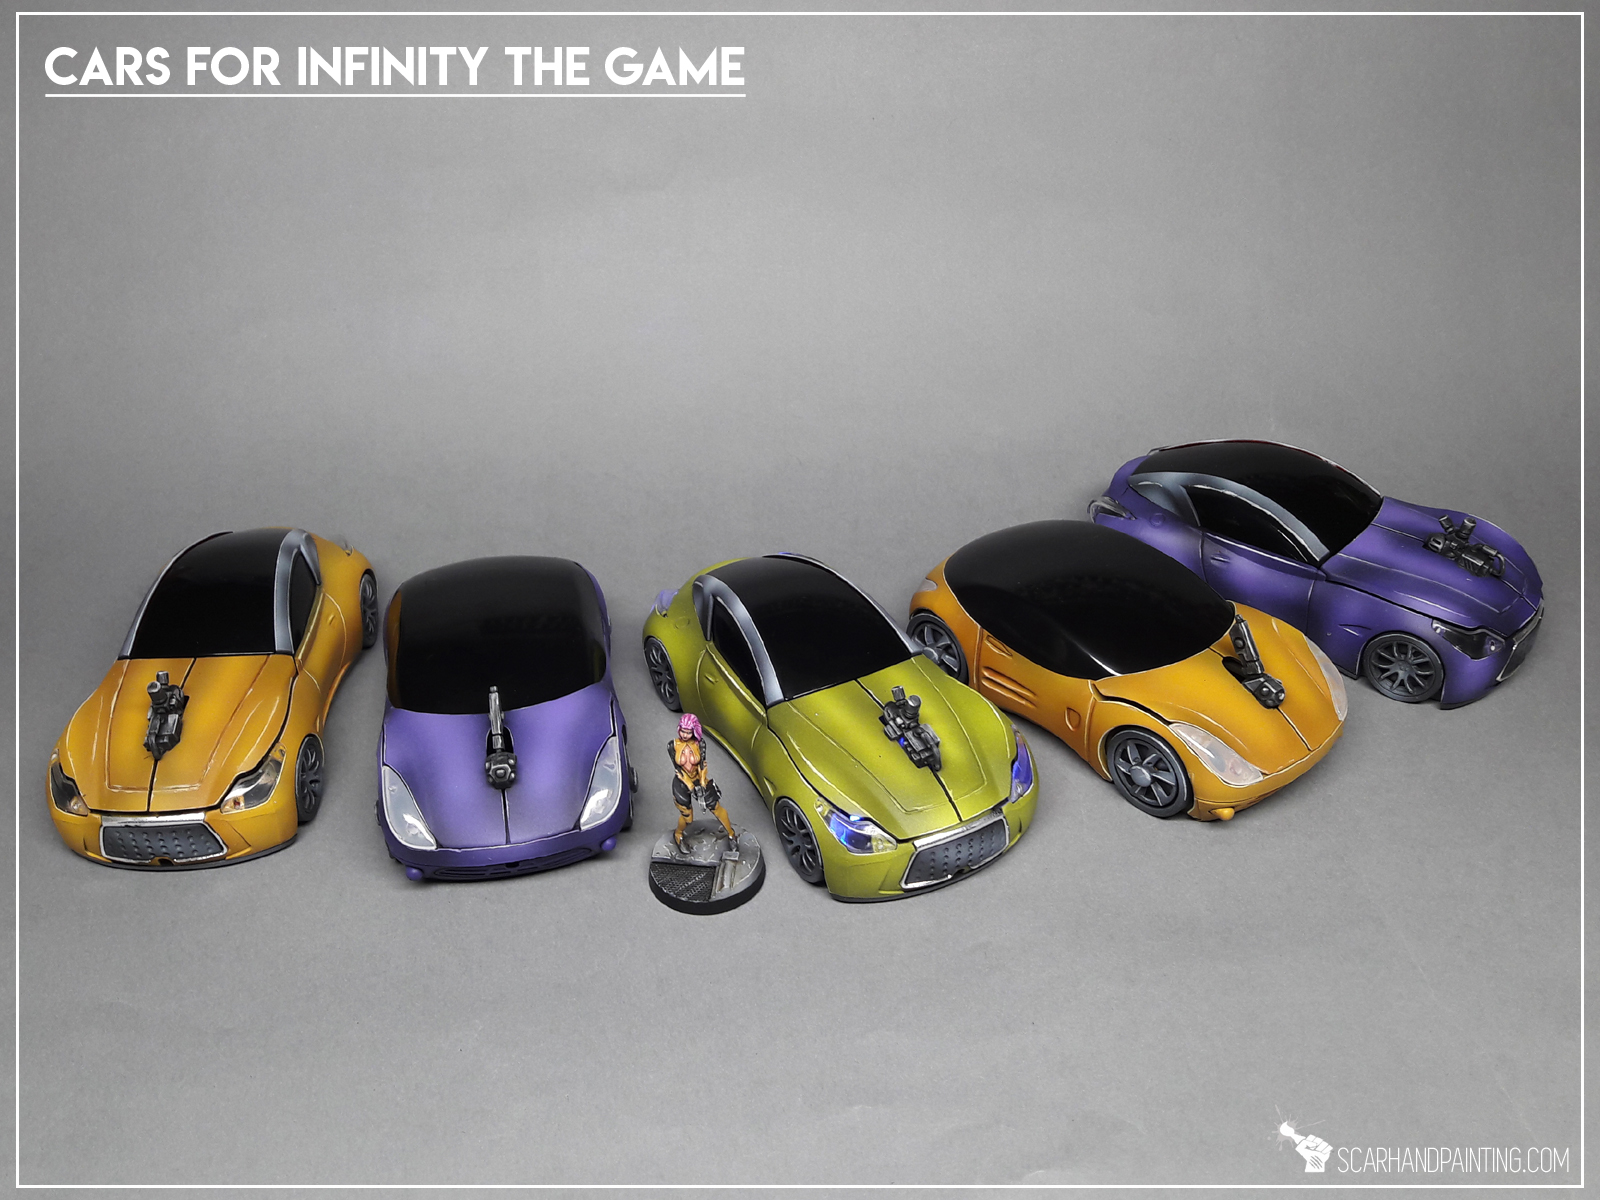
The “Infinity Cars” are nowe done and I cannot wait to use them in the upcoming games of Infinity. I do hope you like the idea of using PC Mouse as an Infinity scenery piece. If you want to grab your own, just look for “PC Mouse Car” at E-bay or google. In the meantime I invite you tocheck out the “Infinity Cars” Gallery… and tell me what you think in the comments below 😉
Cheers!
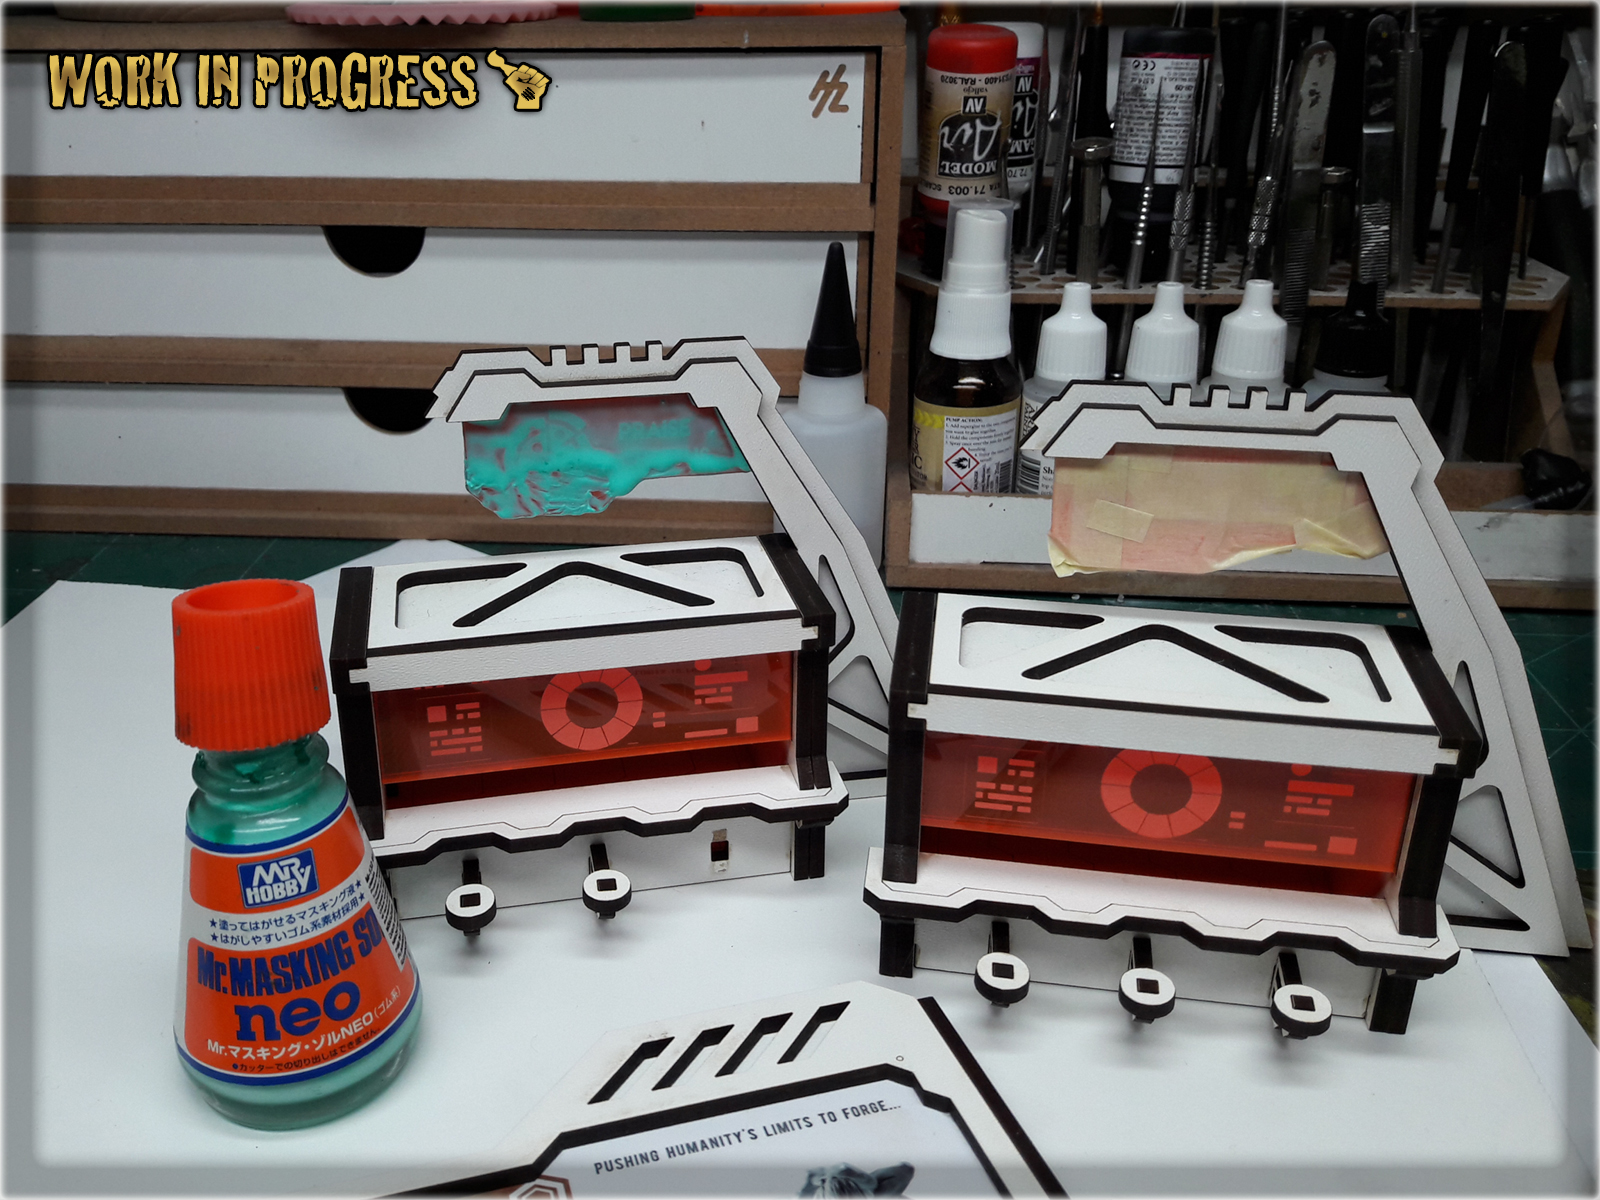
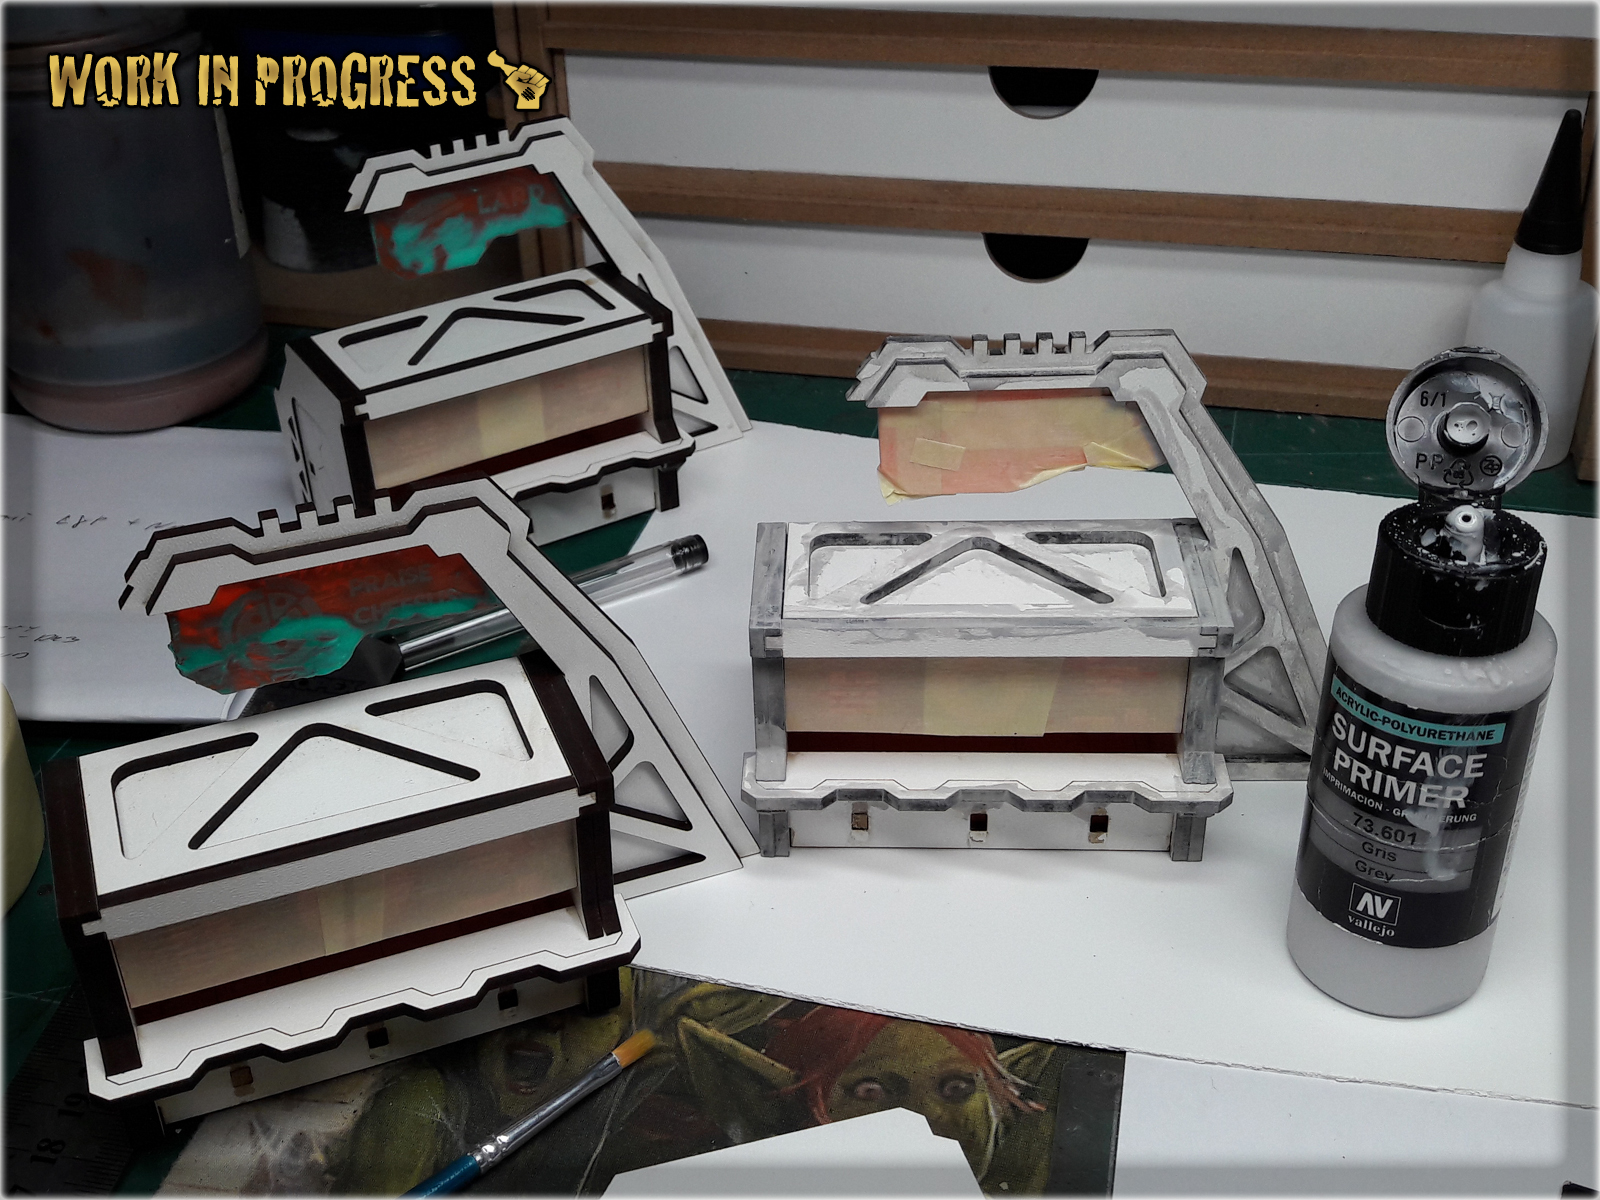
“The Mirrored City of Shadespire is a nightmare plane of illusions and madness, an ever-changing labyrinth of endless stairs, cramped streets and soaring archways. The original city is drained of all color and life, and for thousands of years, it has rested as a foreboding ruin. Those unfortunate, brave, or foolhardy adventurers that set foot within its walls are drawn through the veil between realms and trapped within the Mirrored City. For such wayward souls, all hope seems lost. Yet there are those who will not accept their fate without a fight.”
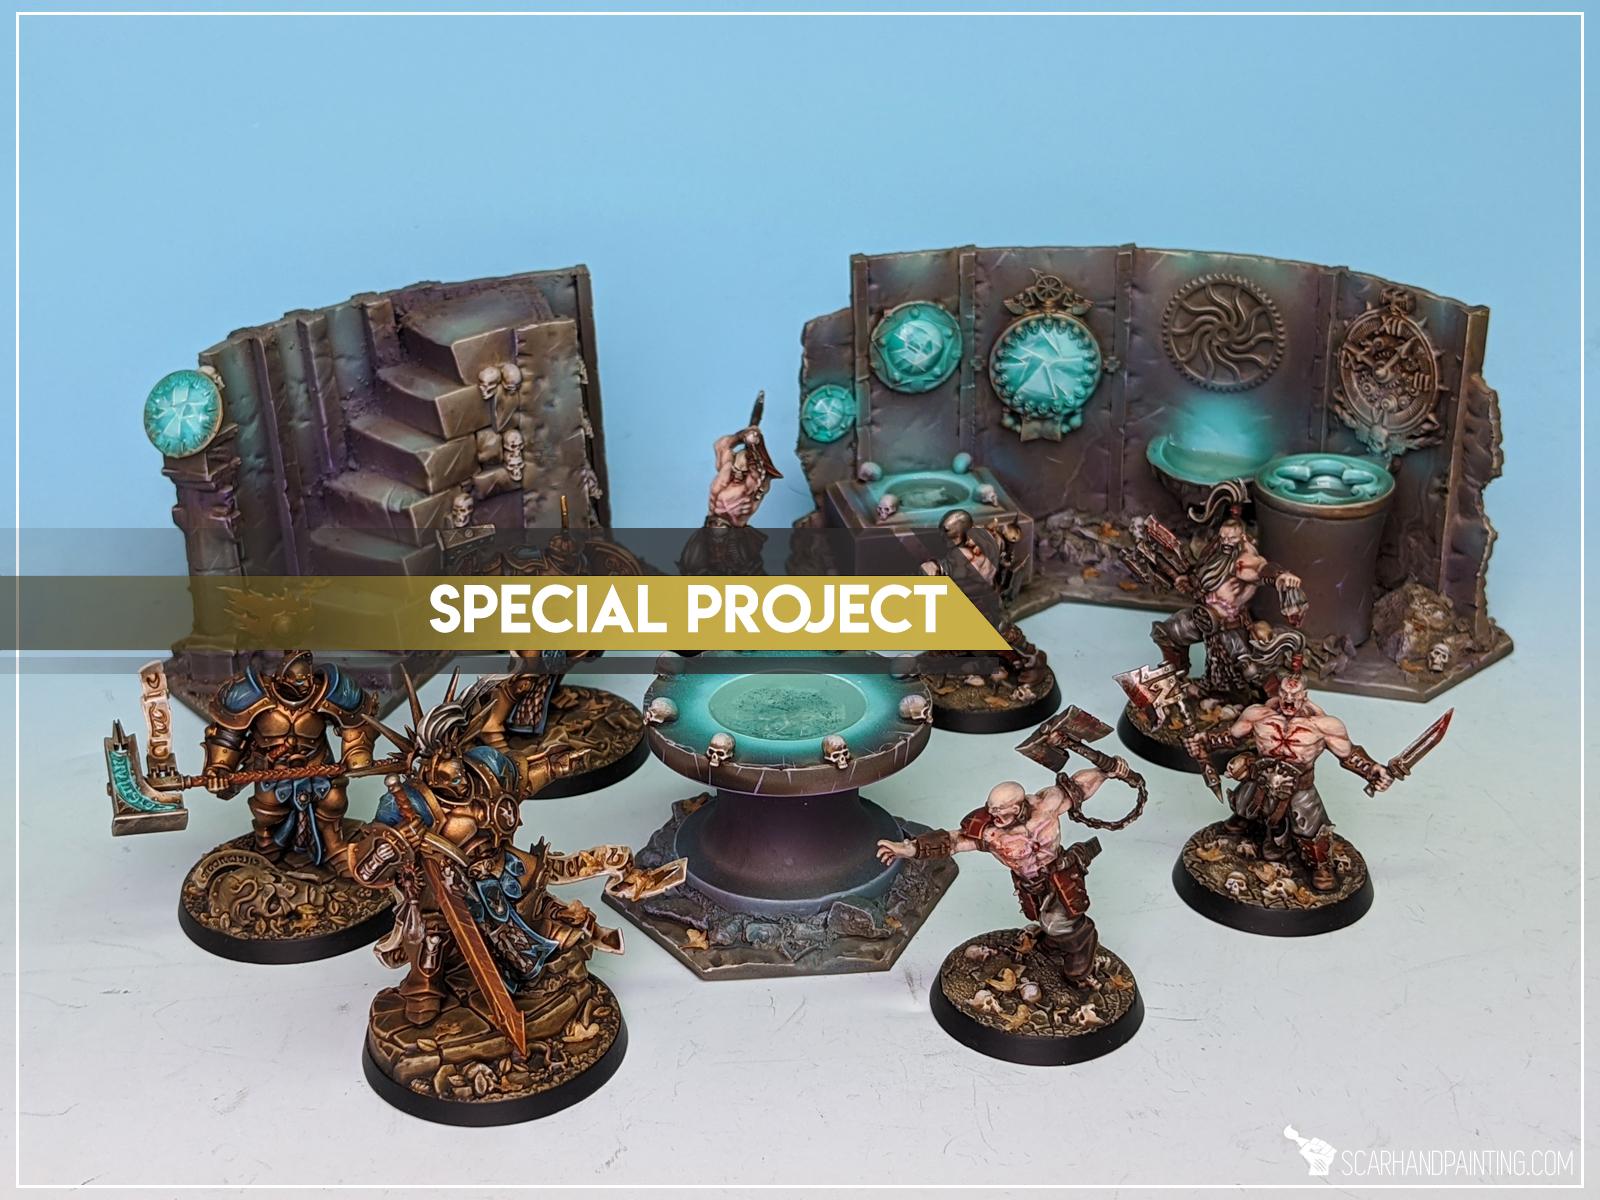
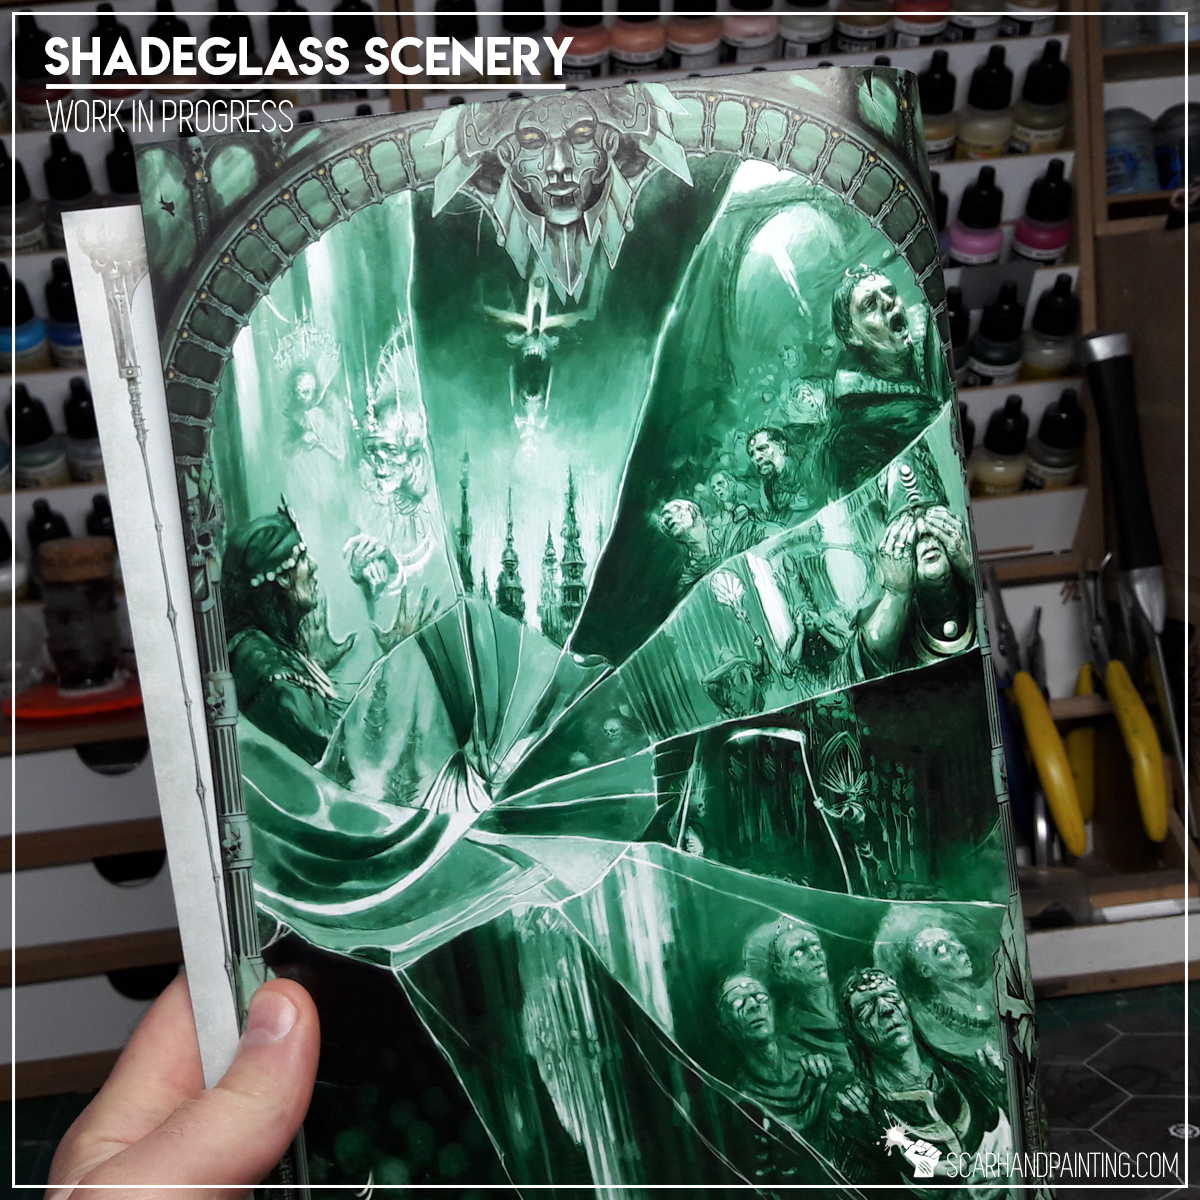
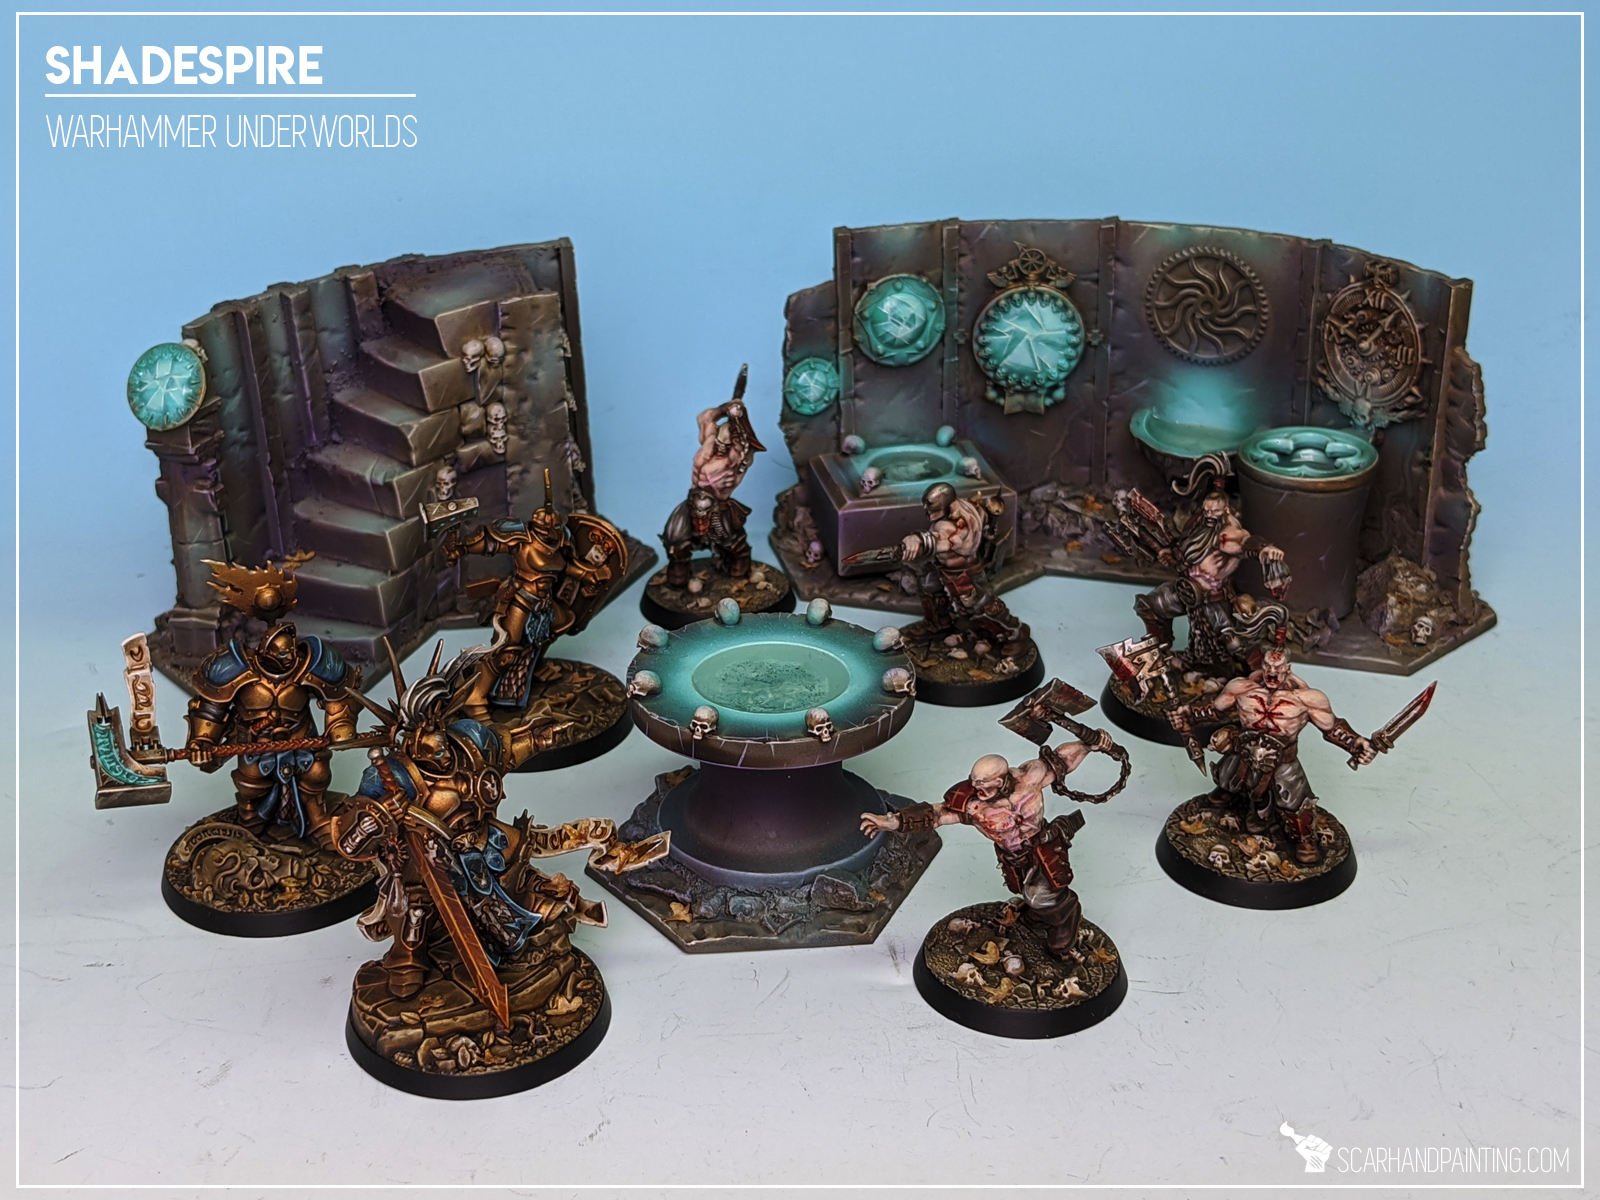
Whenever I pick a new title I always crave to have an ultimate gaming set – the same happened with Warhammer Underworlds: Shadespire. It started when I’ve finished working on a small Shadespire commission and was instantly drawn into the game. Two days later I was already painting my first warband – the Sepulchral Guard, but it wasn’t enough to quench my hobbystic thirst. I moved to another warband, being Garrek’s Reavers, all the while my hype was kept strong by Shadespire facebook group – full of awesome inspiration. Somewhere in the middle of Garrek’s Reavers paint job I let myself be overwhelmed by hype and decided to go for a Shadespire scenery set. The idea was to keep it as crazy cool as I am capable of. Concept was there – inside my head – all along, fueled by Shadespire’s background story and insanely sweet art from the rulebook. So, the scenery was to fit the board with a ‘ruined city of sorcery and mysticism’ theme in mind. Most important part: ‘Shadeglass’ – broken, ghostly lit mirrors incorporated to a variety of trinkets, statues, pools, wells etc.
The way I see scenery making is this:
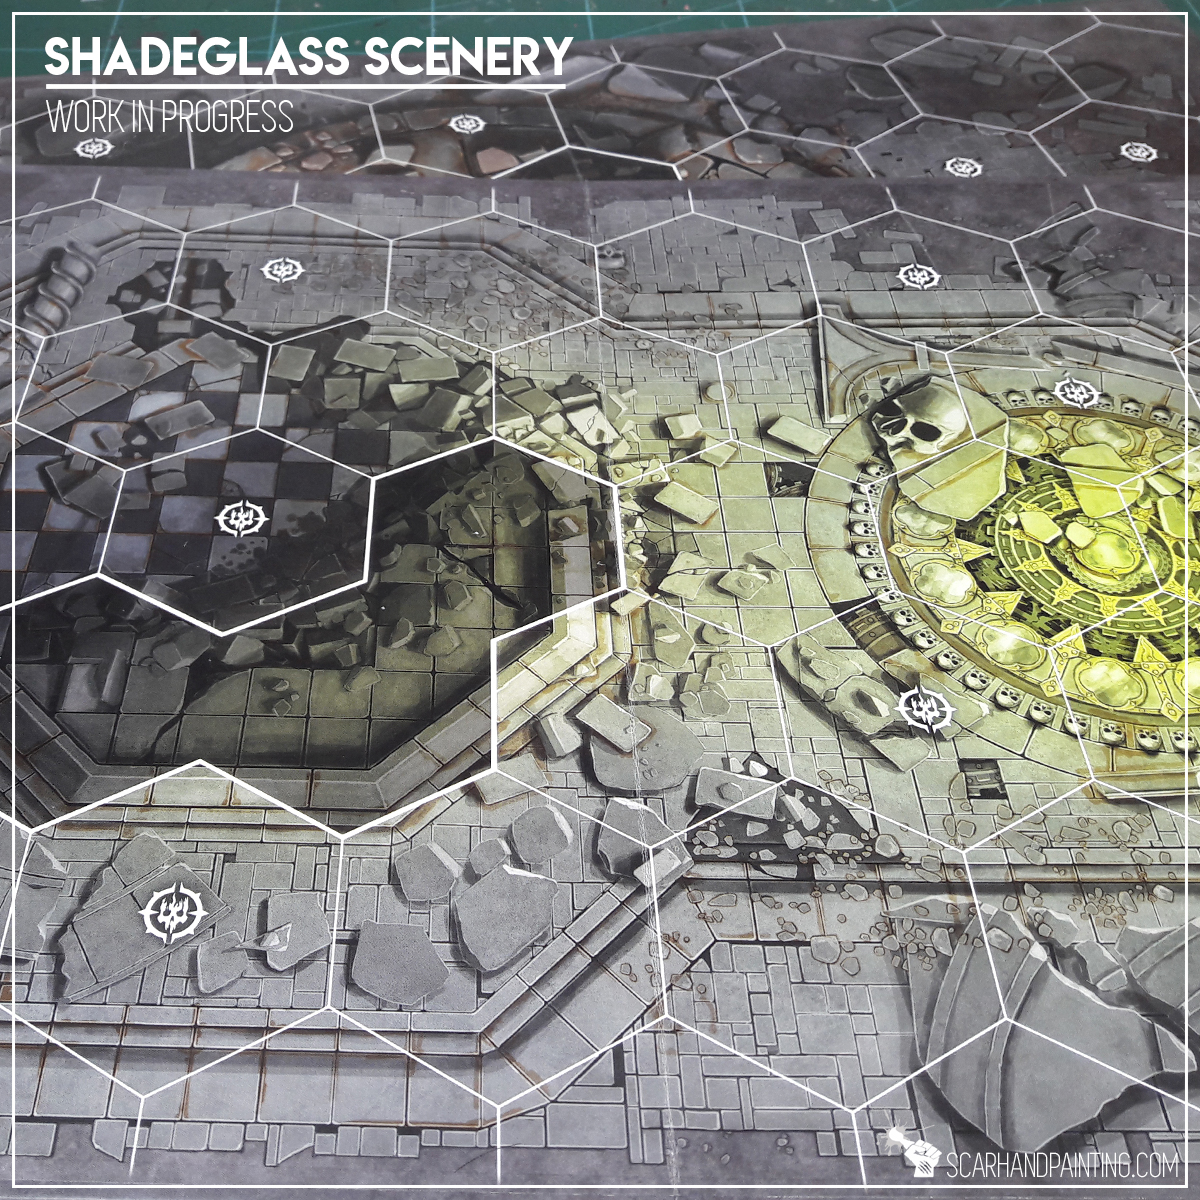
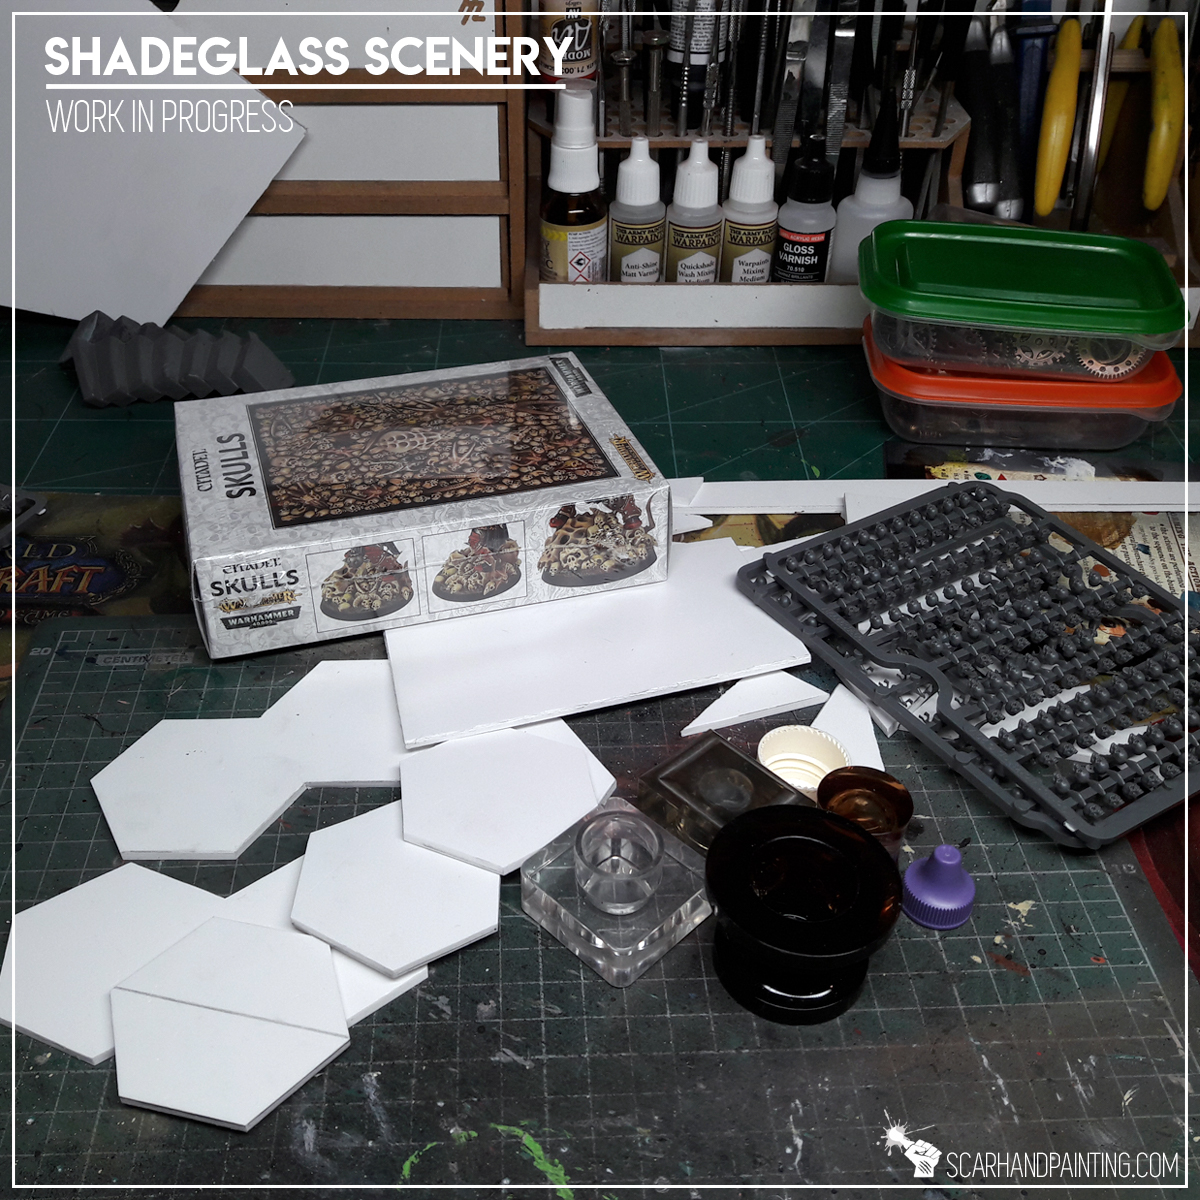
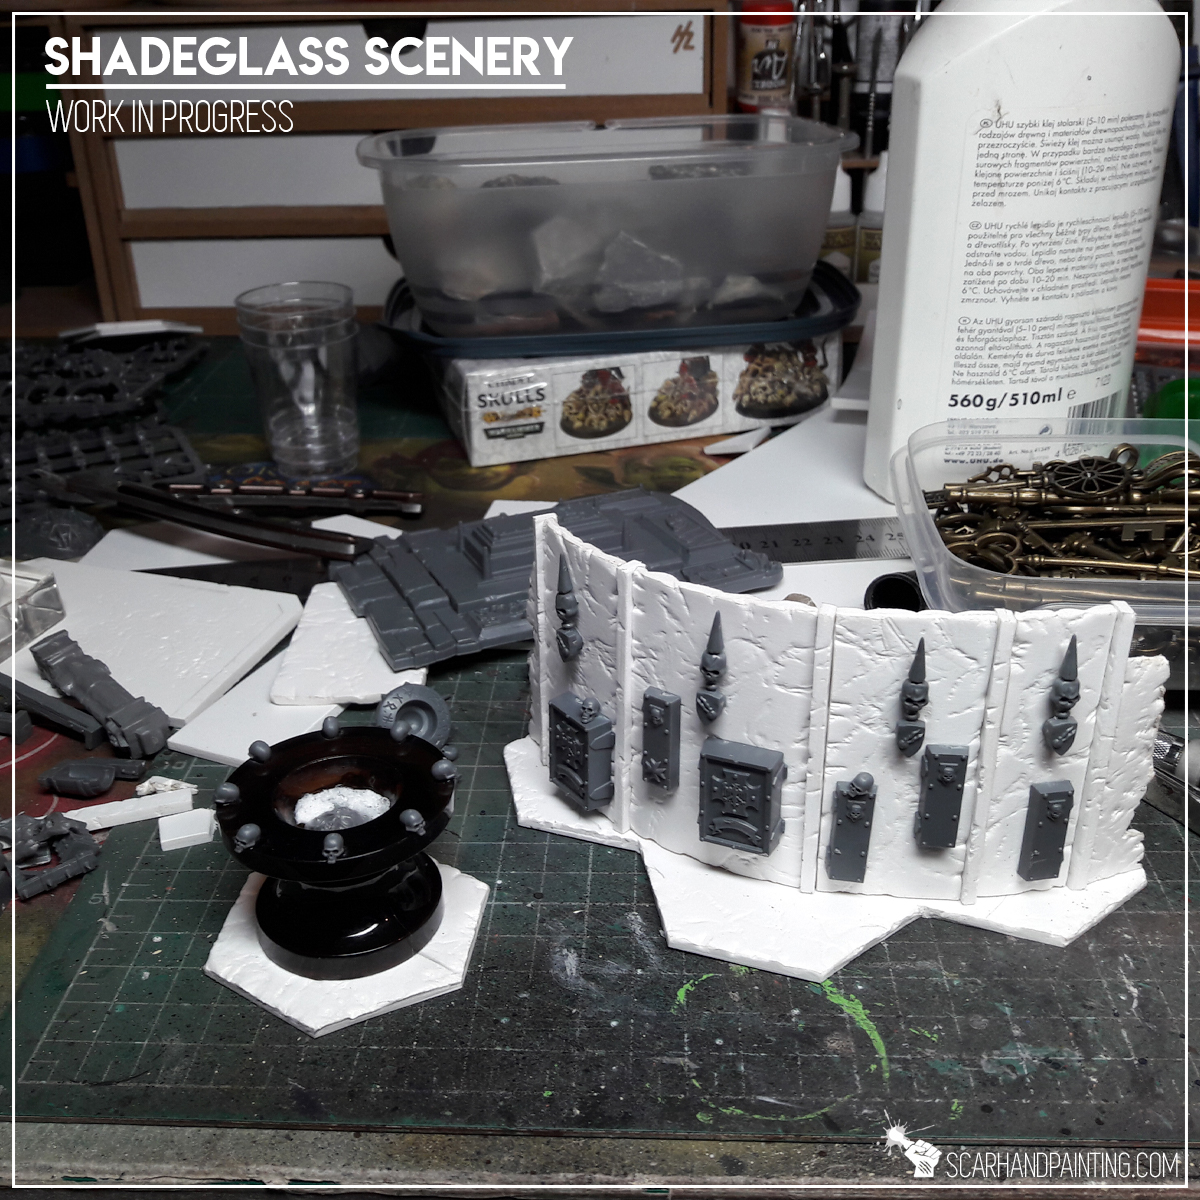
I faced “Shadeglass Scenery” Project following these key points. Started by preparing all the stuff that seemed usable and/or necessary. I like my scenery to be light, durable and painting friendly, so I picked 3mm plasticard to become both bases and baseline shape. Used hot water to bend some pieces, then cut ‘walls’ and hex bases out of the stuff…
Plasticard is very easy to work with. Adding texture all over newly created ‘pieces’ was a matter of using a right tool, rather than sophisticated and time consuming techniques…

With texturized walls and bases I was ready to move to major features – Shadeglass vessels of all sorts and sizes. For this purpose I used perfume cups plundered from my wife’s collection. (At the point when I’m writing this article she already noticed all the missing cups – fortunately the scenery is done and we played with it so she’s more like – ‘for the greater good’)…

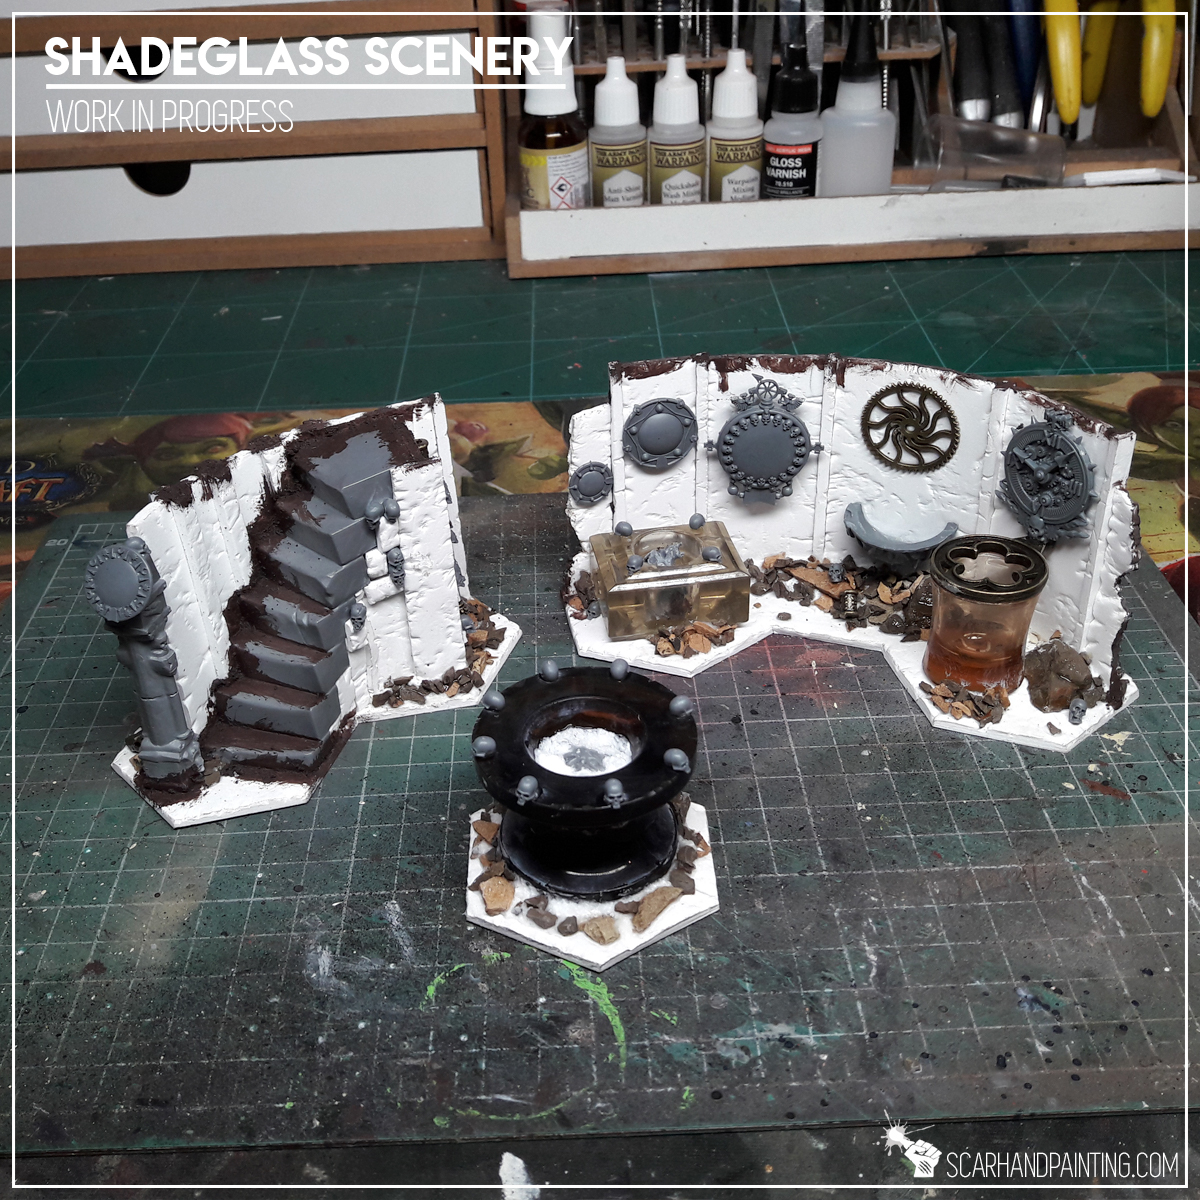
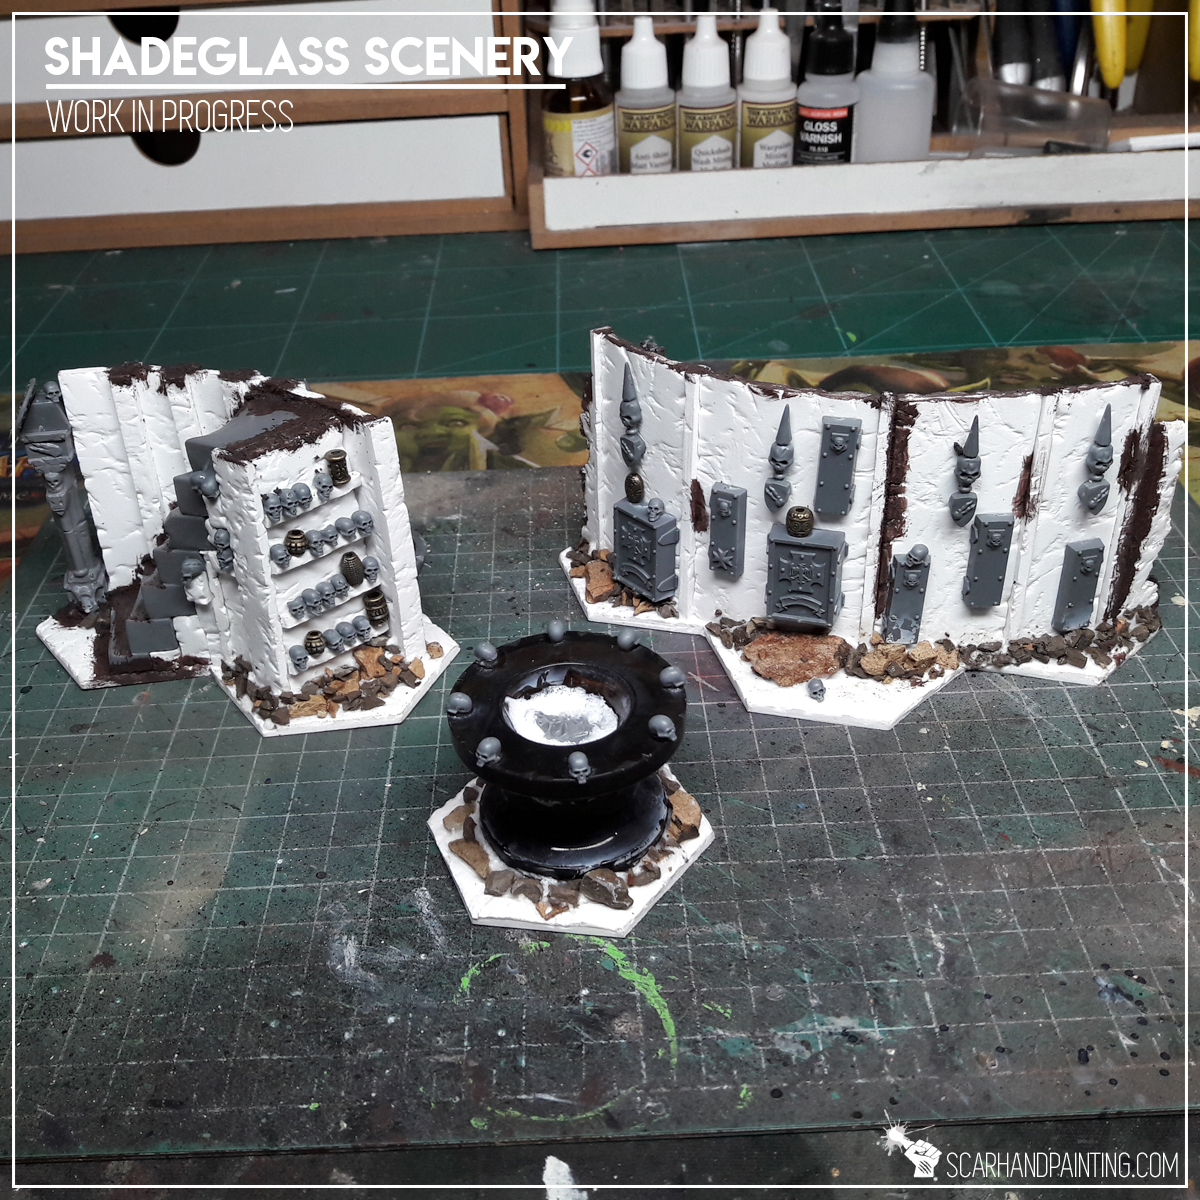
Throughout about twenty years in the hobby I accumulated a vast collection of bitz, although until recently skulls where a rare commodity in the collection – Praise Nagash, Games Workshop released a set of skulls thus rendering them near to unlimited. Skulls backstory aside – I used some bitz to add detail and points of focus to the scenery…
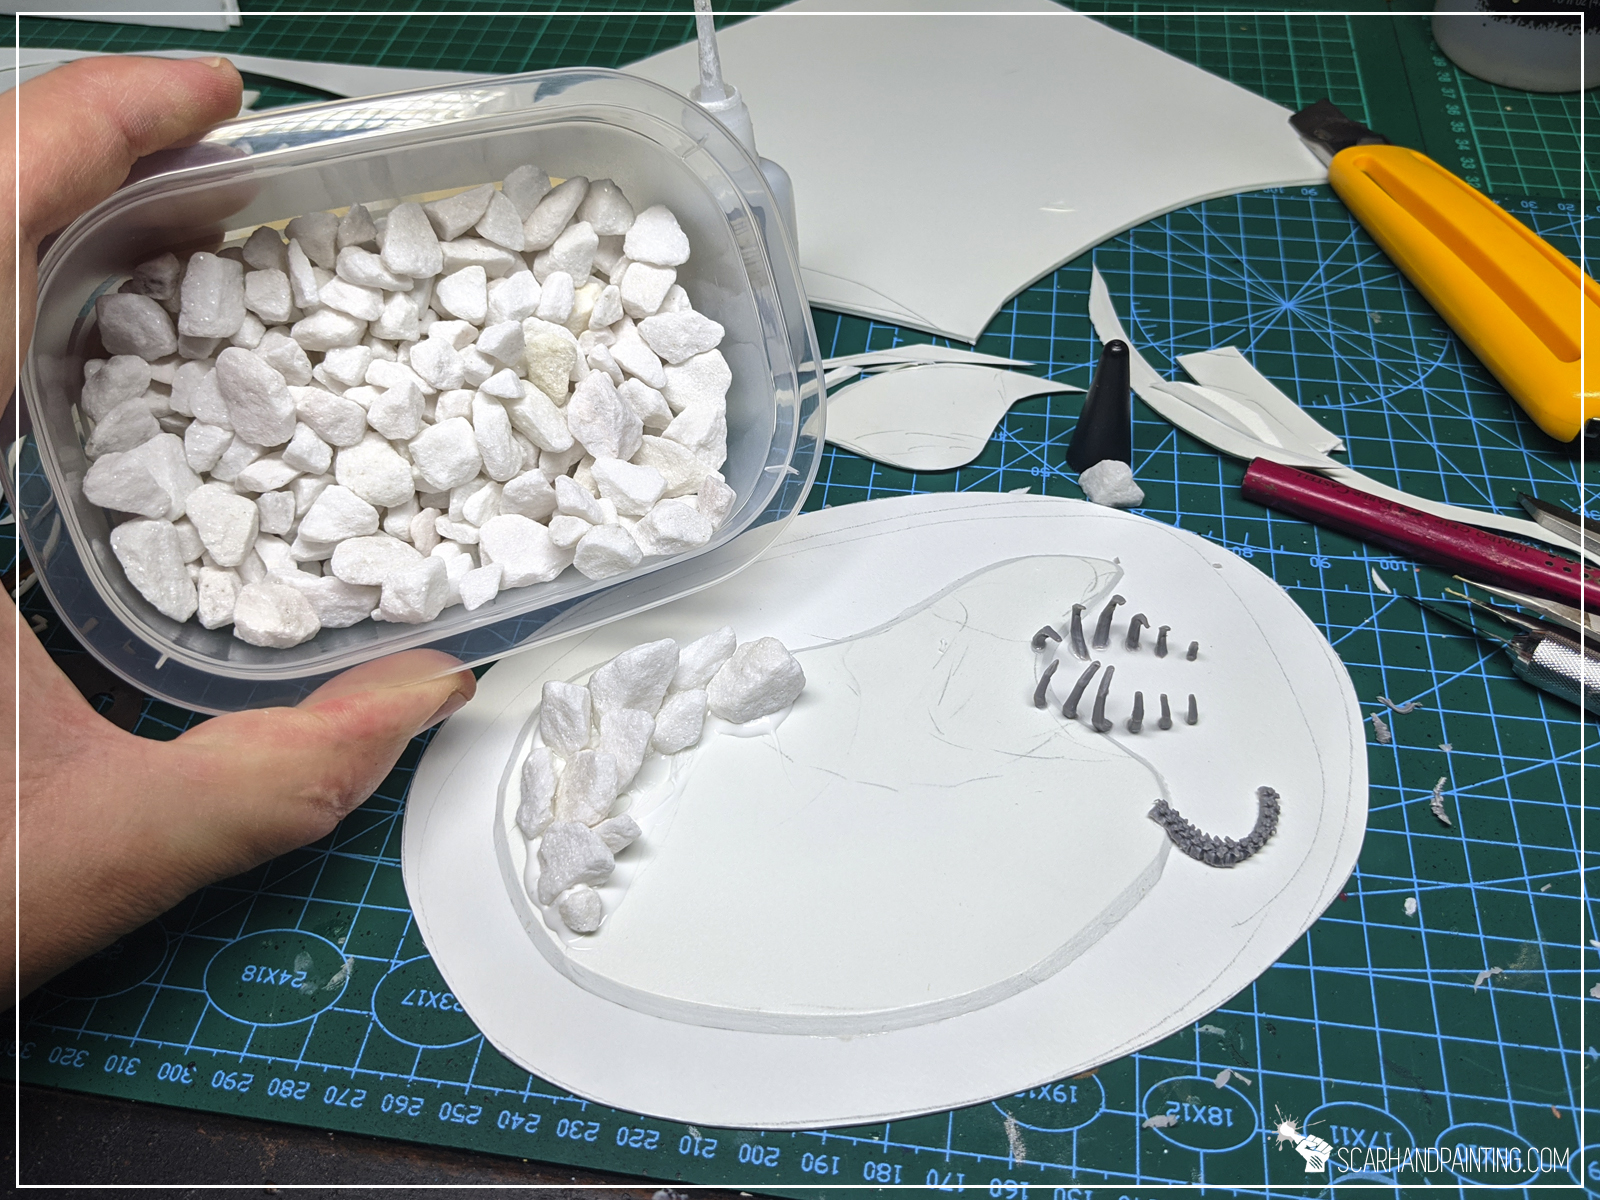
I then used self prepared Hobby Gravel to add more detail and make the scenery pieces look ‘ruined’. Once I was sure that each piece is telling it’s own story – final polish followed and all was ready to get painted…

Painting a ruined city of sorcery and ghosts was an interesting transition between a color recipe I use for Shadespire warband’s bases and working on a much more bigger scale. I decided to follow my guts – start as usual and then see where it would take me. Somewhere along the way I started adding blends of purple to compliment incoming ghostly green’ish-turquoise hum. This turned out to be a bullseye hit, creating an illusion of morbid, colorful lights dancing across the ruins…

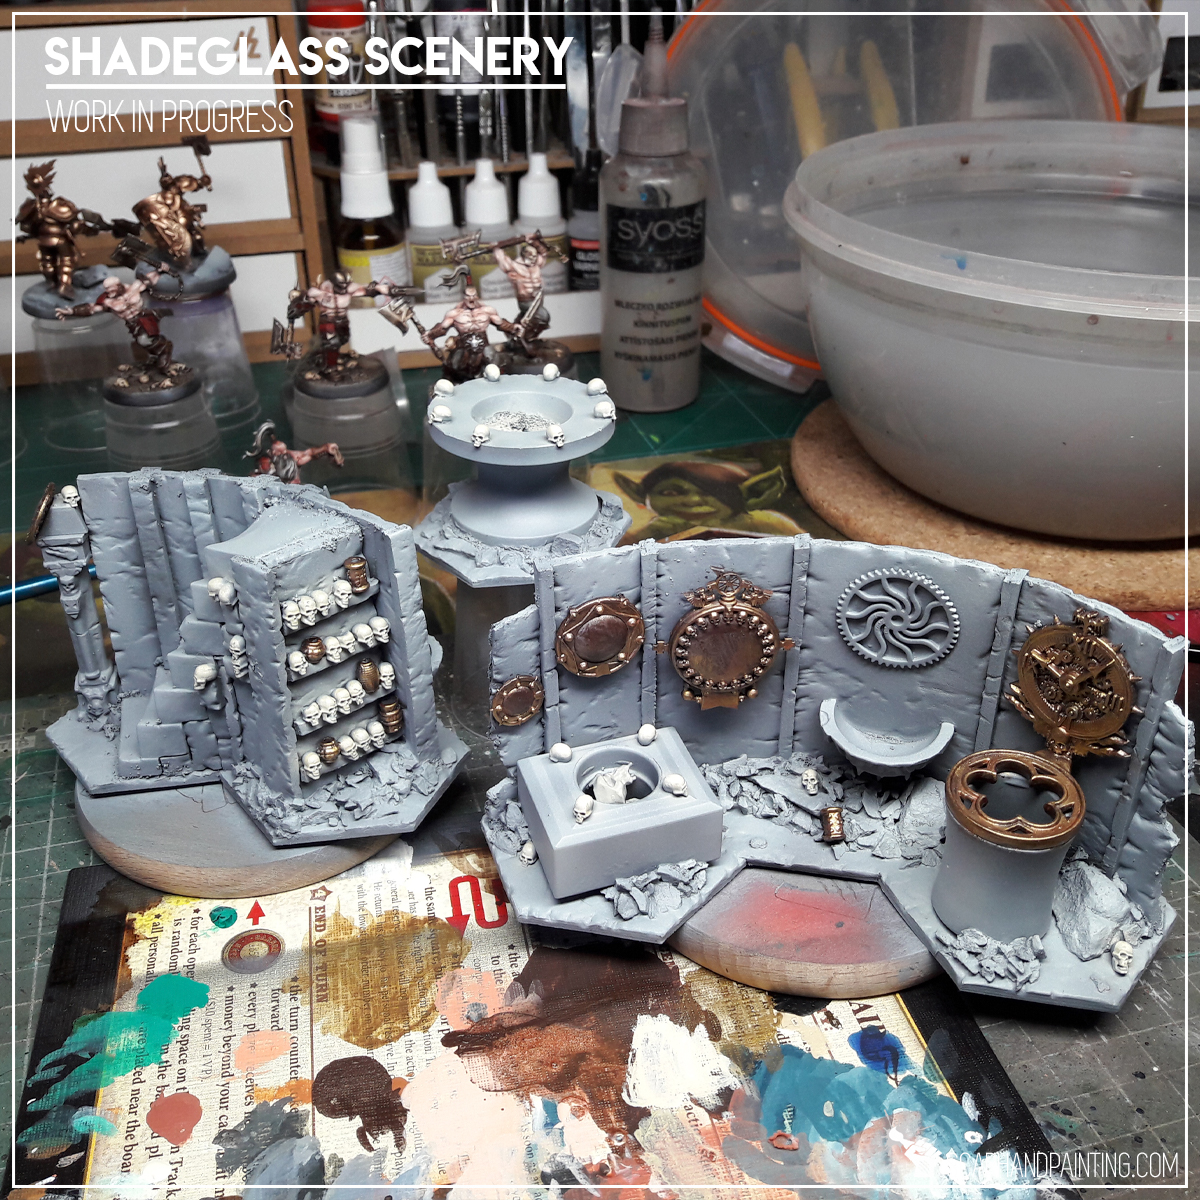
The ghostly hum of Shadeglass was a real challenge. I feel very comfortable with toxic green light, but going turquoise is moving away from warm color spectrum – my sphere of comfort. Still a hobbyist gotta do what a hobbyist gotta do – I braved the unknown with a mix of Vallejo’s Jade Green and White.
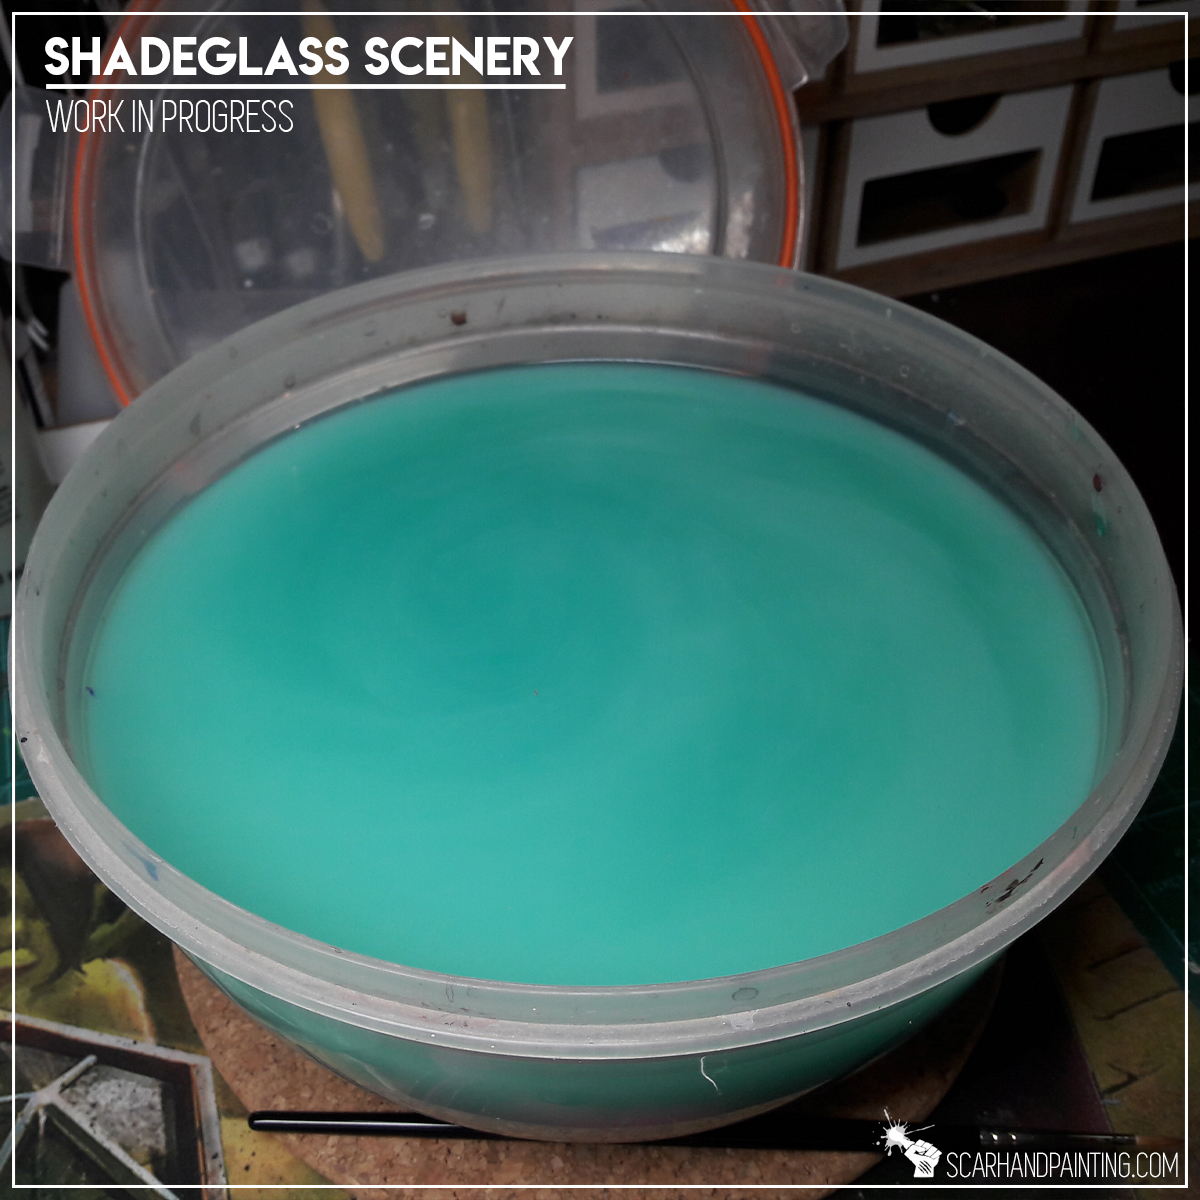
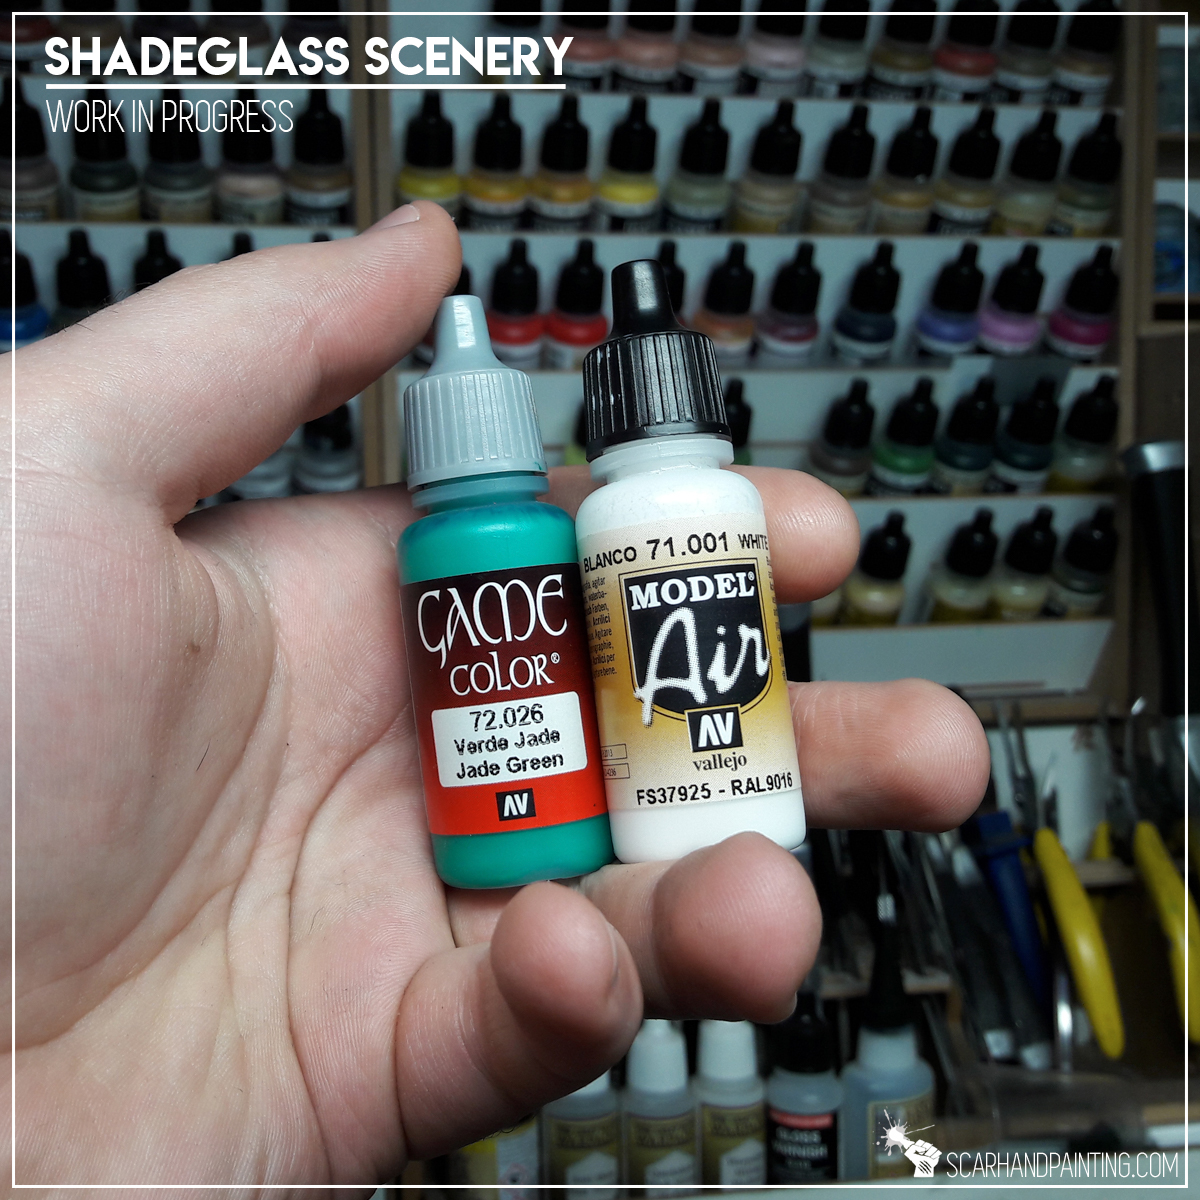

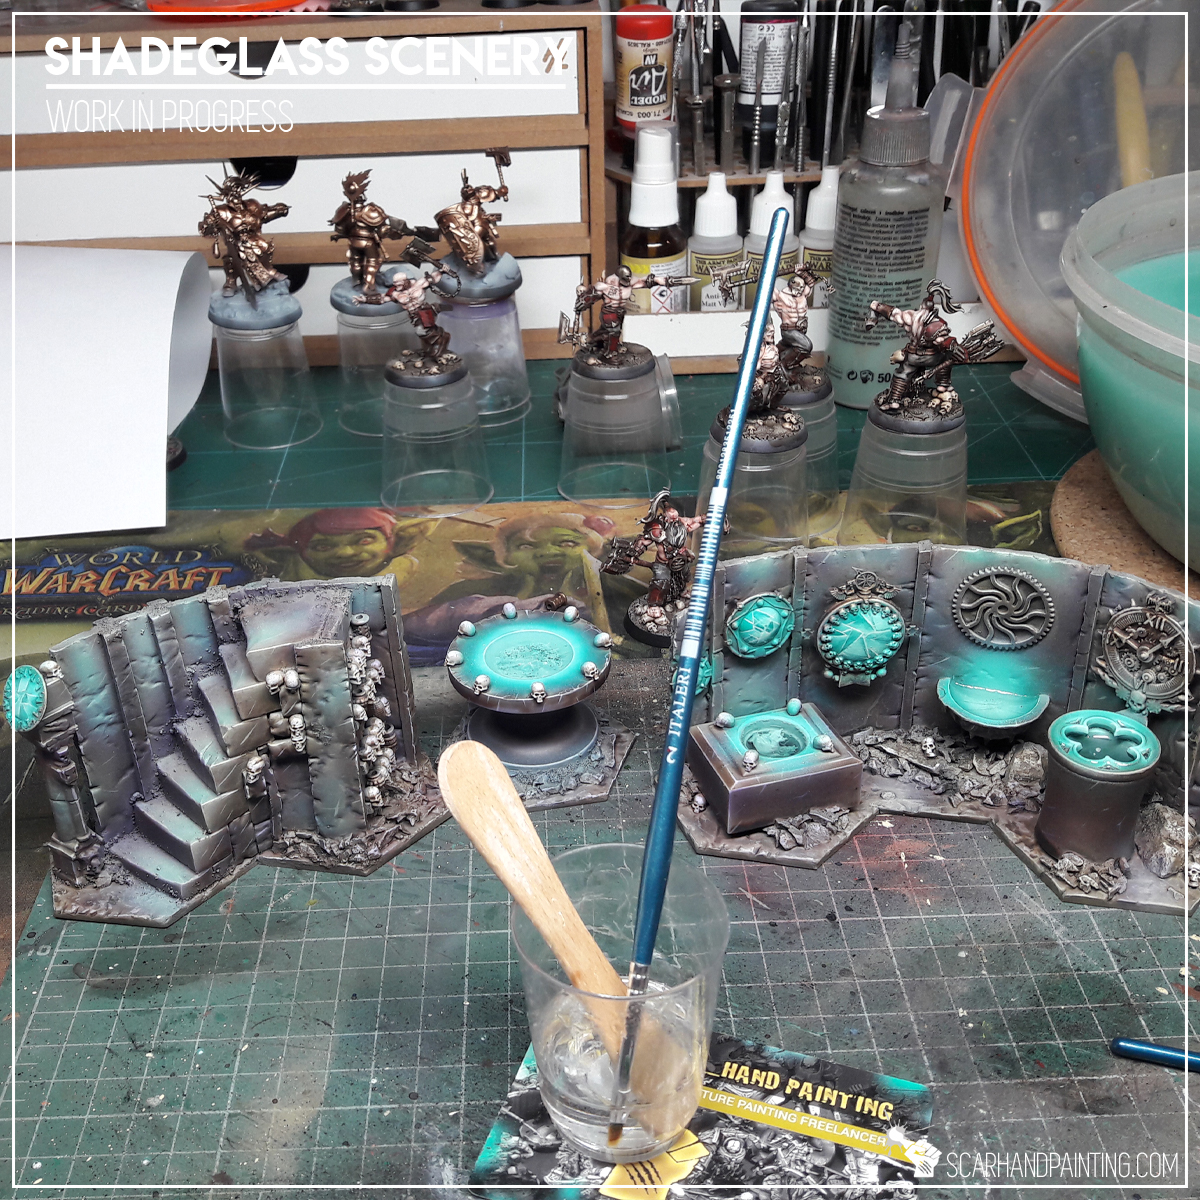
Broken Shadeglass mirrors – a special feature and main theme of the scenery. Decided to approach this in two different ways. First are the hand painted broken mirrors, adorning walls. I simply airbrushed hard angles with a mix of Jade Green and White using a Scarhandpaing’s business card like a stencil. I then adjusted transitions of particular ‘pieces’ of glass and made them more distinct with sharp white lining. Other vessels were a different story. I cut translucent plastic into shards and tossed them into resin-filled vessels. Some sunk instantly, while others stayed afloat – creating a really nice effect – which unfortunately looks much more badass in real life, than in the pictures.


The “Shadeglass Scenery” set is done and it have already seen some Shadespire action. Who knows what will come next if the hype continues? Either way – if you plan to venture into the Mirrored City – be sure to head there through “SHADEGLASS SCENERY” SPECIAL PROJECT gallery…


If you like the article, consider sharing it with someone who likes hobbying around with miniatures. Find me on Facebook and Instagram. Most importantly have a great hobby time!
“The Colony” – an Infinity gaming board project that streaches in time and space.
Yes – The Colony Special Project lives on and dayum! I almost run out of space to store it! Last time (“THE COLONY” SPECIAL PROJECT part nine) I was pretty sure that once I airbrush a bit here and there, The Colony would finally be completed. Imagine my surprise when I saw how the project expanded since last article. So, let’s dive straight into it…
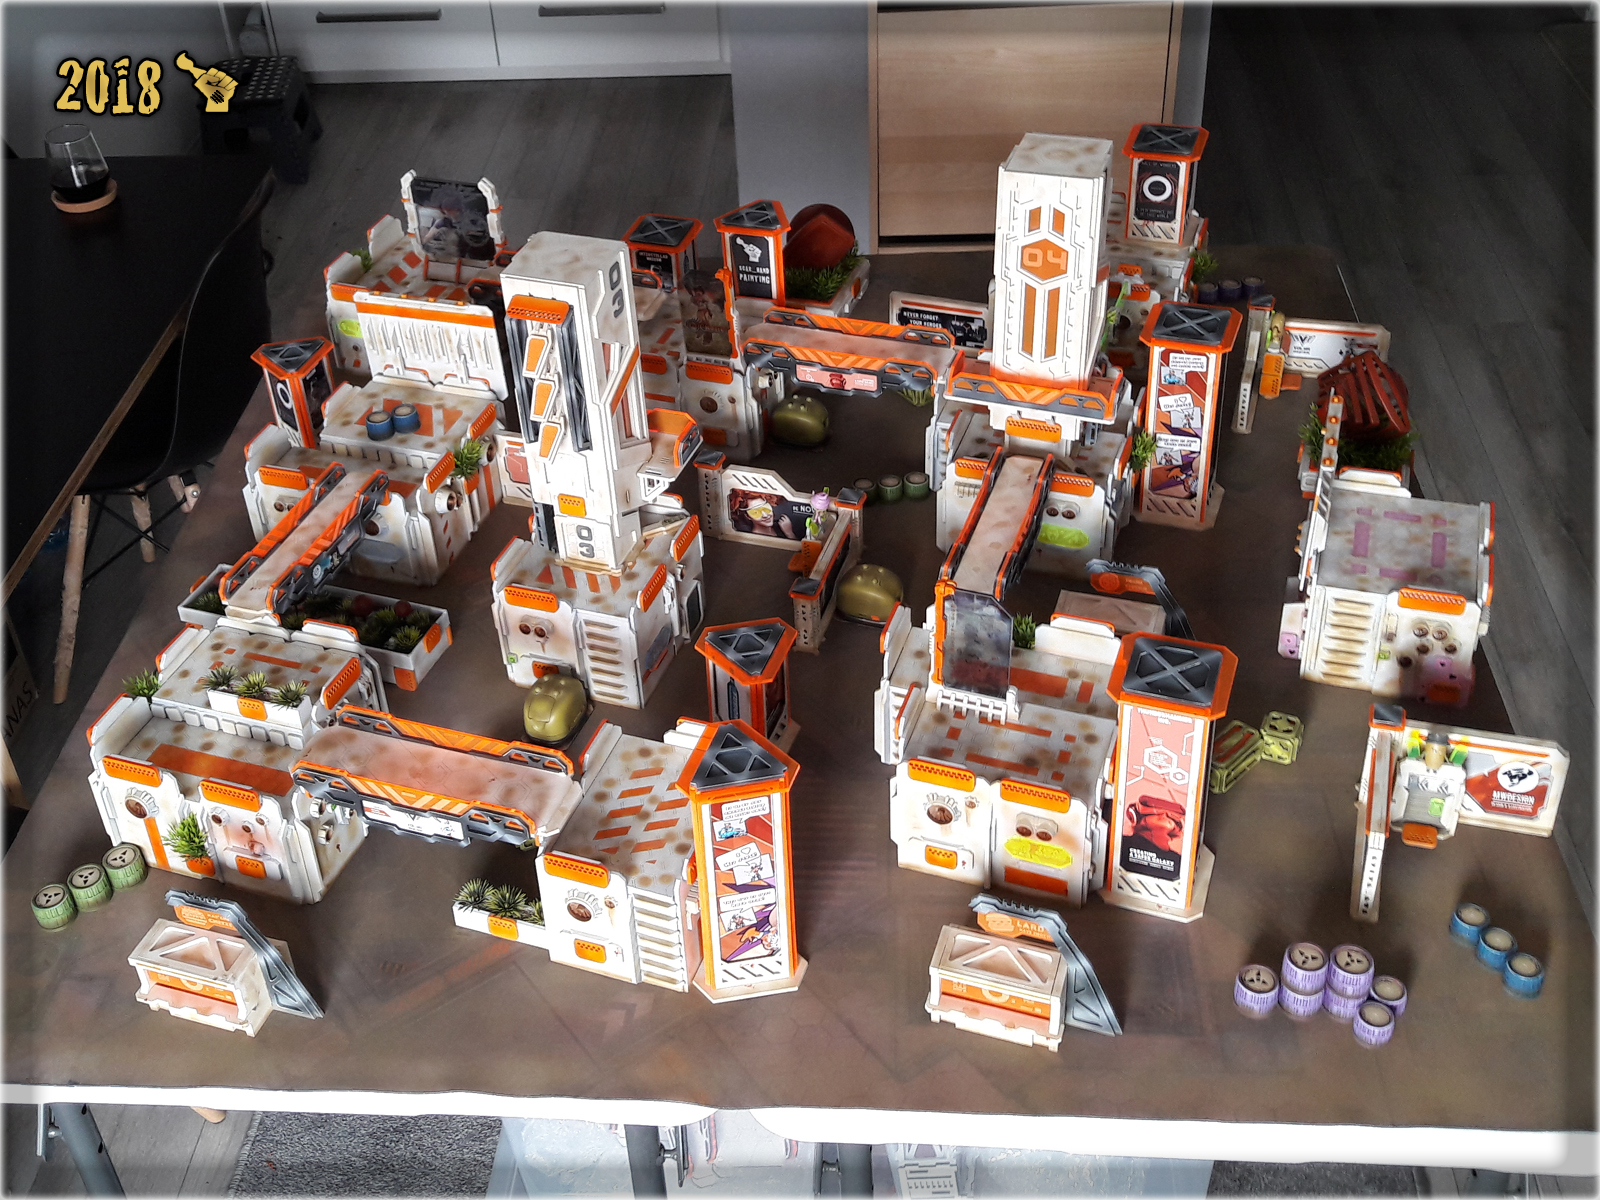
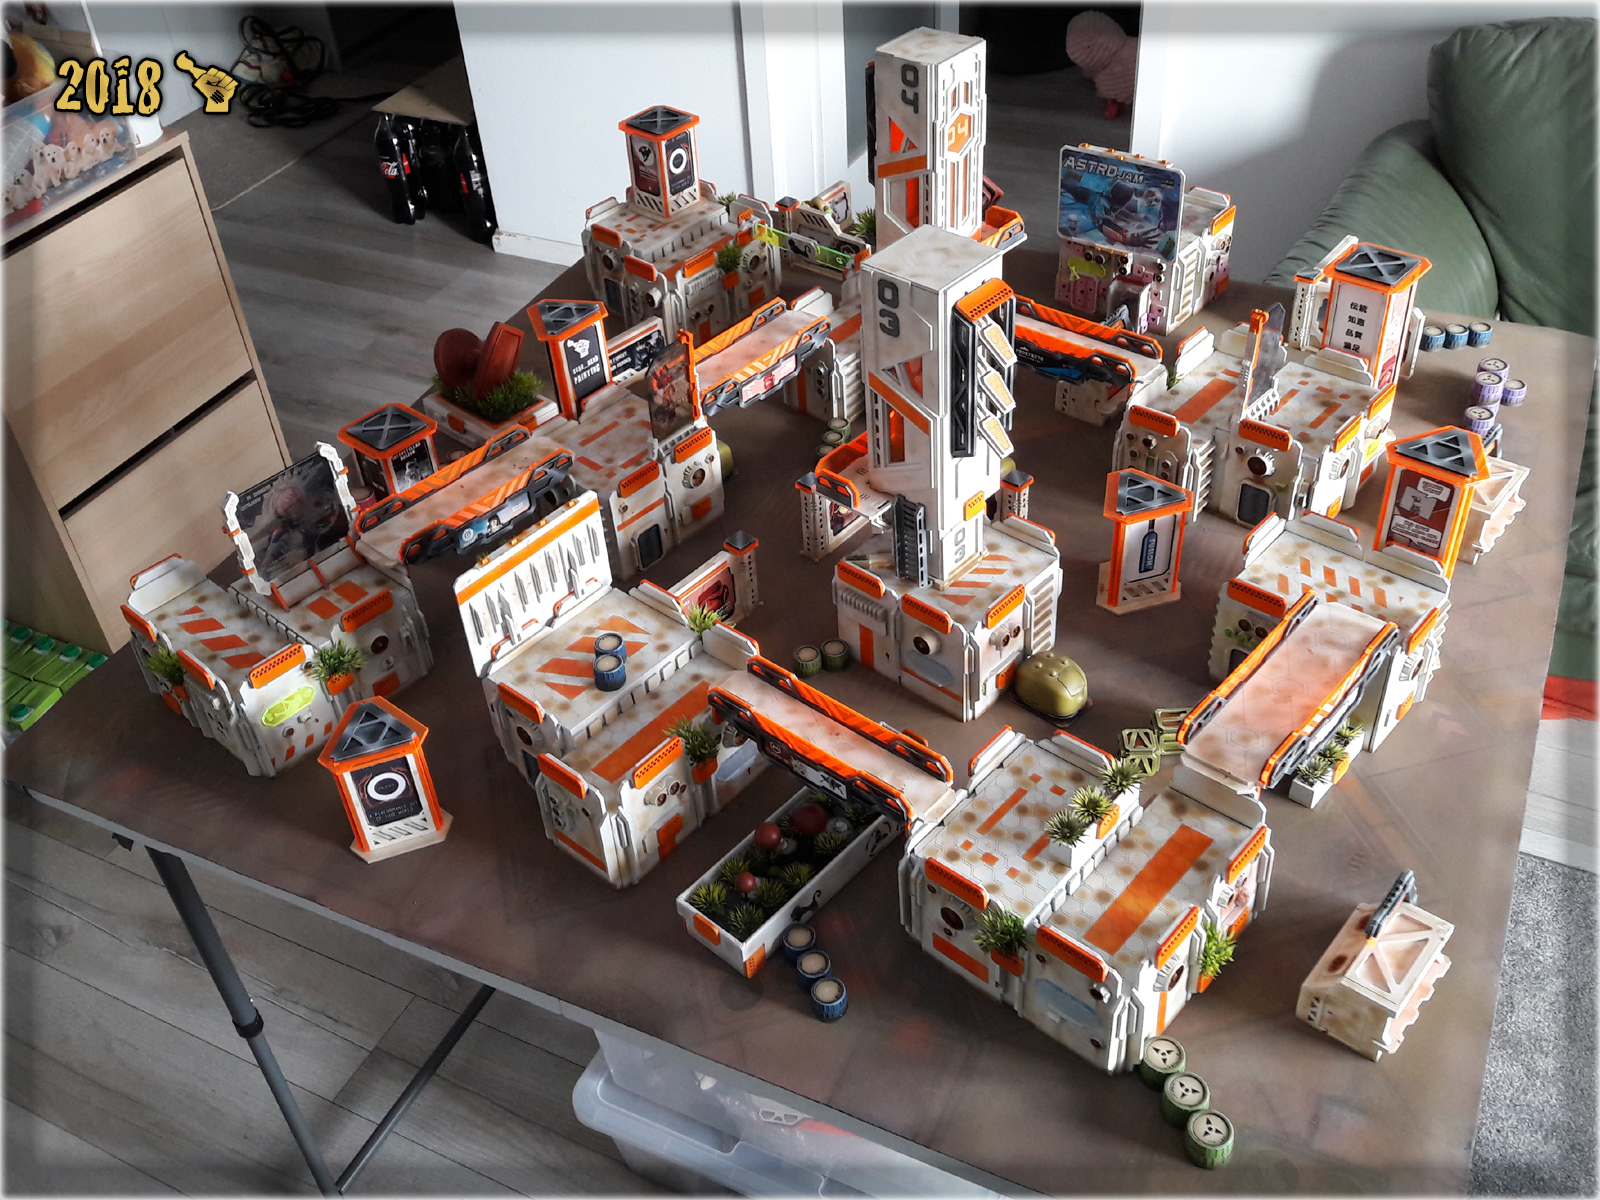
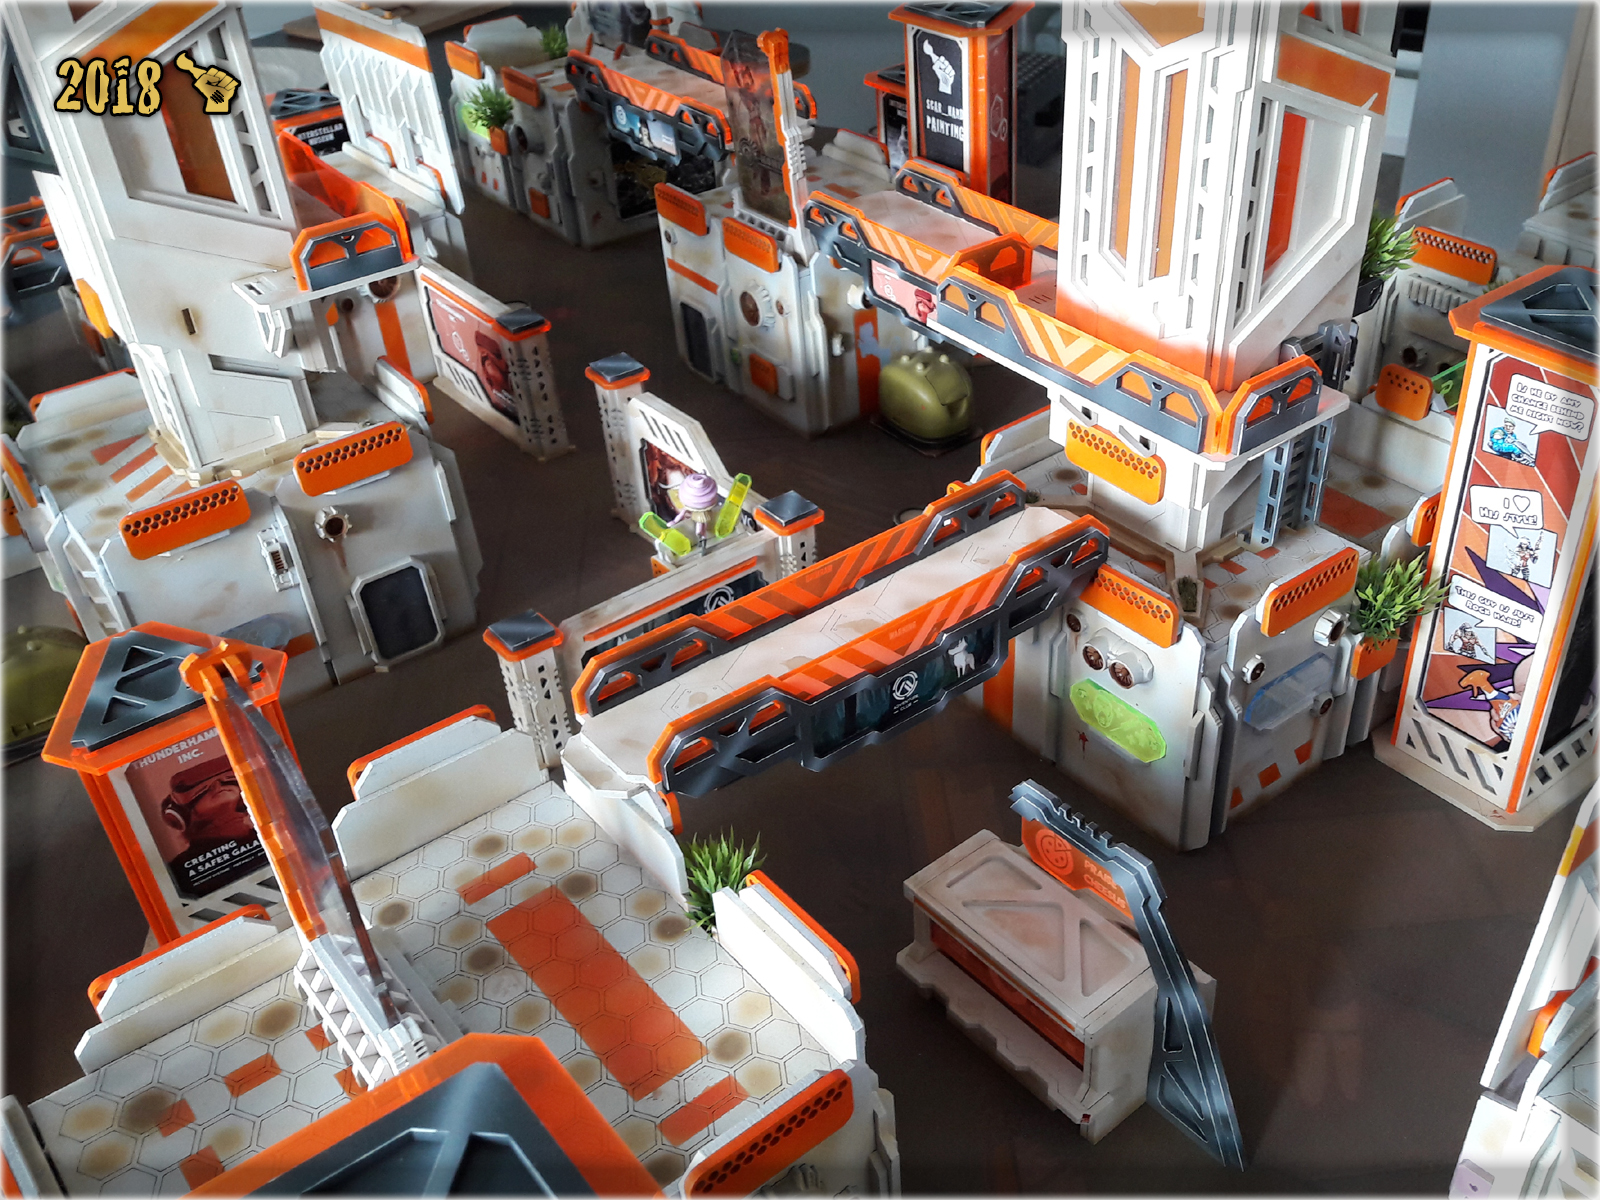
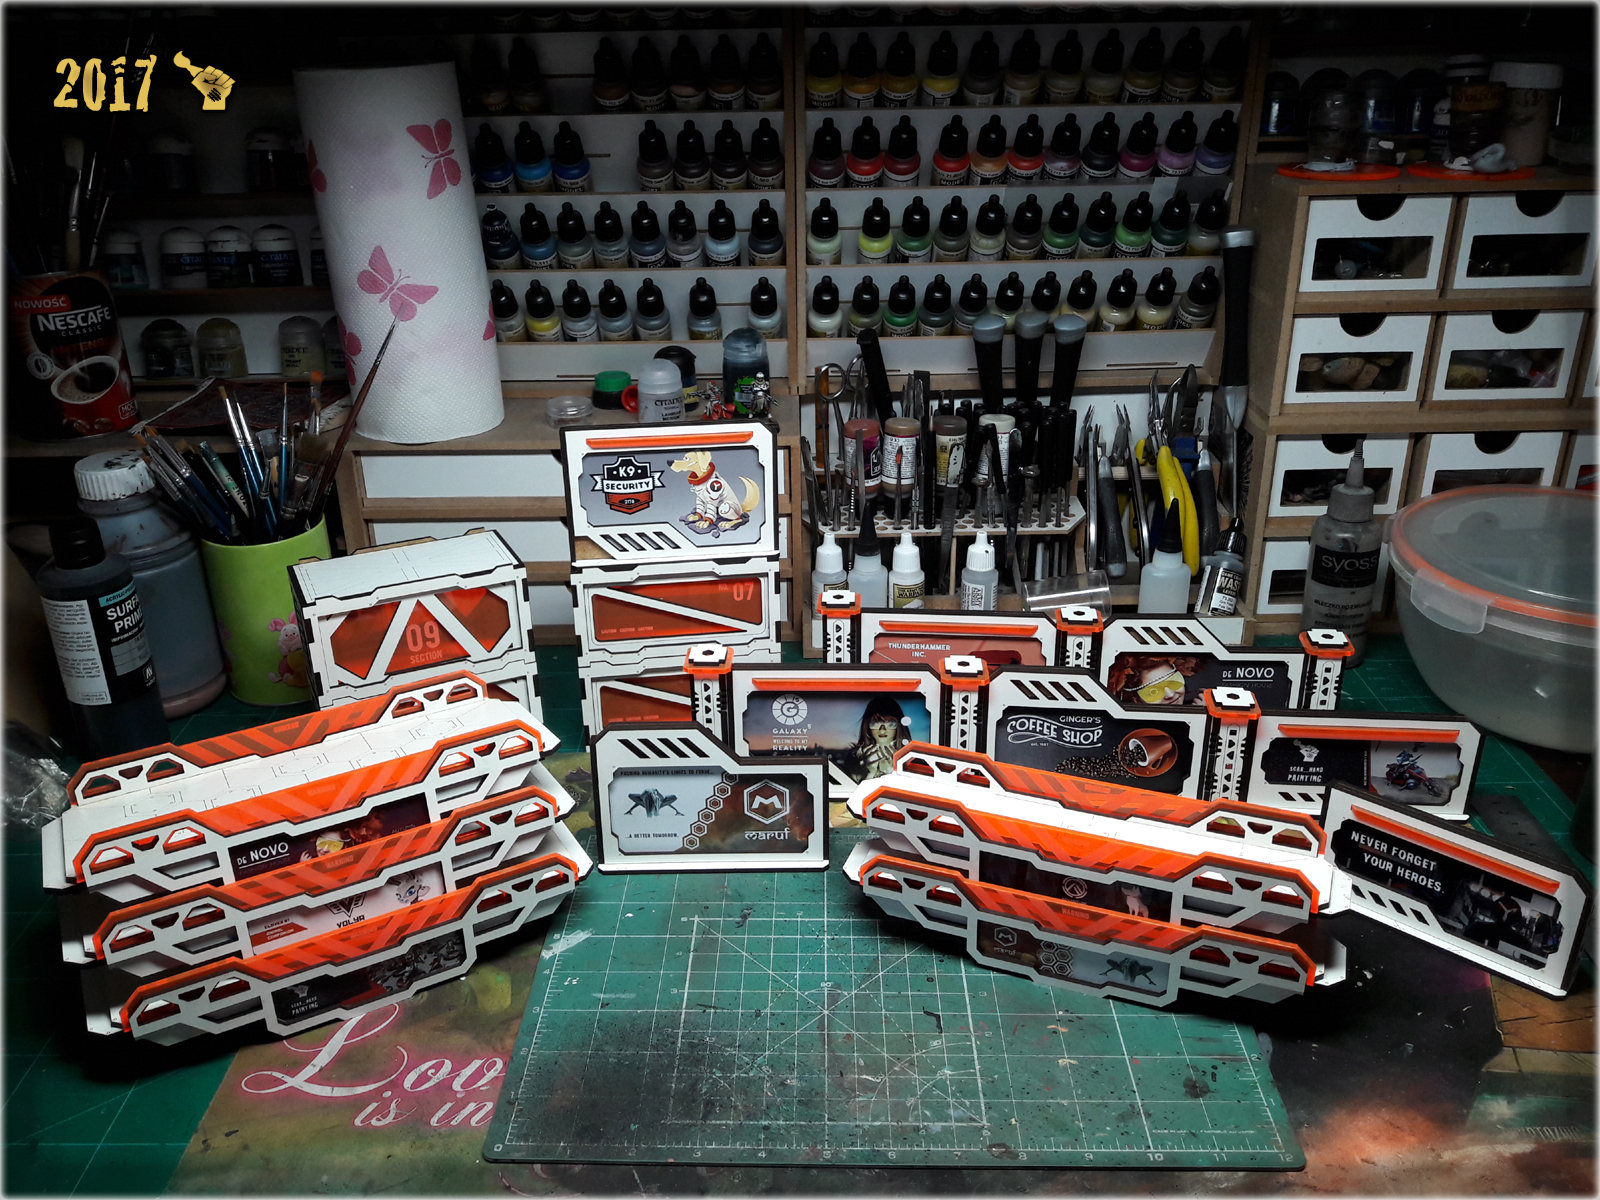
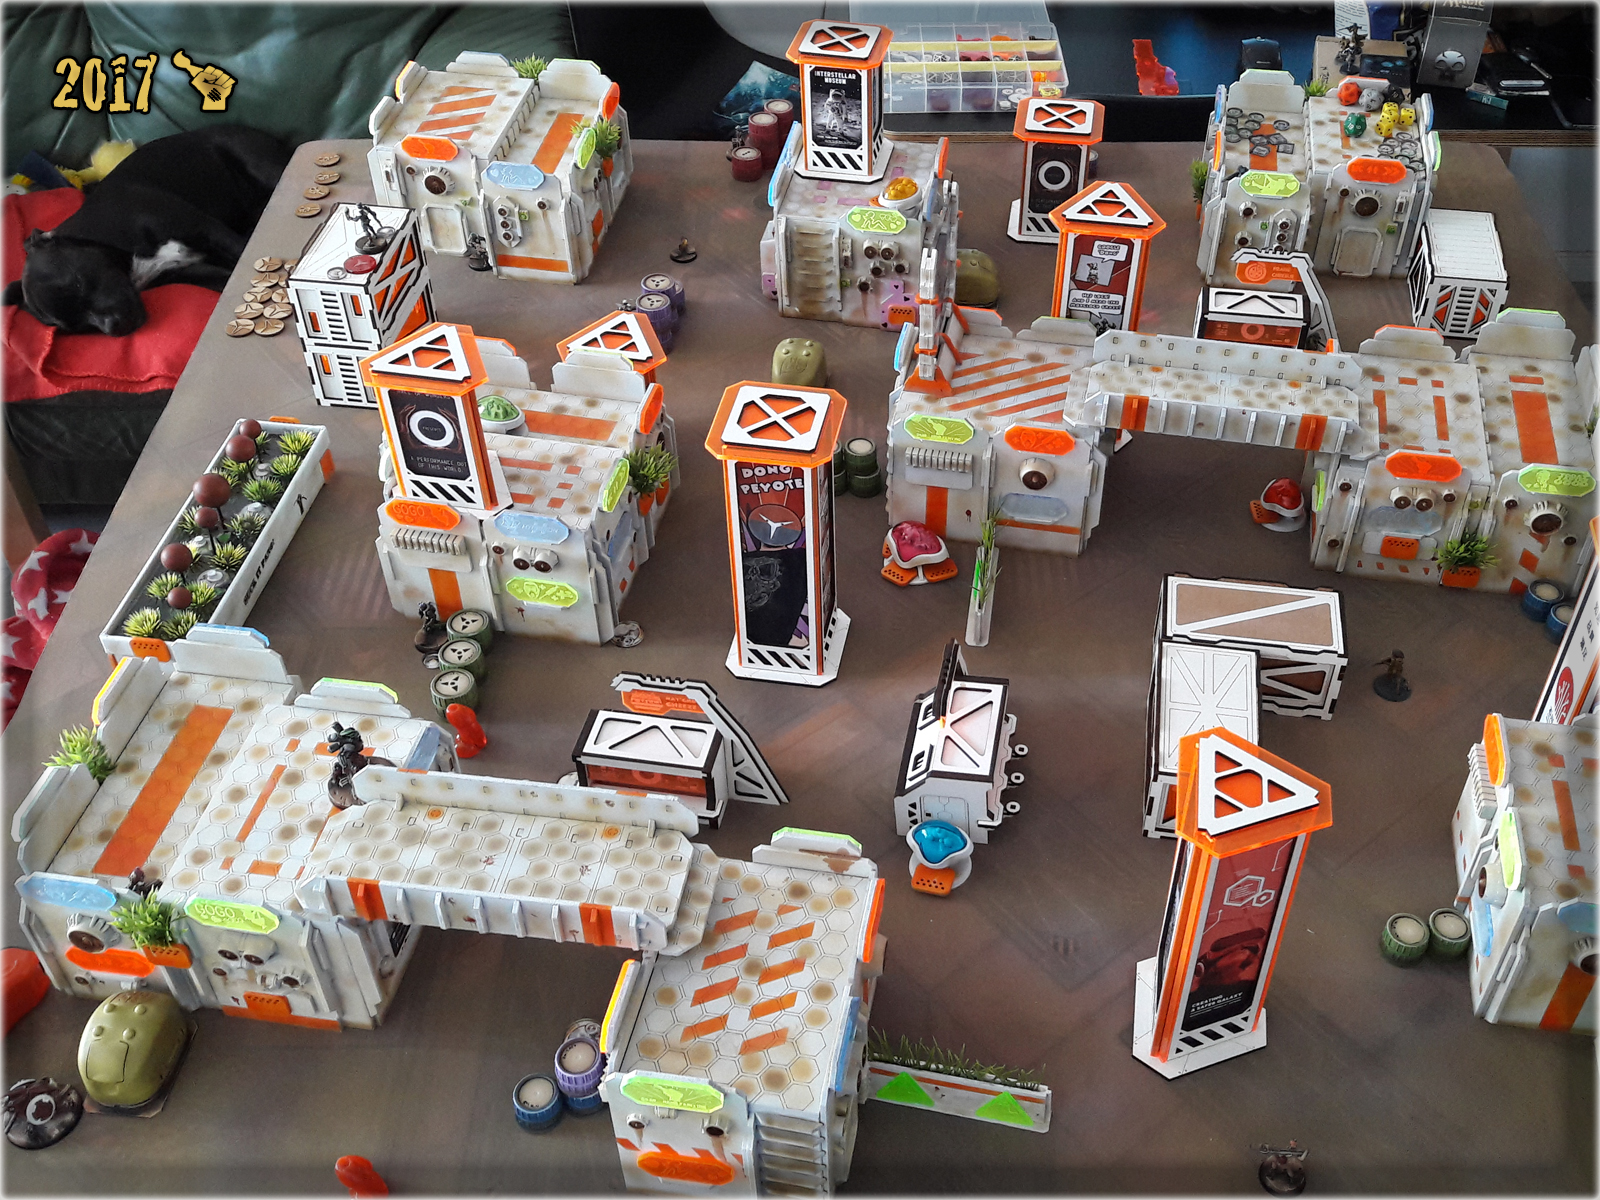
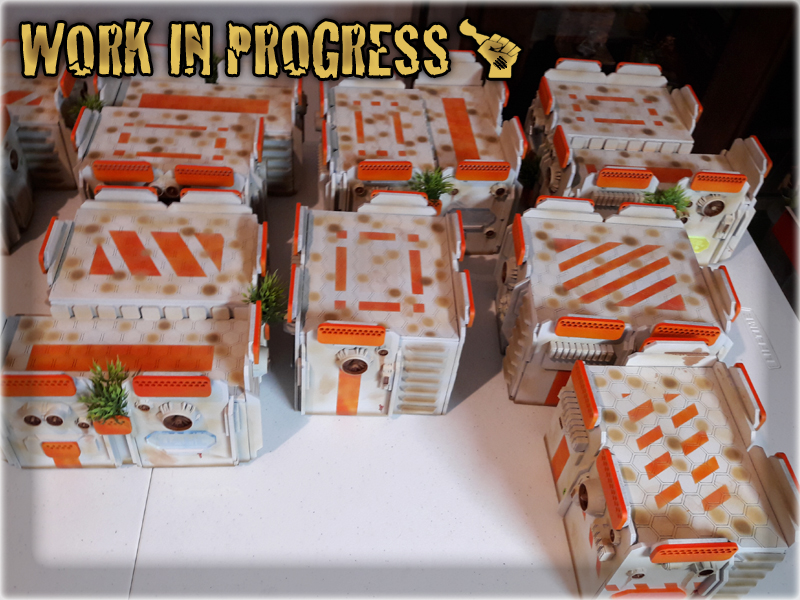
It finally happened – The Colony is now fully painted with no MDF, be it white or regular, visible. The project was set aside for few months, when all of a sudden I got new buildings from Gingermane and painted them to match my existing set. I then followed through with all the rest including bridges, food booths, walls and ad stands. Fortunatelly for me, Bocian from Gingermane is a cool bruh of mine and he cut thin paper pieces to cover all illustrations adorning his designs. I only had to take care to cover plexi elements by myself. Once done – my work went fast and easy. Few evenings was all it took.


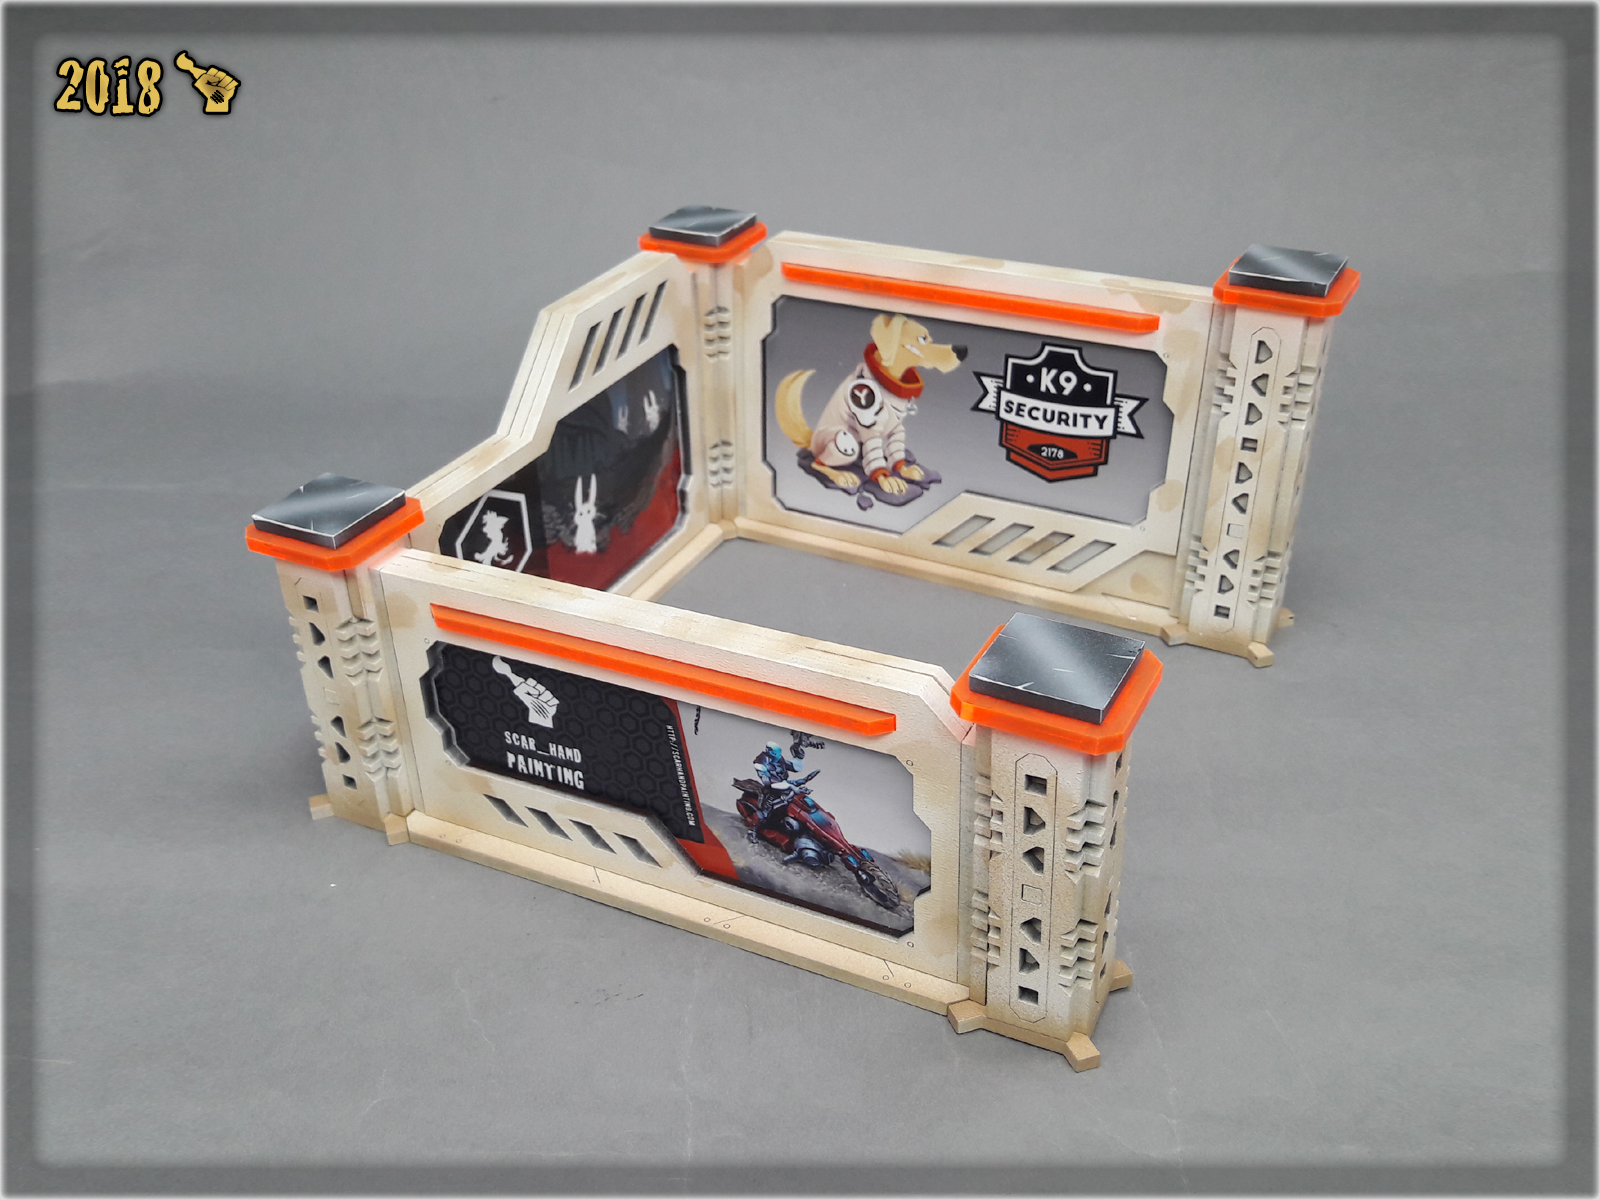
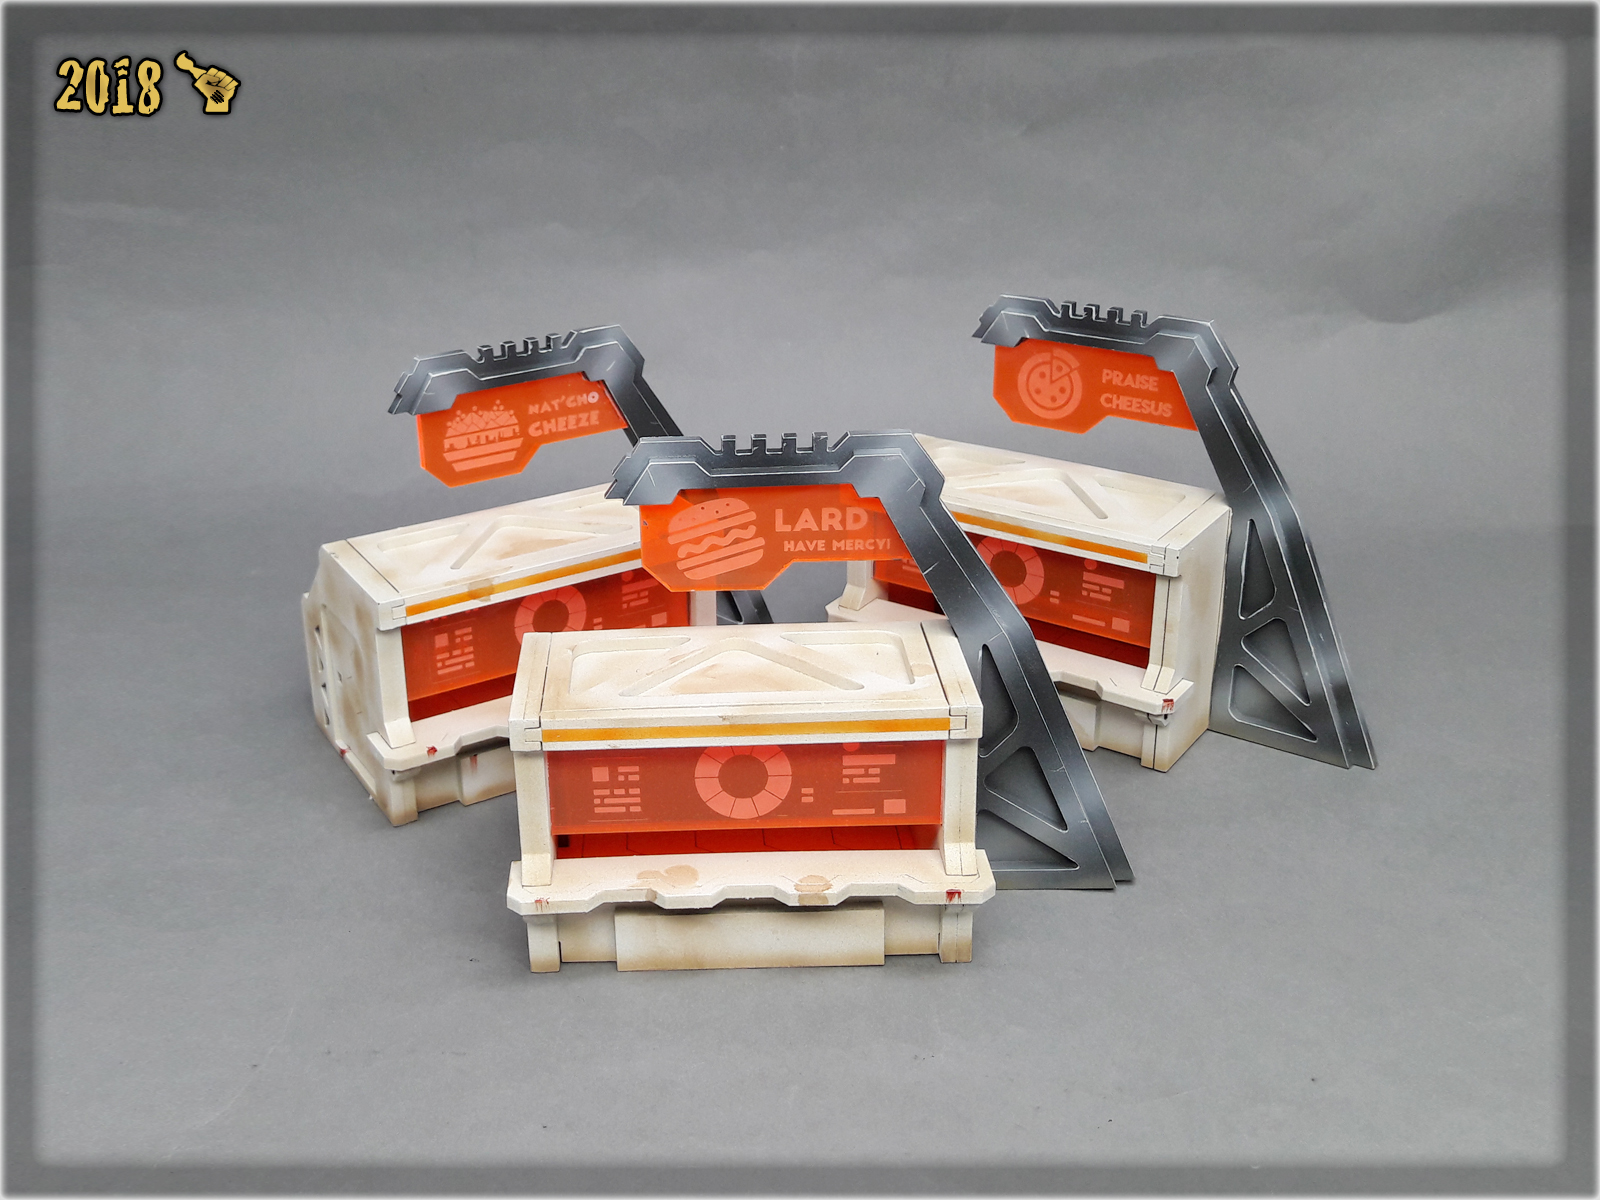
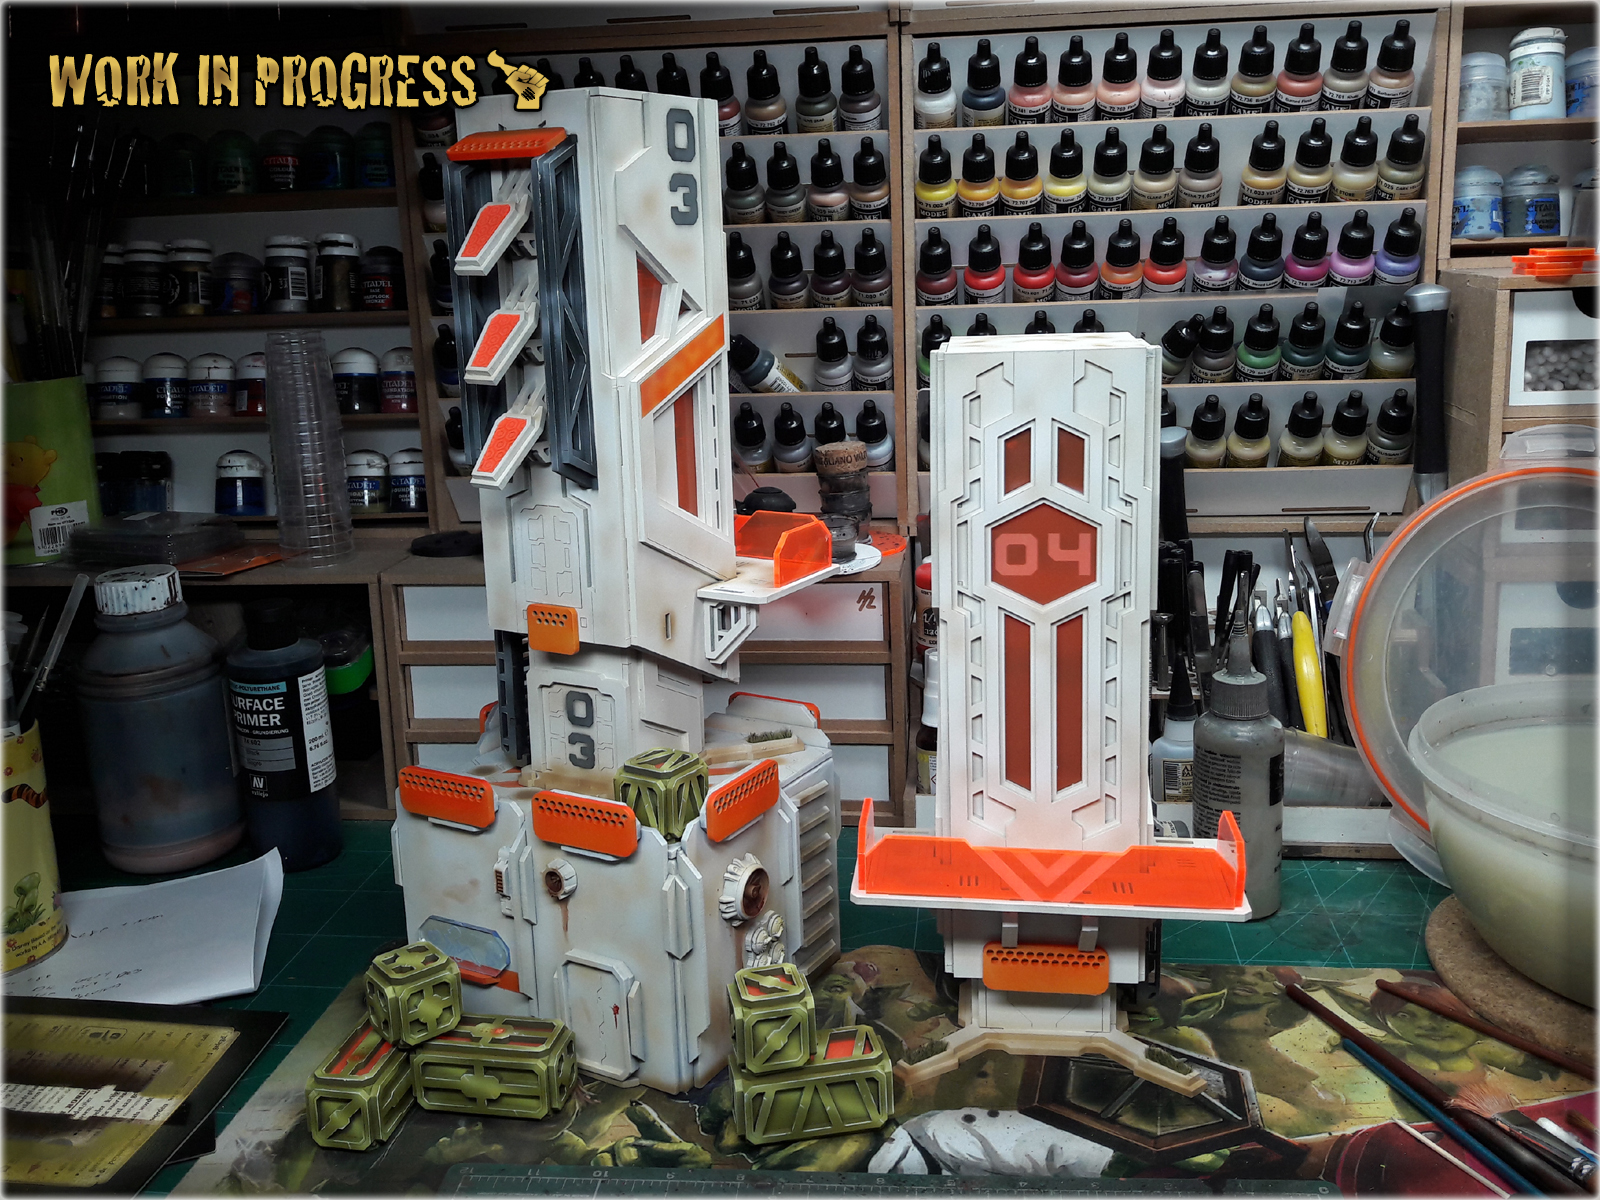
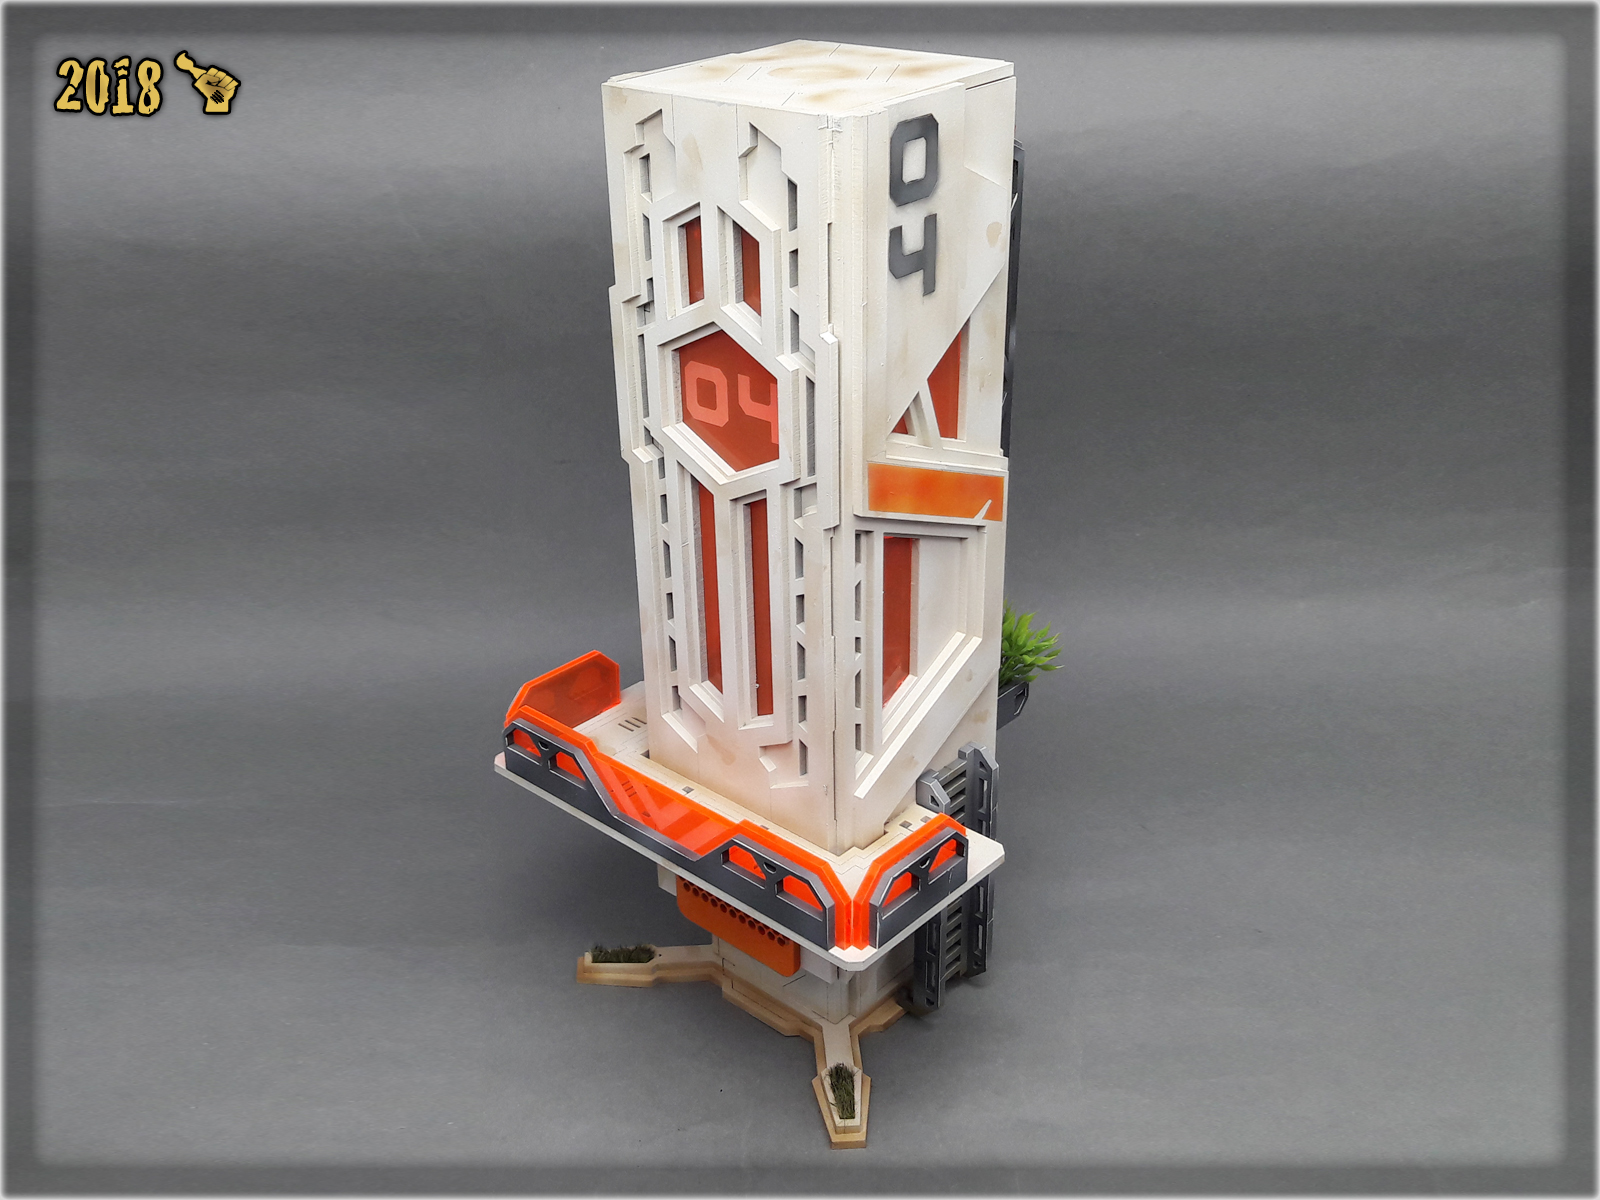
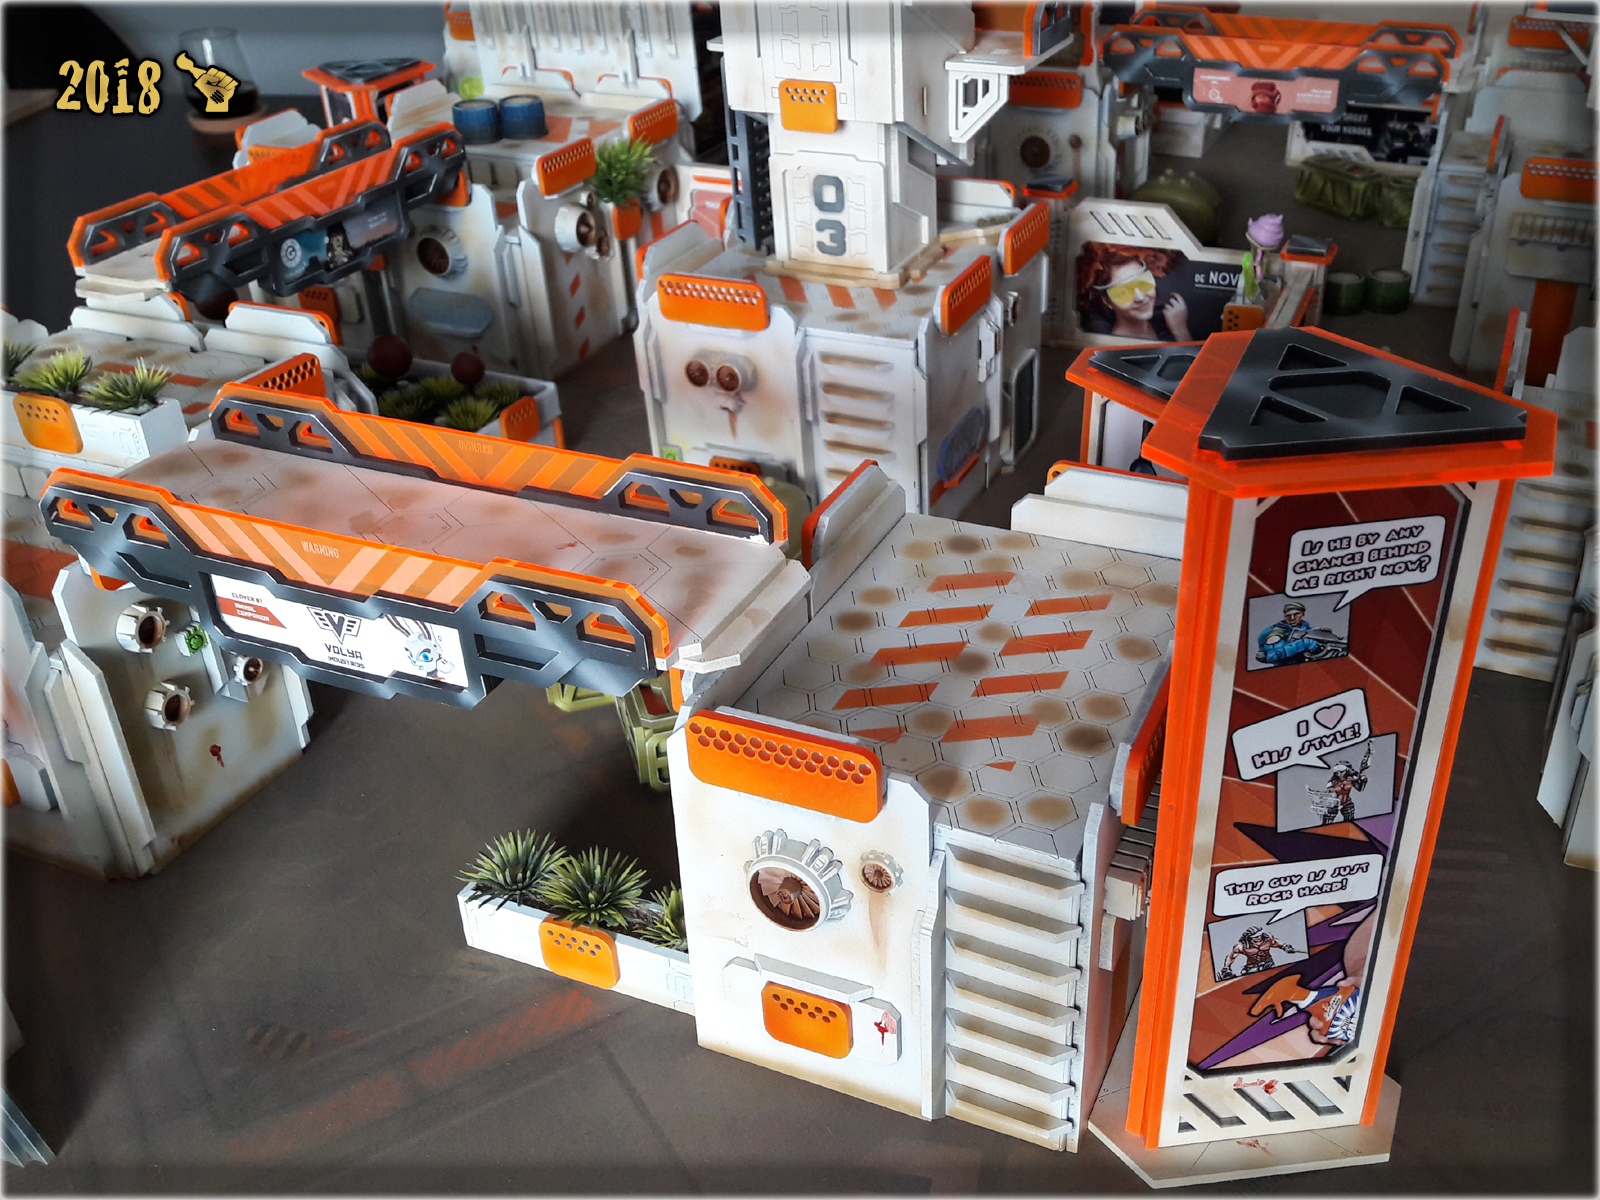
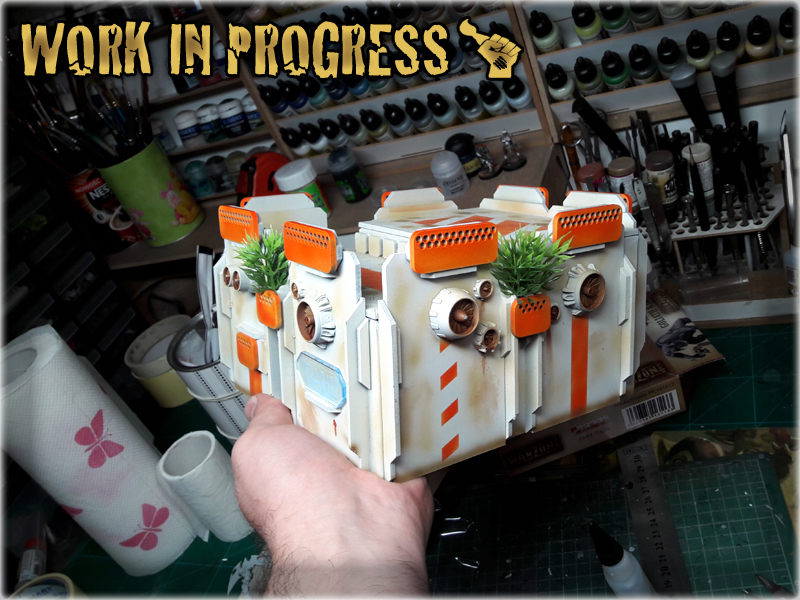
The Colony is vast already, but there’s always room for some extra terrain pieces. With new Gingermane designs appearing every month it’s difficult to stop expanding . It gets even harder, as he let’s me peek on work in progress designs and I sometimes get to buy some before release. Obviously when I saw ‘SF024 The Tower’ I freaked out and demanded these be handed to me emmediately. Gosh how I love these two…
Another addition to The Colony – ‘SF010 Cargo Crates’. Slowly my own designs and scrap-built scenery are forced off the gaming board. I don’t mind it, cause at this point I’m already hooked on Gingermane’s stuff either way 😛

With ‘SF024 The Tower’ I intorudced black/grey colour to The Colony’s overall scheme. It seem to compliment the board so I followed up on this, going back to older scenery pieces. I wander if these, once paper box, buildings will ever rest…
One day ‘The Colony’ will be finished, but seeing how it changes time and time again I can only say TO BE CONTINUED…

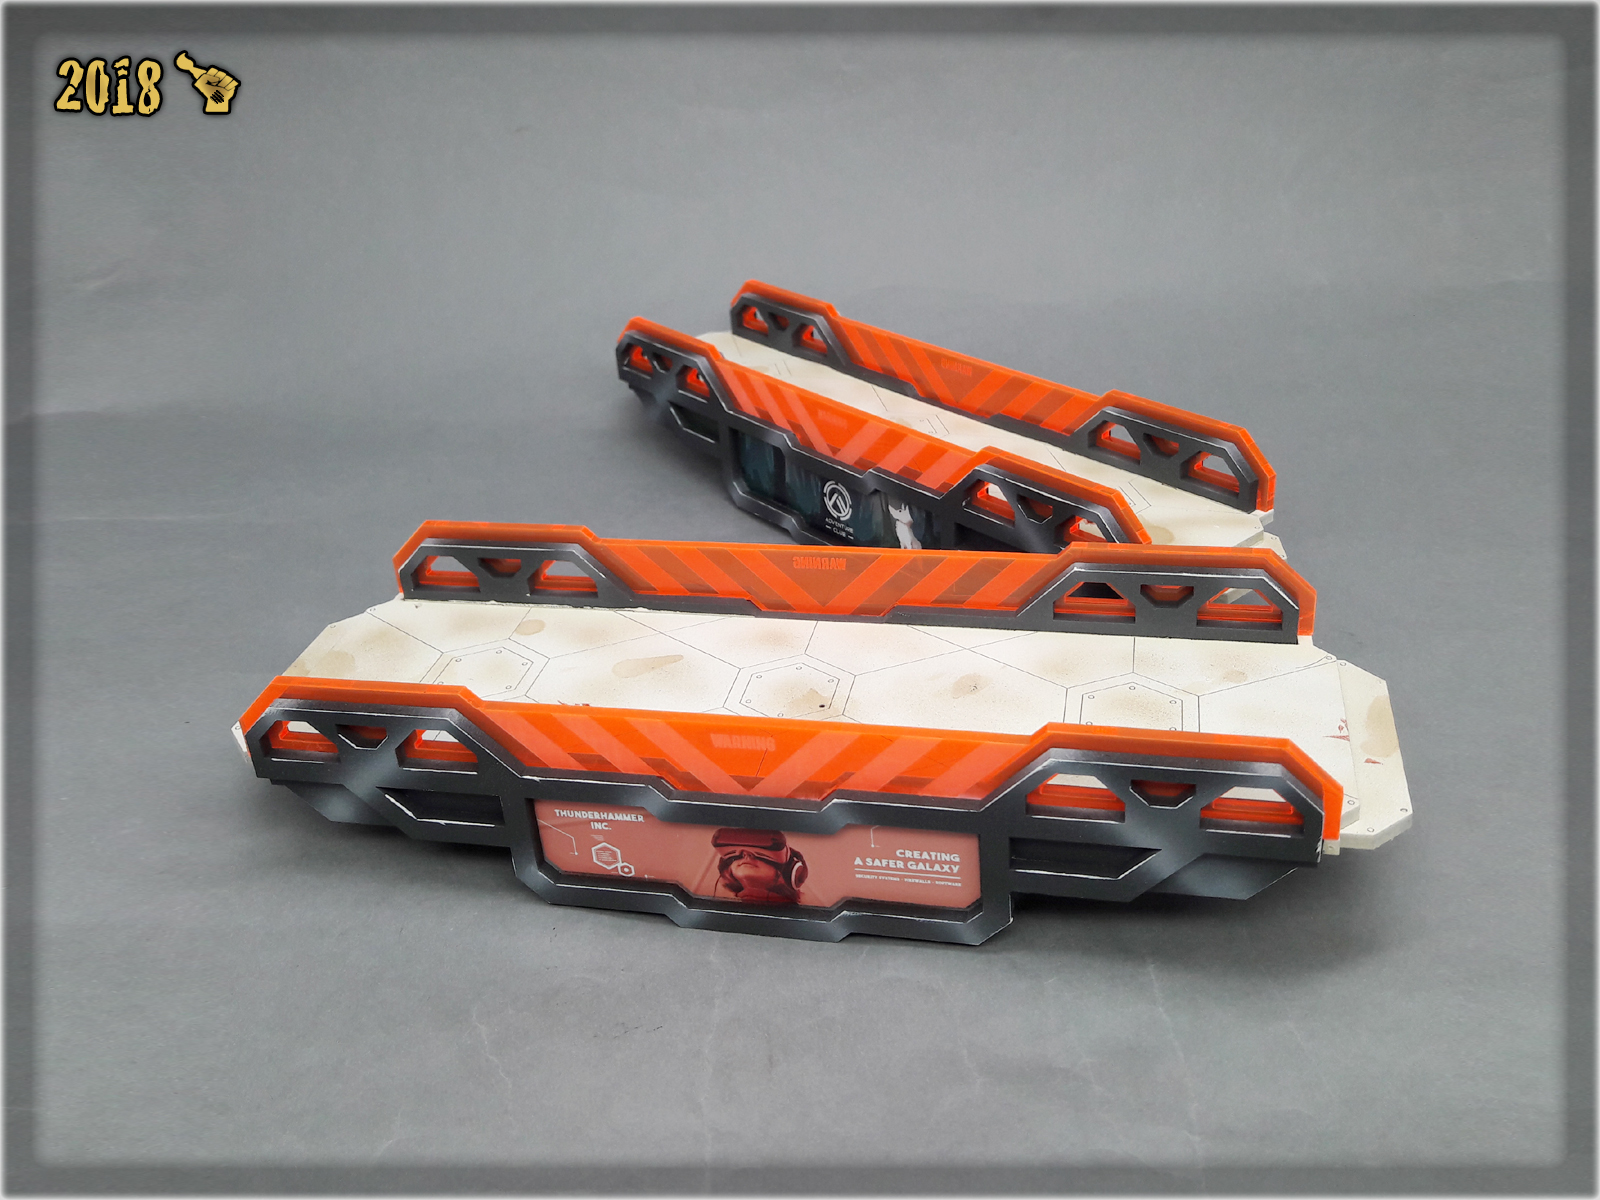
Six months is a lot of time to gather material for another project related article, and thus The Colony Special Project is back with entire new installment about this Infinity gaming board. I just couldn’t leave this project unattended for much longer.
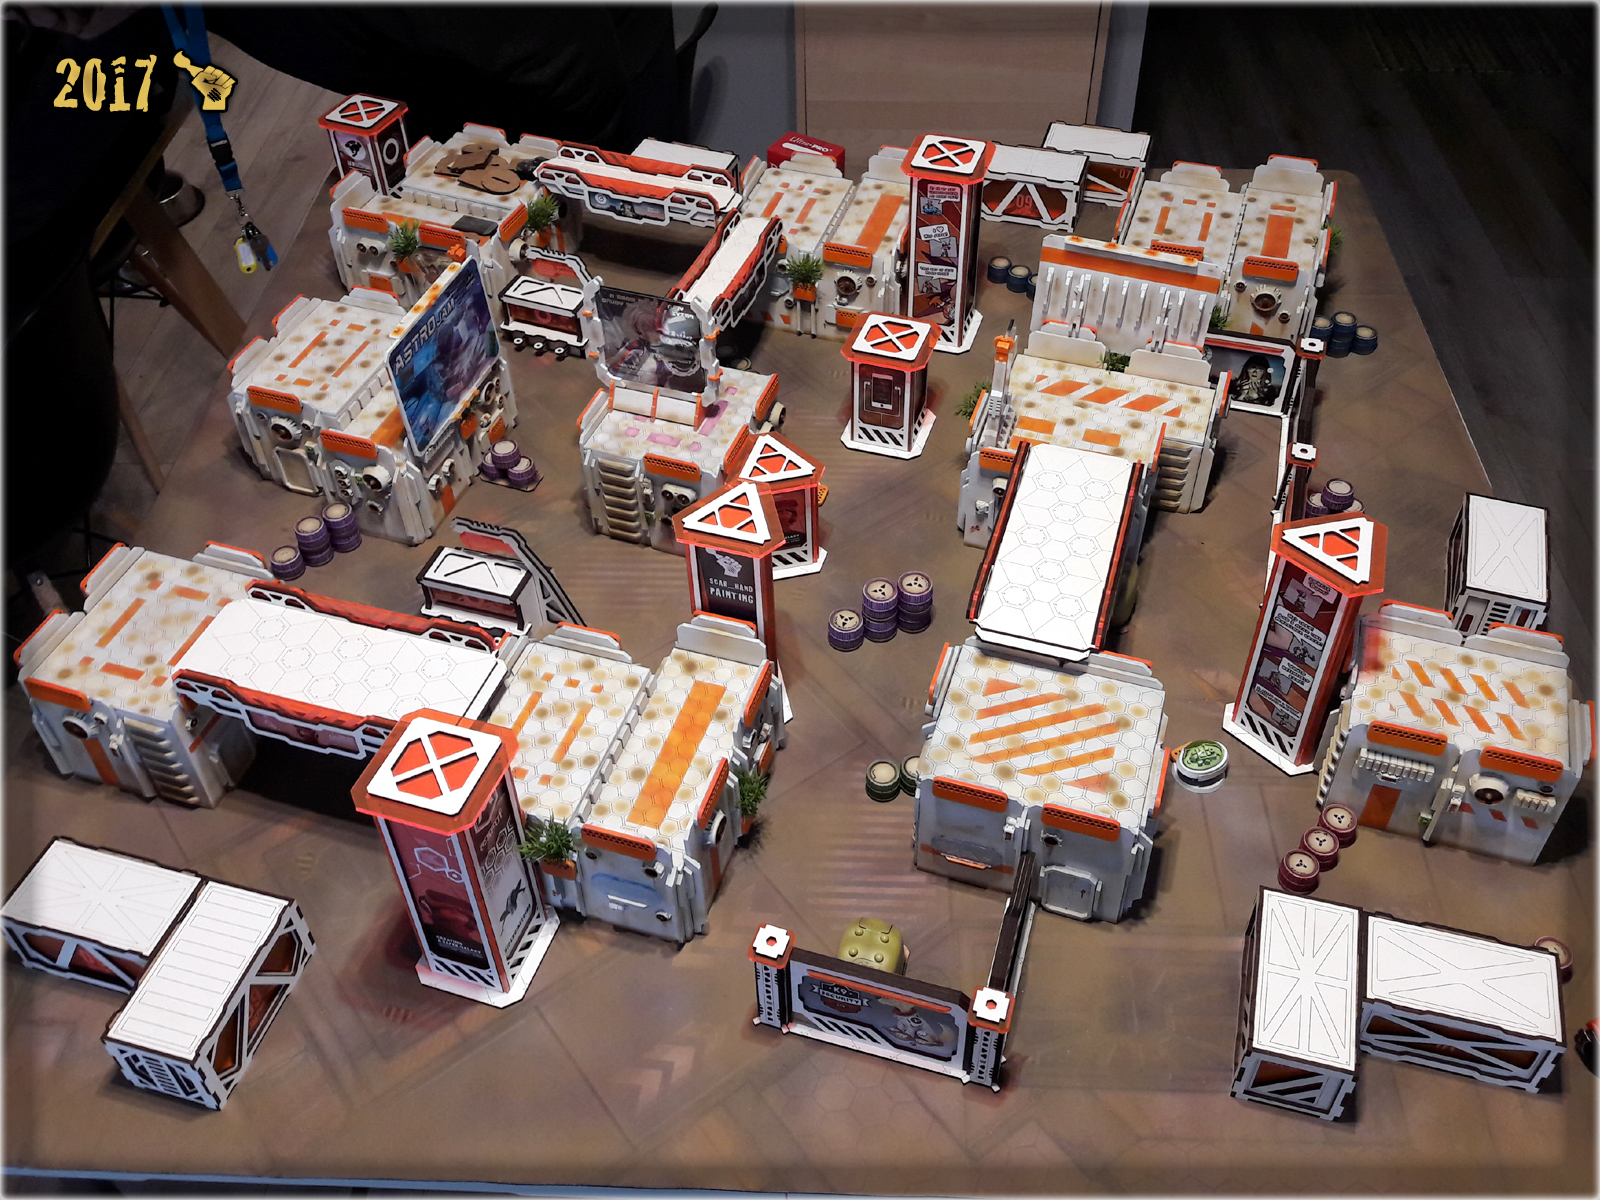
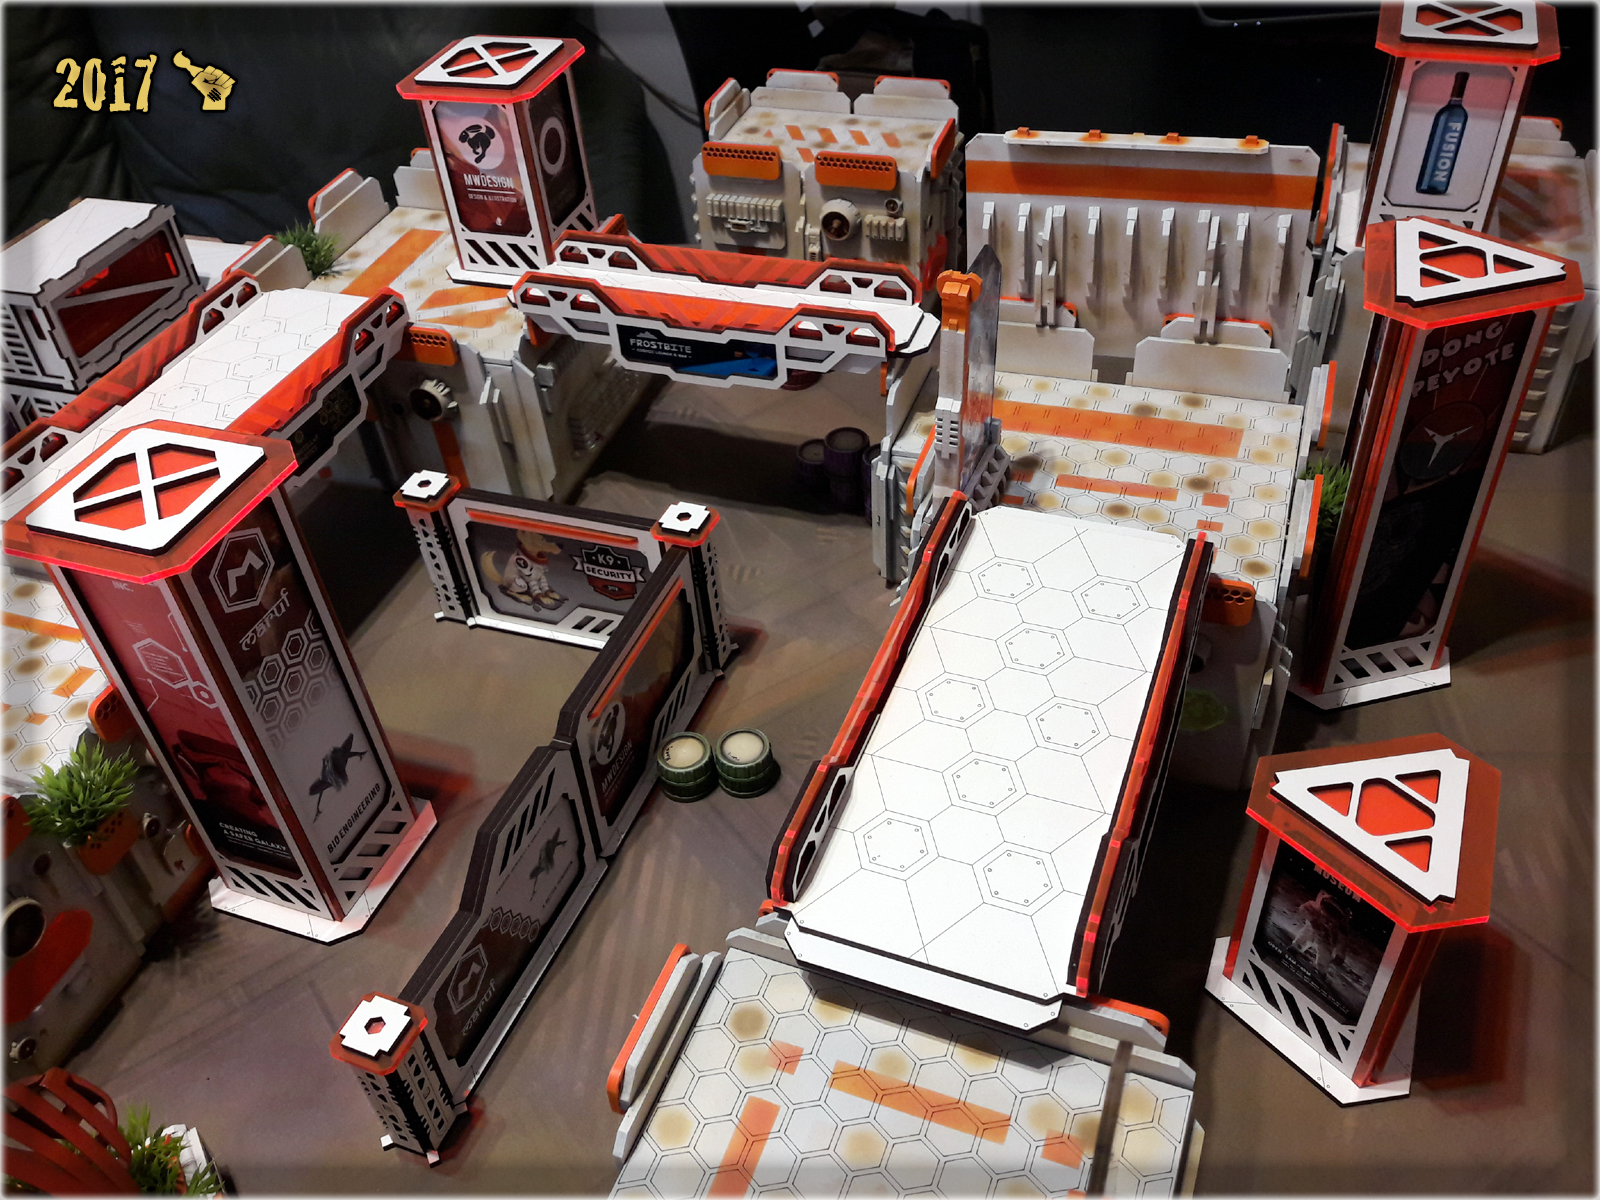
Let me start by telling you this: I love my gaming board. That being said, at some point I felt like something didn’t quite bangt right. The board was finished, I got a lot of awesome, positive feedback about it, still deep down I felt something is off. There’s always place for improvement so my inner artist raged while being unable to pinpoint the exact reason of my discomfort. It took a while for me to understand that the board looked too chaotic to absorb. All the yellow, blue and deep clear-red did not work well with White-Sand-Orange-Green colour scheme.

I started introducing changes by dumping the obvious source of unfitting colours – the Holo Ads, and adding more green to the board with brand new set of Antenocitis Ad Stands. It partially worked but I wasn’t fully satisfied with the result…

The real change sweeped throughout The Colony quite suddenly. Everything, and I can’t stress this enough, because of the Gingermane Studio and it’s scenery. Long story short – there is this guy for whom I paint some Infinity miniatures, and one day he is like ‘I’m designing some scenery pieces, what you think?’ and I’m like ‘OMG I love this shit!’ and he’s like ‘Wanna grab some?’ and I’m like ‘Duuh! Shut up and take my money!’… All of the sudden I find myself knee deep in Gingermane’s scenery pieces which not only look amazing, but also fit right into my gaming board’s theme. They seem to be plucked straight out of my deepest desires – both in case of looks and playability.
This was the exact point at which I decided to finally ‘repair the damage’ I done to my gaming board and contain the colour palette of all the stuff that appears on it…

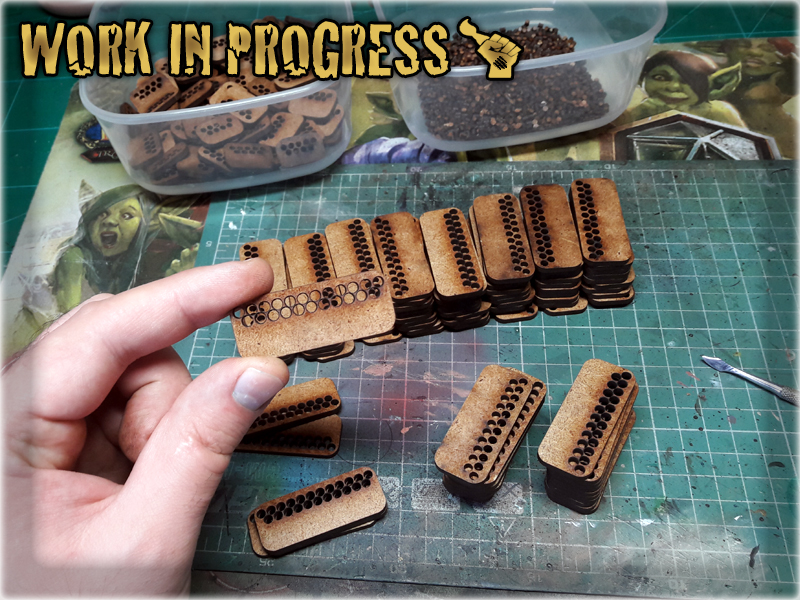
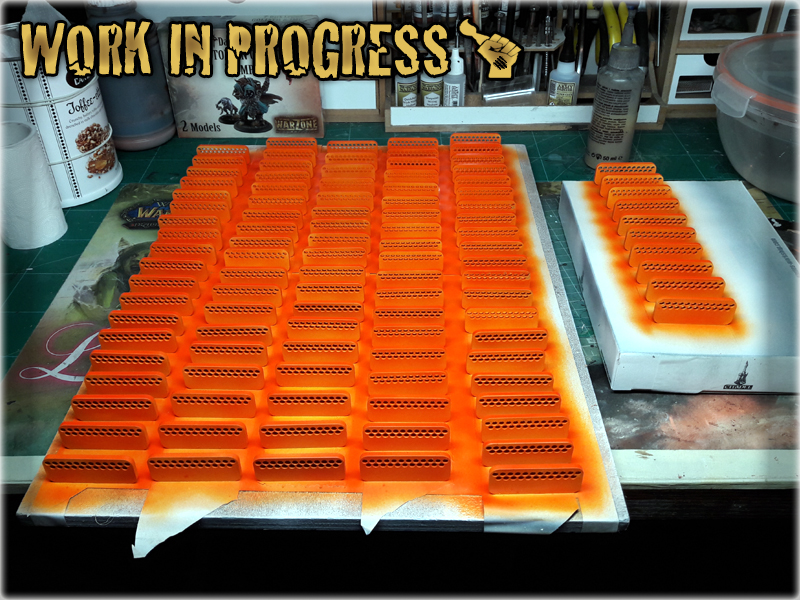
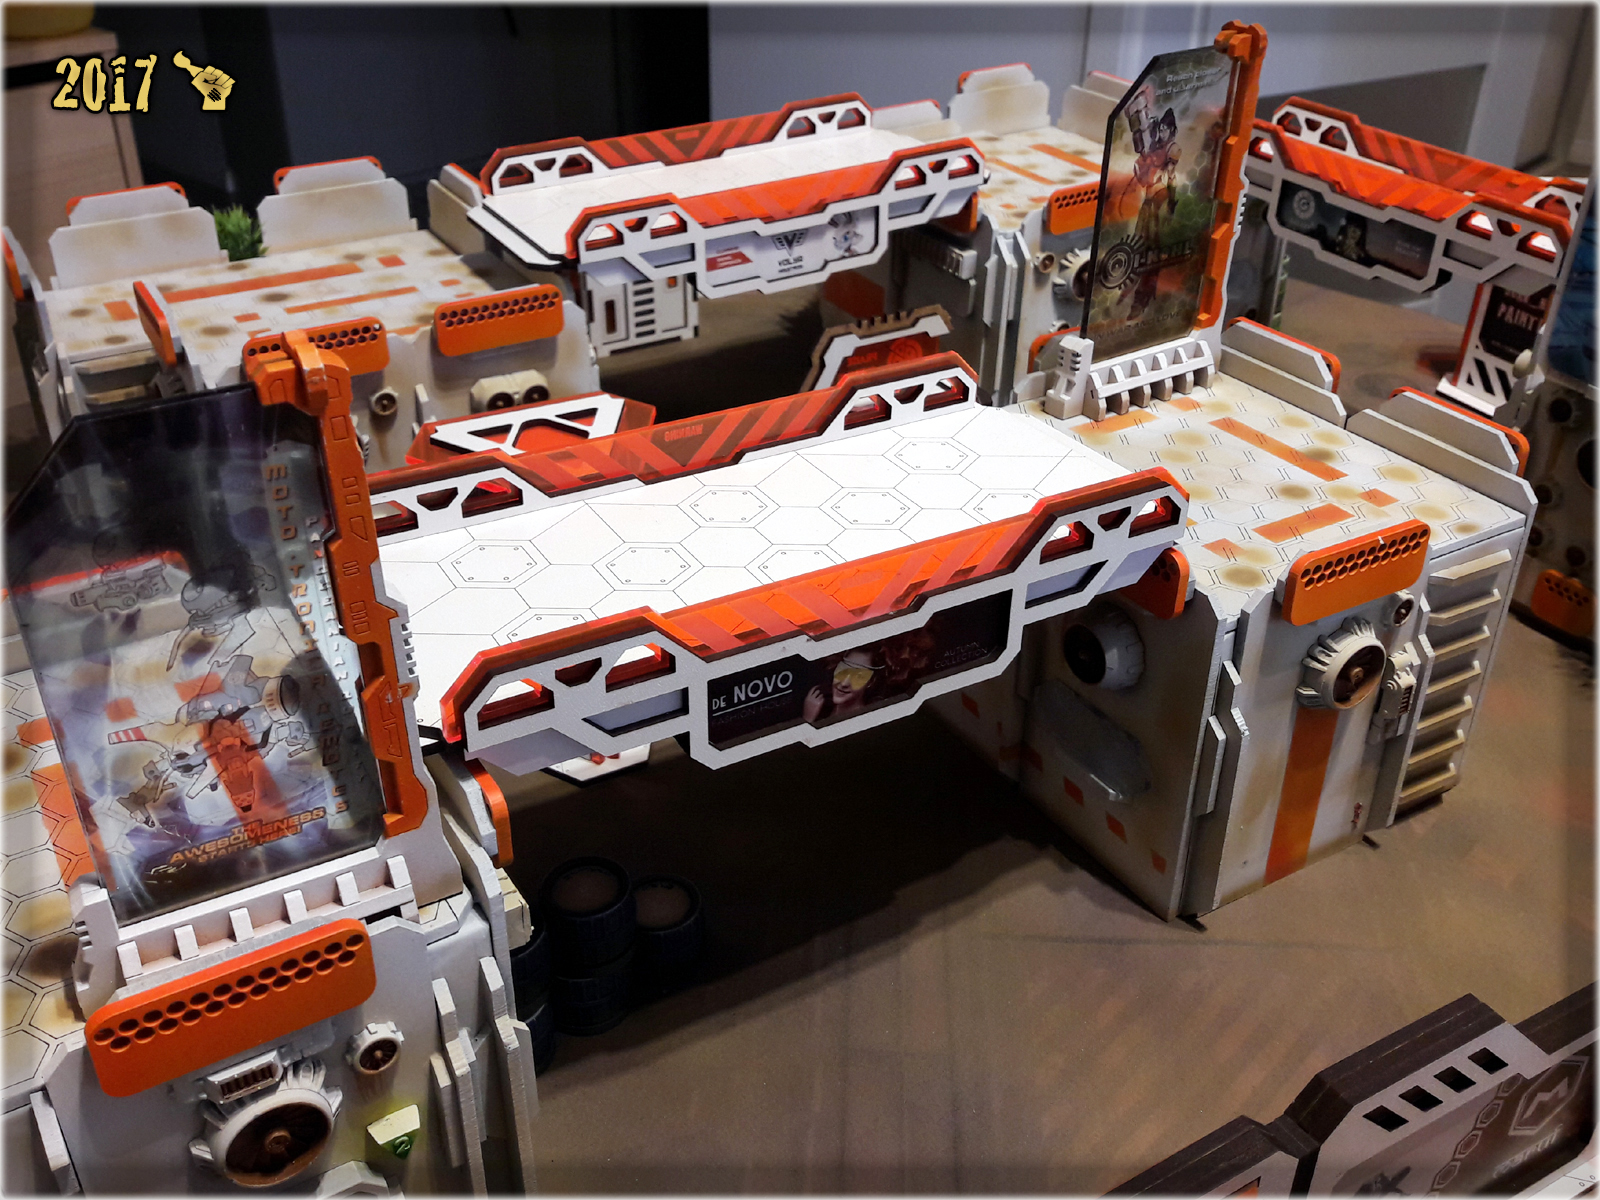
The final decision was made: Coloured Plexi Ads adorning the buildings had to go. Upon reaching this conclusion I instantly contacted my besties from Micro Art Studio and ordered a huge pile of replacement pieces. I’ve figured that a bigger version of ’rounded orange piece’ would work the best for the theme and overall looks. Soon after, I got a delivery of more than a hundred pieces necessary to finalize the ‘grand change’…
Preparing these was harsh. Had to clean them all of soot leftovers and remove small pieces left inside some of the laser-cut holes. Once done I painted all the pieces in a single go, then swaped Plexi Ads with them. The result is exactly how I hoped for.


The road to perfect gaming table streches before me and it’ll take some time till I get there, but I can see the destination. What’s left for me to do is to add dots of Vallejo’s Sandy Yellow here and there to tone down the Gingermane’s white a bit. Afterwards The Colony should be finally complete… at least for some time. I promis to bring you more of The Colony in next installment – probably six months from now :P.

“Three gargantuan spaceships endlessly traverse the Sphere, doing what others cannot or will not do, sticking it to ‘the Man’ and contesting ordinary definitions of normalcy and acceptability. Do you prefer to think for yourself? Do you want to travel? Then you might have a Nomad spirit.”
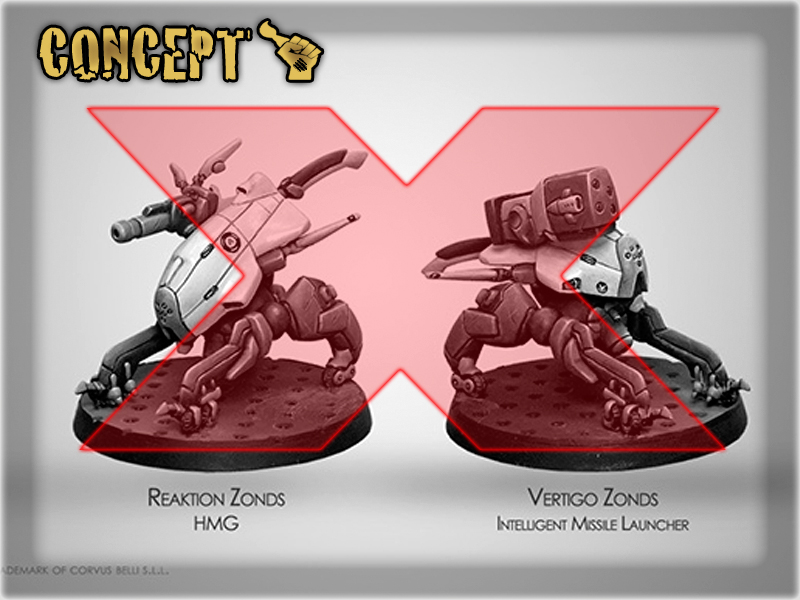
The idea behind “Nomad Zonds” was born as a child of necessity and inspirational spark. What drove me to Infinity the Game and then to Nomads faction was a bunch of awesome looking miniatures. For me this aspect of the game is so important, that I literally ignored Infinity untill first 3d sculpted miniatures appeared and revolutionized the range. That does not mean all of the oldschool miniatures are bad – let’s just say that back in the day there were not enough awesome looking miniatures to sway me. Now, with all of the newly released, sweet looking, stuff – Infinity range looks insane and the game became an important part of my hobby. What holds me back from acquiring entire Nomads range are those few leftovers of the times long past aka #LetsMakeMoranGreatAgain. Due to rescaling and high quality detail of new miniatures, some of the old ones look out of place among all the goodie goodie stuff that Corvus Belli provides for us on monthly basis. Here’s where ‘necessity’ comes in. Instead of waiting for CB to fulfill my hobby’iest desires, I decided to go ahead and do it myself. So the main concept of this project was to avoid original Nomad Zons at all cost and create something that would match the current quality of the range…
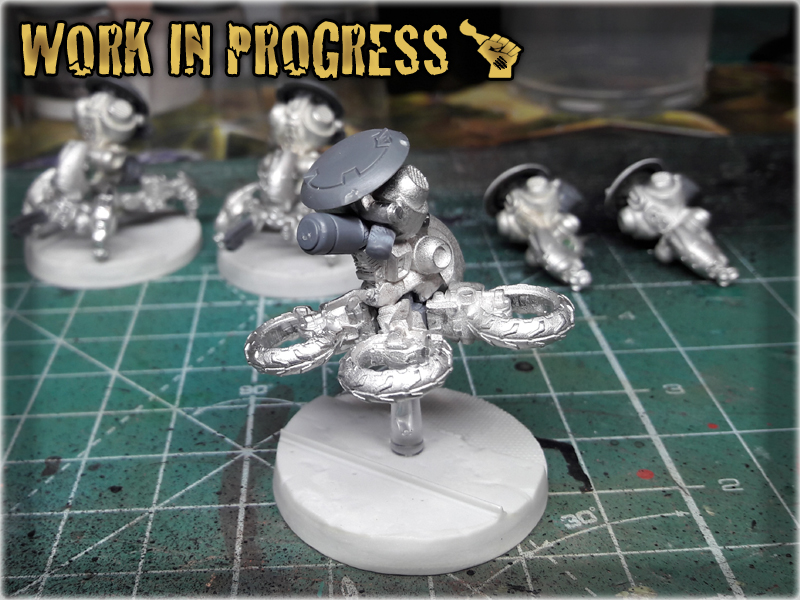
My goal was to create an entire set of silhouette 3 Nomad Zonds to fill all availability once and for all and be able to pick a right tool for a right task at a whim. At the same time I wanted to keep the Zonds somewhat in the boundries of usual four legs, rounded ‘head’ etc. design, to fit the Nomad army and afterwards my Colour Scheme.
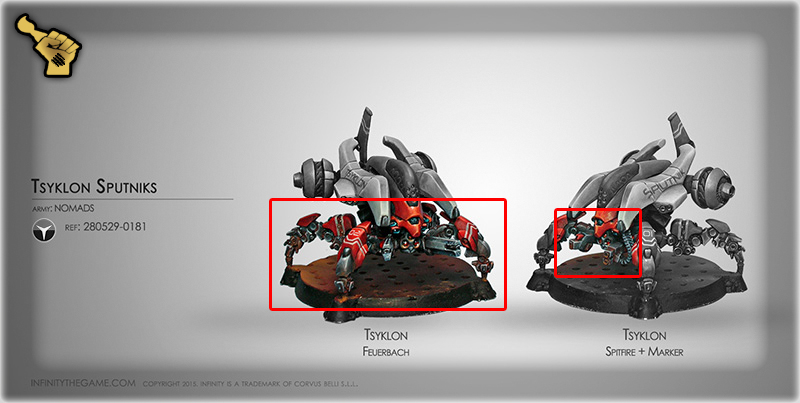
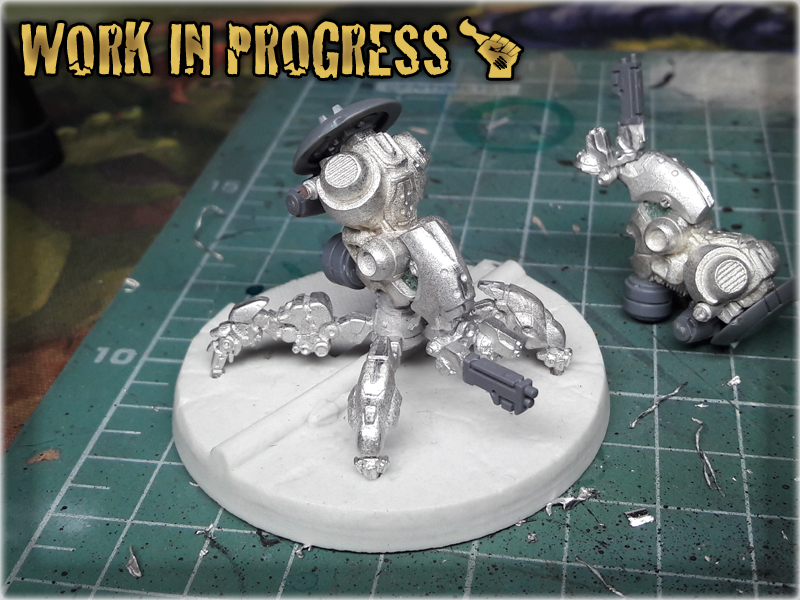
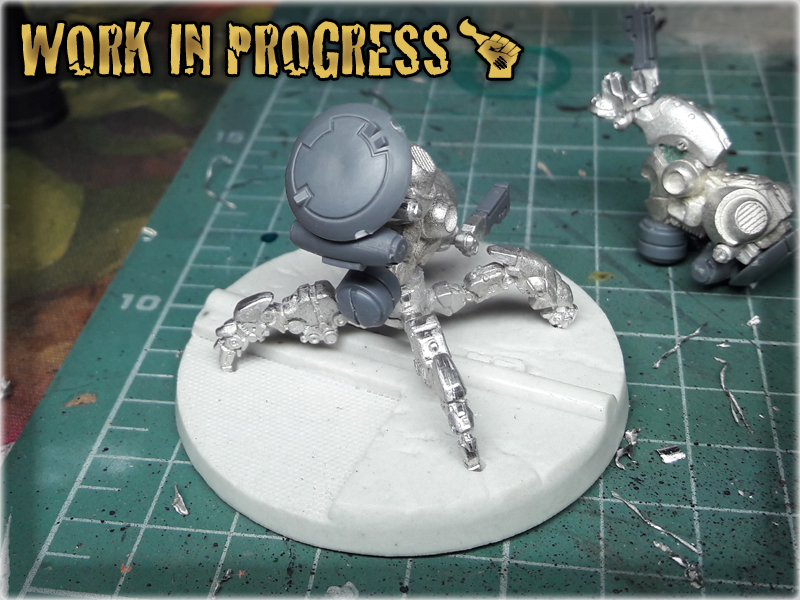
All the required stuff prepared, what was left for me to do at this point was to build this grand new line of Zonds. Lunokhod/Tsyklon legs and axis as a base was an obvious choice. The most Nomad set of legs possible, so I decided to go for it. Legs had to be reposed slightly to match the size of a 40mm base, but otherwise no grand changes required…
Zond’s body is it’s key feature. For this I have picked Haqqislam Bike’s engine. It has the right size, is finely detailed and interresting. I had my eye on this one for a long time now – knowing deep inside it might come in handy at some point. A small cut with hobby cutters between engine and saddle was required to separate these to parts. Afterwards I drilled a hole in the center of upper cannister to mount it on the legs axis…

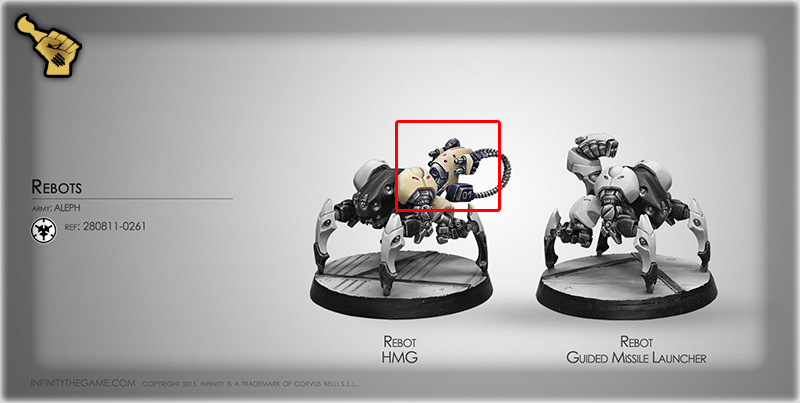
Another important piece – the head. This one was made out of ALEPH Rebot ‘butt-piece’. Fortunatelly a spare butt-piece is thrown into each Rebots box, so it is obtainable for a low price in the long run. Mounted it on a piece of green-stuff and pushed in the excess of greenstuff on the sides to fill the gaps. Drilled a small hole to mount weaponry/lenses underneath…
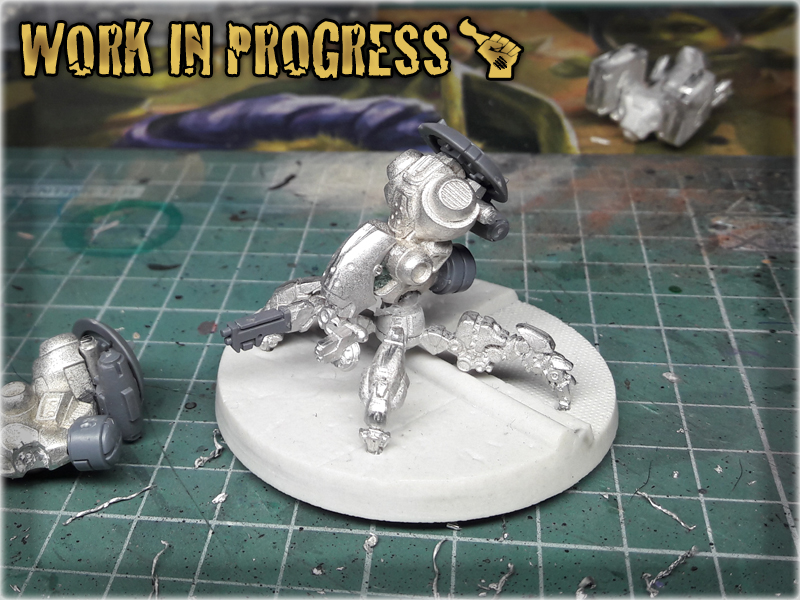
The main difference between Transductor Zonds and Total Reaktion Zonds is the weaponry. Transductors have a Lunokhod front lense mounted and both side weapond cut off, while Reaktion Zonds maintain both weapons, one of which was extended with a Warhammer 40k Tau bitz…
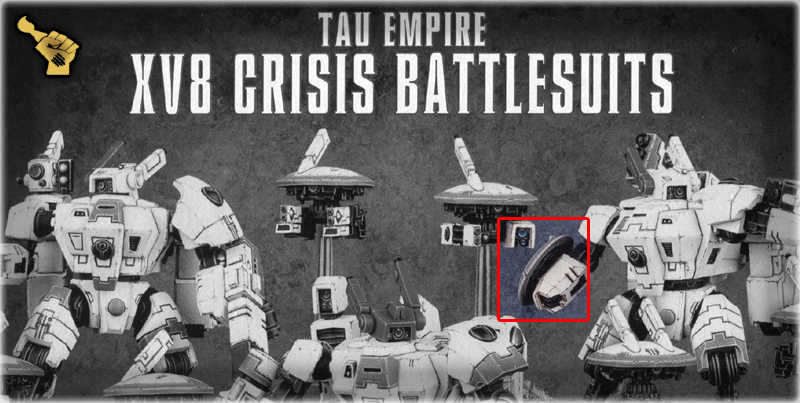
Warhammer 40k Tau bitz… In my opinion these work best as fillers for Infinity conversions. Slightly bulky, still futuristic enough to match the theme. Used many different random pieces to improove the differences between certain types of Zonds, still the key piece was a XV8 Crisis Battlesuits arm shield. These were used for nice, round top pieces on all of my Zonds…

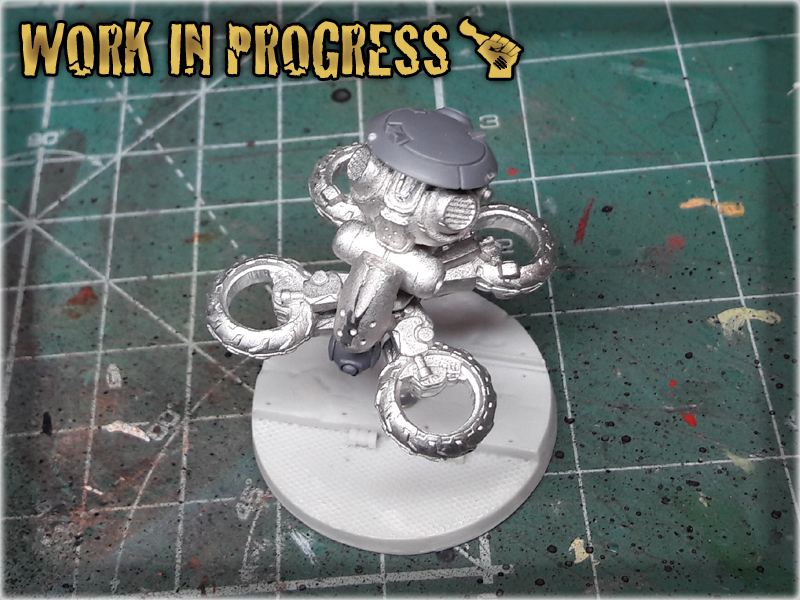
One Zond was meant to fill the roll of a Meteor Zond, or serve as the good old Stempler Zond in times of need. To create a look of futuristic hover engines that would allow the Meteor Zond to Combat Jump I used four front wheels of Haqqislam bikes. Already had plenty of these at my disposal – seemed like a perfect match. I had also mounted a round frontal ‘sensor’ piece instead of the usual Lunokhod lenses and weapons…


Not much about this part. Painting went pretty fast and easy. I used the standard Nomad Colour Scheme slightly improoved throughout the years of constant practice. Main change is a total abandonment of Metallic colours and using Black-Grey-White Infinity Black instead. In this particular scheme I use airbrush just for the light effects. Drawbacks of using old colour scheme – a lot of regular brush work 🙂


Silhouette 3 Zonds set complete. Let’s call them ‘type: Fireant’. They are ready to be unleashed on countless fields of battle (At this point they already seen some action). You can visit the “NOMAD ZONDS” SPECIAL PROJECT GALLERY for more pictures, and GALLERY: NOMADS to see the rest of this army. Next step would be to design and convert two Baggage Salyut Zonds. What you say about an idea of eight legged, spider like Lunokhods with Fireant bodies? I already see the result in my mind’s eye. See you in next Special Project then…
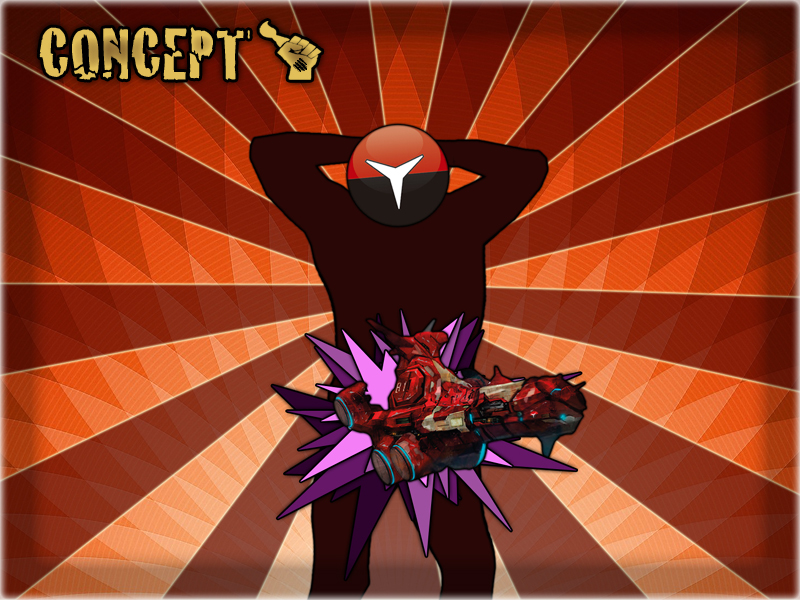
“Fear not Human Sphere – Dong Peyote is here!”
The story of the ‘Dong Peyote’ character begun in Strikezone: Wotan, an online campaign of Infinity the Game, launched by Beasts of War may 2017. The whole idea was inspired by an abrupt appearance of the ‘Don Peyote Repurposed Freighter’, a Nomad vessel shaped like… well – it looks like a dong. Throughout the first stage of the campaign Nomad players had their share of laugh about this peculiar fact and the name of the ship evolved to ‘Dong Peyote’ pretty fast. ‘Plunged balls deep into the enemy lines’ and ‘He’s a hero we deserve’ are just some of the standard lines used in the Nomad Briefing Room and in the hidden command facebook groups. This positive hype about the joke inspired me to turn the ‘Dong Peyote’ into an ingame character – a symbol for the Bromad players to relate to. In terms of fluff, the Nomads are a rather diverse bunch, a group where it is certain for some not entirely sane individuals to be found at times. I bet that there’s plenty among the Nomad to simply follow the idea, adorn the Nomad symbol mask and rampage throuugh the battlefield with a ‘Don Peyote’ shaped dongs strapped to their belts just for the thrill of doing it. These individuals will probably go full commando just to die in a blaze of utter glory soon after…

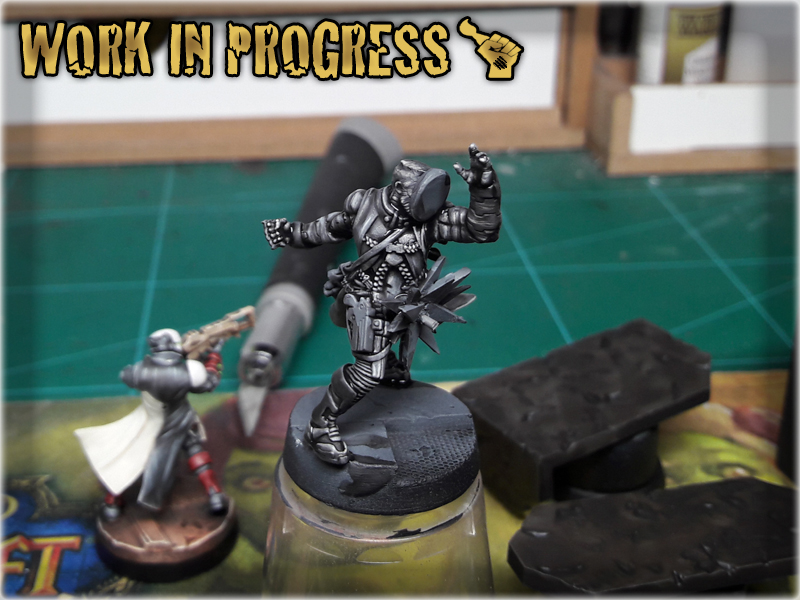
The entire idea of the ‘Dong Peyote’ miniature was to provide a mighty look and a heroic pose plus all the important features like the mask and the actual ‘dong’. I chose to use a Nomad Morlock miniature, as it already had most of what I expected for. The newest Morlock is a badass looking, huge, muscled chunk of a miniature in a dynamic pose and with a lot of great details. It looks so mighty that I had real problems using it to represent a puny Morlock. A perfect candidate for the ‘Dong Peyote’, even in terms of fluff – as Morlocks would be the first to follow the trend end adorn the Nomad mask.
Plunged balls deep into the enemy lines, the Dong Peyote is a sight to behold! His incredible feats of manliness are well known in the entire Human Sphere! This is a hero the Nomads deserve!
The proud prow of the ‘Dong Peyote’ was a real challenge. The picture provided by Corvus Belli is insanely hard to bring to life in such a tiny scale. I used some Warhammer 40,000 bitz to create something akin to the Don Peyote Freighter. This one took most of the work, but in the end looks mighty enough 🙂
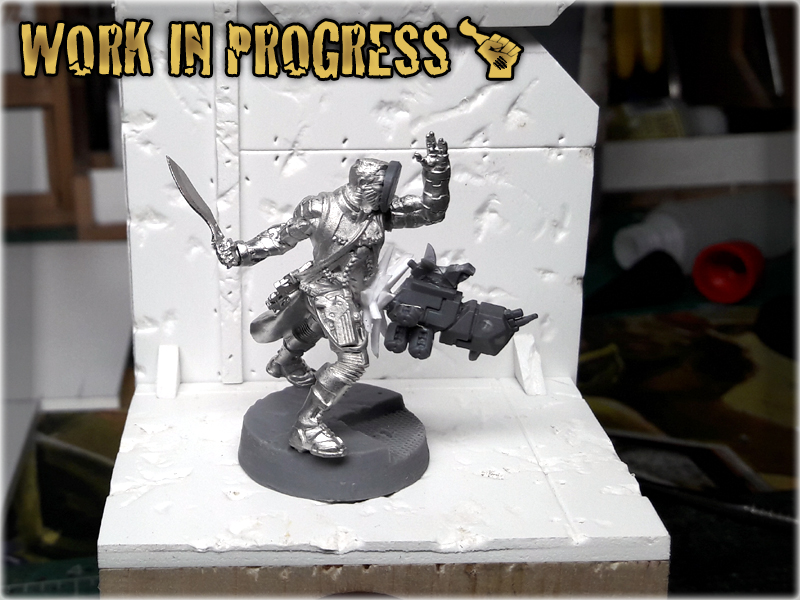

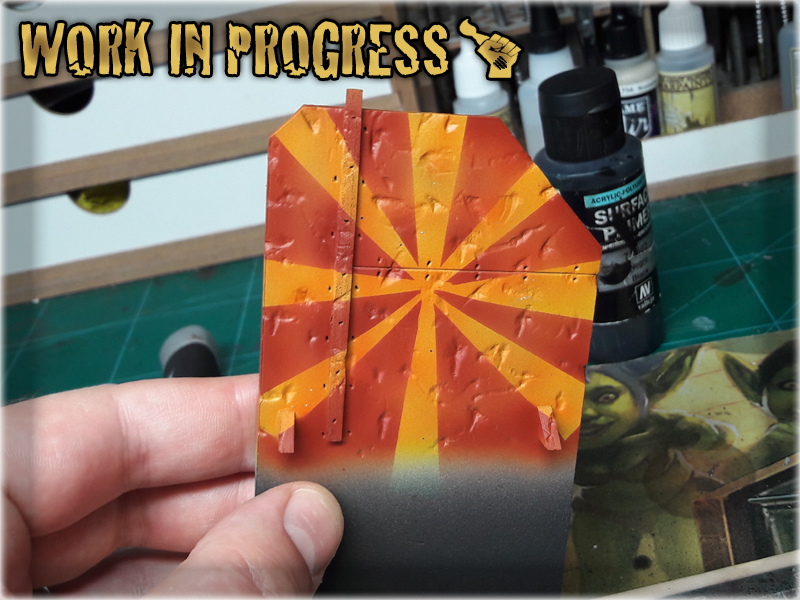
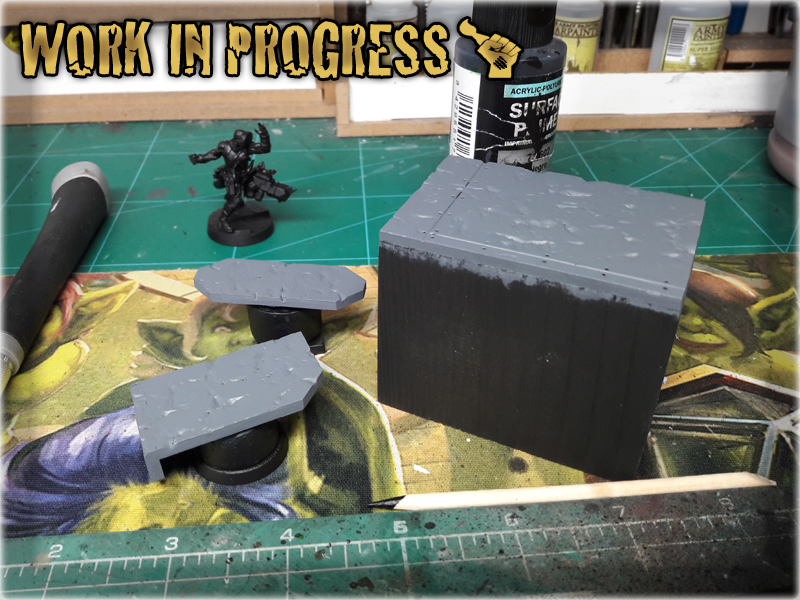
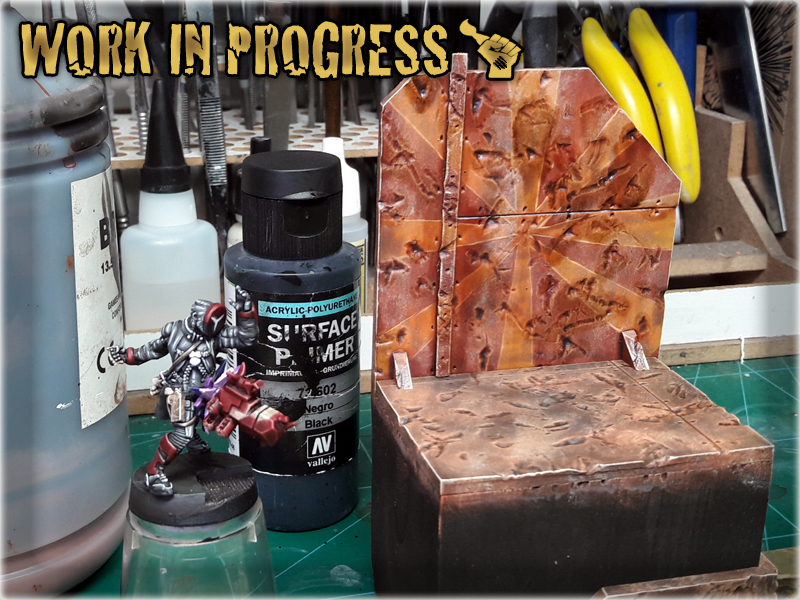
A single miniature is not enough to fully support the concept, of an urban legend incarnate. With all the videos in which I used the image of the Dong Peyote character I wanted to follow the colour scheme and the background idea. I used plasticard and a wooden cube to build a simple background scenic base. I then painted the entire thing throughout few hours. I tried hard to merge the initial colour scheme with the looks of the rest of my Nomad miniatures, so that both the character and his base would not stand out too much…
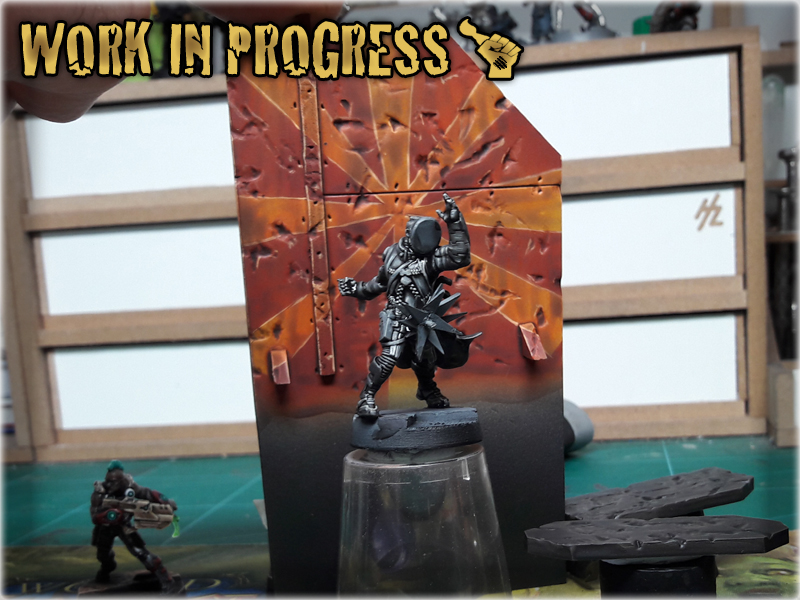
The final product of my labour exceeded my expectations. I now have a fully playable ‘Dong Peyote’ miniature and a scenic base to proudly display it. As I filled the “DONG PEYOTE” SPECIAL PROJECT GALLERY with pictures and presented them to my fellow Bromads – only one more thing was missing…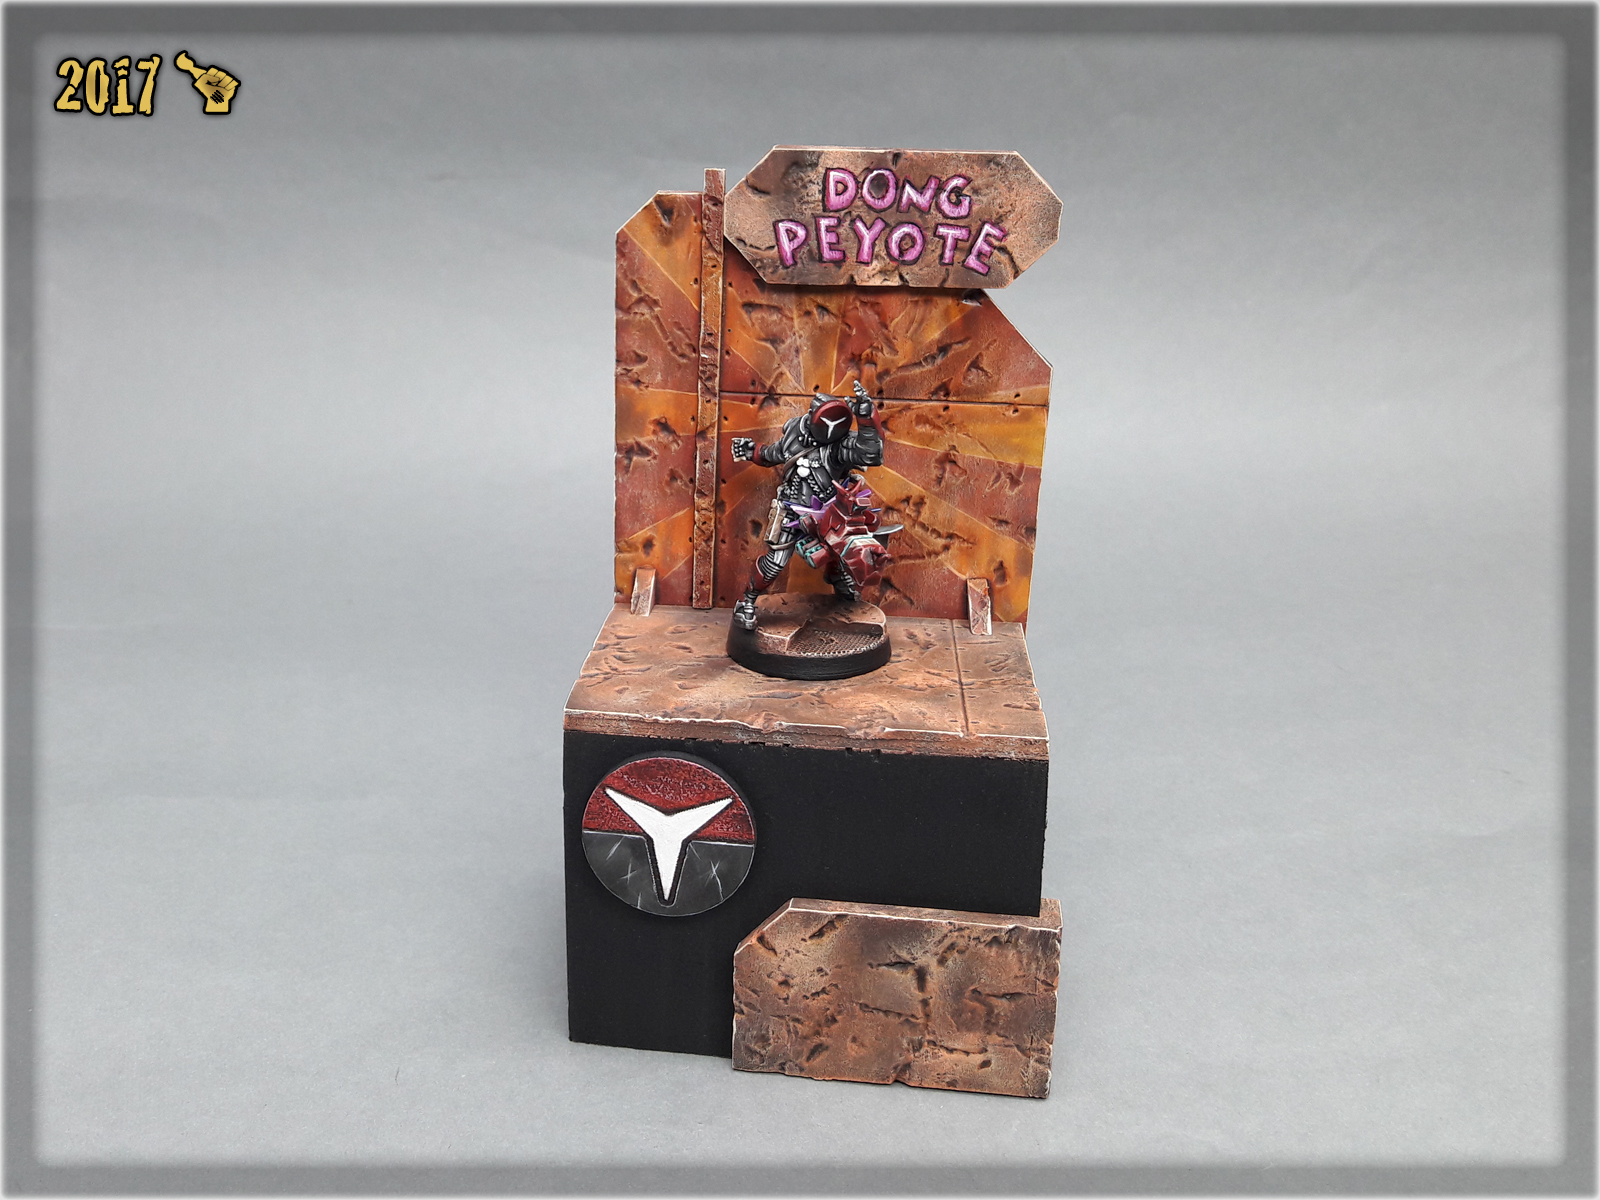
This mighty character required a set of playable stats and off course a point cost to be used in game. Some of my brethren had the idea of how this character should work, among them Del S was the closest to create a playable statline for the ‘Dong Peyote’, but as in case of every miniature game – players should not be allowed to tinker too much with stats for the miniatures of their own factions. Trying to introduce the character to my gaming group was not easy – some of my friends considered the proposed stats to be not entirely balanced. I asked one of them (Narrator) to create his own version for the ‘Dong’ and he actually managed to come up with a really nice and what looks like a well balanced statline…
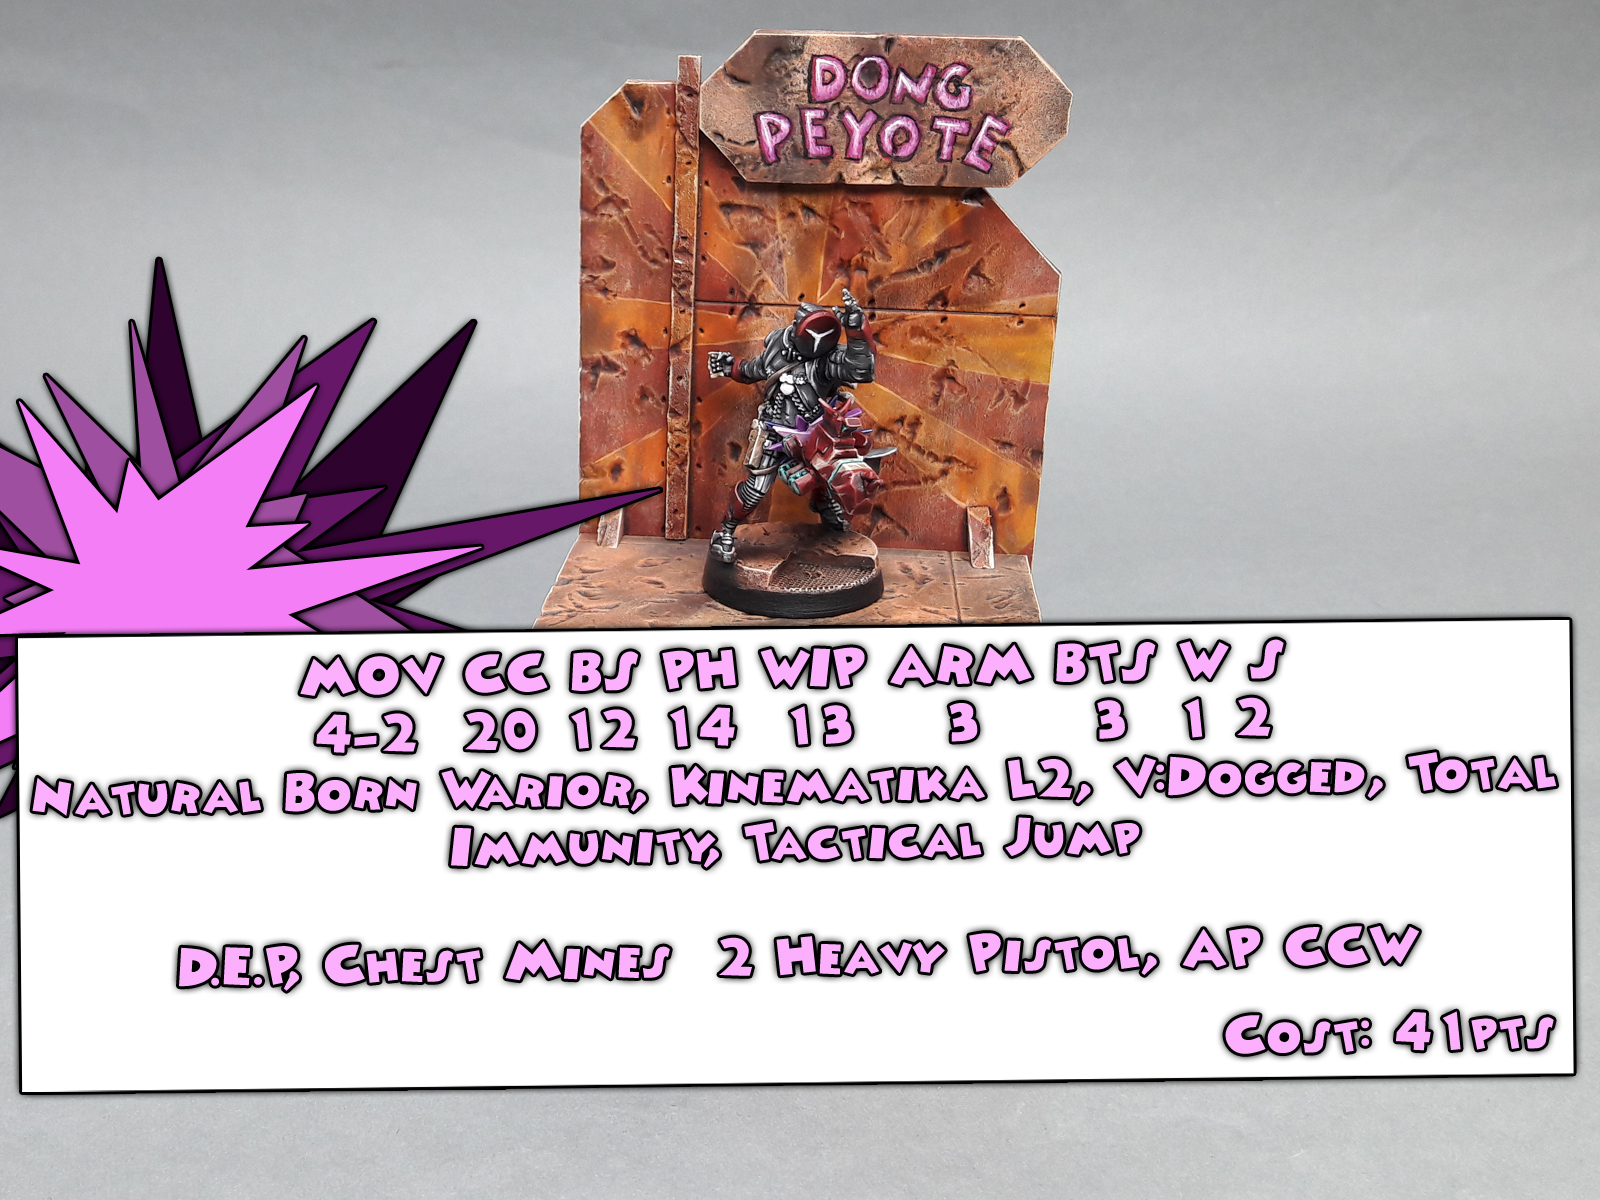
Thus the ‘Mighty Dong Peyote’ was born. I gave him a try just next day in a Strikezone: Wotan game of Infinity against one of my friends. I do hope that this Special Project inspires some of my Nomad brethren to use the character in their own games and thus lead to the ‘Dong Peyote’ being a part of the lore – even if only as a recognisable unnoficial part…