- contact@scarhandpainting.com


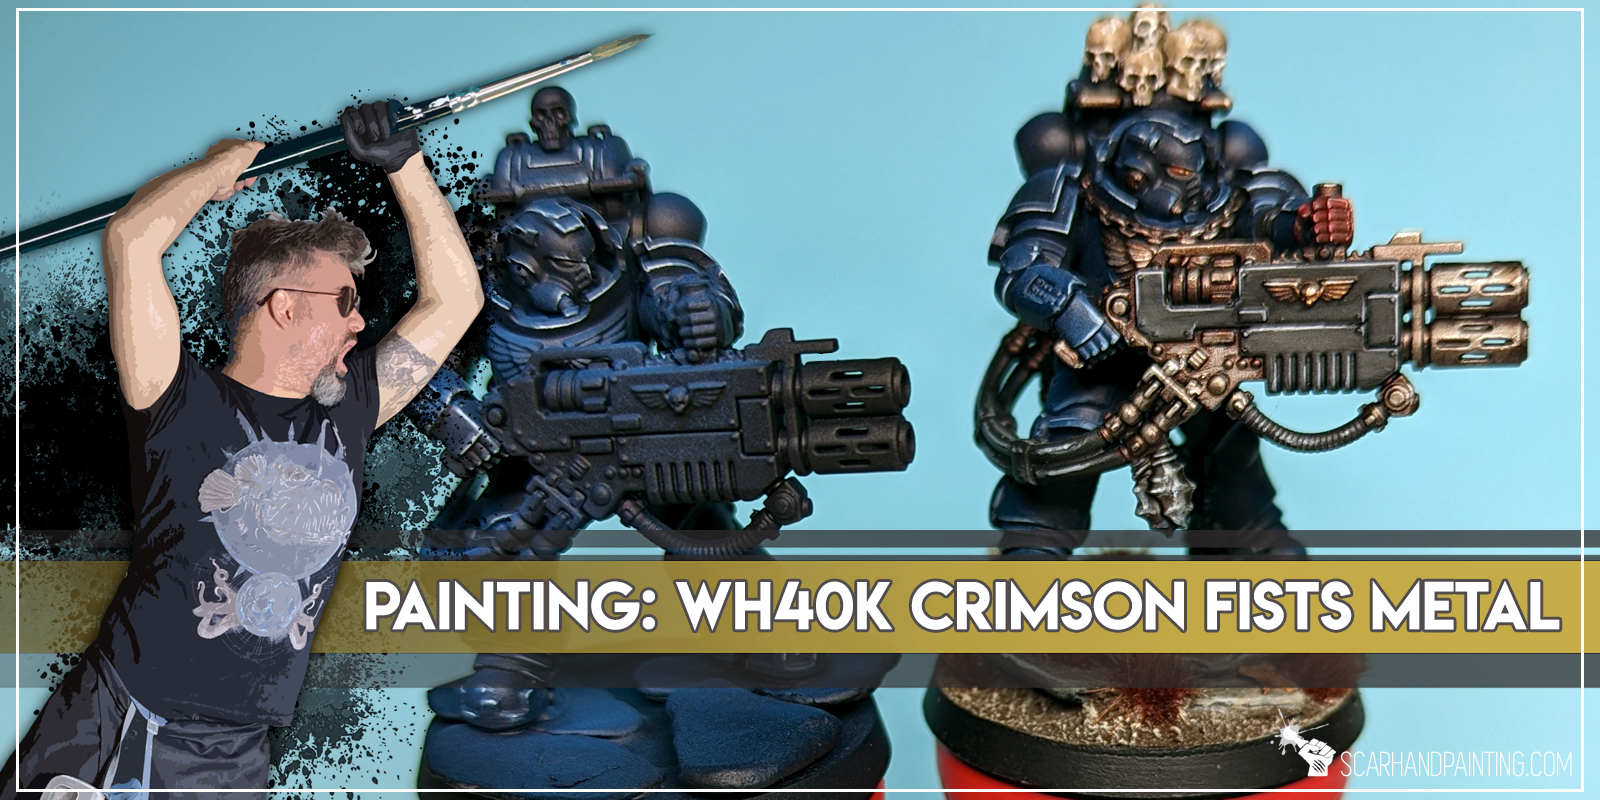
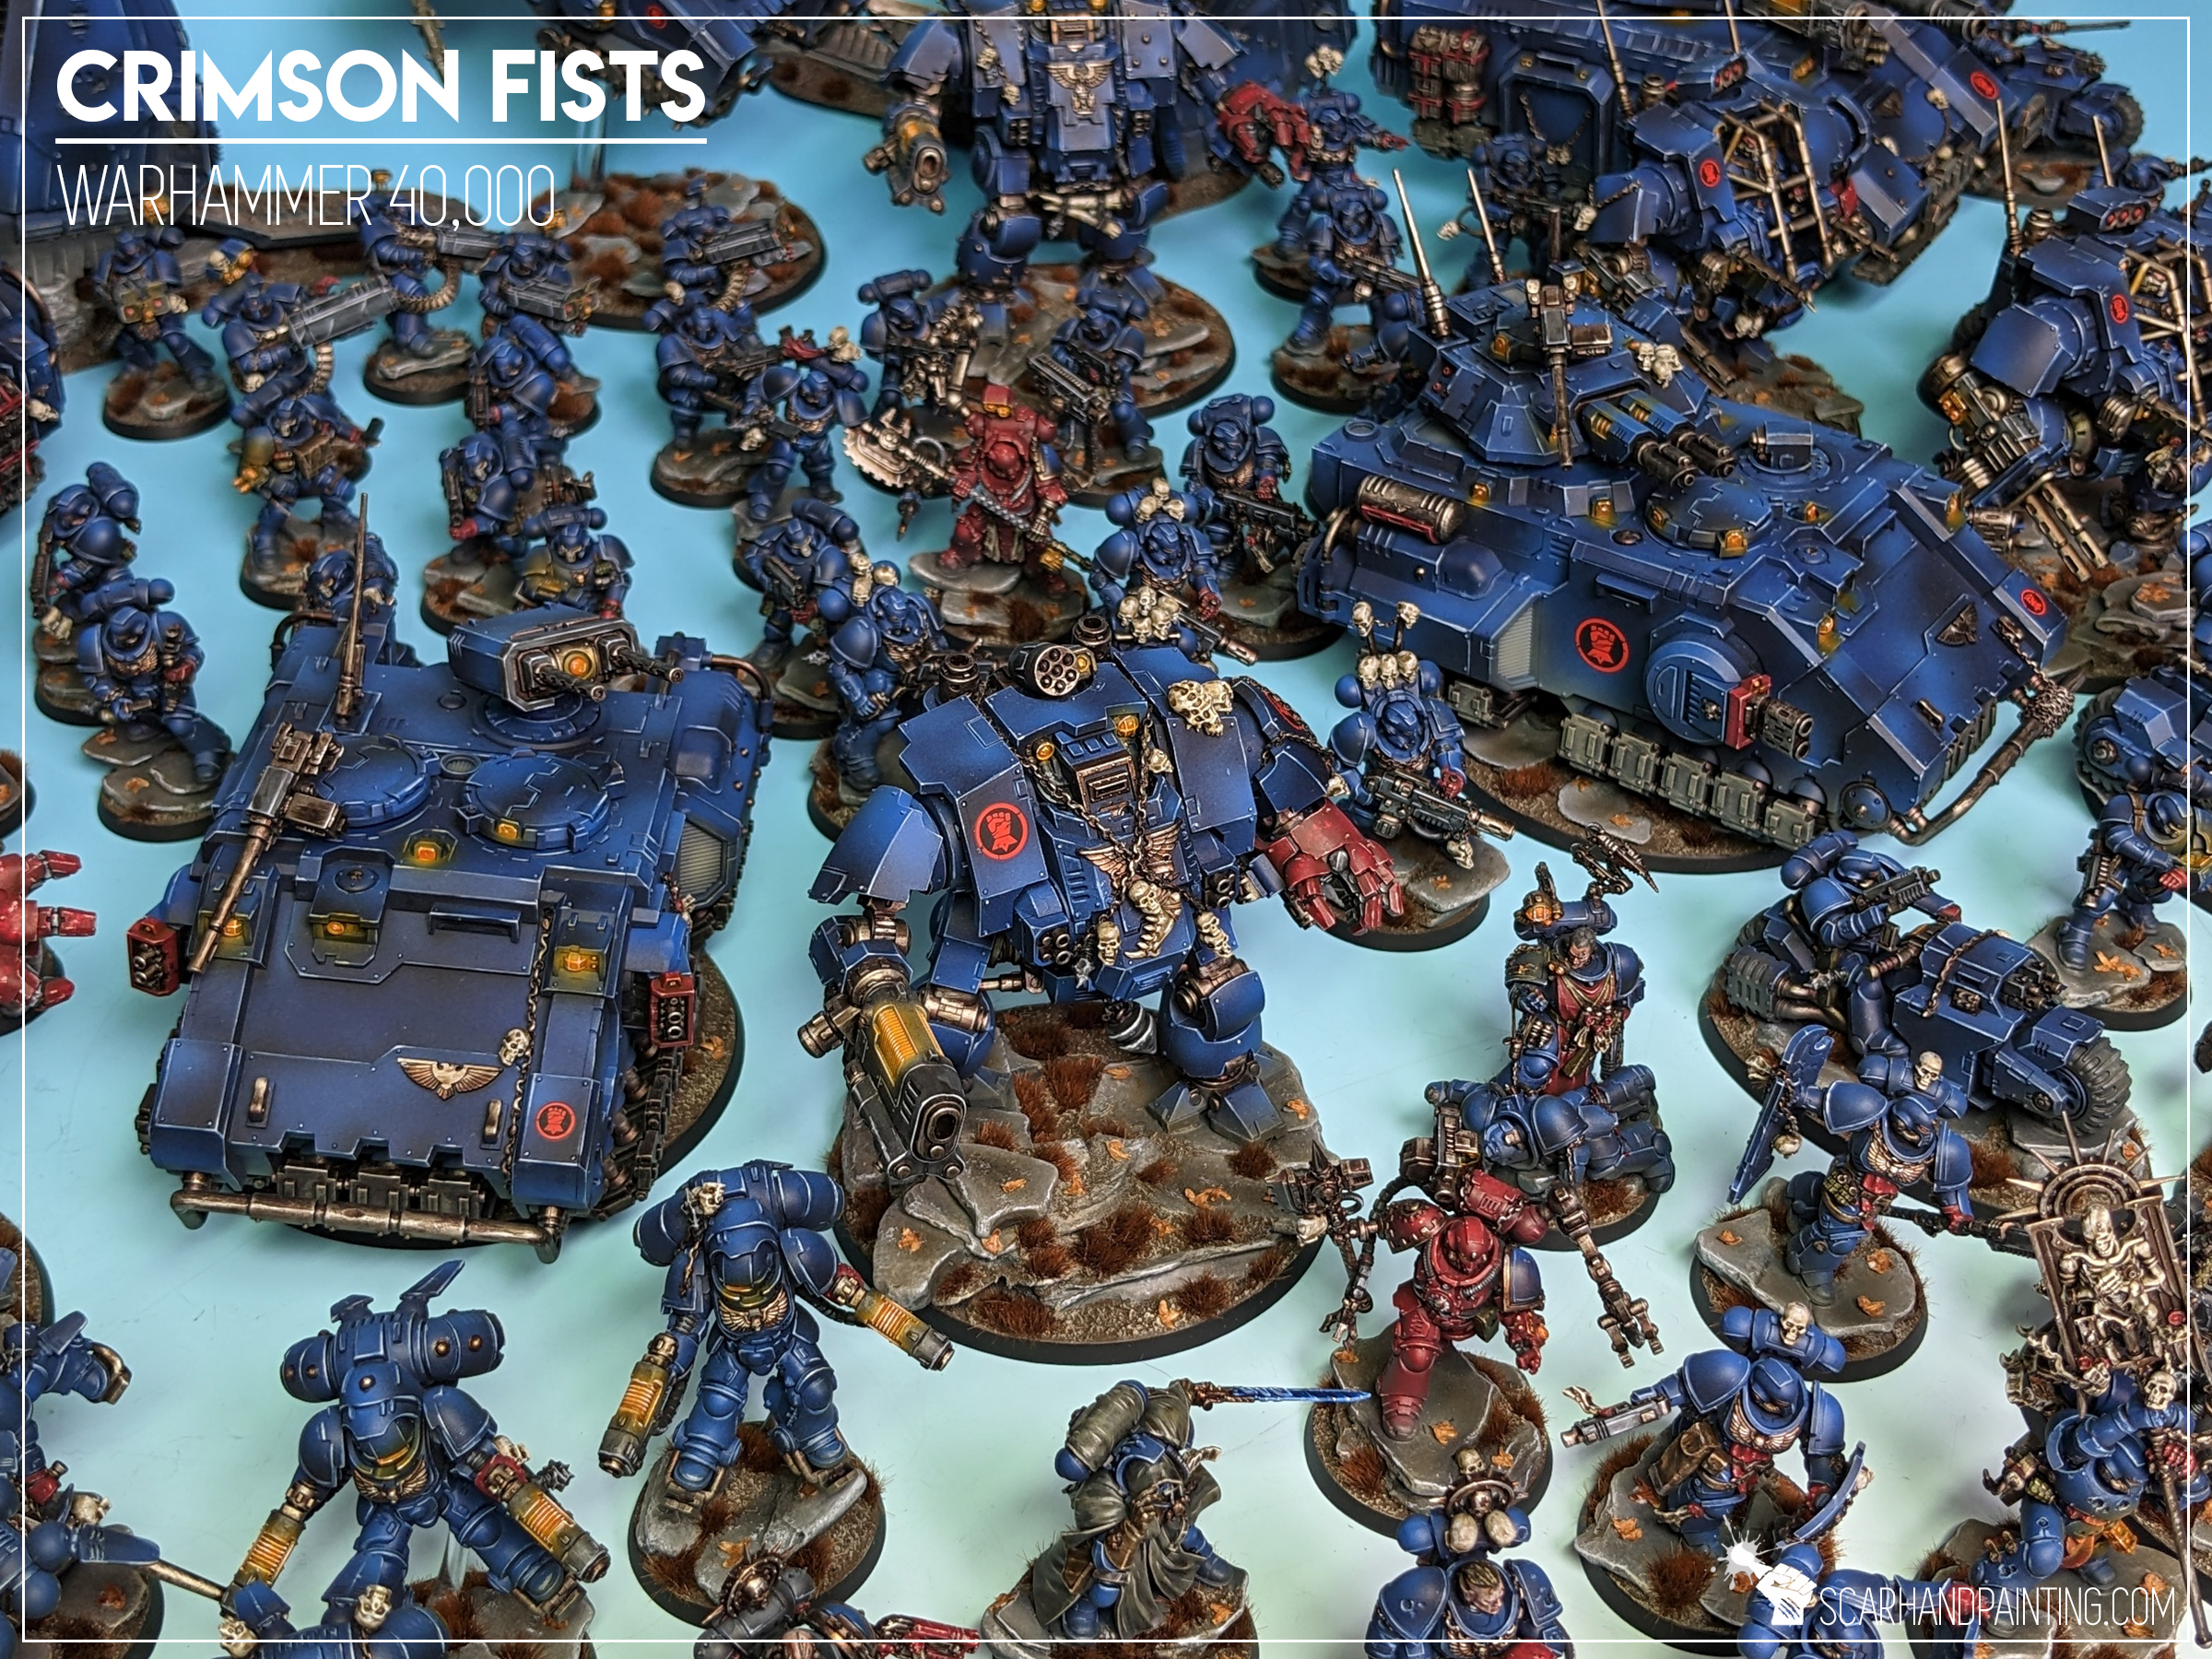
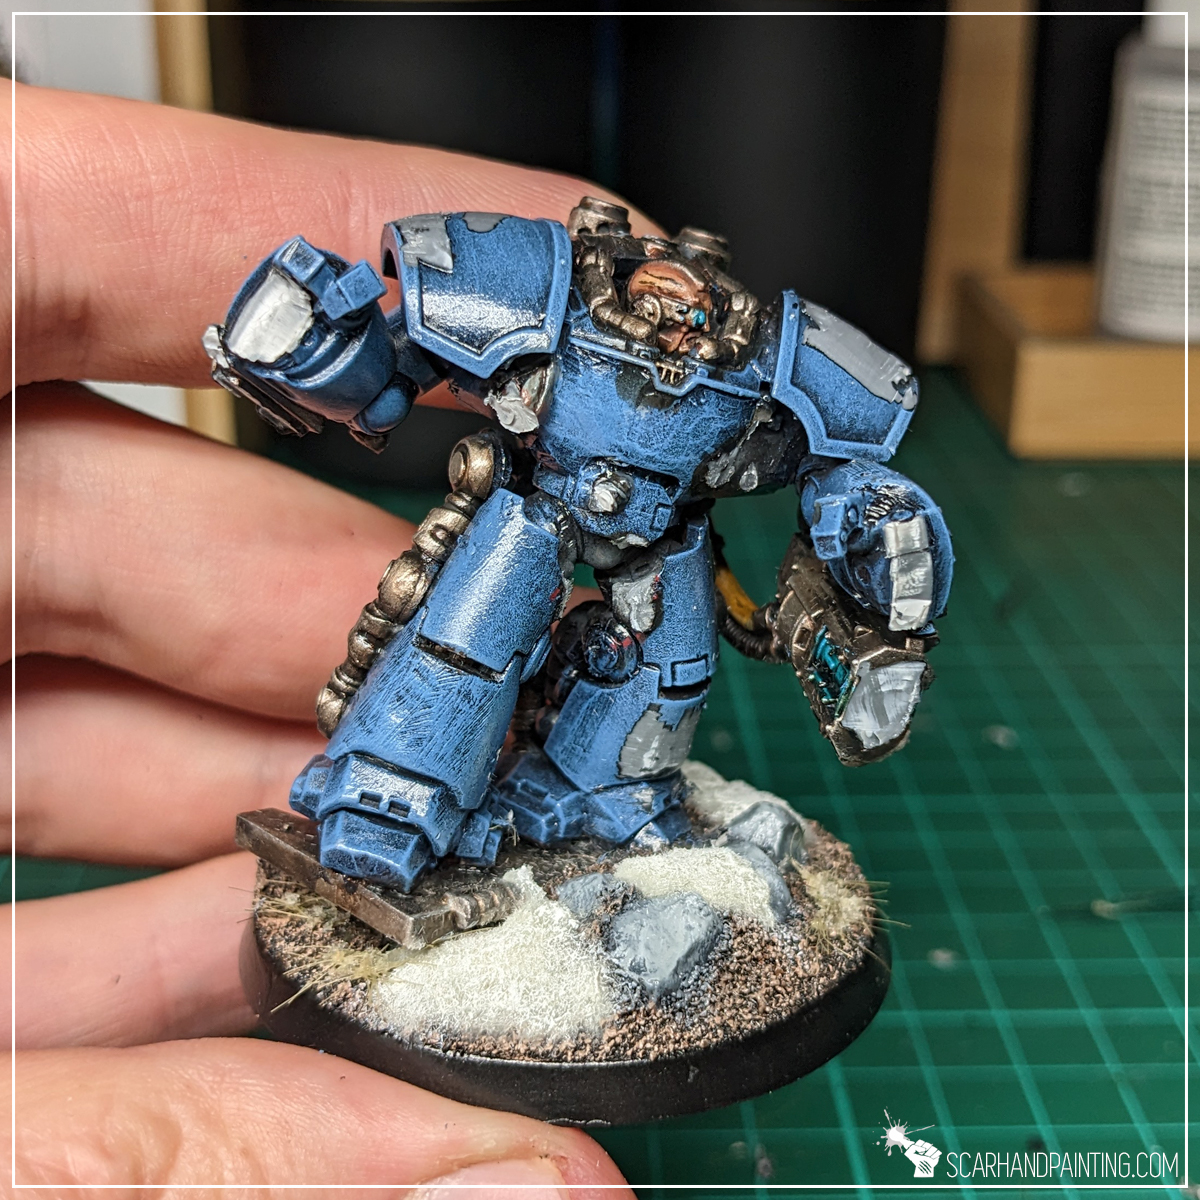
Welcome to Painting Warhammer 40,000 Crimson Fists tutorial. Here I will present to you a Step-by-step of an easy and fast painting process for Games Workshop Crimson Fists Primaris Marines metal as can be seen in Gallery: Crimson Fists.
Before we start, some notes:
Previous steps: Blue Armor
Although metal elements can be painted separately I strongly recommend following part one of the article before moving to this color. Visit Tutorial: Painting Warhammer 40,000 Crimson Fists part one Blue Armor for more information.
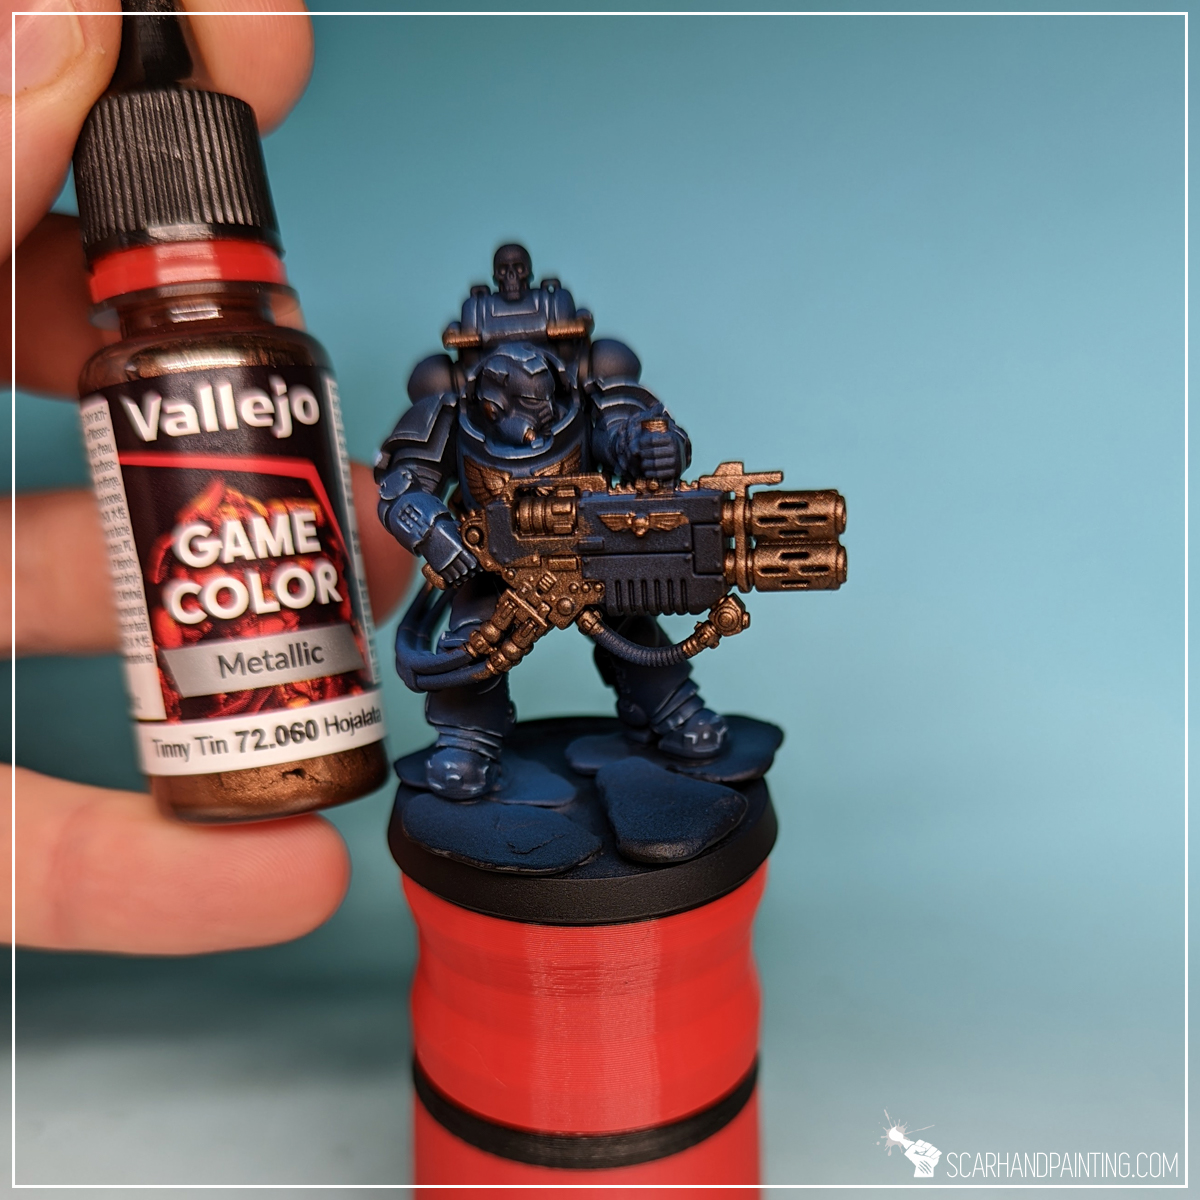
Step one: Base Color
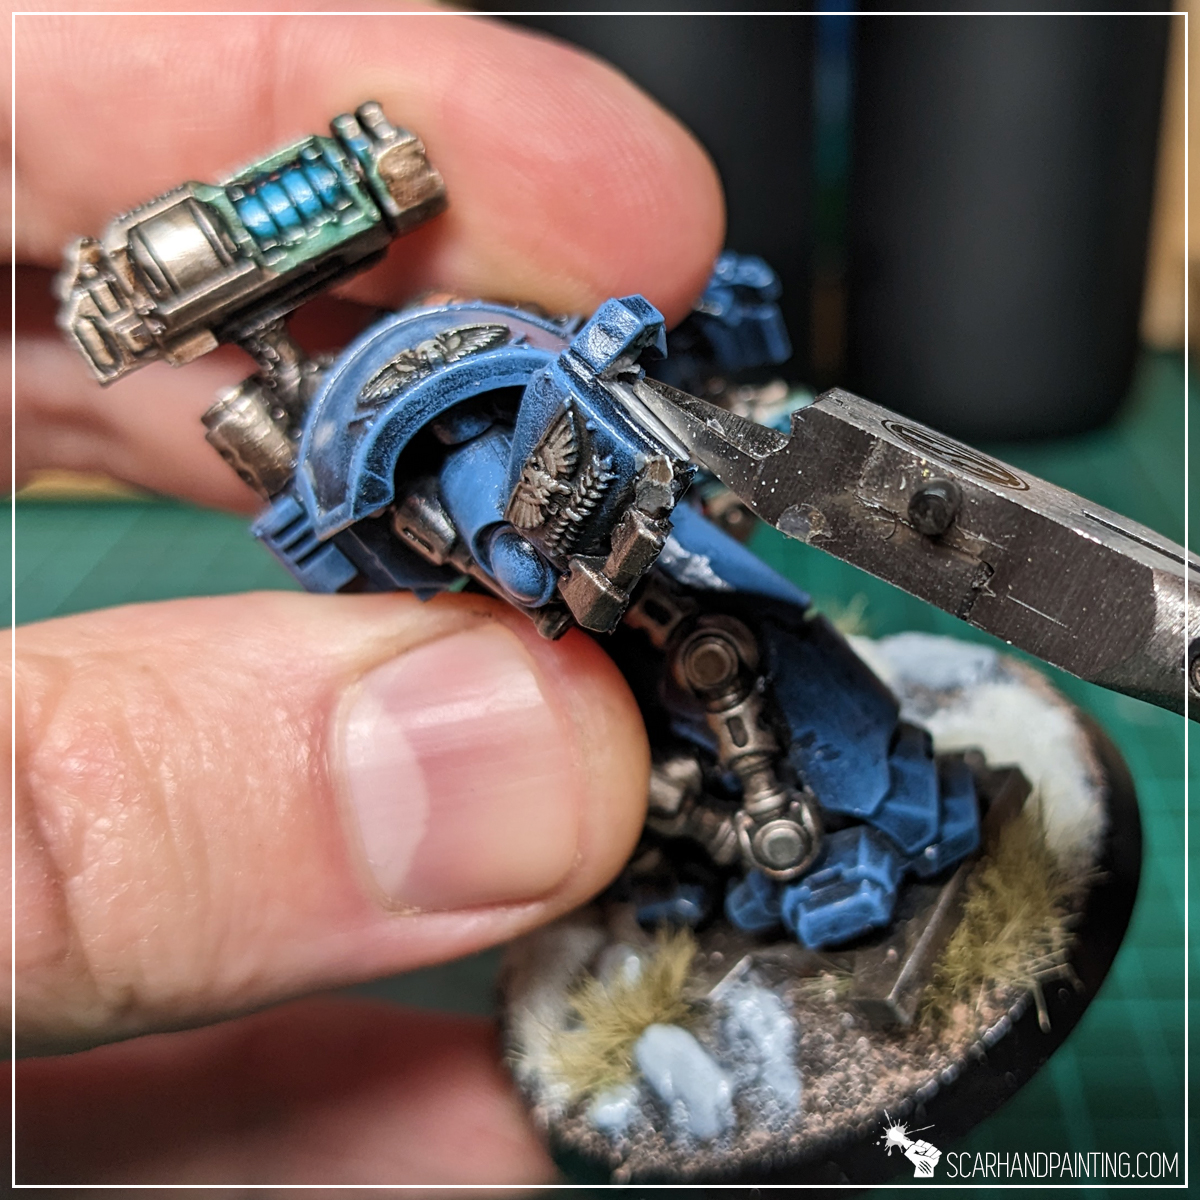
The initial layer was painted manually (no airbrush) with Vallejo Game Color – Tinny Tin (72.060). The color is relatively thin making it easy to move into any recesses, but also maintains a strong coverage, which is good because covering the entire surface is imperative for this particular layer.
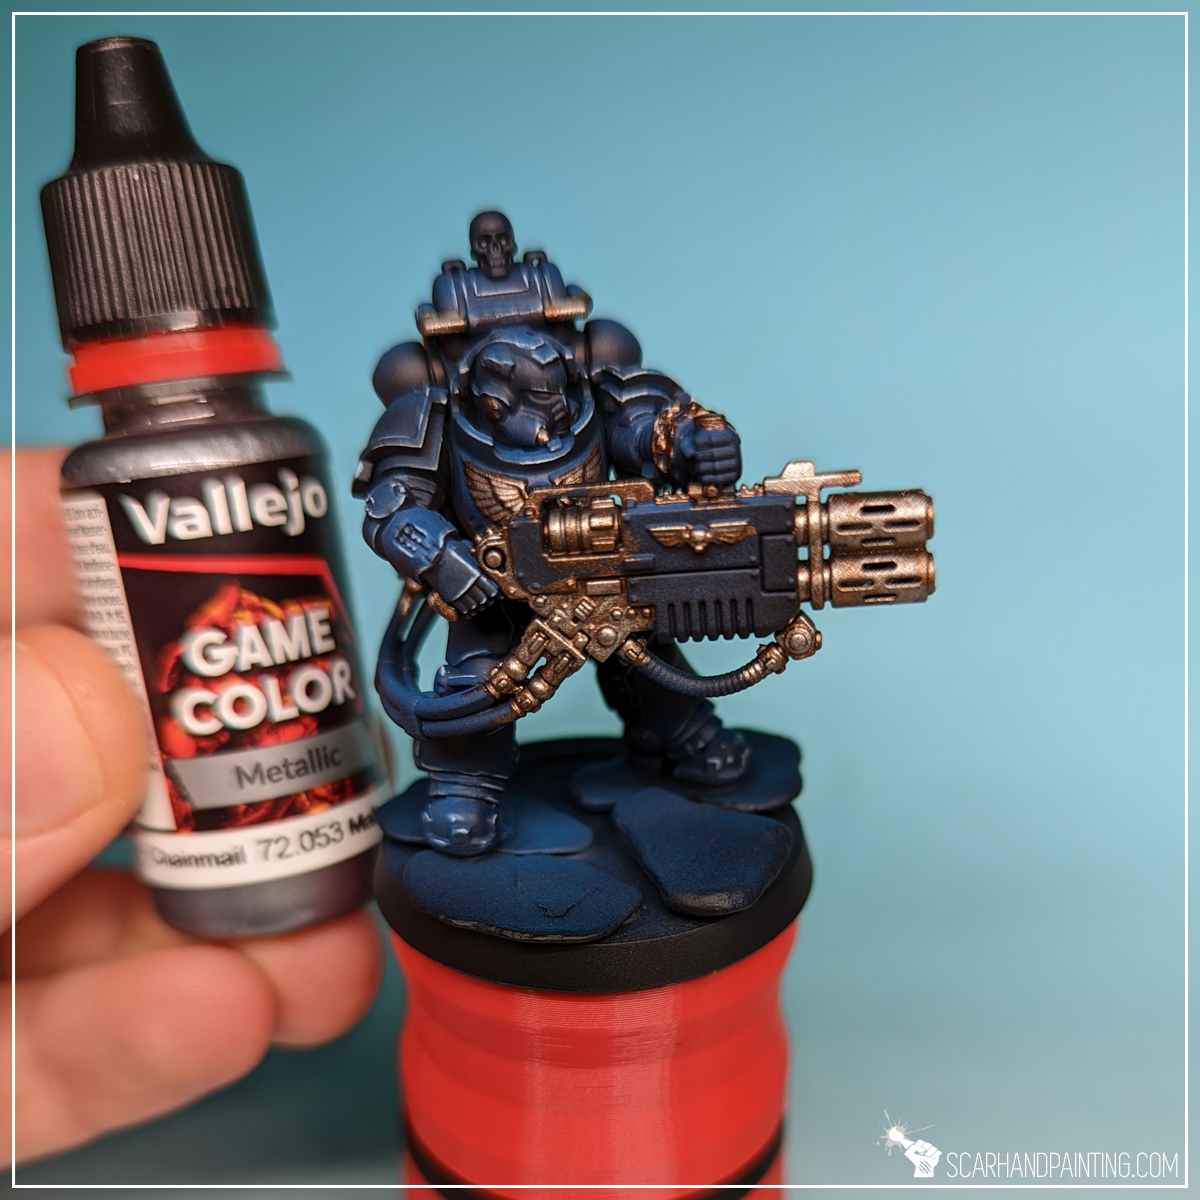
Step two: Highlight
Next I manually applied a large area (flatbrush) highlight of Vallejo Game Color – Chainmail (72.053). A much brighter steel color with strong pigmentation to cover most of the surface, except recesses.
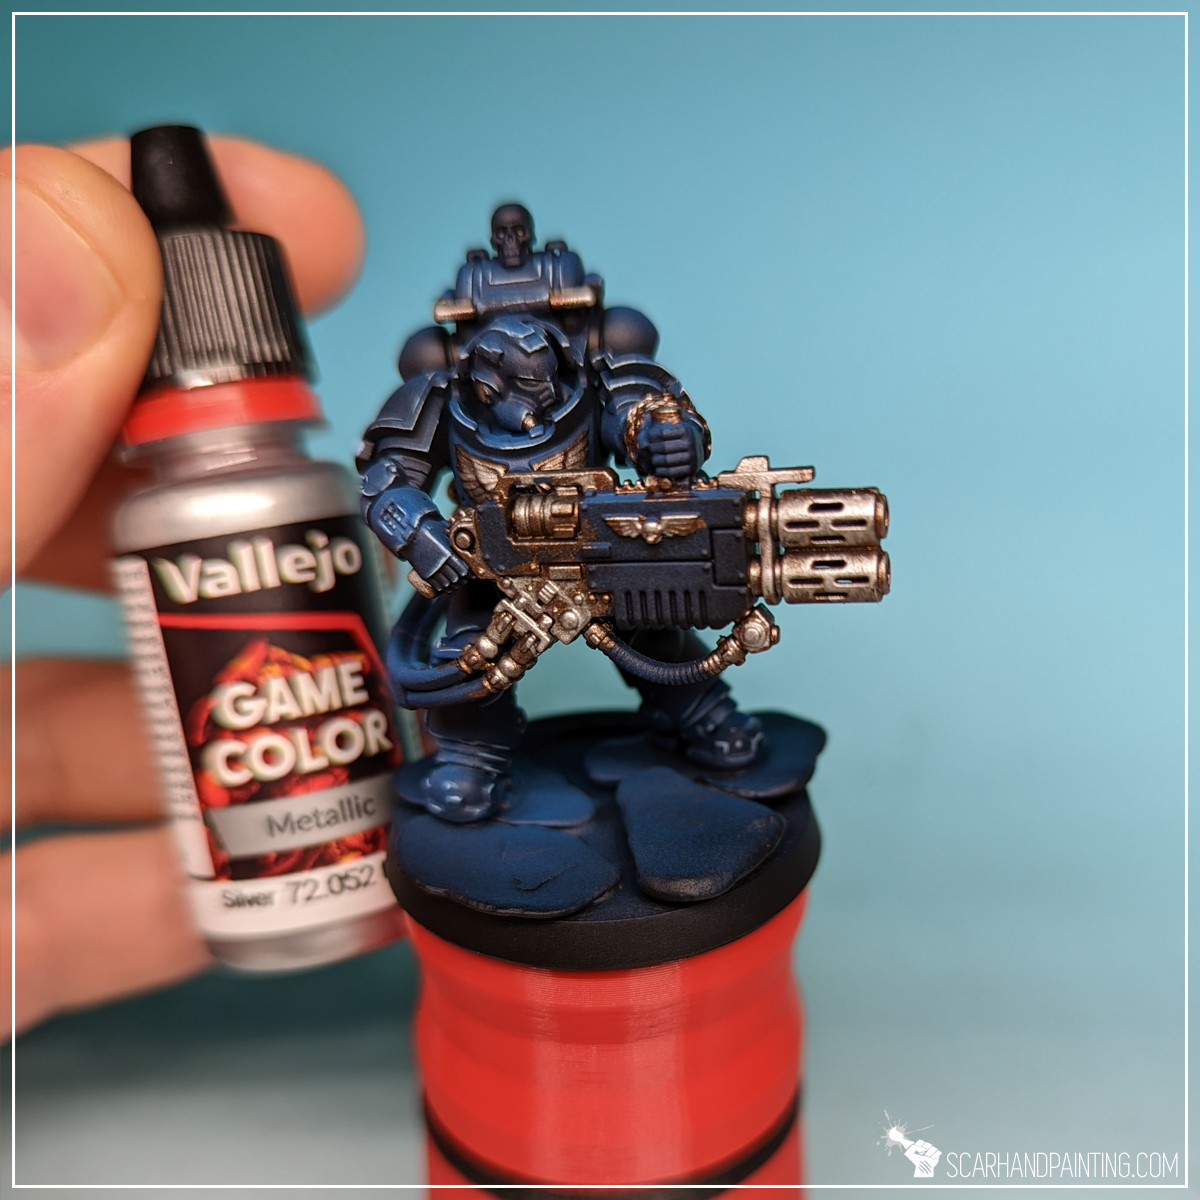
Step three: Highlight
I then applied a more contained highlight of Vallejo Game Color – Silver (72.052), switching between edge highlight and flatbrush.
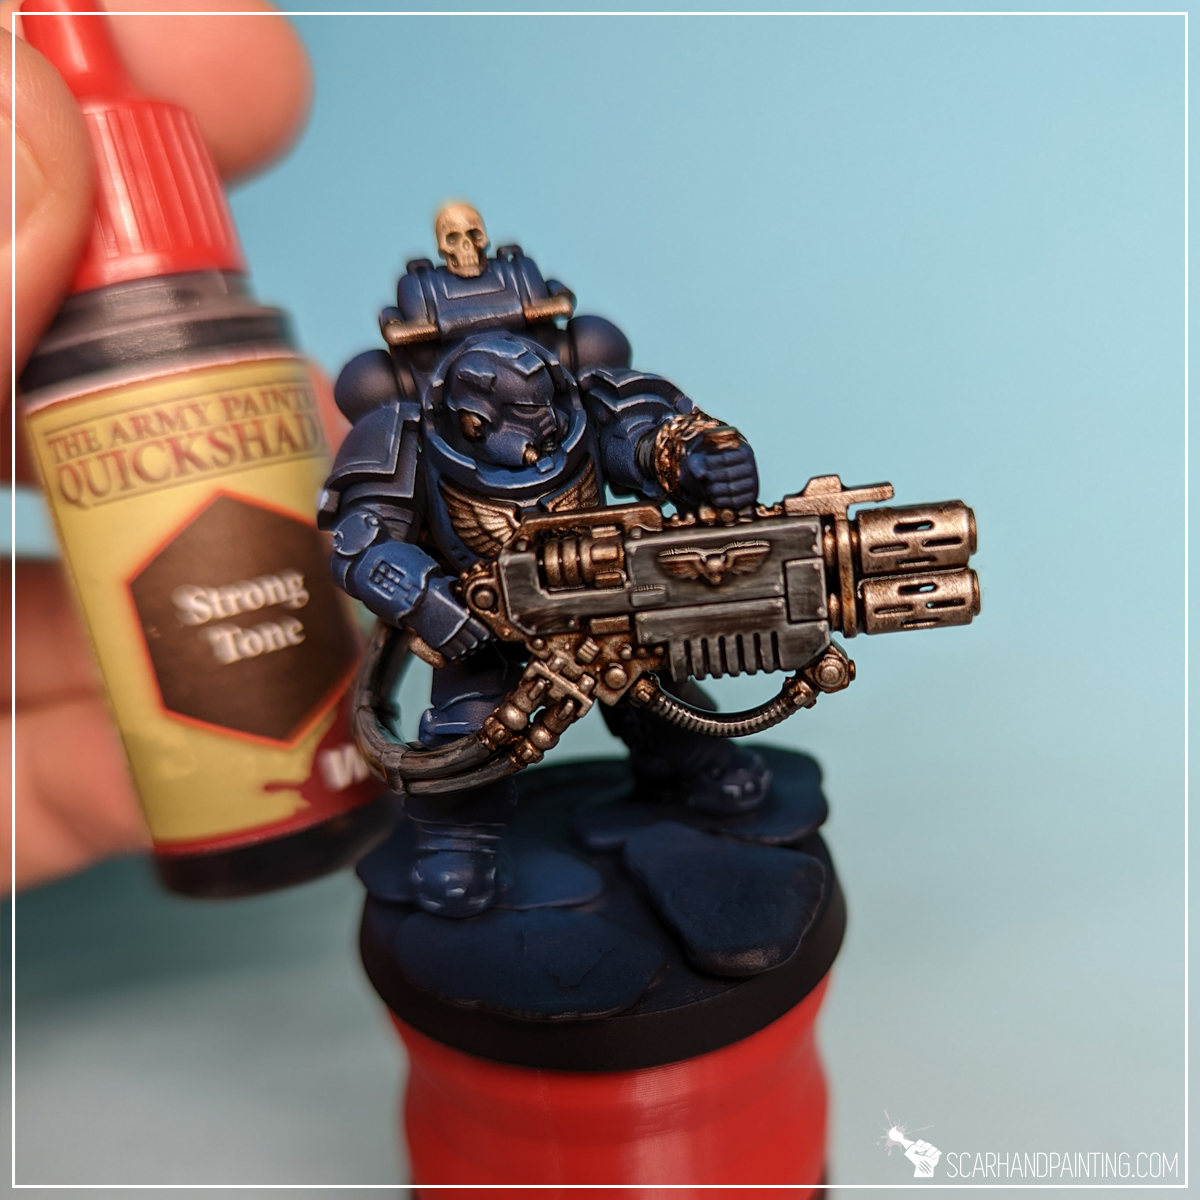
Step four: Wash
Lastly I applied a lot of The Army Painter – Strong Tone Wash. I like to go hard on washes, applying lots and lots of them to allow for pigmentation to do its thing.
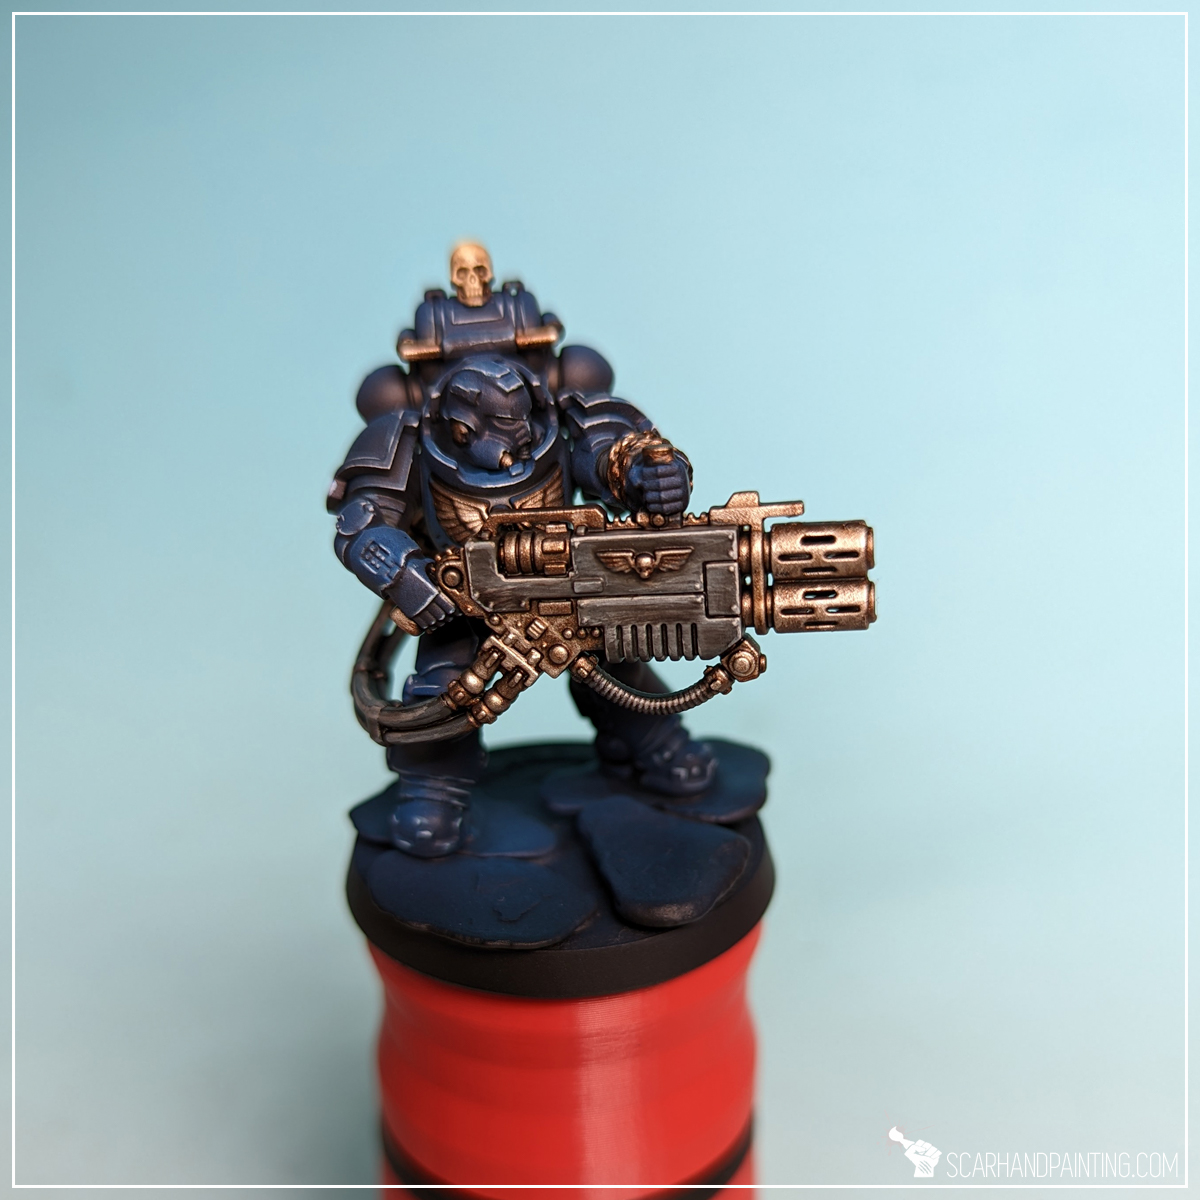
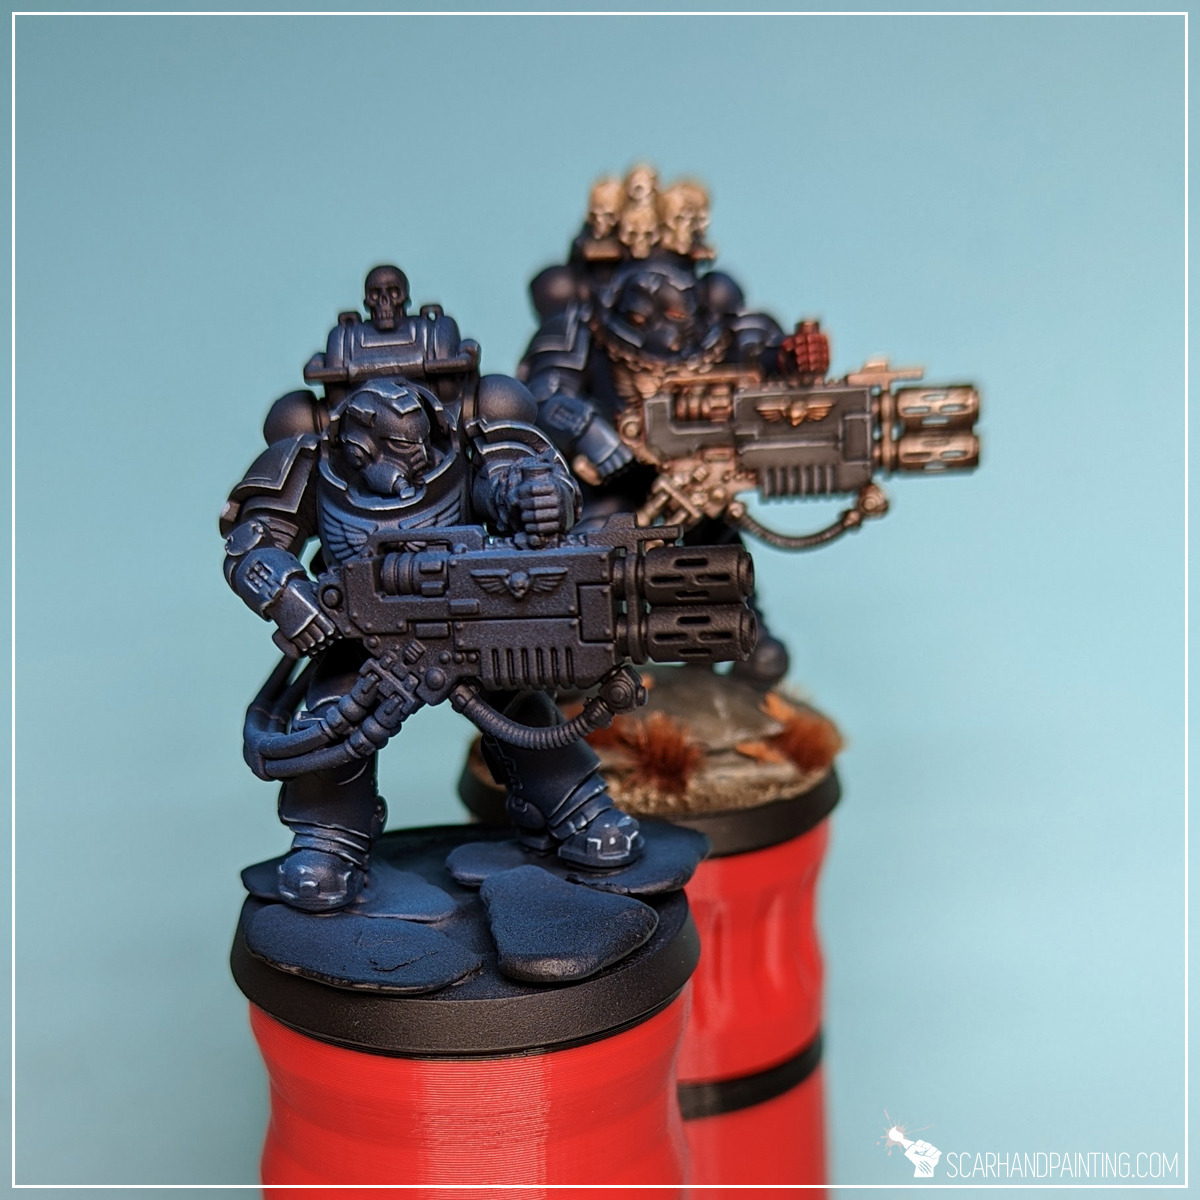
Extra Step: Final Highlight
Depending on the level of paint job I sometimes apply a final, soft highlight of Vallejo Game Color – Silver (72.052). This might work especially good for tiny detail such as chains, Imperial Aquila and similar, making steel look crisp and sharp. Unfortunately I skipped this part for the Eradicators so you’d have to take my word for how it works, or see other Crimson Fists miniatures for reference.
I hope you’ve enjoyed this article. Be sure to let me know your thoughts in the comments below or via Facebook or Instagram. I would also appreciate it if you considered sharing this content with your friends, who might find it interesting. Finally if you are looking for a professional miniatures painting service, be sure to contact me with this contact form. I always reply within 24 hours, after which please check out your spam folder.
Welcome to Painting Warhammer 40,000 Crimson Fists tutorial. Here I will present to you a Step-by-step of an easy and fast painting process for Games Workshop Crimson Fists Primaris Marines red as can be seen in Gallery: Crimson Fists.

Before we start, some notes:
Previous steps: Blue Armor
Although red elements can be painted separately I strongly recommend following part one of the article before moving to this color. Visit Tutorial: Painting Warhammer 40,000 Crimson Fists part one Blue Armor for more information.
Step one: Base Color
The initial layer was painted manually (no airbrush) with Vallejo Model – Hull Red (70.985). The color is thick resulting in strong coverage. I deliberately avoided going back to places where the undercoat might be visible, not to build too much paint in the area. Other layers will take care of that.

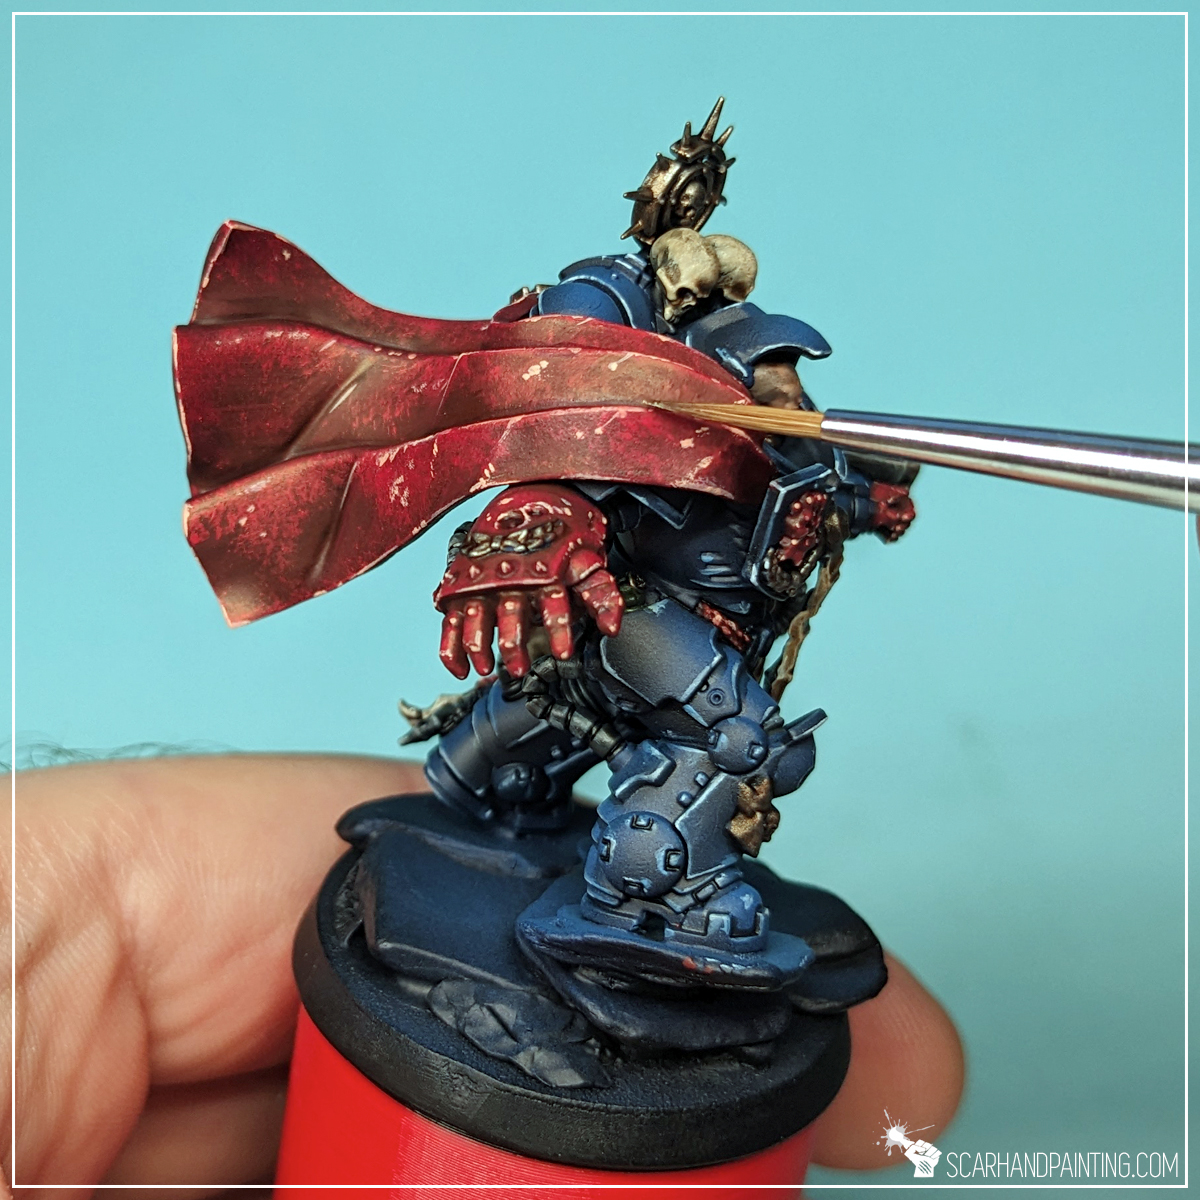
Step two: Highlight
Next I manually applied a large area highlight of Vallejo Burnt Red (70.814). A bit brighter and slightly pastele, the color has a relatively good coverage. I focused on covering all edges and exposed areas, less on recesses and inner folds.

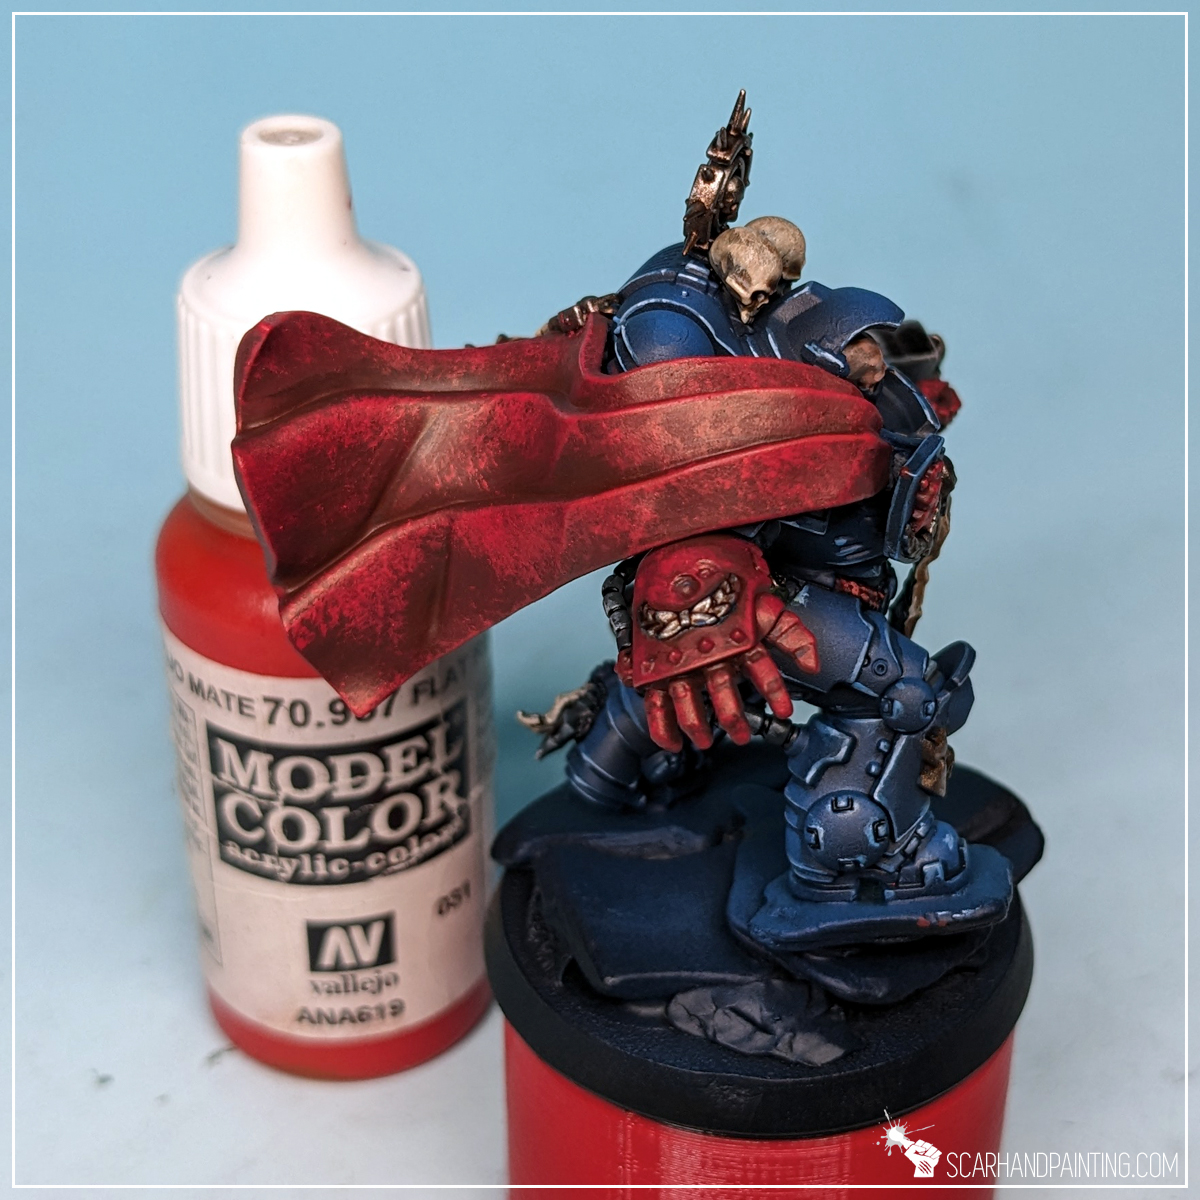
Step three: Texture Highlight
I then applied a mix-method layer of Vallejo Flat Red (70.957)*, switching between edge highlight and stippling. This added much needed texture and vibrancy.
* Warning: I am convinced my Vallejo Flat Red is bugged. I have purchased a number of bottles and the one used for my Crimson Fists is clearly mixed up. There sadly is no comparable color in the entire Vallejo range that I am aware of (and I got each Red they make to test it). I recommend choosing any strong, vibrant, well pigmented red for this step instead.
Step four: Final Highlight
In the last step I added a limited highlight of Citadel Lugganath Orange. The paint is thick and I used it without thinning. Just a few lines on the edges, a few irregular dots in certain areas. Not to much, not to change the expression of the overall color.

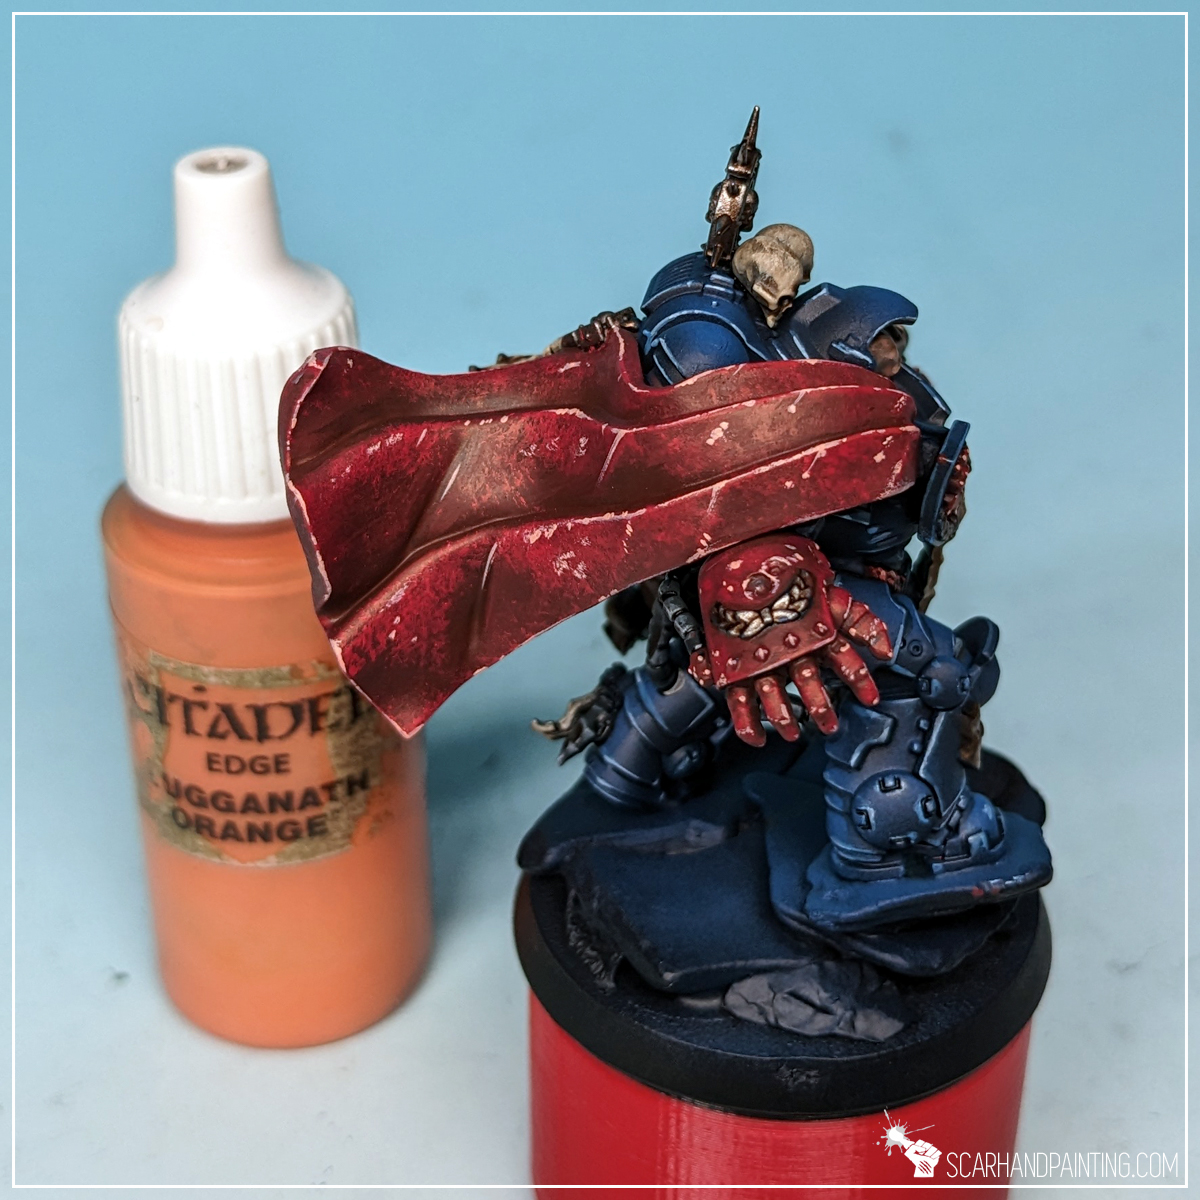
That wraps up red. Four layers of paint to imitate eye catching, vibrant tone. Two most important colors out of the way, the rest is a topic for another day. Stay tuned for part three of the tutorial.
I hope you’ve enjoyed this article. Be sure to let me know your thoughts in the comments below or via Facebook or Instagram. I would also appreciate it if you considered sharing this content with your friends, who might find it interesting. Finally if you are looking for a professional miniatures painting service, be sure to contact me with this contact form. I always reply within 24 hours, after which please check out your spam folder.

Magnetic transportation is probably the best way to carry miniatures safely. Its main pros are ease of use and speed with which the miniatures get packed/unpacked. Although pure comfort, this way of transporting miniatures is not without issues, amongst which is how very heavy pieces can slide and rub on one another, damaging the paint job in the process. Today I will present to you an easy way of dealing with this issue once and for all!
I have been using magnetic transportation for the last few years. Before that I was all about foam bags and stuff, but since I got my first A-Case I’ve abandoned all other ways of carrying minis and never looked back. Now I am happily carrying my lovingly crafted armies, including scenery, in magnetic transportation cases exclusively. Although I will never trust in any one way of carrying minis completely, with only the positive experience, I grew to trust magnetic transportation *almost* all the way. By “almost” I mean there are, like with all methods, some things worth being aware of. For starters I will never, under any circumstances put my case sideways. Do not get me wrong – my miniatures are professionally magnetized, but why tempt fate? More importantly some miniatures are really, and I mean REALLY, heavy and may slide around regardless of how many magnets you put into their underside.
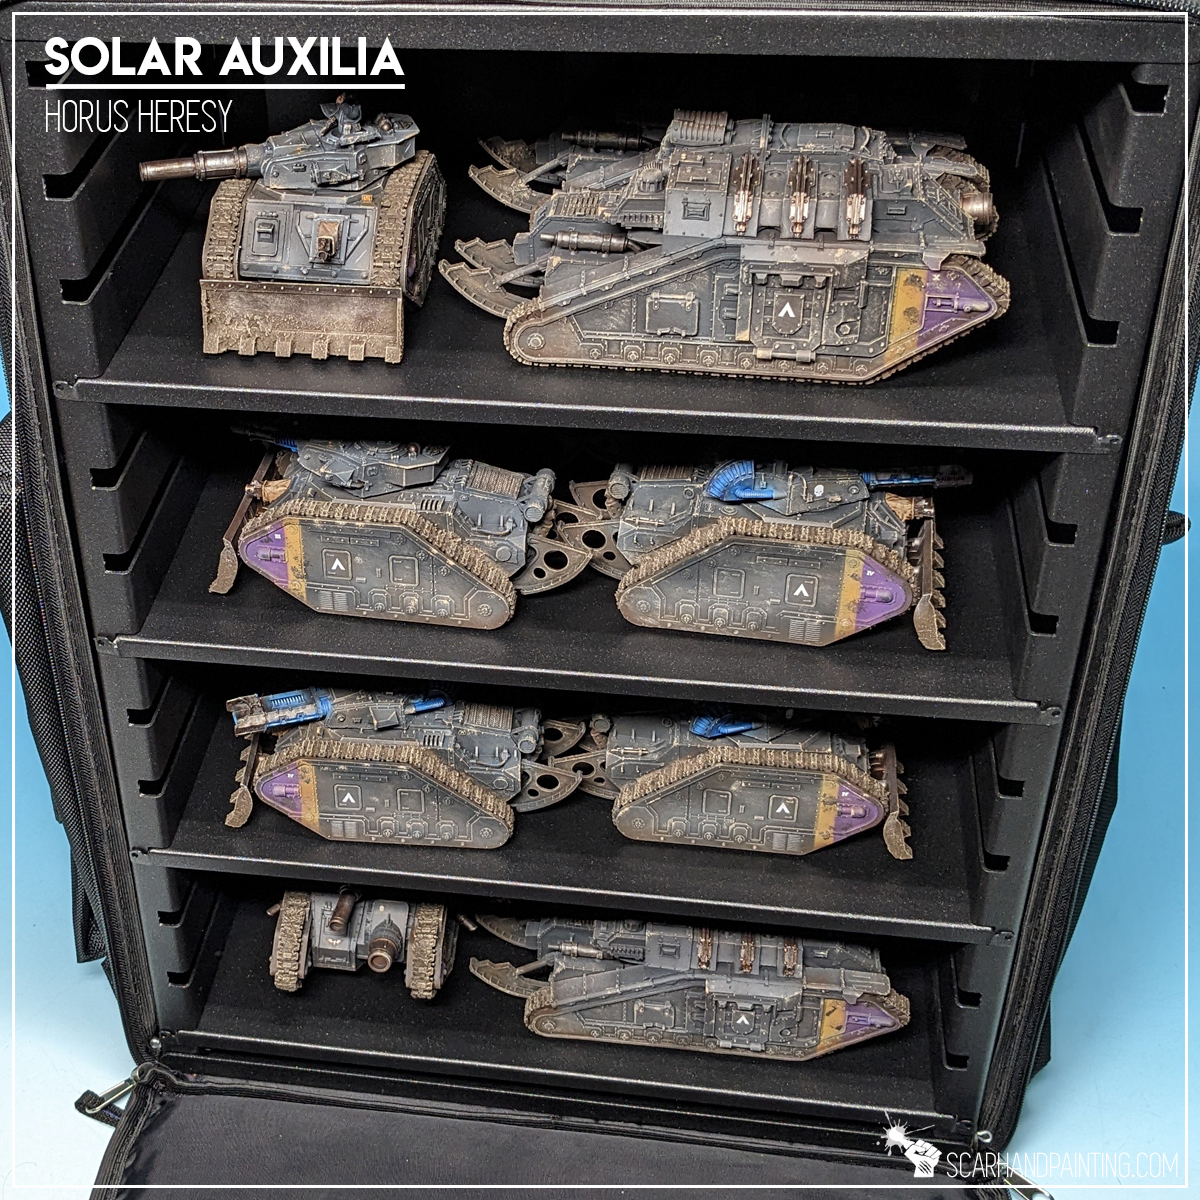
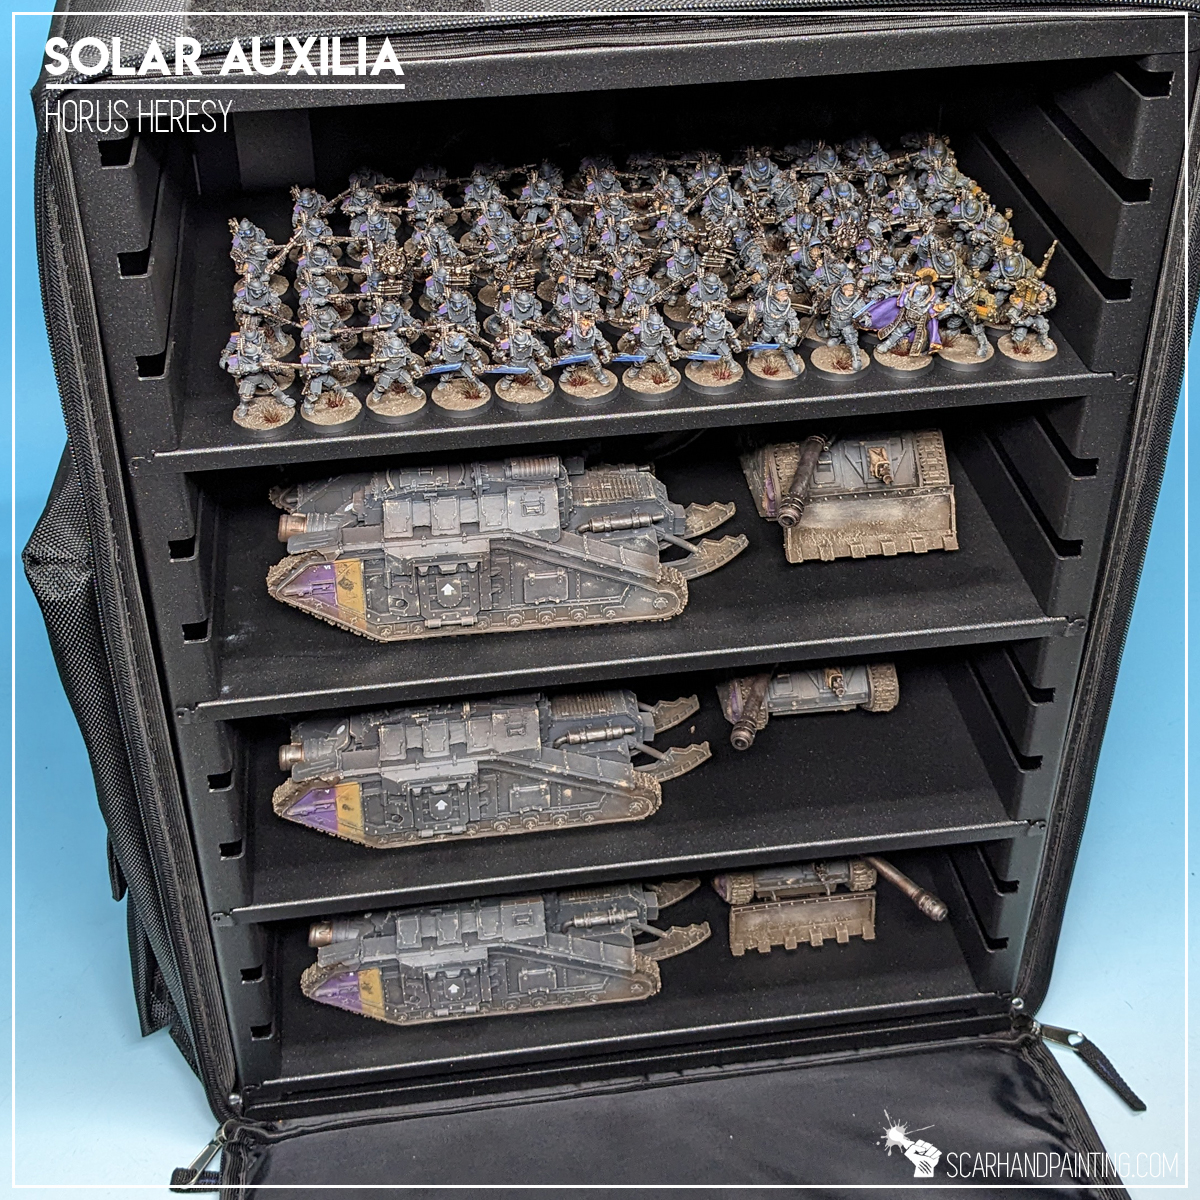
Just recently I have completed a large Solar Auxilia commission, including ten resin Dracosan tanks, over 400 grams each! The customer asked me to magnetize them and I got to it right away, but not without some thorough testing, to ensure the solution will work properly for these bad boys. Of course the miniatures moved around. I went through magnetized 3d printed holders, more magnets, stronger (over 20kg attraction power) magnets, magnets with rubber bands stretched between them, anti-slide stickers, foam trays to protect the miniatures and more. Neither solution satisfied the goal of providing safe transportation for my customers’ collection. Finally after multiple trials and errors I found an easy, cheap solution that gets the job done and is very user friendly.
Final word before we start:
The solution is very simple: Due to heavy weight the miniatures, if well magnetized, will stay on top of the metal shelf without issue. In order to prevent them from sliding around I simply needed to create a socket to block any extensive sideways movements.
For this I used 3mm thick self-adhesive felt sheets and pads. Yes, that is correct – the solution was much simpler than anticipated. I used the actual Dracosan tanks spread across an A-Case shelf and stuck a few felt pads, prepared in advance, around them. I left some loose space between the sheets and the tanks to make it easier for the customer to fit each tank in each slot, regardless of eventual small differences in size of resin elements. Assuming the tanks will not take off, they are allowed to slide just barely, as long as the only thing they hit would be a relatively soft pad…
The Final Test was successful!
I hope you’ve enjoyed this article. Be sure to let me know your thoughts in the comments below or via Facebook or Instagram. I would also appreciate it if you considered sharing this content with your friends, who might find it interesting. Finally if you are looking for a professional miniatures painting service, be sure to contact me with this contact form. I always reply within 24 hours, after which please check out your spam folder.

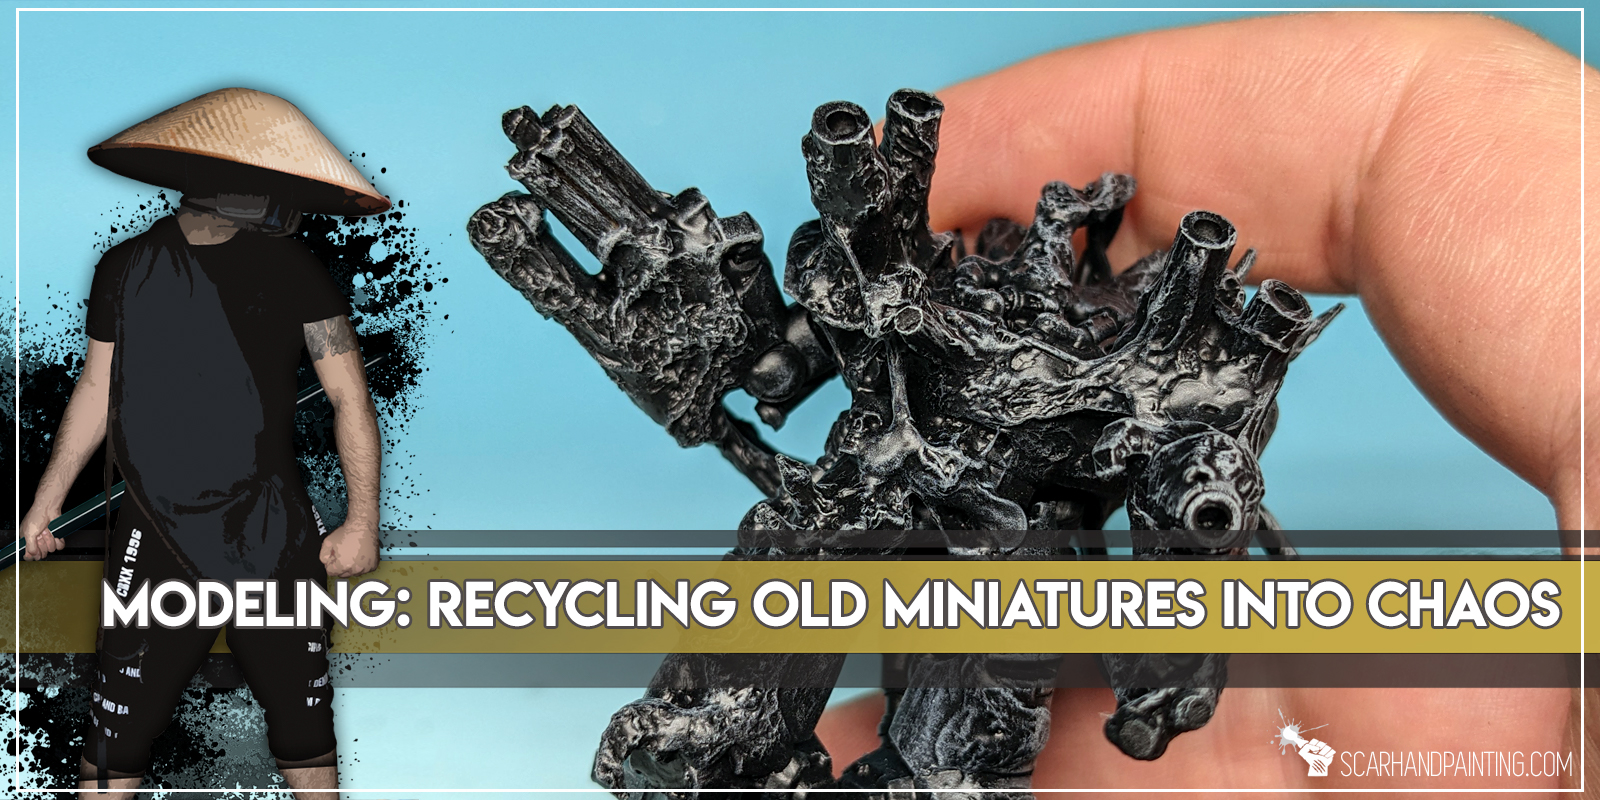
What if I told you it is possible to turn almost any old, damaged, badly painted Space Marine model into an Obliterator using trash and a bit of modeling magic? Sounds good? How about I just show you!
Before we start, some notes:
I have been playing Warhammer for over two decades now. Throughout that time I had multiple armies that I built, then painted, then sold out to get dough for another dose of ‘plastic crack’. At times I had to get rid of some really badly painted, out of date sculpts. Easy to say, I came up with a variety of ideas on how to make such miniatures more desirable in the eyes of potential buyers, one of which was turning old minis into Chaos Obliterators and Spawns. The key was to use an old miniature and as little extra bitz as possible to up the value on the gaming board. Nowadays Obliterators come in plastic and look cool, but I believe there is still value in recycling old minis, especially if you’re short on cash and would like to play CSM proper by spamming these bad boys all over the place. The method shown below can be used for anything, including turning Marines/Vehicles Death Guard, making Possessed or Mutants and more. I deliberately chose to make an Obliterator, but stay open minded and let me know in the comments if you would like to see some kind of dedicated Nurge’esque magic in the future.
Now buckle up and let’s jump straight into it!

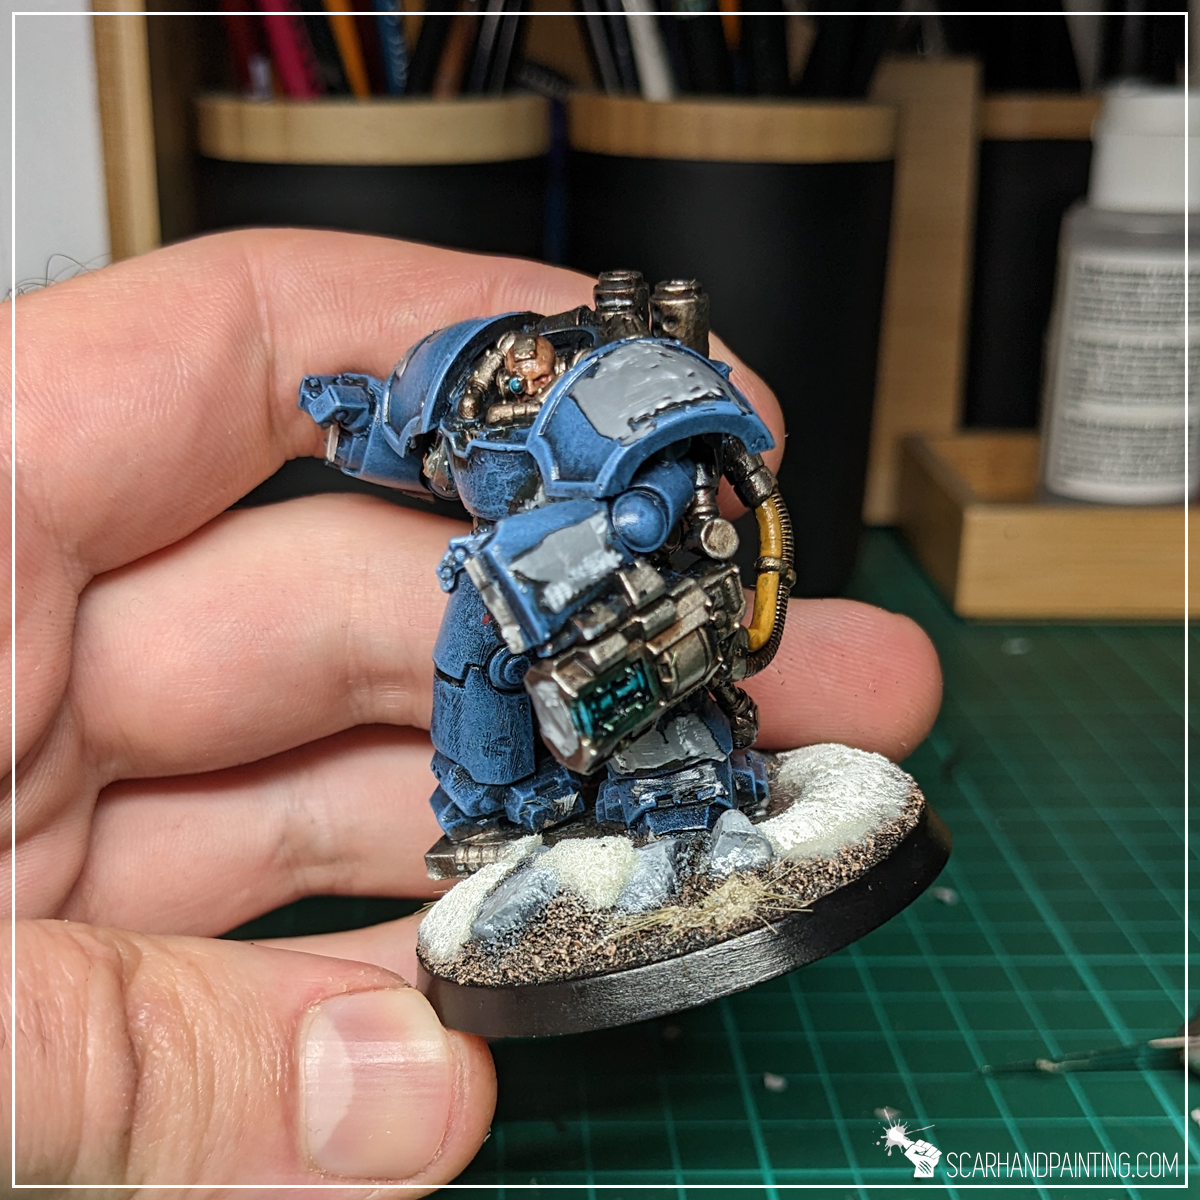
Step One: Preparing the Miniature
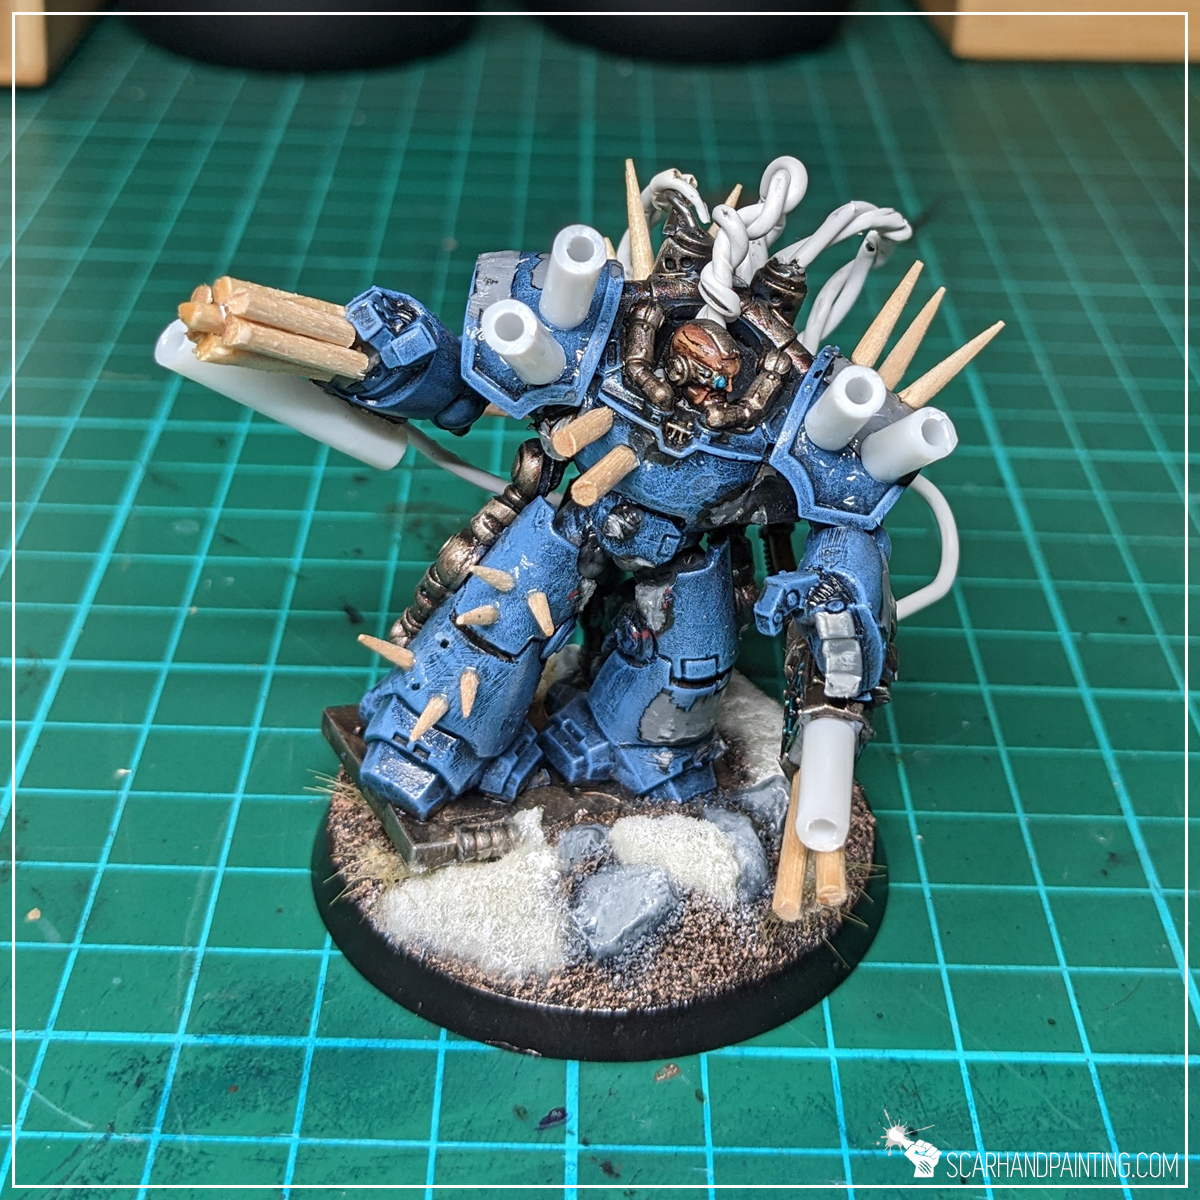
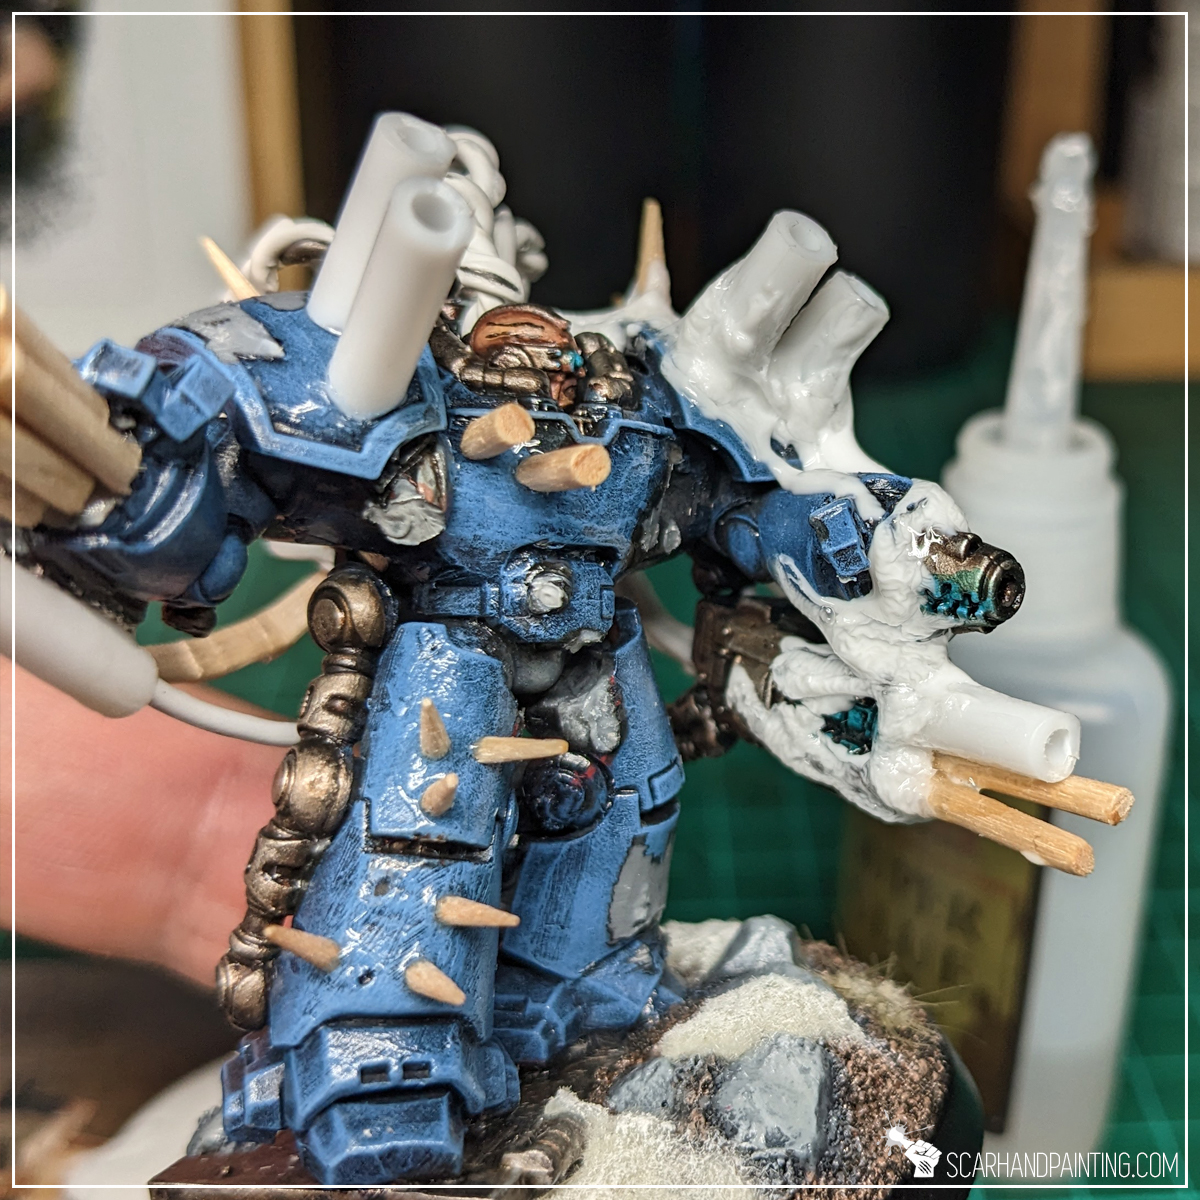
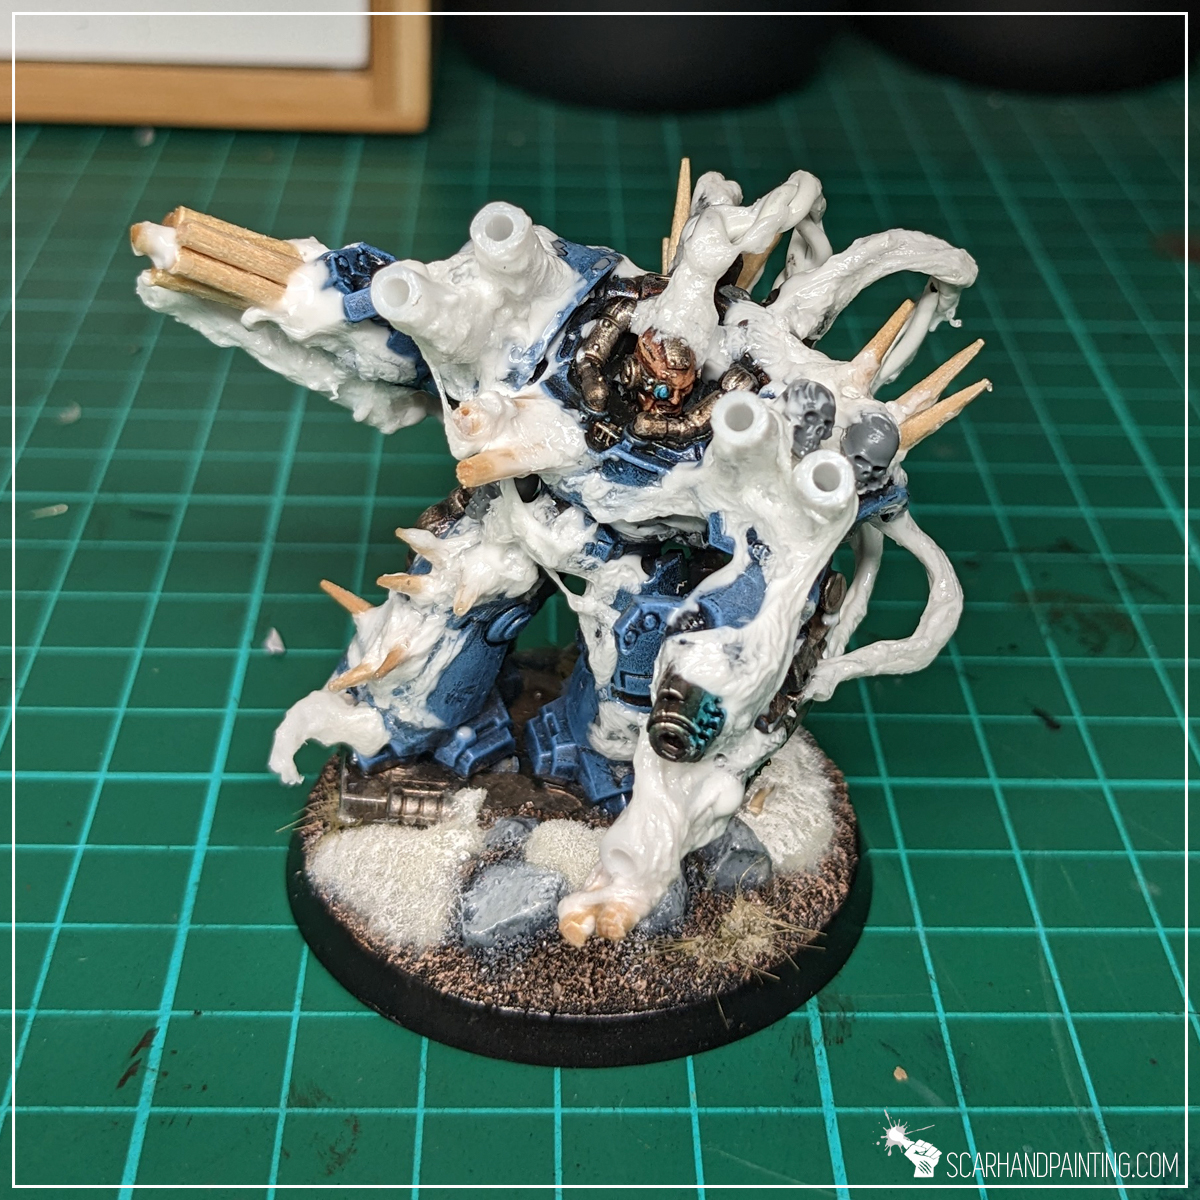
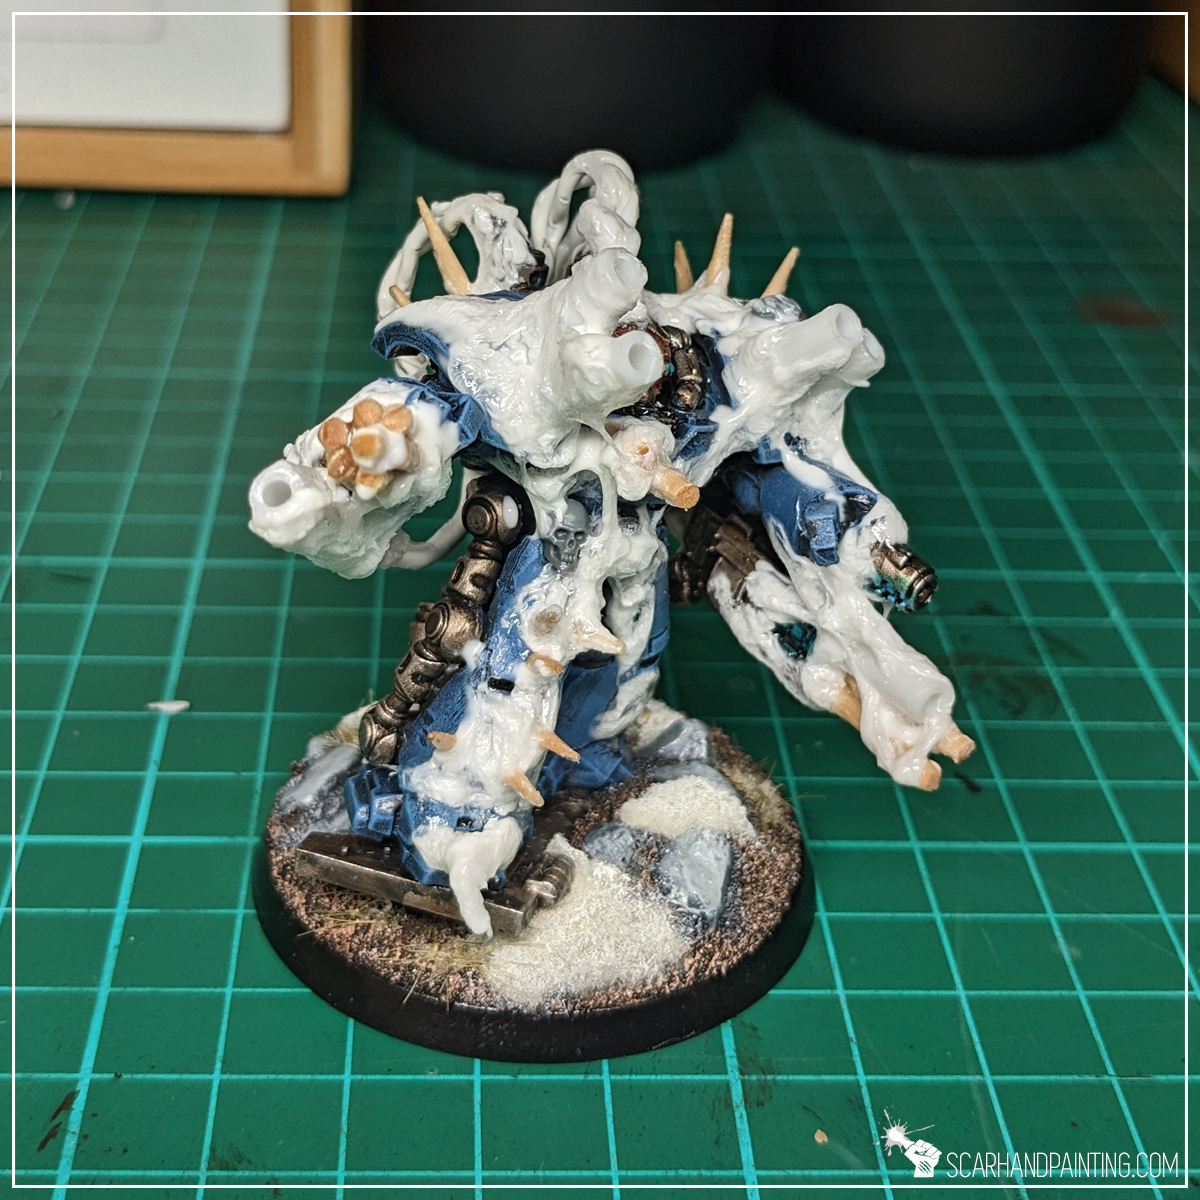
Using Hobby Cutters and a Hobby Knife I removed front parts of the miniature’s arms to make space for the upcoming weapon extensions. I also removed any Imperium related symbols.

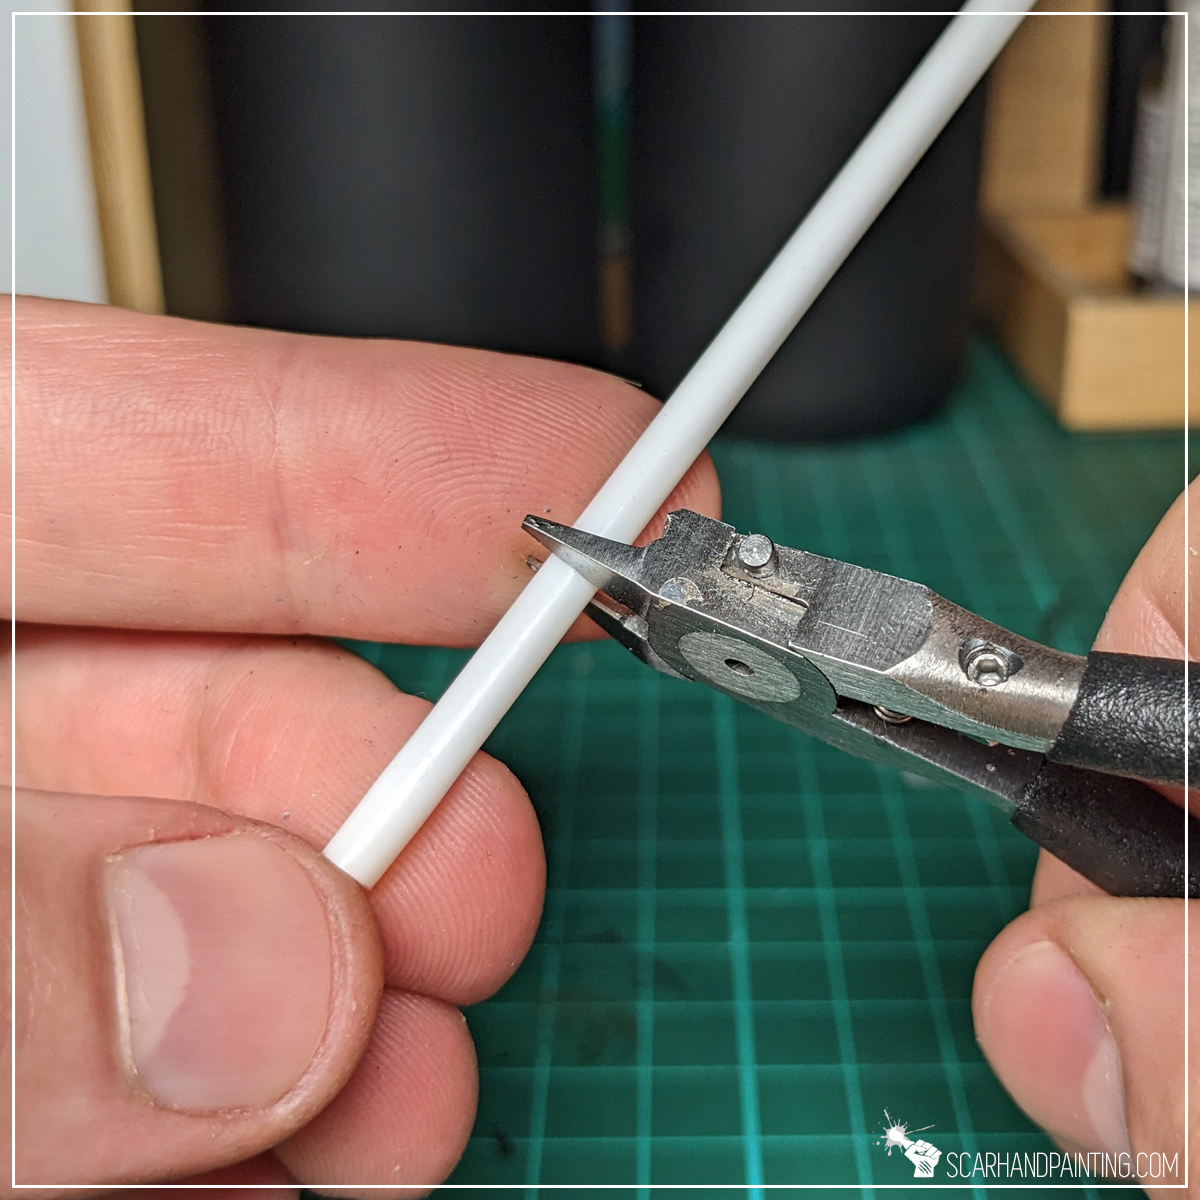
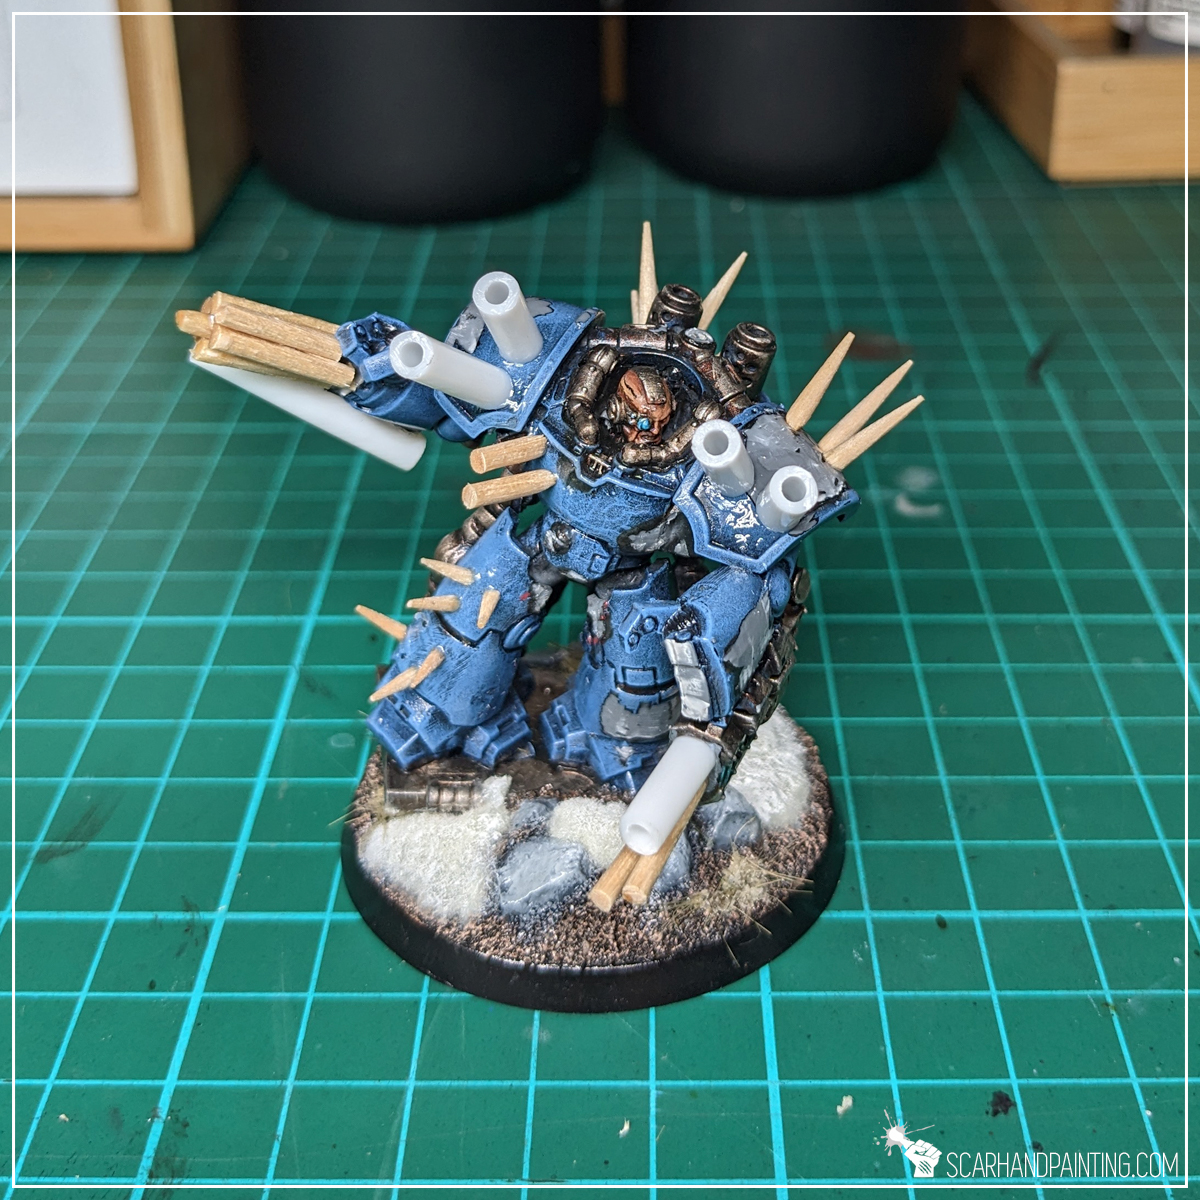
Step Two: Weapon Barrels
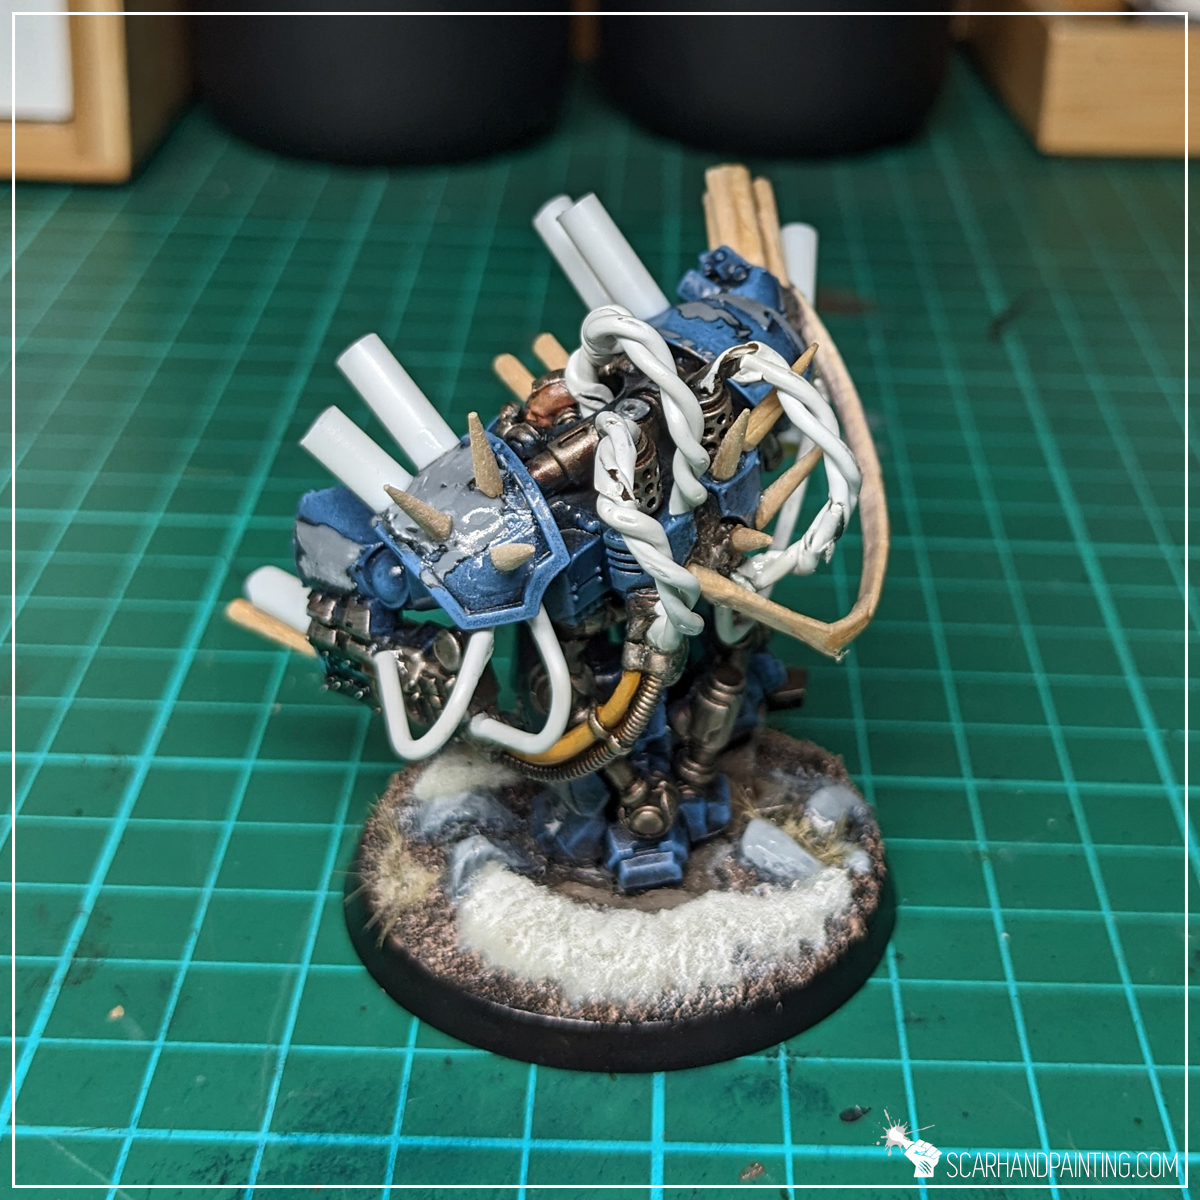
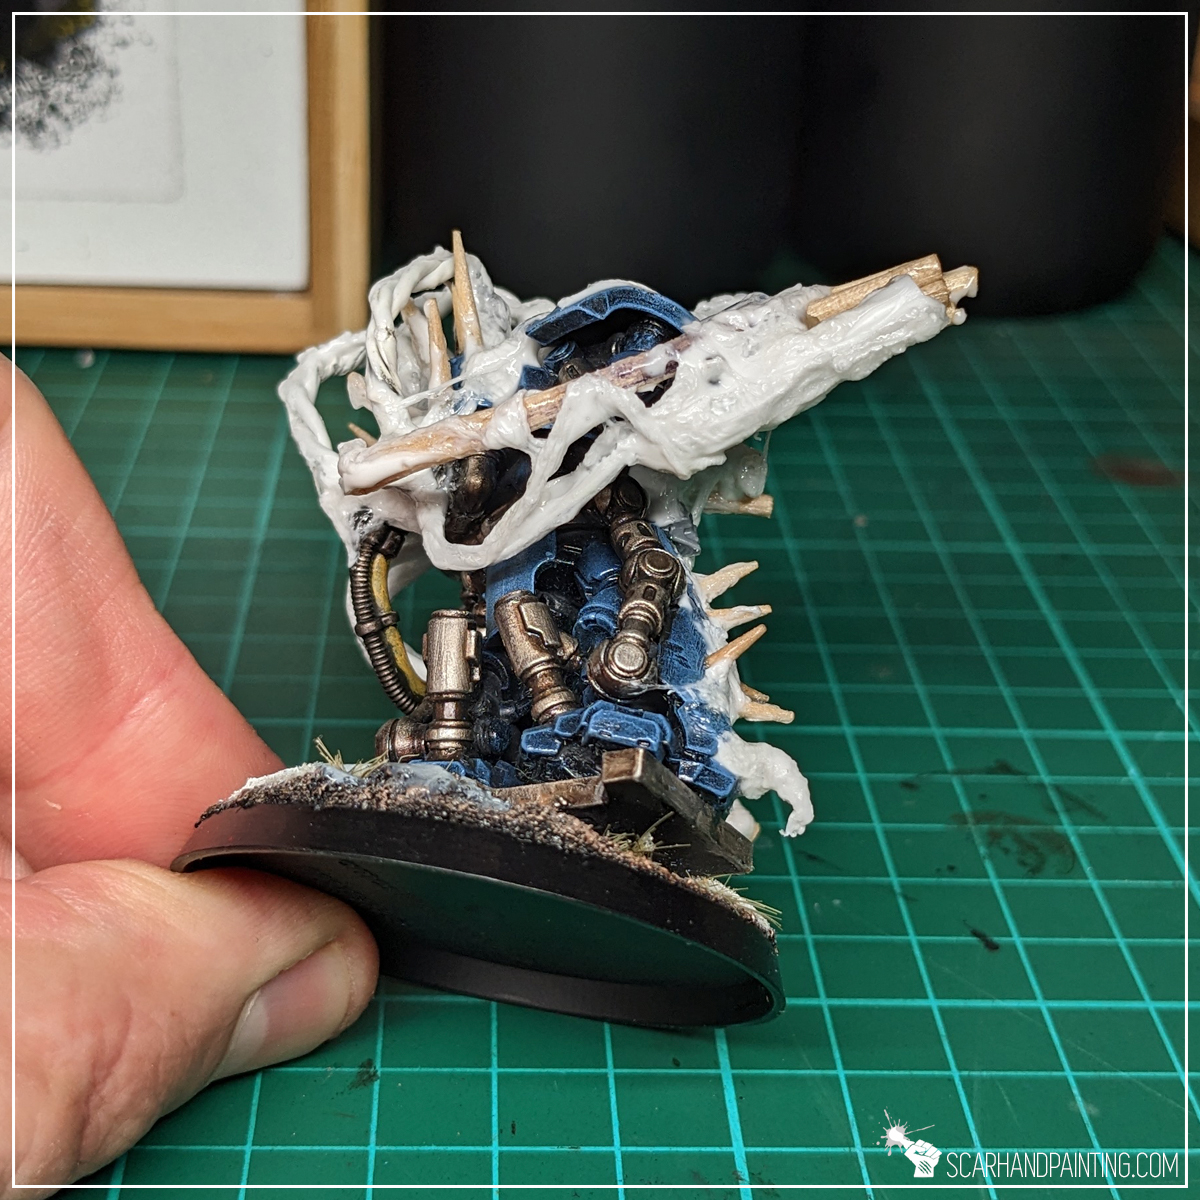
Next I cut an old lollipop stick and a few toothpicks into short pieces, then glued them onto the shoulder guards and arms of the miniature with Super Glue. I used remaining sharp toothpick ends to form spikes on one leg and the back of the miniature.

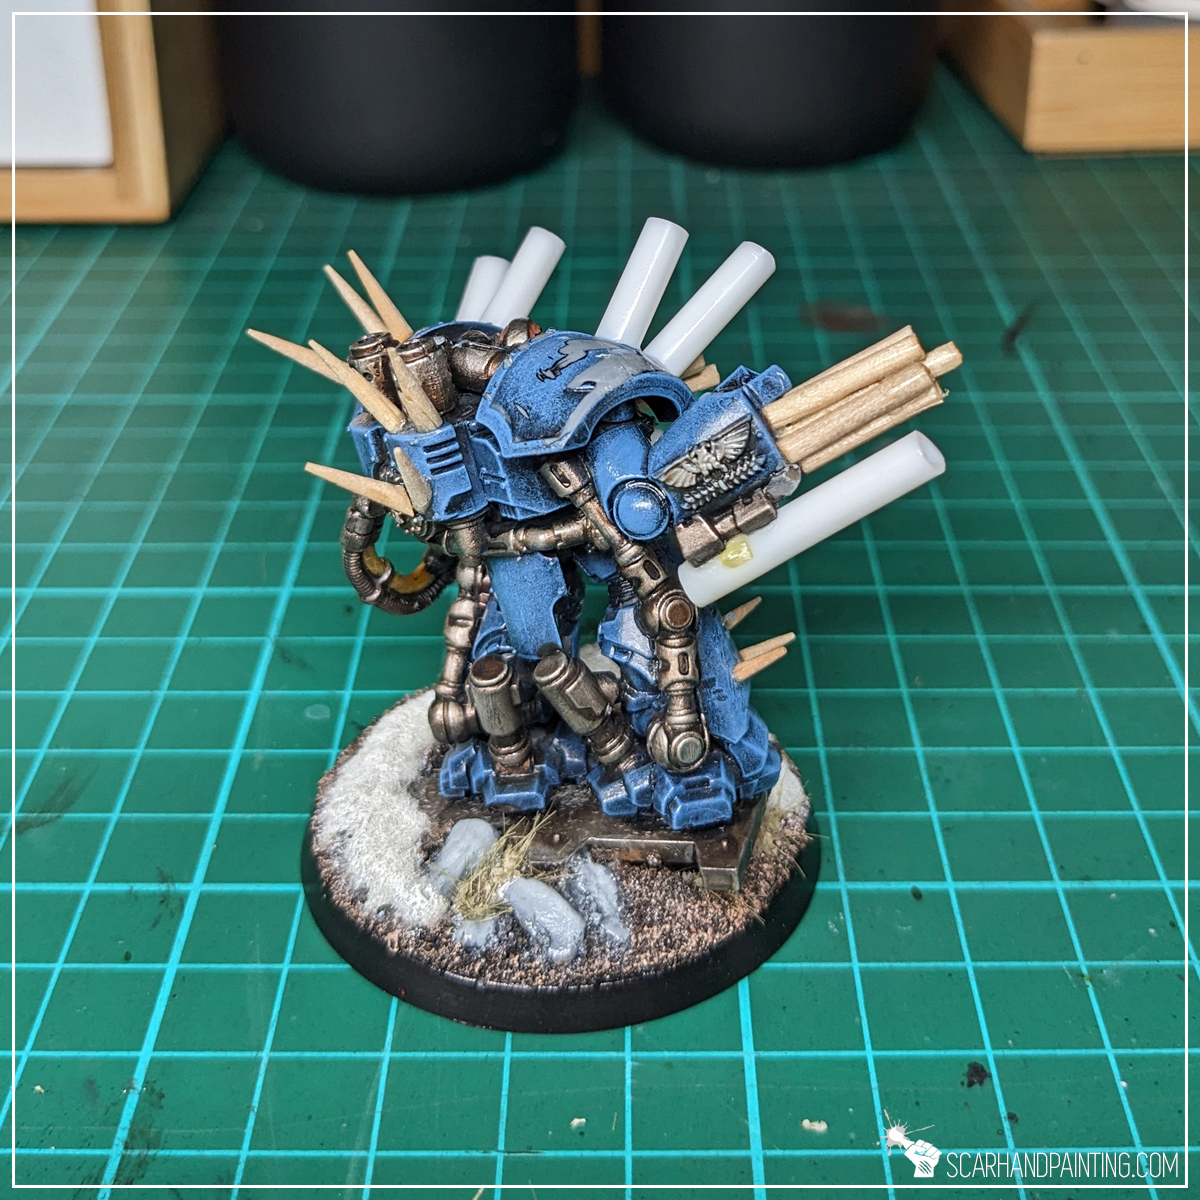
Step Three: Veins and Cables
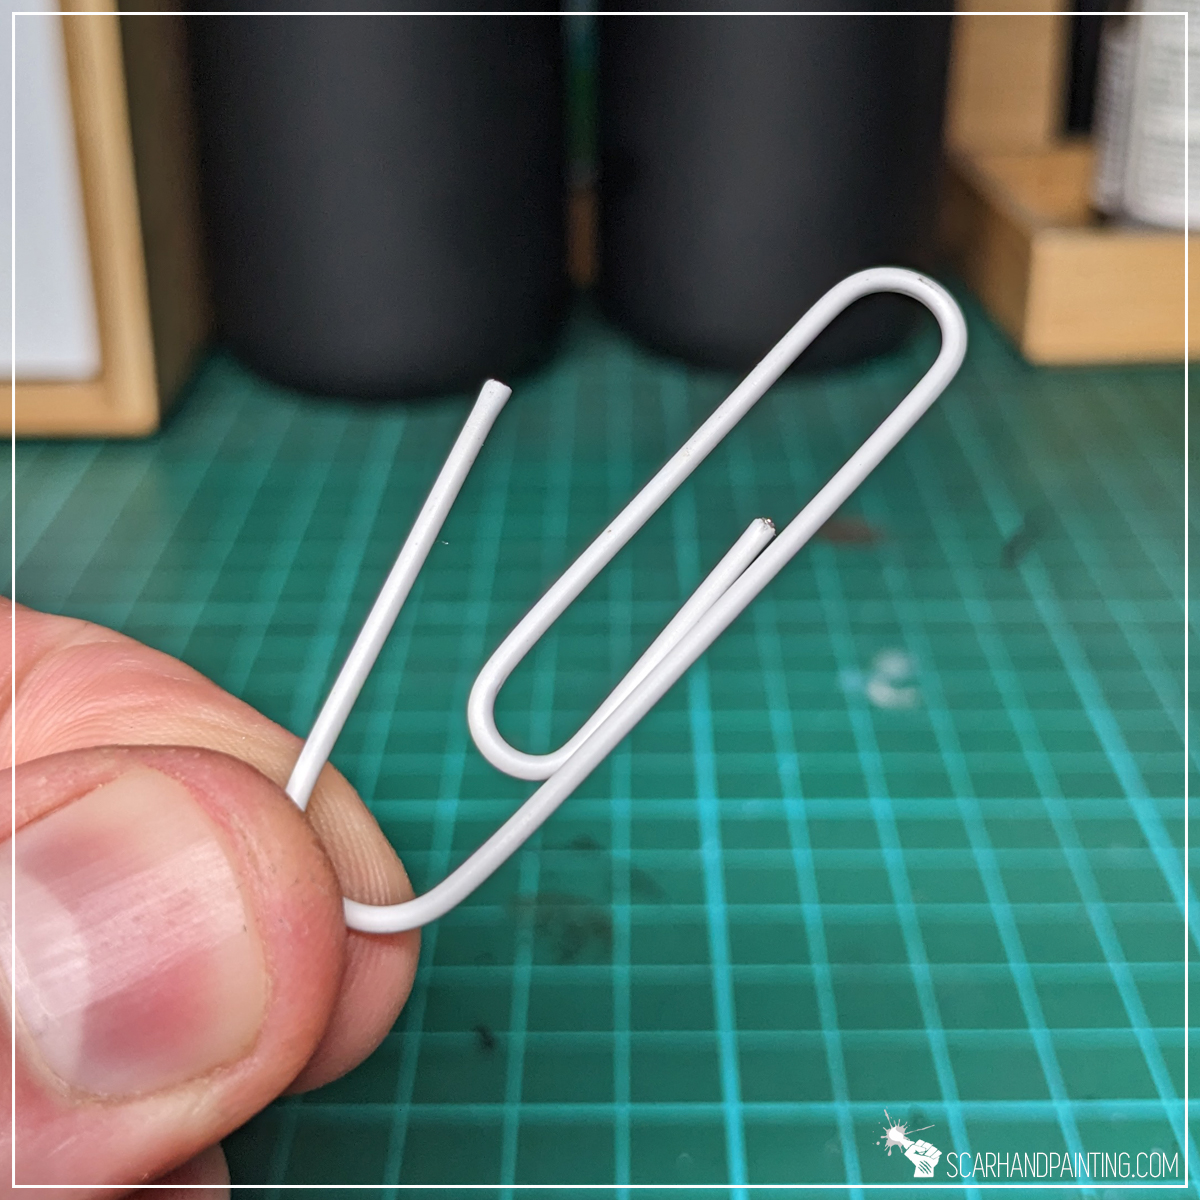
I then added another thematic detail by cutting paper clips into small pieces, then bending them to form swathes of cabling. I also twisted a few to form double cabling/veins then glued all of them onto the miniature. Again with Super Glue.

Step Four: Glue Goo Magic
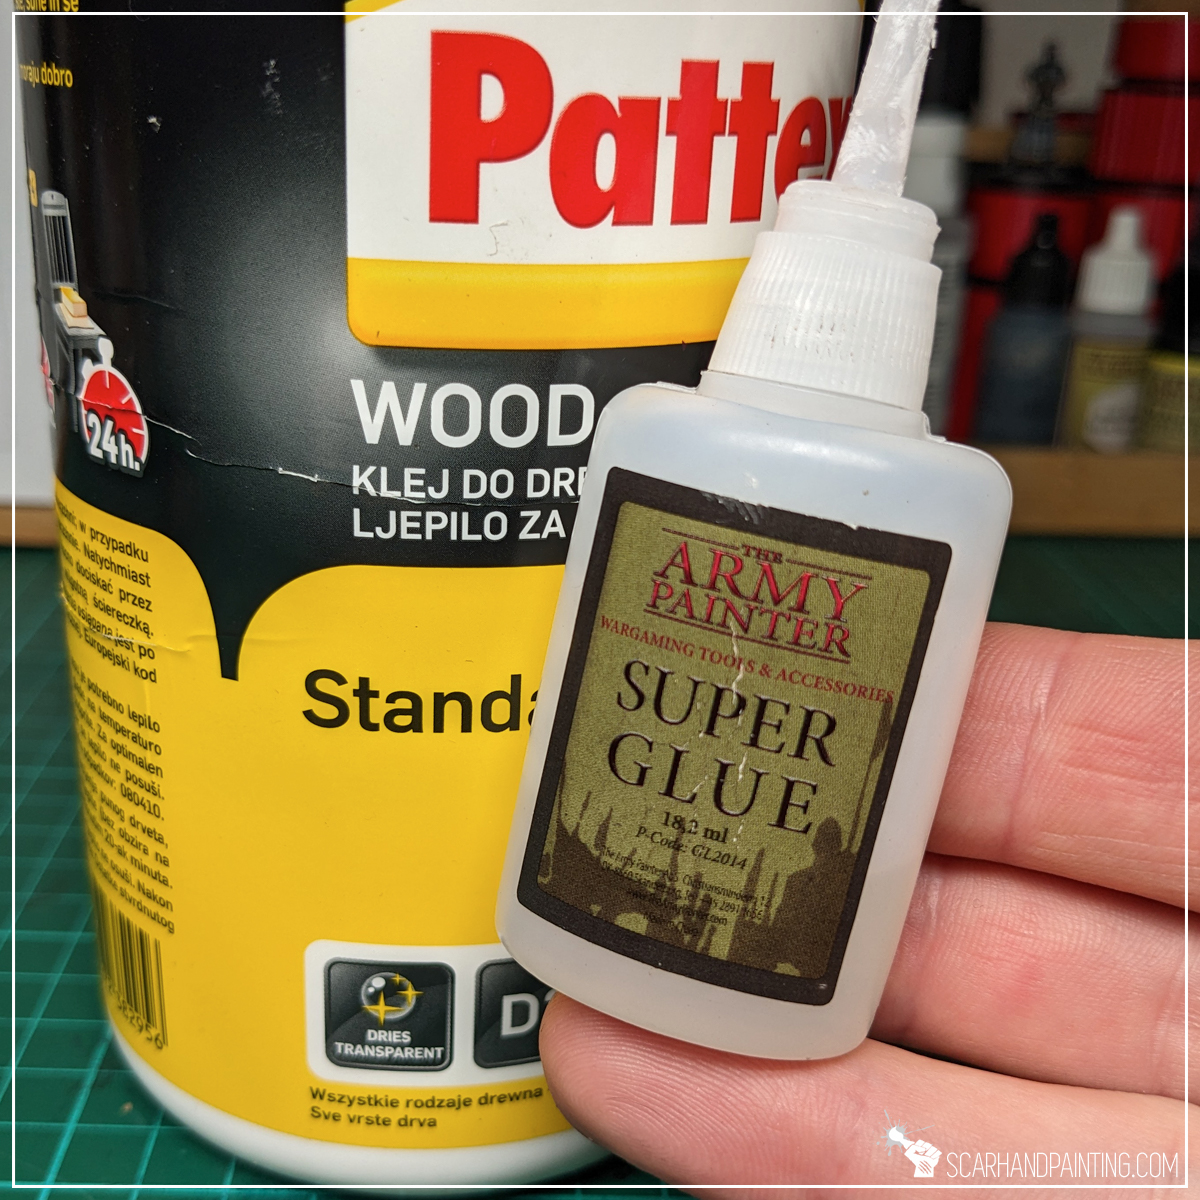
I followed up with the favorite trick amongst my arsenal – a mix of PVA glue and Super Glue. First I applied some PVA onto the miniature, then right after, I applied Super Glue on top. I then started ‘dragging’ the goo around with a tip of a toothpick to form veins and some sort of meat chunks. The curing Super Glue twisted and hardened the PVA glue underneath – MAGIC!

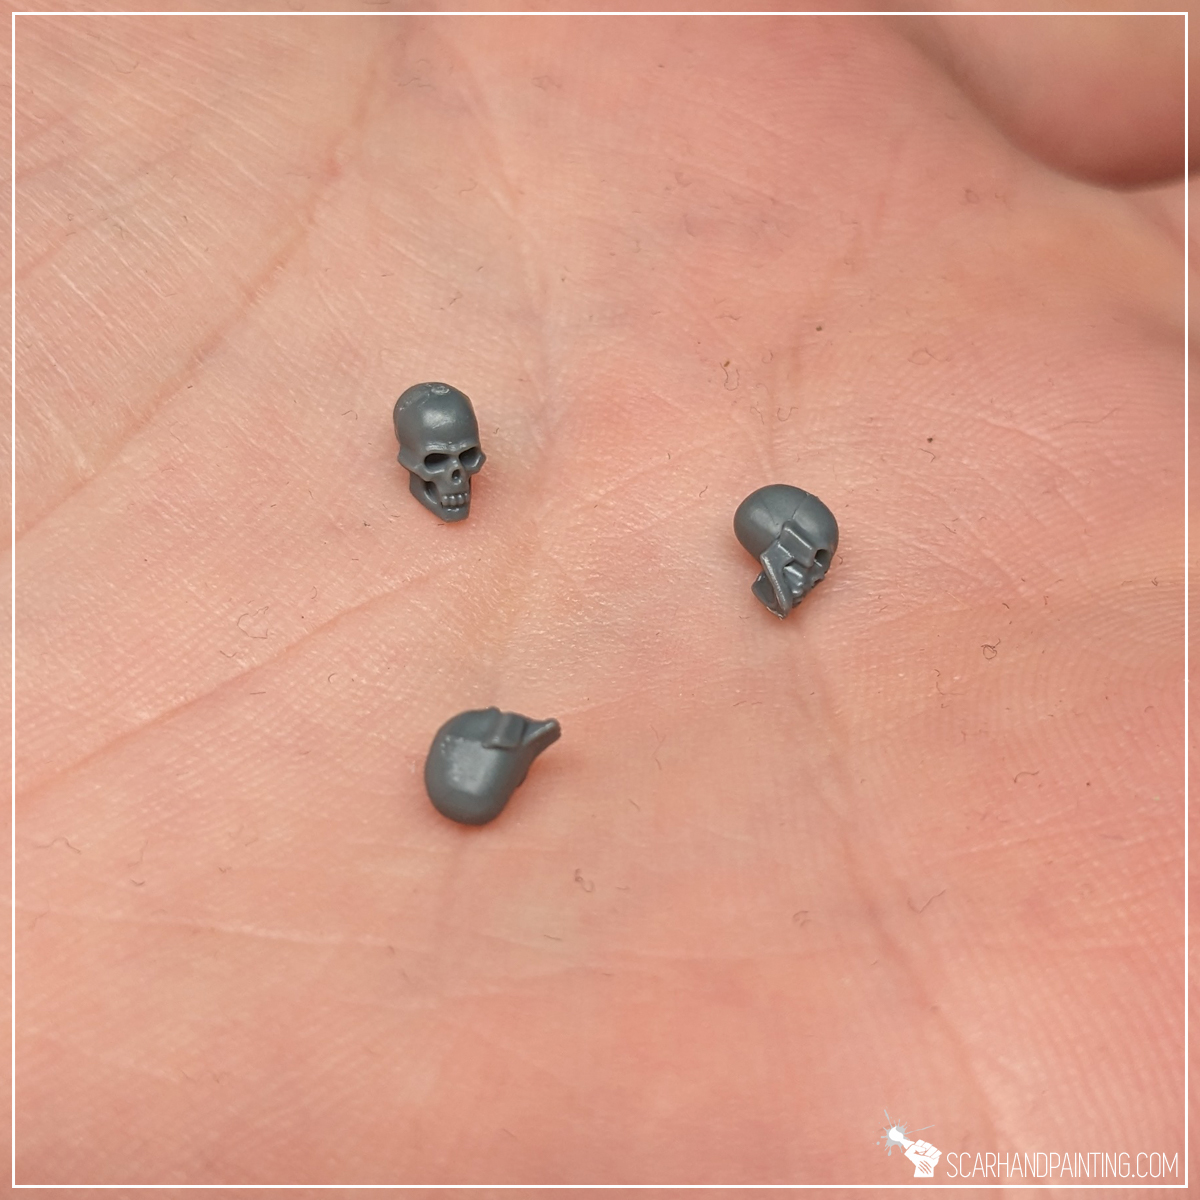
Step Five: Additional Detail
Here’s where I would usually add some leftover bitz. For this particular miniature I glued three skulls here and there to better represent the theme of ‘big bad Chaos thing’, but I invite you to experiment with stuff. I just wanted to keep things simple.
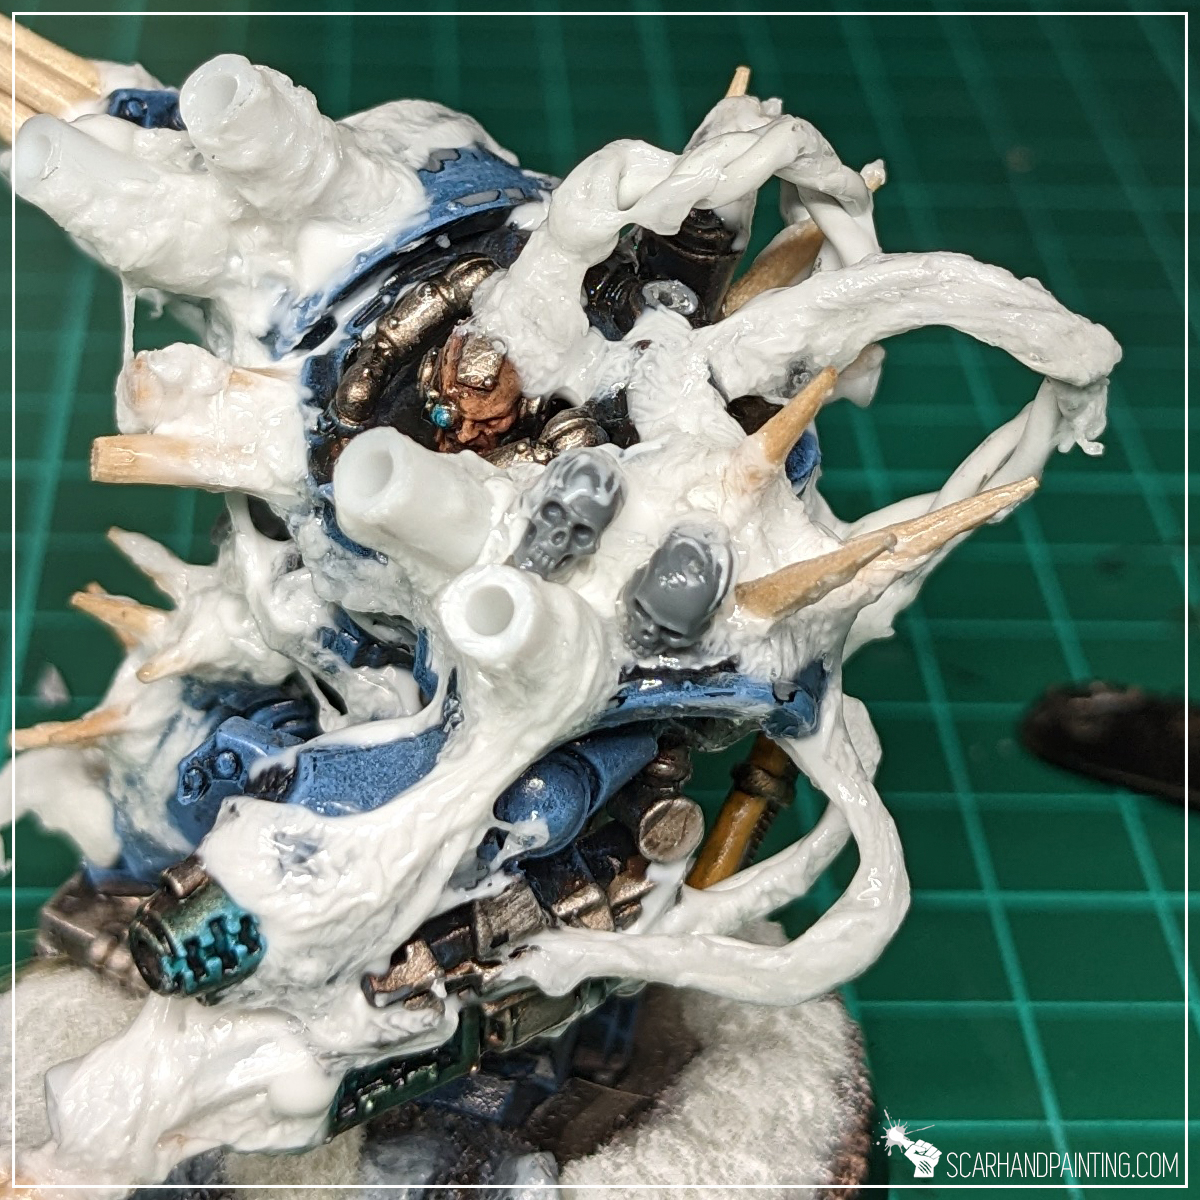
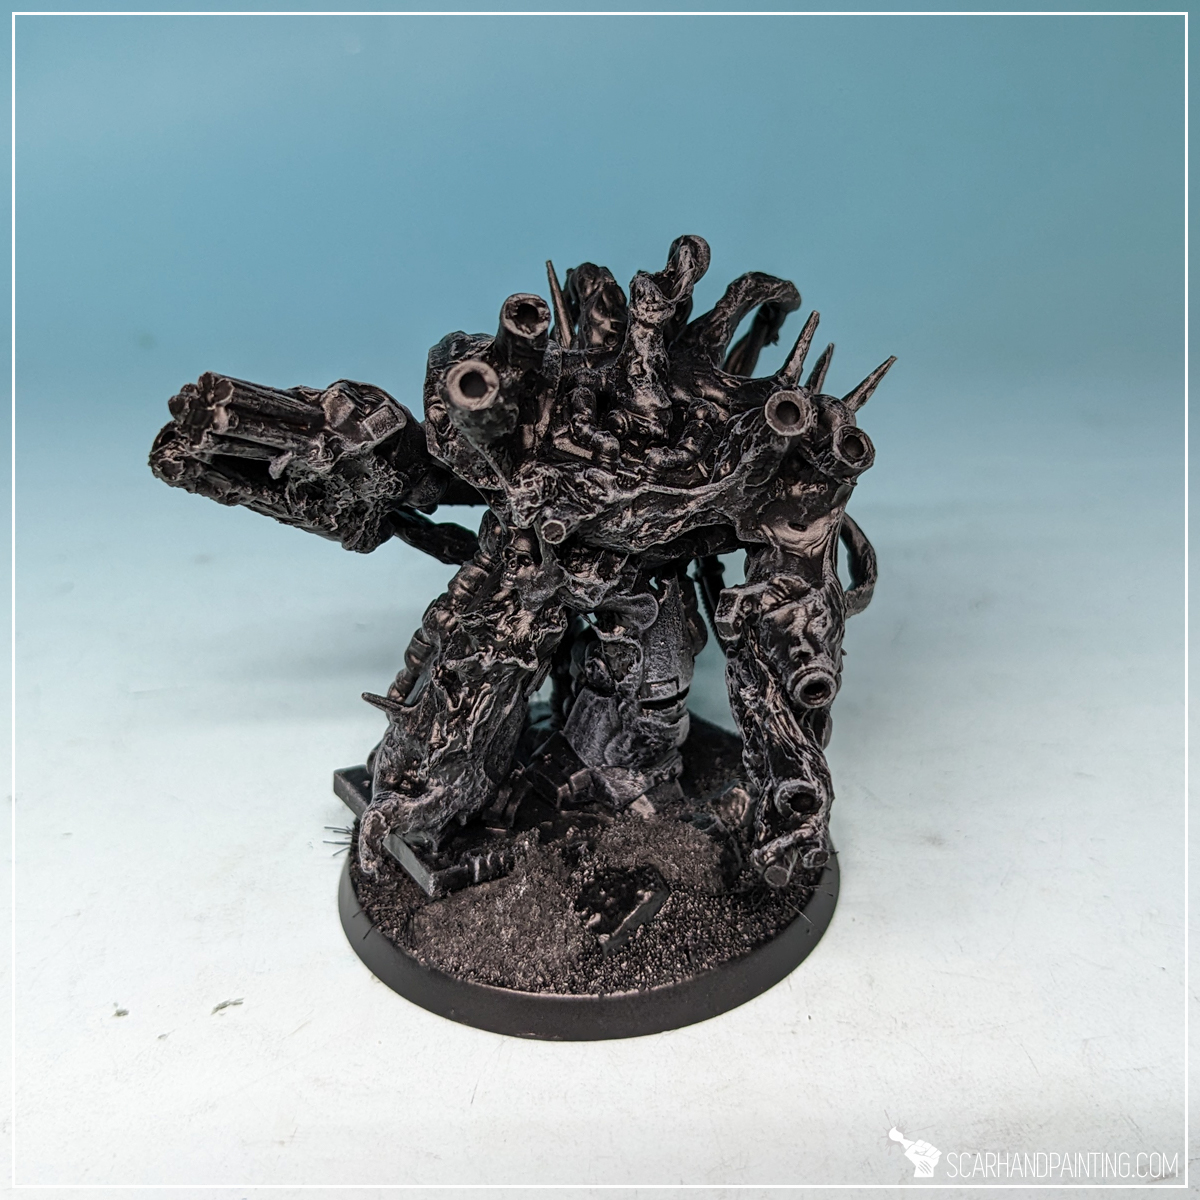
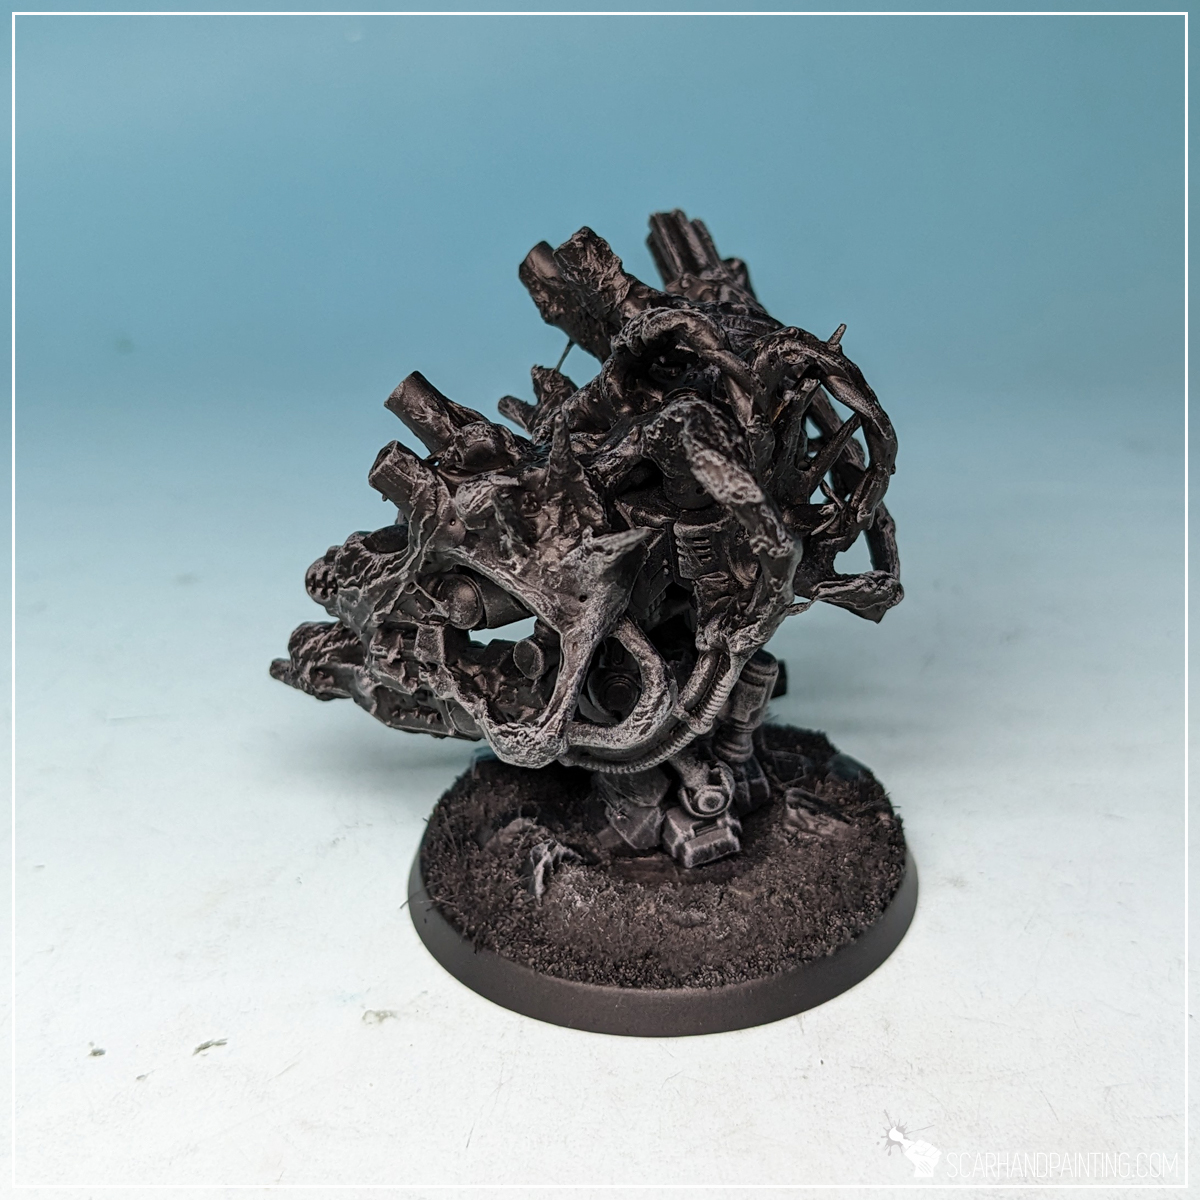
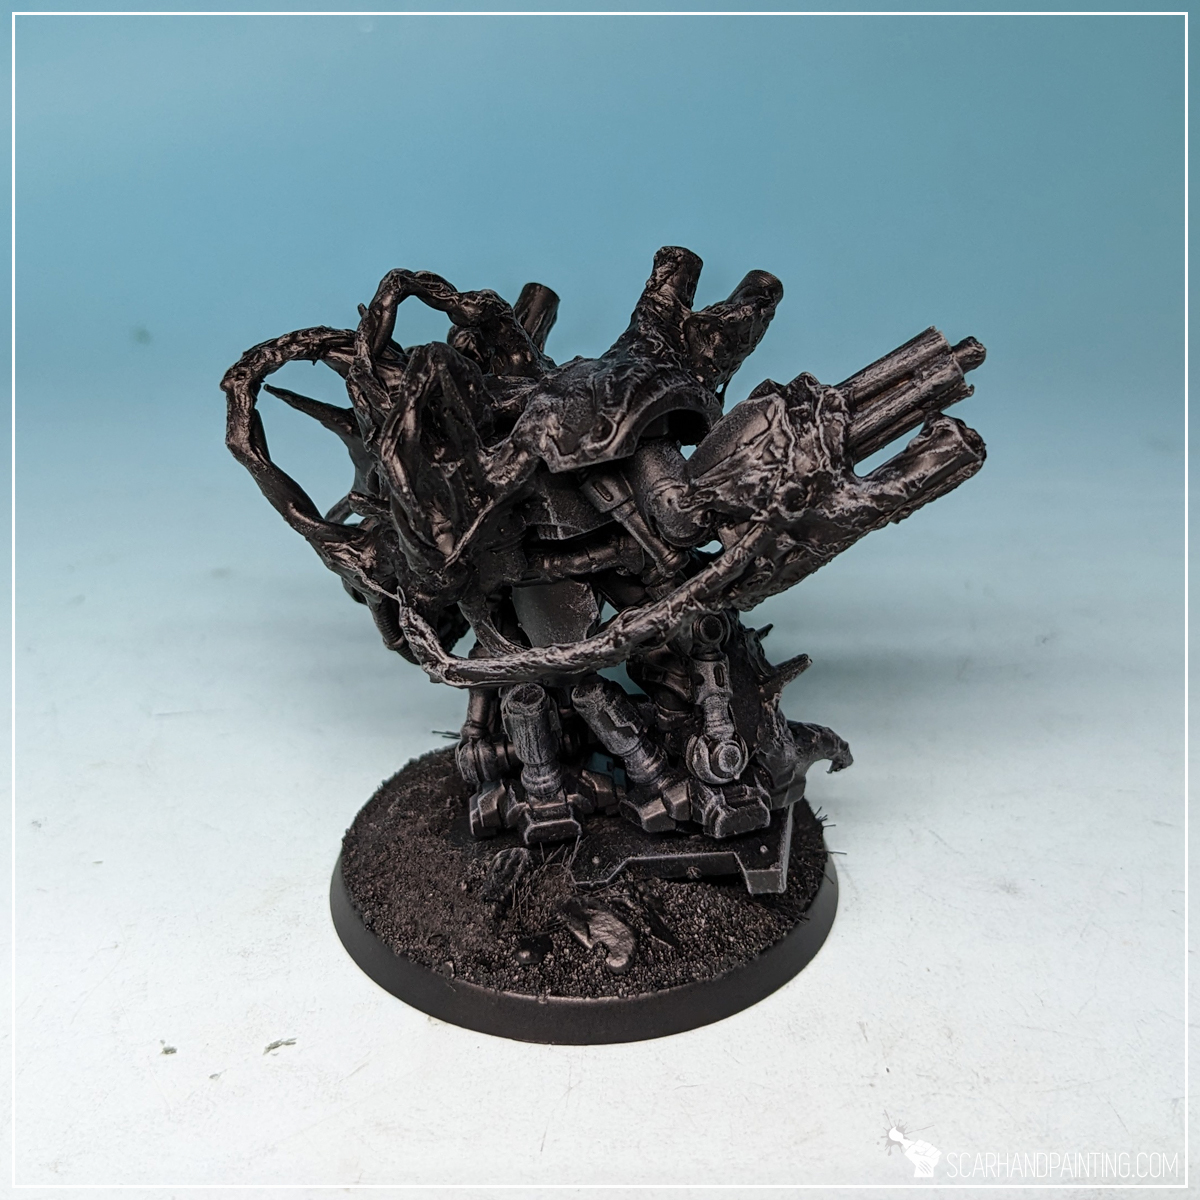
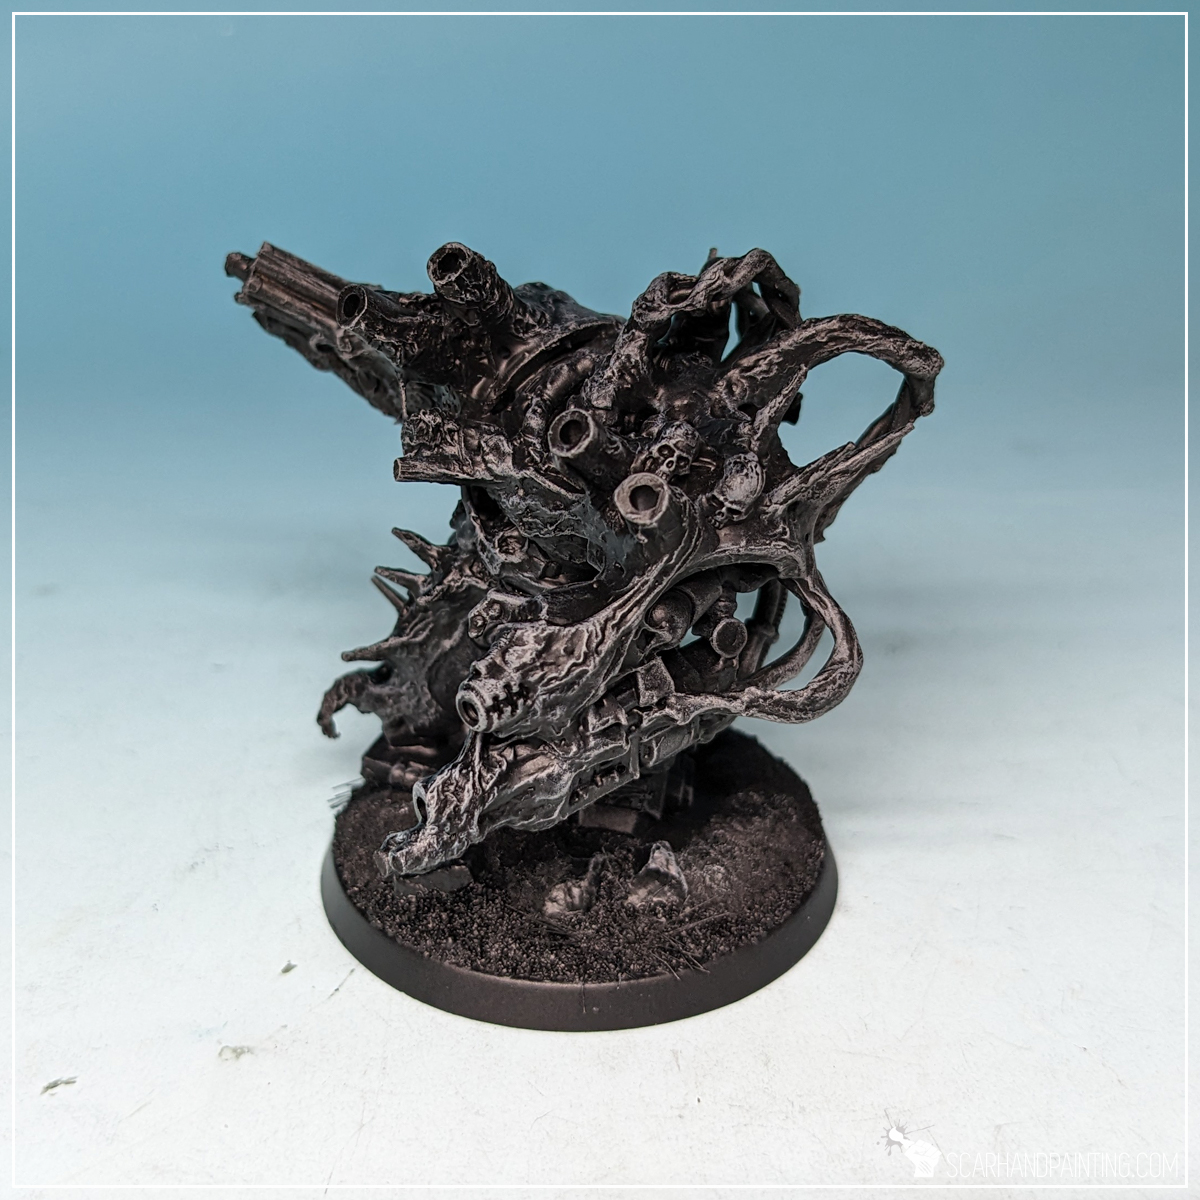
Job done – seriously. I know the miniature above looks like crap, but just take a look at this undercoated, drybrushed Chaos Obliterator below. It took me less than ten minutes to make and cost as much as an old mini that hadn’t seen action in a decade!
I hope you’ve enjoyed this article. Be sure to let me know your thoughts in the comments below or via Facebook or Instagram. I would also appreciate it if you considered sharing this content with your friends, who might find it interesting. Finally if you are looking for a professional miniatures painting service, be sure to contact me with this contact form. I always reply within 24 hours, after which please check out your spam folder.
Who wouldn’t like to play games on a highly detailed, great looking scenery? Fortunately for us – hobbyists, we’re living in times of abundance. Not only is the market saturated with ready to buy awesome scenery elements, but there are many ways to make our own scenery from scratch. Today I’m here to share with you the latter – my method of scratch building well textured, interesting looking trees, of any size and shape!

Before we start, some notes:
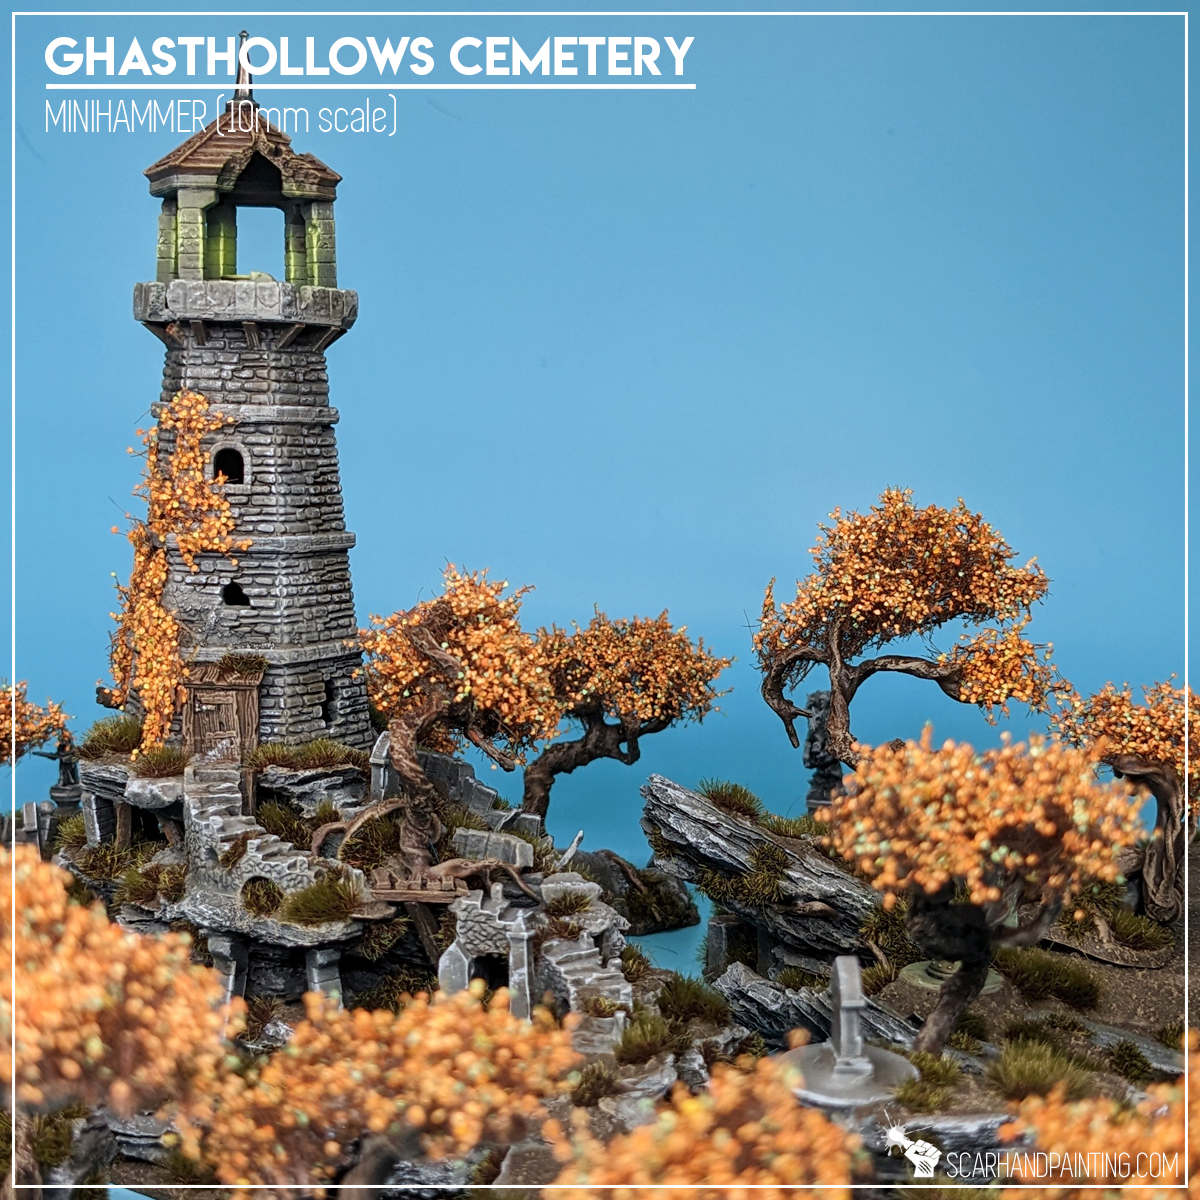
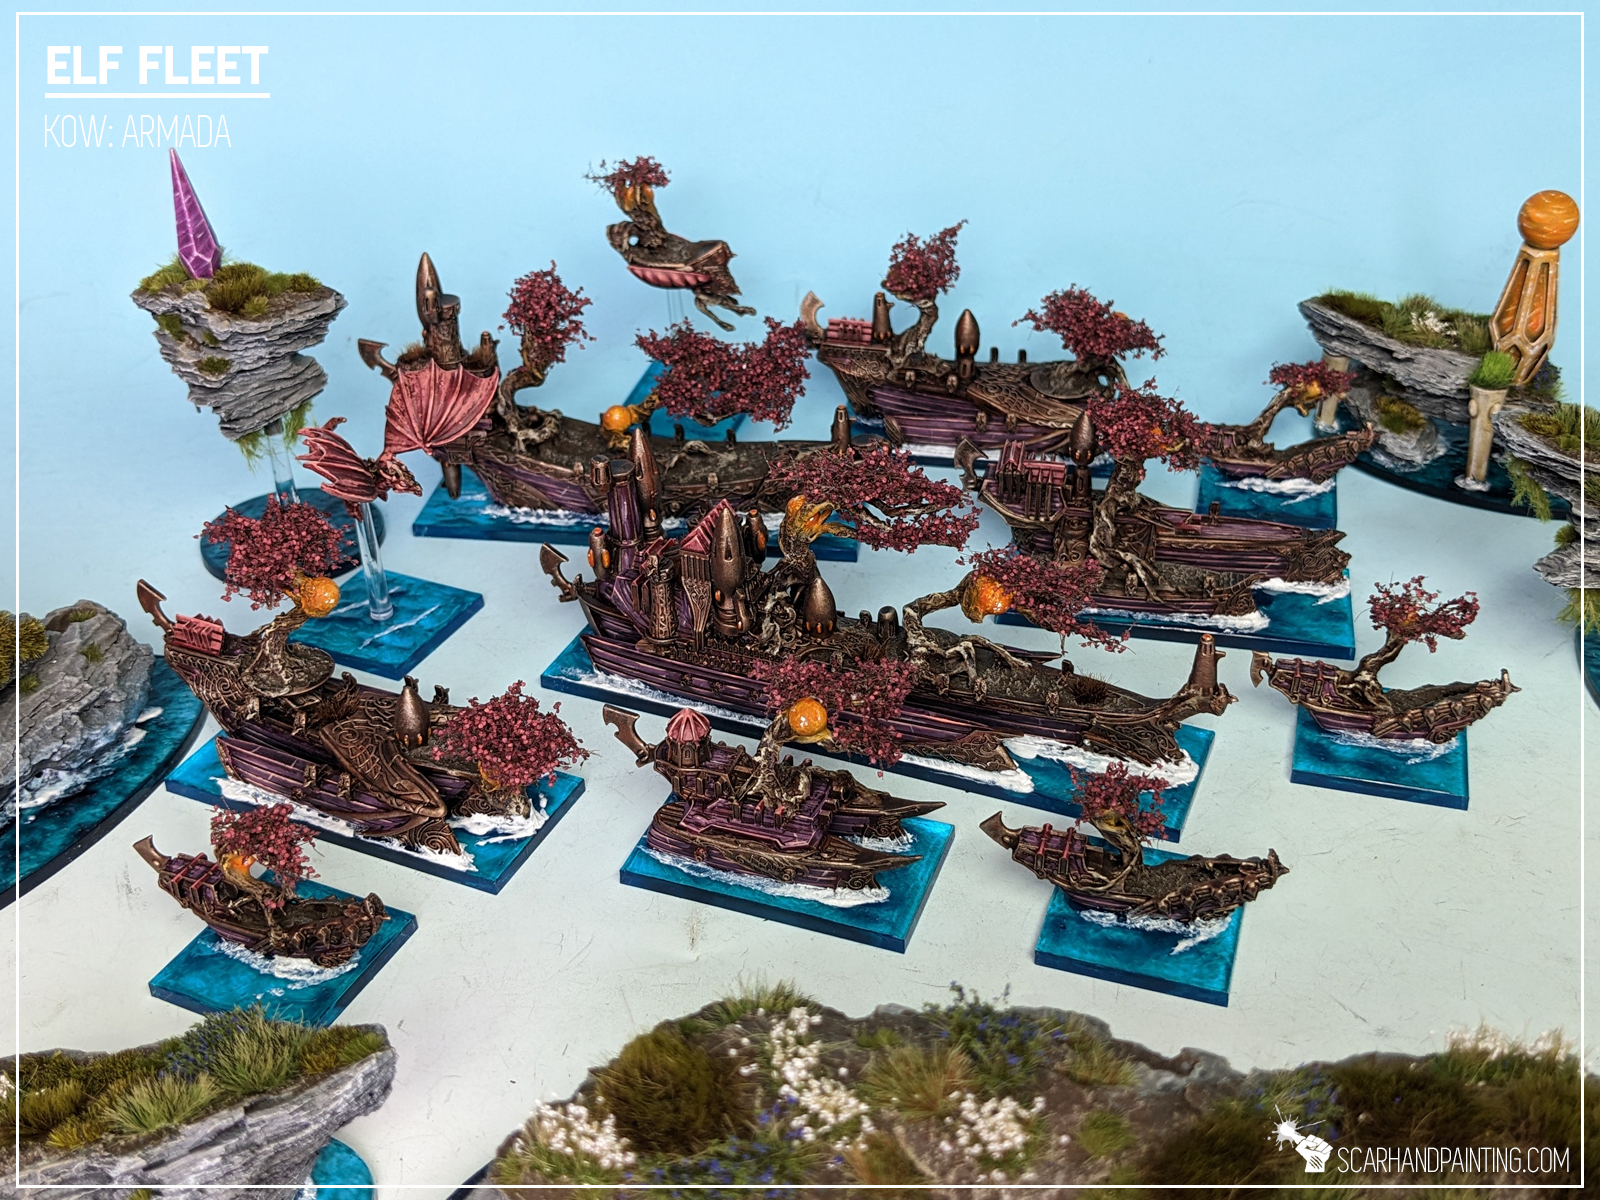
Just recently I decided to finally let my 10mm scale itch loose and commit to a new scenery related project. I chose a dark, fantasy theme for it, so alongside crumbling ruins, rocky hills peppered with tombstones I needed some twisted, creeping trees to better tell a story of the glory times long gone. Making scenery from scratch allows us to tell a different short story with each individual piece. This can only be enhanced with self made trees of any size and shape, thus I decided to go this route. The resulting Ghasthollows Cemetery set speaks for itself.
Without further ado here’s how I went about it…
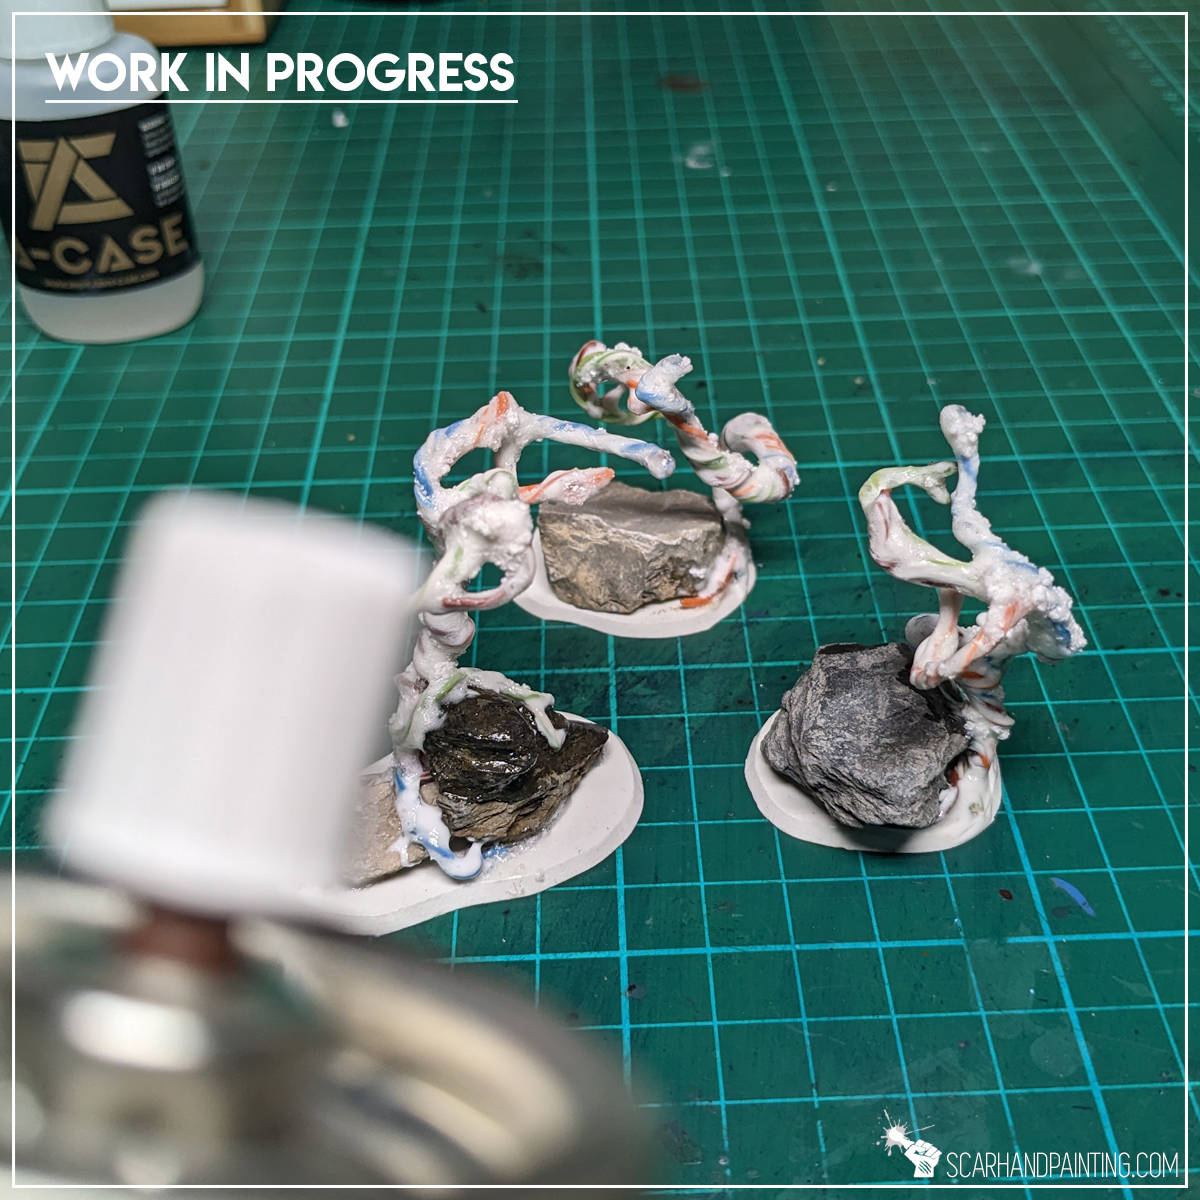
Step One: Trunks
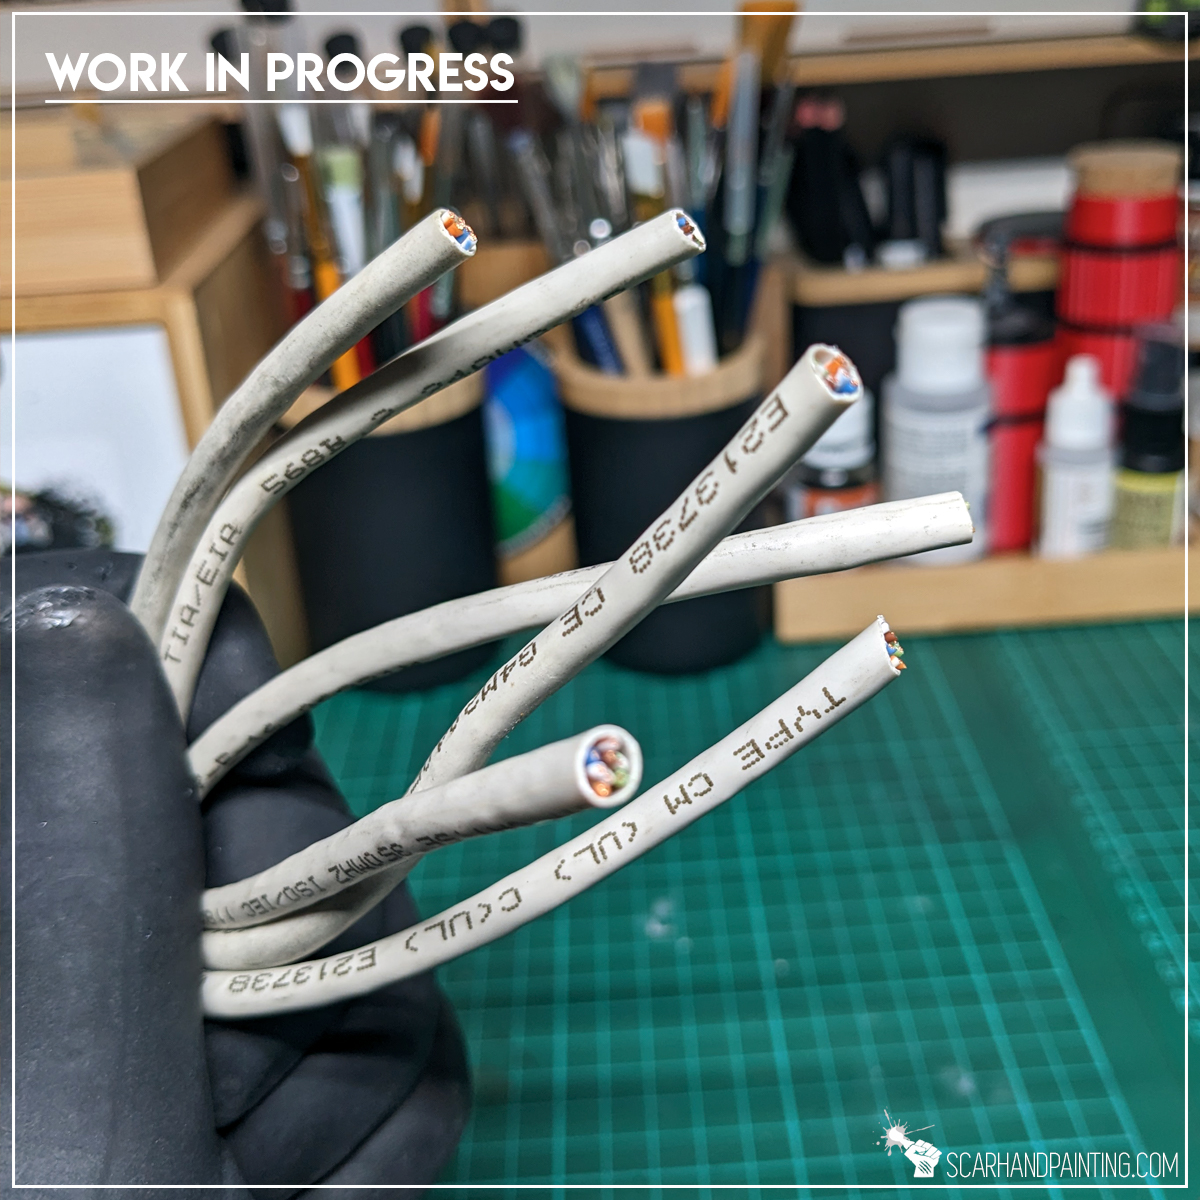
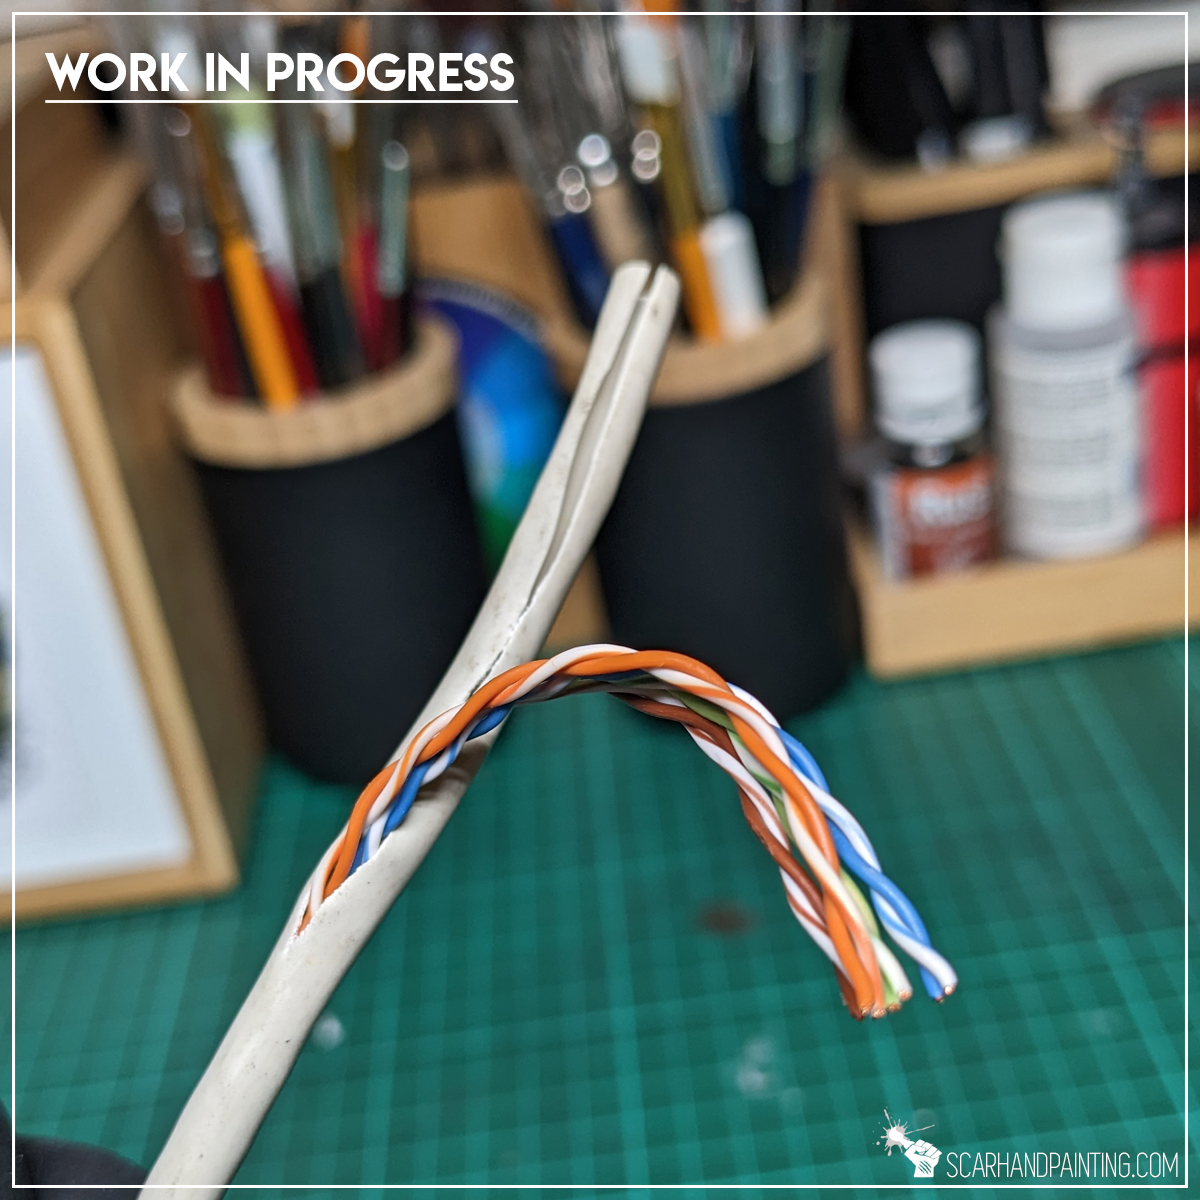
I have started by butchering an old Ethernet cable, removing the rubber cover and pulling out small rubber protected ones. I deliberately chose this type of cable because of the rubber shielding the wires inside. I have observed paint sticking onto it much better than to smooth metal surfaces.
Next I have cut a few pieces of similar size and bundled them together, twisting them in the middle to form tree trunks and leaving top and bottom parts separated.

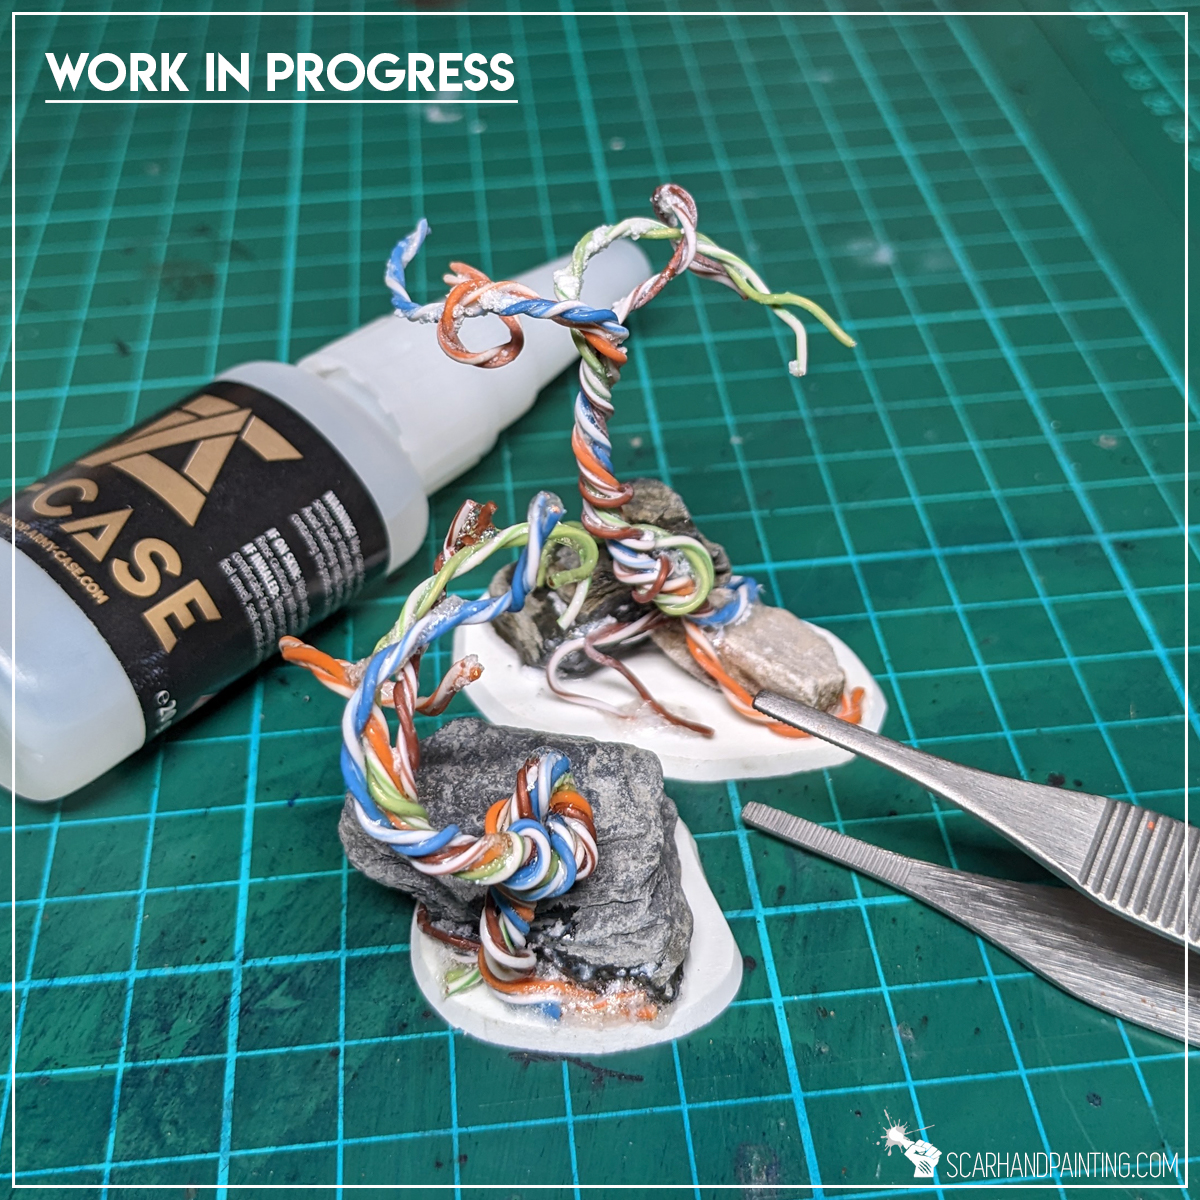
Step Two: Roots and Branches
Next I based the tree, first forming roots from the lower wires with a set of solid tweezers and then sealing them alongside the trunk with Super Glue. Once dry I then formed upper branches and sealed them with Super Glue using the same method.
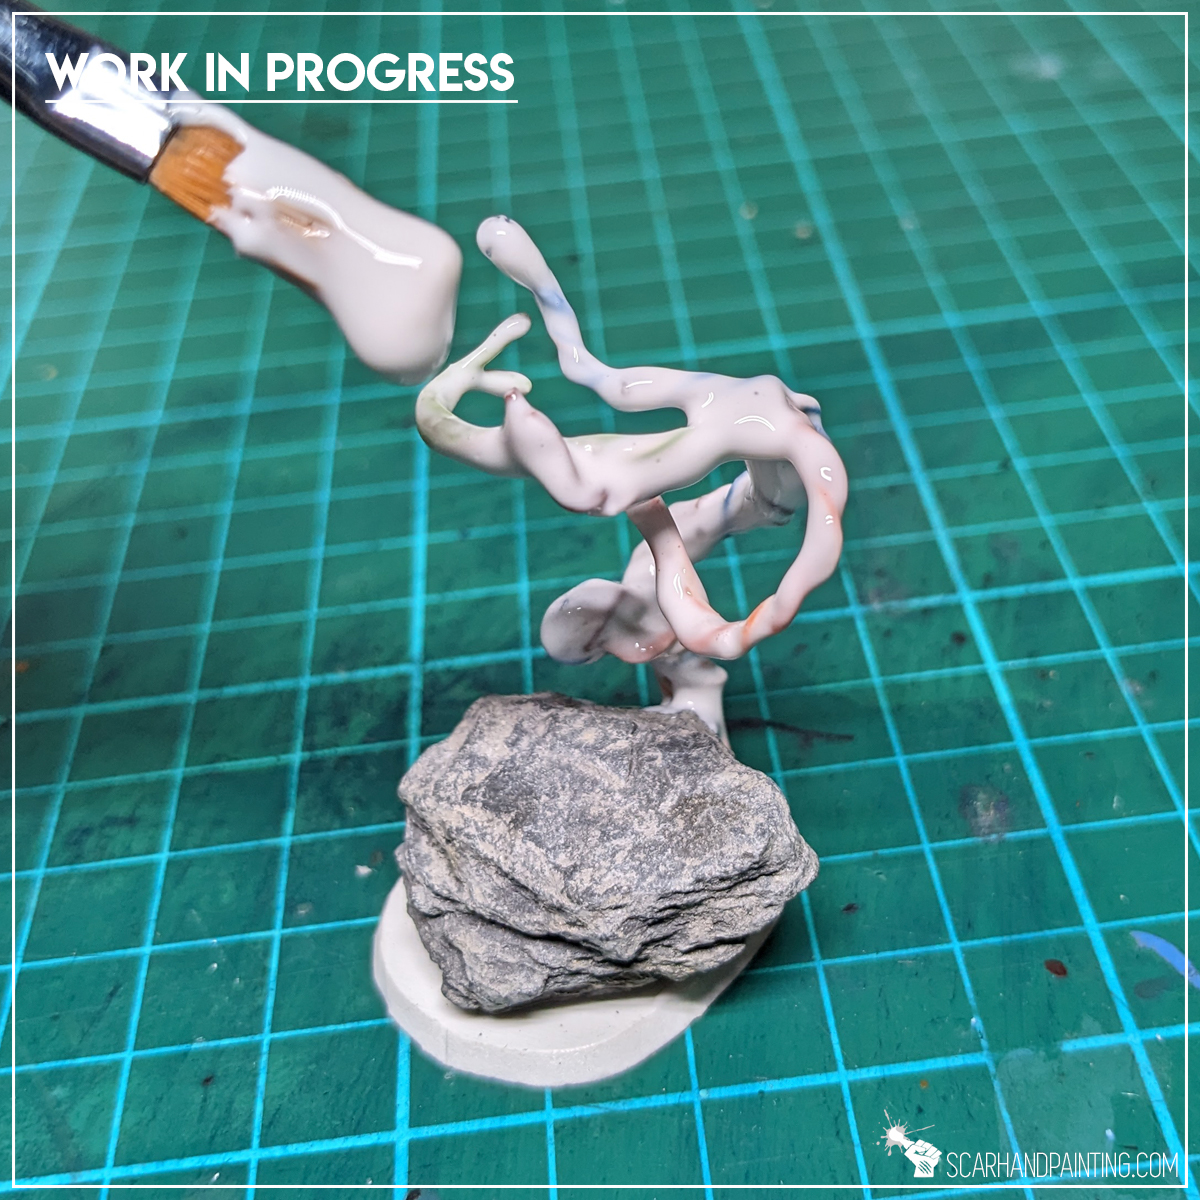
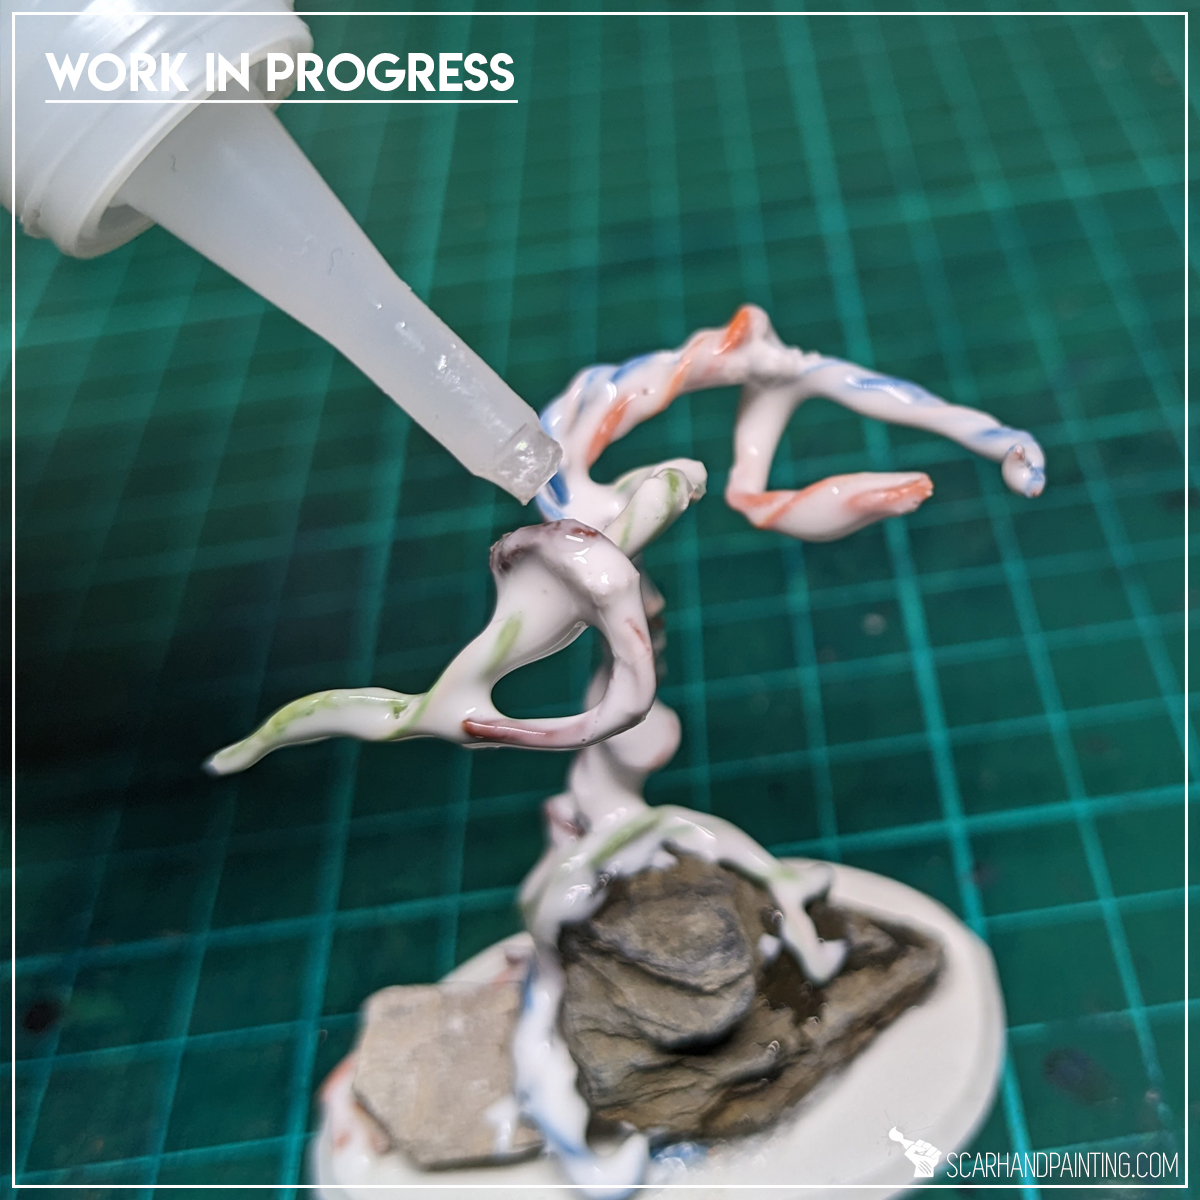
Step Three: Texture
To add texture and increase durability I covered the entire tree with PVA glue, immediately applied Super Glue on top and sealed it with Super Glue Activator. This way I ended up with solid, sturdy trees covered with a mix of twisted veins / rough bark-like texture.
…Painting
This one I leave up to you. Everyone have their own painting preferences, depending on scale and the effect they’re aiming for. My set was painted with grey pre-shades on black undercoat, then covered in brown contrast like paint to finally get a drybrush od bright sandy-brown. Nothing special, but on a 10mm scale it really does the job.
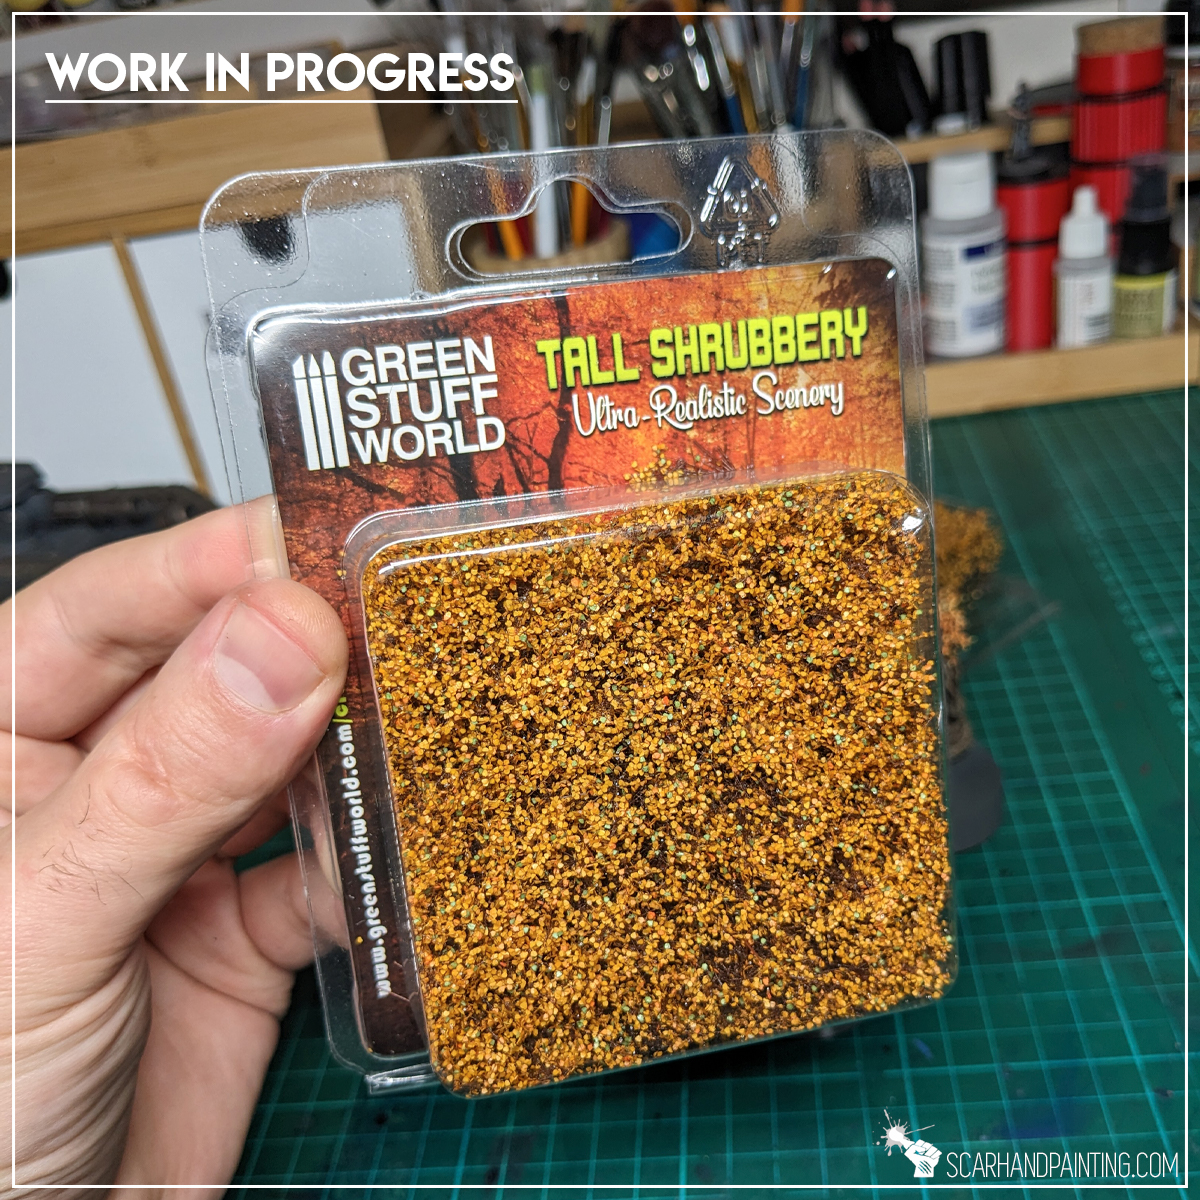
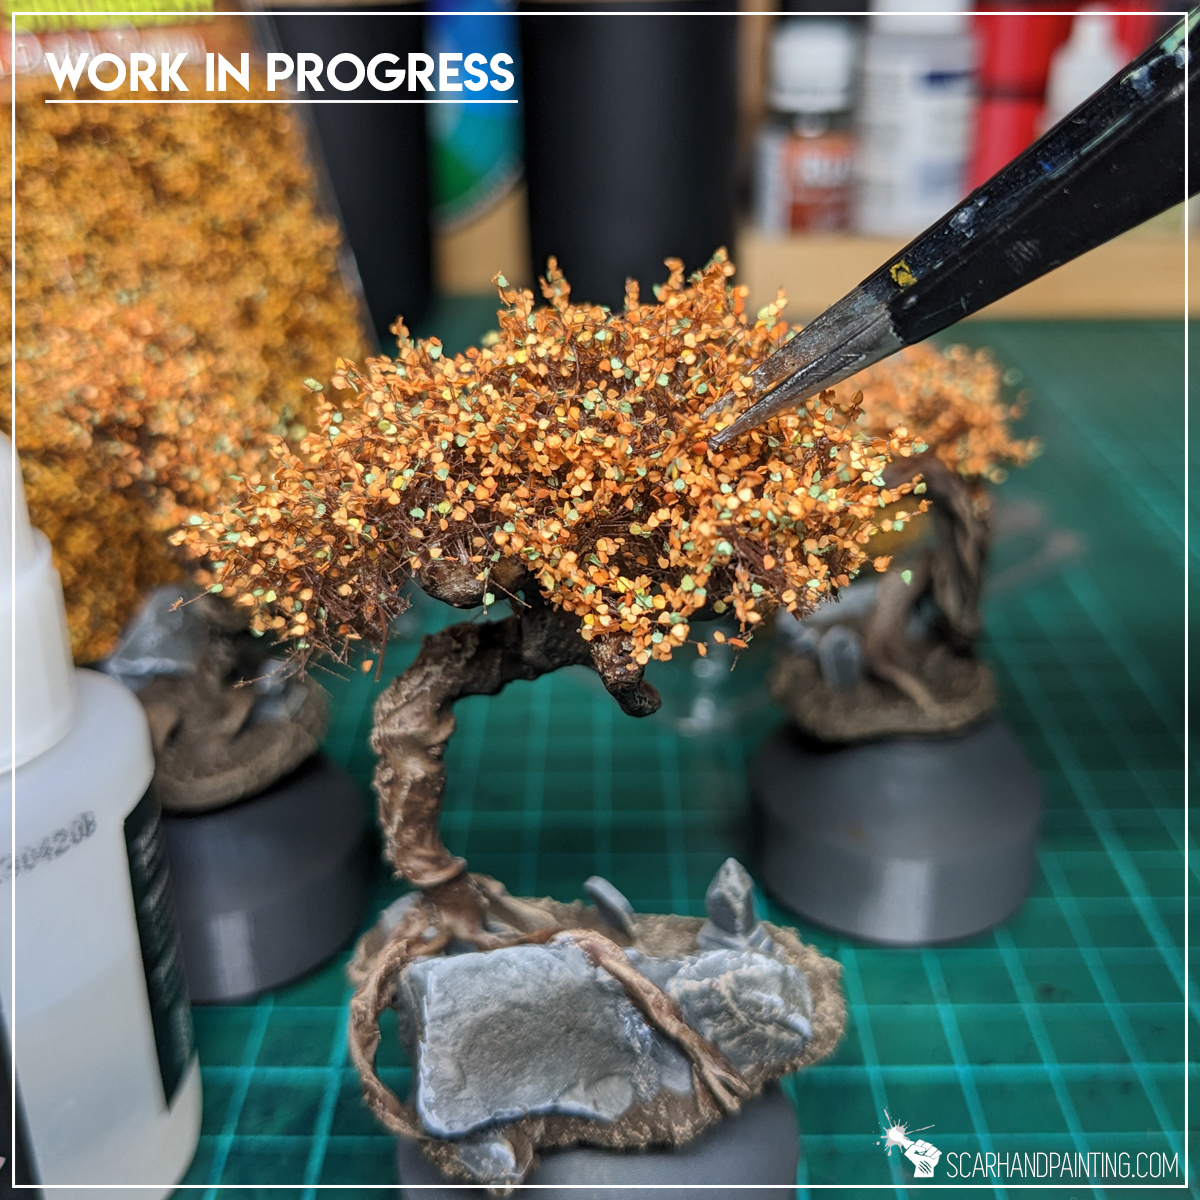
Step Four: Foliage
As a final touch I applied just a bit of Super Glue on top of each branch then, using a set of tweezers, glued a small canopy made of Green Stuff World Tall Shrubbery on top. I then sealed it with Vallejo Polyurethane Matt Varnish airbrushed all over, to keep small specks from falling off.
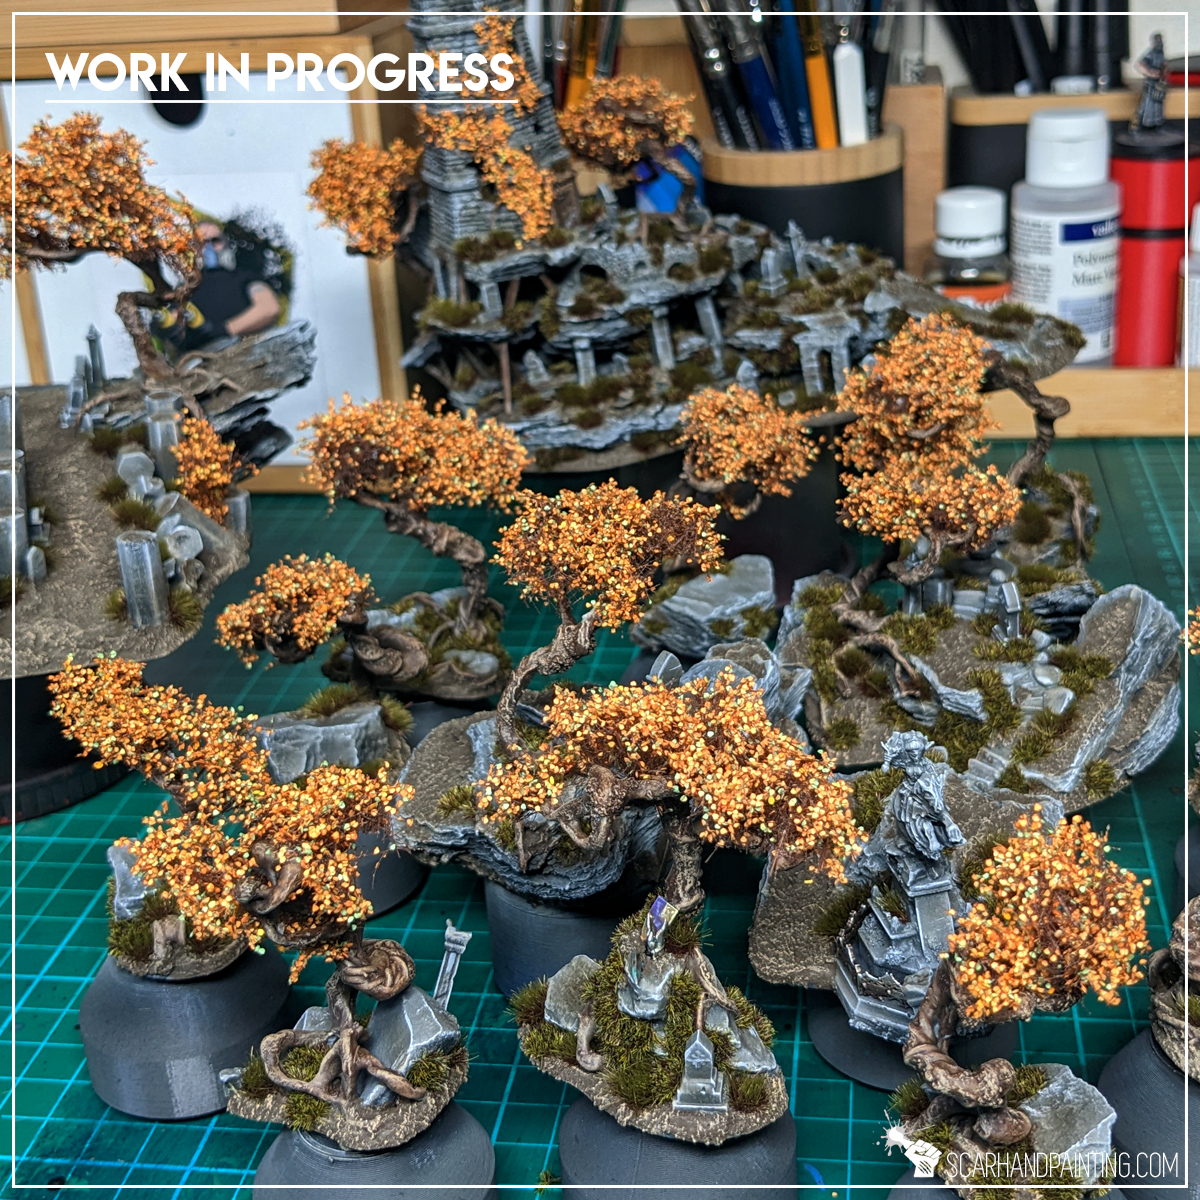
That’s all – a set of awesome looking trees for miniatures is now within your reach. As a final word I recommend staying open minded – there’s plenty of different materials you can use to make your own trees, not just the ones I presented. It is worth experimenting. Be sure to share your result with me.

I hope you’ve enjoyed this article. Be sure to let me know your thoughts in the comments below or via Facebook or Instagram. I would also appreciate it if you considered sharing this content with your friends, who might find it interesting. Finally if you are looking for a professional miniatures painting service, be sure to contact me with this contact form. I always reply within 24 hours, after which please check out your spam folder.
Welcome to Painting Star Wars: Shatterpoint Cad Bane tutorial. Here I will present to you a Step-by-step of a basic painting process for Fistful of Credits Aurra Sing miniature and a few extras.

Before we start, some notes:
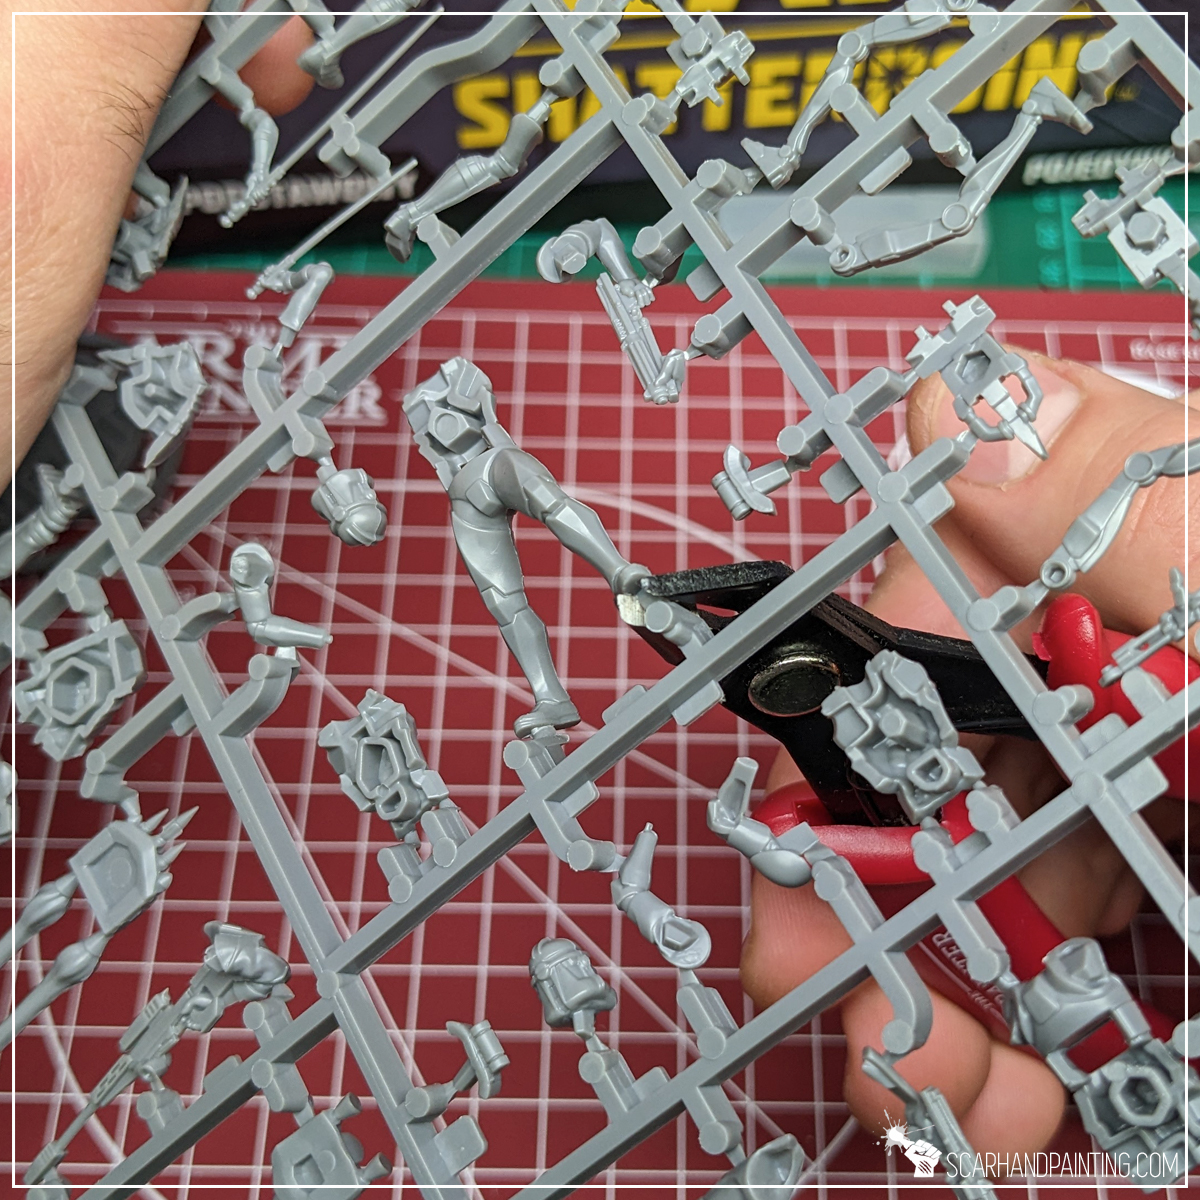
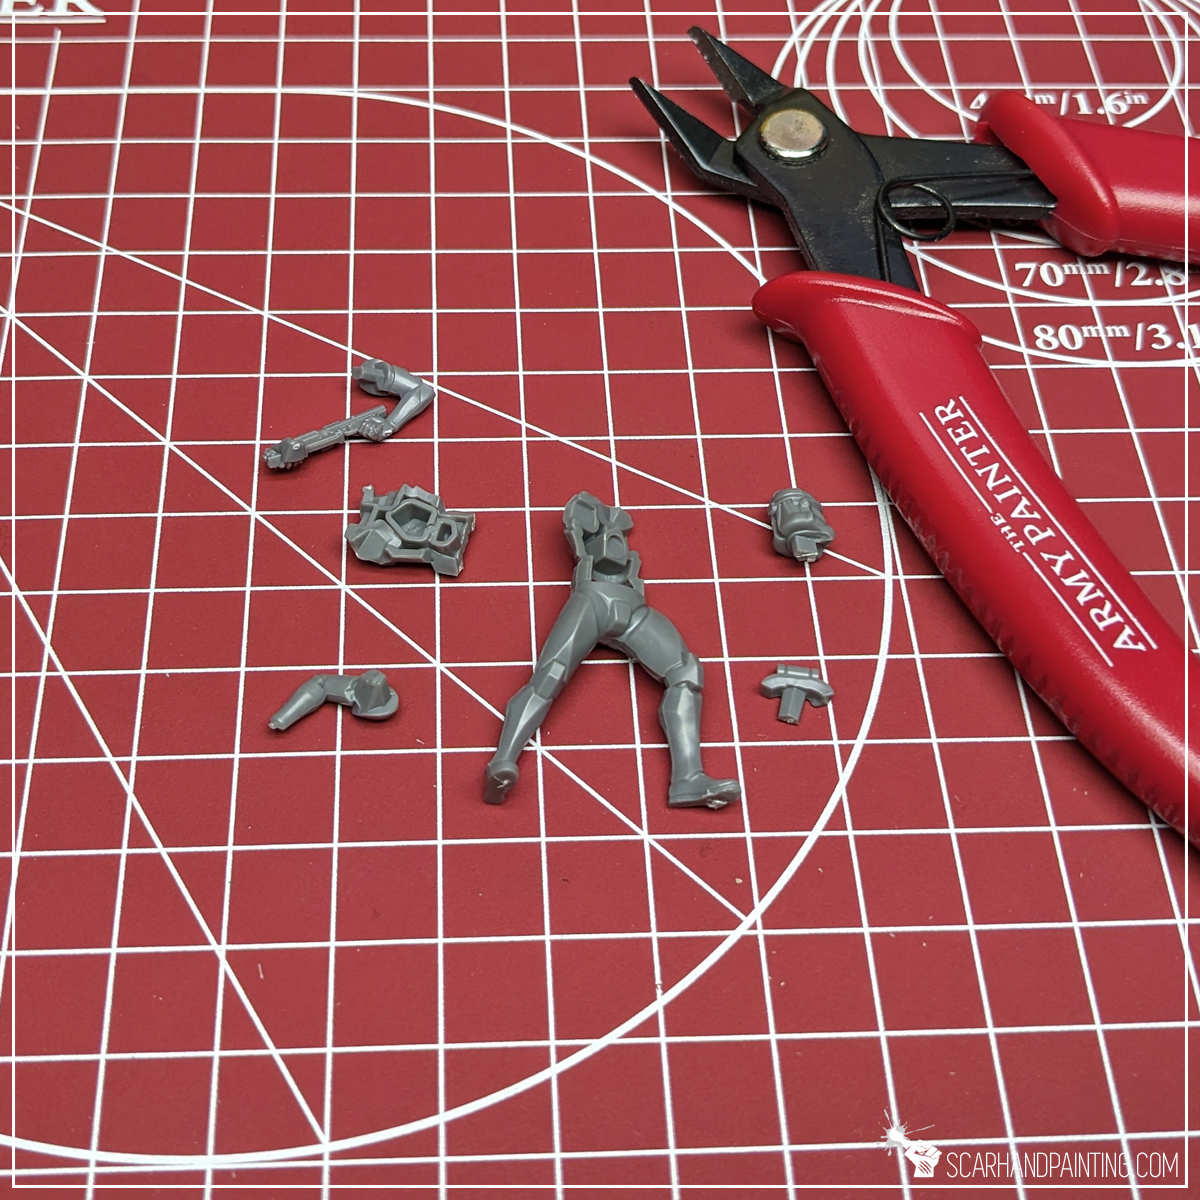
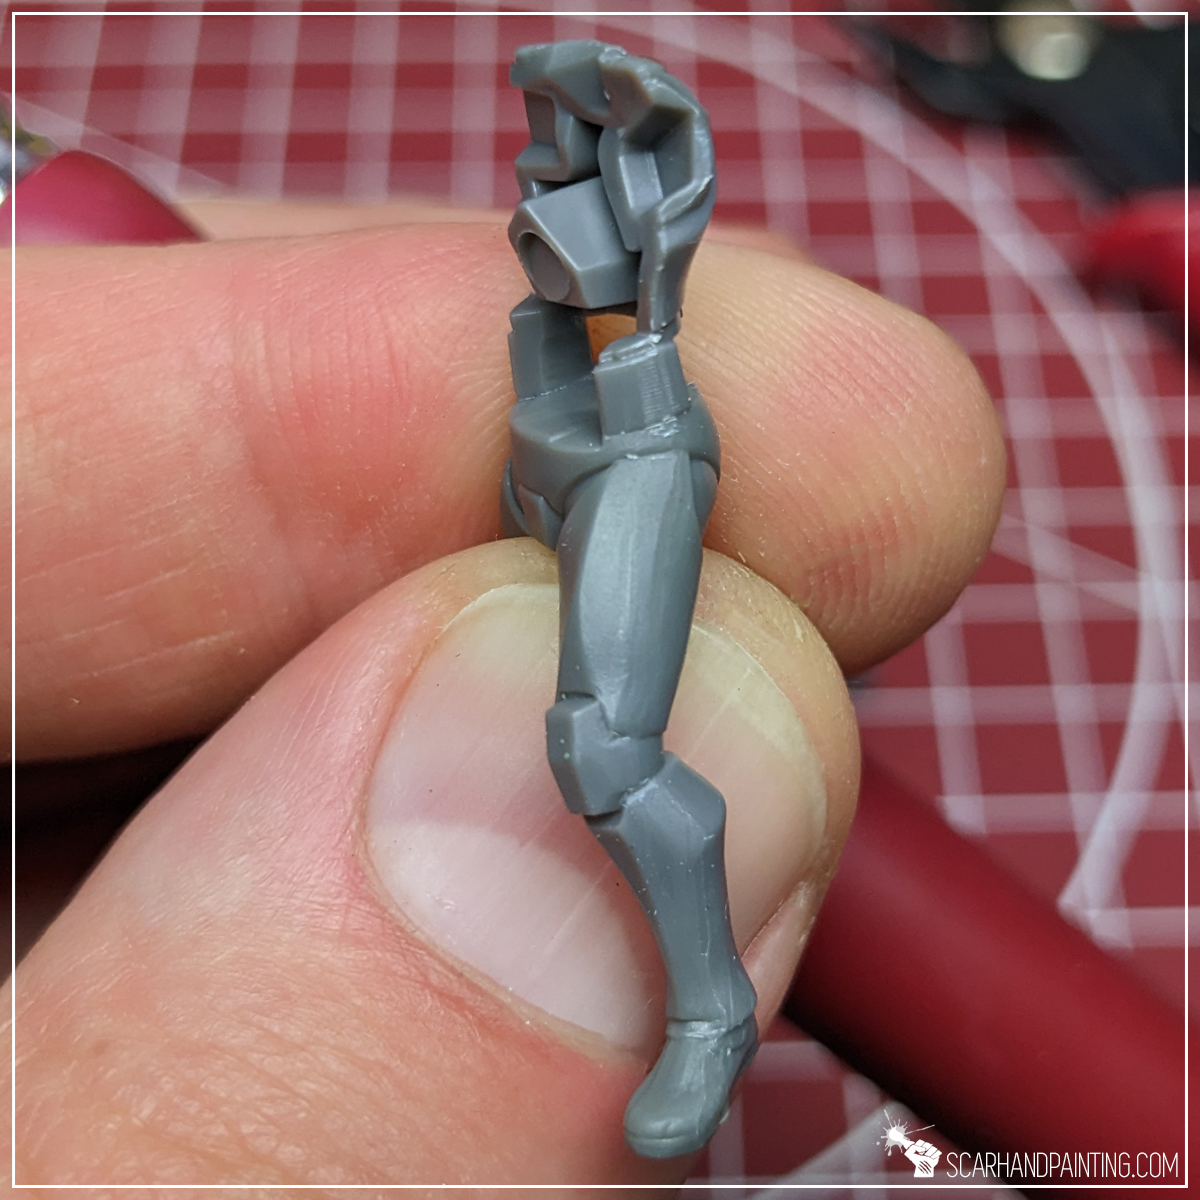
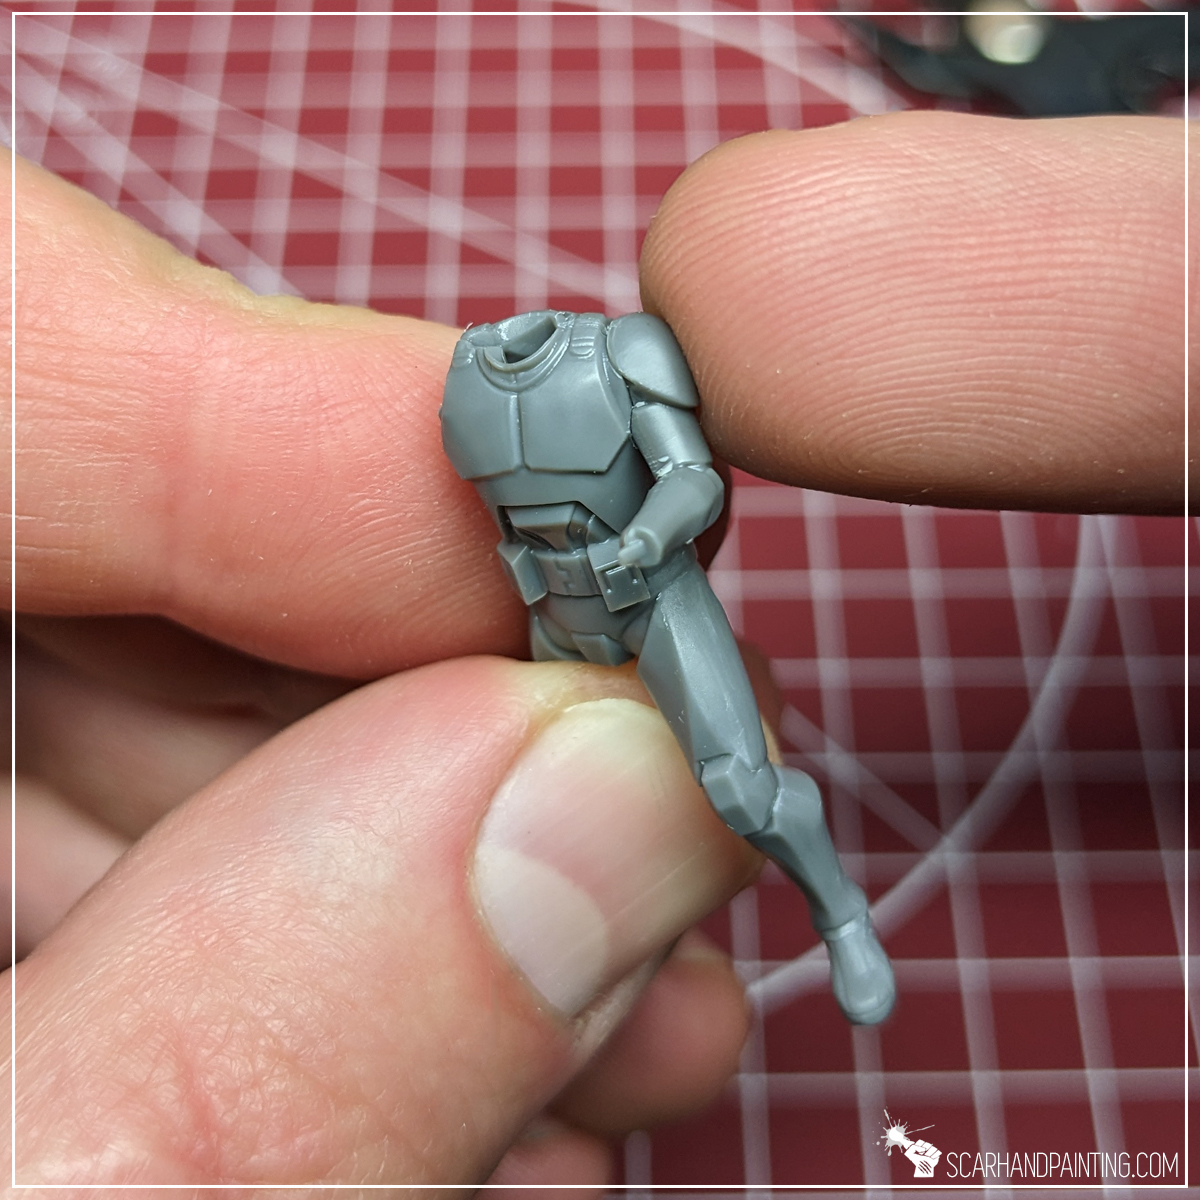
Both Mandalorian Super Commandos were prepared in the same way as previous Shatterpoint miniatures. Visit Tutorial: Painting Star Wars Shatterpoint Clone Troopers article for a detailed step-by-step guide.
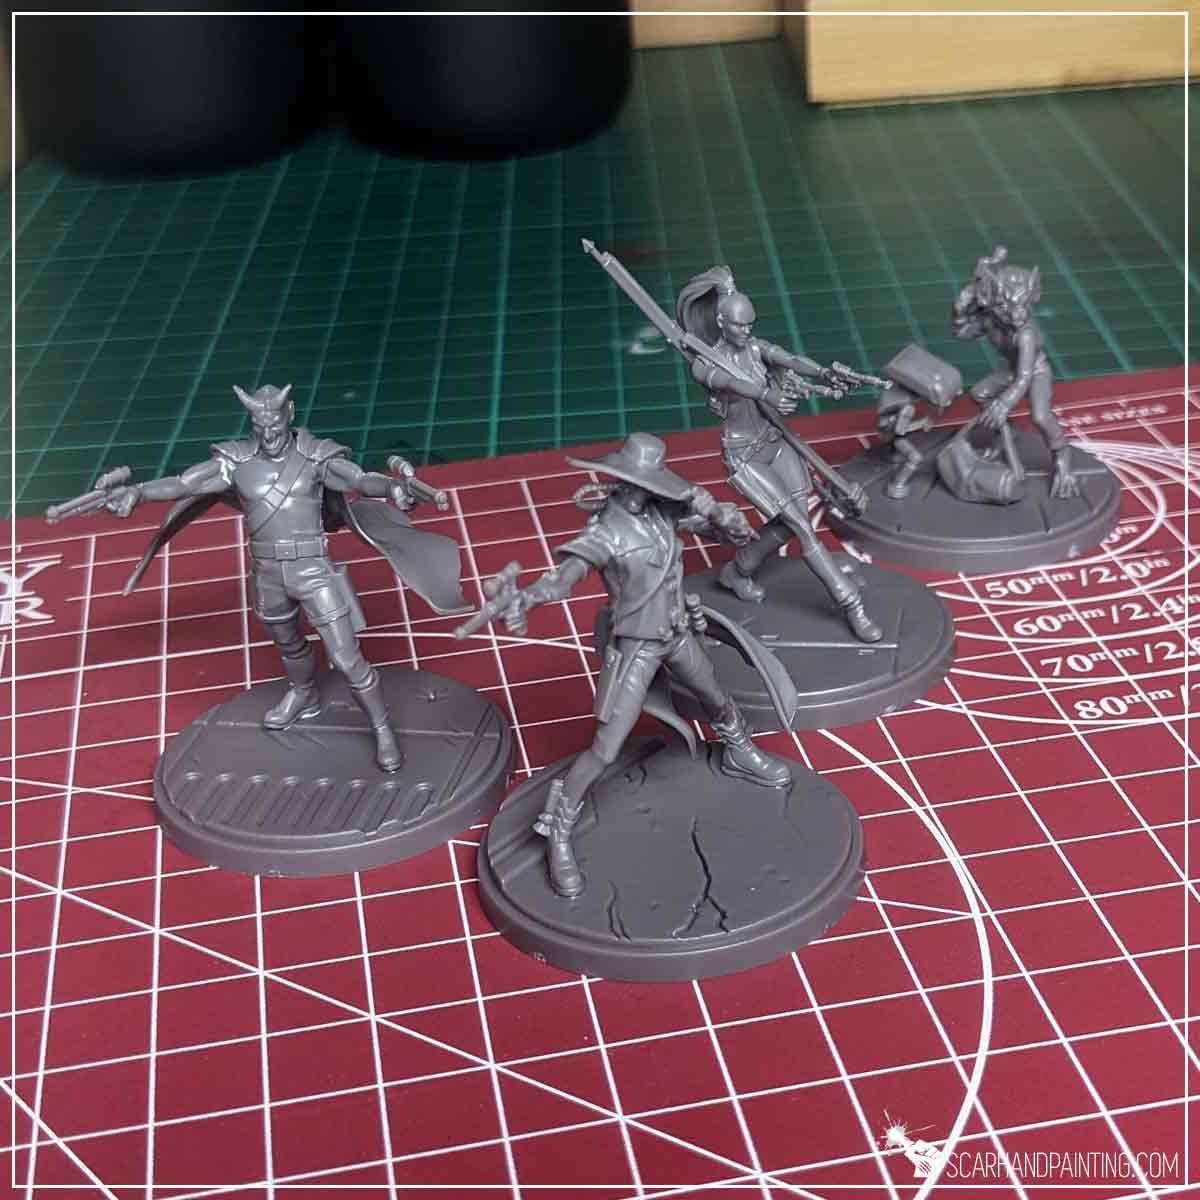
I mounted the miniatures on a stick with a piece of Blu-Tack, then undercoated them with The Army Painter White Matt Primer.
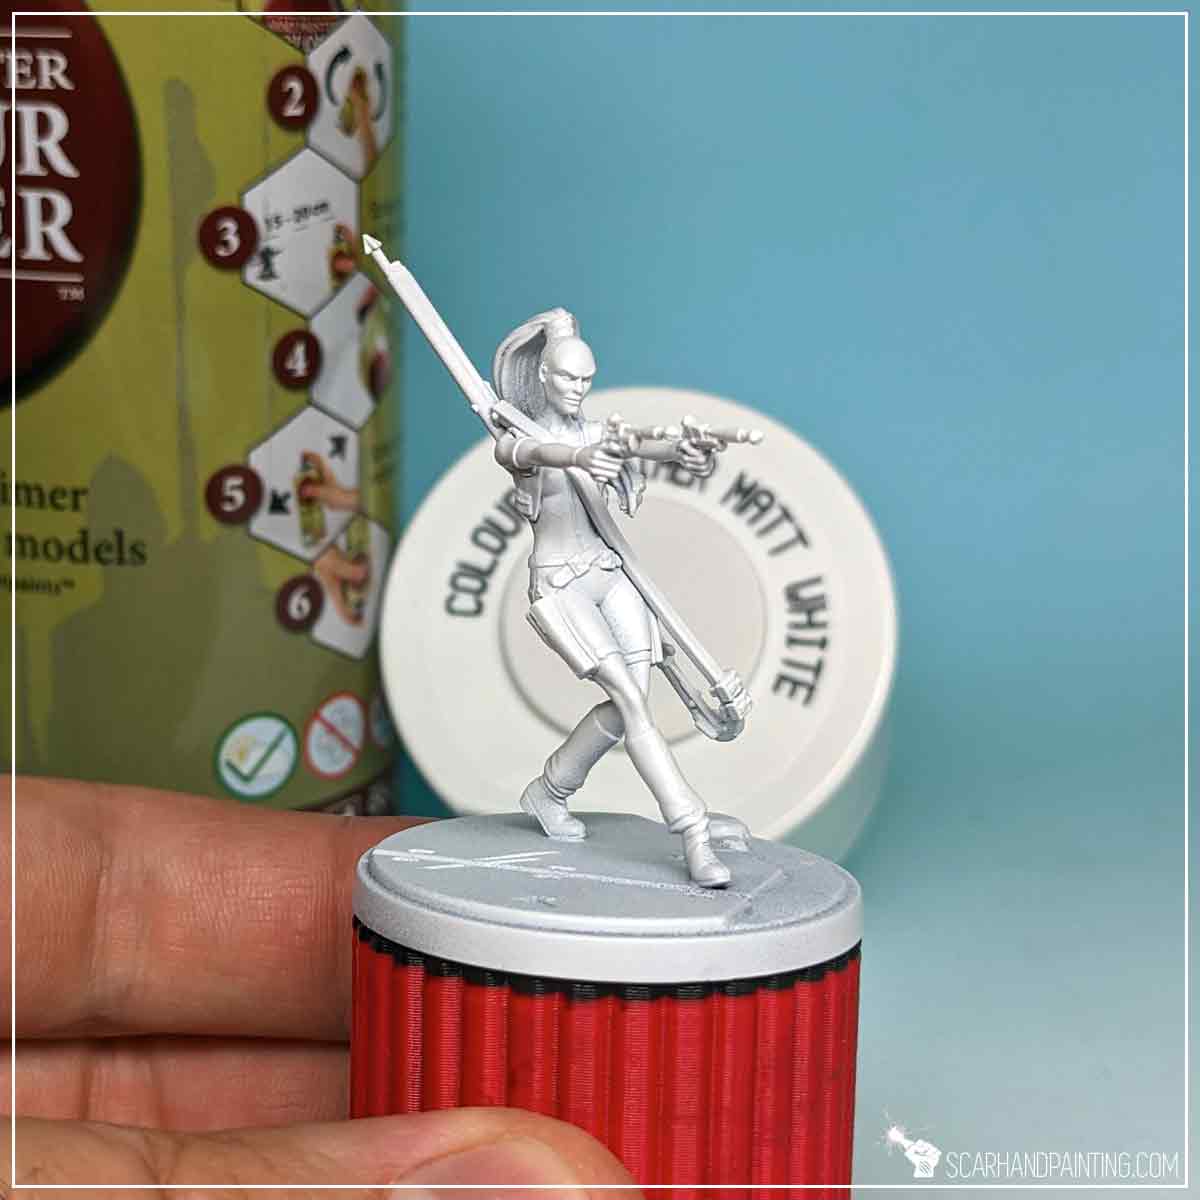
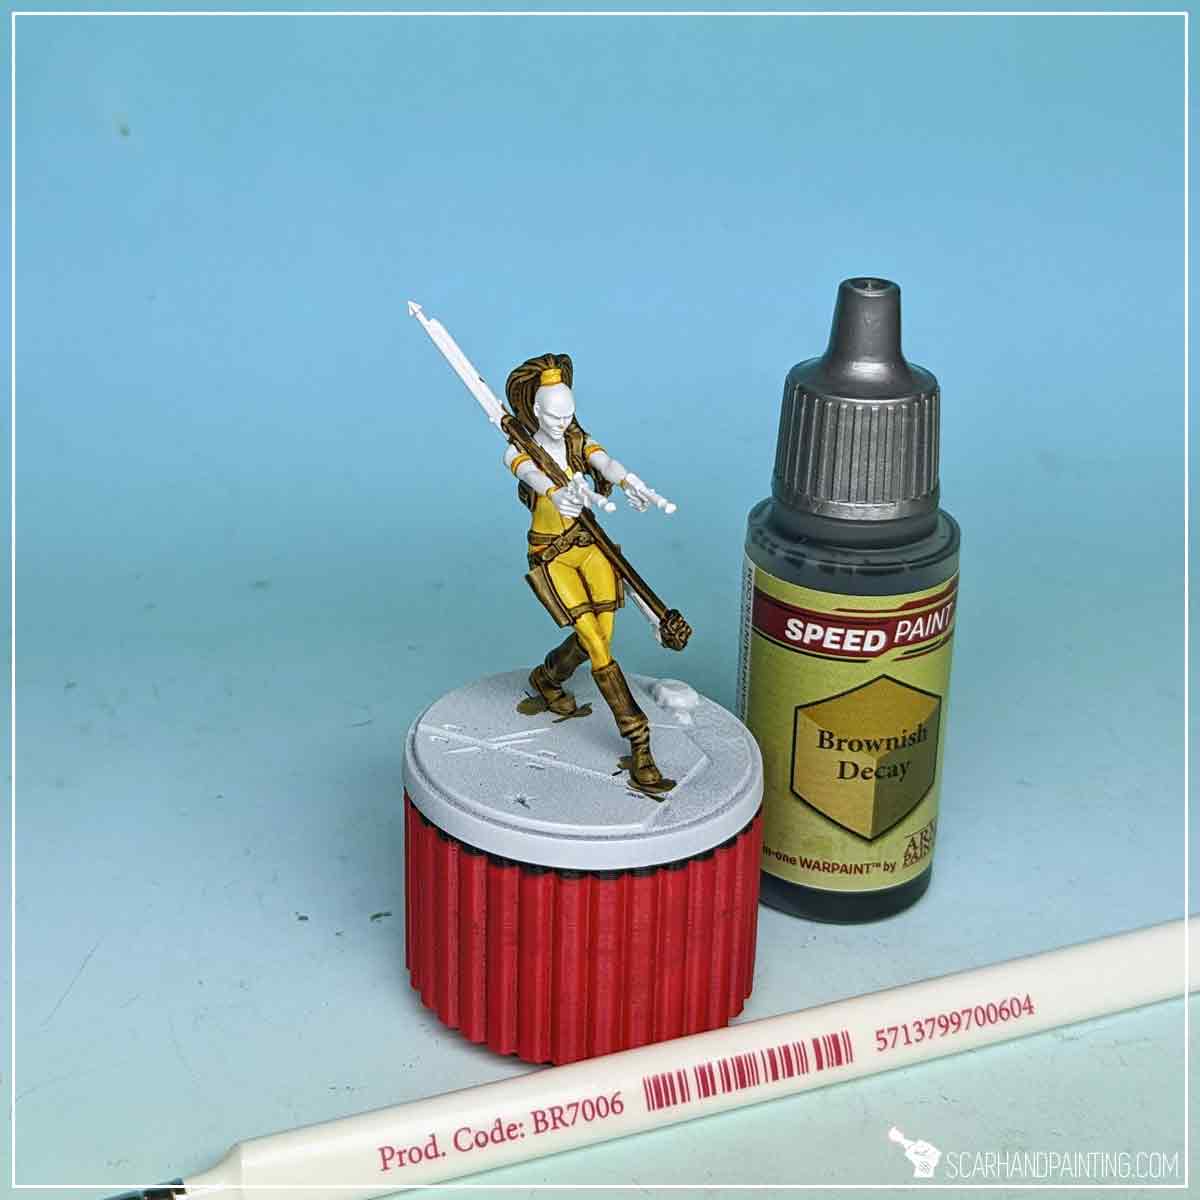
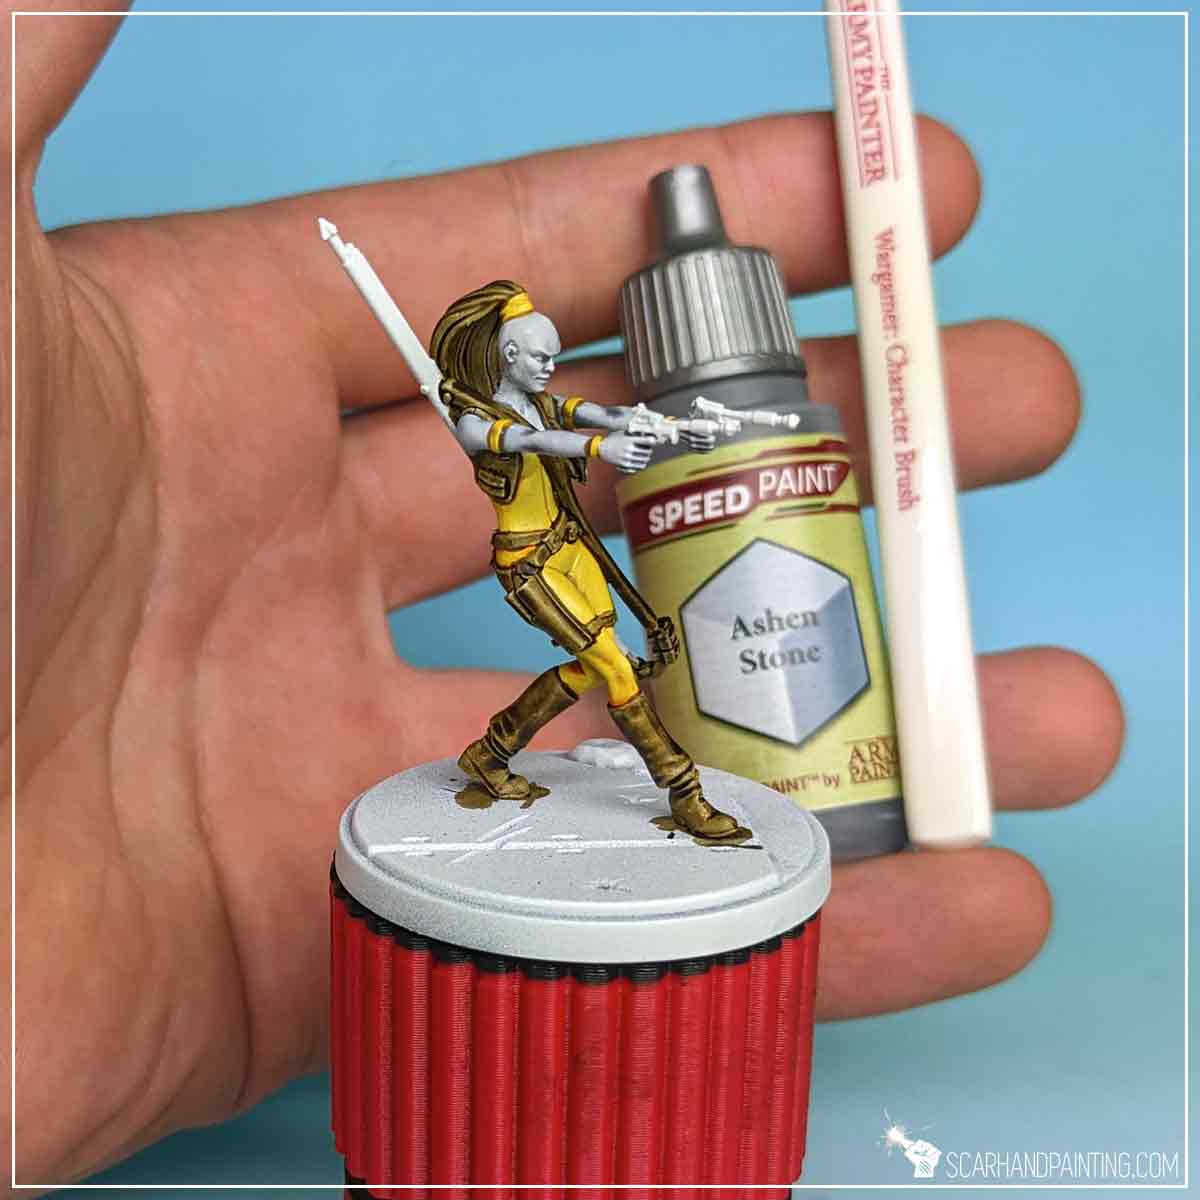
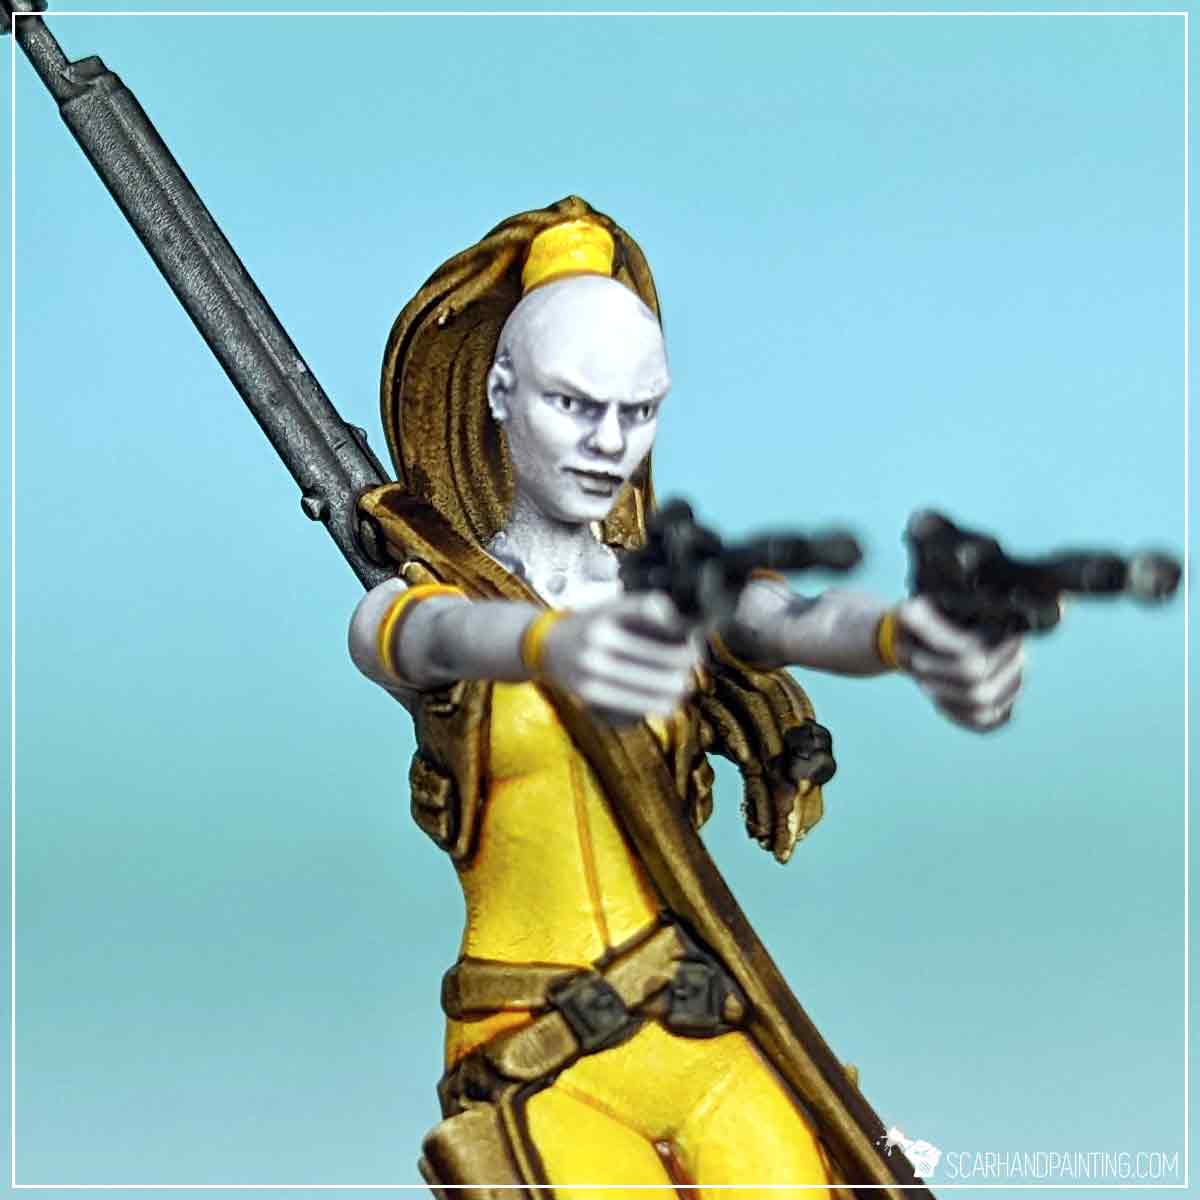
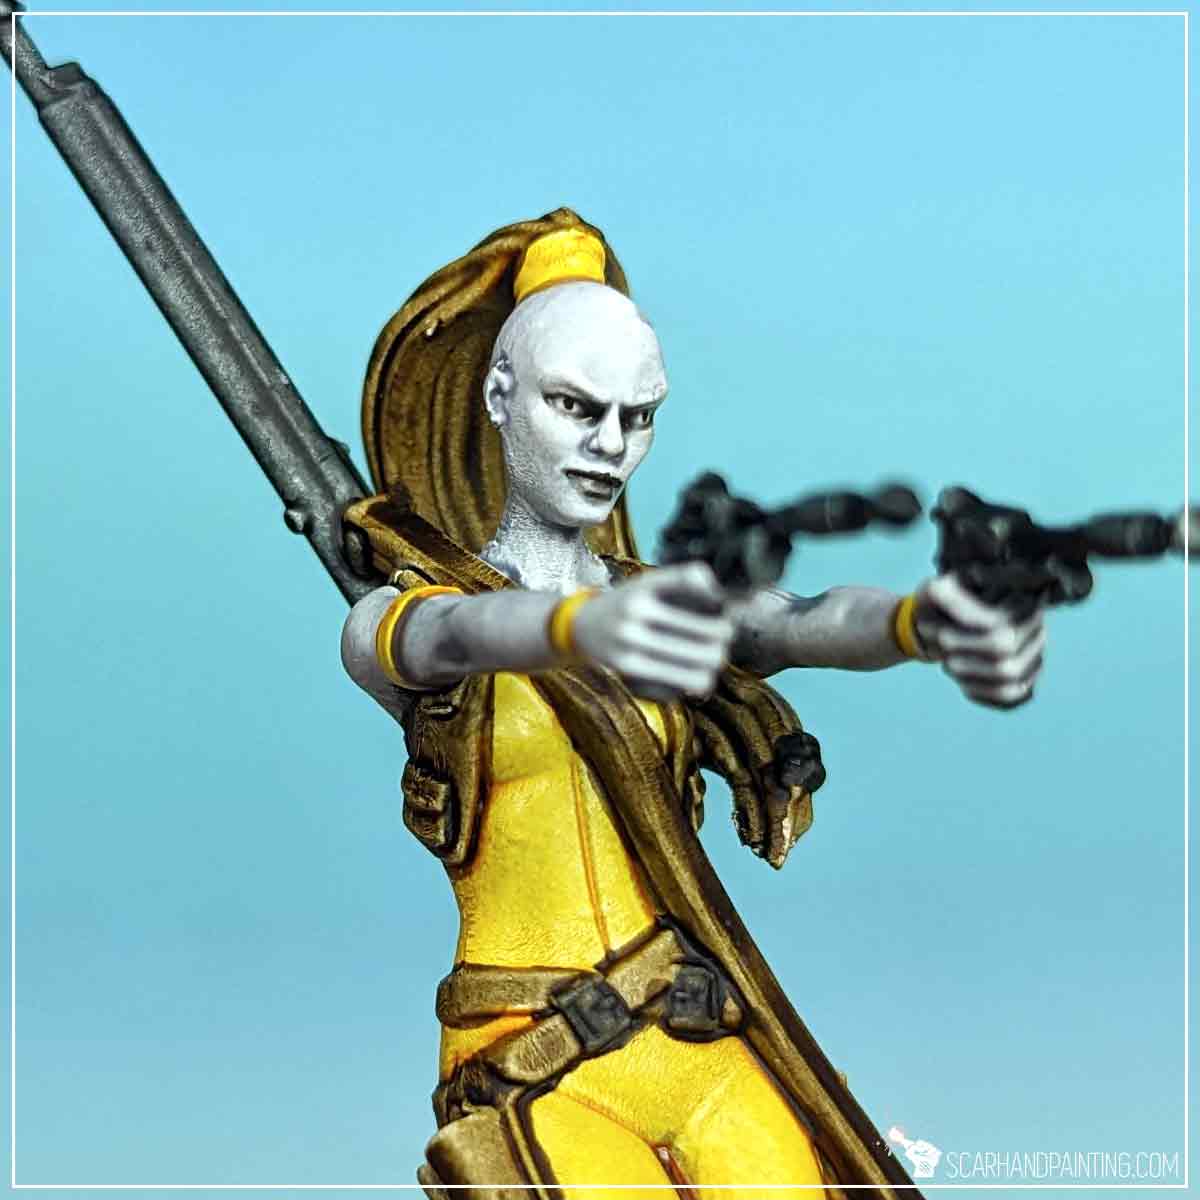
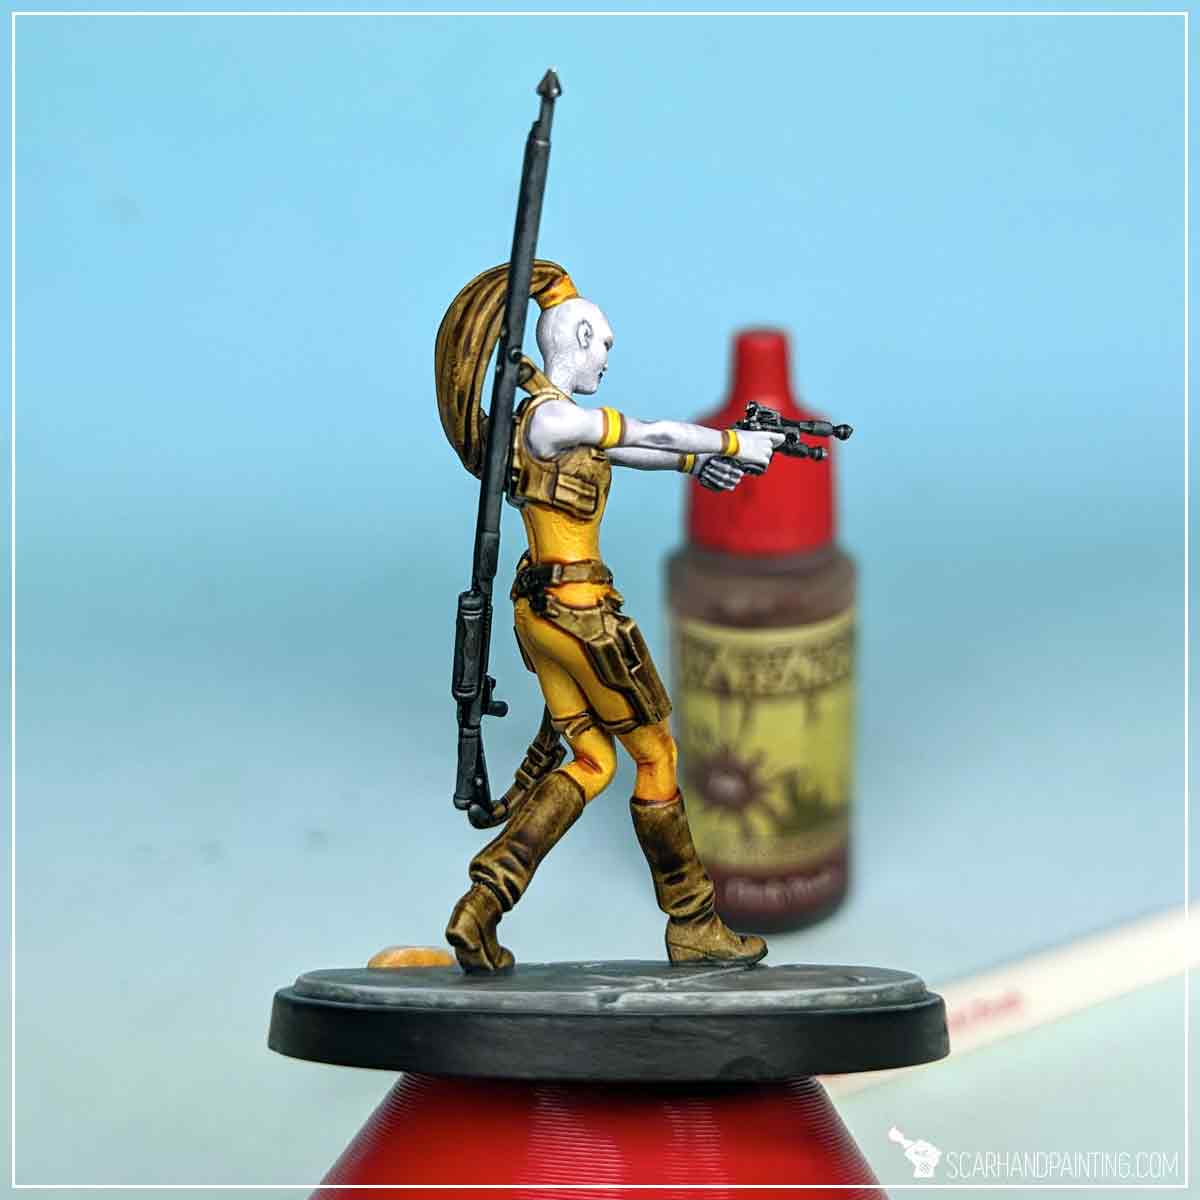
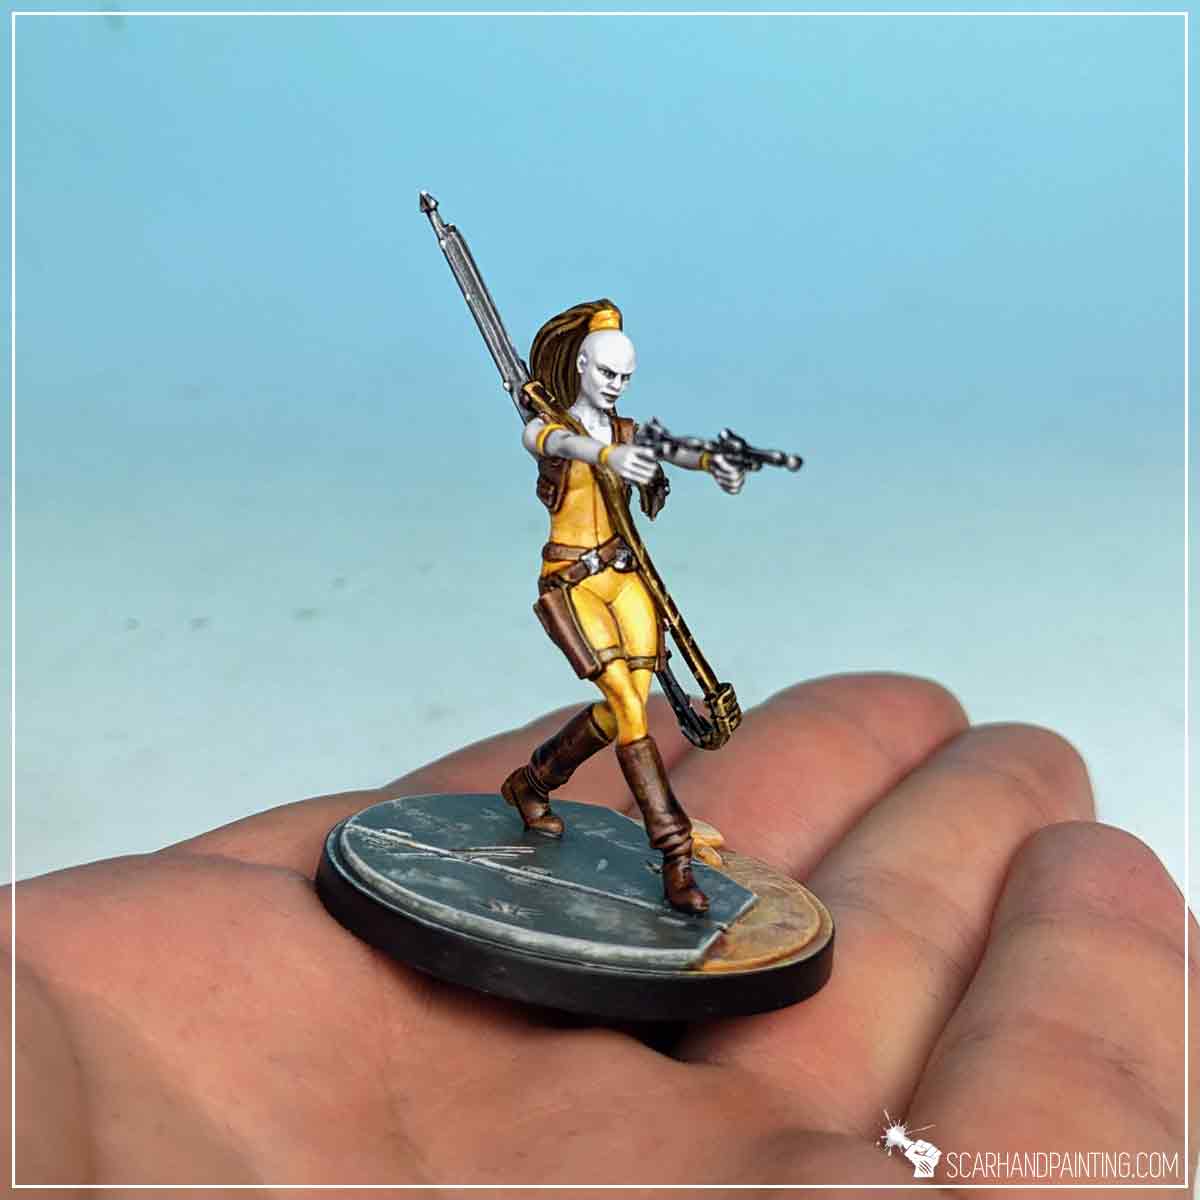
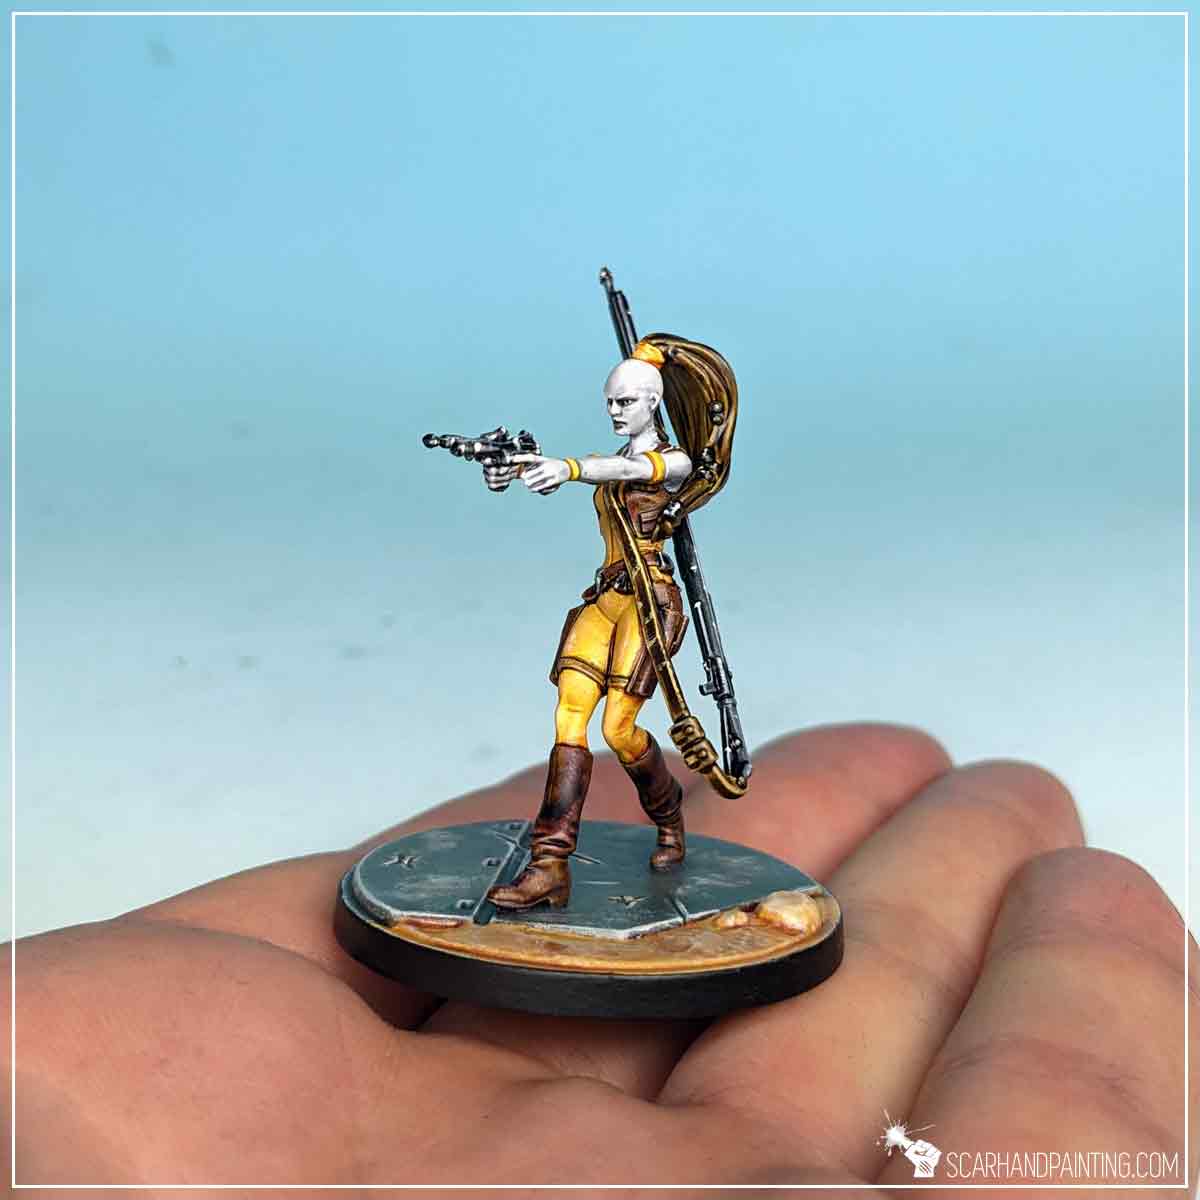
Aurra Sing is commonly represented in either opaque orange or yellow clothes. I decided to base this paint job on Fistful of Credits box art, so honey yellow. Using Wargamer: Character Brush I have painted all clothes with Ancient Honey Speedpaint.
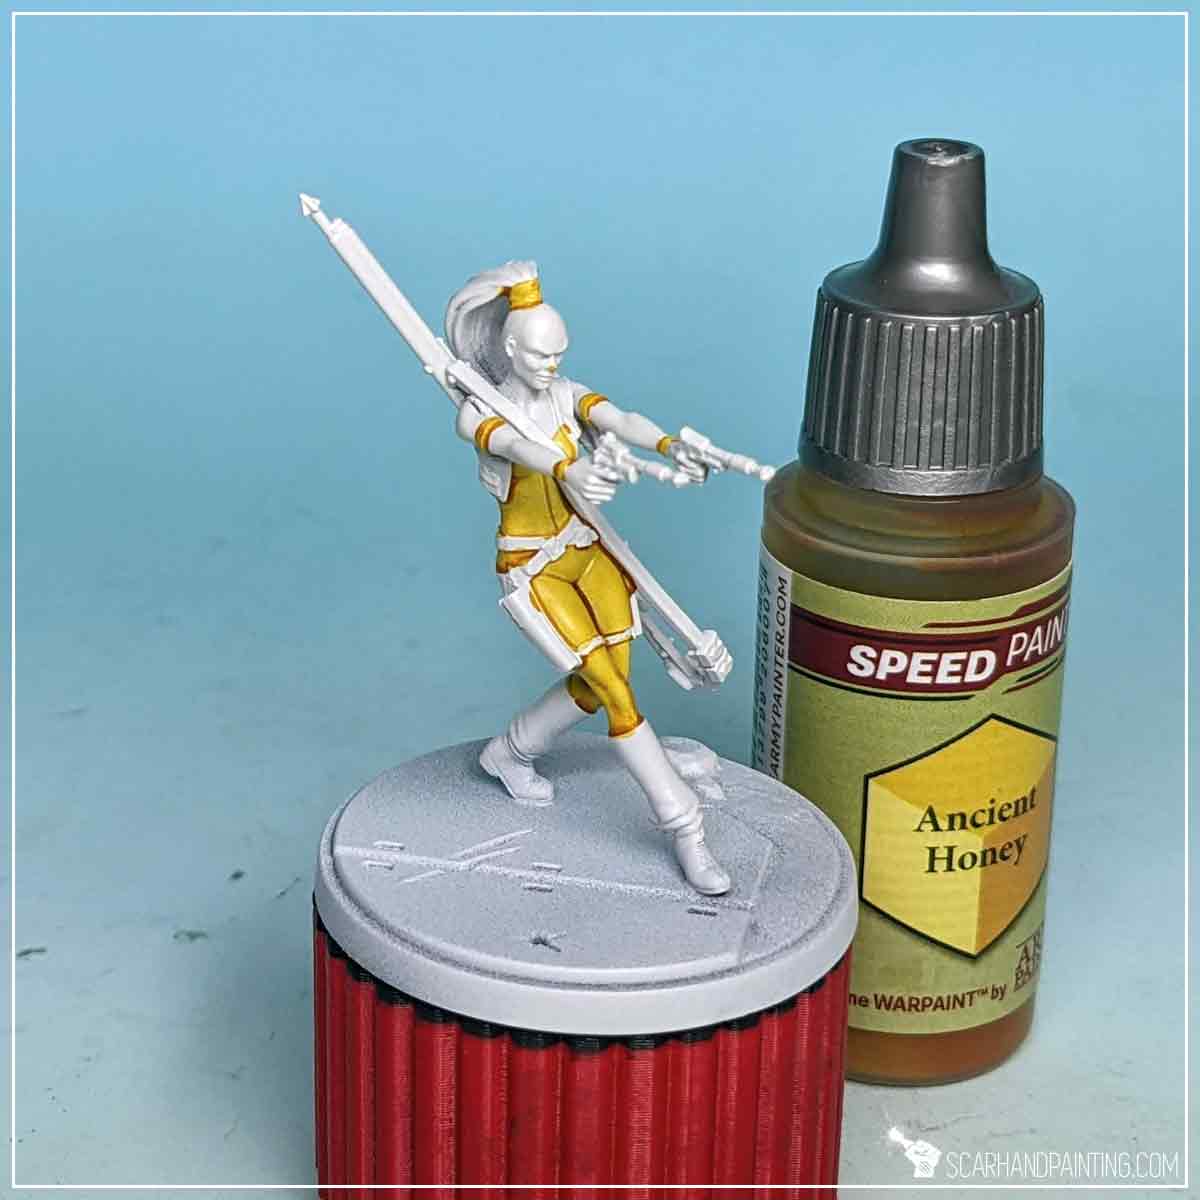
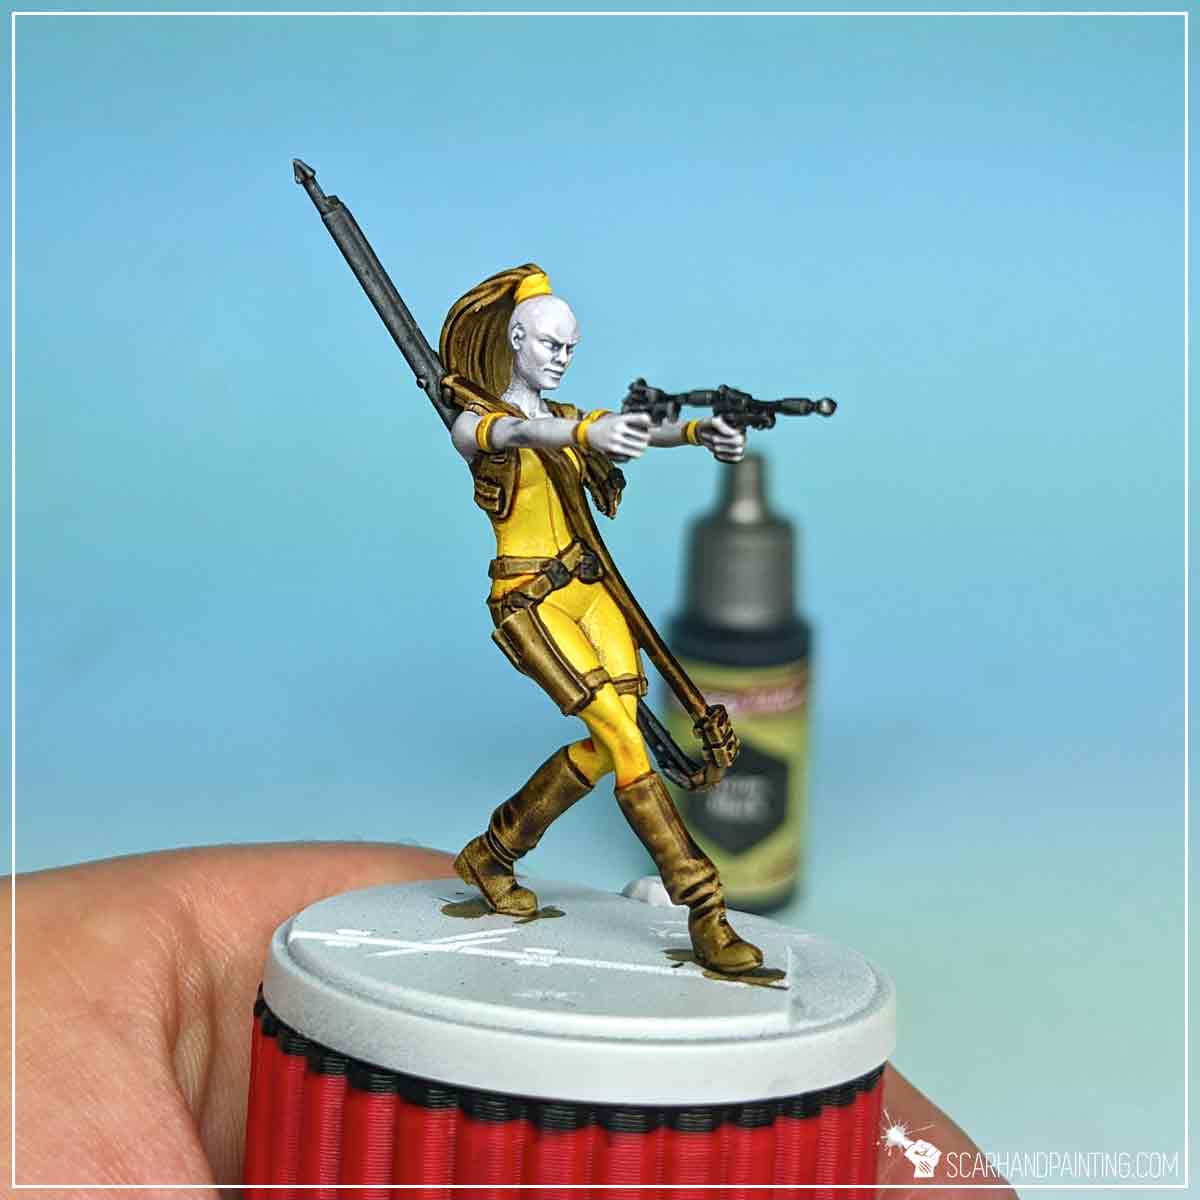
Next, using the same brush, I’ve painted boots, weapon holsters, straps, hair and vest with Brownish Decay.
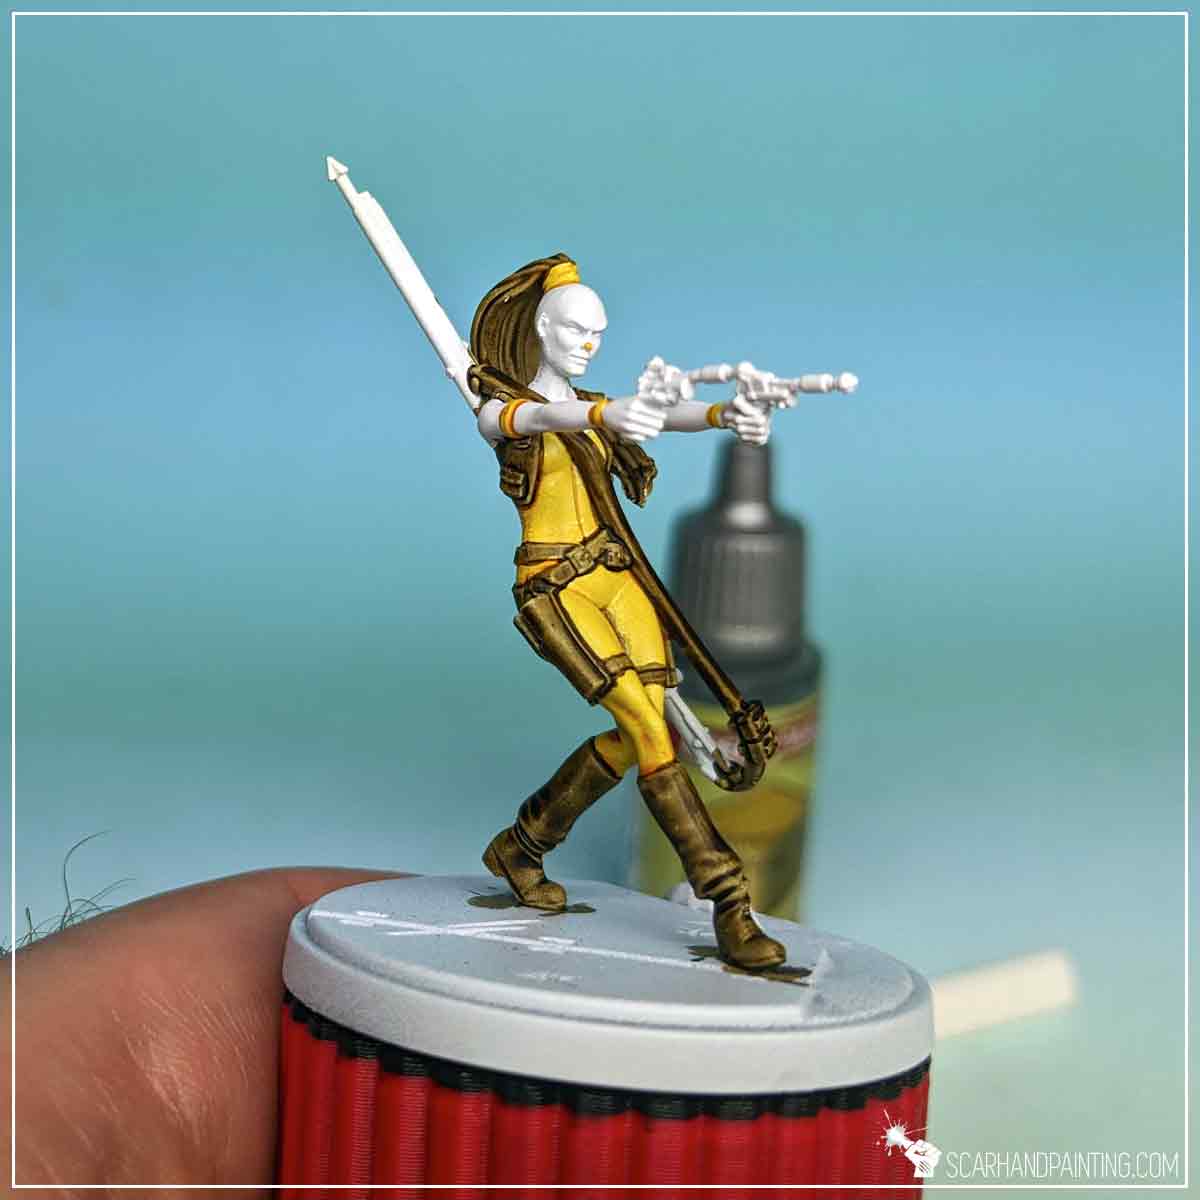
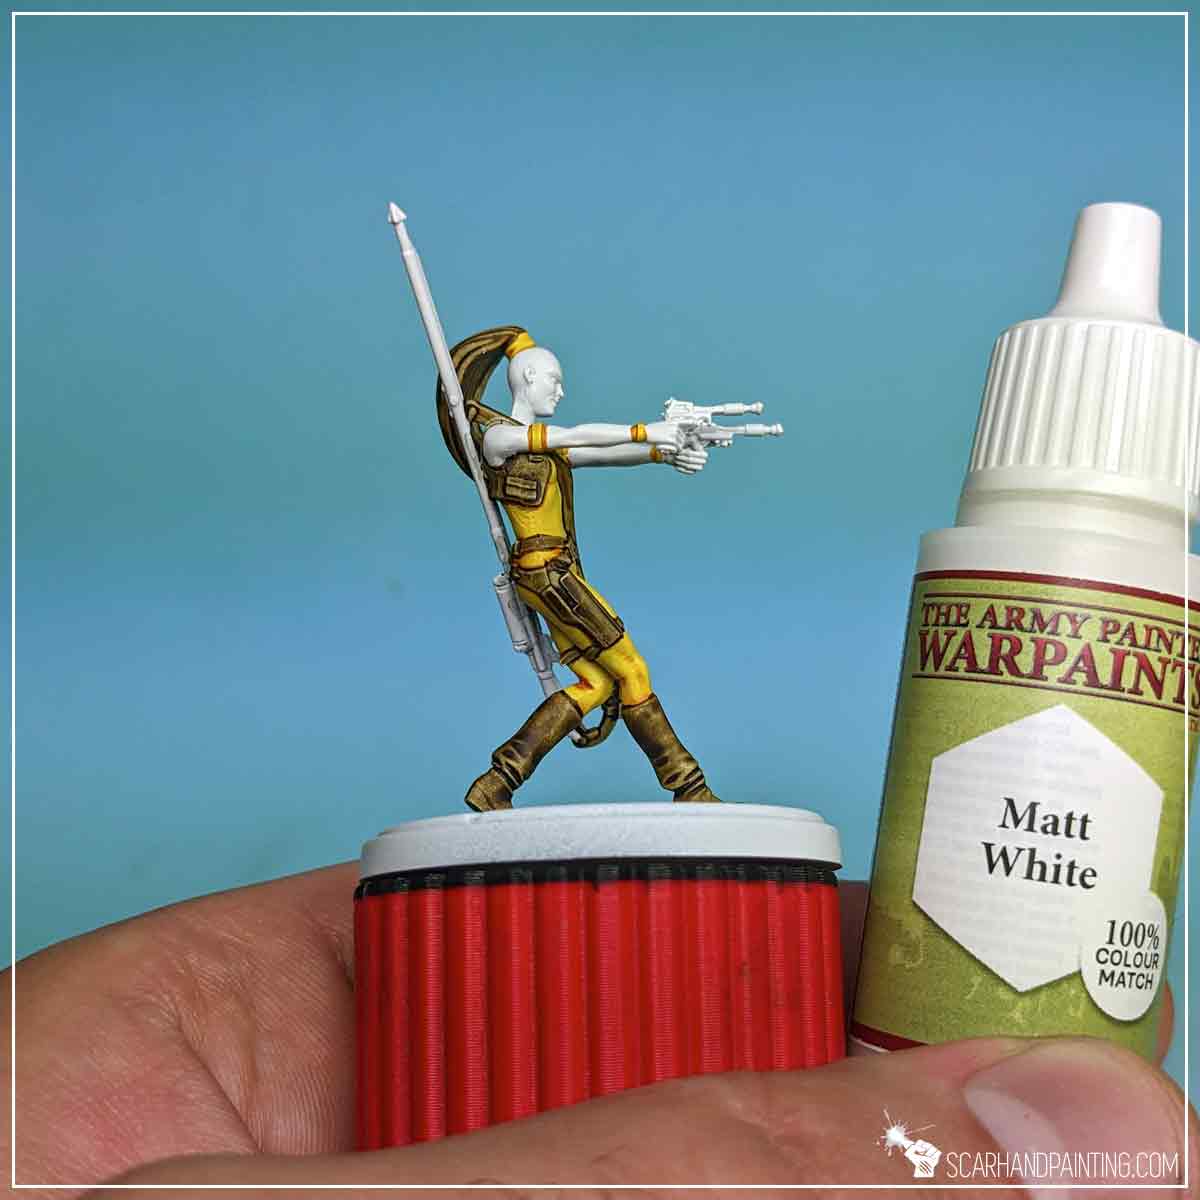
I’ve made quite a few mistakes with previous layers that I have corrected in this step using Matt White.
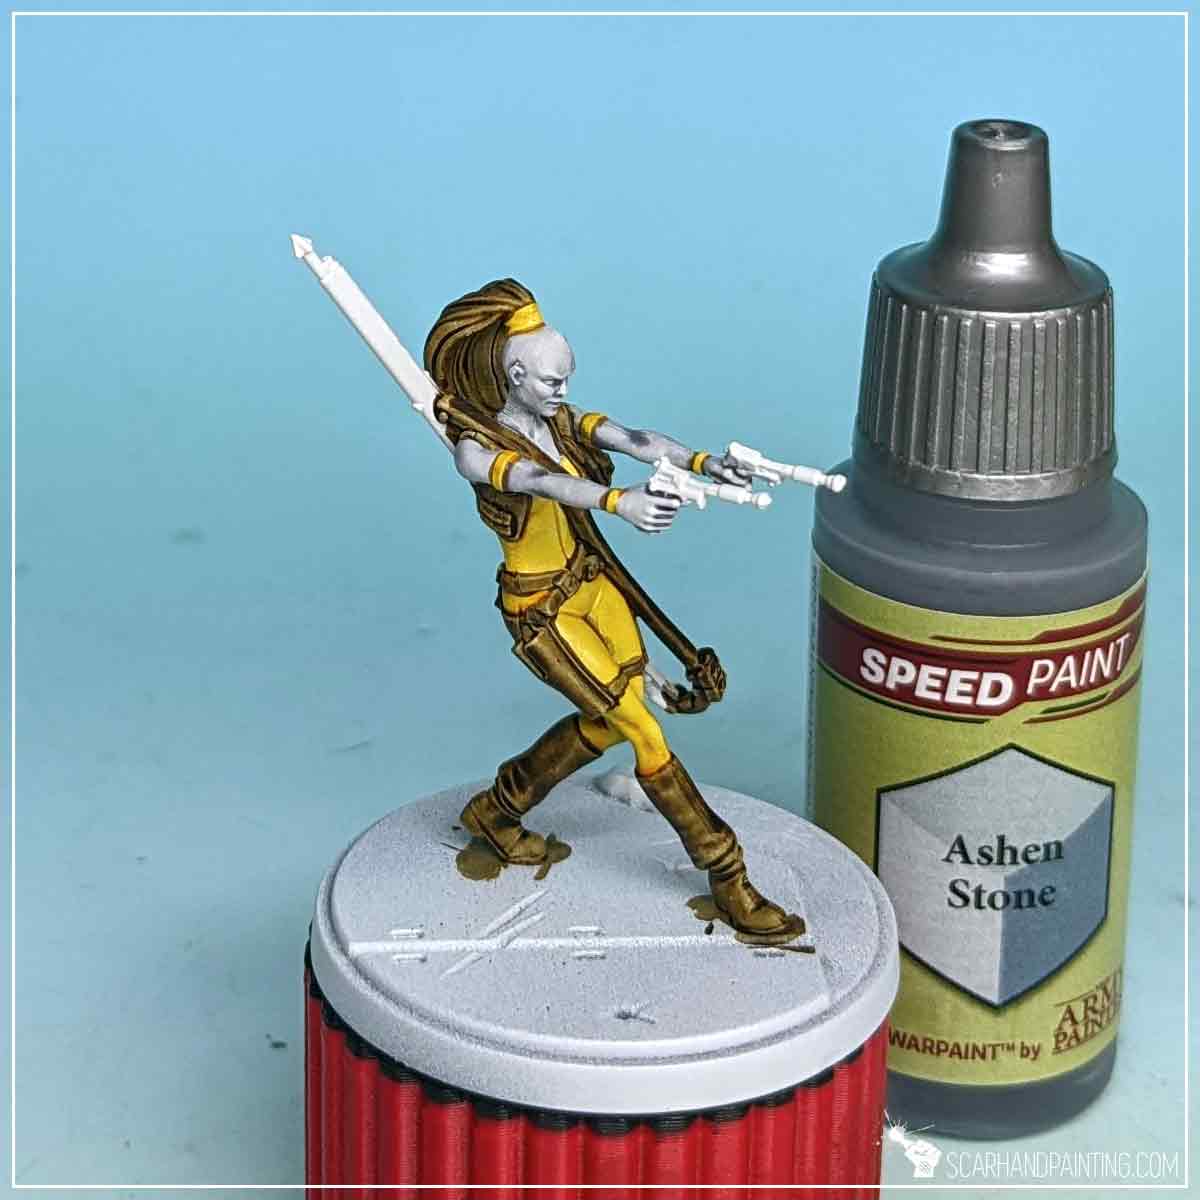
To better represent Aurra’s pale grey’ish skin tone I applied a layer of Ashen Grey.
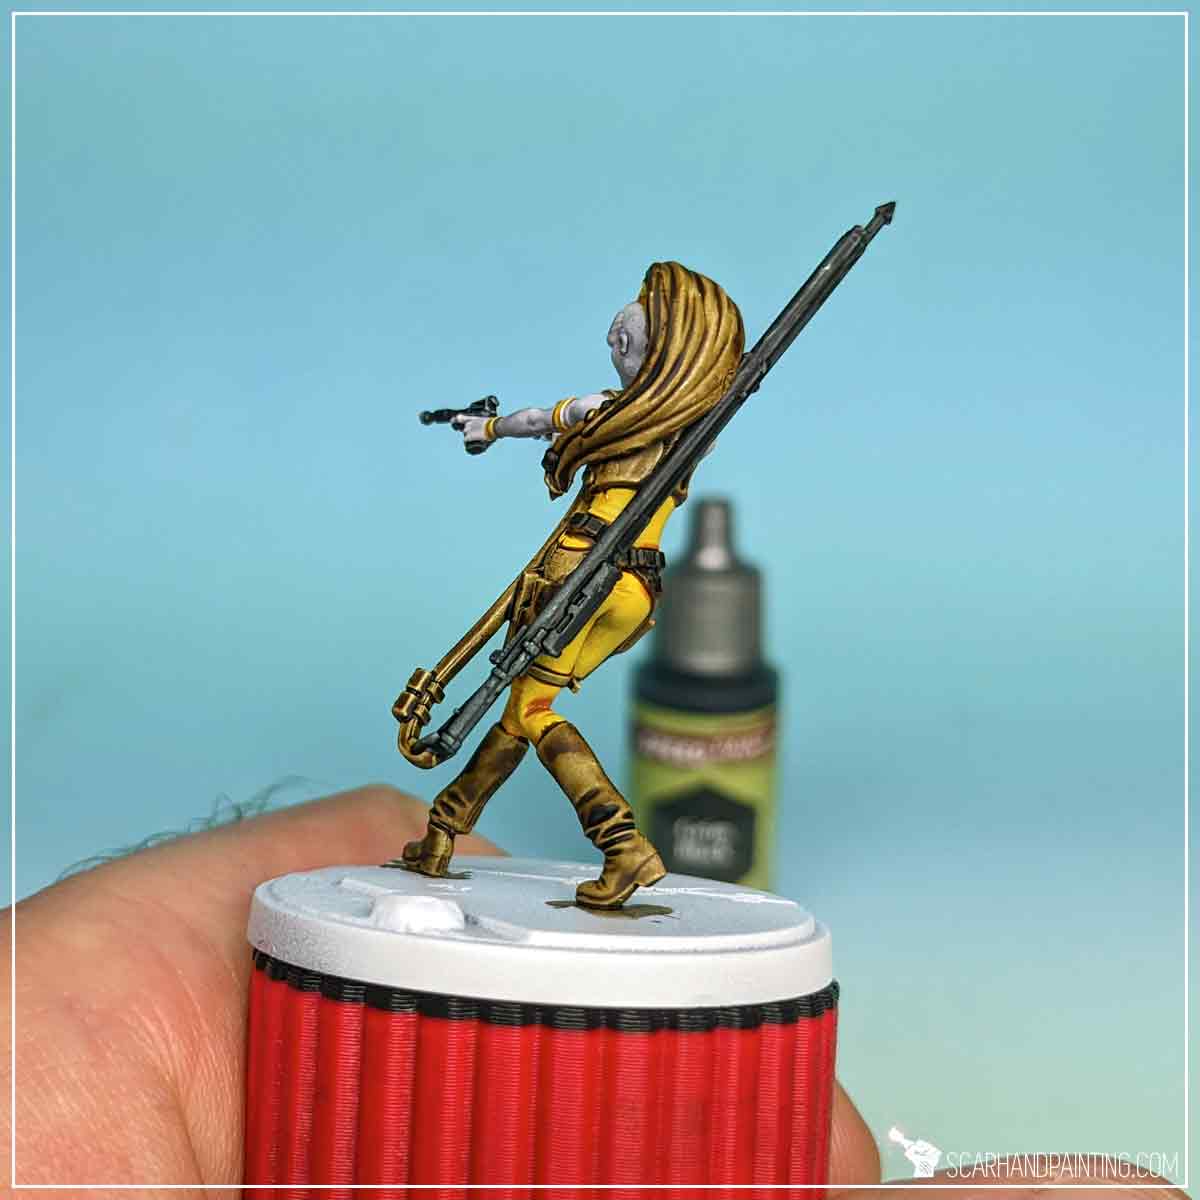
I then painted weapons, strap buckles and hair jewelry with Grim Black Speedpaint.
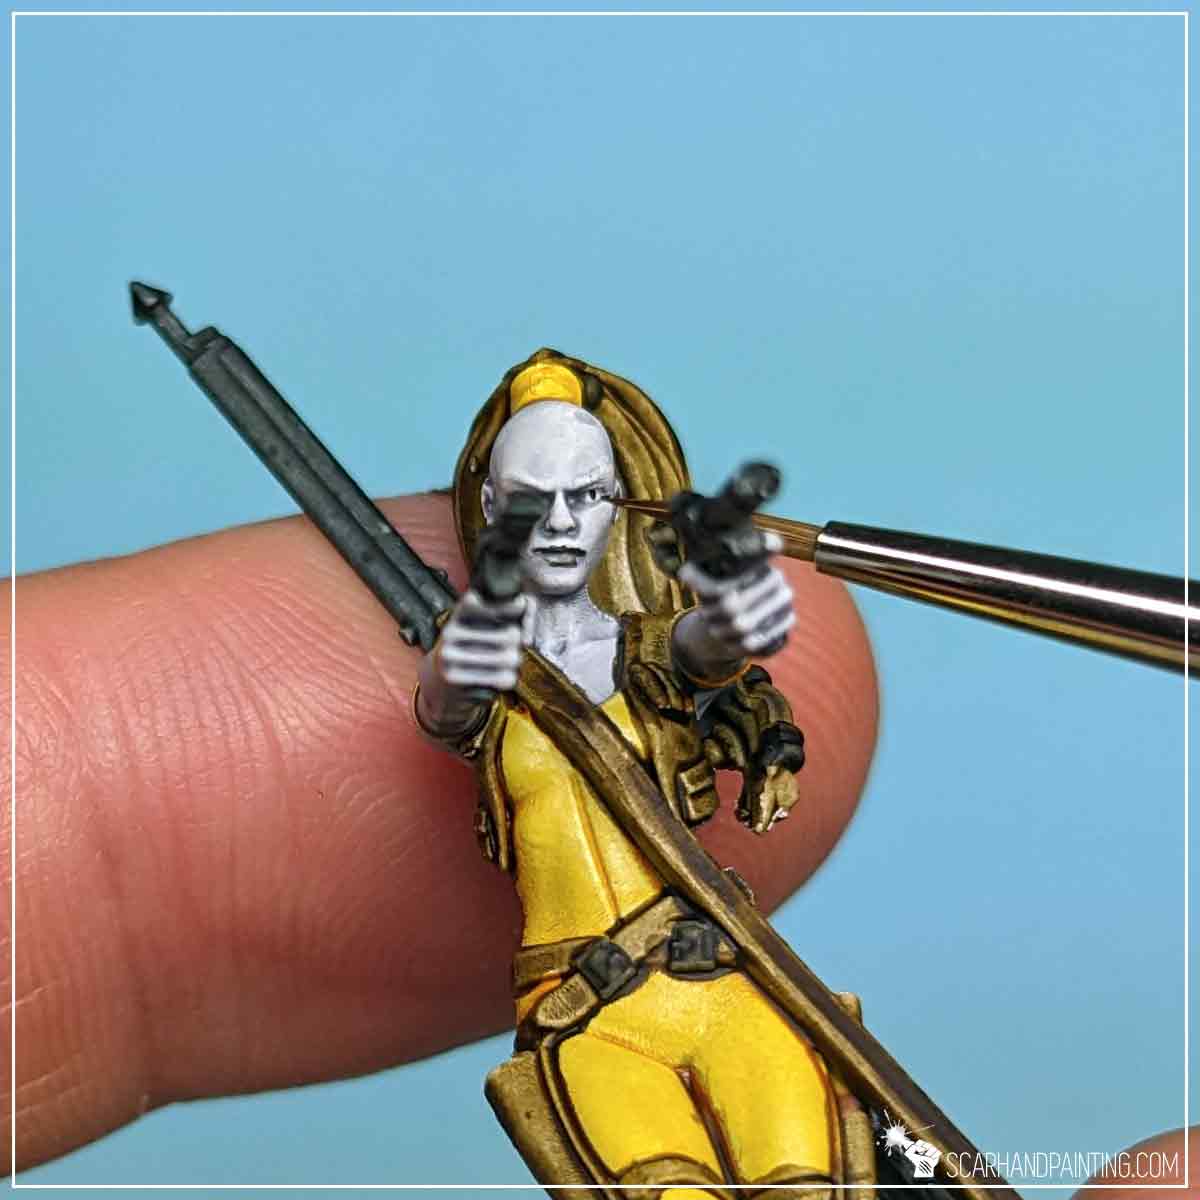
Painting eyes is a craft in its own category. Fortunately for Aurra here two small dots of Matt Black followed by delicate ‘touches’ of Dark Tone wash worked like a charm. I also applied Dark Tone wash to her lips. Wargamer Detail Brush was perfect for this step.
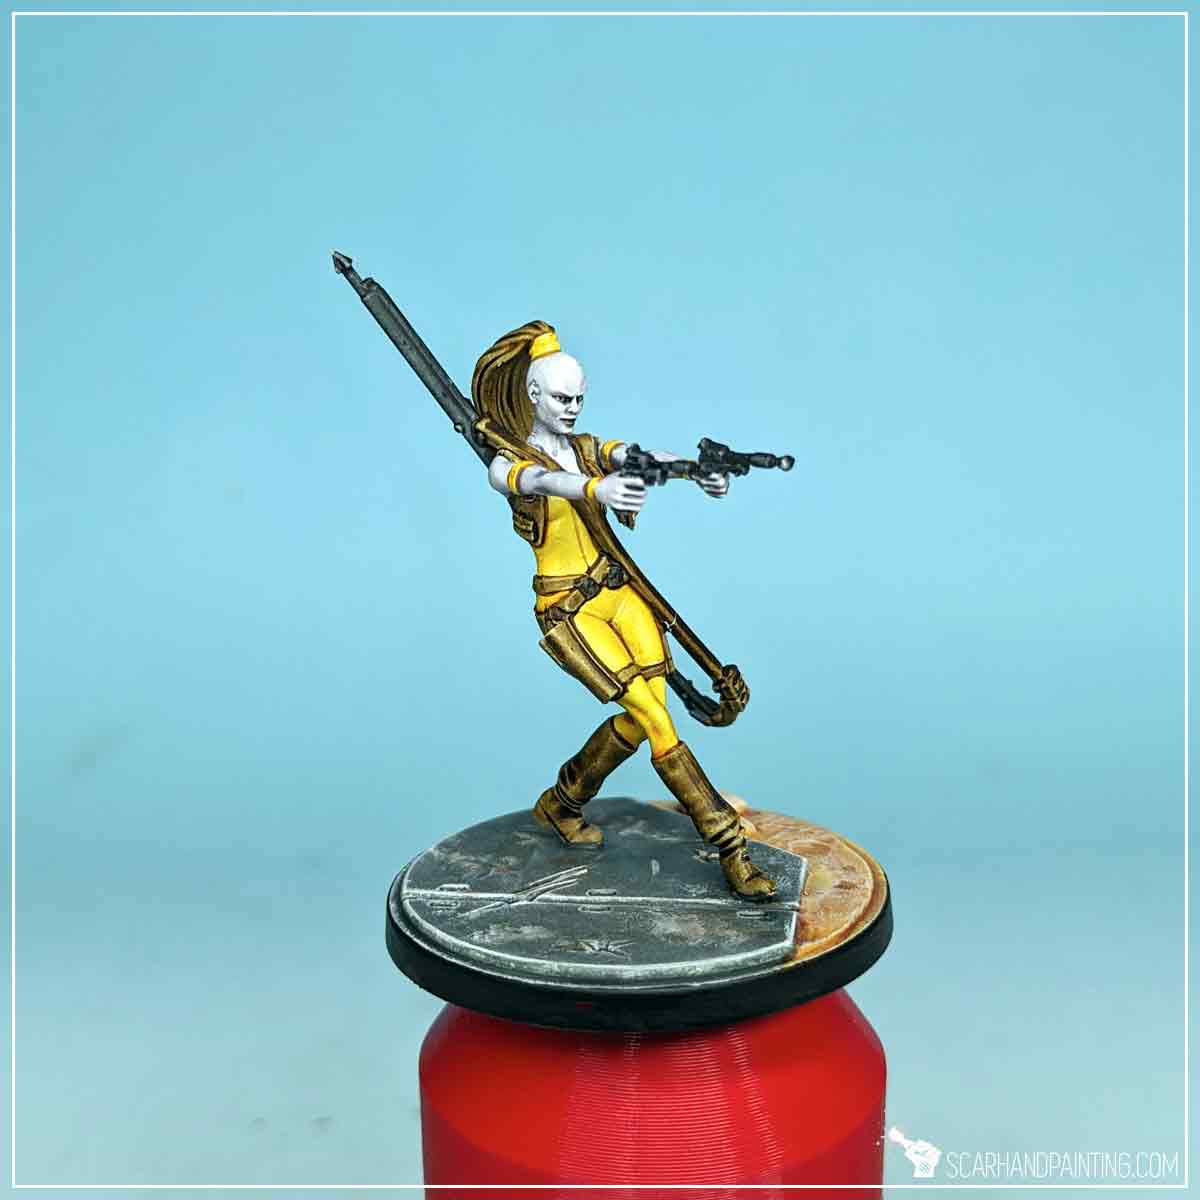
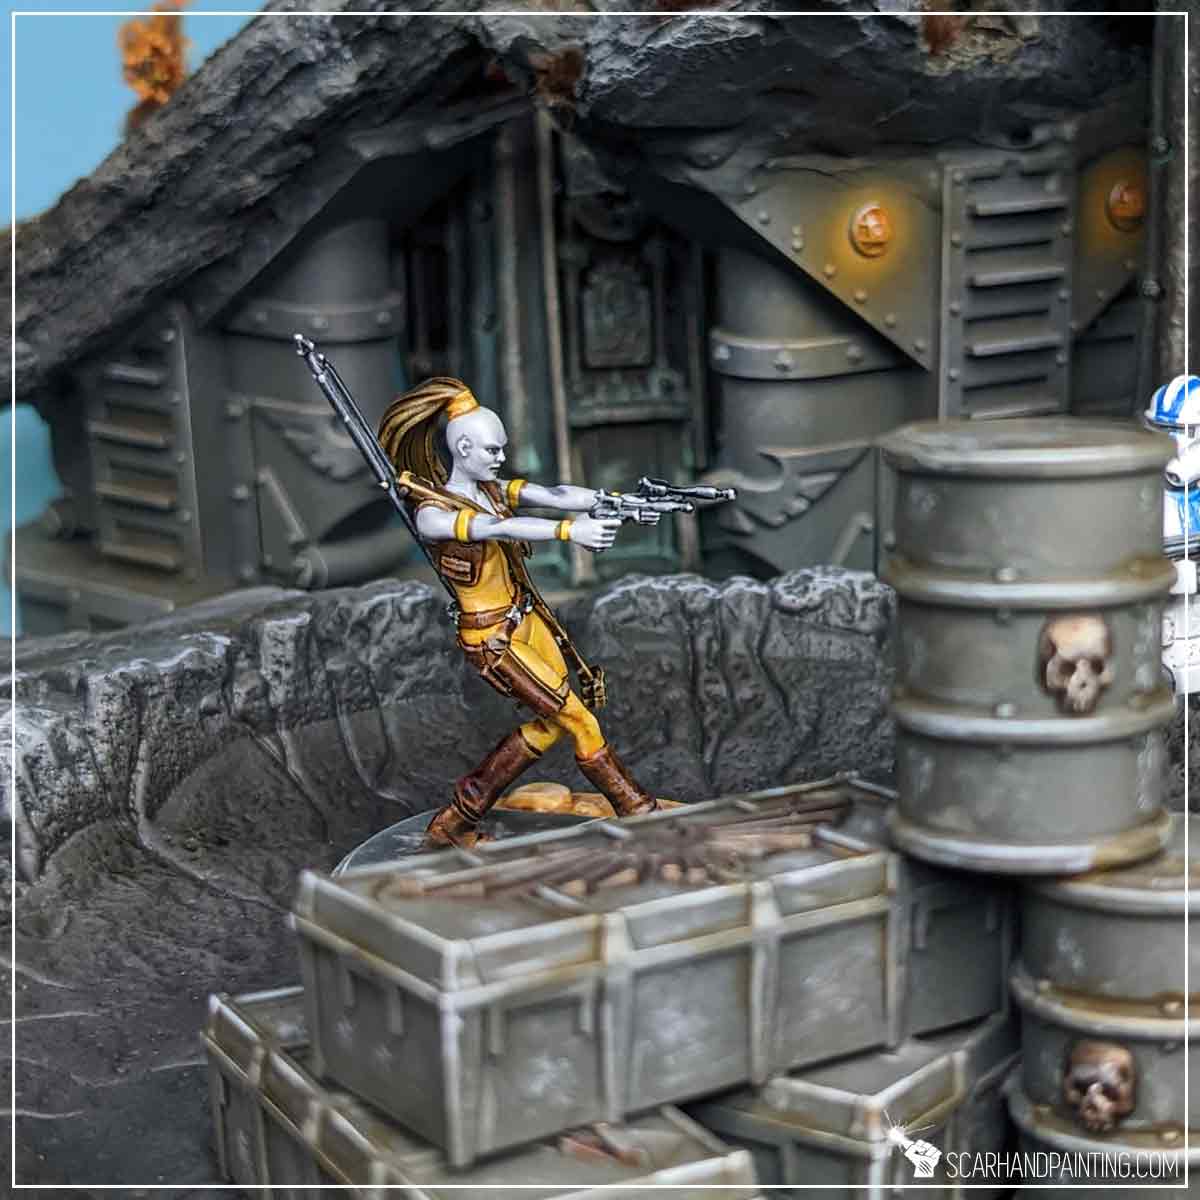
Finally I have painted the base following steps previously presented in the Tutorial: Painting Star Wars Shatterpoint Clone Troopers article, at which point the basic painting process was over and the miniature might have been considered done… but why not take it further?
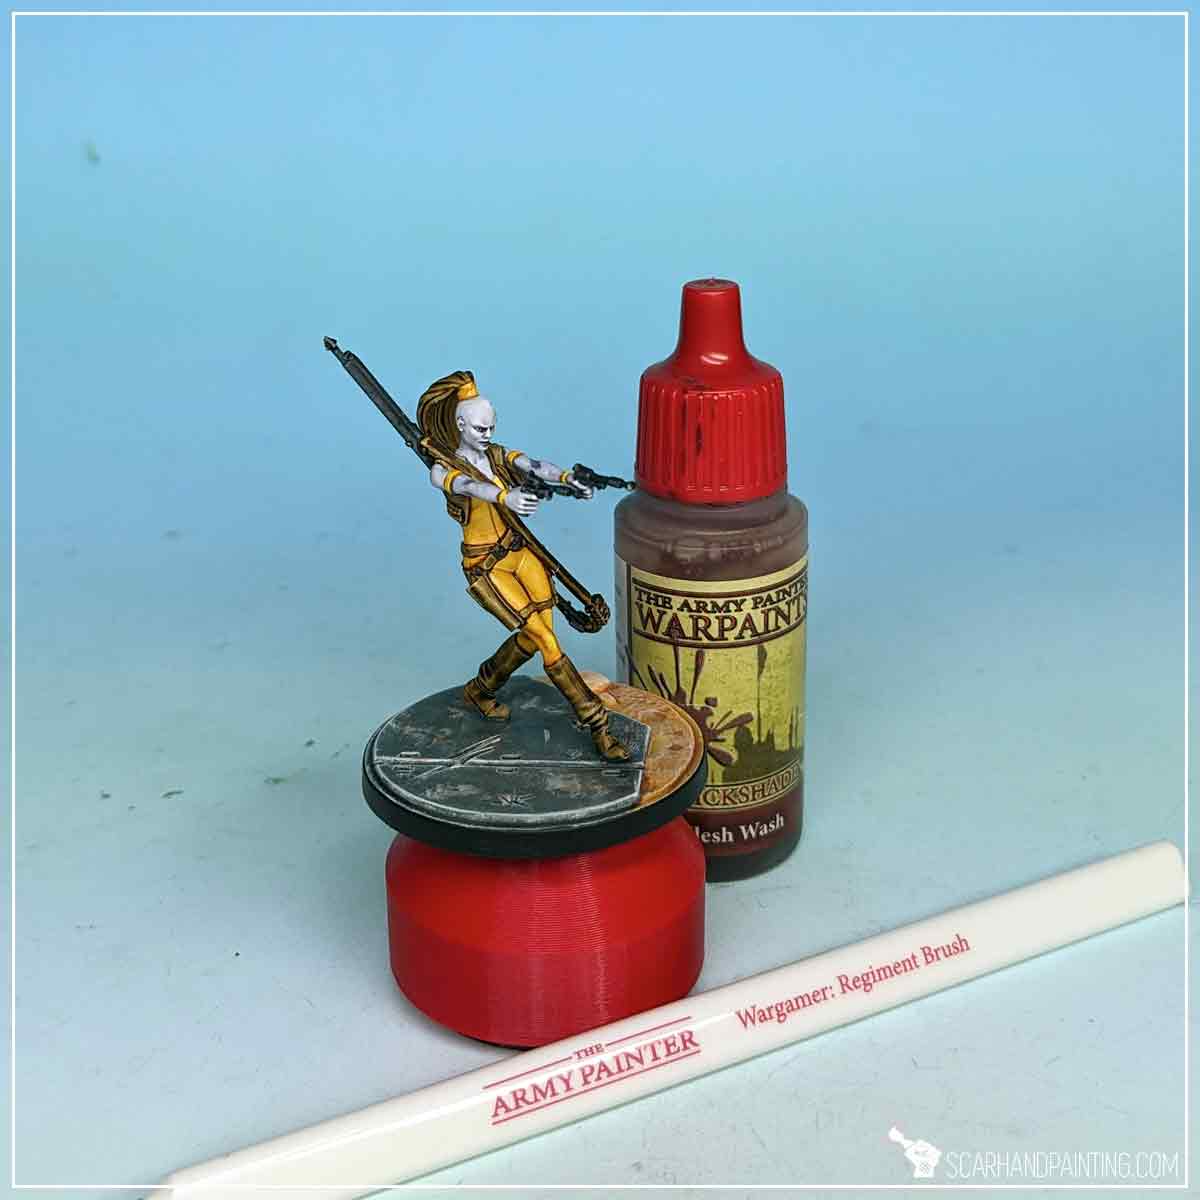
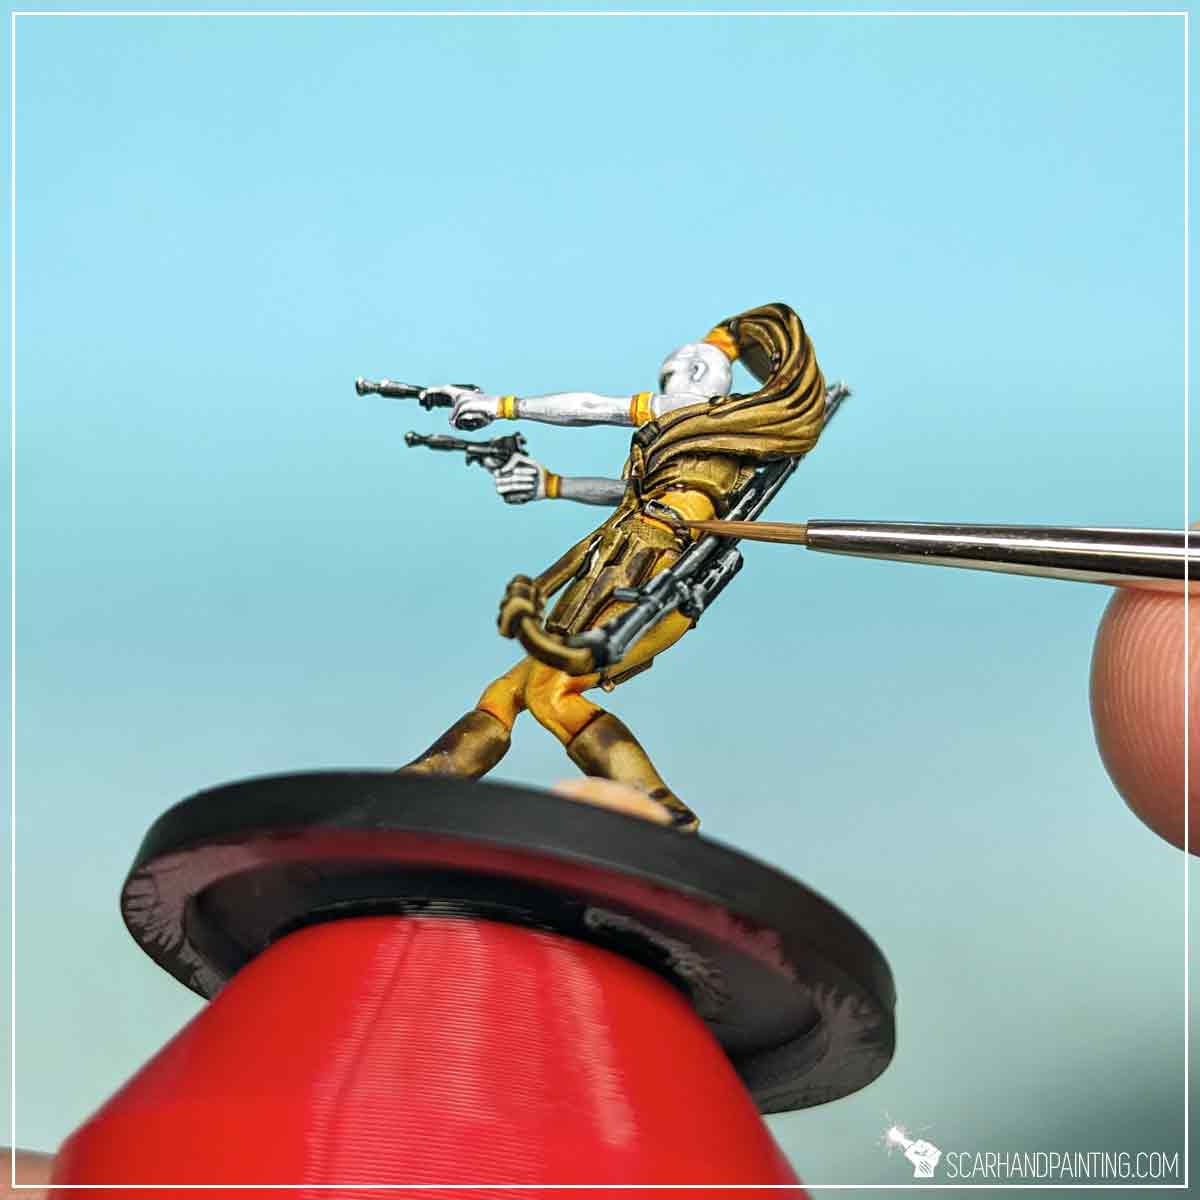
To bring more depth to Aurra’s clothes I applied a layer of Flesh Wash.
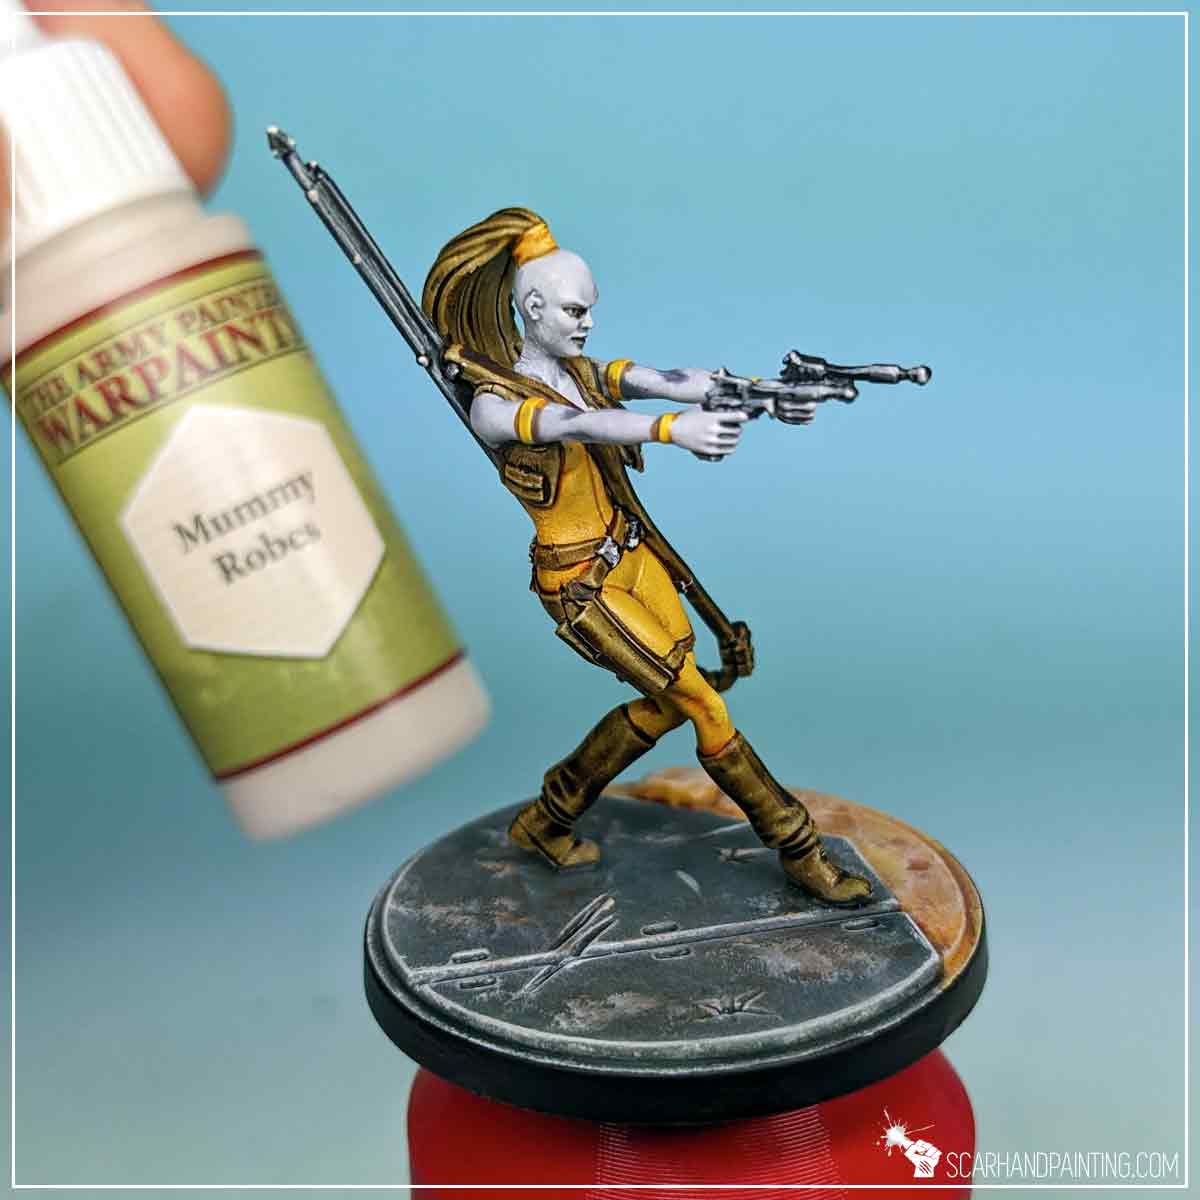
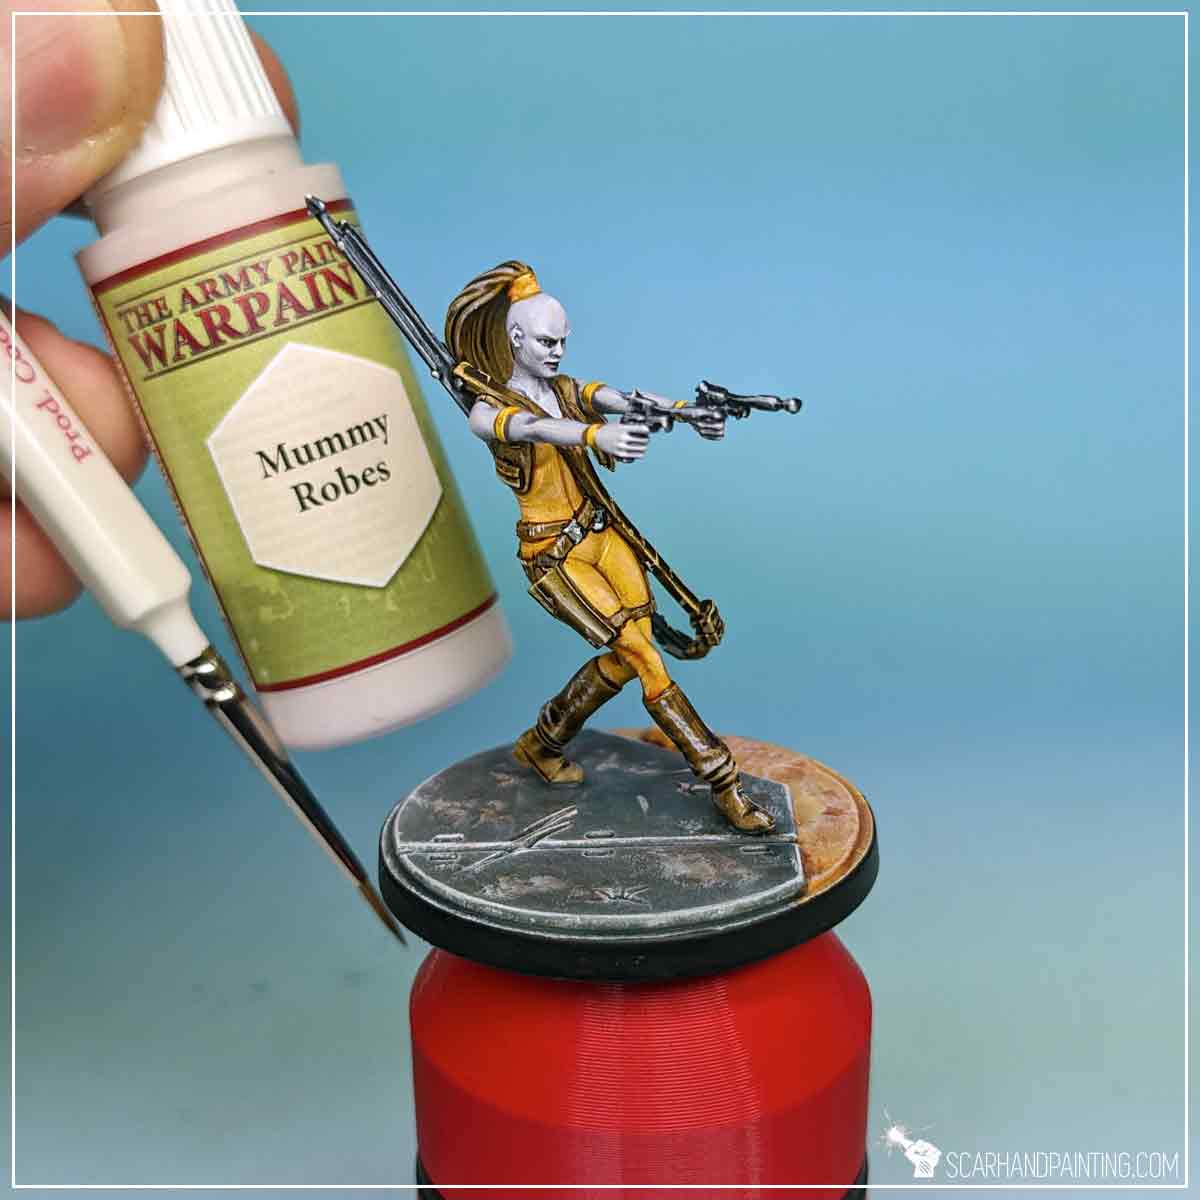
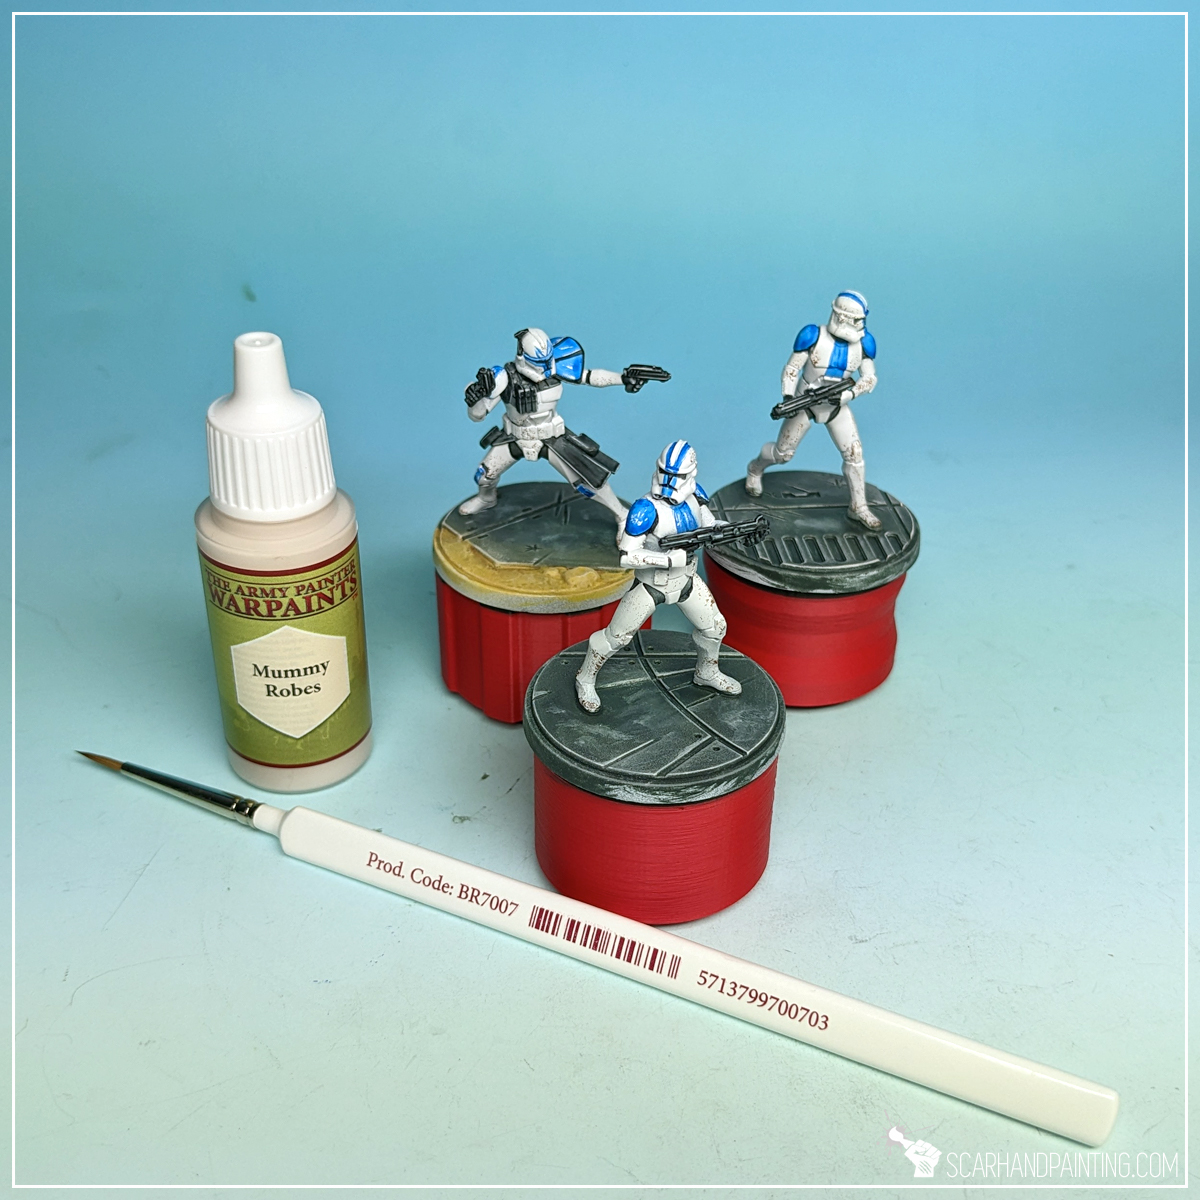
With Wargamer: Detail Brush I applied thin lines of Mummy Robes to the sharp edges of weapons and strap buckles. I also applied a few tiny dots to selected spots on weapons, buckles and hair jewelry. Dots of bright colors create focus points that result in more contrast within a particular color range.
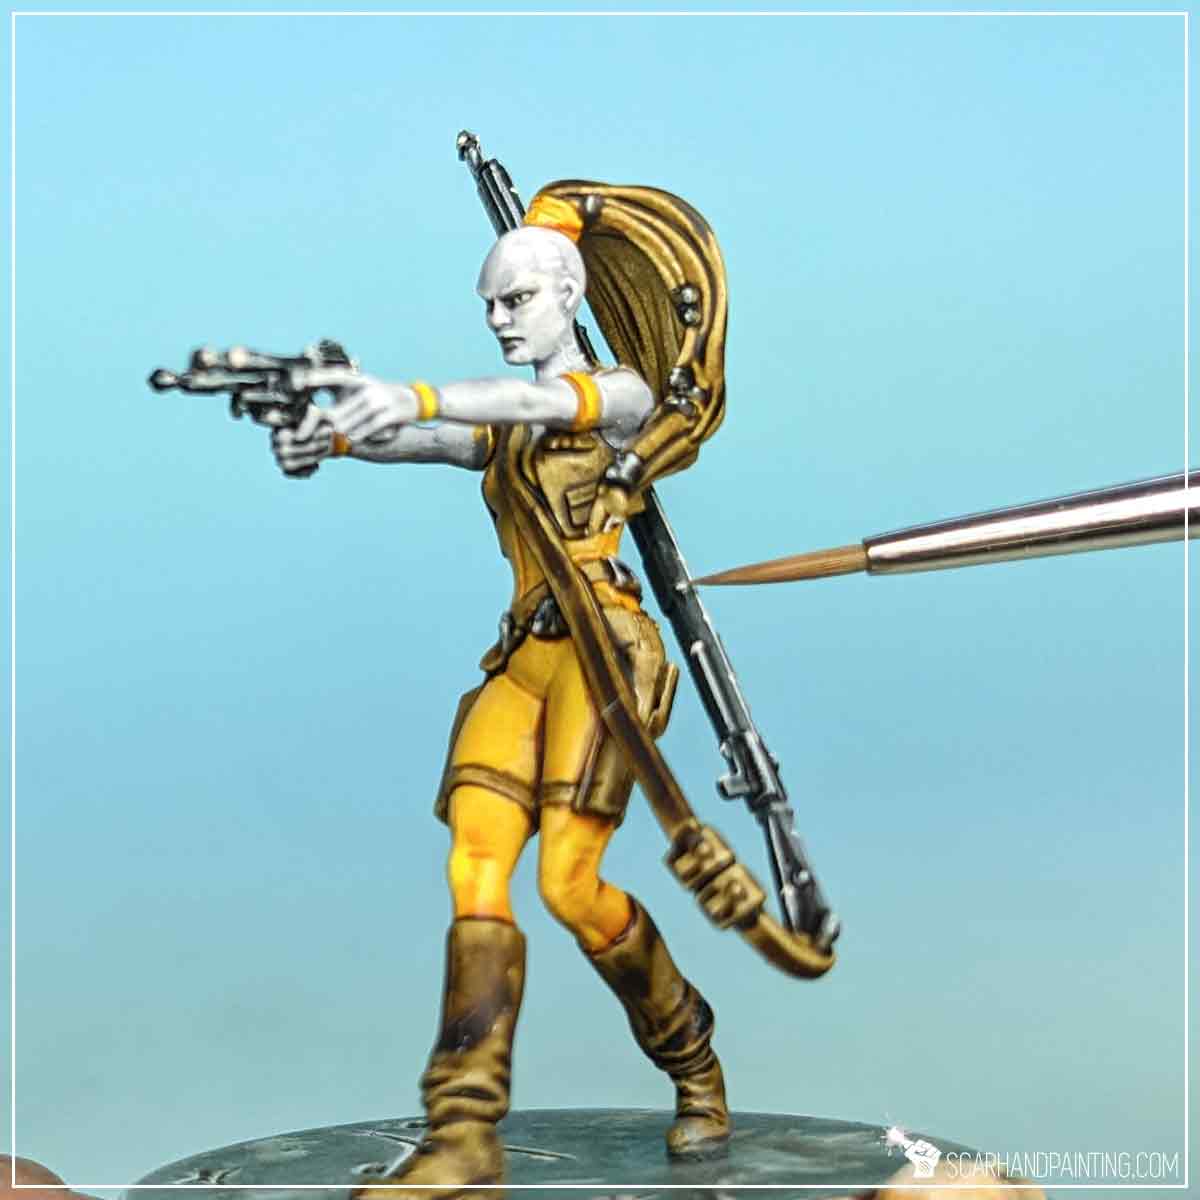
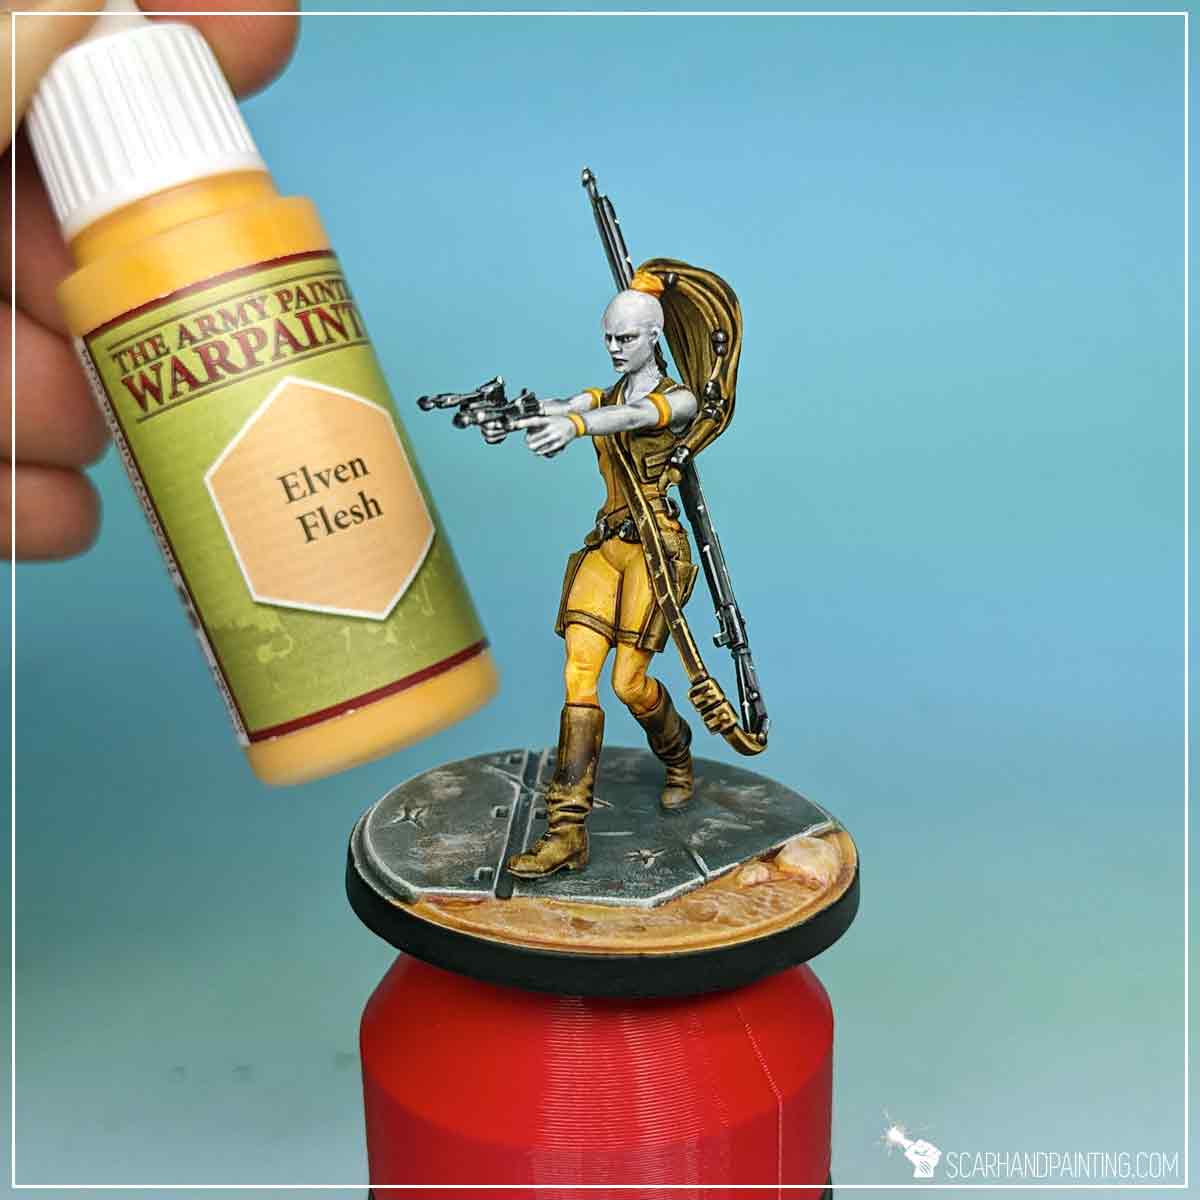
Next I applied similar lines and dots to the weapon strap with Elven Flesh color.
All other browns, including straps, hair, boots and weapon holsters, I have highlighted with lines and dots of Mummy Robes to prepare them for upcoming color filters.
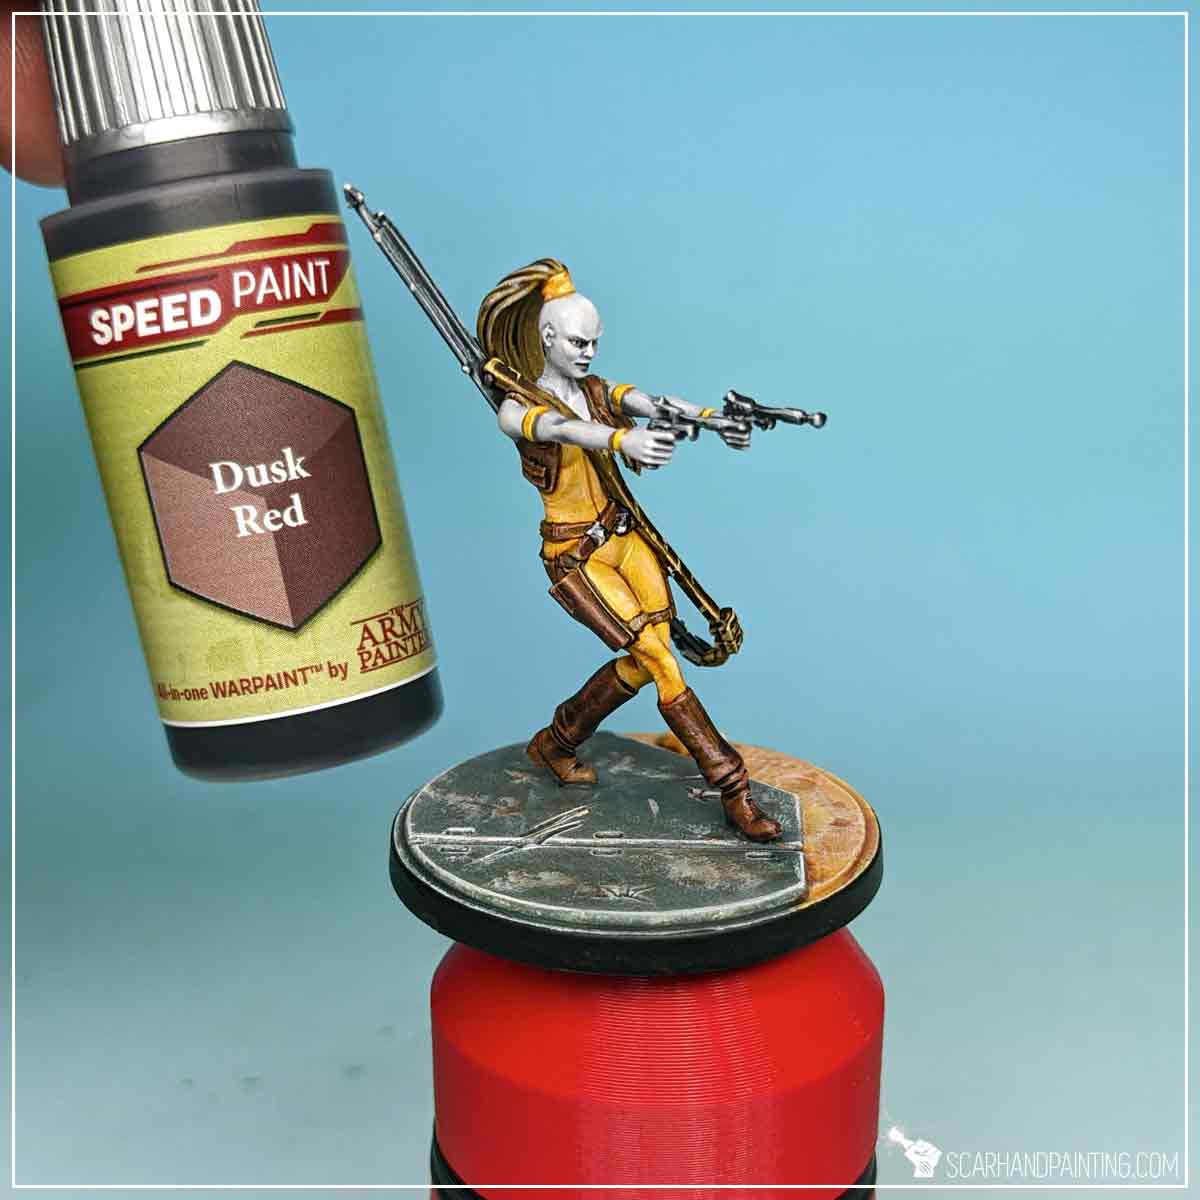
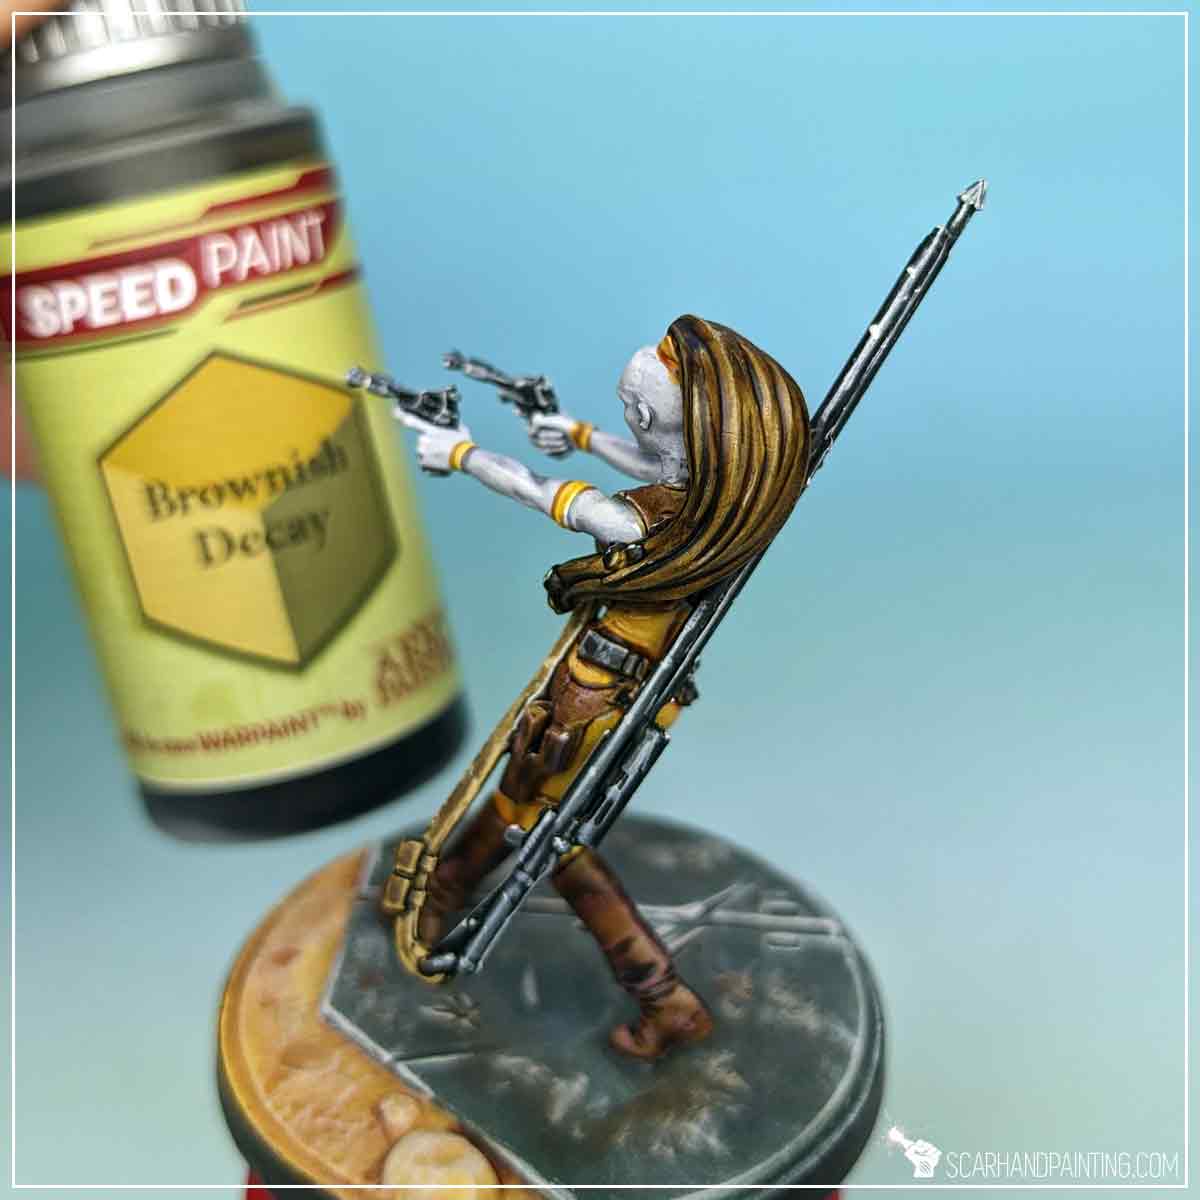
Next I have applied slightly thinned down Dusk Red to all elements, except for hair that got Brownish Decay treatment instead. Combined with well punctuated weapon strap the miniature ended up with a nicely diversified range of browns.
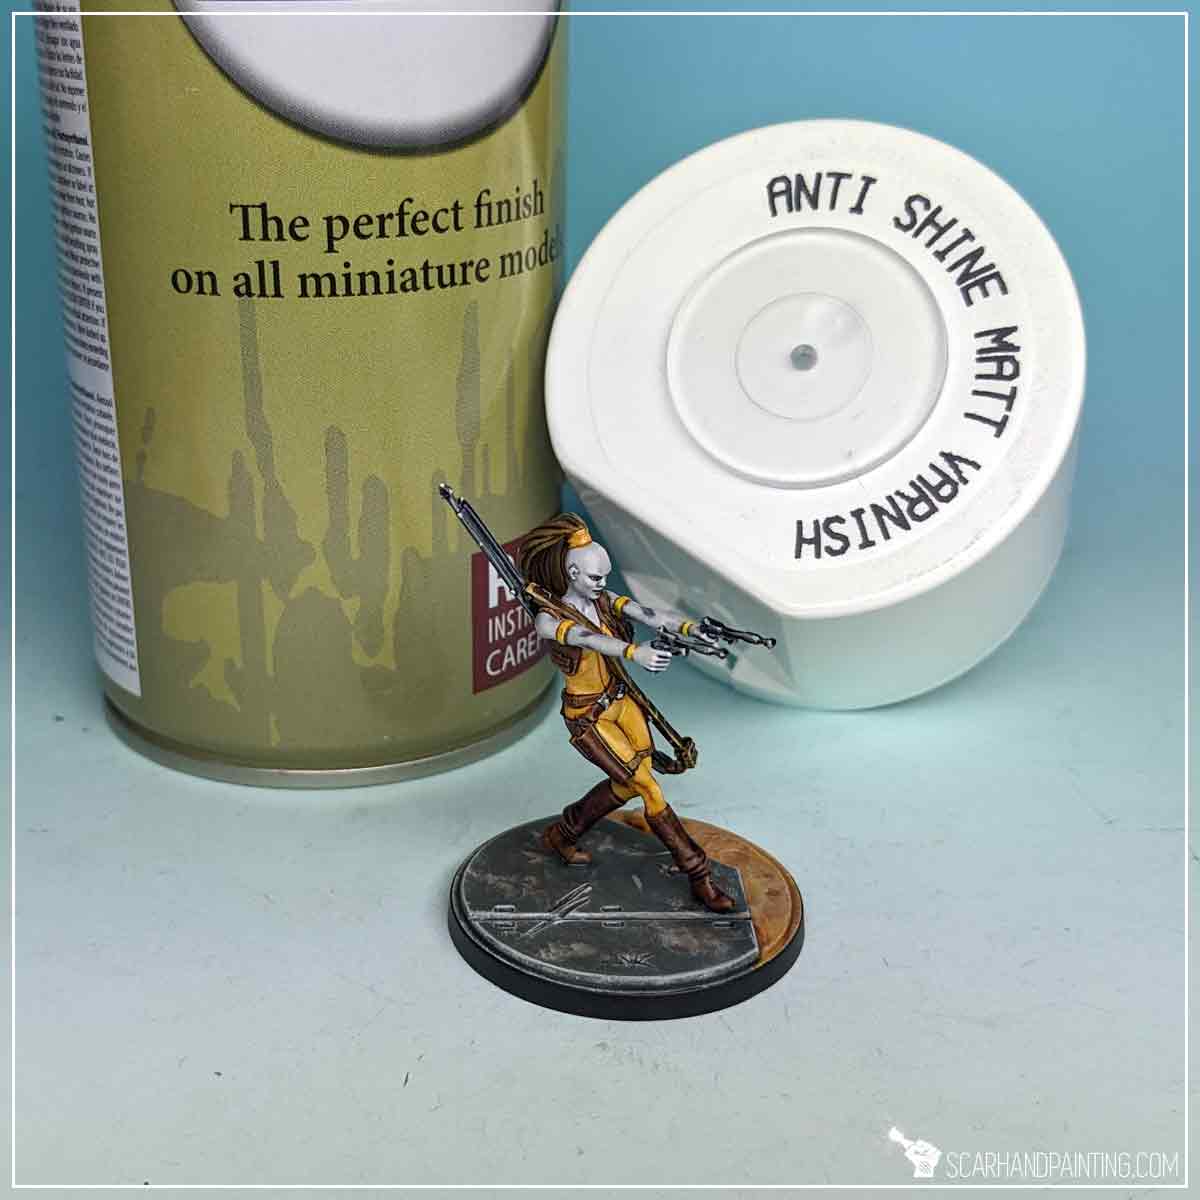
Finally I Varnished the miniature the same way as presented in the Tutorial: Painting Star Wars Shatterpoint Clone Troopers article.

I hope you find this tutorial interesting. Be sure to let me know your thoughts in the comments below or via Facebook or Instagram. I would also appreciate it if you considered sharing this content with your friends, who might find it useful. Many thanks to Rebel.pl for sponsoring this content. Stay tuned for more Star Wars: Shatterpoint tutorials.
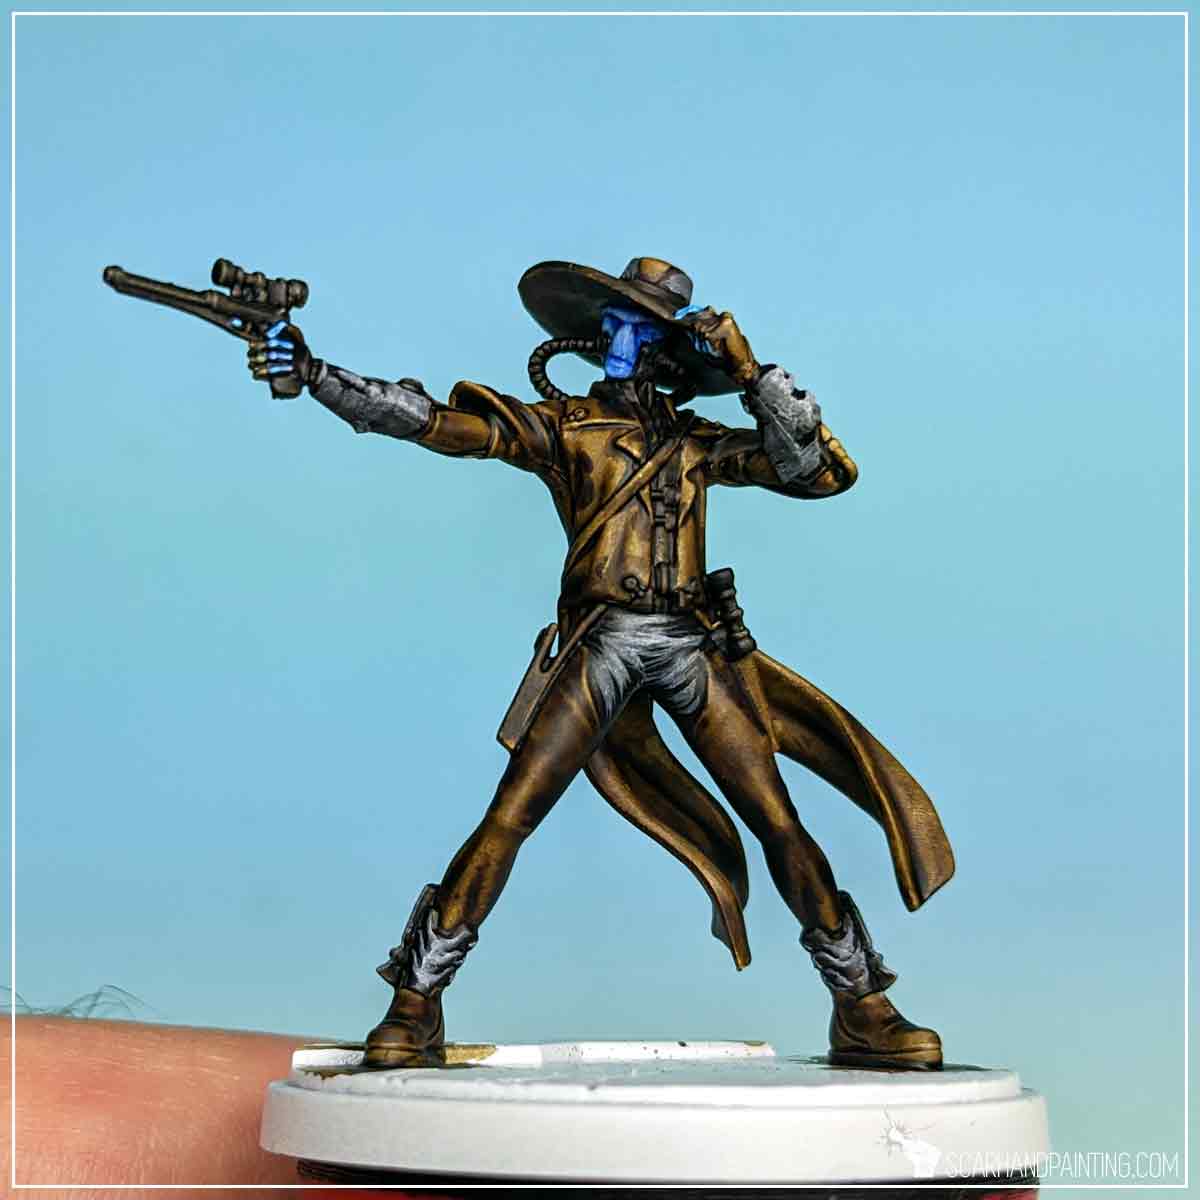
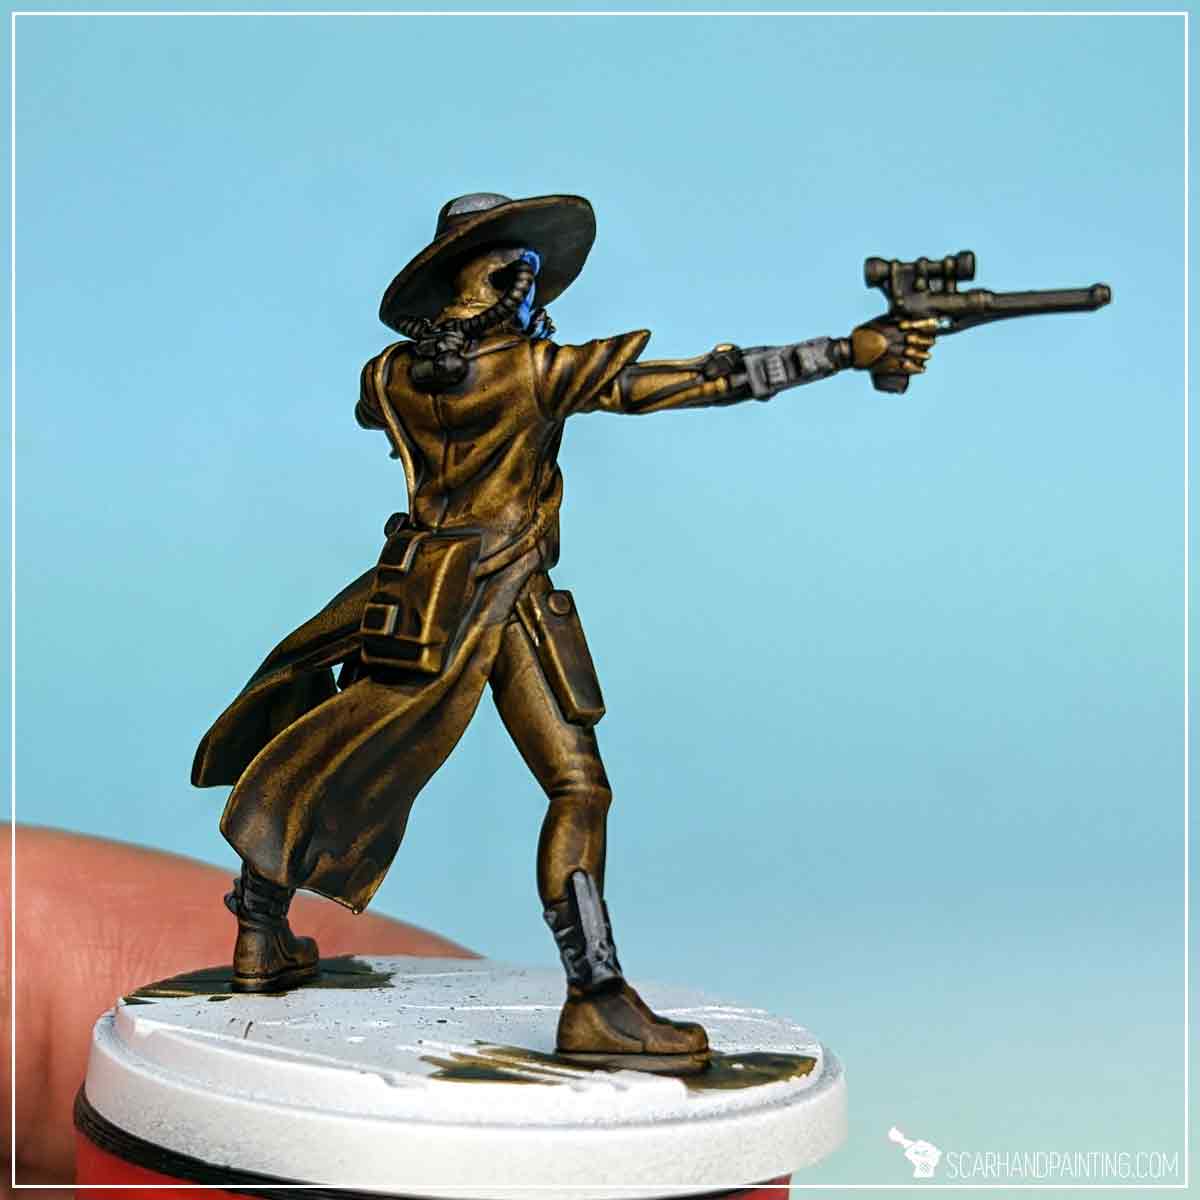
Welcome to Painting Star Wars: Shatterpoint Cad Bane tutorial. Here I will present to you a Step-by-step of a basic painting process for Fistful of Credits Cad Bane miniature and a few extras.
Before we start, some notes:
Both Mandalorian Super Commandos were prepared in the same way as previous Shatterpoint miniatures. Visit Tutorial: Painting Star Wars Shatterpoint Clone Troopers article for a detailed step-by-step guide.
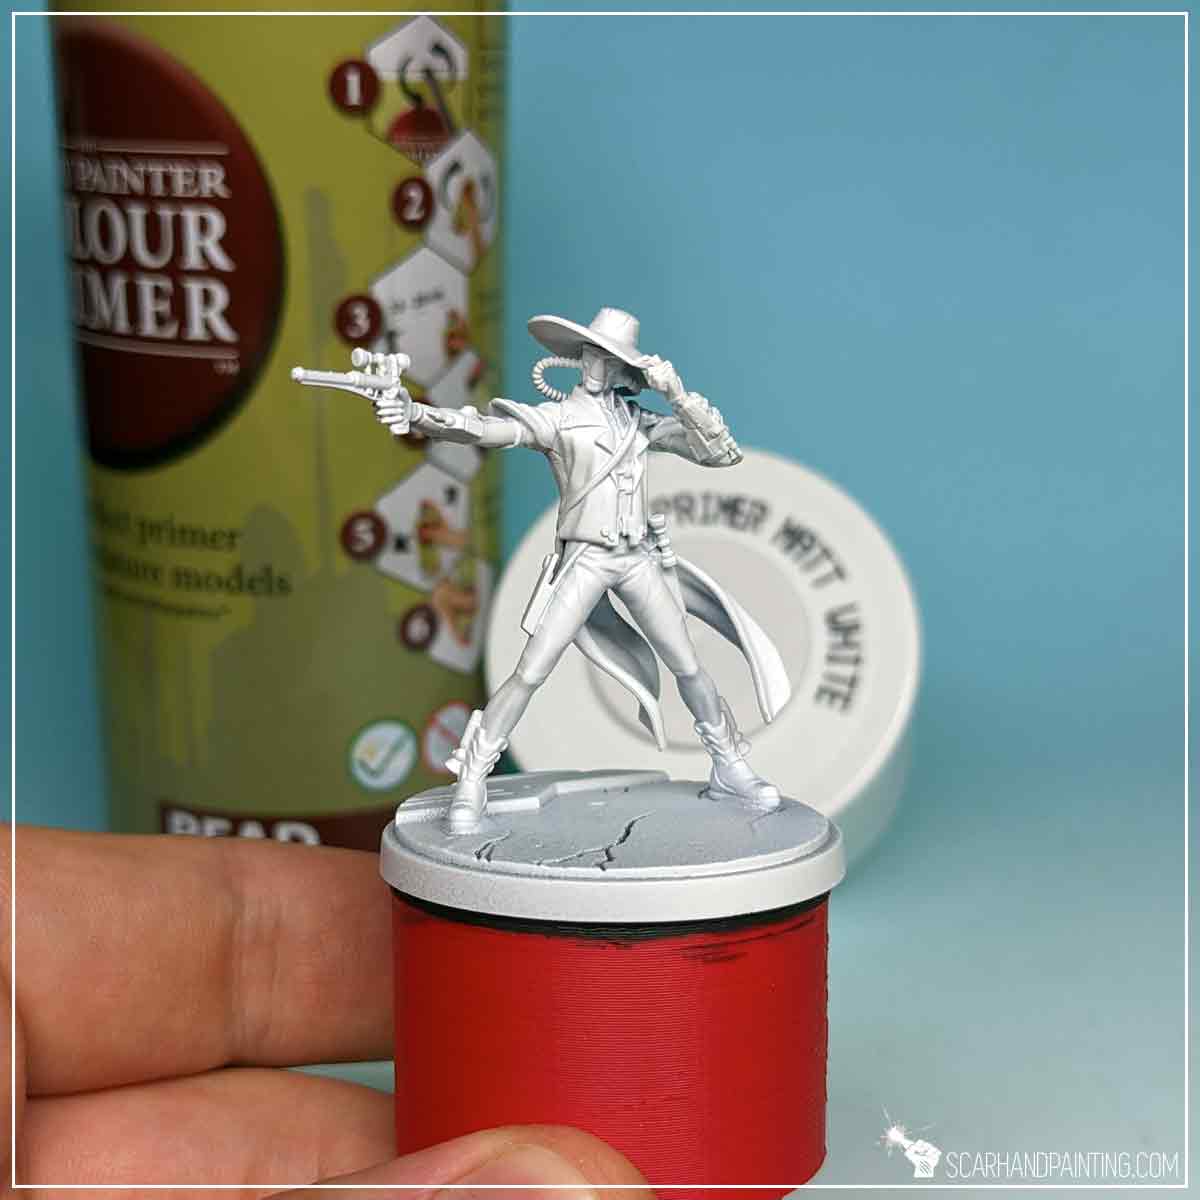
I mounted the miniatures on a stick with a piece of Blu-Tack, then undercoated them with The Army Painter White Matt Primer.
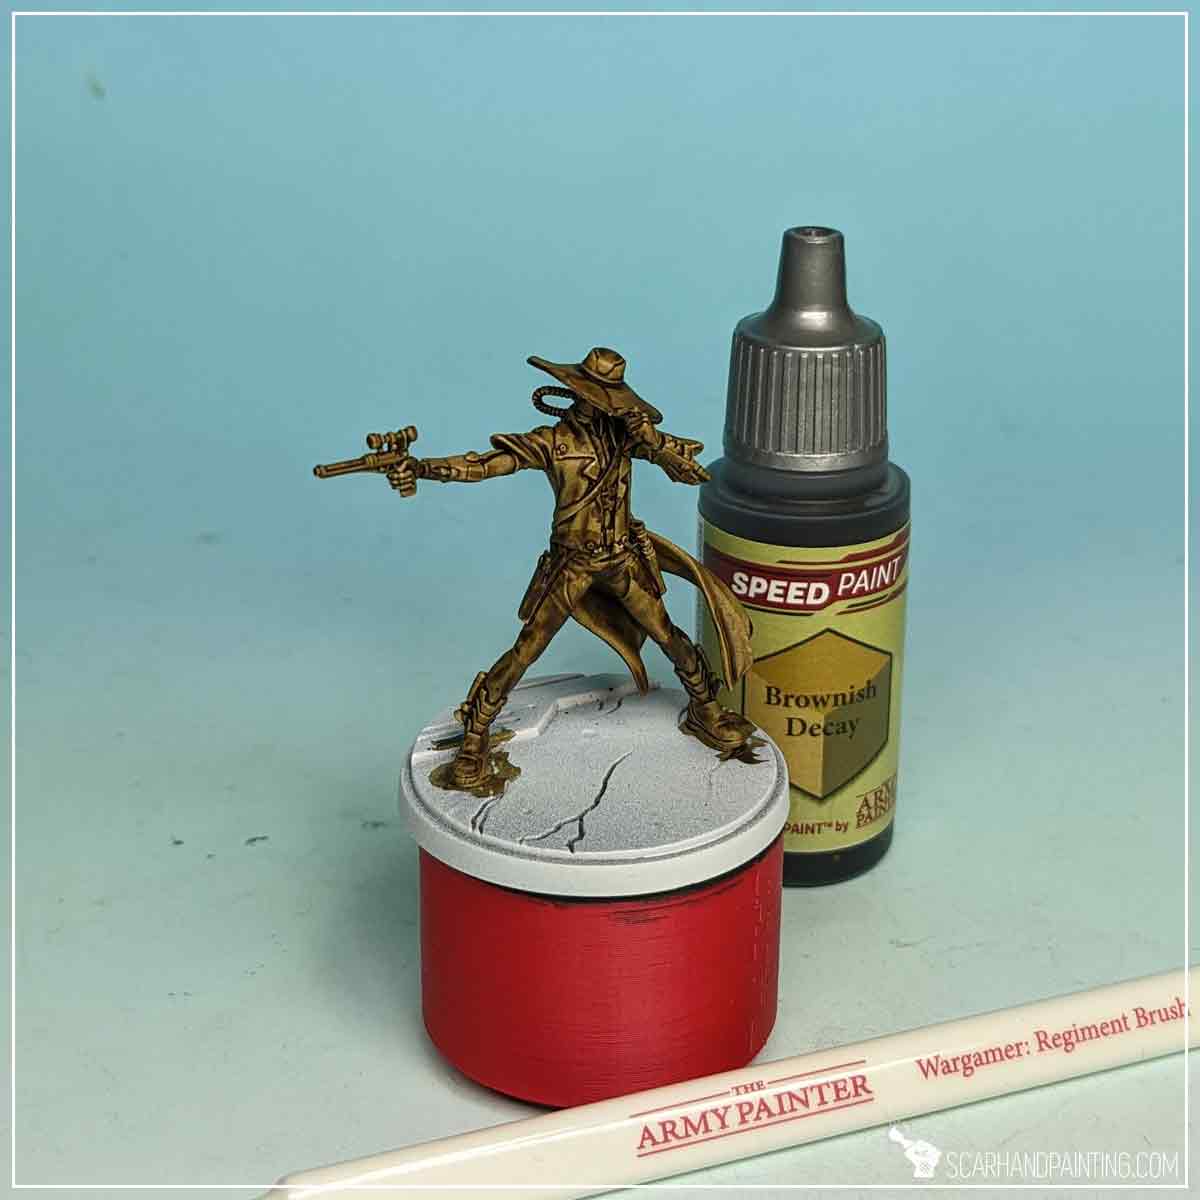
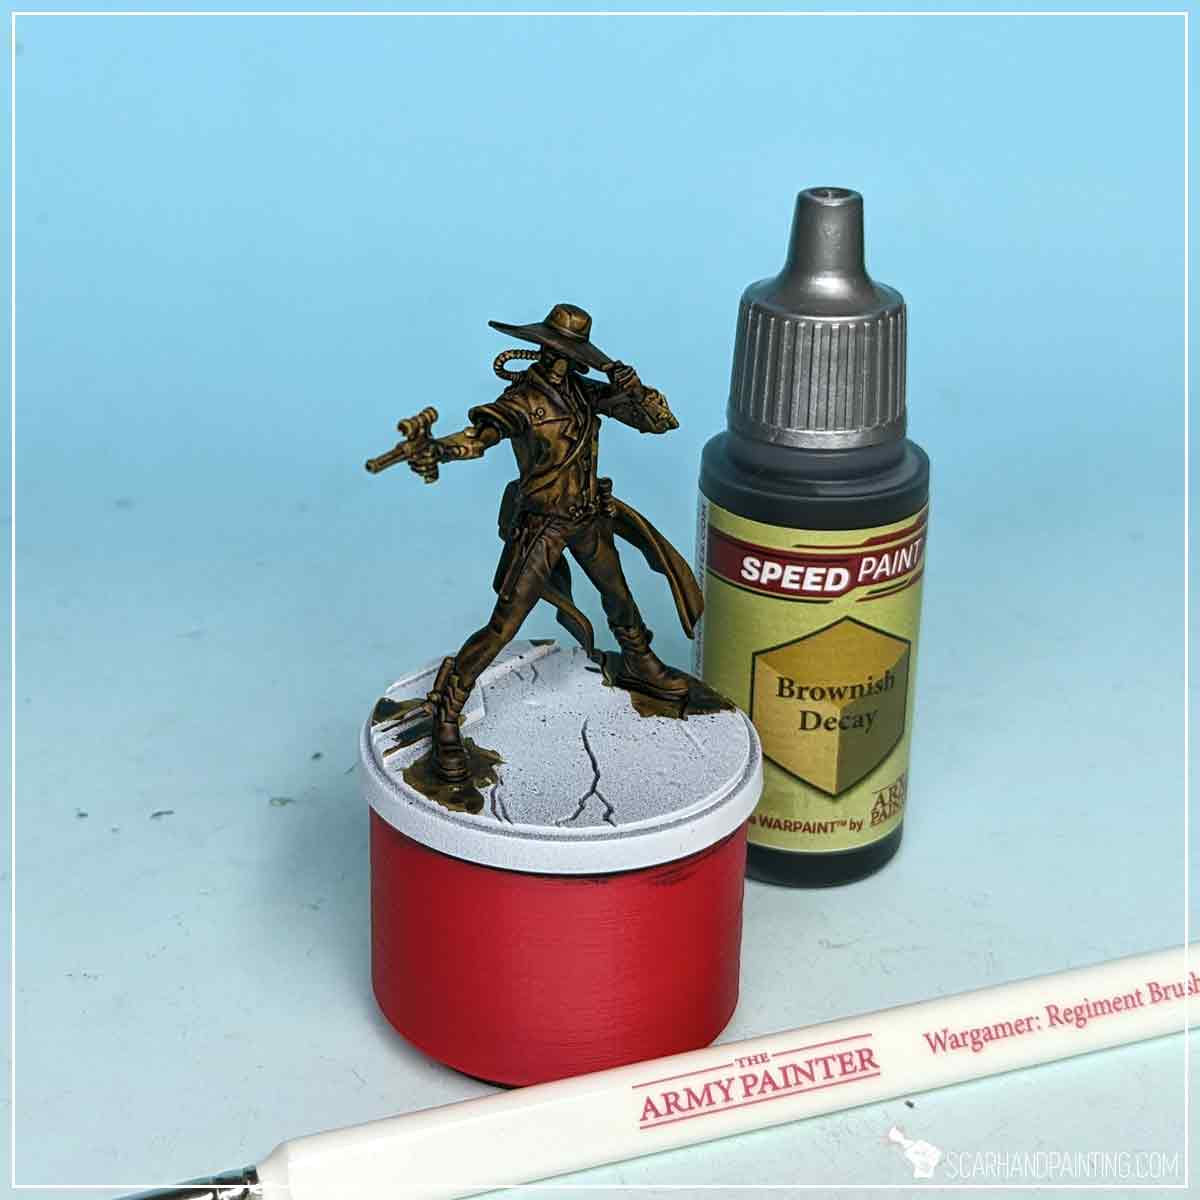
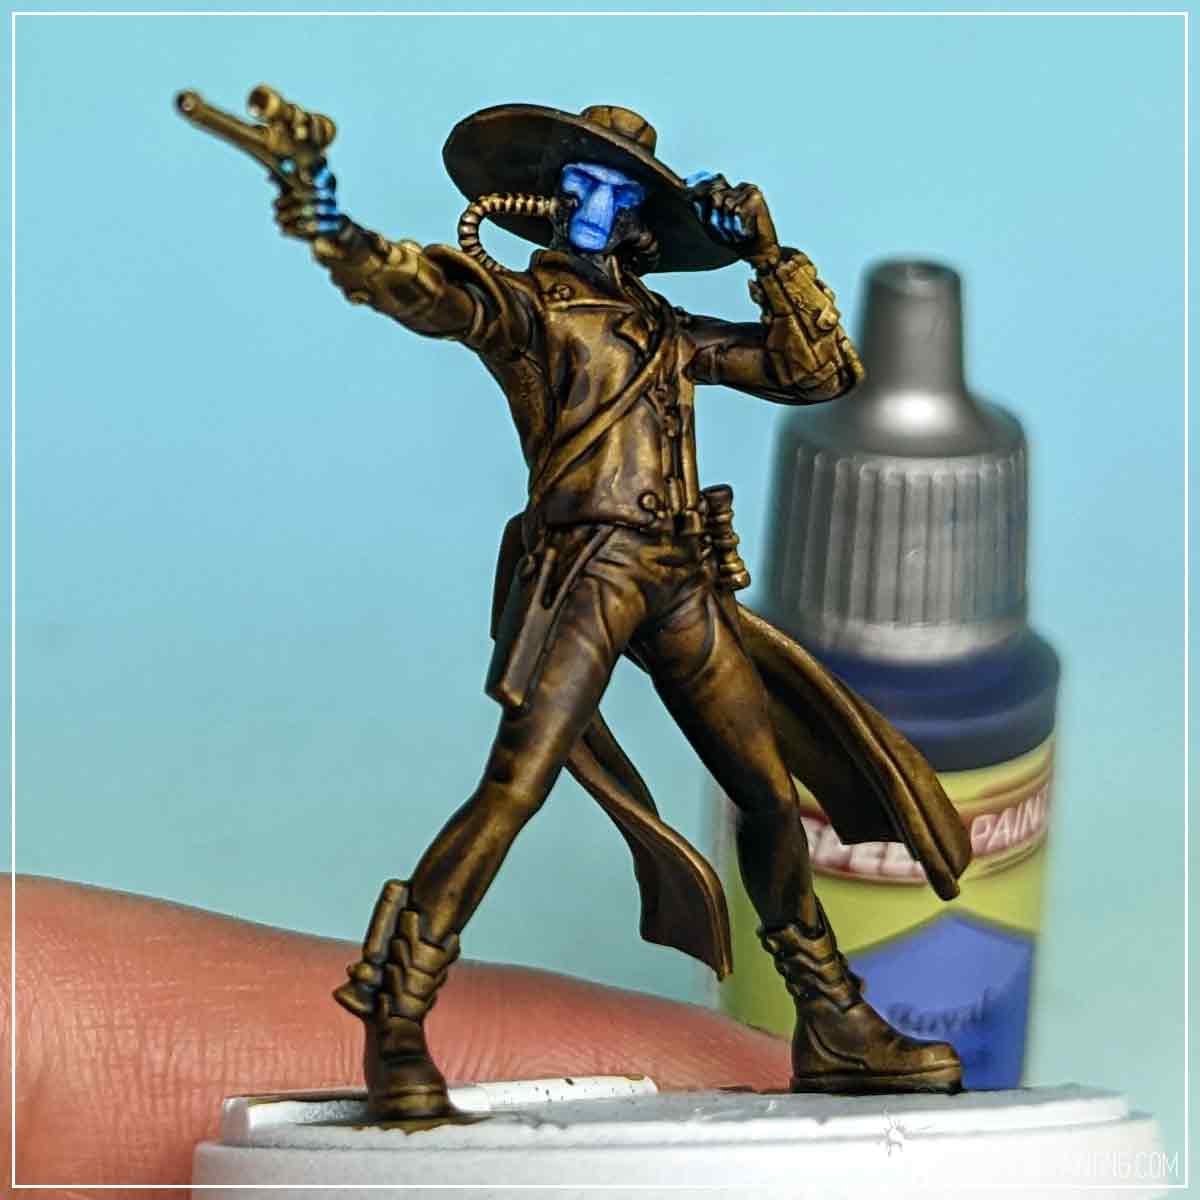
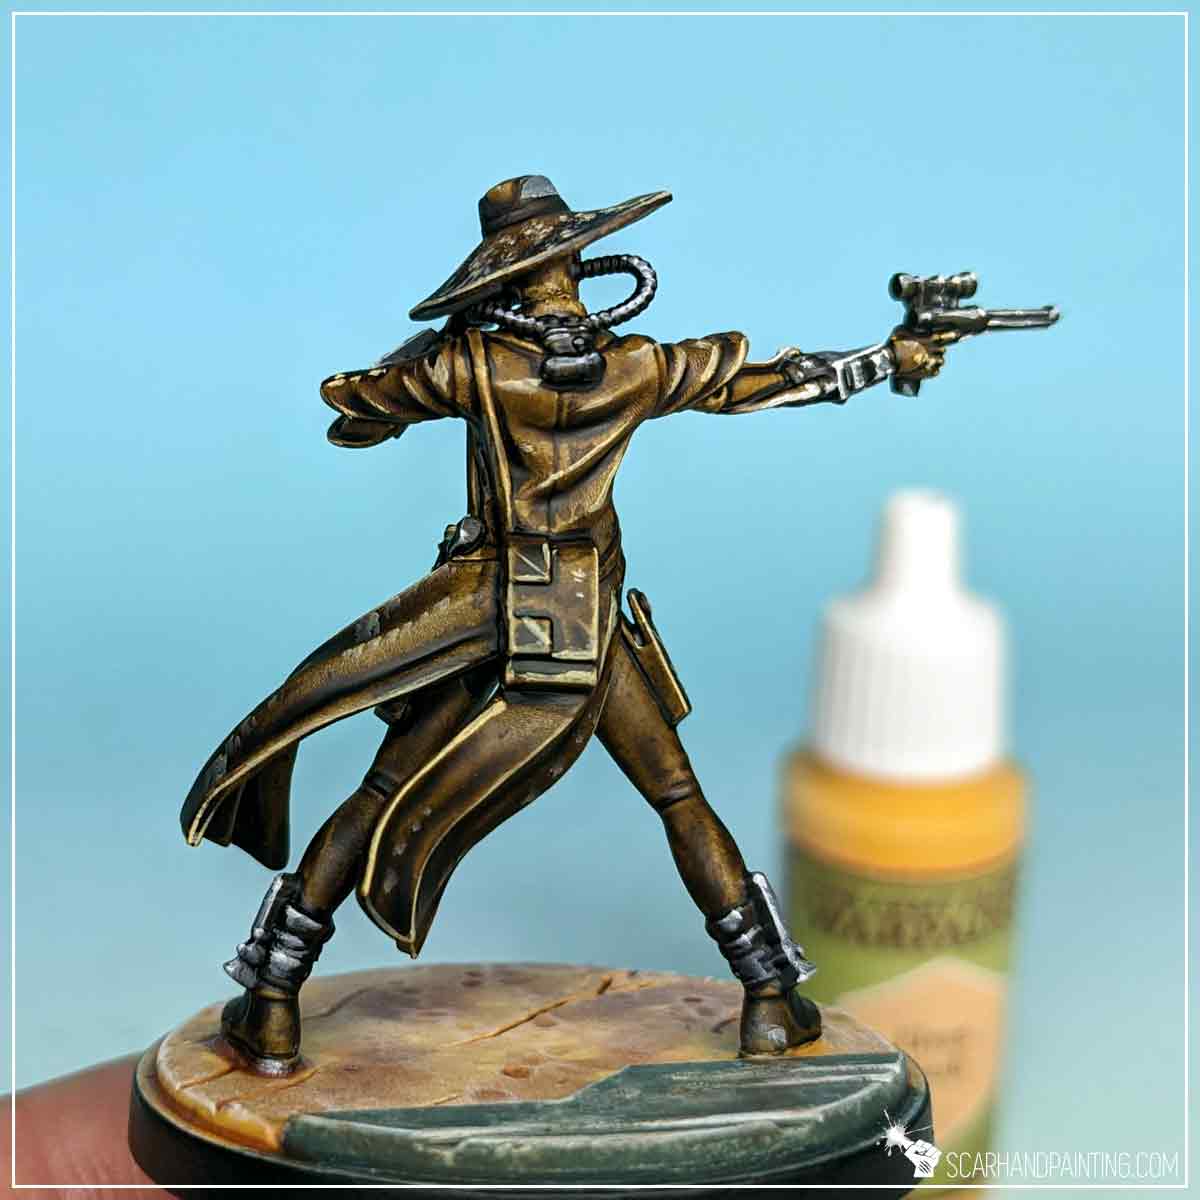
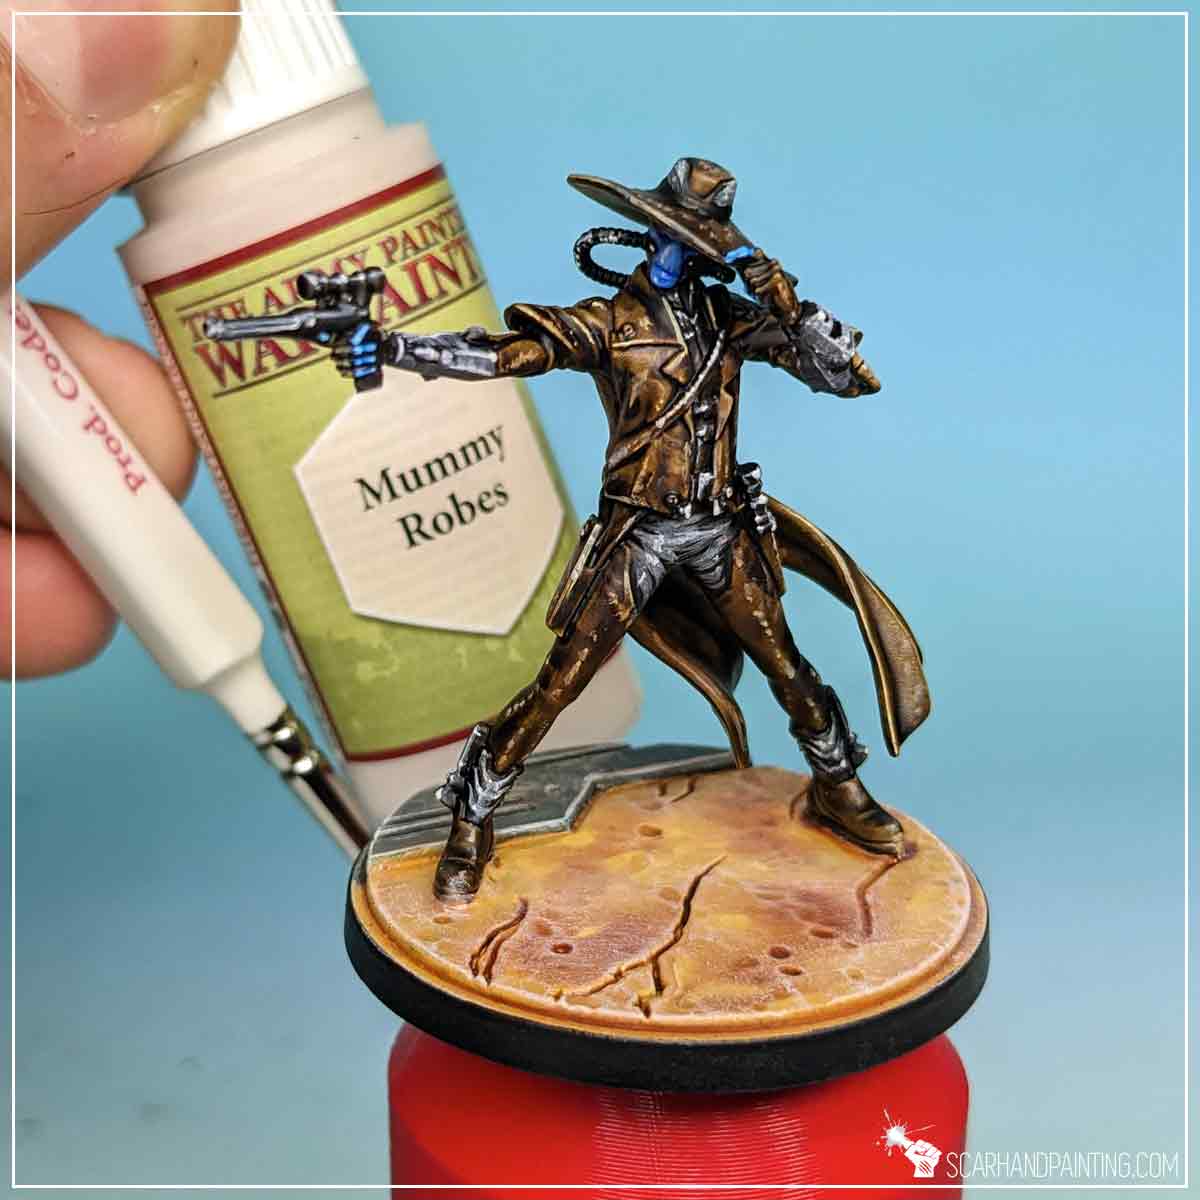
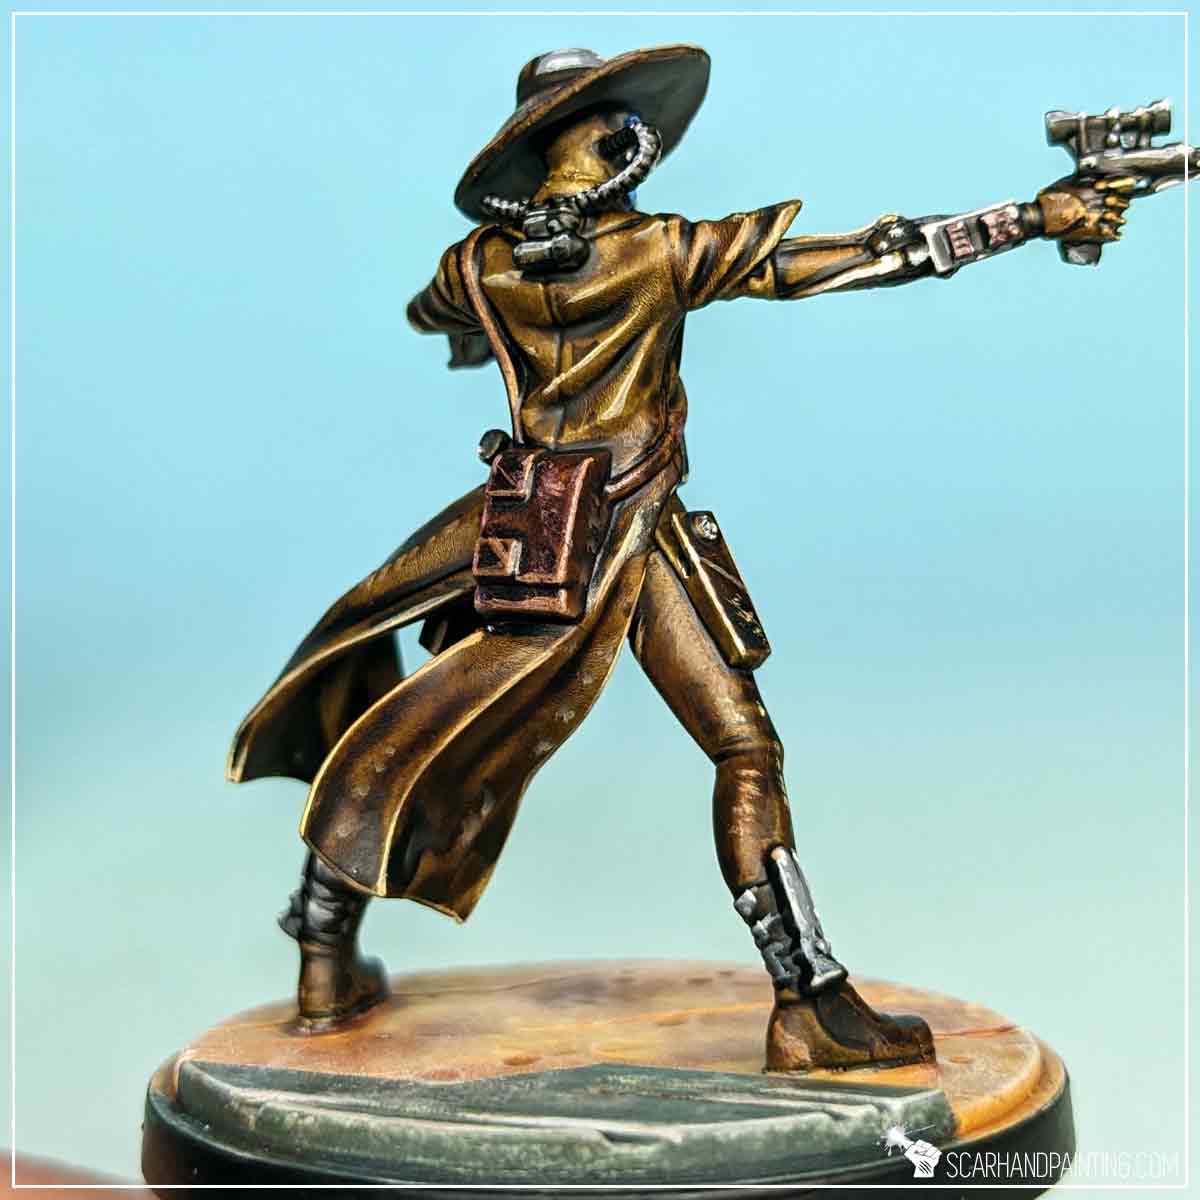
Mostly clothed in brown, the Cad Bane clearly favors comfort over style, or at least this is what I tell myself. The color is so prominent that I have decided to start with it and build from there. Using a Wargamer: Regiment Brush I have covered the entire miniature with Brownish Decay Speedpaint.
Then, once the first layer dried out completely, I repeated the process by applying another layer of Brownish Decay.
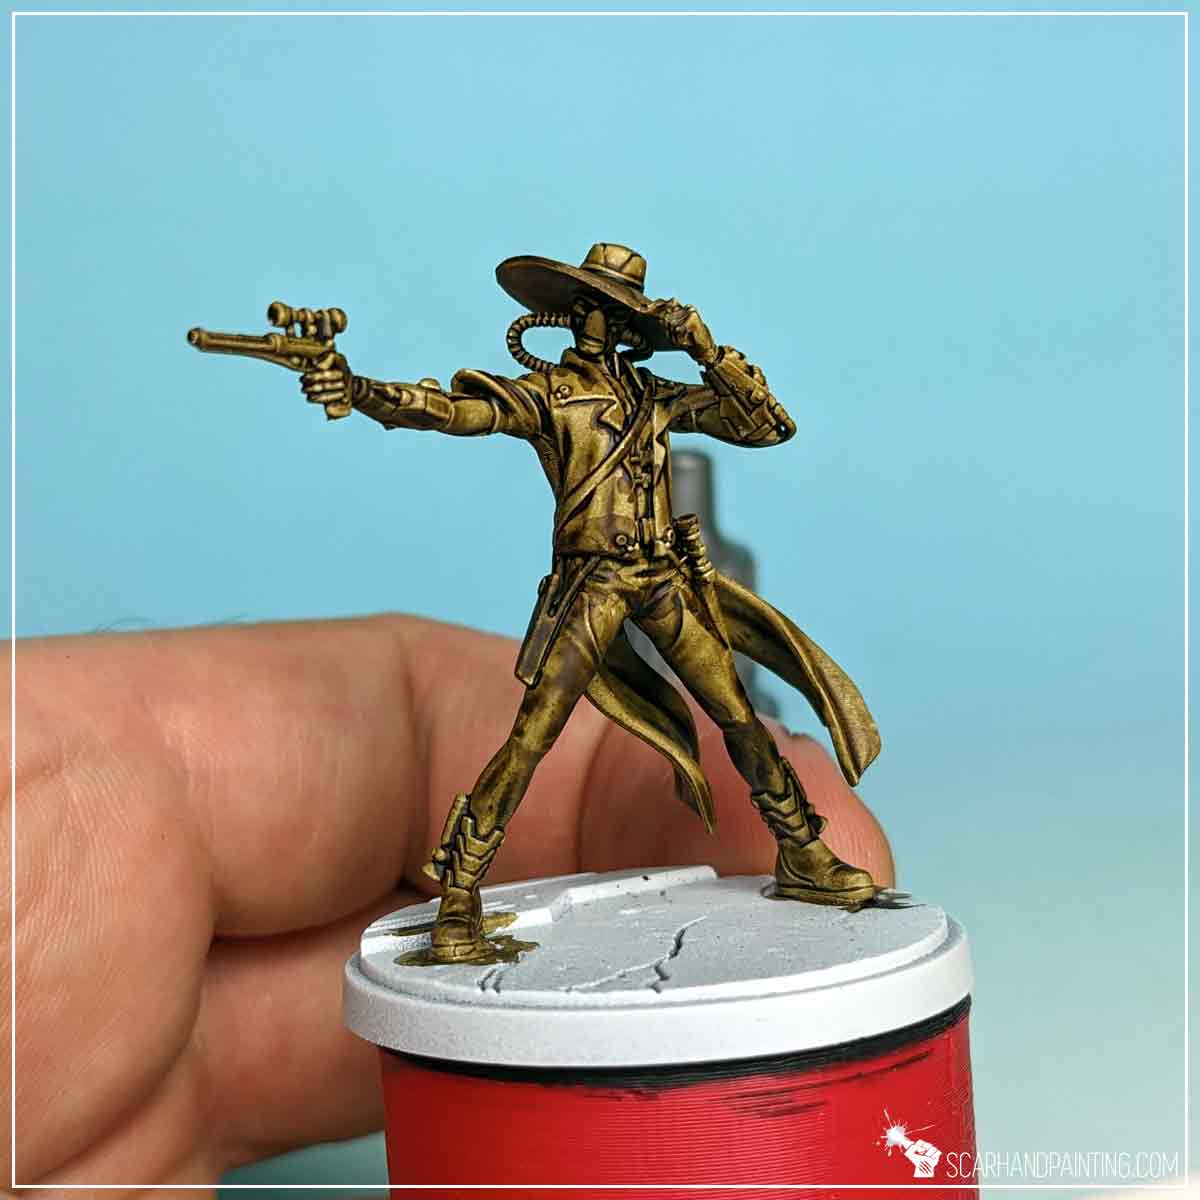
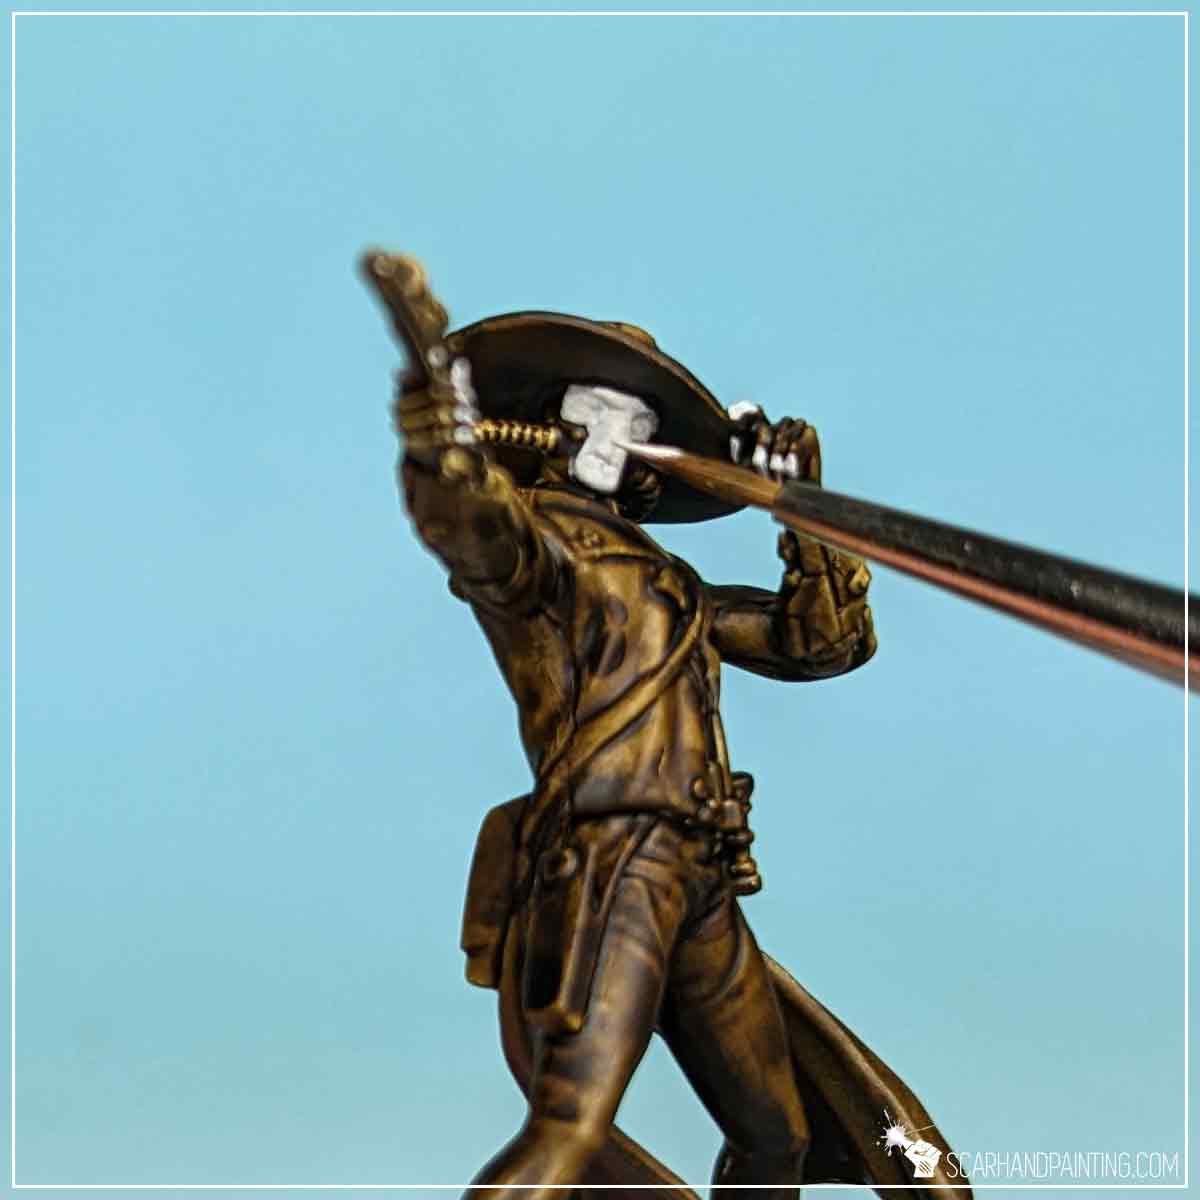
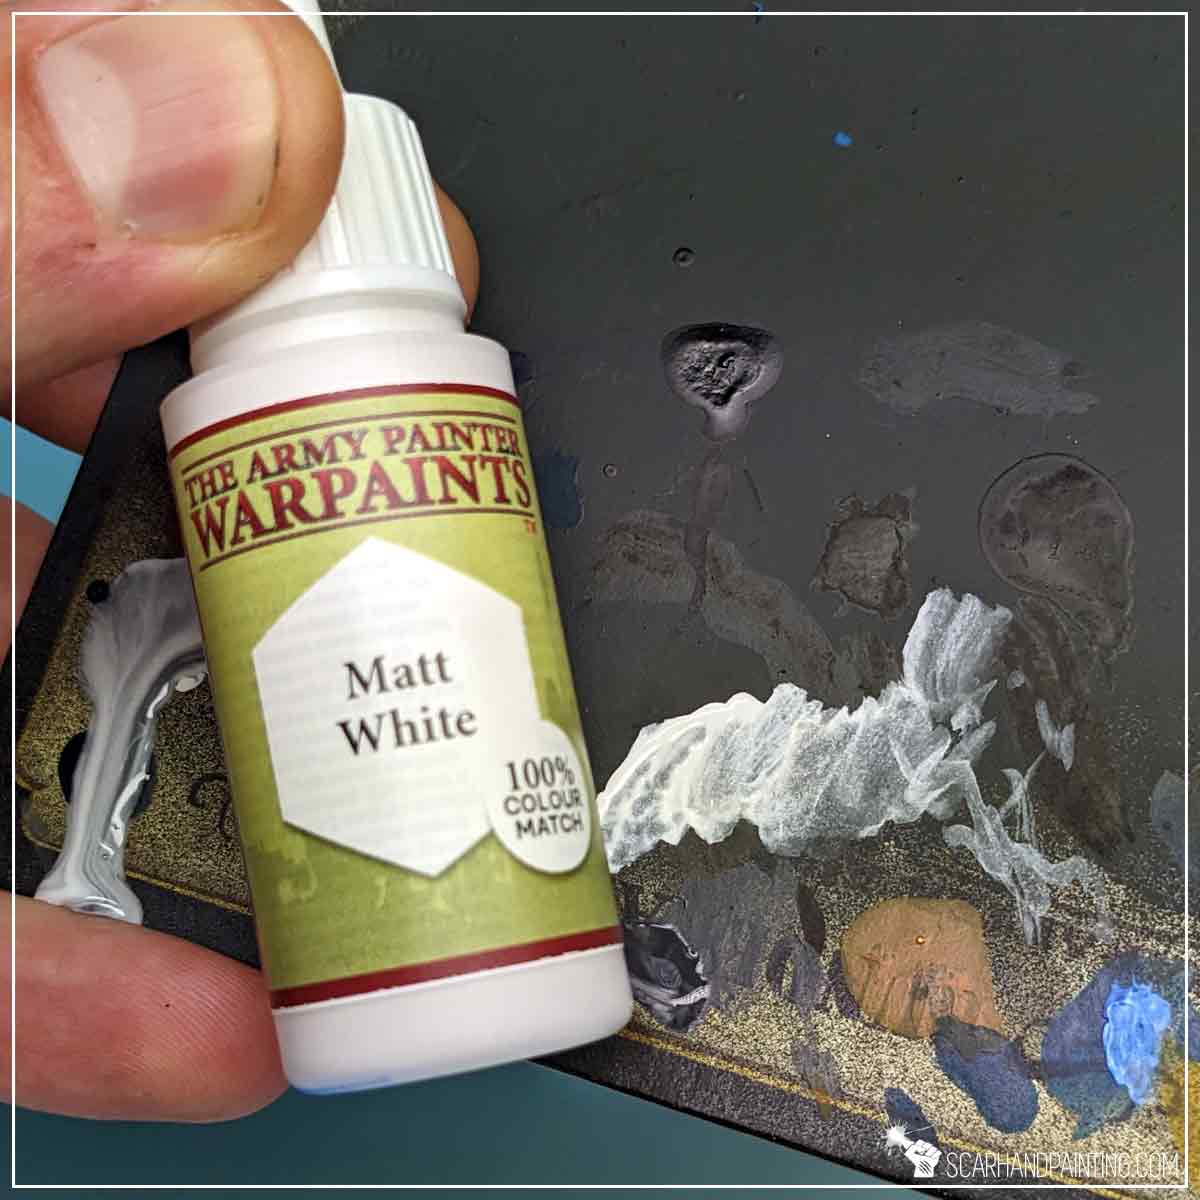
Usually I would have left some areas unpainted, but in this case painting around just a few spots (mainly face and fingers) was too much of a hassle, not worth the time investment. Instead I have repainted these areas with Matt White, thus creating a nice base for the upcoming Speedpaint coloration.
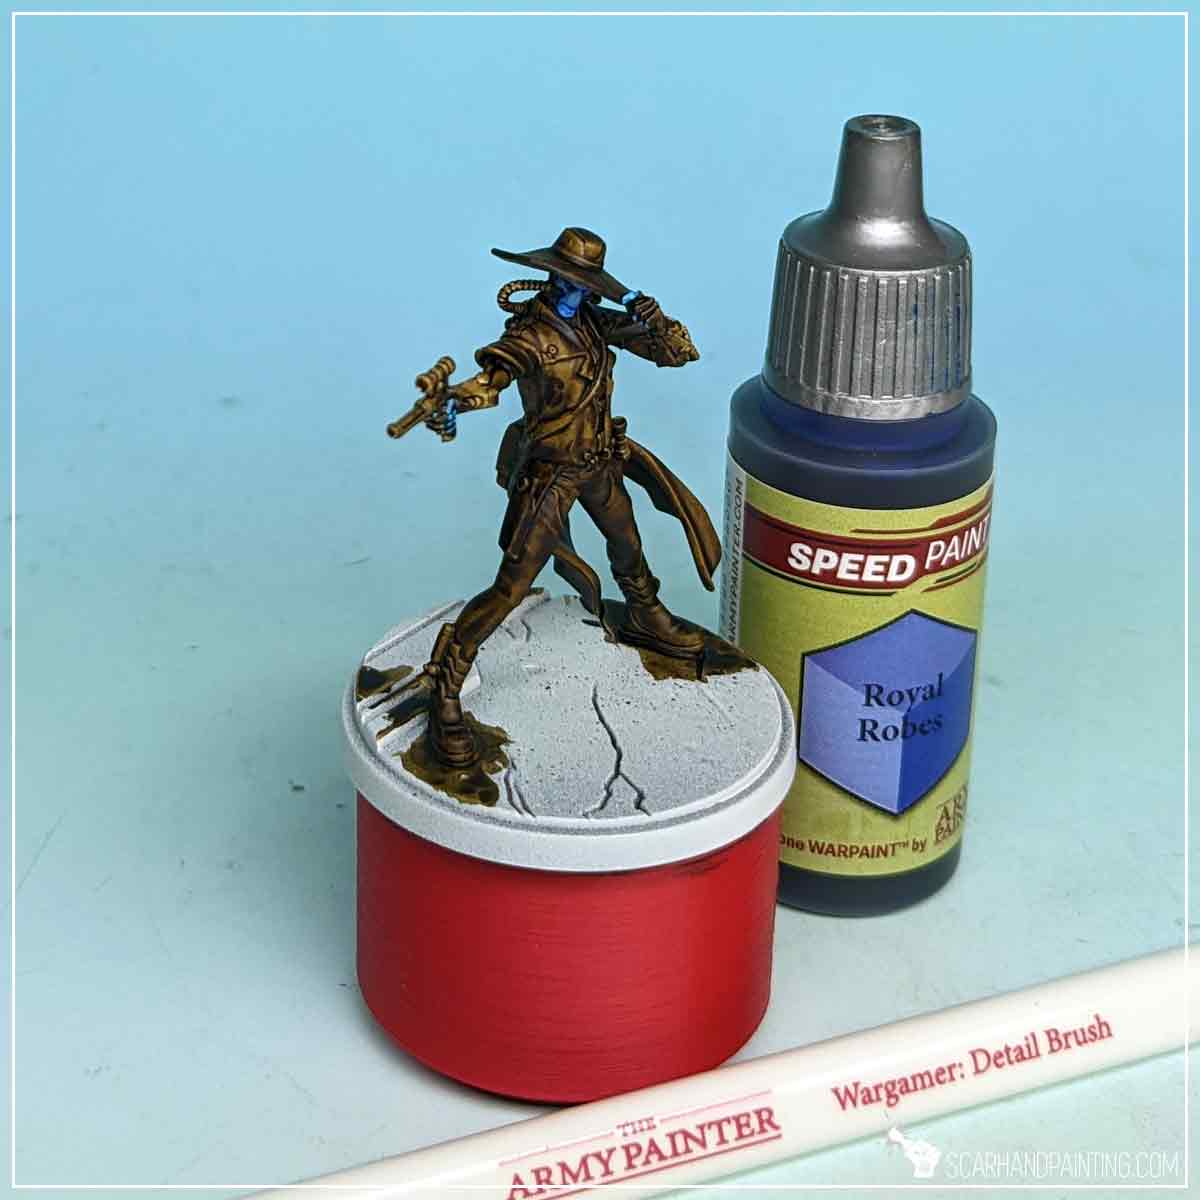
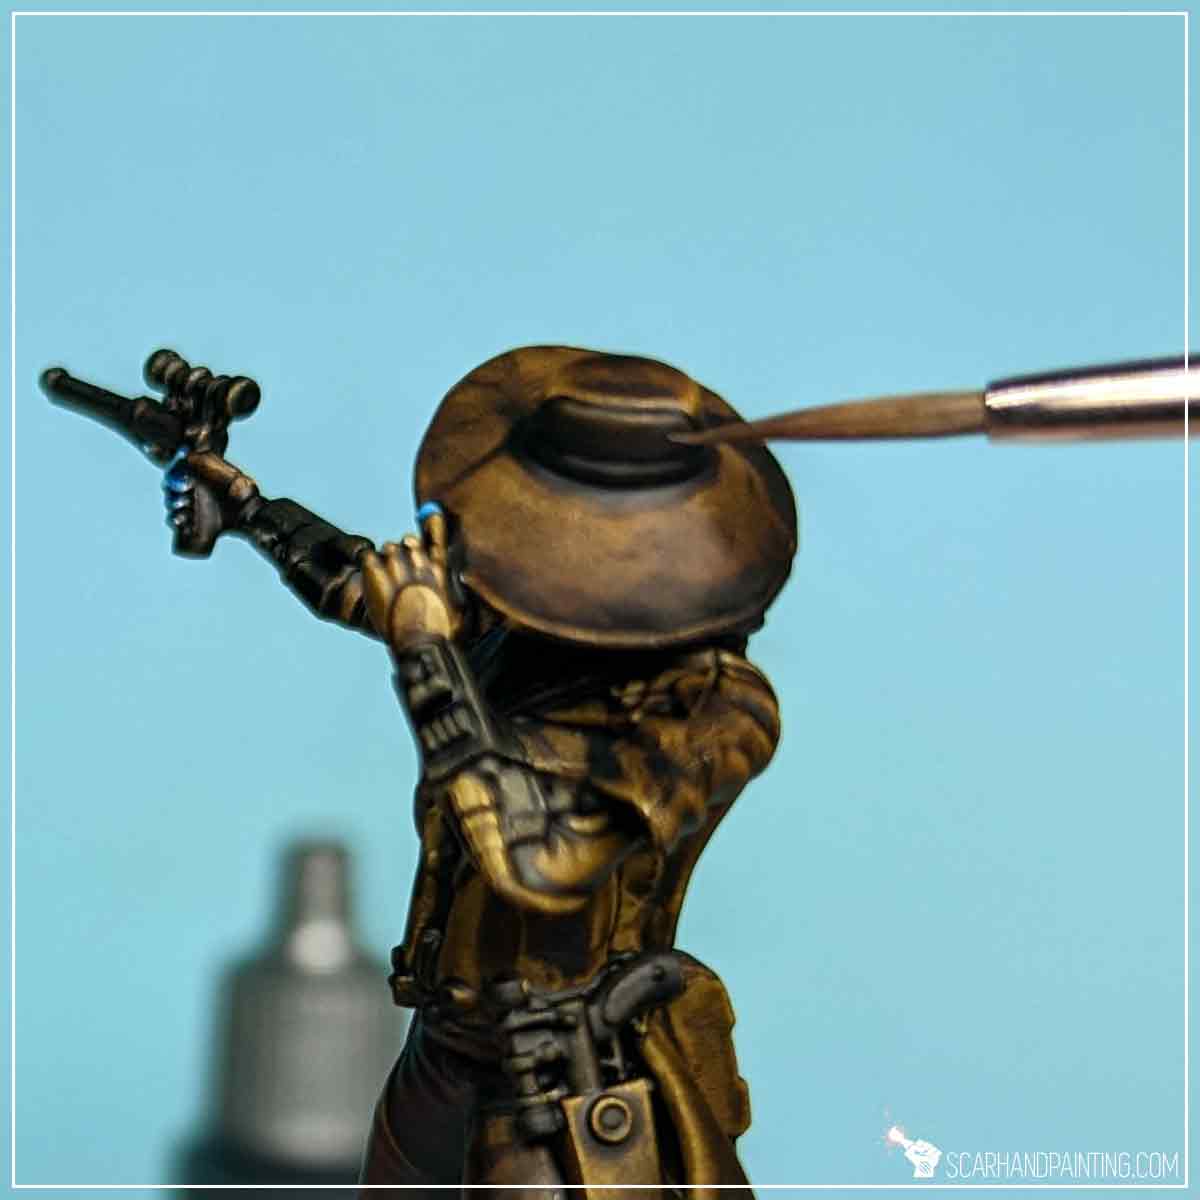
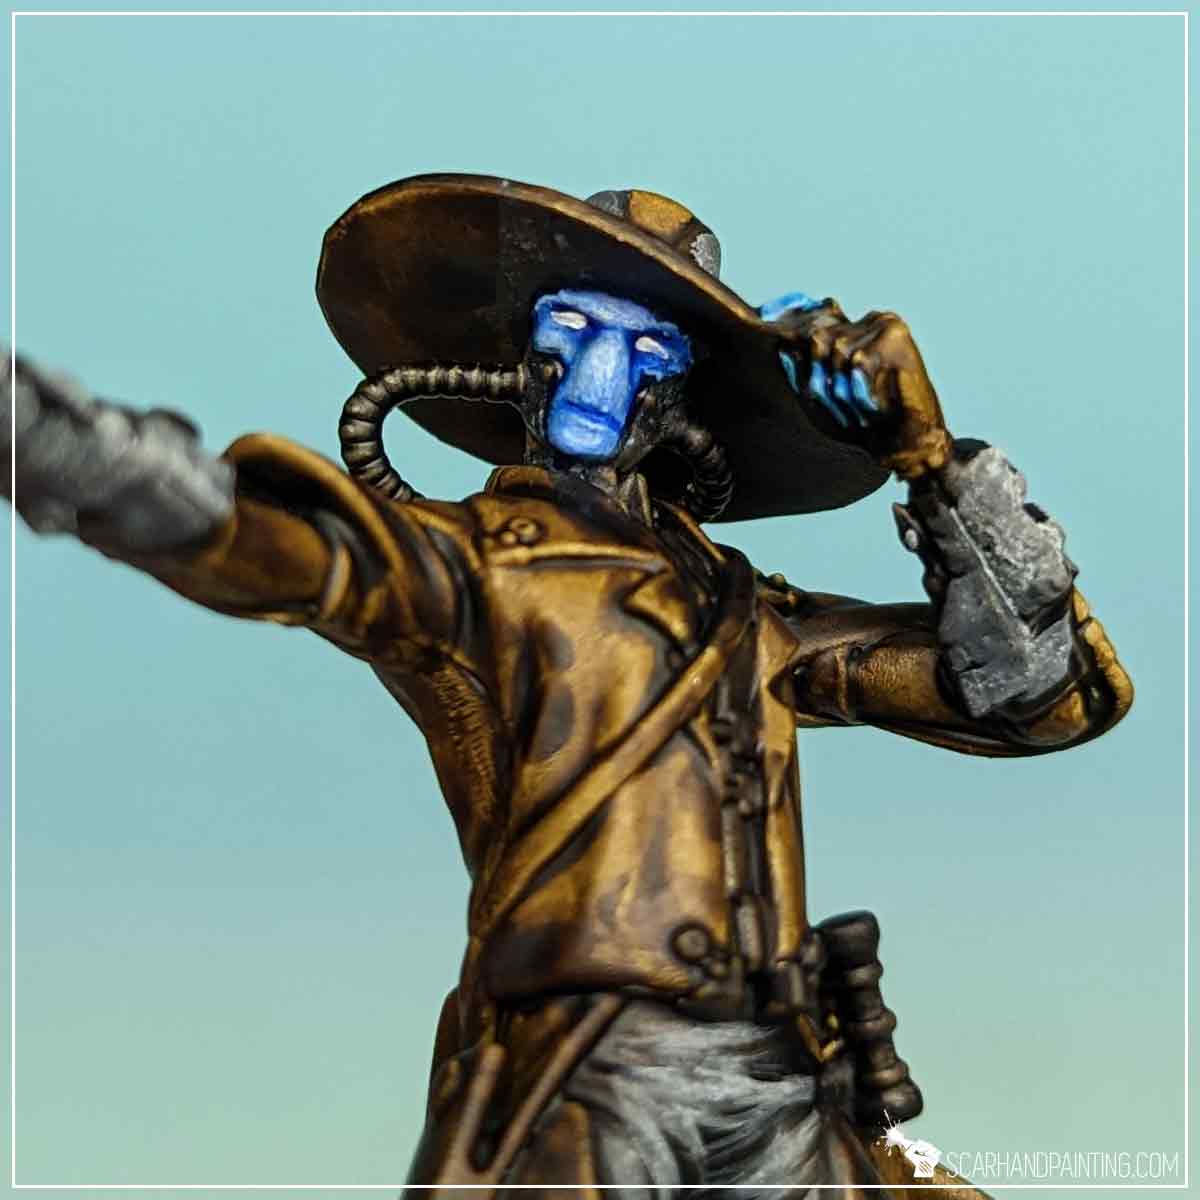
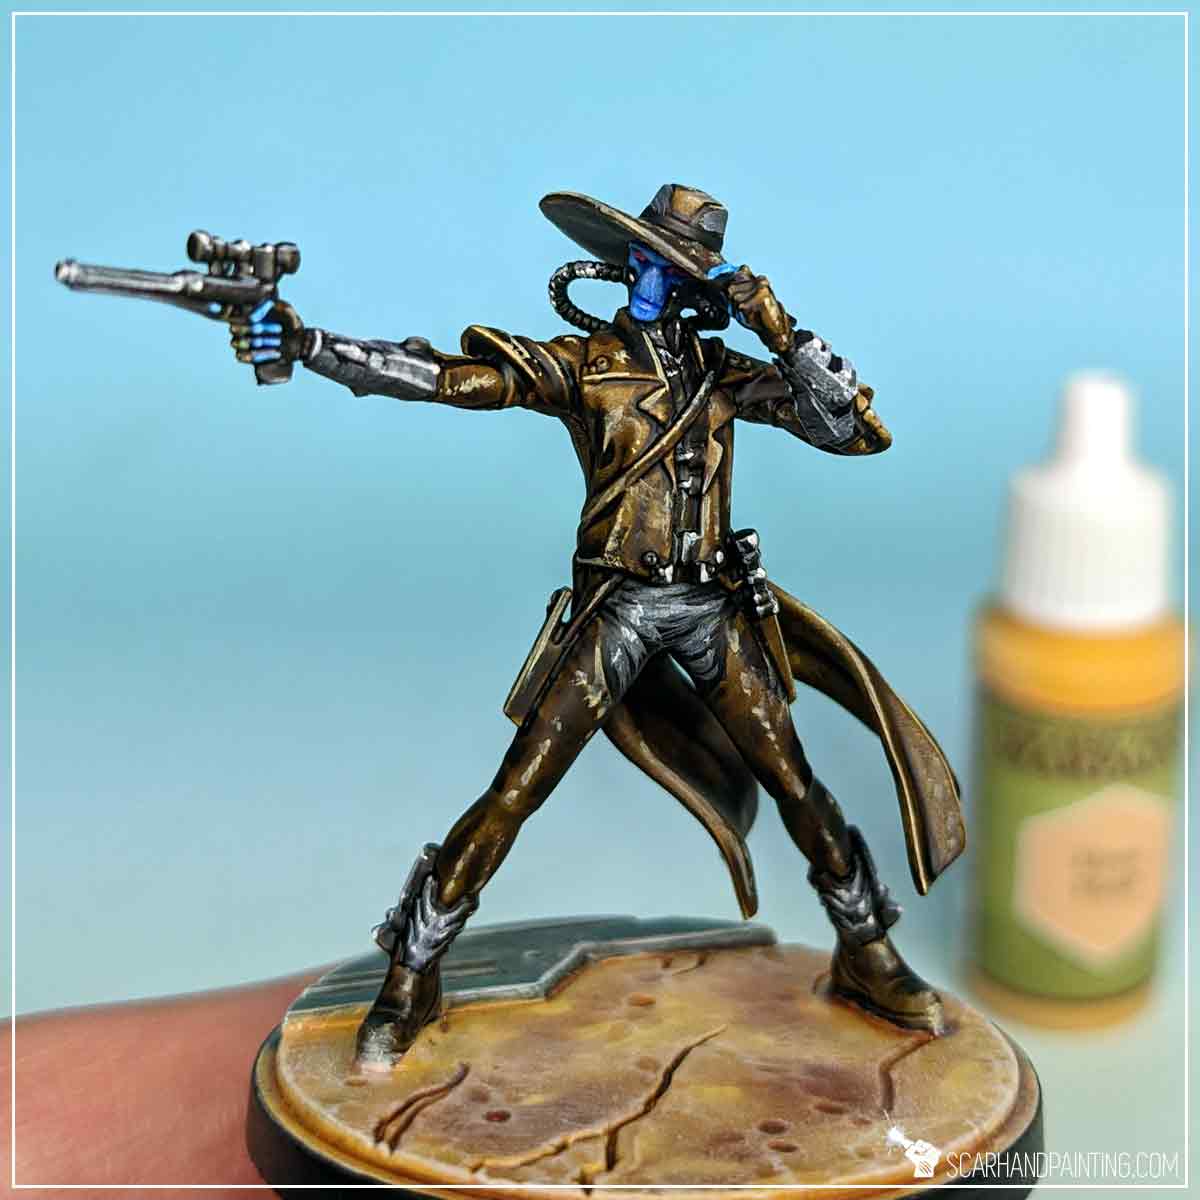
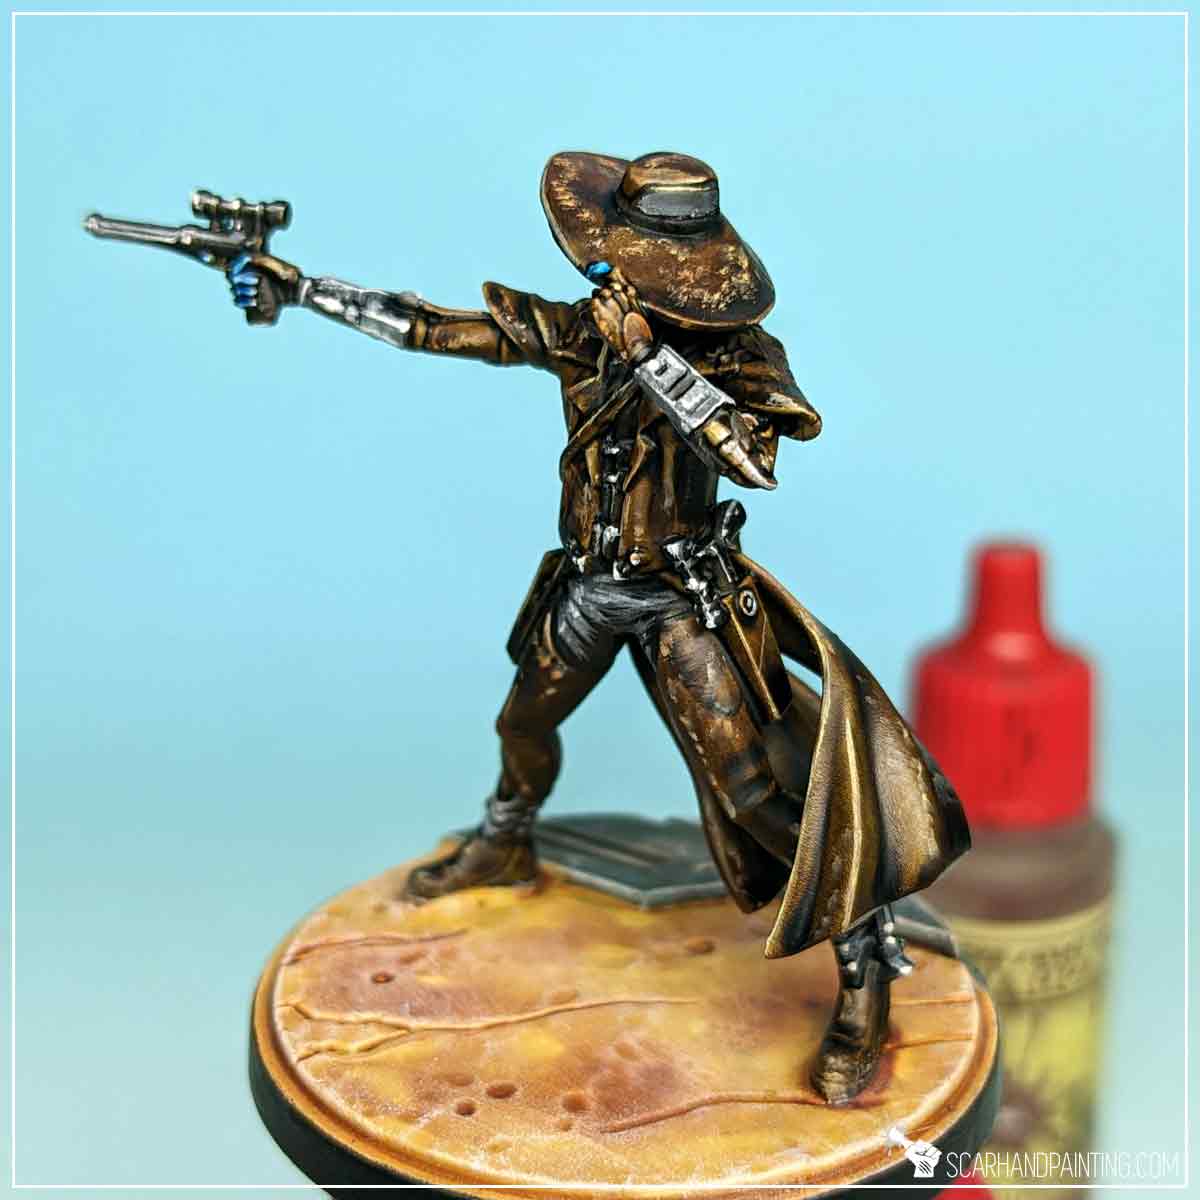
Next, with a Wargamer: Detail Brush, I applied Royal Blue Speedpaint to the face and the exposed fingers of the miniature.
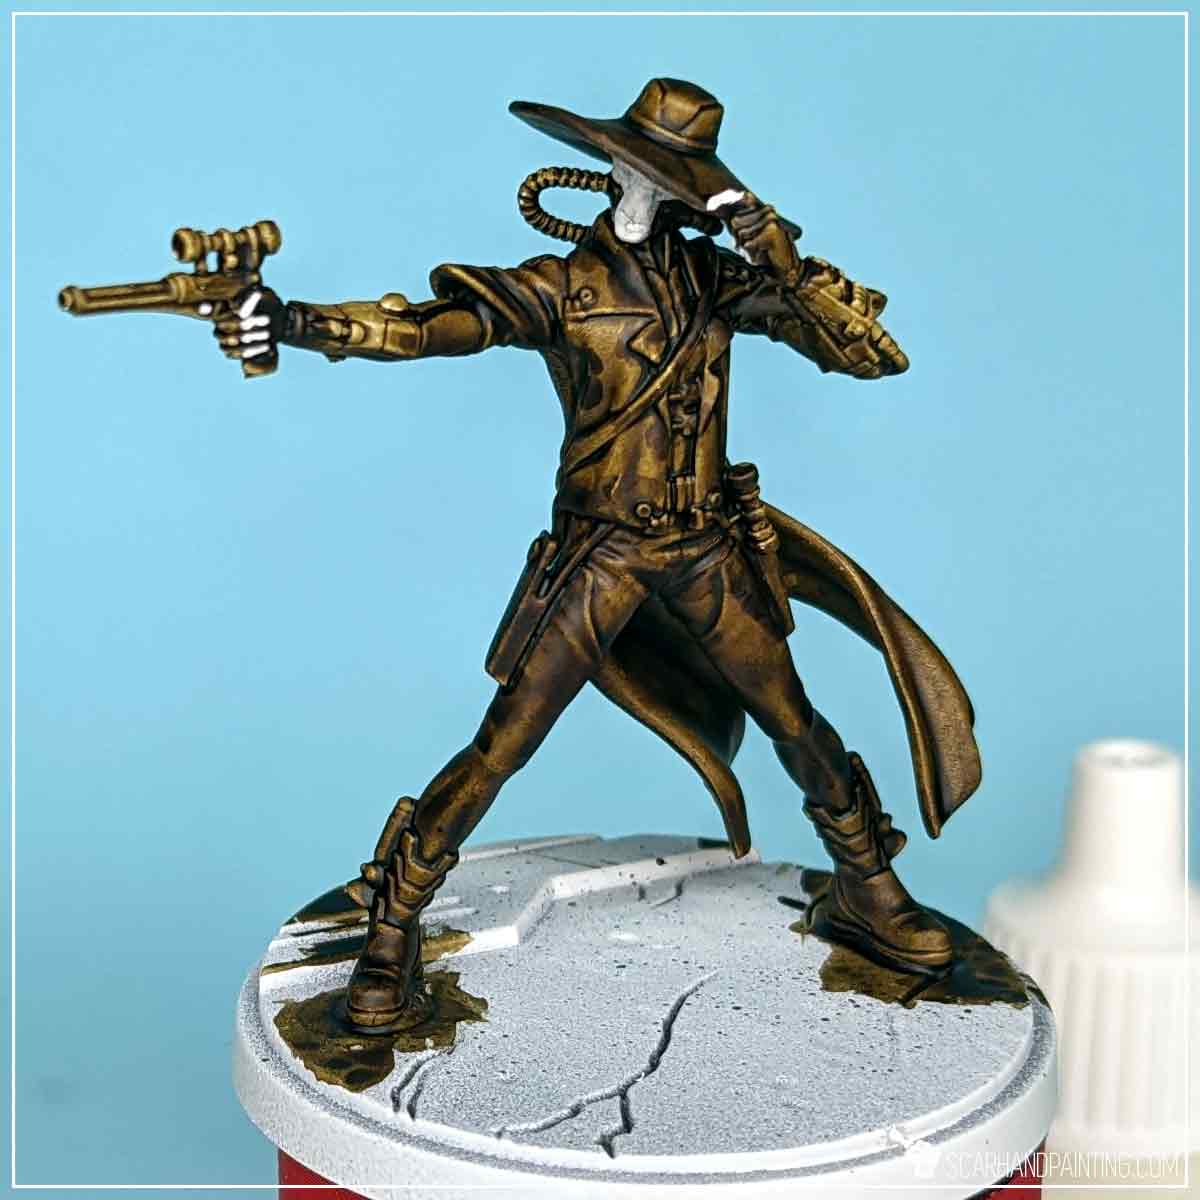
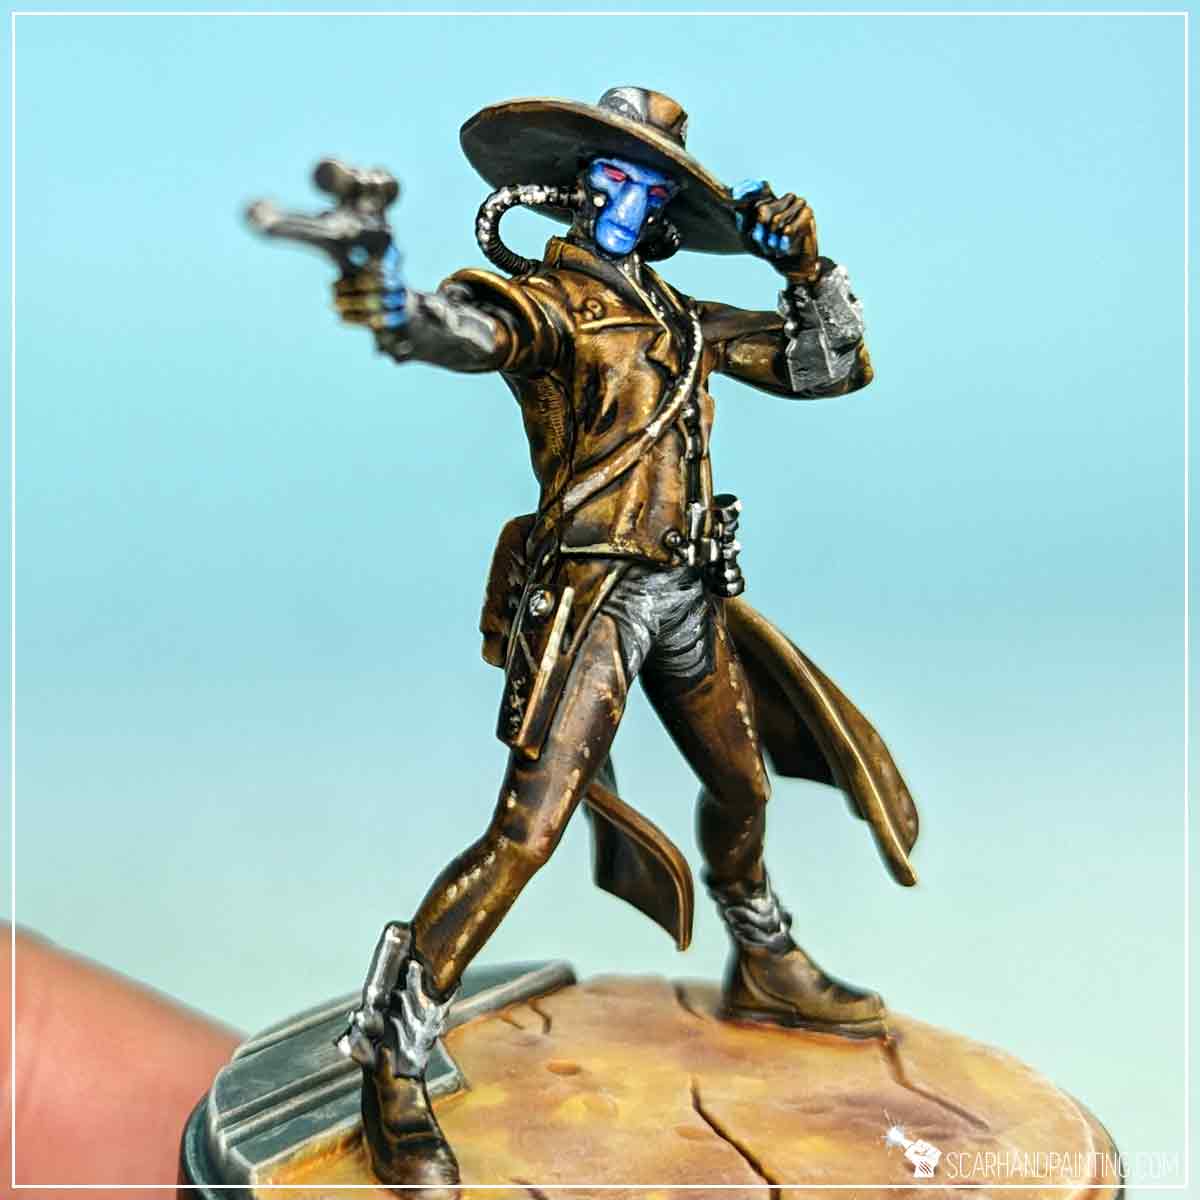
Weapons, breathing pipes, armor, had detail and the ‘under’ pants I have painted black with Grim Black Speedpaint, darkening them and creating a solid base for future highlights.
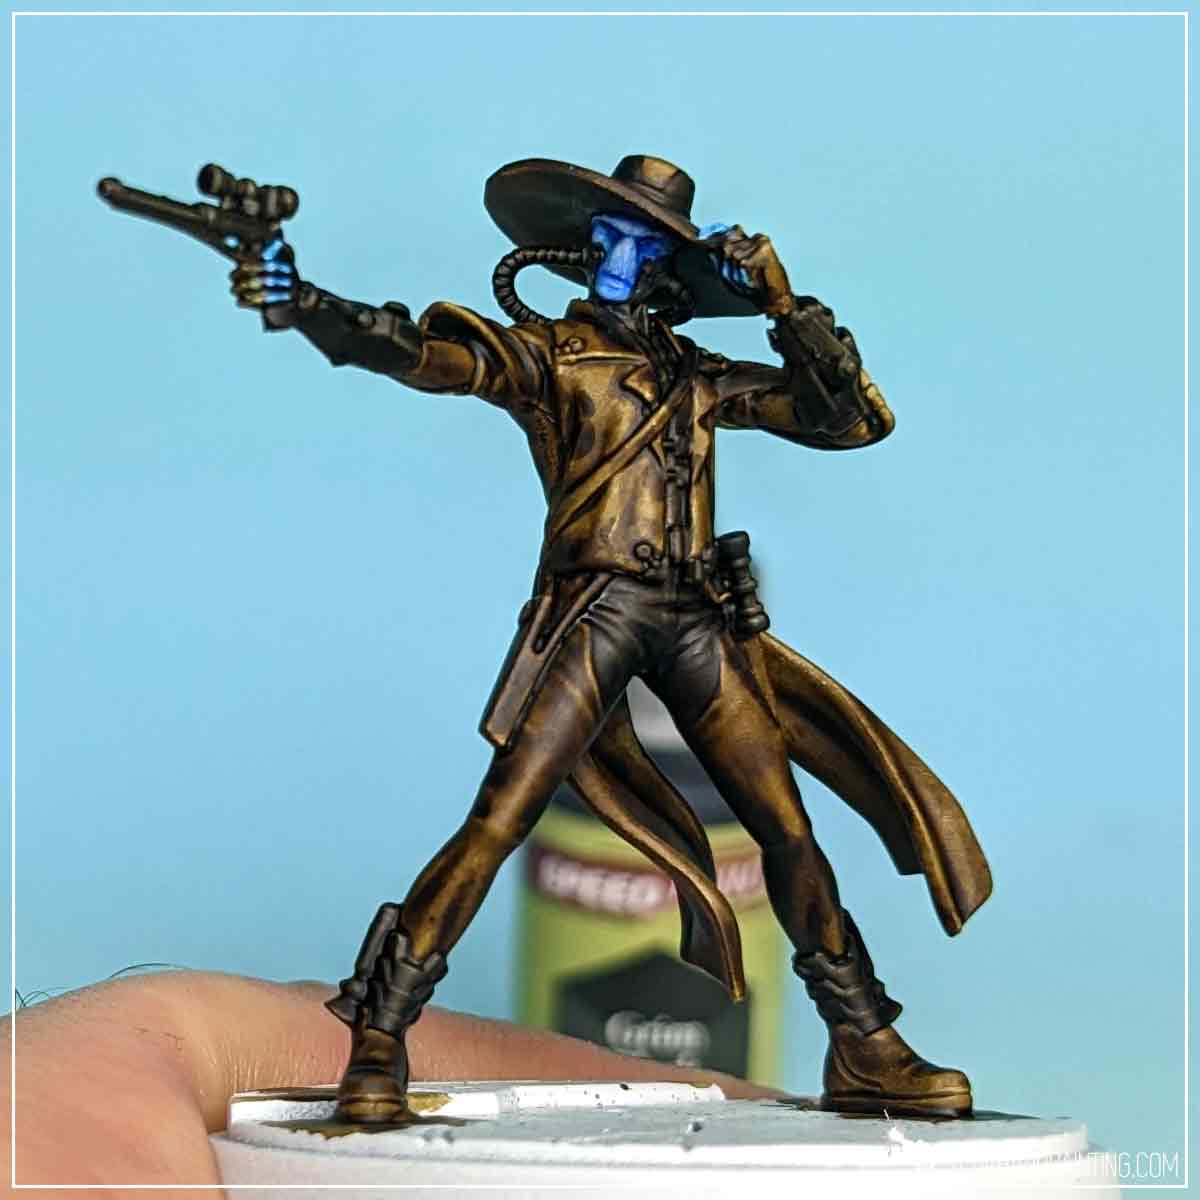
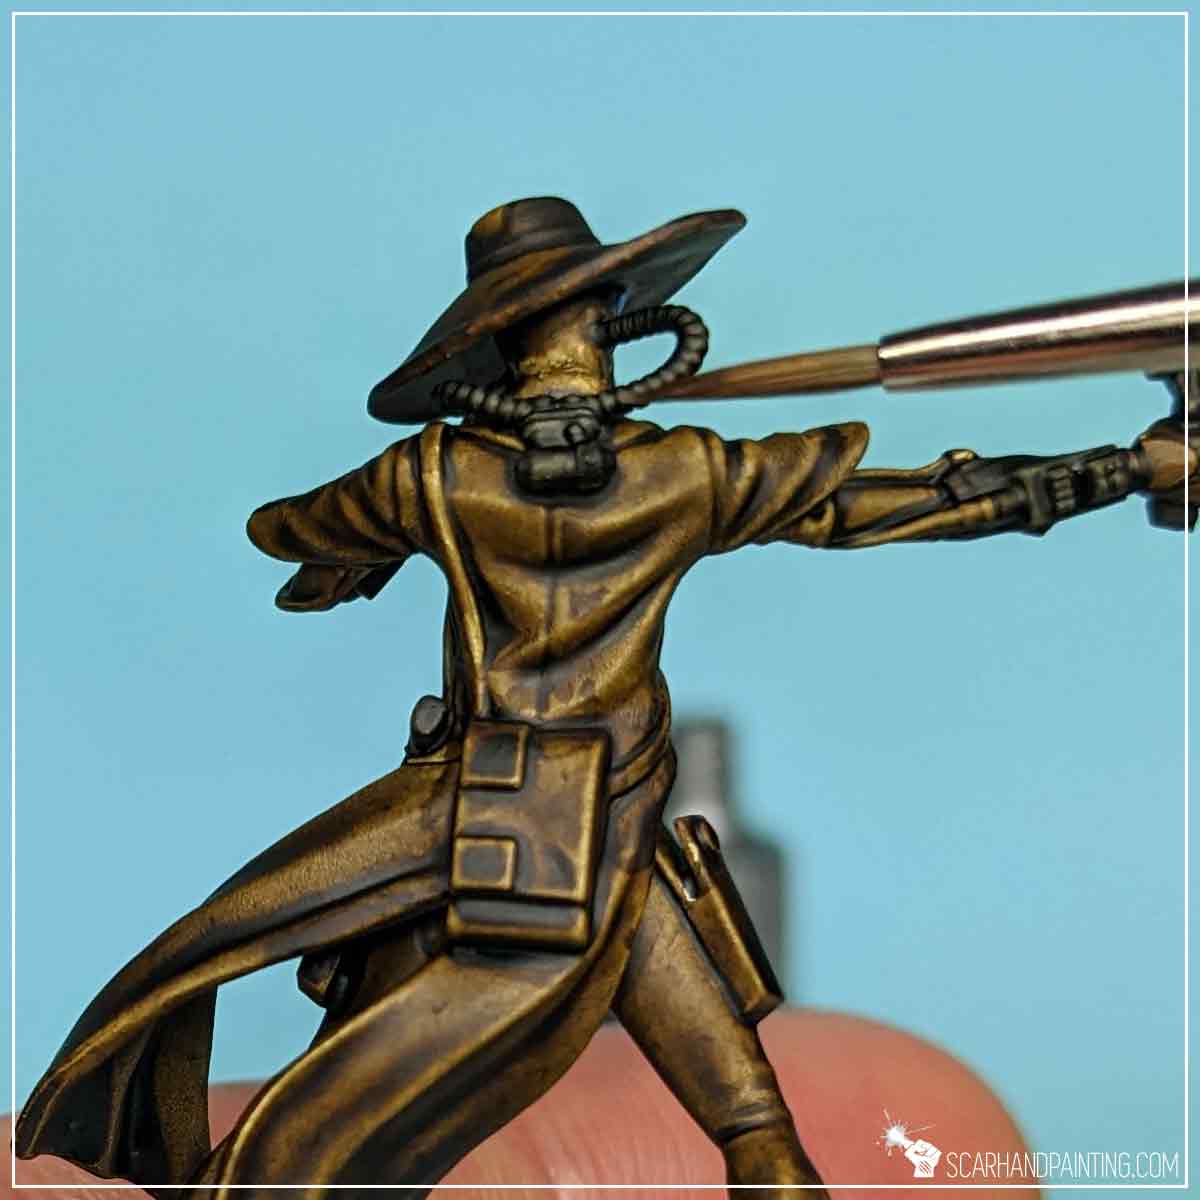
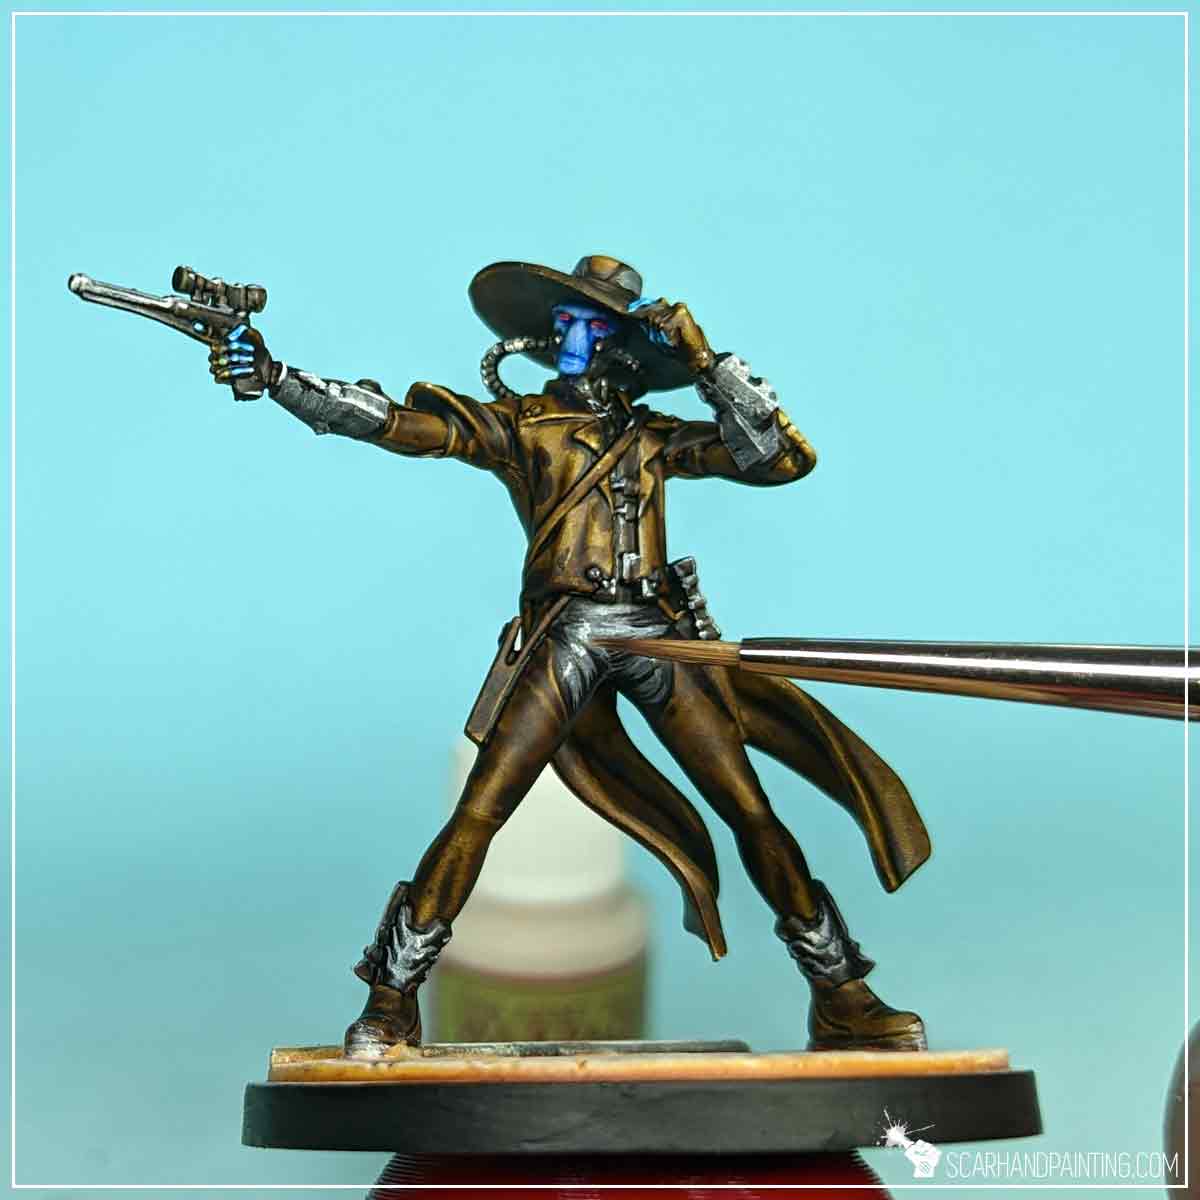
I then followed up with semi-highlights of flatbrushed Matt White. I tried to leave the excess of the paint on a dry palette and move the tip of the brush back and forth leaving blurred lines of paint on chosen surfaces. I deliberately skipped the pistols.
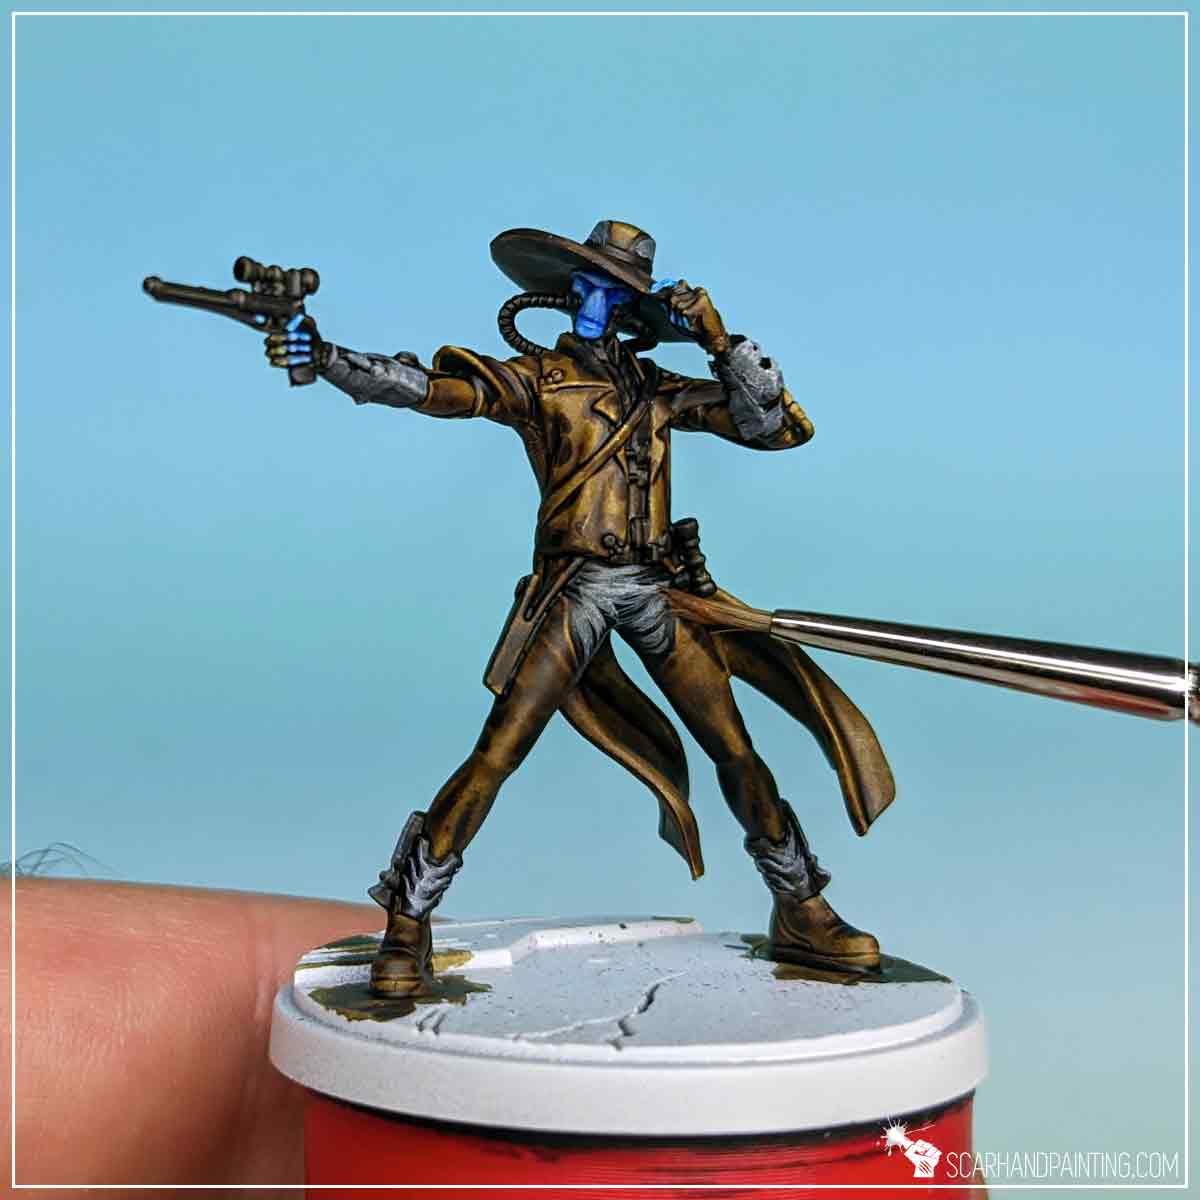
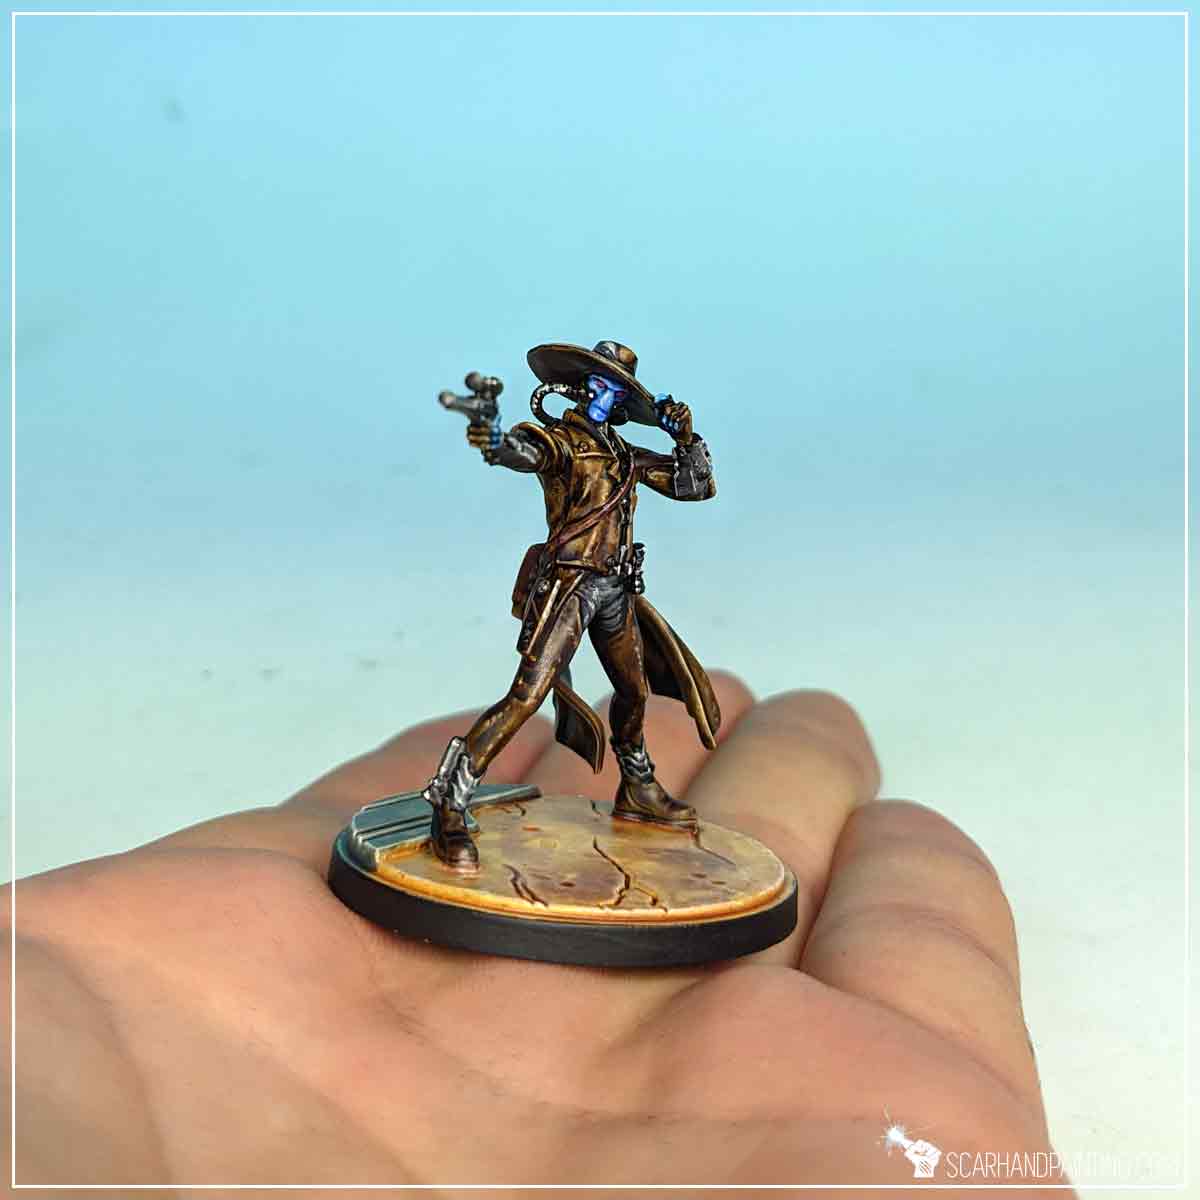
For eyes I used a Wargamer: Detail Brush, applying lines of Matt White, followed up by a touch of Poppy Red Speedpaint.
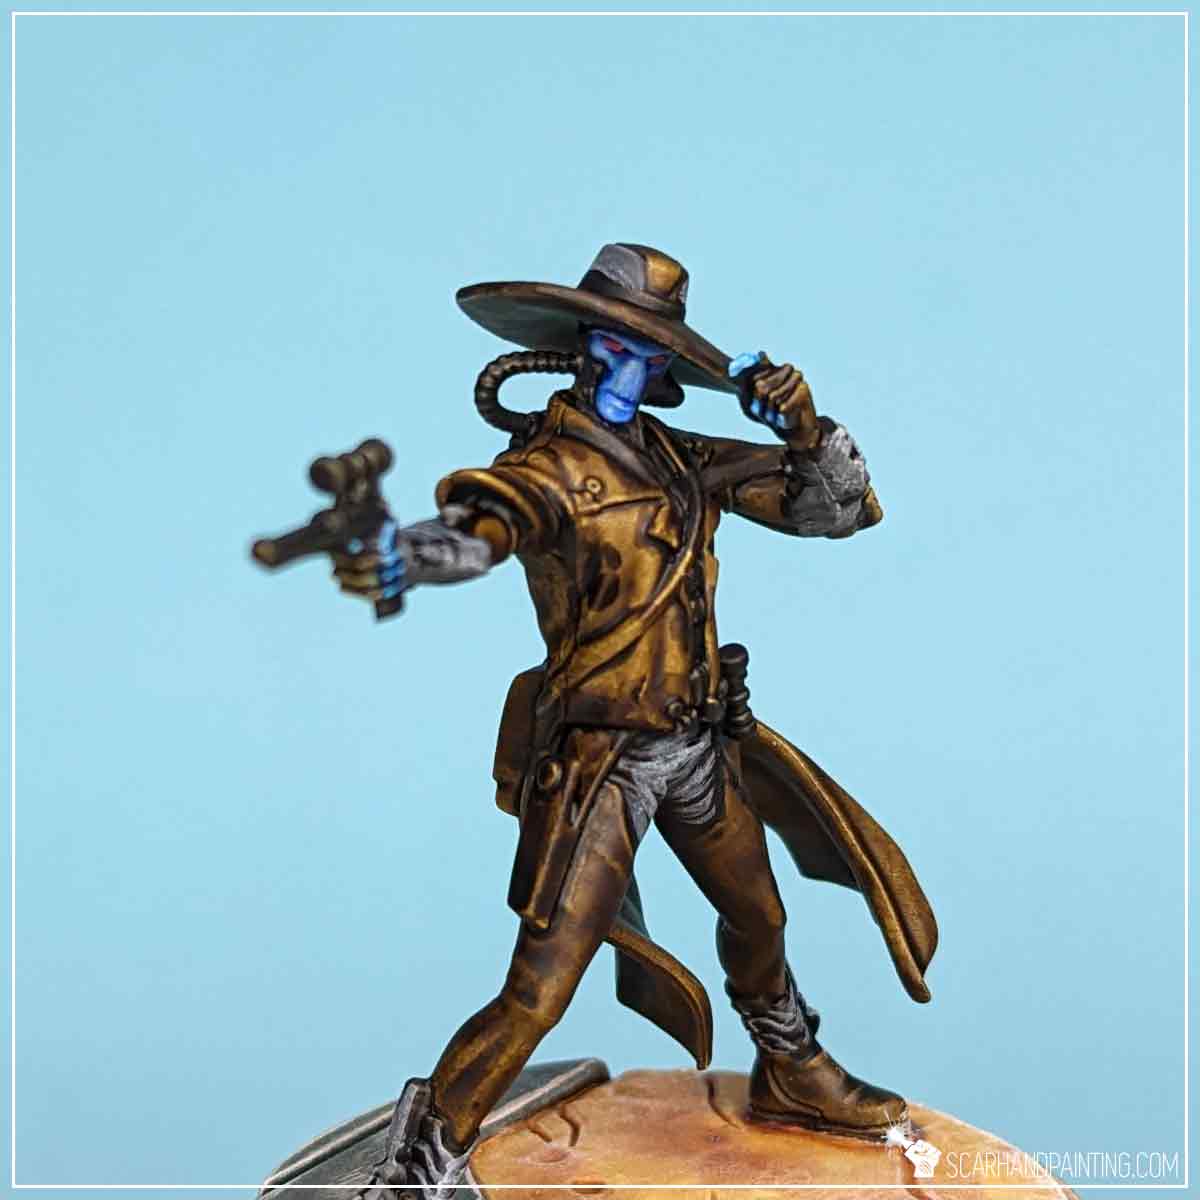
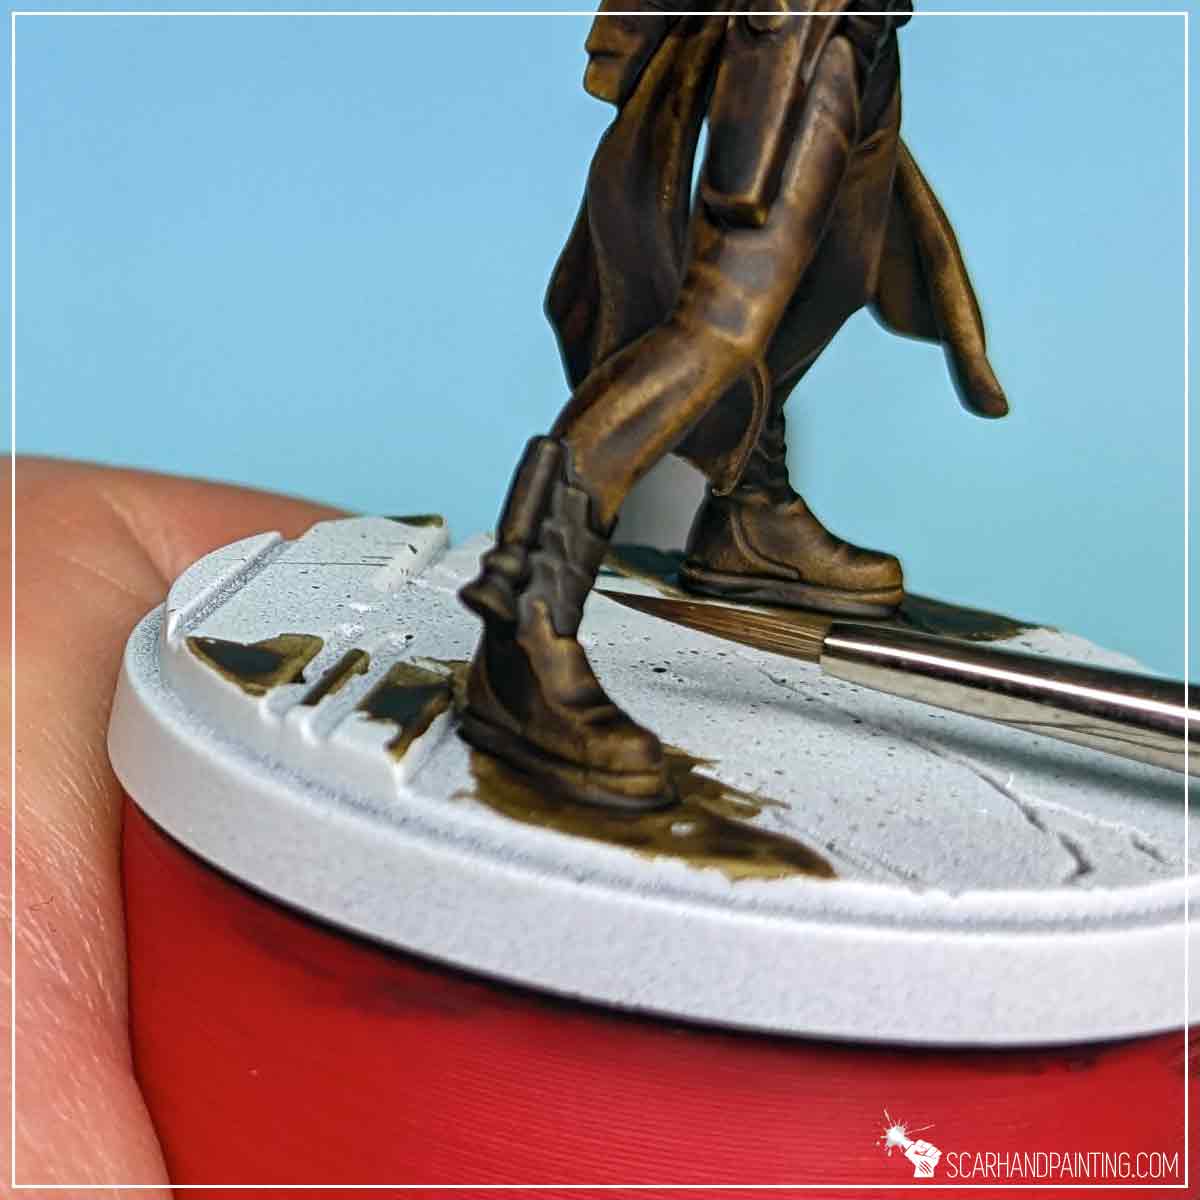
Finally I have painted the base following steps previously presented in the Tutorial: Painting Star Wars Shatterpoint Clone Troopers article, at which point the basic painting process was over and the miniature might have been considered done… but why not take it further?
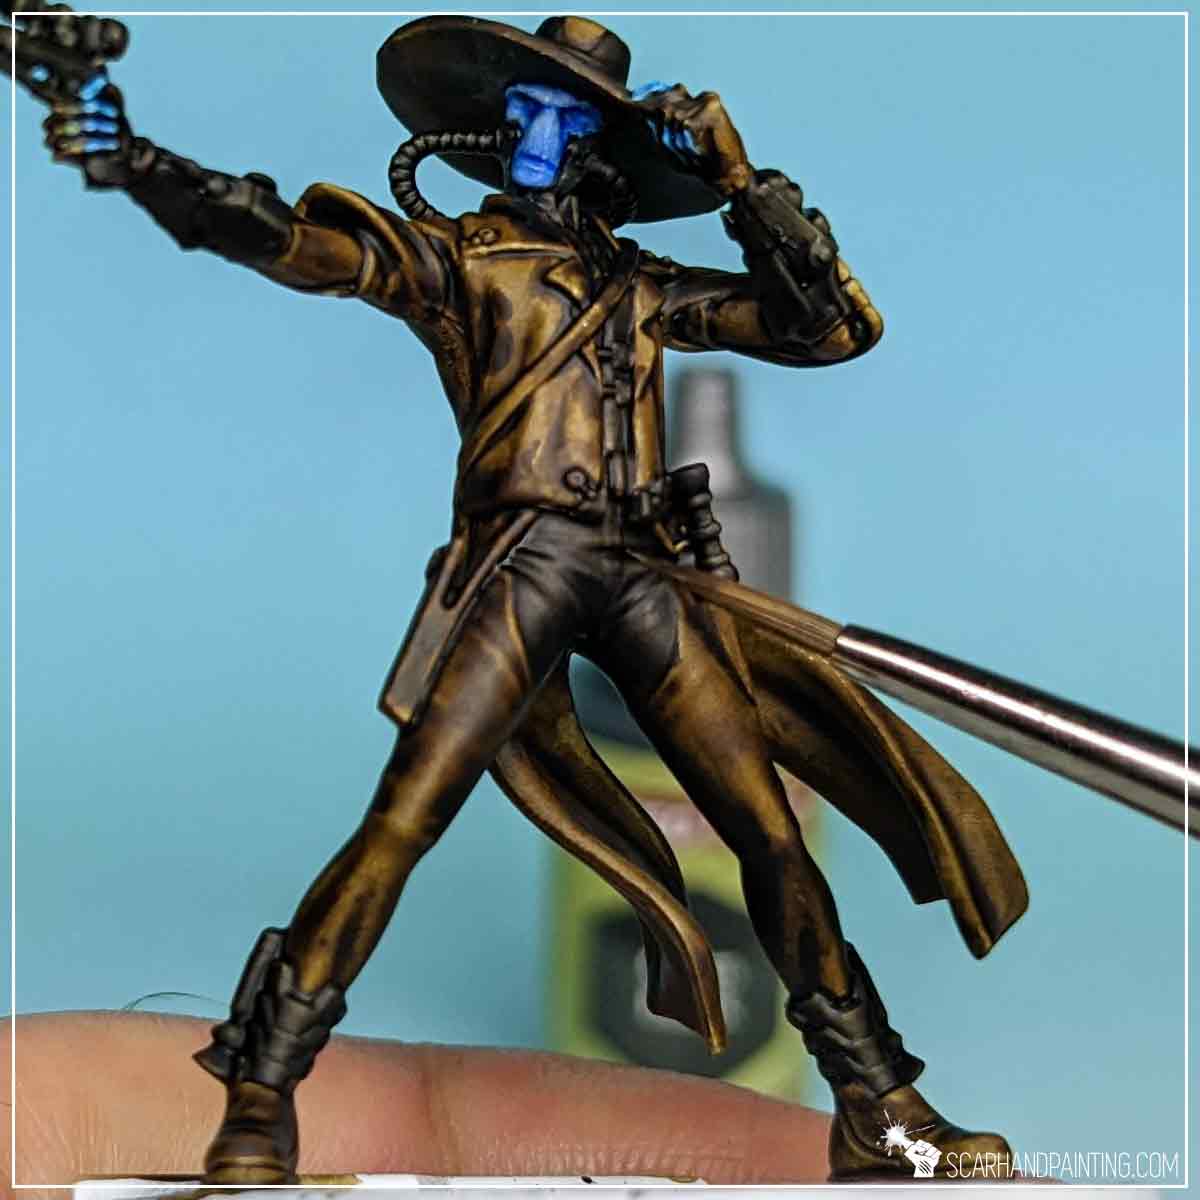
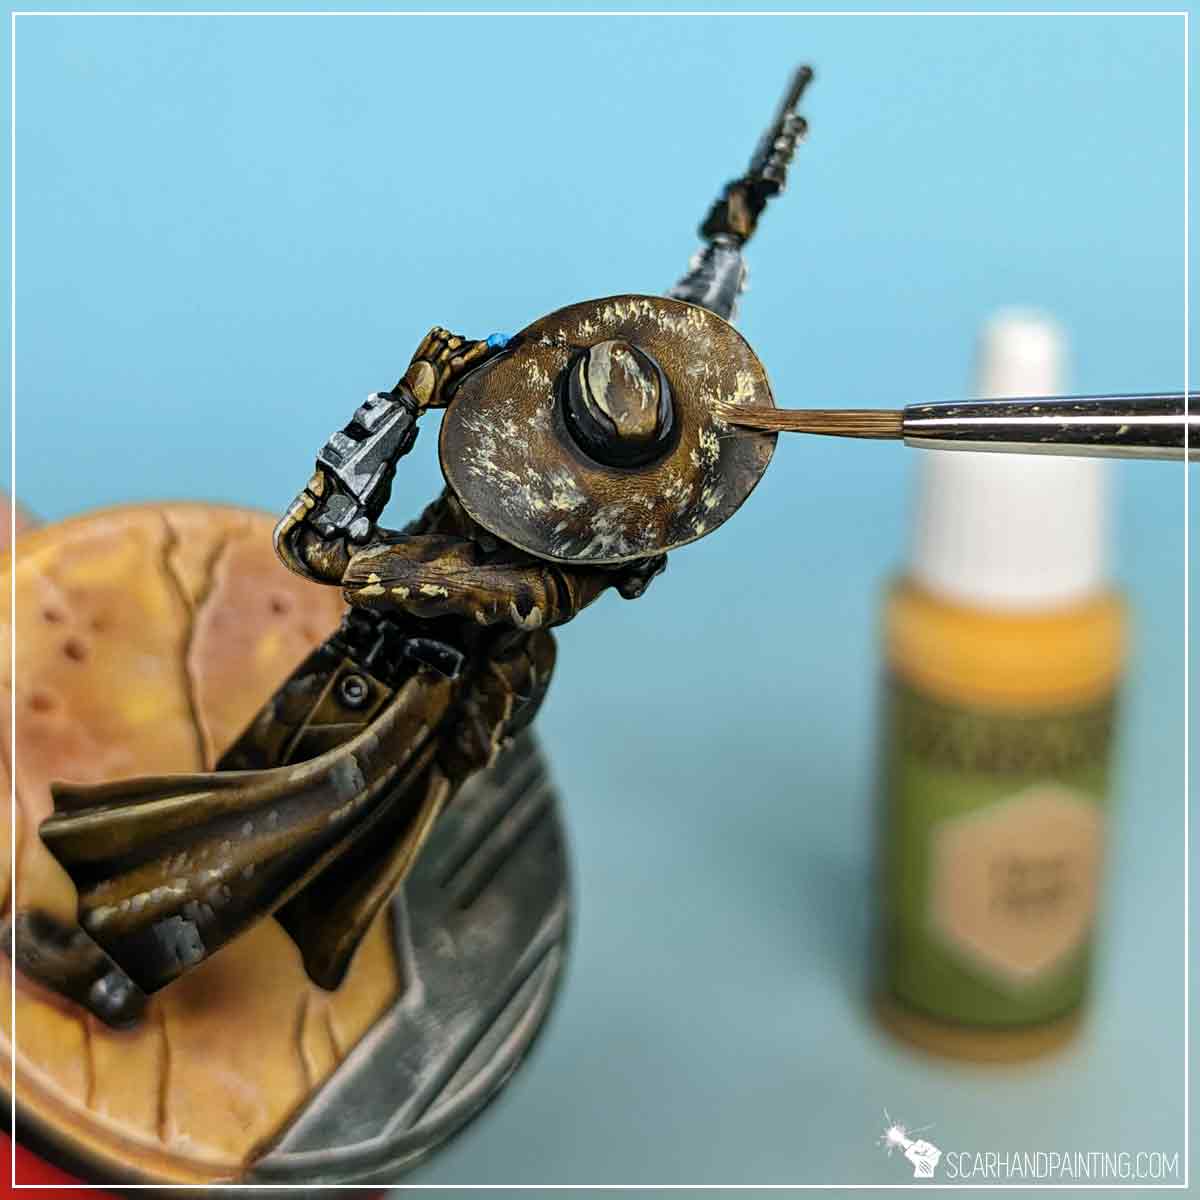
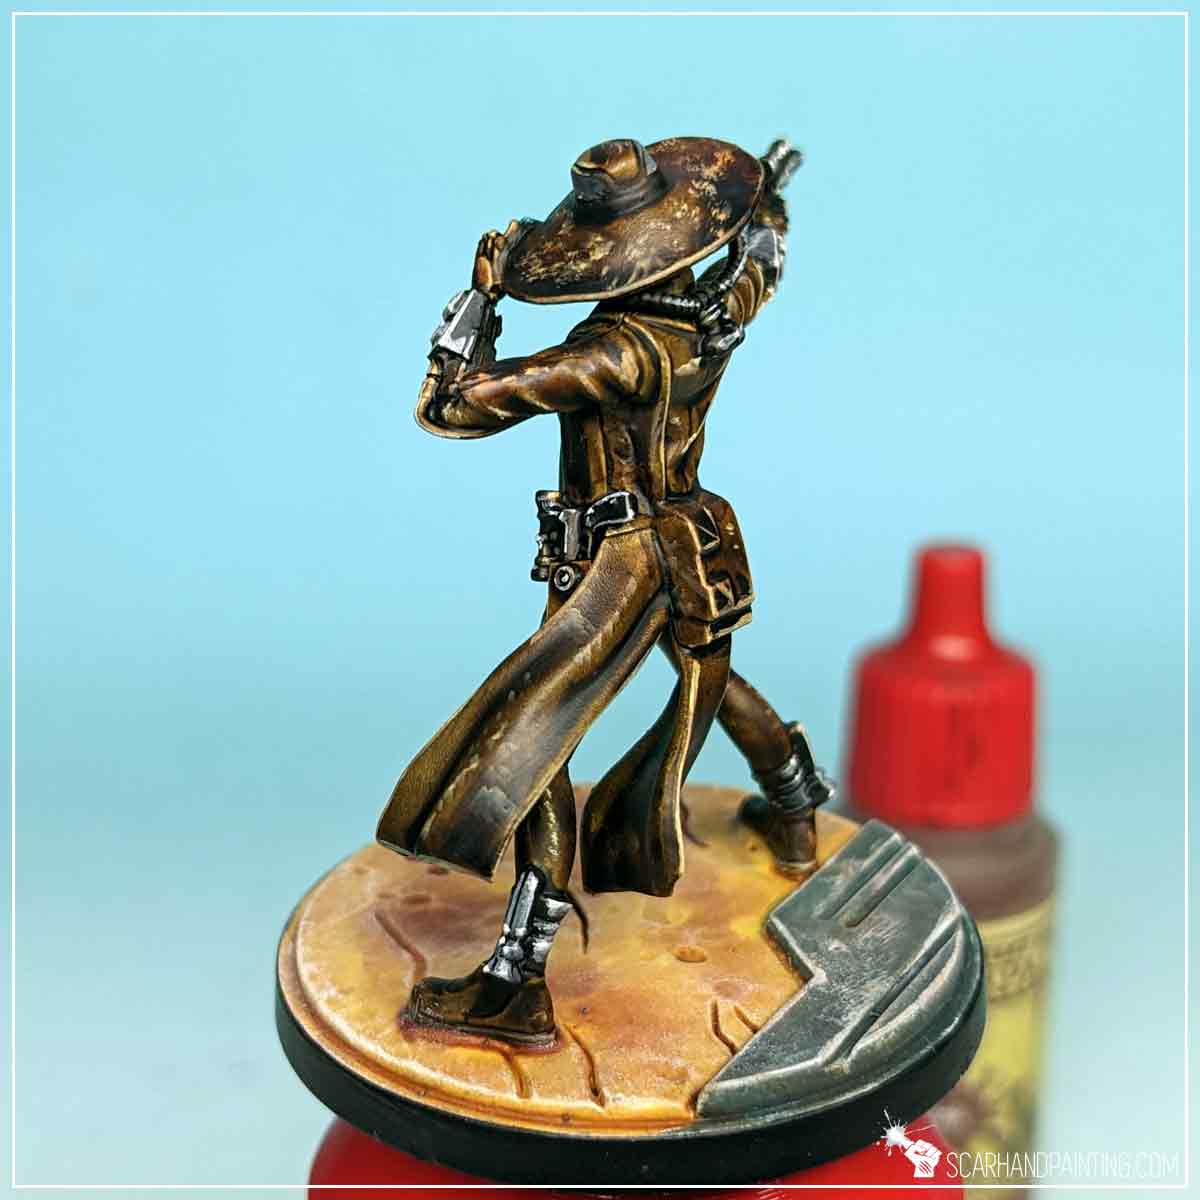
With Wargamer: Character Brush I applied thin lines and dots of Mummy Robes paint on the edges and in selected spots of weapons, breathing pipes, pants, armor and dark had elements. Dots of bright colors create focus points that result in more contrast within a particular color range.

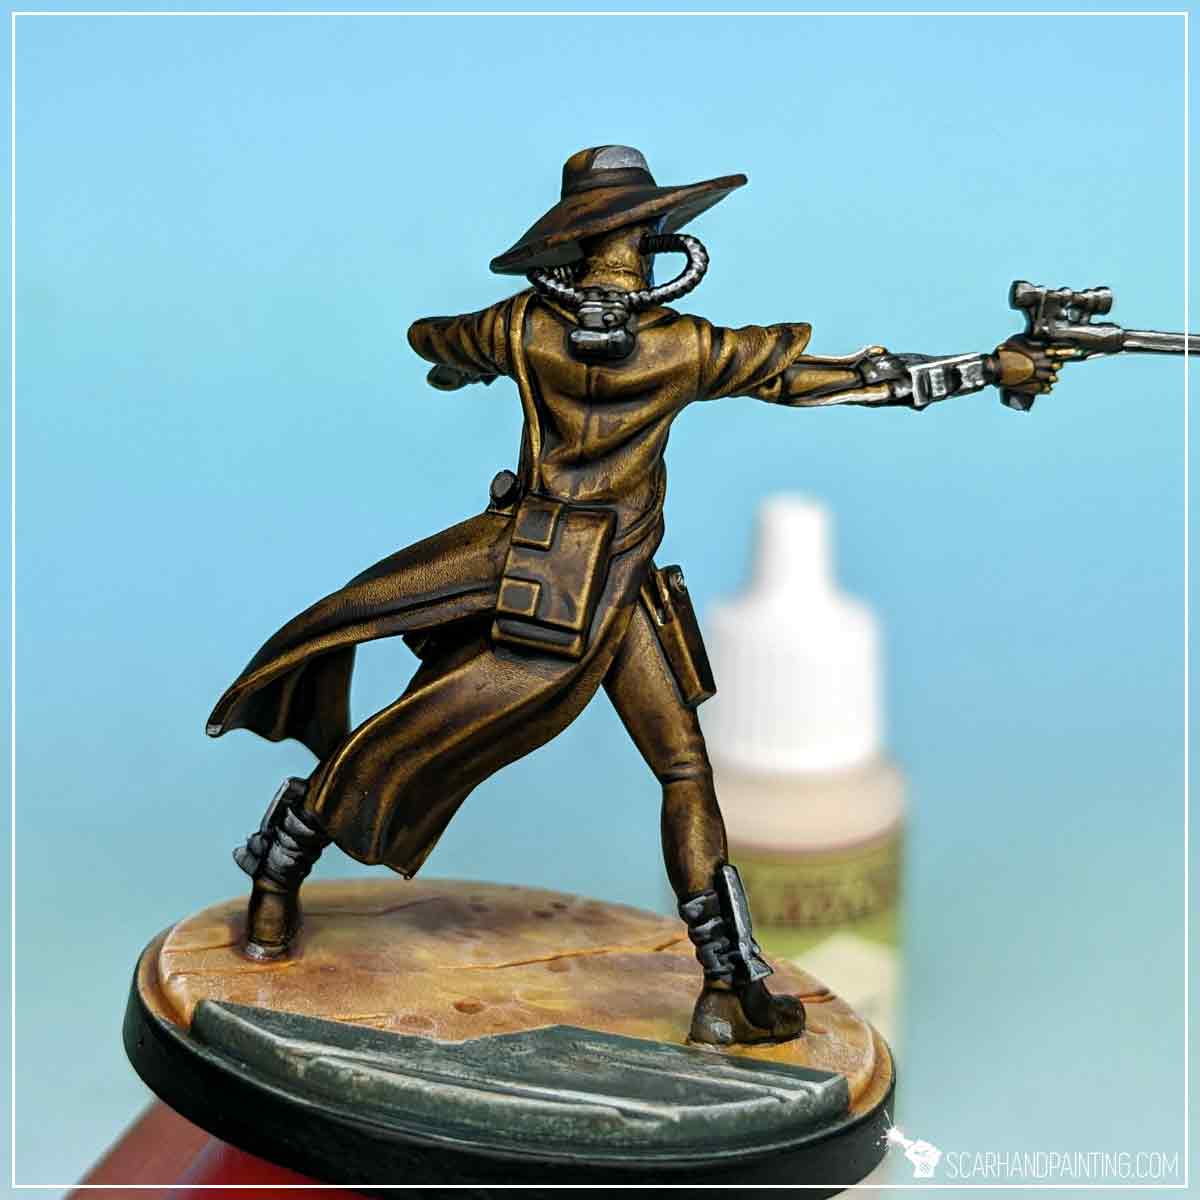
I then did the same for Browns, switching Mummy Robes for Elven Flesh which has a warmer feel to it, thus is more compatible with brow. For large, flat areas I applied small smudges and scratches of Elven Flesh with a tip of the brush, creating an interesting texture.
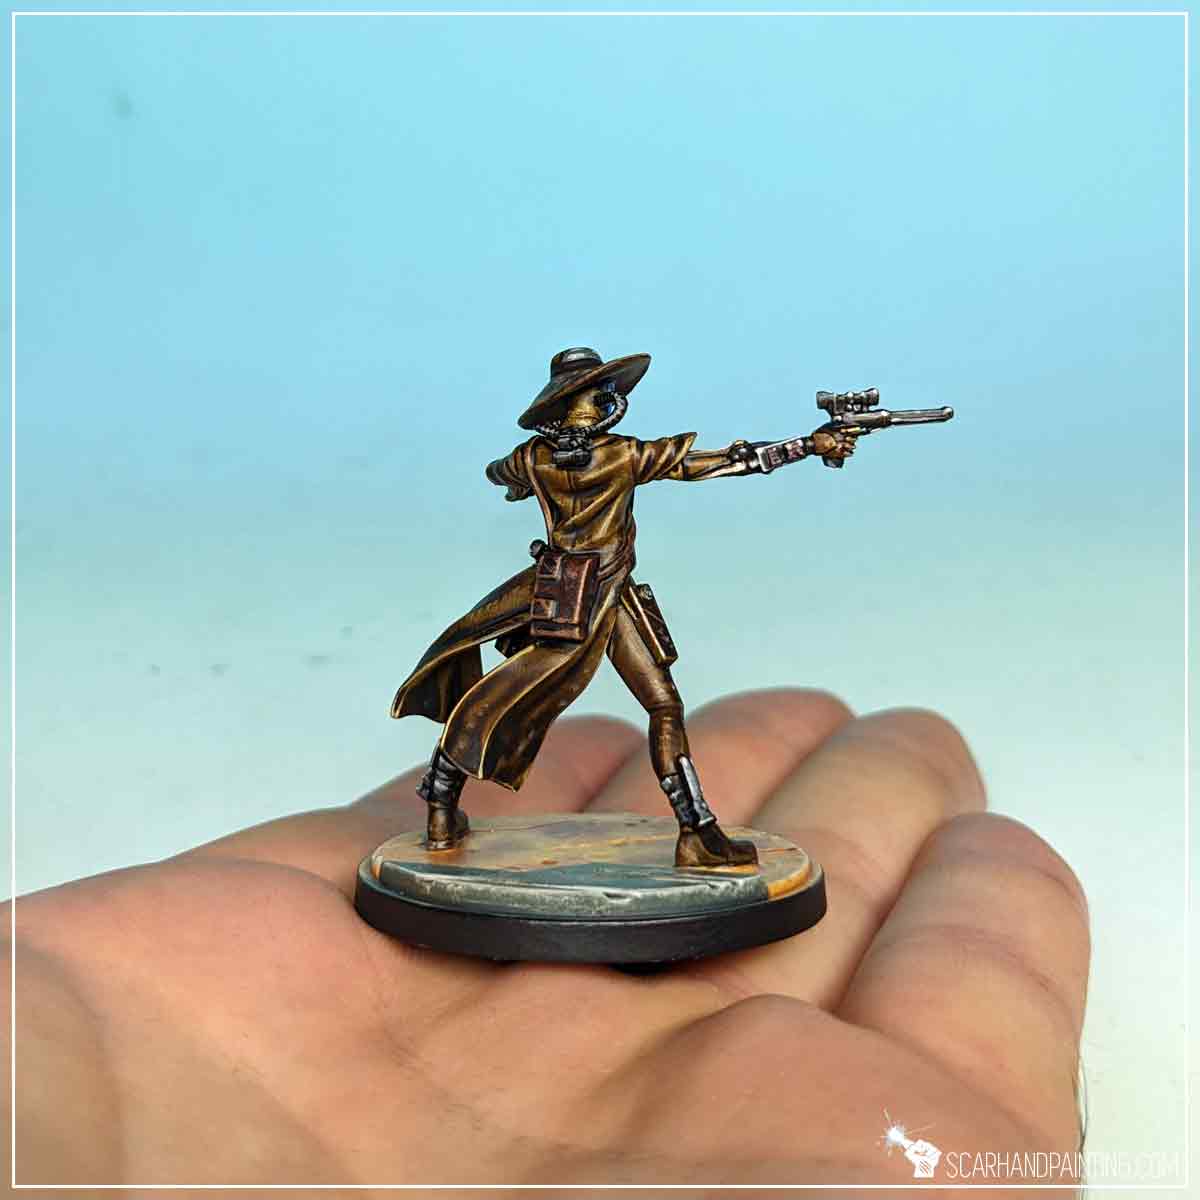
Next I applied a ‘filter’ of Flesh Wash all over browns, that toned down (and ‘browned down’) the excessive highlights.
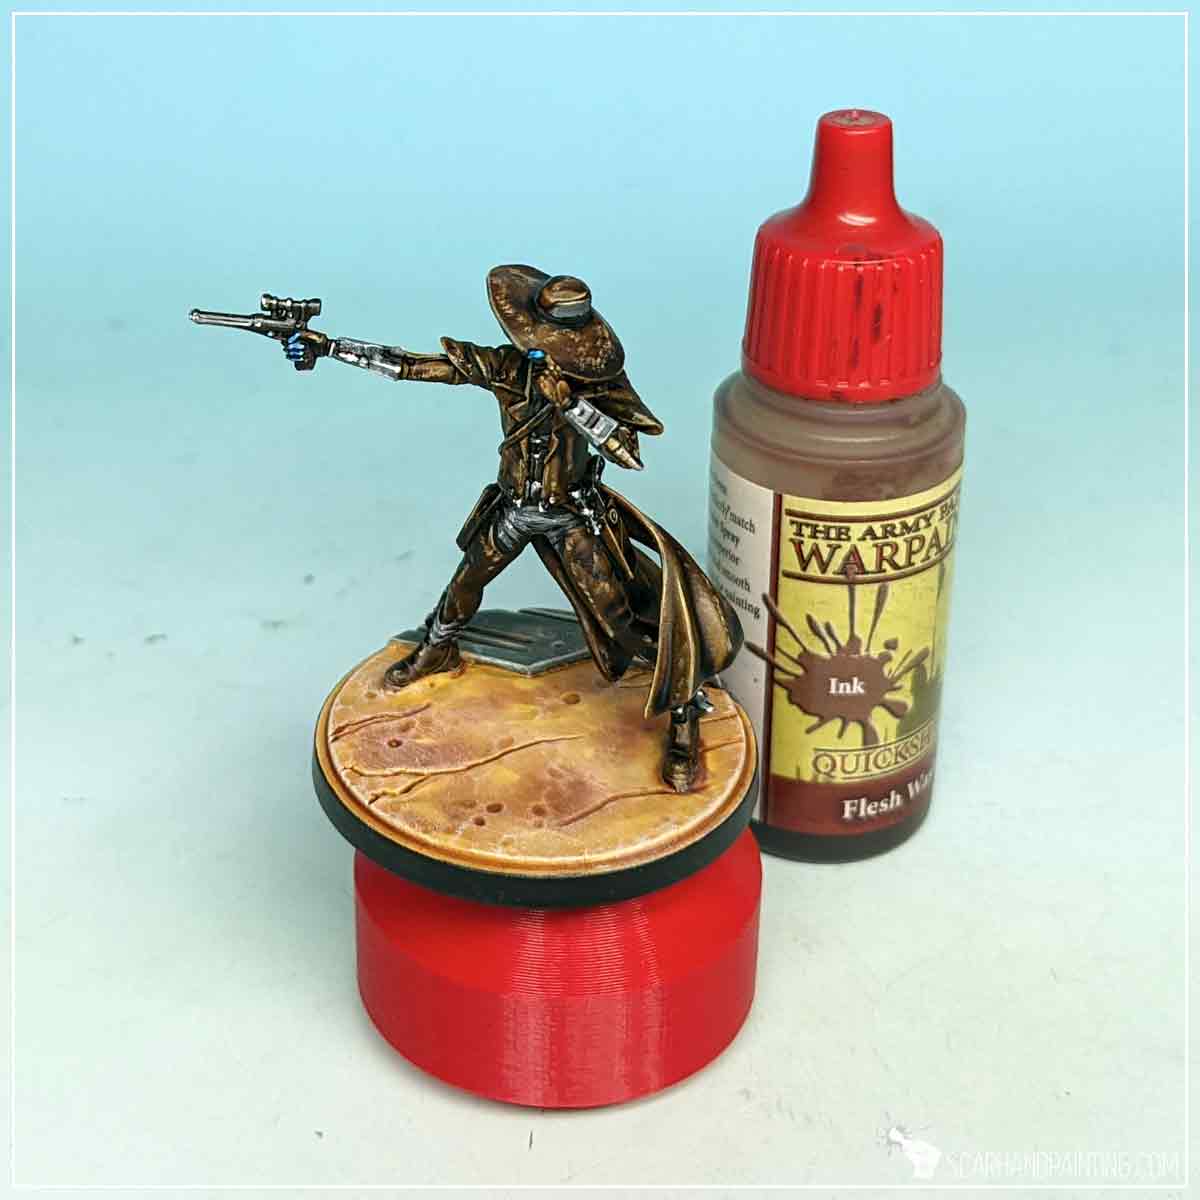
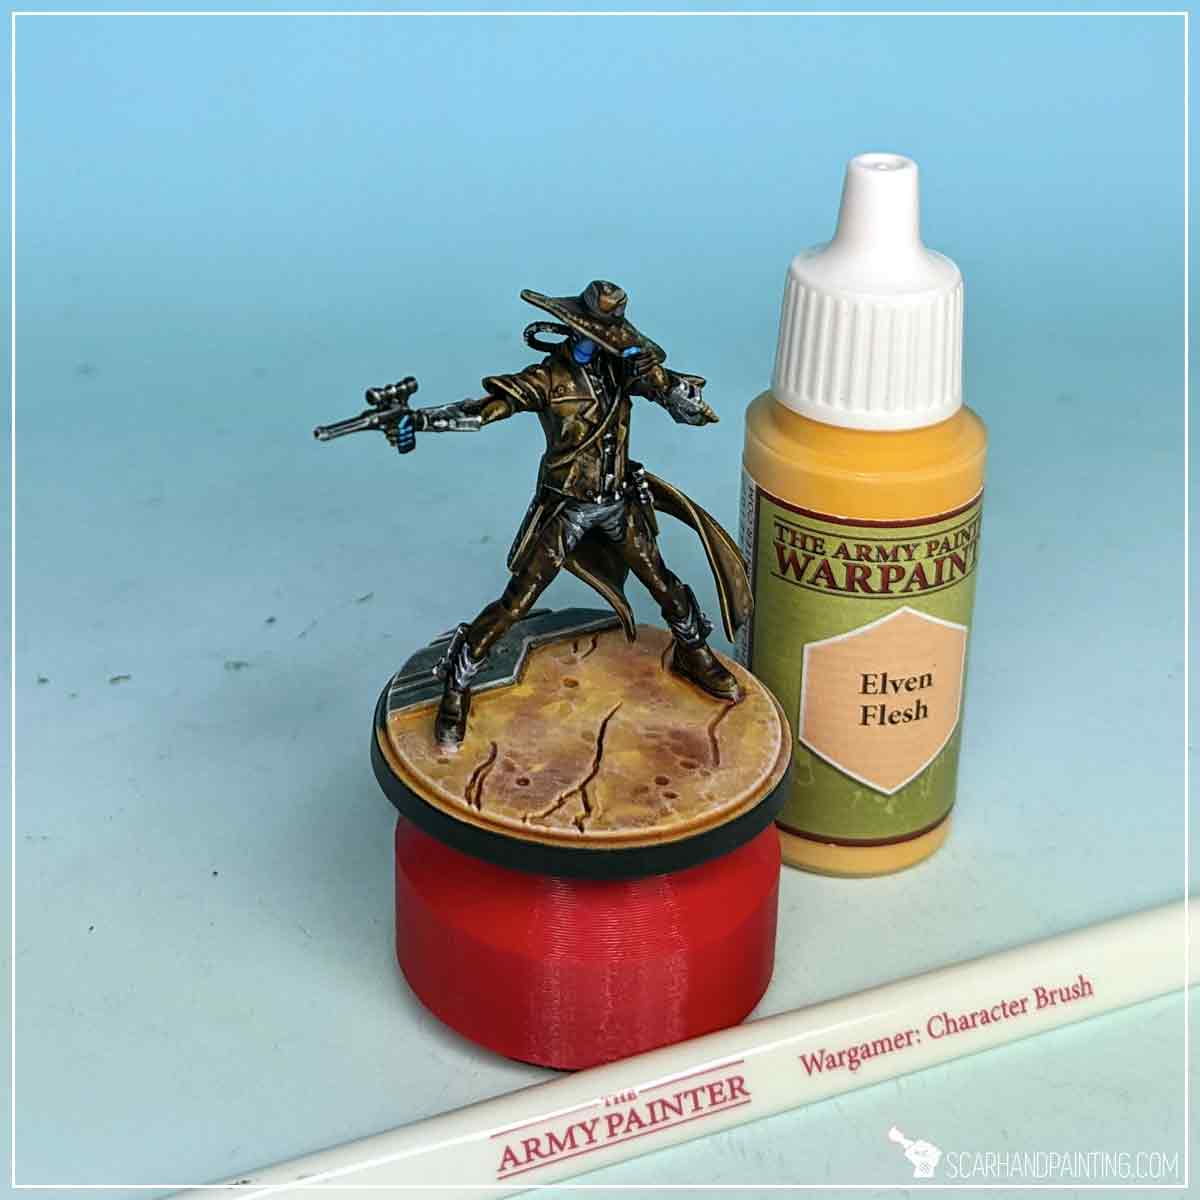
Following the box art I’ve decided to diversify browns a bit, by first applying lines and scratches of Mummy Robes on the edges alongside the satchel, gun holsters and the top of the boots. I used the opportunity to apply a few small dots of Mummy Robes to the face of the miniature as well, adding a nice highlight.
I then applied a ‘filter’ of slightly thinned down Rusk Red Speedpaint to the satchel, boots and holsters, adding a nice red’ish feel to them.
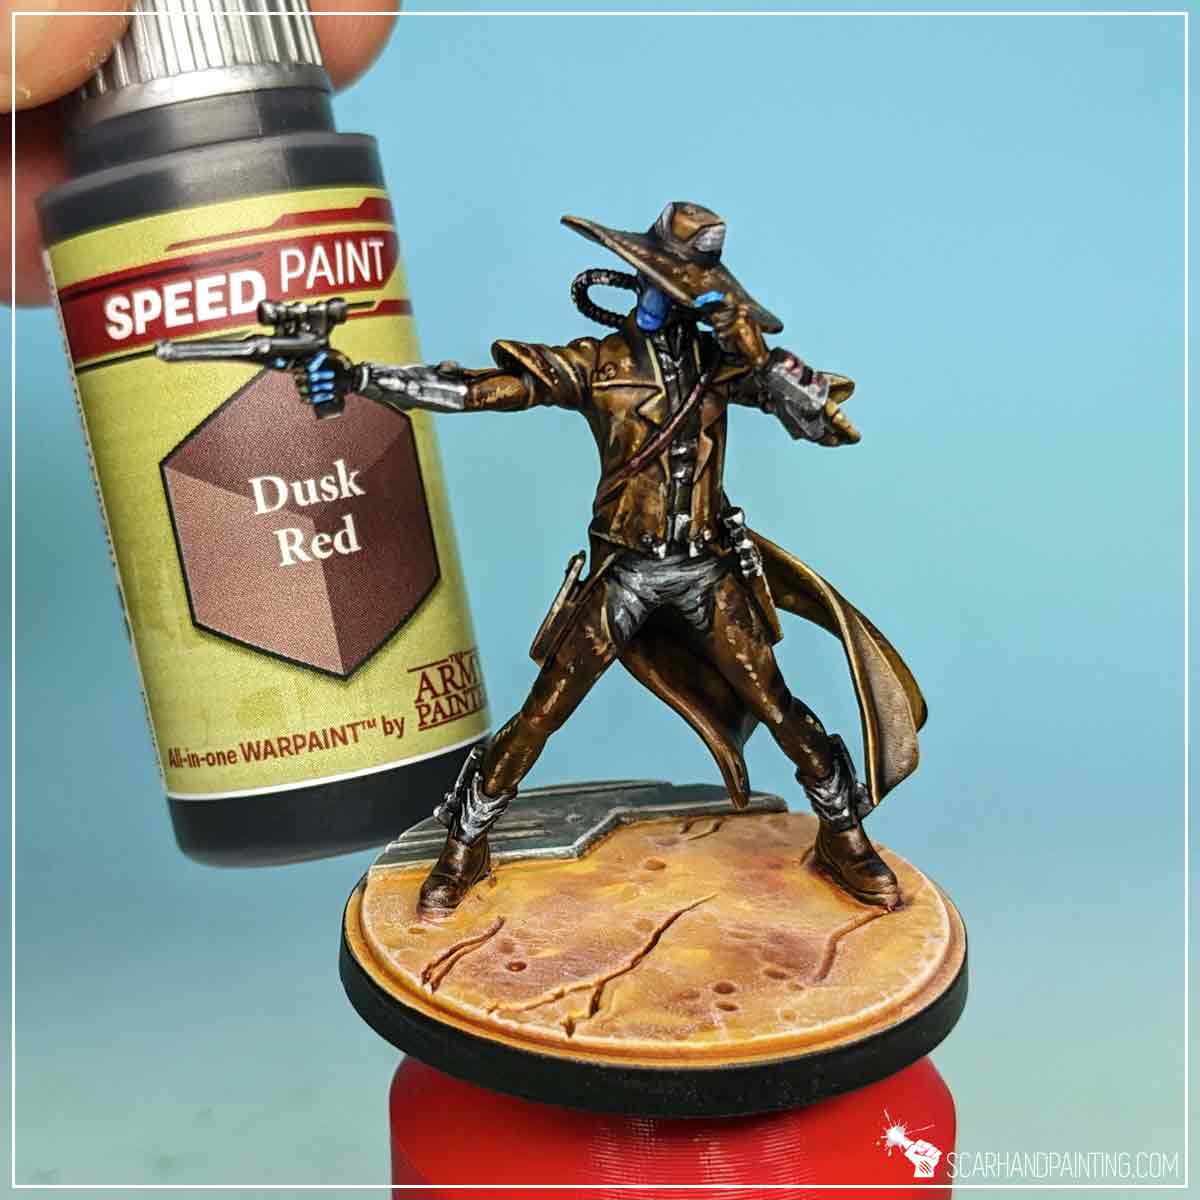
Finally I Varnished the miniature the same way as presented in the Tutorial: Painting Star Wars Shatterpoint Clone Troopers article.
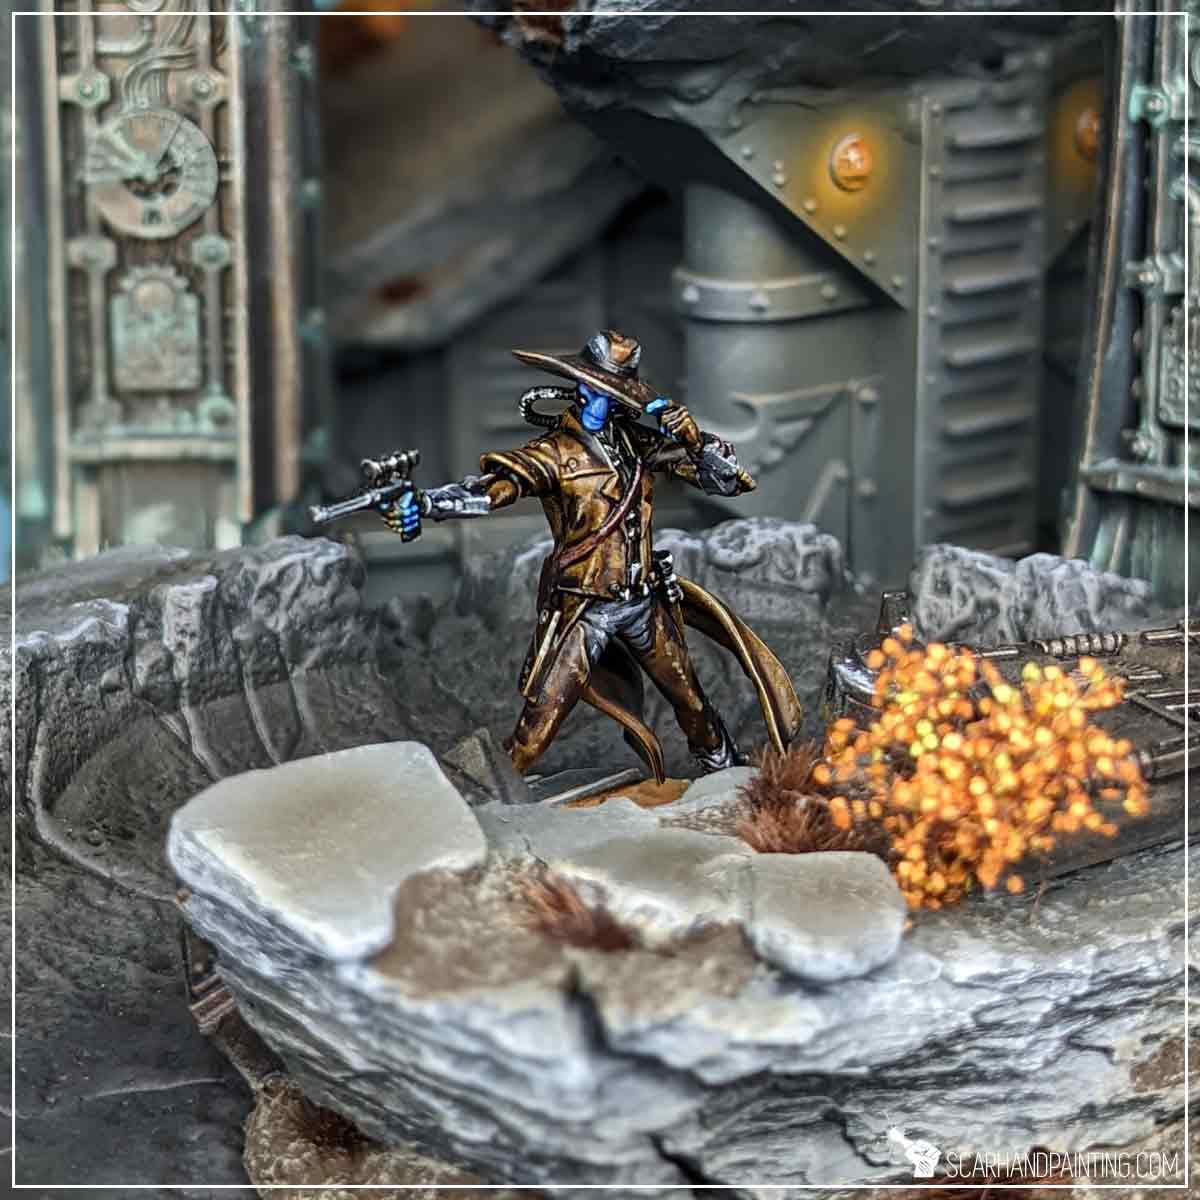
I hope you find this tutorial interesting. Be sure to let me know your thoughts in the comments below or via Facebook or Instagram. I would also appreciate it if you considered sharing this content with your friends, who might find it useful. Many thanks to Rebel.pl for sponsoring this content. Stay tuned for more Star Wars: Shatterpoint tutorials.
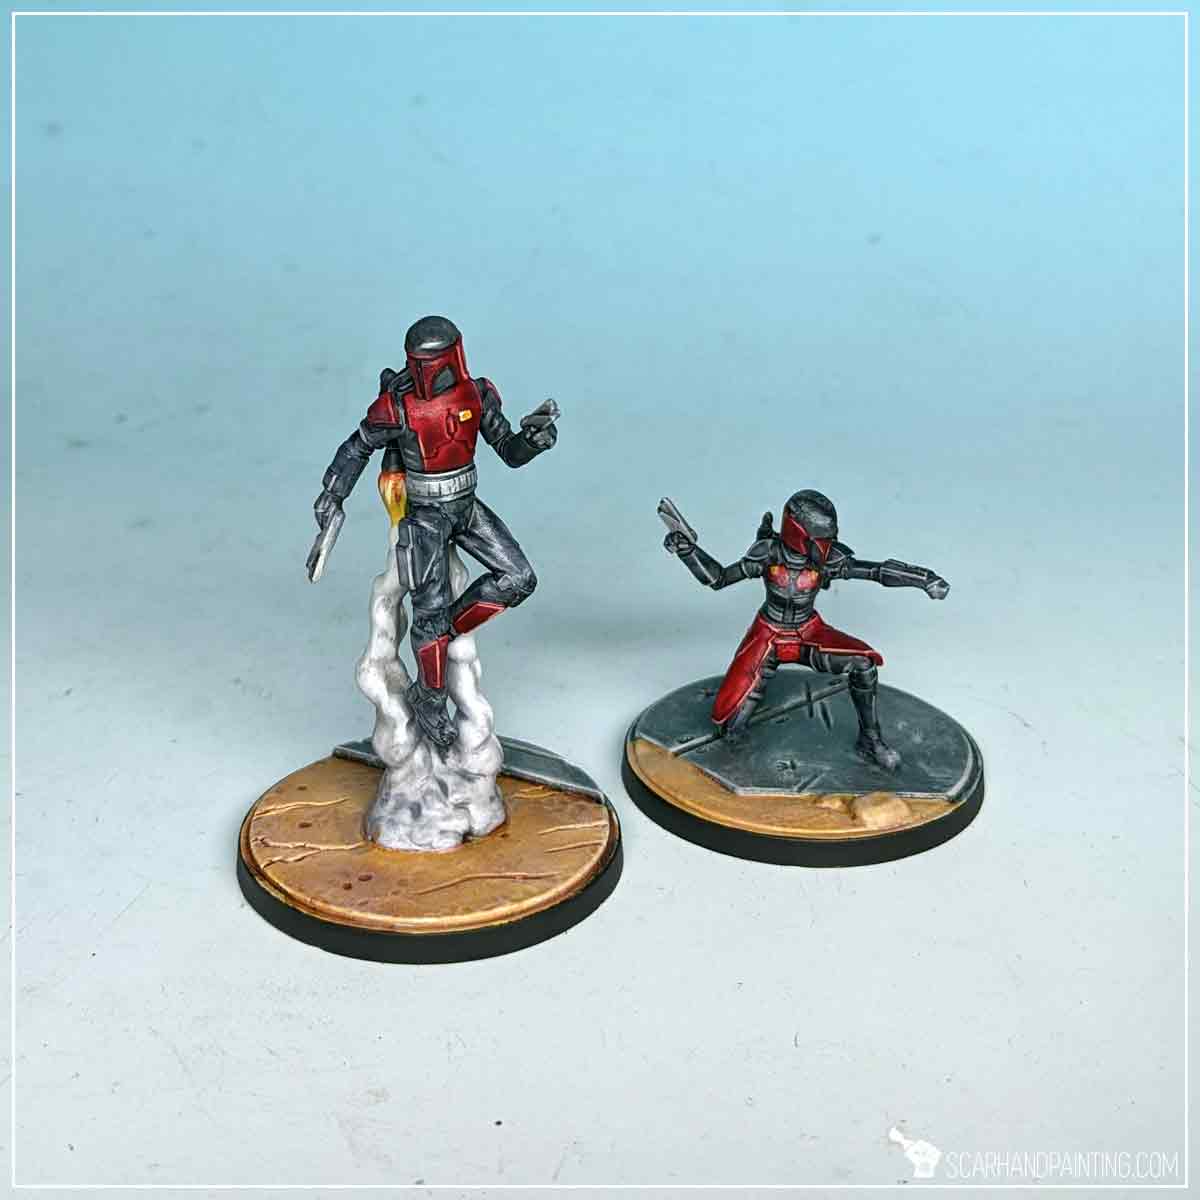
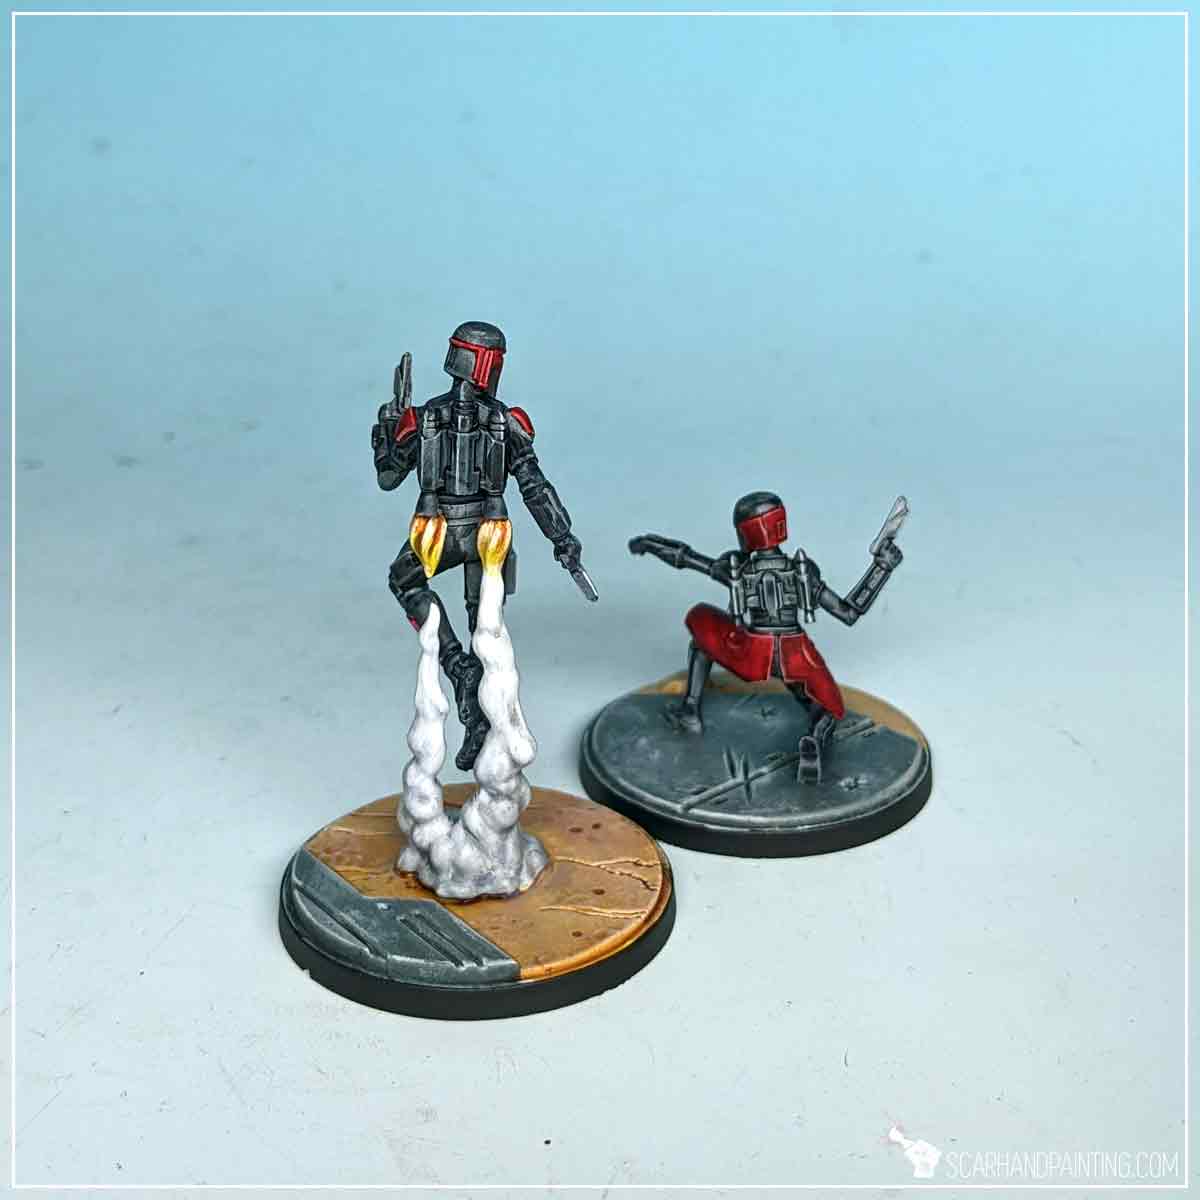
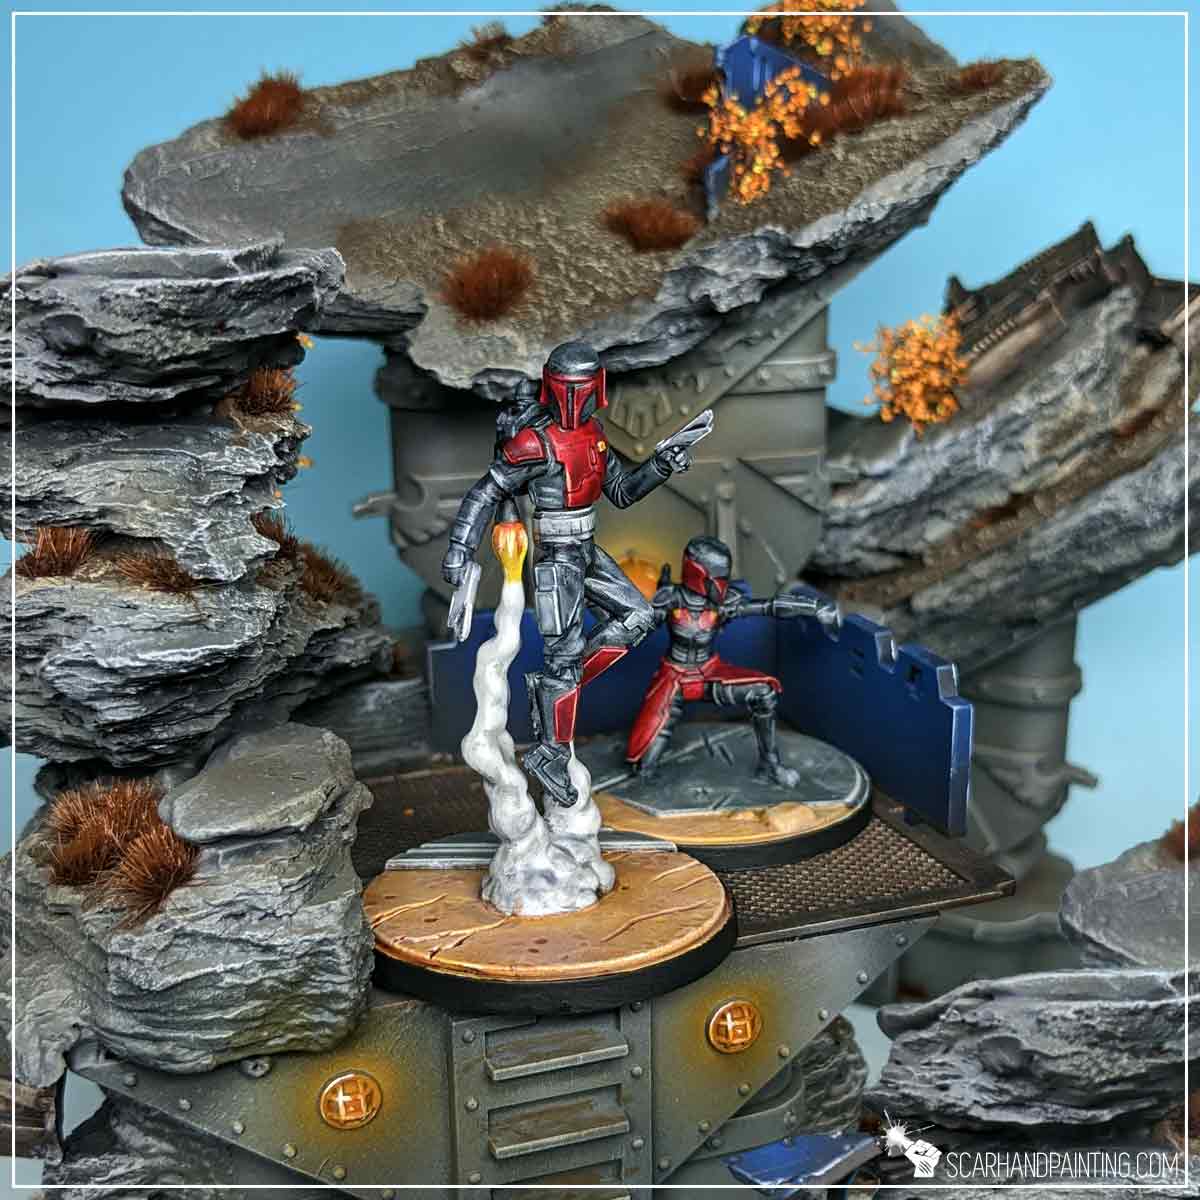
Welcome to Painting Star Wars: Shatterpoint Super Commandos tutorial. Here I will present to you a Step-by-step of a basic painting process for Mandalorian Super Commandos and a few extras.
Before we start, some notes:
Both Mandalorian Super Commandos were prepared in the same way as previous Shatterpoint miniatures. Visit Tutorial: Painting Star Wars Shatterpoint Clone Troopers article for a detailed step-by-step guide.
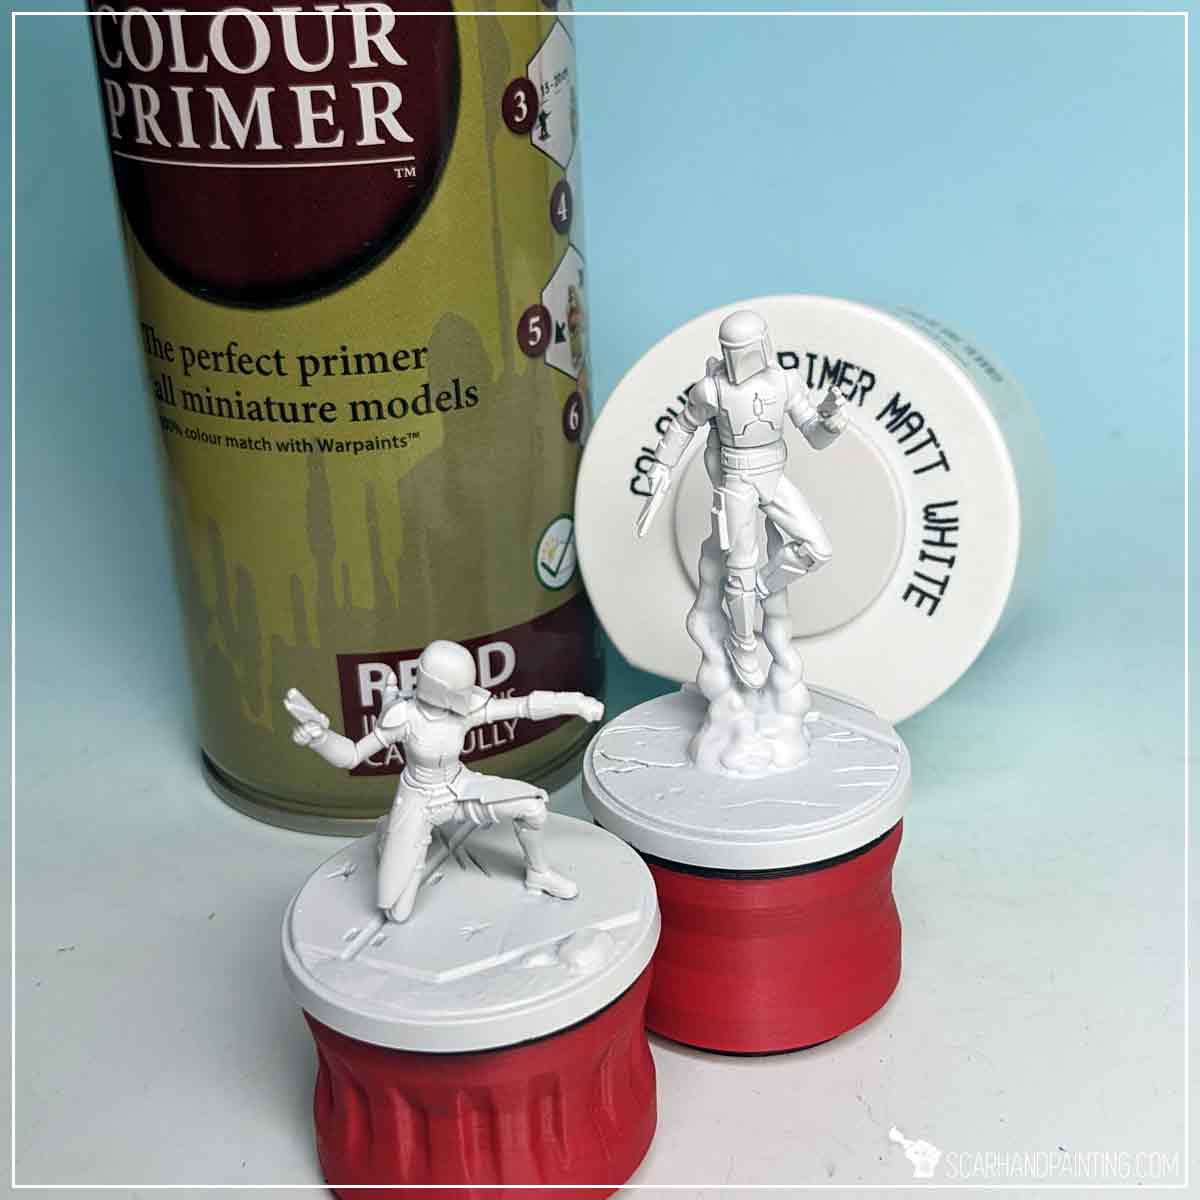
I mounted the miniatures on a stick with a piece of Blu-Tack, then undercoated them with The Army Painter White Matt Primer.
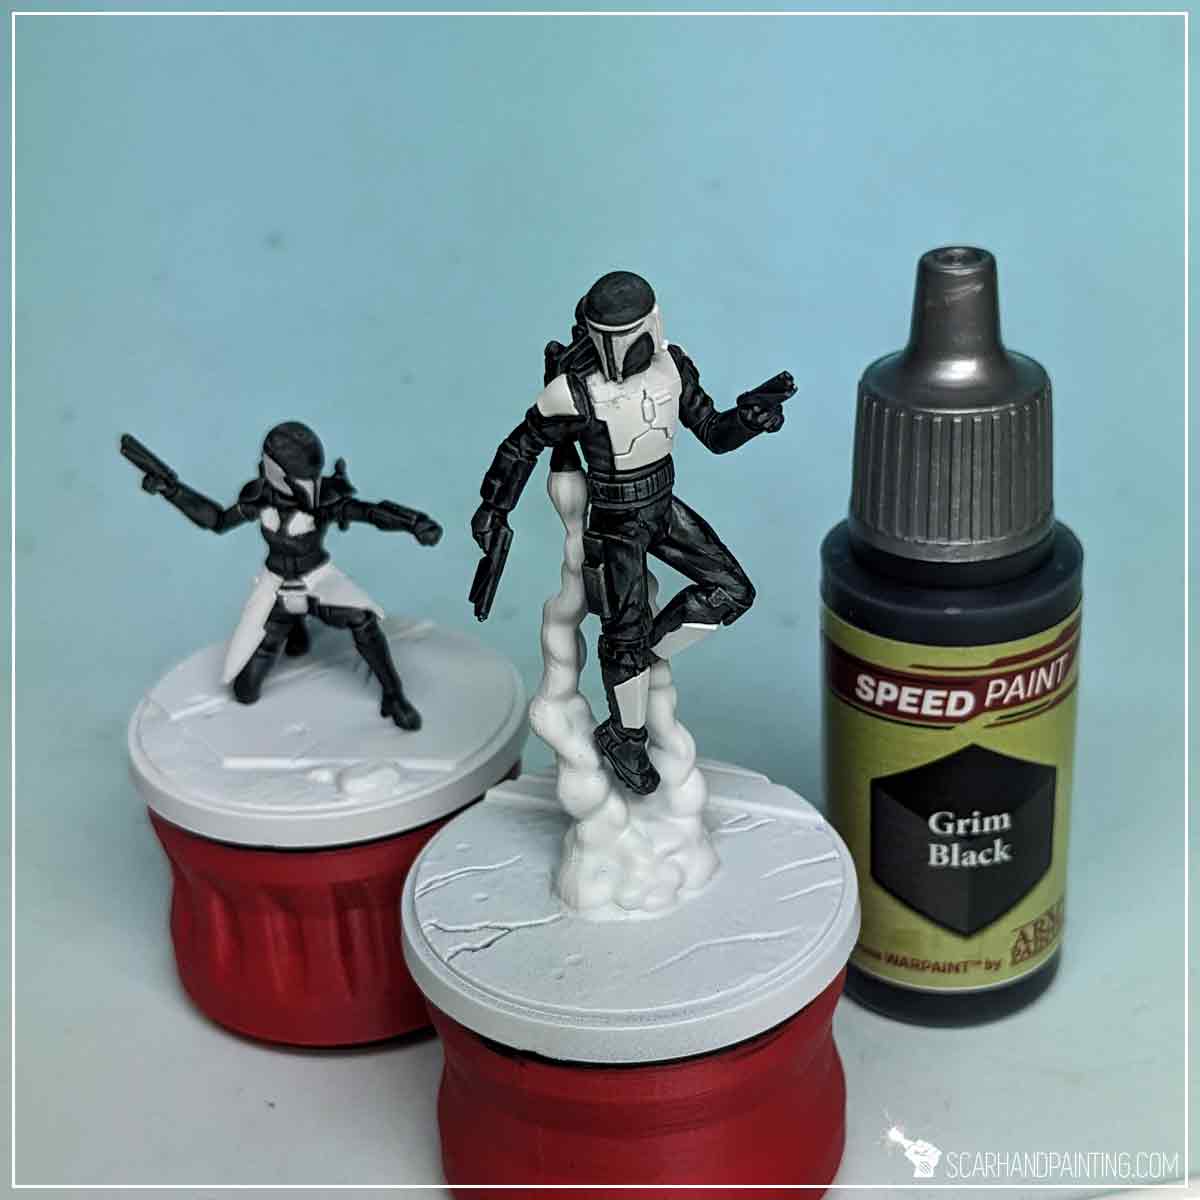
I started by applying Grim Black Speed Paint to most of the miniature, leaving out only a few selected armor elements and backpack exhaust fumes. My brushes of choice were Wargamer: Regiment Brush and Wargamer: Character Brush.
TIP: I then used a tip of a toothpick to softly scratch any mistakes of black paint getting where it wasn’t supposed to.
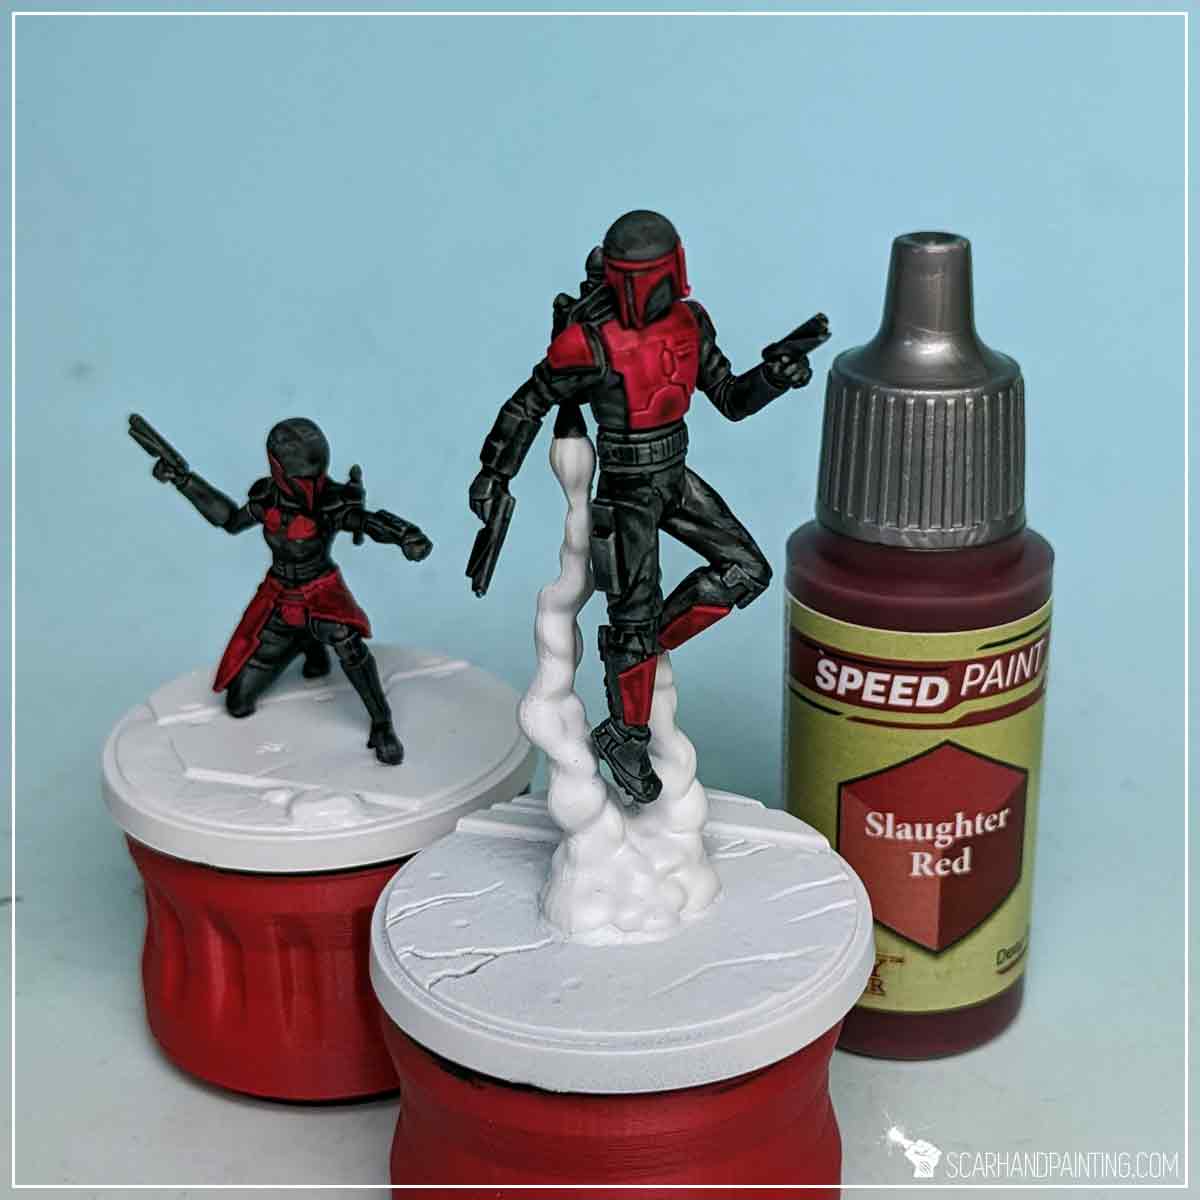
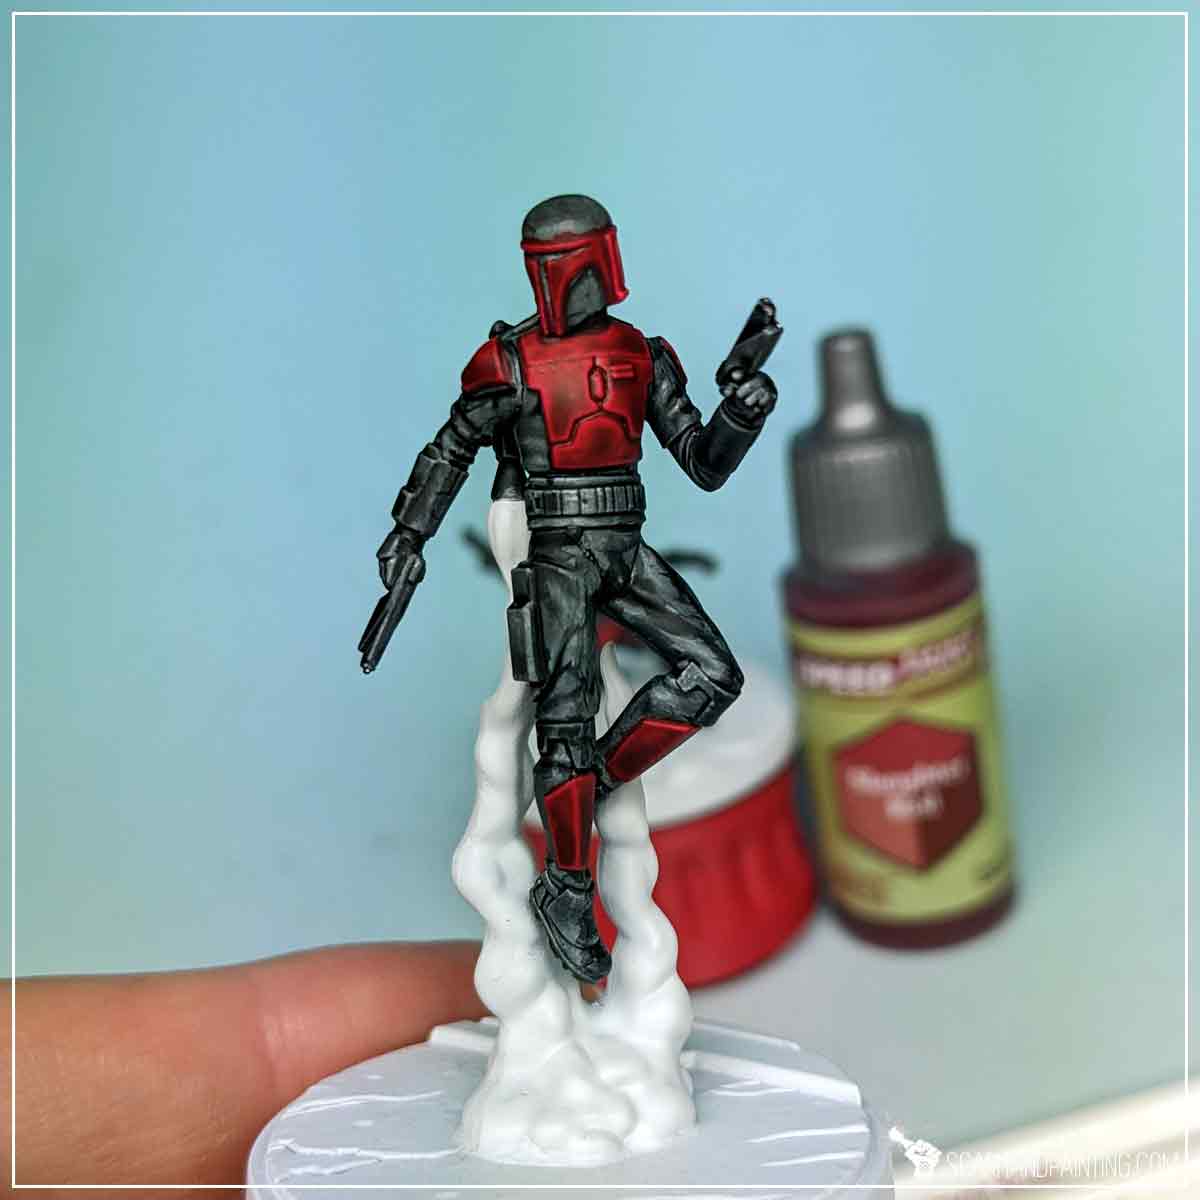
Next, using the same two brushes, I applied Slaughter Red Speed Paint onto white armor plates.
I then repeated the process, adding another layer of Slaughter Red to add warmth and deepen the red color.
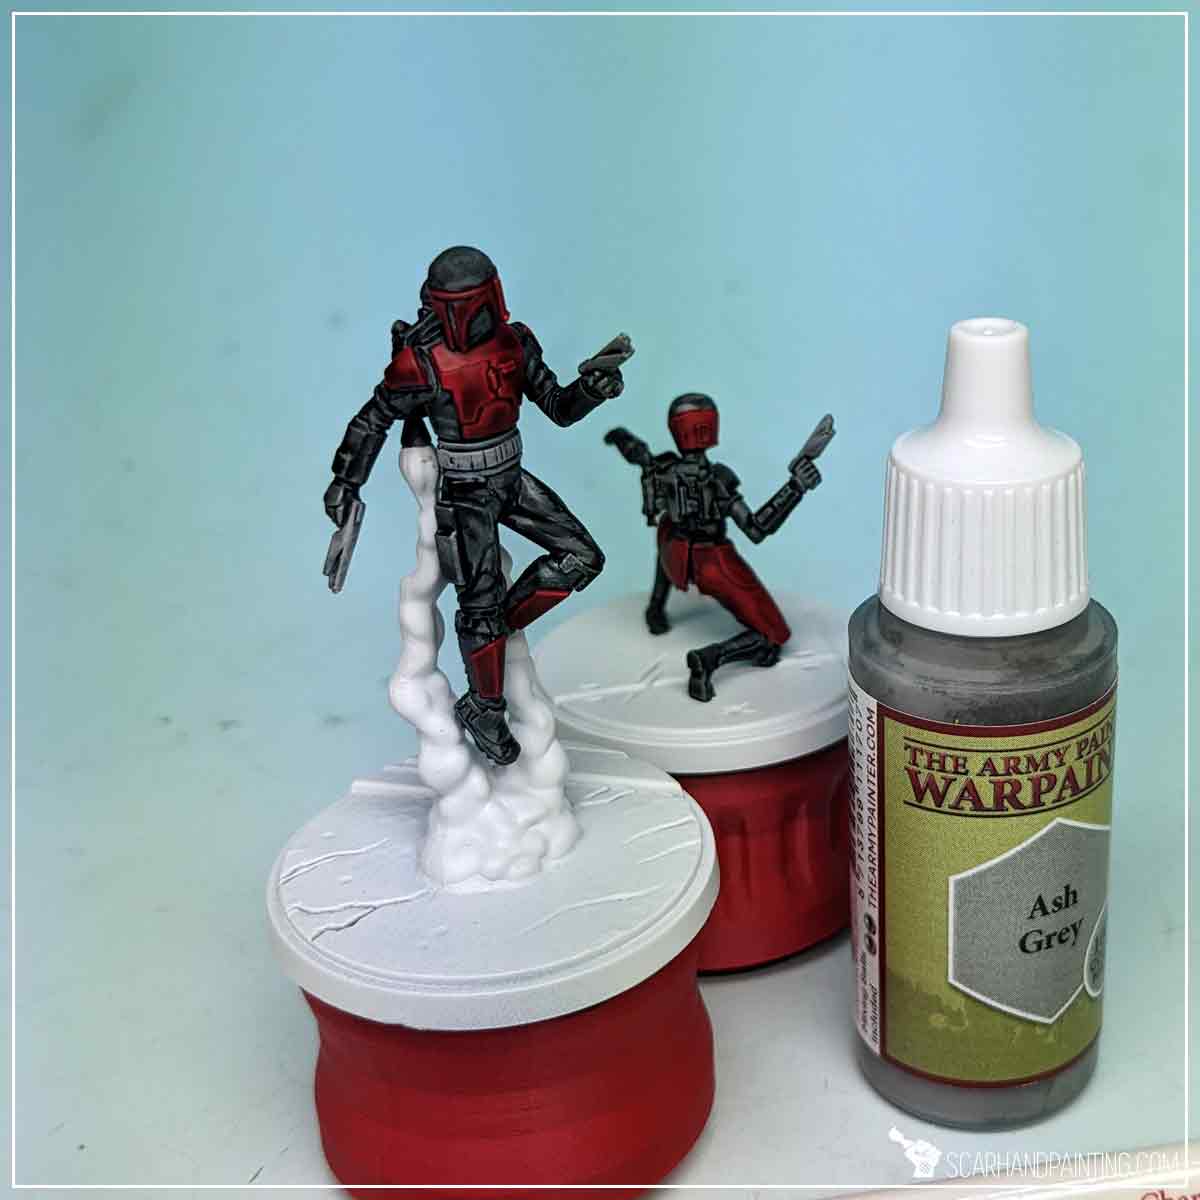
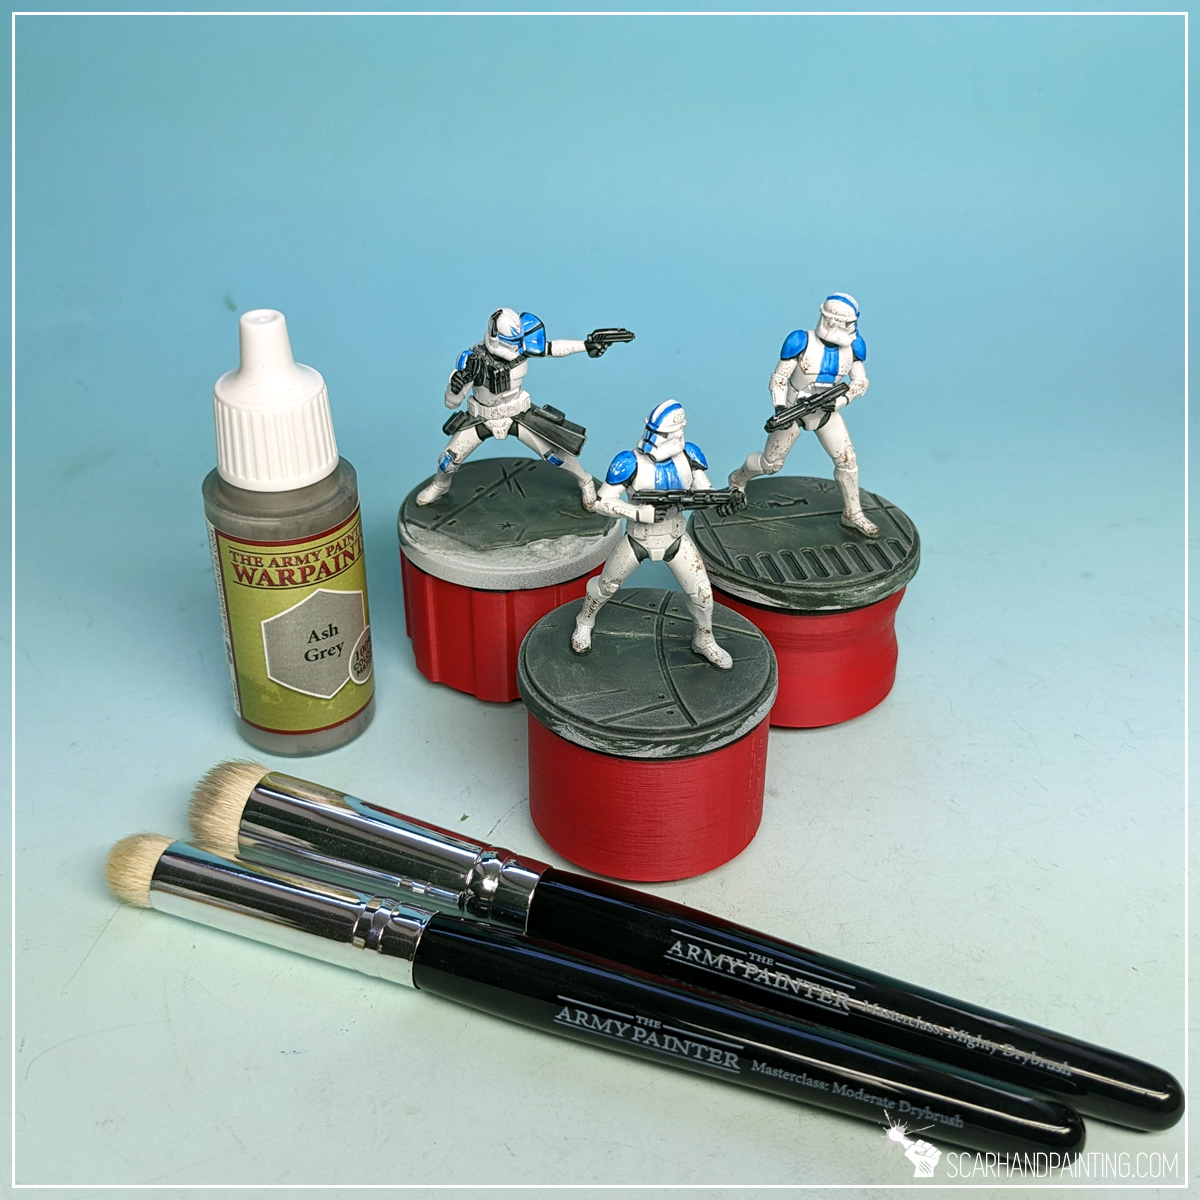
For Belts and Weapons I applied a layer of Ash Grey. I used the Wargamer: Character Brush and the Flatbrush technique to do this.
TIP: Flatbrushing is done by putting the tip of a brush in paint, then brushing the excess paint off onto a piece of paper or other smooth surface material, then brushing the remainder of the paint onto the chosen surface, in one direction and perpendicular to any edges. This technique works best with brushes equipped with a long “head” or synthetic brushes with a long “belly” part. You can learn more about the technique HERE.
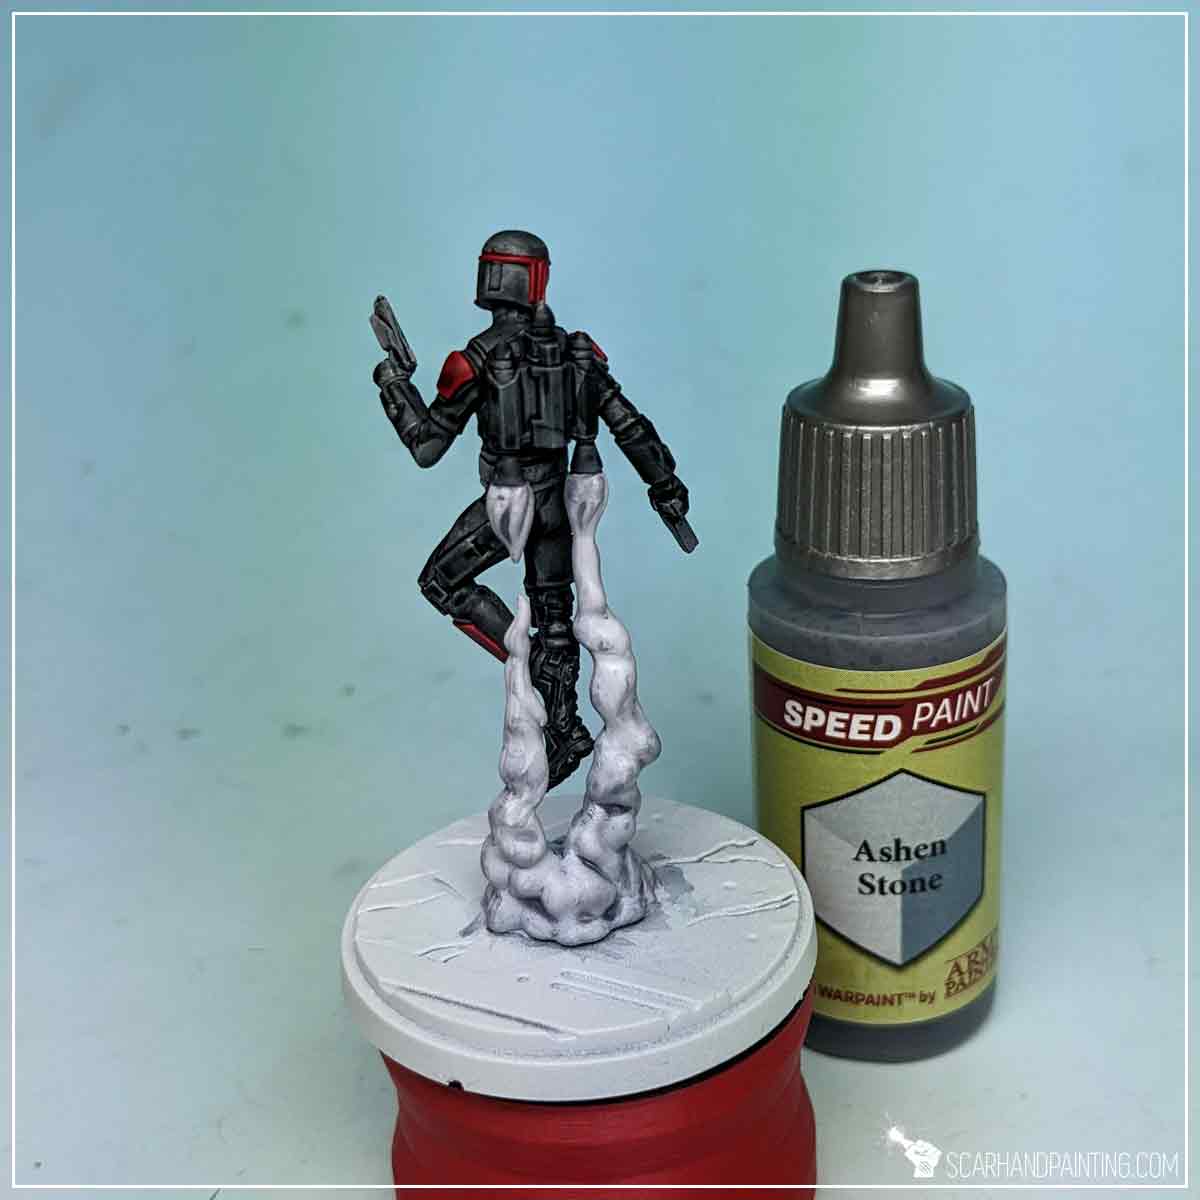
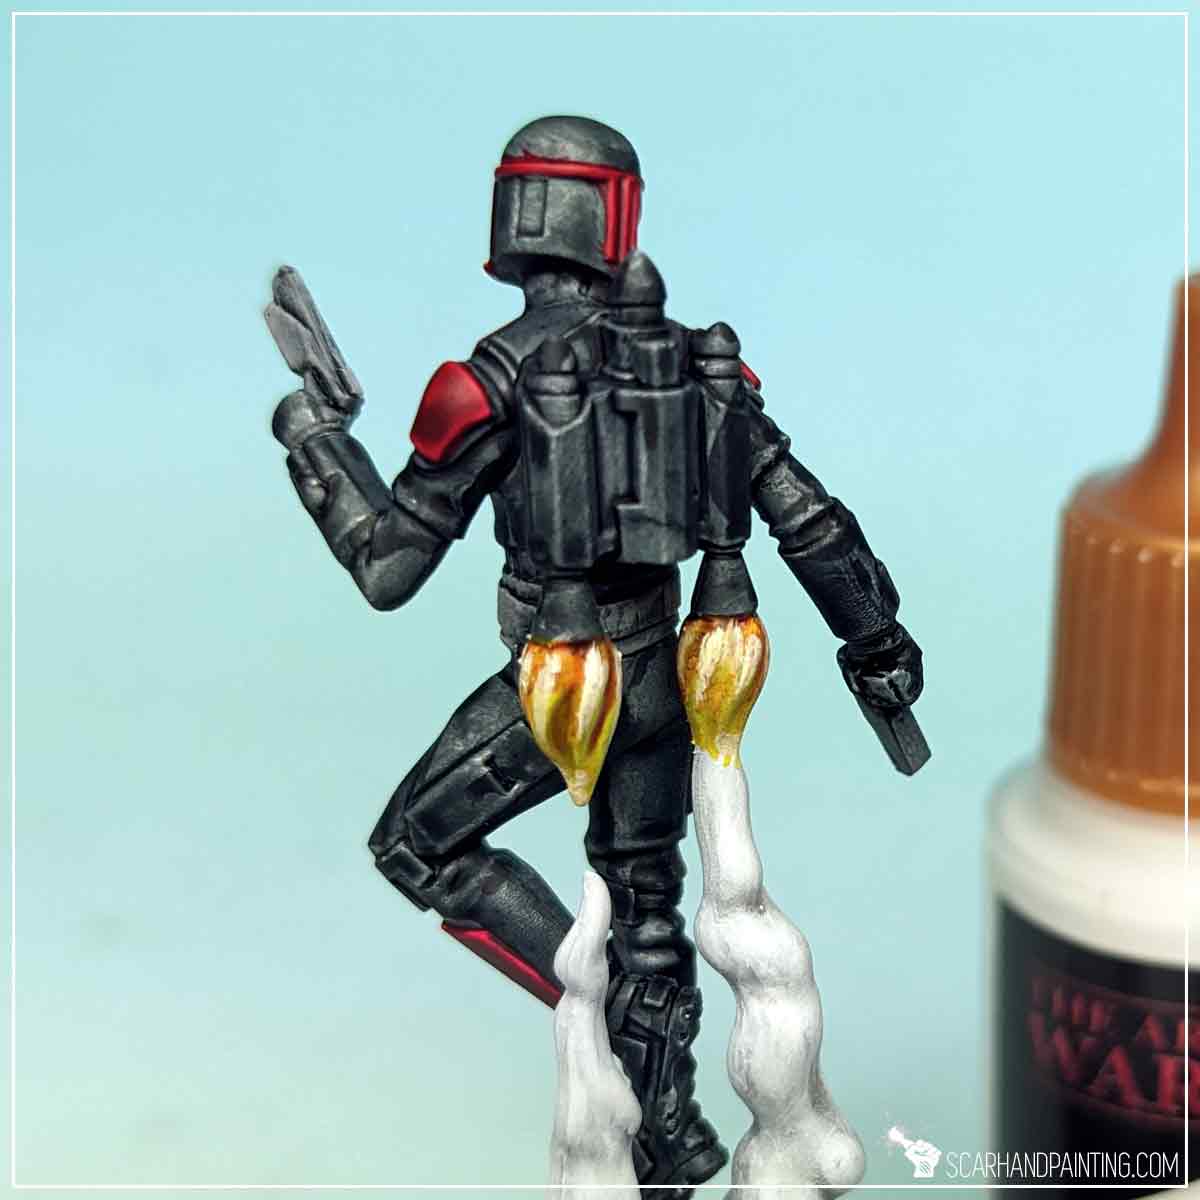
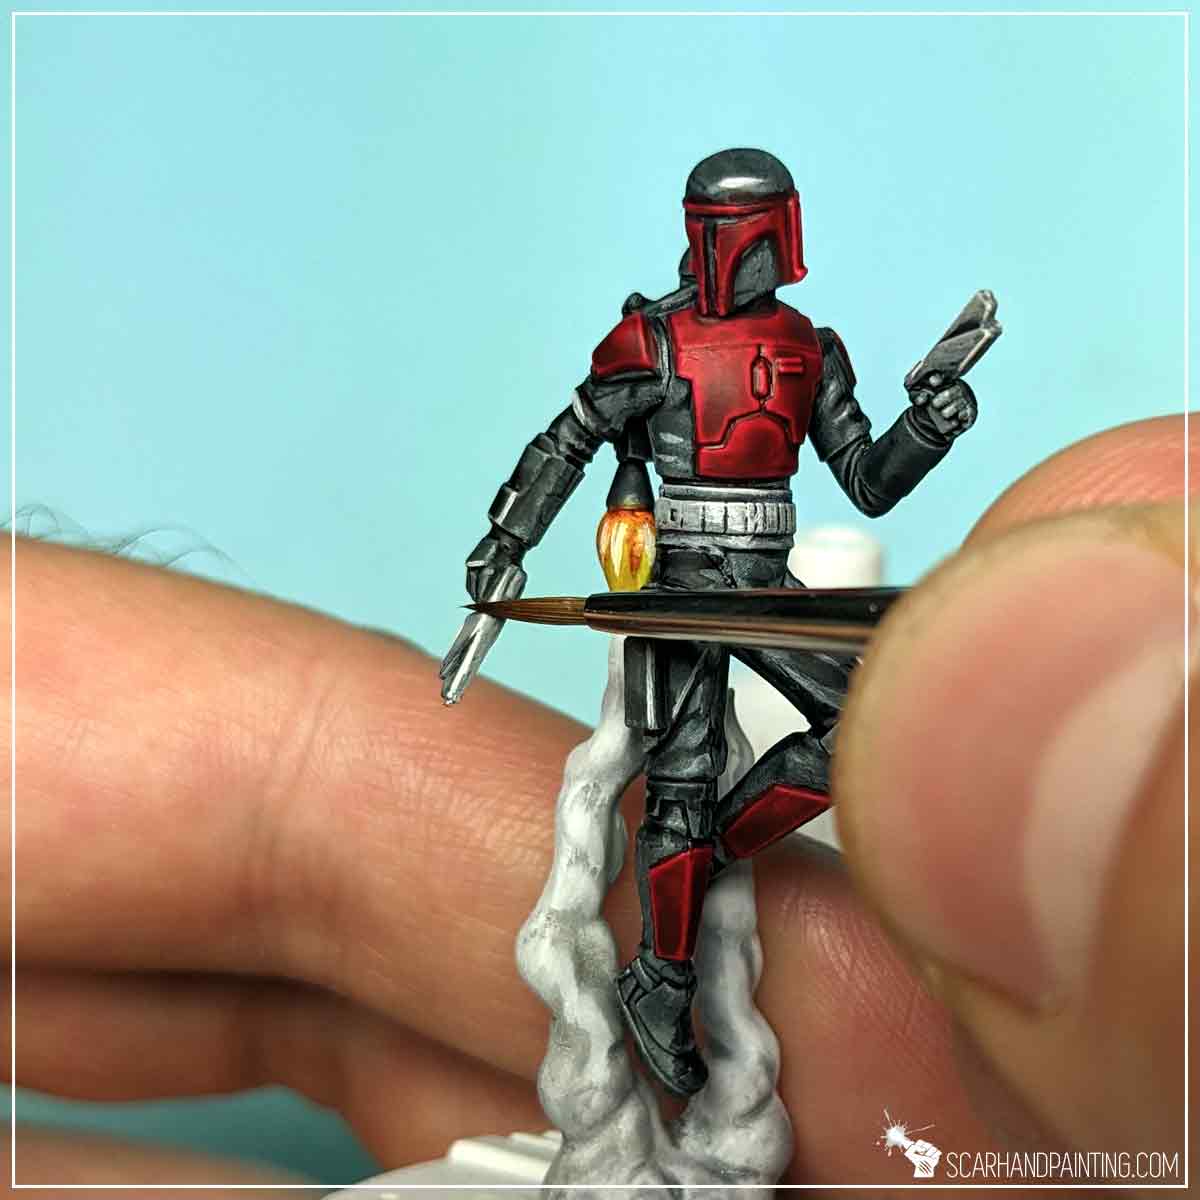
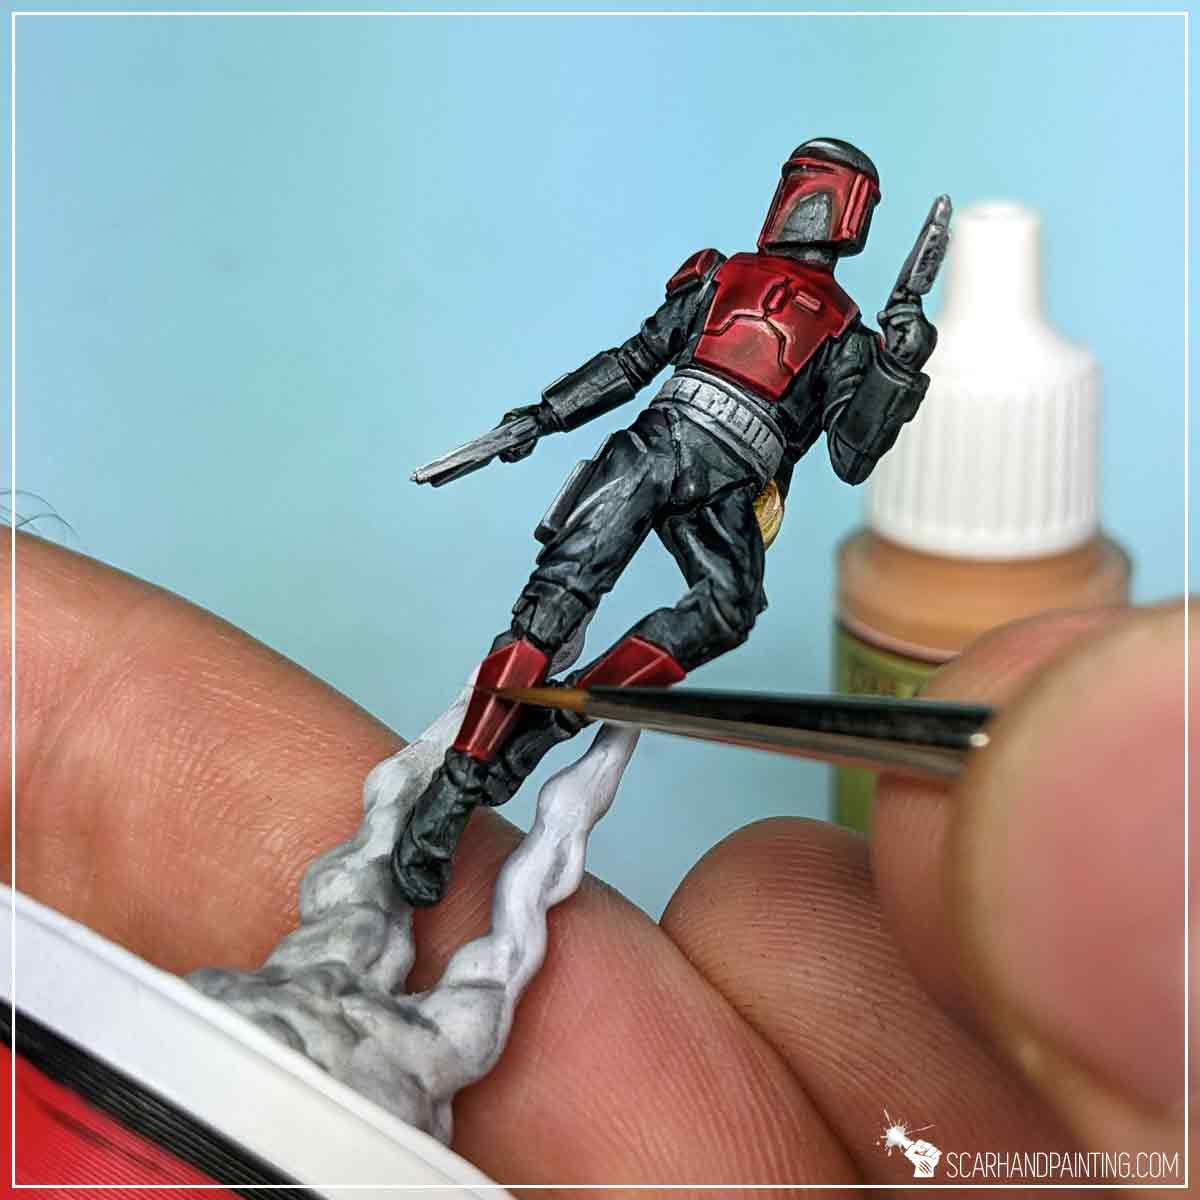
Focusing on easy methodology I built a volume of smoke like color by thinning Ashen Stone Speed Paint with water, and covering the entire surface with the resulting mix.
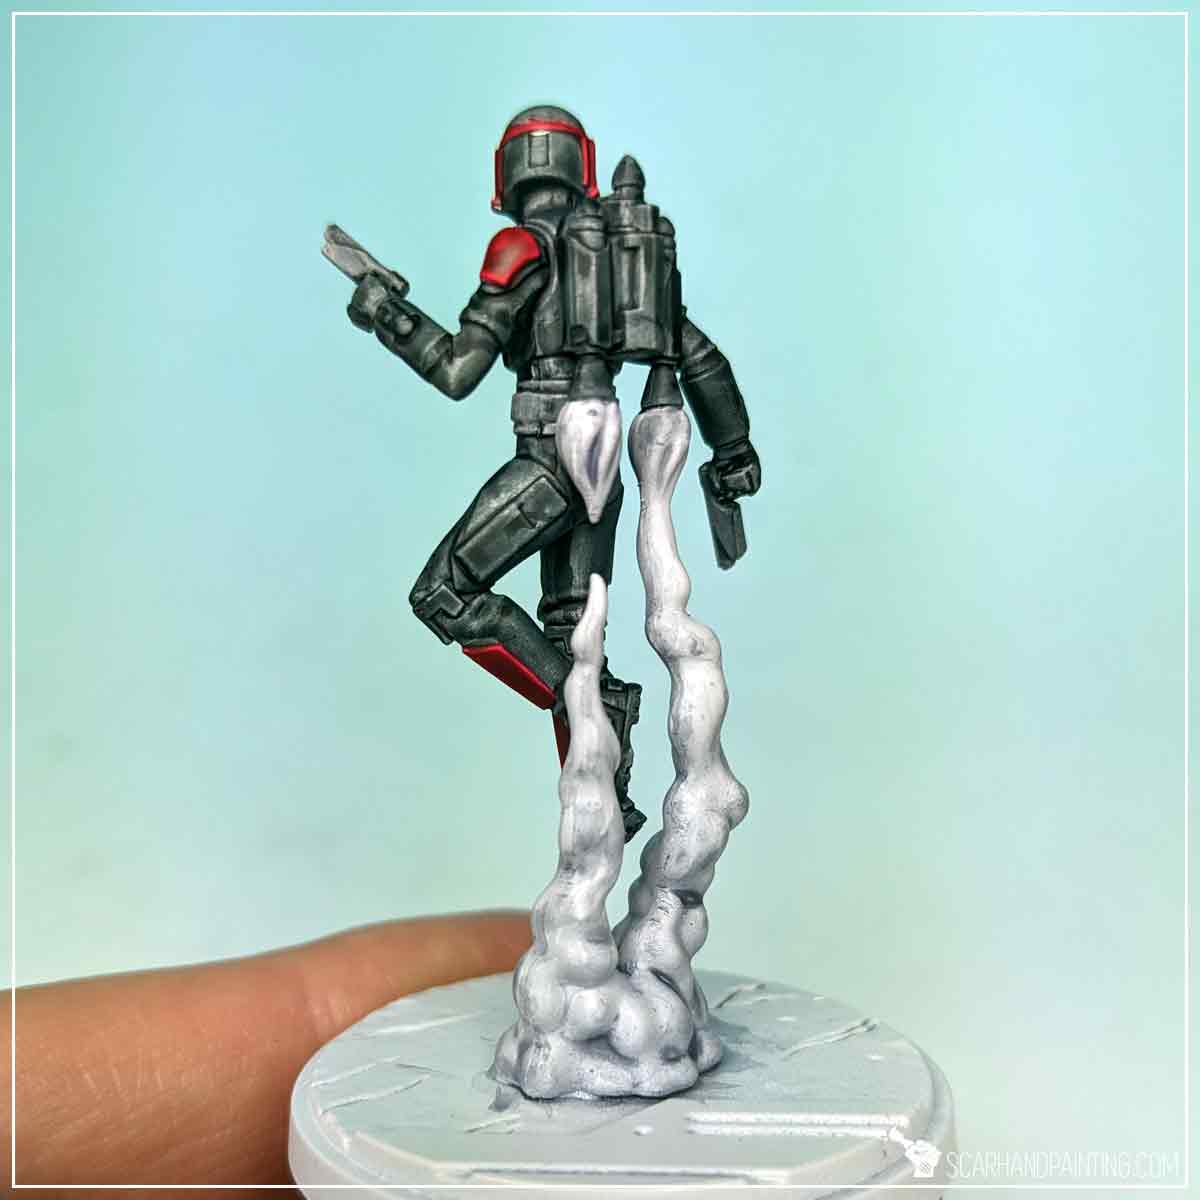
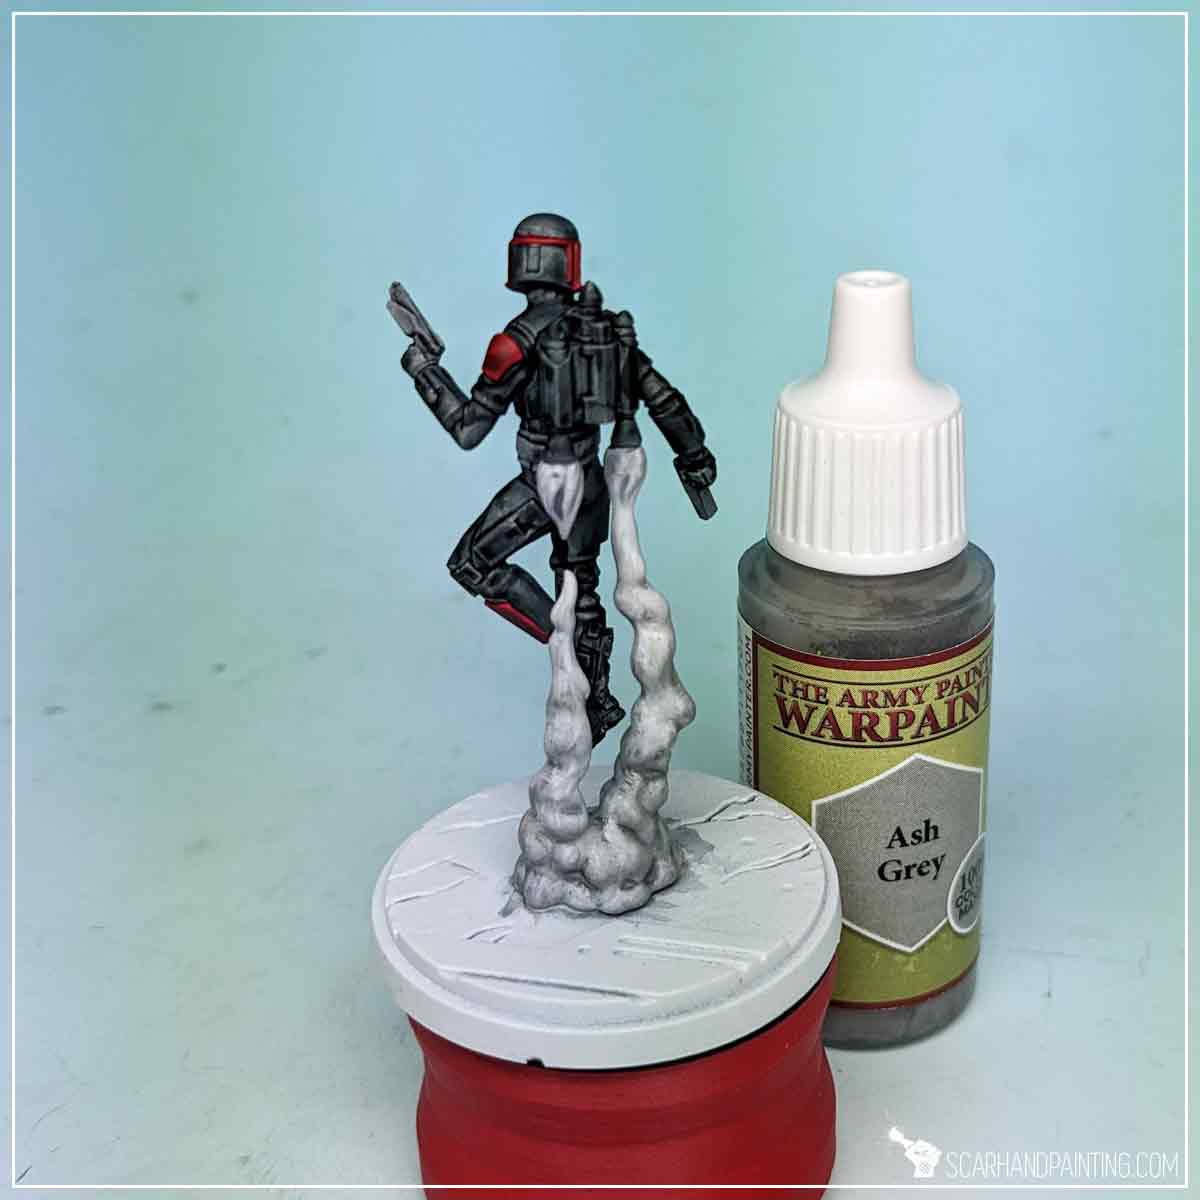
I then applied another mix. This time I used water to thin down Ash Grey in a 1:1 ratio.
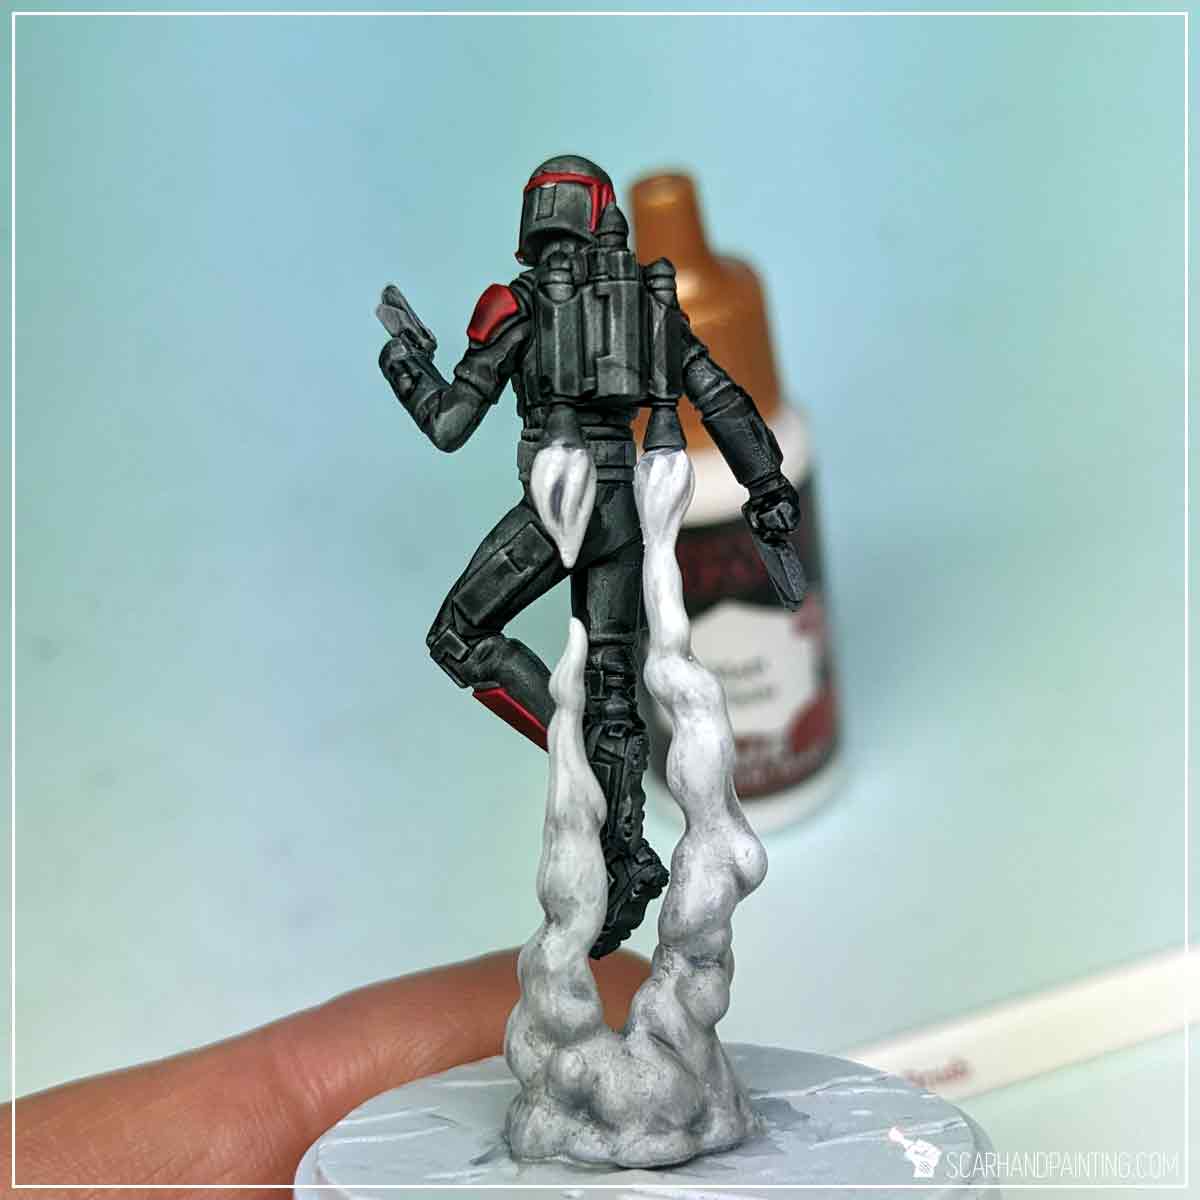
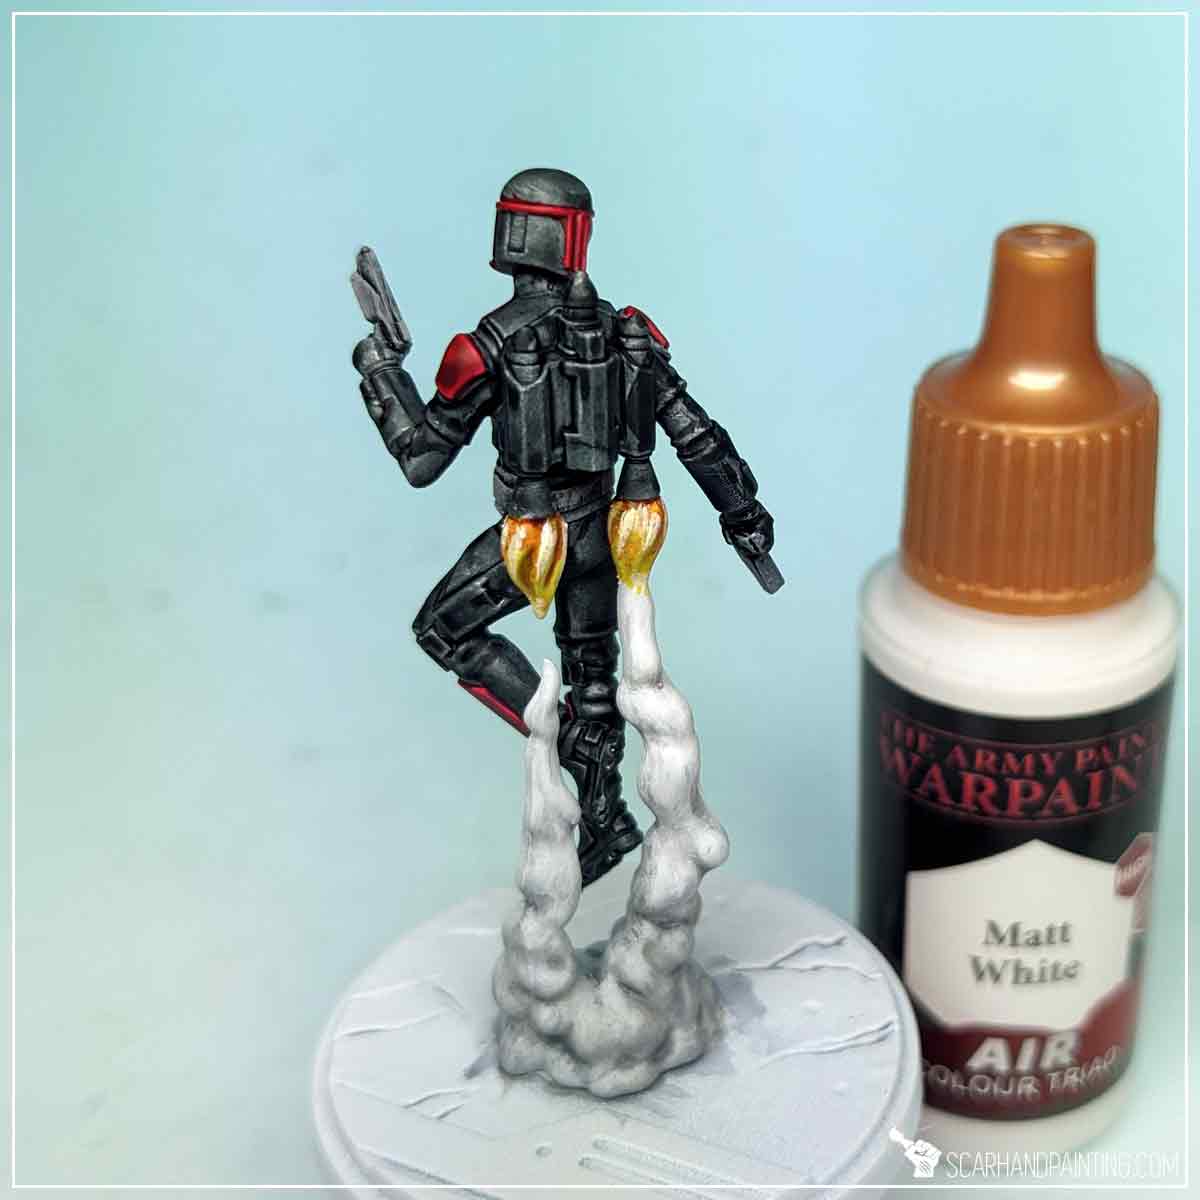
Next I manually applied some Matt White (Air) to the upper, most exposed parts. Air paints are thin by nature, which resulted in a nice color gradation between upper and lower areas of fumes.
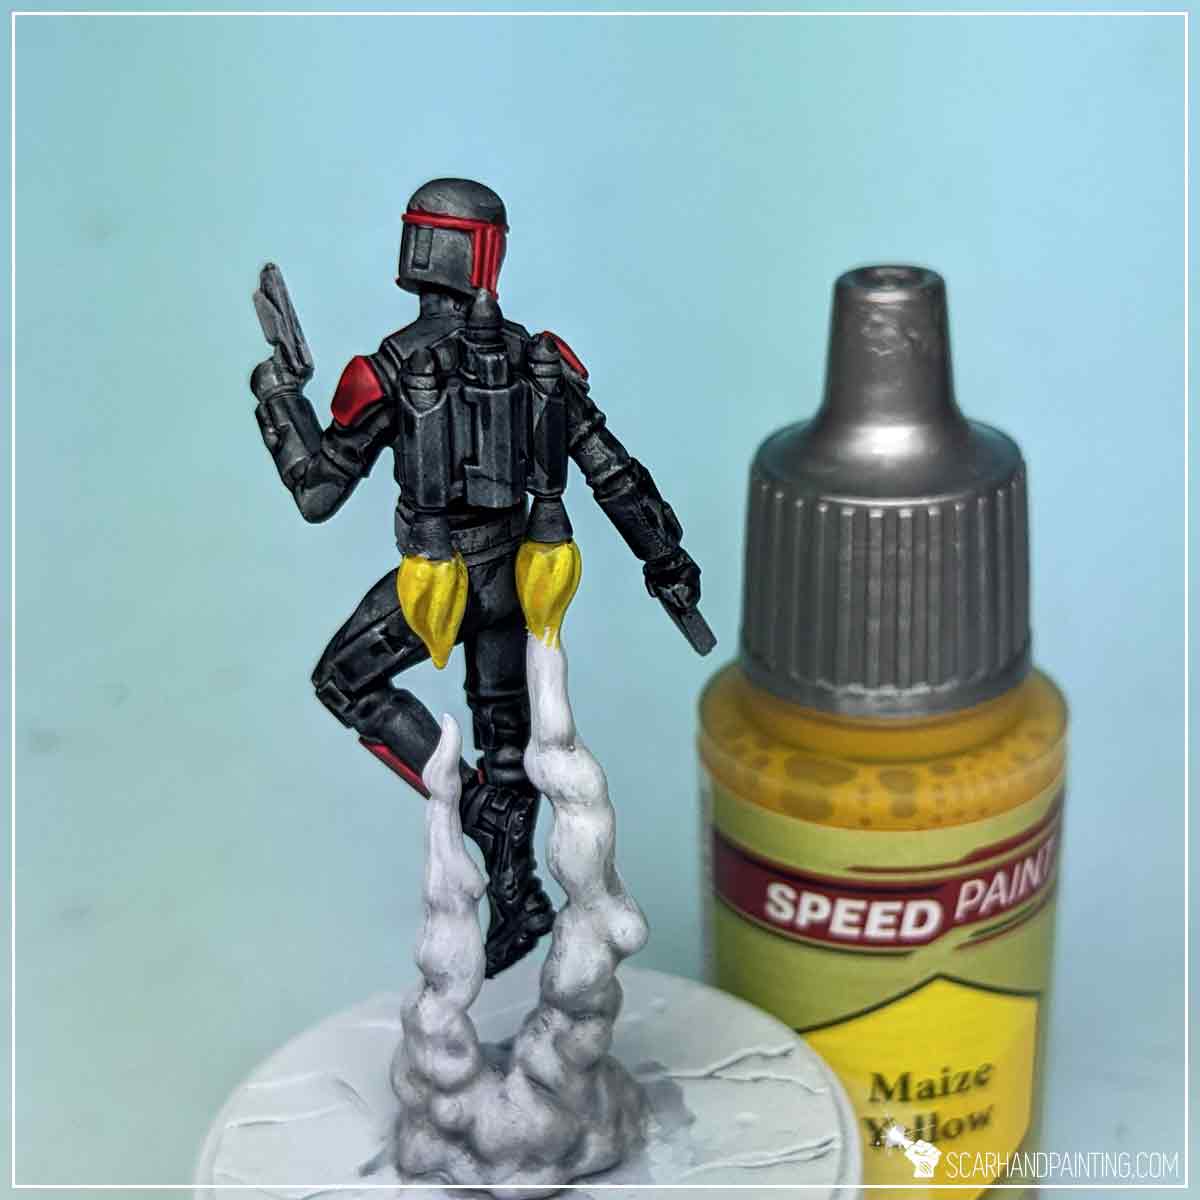
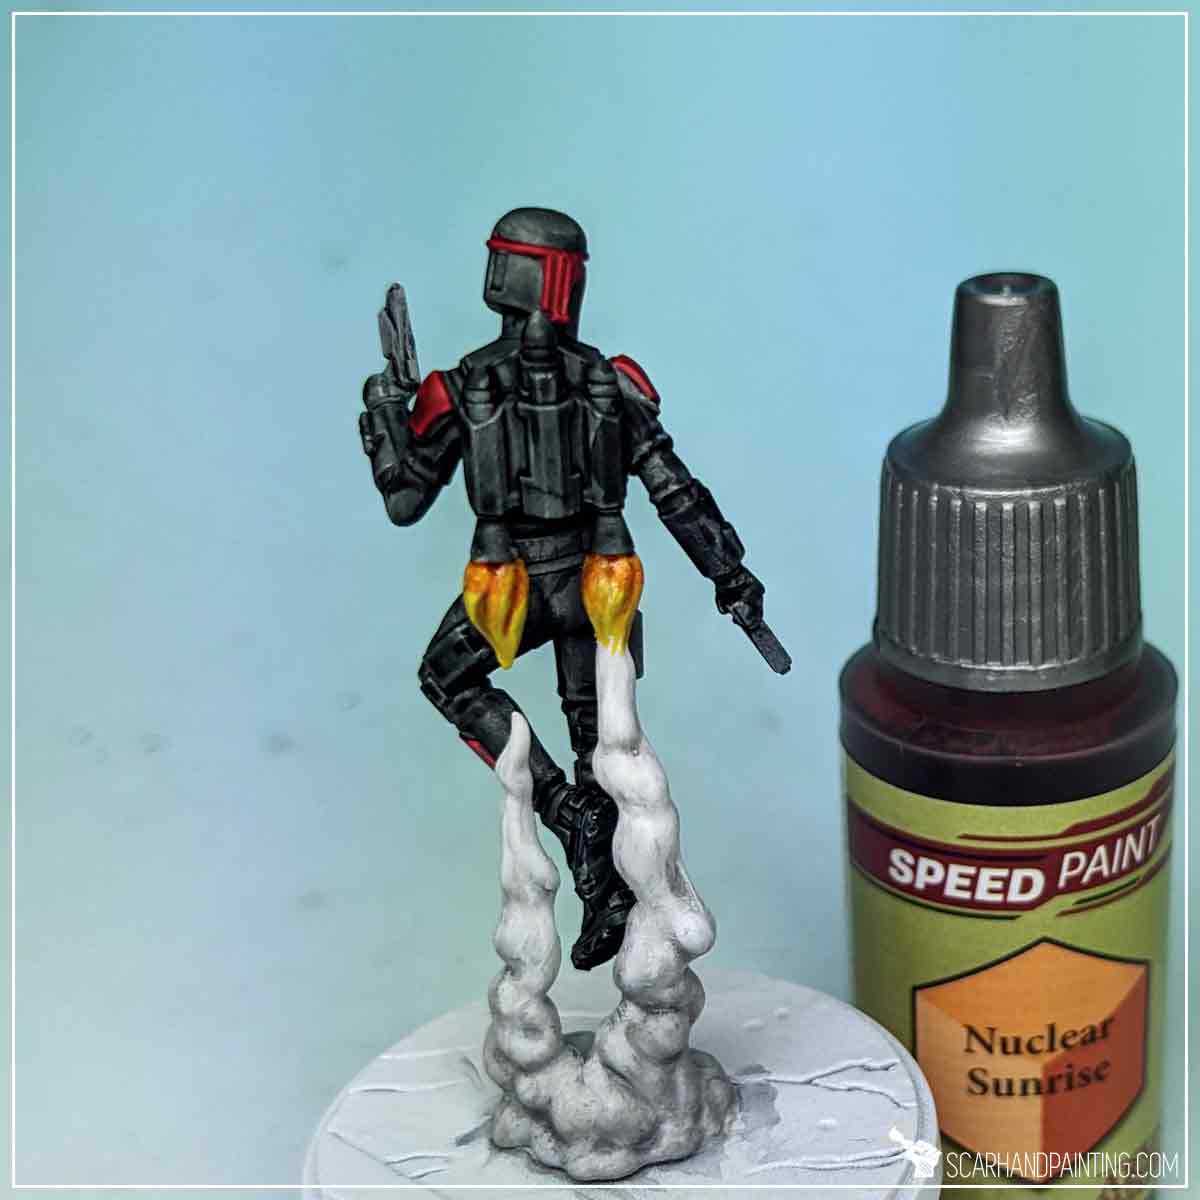
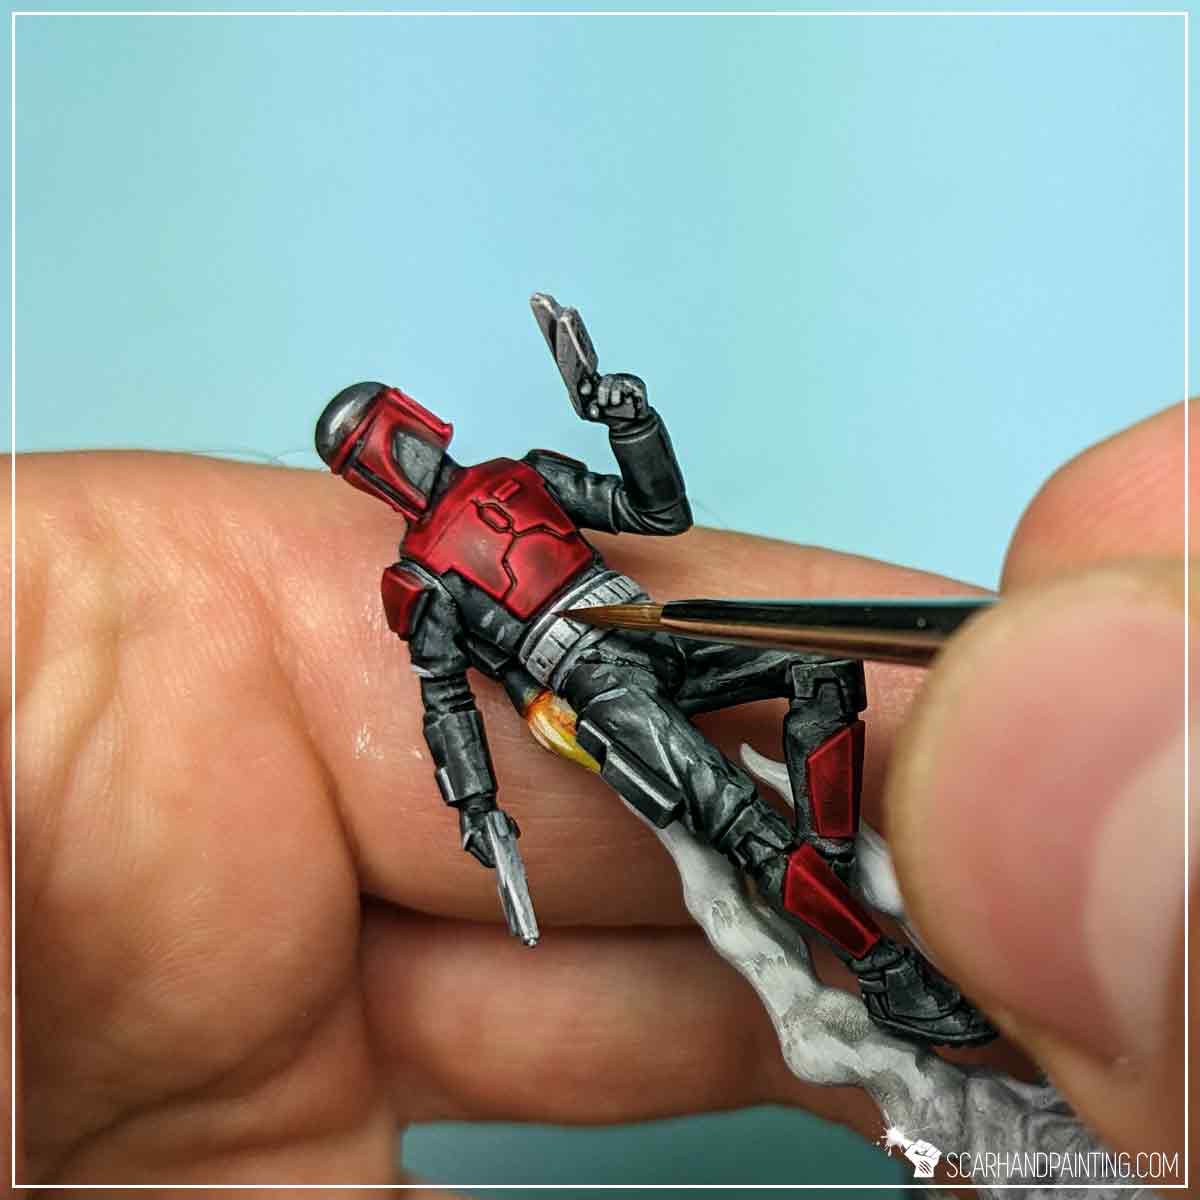
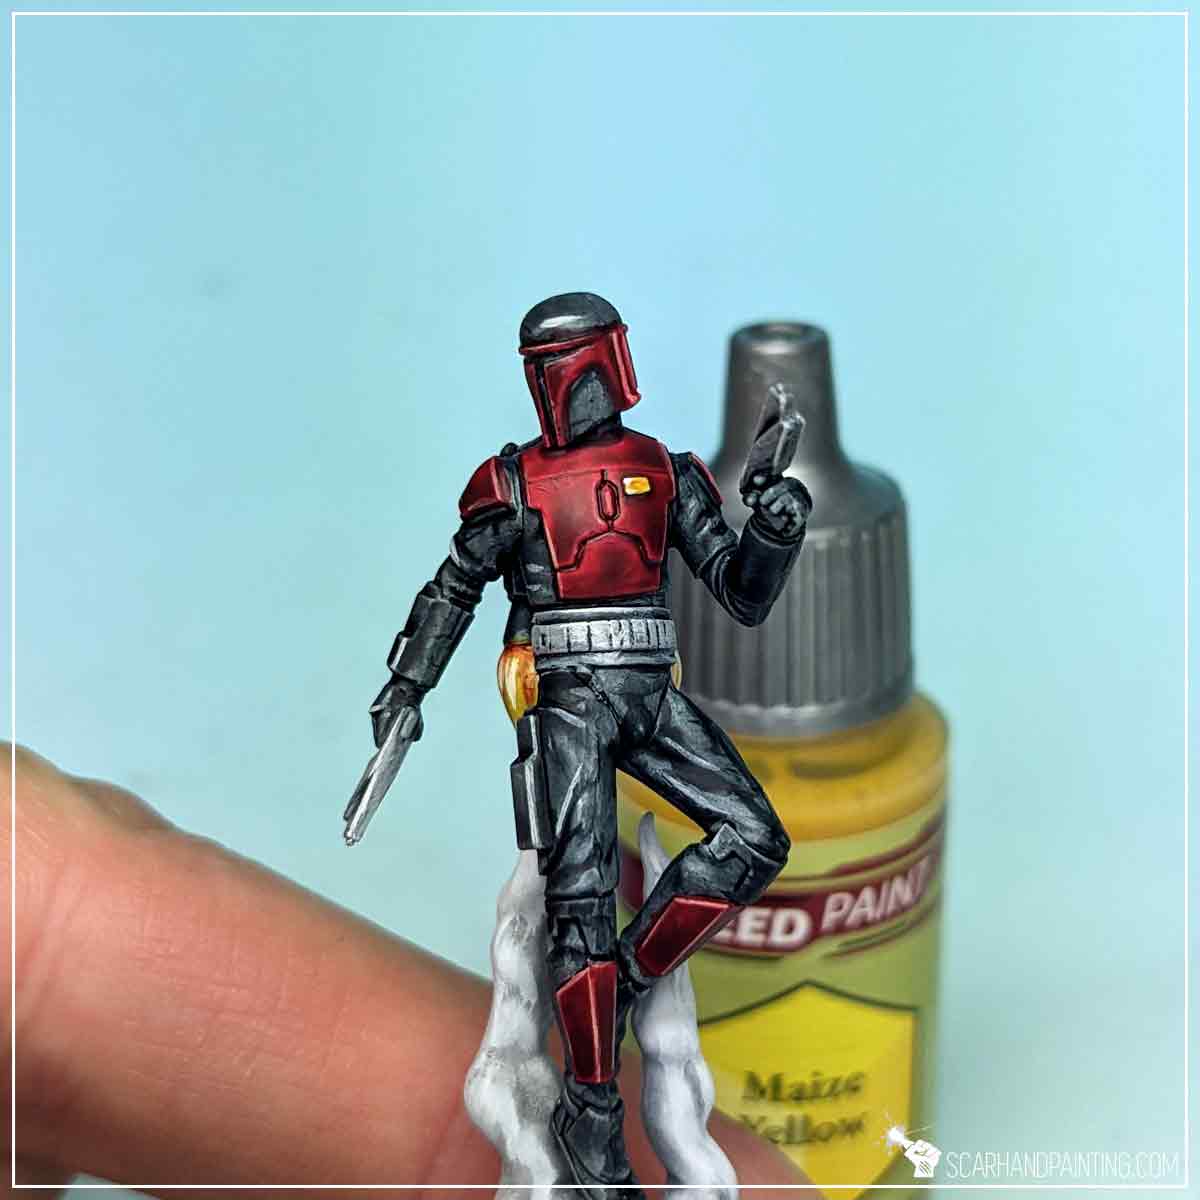
Finally I painted the top of the exhaust fumes with Maize Yellow Speed Paint, followed short by Nuclear Sunset Speed Paint at the very top.
To make the colors pop I drew a few lines of Matt White along the most exposed areas.
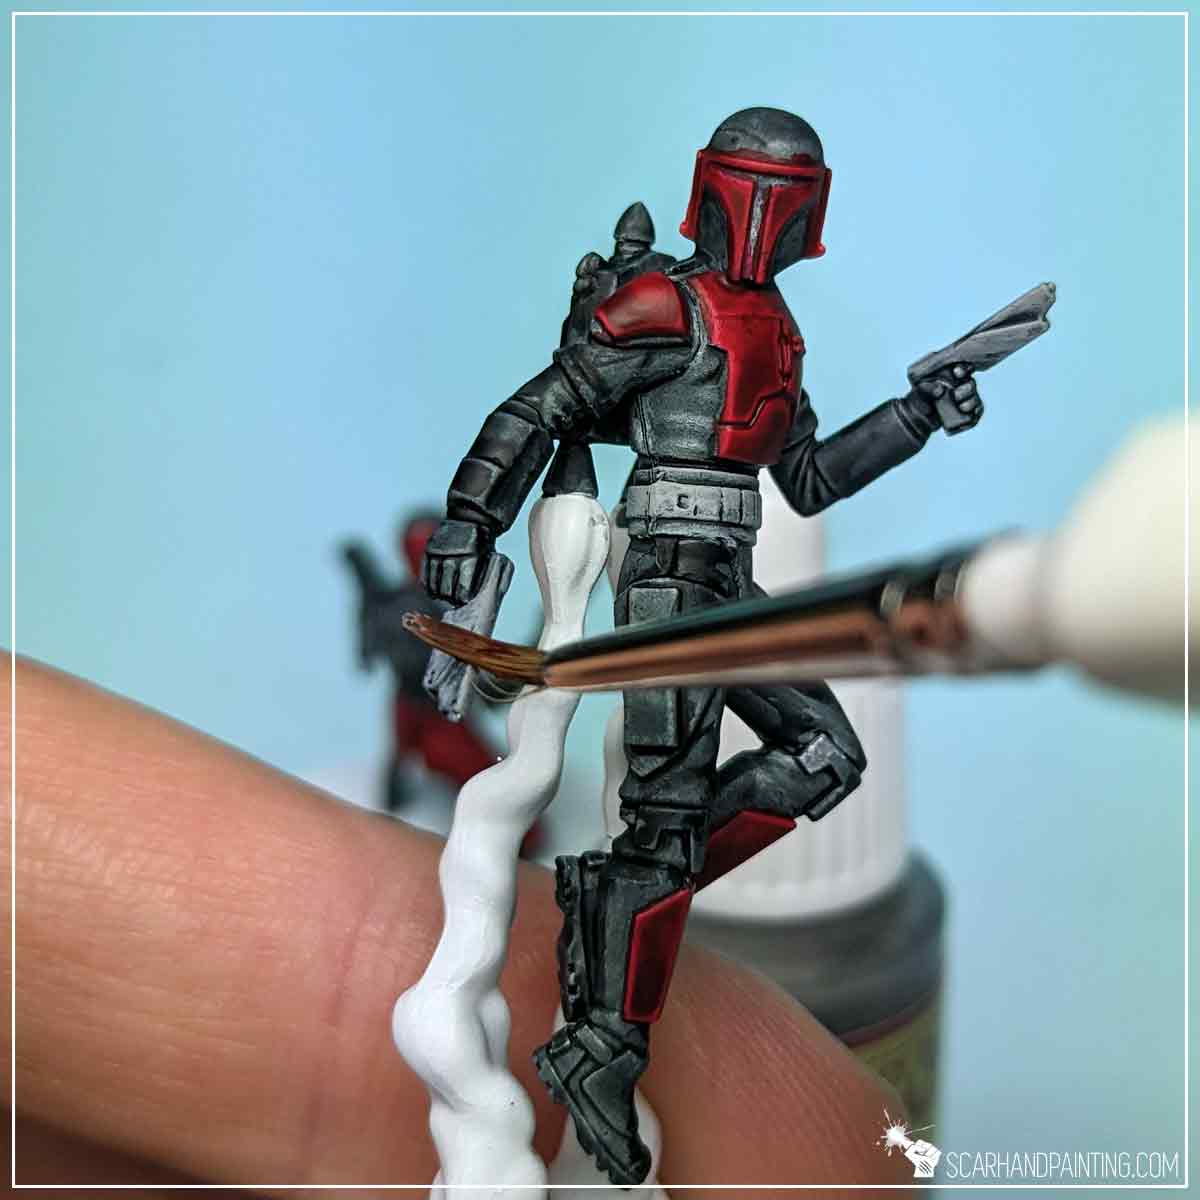
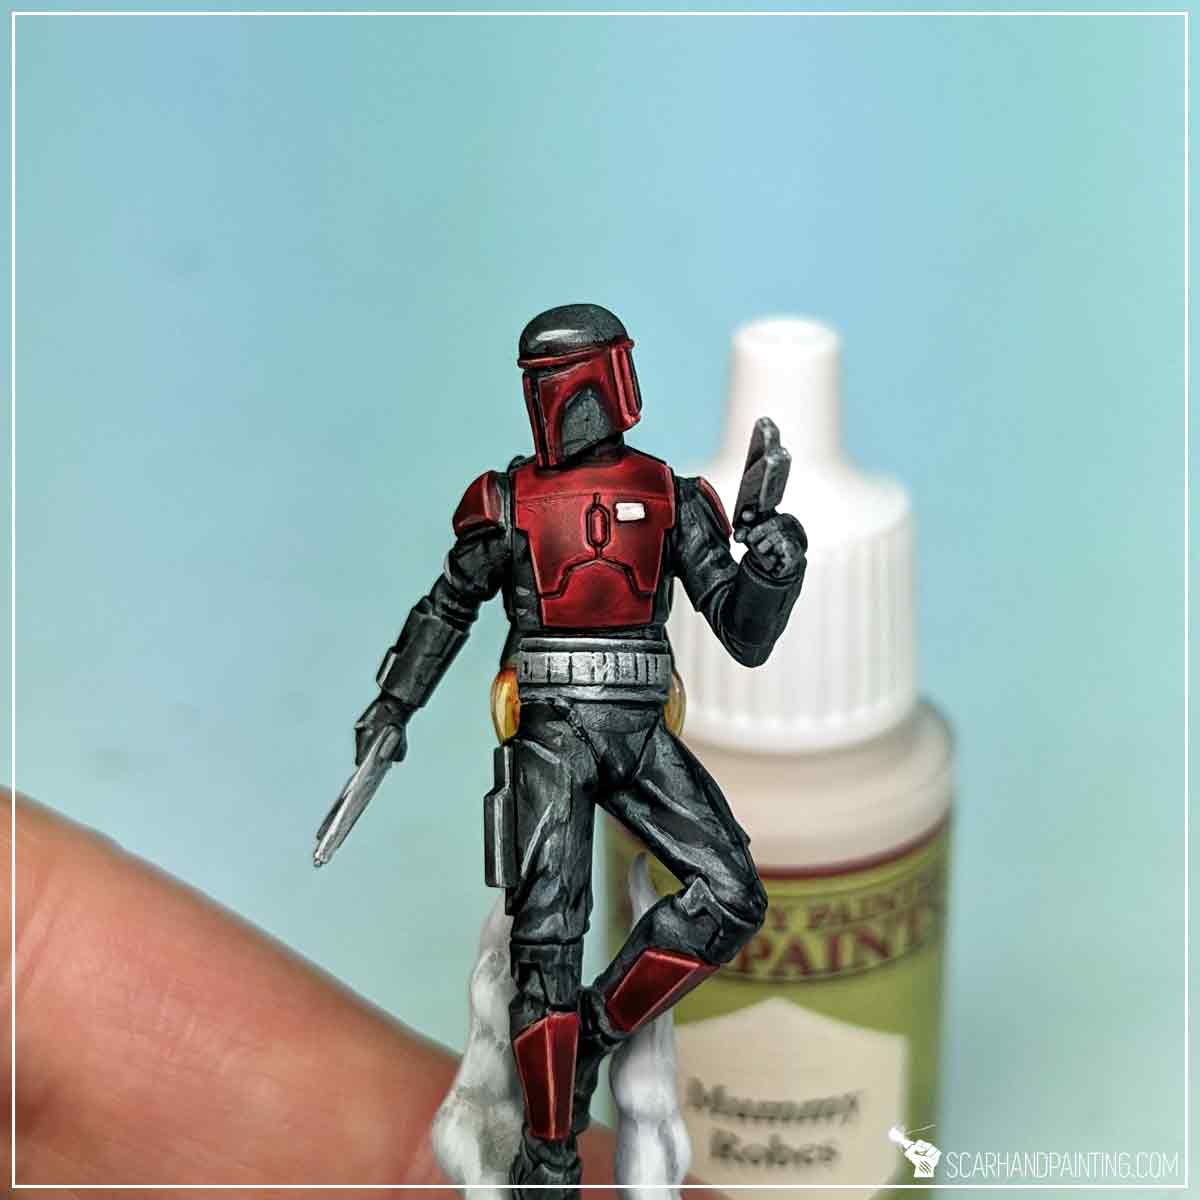
To make dark clothes, armor, belt and weapons pop I applied a simple, selective highlight of Mummy Robes. I focused on the most exposed, easy to access edges, painting thin lines with a side of Wargamer: Detail Brush.
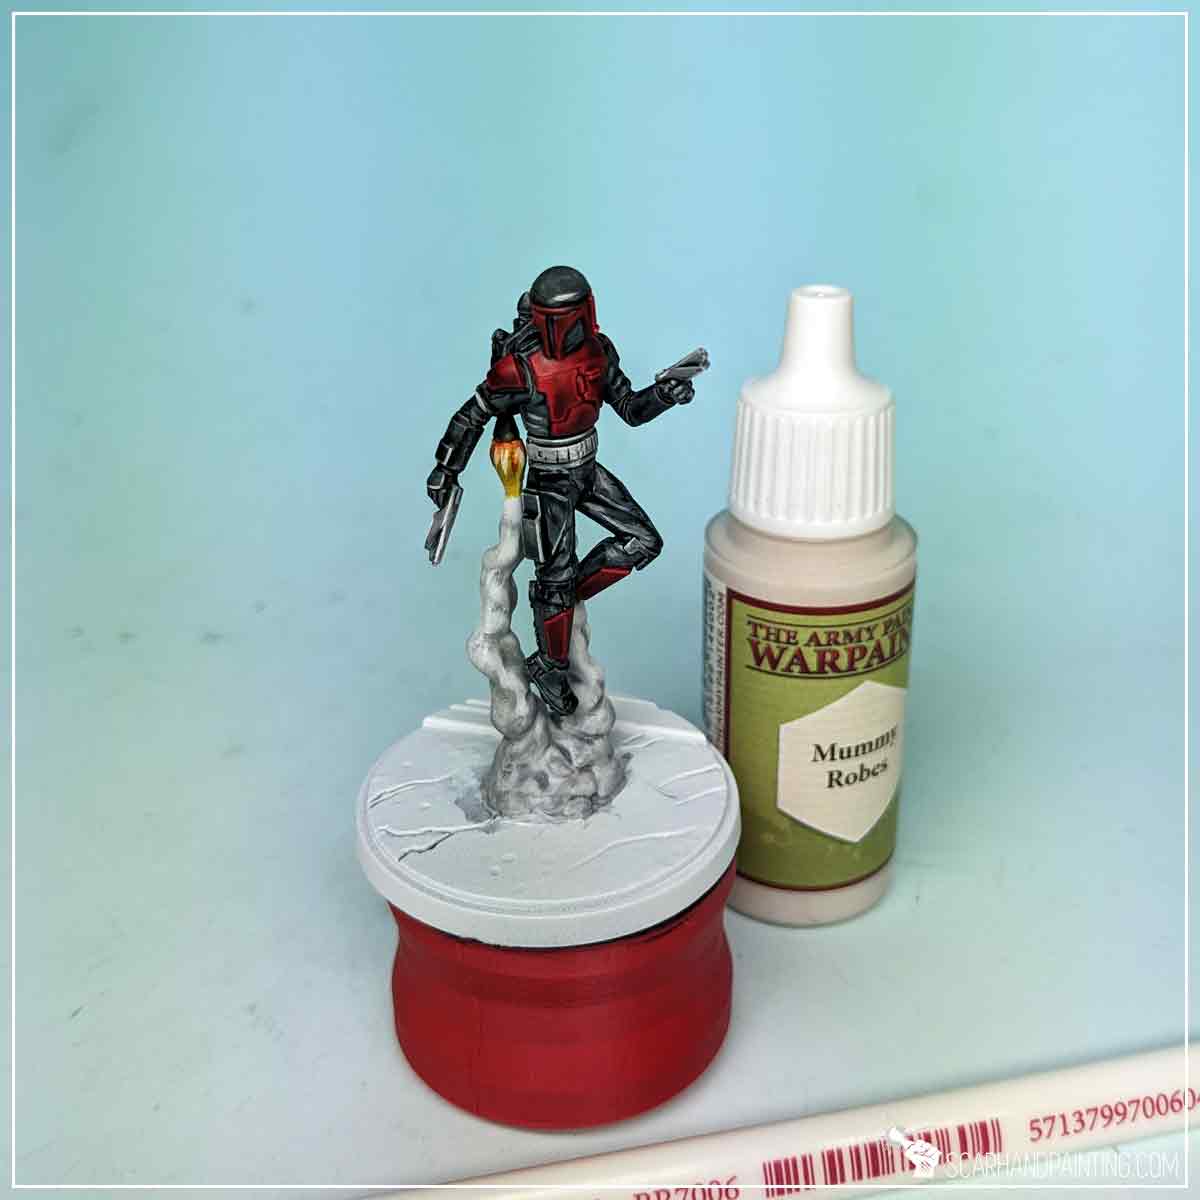
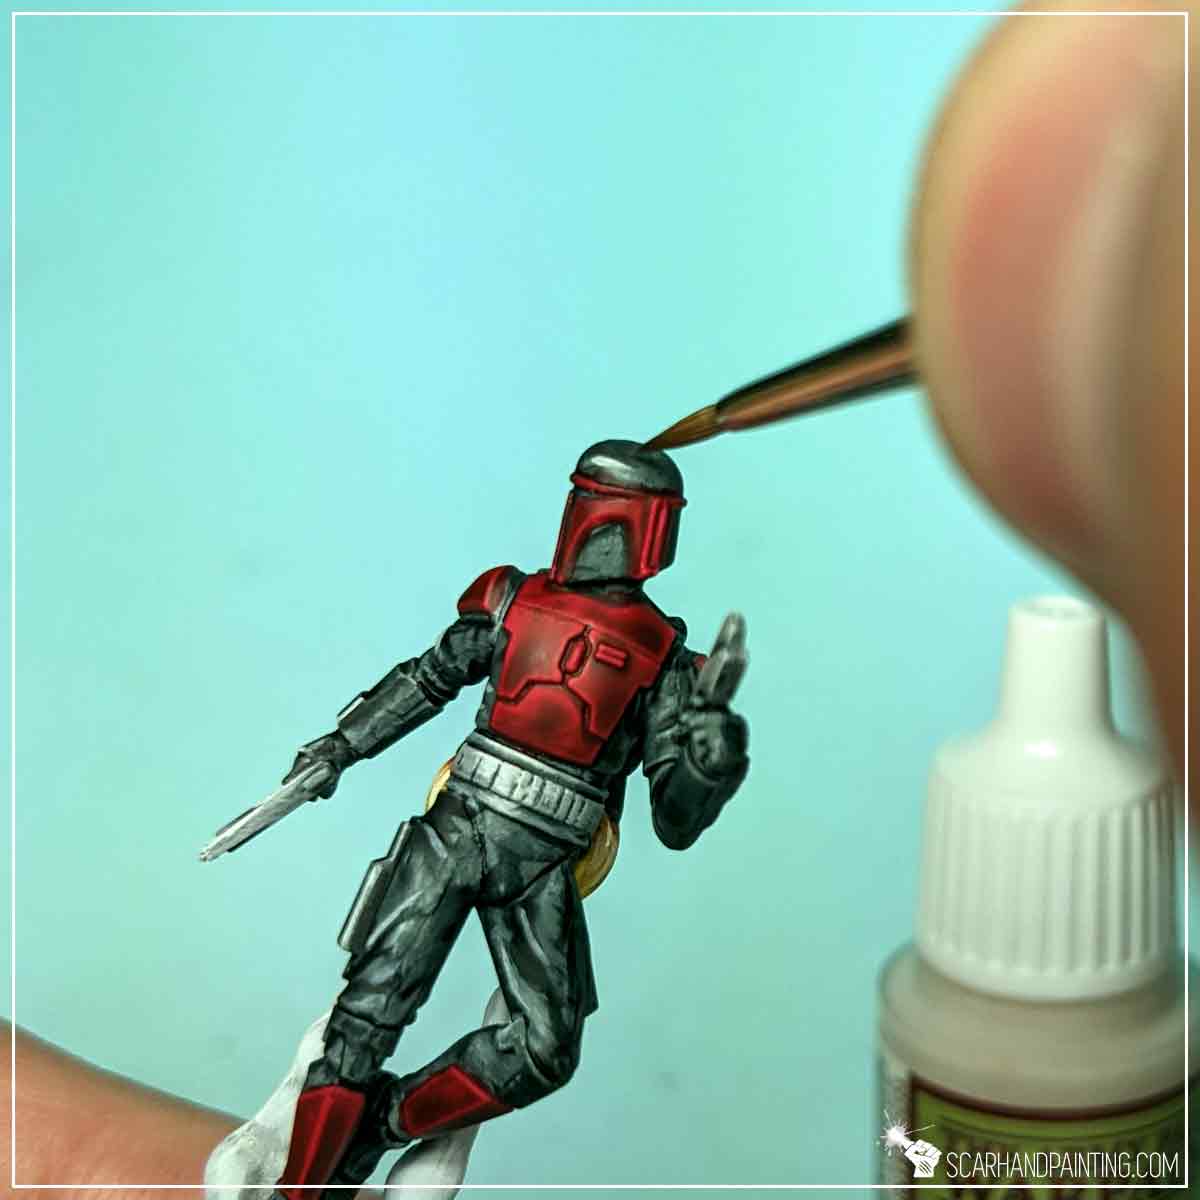
I have switched paint to Barbarian Flesh and repeated the process for Red armor.
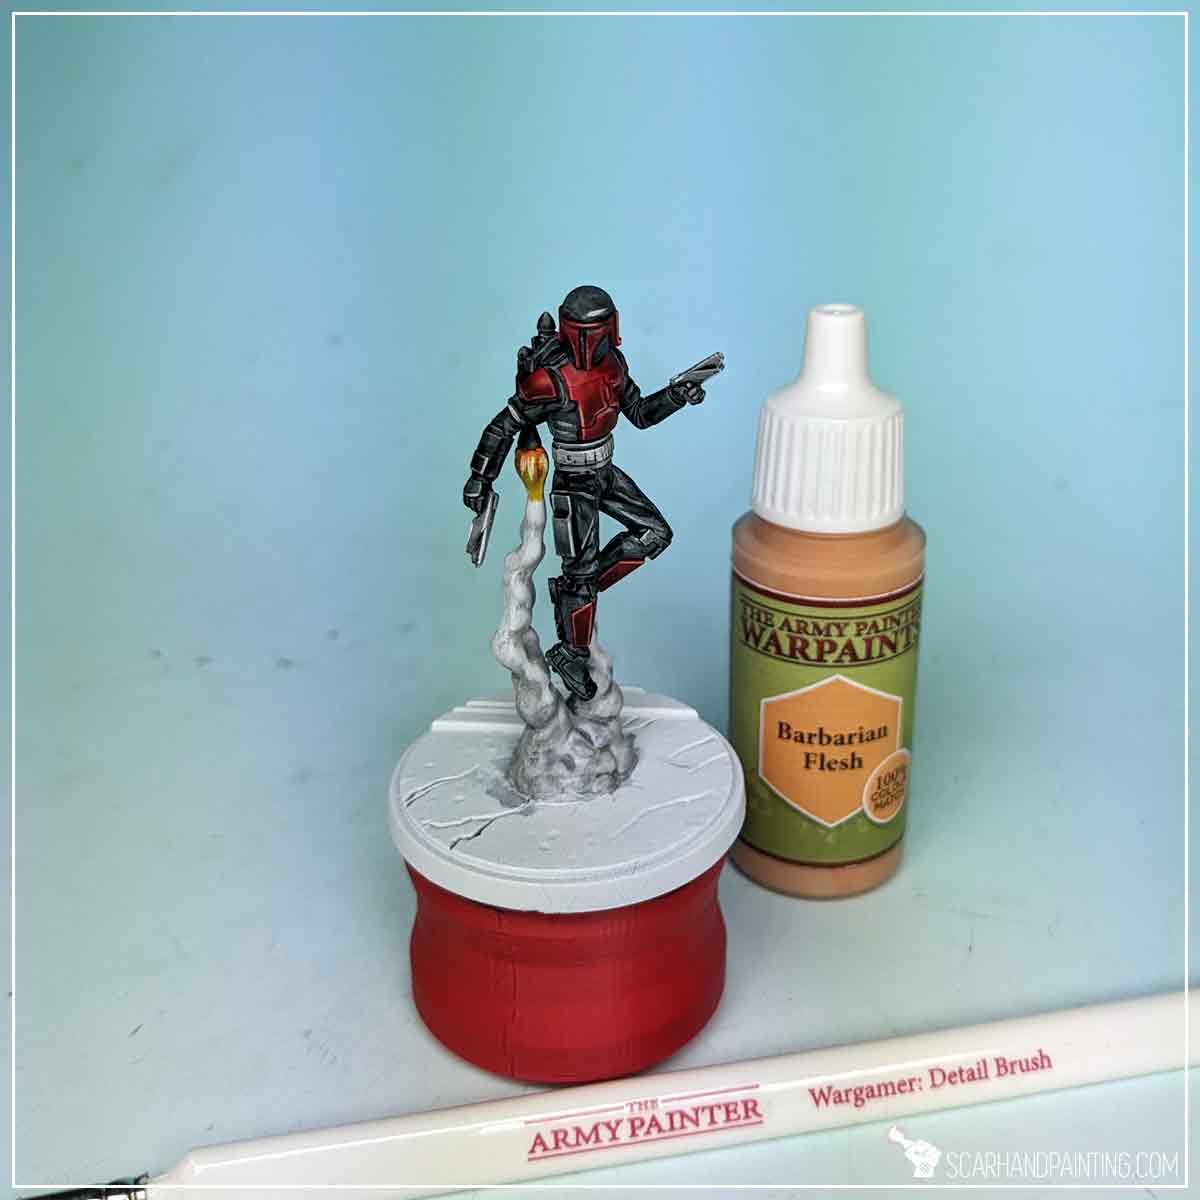
To add a final touch I have painted the chest armor pin Matt White, followed short with Maize Yellow Speed Paint.
Finally I have painted bases and Varnished both miniatures following steps previously presented in the Tutorial: Painting Star Wars Shatterpoint Clone Troopers article.
I hope you find this tutorial interesting. Be sure to let me know your thoughts in the comments below or via Facebook or Instagram. I would also appreciate it if you considered sharing this content with your friends, who might find it useful. Many thanks to Rebel.pl for sponsoring this content. Stay tuned for more Star Wars: Shatterpoint tutorials.
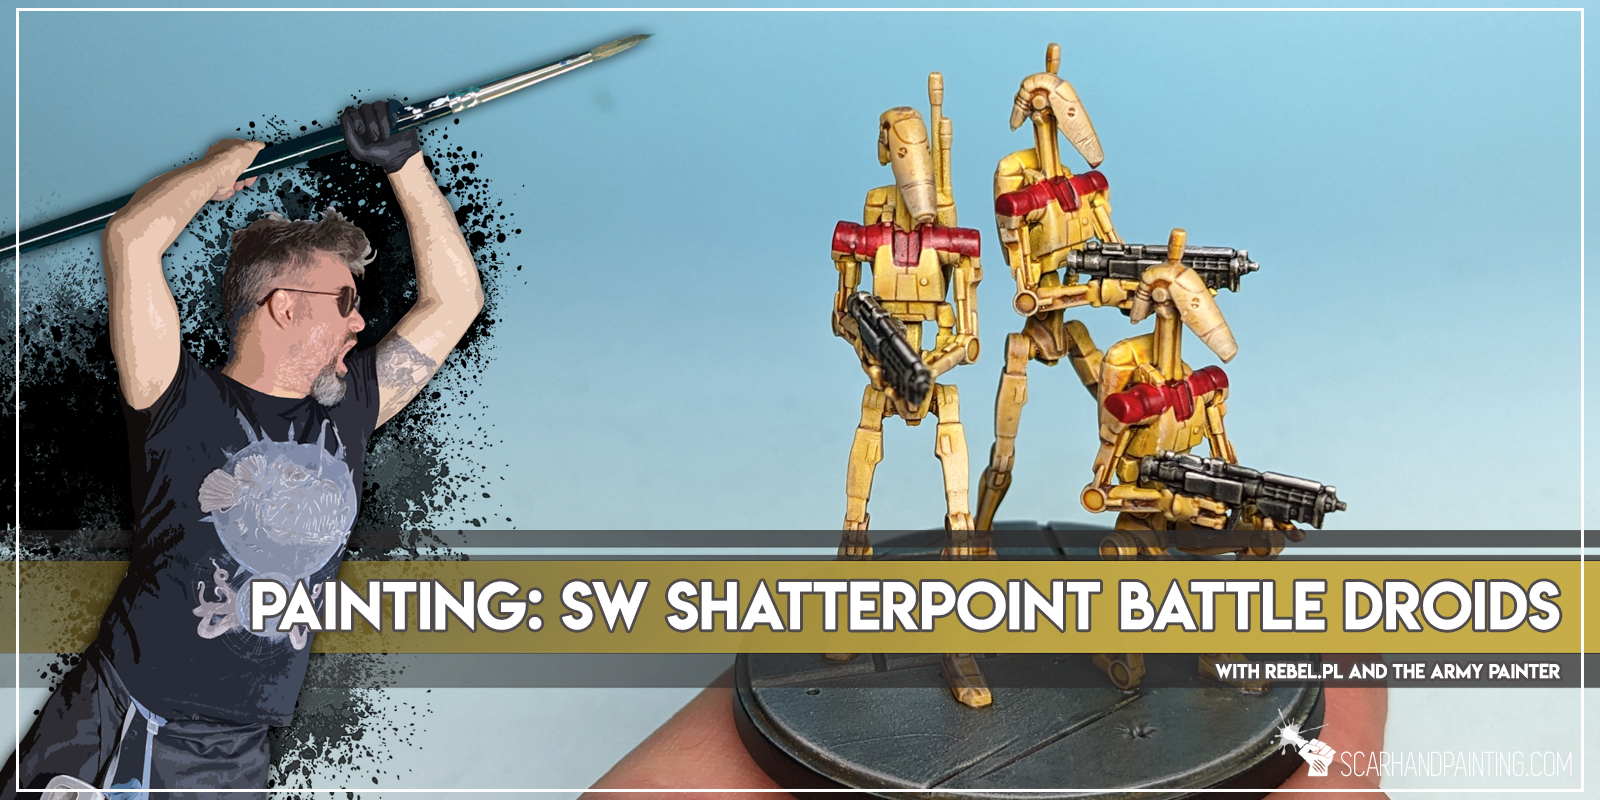
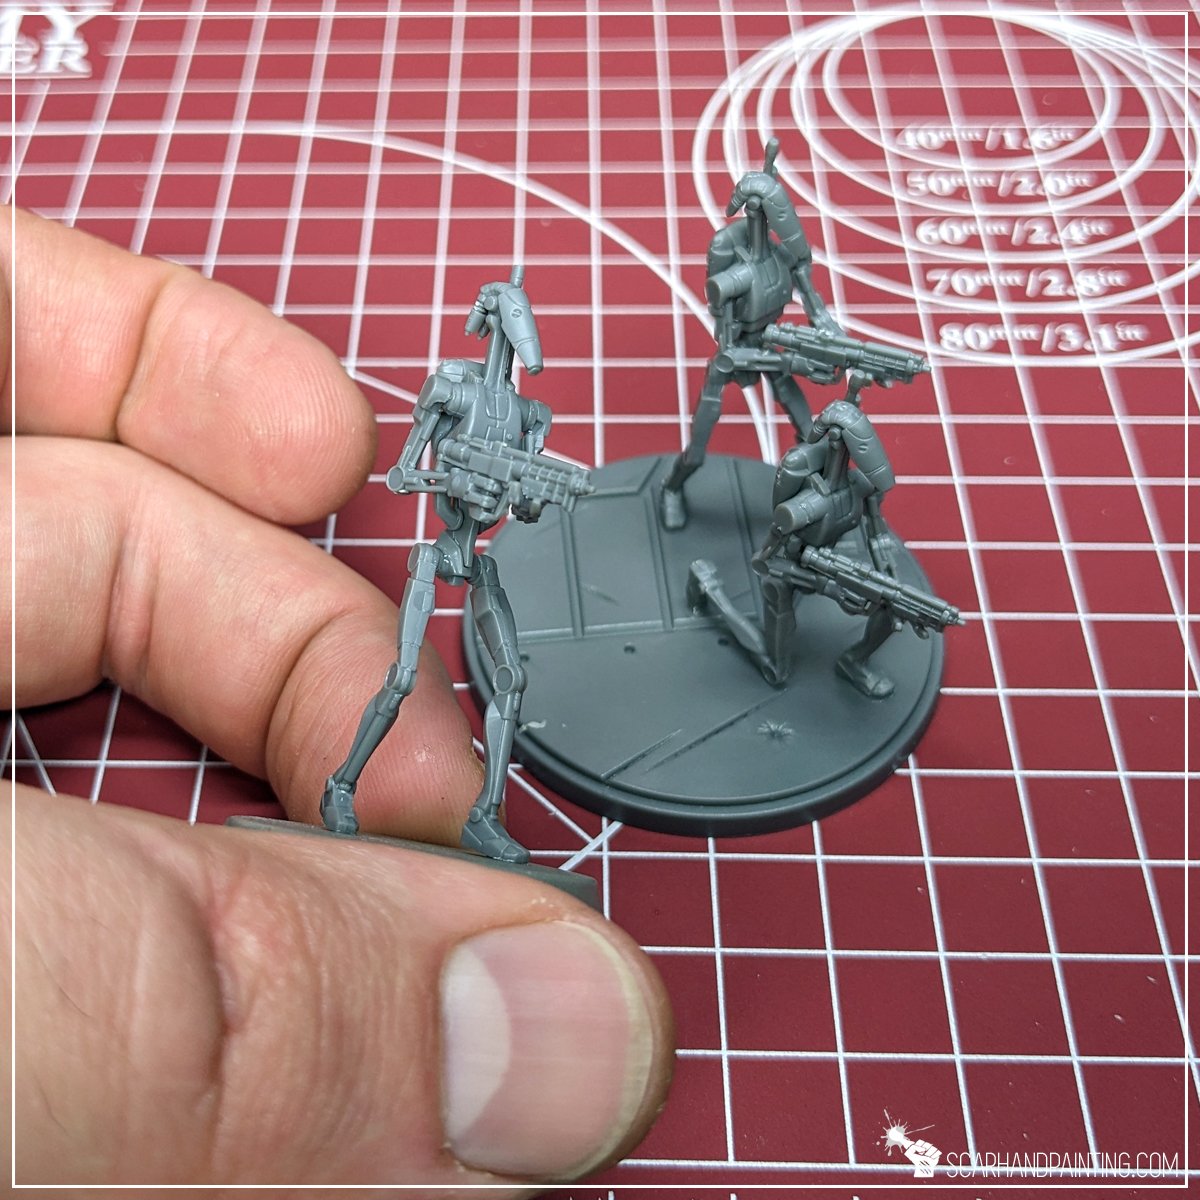
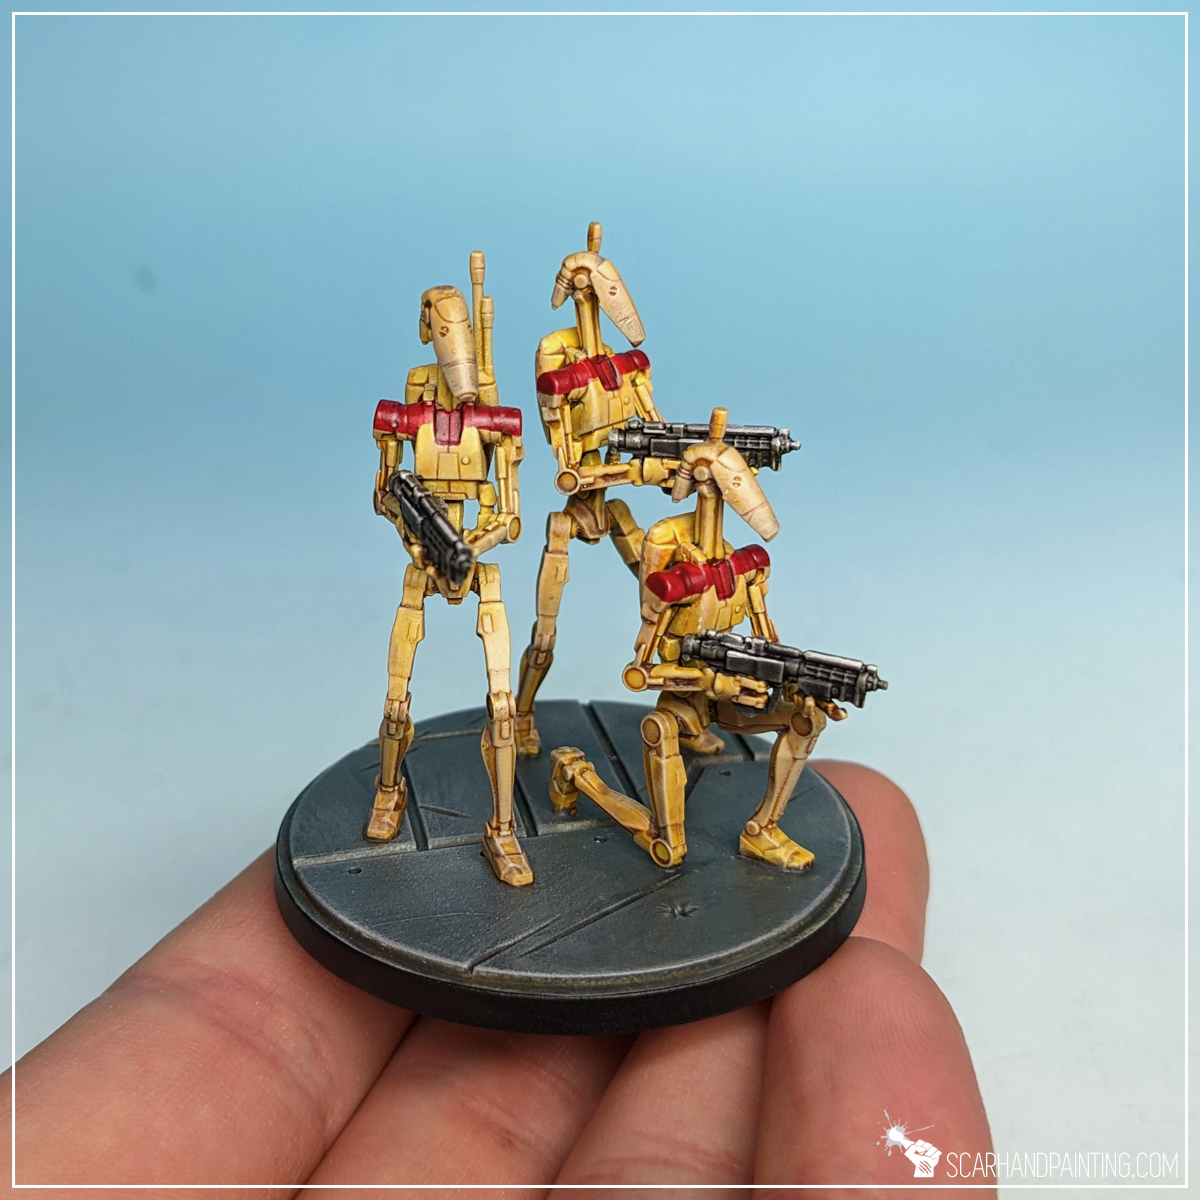
Welcome to Painting Star Wars: Shatterpoint Battle Droids tutorial. Here I will present to you a Step-by-step of a basic painting process for Battle Droids.
Before we start, some notes:
In case you are totally unfamiliar with the hobby, I have prepared a short guide on Shatterpoint miniatures preparation and assembly, including some in-depth notes regarding priming and particular painting techniques. You can find it in the previous article: Tutorial: Painting Star Wars Shatterpoint Clone Troopers.
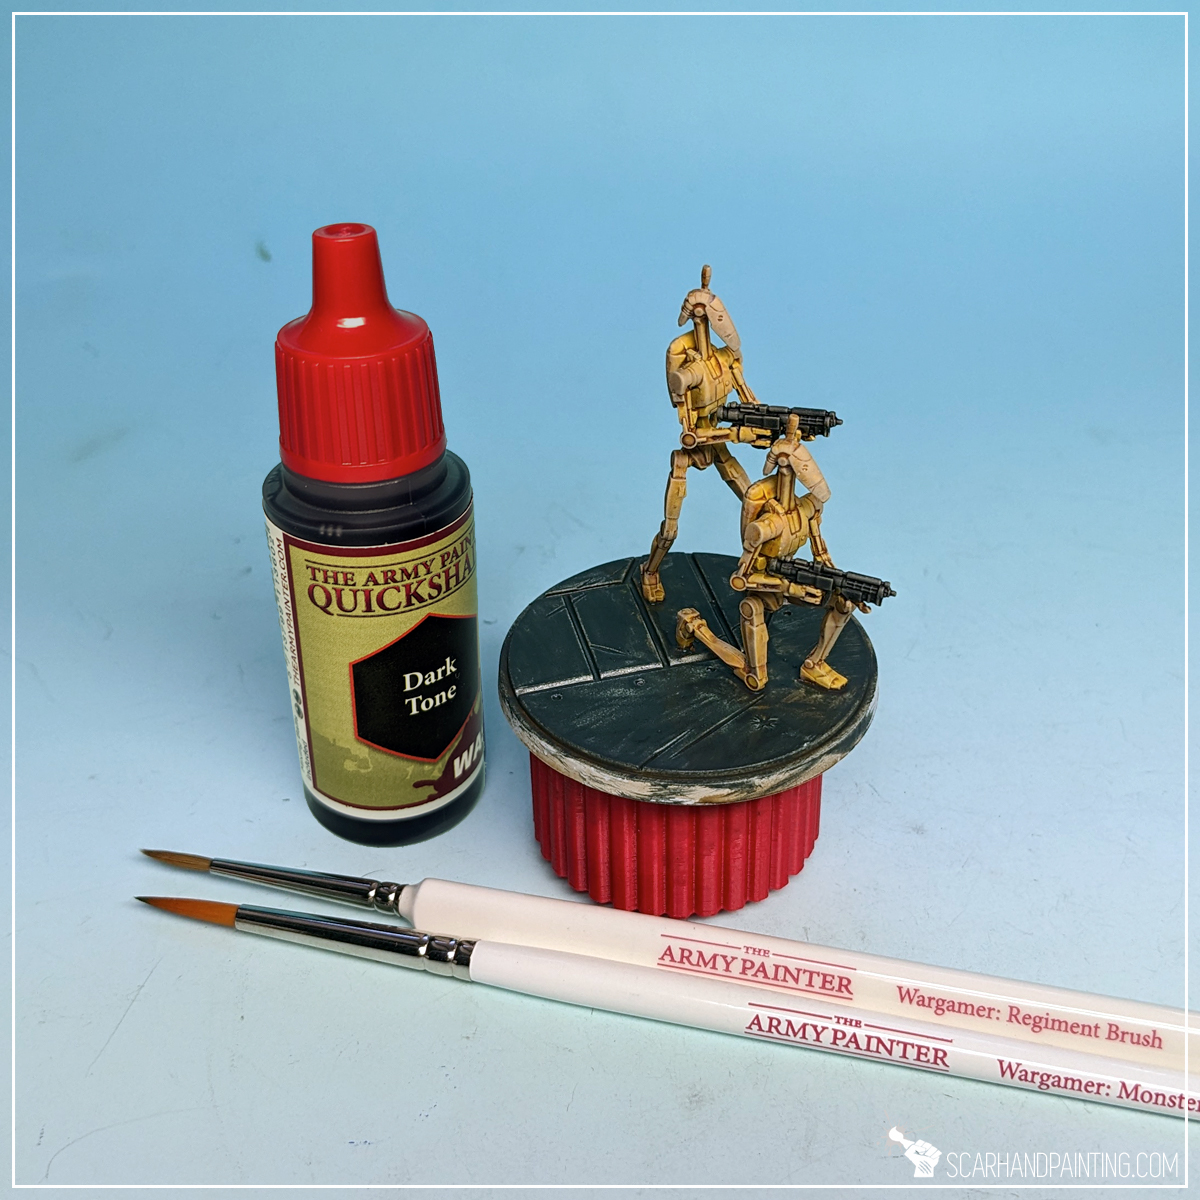
TIP: To better present the painting process I have kept one Droid on a separate base. If you feel it might be difficult to paint multiple miniatures glued to a single base, you can paint them separately, then glue together just before the Varnish step.
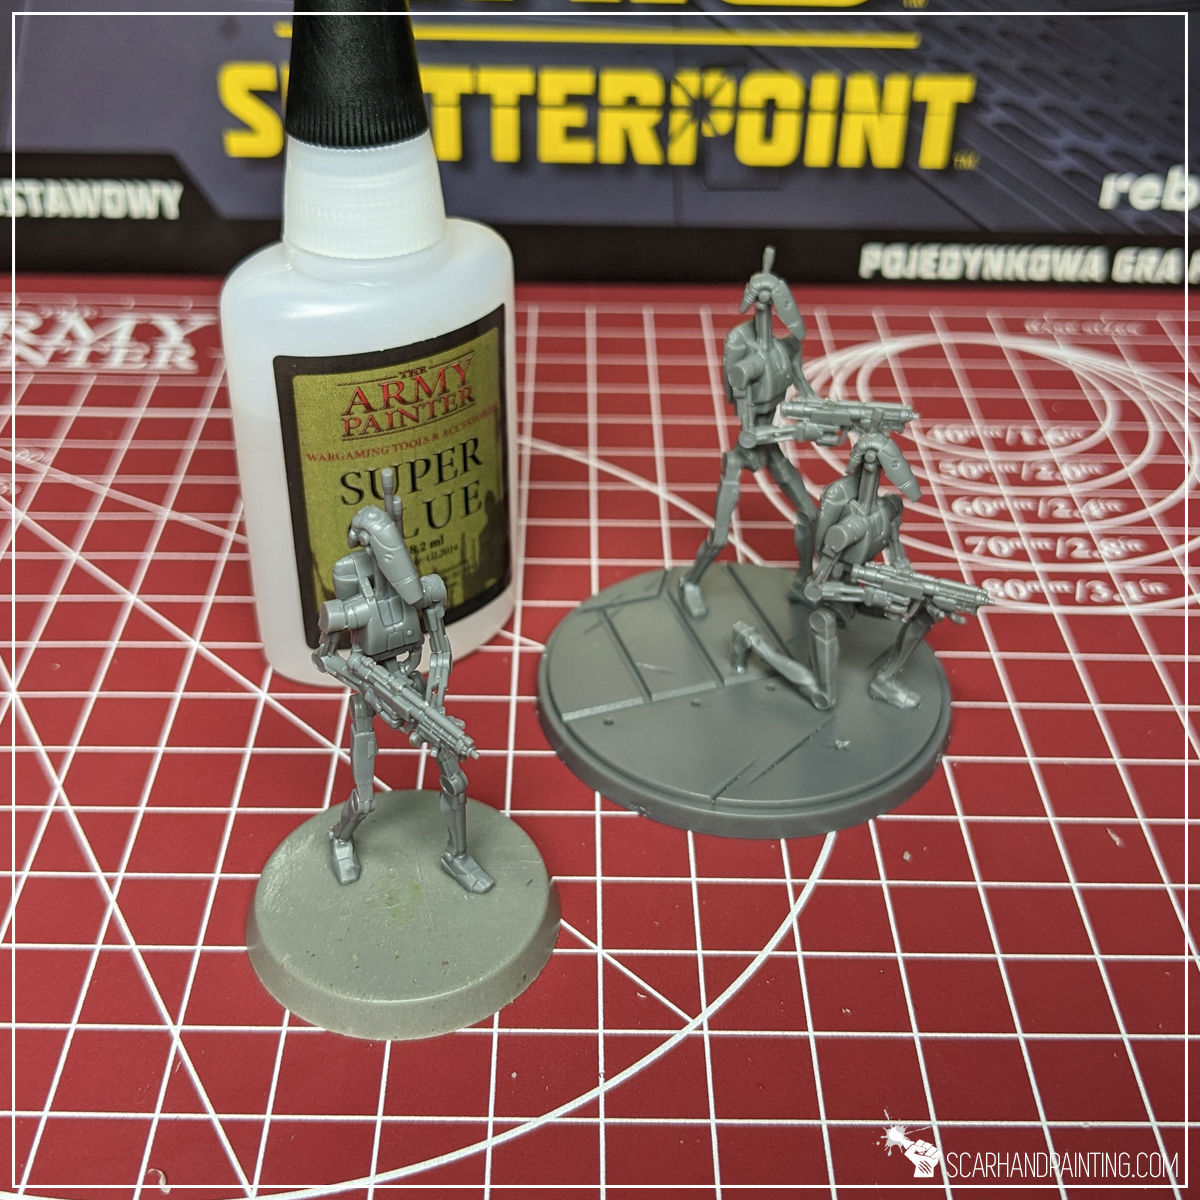
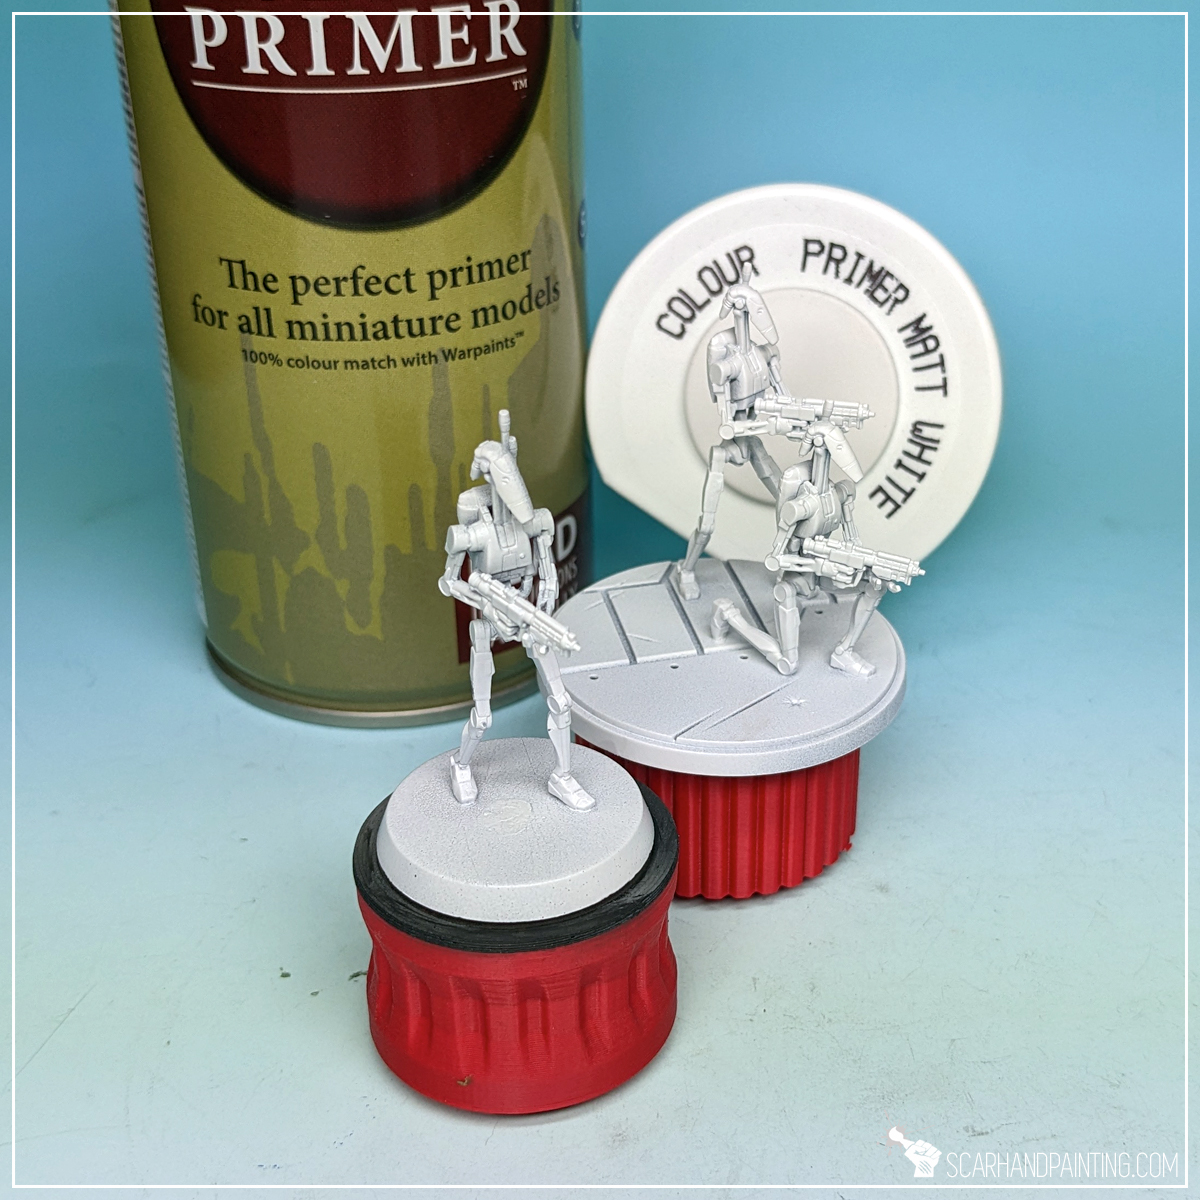
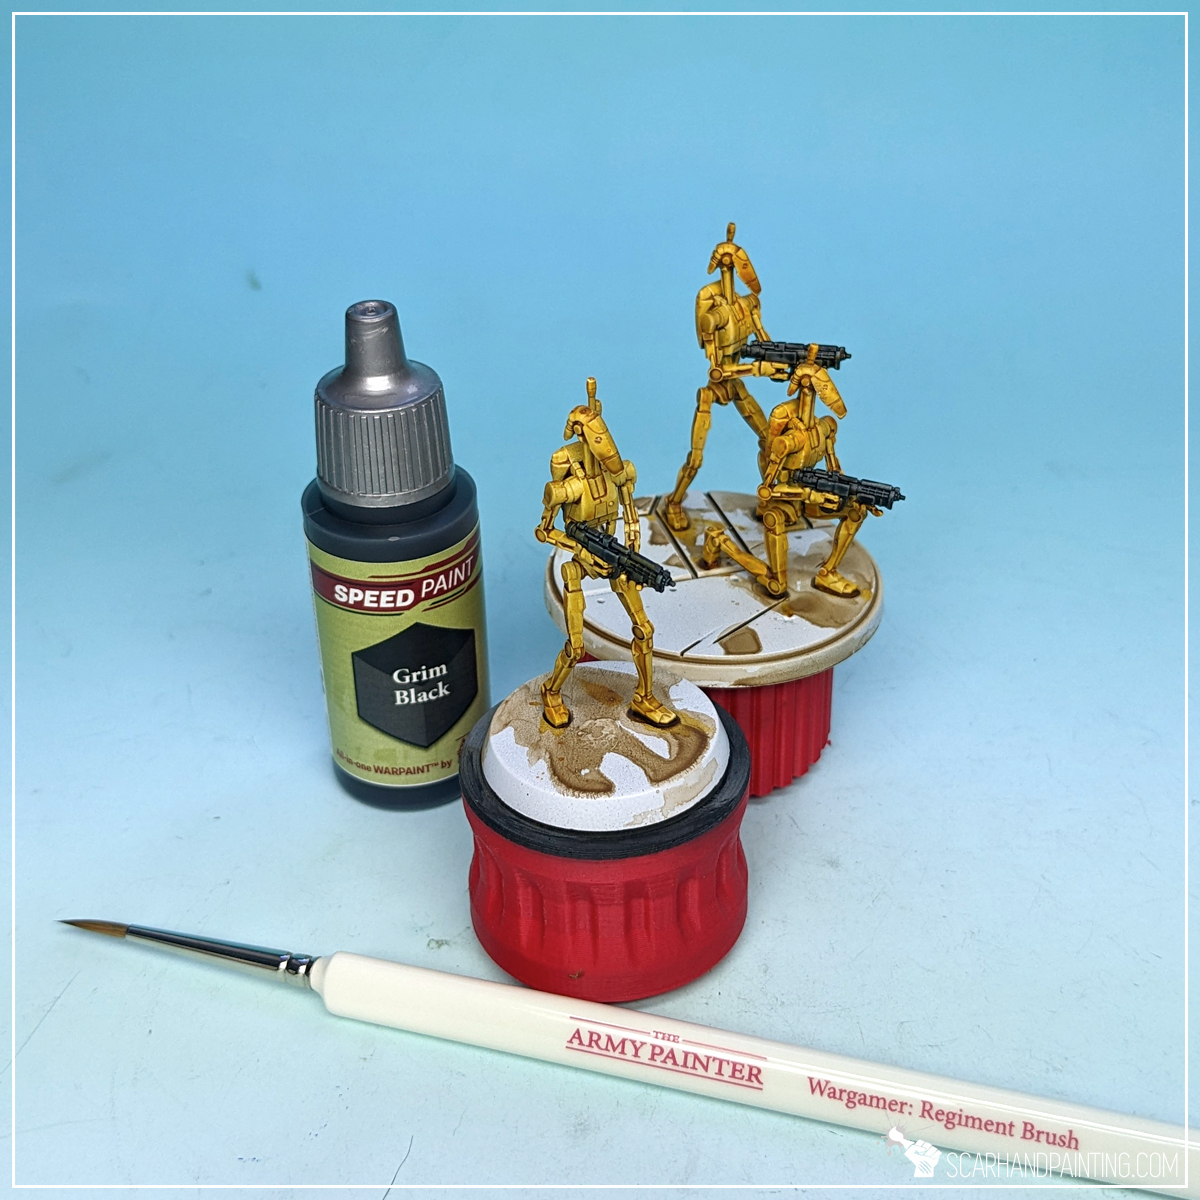
I mounted the miniatures on a stick with a piece of Blu-Tack, then undercoated them with The Army Painter White Matt Primer.

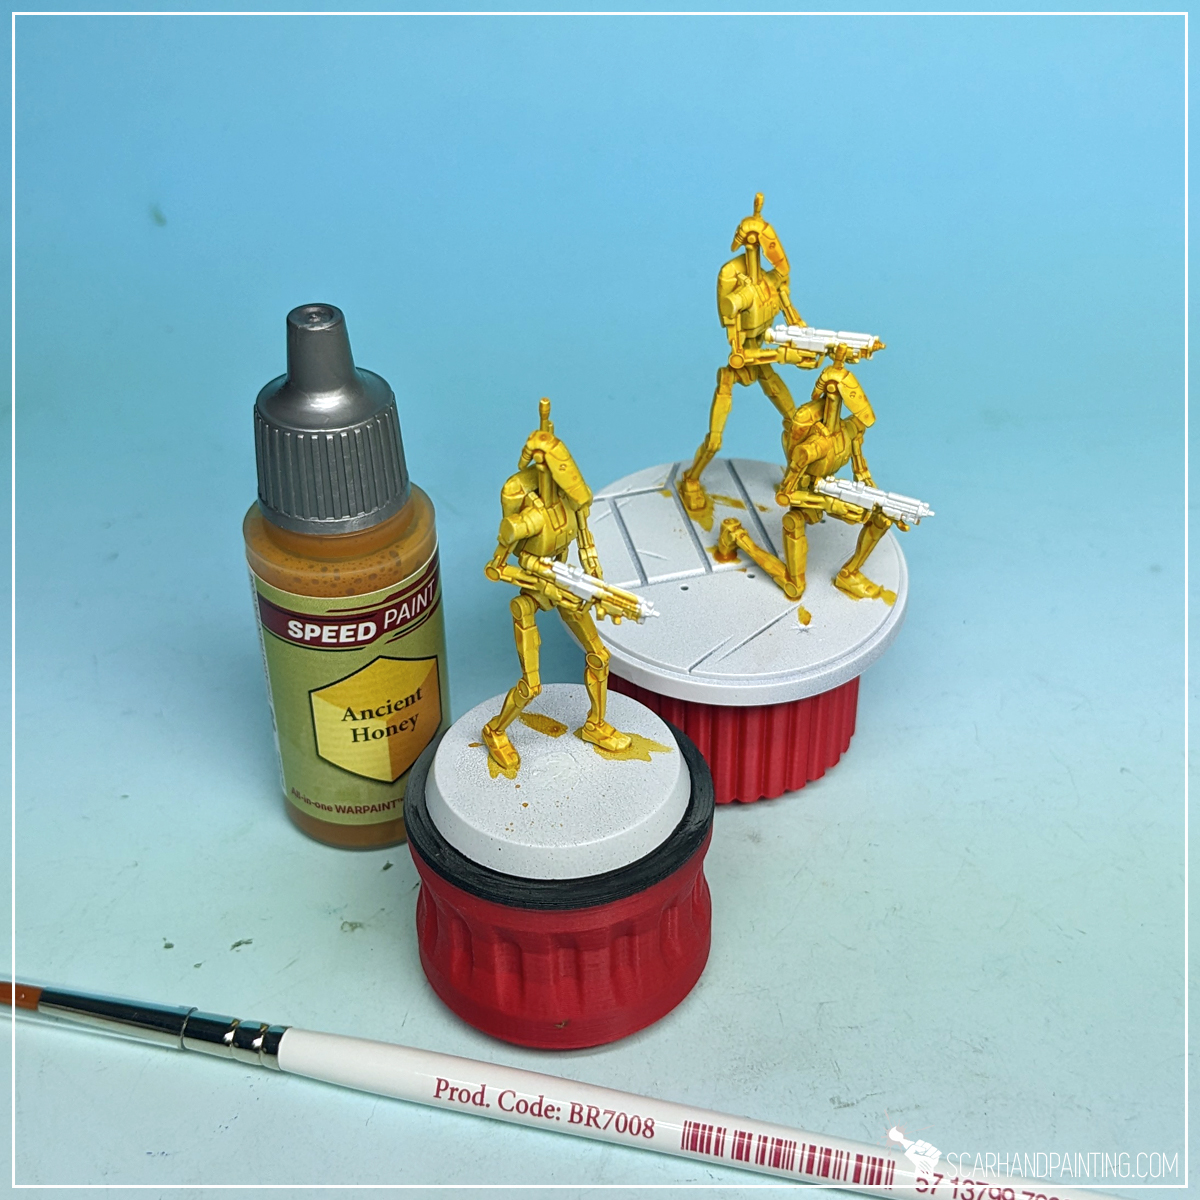
With Wargamer: Monster Brush I have applied a thick layer of Ancient Honey Speed Paint over the miniatures, except for weapons. This created a strong, bright base color.
TIP: No need to worry about the weapons too much. The painting process was designed to cover any mistakes made at this point.
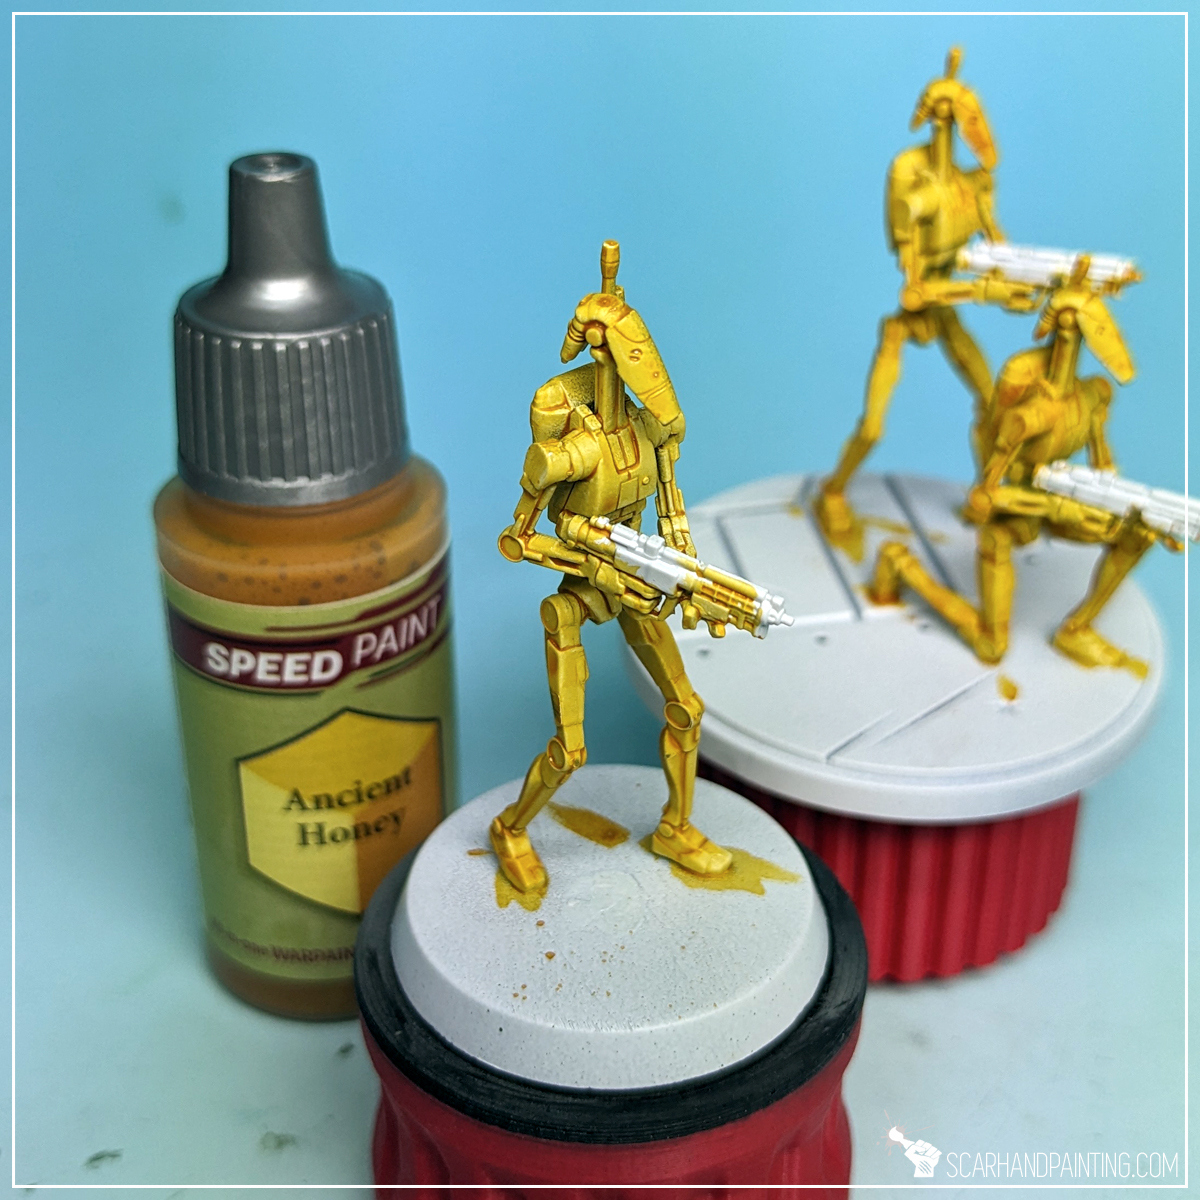
Next, with a softer Wargamer: Regiment Brush, I applied a solid layer of Soft Tone all over the armor. Washes, such as Soft Tone, provide strong pigmentation in all recesses, adding color depth. They also tone down the entire color a bit, which in case of Battle Droids, works to our advantage.

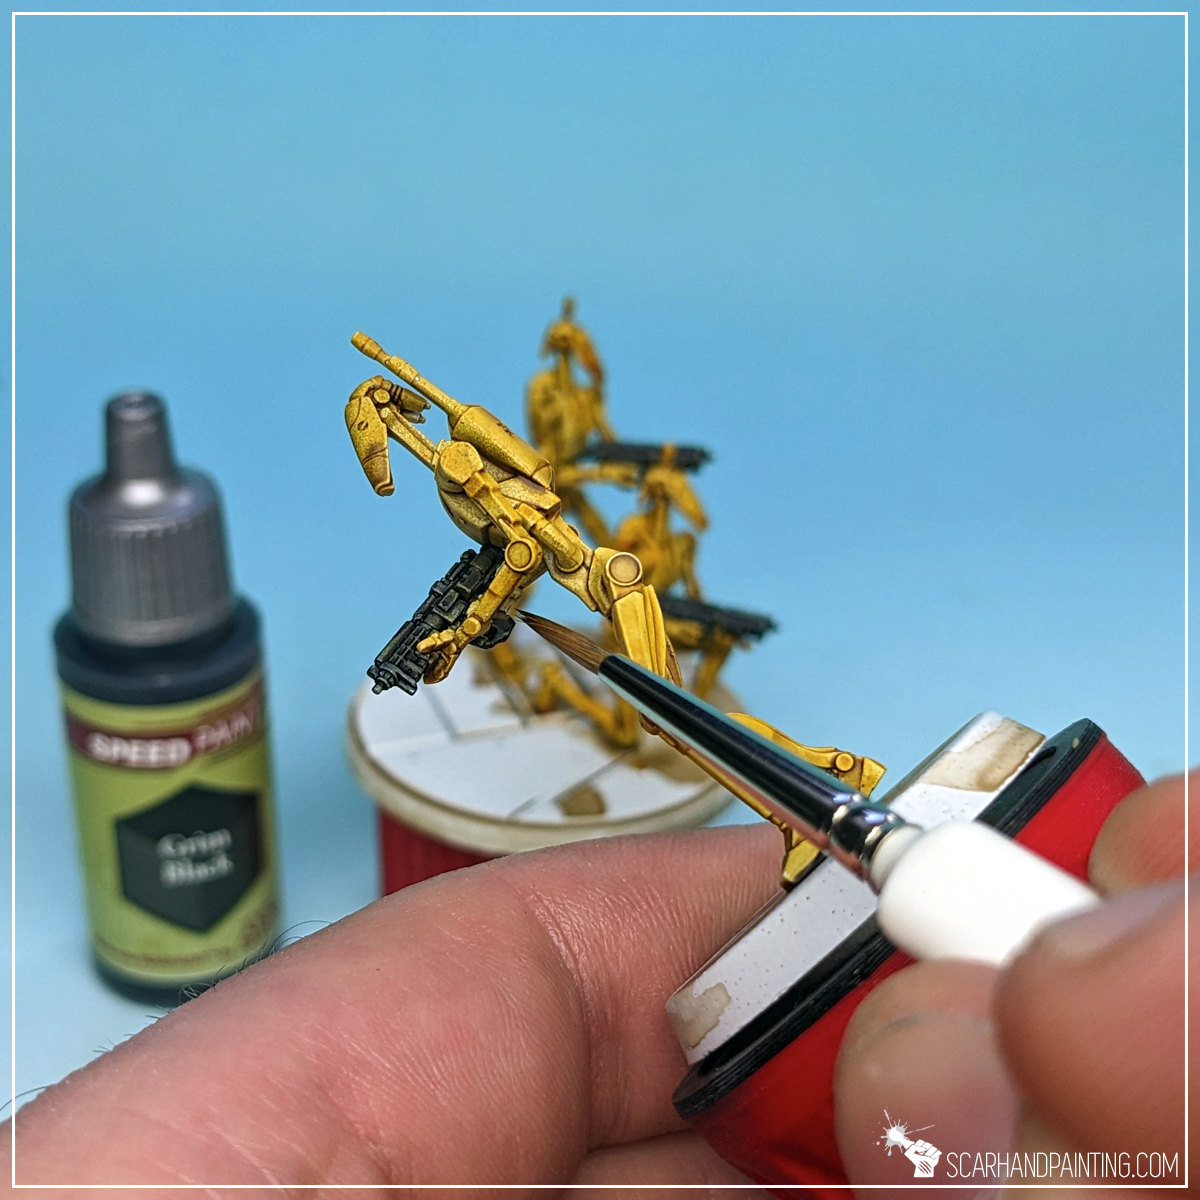
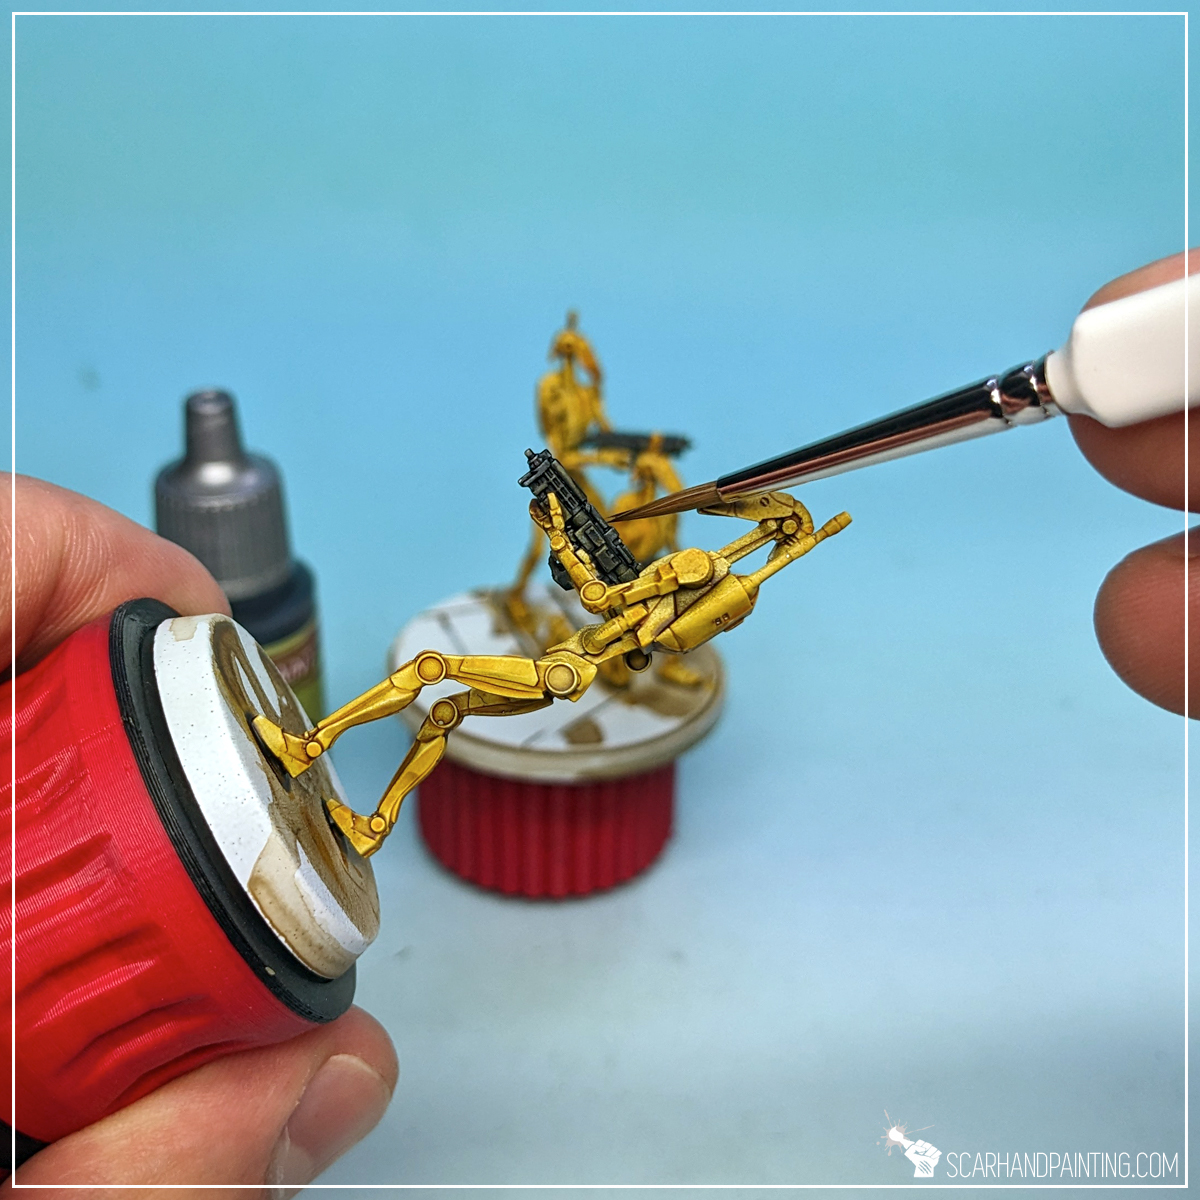
For weapons I went with the Grim Black. This Speed Paint was already tested during the Clone Troopers tutorial, so I knew it would cover any previous mistakes left on the painted areas. I used a Wargamer: Regiment Brush and did my best to avoid messing up the bright Droid armor.
TIP: This might be a difficult step for anyone not familiar with a brush. I recommend switching between different brush sizes and moving the miniature around for easier access. Speed Paints are thin, so you do not have to ‘lead’ the tip of the brush too much. Delicate touches will do.
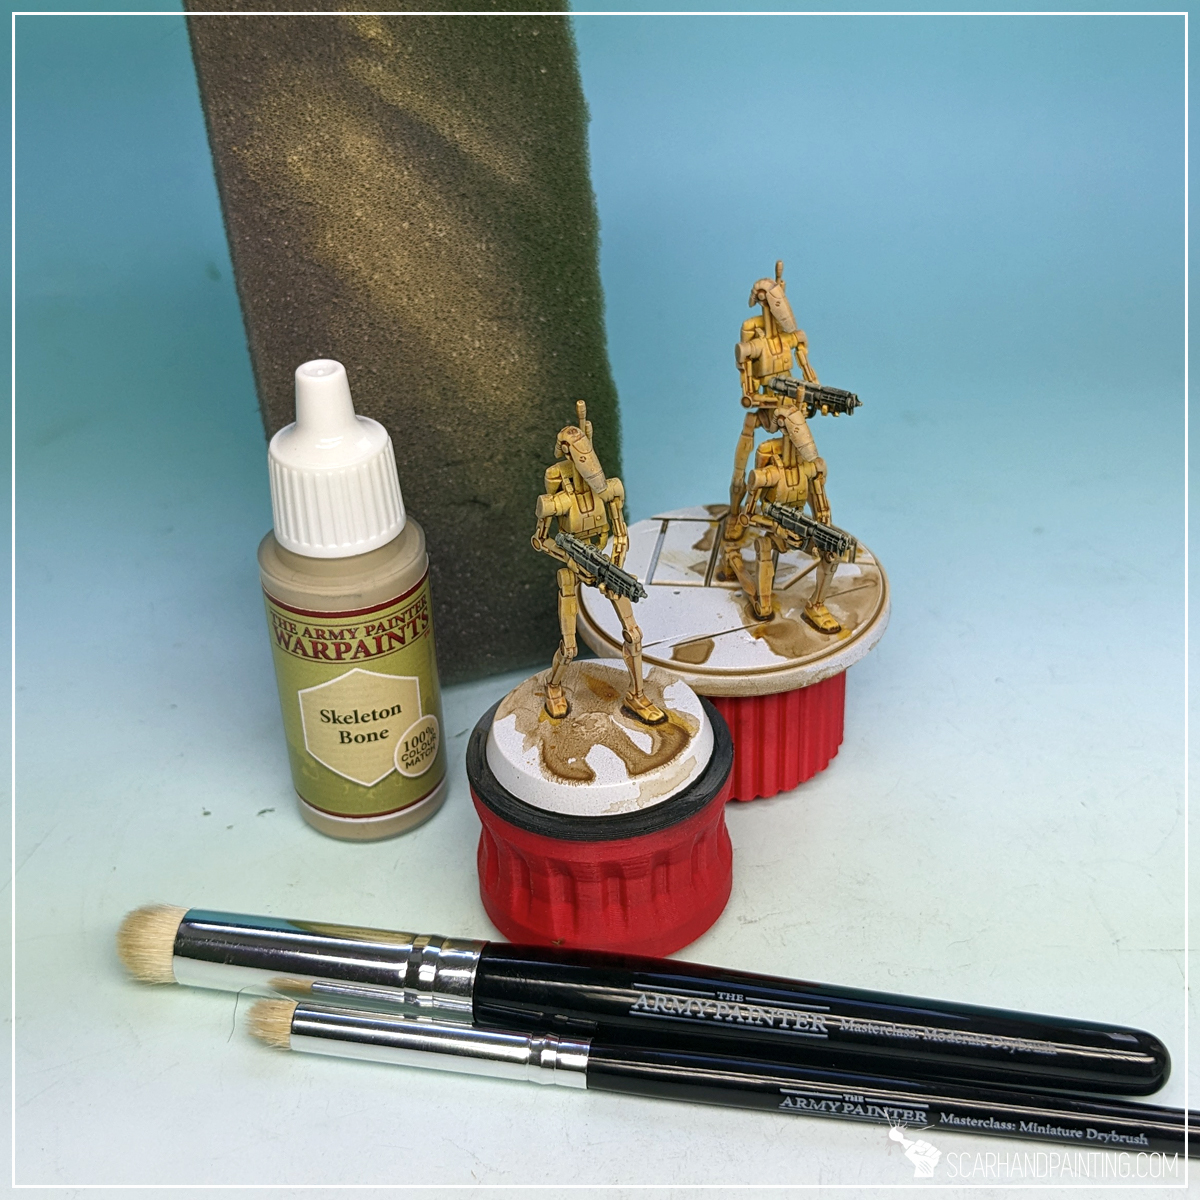
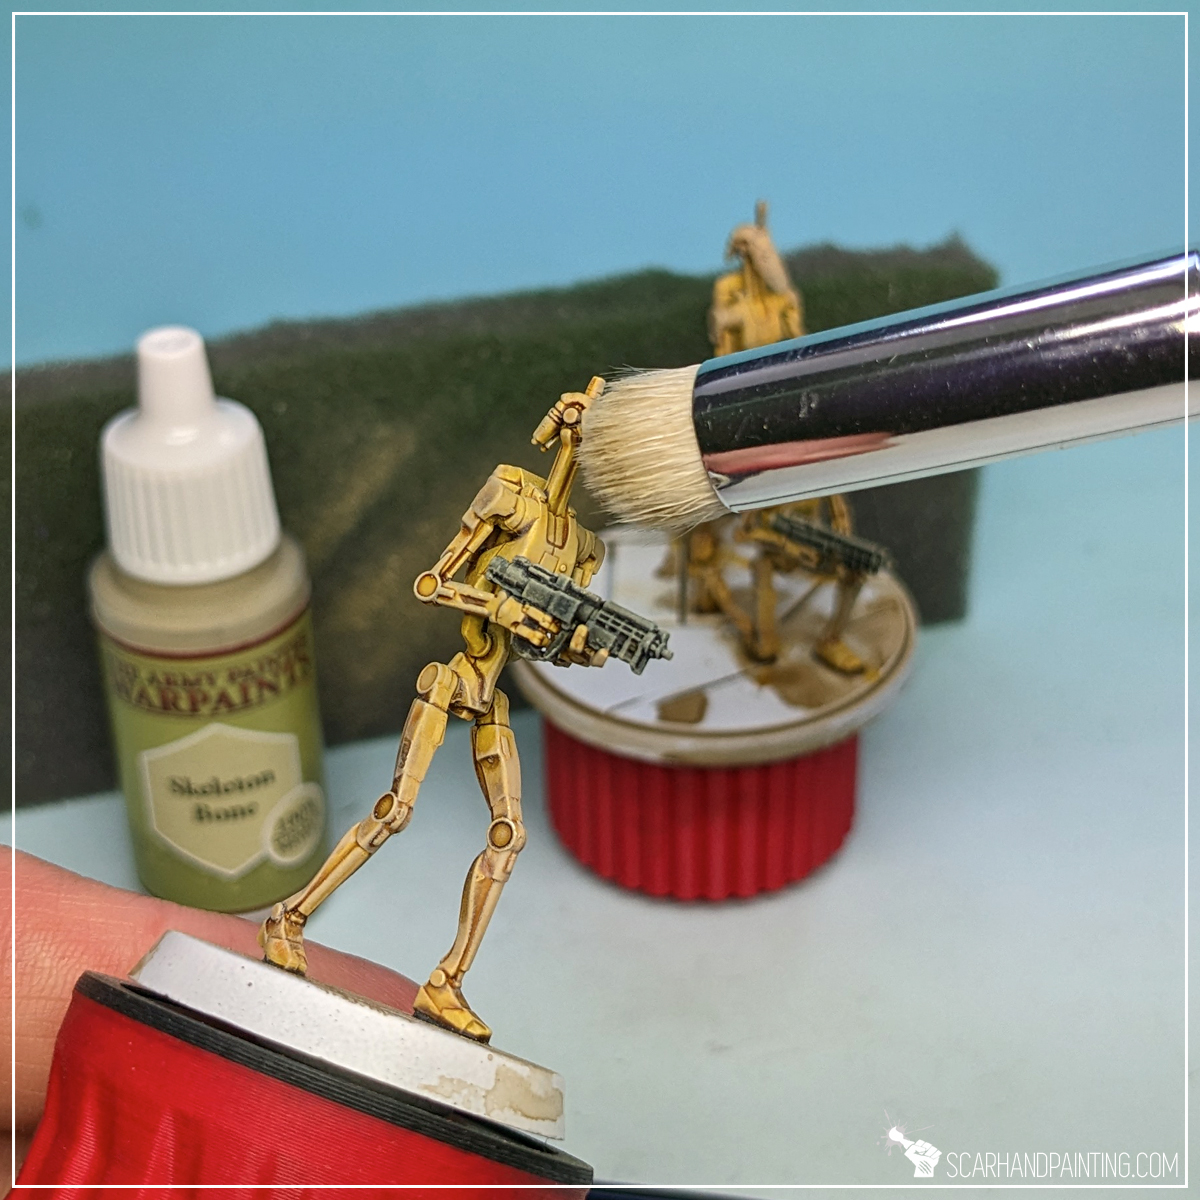
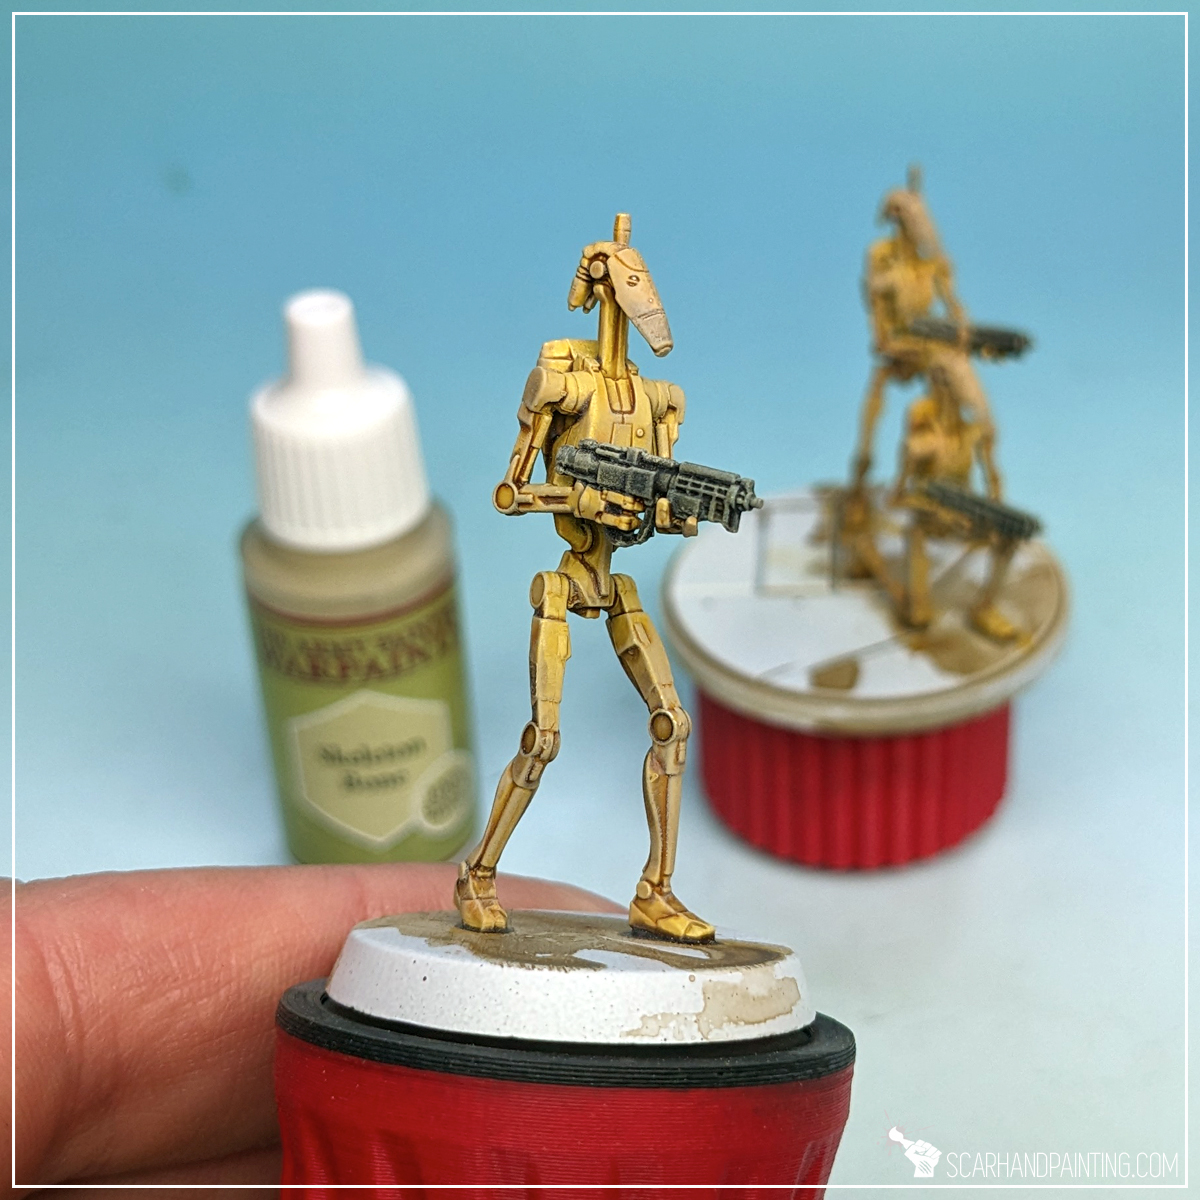
To apply an overall highlight I Drybrushed Skeleton Bone all over the miniature. I used Masterclass Mighty and Moderate Drybrush for this, but it can be done with Wargamer: Large Drybrush as well.
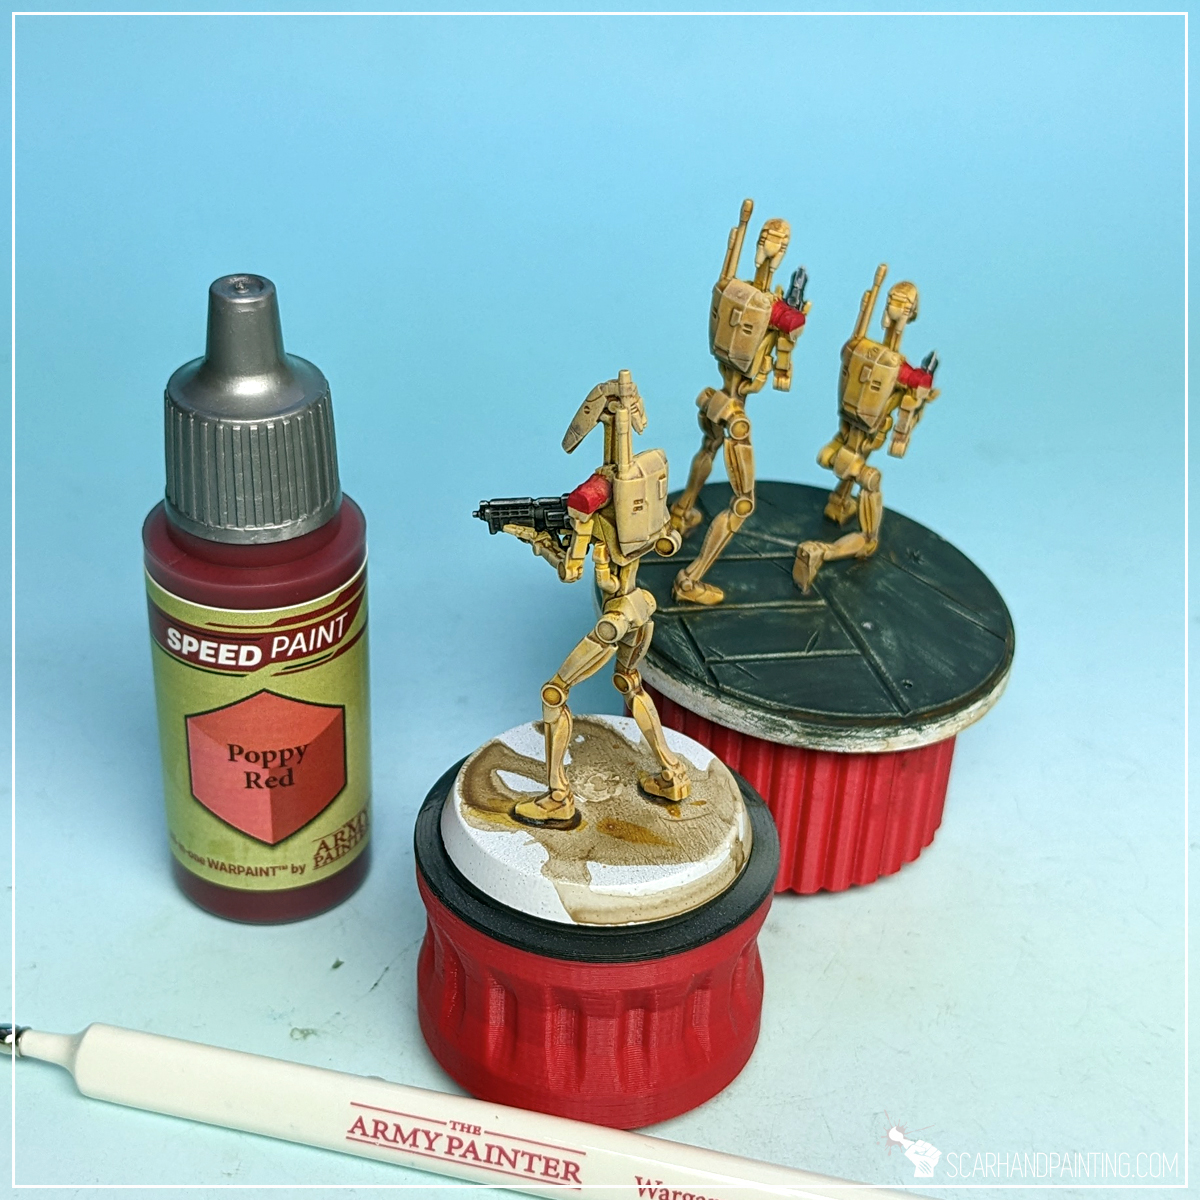
I used Poppy Red Speed Paint and applied it on top of chosen areas with Wargamer: Insane Detail Brush. As a Speed Paint the Poppy Red is perfect to cover bright paints underneath, including edges, previously highlighted with Skeleton Bone.

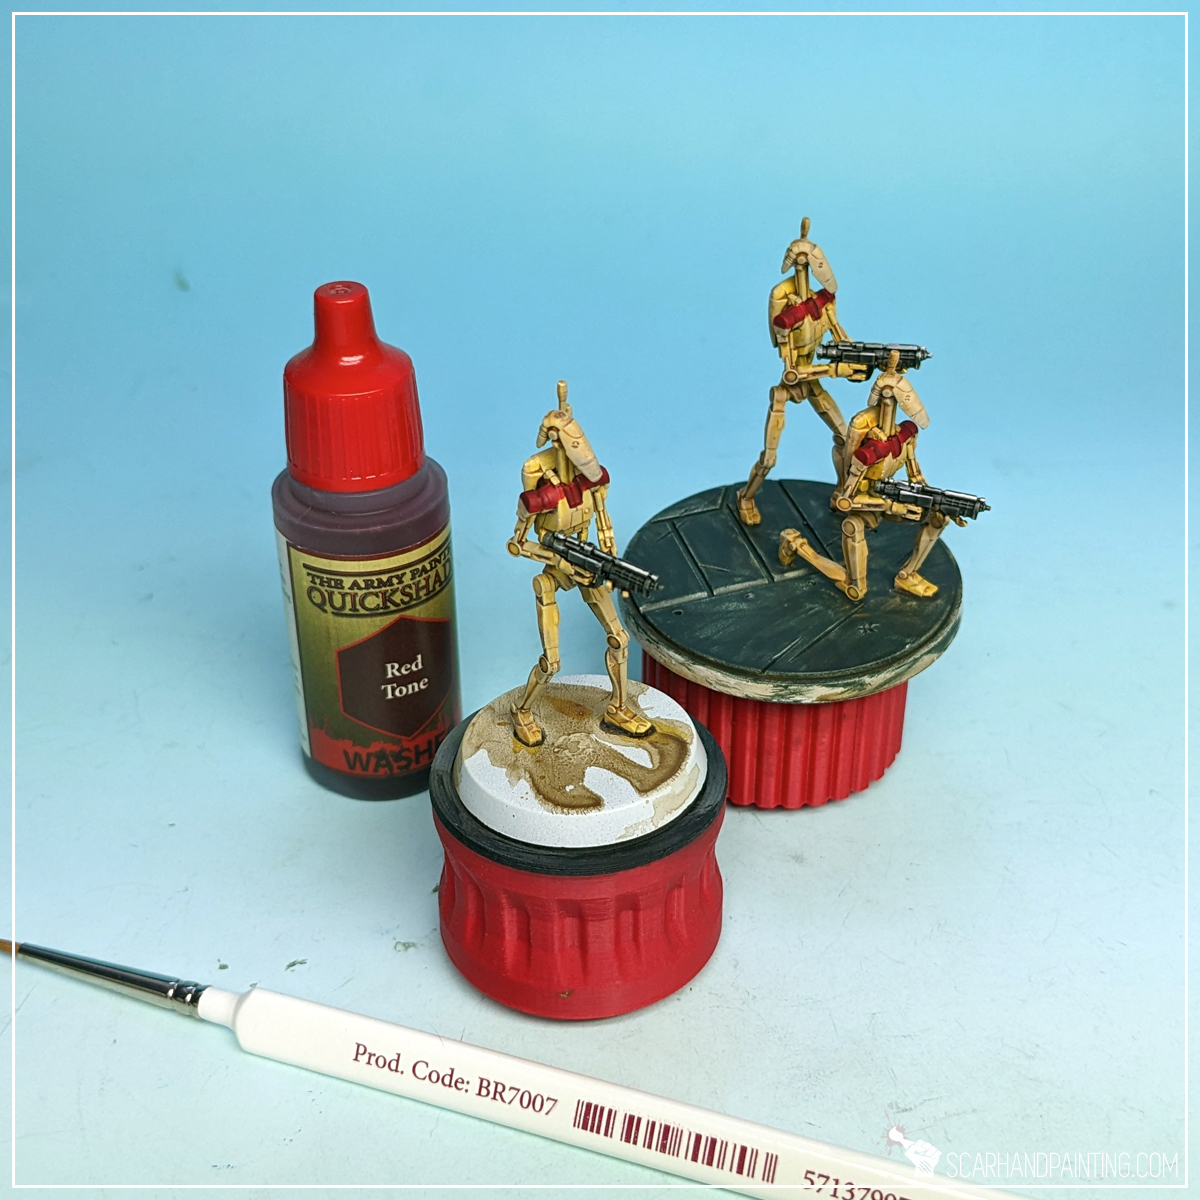
Next I applied a layer of Red Tone wash on top, to add depth and darken the color just a bit.
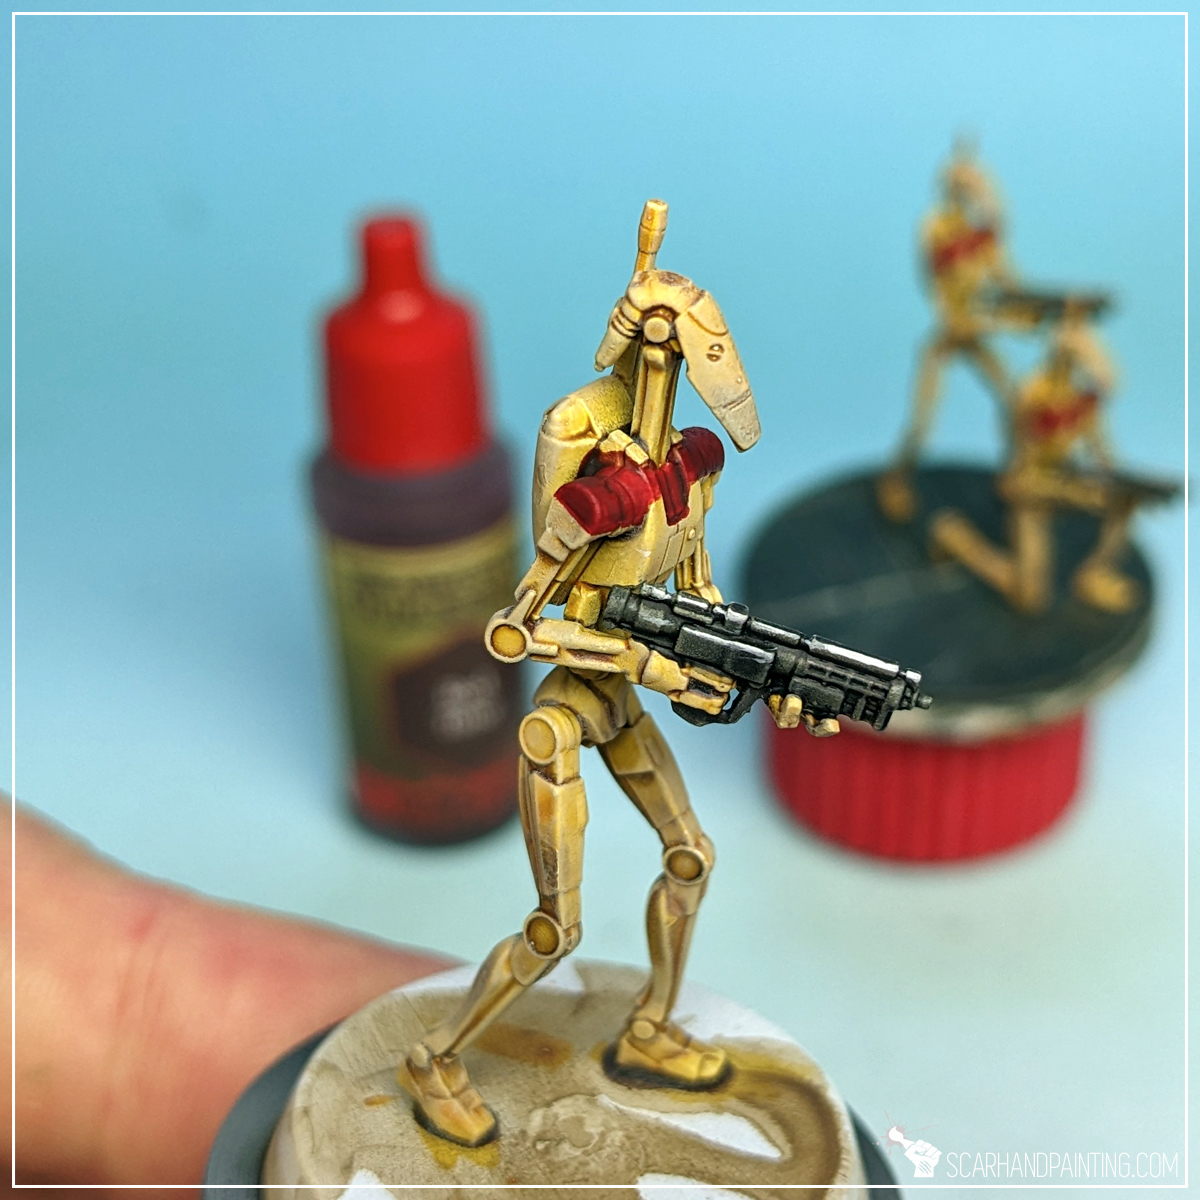
To make weapons pop, I used a Wargamer: Regiment Brush and applied a Dark Tone wash over them.
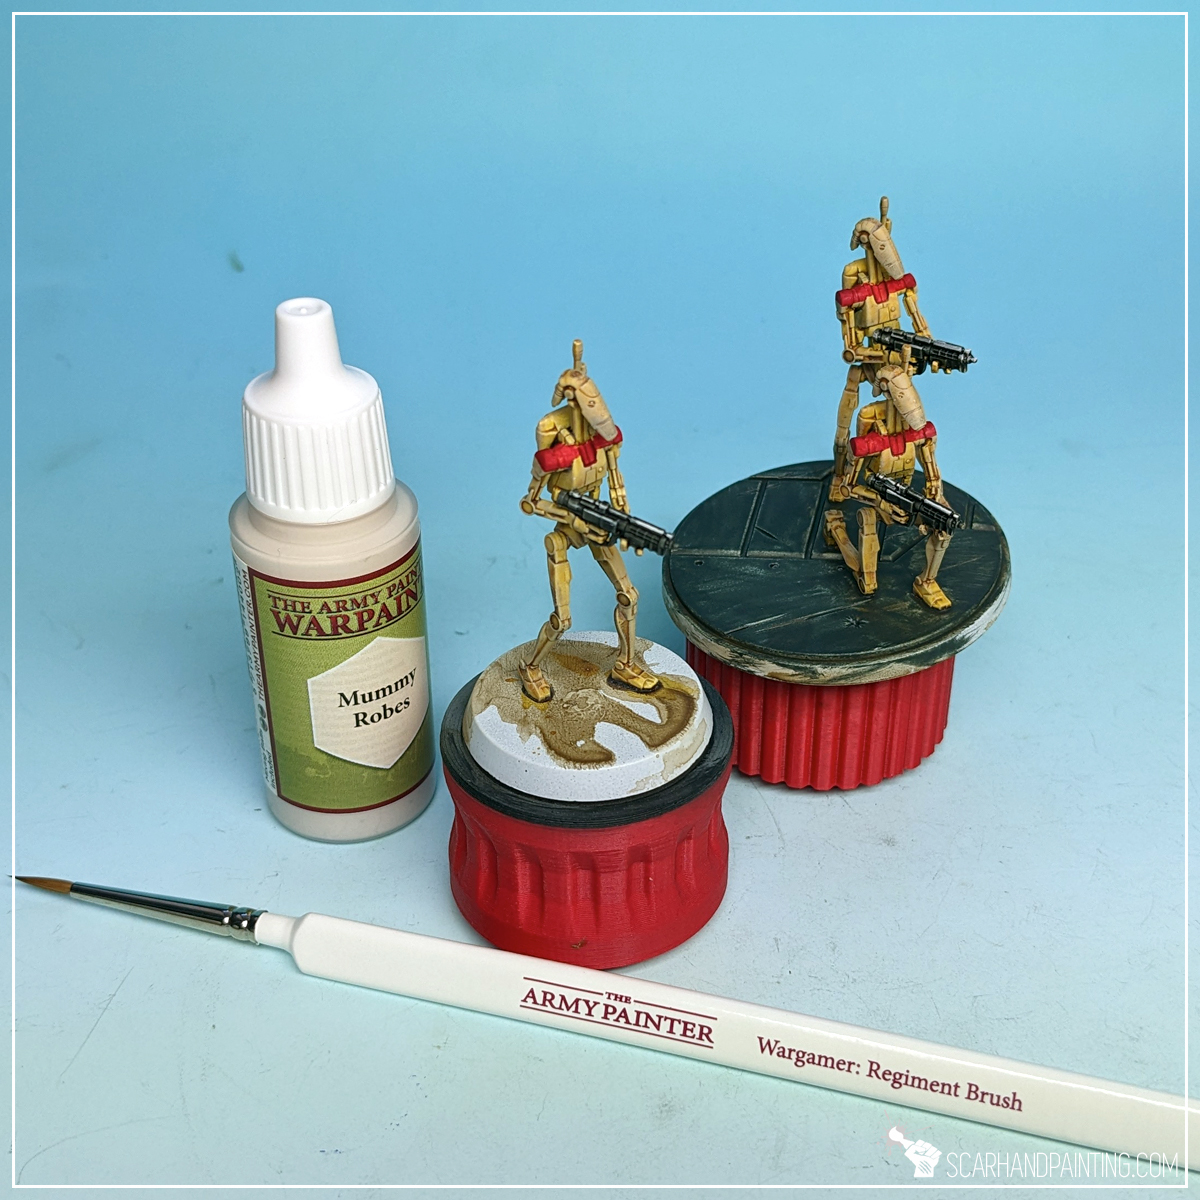
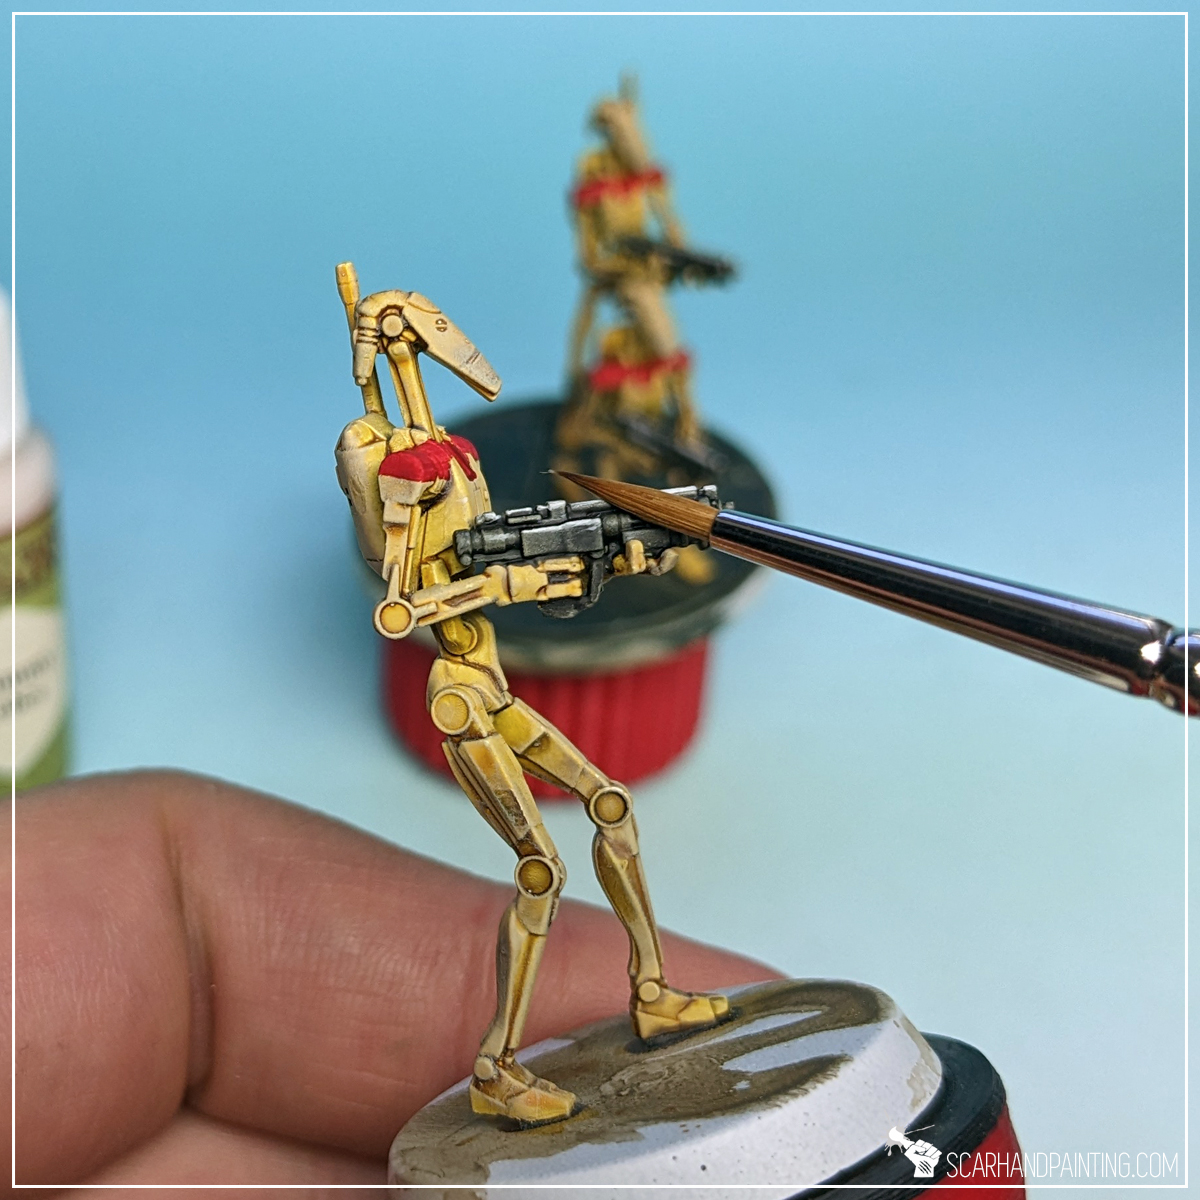
I then highlighted the edges with Mummy Robes, similar to how I did it in the Clone Troopers tutorial.
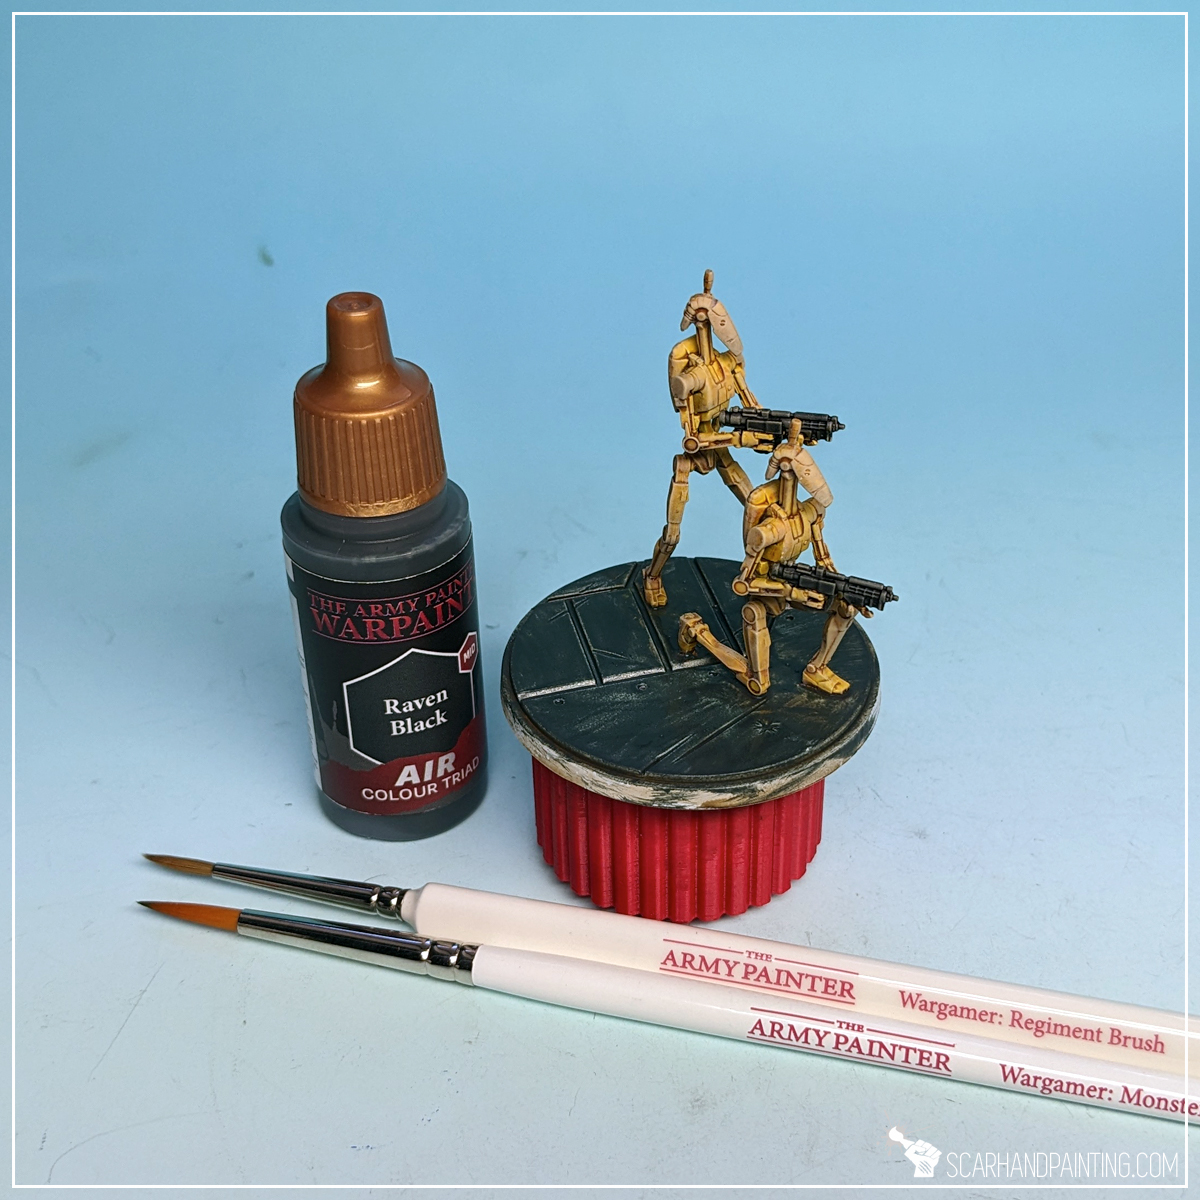
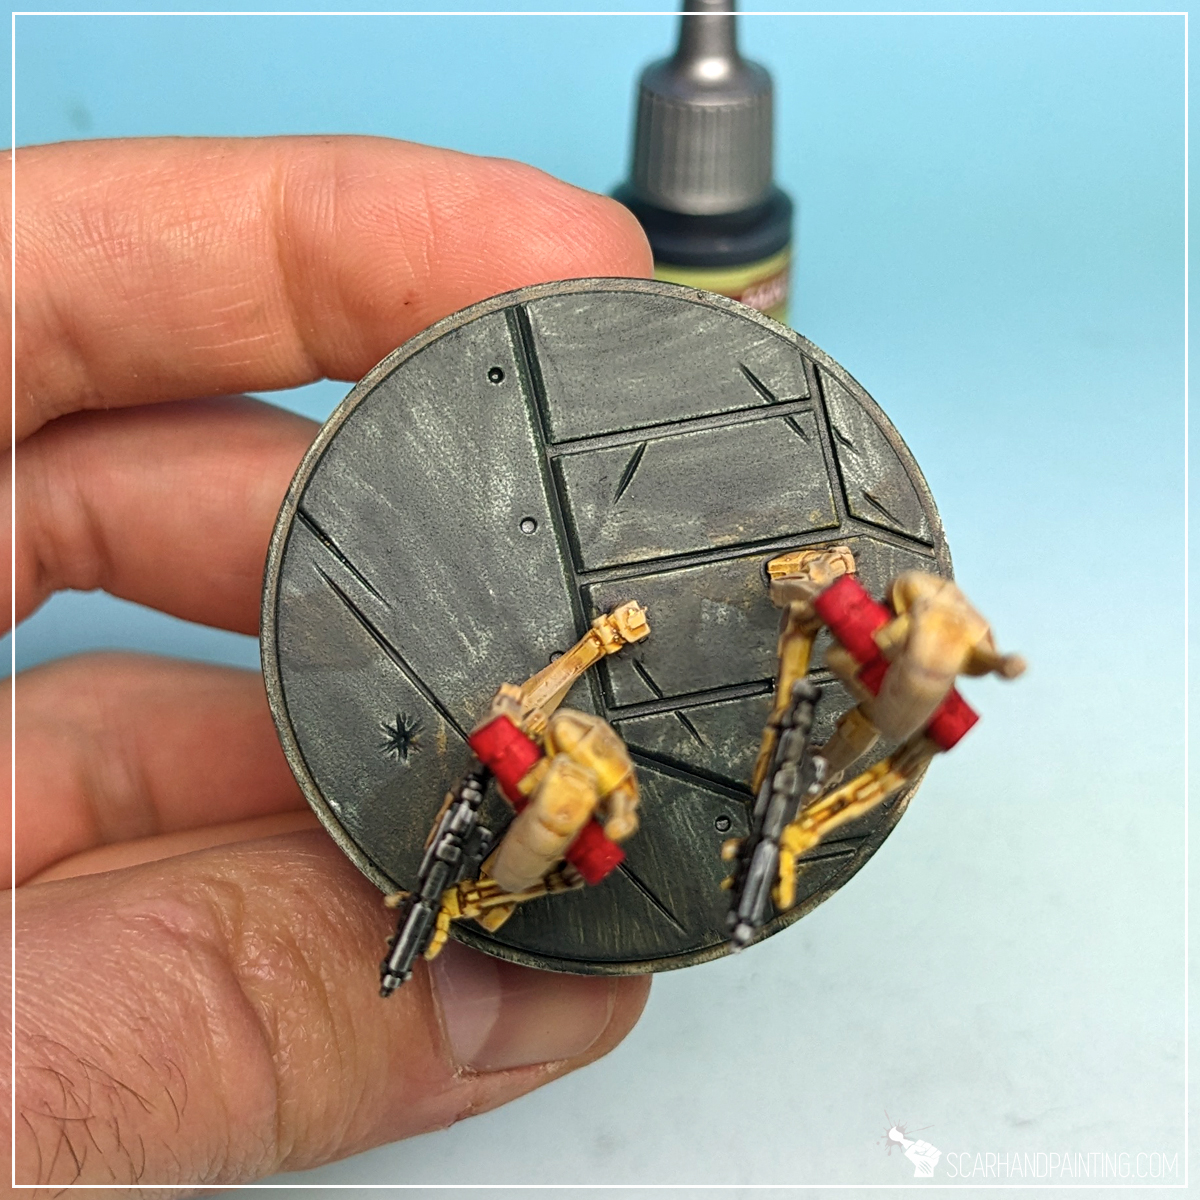
For bases I applied a layer of Raven Black (air) with a Wargamer: Regiment Brush. Just like with Clone Troopers, I deliberately used air series paint for an extra messy end result.
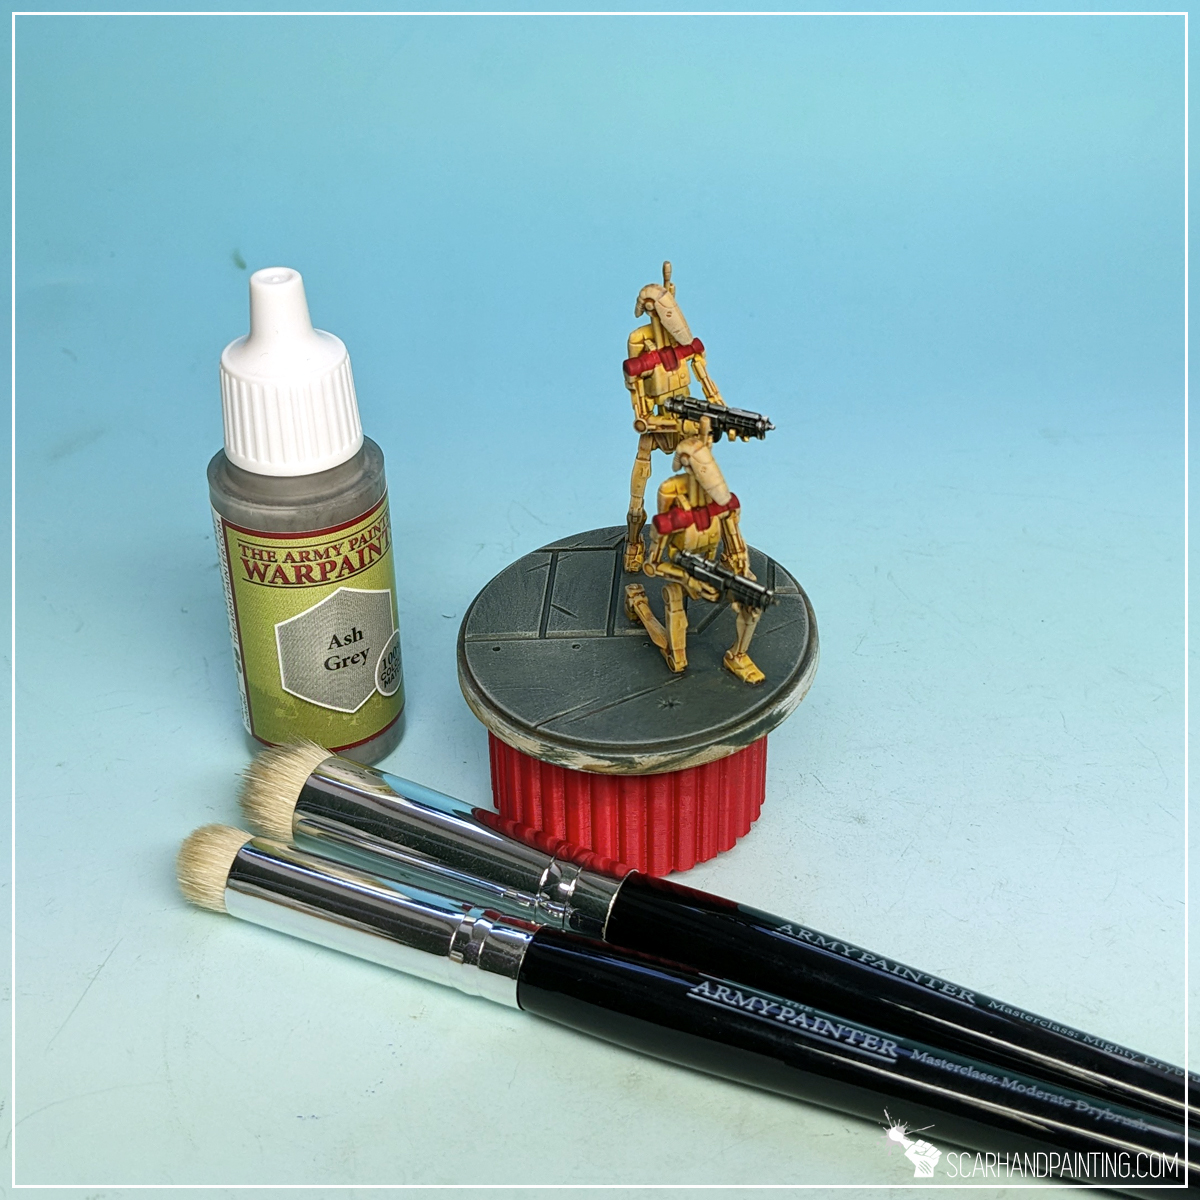
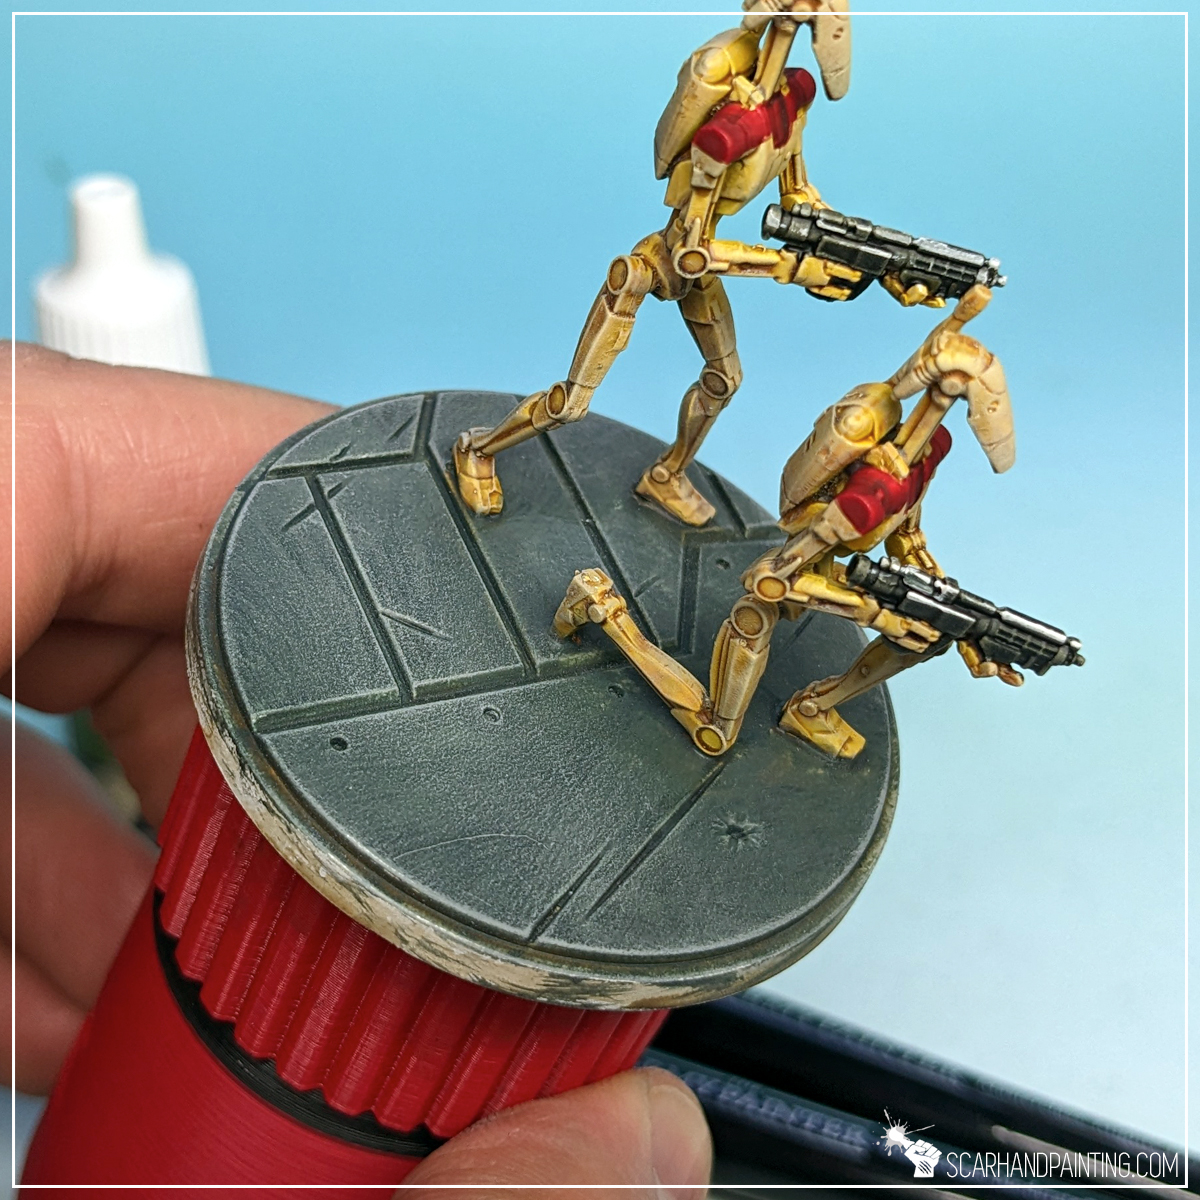
I then applied a strong drybrush of Ash Grey all over the bases and feet of the miniatures.
Finally I finished the bases with smooth, black edges. One layer of Matt Black, applied with Wargamer: Regiment Brush.
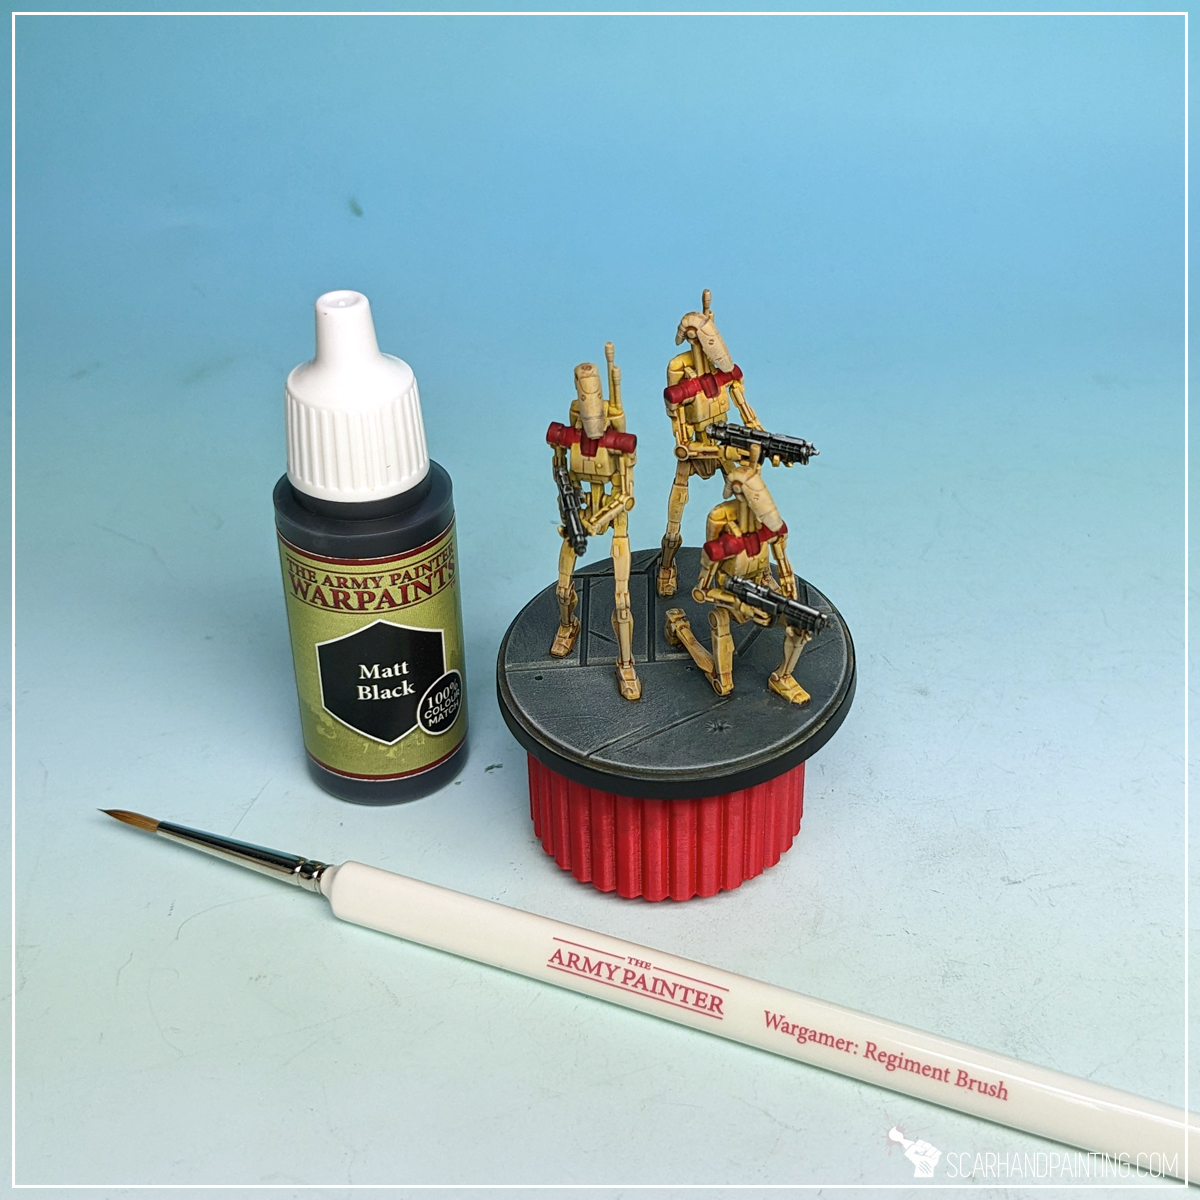
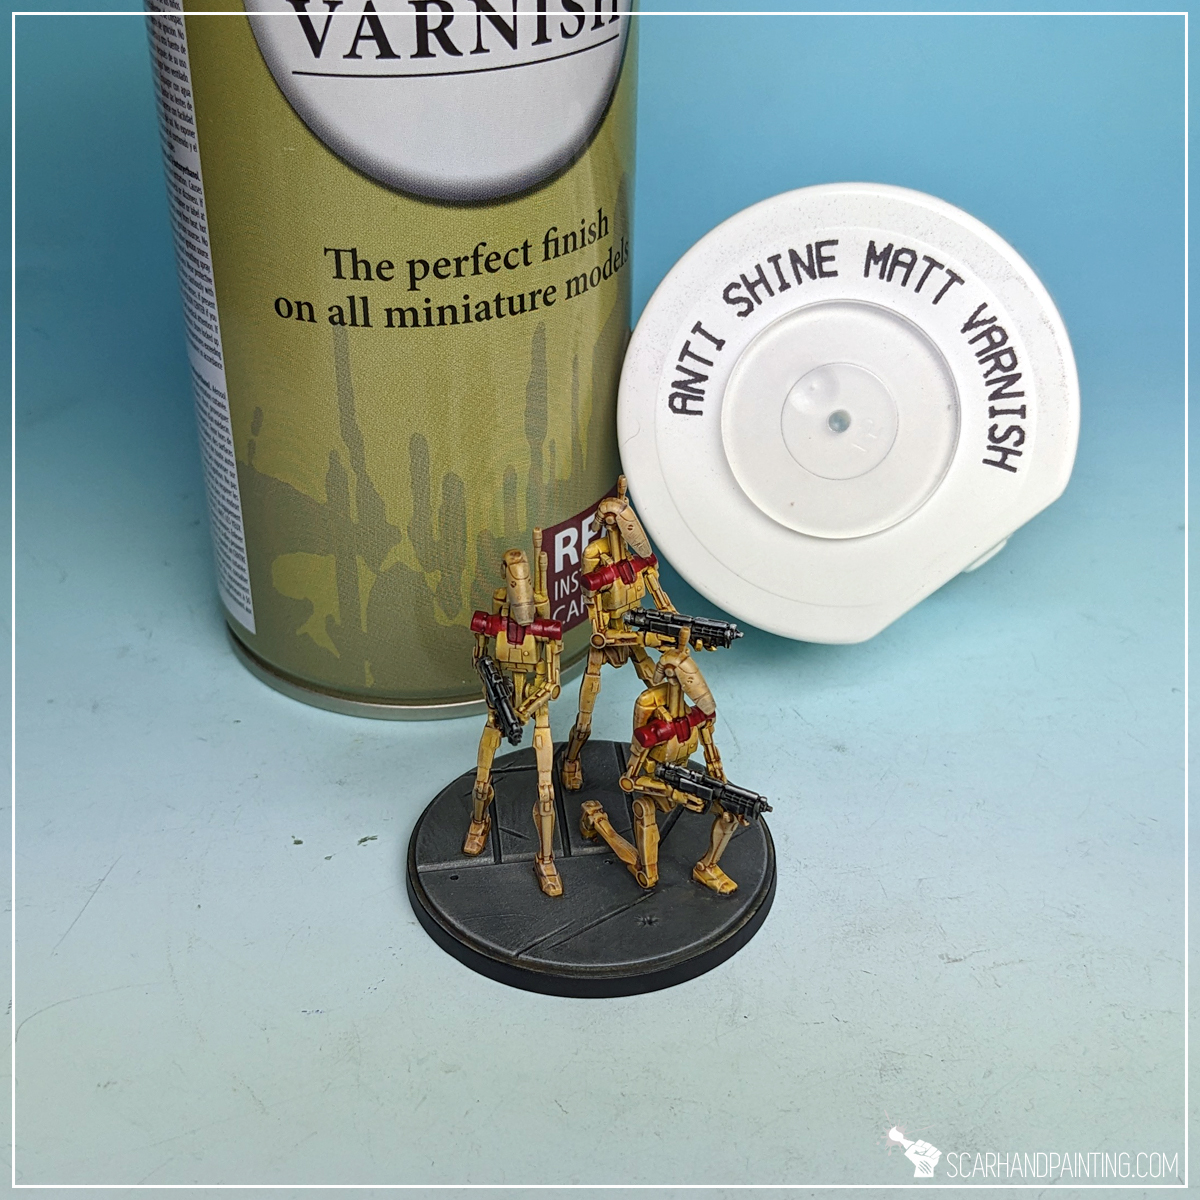
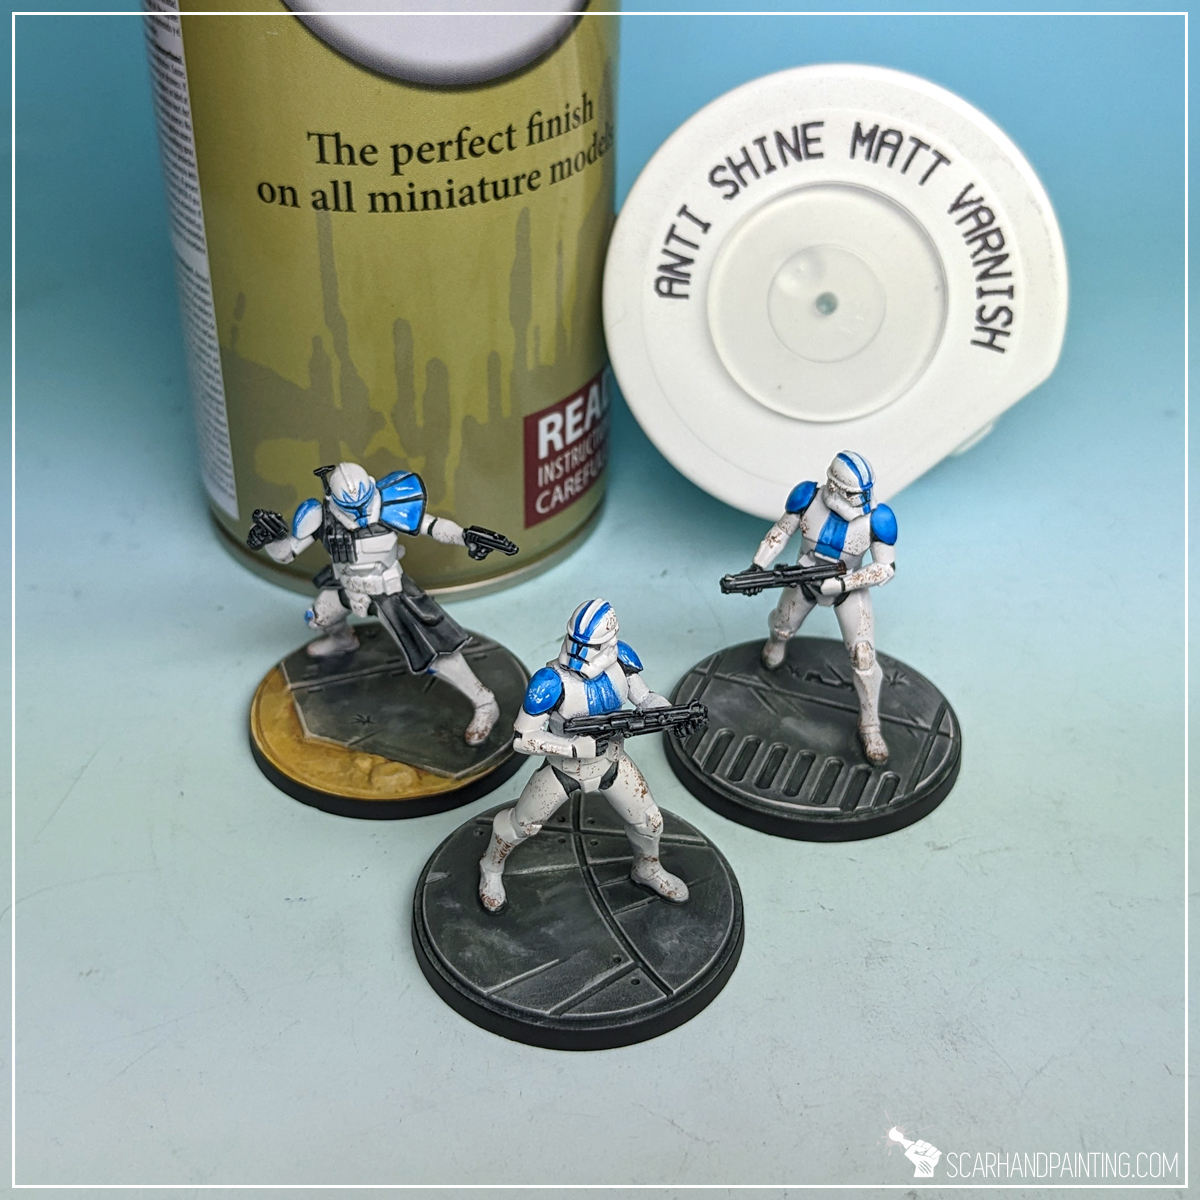
Lastly I sealed the paint job with Anti Shine Matt Varnish.

I hope you find this tutorial interesting. Be sure to let me know your thoughts in the comments below or via Facebook or Instagram. I would also appreciate it if you considered sharing this content with your friends, who might find it useful. Many thanks to Rebel.pl for sponsoring this content. Stay tuned for more Star Wars: Shatterpoint tutorials.
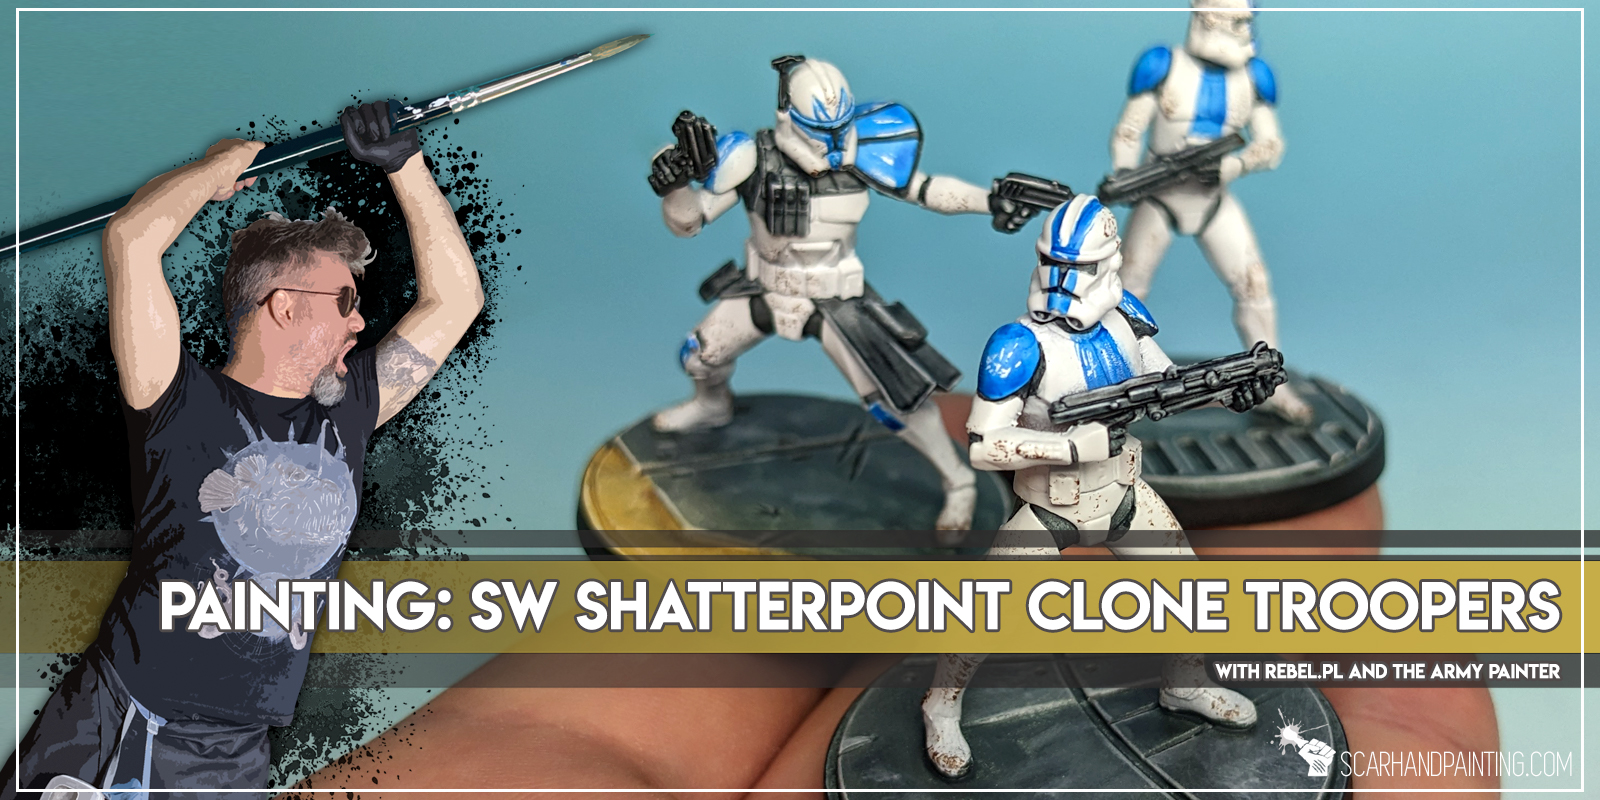
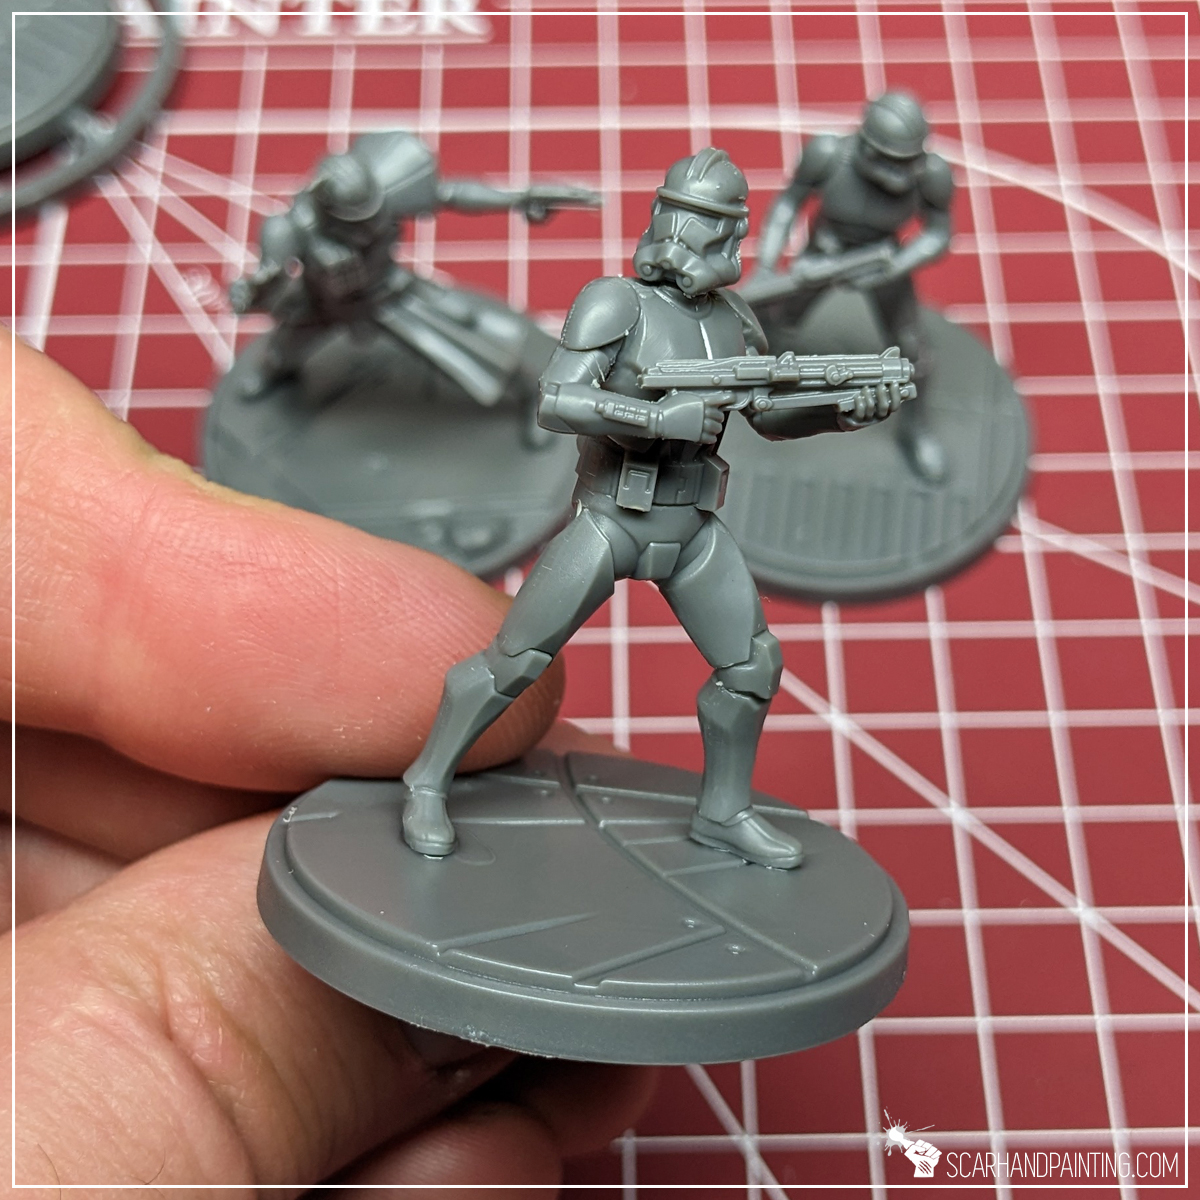
Welcome to Painting Star Wars: Shatterpoint Clone Troopers tutorial. Here I will present to you a Step-by-step of a basic painting process for Clone Troopers, with few optional extras.
Before we start, some notes:
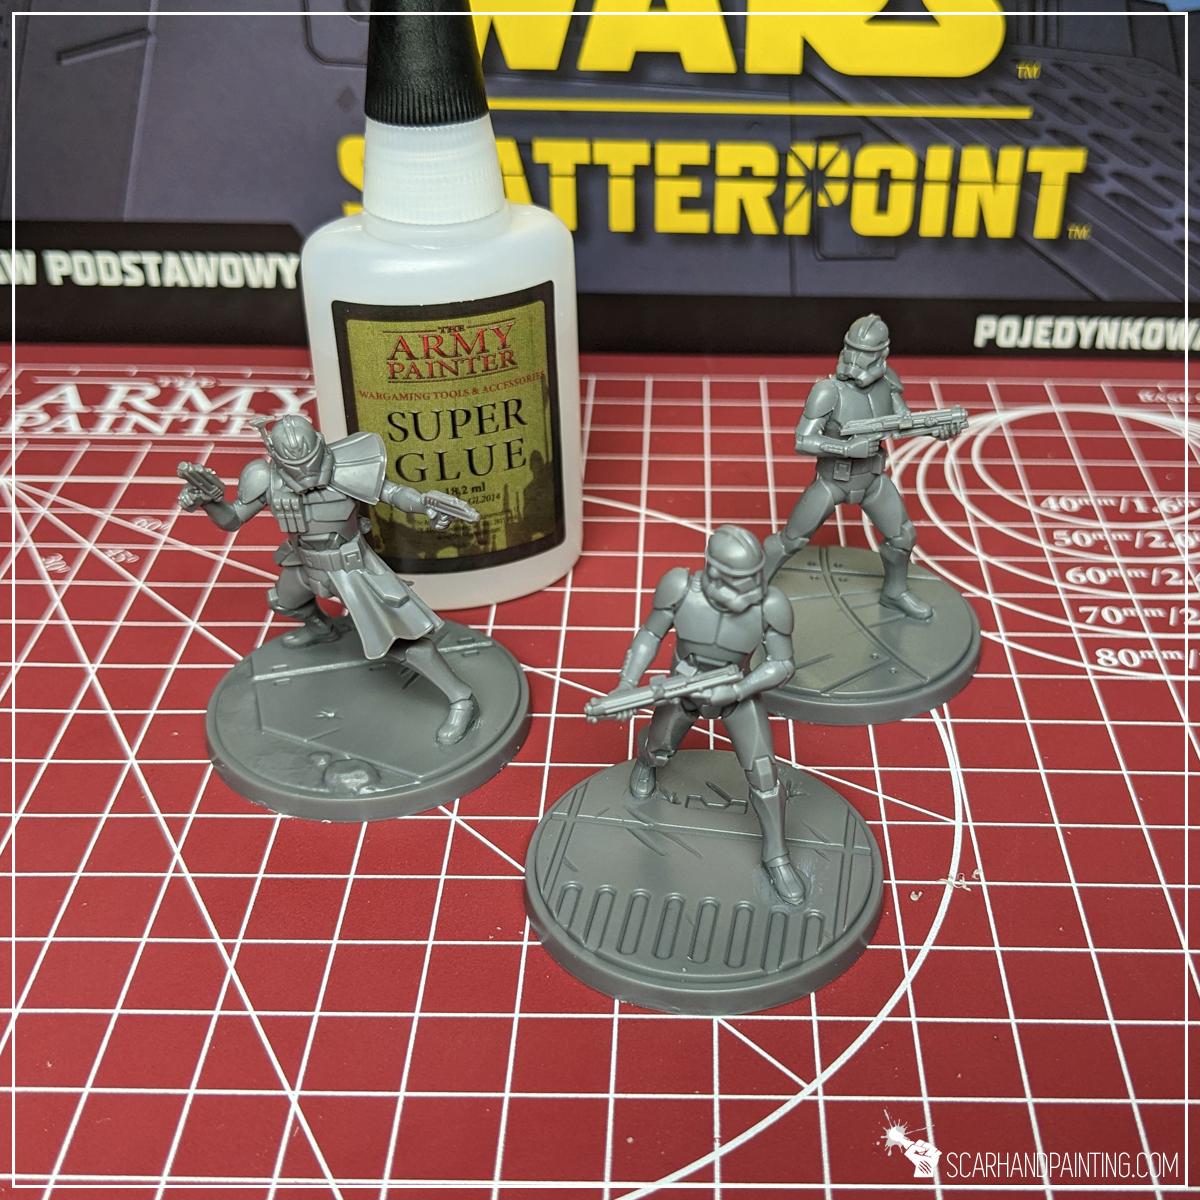
In case you are totally unfamiliar with the hobby, Star Wars: Shatterpoint being your very first step into the overall Wargaming, below are a few basic steps of miniatures build and preparation.


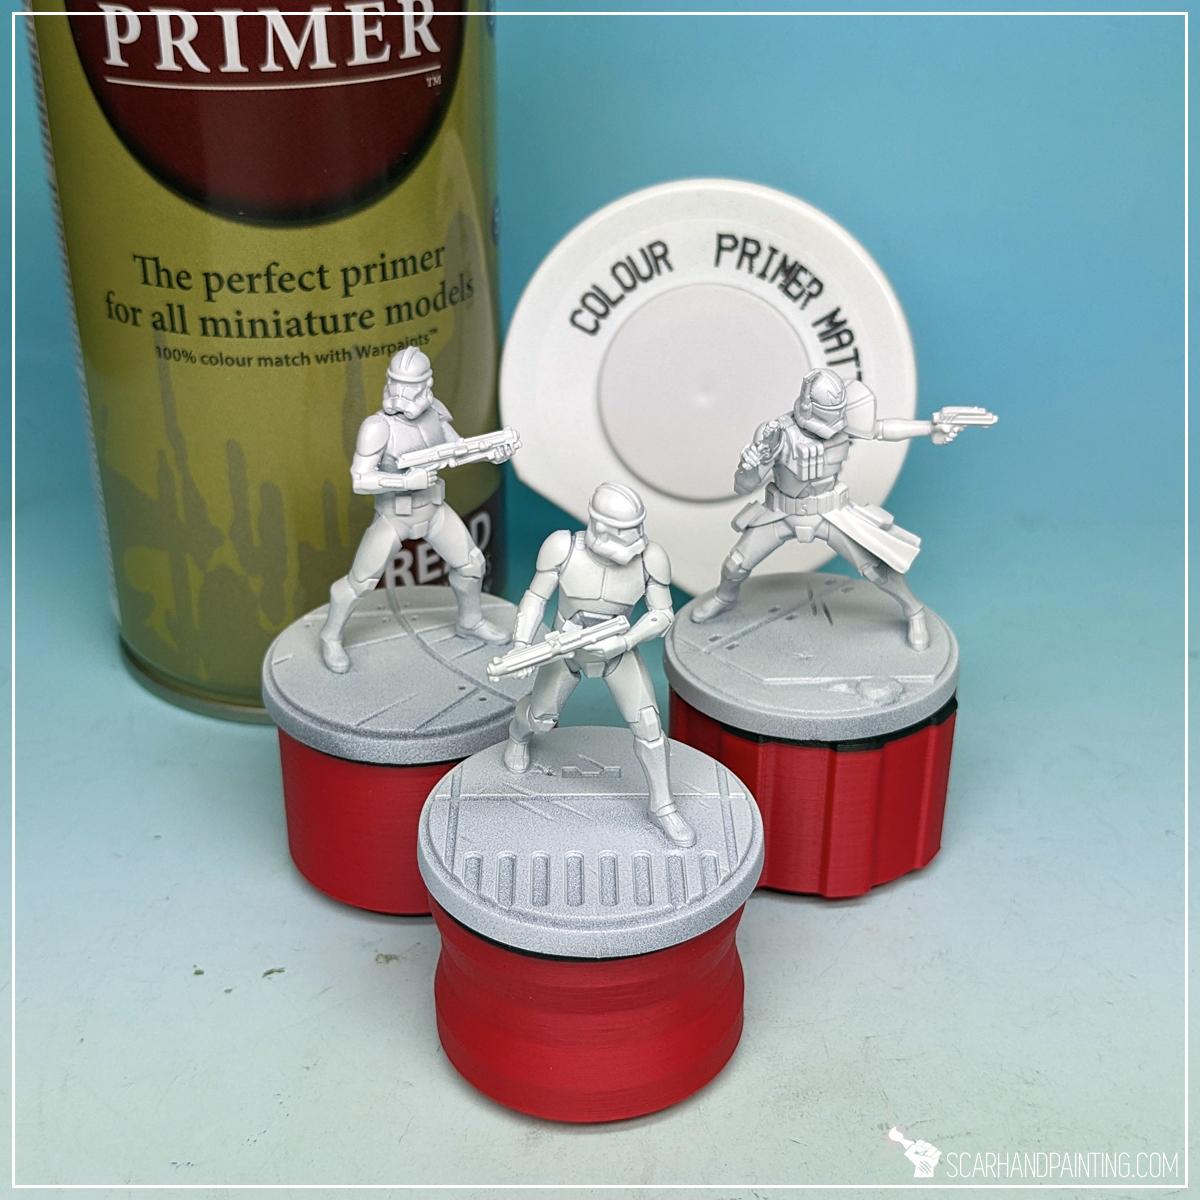
Undercoating miniatures is a topic on its own. Each primer color and technique of application has some advantages. For this tutorial I chose The Army Painter White Matt Primer and sprayed the miniatures around, mounted on a stick with a piece of Blu-Tack. This resulted in a durable, smooth surface, perfect for this kind of paint job. It also allowed me to skip an otherwise difficult first step – white armor.
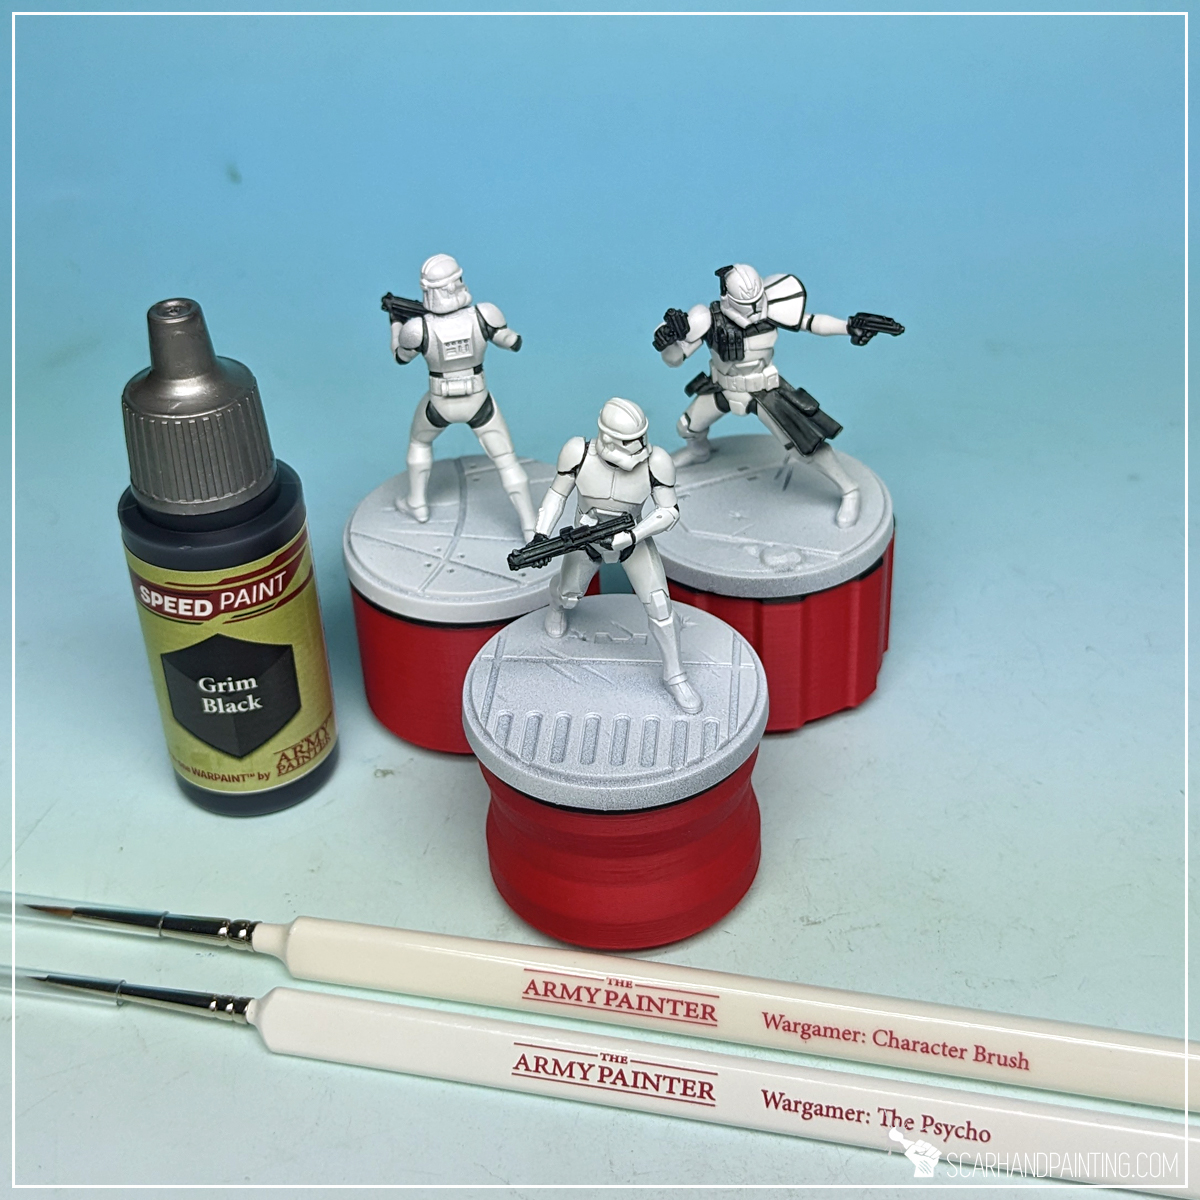
With a Wargamer: Character brush I applied Grim Black Speed Paint over weapons and cloth. I then switched to Wargamer: The Psycho to apply more paint into recesses between armor and onto helmet visors.
TIP: This step is a bit tricky. A lot can go wrong. Fortunately, thanks to spray undercoat’s durability and smoothness, any bloopers can be erased using a toothbrush soaked in water. Simply soak the tip of a toothpick in water, then flatten it with a pair of pliers to make an ultimate bloopers eraser.


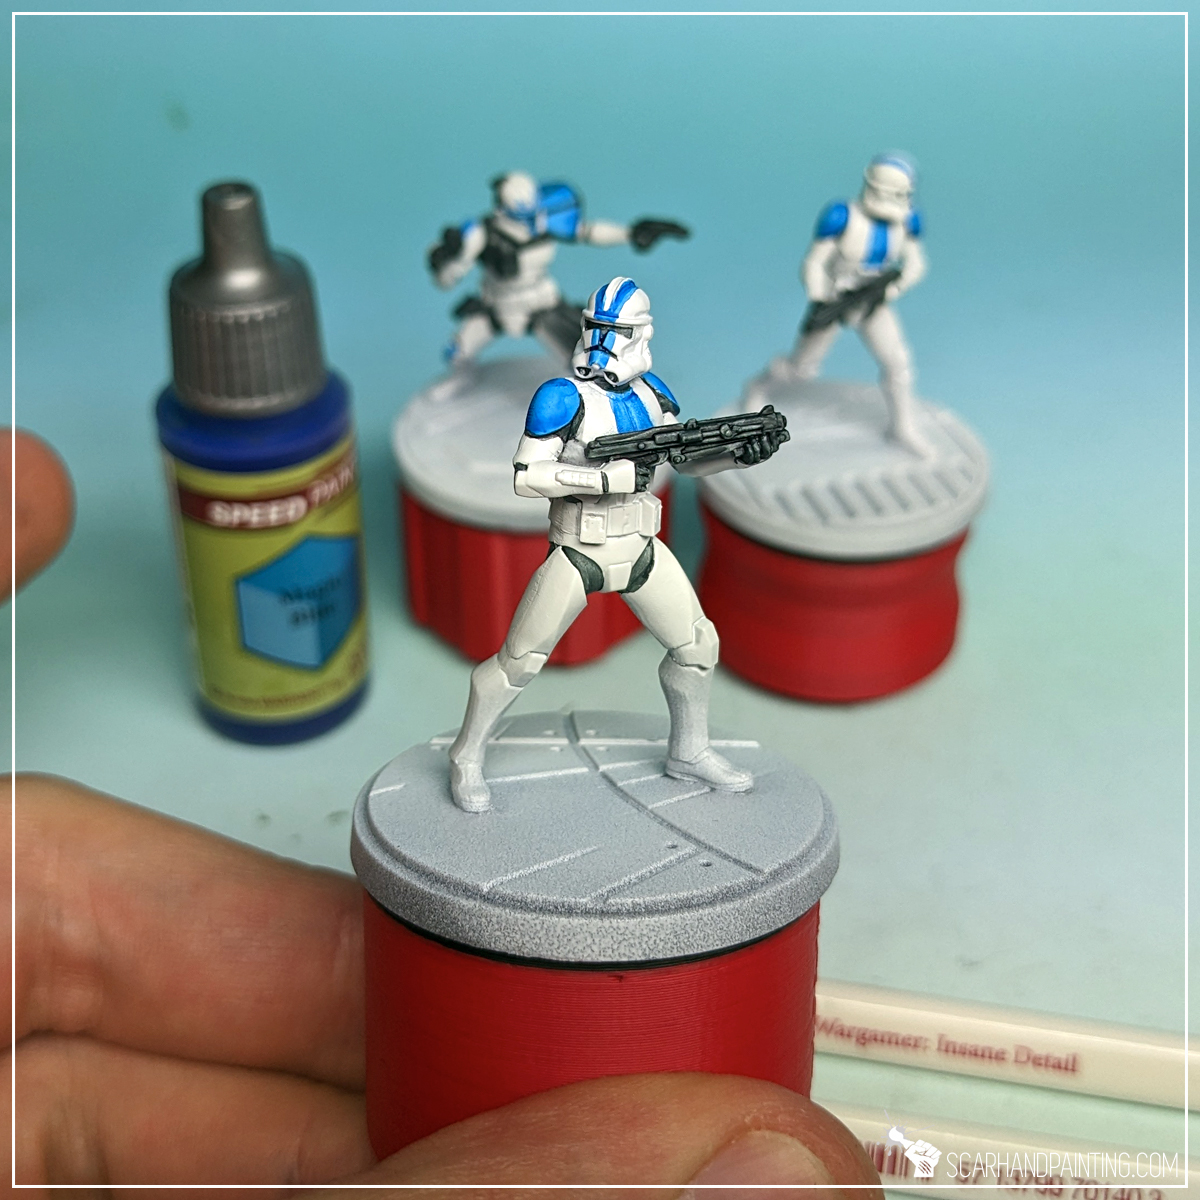
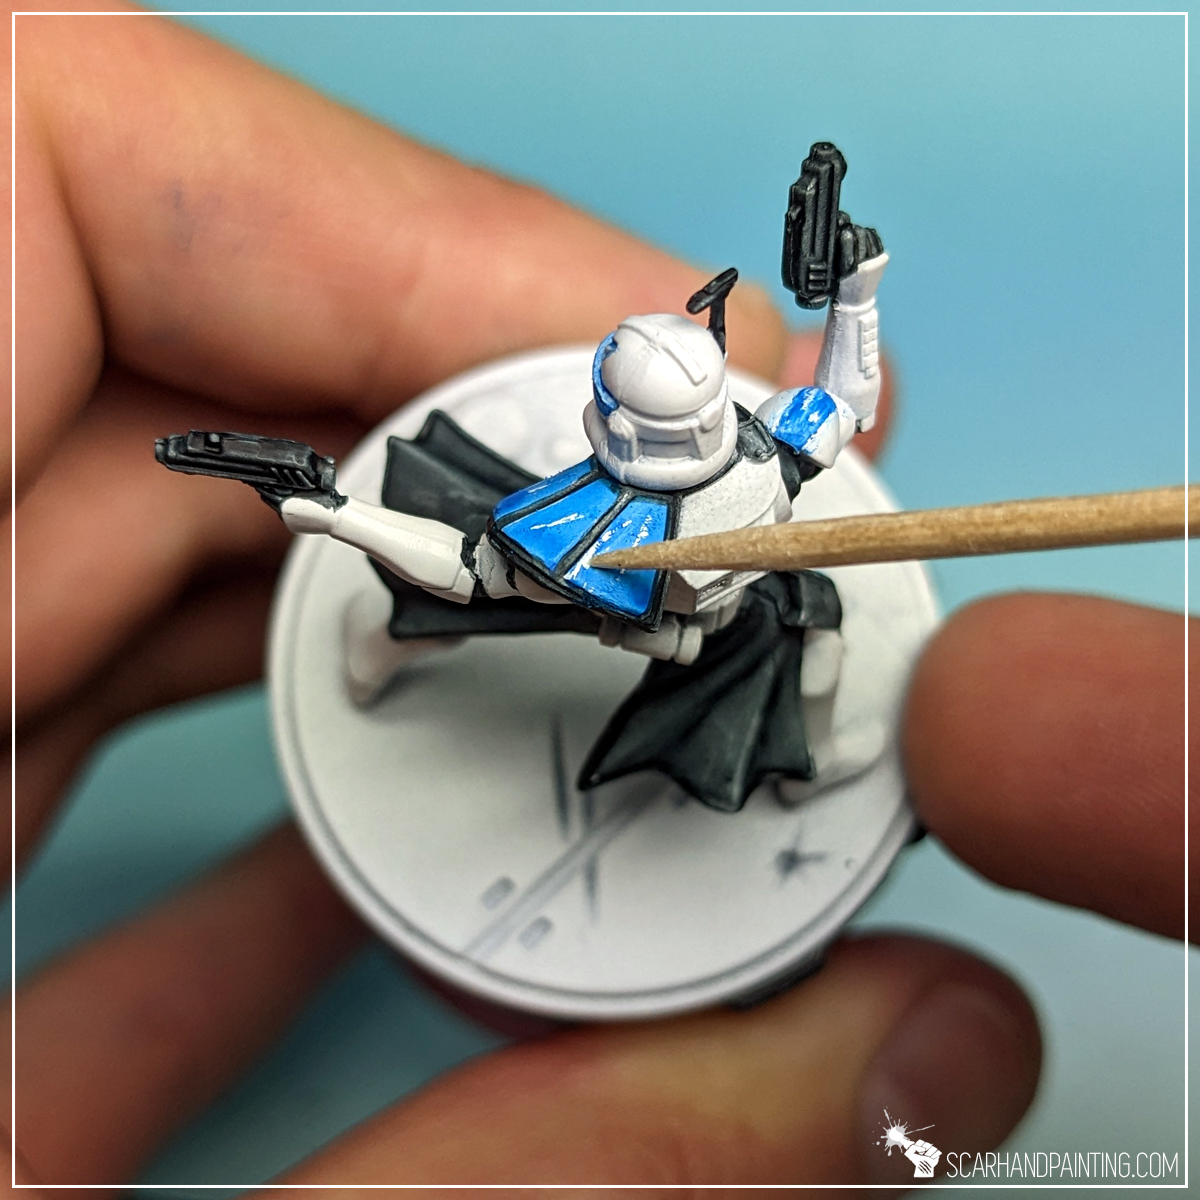
Next I applied Magic Blue Speed Paint onto shoulder guards and in selected areas on helmets and chest plates. I used Wargamer: Insane Detail and Wargamer: The Psycho brushes for this. Usually, when using thin paints such as Speed Paints I go with larger brushes, but here I aimed at precise application.
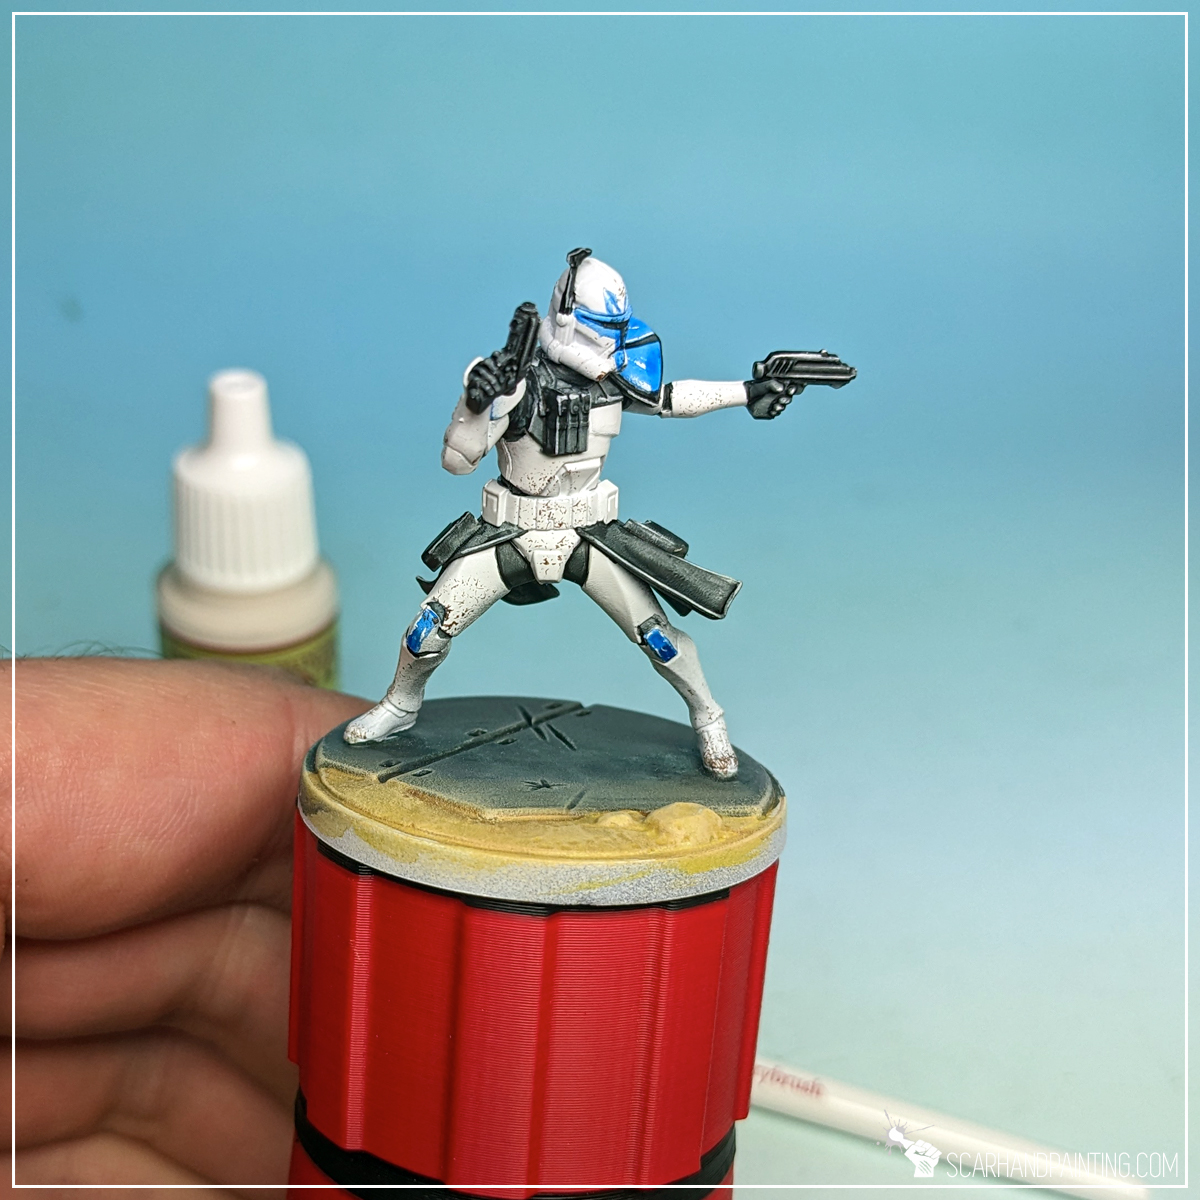
I then used a tip of a toothpick to scratch blue surface, adding some character with thematic battle damage. This wouldn’t be possible on most undercoats, but The Army Painter primers leave a really strong plastic-like surface.

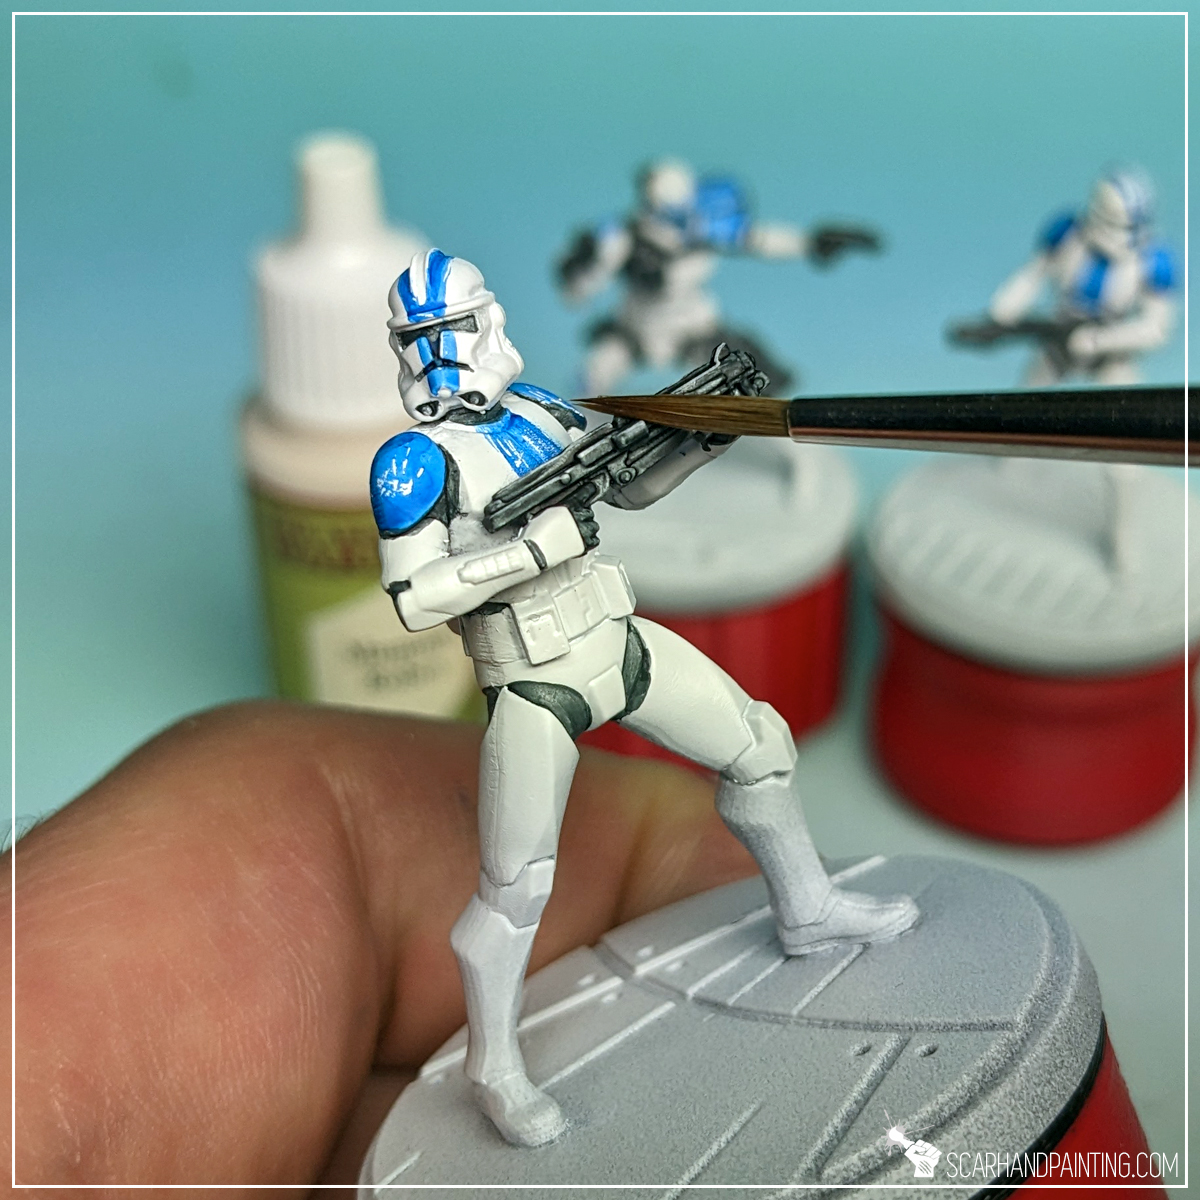
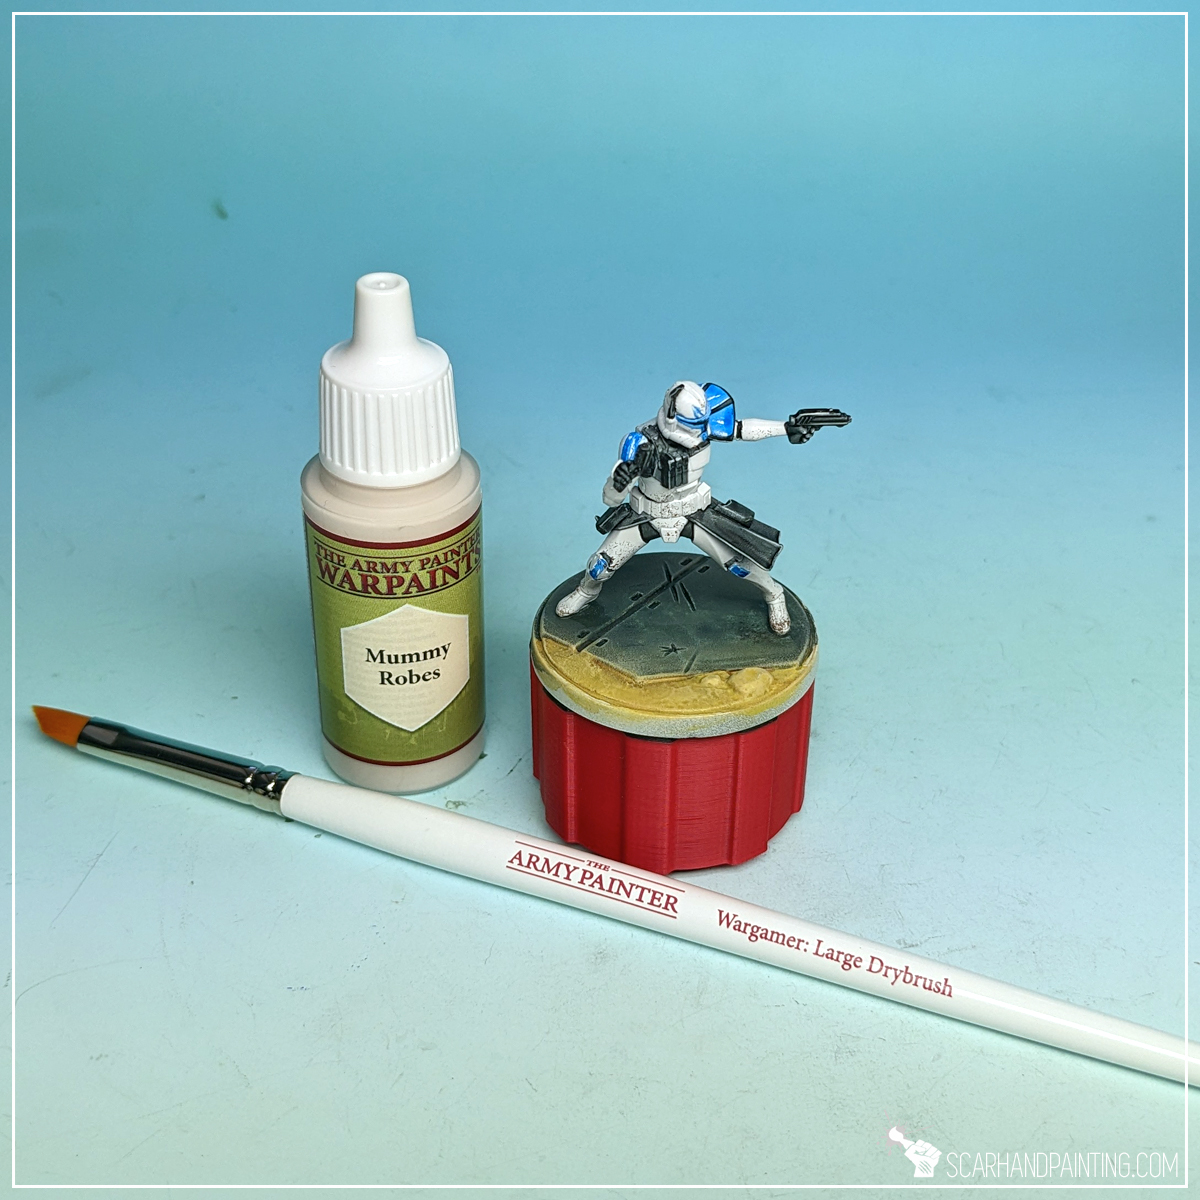
Using a Wargamer: Regiment Brush I then applied a highlight of Mummy Robes onto the top edges of the guns. Due to wider, more sturdy heads, I find larger brushes better for this kind of job. The key was to keep the paint to a minimum and slide the brush perpendicularly across the top surface of each gun.

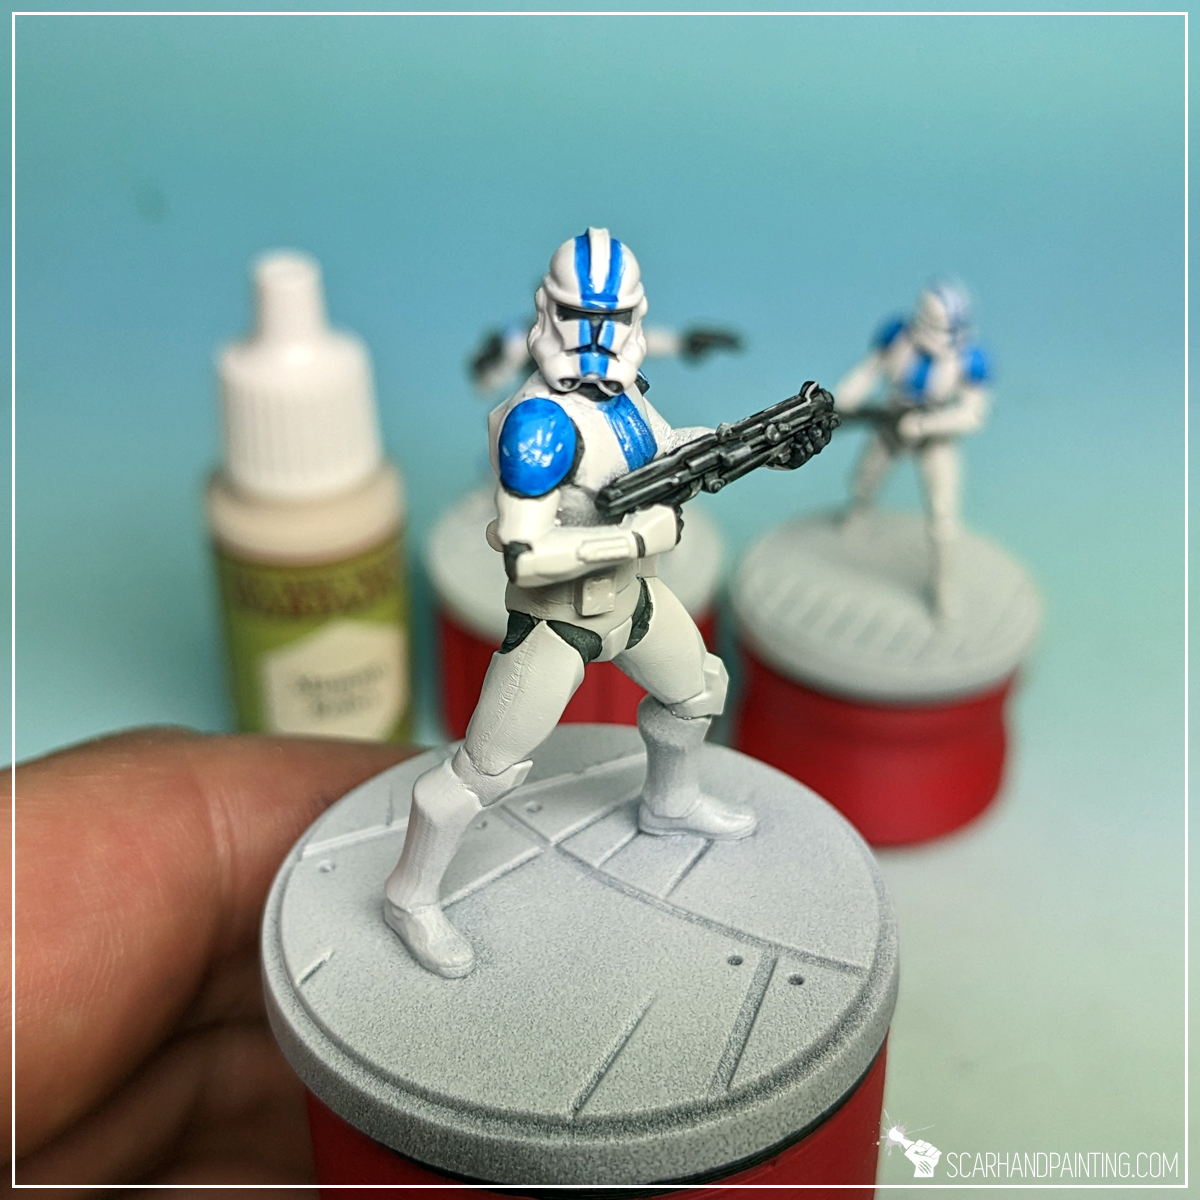
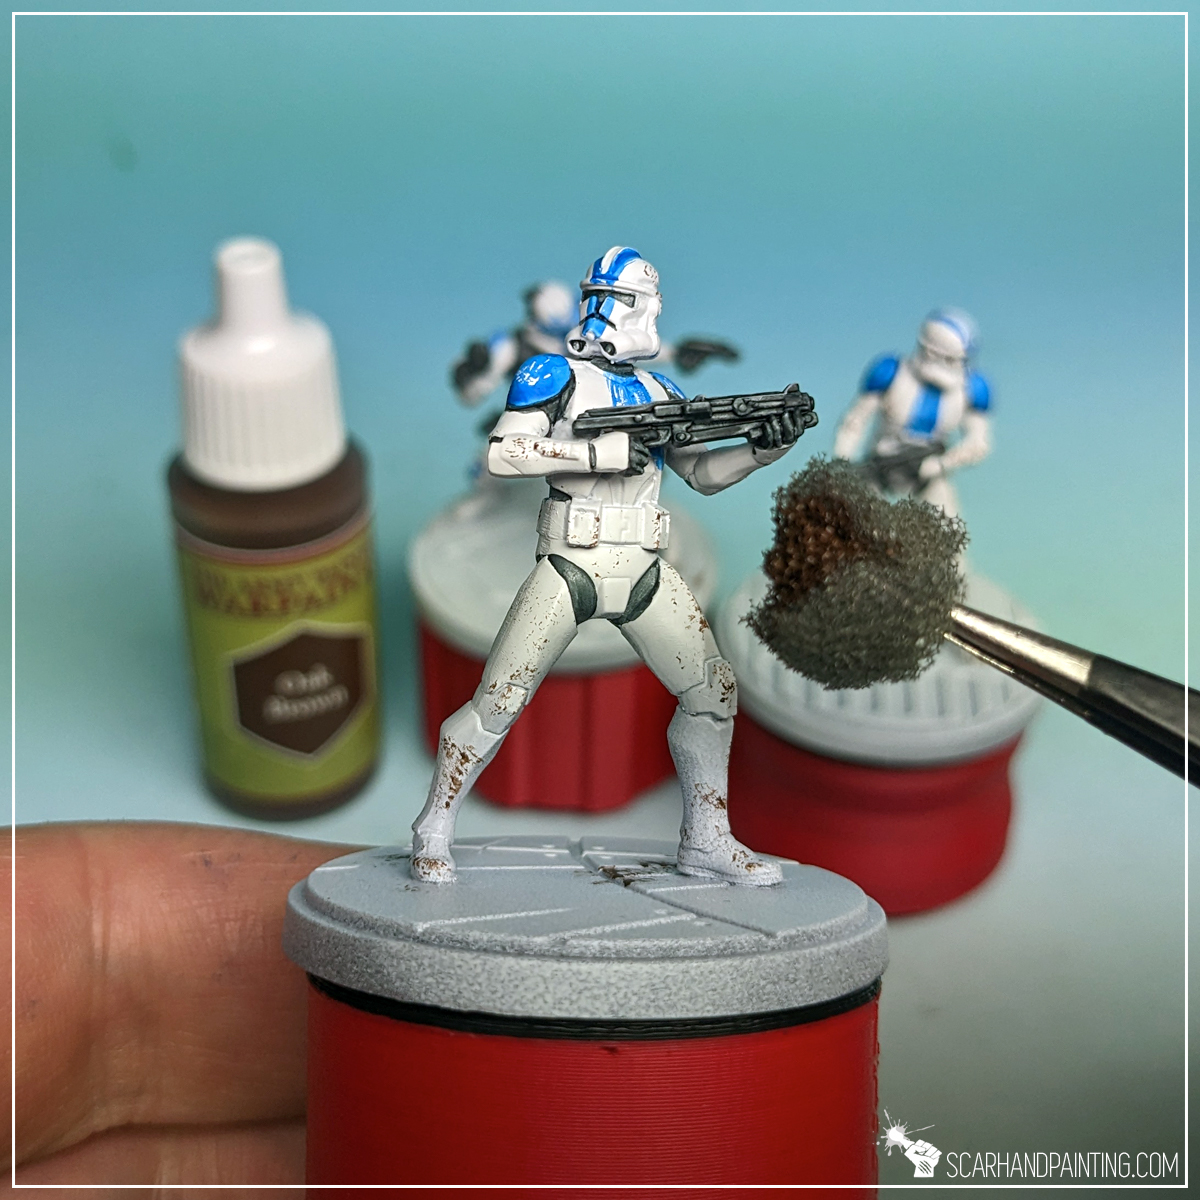
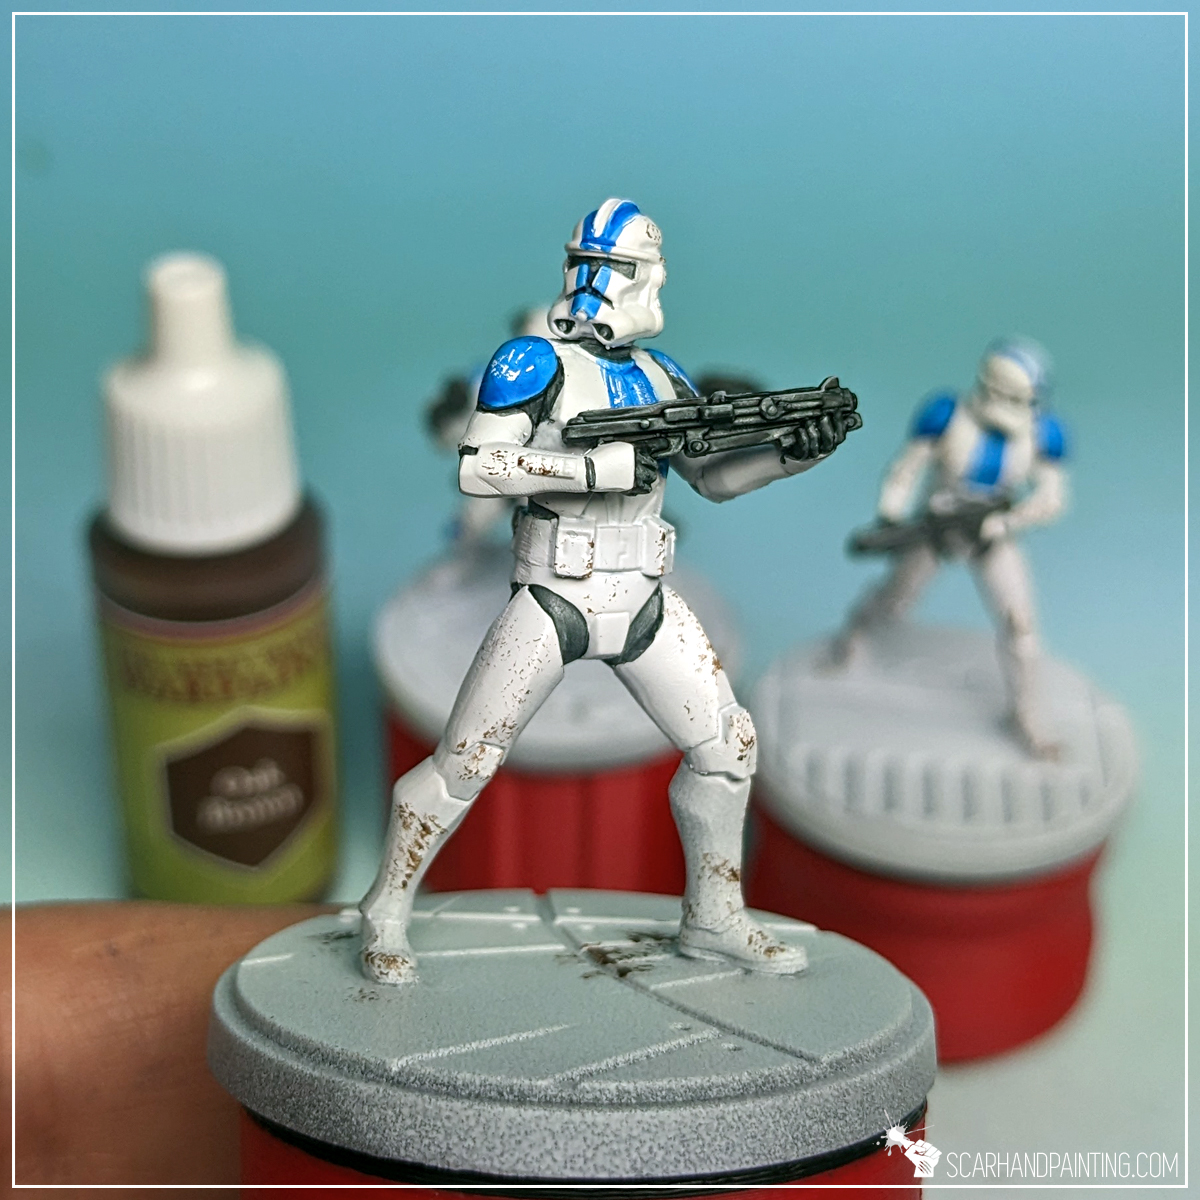
I then used a pair of tweezers and a piece of foam to stipple Oak Brown all over the armor plates. This broke the otherwise flat looking armor and provided additional detail to the miniatures.

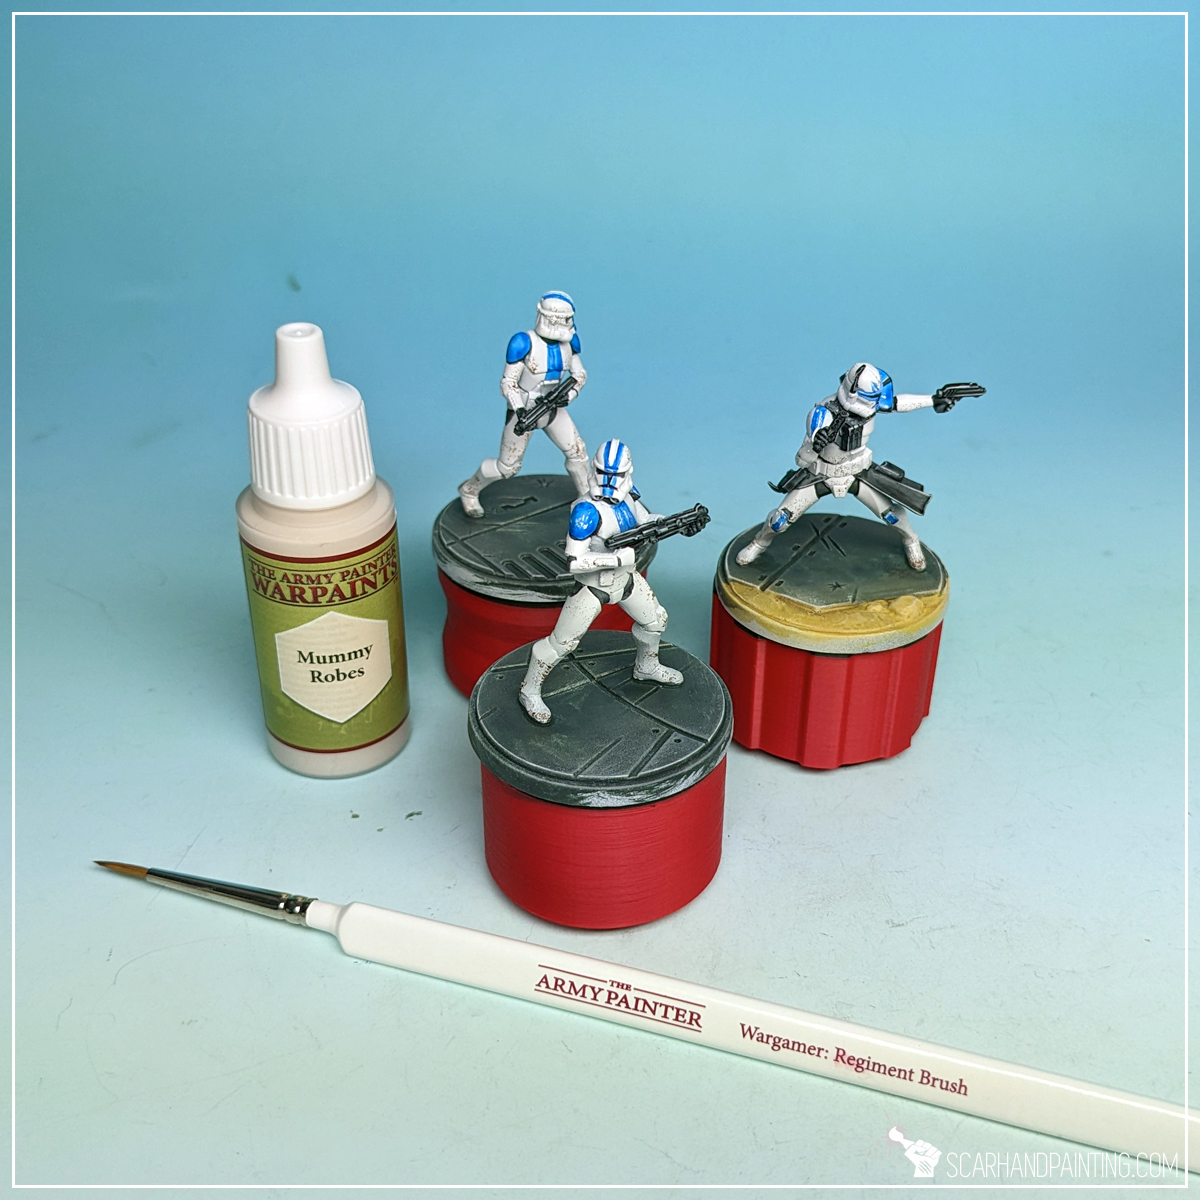
For bases I decided to keep them relatively simple, to make the miniatures stand out. First I applied a layer of Raven Black (air), starting carefully around the miniature’s feet, then expanding outwards. I deliberately used air series paint for an extra messy end result – free details on the painted surface. I used Wargamer: Regiment Brush for this and the next layer.
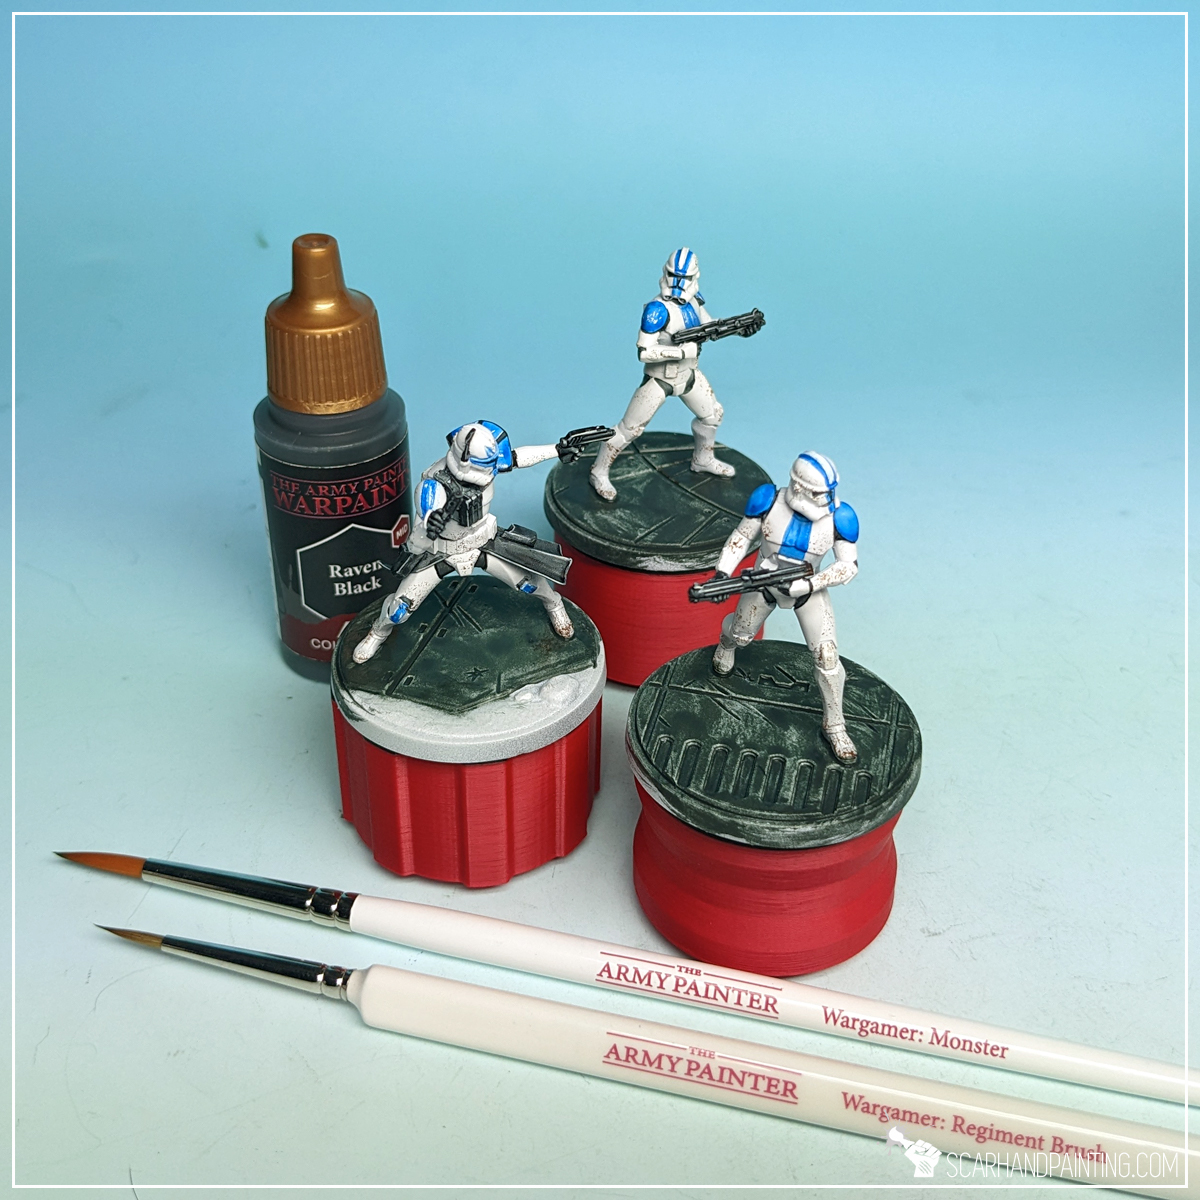


Next, using the same methodology, I followed up with Crow Hue.
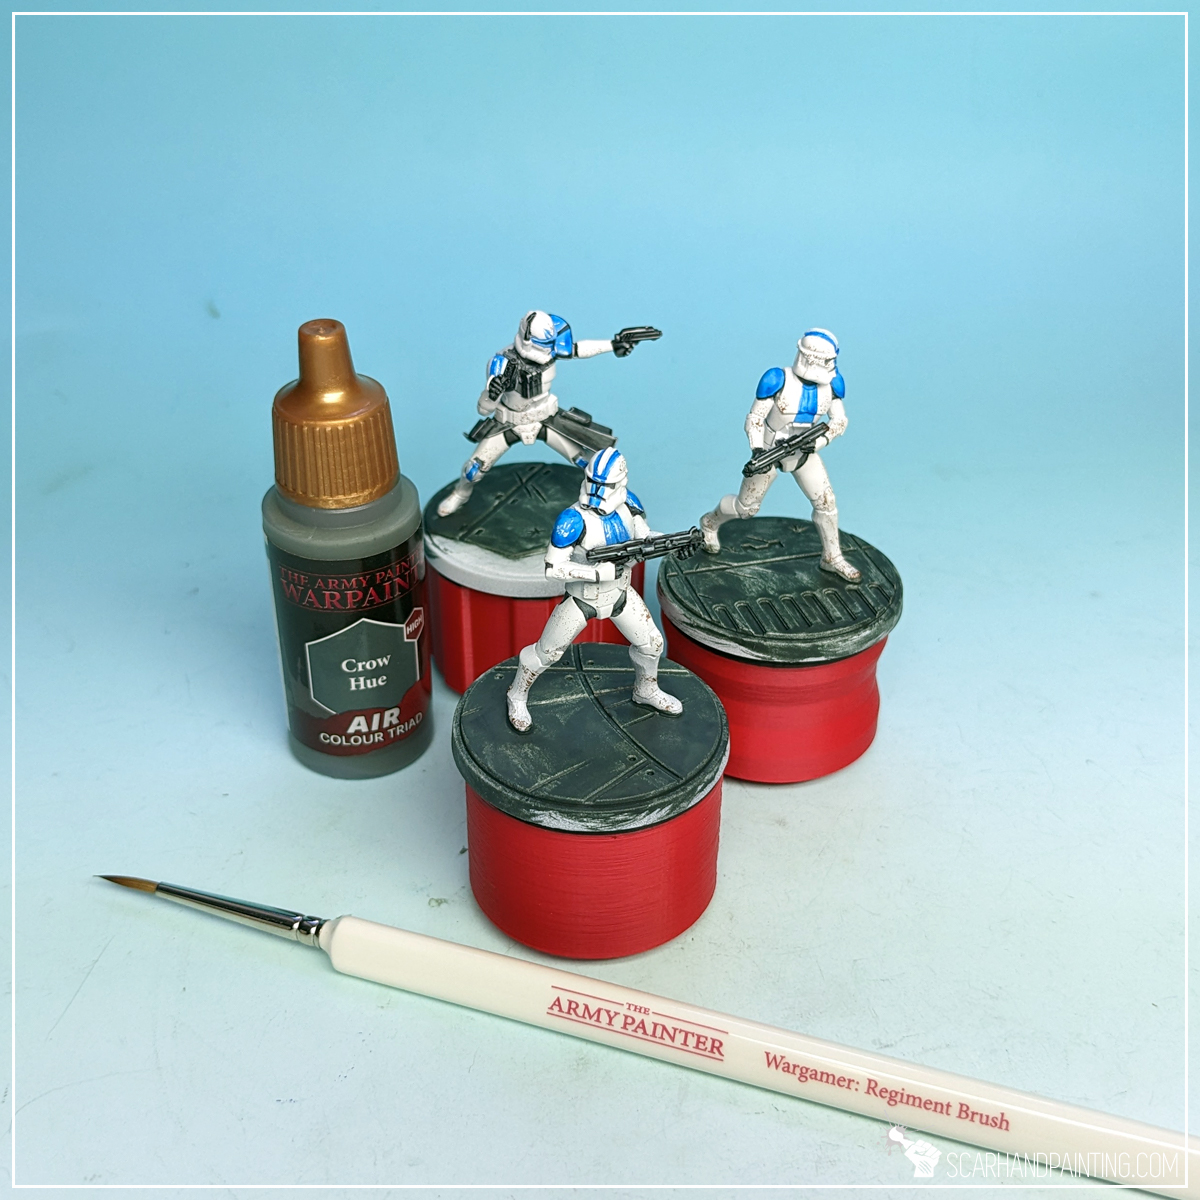

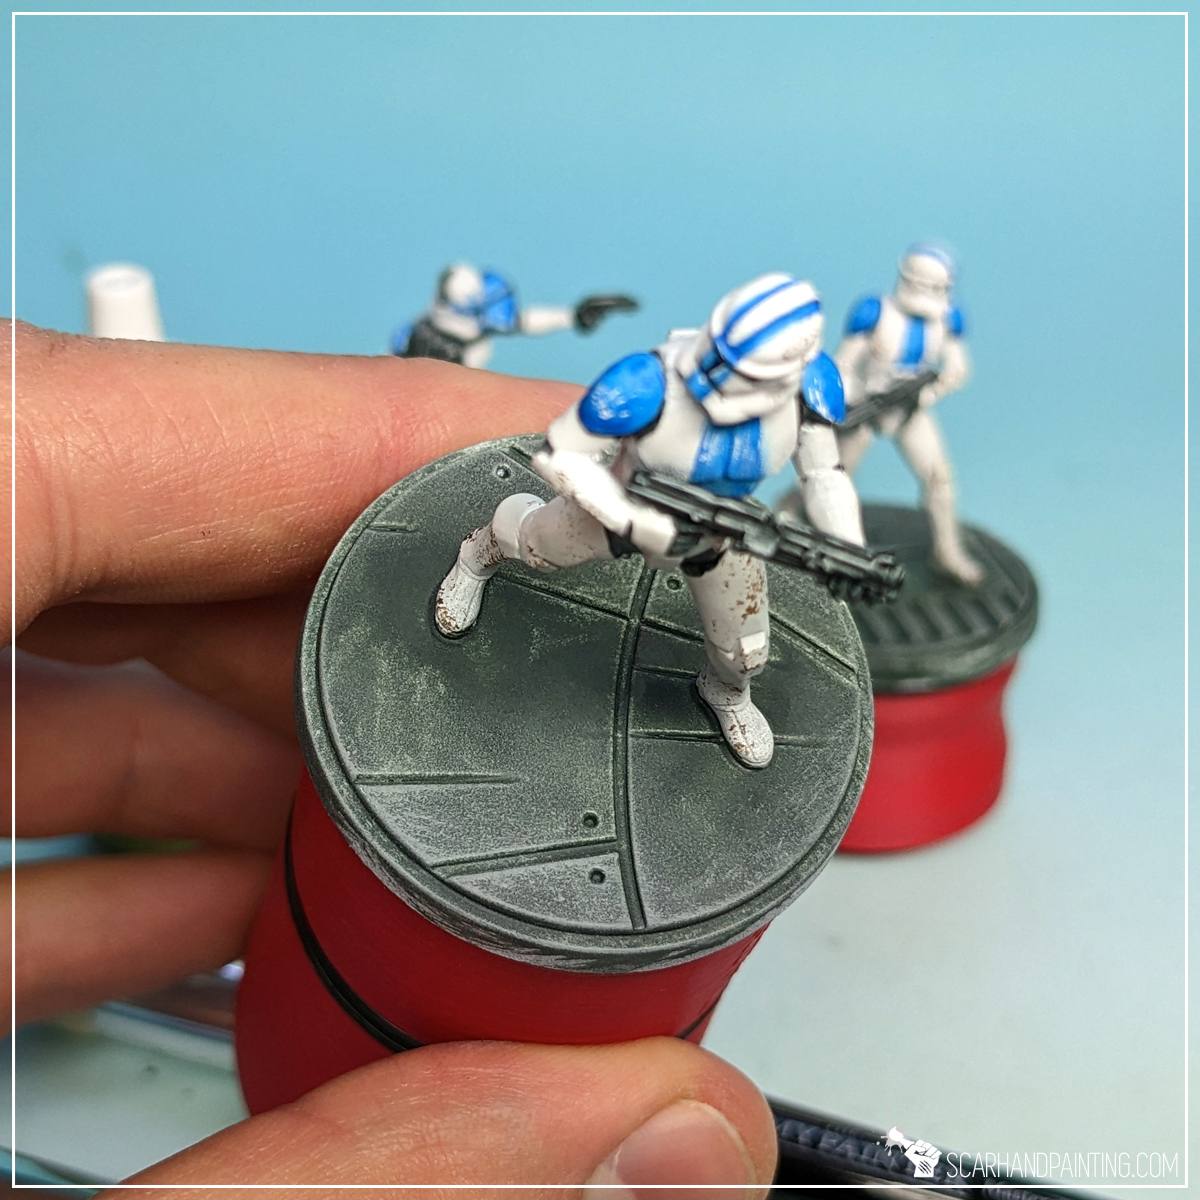
I then drybrushed entire base with Ash Grey.
TIP: Drybrush is done by putting the tip of a brush in paint, then brushing the excess paint off onto a piece of paper, foam or some other material, then brushing the remainder of the paint onto the chosen surface. This can be done with either standard Small/Large Drybrush, or Masterclass for easier, faster application.
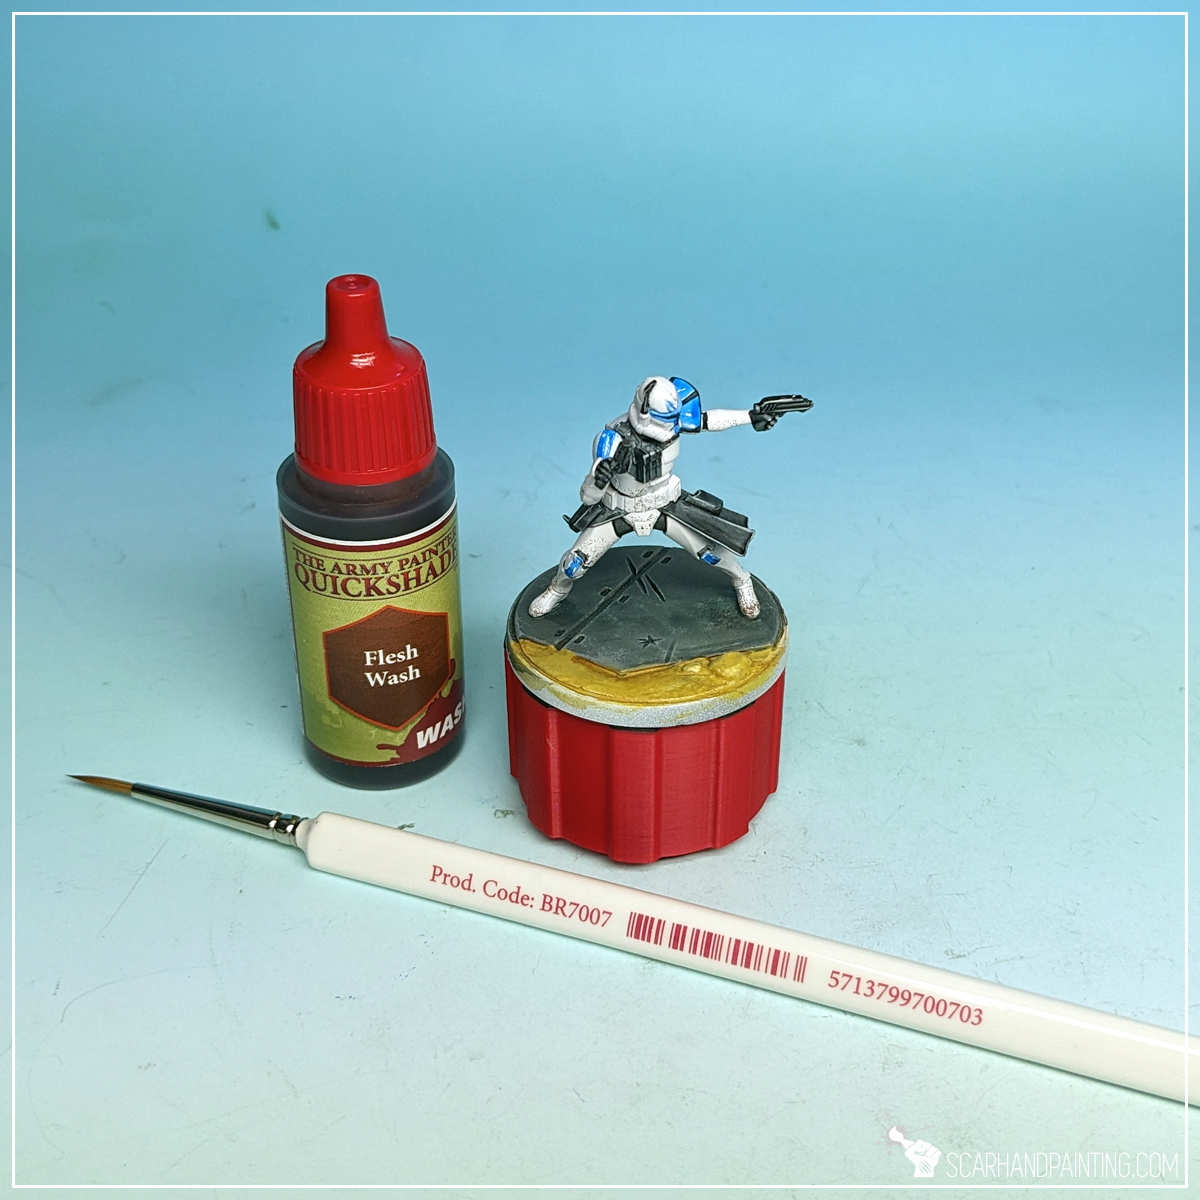
For sand I applied Yellow Dune (air), followed by a wash with Flesh Wash paint.
TIP: Washing is done by applying Washes, or Inks in large quantities and letting them dry. The pigmentation goes into recesses, highlighting any raised areas.

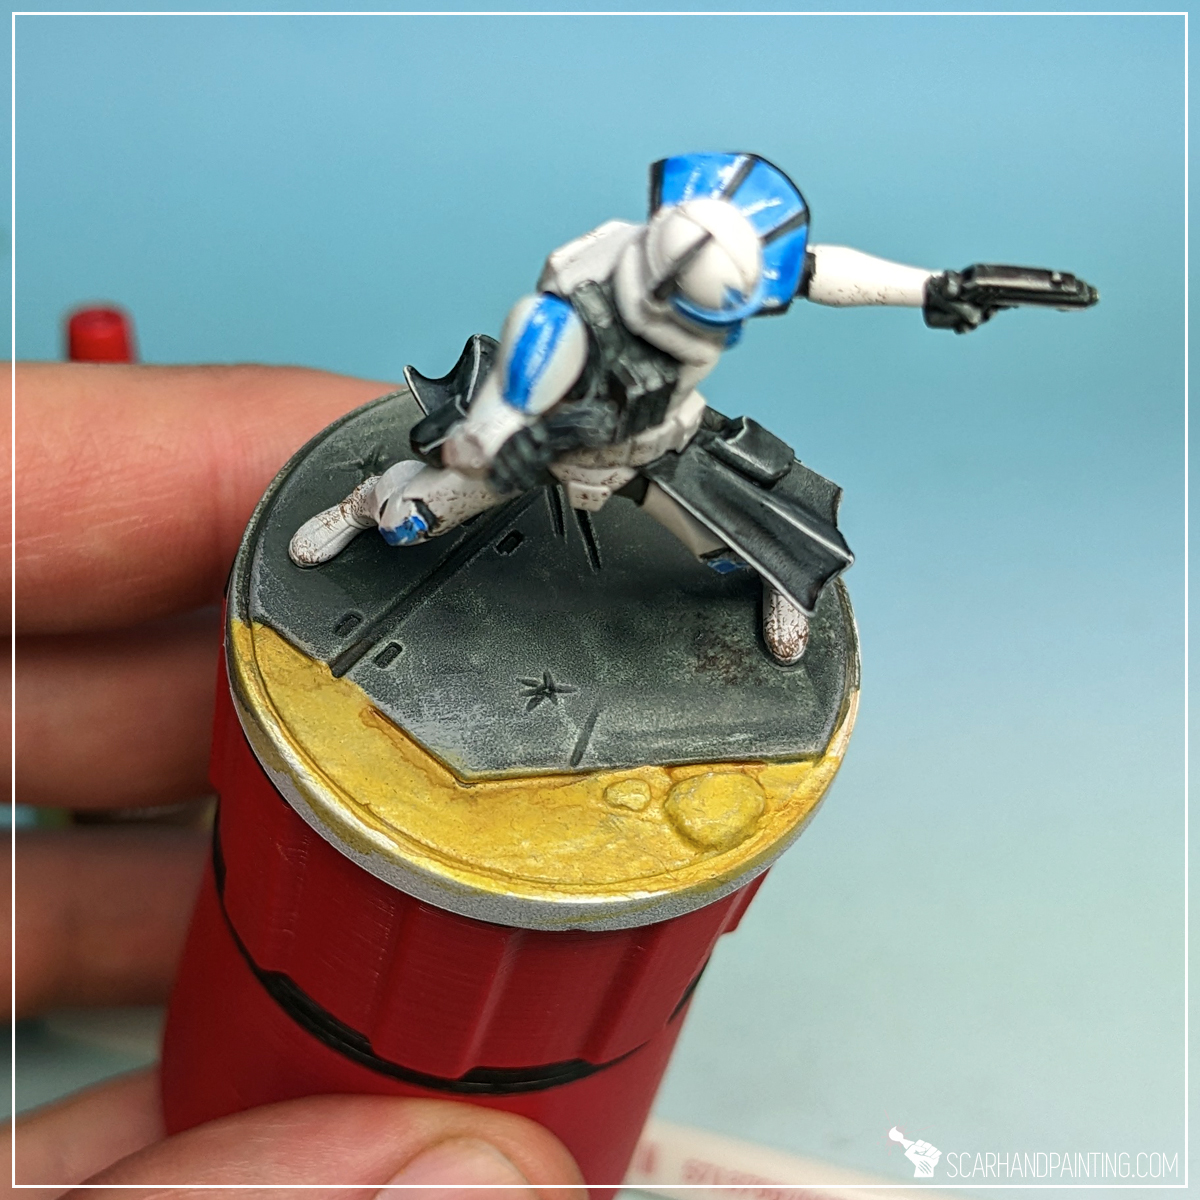
Next I drybrushed sand and surrounding areas with Mummy Robes.

To add depth I highlighted concrete plates edges with Mummy Robes…
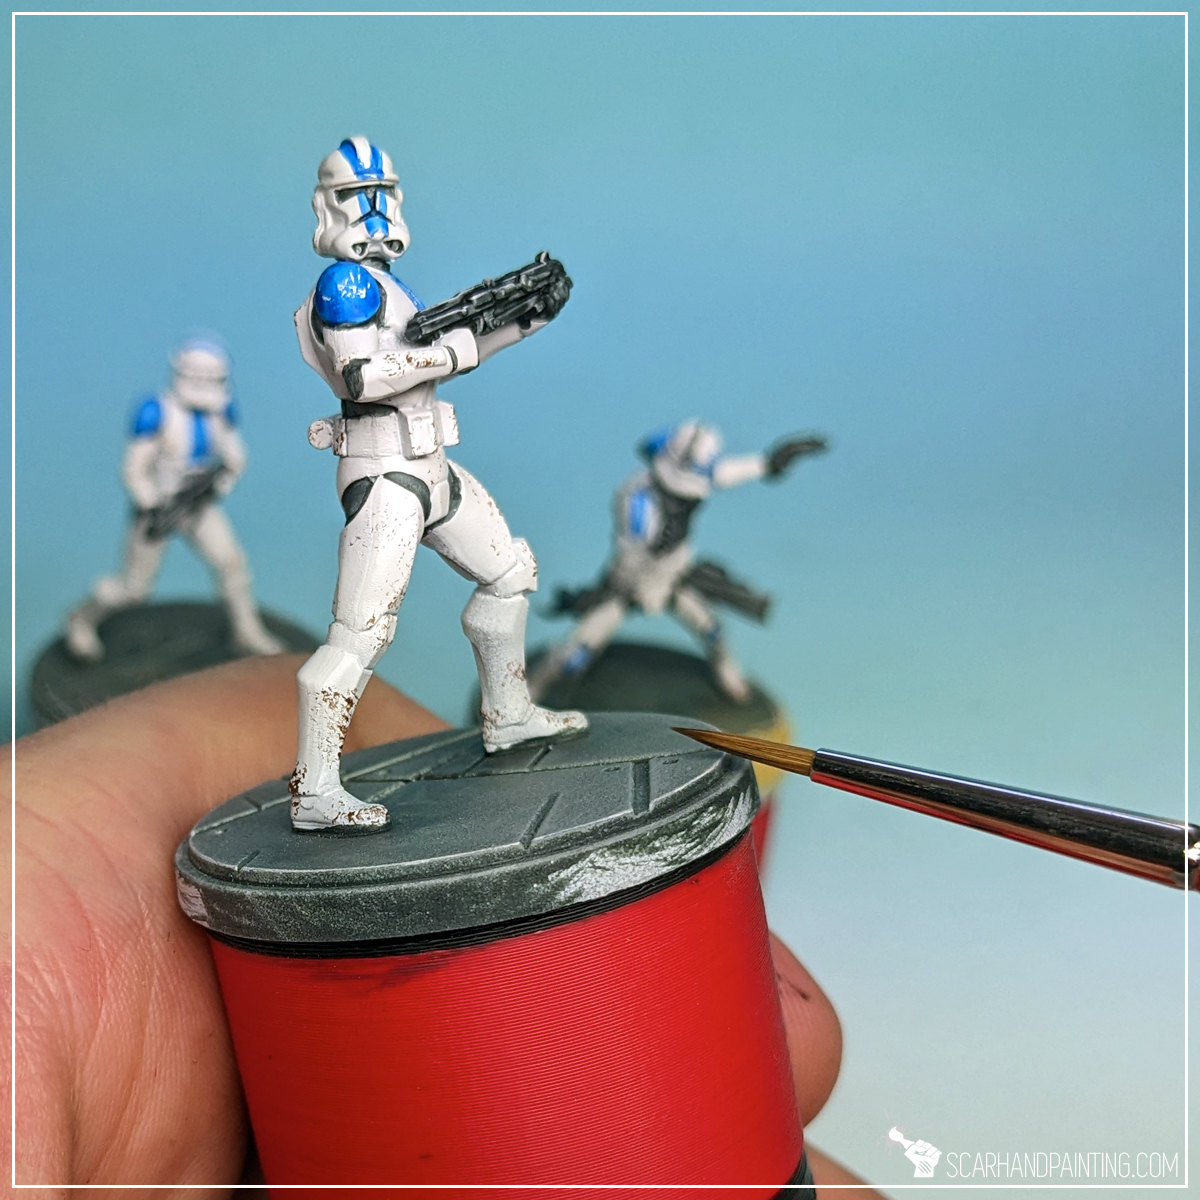
… then thinned Mummy Robes with a bit of water and wiped the brush off with a series of semi random movements, onto flat concrete areas. I used Wargamer: Regiment Brush.

To make the miniatures stand out and underline them, I painted bases’ edges with Matt Black. Wargamer: Regiment Brush again.

Finally I sealed the paint job with Anti Shine Matt Varnish. This protective layer will keep my Clone Troopers secure from damage, while I game them into oblivion. With this I have finished the paint job.

I hope you find this tutorial interesting. Be sure to let me know your thoughts in the comments below or via Facebook or Instagram. I would also appreciate it if you considered sharing this content with your friends, who might find it useful. Many thanks to Rebel.pl for sponsoring this content. Stay tuned for more Star Wars: Shatterpoint tutorials.