- contact@scarhandpainting.com


Here are some Colour Recipes for Steelheart’s Champions from GALLERY: SHADESPIRE STEELHEART’S CHAMPIONS. Please take note that this is a simple colour scheme, not covering multiple overlapping layers and blends inbetween, that lead to the final product. It is supposed to be used as guidline not a step-by-step.
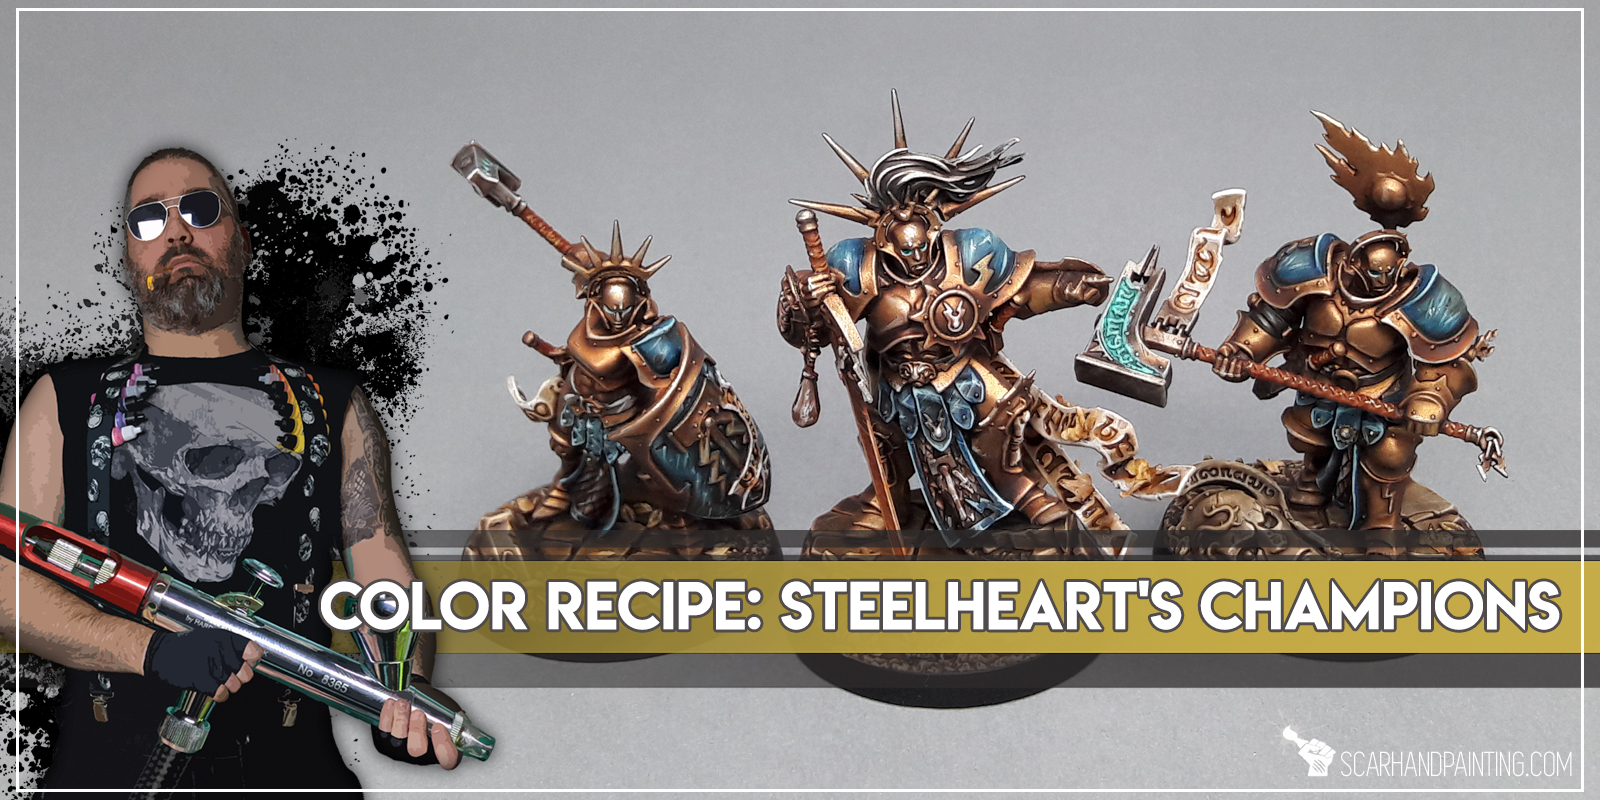
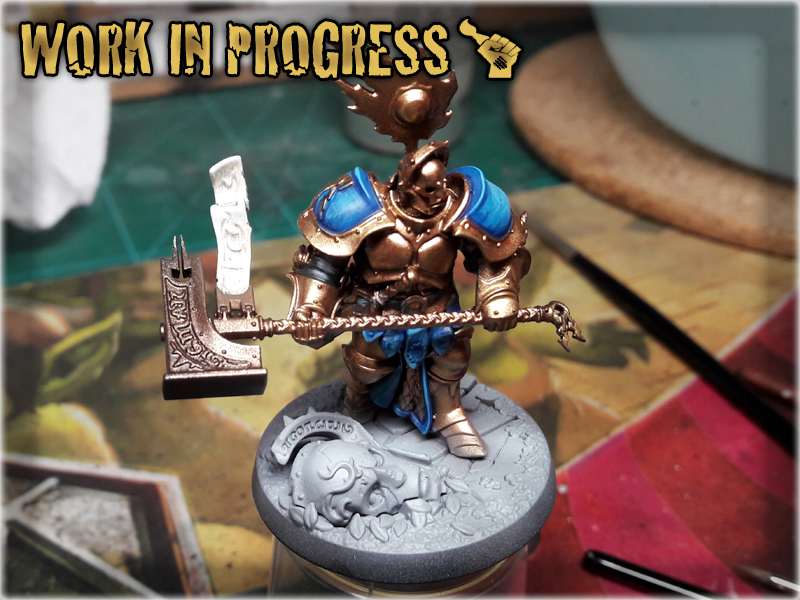
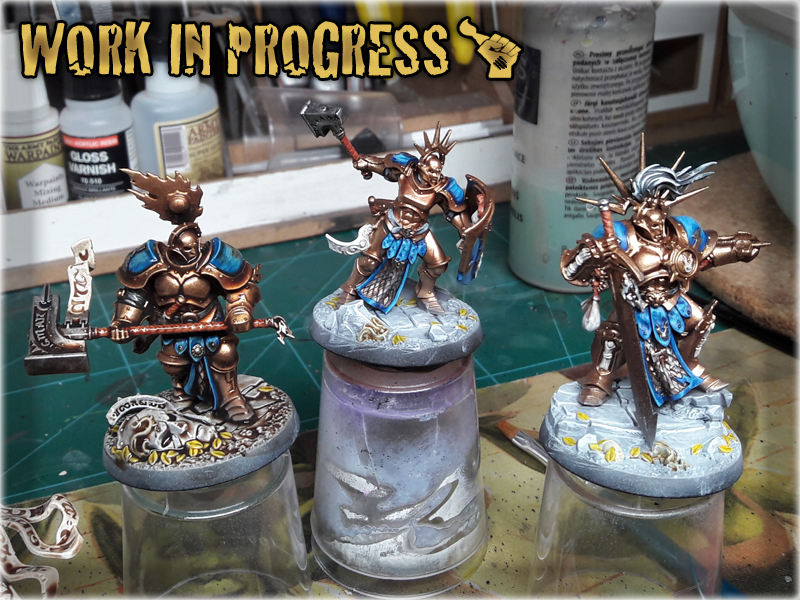
GOLDEN armour:
Black Undercoat,
Mix Rust metallic (Val) 1:1 Blackk metallic (Val), *
Bright Bronze (Val), *
Mix Bright Bronze (Val) 1:1 Brass Balls (P3),
Mix Strong Tone Ink (AP) 1:1 Soft Tone Ink (AP),
Mix Brass Balls (P3) 1:1 Shining Silver (AP), l&p
BLUE:
Steel Blue (Val),
Magic Blue (Val),
Mix Magic Blue (Val) 1:1 French Blue (Val), l
Mix Magic Blue (Val) 1:1:1 French Blue (Val), Off White (Val), l&p
Mix Strong Tone Ink (AP) 1:1 Soft Tone Ink (AP),
Baharroth Blue (GW), l&p
Guilliman Blue (Gw), glaze
Off White (Val), l&p
SCROLLS:
Khaki (Val), *
Bonewhite (Val), *
Mix flayed one Flesh (GW) 1:1 Off White (Val),
Mix Strong Tone Ink (AP) 1:1 Soft Tone Ink (AP),
Off White (Val), l&p
Hot Orange (Val), gl
Gloss Varnish (Val), p
METAL weapons:
Black Undercoat,
Warplock Bronze (GW),
Gun Metal (AP),
Shining Silver (AP), l&p
Mix Strong Tone Ink (AP) 1:1 Soft Tone Ink (AP),
Shining Silver (AP), l&p
GREY belts & strips:
Black Undercoat,
Panzer DK. Grey (Val),
Fenrisian Grey (GW), flbr
Pallid Wych Flesh (GW), l&p
Mix Strong Tone Ink (AP) 1:1 Soft Tone Ink (AP),
Off White (Val), l&p
ORANGE hafts:
Black Undercoat,
Cavalry Brown (Val),
Orange Brown (Val), l&p
Mix Strong Tone Ink (AP) 1:1 Soft Tone Ink (AP),
Orange Brown (Val), l&p
Lugganath Orange (GW), l&p
Off White (Val), l&p
Hot Orange (Val), gl

BASES:
Medium Sea Grey (Val), *
Light Grey (Val)*,
Pale Grey (Val),*
Mix Strong Tone Ink (AP) 1:1 Soft Tone Ink (AP),
Off White (Val), l&p
Dirt (Val), bl
Mix Strong Tone Ink (AP) 1:1 Soft Tone Ink (AP), bl
l&p – lines and points,
p – points,
bl – blend,
gl – glaze,
drbr – drybrush,
flbr – flatbrush,
stpl – stippling,
*Airbrushed (with multiple layers and mixes)
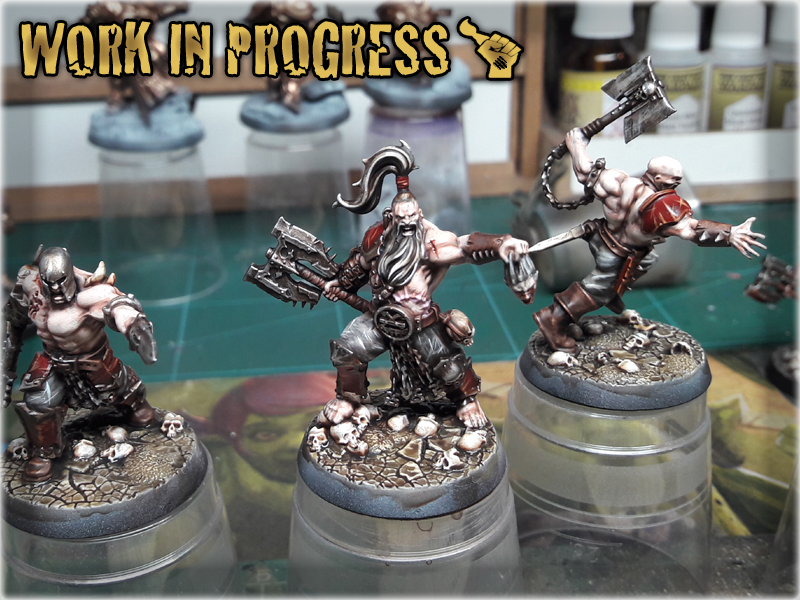
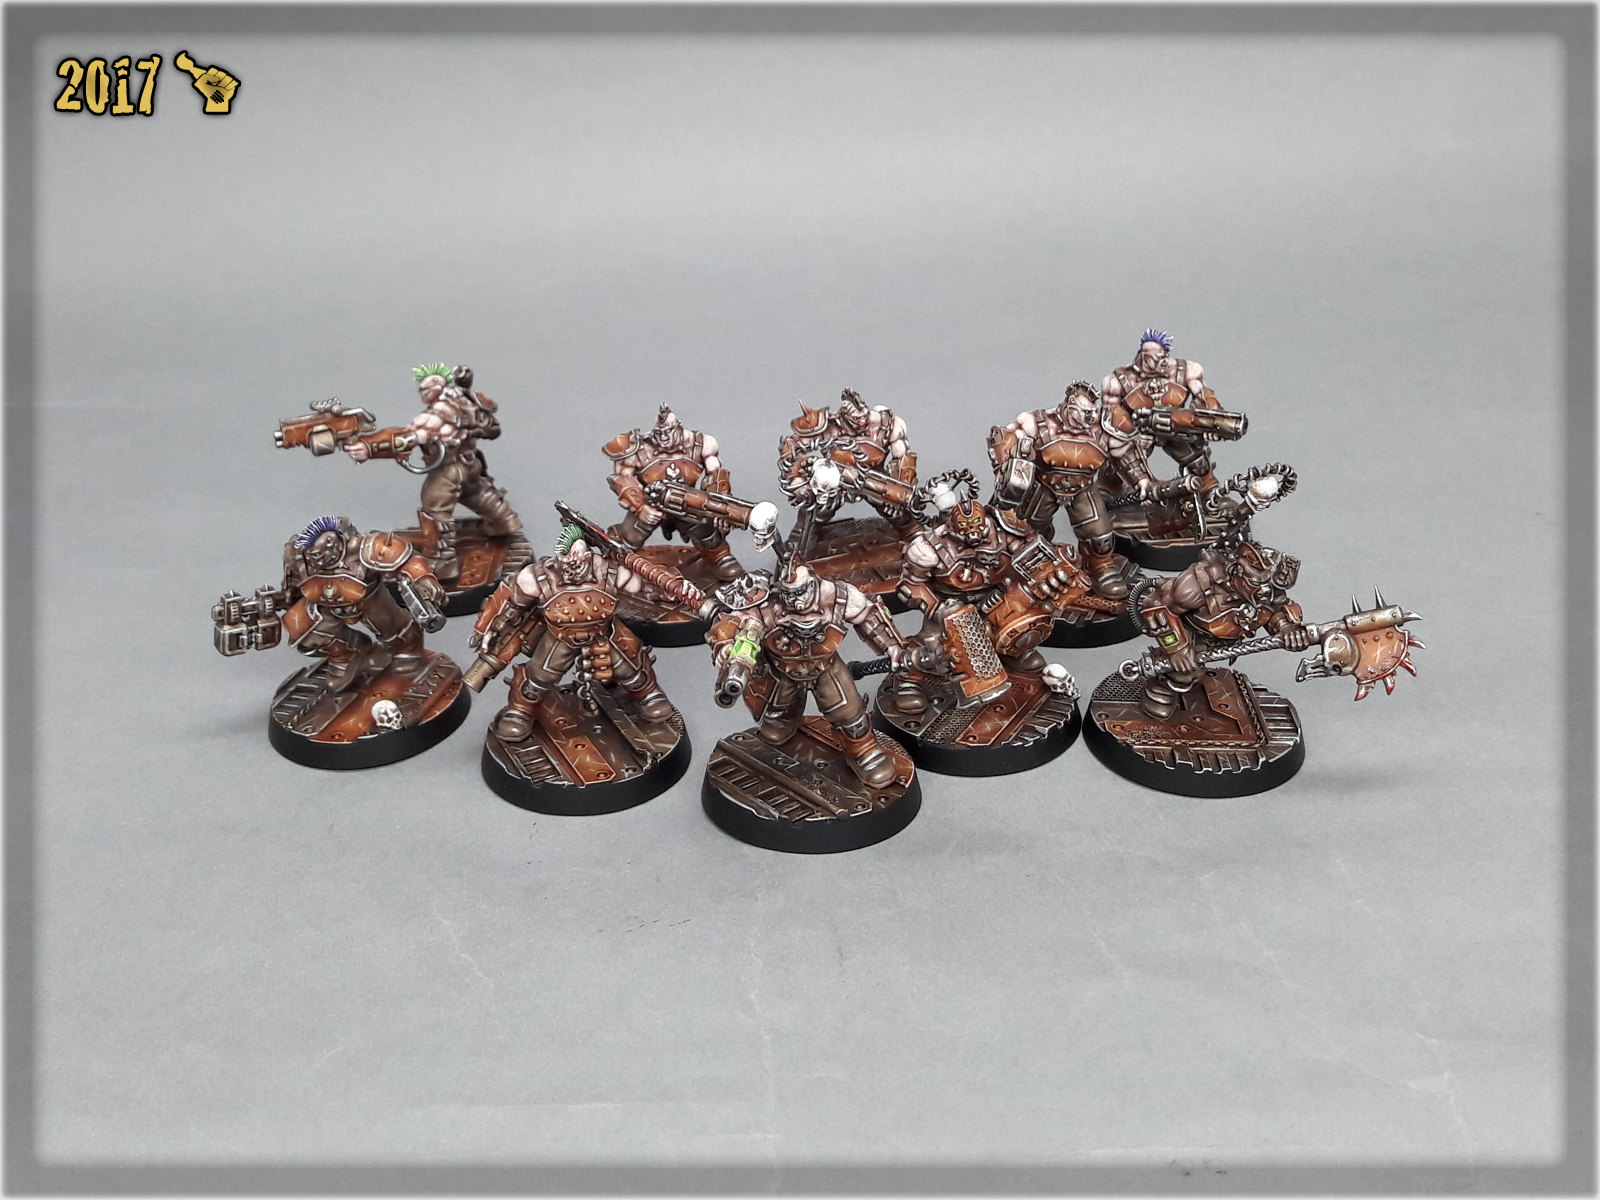
Here are some Colour Recipes for Garrek’s Reavers from GALLERY: SHADESPIRE GARREK’S REAVERS. Please take note that this is a simple colour scheme, not covering multiple overlapping layers and blends inbetween, that lead to the final product. It is supposed to be used as guidline not a step-by-step.
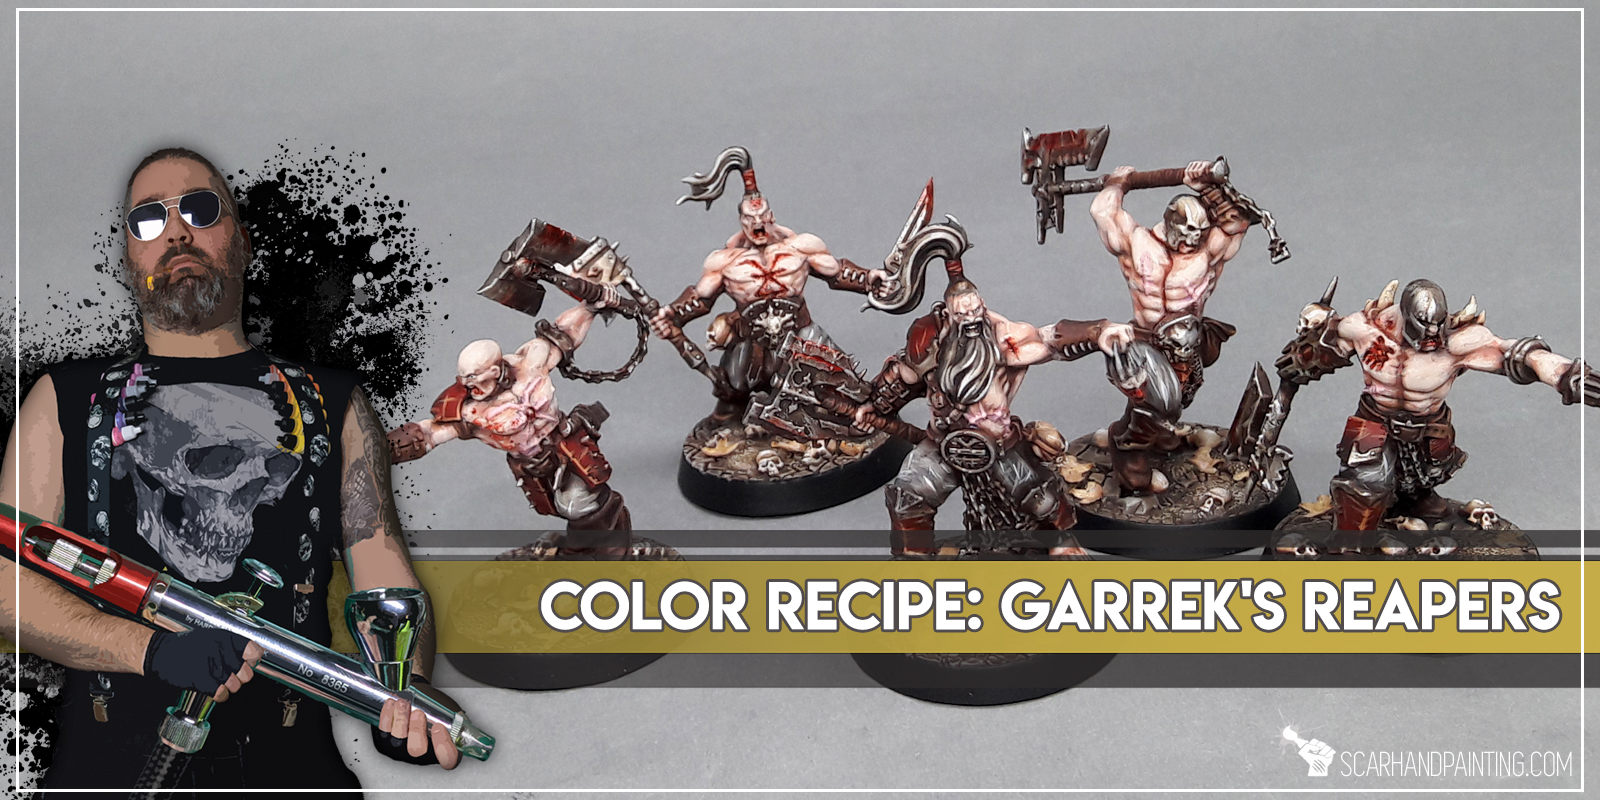
SKULLS:
Black Undercoat,
Bonewhite (Val),
Skeleton Bone (AP),
Mix Skeleton Bone (AP) 1:1 Off White (AP), l&p
Off White (Val), l&p
Mix Strong Tone Ink (AP) 1:1 Soft Tone Ink (AP),
Off White (Val), l&p
SKIN:
Black Undercoat,
Red Terracotta (Val), *
Dwarf Skin (Val), *
Flesh (Val), *
Mix Strong Tone Ink (AP) 1:1 Soft Tone Ink (AP),
Dwarf Skin (Val), bl
Flesh (Val), b
Tanned Flesh (Val), gl
Flesh (Val), l&p

RED armour:
Black Undercoat,
Red Terracotta (Val), *
Khorne Red (GW),
Mephiston Red (GW),
Mix Strong Tone Ink (AP) 1:1 Soft Tone Ink (AP),
Fire Dragon Bright (GW), l&p
Lugganath Orange (GW), l&p
Streaking Grime (AK),
METAL armour:
Black Undercoat,
Warplock Bronze (GW),
Gun Metal (AP),
Shining Silver (AP), l&p
Mix Strong Tone Ink (AP) 1:1 Soft Tone Ink (AP),
Shining Silver (AP), l&p
BROWN belts & strips:
Red Terracotta (Val), * undercoat,
Pallid Wych Flesh (GW), flbr
Off White (Val), l&p
Mix: Scorched Brown (Val) 1:1:1 Dark Fleshtone (Val), Medium,
Mix Strong Tone Ink (AP) 1:1 Soft Tone Ink (AP),
GREY clothes:
Black Undercoat,
Panzer DK. Grey (Val),
Fenrisian Grey (GW), flbr
Pallid Wych Flesh (GW), l&p
Mix Strong Tone Ink (AP) 1:1 Soft Tone Ink (AP),
Off White (Val), l&p
BASES:
Medium Sea Grey (Val), *
Light Grey (Val)*,
Pale Grey (Val),*
Mix Strong Tone Ink (AP) 1:1 Soft Tone Ink (AP),
Off White (Val), l&p
Dirt (Val), bl
Mix Strong Tone Ink (AP) 1:1 Soft Tone Ink (AP), bl
Off White (Val), l&p
l&p – lines and points,
p – points,
bl – blend,
gl – glaze,
drbr – drybrush,
flbr – flatbrush,
stpl – stippling,
*Airbrushed (with multiple layers and mixes)
Here are some Colour Recipes for Sepulchral Guard from GALLERY: SHADESPIRE SEPULCHRAL GUARD. Please take note that this is a simple colour scheme, not covering multiple overlapping layers and blends inbetween, that lead to the final product. It is supposed to be used as guidline not a step-by-step.

BONES:
Black Undercoat,
Dark Earth (Val), *
Khaki Brown (Val), *
Bonewhite (Val), *
Mix Bonewhite (Val) 1:1 White, *
Off White (Val), l&p, stpl
Mix Strong Tone Ink (AP) 1:1 Soft Tone Ink (AP),
Streaking Grime (AK),
Off White (Val), l&p, stpl

METAL armour:
Black Undercoat,
Warplock Bronze (GW),
Gun Metal (AP),
Shining Silver (AP), l&p
Mix Strong Tone Ink (AP) 1:1 Soft Tone Ink (AP),
Shining Silver (AP), l&p
Streaking Grime (AK),
BROWN belts & strips:
‘BONES’ undercoat,
Mix: Scorched Brown (Val) 1:1:1 Dark Fleshtone (Val), Medium,
Mix Strong Tone Ink (AP) 1:1 Soft Tone Ink (AP),
Flayed One Flesh (GW), l&p
Off White (Val), l&p
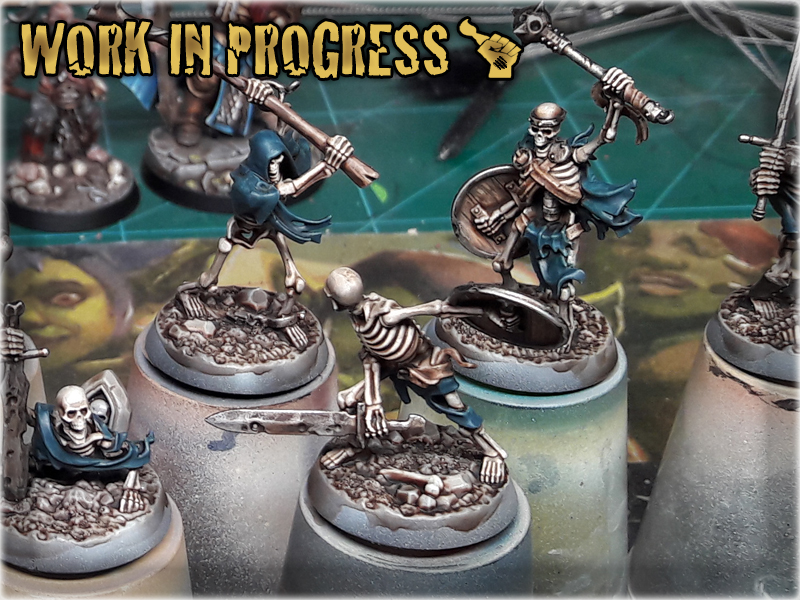
BLUE clothes:
Black Undercoat,
Stegadon Scale Green (GW),
Mix Strong Tone Ink (AP) 1:1 Soft Tone Ink (AP),
Stegadon Scale Green (GW),
Mix Stegadon Scale Green (GW) 5:1 Off White (Val),
Mix Stegadon Scale Green (GW) 4:1 Off White (Val),
Mix Stegadon Scale Green (GW) 3:1 Off White (Val), l&p
Mix Stegadon Scale Green (GW) 2:1 Off White (Val), l&p
Mix Stegadon Scale Green (GW) 1:1 Off White (Val), l&p
Off White (Val), l&p
BASES:
Medium Sea Grey (Val), *
Light Grey (Val)*,
Pale Grey (Val),*
Mix Strong Tone Ink (AP) 1:1 Soft Tone Ink (AP),
Off White (Val), l&p
Mix Strong Tone Ink (AP) 1:1 Soft Tone Ink (AP), bl
Dirt (Val), bl
Off White (Val), l&p
l&p – lines and points,
p – points,
bl – blend,
drbr – drybrush,
flbr – flatbrush,
stpl – stippling,
*Airbrushed (with multiple layers and mixes)

“The Mirrored City of Shadespire is a nightmare plane of illusions and madness, an ever-changing labyrinth of endless stairs, cramped streets and soaring archways. The original city is drained of all color and life, and for thousands of years, it has rested as a foreboding ruin. Those unfortunate, brave, or foolhardy adventurers that set foot within its walls are drawn through the veil between realms and trapped within the Mirrored City. For such wayward souls, all hope seems lost. Yet there are those who will not accept their fate without a fight.”
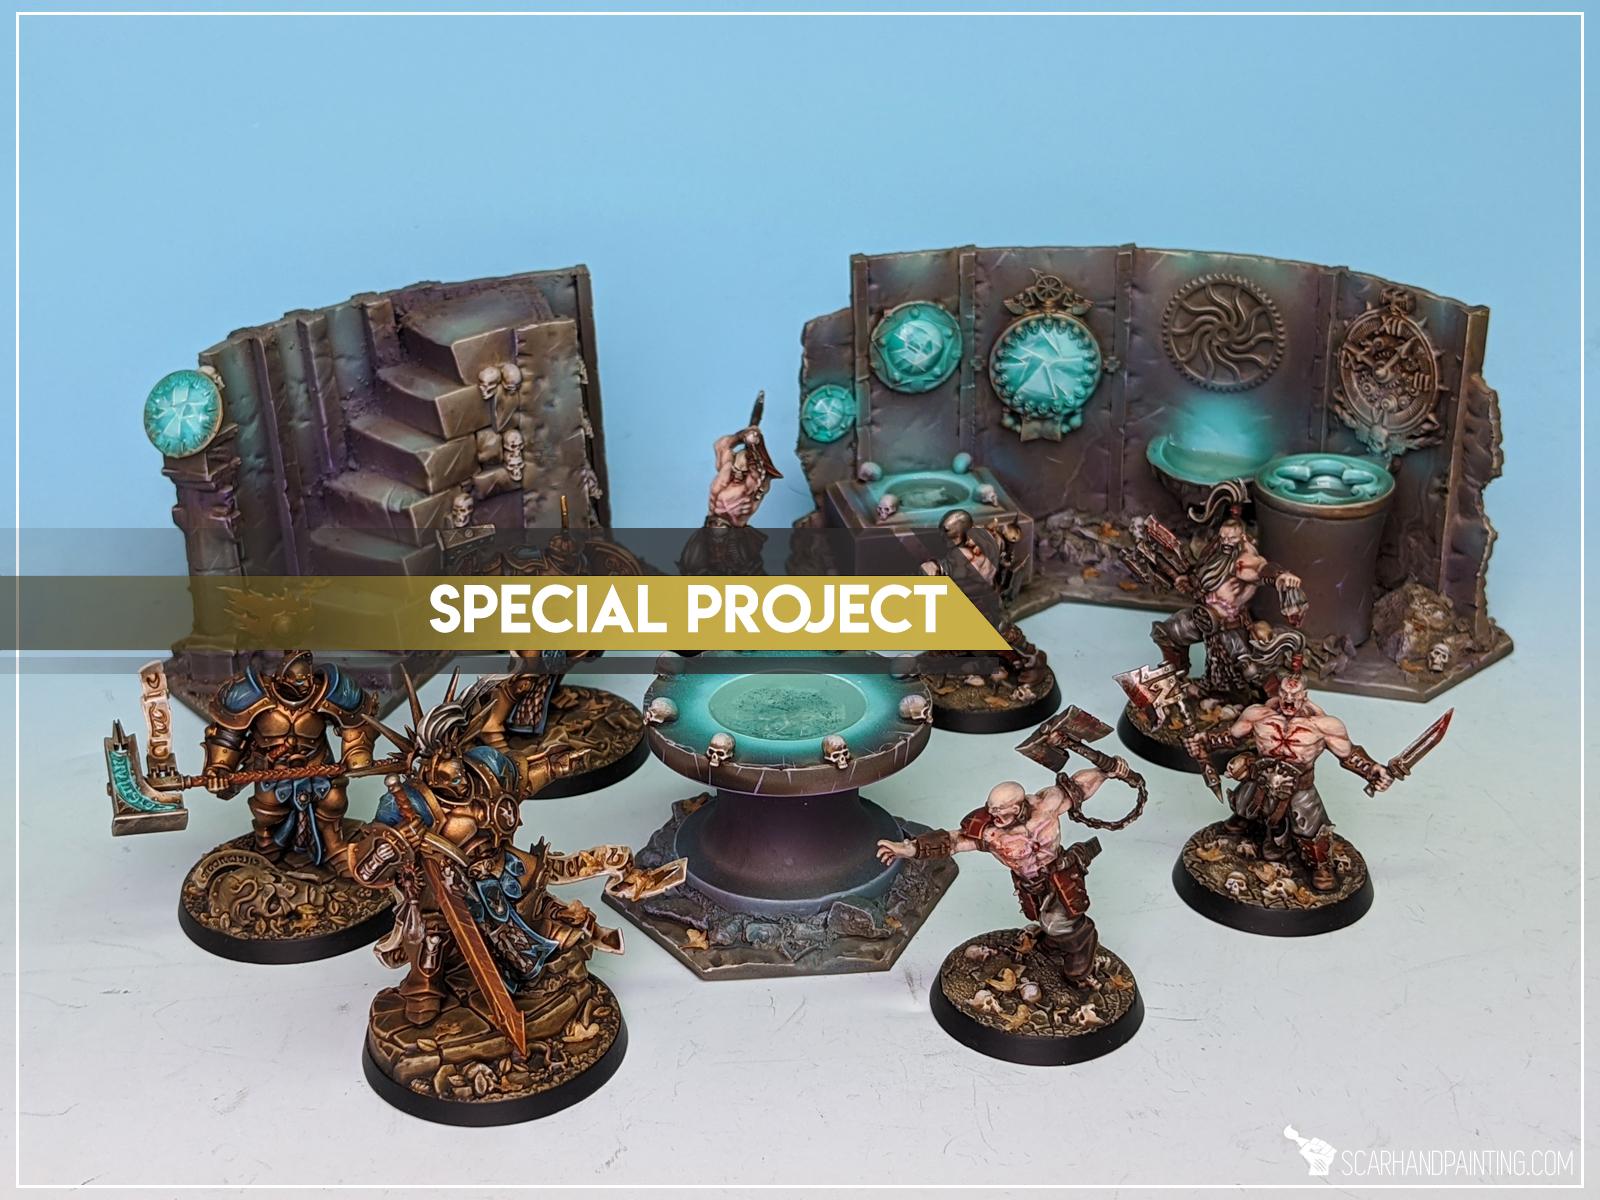
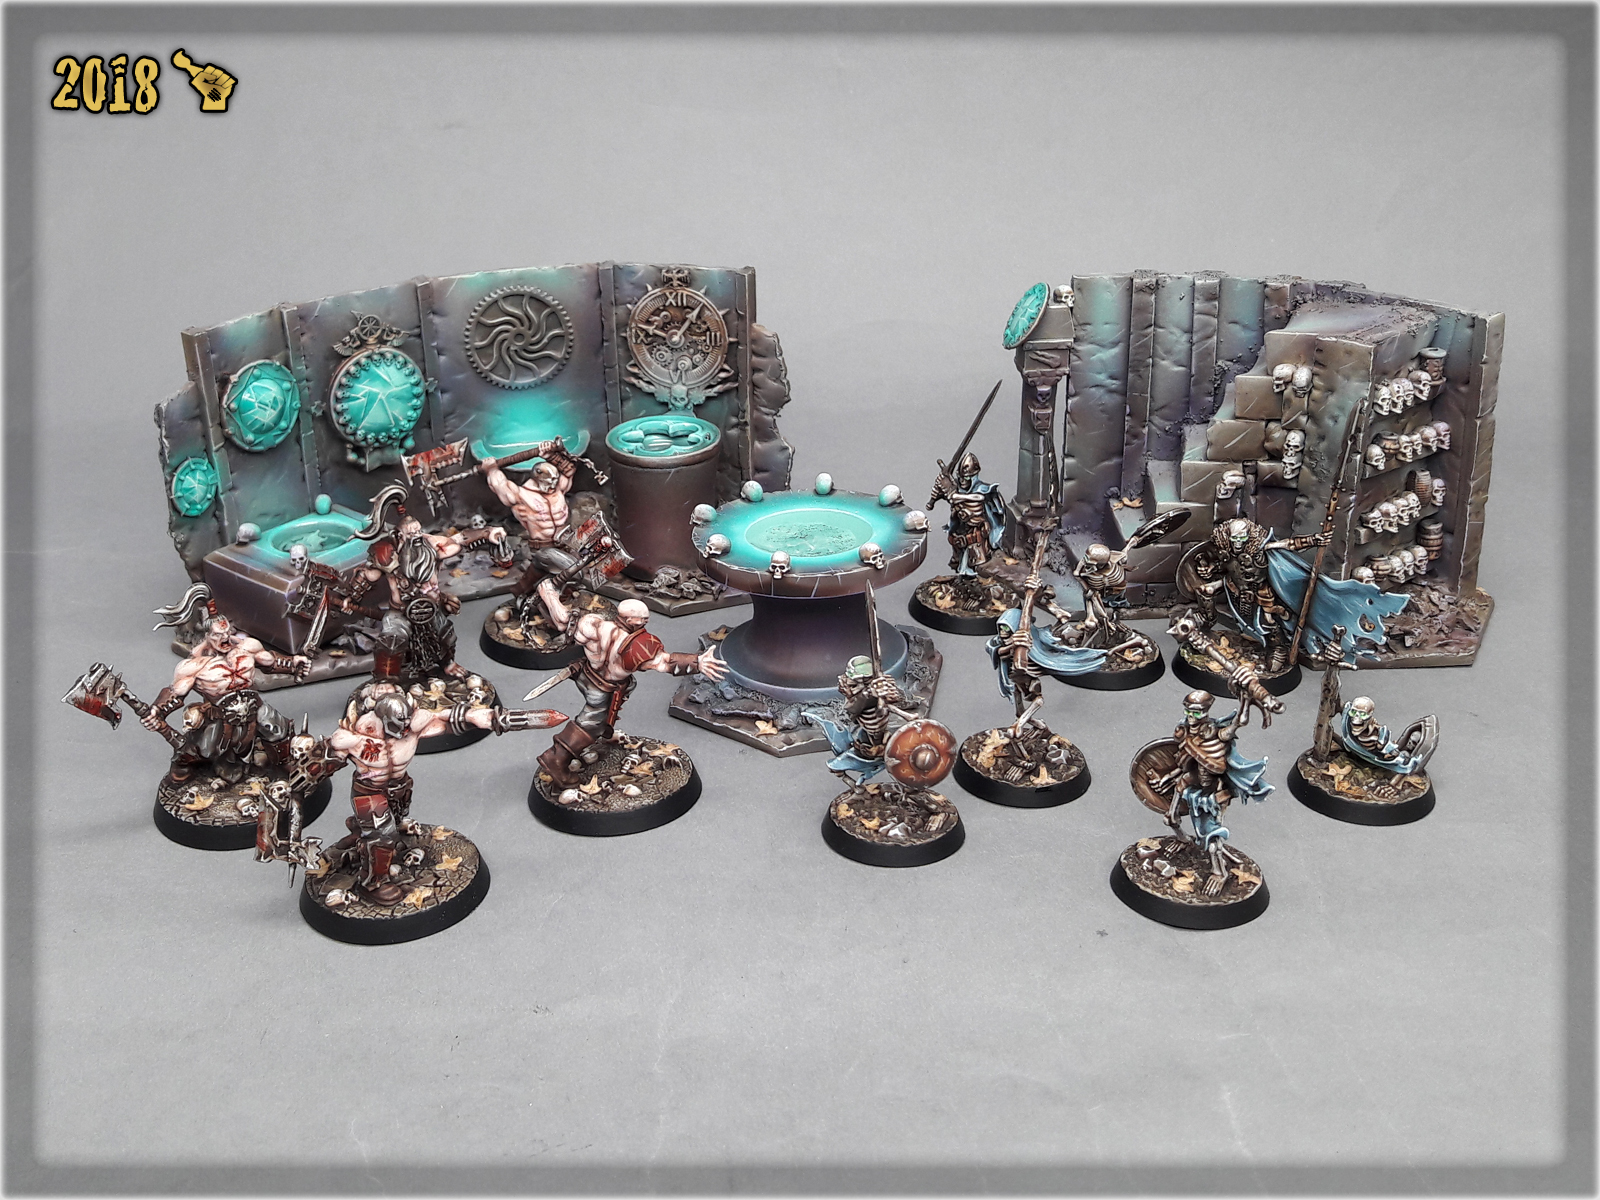
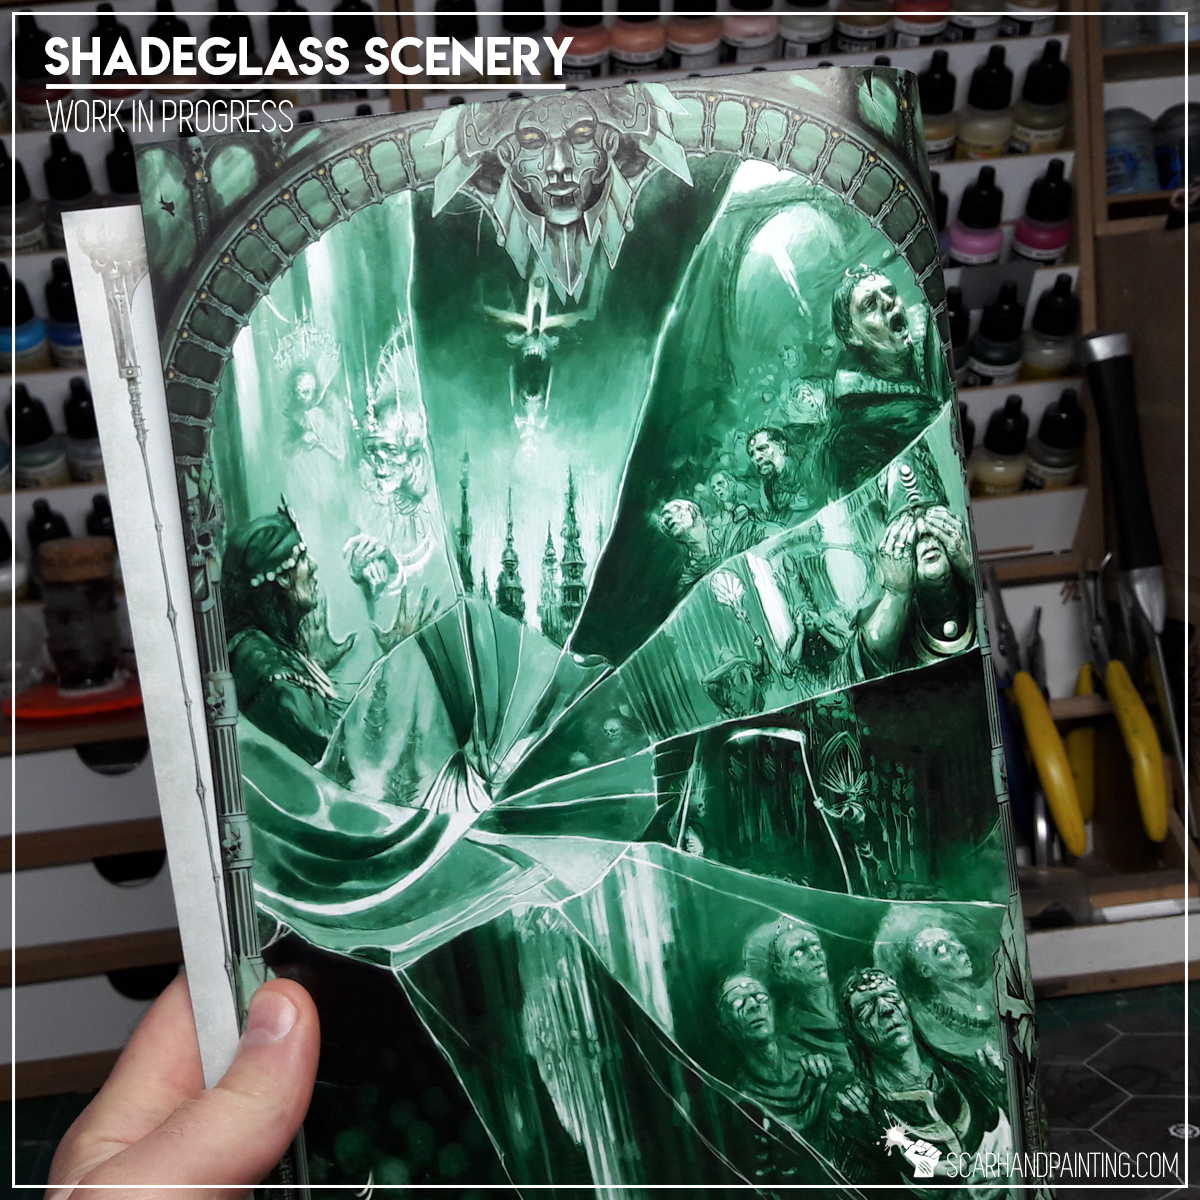
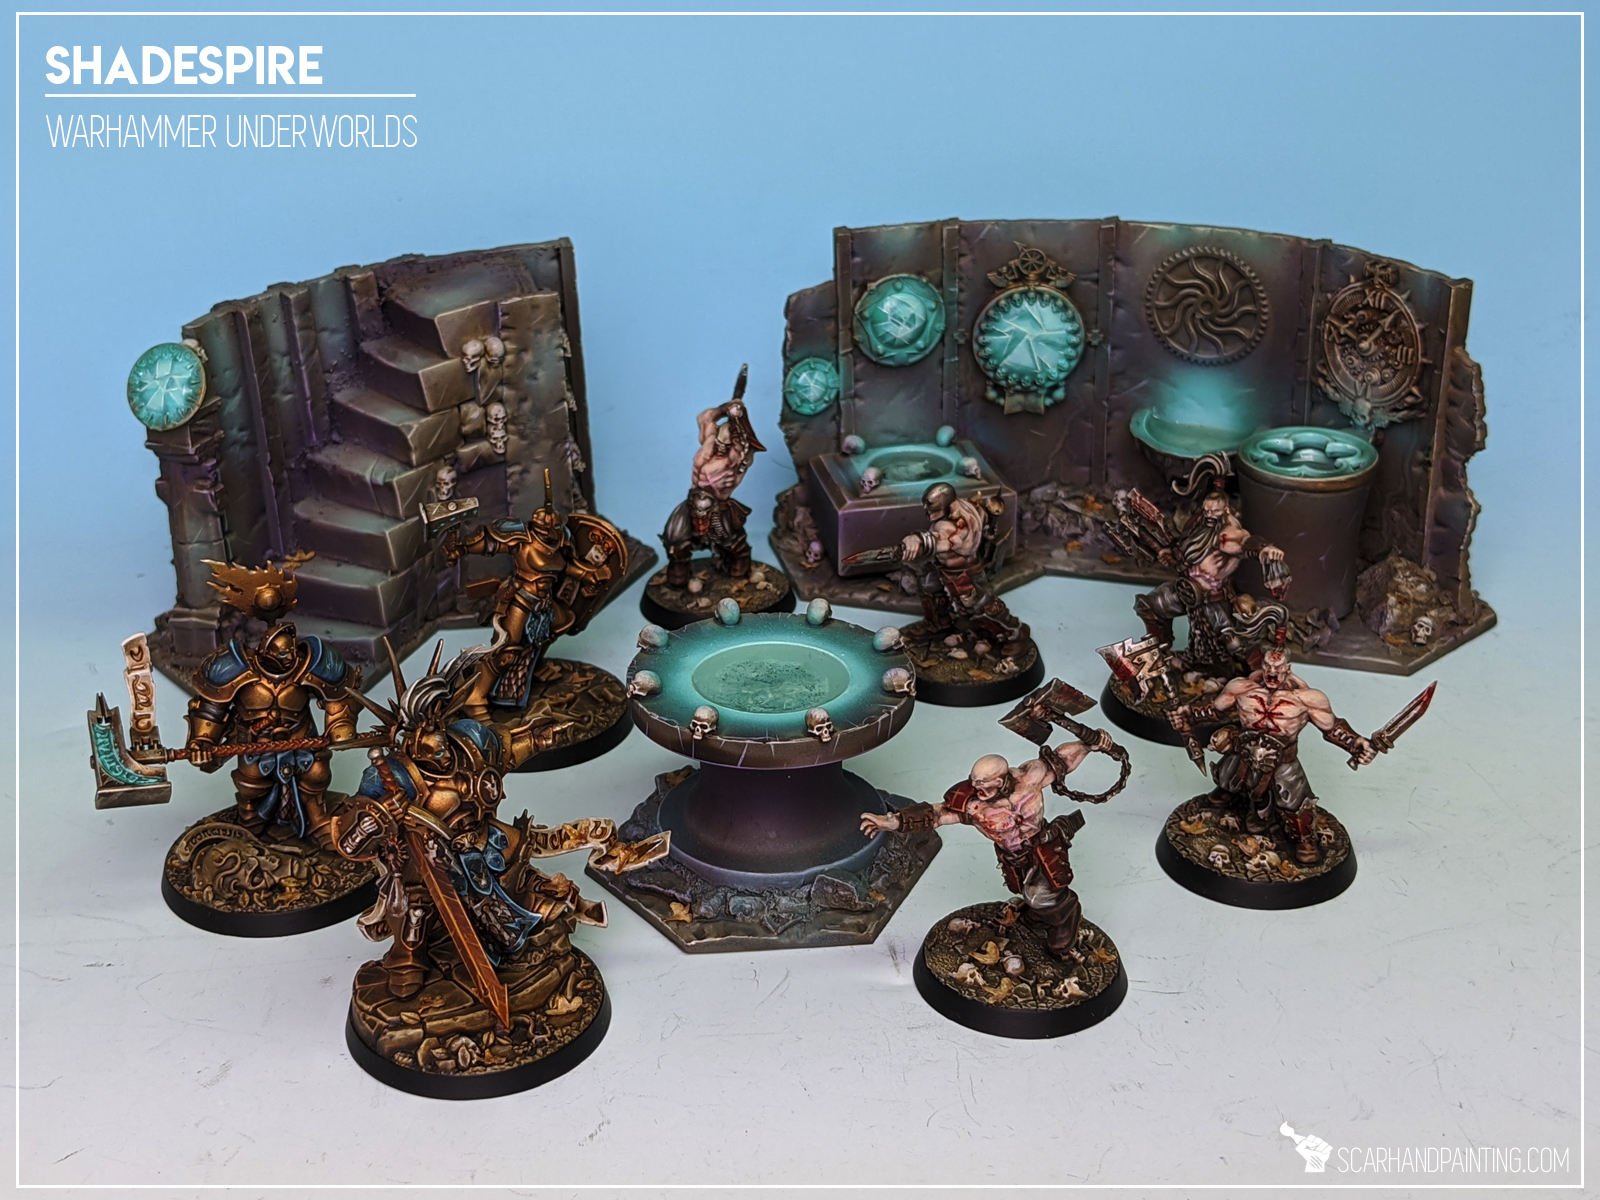
Whenever I pick a new title I always crave to have an ultimate gaming set – the same happened with Warhammer Underworlds: Shadespire. It started when I’ve finished working on a small Shadespire commission and was instantly drawn into the game. Two days later I was already painting my first warband – the Sepulchral Guard, but it wasn’t enough to quench my hobbystic thirst. I moved to another warband, being Garrek’s Reavers, all the while my hype was kept strong by Shadespire facebook group – full of awesome inspiration. Somewhere in the middle of Garrek’s Reavers paint job I let myself be overwhelmed by hype and decided to go for a Shadespire scenery set. The idea was to keep it as crazy cool as I am capable of. Concept was there – inside my head – all along, fueled by Shadespire’s background story and insanely sweet art from the rulebook. So, the scenery was to fit the board with a ‘ruined city of sorcery and mysticism’ theme in mind. Most important part: ‘Shadeglass’ – broken, ghostly lit mirrors incorporated to a variety of trinkets, statues, pools, wells etc.
The way I see scenery making is this:
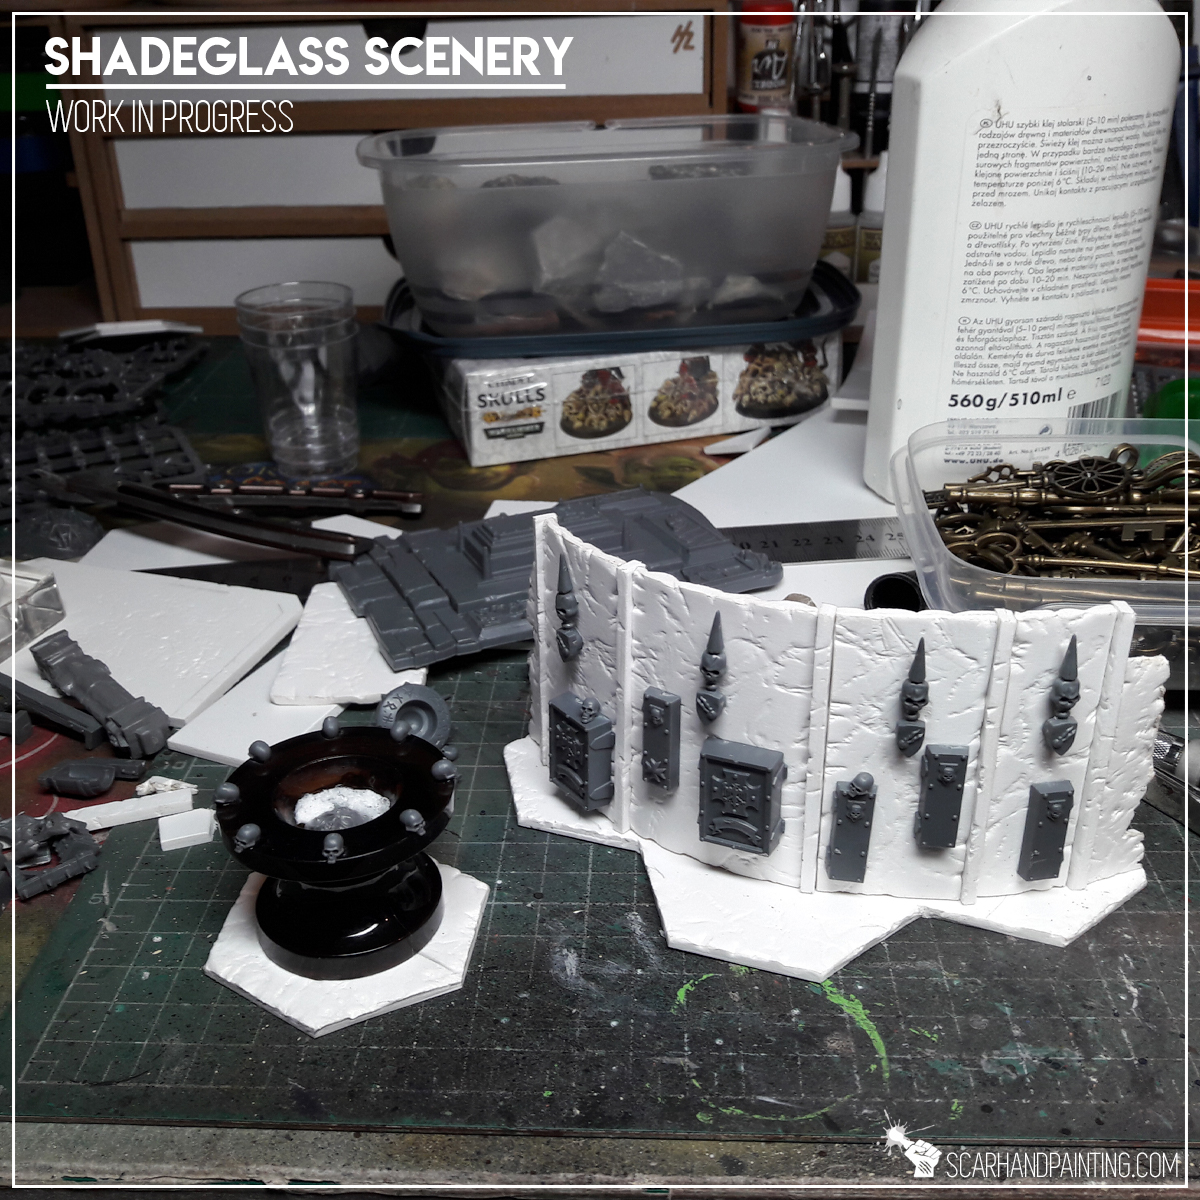
I faced “Shadeglass Scenery” Project following these key points. Started by preparing all the stuff that seemed usable and/or necessary. I like my scenery to be light, durable and painting friendly, so I picked 3mm plasticard to become both bases and baseline shape. Used hot water to bend some pieces, then cut ‘walls’ and hex bases out of the stuff…
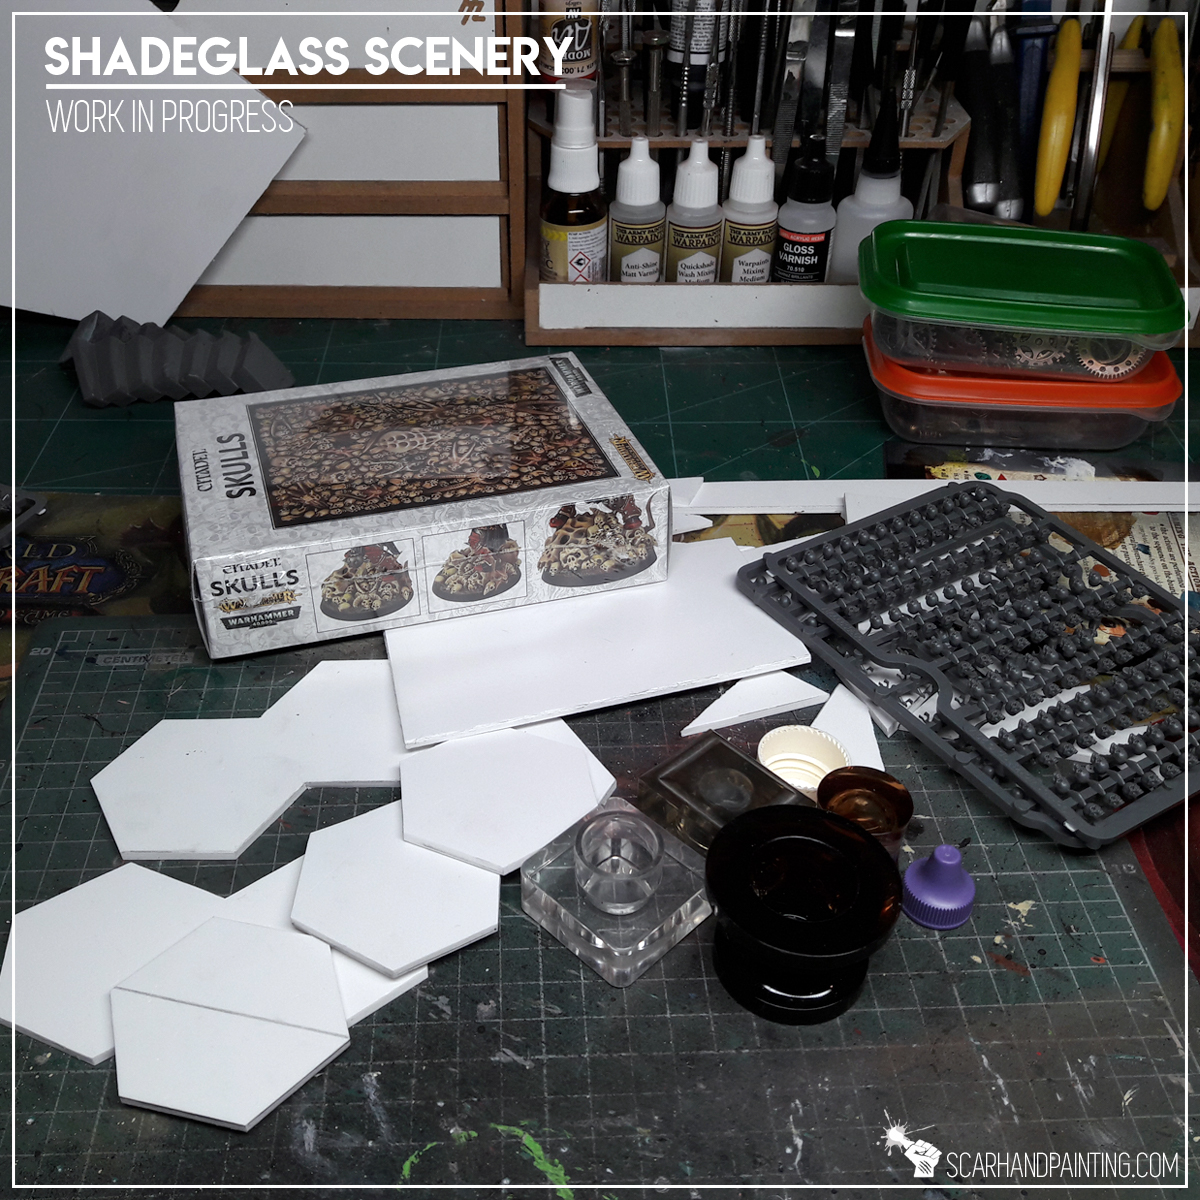
Plasticard is very easy to work with. Adding texture all over newly created ‘pieces’ was a matter of using a right tool, rather than sophisticated and time consuming techniques…

With texturized walls and bases I was ready to move to major features – Shadeglass vessels of all sorts and sizes. For this purpose I used perfume cups plundered from my wife’s collection. (At the point when I’m writing this article she already noticed all the missing cups – fortunately the scenery is done and we played with it so she’s more like – ‘for the greater good’)…

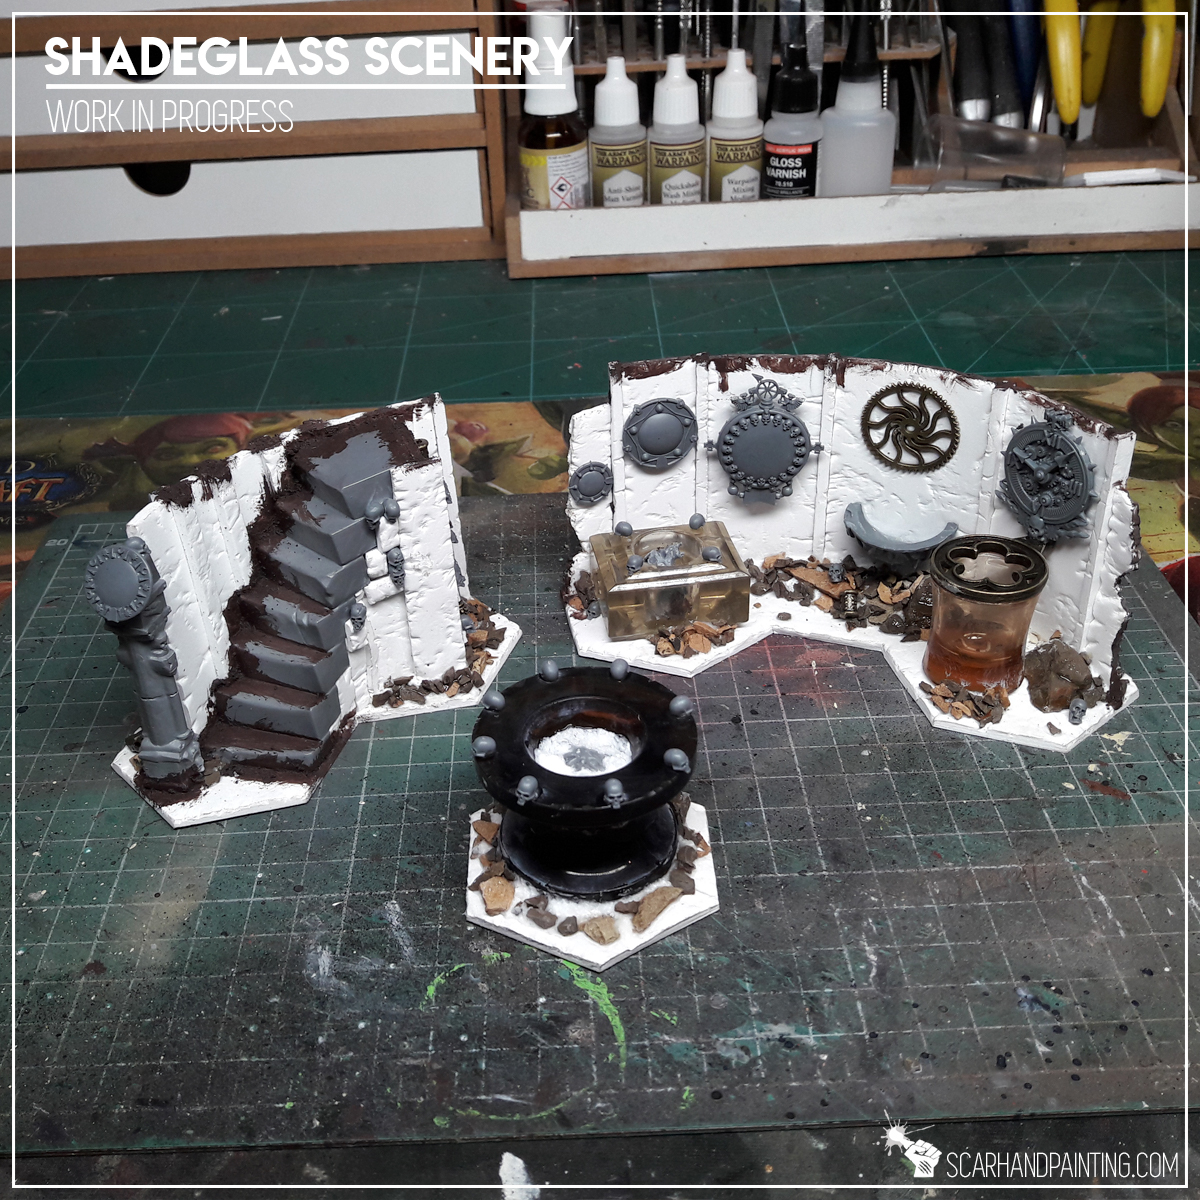
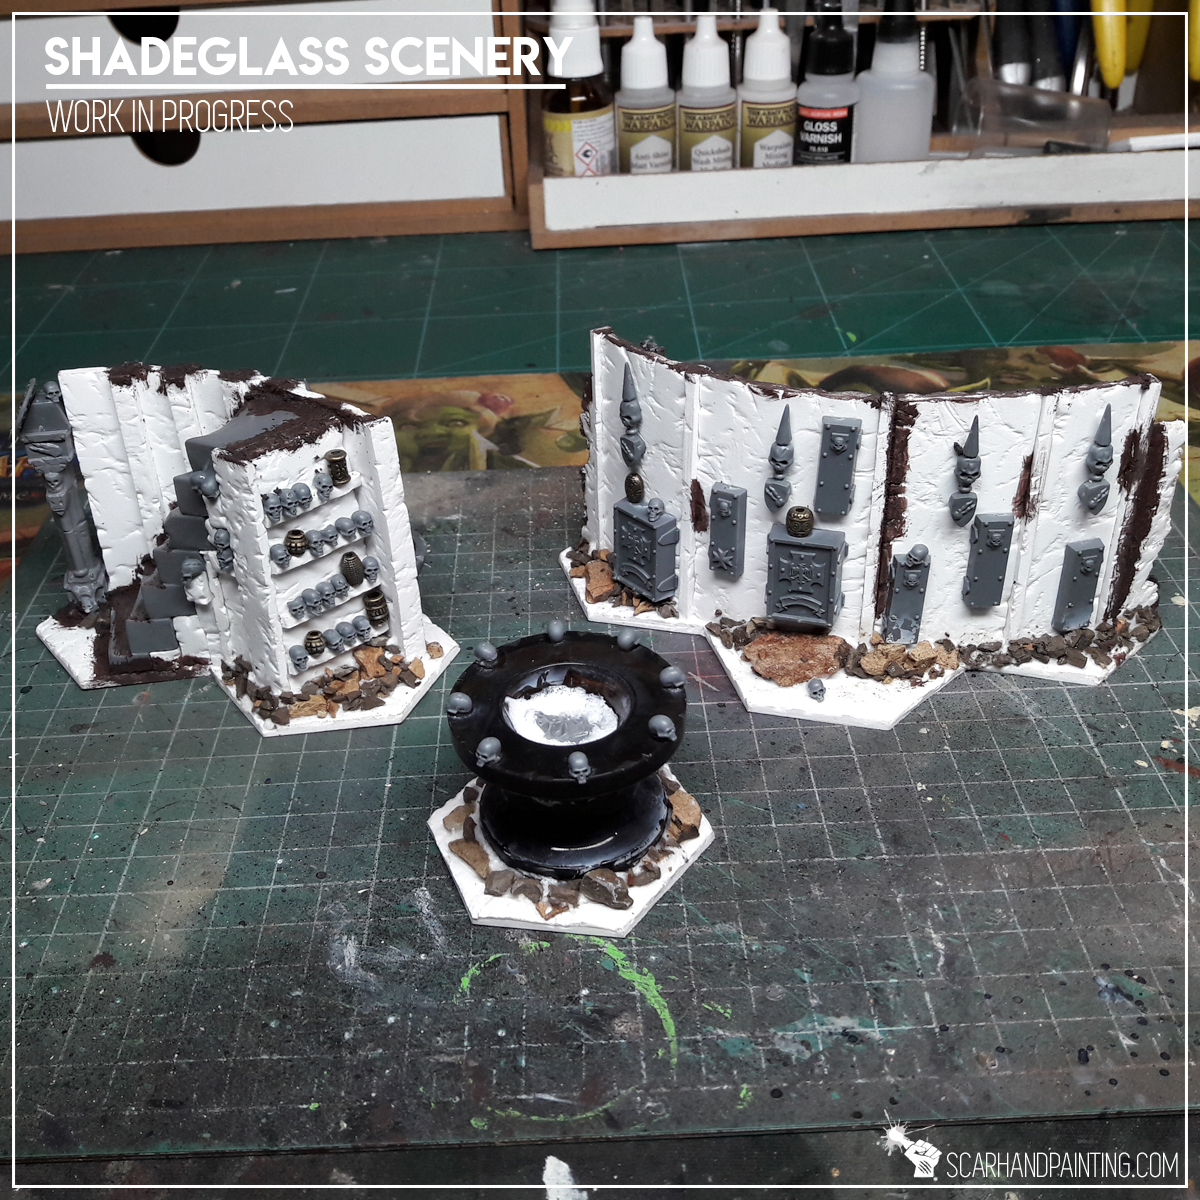
Throughout about twenty years in the hobby I accumulated a vast collection of bitz, although until recently skulls where a rare commodity in the collection – Praise Nagash, Games Workshop released a set of skulls thus rendering them near to unlimited. Skulls backstory aside – I used some bitz to add detail and points of focus to the scenery…
I then used self prepared Hobby Gravel to add more detail and make the scenery pieces look ‘ruined’. Once I was sure that each piece is telling it’s own story – final polish followed and all was ready to get painted…

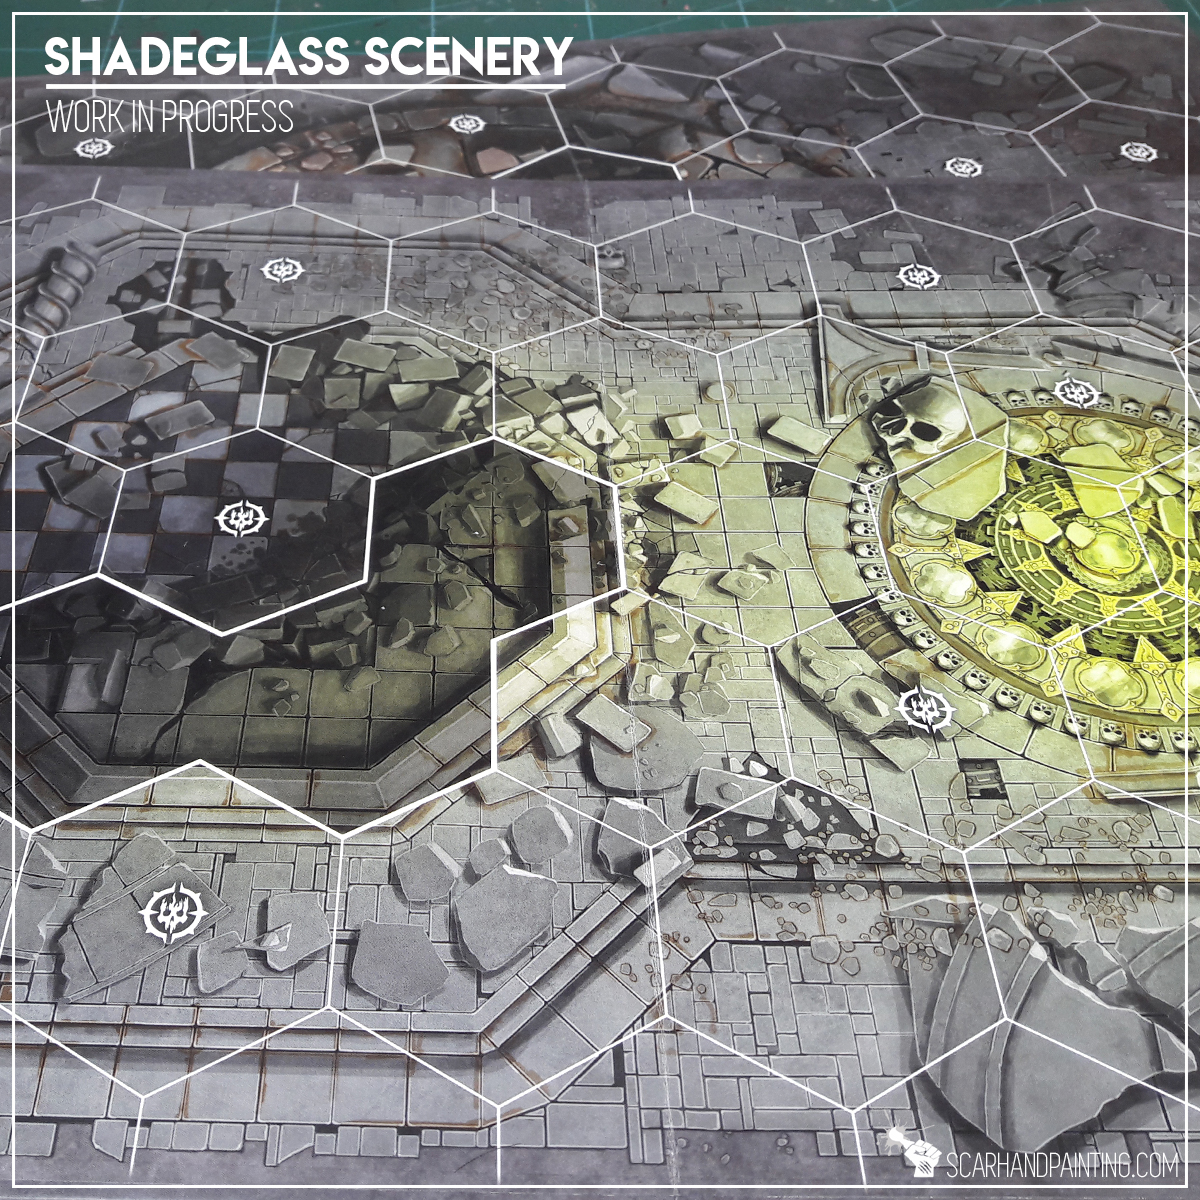
Painting a ruined city of sorcery and ghosts was an interesting transition between a color recipe I use for Shadespire warband’s bases and working on a much more bigger scale. I decided to follow my guts – start as usual and then see where it would take me. Somewhere along the way I started adding blends of purple to compliment incoming ghostly green’ish-turquoise hum. This turned out to be a bullseye hit, creating an illusion of morbid, colorful lights dancing across the ruins…

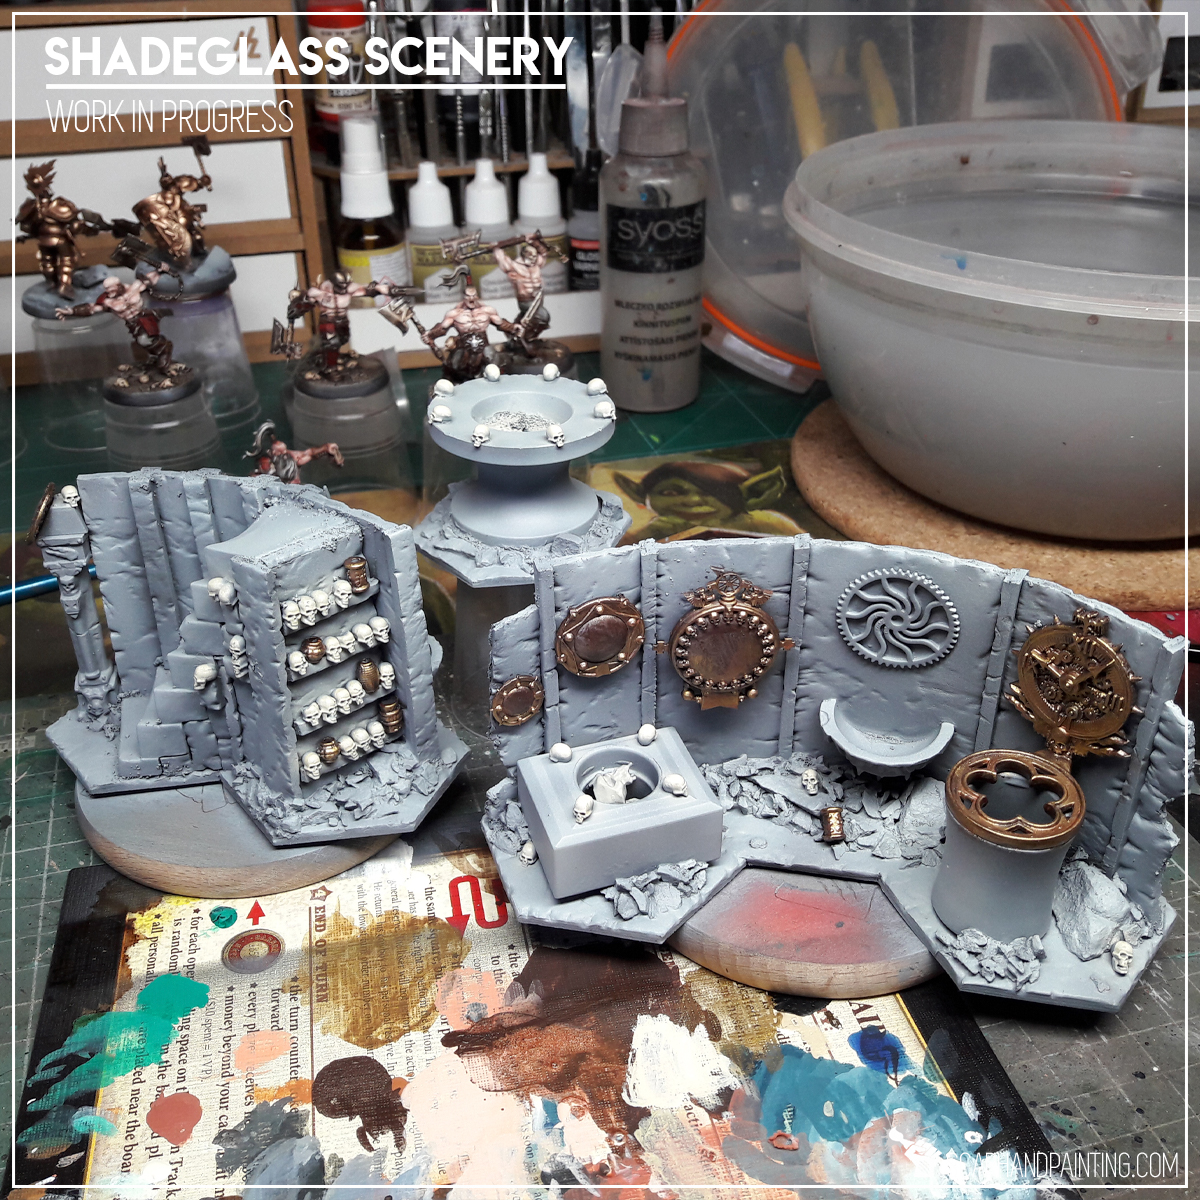
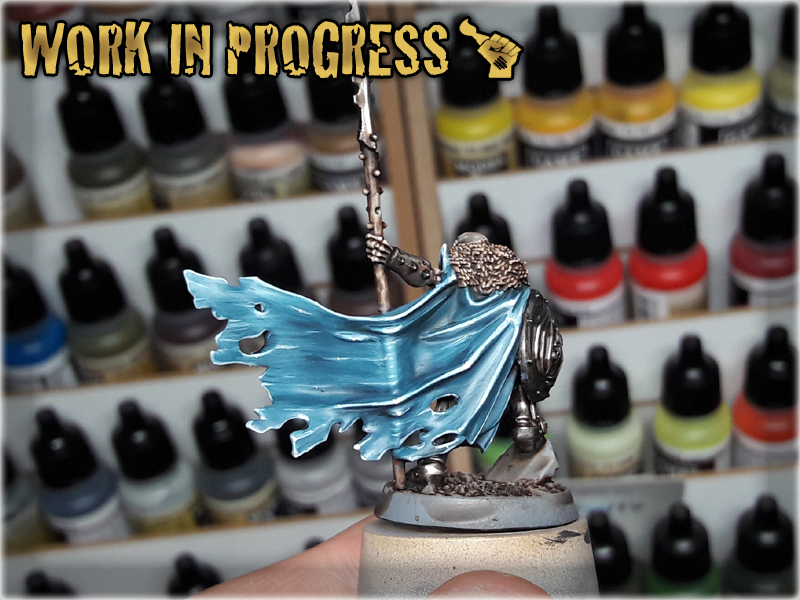
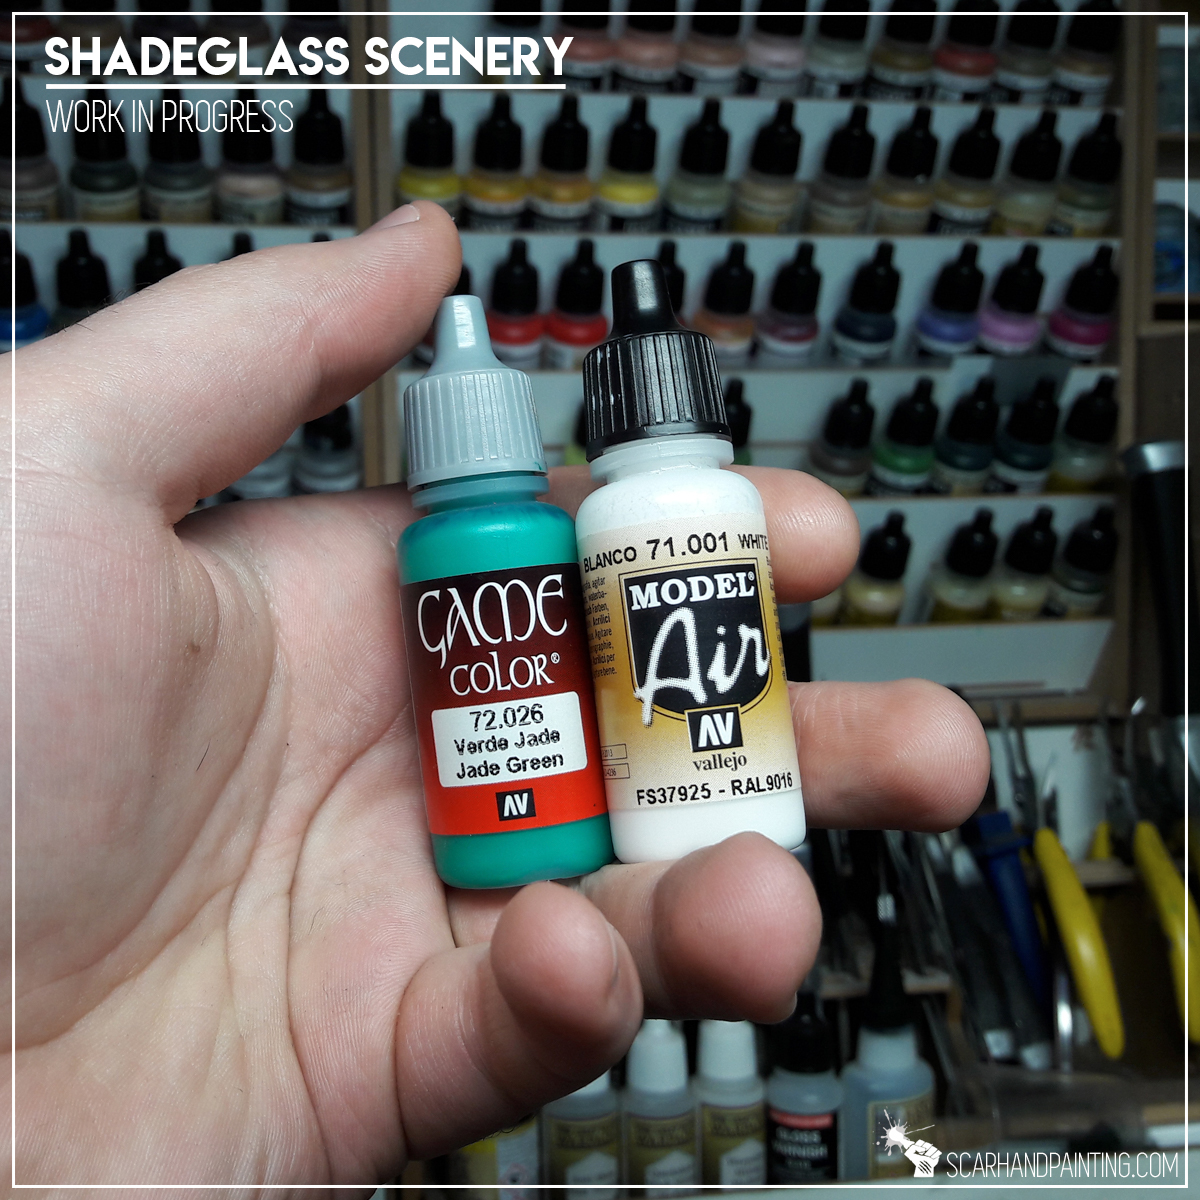
The ghostly hum of Shadeglass was a real challenge. I feel very comfortable with toxic green light, but going turquoise is moving away from warm color spectrum – my sphere of comfort. Still a hobbyist gotta do what a hobbyist gotta do – I braved the unknown with a mix of Vallejo’s Jade Green and White.
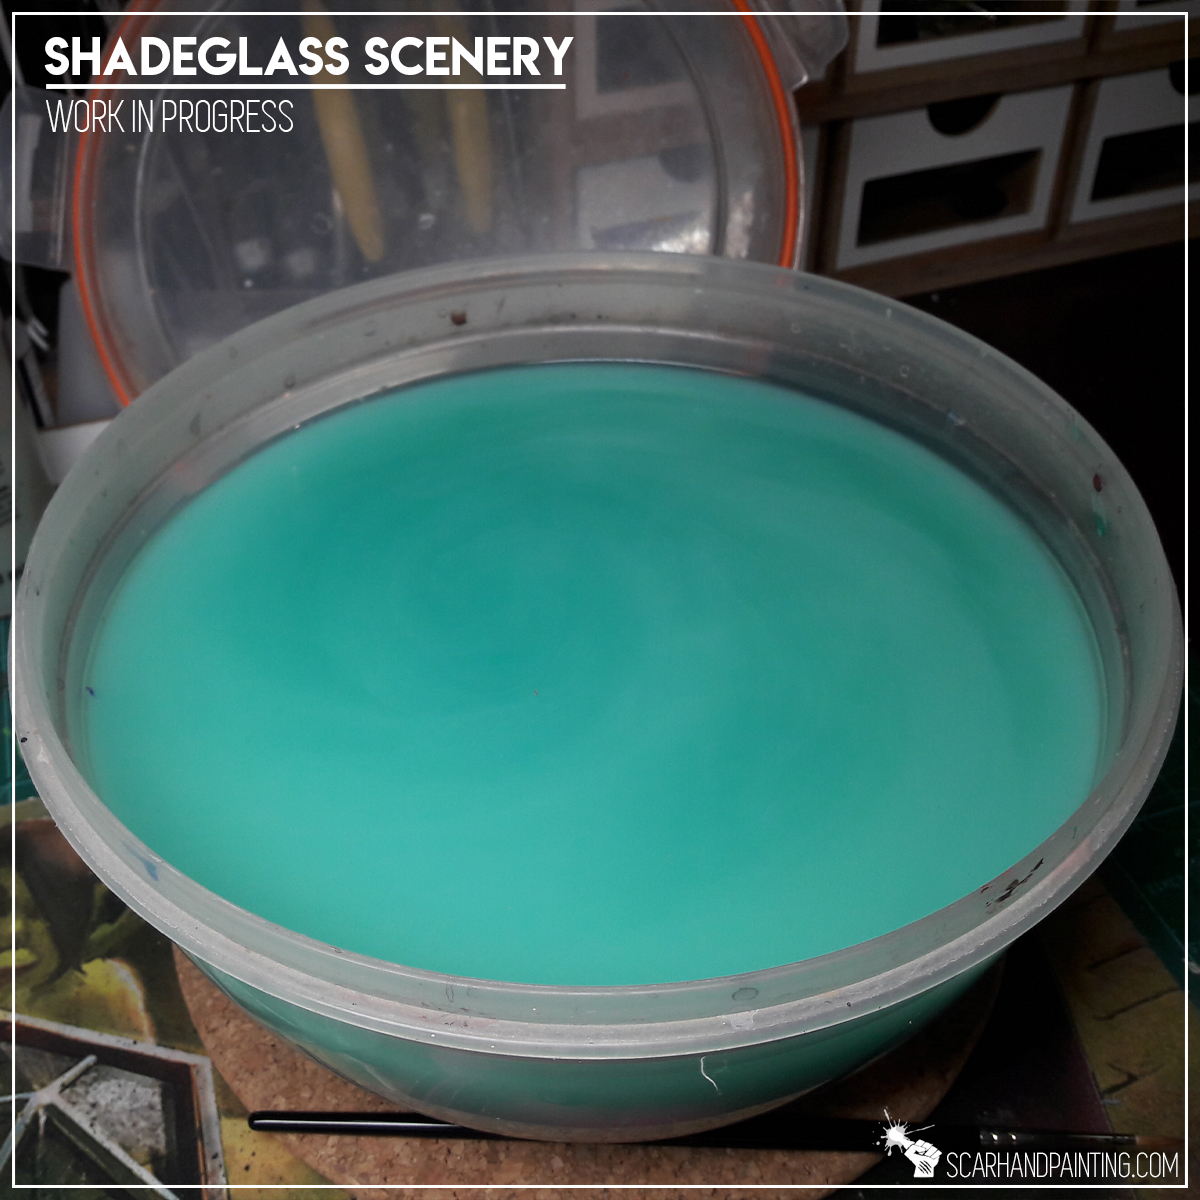

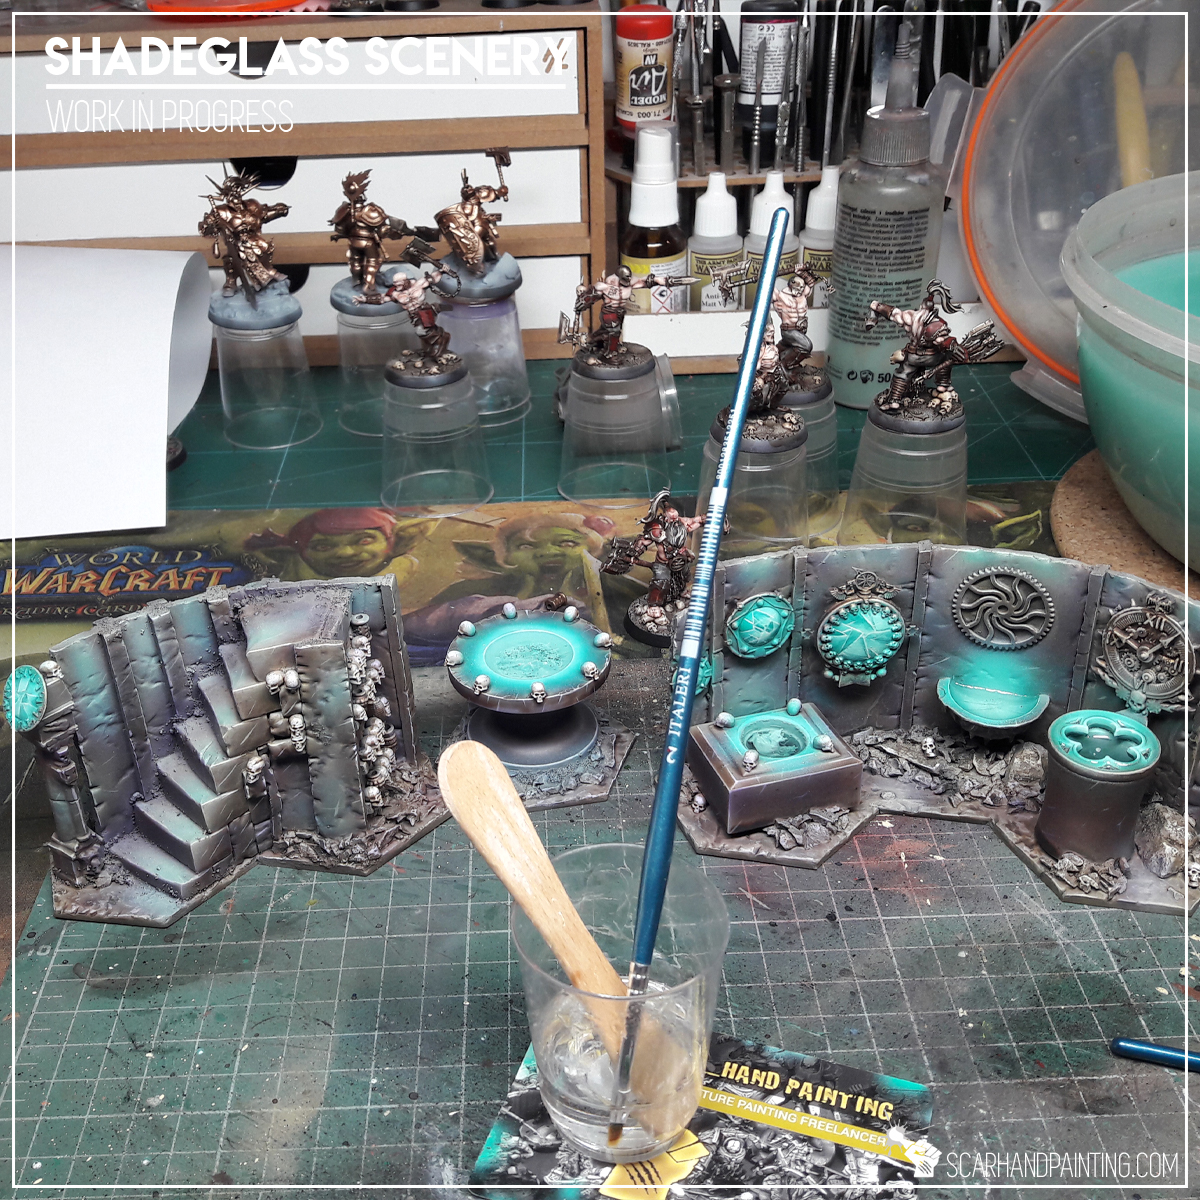
Broken Shadeglass mirrors – a special feature and main theme of the scenery. Decided to approach this in two different ways. First are the hand painted broken mirrors, adorning walls. I simply airbrushed hard angles with a mix of Jade Green and White using a Scarhandpaing’s business card like a stencil. I then adjusted transitions of particular ‘pieces’ of glass and made them more distinct with sharp white lining. Other vessels were a different story. I cut translucent plastic into shards and tossed them into resin-filled vessels. Some sunk instantly, while others stayed afloat – creating a really nice effect – which unfortunately looks much more badass in real life, than in the pictures.


The “Shadeglass Scenery” set is done and it have already seen some Shadespire action. Who knows what will come next if the hype continues? Either way – if you plan to venture into the Mirrored City – be sure to head there through “SHADEGLASS SCENERY” SPECIAL PROJECT gallery…


If you like the article, consider sharing it with someone who likes hobbying around with miniatures. Find me on Facebook and Instagram. Most importantly have a great hobby time!
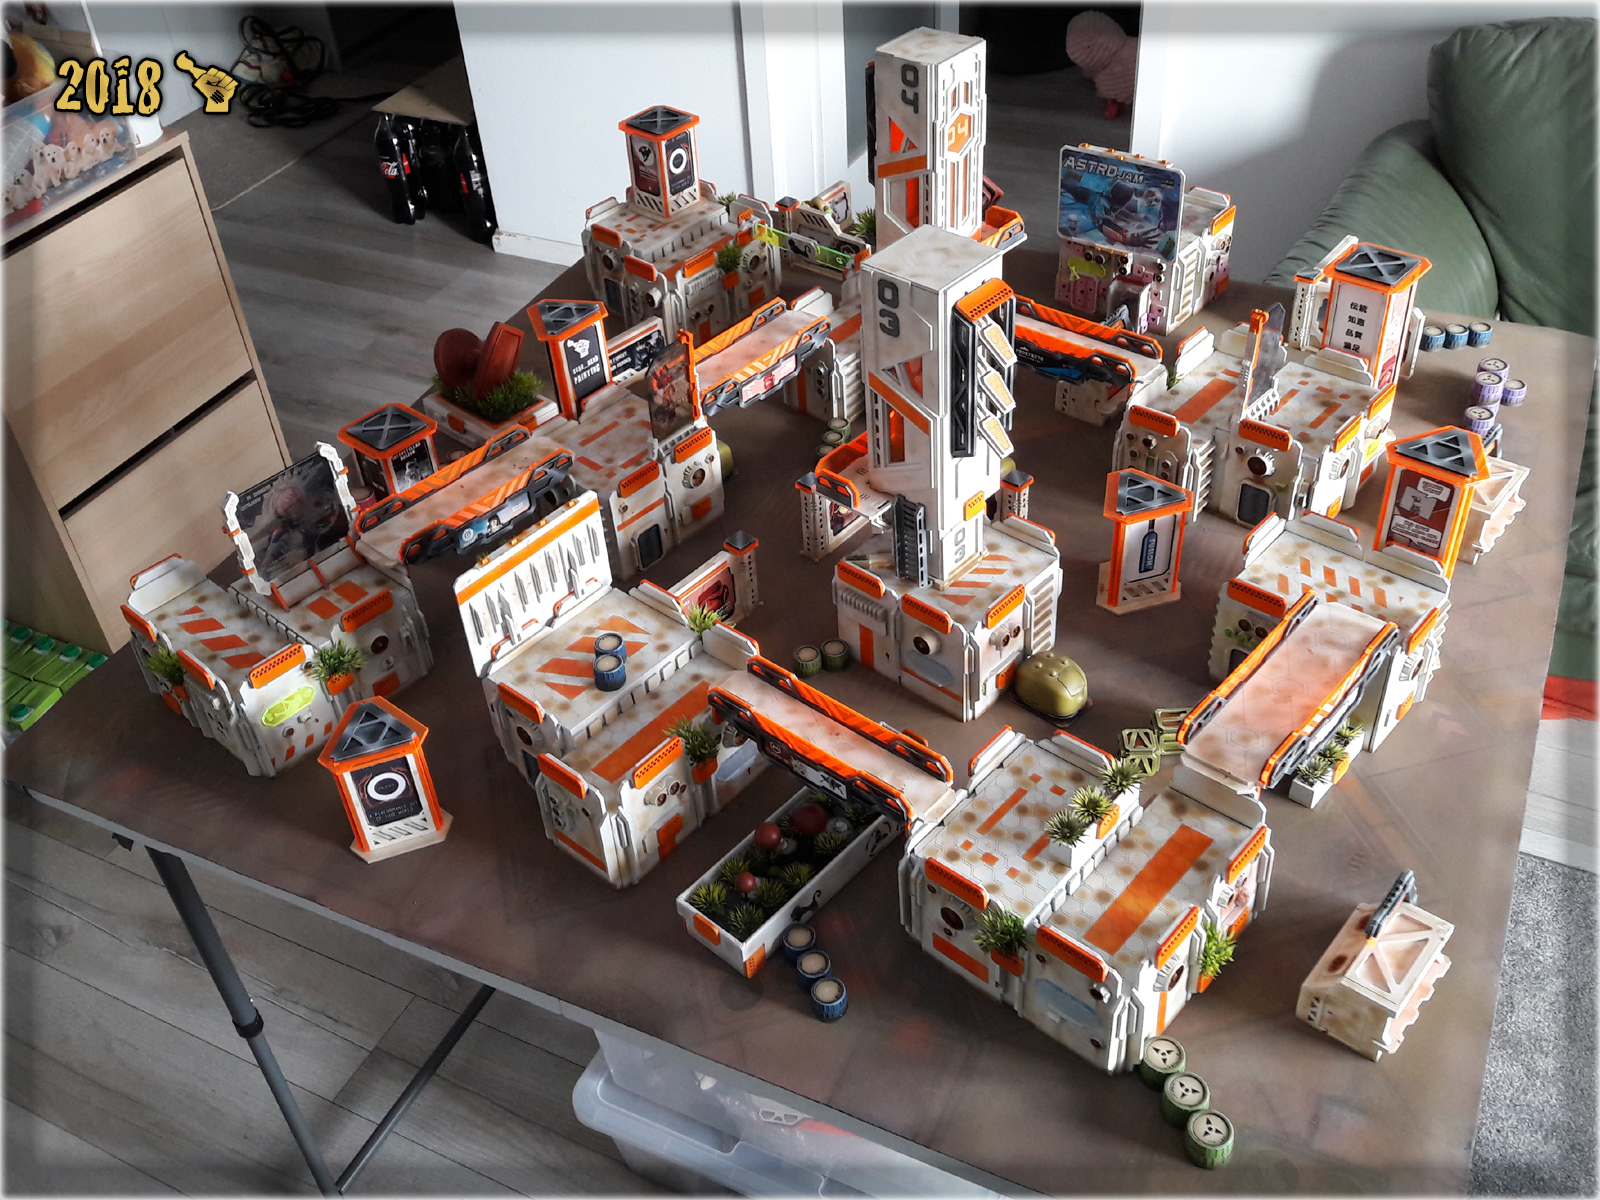
“The Colony” – an Infinity gaming board project that streaches in time and space.
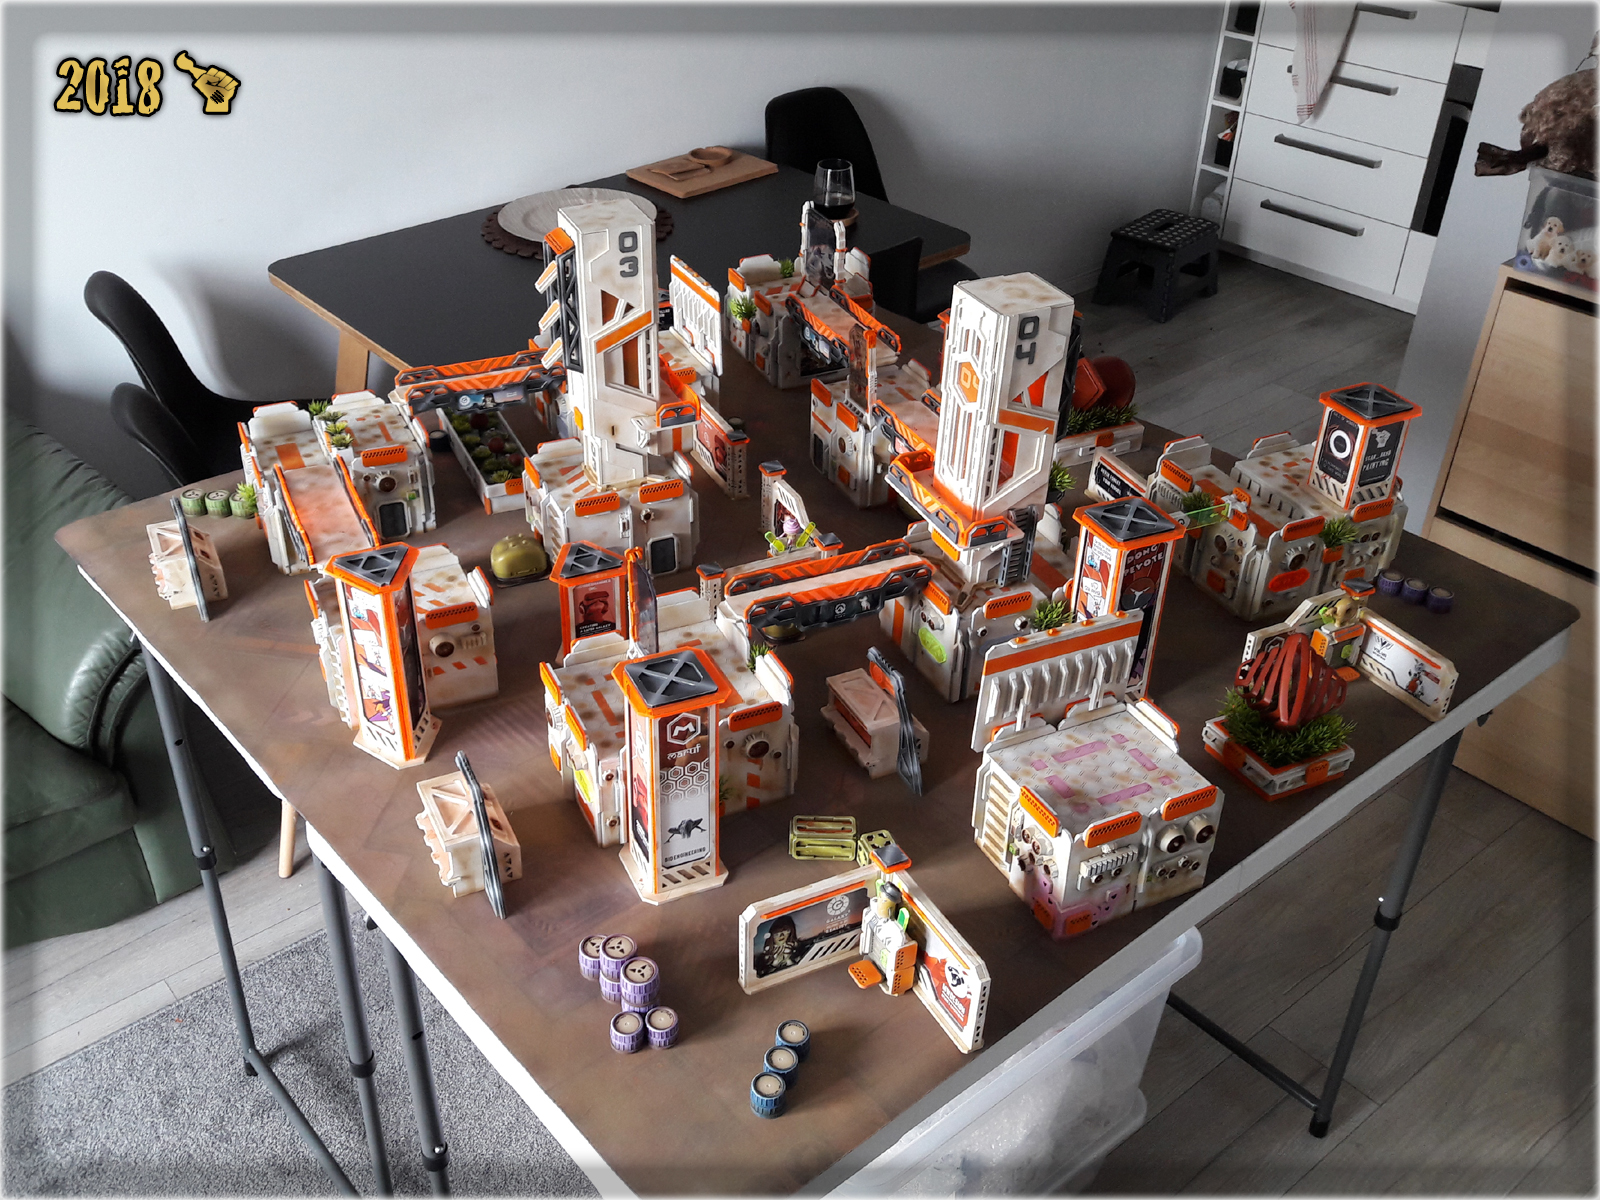
Yes – The Colony Special Project lives on and dayum! I almost run out of space to store it! Last time (“THE COLONY” SPECIAL PROJECT part nine) I was pretty sure that once I airbrush a bit here and there, The Colony would finally be completed. Imagine my surprise when I saw how the project expanded since last article. So, let’s dive straight into it…
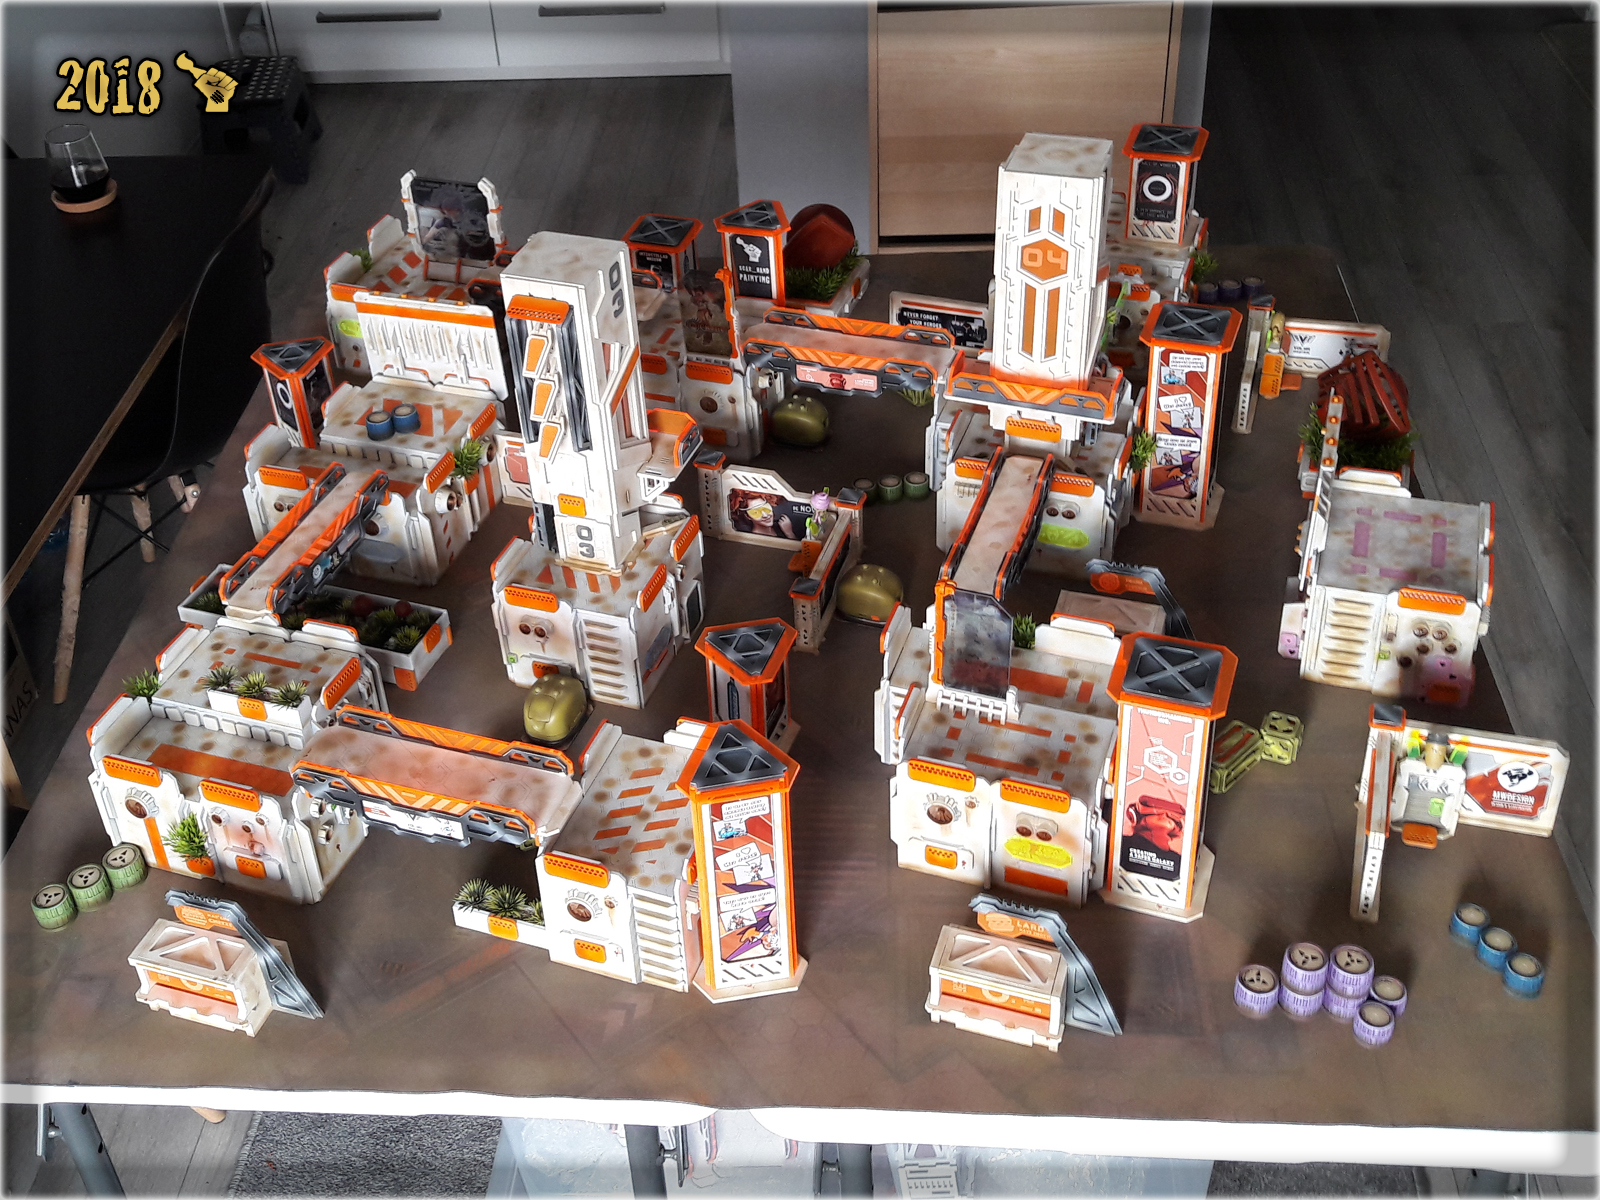
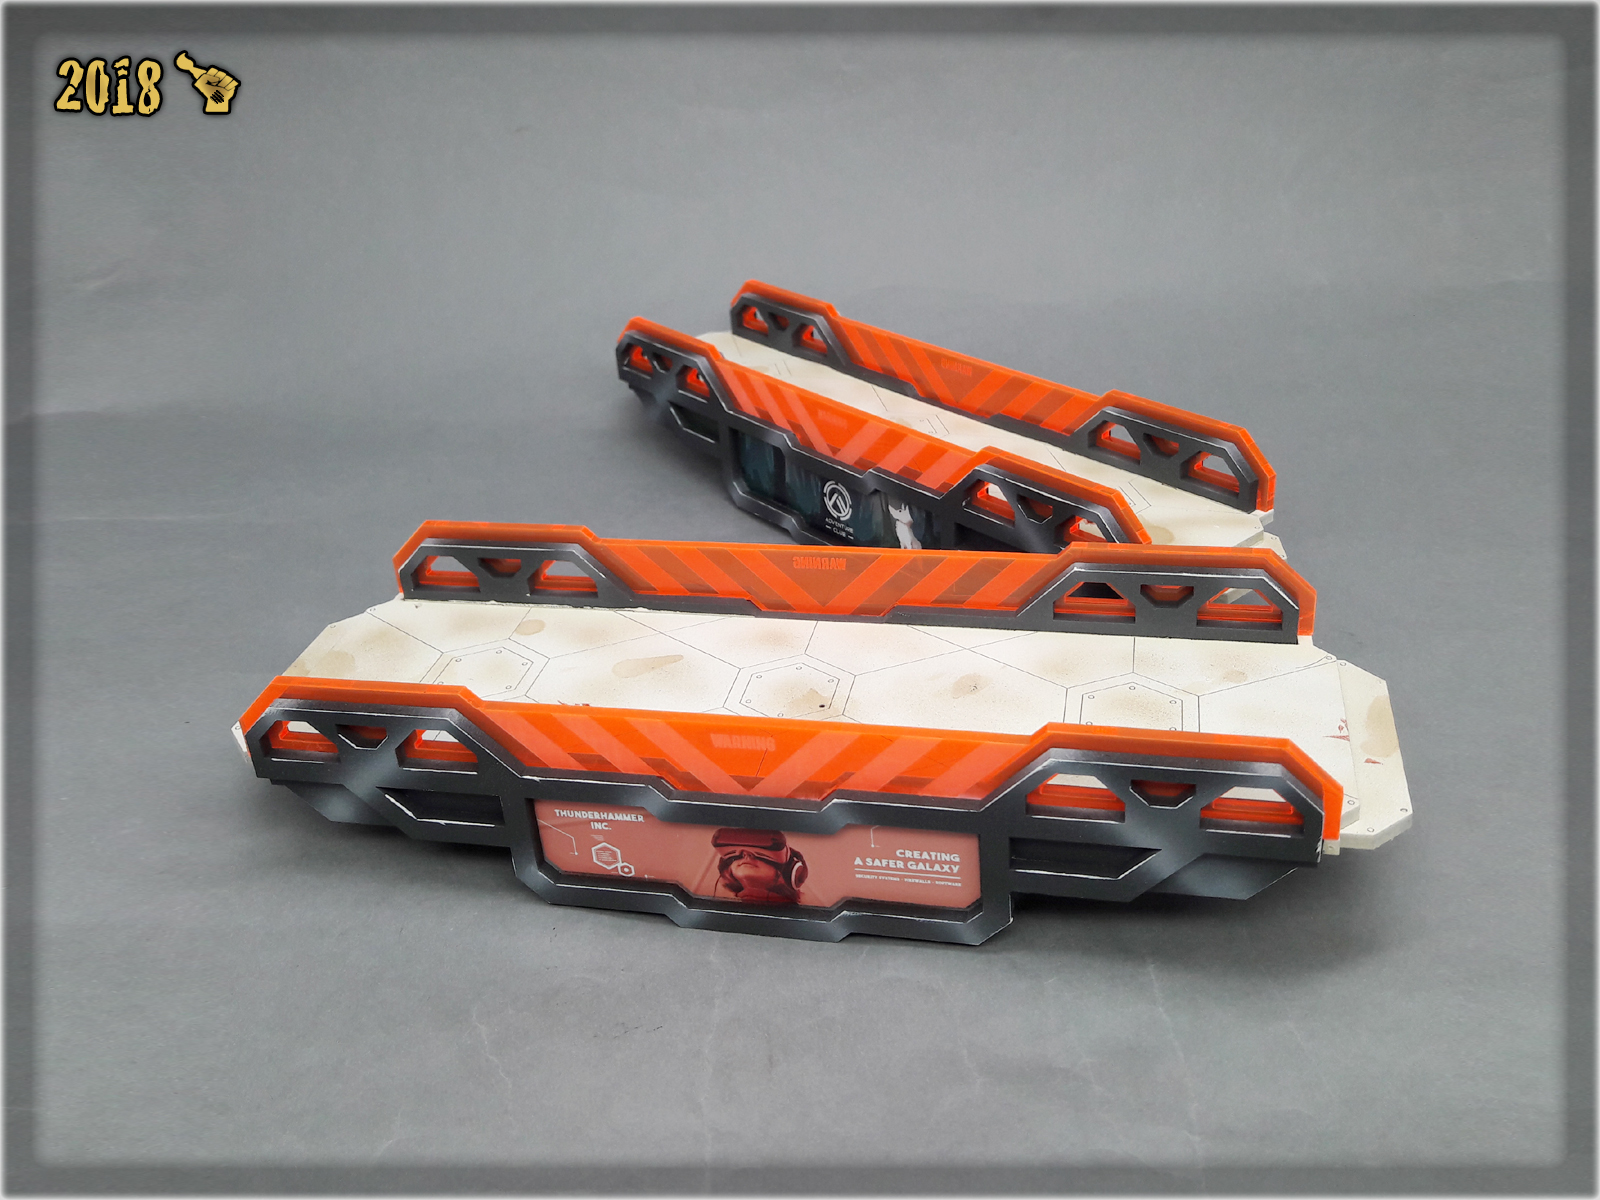
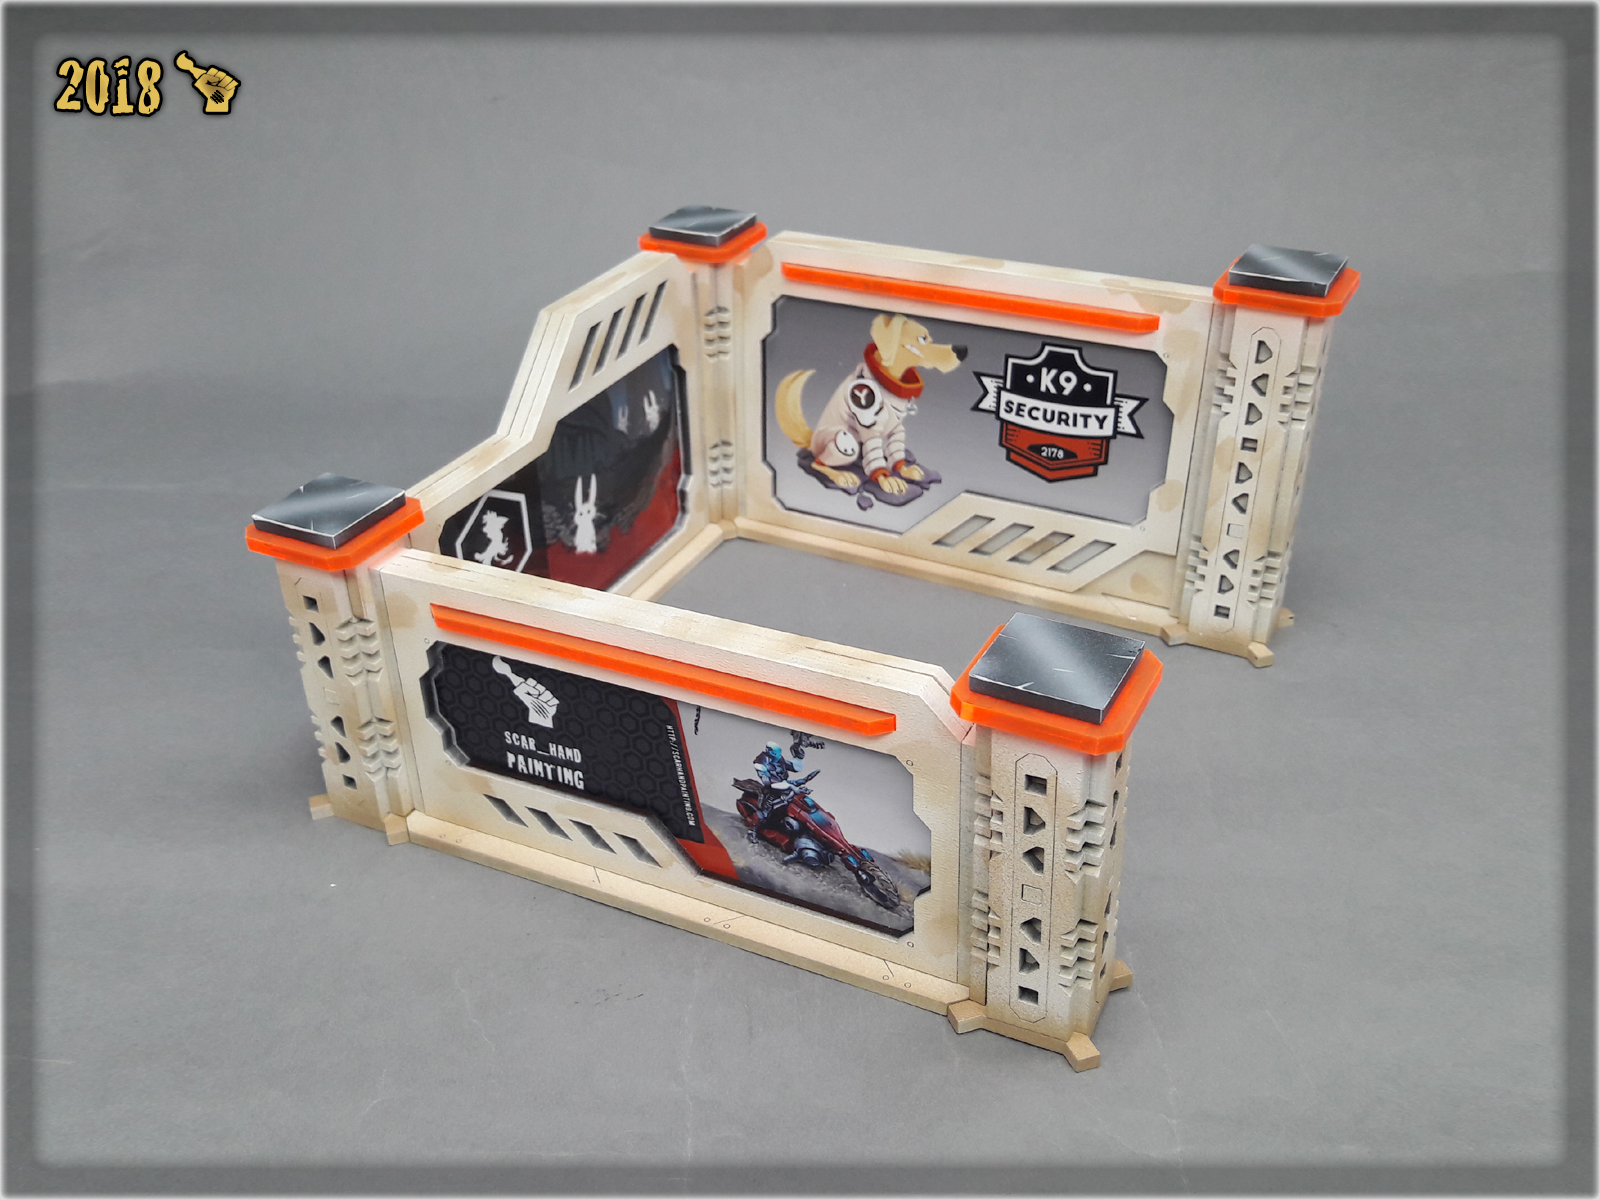
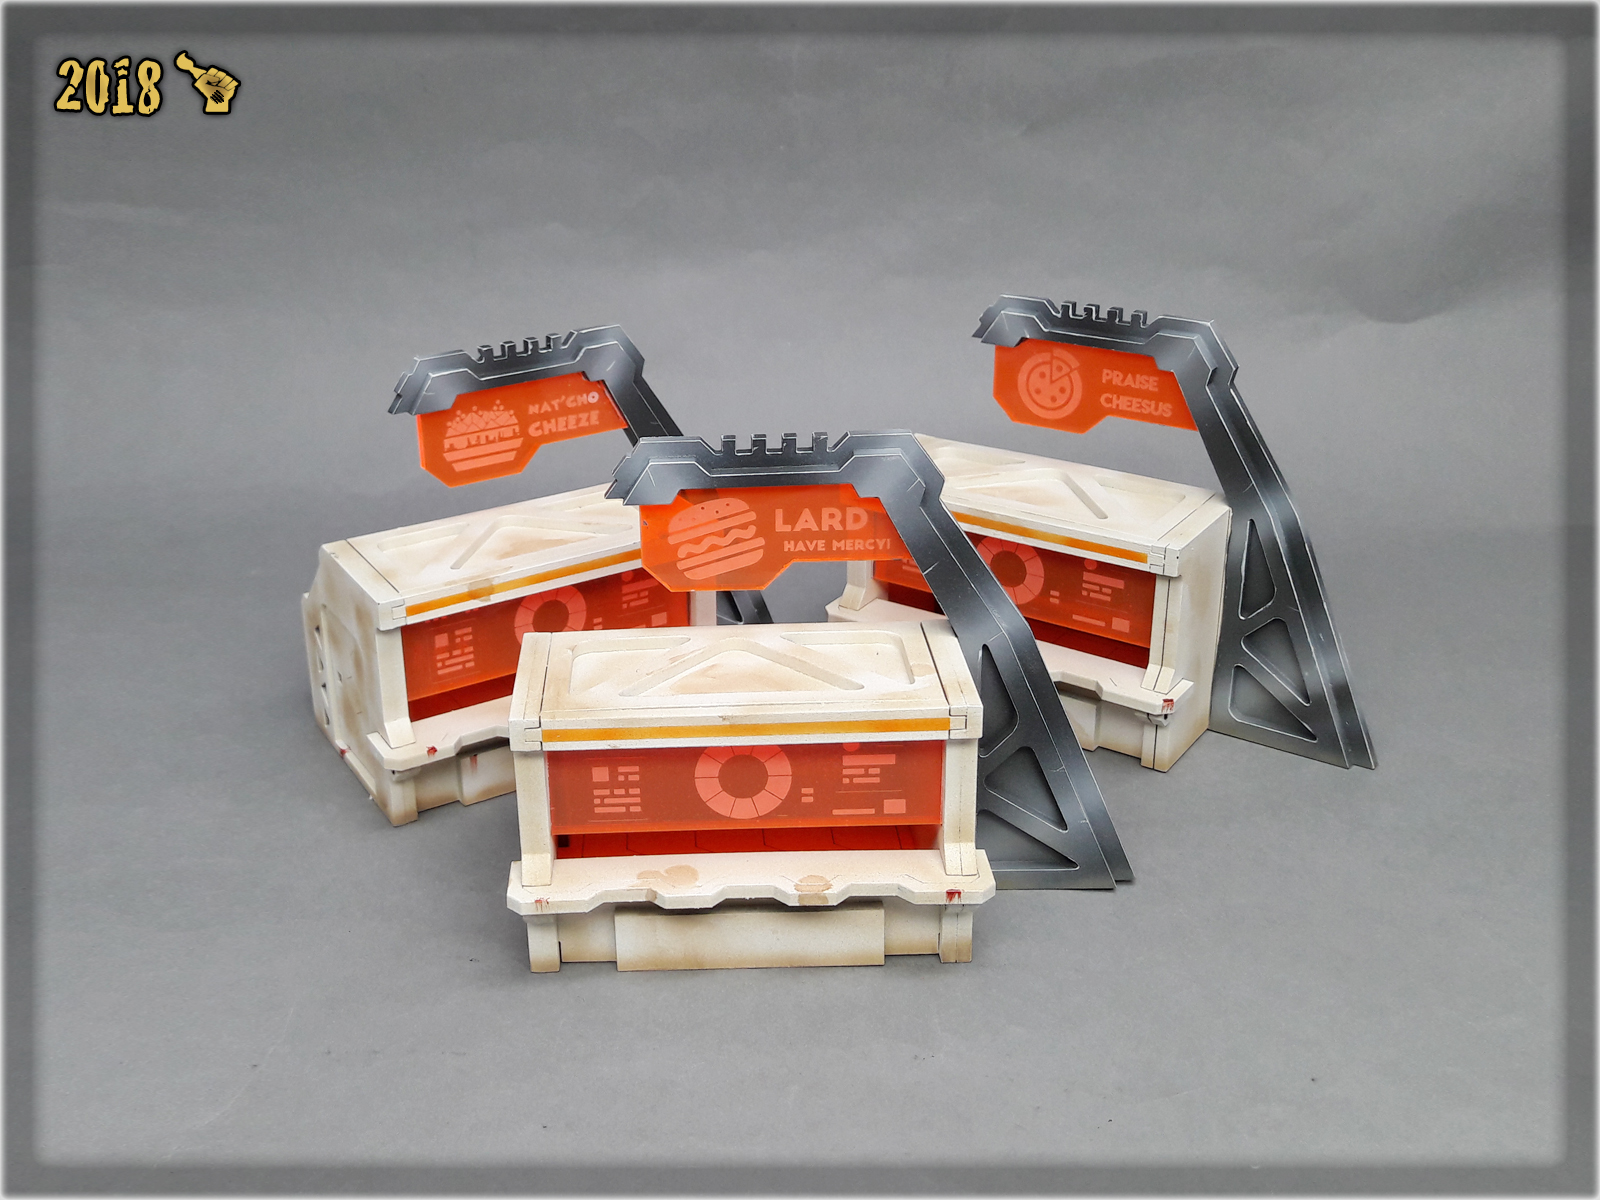
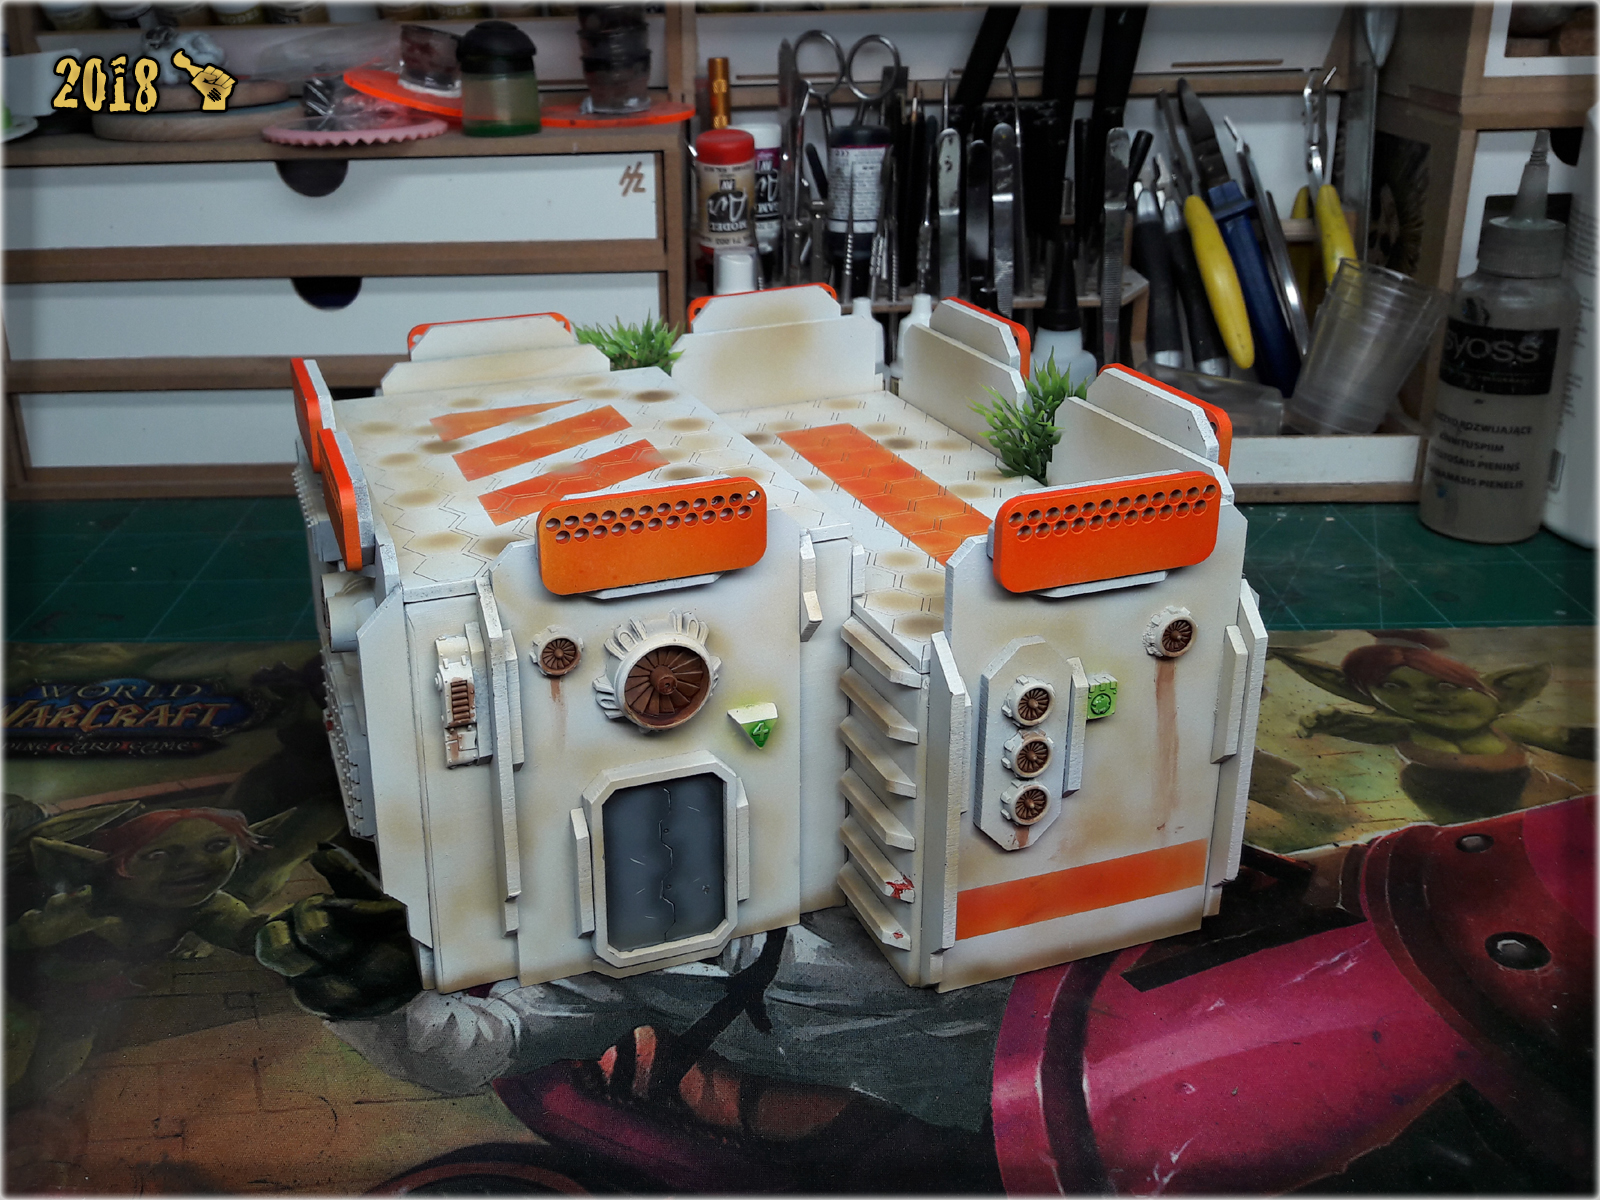
It finally happened – The Colony is now fully painted with no MDF, be it white or regular, visible. The project was set aside for few months, when all of a sudden I got new buildings from Gingermane and painted them to match my existing set. I then followed through with all the rest including bridges, food booths, walls and ad stands. Fortunatelly for me, Bocian from Gingermane is a cool bruh of mine and he cut thin paper pieces to cover all illustrations adorning his designs. I only had to take care to cover plexi elements by myself. Once done – my work went fast and easy. Few evenings was all it took.


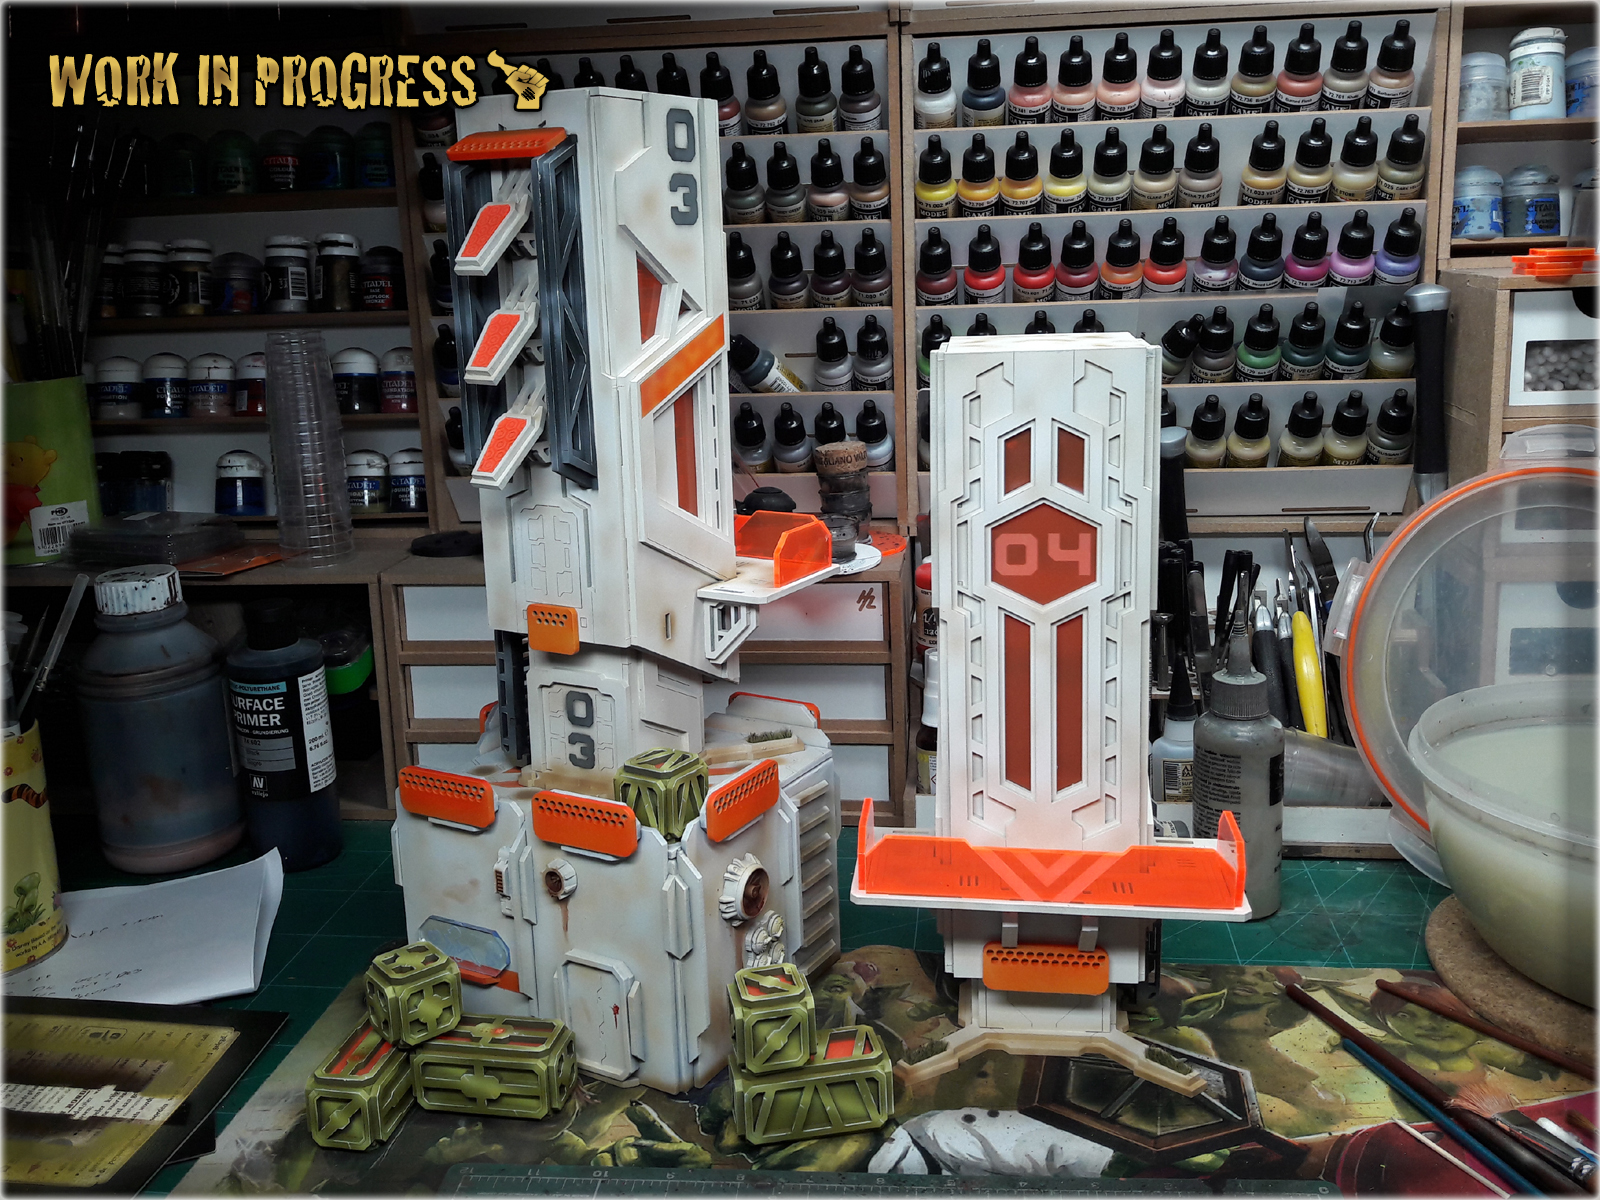
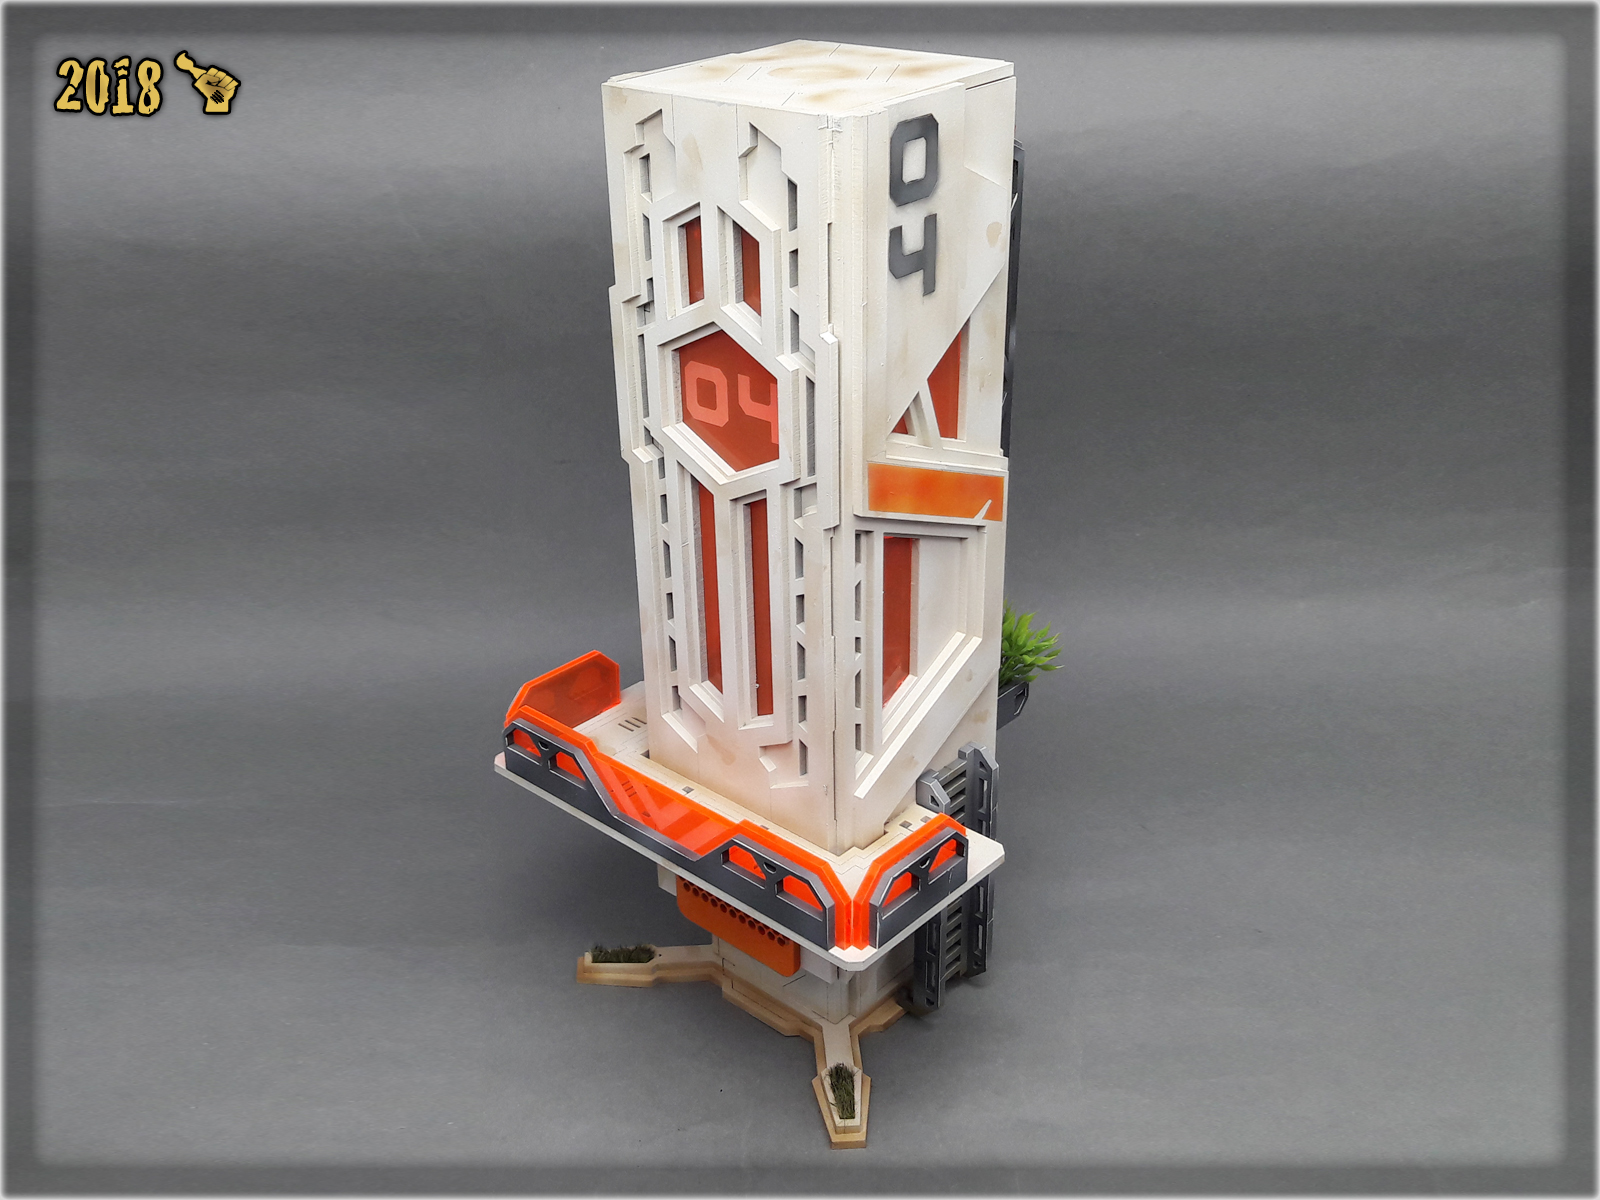
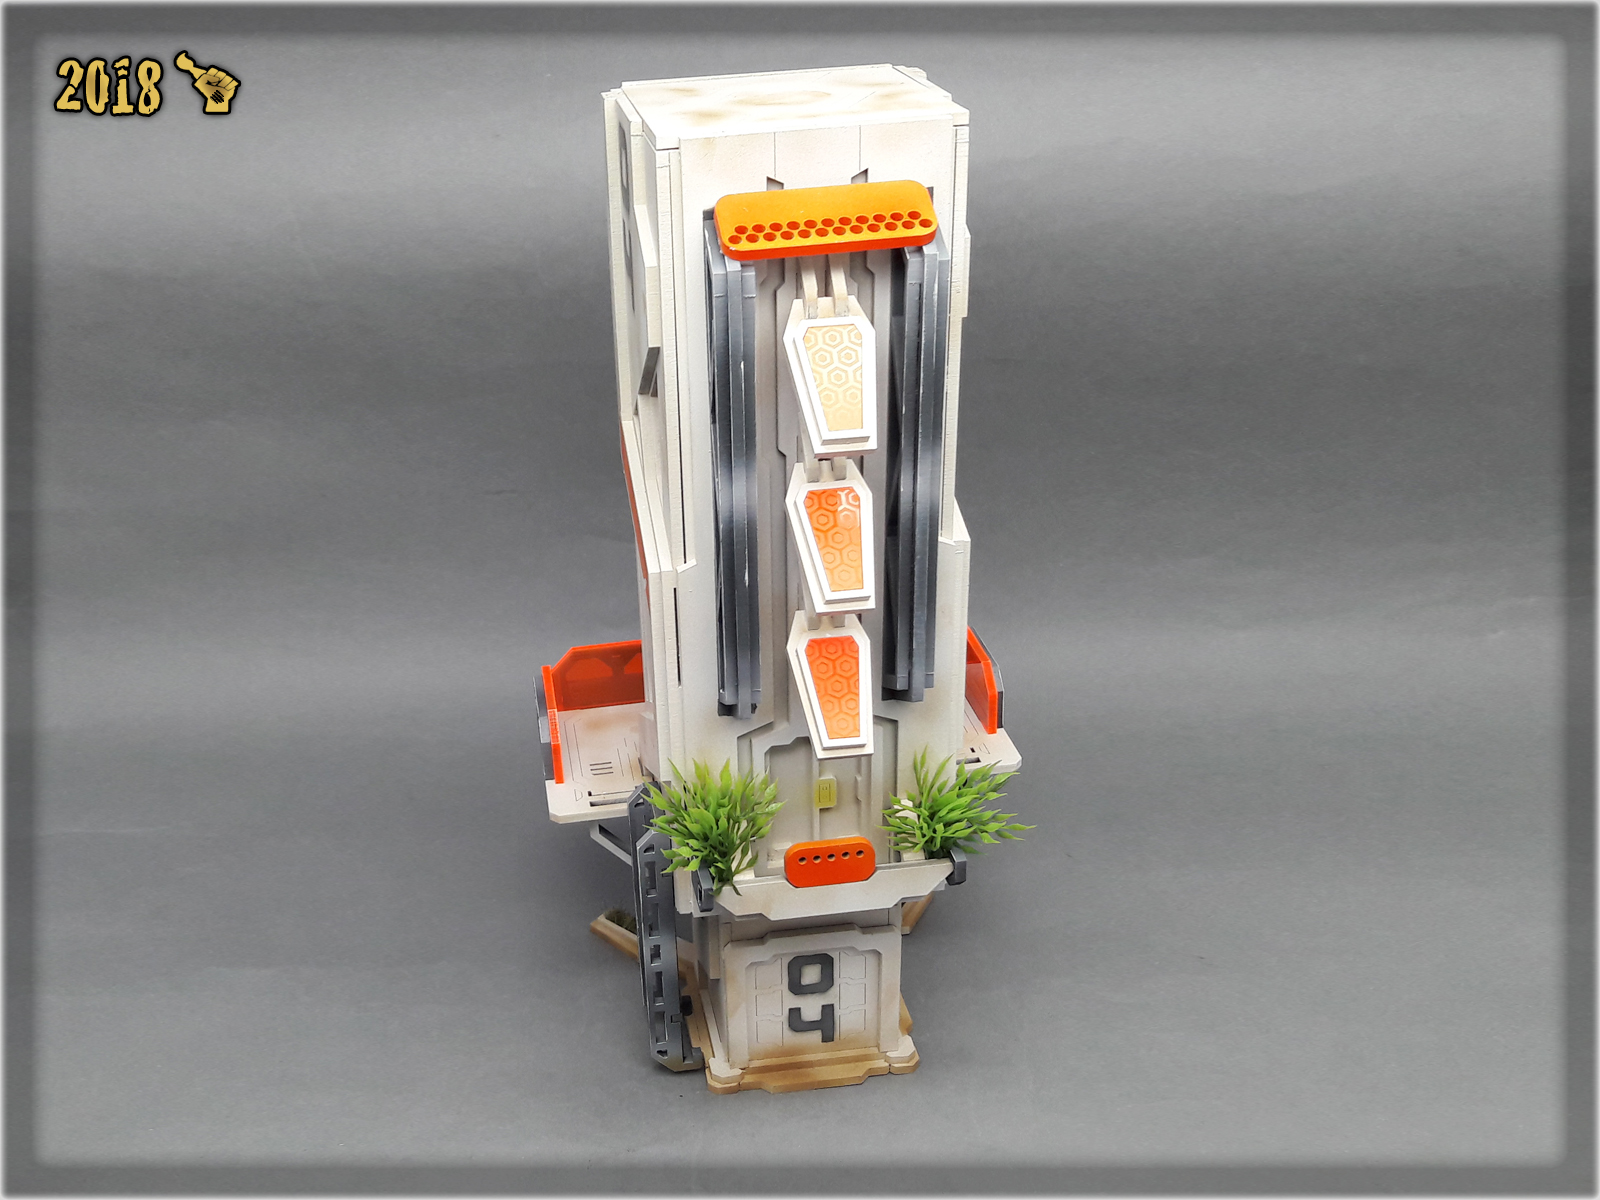
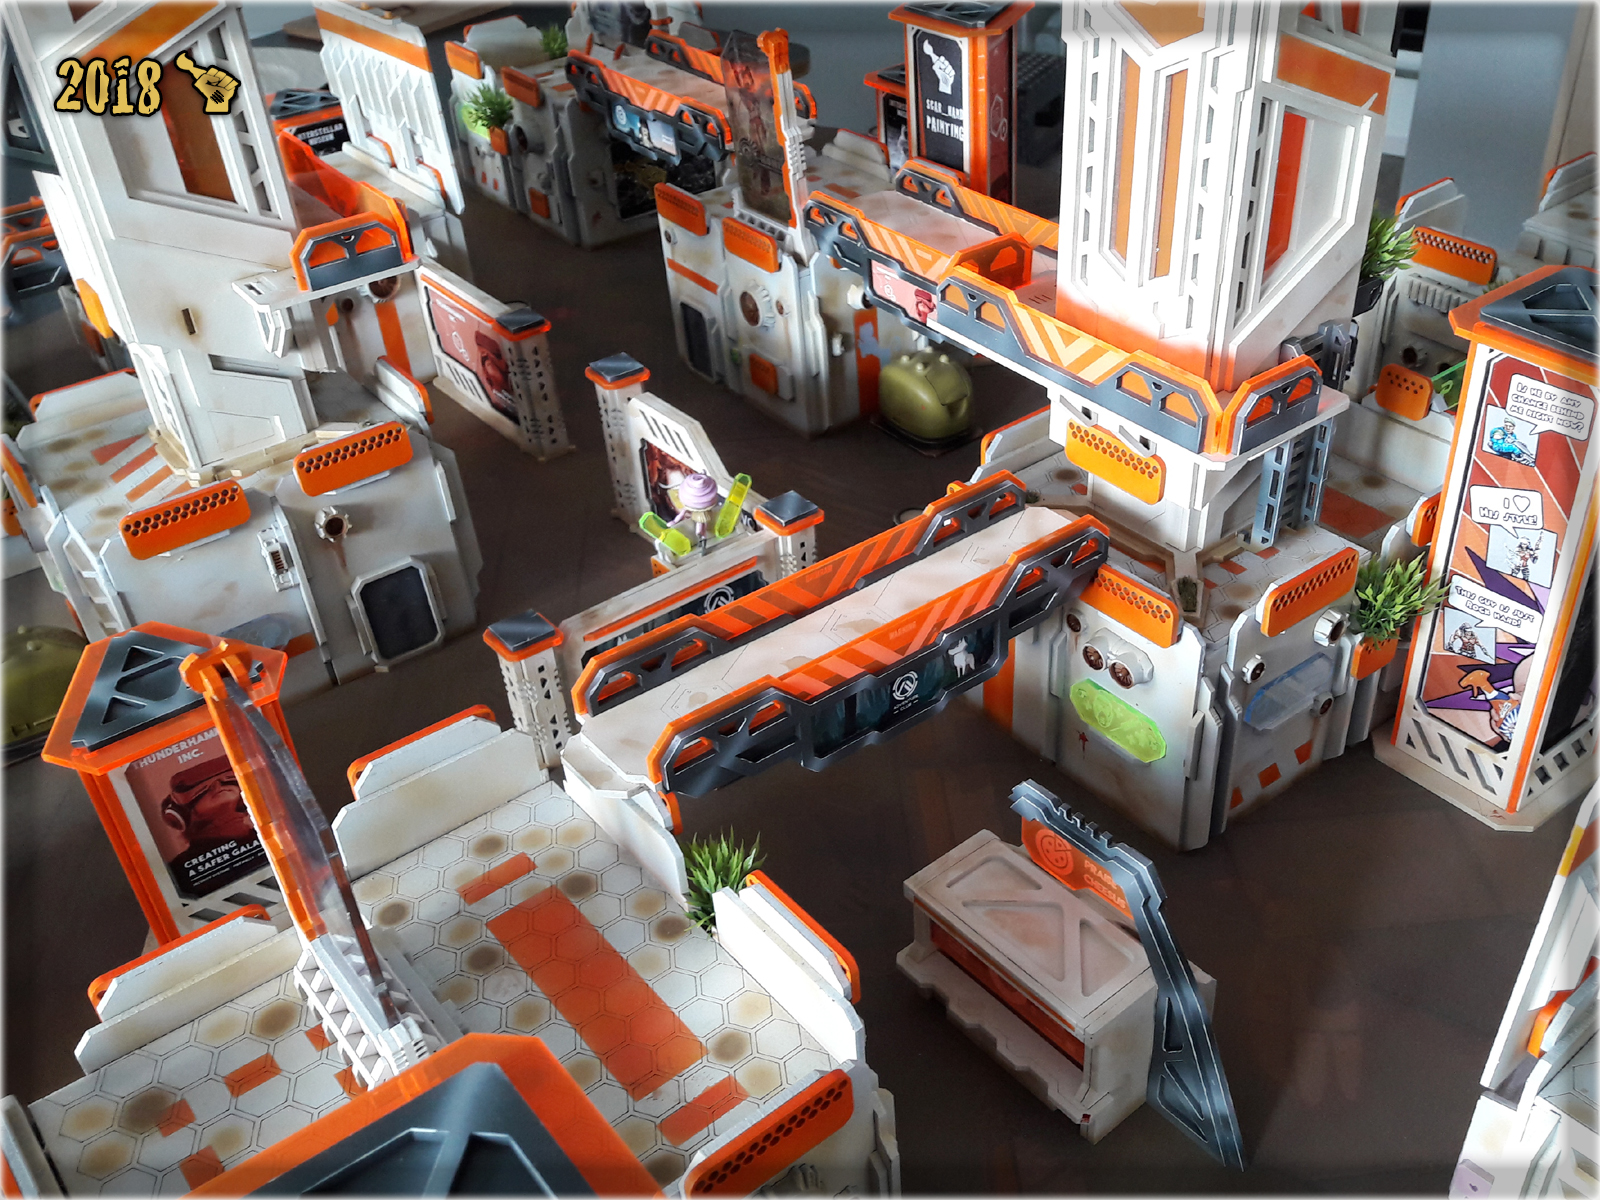
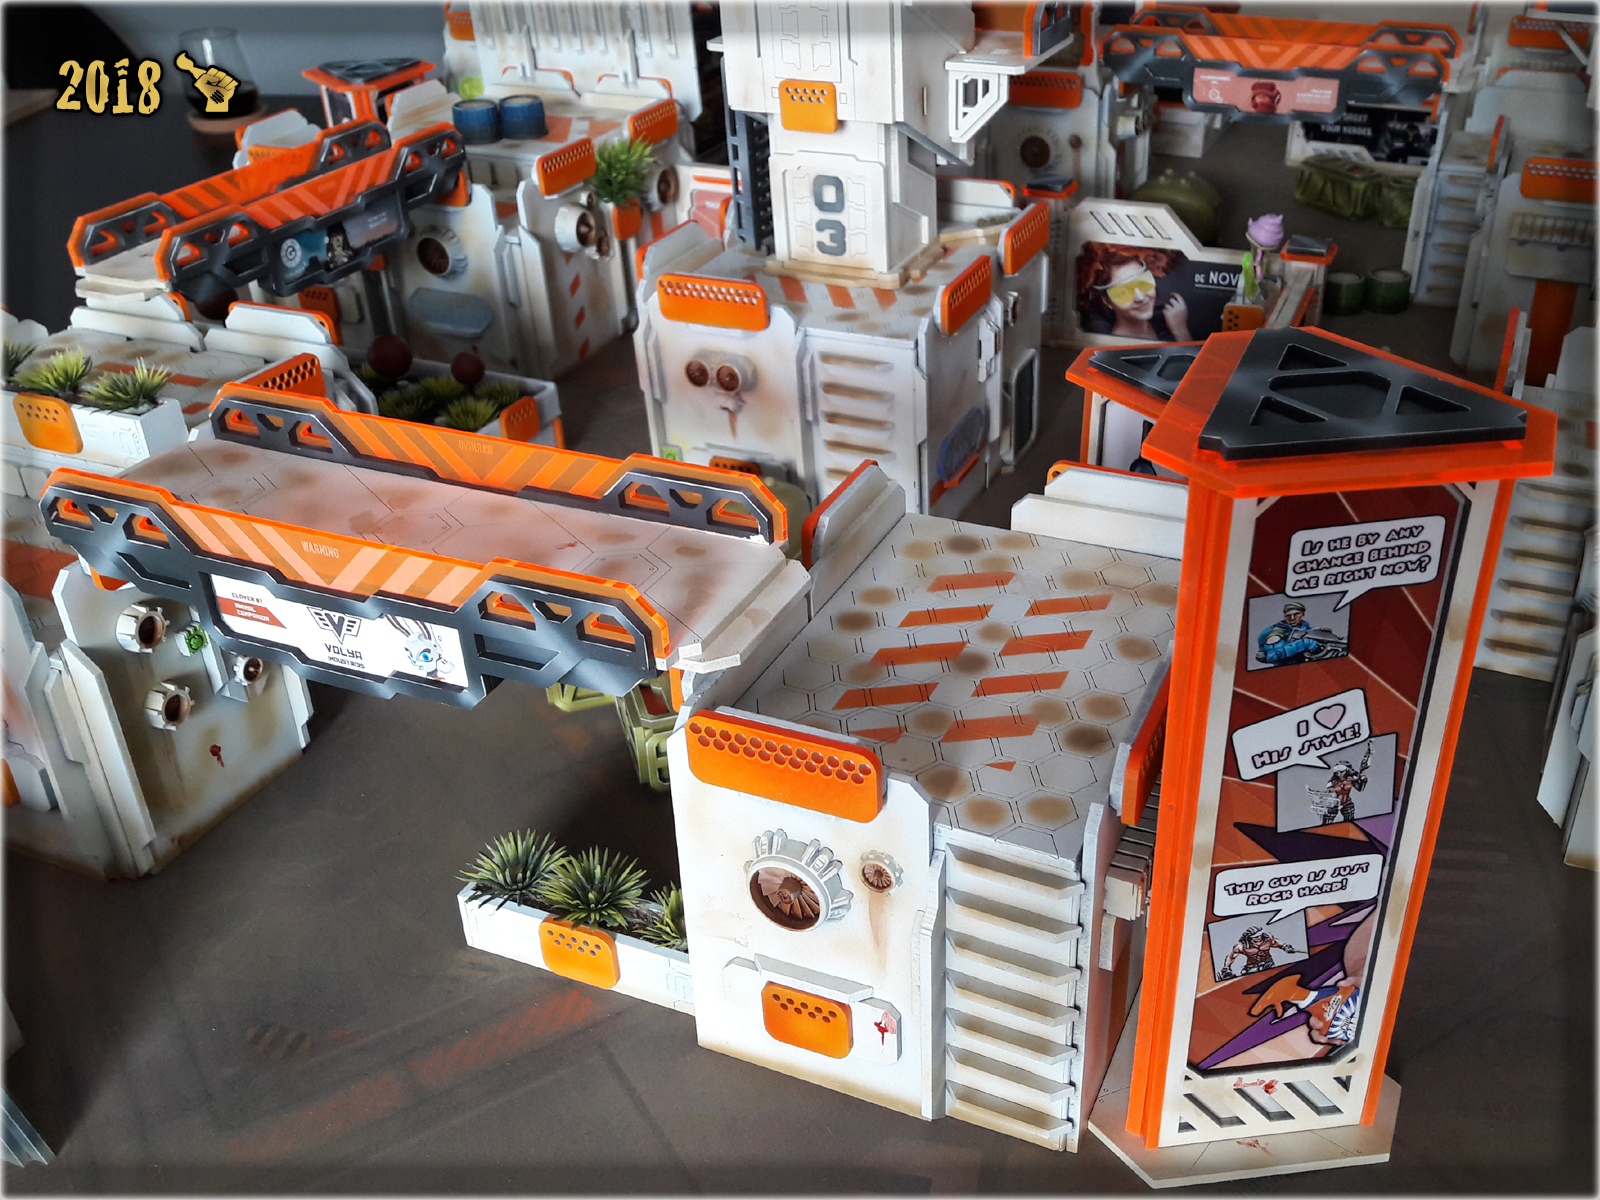
The Colony is vast already, but there’s always room for some extra terrain pieces. With new Gingermane designs appearing every month it’s difficult to stop expanding . It gets even harder, as he let’s me peek on work in progress designs and I sometimes get to buy some before release. Obviously when I saw ‘SF024 The Tower’ I freaked out and demanded these be handed to me emmediately. Gosh how I love these two…
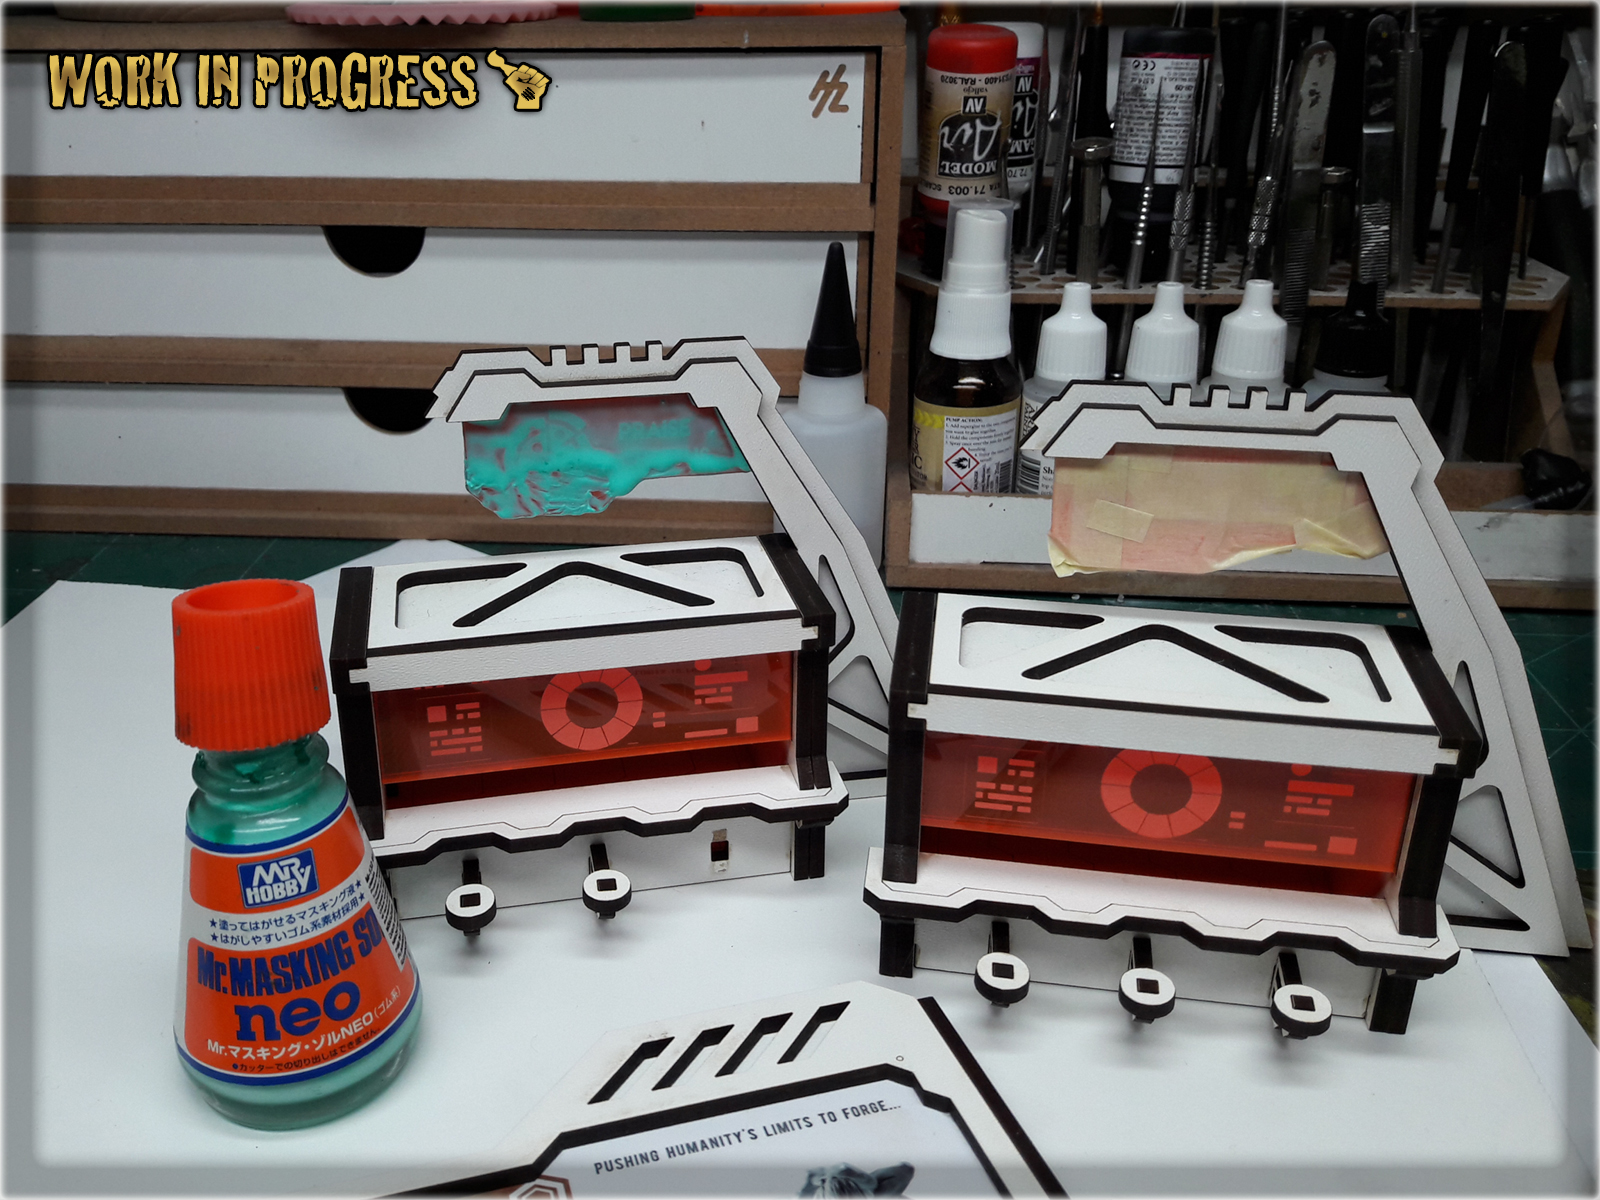
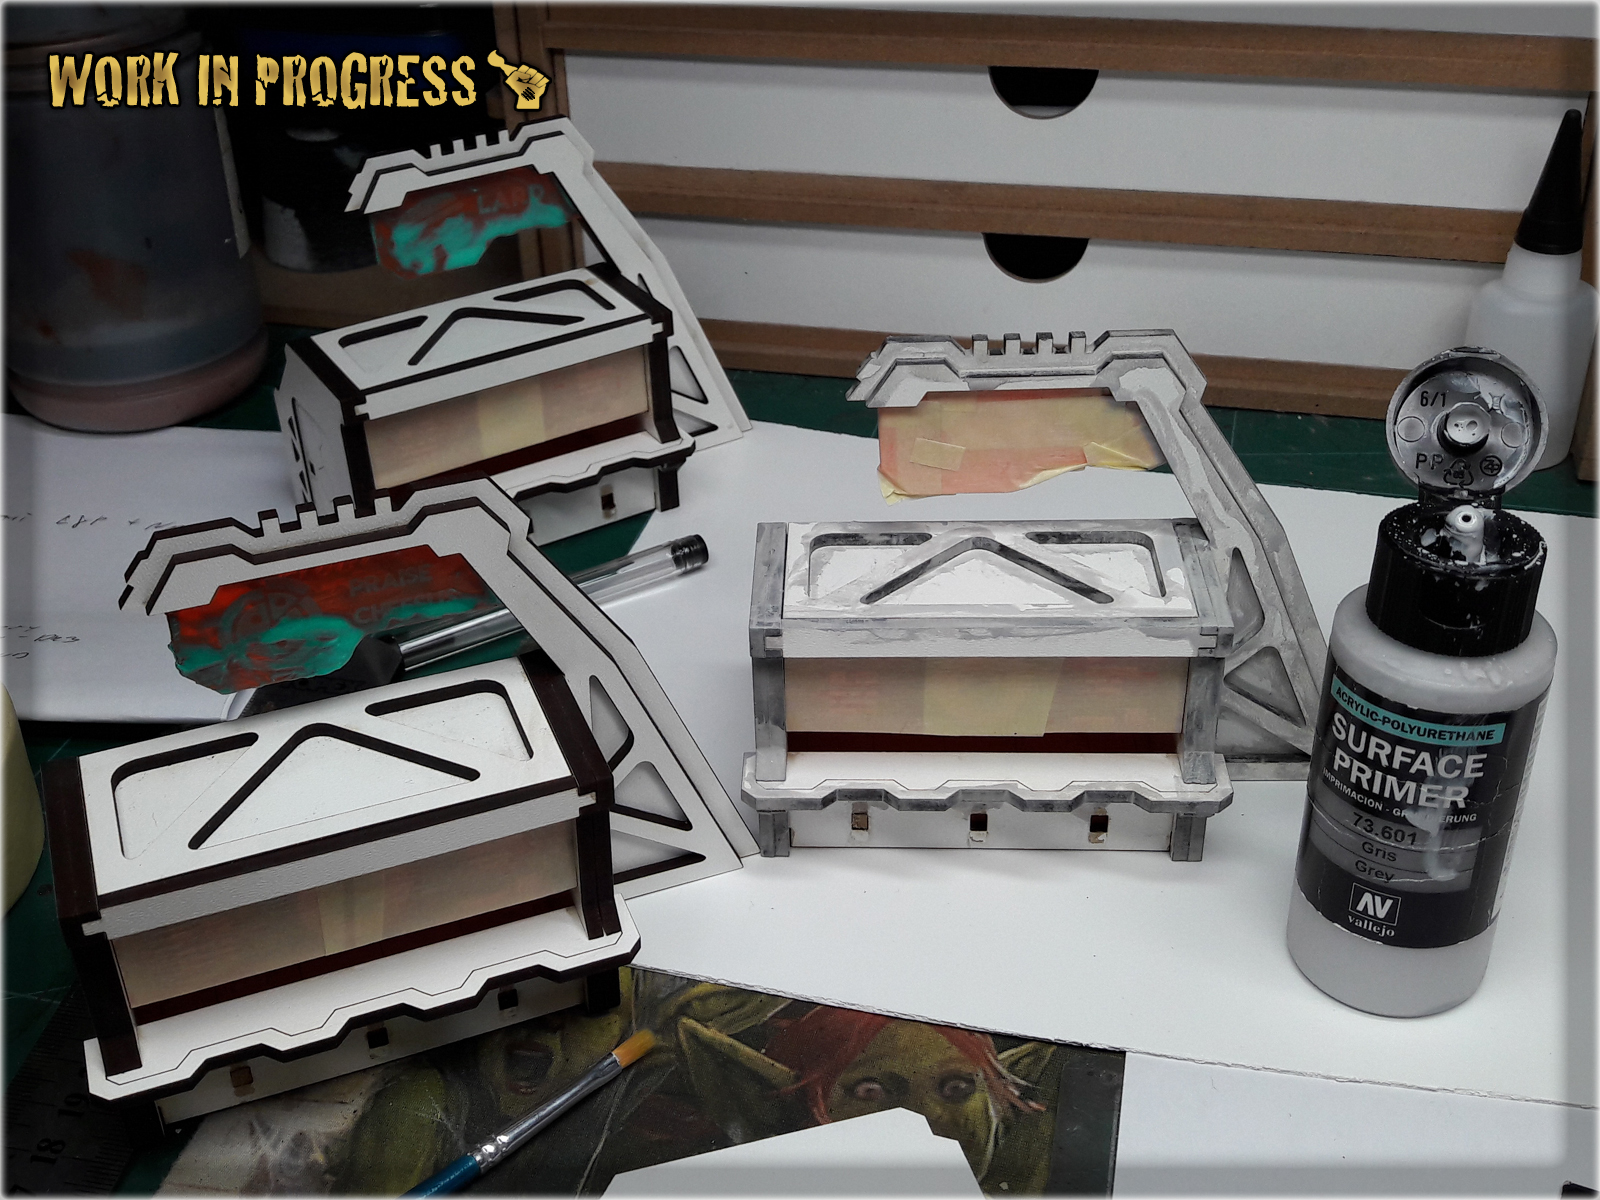
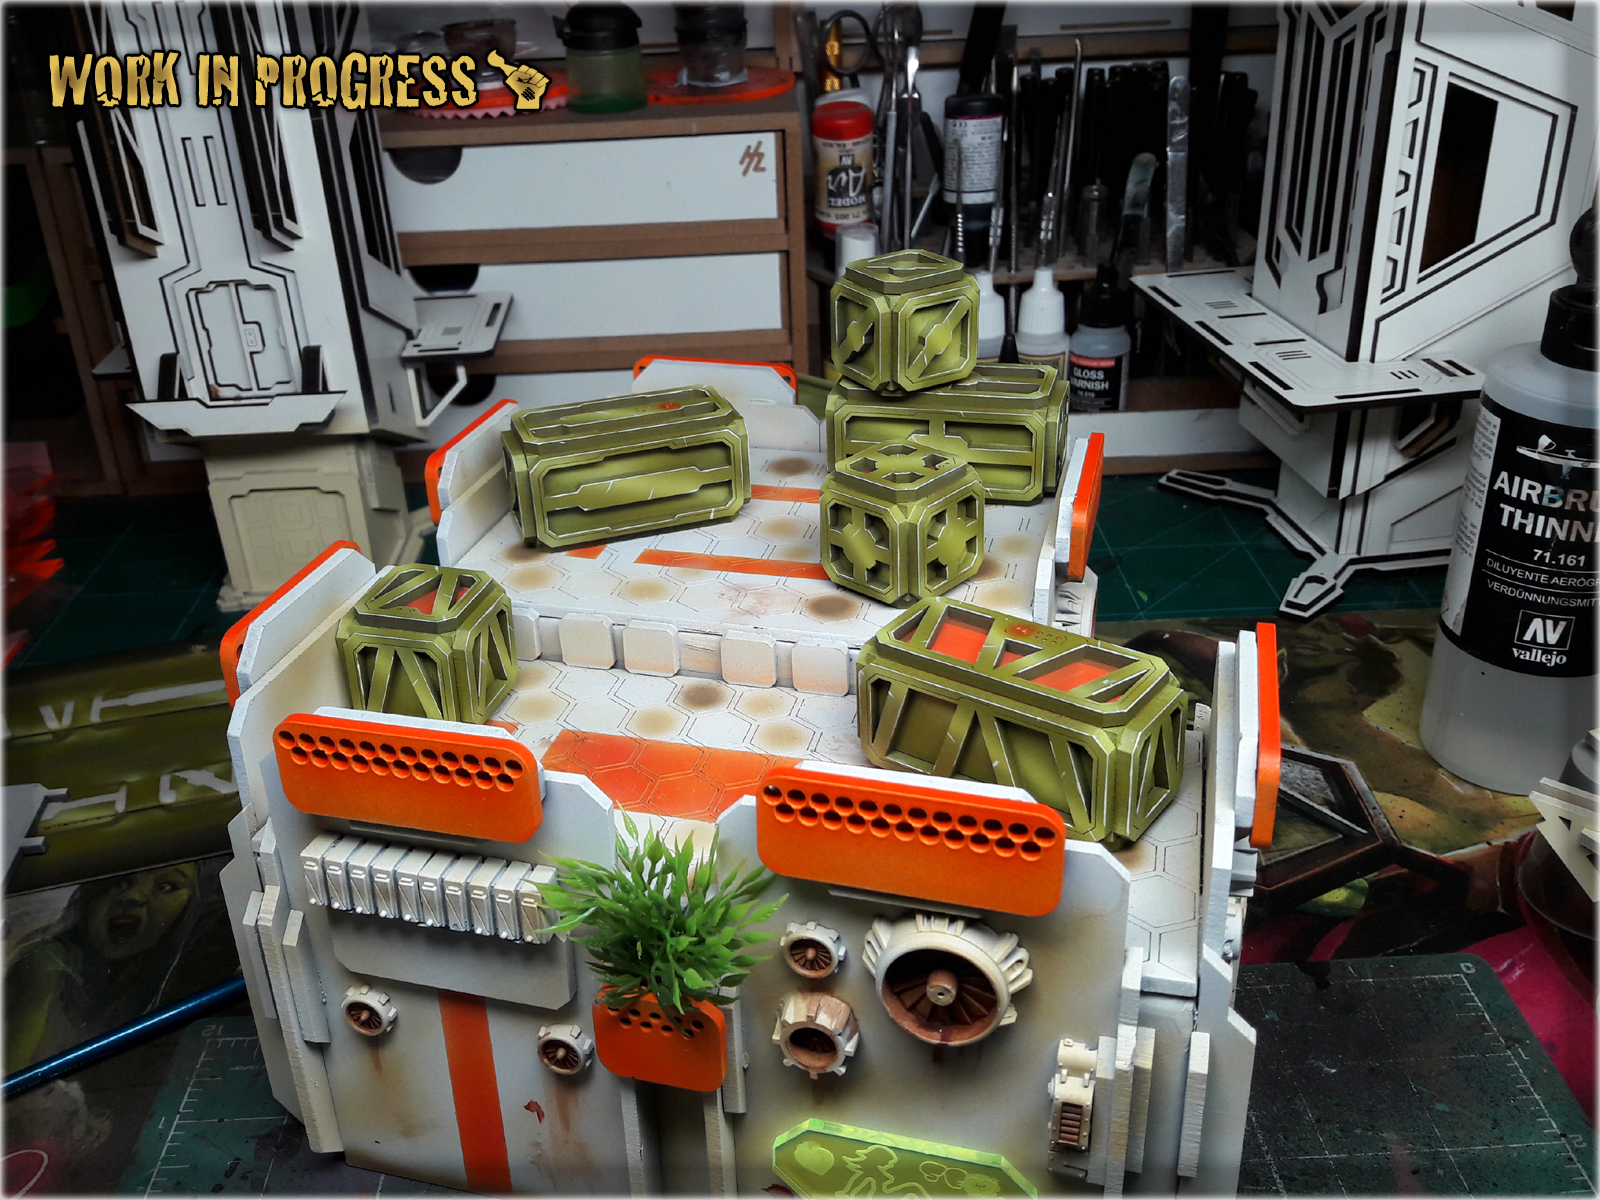
Another addition to The Colony – ‘SF010 Cargo Crates’. Slowly my own designs and scrap-built scenery are forced off the gaming board. I don’t mind it, cause at this point I’m already hooked on Gingermane’s stuff either way 😛

With ‘SF024 The Tower’ I intorudced black/grey colour to The Colony’s overall scheme. It seem to compliment the board so I followed up on this, going back to older scenery pieces. I wander if these, once paper box, buildings will ever rest…
One day ‘The Colony’ will be finished, but seeing how it changes time and time again I can only say TO BE CONTINUED…

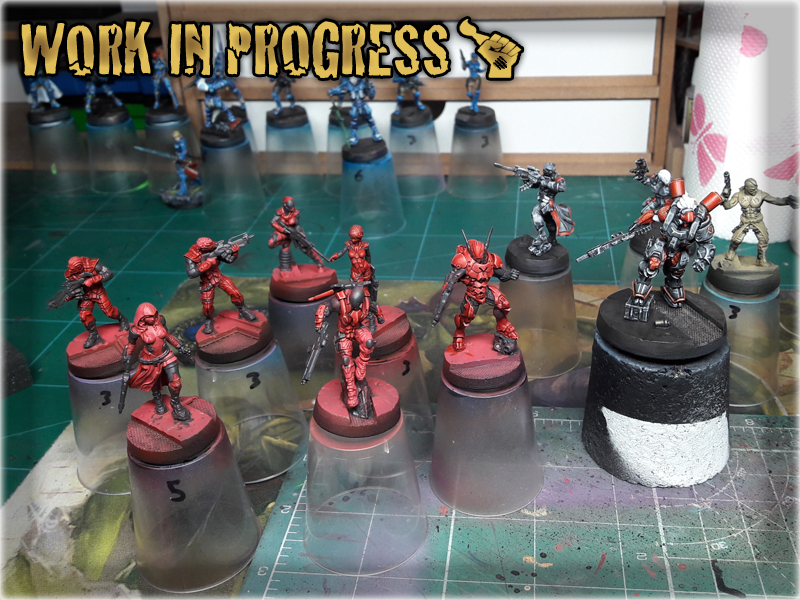
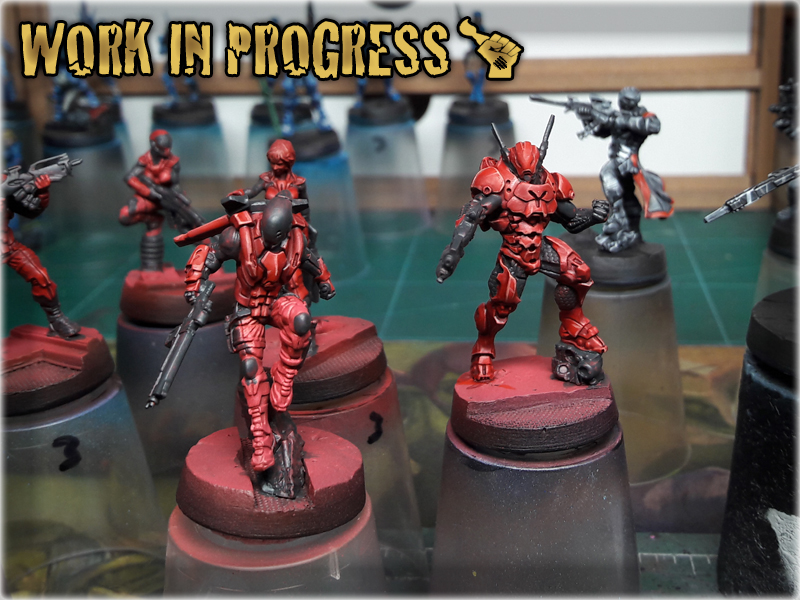
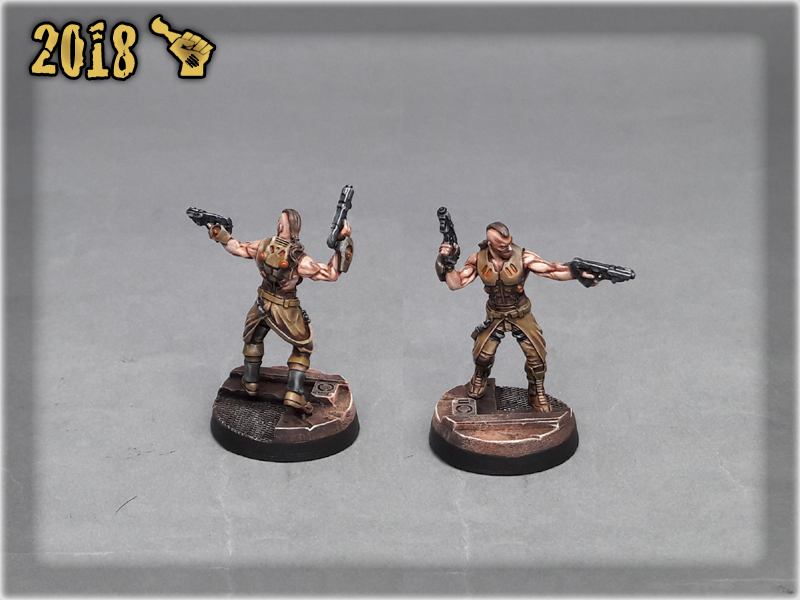
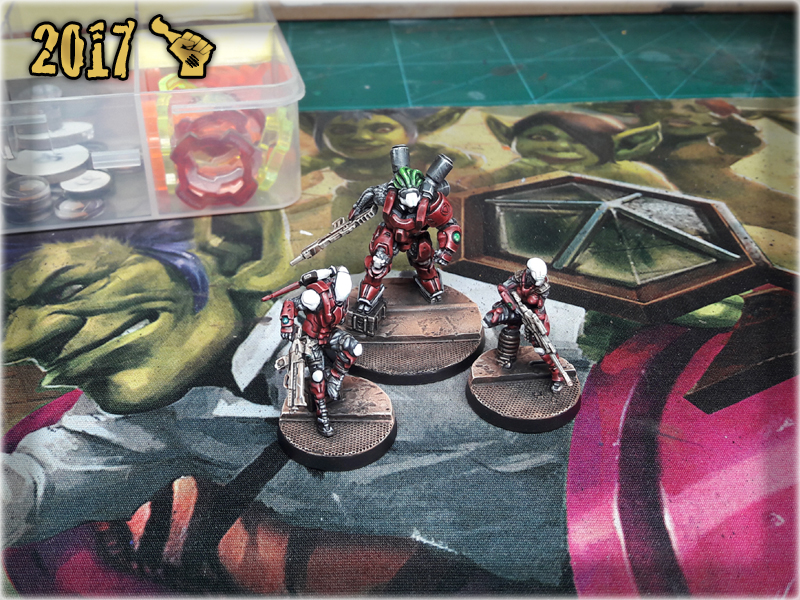
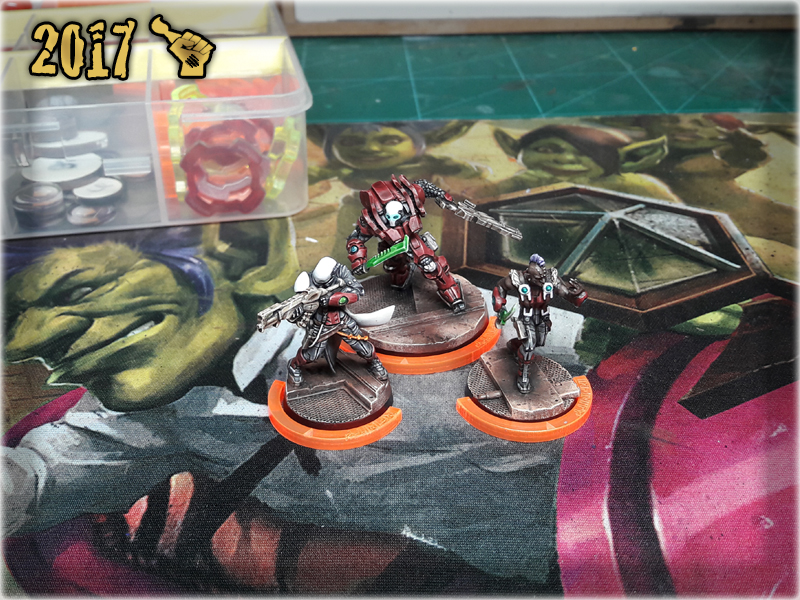
Here are some Colour Recipes for Nomads from GALLERY: INFINITY OPERATION ICE STORM. Please take note that this is a simple colour scheme, not covering multiple overlapping layers and blends inbetween, that lead to the final product. It is supposed to be used as guidline not a step-by-step.
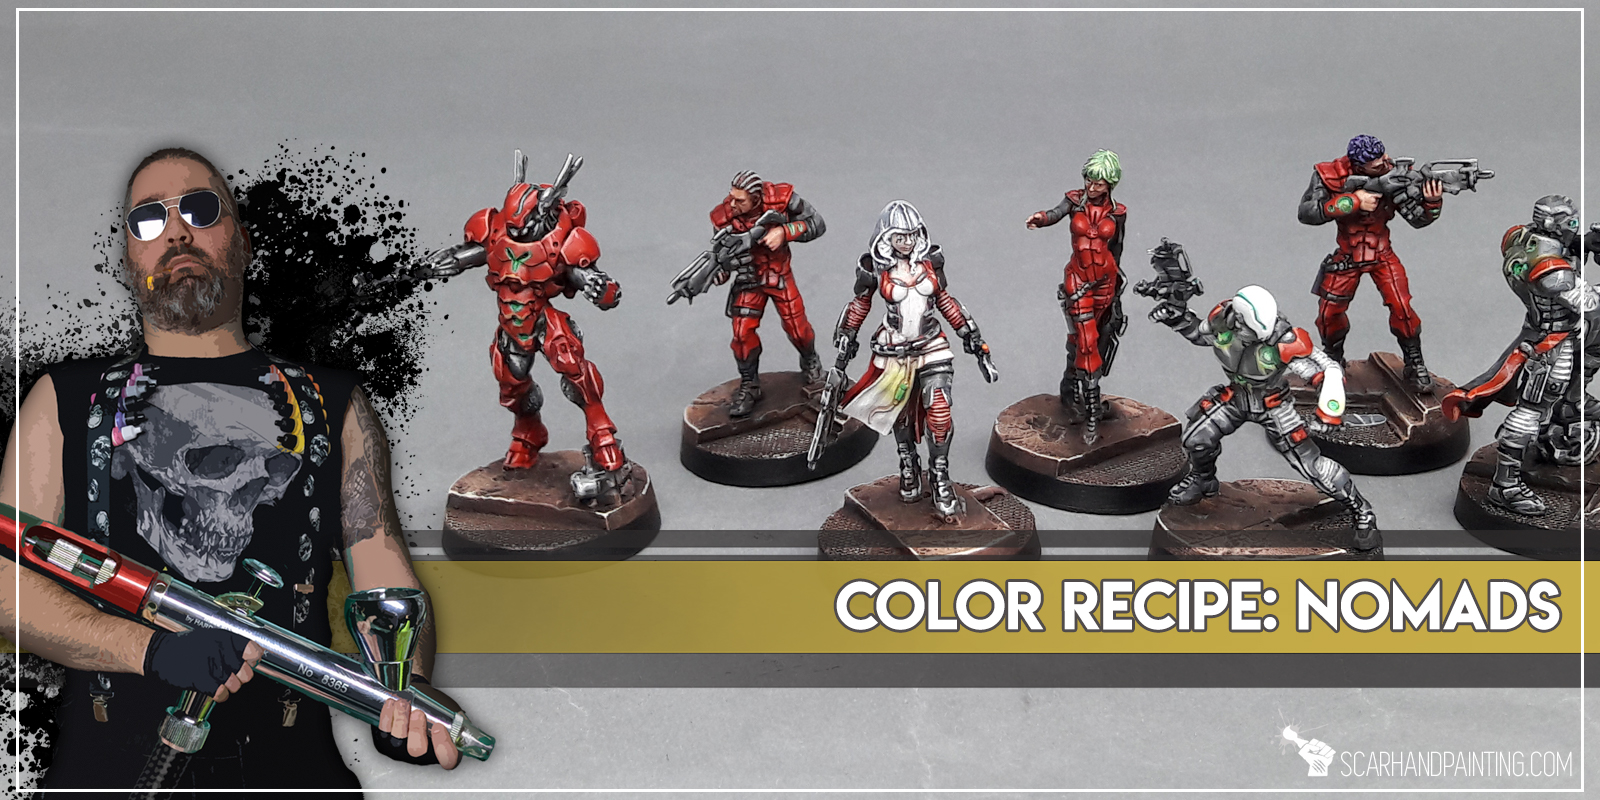
RED armour & uniforms:
Black Undercoat,
Scarlet Red (Val), *
Orange Brown (Val), *
Red RLM 23 (Val), *
Elf Skintone (Val), l&p
Red Tone Ink (AP),
Hot Orange (Val), B
Lugganath Orange (GW), L&p
BLACK/GREY outfits & weapons:
Black Undercoat,
Skavenblight Dinge (GW),
Fenrisian Grey (GW),
Pallid Wych Flesh (GW), l&p
Dark Tone Ink (AP),
Pallid Wych Flesh (GW), l&p
White, l&p
LIGHT GREY outfits:
Black/Grey outfits +
Pallid Wych Flesh (GW), l&p
Pale Grey Wash (Val),
Off White (Val), l&p
SKIN:
Bugmans Glow (GW),
Dwarf Flesh (GW),
Flesh (Val),
Mix Strong Tone Ink (AP) 1:1 Soft Tone Ink (AP),
Flesh (Val) l&p,
GREEN lights:
Sick Green (VAL),
Escorpena Green (VAL),
MIX: Escorpena Green (VAL) 1:1 Off White (VAL), l&p
Waywatcher Green (GW), glaze
Light Livery green (VAL), blend

l&p – lines and points,
p – points,
b – blend,
drbr – drybrush,
flbr – flatbrush,
stpl – stippling,
*Airbrushed (with multiple layers and mixes)

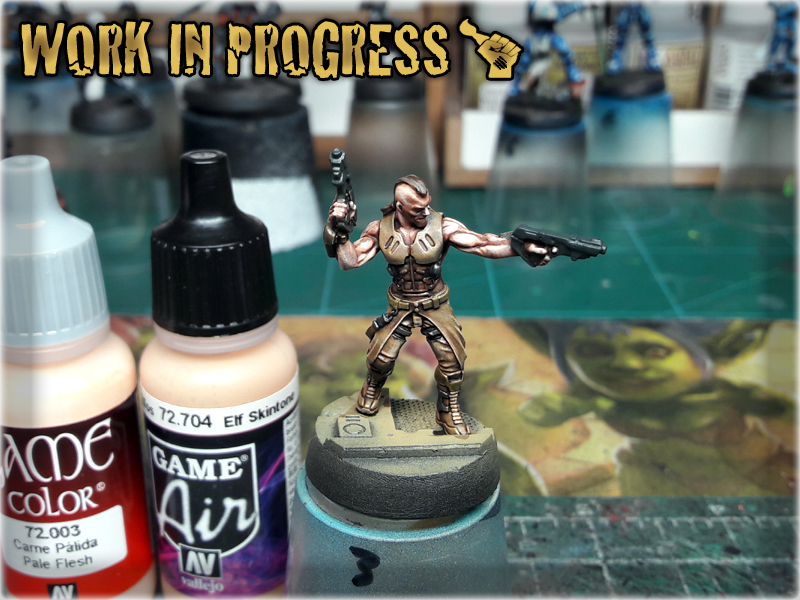
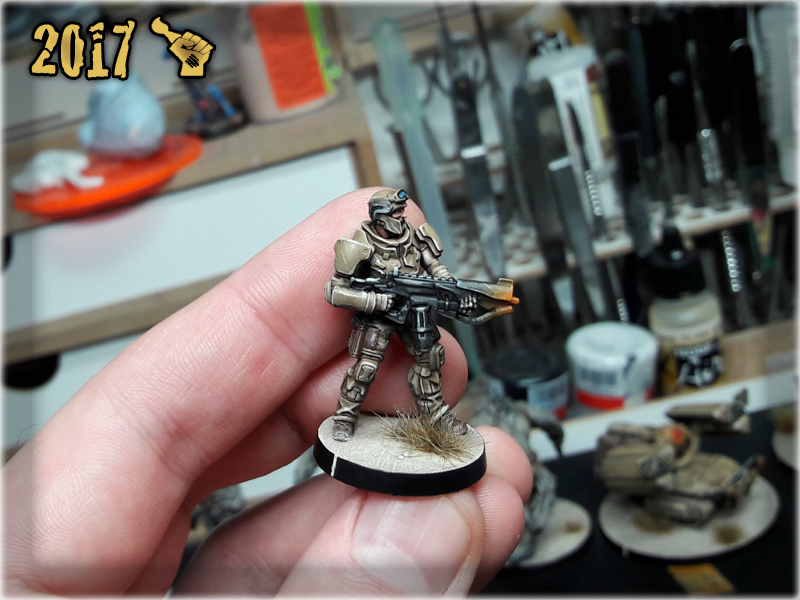
Painting skin – nightmare for some, EZ for others. Back in the days I’ve struggled with a proper skin tone, my miniatures turning out too dark, or skin being overall flat and uninterresting. Practicing ‘Five Layers Technique‘ for many years, led me to some realisations and now I am able to present to you my ultimate way of basic skin painting.


* Regular Brush,
* Bugmans Glow (GW),
* Dwarf Flesh (GW),
* Flesh (Val AIR),
* Strong Tone Ink (AP),
* Soft Tone Ink (AP),
* Pale Flesh (Val),
! You can achieve similar results using different paints and avoiding mixes, as long as you follow Five Layers Technique basics. For example Bugmans Glow (GW) might be switched for Tanned Flesh (AP) or Tan (Vallejo).
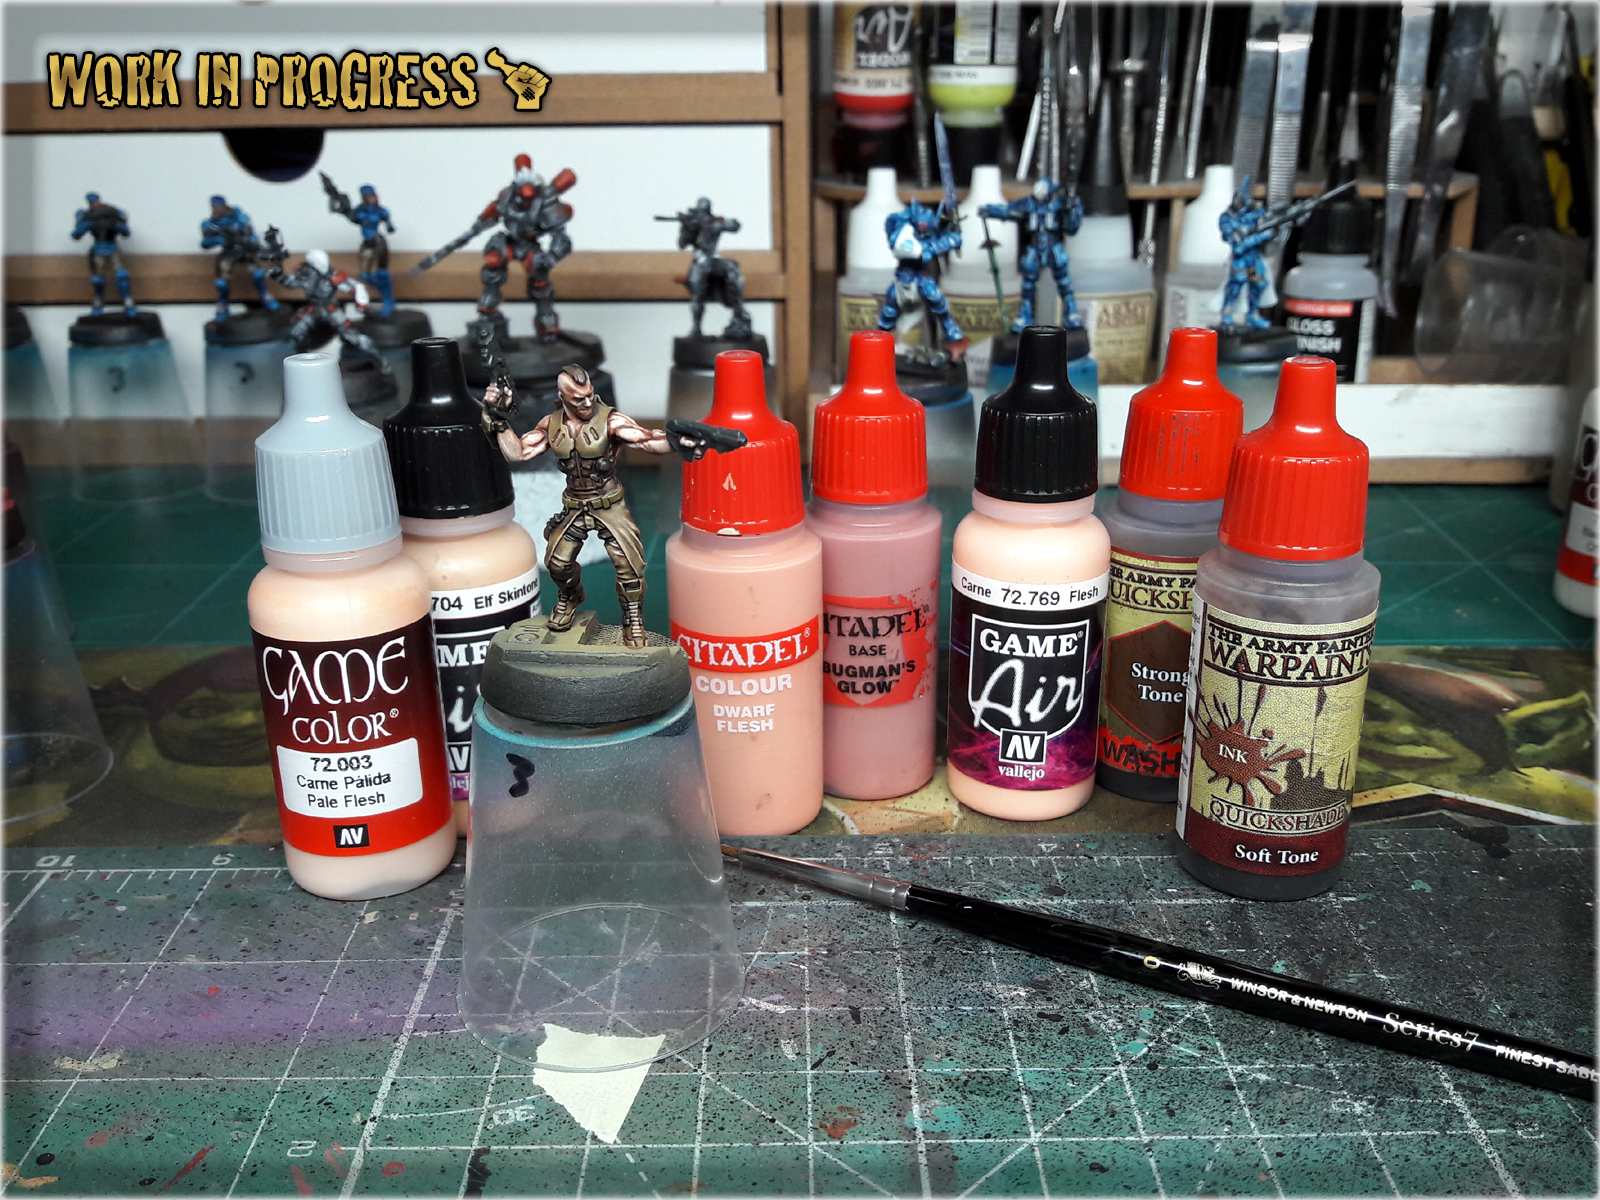
! You can start by applying first layer on any surface. This method does not require any special preparation, like re-painting surface to primer black etc.

1 I started by applying an underlayer of Bugmans Glow paint over any surface destined to become skin. This layer might be a bit messy and is not meant to be smooth, only to cover entire surface. For this particular layer I encourage thinning the paint a bit to help it flow into recesses.
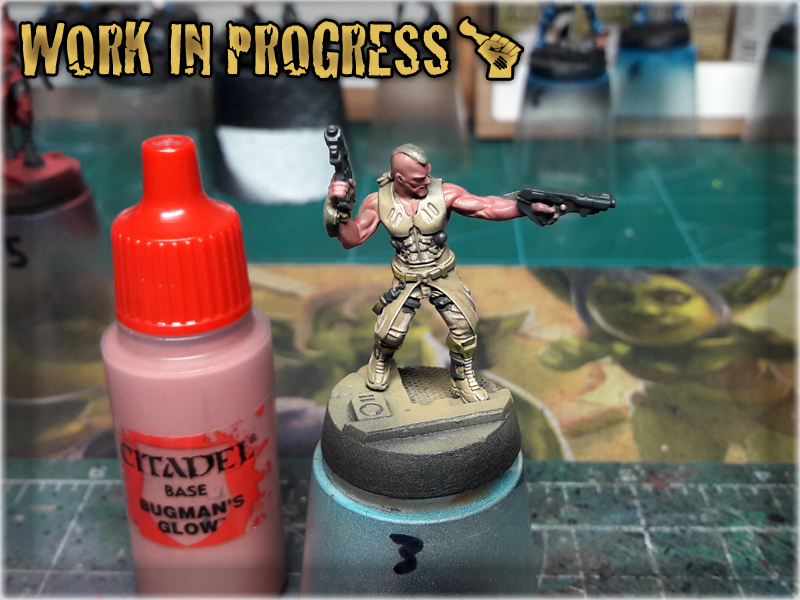
2 Next I applied a main layer of Dwarf Flesh. This time I tried to keep paint from flowing into recesses and made sure that it will cover all big flat areas.

3 I then applied a layer made of a 1:1 mix of Dwarf Flesh and Flesh over all raised areas. This is suposed to be the first highligh and provides a difference in skin tones over the model. Don't worry if some piant flows into recesses, just try to avoid covering everything with it.

4 Here came the flood of wash. I applied a 1:1 mix of Army Painter's Strong Tone Ink with Soft Tone Ink. As usual I didn't bother to be subtle about it.


5 Once dried, I highlighted skin with a 1:1 mix of Elf Skintone and Pale Flesh. This usually is the final highlight and is meant to POP the skin.
! If I was to enchance skin a bit and move forward from this point, I would add points of focus with lines and dots of Pale Flesh. Some deeper spots can also be in-lined with Flesh Tone or some brown-ish wash to build contrast but that's for another article.


Thus we may know that there are five essentials for miniatures painting:
He will paint who knows when to paint and when not to paint.
He will paint who knows how to handle both superior and inferior brushes.
He will paint whose paints are mixed on the same palette throughout entire project.
He will paint who, prepared himself, waits to take the project undercoated.
He will paint who has hobby capacity and is not interfered with by the customer.
If you know the miniature and know your paints, you need not fear the result of a hundred paint jobs.

Remember Fifty Shades of Scarhandpainting? Well, it was published an uncountable number of hobby hours and over a thousand painted miniatures ago. Yes – today is my dear Scarhandpainting.com’s second anniversary and guess what – I totally forgot to get myself a present. At least you guys remembered and prepared a fantastic surprise for me: over 220000 visits from more than 90000 different IP’s throughout the year. That literally doubled last year’s results. I’m very excited to see how popular this site is. For me this is the best reward for all the effort put into expanding Blog’s content. It is insane that so many people visit my humble site and for that I thank all of you. Cheers!
Last twelve months were like a constant extatic frenzy of painting new, awesome projects, meeting fantastic people from around the world and hobbying all night long! Must say that this way of life suits me well, creating a variety of means to express myself through hobby. It brings me joy to interact with great people and see how they implement my ideas into their own projects. Sharing projects with an audience keeps me hyped and motivated, while providing tips and advice through hobby related articles helps me focus and grow as a painter. That’s why I plan to continue on a quest to bring even more projects and articles to life.
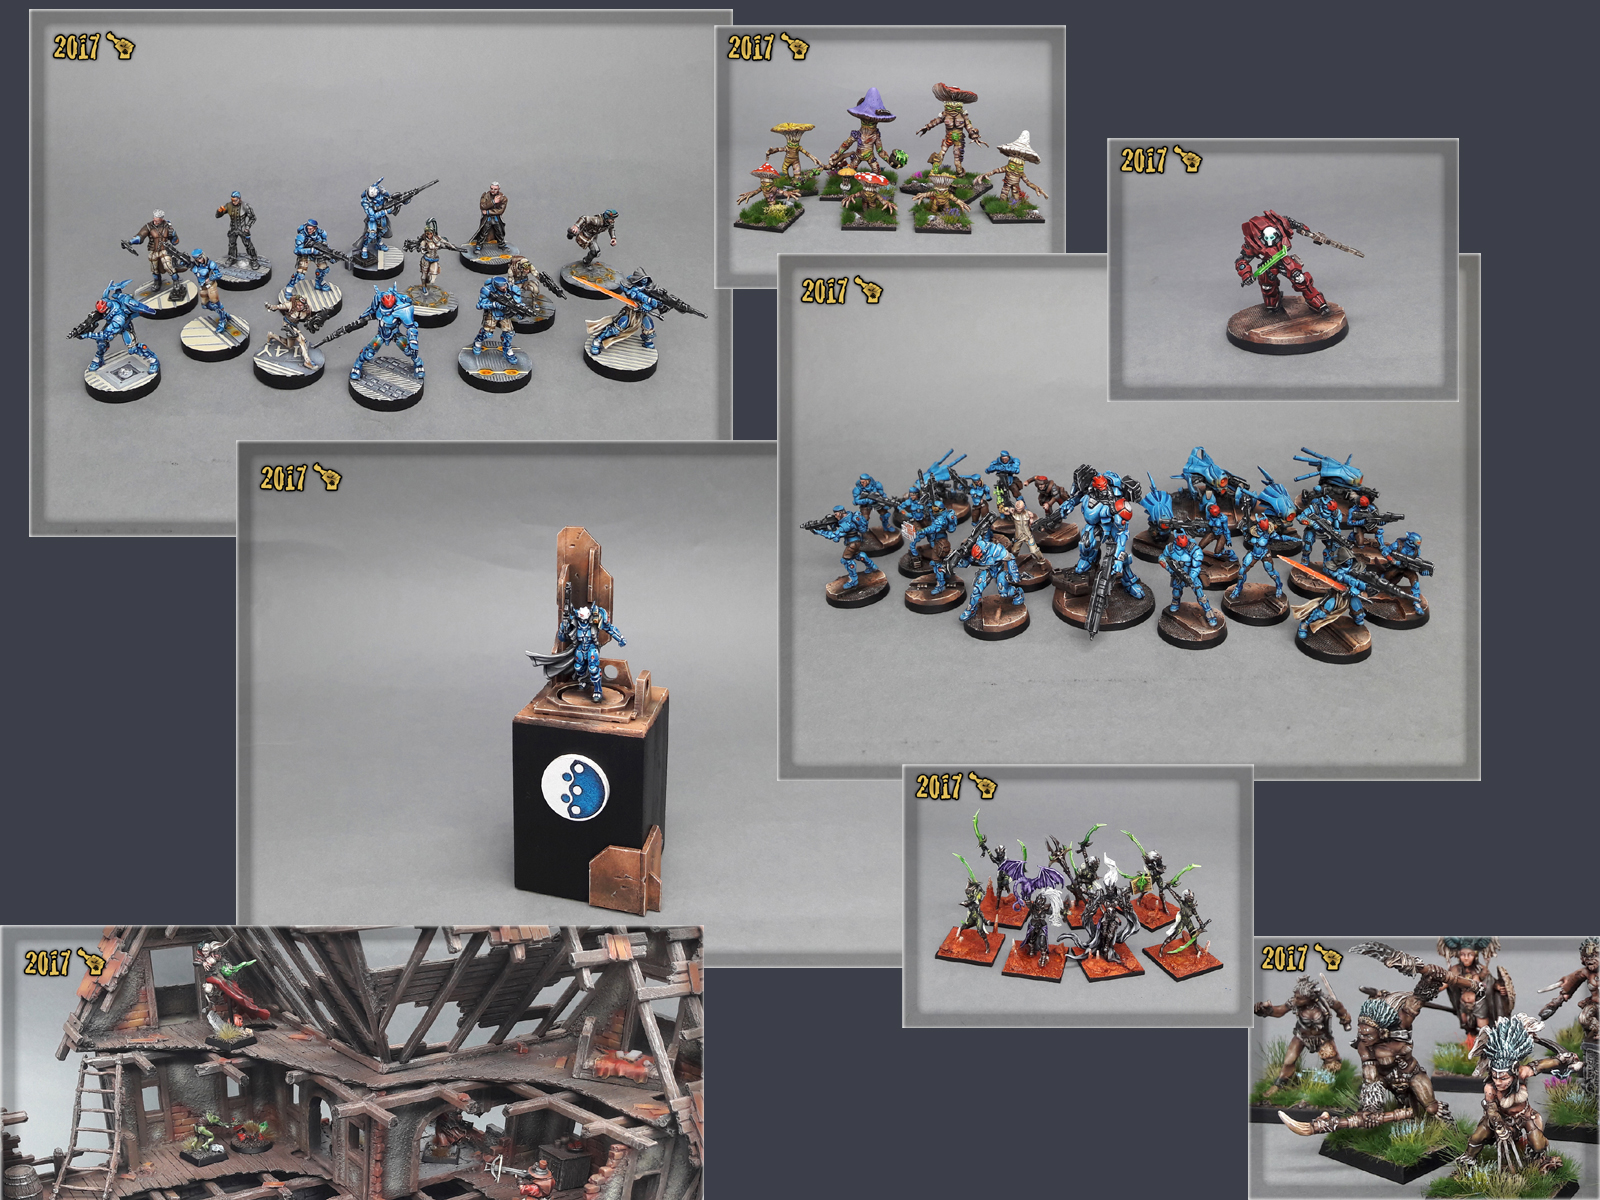
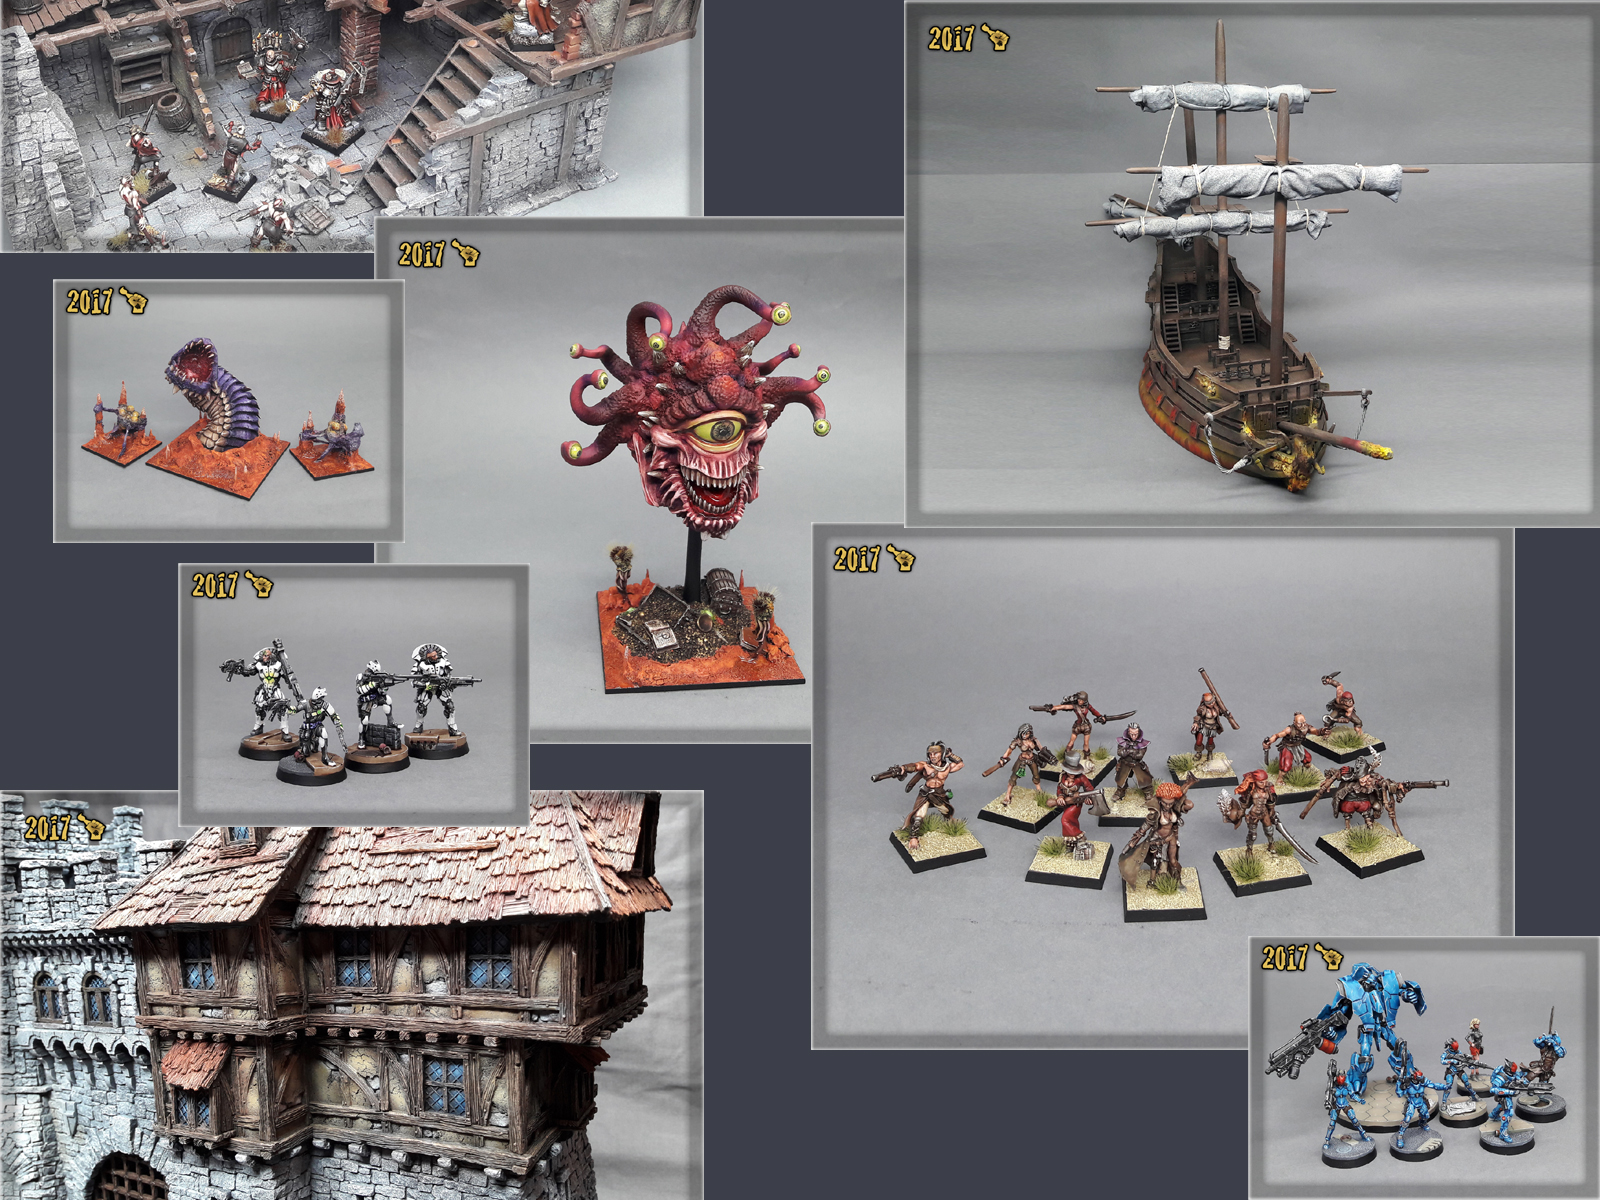

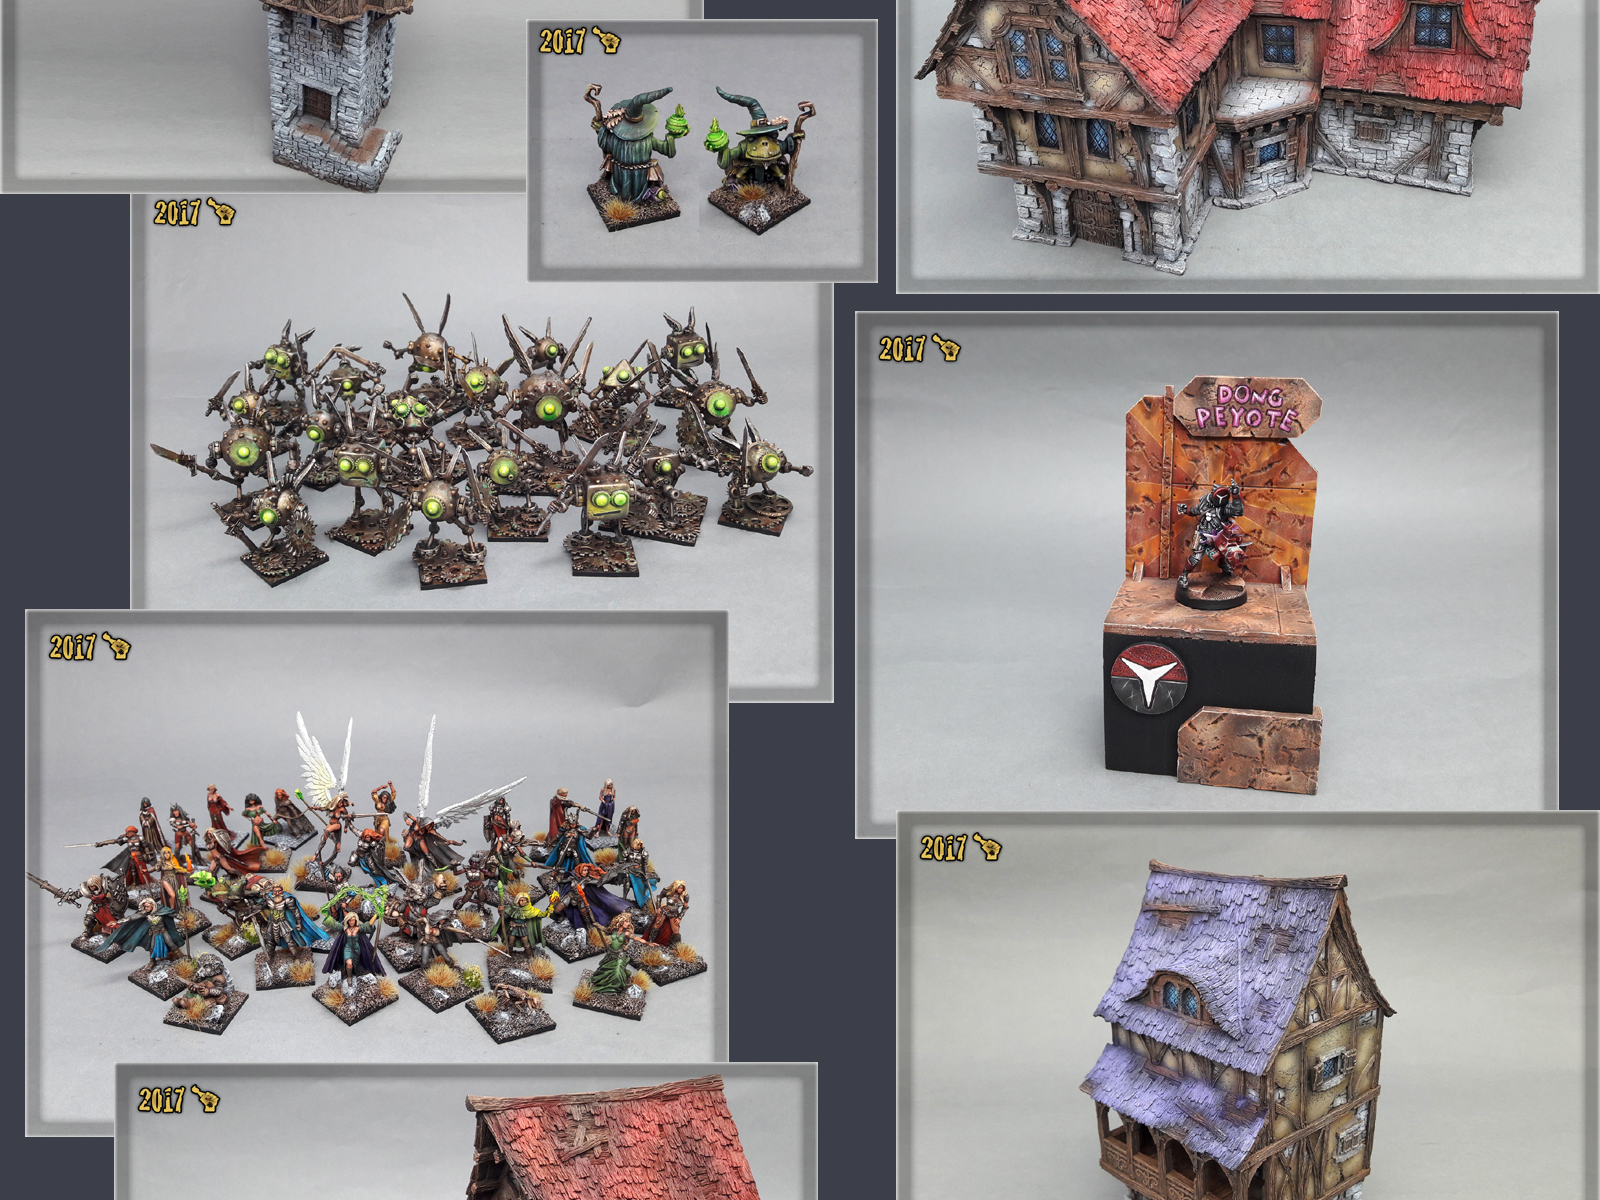

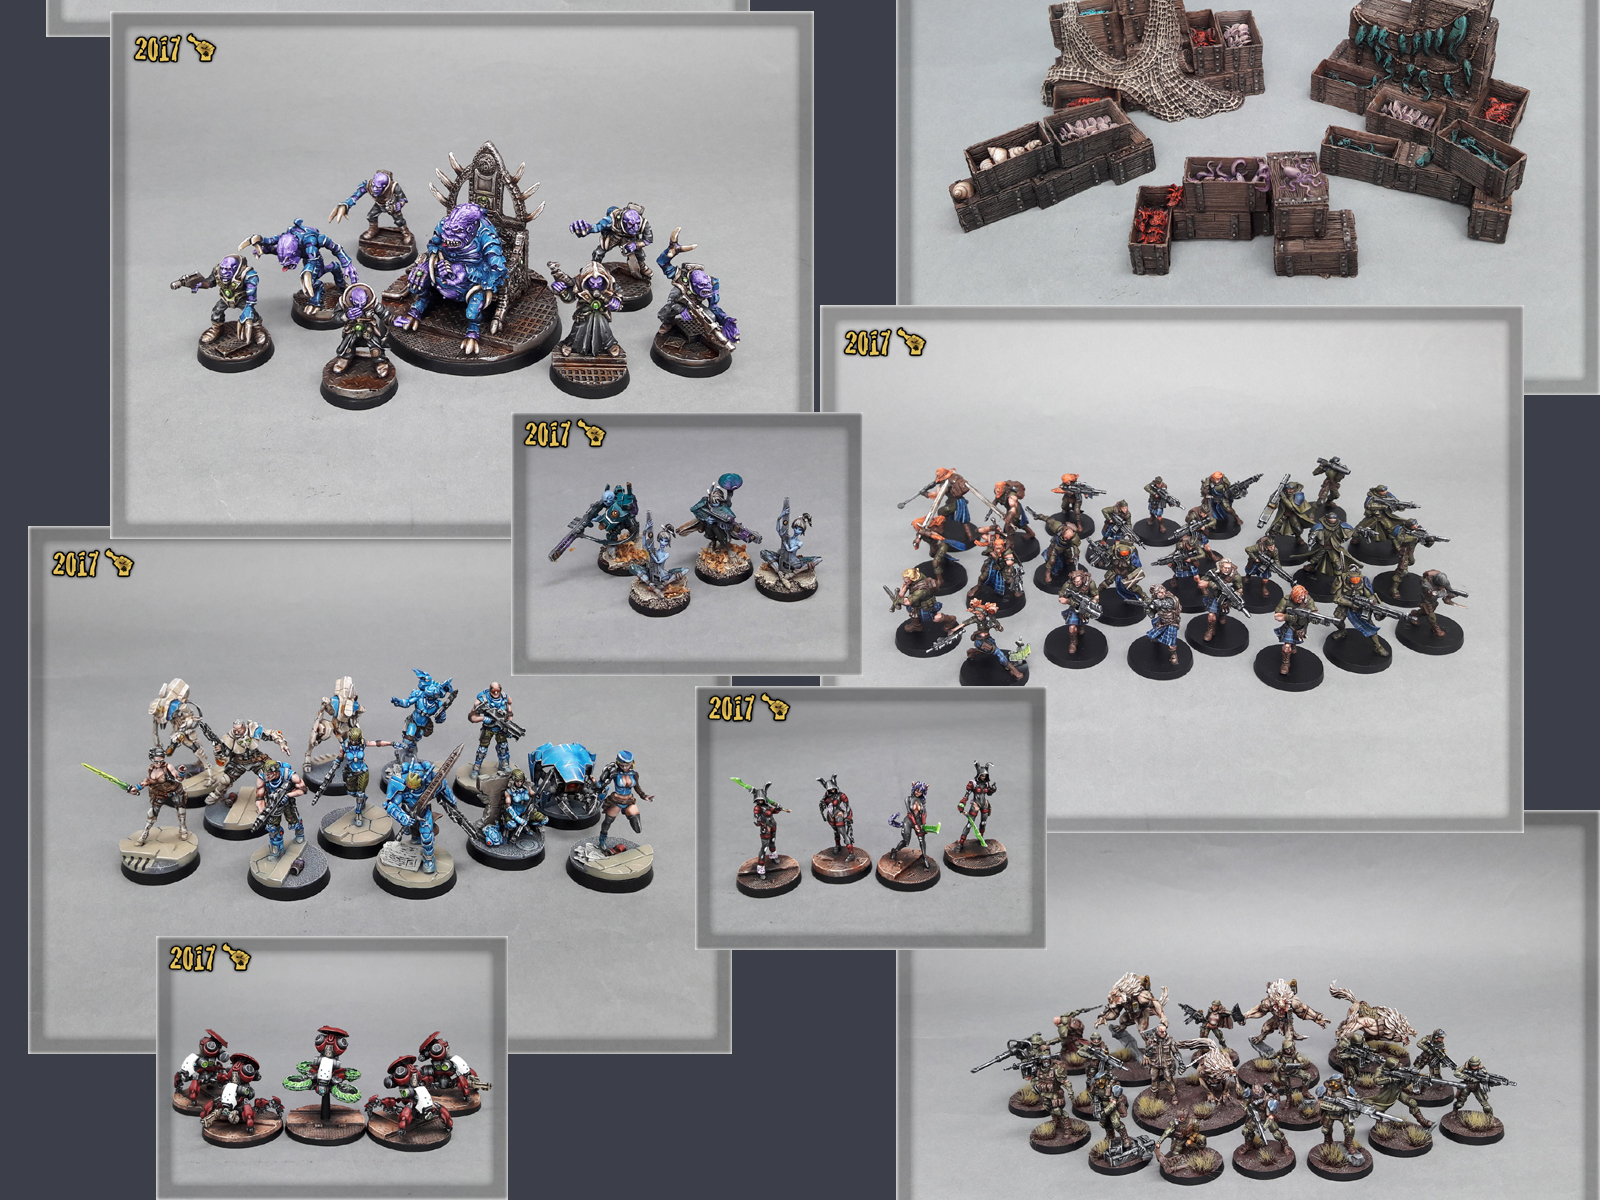
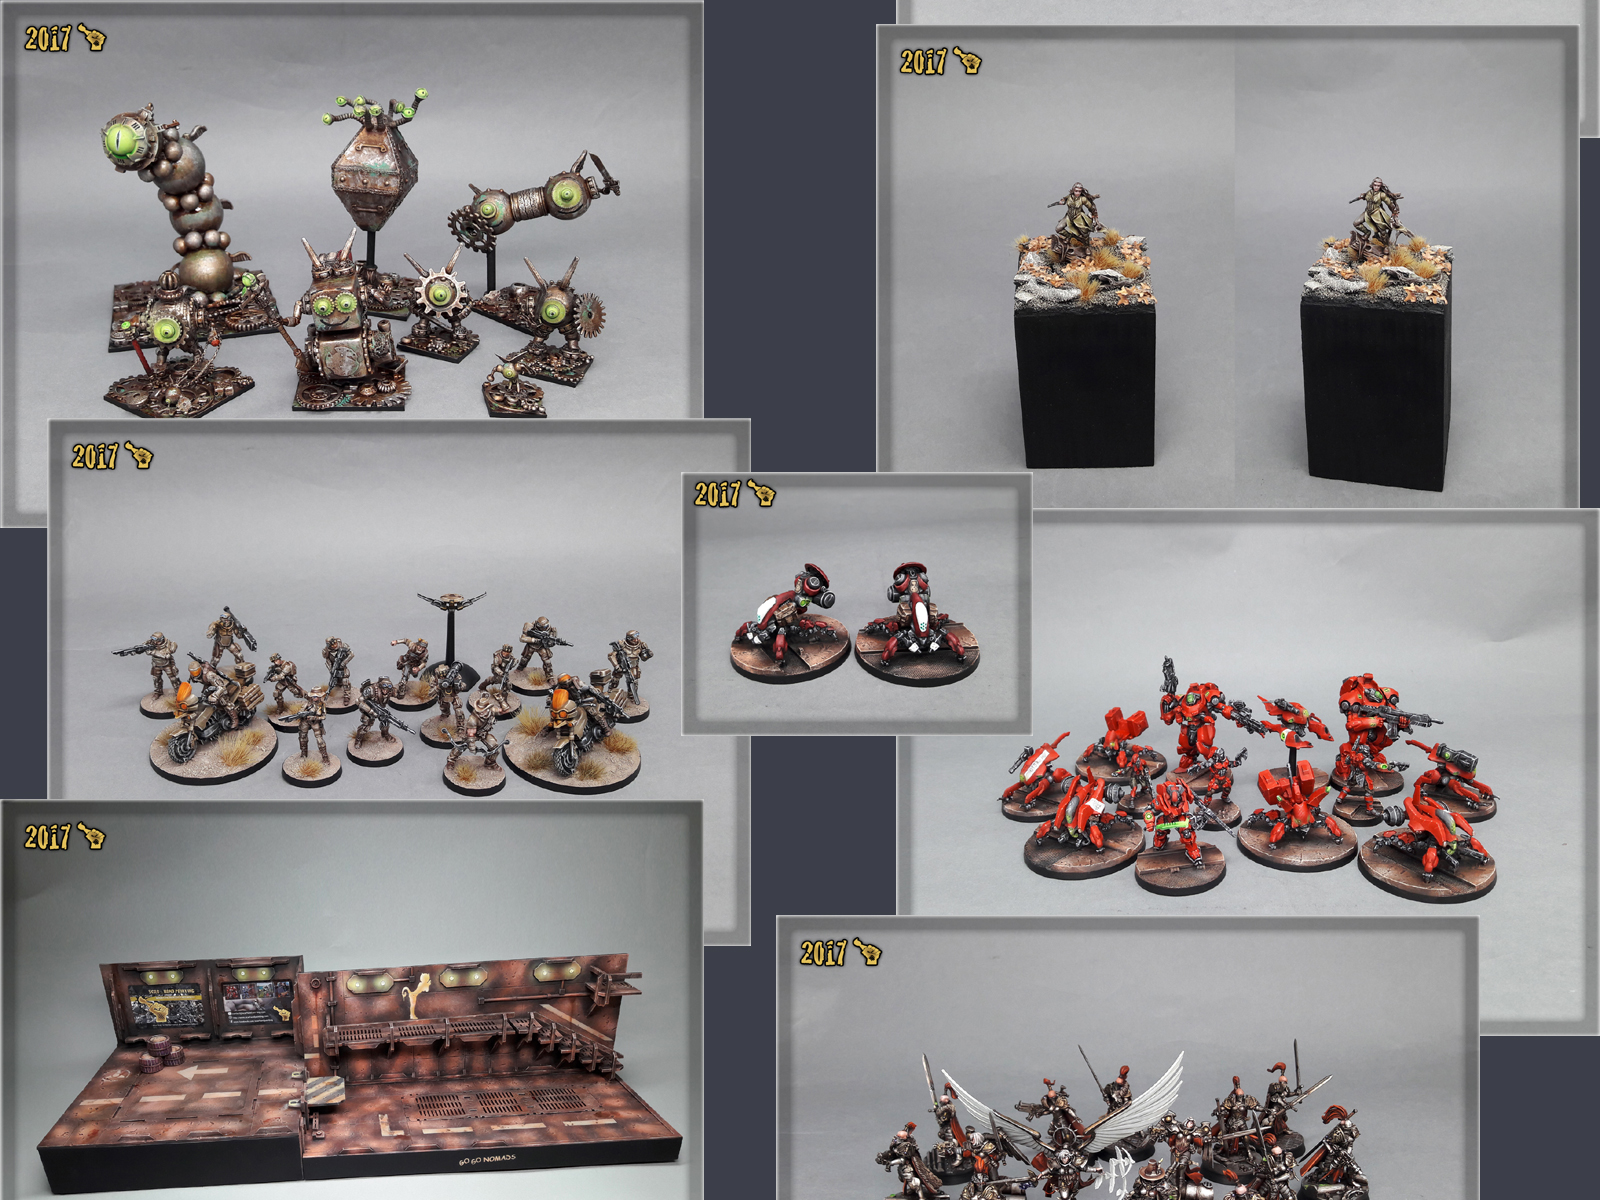
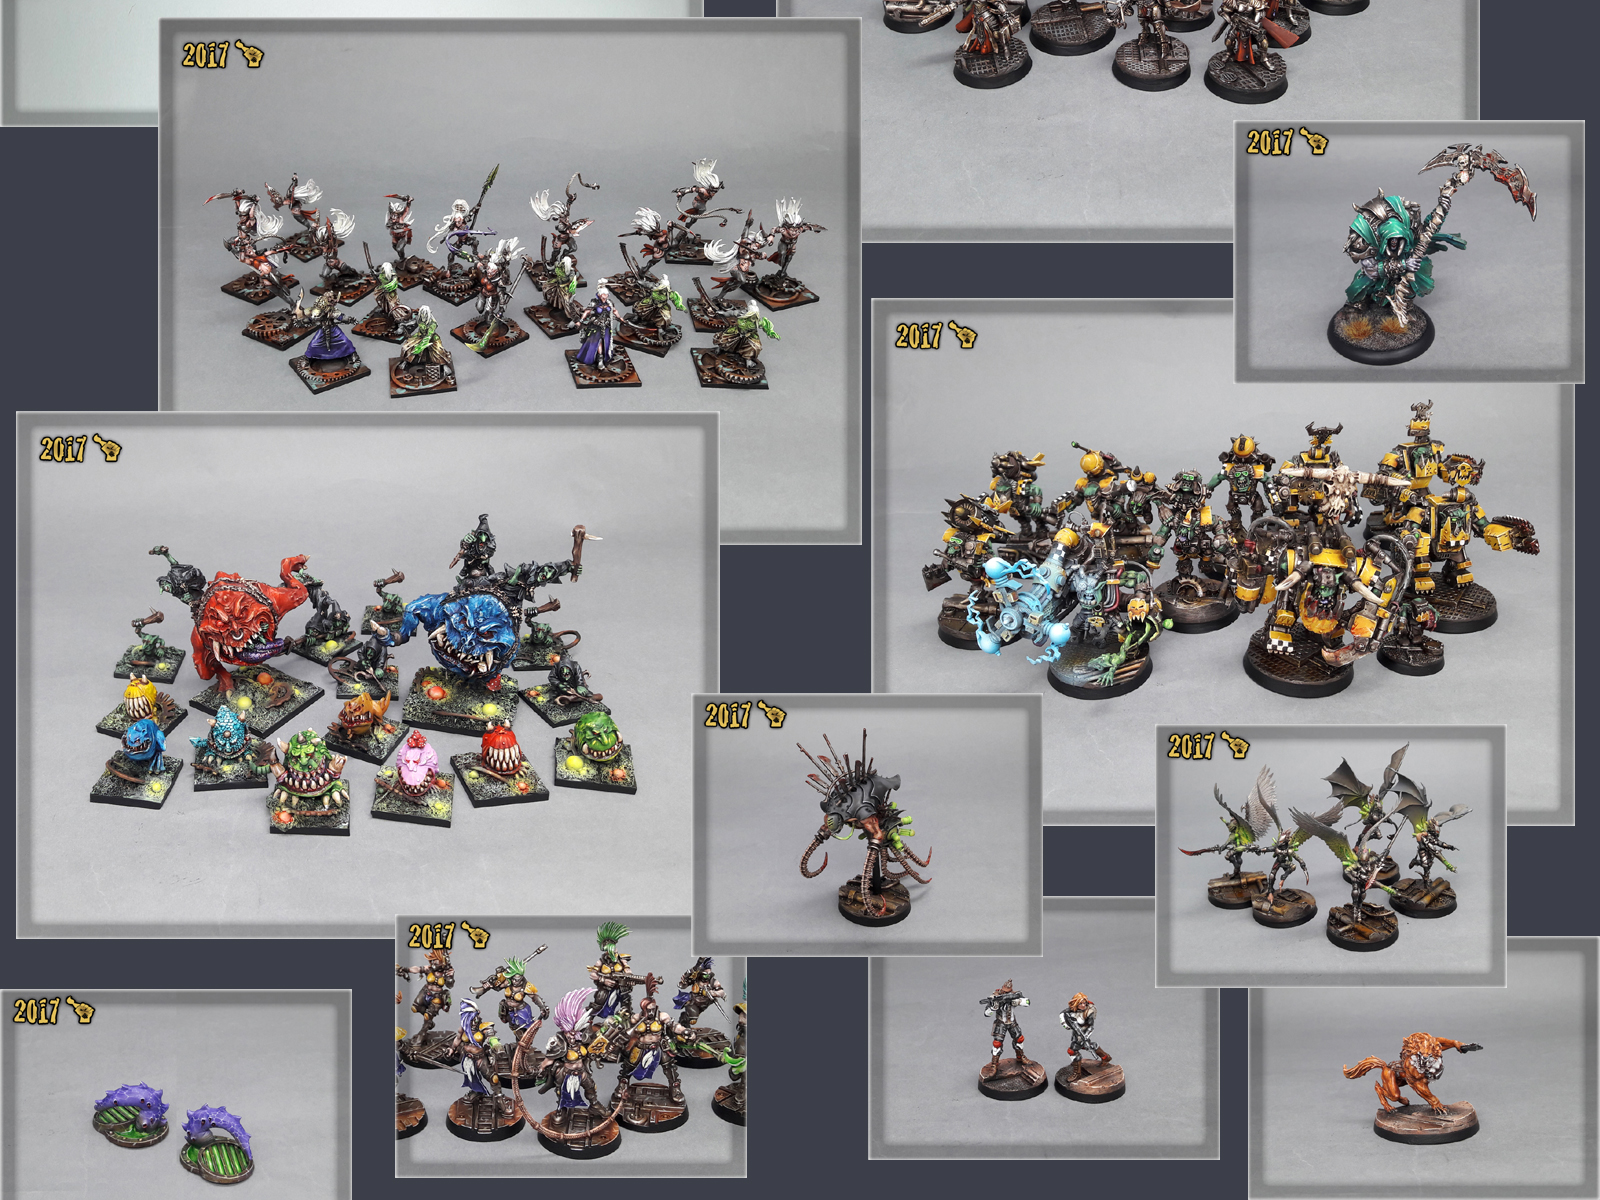
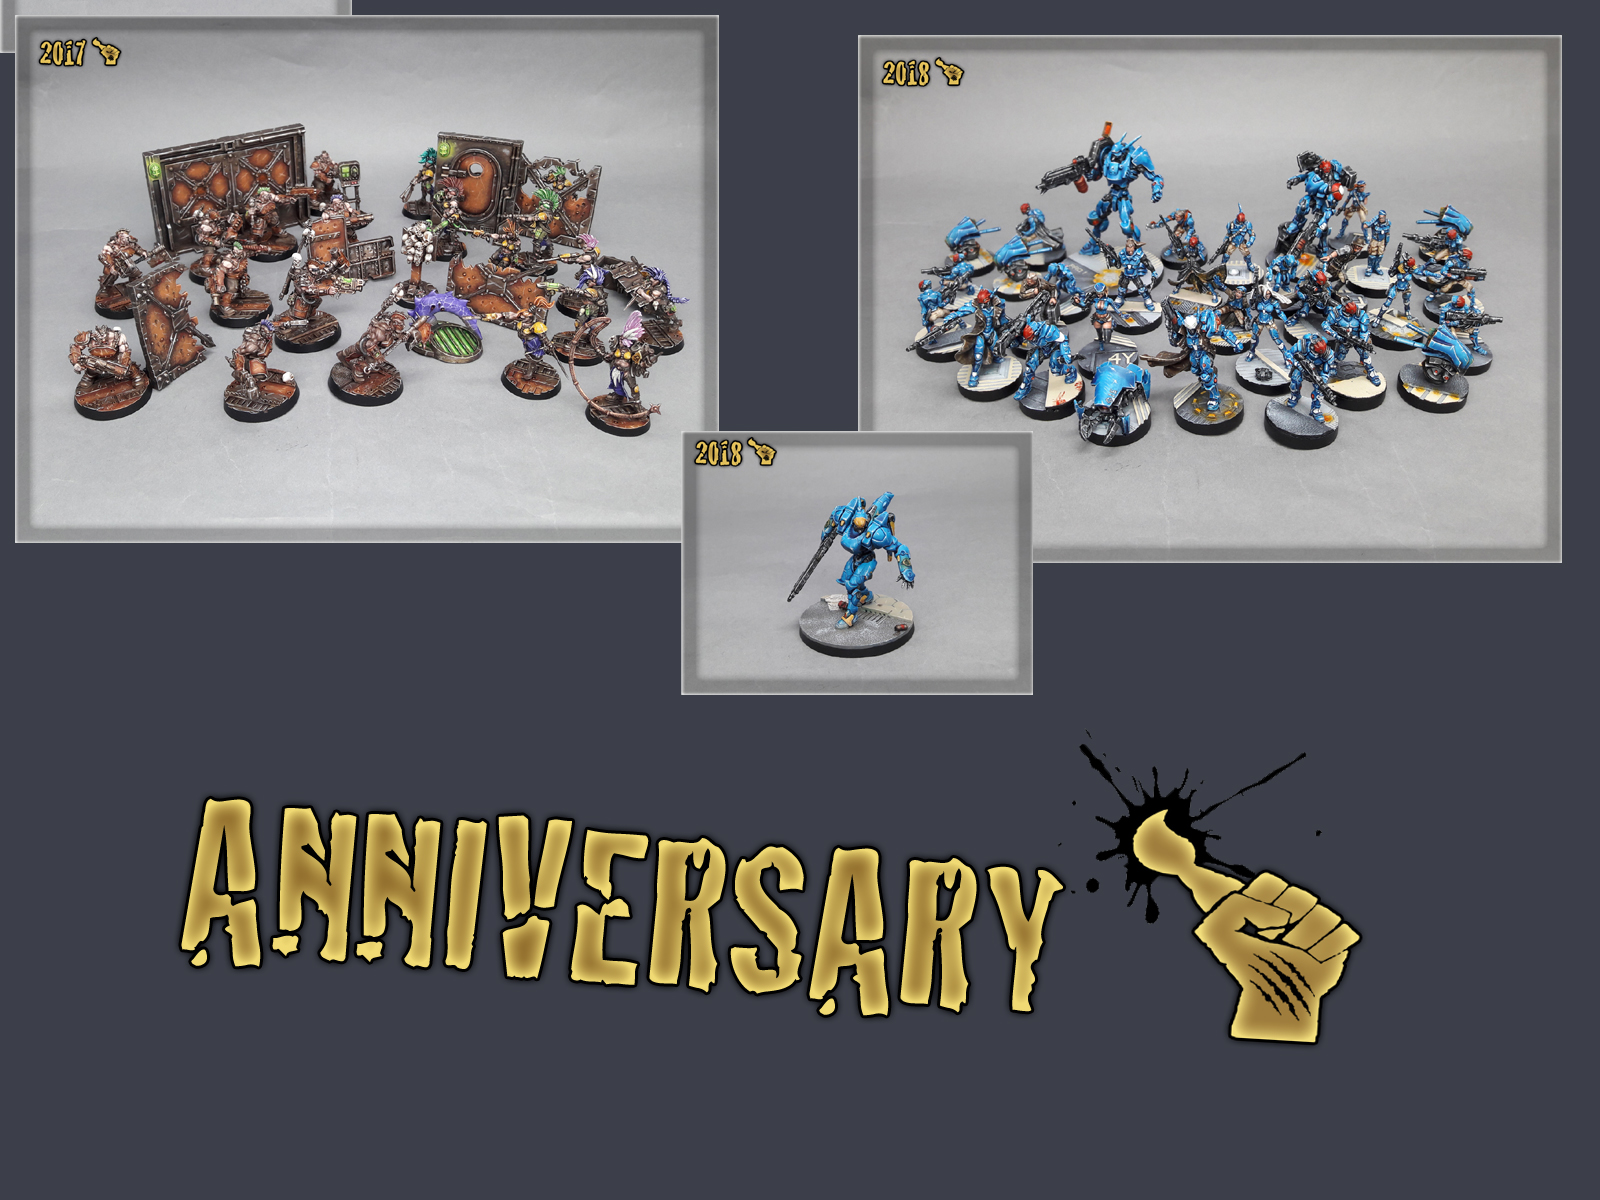
Looking at all these pictures I can’t help myself but feel satisfied. I’ve painted an entire spectrum of crazy awesome stuff from among both games I love and games I haven’t even heard of before. Some of these have really challenged my skill to the limits, while others felt like visiting a good old friend. If this is how next twelve months would look like then count me in!
At this point I would like to thank all of my friendstomers, without whom this fantastic trip wouldn’t be possible. I appreciate your support, all the hobby chatter and trust you bestowed upon me.
Special thanks to Andreas, Thomas, Jek and Behemoth. I am honoured with your trust and friendship. You have my axe, my bow and my brush!

The number of articles grew exponentially since first anniversary. Below is a list of articles that you found most interresting throughout last twelve months (ordered at random).
TUTORIAL: INFINITY DIY CONSOLE
TUTORIAL: PAINTING ‘INFINITY’ BLACK
TUTORIAL: PAINTING NOMAD RED ARMOUR
TUTORIAL: INFINITY ‘DO IT YOURSELF’ GAMING TERRAIN
COLOUR RECIPES: FALLEN FRONTIERS RIFFS
TUTORIAL: PAINTING MICRO ART STUDIO CONCRETE WALLS
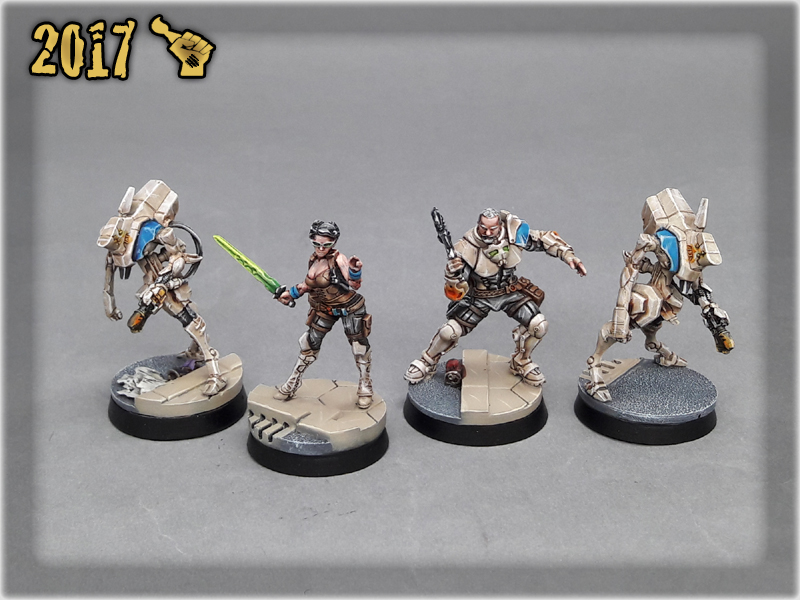
COLOUR RECIPES: INFINITY USARF
PAINTING PHILOSOPHY part three EDGE OF TOMORROW
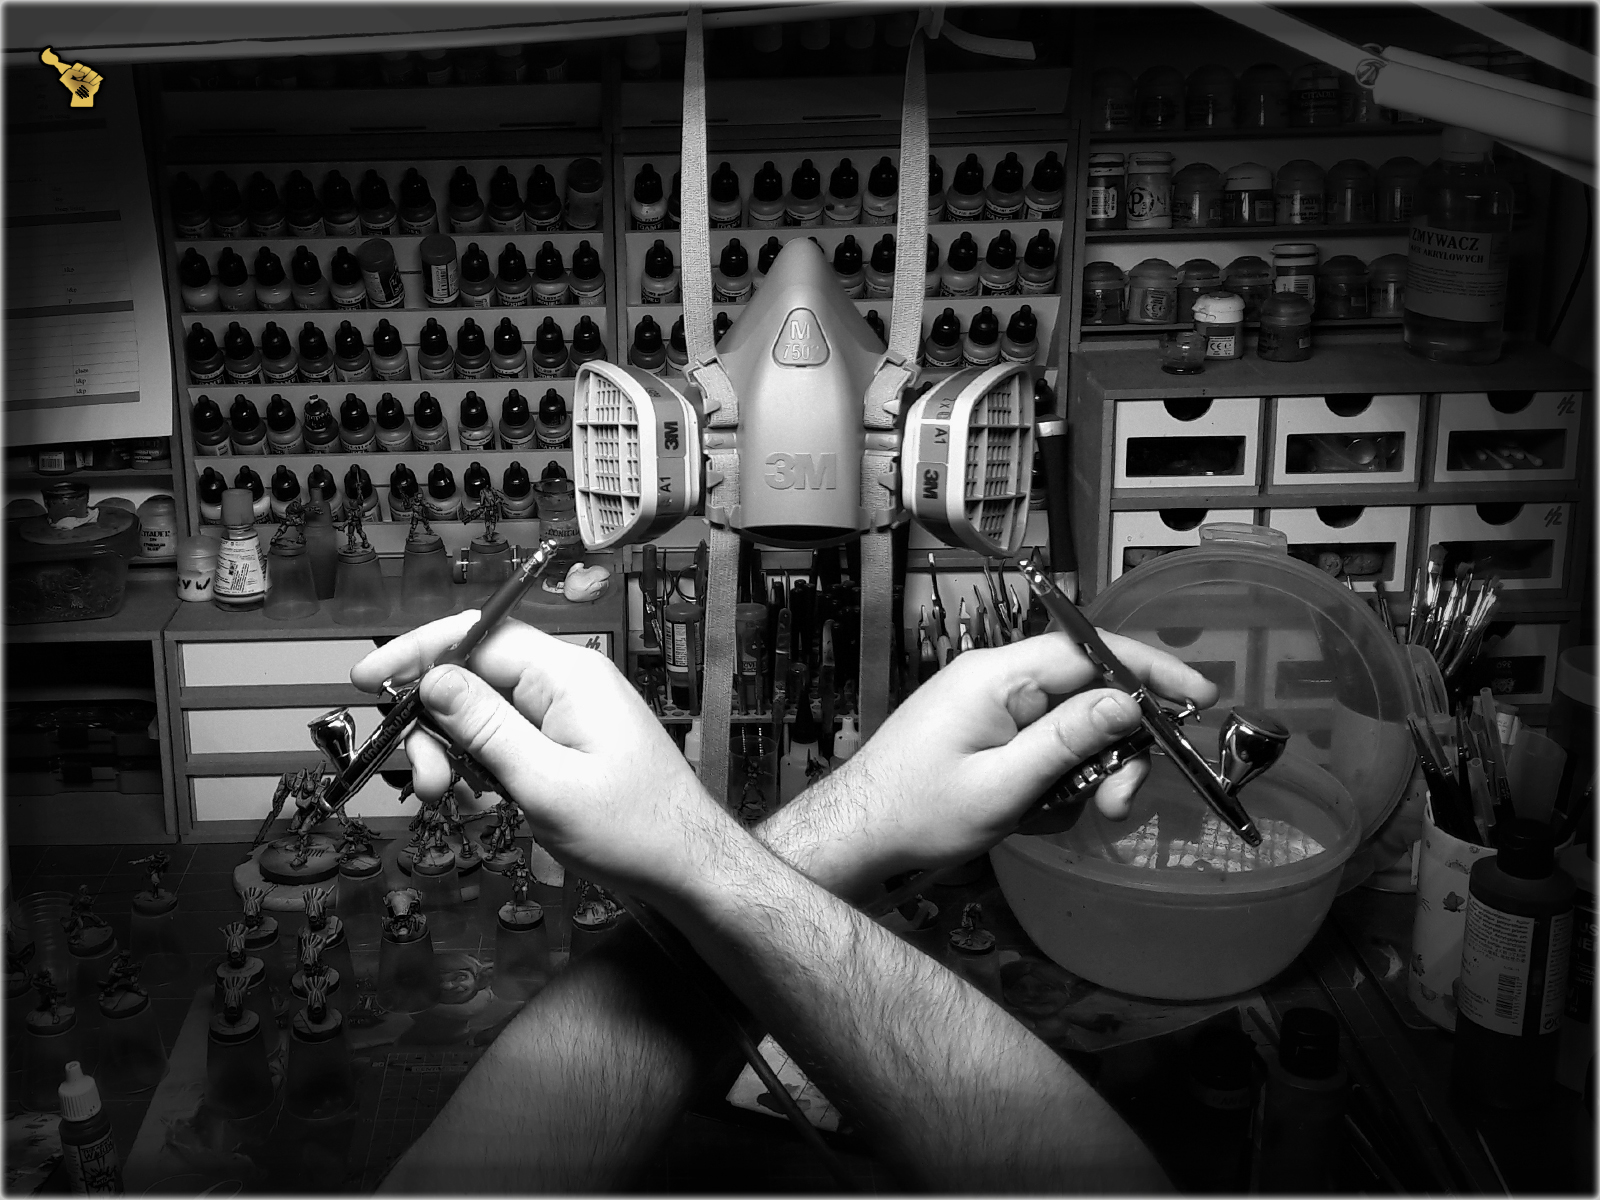
With two sharp brushes in hands, chest wet from dripping paint and fierce warcry on my twisted lips I urge you to ‘Witness Me!’ as I face another year of insanely cool projects! What lays ahead cannot be described with simple words. Follow me and see for yourself!
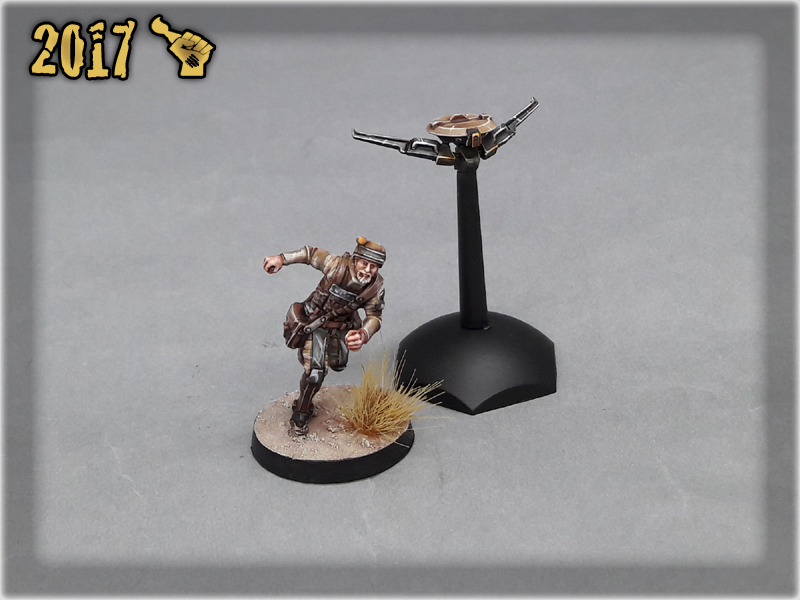
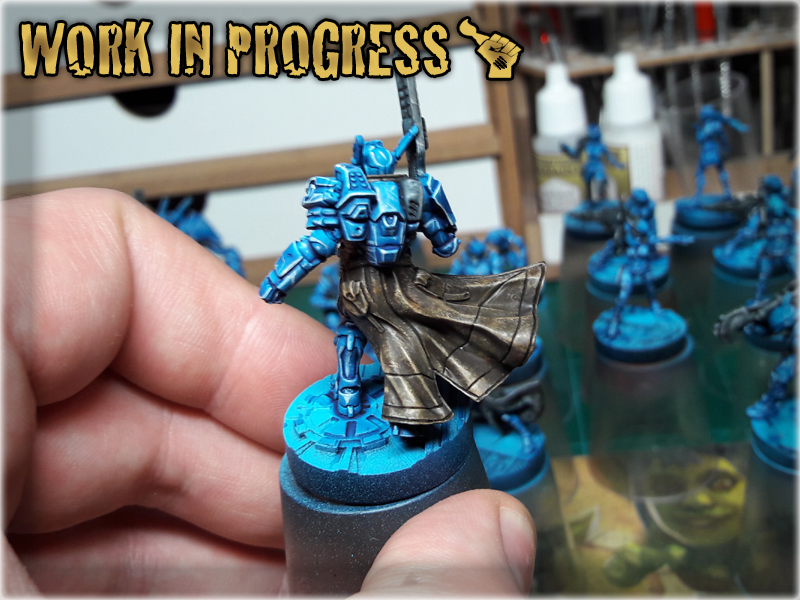
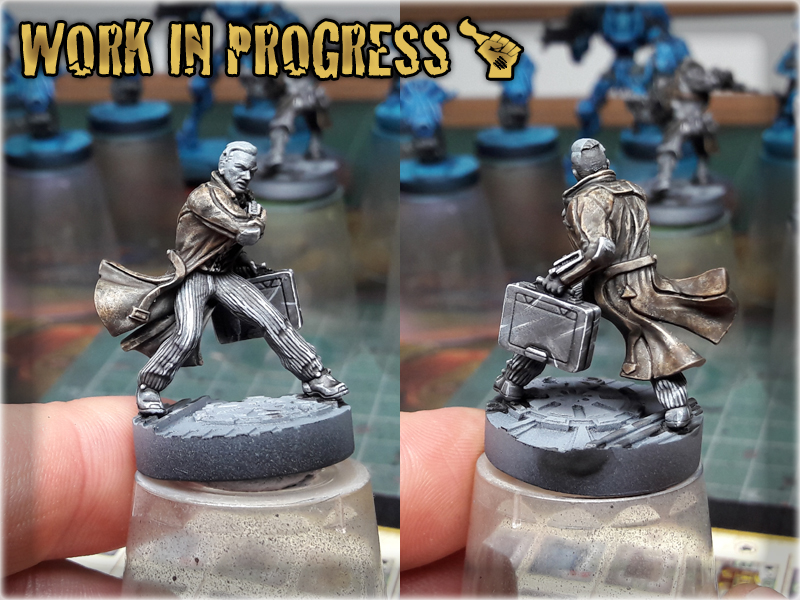
How about I show you a technique to paint brown military coats like a pro in a way so simple that it’ll make you wander why haven’t you painted like that before? Below is a simple Step-by-step tutorial on how to achieve awesome tattered and used up leather brown coat effect in just few simple steps.

First some home brewed theory.
Stippling: A technique of creating texture out of dozens of tiny dots of paint. Easiest way to achieve this is to use a Stippling Brush (round head, tip cut off – flat surface instead, resilient hair).
Blending: A technique of gently intermingling two or more colors to create a gradual transition or to soften lines. Below I will demonstrate a rather crude version of it.
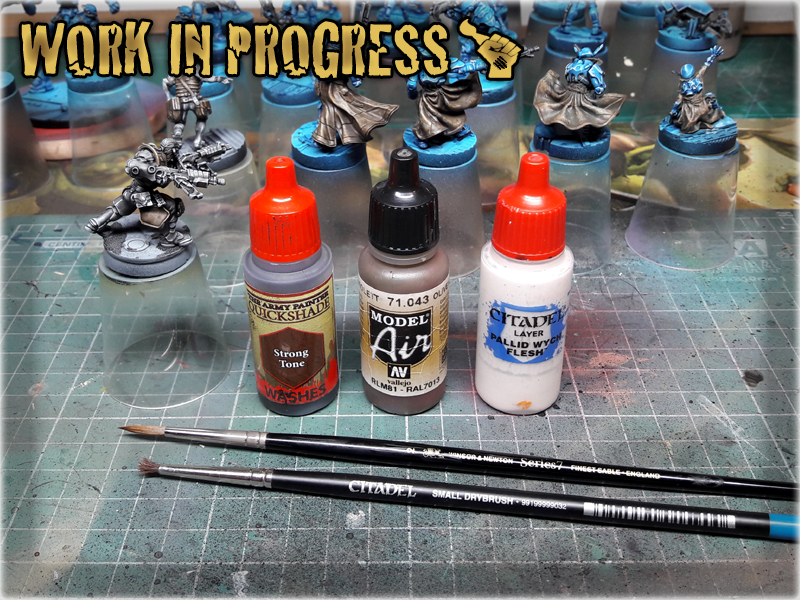
* Stippling Brush (GW),
* Regular Brush,
* Olive Drab (Vallejo AIR),
* Pallid Wych Flesh (GW),
* Strong Tone Ink (AP),
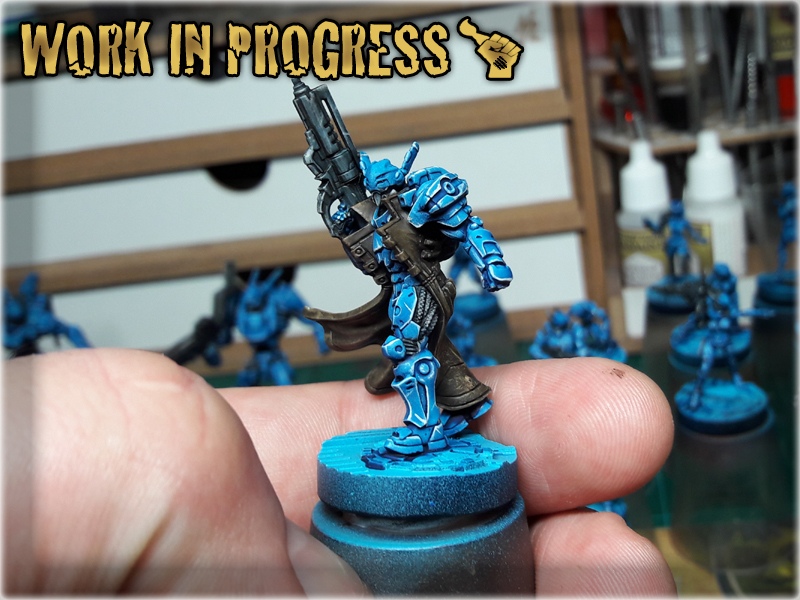
1 You can start painting this on any dark surface, but for good result I recommend to prepare the surface, by following steps 1 to 3 of Painting 'Infinity' Black Tutorial. This will transition into a complex and interresting surface to work on. On a bright side neither these nor following layers require precision and are really fast to paint.
TUTORIAL: PAINTING ‘INFINITY’ BLACK
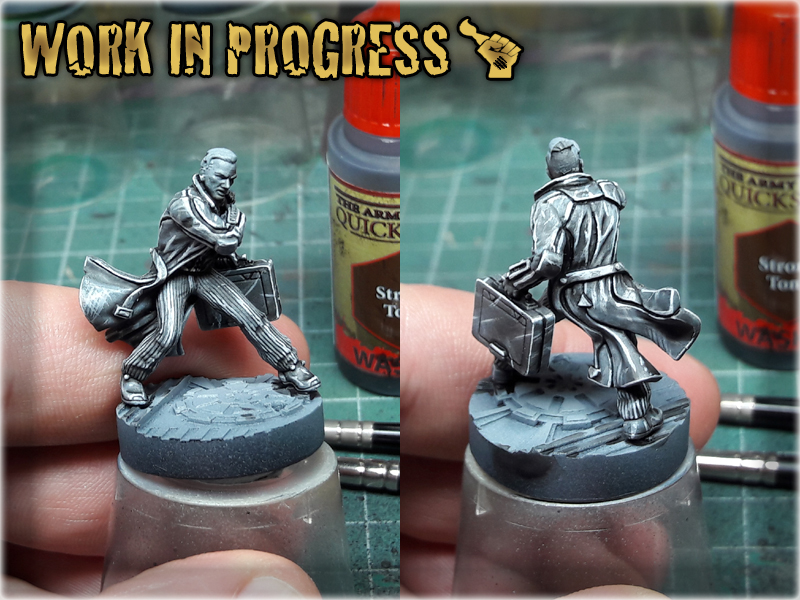
2 Time to stipple. I used a Stippling brush and Pallid Wych Flesh paint. I left the excess paint on the palette and randomly applied some dots onto the coat.


3 Next I mixed Olive Drab 1:1 with Strong Tone Ink and applied it all over the coat. This is the crude version of blending I mentioned earlier. It has not much to do with actual blending technique, except it changes the color and actually 'blends'.
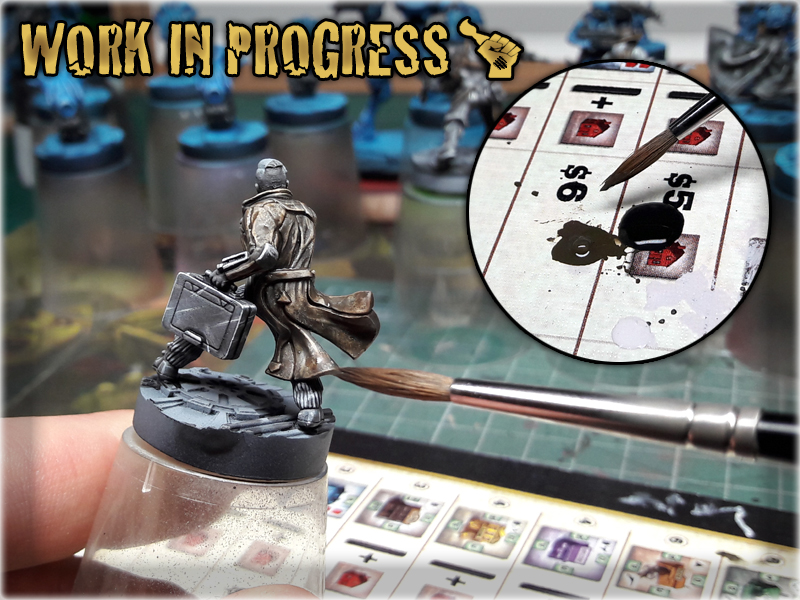
4 Wash comes last. I applied a strong, wet layer of Strong Tone Ink all over the coat. Once dry - paint job is done.

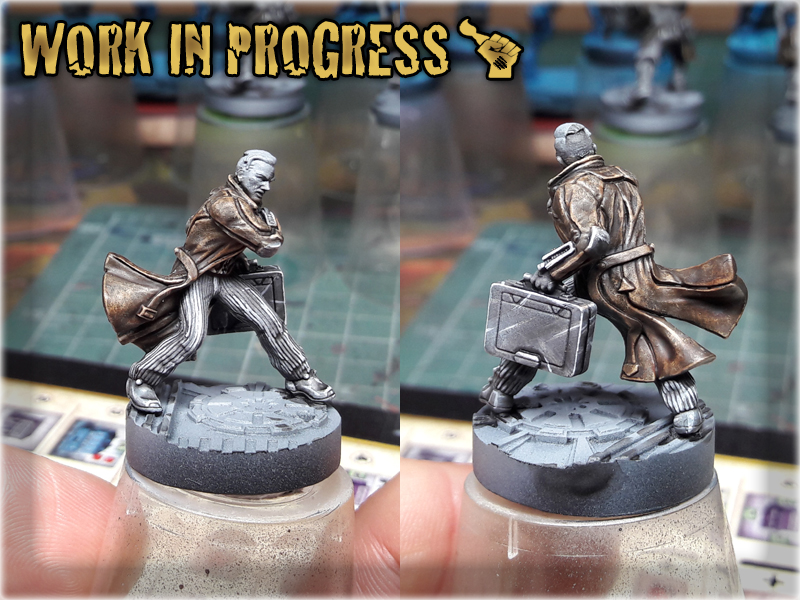
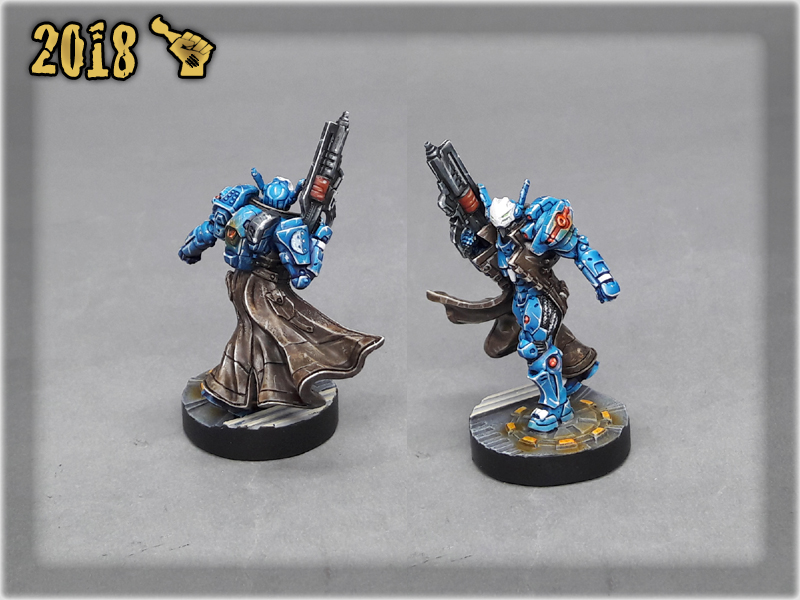
! This might be the end to it, but if you preffer to take your paint job to a higher level you can for example 'edge' the coat with a brighter brown/leathery colour. From now on you have a great looking base to add detail to and it was achieved in no time.


This is a second installment in the ‘Painting Philosophy’ series in which I let you in on ‘how’ and especially ‘why’ I do some things in a certain way. “In my opinion a proper approach to painting is crucial to maintain healthy and rewarding experience. Final result depends on it in the same way as on techniques, know-how and tools used. Nowadays internet is full of painting tutorials yet it takes some inner understanding of our own capabilities to find what suits us best and fully benefit from all acquired knowledge. That being said – In this series I will reveal what works best for me as a painter. I hope you will find some wisdom in it…”
The edge, a plastic frontier between a piece of art and the rest of the world. It divides a miniature from the surrounding chaos. It defines the paint job. It underlines the final result of your work, enhancing the visual effect. In short, a properly painted edge of a base will enclose the miniature just like a frame around a painting. Can you imagine a ‘Mona Lisa’ in a dirty styrofoam frame? Well, that’s what I see each time I look upon a picture of awesomely painted miniature on a base, with dirty, unprepared edge. No matter the quality of paint job, a piece of art turns into a kid with chocolate smeared all over it’s face. I just can’t appreciate ‘that’. But is the difference so evident? Don’t take my word for it – see for yourself…
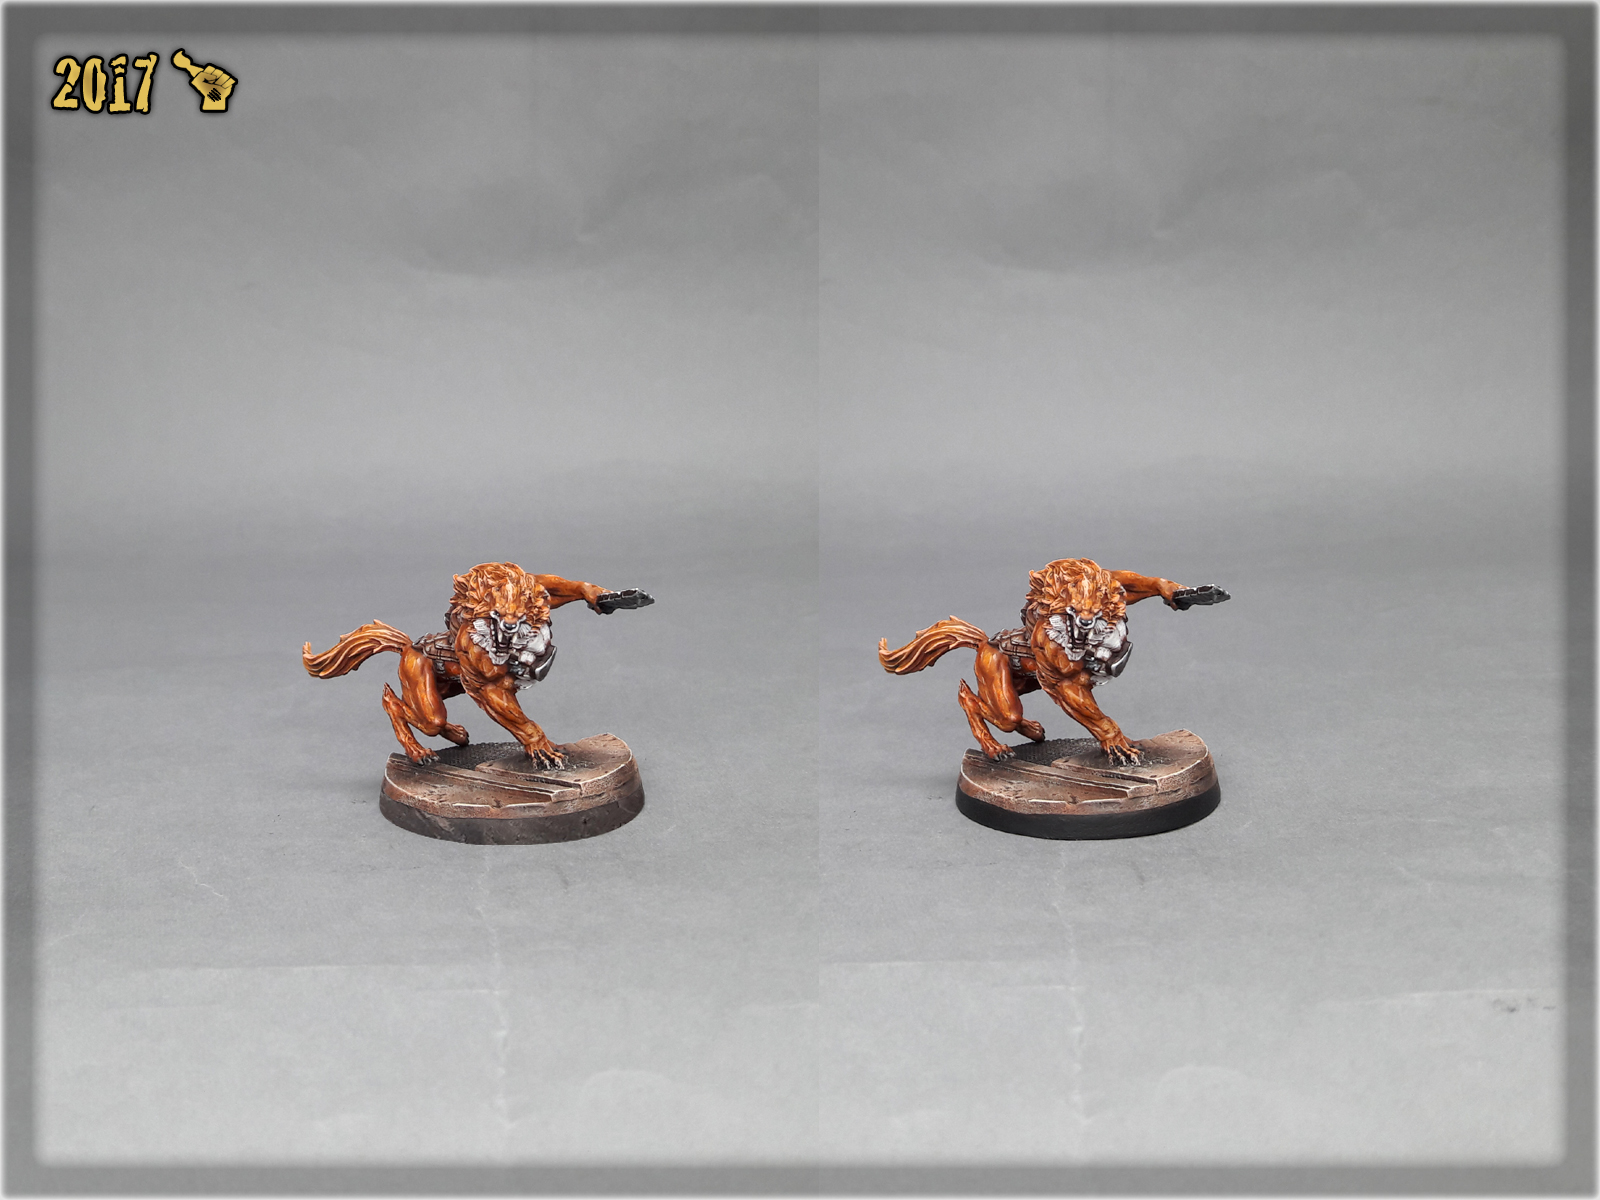
This actually IS the exact same miniature, with the only exception of one base’s edge being covered with a dirty base edge Photoshopped from a work in progress picture. But enough about ‘how I feel’ and let’s skip to ‘how I do’. For me there’s only one paint capable of fully POPing a miniature on the battlefield and it’s BLACK!
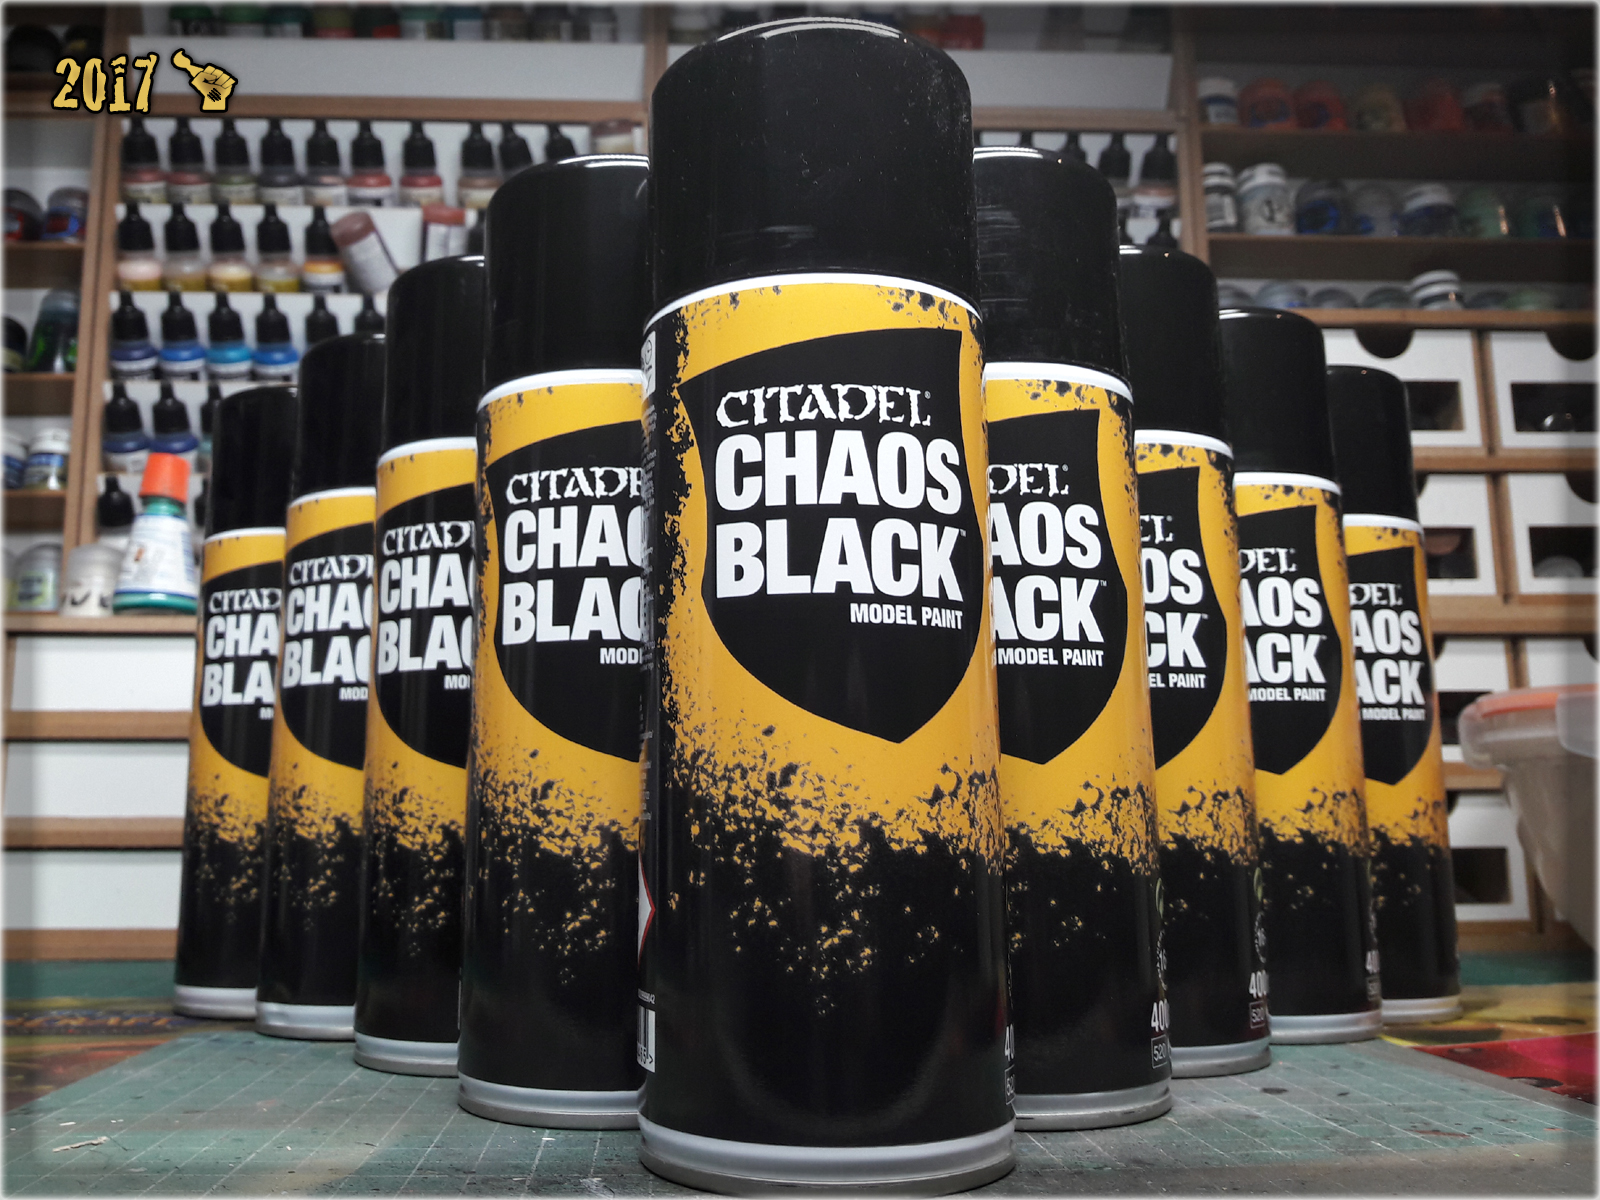
In light spectrum black is not even a color per se, being an ultimate lack of color instead. In the world of hobby paints black is technically a color, due to pigments used to create black paint. This particular colour will work with whatever color scheme you choose for a miniature, enhancing the effect of what’s on the base. It is worth mentioning, that black paint usually surpasses other colors when it comes to opacity, therefore it is much easier to provide a smooth, opaque layer using black than most other paints.
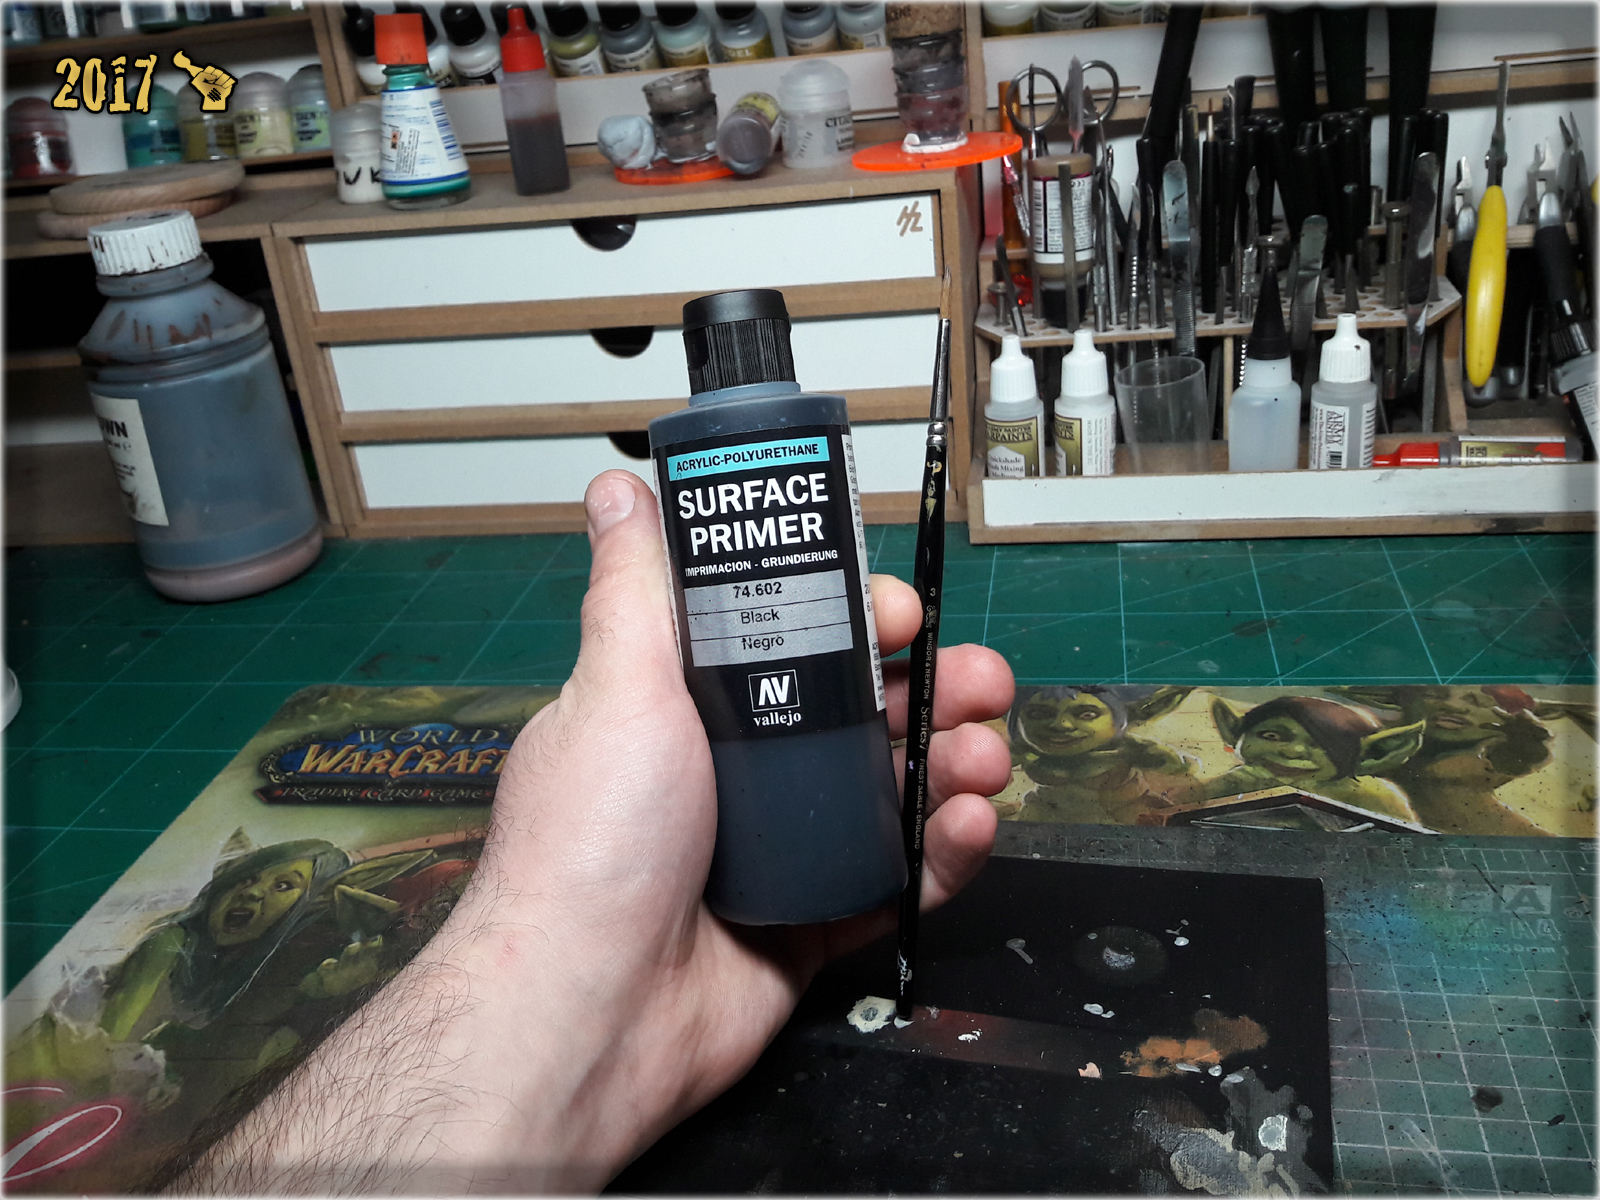
I go about it in a simple, old school manner – with regular medium sized brush and a good, trusted paint. After testing a lot of different black paints I chose Vallejo 74.602 Negro Surface Primer. It works great both with brush and surface. Usually one layer is all that is needed to fully cover the edge, if not – second one is always enough. This paint leaves a nice, smooth, thick layer, hiding some irregularities that might happen to cover the edge of the base. It is worth pointing out, that the base’s edge is always the last thing I paint, before finishing a project. First I thoroughly clean up my painting space of any project leftovers, then I apply varnish and just then move to painting black edges. This way both Varnish and edges are clear of any dust particles and unwanted stuff that might stick to them.
How do I deal with a situation, when a game requires the base to be marked / split or otherwise painted so that the arc of vision or other feature is clearly visible? I prefer to either:
* Use a modelled on-base feature to clearly indicate the direction a miniature is facing,
* Use a marker instead,
When painting a project for someone else I’m sometimes asked to add an ‘arc of sight’ on the base’s edge. If possible I provide small markings to minimize the other colors impact on the otherwise black edge. This seems to work pretty well and keeps the initial feel of a miniature being underlined.
So here we are, at an end of the second installment in the Painting Philosophy – a series that is meant to ‘infect’ you with some of my hobby ideals. Hope you found this one interesting and helpful.
As usual – I have put a lot of effort into preparing for this article, yet I am sure I missed something important. If you happen to have any questions or suggestions related to it – feel free to hit me with them. Also take note that what works for me, might not necessarily work for you – still there are many ways to accomplish certain things – mine is just one of them.
All right, sweethearts, you’re a team and there’s nothin’ to worry about. We come here, and we gonna conquer, and we gonna paint some, is that understood? That’s what we gonna do, sweethearts, we are going to go and paint some. All right, people, on the ready line! Are ya lean?