- contact@scarhandpainting.com


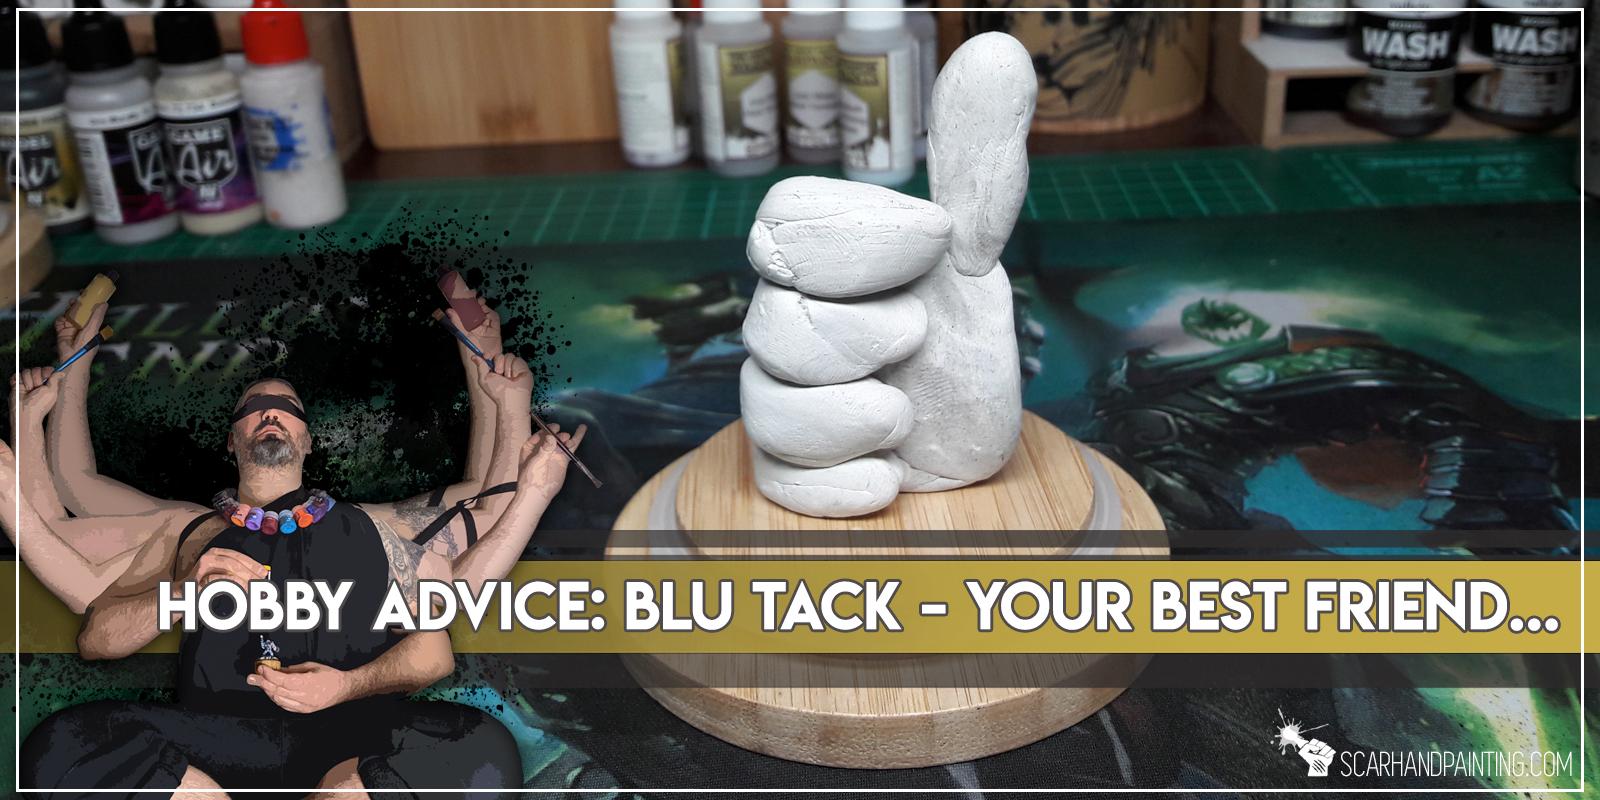
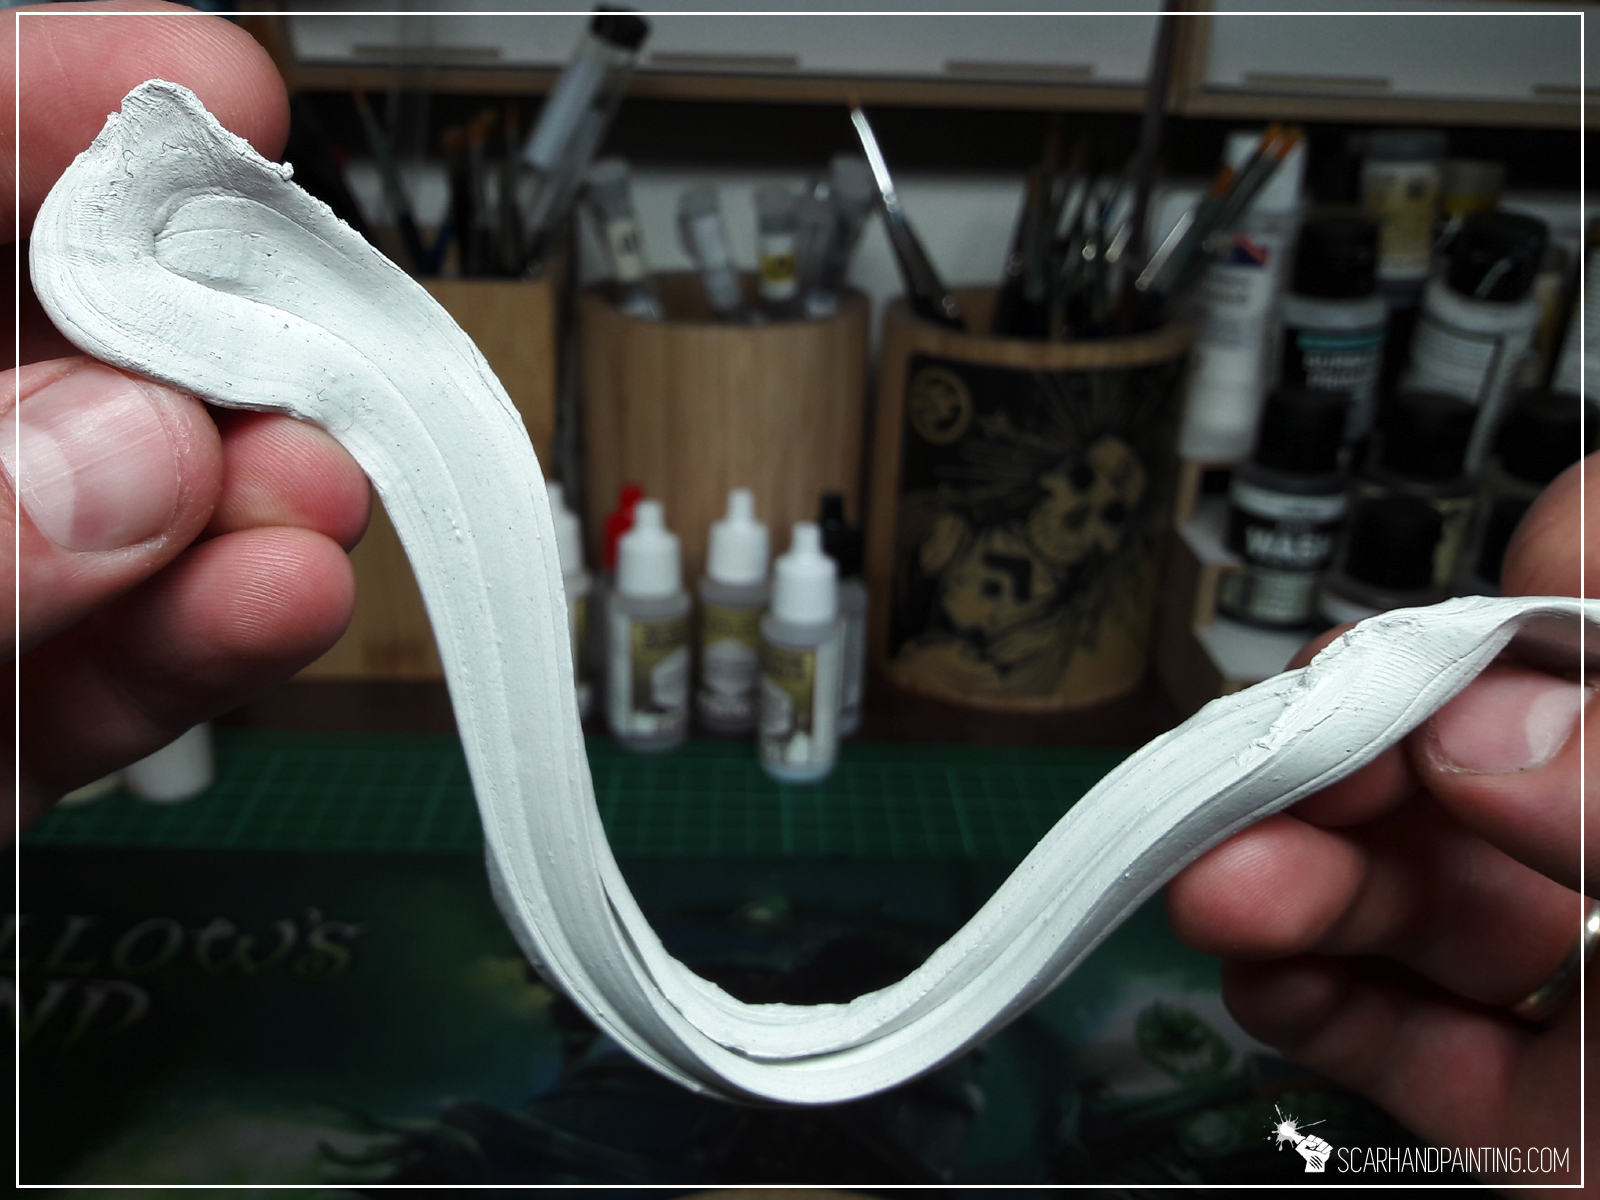
Brushes, paints, even entire hobby desks – they come and go. It doesn’t matter how much I like particular pot of paint or a hobby tool. At some point everything gets old and I simply got used to part ways with almost every hobby related item. There has ever been just one friend that stick and grew alongside me throughout the years. I dedicate this article to my fav support teammate. Let’s talk Blu Tack!
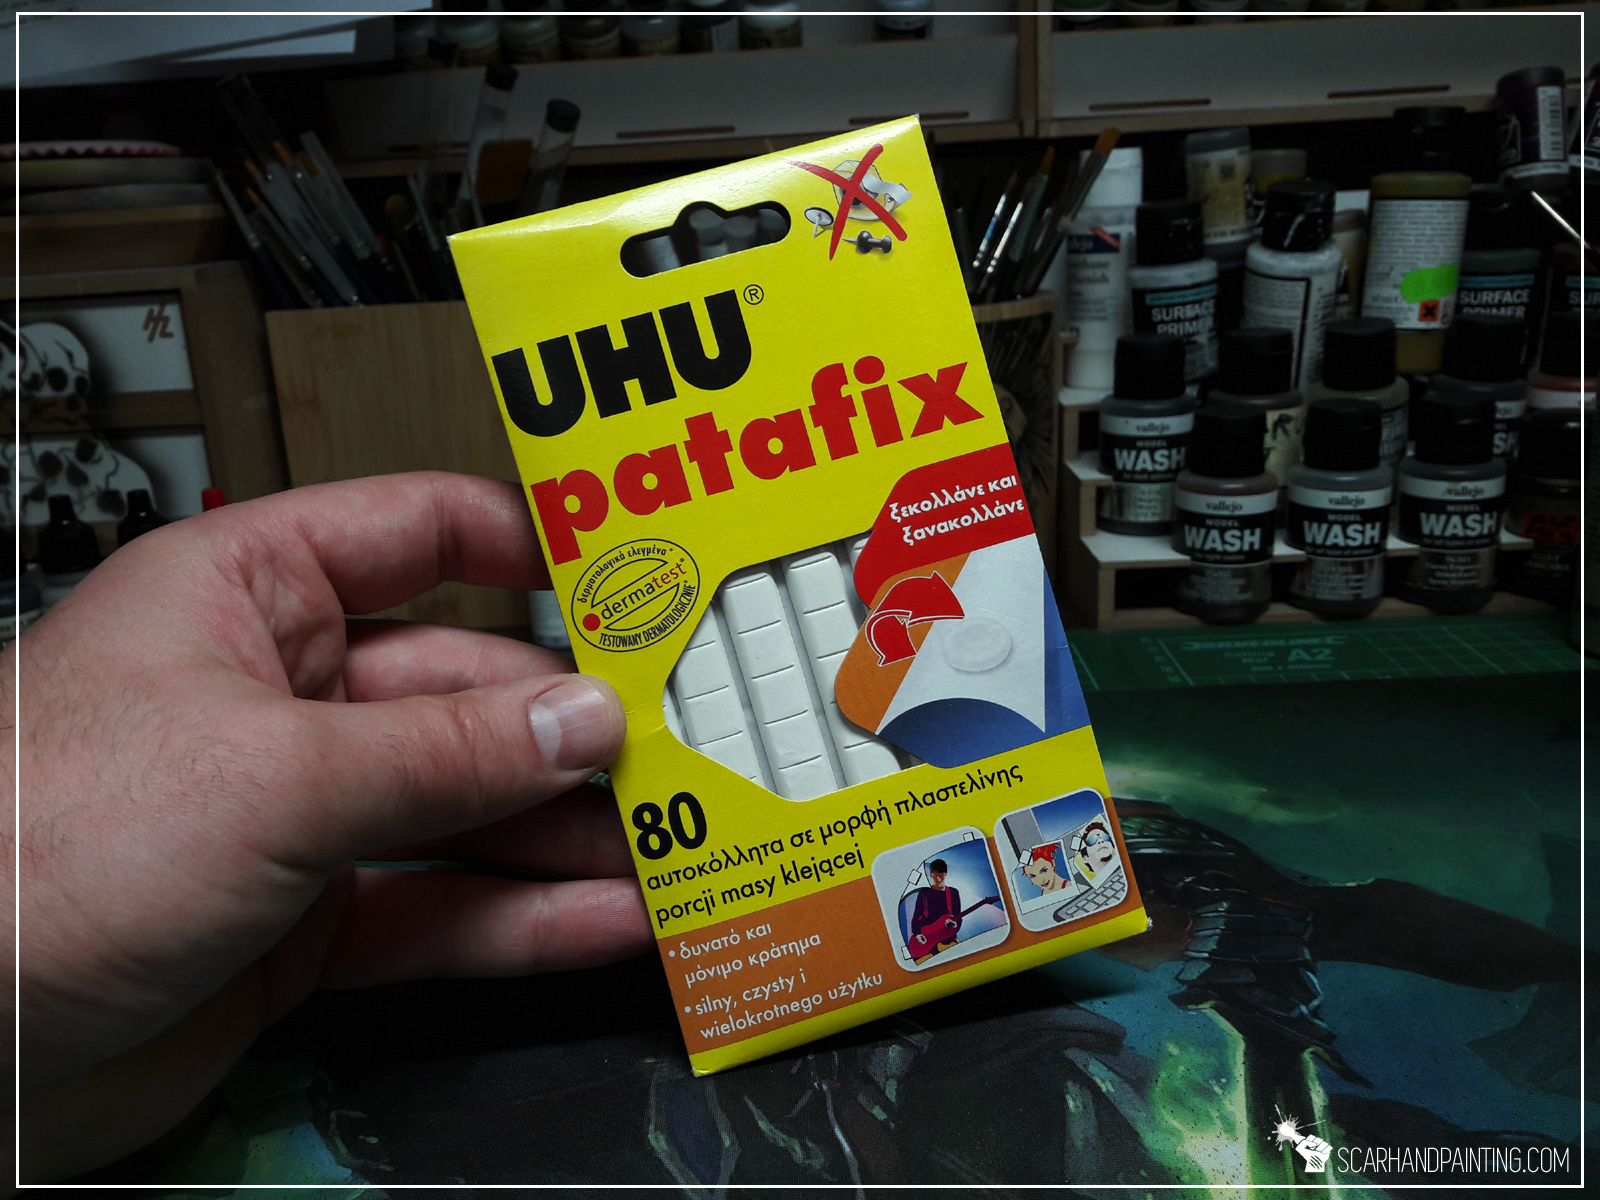
Blu Tack is an adhesive, reusable putty-like mass. The most known “original” comes by that name, but you can find different variations of the stuff all over the internet and not all come in traditional blue. It can be used to attach lightweight objects to any dry surfaces, but also as a painting tool.

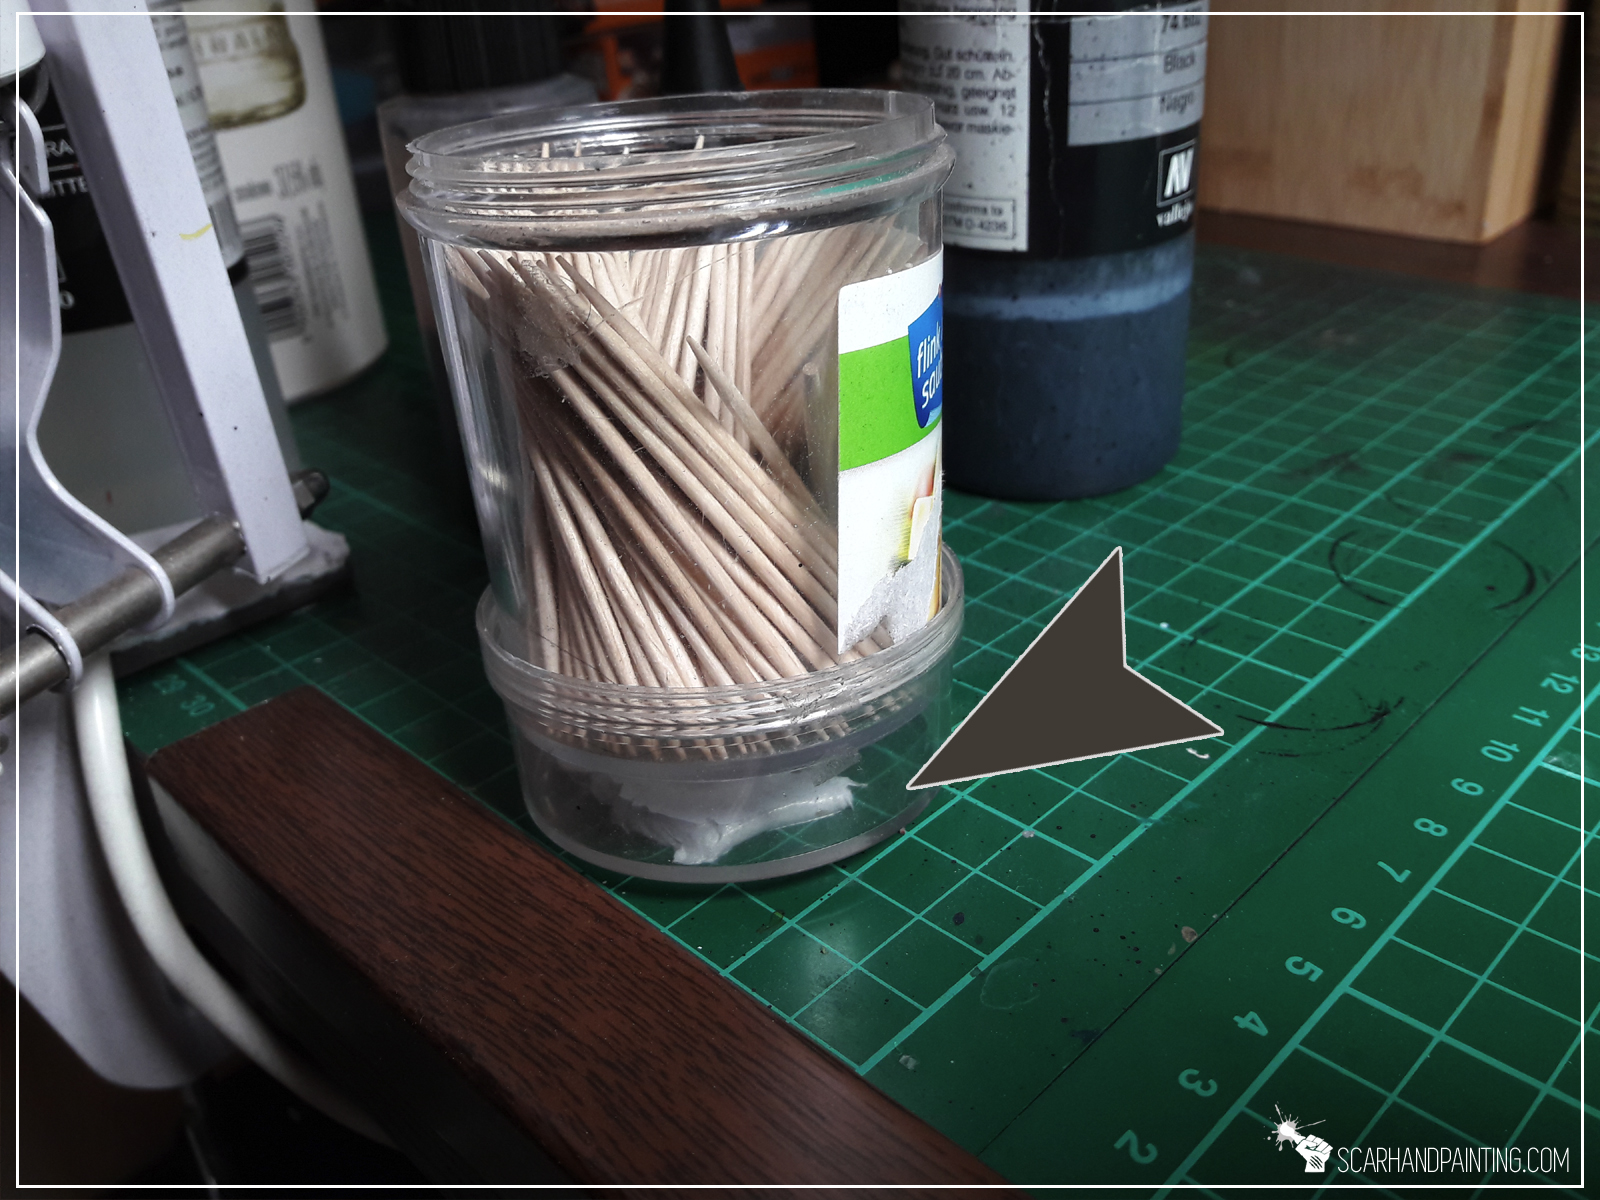
Spilled paint, toothpicks all over the place, airbrush on the floor in a pool of spilled exhaust waste… not for me. While I drown in righteous fury, punishing miniatures with relentless brush strokes, my friend Blu Tac holds the objective – keeping the surroundings in one piece. Literally…

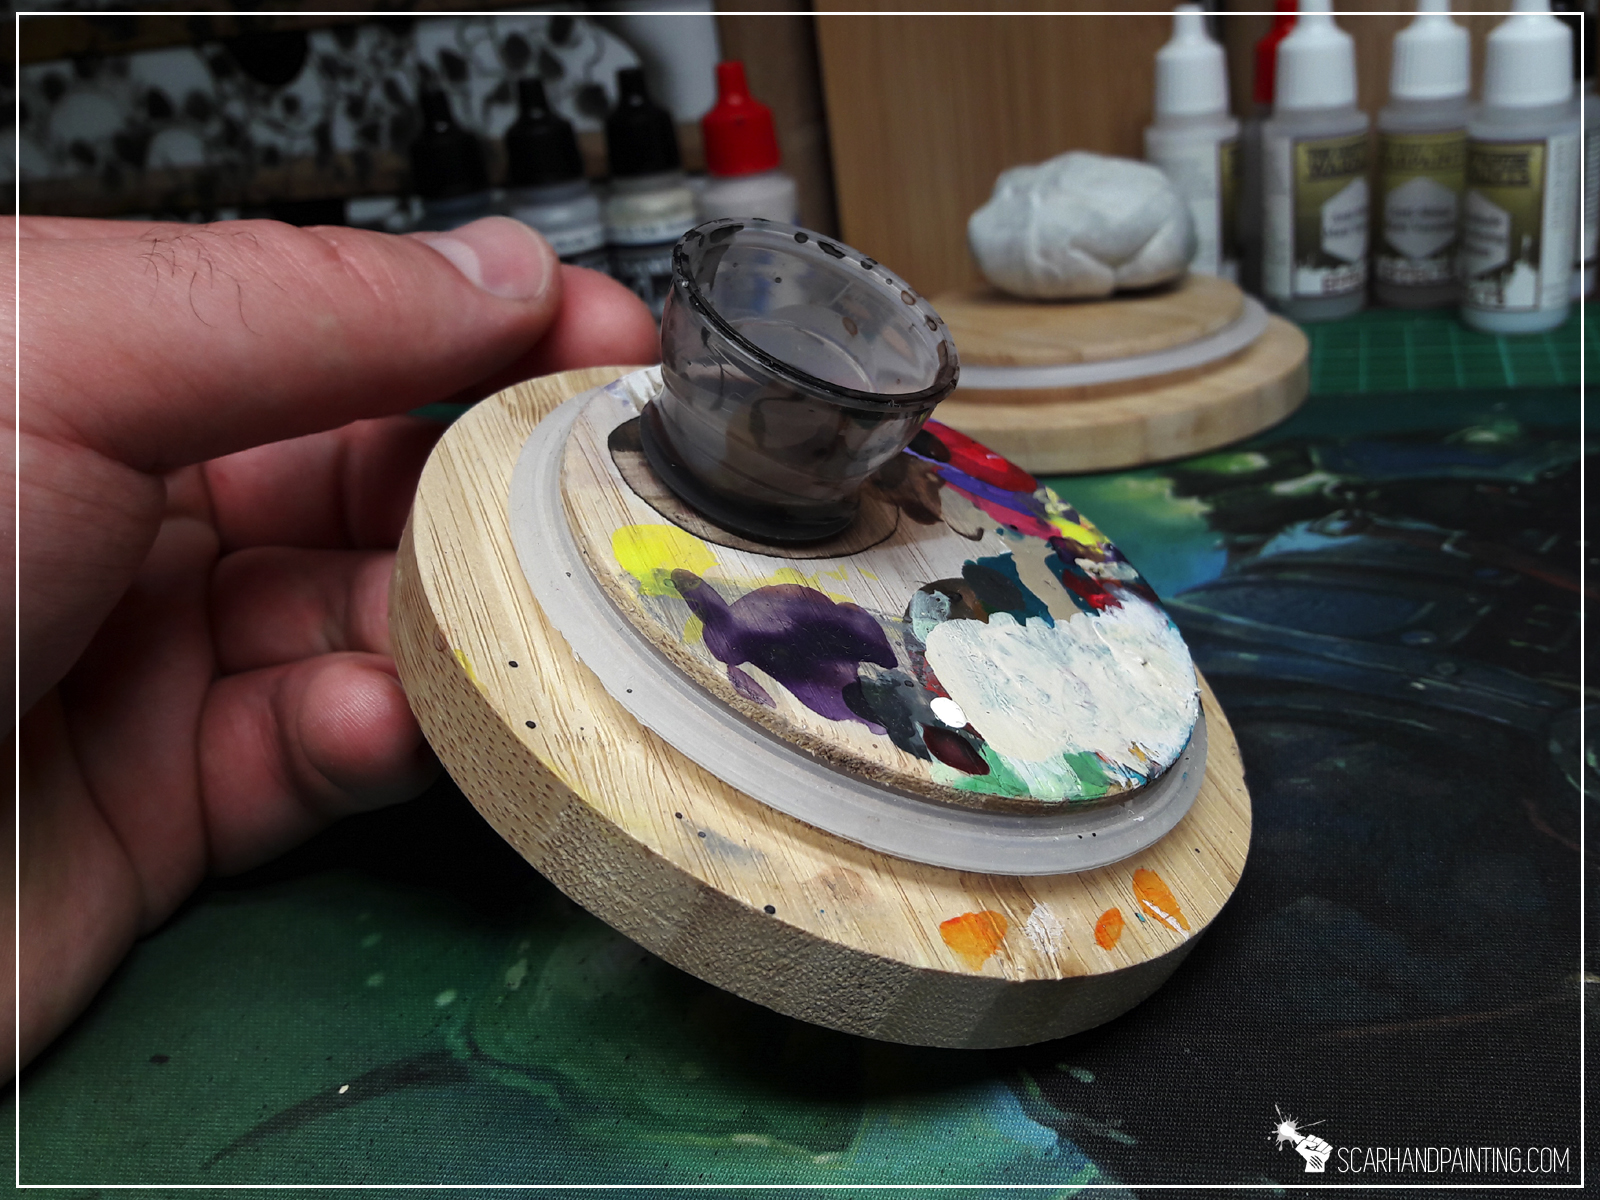
Once the creative fury abates, allowing me to paint with sniper-like calm, using both precision and cunning – Blu Tack takes the fight to the front line, lending me his strength by pinning targets in place and covering important areas…


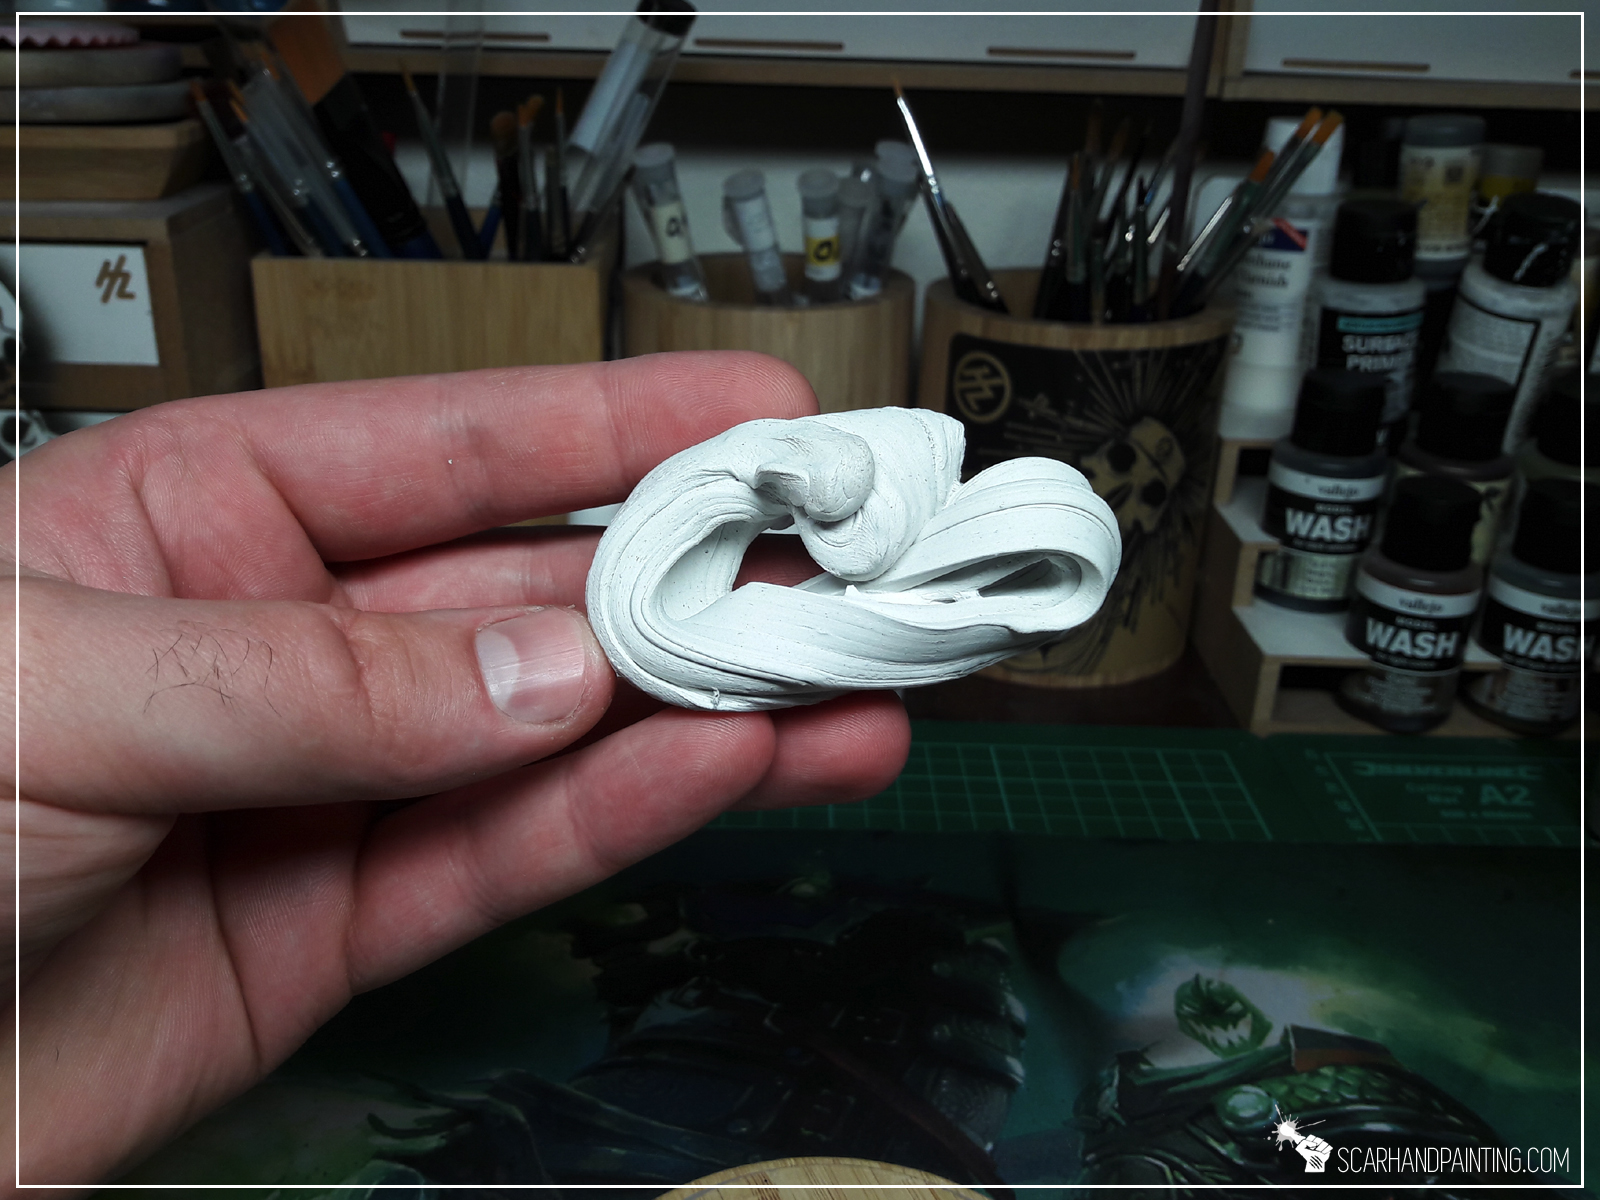
Most importantly Blu Tack is like a mythological hero. It doesn’t die, it doesn’t get old. It builds mass with every new batch added to the body. It is a friend that throughout our painting adventure never let me down and always had my back. I know I can count on it, no matter what new challenges we will face next! Blu Tack is love. Blu Tack is god!

Do you know and use Blu Tack in your hobbying, or did you just learned of it through this article? Lemme know in the comments or at Facebook! Cheers!

The idea of introducing cars to my Infinity gaming board is one to haunt me for quite some time now. Many times I found myself in a toy store, standing before a toy car shelf and trying to pick a right car to fit Infinity the Game scale and sci-fi theme. Easy to say that all my efforts were futile, thus I postponed the idea time and time again, slowly loosing hope. This state of things changed drastically just few days ago…
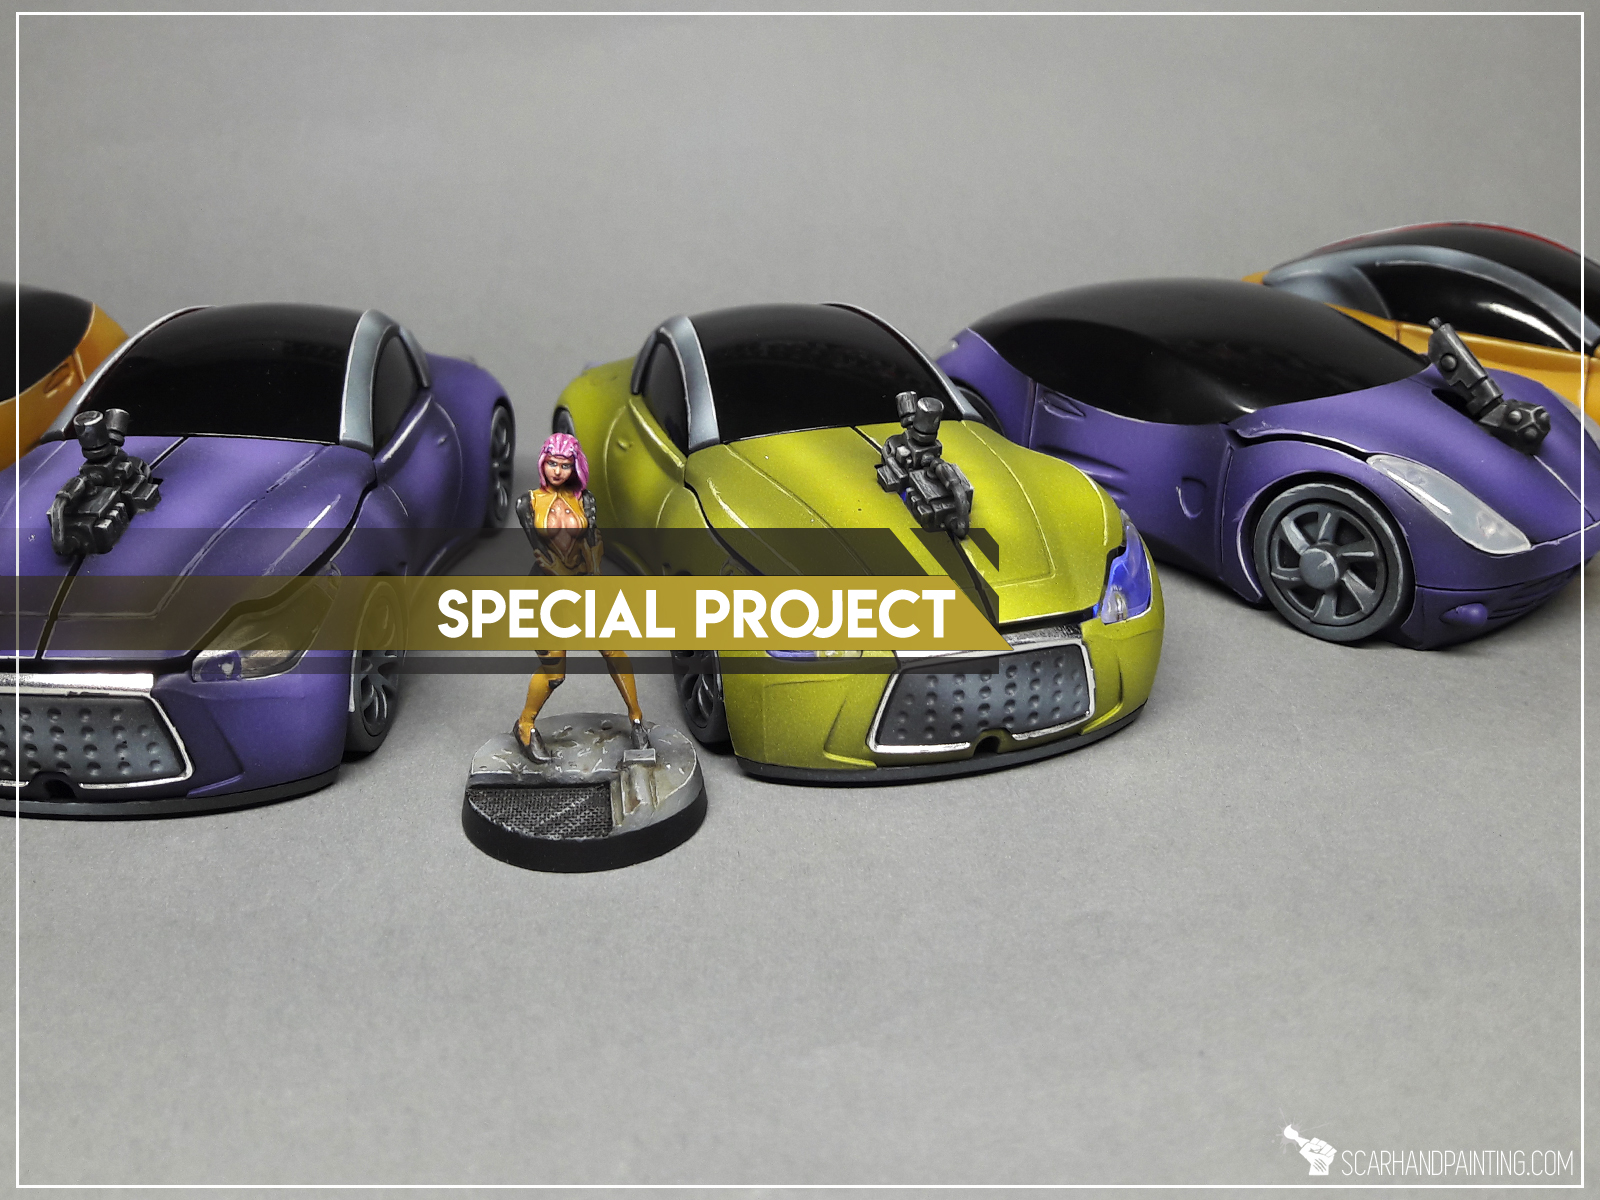
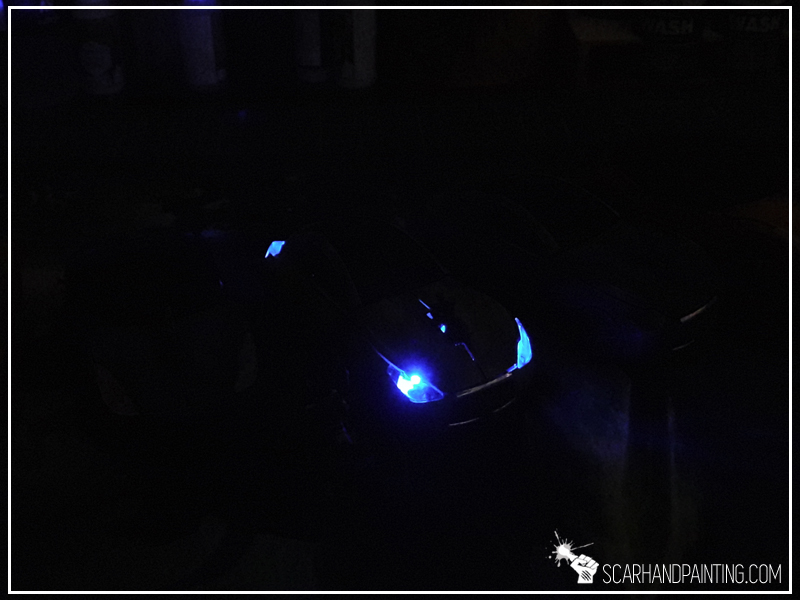
I was visiting the post office, when all of a sudden I saw it! The postal worker was playing with an ideal toy car. Wait!? She wasn’t playing at all! That was a PC Mouse! Imagine my shock, when that realization struck me. Shaped like a car, with lights glowing bright, the PC Mouse was just perfect!
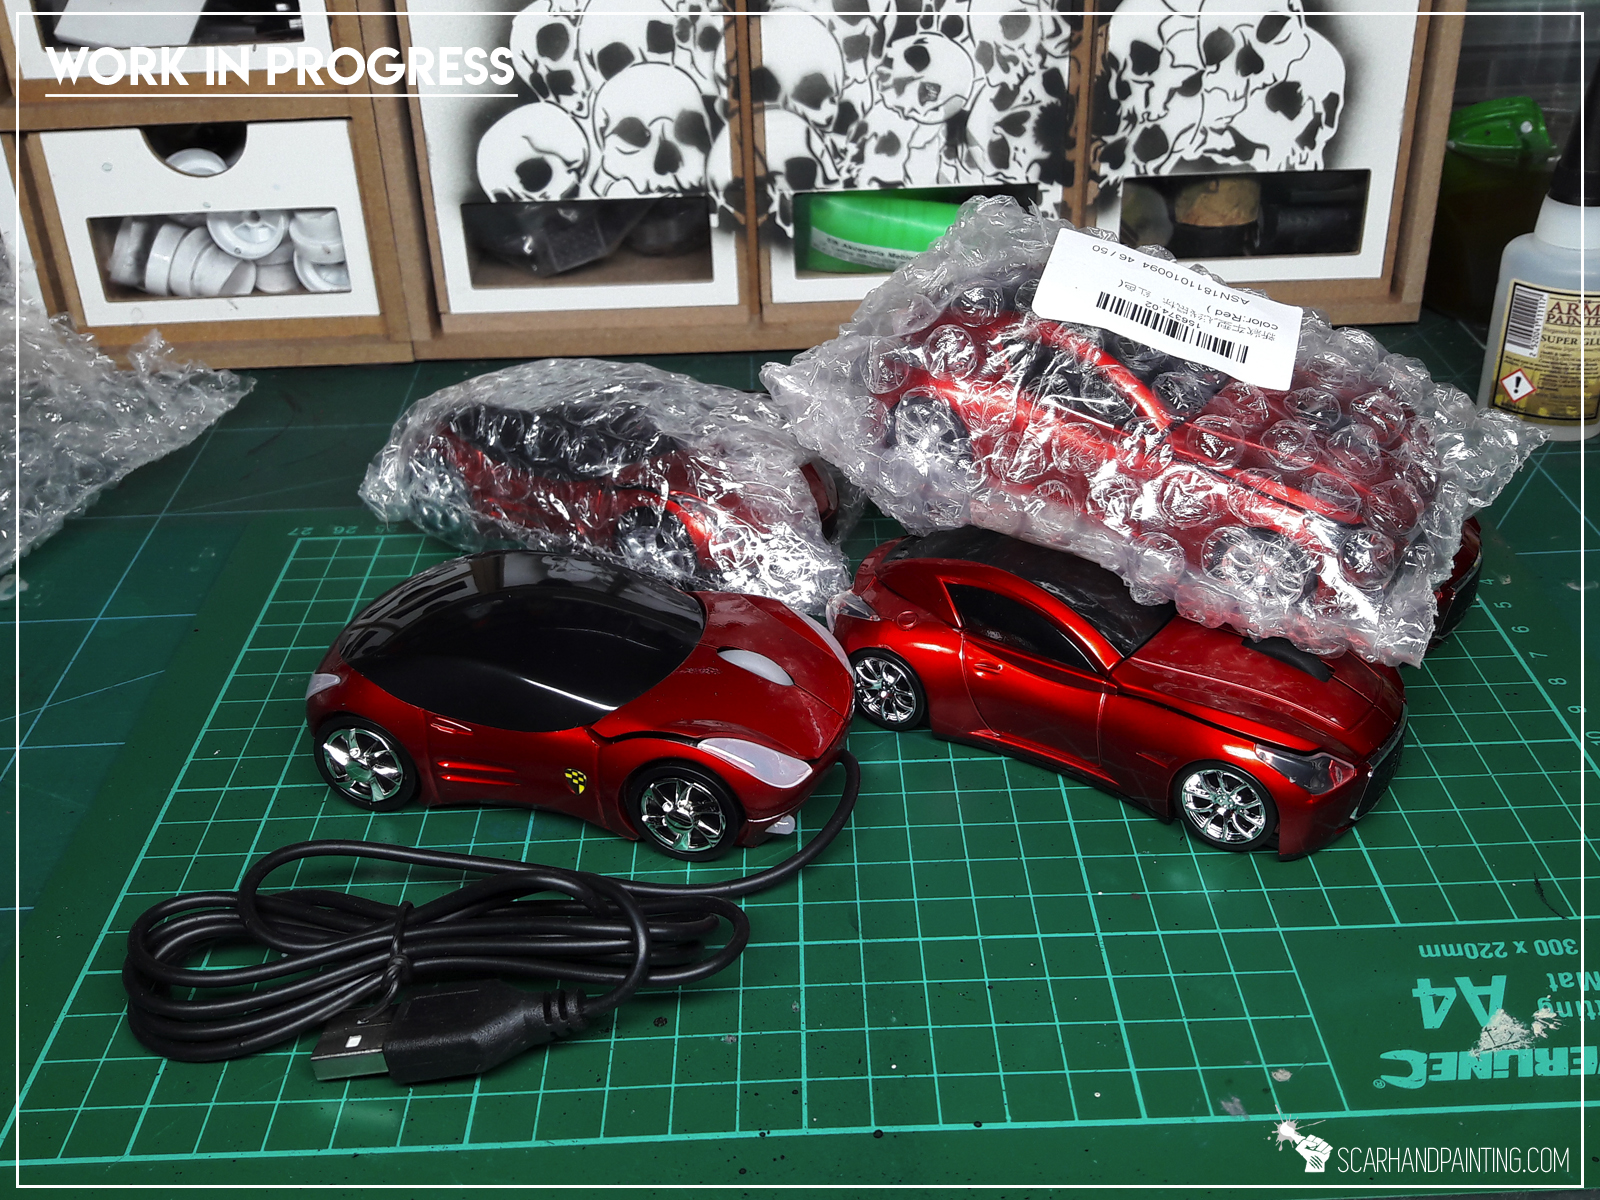
Two days later I was in possession of half a dozen PC Mouse cars. This was where “Infinity Cars” Special Project actually started. After a good look at the cars features I figured that apart of awesome futuristic design, the cars had translucent light covers, black mirrored glass, chrom elements plus some of them had battery powered interior glowing lights. These were key features I wanted to transfer onto final form. I started dismantling the cars to pieces…
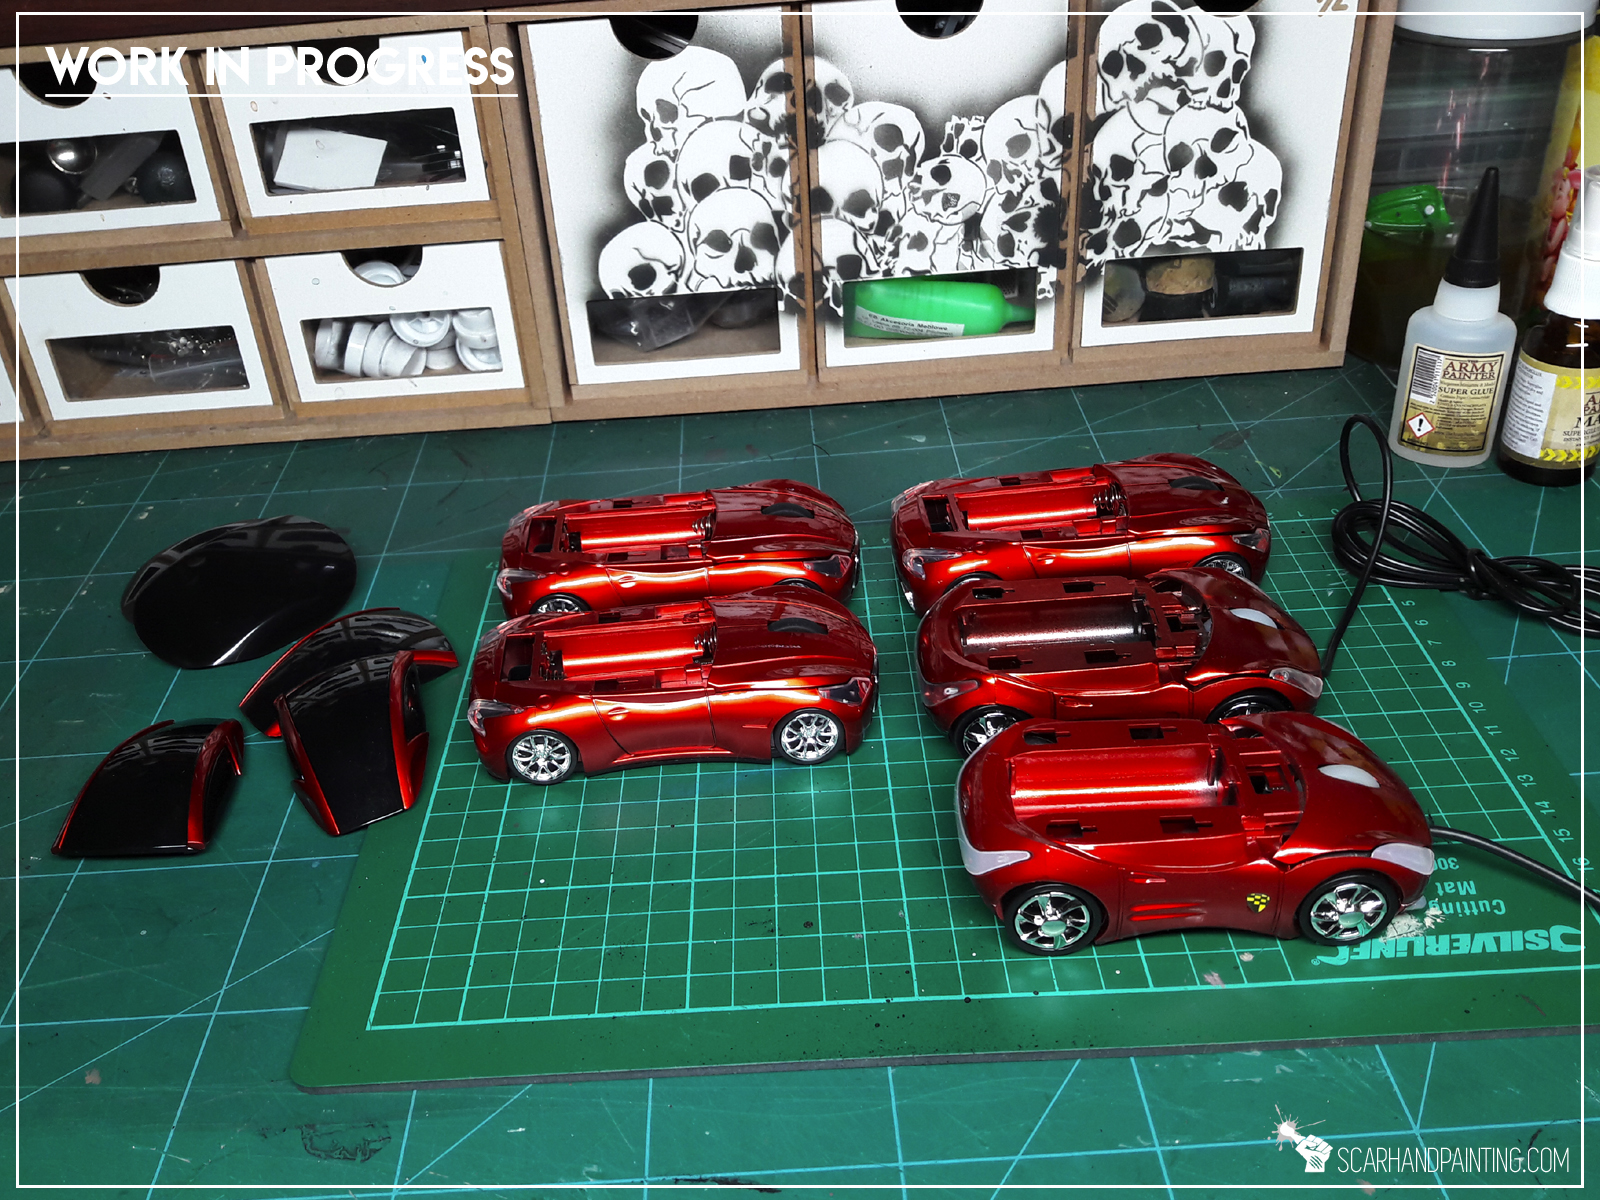
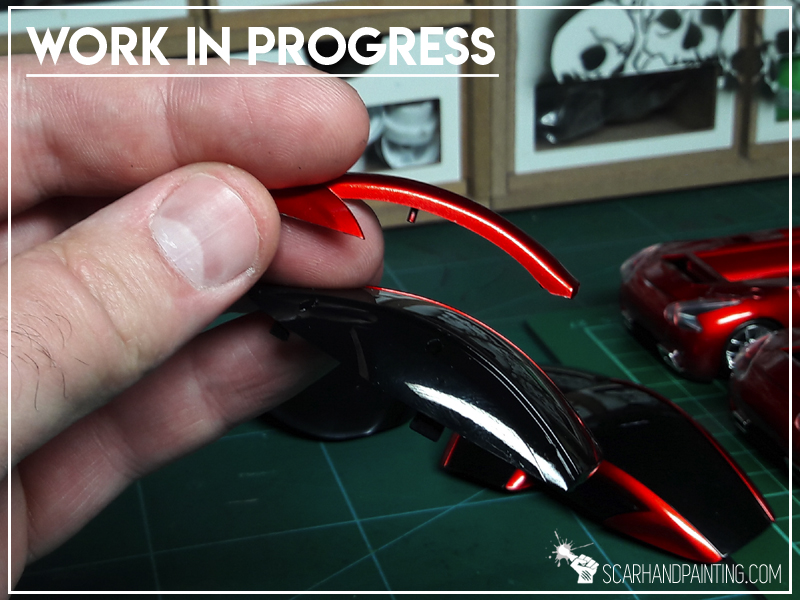

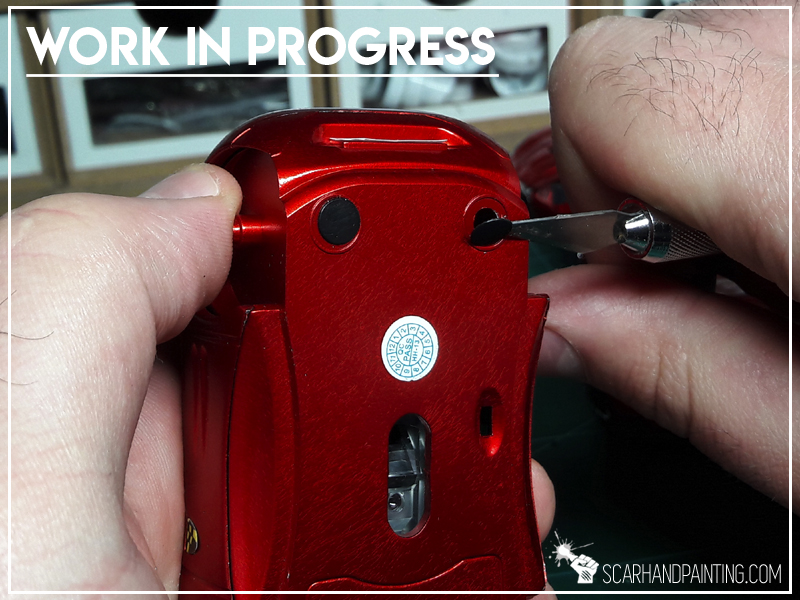
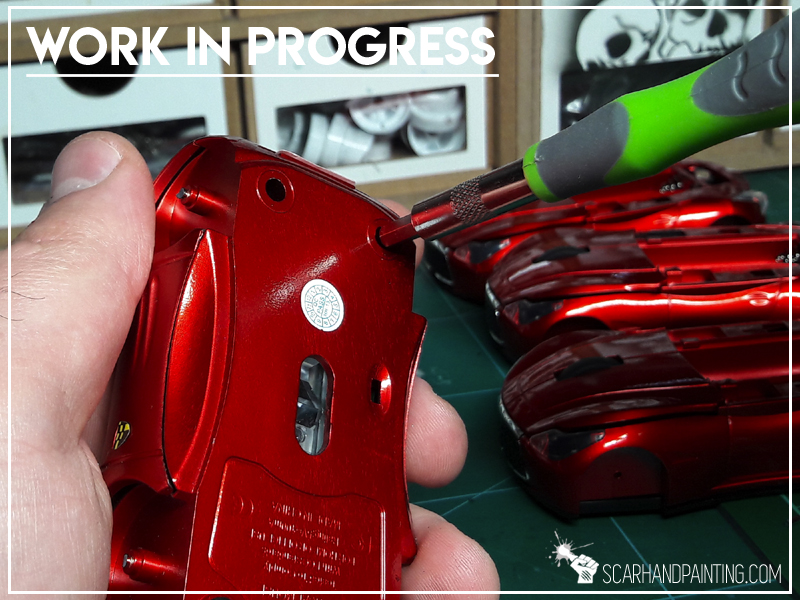
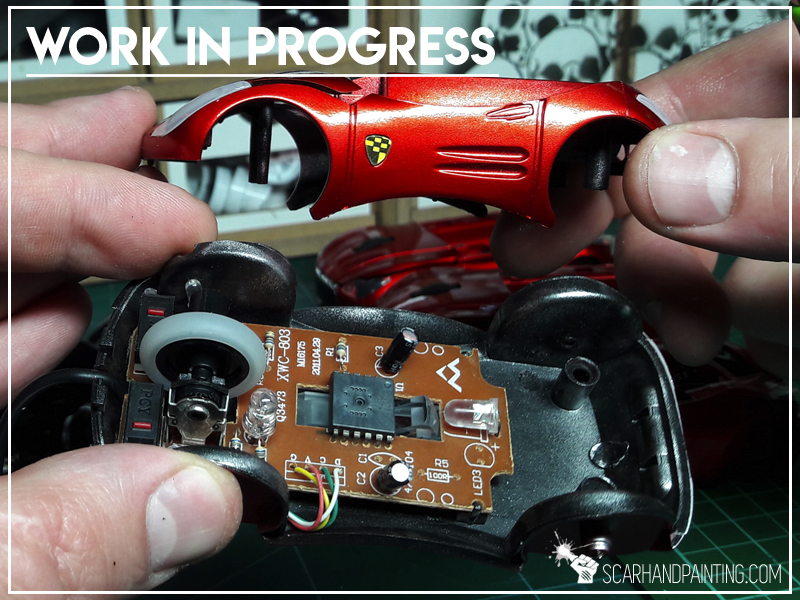

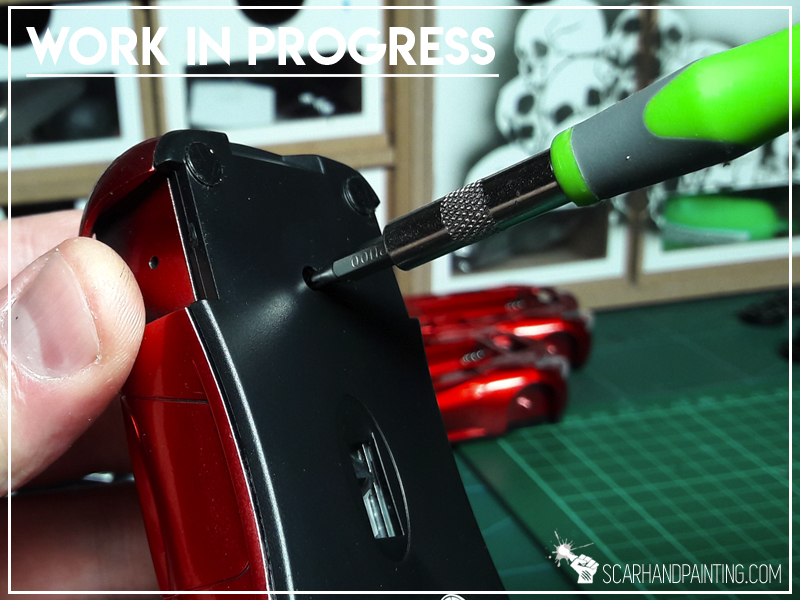

It didn’t took long, as parts came off pretty easily. Depending on a car type there were either one or two screws that needed handling, other than that I only needed to pull parts gently for them to come apart.
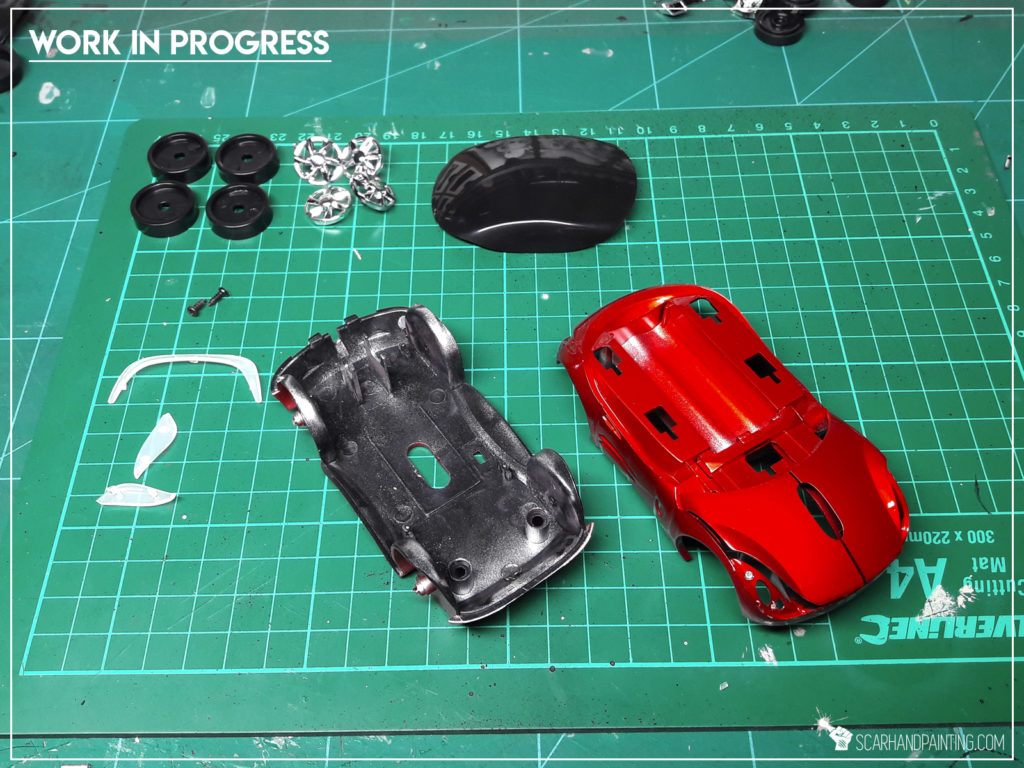

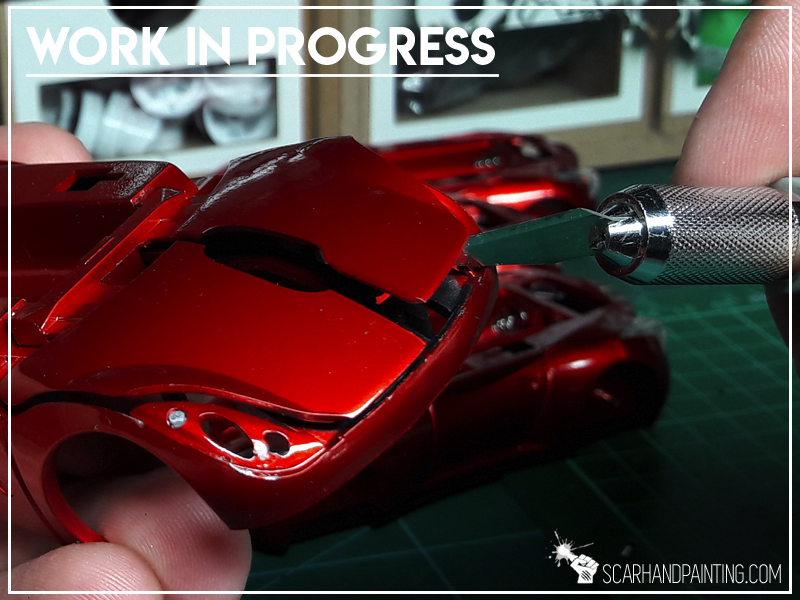
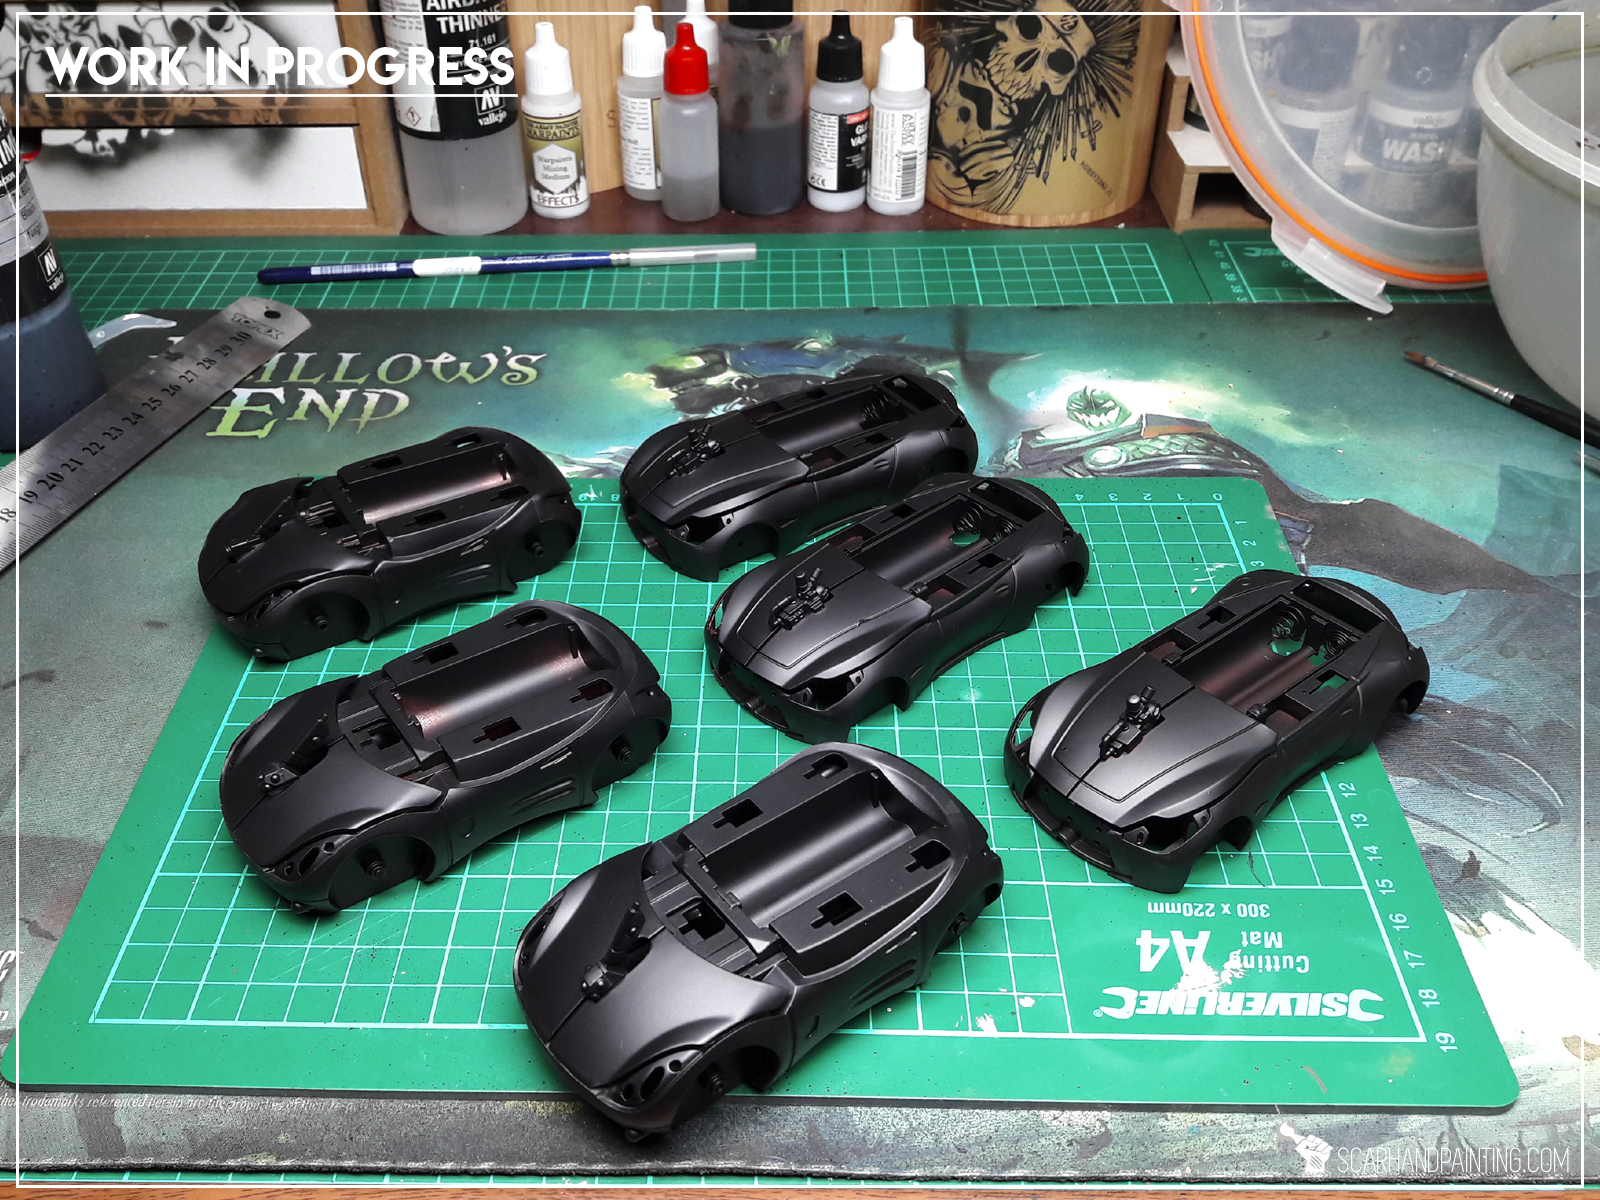
Every piece being separated, I prepared everything for a proper paint job. I didn’t modify the cars too much. Removed “scroll buttons” and glued in some Warhammer 40k bitz to add Sci-fi looks instead, glued left and right buttons firm, removed “the insides” of cable mouses. Didn’t even bother to strip the paint.
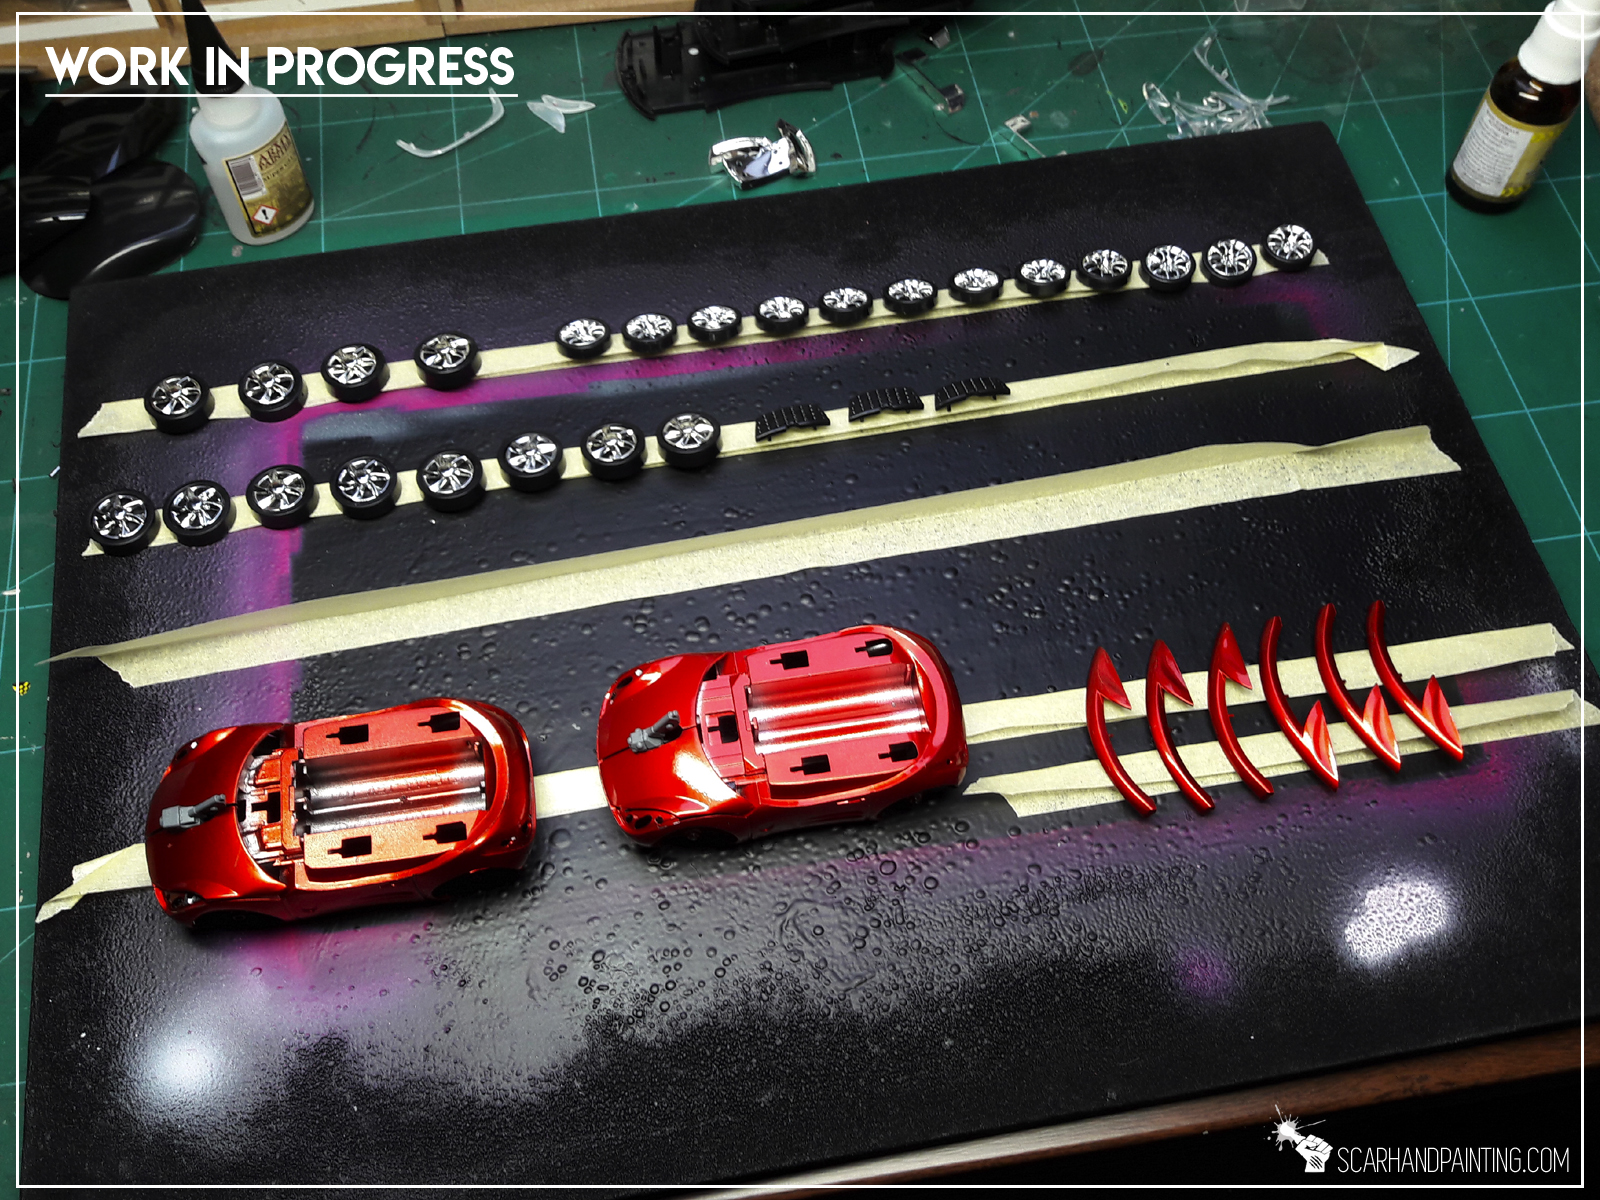
Afterwards the cars got undercoated and soon after I applied a paint job with bright, juicy colours. I decided to keep the paint job simple, with no decals, freehands and other stuff that could have spoiled the perfect shape of these futuristic cars bodies. These are scenery pieces after all, too much is not always same as better.

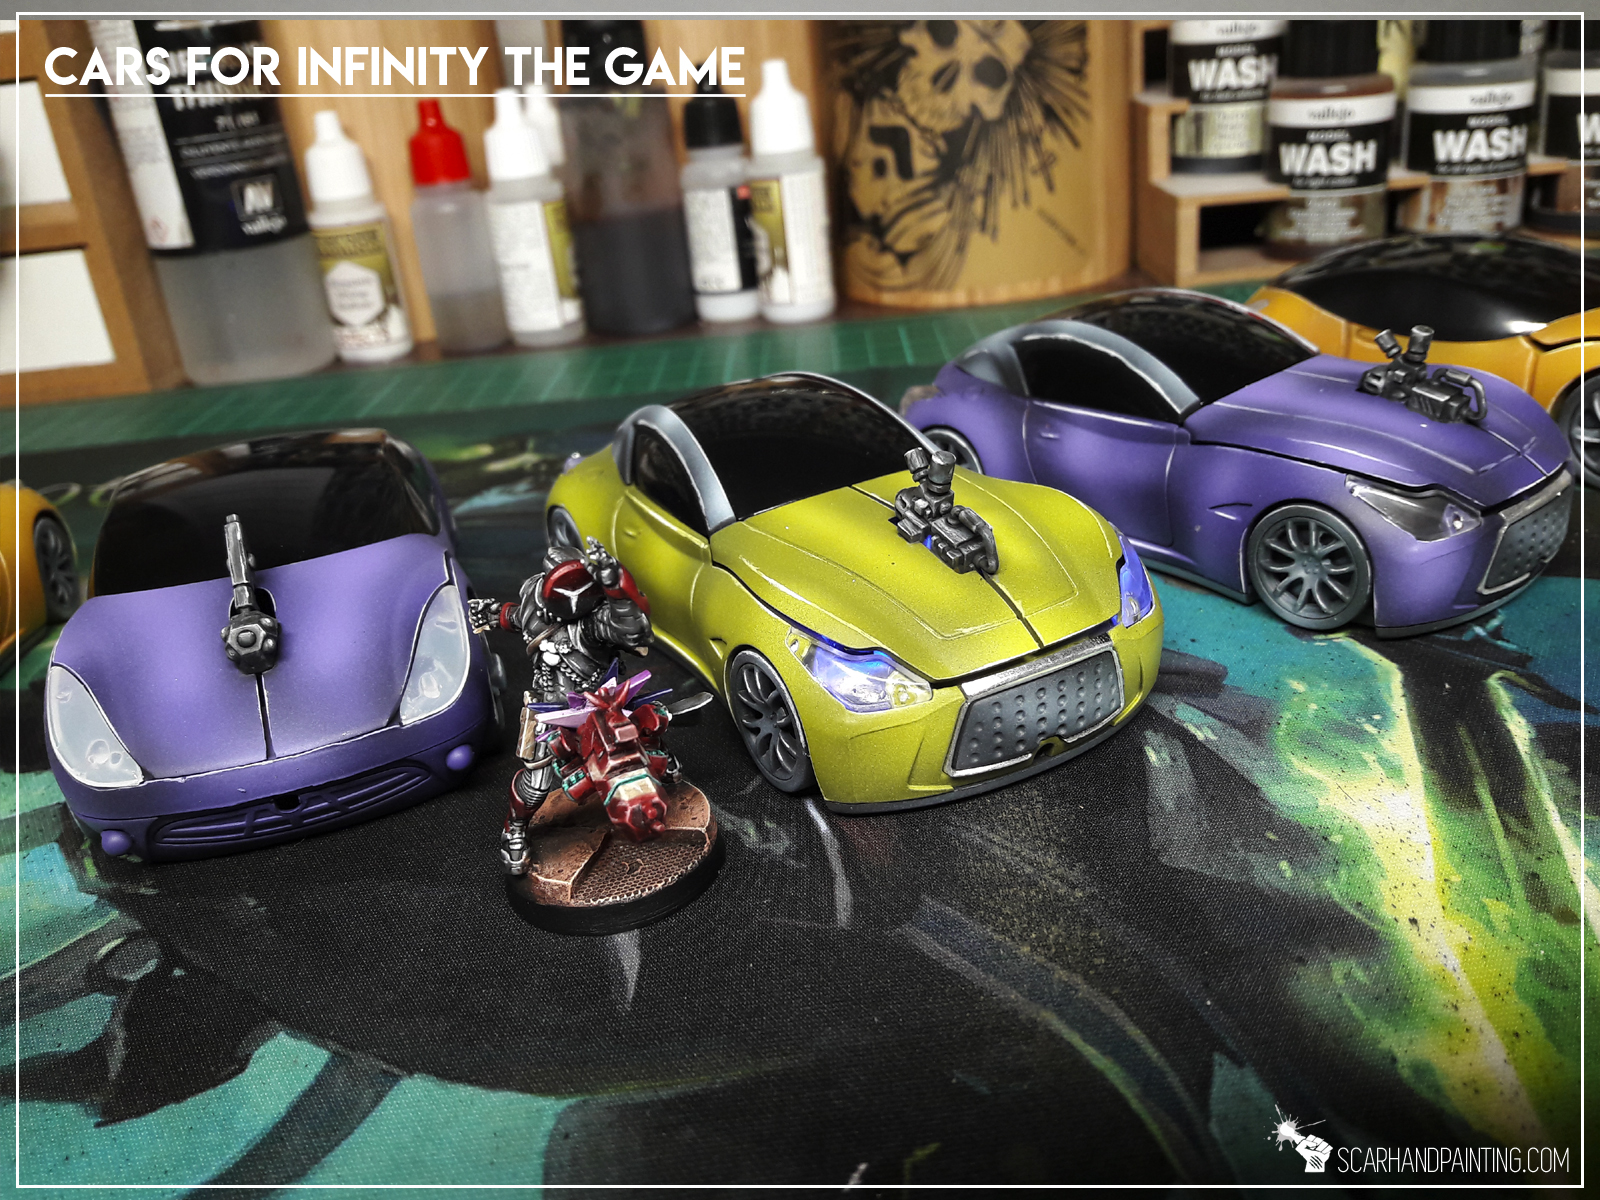
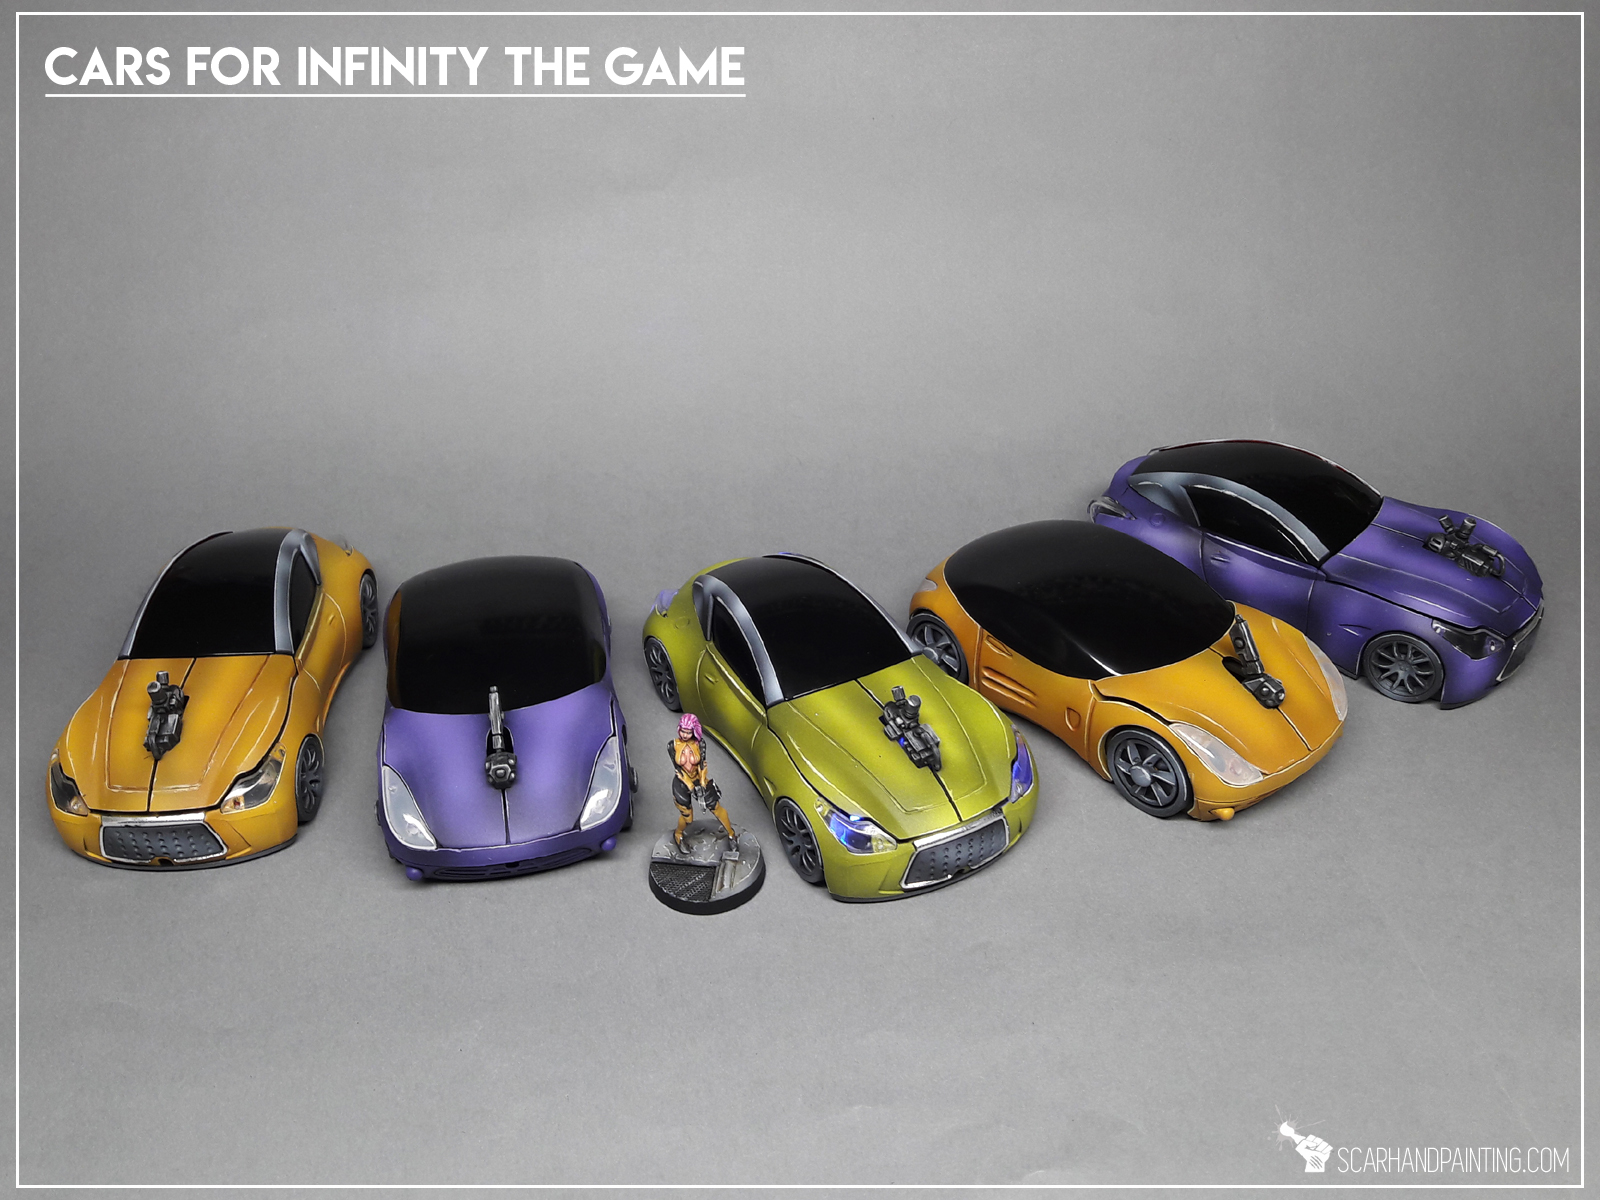
The “Infinity Cars” are nowe done and I cannot wait to use them in the upcoming games of Infinity. I do hope you like the idea of using PC Mouse as an Infinity scenery piece. If you want to grab your own, just look for “PC Mouse Car” at E-bay or google. In the meantime I invite you tocheck out the “Infinity Cars” Gallery… and tell me what you think in the comments below 😉
Cheers!

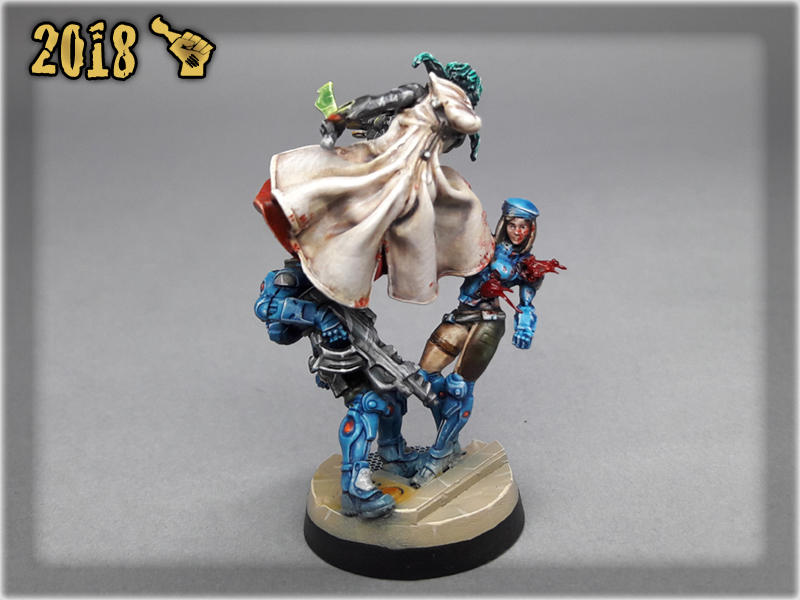
Here are some Colour Recipes for Haqqislam from Gallery: Infinity Operation Red Veil. Please take note that this is a simple colour scheme, not covering multiple overlapping layers and blends in between, that lead to the final product. It is supposed to be used as guideline not a step-by-step.
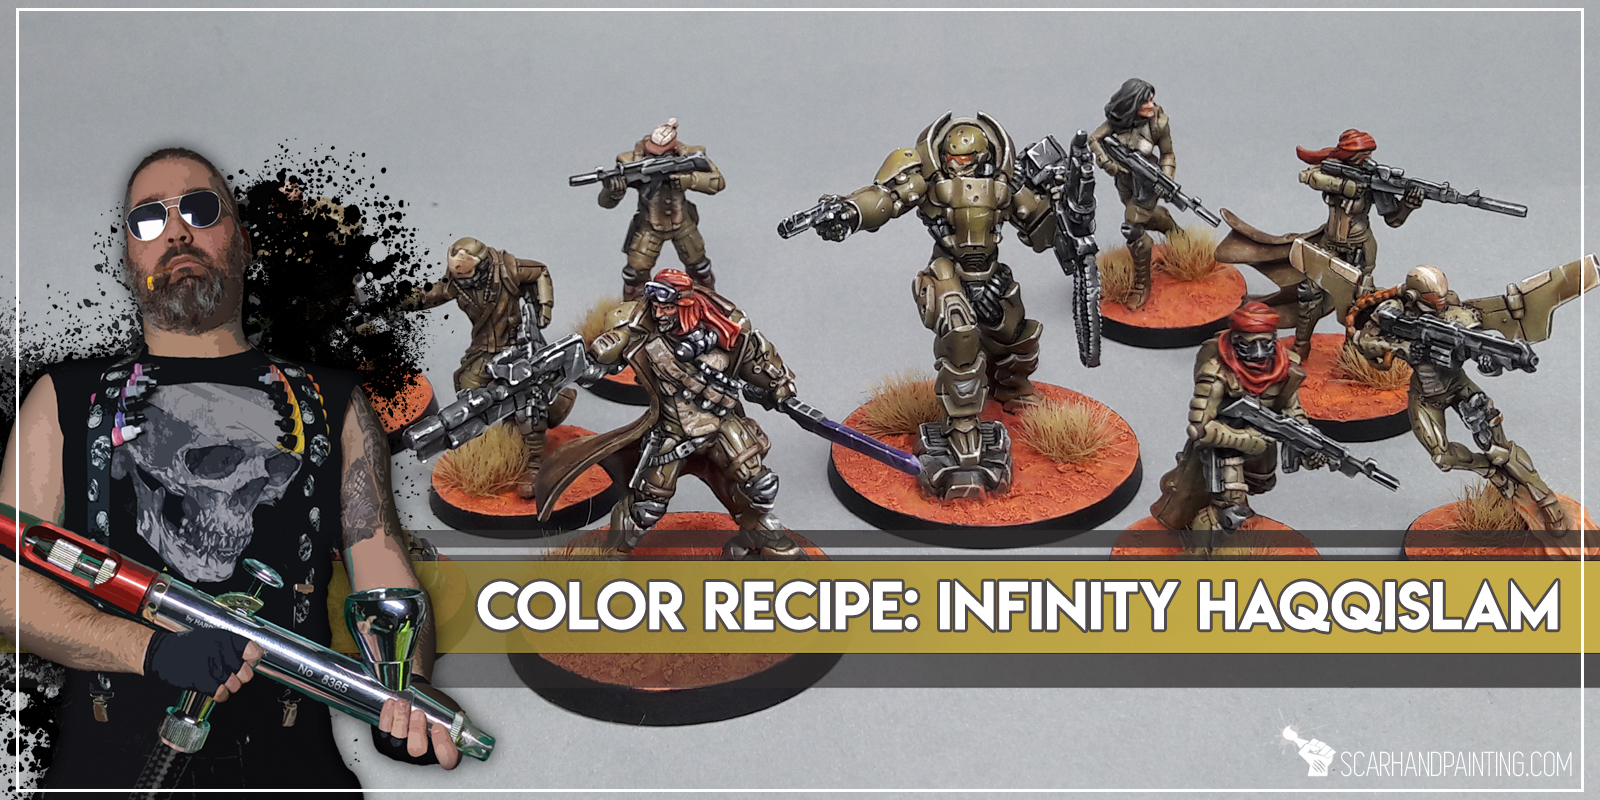
MILITARY armour:
Interior Green (Val a),*
Mix Interior Green (Val a) 2:1 Desert Yellow (Val a),*
Mix Interior Green (Val a) 2:1:1 Desert Yellow (Val a), Bonewhite (Val a),*
Mix Strong Tone Ink (AP) 1:1 Soft Tone Ink (AP),
Flayed One Flesh (GW), l&p
Off White (Val), l&p
CREEME leather armour:
Mix Olive Drab (Val a) 1:1:1:1 Dark Fleshtone (Val a), Strong Tone Ink (AP), Soft Tone Ink (AP),
Bonewhite (Val a),
Flayed One Flesh (GW), l&p
Mix Strong Tone Ink (AP) 1:1 Soft Tone Ink (AP),
Pale Wych Flesh (GW), l&p

BLACK/GREY outfits & weapons:
Black Undercoat, Mix Black 1:X Panzer DK Grey (Val),
Panzer DK Grey (Val),
Fenrisian Grey (GW),
Pallid Wych Flesh (GW), l&p
Dark Tone Ink (AP)
Fenrisian Grey (GW), blend
Pallid Wych Flesh (GW), l&p
Off White (Val), p
MARTIAN bases:
Cavalry Brown (Val), *
Martian Ironcrust (GW) & Martian Ironearth (GW), texture
Fire Dragon Bright (GW), flbr

l&p – lines and points,
p – points,
bl – blend,
gl – glaze,
drbr – drybrush,
flbr – flatbrush,
lobr – loaded brush,
stpl – stippling,
*Airbrushed (with multiple layers and mixes)
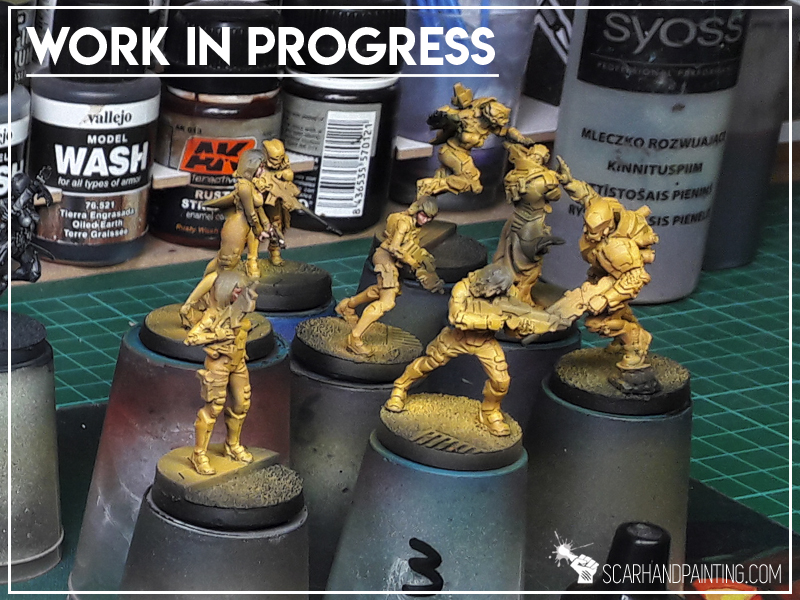
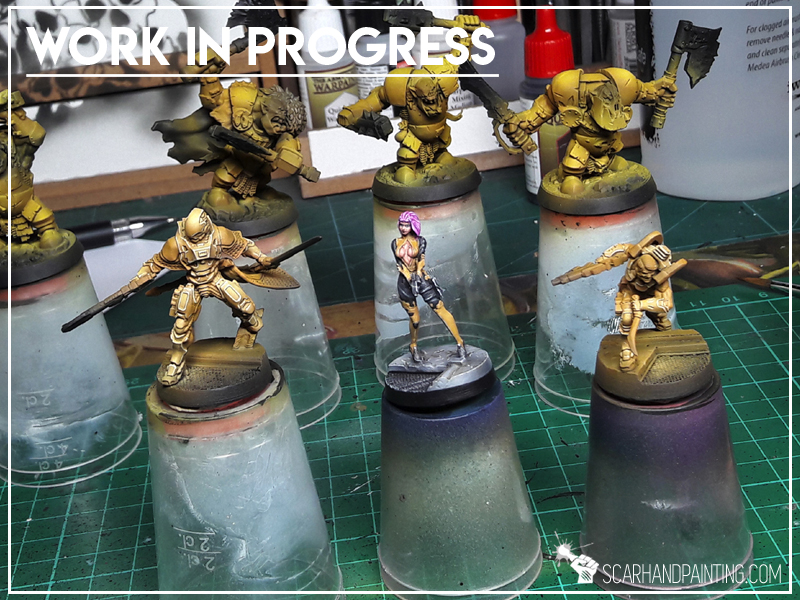
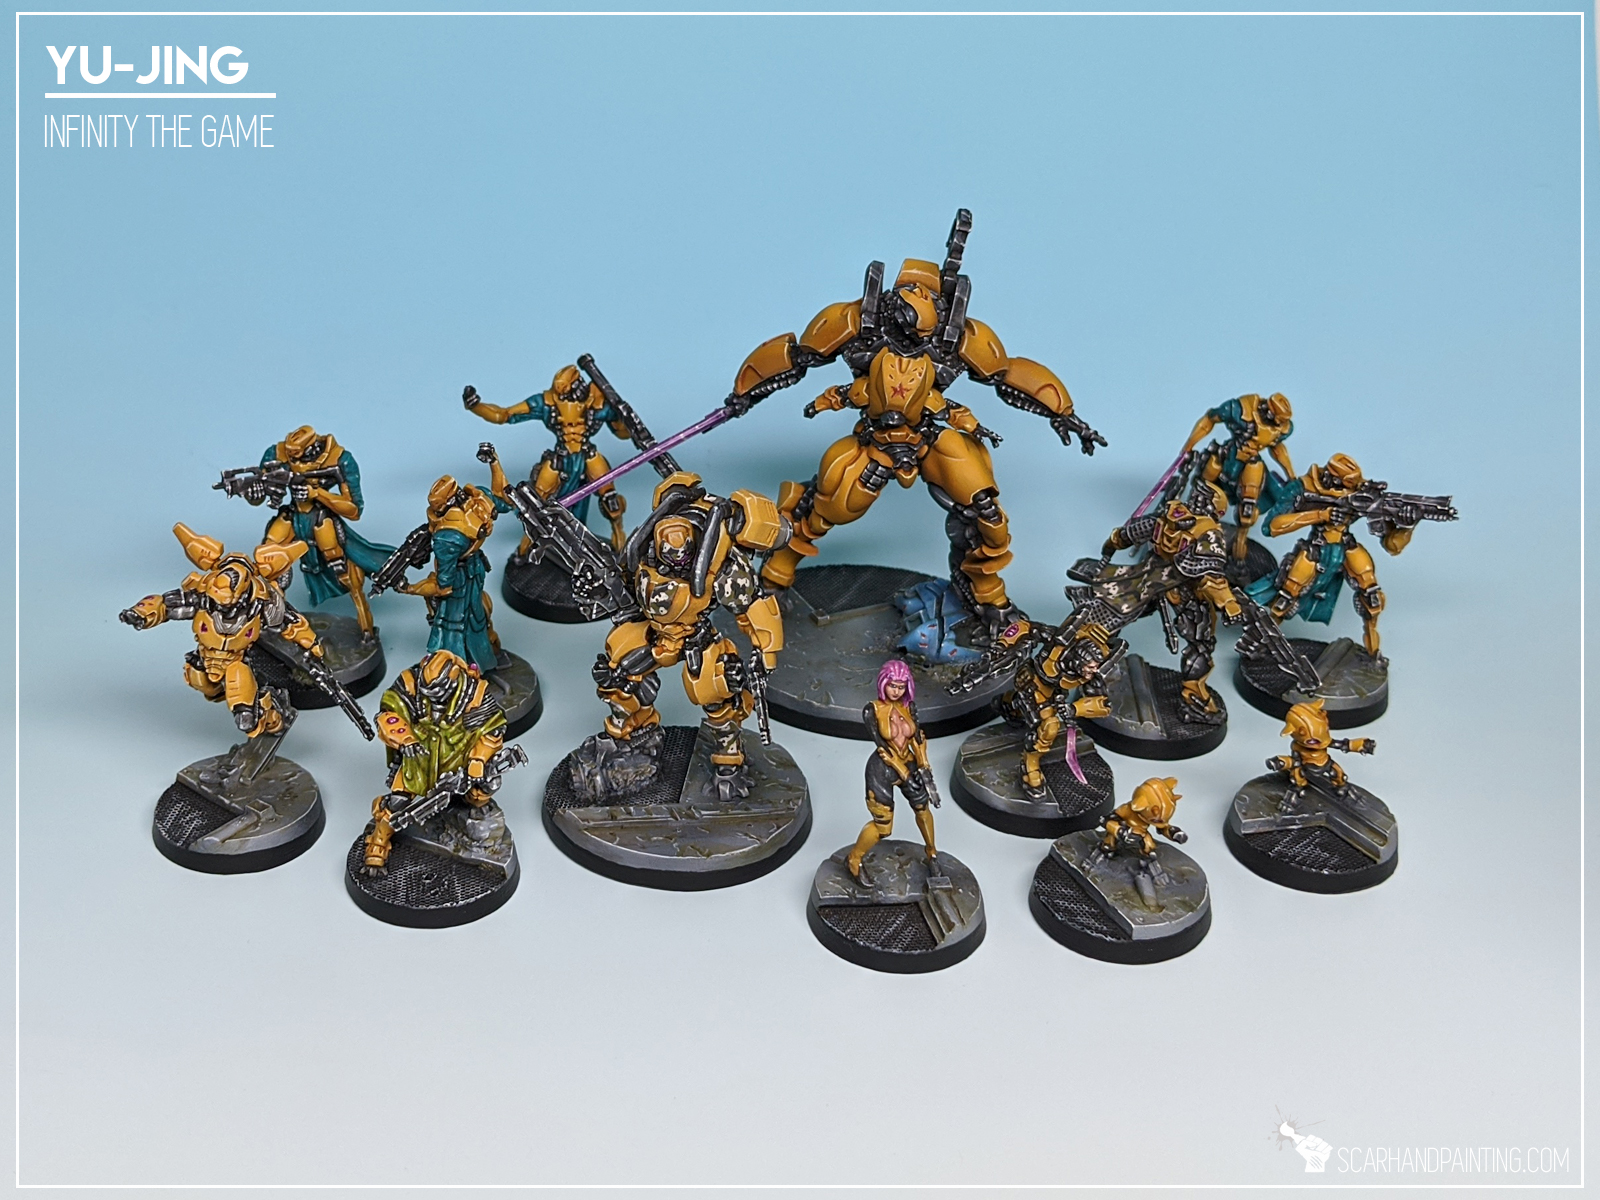
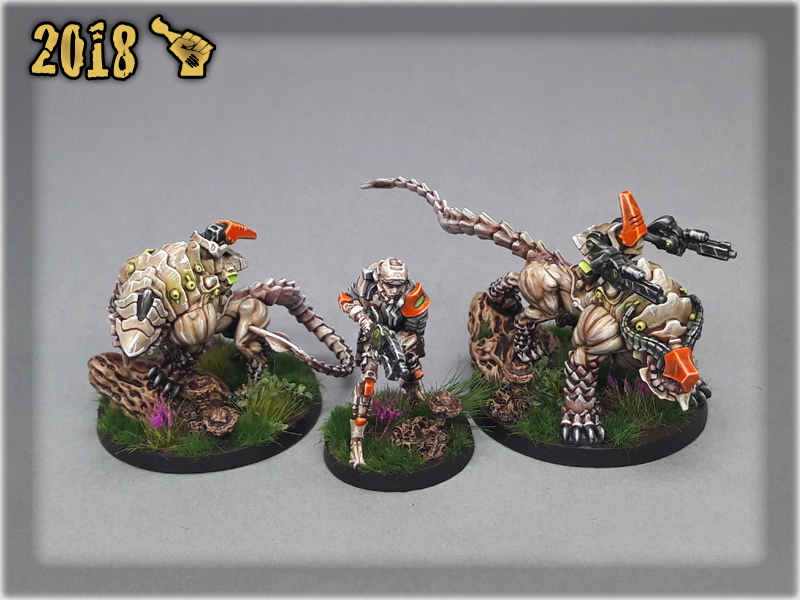
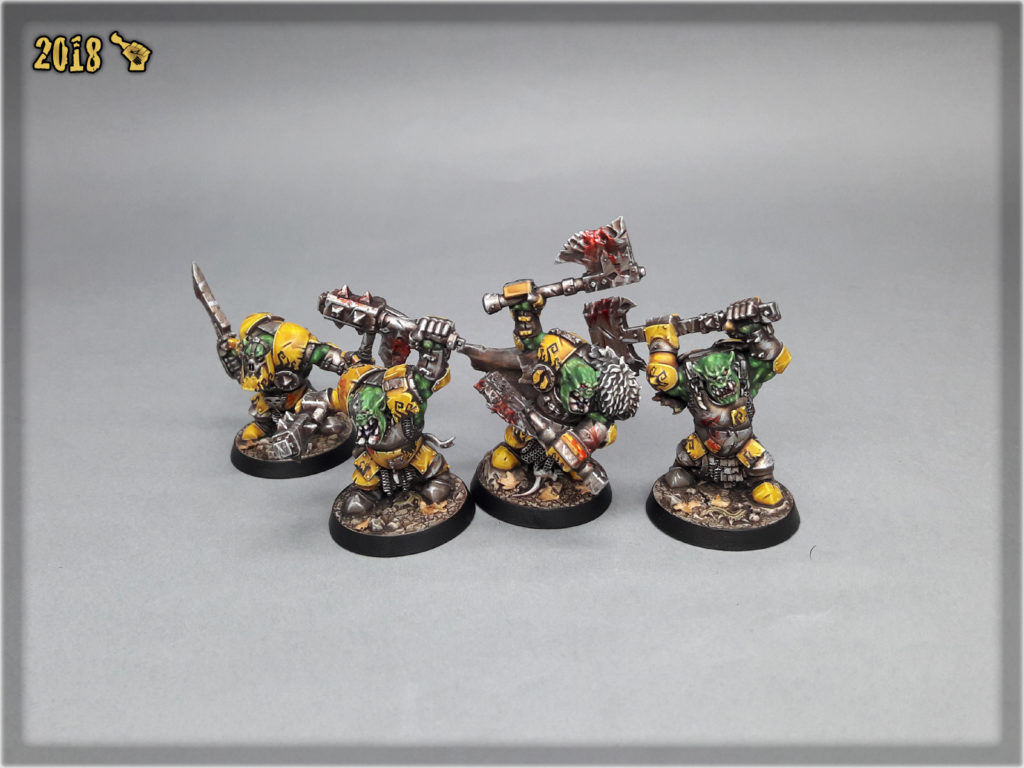
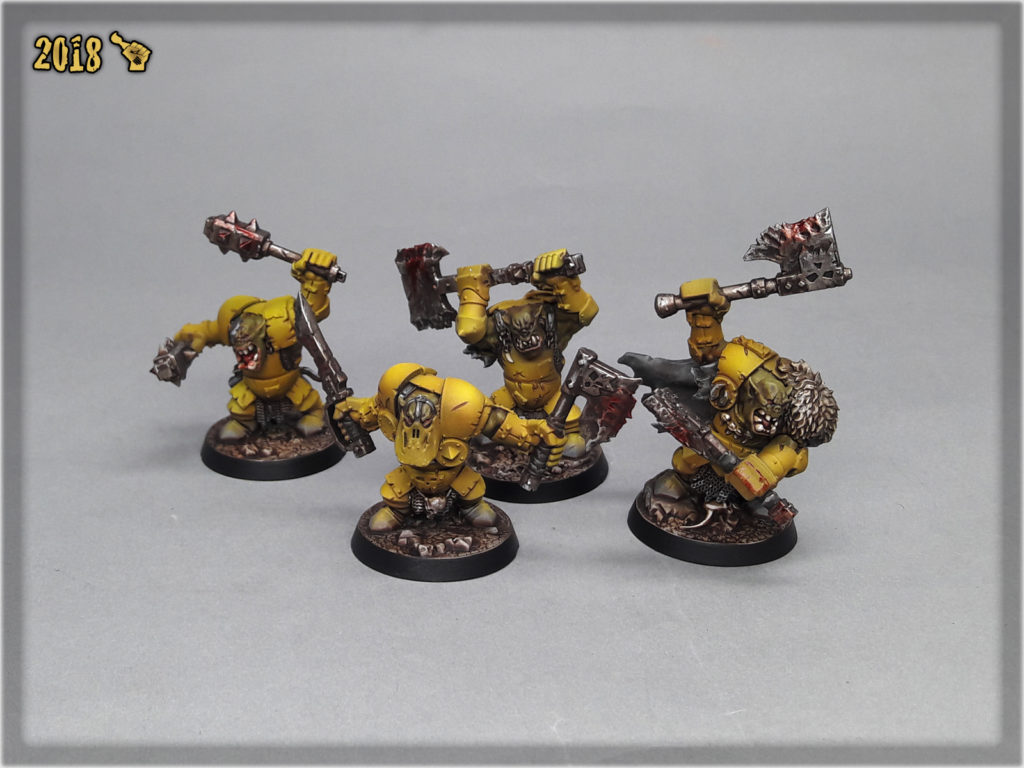
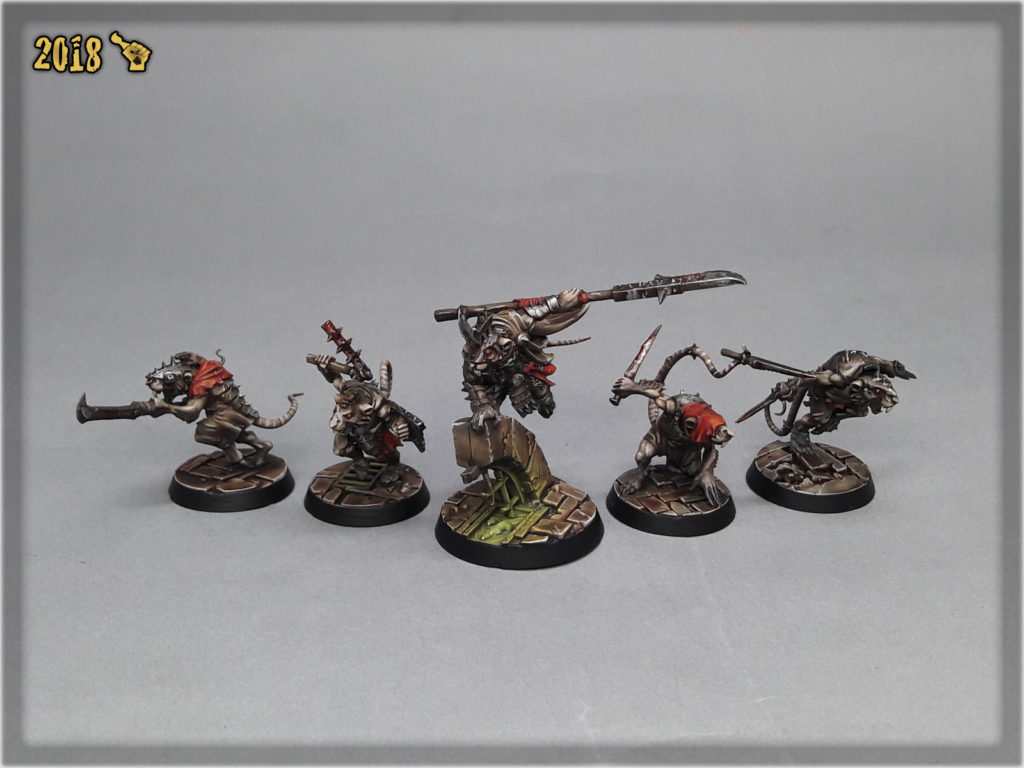
Here are some Colour Recipes for Yu-Jing from Gallery: Infinity Yu-Jing lvl 5. Please take note that this is a simple colour scheme, not covering multiple overlapping layers and blends in between, that lead to the final product. It is supposed to be used as guideline not a step-by-step.

YELLOW armour:
Orange Brown (Val), *
Scrofulous Brown (Val), *(horizontal)
Mix Scrofulouus Brown (Val) 4:1 Off White (Val), *
Ice Yellow (Val), l&p
Light Tone Ink (AP), inner lining
BLACK/GREY outfits & weapons:
Black Undercoat, Mix Black 1:X Panzer DK Grey (Val),
Panzer DK Grey (Val),
Fenrisian Grey (GW),
Pallid Wych Flesh (GW), l&p
Dark Tone Ink (AP)
Fenrisian Grey (GW), blend
Pallid Wych Flesh (GW), l&p
Off White (Val), p
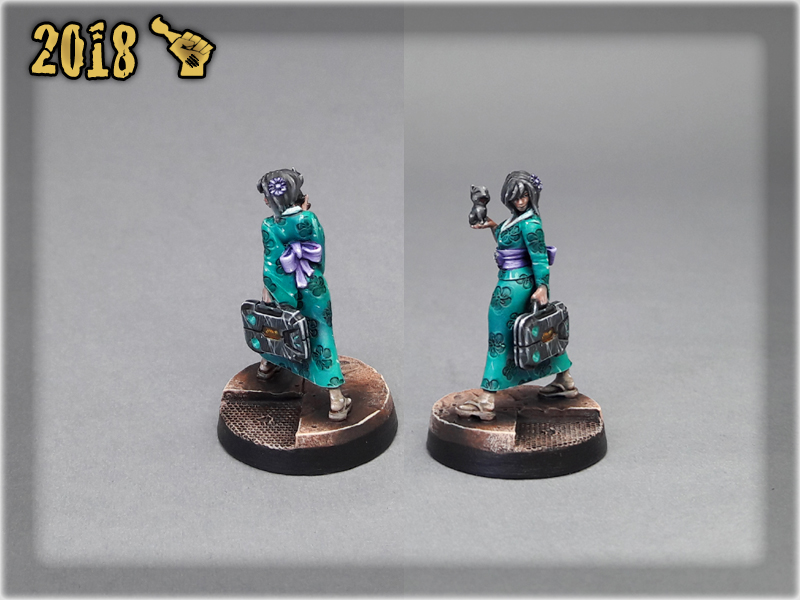
TURQUOISE clothes:
Coal Black (P3),
Scurvy Green (Val),
Mix Scurvy Green (Val) 3:2 Hydra Turquoise (AP), lobr
Hydra Turquoise (AP),
Arcane Blue (P3), l&p
Coelia Greenshade (GW),
Arcane Blue (P3), l&p
SKIN:
Carne Marron Tan (Val),
Dwarf Skin (Val a),
Dwarf Skin (Val) + Pale Flesh (Val a),
Pale Flesh (Val a), l&p
Pale Flesh (Val),
Mix Strong Tone Ink (AP) 1:1 Soft Tone Ink (AP), inner lining
Pale Flesh (Val),
l&p – lines and points,
p – points,
bl – blend,
gl – glaze,
drbr – drybrush,
flbr – flatbrush,
lobr – loaded brush,
stpl – stippling,
*Airbrushed (with multiple layers and mixes)
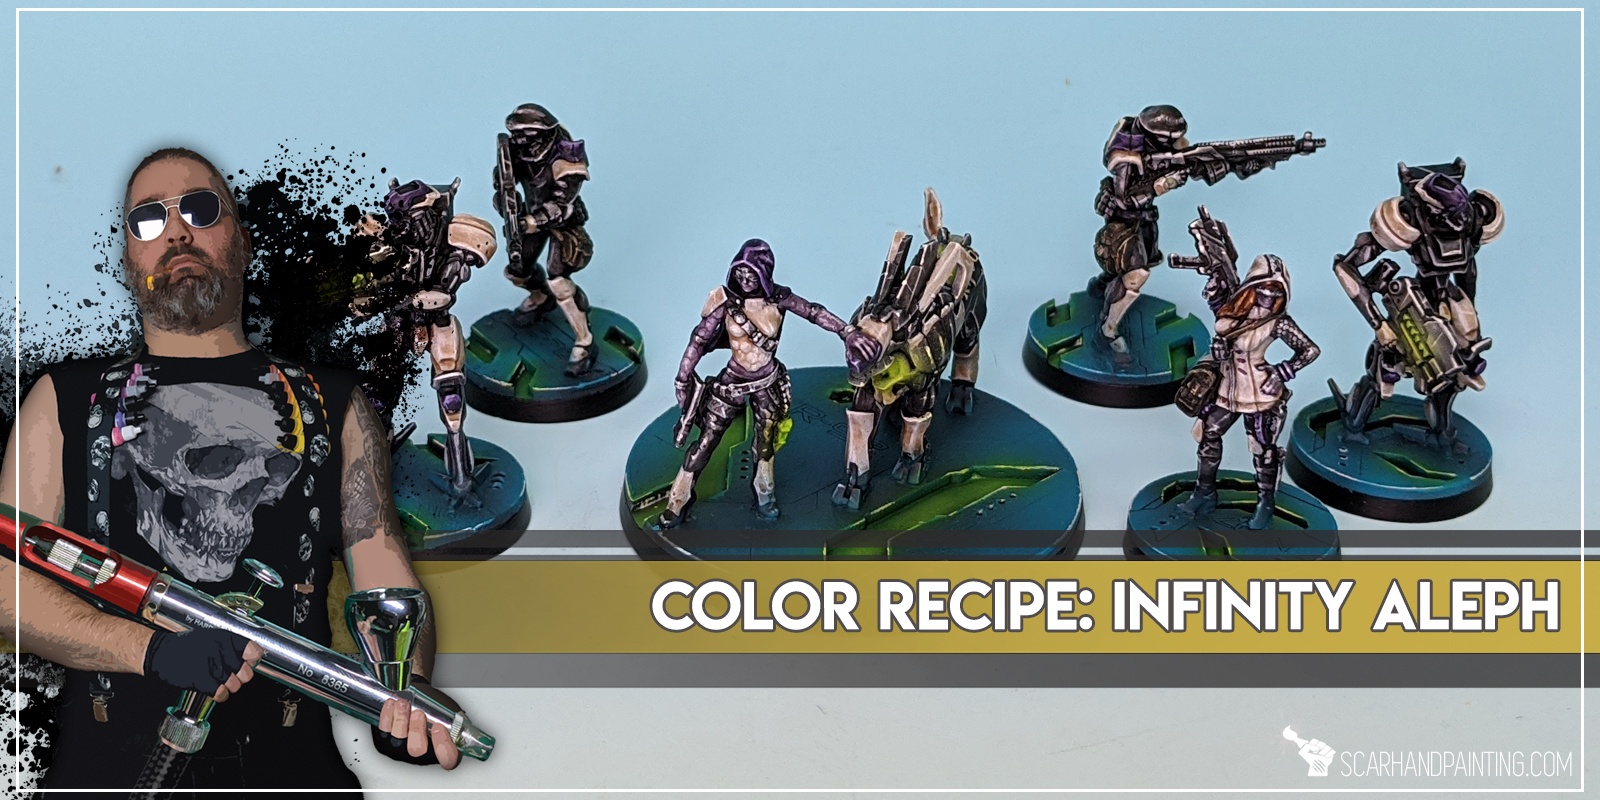
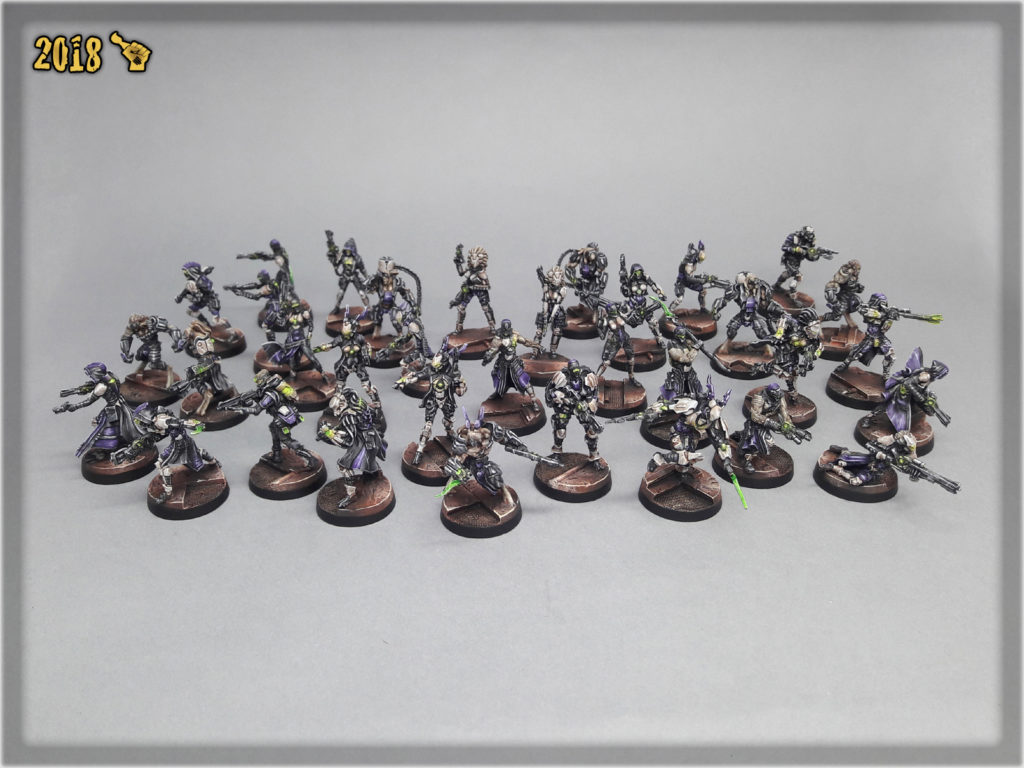
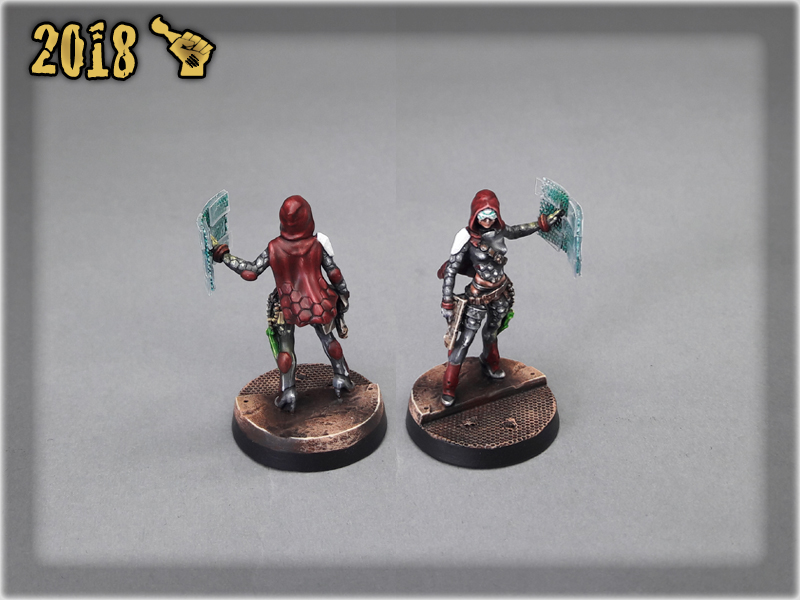
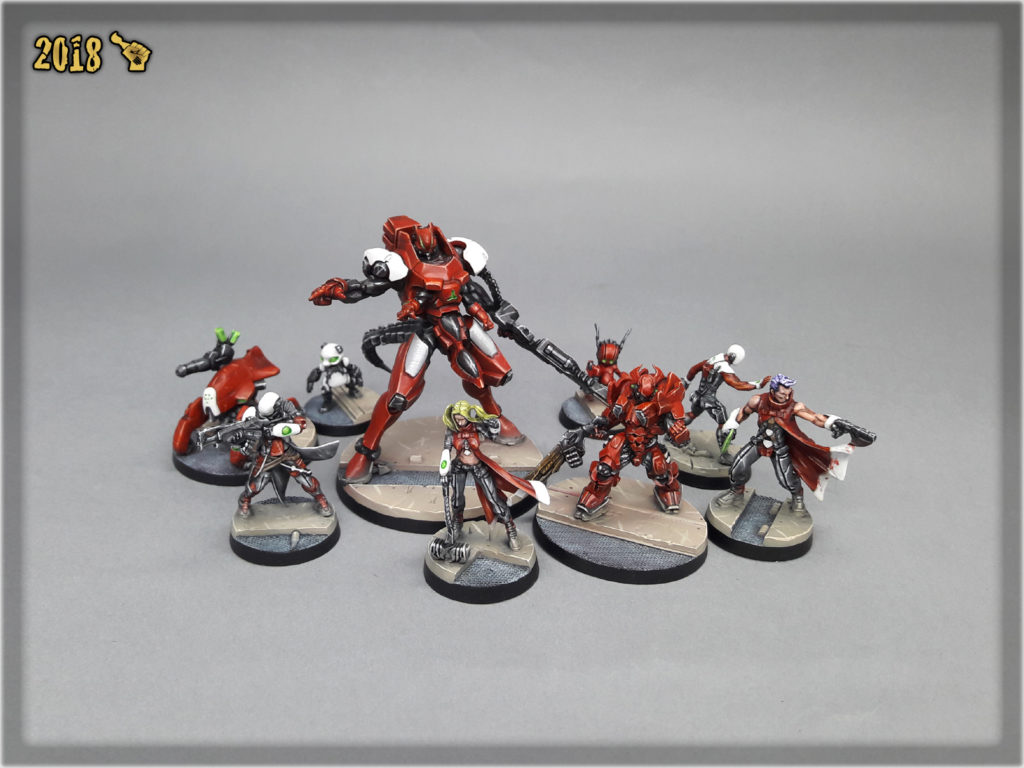
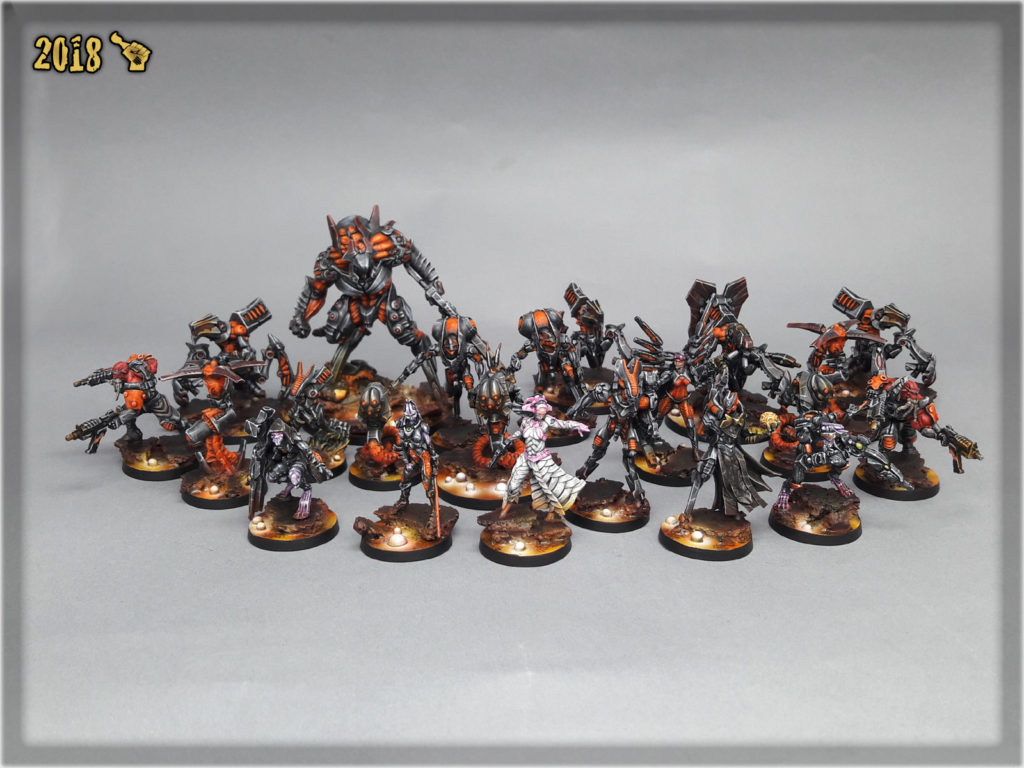
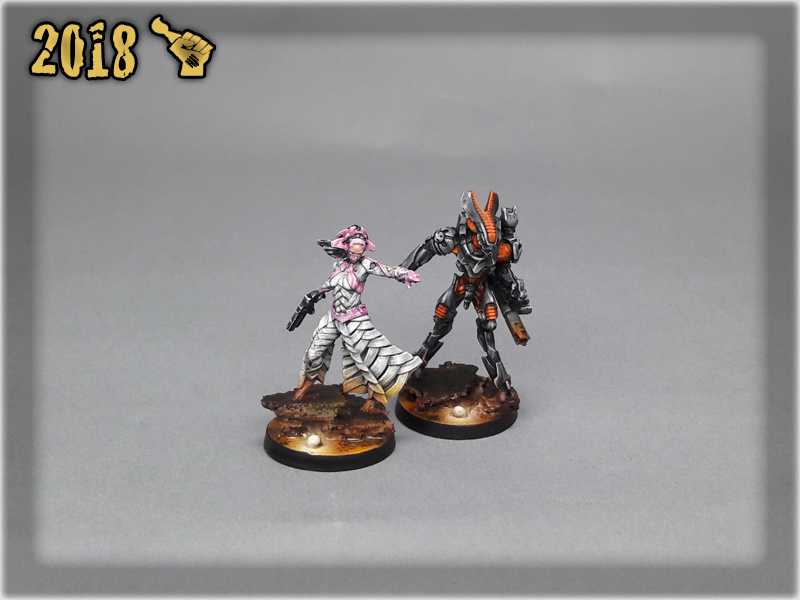
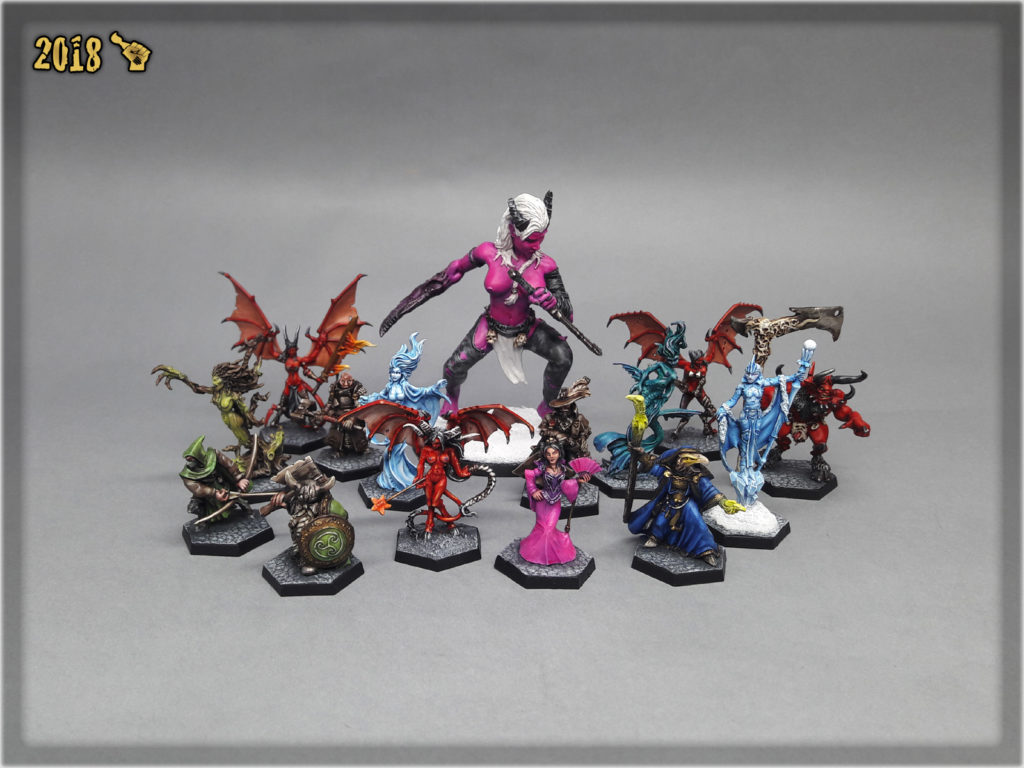
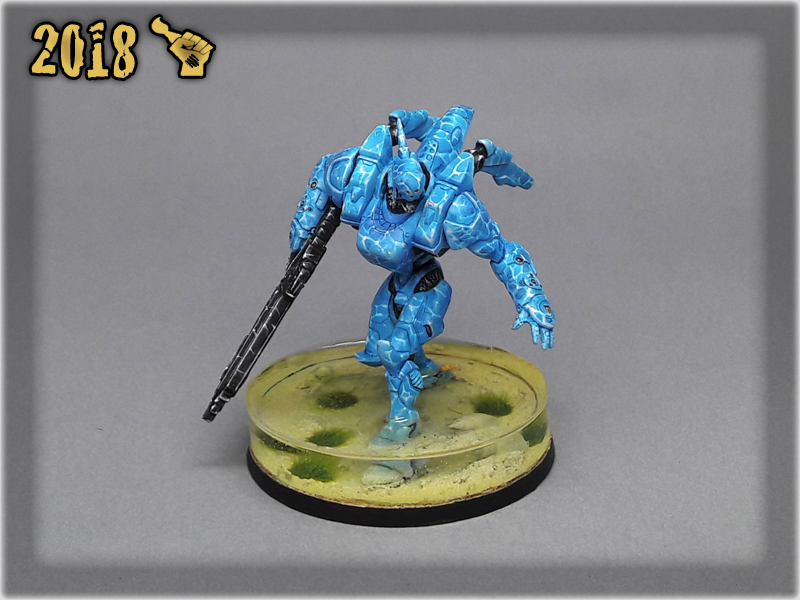
Here are some Colour Recipes for Aleph from Gallery: Infinity Aleph S.S.S. lvl 4. Please take note that this is a simple colour scheme, not covering multiple overlapping layers and blends in between, that lead to the final product. It is supposed to be used as guideline not a step-by-step.
BLACK/GREY armour & weapons:
Black Undercoat,
Panzer Dark Grey (Val),*
Fenrisian Grey (GW), l&p
Pallid Wych Flesh (GW), l&p
Dark Tone Ink (AP),
Pallid Wych Flesh (GW), l&p

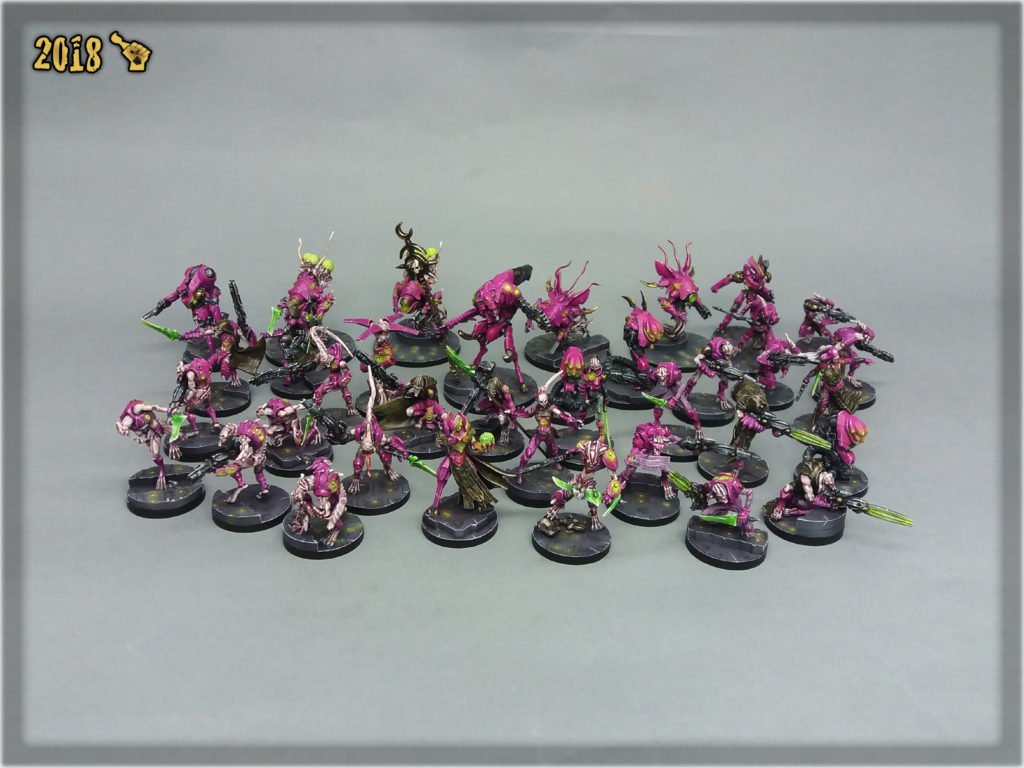
PURPLE skin:
Warpfiend Grey (GW),
Slaanesh Grey (GW),
Mix Purple Tone Ink (AP) 2:1:1 Strong Tone Ink (AP), Medium,
Slaanesh Grey (GW), l&p
Mix Slaanesh Grey (GW) 1:1 Pale Wych Flesh (GW), l&p
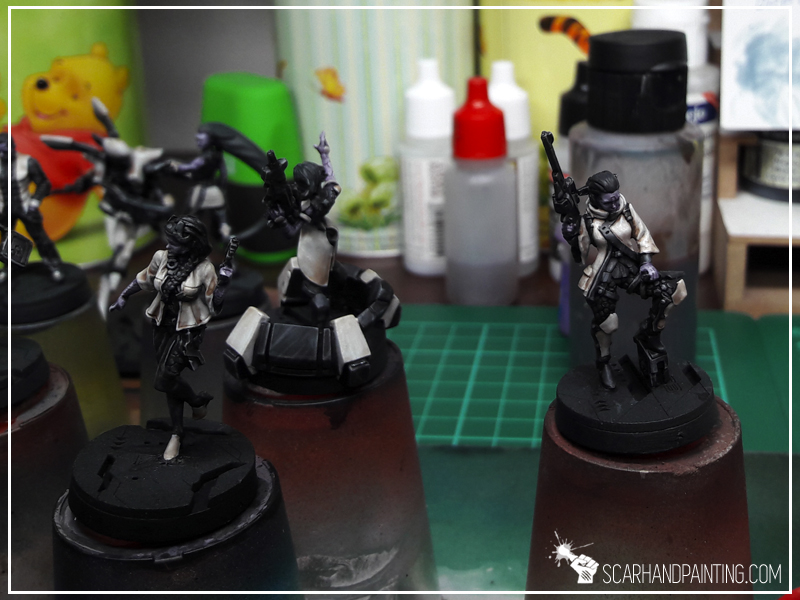
CREAM armour:
Mix Wolf Grey (Val) 1:1 Fenrisian Grey (GW),
Ghost Grey (Val),
Mix Strong Tone Ink (AP) 1:1:1:1 Soft Tone Ink (AP), Flow Improover, Medium,
Off White (Val), l&p

PURPLE armour:
Hexen Lichen (Val),
Genestealer Purple (GW), flbr
Dechala Lilac (GW), l&p
Purple Tone Ink (AP),
Dechala Lilac (GW), l&p
Pale Wych Flesh (GW), l&p
l&p – lines and points,
p – points,
bl – blend,
gl – glaze,
drbr – drybrush,
flbr – flatbrush,
stpl – stippling,
*Airbrushed (with multiple layers and mixes)

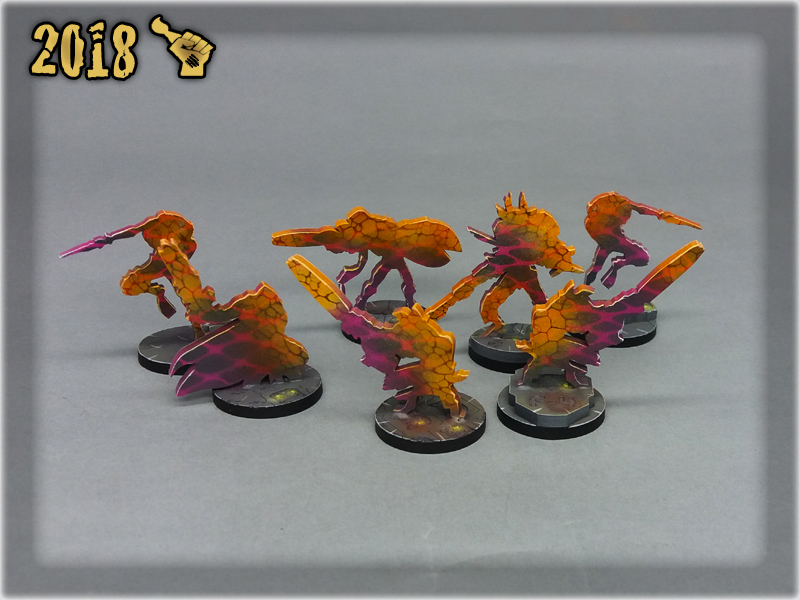
Welcome to Painting Jade Bases tutorial. Here I will take you on a Step-by-step trip through the process of painting jade Sci-Fi bases the same way as seen at: Gallery: Aleph S.S.S.

Before we start, some notes:
* This one requires an Airbrush.
* What works for me might not necessarily work for you.
* I used Zen Terrain “Futura” base toppers.
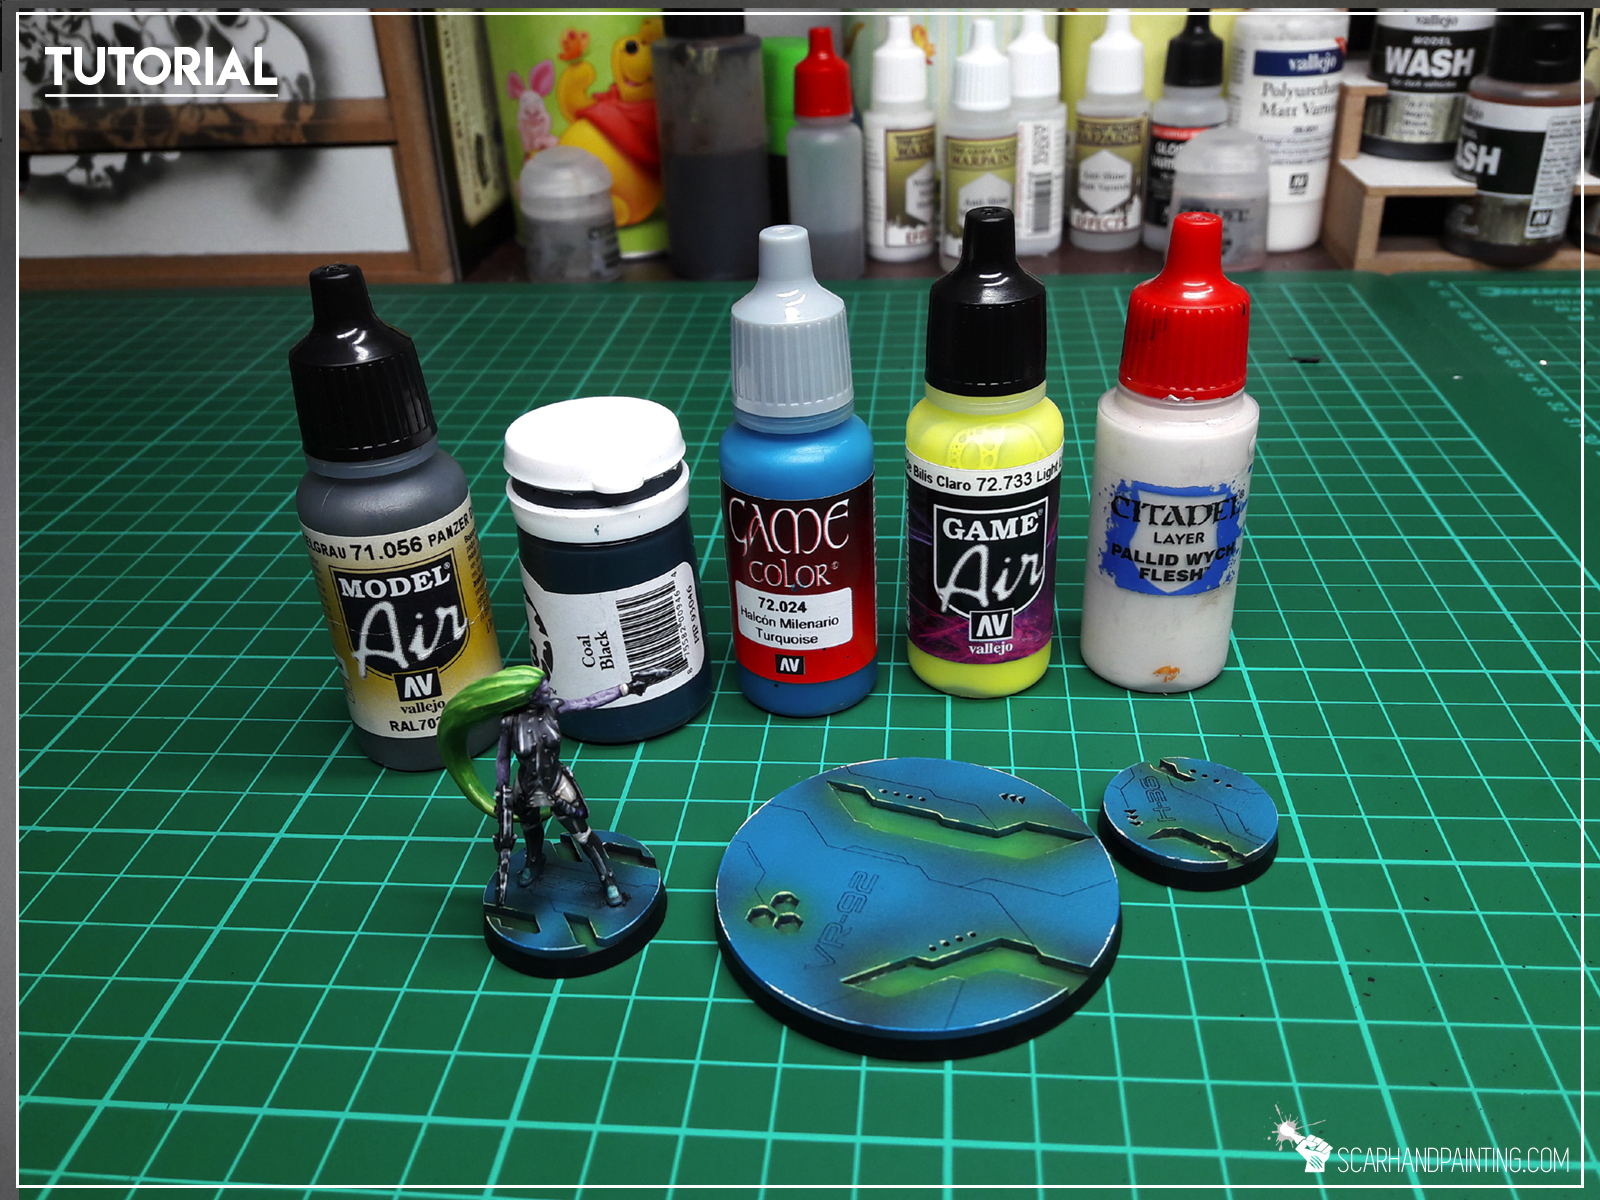
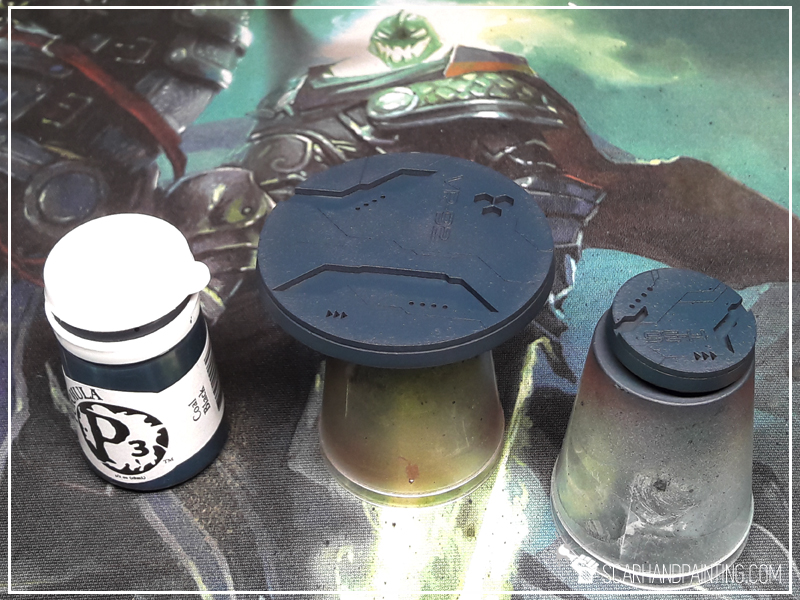
* I started by airbrushing a thick layer of Vallejo Panzer Dark Grey.

* I followed with a layer of P3 Coal Black, mixed with Flow Improover.
* Next I applied a layers of Vallejo Turquoise, mixed with Flow Improover, but this time made sure to leave some spots of previous layer visible.
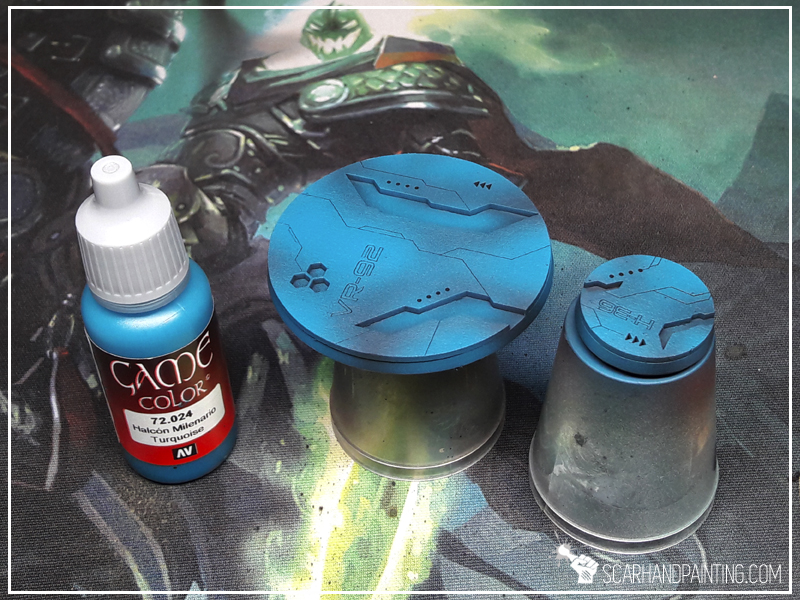
* Using a regular brush I then highlighted all the edges with Vallejo Turquoise.

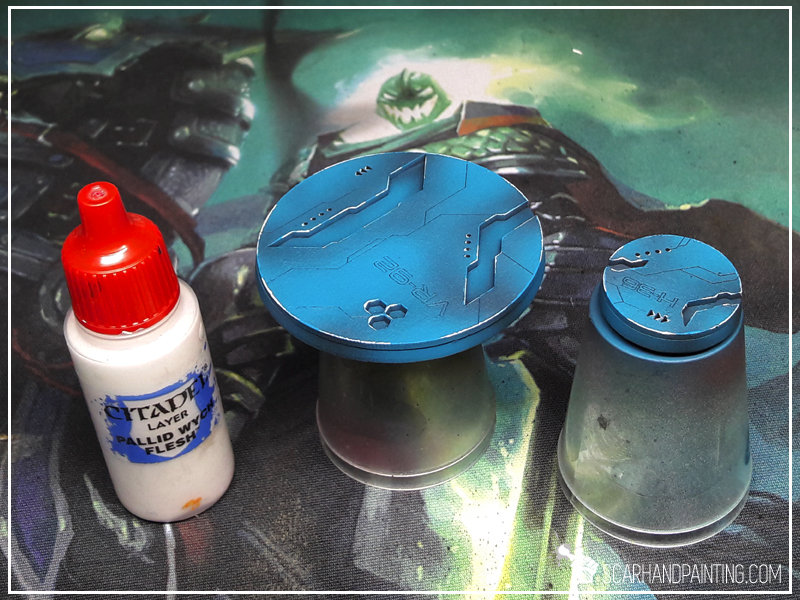
* Next I partially higlighted the edges with Games Workshop Pale Wych Flesh.
* Back to airbruush, I applied a layer of Vallejo Light Livery Green on top of all lower parts of the base.
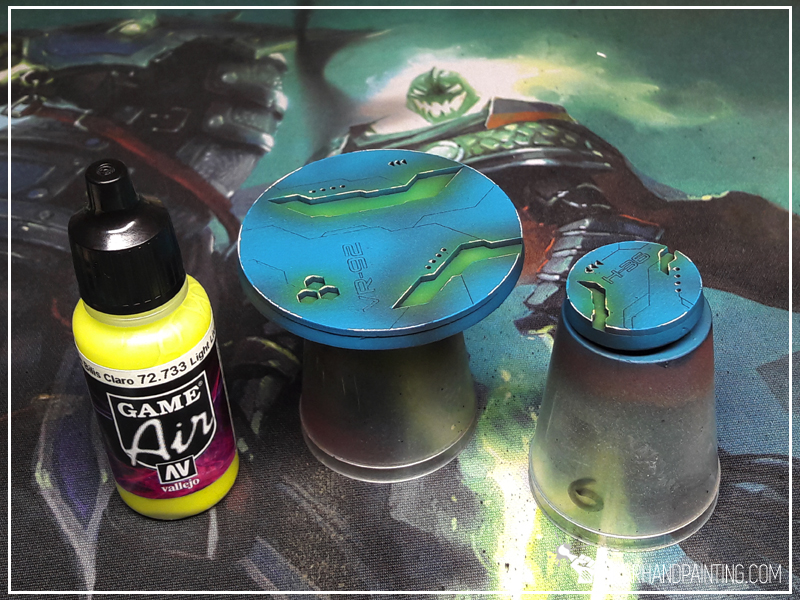
* I then washed all recess spots with Games Workshop Waywatcher Green, being careful not to leave stain outside the lower parts of the base.

* Finally I painted side edges black. Job done.

That’s all! If you followd this tutorial and painted your own bases this way, be sure to leave a comment and drop me some pics via Facebook 😉
Cheers!

Airbrush blow, Airbrush blow
Add the flow
Mix the paint in the cup bady di-di-di-ding
TKO, comatose adios
Slow motion on you muddafuckah (Booyah!)
Super man, airbrush gun
Make ’em fun
Paint ’em down with the wicky-wicky, wa-wa-wa-wash
Automatic now ya minis looking supapainted
Paint splattered, when I hit ya with the “Booyah”
Good brush get the cash get the ching, ching
Get the gold, get the green, get the pin-pin-pin-pink
Get the purple, get the flesh, get the brown
Ten hundred, minis, baby get that (Booyah!)
Passing time, passing time
On the brain, on the mental
Got minis on my mah-mah-mah-mind
Make ’em stop, painting time
Painting time, keep on painting…

Twelve months, dozens of finished projects and hundreds of painted miniatures have happened since last anniversary. Here I am, yet again, delving into past year, assessing progress and boring you to death. Woo hoo!
Scarhandpainting.com visit score is closing to 500000. That’s just insane! When I started this journey about three years ago I never imagined the site might get that popular. Even though the site itself is not meant to generate any income, I’m very happy to have this platform, through which I can share my passion for painting miniatures with all of you. I appreciate all the positive feedback and your e-mails. This means a lot to me.
I know that lately blog section was a bit neglected. As some of you already know, last few months were a bumpy road for me for couple reasons. I moved out to yet another place. On top of that there’s also less projects than it used to. On the bright side I use my spare time to settle in a new place, set up brand new workshop, redesign some parts of the website. Less projects does not mean I sit here looking at the ceiling. I just don’t have much material for tutorials. Things should get back to normal soon and I look forward to start blogging vigorously once again.

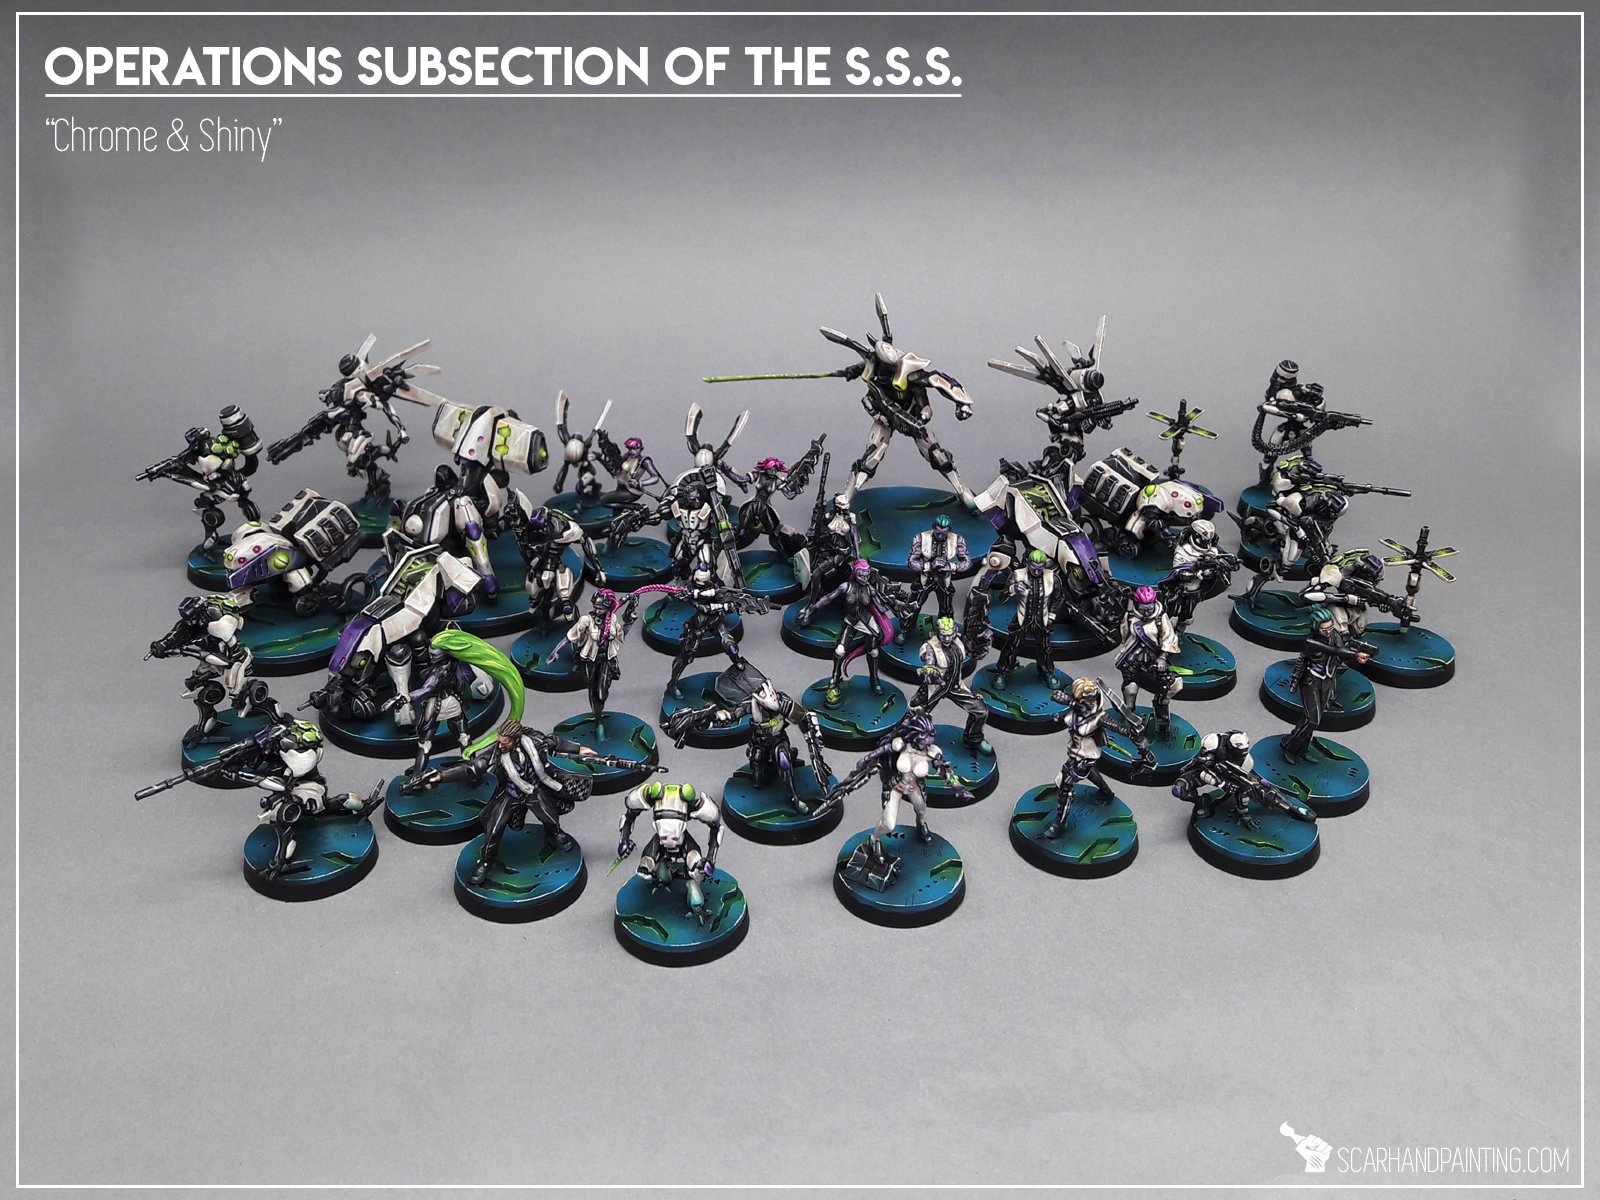
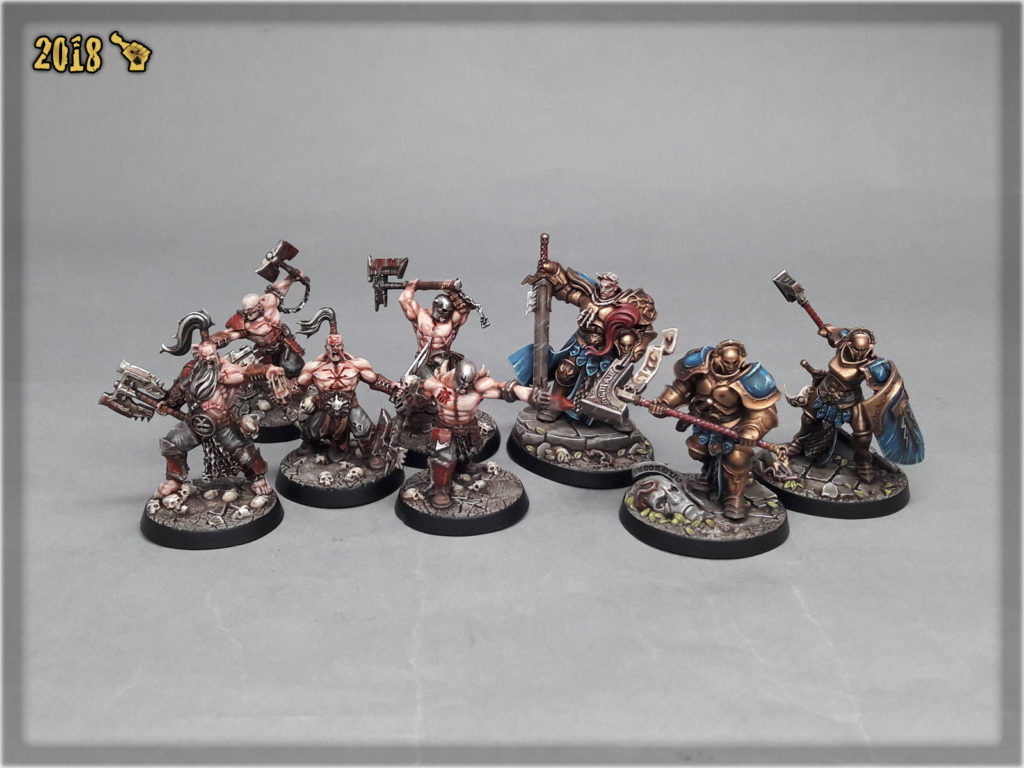
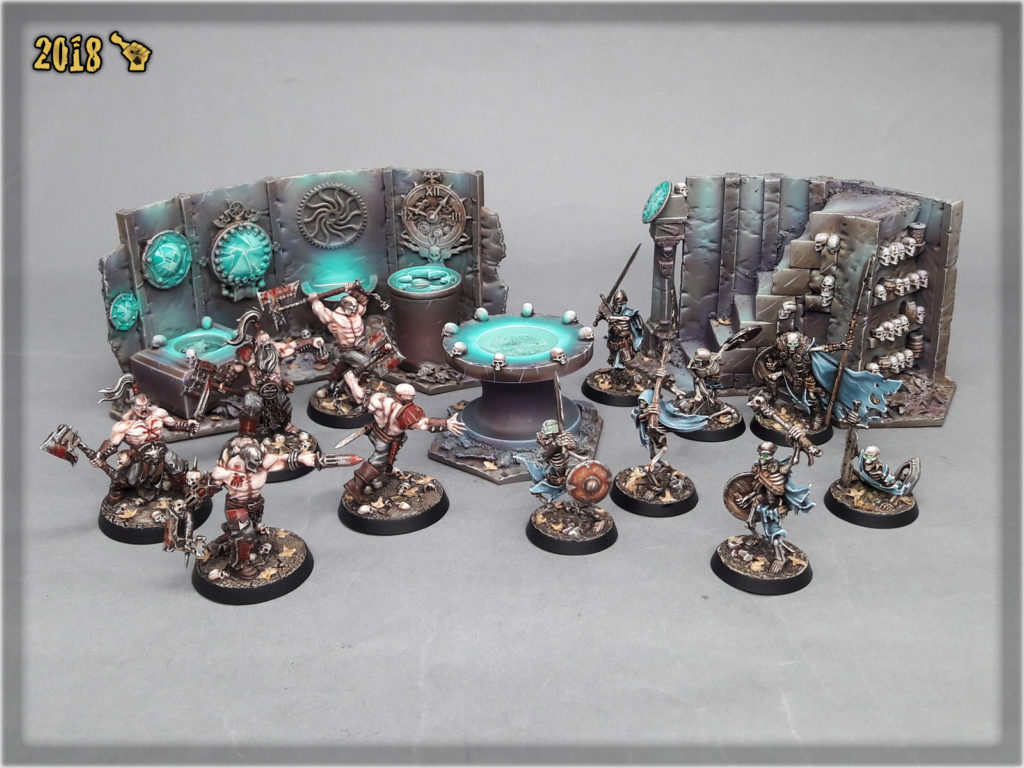
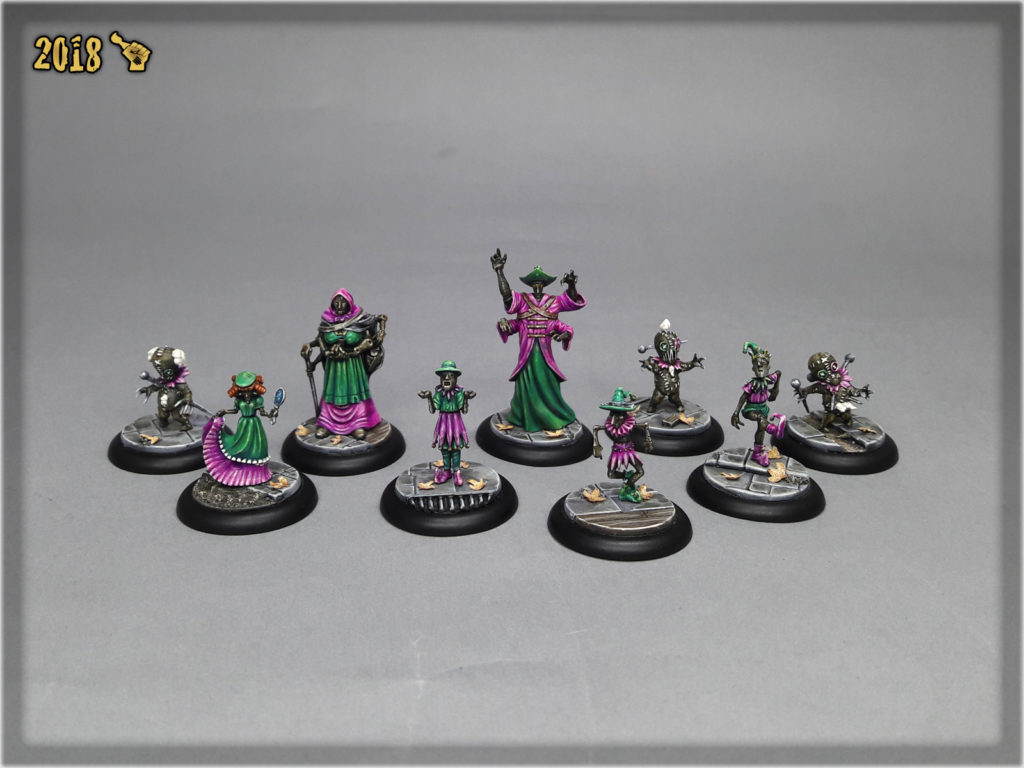
Previous year was spread across wide range of projects. A mix of fantasy/sci-fi from entire spectrum of games and ranges. This time with scarhandpainting.com growing popularity among Infinity the game community I spent most of the year painting my favorite game of all time. Alongside Infinity there’s also a lot of Shadespire. Yup, thanks to a commission for a friend, I got into the game myself. Oh cruel fate of a miniatures painter 🙂 Below you will find some of the highlights from the last twelve months. Be sure to let me know which ones you find the most interresting in the comment section or at my facebook.
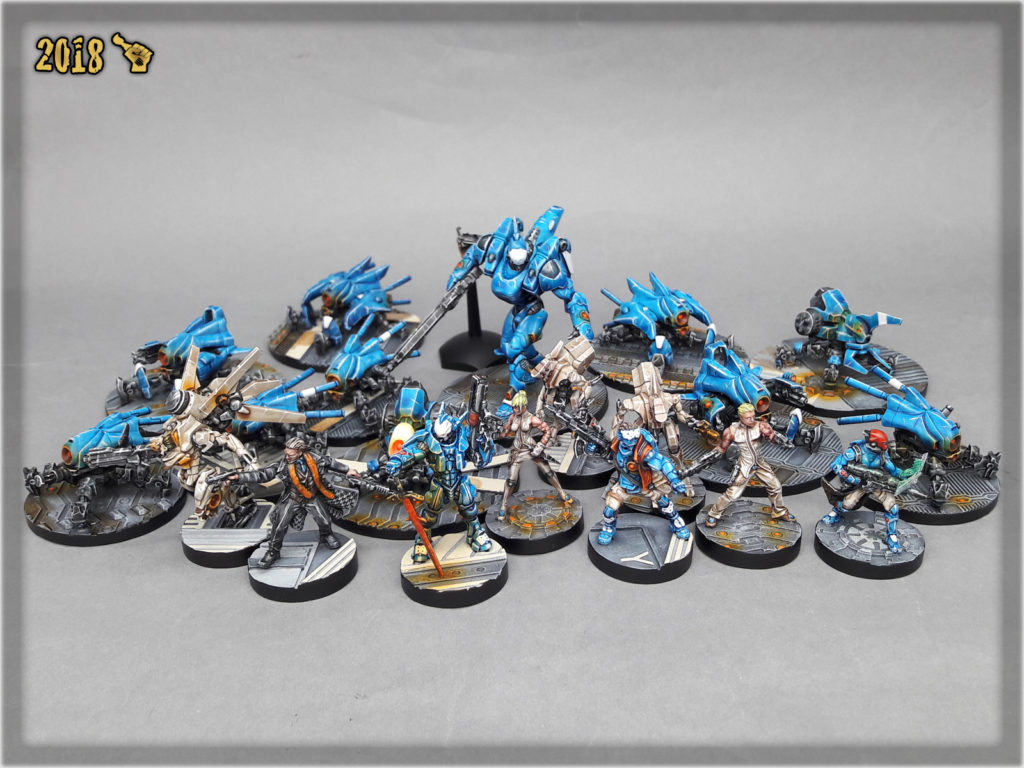
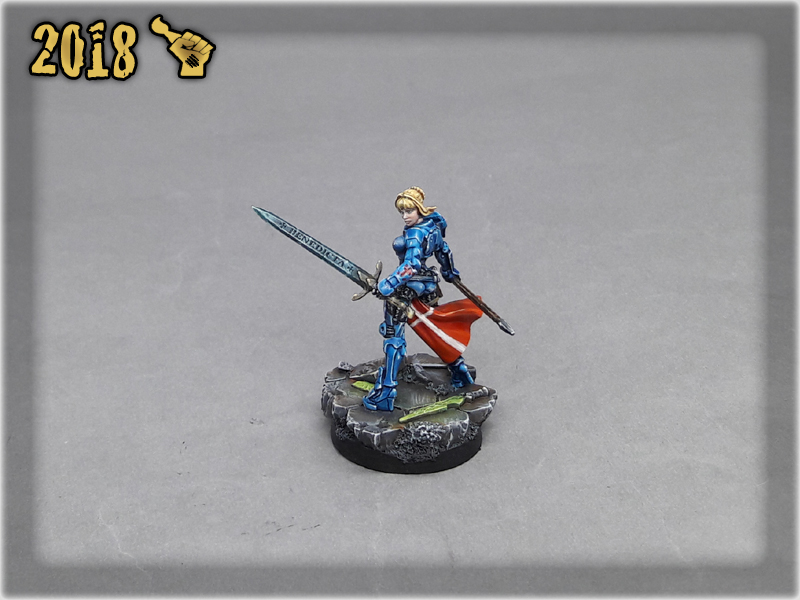


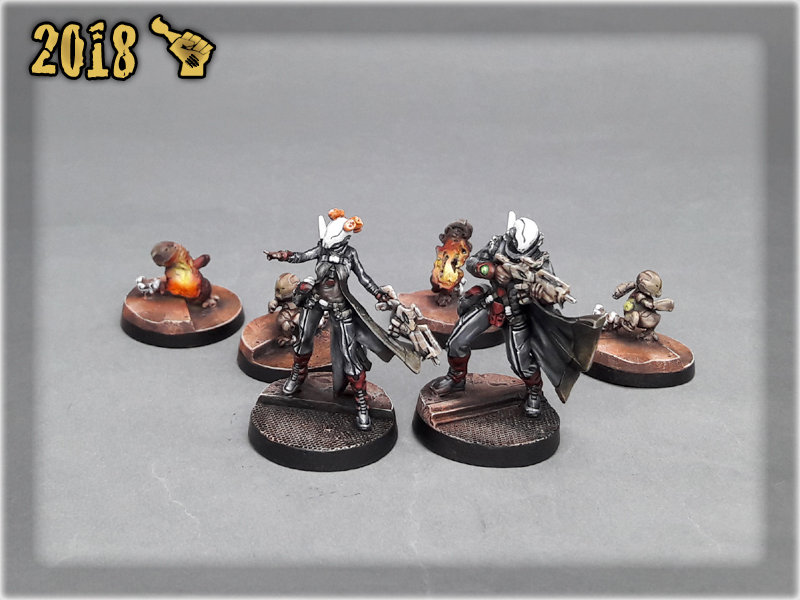
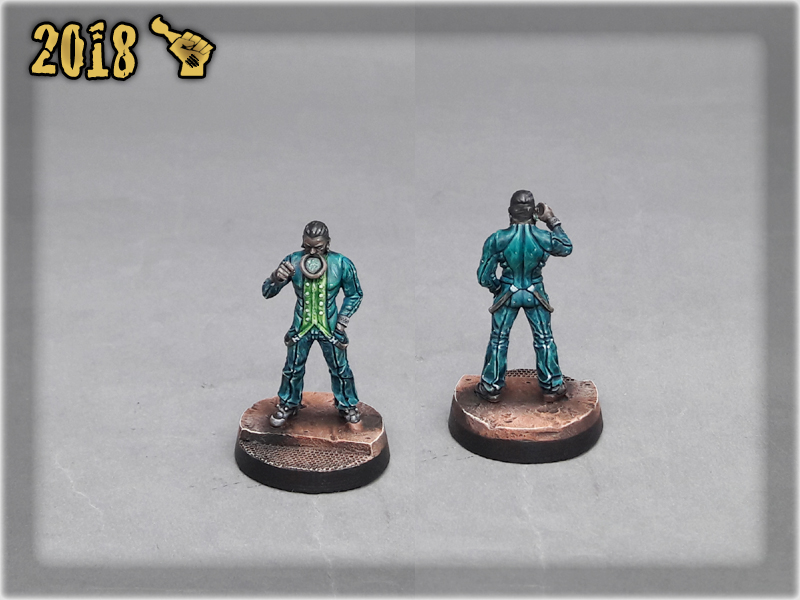
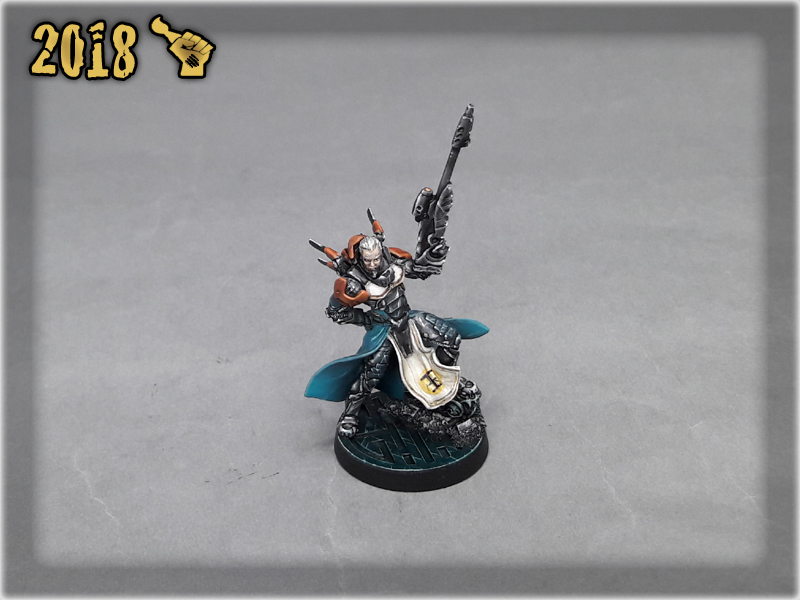


Looking back I can’t help but feel excited for all the cool projects I worked with. All the challenges, uncommon colour schemes. Considering skill progress I think I’ve made some. Opportunity to paint on higher levels plus moving my palette away from GW and into the colorful embrace of Vallejo brought many new possibilities. I’m very happy with results and hope they can be seen.
As usual, I would like to thank all of my friendstomers, for the support and trust. I wish you many exciting projects to come.
Special thanks to Andreas, Thomas, Bettina, Romana, Clemens, Behemoth and all friends who stick with me for good 😉 My hobby wouldn’t be the same without you.
39 new articles showed up since previous anniversary. These are the ones you found to be the most interresting…
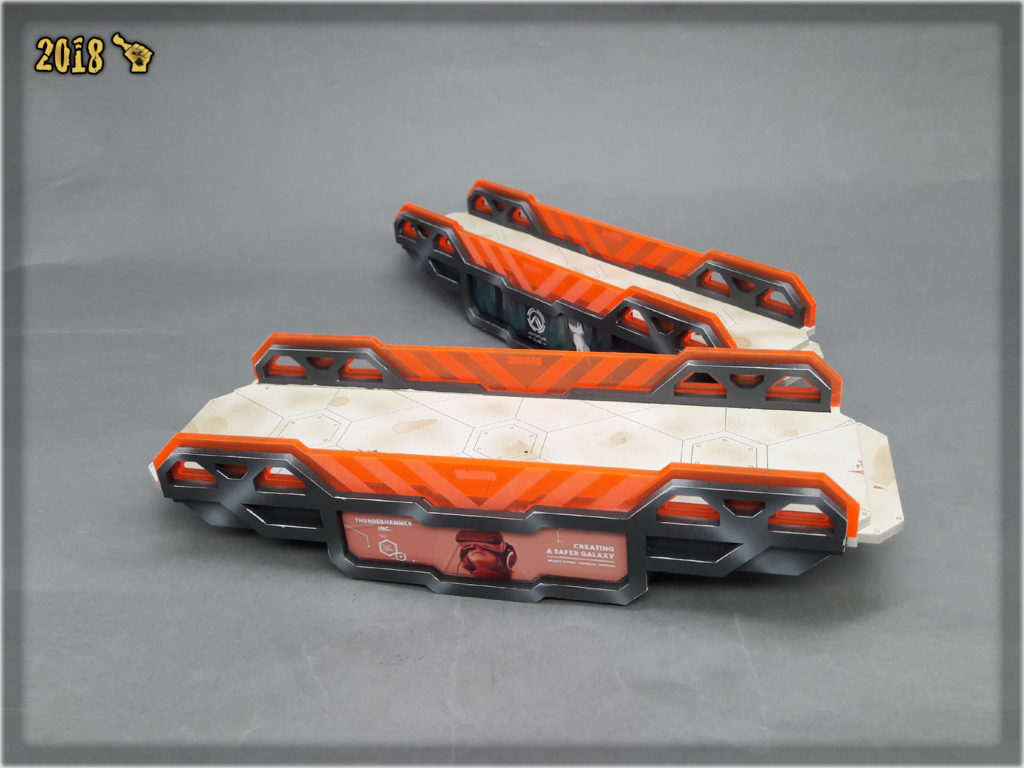
TUTORIAL: INFINITY ‘DO IT YOURSELF’ GAMING TERRAIN
“SHADEGLASS SCENERY” SPECIAL PROJECT
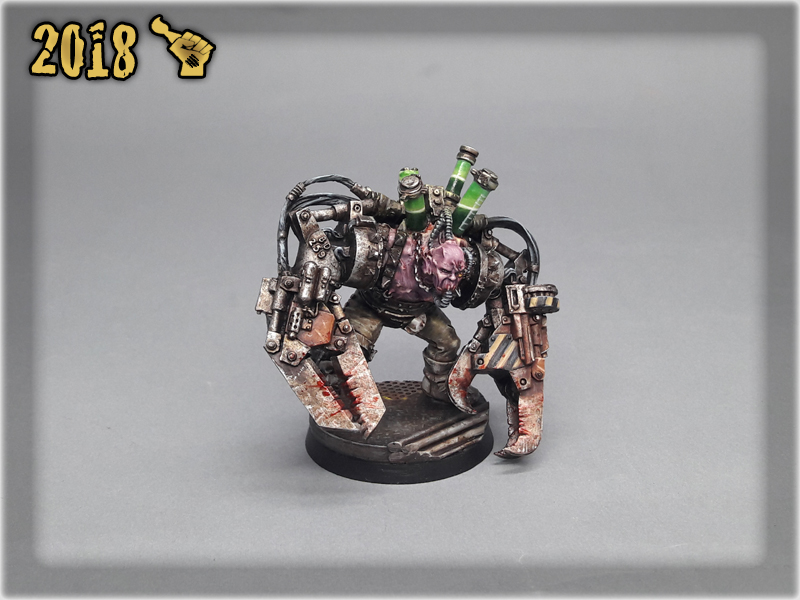
TUTORIAL: ENHANCING NECROMUNDA BASES
…and some long term favorites:
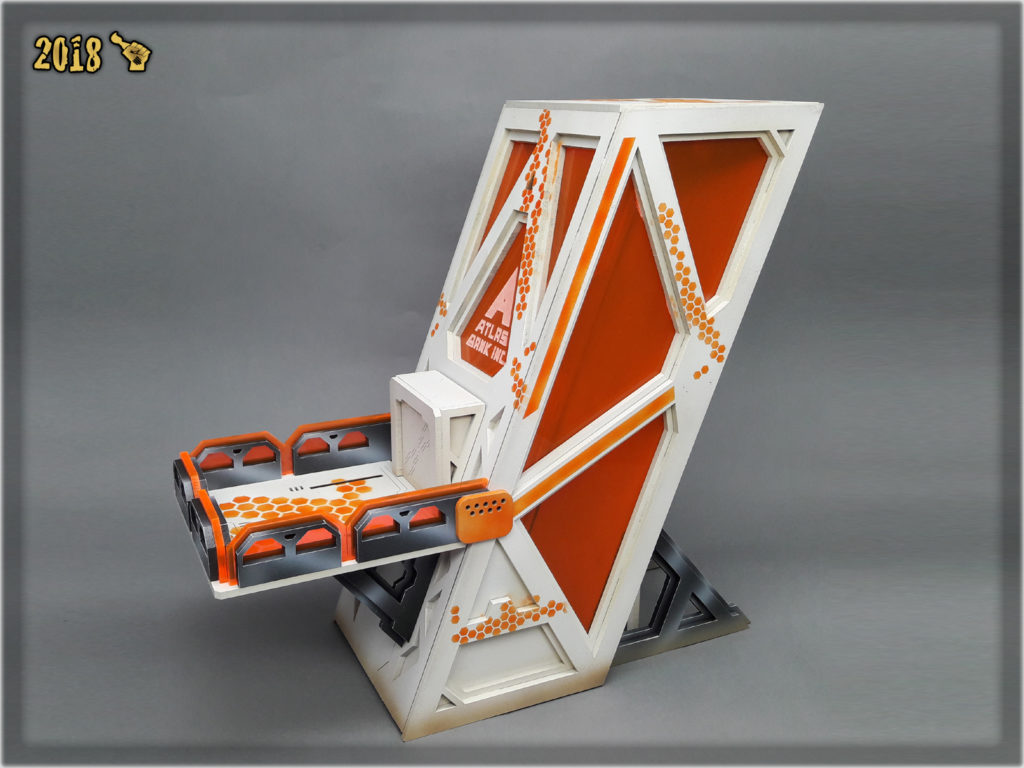
TUTORIAL: INFINITY DIY CONSOLE
TUTORIAL: PAINTING MICRO ART STUDIO CONCRETE WALLS
COLOUR RECIPES: INFINITY USARF
I stand on the precipice with another happy year of hobbying behind my back. What lays before me is an unknown but I cross the threshold with excitement and confidence. Surrounded by friends, armed to the teeth with Vallejo paints, Airbrushes in both hands – I’m ready for everything 2019 is gonna throw my way!

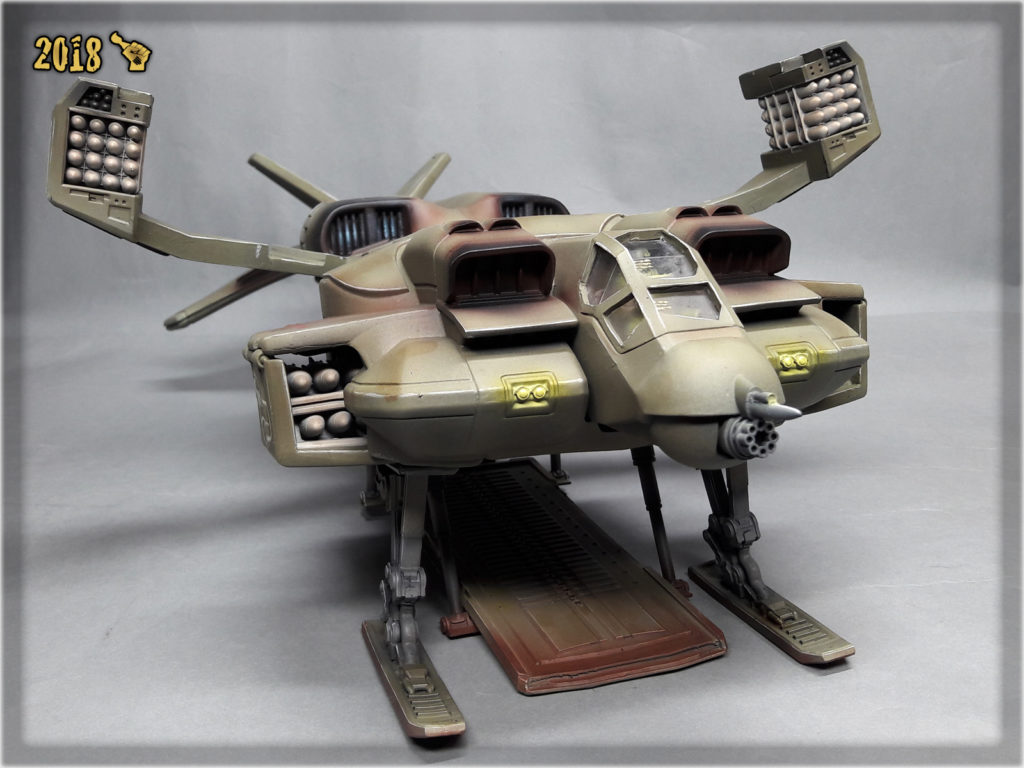
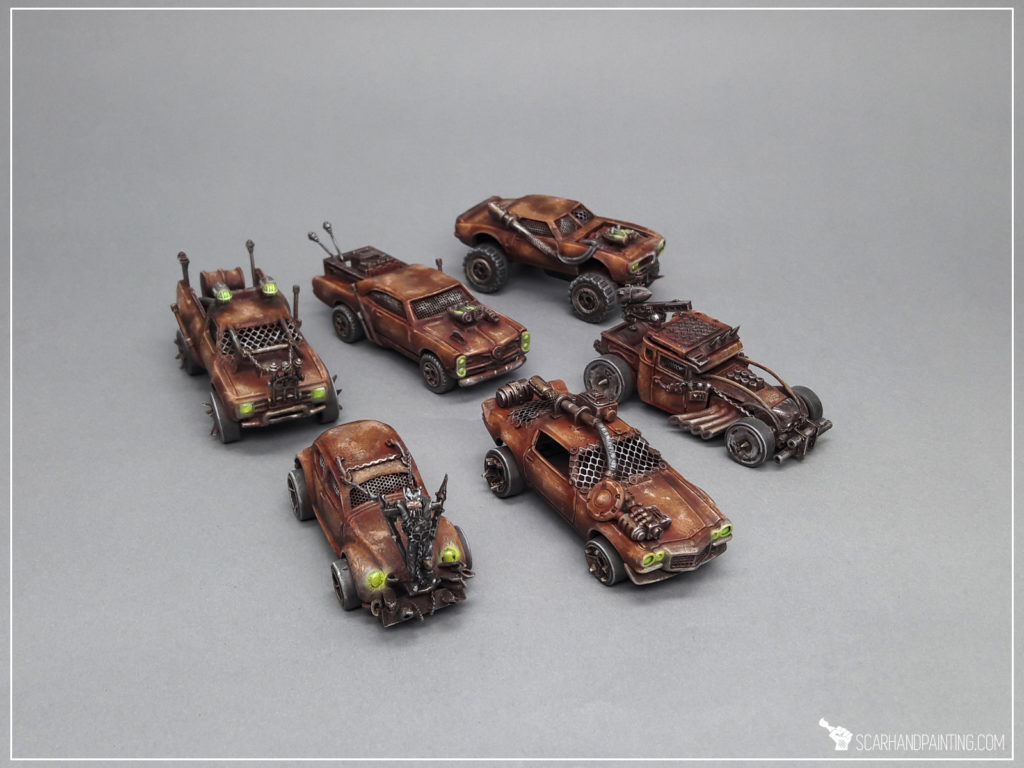
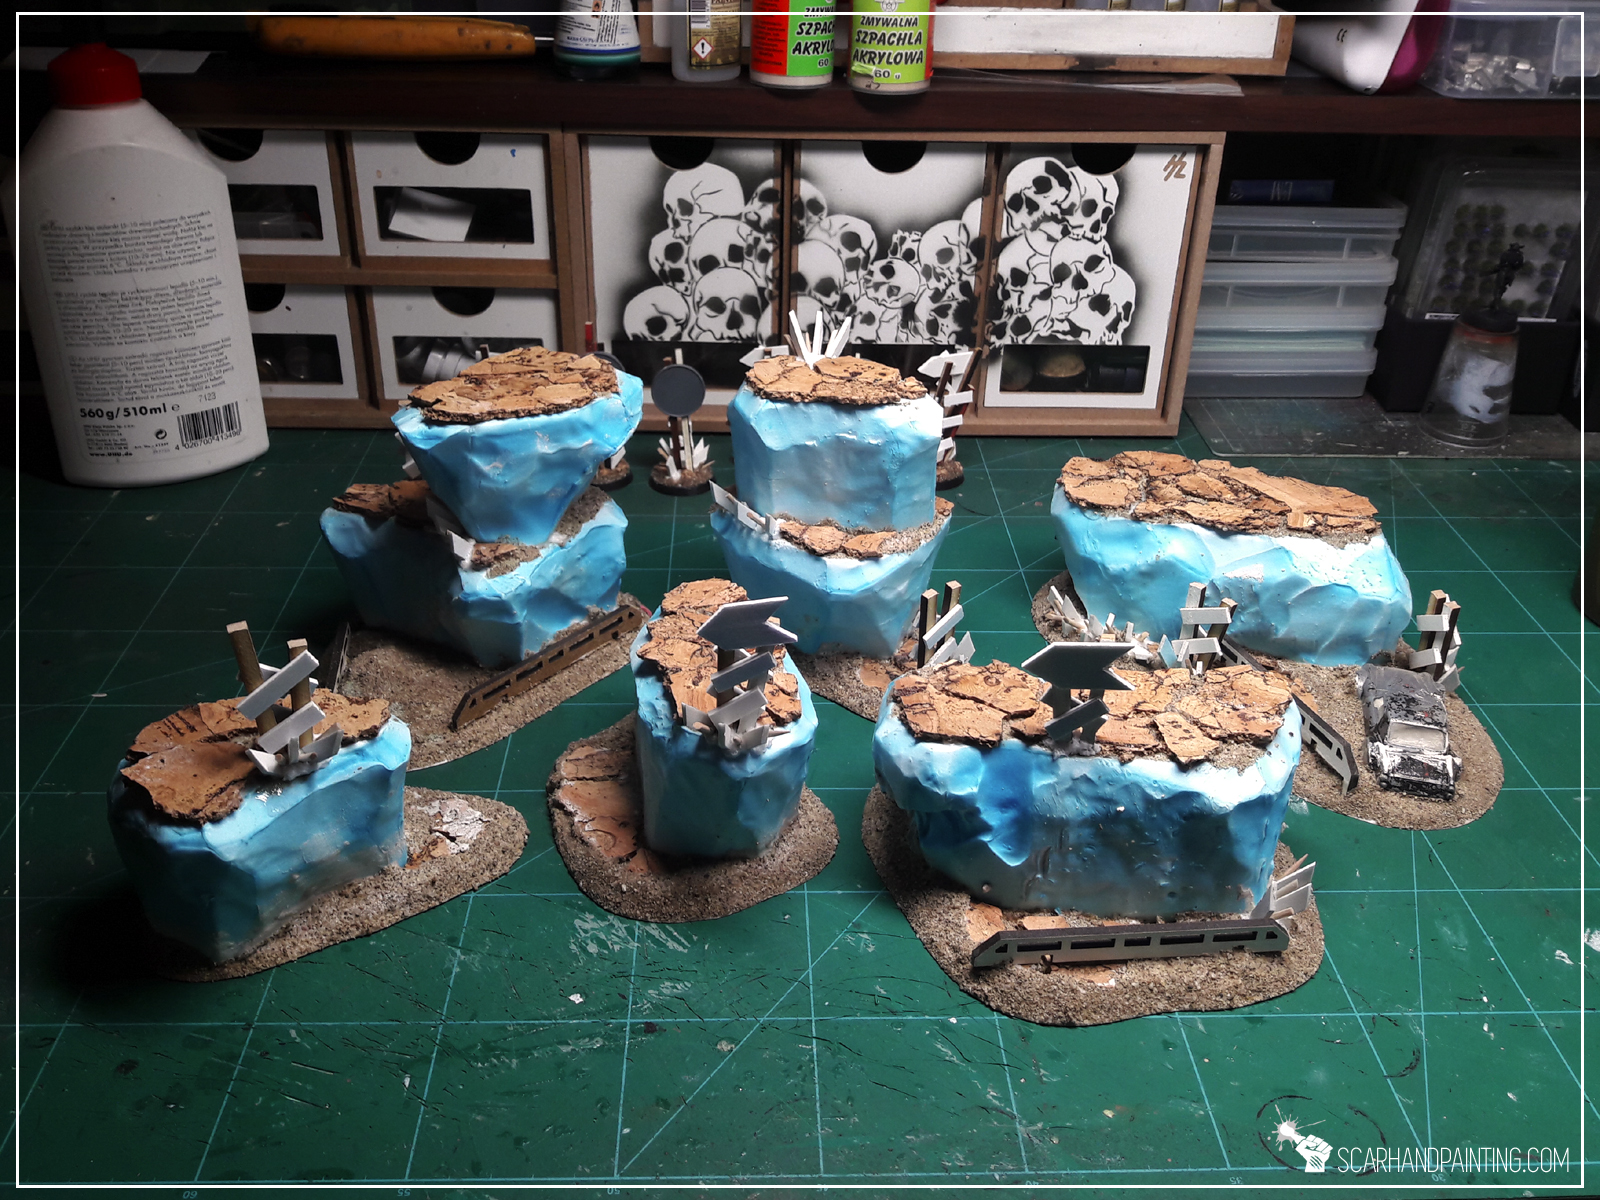
In this easy, step-by-step tutorial I’m going to show you how to create a Desert Scenery as could be found in “Gallery: Gaslands”.

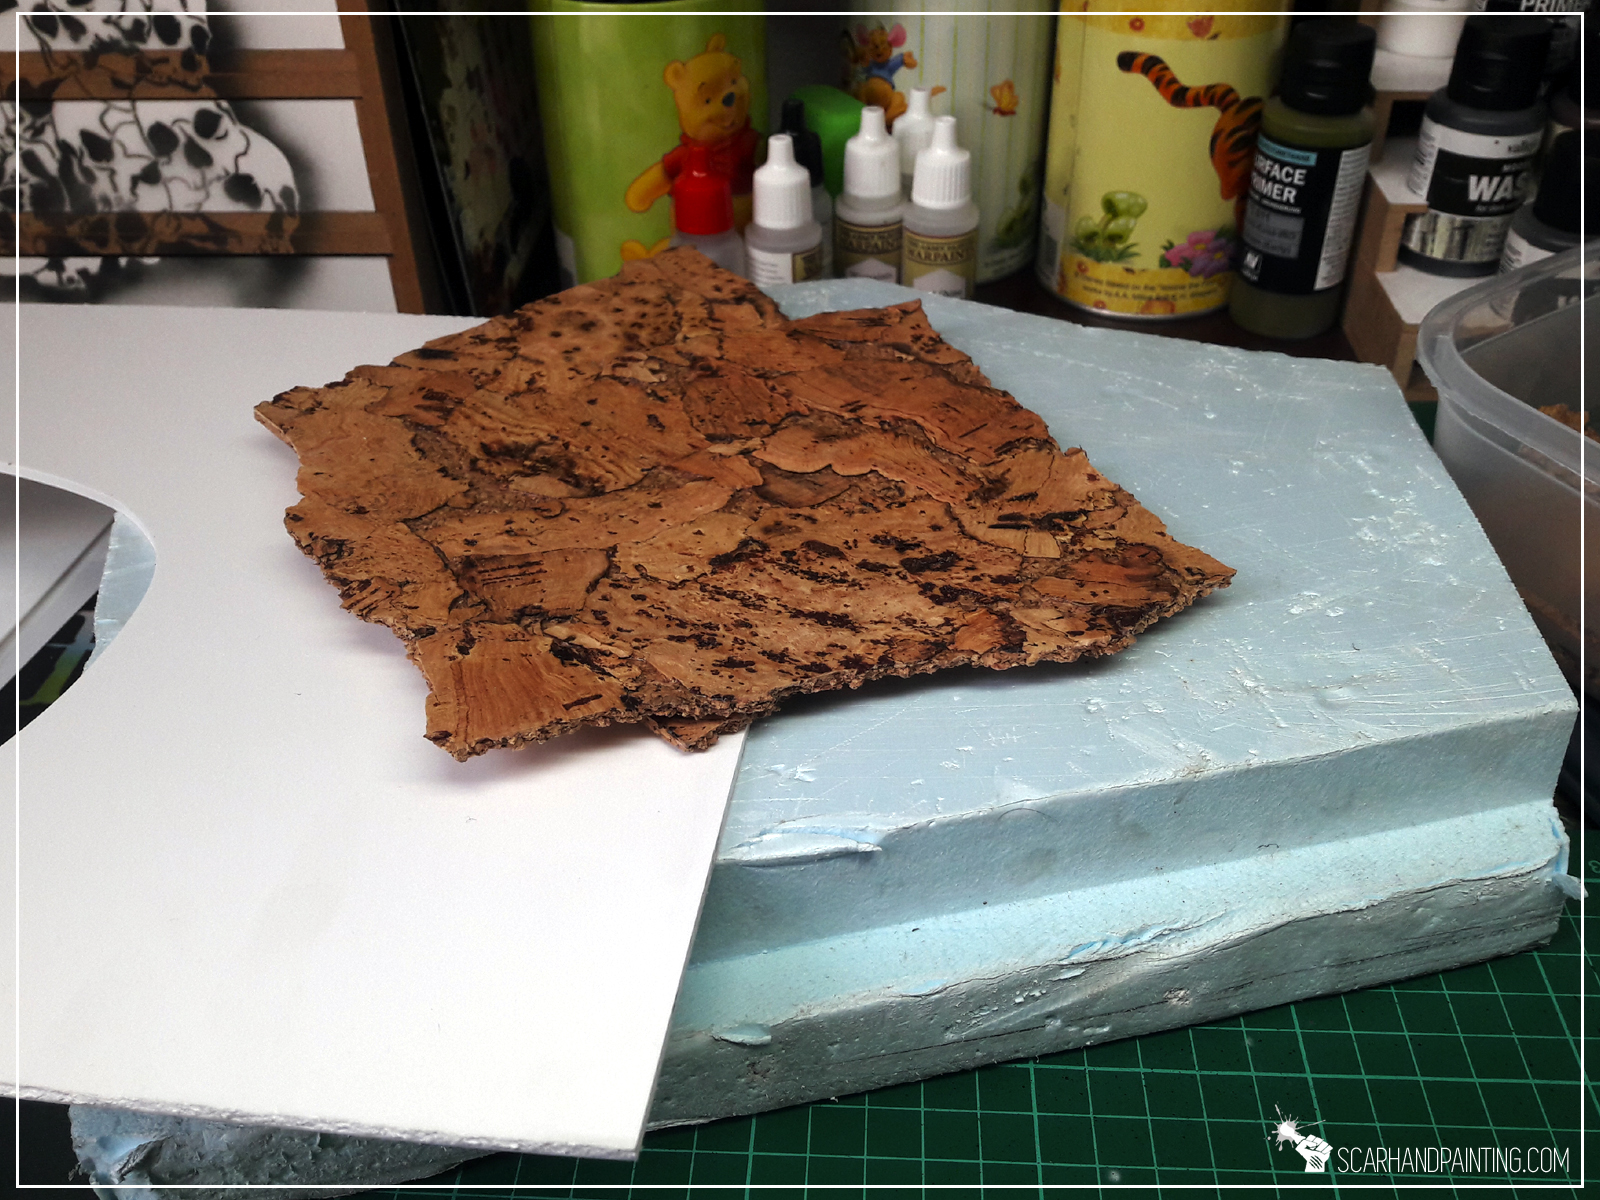
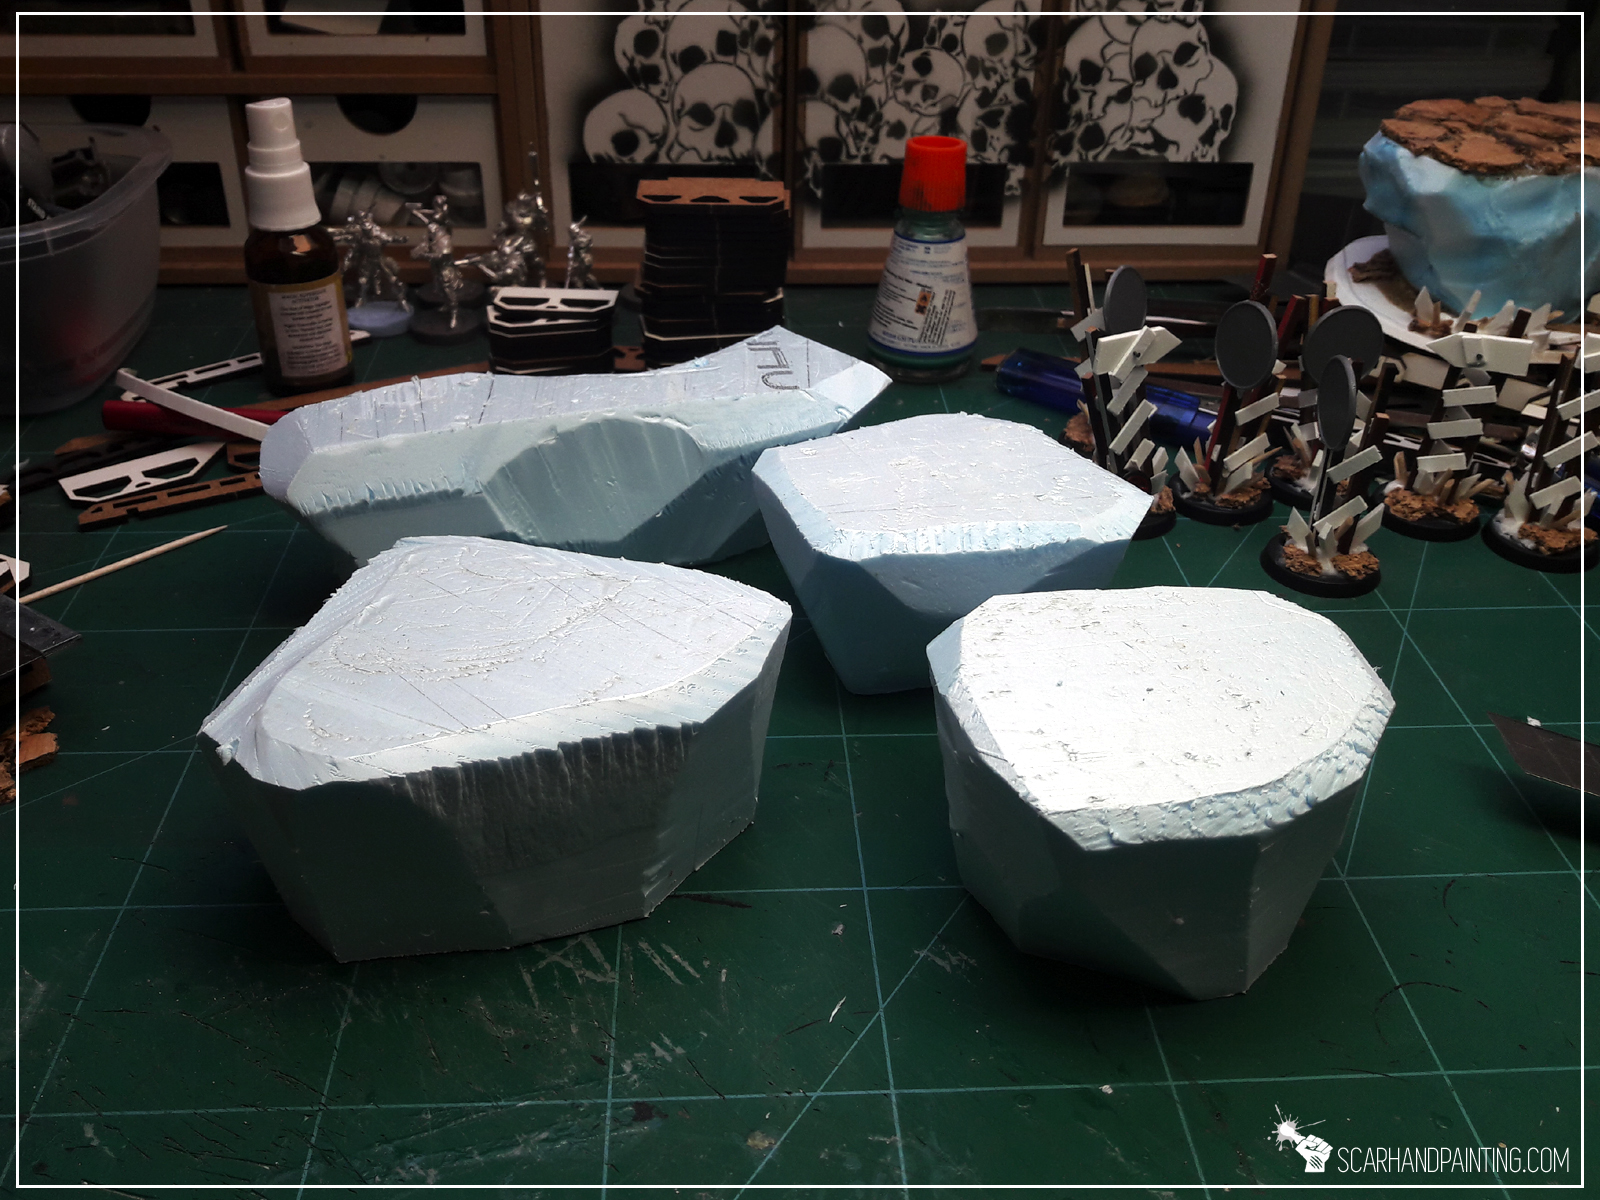
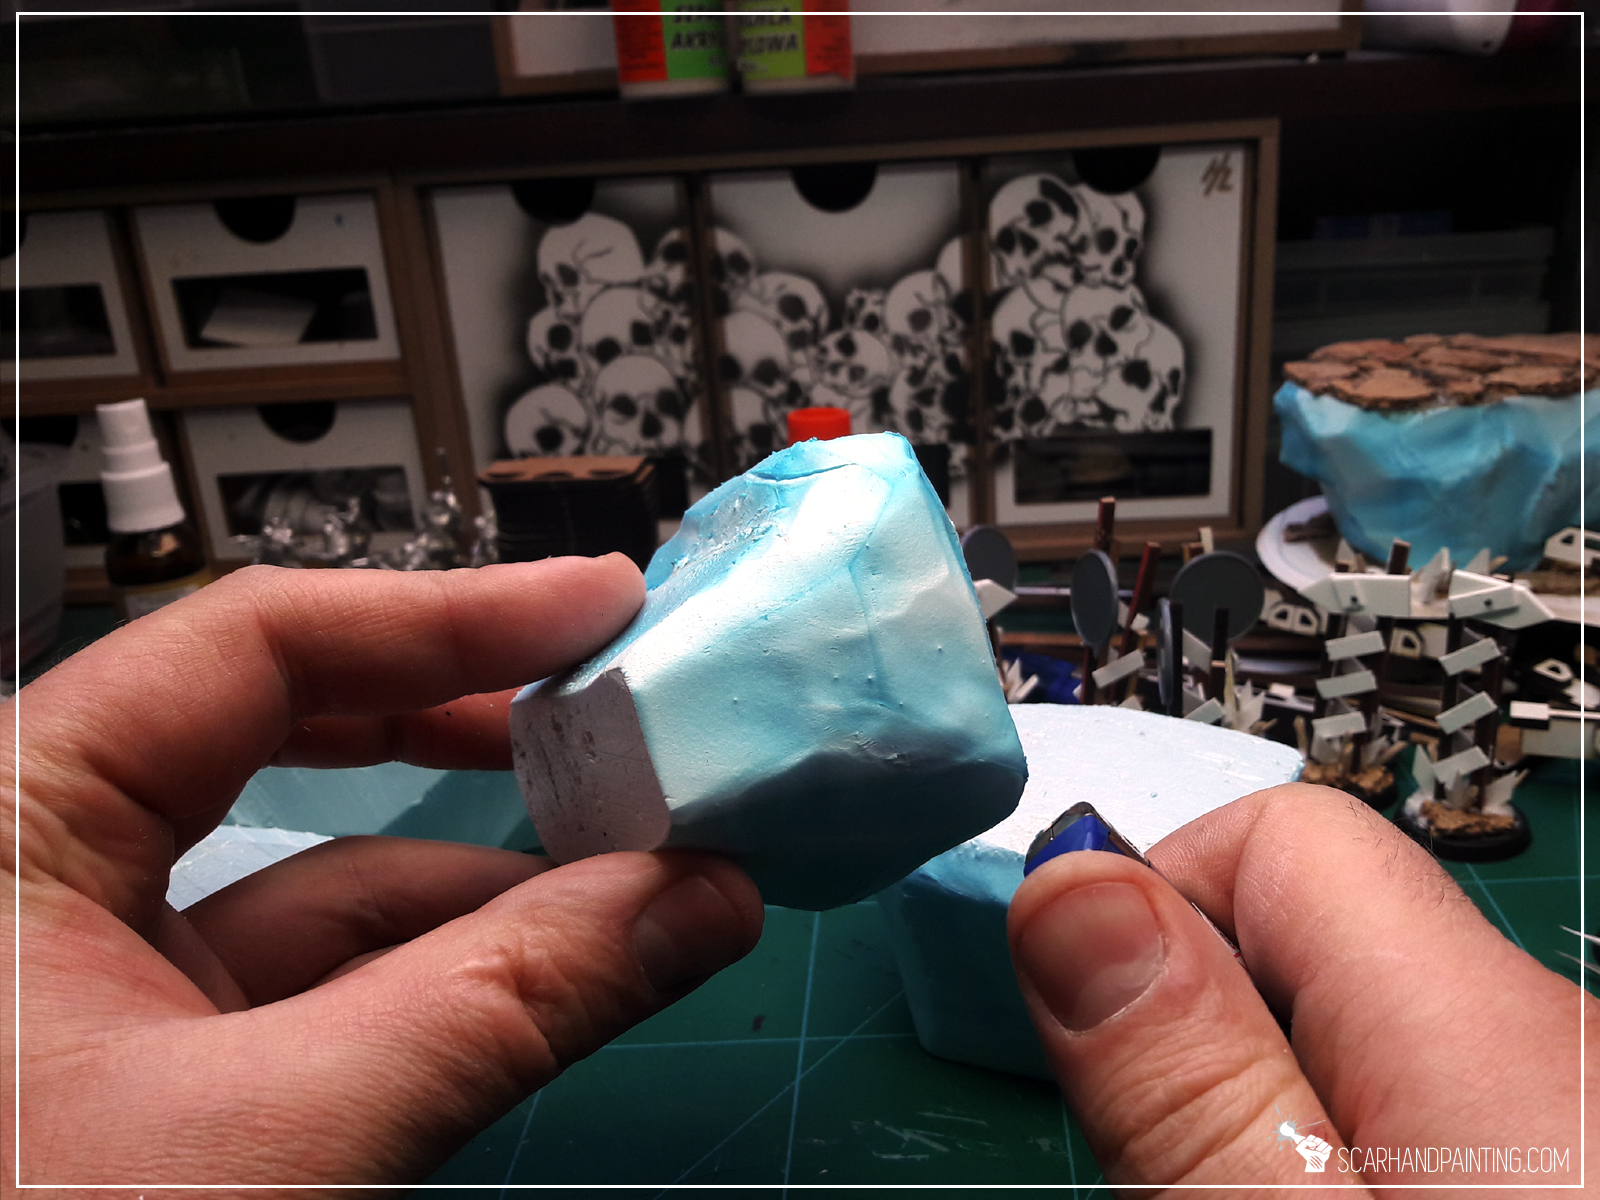
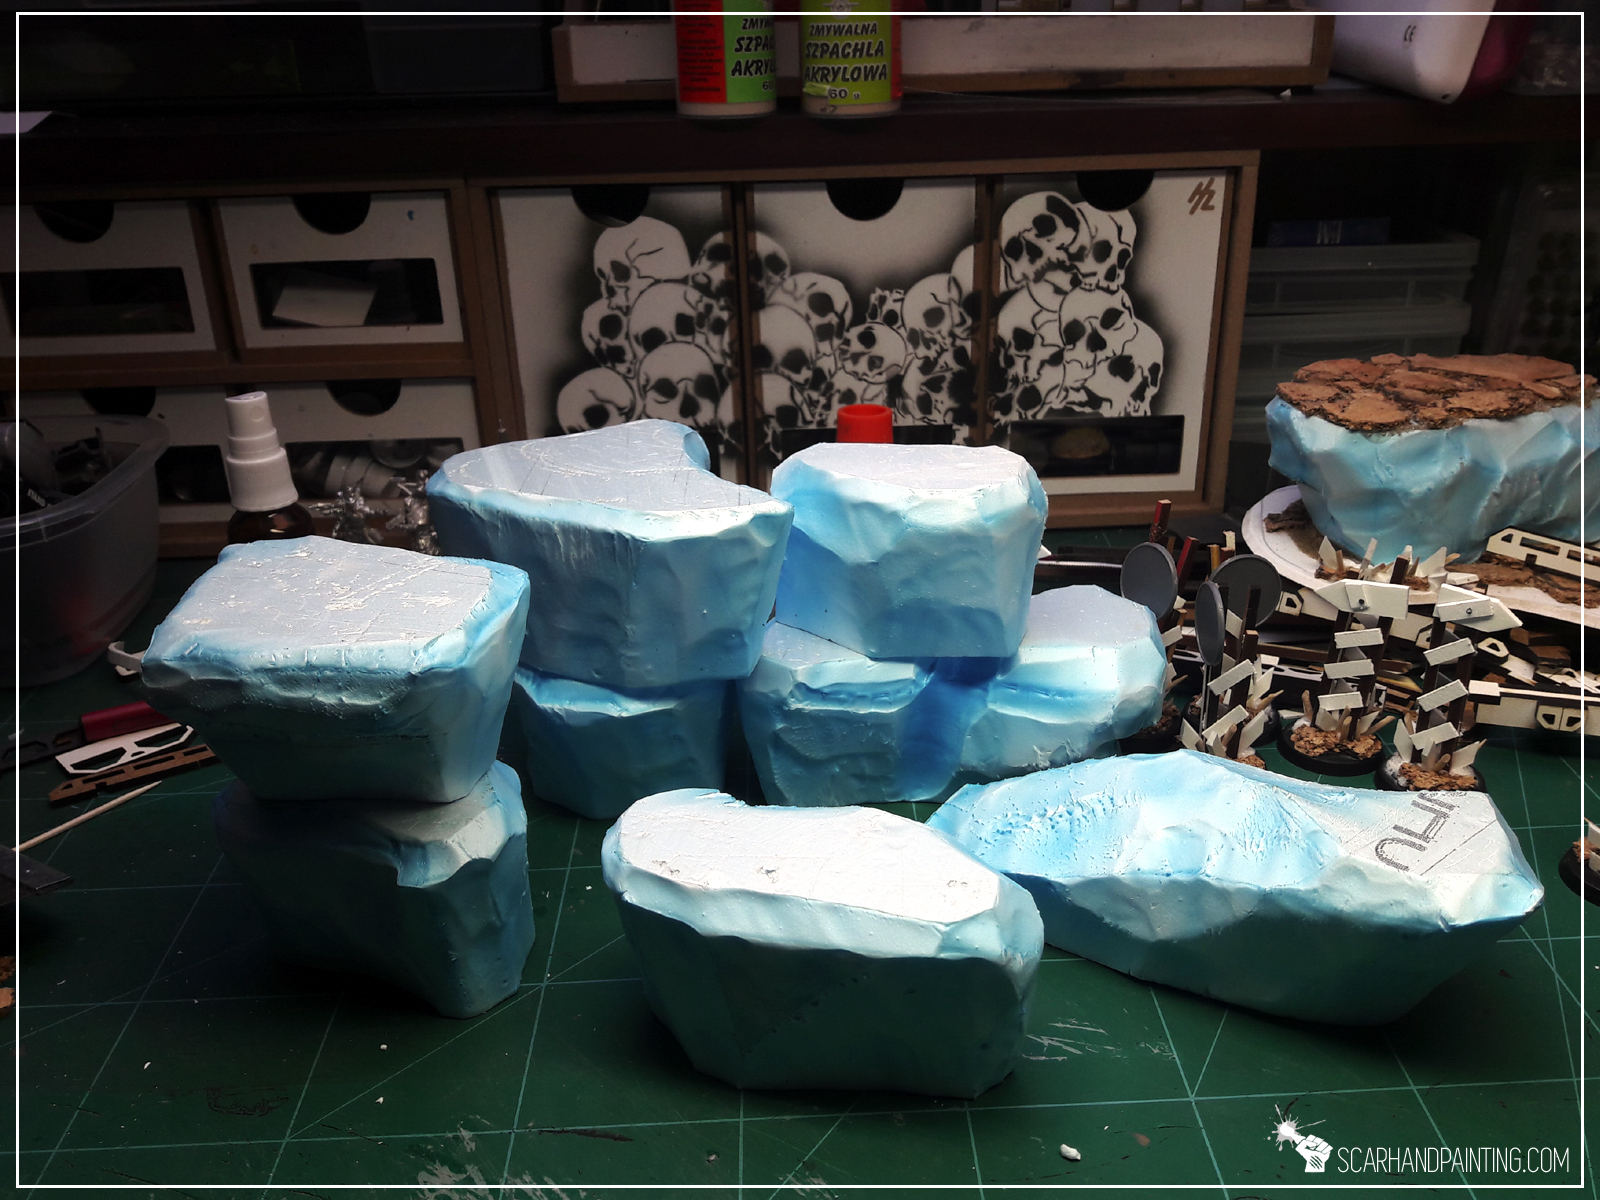
* I started by cutting foamed PCV (or styrofoam) into basic rocky blocks.

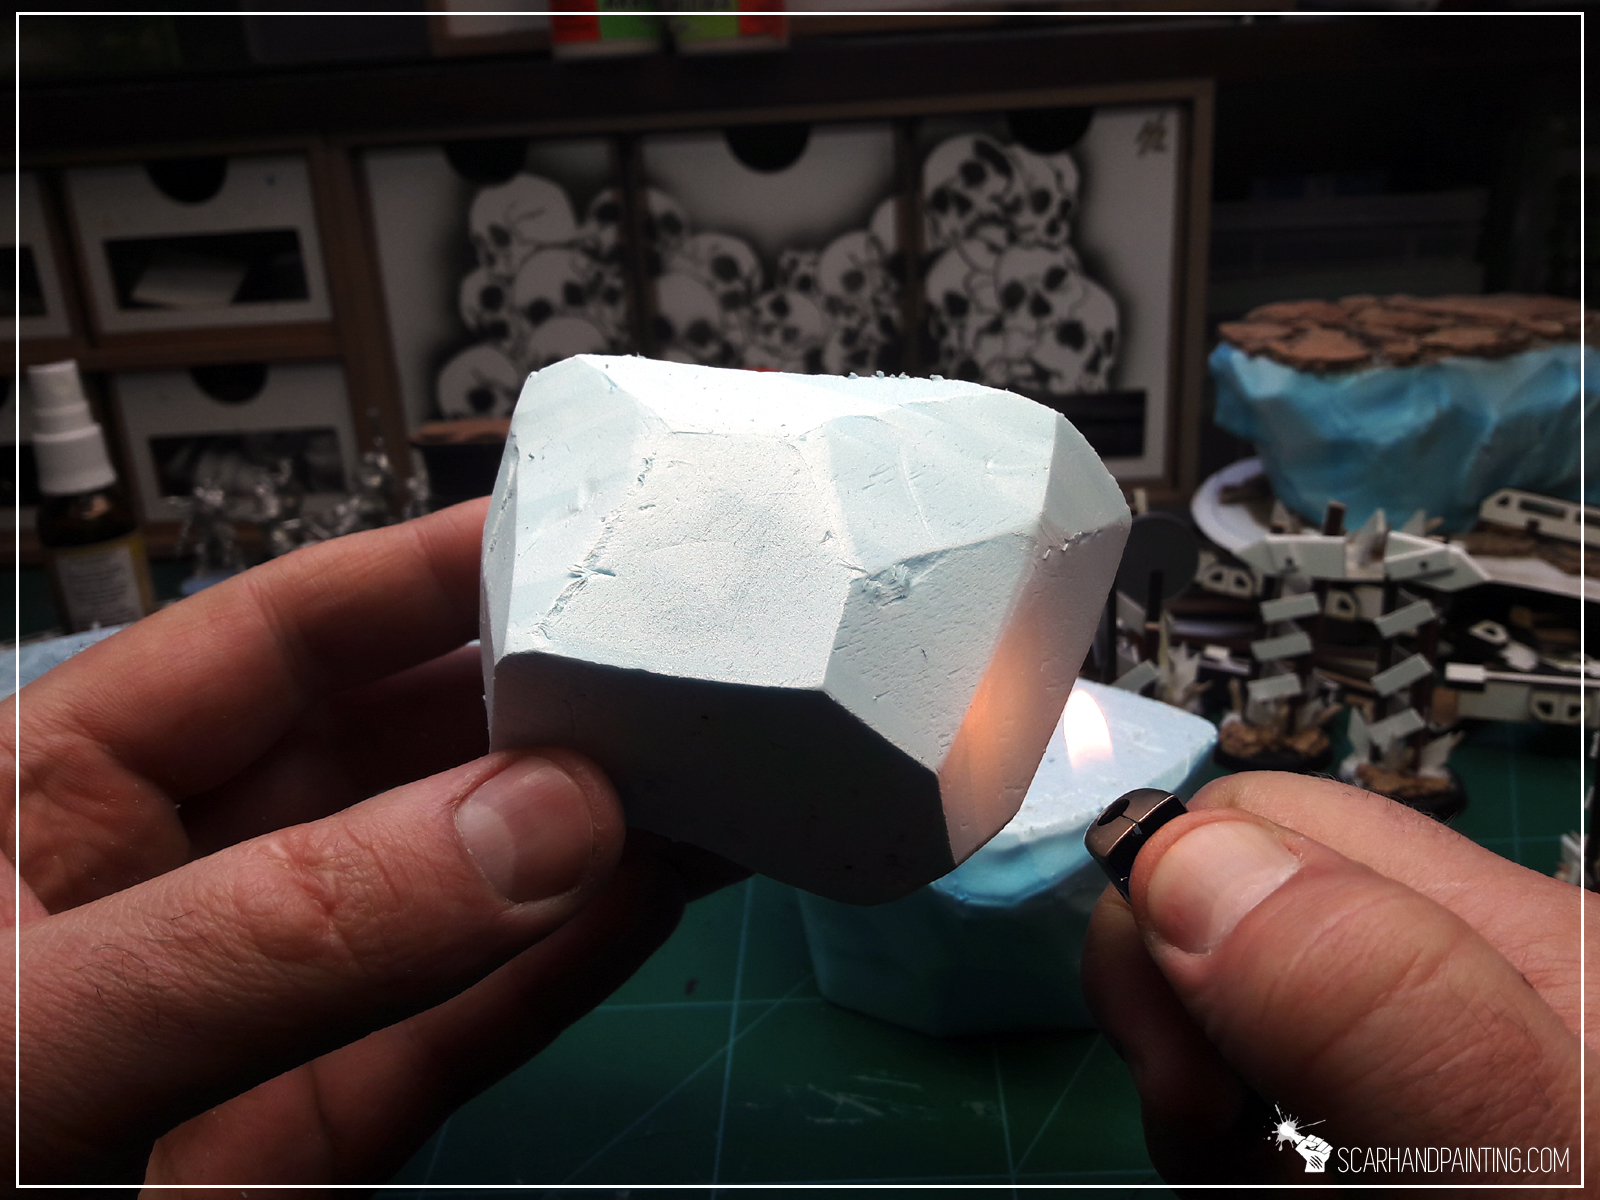
* I then used lighter to gently heat blocks on the sides, avoiding heating up top and bottom surfaces.
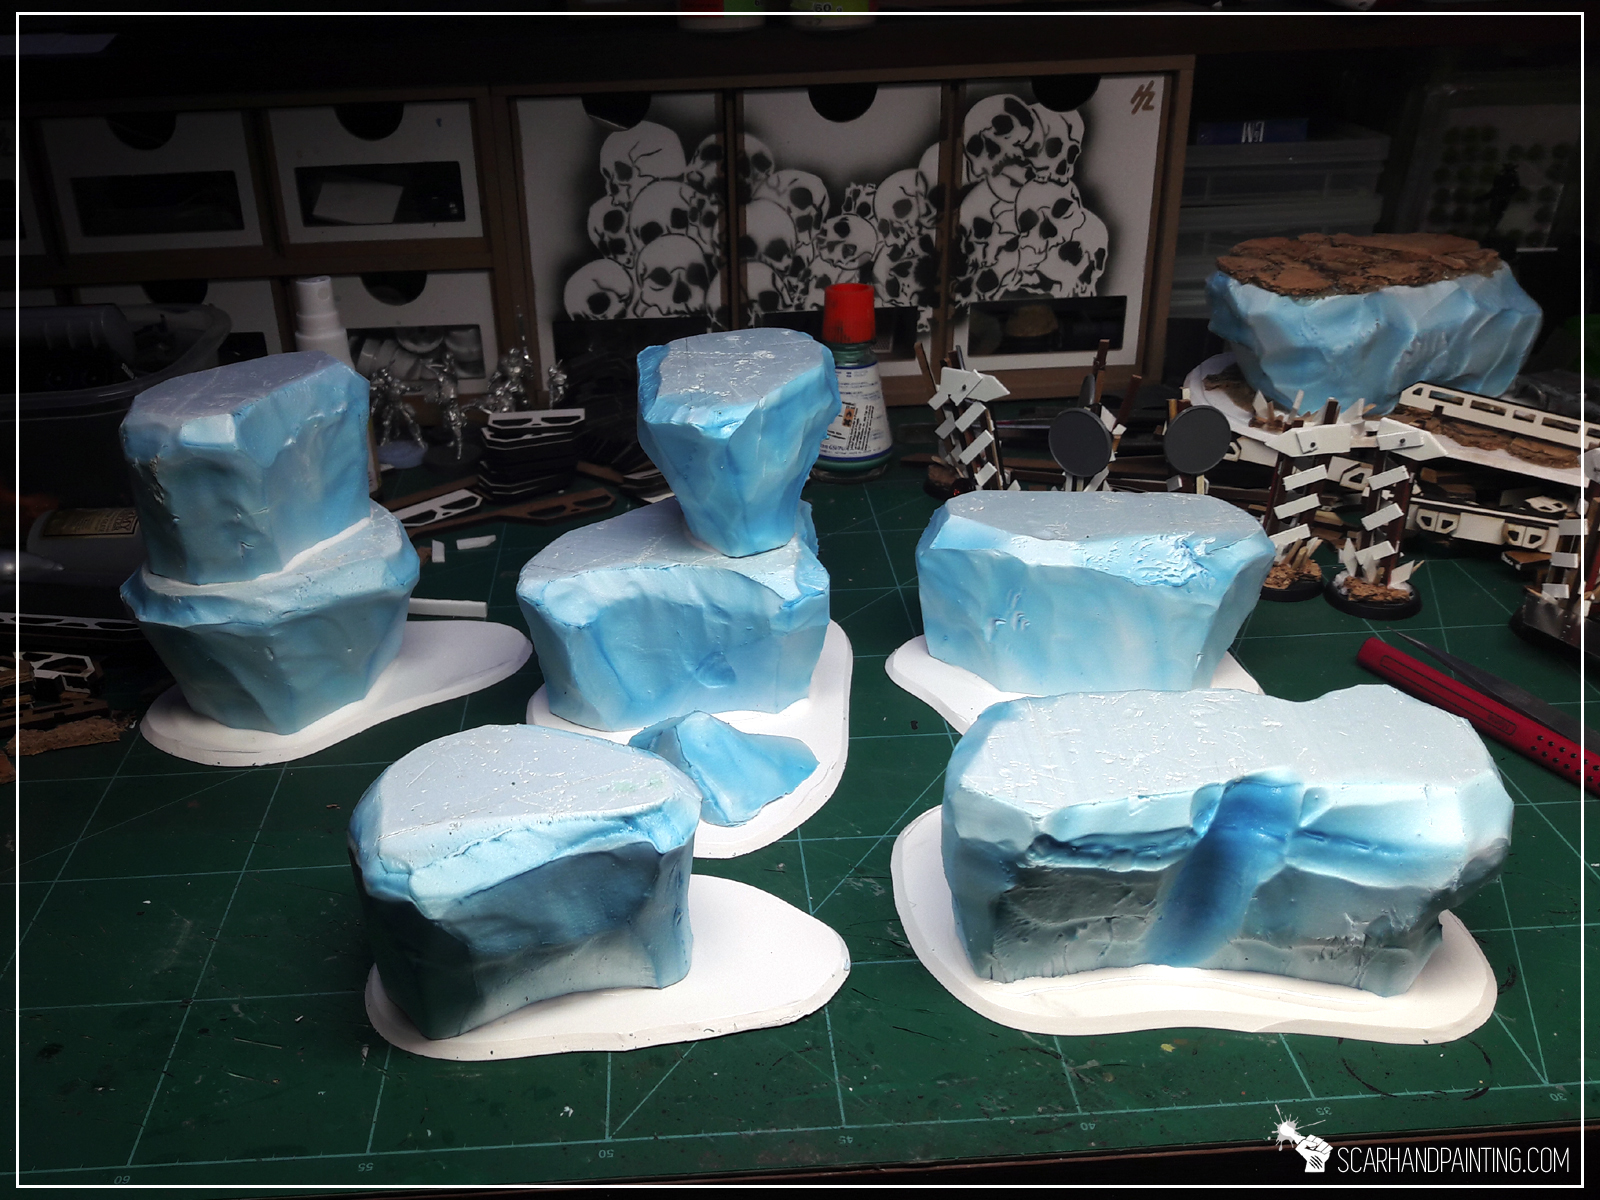
* Next, using a hobby knife, I cut bases from 3mm thick plasticard.

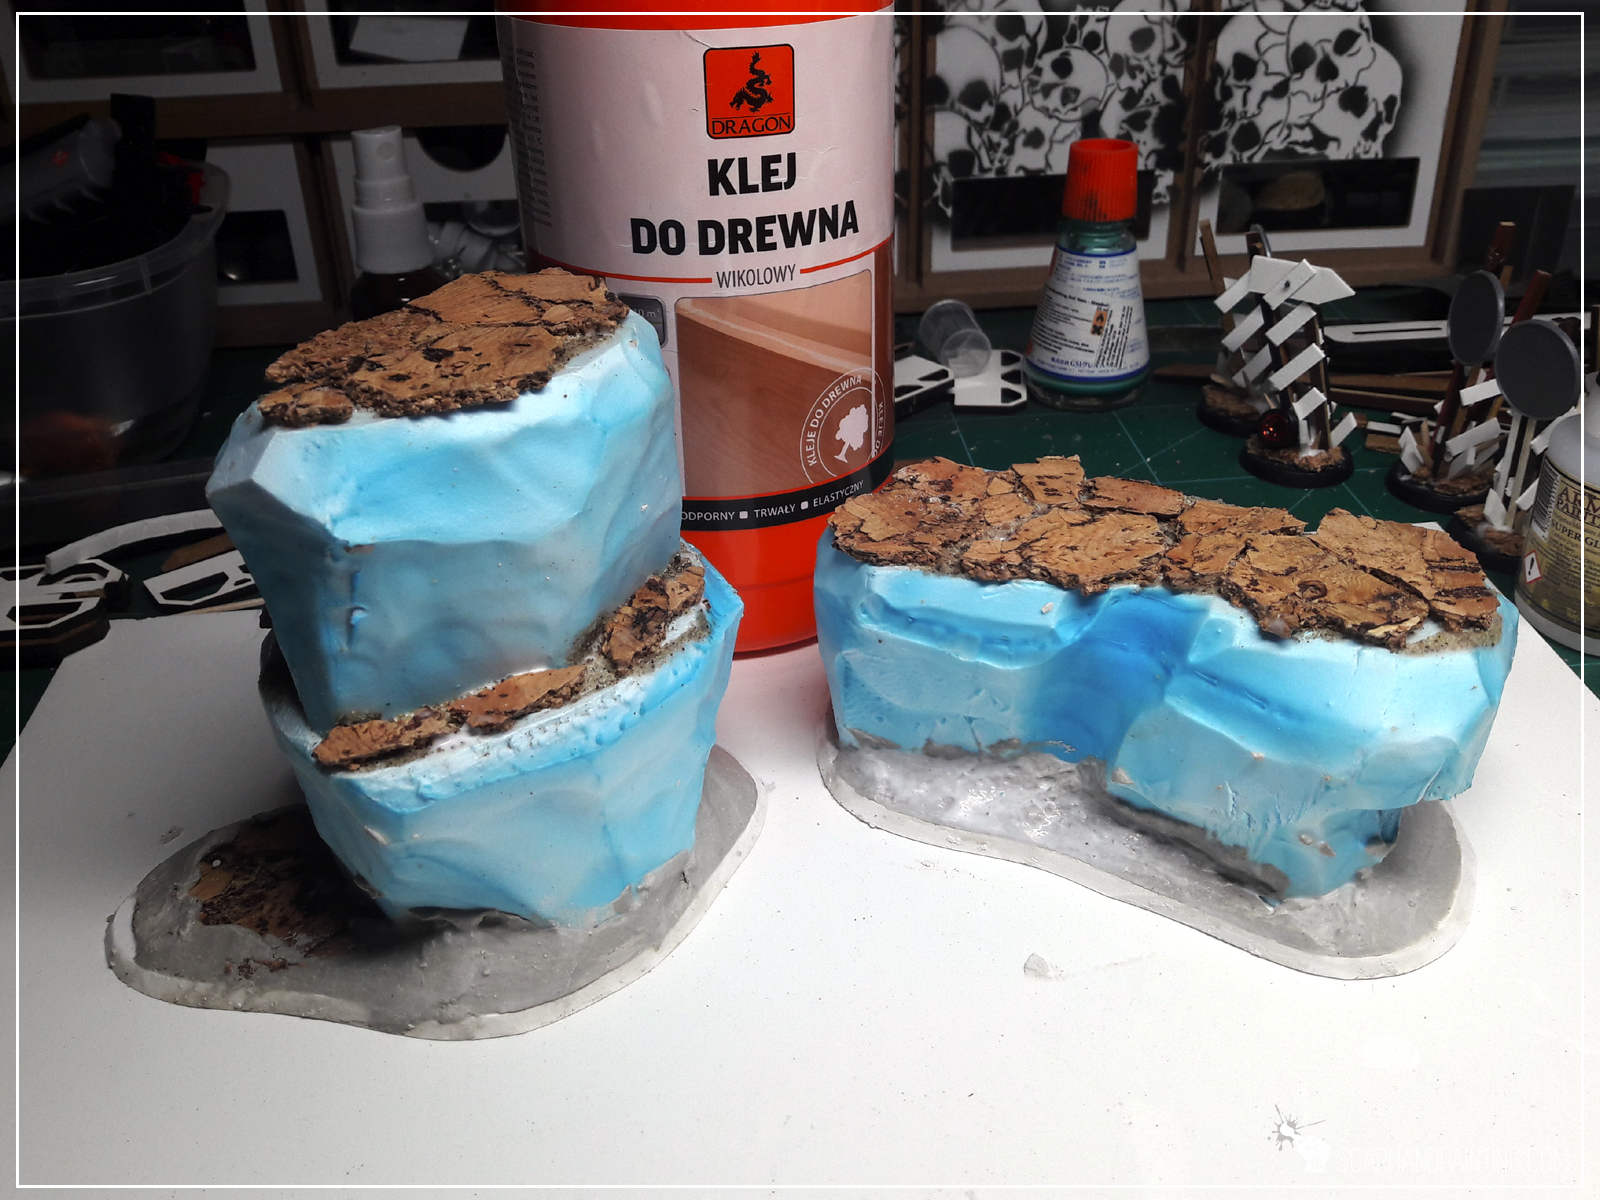
* I then glued rocky blocks on top of the bases with basing (PVA) glue. I also glued some blocks on top of one another for the scenery to look more diverse and interresting.
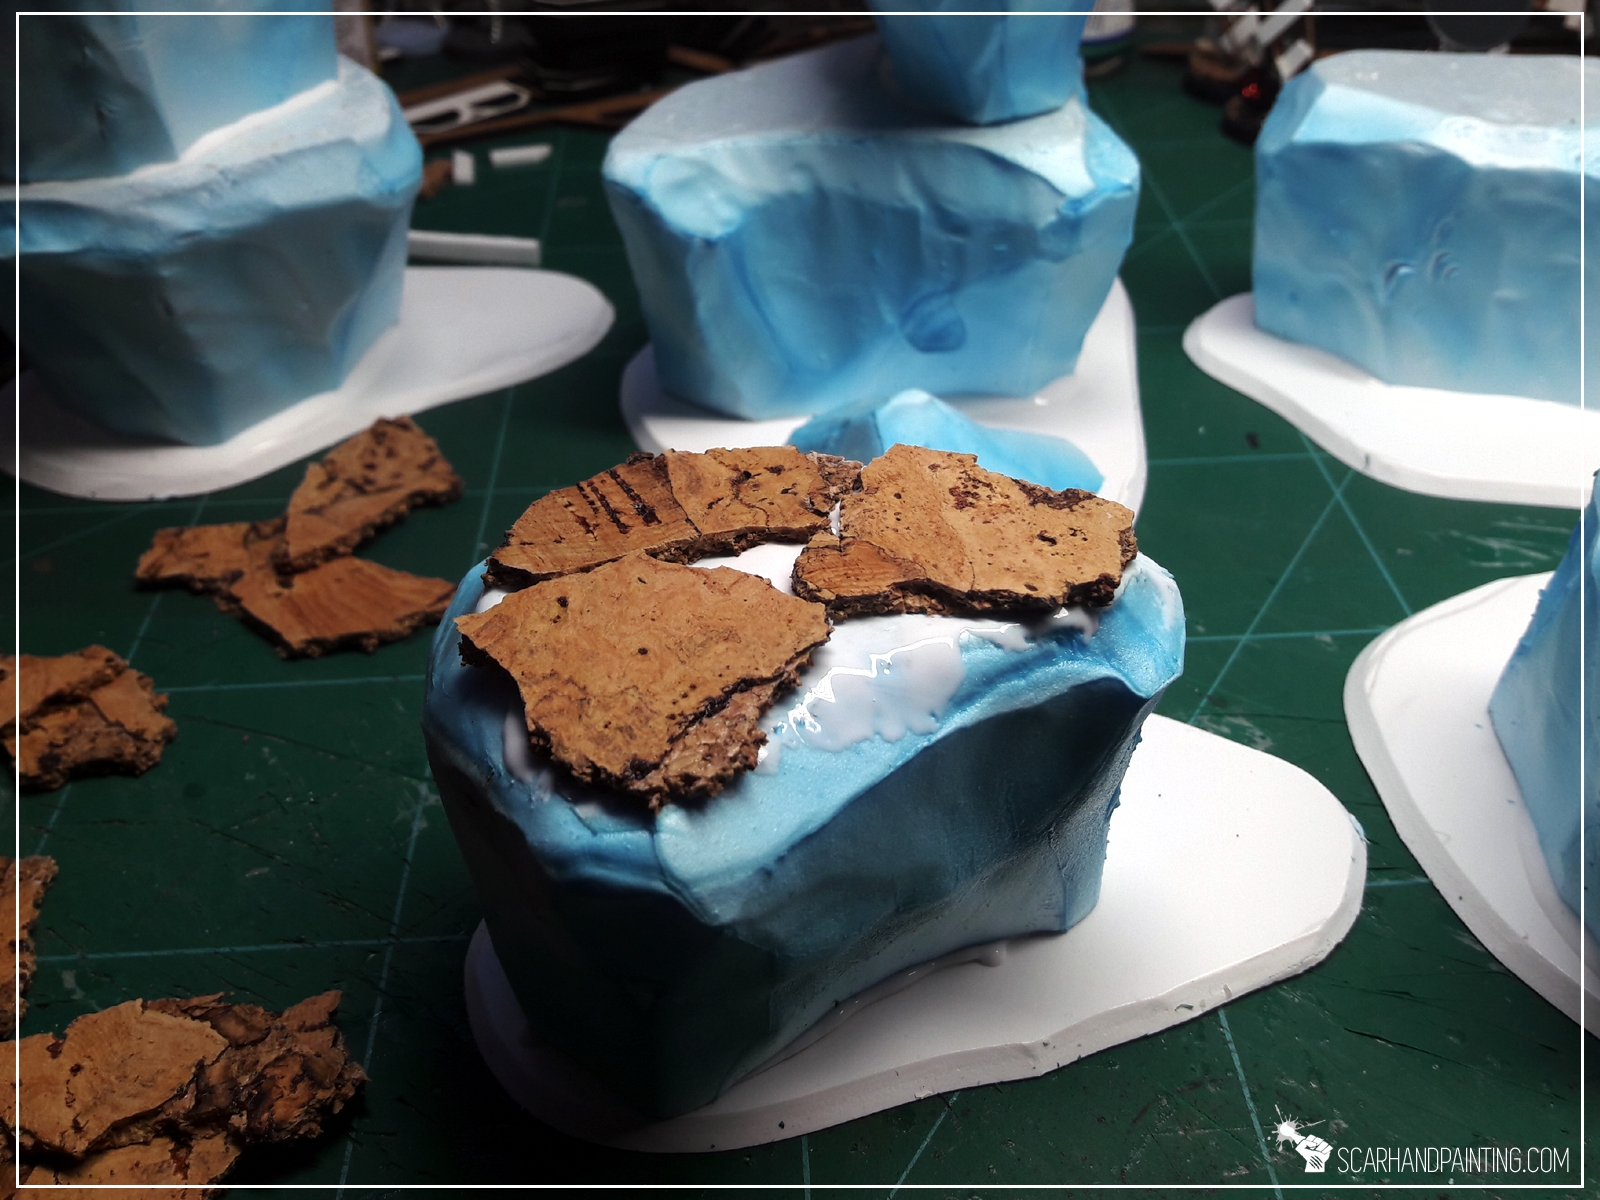
* Next I crumbled a sheet of cork into small pieces and glued them on top of the blocks with basing glue, sanding them before glue dried out to fill the gaps inbetween separate cork pieces.


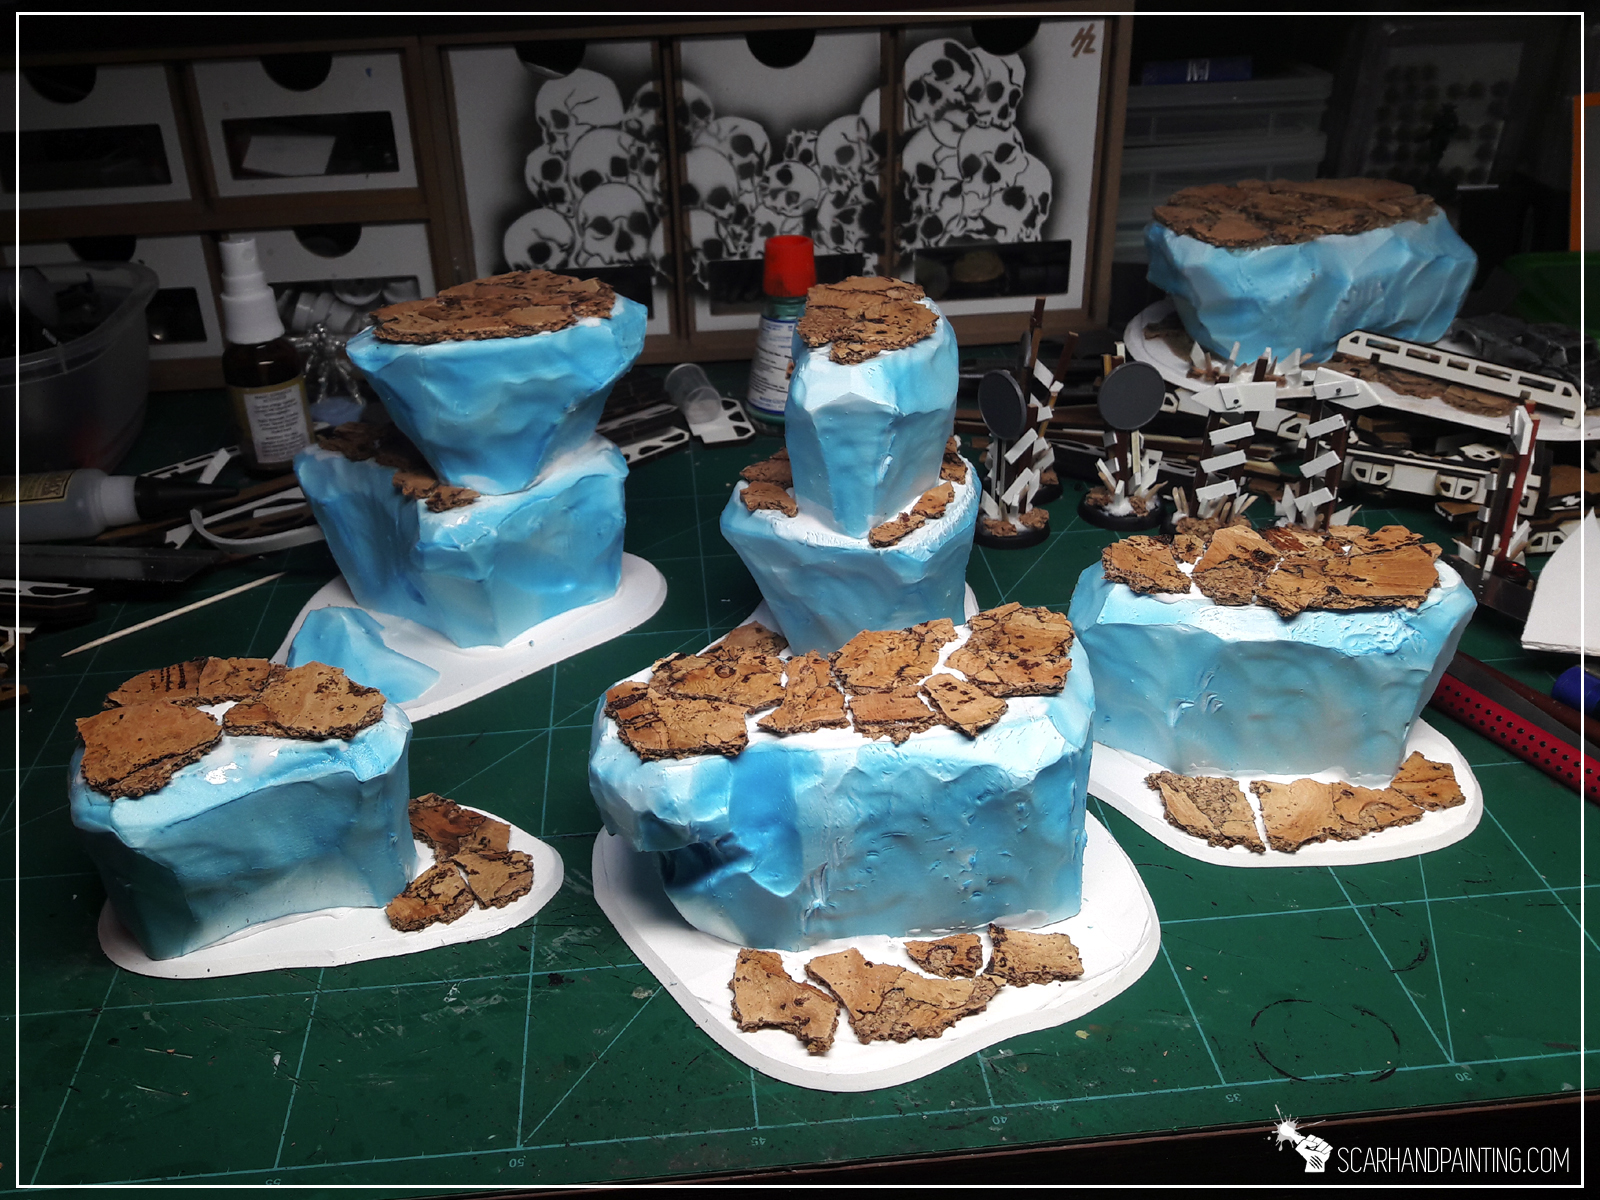

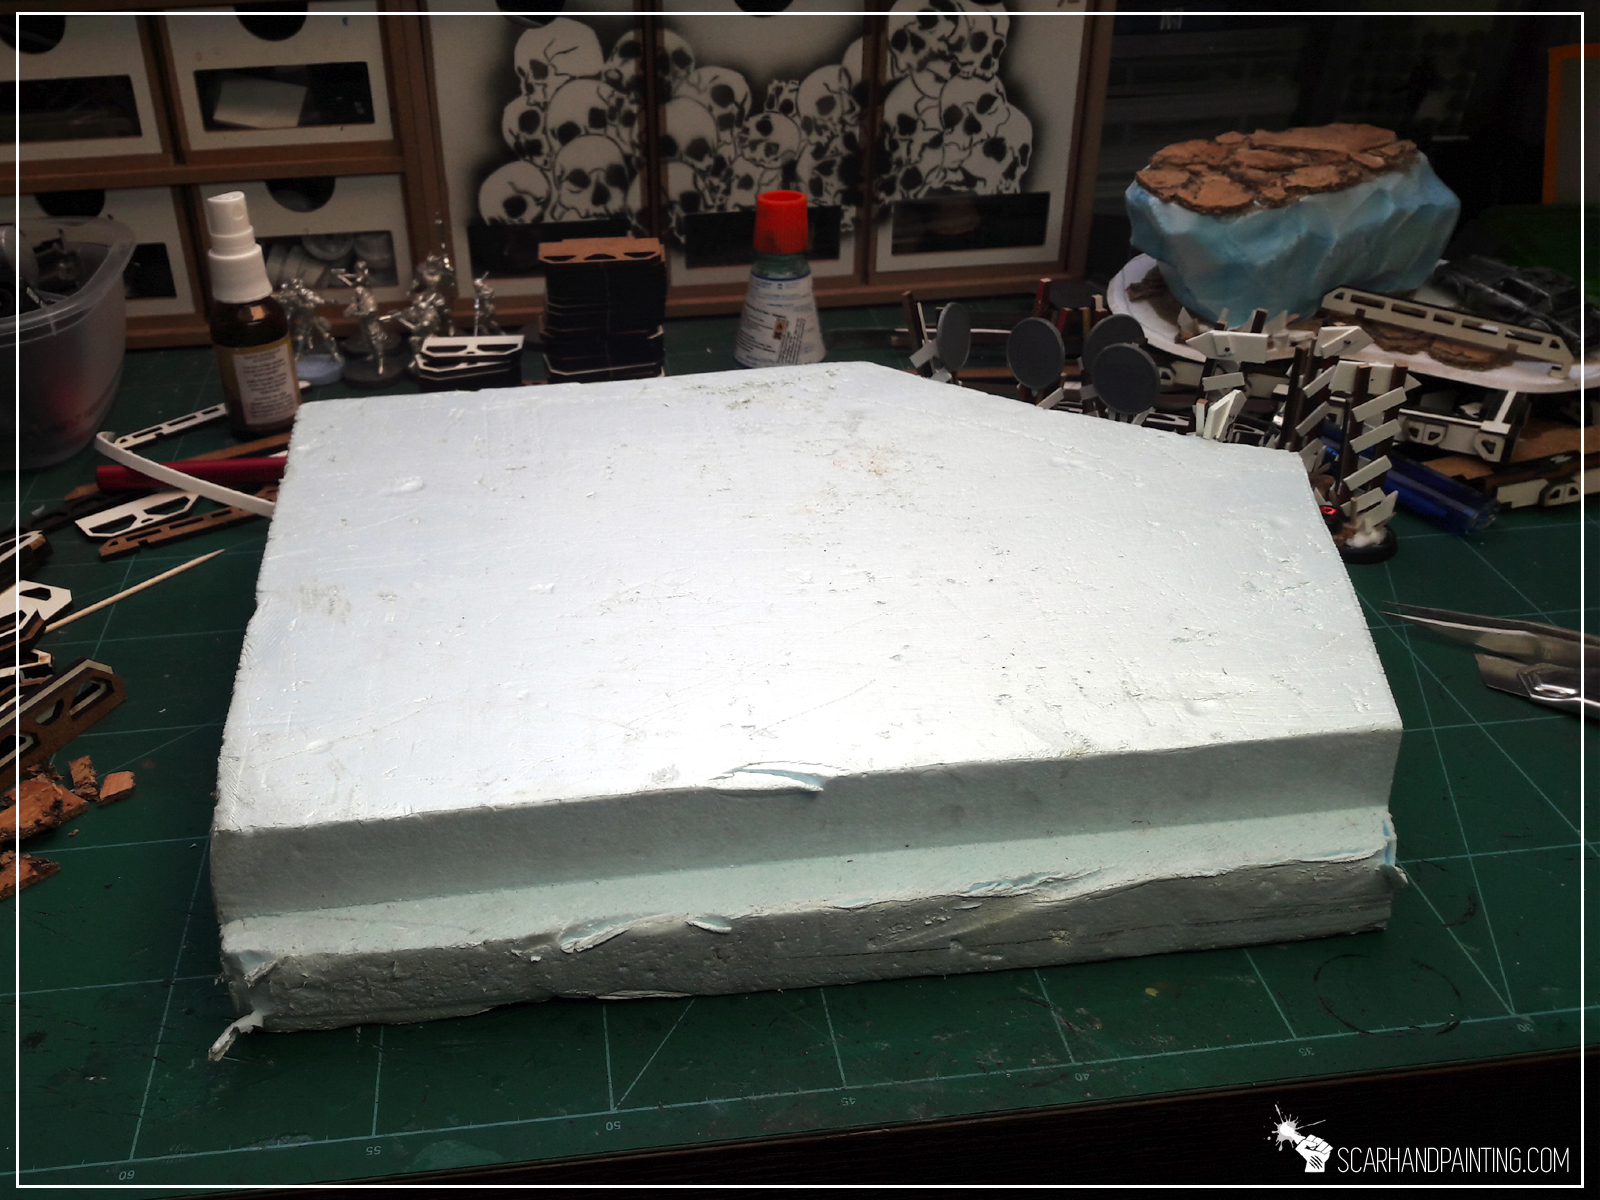
* I then used plaster (gypsum) to build a gentle transition between bases and blocks.
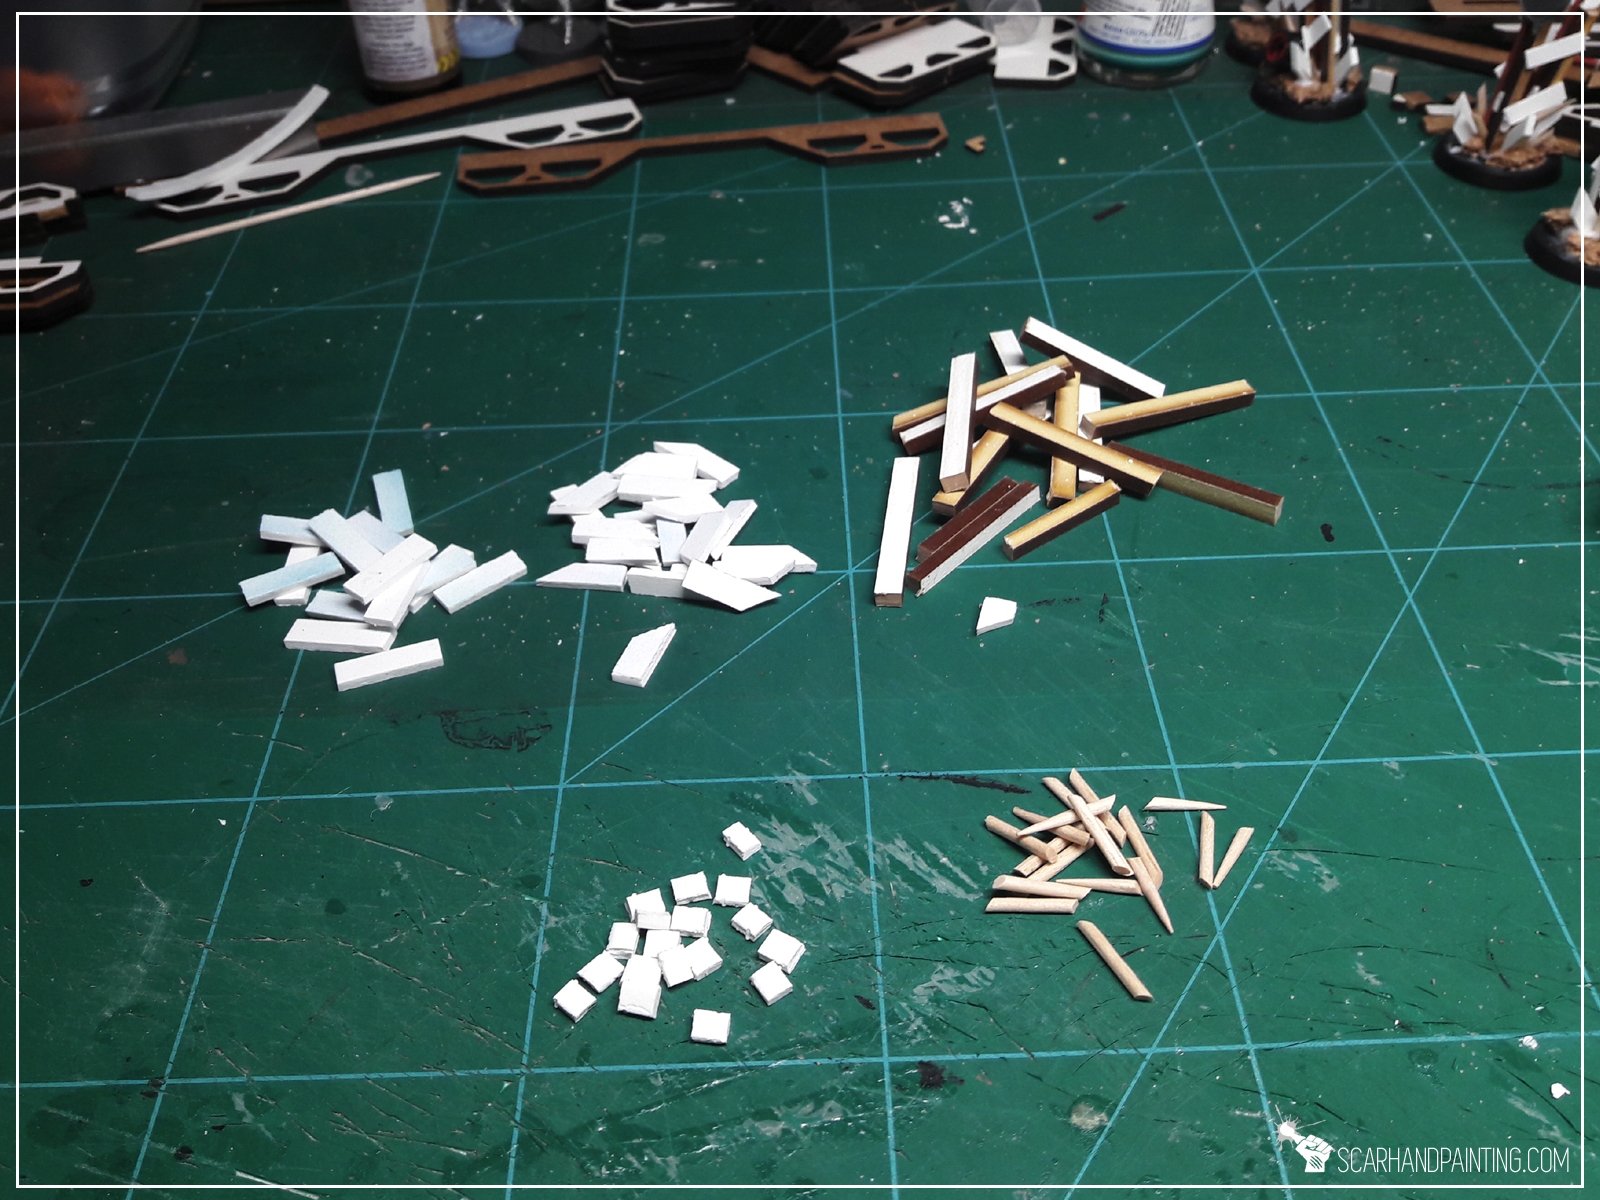
* A time has come for me to add some detail. Not much, just some texture to bring more life to the wasteland. I cut pieces of plasticard and used toothpicks, MDF leftovers and a toy car to create ragtag barricades and post-apo racing signs.
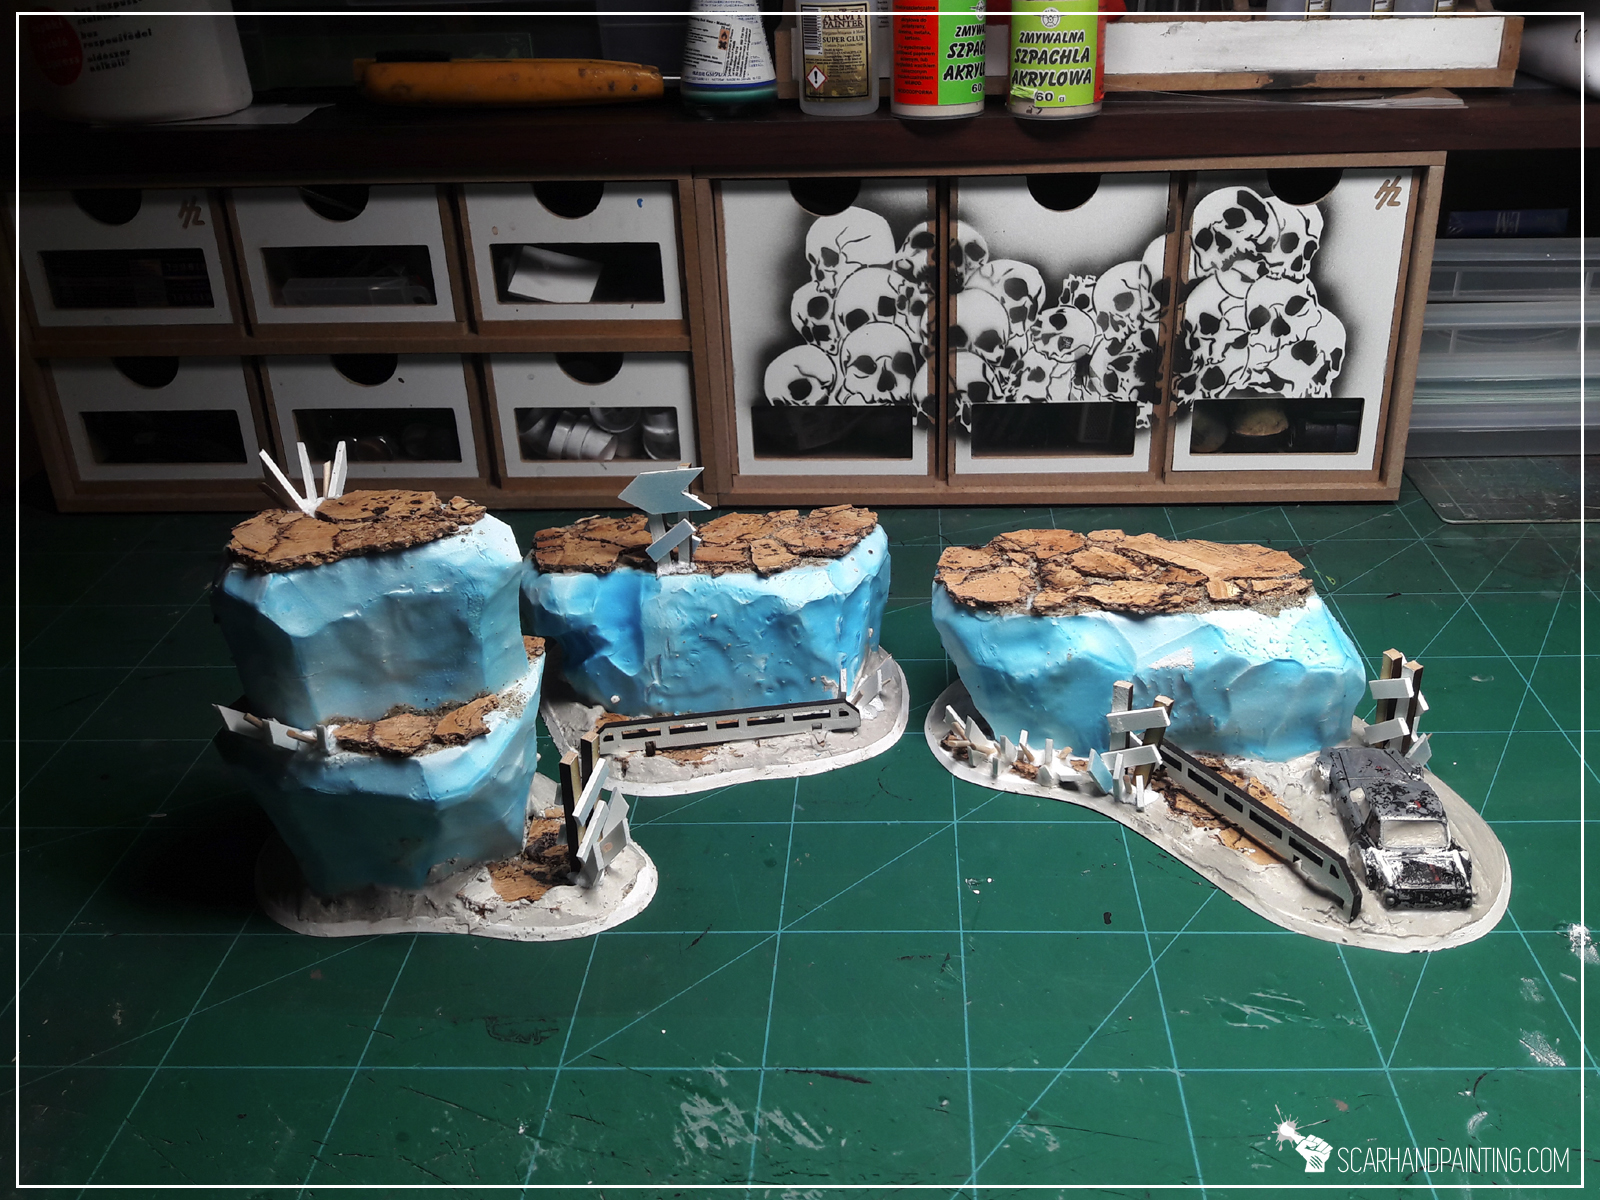
* Lastly, with a regular brush, I applied basing glue then sanded all the plaster, sides of the bases and some areas around cork pieces on top of the blocks.
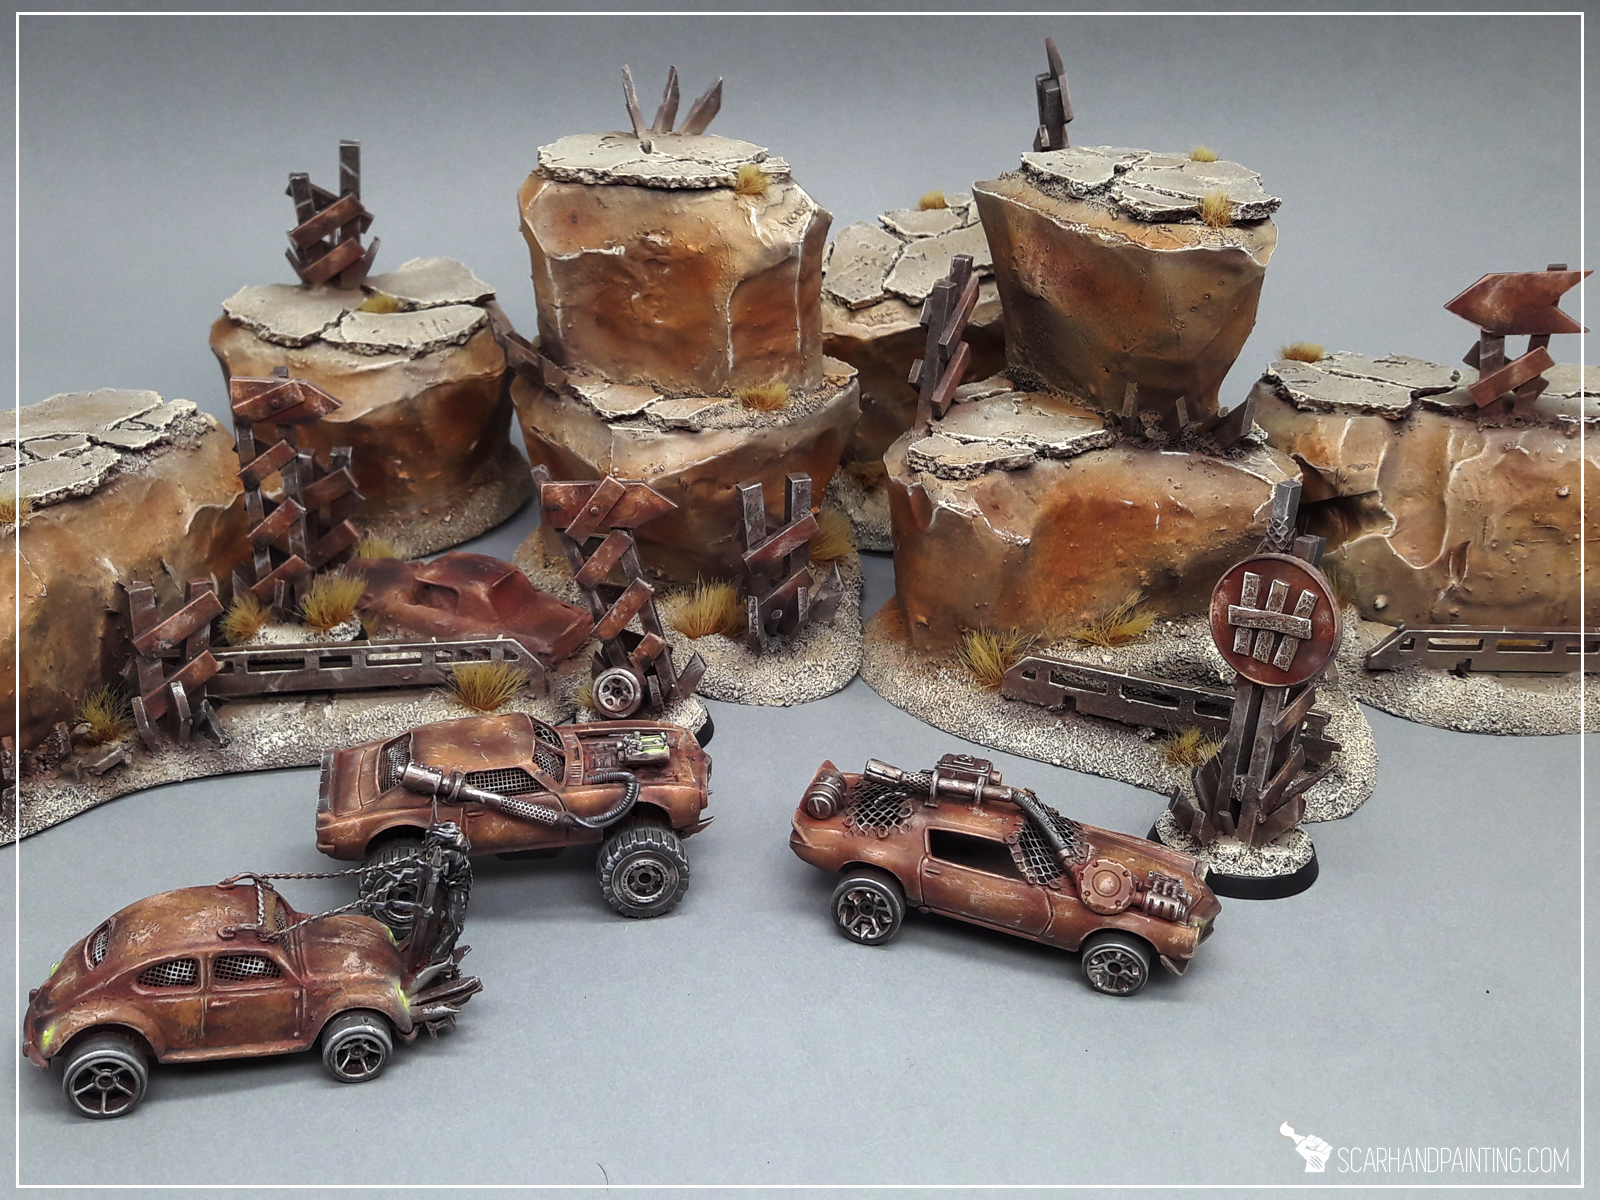
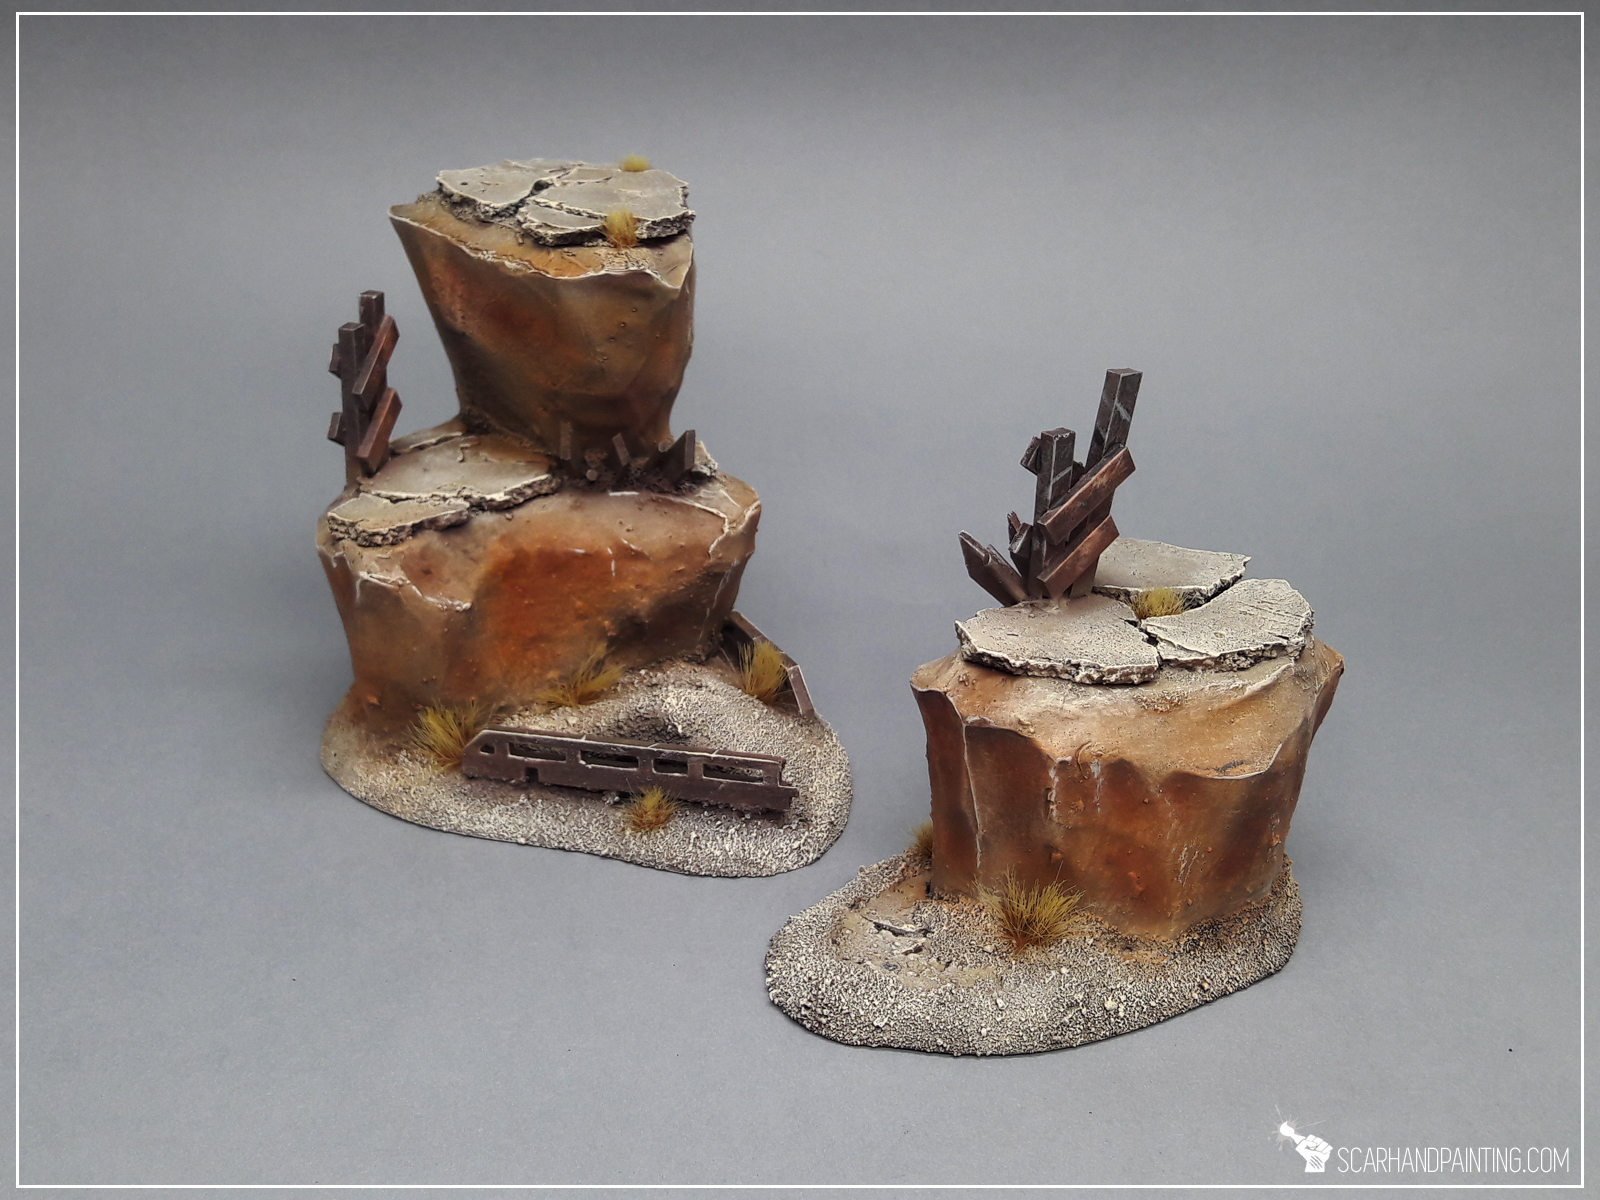
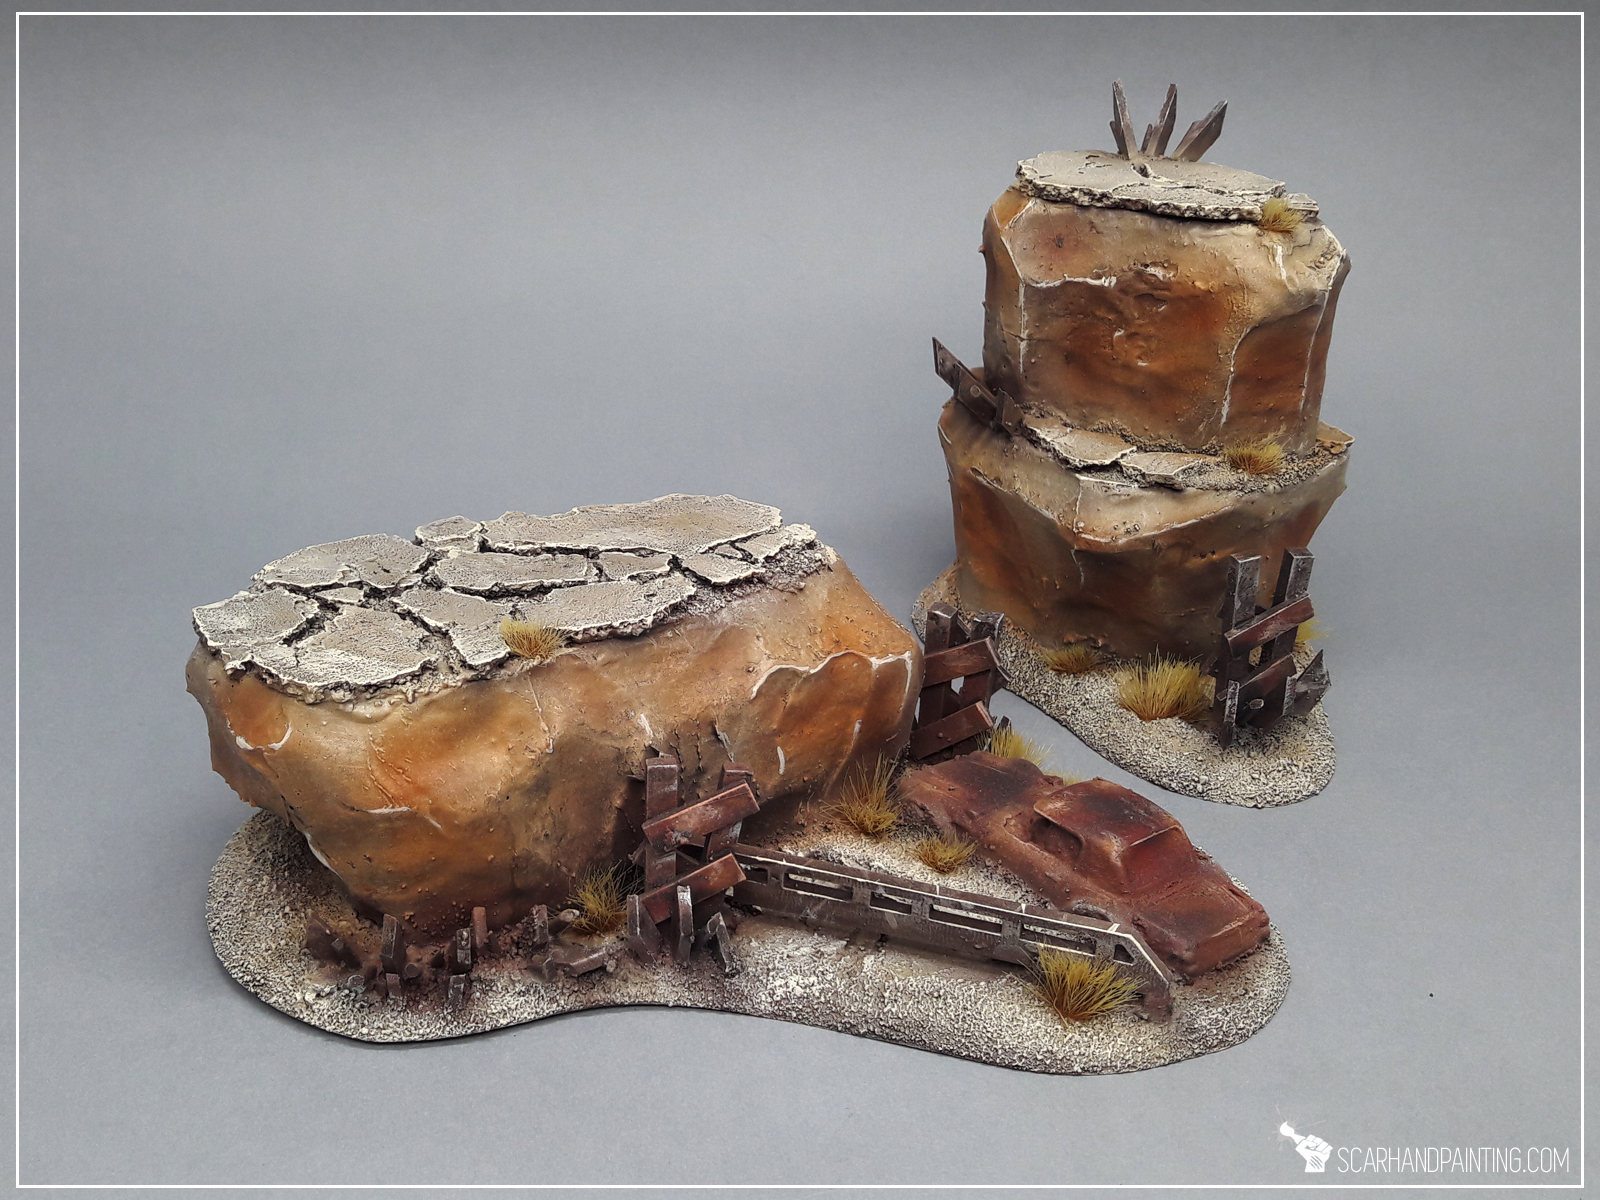
Couple of hours later I have painted this stuff and added some tuftsthe end result looks like this:


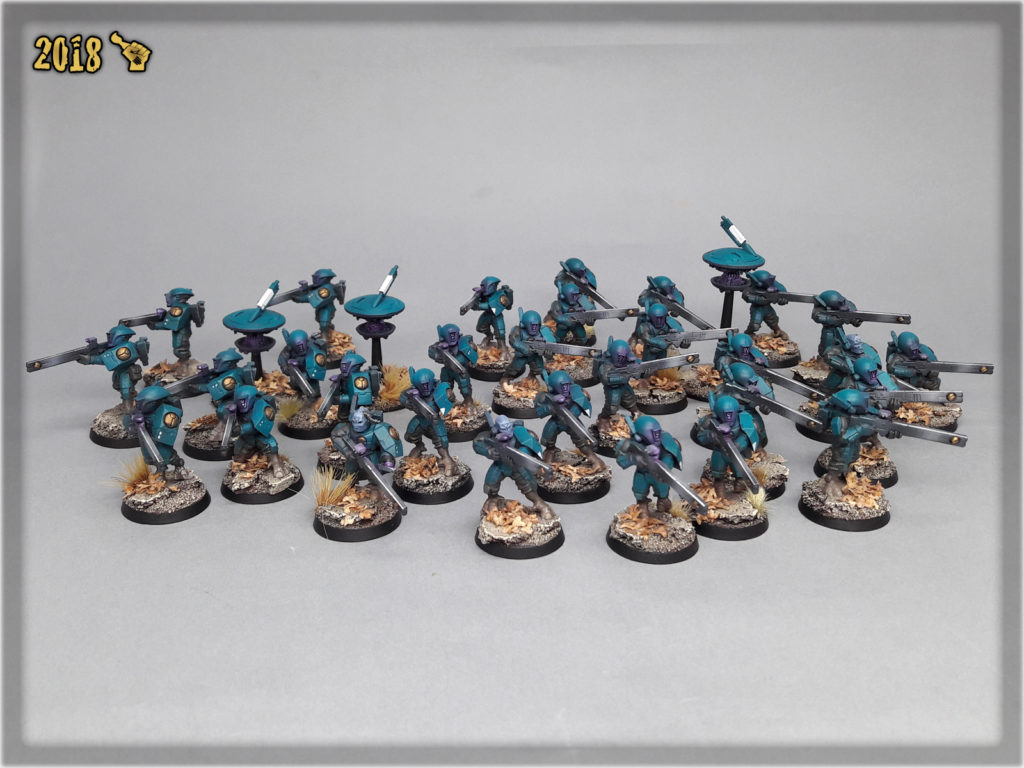
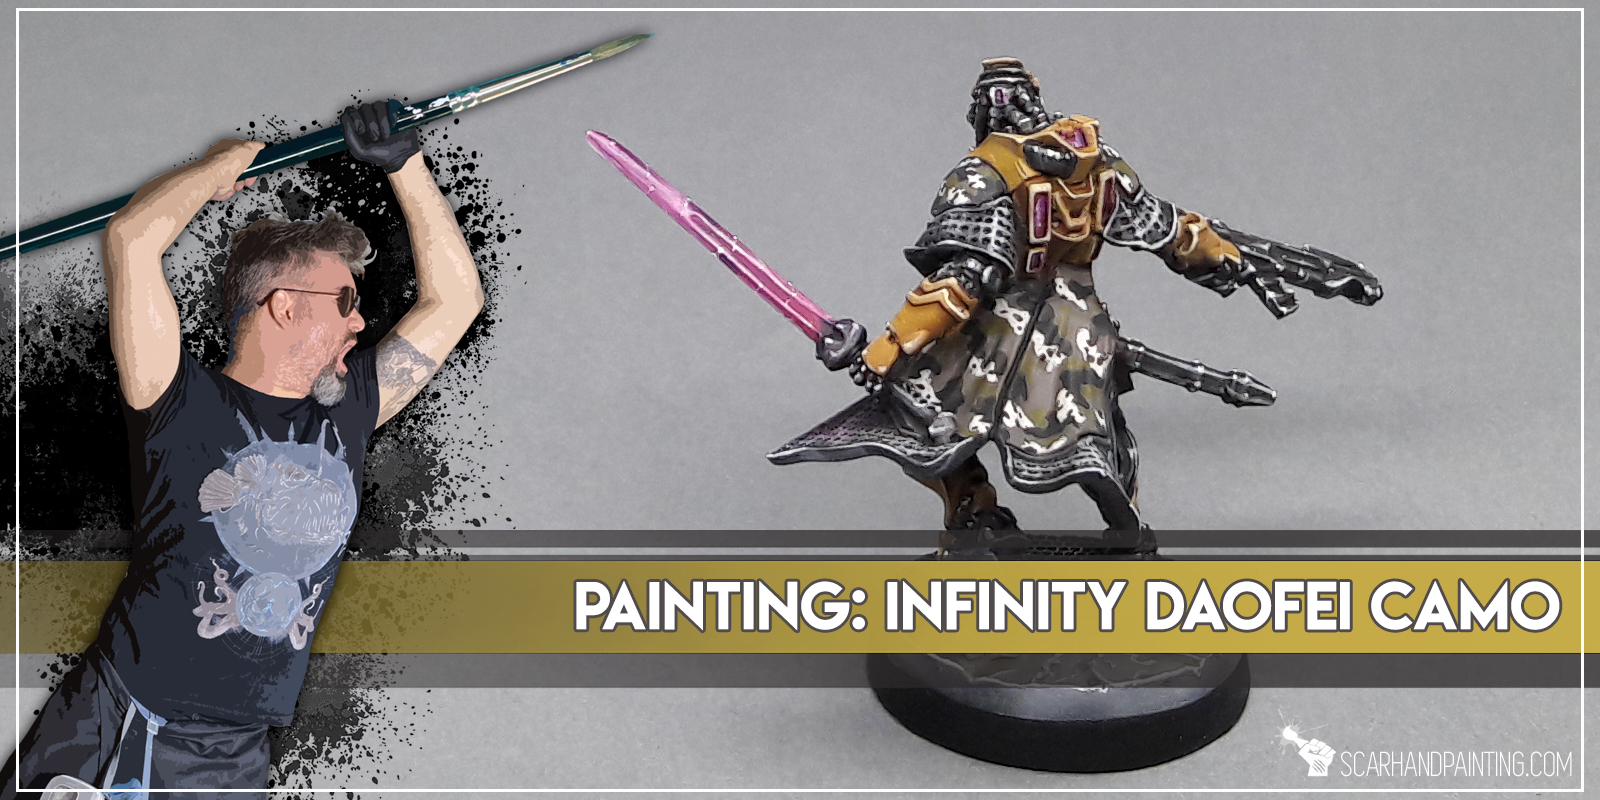
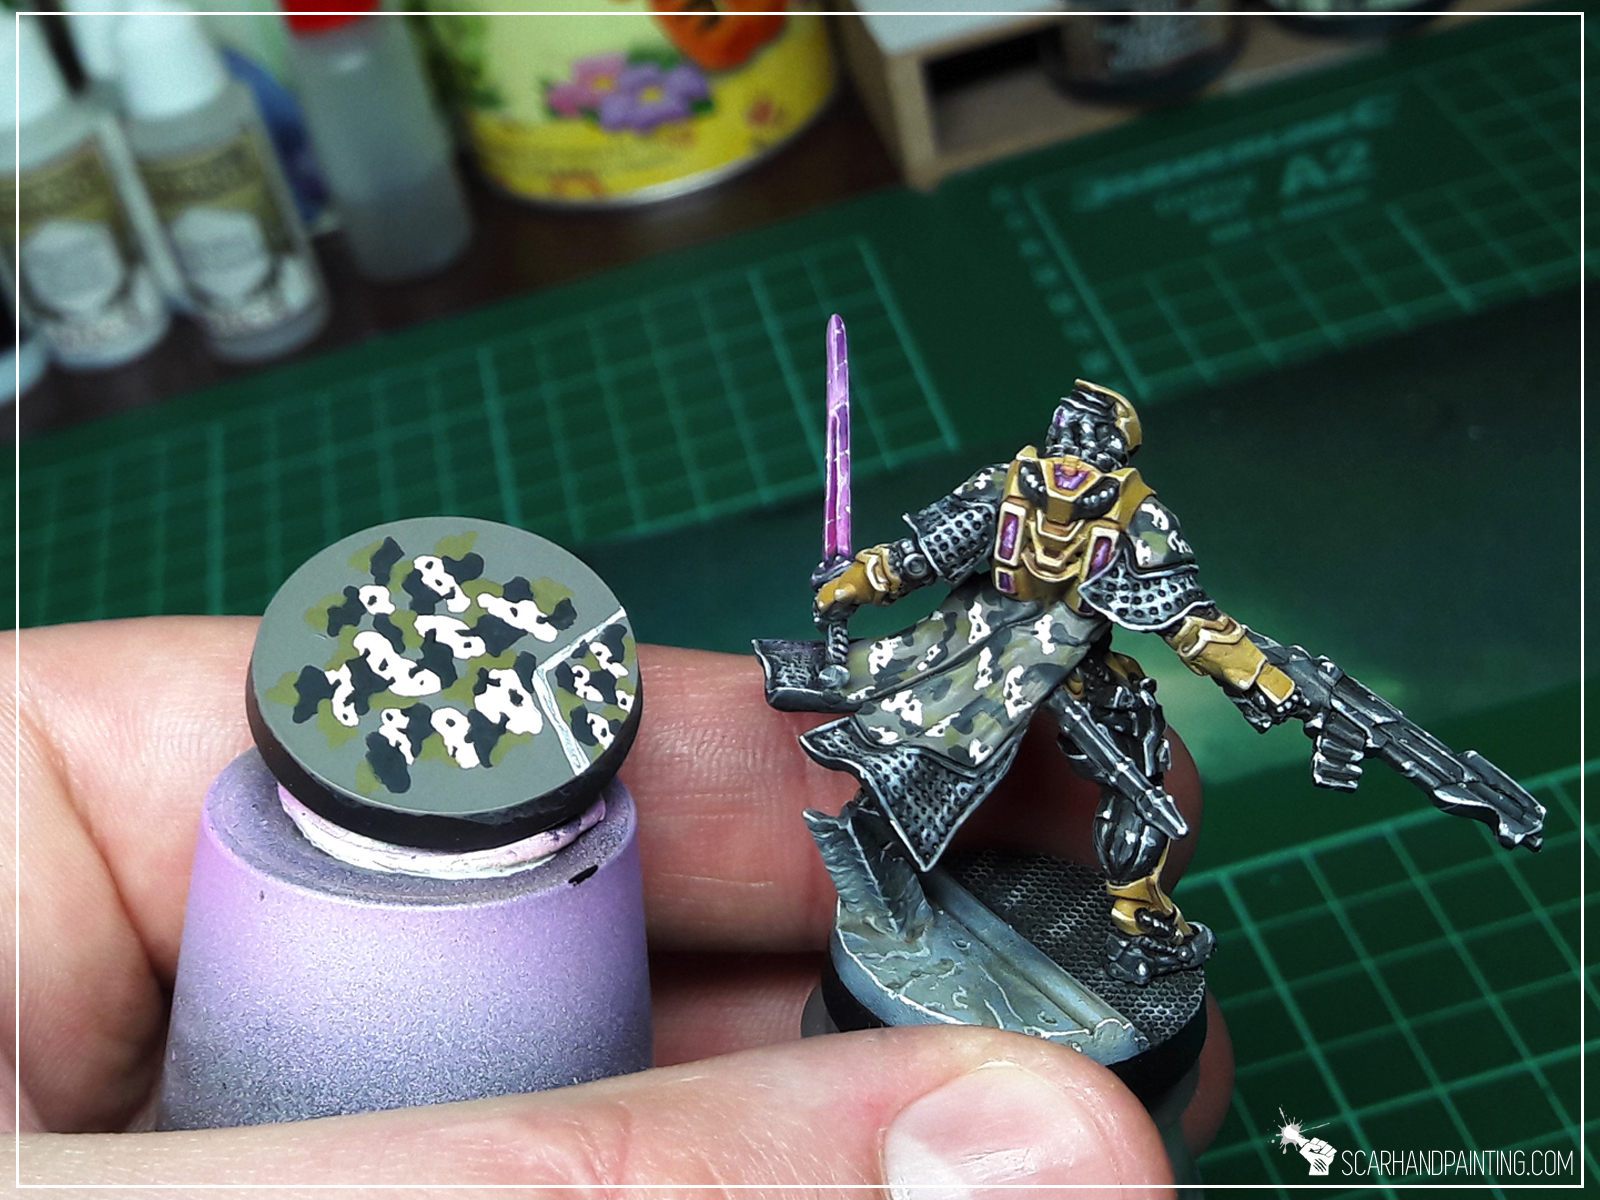
Welcome to Painting Infinity Daofei Camo tutorial. Here I will take you on a Step-by-step trip through the process of painting Daofei Camo the same way as seen at: Gallery: Yu-Jing.
Before we start, some notes:
* This one requires no Airbrush.
* For better visibility there are two different sizes of the pattern.
* What works for me might not necessarily work for you.
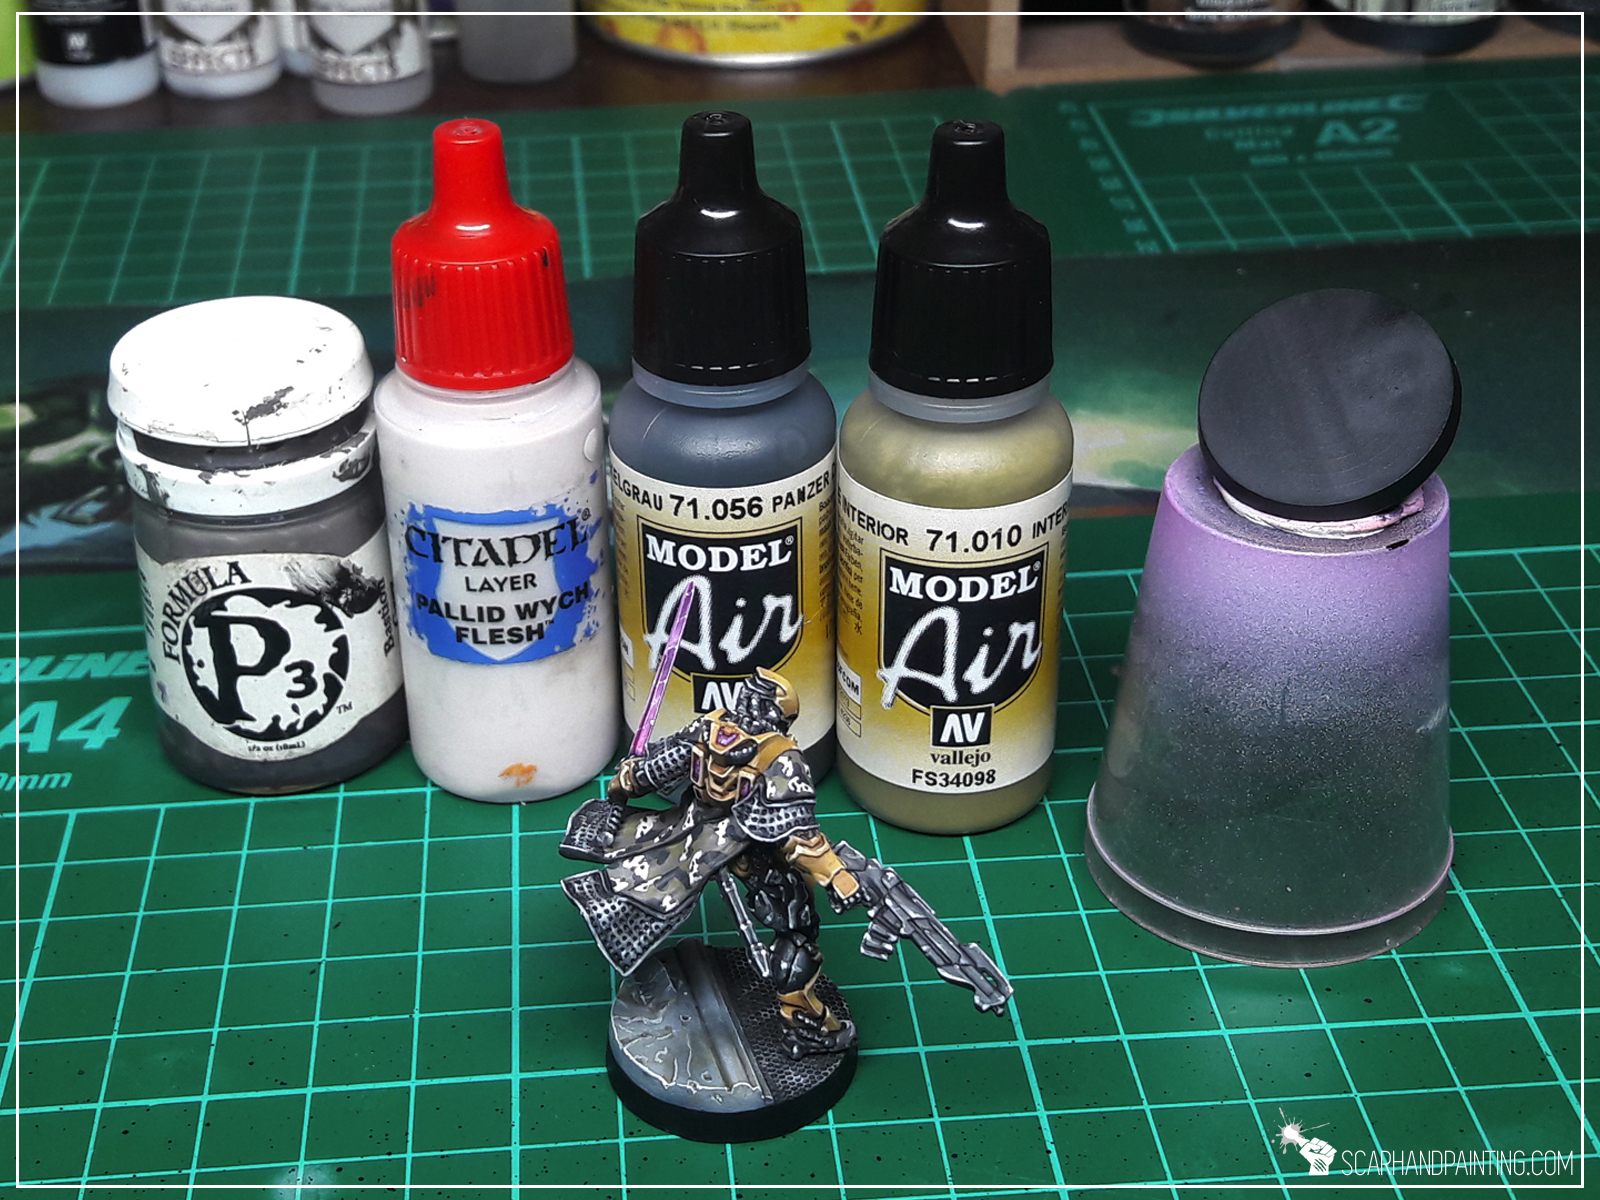
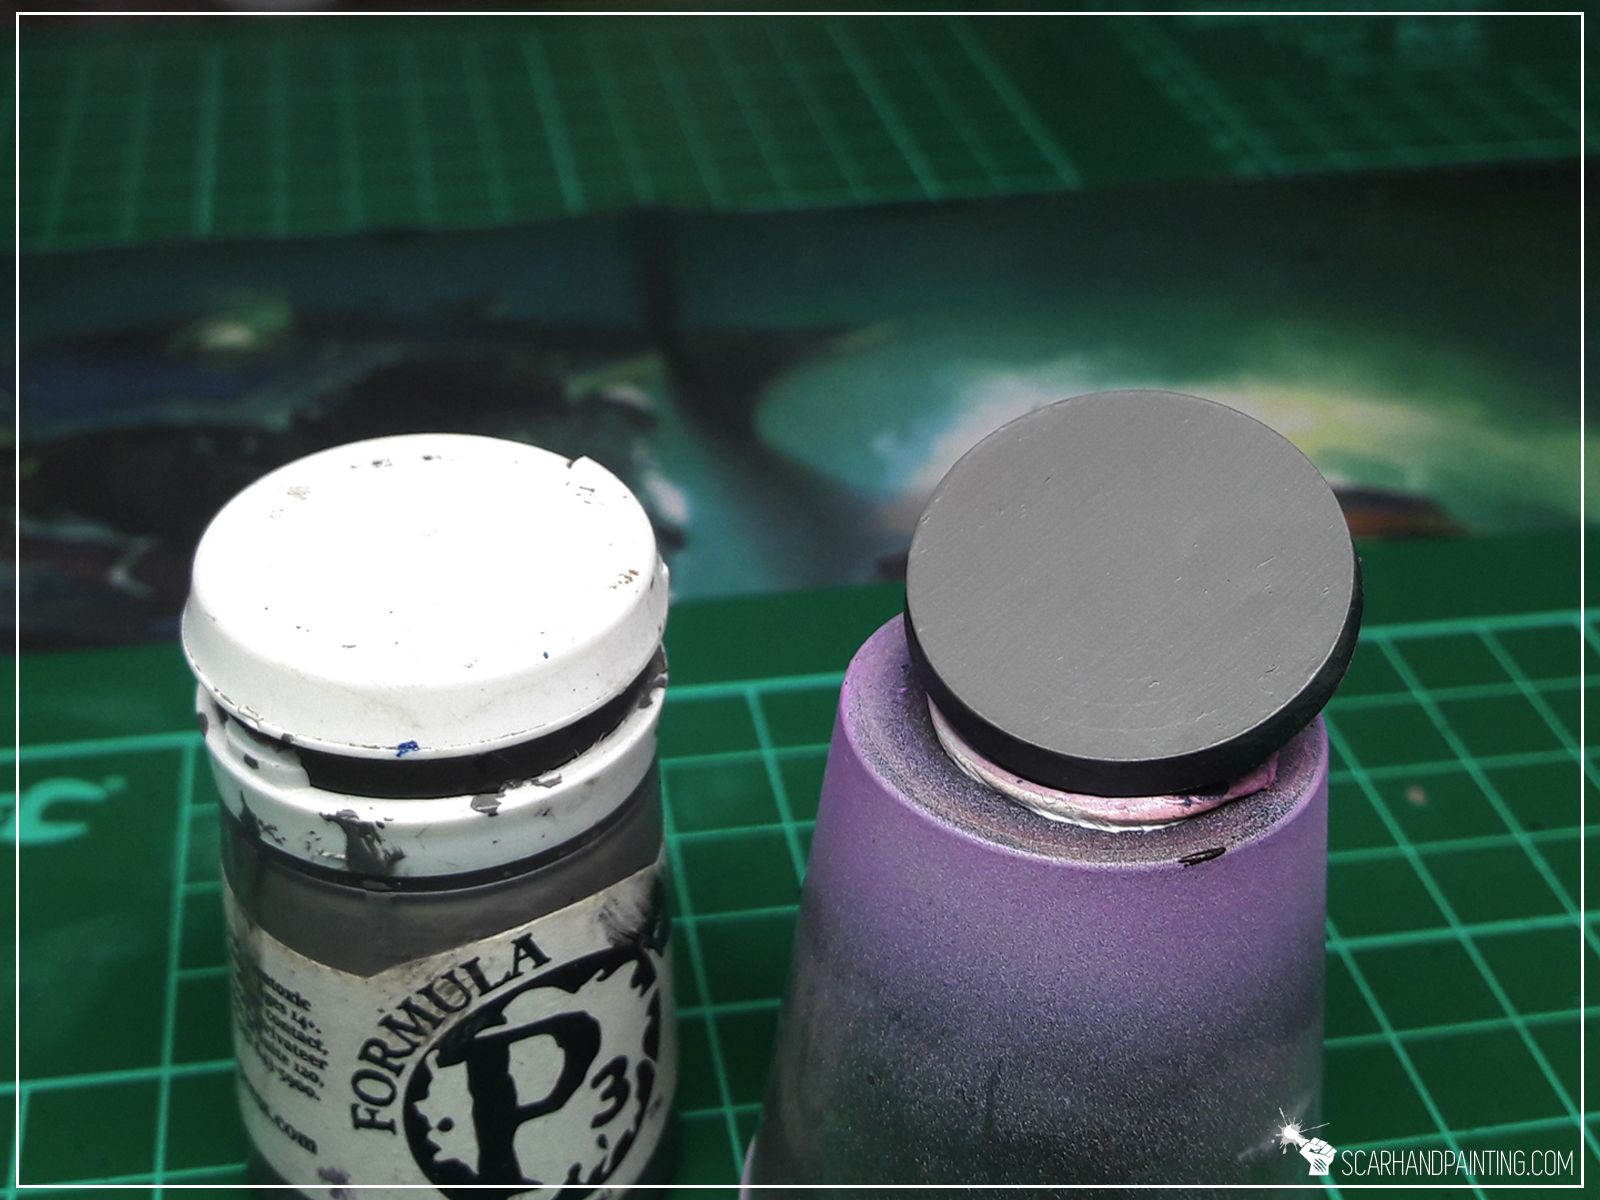
* Start by applying a smooth layer of P3 Bastion Grey.
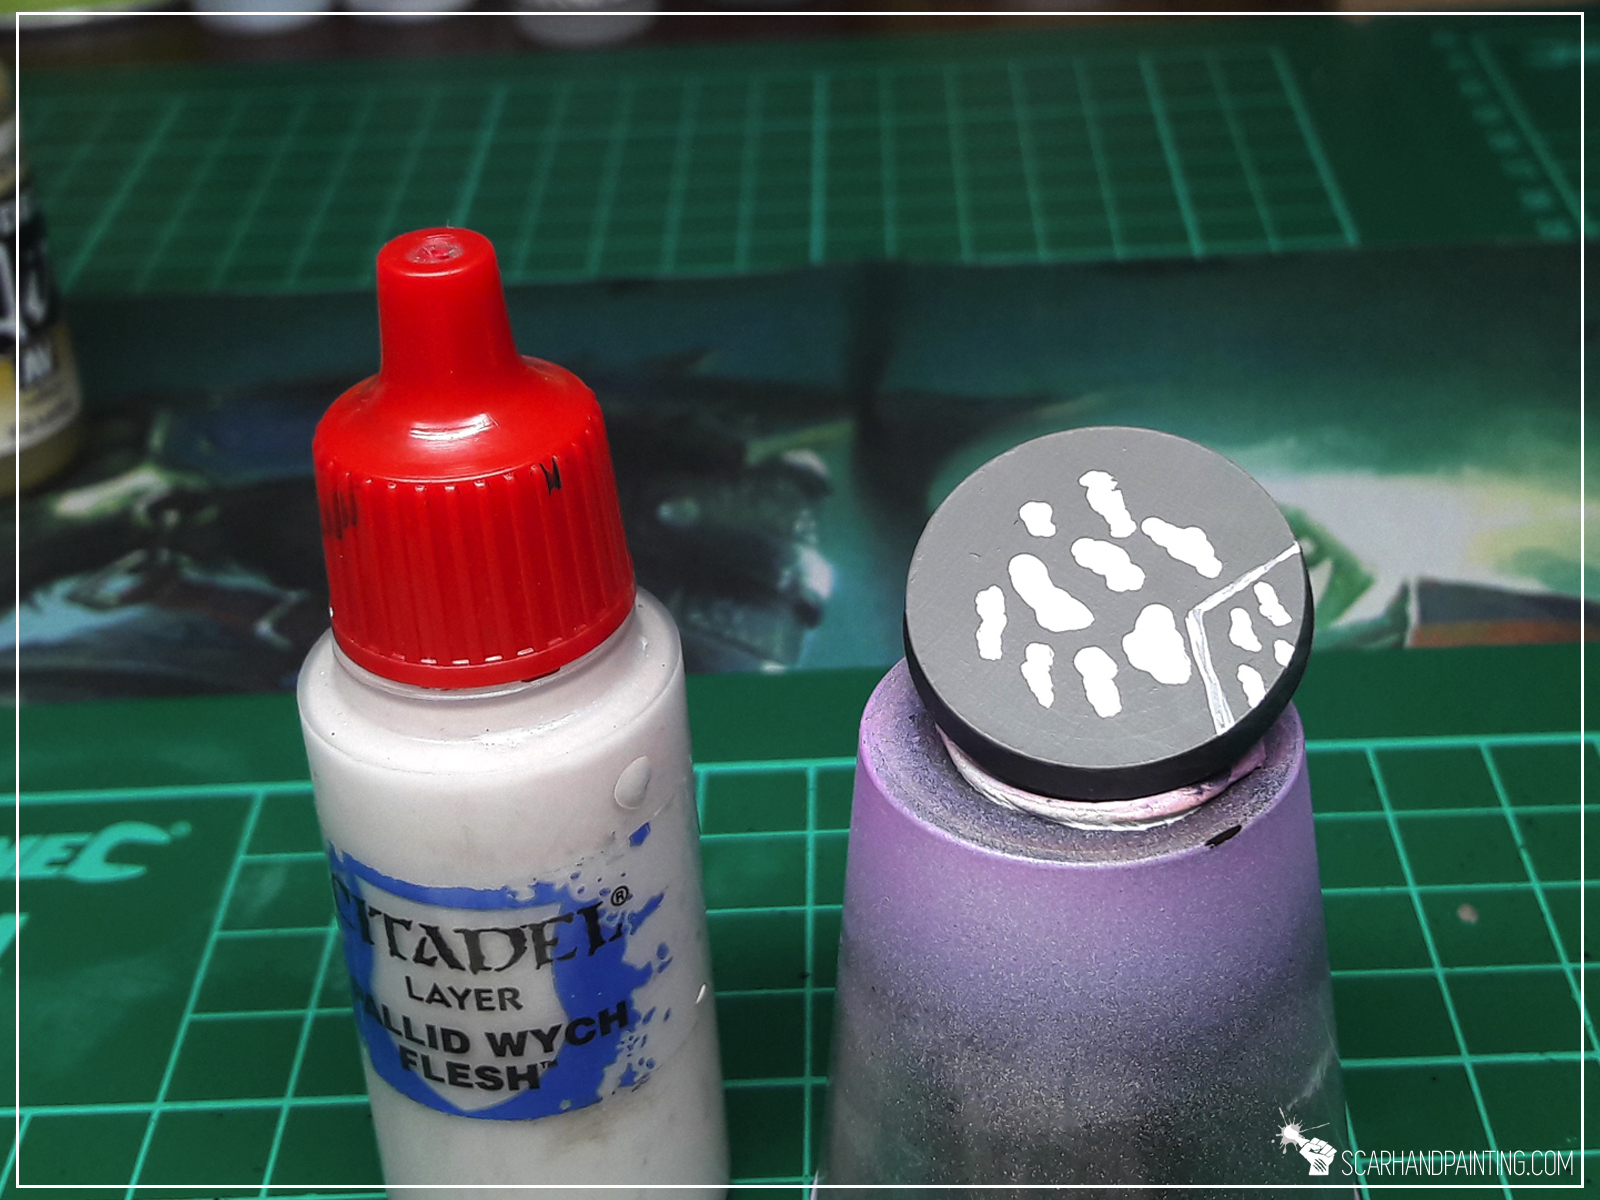
* Create basic pattern, applying Pale Wych Flesh spots leaving similar sized gaps inbetween .
* Next apply Panzer Dark Grey spots between Pale Wych Flesh, so that every new spot touches at least one from the previous layer.
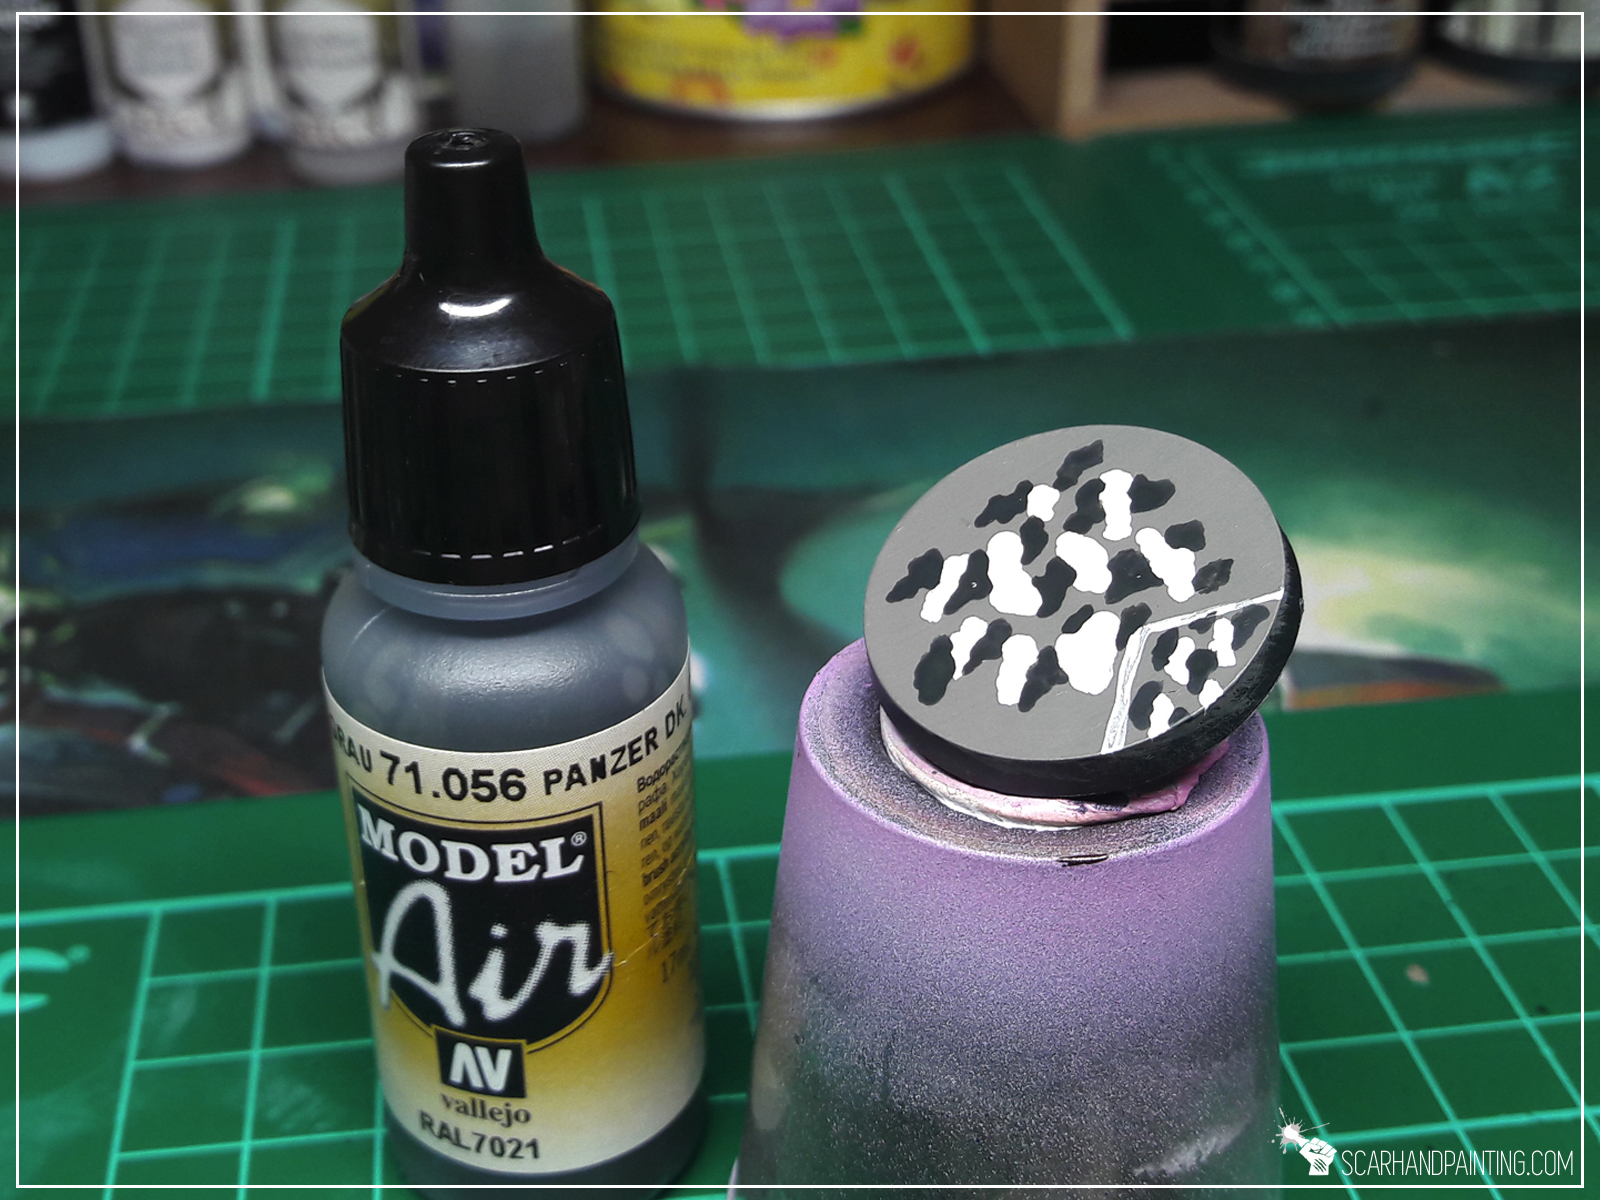
* Follow up with a third layer of pattern, using Interior Green and following the same rules. Be sure to leave some spots of Bastion Grey visible.

* Lastly add tiny spots of Panzer Dark Grey on top of Pale Wych Flesh pattern. Some might touch the edges.

That’s it, you have painted the pattern. Congrats! Be sure to visit Infinity Yu-Jing gallery for further inspiration if need be 😉
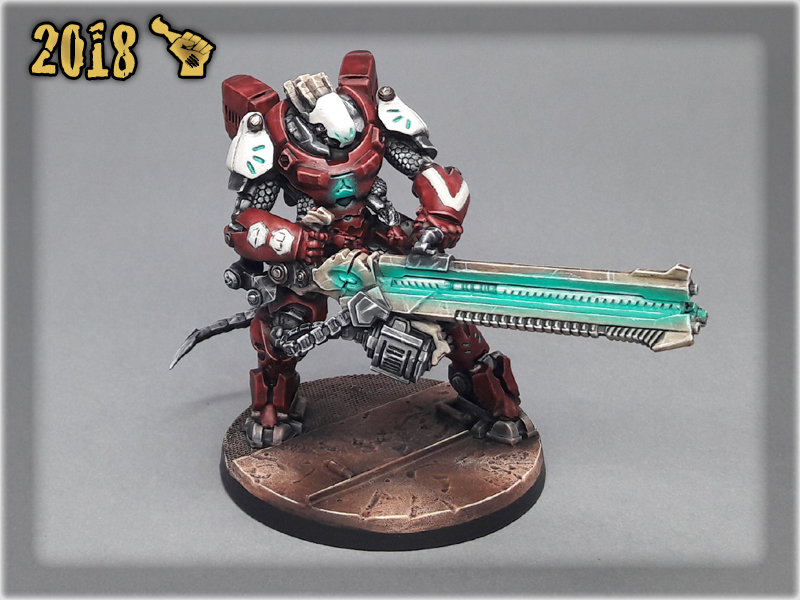
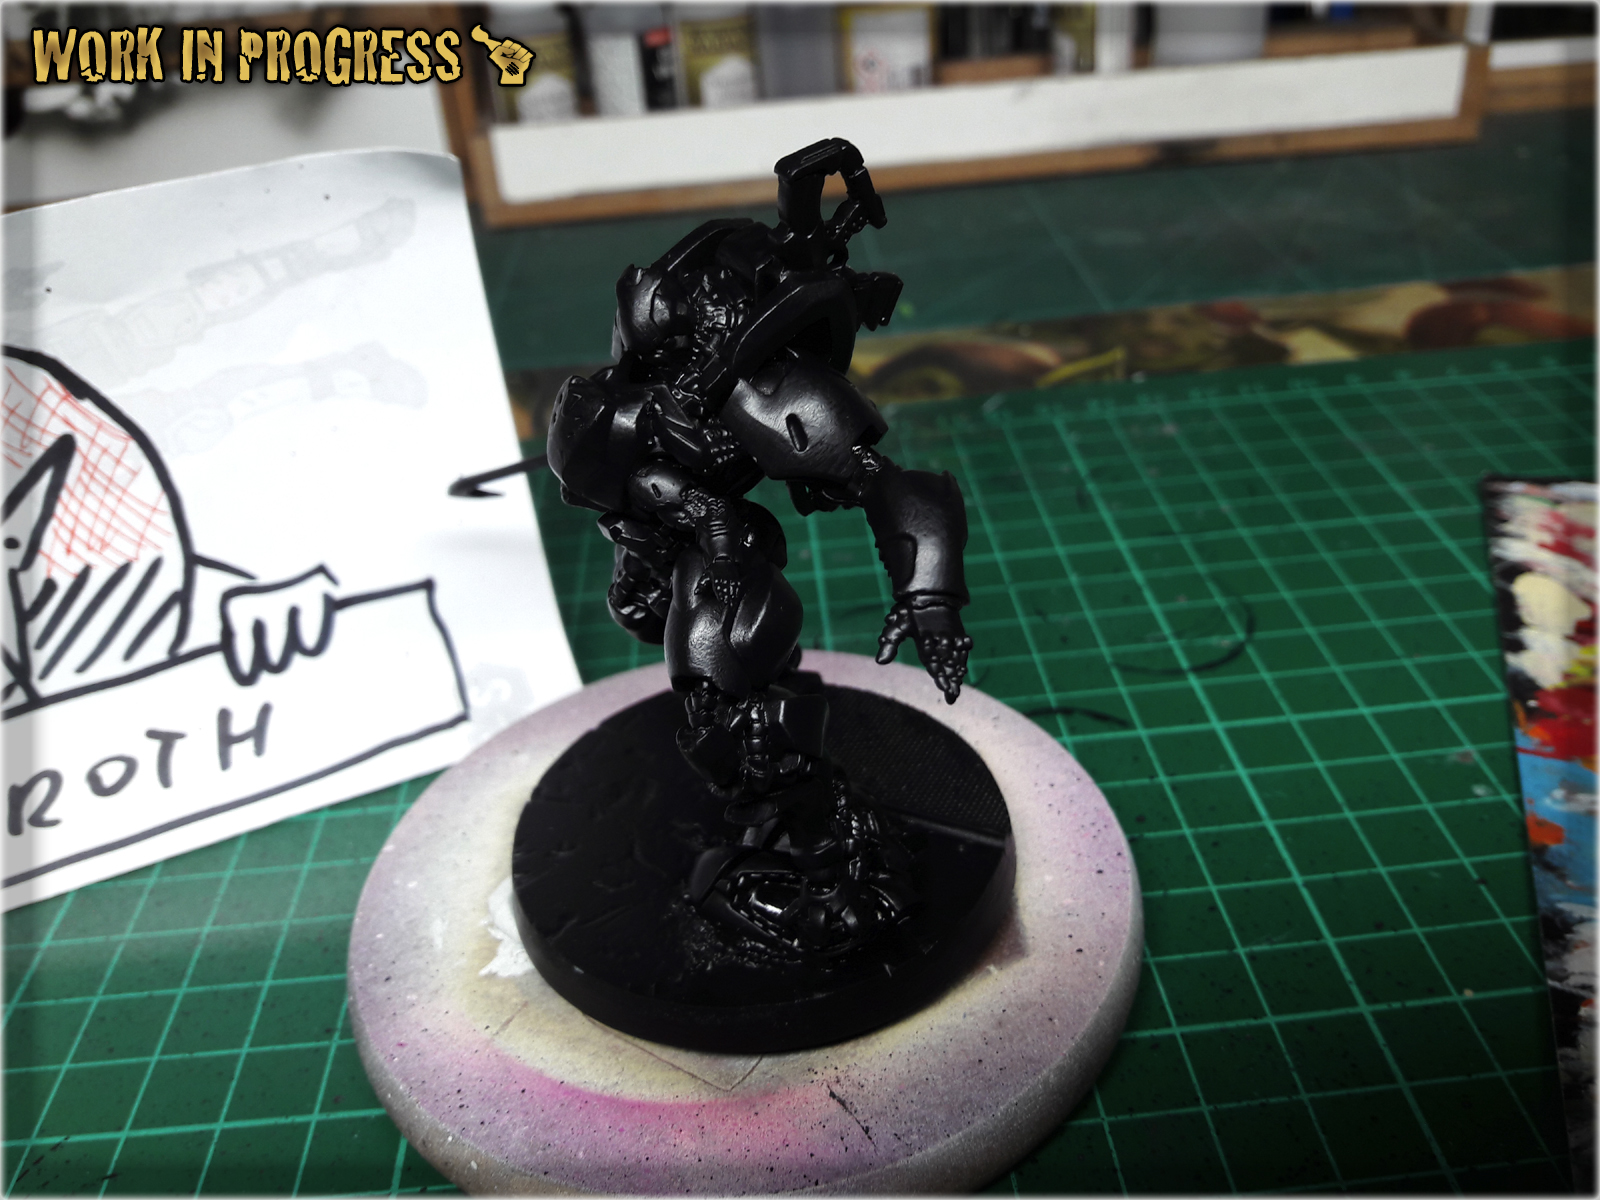
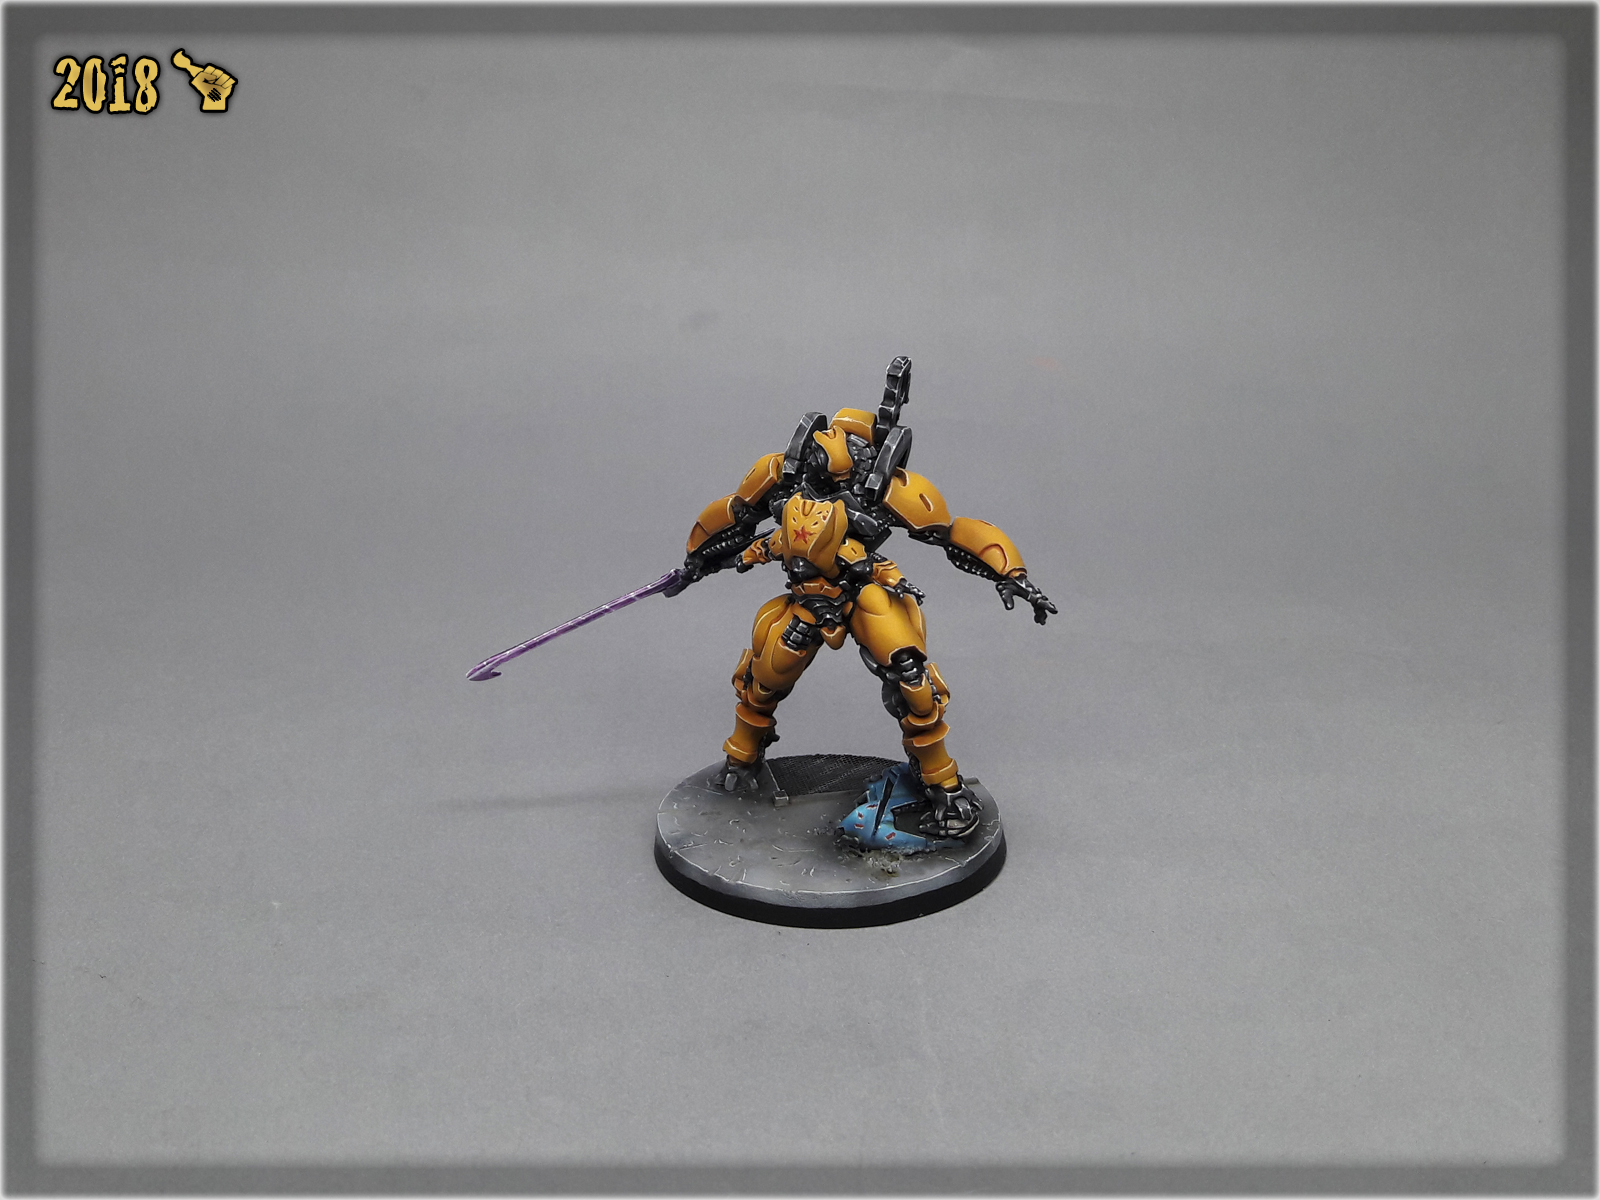
Welcome to Painting “Guijia” tutorial. Here I will take you on a Step-by-step trip through almost entire process of painting Infinity the Game “Guijia” Special Project.
Before we start, some notes:
* This one requires an Airbrush.
* Paints are to be properly thinned before airbrush application.
* As usual, please take note that what works for me might not necessarily work for you.

Allright! Undercoat the miniature with black, check your gear and let’s do this!
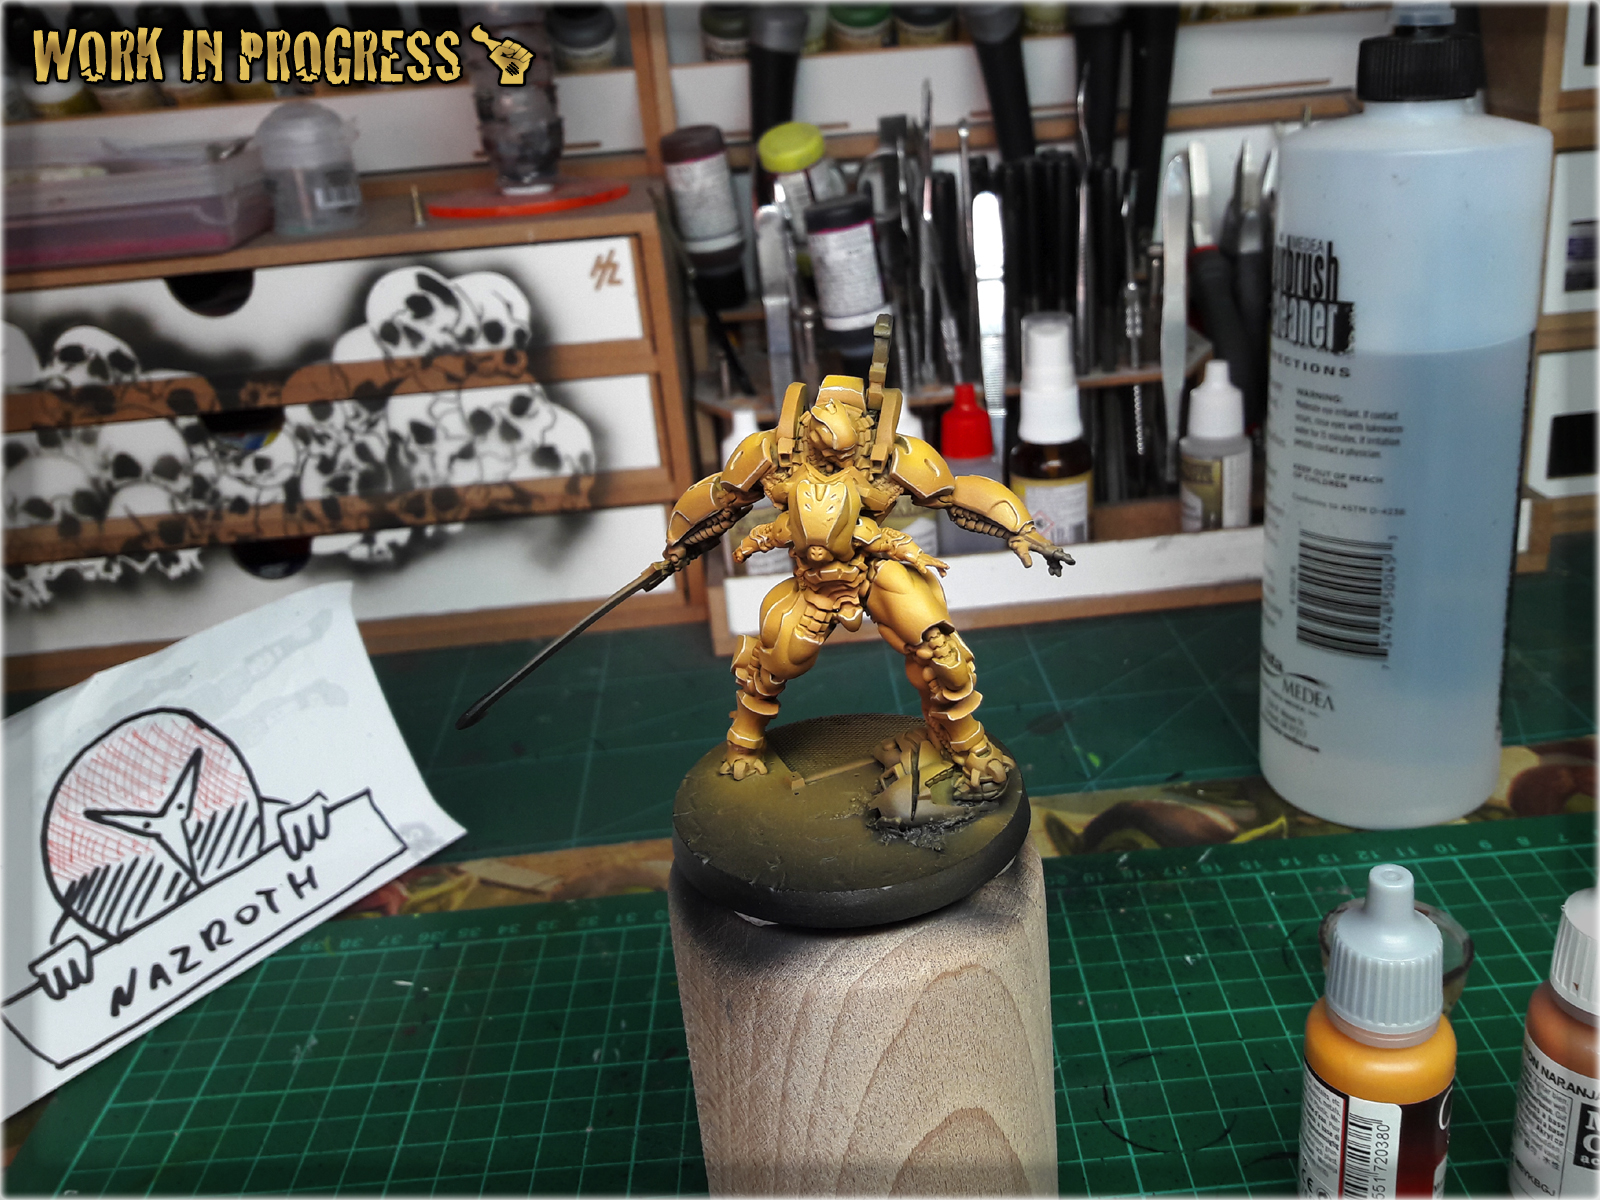
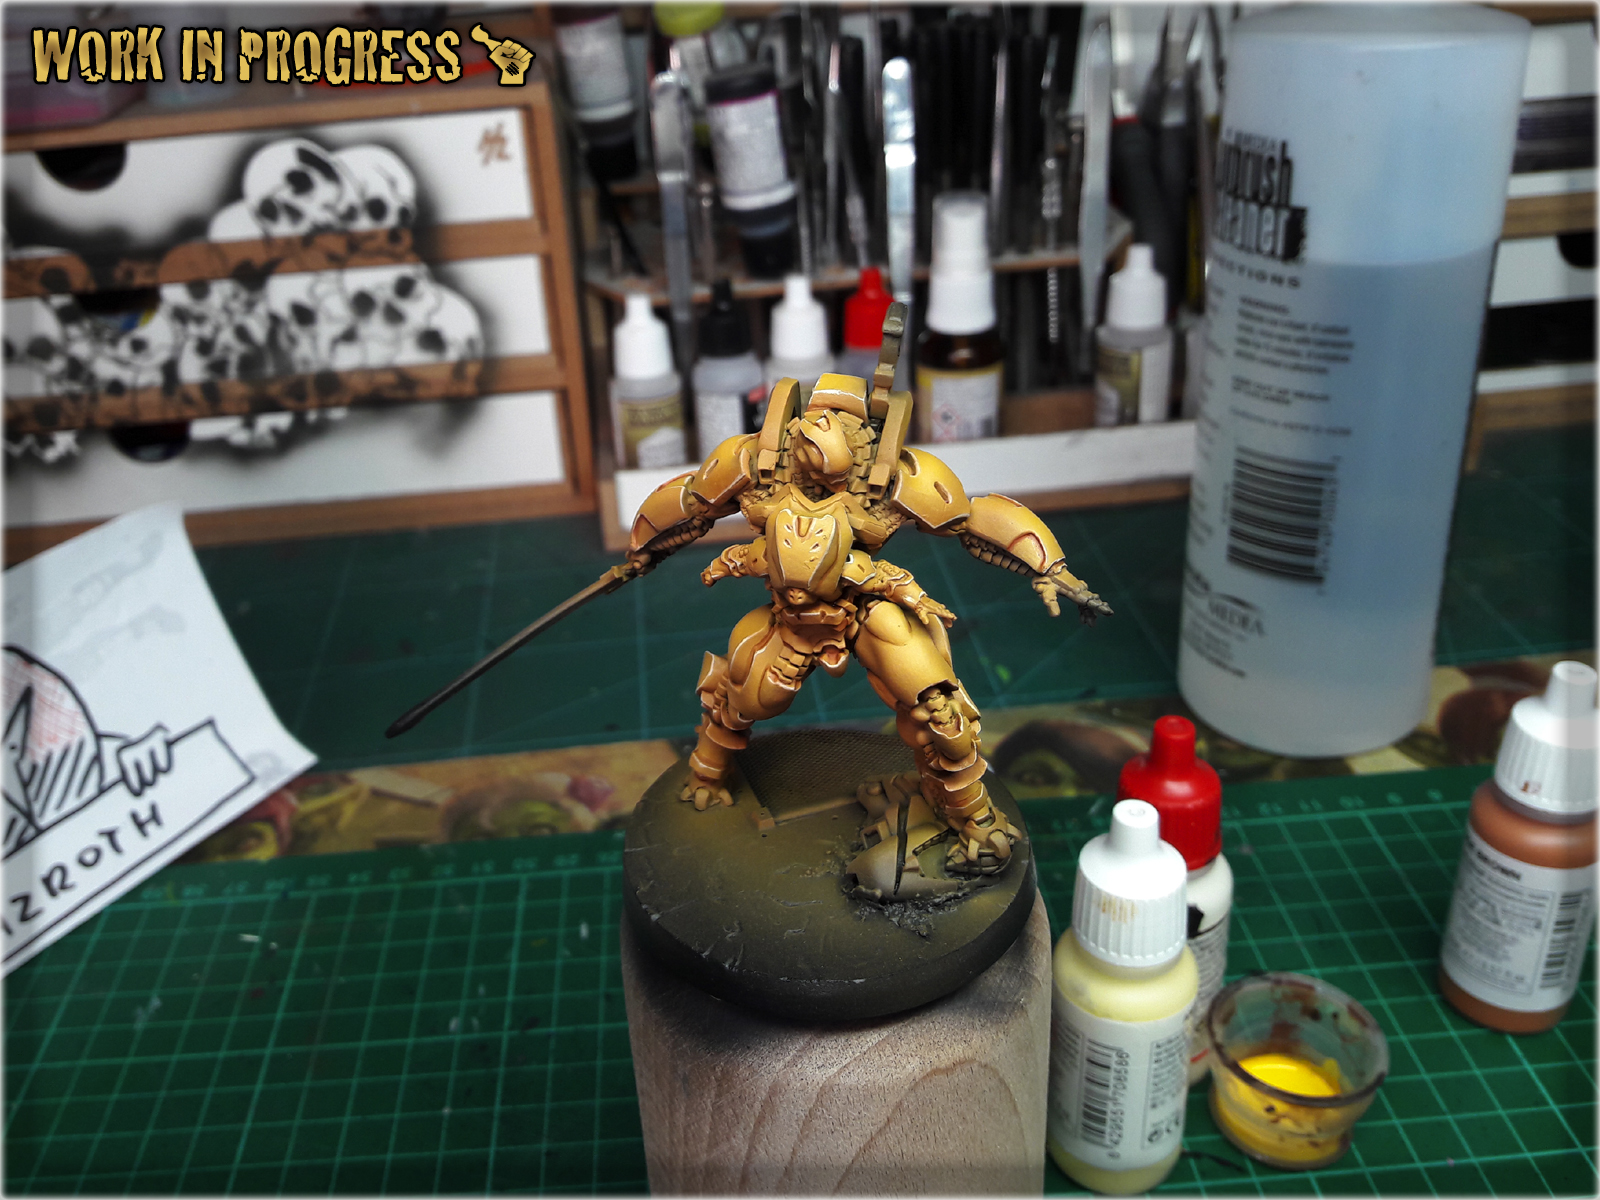
* Start with a solid layer of airbrushed Val. Orange Brown. I applied mine in three delicate, overlaping layers. I went around the miniature, with top and bottom, focusing on Armor Plates areas.

* Next, airbrush Val. Scrofulous Brown. Mostly from the top and up to 45* degree, focusing on the most exposed areas. You can start building transitions to previous layer avoiding shadowed areas.

* I forgot to take a picture of this layer. That's on me. Fortunatelly the result can be seen on the next picture. The layer is a mix of Val. Scrofulous Brown and Val. Off White, applied from top onto the center of all exposed areas.
* Next, outline all the edges with Val. Ice Yellow
* Lastly, underline armor plates with Army Painter Soft Tone Ink. I also used strongly dilluted Soft Tone to apply some more shadow in certain 'over the edge' areas.
* This is the most difficult part of the process. Mix Val. Black (air) 1:5 with Val. Panzer Dark Grey (air) and apply it to everything, that is not external armour plates and blade. The difficult part is to not mess up all these sexy Orange-to-Yellow armour plates. If you do, you can try out Erasing Bloopers following one of my tutorials, still the airbrushed nature of the layer will make it extremely difficult.
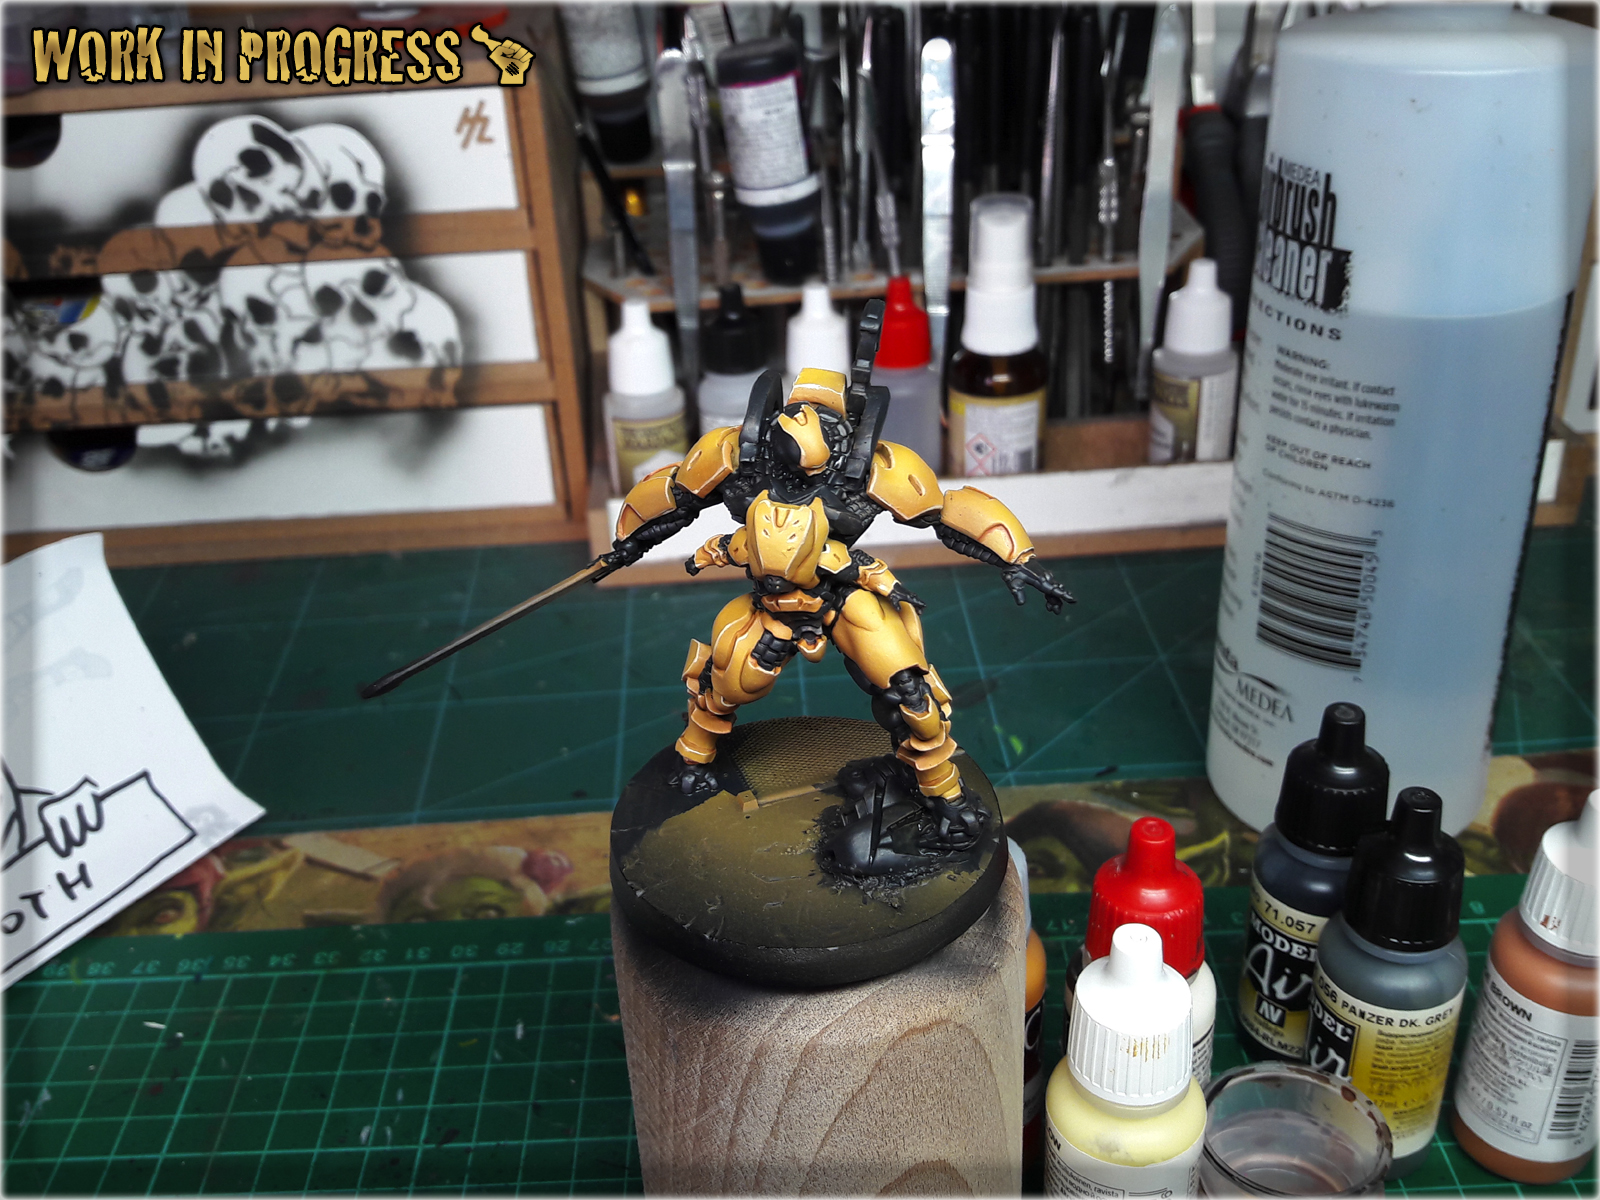
* Next apply a watered down GW Fenrisian Grey over black areas. It is important not to fill any recesses. You can apply more than one thin layer, overlaping each other and even leave some irregularities - this will work to the overall paint job's advantage.

* Next, higlight edges with GW Pale Wych Flesh. This time no thinning down the paint. You can imitate some scratches, reflexions etc.


* Now wash it all with a thinned down Army Painter Dark Tone Ink. Once again be extra carefuul not to paint over finished armour plates.

* Now it's time to make it POP! Using GW Pale Wych Flesh and Val. Off White, highlight the edges and create some points of focus, scratches, reflections etc.

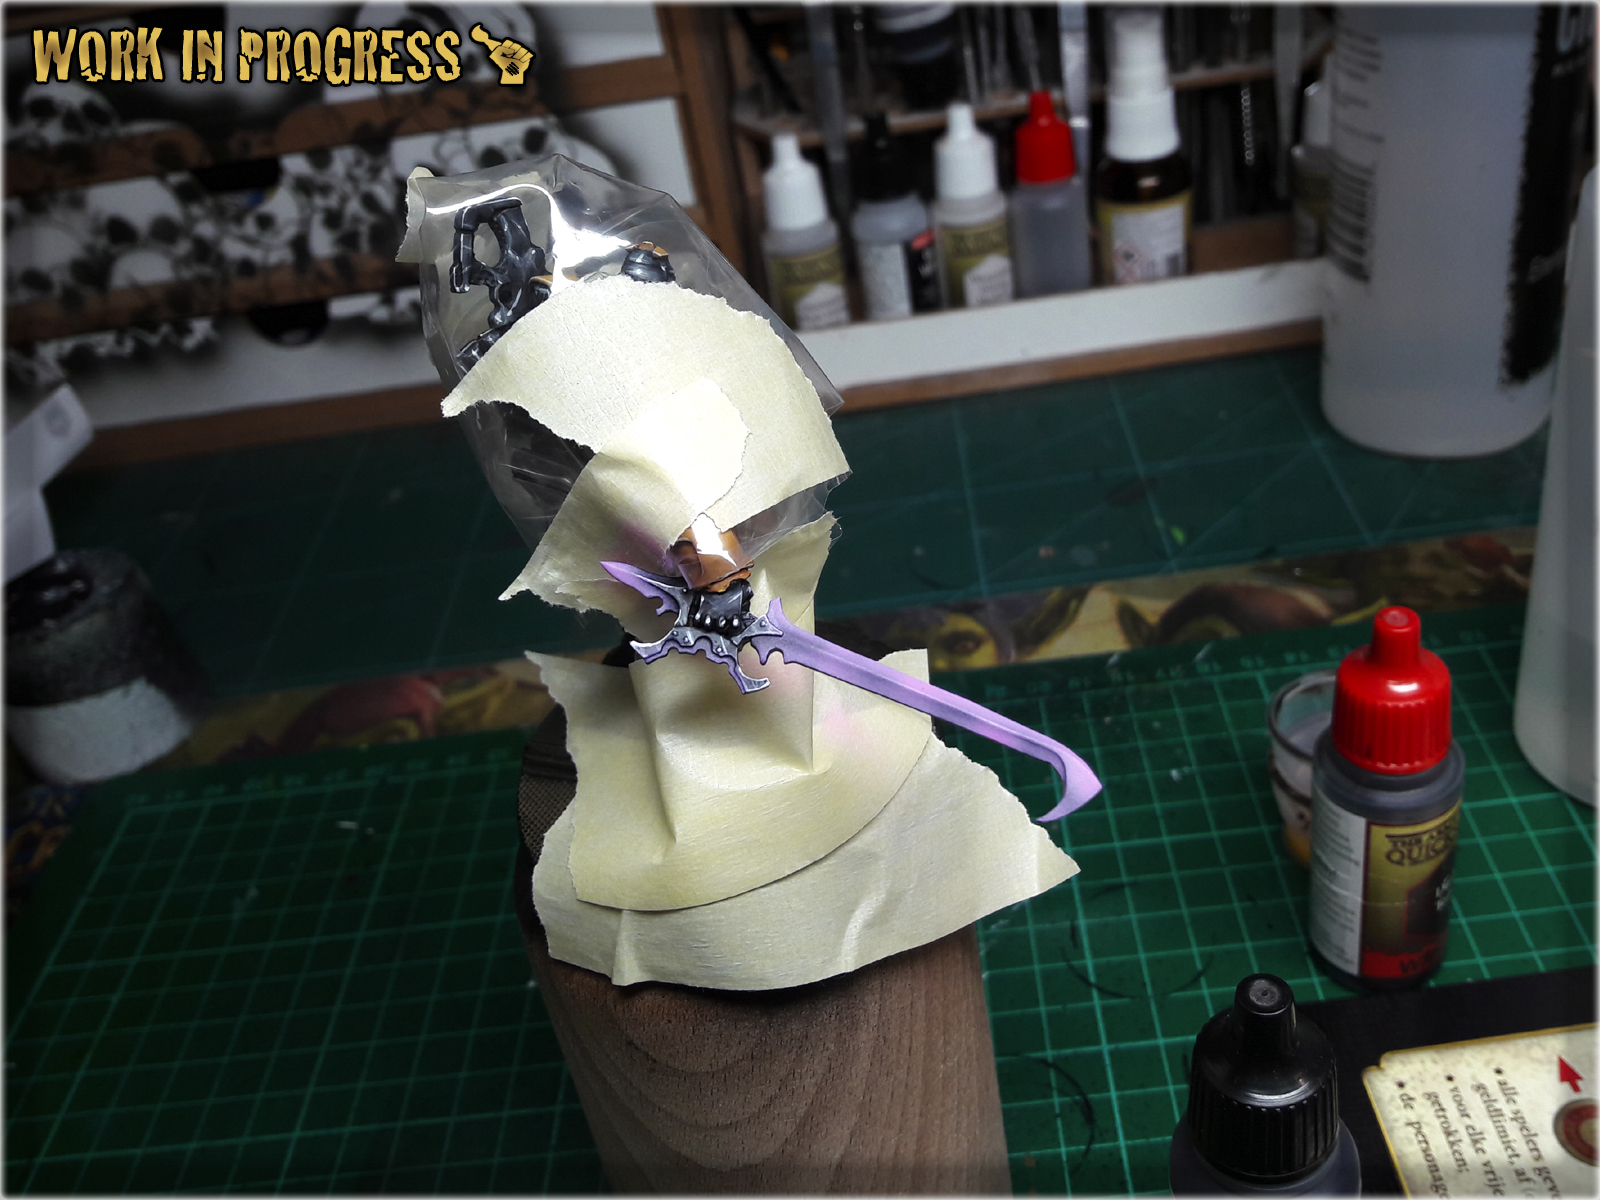
* Start by masking the Guijia's leg. I used a piece of foil and masking tape to cover areas that I didn;t wanted to get dirty. Then manually applu a layer of Val. Prussian Blue, avoiding areas of Black Mesh.

* Next airbrush a layer of Light Sea Blue, focusing on the most exposed areas of armour.
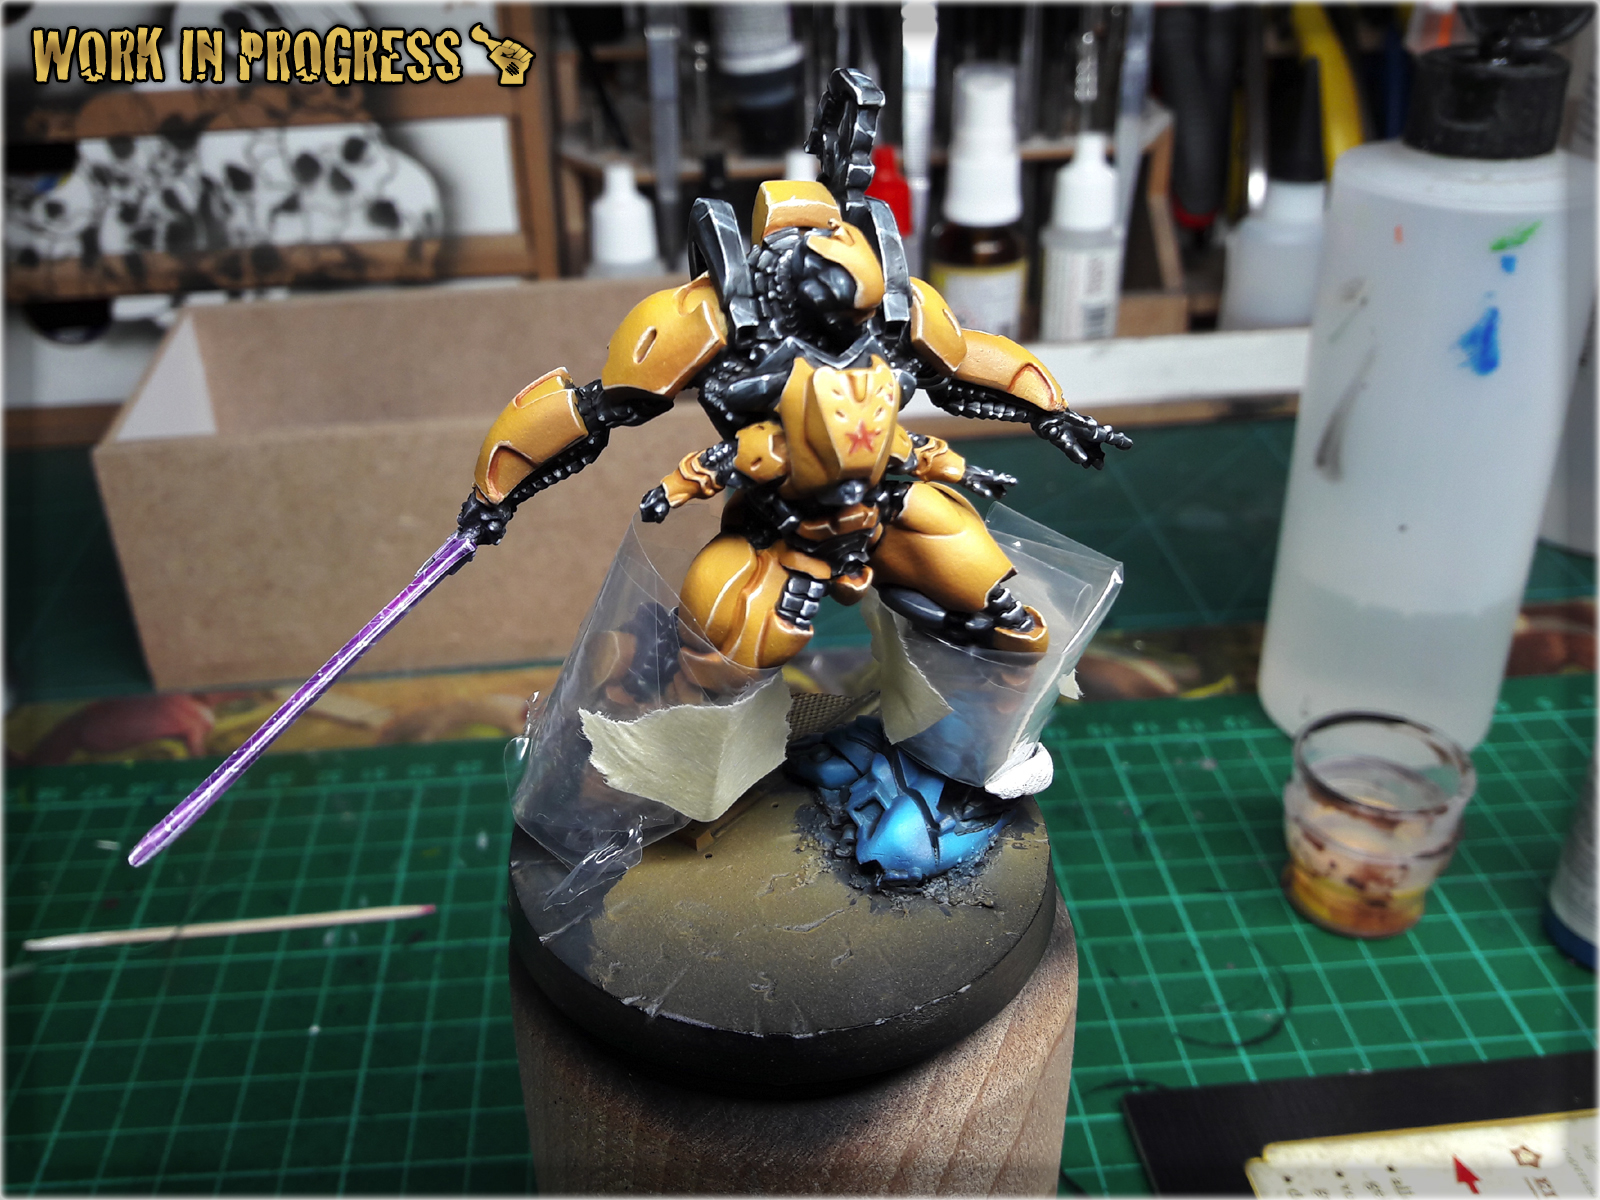
* Next, airbrush a mix of Val. Light Sea Blue with a bit of Val. White focusing on middle areas, creating a transition from previous layer.
* Next highlight the edges with GW Pale Wych Flesh.

* To seal Blue, wash it with thinned down GW Guilliman Blue Glaze. You can see that I have also painted some battle damage. I did it using Val. Cavalry Brown, underlined with Val. Off White.

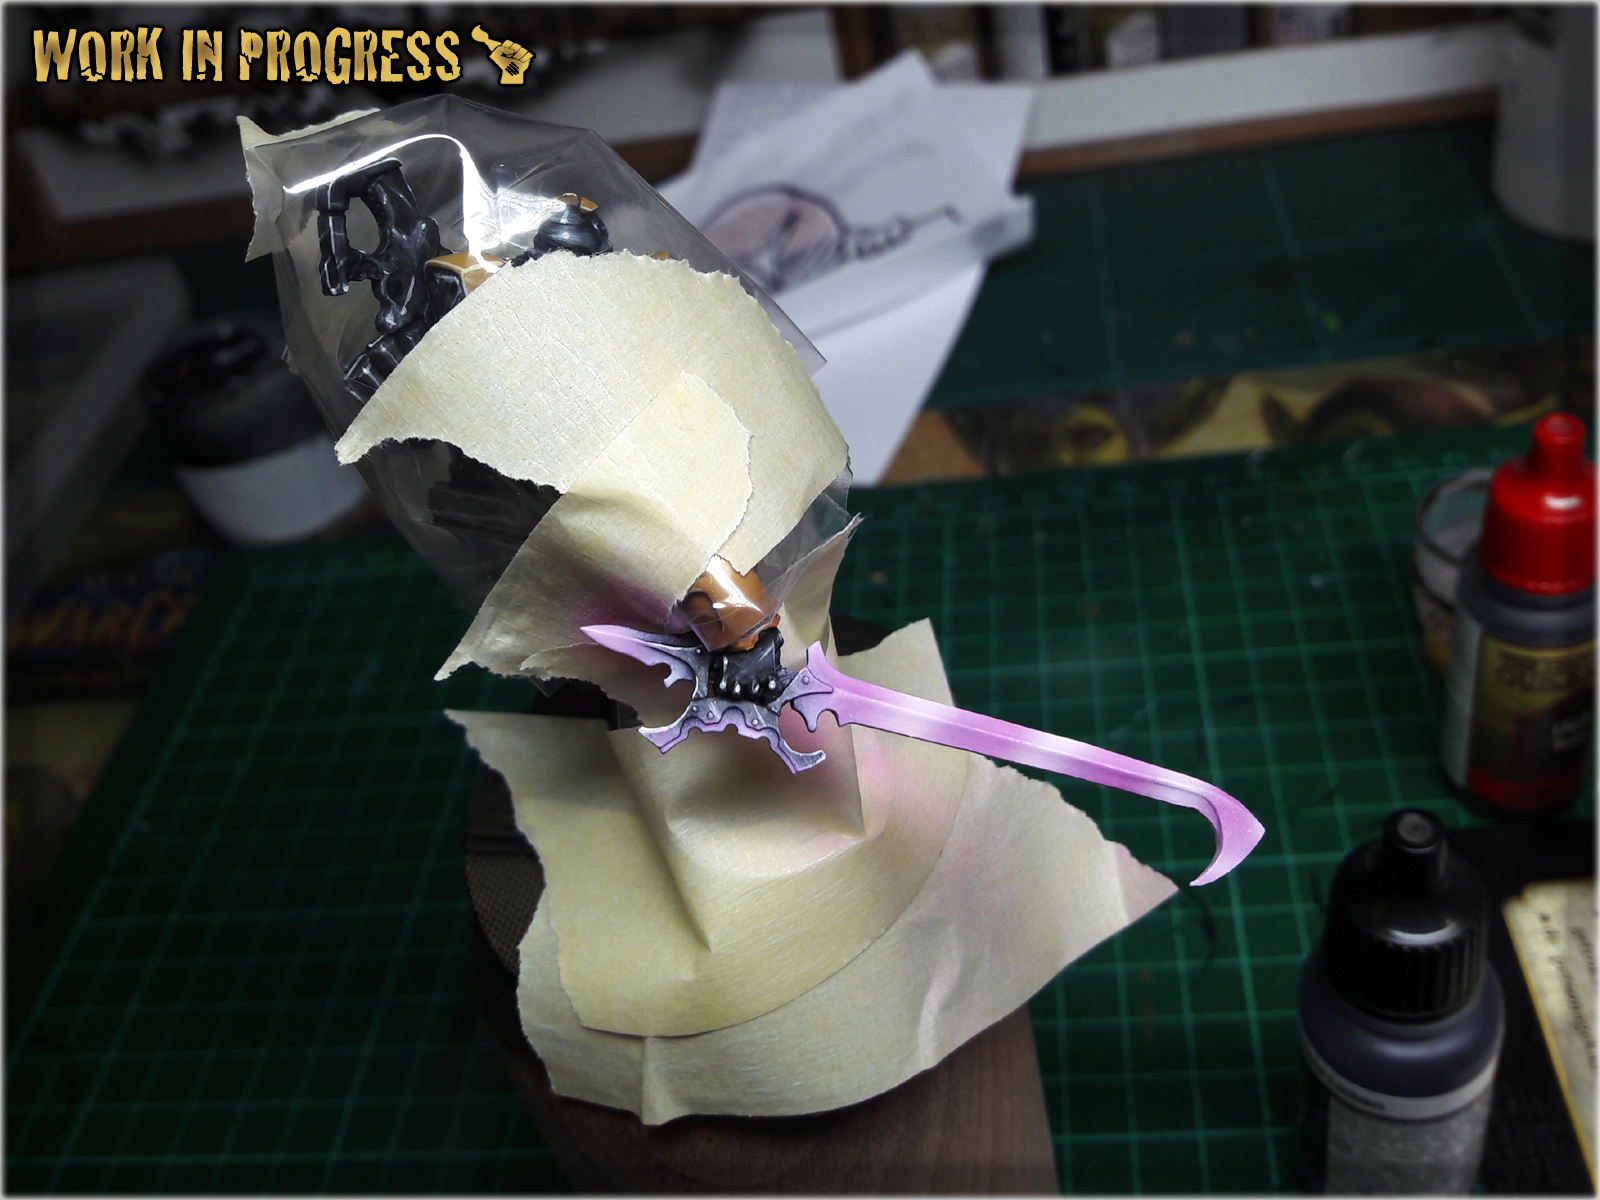
I leave adding Black Under Armour and additional details to you. Now to the Sword… To be honest, because of strong light, pictures taken during this one’s painting process did not captured how the sword looked like and I really don’t like how they turned out. That being said – I will still show you the Sword and name the paints used, but instead of a Step-by-step tutorial, let’s just call it a BONUS.
List of paints:
Val. Warlord Purple,
Val. Off white,
GW. Pale Wych Flesh,
AP. Purple Tone Ink,

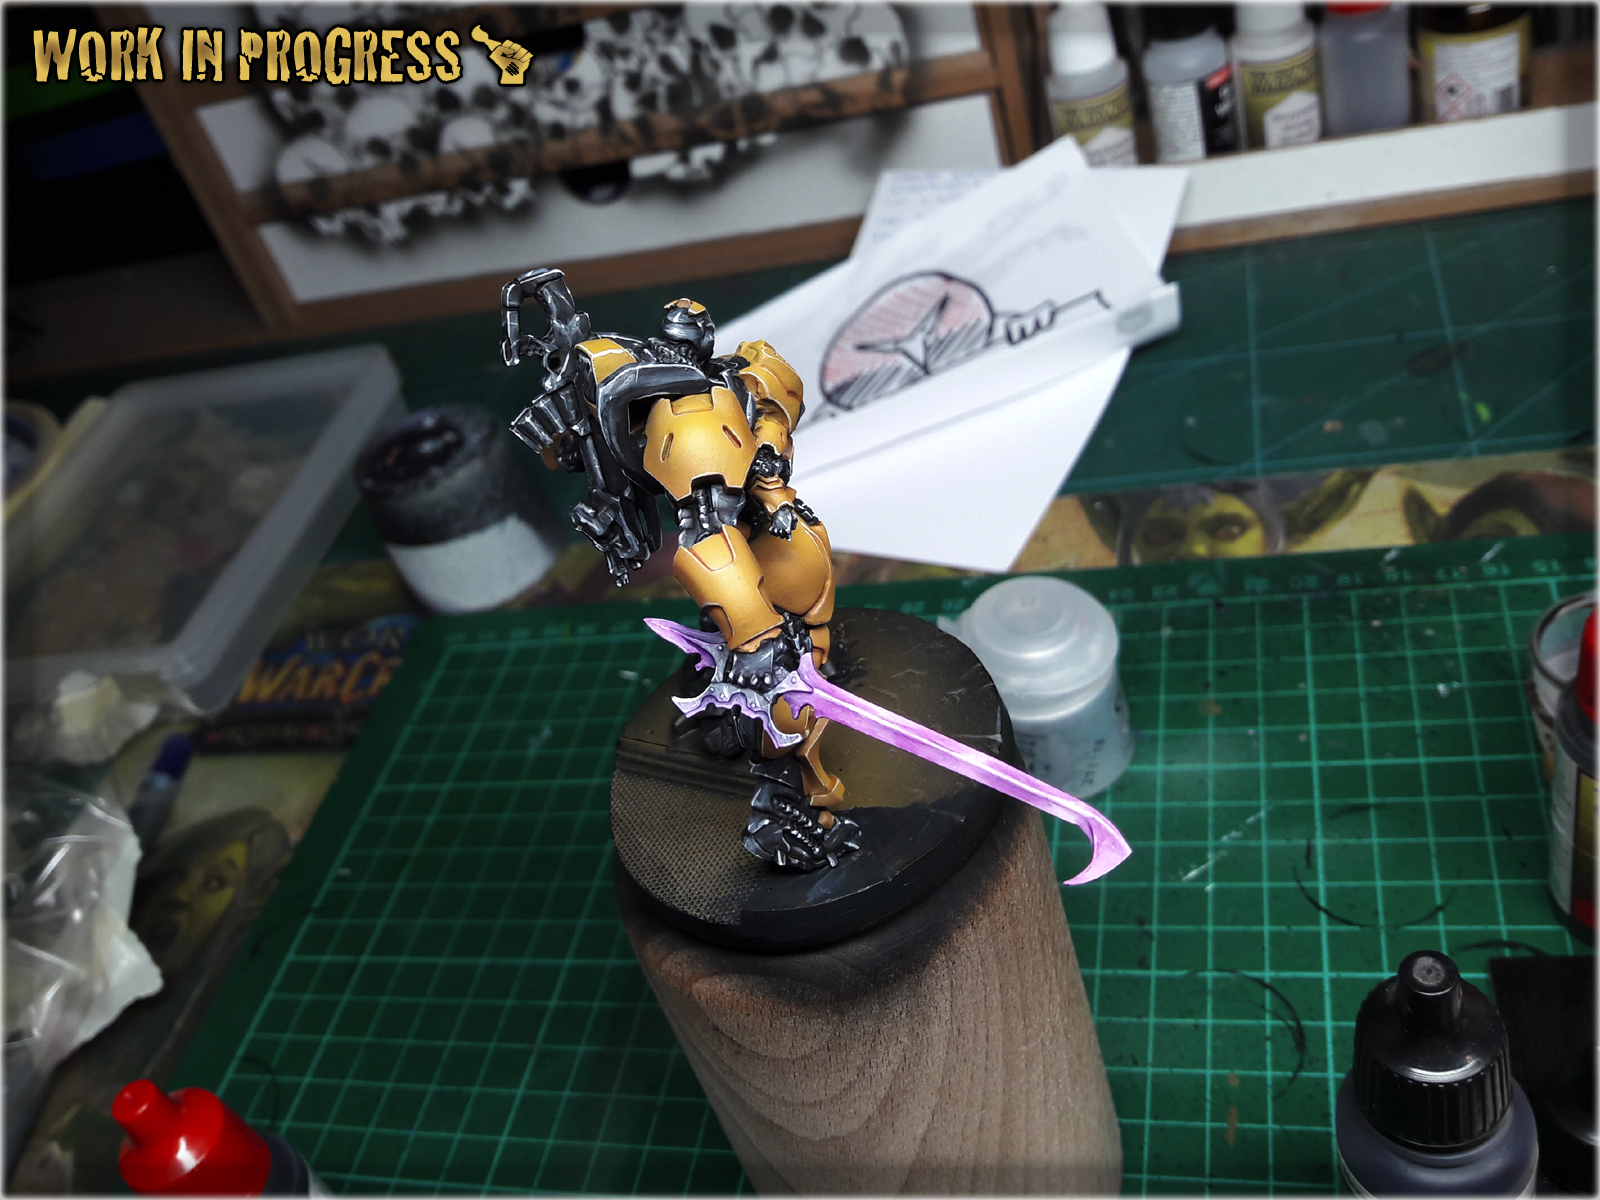

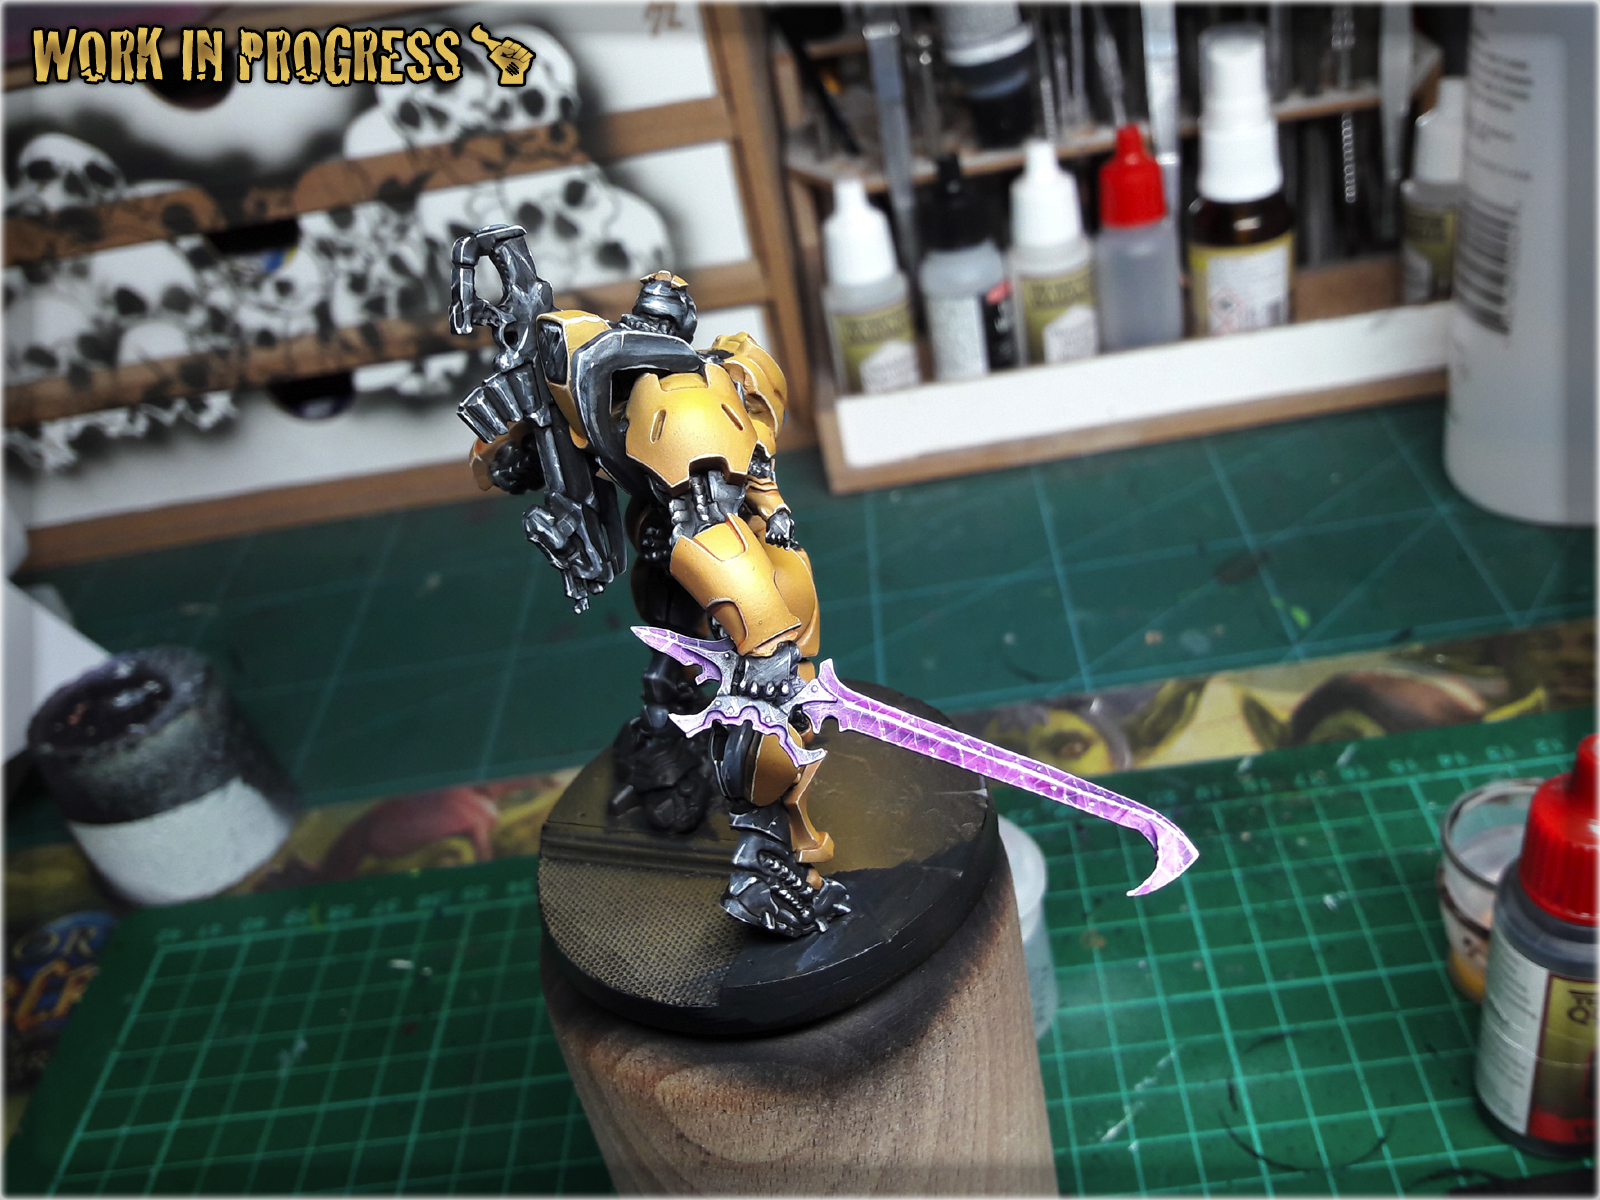
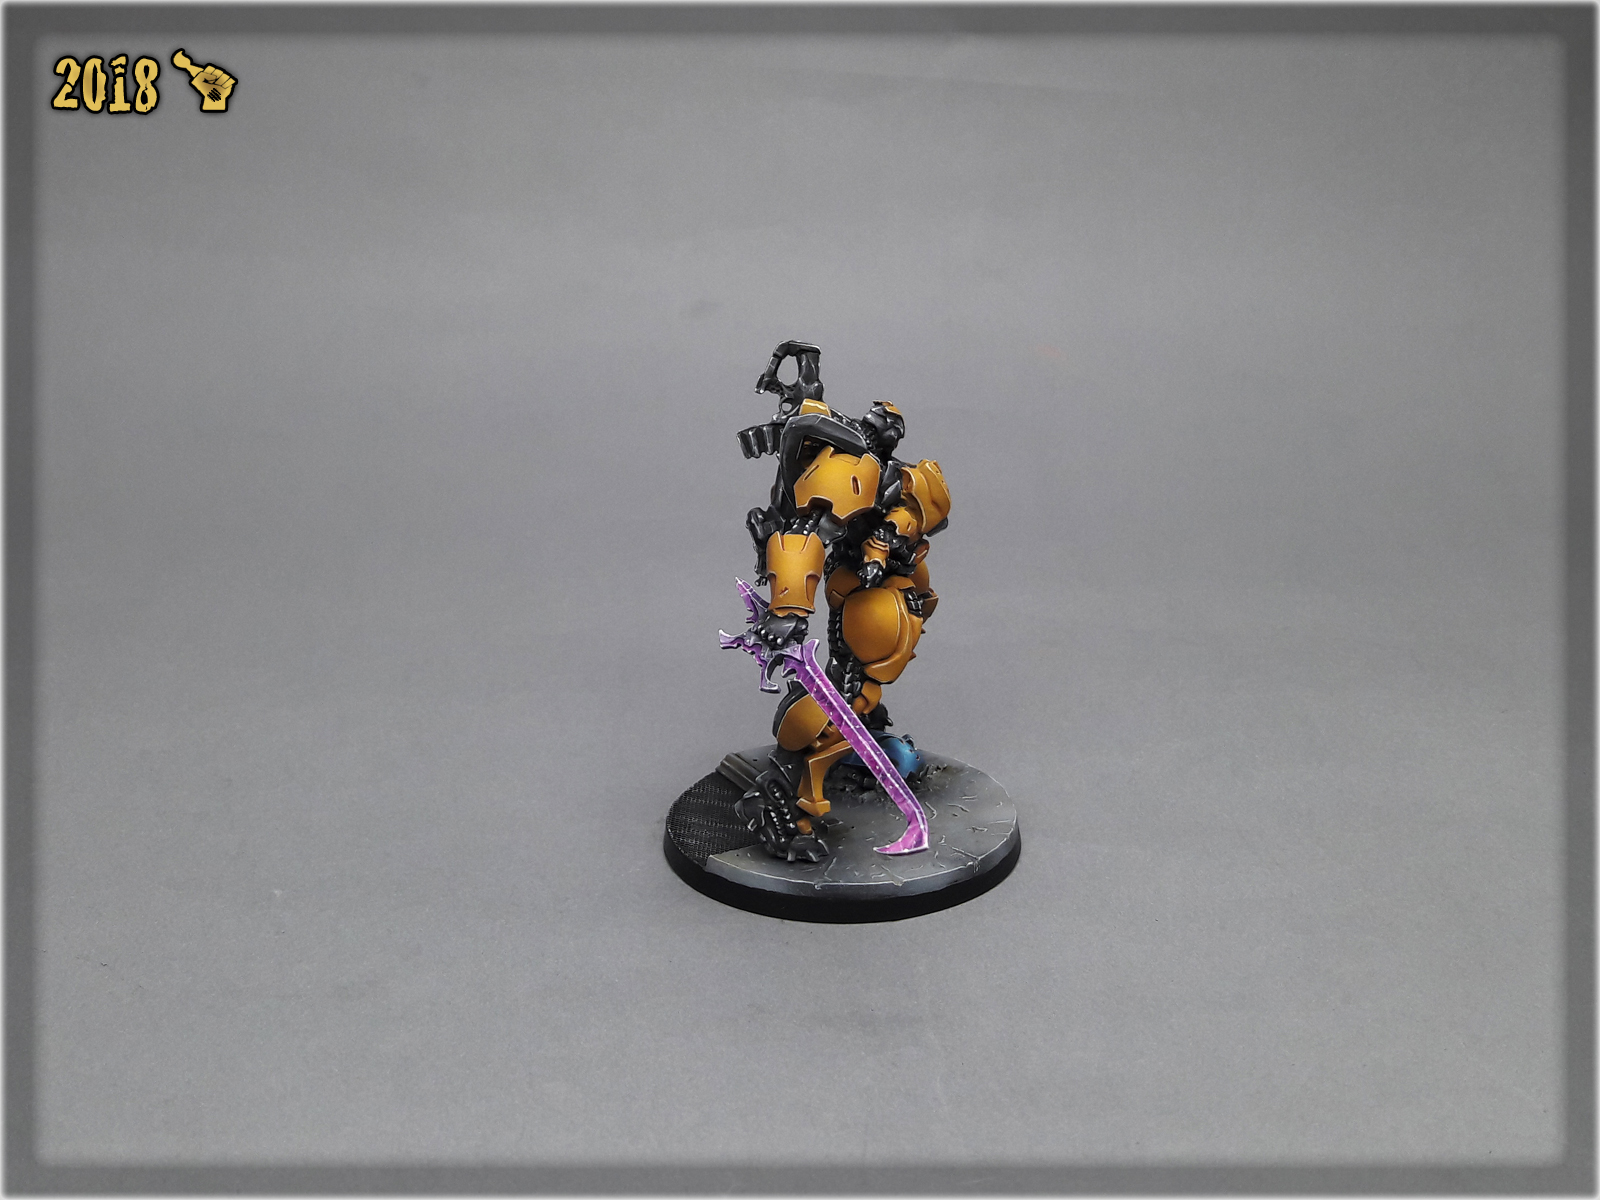
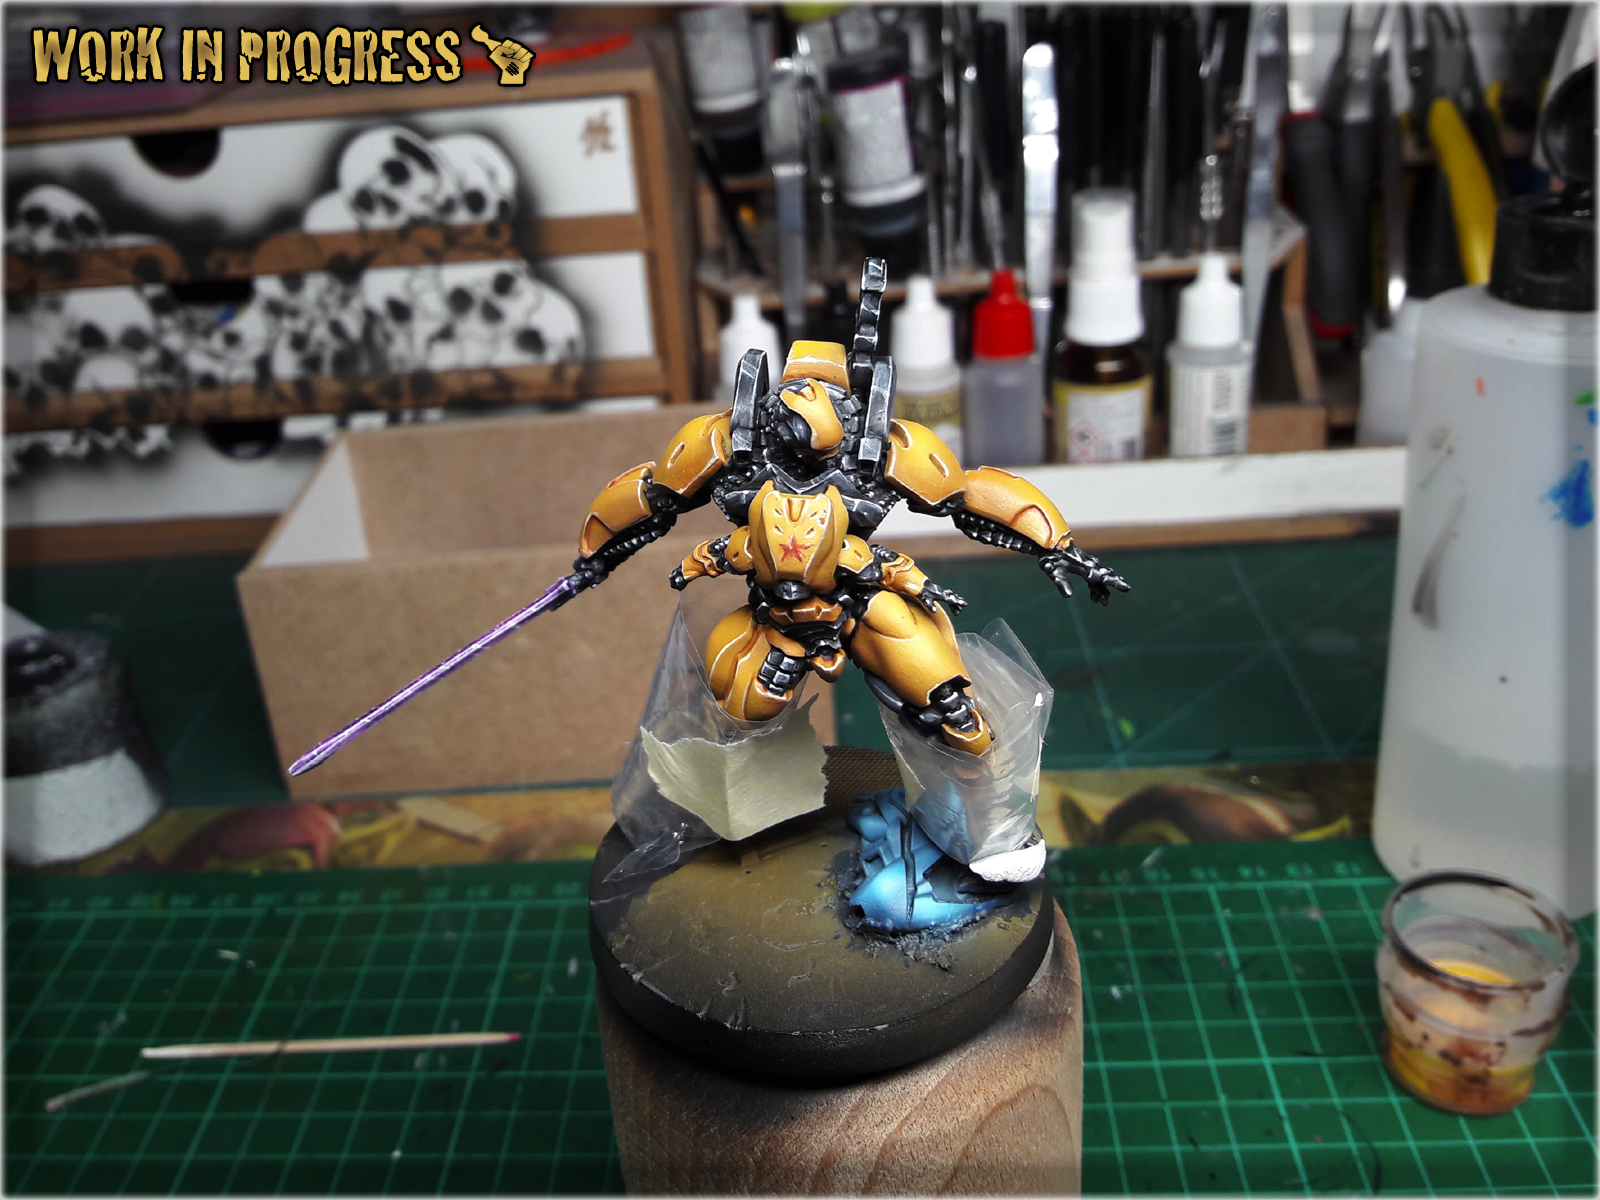
I leave the base and additional detail to you. Congratulations, you have painted a Guijia 🙂
Was this tutorial helpful? Did you enjoyed it? Leave me a comment 😉
I hope you find this tutorial interesting. Be sure to let me know your thoughts in the comments below or via Facebook or Instagram. I would also appreciate if you considered sharing this content with your friends, who might find it useful. Finally if you are looking for a professional miniatures painting service be sure to contact me with this contact form. I always reply within 24 hours, after which please check out your spam folder.