- contact@scarhandpainting.com


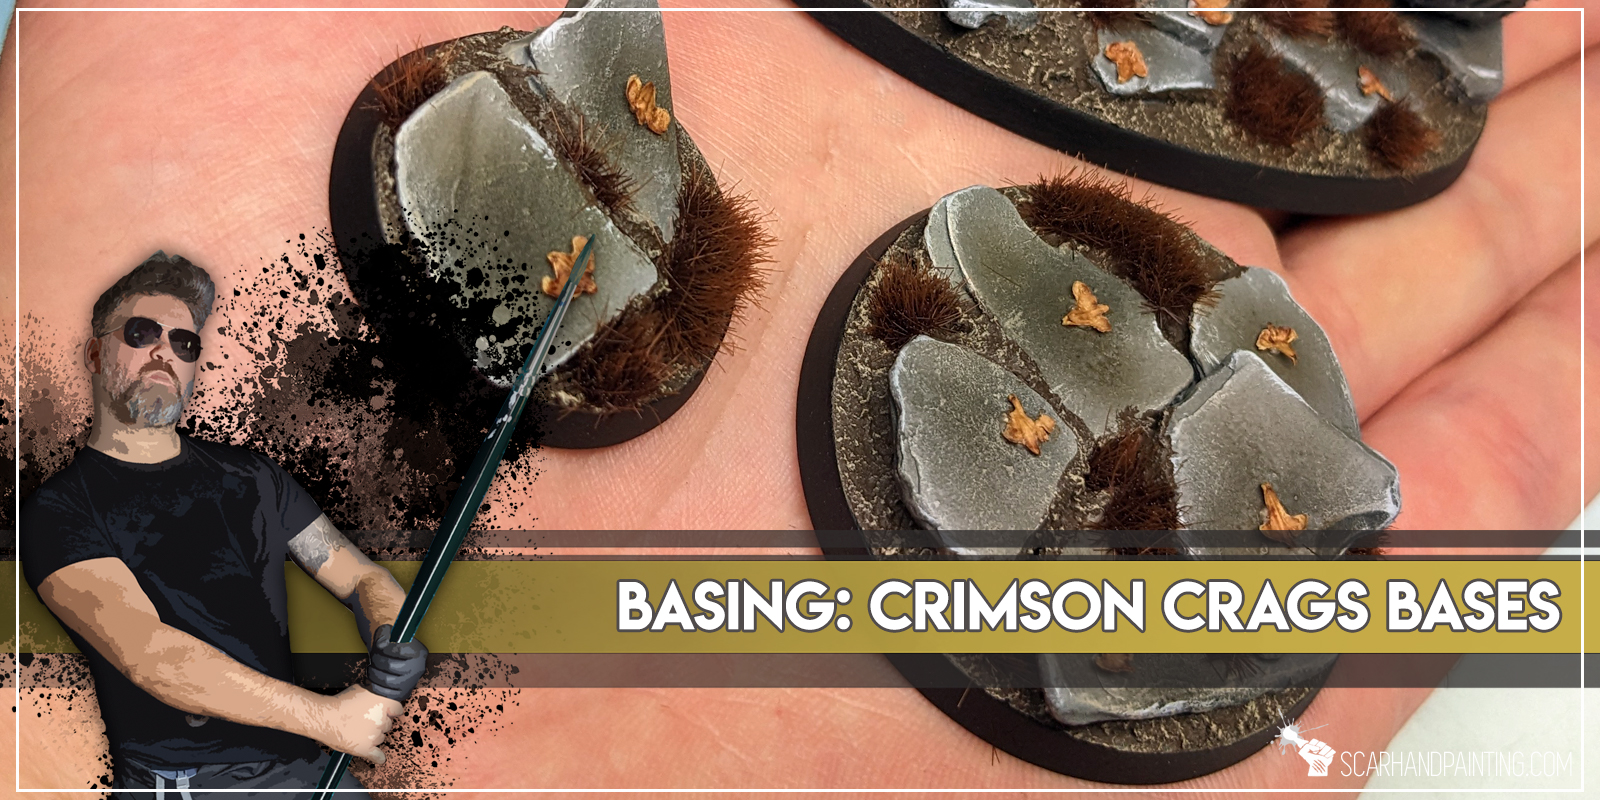
Welcome to Crimson Crags Bases tutorial. Here I will take you on a Step-by-step trip through the process of creating Crimson Crags themed Bases the same way as seen at: Gallery: Warhammer 40,000 Crimson Fists.
Before we start, some notes:
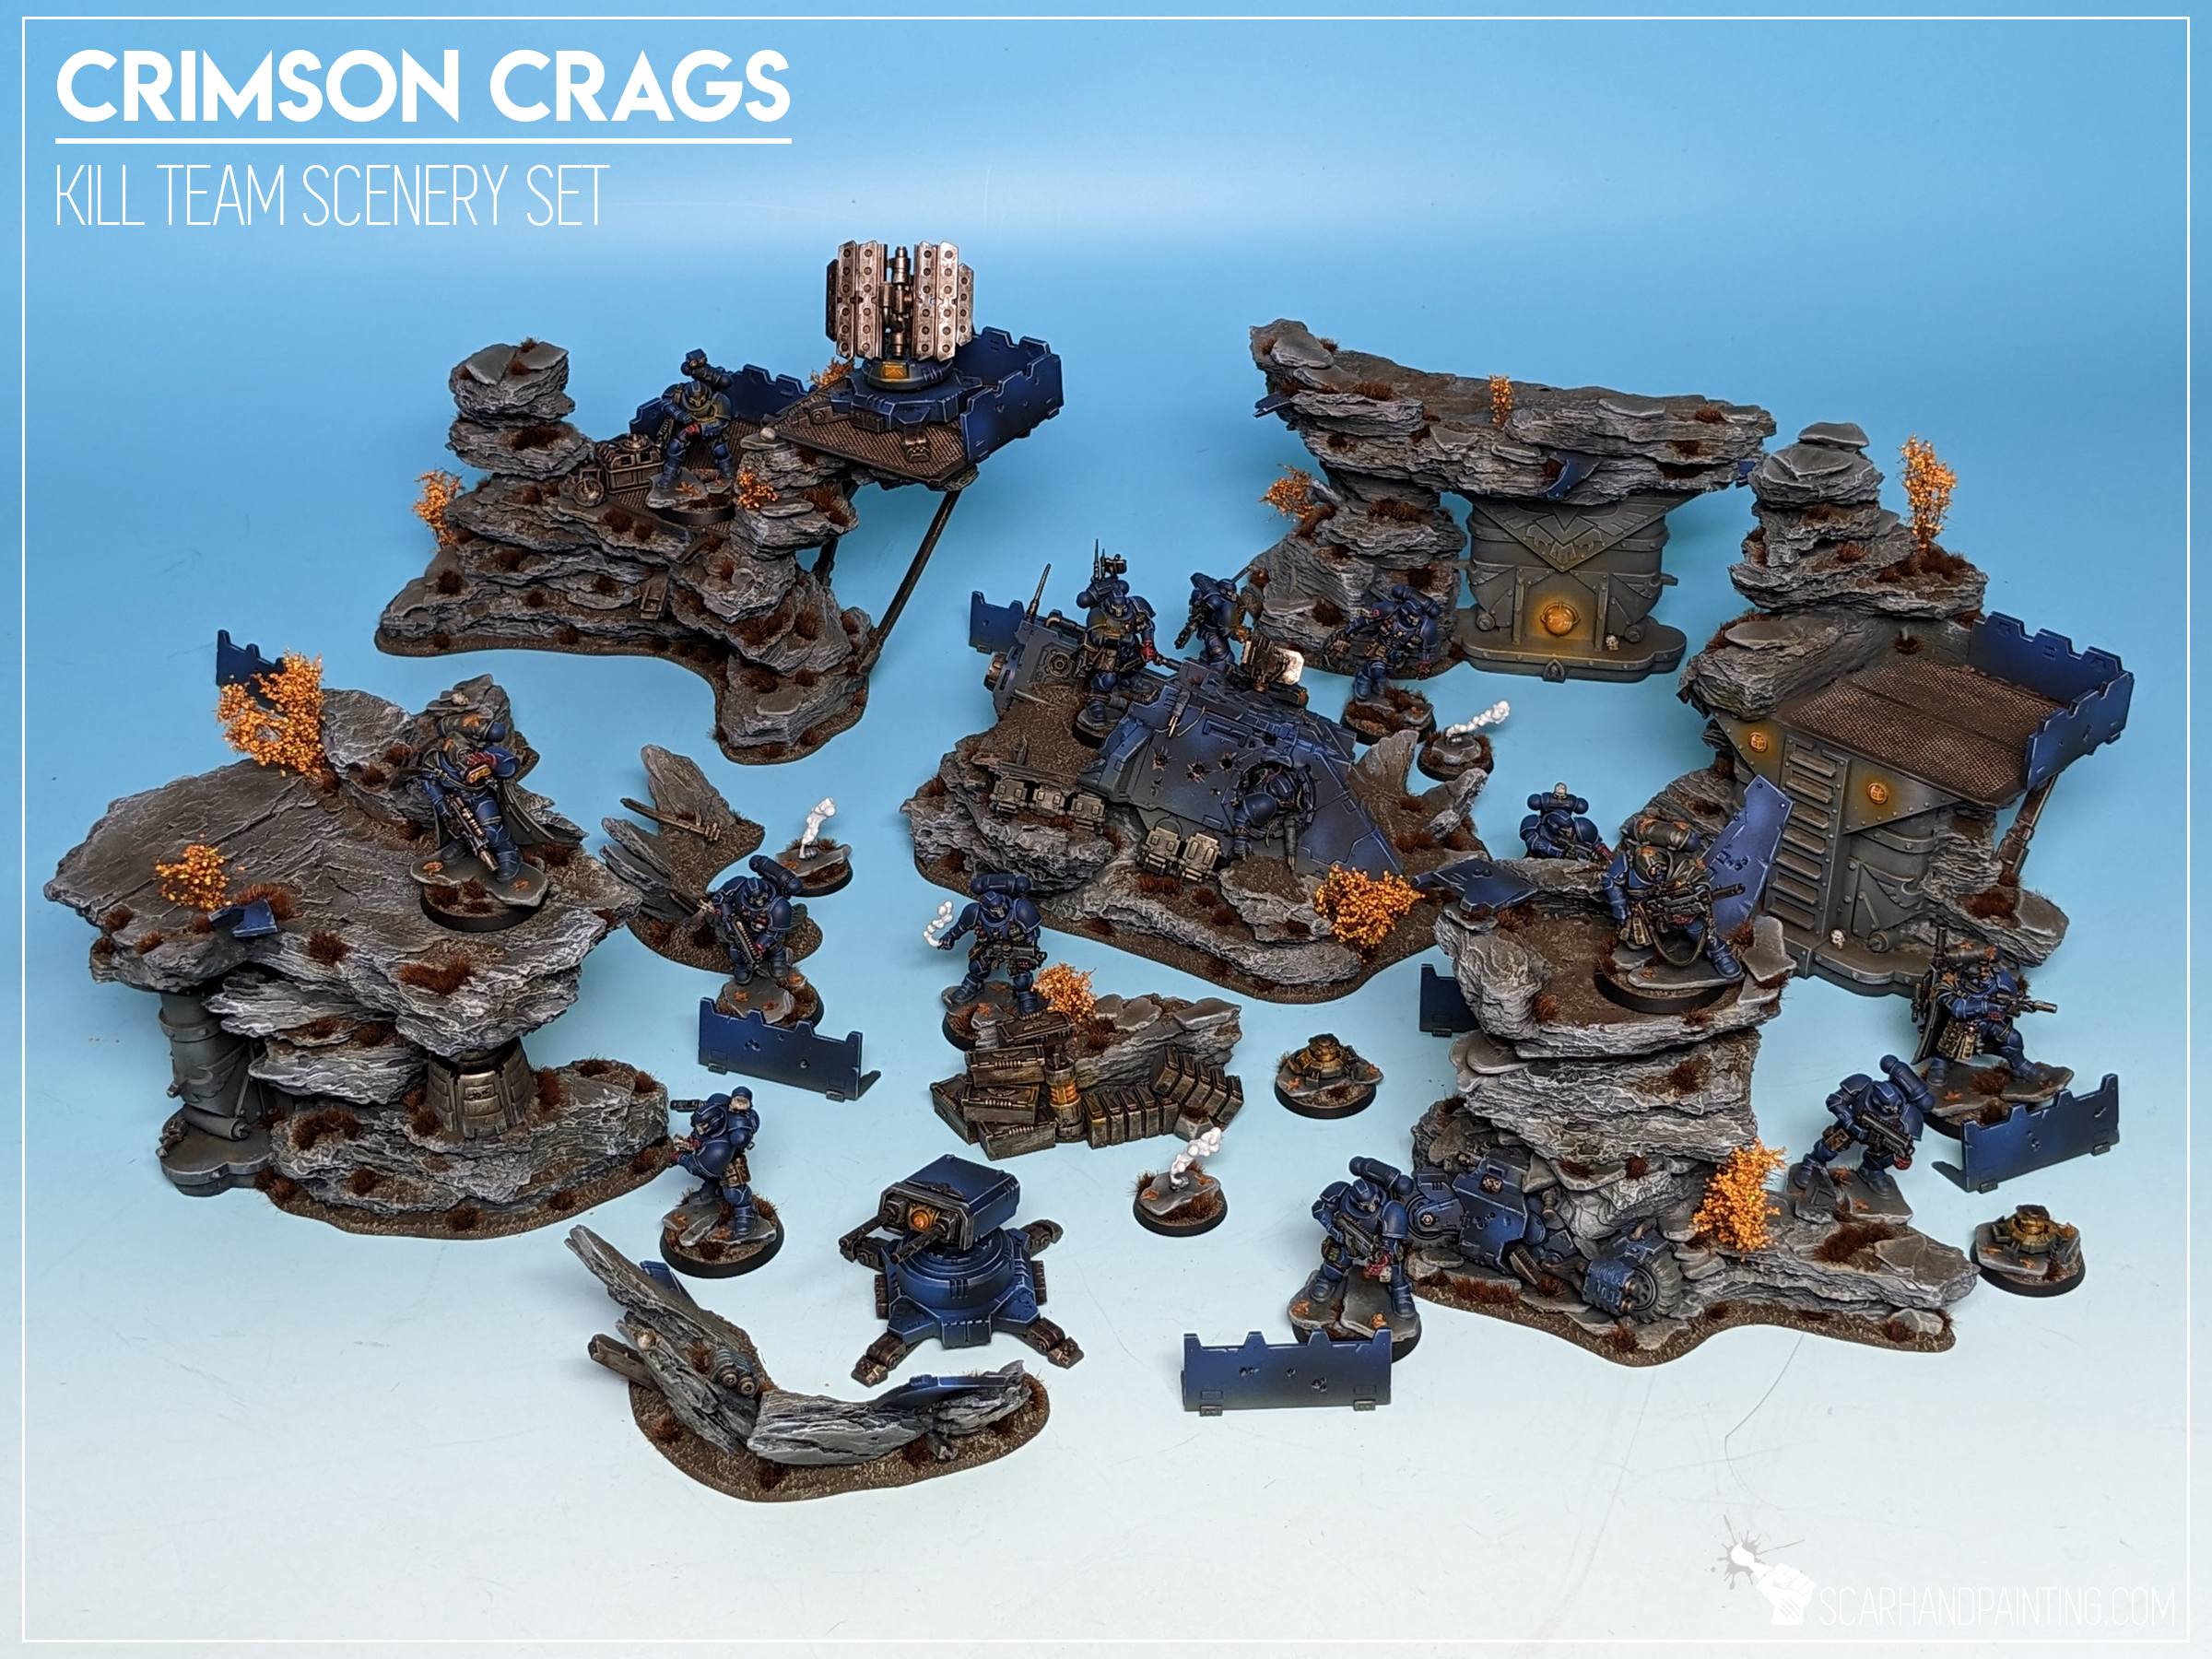
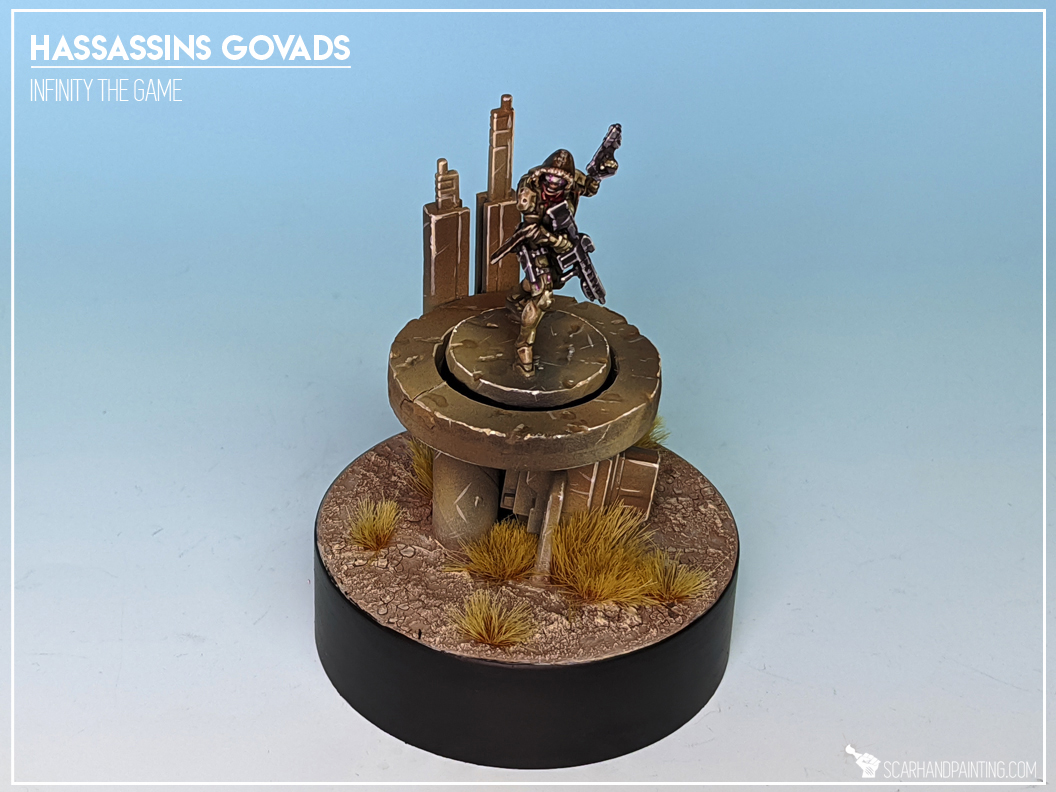
The “Crimson Crags” is a name of a self designed Warhammer 40,000/Kill Team scenery setting themed around my Crimson Fists Astartes collection. The idea behind the setting is reinforced rocky ravines ravaged by war. You can see more examples of the scenery and basing in the Killzone Crimson Crags gallery. I have already covered painting Crimson Fists and modeling the scenery in previous hobby articles. Now is time to present to you the basing.
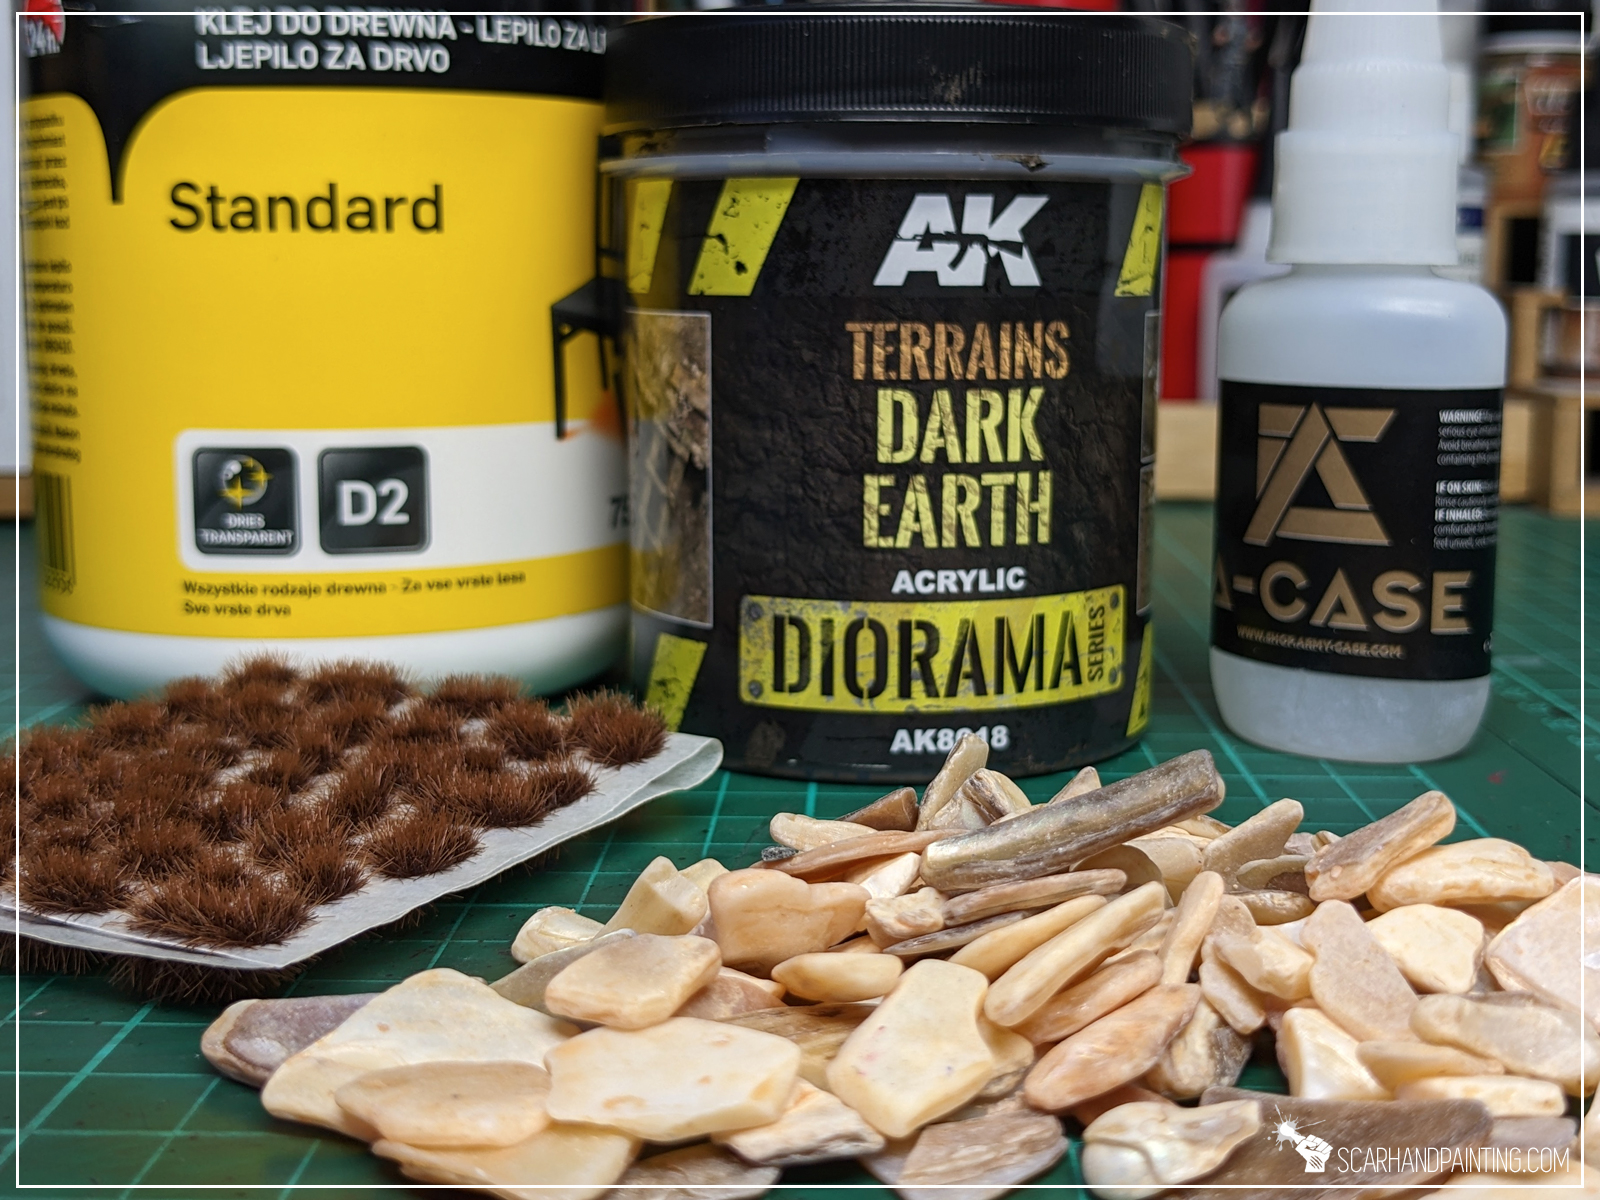
For this tutorial I will be using:
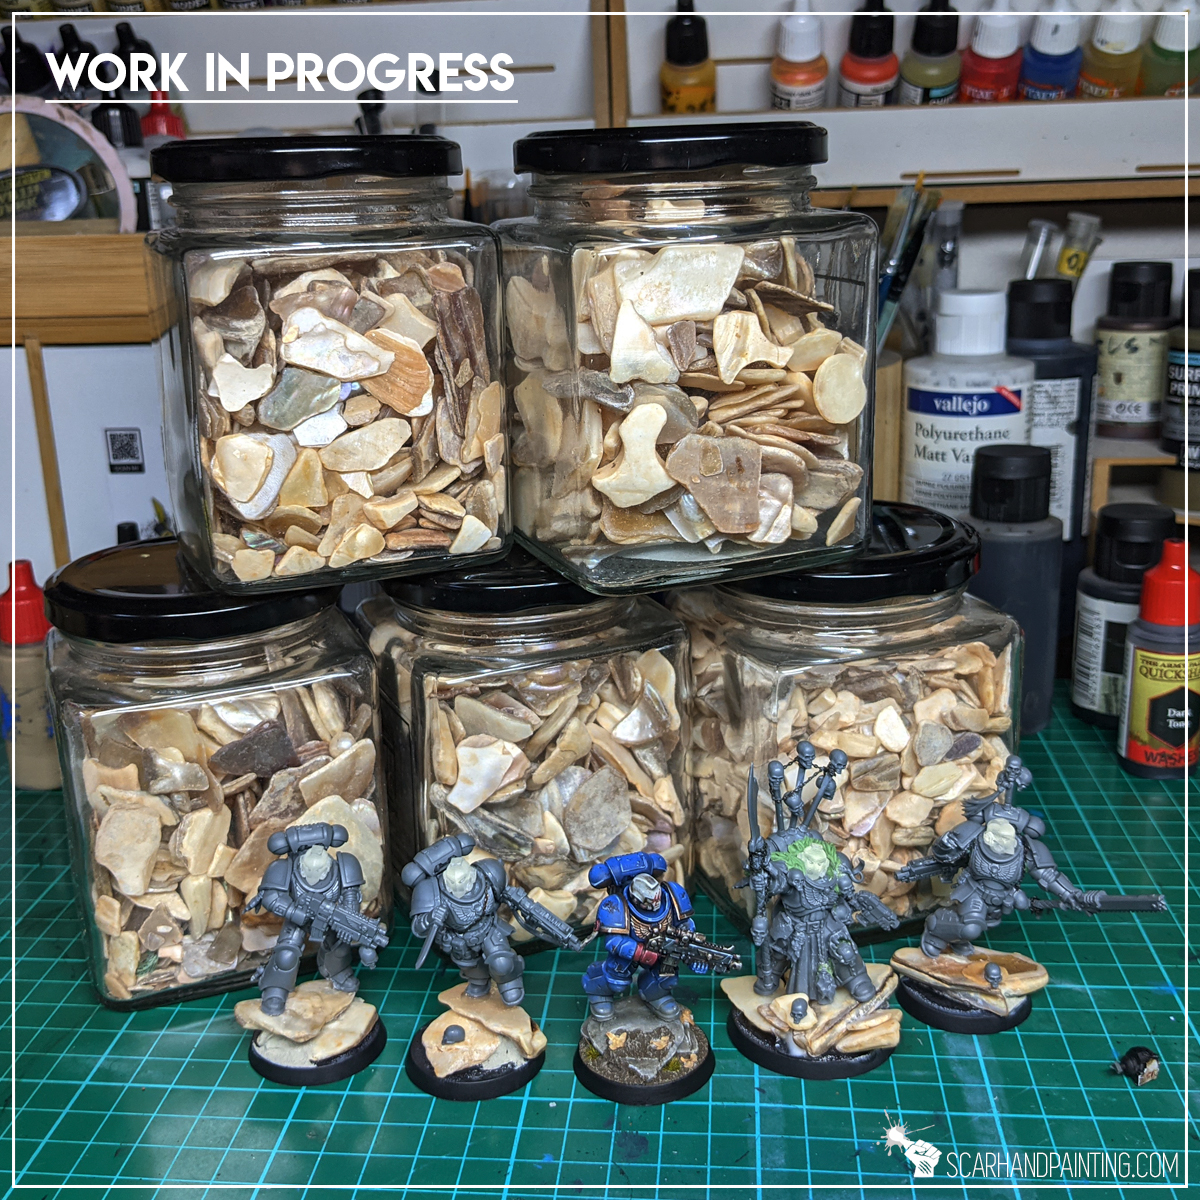
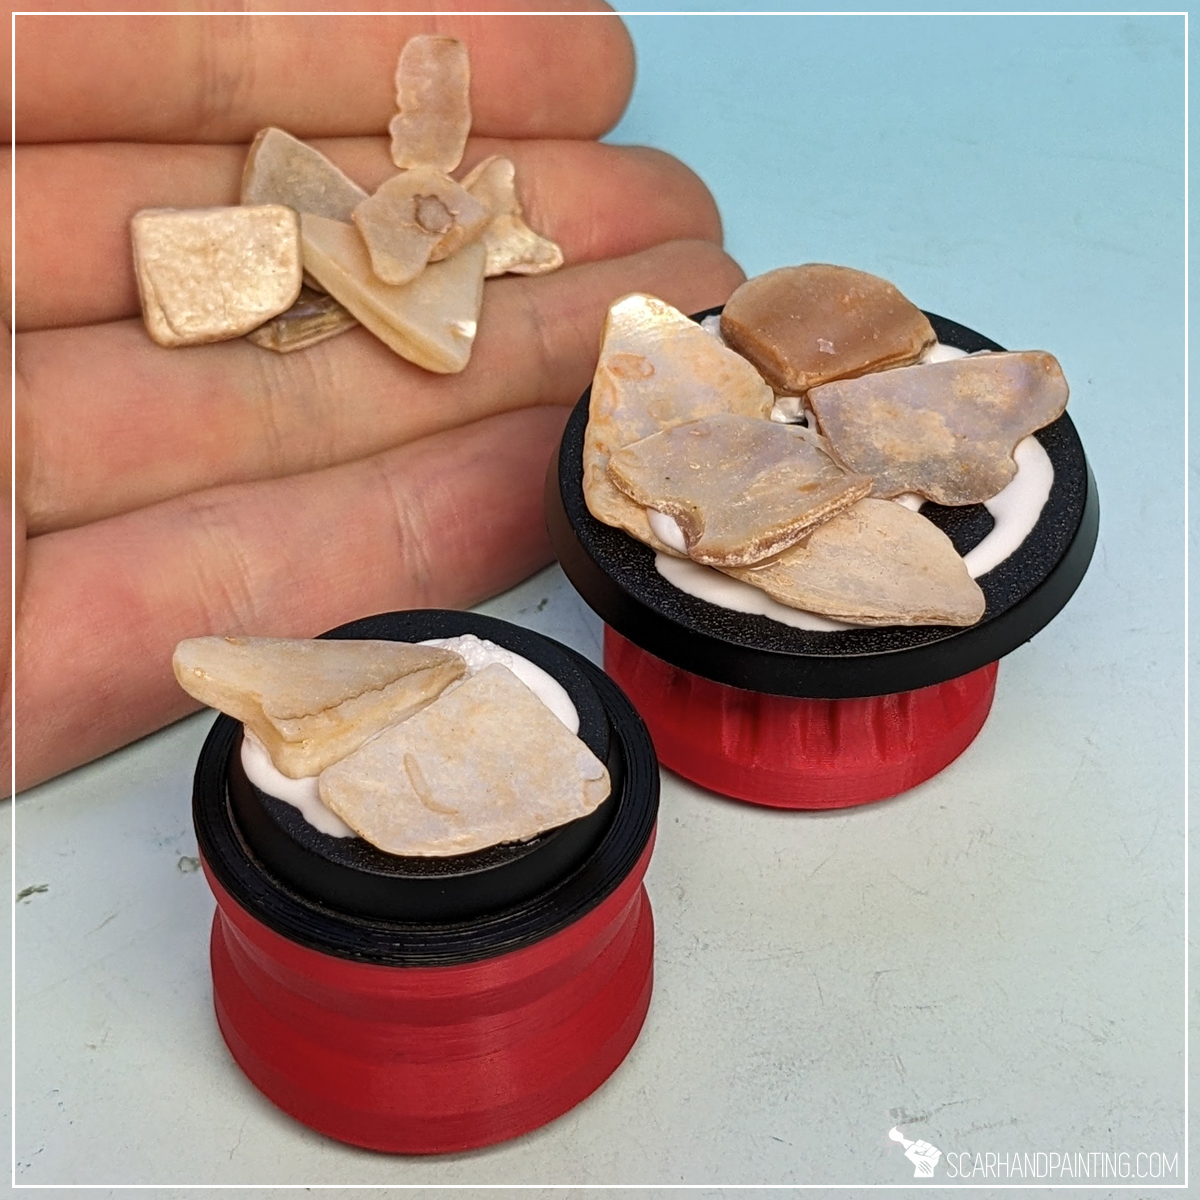
Let’s get it out of the way – yes, I am using natural stones. I like to have my miniatures heavy and stable on the board, plus trying to imitate the effect with self made elements would be rather time consuming. These particular stones are something I’m being asked about a lot, so here’s what I can tell you about them. The stones I’m using are regular decoration gravel from construction/home/garden stores. They are sold in small packages for about 1-2€. Unfortunately I do not know the professional name for this kind of stone, but am sure you will find similar stuff in either Ikea, or other home/garden stores. Below an old pic for reference.
Rocks out of the way, let’s rock! (You see what I did there?).
The modeling process is pretty straightforward, starting with base rock formation, after which the miniatures are mounted on top, everything gets undercoated then painted. Lastly the second part of modeling kicks in with textures and finishing touches.

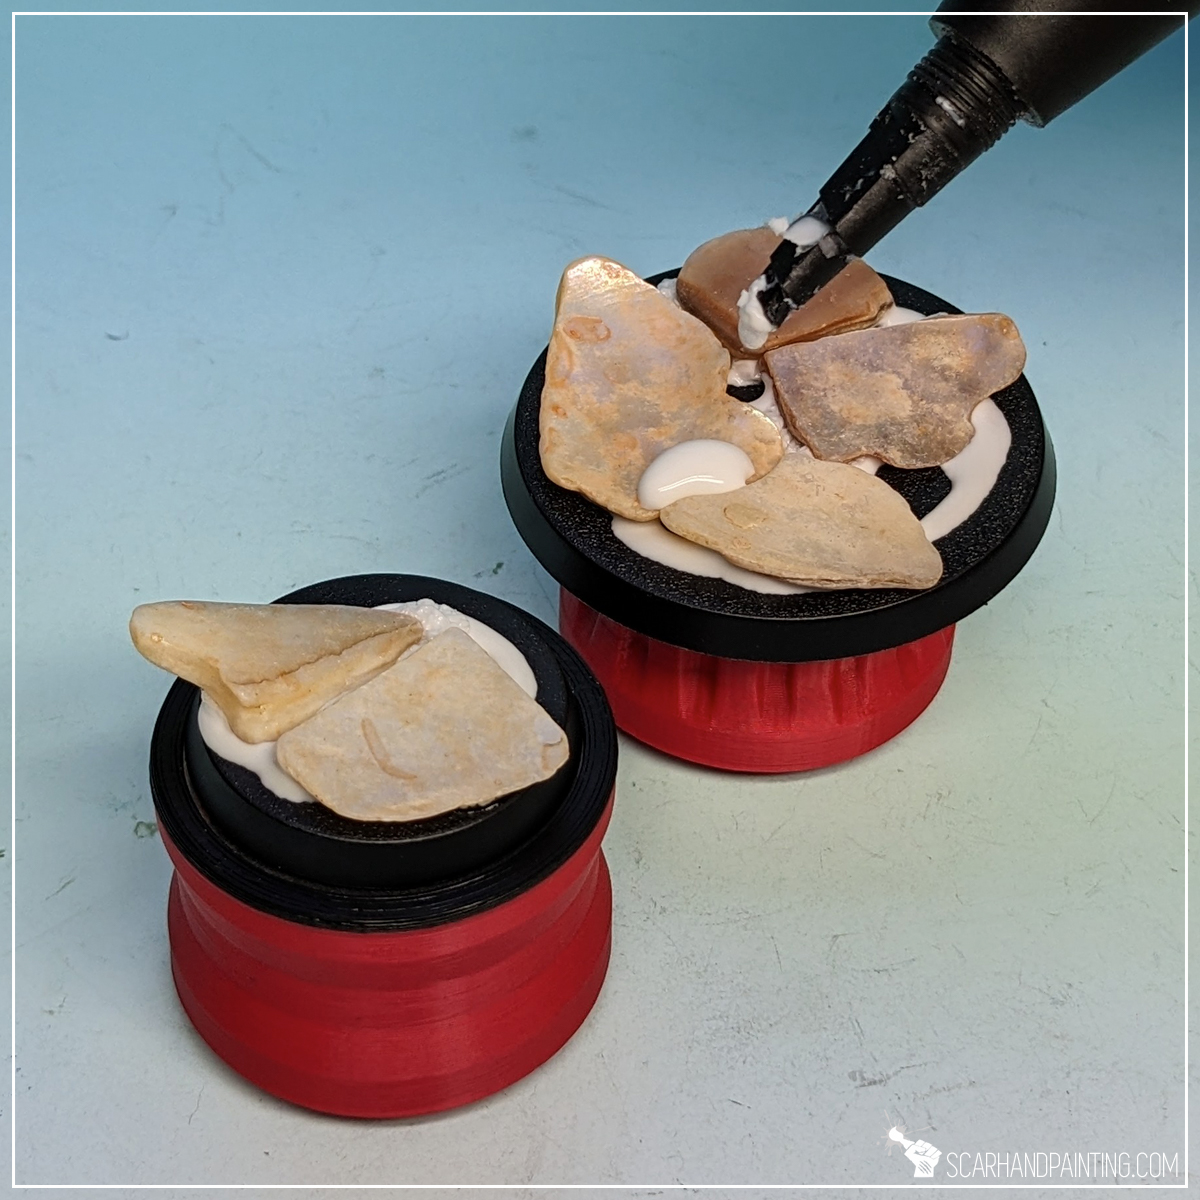
Step one: Rock formation
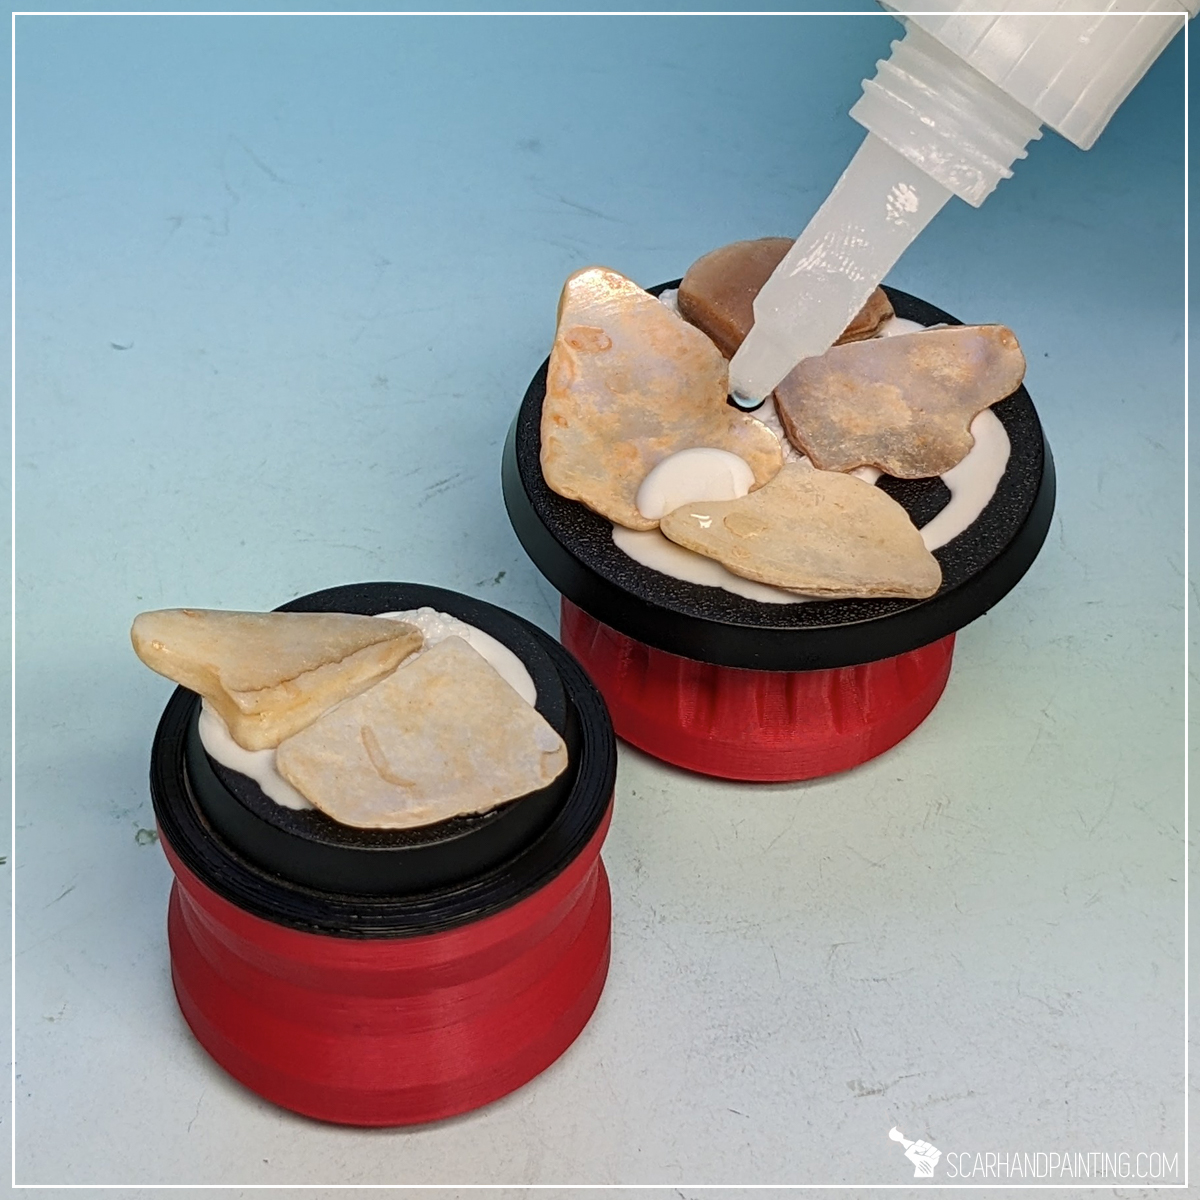
I started by applying PVA glue on top of the base. There’s no need to keep this one smooth – a clumsy random layer will suffice. Next I applied few drops of super glue on top. Finally I put few flat stones on top. Both glues mixed under preassure, filling most gaps between the stones and keeping them in place.

Step two: Increased Volume
Depending on the size and future assignment of the base I sometimes add volume to the rock formation. Some miniatures have one leg slightly raised, or I just want to get a more dynamic posing for my Astartes characters. Having that in mind I applied a drop of PVA glue followed by a drop of super glue and added another stone on top.
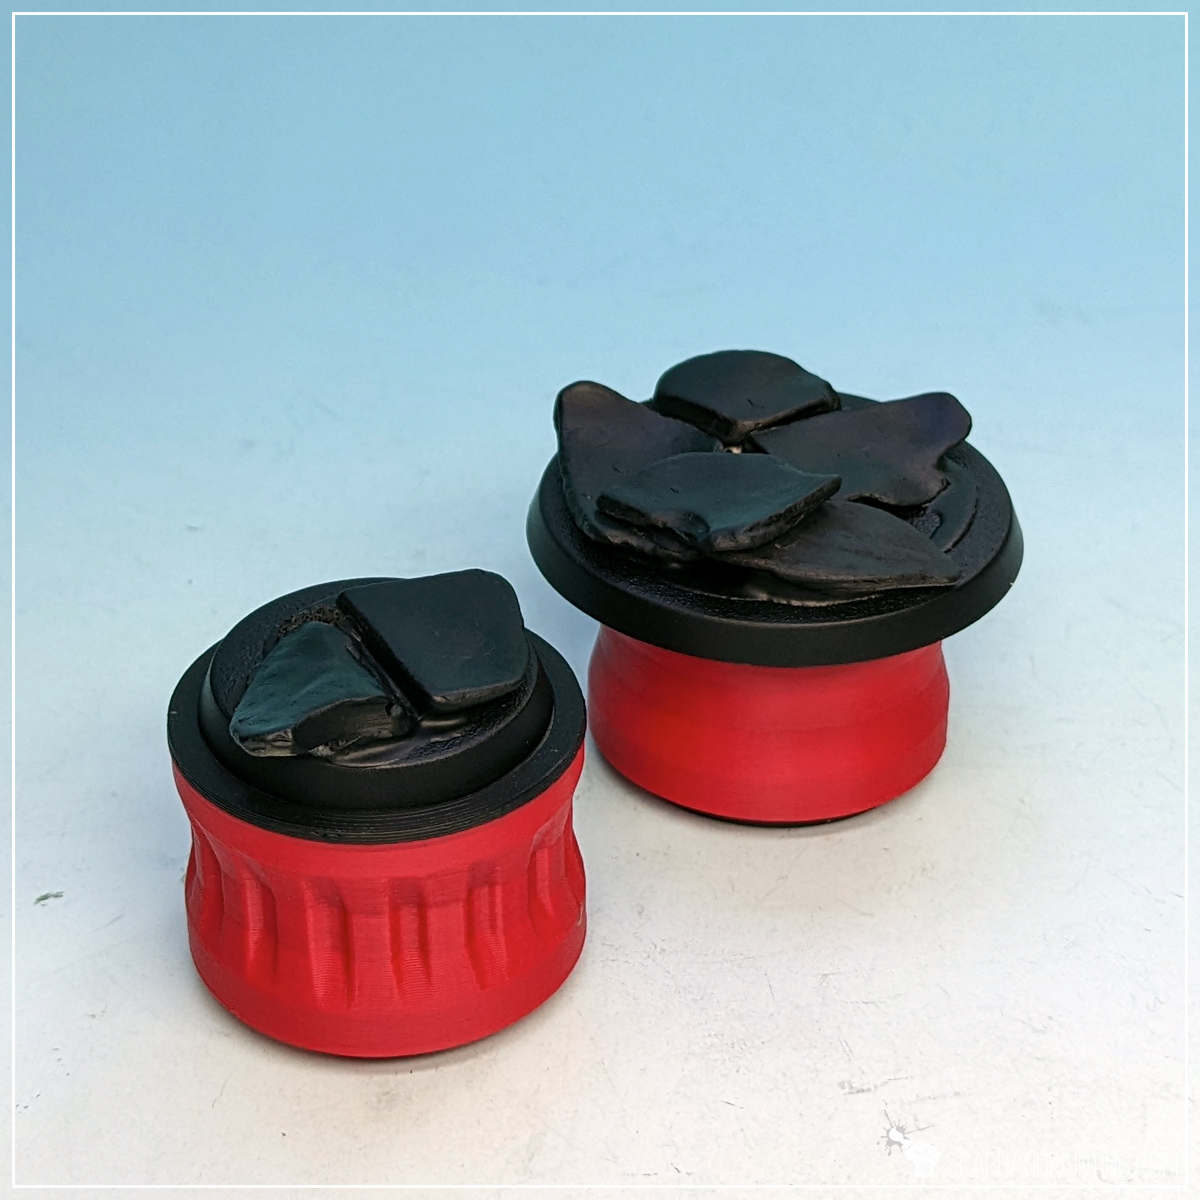
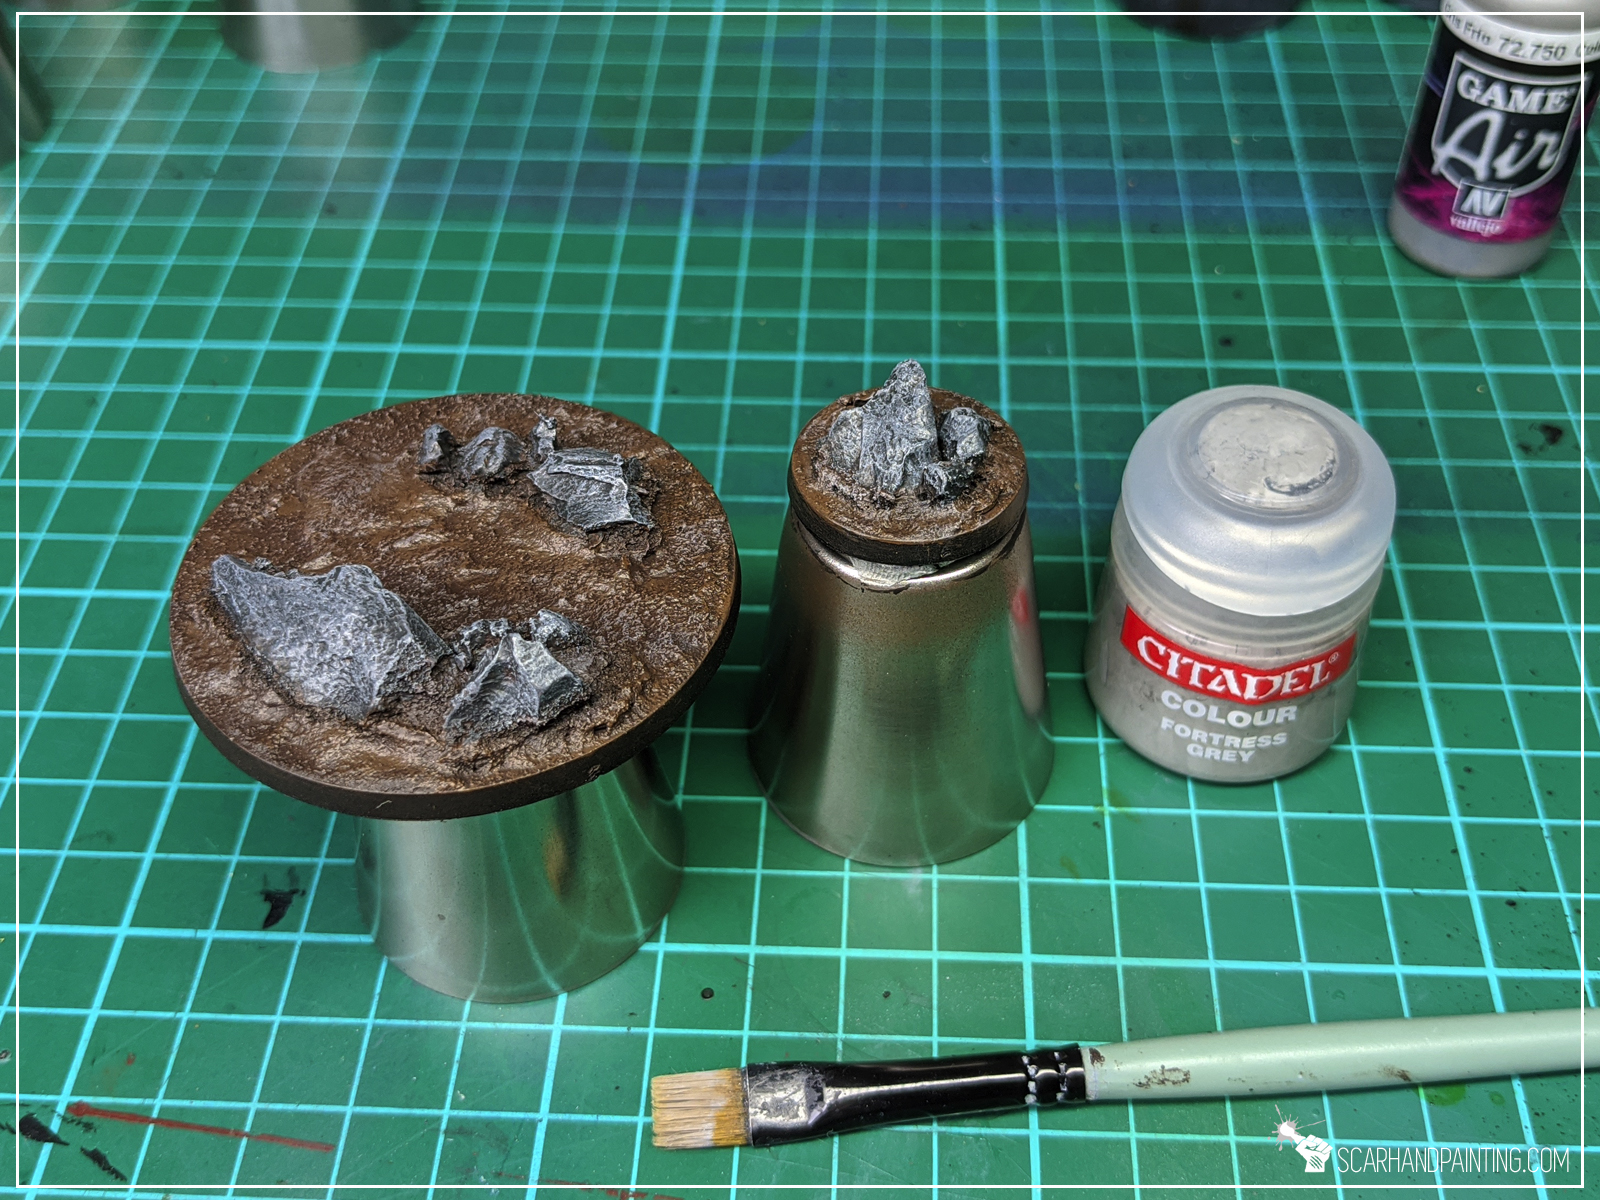
Step three: Undercoat
Once the mix of glue dried up nicely I moved to undercoating. This was done with a smooth layer of Citadel Chaos Black spray primer.
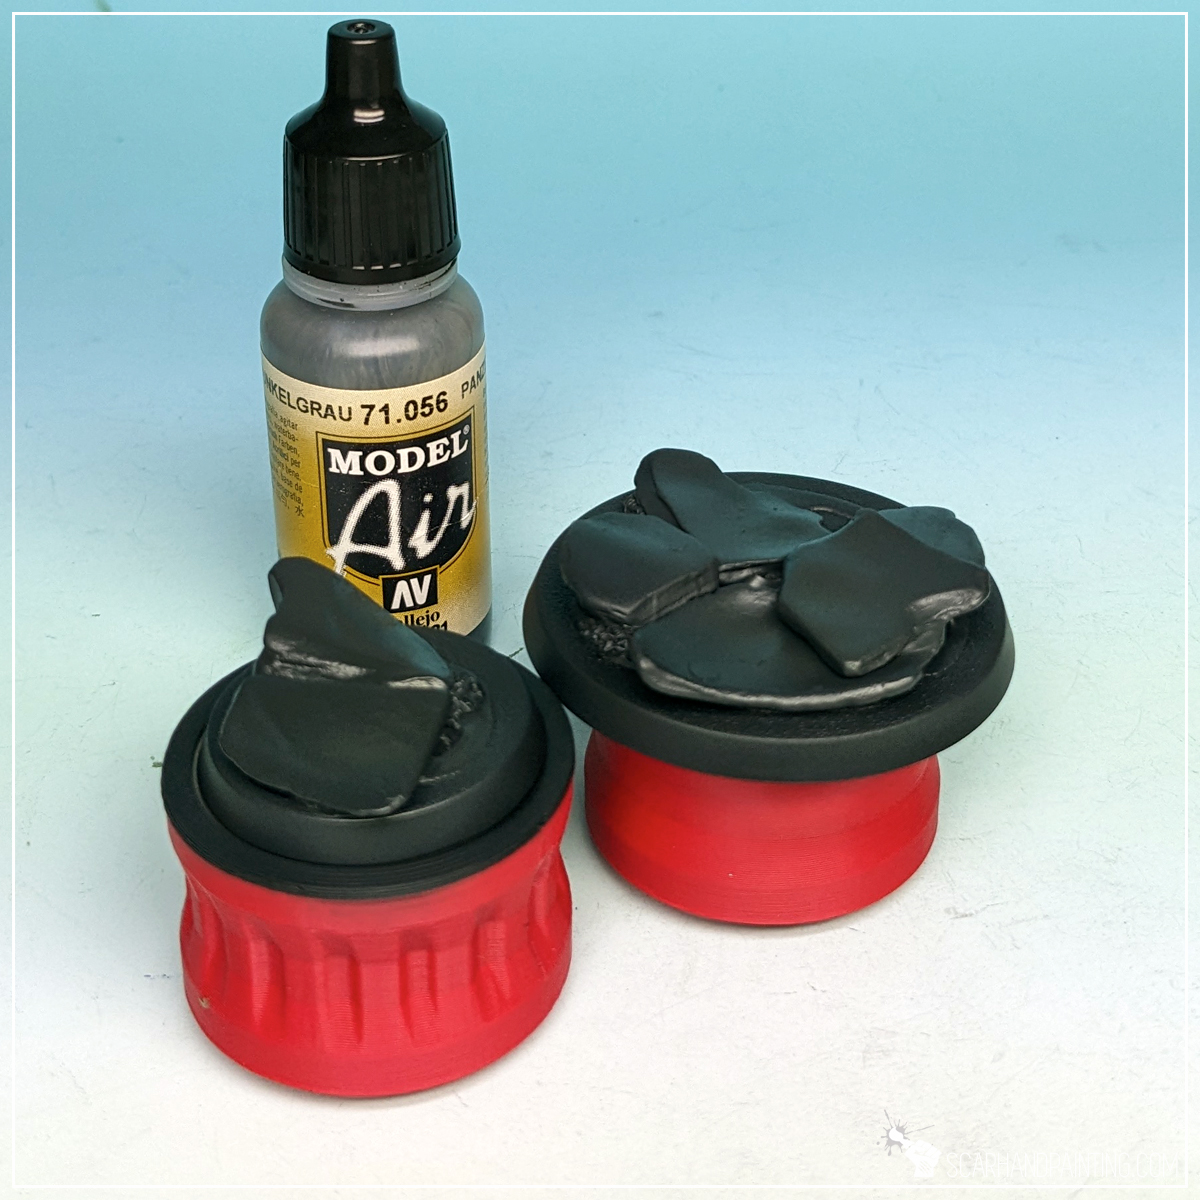
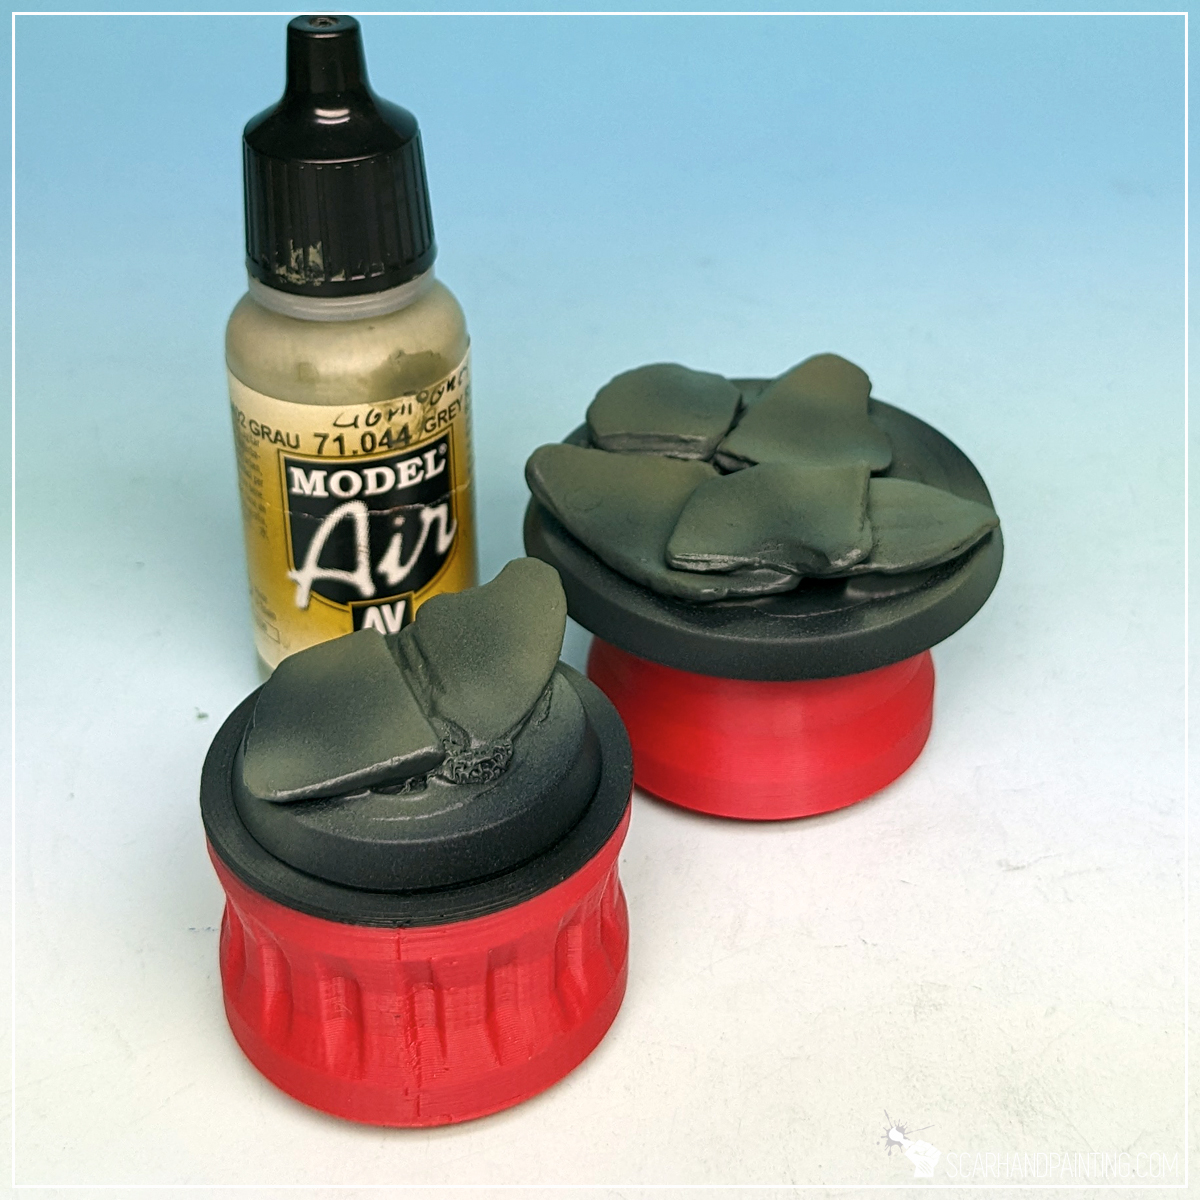
Step four: Base Color
I started painting by airbrushing a strong layer of Vallejo Panzer Dark Grey (air), straight from the pot. I then applied a slightly thinned Vallejo Light Grey Green (air), followed by Vallejo Cold Grey (air). In both cases I tried to reduce the area of paint to add color differentiation.

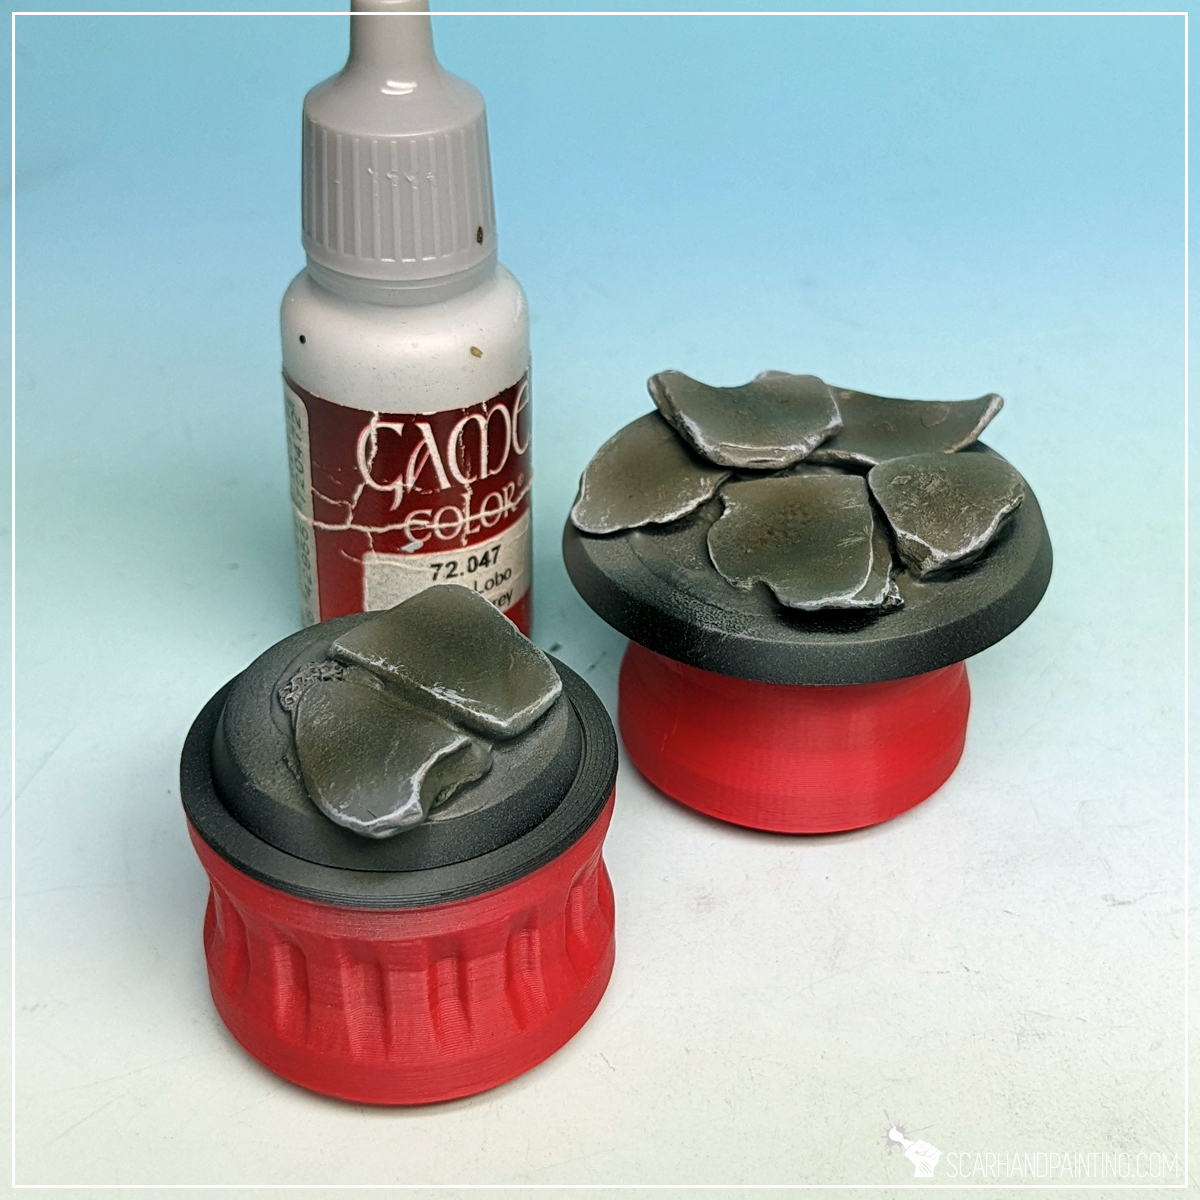
Step five: Highlights
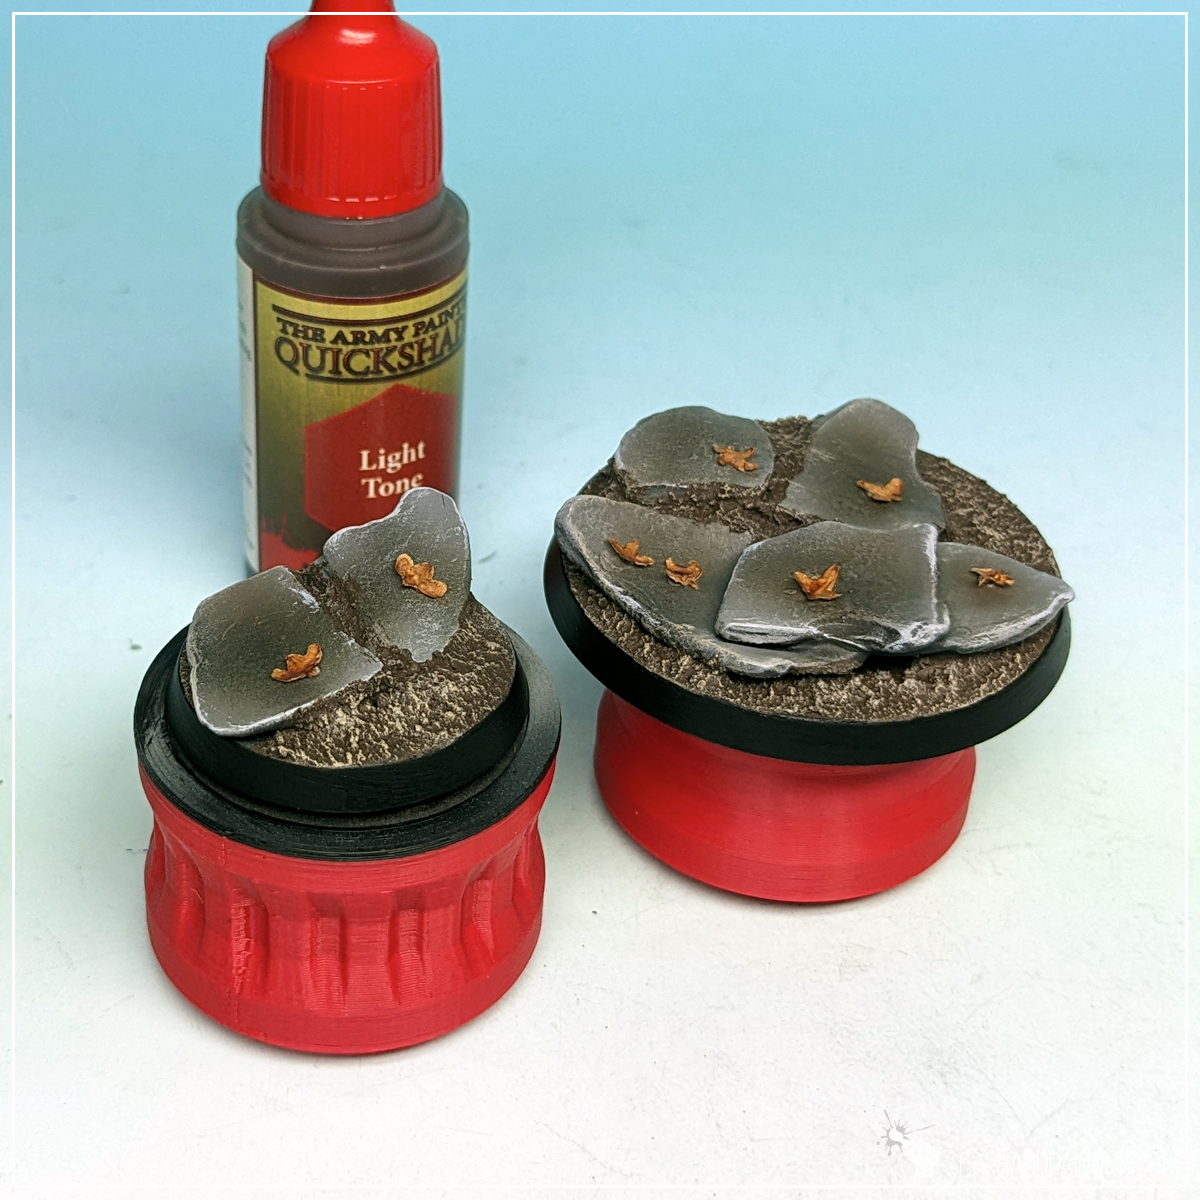
Next I applied a drybrush of Vallejo Medium Sea Grey all over the bases, followed by edge drybrush of Vallejo Wolf Grey. Finally I softly airbrushed Army Painted Strong Tone Quickshade onto the middle points of each individual stone on the base, and slightly around. All of this to add more visual volume.


Step six: Final Highlighs
I then stippled a bit of Vallejo Wolf Grey on the edges of each individual stone, to make them stand out a bit more.
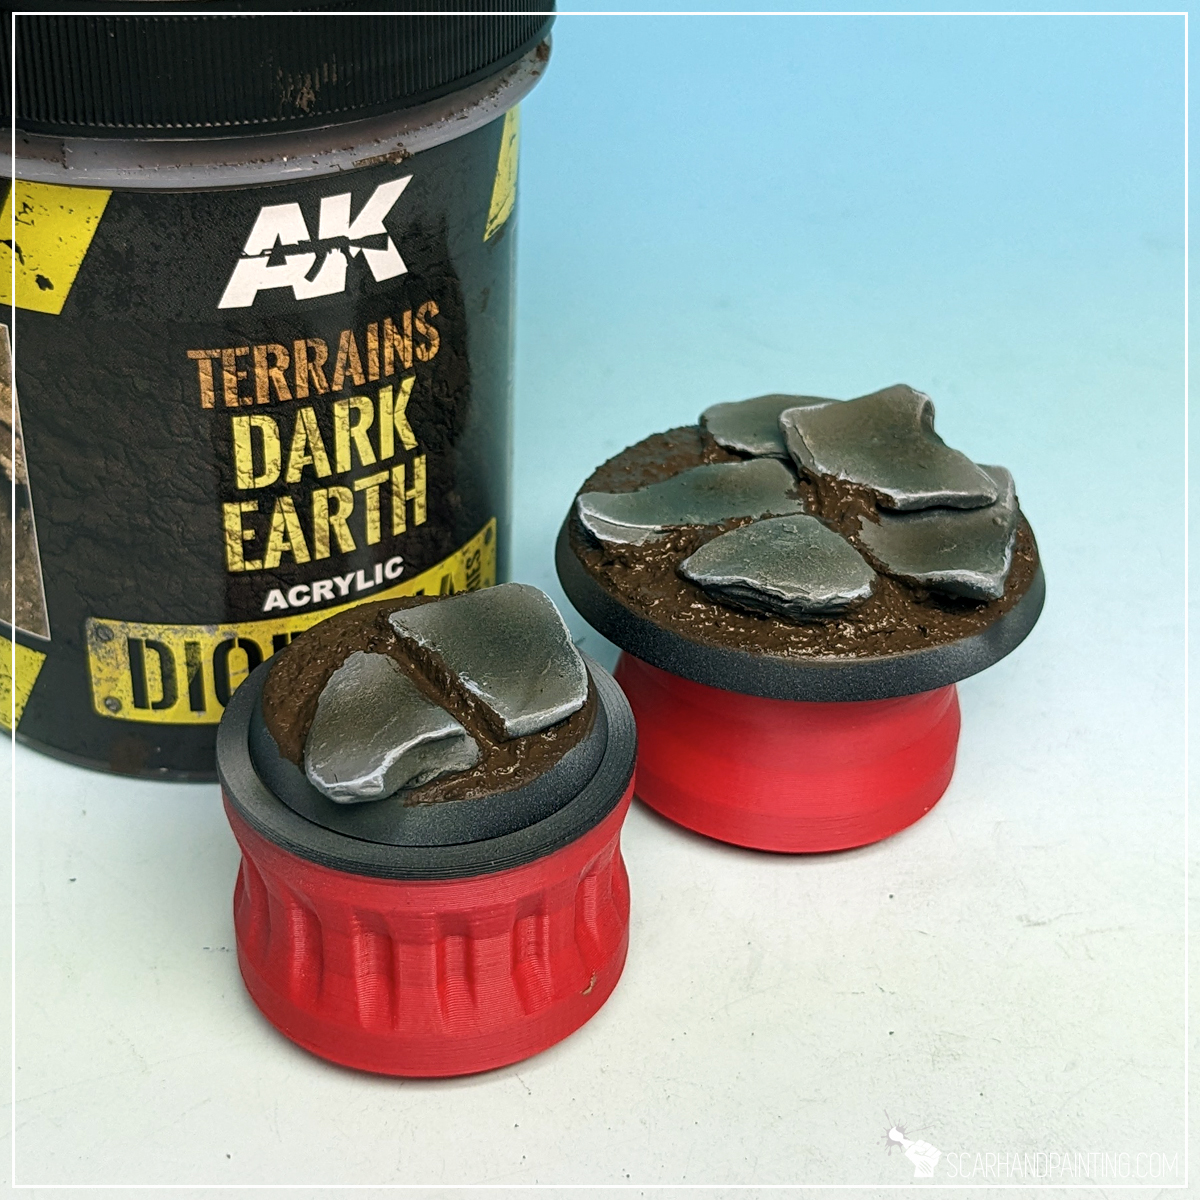
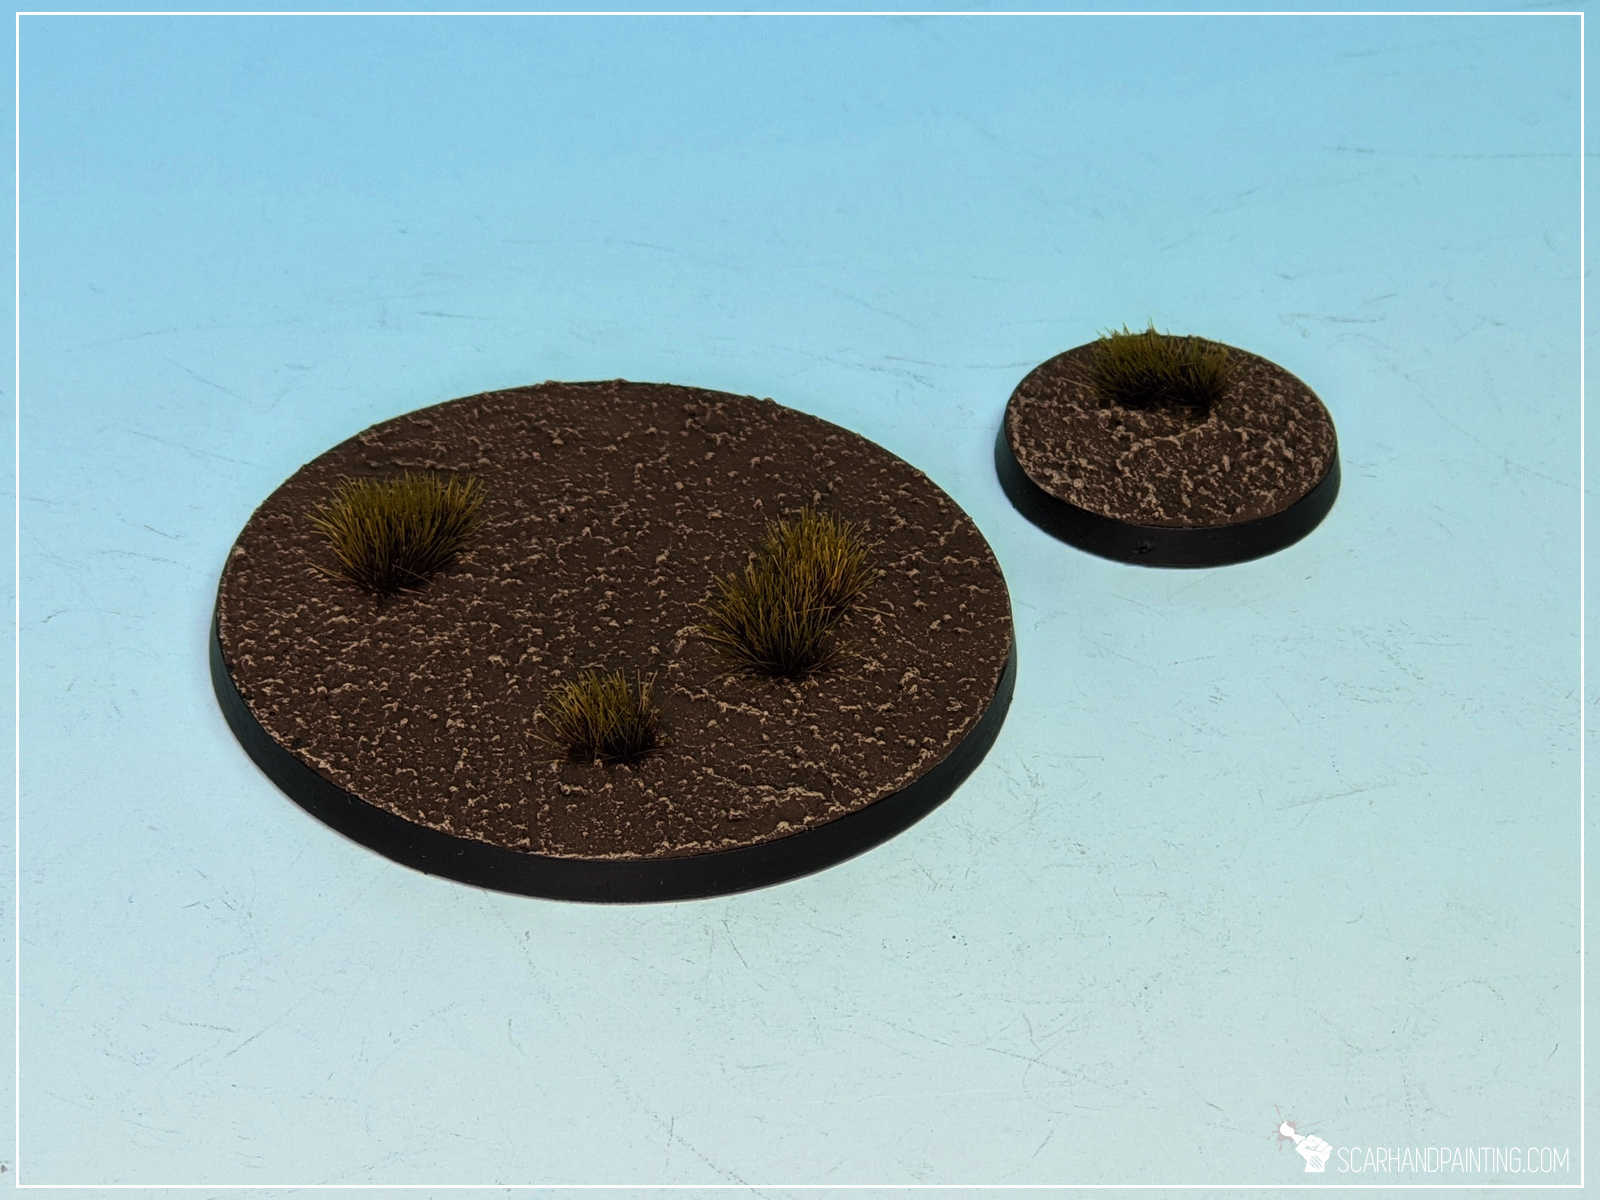
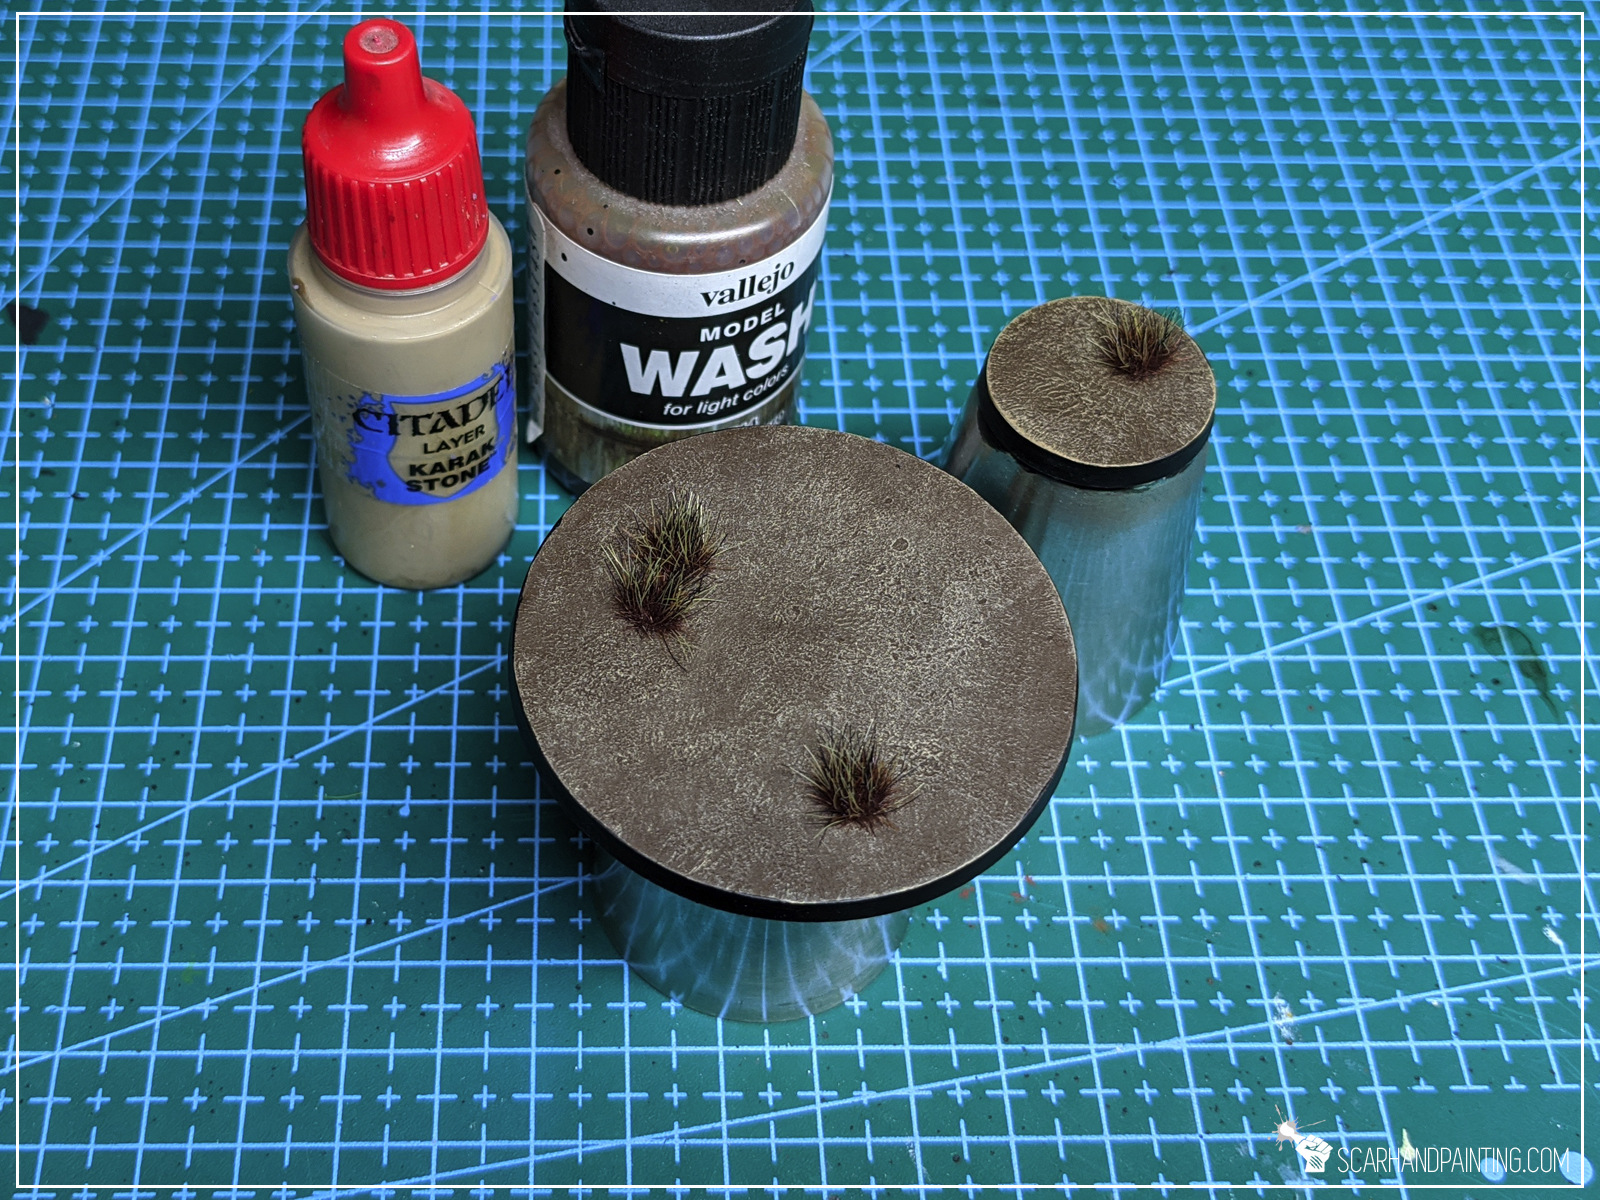
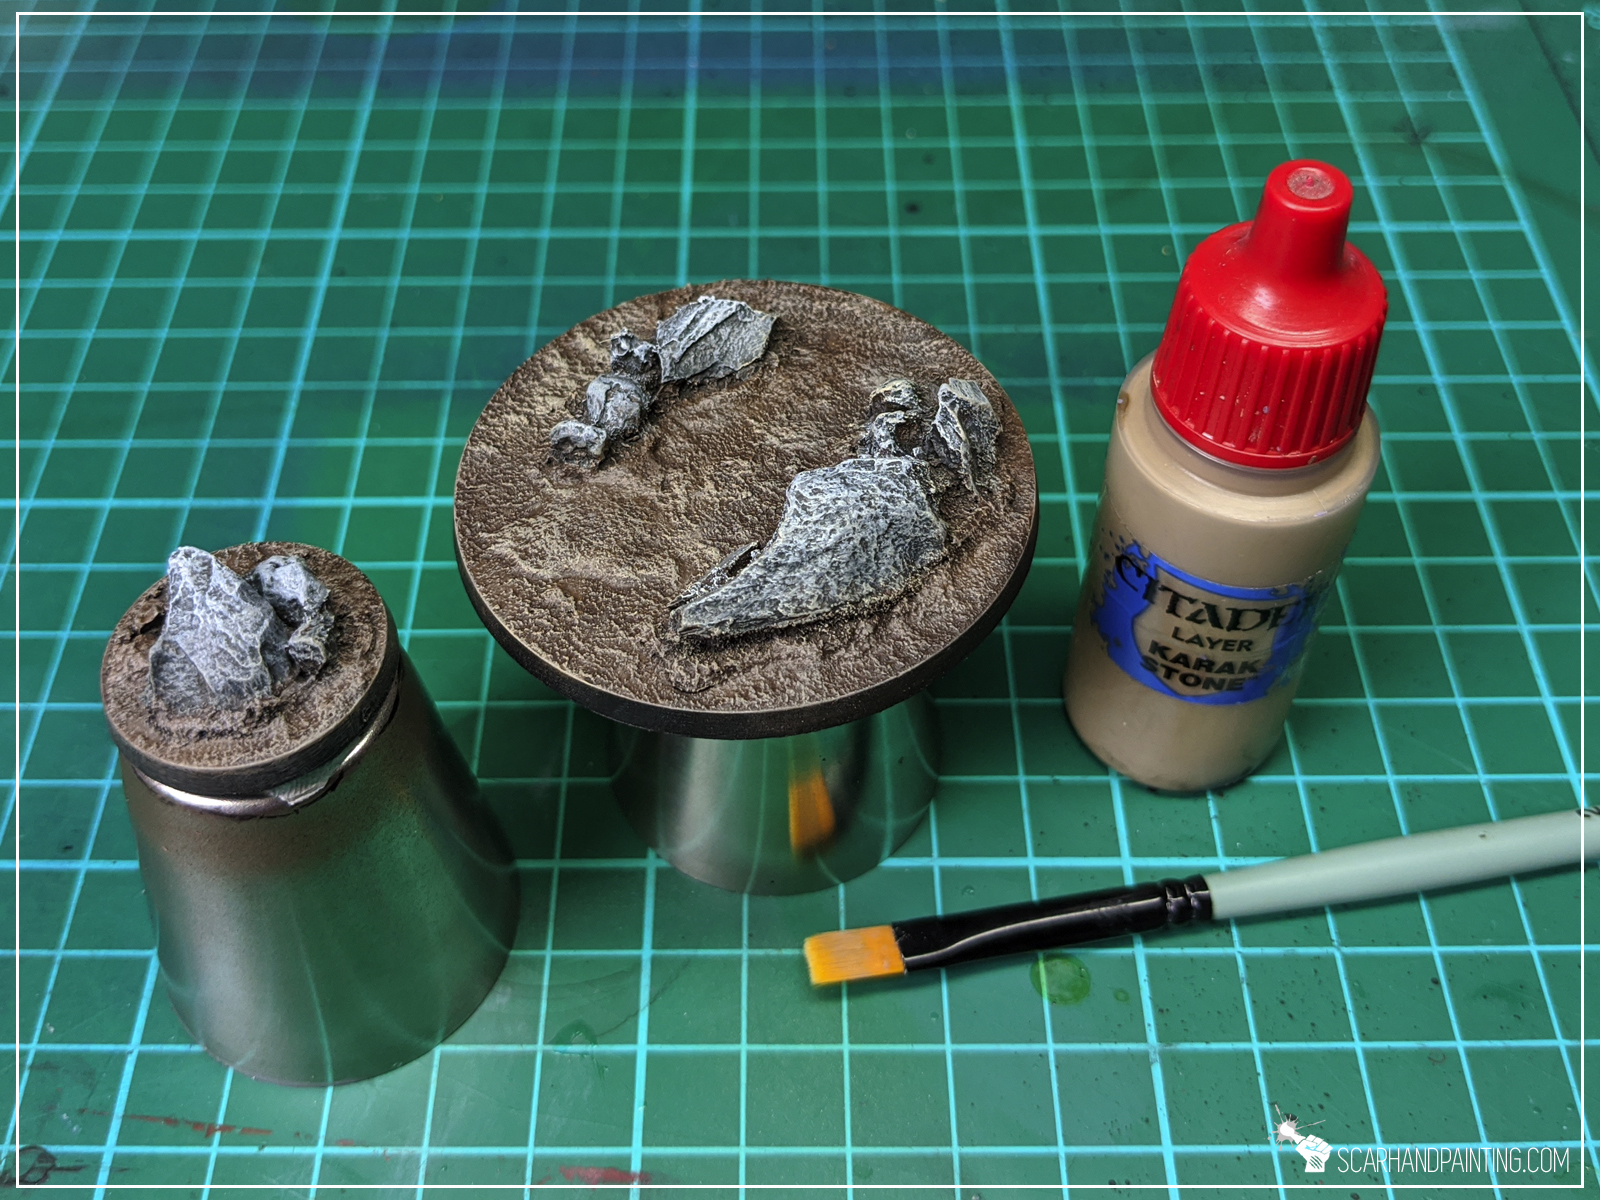
Step seven: Ground Texture
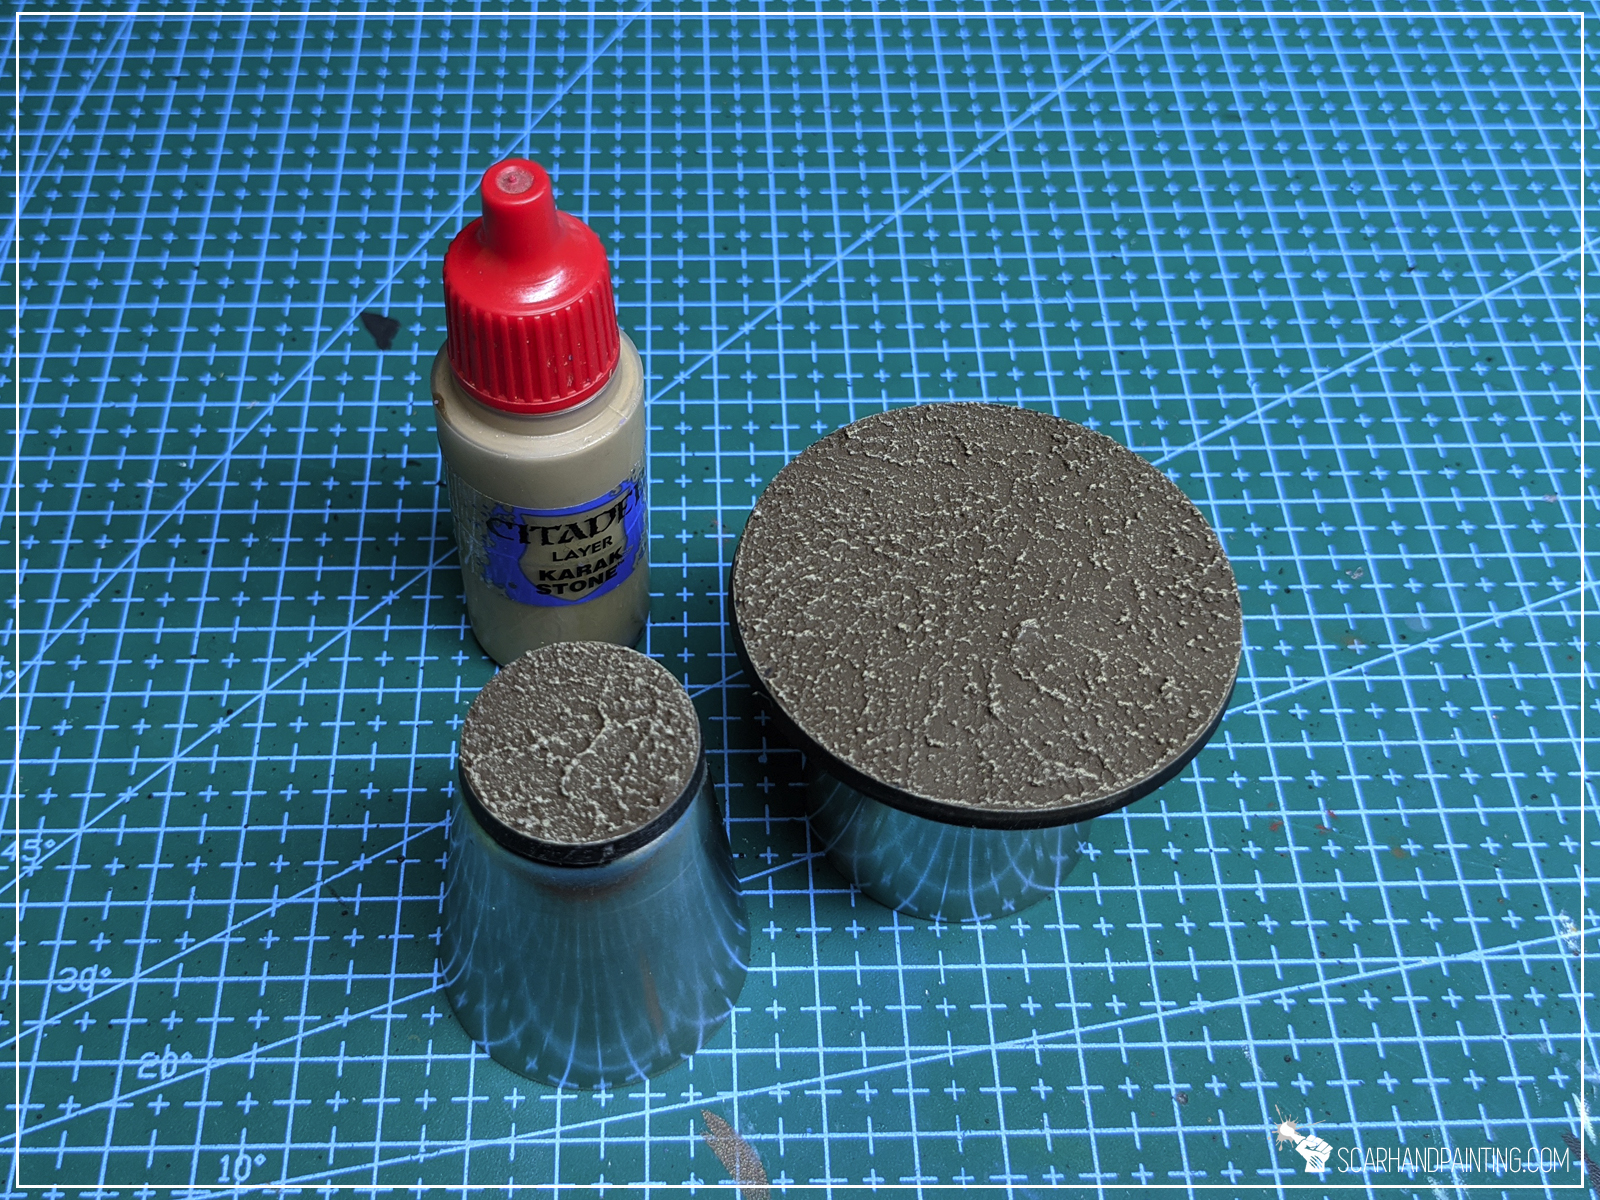
Next I moved to my favorite texture of all time – AK Interactive Dark Earth diorama series that you can learn more about here. I applied a thick layer of the texture, let it dry than drybrushed Citaled Karak Stone on top.

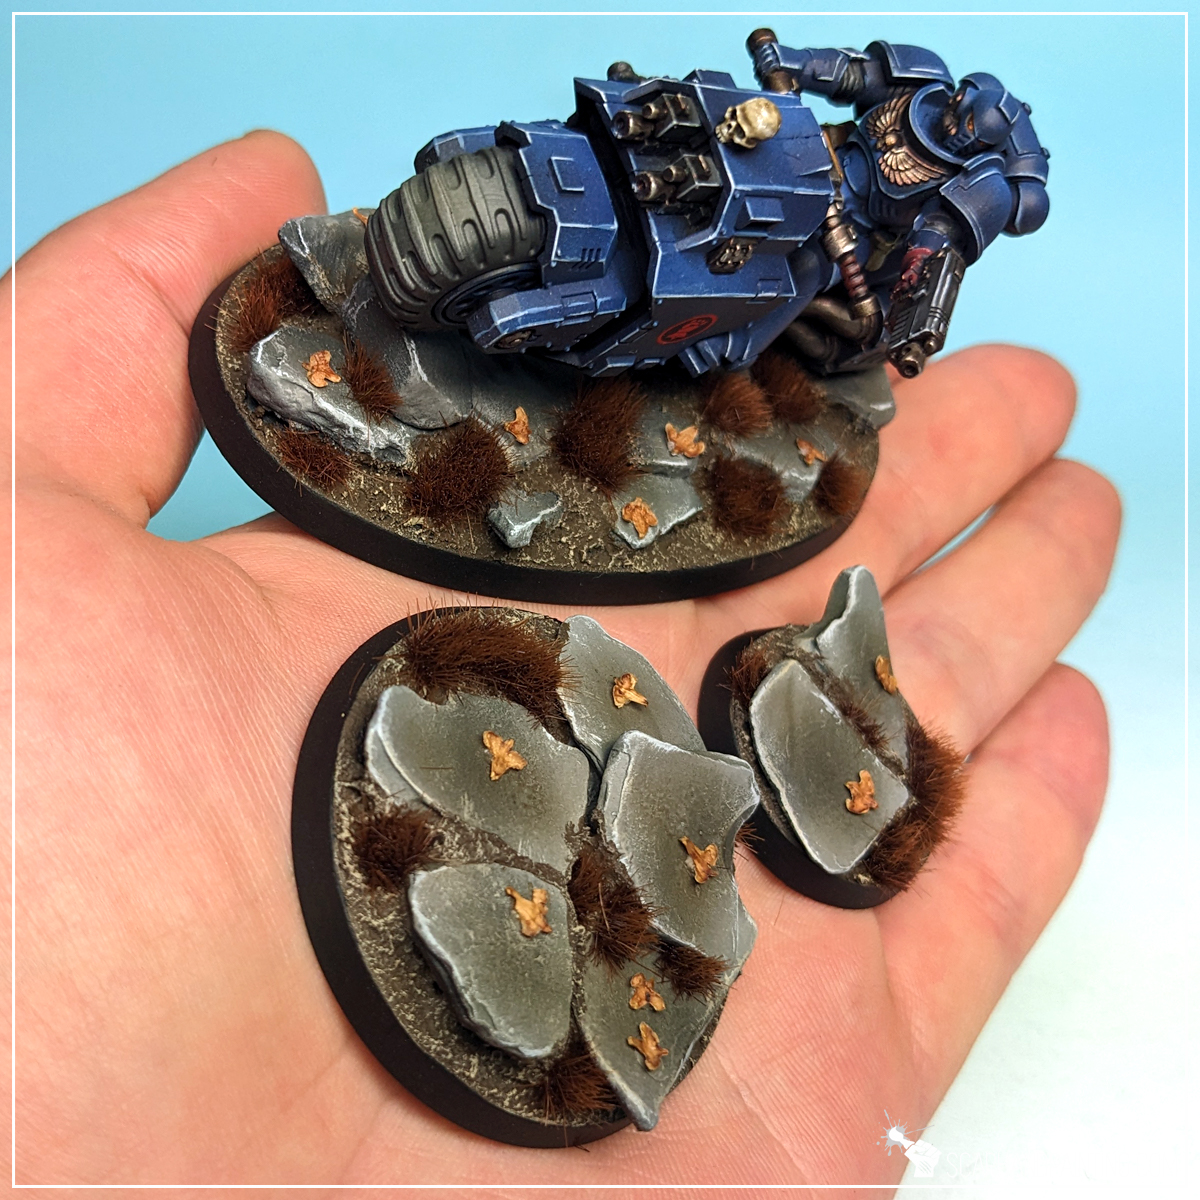
Step eight: Leaves
Then I applied few small drops of super glue and put a Birch tree seed on top of each. Once dry, leaves got painted with Army Painter Soft Tone Quickshade, to add color depth and just some durability.

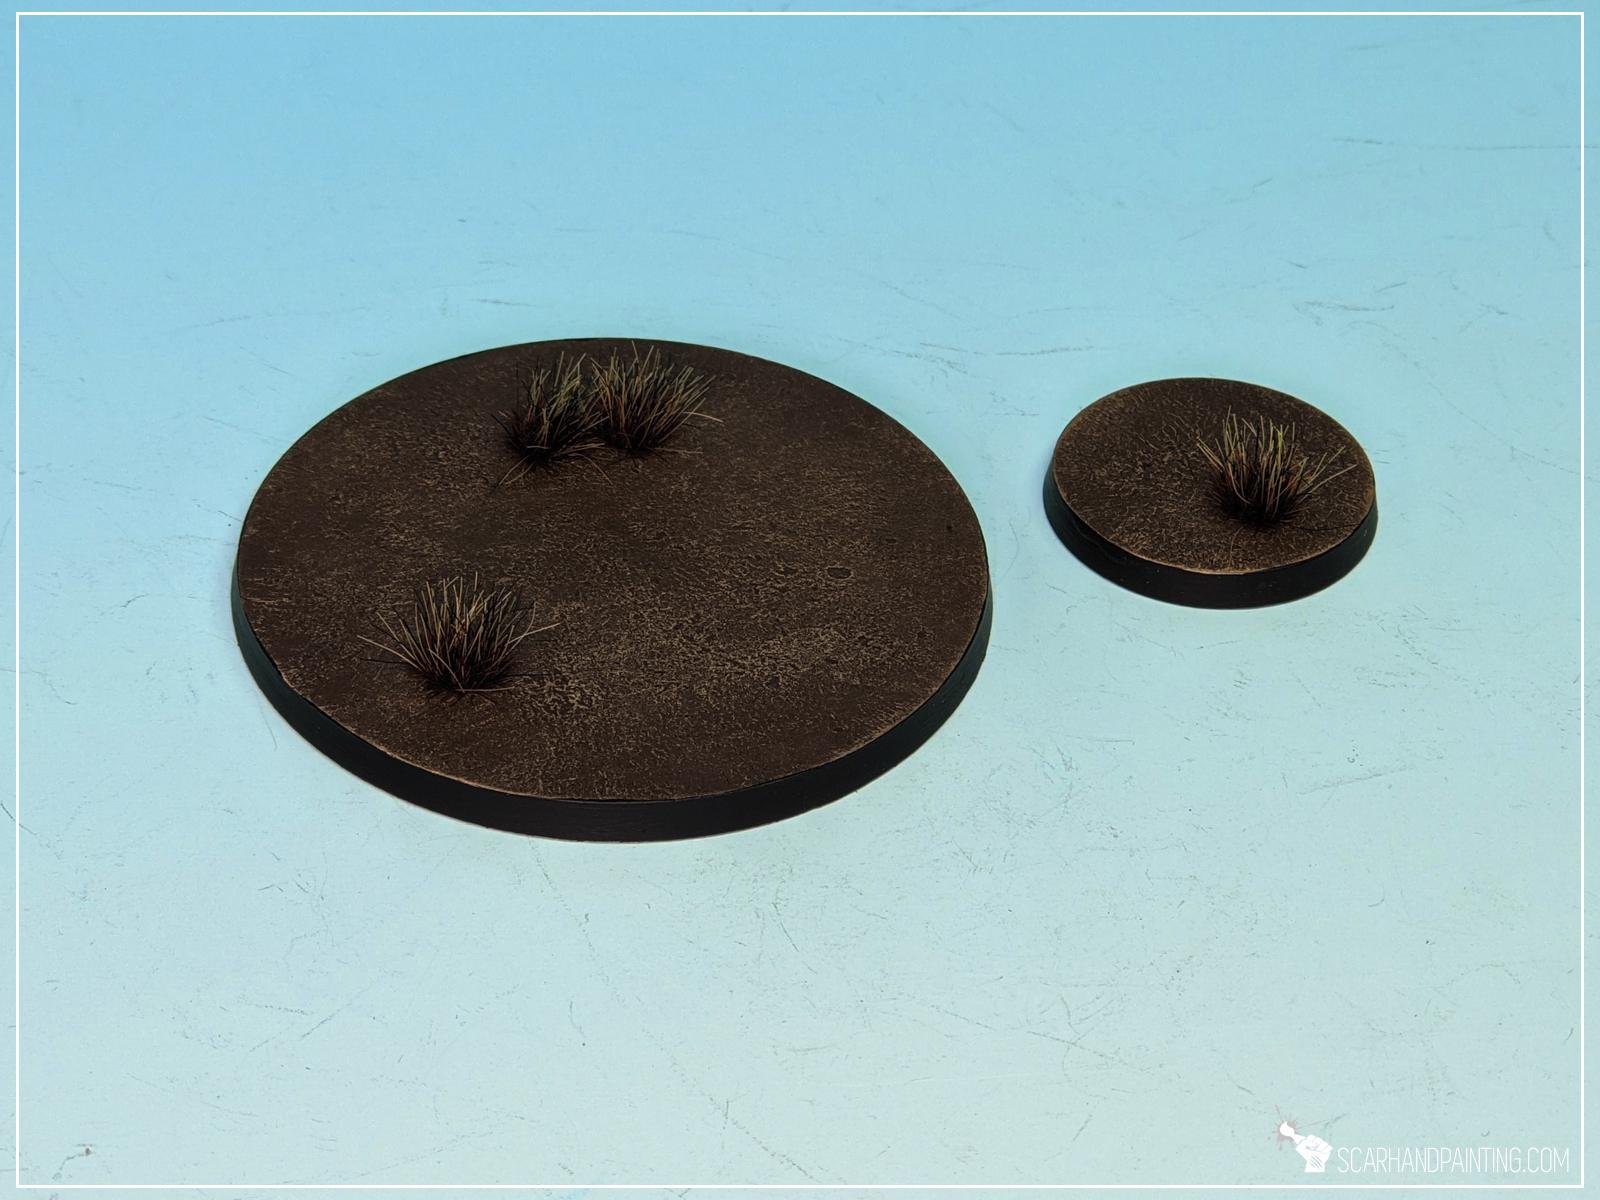
Step nine: Final Touches
Finally I repainted base’s edges black and airbrushed a strong layer of Vallejo Polyurethane Matt Varnish all over. Job done.
I hope you find this tutorial interesting. Be sure to let me know your thoughts in the comments below, or at Facebook or Instagram. I would also appreciate it if you considered sharing this content with your friends, who might find it useful. Finally if you are looking for a professional miniatures painting service, be sure to contact me with this contact form. I always reply within 24 hours, after which please check out your spam folder.
Welcome to Painting Swamp Bases tutorial. Here I will take you on a Step-by-step trip through the process of creating Swamp Bases the same way as seen at: Gallery: Infinity Varuna.
Before we start, some notes:

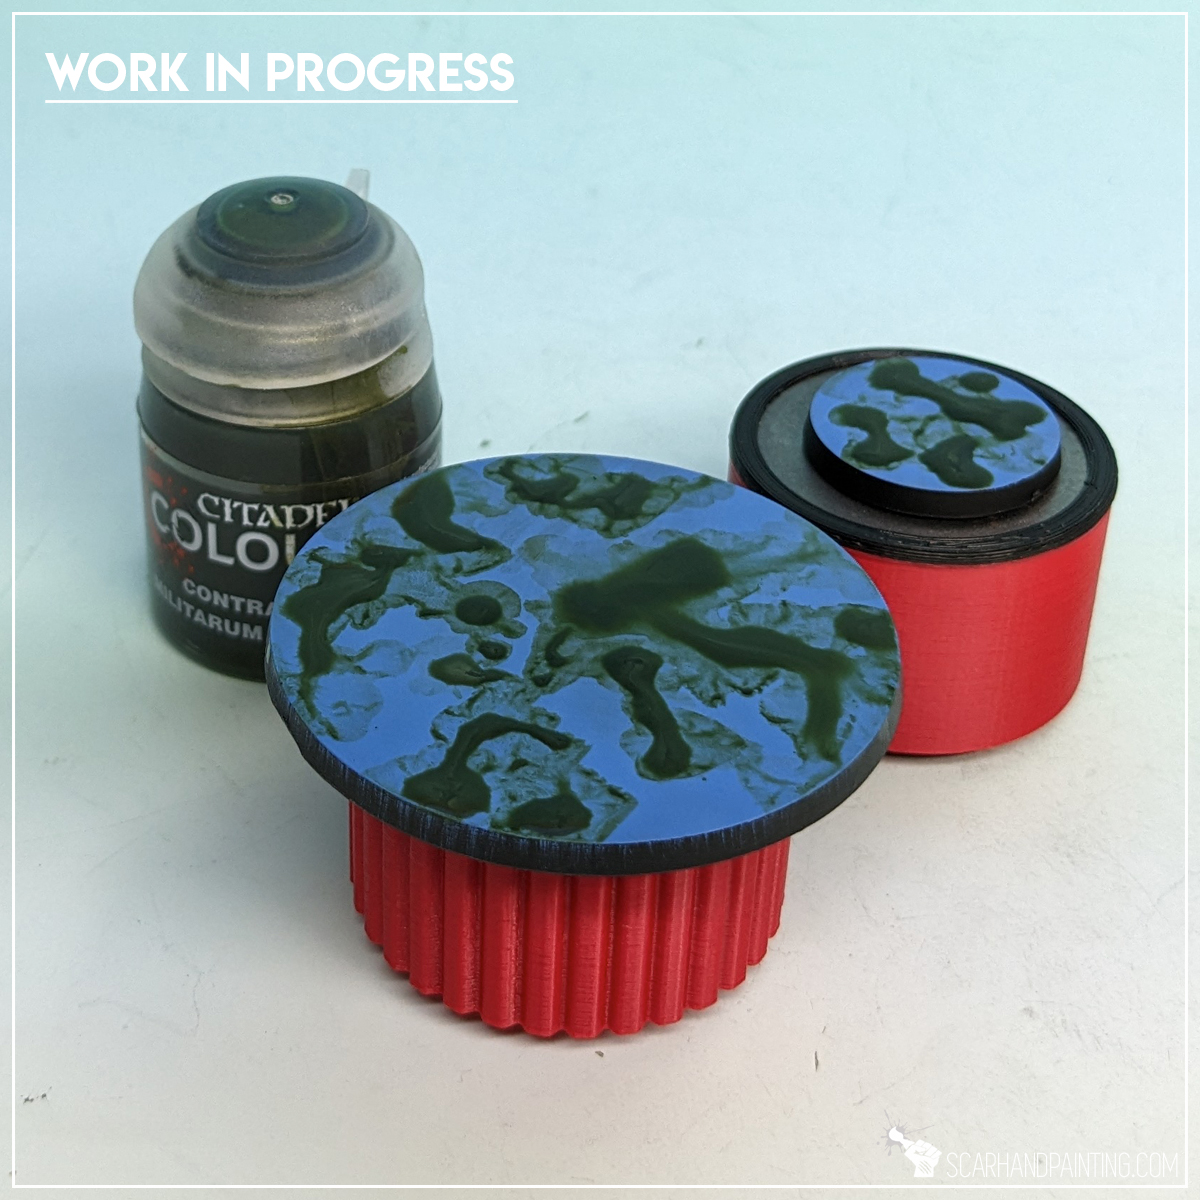
Step one: Undercoat
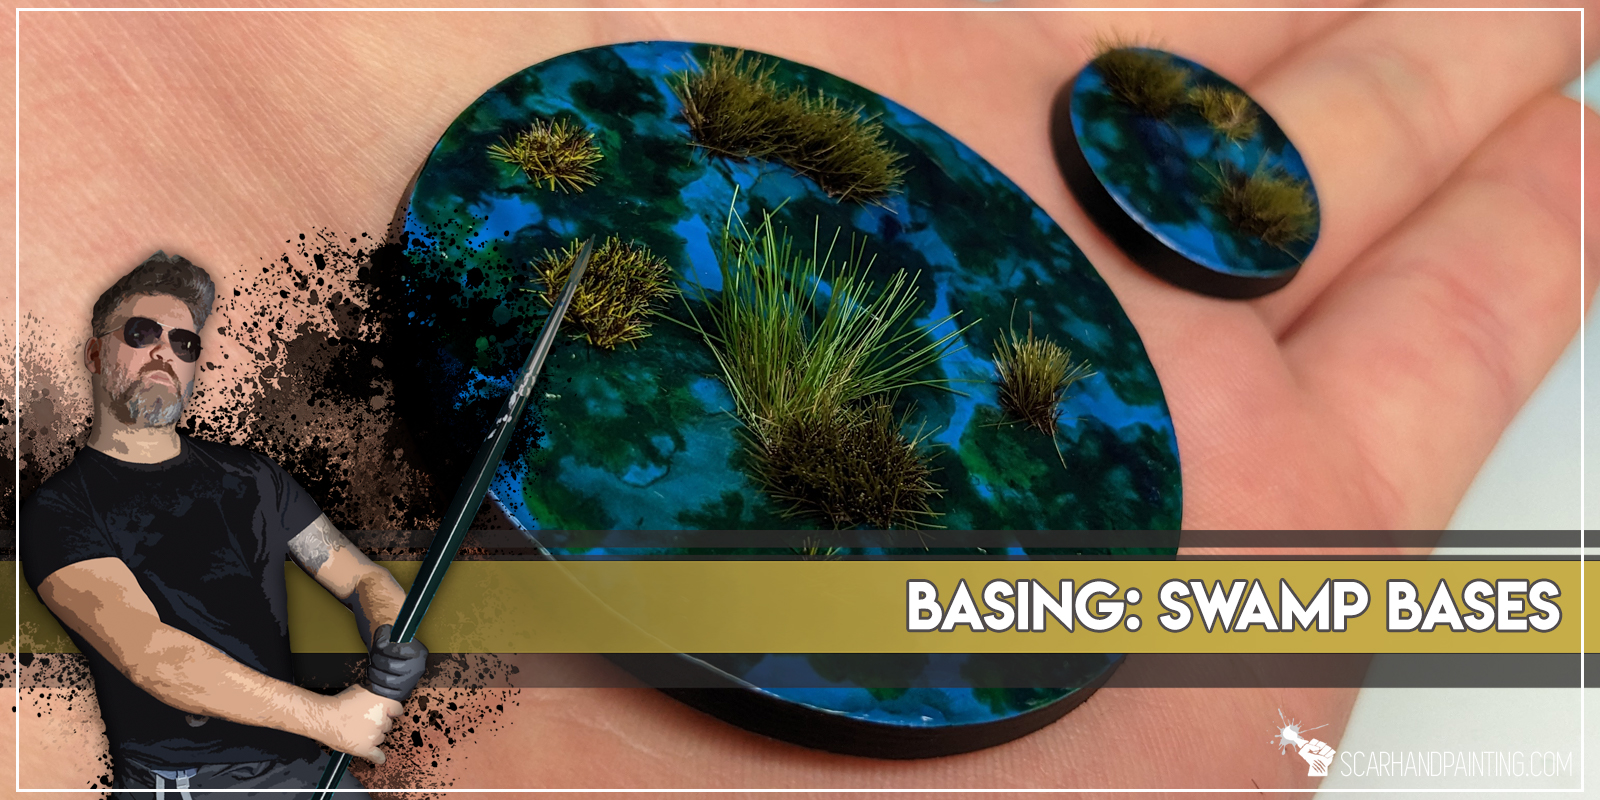
I started with a relatively smooth layer of Vallejo Elfic Blue. Any similar color would fit and I encourage you to experiment.
Step two: Underwater Plants
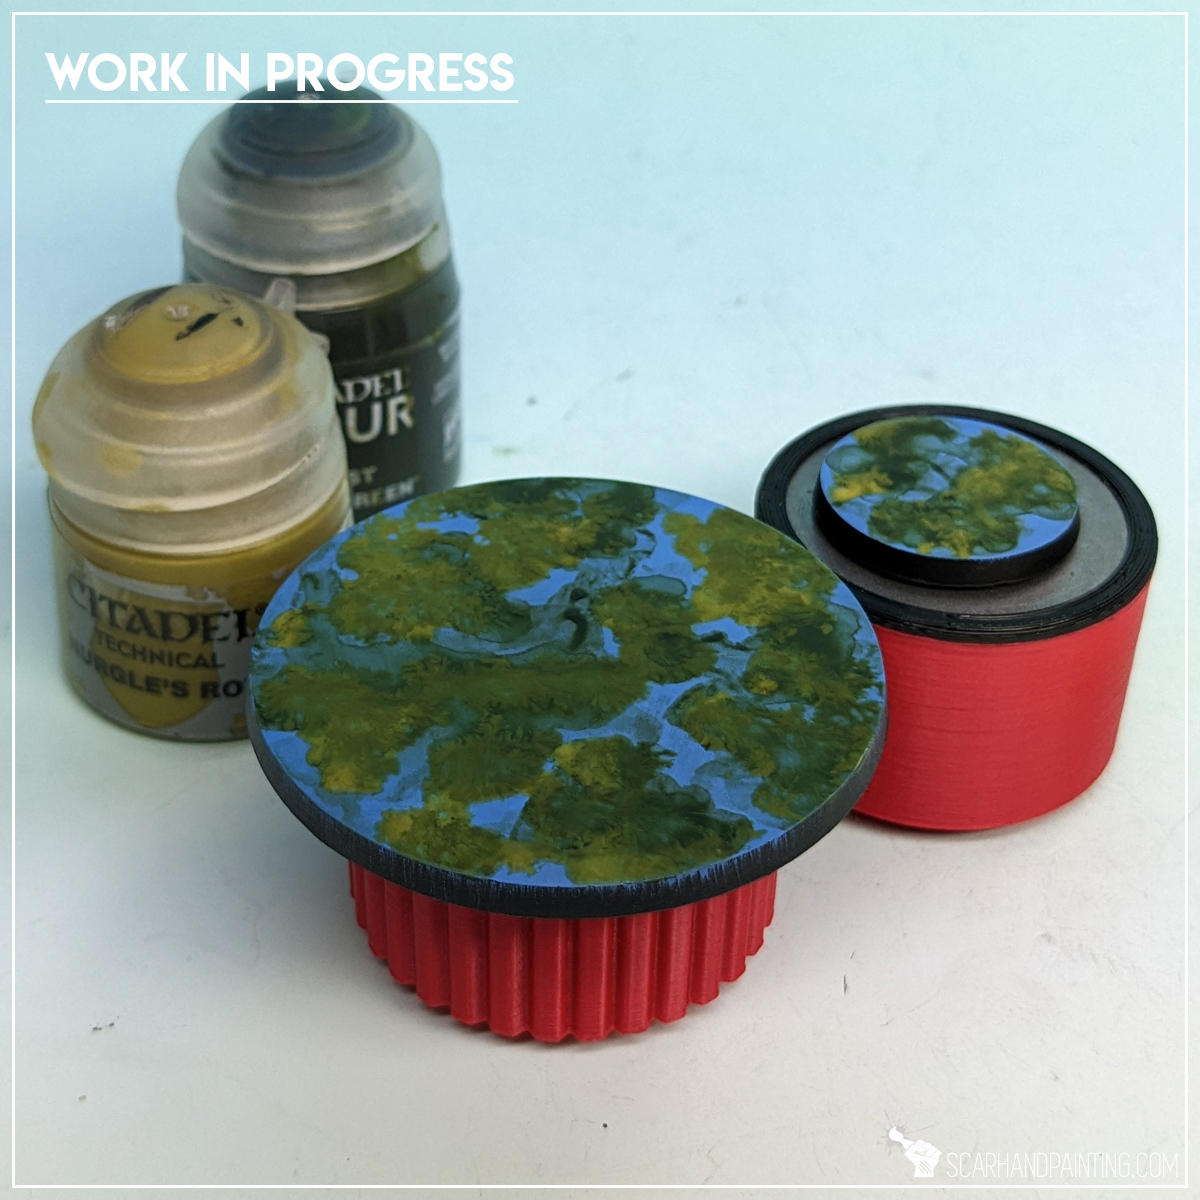
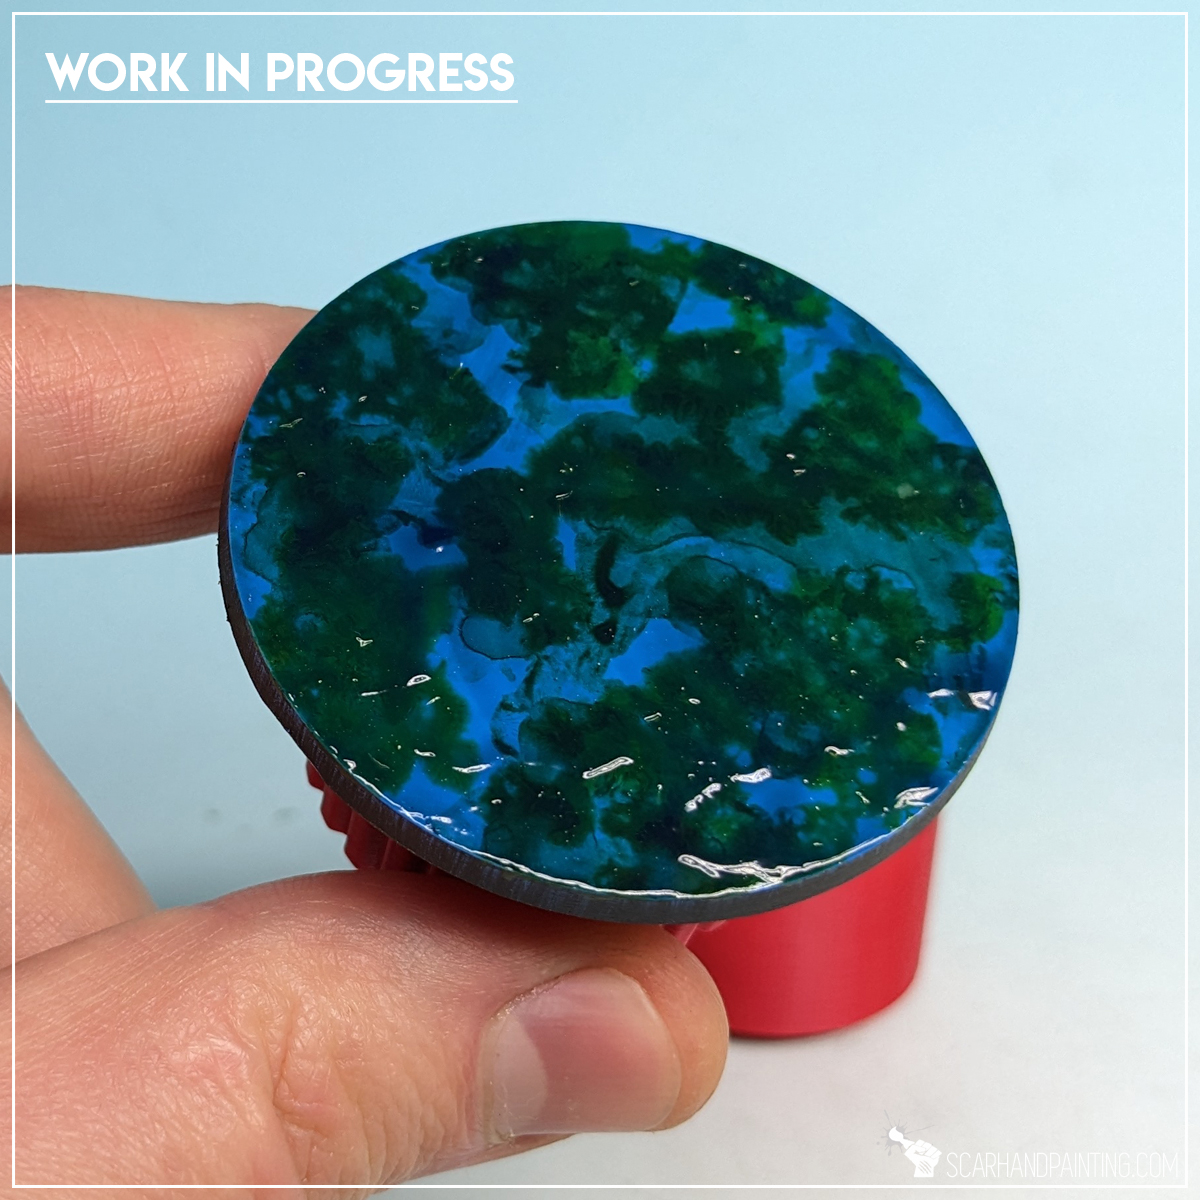
Next I applied spots of Games Workshop Militarum Green Contrast mixed with a bit of water, followed short by Games Workshop Nurgle’s Rot on top. I used relatively large, soft brush to ‘stipple’ Nurgle’s Rot on top of still wet Militarum Green. These paints do not mix well, precipitating and creating interesting patterns in result.
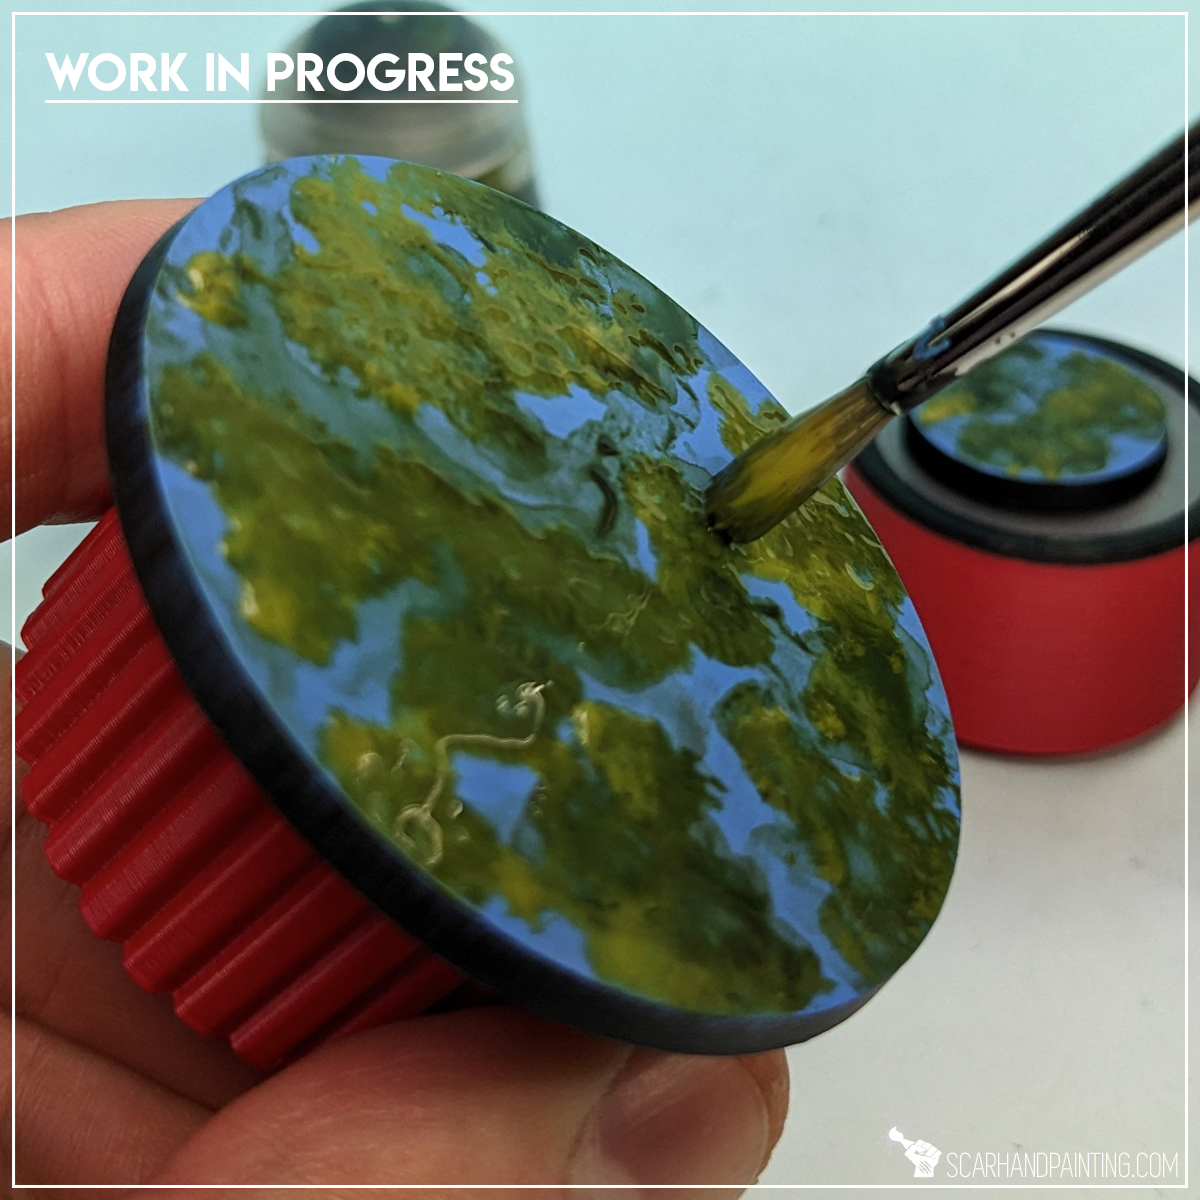
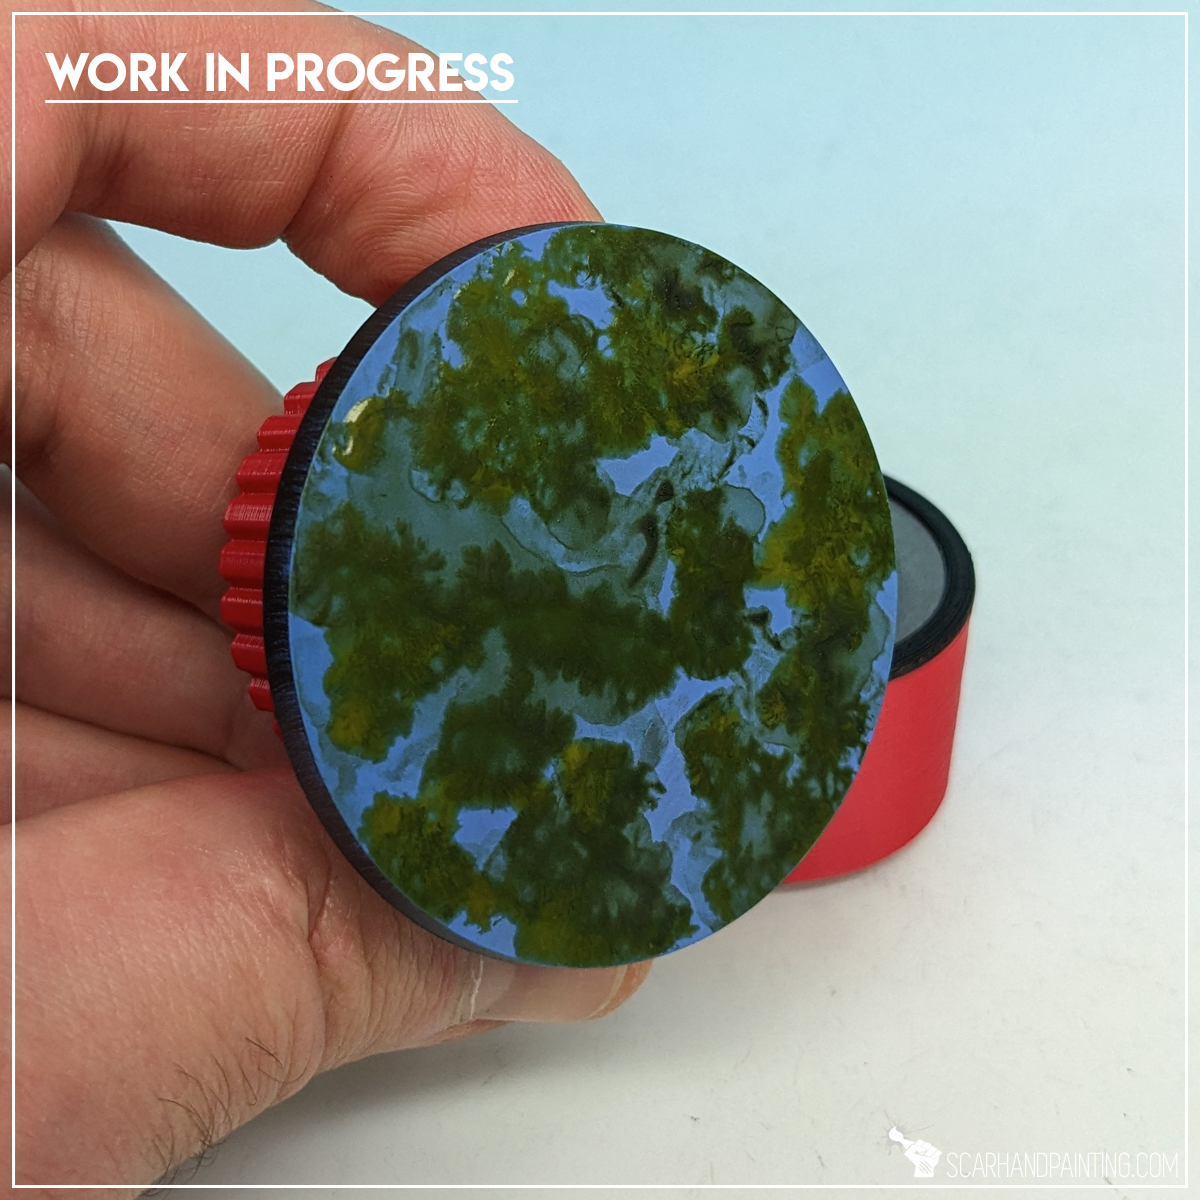
Step three: Water Effect
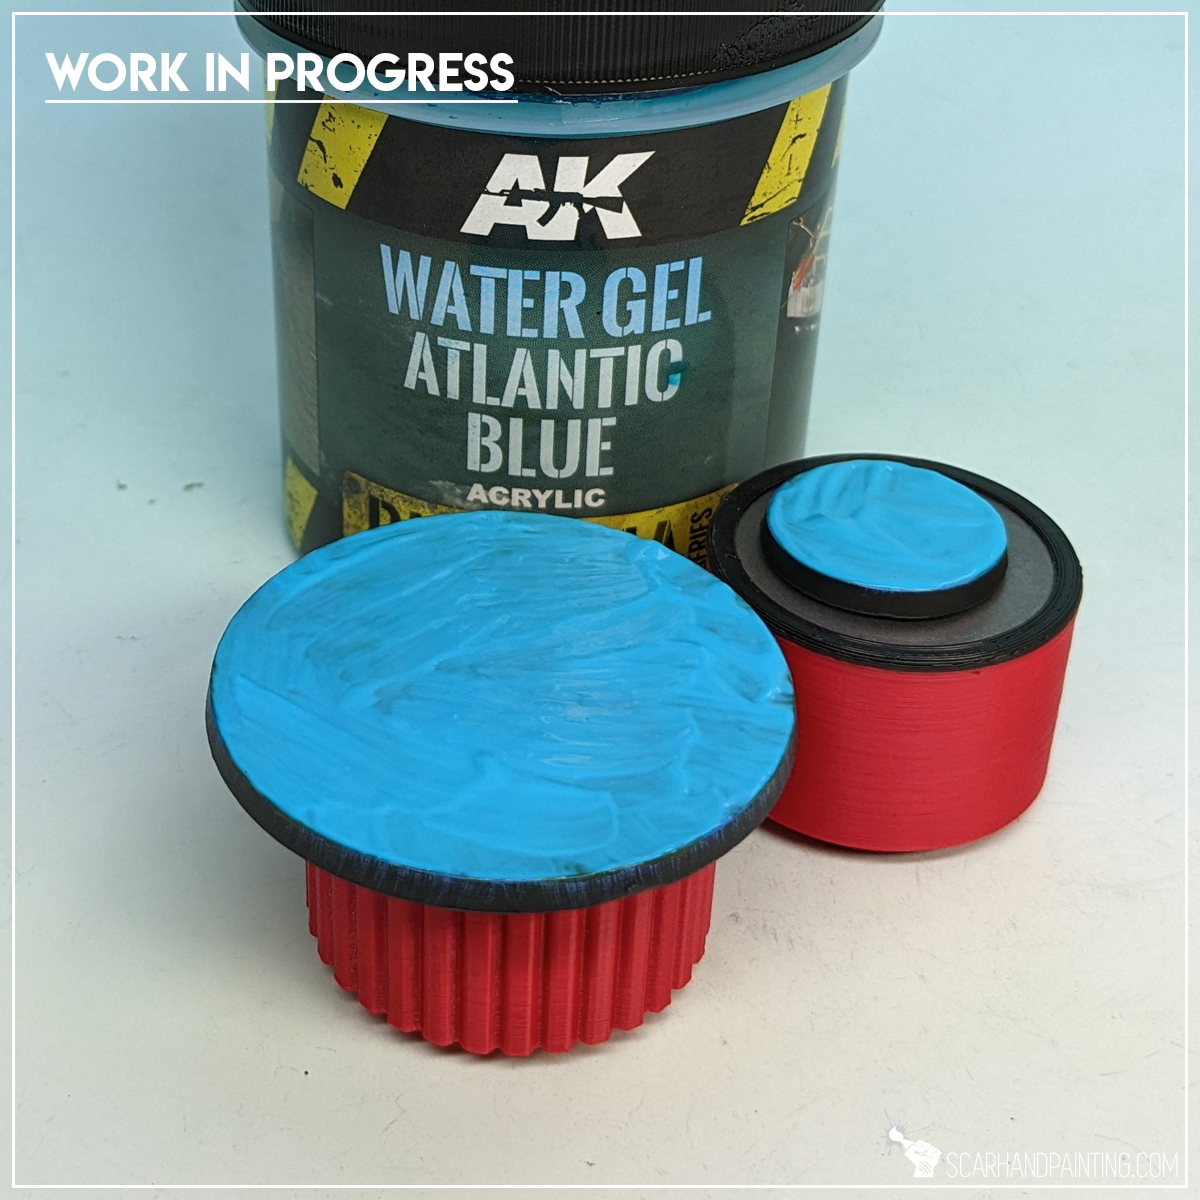
Once the previous layer dried, I covered entire base with a thick layer of AK Interactive Atlantic Blue texture and left it for half an hour to dry well.
Step four: Tufts
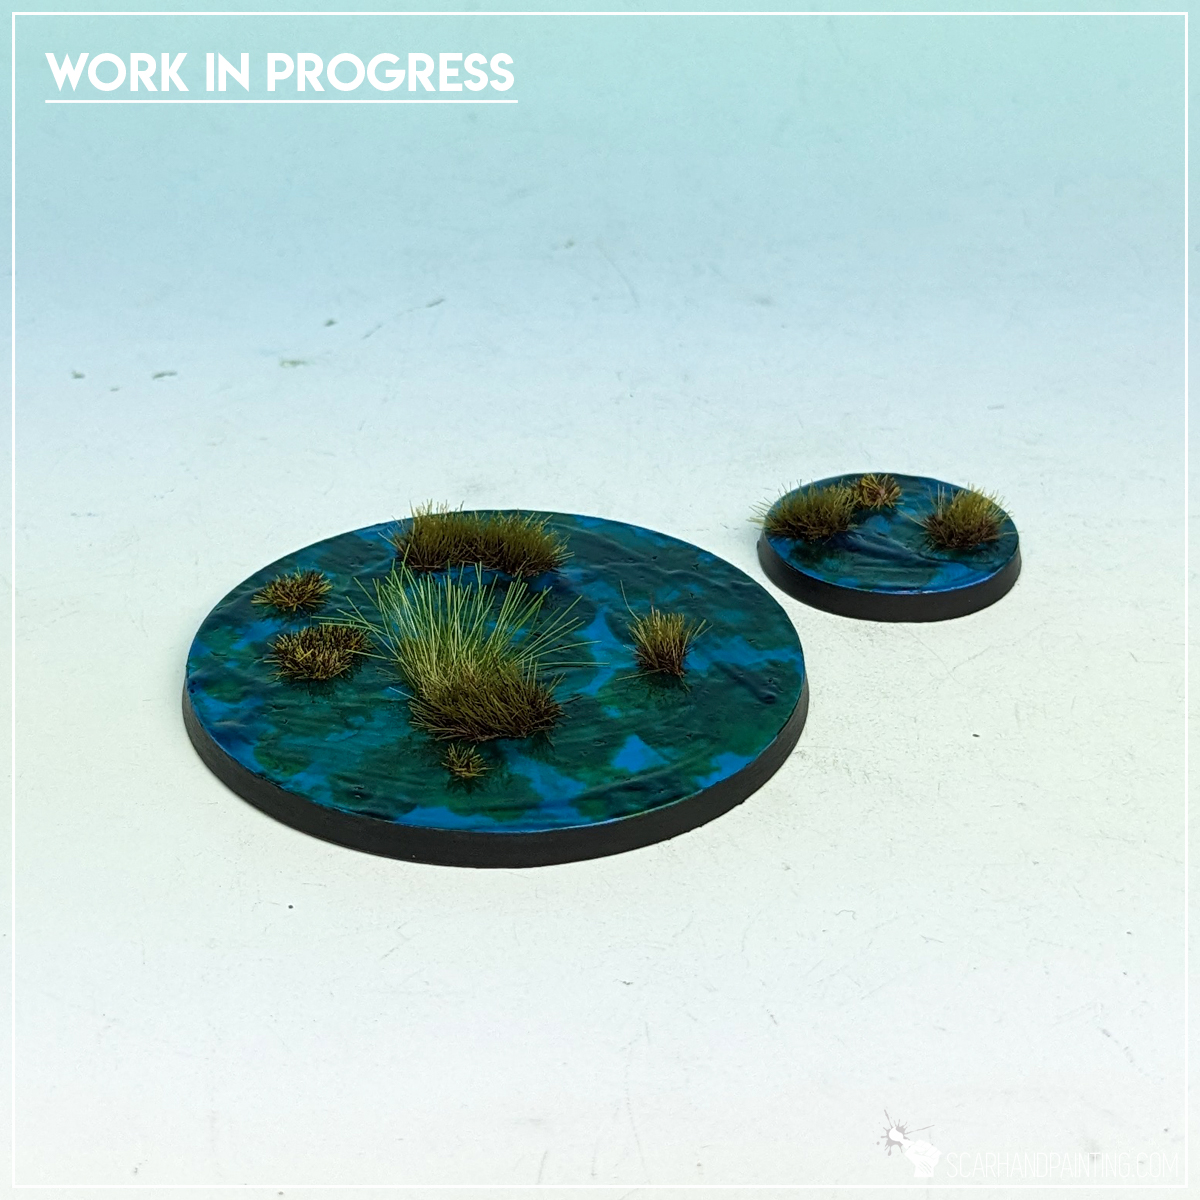
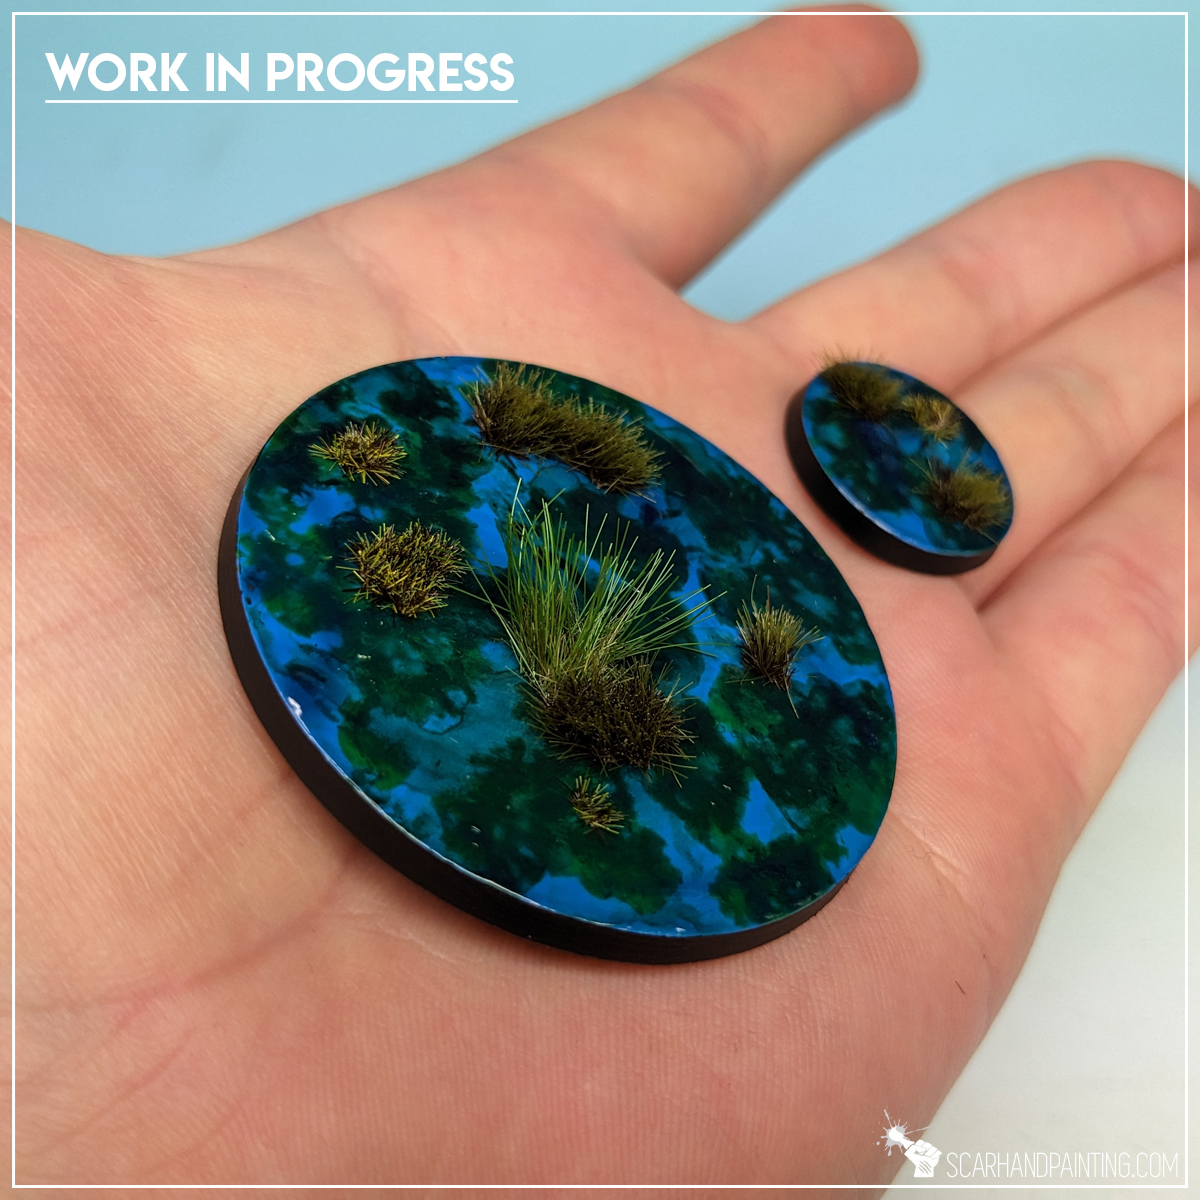
Finally, (after some black edge ninja painting) I applied some tufts. I used a mix of Gamers Grass Swamp and Dark Moss tufts to add volume to the base.

As you can see the process is super easy but provides an interesting, eye catching final result. I strongly suggest you take the process further and experiment with different colors and overall volume. I believe there is a lot of potential in this method.

I hope you find this tutorial interesting. Be sure to let me know your thoughts in the comments below or via Facebook or Instagram. I would also appreciate if you considered sharing this content with your friends, who might find it useful. Finally if you are looking for a professional warhammer 40k miniatures painting service, be sure to contact me with this contact form. I always reply within 24 hours, after which please check out your spam folder.

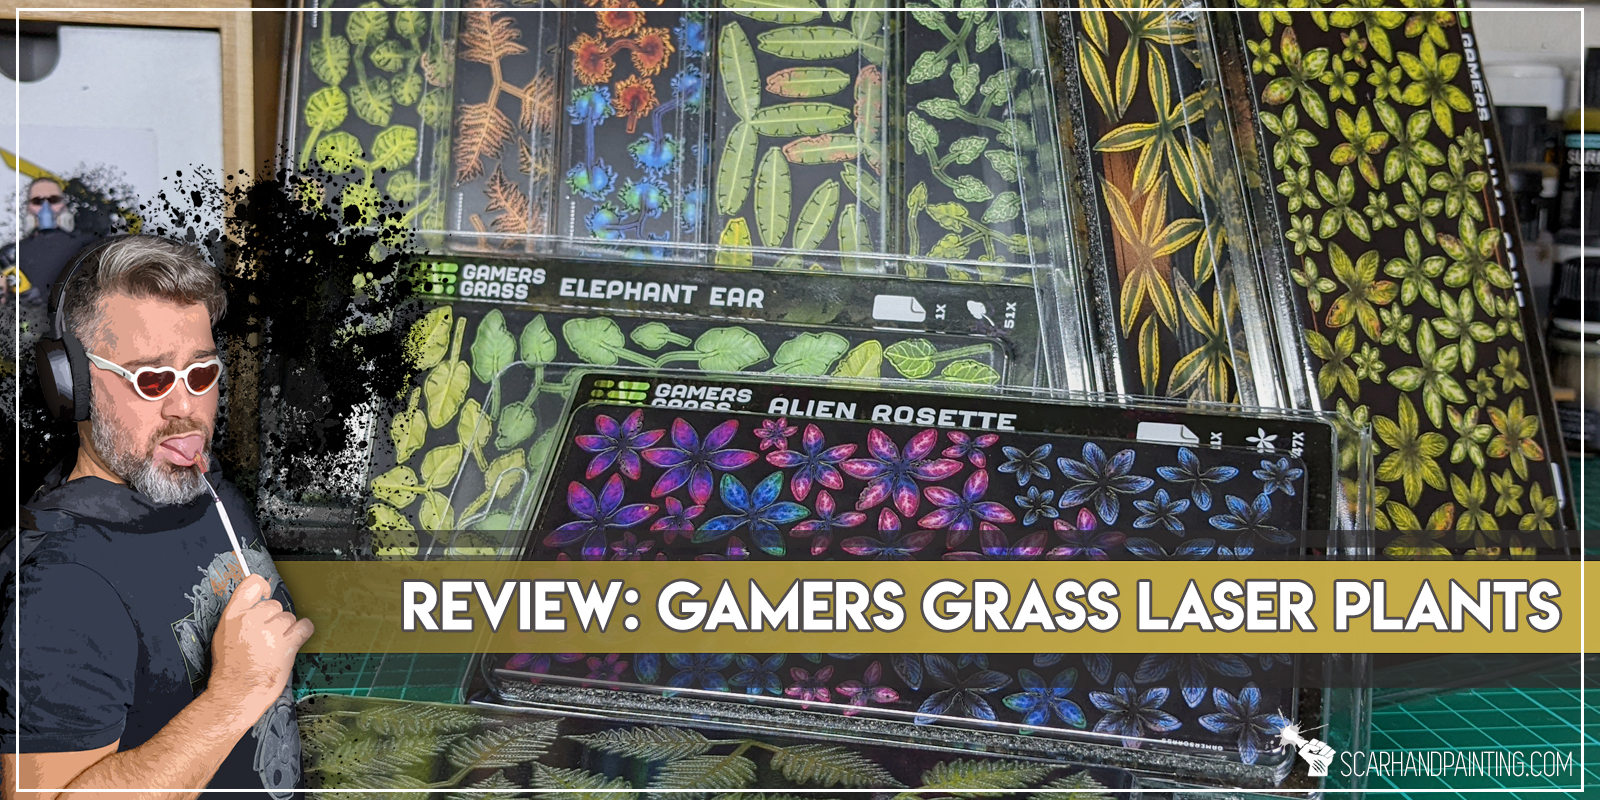
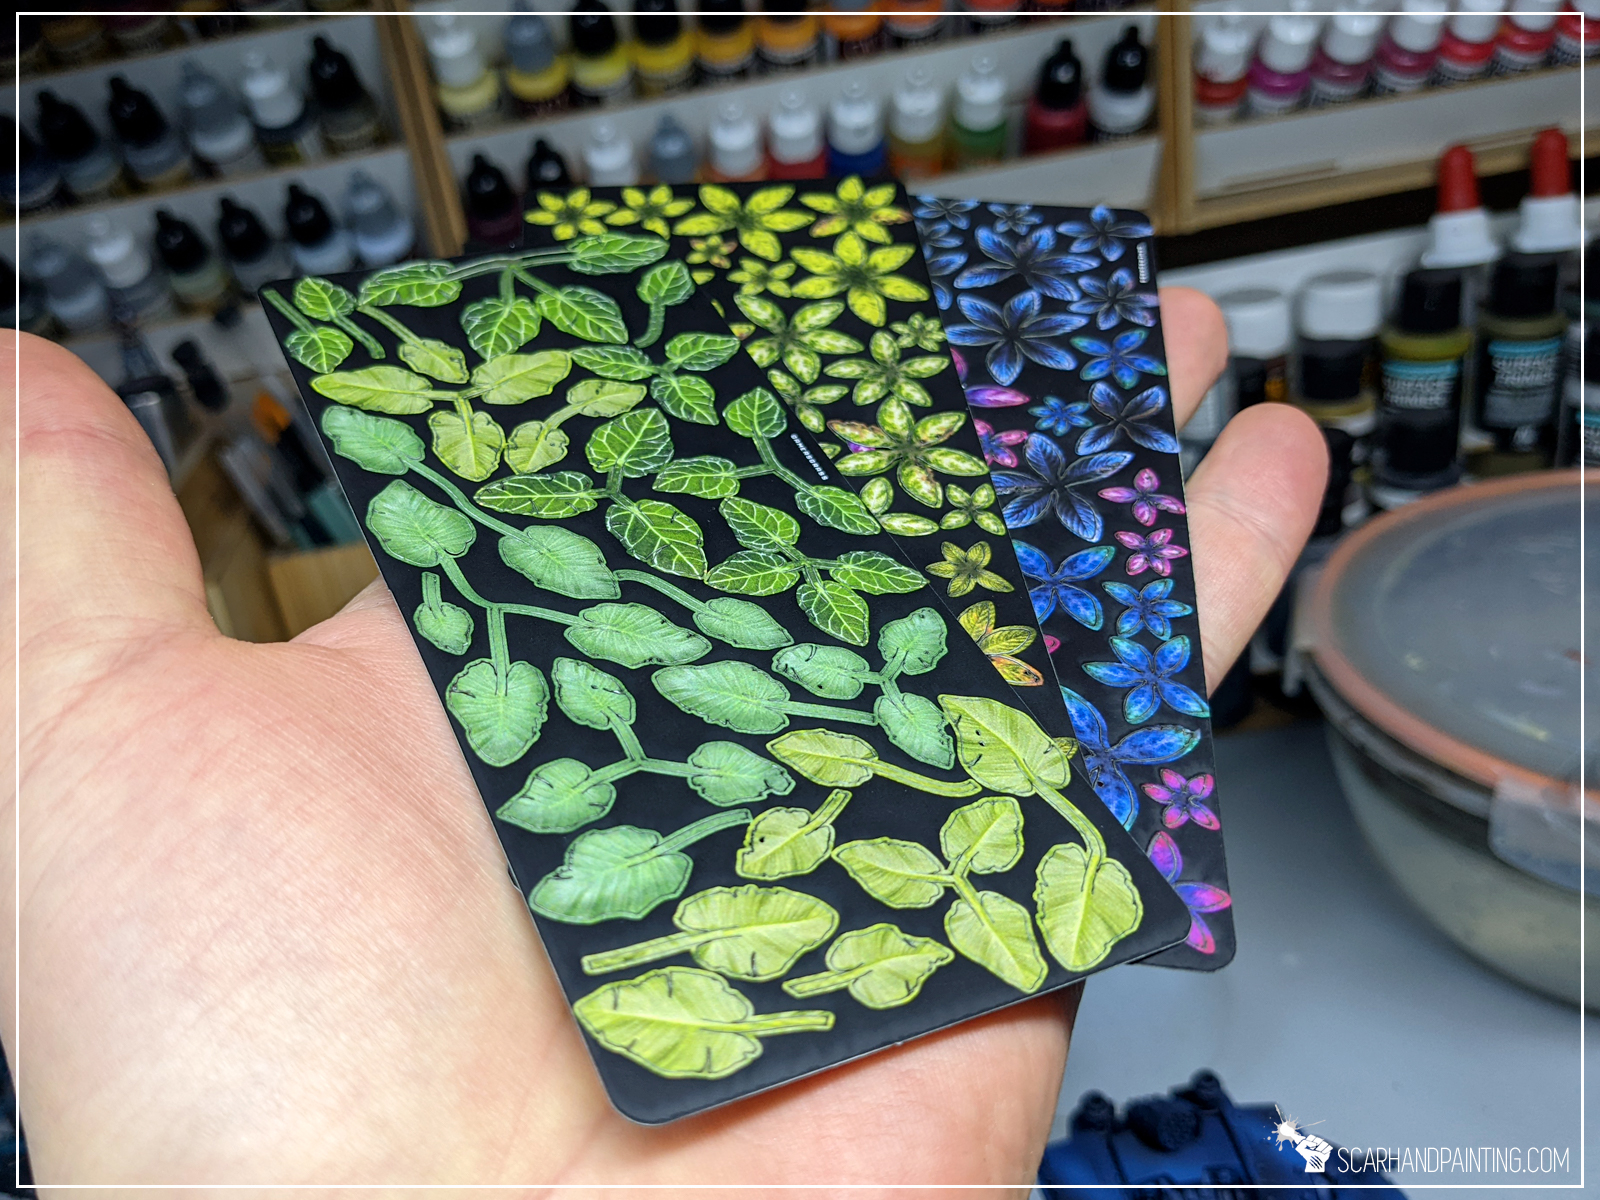
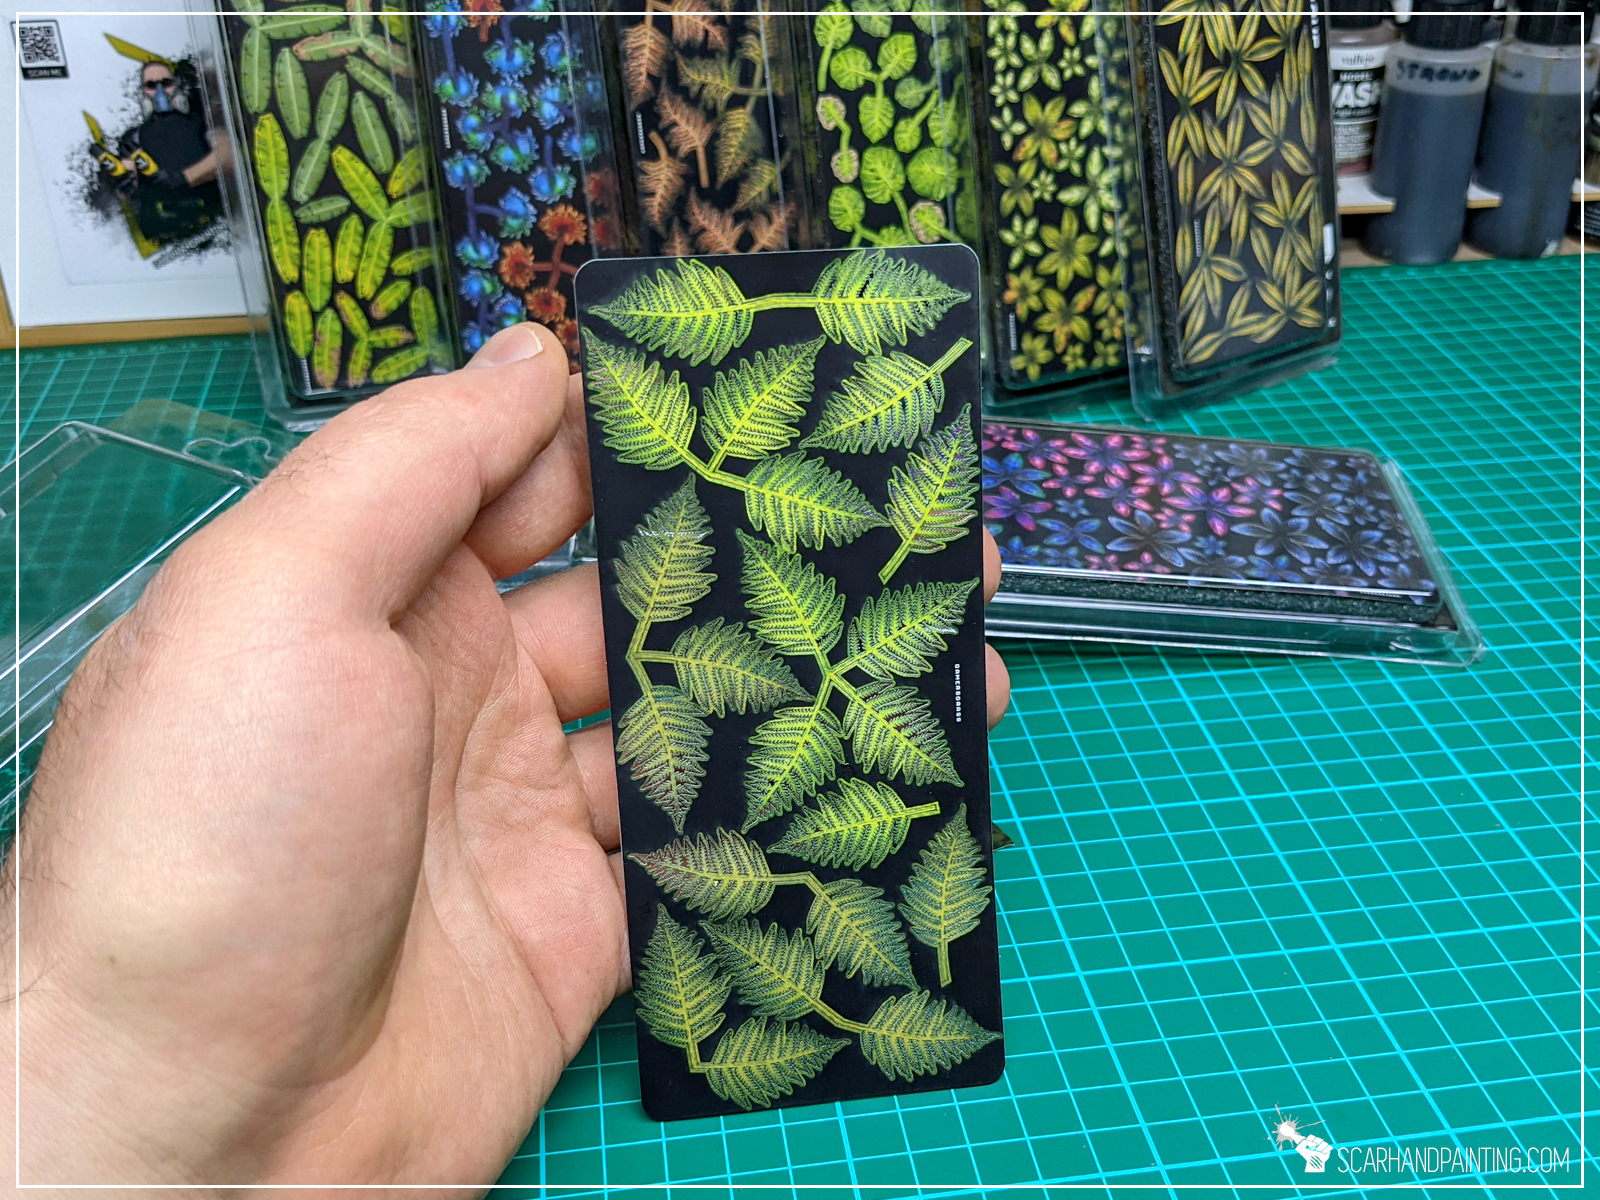
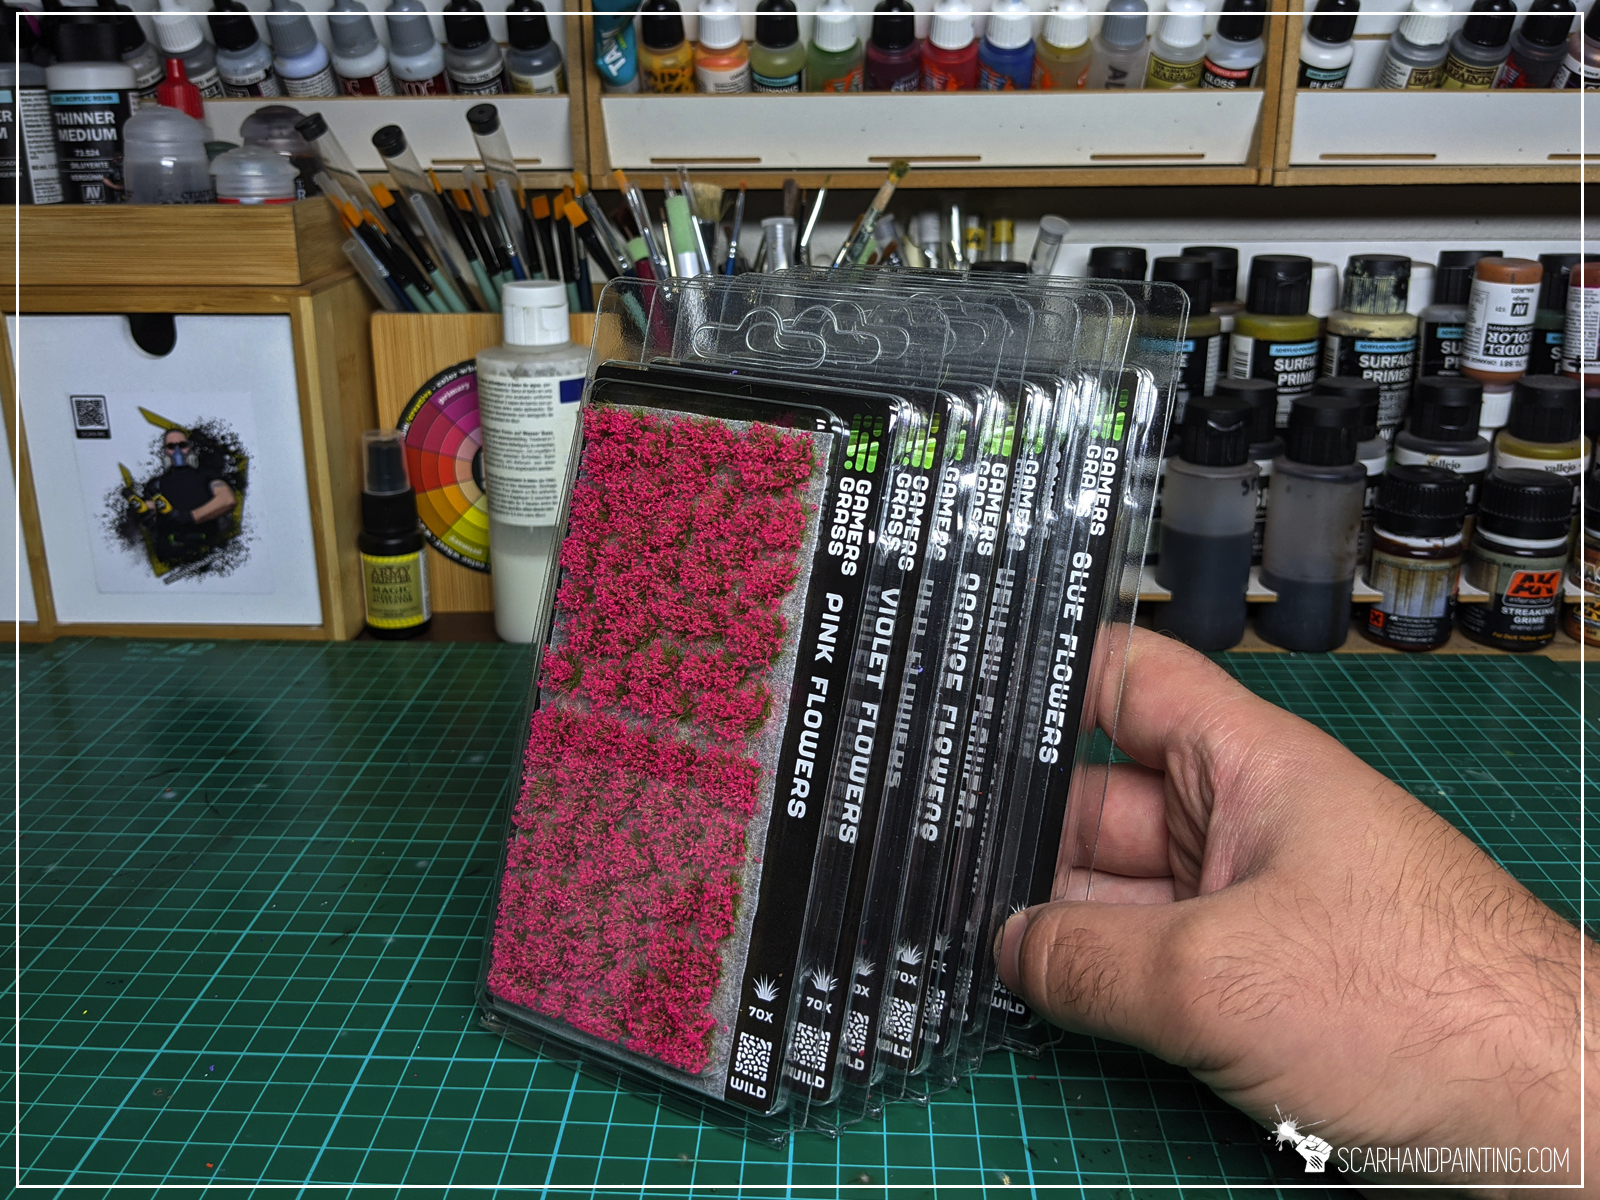
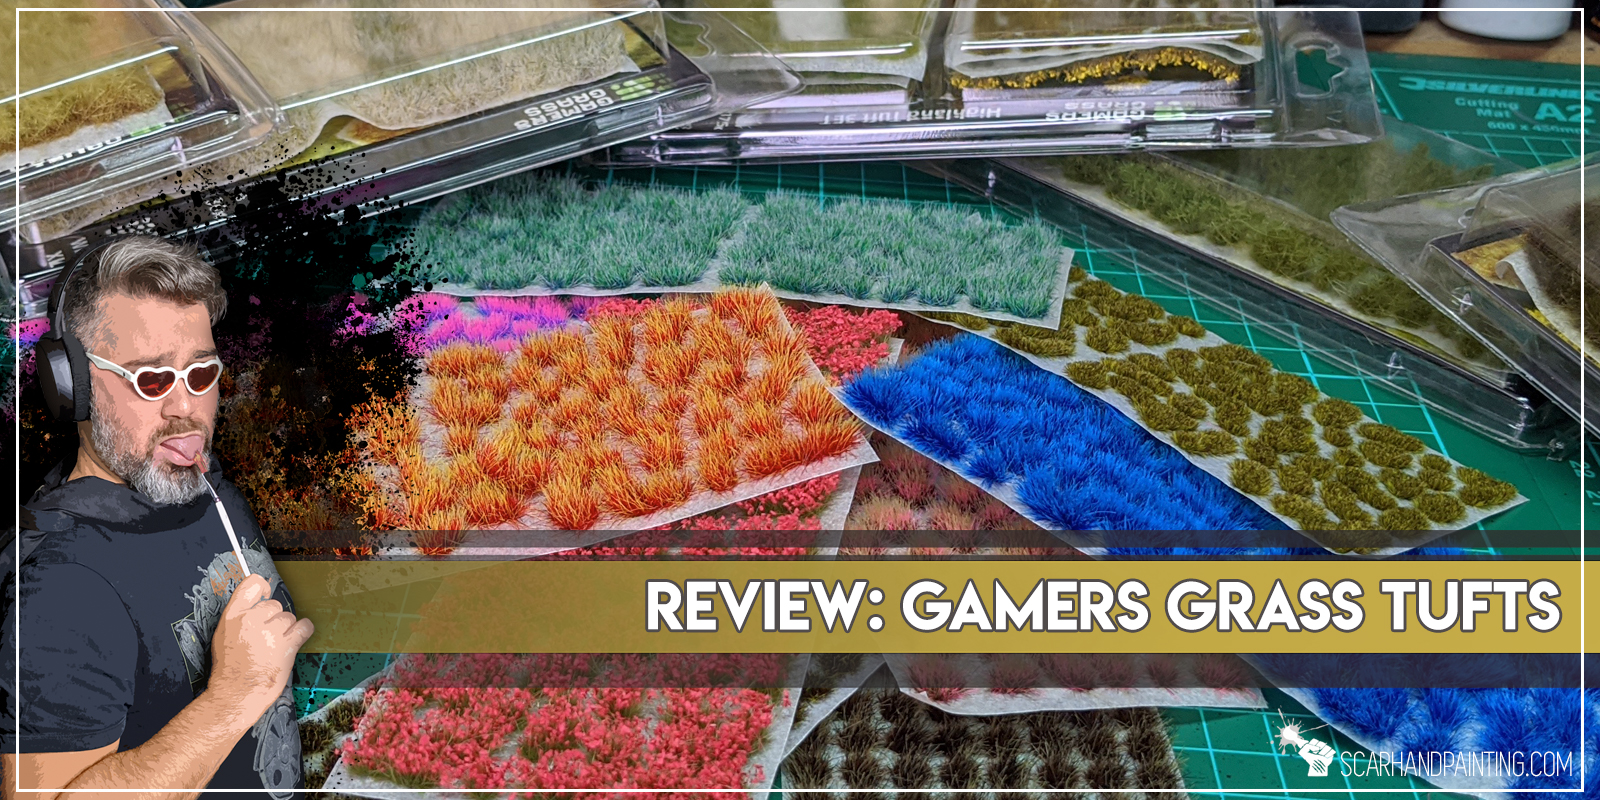
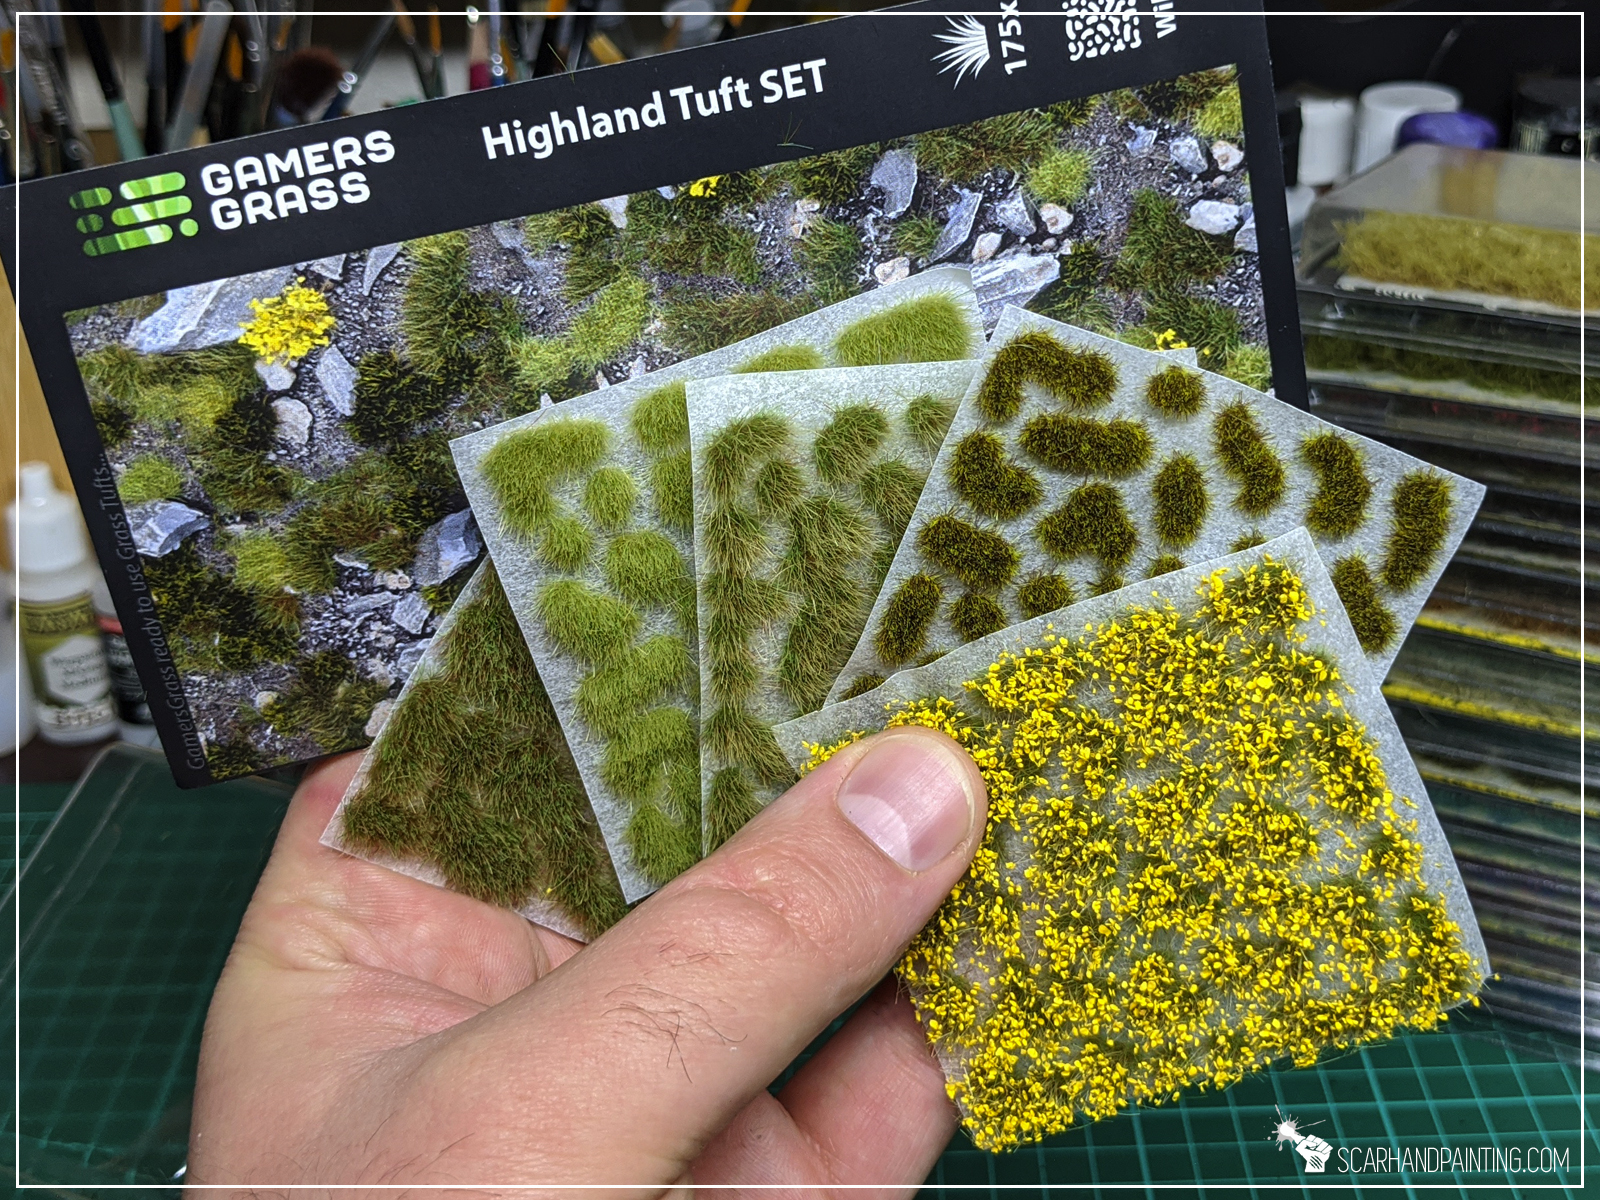
Gamers Grass – is a Portuguese company producing a wide range of high quality basing accessories. For me Gamers Grass is a trustworthy, go to supplier of everything basing related. If you hadn’t had an opportunity to get to know their range, I recommend previous articles: Review: Gamers Grass Tufts, Review: Gamers Grass Flowers. Third time’s a charm and today I will go through GG’s innovative line of products: Laser Plants.
For those of you who follow my articles it is a well known fact that I am a quality freak. When I choose tools and material to work with I always prioritize the very top of the line. At this point with dozens upon dozens of Gamers Grass products testes – I’m just positively biased towards their releases. Easy to say GG done it once again, introducing a high quality line of products that make me feel like a little kid coming to a hobby store for the first time. Everything looks breathtaking!

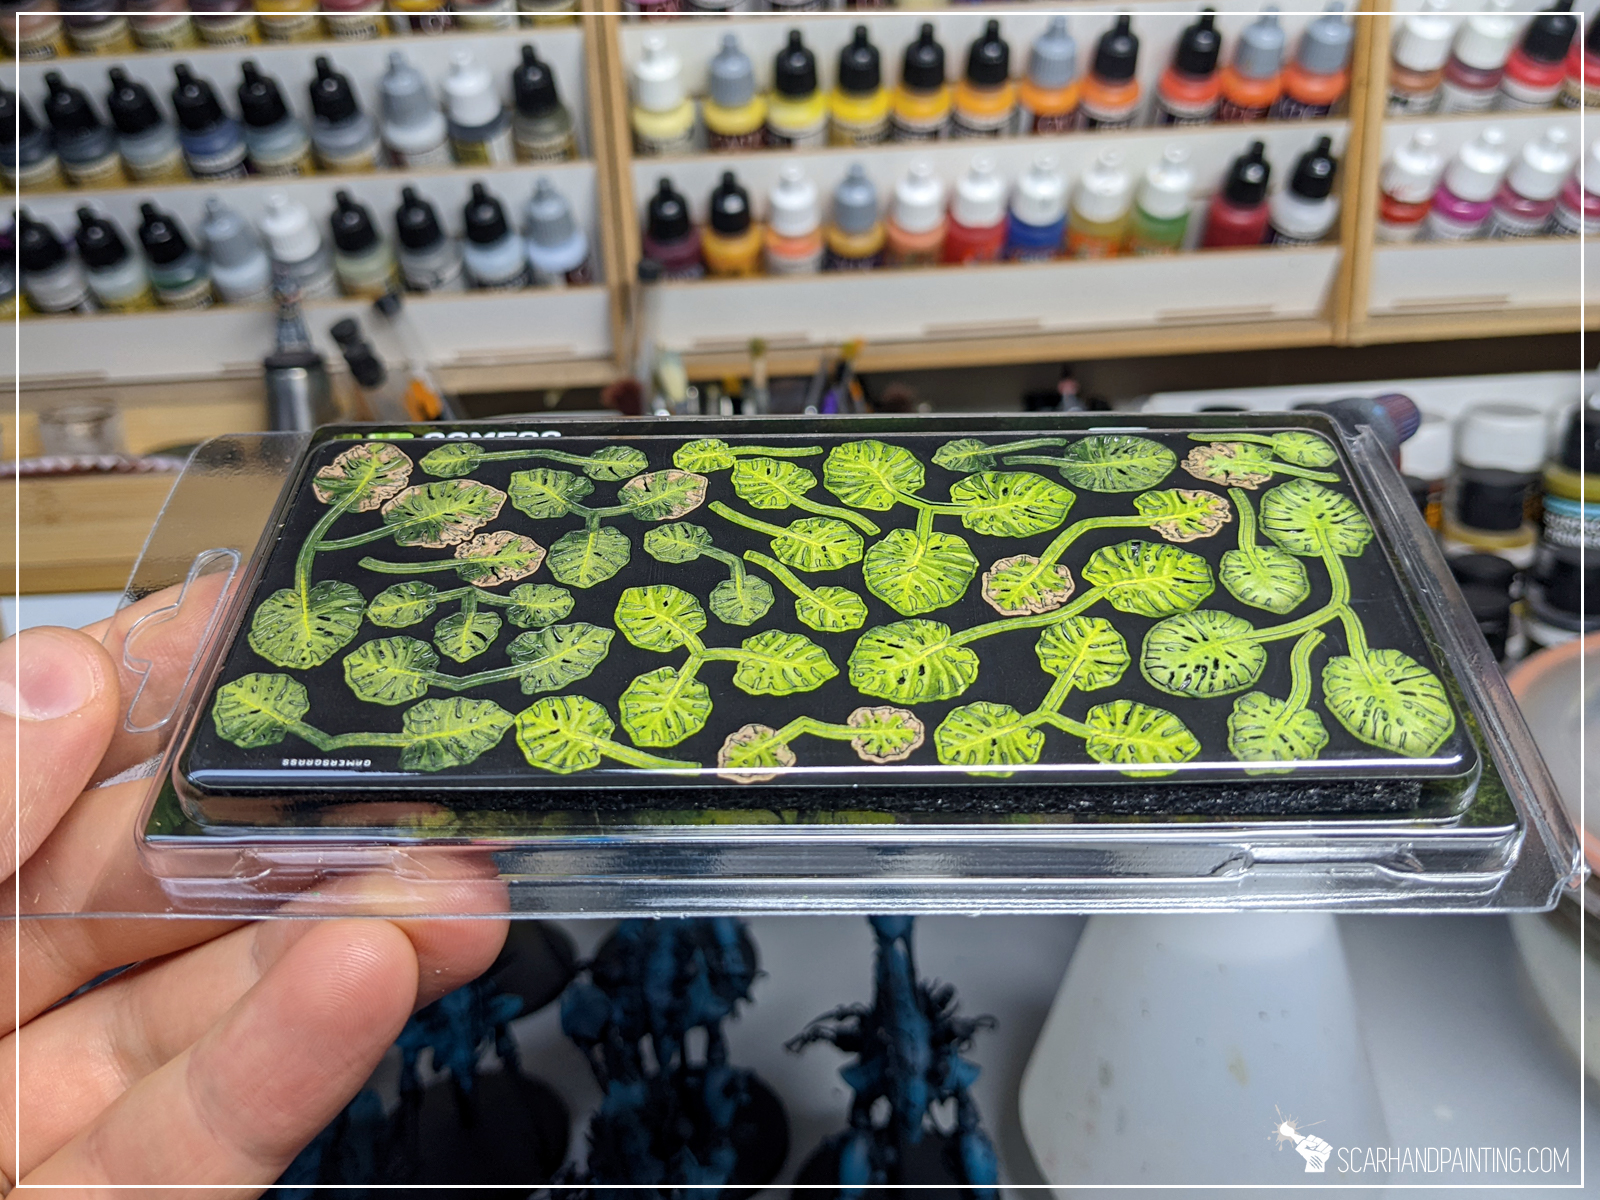
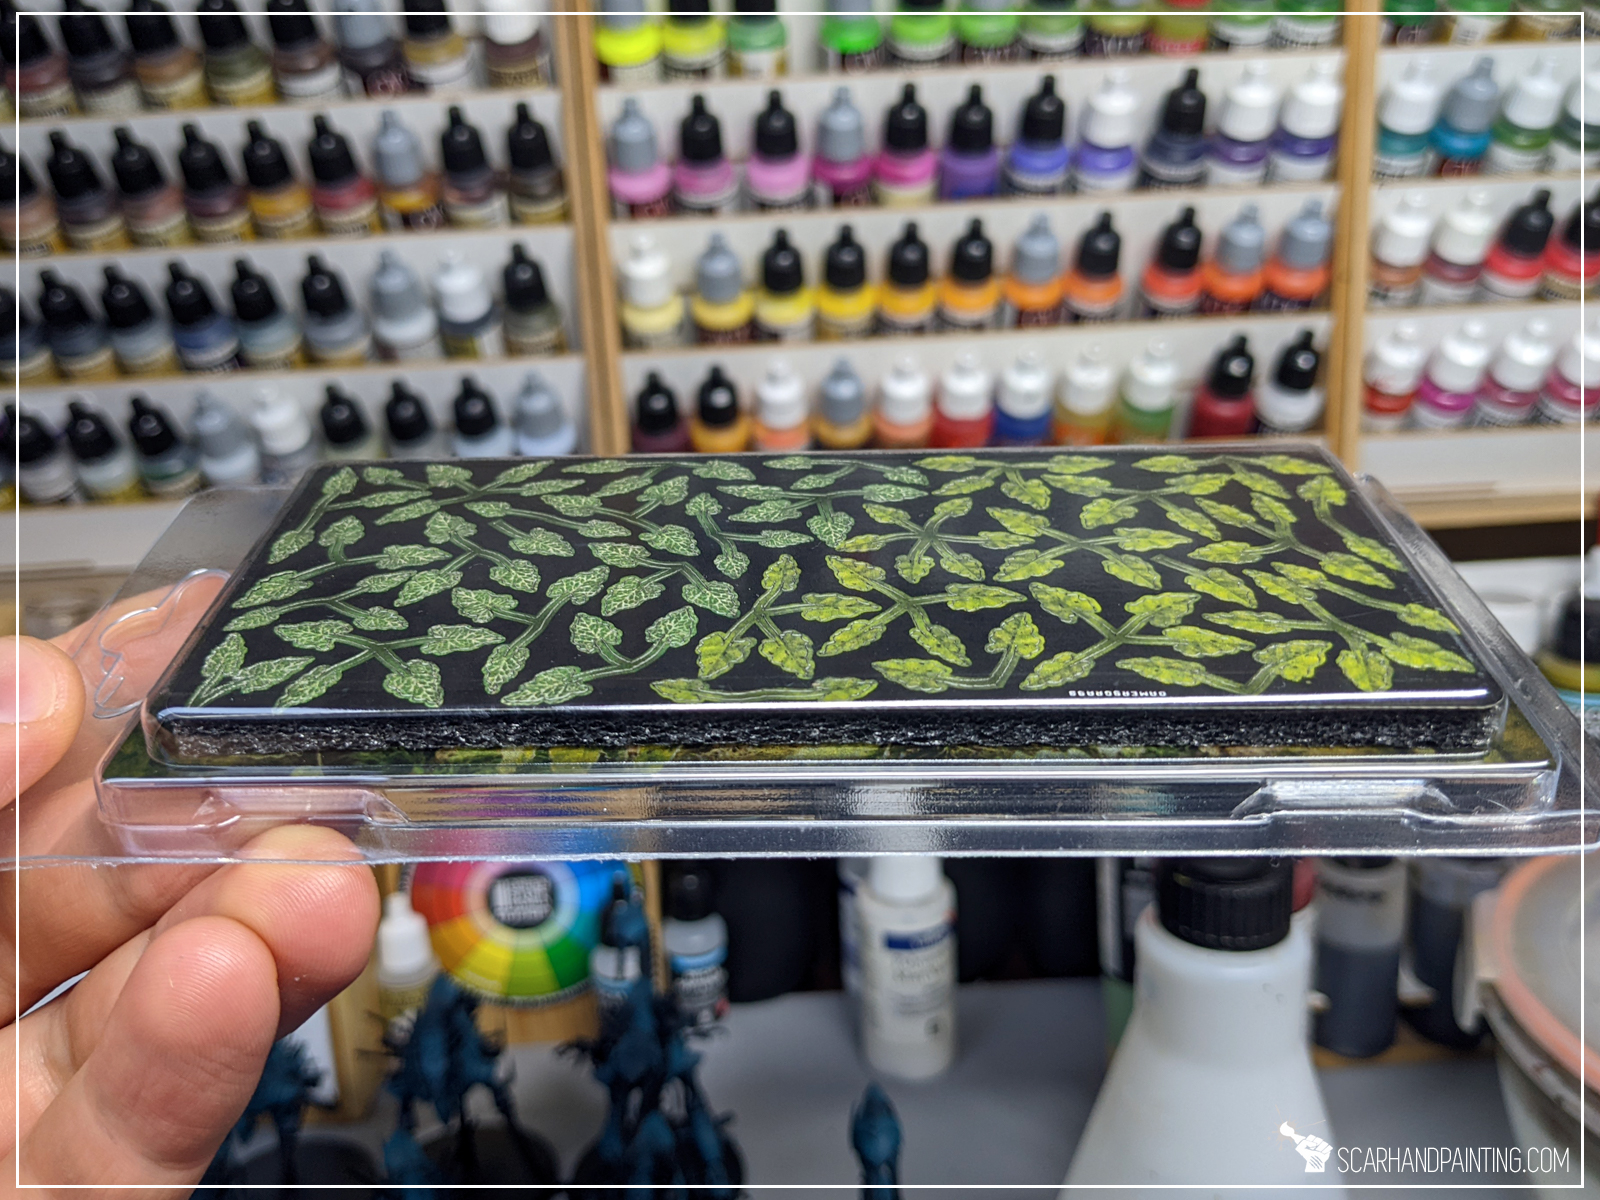

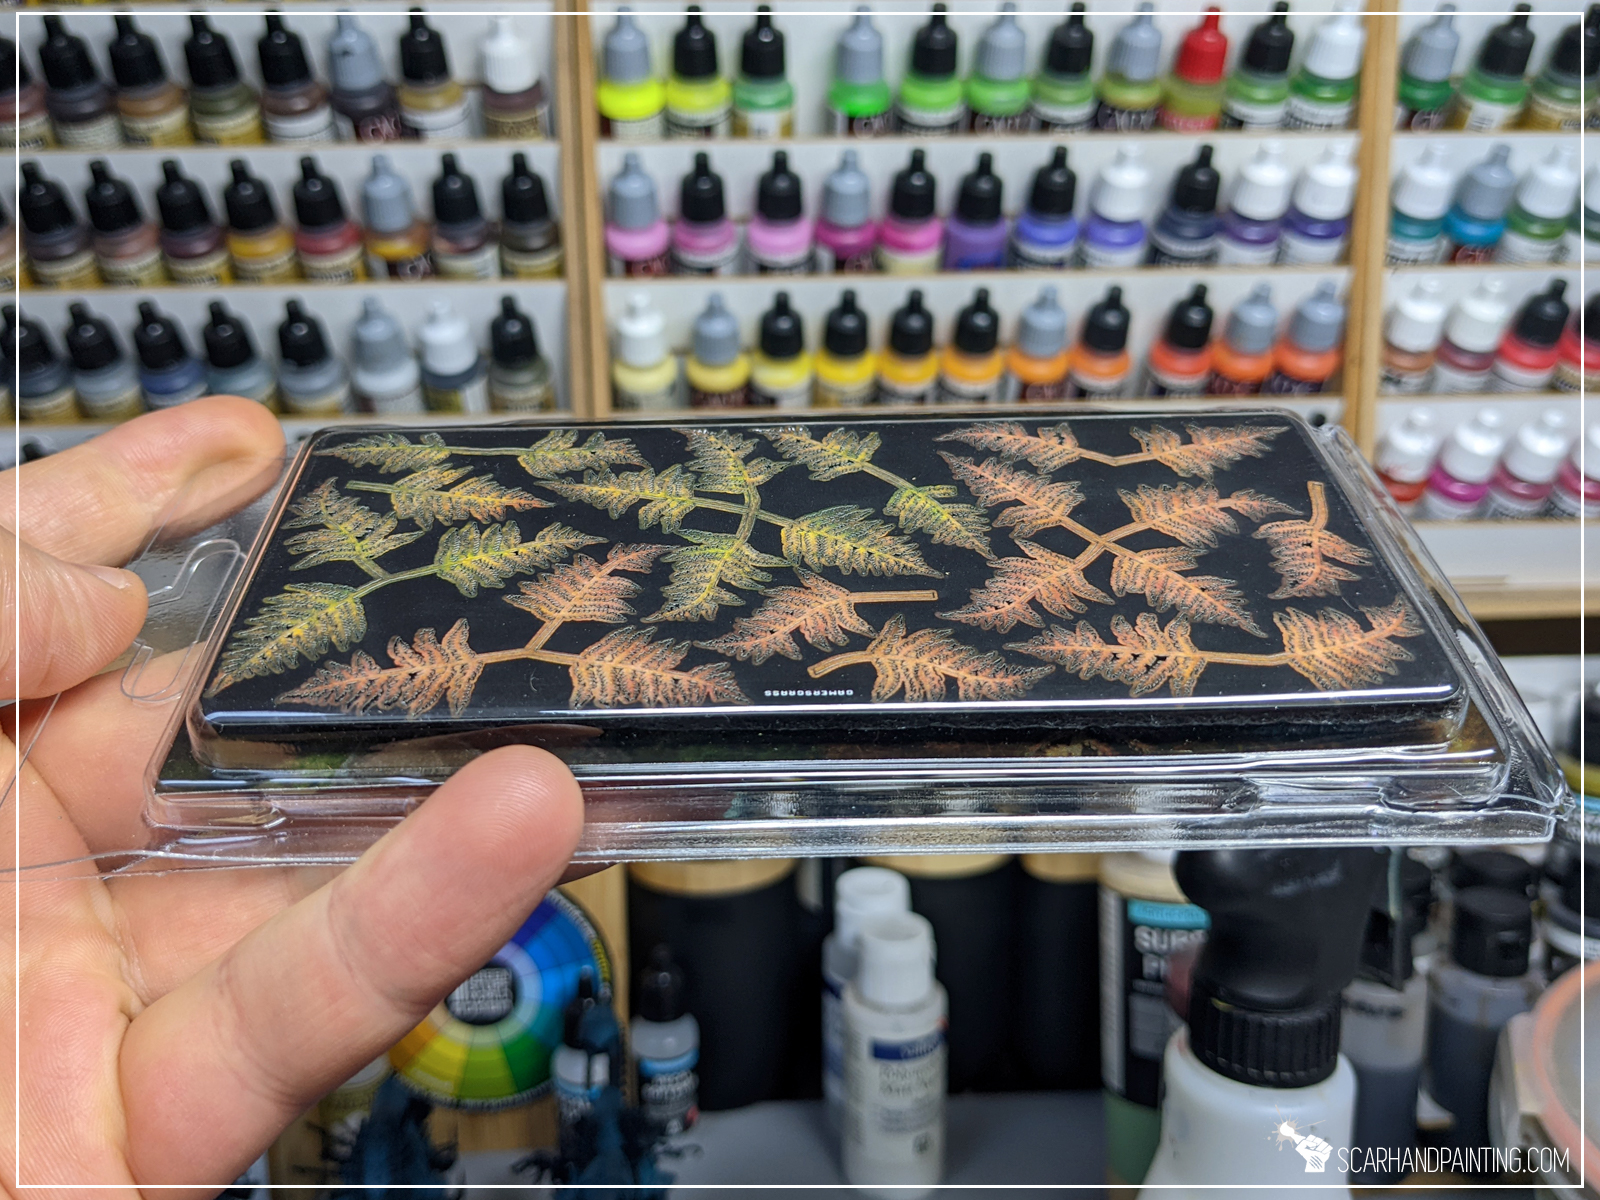

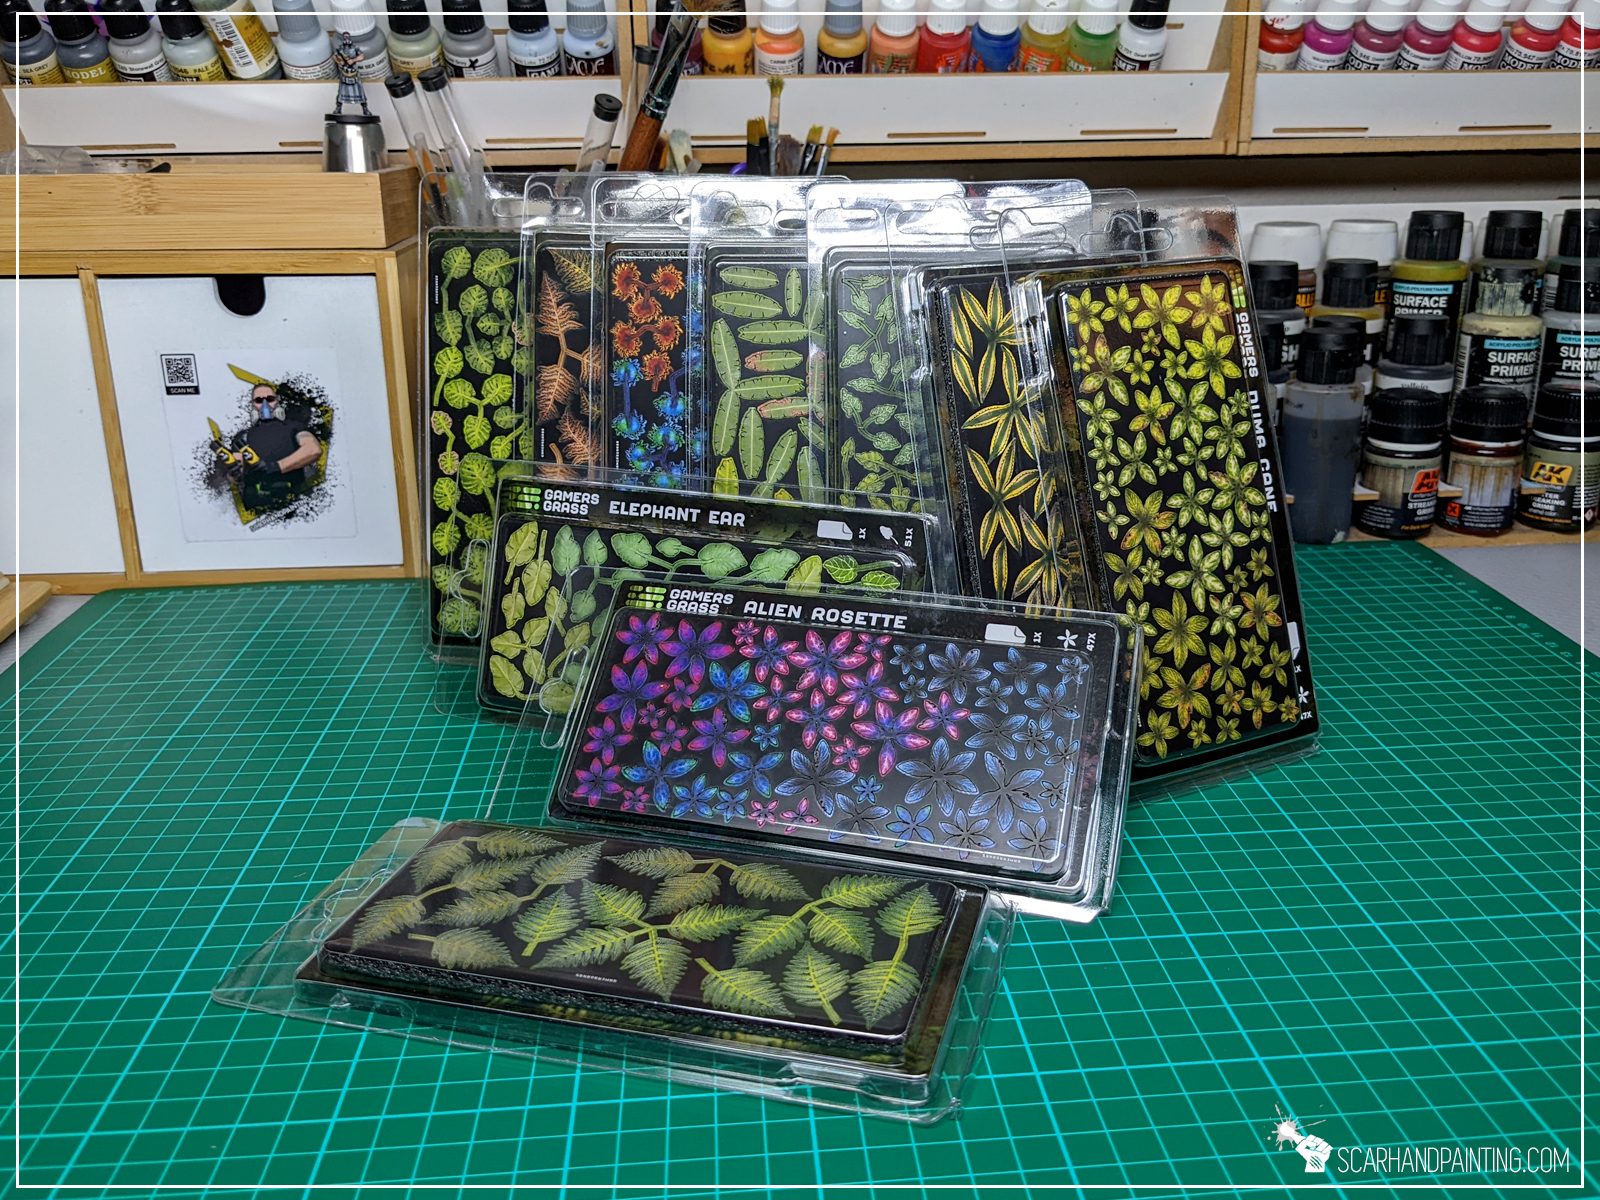
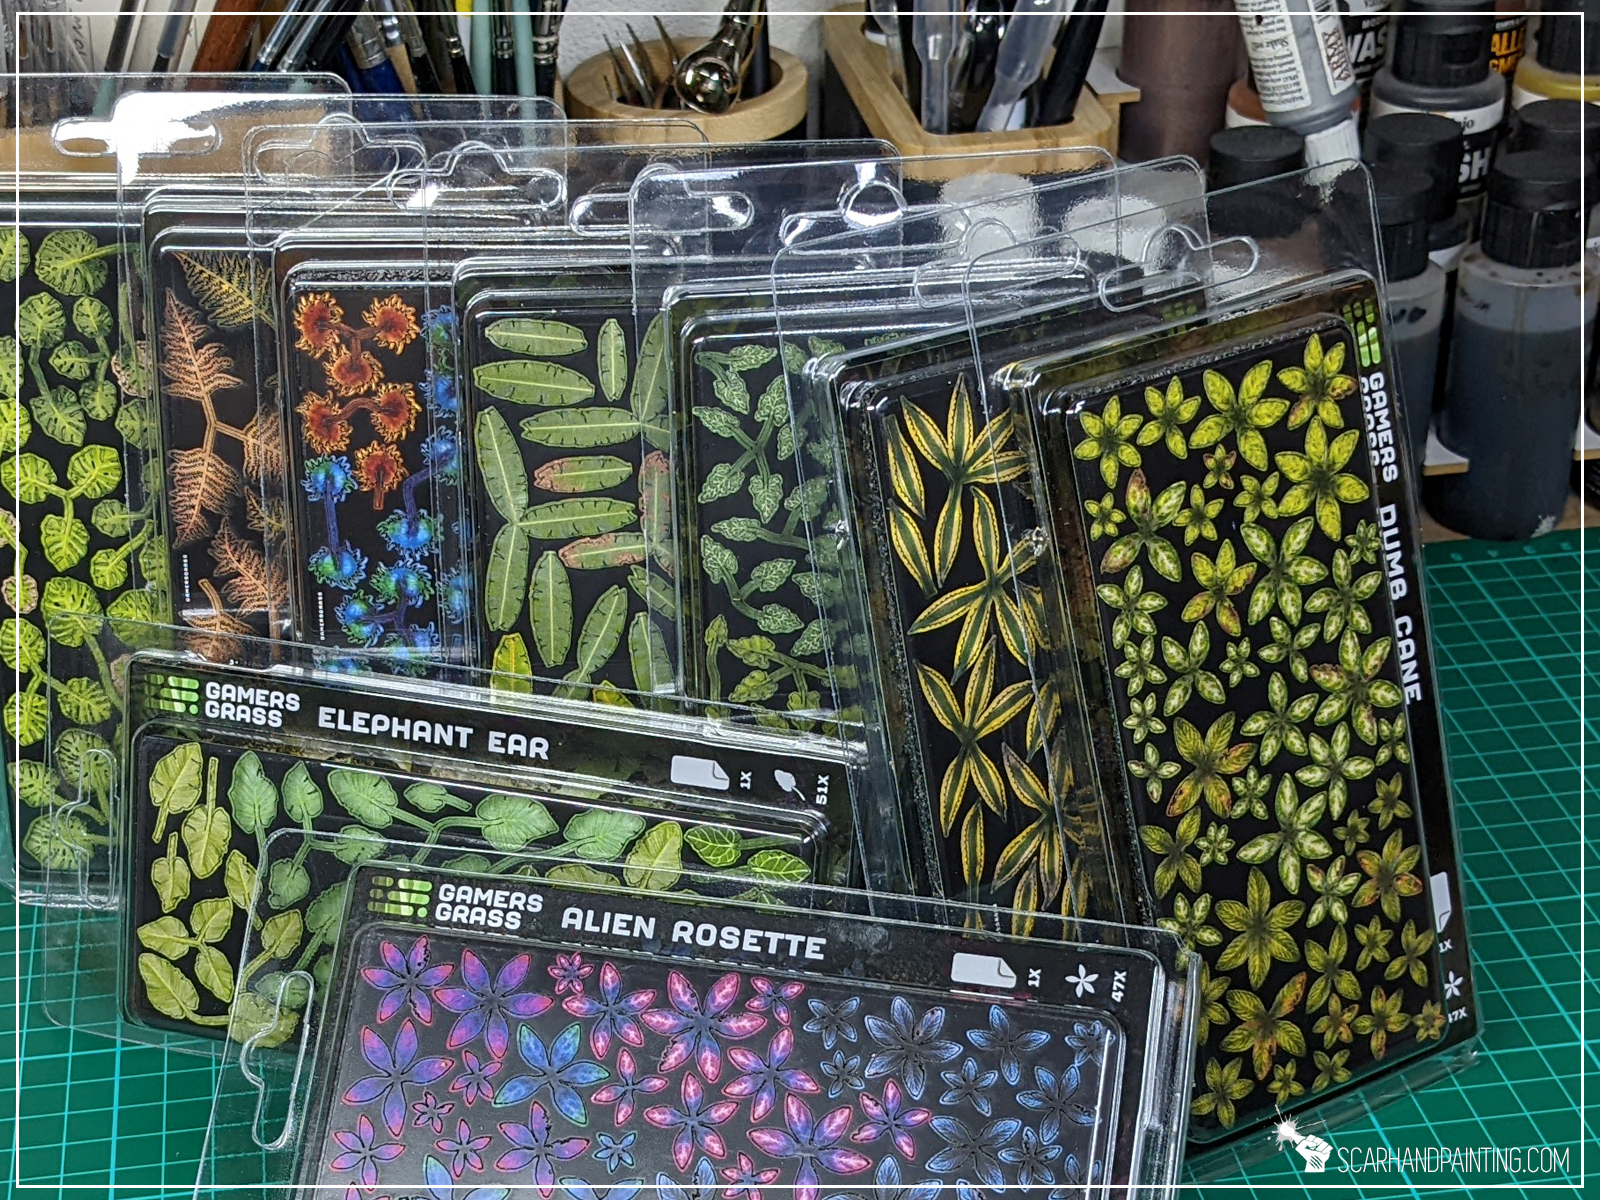
Hype aside, the quality is amazing. Prints are clean and on point, with crisp detail. Color depth looks great and each particular plant is well cut. The plants are much more durable than any paper counterparts found in the market and material is far less problematic than typical brass favored by modeling companies.
When it comes to visuals Gamers Grass Laser Plants look stunning. Nothing that I saw in the market can even compare. They are colorful, interesting, diverse and just beautiful. Ready to turn any base in to a small work of art.

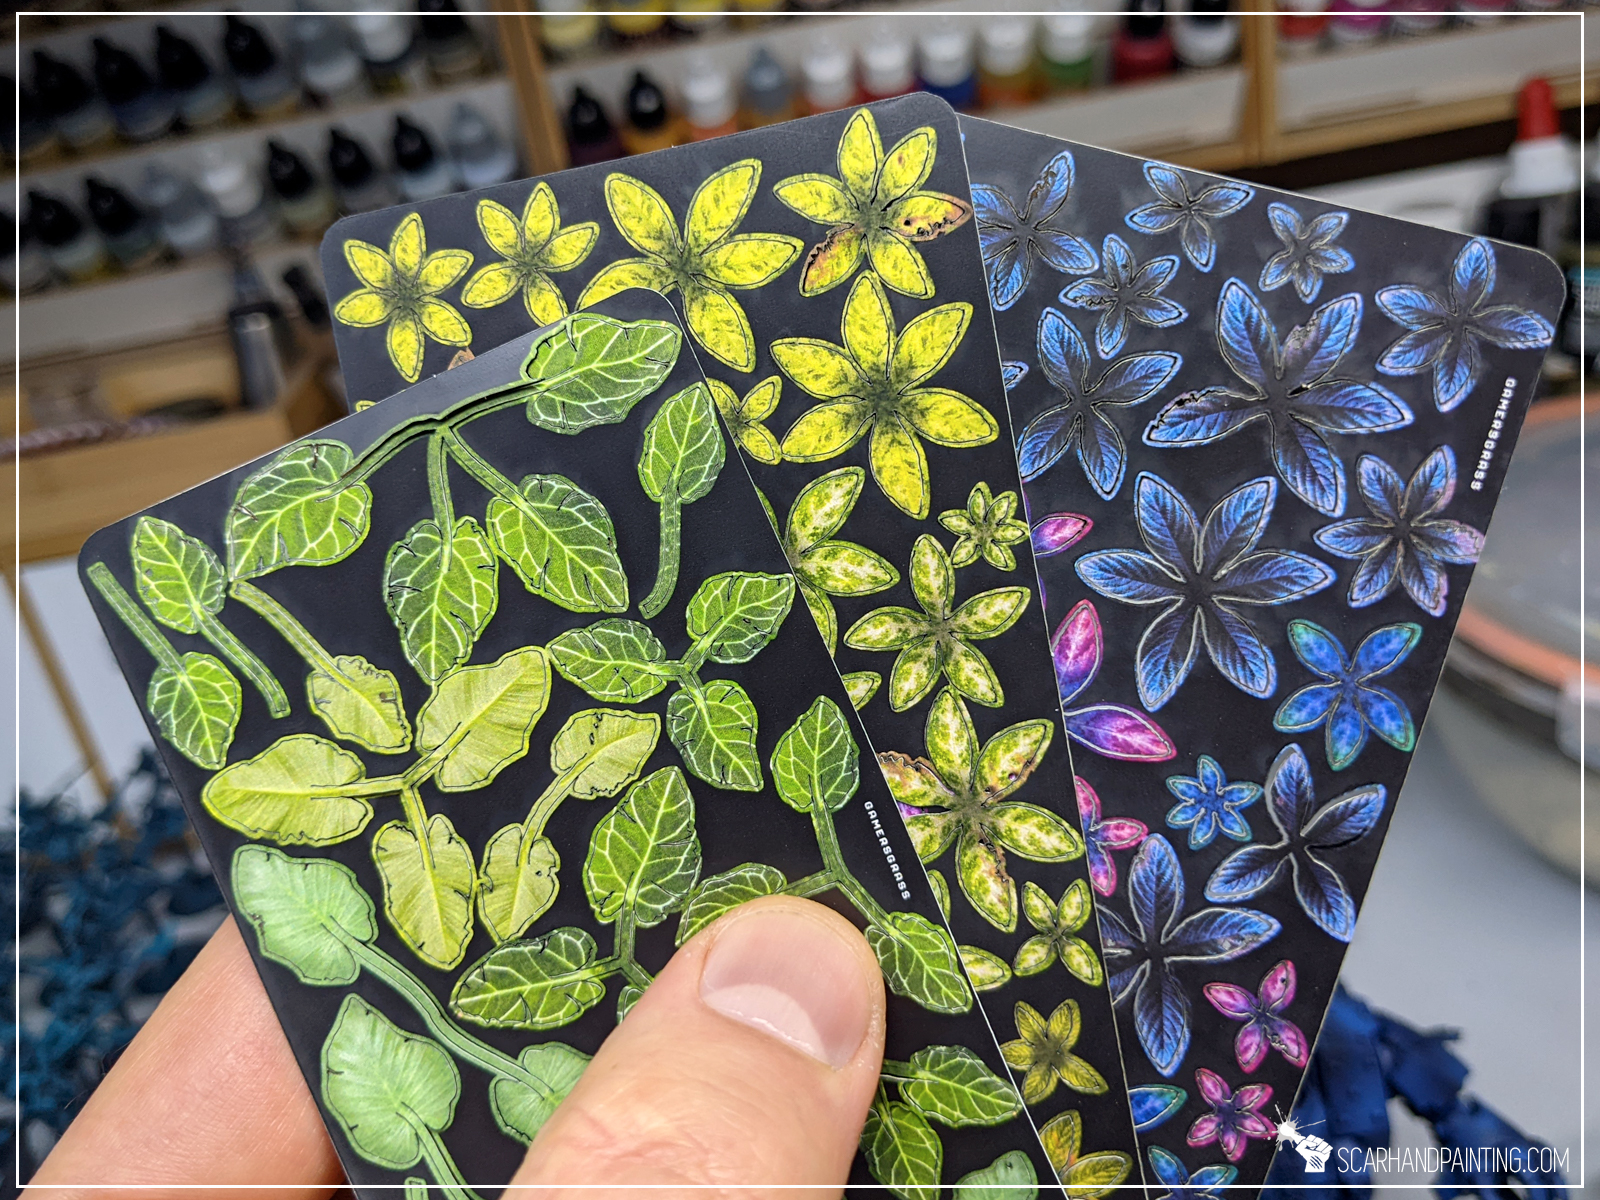
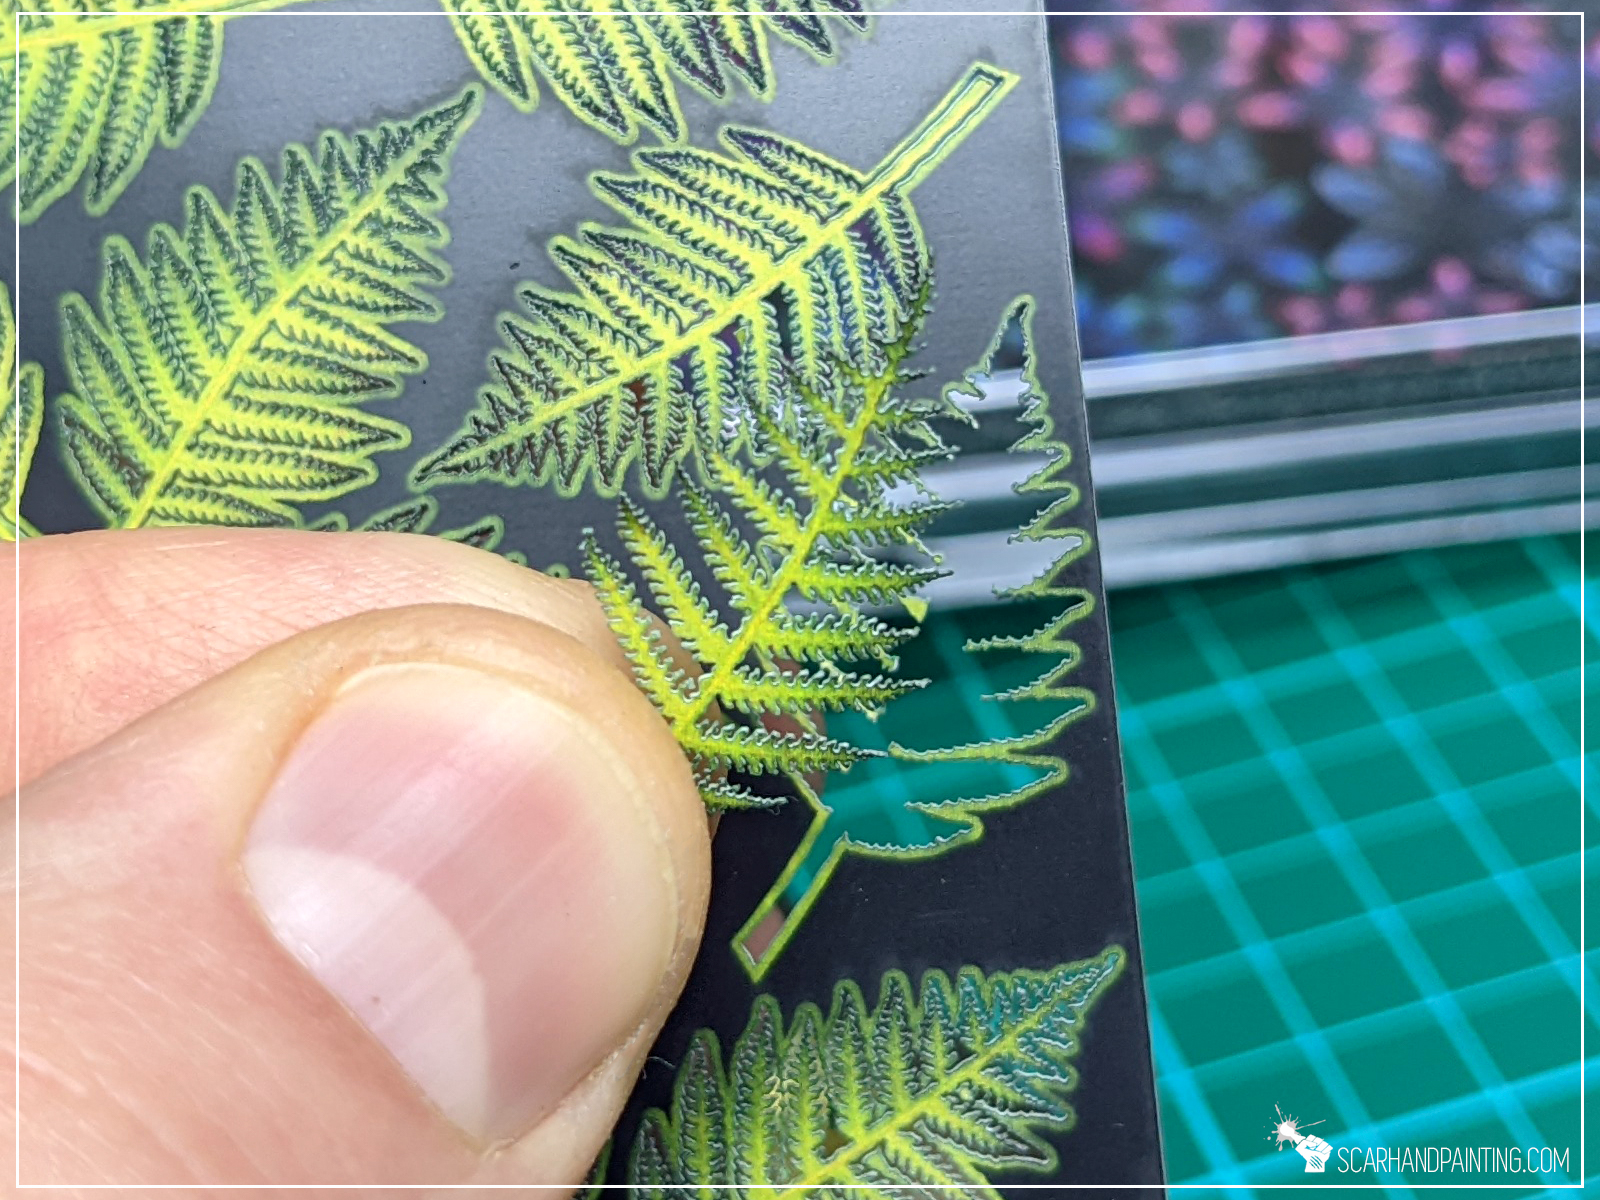
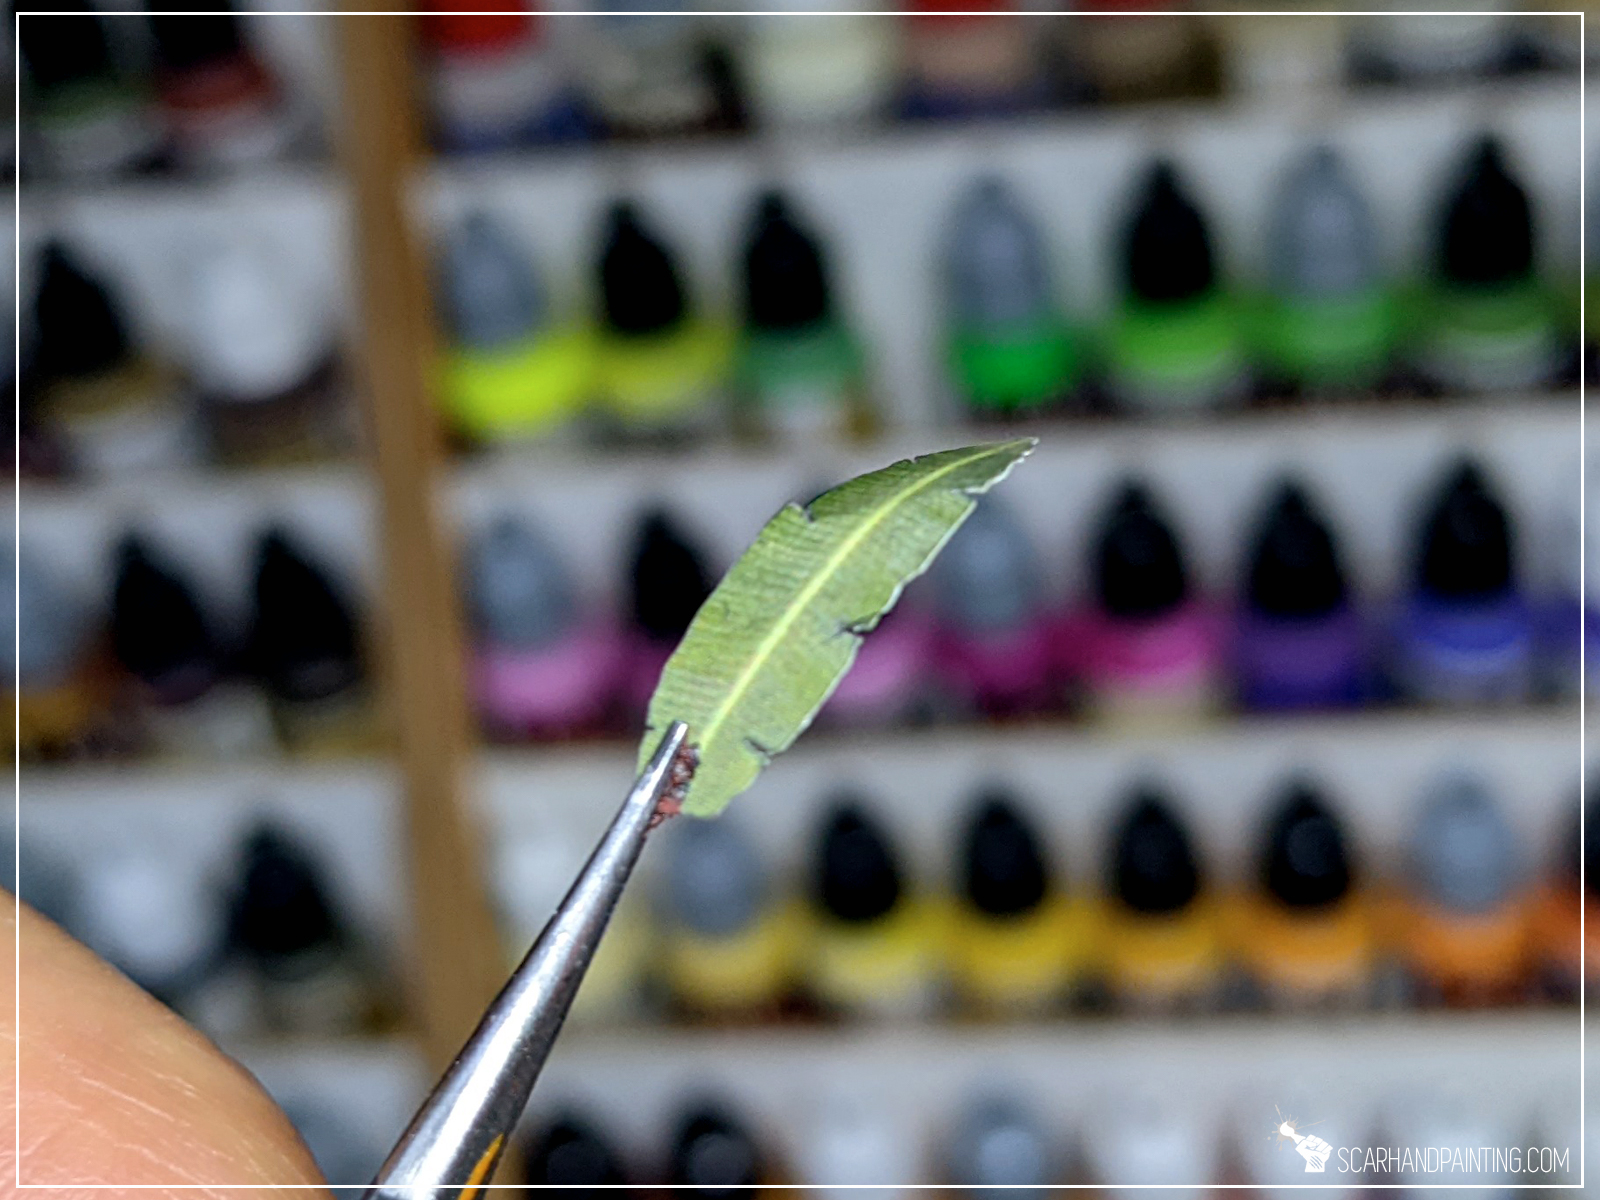
I never was a fan of laser cut / etched plants. This is because although they fill a very specific niche in basing products, what used to be available in the market was never functional. Paper is difficult to work with and is susceptible to damage, etched brass plant are easy to form but also very easy to chip the paint off of. Both usually require painting, and it translates to a lot of time spent on painting something that is secondary to the actual miniature. Sure, there are some pre-painted paper plants available, but the quality of paint job is not that great and it is just too easy to break tiny stalks, ruining the base.
Here’s where Gamers Grass Laser Plants come in. Each plant is precisely cut from what seem to be a thin plastic sheet. They are easy to take out of the sheet and very – VERY – durable. Prints look great and are good to go from the moment of opening the box. No need for additional painting, although it can be done. One issue I found is repositioning the plants without creating hard angles, but after some testing I was able to produce good results by soaking the plants in hot water beforehand. These are really fun and easy to work with, which is not something I was expecting 🙂


Time to take in the price factor. I’ve done quick research and putting Etched Brass plants aside (as the market is full of these and price range is just too vast to compare) here’s how it looks like against immediate competition:


I have a limited experience with laser cut / etched brass plants and all was rather disappointing. On the other hand Gamers Grass Laser Plants are very simple to use from the get go and look amazing. With stunning visuals these plants stand out amongst the competition and are fairly priced on top.
I might be a Gamers Gras shill at this point, but these plant are awesome and I appreciate the innovation.
What’s your opinion? Let me know in the comments.
You can order through Gamers Grass official store, or try out your luck in a local hobby store. To make things easier for you, Gamers Grass prepared this awesome Store Locator.
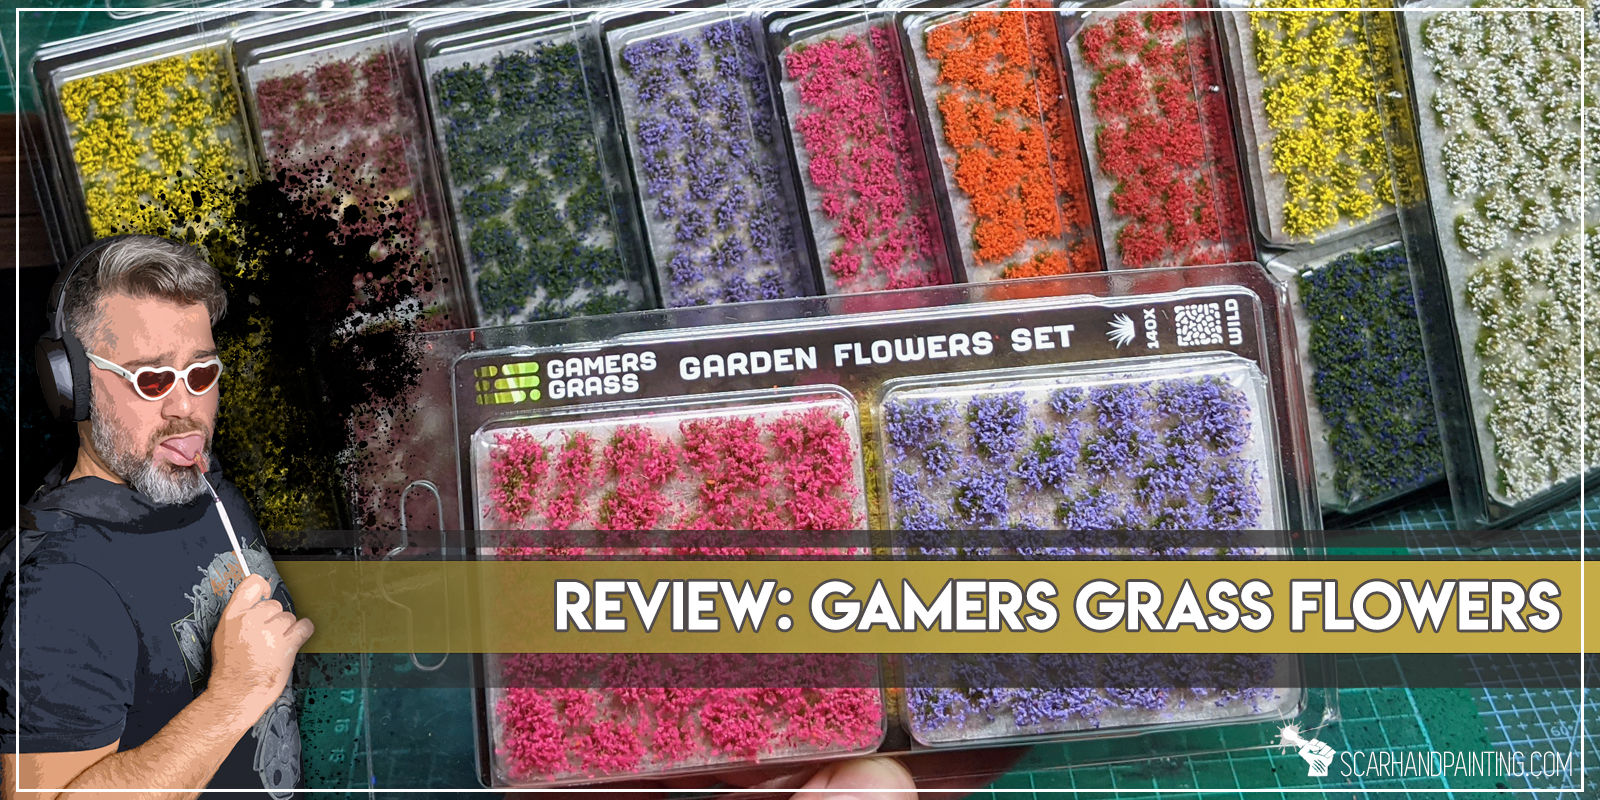
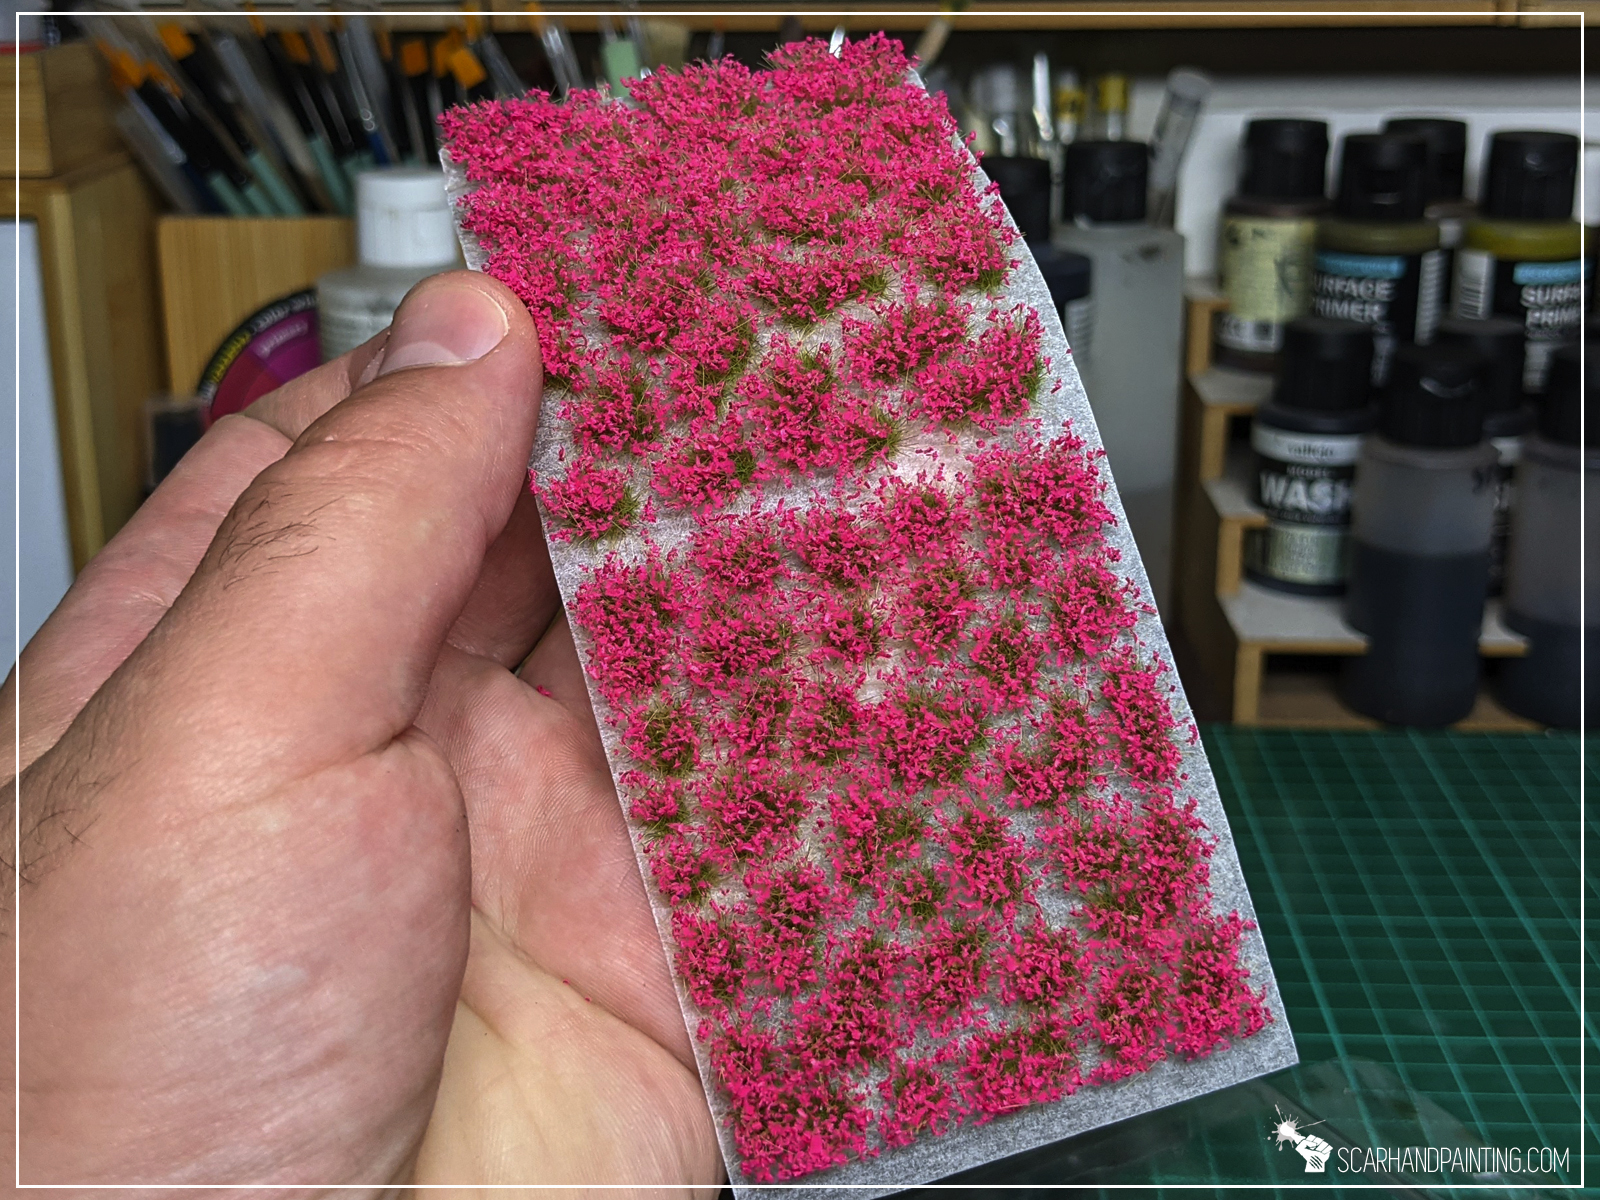
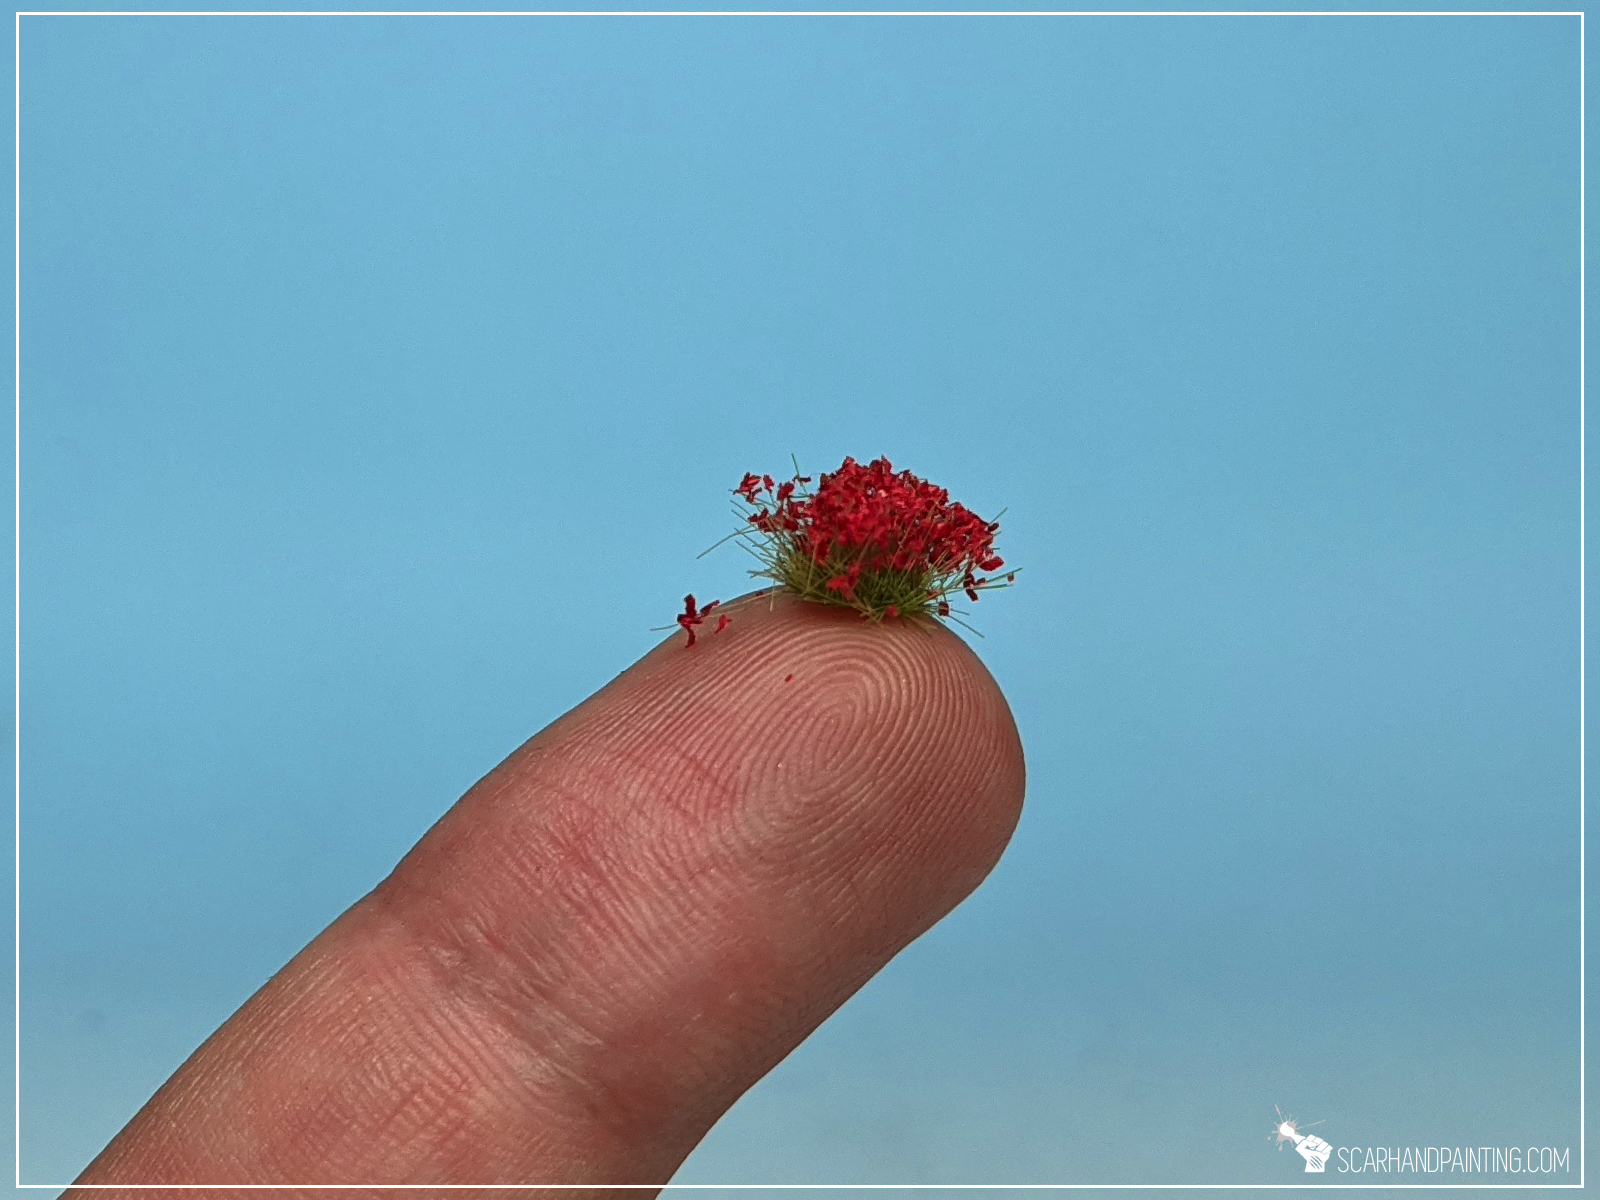
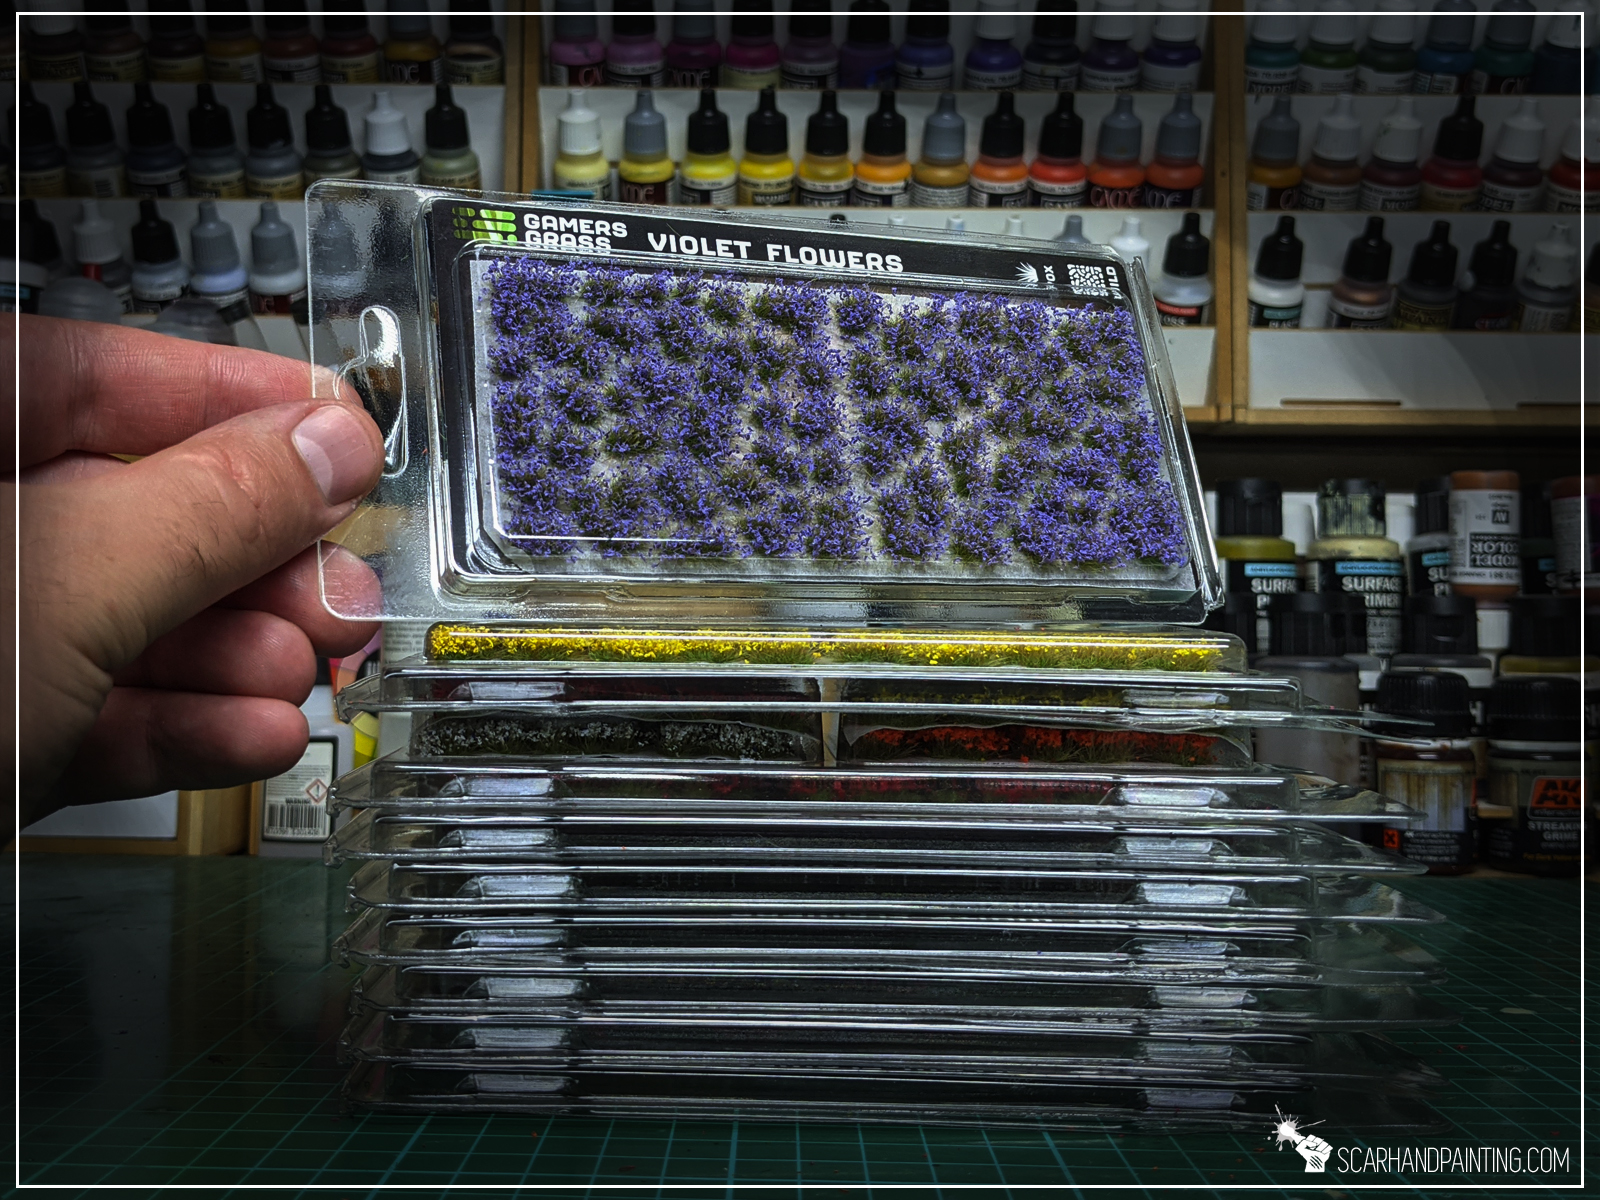
Gamers Grass – is a Portuguese company producing a wide range of high quality basing accessories. For me Gamers Grass is a trustworthy, go to supplier of everything basing related. If you hadn’t had an opportunity to get to know their range, I recommend this article: Review: Gamers Grass Tufts. Now, all that introduction done, allow me to share my excitement over a new series of products: Flowers.
Painting miniatures is my hobby, but is also my job. Good quality tools and products used for modeling can save a lot of time (and nerves). This is why I strive to use only the very best stuff. I’ve been working with Gamers Grass range for quite some time now and can honestly say they meet my high standards.


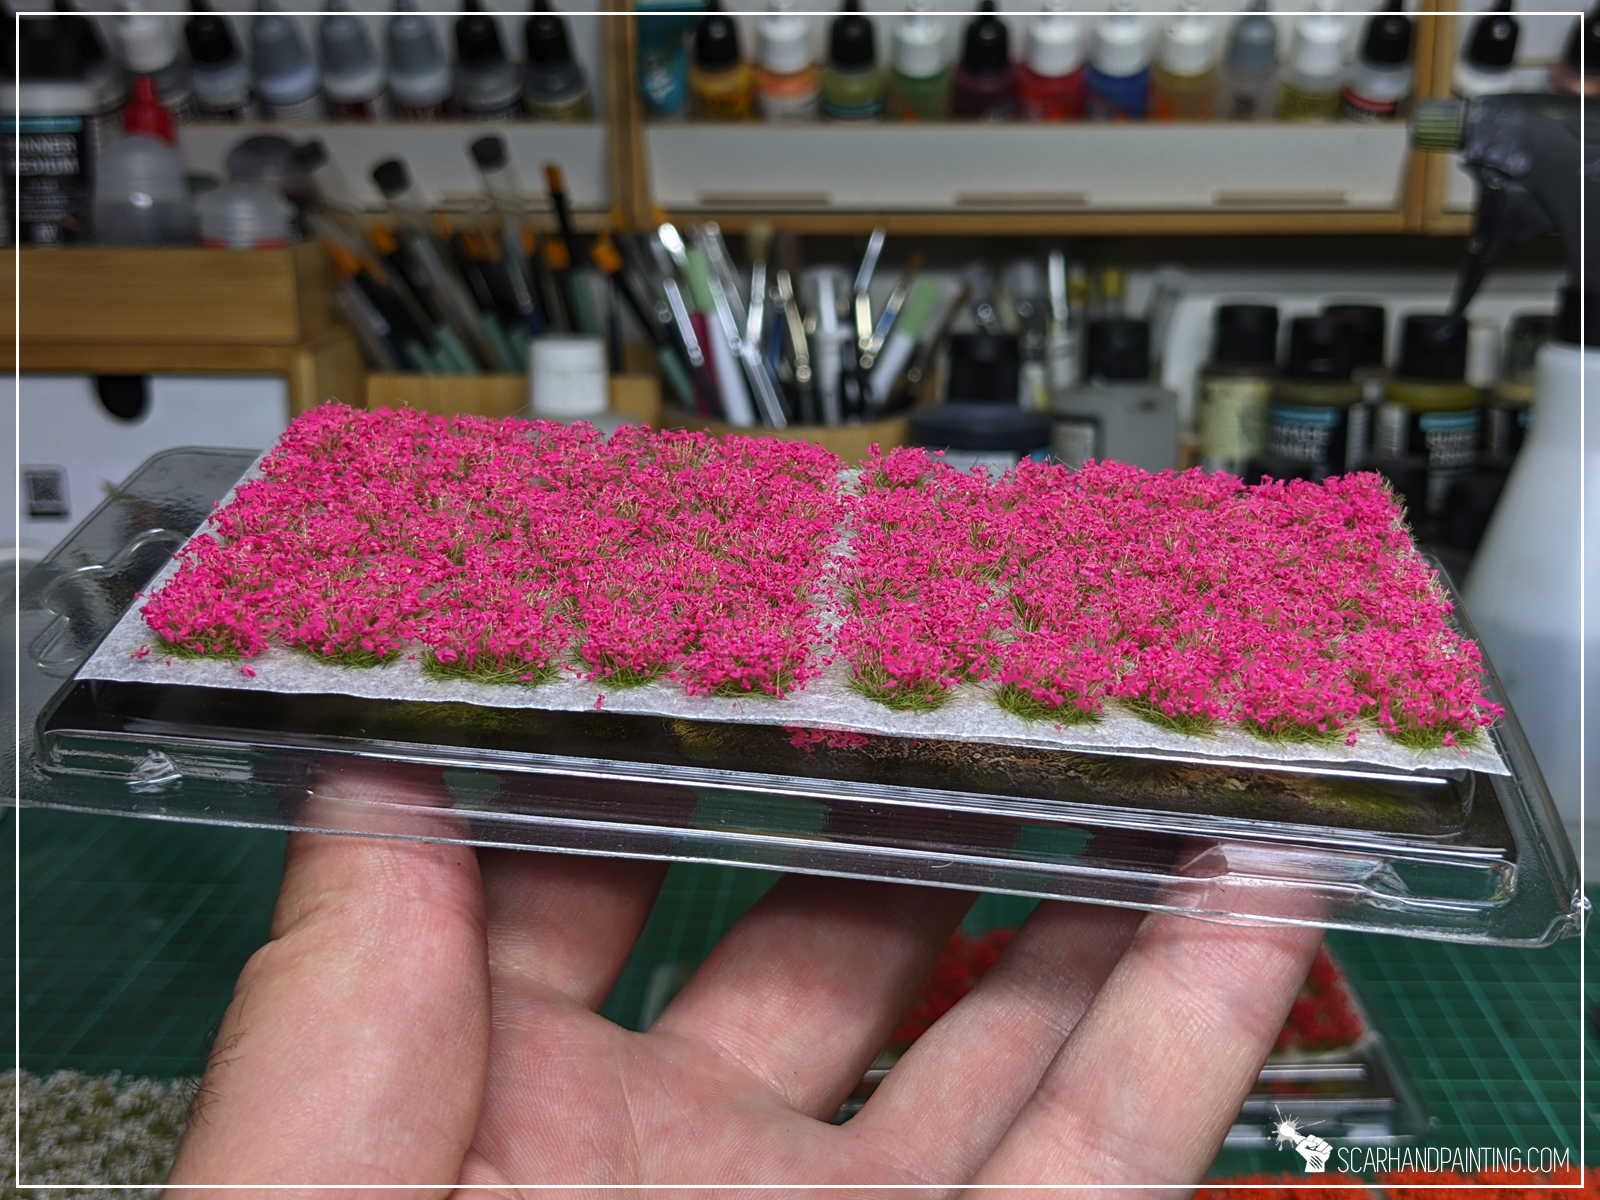
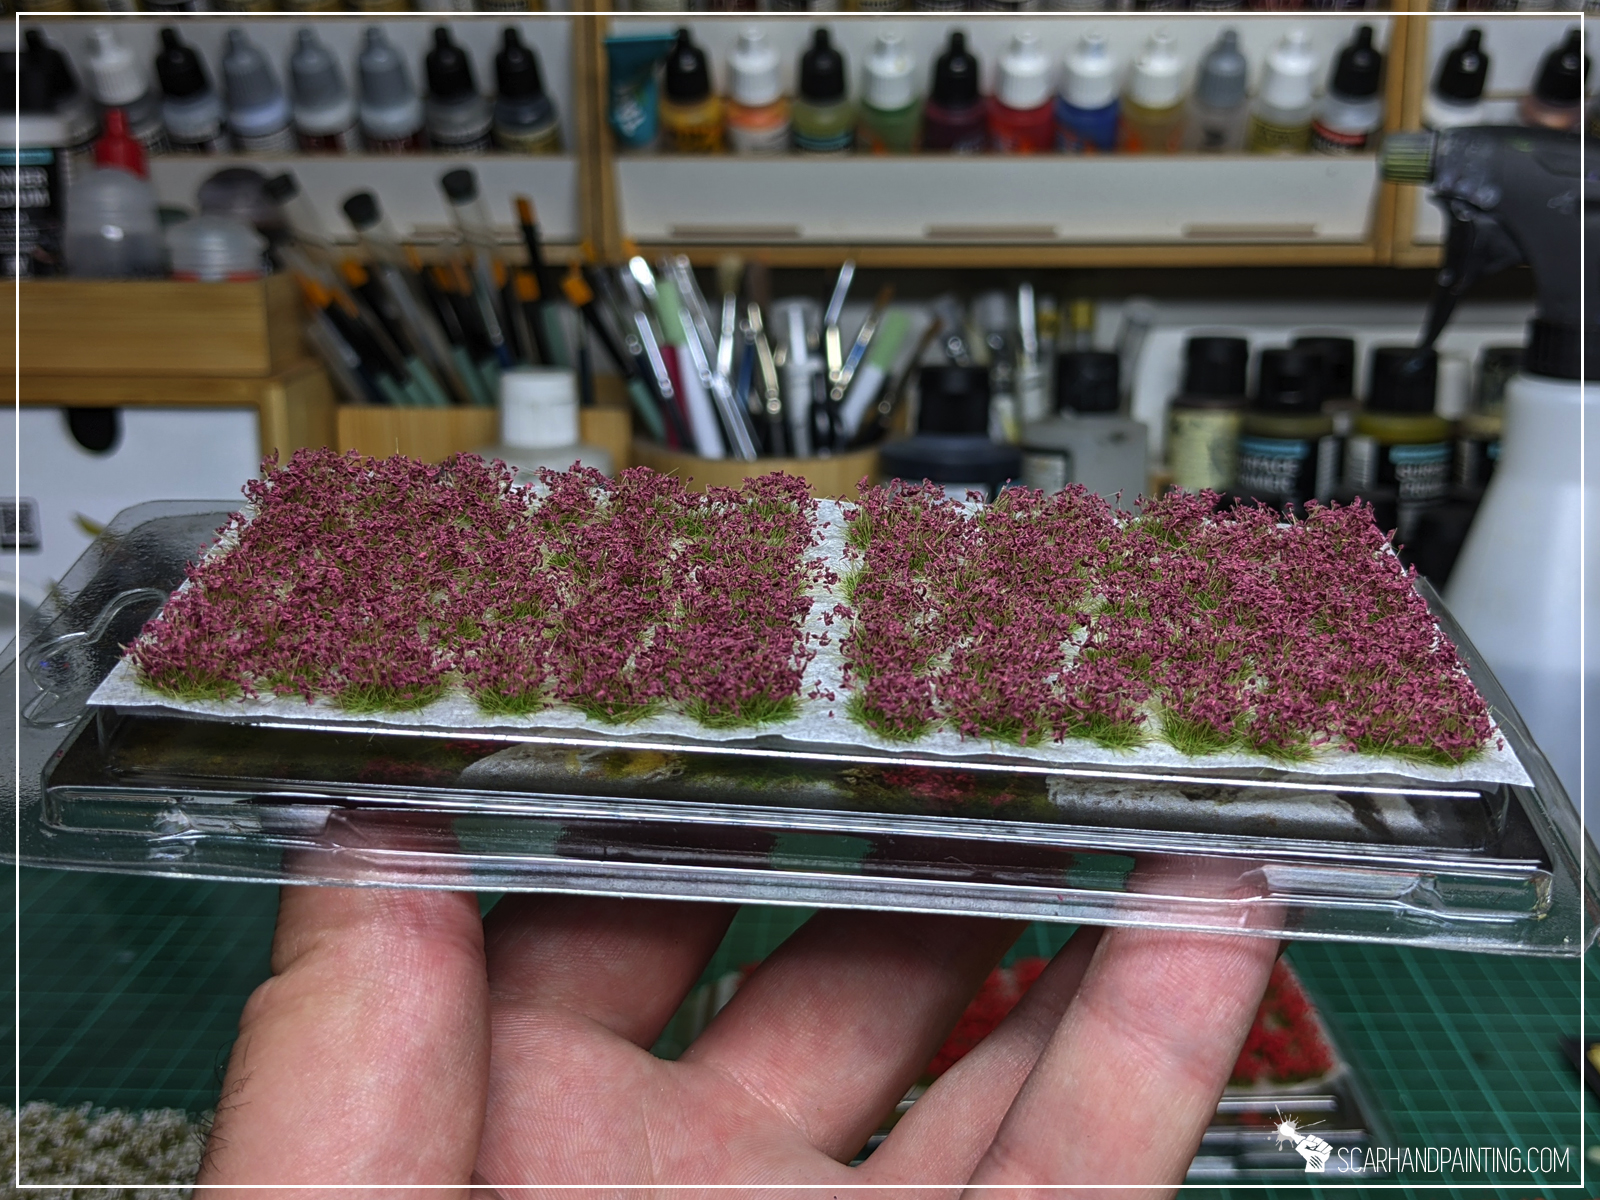
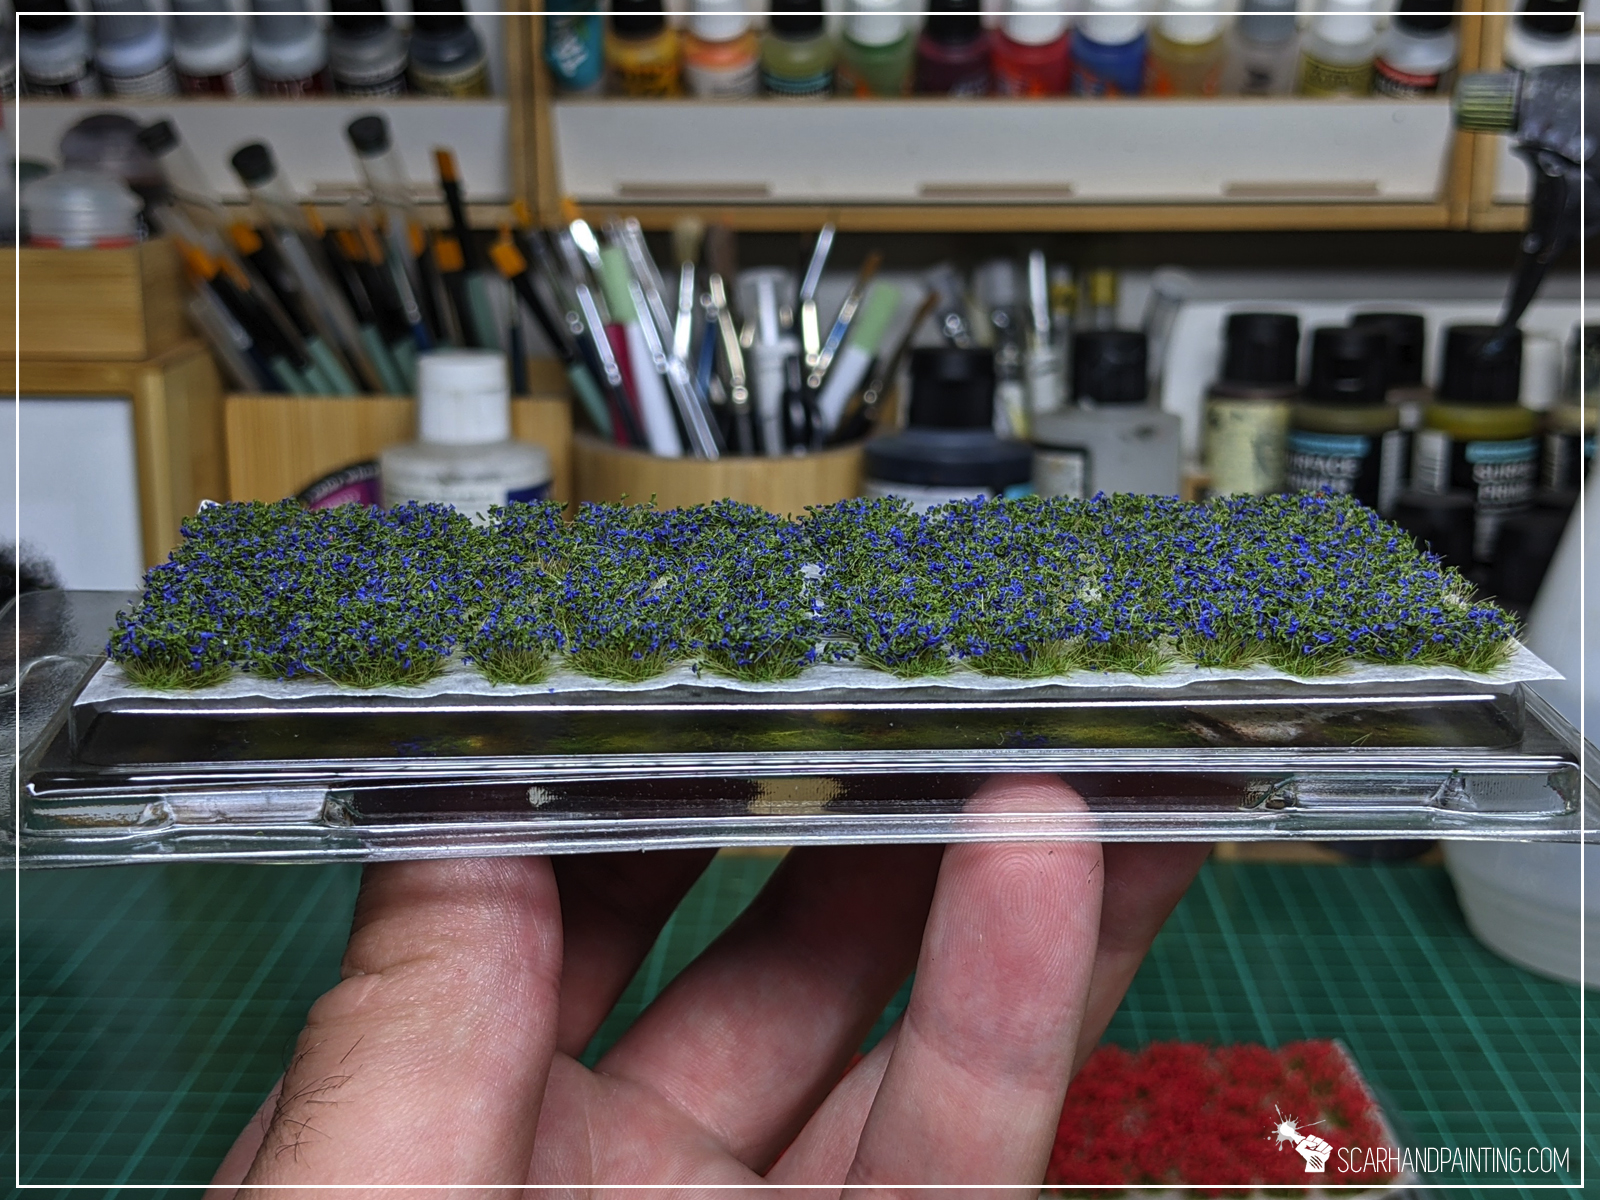
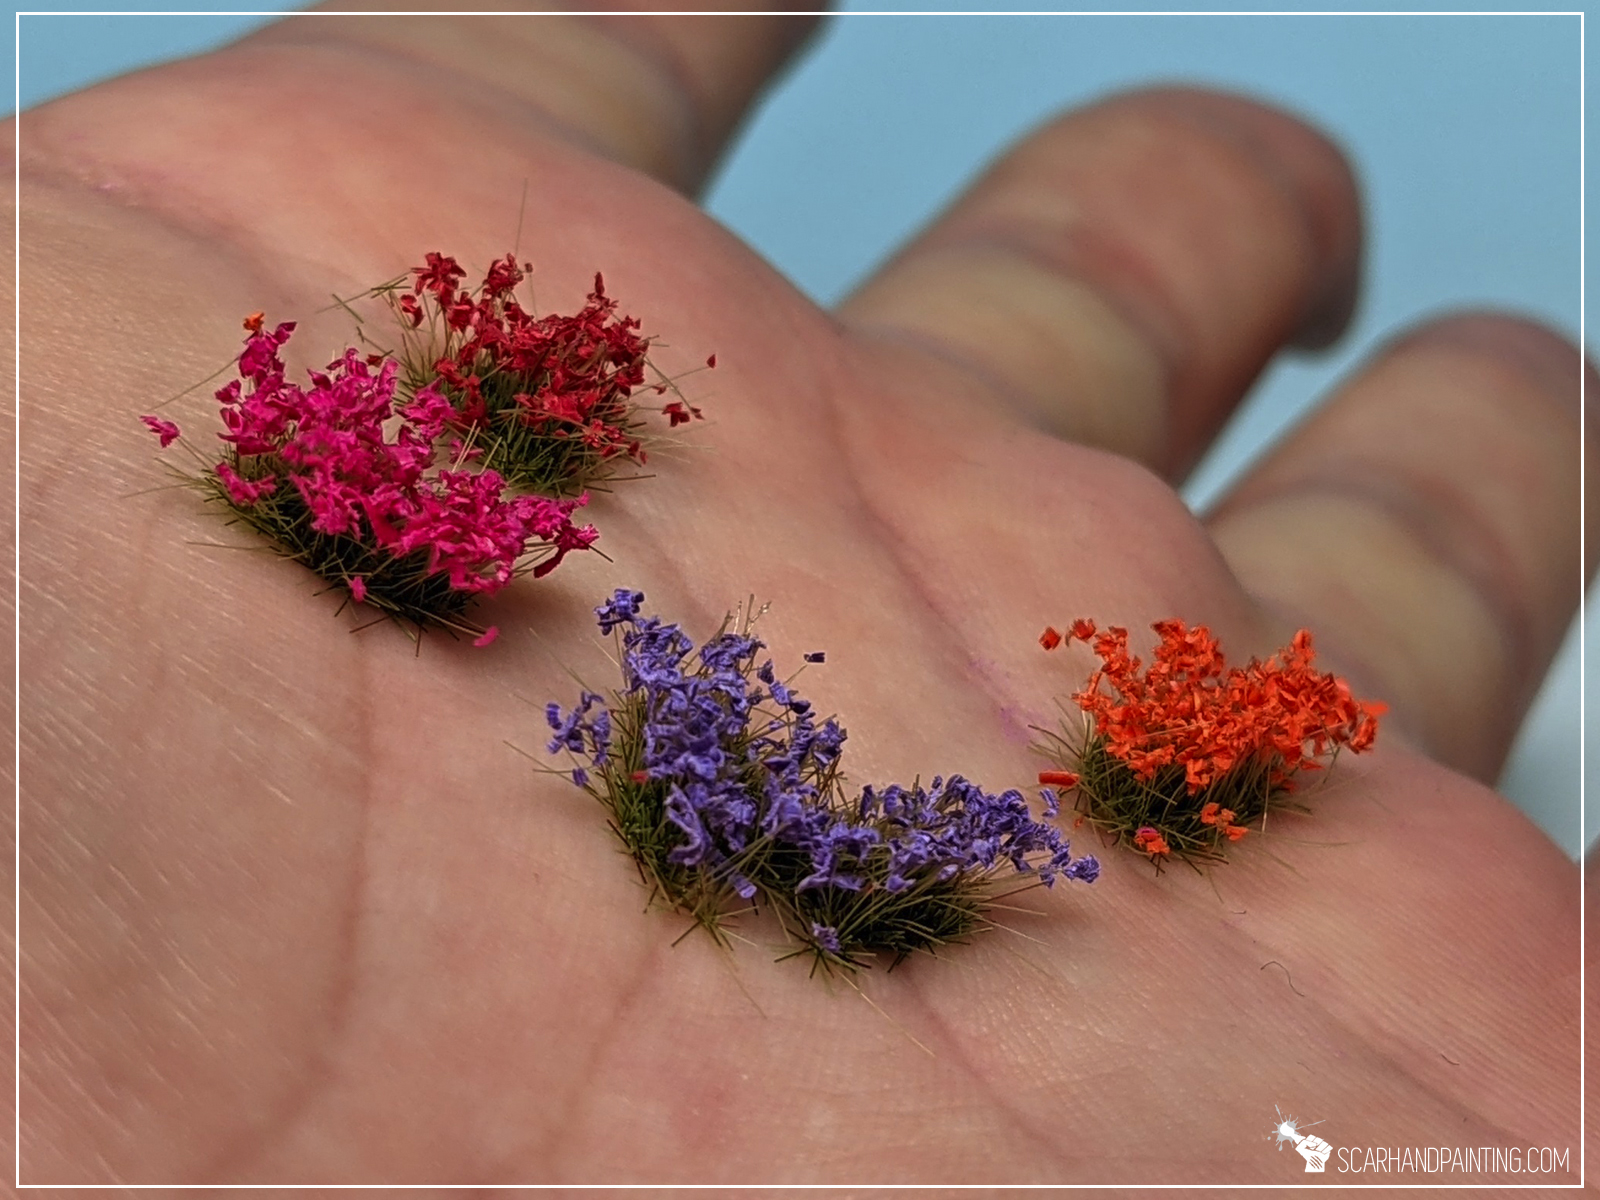
Flower beds are precisely shaped with base being thinner in a natural way. Not many stray stalks protrude out of the main body. These are all done very precisely. The bottom is covered with a strong adhesive, capable of sticking into a variety of surfaces. I have no negative feedback to give about these. Most importantly, due to a more natural shape and no powdering Gamers Grass flowers present themselves much better than competition. Just see below:
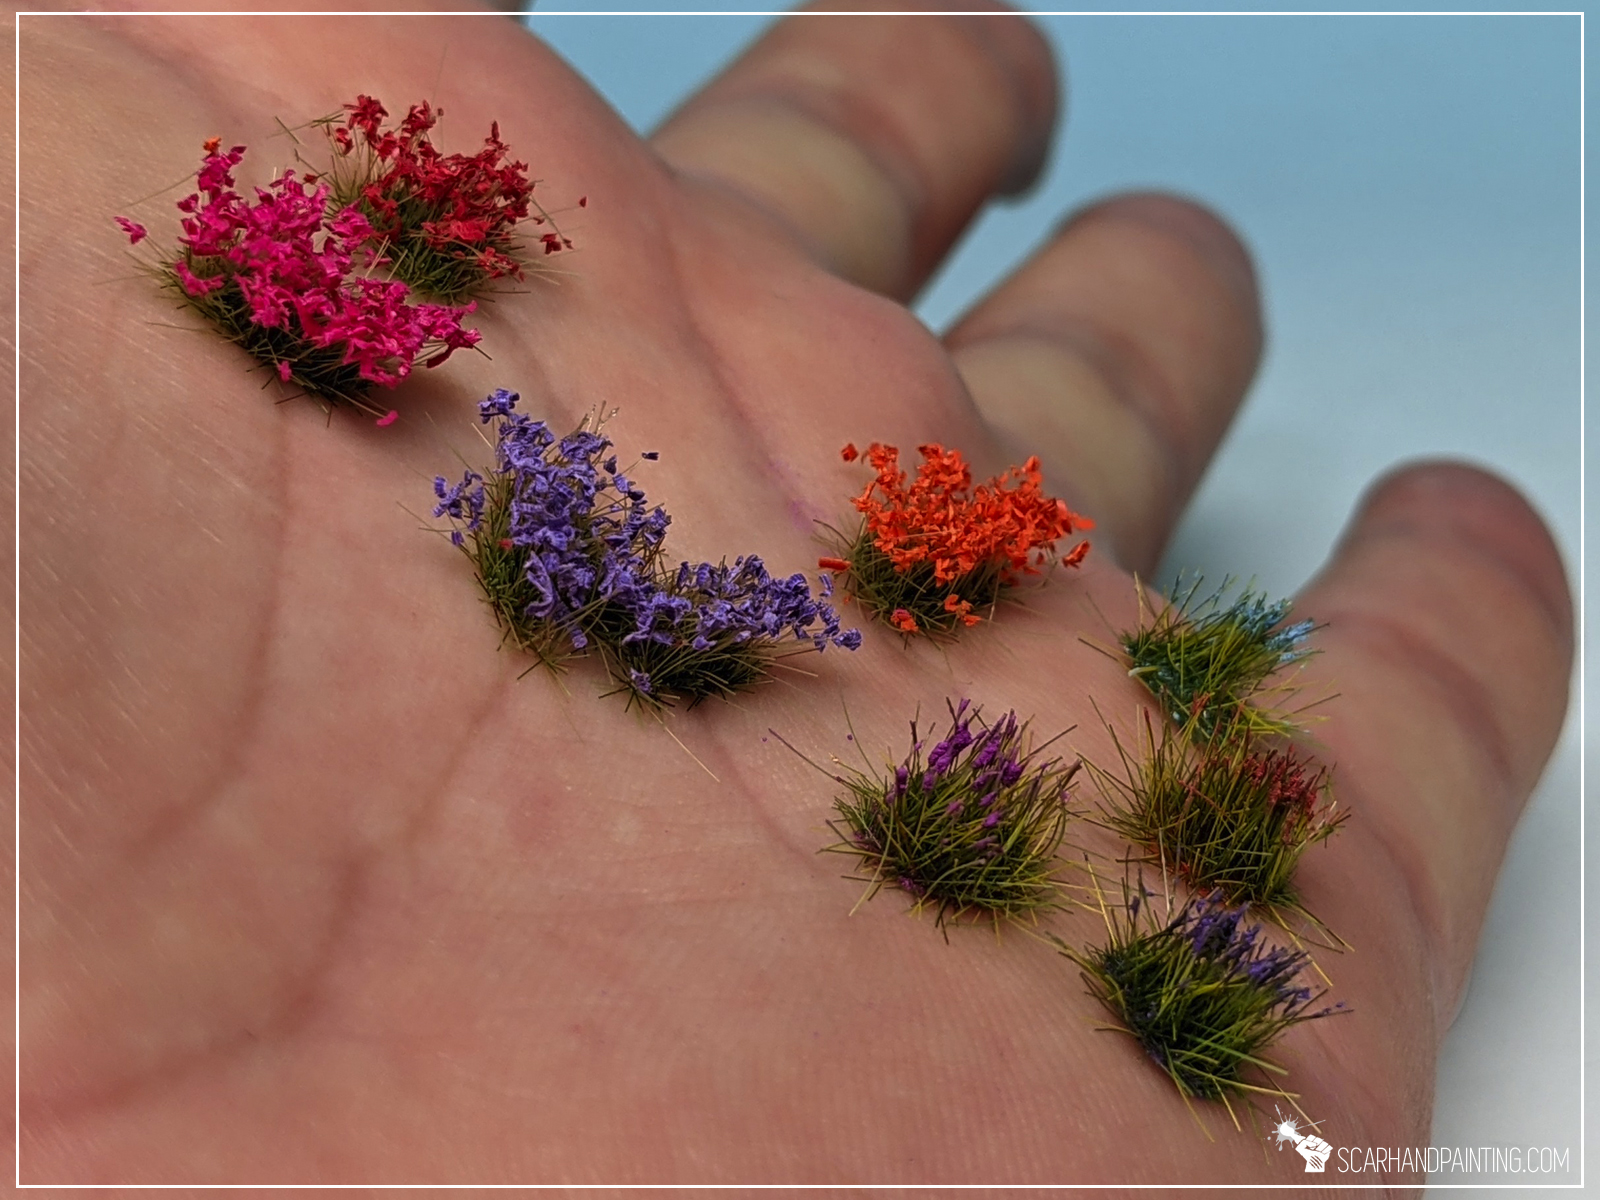
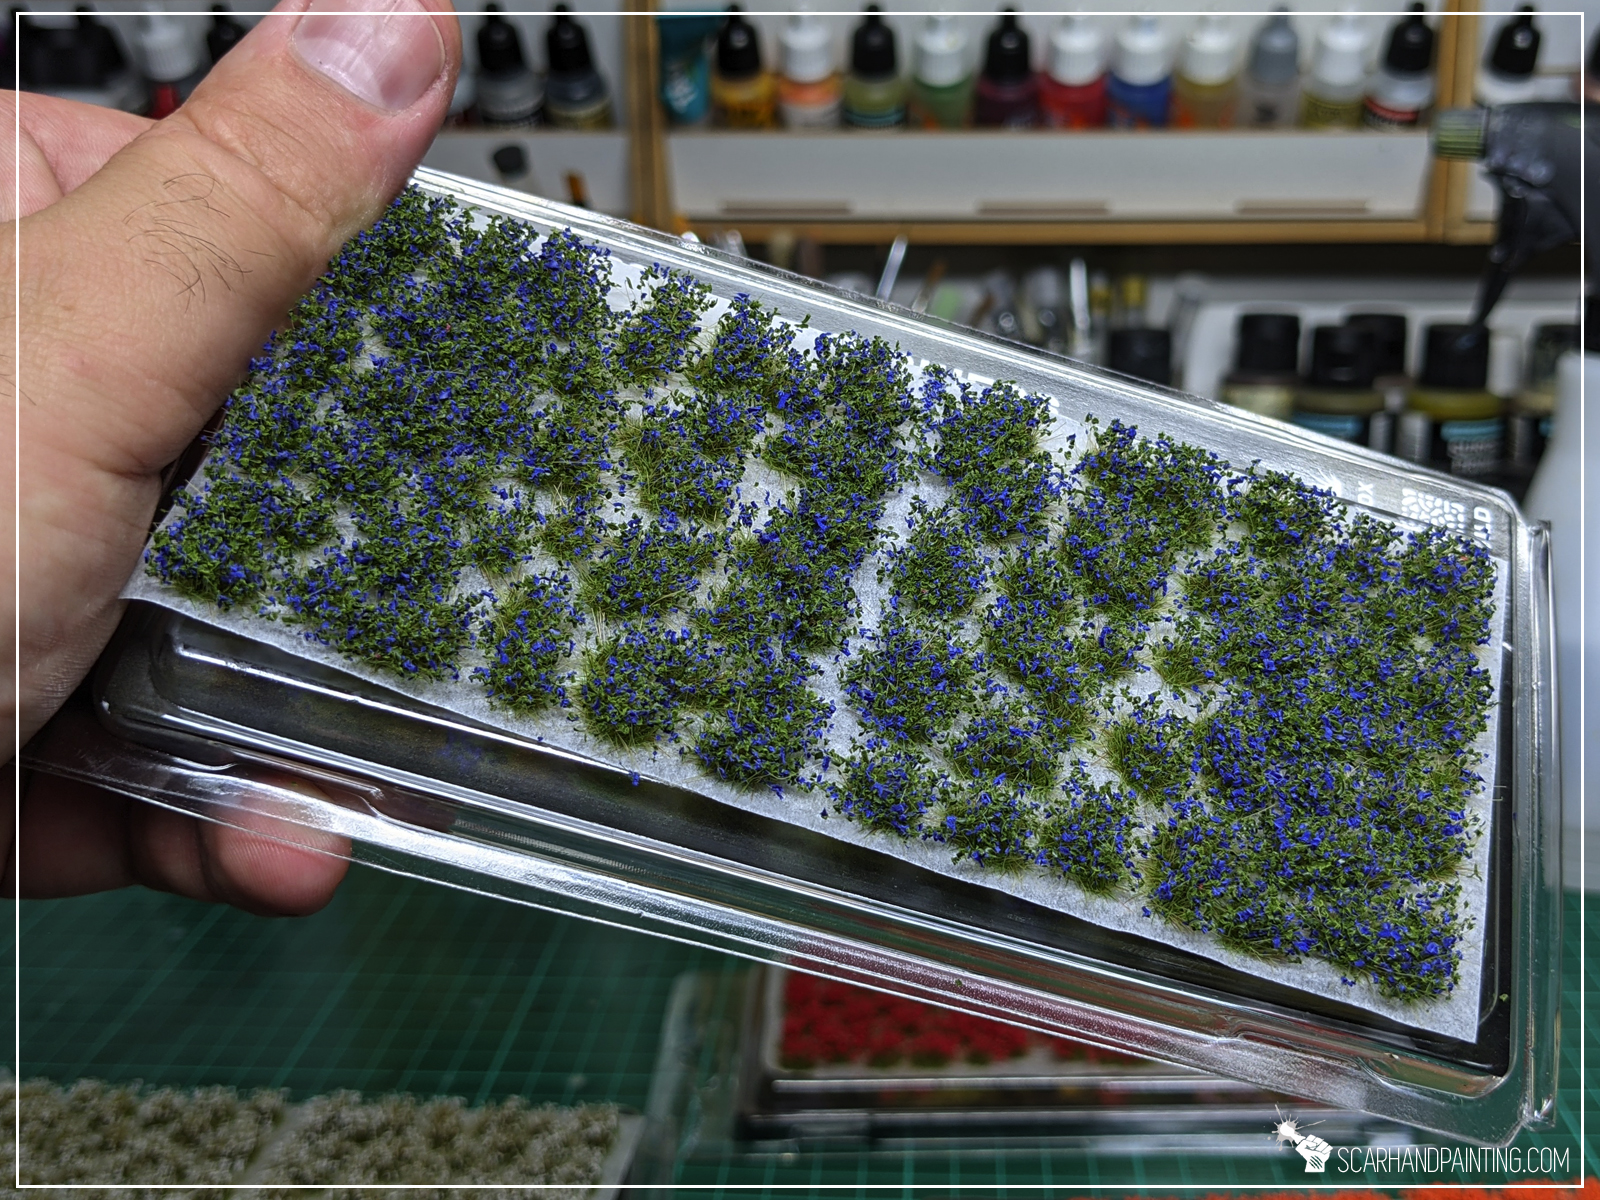
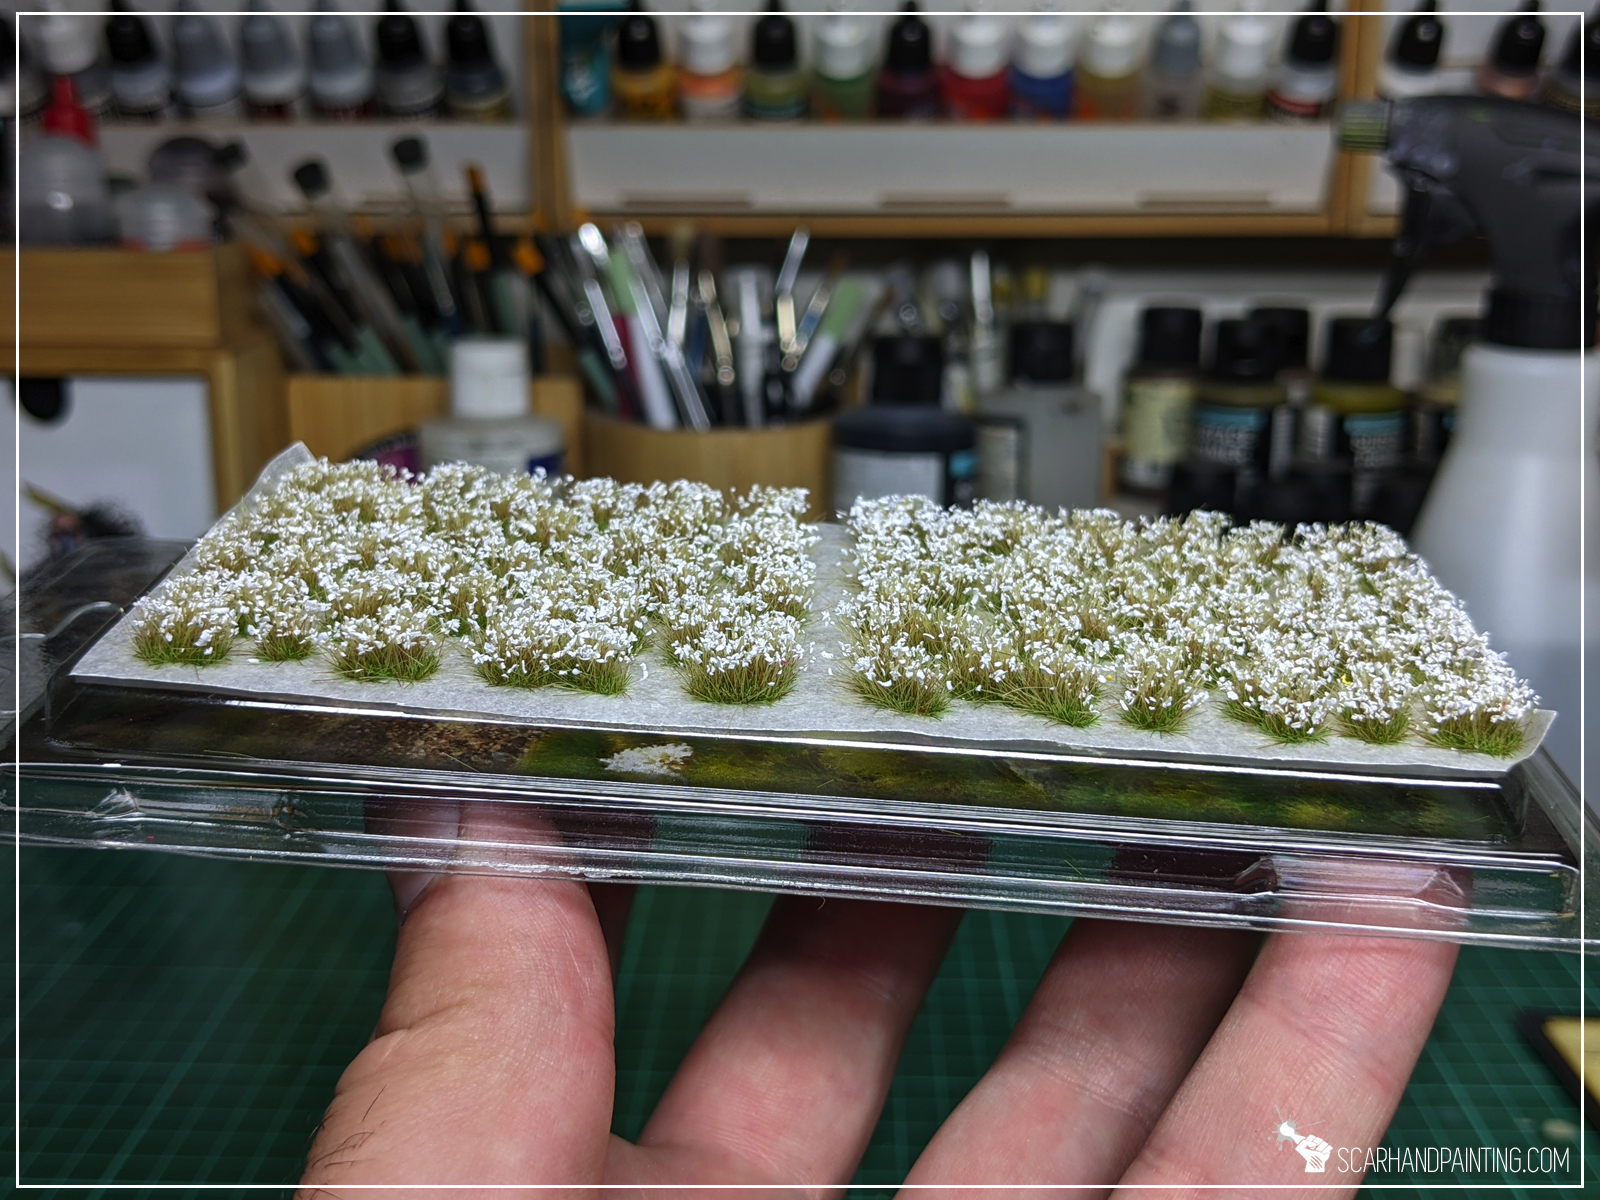
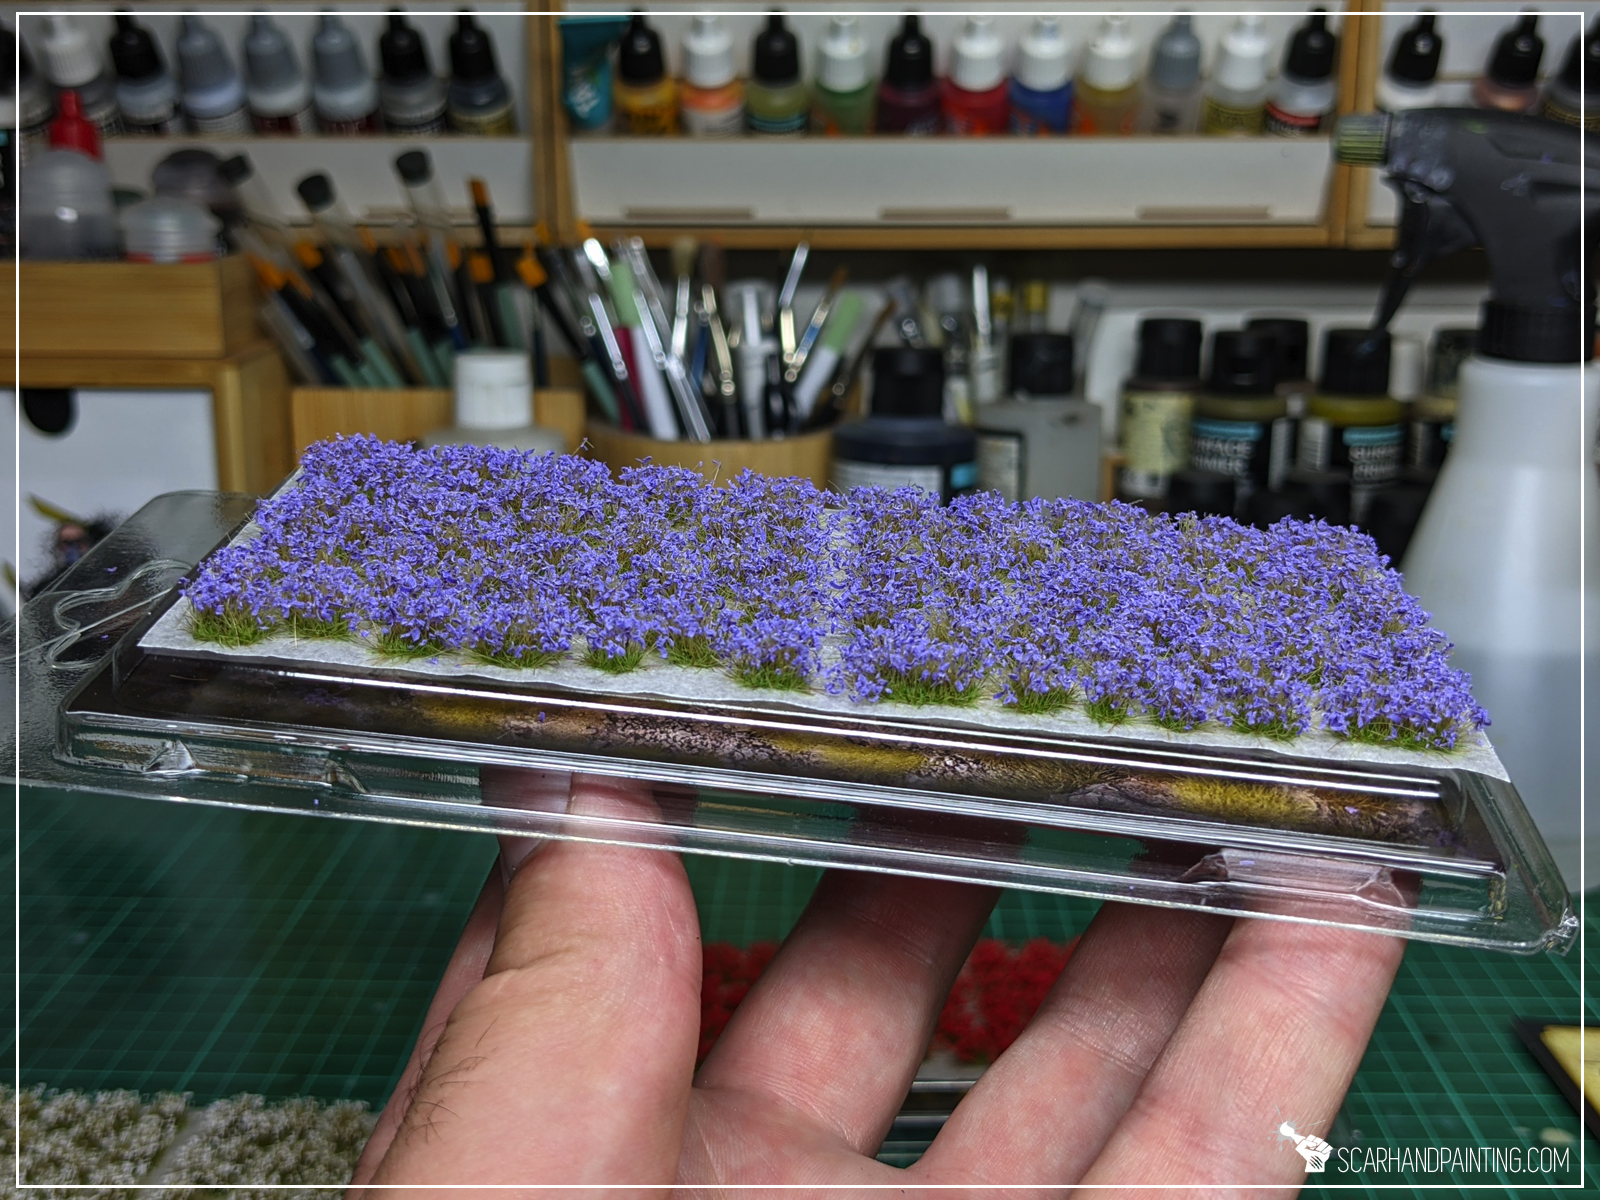
Visually Gamers Grass Flowers present themselves great. A palette of colors to choose from, some strong, some a bit pastele, makes the range fit into all variety of projects and styles. There’s also a variety of shapes which makes flowers look more natural.
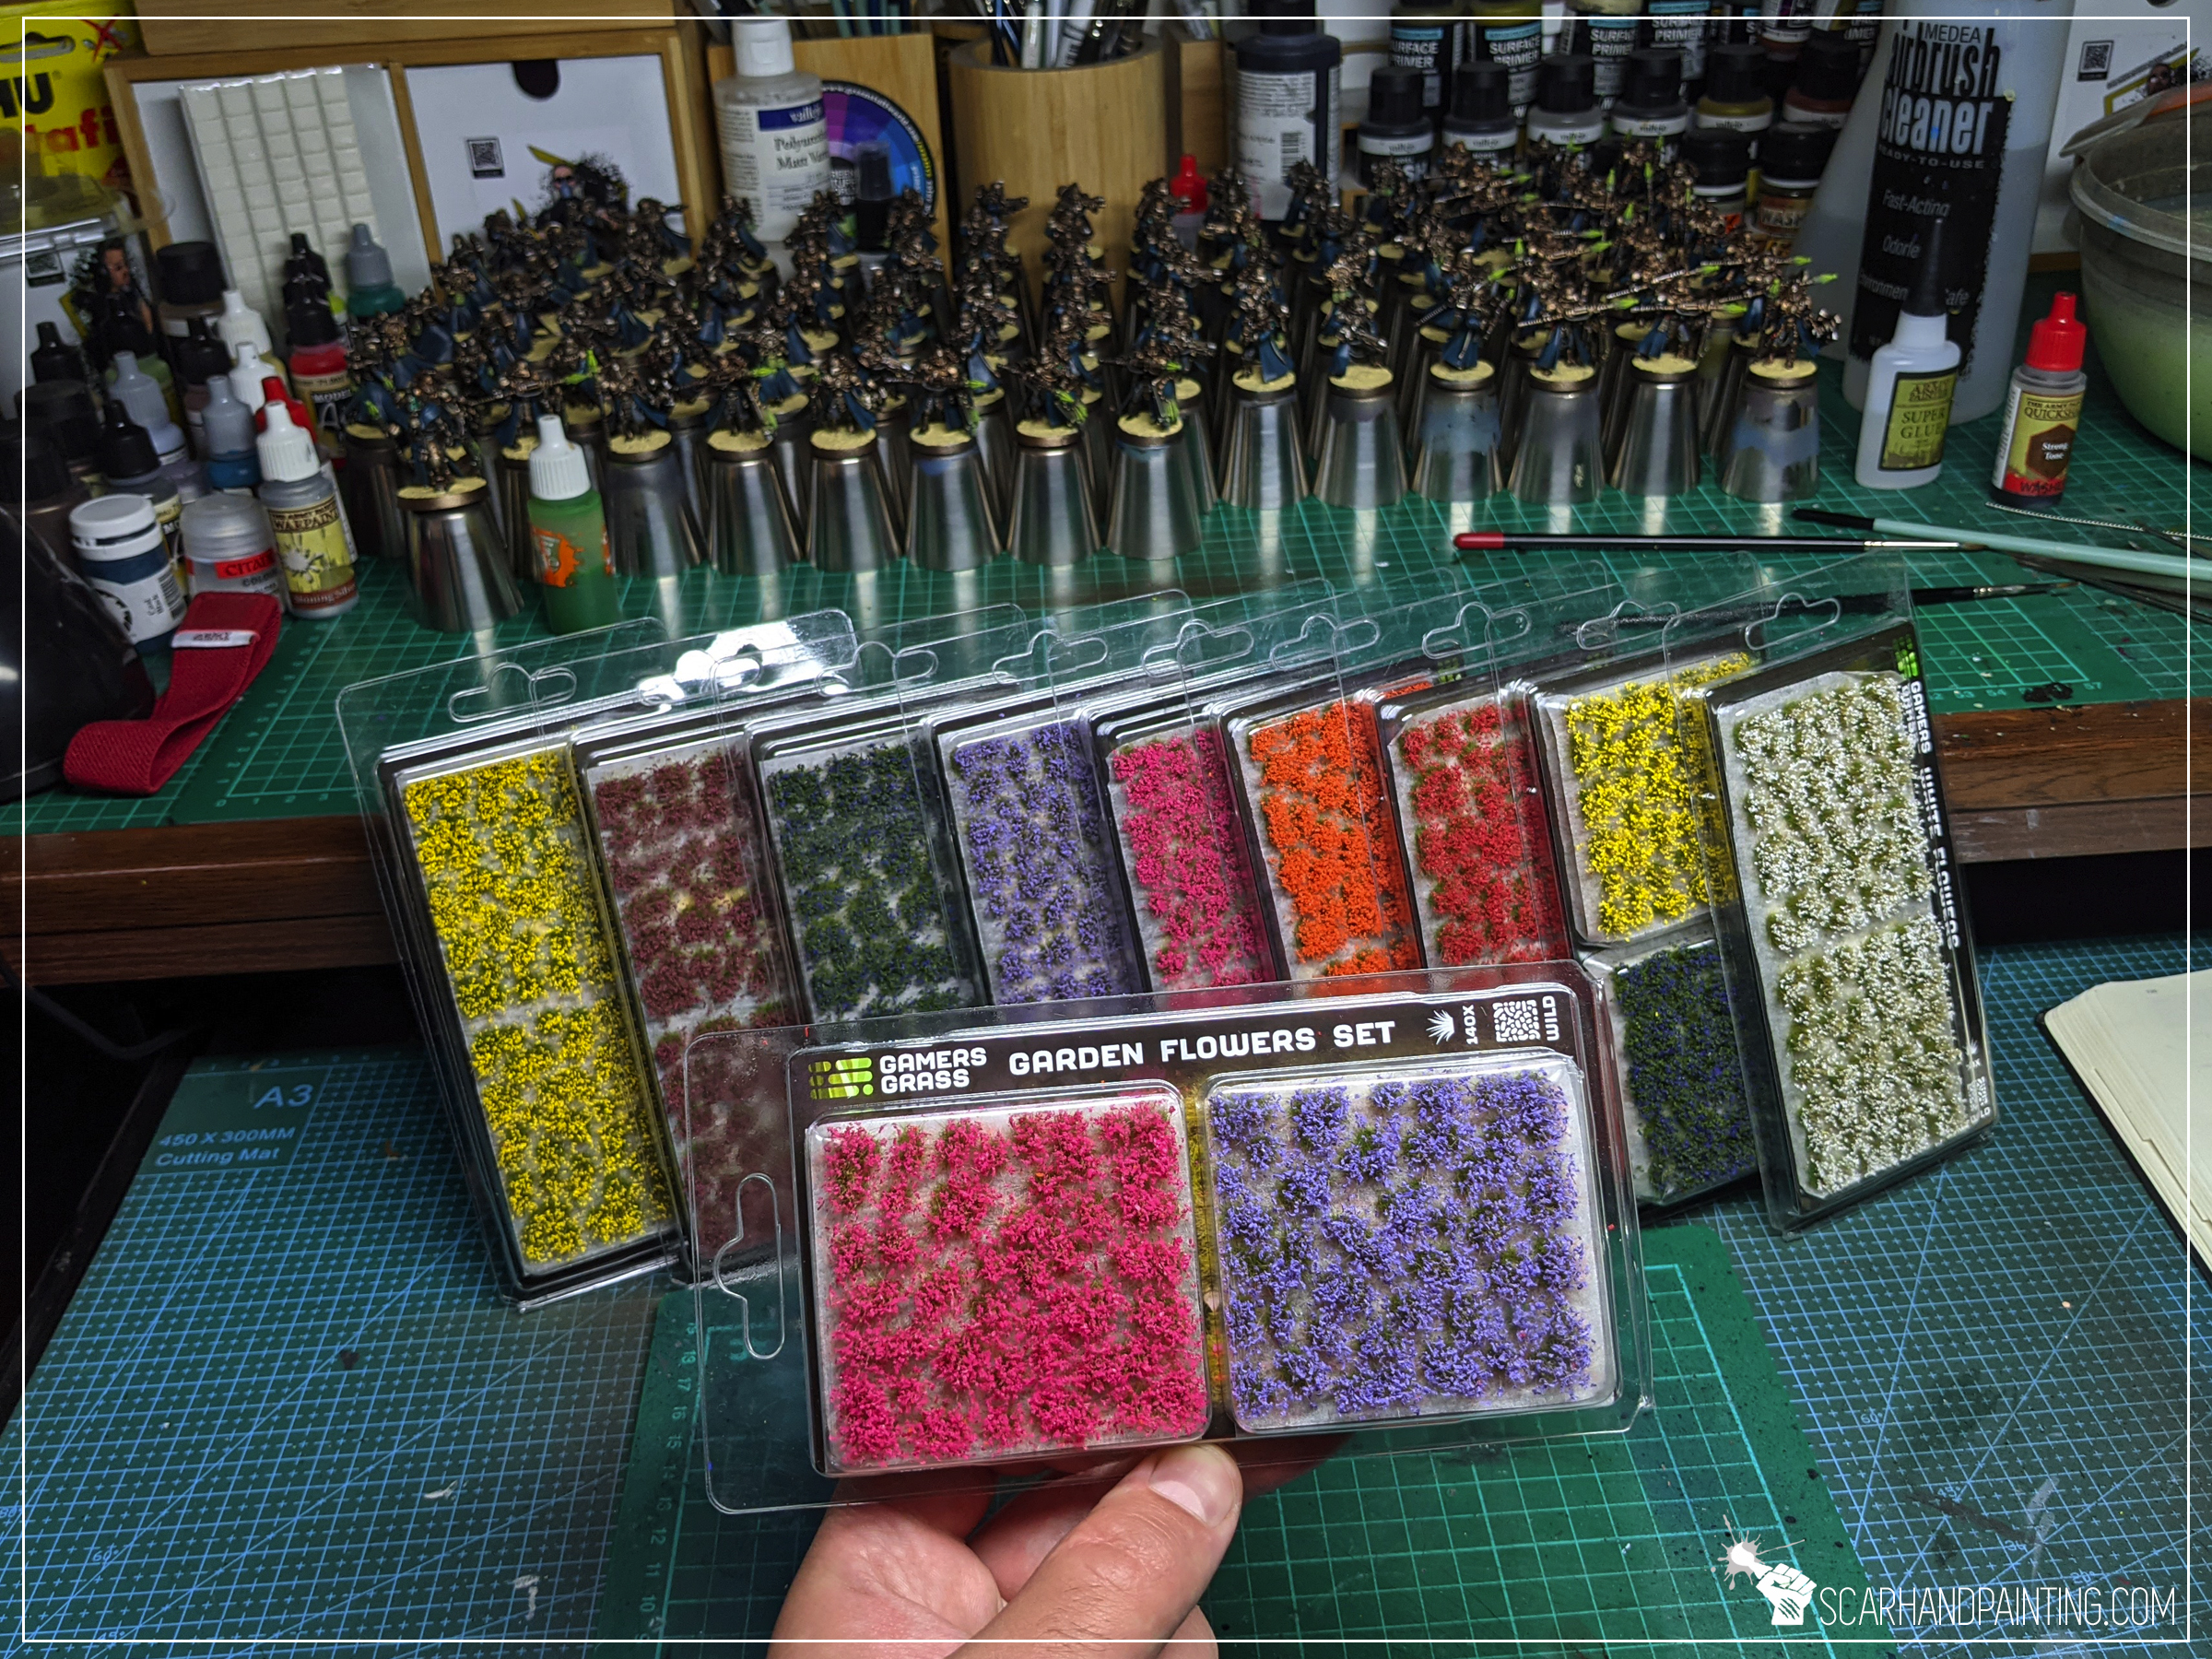
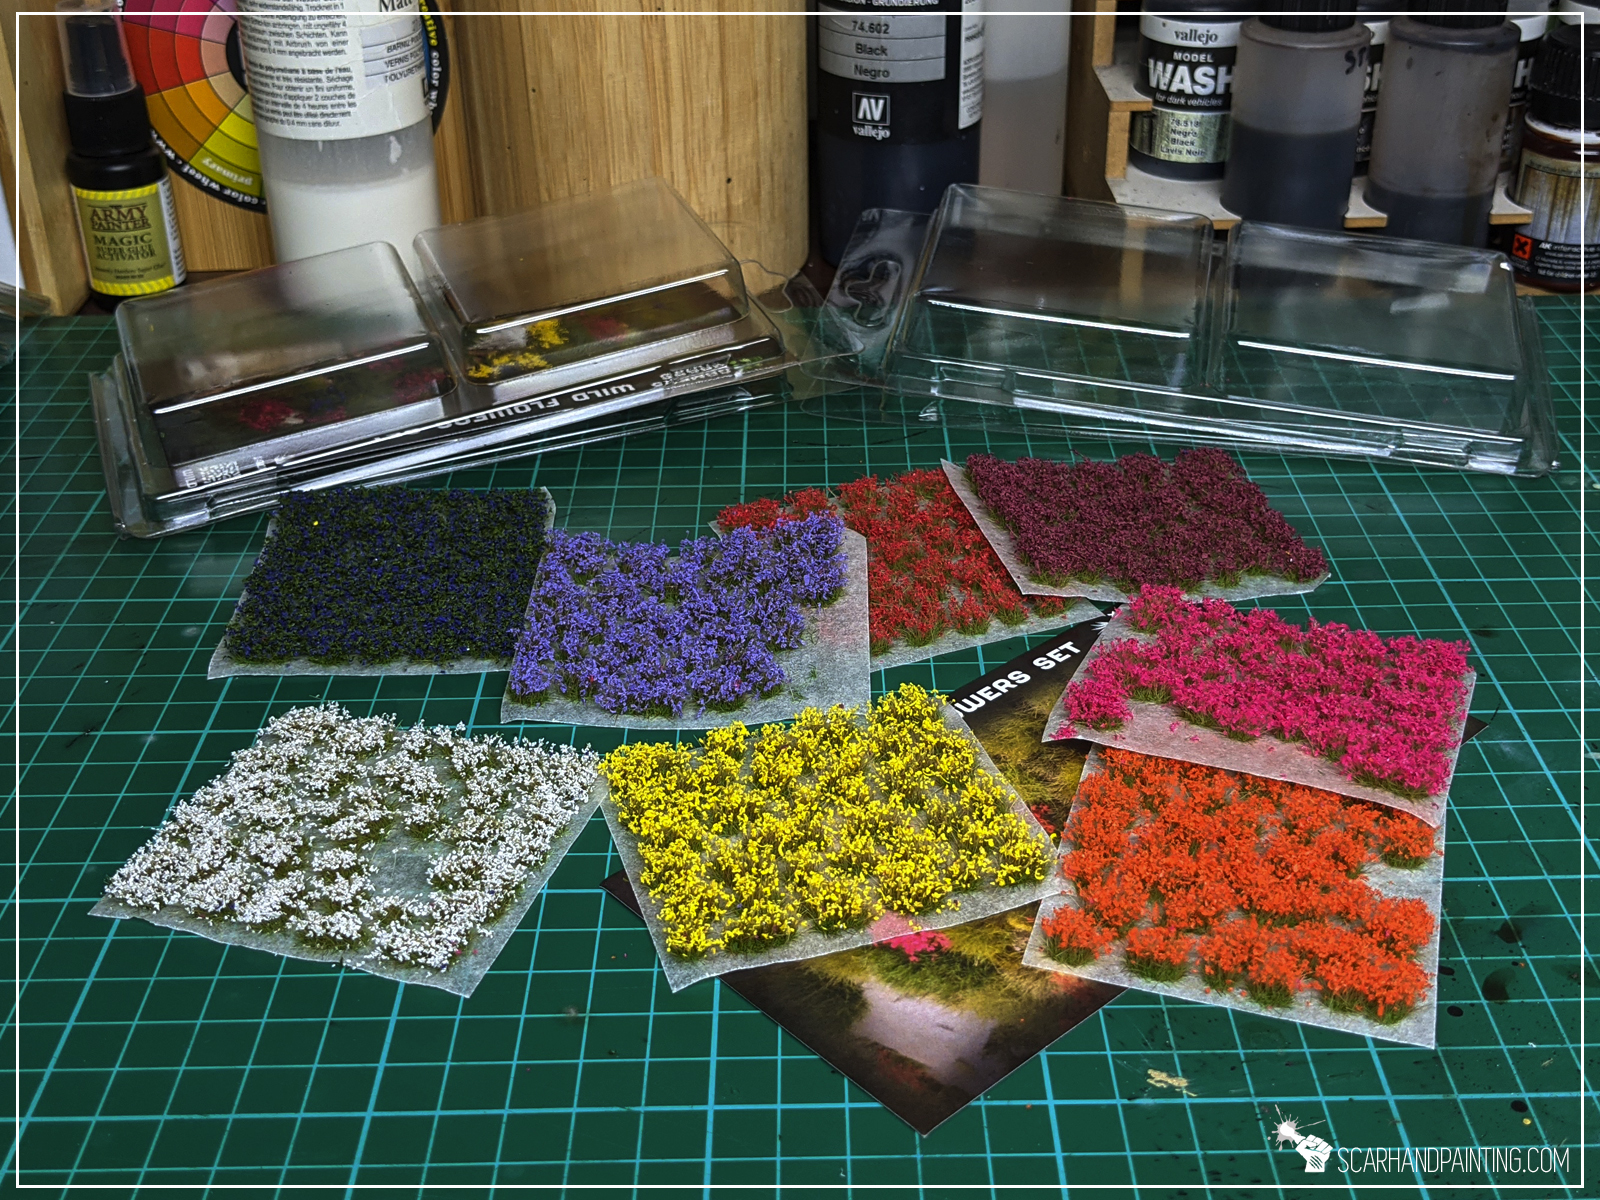
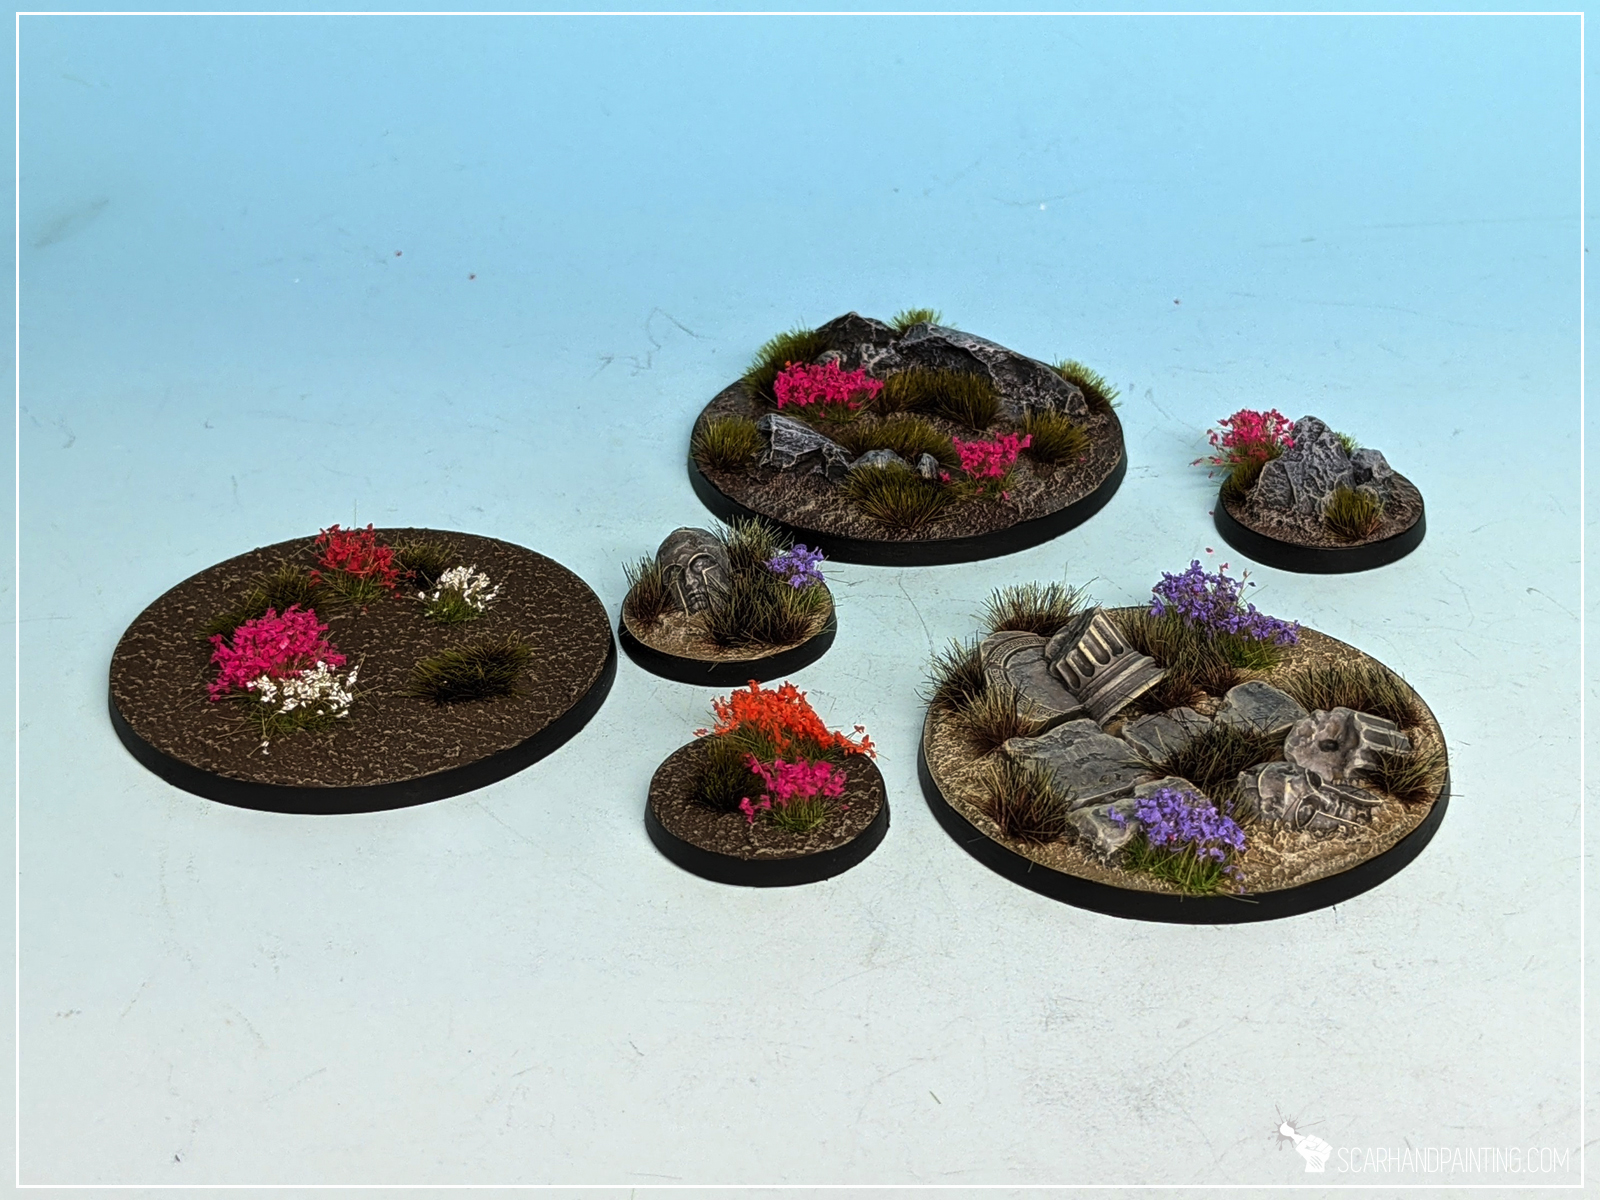
All flowers types are user friendly and there’s no quality difference between particular colors . There’s a clear separation between every piece on the sheet. Glue is strong and sticks to a range of different surfaces. There’s not many stray hair that require removal after application onto a base. Once used, flowers hold their shape nicely. Joy to work with. Additionally they come in two formats, one being four different colors packed into a single blister. This is a great way to get a lot of variety in a single cheap purchase, or a cool anniversary bouquet for your partner!

I generally don’t expect modelling flowers to make a good impression. This is because usually they are messy and not very user friendly, dragging other beds out of the sheet alongside them, leaving powder everywhere etc. That being said, the Gamers Grass Flowers are awesome. Easy and Fun to use, clean, well shaped. Just awesome.

Time to take in the price factor. I’ve done quick research and here’s how it looks like against immediate competition:
It seems that Gamers Grass is the more expensive, even though not that much.
To sum things up: I have tested about a dozen different suppliers in the past few years and compared to competitors, the Gamers Grass Flowers stand out both in quality and functionality. Visuals are great, range is wide. Price might use a tweak, but in my opinion the product is totally worth the extra. Also due to reality we now live in, more suppliers will probably increase their pricing throughout the year. Call me a sucker and a fanboy of the Gamers Grass range, but for me price is not a decisive factor when compared to such high quality!
What’s your opinion? Does quality top price or vice versa? Let me know in the comments 😉

You can order through Gamers Grass official store, or try out your luck in a local hobby store. To make things easier for you, Gamers Grass prepared this awesome Store Locator.
![]()
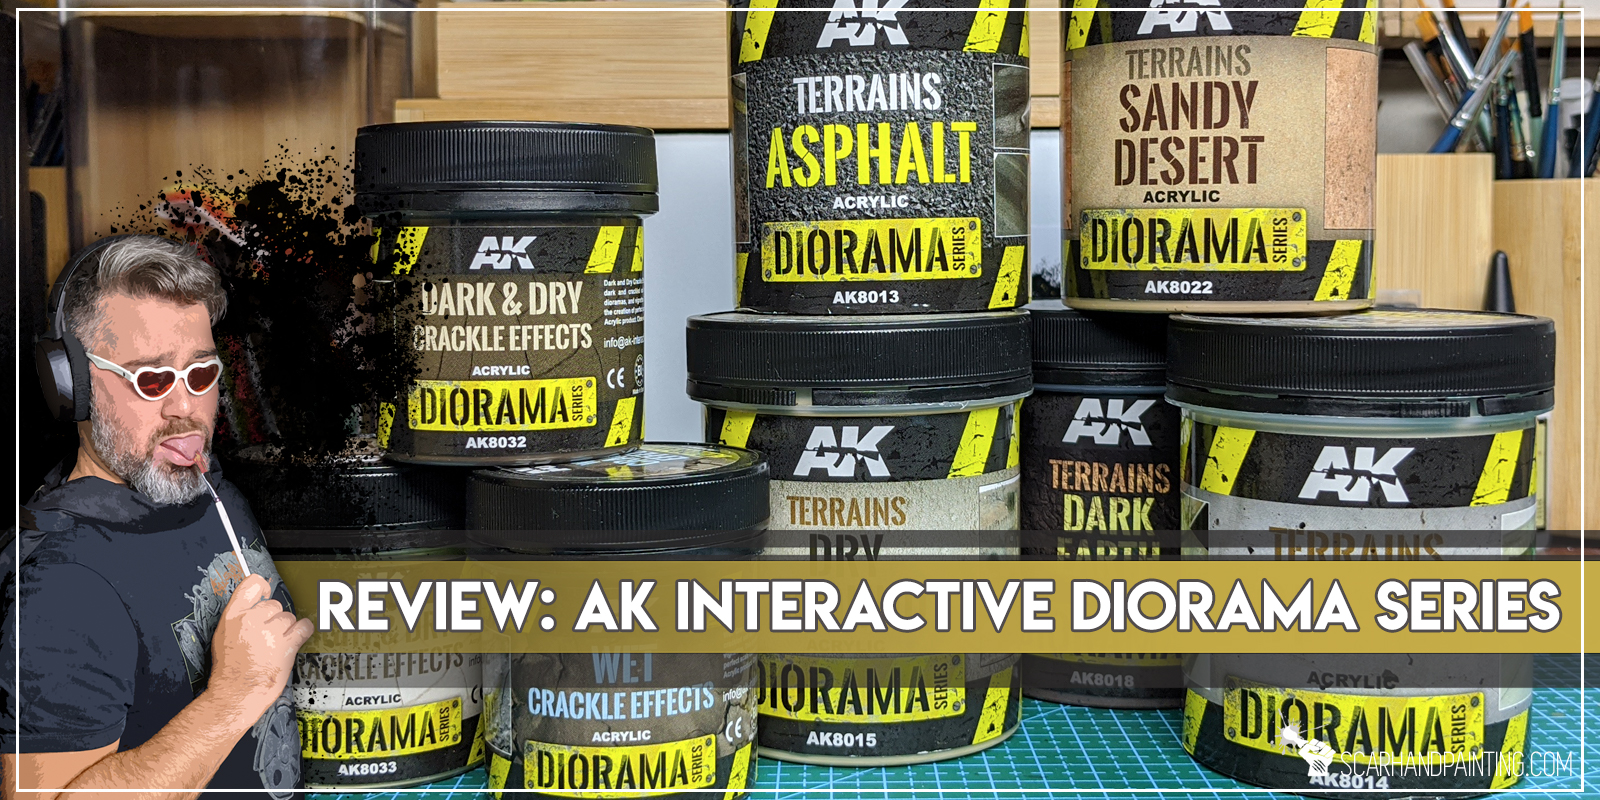
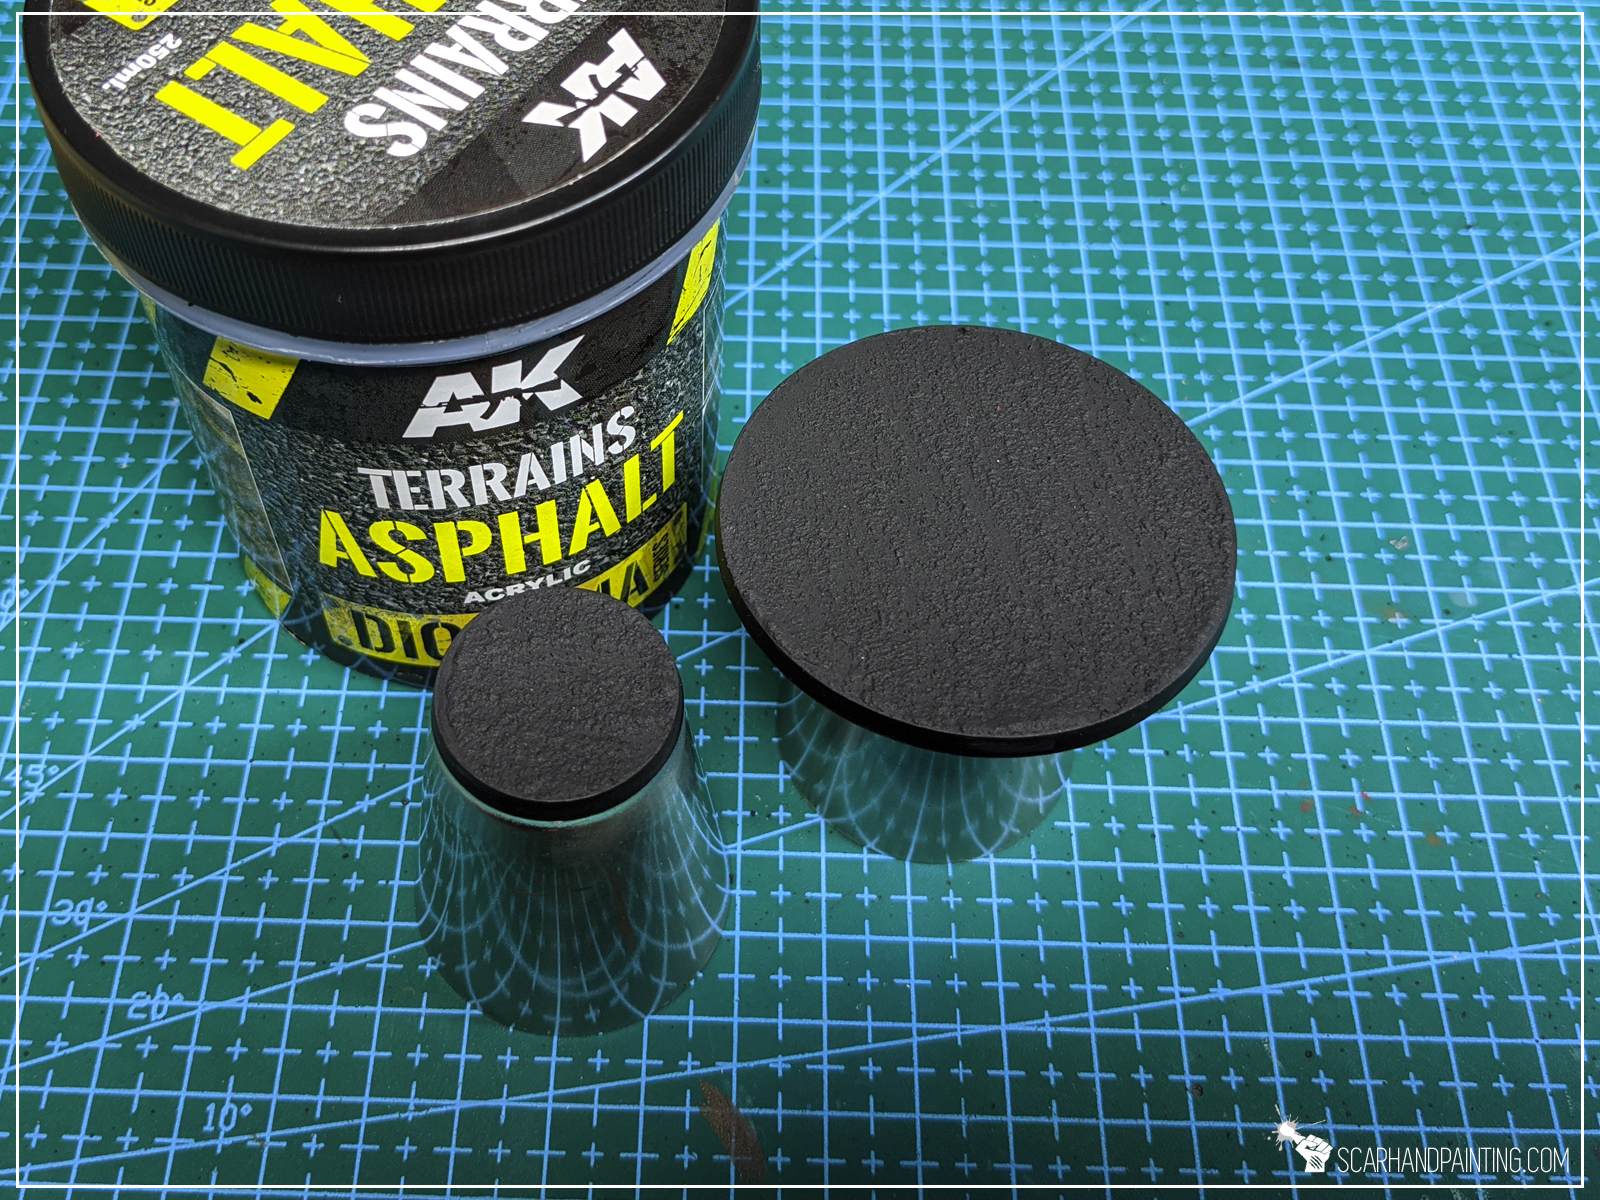
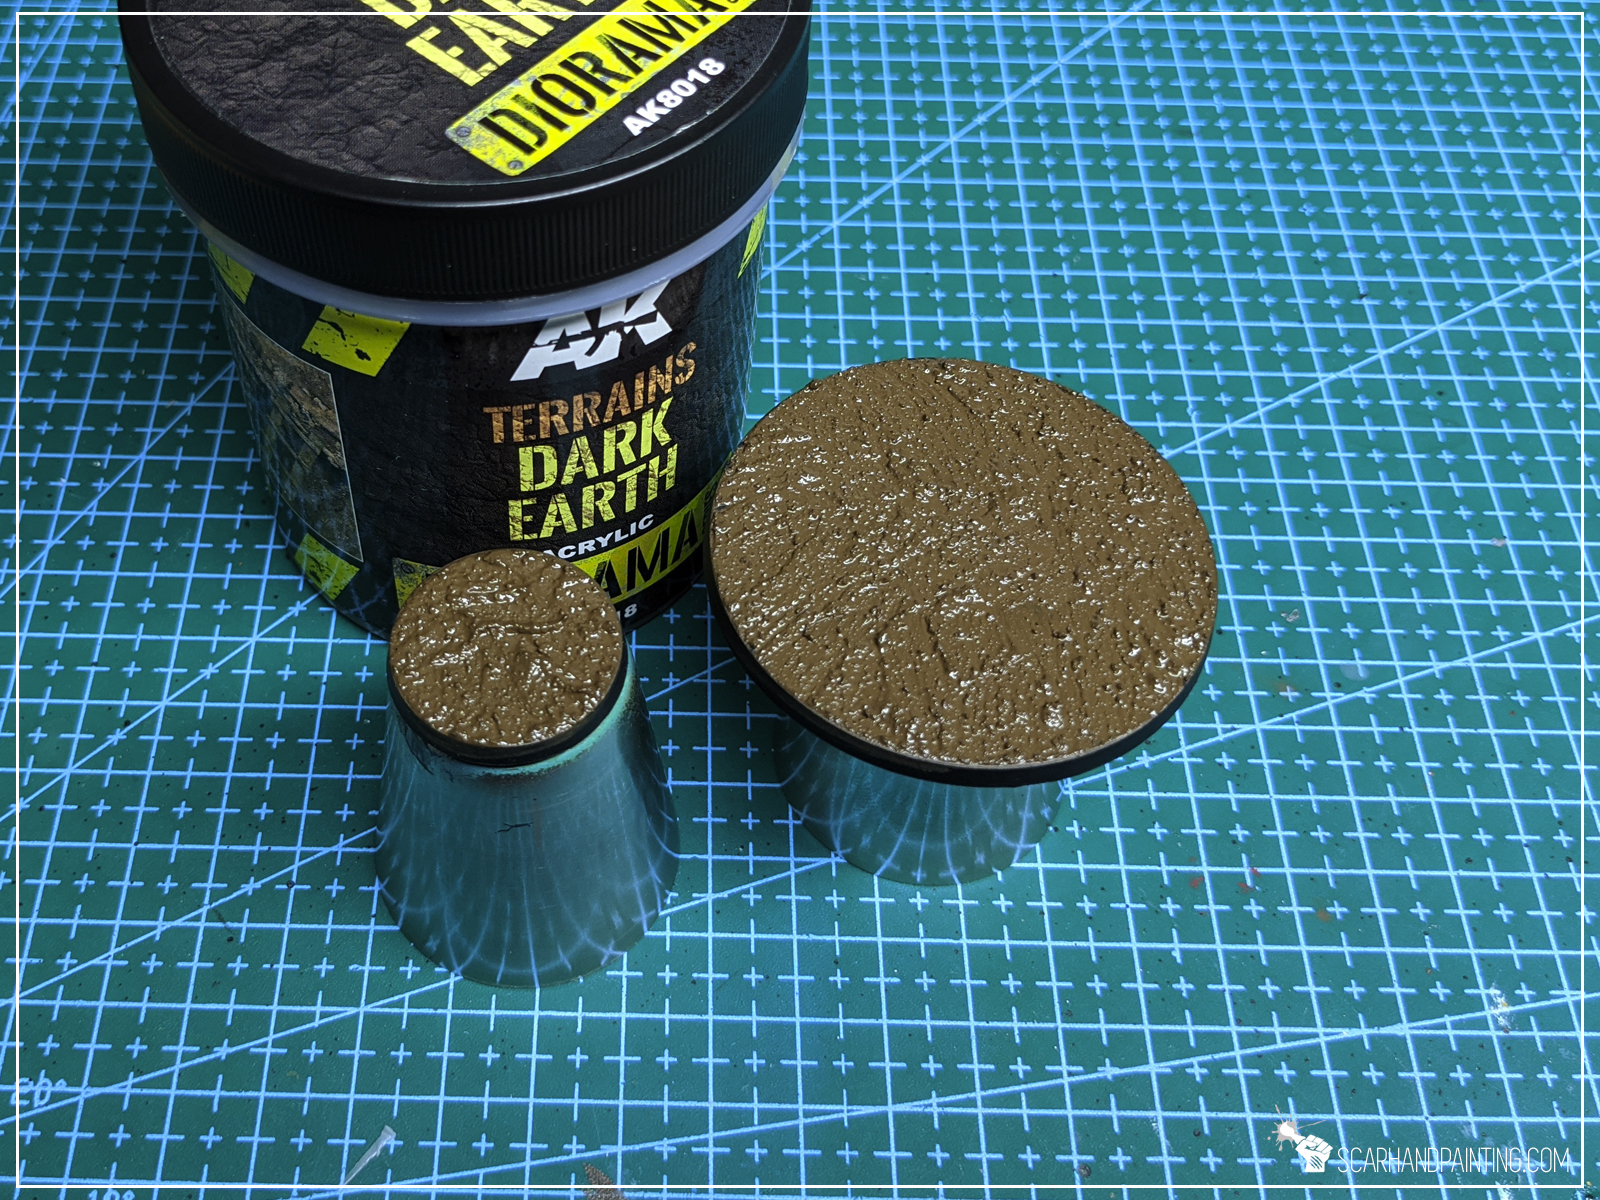
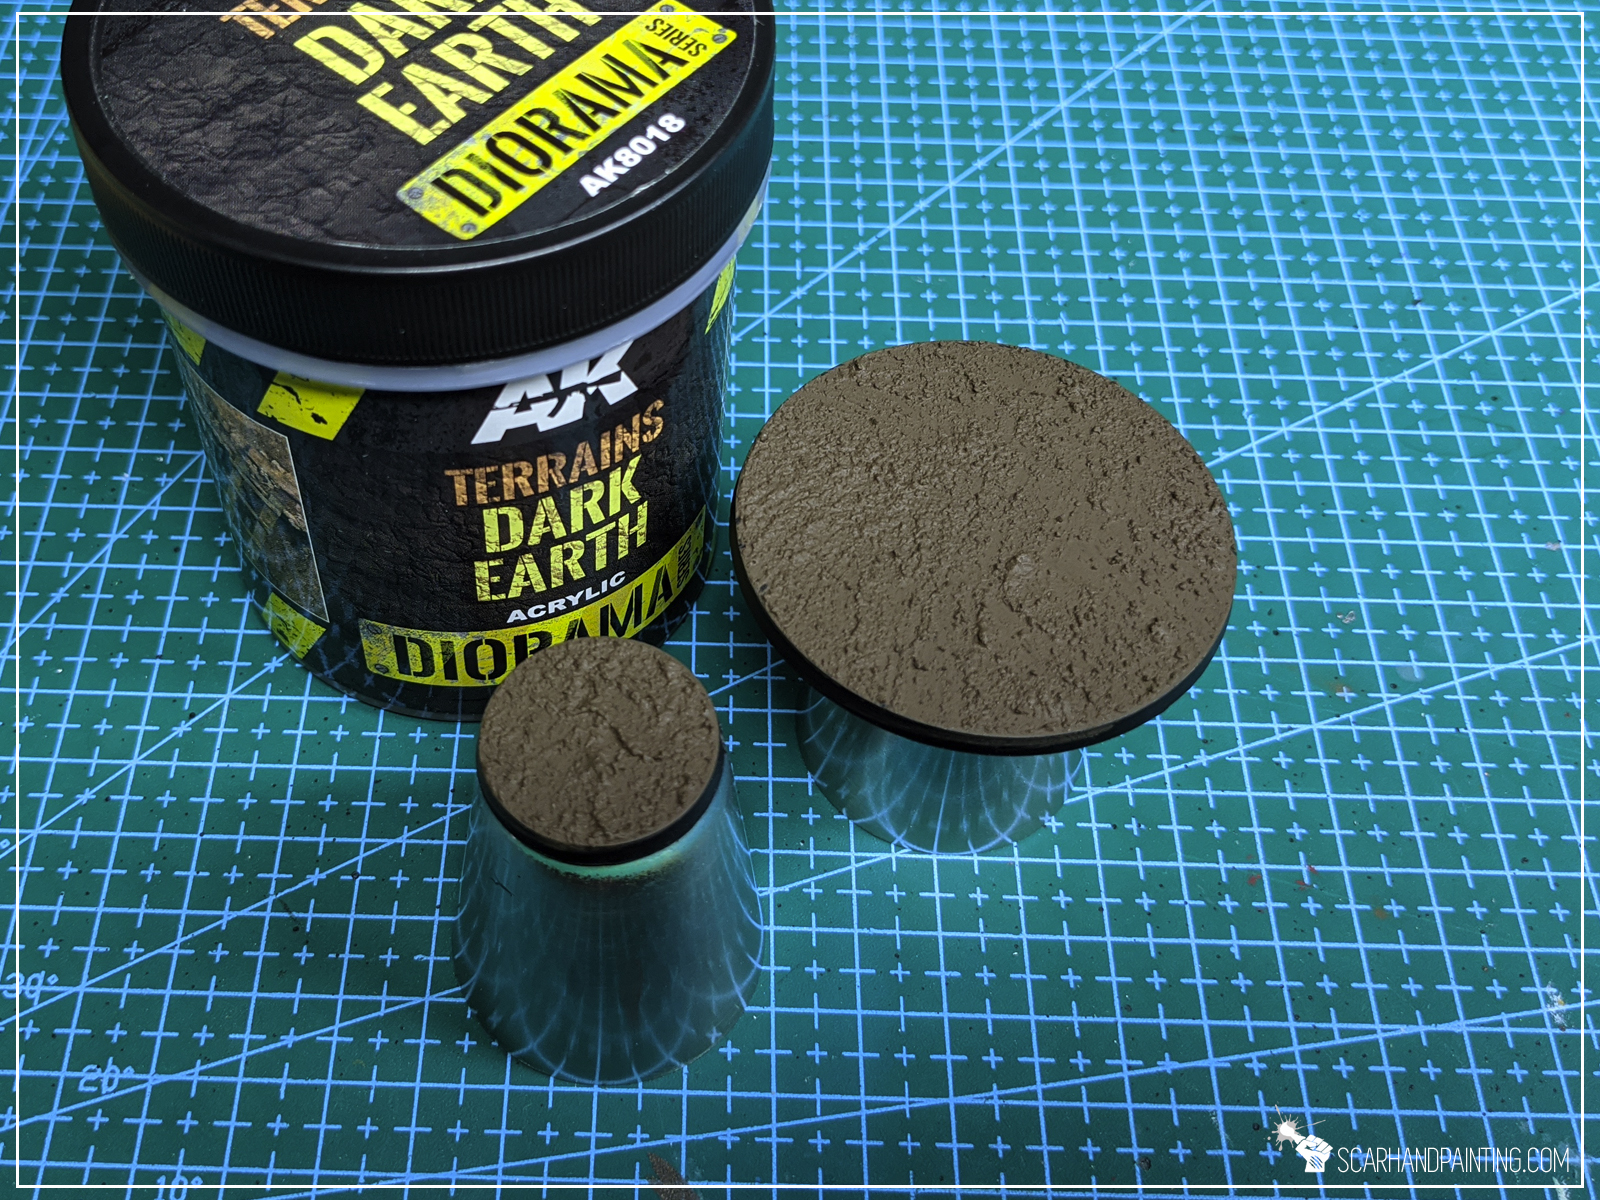
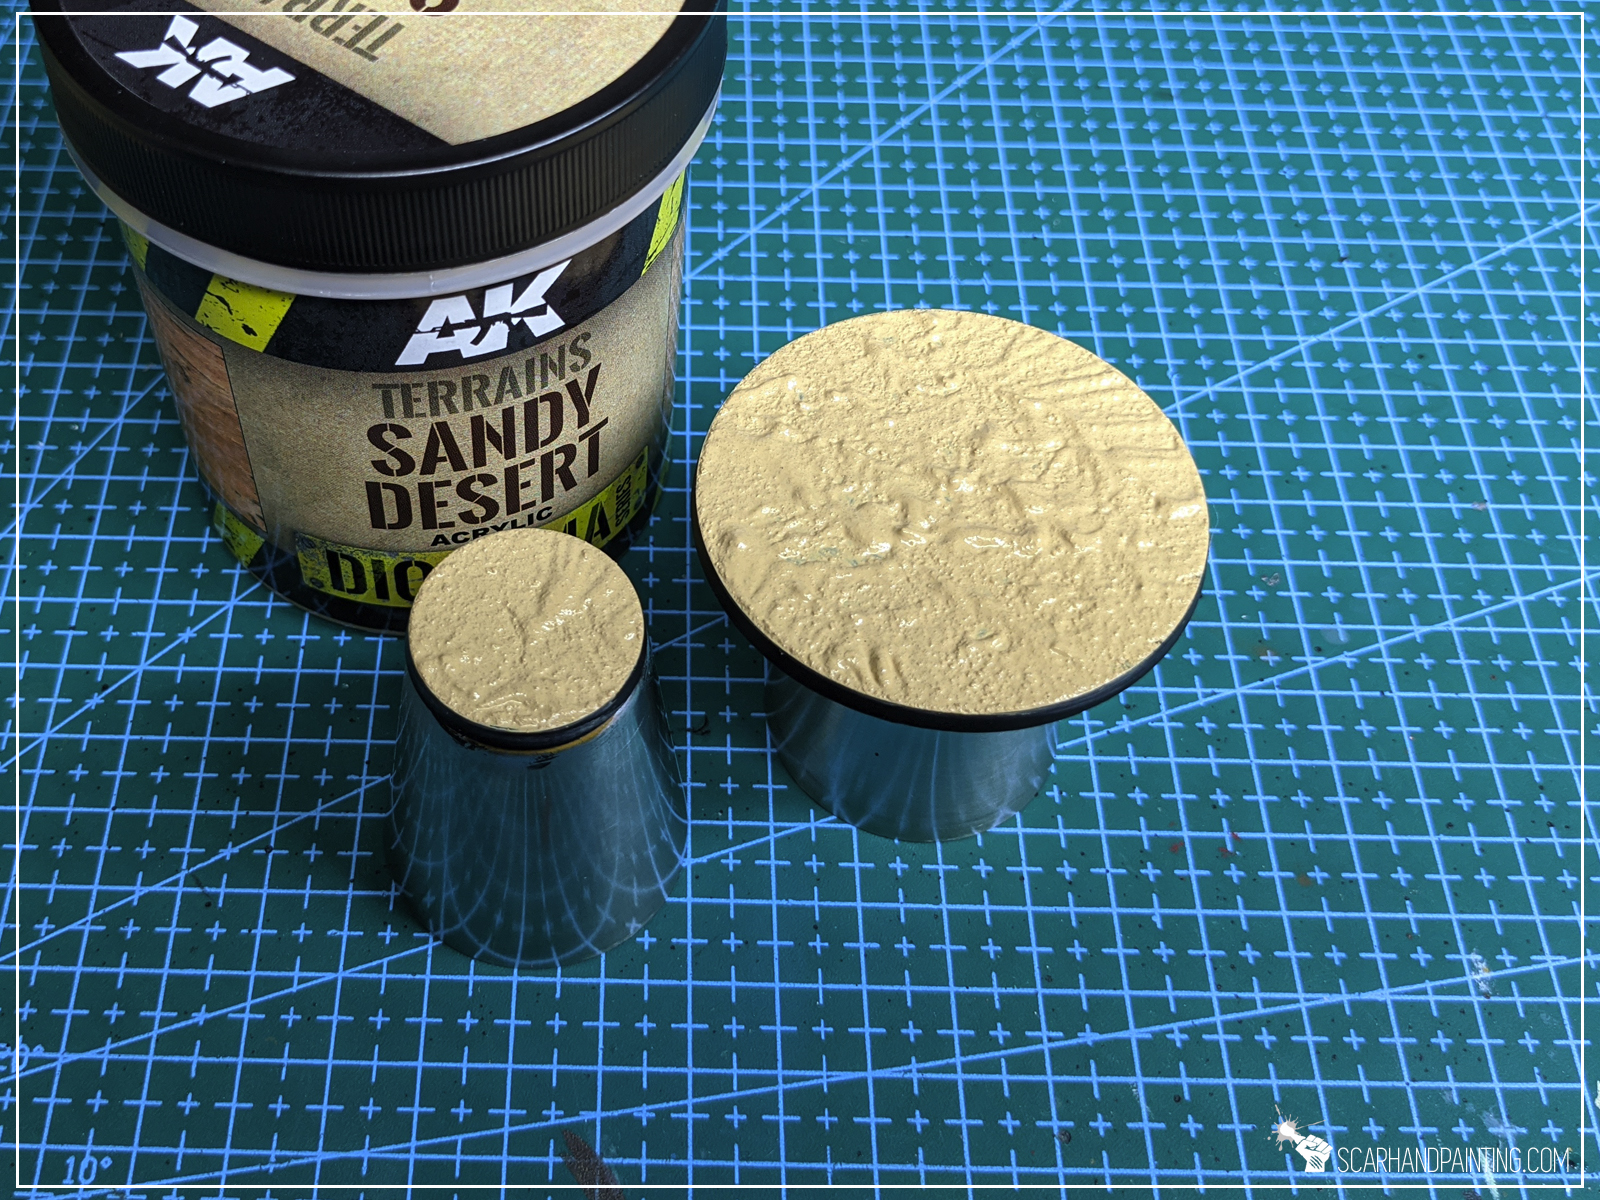
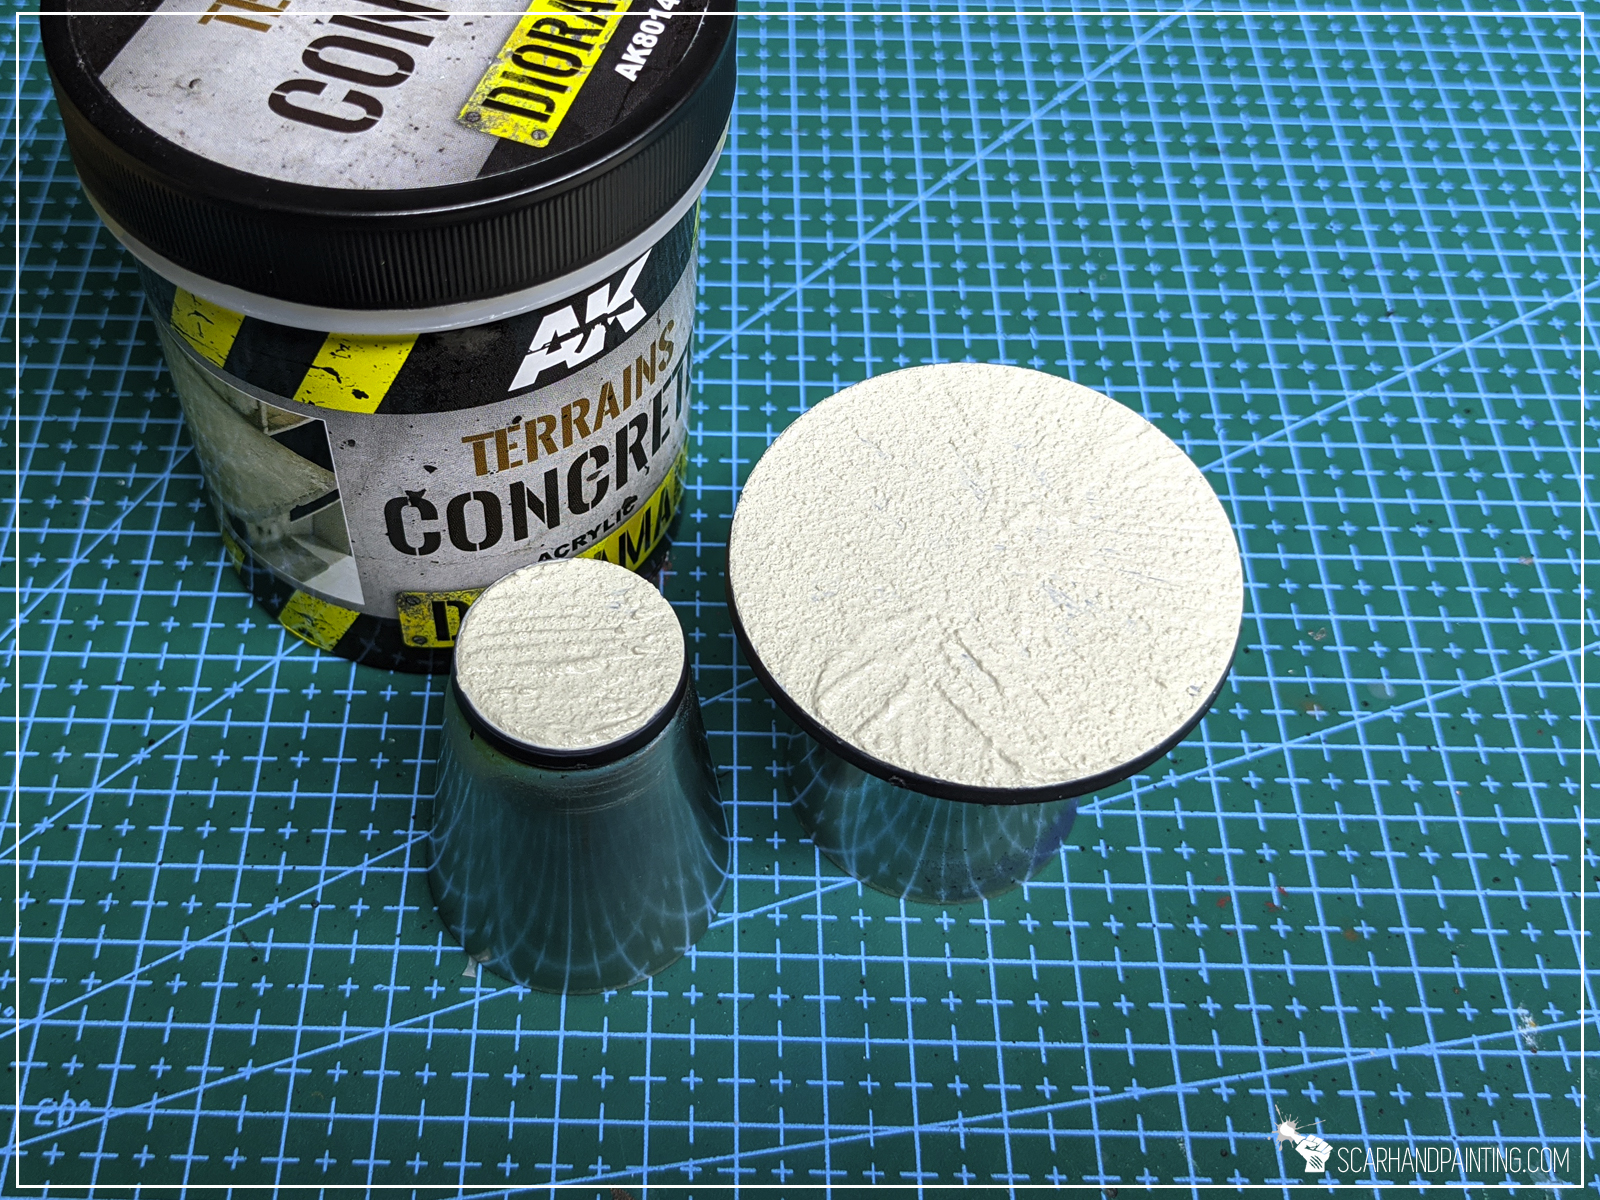
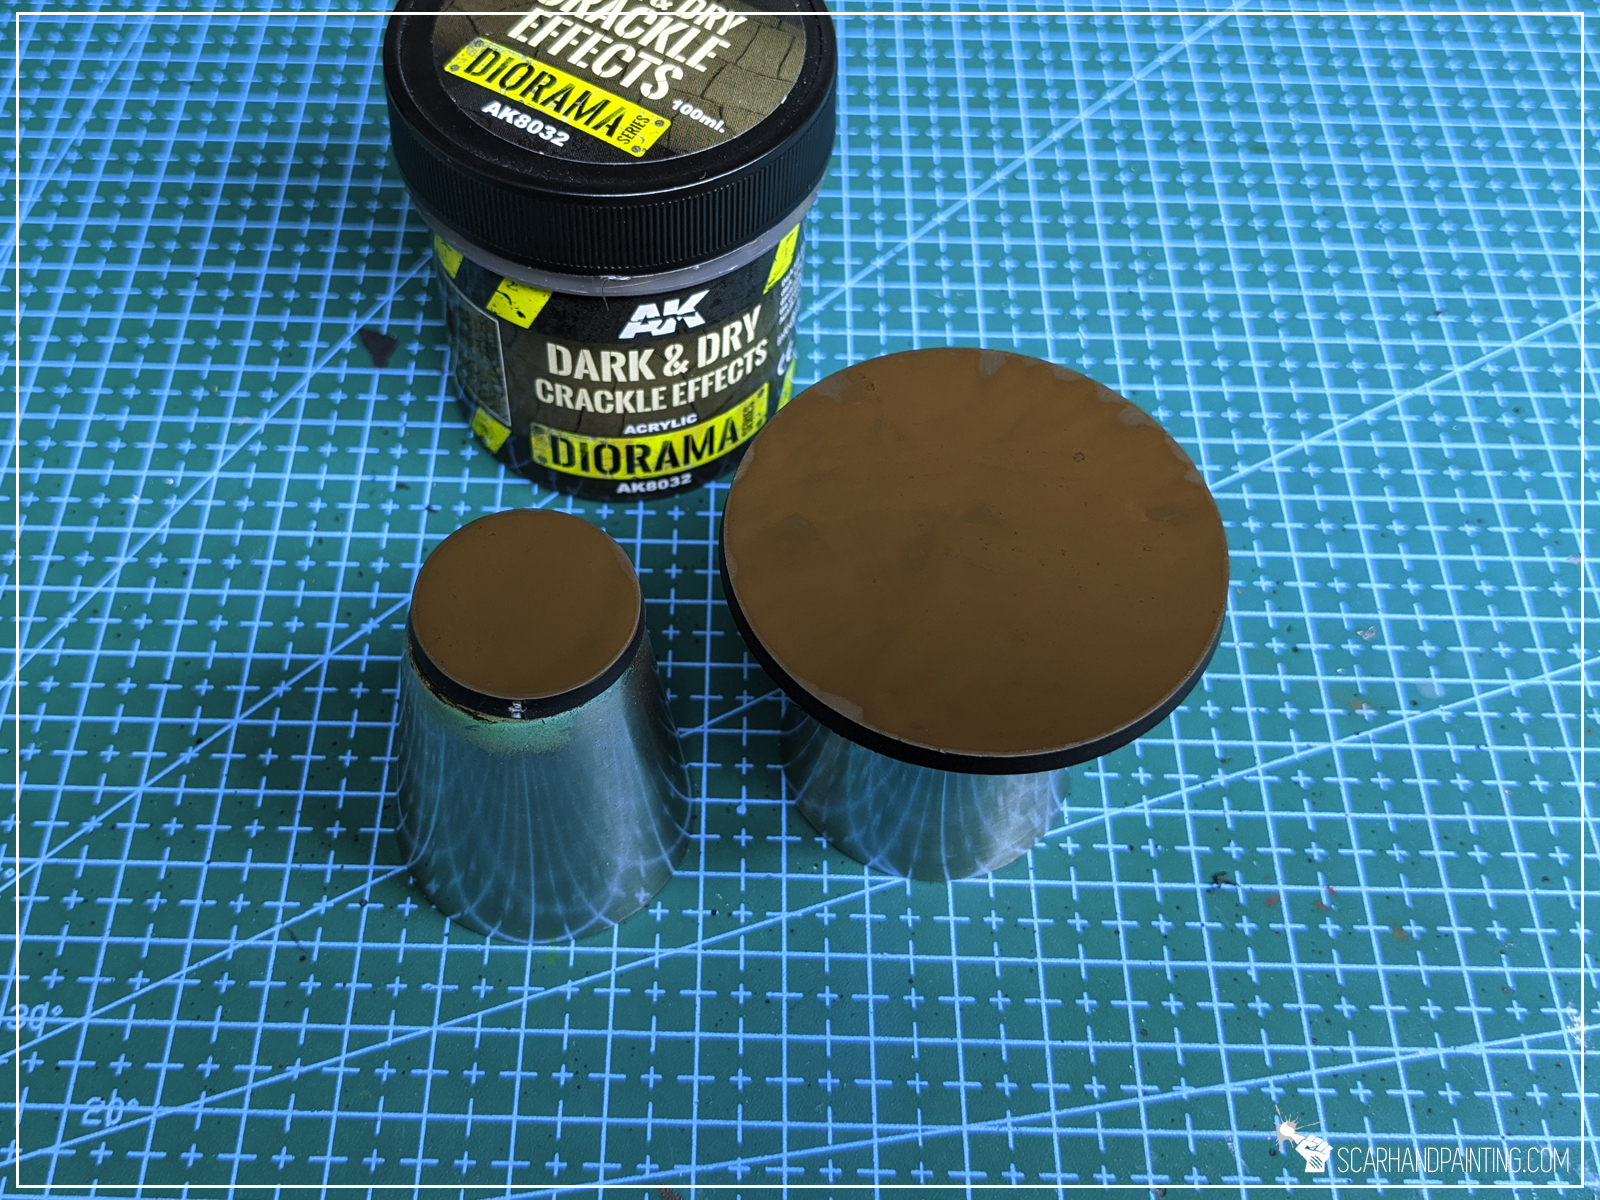
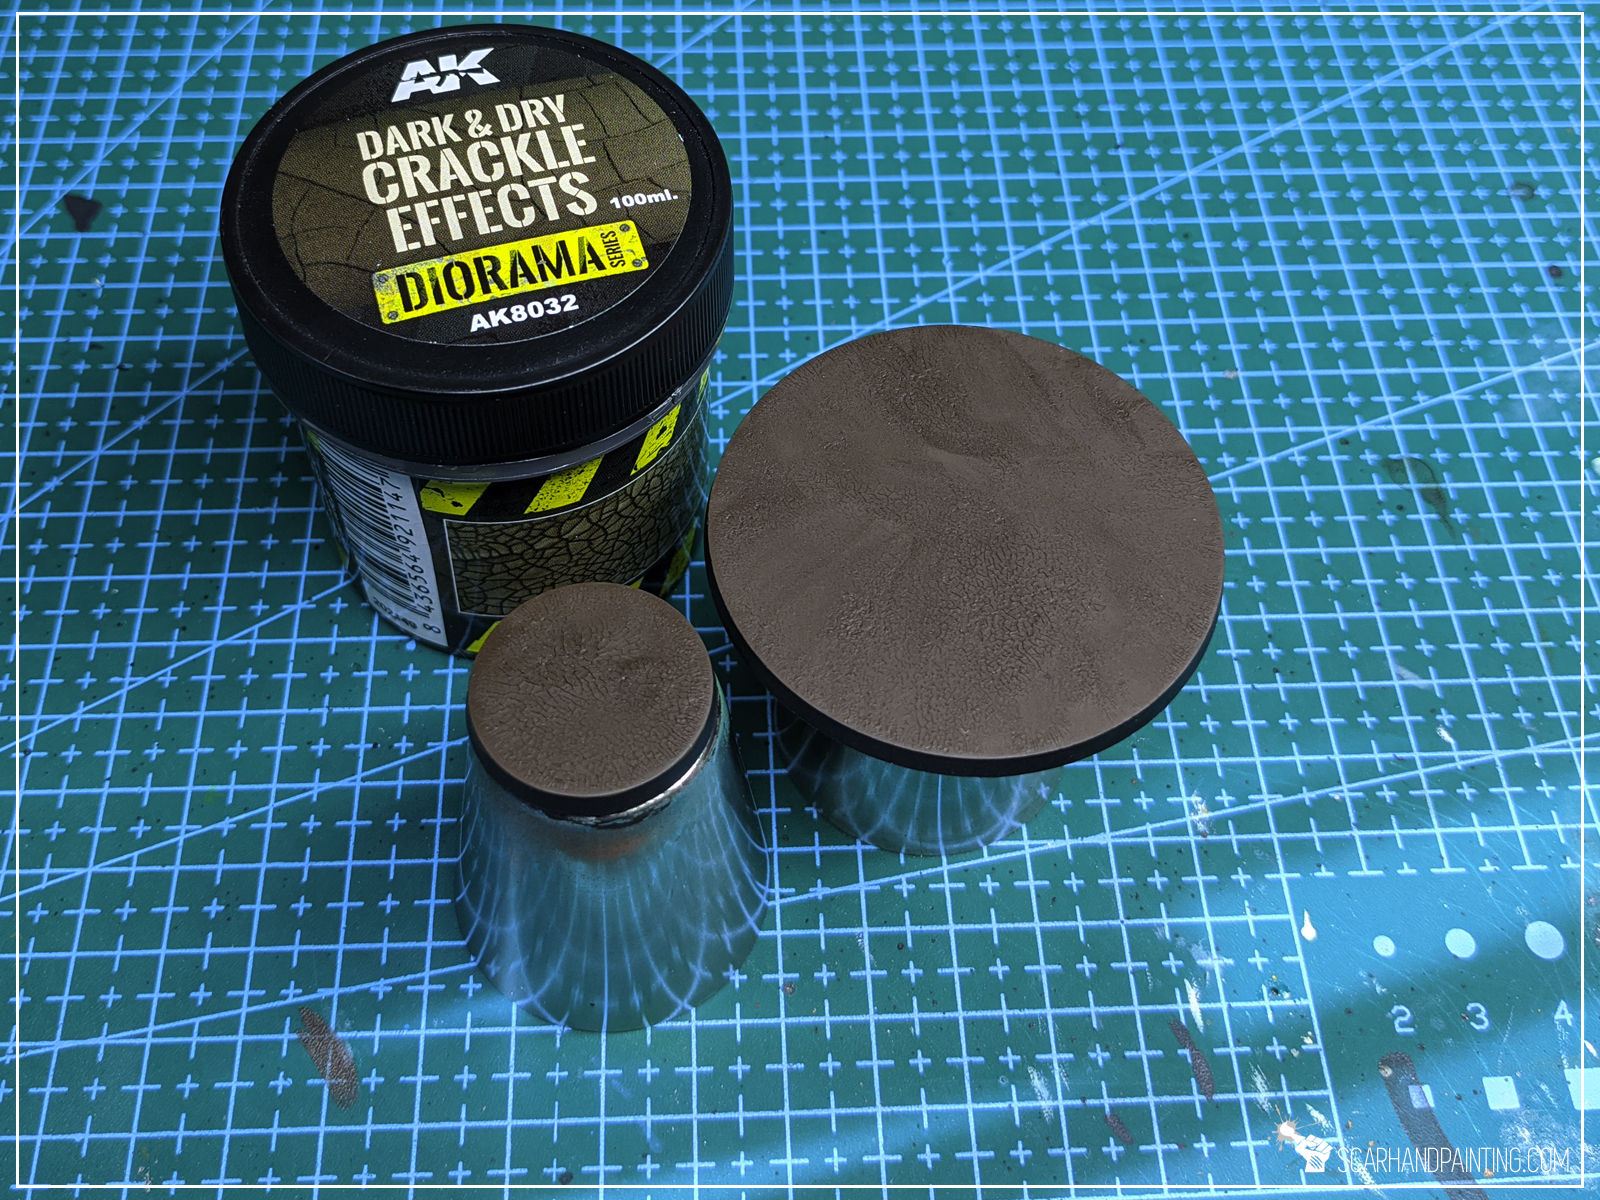
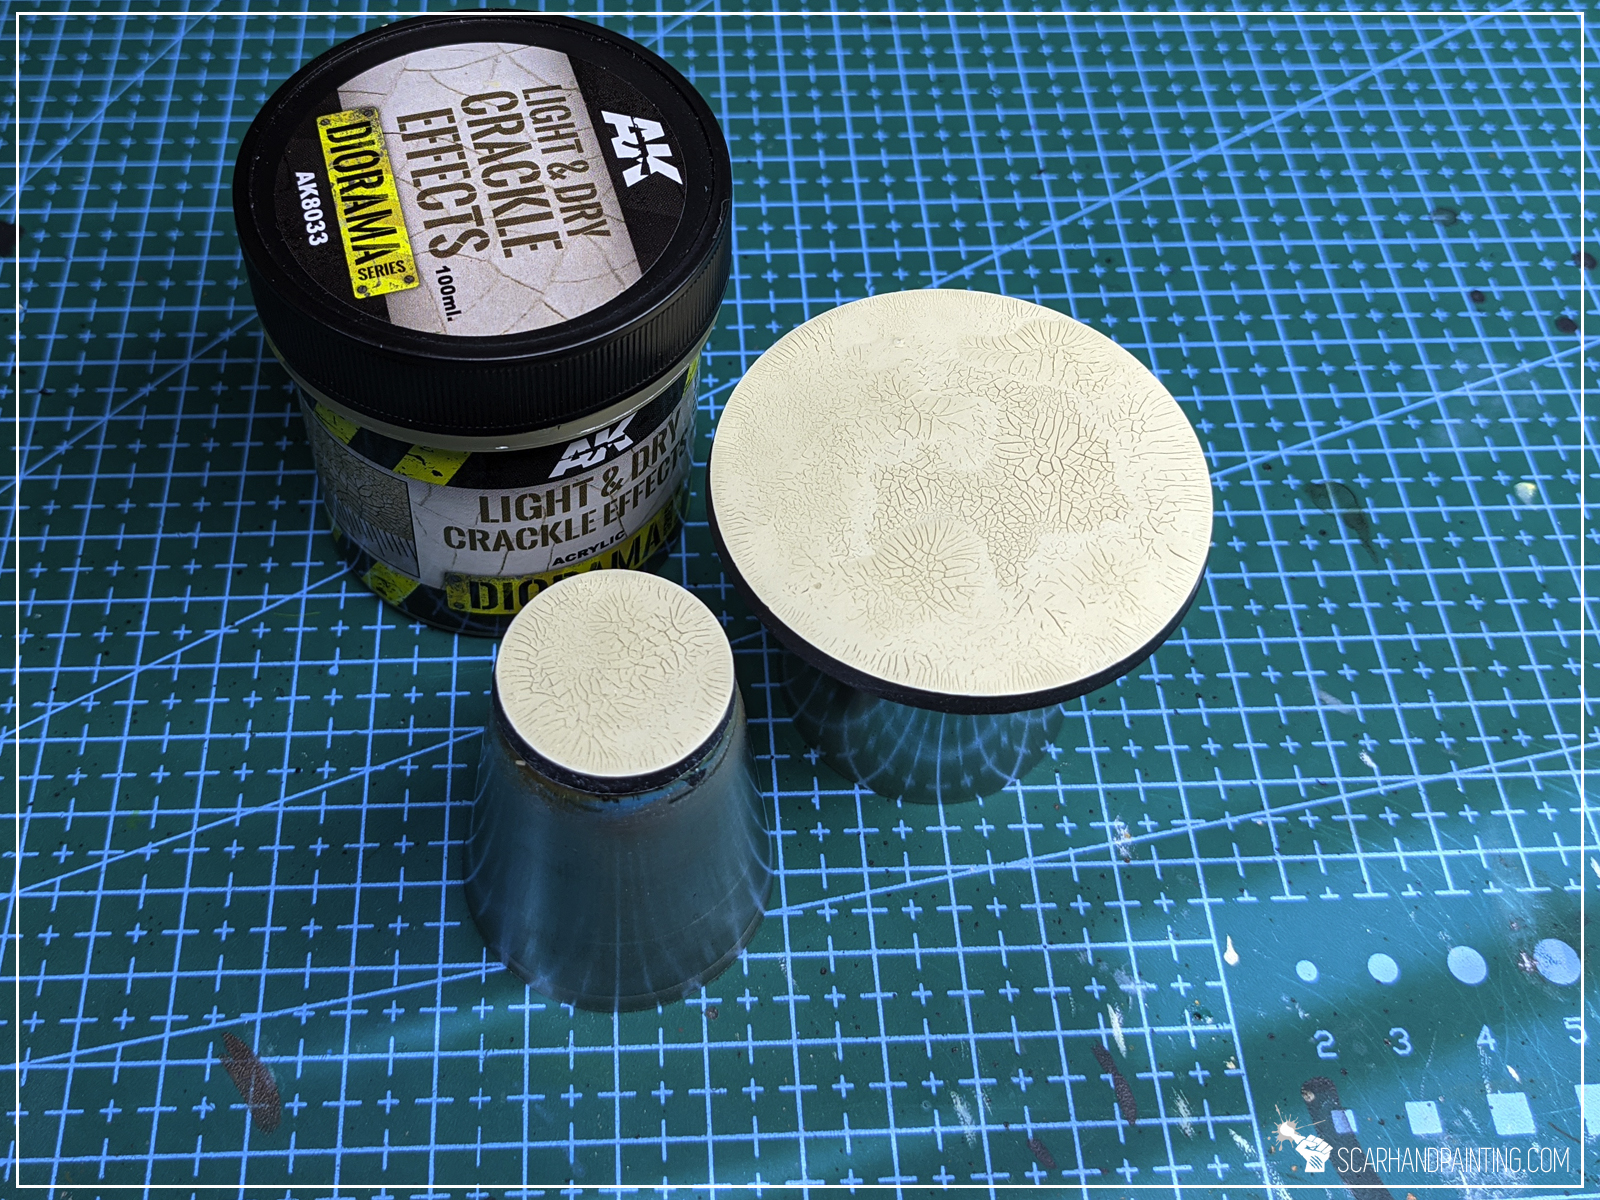
AK – Interactive – a Spanish company behind a well established series of products for modelers. They managed to become one of the most recognized brands in the modeling world with continuously evolving range of paints, brushes, weathering products and effects. I have been a fan of their products for years now. Recently I decided to take another step and expand a range of texture paints at my disposal. Knowing the quality of AK’s products and lured by sweet pricing I went berserk and got a lot of Diorama Series textures.
Now I’m here to share my impressions.
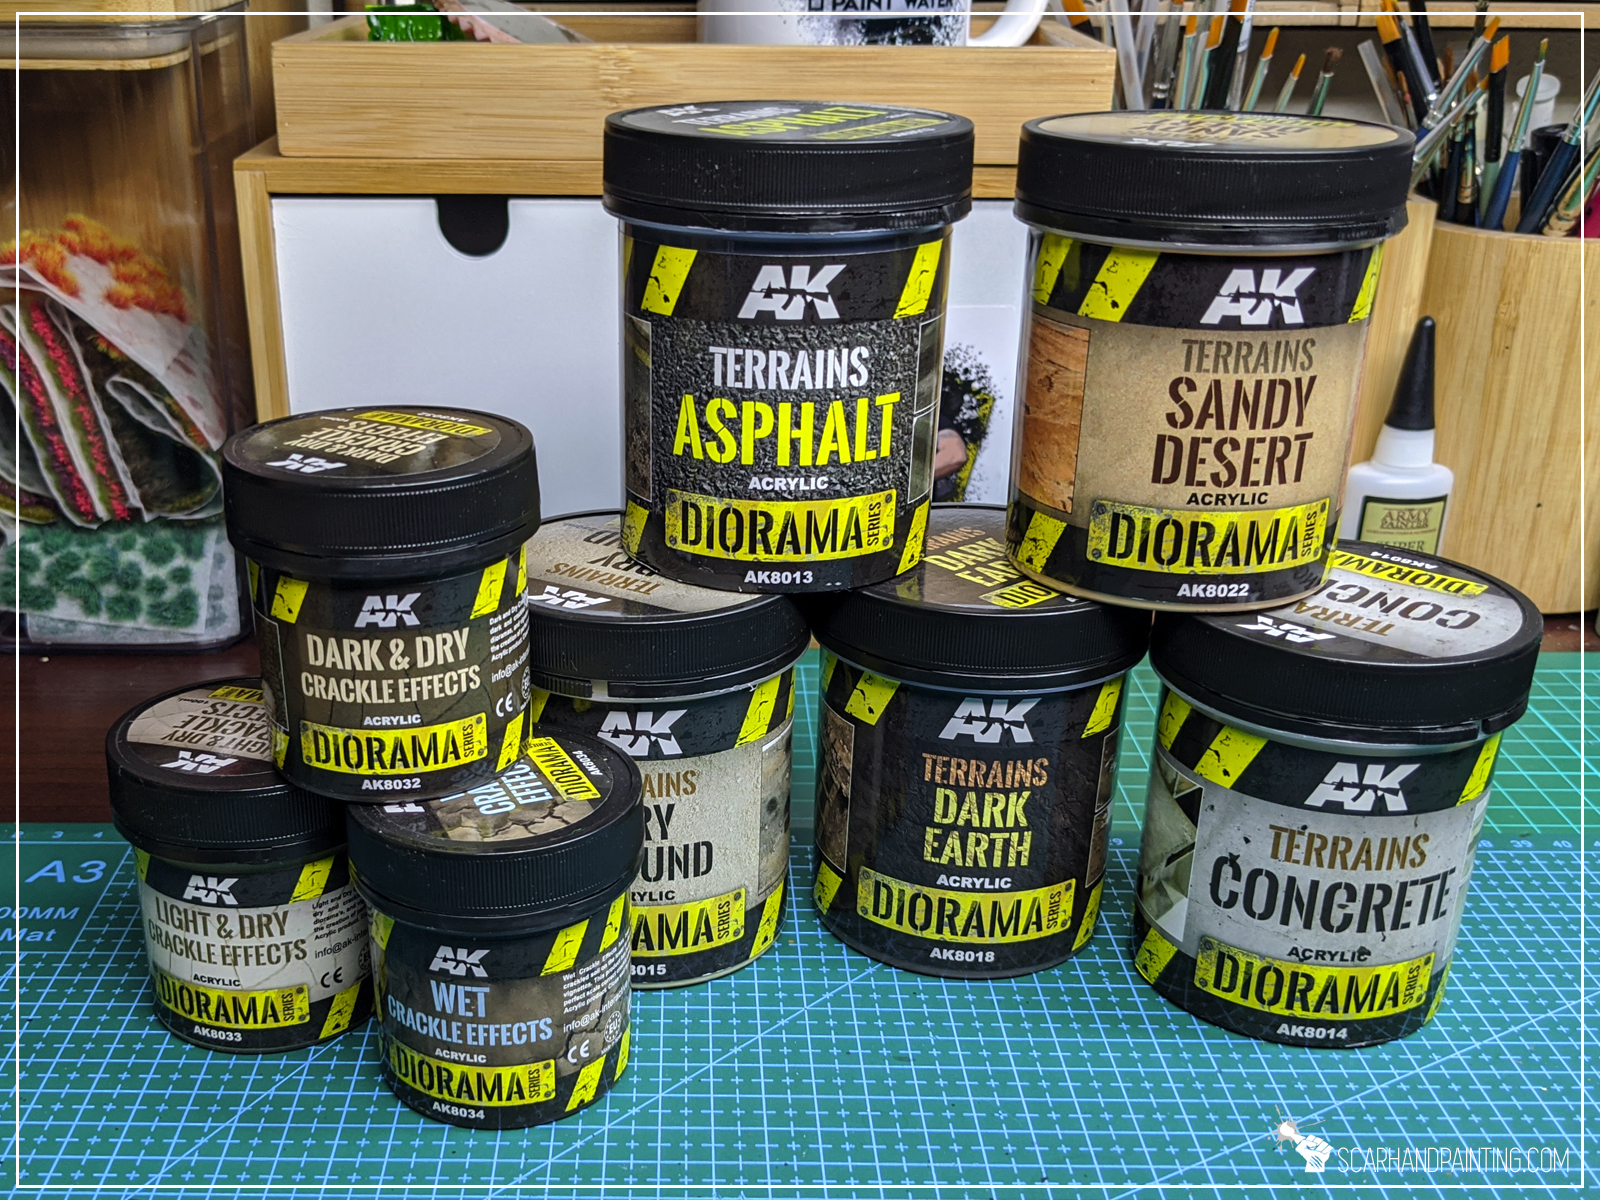

Usually I do the entire Quality, Visuals, Functionality thing. This time though I decided to take a different approach and just jump right into testing the actual products, with pictures taken at every step. Consider this to be a Review/Tutorial hybrid. I will share my thoughts in the summary, so no worries 😉
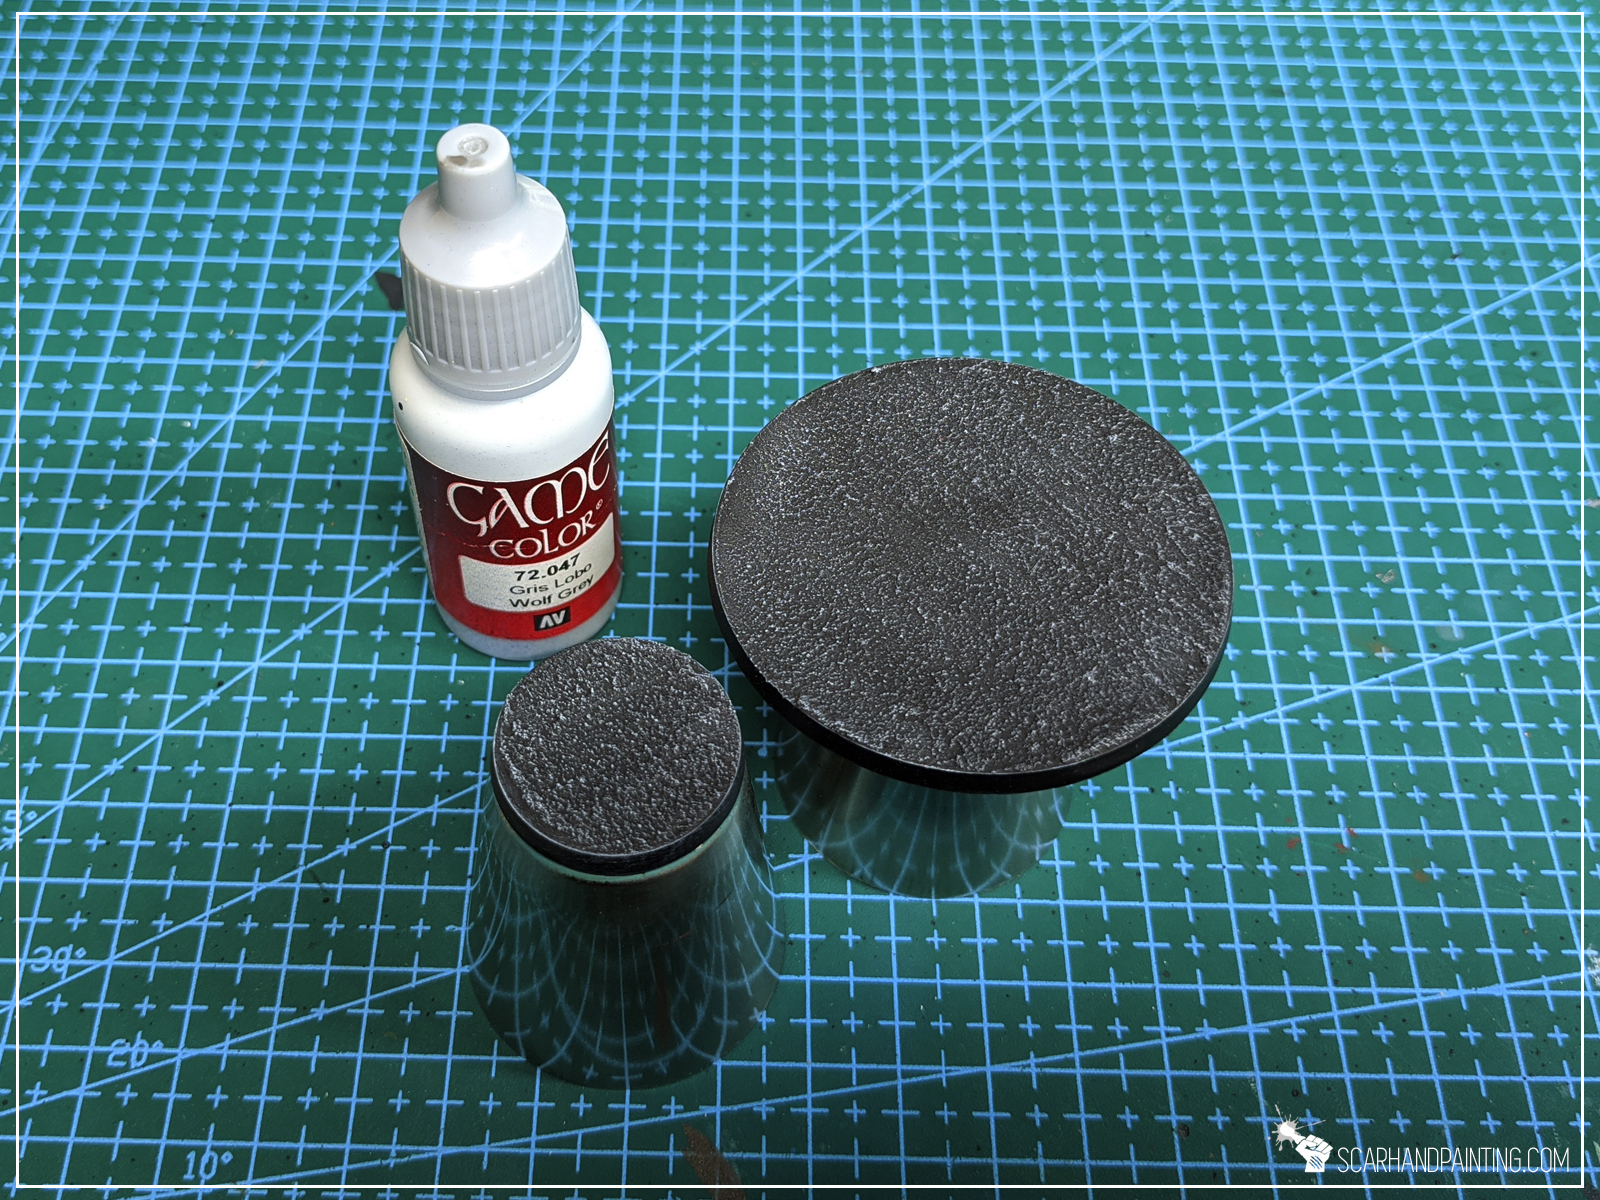
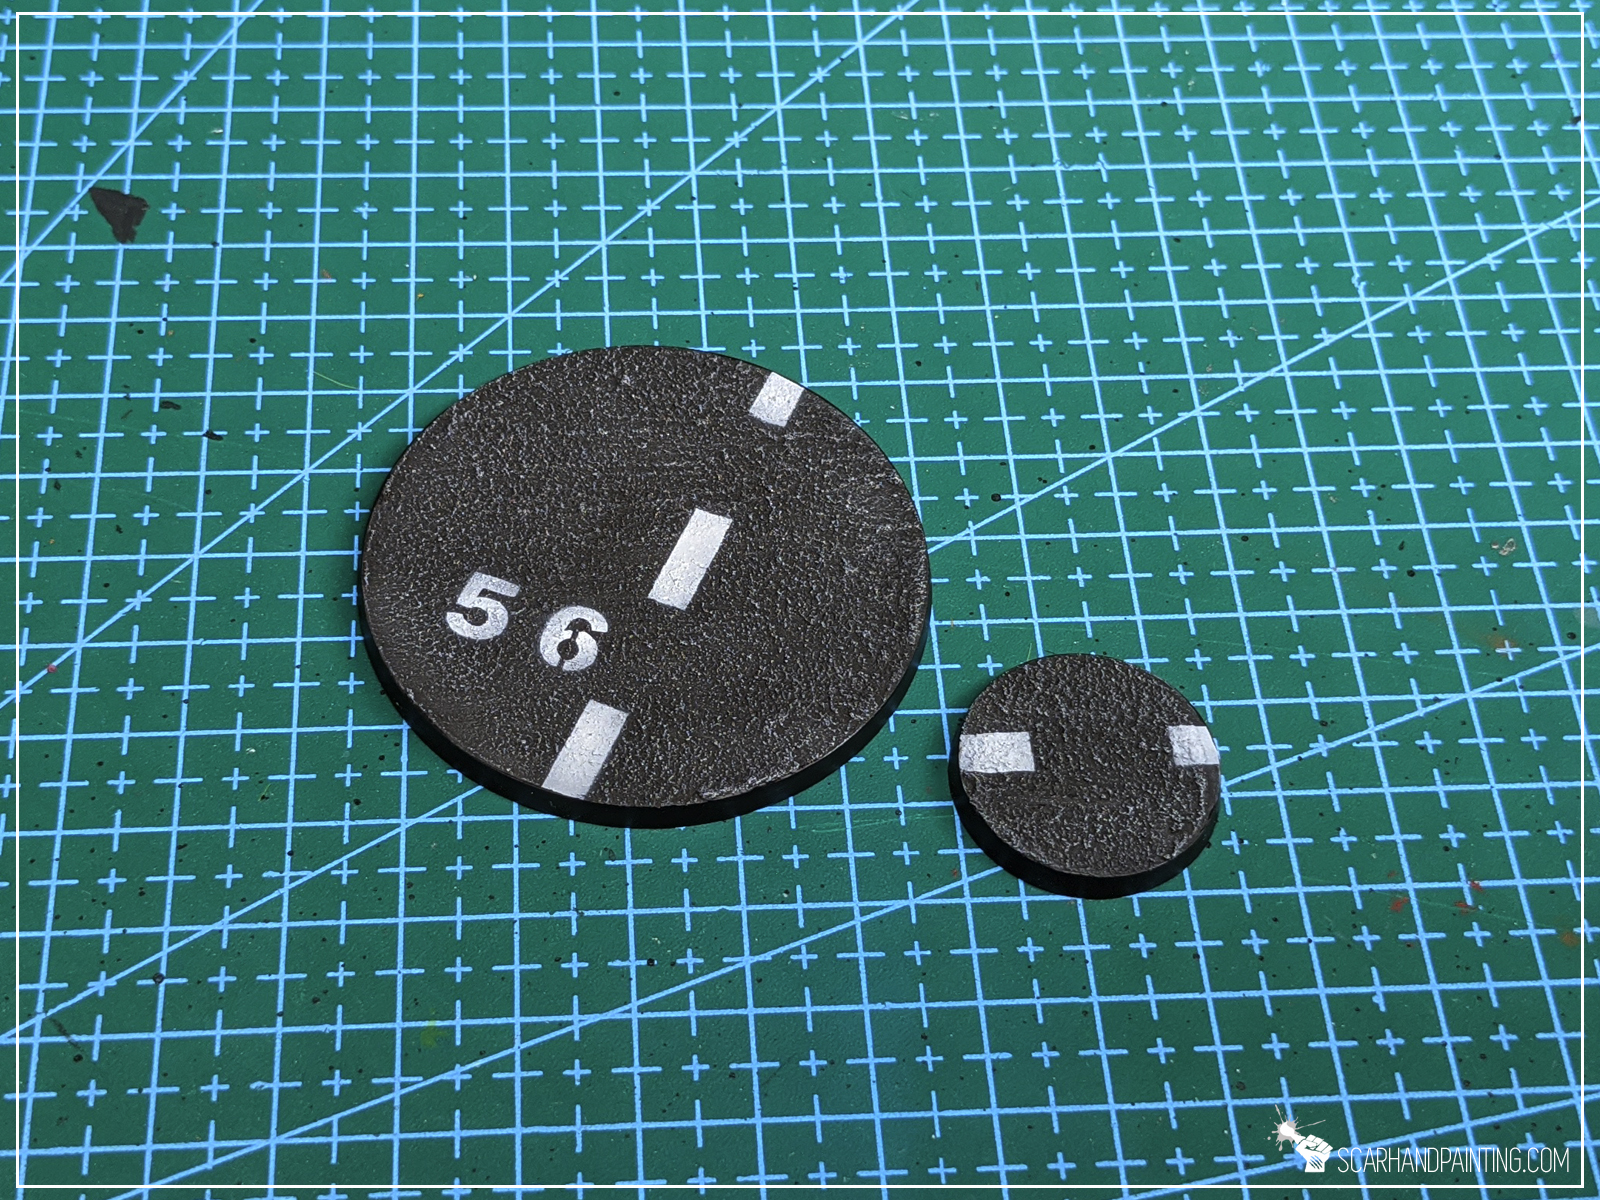
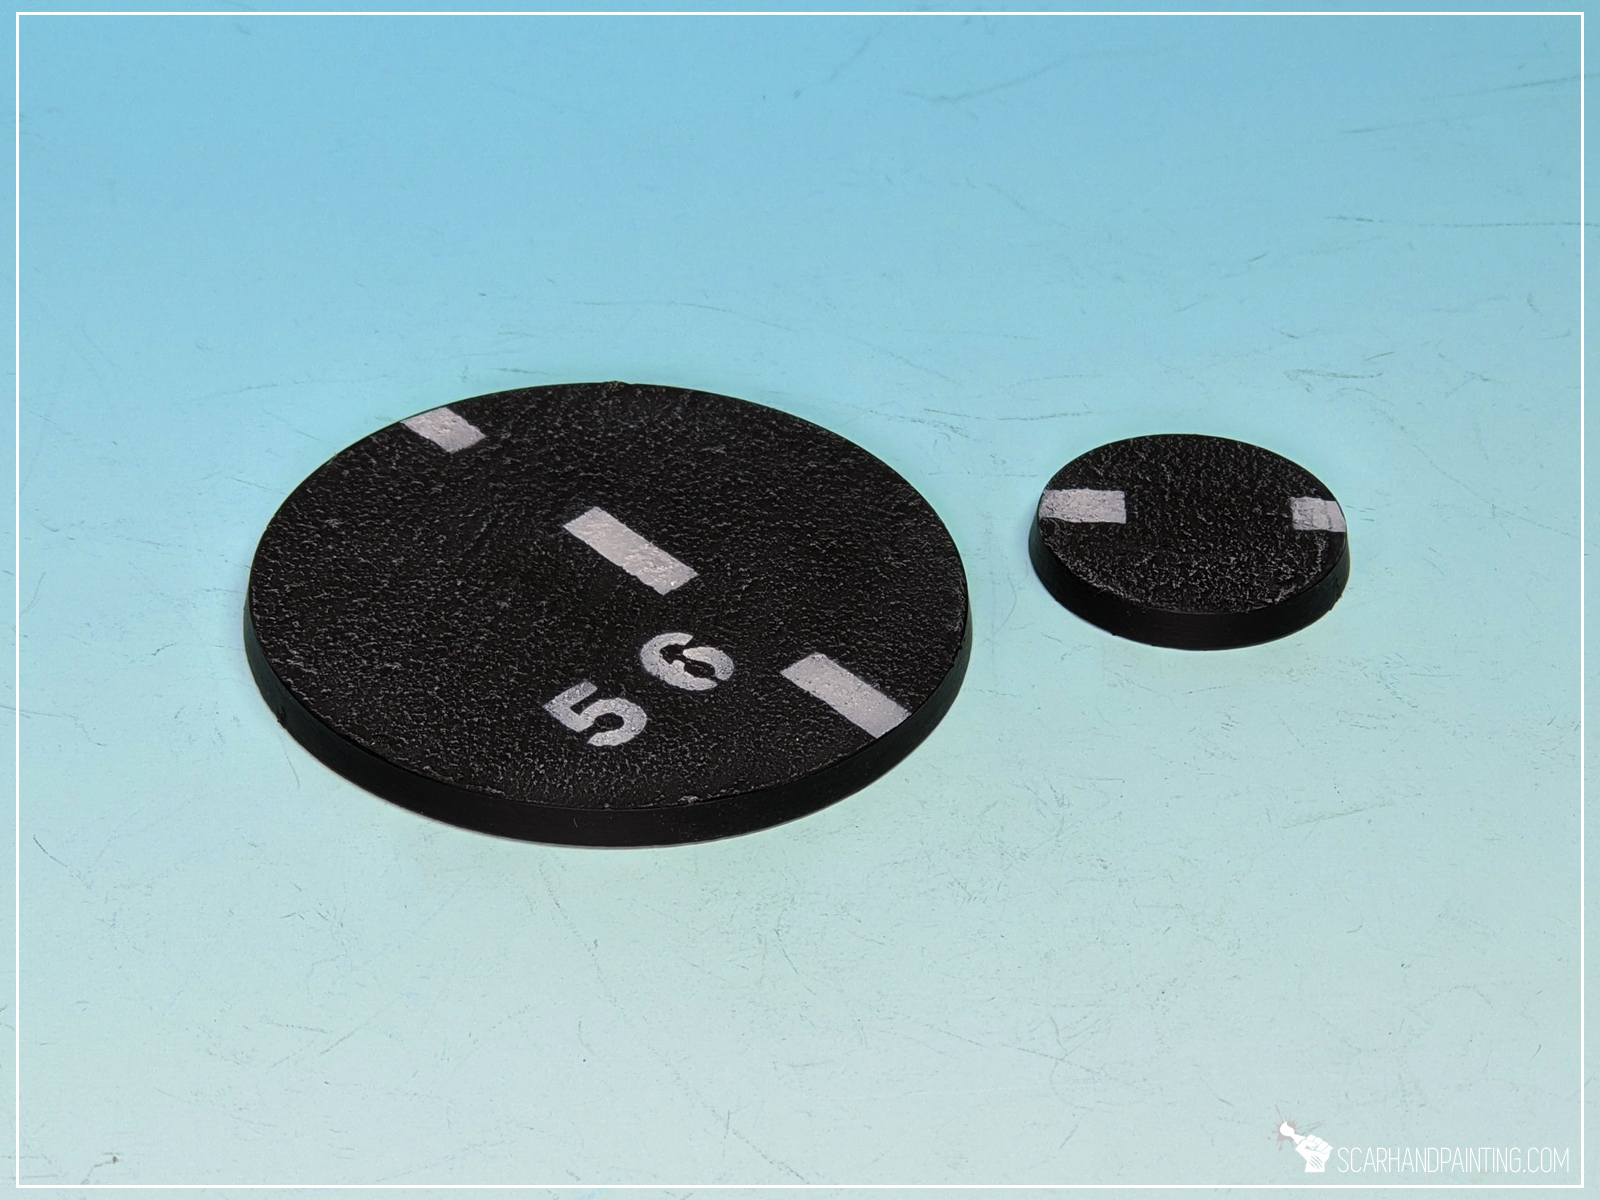
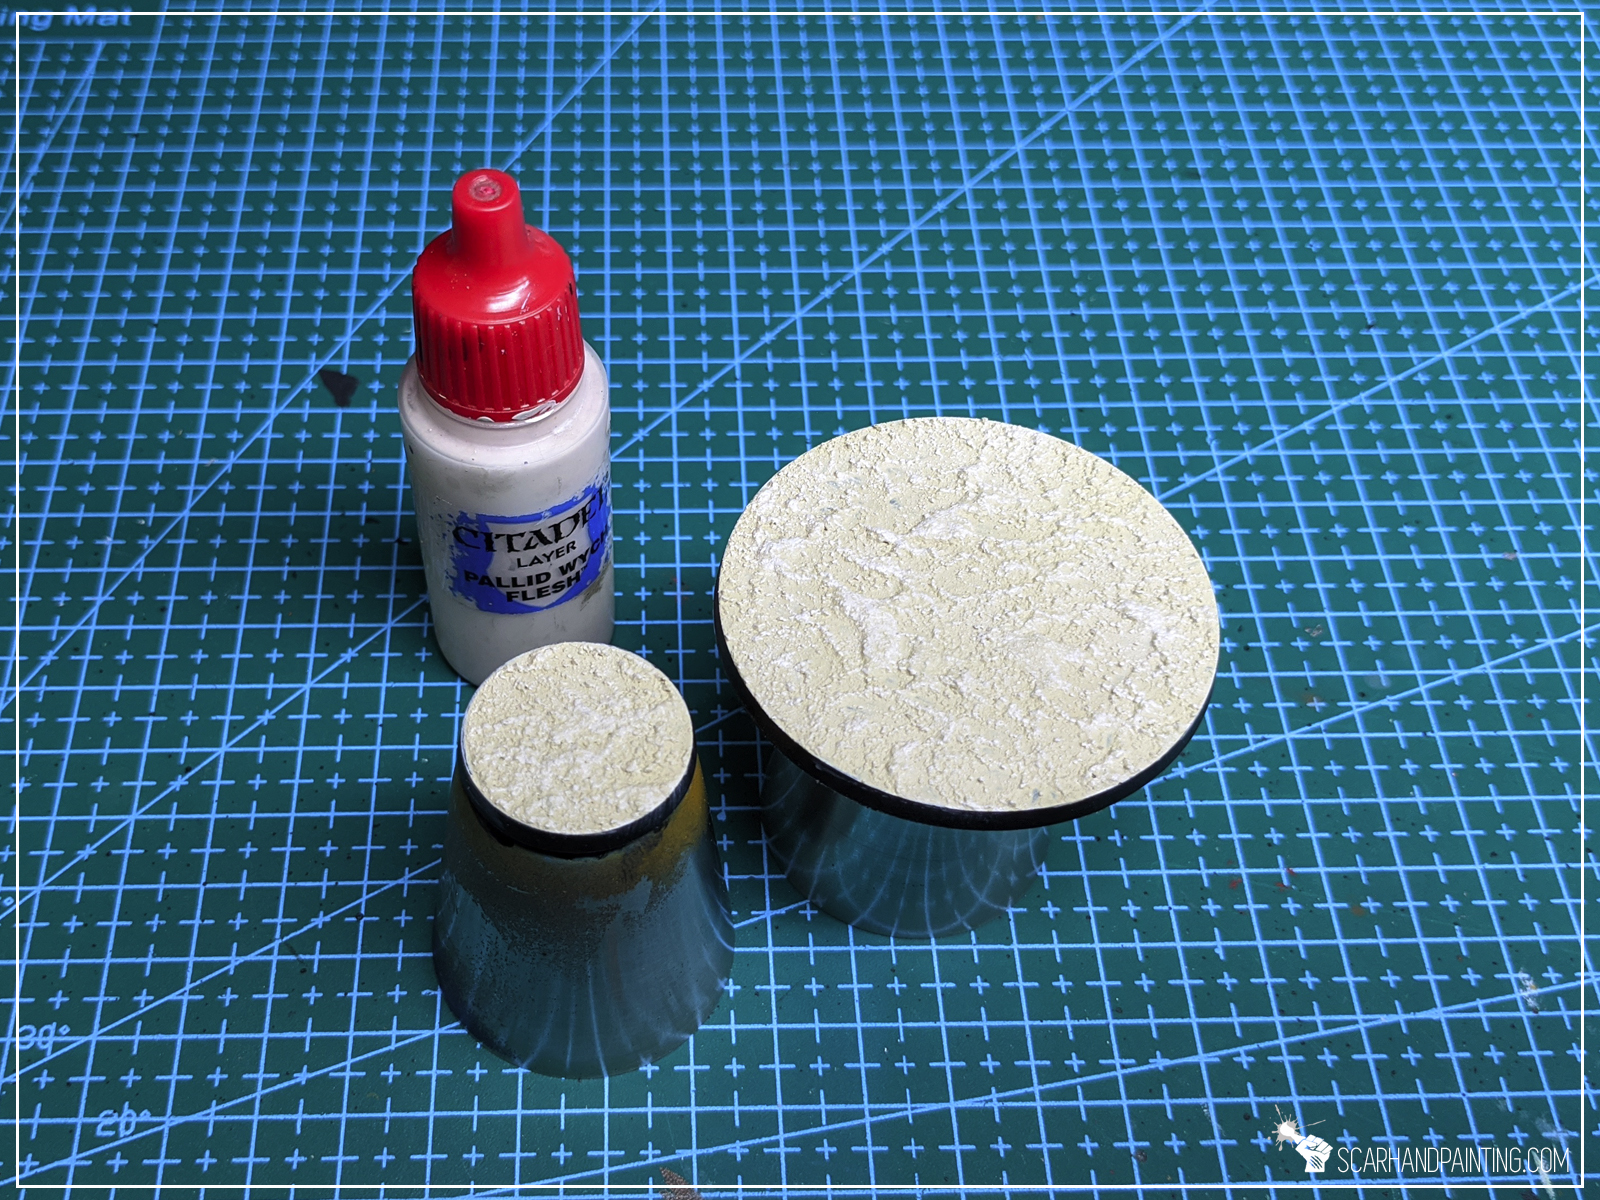
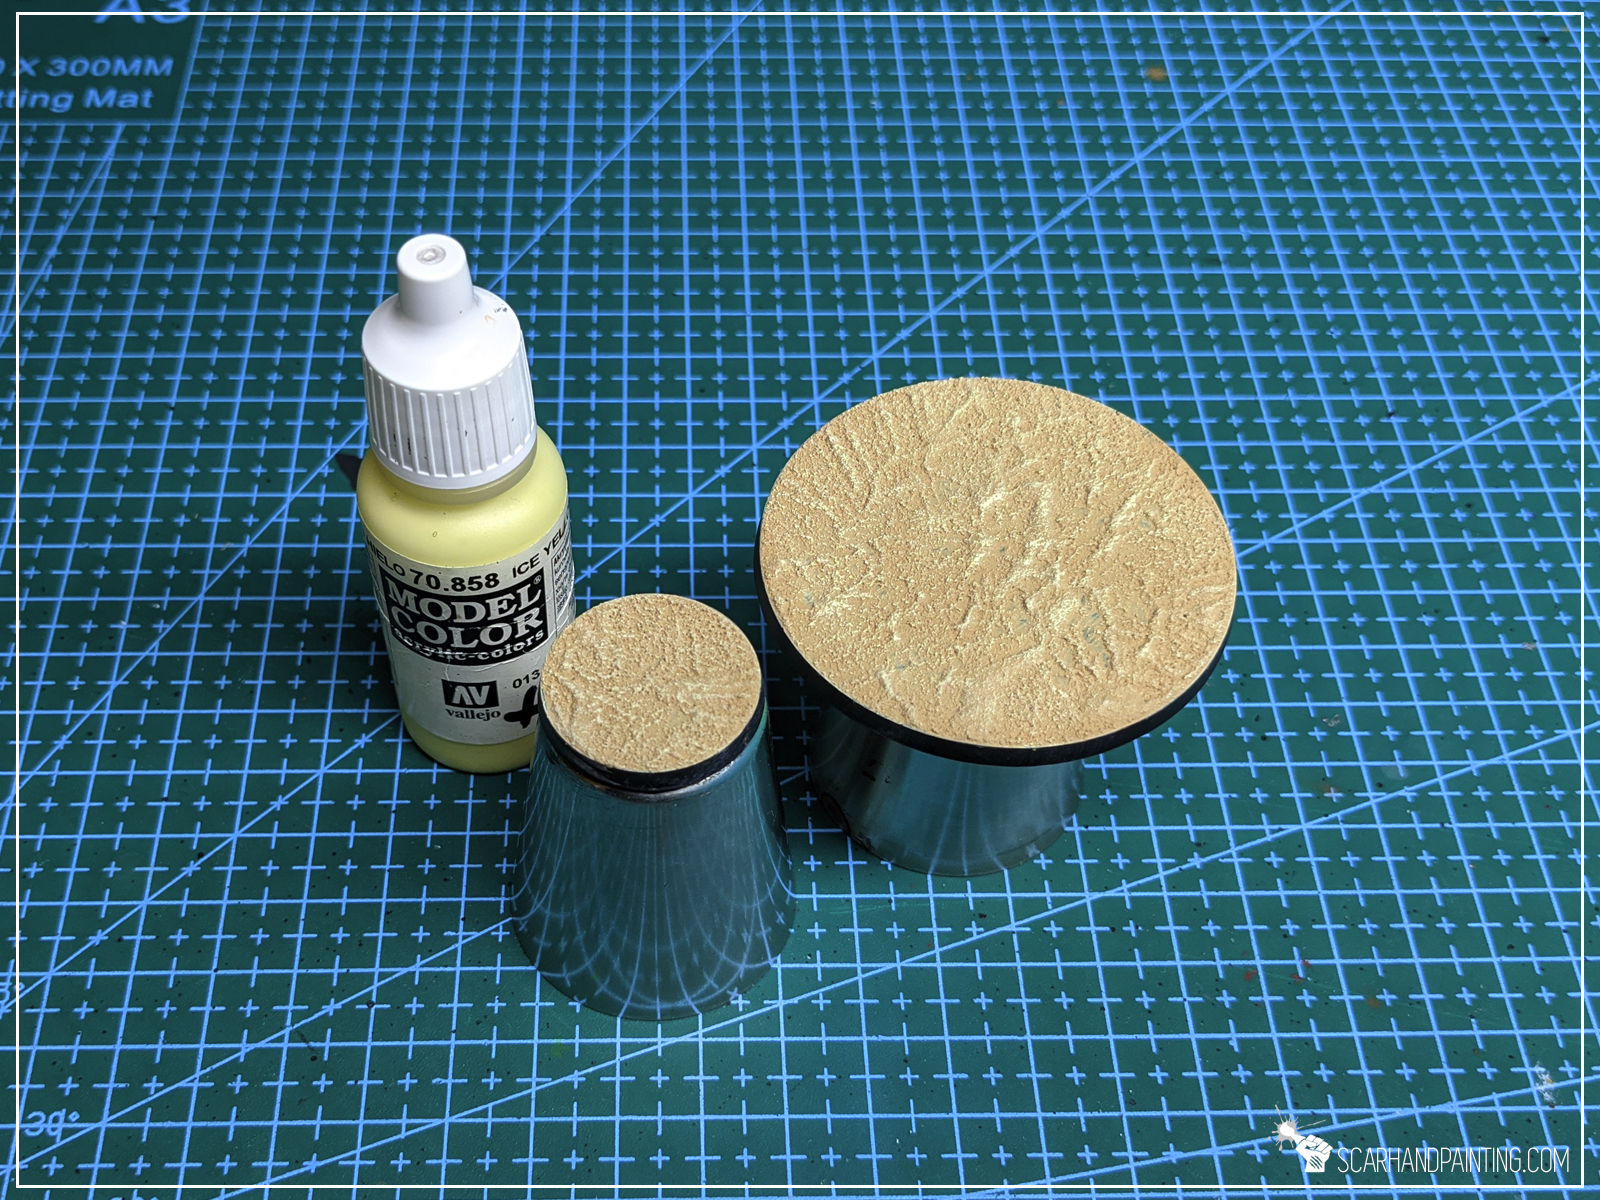
Very happy with this one. Not too grainy. Perfect coloration. Two steps process with a final touch of white markings airbrushed through a stencil. End result – very satisfactory.
Say goodbye to sand on PVA glue! This puppy is now my favorite two-steps basing for fantasy miniatures!

Would have never expected to go with such a color, but seeing the end result I’m getting strong Star Wars The Last Jedi / Mad Max Salt Planes vibes… many possibilities!
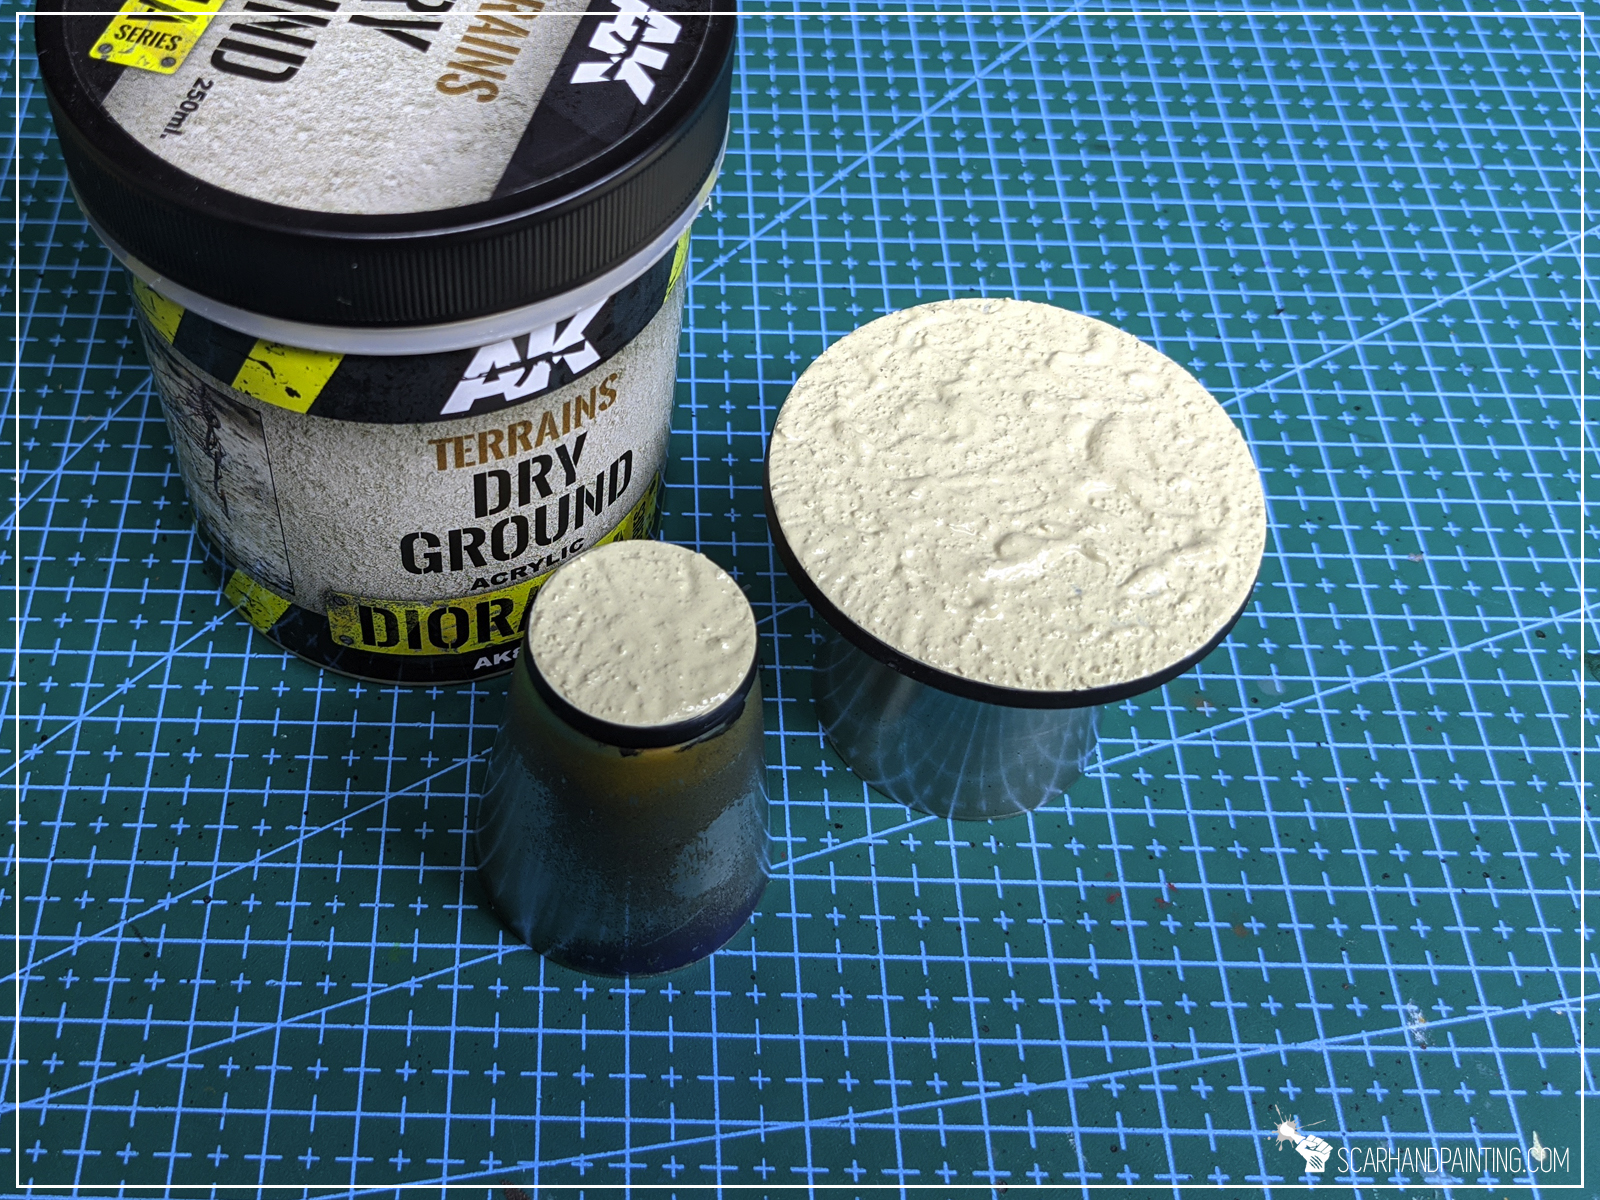
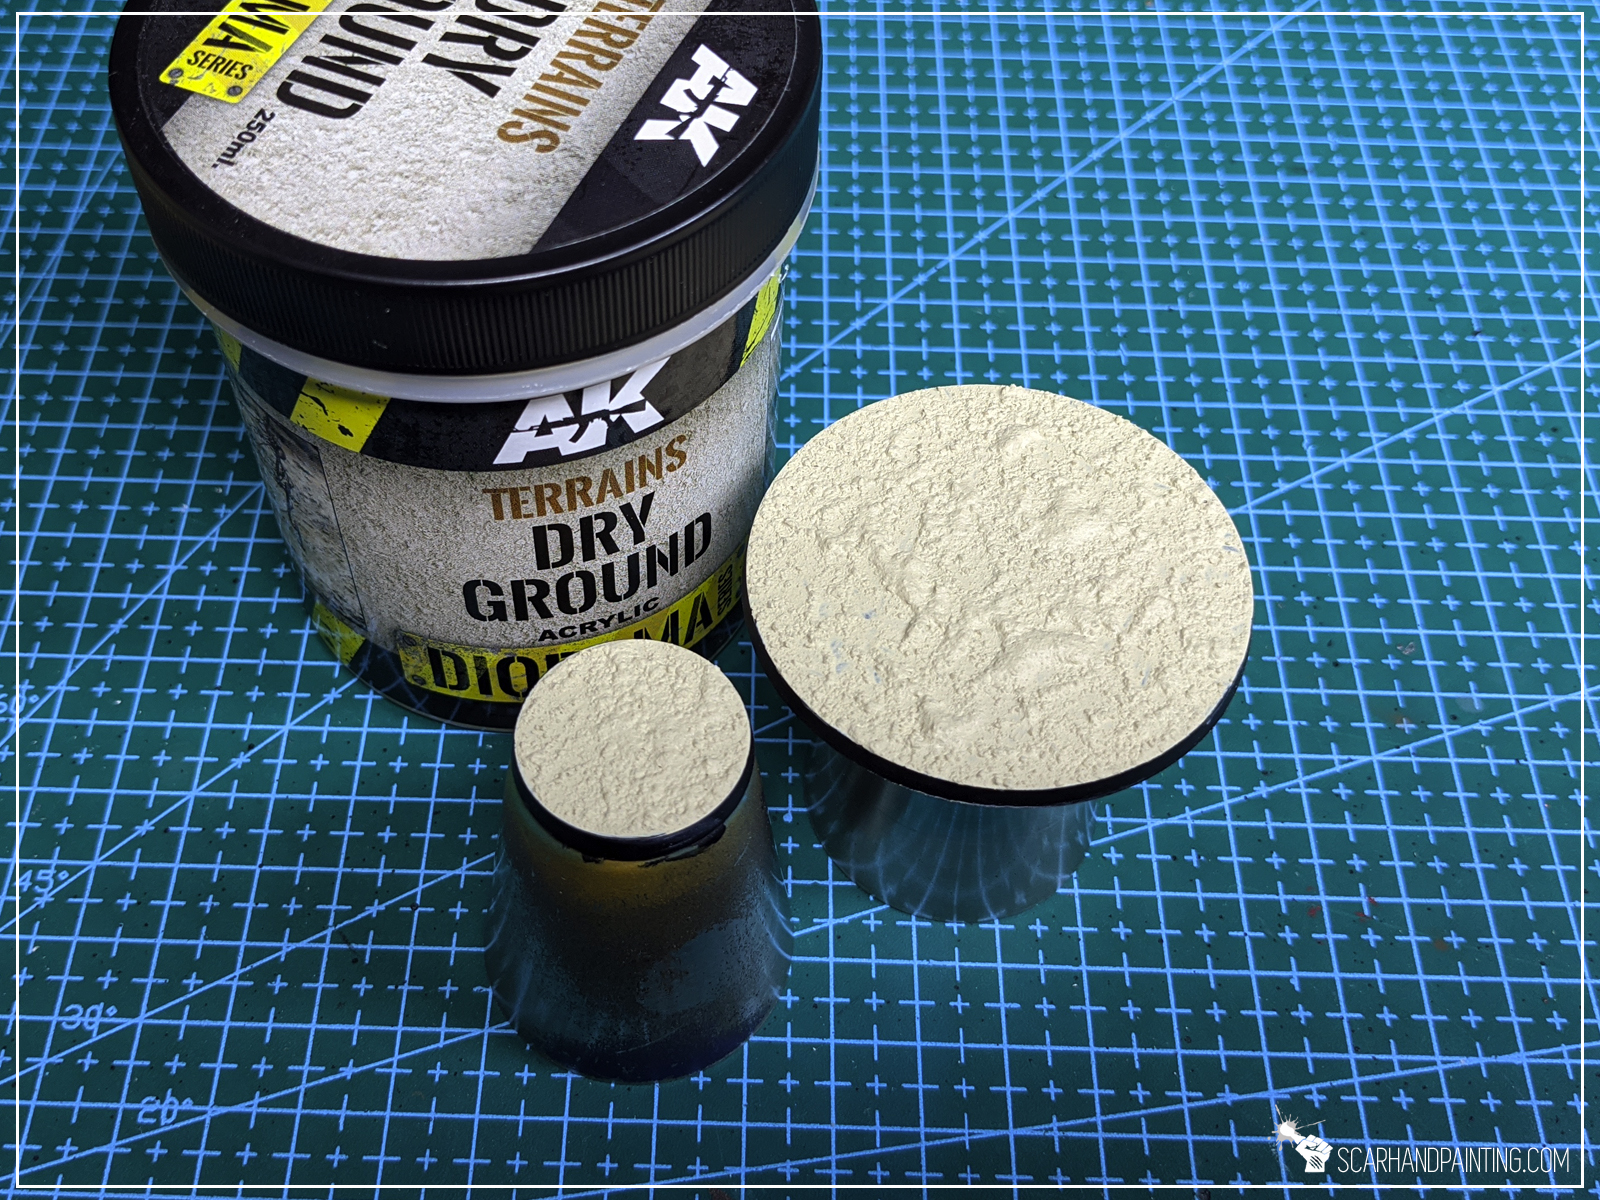
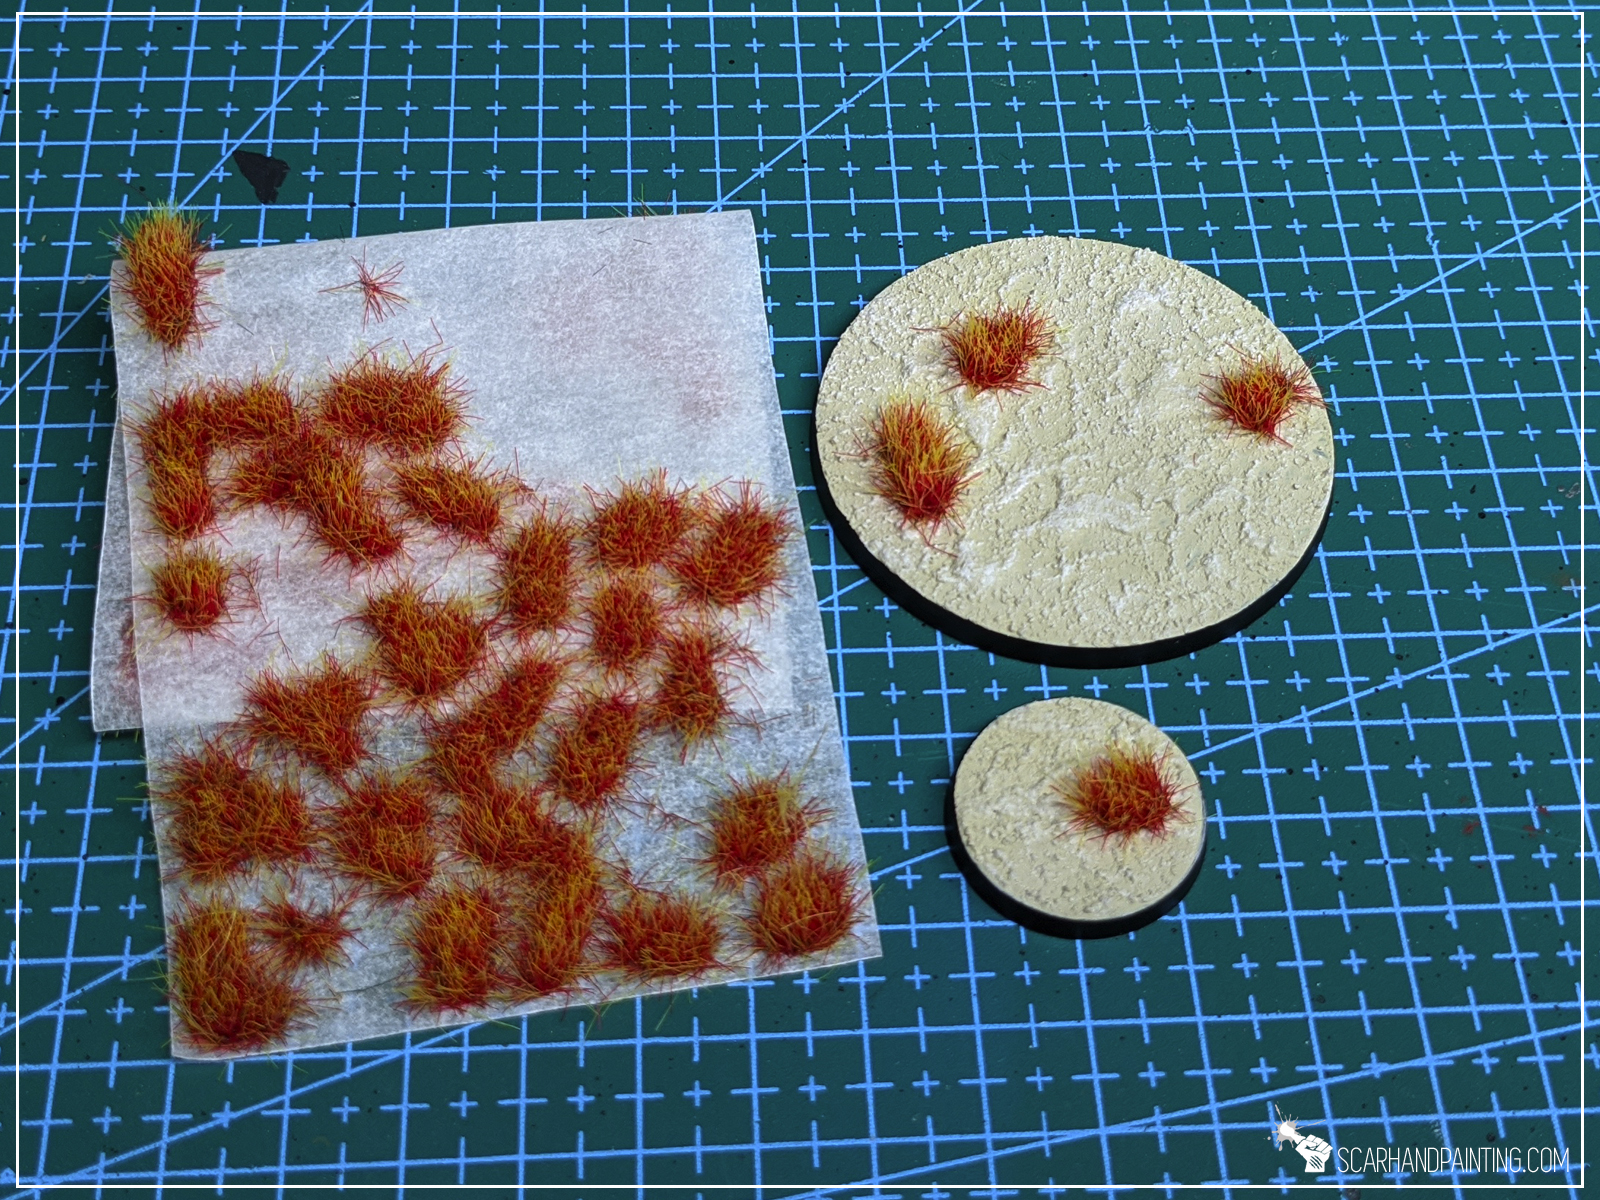

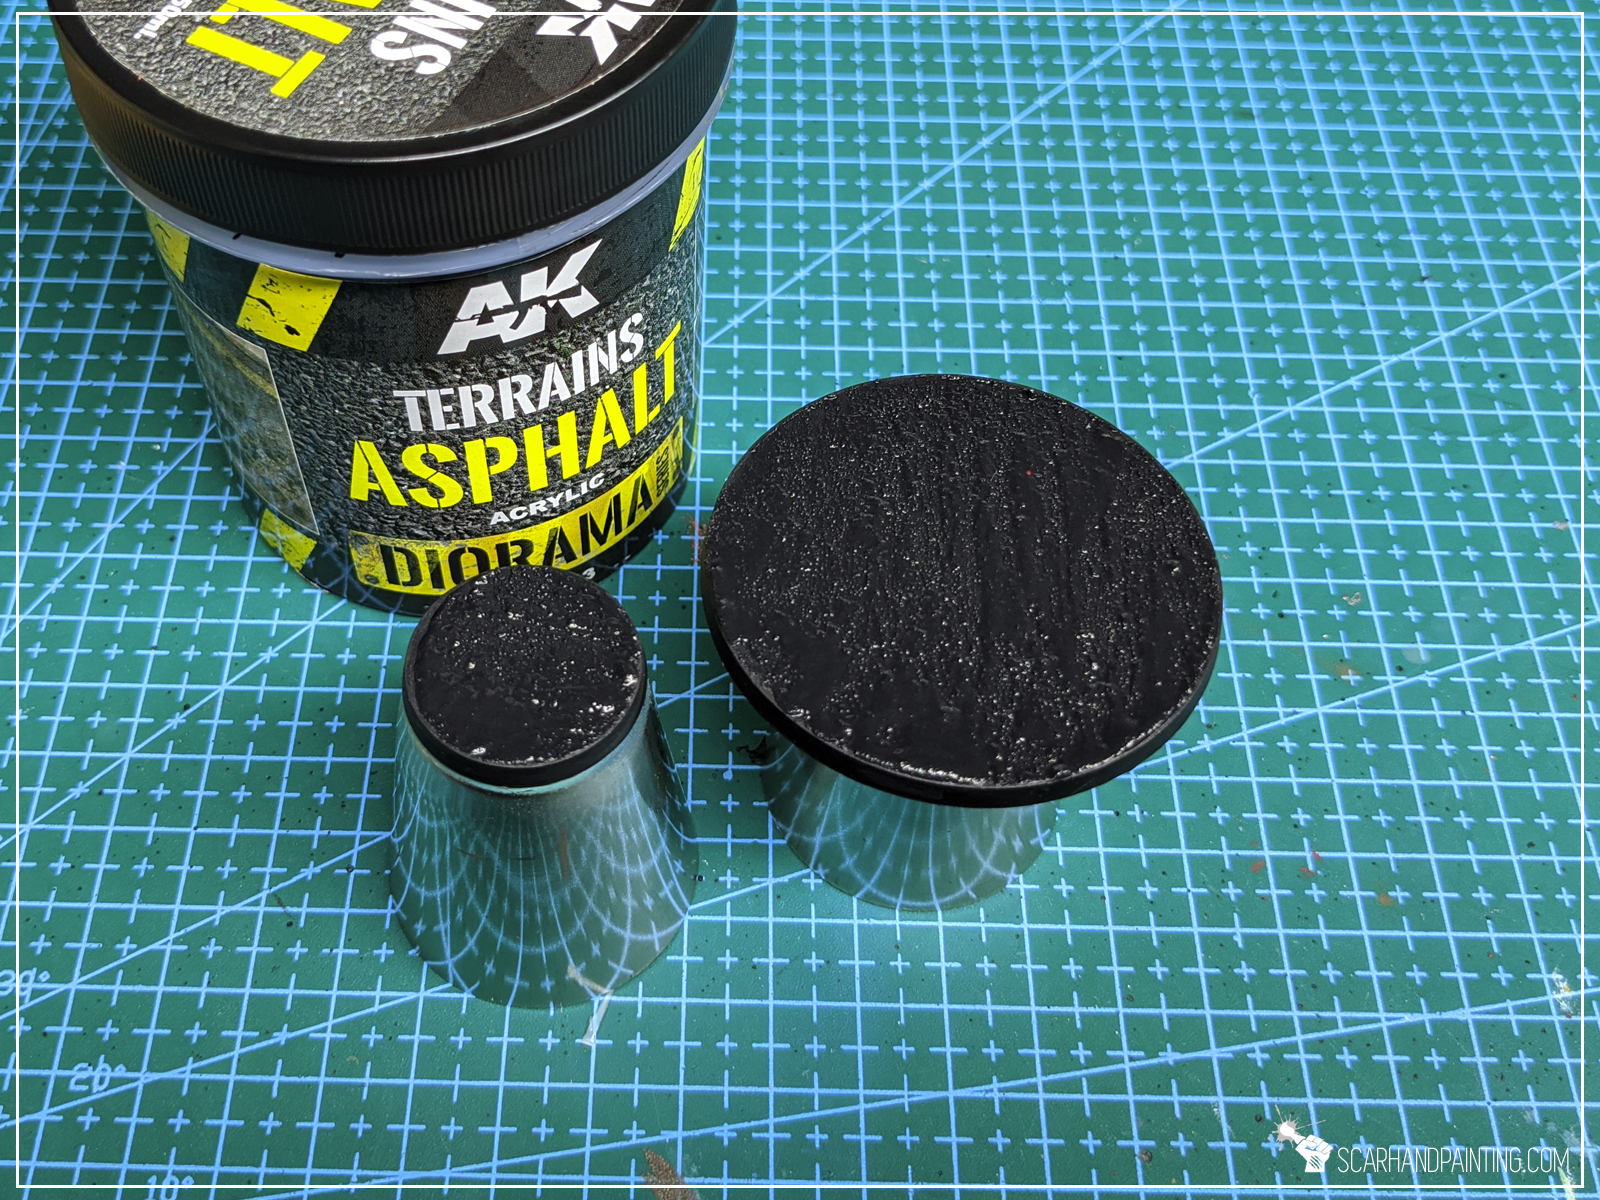
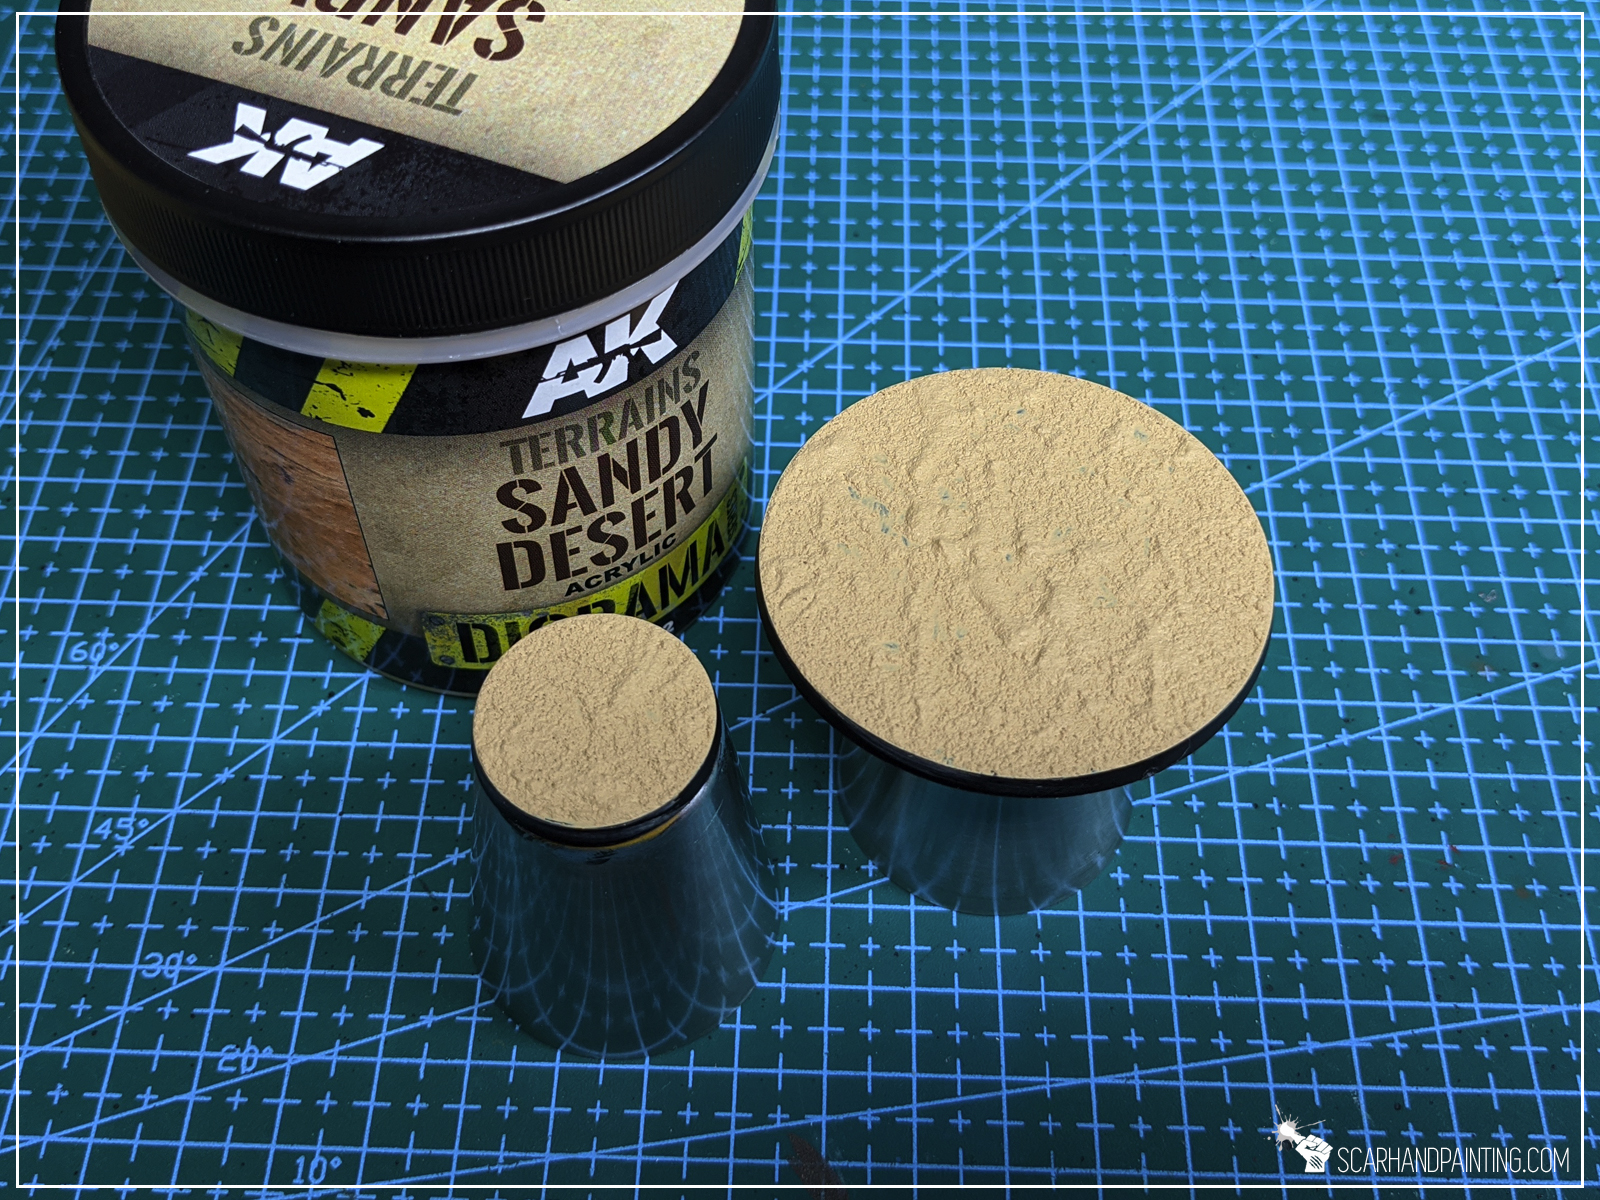
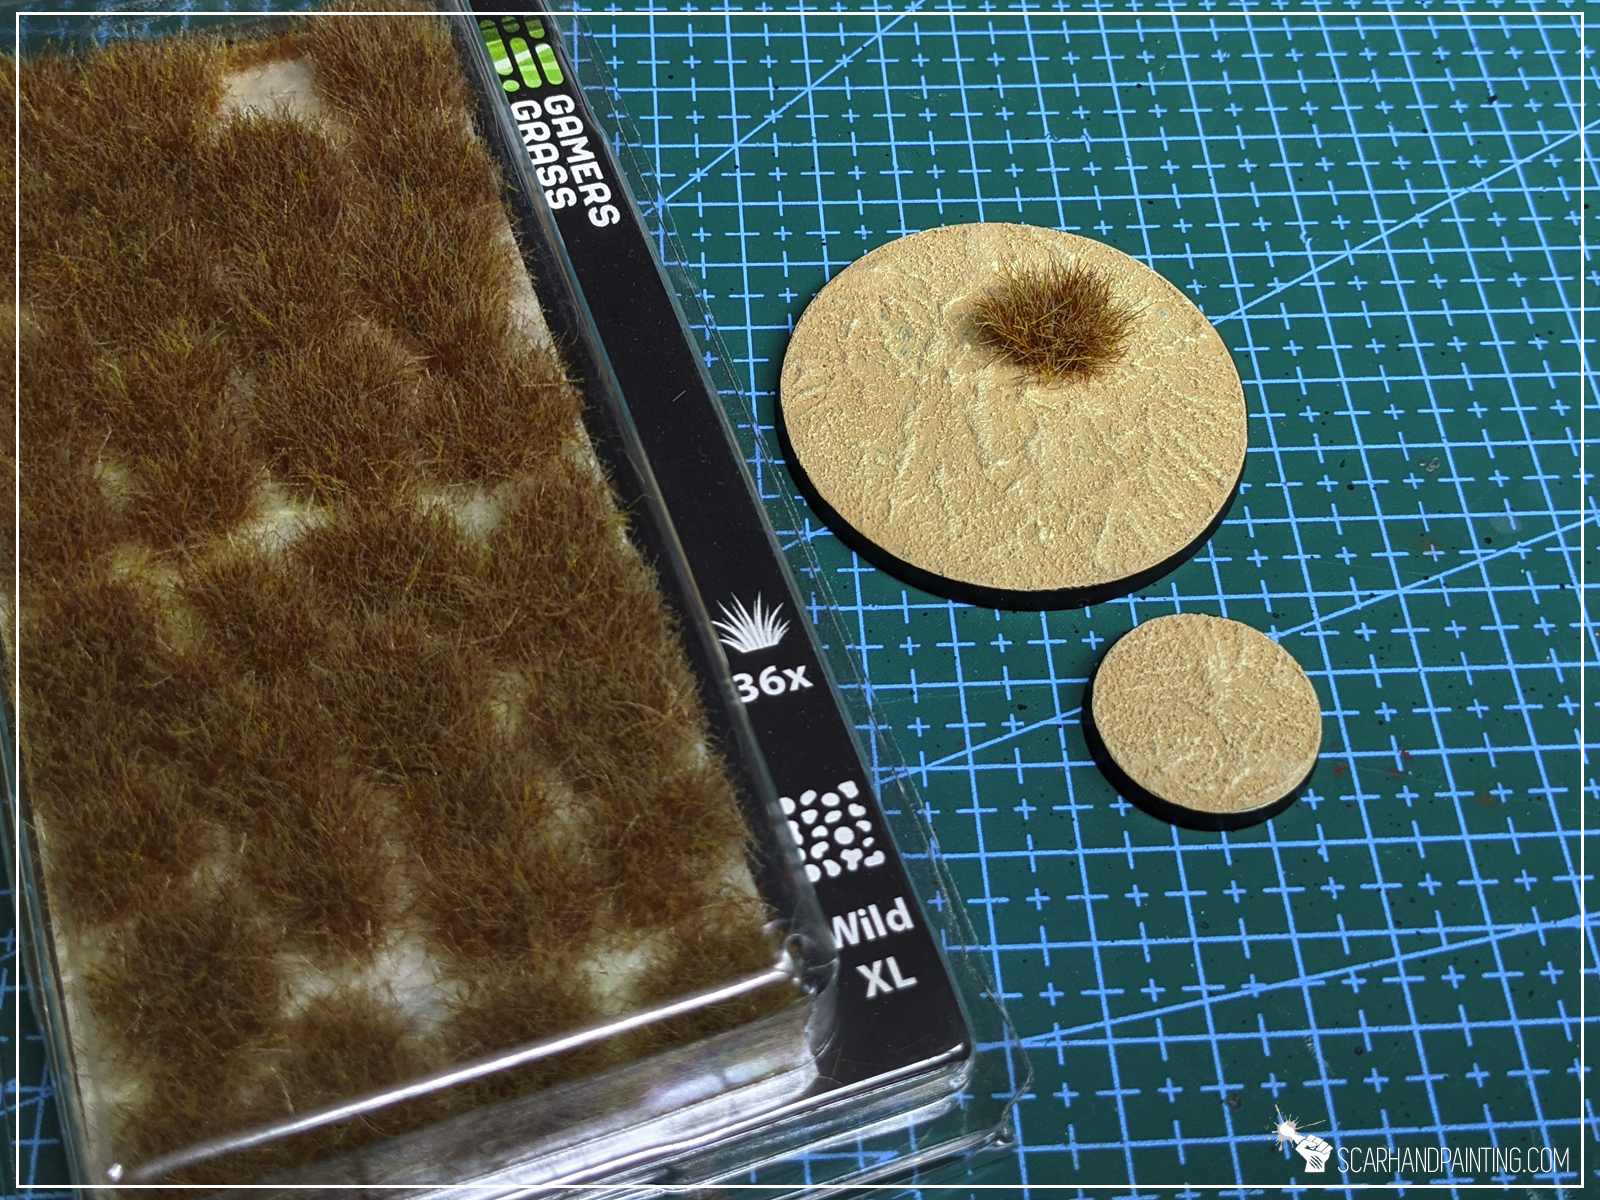
No need to explain – just look at this! Two steps and your miniature is based on a desert!
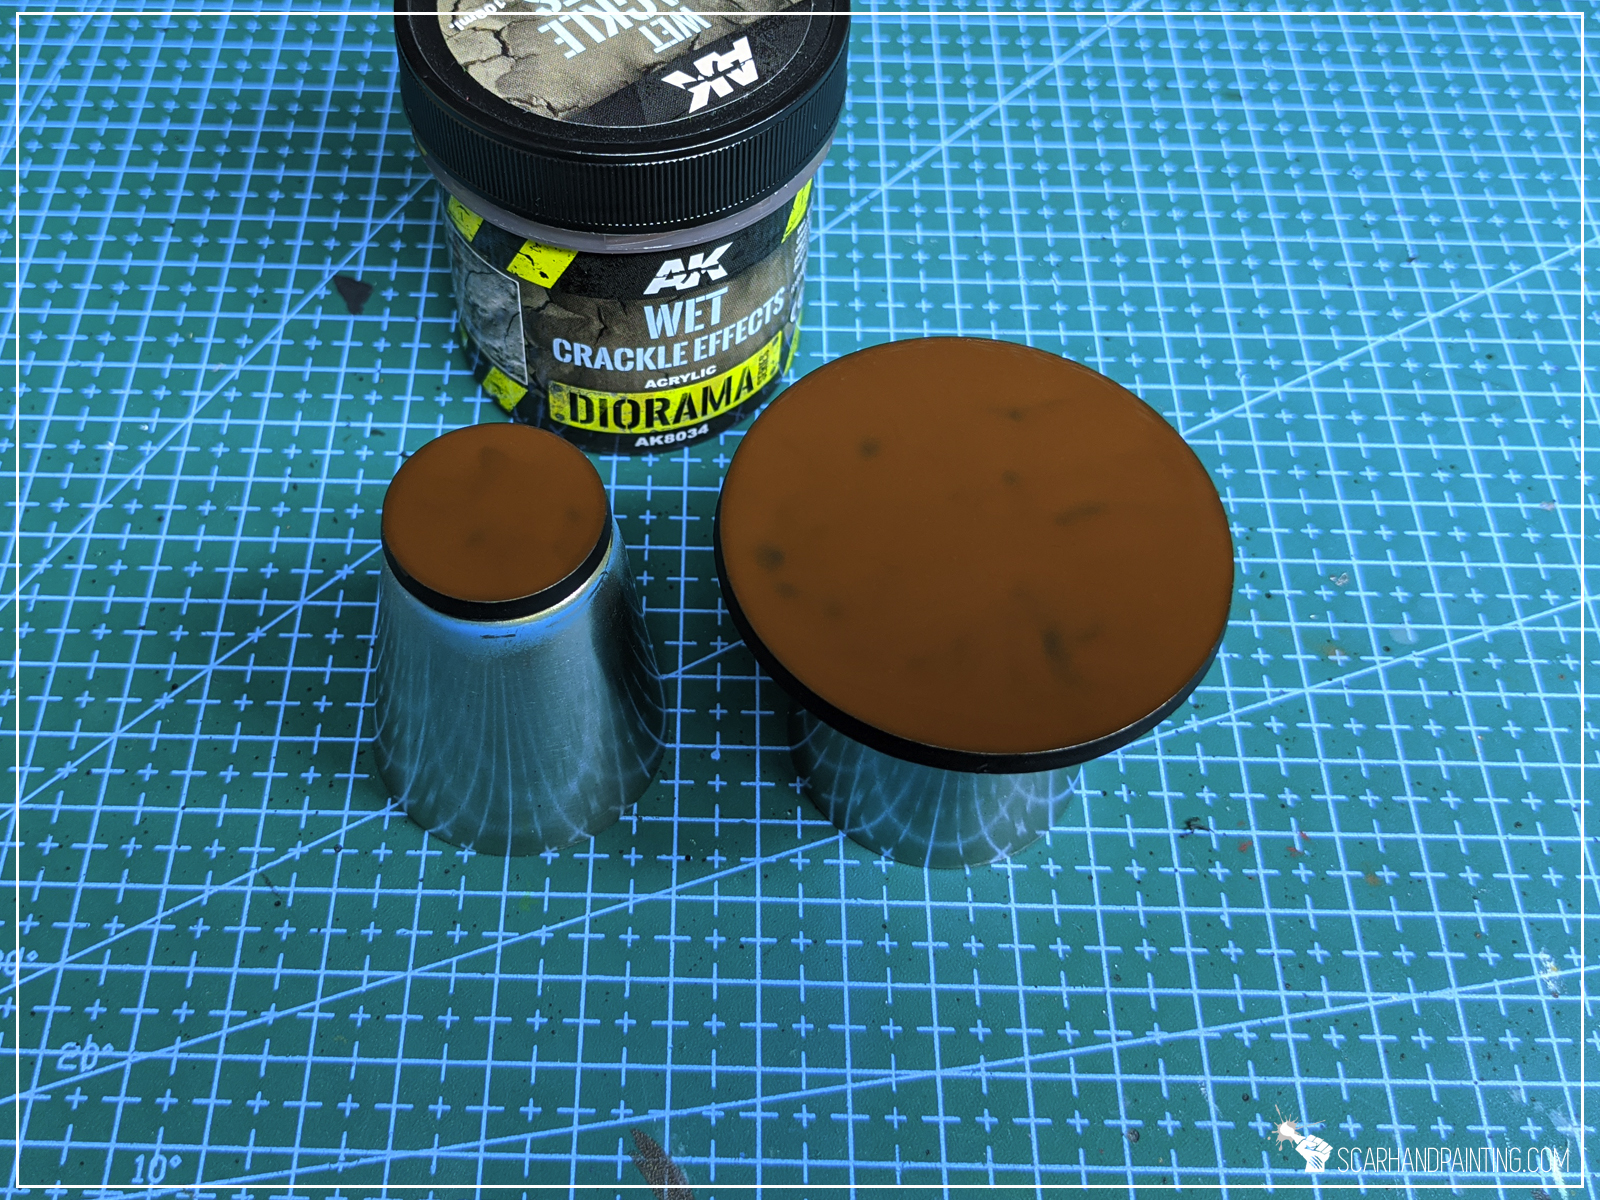
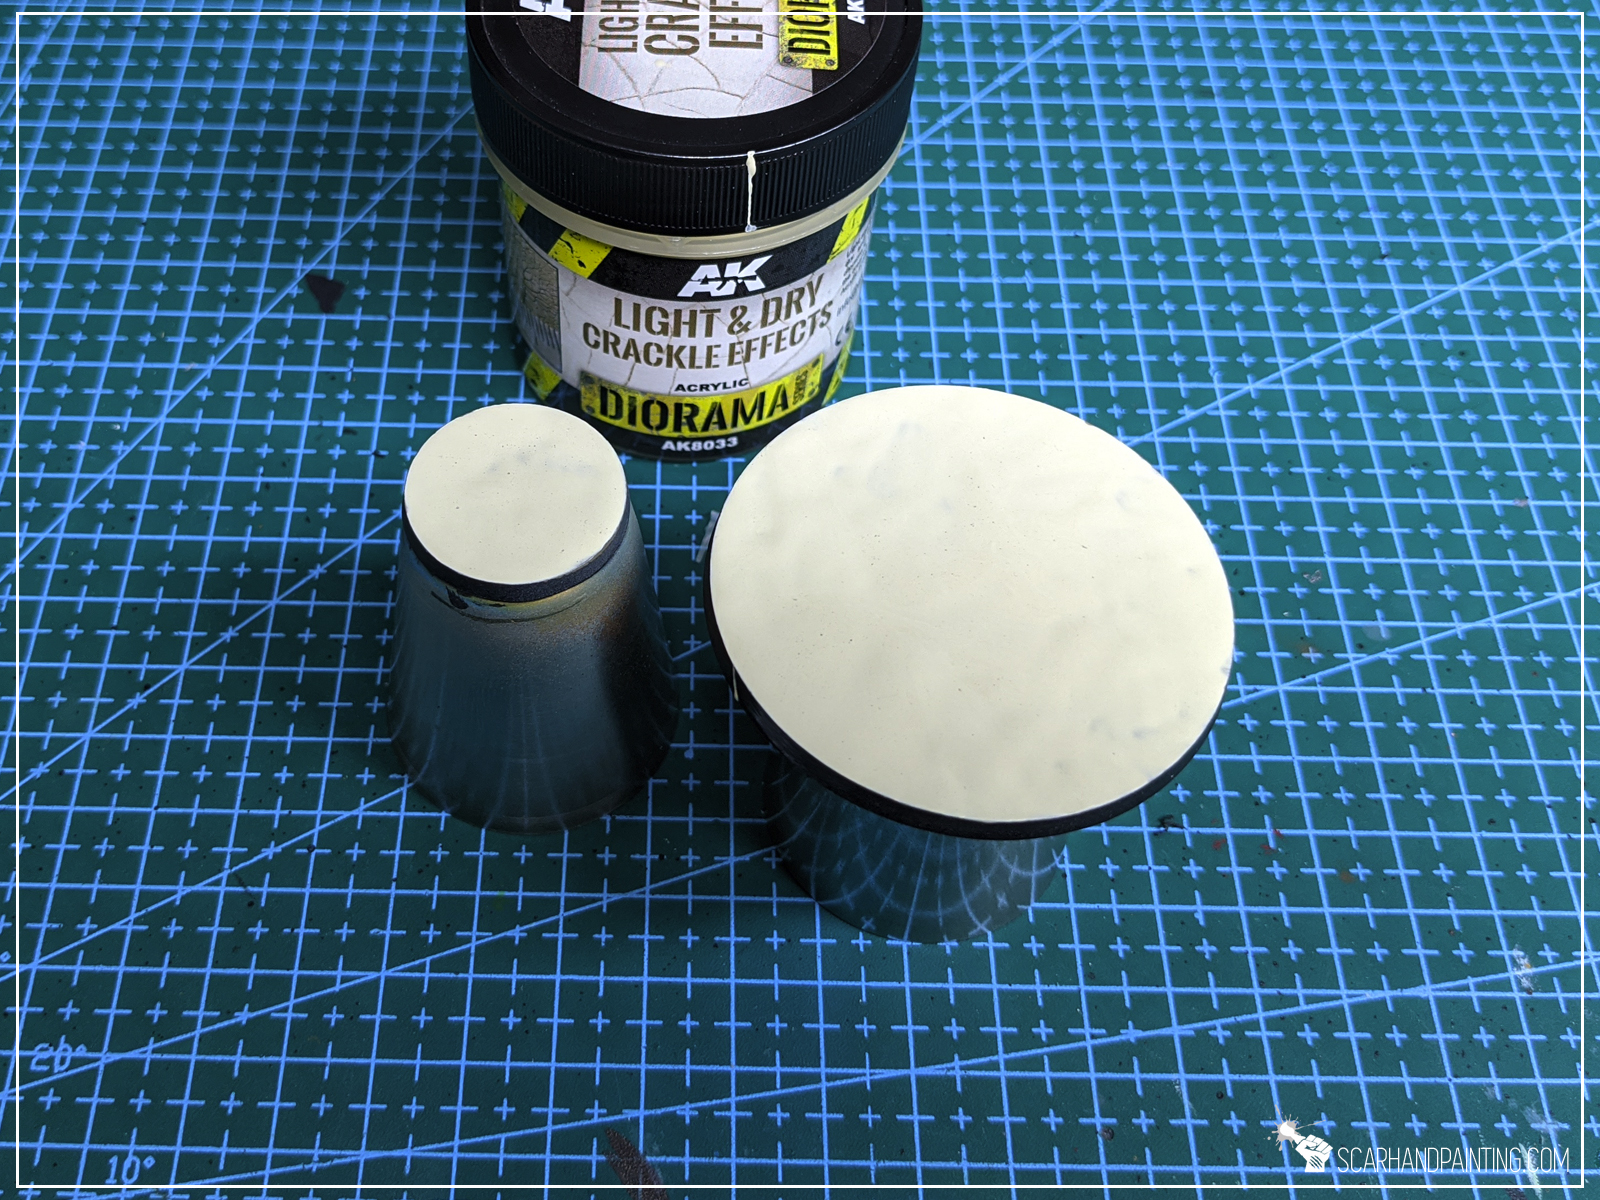
This one didn’t hit the mark for me. I expected a more paste-like, smooth surface. More of a Dark & Dry Crackle end result (below). Either way the product itself is solid, just not what I expected, thus once dried, I didn’t follow up on it. I plan to give it another go on my next project so who knows…

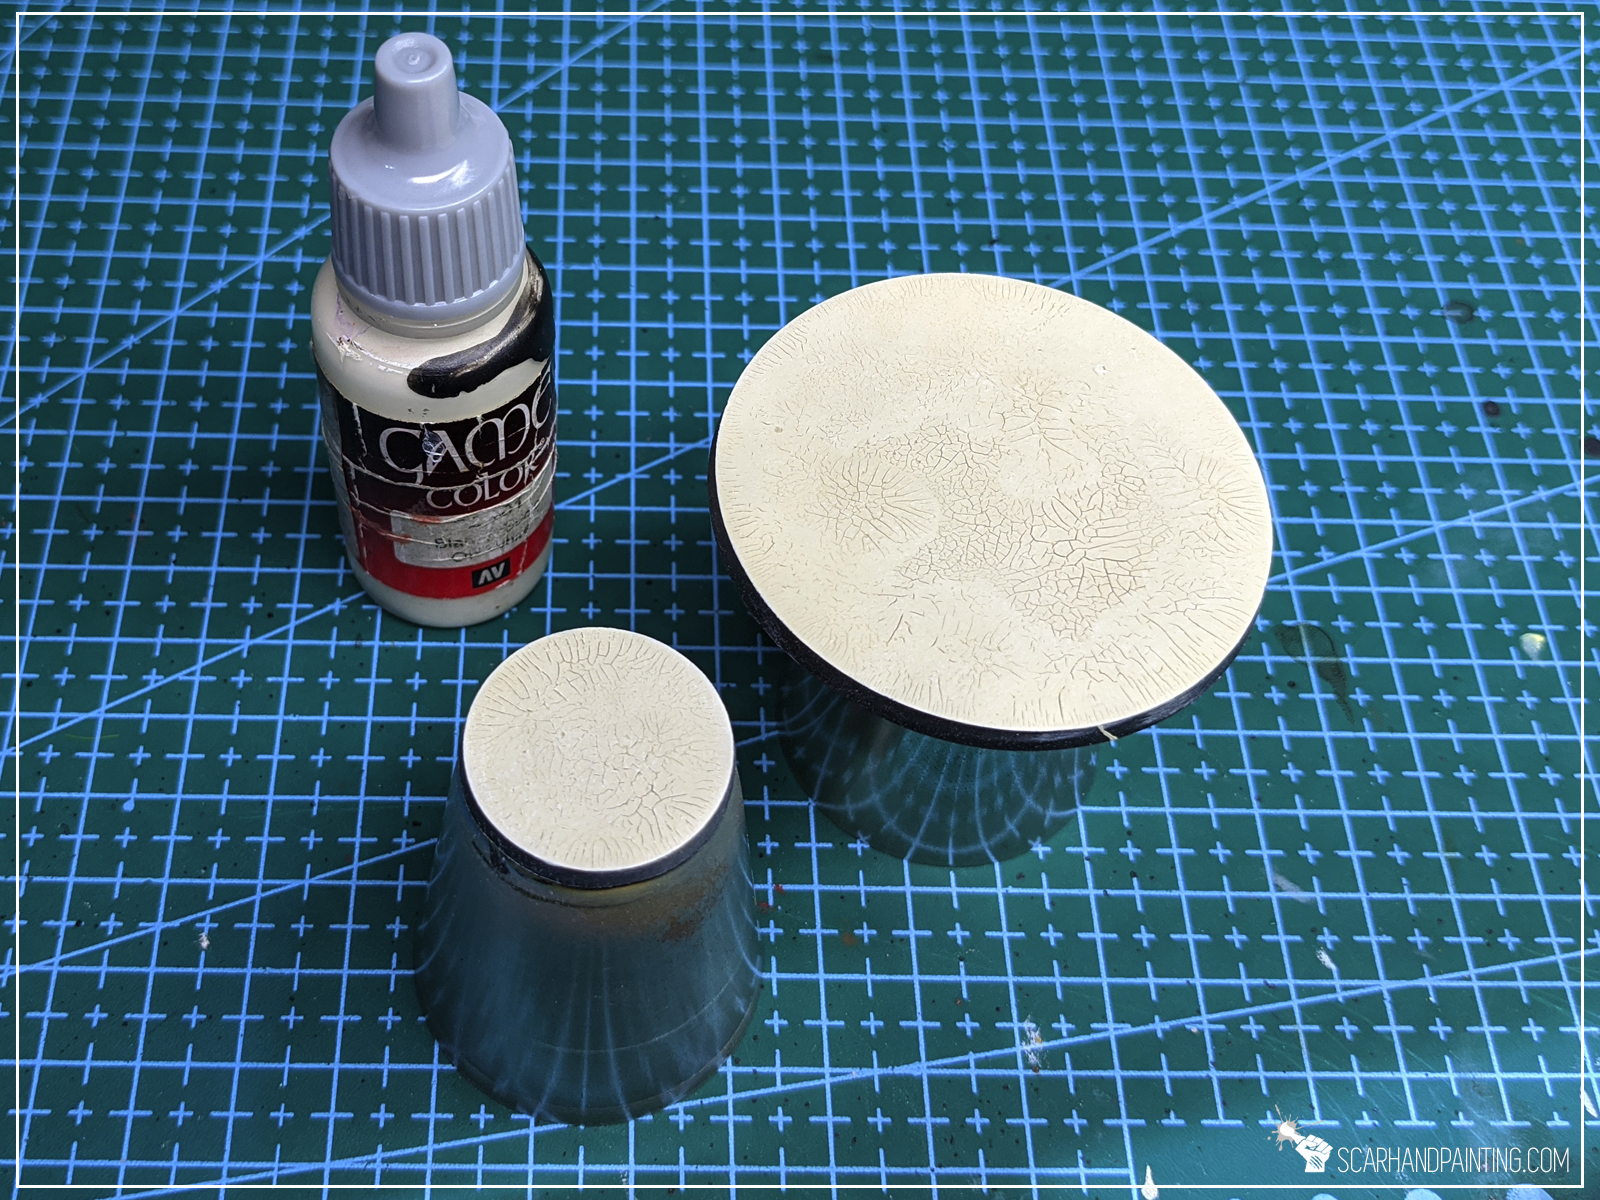
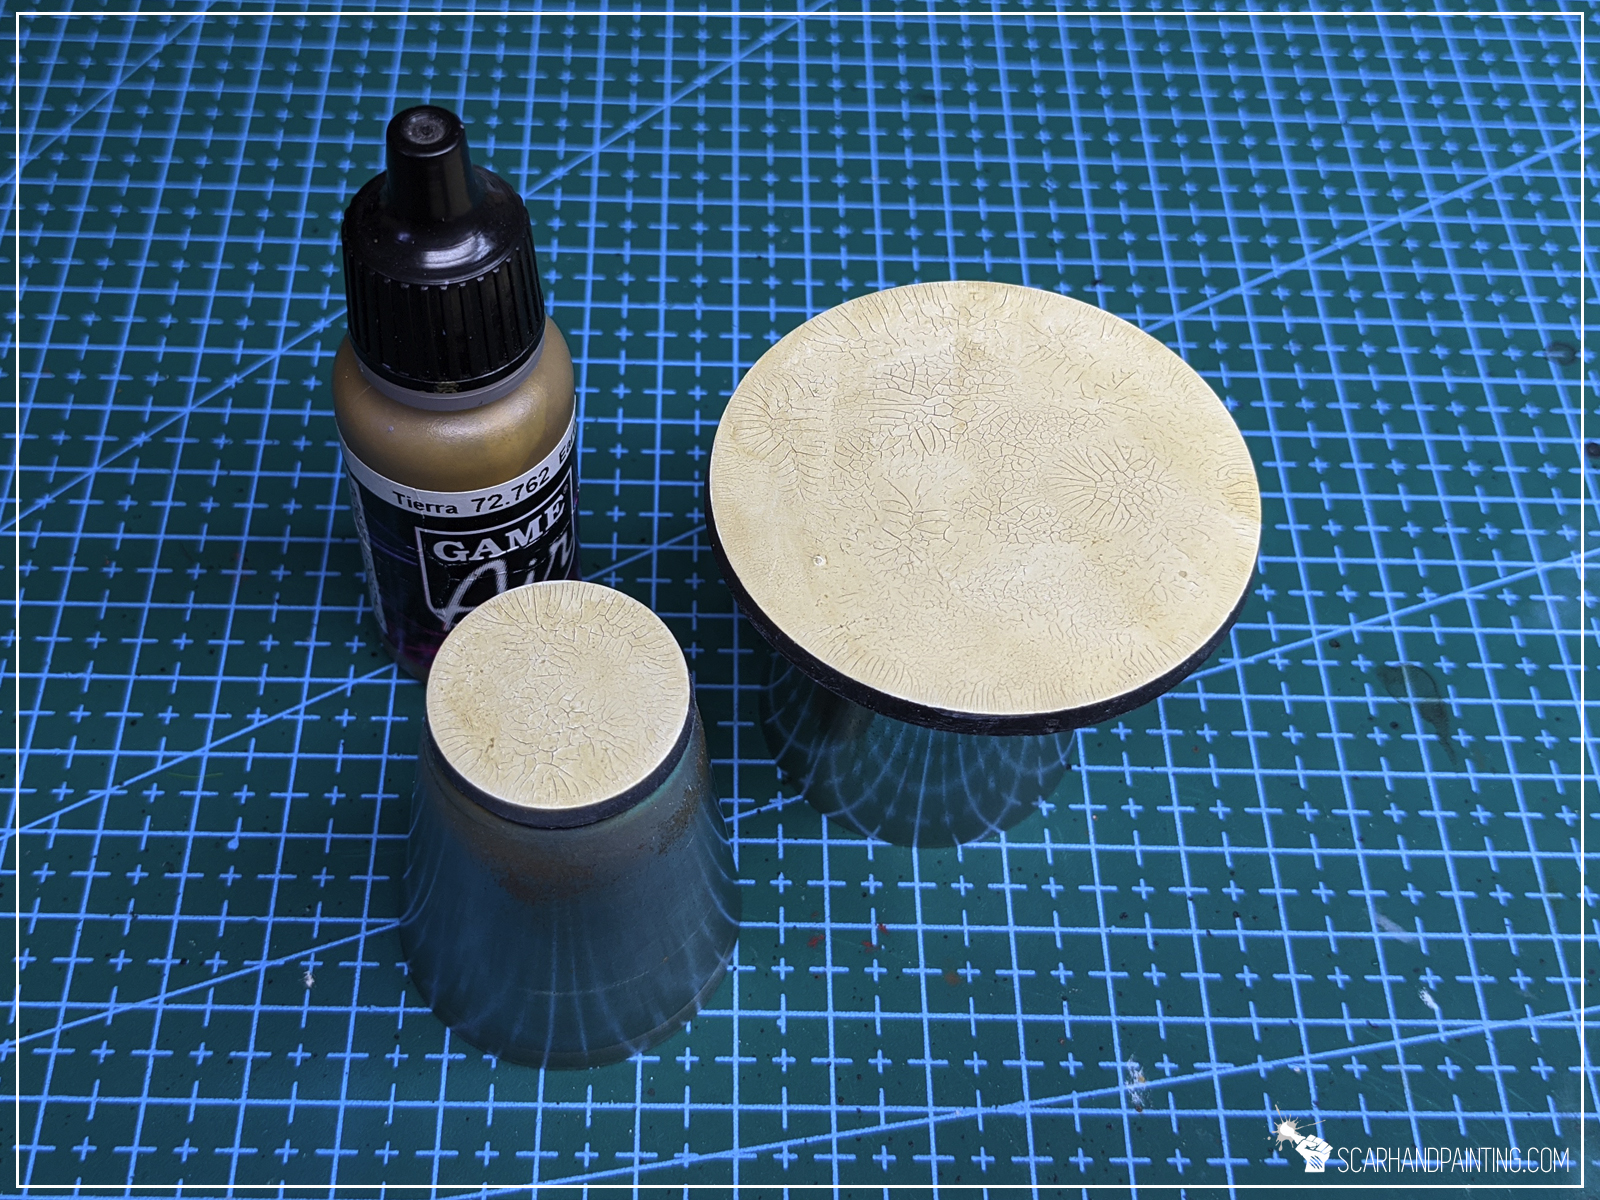
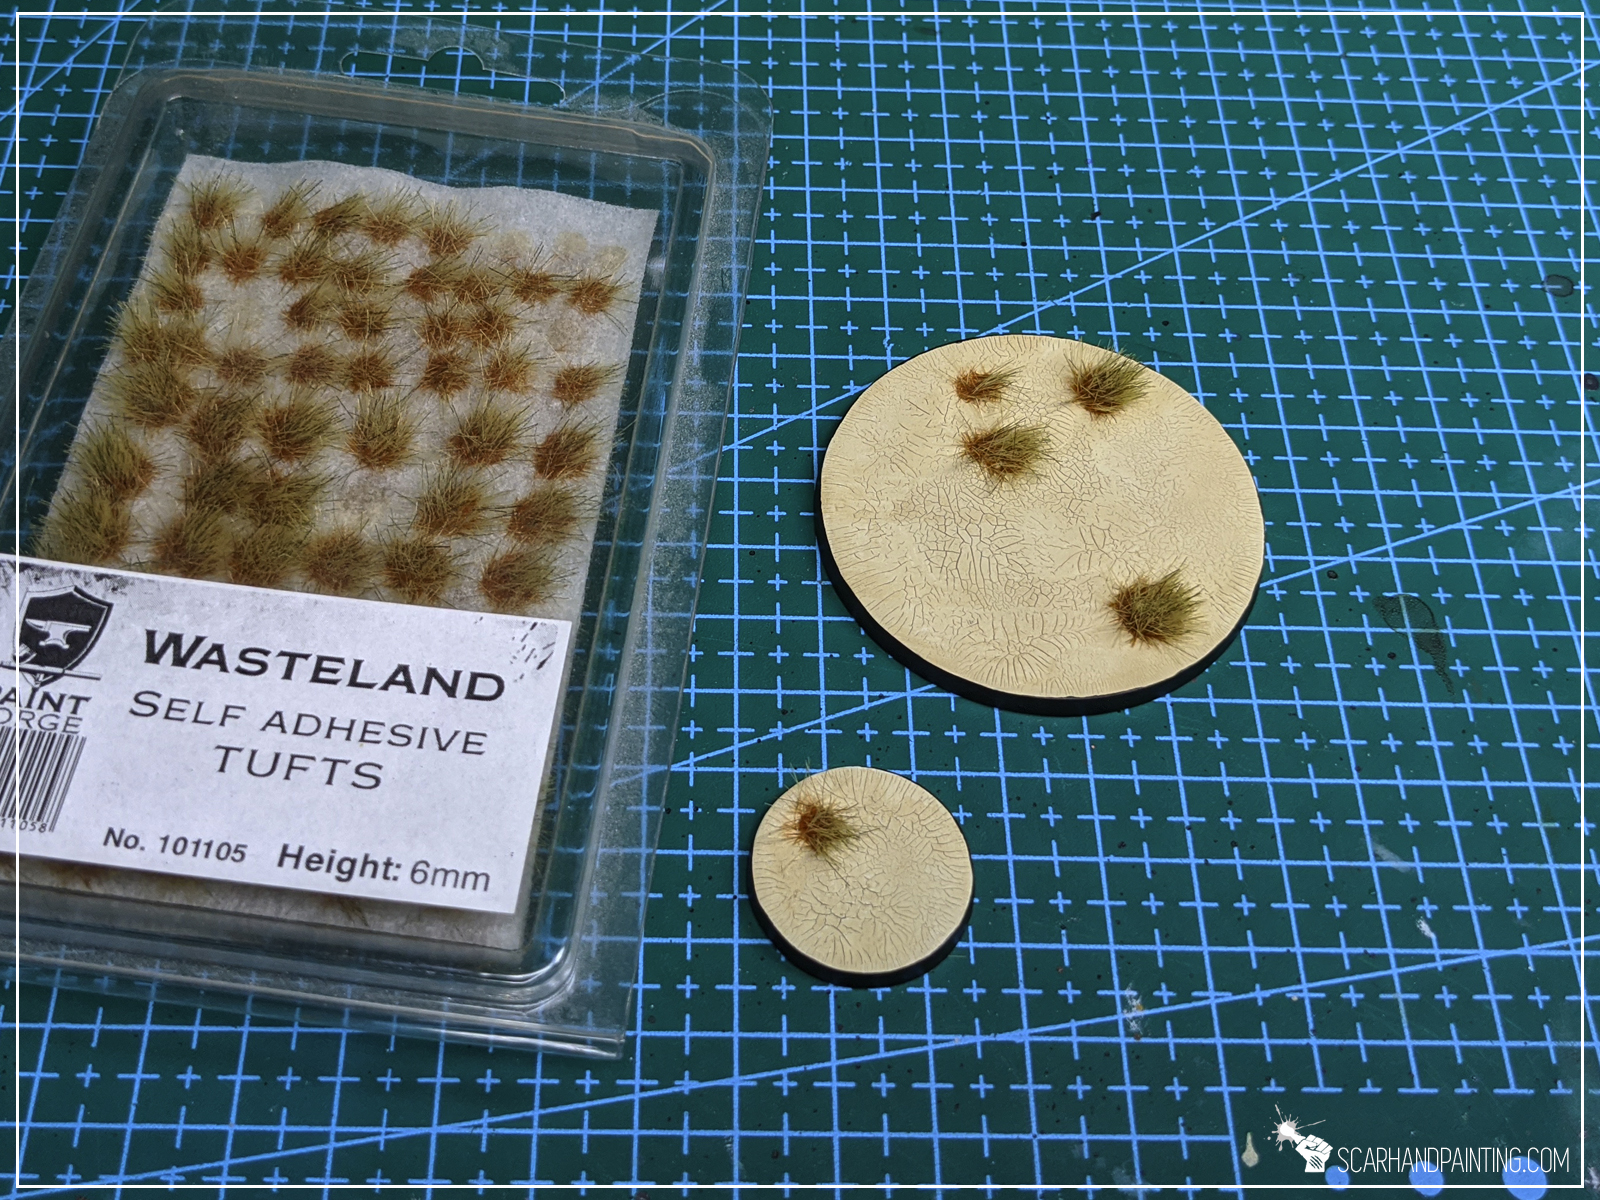
This one required a third step to bring out the cracks as they are super tiny. The end result is very interesting. I’m sure that a mix with Dark Earth will bring magnificent results. Right now it looks like a trampled ground, or a road. Will definitely use.

Well… not what I’ve expected. Tried few times, taking different routes. End result is pretty disappointing. So much so that I just skipped further work with this.

Now that’s “crackled”! Three steps and it looks great! I bet it would look even better with Terrain Dry Ground. Count me in babe!

Working with these products was very comfortable. These are definitely high quality and very user friendly. I used a large brush to apply all the effects and simply cannot stress enough how great and easy it was! Growing up on Games Workshop’s products, moving onto these I felt like if I switched a worn out car for a new one, straight out of the factory! No more “fishing” for dry’ish conglomerates of grains to try and smear them onto a base. Nothing of the sort! Smooth. Great to use. Very easy. Zero stress. Just awesome!
Now Wet Crackle Effect turned out to be a disappointment, but all the rest behaved as they should and brought awesome results. The rest is so good that I’m willing to give Wet Crackle a benefit of a doubt and assume I’ve used it incorrectly. Will go back to it at some point and try to bring forth it’s full potential.
Other than that – these are pure gold! I love them. I will be working with them from now on and definitely prefer them over other products that I used until now.

Price factor is very important, especially with paints. You know how it is – you spill half of it, then use up like a one third and the rest dries out 😛 Just kidding, still I’m sure we can all agree that for many hobbyists pricing matters a lot. Just take a look at this:
What else is there to add? 🙂
Except for the Wet Crackle, the AK – Interactive’s Terrains series is a solid 10/10. On top of being extremely easy to use and very efficient, the effects look great. Full recommendation on my end.
I hope you enjoyed this little Review/Tutorial. Share your thoughts in the comments below. Cheers!

You can get these straight from AK’s web store, or if you happen to live in Poland, go to a well equipped Vanaheim online store.
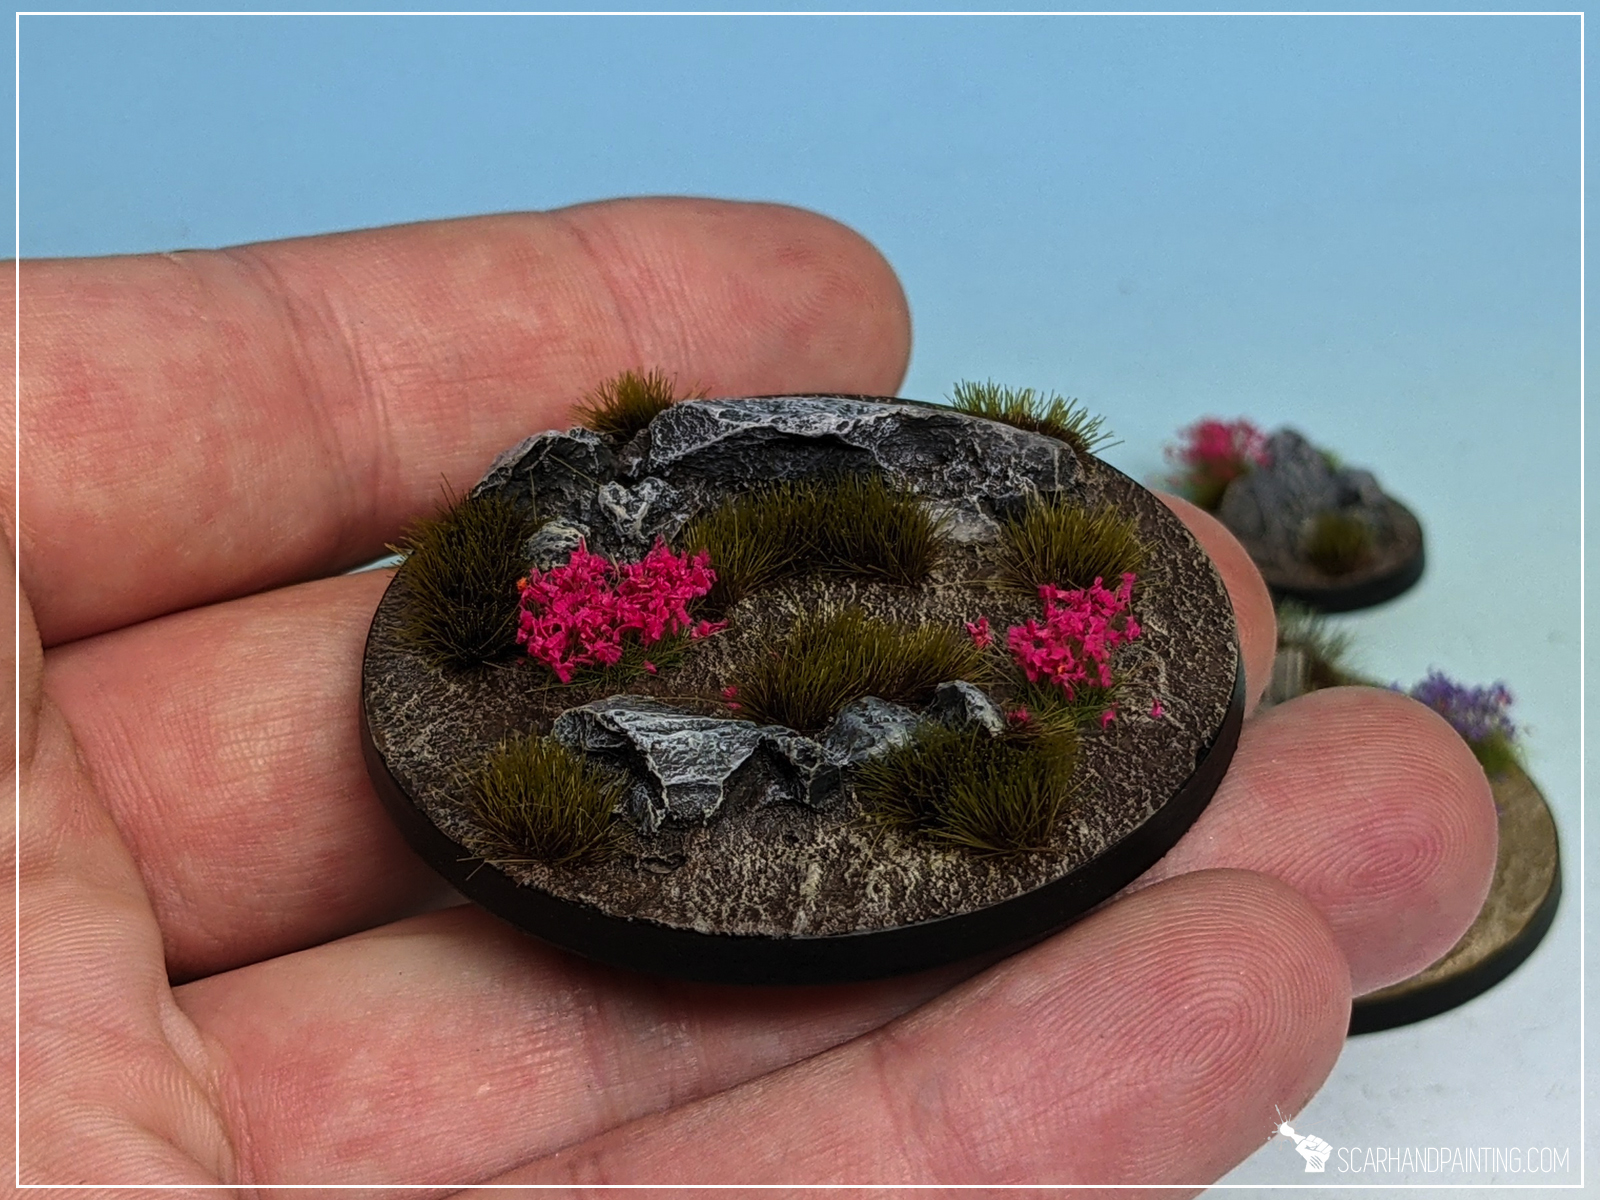
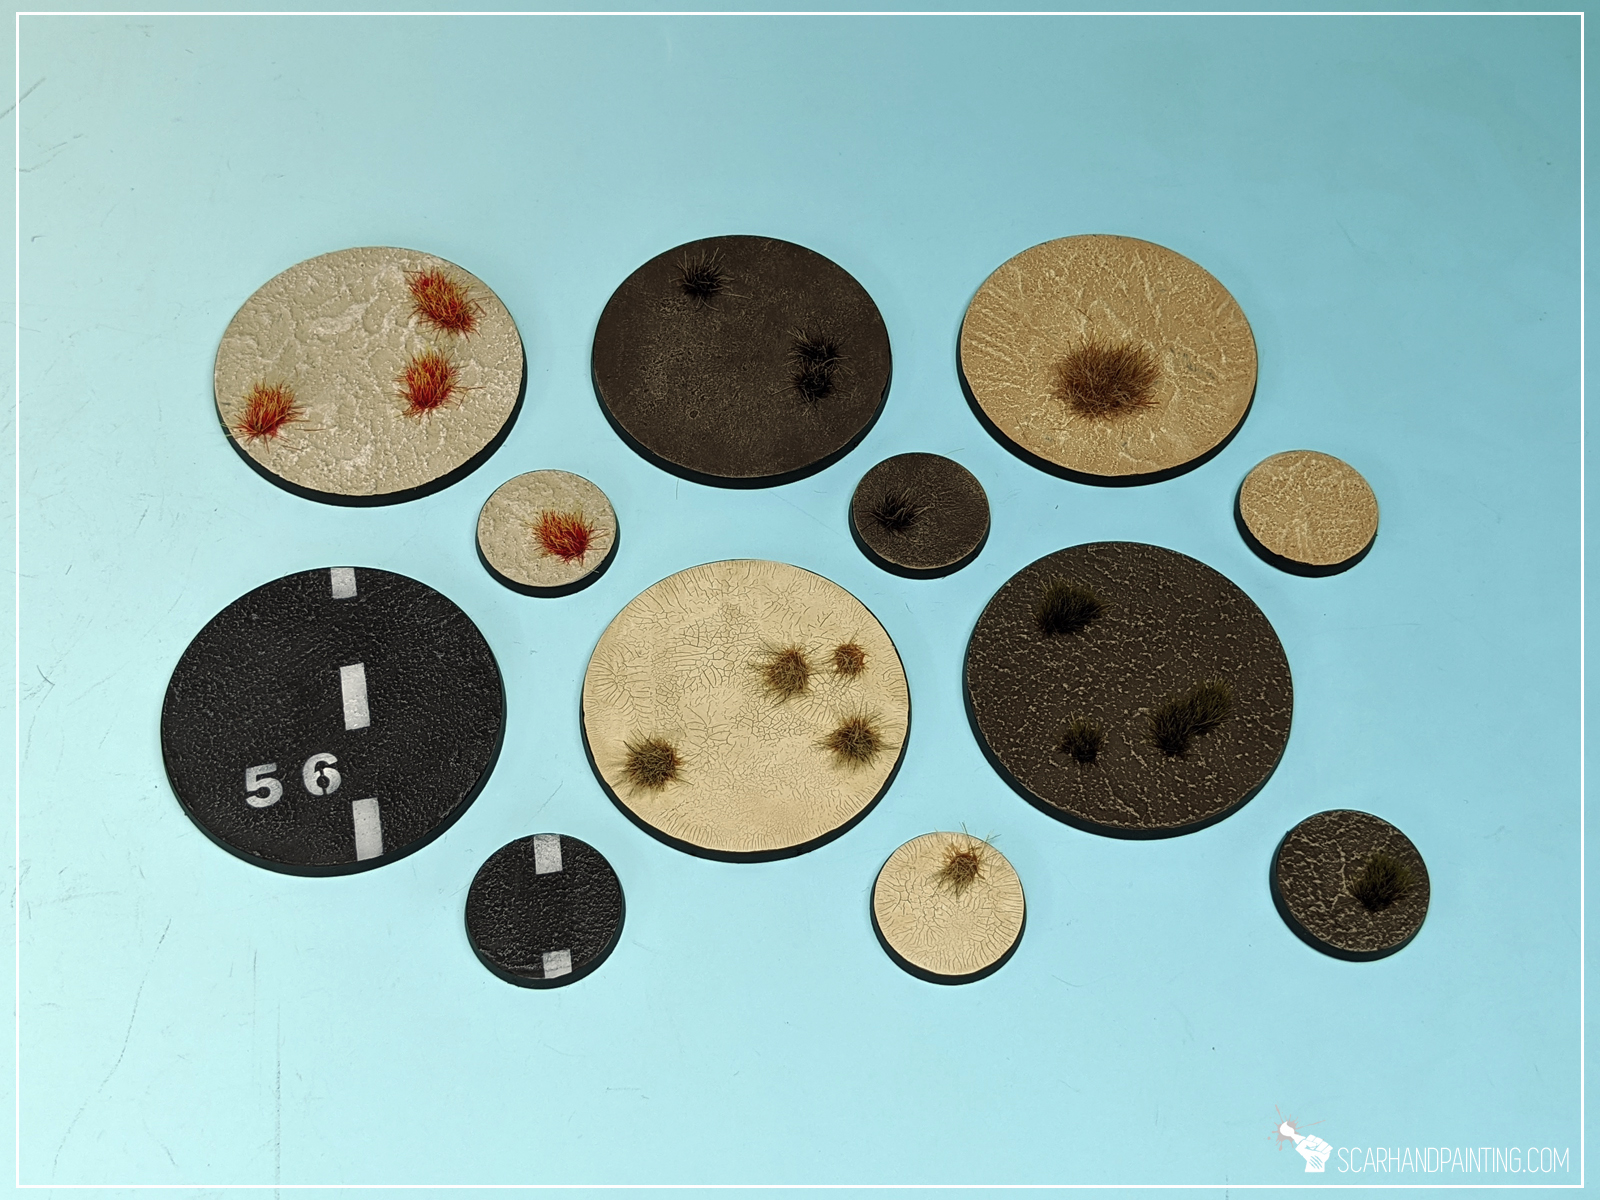
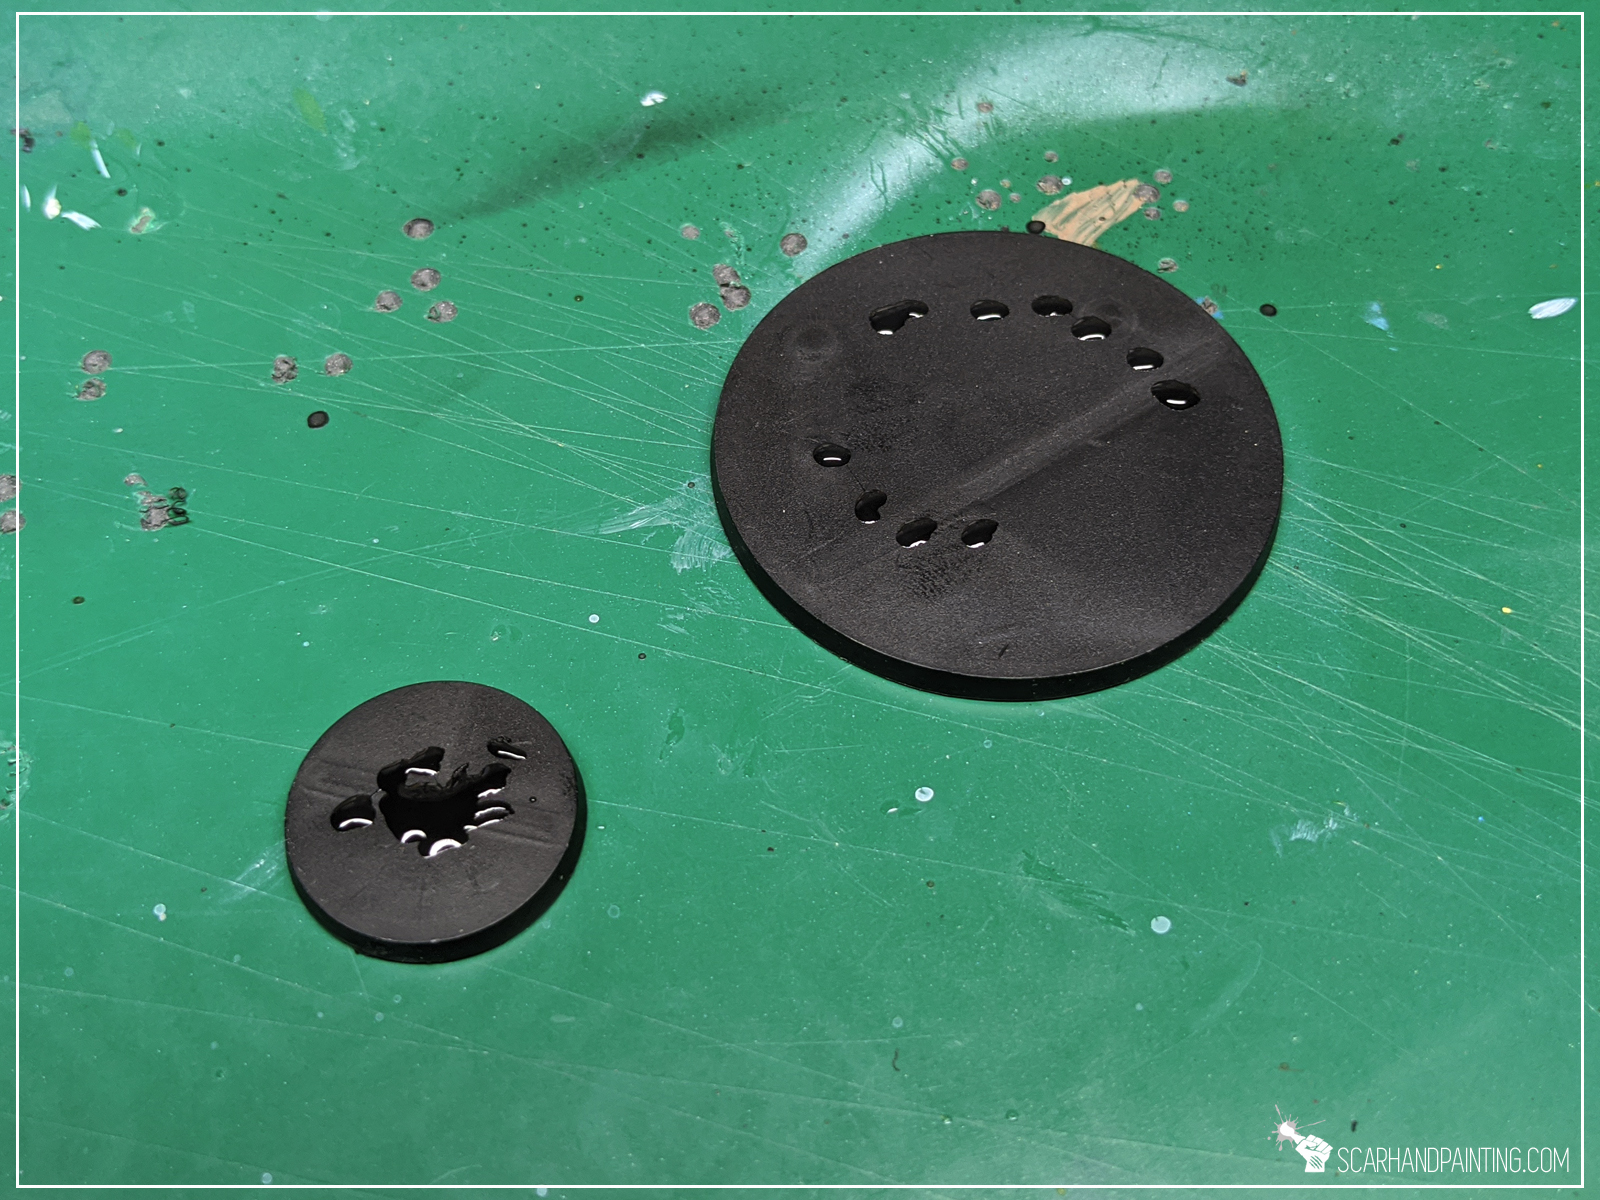
Welcome to Rocky Bases tutorial. Here I will take you on a Step-by-step trip through the process of creating and painting Rocky Bases as presented in the picture below. This adventure is possible thanks to generosity of Gamers Grass and their easy to use, fantastic products.

Before we start, some notes:
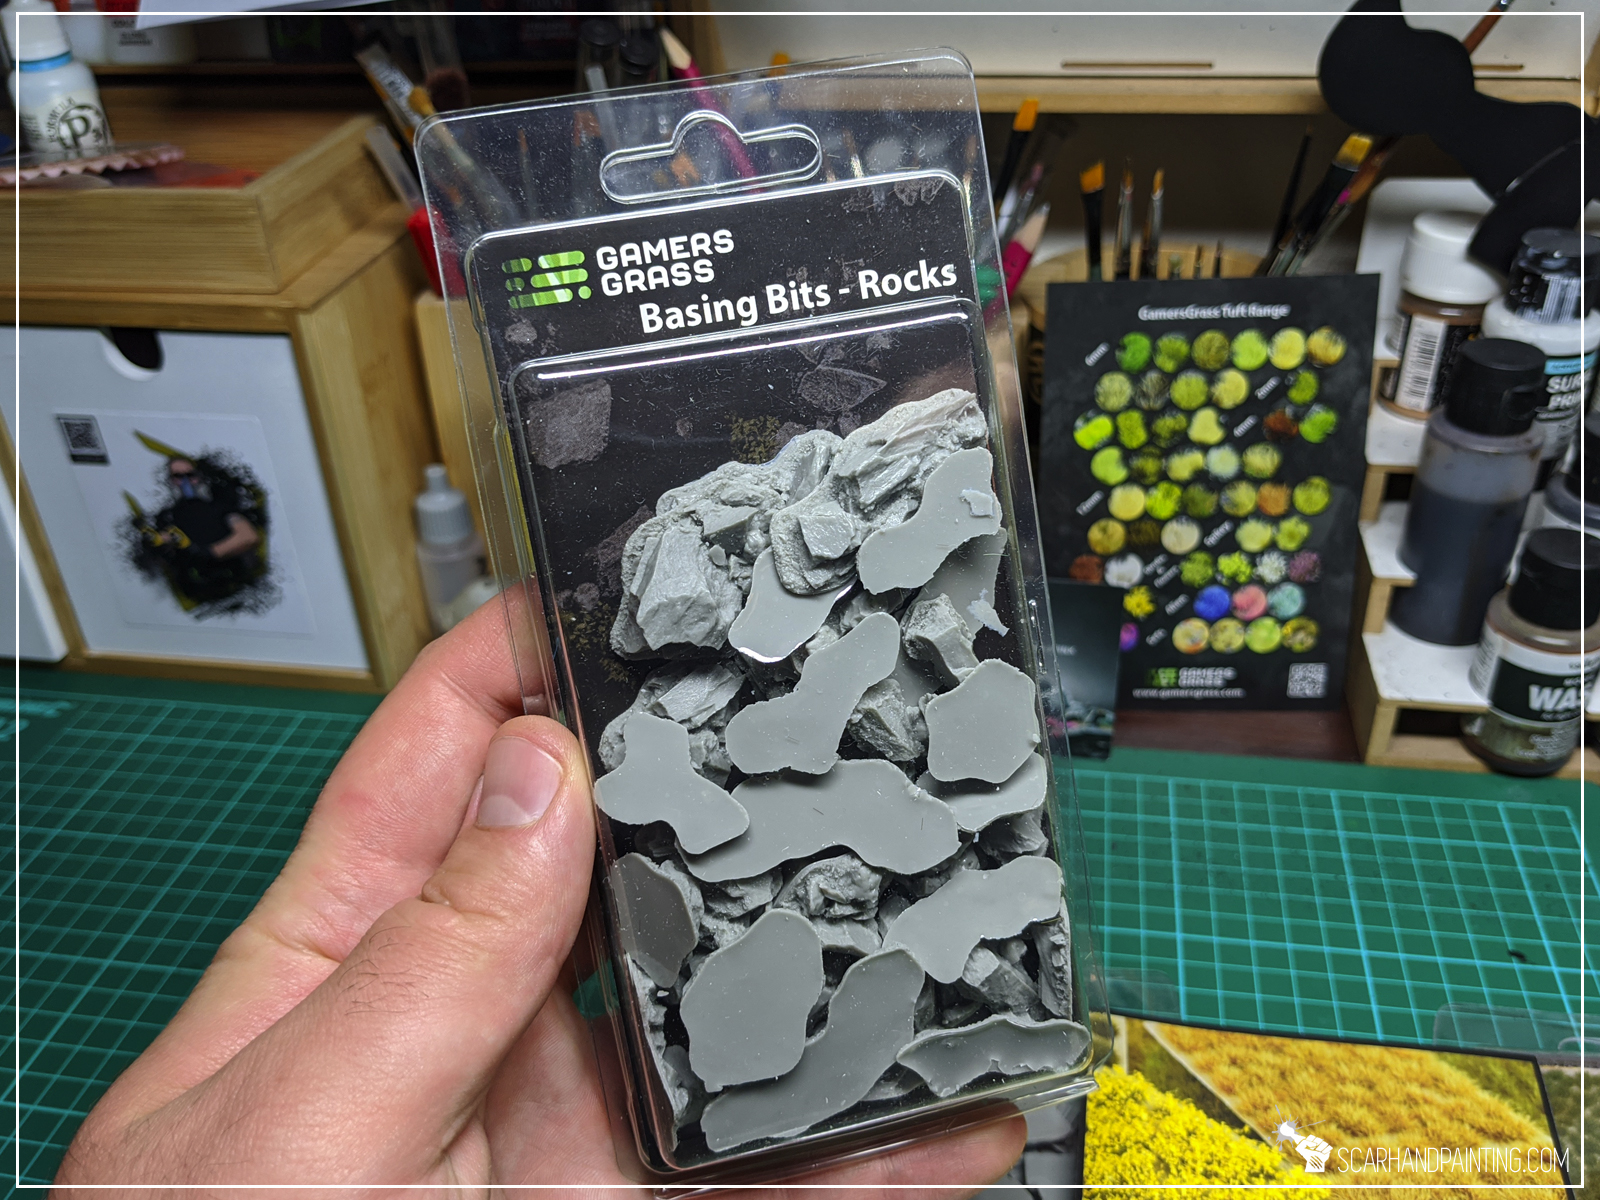
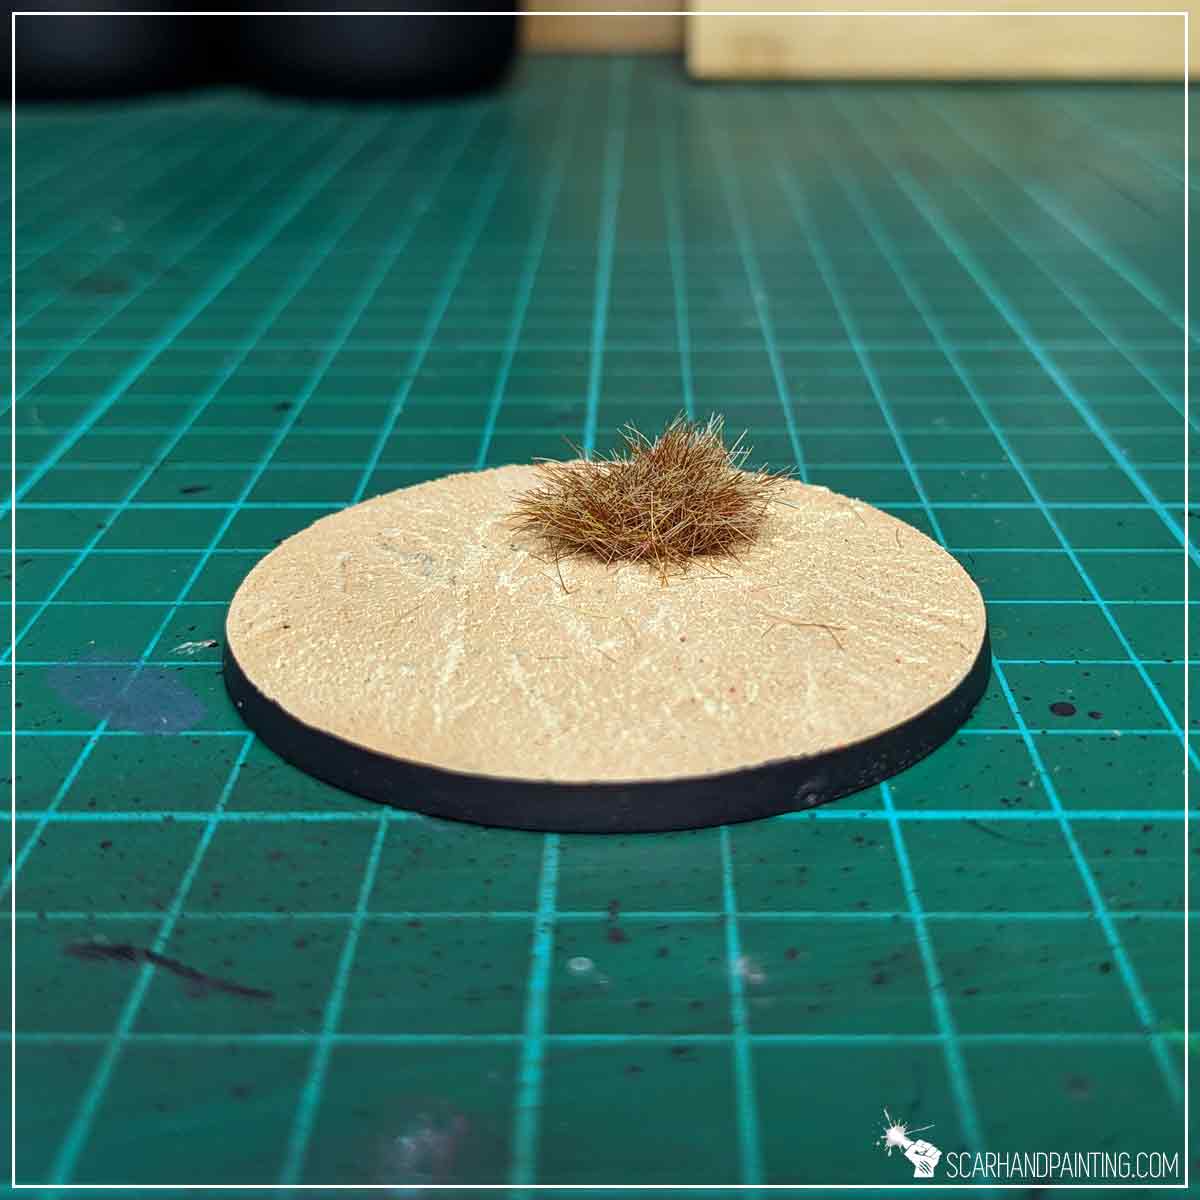
As mentioned in previous Tutorial, when making bases, I usually aim for fast, simple, yet effective solutions. It is important to pick a basing method that is easy to copy onto large quantities of miniatures or coming back to a project. This is why I consider Gamers Grass Basing Bits a perfect solution. Nicely textured, ready to use straight out of the box – glue them on, add some texture around – you’re ready to paint. All that being said – for this particular base type I choose Gamers Grass “Rocks” basing bits.
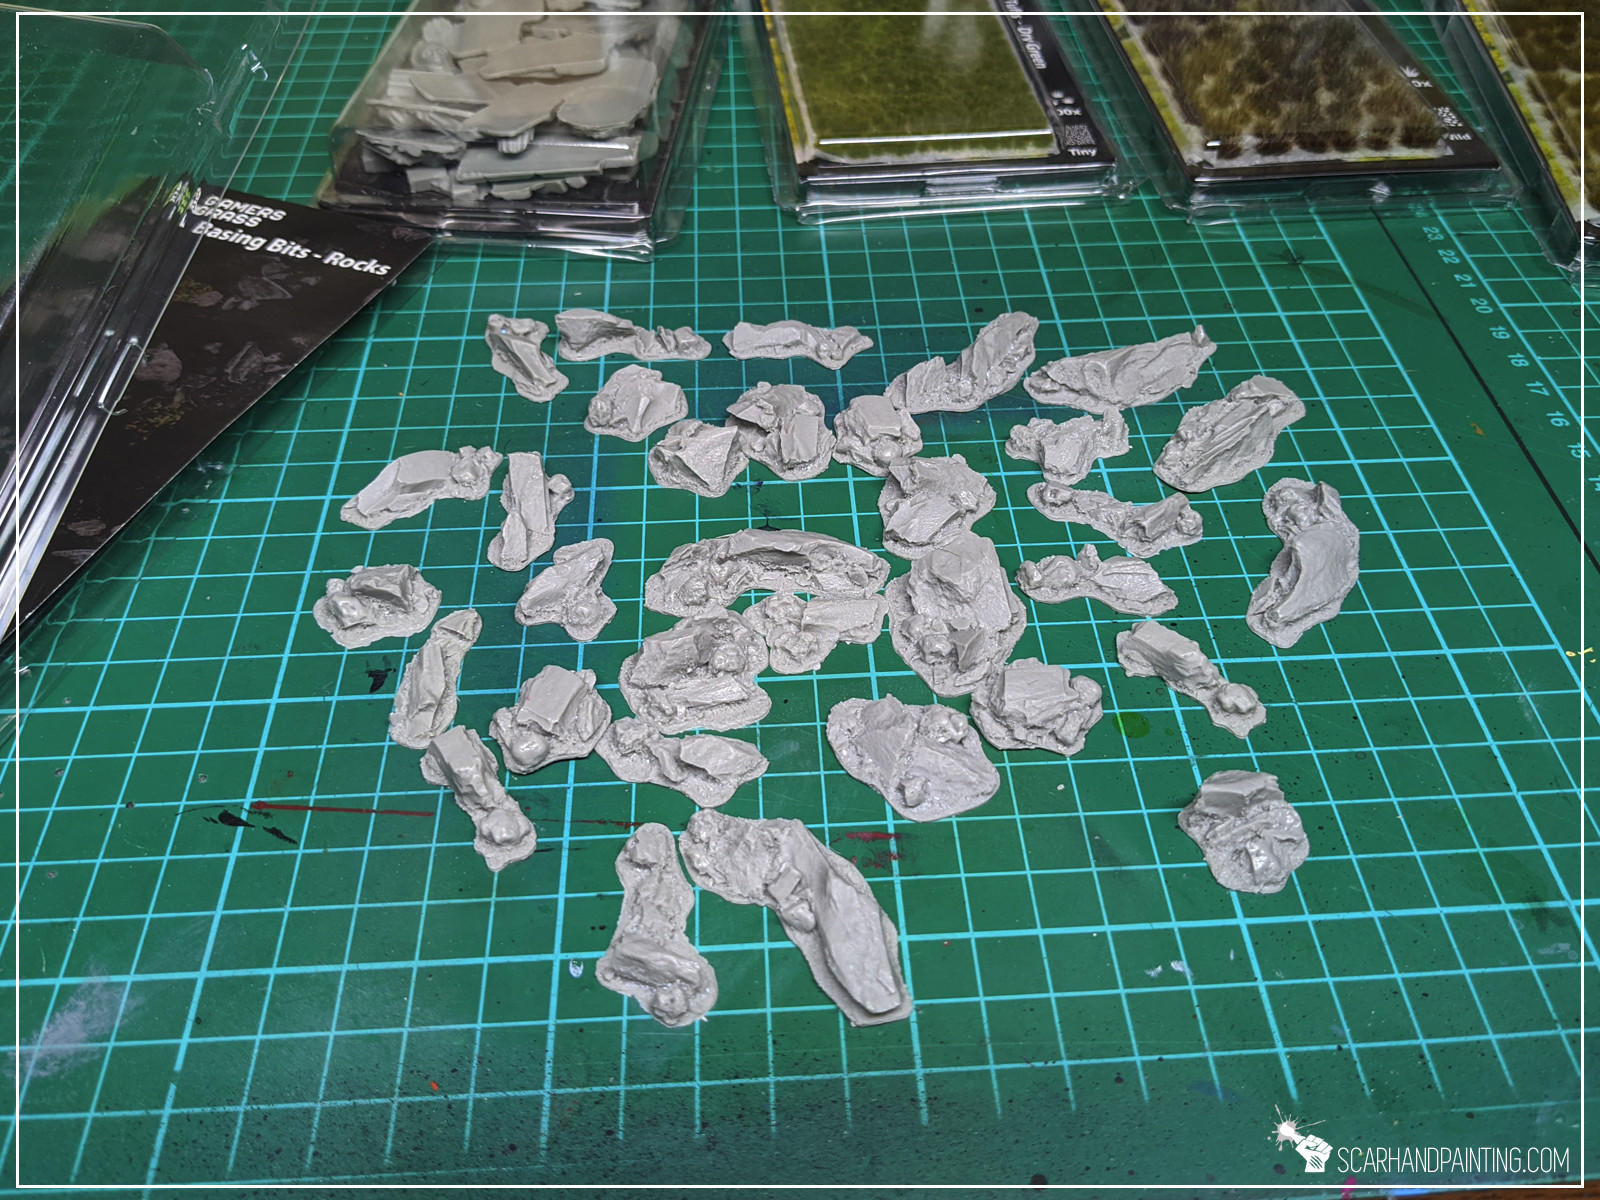
Step one: Applying basing bits
I started by applying glue onto the base and gluing few basing bits on top.

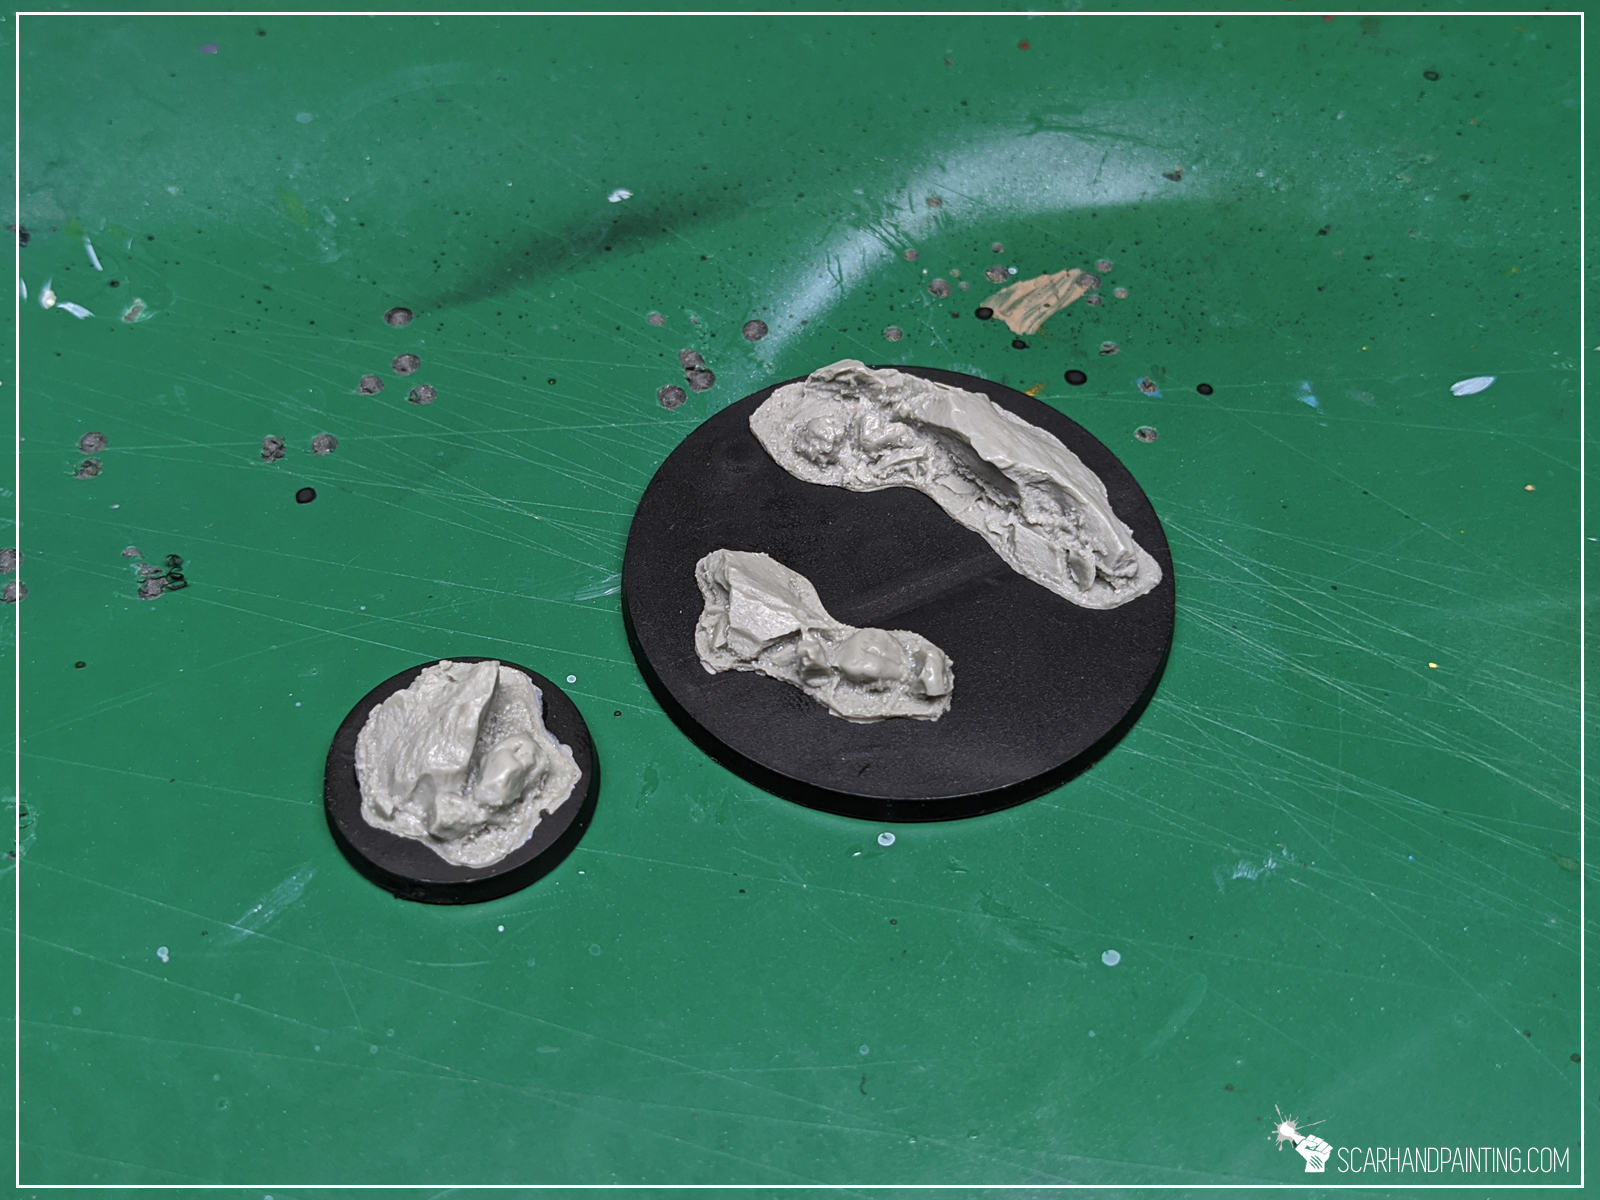
Step two: Applying texture
I then applied texture with Games Workshop Stirland Mud.


At this point entire “Modelling” part is done. If it seem fast it’s because it really is. Just two steps and you’re ready to paint!

I choose to paint these Rocky bases in a classic Bron plus Grey style. Assuming these are meant to be used for a large collection, I want to keep things simple. Would be perfect to close in about three layers per color, with a single type of tufts on top. Just your everyday nice looking, coherent bases. Here’s how I went about it…
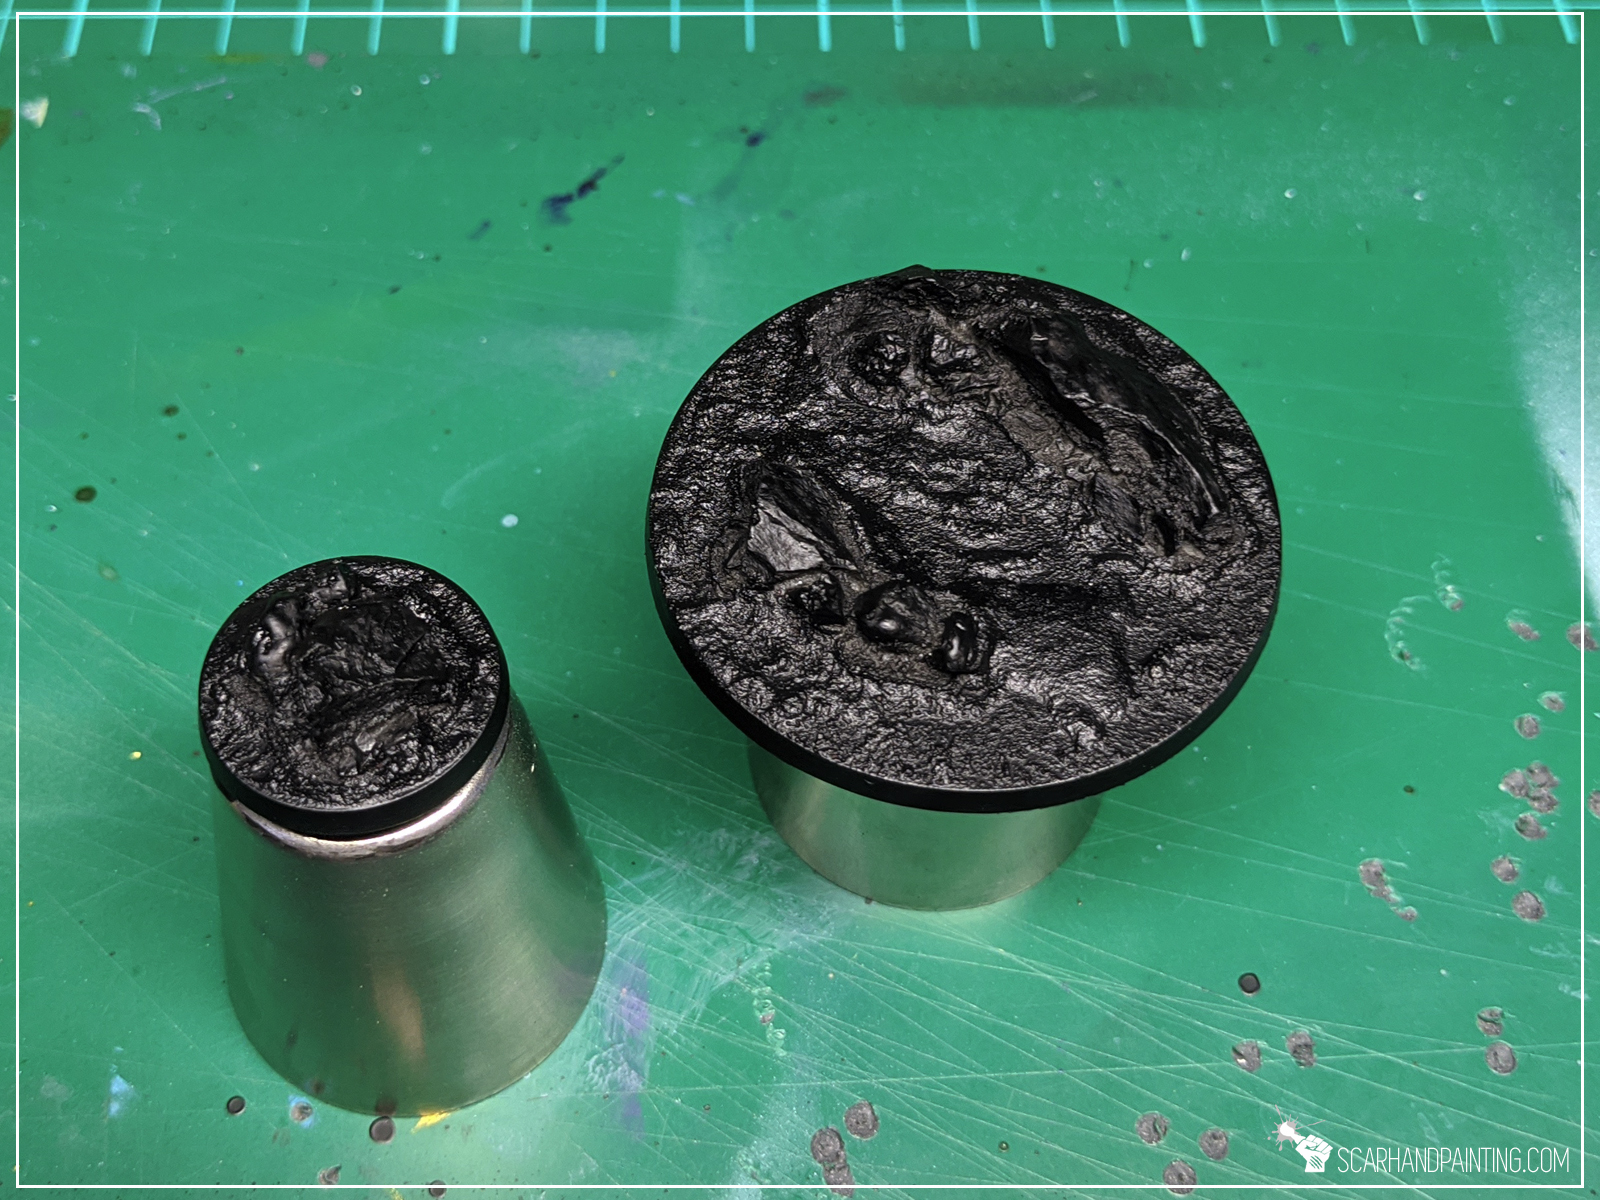
Step two: Undercoat
I applied a black undercoat.
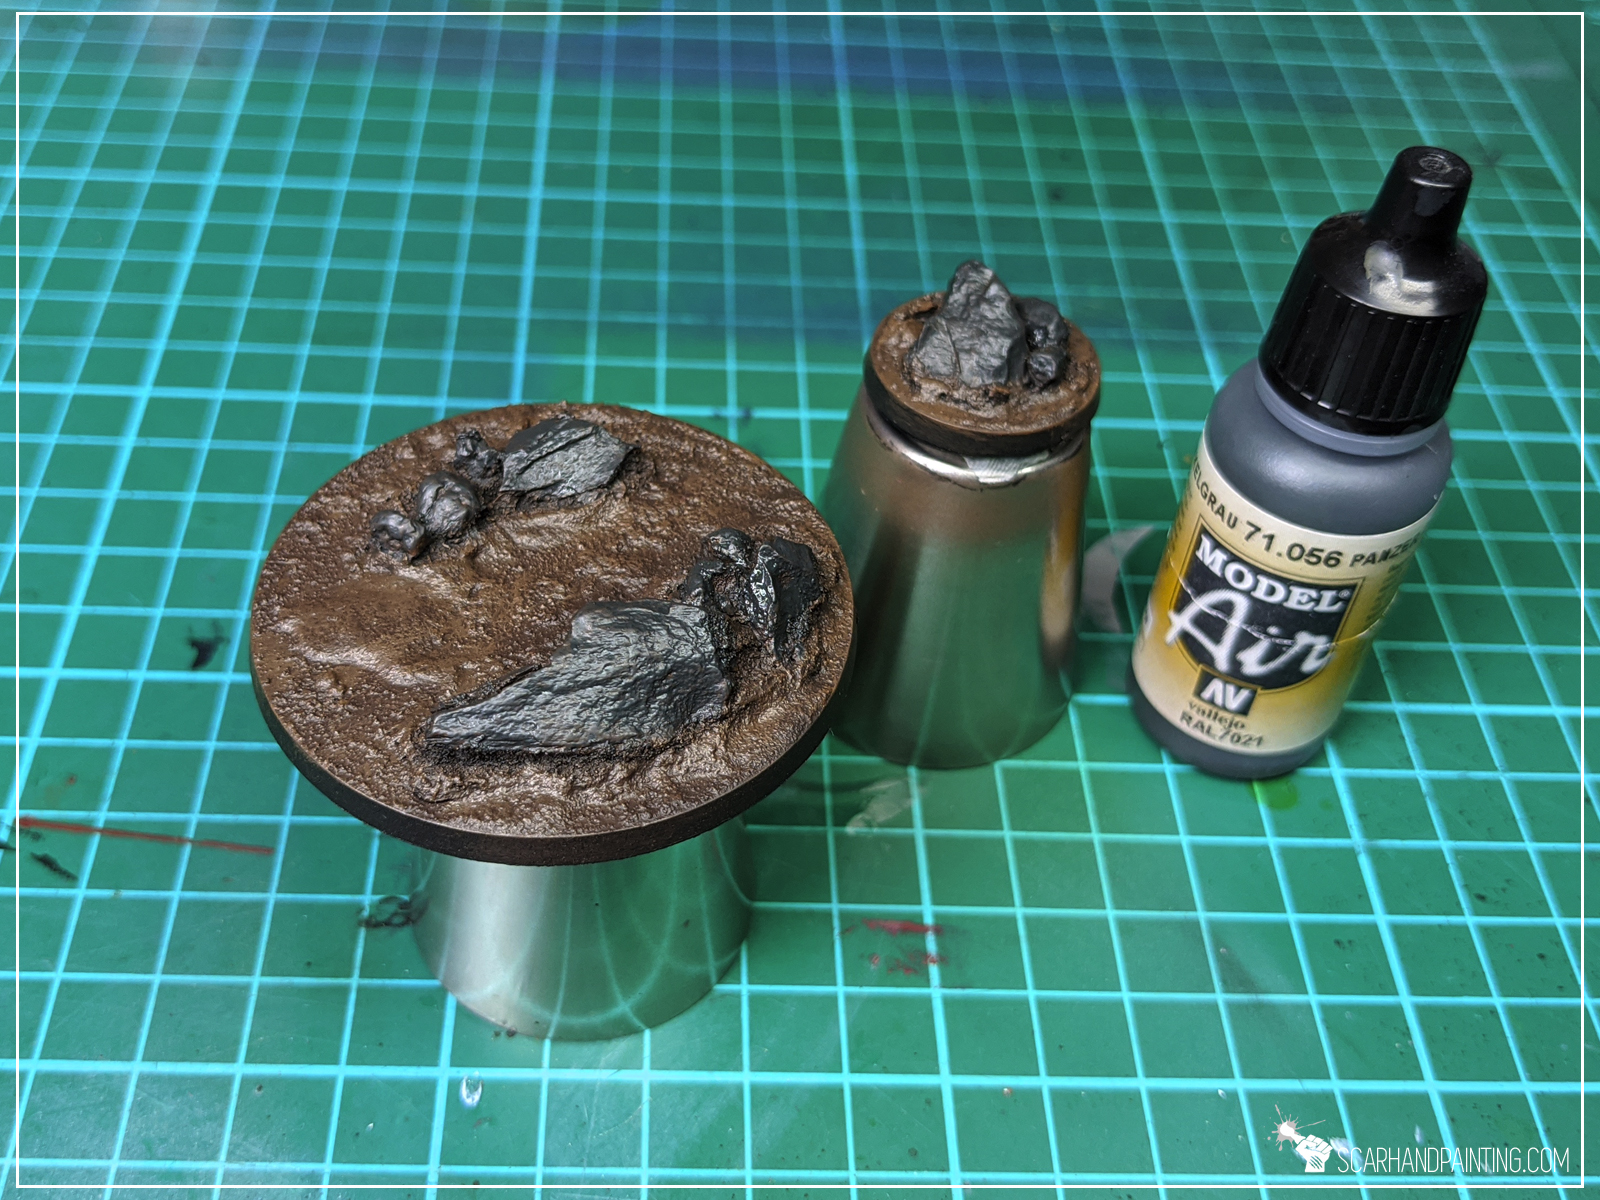
Step two: Main color
I then painted entire base with Vallejo Charred Brown. Once dry I drybrushed Games Workshop Calthan Brown on top.


Step two: Secondary color
For rocks I went with Vallejo Panzer Dark Grey, followed by a drybrush of Games Workshop Fortress Grey.
Step tree: Highlights
Final highlight was done with a drybrush of Games Workshop Karak Stone for brown and a drybrush of Vallejo Ghost Grey for rocks.

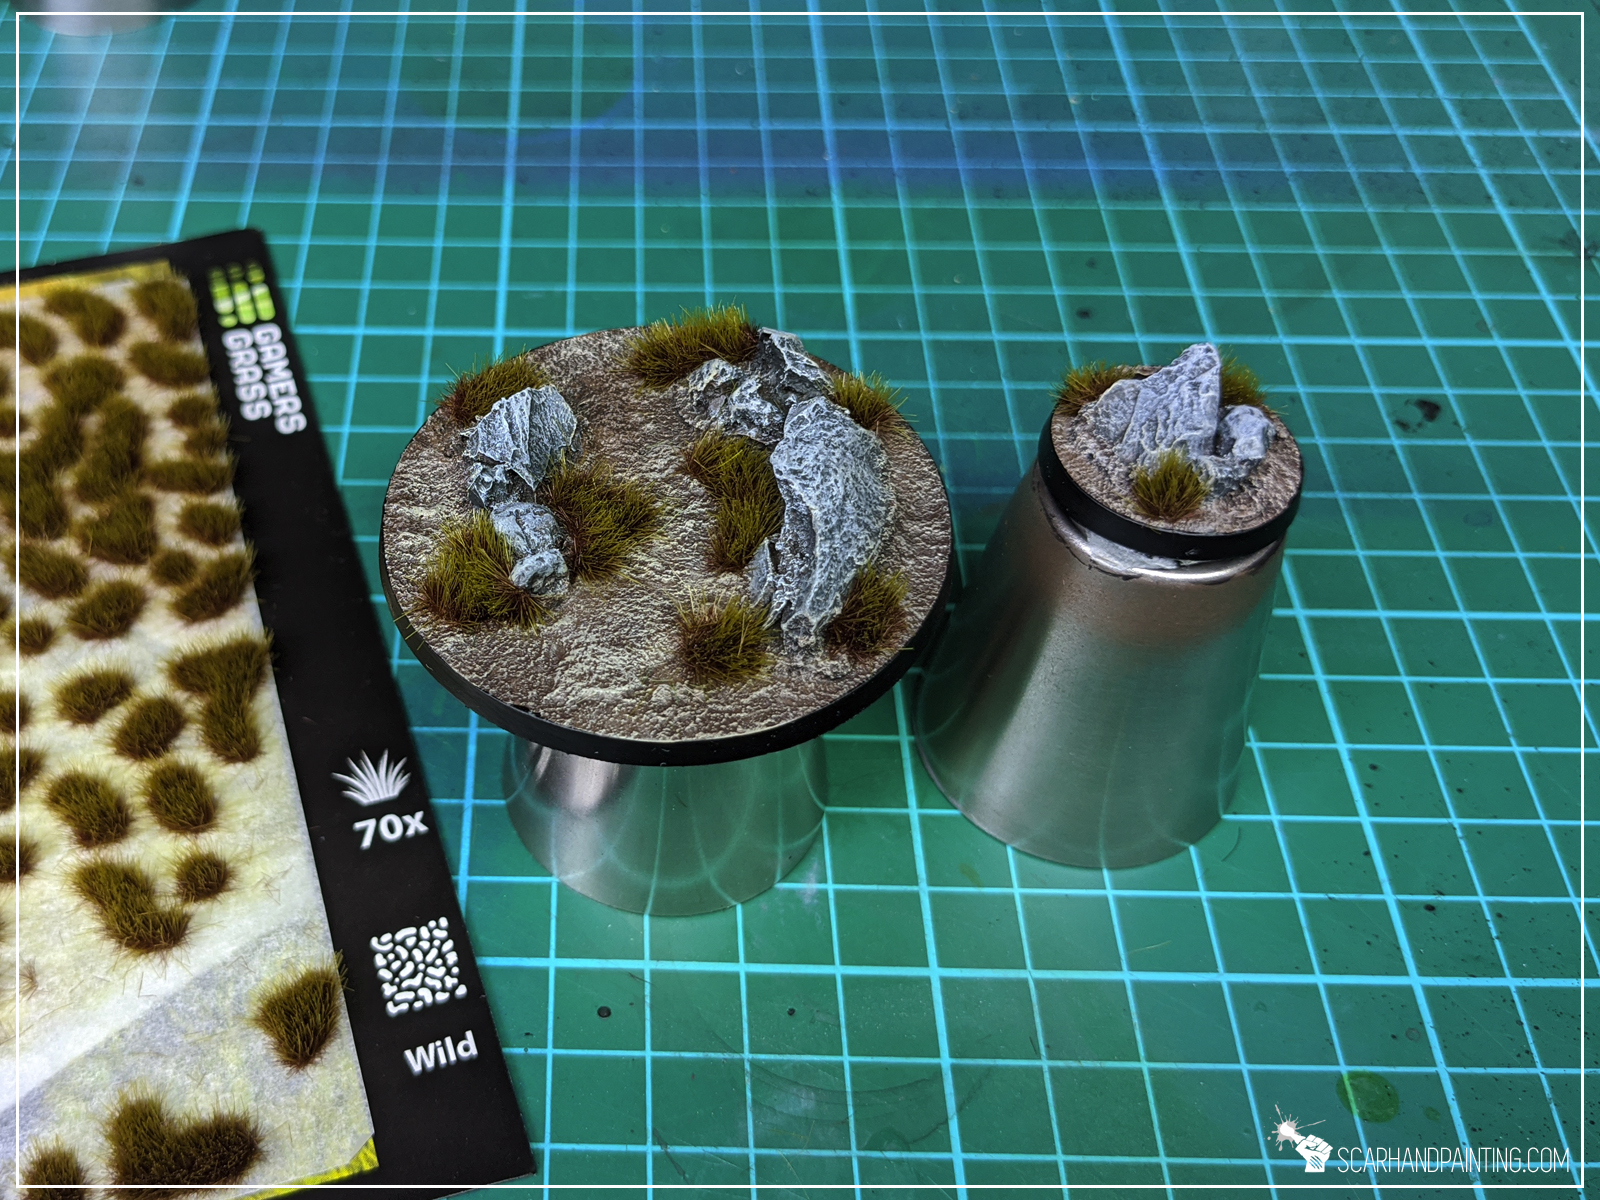
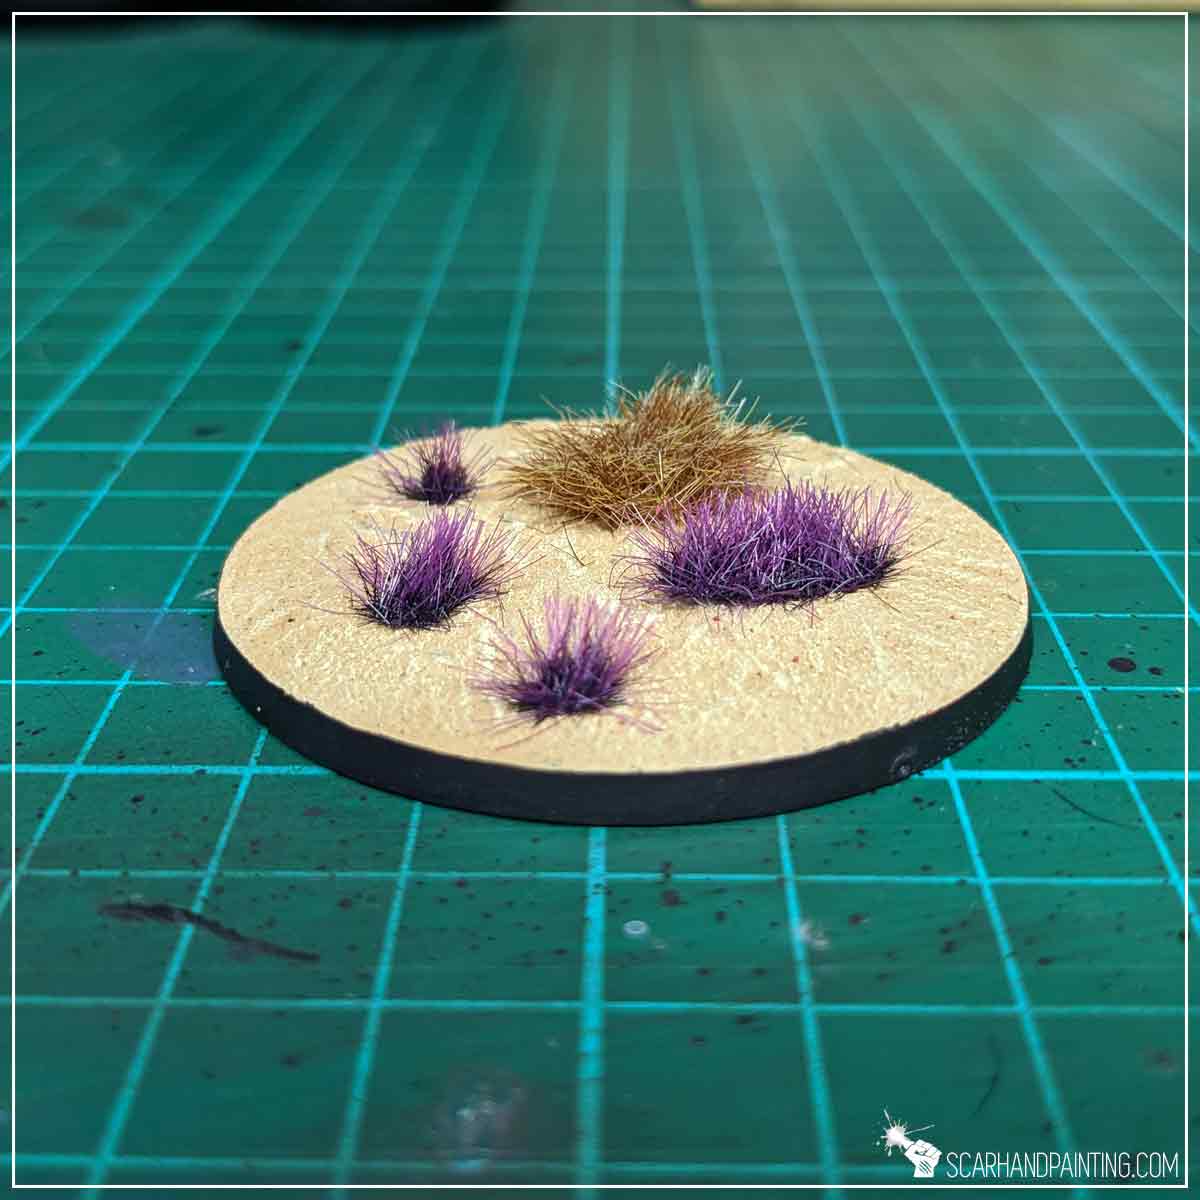
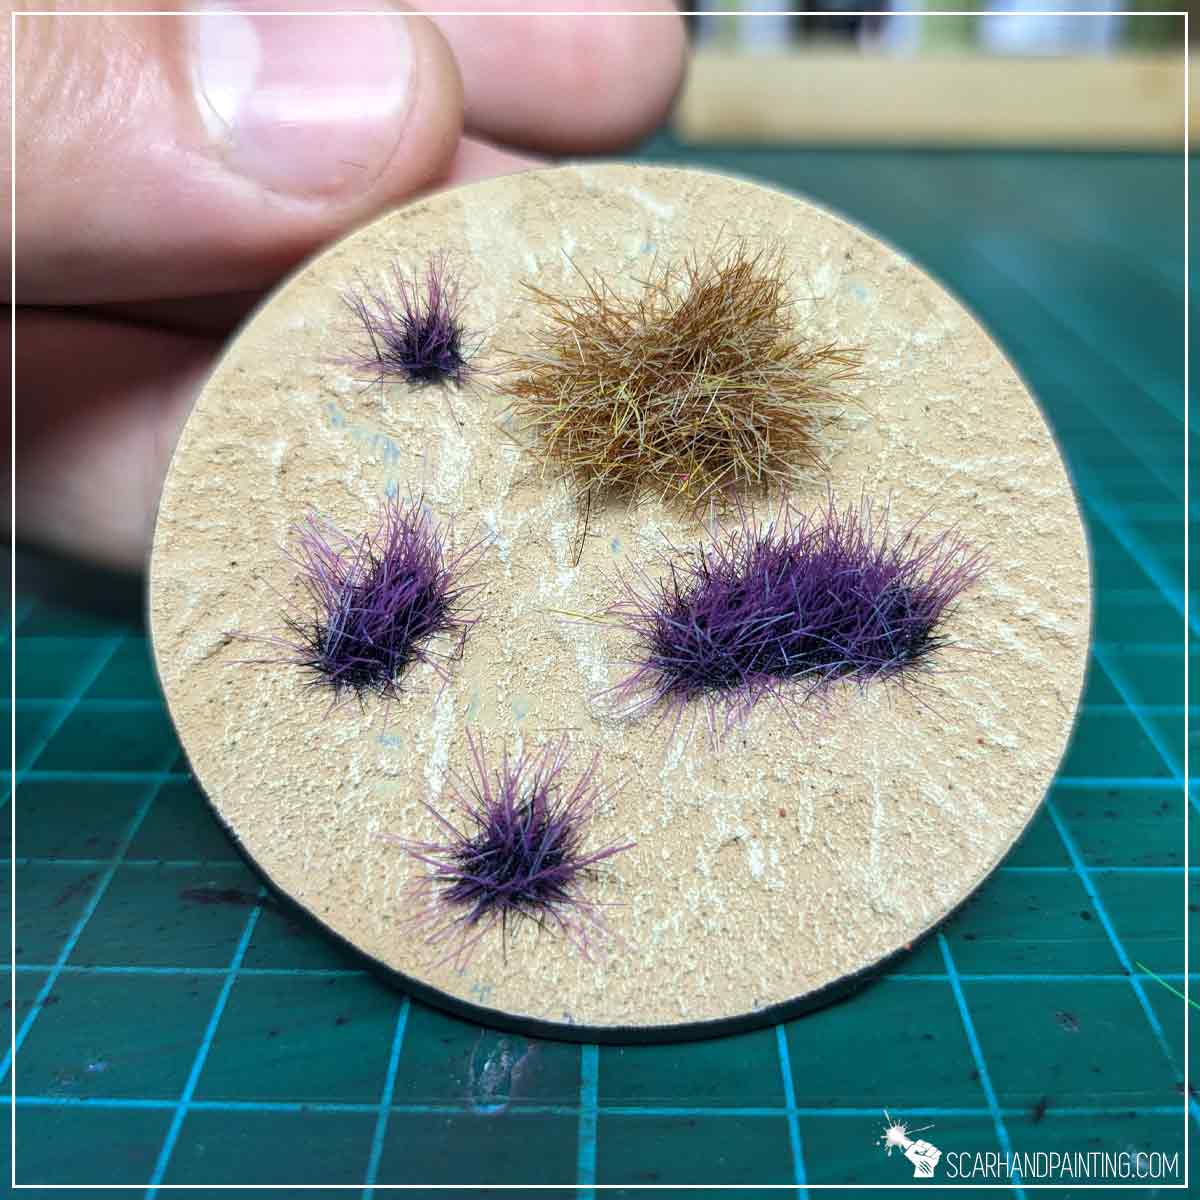
Step tree: Tufts
Finally I applied Gamers Grass Swamp Wild Tufts.

And with that the job was done! Fast and easy – as all bases should be. I hope this was a pleasant tutorial and that you saw how simple the process is. If you want to learn more about Gamers Grass products – here’s my review:
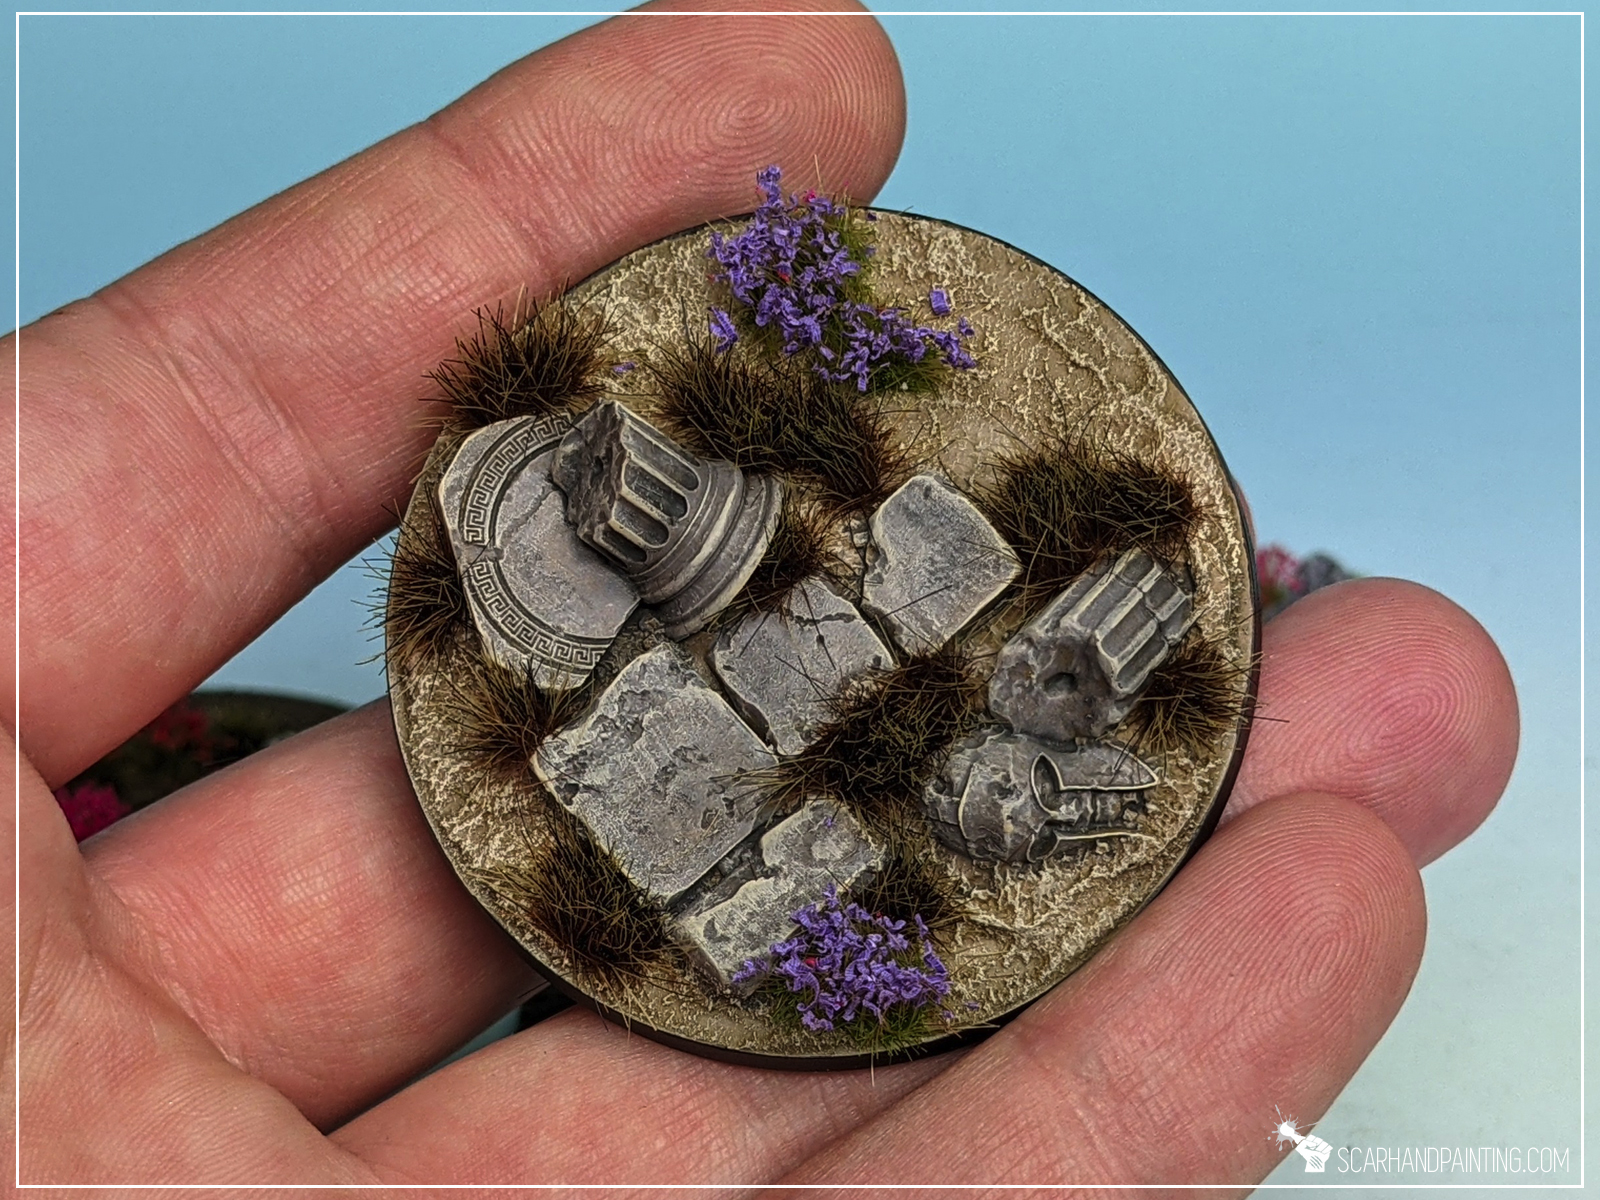
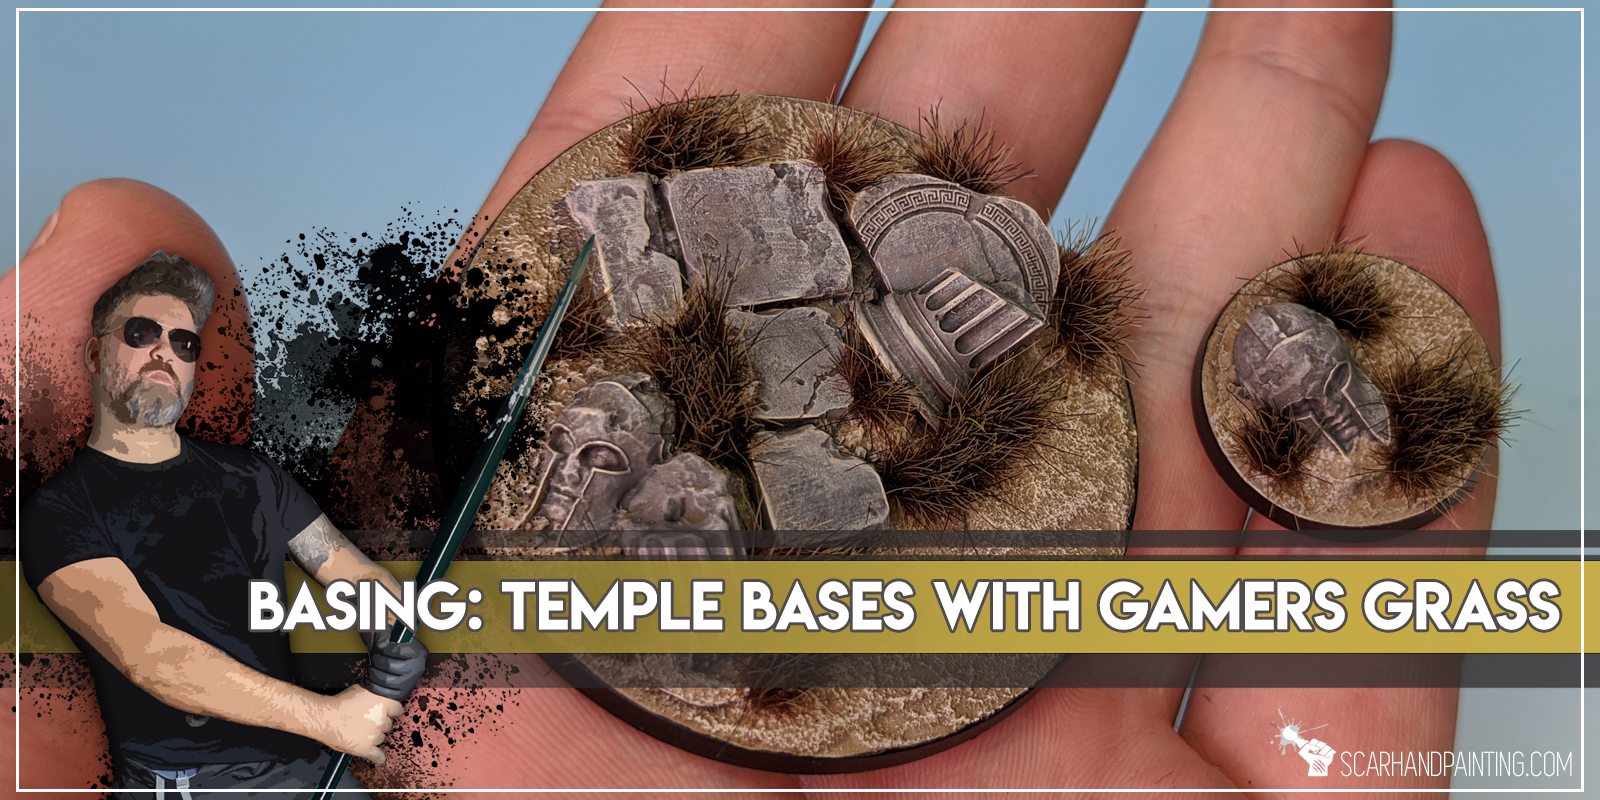
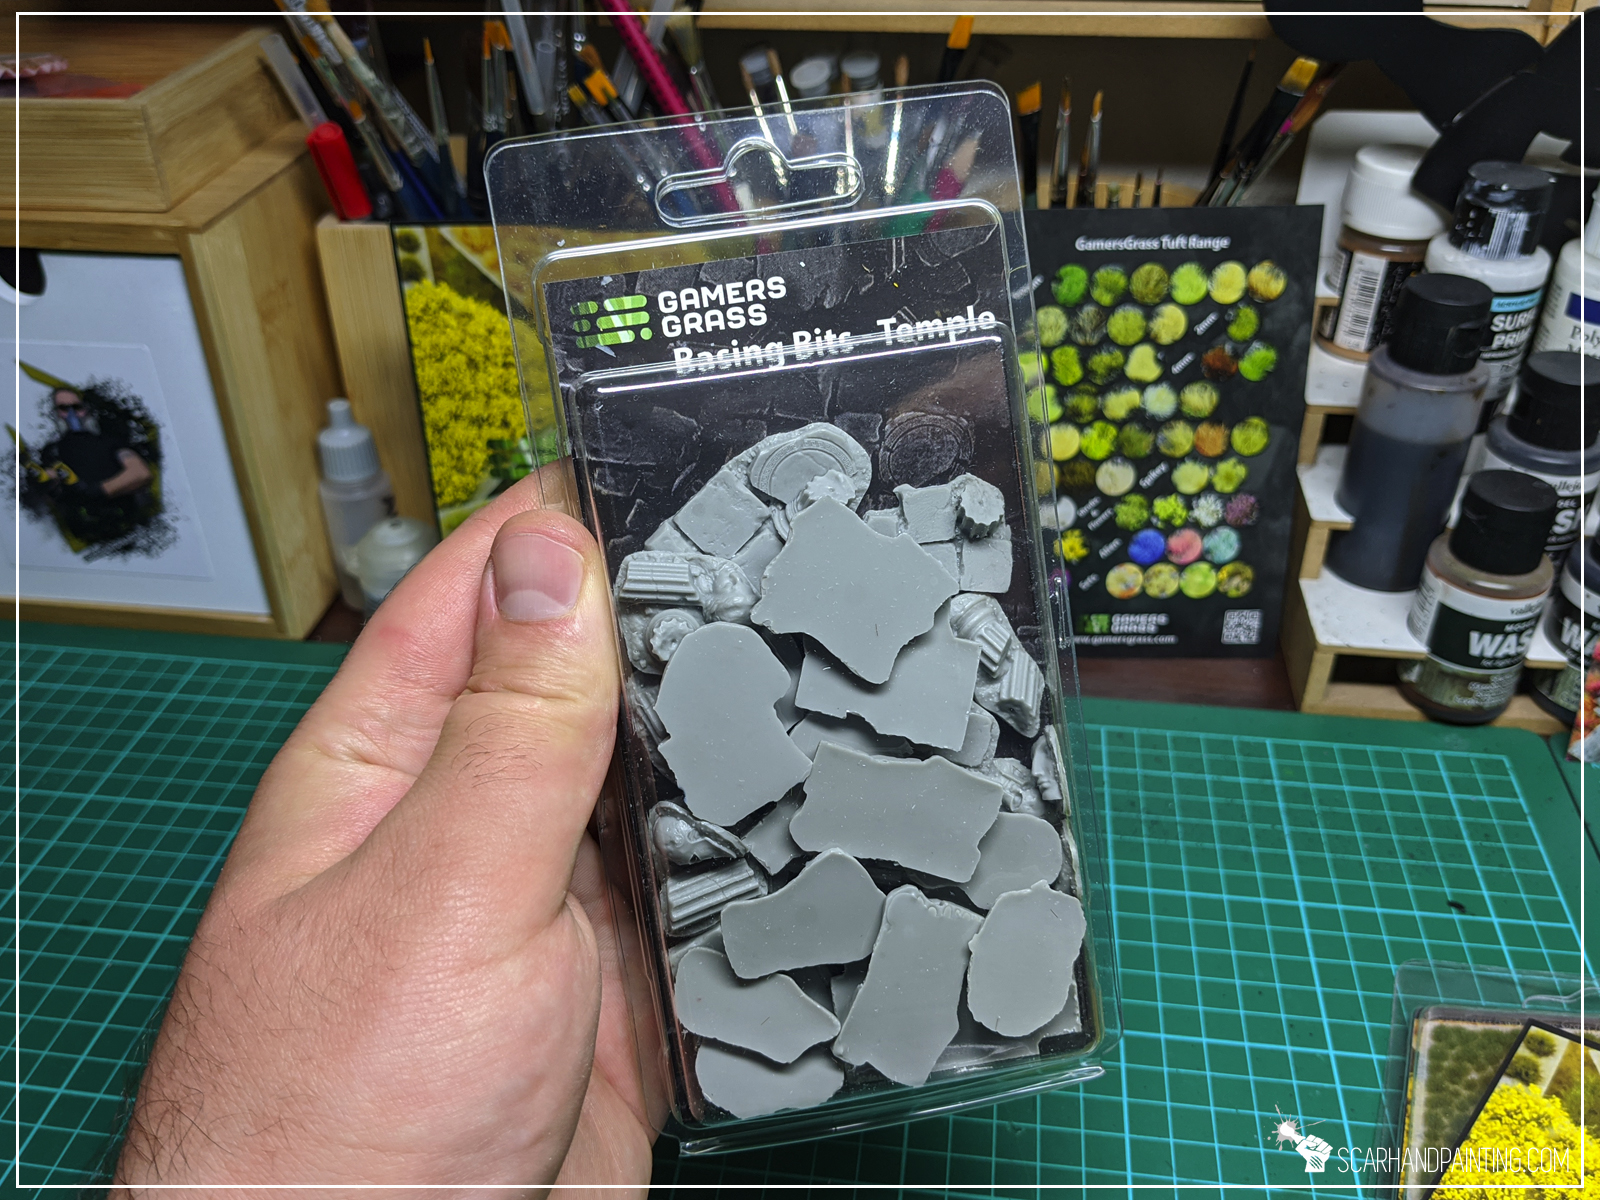
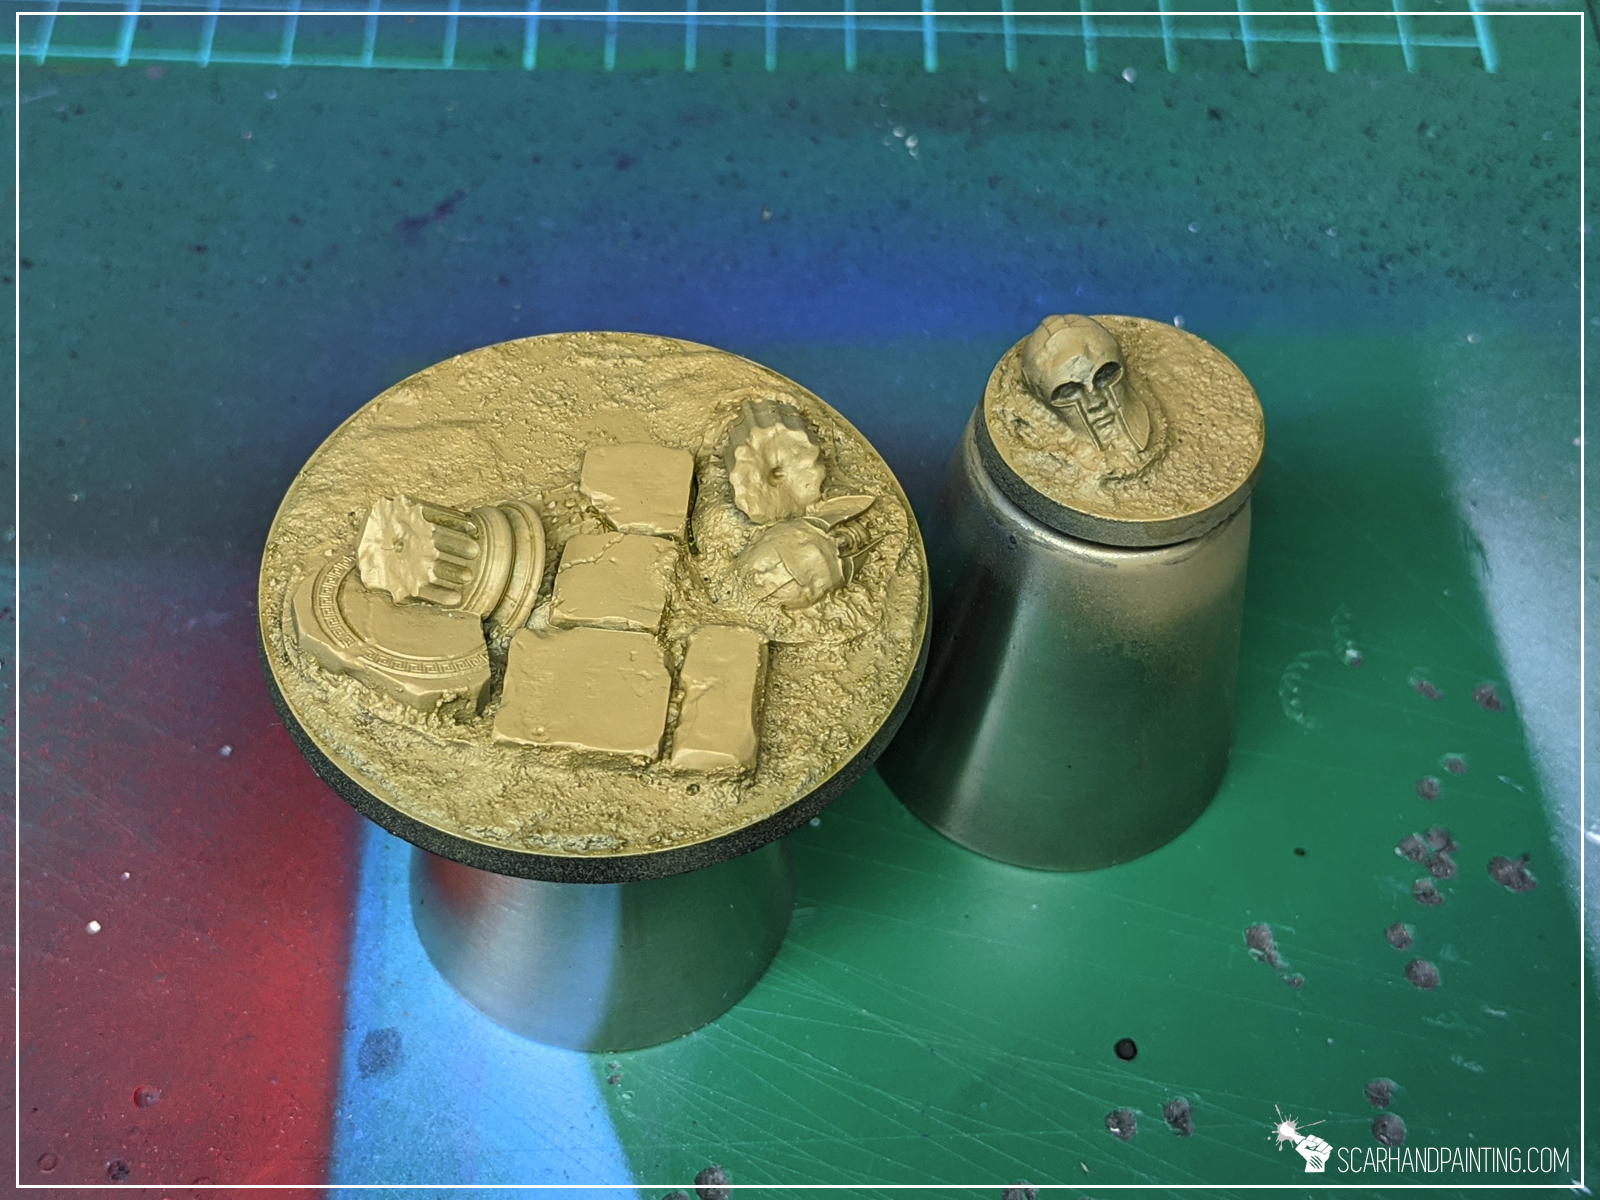
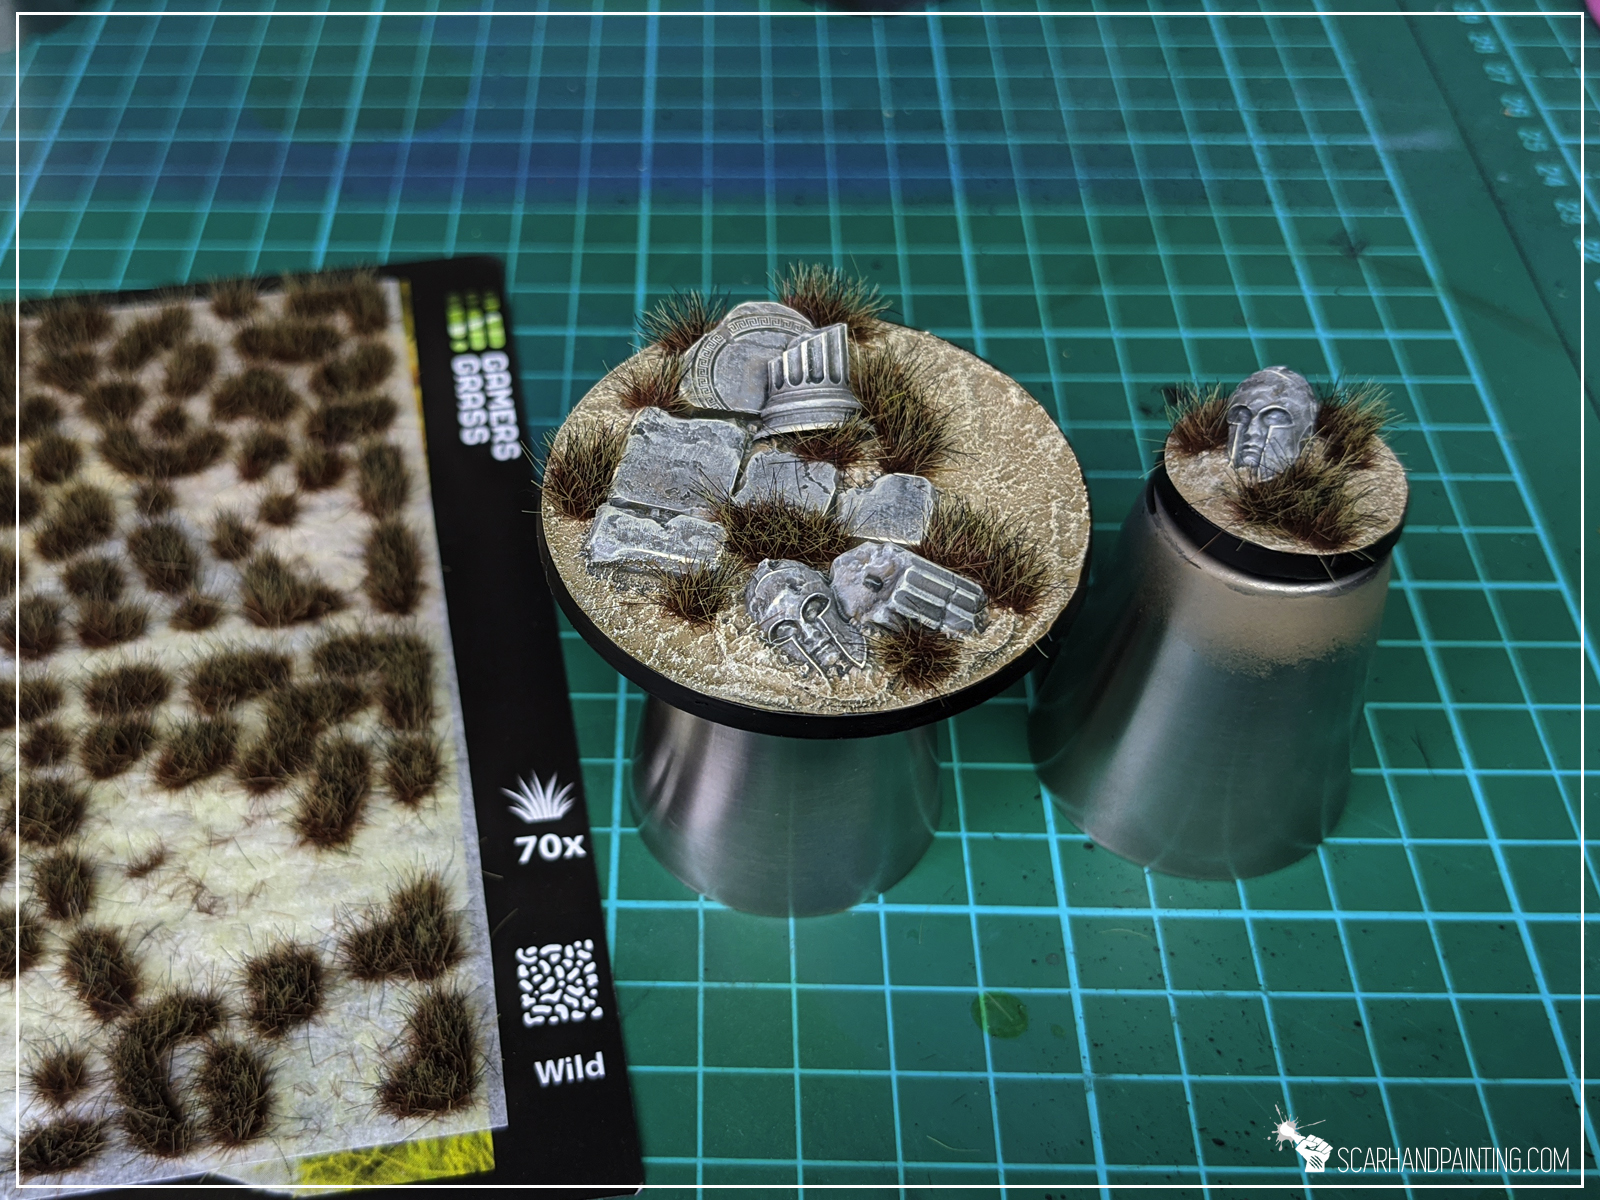
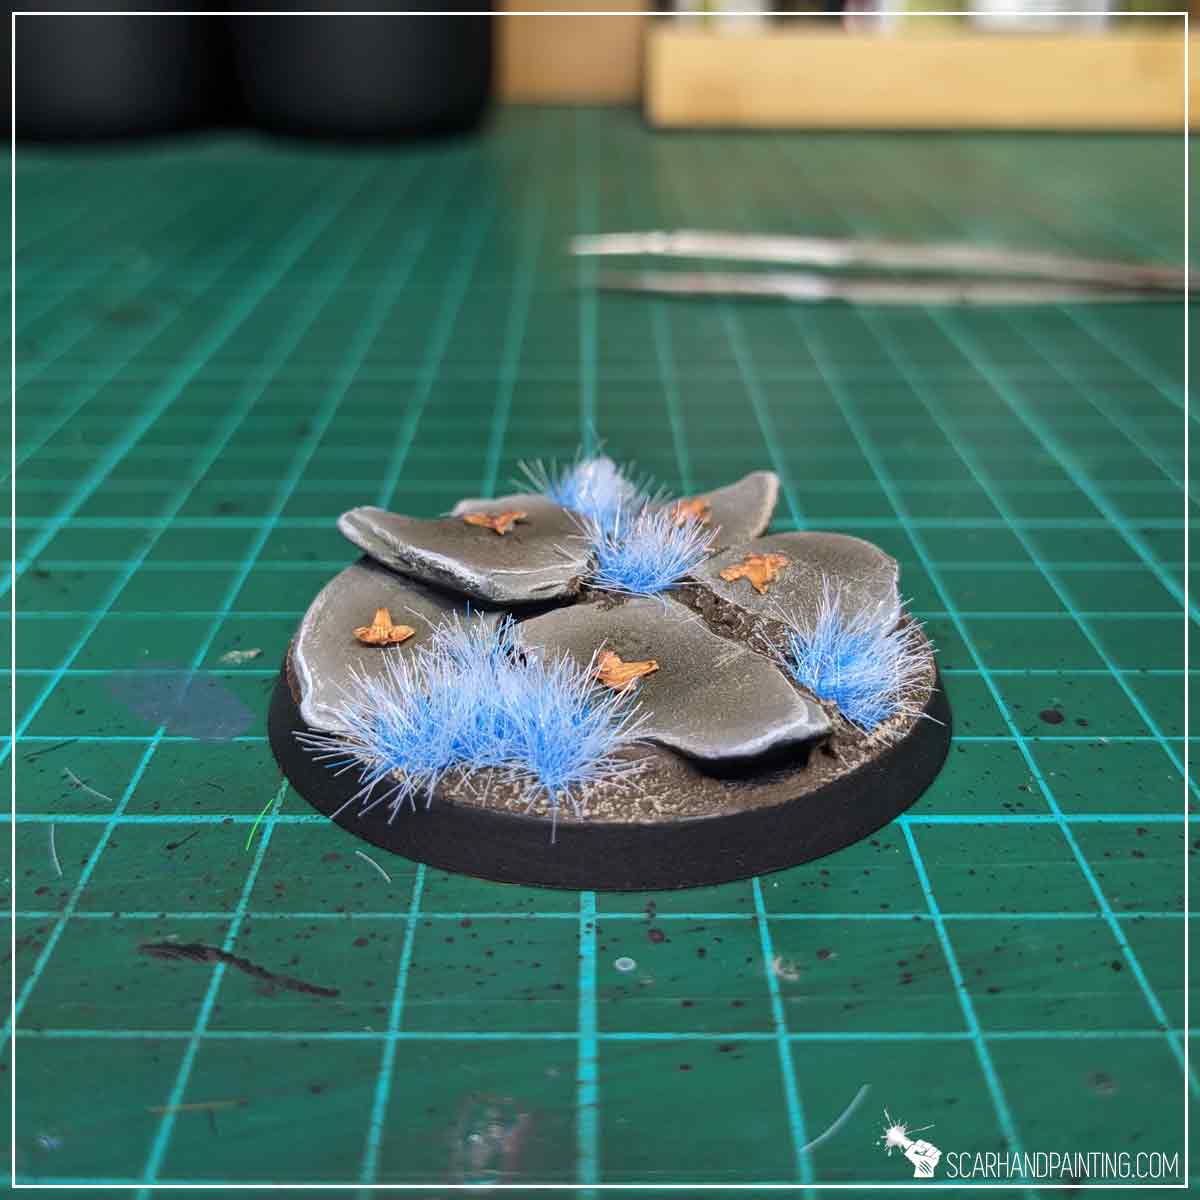
Welcome to Temple Bases tutorial. Here I will take you on a Step-by-step trip through the process of creating and painting Temple Bases as presented in the picture below. This adventure is possible thanks to generosity of Gamers Grass and their easy to use, fantastic products.
Before we start, some notes:
In my opinion base is supposed to complement a miniature, not steal the spotlight. For this reason, when making bases, I usually aim for fast, simple, yet effective solutions. Important thing to note when deciding on what to use for your bases is to pick a method that is easy to copy. This is why I consider Gamers Grass Basing Bits a perfect solution. Nicely textured, ready to use straight out of the box – glue them on, add some texture around – you’re ready to paint. All that being said – for this particular base type I choose Gamers Grass “Temple” basing bits.
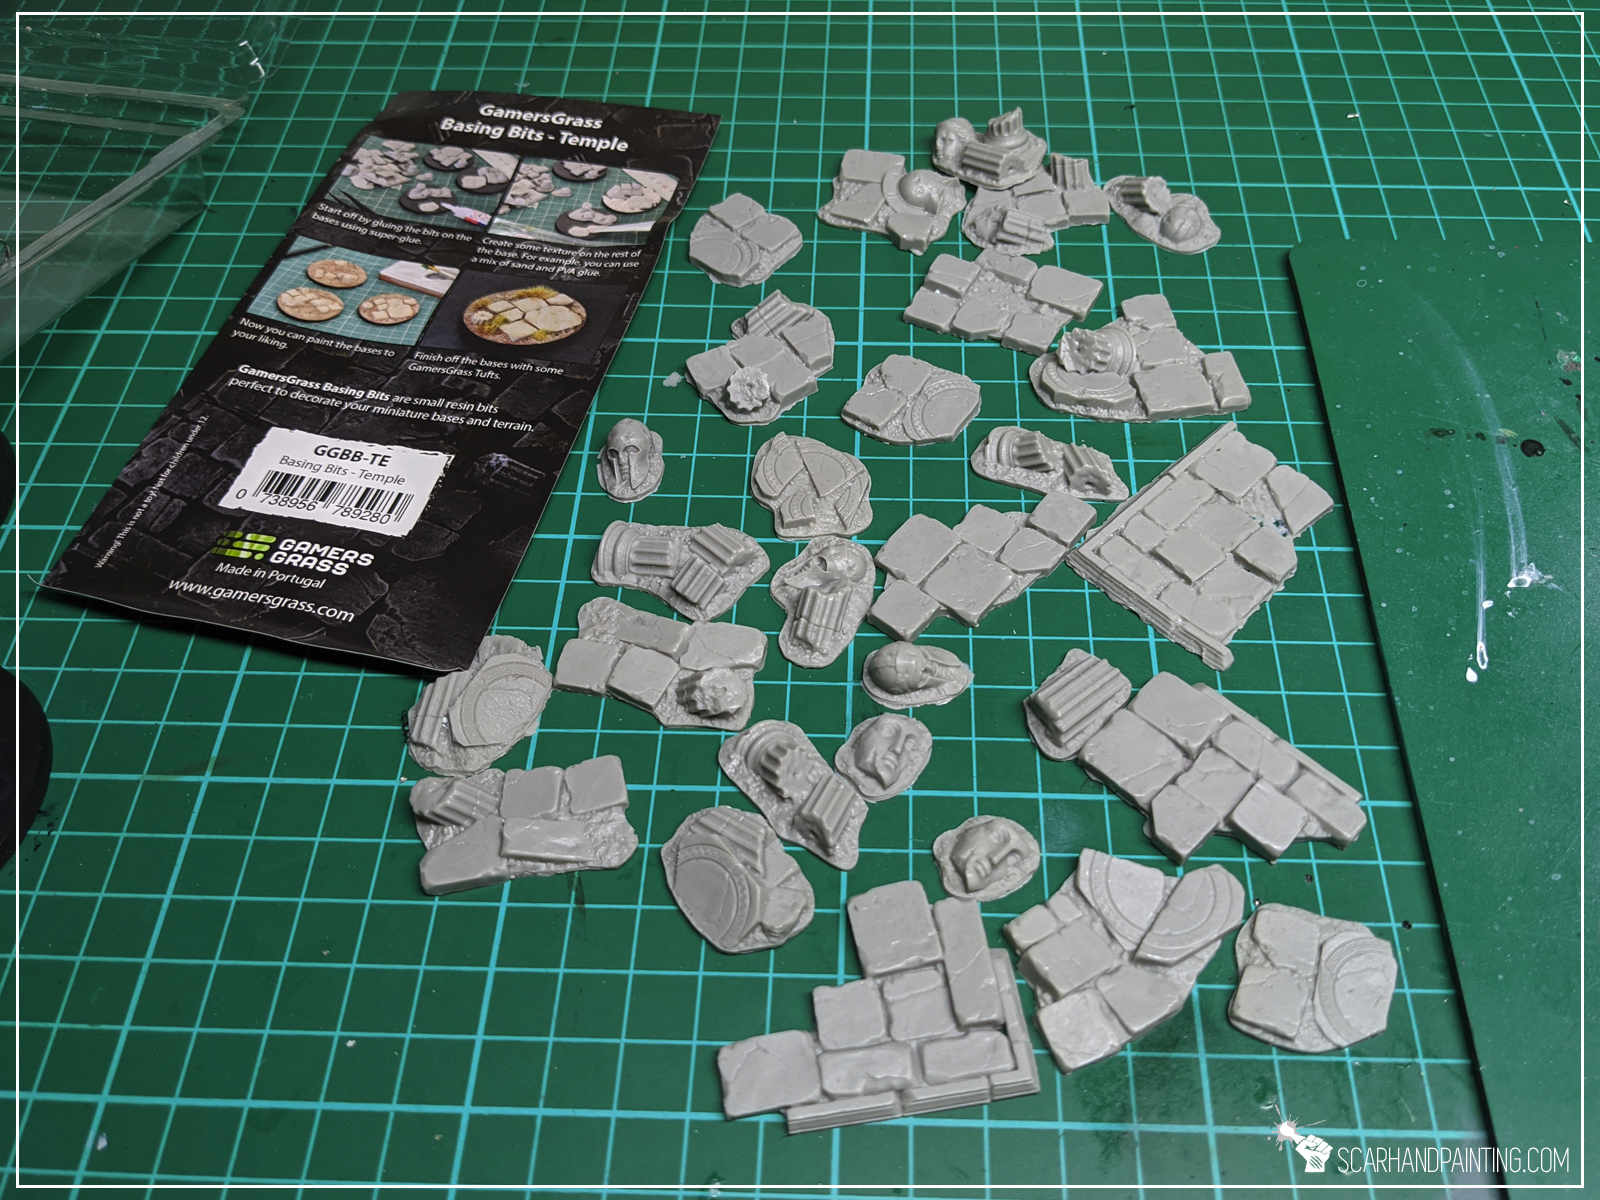
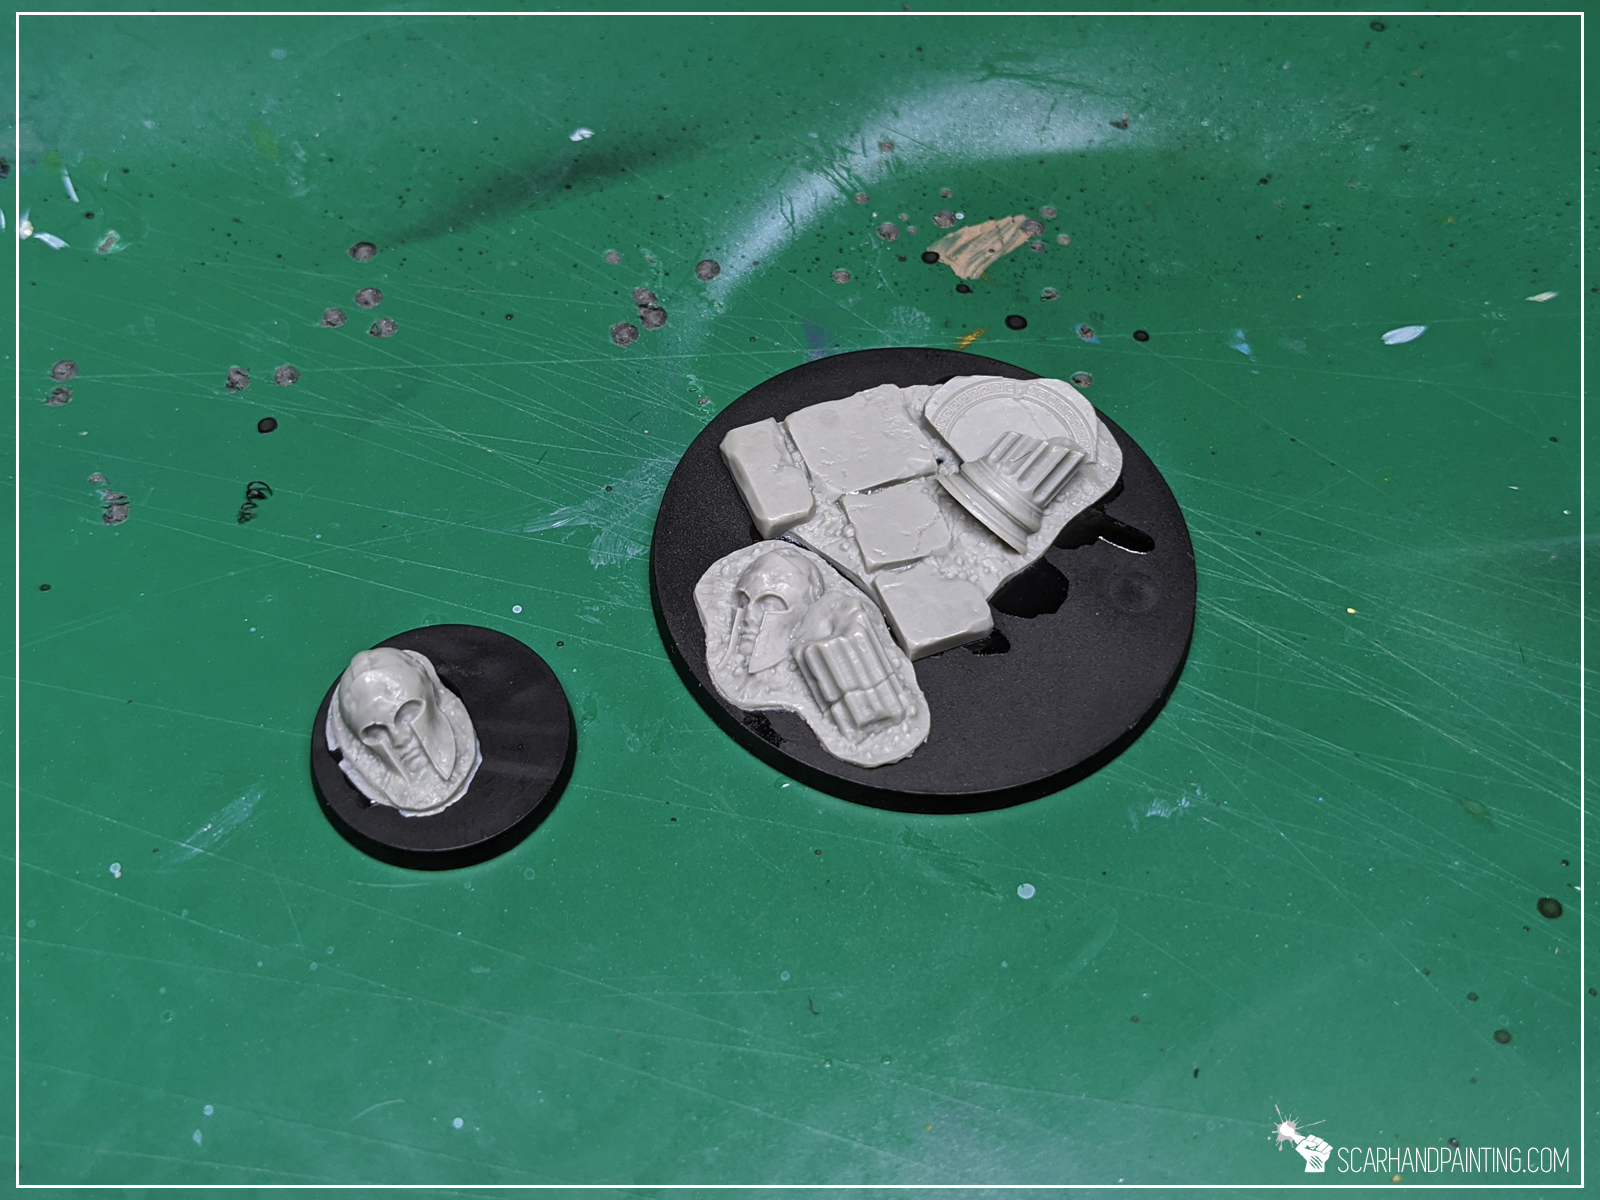
Step one: Applying basing bits
I started by applying glue onto the base and gluing few basing bits on top.


Step two: Applying texture
I then applied texture with Games Workshop Stirland Mud.
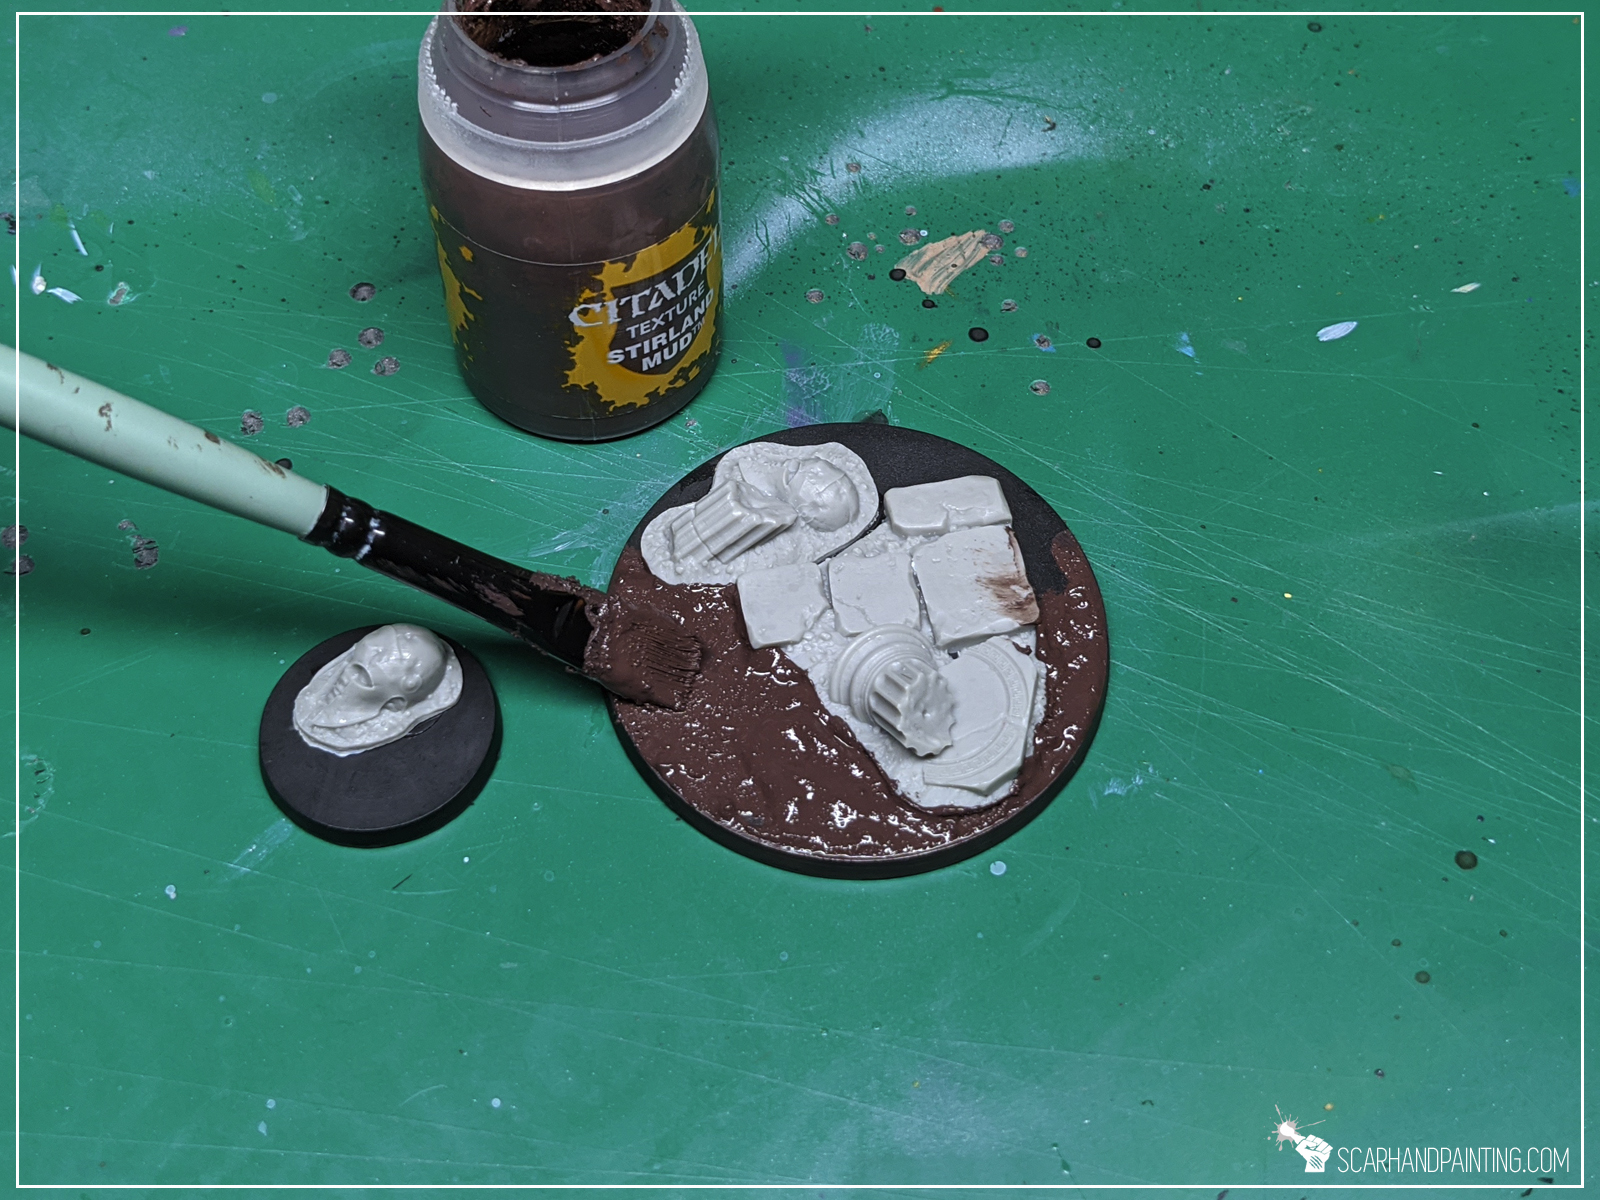
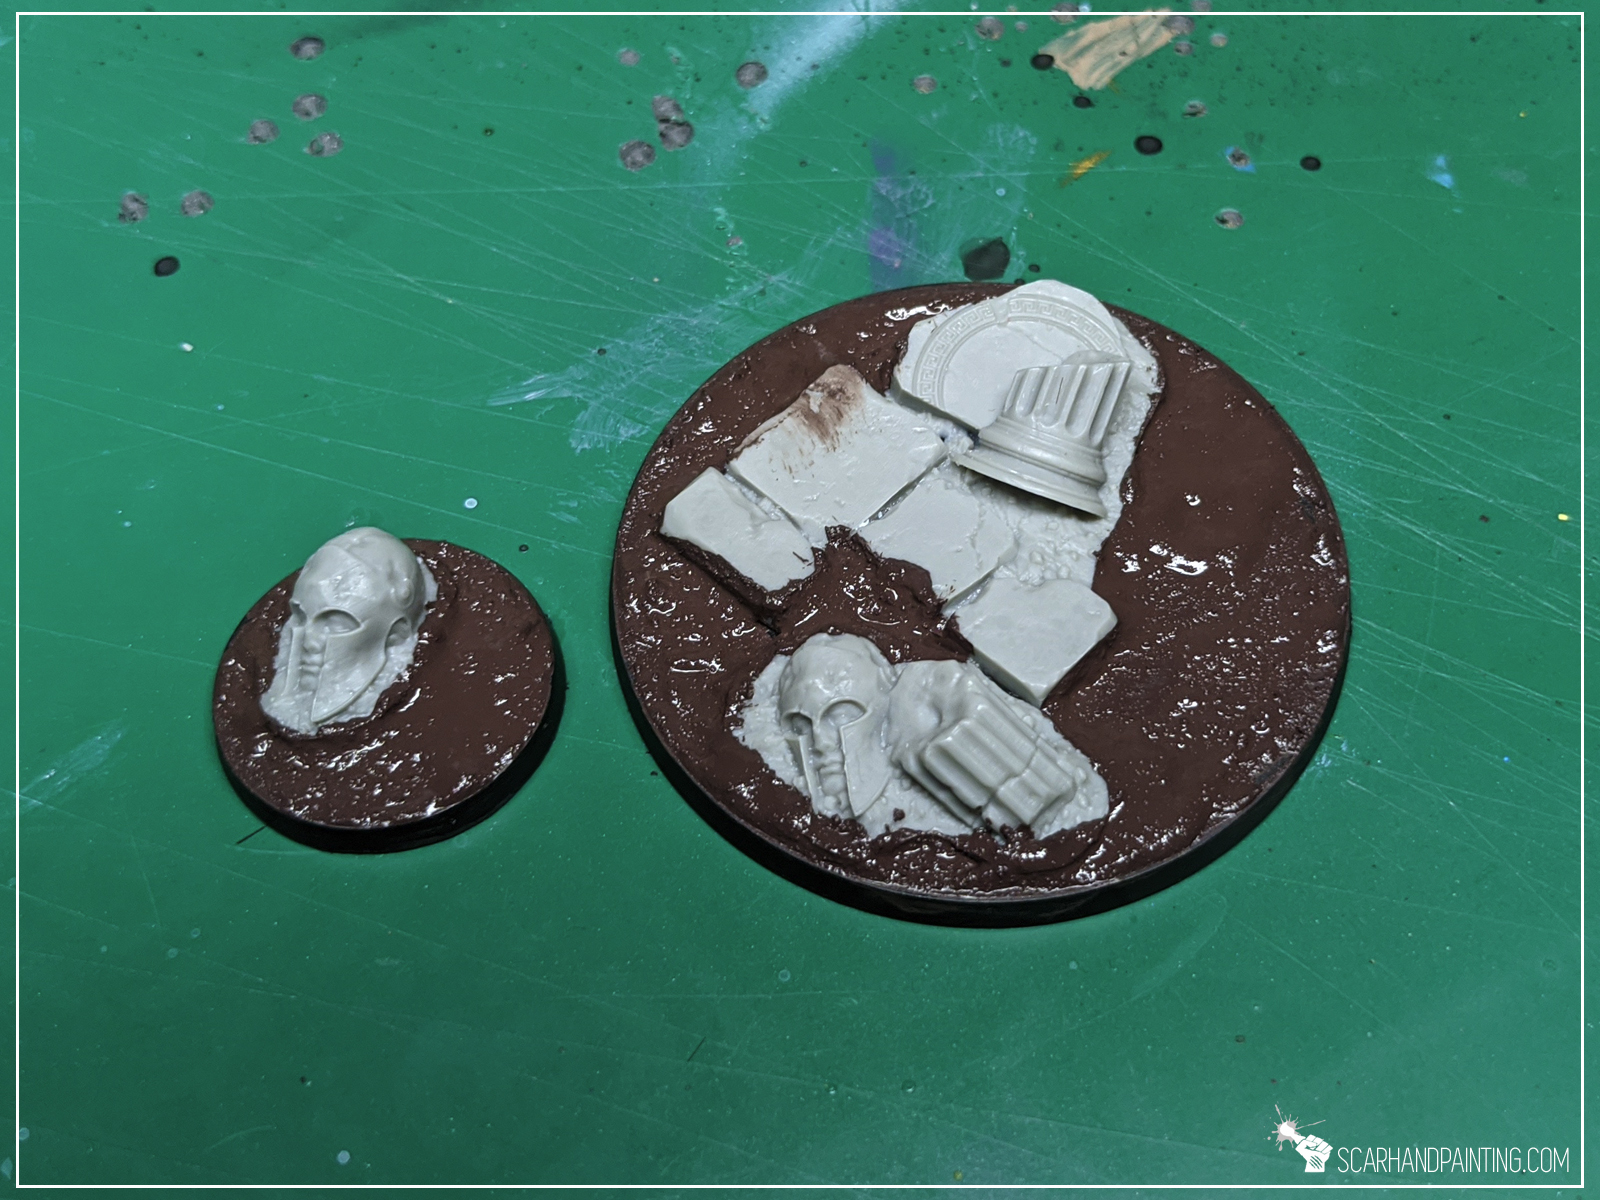
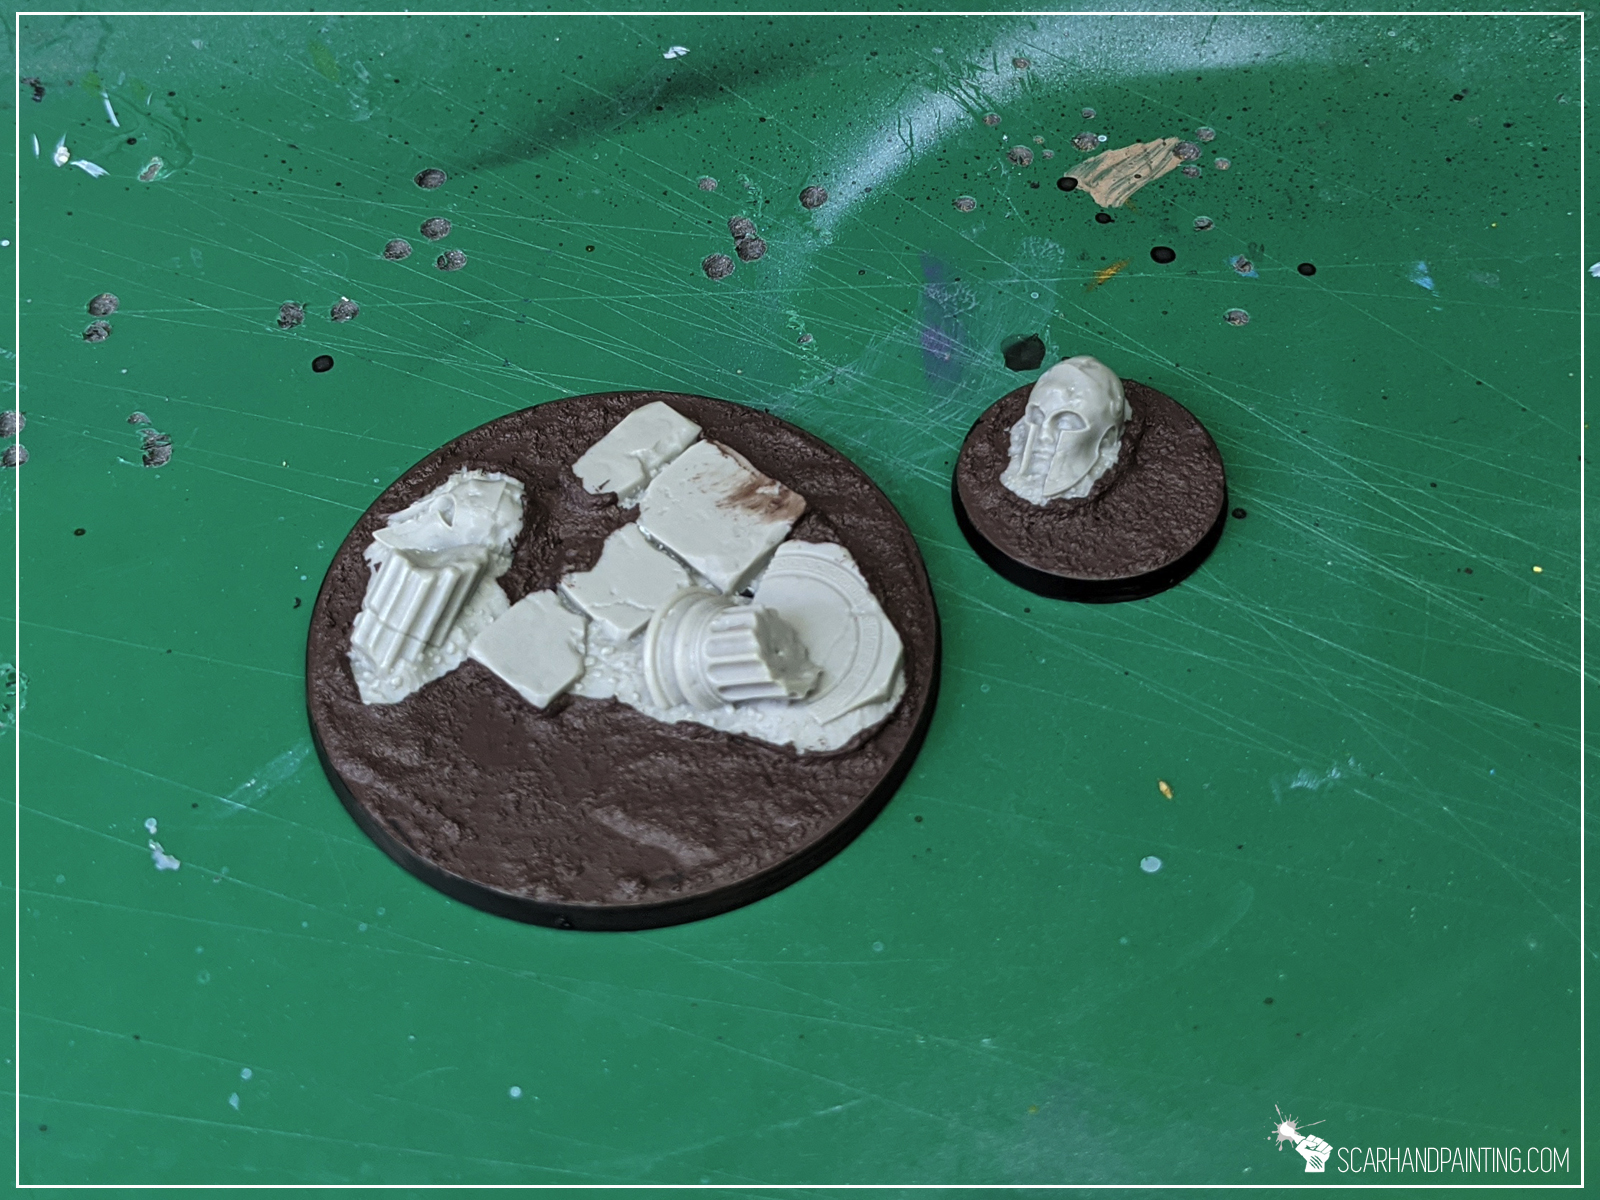
At this point entire “Modelling” part is done. If it seem fast it’s because it really is. Just two steps and you’re ready to paint!
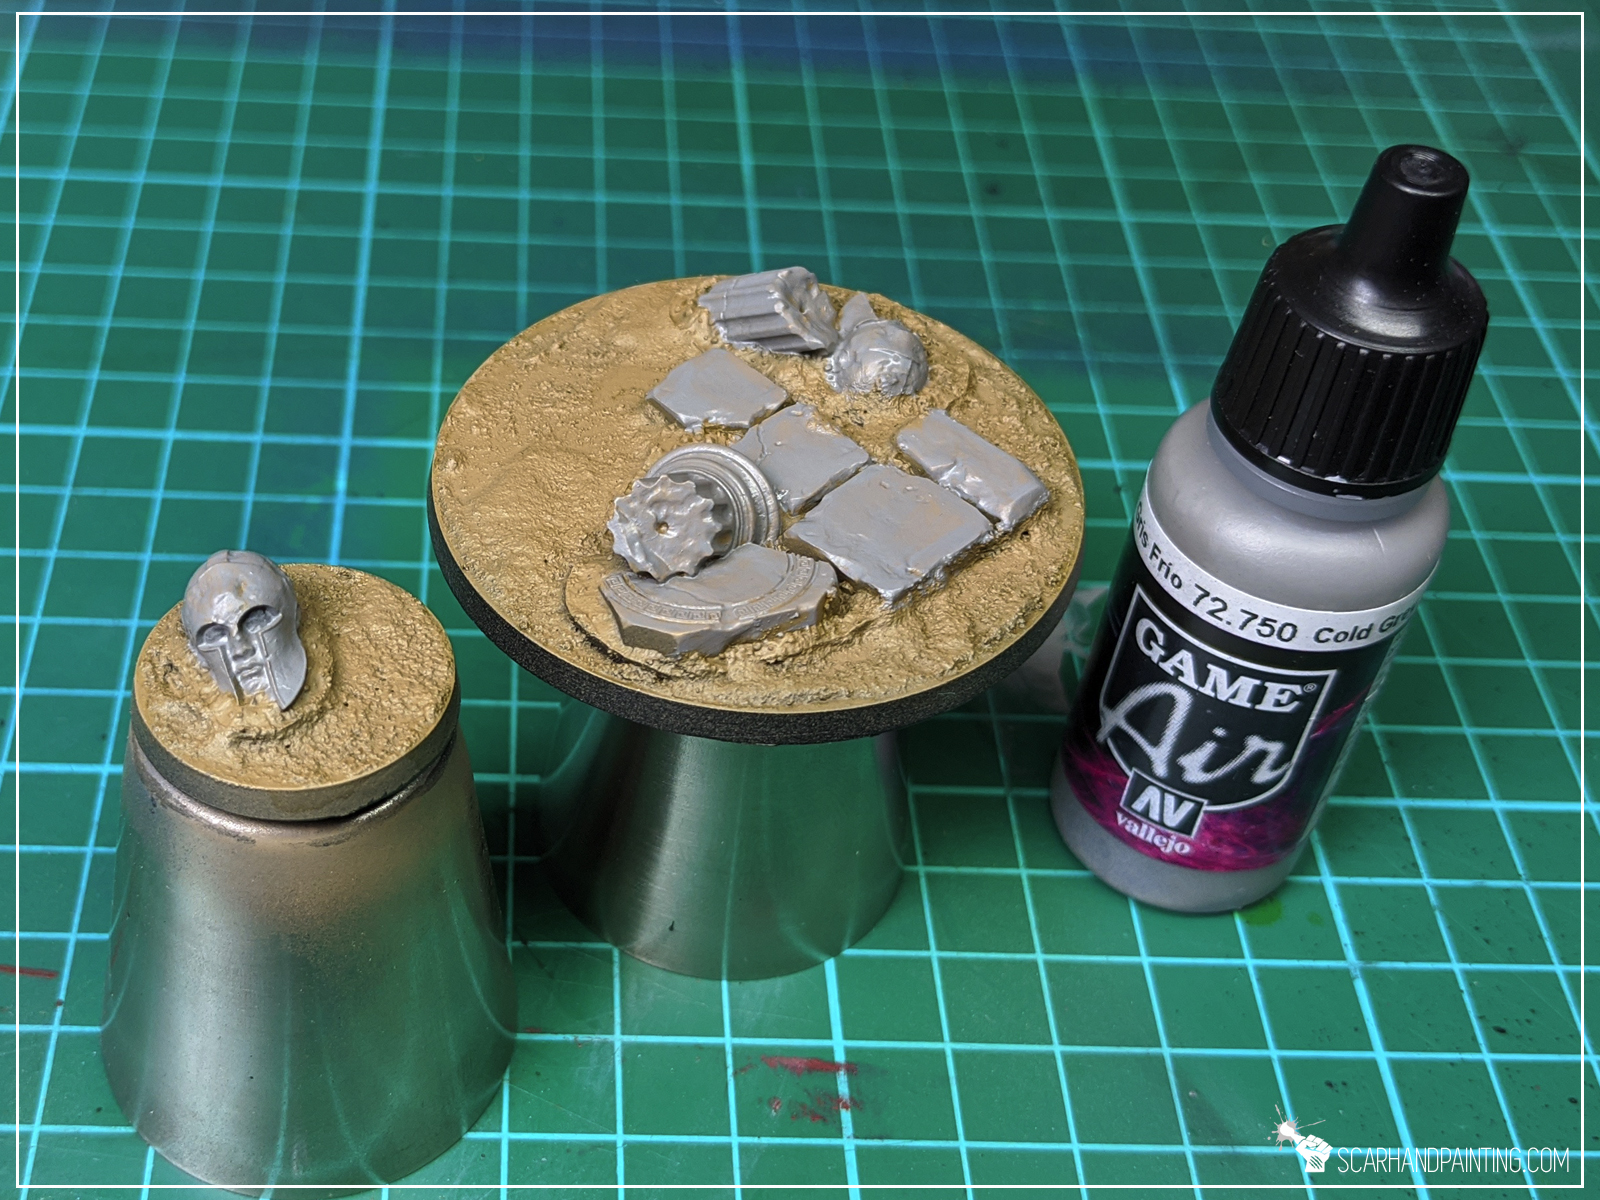
I choose to paint these Temple bases in a bit of a Desert’ish style. Let’s say these are meant to be used for a large army. I want to keep things simple, best if within three layers per color, crowned with a single type of tufts. Nothing fancy, just nice looking, coherent bases. Here’s how I went about it…
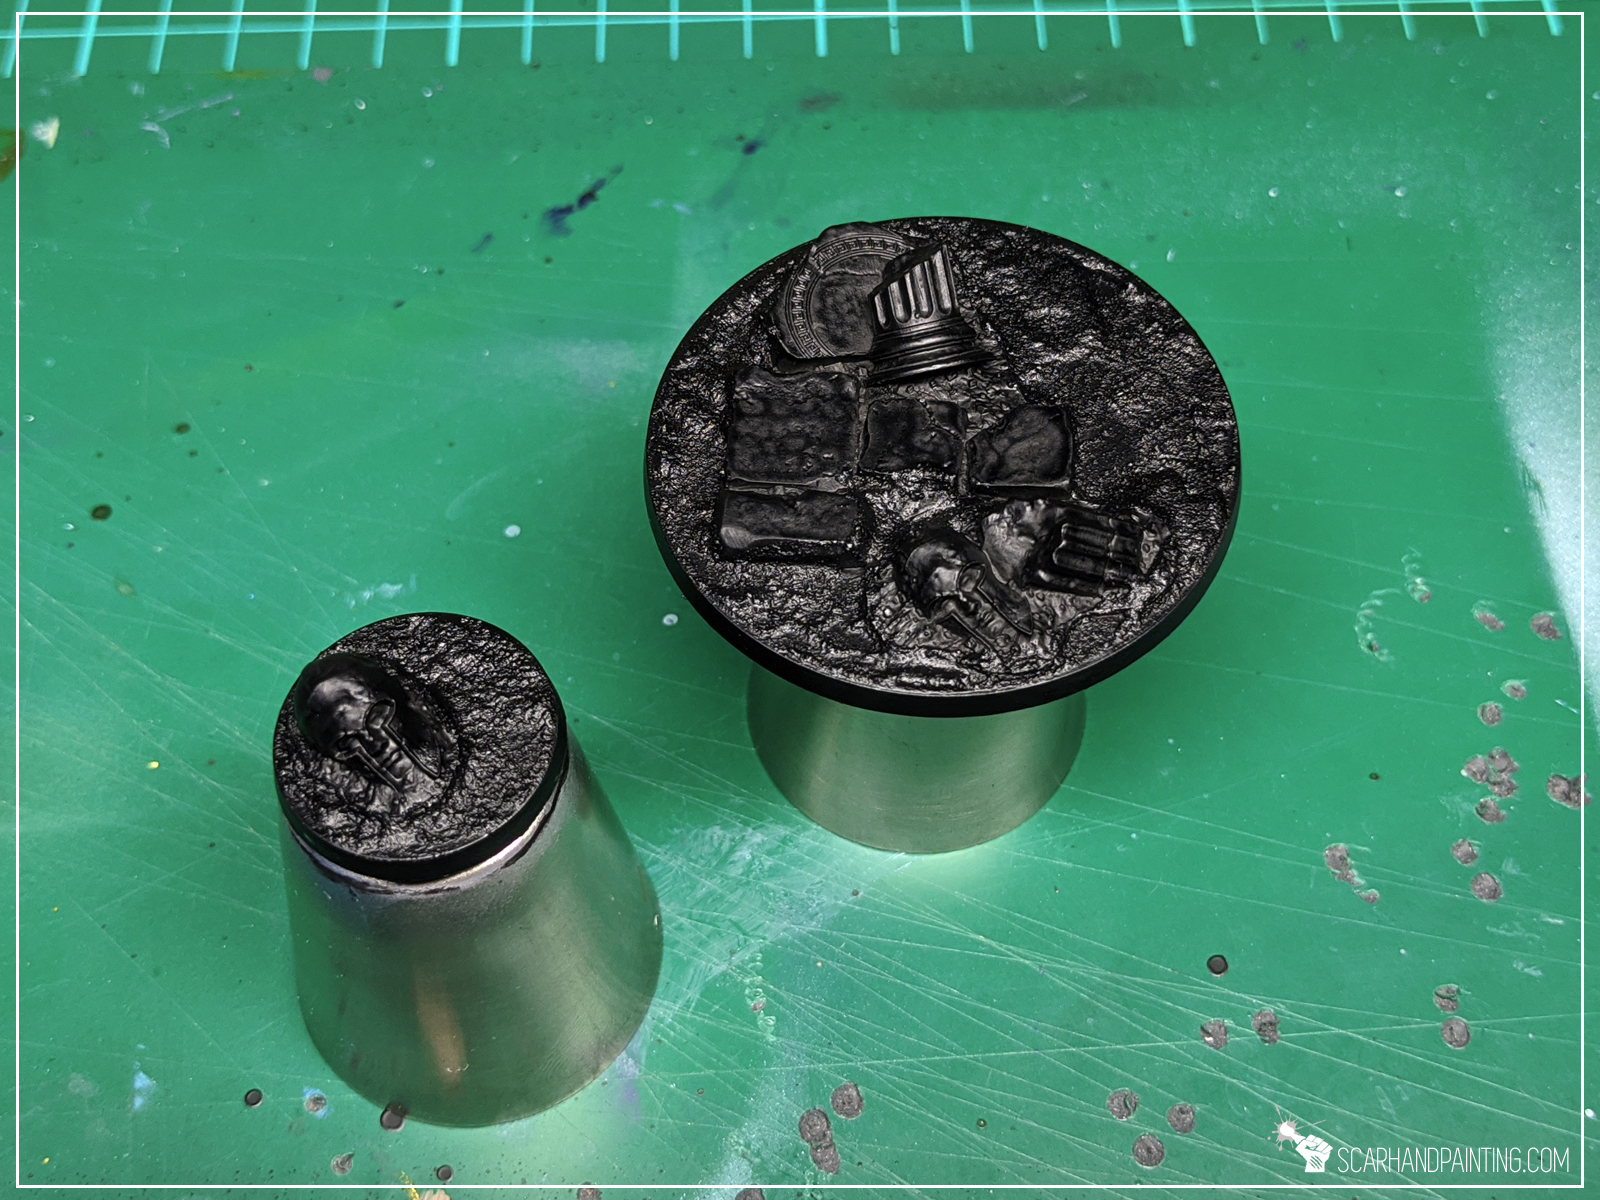
Step one: Undercoat
I applied a black undercoat. This is my usual start for everything 😛
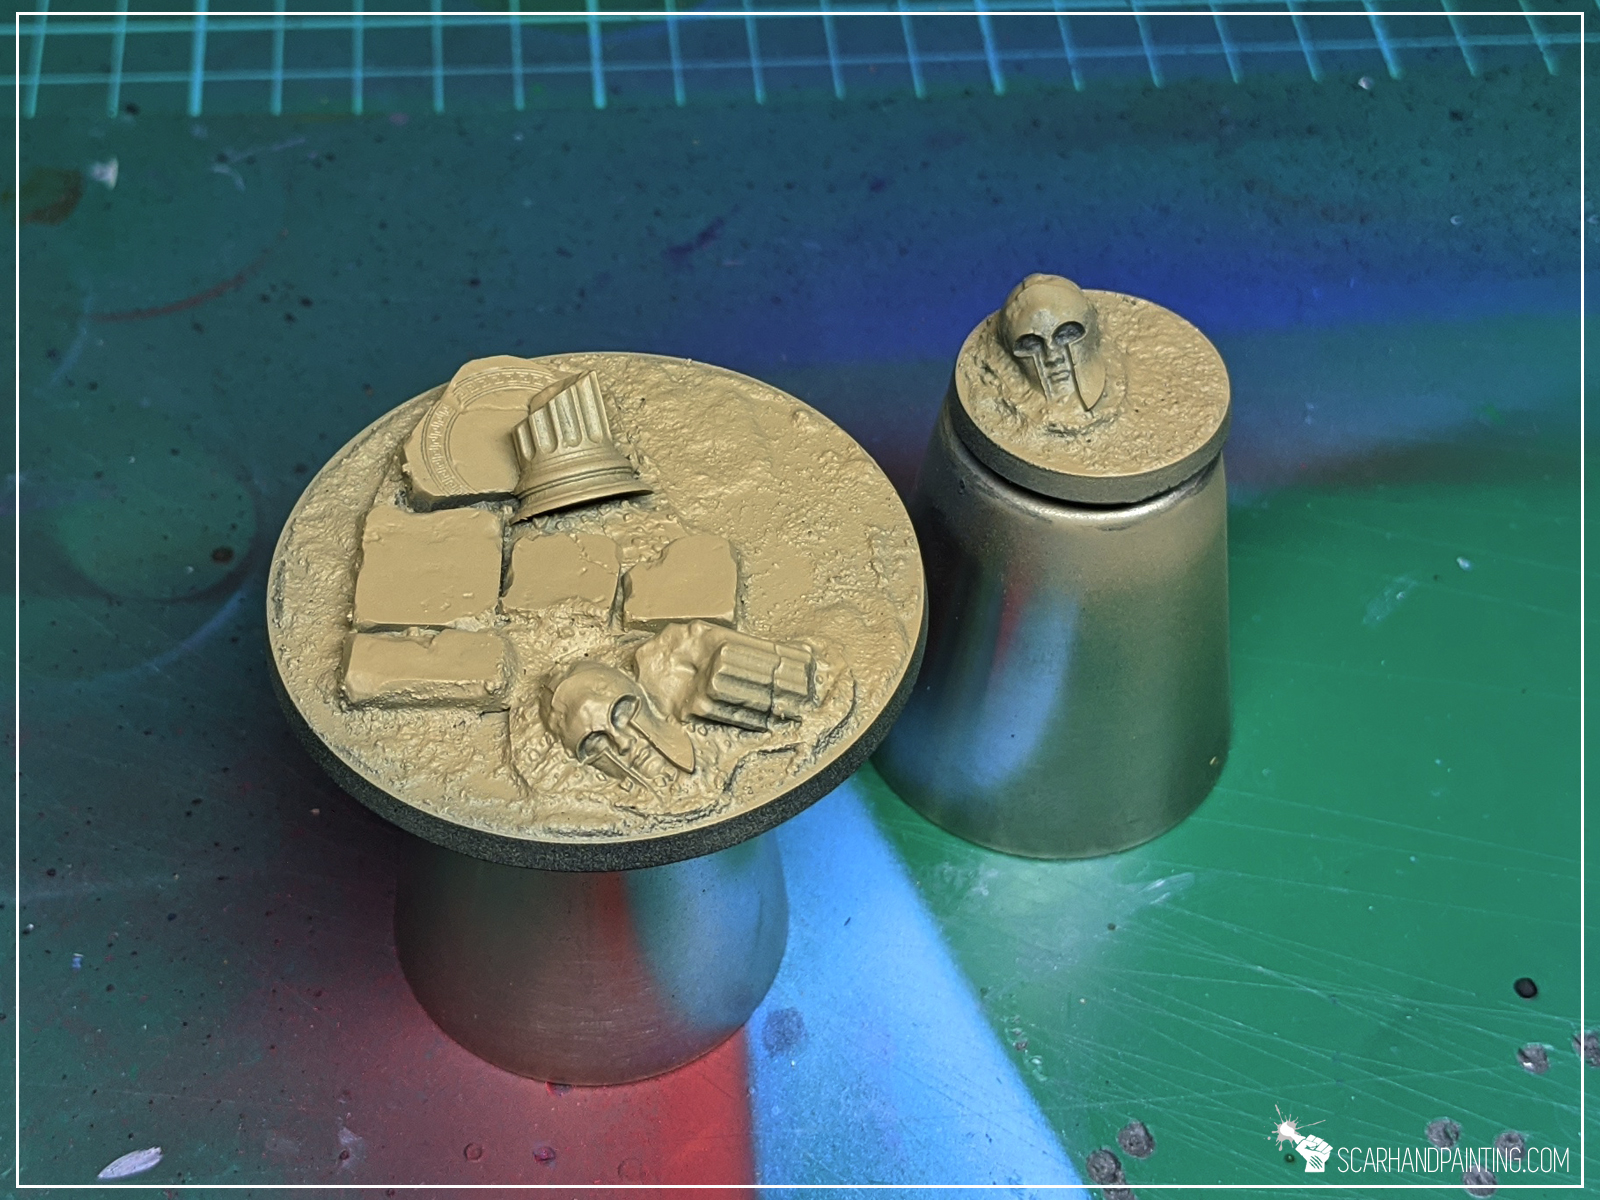
Step two: Main color
I then airbrushed Vallejo Desert Yellow over entire base. Once dry I applied Vallejo European Dust Wash.
Step two: Secondary color
For ruins I choose Vallejo Cold Grey, followed by a wash of water thinned Vallejo Dark Panzer Grey.
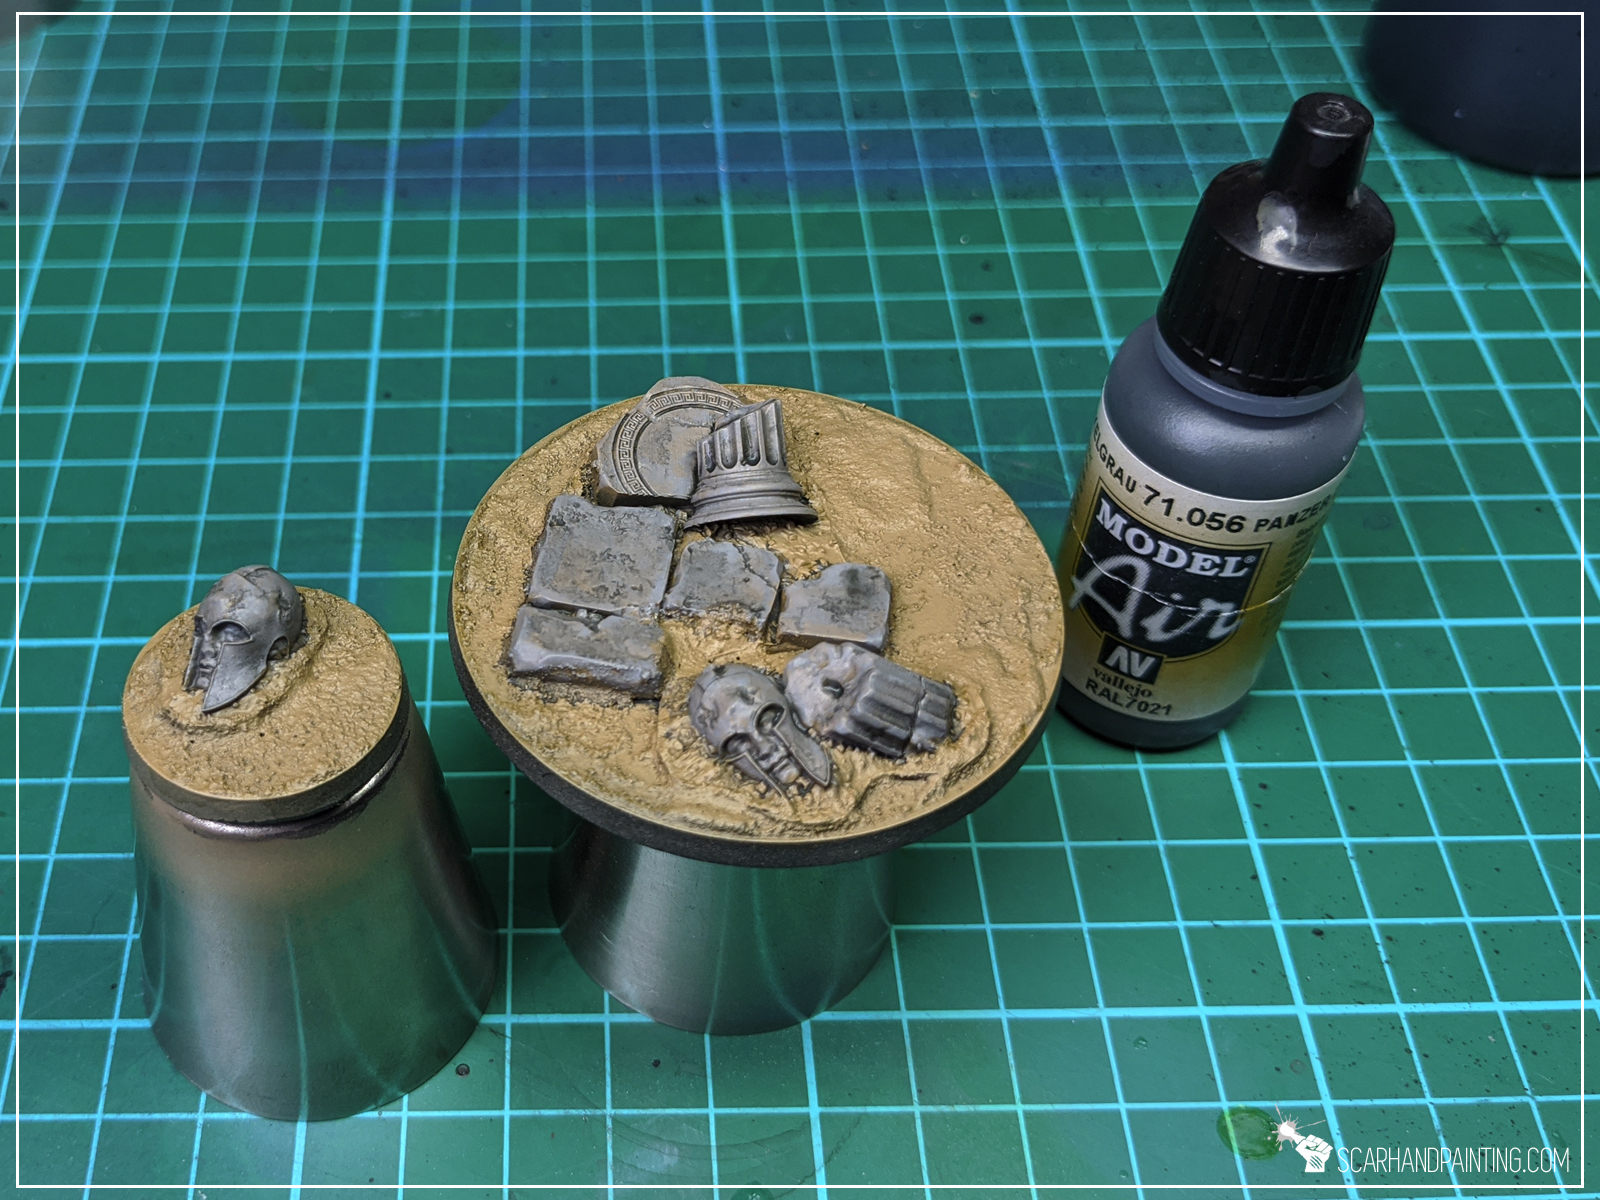
Step tree: Highlights
I then highlighted both colors with a soft drybrush of Games Workshop Flayed One Flesh. I also applied some highlights with the same color on the edges of ruins – just a bit to make them pop.

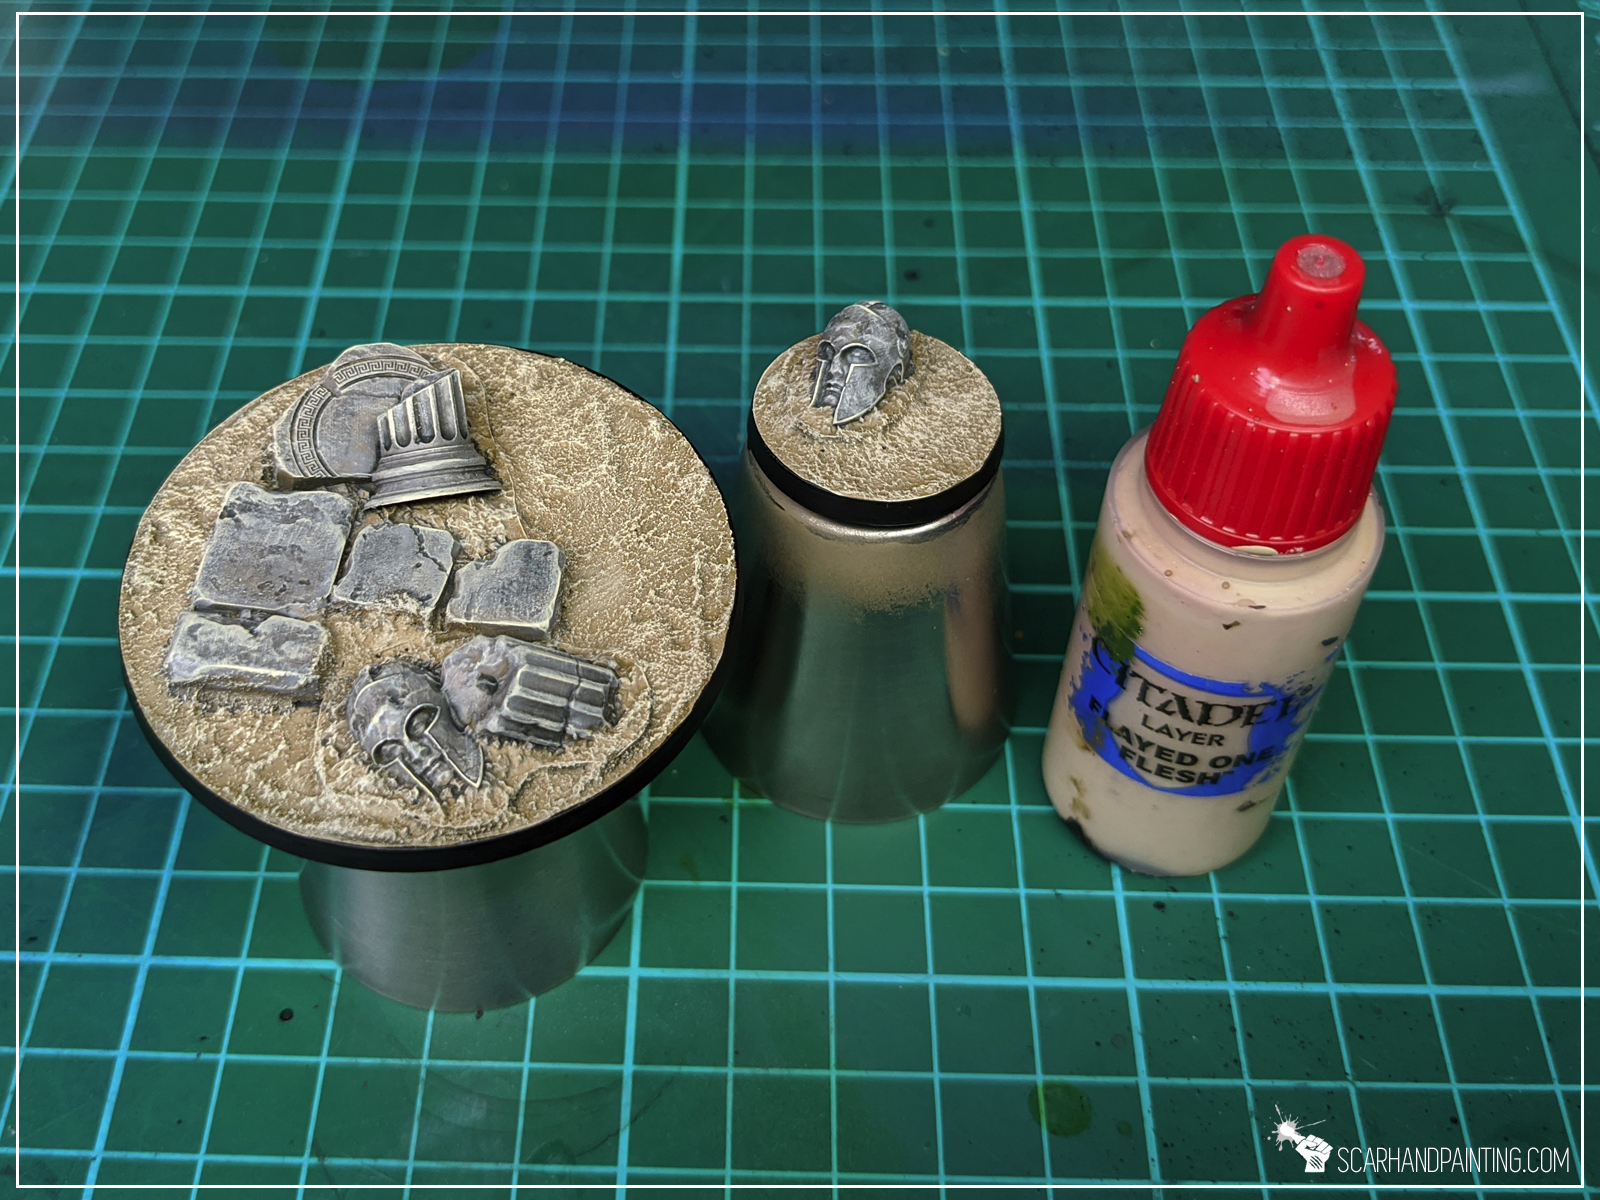
Step tree: Tufts
Finally I applied Gamers Grass Burned Wild Tufts.

Job done! There’s some poetry in both starting and finishing a base using products from the same company 😛 Either way – I hope this was a pleasant tutorial and that you saw how simple the process is. If you want to learn more about Gamers Grass products – here’s my review:

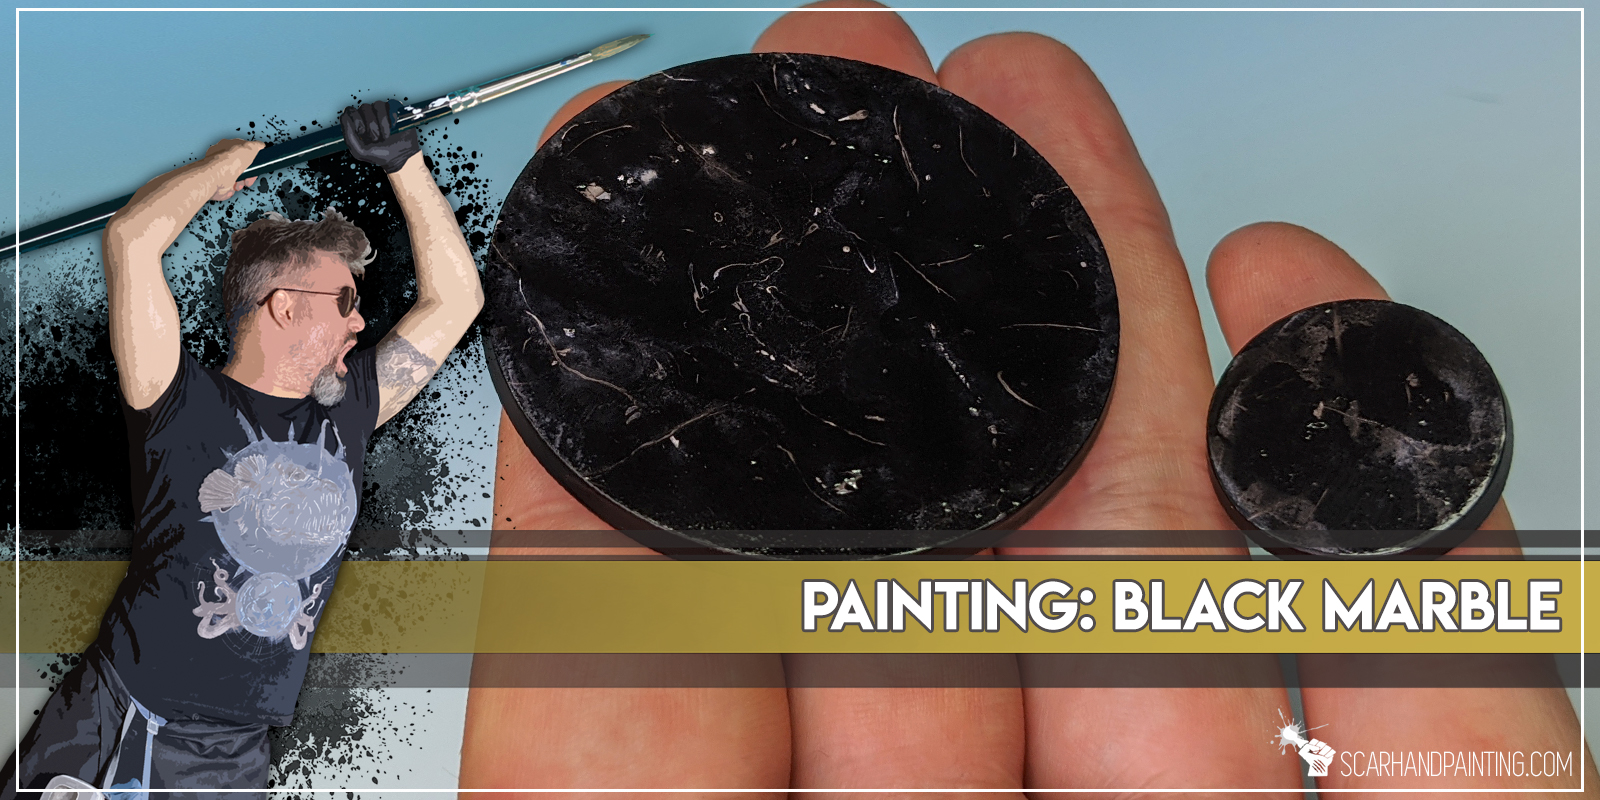
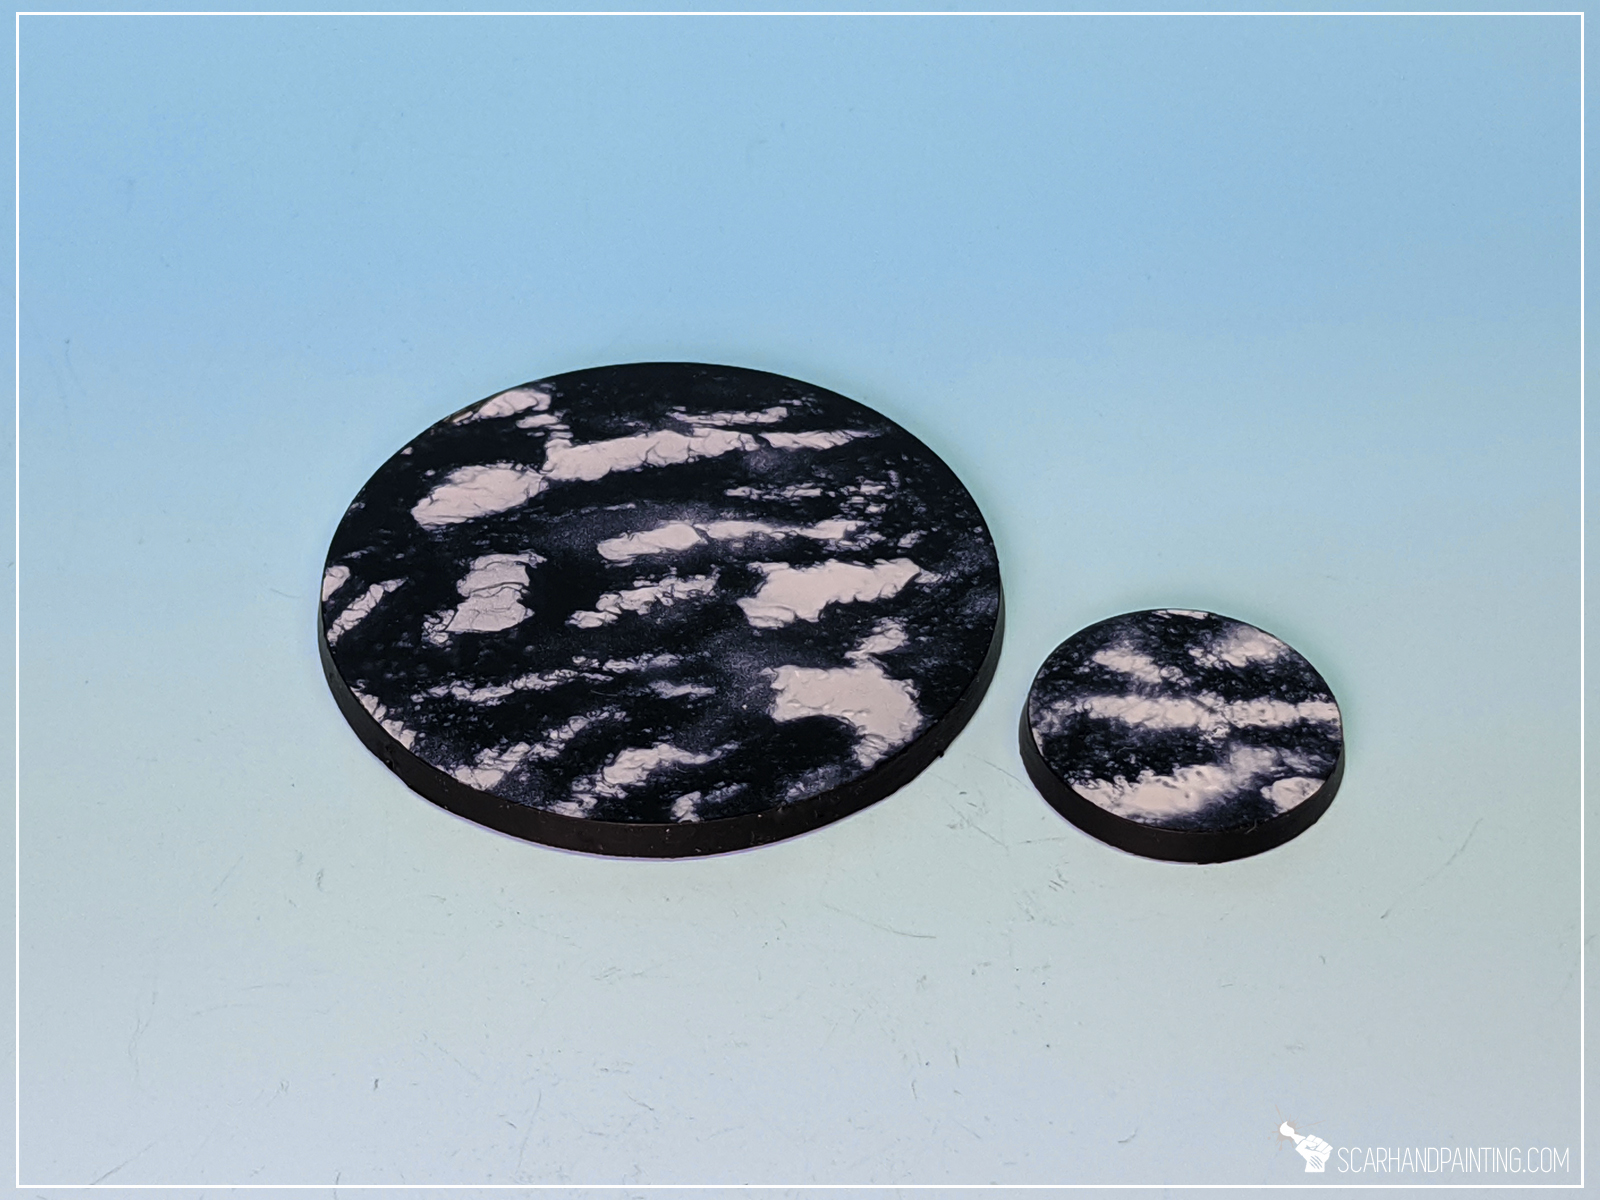
Welcome to Painting Black Marbe tutorial. Here I will take you on a Step-by-step trip through the process of painting black marble.
Before we start, some notes:
Step one: Undercoat
I started with an airbrushed layer of White.

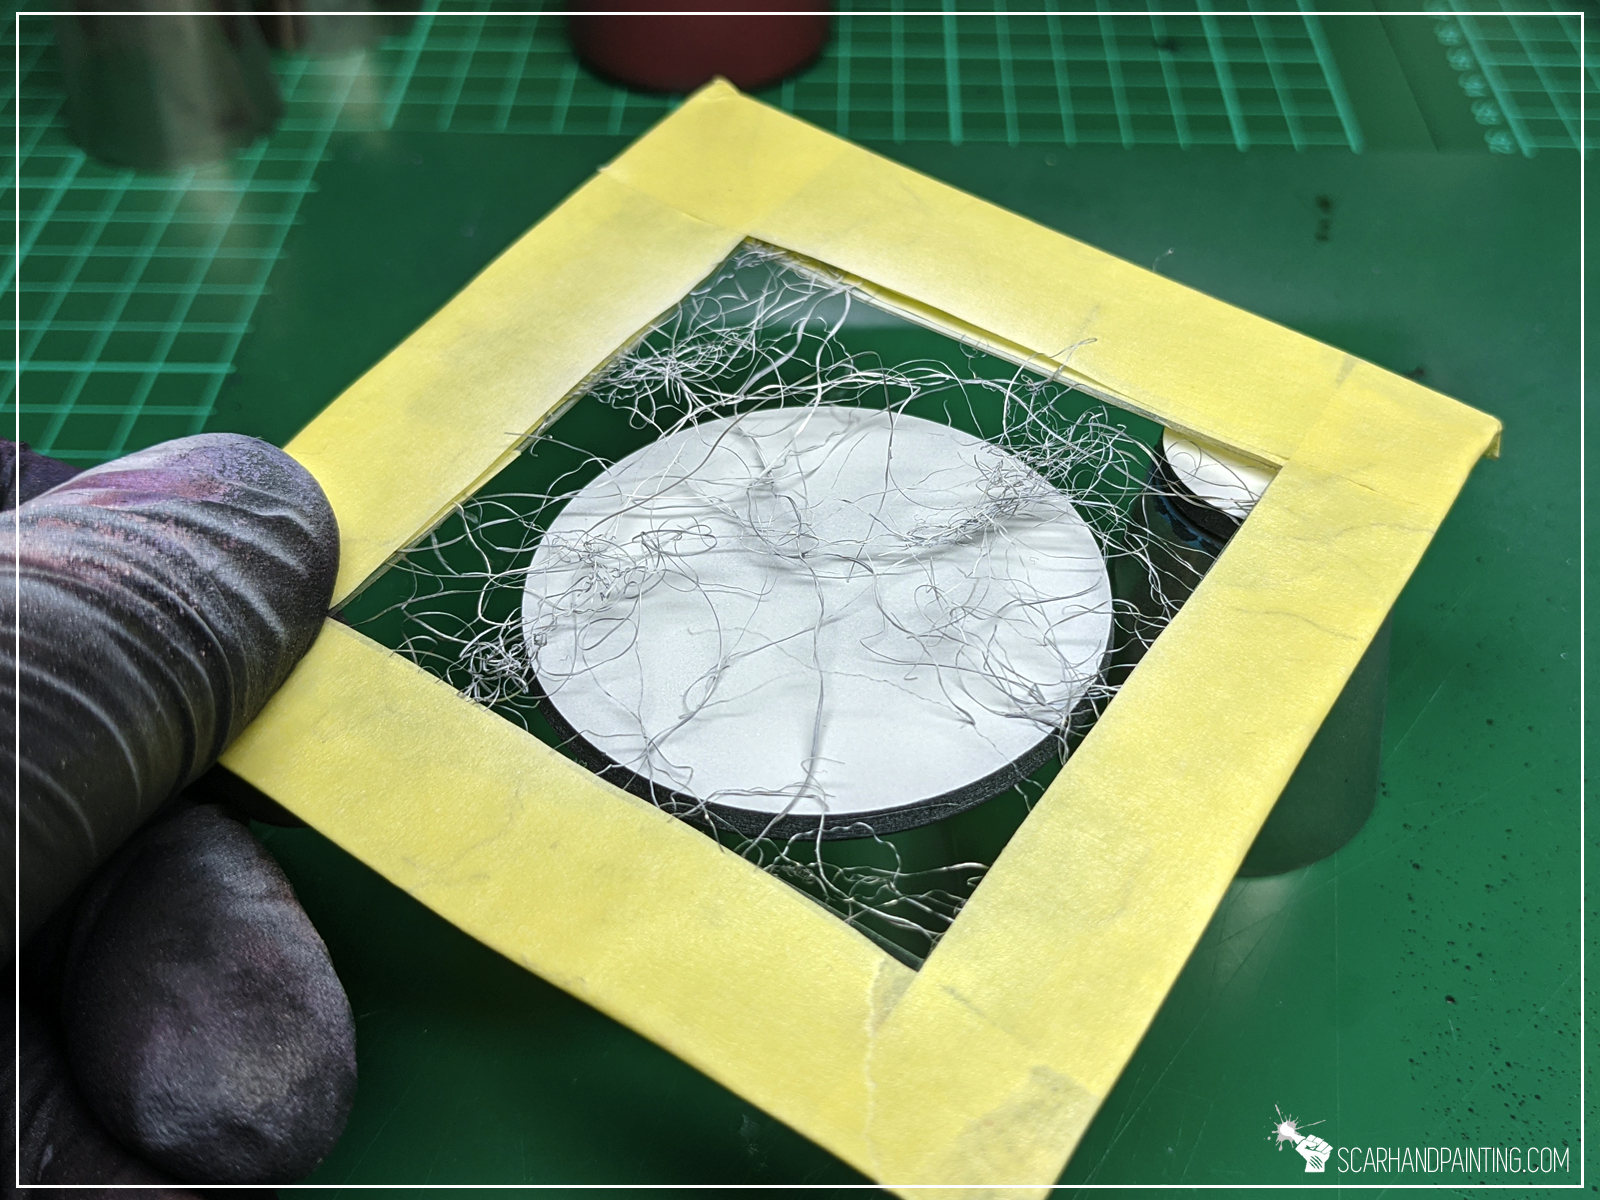
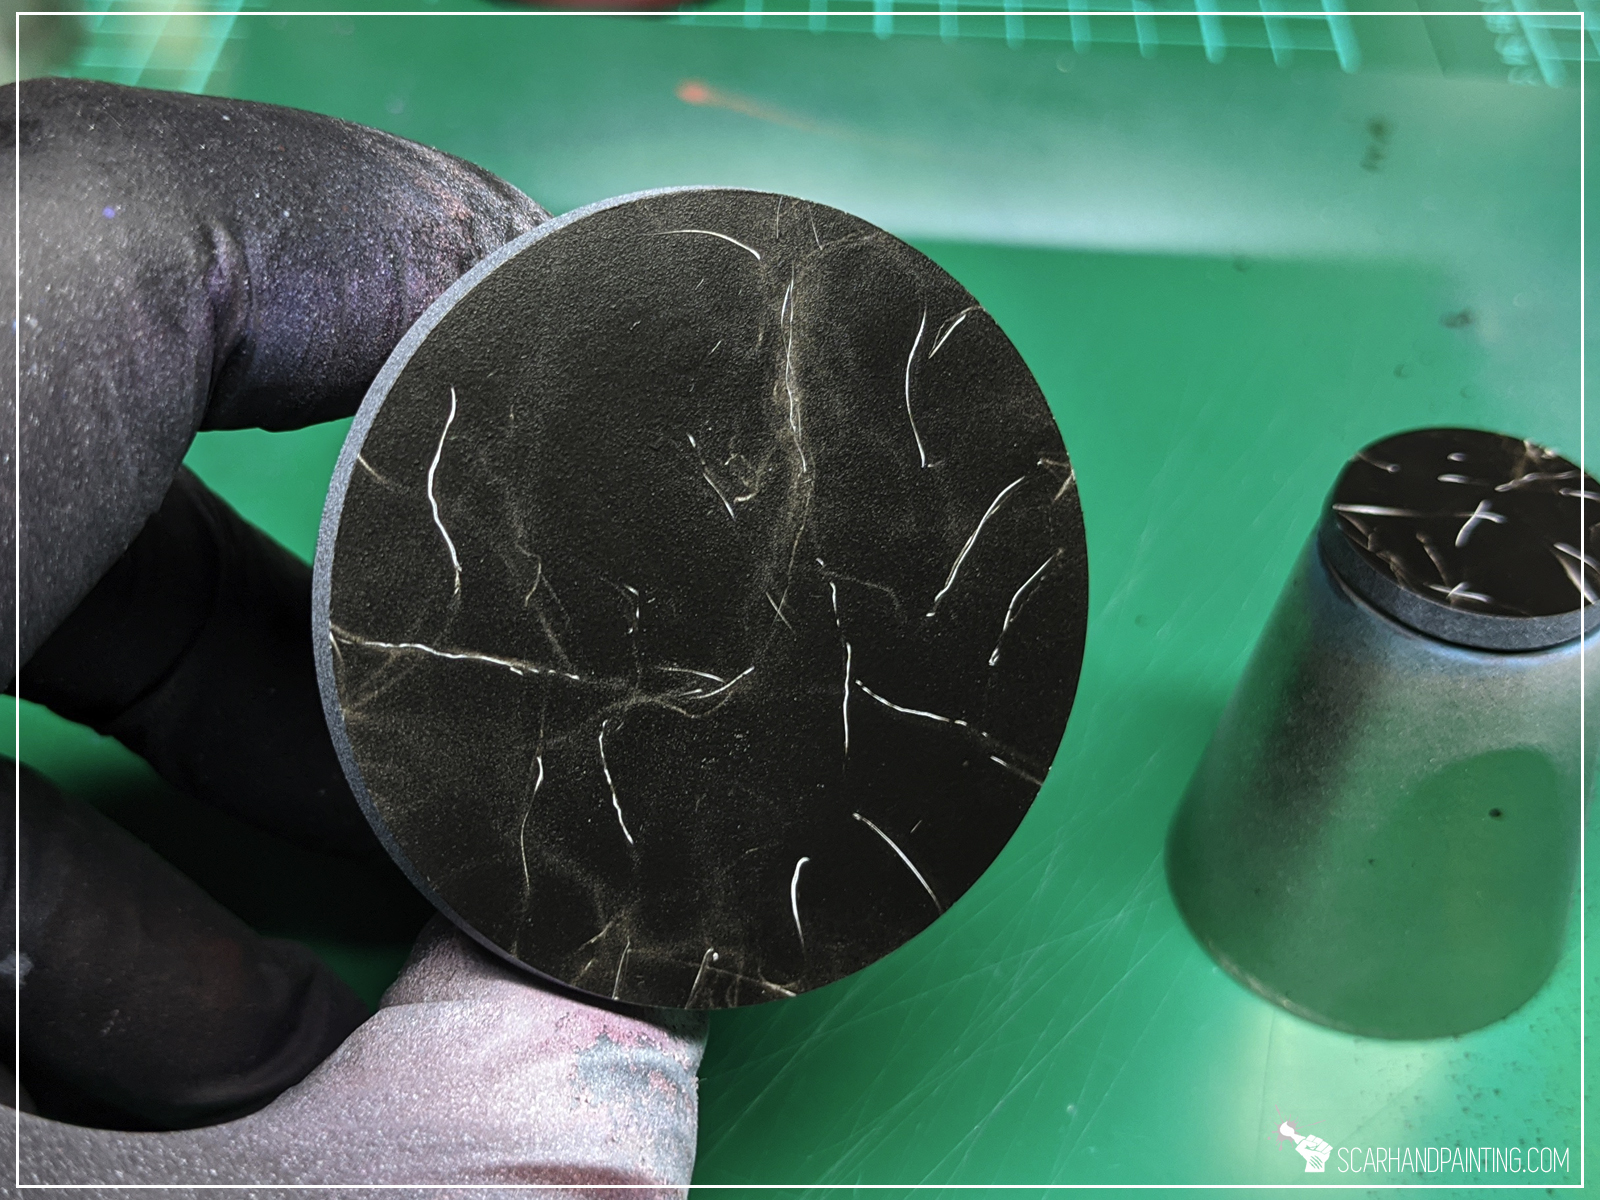
Step two: Base texture
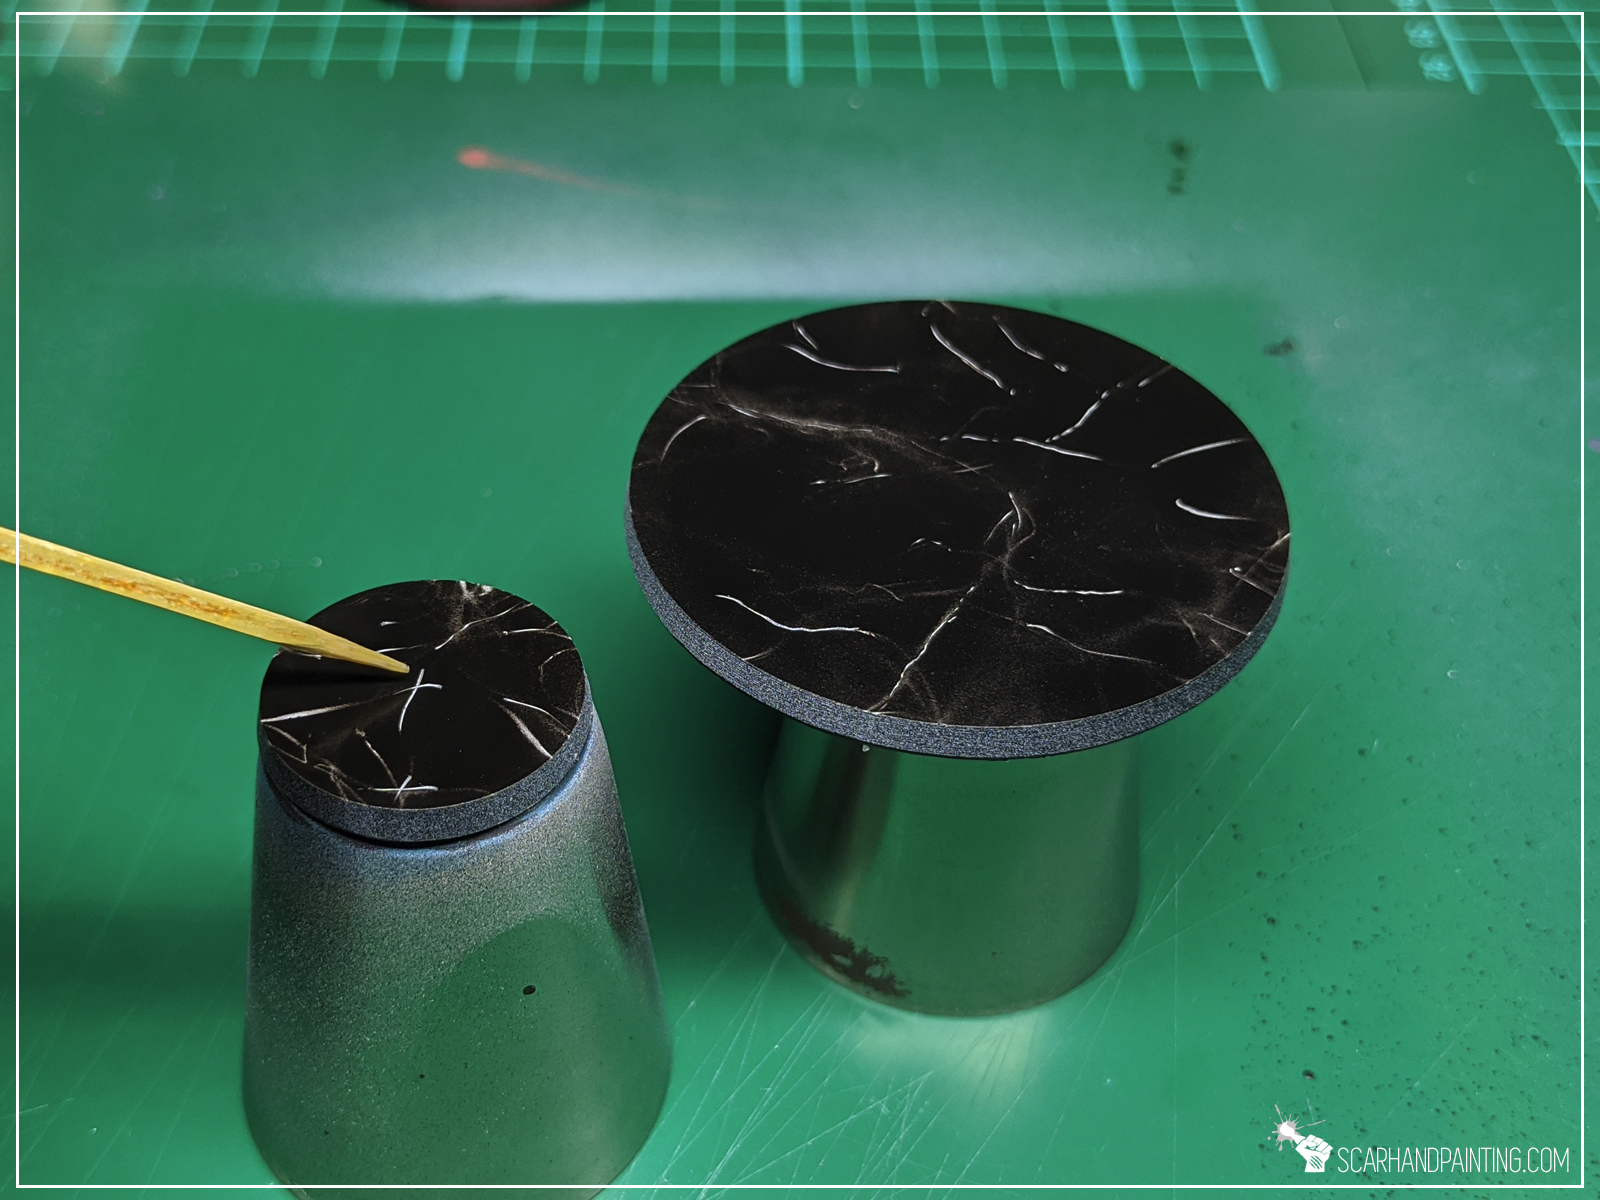
For this step I used a Steel Wool stencil prepared in the previous Tutorial: Painting Marble. I simply took few pieces of steel wool, taped them together and used them as a stencil. I then airbrushed black paint through the stencil. Furthermore in some places I have removed black paint with a wet toothpick to create strong white lines.
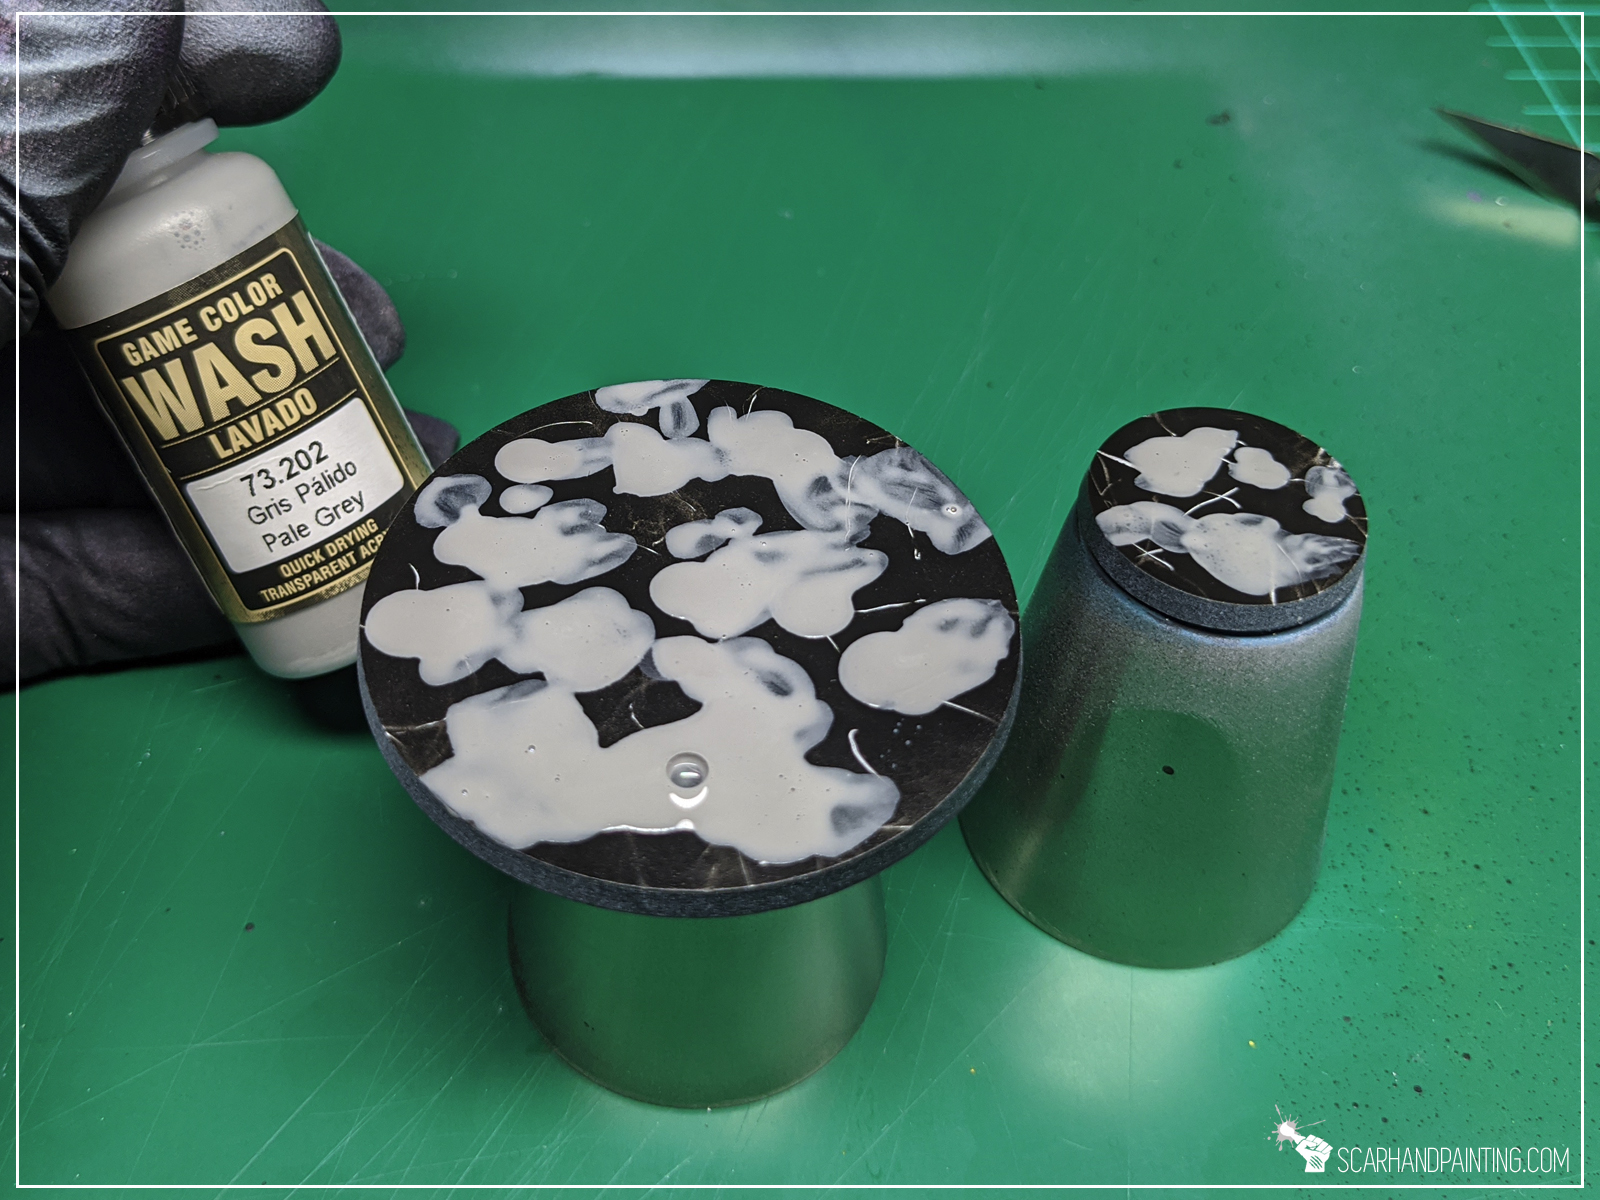
Step three: Texture
Next I added a layer of texture by manually applied stains of Vallejo Pale Grey Wash. After waiting half a minute I removed the excess of the paint with a paper towel.


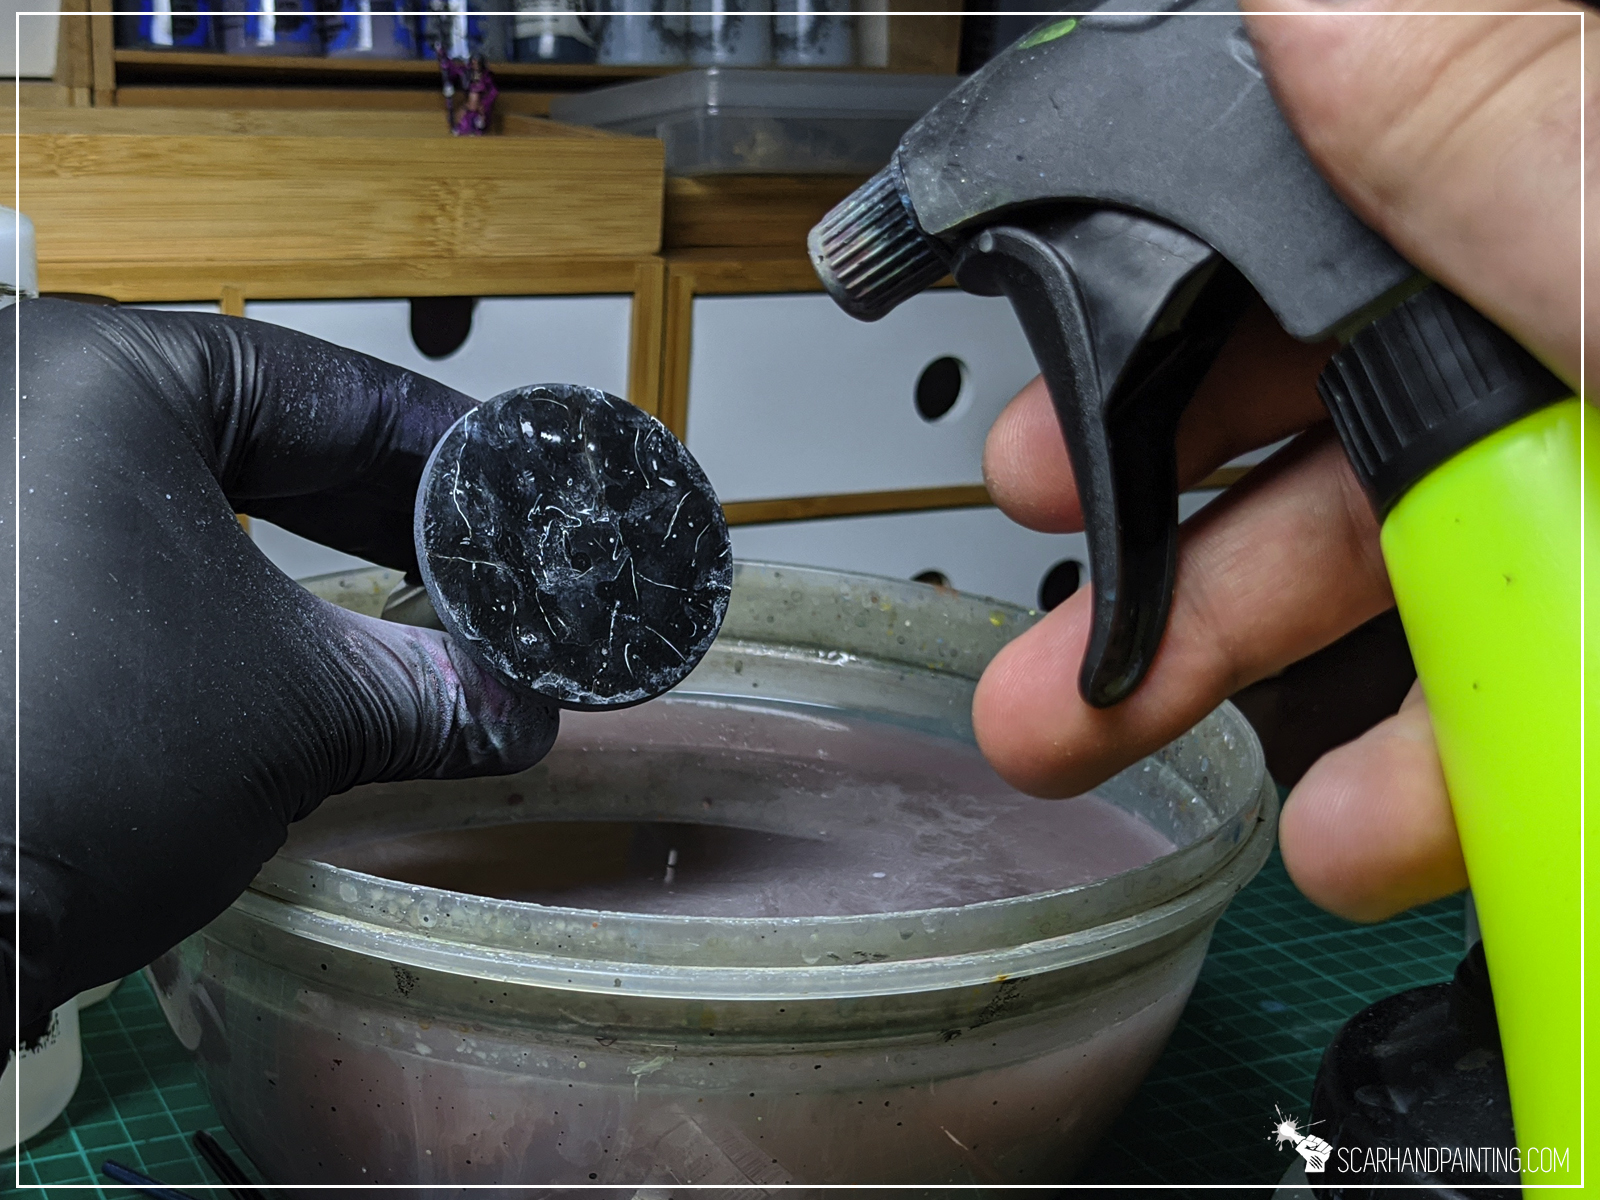
Step four: More texture
I then applied stains of Vallejo Air White, but this time removed the excess of the paint with slightly pressured water. You can simply airbrush water with around 0,5 bar pressure if you don’t have a sprinkler.

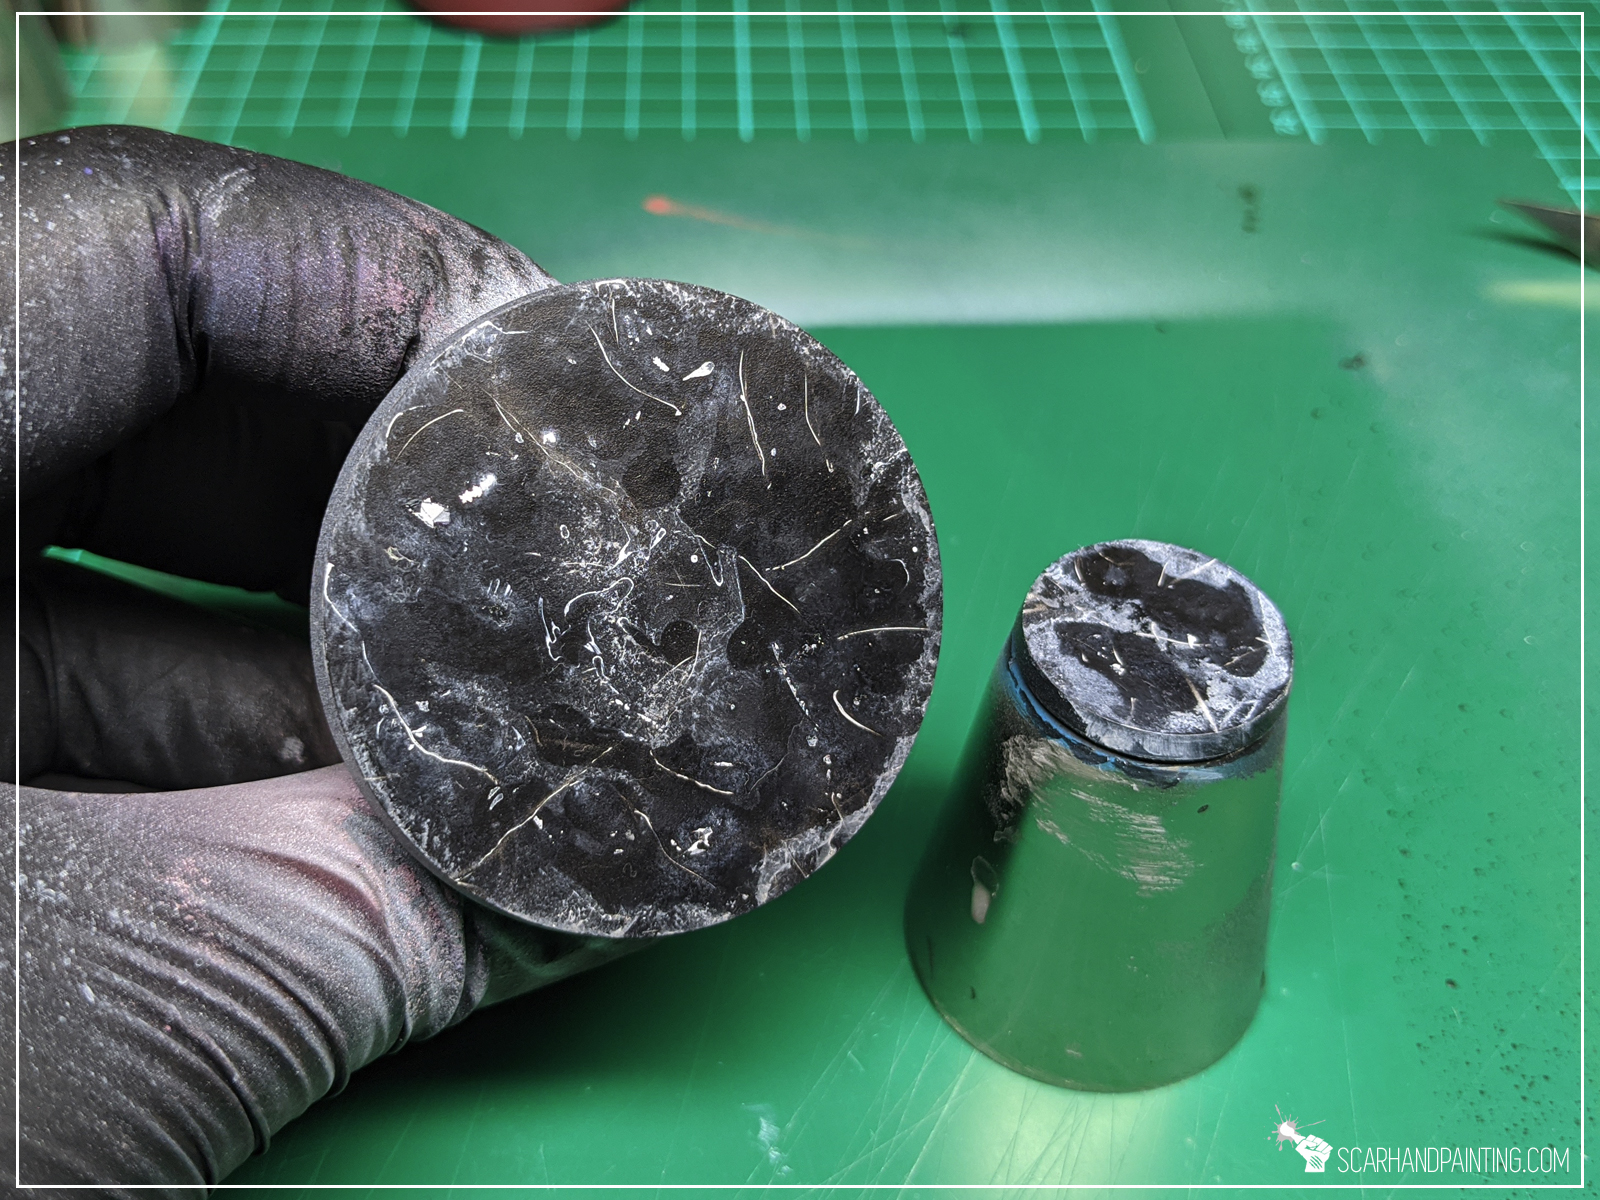
Step five: Sealing the colour
To seal the colour I applied an even, smooth layer of Army Painter Dark Tone Ink.
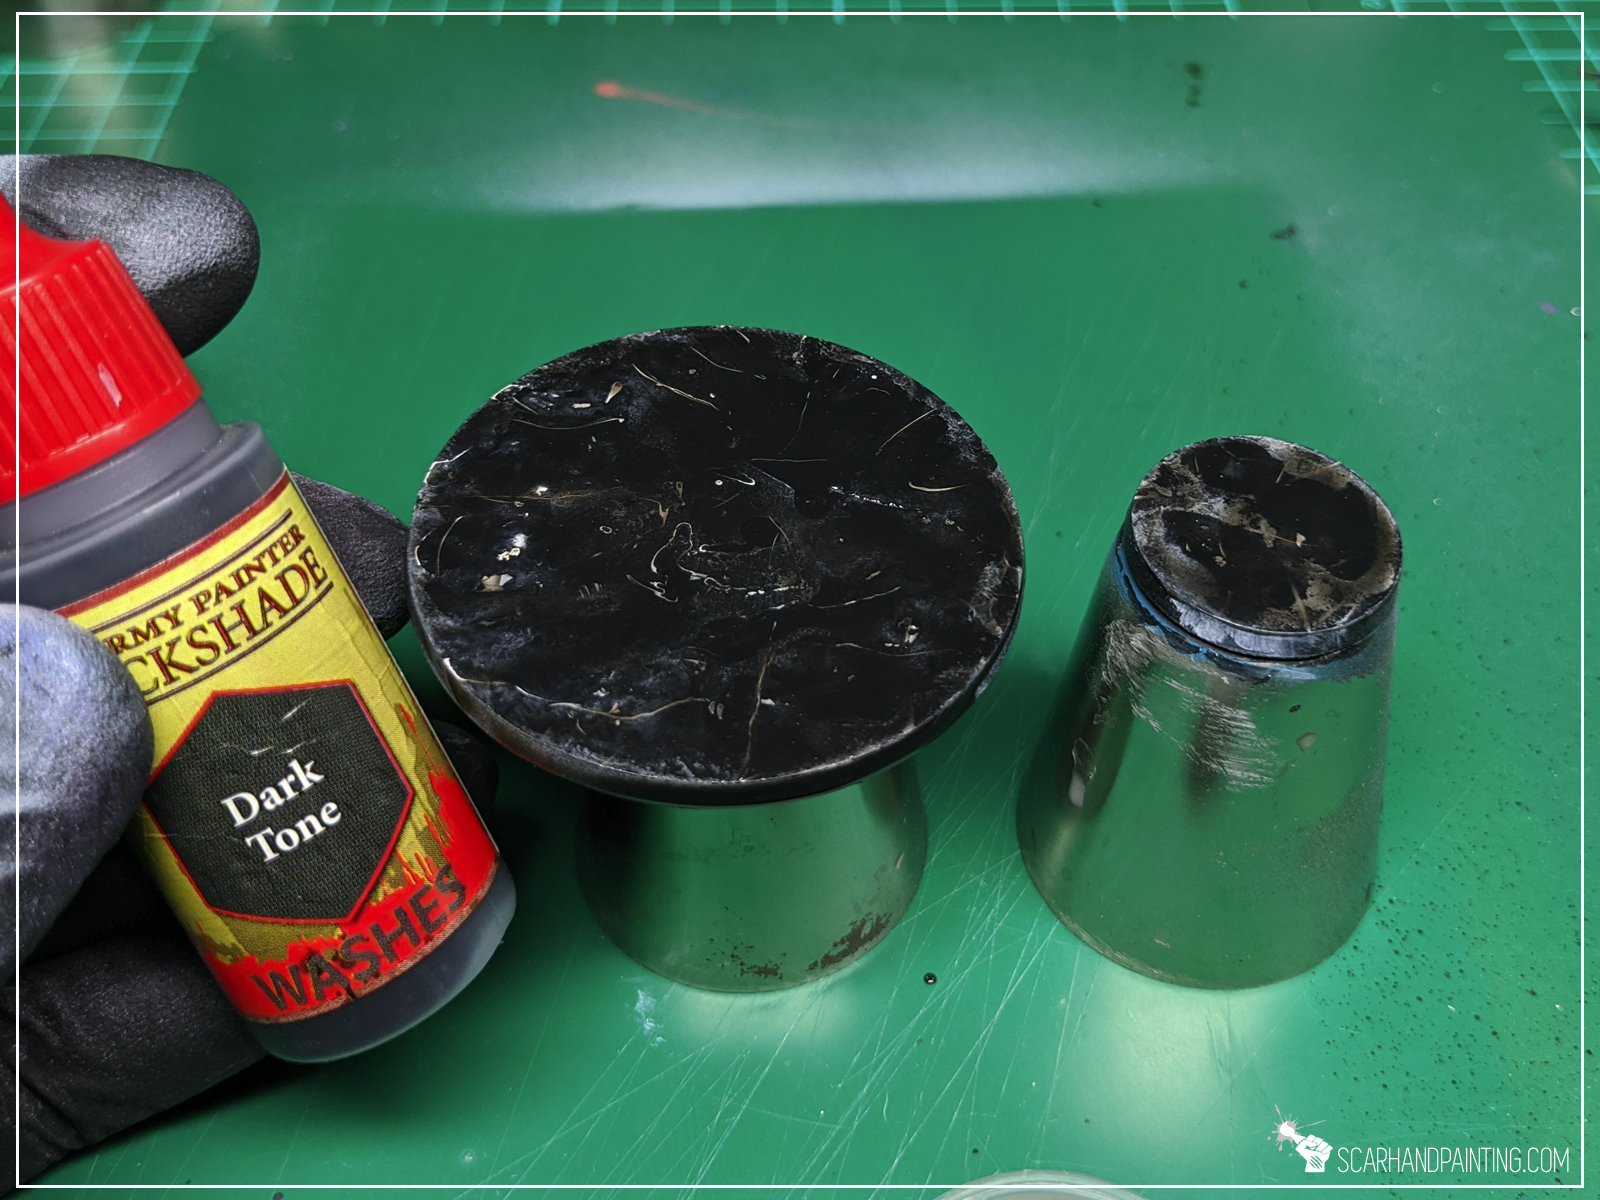

Step five: Gloss
Finally I applied two layers of airbrushed Gloss Varnish. This resulted in a nice polished glossy look but also added that 3d look to different layers.
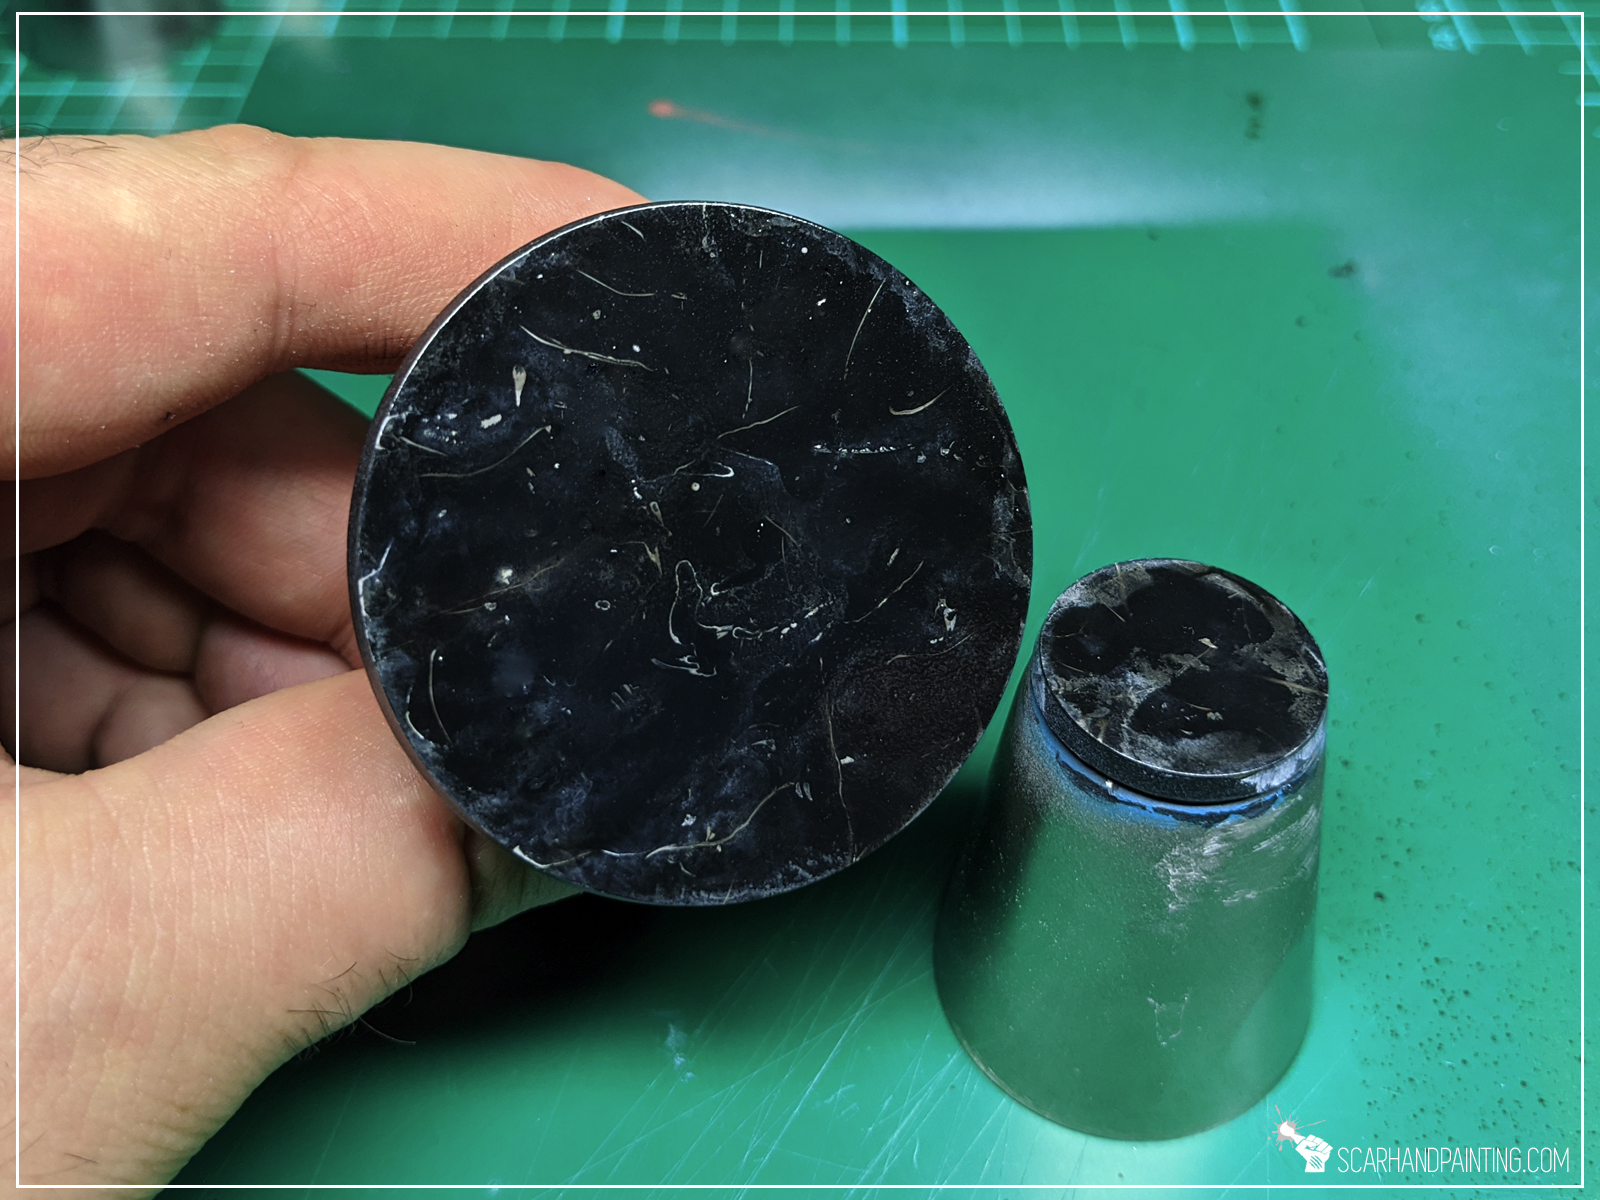
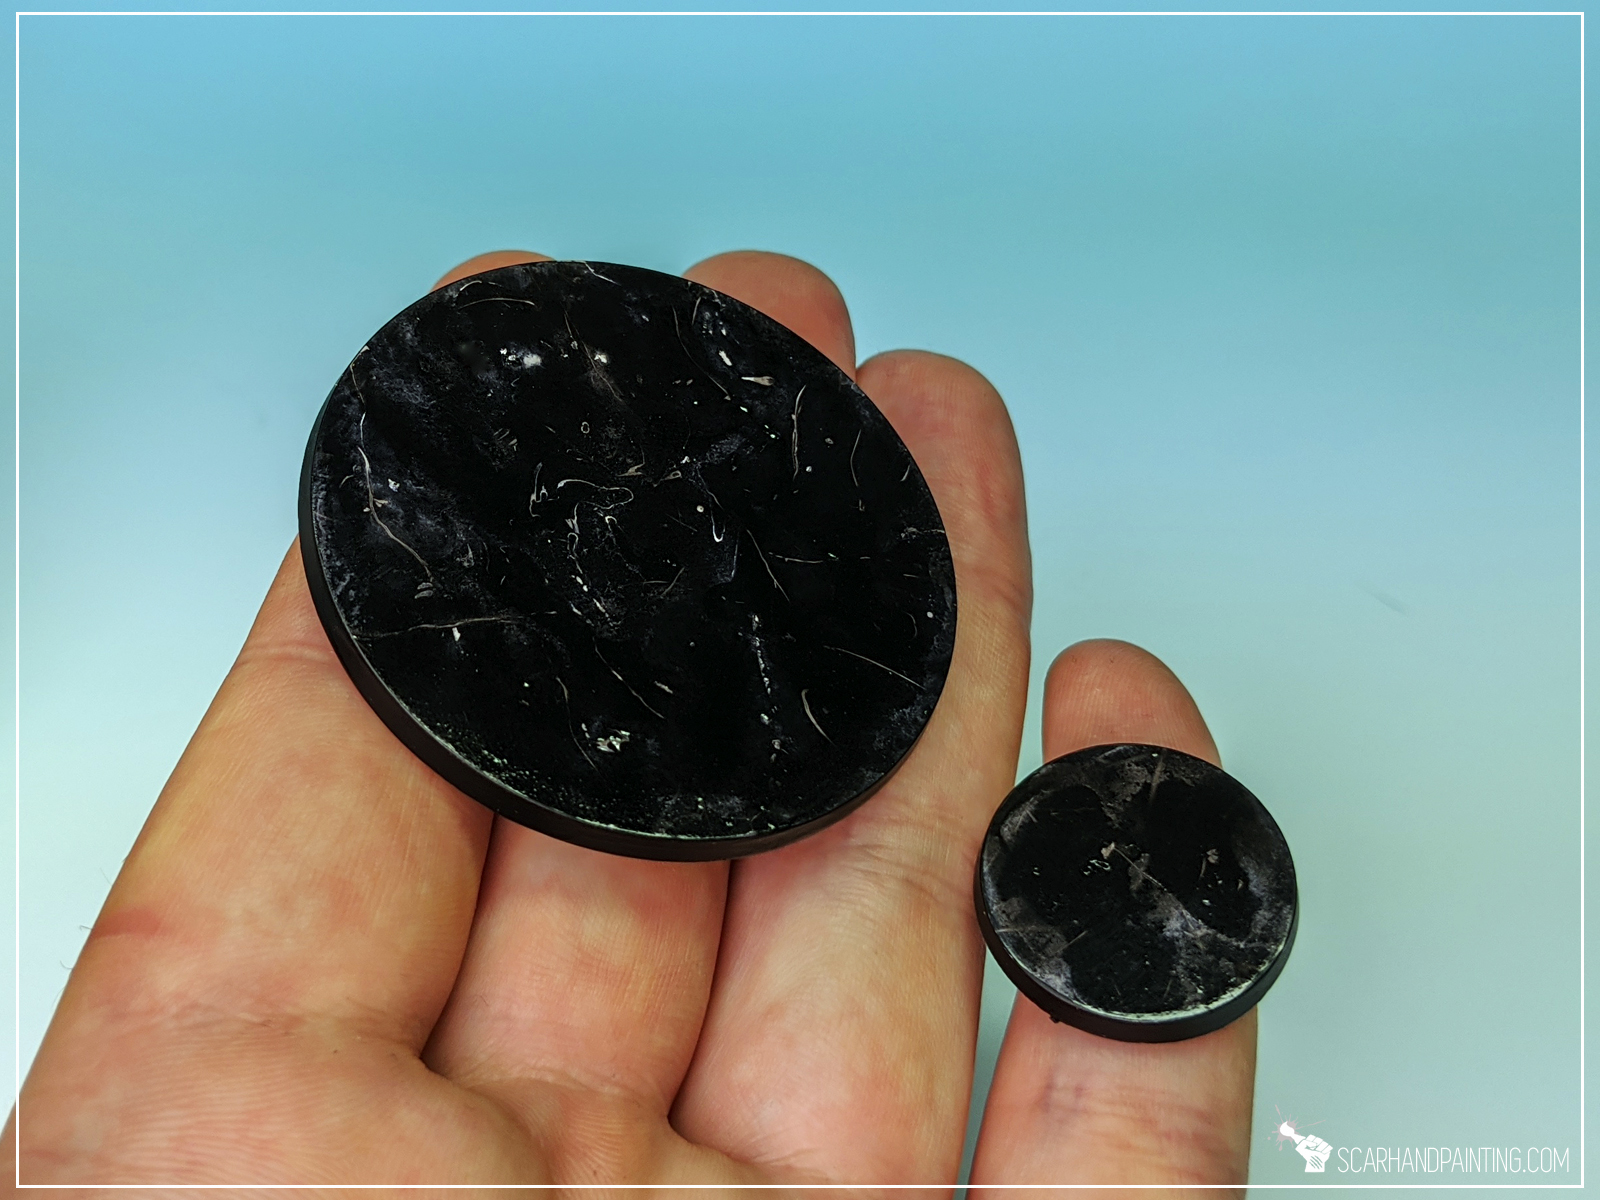
Here’s how the finished base looks like.


This bonus method is much simpler and I think it had a lot of potential, still I stumbled upon it by accident just fed ways ago and hadn’t had time to test it thoroughly. Here’s basics:
Done! Seems mind blowing? Surely is. Have I done this right? Totally no 😛 White spots are too large, but as mentioned – there’s potential in the method and at some point I will find a way to make it work.


Note from the author: I hope you enjoyed this article. Be sure to let me know what you think in the comments or at my facebook. If you ever use the tutorial – please tag me at facebook or send pics through Line app to scarhandpainting, so I can enjoy your work 😉
![]()
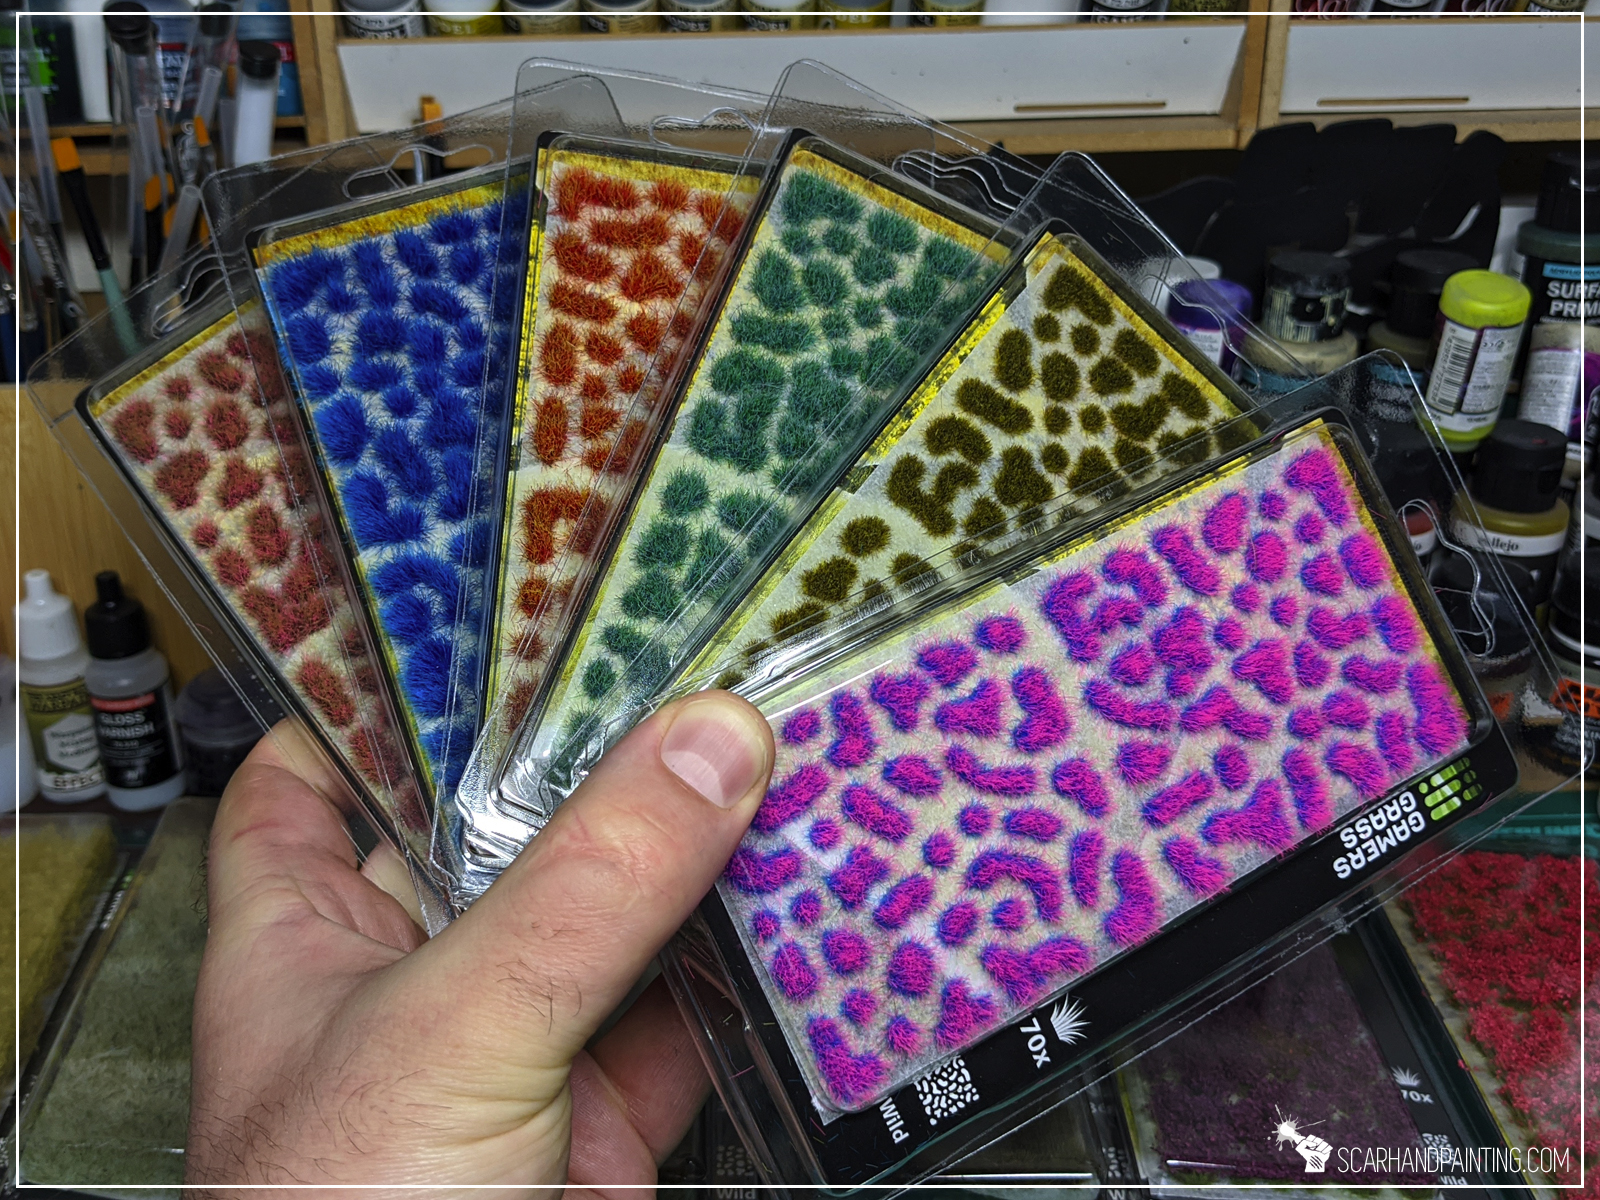
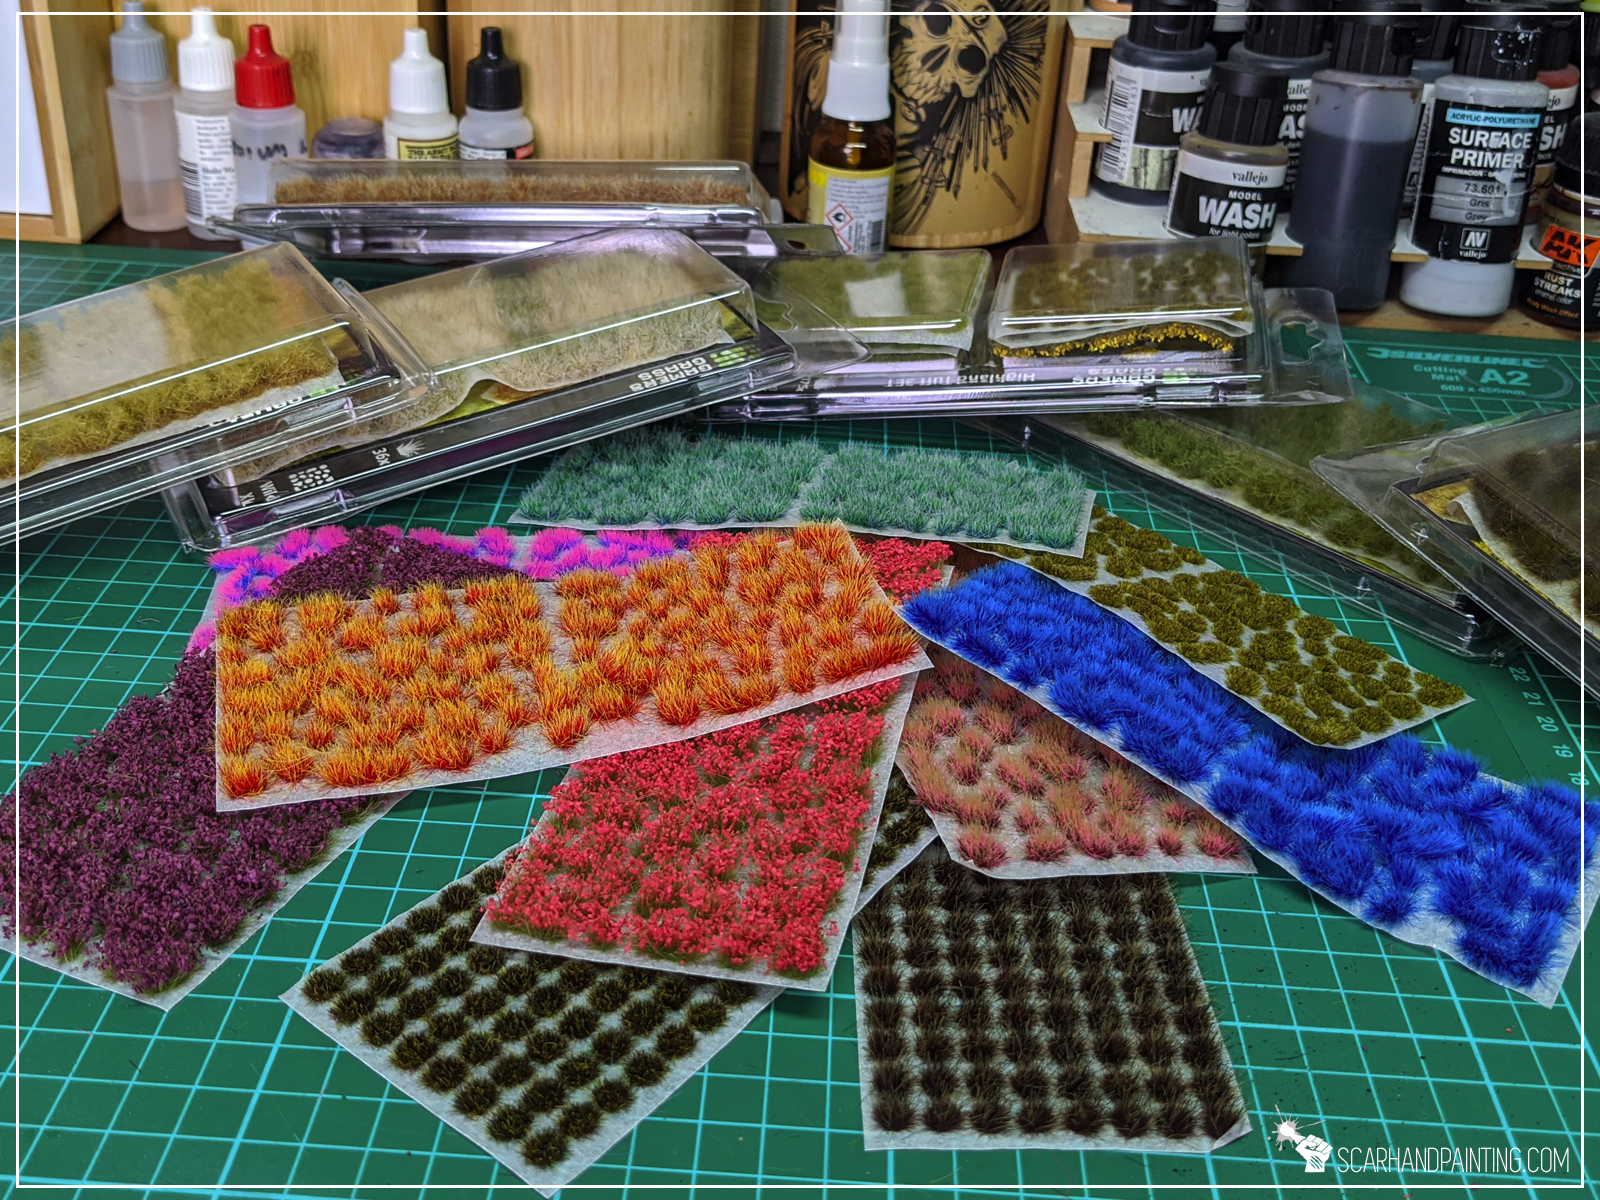
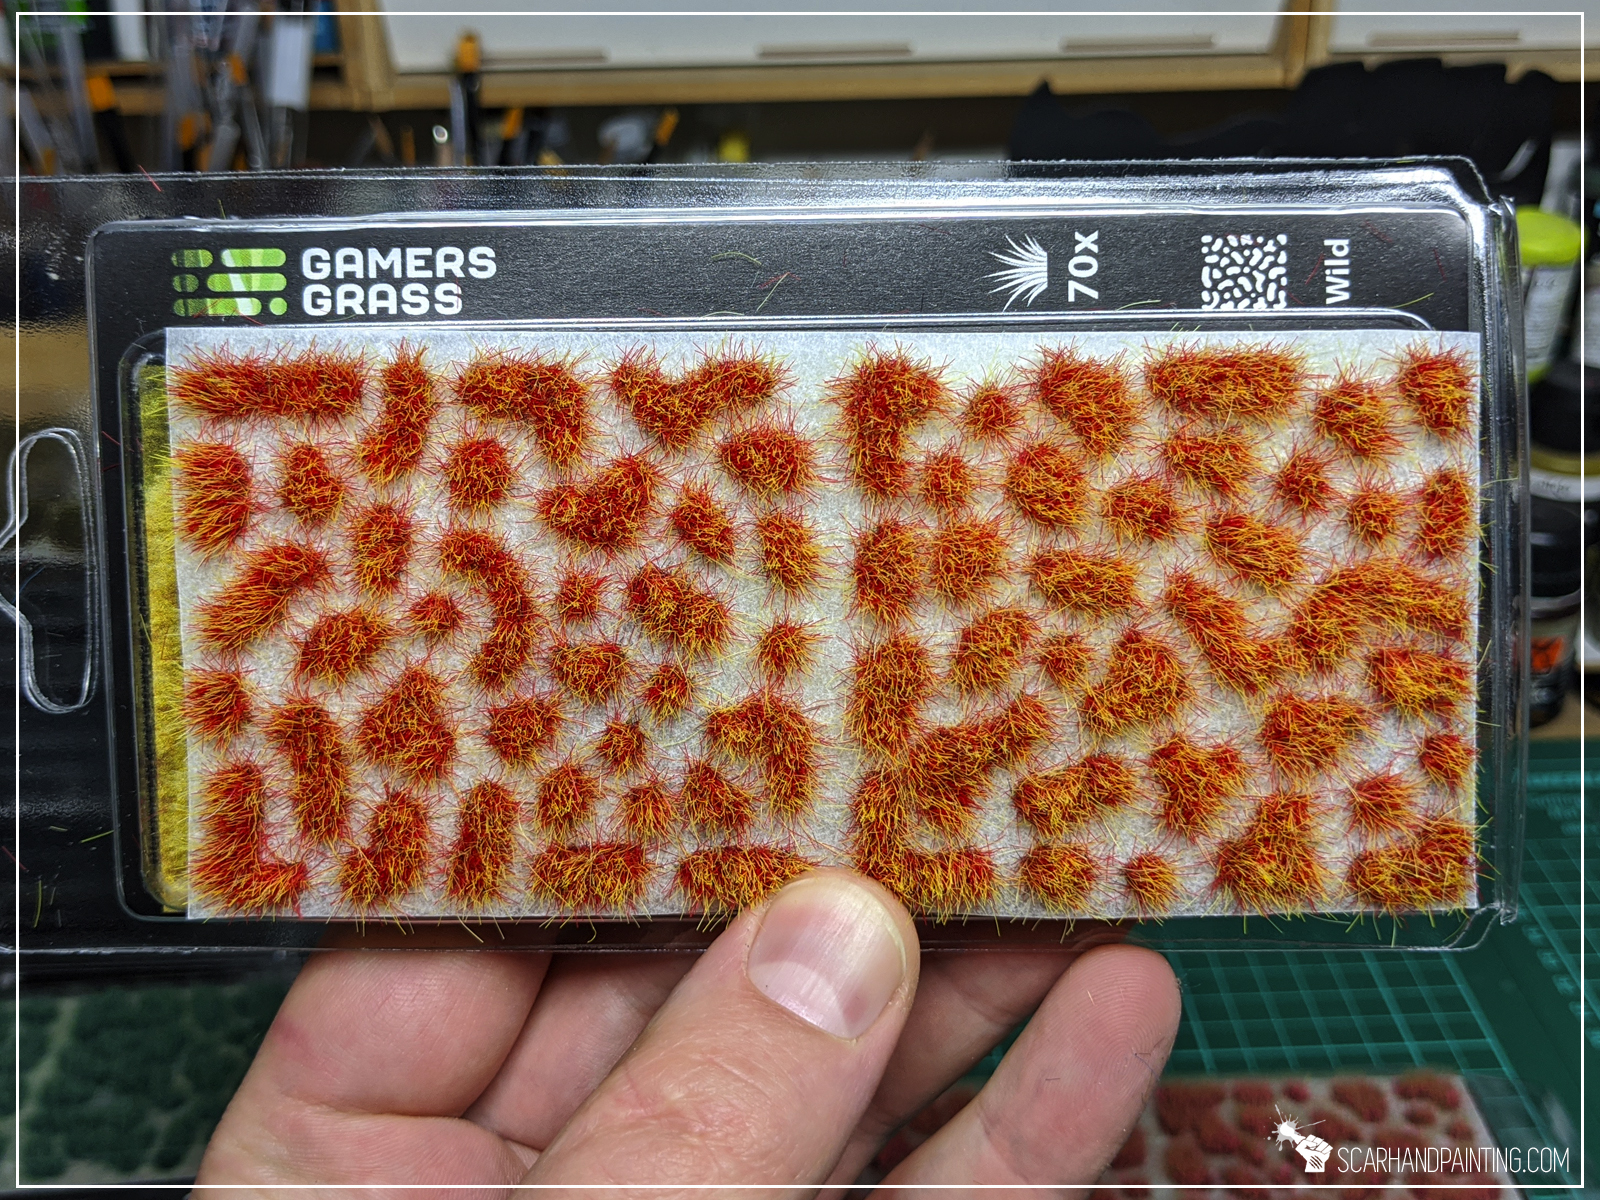
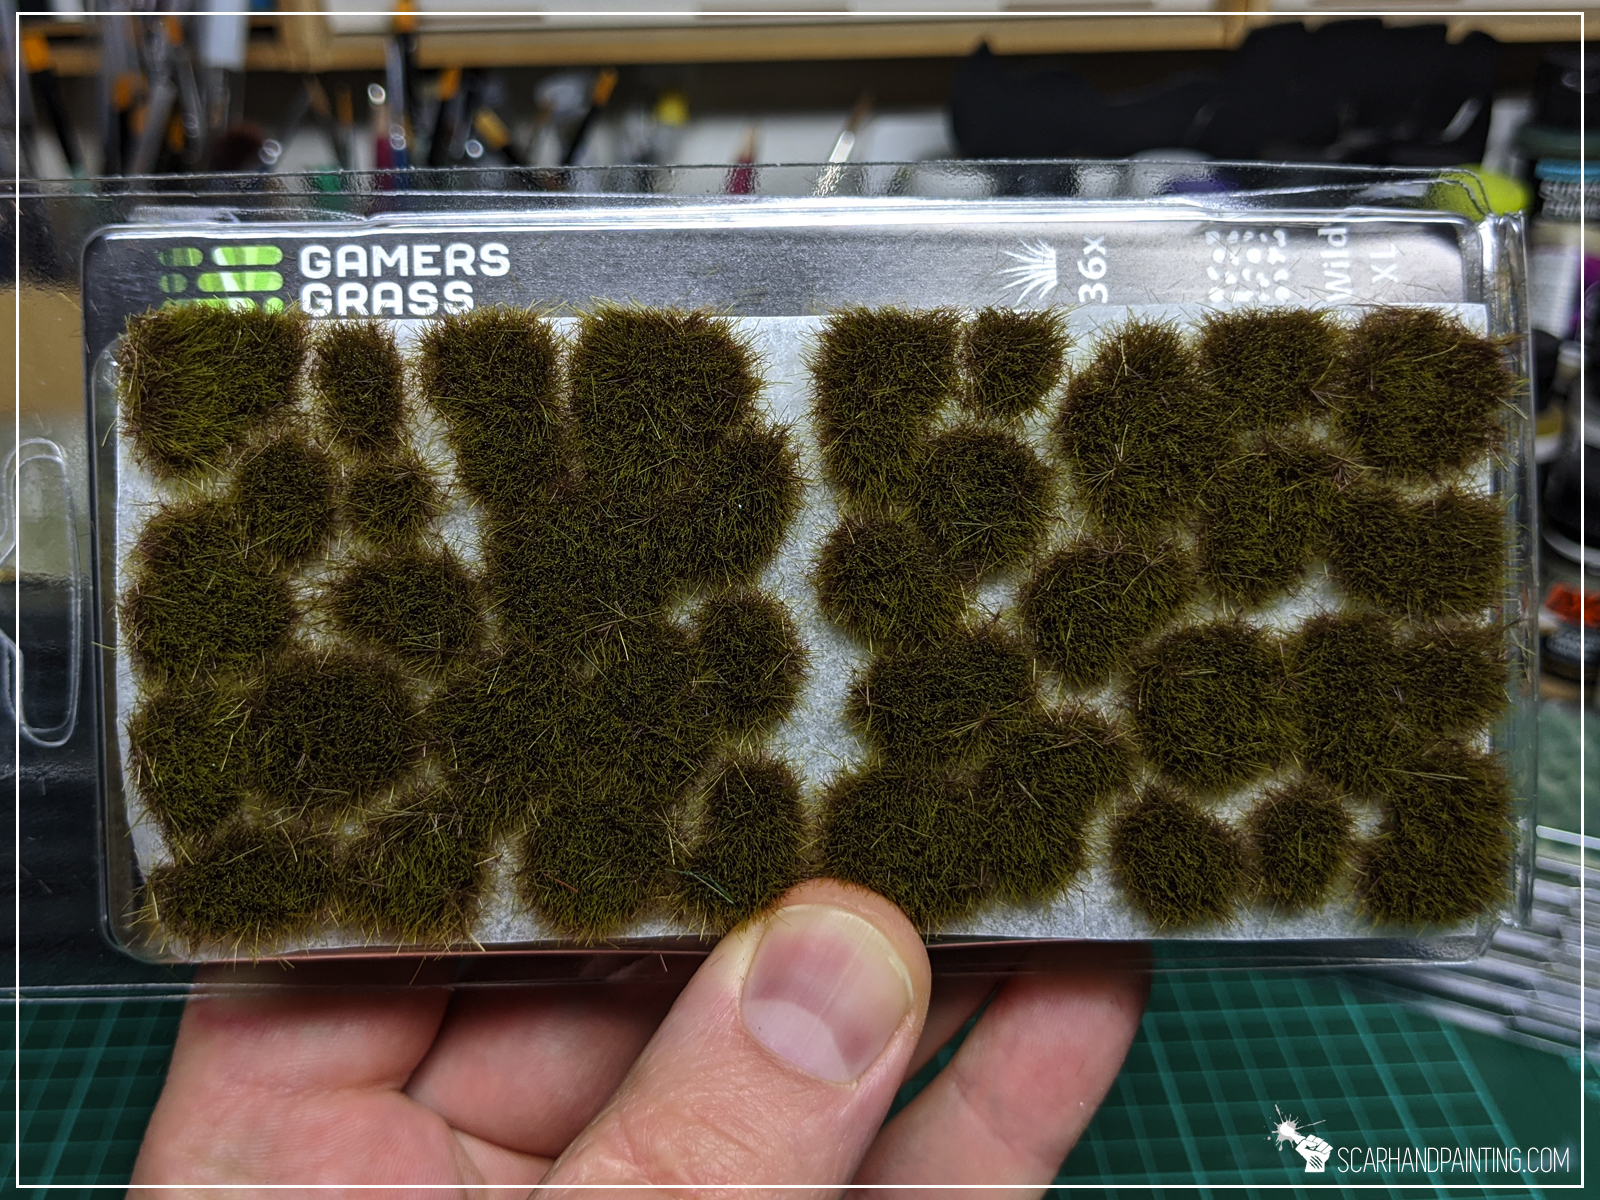
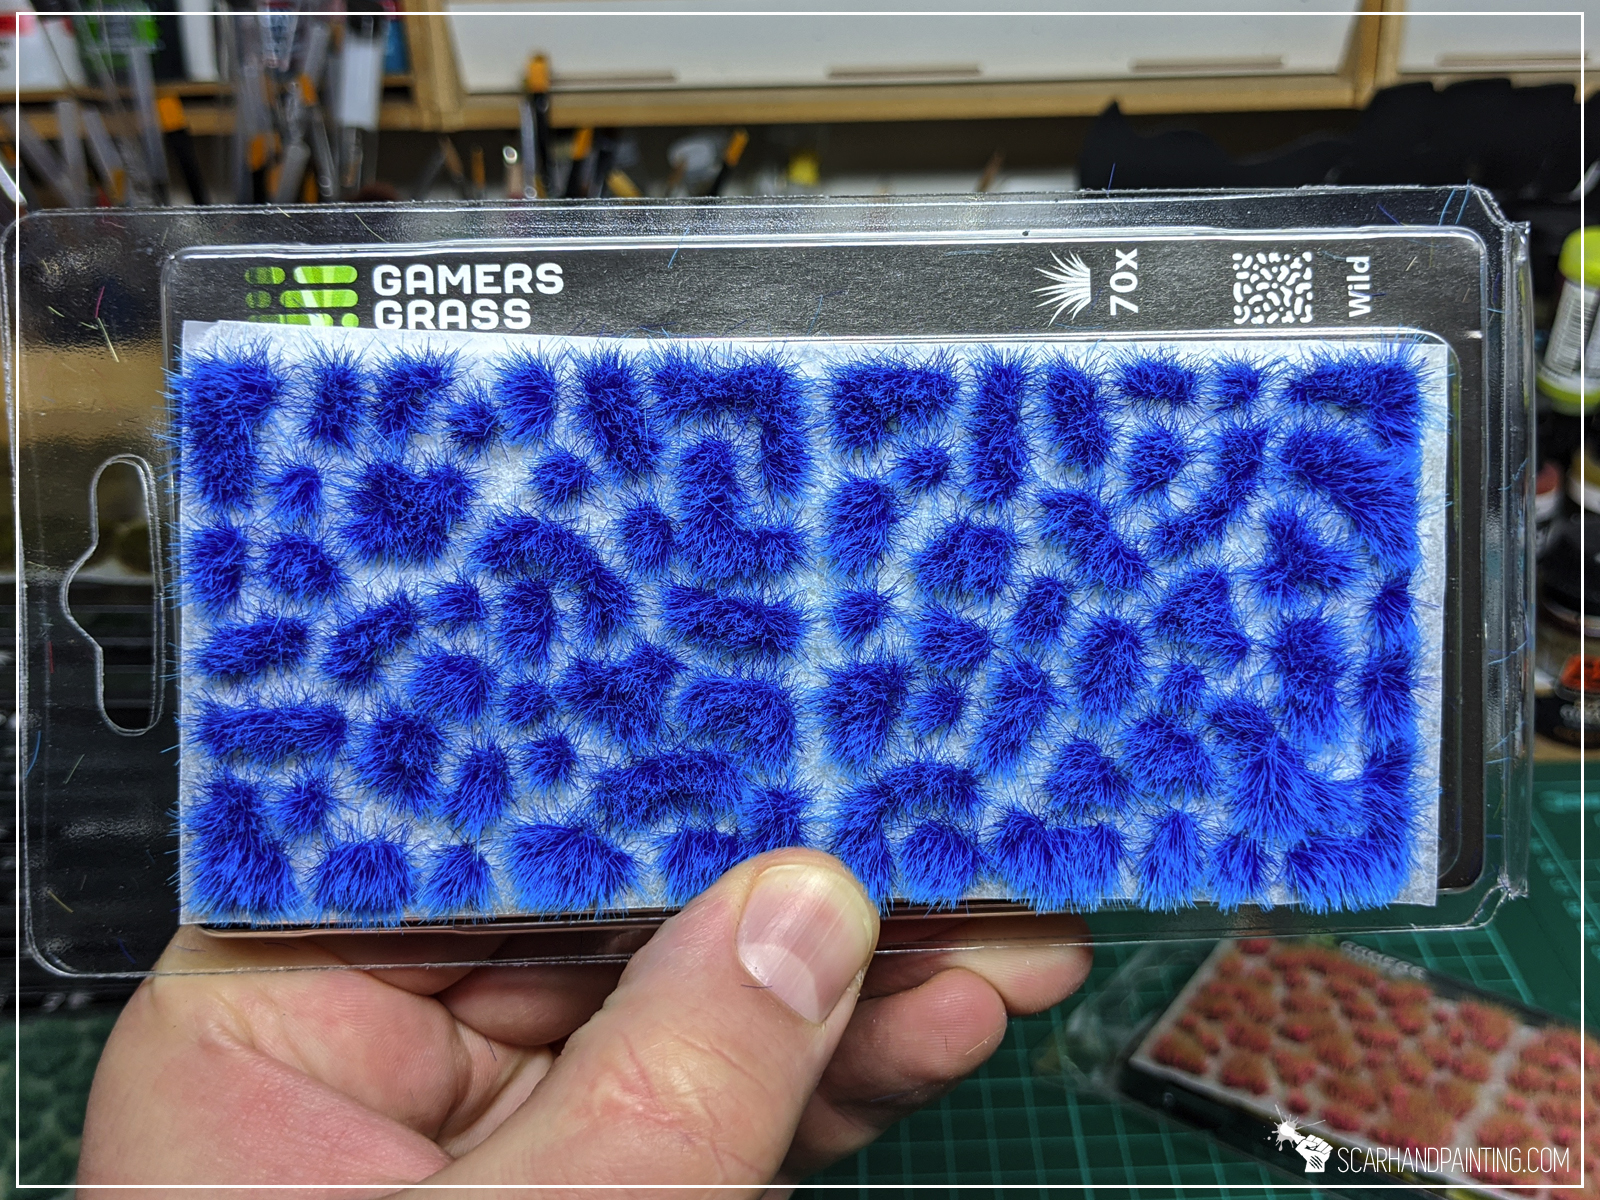
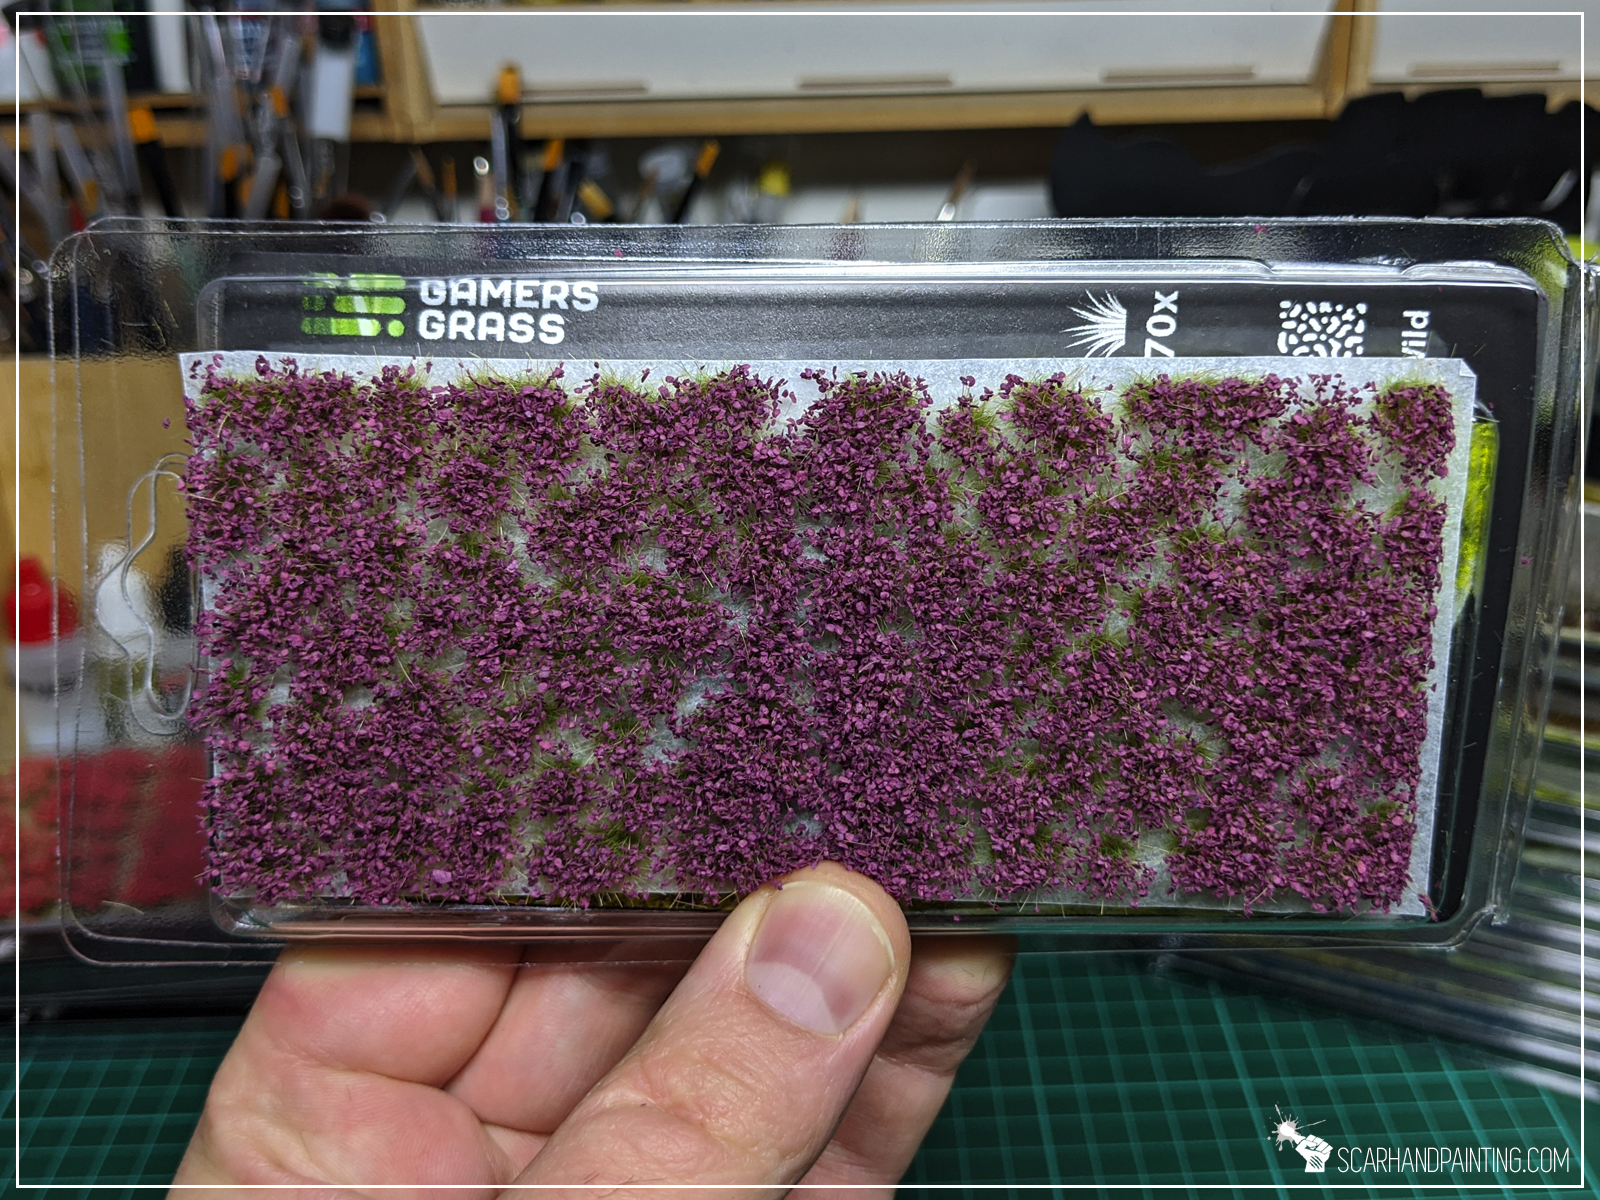
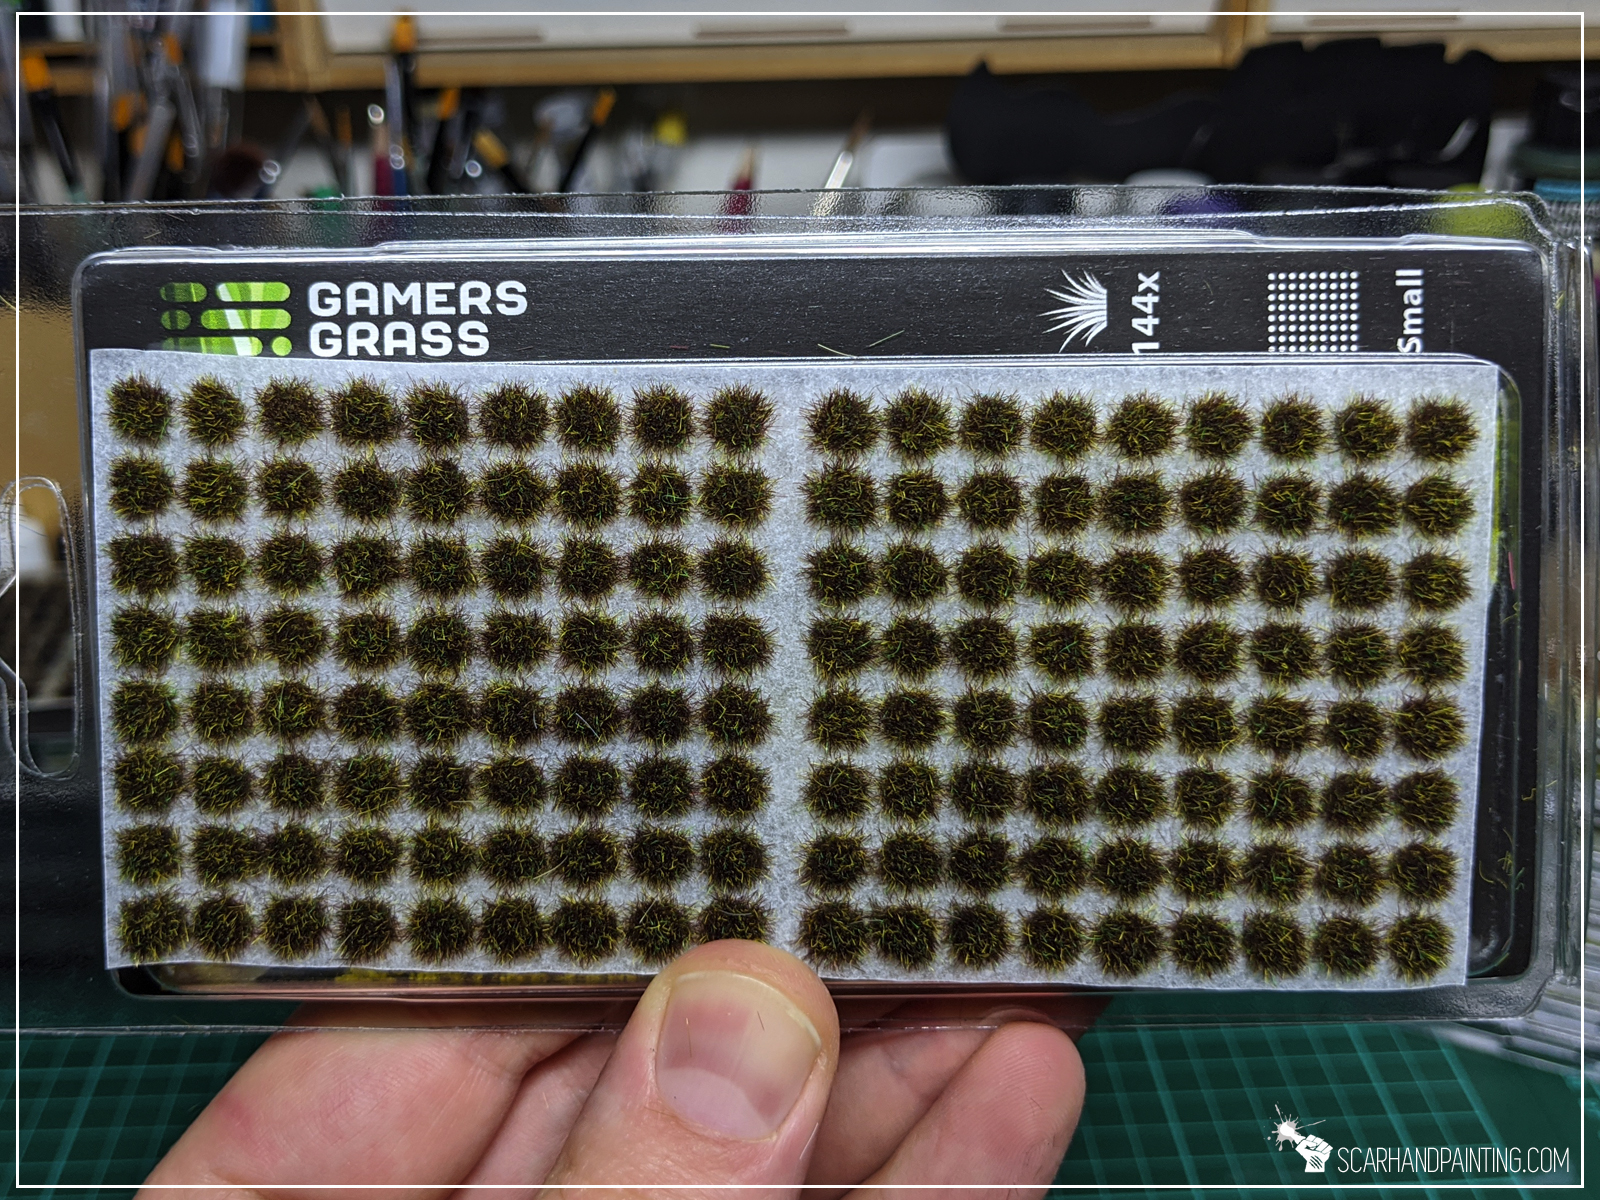
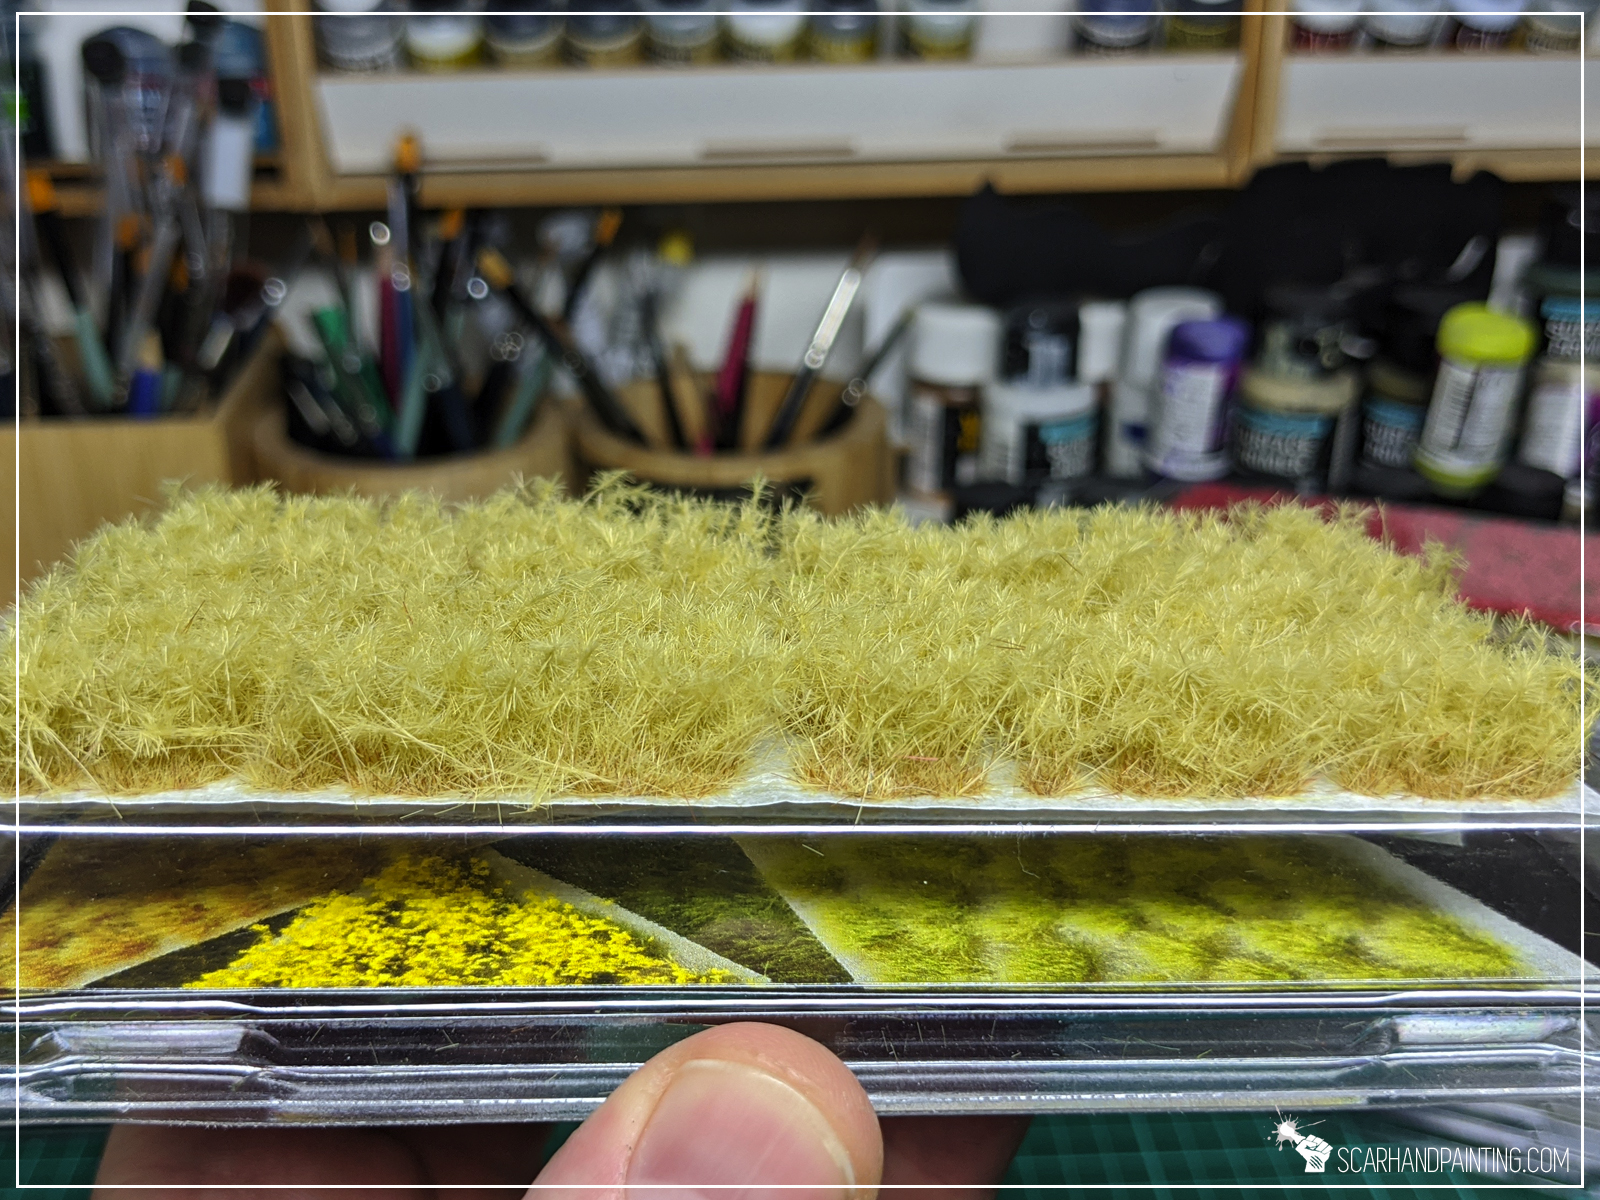
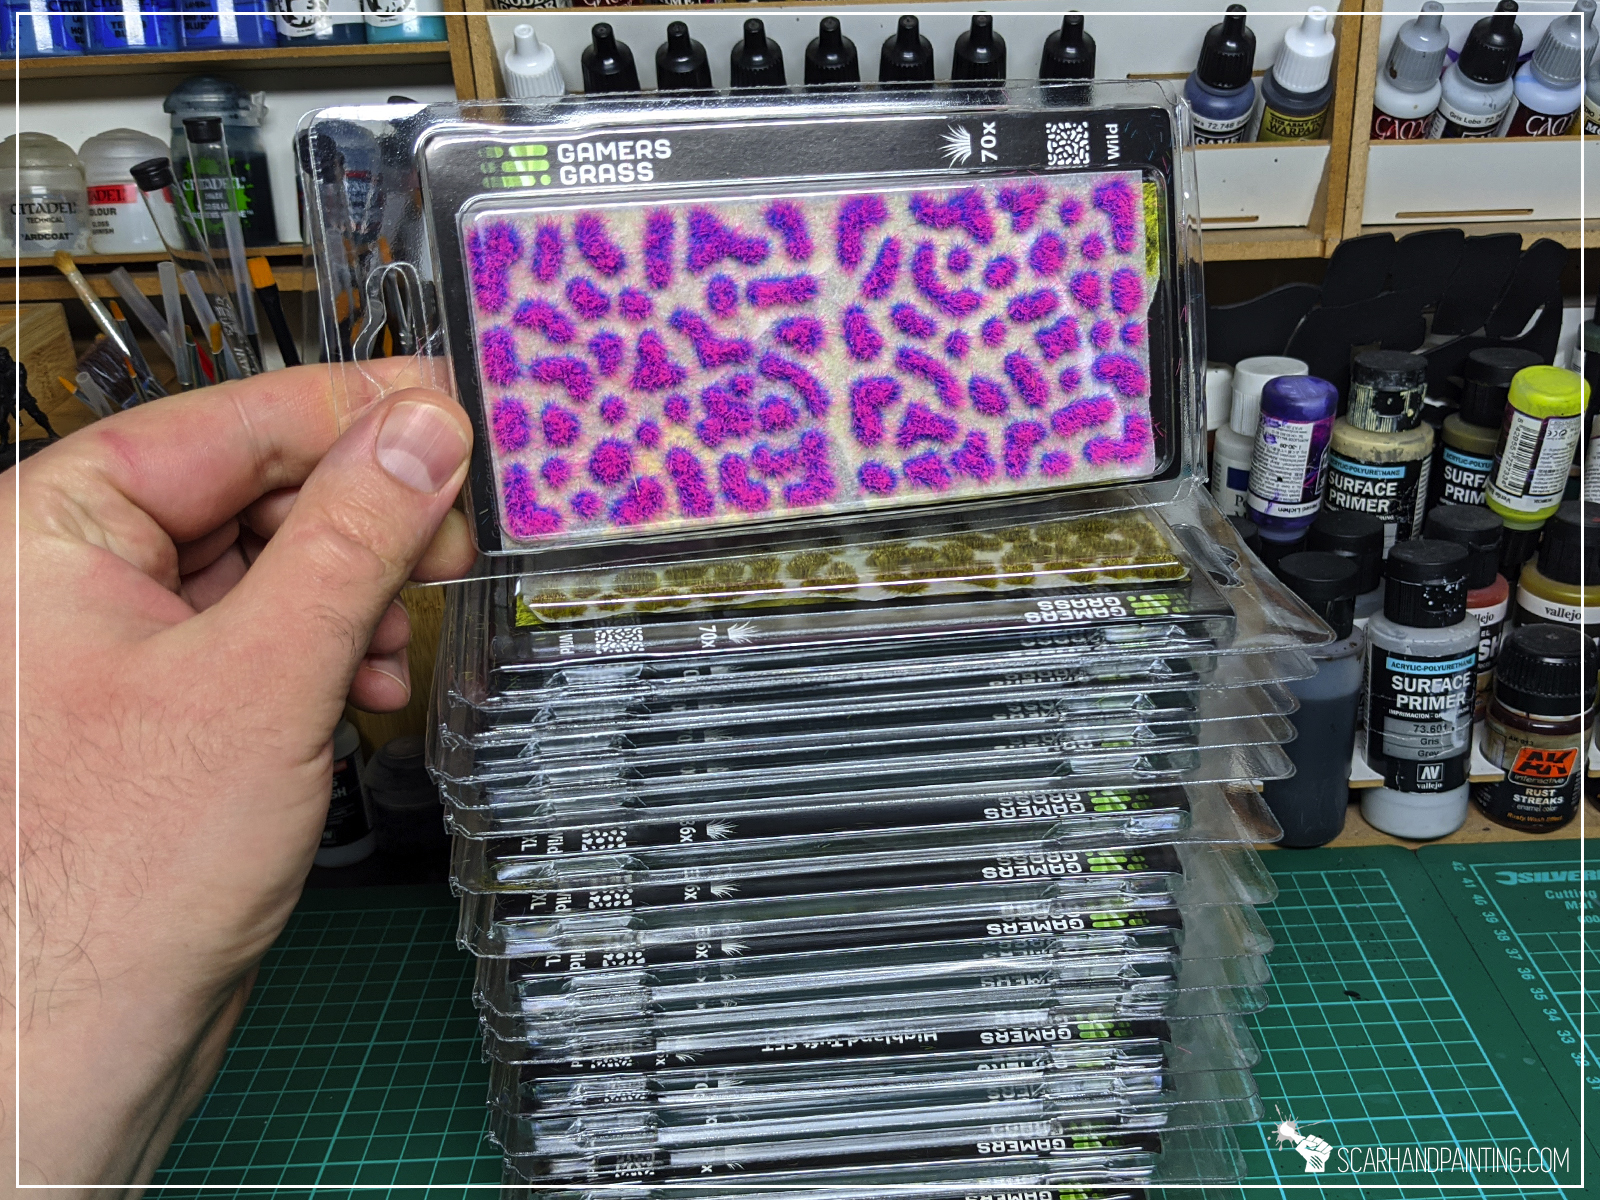
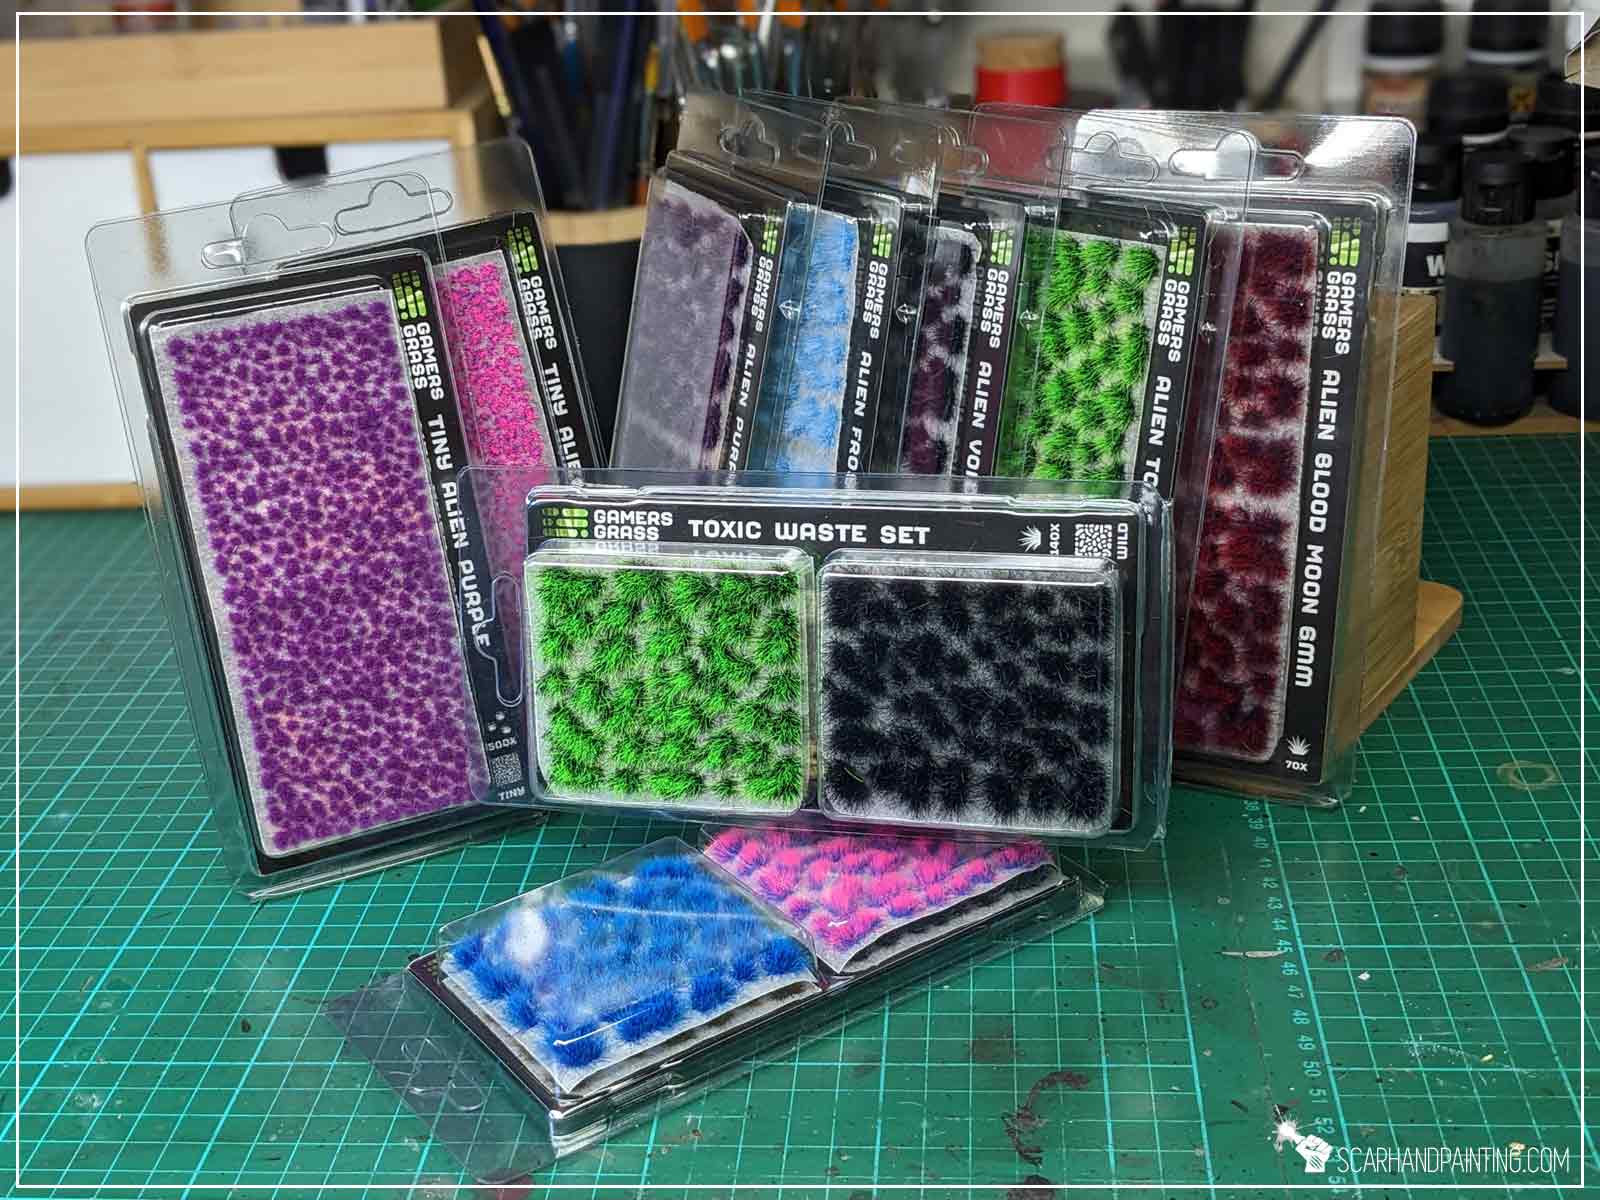
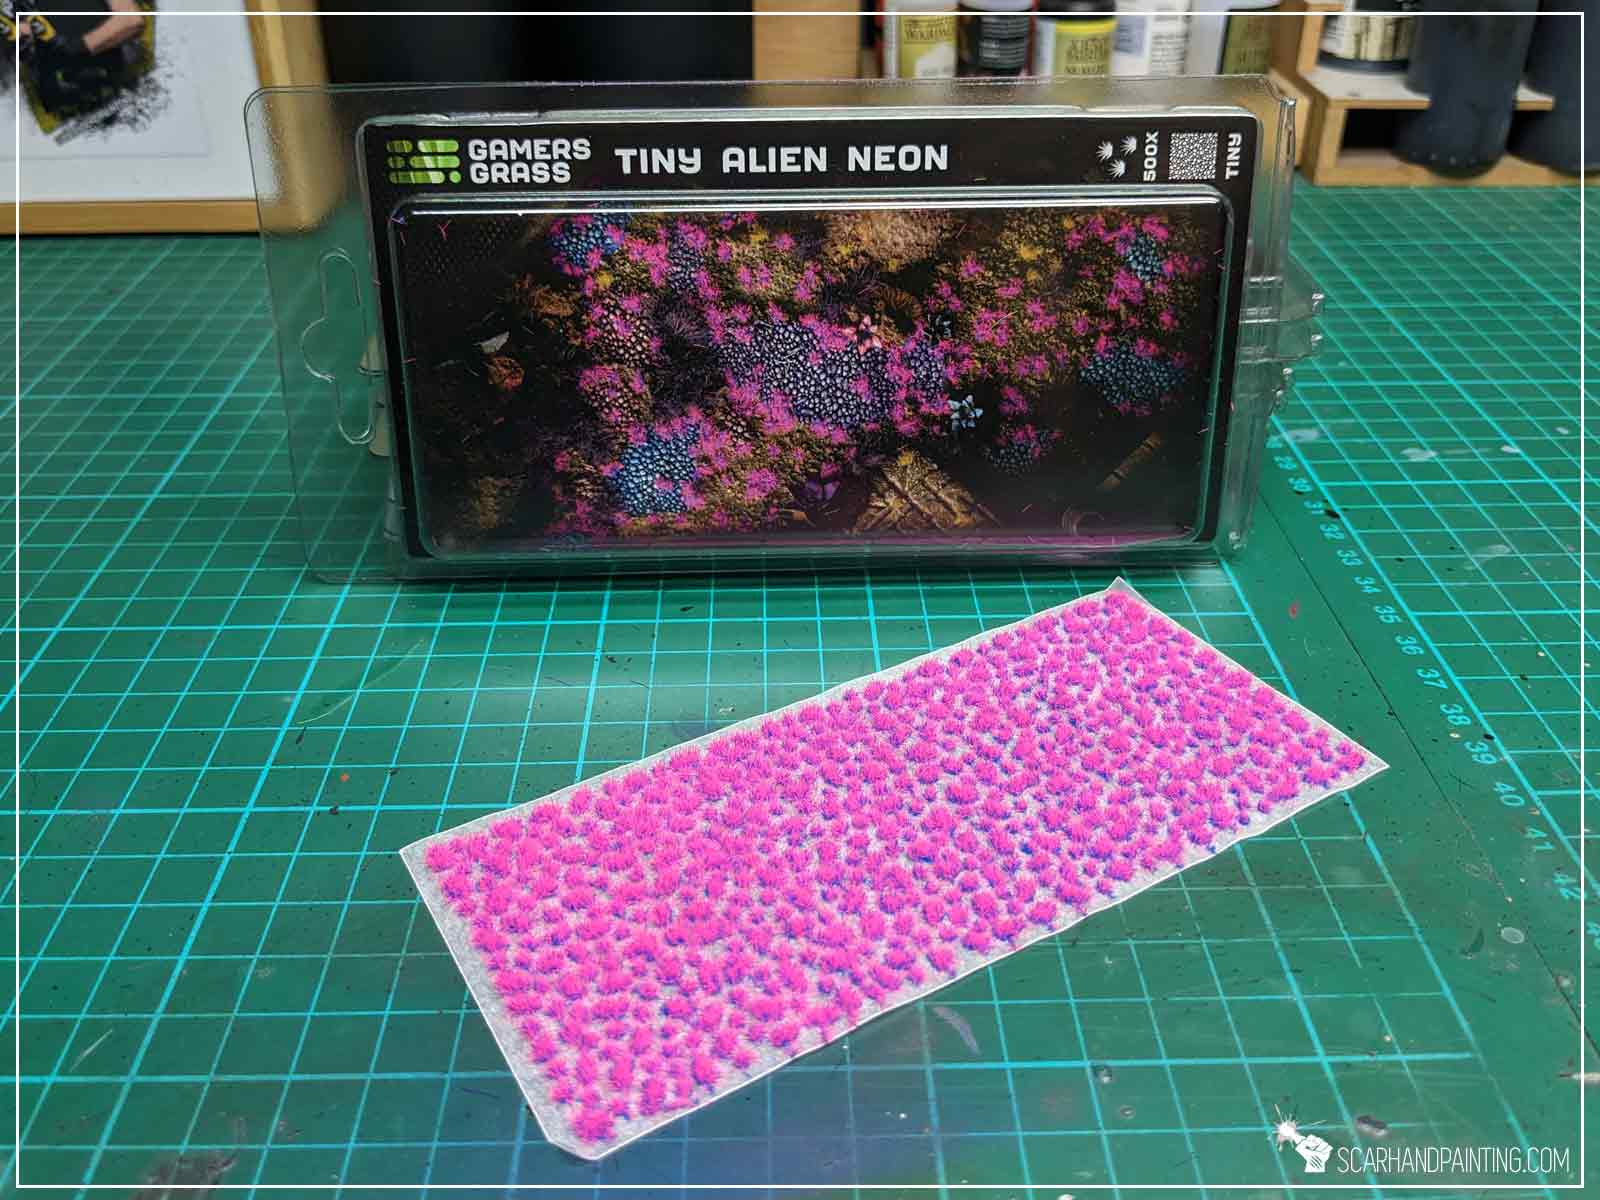
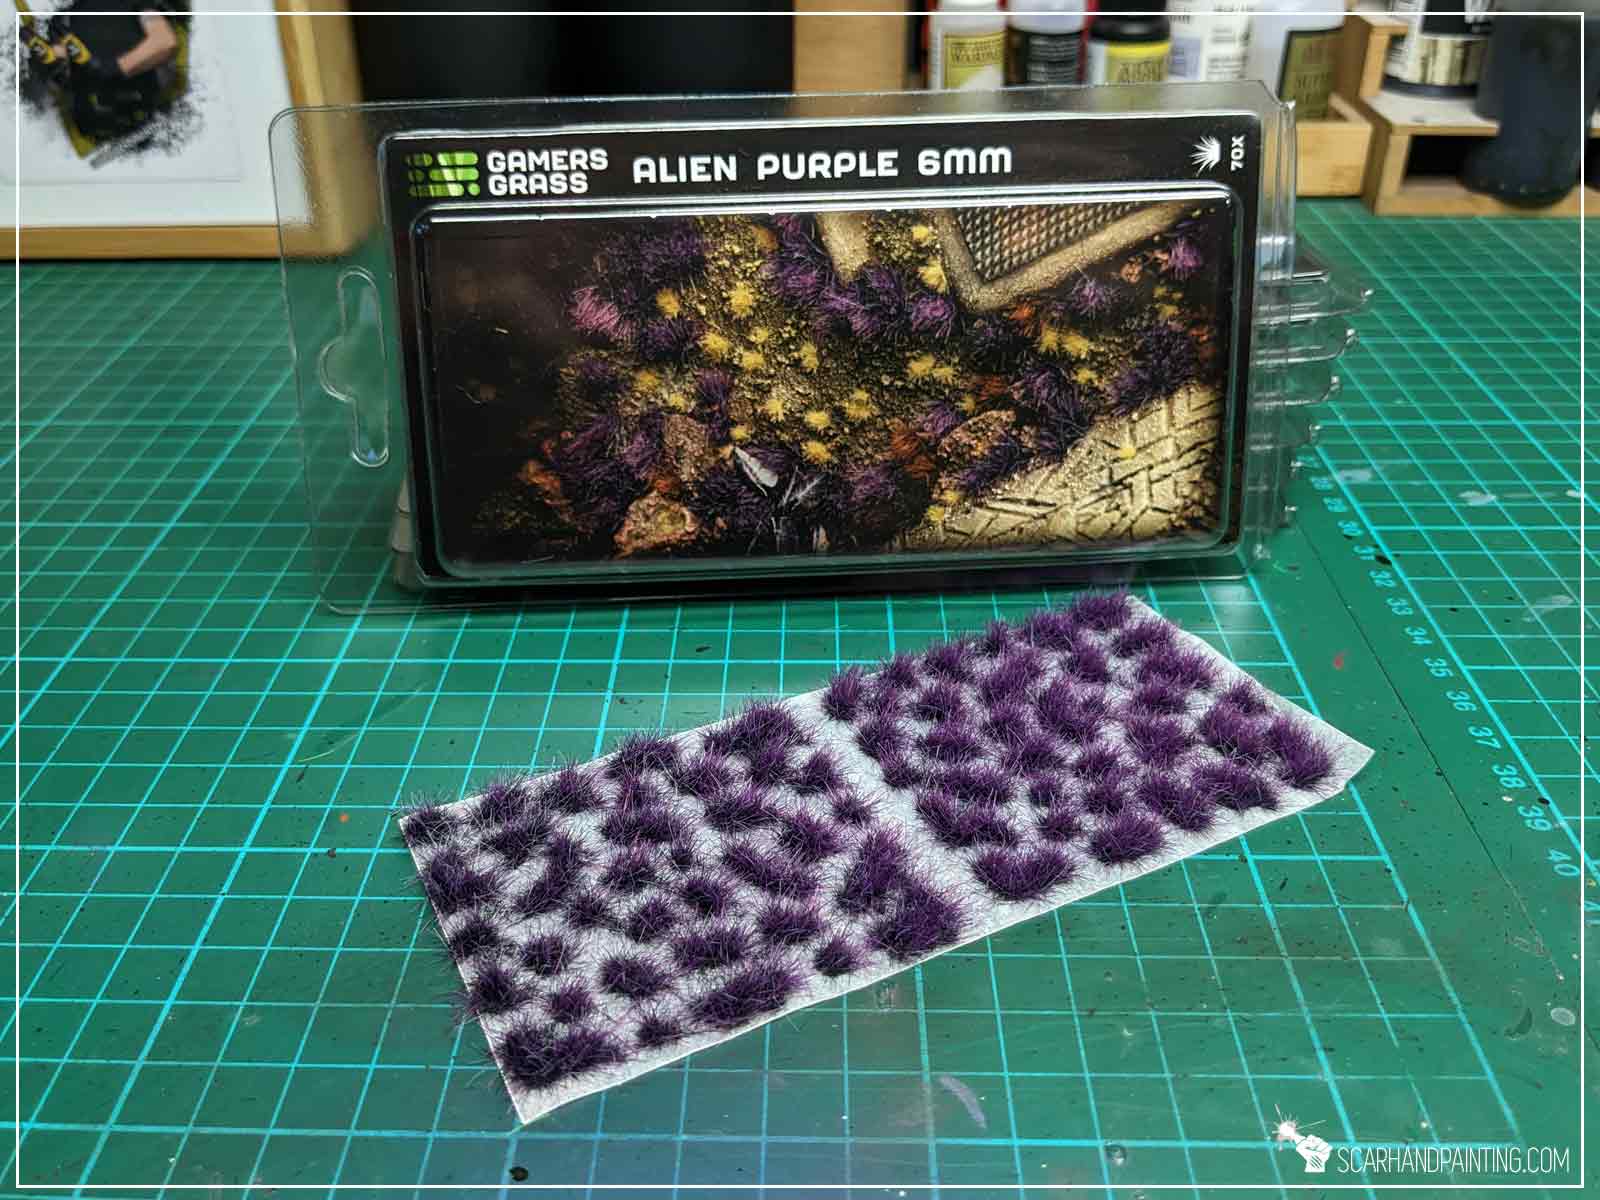
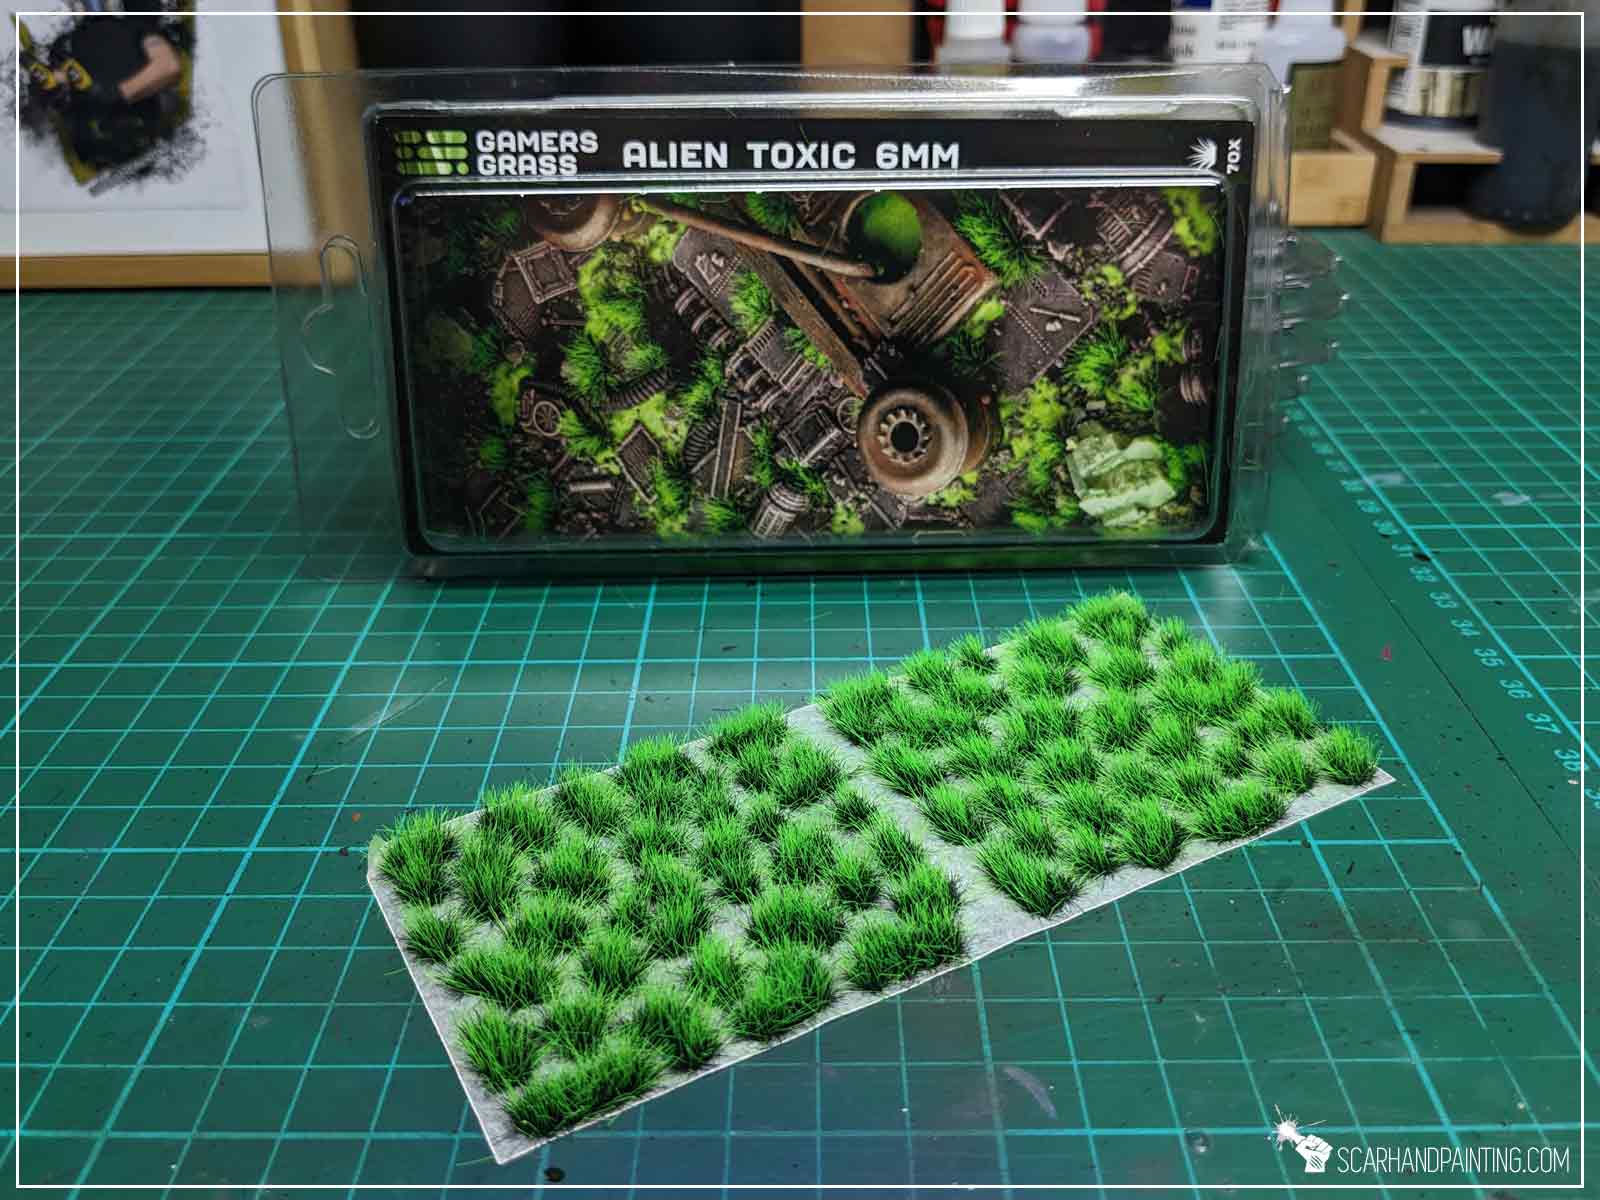
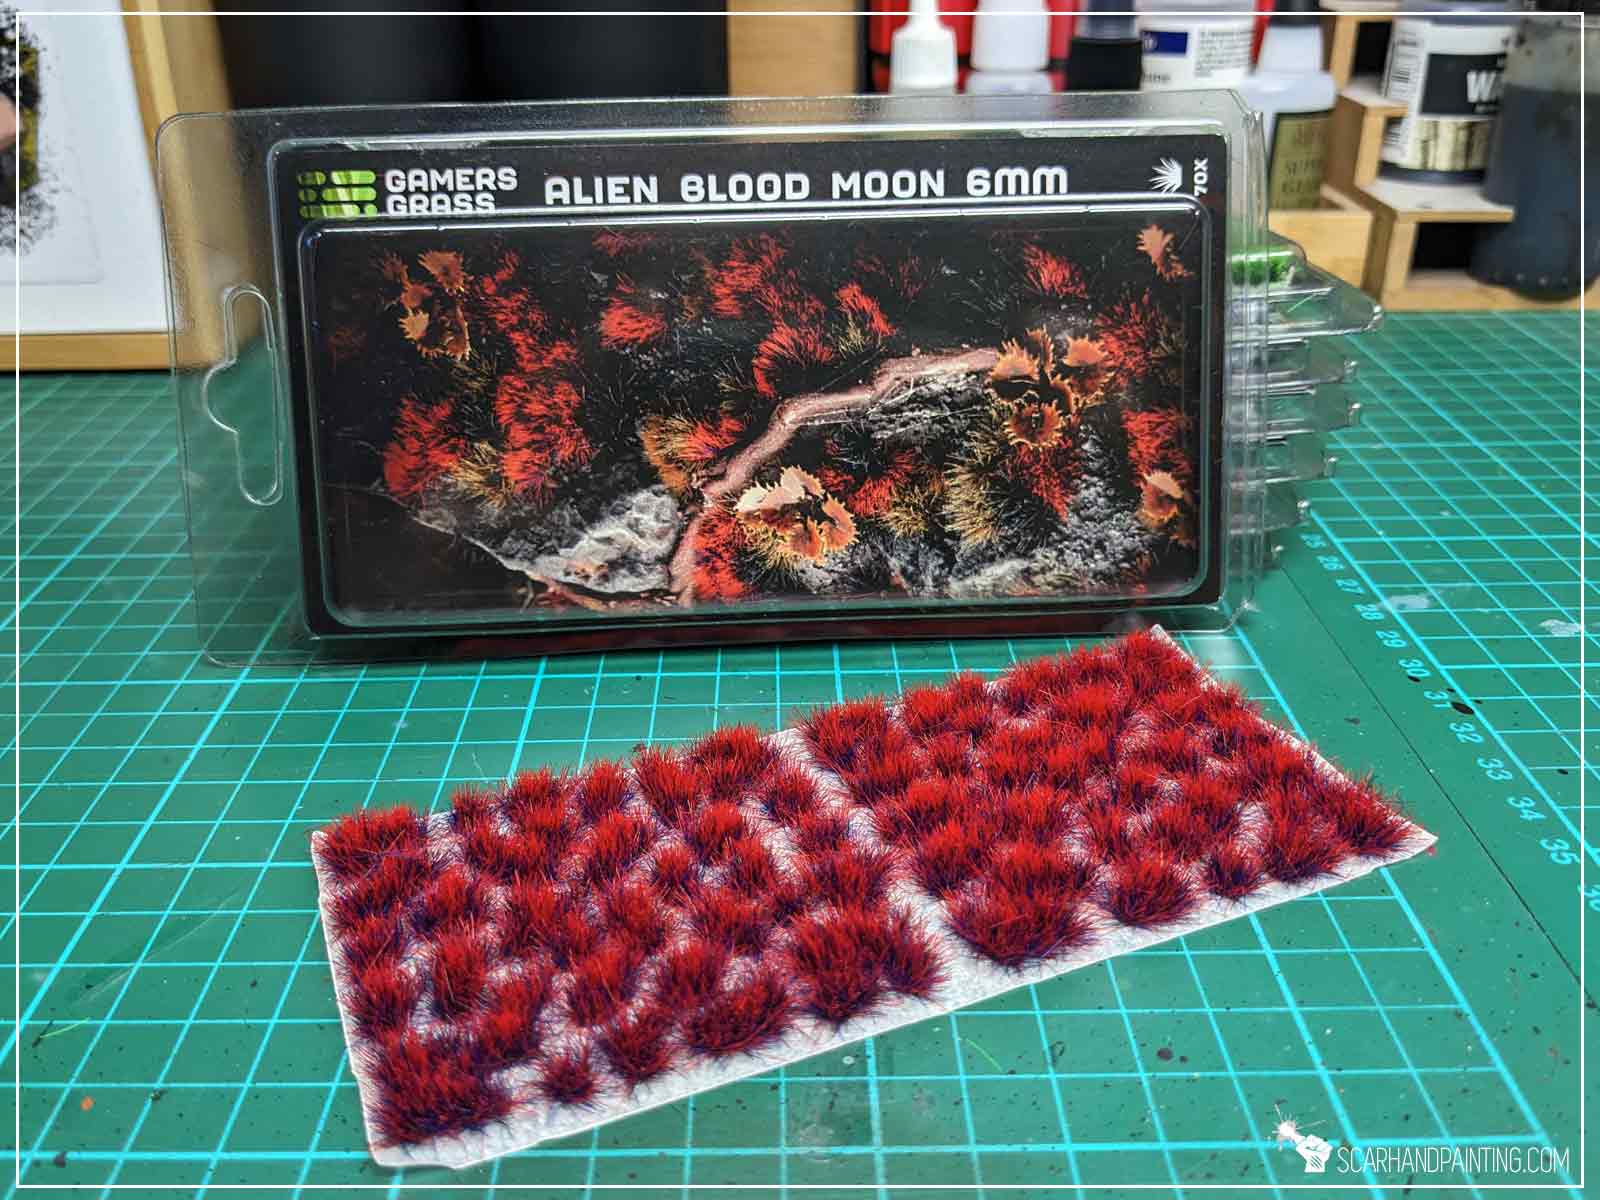
Gamers Grass – a Portuguese company focusing on delivering a wide range of basing accessories. Formed in 2015 by a group of hobbyists, Gamers Grass brought many interesting products to the market. Alongside well established Tufts, Flowers and Shrubs, their range consists of ready to use Bases, but also basing Bitz and very colorful Alien Tufts. It was the latter that drew my attention to Gamers Grass, which instantly resulted in some shopping.
Now it’s a few days after the delivery. I have thoroughly tested a range of Tufts/Shrubs/Flowers and done some research, hence I am ready to share my opinion with a wider public.

As a full time miniatures painter I cannot allow myself to use products of questionable quality. This is why quality is the first thing I look out for when purchasing hobby related items.
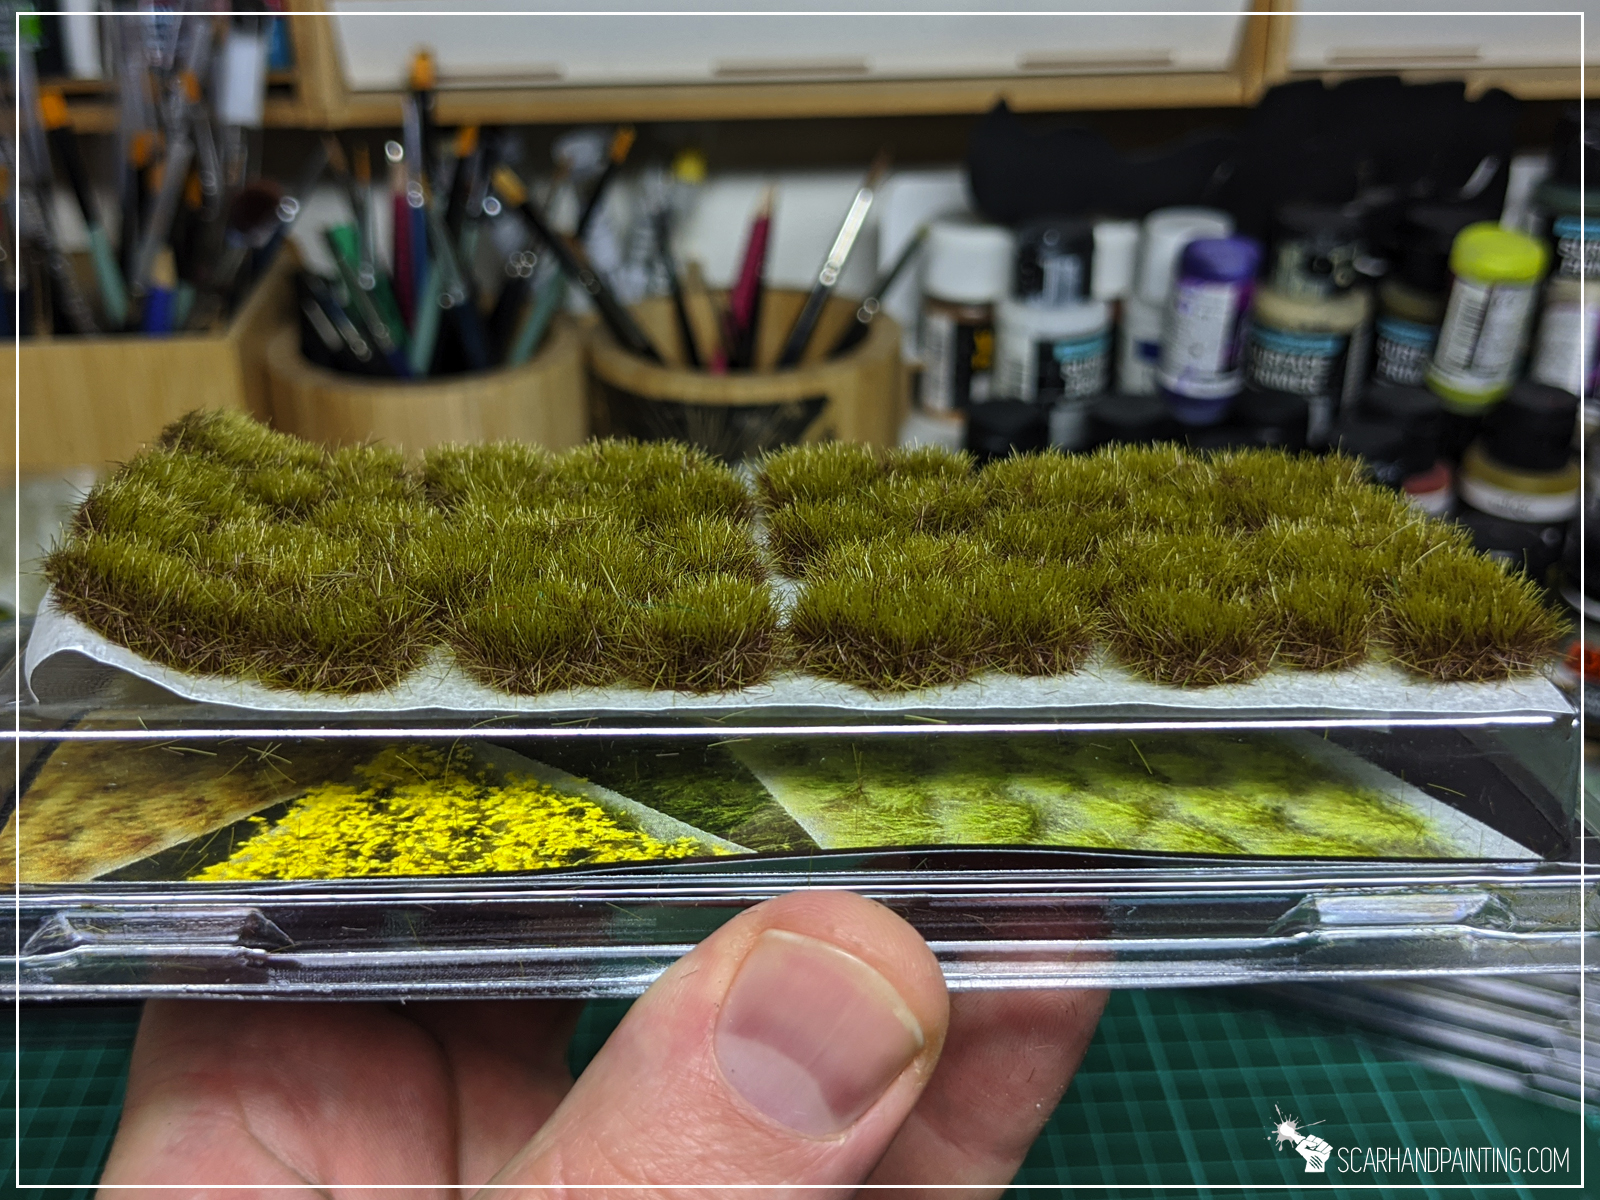
That being said Gamers Grass Tufts and Flowers strike me as well thought through, top quality products. They are mostly precisely shaped, with near to none stray hair. Each Tuft has a bit of adhesive at the bottom and can be applied straight from the sheet. Adhesive strength is comparable with Army Painter’s tufts, so less “goo” than for example Paint Forge’s and GW’s, but perfect for my personal taste. I apply some Super Glue either way.
Most importantly, except just just a few, the Gamer’s Grass Tufts hold their shape firmly. Not much hair fell off when I was removing the tufts from the sheets and applied them onto the bases.
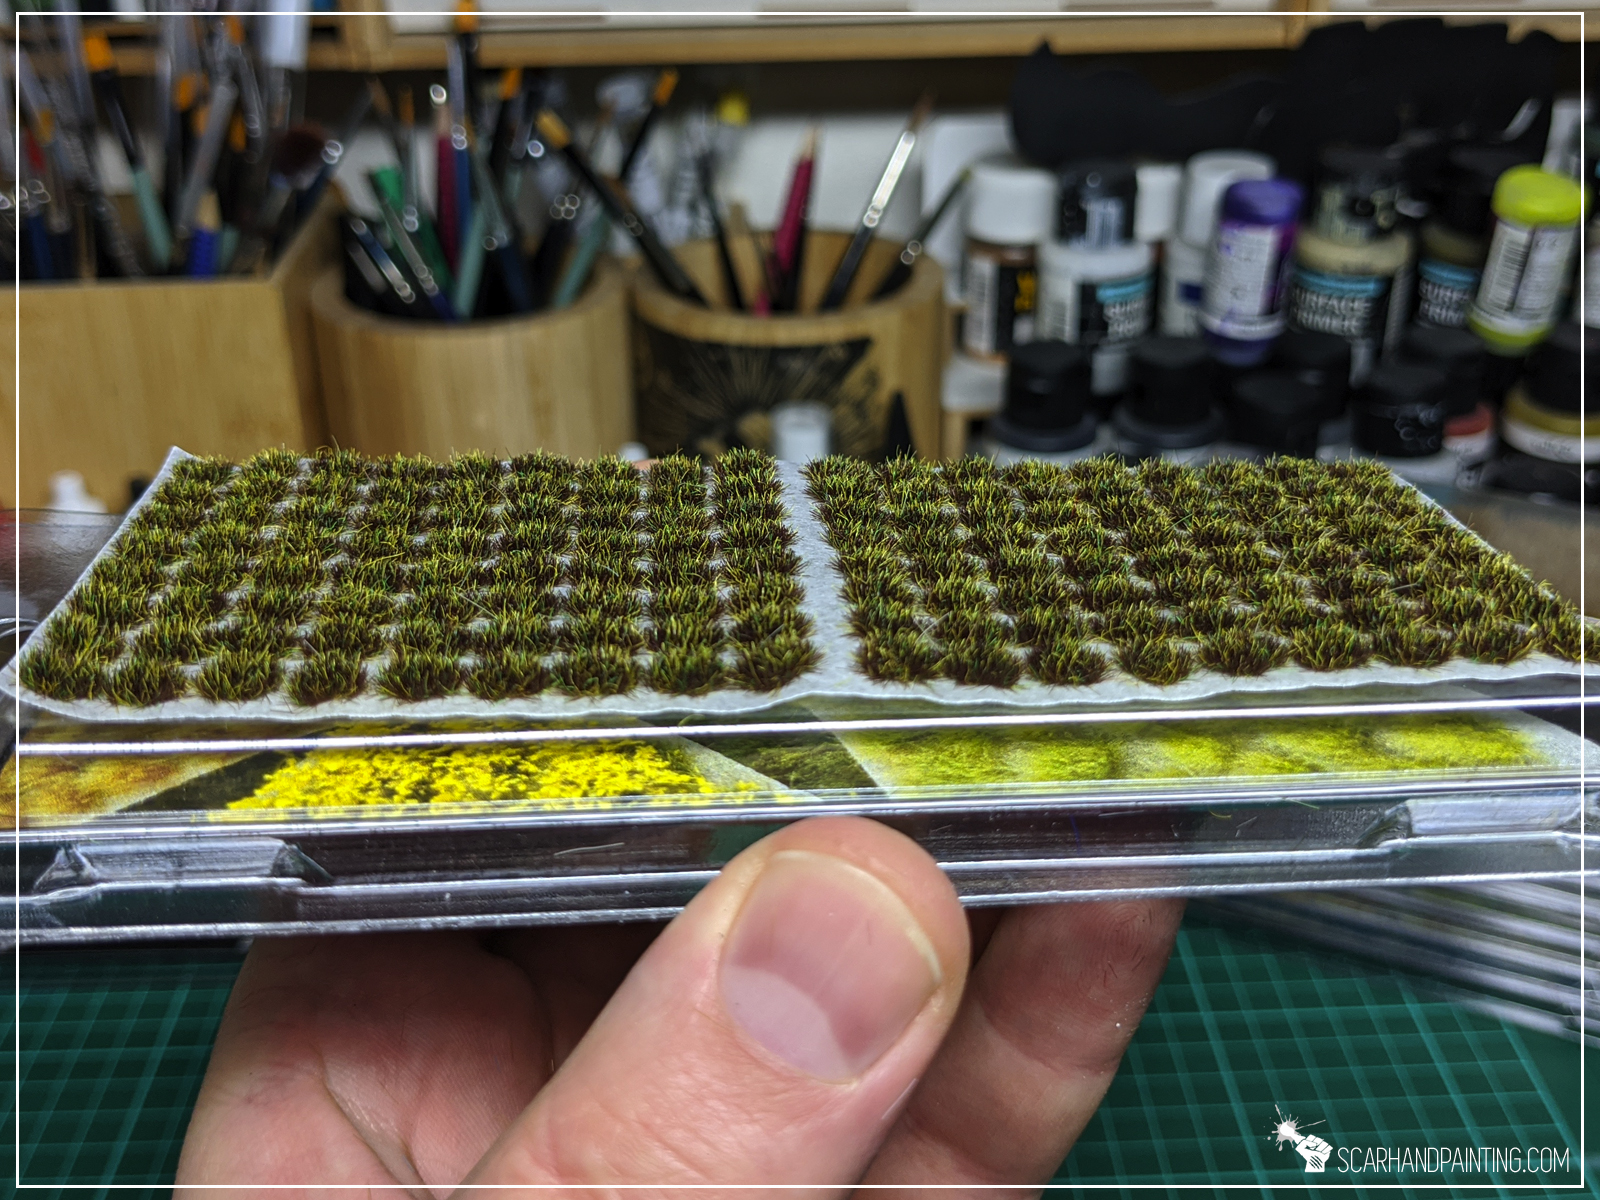
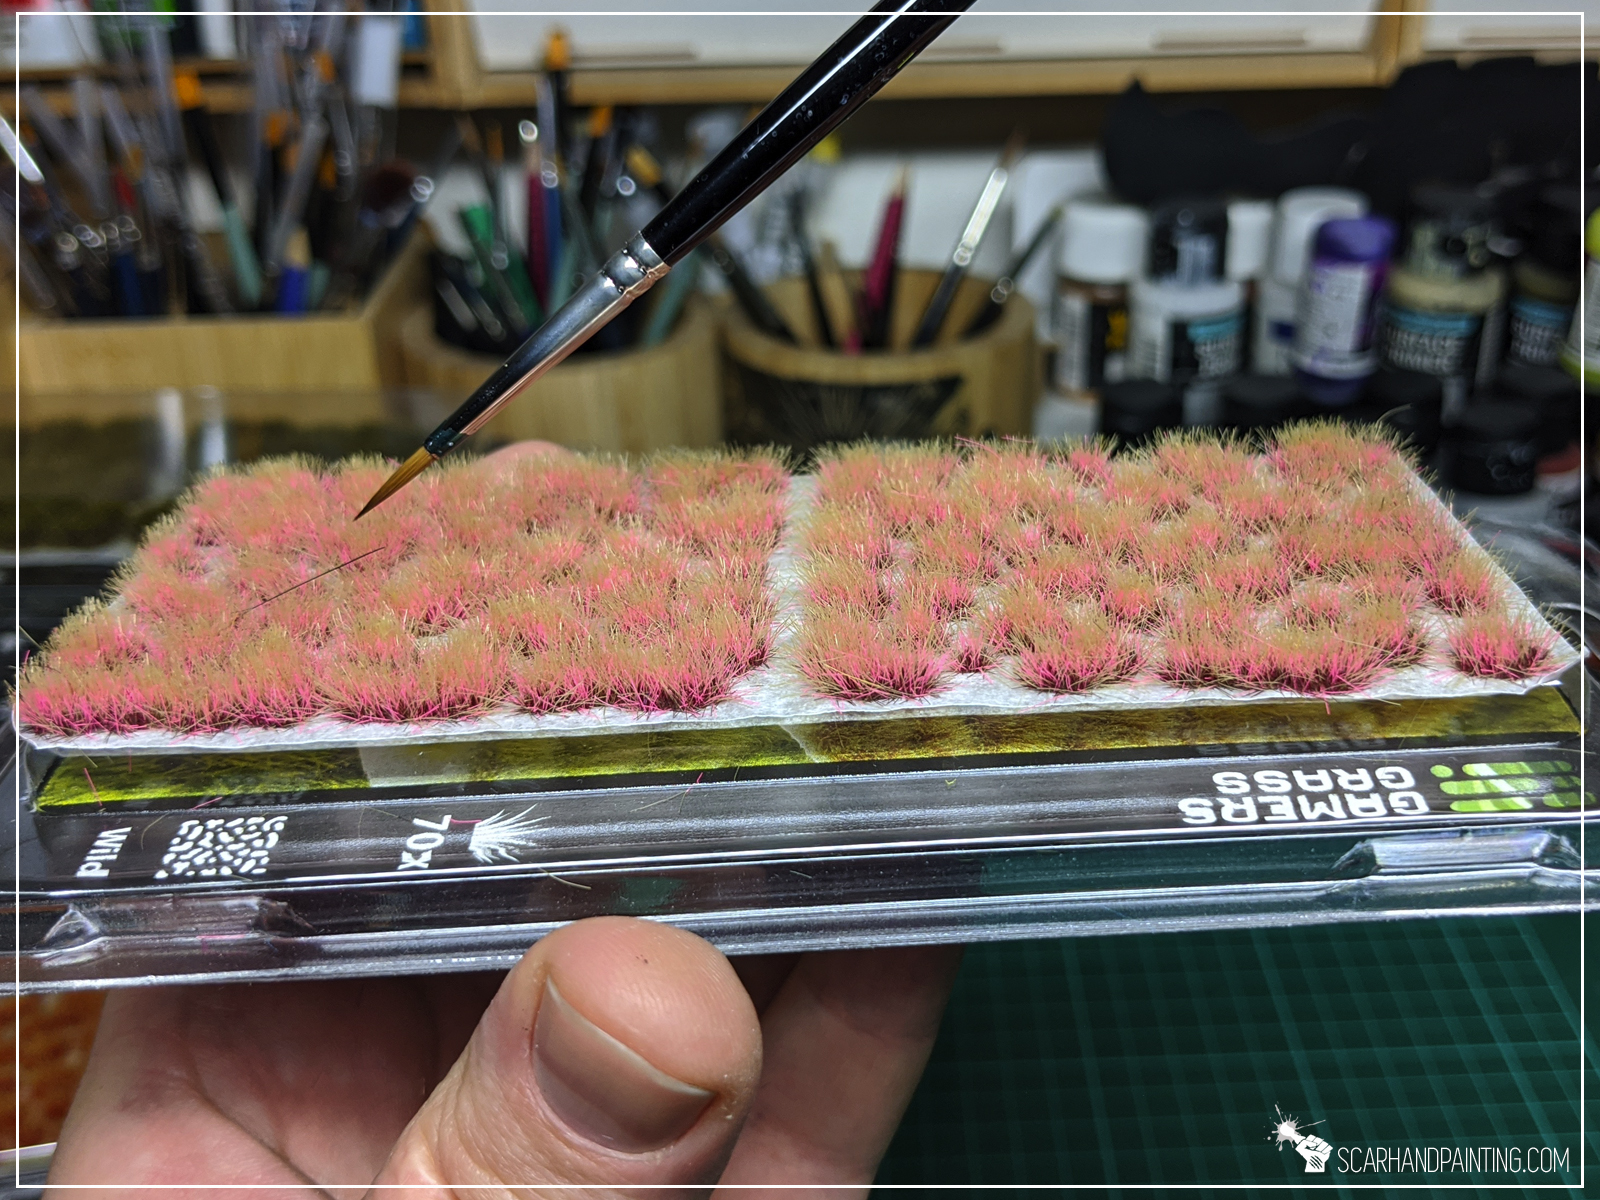
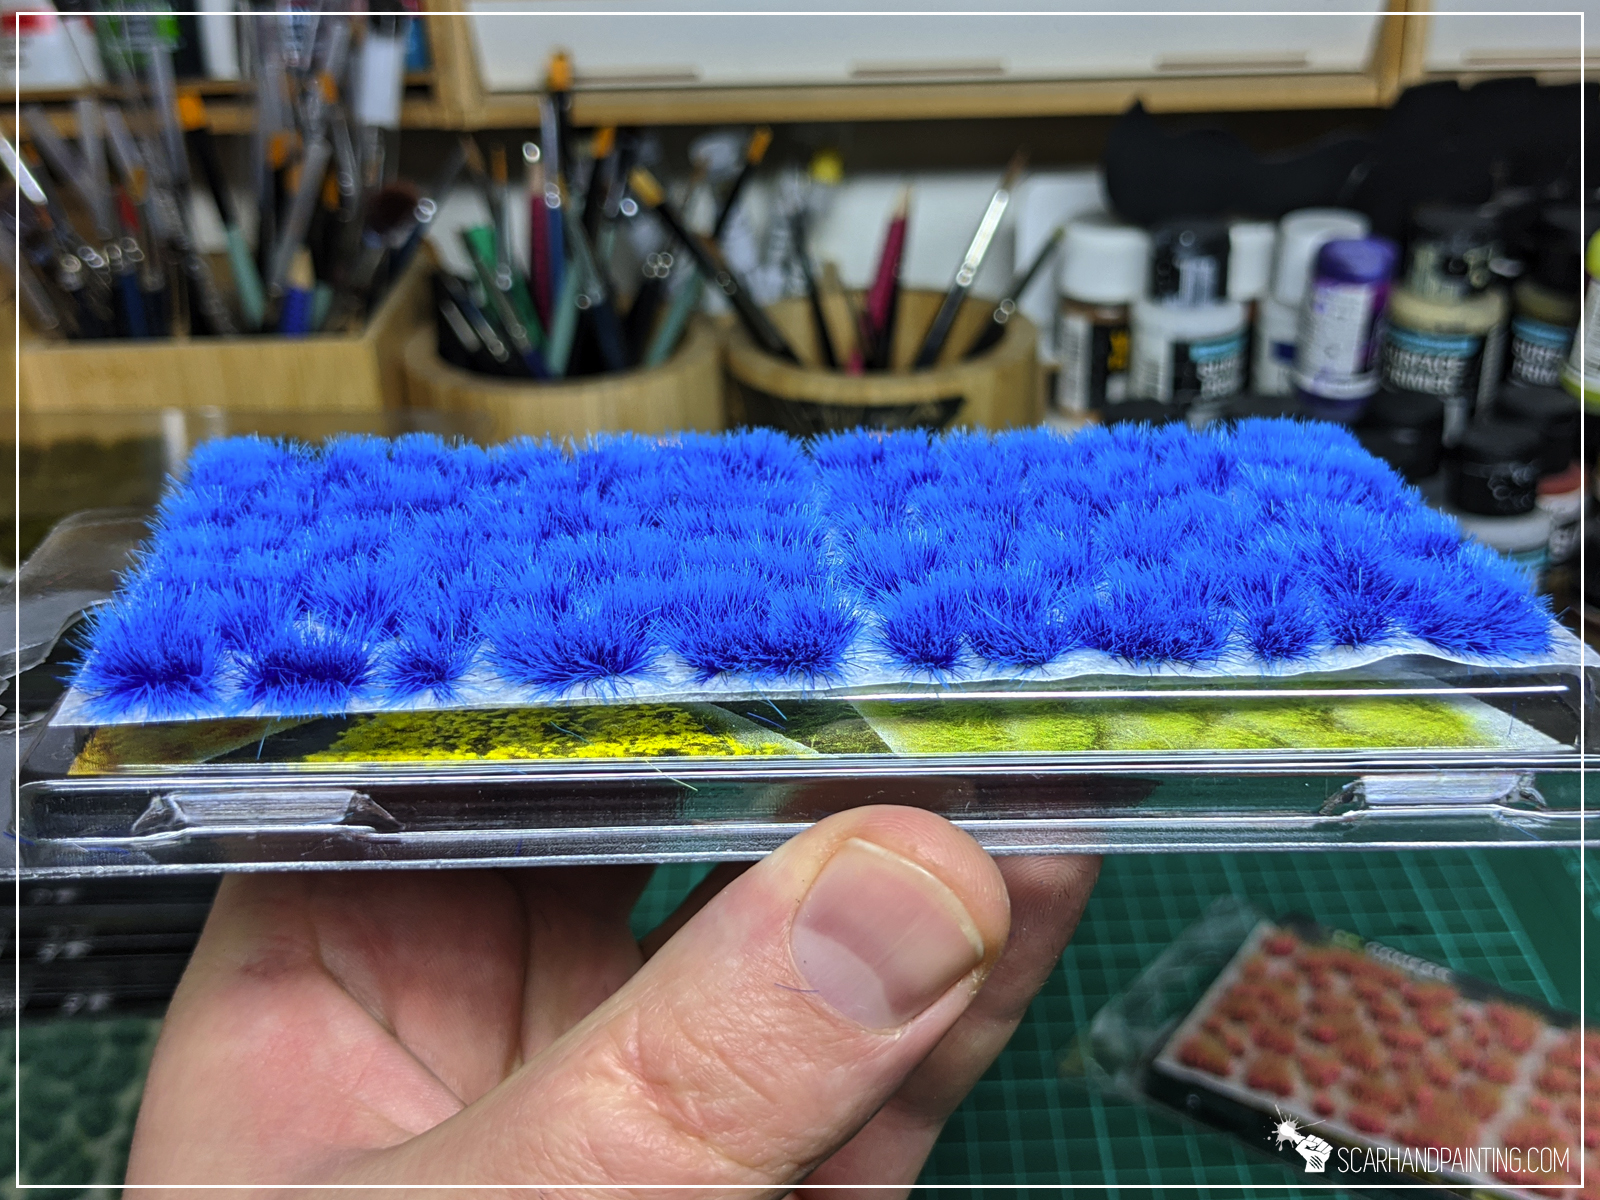

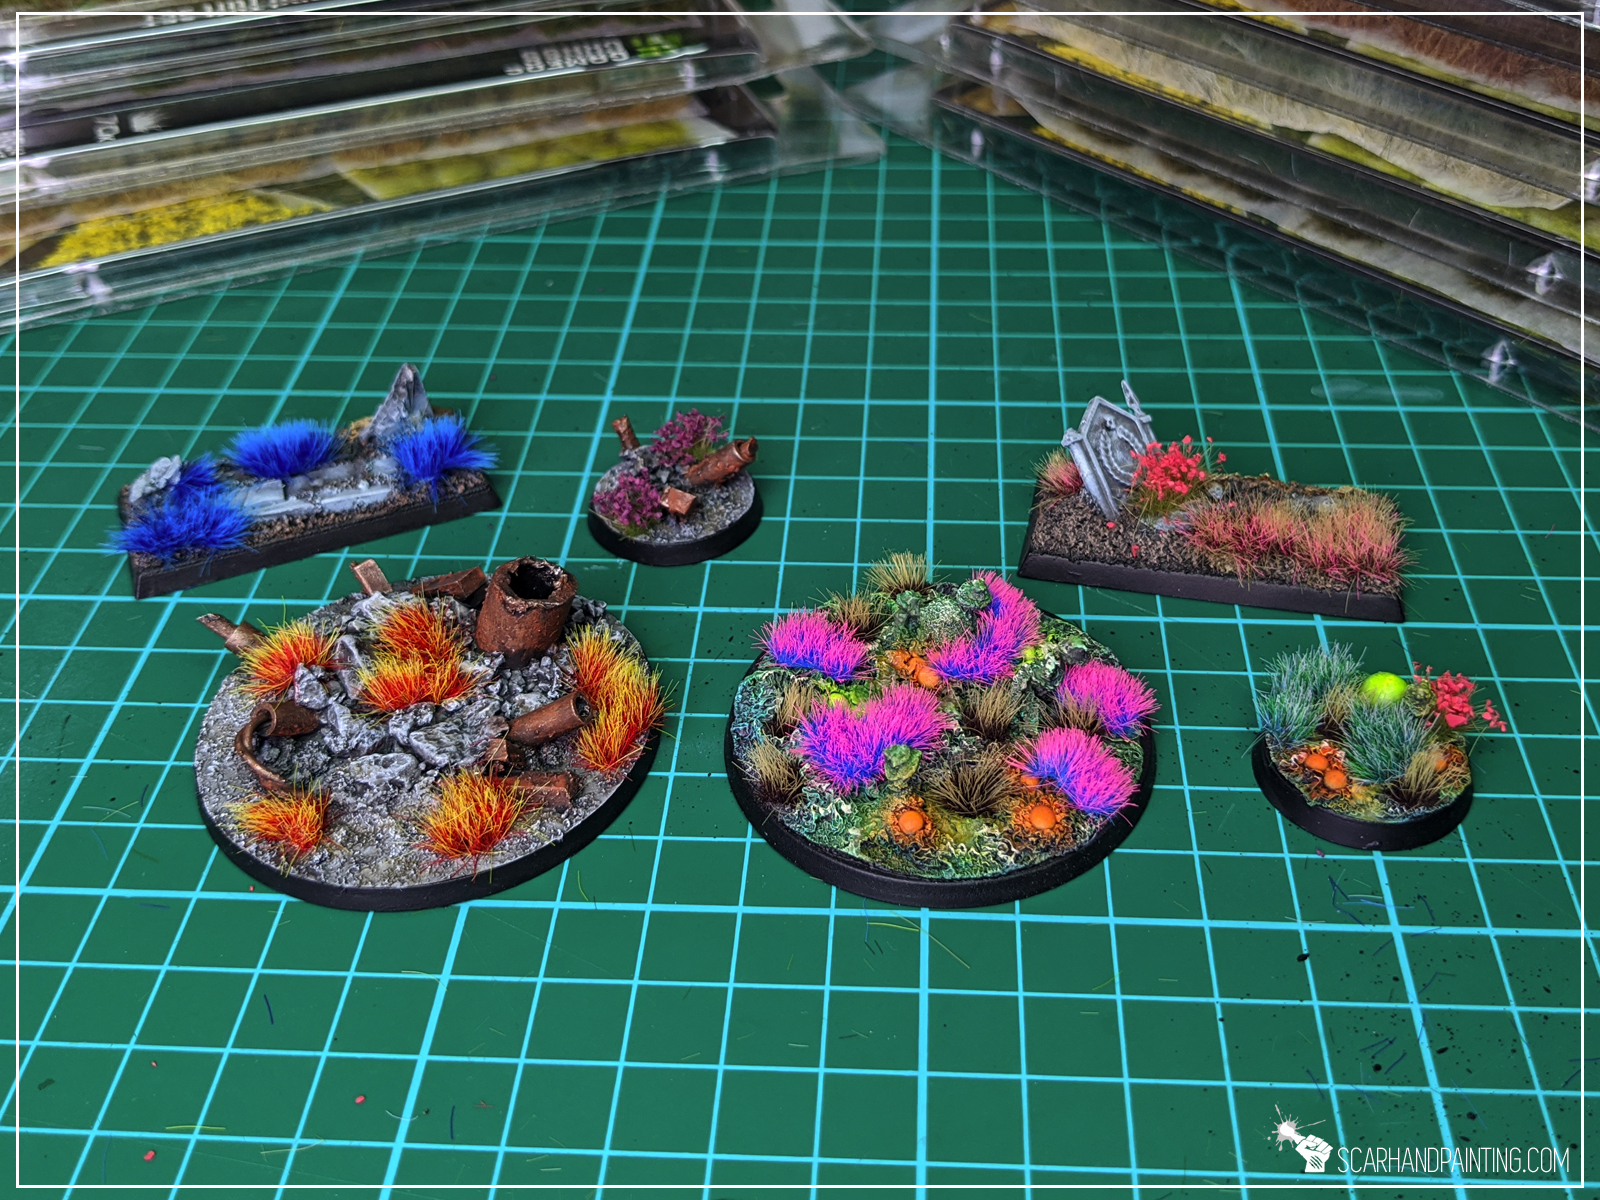
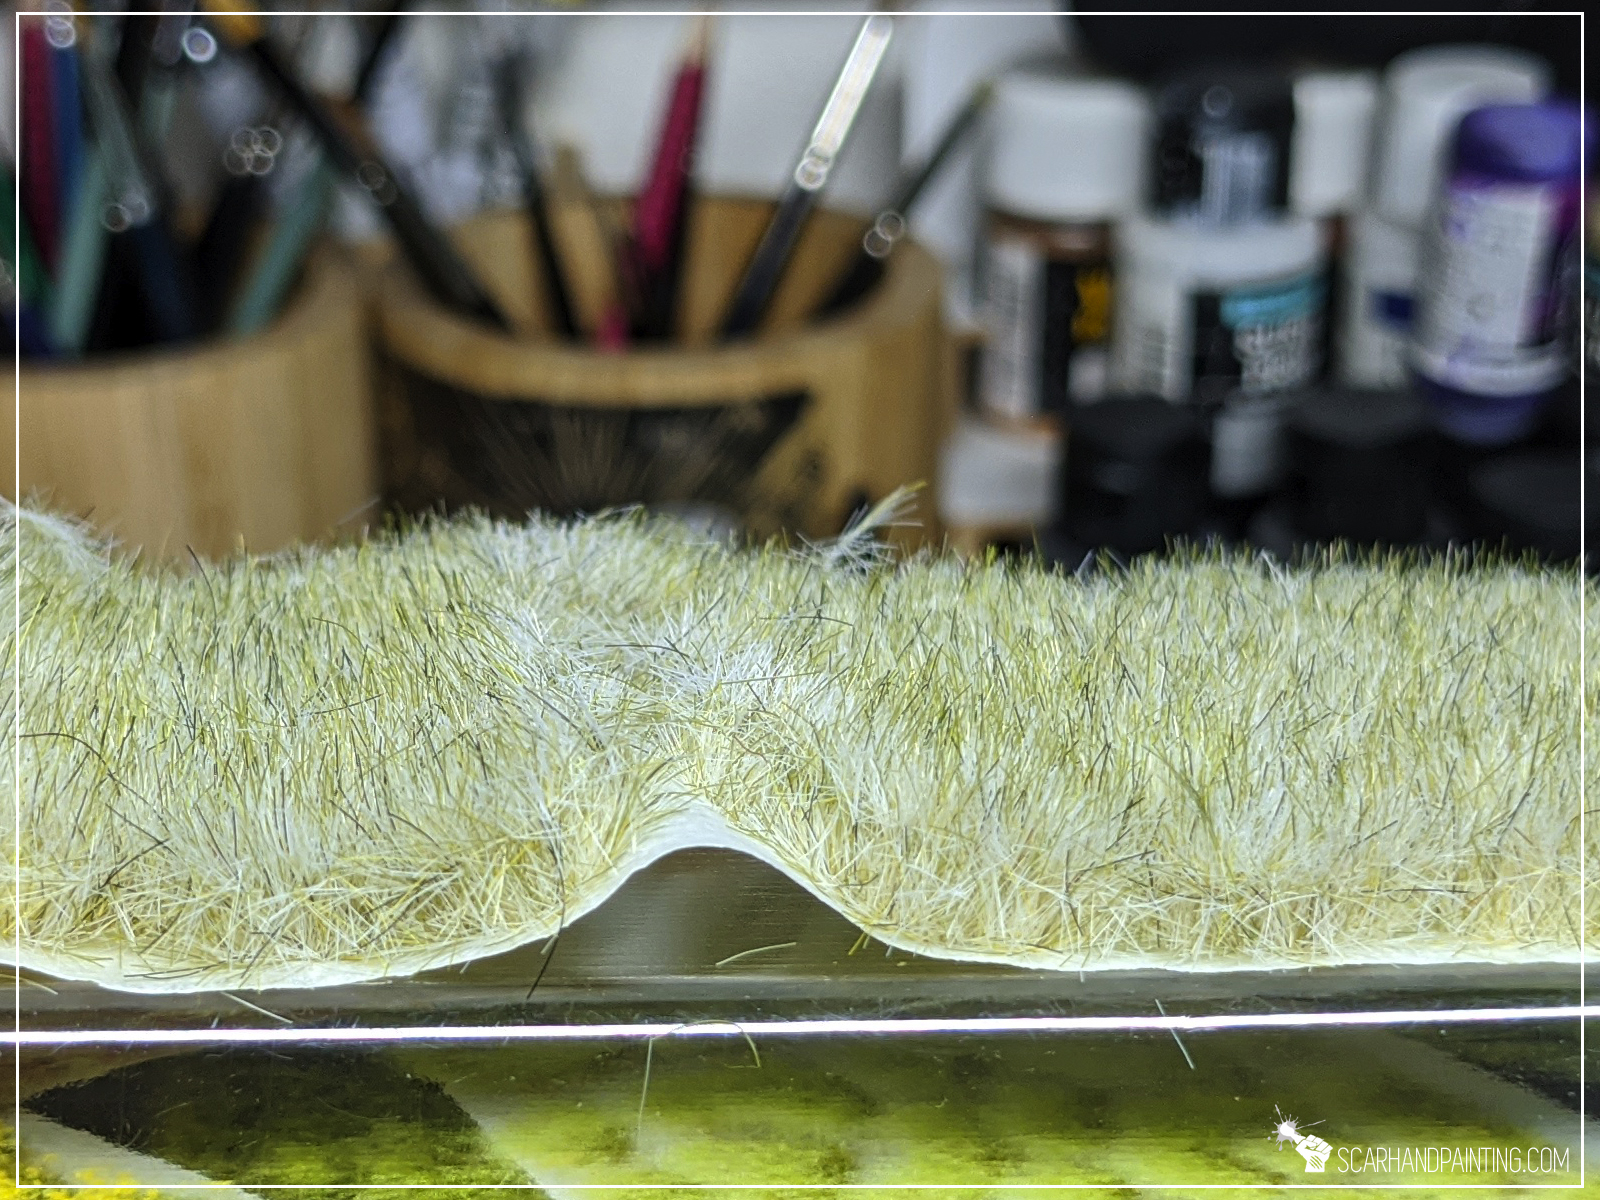
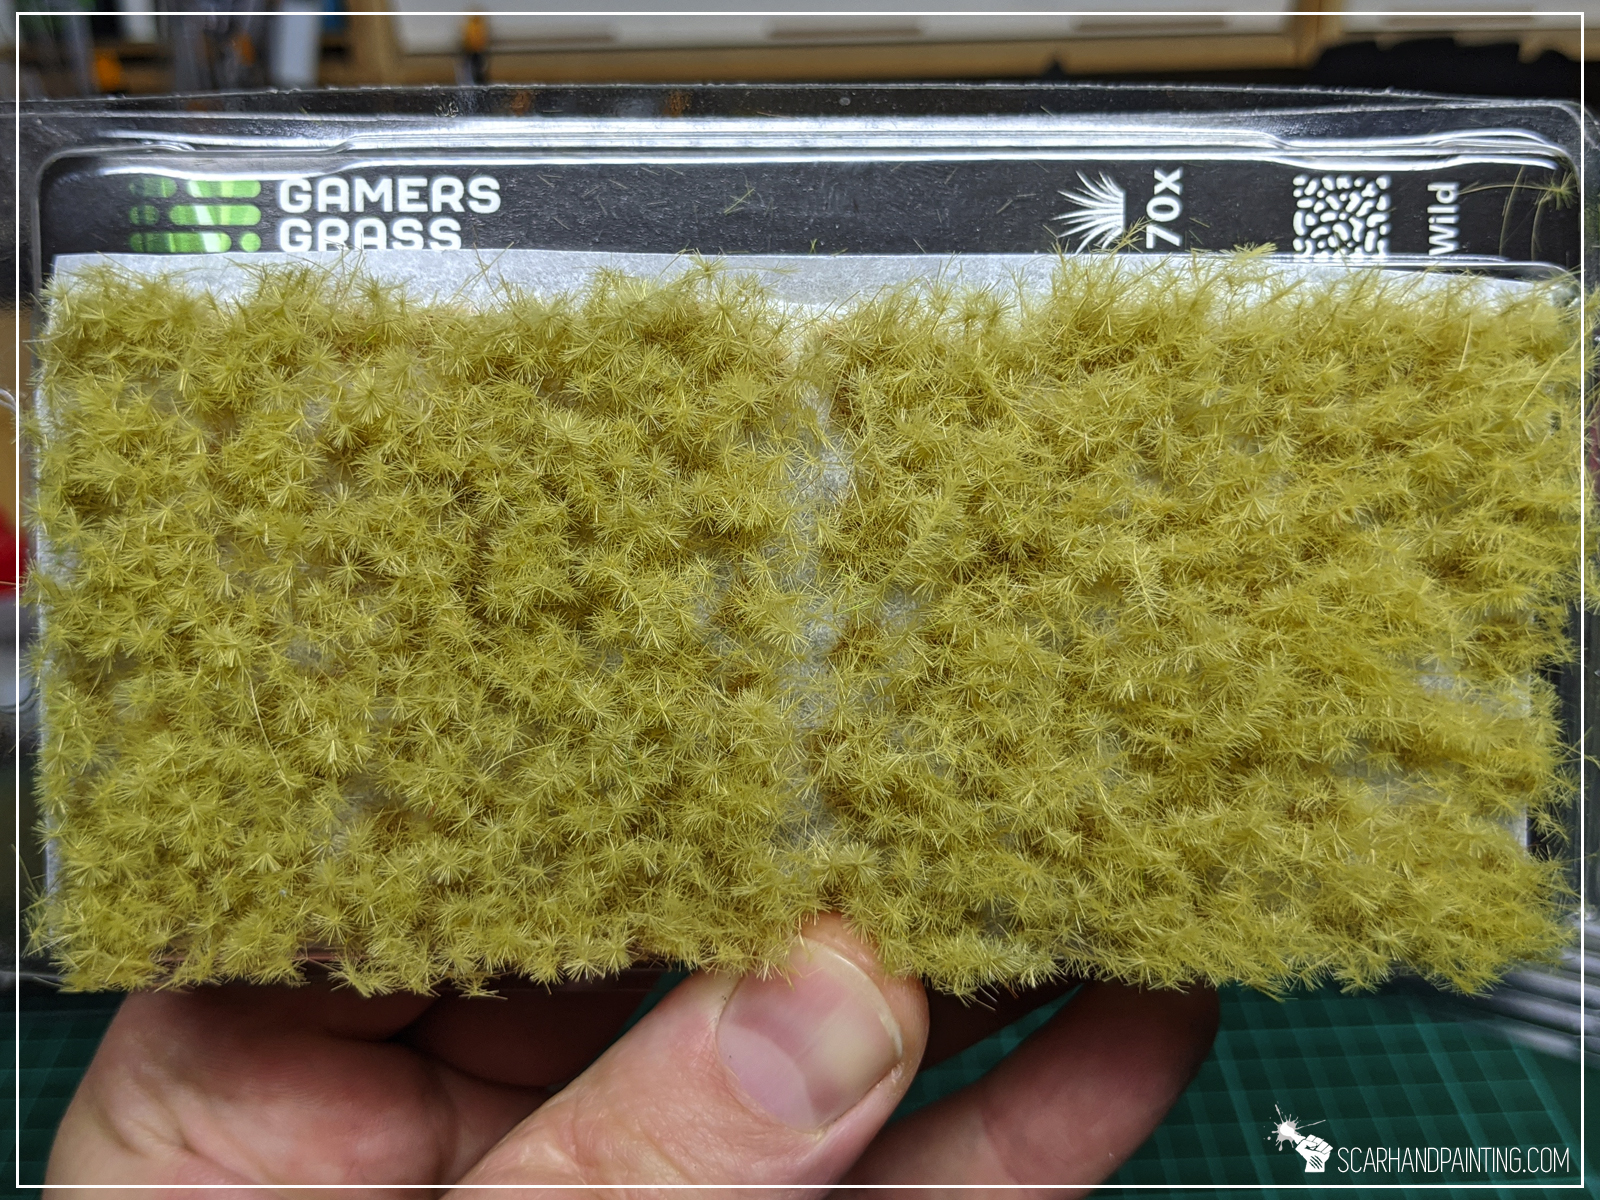
Visually Gamers Grass Tufts look stunning. Apart from classic tufts, there’s Alien and Spikey series, which are like nothing I’ve seen previously in the market. All tufts are fluffy and solid and thanks to a wide variety of colors and shapes – they turn bases into little pieces of awesome.
Most Gamers Grass Tufts are very user friendly. Separated on the sheet by a clear line, easy to pick and apply. Once picked, they hold their shape. I could go on, but let’s just say they are a joy to work with.

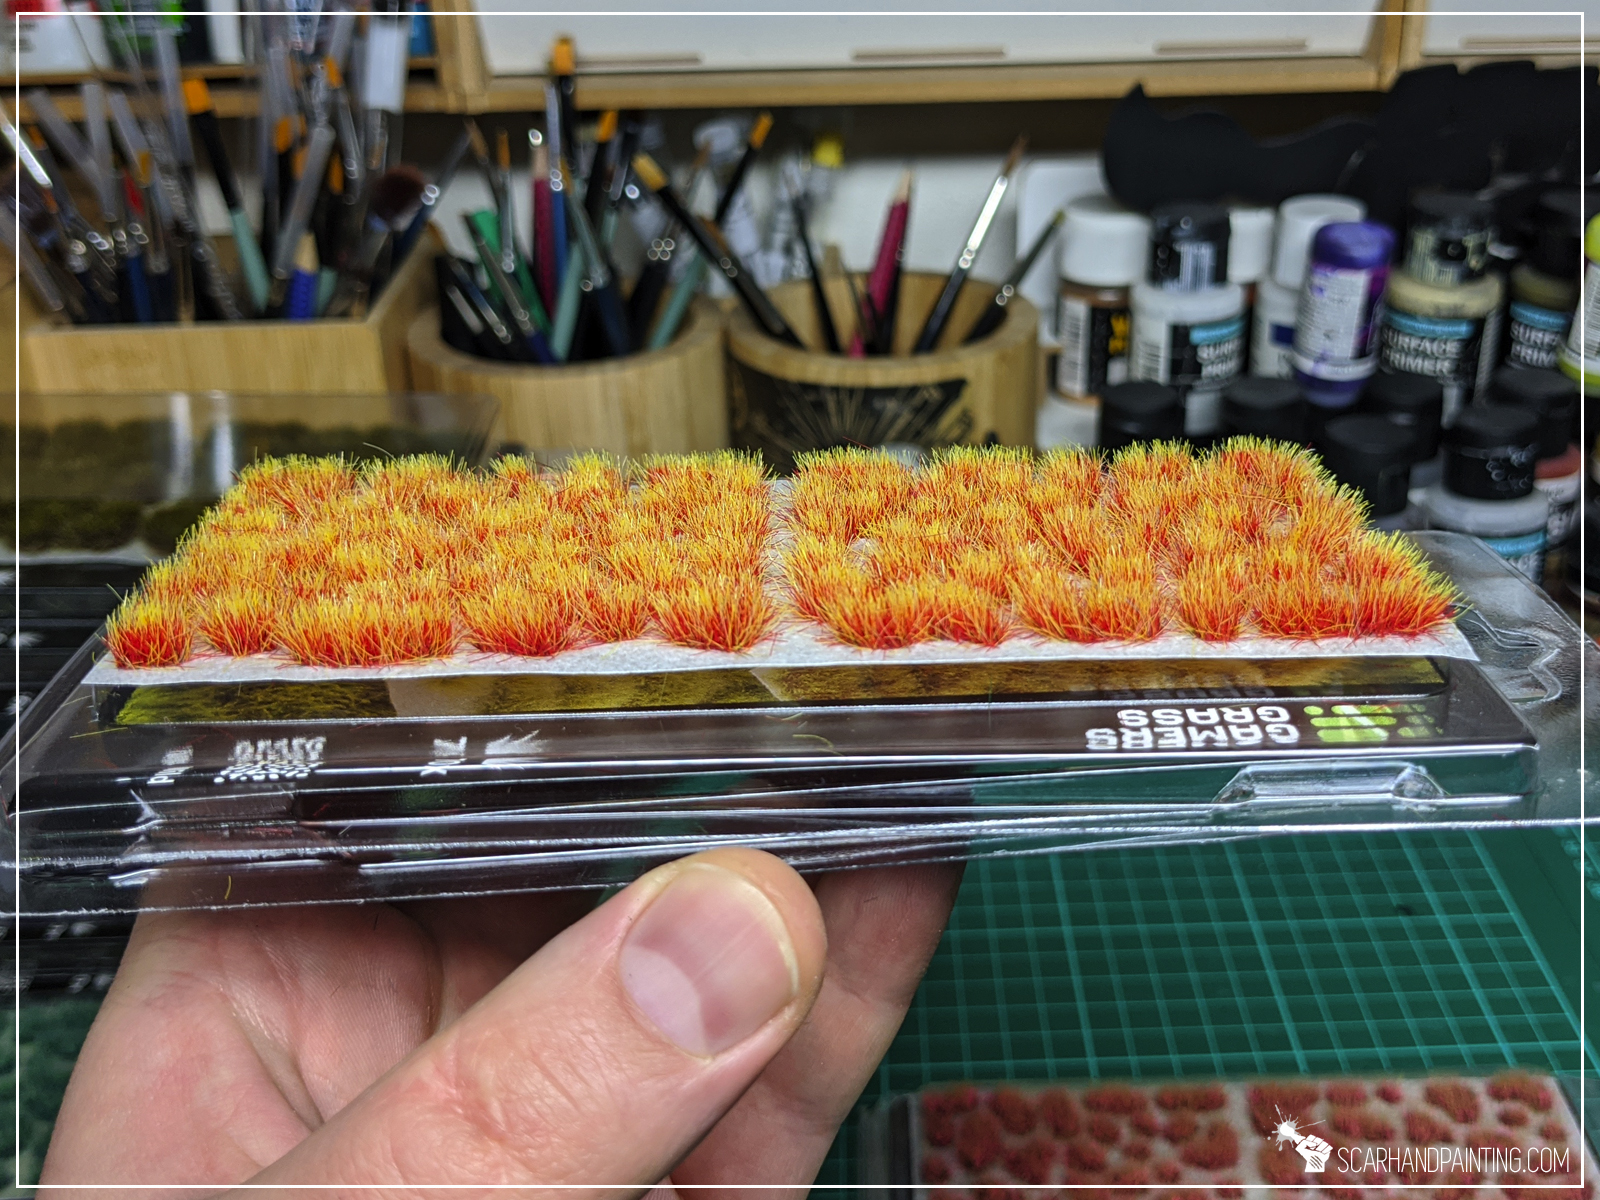
Like with all product series not everything is perfect. Amongst the batch I purchased there are two products that do not entirely hold up to the standards described above.
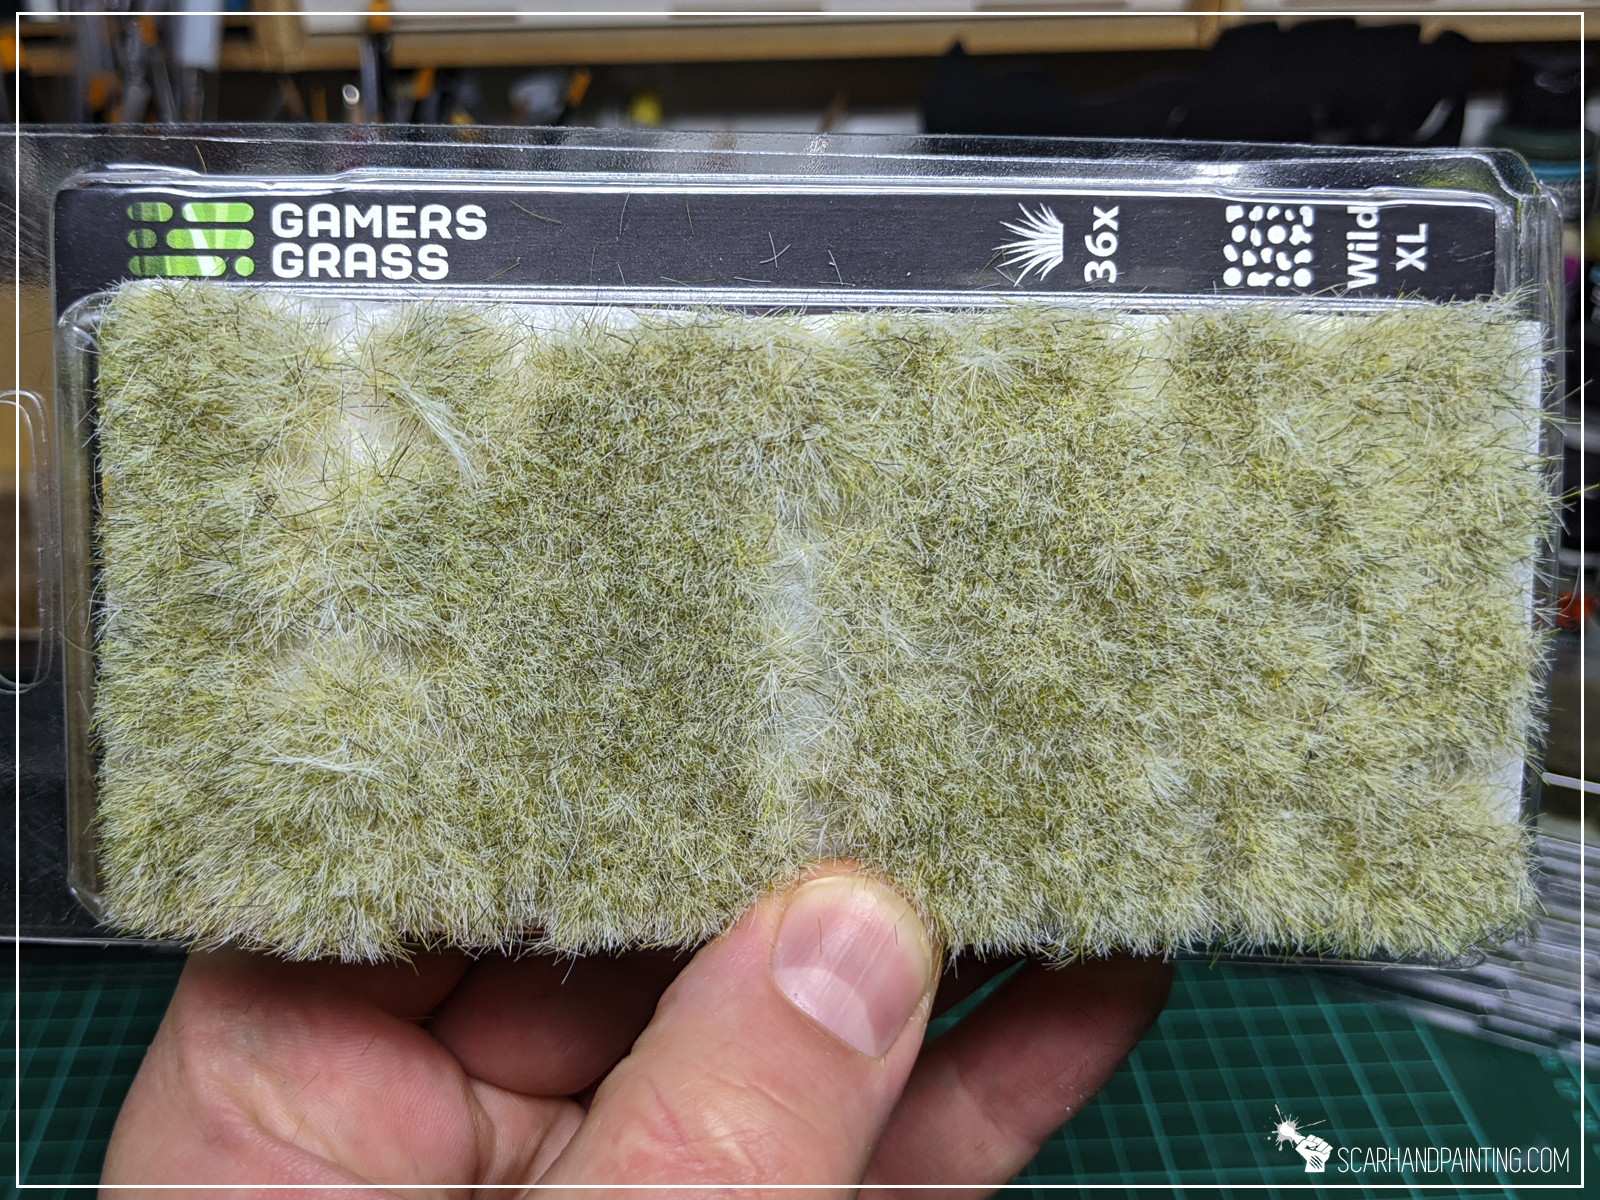
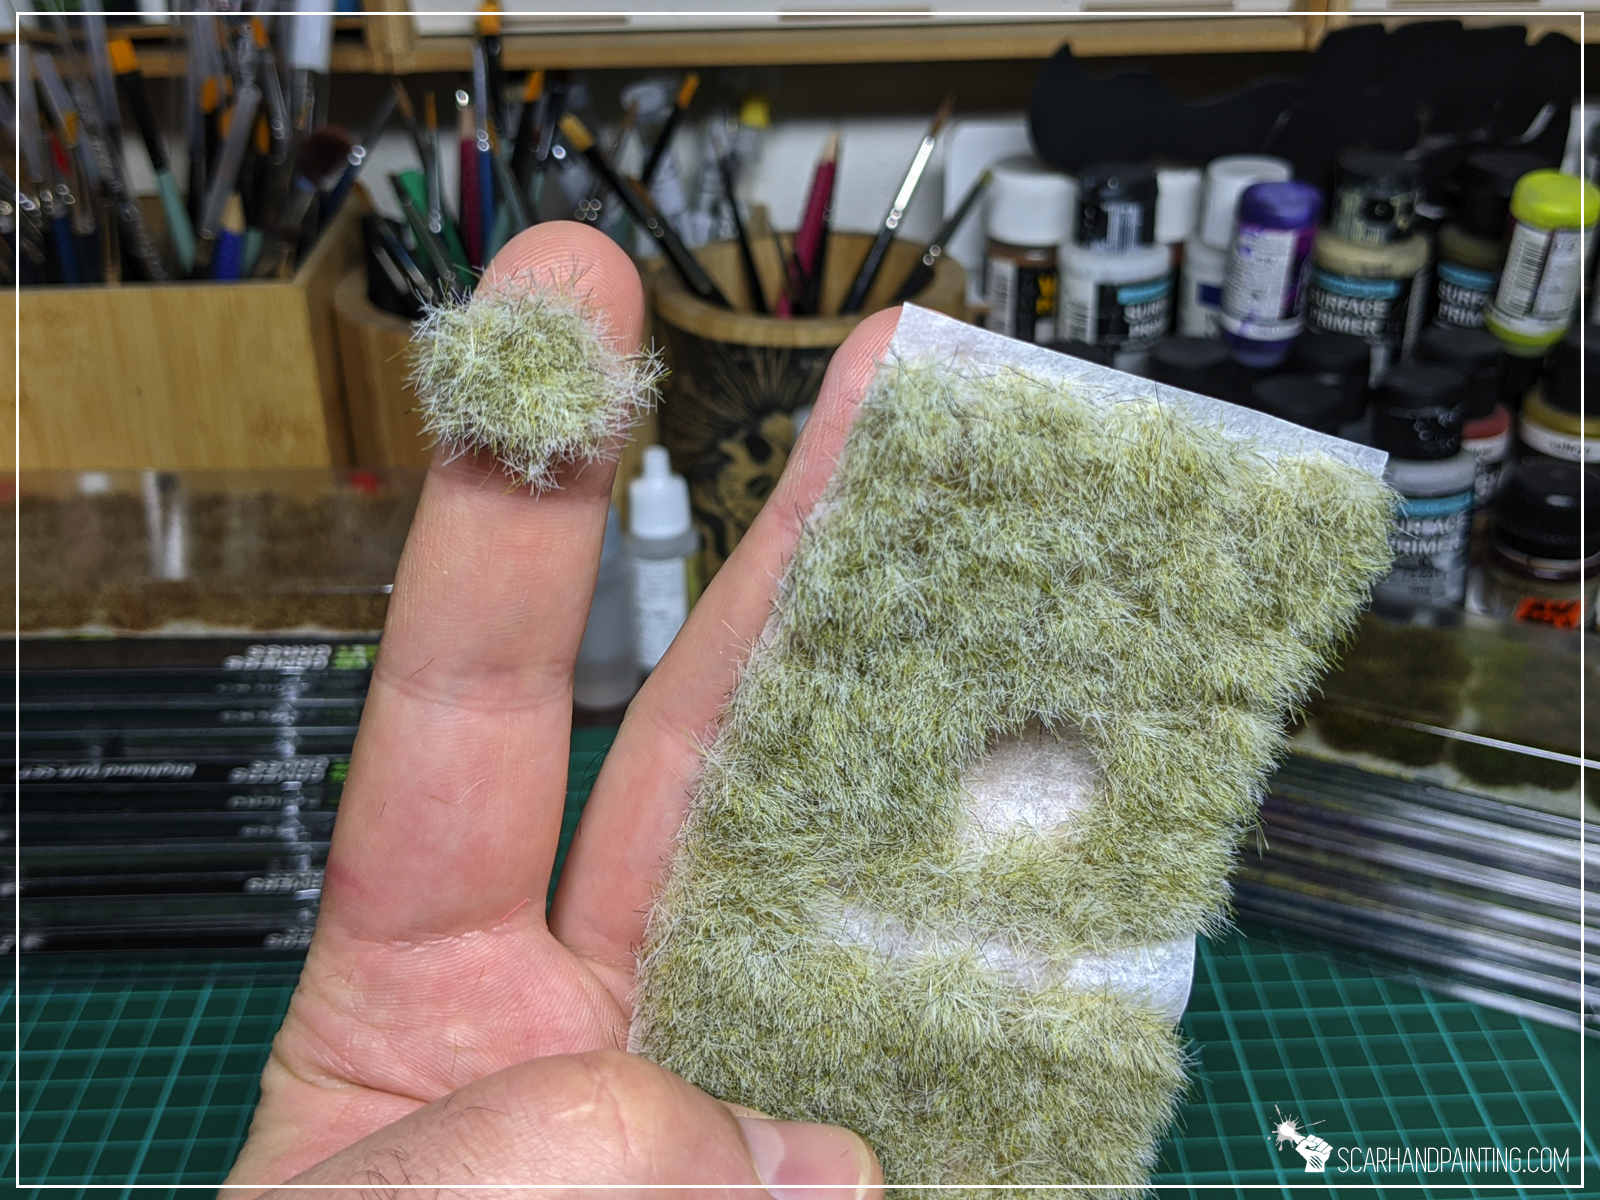
12mm Wild Winter Tuft is a bit too messy for my tastes. There’s not enough separation between particular tufts and there’s a lot of “leftover” coming off the tufts during use. It looks pretty dope once separated from the sheet, still I had issues separating particular tufts from one another.

Similarly Wild Spikey Green and Wild Spikey Beige Tufts are very messy to work with. Whereas they look insanely cool, it is very difficult to remove them from the sheet intact. They lose a lot of strands in the process.
Fortunately these issues don’t translate to the entire range, which for the most part is full of top quality, high end products.
Time to focus on the price. I’ve done some math comparing the price of standard and “Wild” tufts from Gamers Grass, Games Workshop and Army Painter. Here’s where I’ve landed:
Easy to say that when it comes to price Gamers Grass beats its competition hard and that is great news!
To summarize, when it comes to professional hobby tufts Gamers Grass is totally in the lead. The vast variety of unprecedented lush colors and types is by itself a good reason to try their offer out. To top it all there’s perfect pricing. Their range as a whole is super solid. I will definitely use these from now on and wholeheartedly recommend you to test it yourself.
You can order through Gamers Grass official store, or try out your luck in a local hobby store. To make things easier for you, Gamers Grass prepared this awesome Store Locator. So what are you waiting for? I invite you to, at the very least, take a peek at their offer.
It’s July 2023 and I am still a huge fan. I have been working with Gamers Grass products for a few years now and throughout that time I got rid of all the alternatives. Gamers Grass is beyond any competition. I just love the quality, visuals and how user friendly their products are, at an affordable price on top.
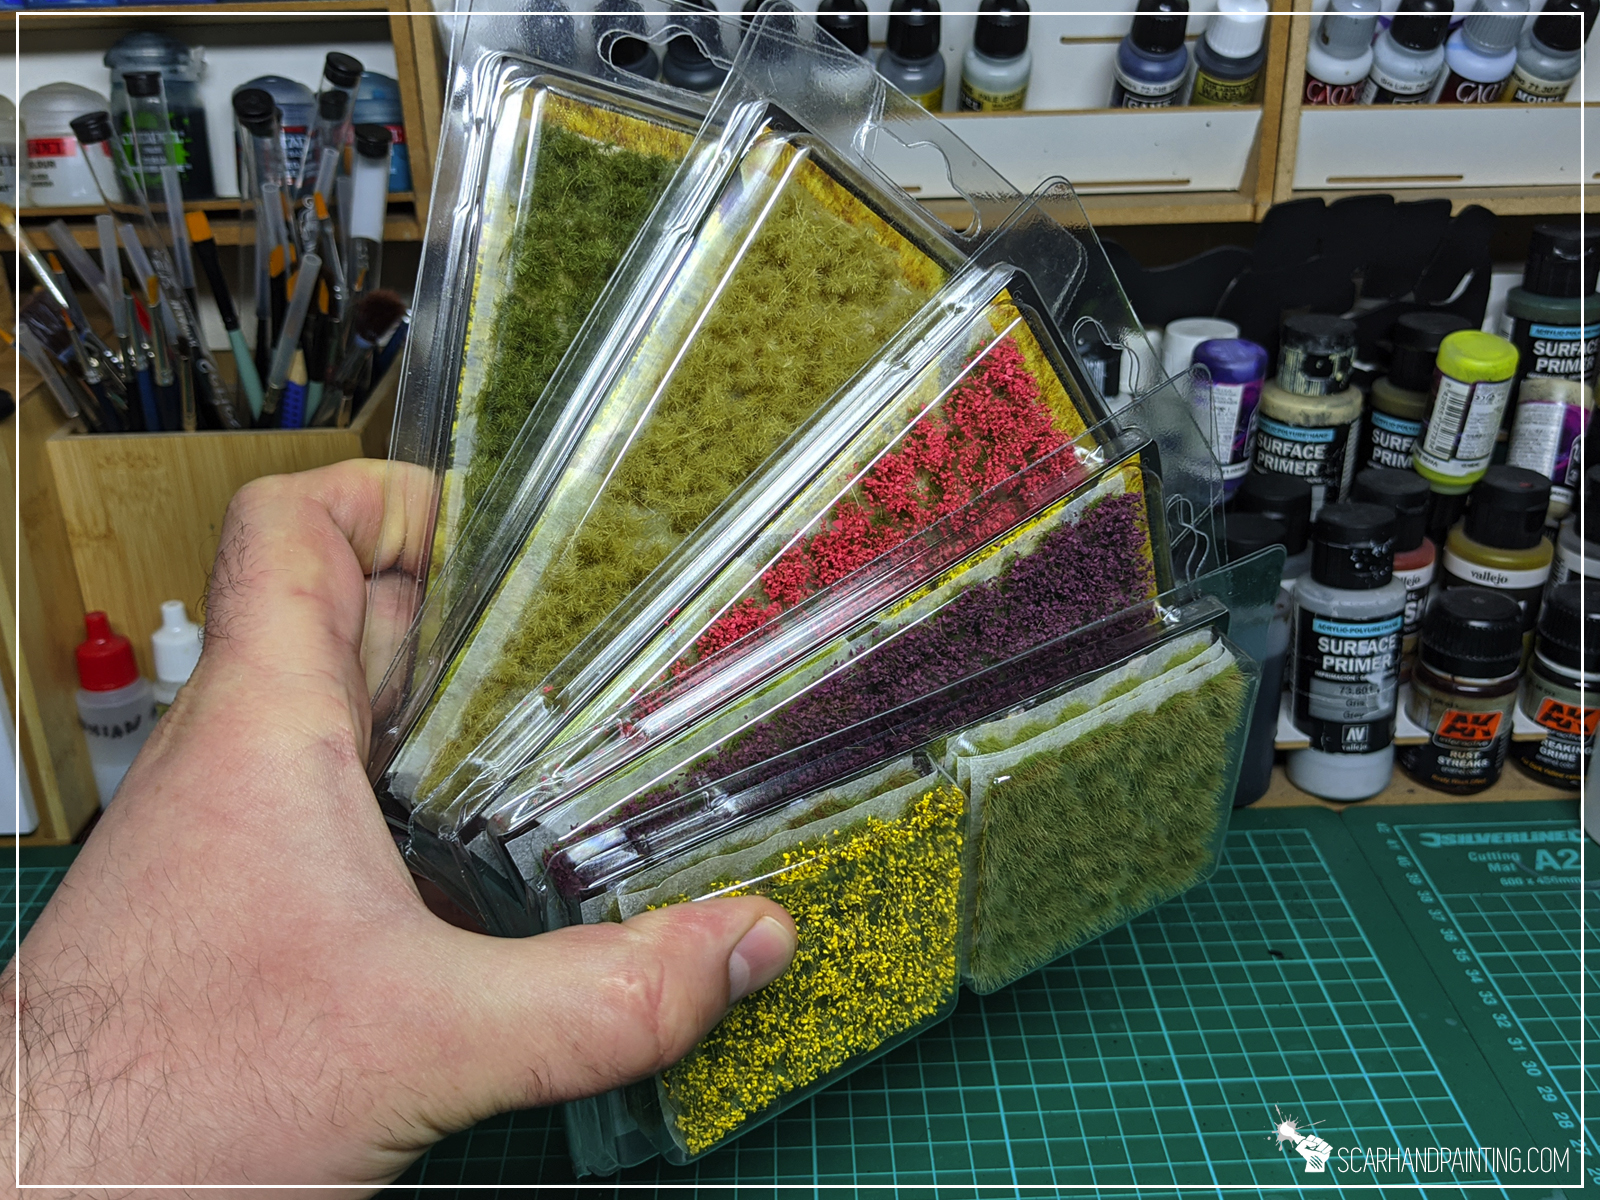
More importantly the Gamers Grass range is growing. Just recently they sent me a package containing a variety of new releases. Just look at this stuff – it is out of this world!


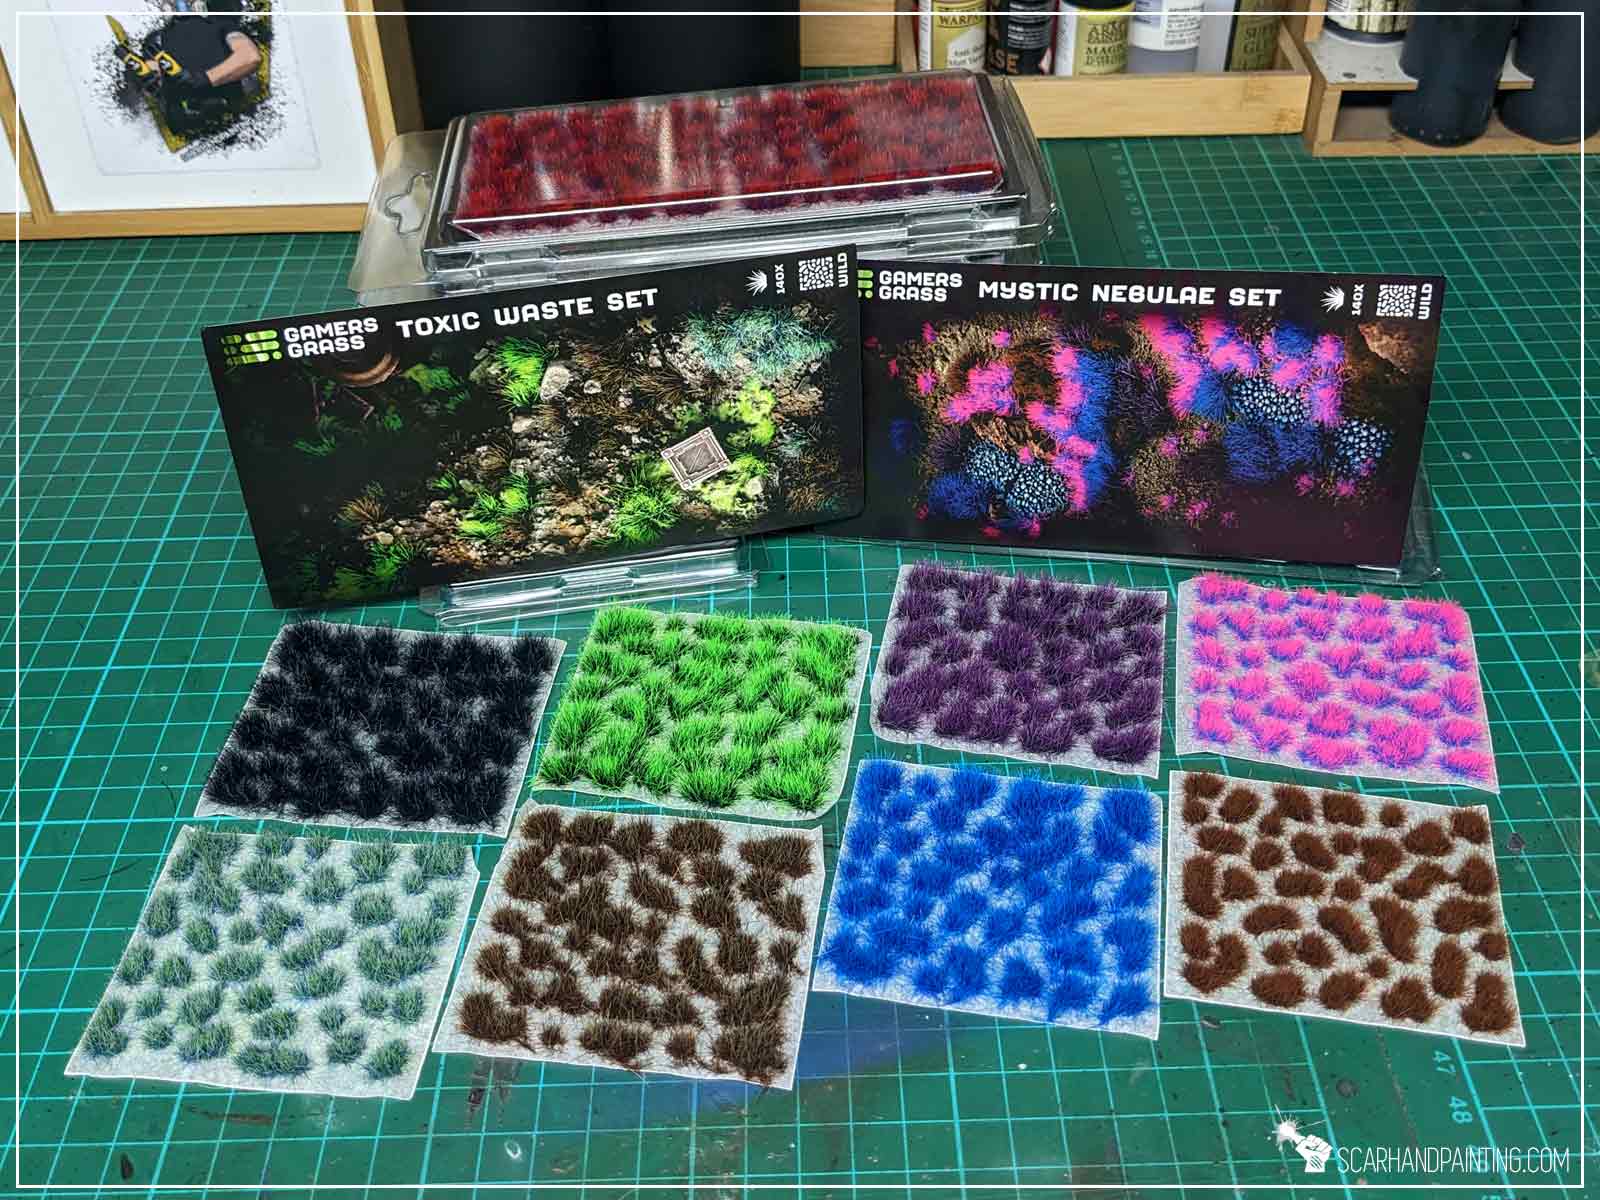
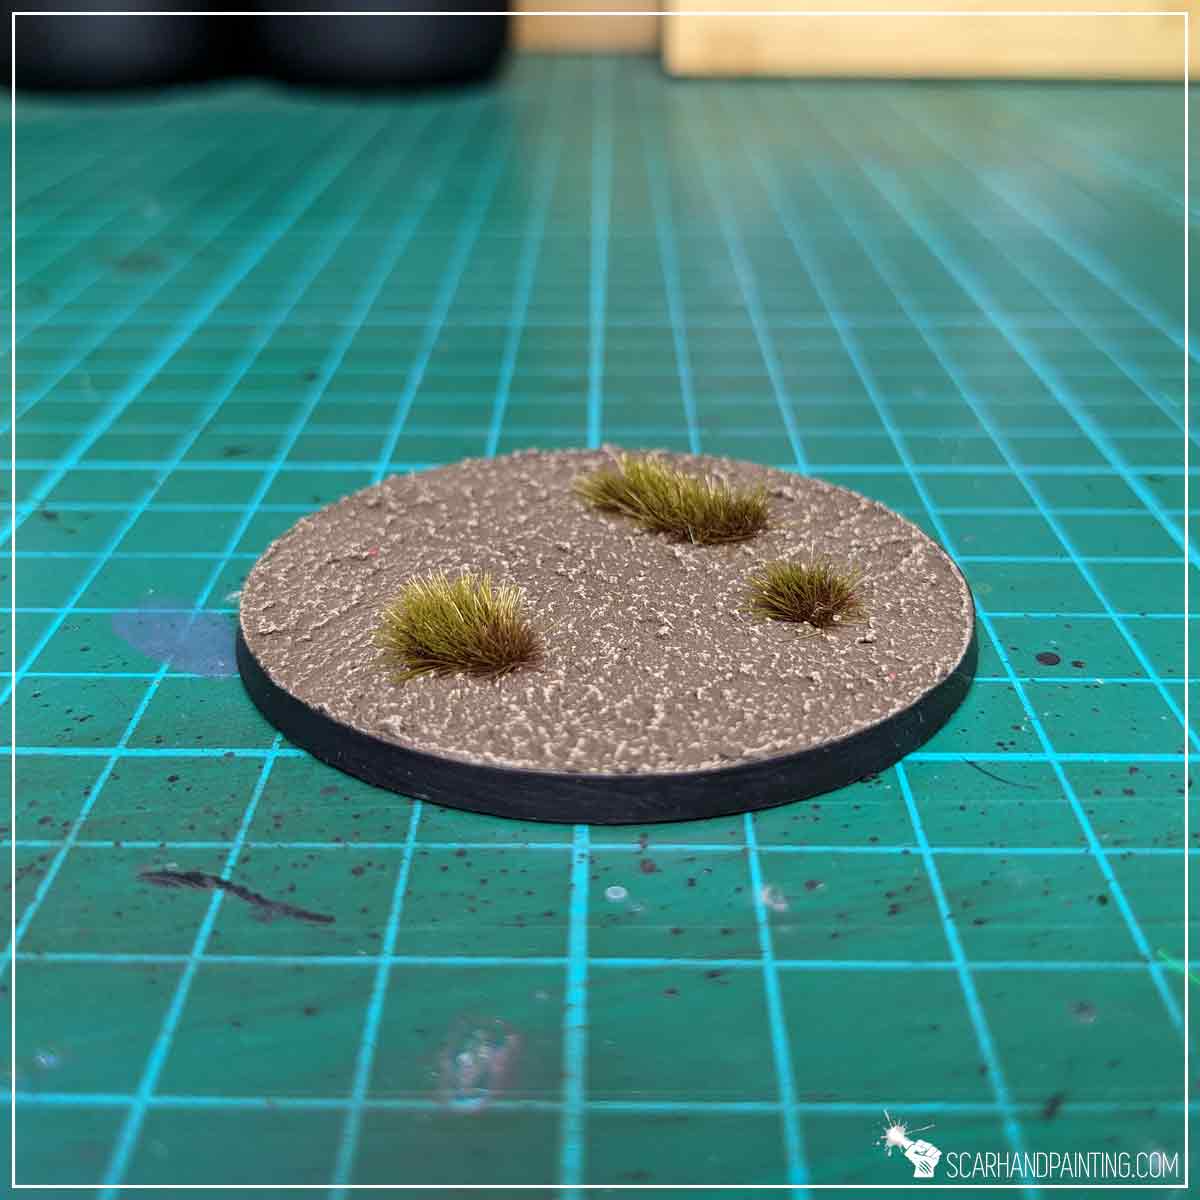
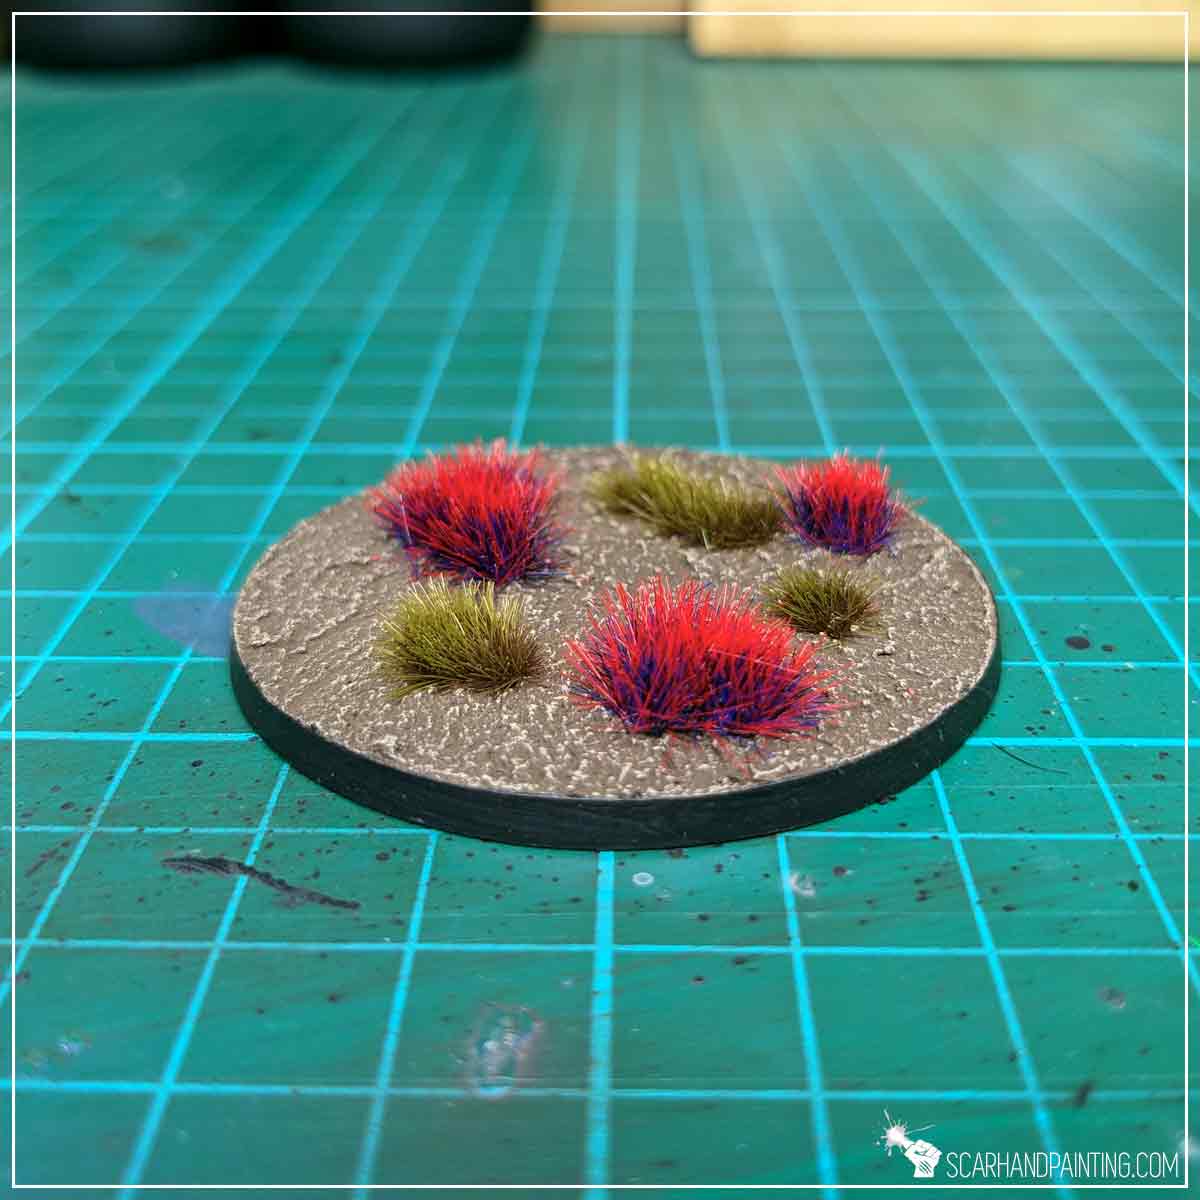
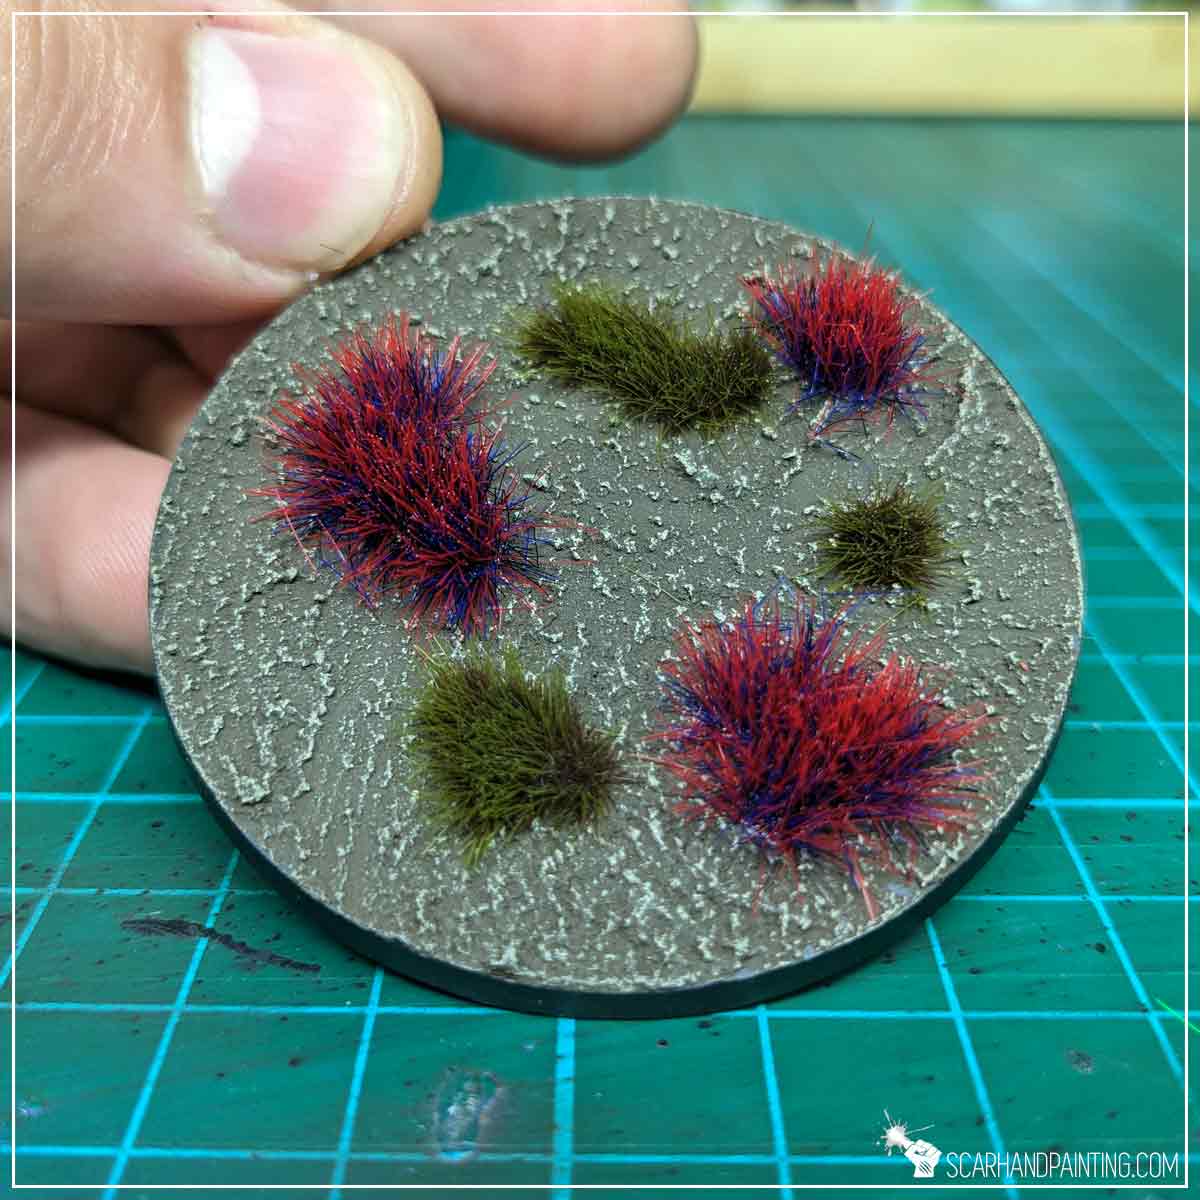

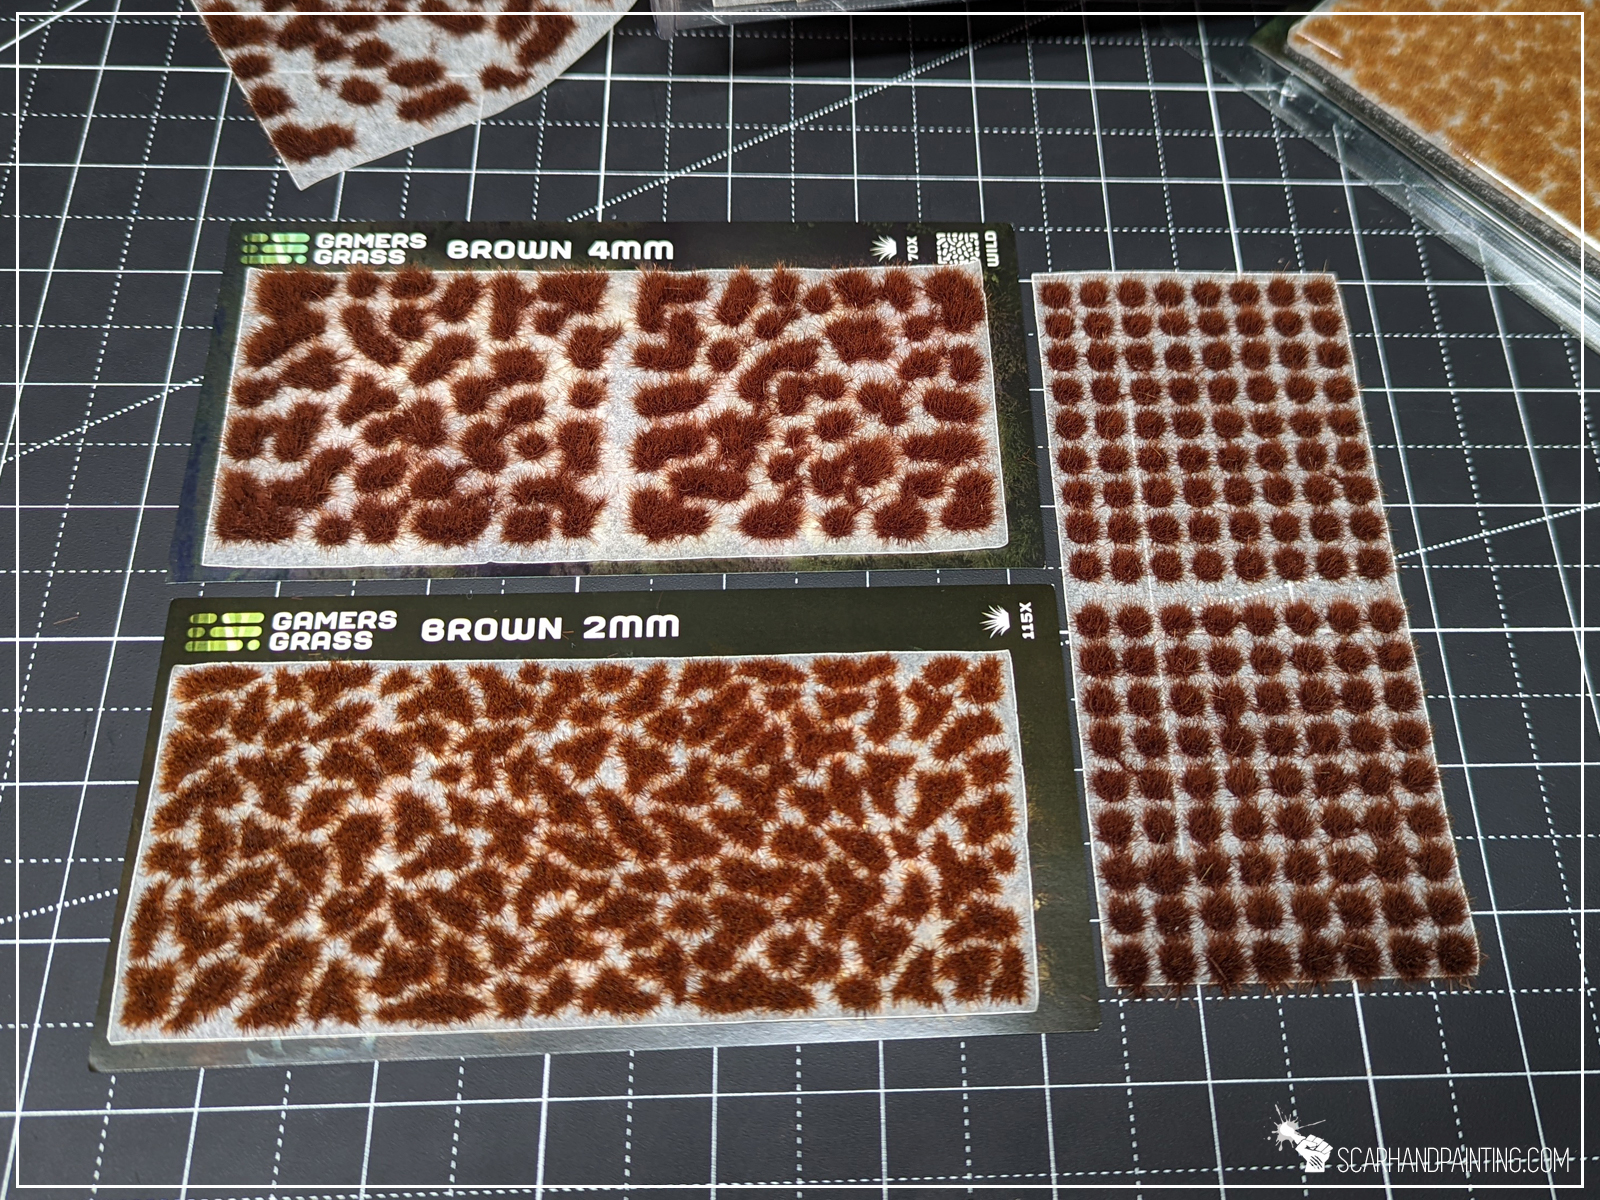
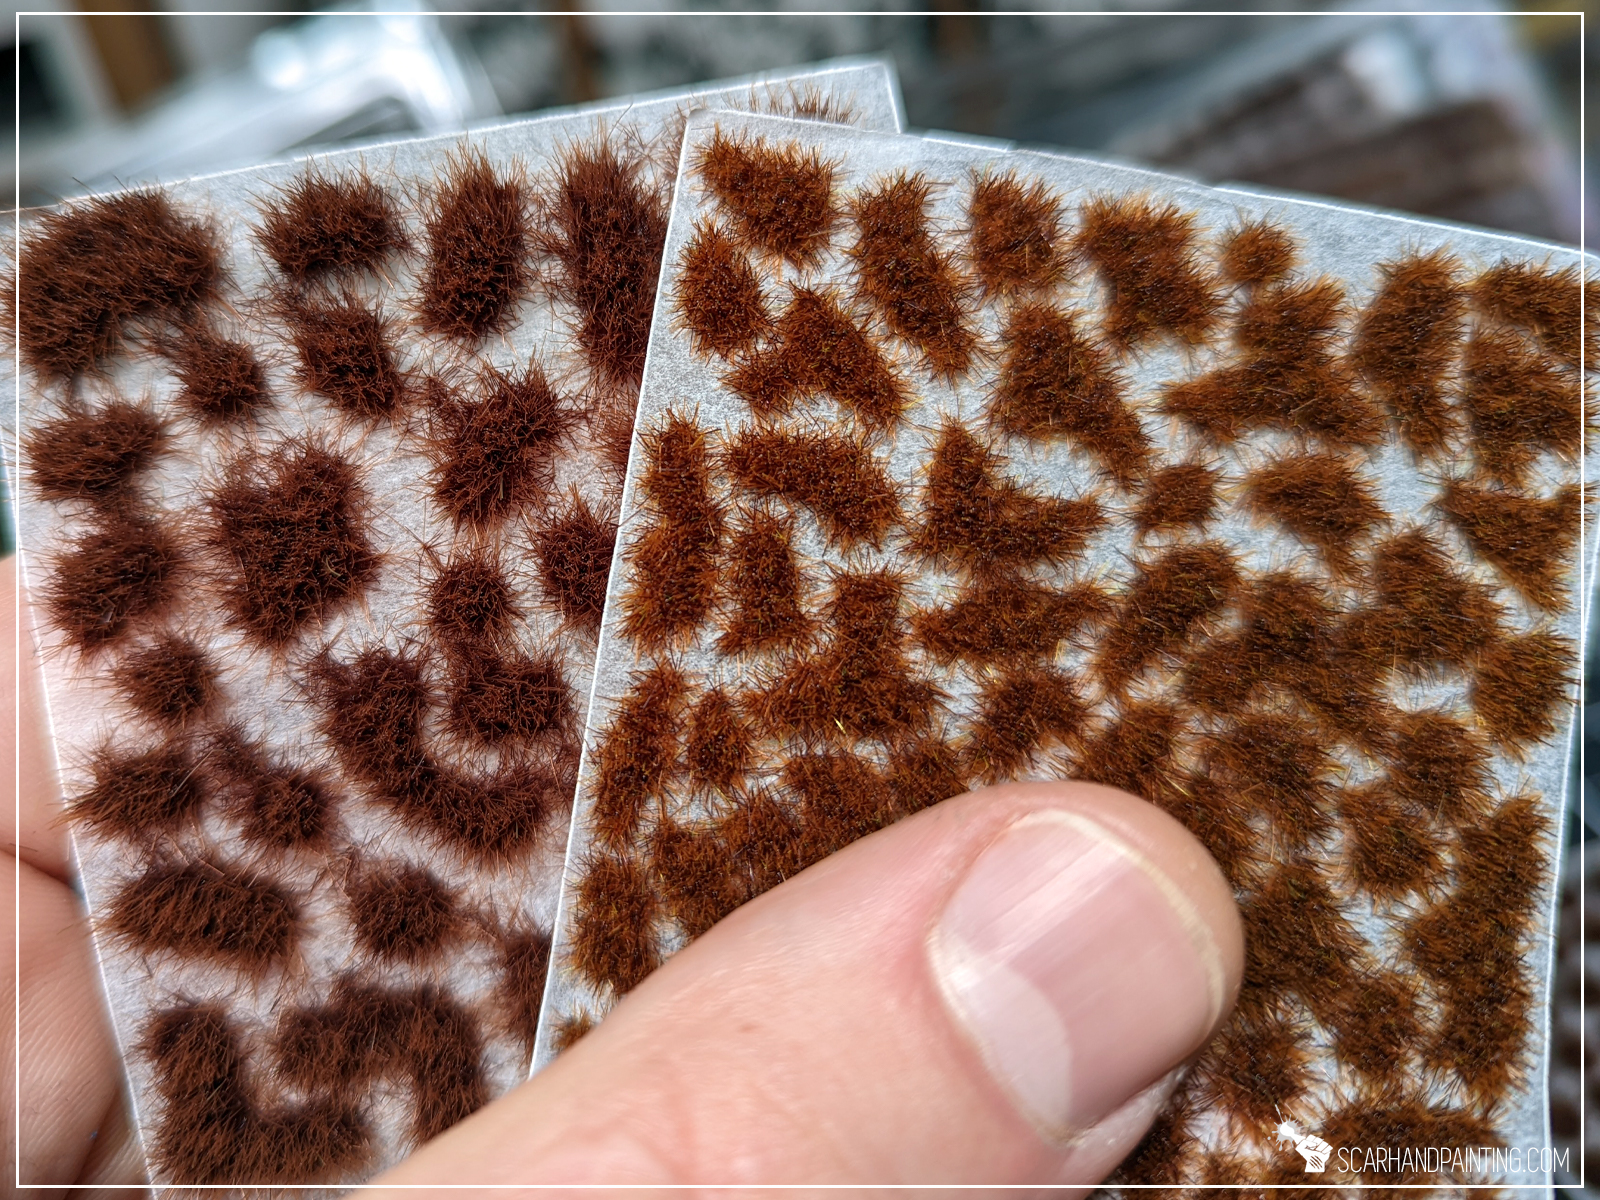
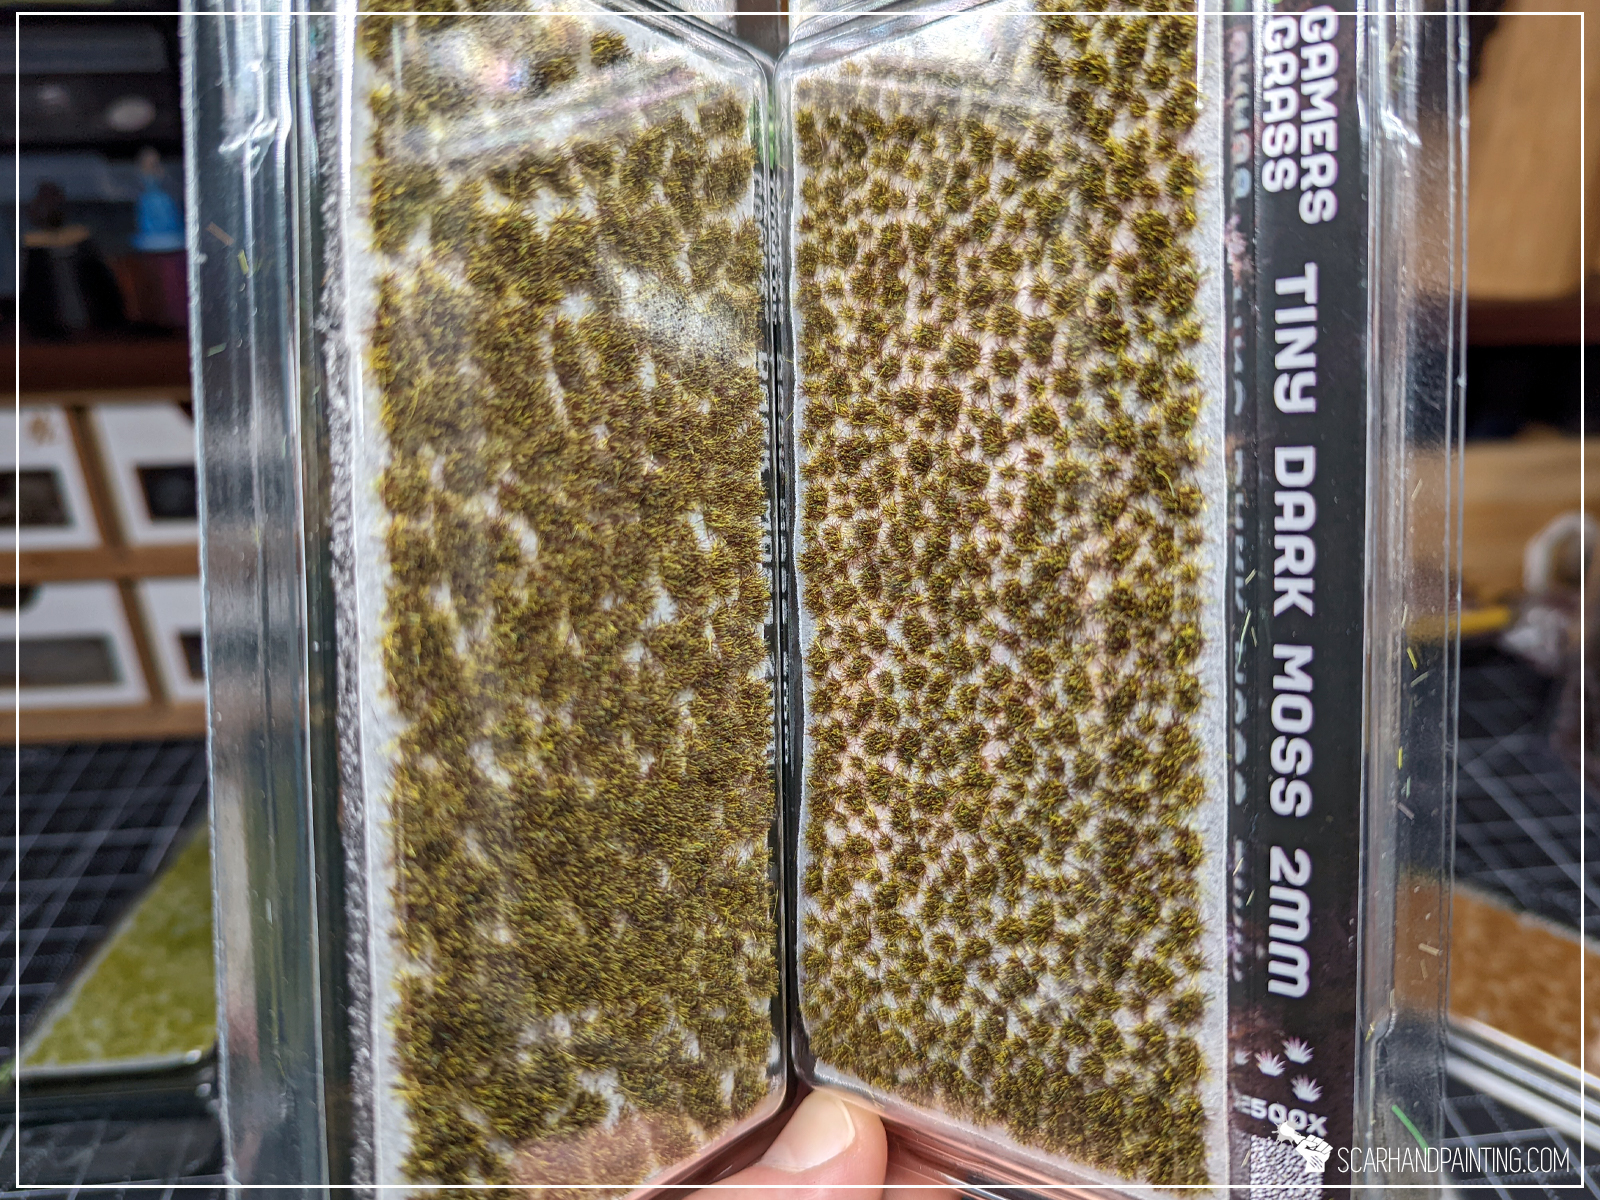
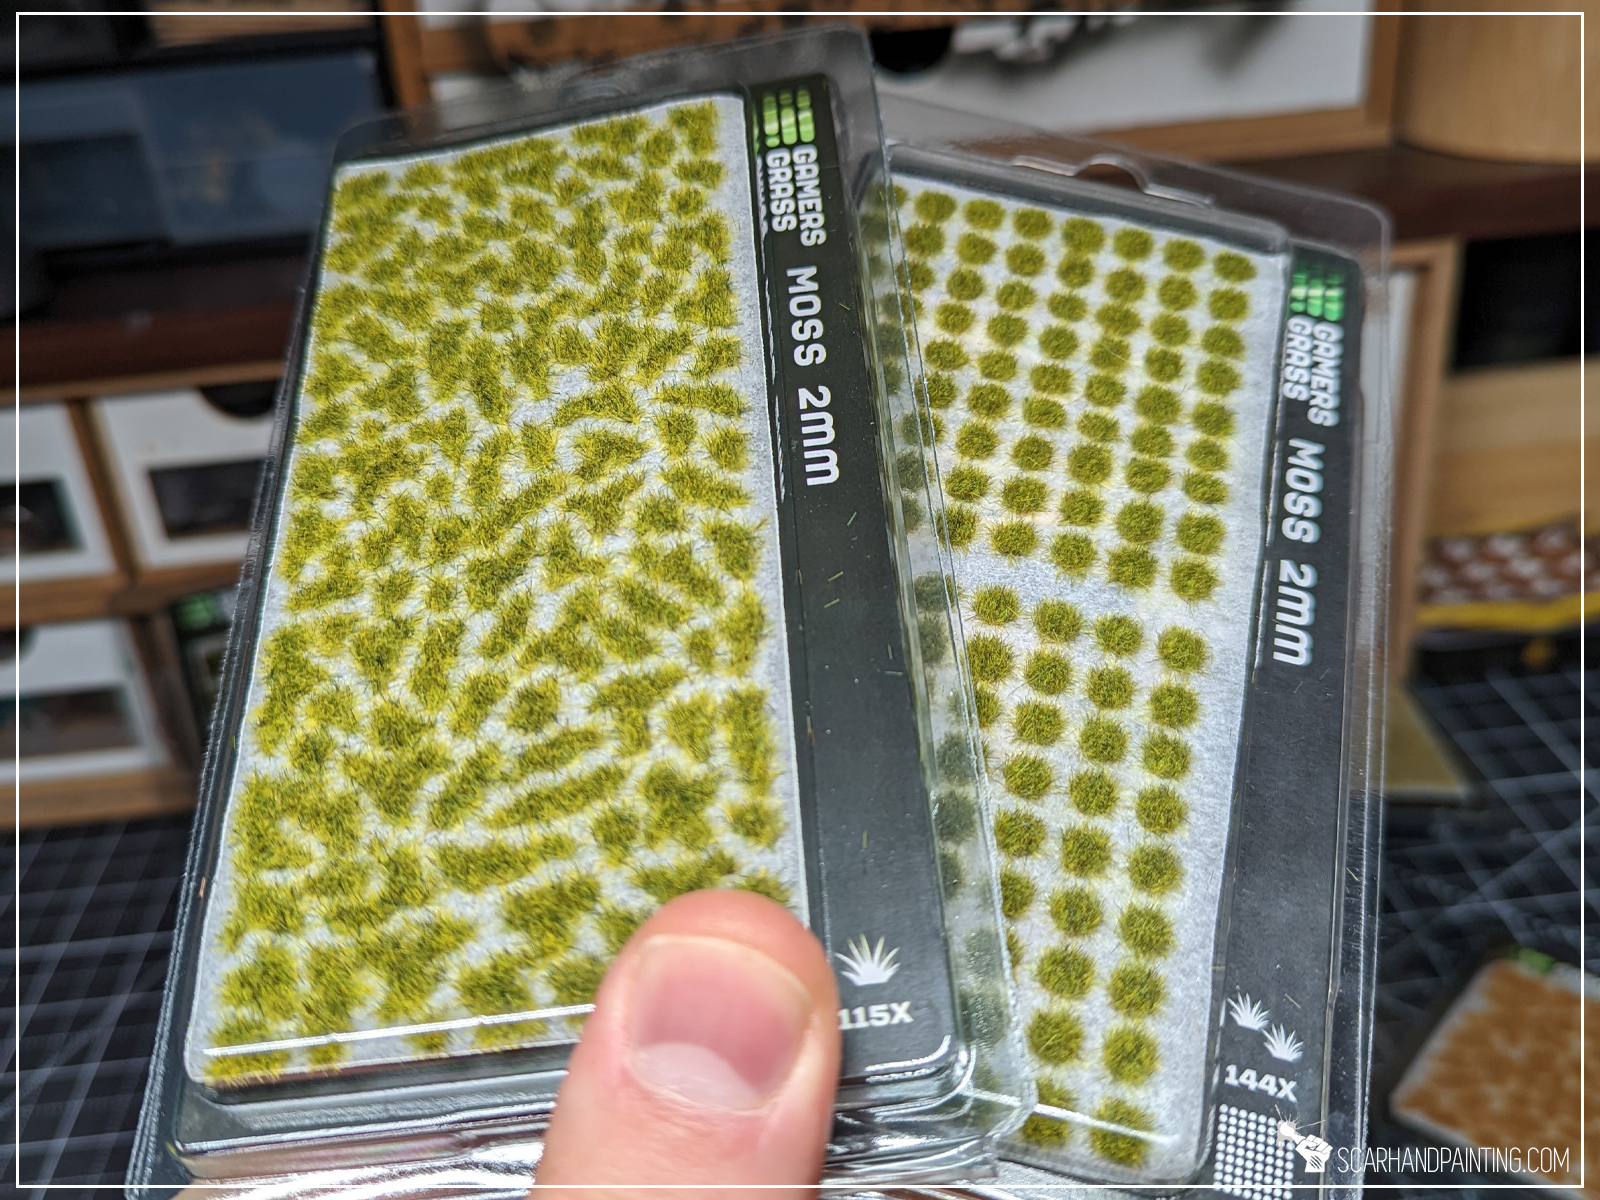
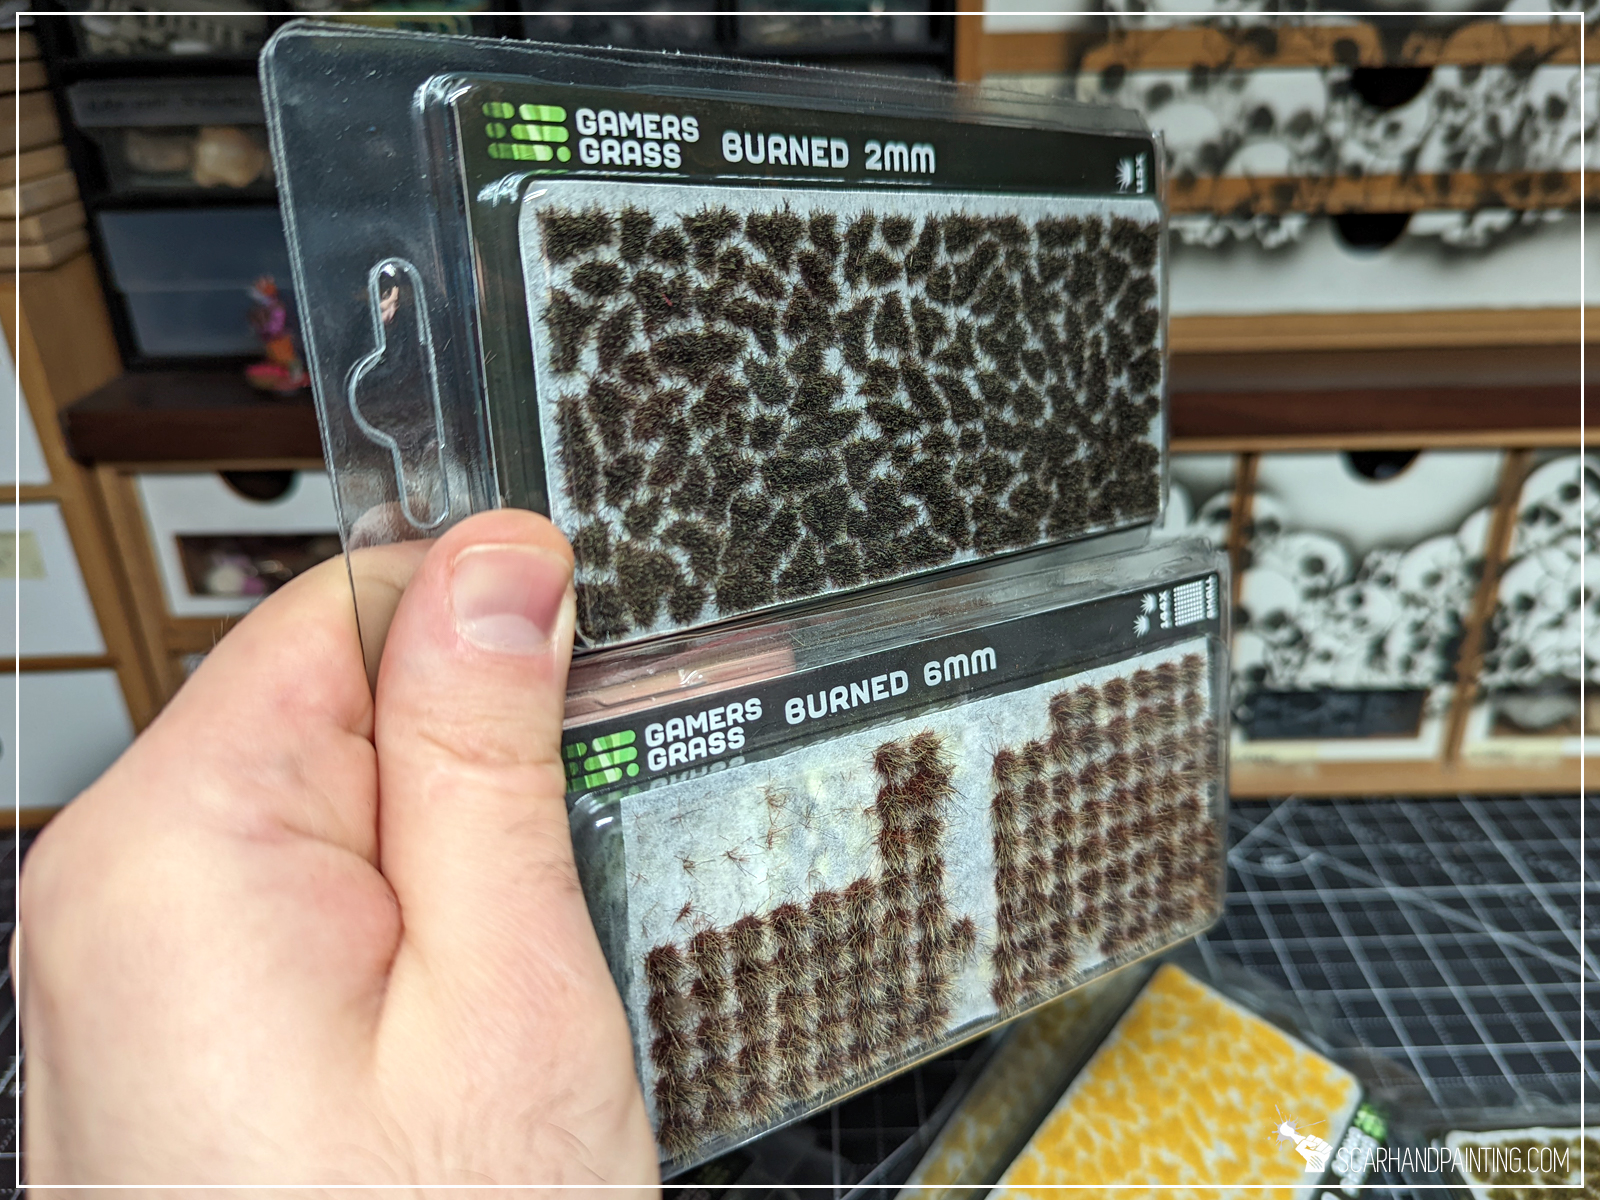
February 2024 hit and we’ve seen some expansion of the Gamers Grass regular 2mm tufts. Eight new products combining the features of “wild” and “tiny” lines into a 2mm series. As it happens, the Gamers Grass gifted me with a full set of eight. Now when I had sufficient time to get to know these streamlined products thoroughly, I am ready to share my take on them.

In terms of user friendliness, surface adherence and stalk length coherency – the product quality is of the same utmost best that you can expect from any and all Gamers Grass tufts. Shape variety is great with a mix of really small, medium and large swathes of tuft goodness.
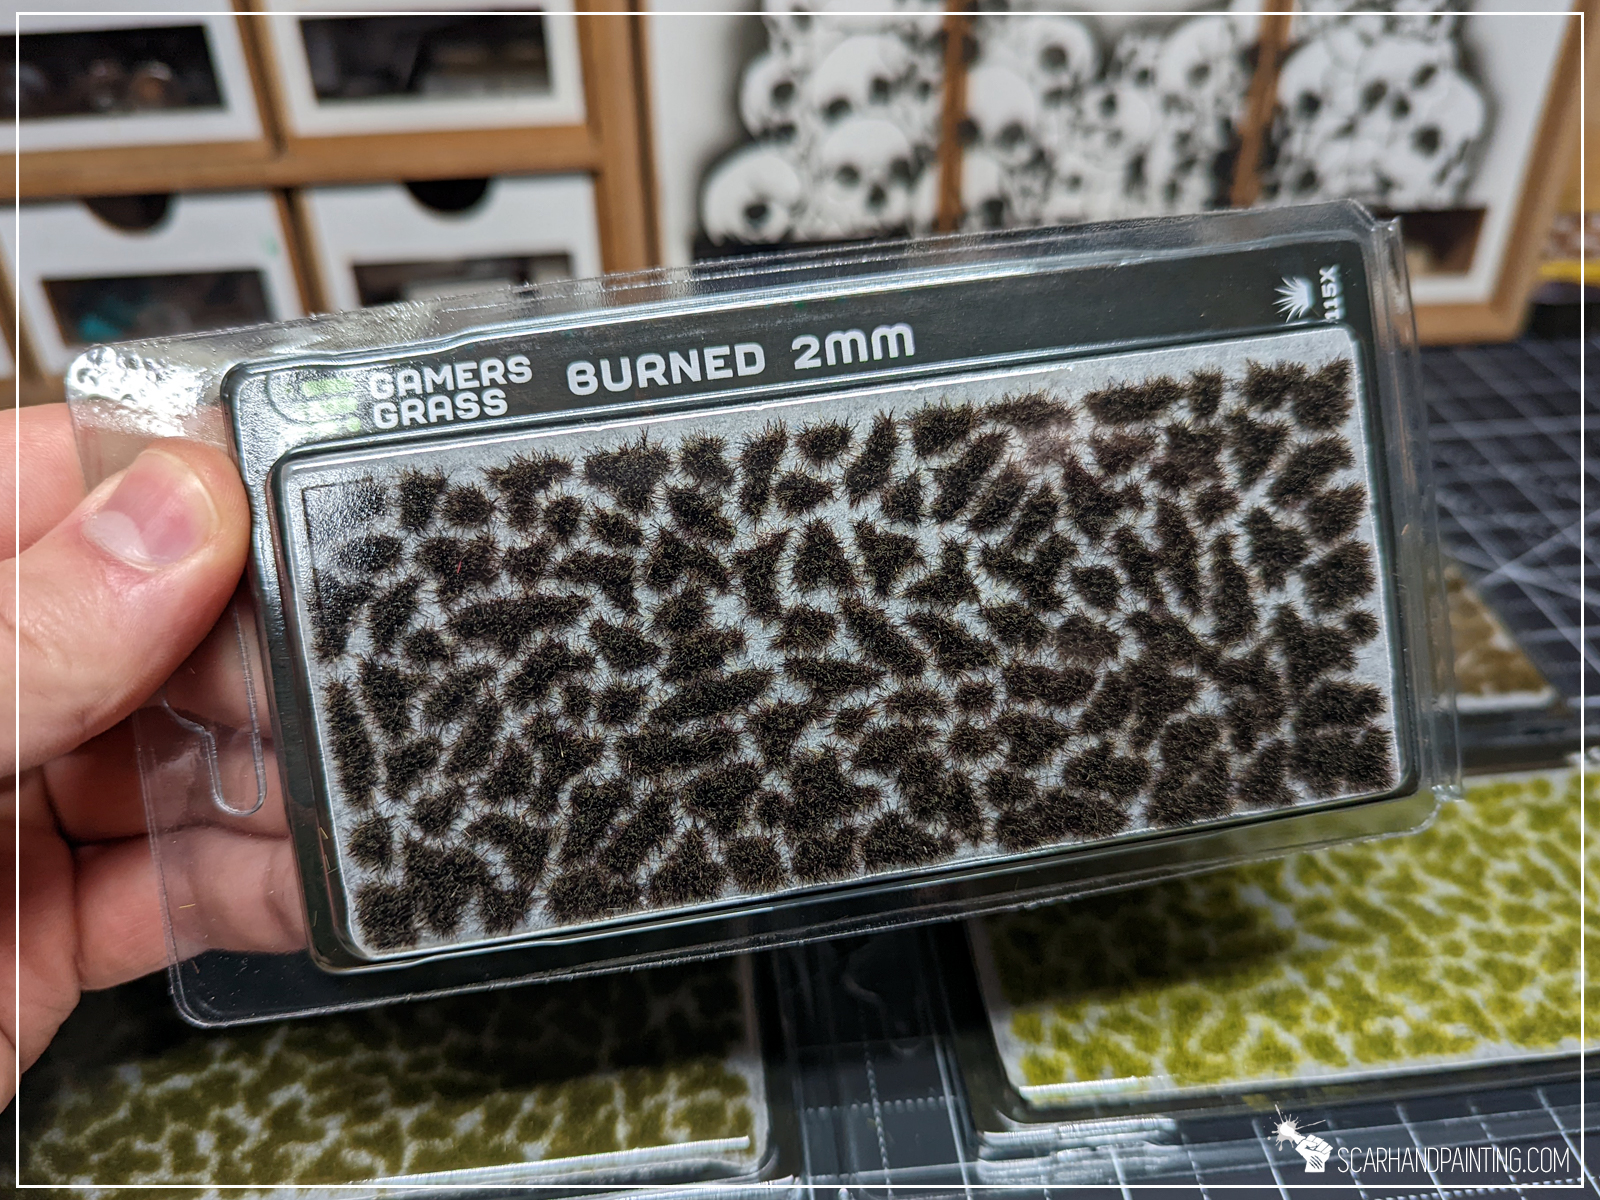
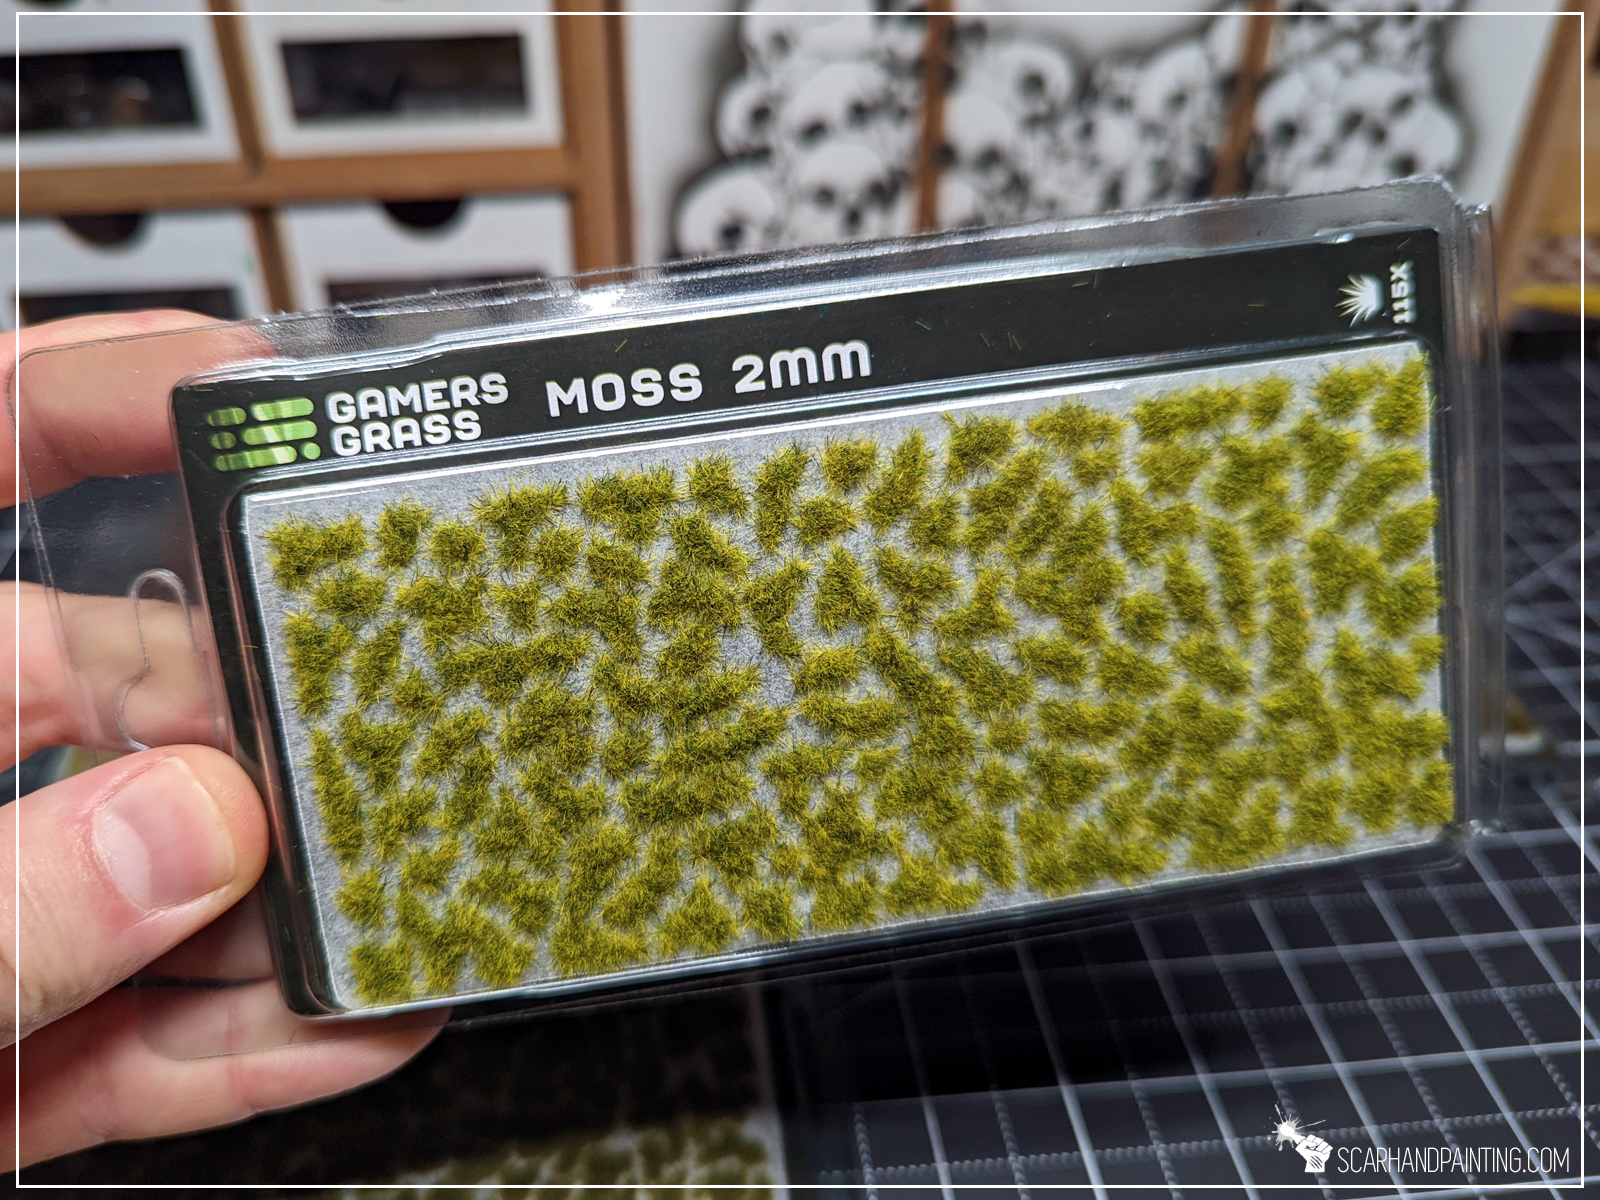
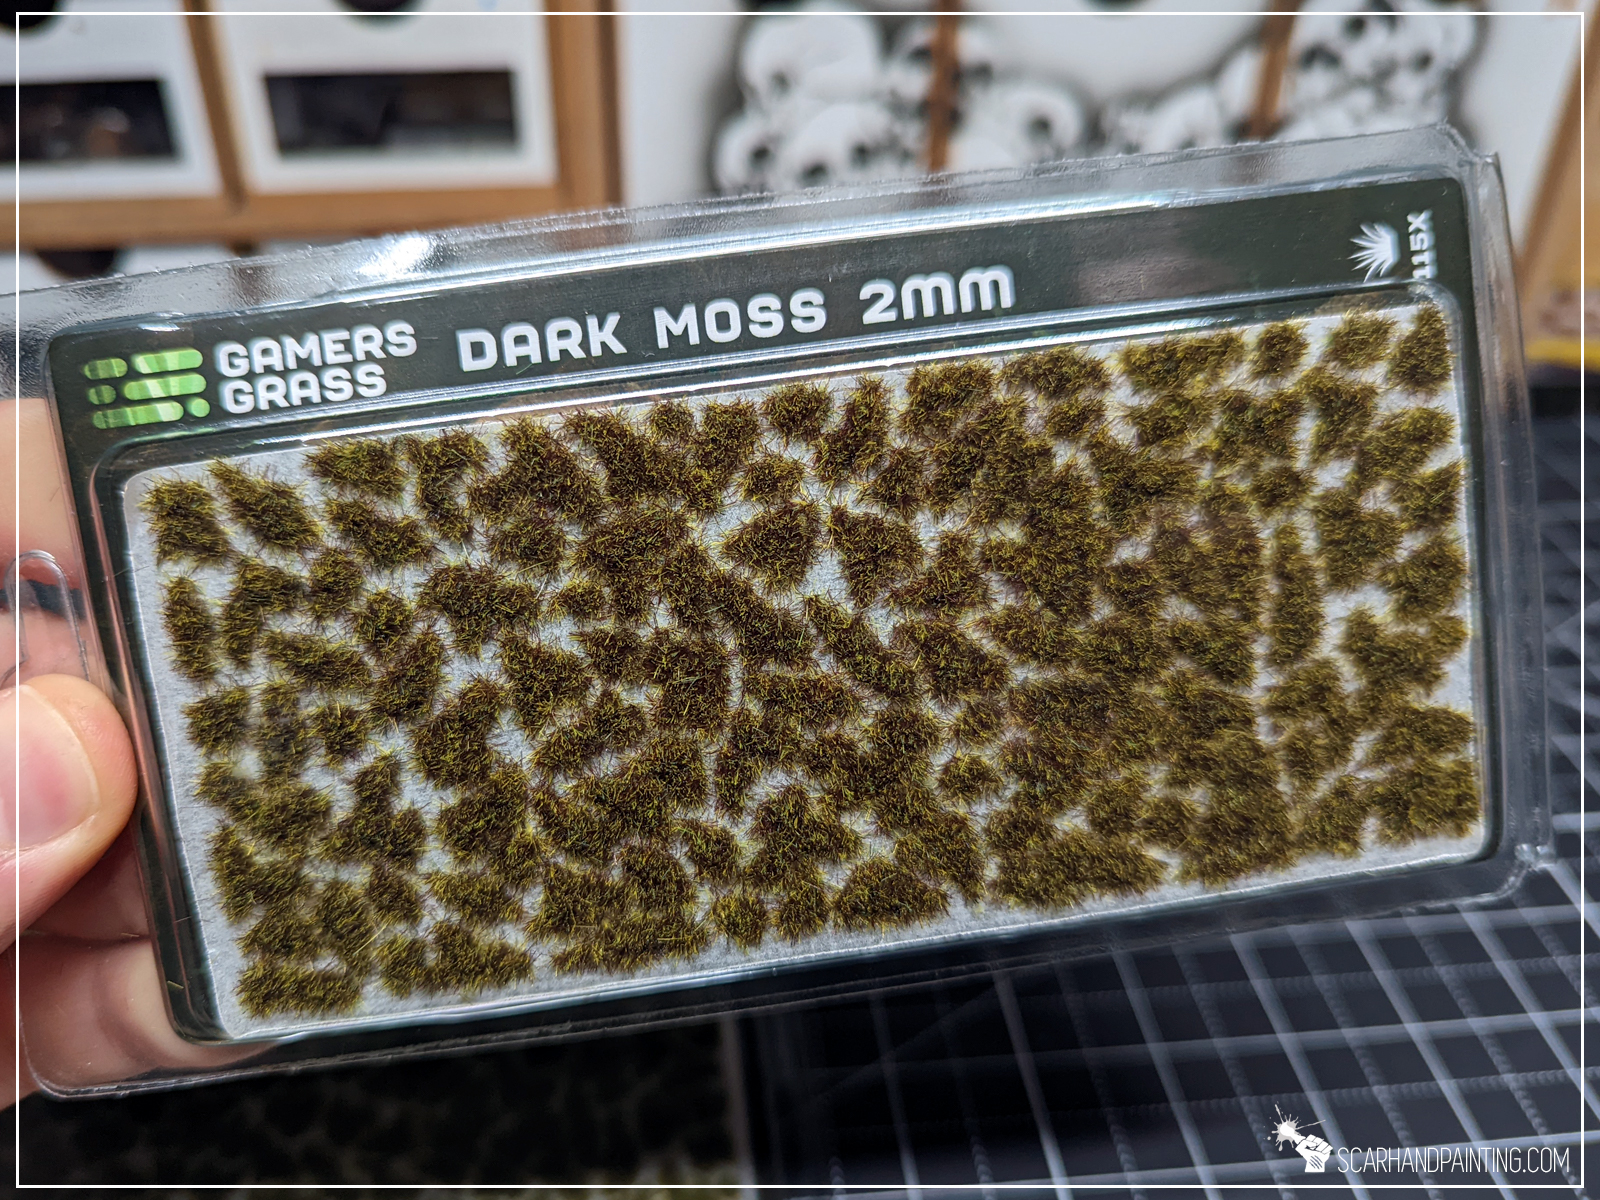
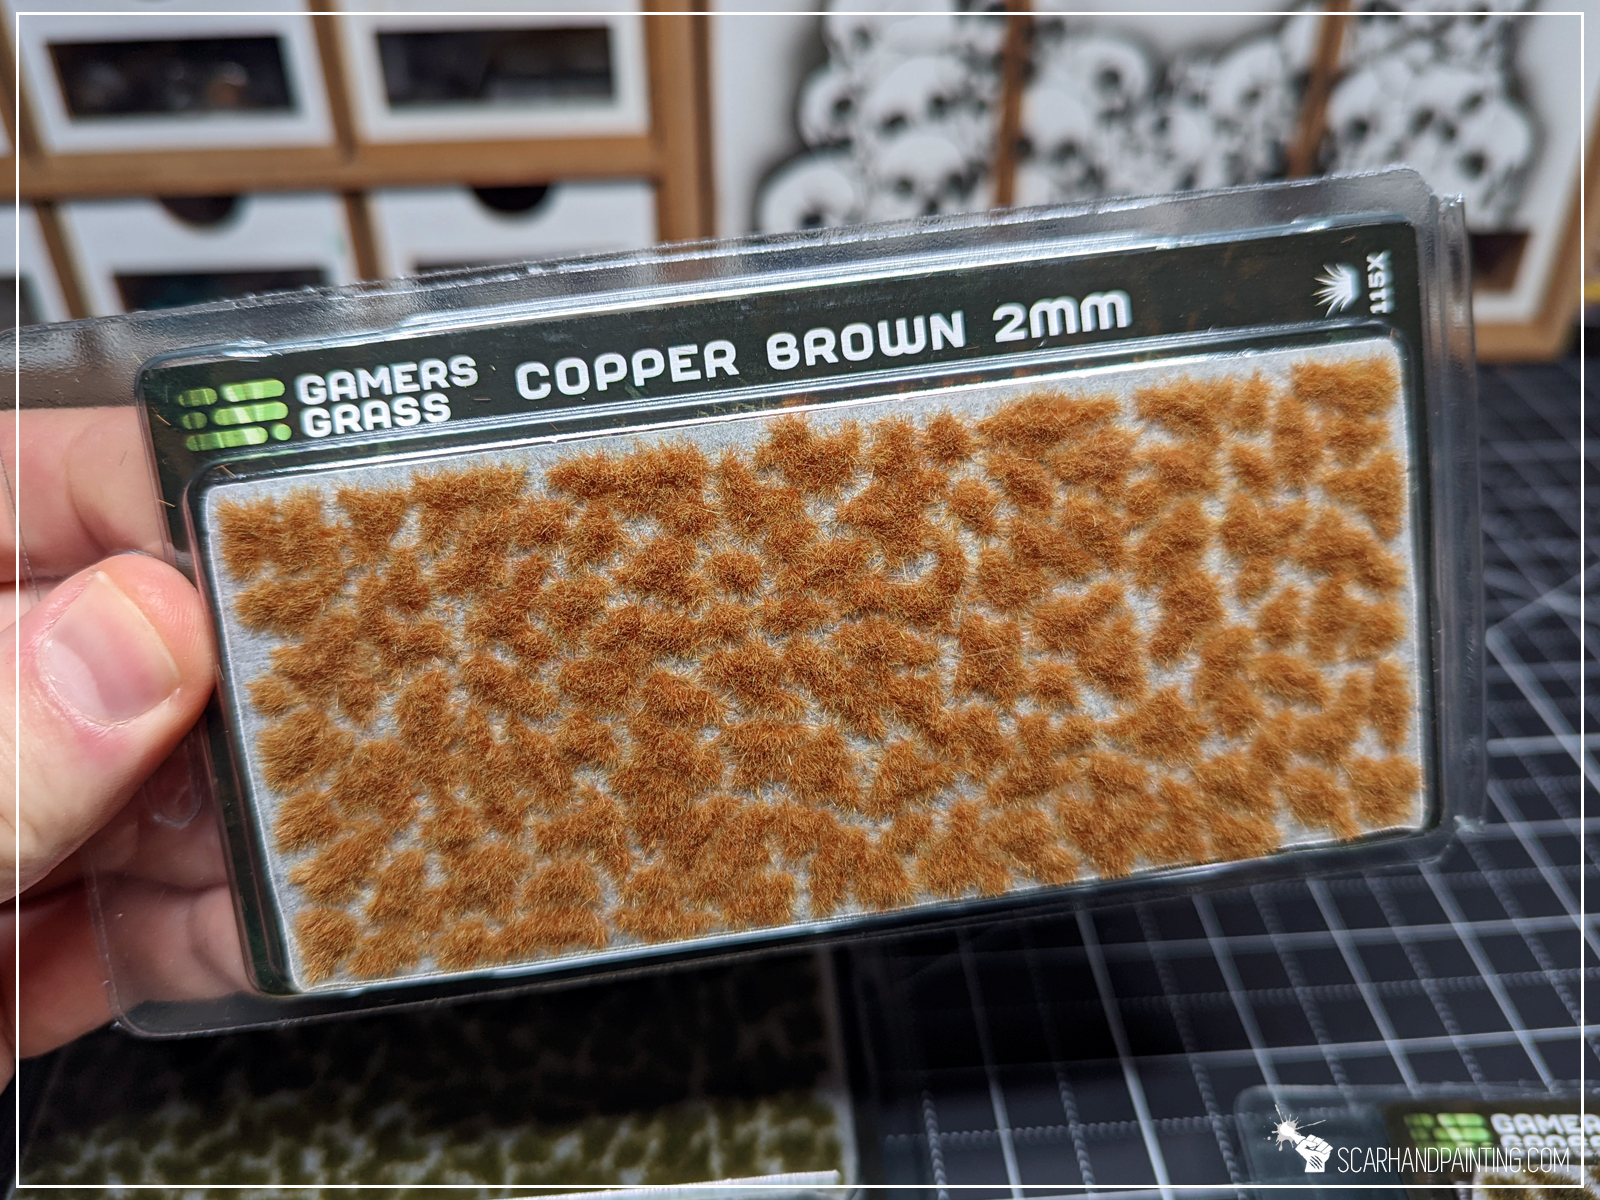
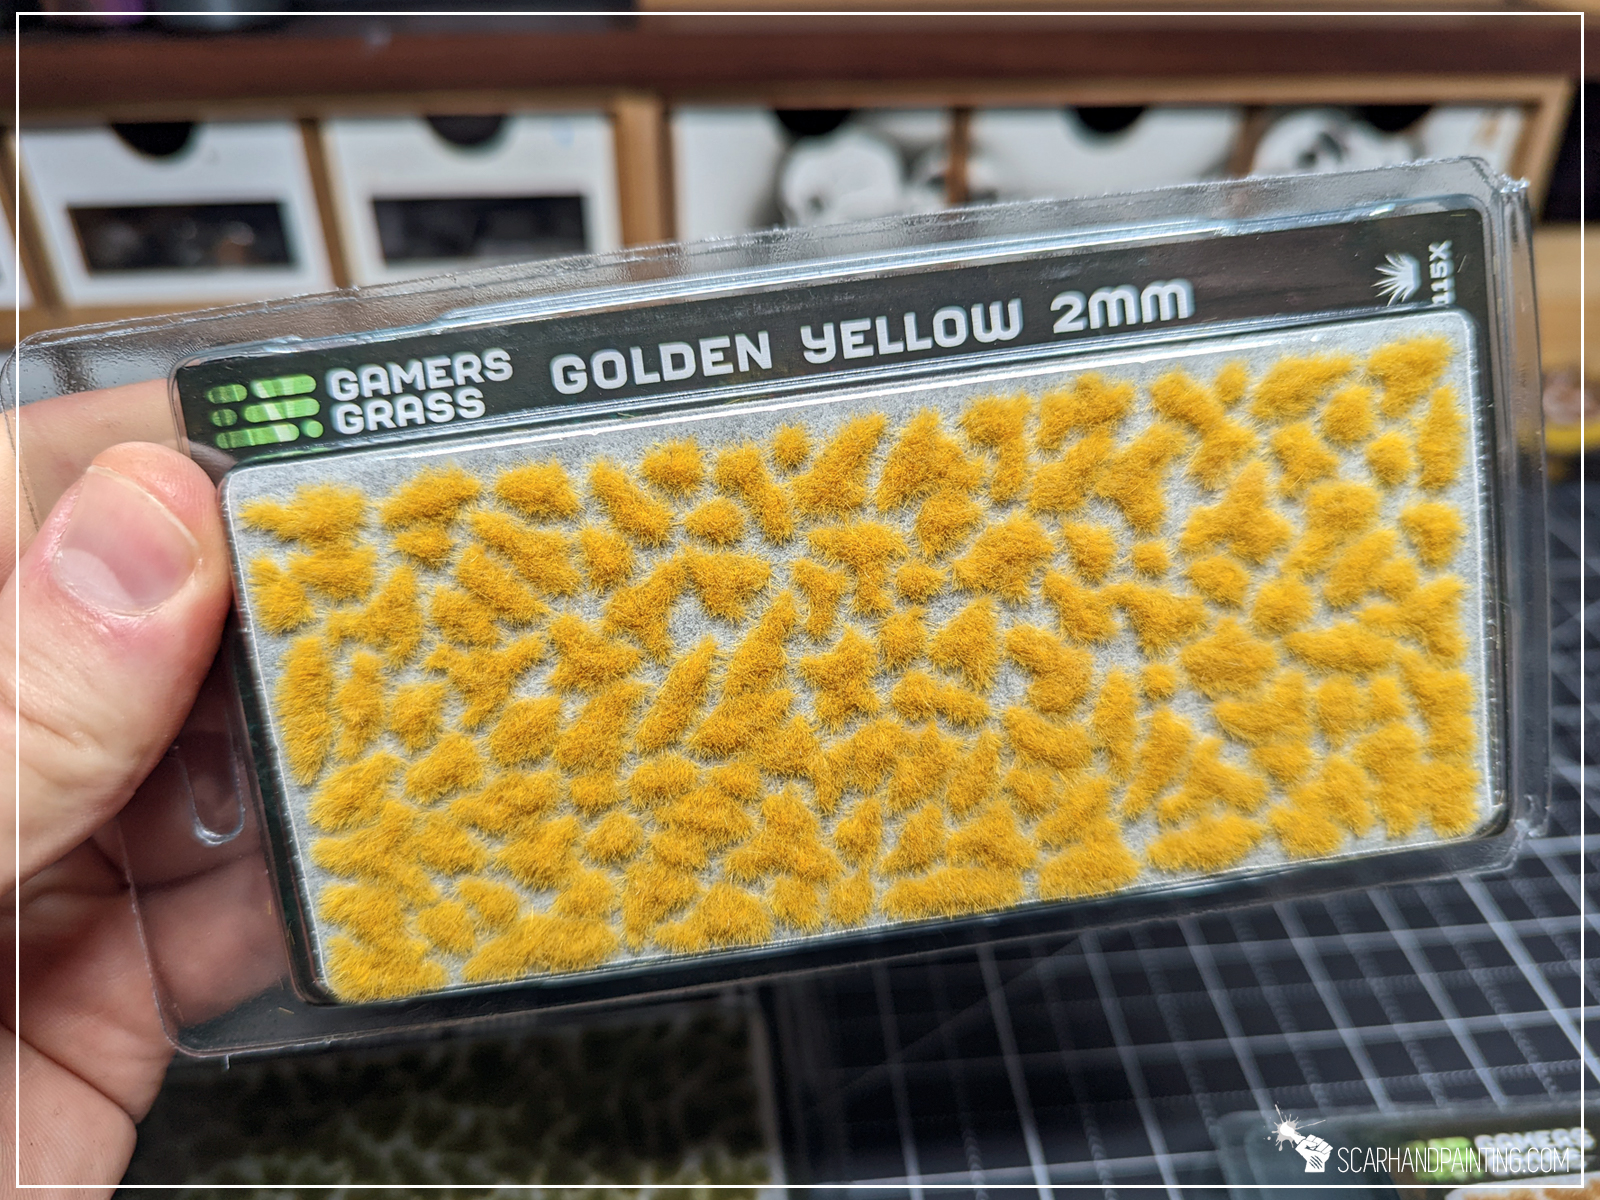
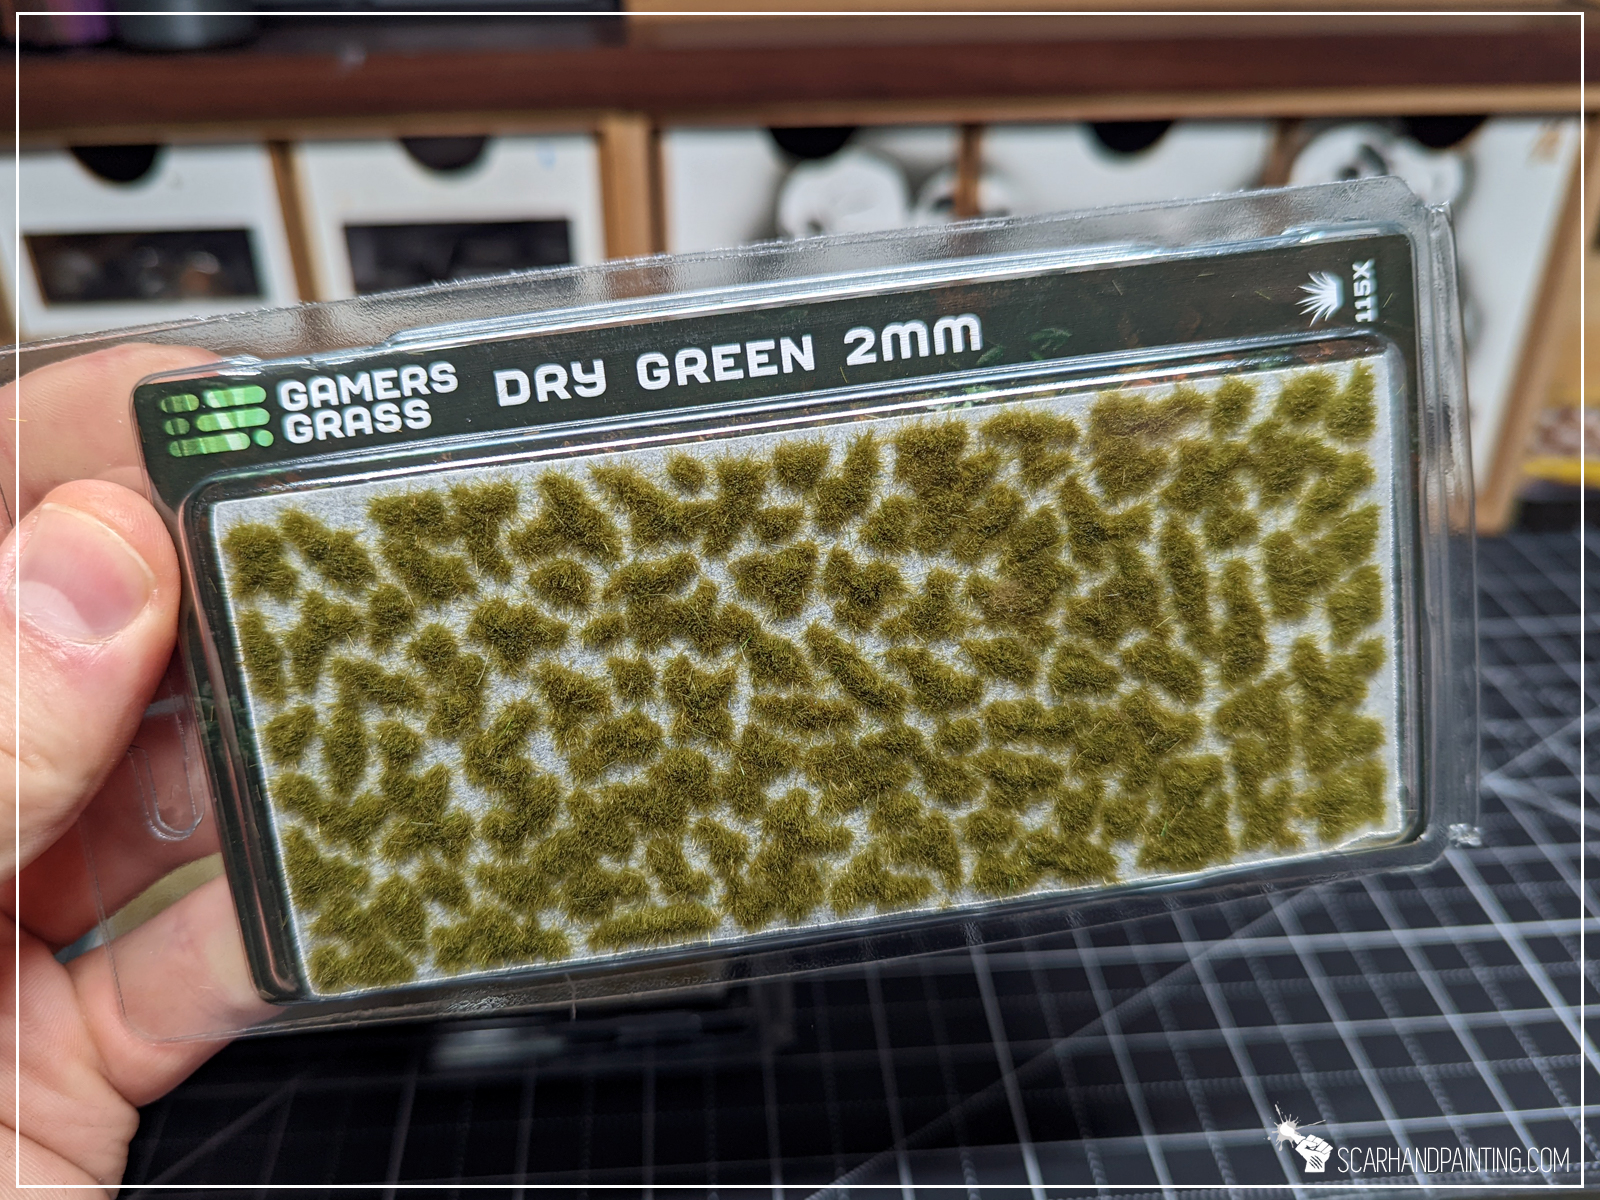
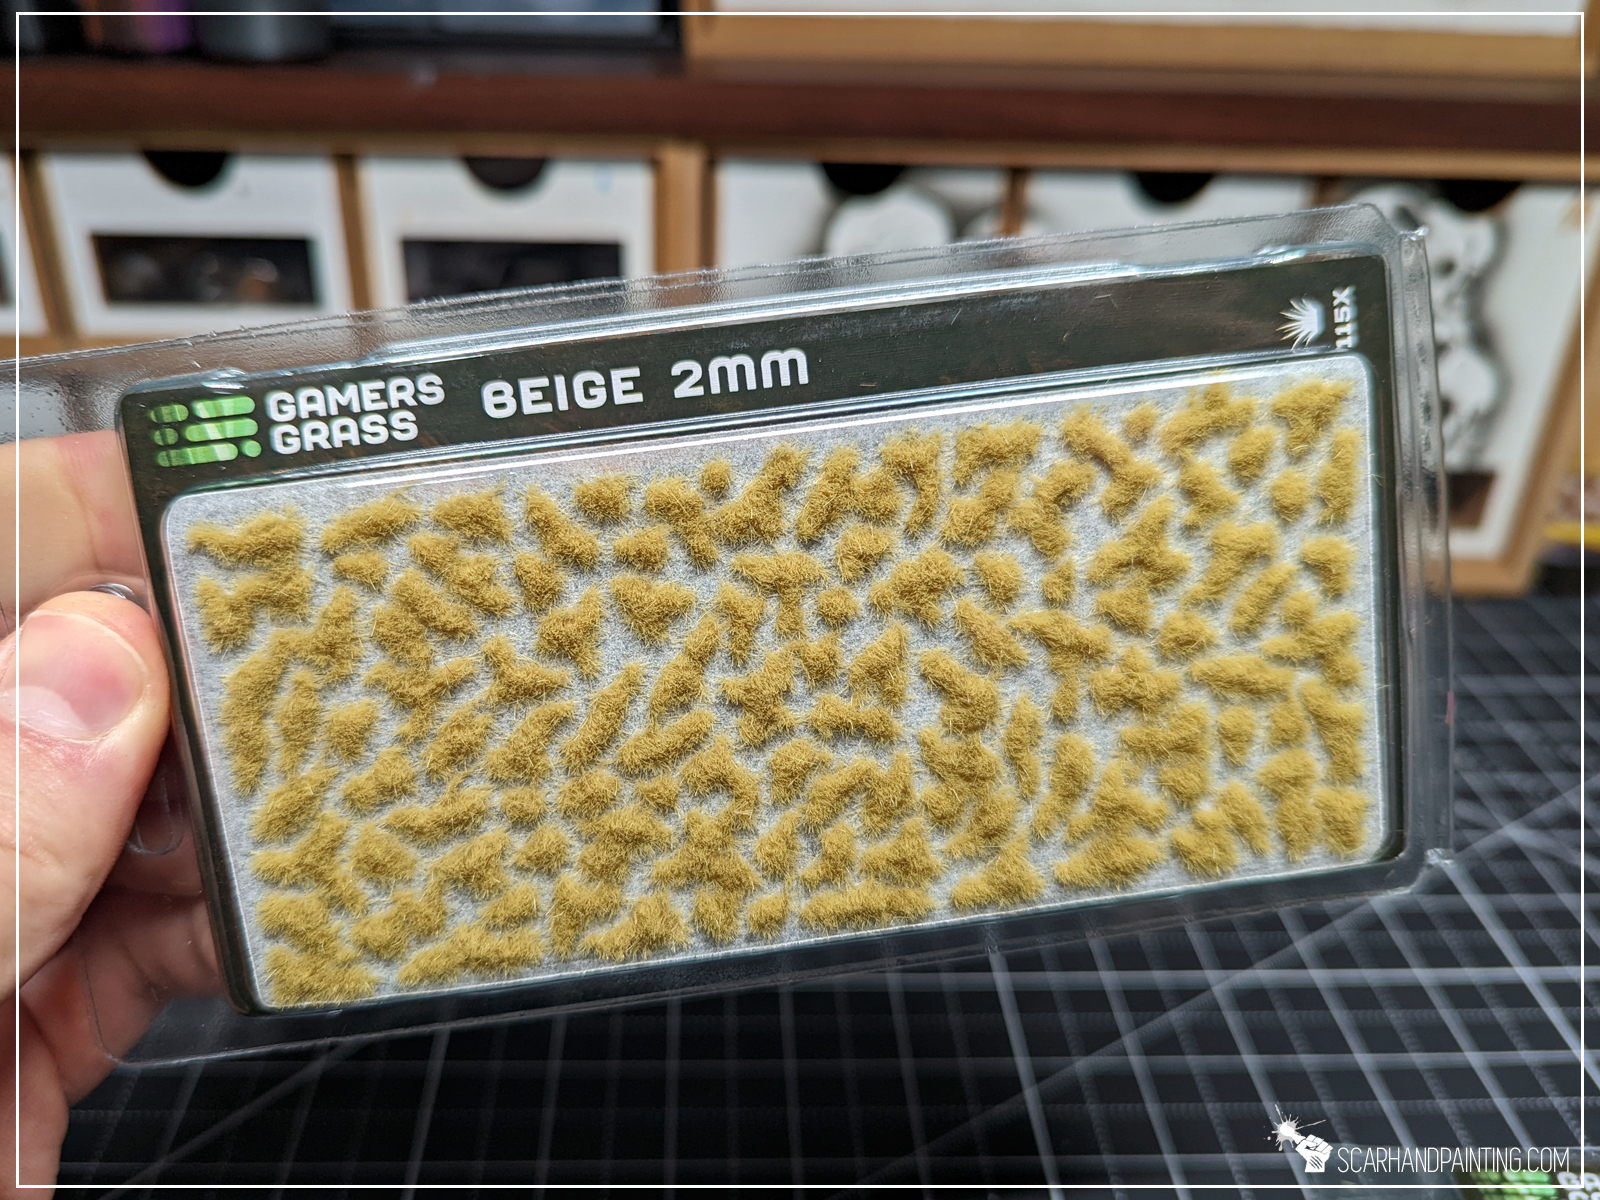
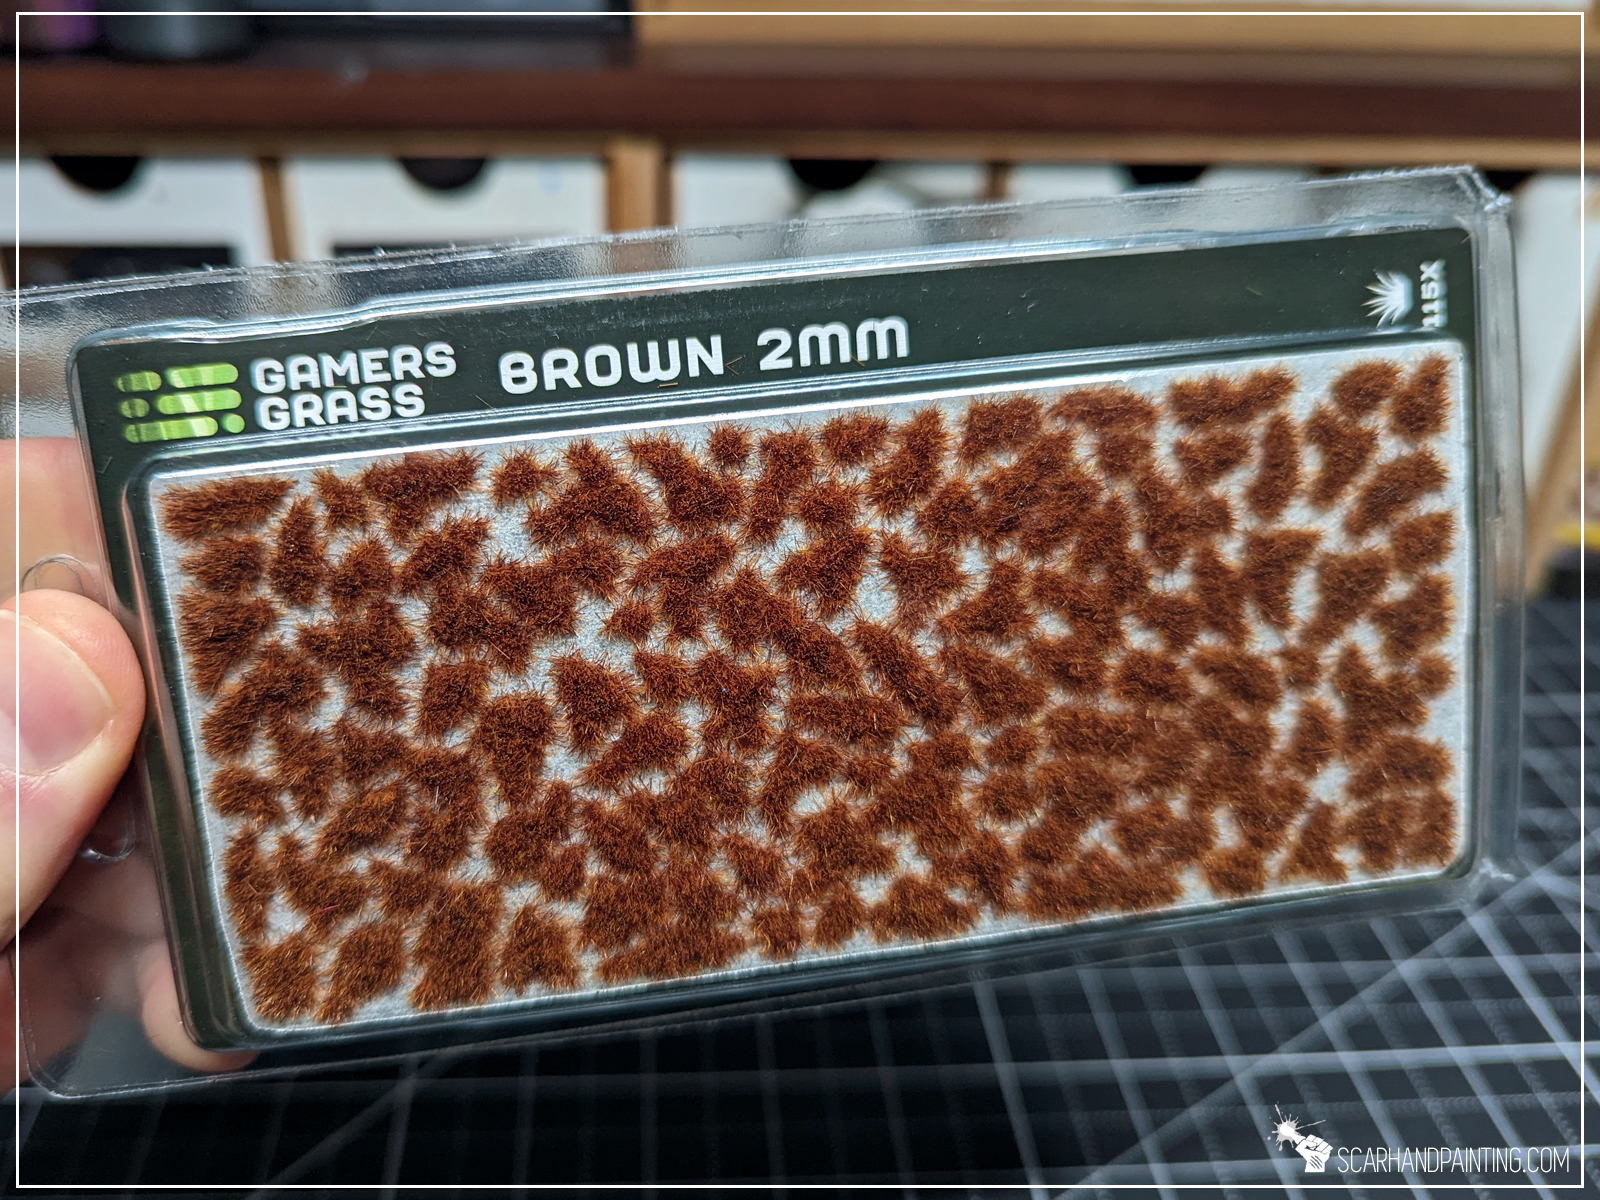
Colors are strong and vibrant (where varanted) and with a few exceptions, do match their larger counterparts that I had in stock to compare. Sadly, even though they do properly convey the ‘feel’, Burned and Brown 2mm tufts look out of synch with 4mm versions. Depending on your preferences this might be a positive, allowing for a bit of variety on a base by combining slightly different color tones and sizes. Still it seems like something worth being aware of beforehand.
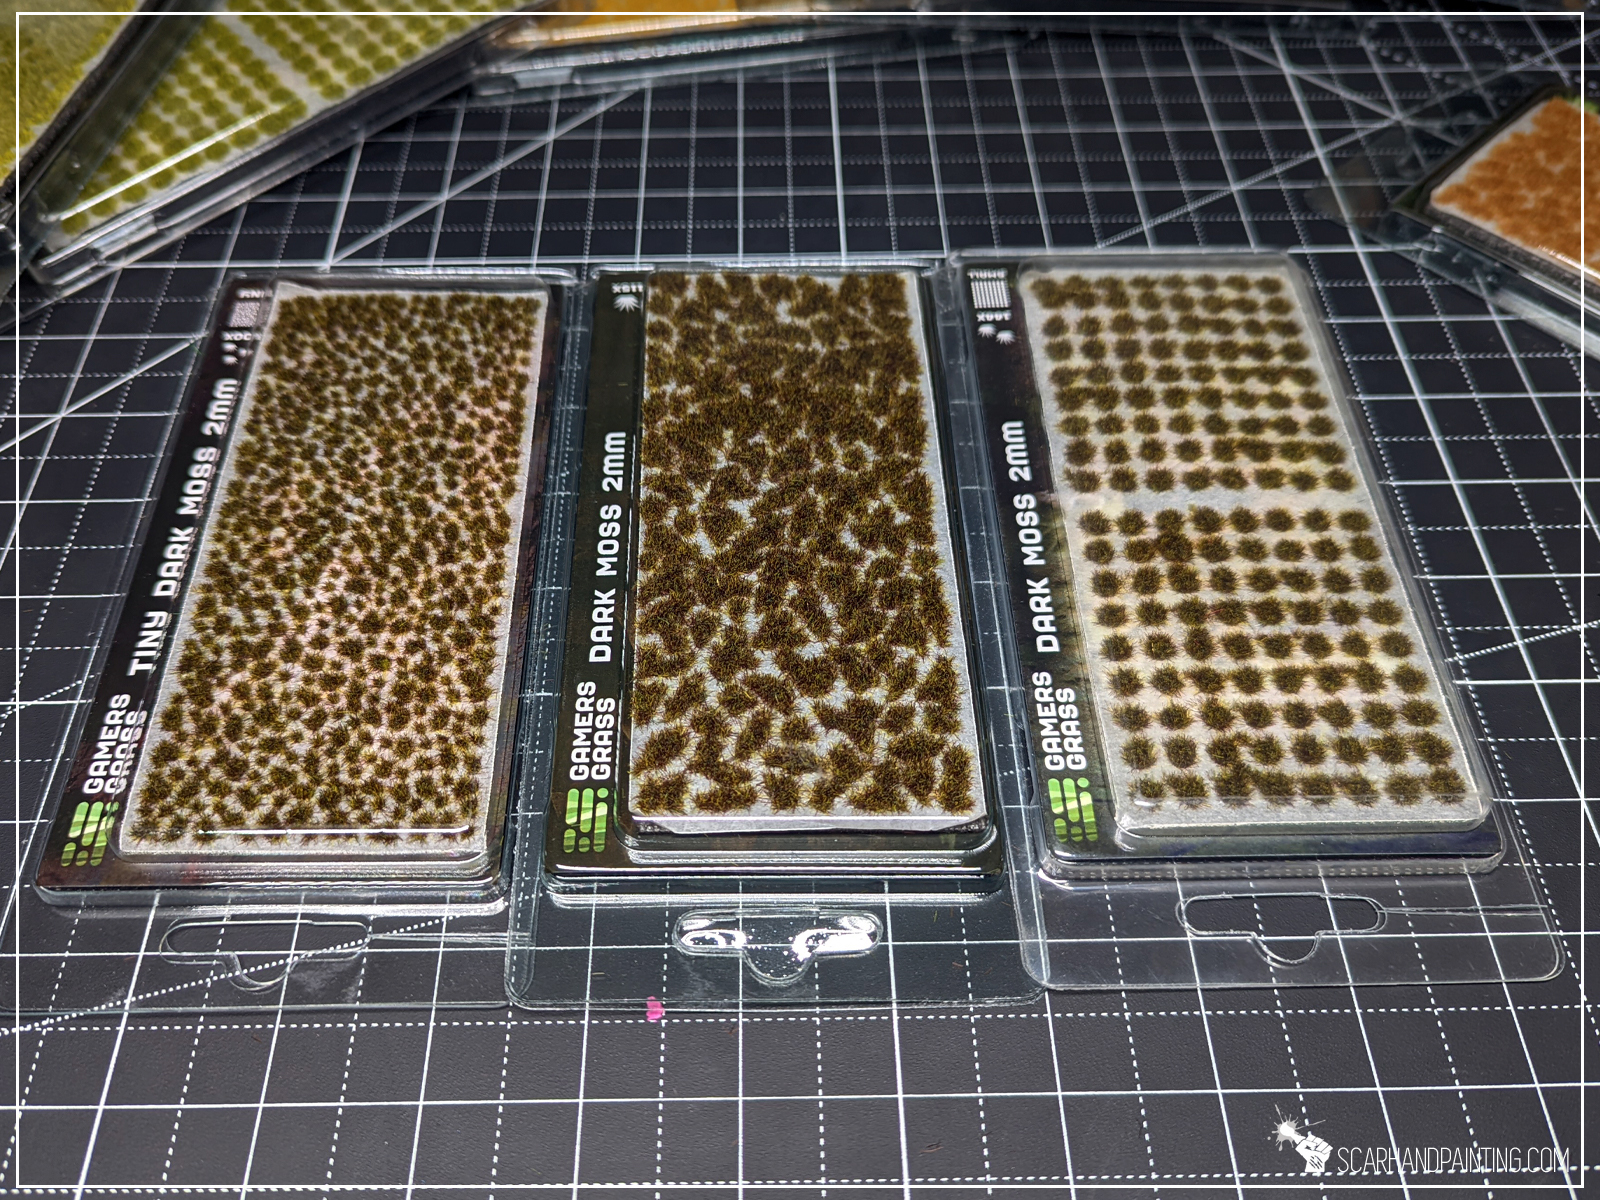
Personally I love to see the 2mm tufts line expanded. They are easy to work with, offer wide variety of uses and look amazing. I also very much appreciate the Gamers Grass pro customer move of offering all the options from really tiny to large wild swathes of grass in just a single pack of tufts. This is a big deal for anyone who wants to try out these amazing tufts but is not invested in a large scale miniatures project.
I hope you’ve enjoyed this article. Be sure to let me know your thoughts in the comments below or via Facebook or Instagram. I would also appreciate it if you considered sharing this content with your friends, who might find it interesting. Finally if you are looking for a professional miniatures painting service, be sure to contact me with this contact form. I always reply within 24 hours, after which please check out your spam folder.
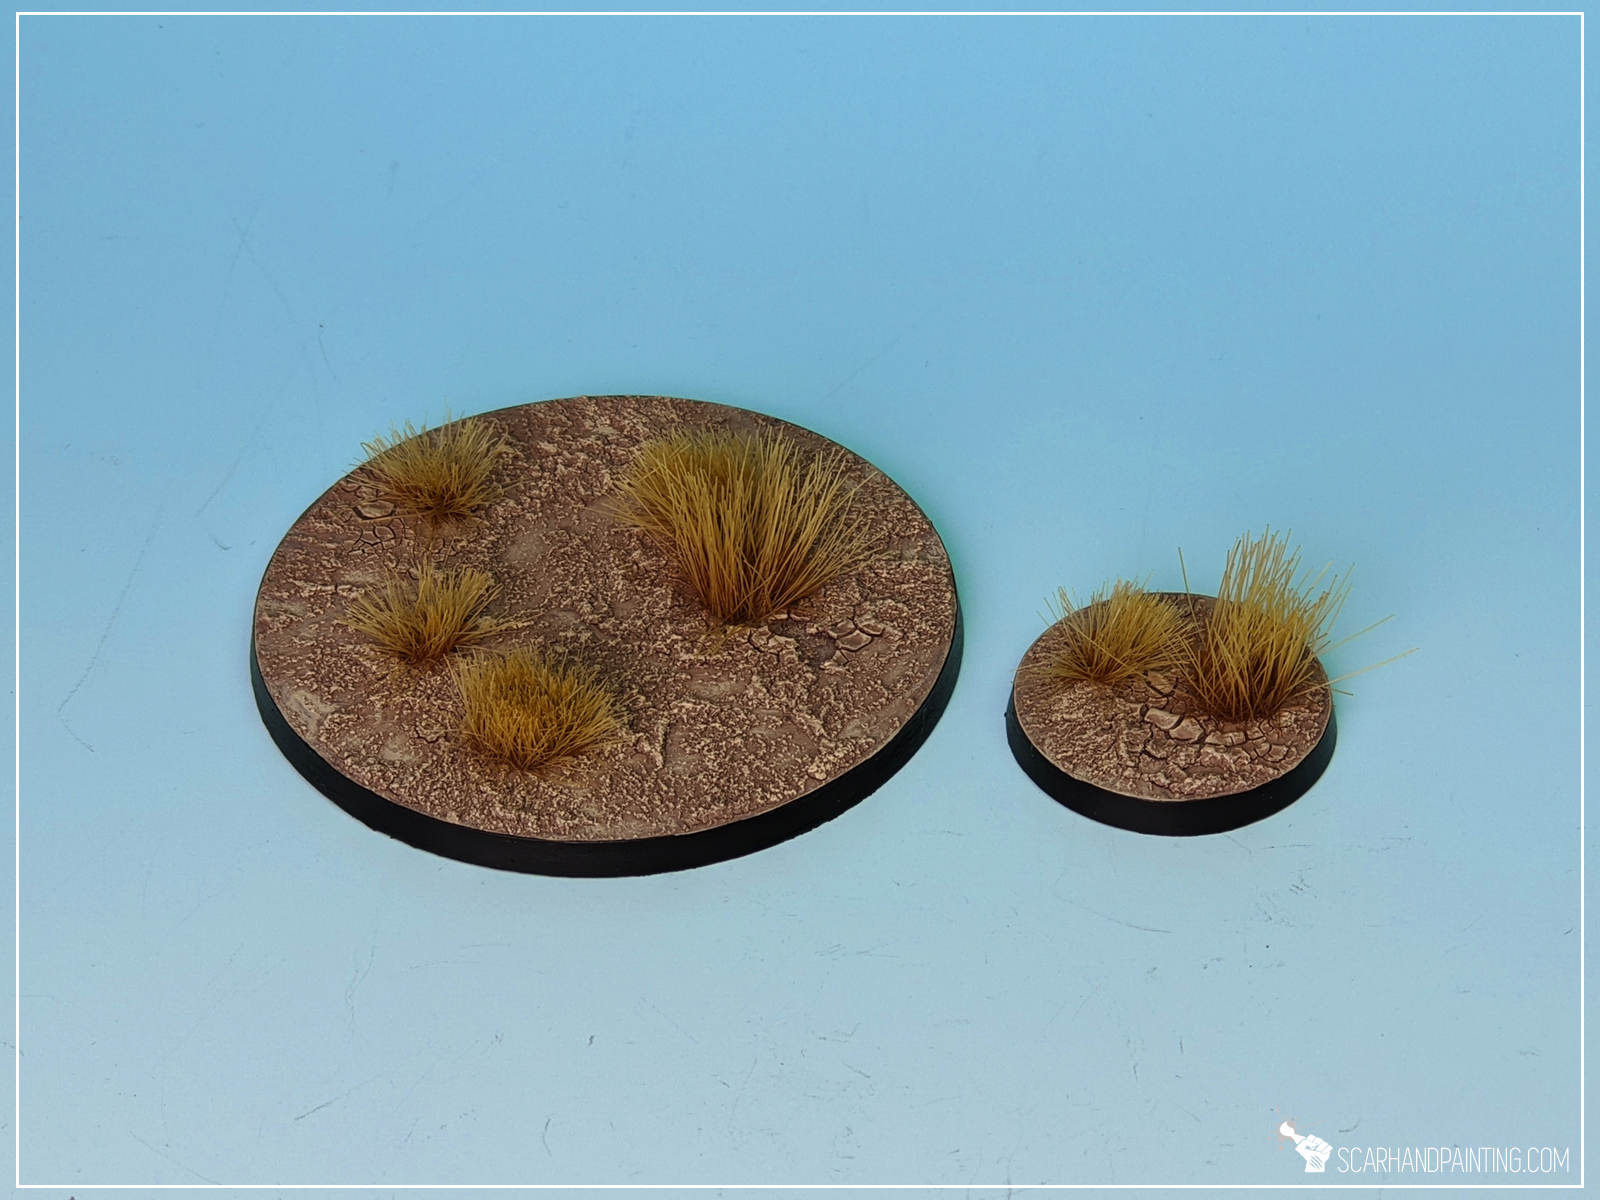
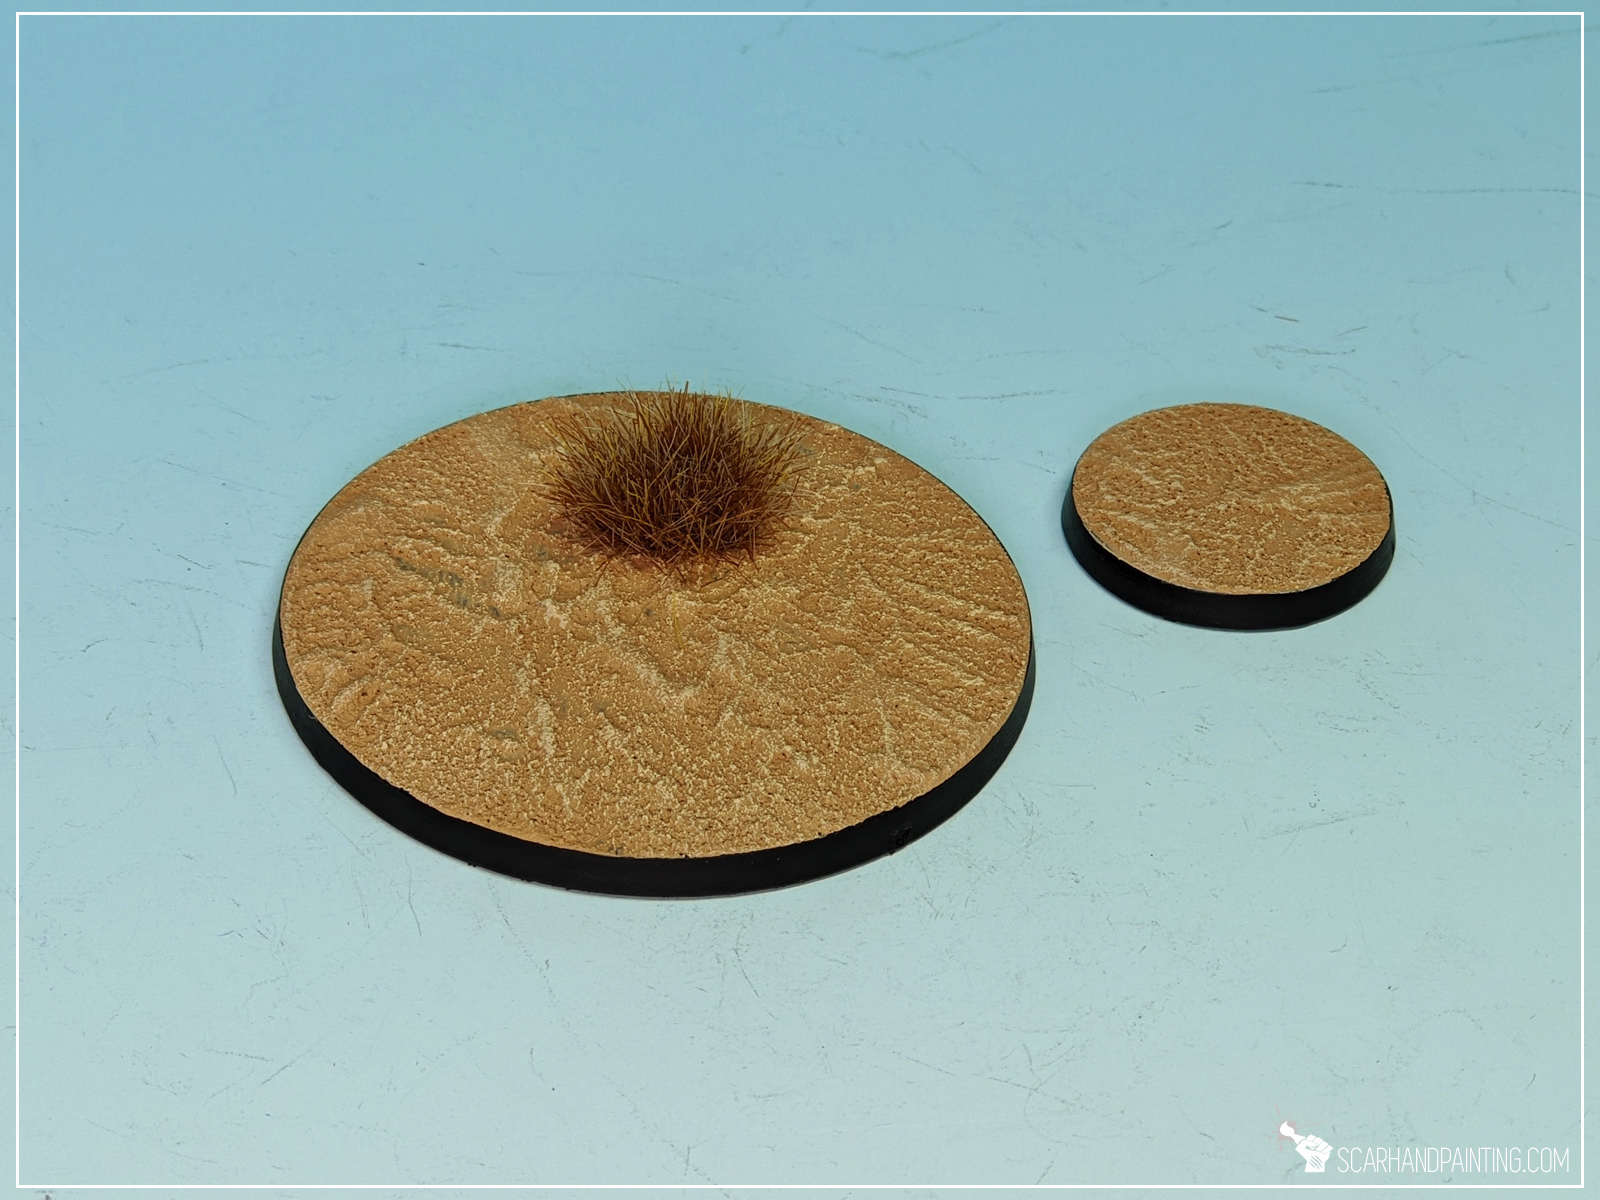
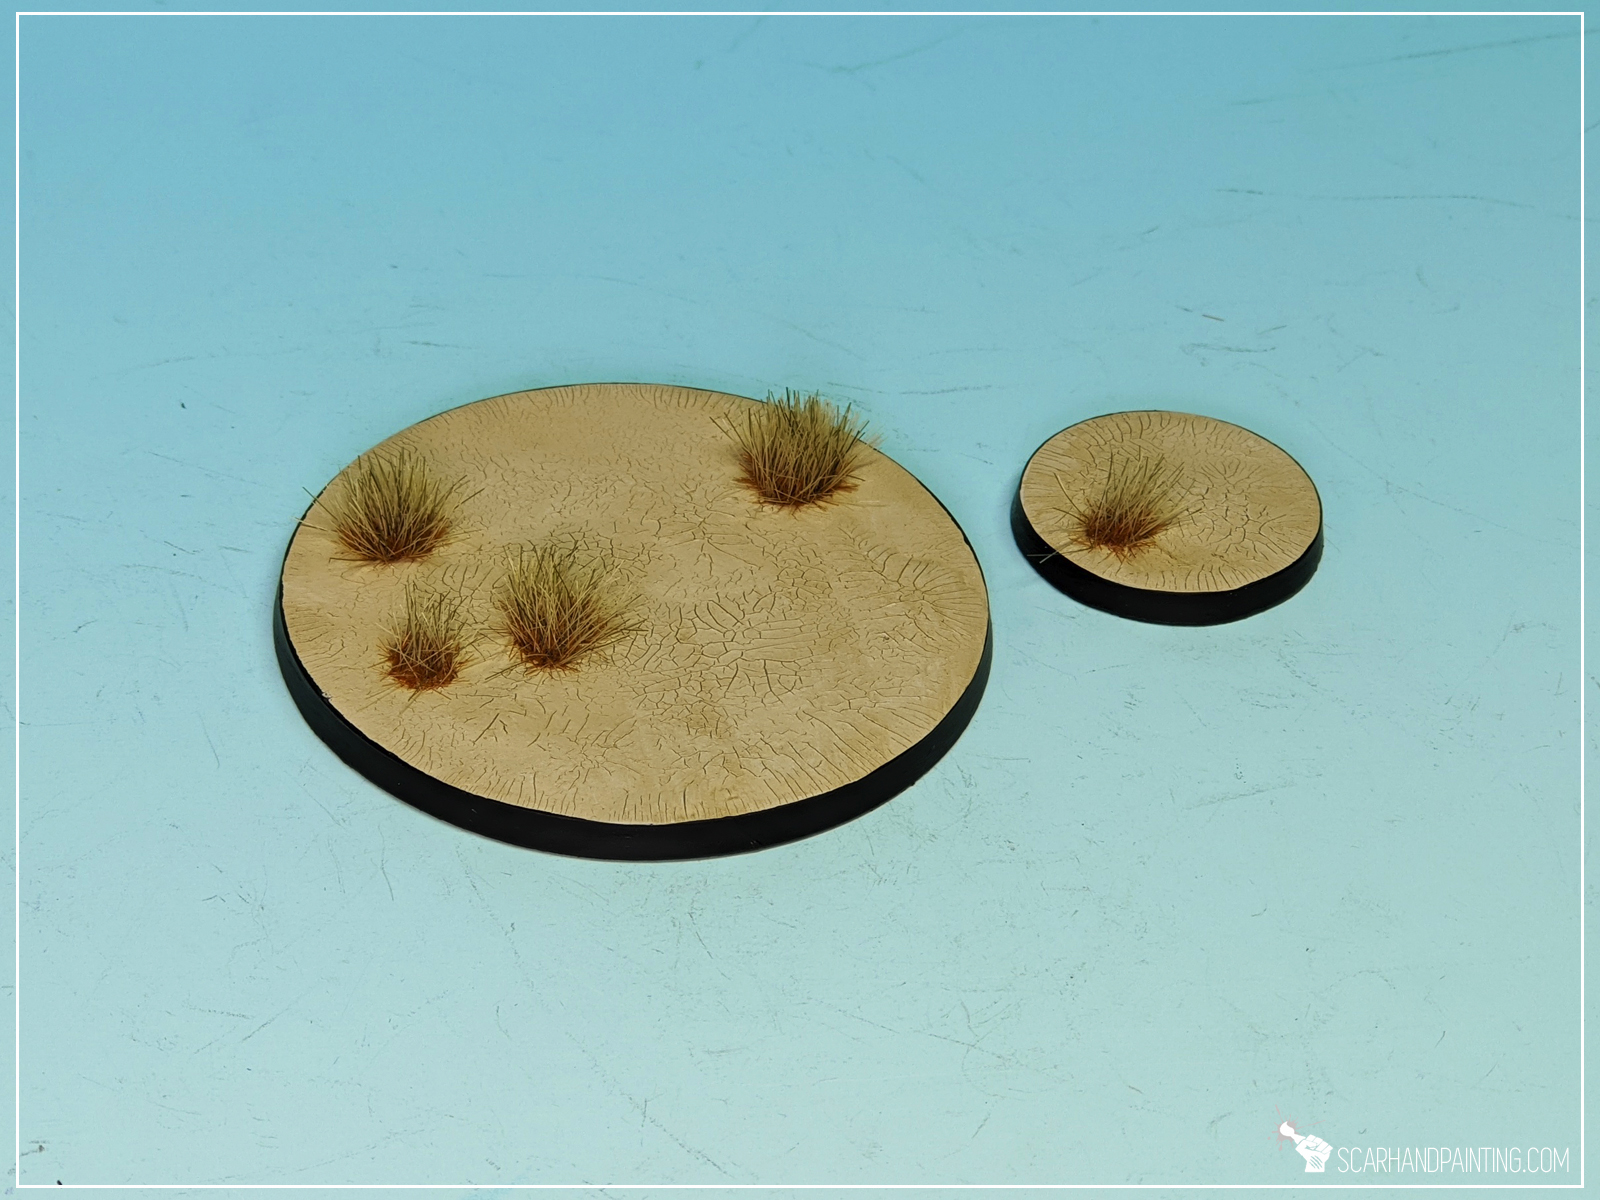
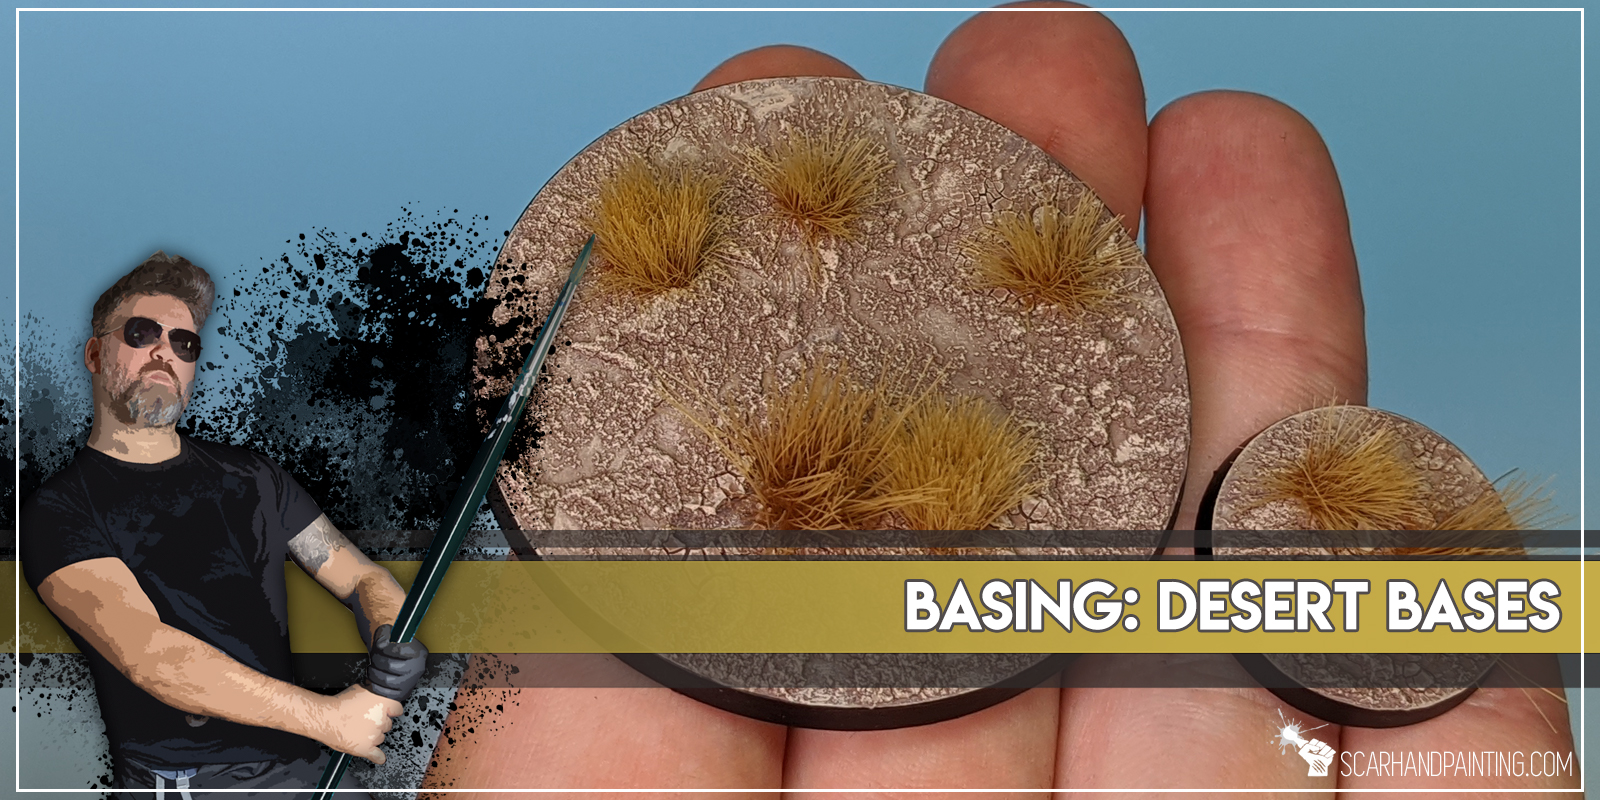
Welcome to Painting Desert Bases tutorial. Here I will take you on a Step-by-step trip through the process of painting Desert Bases the same way as seen at: Gallery: Infinity USARF
Before we start, some notes:
Step one: Undercoat
I started with a lazy layer of Games Workshop Gorthor Brown. Any similar colour would do and the layer doesn’t need to be thorough.

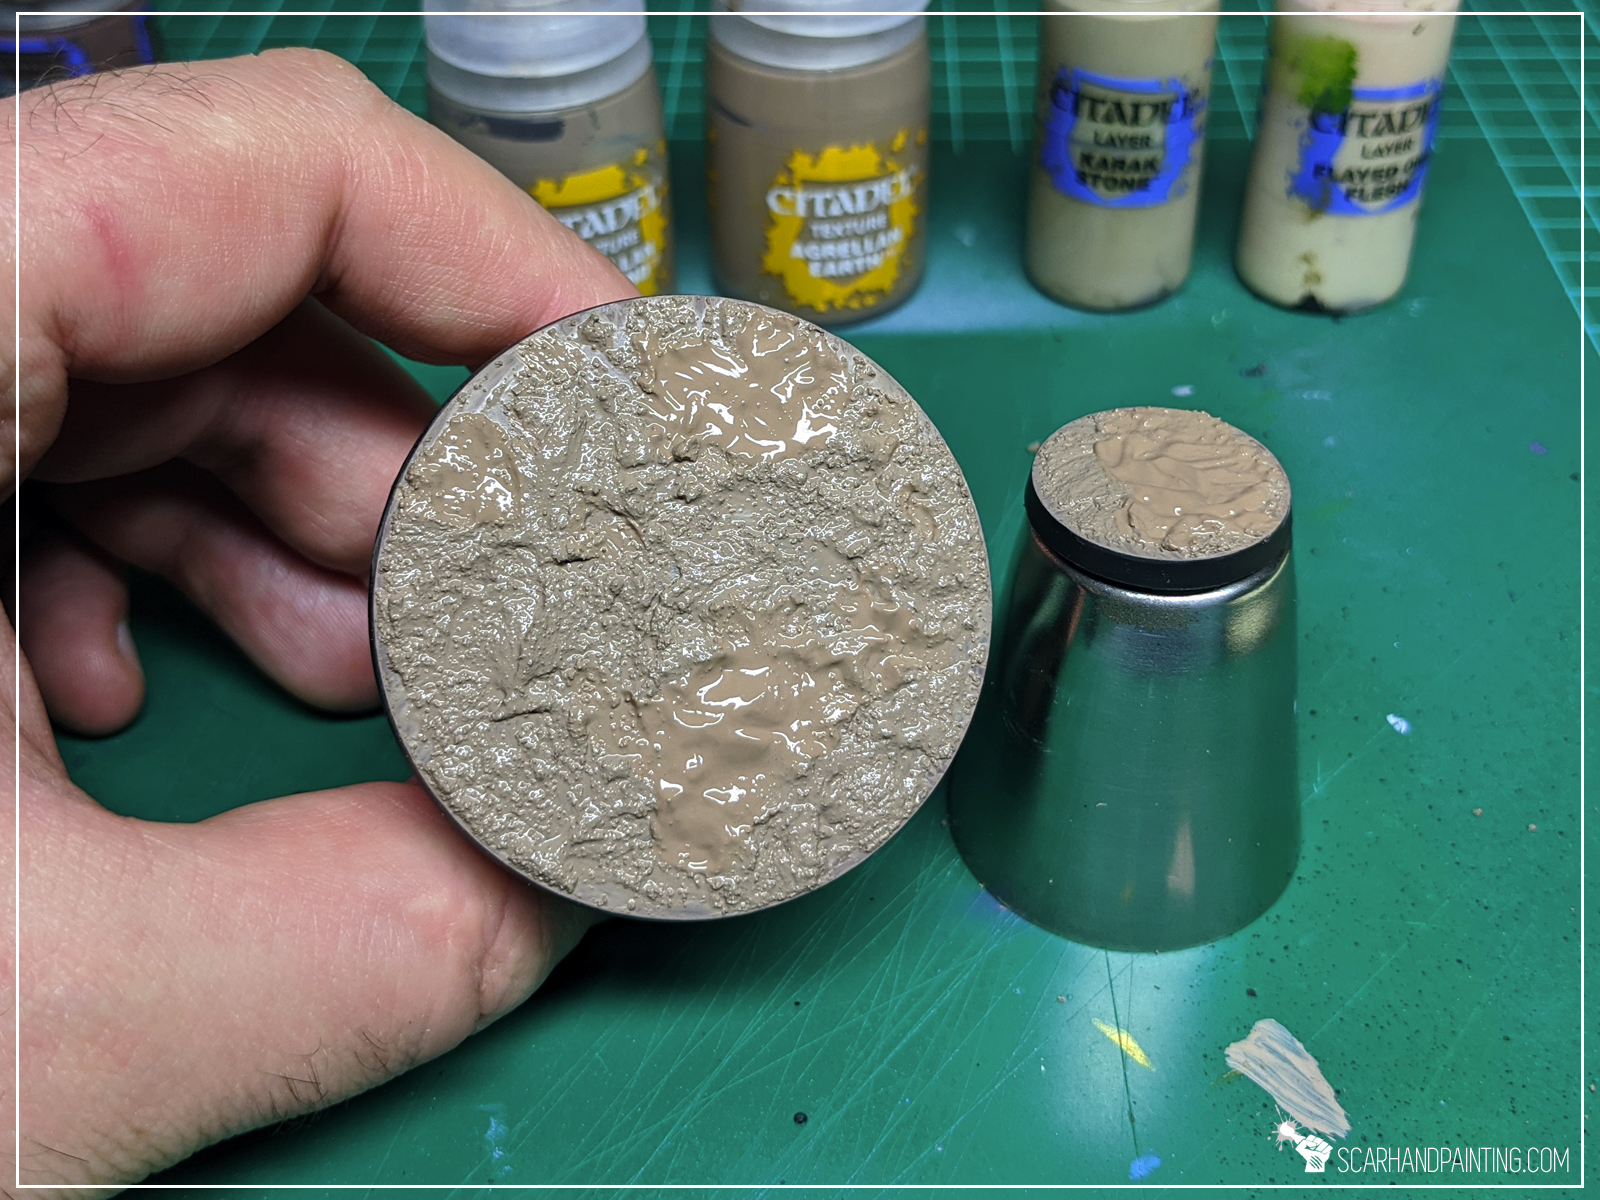
Step two: Base texture
I applied a solid irregular layer of Games Workshop Agrellan Badlands with some points of Games Workshop Agrellan Earth on top.
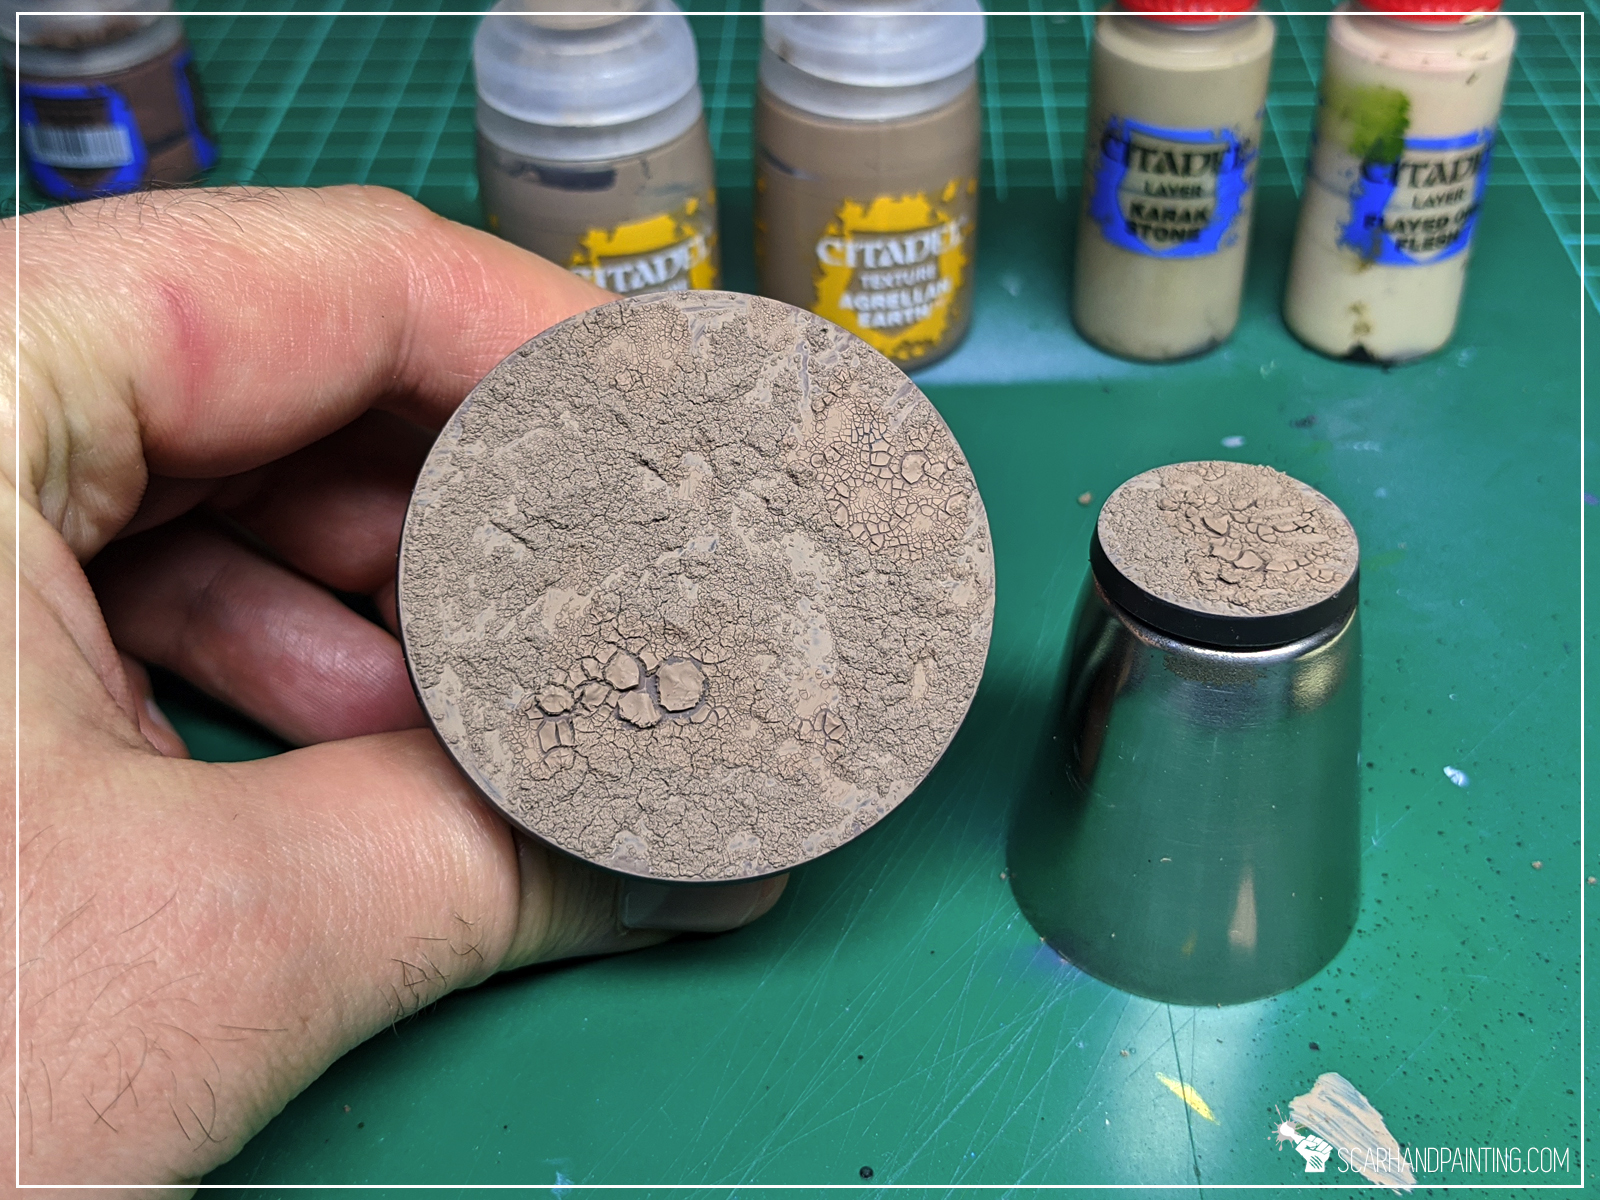
Step three: Highlight
Next I drybrushed a layer of Games Workshop Karak Stone. Some pieces of cracked earth fell off, but that doesn’t matter in the long run.
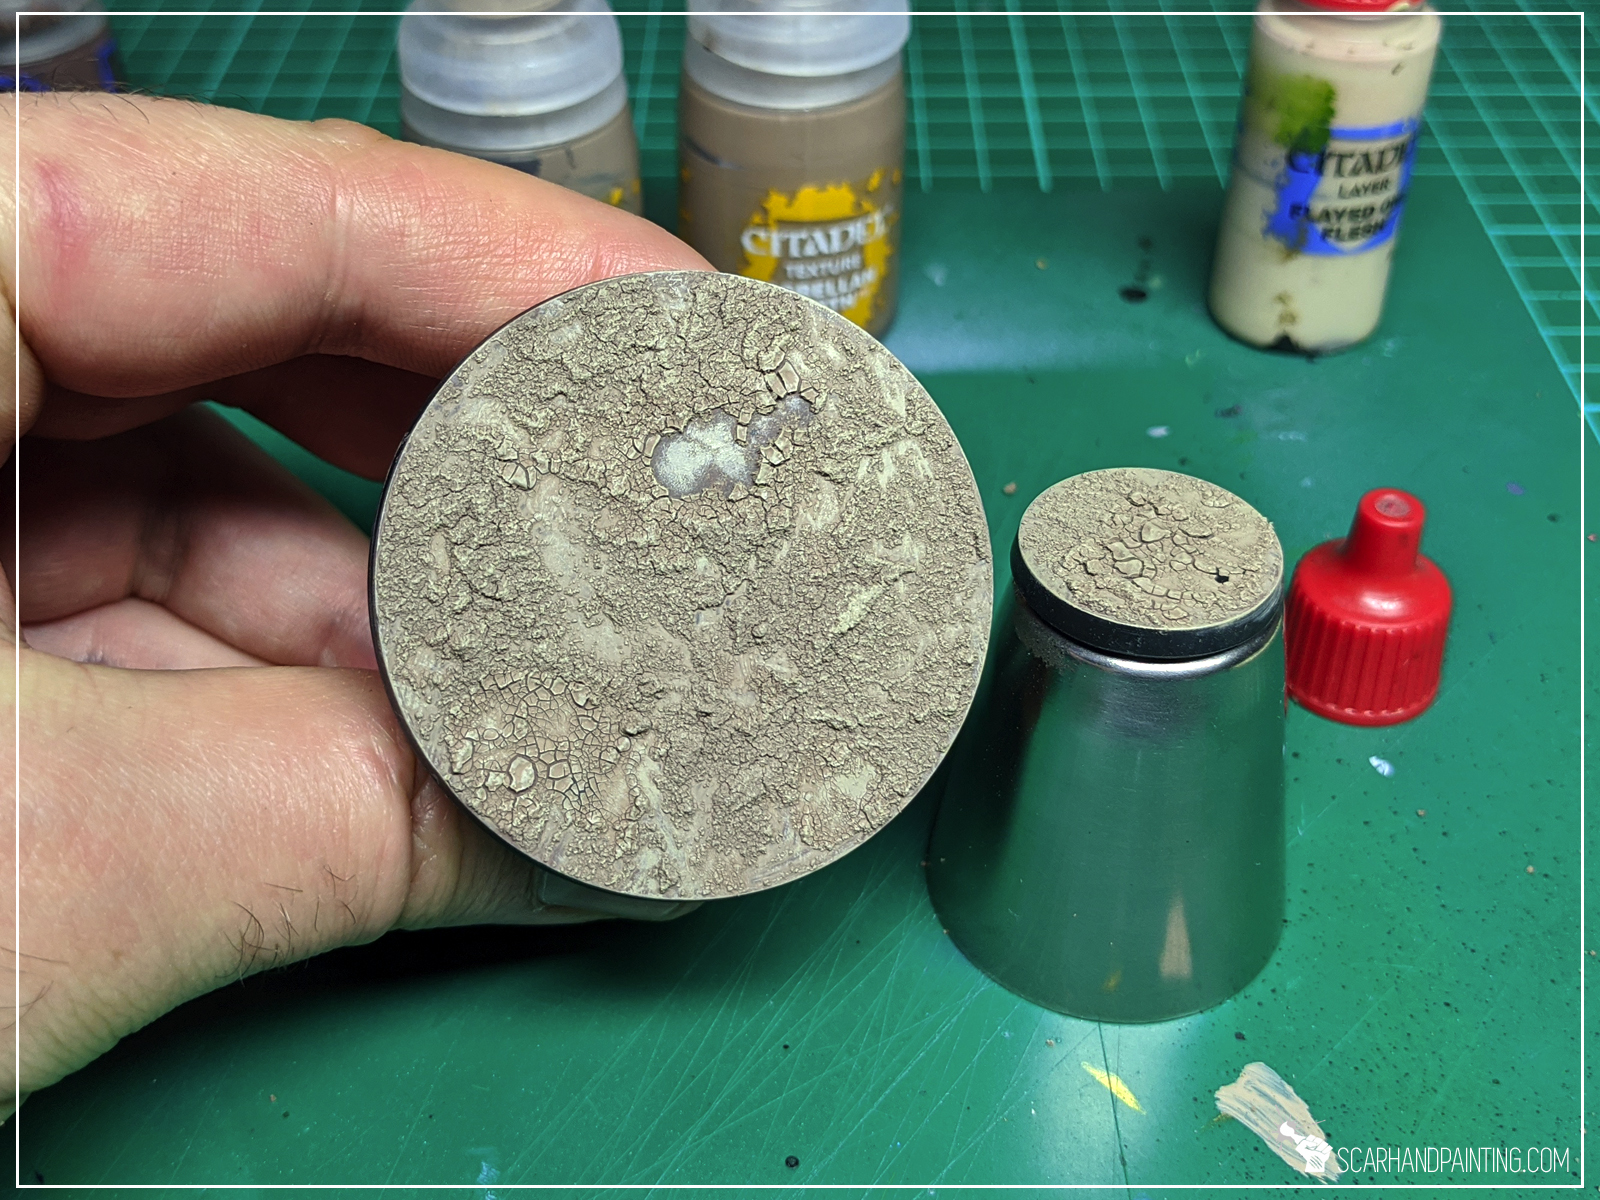
Step four: Highlight
I drybrushed again, this time with Games Workshop Flayed One Flesh.

Step five: Tufts
I glued Paint Forge Steppe tufts on top of the bases, ensuring that any points where cracked earth fell off got covered.
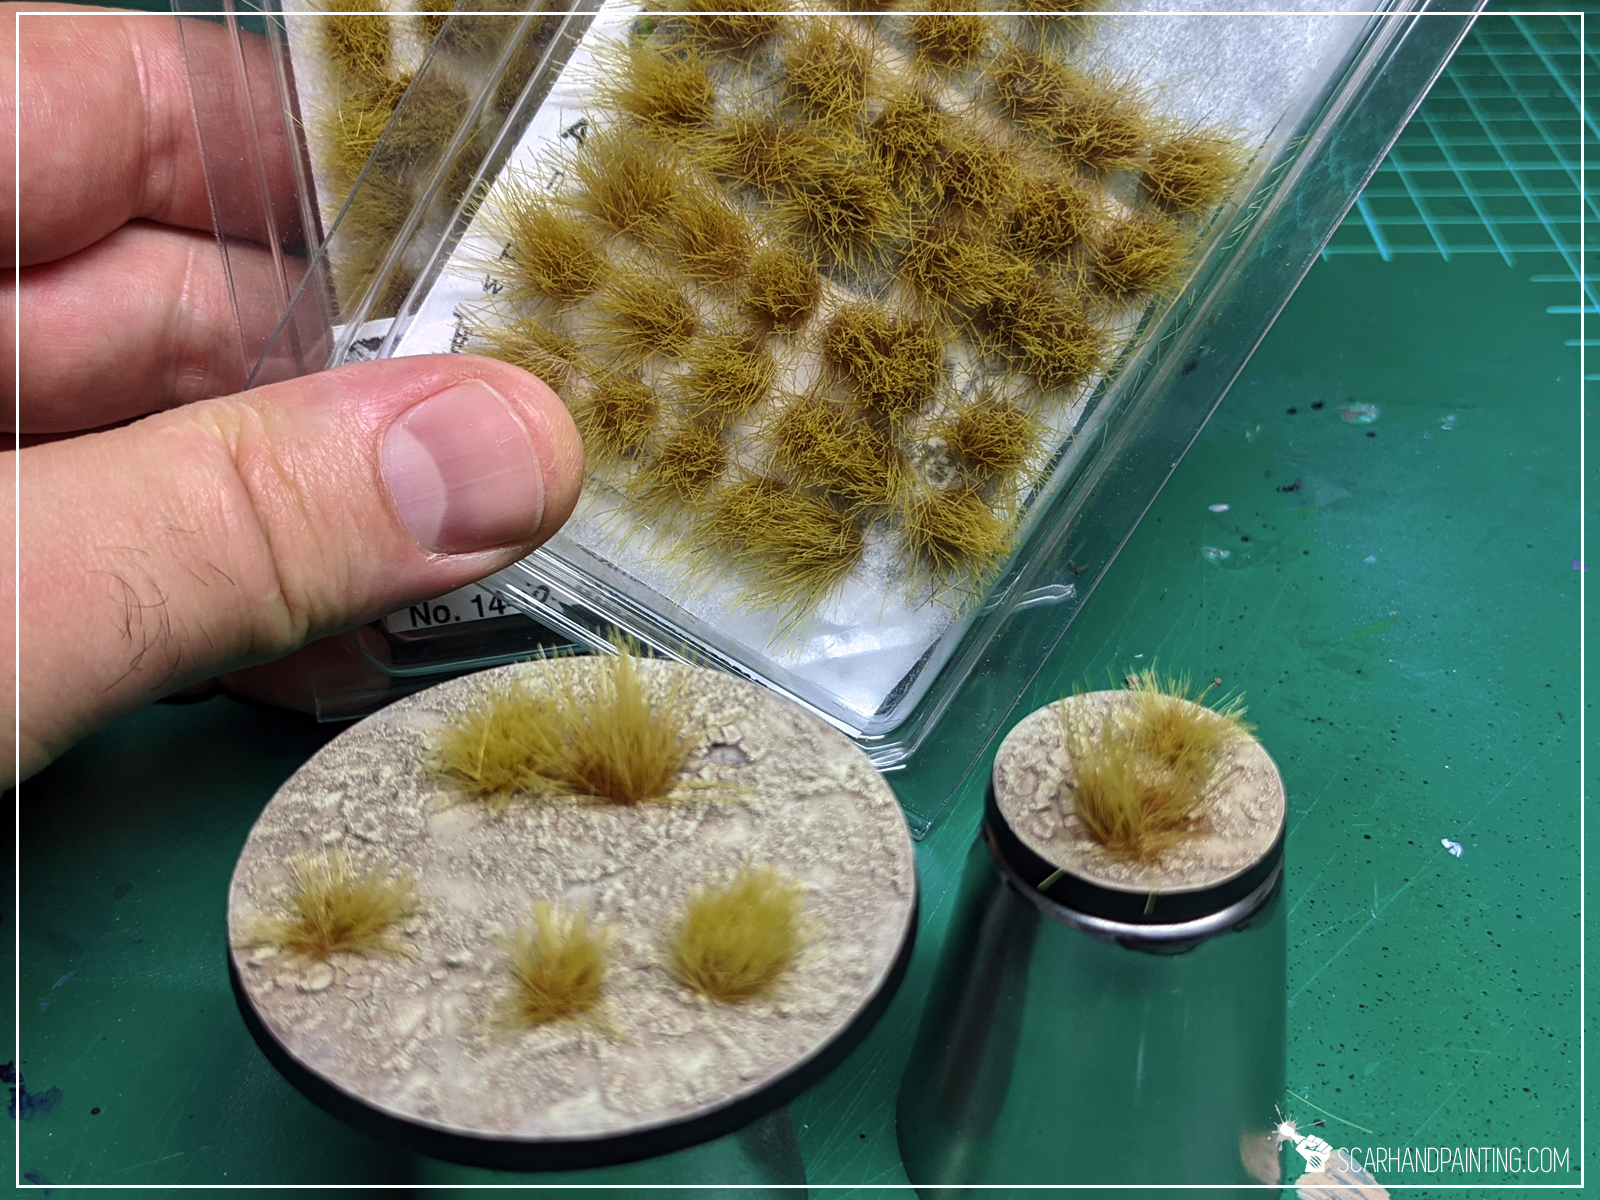

Here’s how the finished base looks like.