- contact@scarhandpainting.com


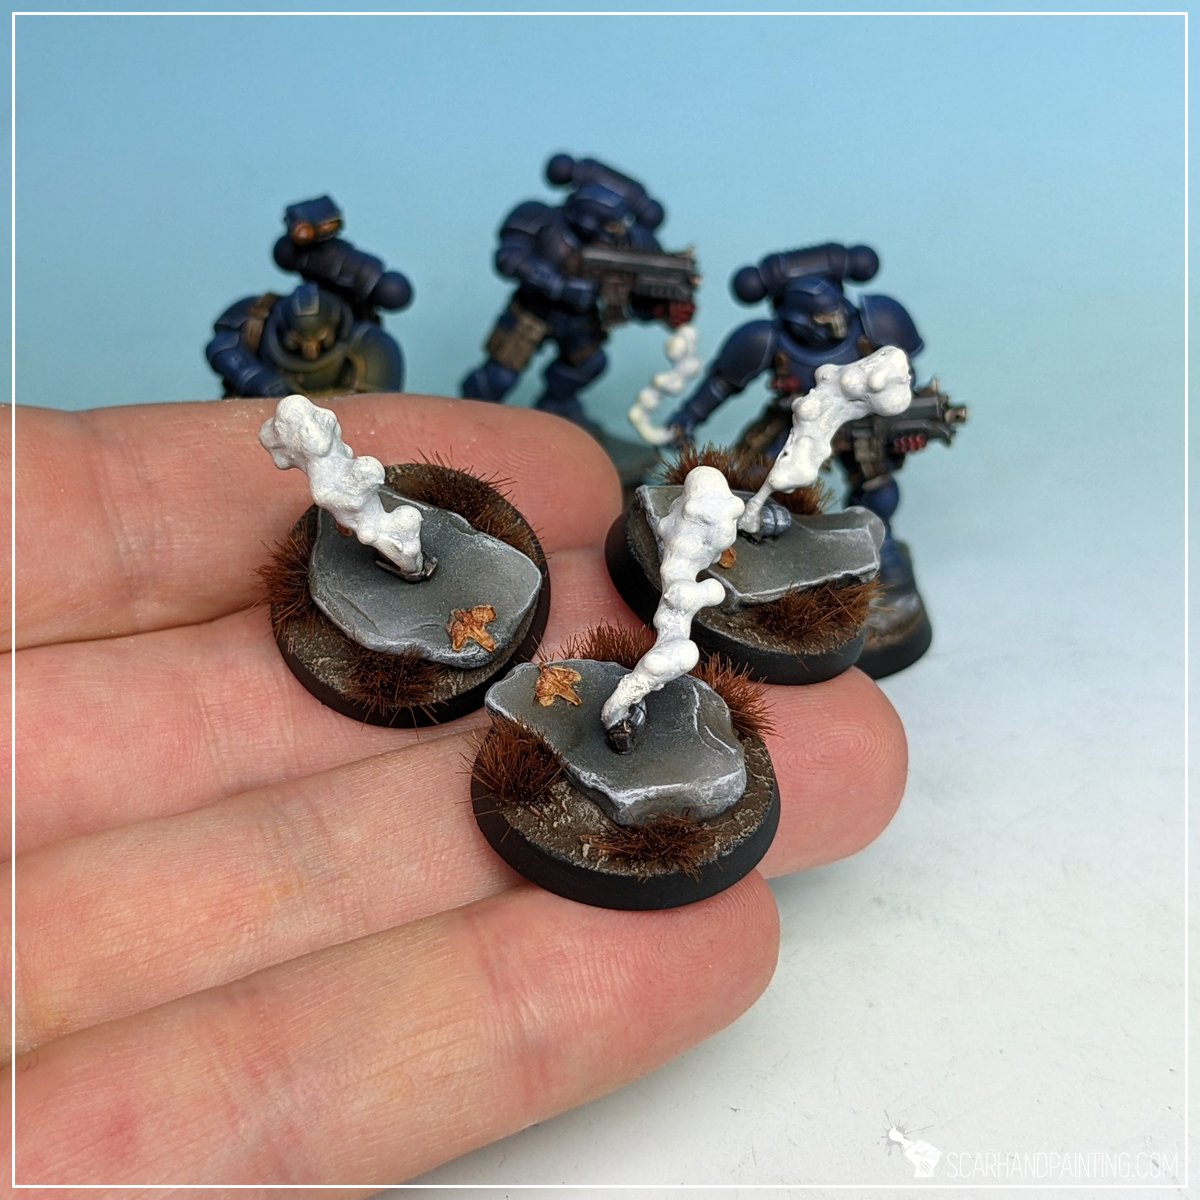
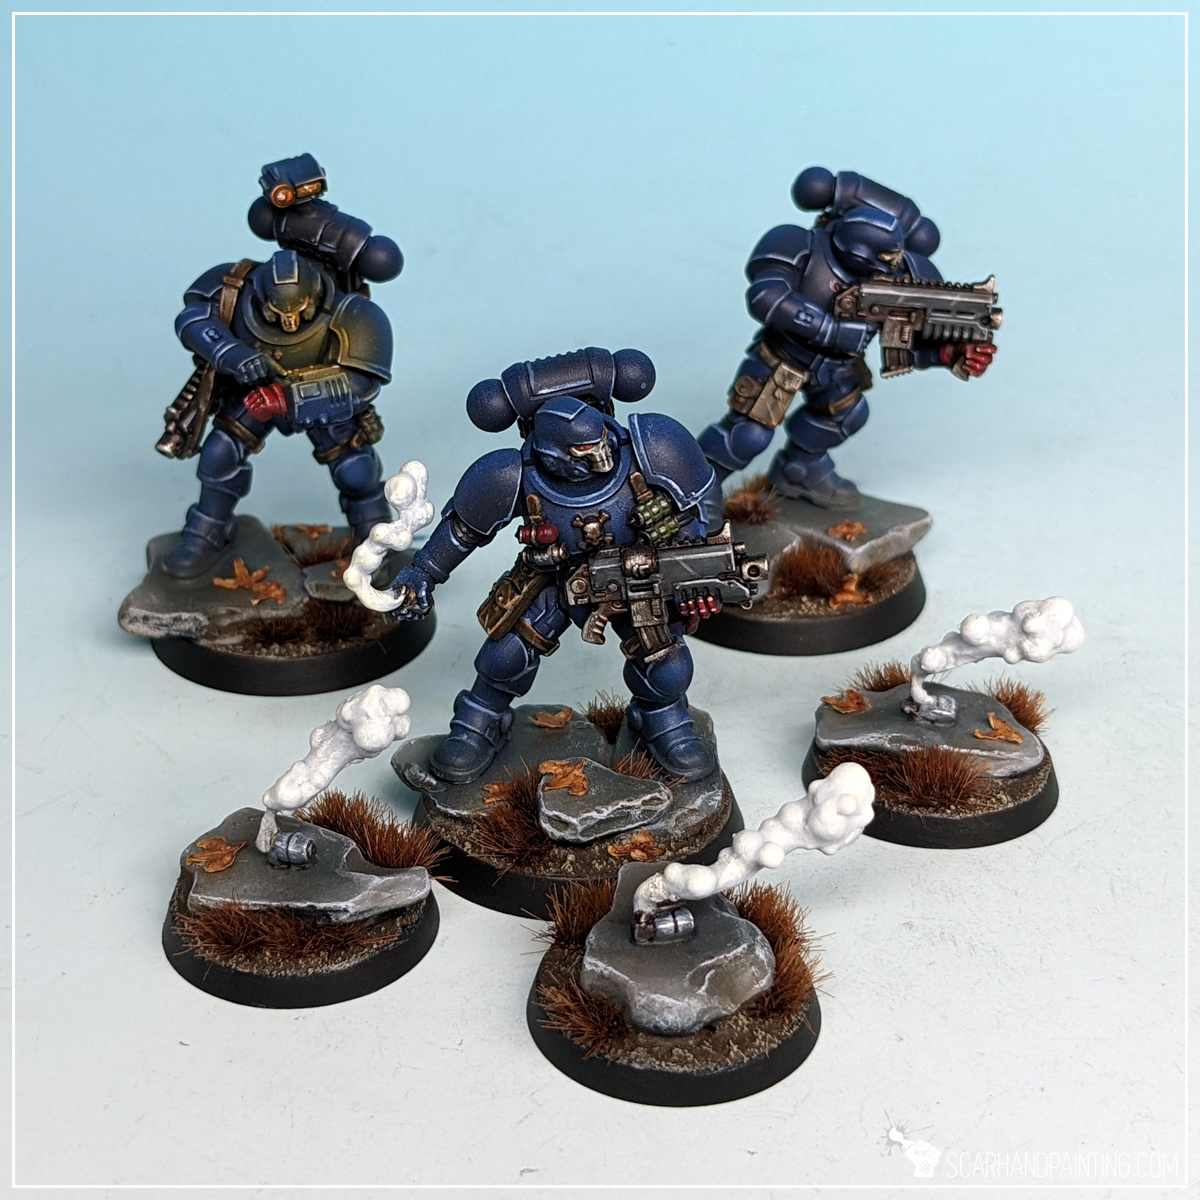
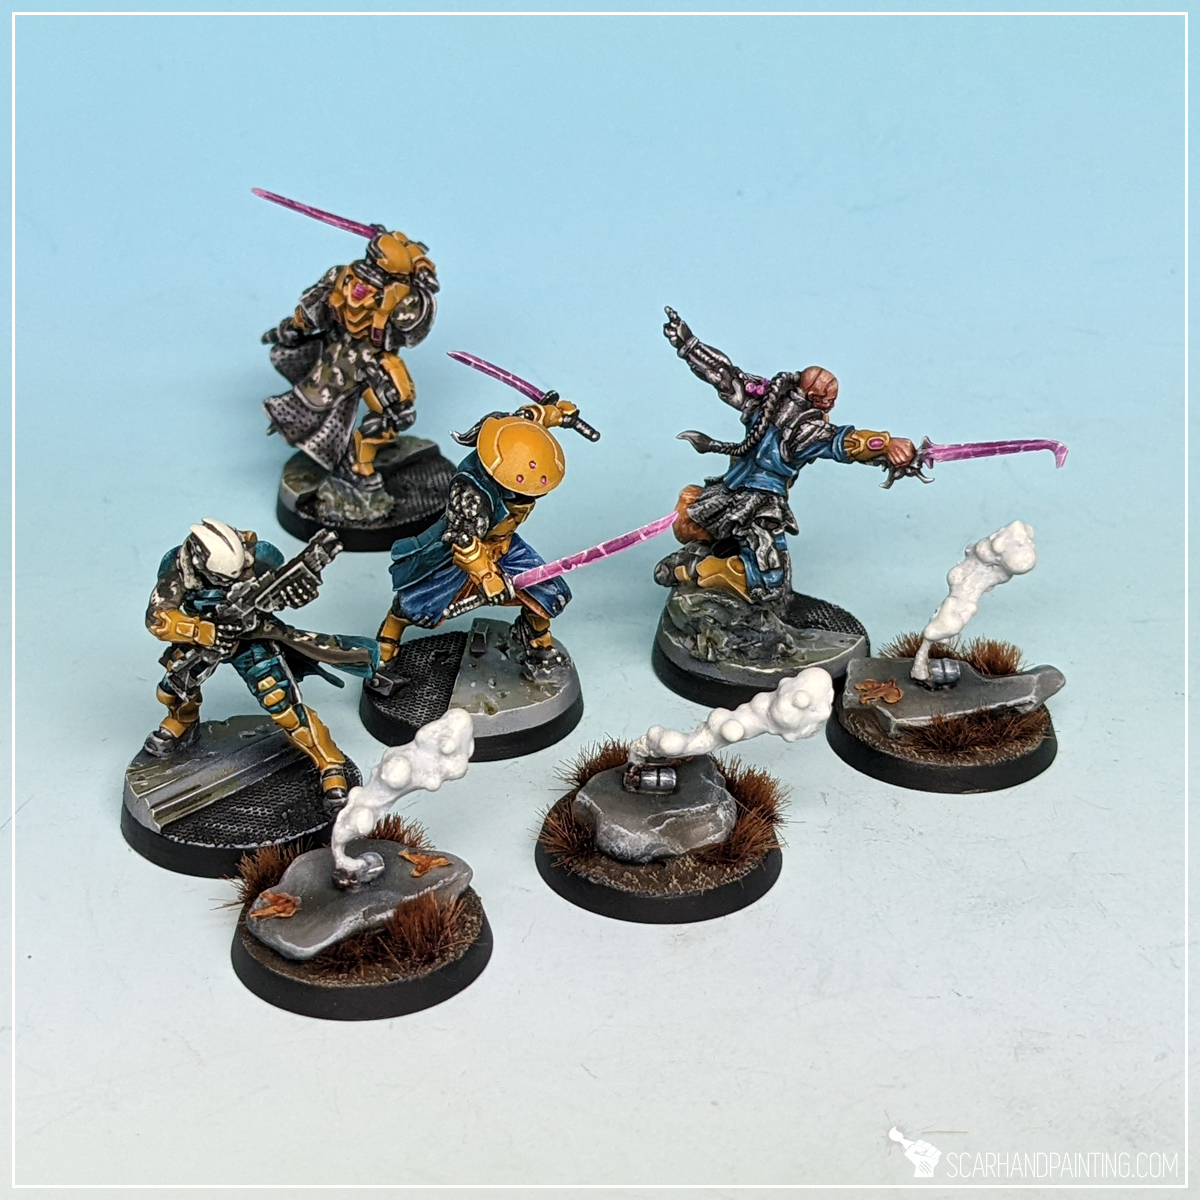
Oh those sweet looking puff of smoke. Such a fine detail. So much character. So many conversion possibilities. Be it fumes from magic cauldron, engine exhausts or freshly tossed smoke grenades. There’s only that many Kill Team Moroch boxes a hobbyist can get their hands on, am I right?
What if I told you there exists an unlimited source of similar, miniature scale puffs of smoke and they come as cheap as a bottle of PVA and Cyanoacrylate glue combined? Witness Me!

Before we start, some notes:

The Basics:
Just before we turn everything milky white with miniature smoke, a word of introduction. I recently purchased a Warhammer 40,000 Phobos Kill Team to add flavor to my existing army. Inside there was a single piece that really got my blood rushing. A tiny grenade with a cone of smoke. Such a wonderful piece. I wished to get more to use as tokens, but also cut and re-purpose for other projects. Sadly this piece is rare across the 40k range and I was left with only one way forward: Completely back engineer and make my own miniature smoke.
Fortunately it wasn’t that difficult and today I bring to you a relatively easy step-by-step tutorial so that you can follow me into the smoke!
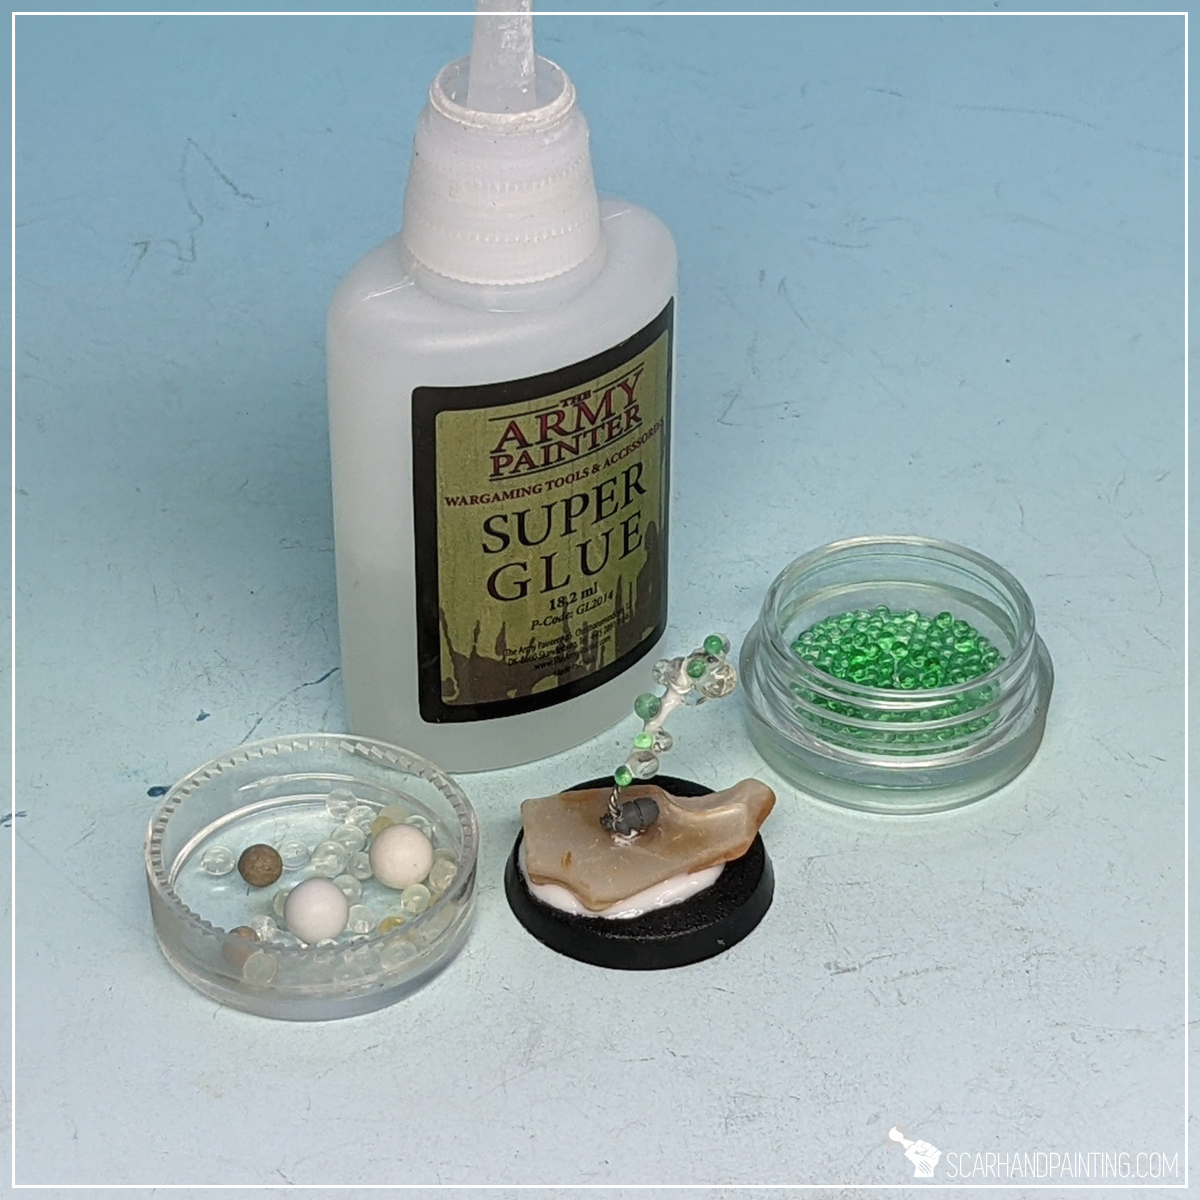
The method described here requires a piece of wire, wire cutters, cyanoacrylate glue, PVA glue, hobby drill, tweezers and some tiny balls. The latter can be made with Green Stuff, but I strongly recommend you to read this article and save yourself the hustle instead: Unlimited Tiny Balls for Modelling
Let’s get into it!
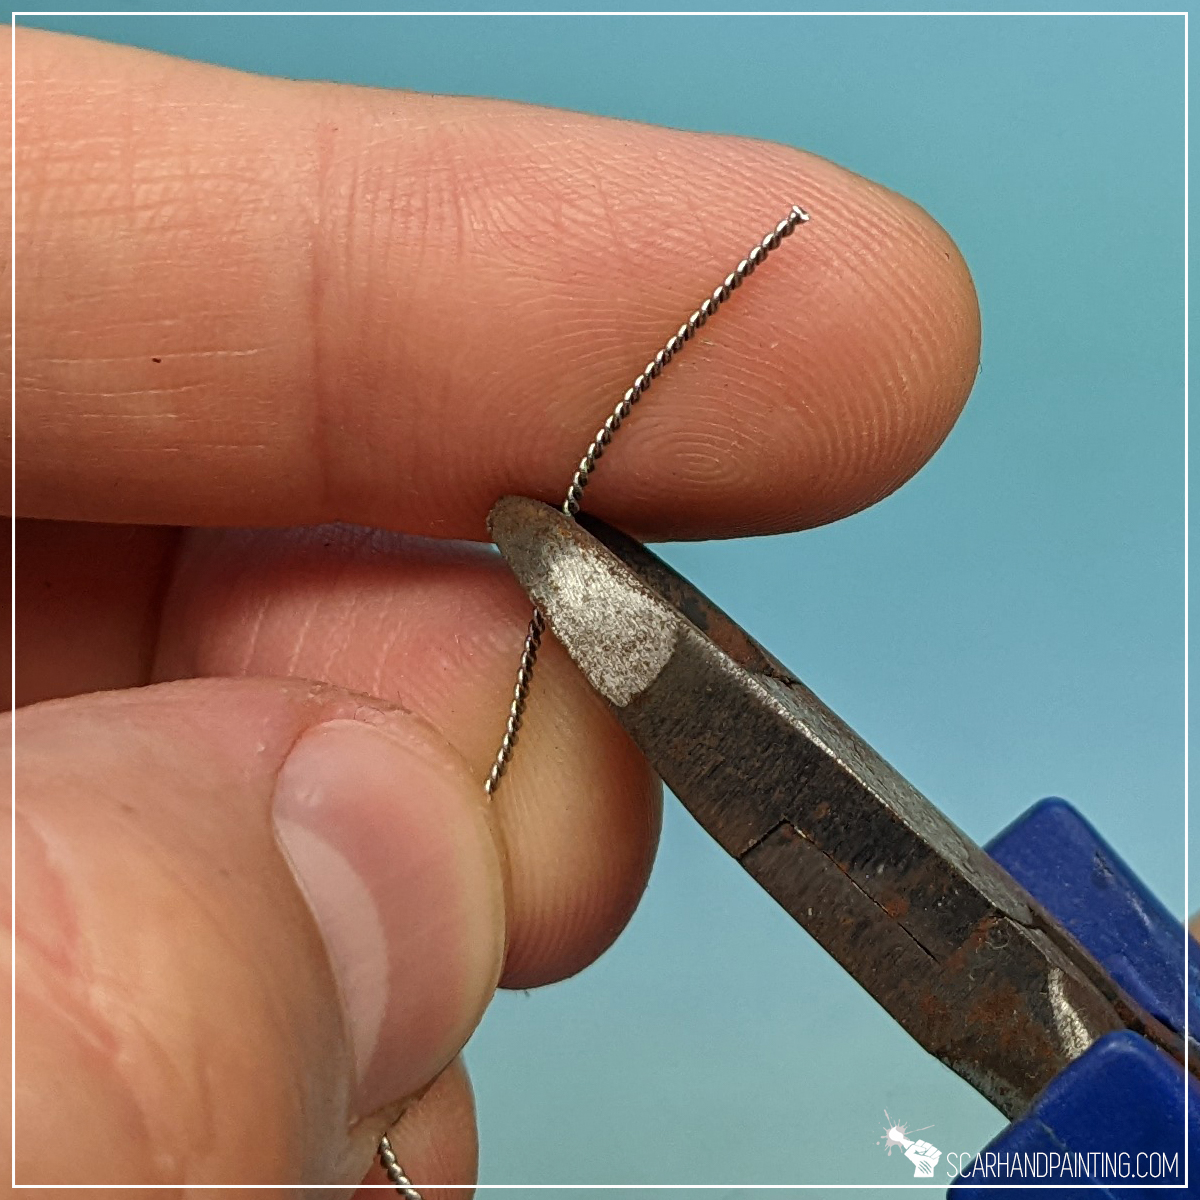
Step one: Wire
I started by cutting a piece of soft wire into smaller fragments. The size of these fragments depends on the size and complexity of planned smoke cones. I also found that double twisted wire works better than single line, because it holds the cyanoacrylate plus PVA glue mixture much stronger.
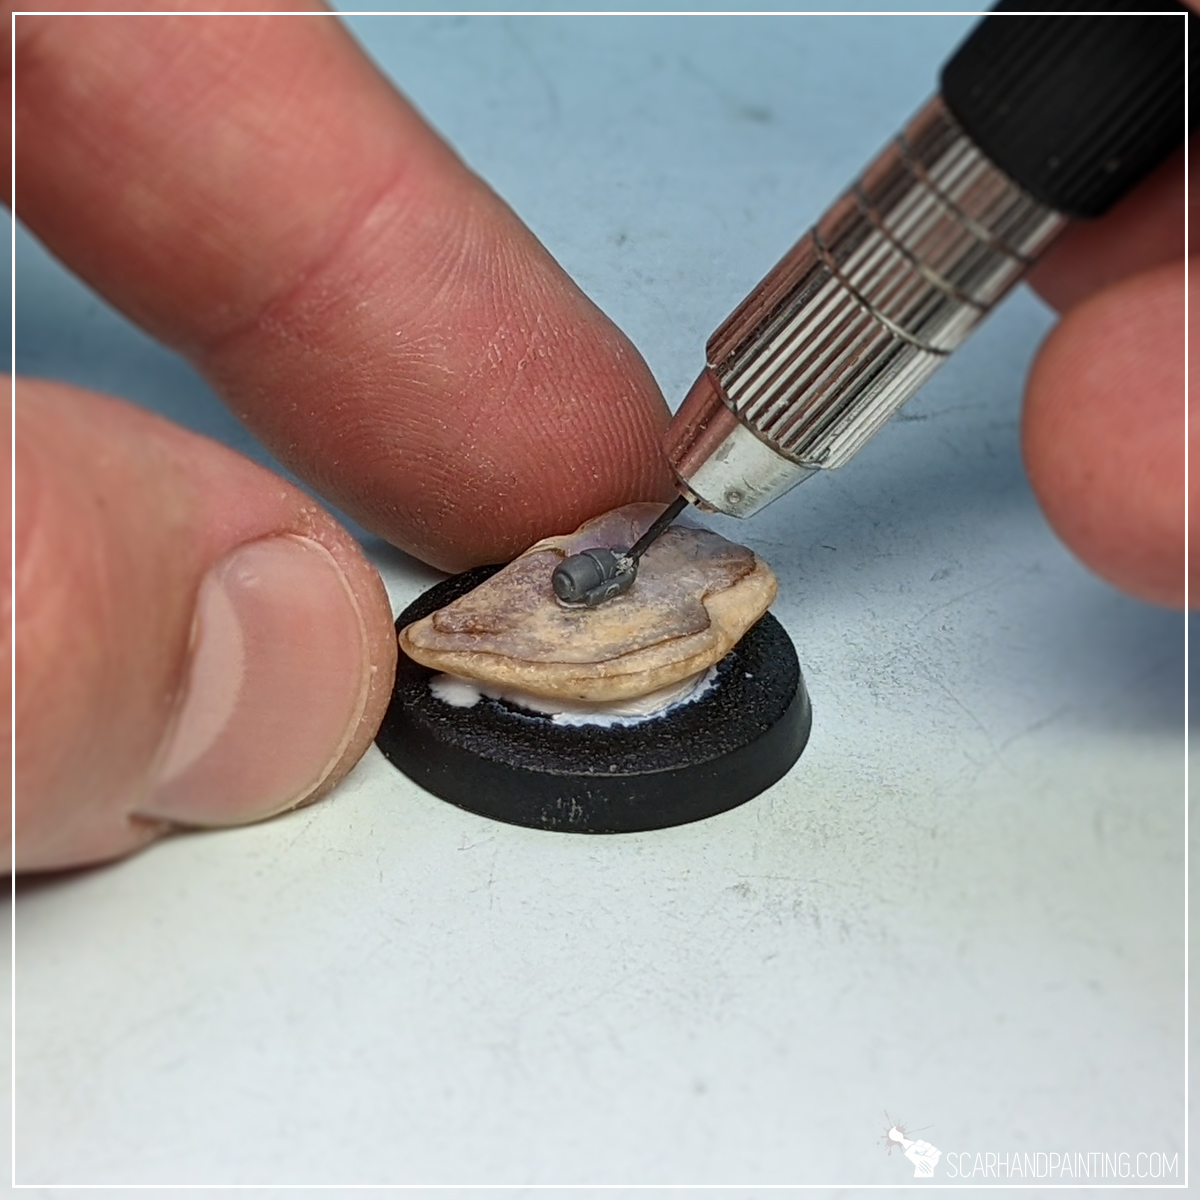
Step two: Mounting place
Next I drilled a tiny hole in the spot where I wanted the smoke to originate from. In this case it was at the head of a tiny grenade, glued firmly to a base.
Step three: Mounting
Using cyanoacrylate glue I then glued a piece of wire into the hole.

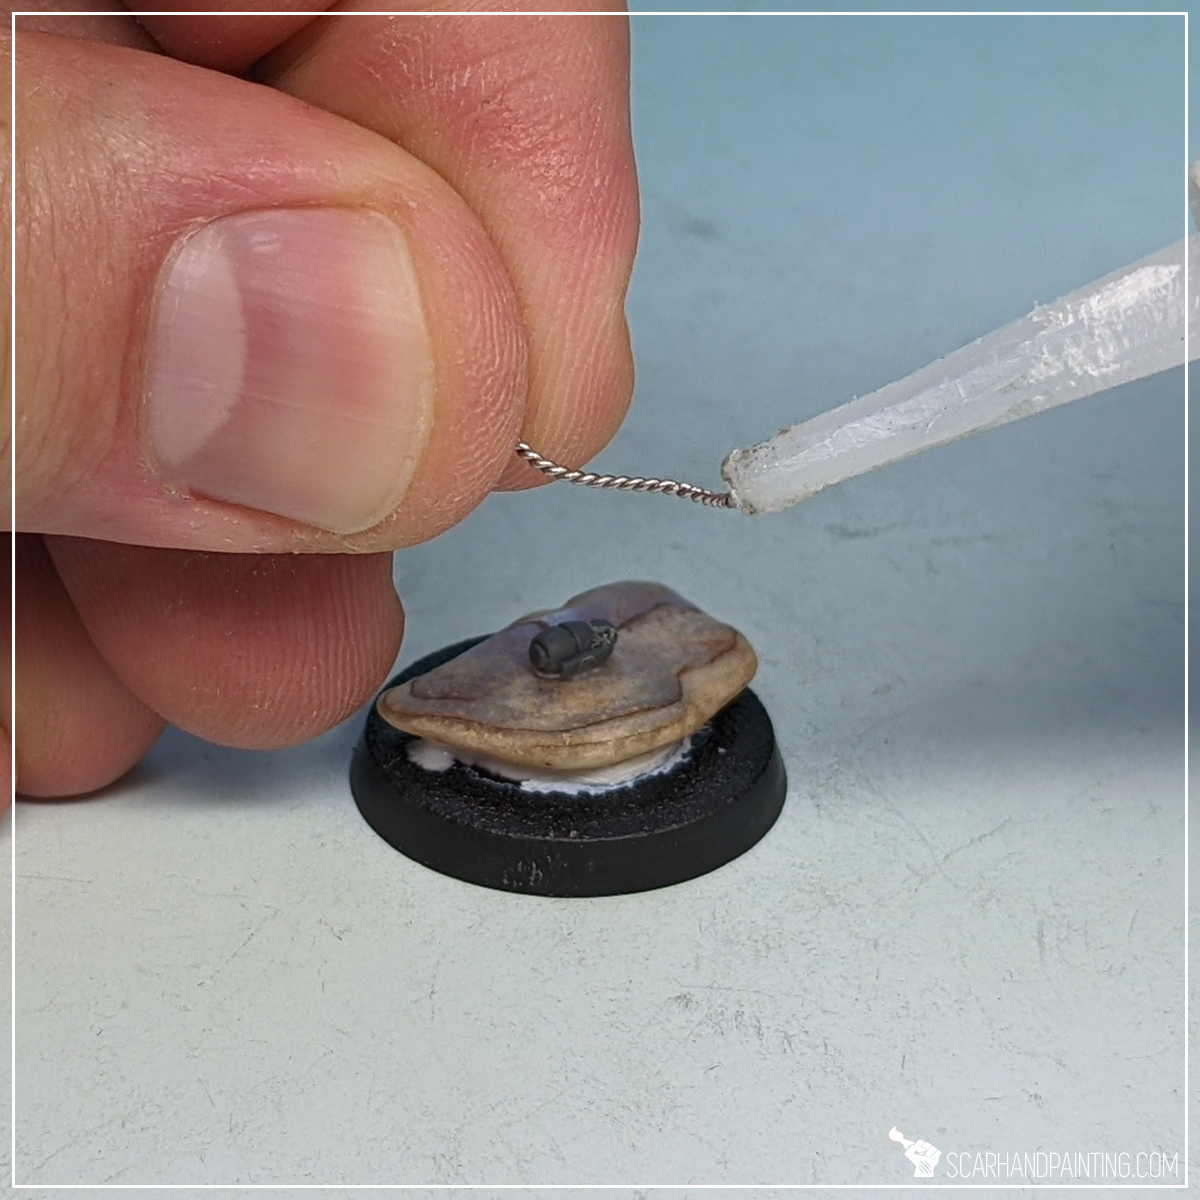
Step four: Shaping
Once dried firmly, I then shaped the wire to resemble a basic smoke streak. This can be done with either tweezers or by using soft finger pressure on a wire rested on a rounded surface, such as a side of a brush etc.
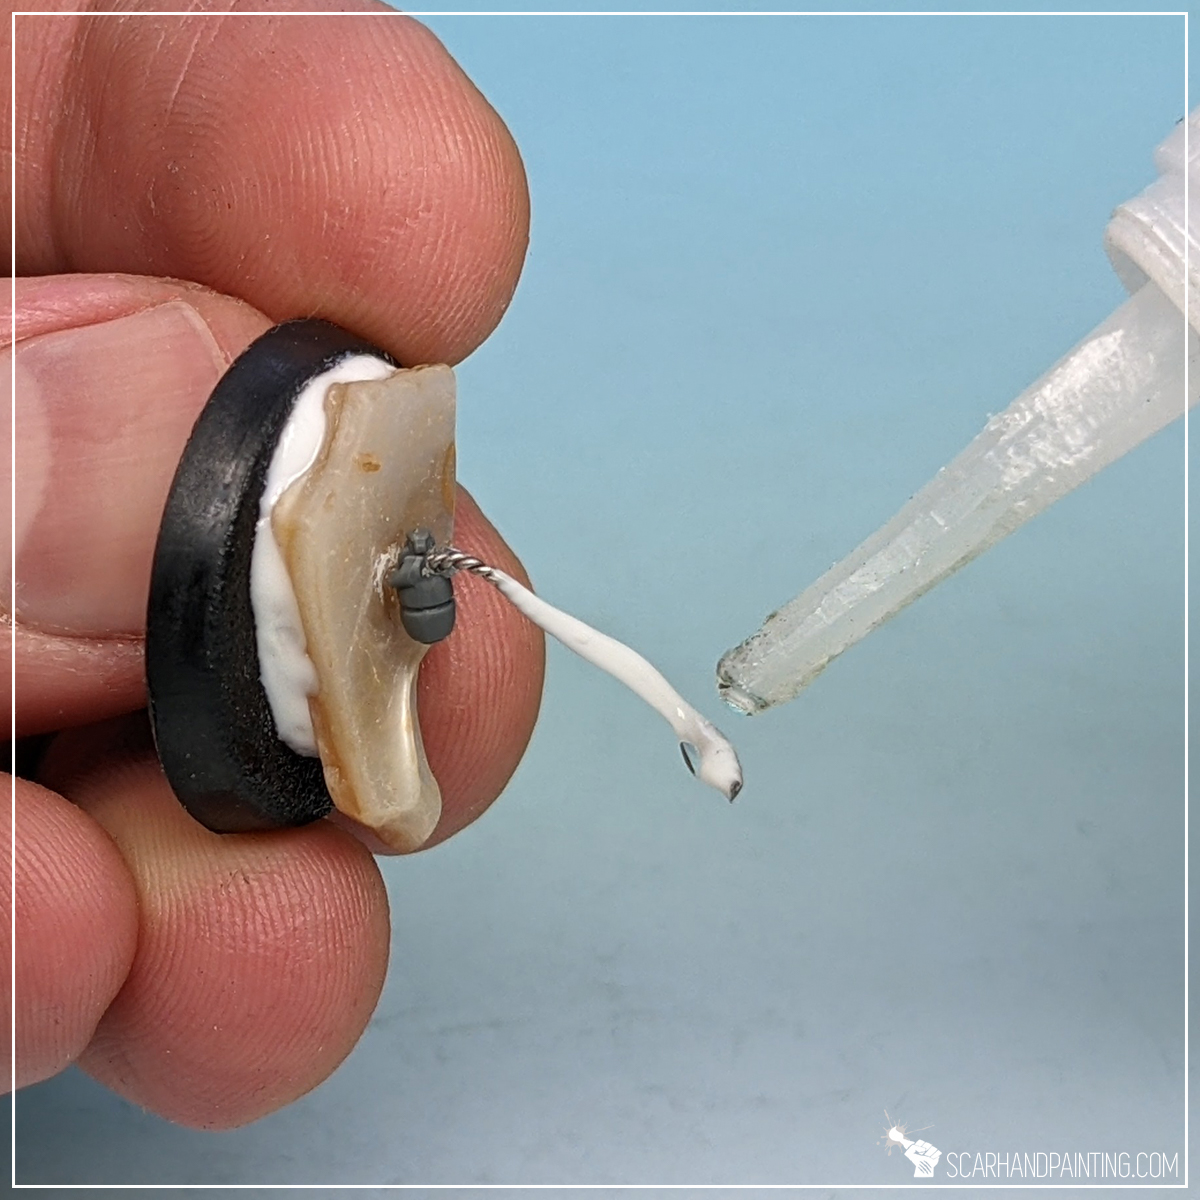
Step five: The Mixture
Next I applied some PVA glue and then cyanoacrylate glue onto the wire, in this order. I didn’t wait for these to bind…

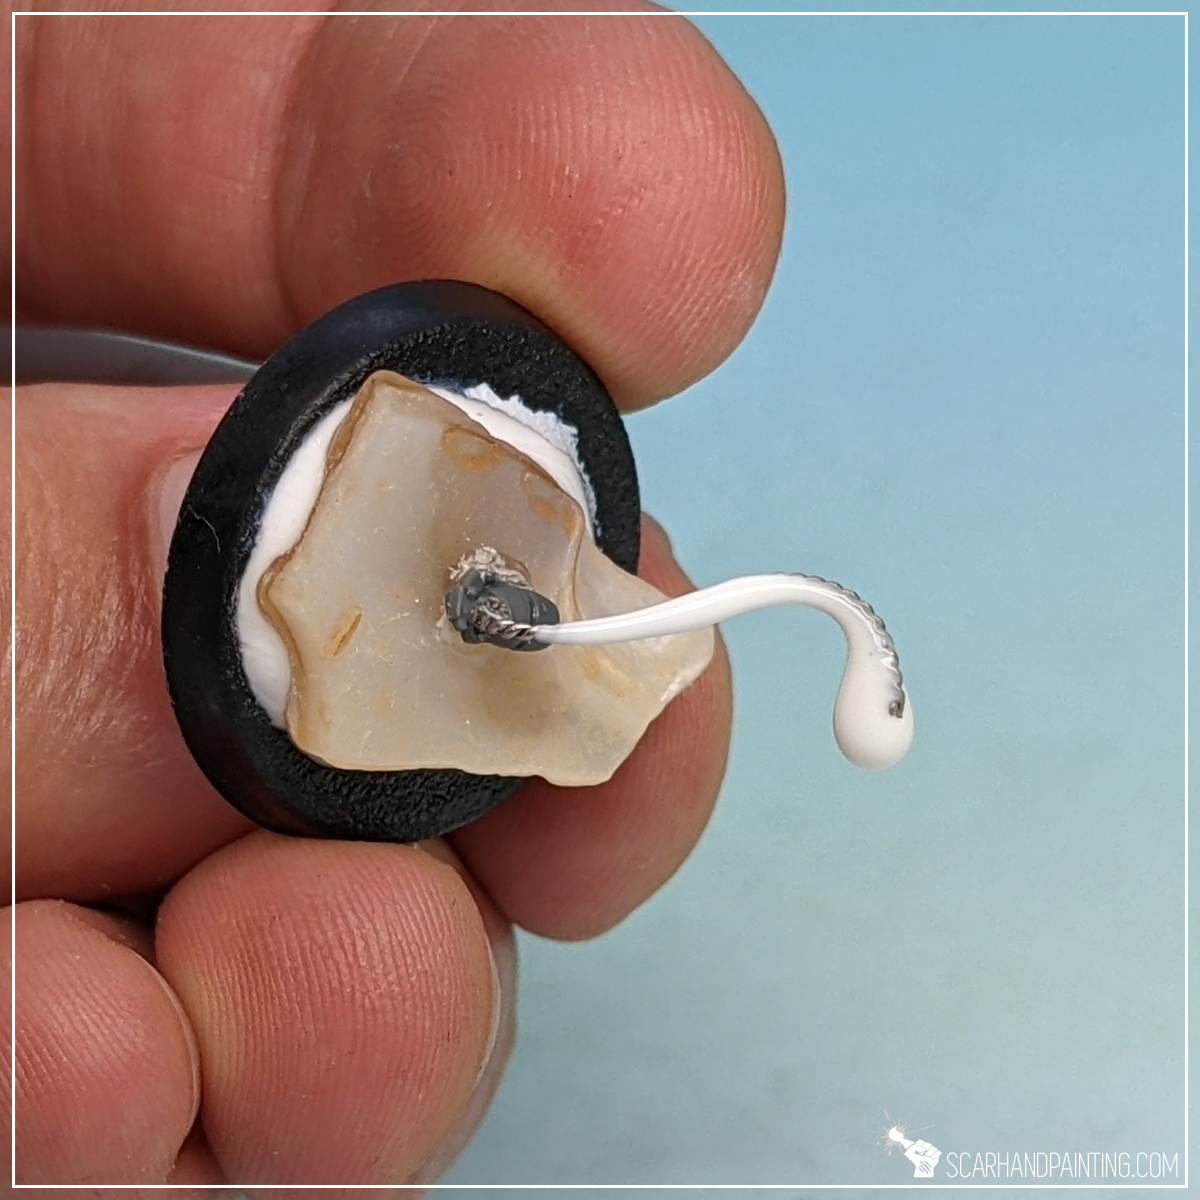
Step six: Volume
… and glued a bunch of tiny balls around to form volume. This step requires some creativity and precision, but gets much easier with a pair of slightly wet tweezers and a bowl of ready-to-use balls. Once again I advise you check this article out: Unlimited Tiny Balls for Modelling

Step seven: Finishing touches
Finally I used cyanoacrylate glue with activator to add more volume around the wire and finalize the shape. Activated Super Glue does not run down so easily, allowing it to bind larger areas with a nice, smooth surface.
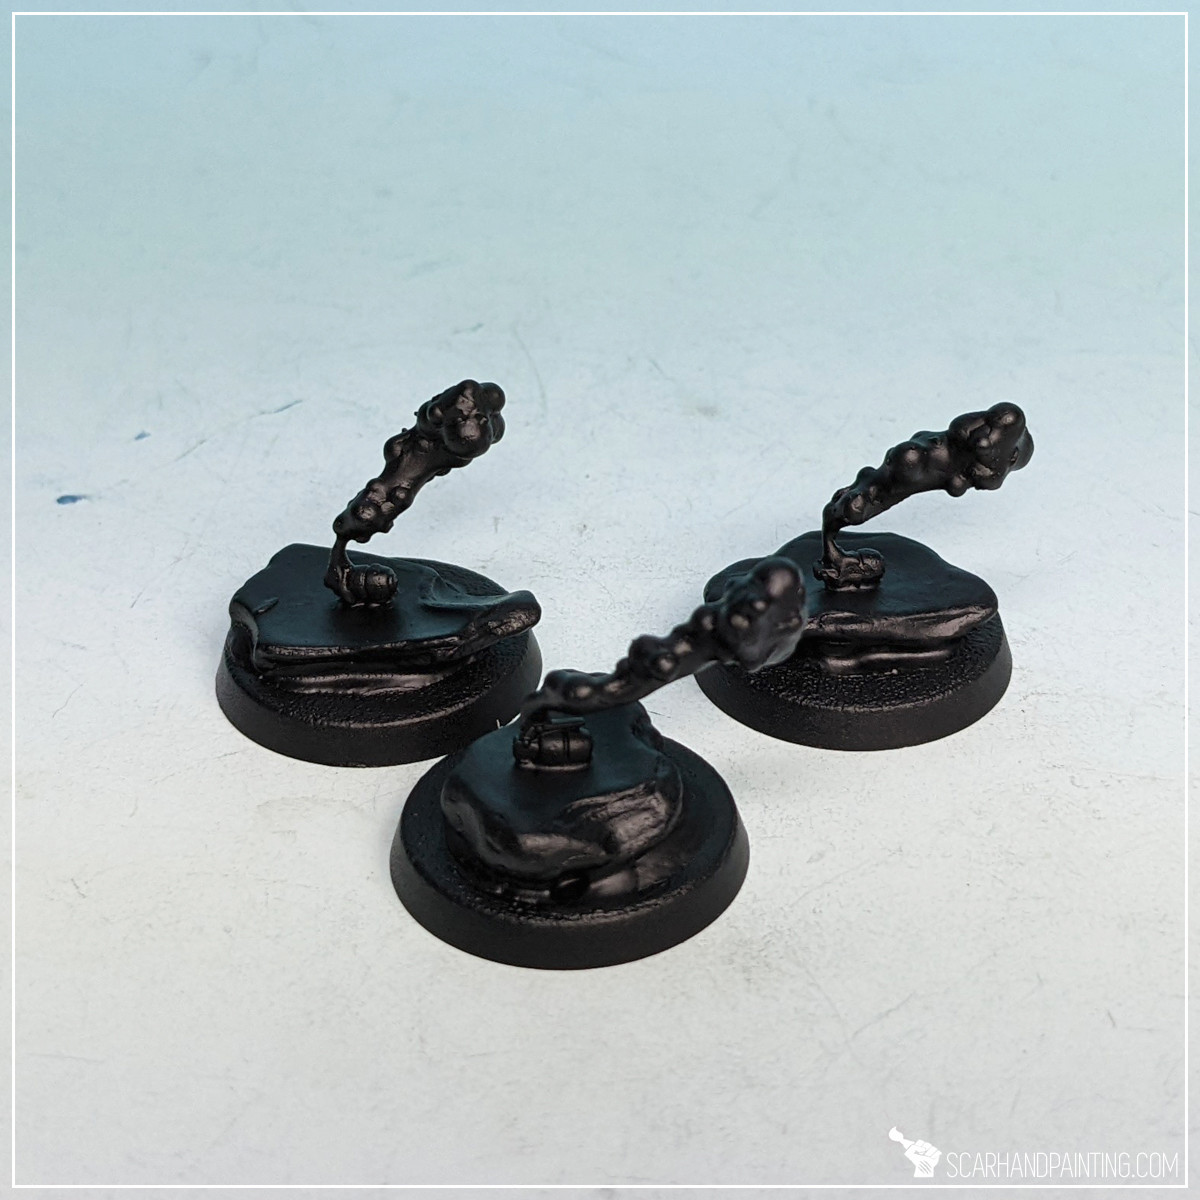
Done! Prime, paint and ready to play. Smoke away!

I hope you find this tutorial interesting. Be sure to let me know your thoughts in the comments below or via Facebook or Instagram. I would also appreciate if you considered sharing this content with your friends, who might find it useful. Finally if you are looking for a professional warhammer 40k miniatures painting service, be sure to contact me with this contact form. I always reply within 24 hours, after which please check out your spam folder.