- contact@scarhandpainting.com


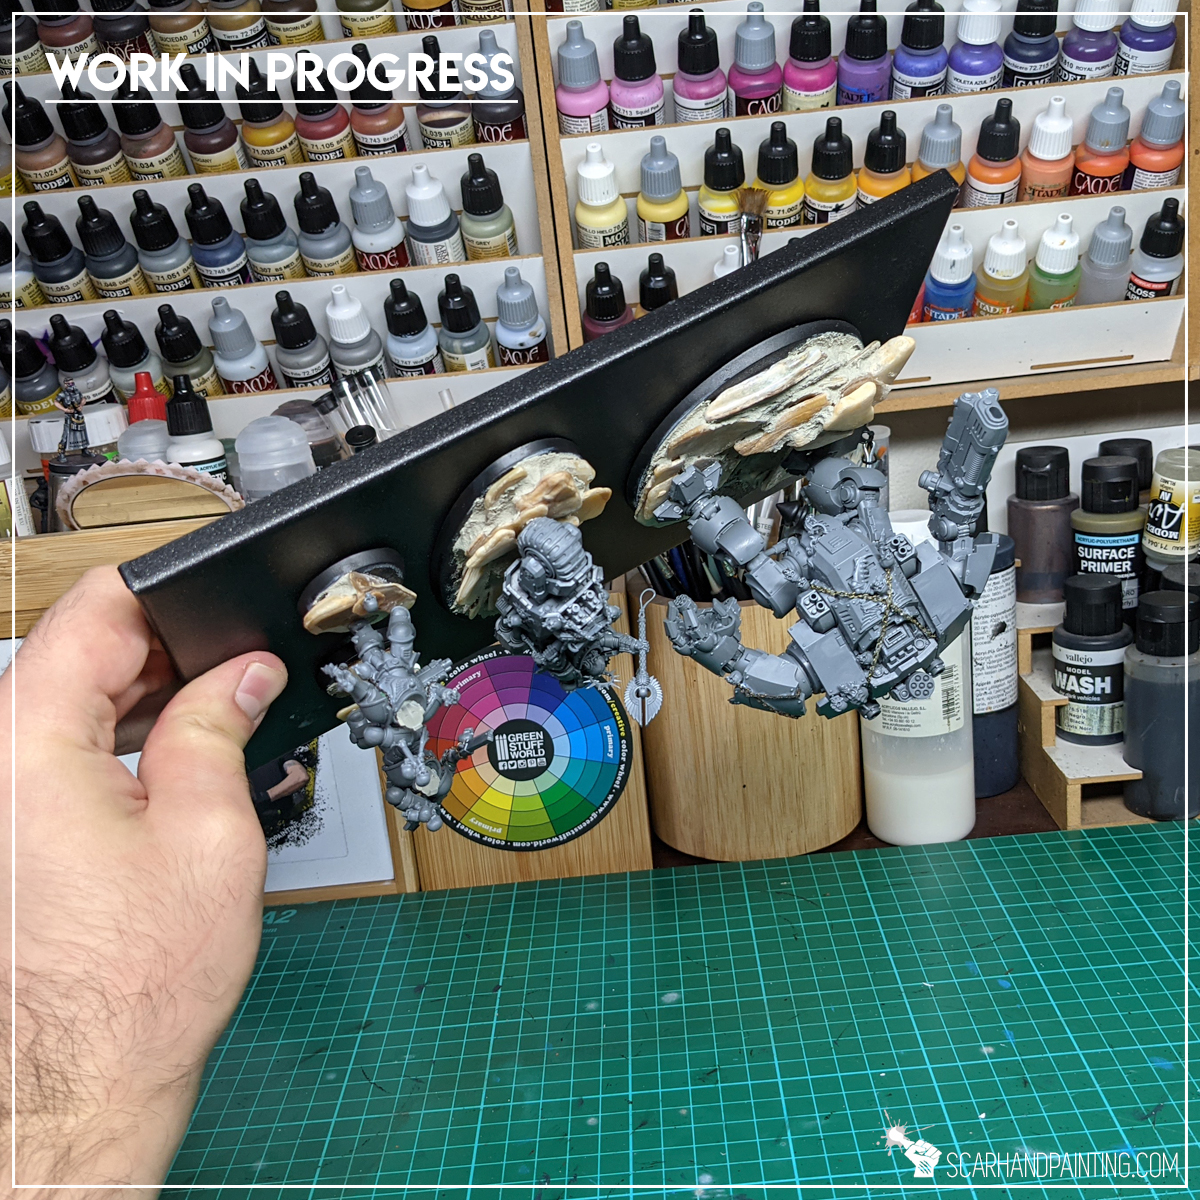
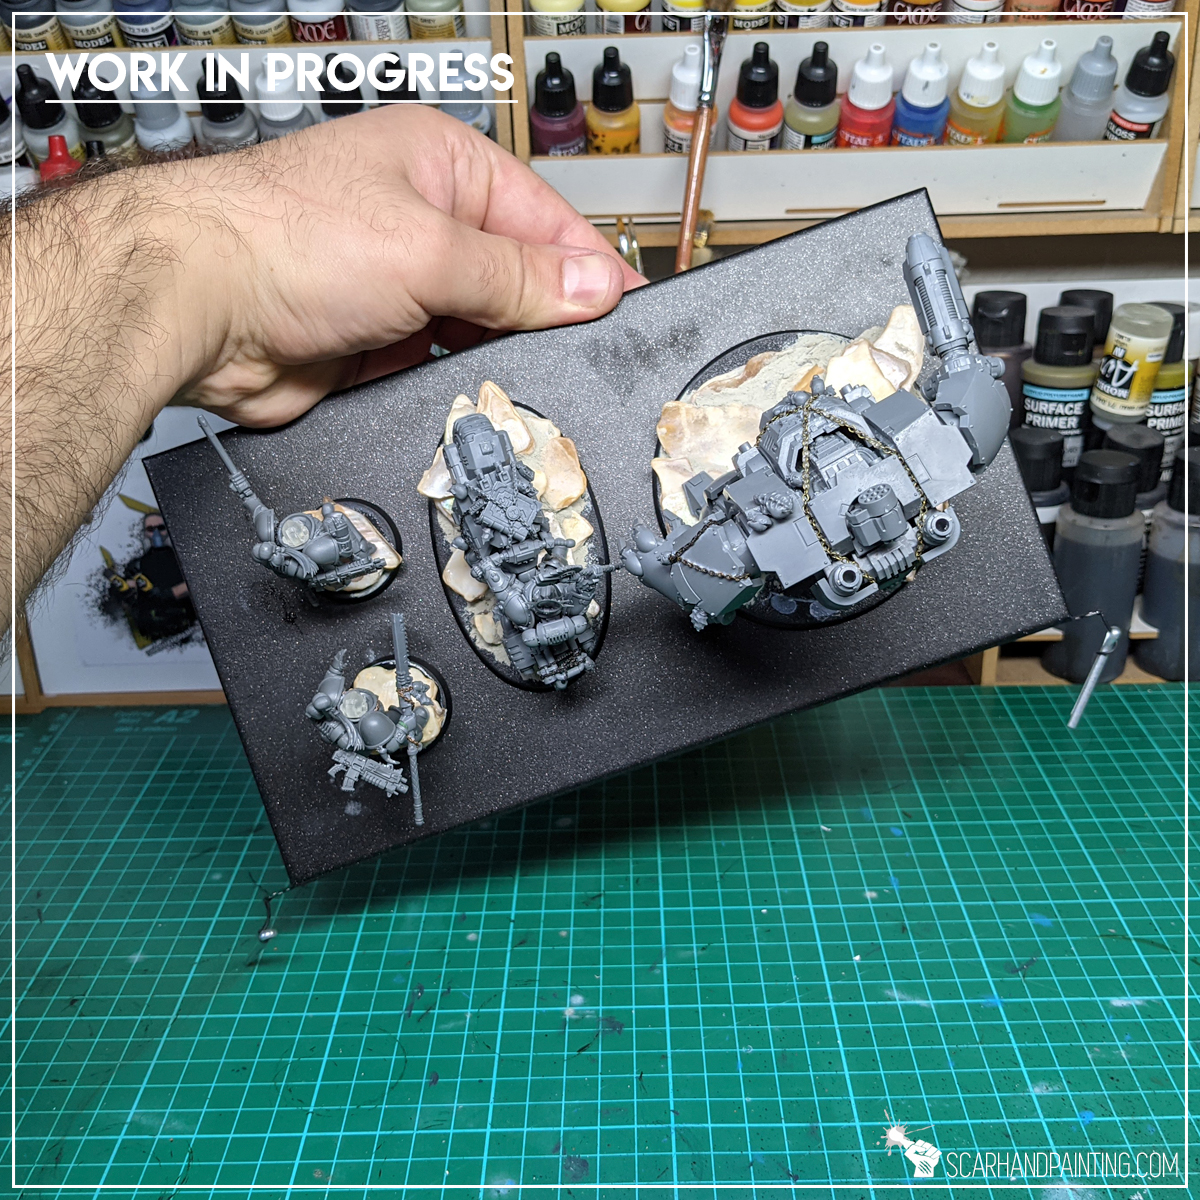
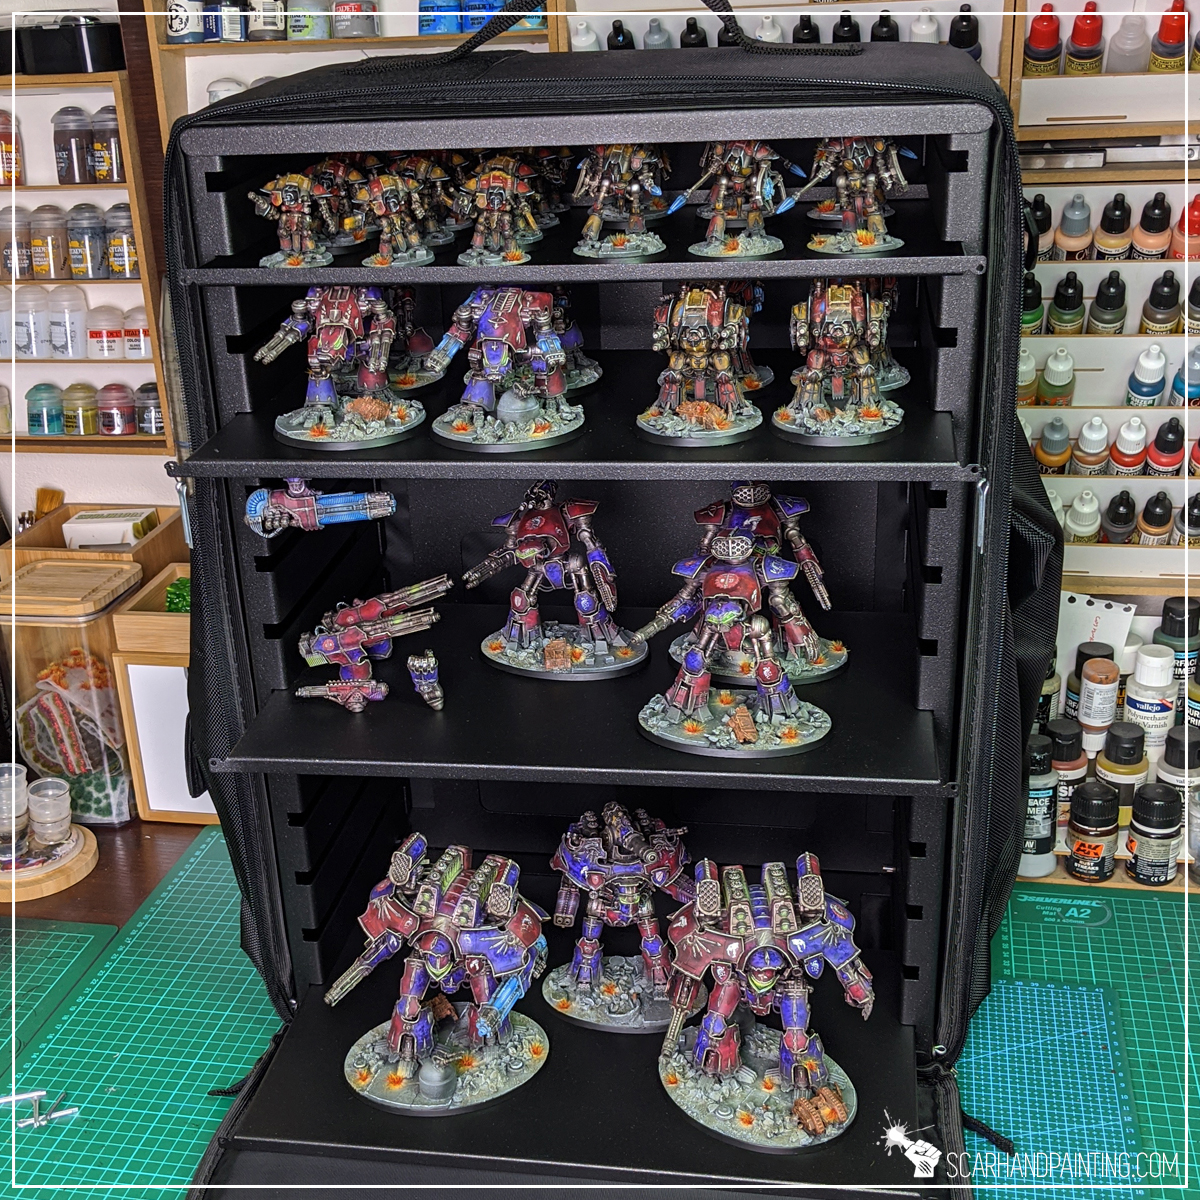
Magnetic transportation is probably the best way to carry miniatures safely. Its main pros are ease of use and speed with which the miniatures get packed/unpacked. Although pure comfort, this way of transporting miniatures is not without issues, amongst which is how very heavy pieces can slide and rub on one another, damaging the paint job in the process. Today I will present to you an easy way of dealing with this issue once and for all!
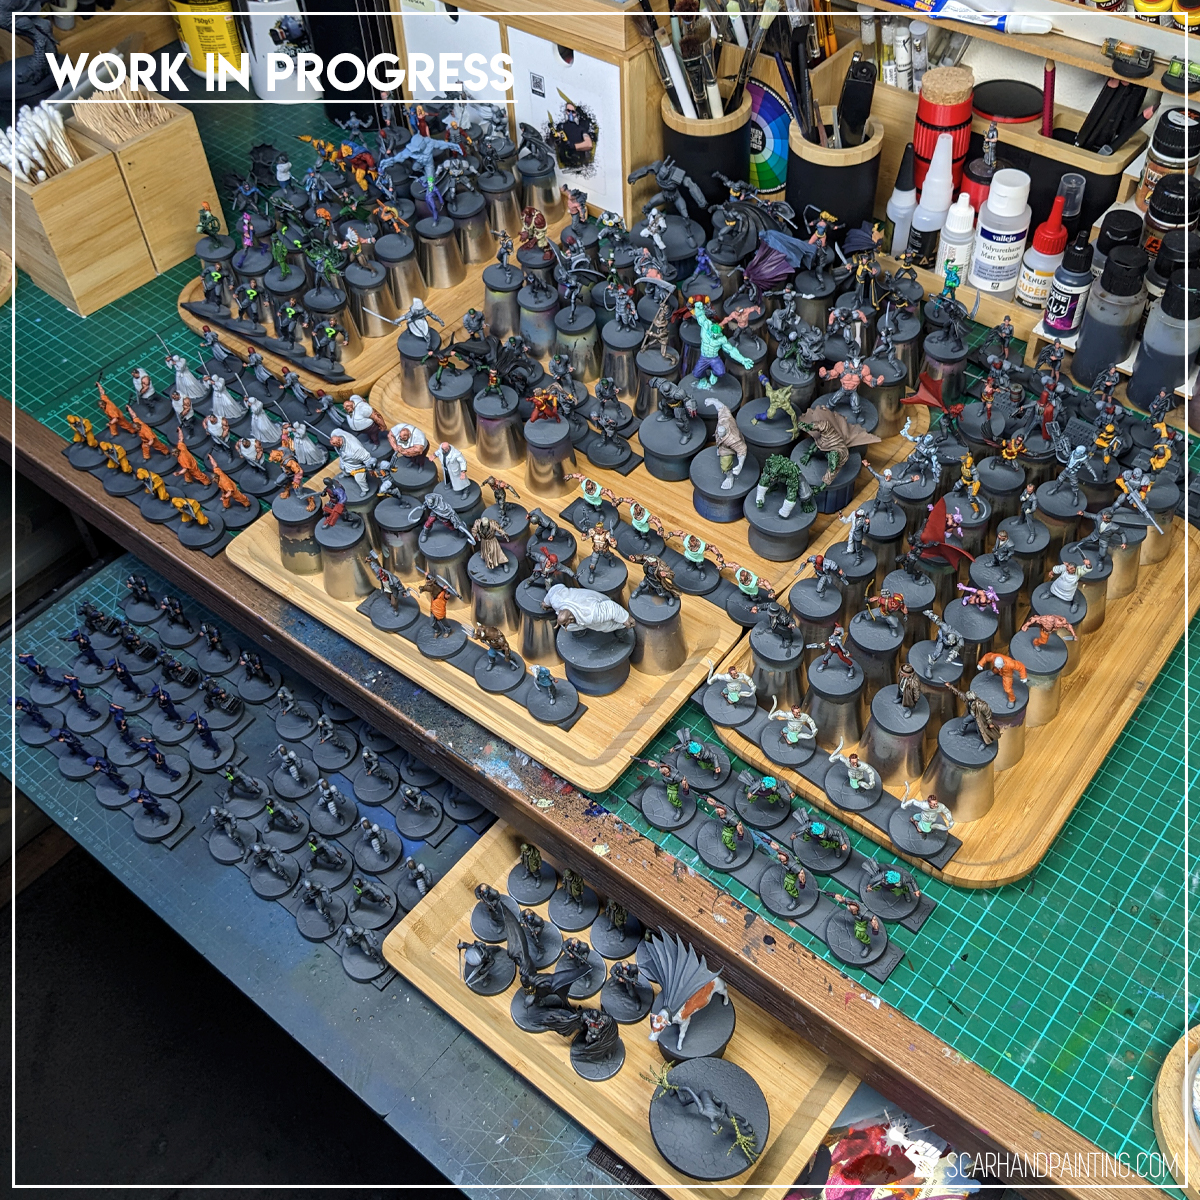
I have been using magnetic transportation for the last few years. Before that I was all about foam bags and stuff, but since I got my first A-Case I’ve abandoned all other ways of carrying minis and never looked back. Now I am happily carrying my lovingly crafted armies, including scenery, in magnetic transportation cases exclusively. Although I will never trust in any one way of carrying minis completely, with only the positive experience, I grew to trust magnetic transportation *almost* all the way. By “almost” I mean there are, like with all methods, some things worth being aware of. For starters I will never, under any circumstances put my case sideways. Do not get me wrong – my miniatures are professionally magnetized, but why tempt fate? More importantly some miniatures are really, and I mean REALLY, heavy and may slide around regardless of how many magnets you put into their underside.
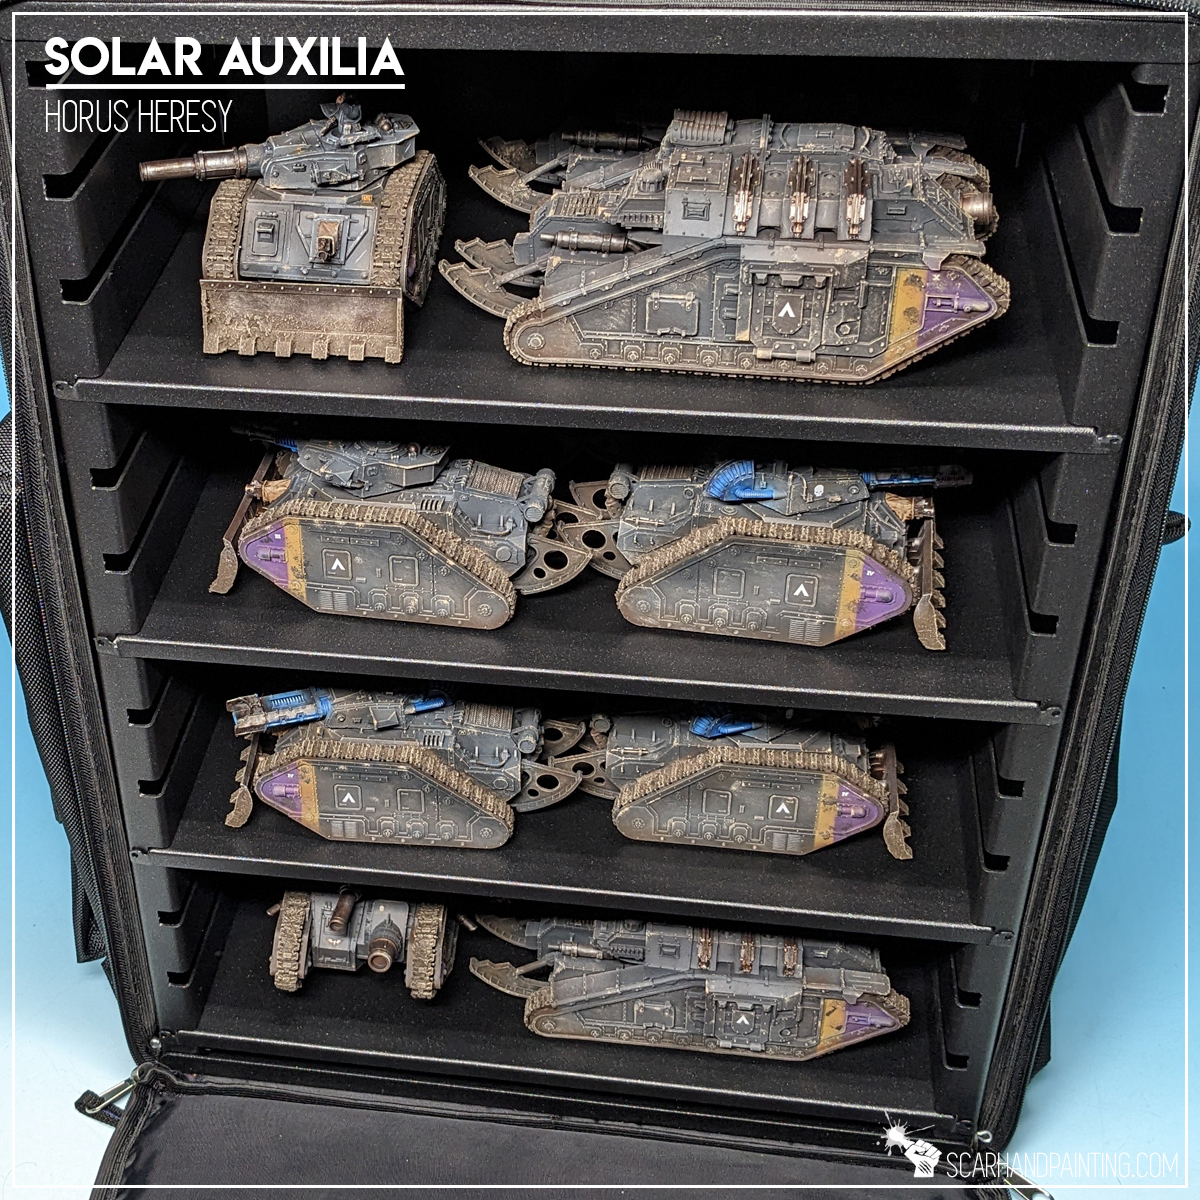
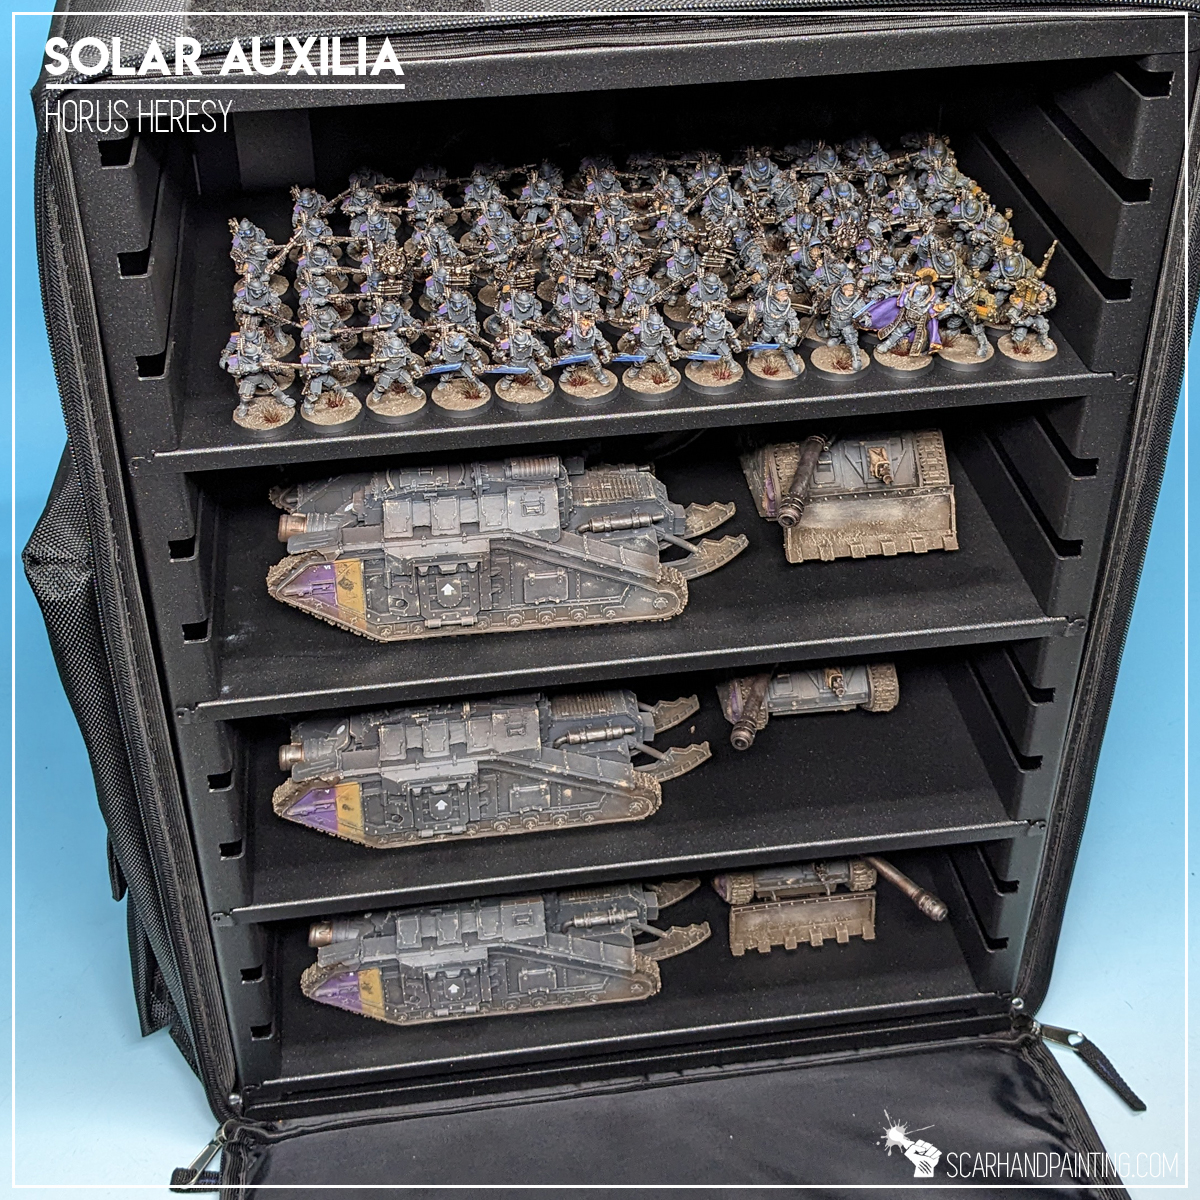
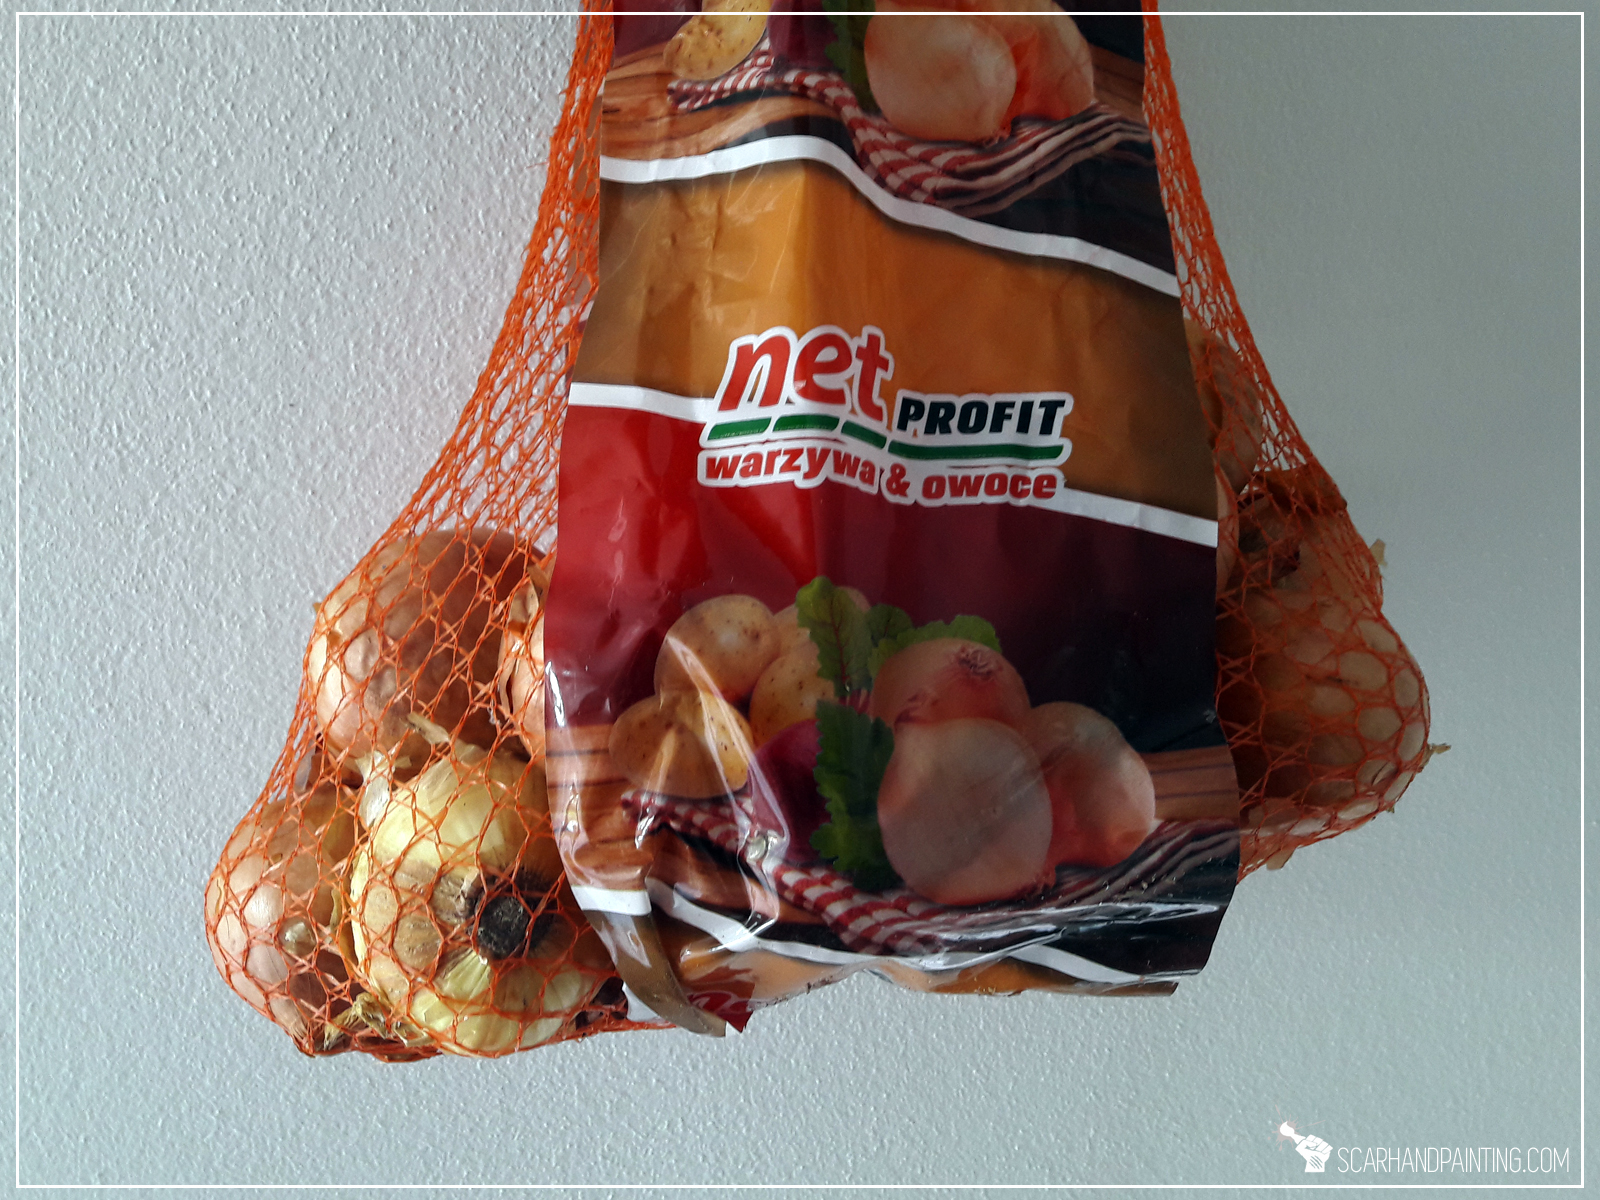
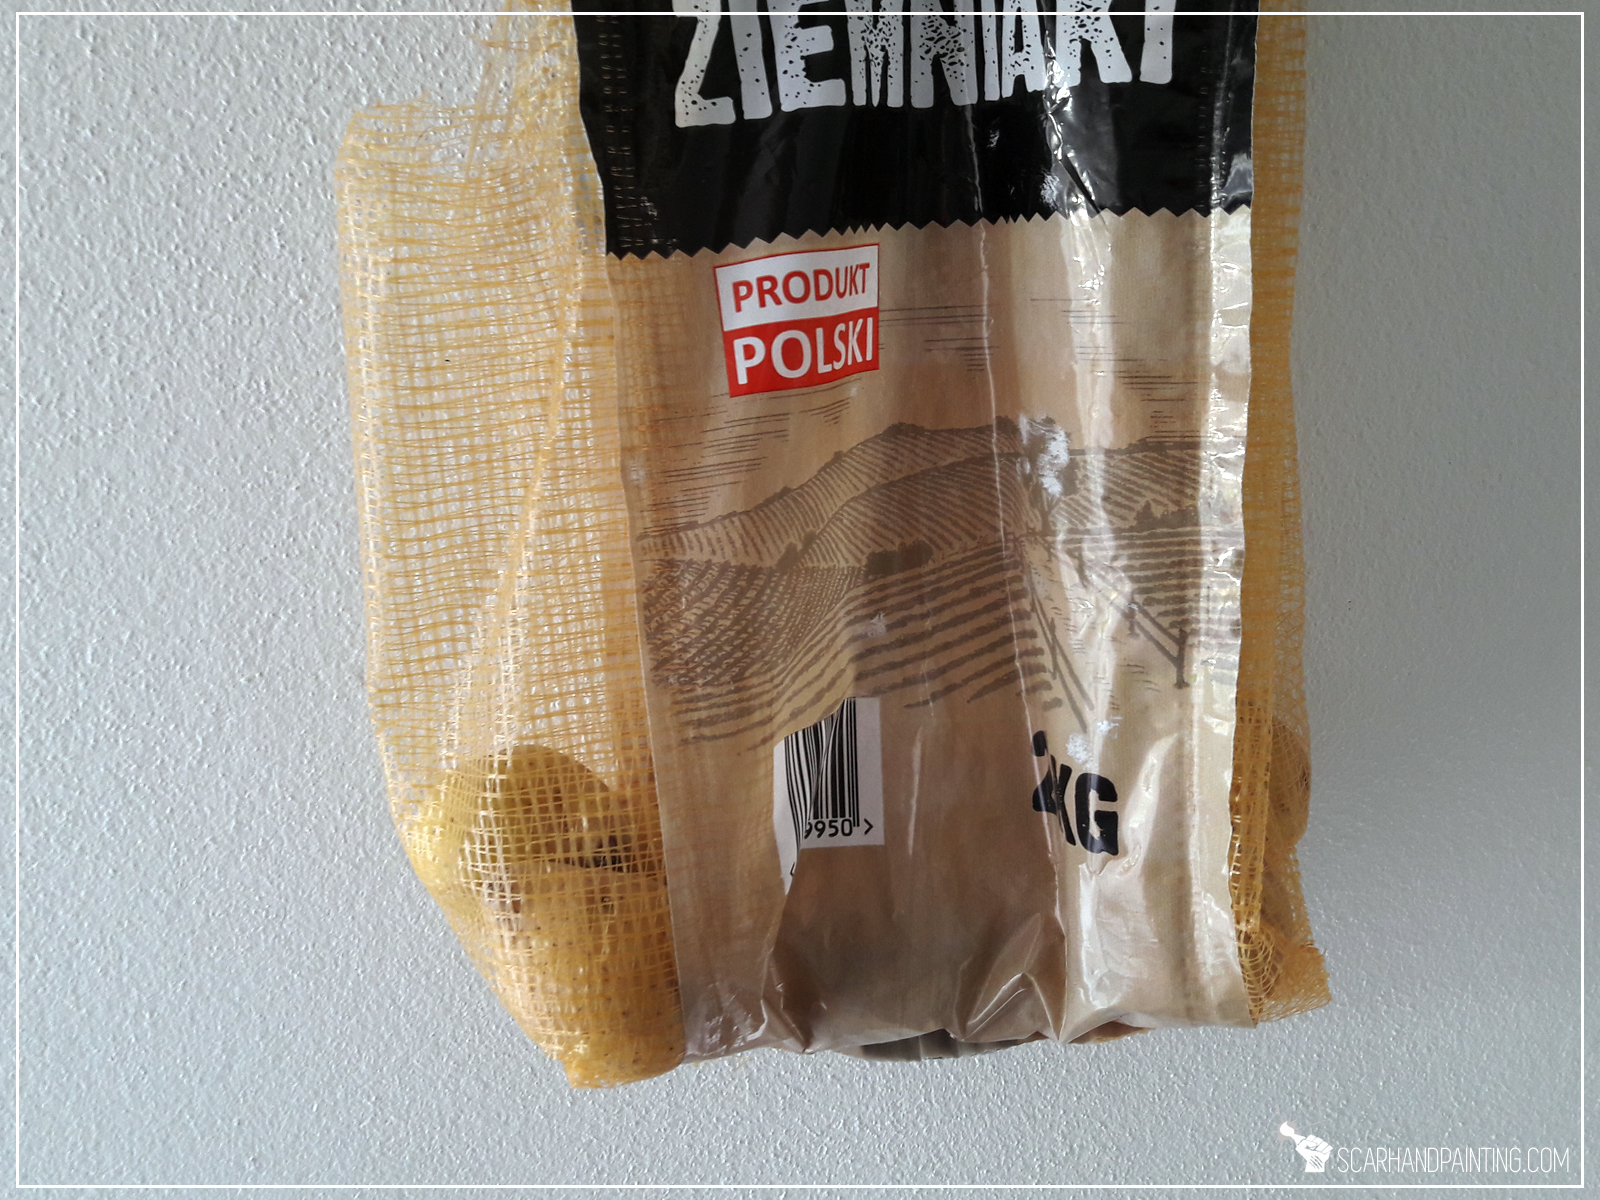
Just recently I have completed a large Solar Auxilia commission, including ten resin Dracosan tanks, over 400 grams each! The customer asked me to magnetize them and I got to it right away, but not without some thorough testing, to ensure the solution will work properly for these bad boys. Of course the miniatures moved around. I went through magnetized 3d printed holders, more magnets, stronger (over 20kg attraction power) magnets, magnets with rubber bands stretched between them, anti-slide stickers, foam trays to protect the miniatures and more. Neither solution satisfied the goal of providing safe transportation for my customers’ collection. Finally after multiple trials and errors I found an easy, cheap solution that gets the job done and is very user friendly.
Final word before we start:
The solution is very simple: Due to heavy weight the miniatures, if well magnetized, will stay on top of the metal shelf without issue. In order to prevent them from sliding around I simply needed to create a socket to block any extensive sideways movements.
For this I used 3mm thick self-adhesive felt sheets and pads. Yes, that is correct – the solution was much simpler than anticipated. I used the actual Dracosan tanks spread across an A-Case shelf and stuck a few felt pads, prepared in advance, around them. I left some loose space between the sheets and the tanks to make it easier for the customer to fit each tank in each slot, regardless of eventual small differences in size of resin elements. Assuming the tanks will not take off, they are allowed to slide just barely, as long as the only thing they hit would be a relatively soft pad…
The Final Test was successful!
I hope you’ve enjoyed this article. Be sure to let me know your thoughts in the comments below or via Facebook or Instagram. I would also appreciate it if you considered sharing this content with your friends, who might find it interesting. Finally if you are looking for a professional miniatures painting service, be sure to contact me with this contact form. I always reply within 24 hours, after which please check out your spam folder.

Keeping a clean and tidy workspace might seem like a chore, but it does not have to be so. In this article I will share with you some tips on organizing your hobby workspace, based on my own experience. I will also let you in on what benefits are there from working in a well organized environment.


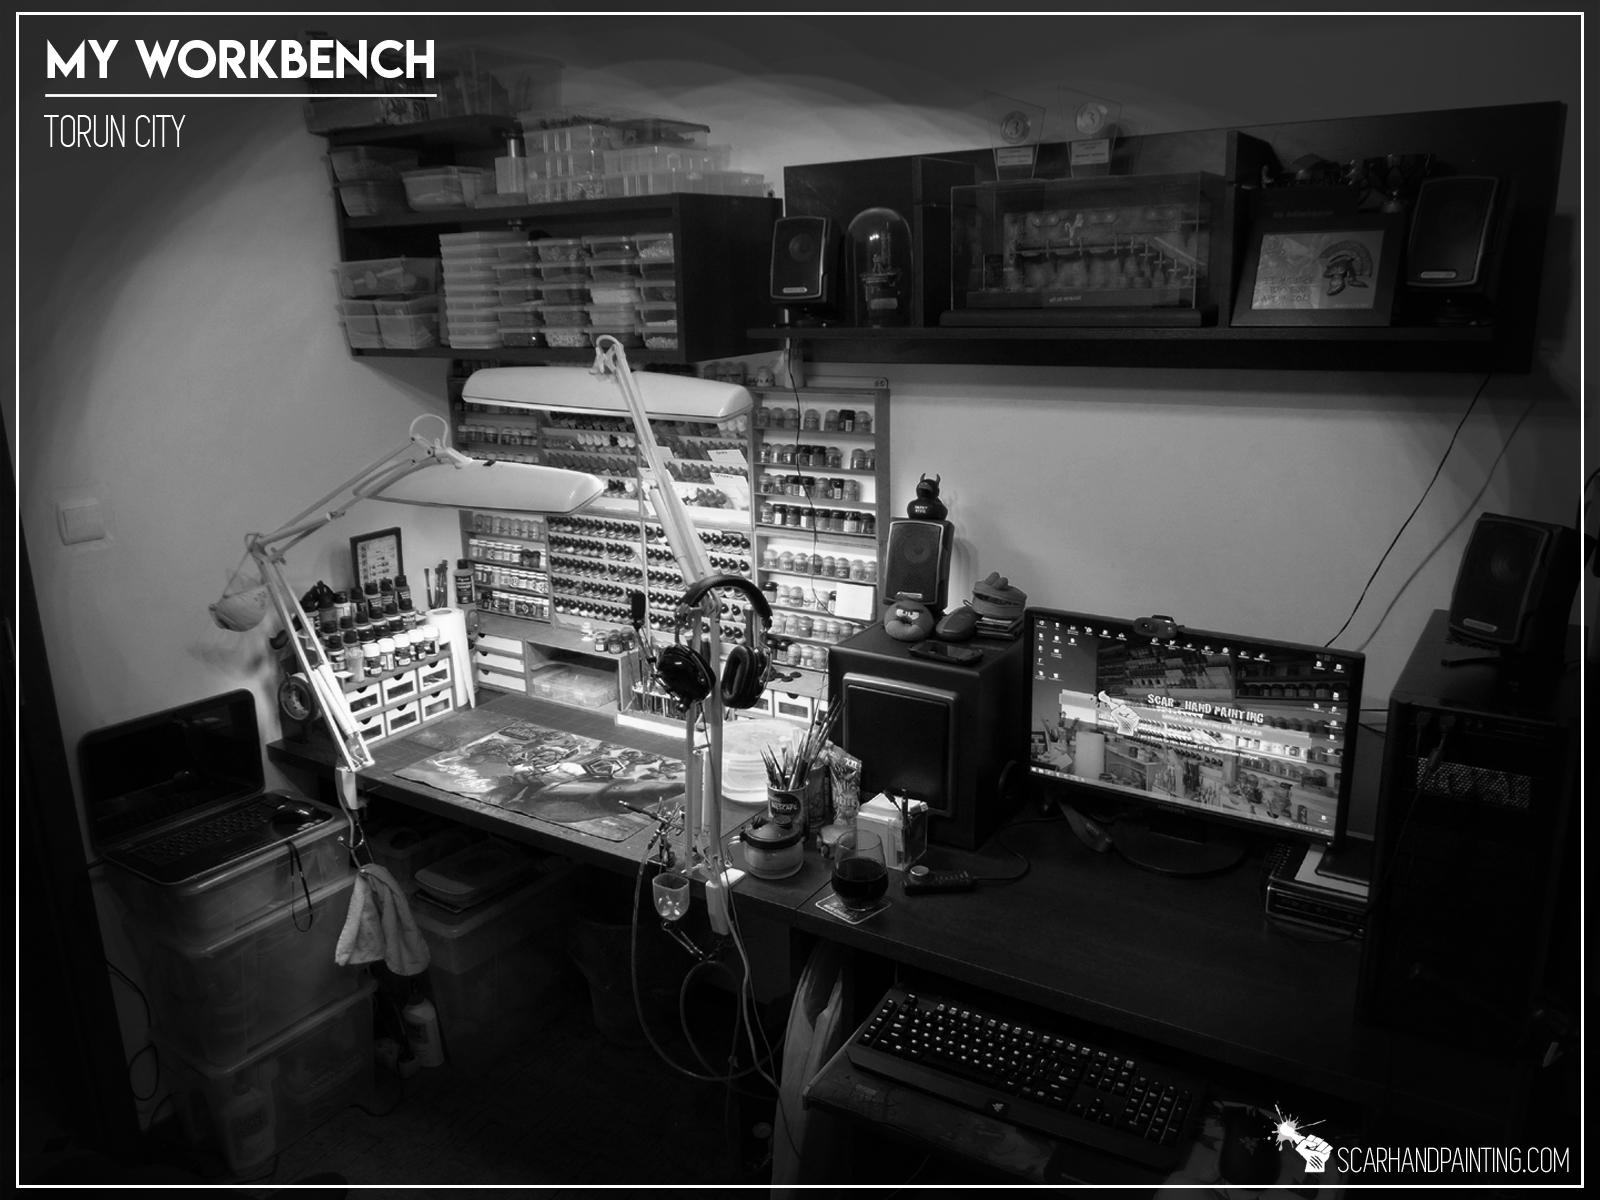
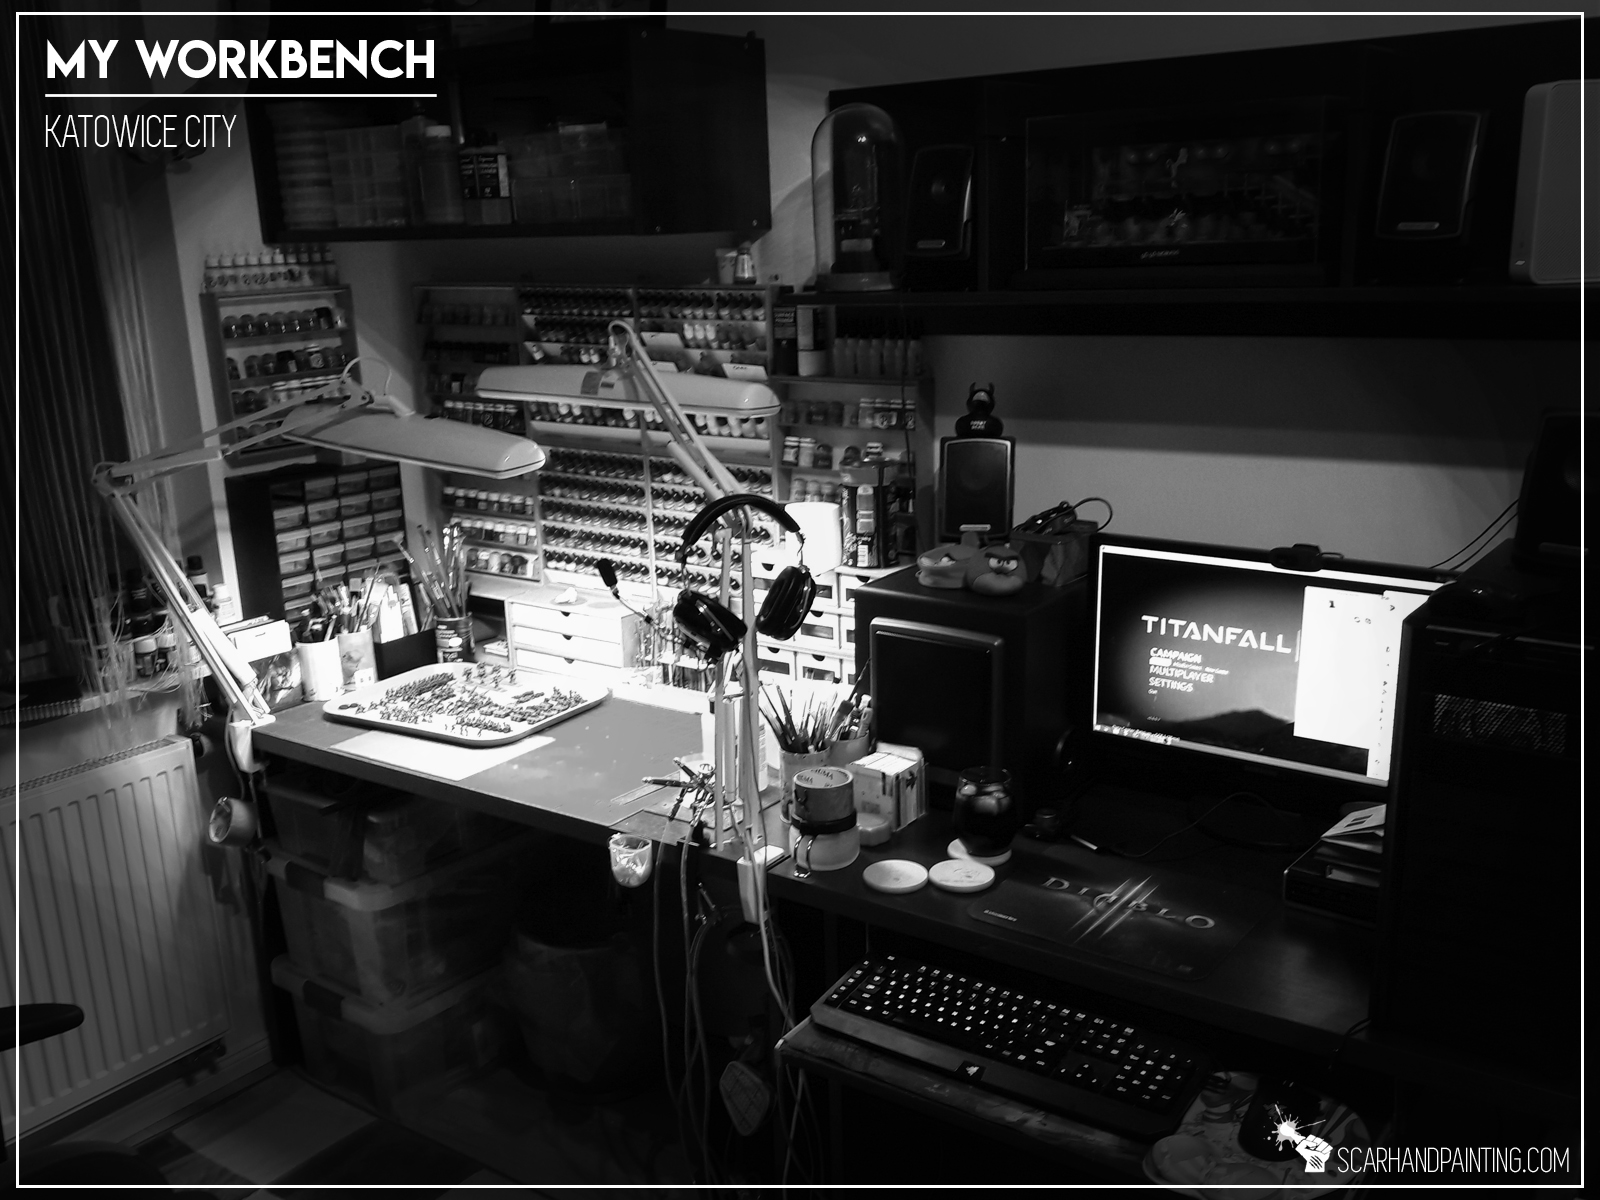
Before we start, it is worth noting that I am a full time, professional commission painter. For years now I have been testing different solutions to try and improve my personal workspace. Moving from town to town required me to build my workbench from the ground up multiple times and provided a lot of insight into what to aim for. You might not necessarily have space, funds or need to achieve a similar setup, but if my adventure has taught me anything, it’s that there is always the space for improvement. Here’s the best proof of that – some previous iterations of my trusty workspace:

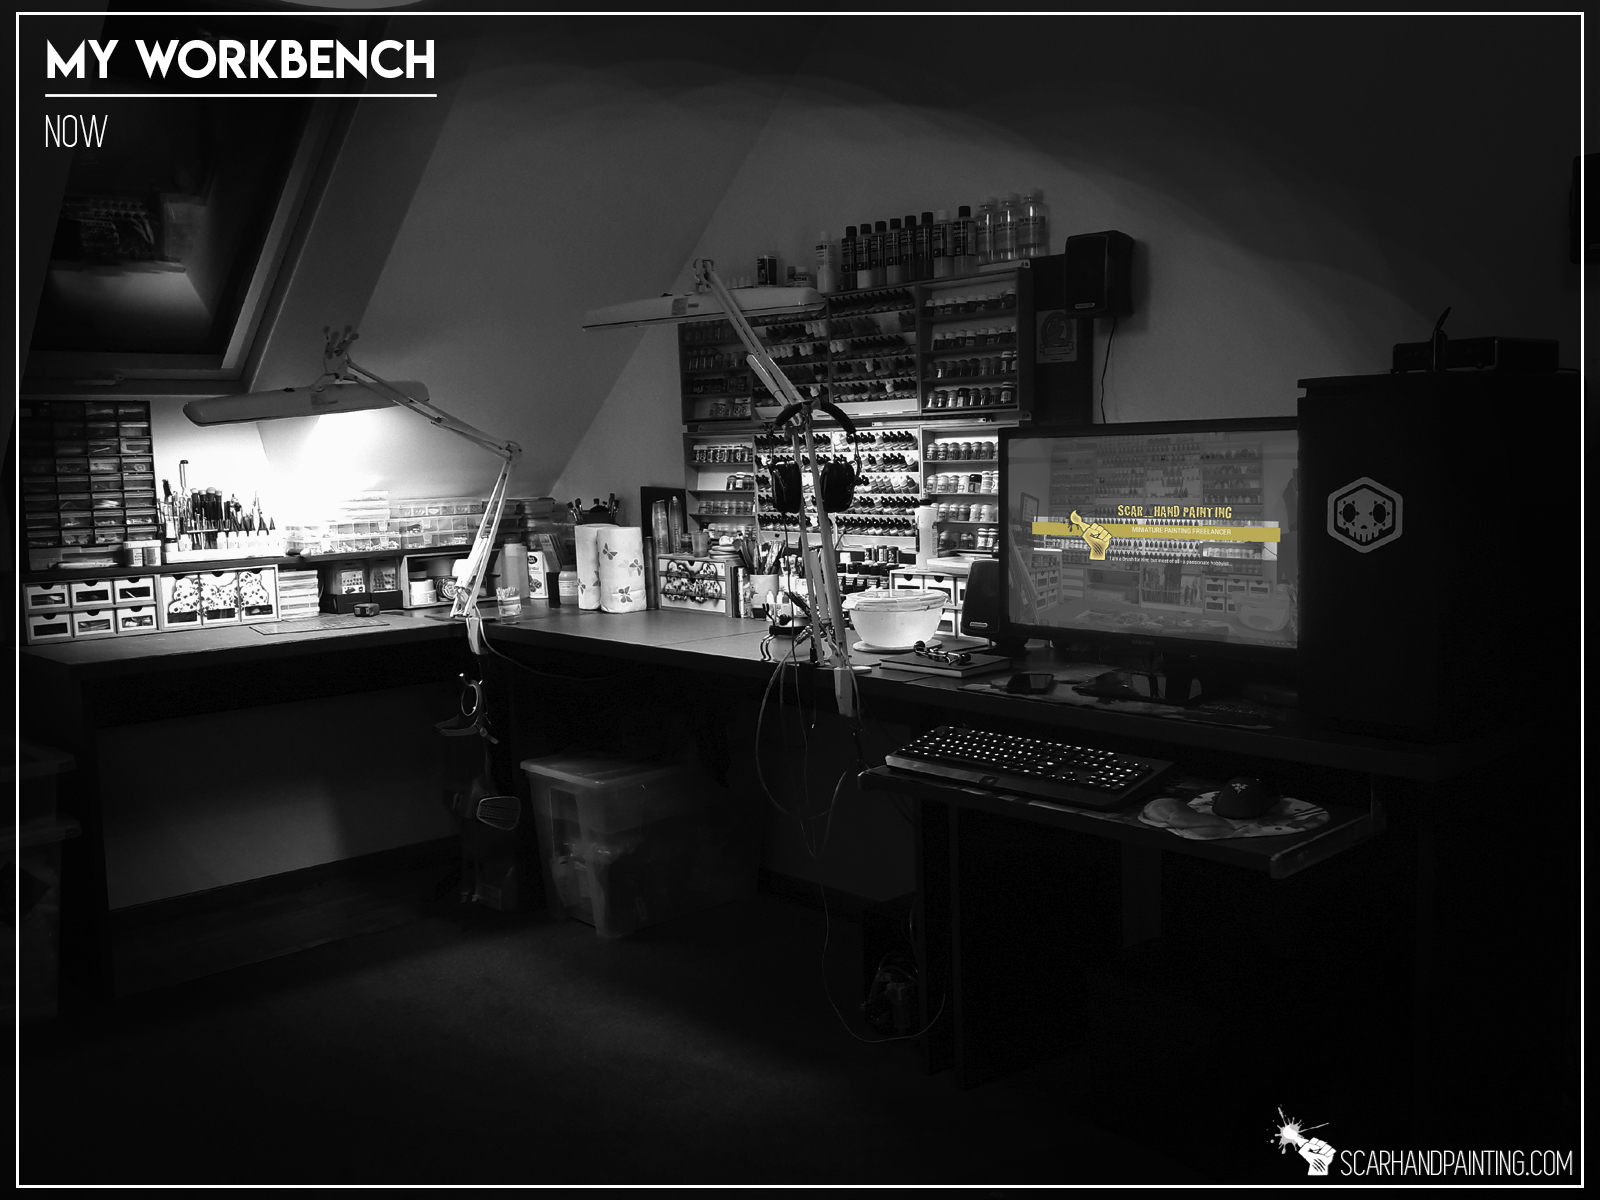
Regardless of you being a weekend hobbyist or a professional, a workspace’s main purpose is to provide comfort of your painting process. This includes the ease with which you access tools, manage projects and even how you feel when painting miniatures. A tidy, clean workspace translates directly into your work and motivation. It is far easier to take on a new project when you don’t have to take care of the mess first. Less time spent in search of tools or bitz means more time spent on the actual thing you want to do. Most importantly keeping things in established spaces allows to train muscle memory, thus increasing productivity.
For the purpose of this article I have narrowed down the list of useful advice to a few tips that greatly improve the quality of life while not being too hard or expensive to implement. Without further ado, let’s get into it!

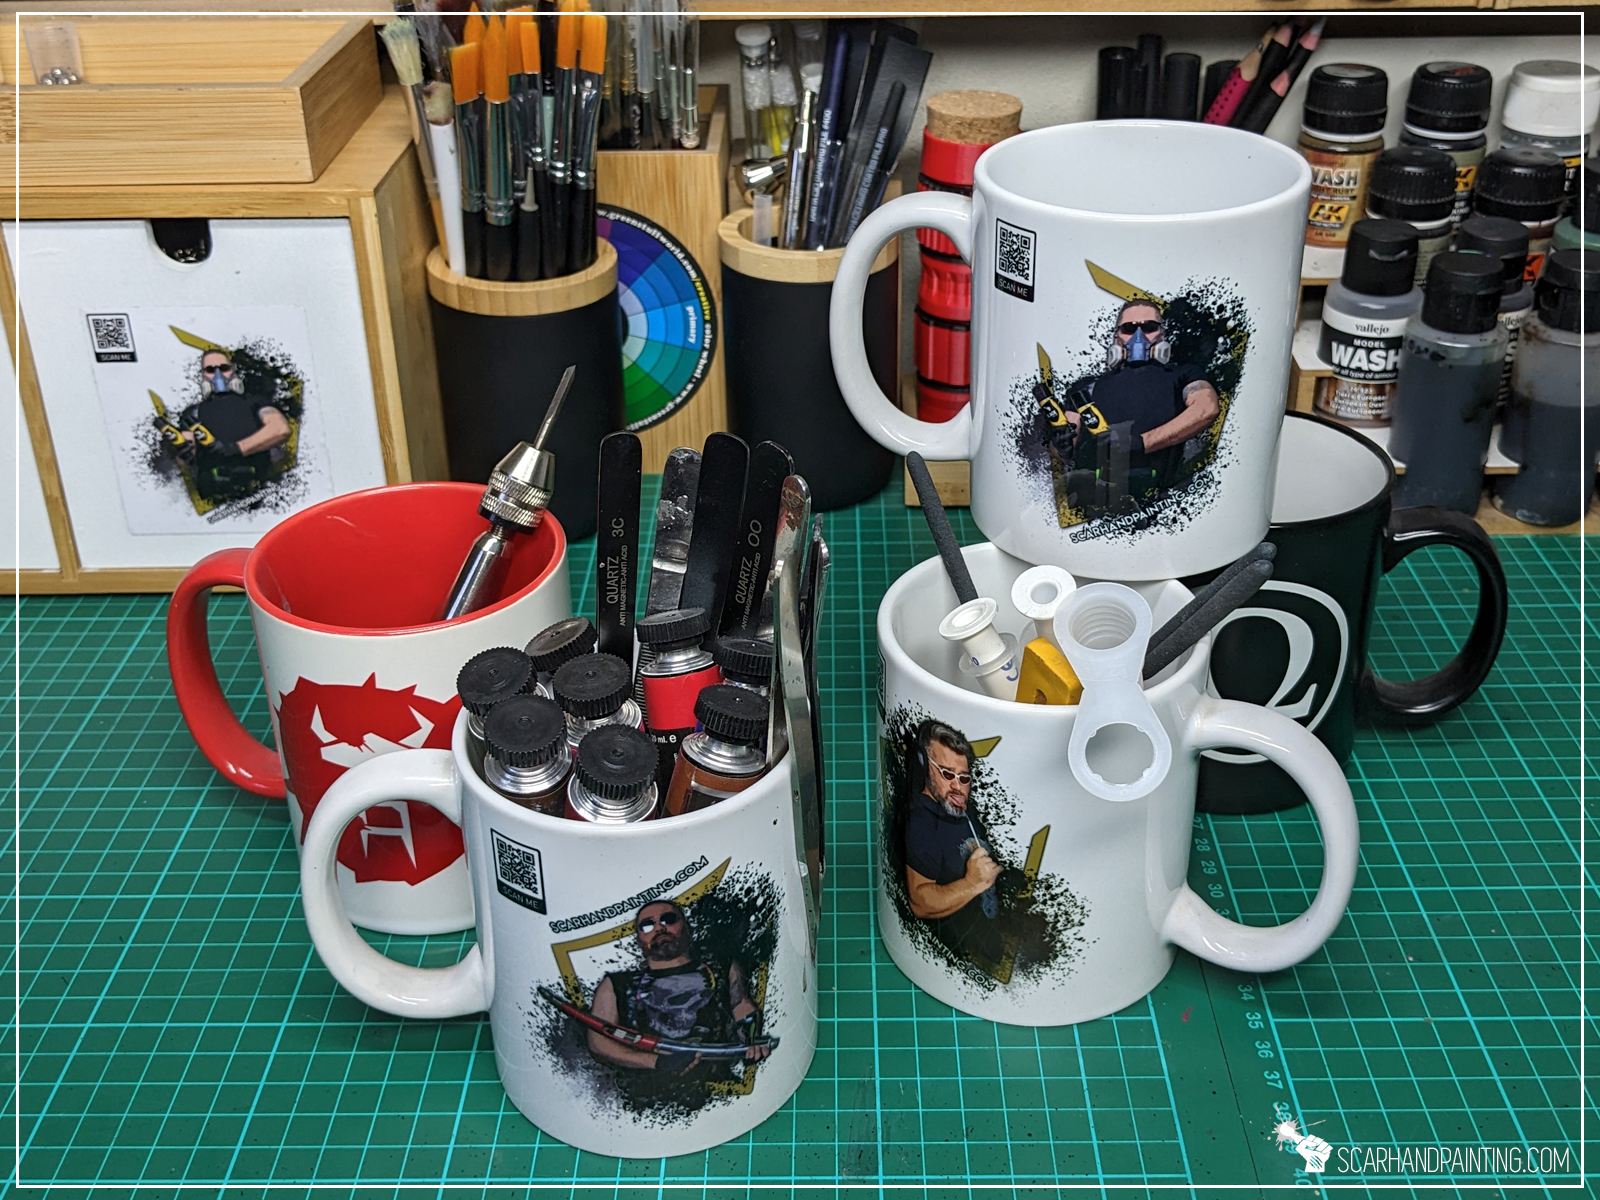
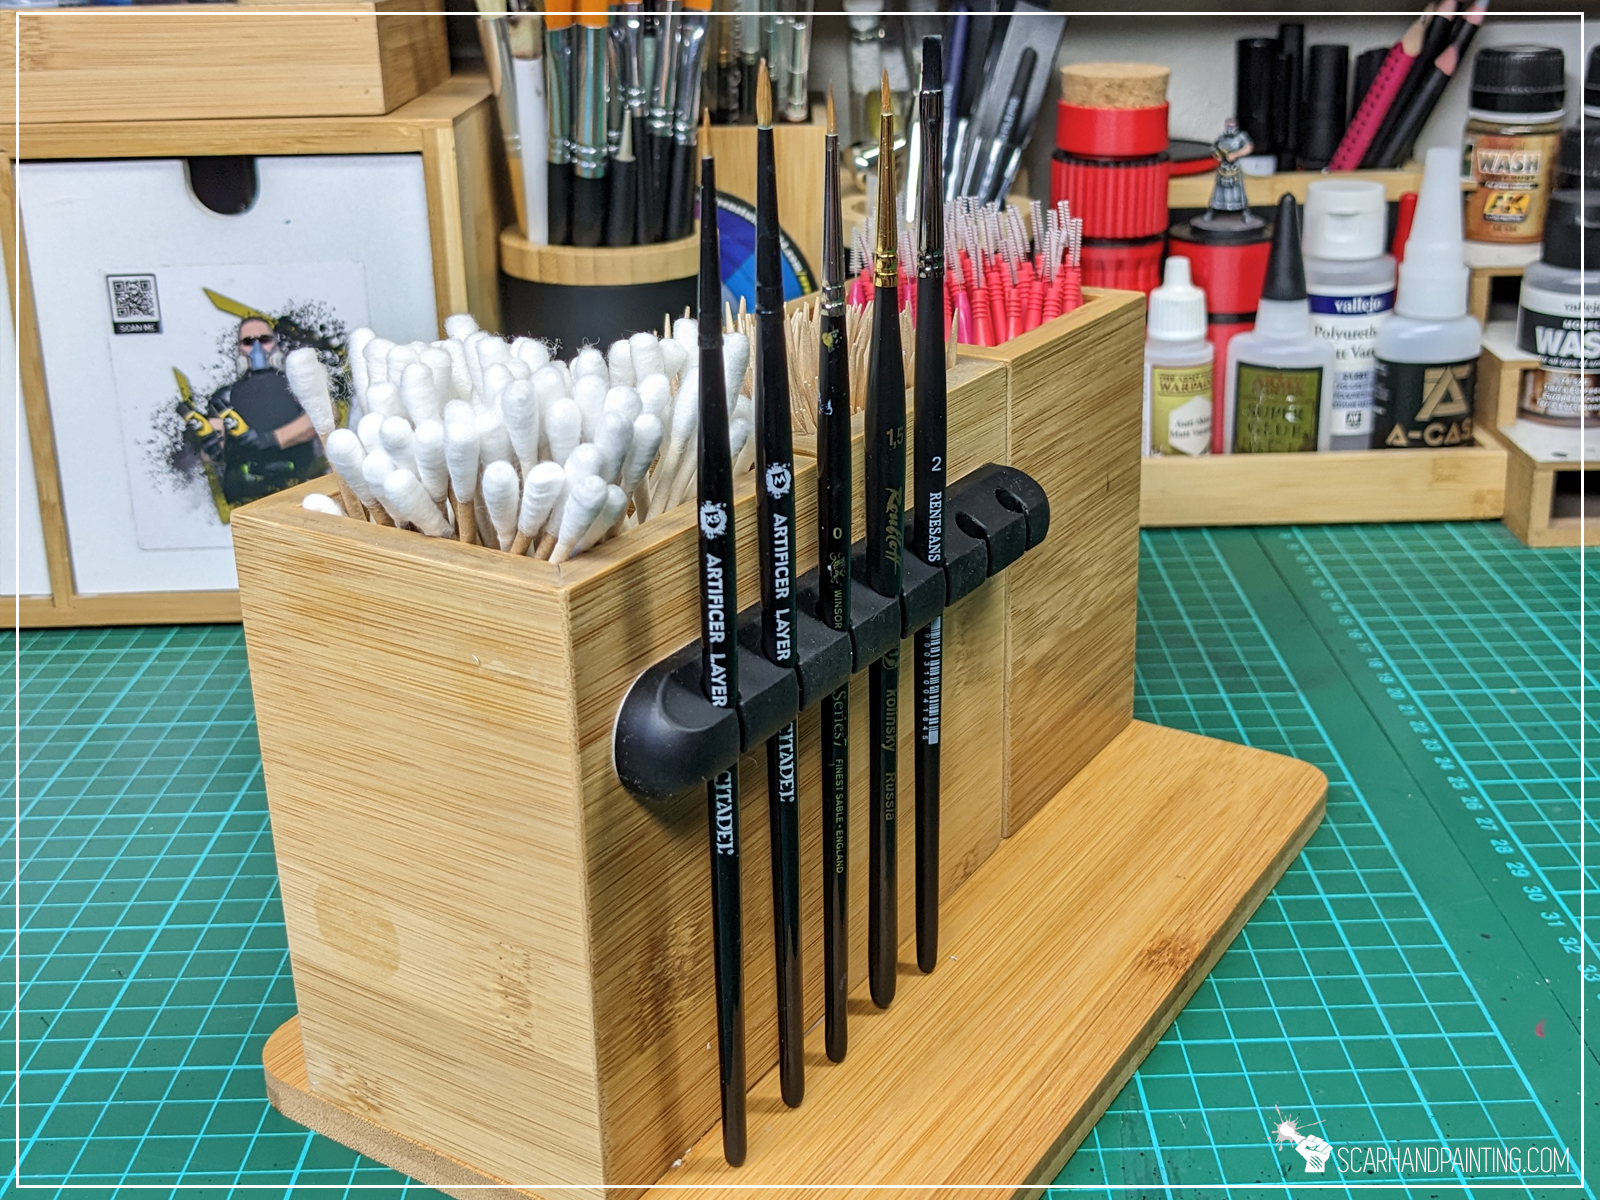
With how popular the hobby has become, a variety of innovative brush storage utensils are being introduced to the market every year. Still when it comes to it, there’s nothing better than a good old mug. Well… not entirely. Toothbrush cups come in a variety of shapes and styles, bringing all the best that mugs have to offer, but without cons. Bathroom cups are usually plain, without handles, occupying less space and being easier to store around the workspace. Plus, depending on your tastes, they might up the visual style of your hobby area.


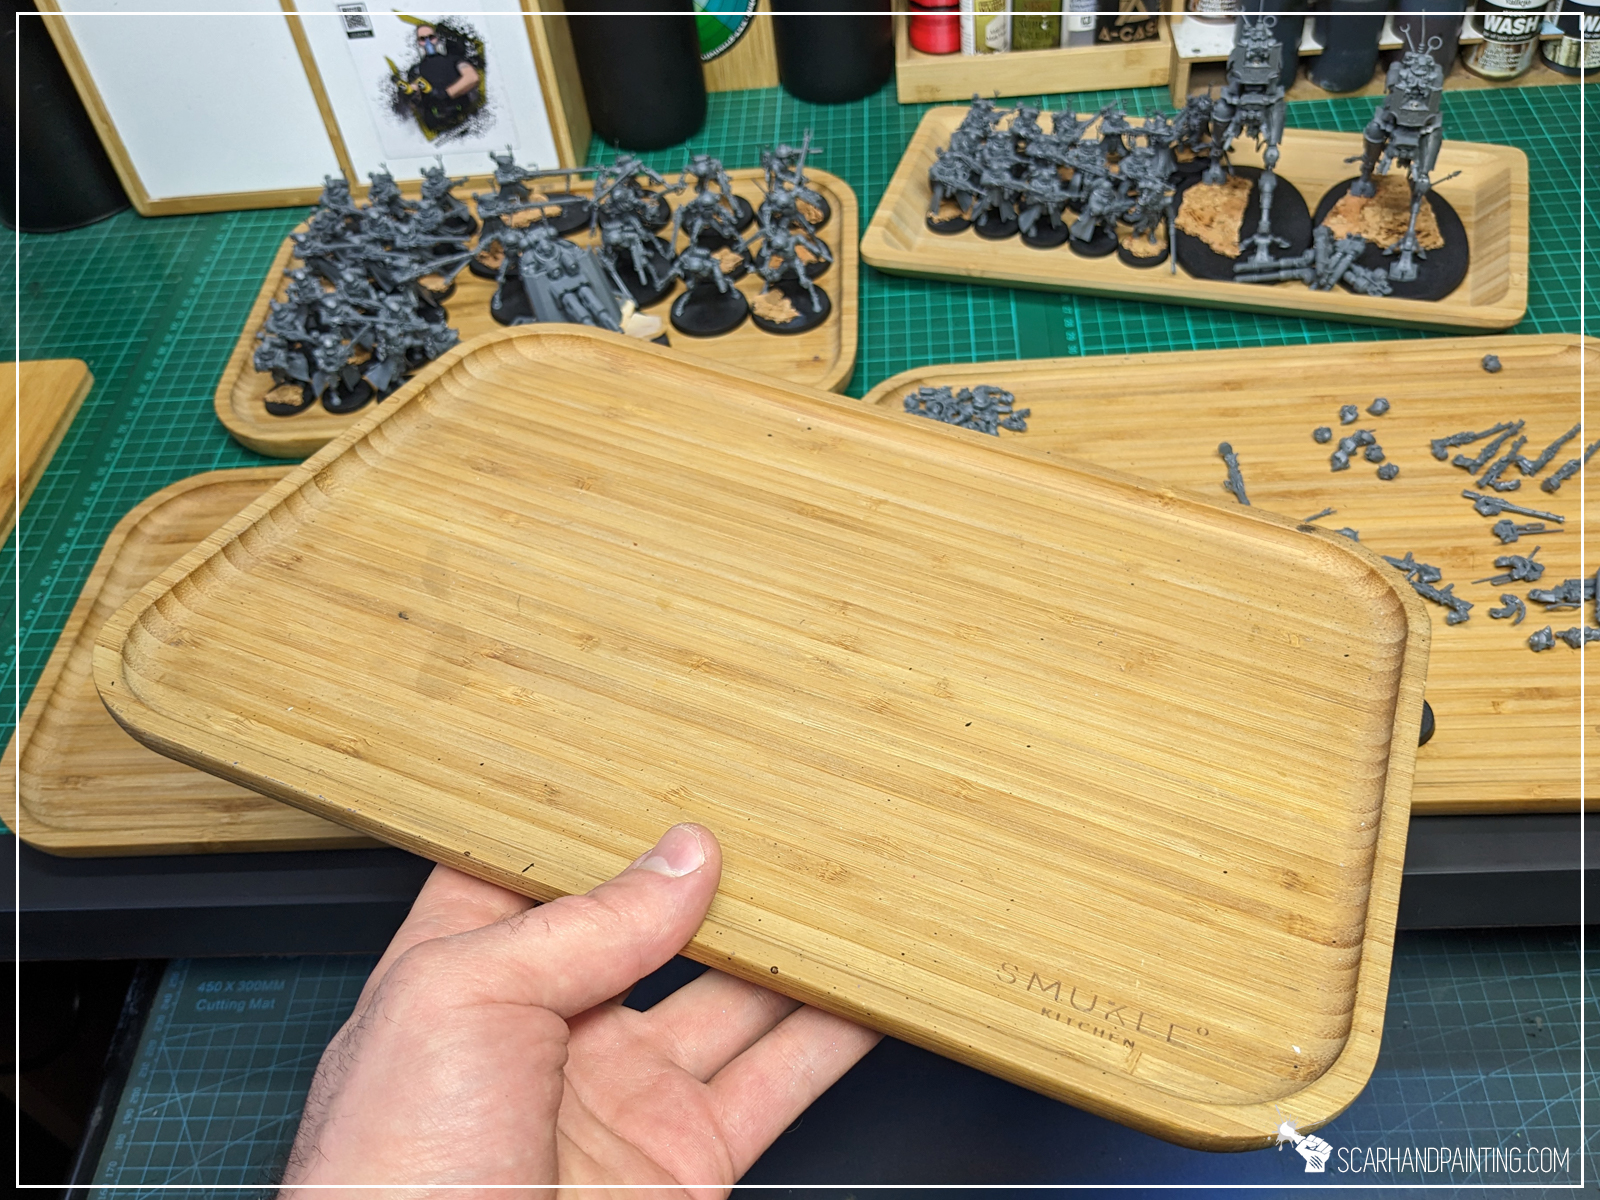
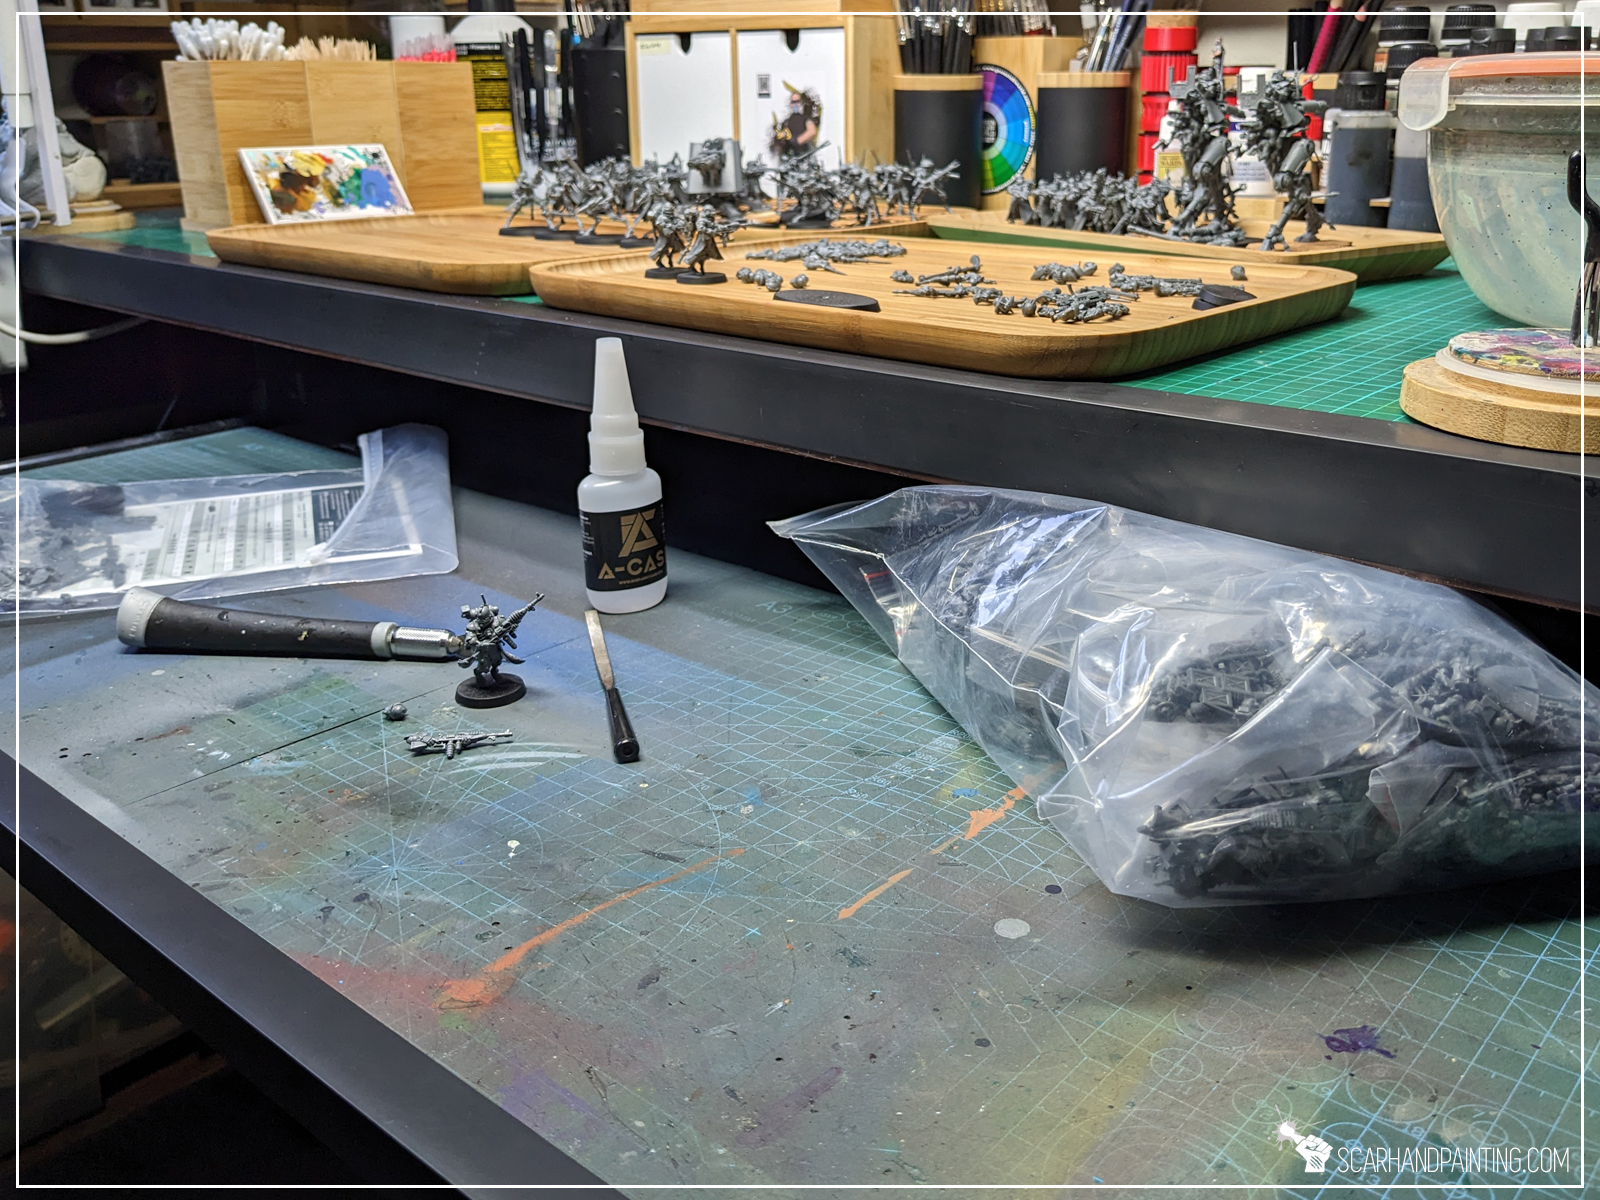
Trays ain’t on a list of your typical miniatures painter must-haves, but they definitely should! One of the things that used to frustrate me the most was having to switch projects or move stuff around in order to dig for a tool. It became a none-issue once I introduced trays into my hobby. Nowadays groups of hobby tools, paints and even entire projects can be moved around freely, saving me a lot of time. More so, on top of clean and friendly work conditions, setting up ongoing projects on trays defines particular stages of the work, helps me to define goals and keep the motivation up.


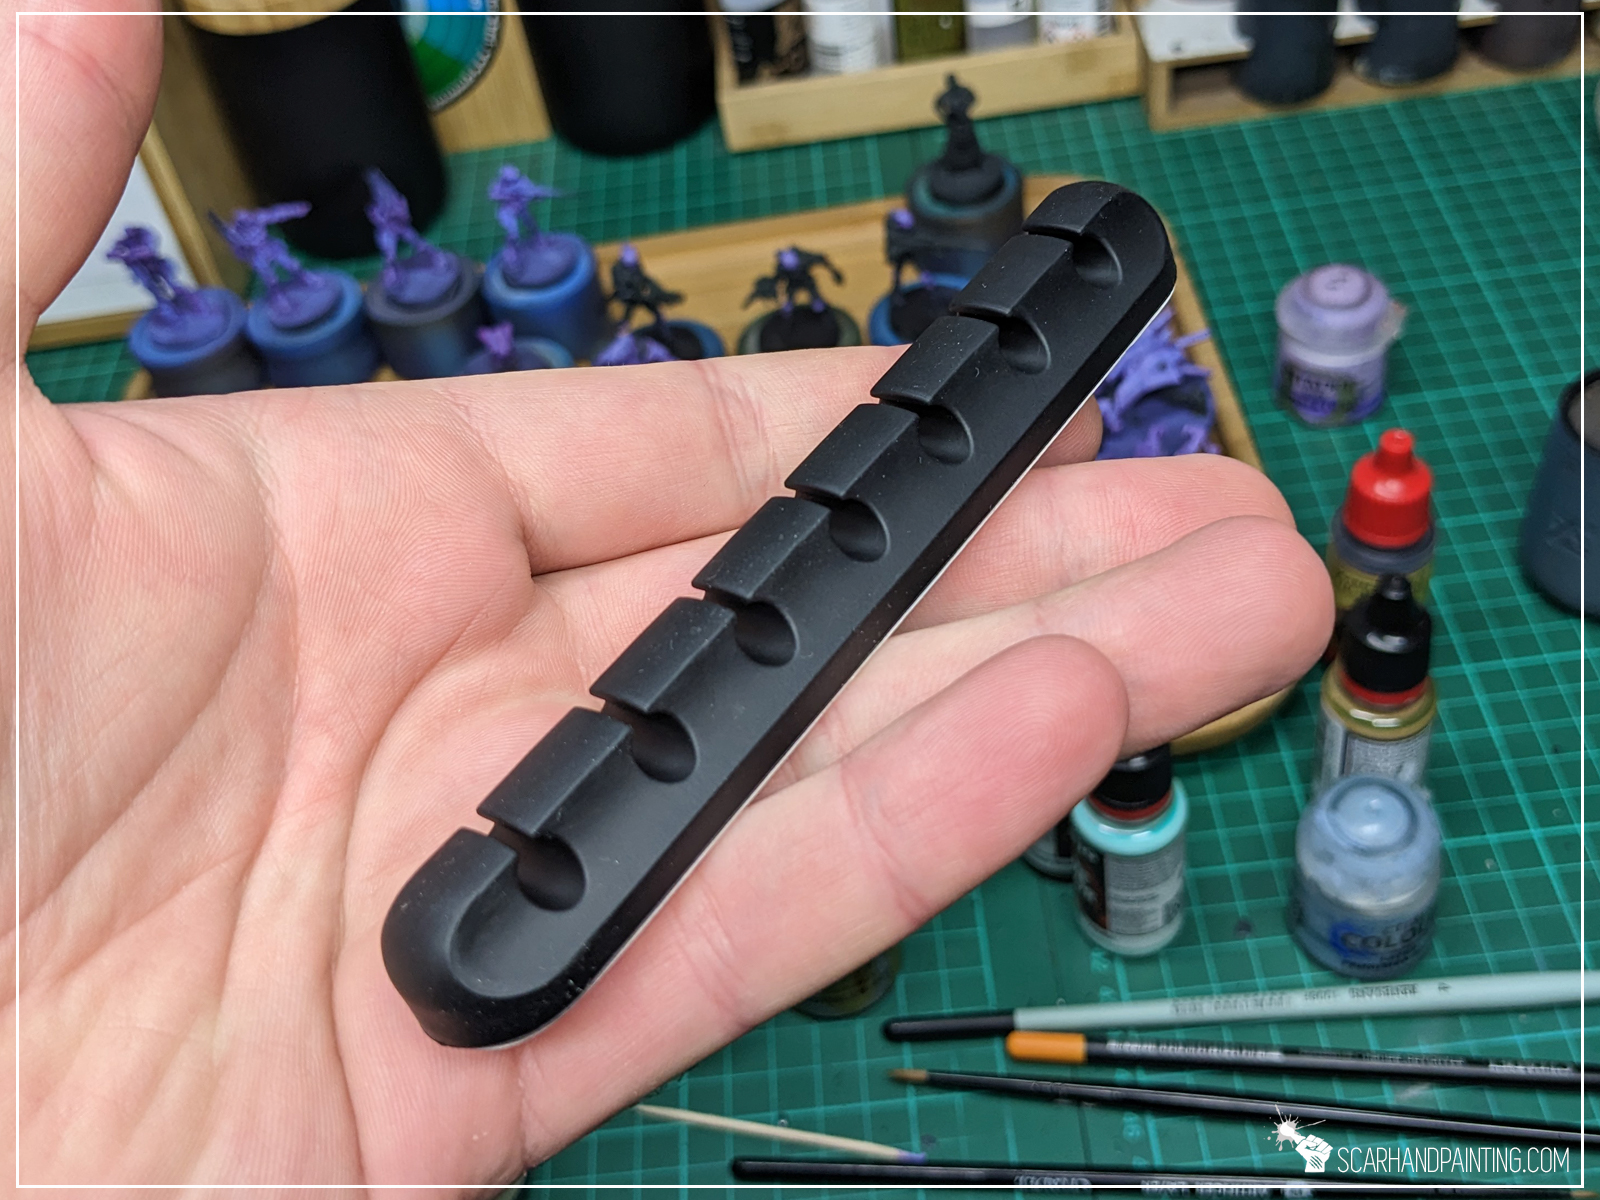
Self adhesive, rubber cable organizers are a useful tool to help keep all those nasty air hoses and cables in check. More so, with a bit of a lifehack’ish mindset, they can be used as a fantastic mid-work brush holders.

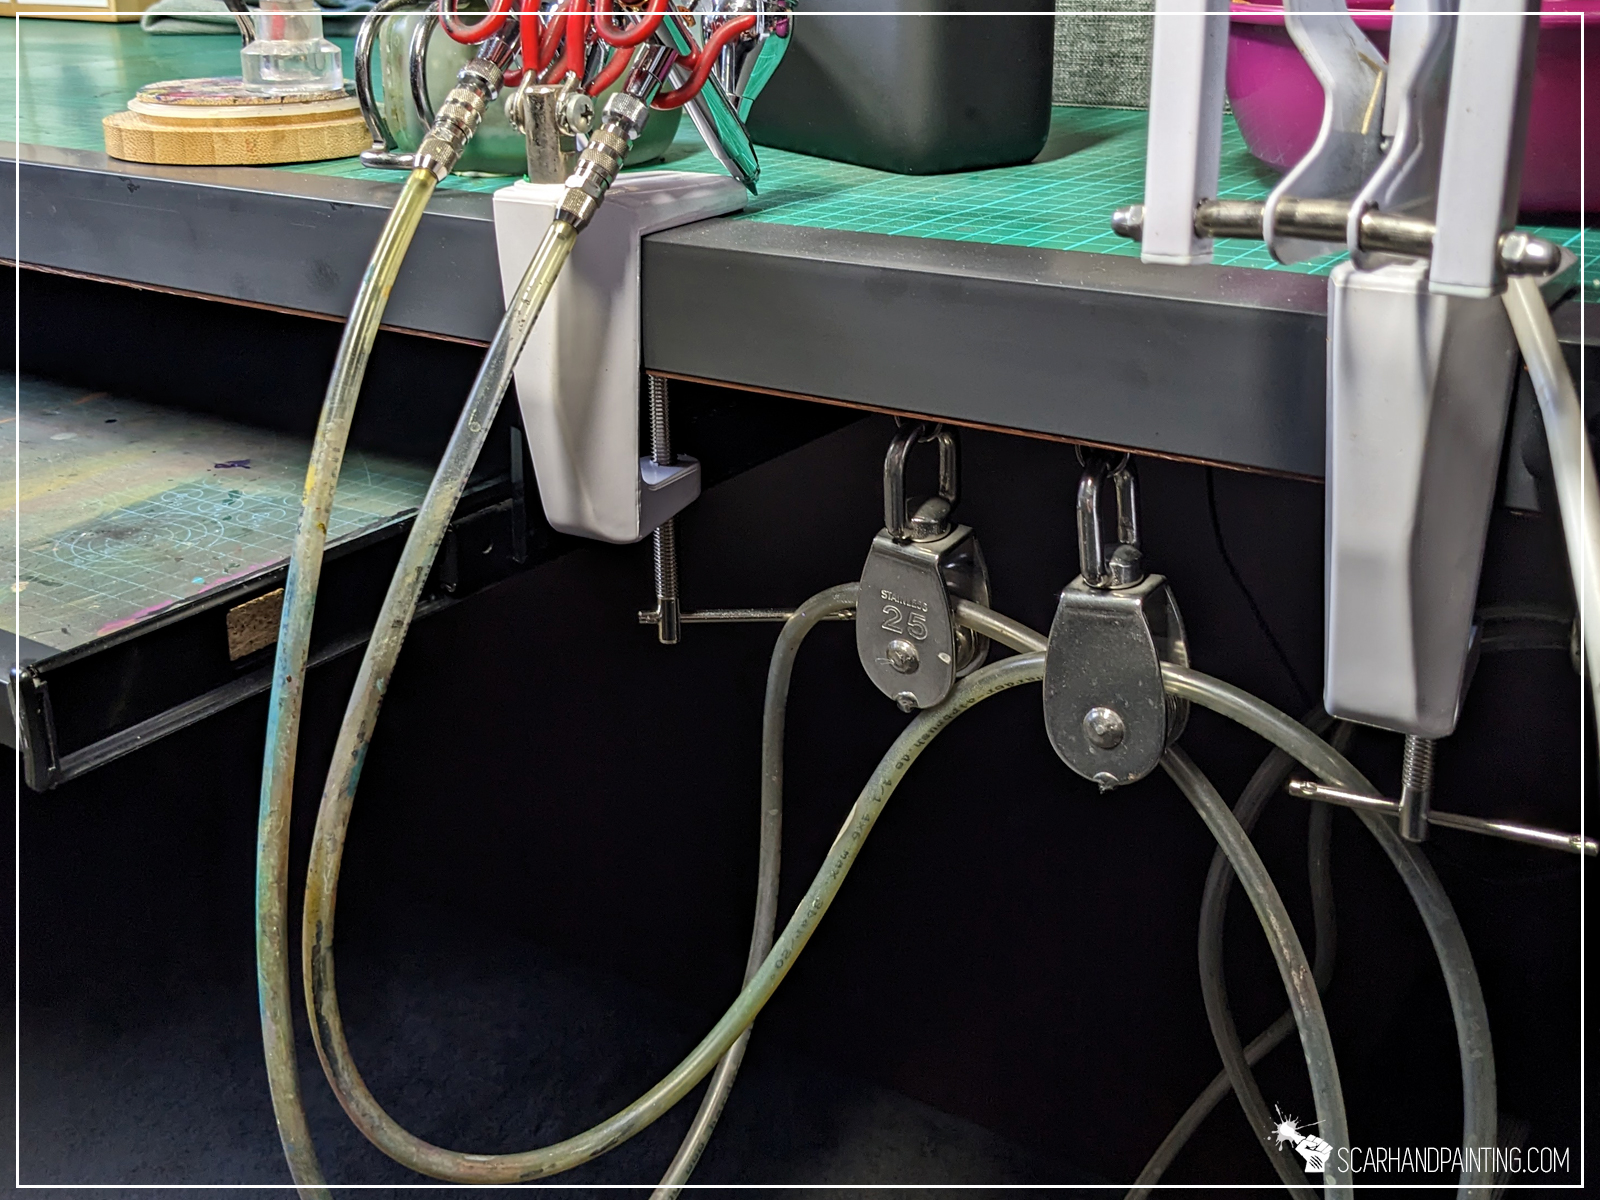
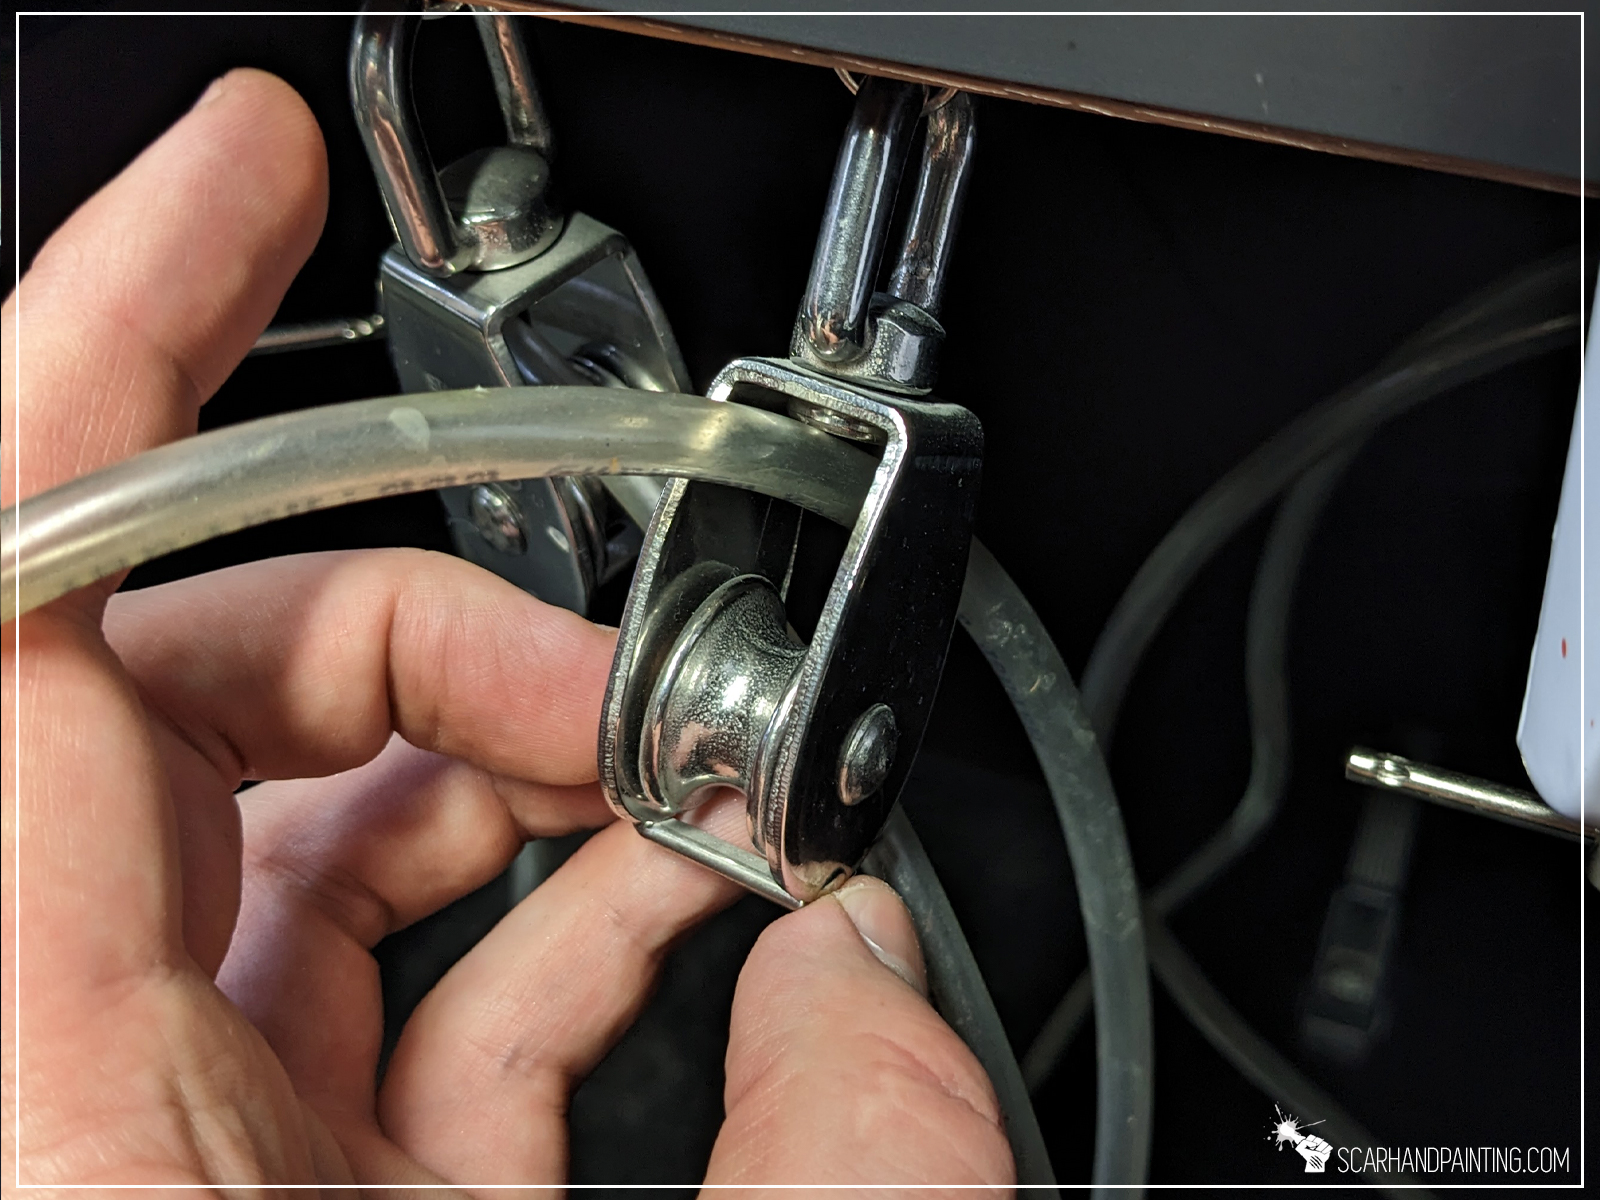
And while we’re at it, airbrush air hoses are usually very difficult to tame. They’re rather stiff and tend to curl. Fortunately, it’s nothing that a sailing block can’t handle! These puppies will keep the air hose where you want it and allow for rapid airbrush deployment when the time comes!
It is easier to switch a cover than an entire desk. Respect your desk and it will serve you longer, plus there’s probably nothing worse than dusted, grainy, irregular, dried paint surface irritating your skin when painting. Don’t even get me started on a sharp desk edge cutting a side of a wrist (shivers internally). Personally I use a thick cutting mat and a self adhesive PVC corner cover, but anything will do as long as it’s water resistant, easy to clean and stiff enough.

‘Enlarge your p’ …ainting space with a single pull. This simple solution expands your working area when needed, but does not take up much space when not being used. I sometimes find my desk overwhelmed with miniatures and instead of transferring a part of work to secondary space, I just extend a shelf from underneath and continue working. It’s especially useful when I have something messy to do, like applying static grass or pouring resin, but don’t want to risk the entire project getting dirty.

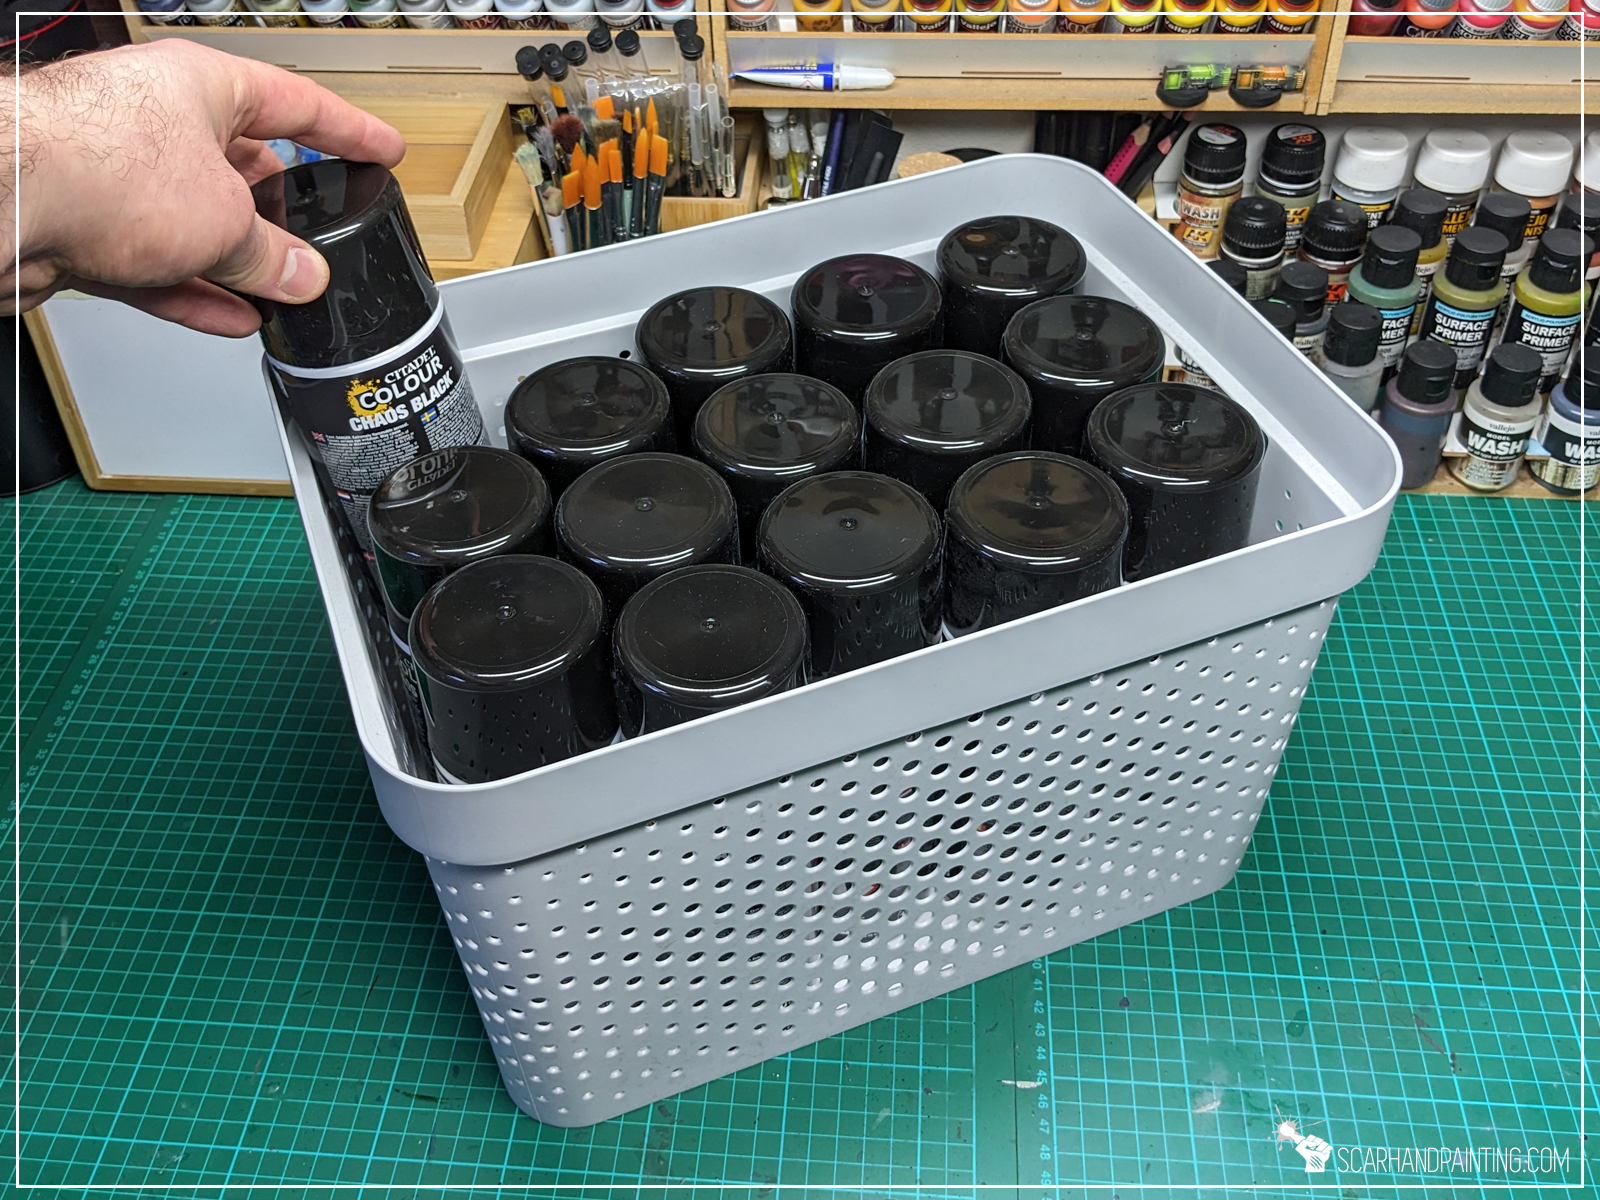
These can be found in almost every house & decor store. Plastic baskets, food containers, tool organizers, clothes storage boxes. Instead of keeping all the boxes, packaged miniatures, spare paints and other stuff stacked on shelves and one another – why not keep it more accessible? Pulling a box from a shelf is much faster and more comfortable than ‘excavation’.

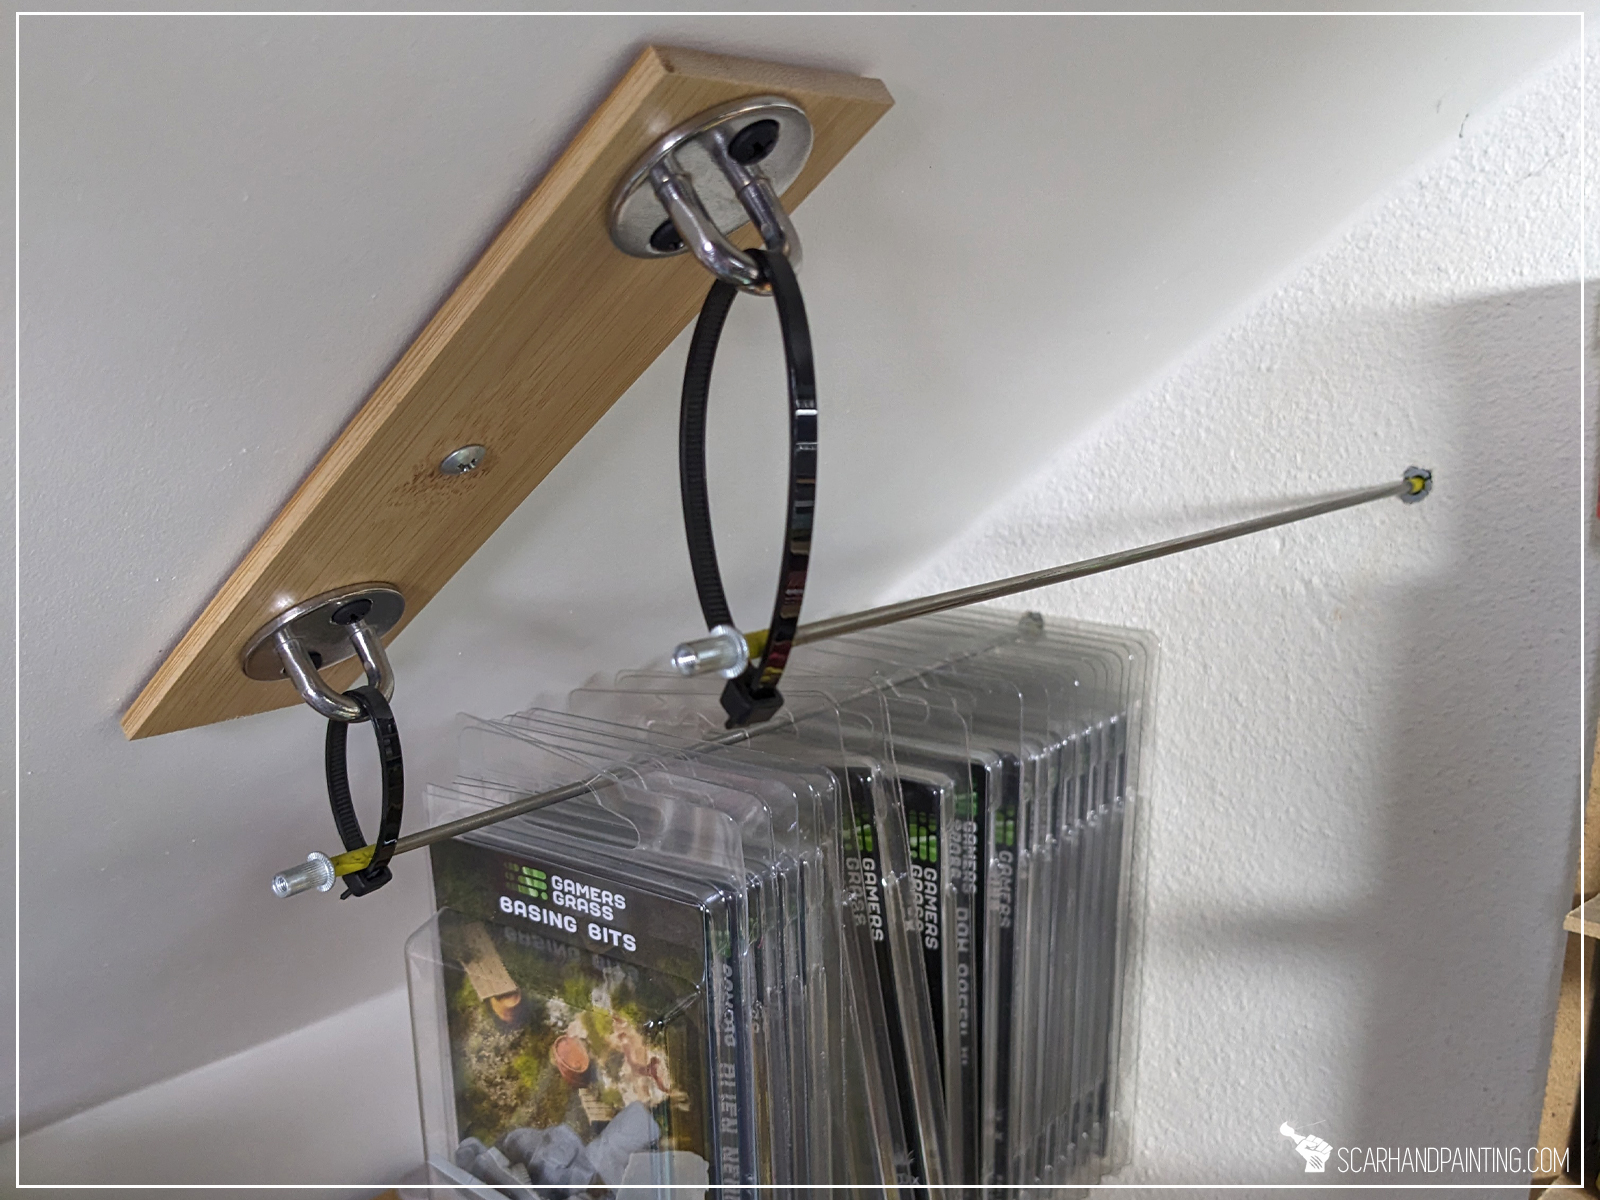
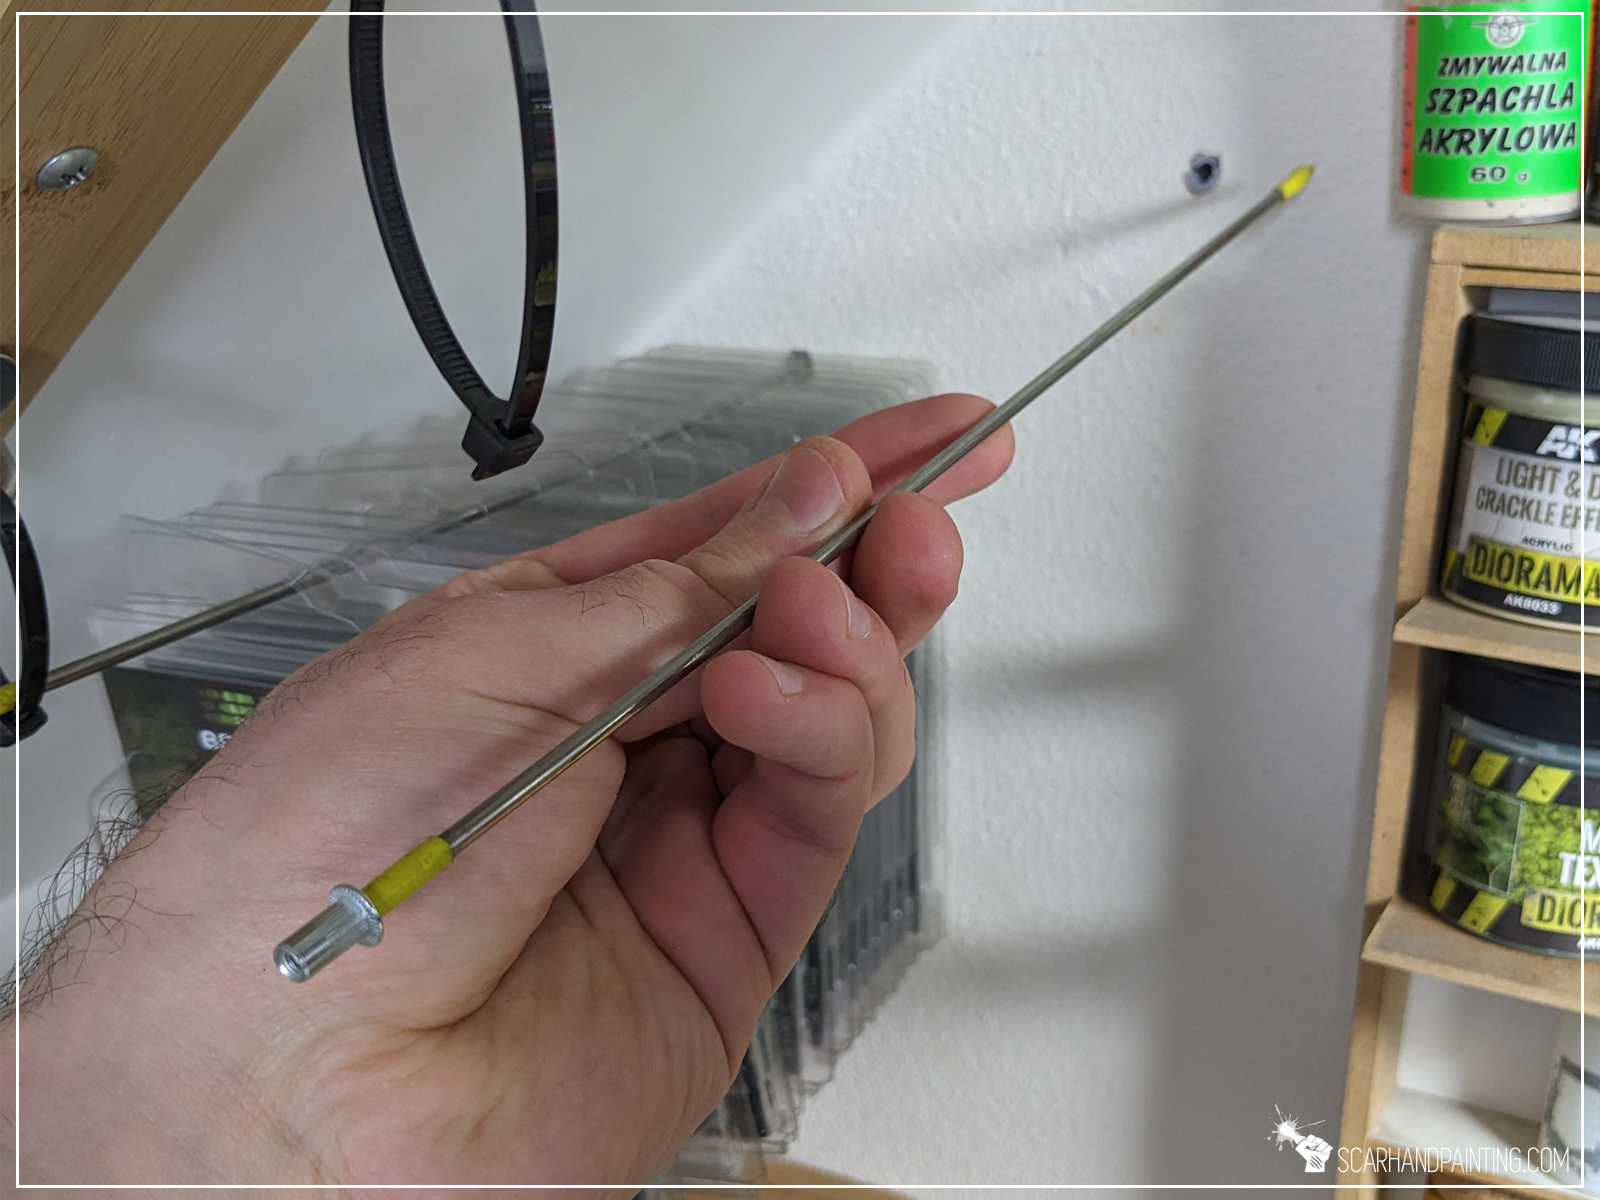
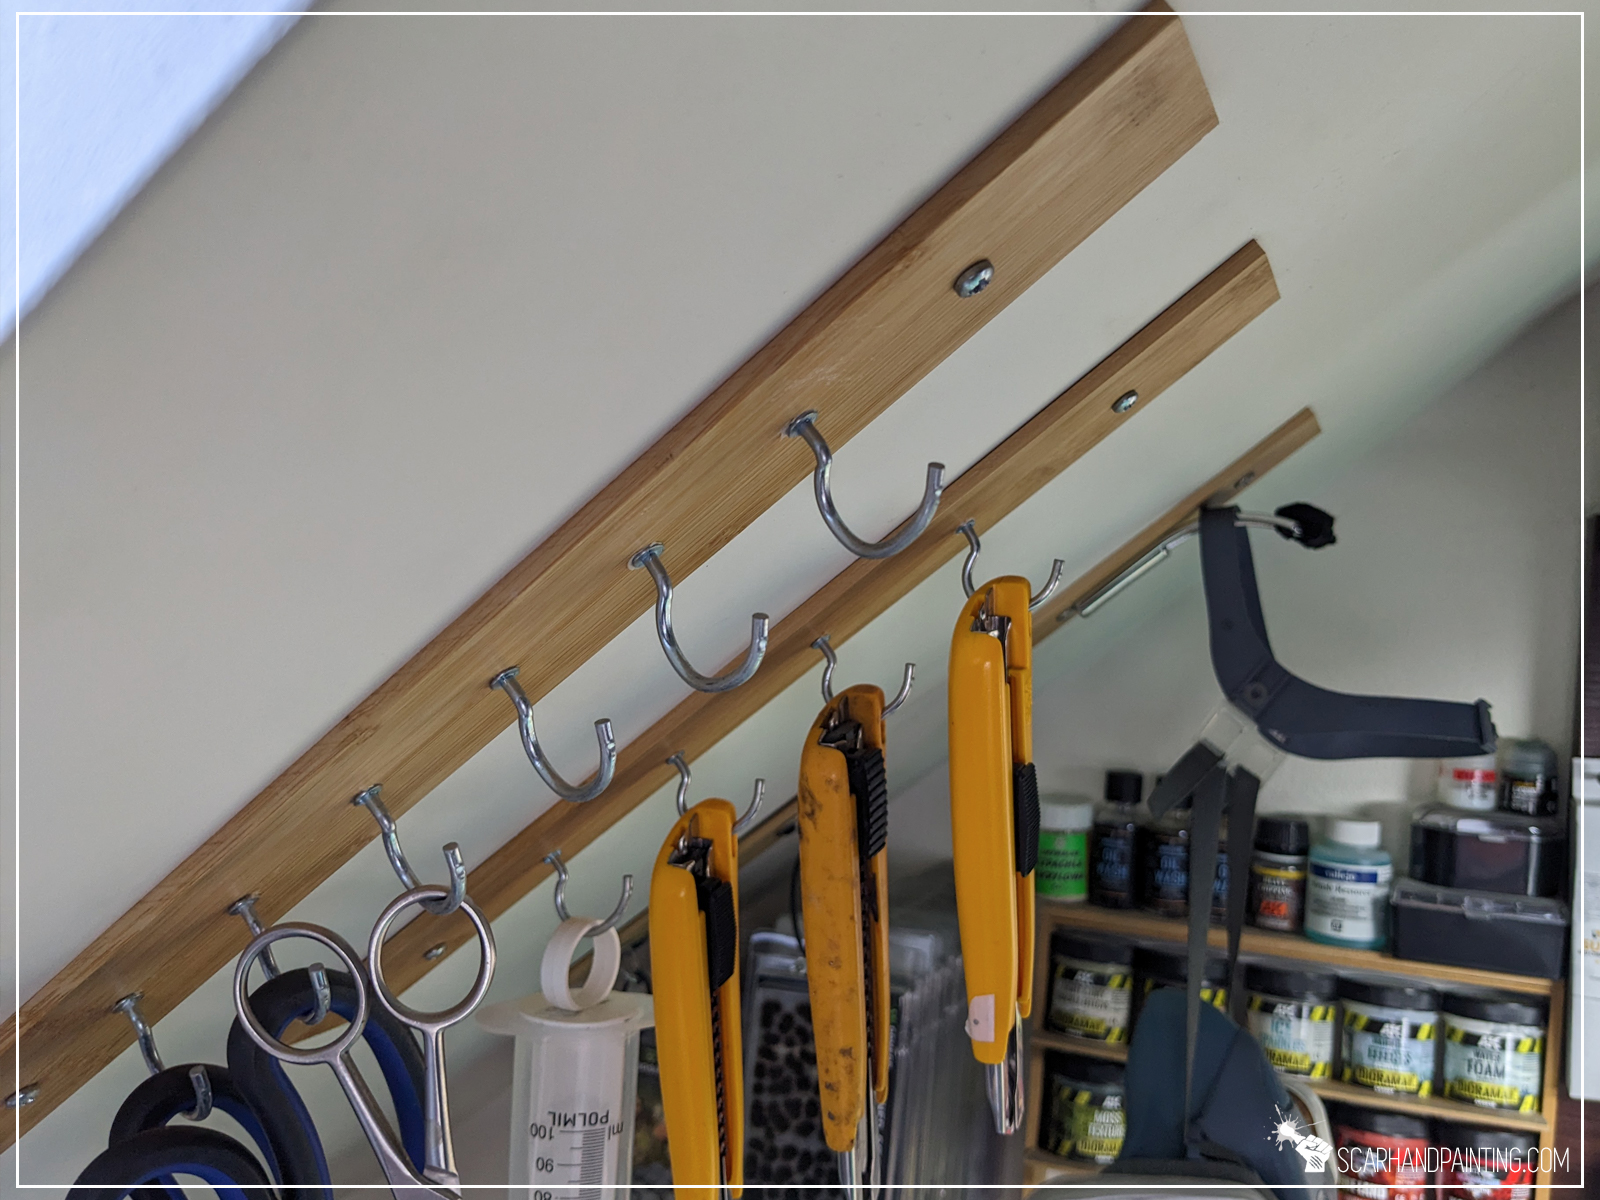
Some stuff is not very comfortable to stack around the workspace. This is especially true for large tools and packages of hobby tufts. There are of course some workarounds. Here’s a pretty simple way to store these items. These self-made tool racks are thin bamboo planks with small hooks and handles, screwed to the ceiling. For tufts I used a metal rod mounted on a piece of plastic on one side and inserted into a hole in a wall at the other. Tuft packages have then been cut on one side, as seen in the picture below, to allow them to be taken off and put back on the rack individually. This made an otherwise unused space into a nice storage area.


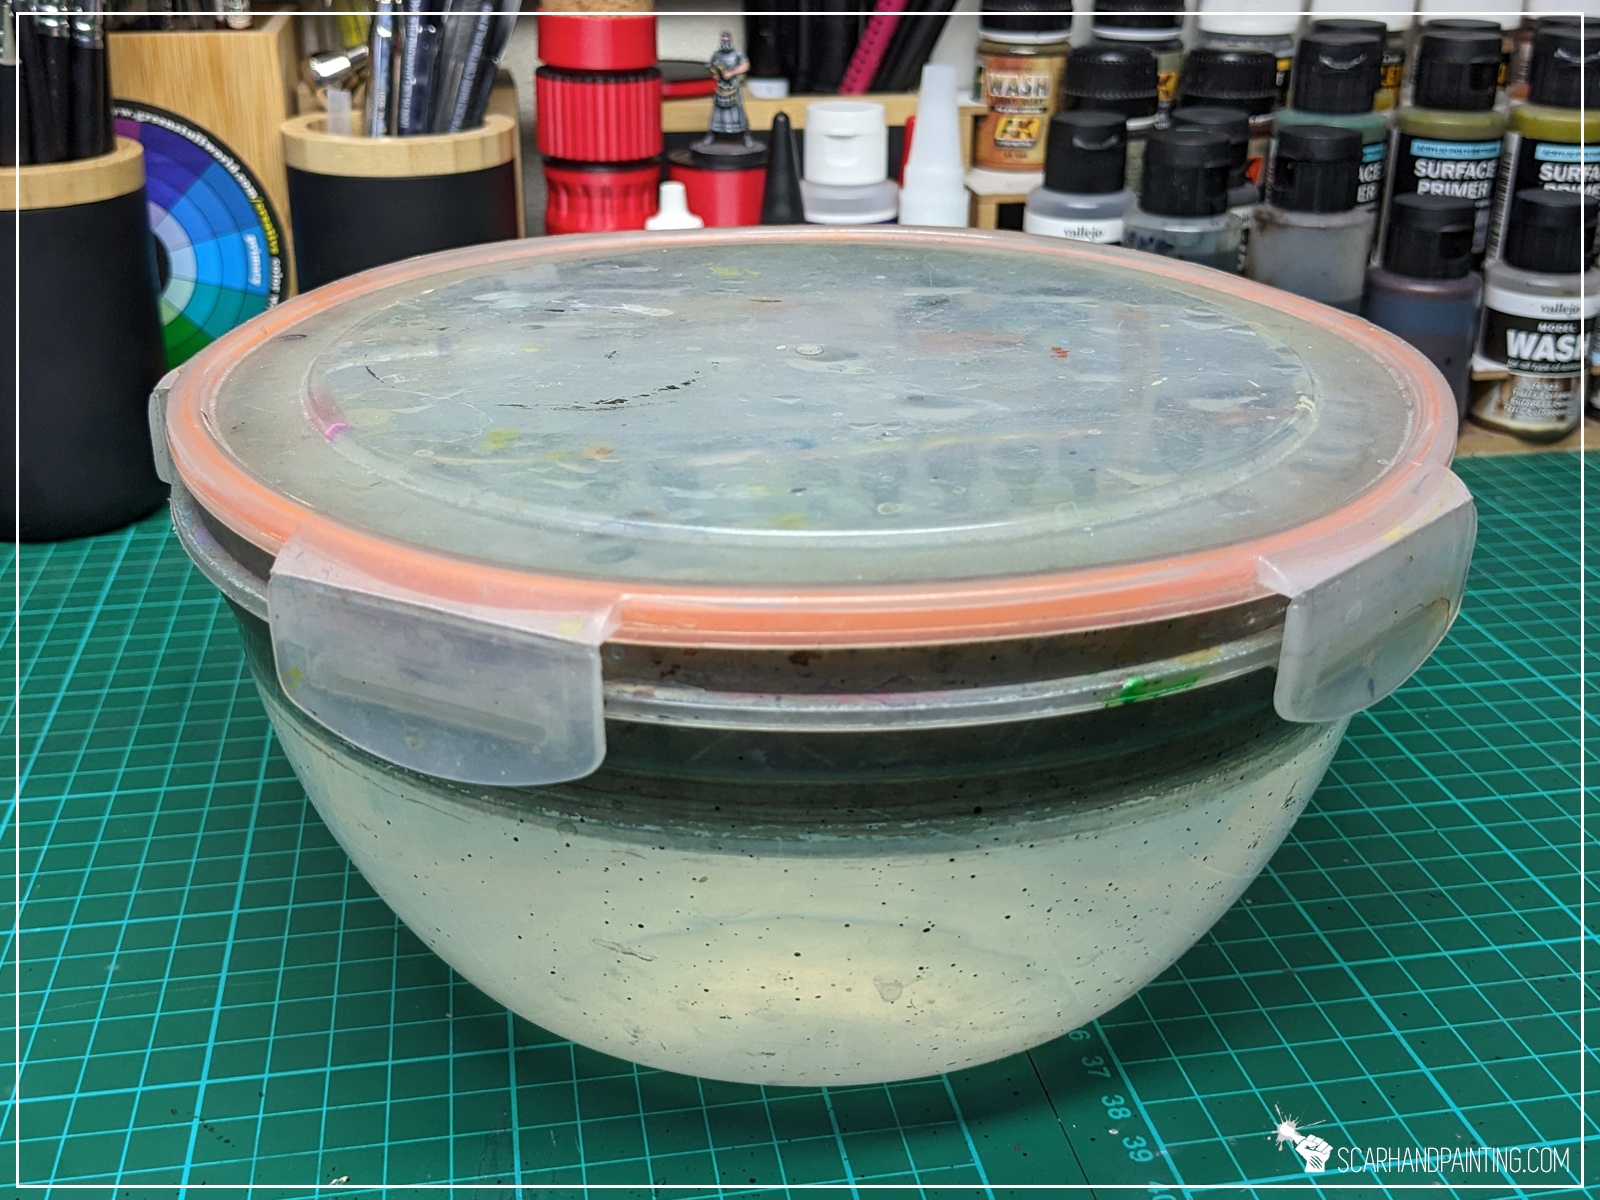
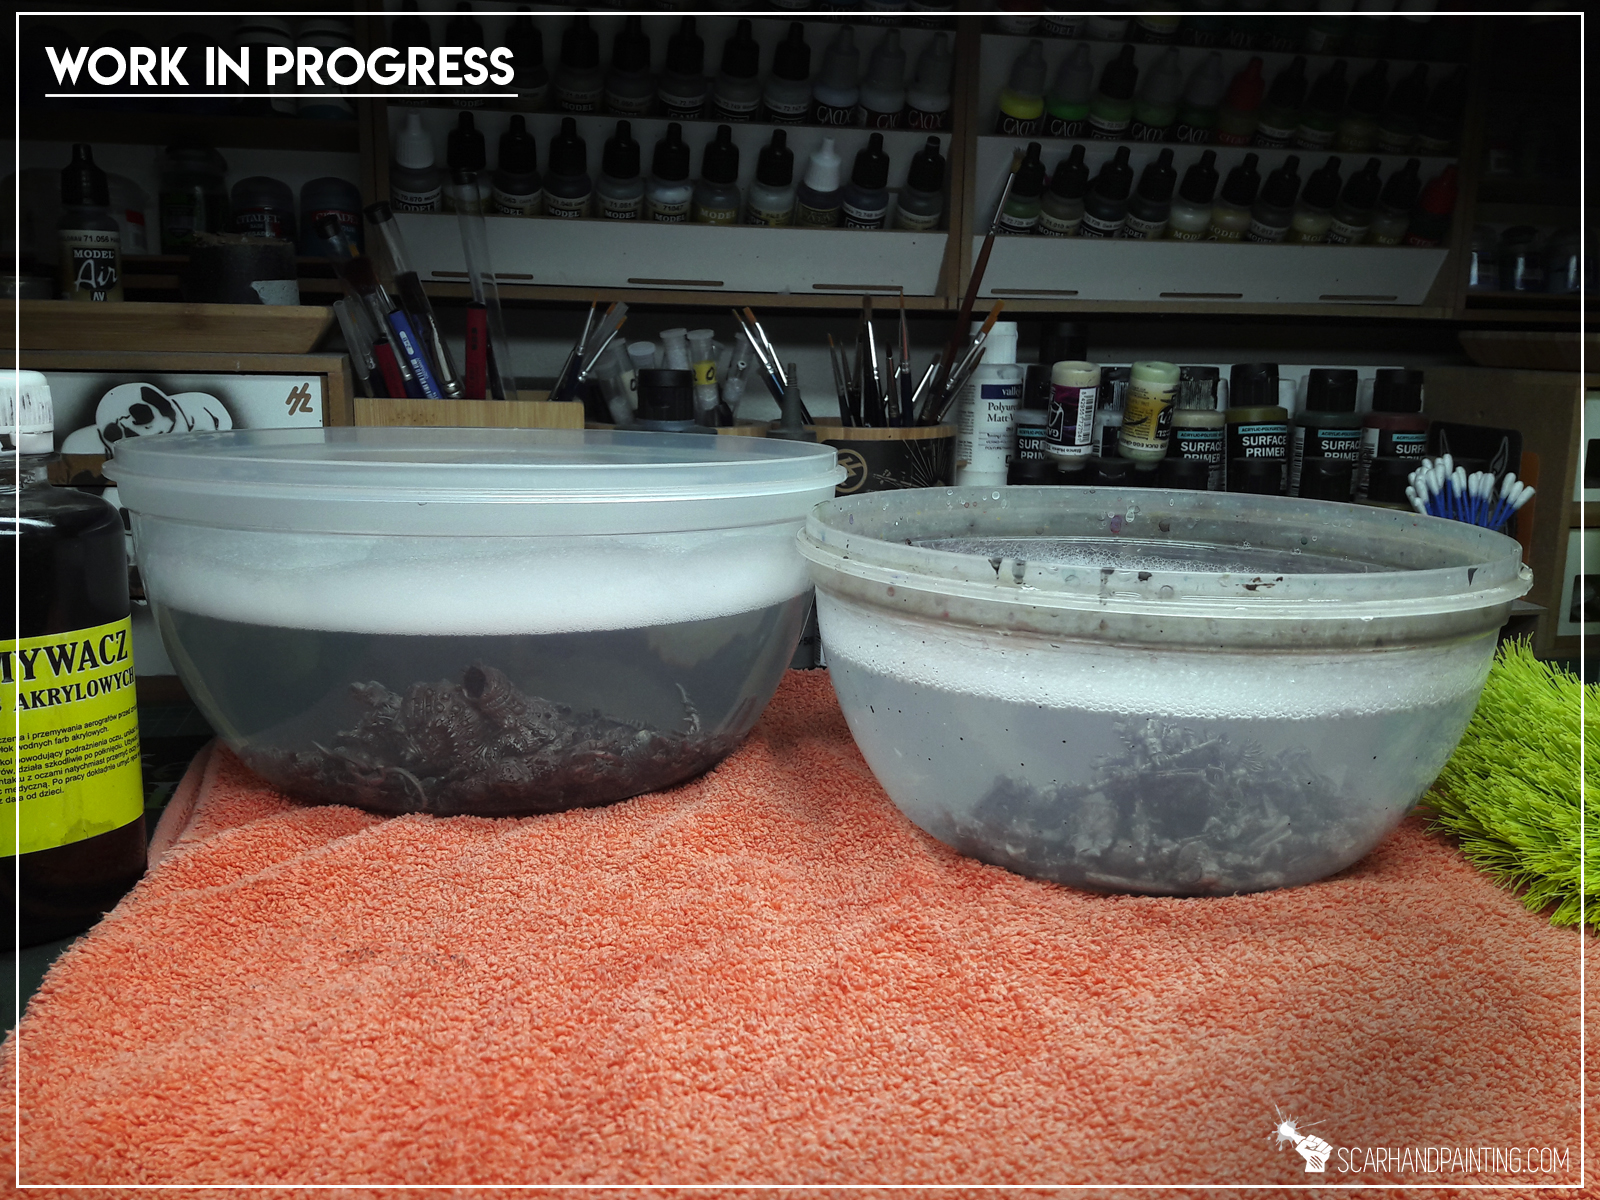
I think I should dedicate an entire article to the water bowl and how superior it is compared to a cup. Maybe even a book! But in all seriousness, the more water there is, the longer it will last. It is easier to clean an airbrush, or a regular brush in a larger area of water. Cups and mugs are prompt to topple and need to be cleaned and refilled more often. Plus there’s the lid. This magnificent contraption protects your desk from water when put on, allows for safe transportation to and from the sink and allows to use the space otherwise occupied by the bowl. Just epic!

When it comes to bitz, they tend to take up a lot of space. A good way of dealing with that is cutting all the separate parts from the sprues and zipping them in a thematic zip bag. These can then be stored in translucent plastic boxes to allow faster bag identification. Bitz of particular type in a single bag and a tray should let you fish out any bitz you need much faster, than searching through a room full of mixed, half emptied sprues.


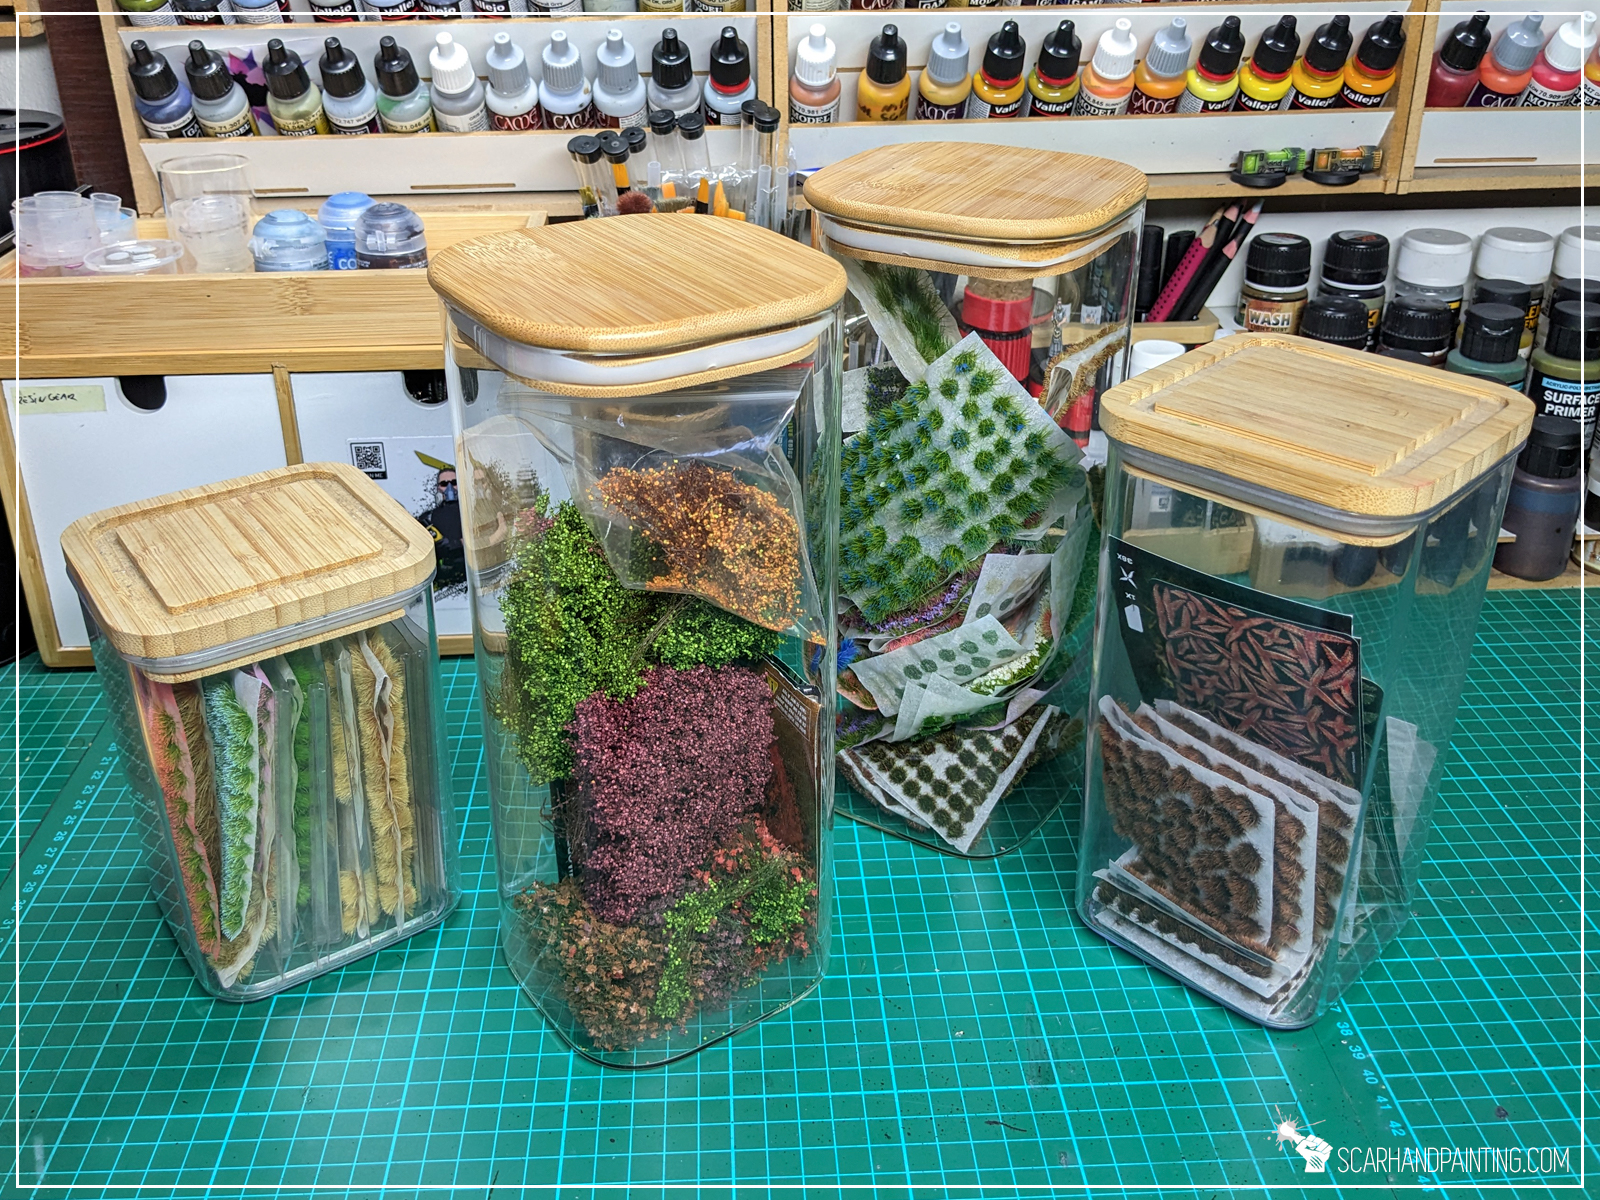
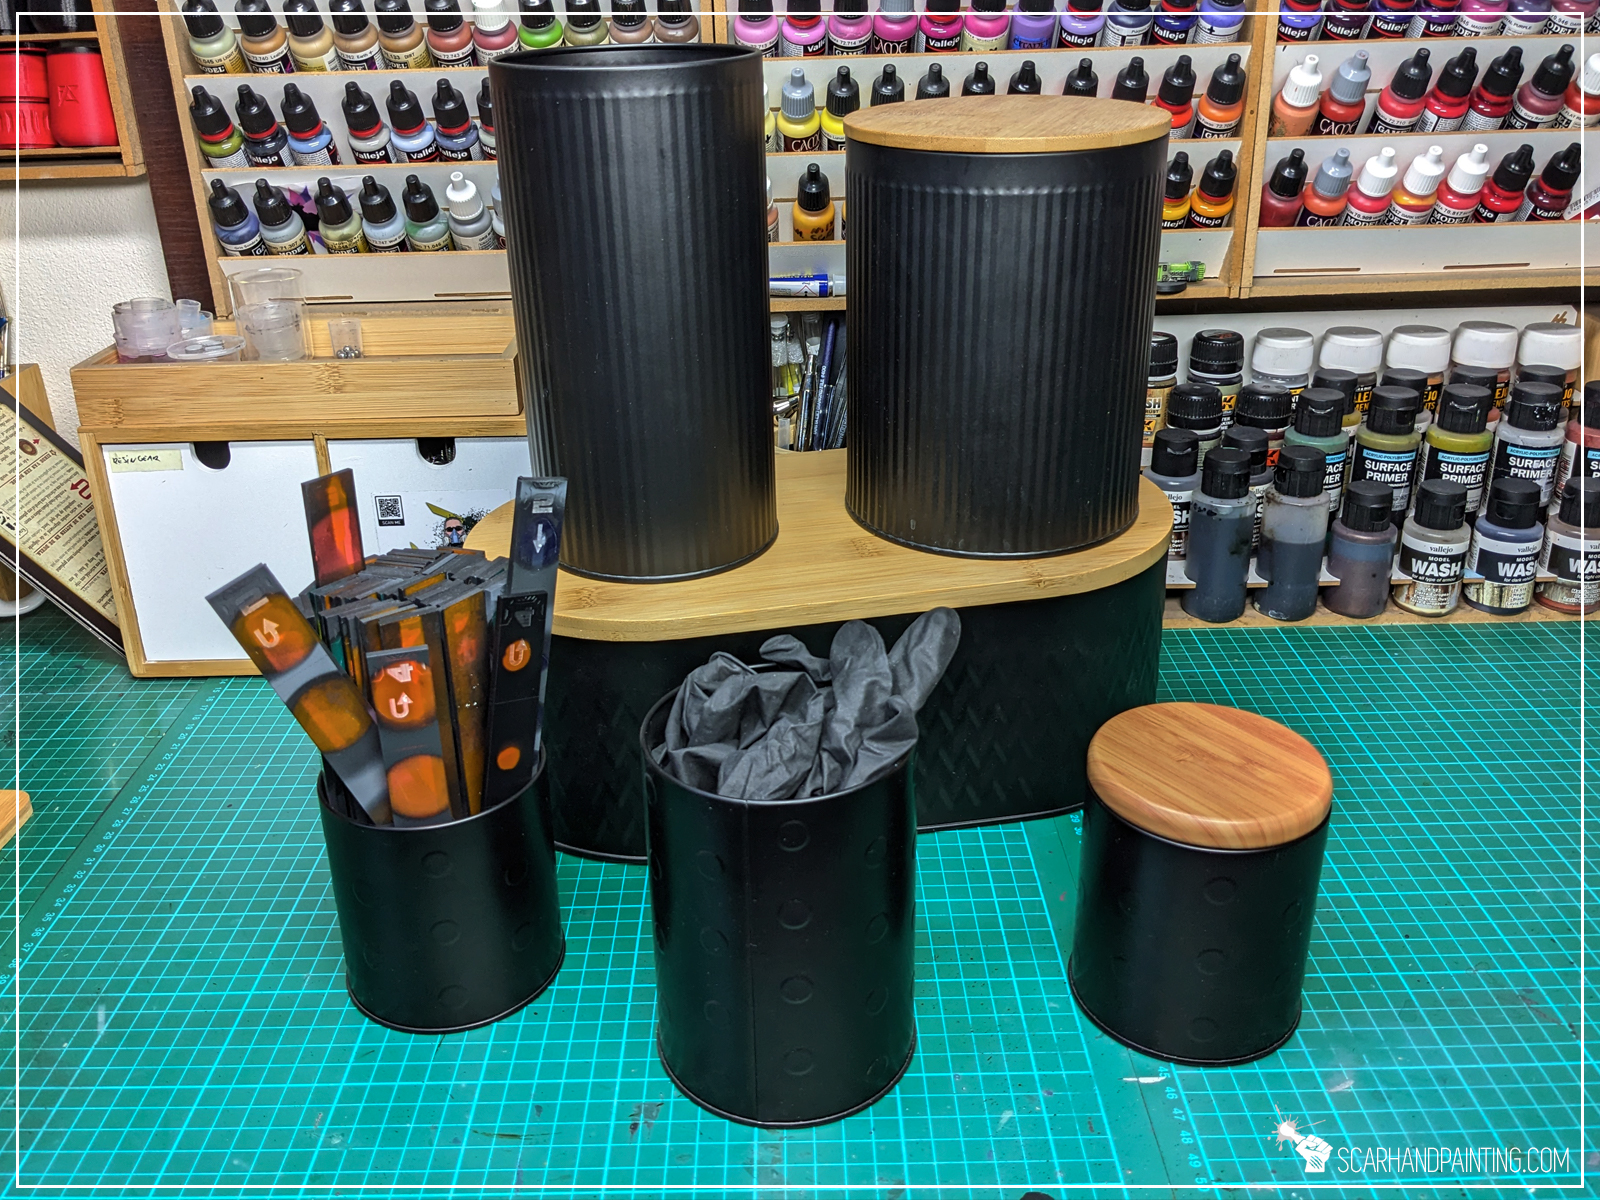
At this point you might see a certain pattern so there’s no need for me to hide it anymore. I admit I might have a little fetish. I tend to bring home a fancy looking food container, a bamboo tray, or some sort of other cool looking stuff whenever I go shopping. If only you saw my kitchen… Anyhow, stylish food containers combine fine looks and functionality. They can be stacked on top of one another and tend to take up less space than standard, flatter boxes. They come in a variety of shapes and sizes, made of either wood, plastic, metal or glass. There’s something to fit any workspace and they have a wide range of storage uses.
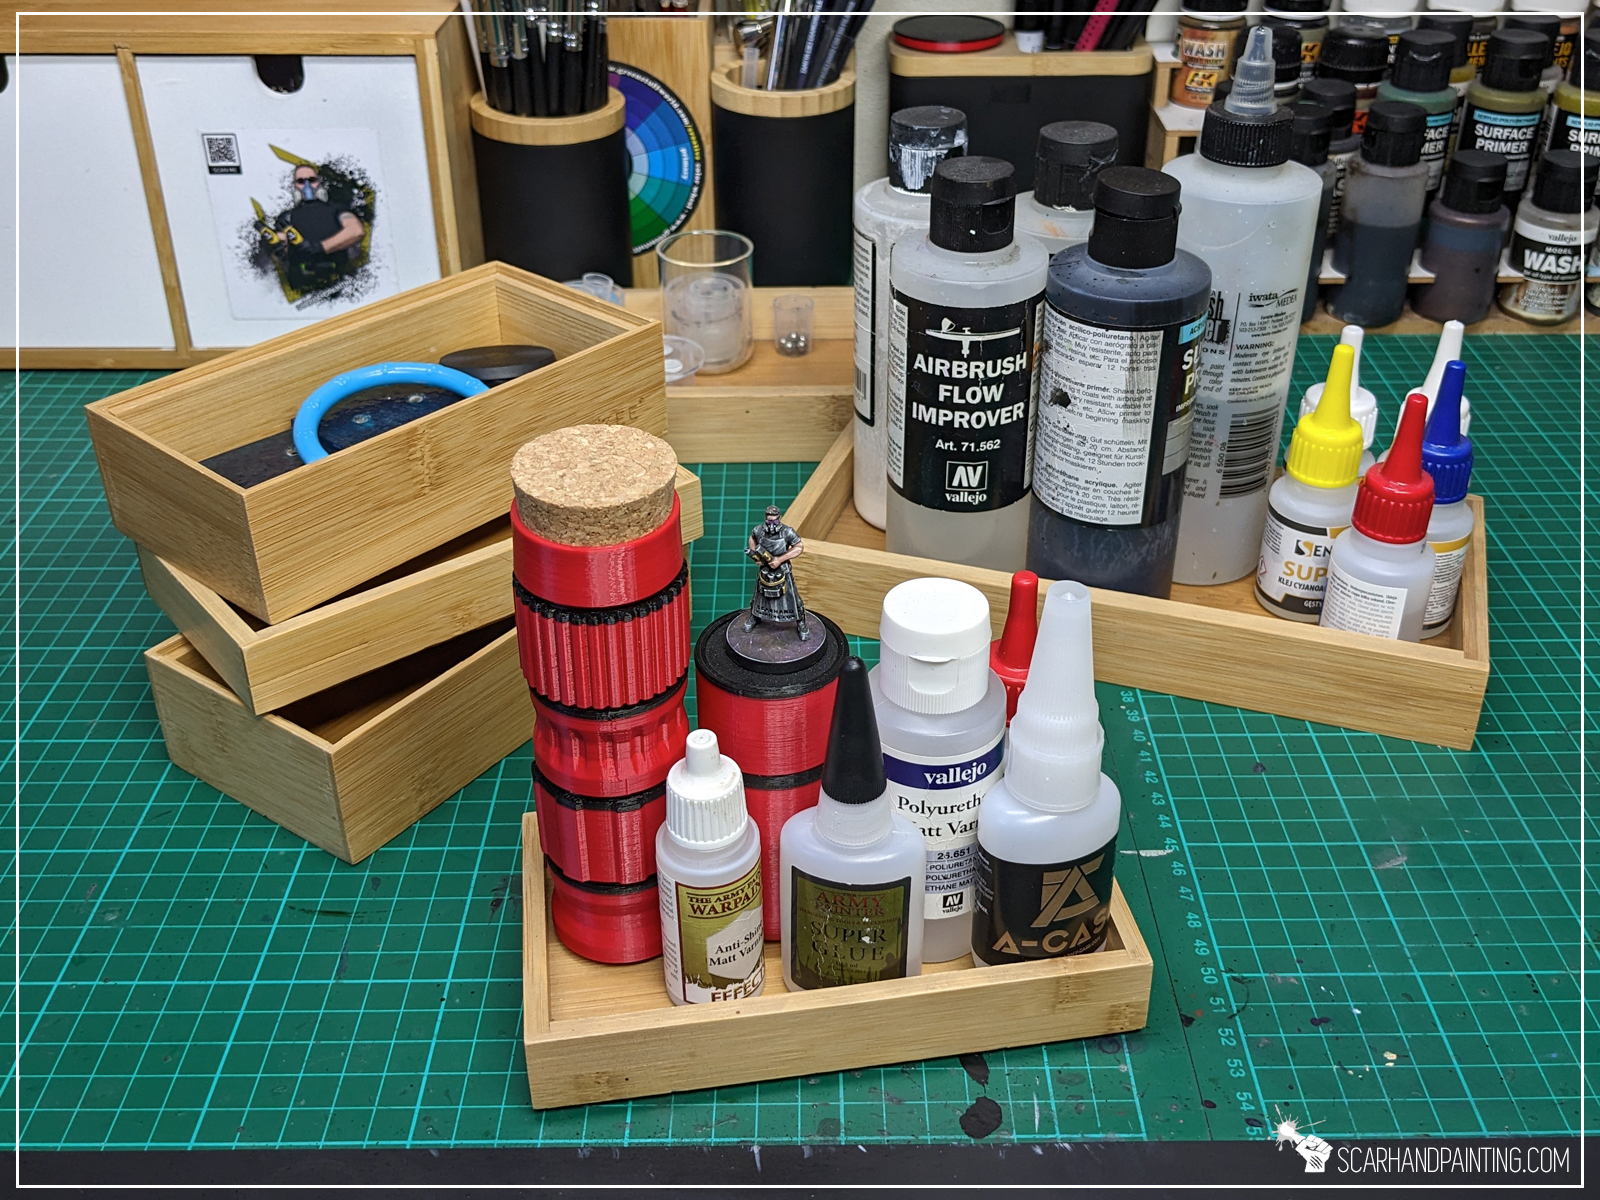
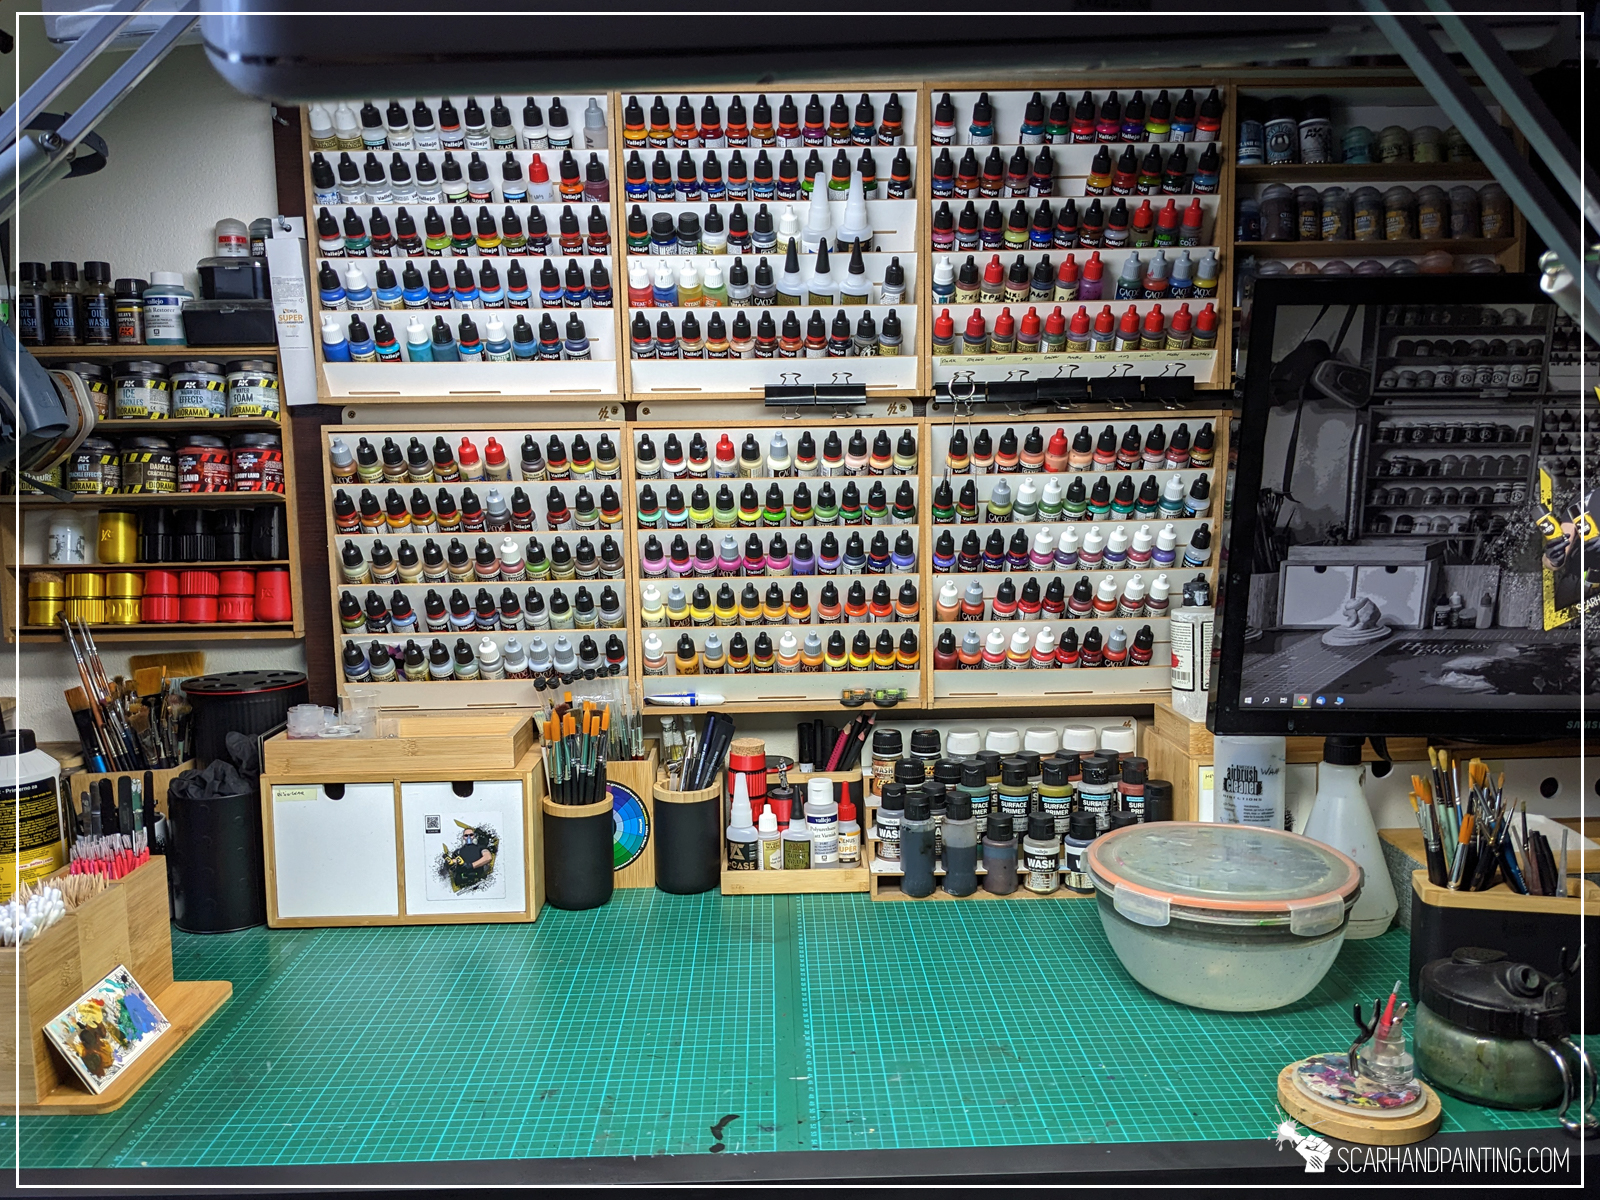
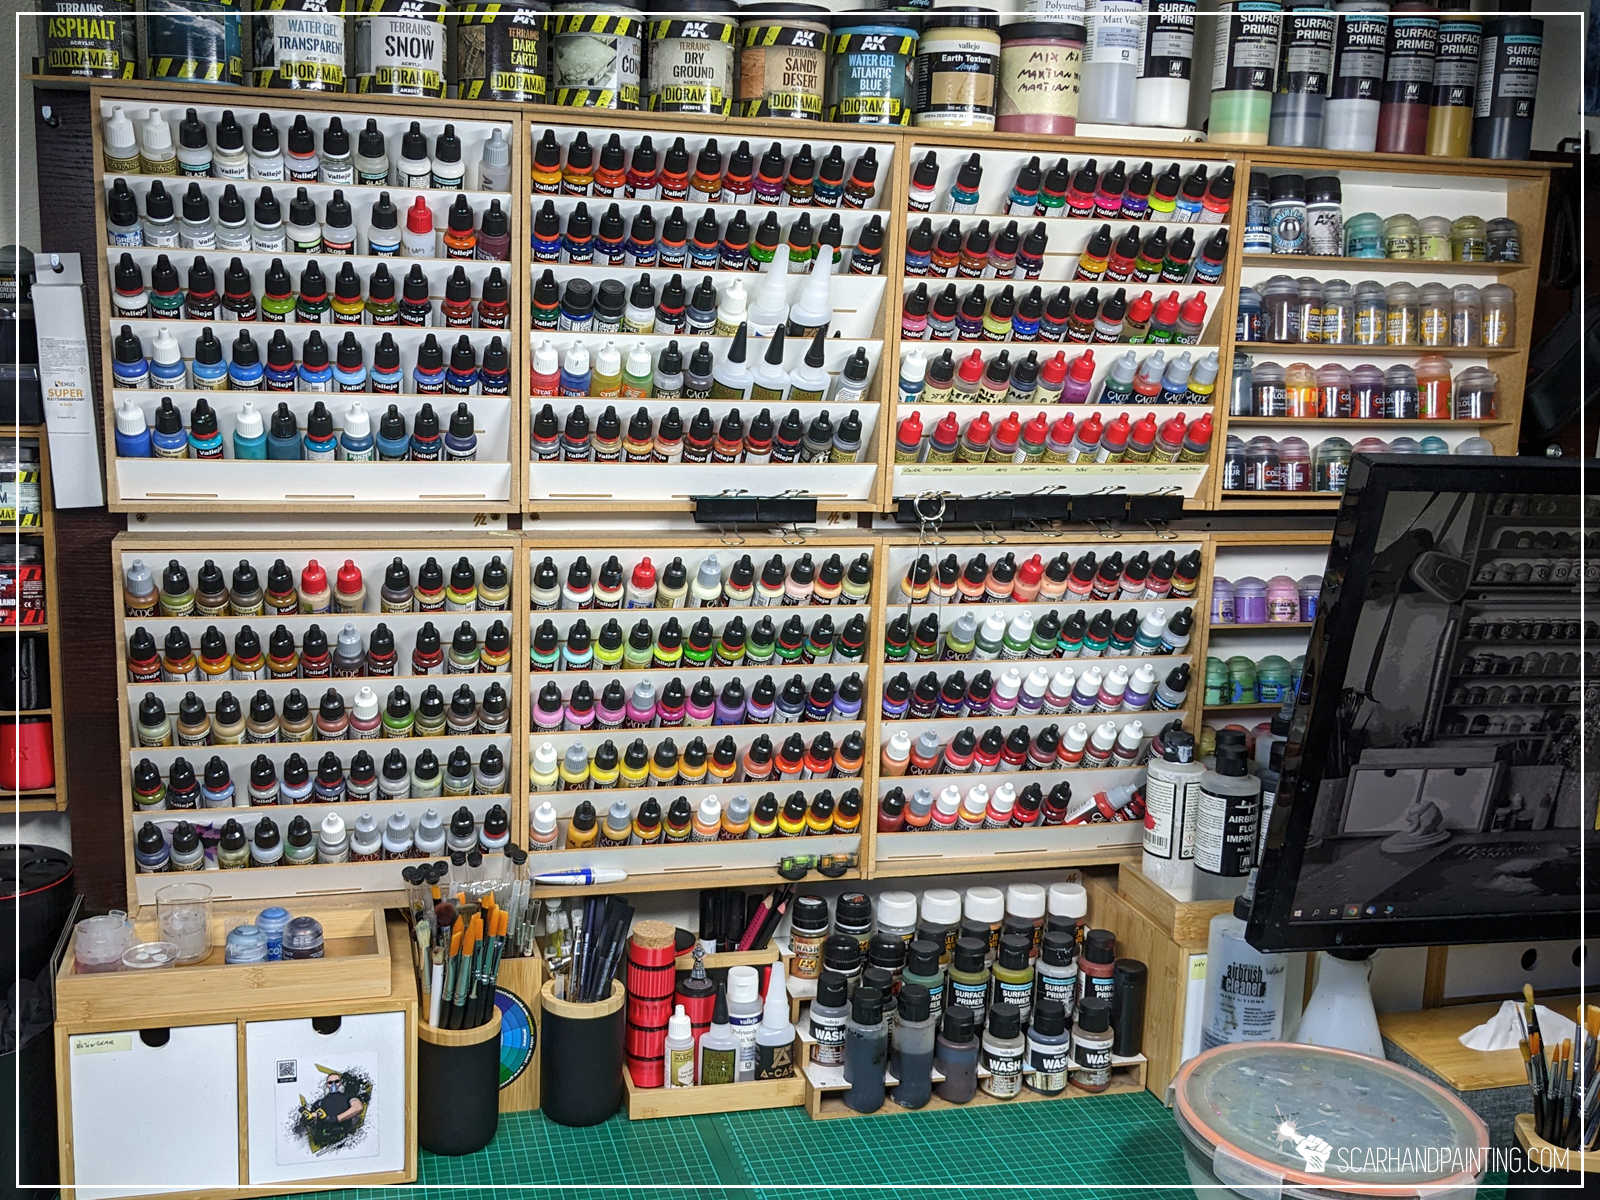
This is a well known classic, so I decided to throw it in. There is a variety of paint racks, tiny drawers and even entire Modular Workshop Systems in the market, such as the popular HobbyZone. Although dedicated painting racks can only be obtained through hobby related companies, tiny drawers and wooden organizers can be found at house & decor stores. In my experience these are similarly priced so there’s not much difference, other than looks, style and in compatibility with other Modular Workshop System.

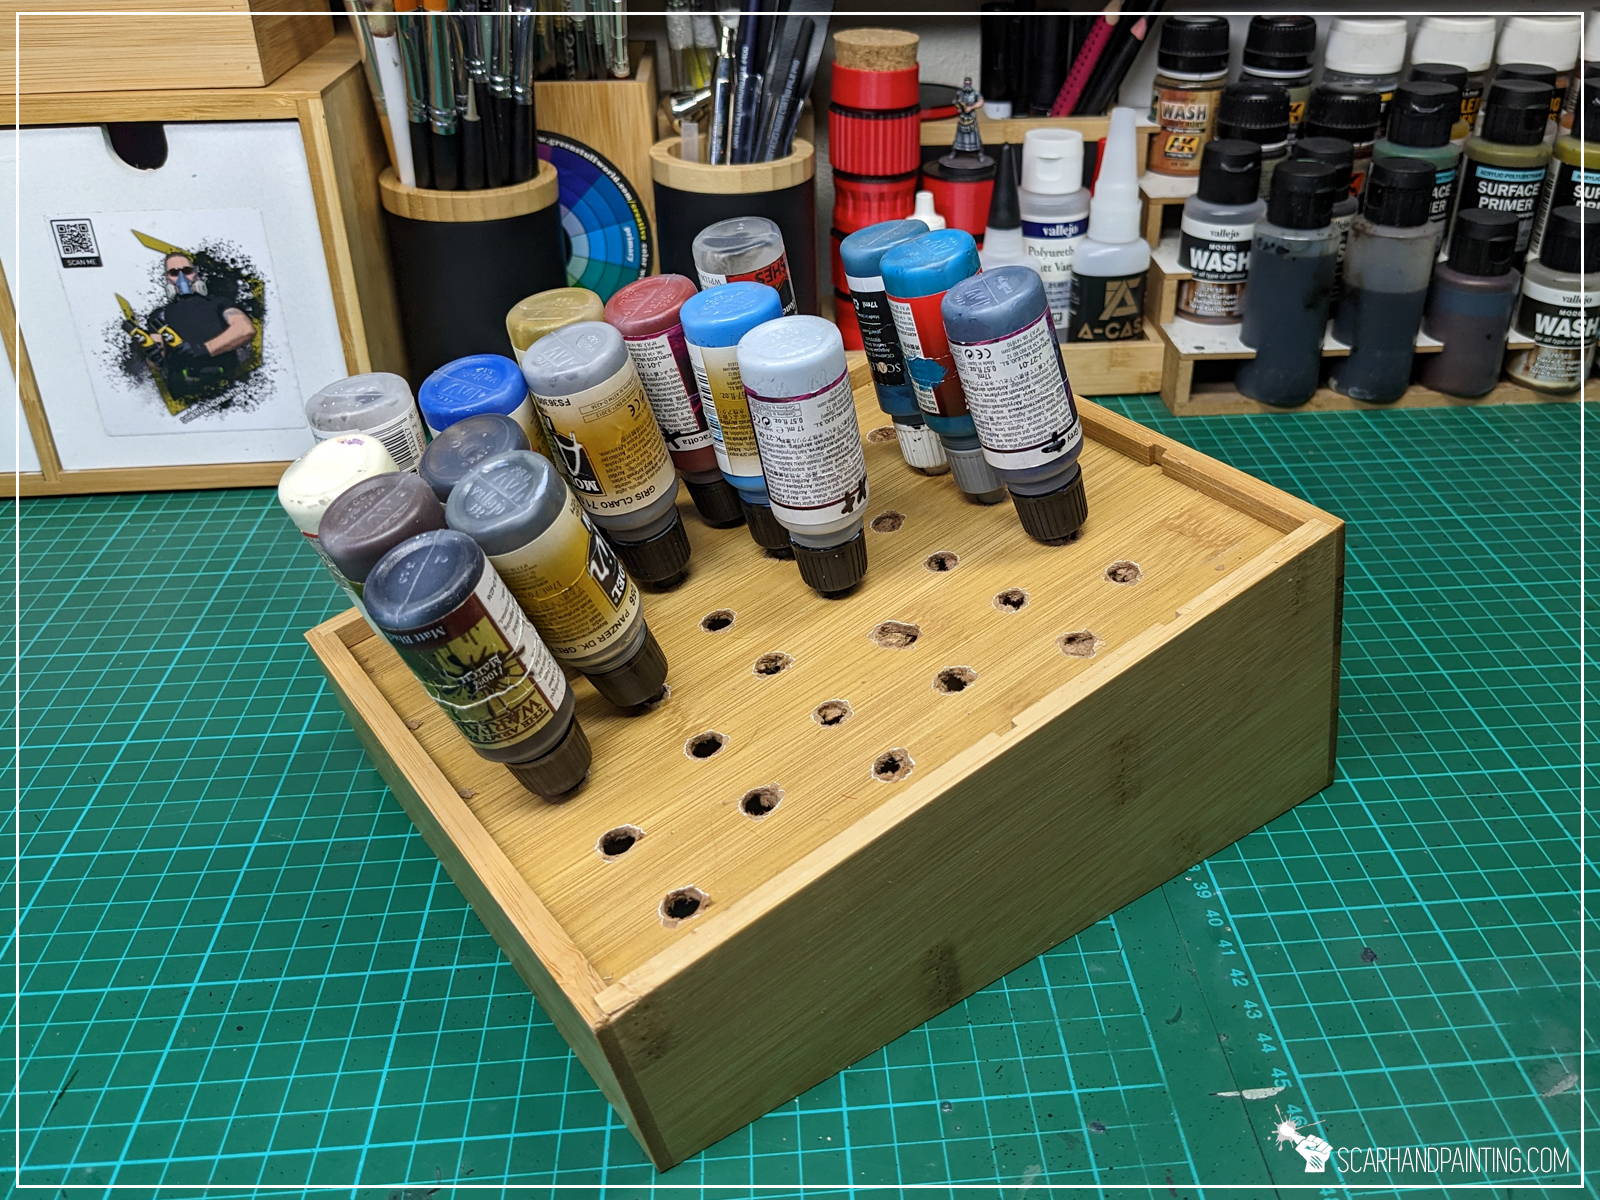
Have you ever found yourself reluctant to throw out an almost empty drop bottle paint, because ‘there is still some left!’ ? Personally I dislike keeping two paints of the same type on a hanger rack, but am also not keen on wasting paint. To avoid diving into backup paint box mid-work, I ‘retire’ old paints to a special self made rack (a box with a few holes drilled in the underside). I keep them close, ready to use at all times. Took a while to make a habit of prioritizing old paints over the new ones on the hanging rack, but once it kicked in I started to save a lot of time.
I’ve been using the above solutions for some time now. They’ve been my allies in a fight against workspace entropy. Now it’s your turn to put them to a test. Let me know if any of these spiked your interest. Are any of the above completely new to you? Which, if any, do you plan to implement in the nearby future? I am eager to read your feedback in the comments below. I’m also available at Facebook and Instagram if you’d rather prefer reach me there. Finally I would appreciate if you shared this article with your hobby buddies.

If you are looking for a professional Warhammer miniatures painting service, be sure to contact me via this contact form. I always reply within 24 hours. If you don’t see anything from me by then, please check your spam folder.
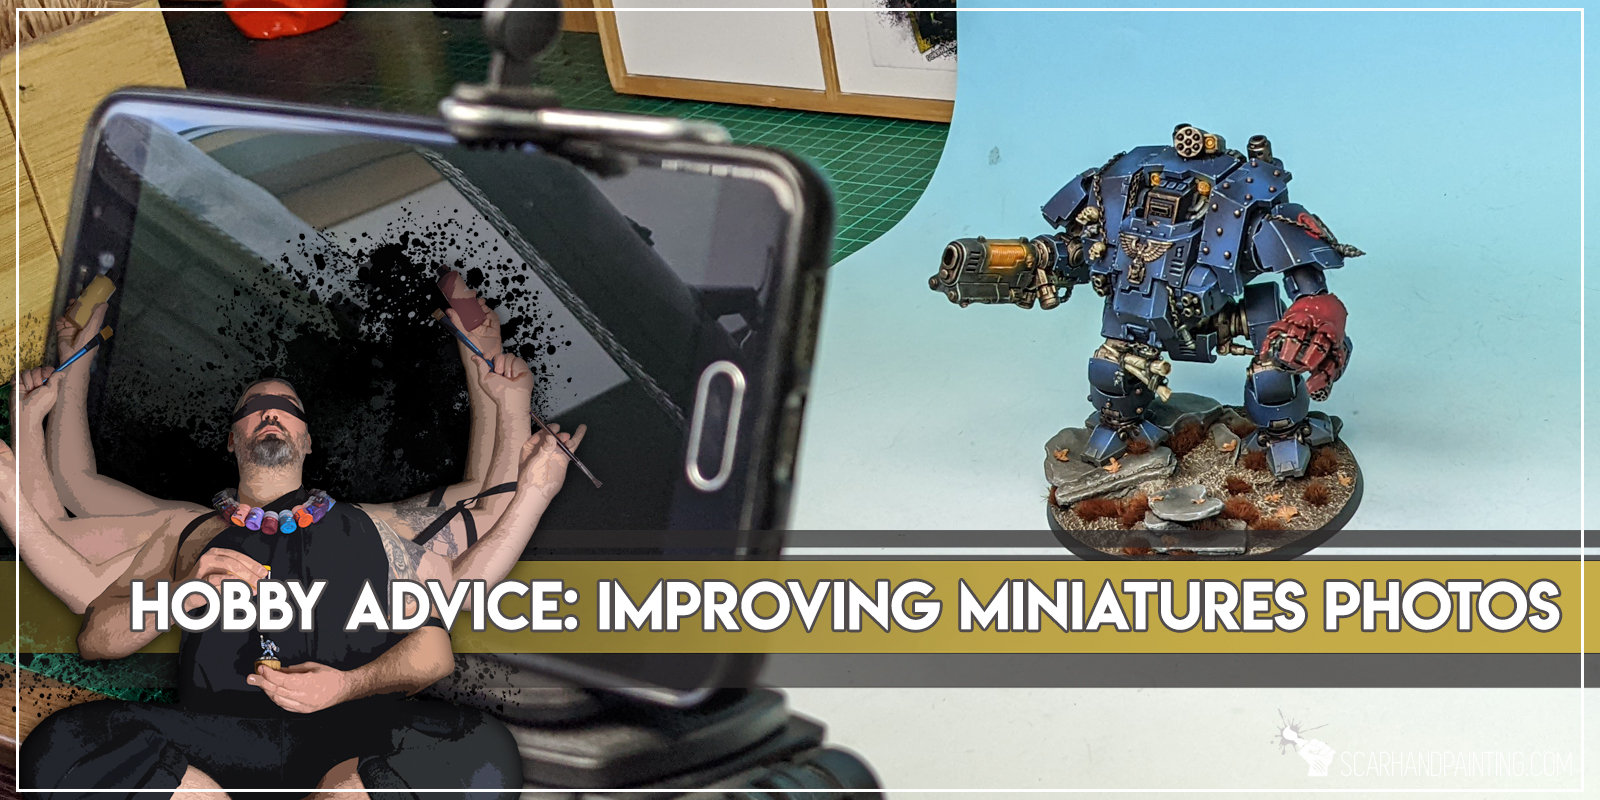
Taking some good quality pictures of our painted miniatures can be a real nightmare. I know for a fact that a lot of hobbyists struggle when presenting their work online because of how misrepresented, by bad quality photos, the paintjob is. Blurry or oversaturated pics can really undermine reception of our work, leading to our disappointment and anxiety, thus discouraging us from further painting attempts. Today I would present to you a few tips that should improve the quality of your pictures without a need for high end photographic equipment.
I have been painting miniatures for over twenty years now. During that time I really struggled with proper presentation. I followed multiple tutorials, tried different cameras and setups, shadow tents and specialist backgrounds. All that “ISO”, “Macro”, “Exposure” settings mambo jumbo made my head hurt while I failed to deliver satisfactory quality pictures. With time technology advanced and became simplified and more efficient. Smartphones are so common and their cameras advanced that there seems to be no need for specialist photographic equipment anymore – at least when it comes to sharing cool pics of painted miniatures.
Miniatures photography is still a part of the hobby I loathe with all my heart, but thanks to experience acquired through failure, my work’s presentation finally feels acceptable. That’s not to say I am now a miniatures photography specialist, just that I feel comfortable to share some tips in hope to help other hobbyists feel satisfaction from presenting their work.
Some notes:

Tip 1: Camera Handling
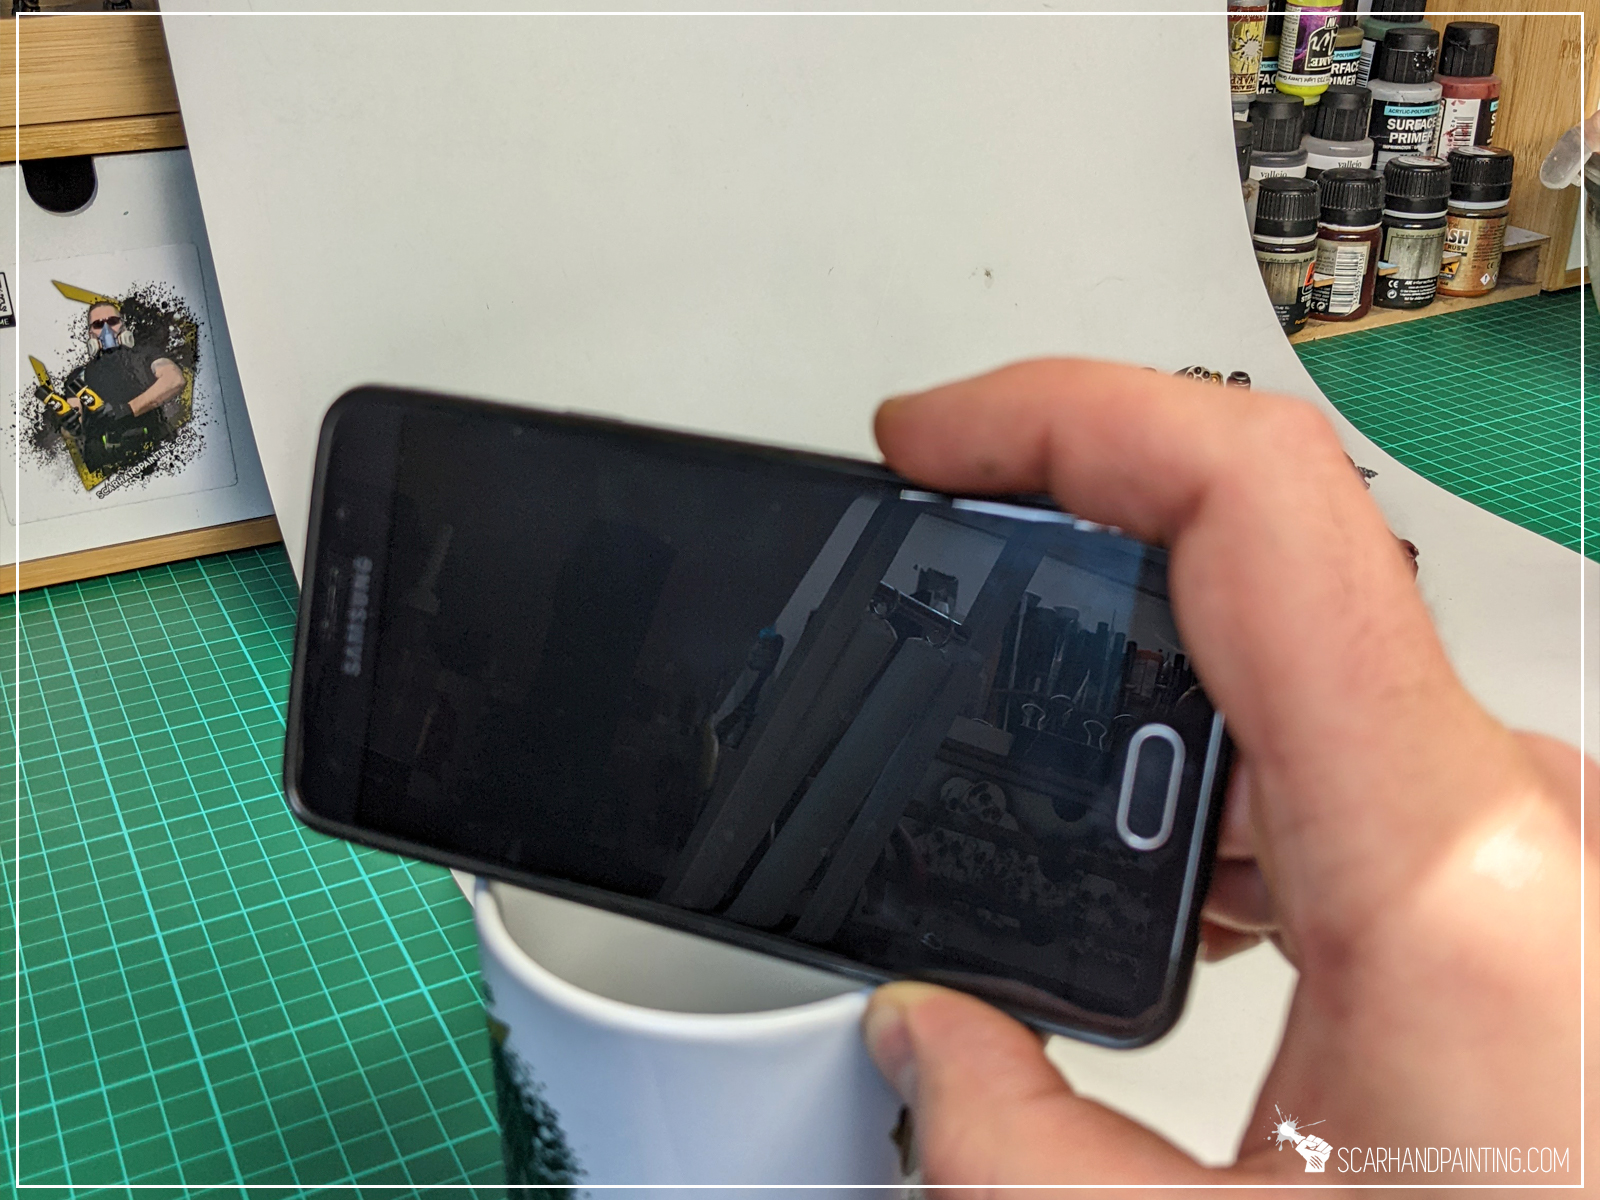
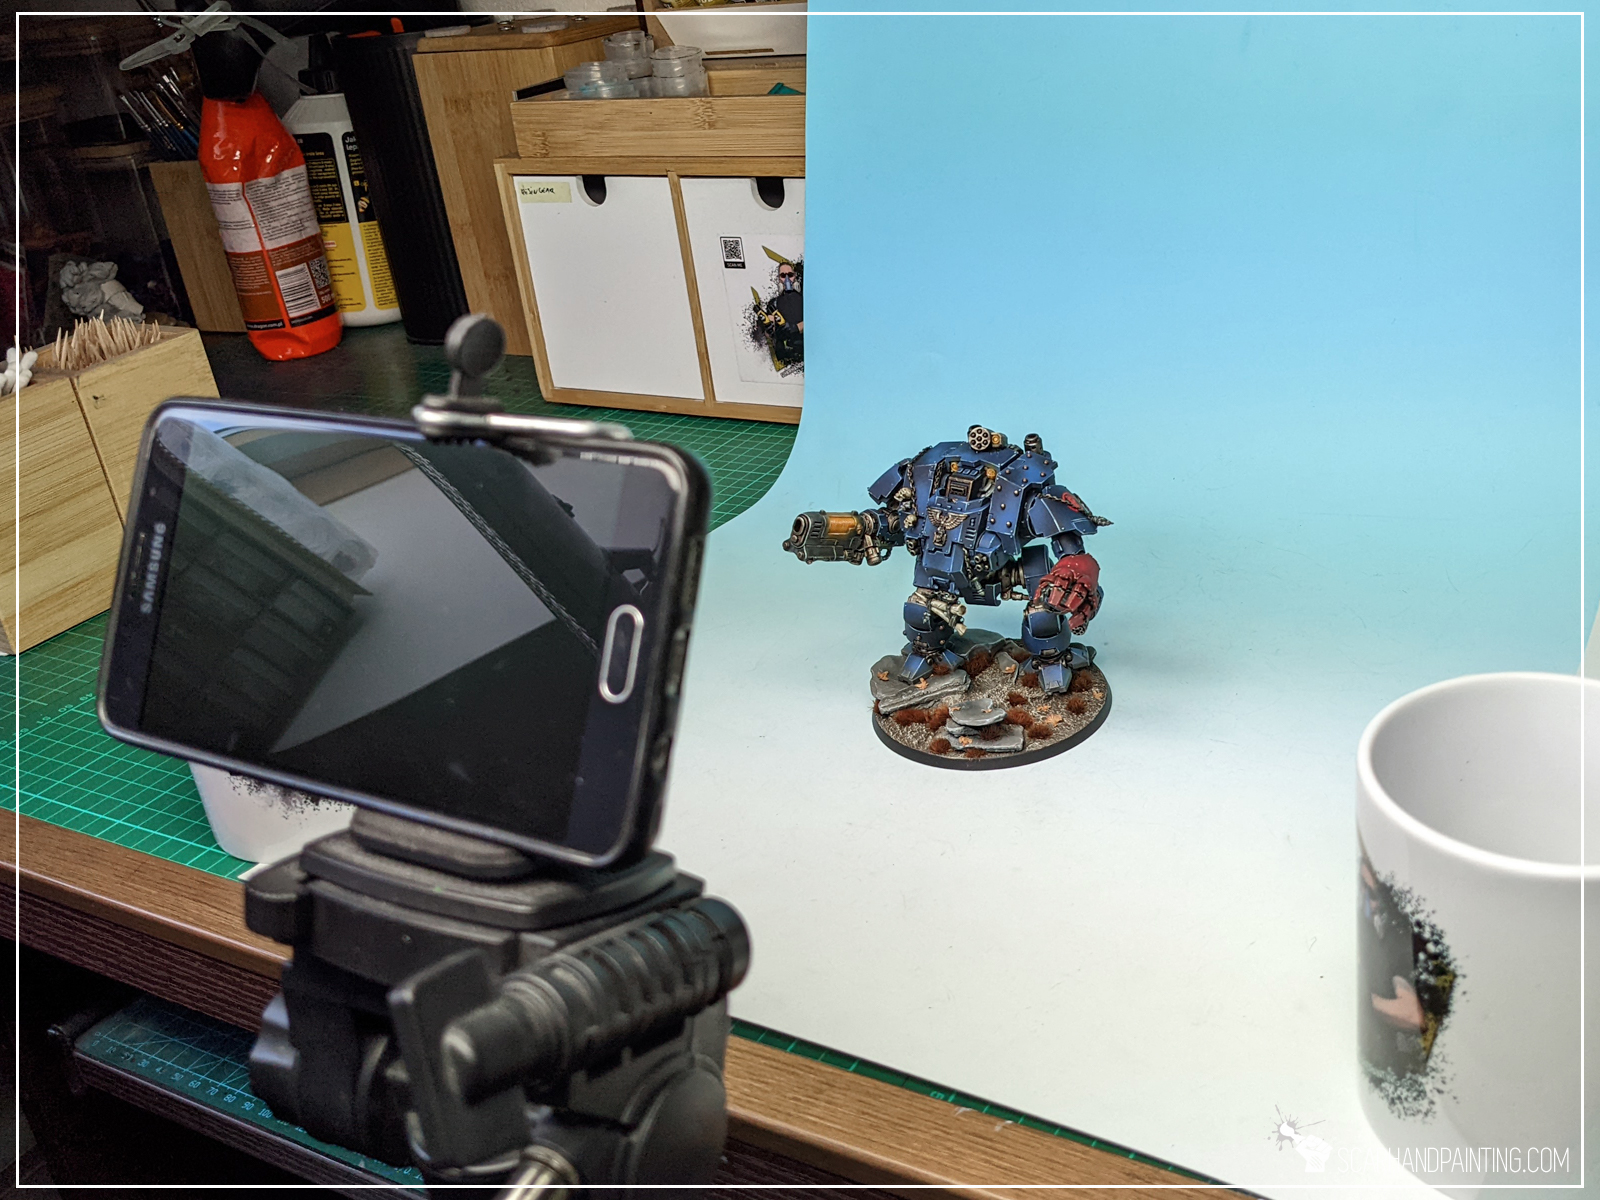
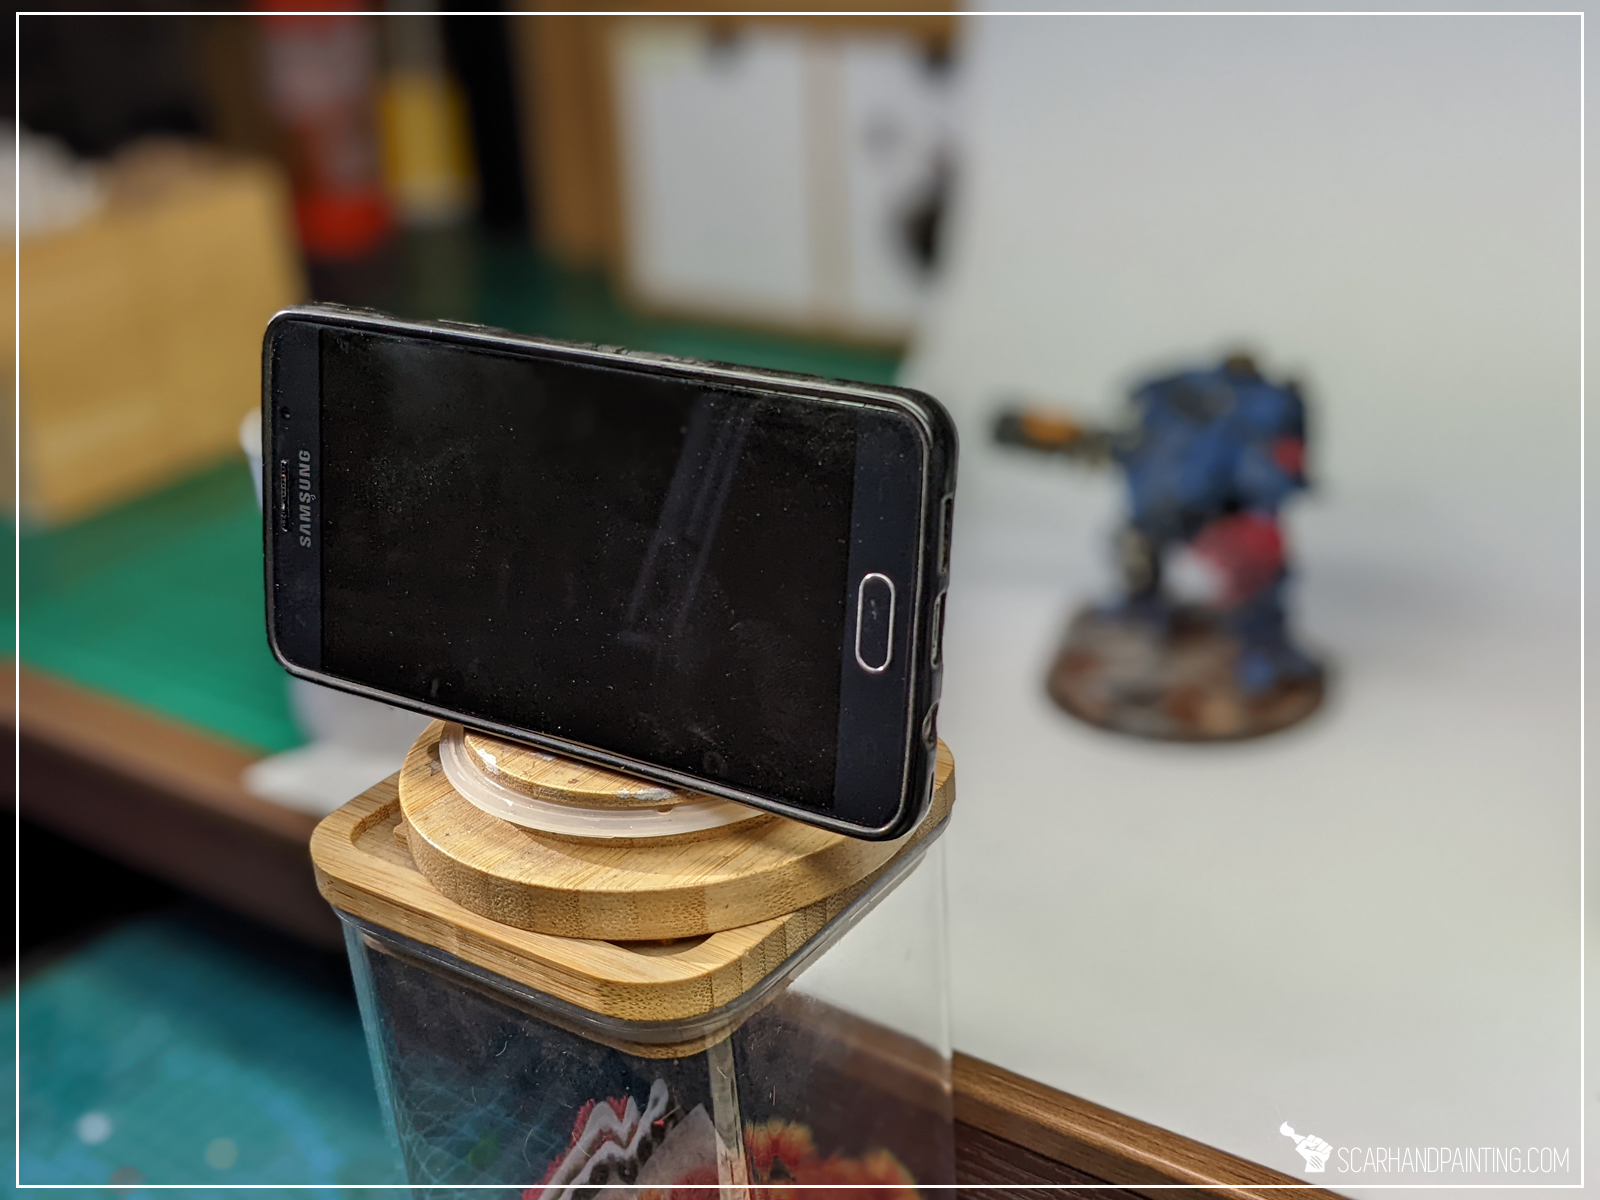
Be it on a tripod, or just held still on a piece of Blu Tack – keeping a camera perfectly still when taking pictures is key to achieving a nice sharp image. Holding the camera in hand, even if partially supported, results in micro movements disturbing focus. This includes taking a picture manually with a push of a button. To avoid unnecessary focus loss I recommend immobilizing the camera and setting a timer to three seconds to give it some time to settle after it got touched.
Example: Camera held in hand.

Example: Camera set up on a tripod or supported.

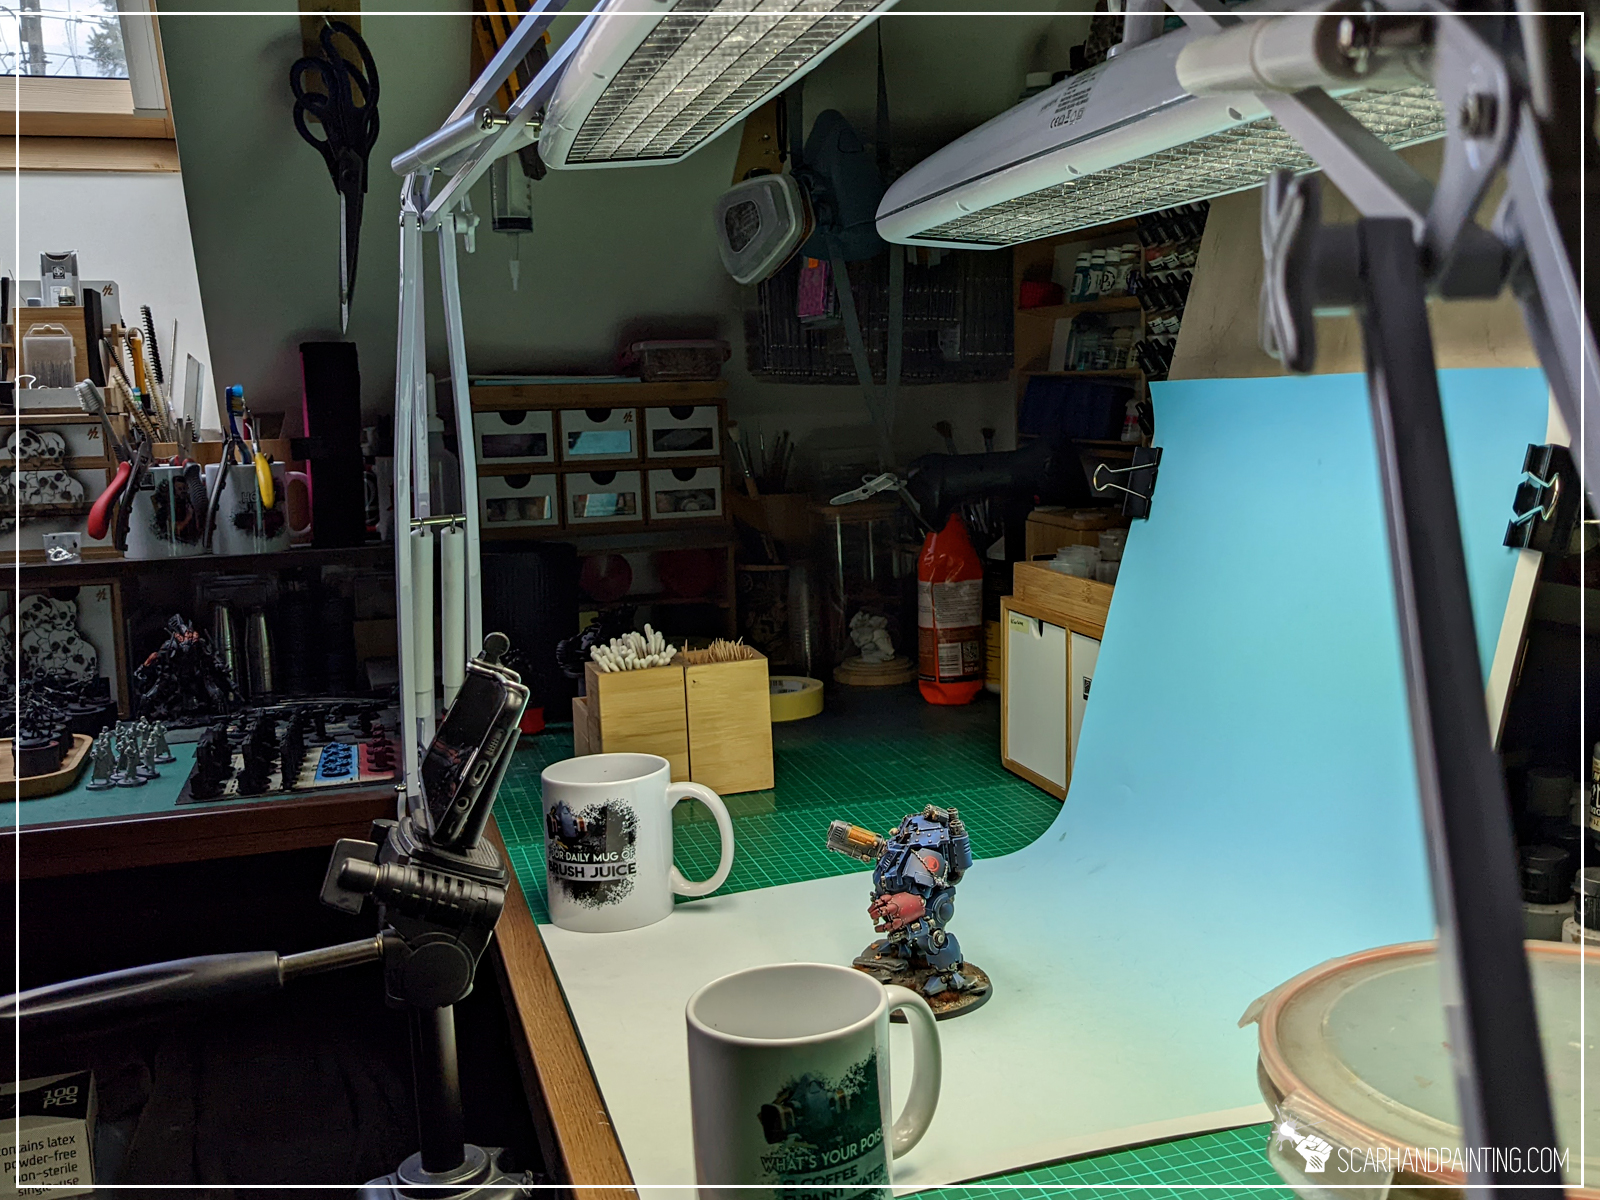
Tip 2: Light Setup
Most common light setup I’ve seen across multiple tutorials was one main light source positioned directly behind and slightly above the camera, backed by one to two supplementary light sources positioned at the sides pointing towards the miniature. After many tests I settled on two white light sources: One placed directly behind and slightly above the camera, pointing towards the miniature. The other is placed above and somewhere between the miniature and the camera, directed away from the camera and towards the miniature. Things to look out for would be placing a light source too far, behind the miniature, resulting in increased contrast and artificial shadows, or pointing towards the lens resulting in a too bright, blurry and fuzzy image.
Example: Light sources placed zenithally, one lamp behind the miniature.
Example: Light sources placed according to the tip.

Tip 3: Background
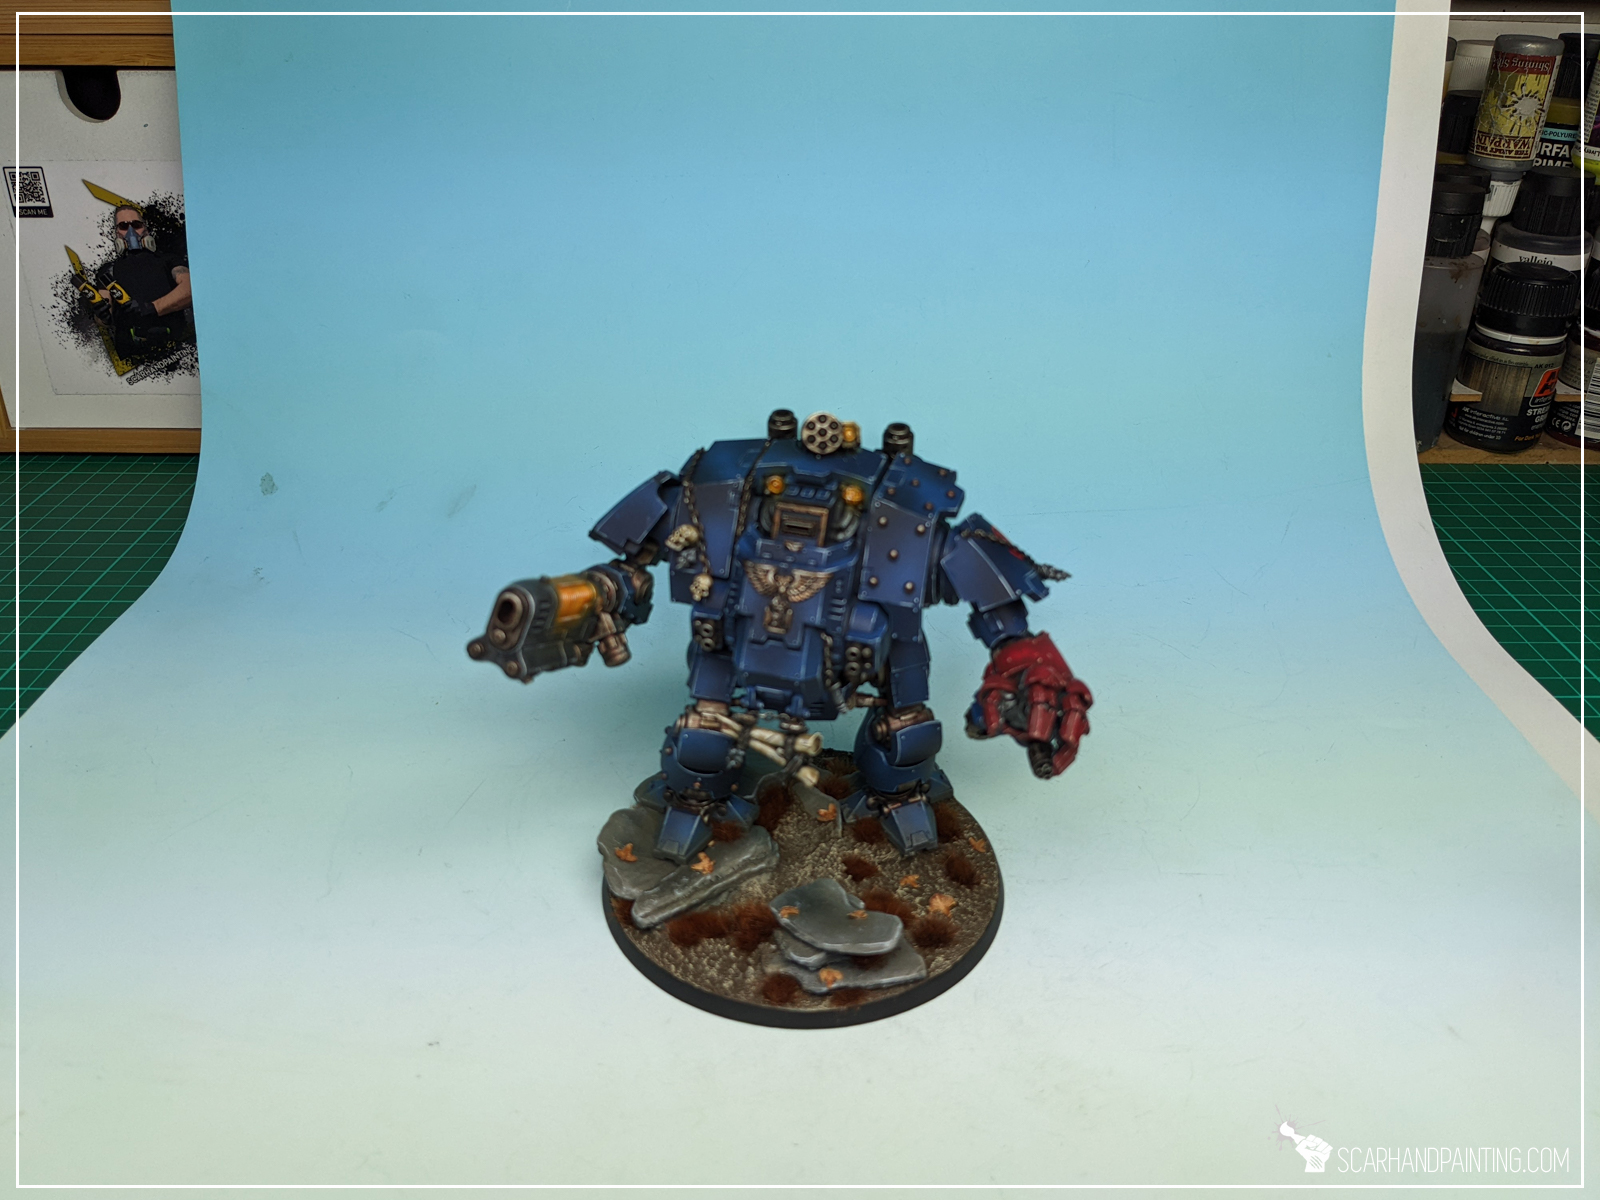
There are multiple approaches to choosing a background for a picture. Some painters prefer backgrounds that compliment a paint job, or produce a certain “feel” of the picture. This is all fine for a more artistic themed presentation. Still I feel that presenting a paint job for evaluation should be first and foremost about that paint job, not a picture. For this reason I try to aim for a background that would present my work in the most realistic way possible without a need to adjust colors in photoshop or create artificial shadows and surrealistic effects. After some ups and downs I feel that the blue to white transition background produces the best results by far, keeping the colors natural while allowing for clean, aesthetic images.

Tip 4: Composition
When setting up a miniature for a picture it is good to position it in a way to present an interesting angle. Some poses might look awkward resulting in entire parts losing depth or supplementary colors being hidden from view. I always check the miniature through the lens of a camera before taking a shot. Sometimes a small pose or angle adjustment might result in a much better shot.
Example: Awkward pose, weapon hidden from view, supplementary color barely visible, lack of depth around shoulder and top armor.

Example: Better proportions, weapon and supplementary color exposed, more depth to one arm and top armor.

Tip 5: Cropping
This might come as no surprise and yet a lot of hobbyists tend to forget about it. Cropping and adjusting an image so that the miniature is properly orientated and centered shows the audience that the author cares about their paint job and presentation. I strongly believe that it is much easier to get valuable feedback and engagement when treating the audience and own work with respect.

Bonus tip: Cinematic shots.
All of the above tips go to waste when talking cinematic in-game shots. There’s no choice of light sources or background. On top of that cinematic shots are just as much about the miniatures as the composition and overall feel of the image. Still most rules can be re-adjusted to work in the gaming area environment.
– Camera can still be supported on a piece of scenery or furniture, even if held in hand.
– Color depth and sharpness of the image will benefit from proper light source position (ceiling lamp behind and above head, instead up front).
– Miniature battlefields are filled with great compositions just asking to be immortalized!
– Cropping remains a thing 🙂

I hope you find this tutorial helpful and if so, please let me know in the comments below or via Facebook or Instagram. I would also appreciate it if you considered sharing this content with your friends, who might find it useful. Finally if you are looking for a professional miniatures painting service, be sure to contact me with this contact form. I always reply within 24 hours, after which please check out your spam folder.
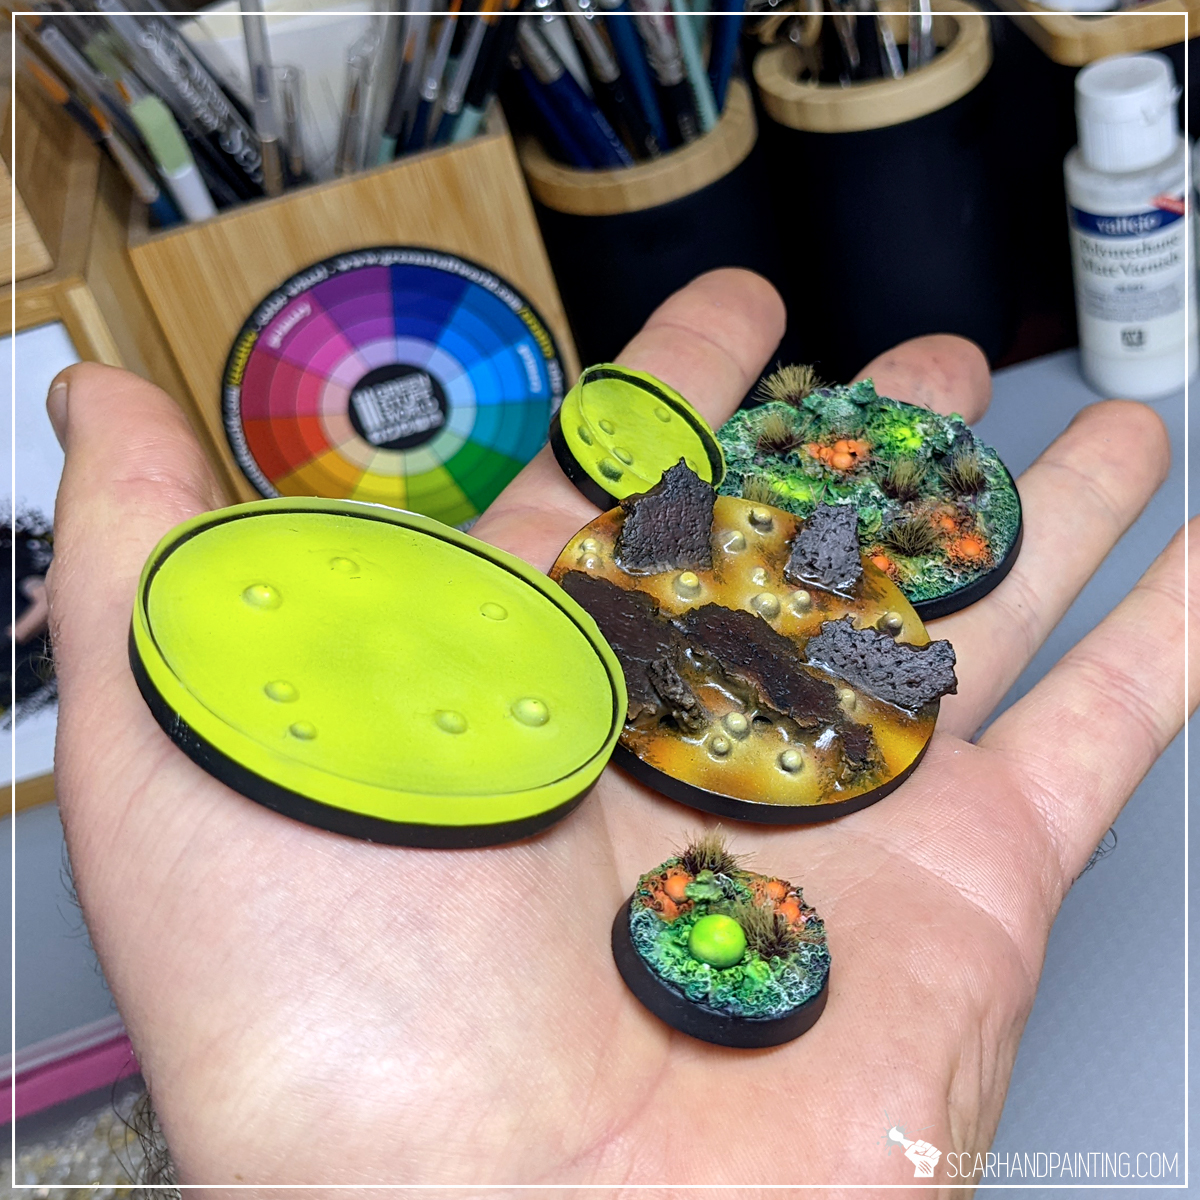
Forget about tiresome Greenstuff rolling! From now on, when modelling Lava bases, the only thing you’ll need to do is to pick a ready-to-use tiny ball from a box! Below is a short guide on how to gain access to unlimited tiny modelling balls.

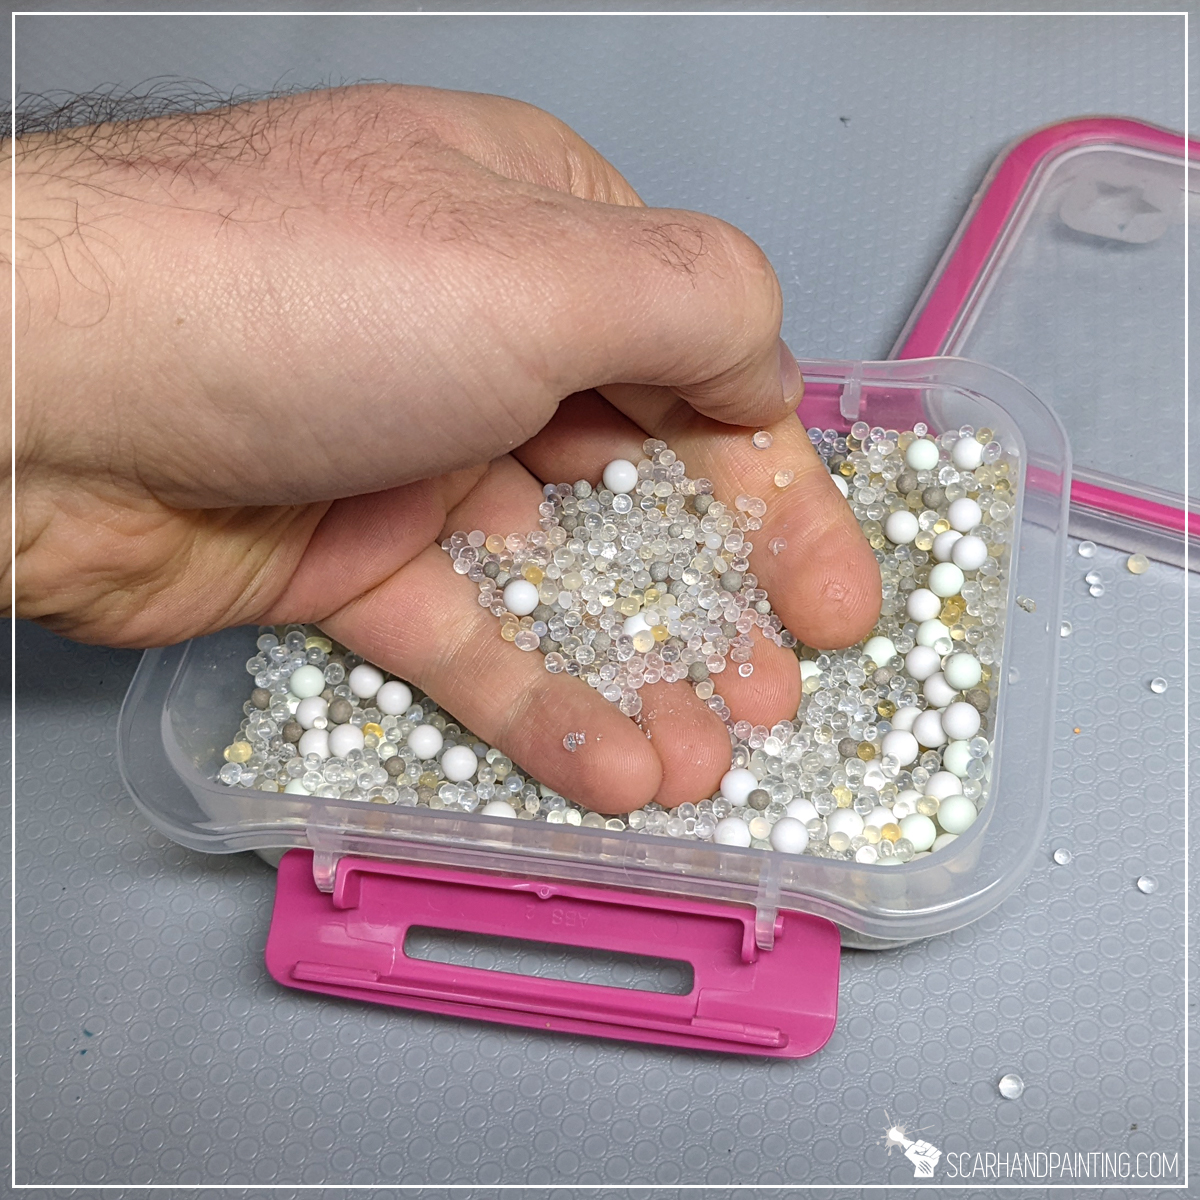
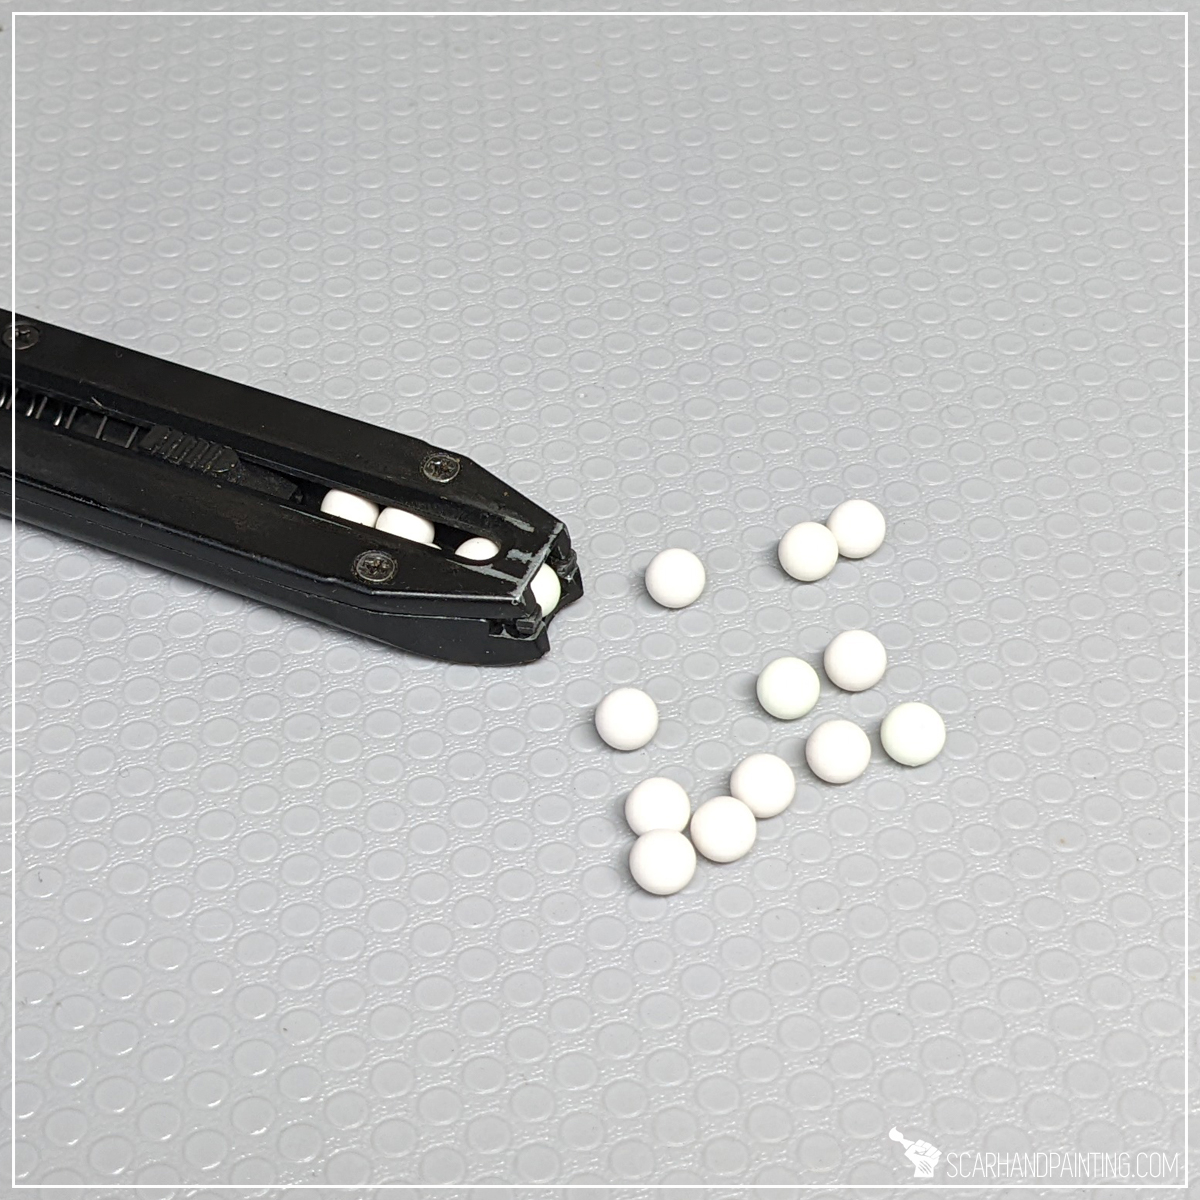
Remember that time when you laboriously rolled about three dozen Greenstuff balls only to drop half of them on the messy floor and then accidentally squash the rest to a pulp? From this day onward traumatic events like this are forever left behind you. No more rolling, no more squashing! As of now you will be able to draw an unlimited number of tiny balls, perfect for any kind of miniatures modelling, from these three sources:
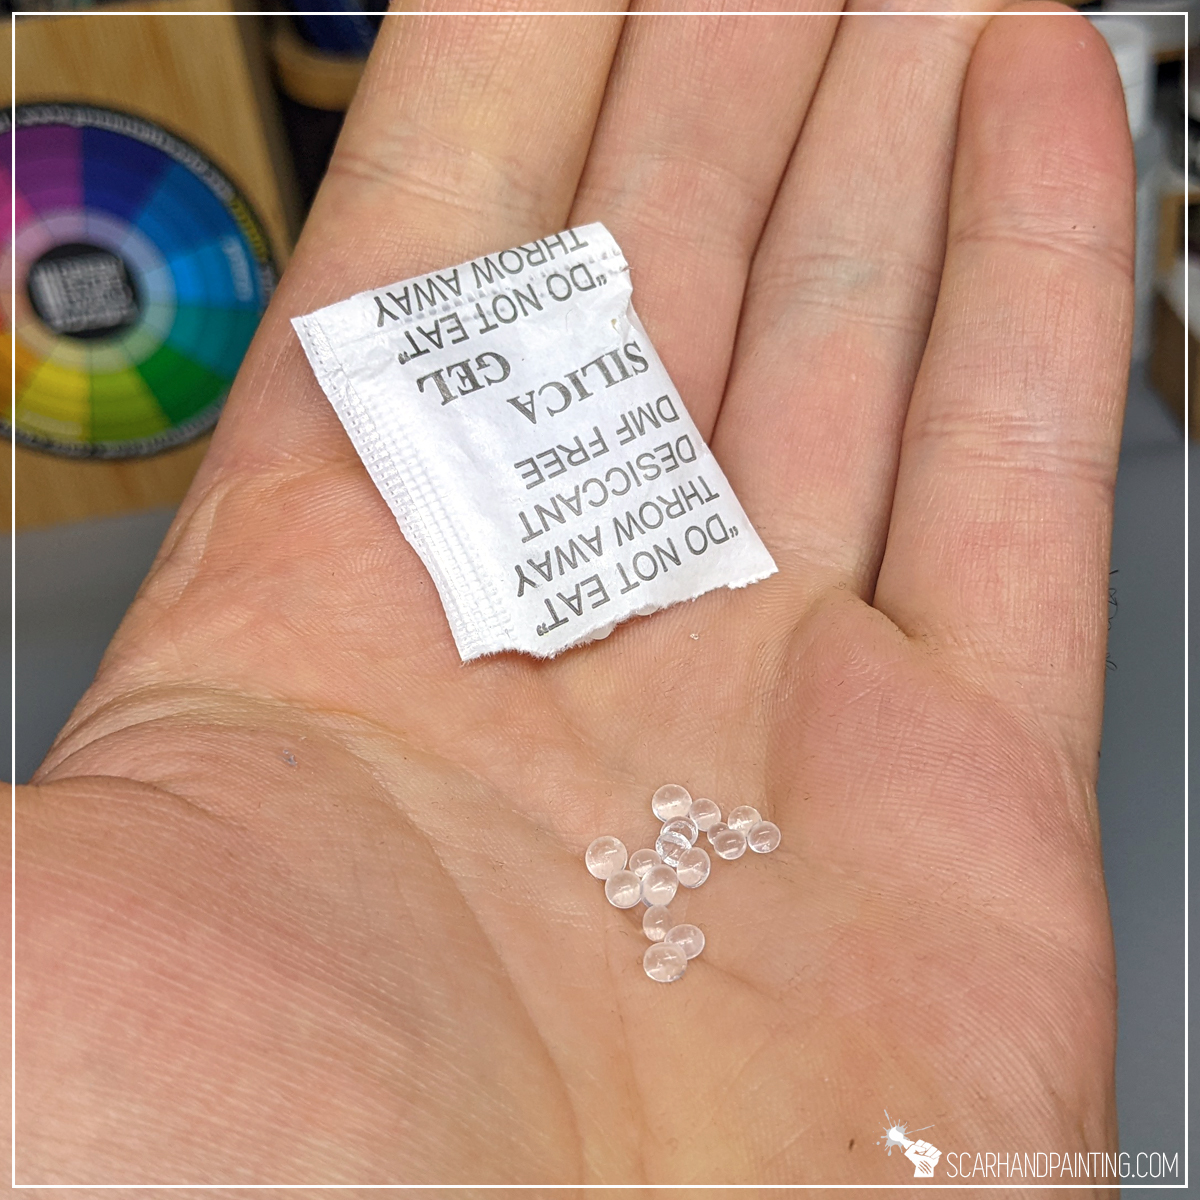
Most clothes and shoes comes pack with a tiny bag of Desiccant. Inside you will find few dozen Silica Gel balls of varied sizes. These work well with typical miniatures hobby paints and are perfect for overall modelling.


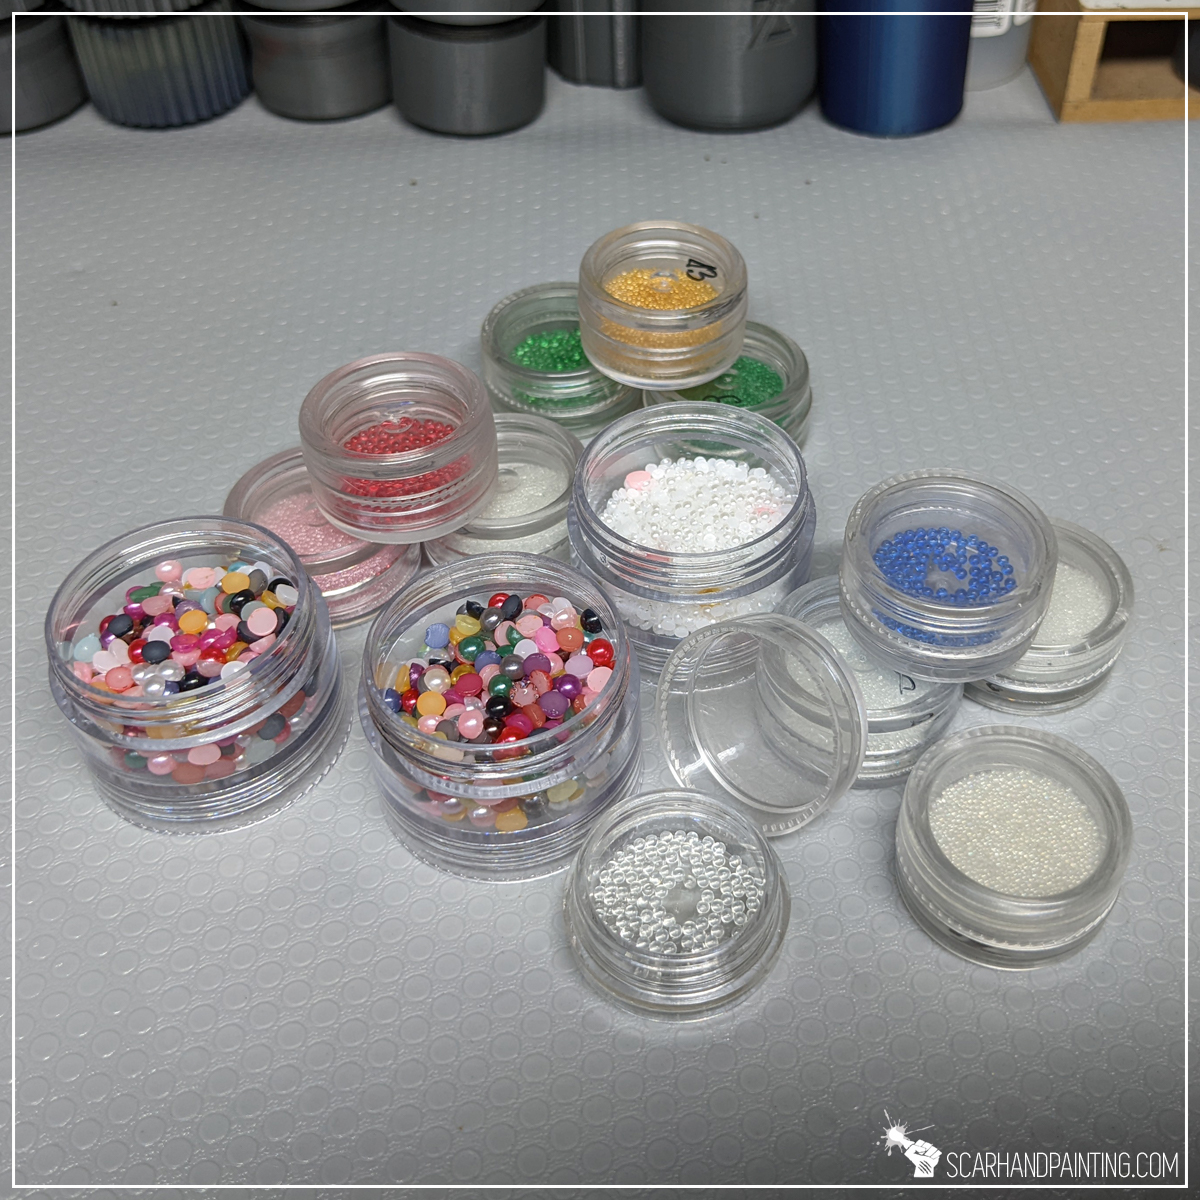
These super tiny glass balls come in small packs and can be obtained from many places including cosmetic stores, Amazon and Ali-express. Different sizes and colors make it a perfect modelling material.
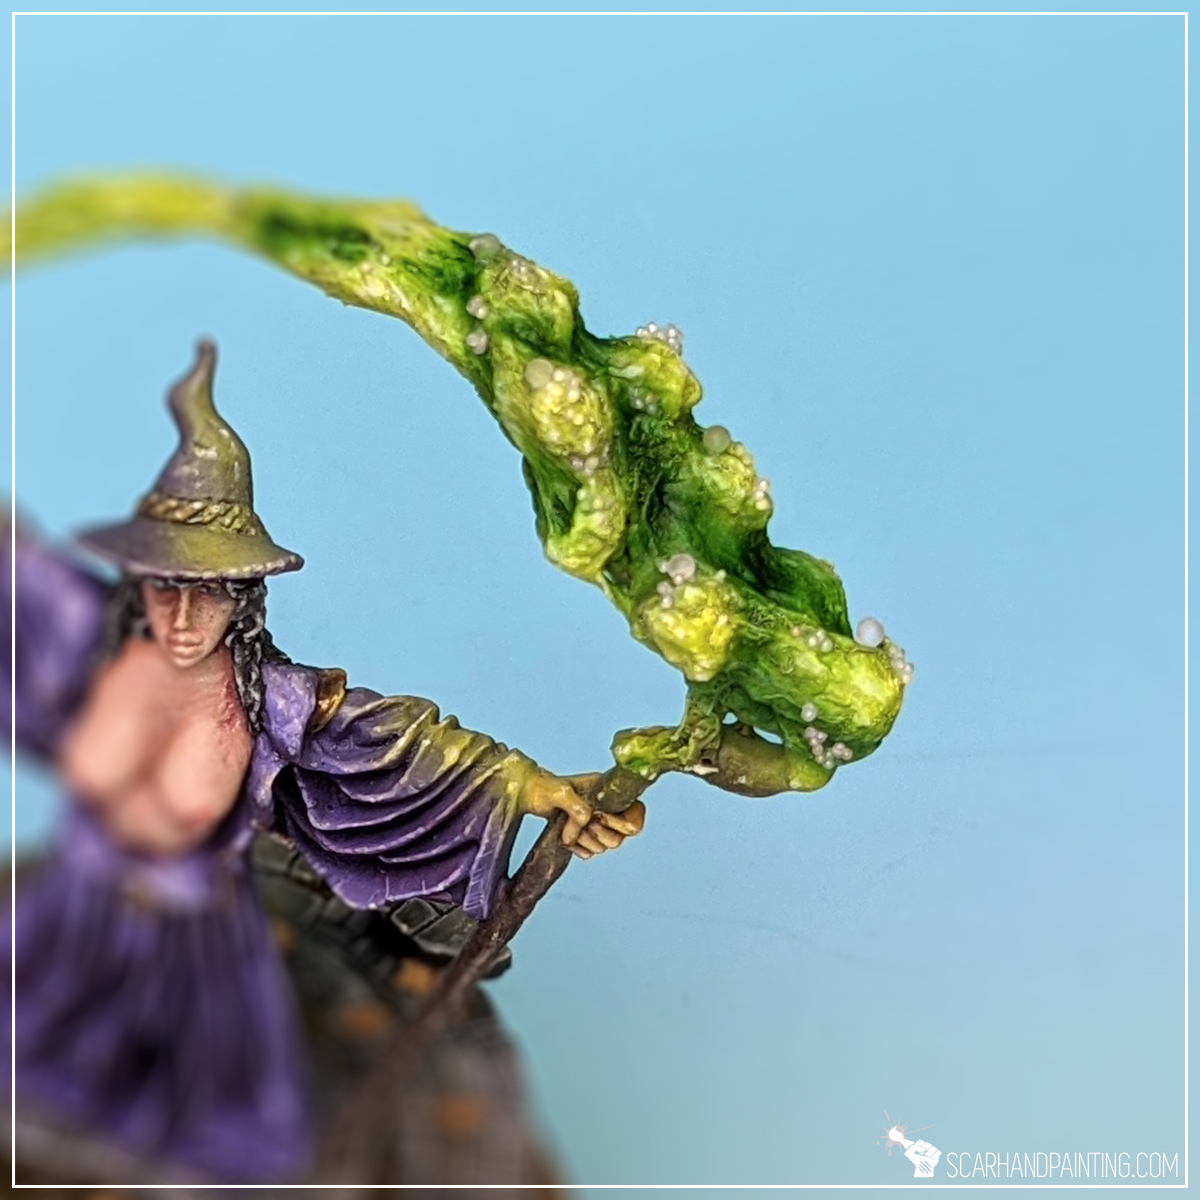
Yup, you read this correctly. Air Soft Gun ammo is just a bunch of tiny balls. Usually ceramic, plastic or metal sold in packs of hundreds. The latter might be a bit expensive and inconvenient, but ceramics and plastics are great for our hobby.


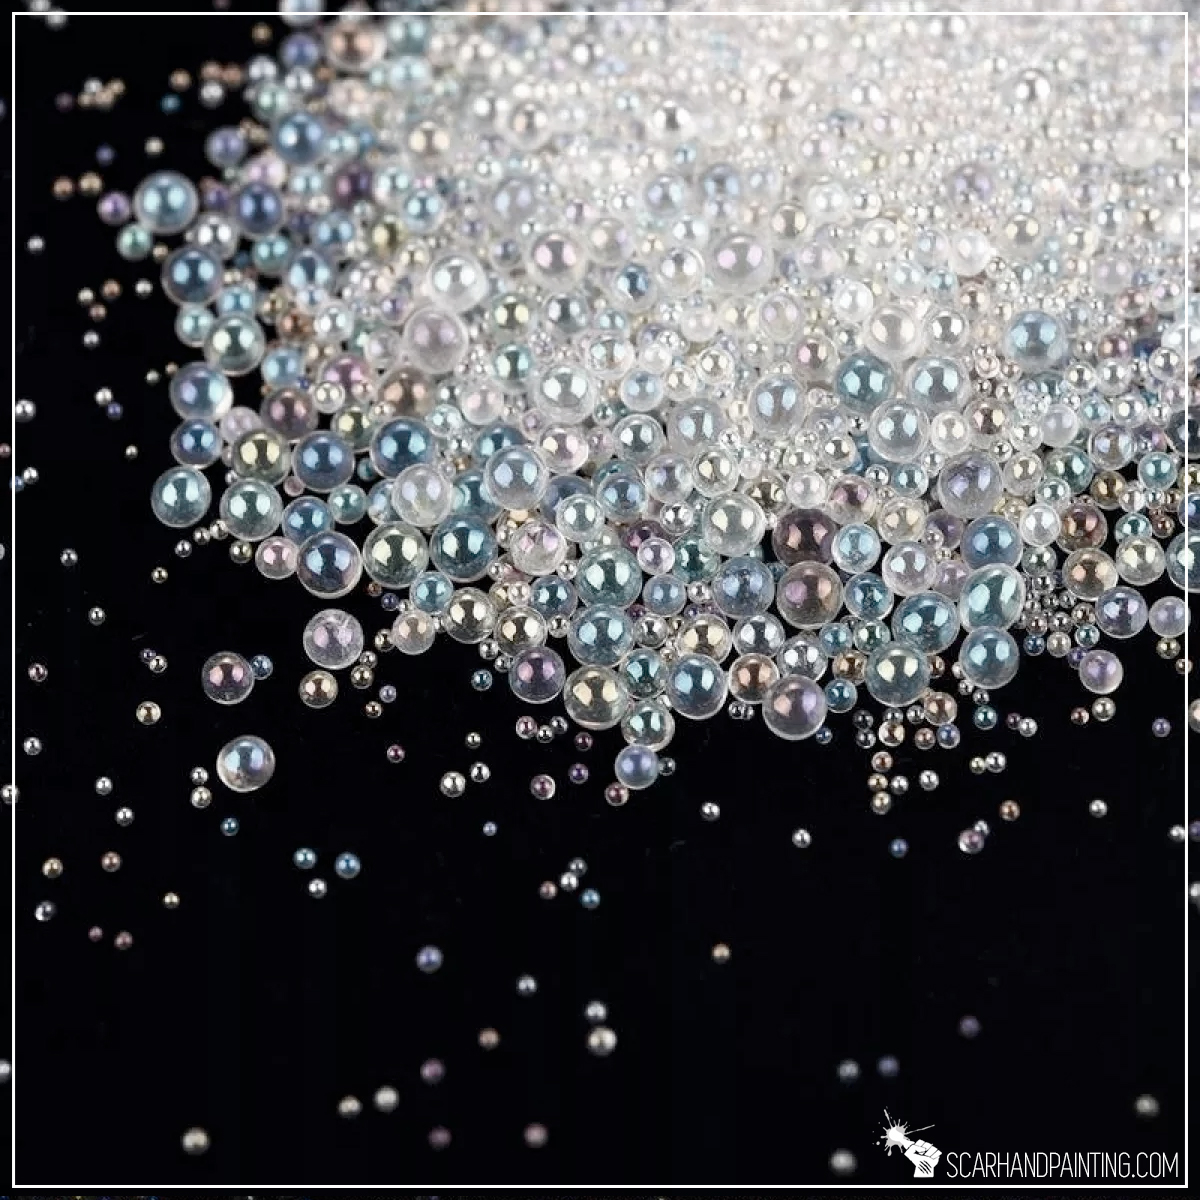
Below some practical use examples:
I hope you find this article entertaining. Be sure to let me know your thoughts in the comments below or via Facebook or Instagram. I would also appreciate if you considered sharing this content with your hobby buds, who might find it useful. Finally if you are looking for a professional miniatures painting service be sure to contact me via this contact form. I always reply within 24 hours, after which please check out your spam folder.
Cheers!
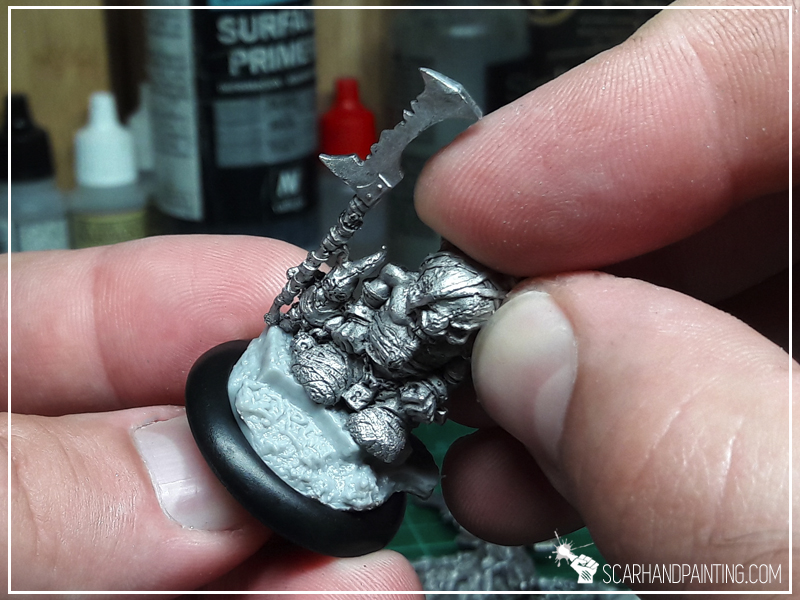
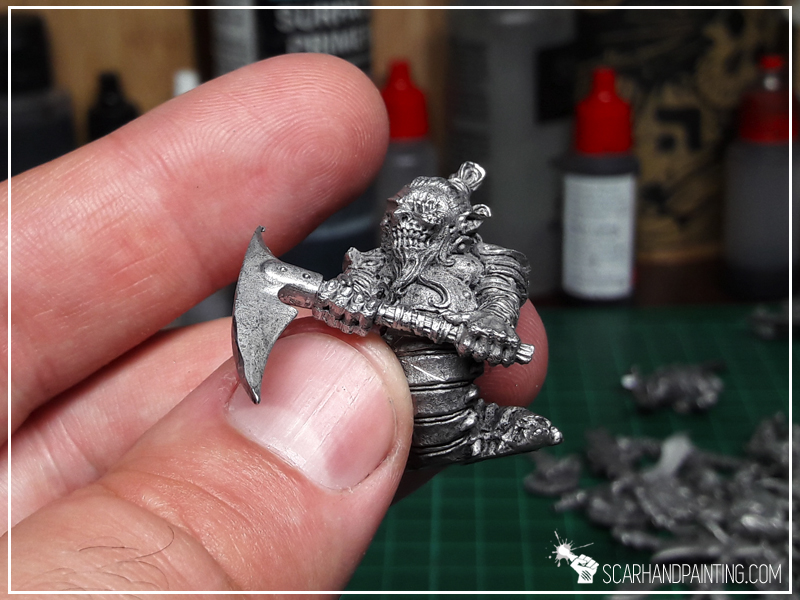
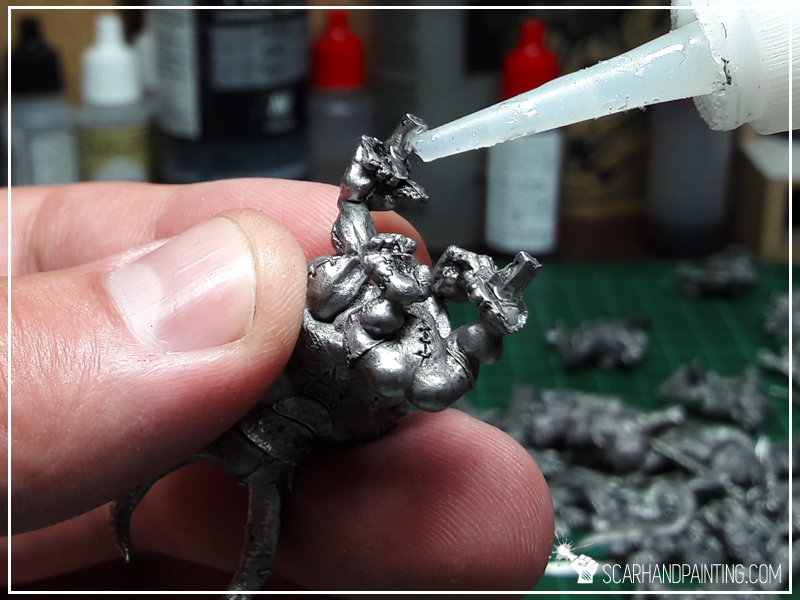
Magnetized bases is nowadays new hotness when it comes to miniatures transportation. This solution allows for comfortable transportation and fast deployment of your army. Once commited to this form of handling your plastic dudesmen, you will probably go back and magnetize all of your stuff. Regardless of choice of container, be it a professional carrying case like A-Case, or just a plain paper box with a piece of metal mounted at the bottom, first thing to do is actually magnetizing the bases.
And here’s where word of mouth and slight issues might discourage you from this glorious path to ultimate wargaming comfort. The internet is full of common misconceptions about magnetized miniatures. That is because a lot of hobbyists decide to go the most straightforward way and just glue a random magnet to the underside of a base YOLO style. This might result in a magnet falling off a base mid-transport, which in turn might transform your precious collection into a pile of scrap. Below I will show you how to avoid this fate with a very easy life hack.
Before we start, some notes:
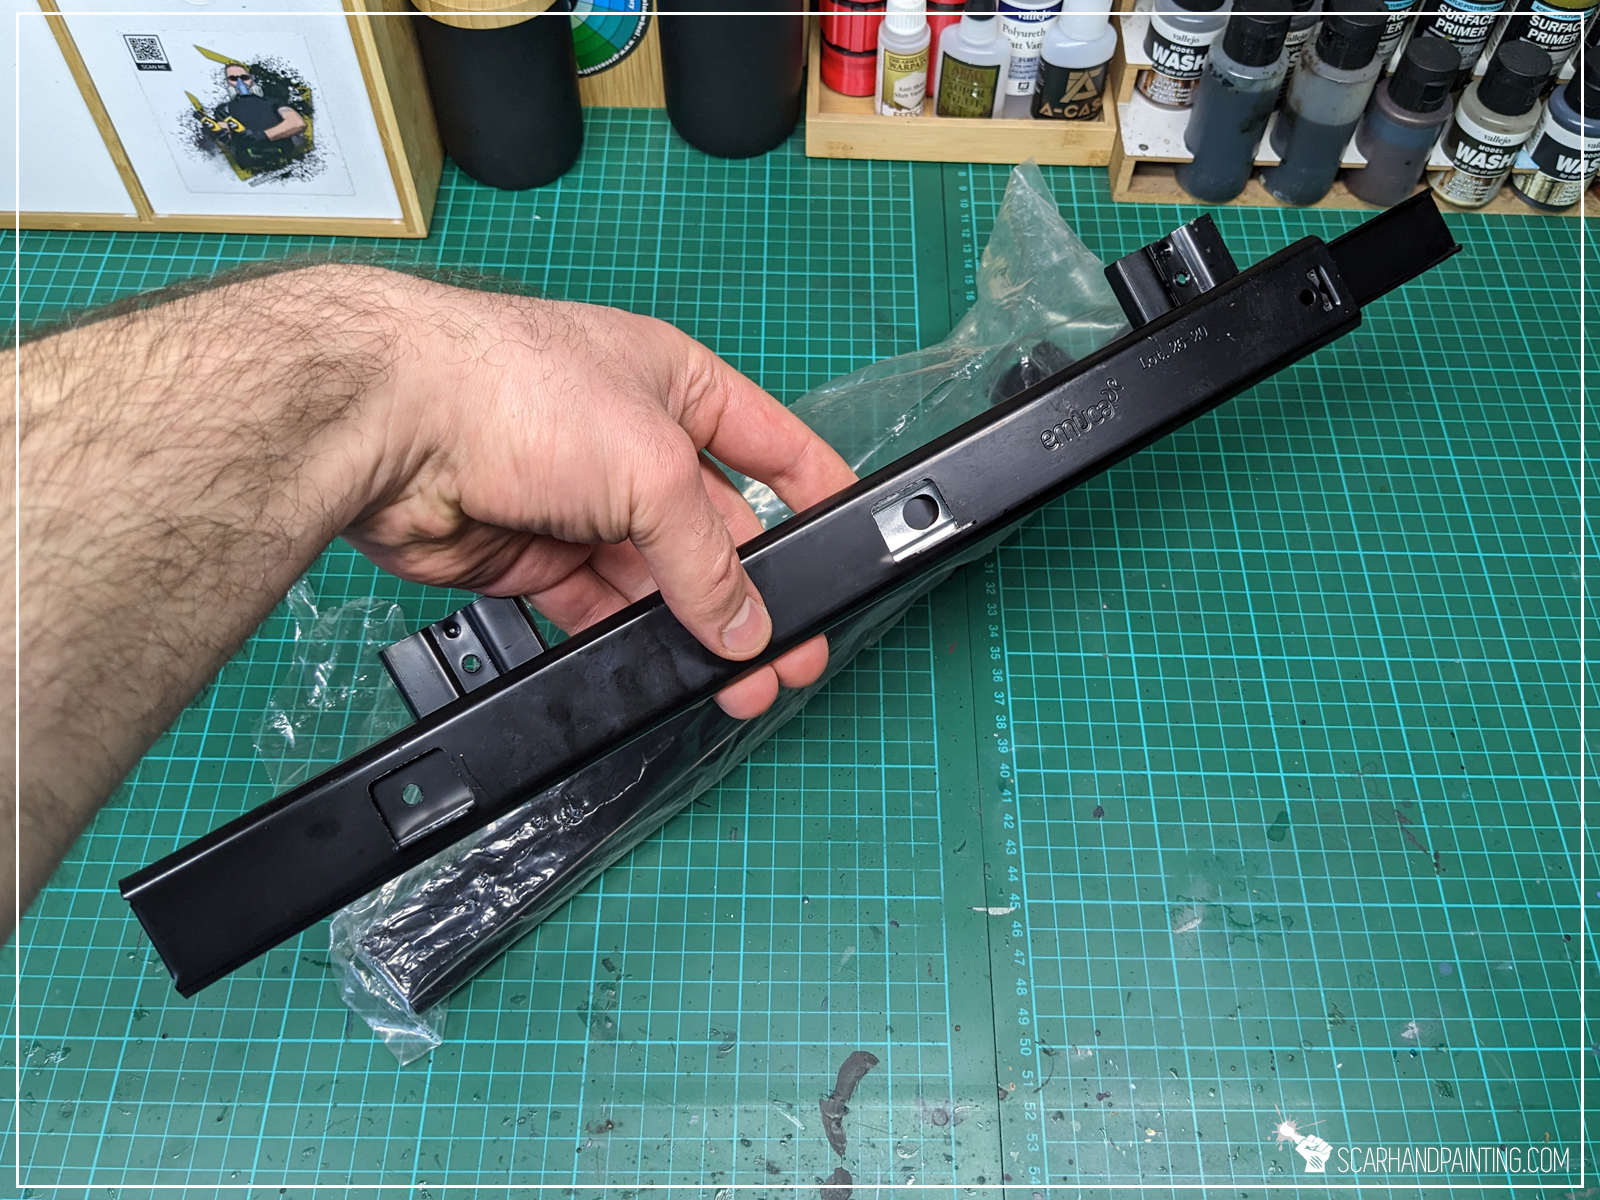
This tutorial focuses on Games Workshop bases specifically as they tend to have empty undersides.
For conveniences sake I highly recommend magnetizing bases before painting.
Please take note that what works for me might not necessarily work for you.
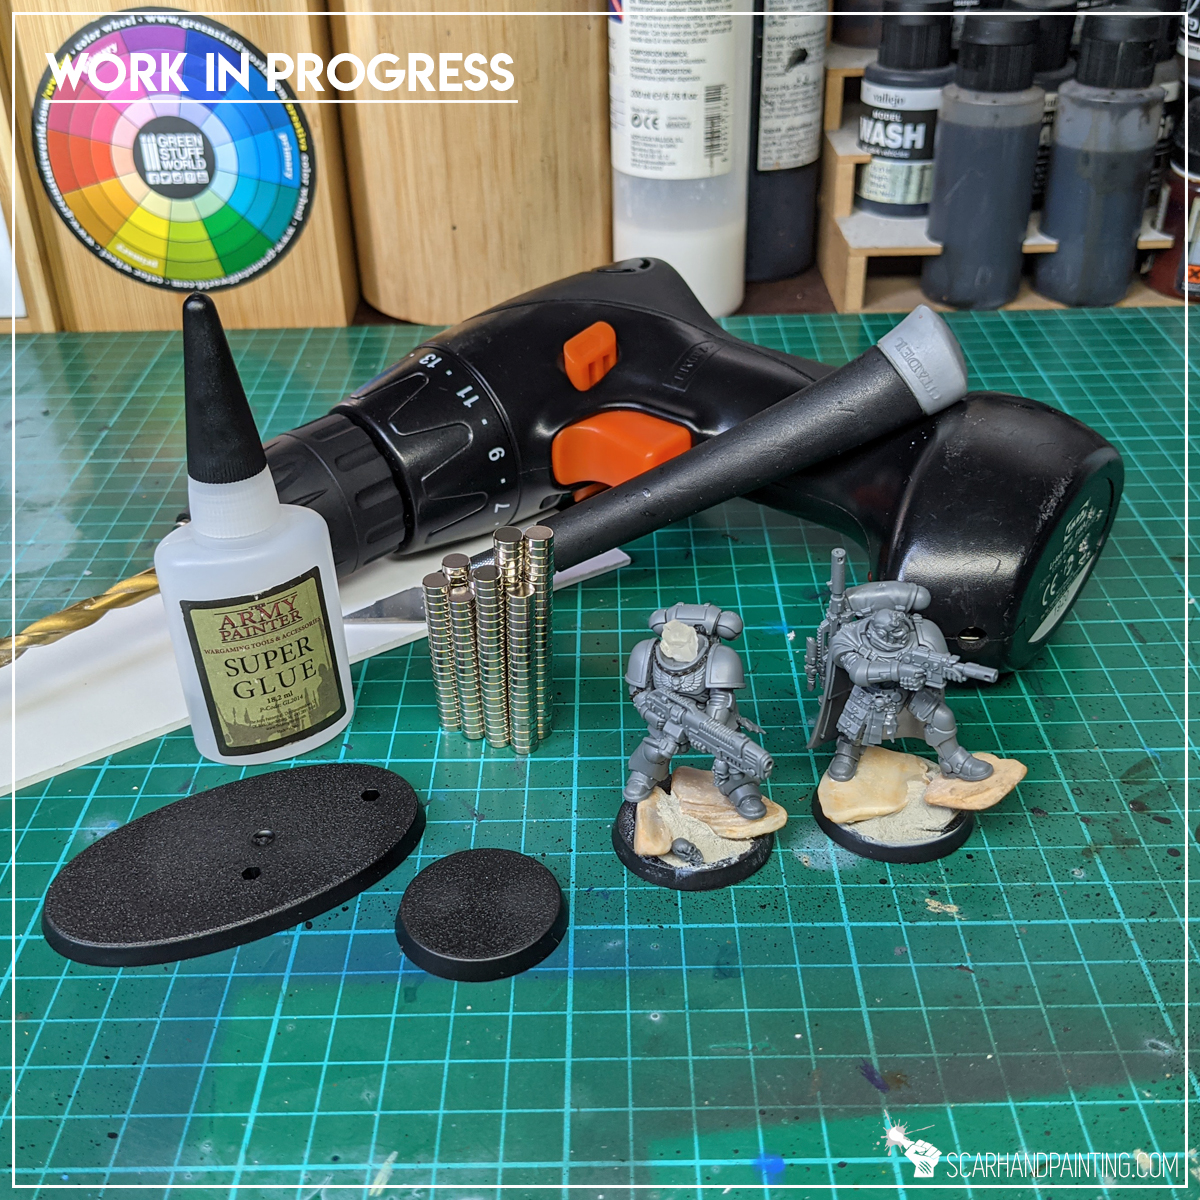
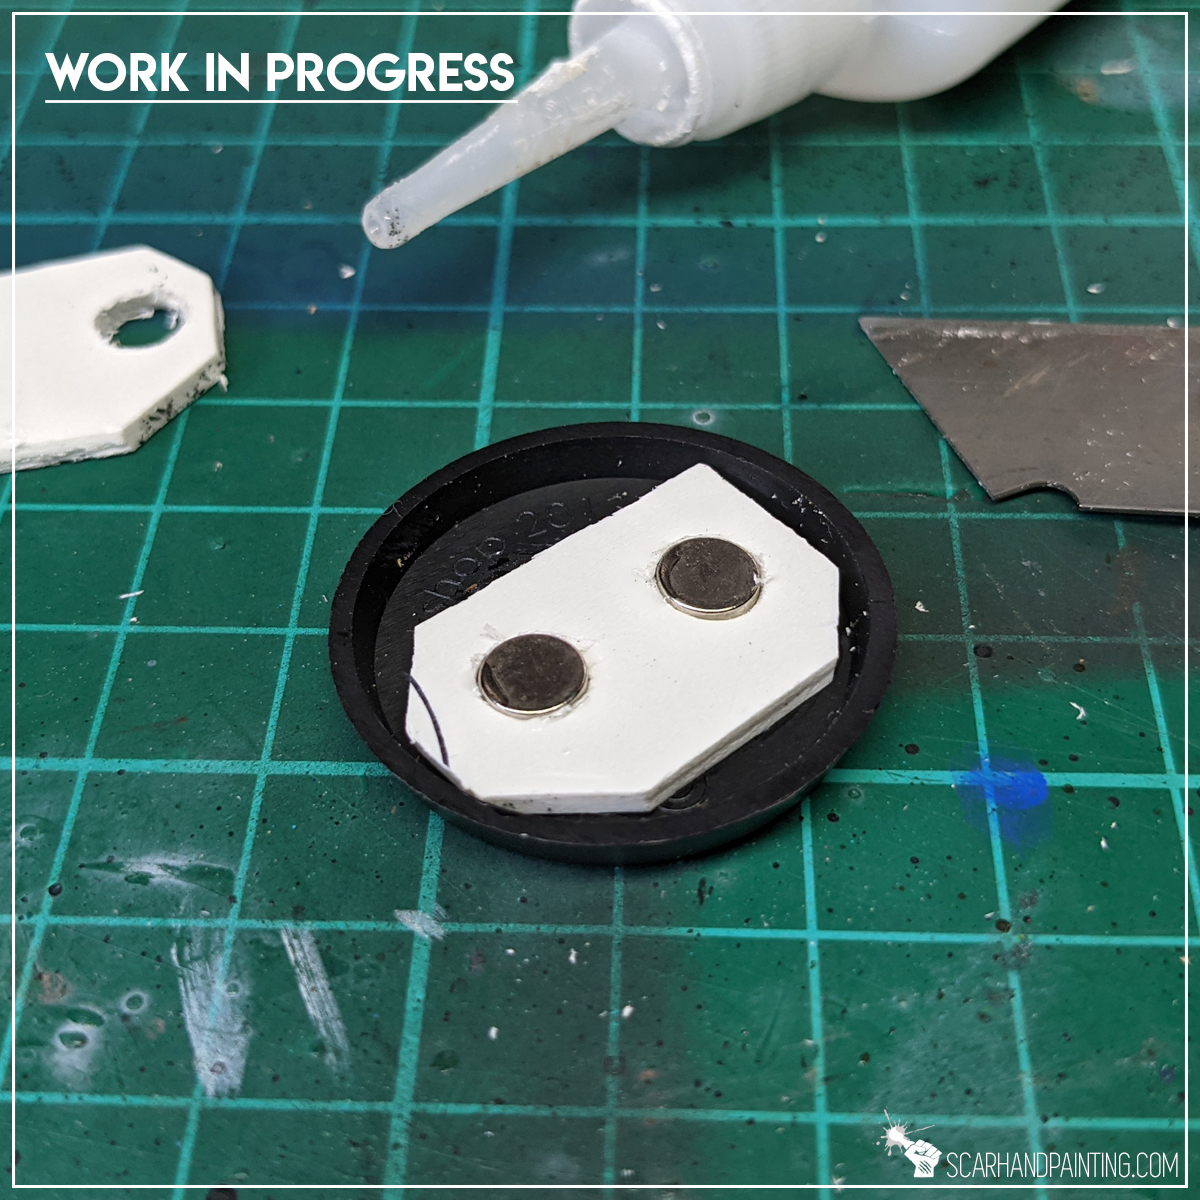
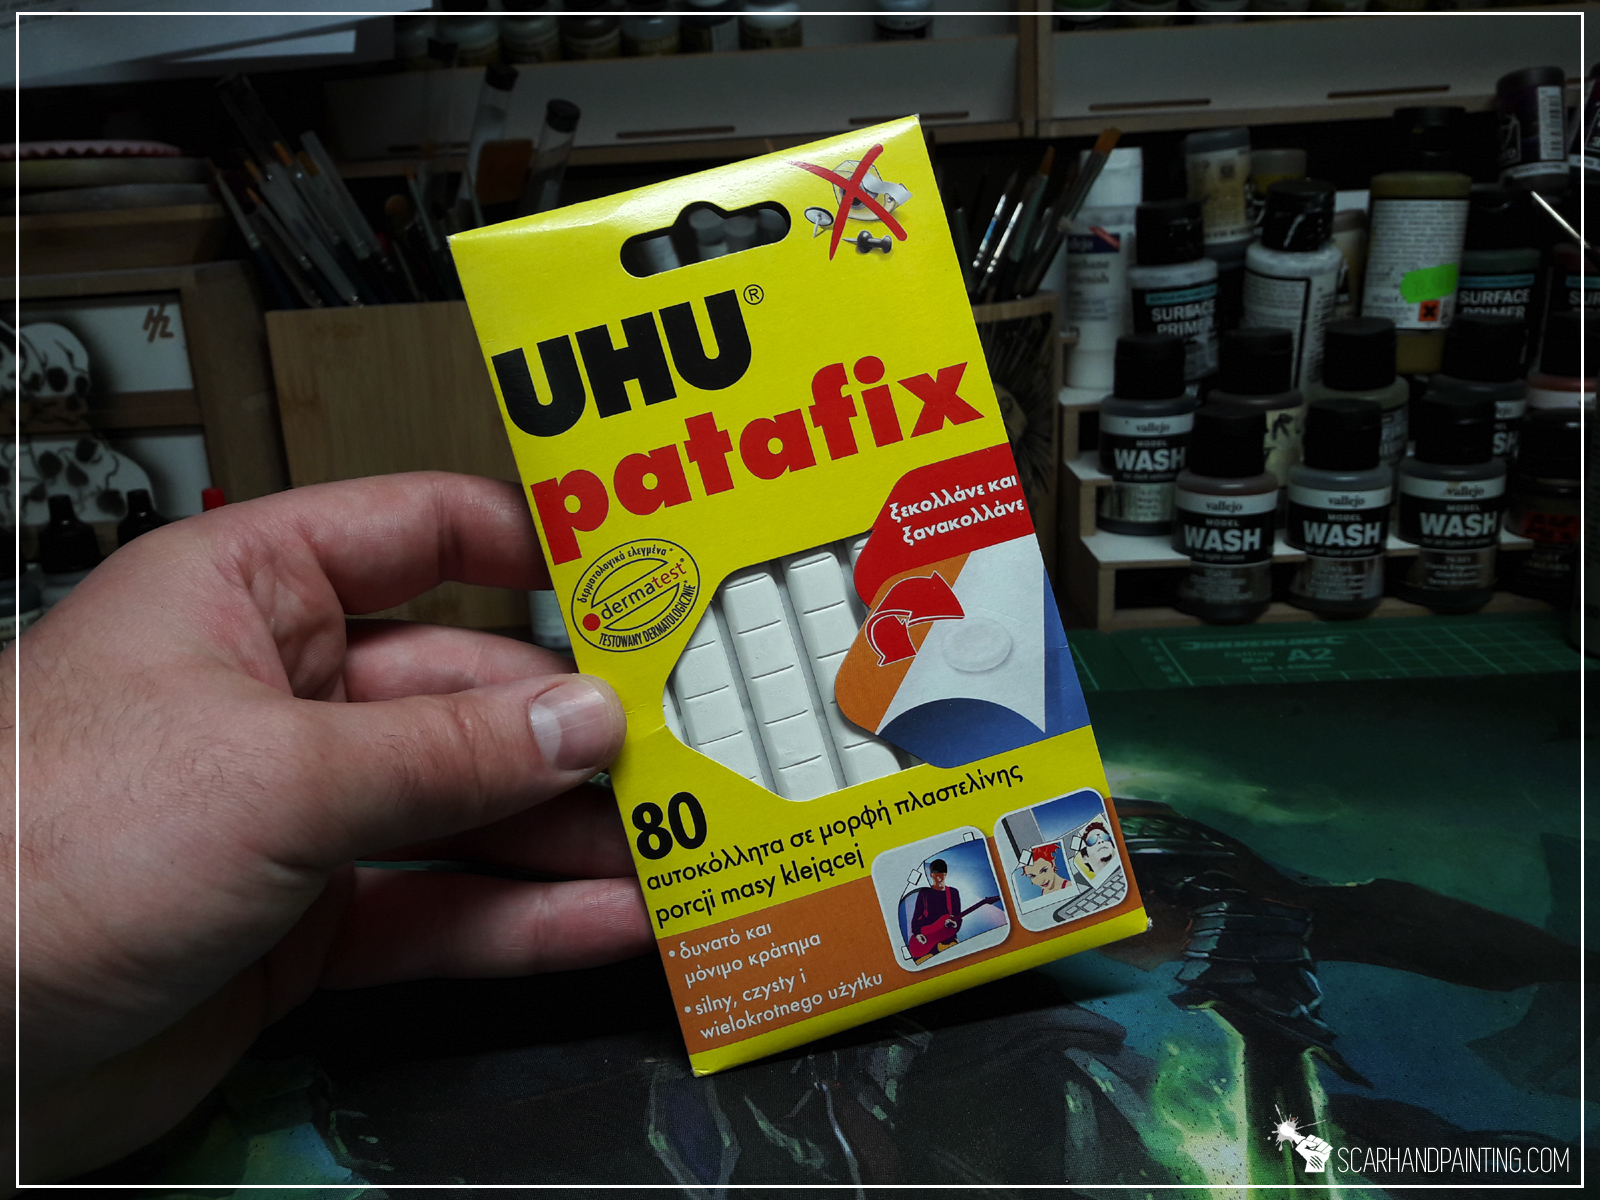
Let’s start by toppling the topic of magnets falling off a base. This happens because the entirety of miniature’s weight is held in place by a relatively tiny spot of contact between a magnet and a base. The smaller the area of contact and the heavier a miniature – the more probable a COVFEFE in your carrying case. To avoid this, but also keep the size of magnets reasonable, I propose to use sockets. A socket extends the area of contact to the sides of a magnet and greatly increases strength with which the magnet is held in place. A proper material for a socket will also increase the bond between the magnet and plastic base.

Another thing is choosing a right size and the amount of magnets for each miniature. Personally I tend to go with two magnets for infantry, three to four for large infantry and cavalry and more for anything larger, depending on weight. The size of these varies depending on what bases I work with. For Games Workshop bases I go with 5x2mm magnets, which work as a charm, providing just enough strength to keep miniatures in place, but not as much as to prevent me from comfortably picking the miniatures.
Boy oh boy, so much theory… “where’s the actual tutorial?!” you might ask. Ok, let’s just go straight for the easy step-by-step.
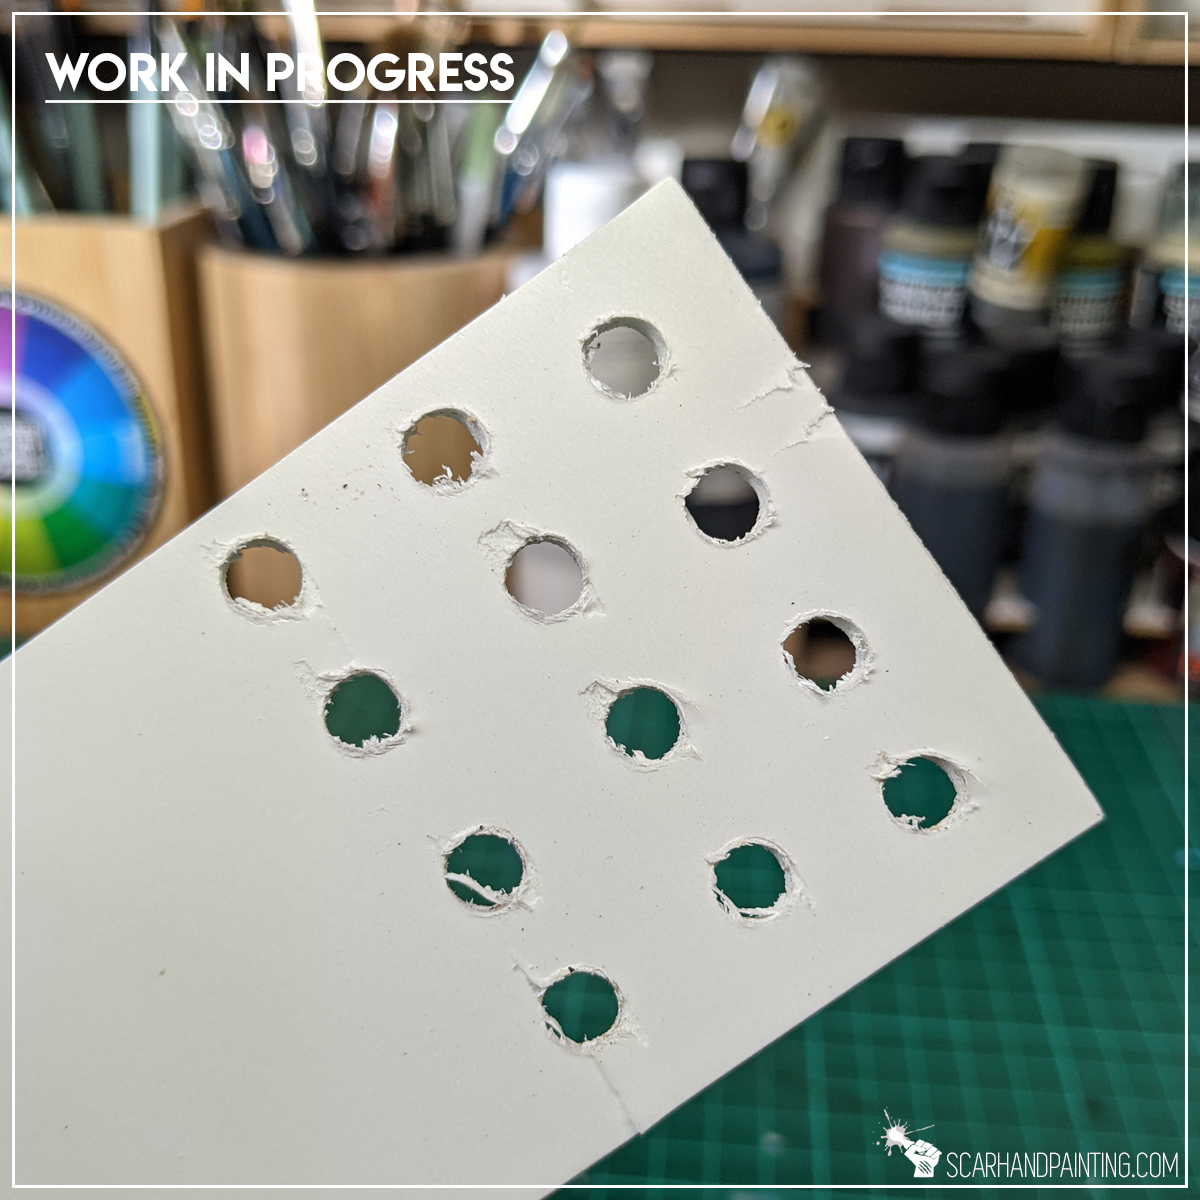
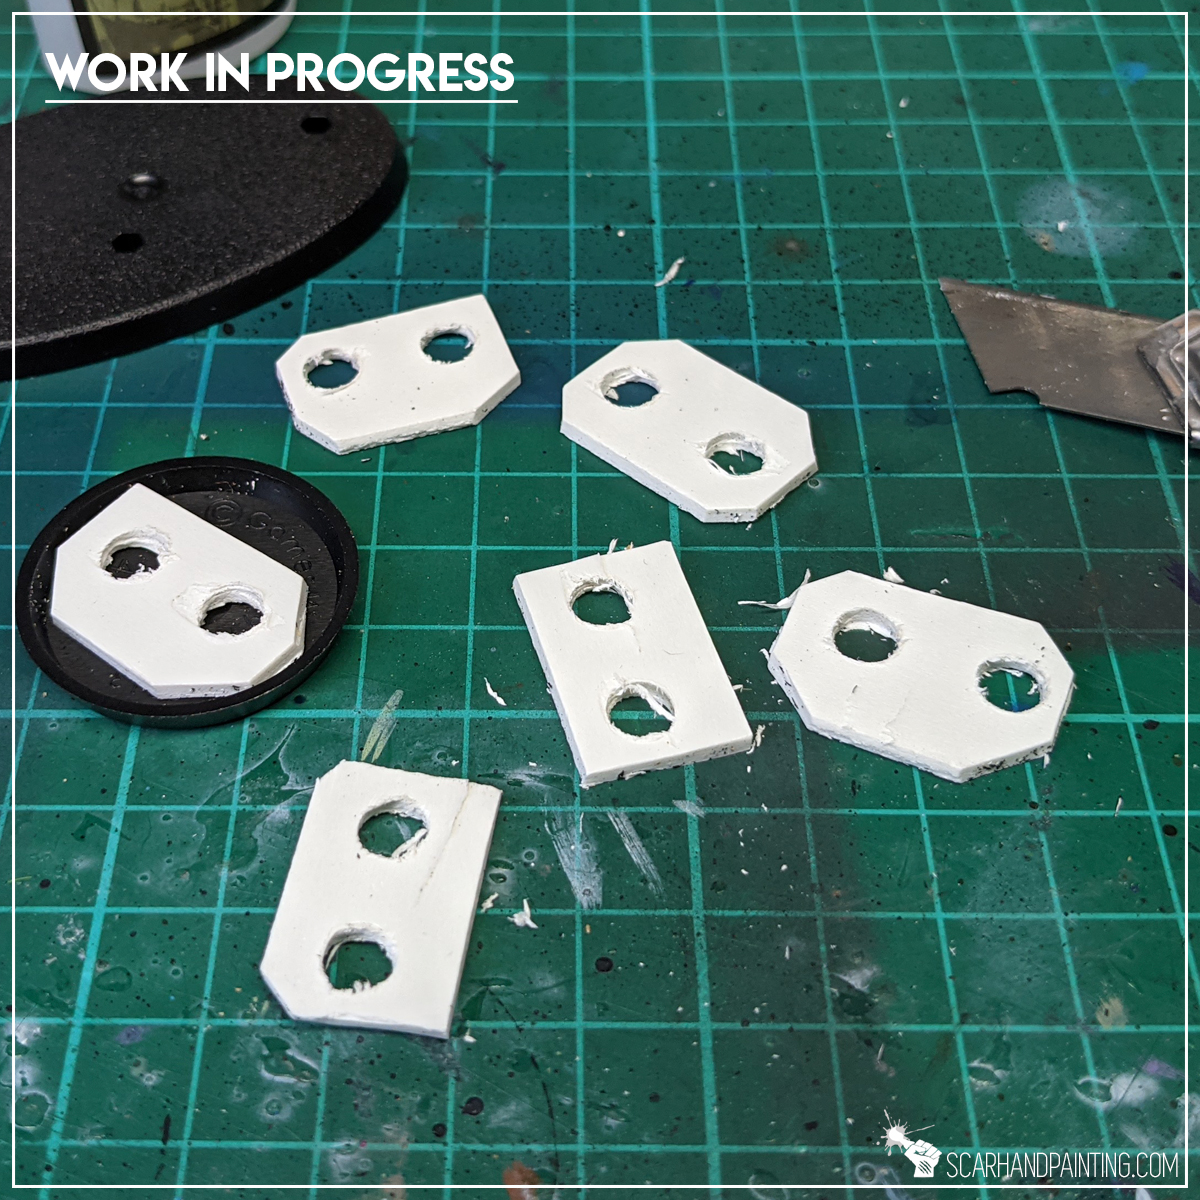
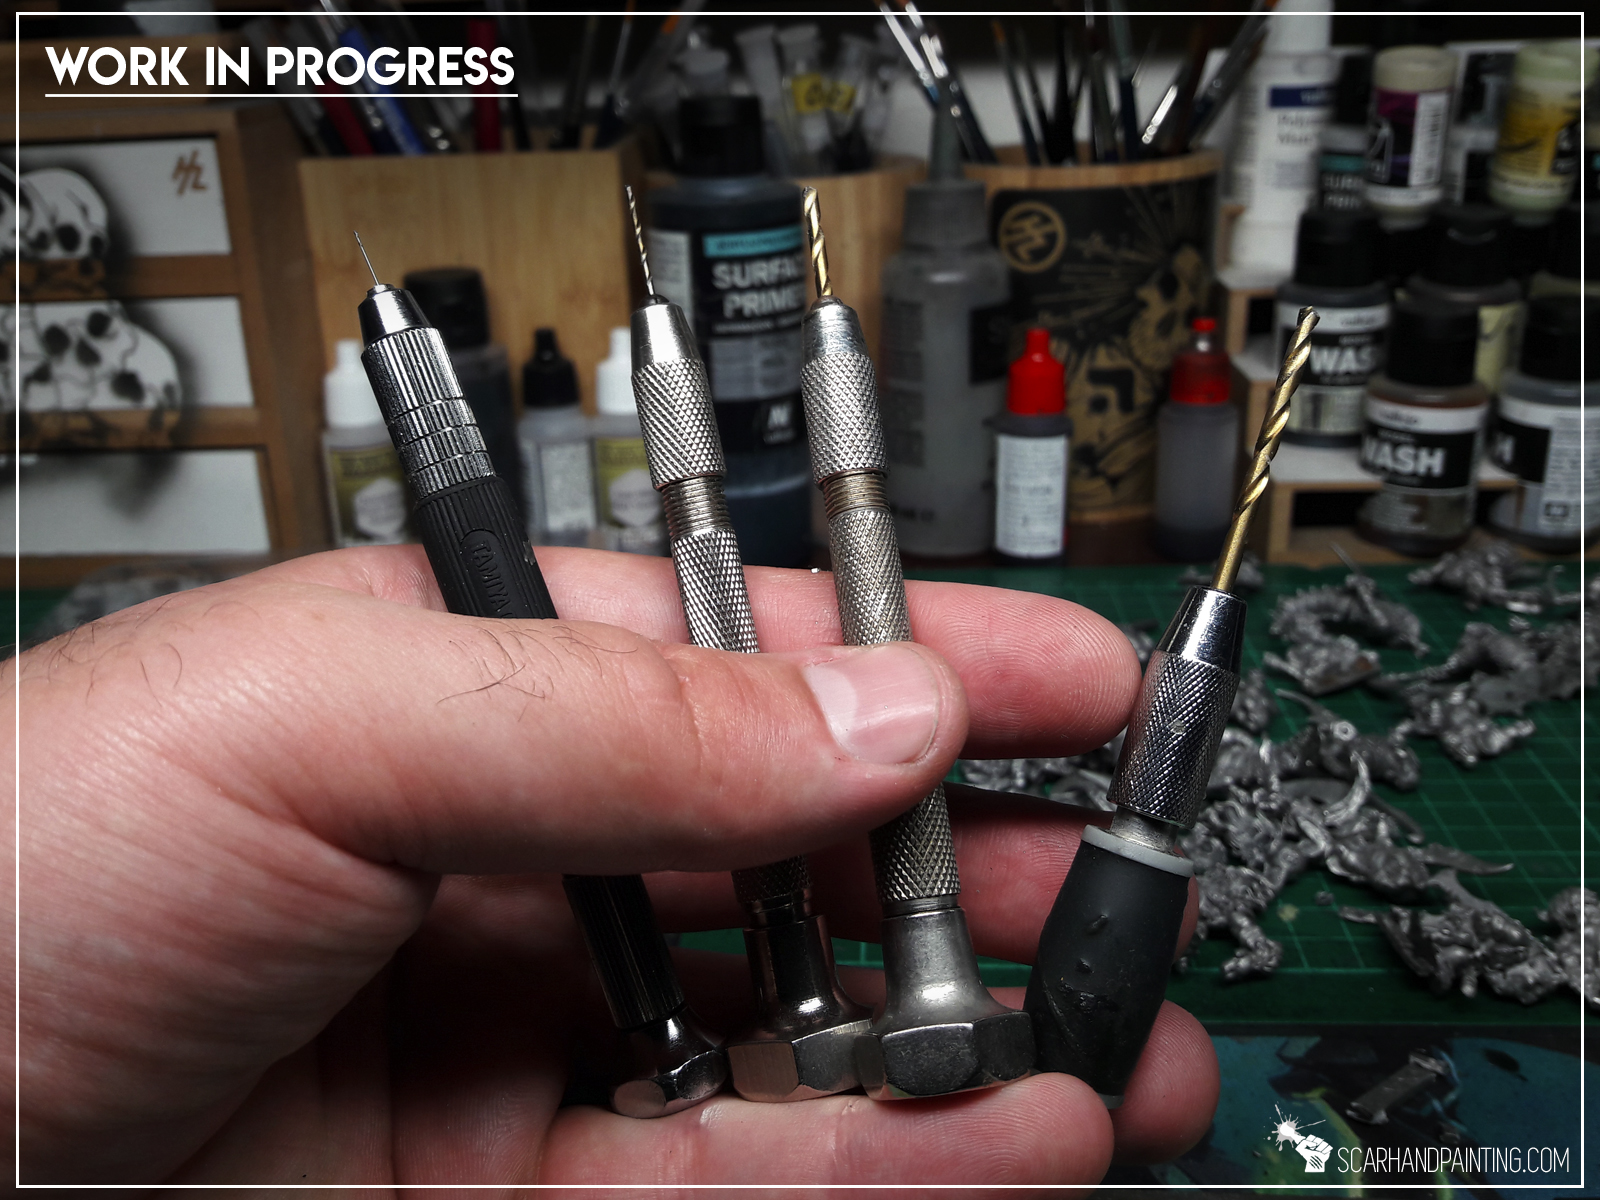
Step one: the PVC
Start by drilling holes in the PVC one beside another with few mm in-between. No need to be very precise. Once done, use a hobby knife to cut the PVC into small two-holes pieces, as seen in the picture below. These are now “sockets” to hold the magnets in. Test if all sockets fit the bases, make some adjustments if necessary.

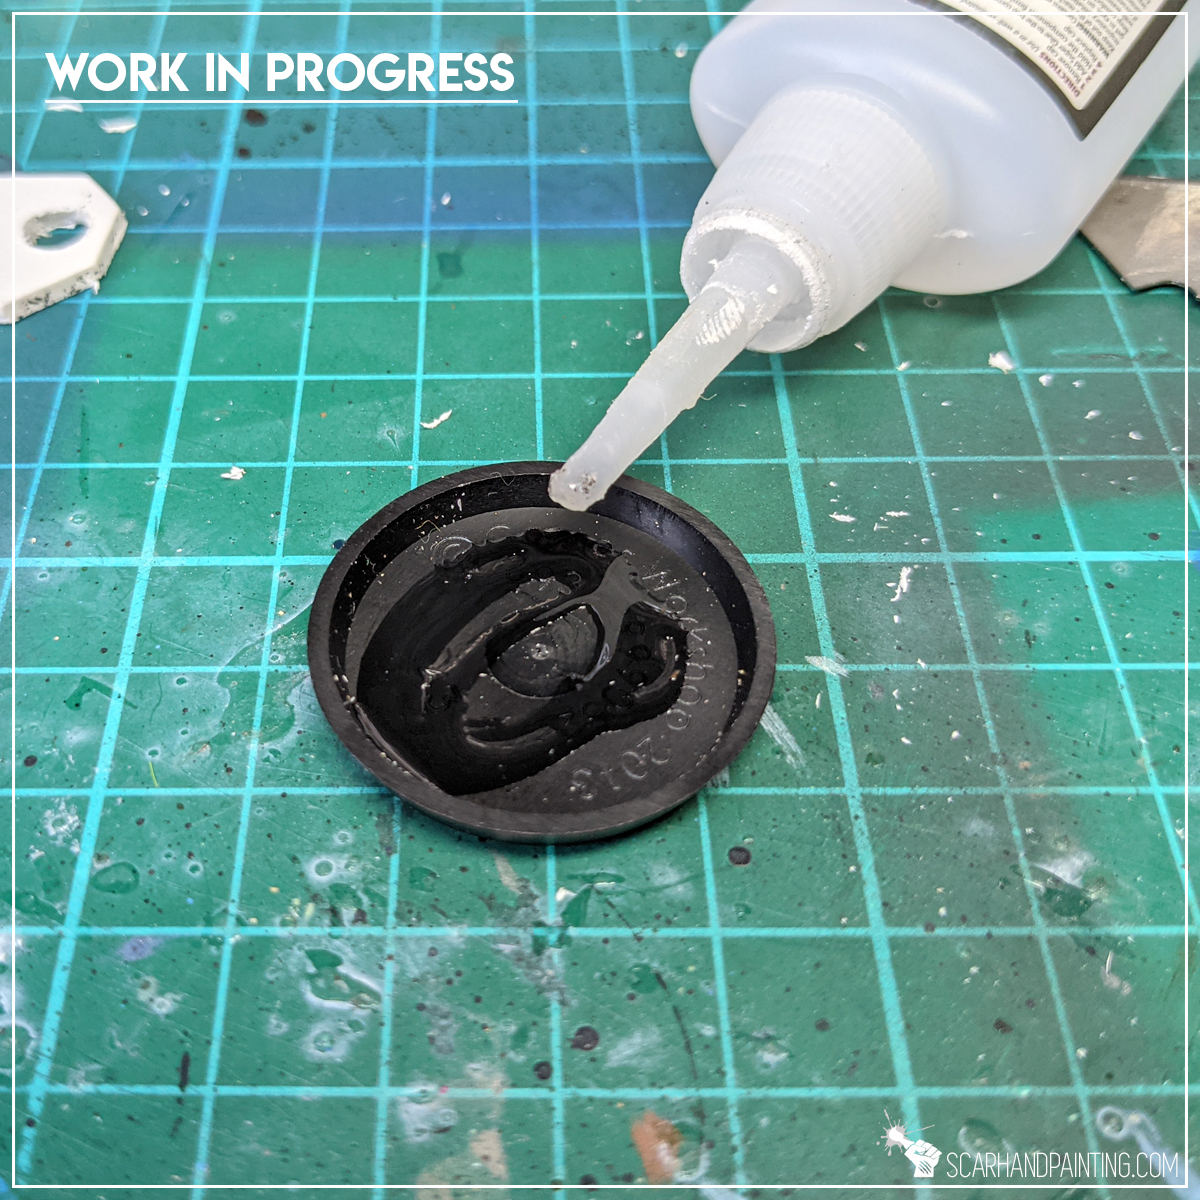
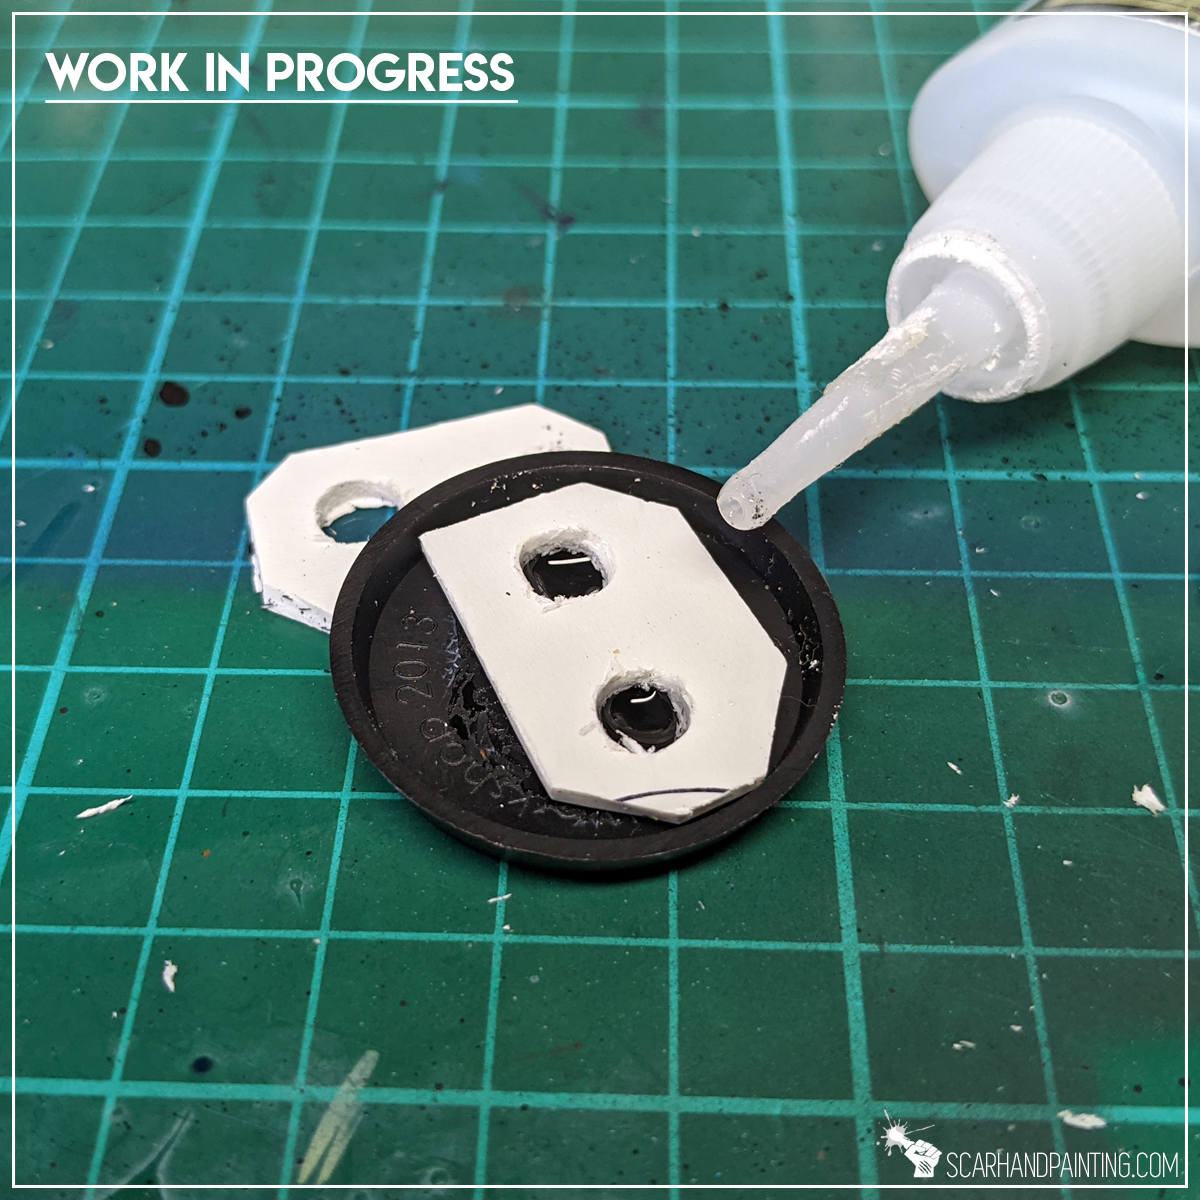
Step two: Mounting Sockets
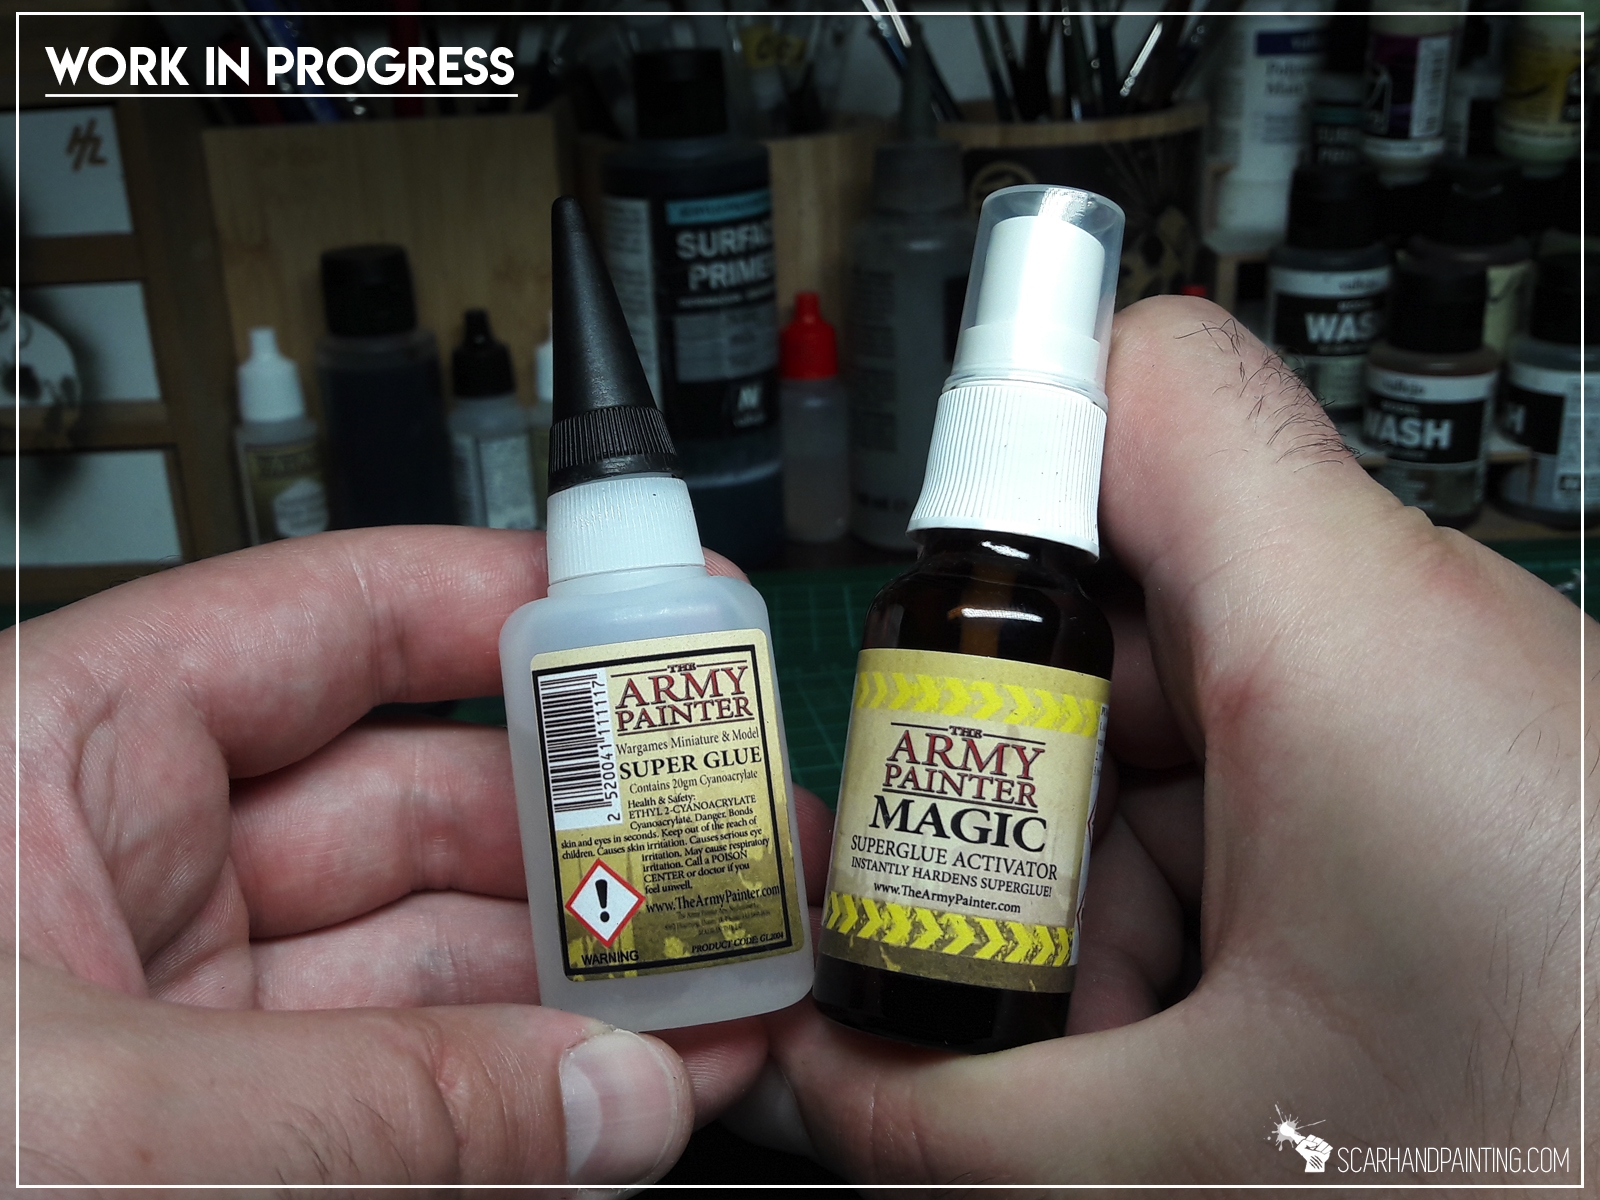
Turn the base upside down, apply some Super Glue onto the surface and glue the socket on top. Avoid sticking your fingers through the holes as you might end up becoming one with the base by accident 🙂

Step three: the Magnets
Apply Super Glue into the sockets and glue the magnets in. Try to glue all the magnets in same direction for better effect. I found that it is better to put the magnet just barely into the socket, then flip the base and push it on top of a flat surface. This way the magnet will slide inside a socket up to a level of the base’s edge, thus providing good connection to a future metal transportation surface.

Hey! That’s it! These three simple steps will greatly increase your magnets (and miniatures) survivability during transportation. I’ve been using this solution for couple of years now, with no bad experience what so ever and I hope it will work for you just as well.


I hope you find this tutorial interesting. Be sure to let me know your thoughts in the comments below or via Facebook.or Instagram. I would also appreciate if you considered sharing this content with your hobby buds, who might find it useful. Finally if you are looking for a professional miniatures painting service be sure to contact me via this contact form. I always reply within 24 hours, after which please check out your spam folder.
Cheers!
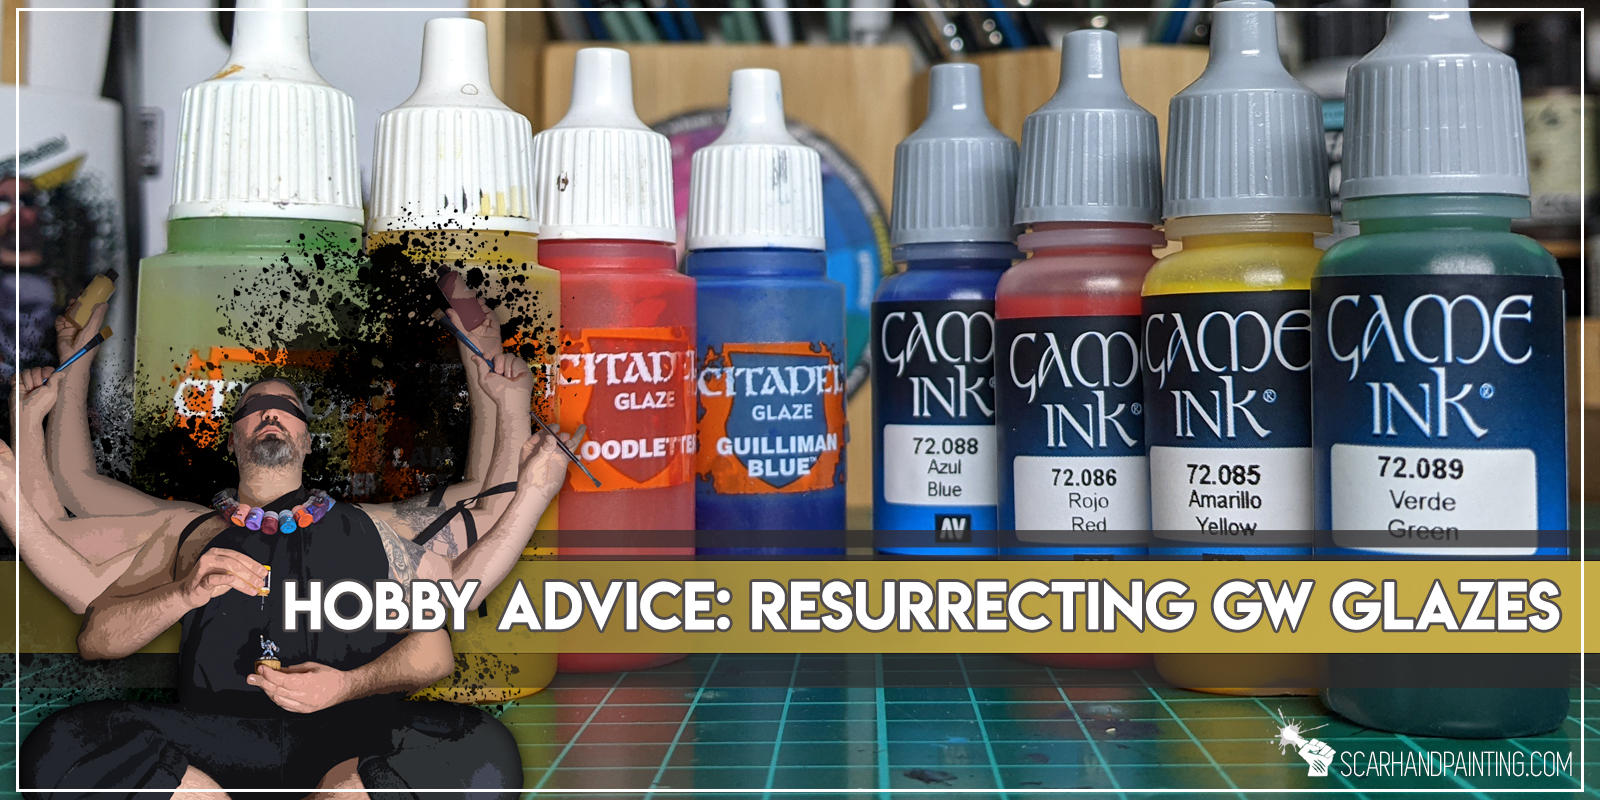
Being a commission painter, or even just a casual hobbyist, might see you grow attached to a certain line of paints. What if suddenly these paints become out of production? Having to change one’s painting habits is rough. Being left in a middle of a project, without means to continue seems even worse!
I’ve been hobbying for over twenty years now. Easy to say I have seen my share of paints going OOP. Been on a receiving end of such blows far too many times. The most recent and by far most painful was Games Workshop’s removal of the amazing Glaze series. Using these as Washes, Glazes and even Mix ingredients I grew to love them. No amount of Contrast paints will fill the void, as these are a thing of their own with different qualities and behavior.
And thus after burning (or rather flowing) though my stash of GW Glazes I started searching for a stable source of substitute. I experimented with Army Painter, Privateer Press, Games Workshop and more. In the end salvation came from Vallejo. It turned out their Game Inks are already pretty close to old GW Glazes. Few tweaks saw these pretty much spot on. See for yourself.
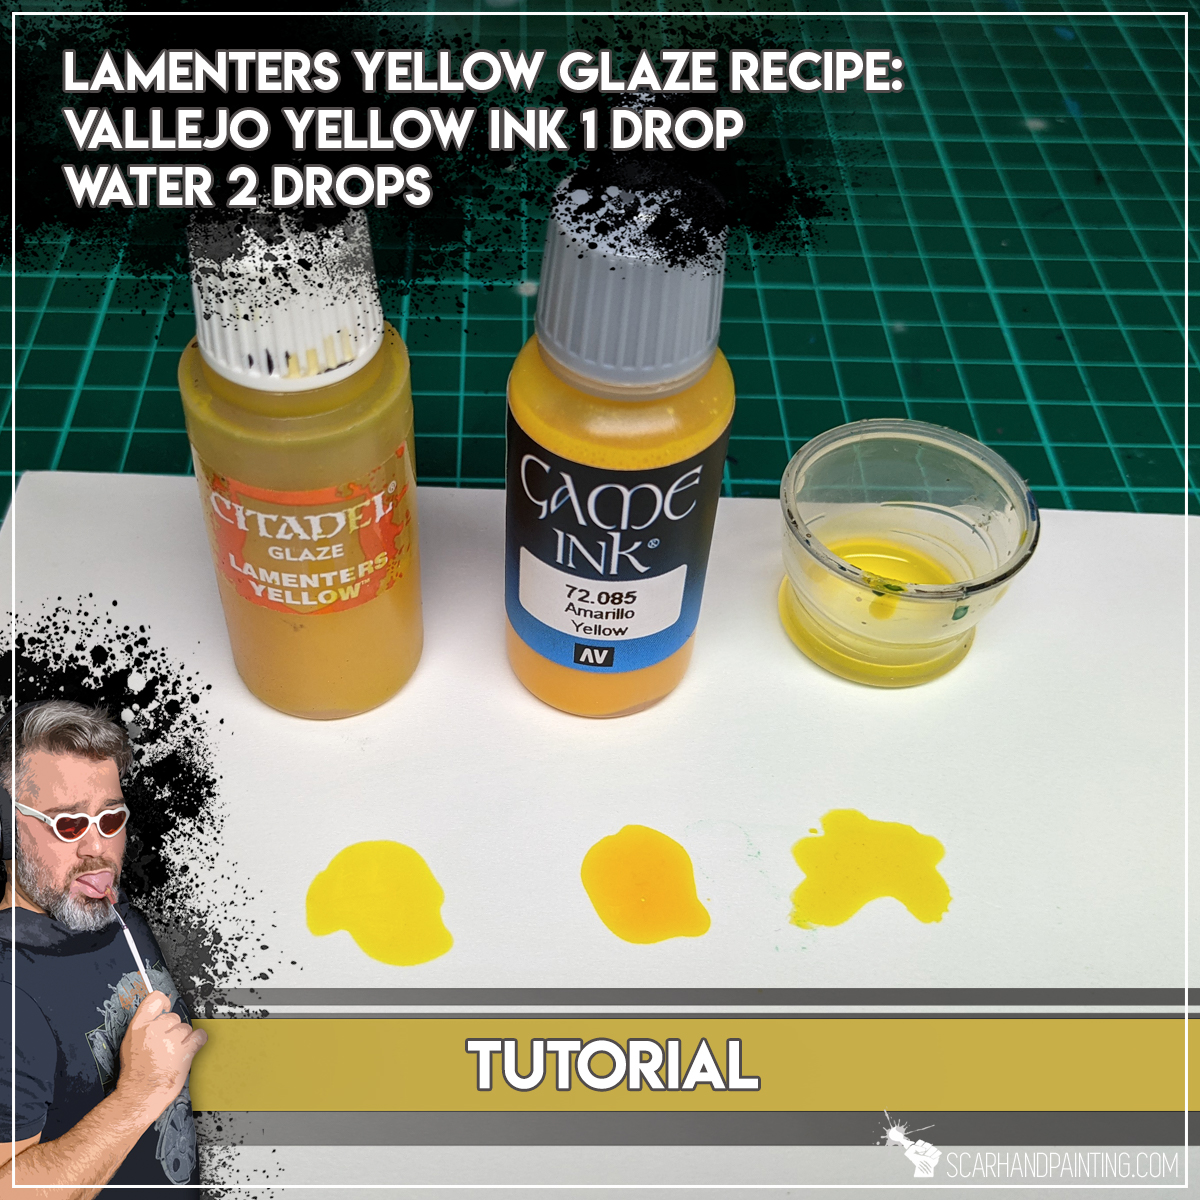
Recipe:
Vallejo Game Ing 72.085 Yellow 1 drop
Water 2 drops

Recipe:
Vallejo Game Ink 72.086 Red 4 drops
Vallejo Game Ing 72.085 Yellow 1 drop
Water 10 drops
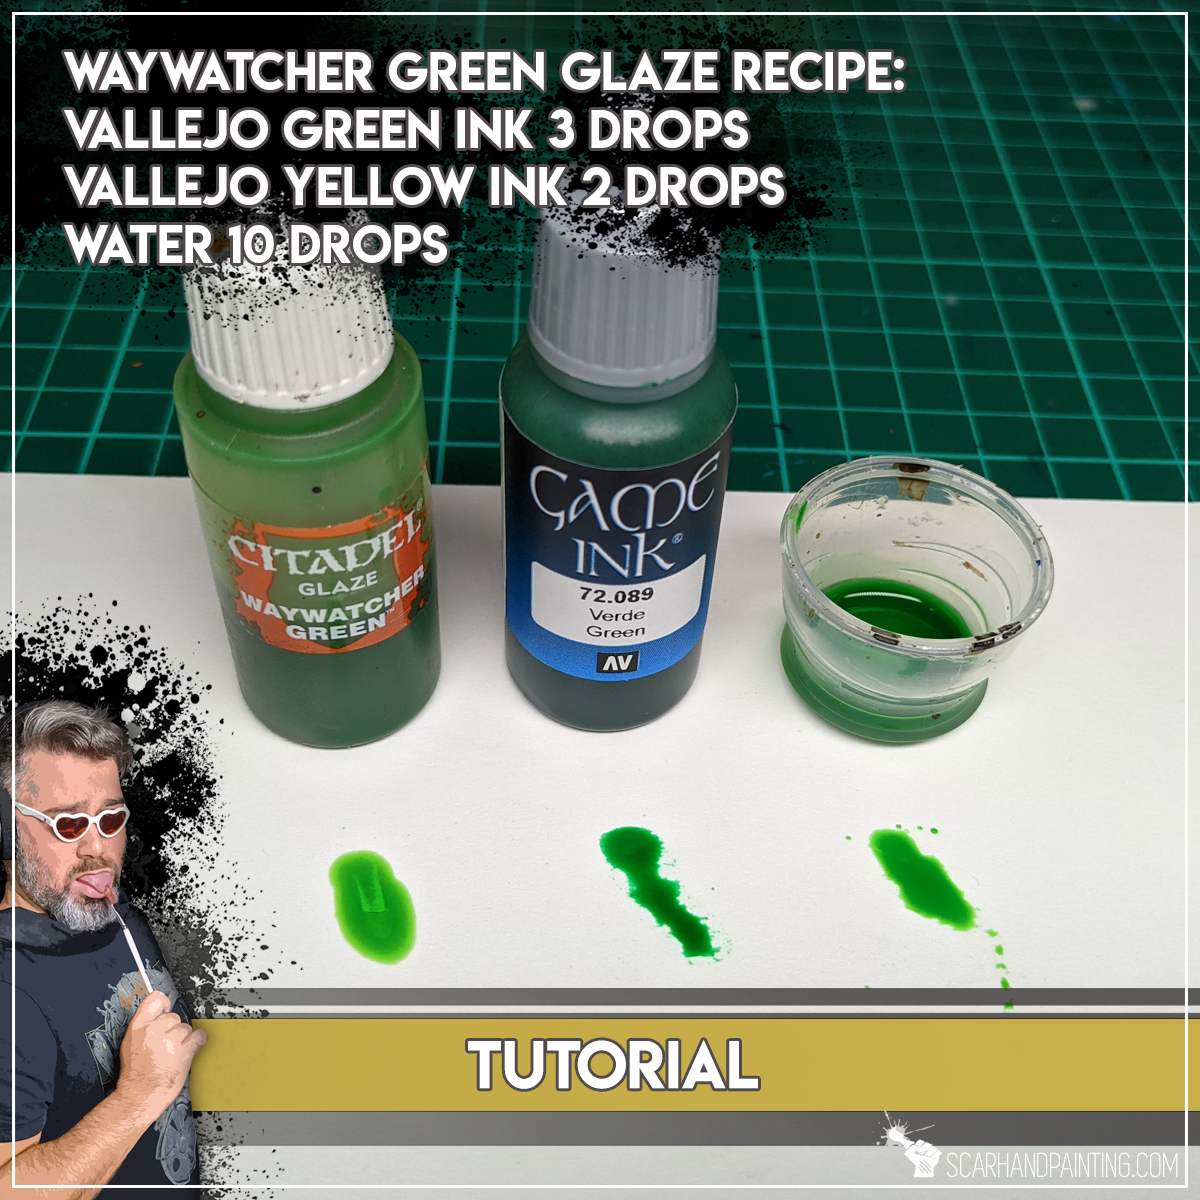
Recipe:
Vallejo Game Ink 72.089 Green 3 drops
Vallejo Game Ing 72.085 Yellow 2 drops
Water 10 drops
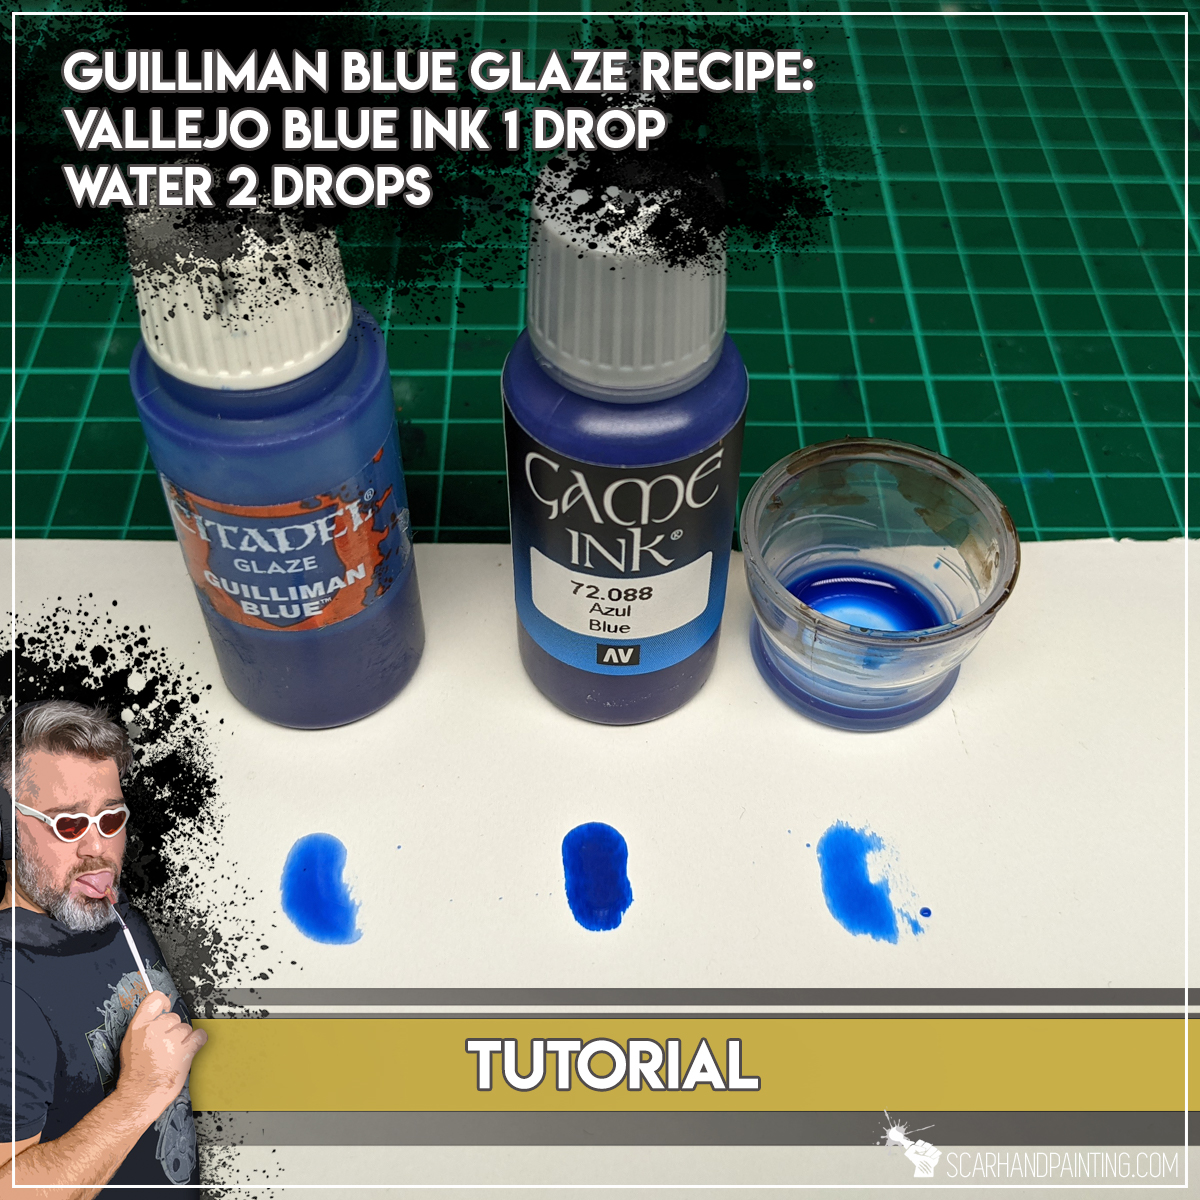
Recipe:
Vallejo Game Ink 72.088 Blue 1 drop
Water 2 drops

There you have it. I hope this will help you refill your own bottles of old GW Glazes.
If you like the article, consider sharing it with someone who likes hobbying around with miniatures. Find me on Facebook and Instagram. Most importantly have a great hobby time!
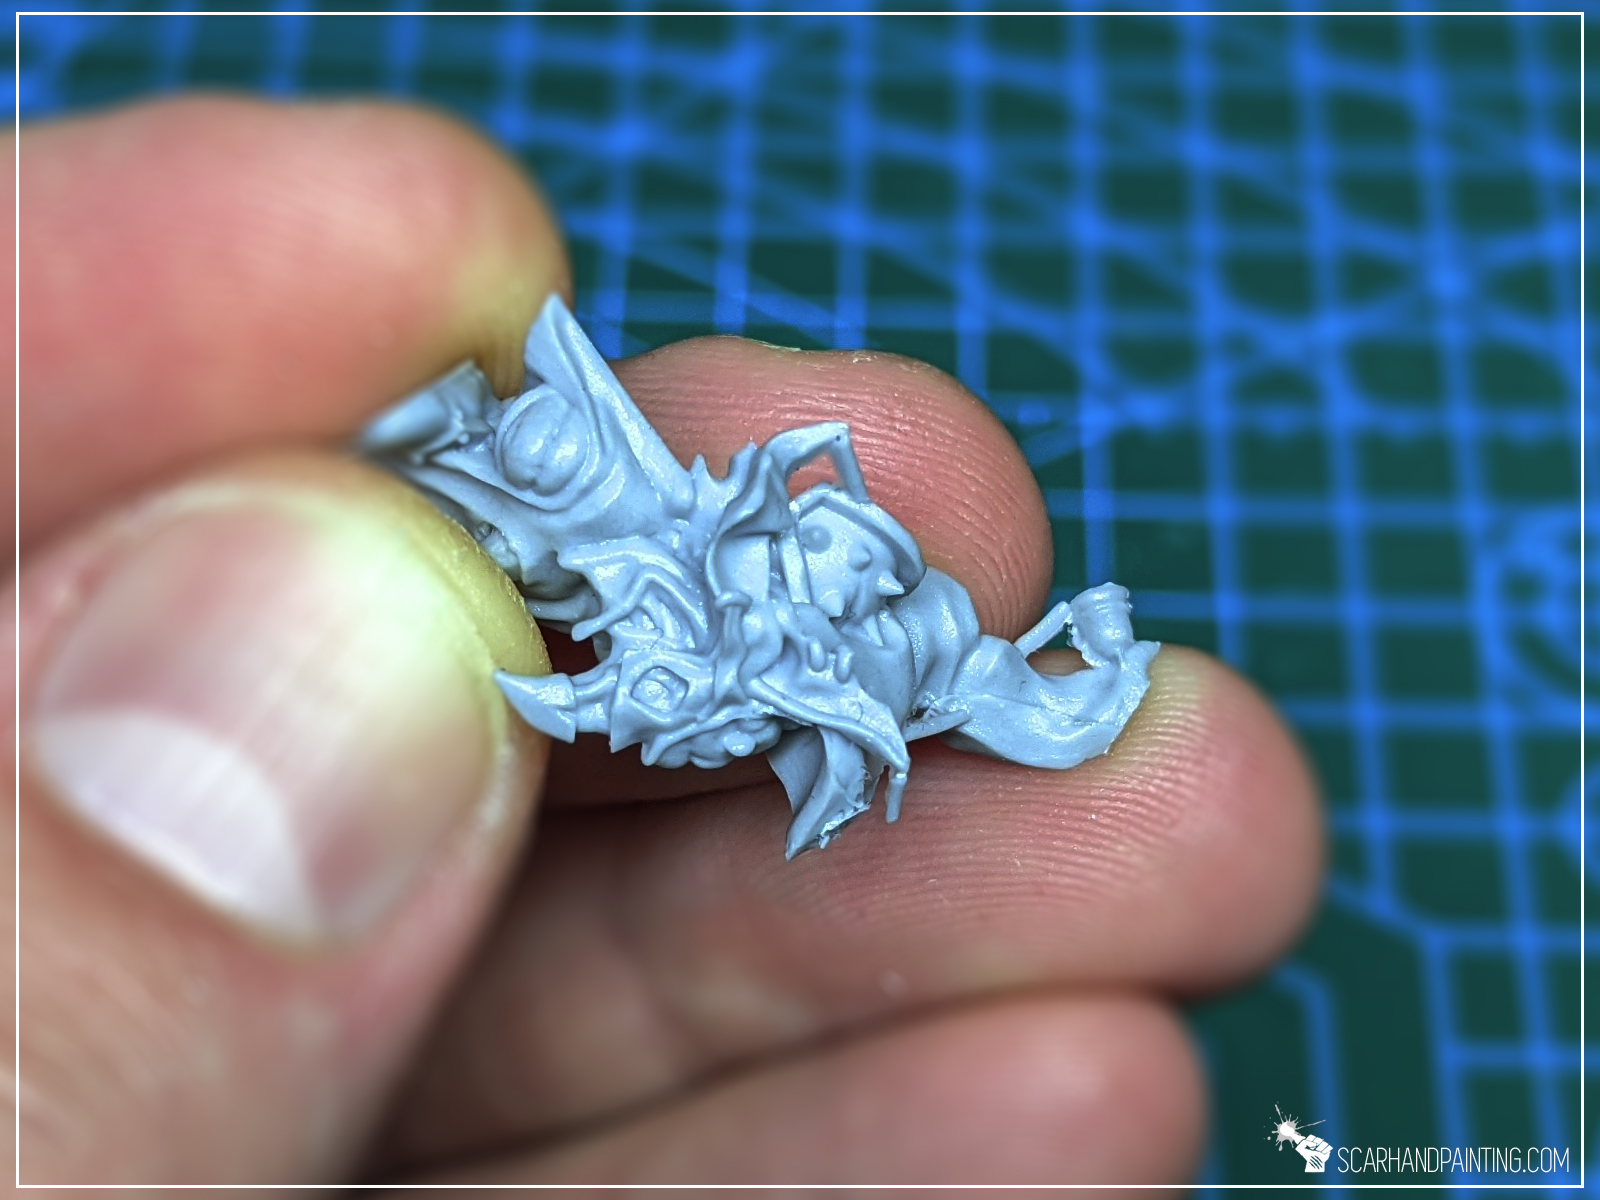
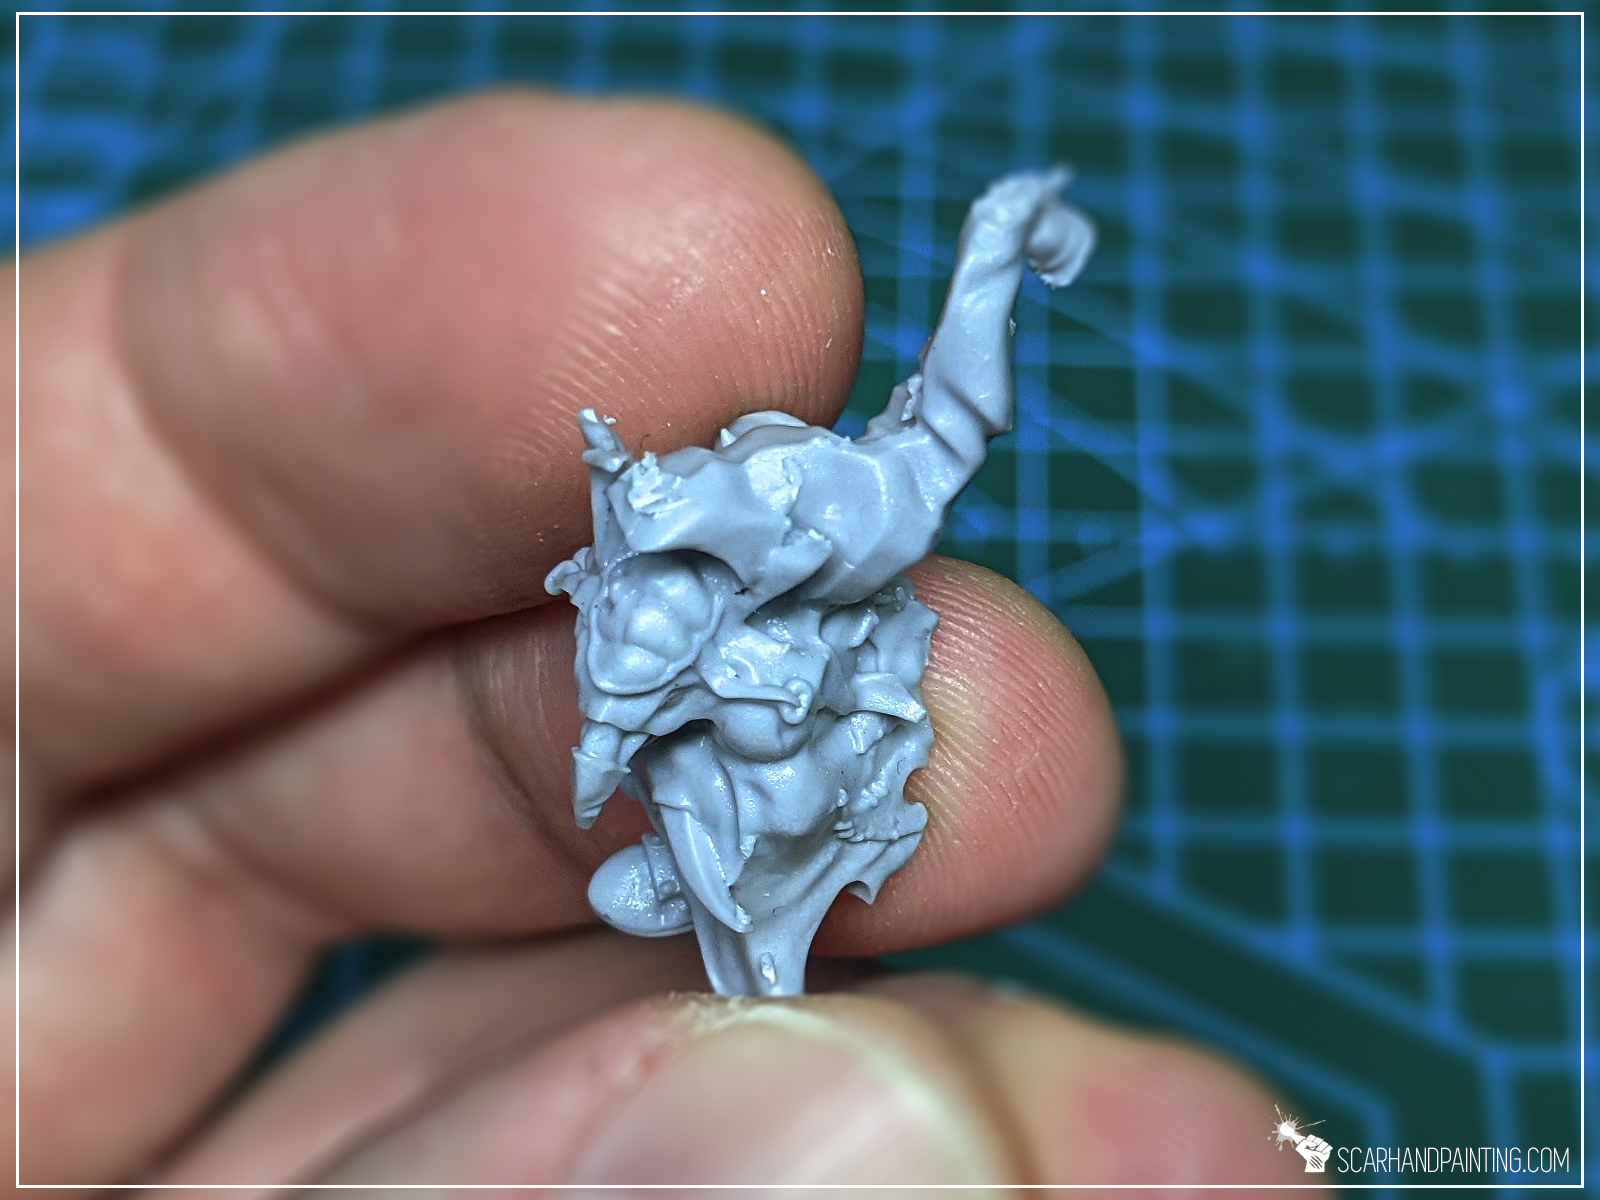
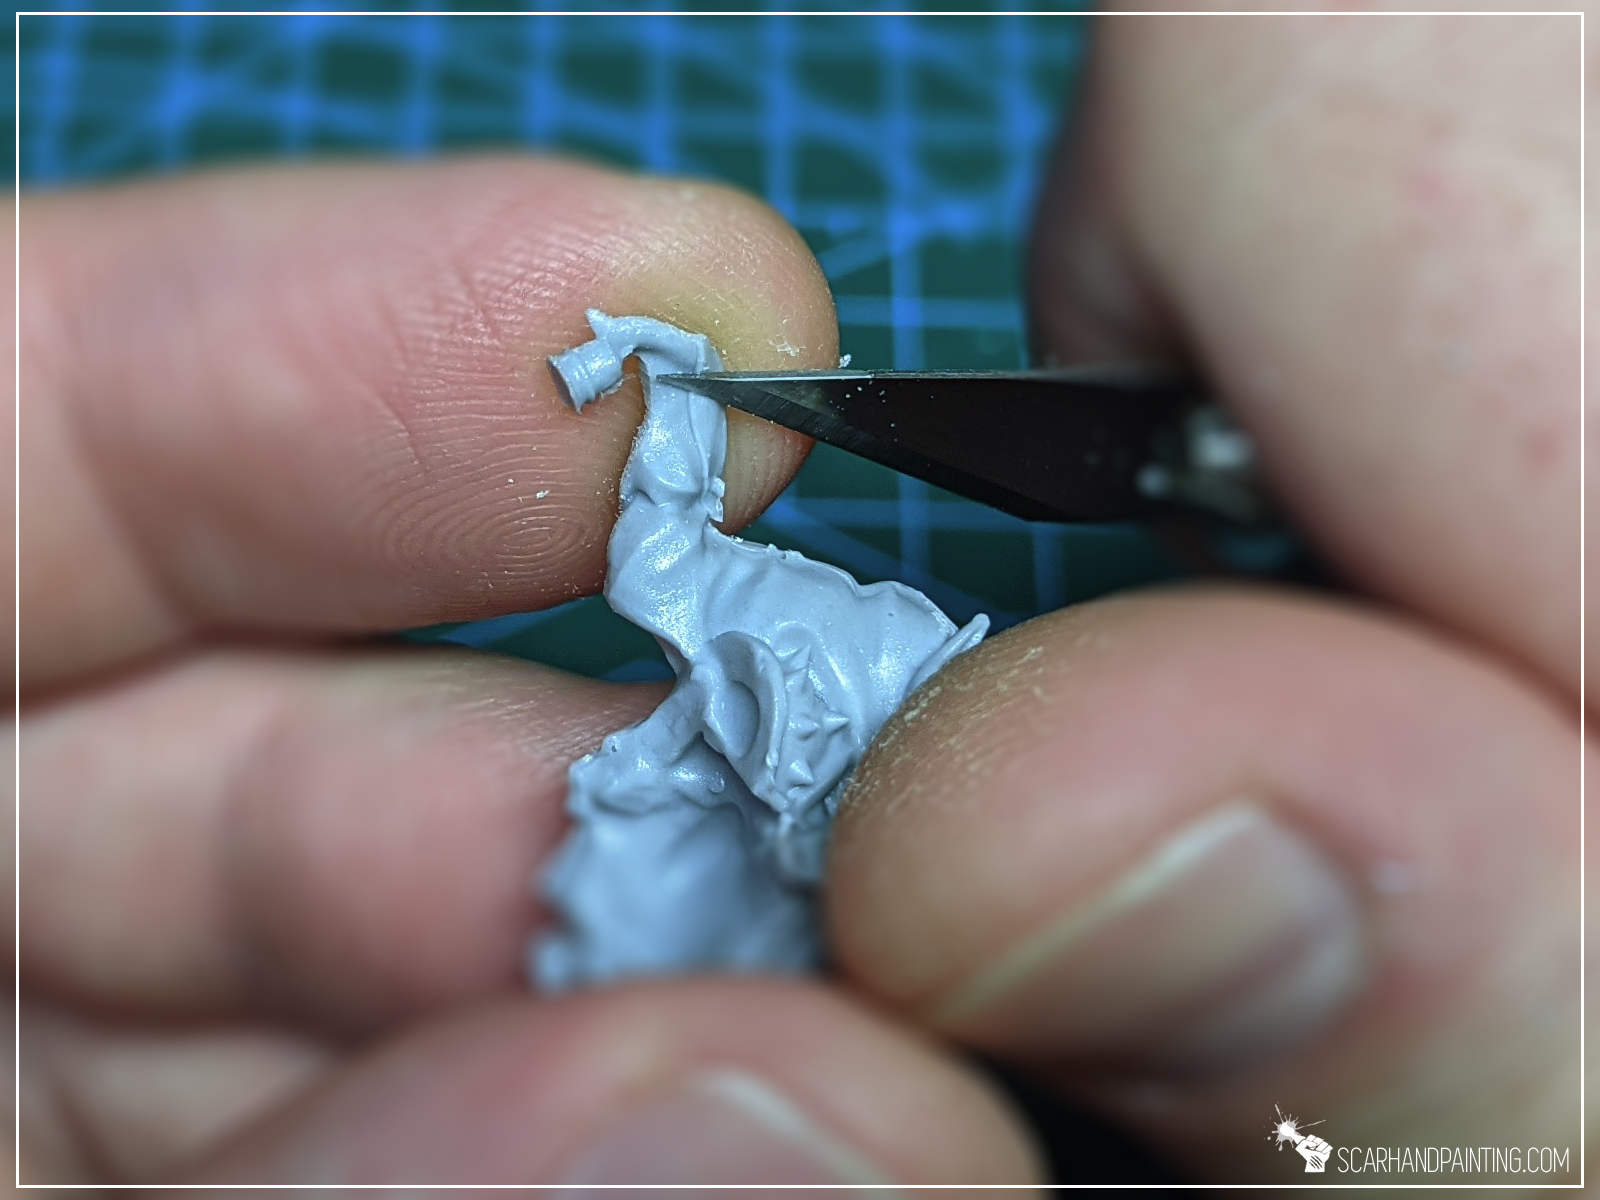
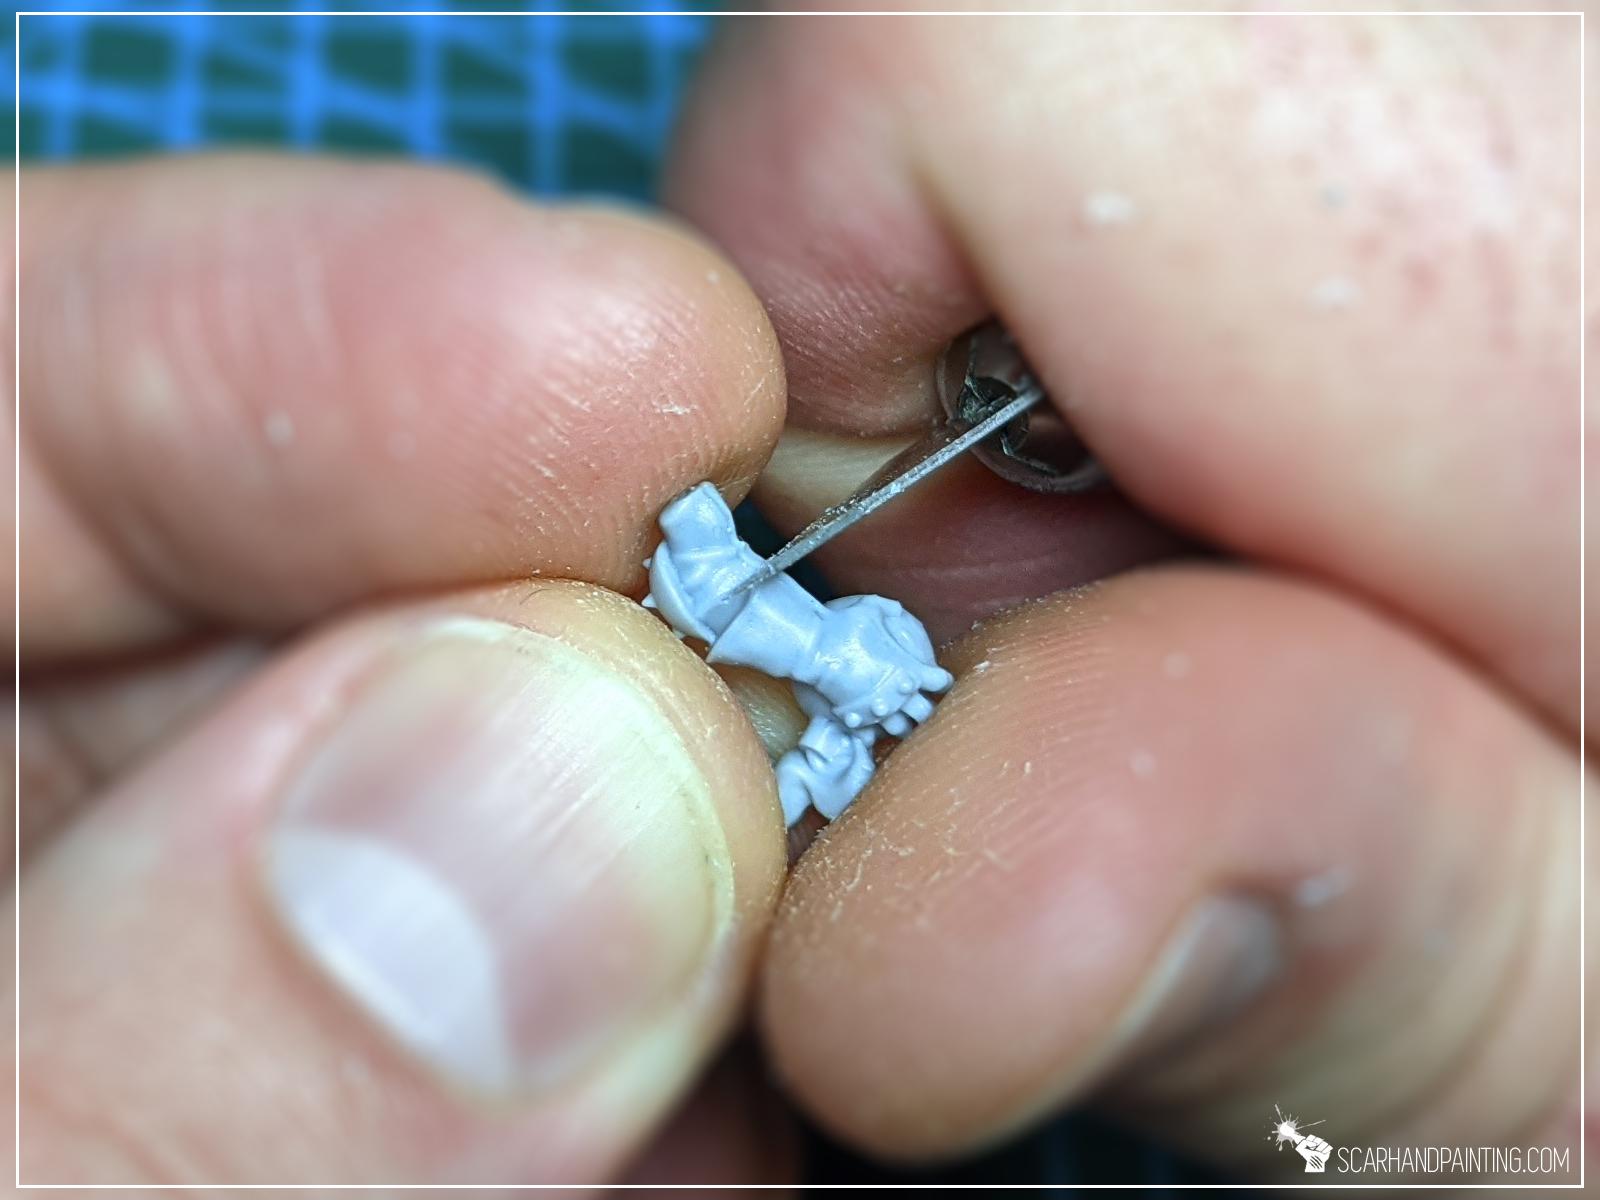
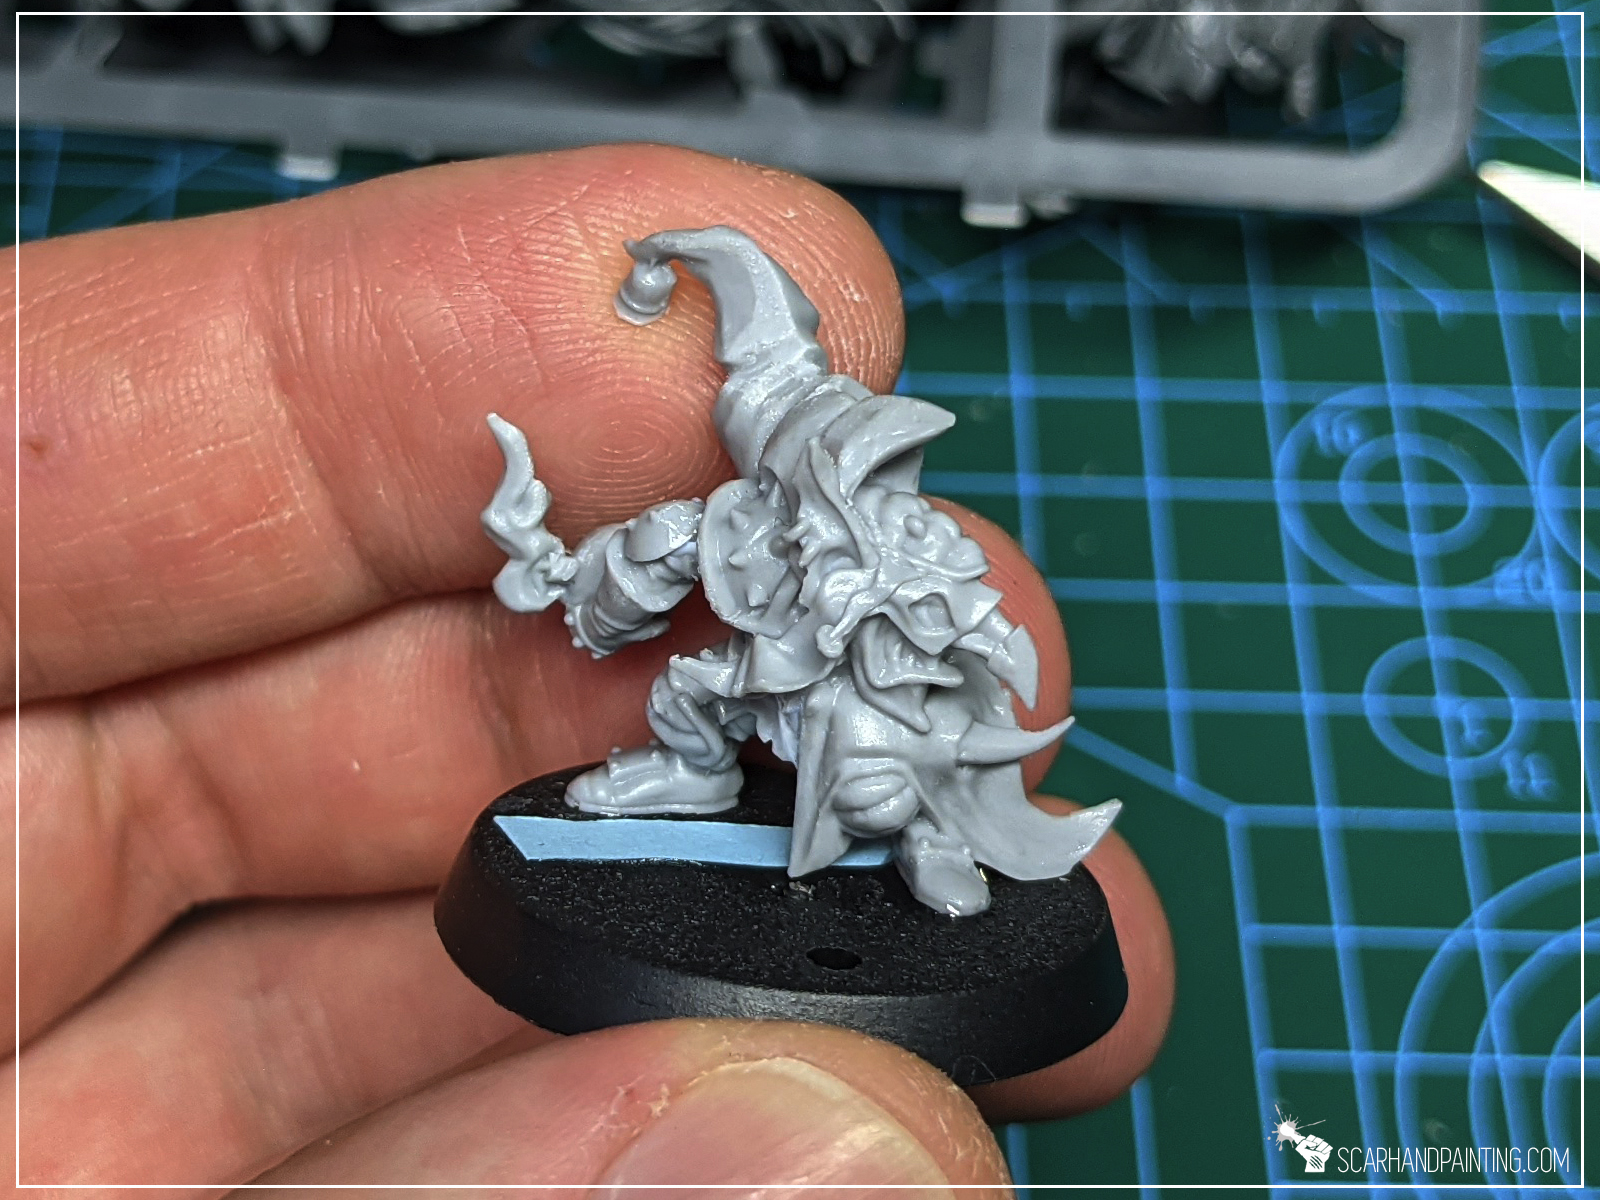
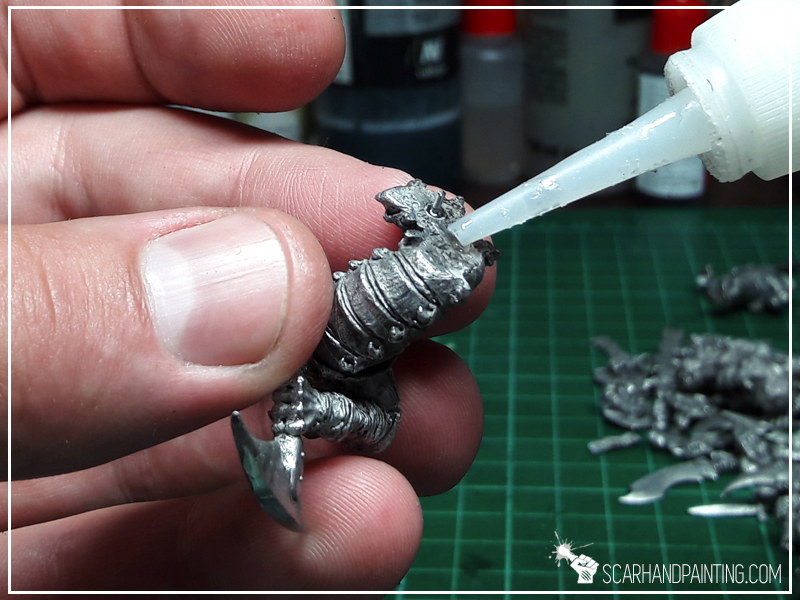
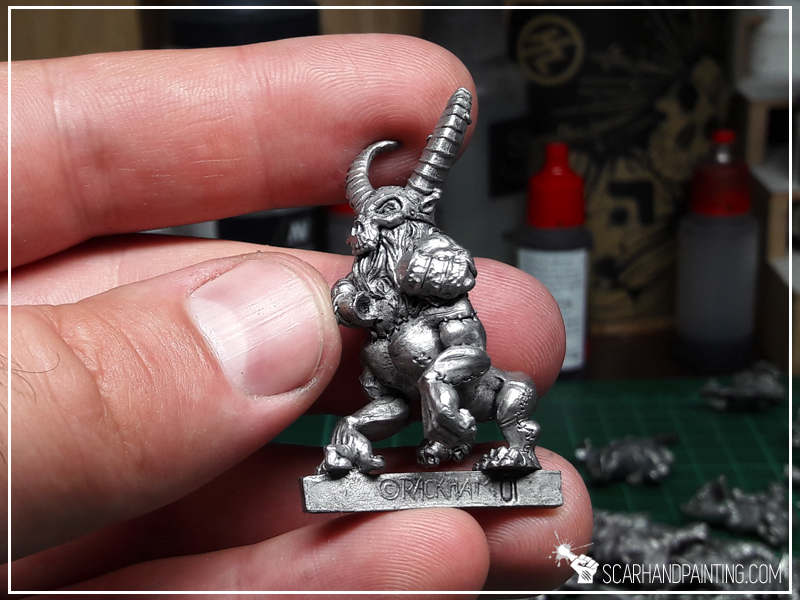
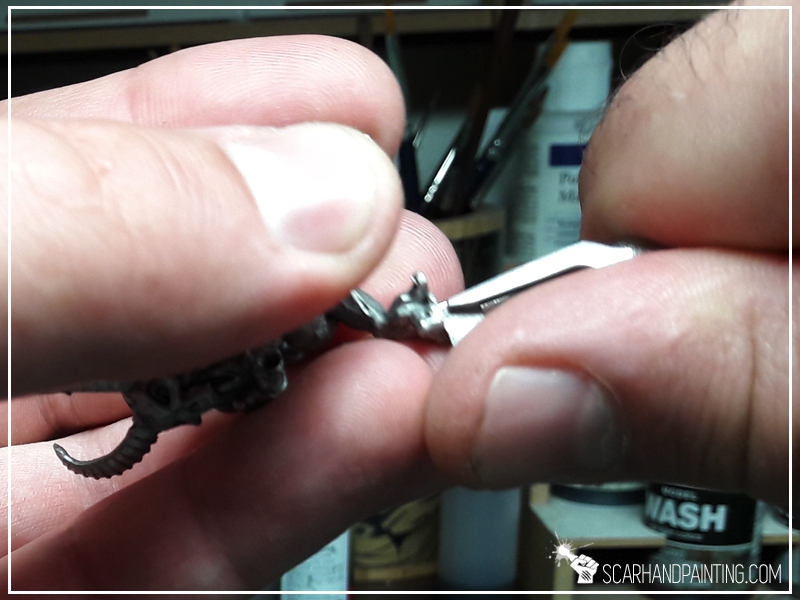
Removing Flash and Seam Lines – a pain of a task, yet such important one. You can be a painting god, but all your fancy brush work will be ruined if miniature wasn’t prepared properly. Running a miniatures painting service I have prepared thousands of miniatures. Below I will share with you some tricks I learned along the way.
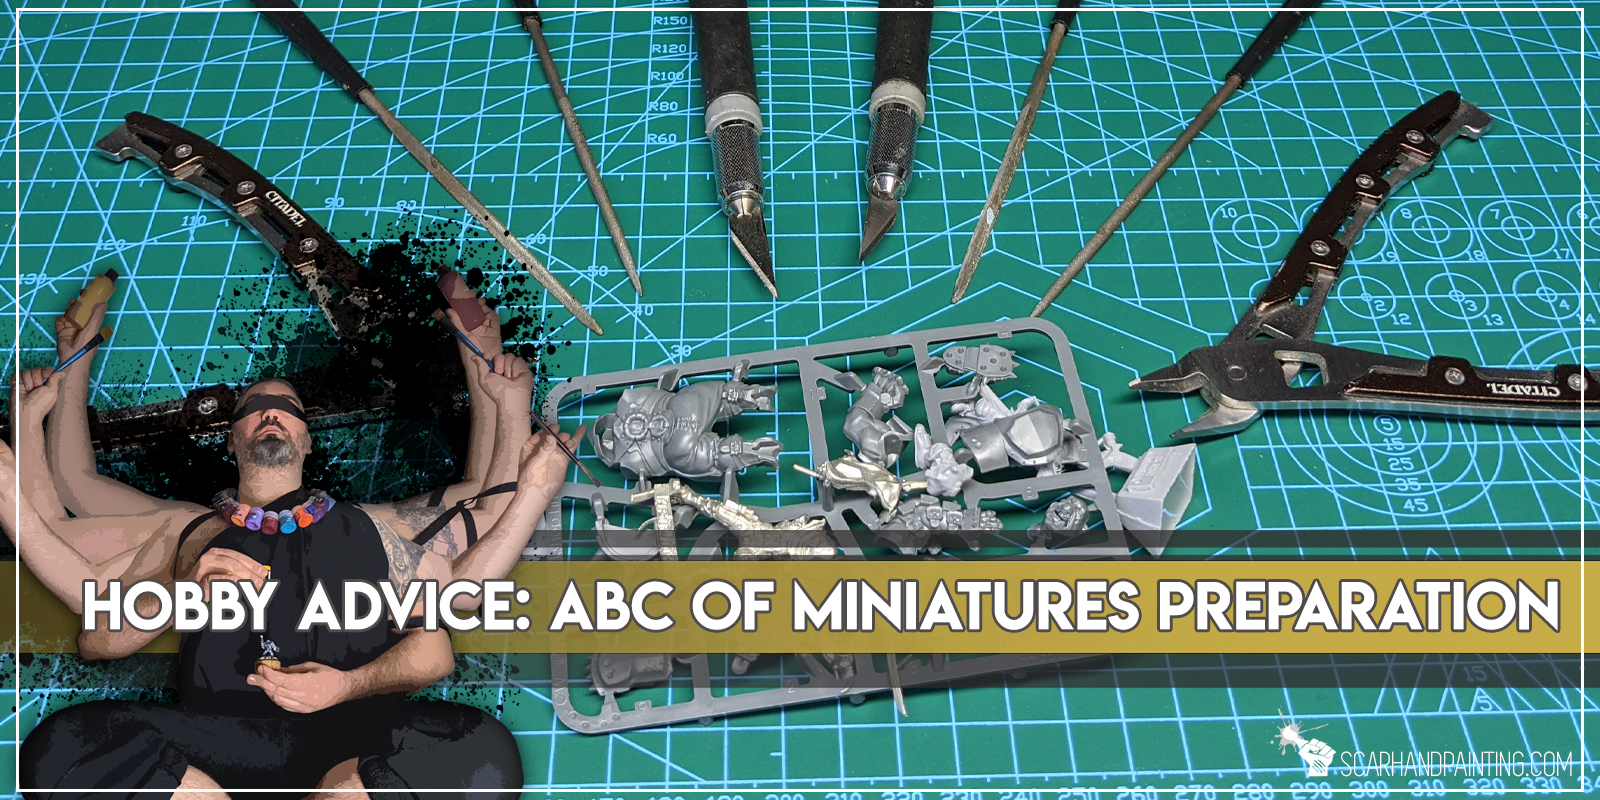
Before we start, the usual note

I know, I know – theory is such a pain – “where are real life examples?!”. I will keep this short and easy.
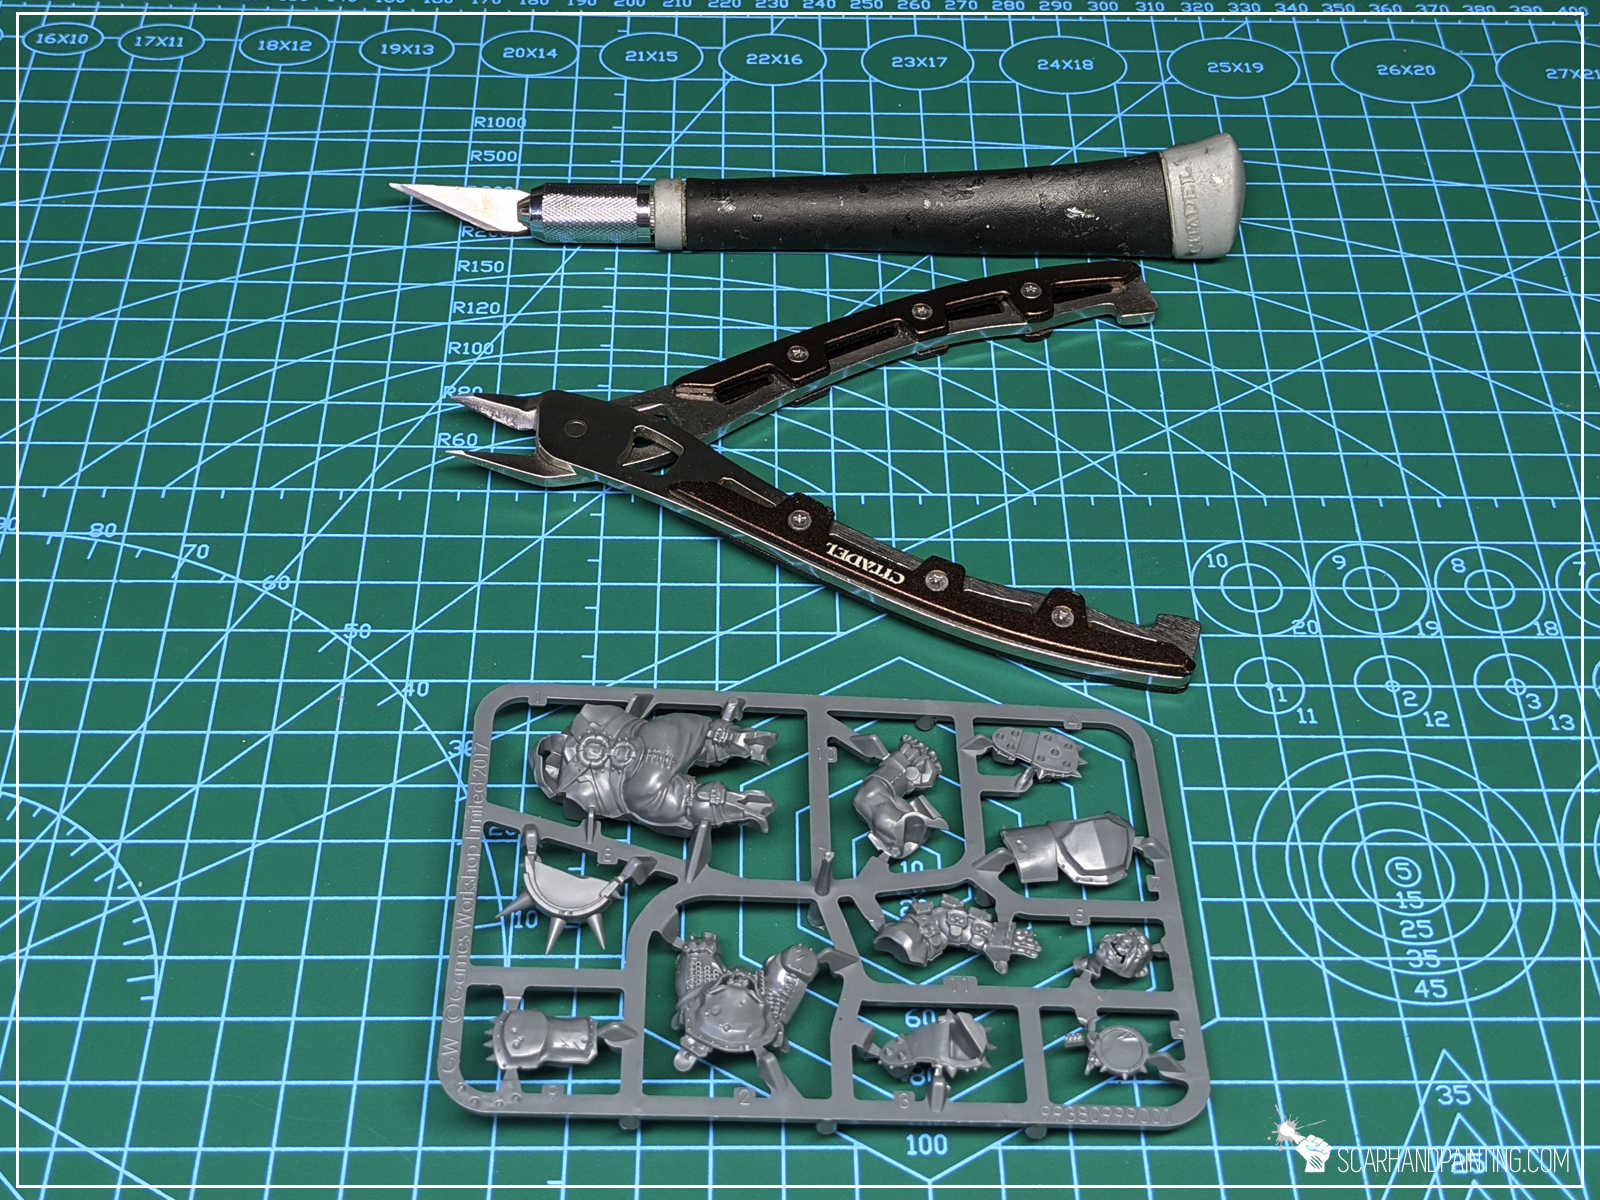
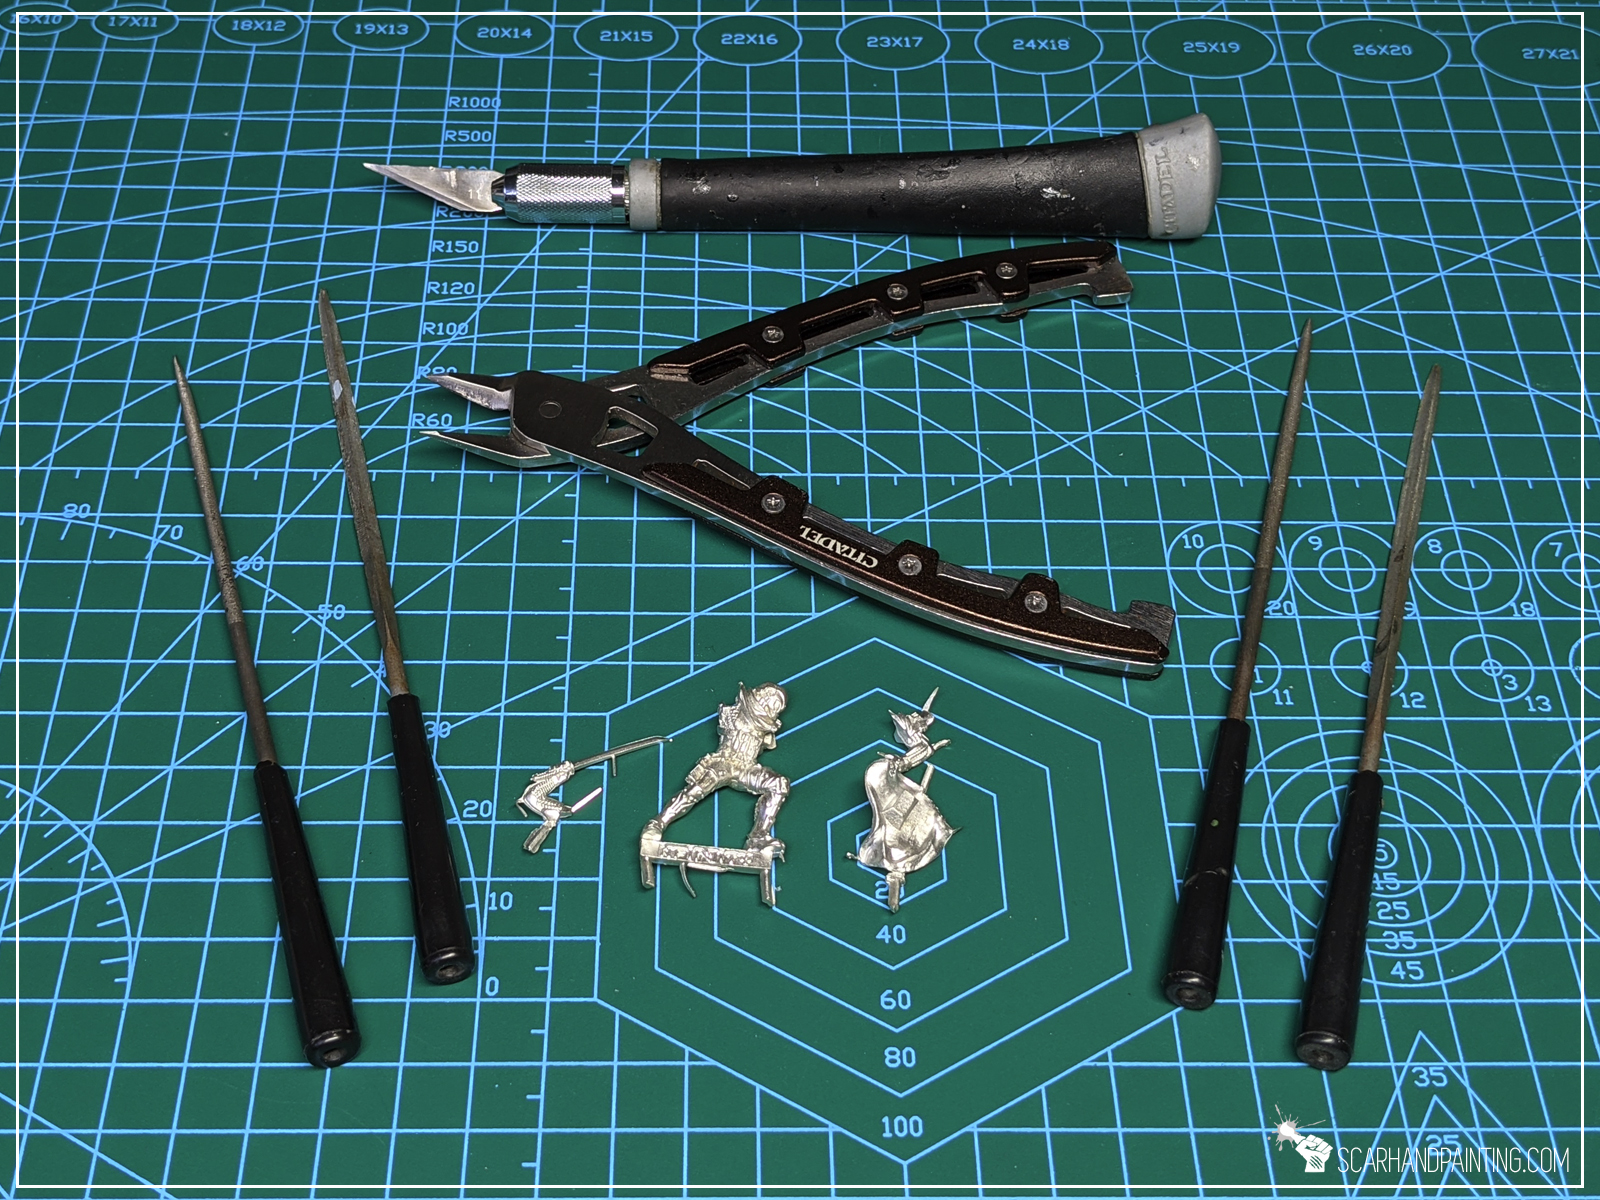
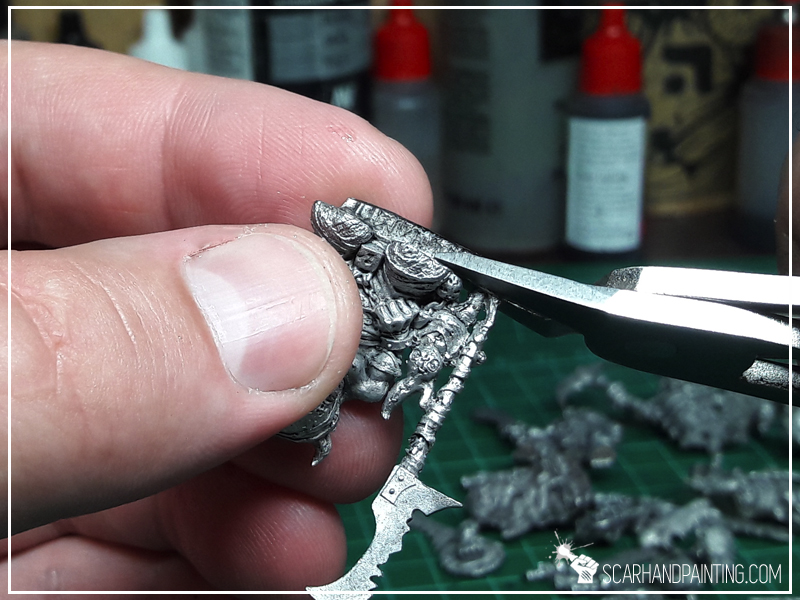
Hobby Knife:

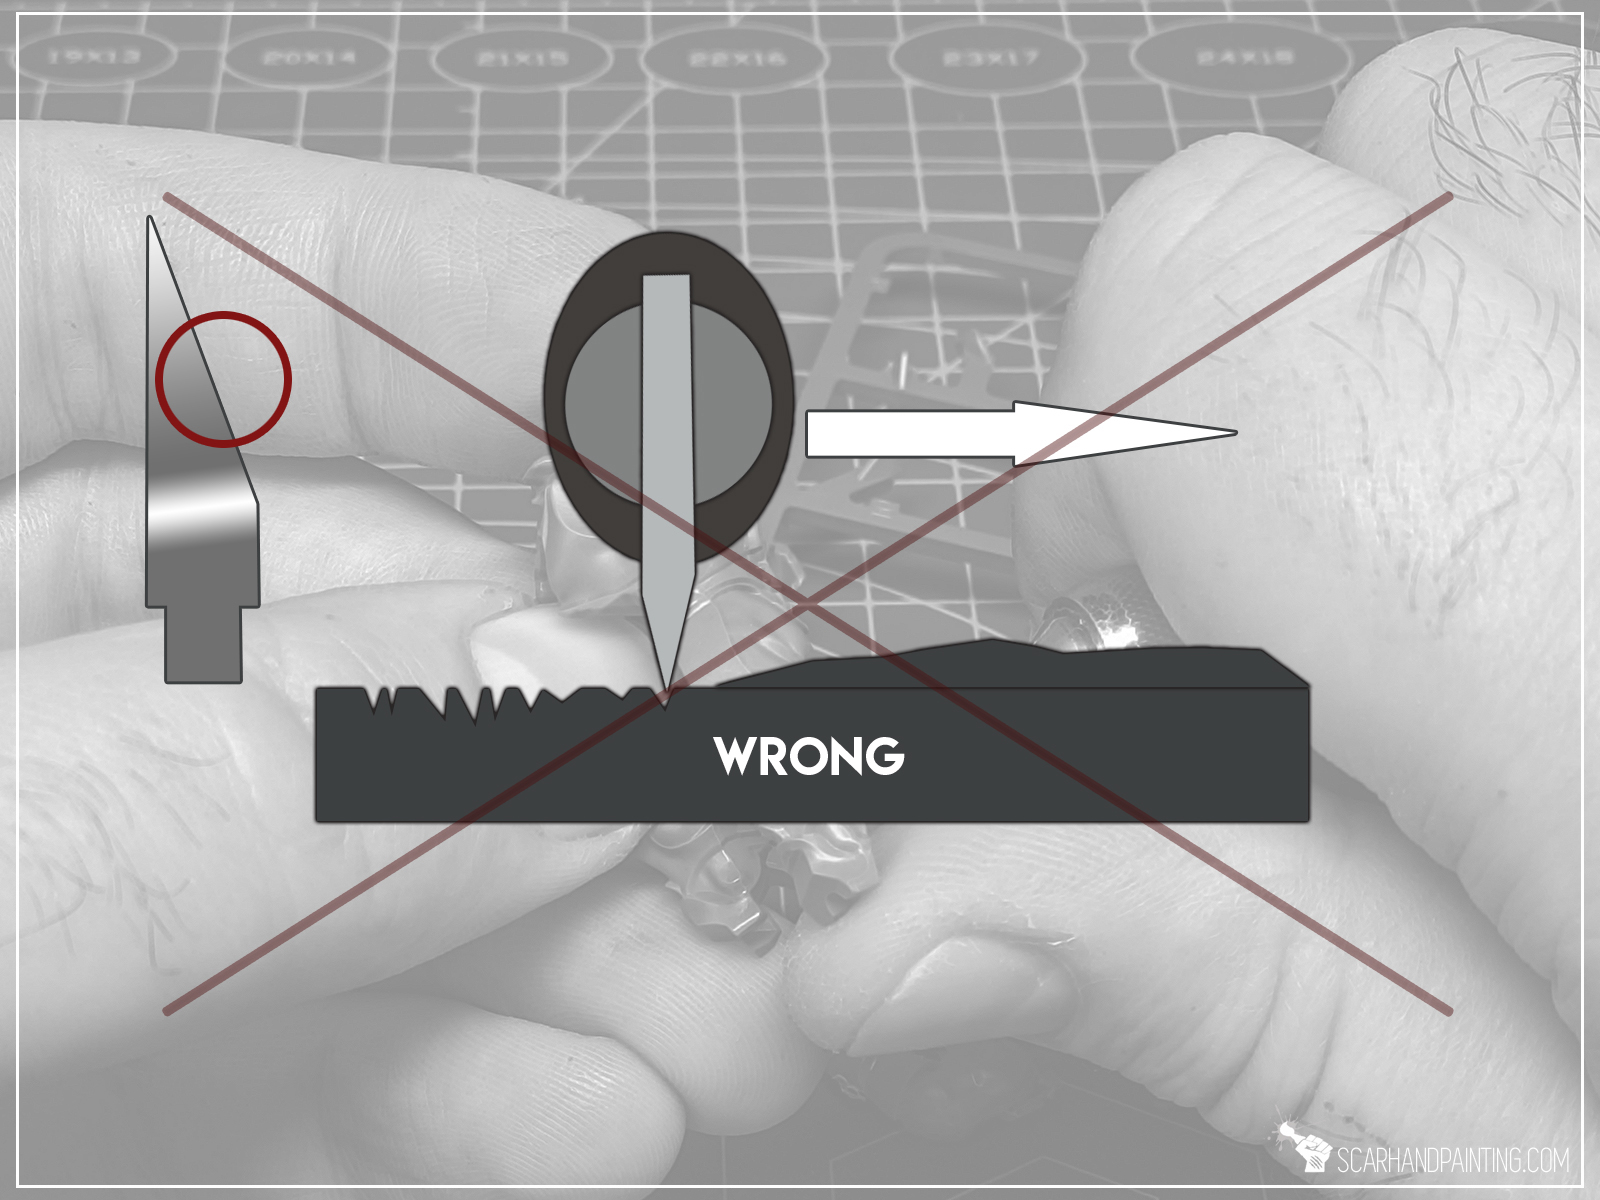
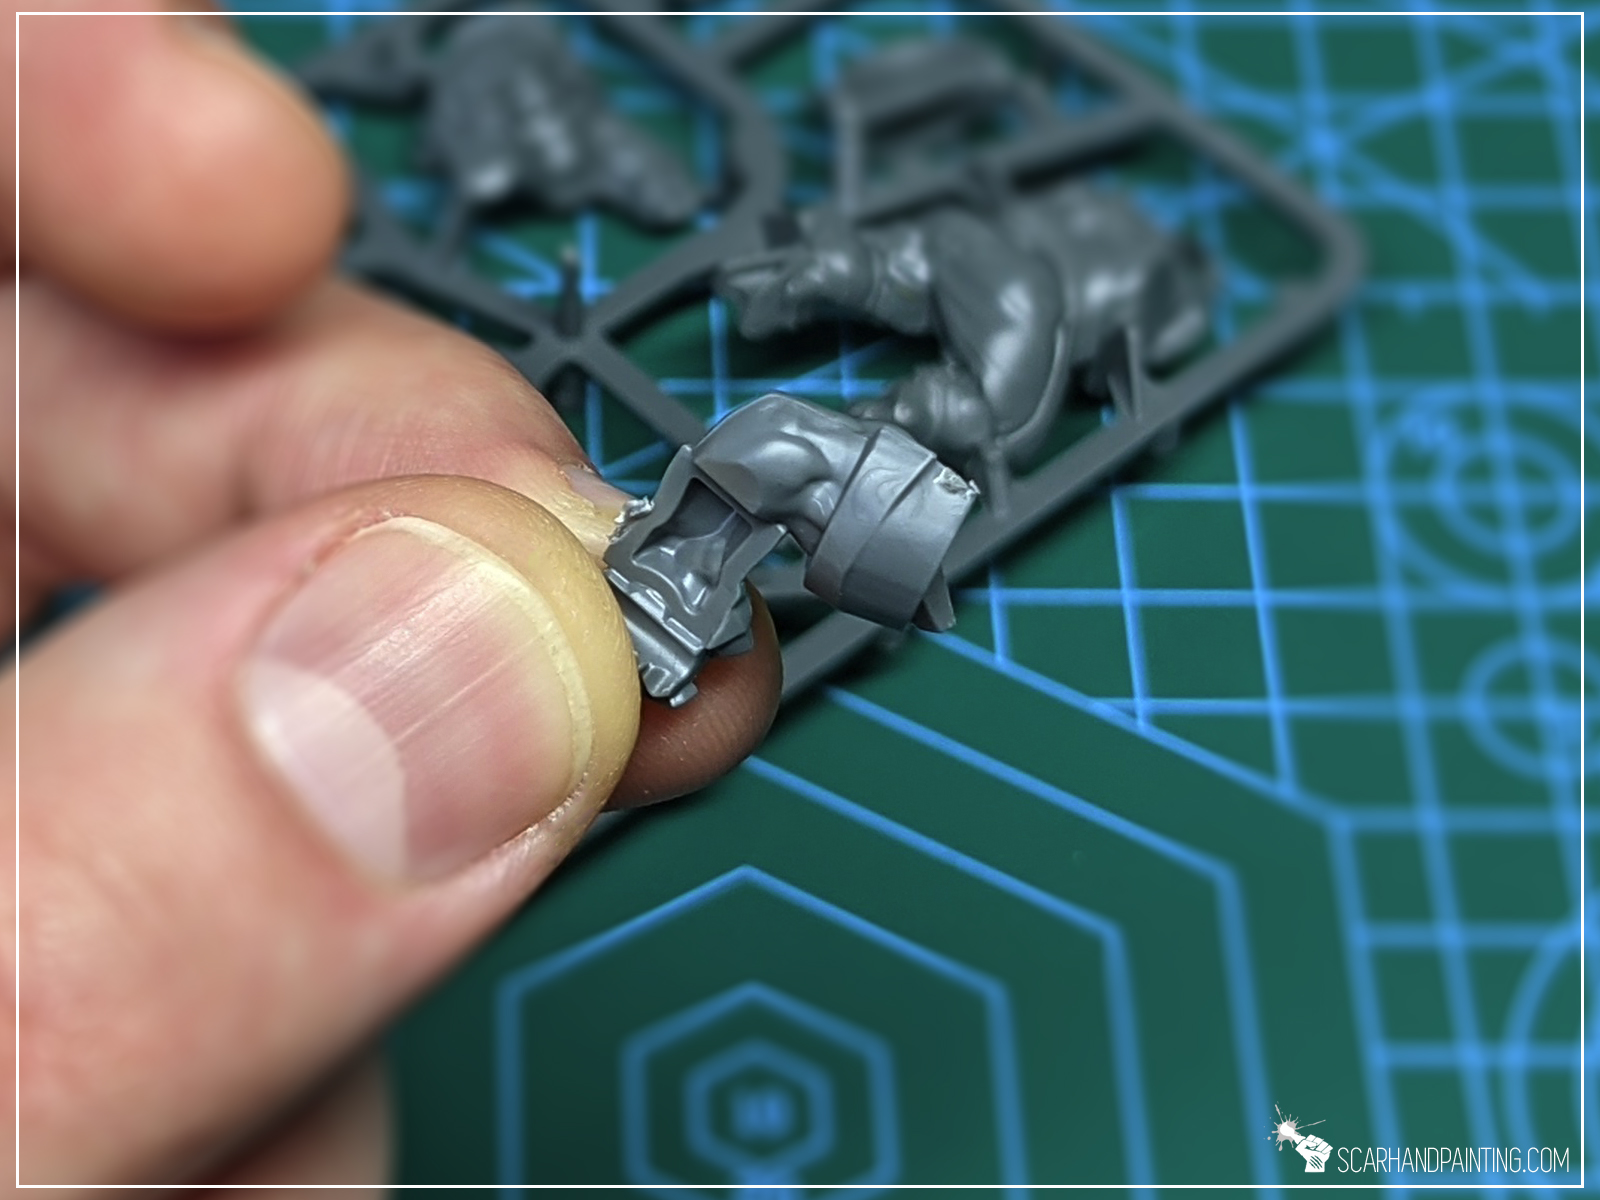
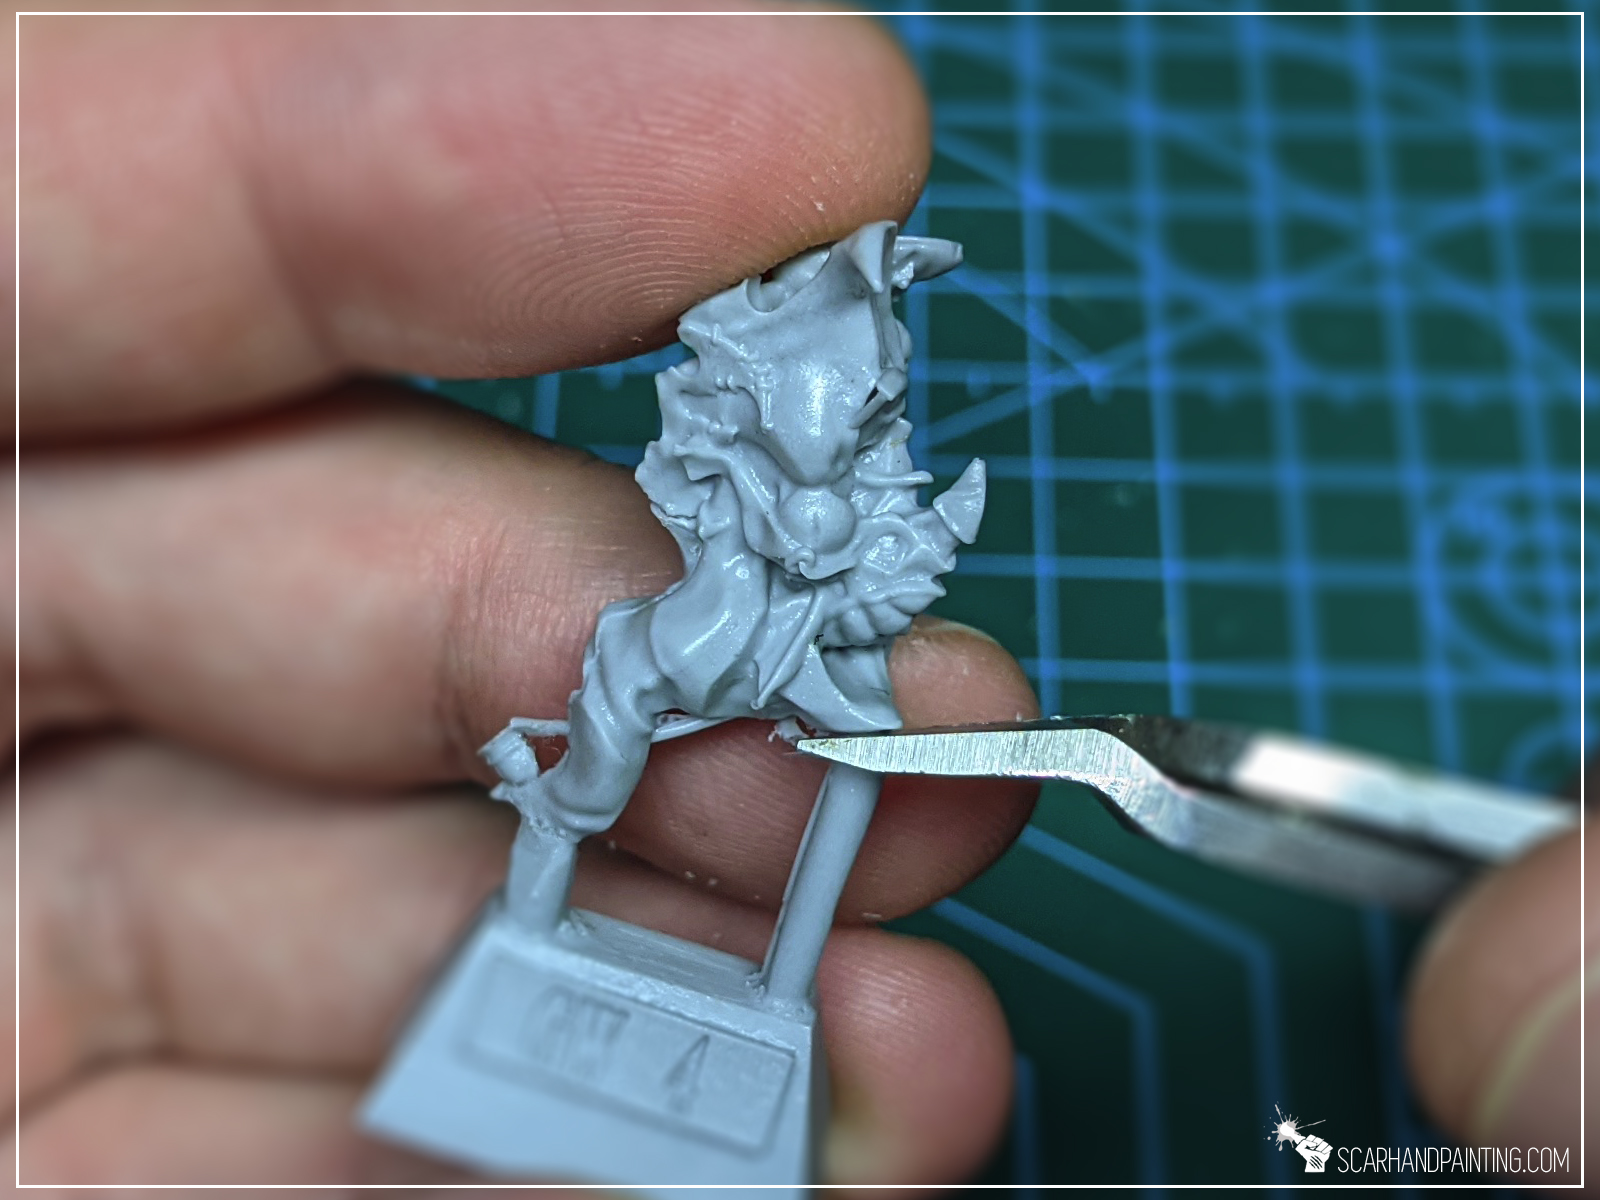
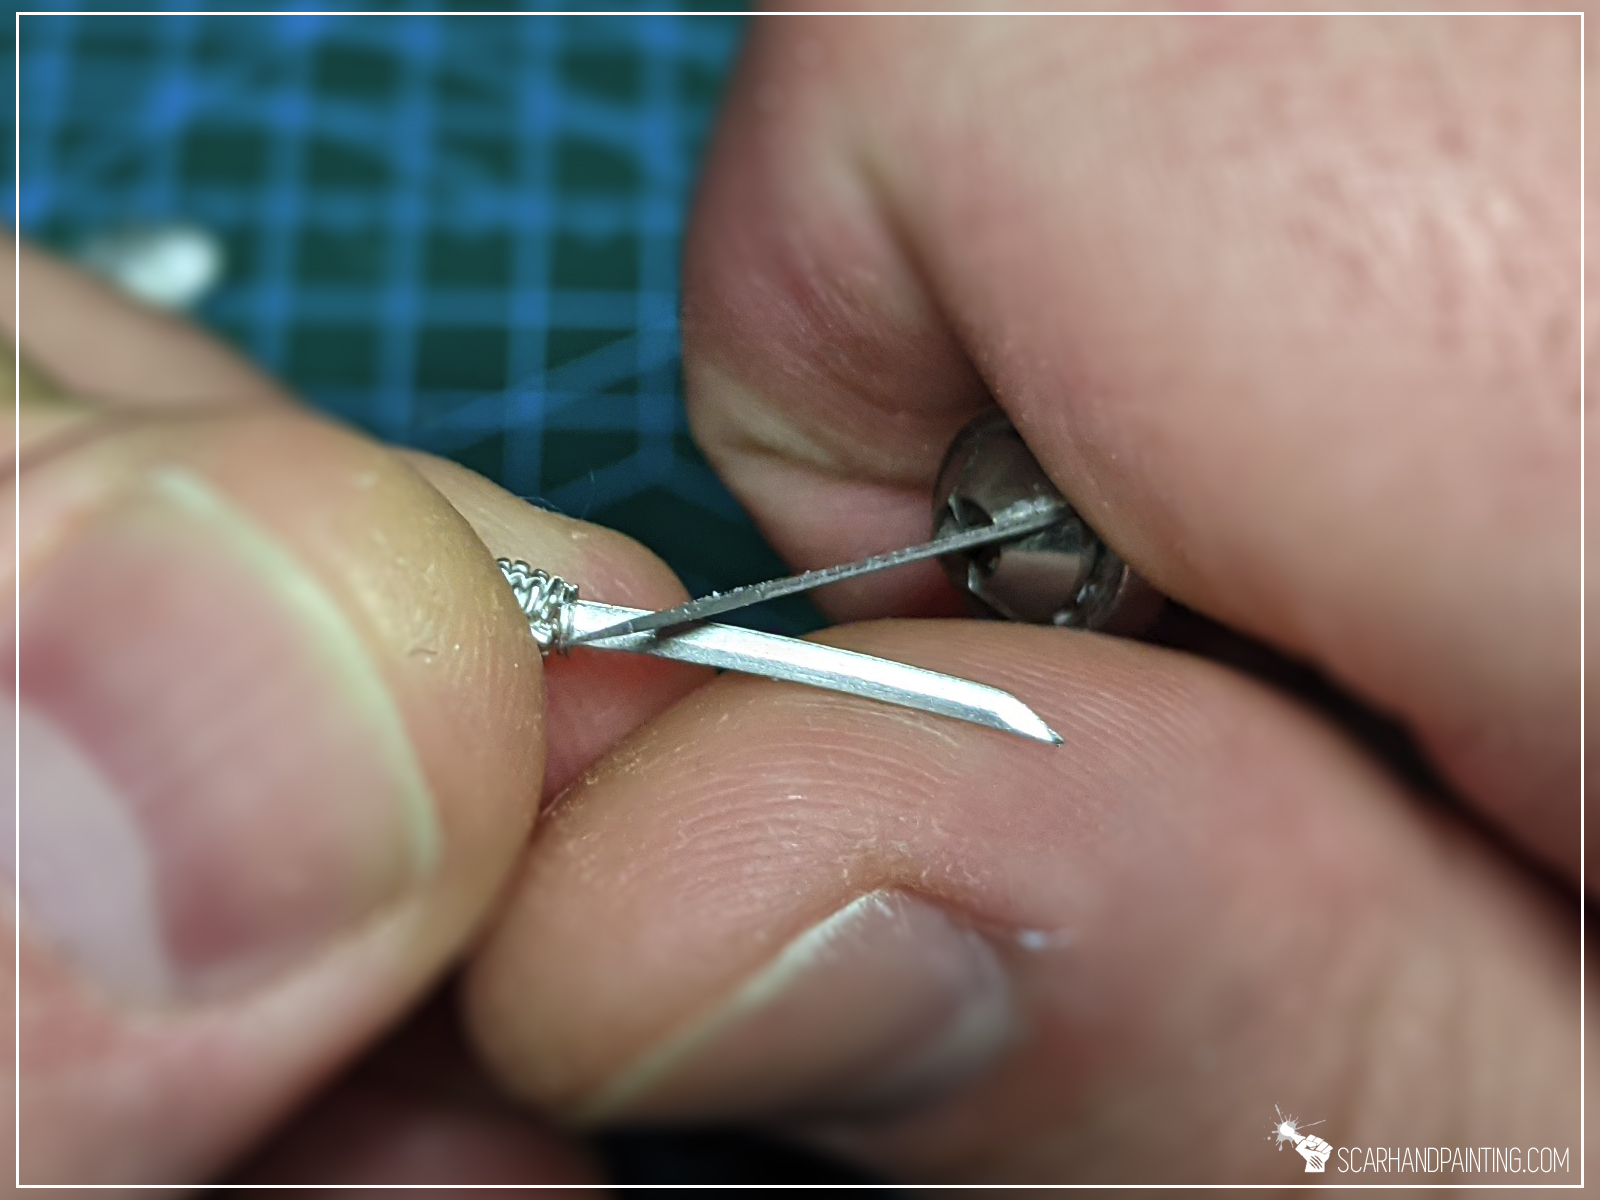
A Hobby Knife is my go to, when it comes to Seam Lines removal. When using a Hobby Knife I hold it in the fold of all fingers, except for thumb, which will be used to support a miniature and allows me for better control over the knife itself. I don’t want to cut myself so I tilt the blade about 45 degrees outwards from the thumb. This also prevents smooth surface from being scrapped (and roughed) by the sharp edge. Tiny consecutive movements are better than one smooth movement, unless I deal with long smooth areas. Somewhere in the middle of the blade is my sweet spot for cleaning accessible Seam Lines.
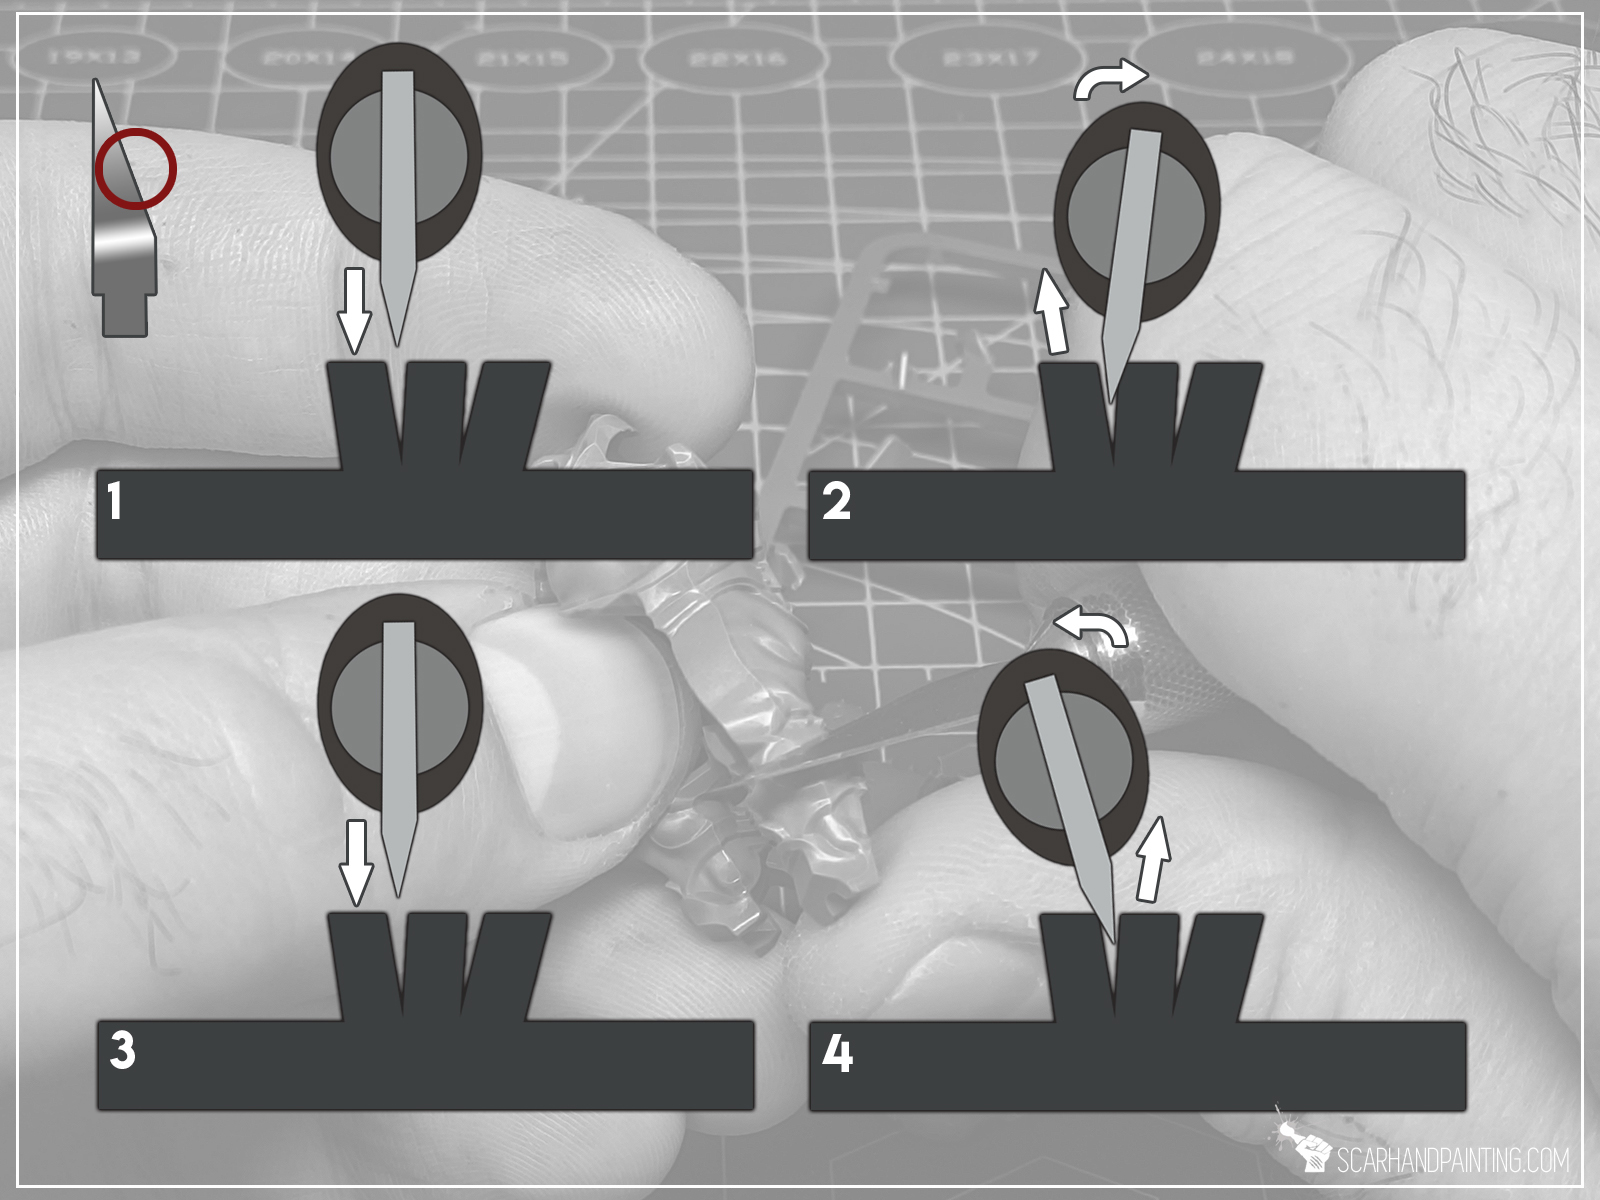
When dealing with sharp recesses, I put the edge inside, tilt it and go back along one edge, then do the same for the other side. Again I use the middle of the blade (if possible) to do this.
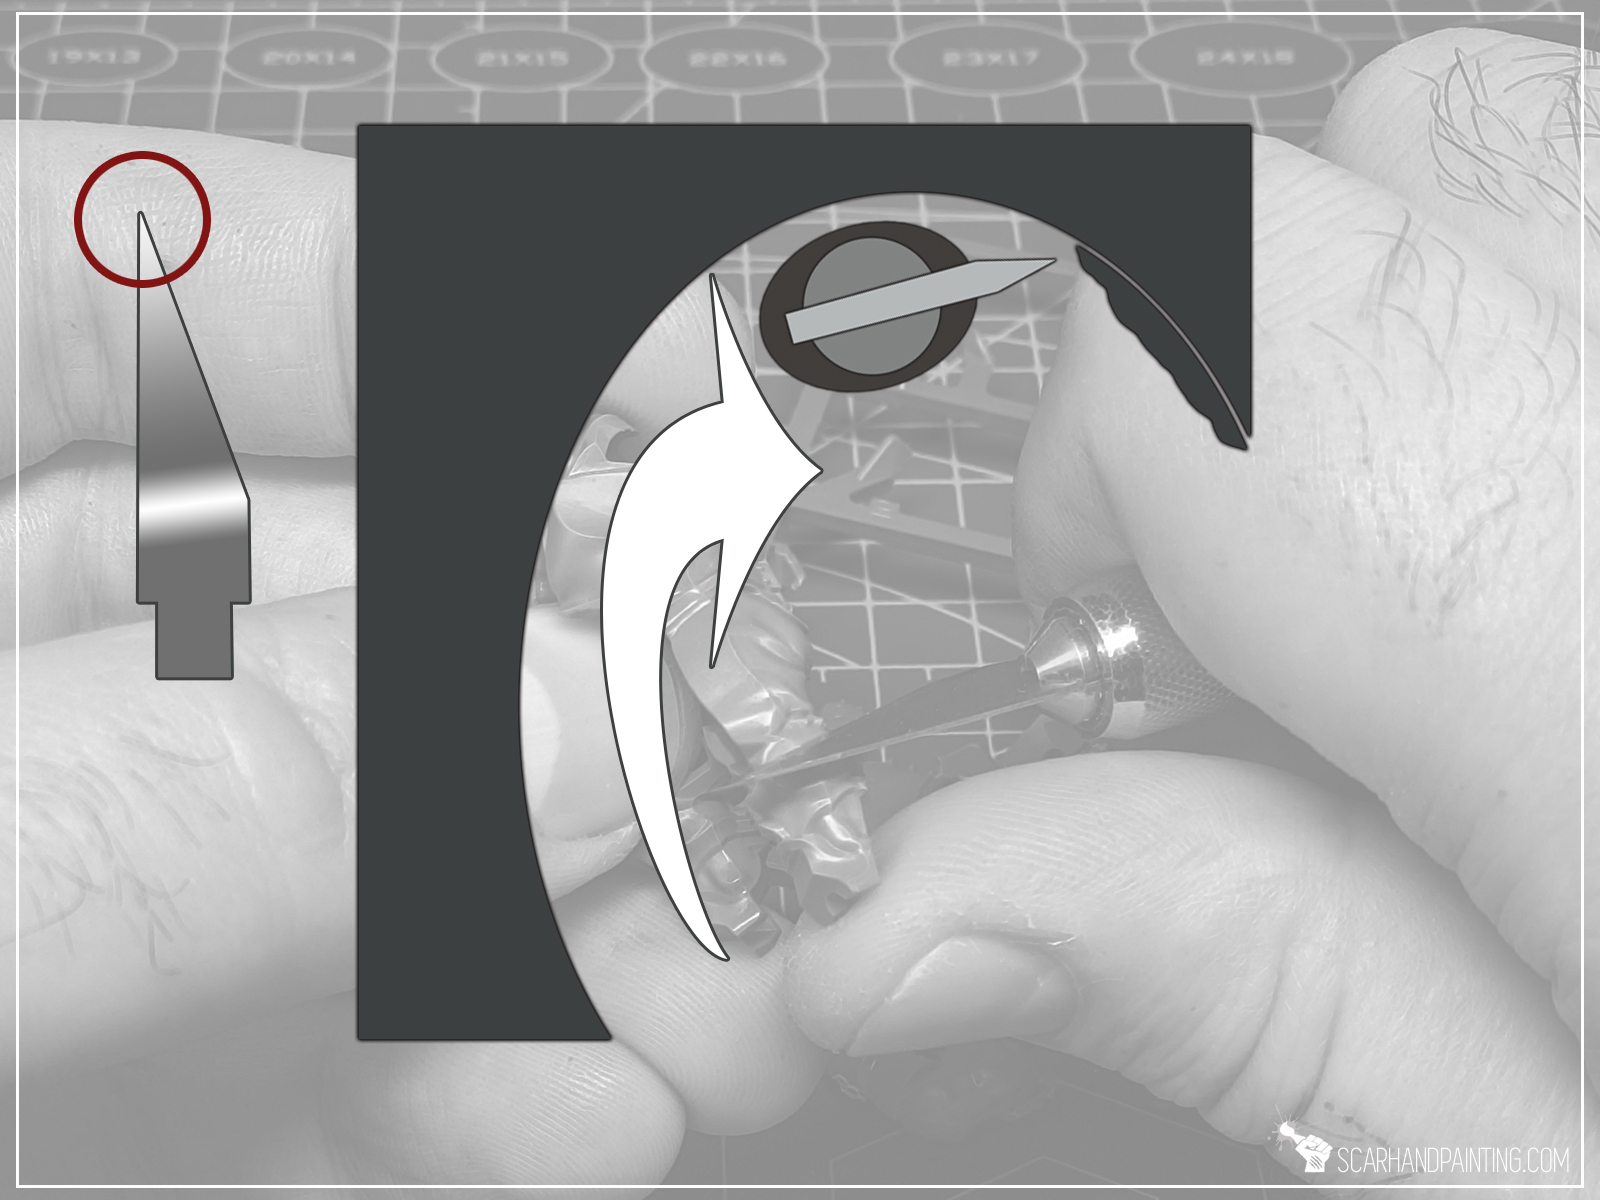
When dealing with rounded elements like inside of a wheel, or in a fold of a cloak, I switch the angle so that the blade faces direction of movement. I then make sure to hide my thumb behind the miniature and use the very tip of the blade to peel off the excess material. I do this with a single rounded movement of the blade.
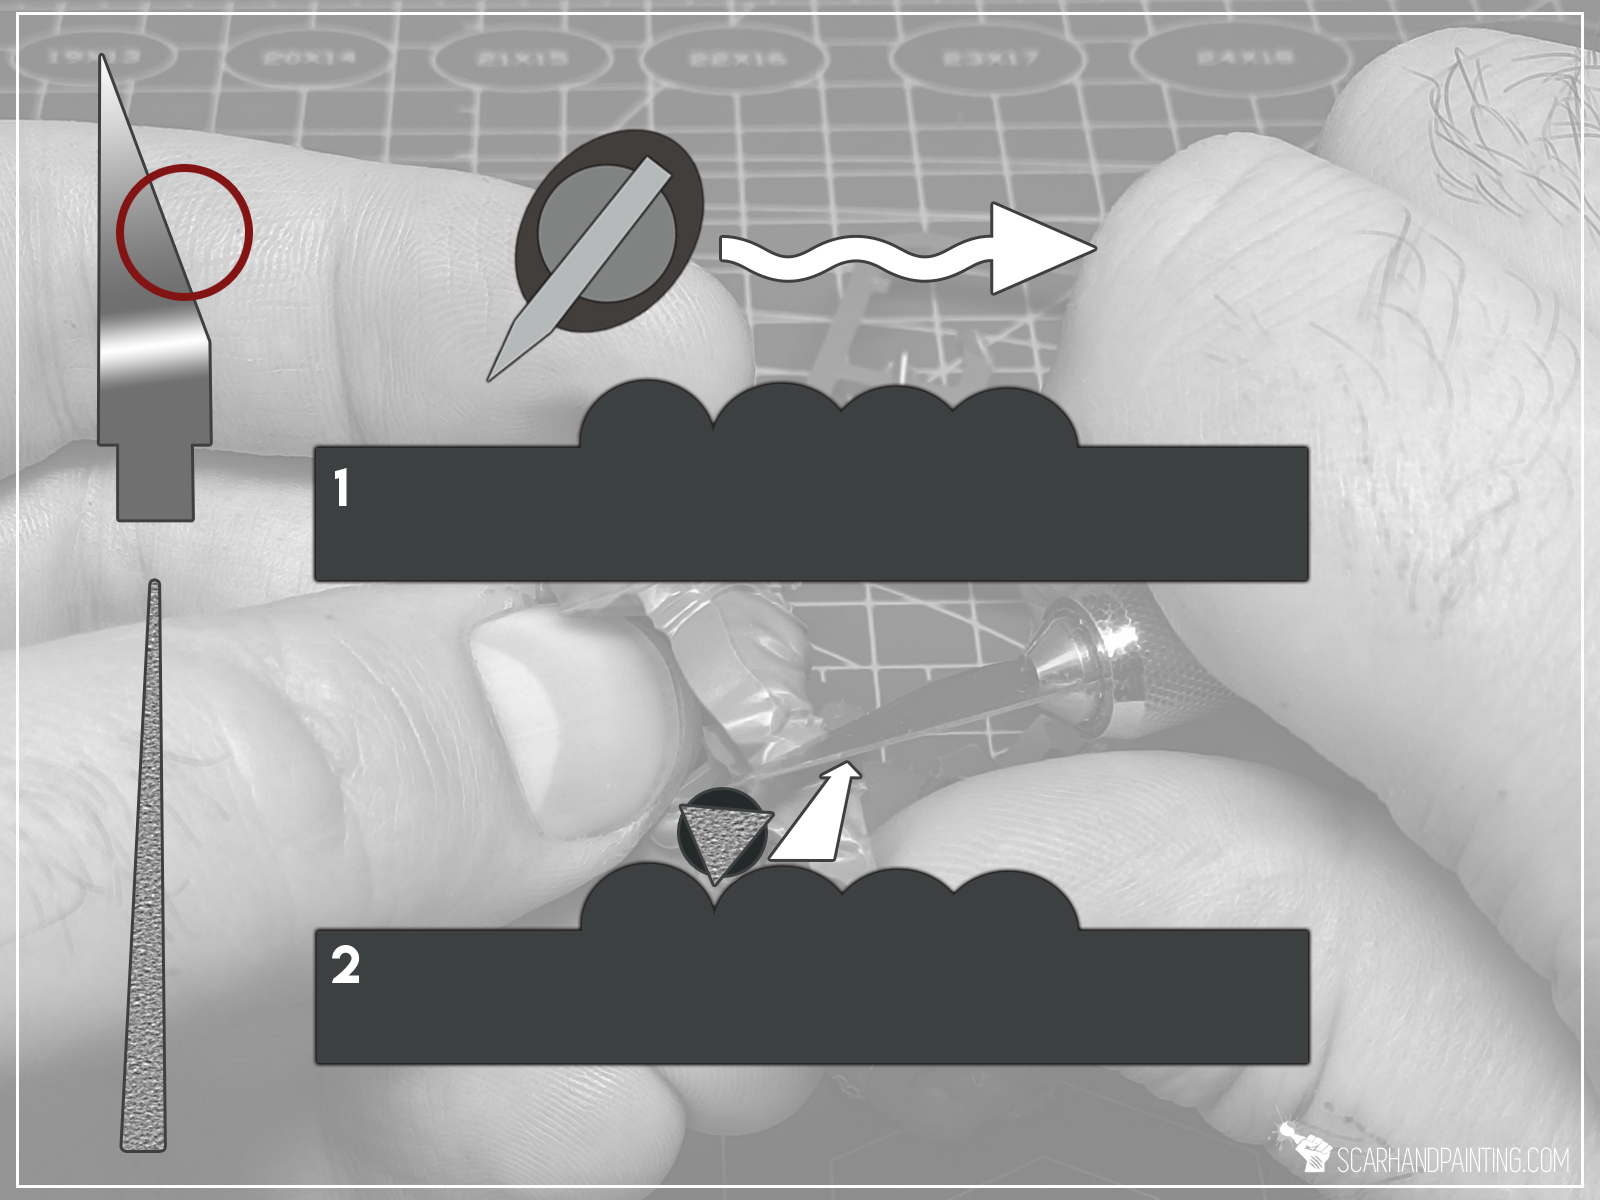
Finally, when dealing with tiny rounded bumps (like fingers of a fist for example) I start with a single, light movement of a blade, then switch to a sharp edge file…
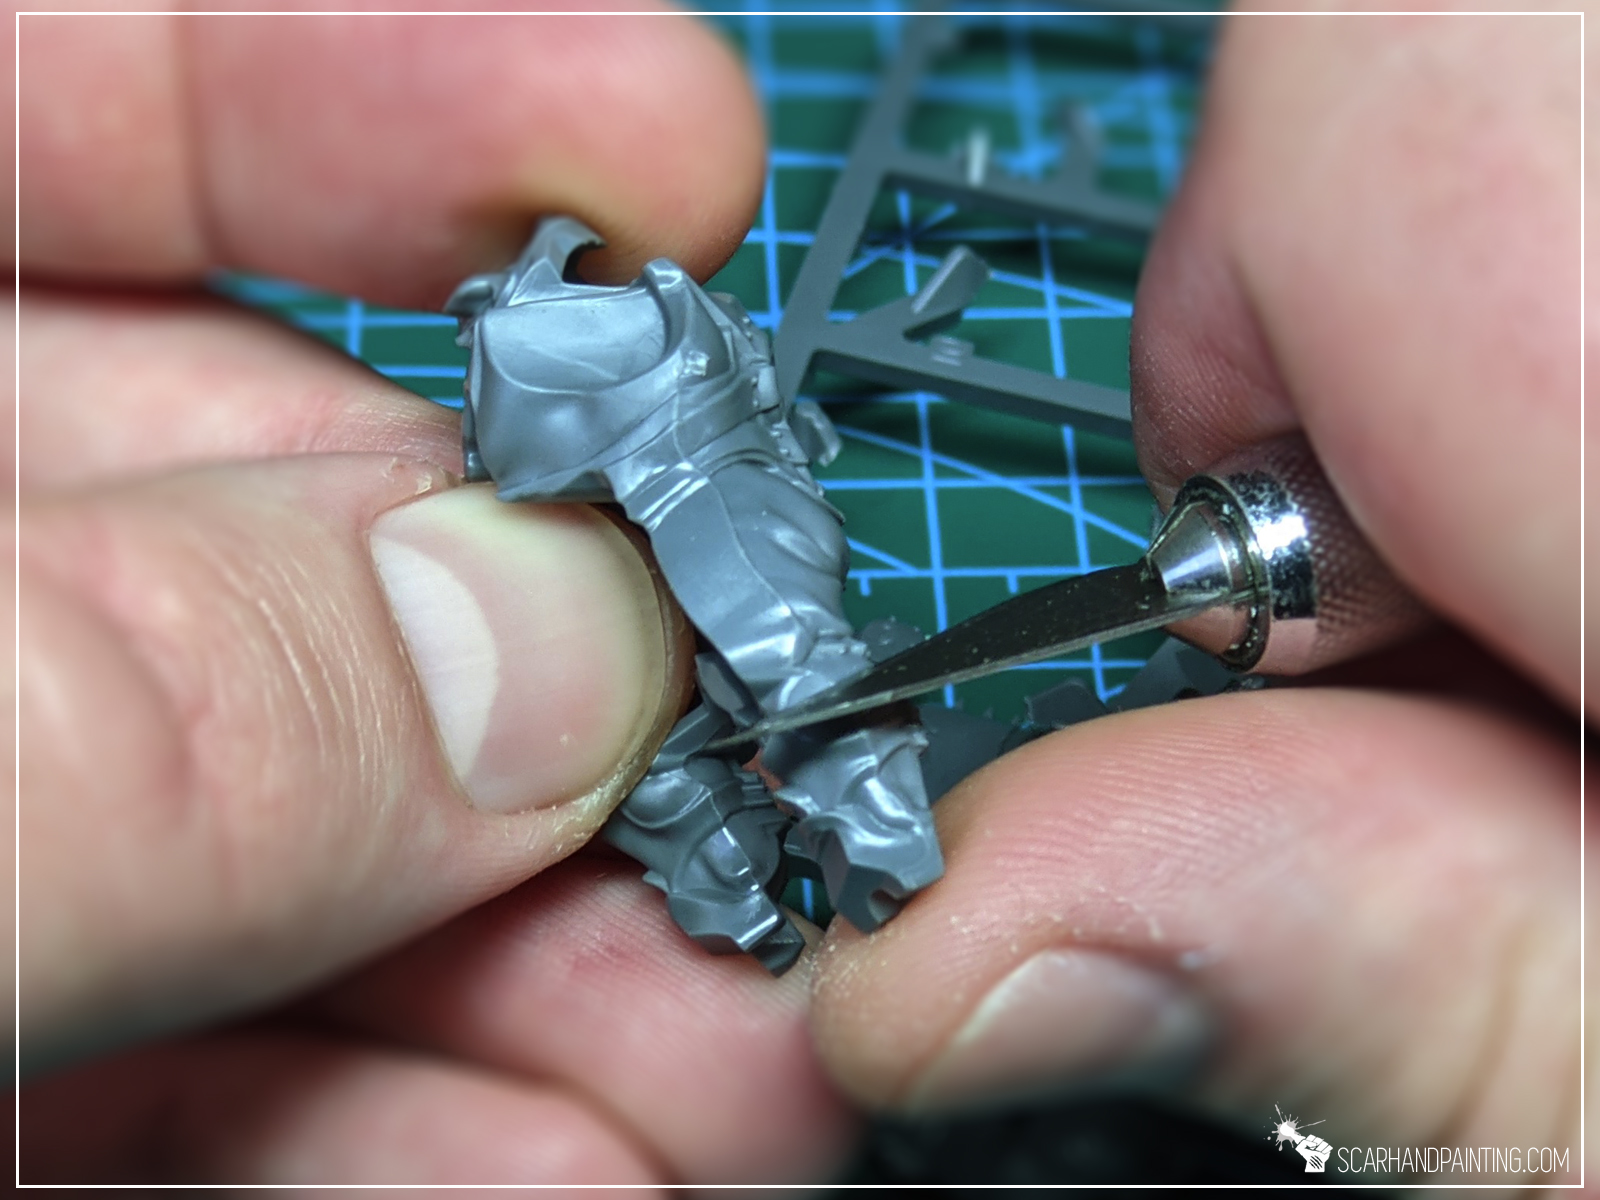
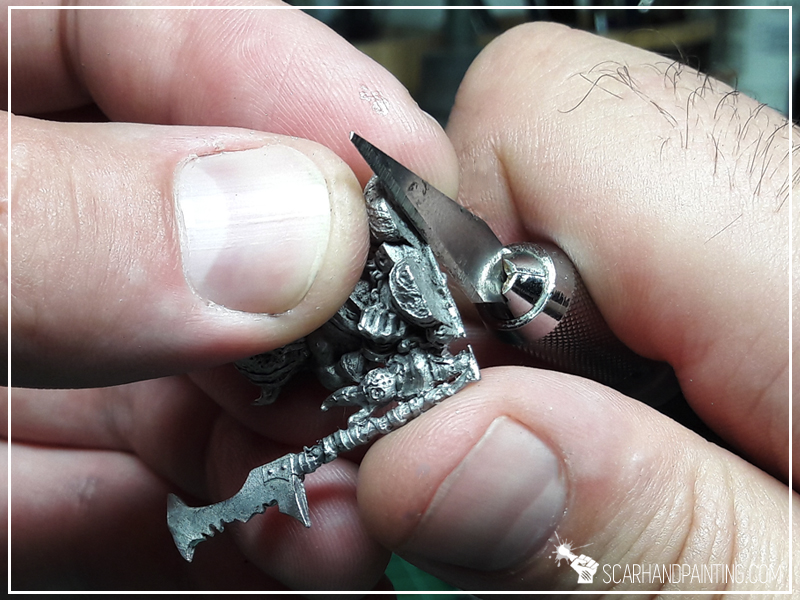
Hobby File:
I have a lot of Hobby Files, but when I think of it – only two of them are what matters. Fully Rounded and Triangle Sharp Edged.
Back to the example picture above, I use Triangle Sharp Edged file to make a single, long, smooth movement between each bump.
Finally Fully Rounded file is being used to smooth up any Mold Lines irregularities (when two halves of a miniature does not align properly).

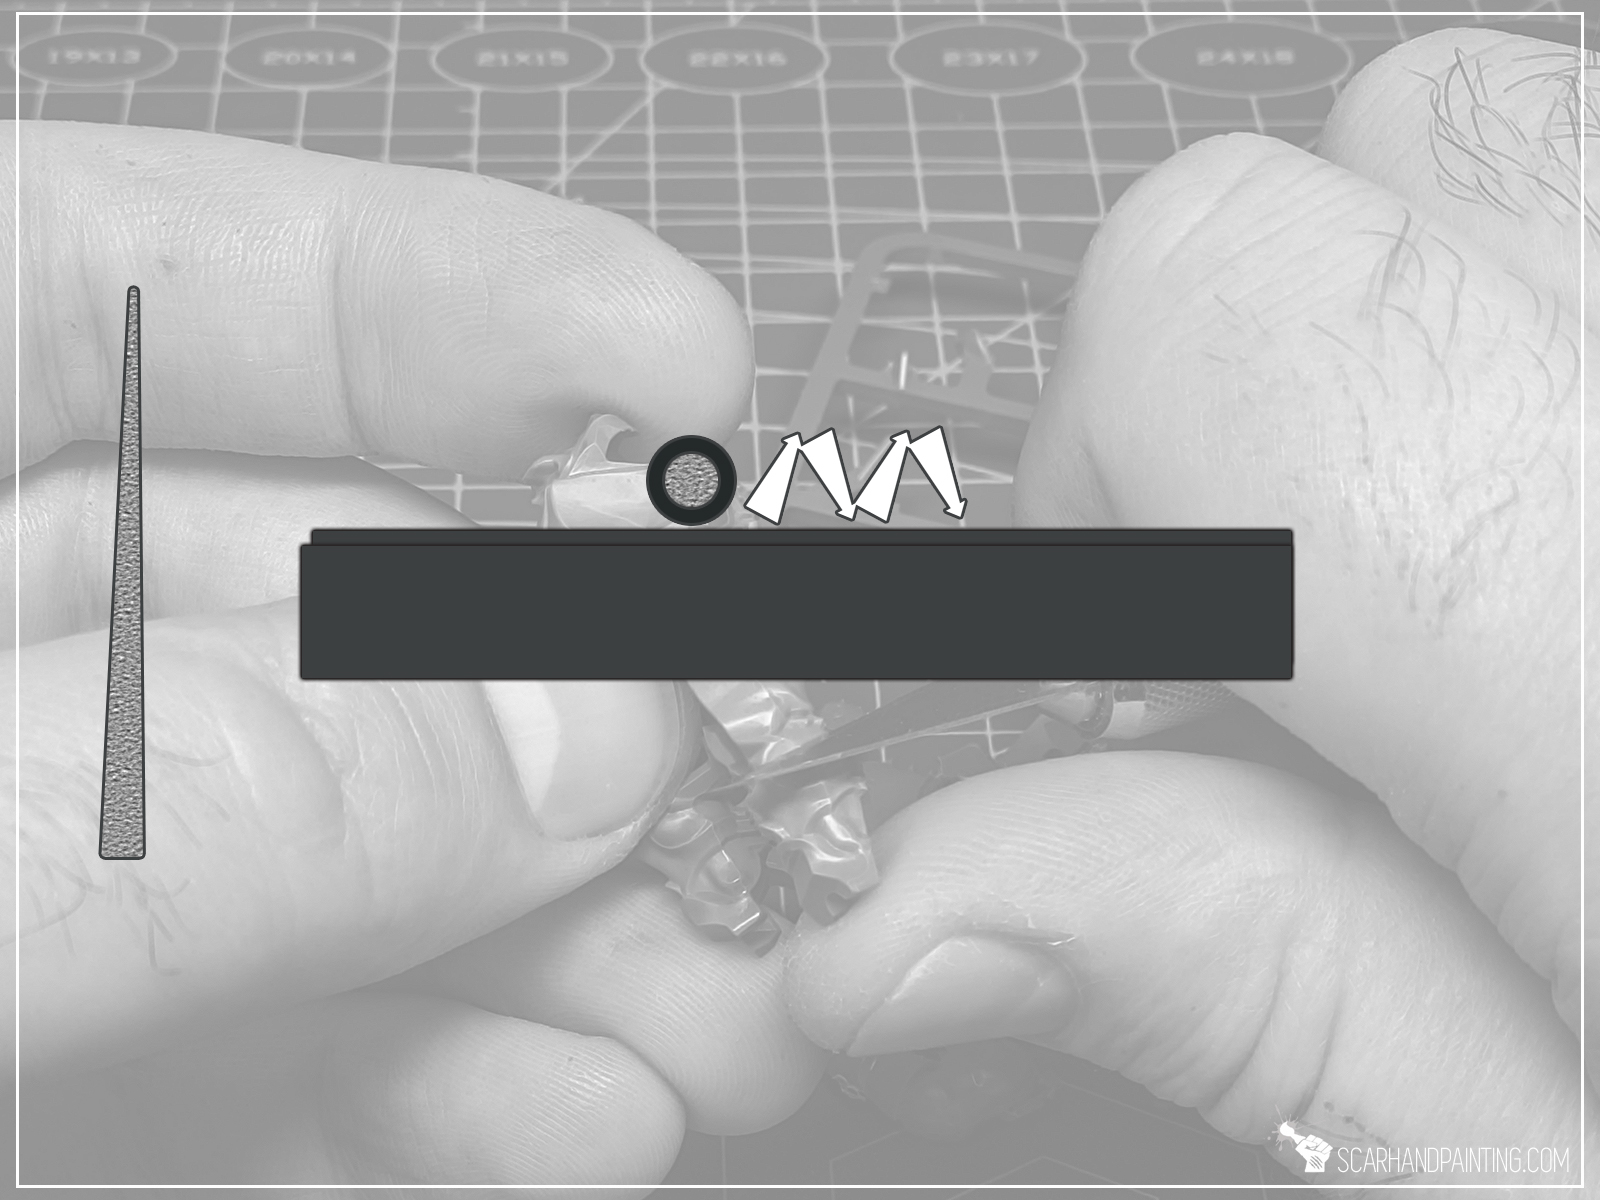
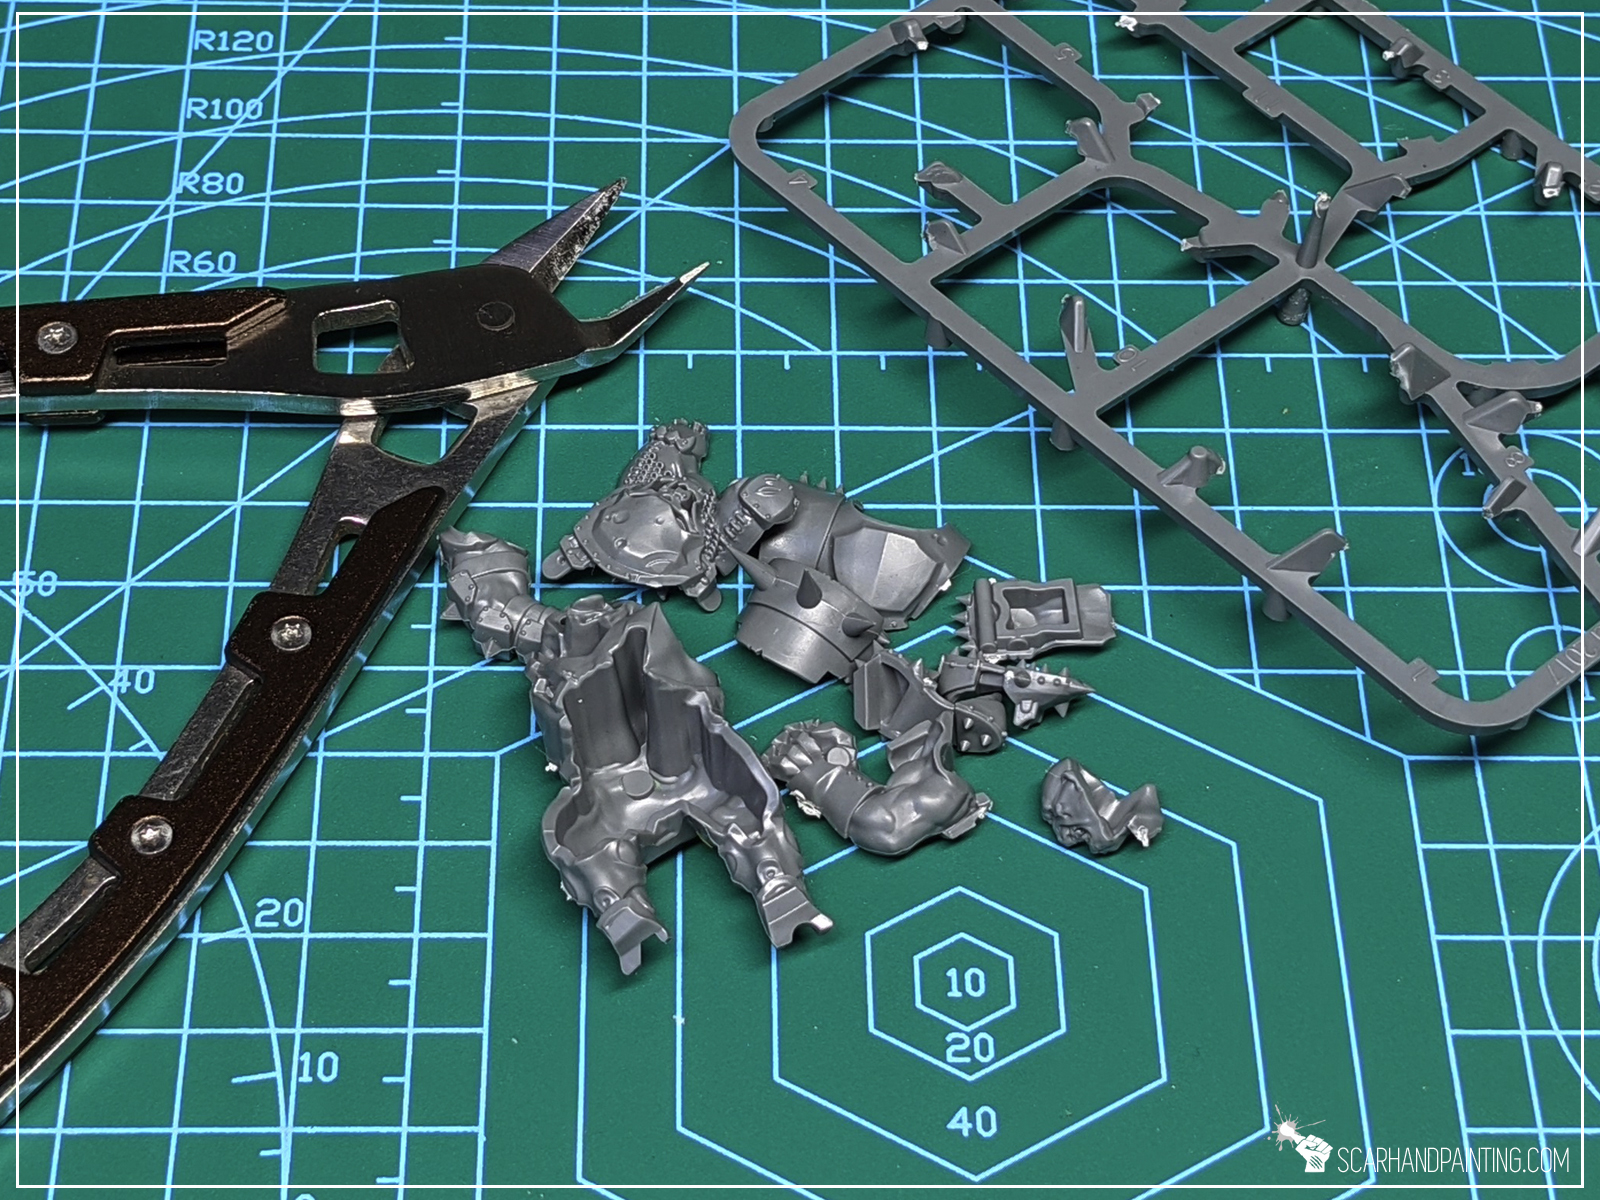
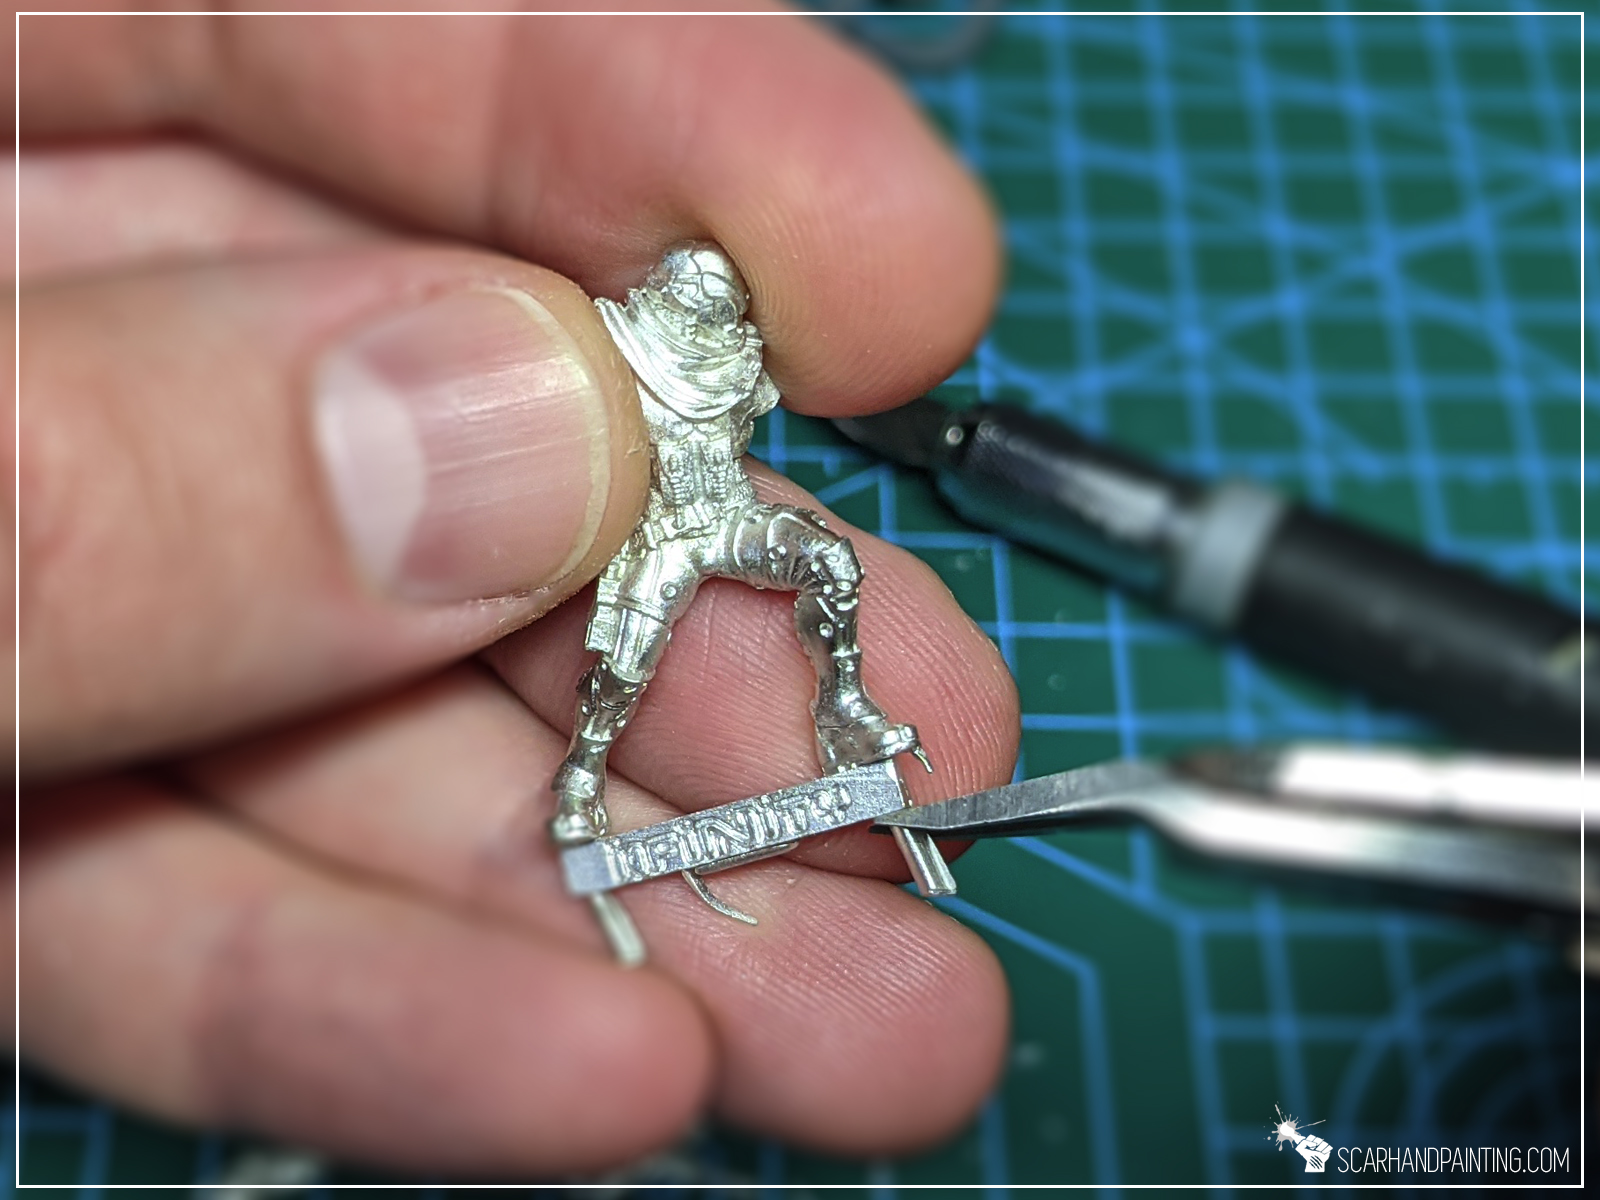
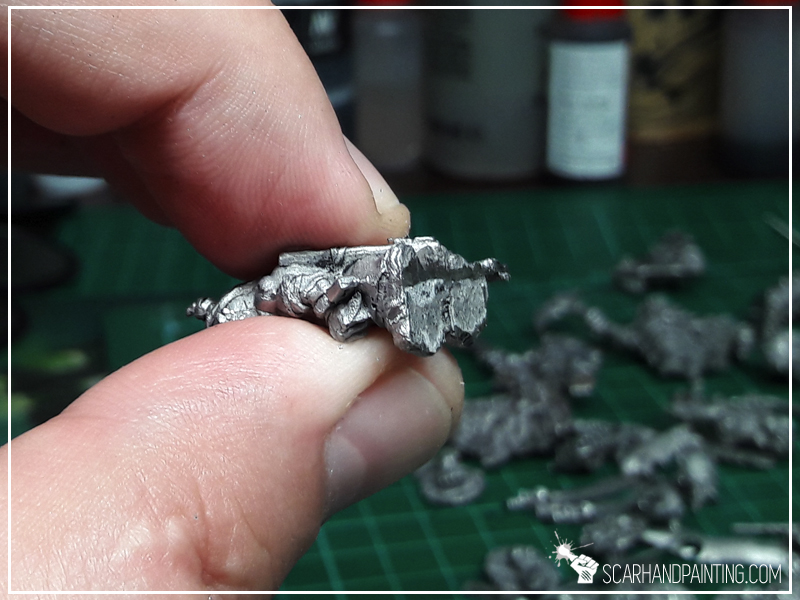
Hobby Cutters:

These are pretty straightforward. I use them to cut pieces of miniatures off the sprues and to cut off any large chunks of excess material. One thing to remember is to align a flat side of the cutting edge with the area you want to cut stuff off from. This will keep the surface smooth.
Plastic: is the most common material one might face while toying with miniatures, so let’s start with this one. There are two main kinds of plastic. Standard Plastic, which can be colored, is a high quality durable and elastic material with crisp detail and no bubbles. Worst issues are mold halves not aligned properly, but this can usually be dealt with by applying more force to a hobby knife. I rarely use files to deal with plastic and prefer to work with Hobby Cutters ands Knife instead.
Board Game Plastic, which is a total gummy disaster and cannot be filed (leaves tiny strains) unless put to a refrigerator for couple of hours. My personal rule is to leave it be, bad material and I just do not prep it at all.

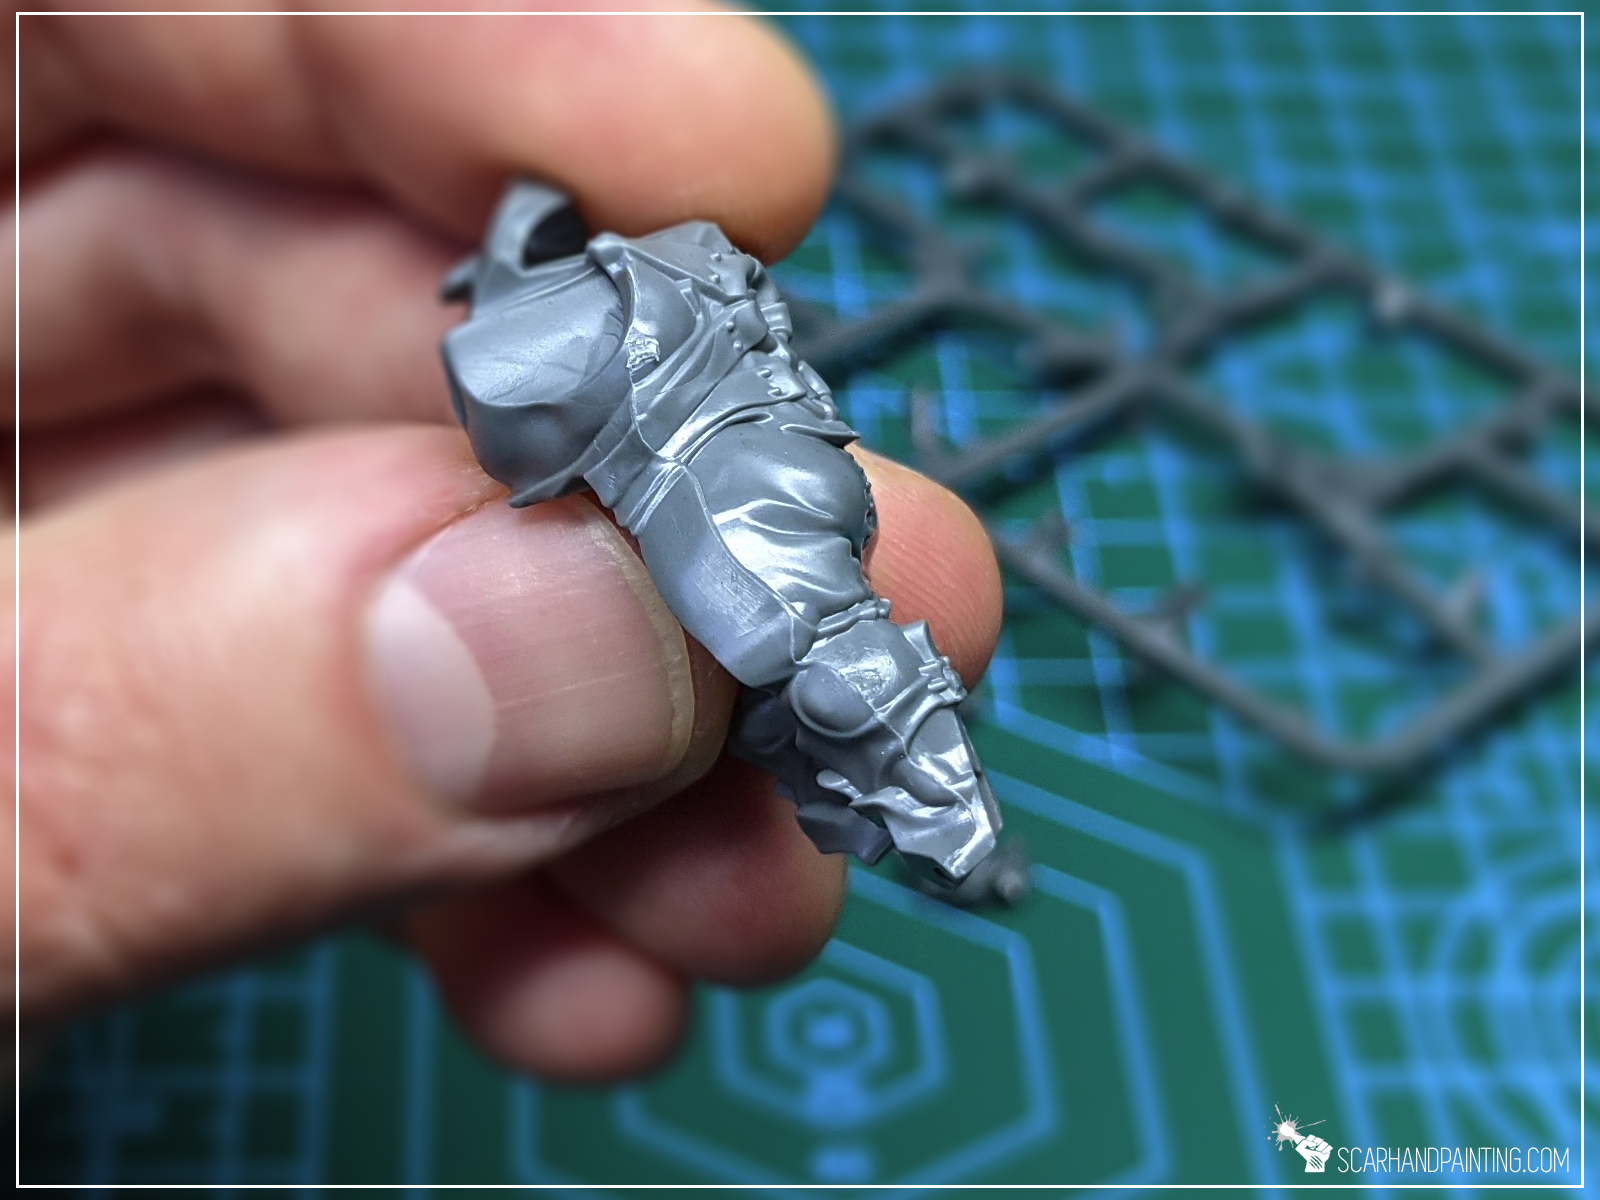


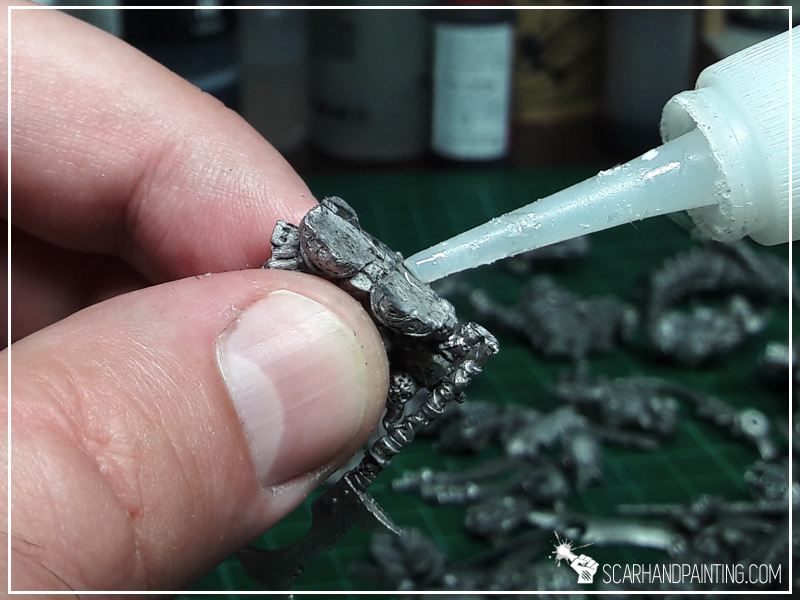
Resin: is the most problematic of the three main materials I have worked with. Resin is fragile, easy to break, tends to have hidden air bubbles plus it is common for mold halves to not be aligned properly. On top of that resin miniatures are sparkled with a lot of supports (tiny excess elements). On a bright side, a properly casted resin has a very sharp detail and texture, is easy to glue together if broken and can be modelled easy with a knife.
When dealing with resin I prefer Hobby Cutters and Knife over files, using the latter only in case of emergency.
Important note: wear a face mask when filing resin. You don’t want to breathe it in.
Metal: is pretty easy to work with. It is usually the softest of all three, can be bent easily, is very easy to file. I do prioritize Files over Knife when working with this material, except for long flat areas and fragile elements (swords etc.). Whereas scratches on plastic and resin are prominent, metal can be intentionally scratched with a tip of a File to remove Seam Lines from detailed surfaces like between hair and on a face.
Apart from pics, you can see me in action in this Youtube video:
Thanks for reading. If this tutorial helped you, be sure to let me know either in the comments below or at my facebook profile.
Please link this tutorial to anyone who likes to learn new hobby tricks.
Lastly I also invite you to follow me at Instagram, where I drop some nice pictures from time to time.
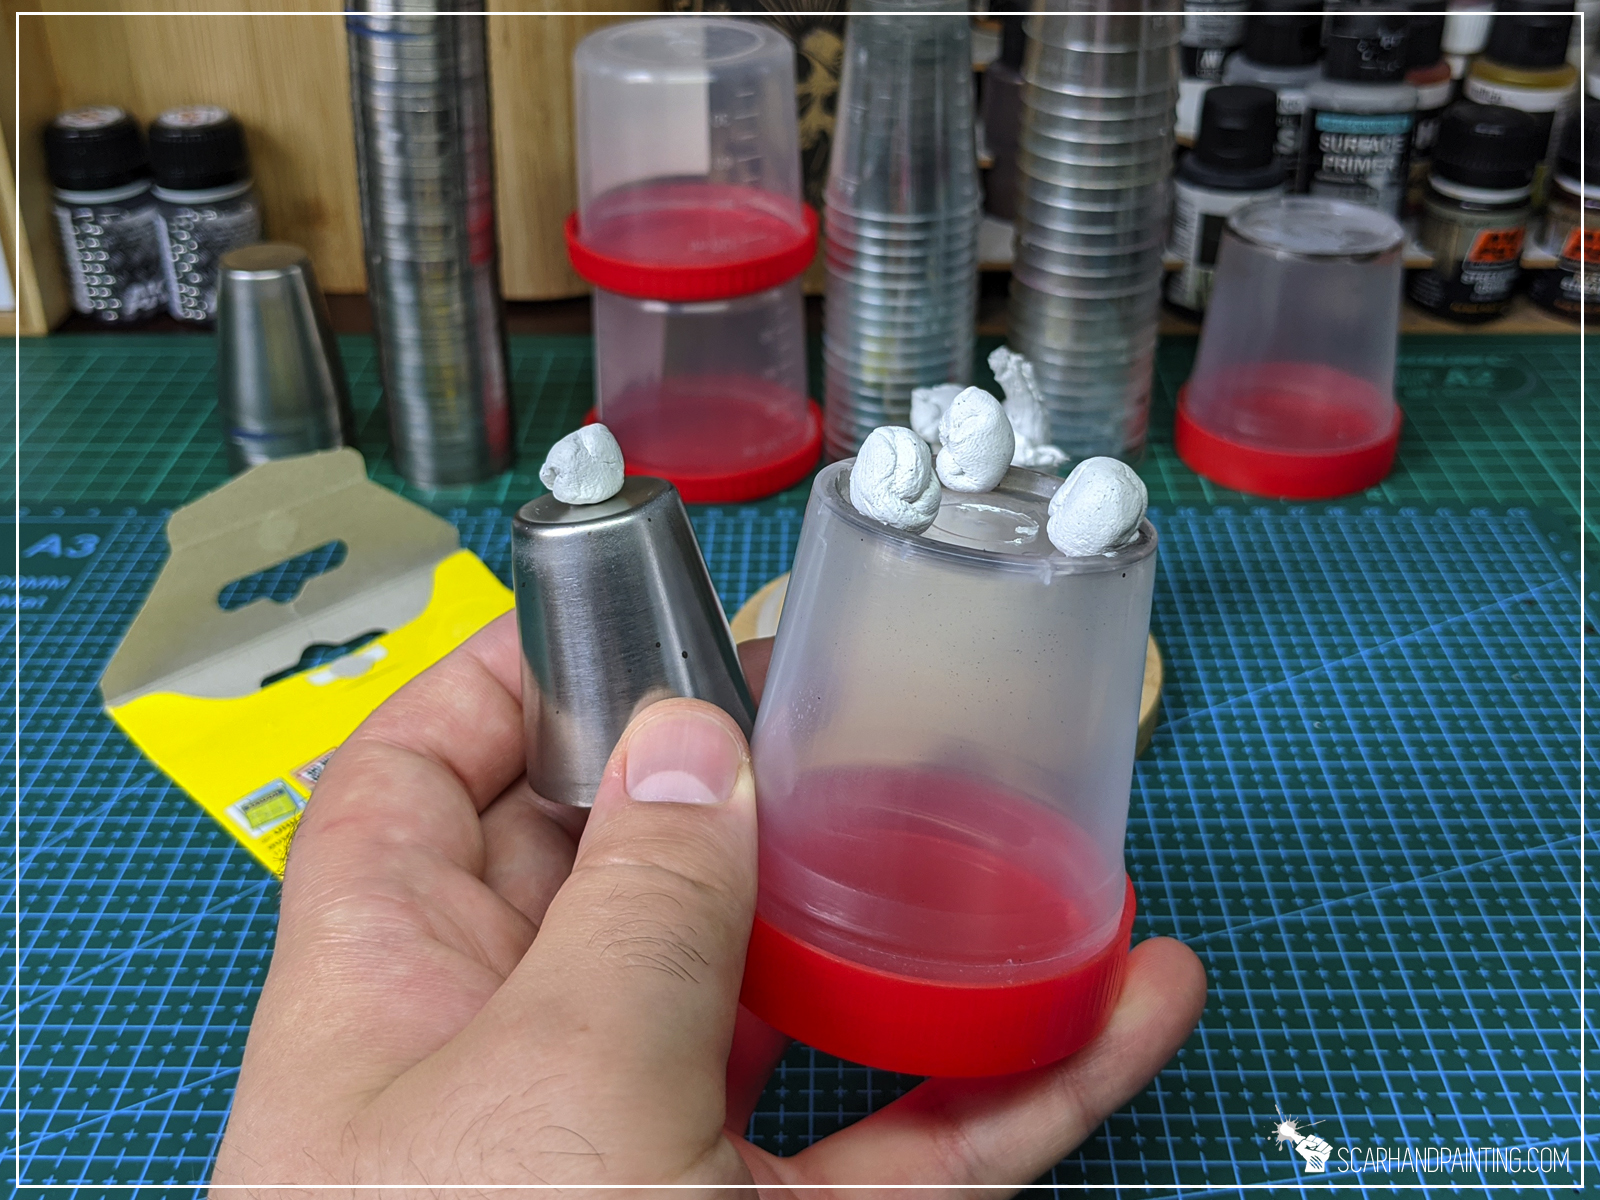
Hobby Grips, Miniature Holders, Painting Holders – many names for a single high-demand product. Painting Holders are a topic that comes back time and time again at painting facebook groups and forums. Hobbyists seek advice on ‘which one is the best’, ‘where to buy’ etc. The thing is that in general ‘the best’ is what works for you and while Painting Holders are a rather expensive addition to your hobby tools collection – it does not have to be this way. Below is a Tutorial, or rather just a simple idea on how to create your own Painting Holders in large numbers and most importantly – for cheap.
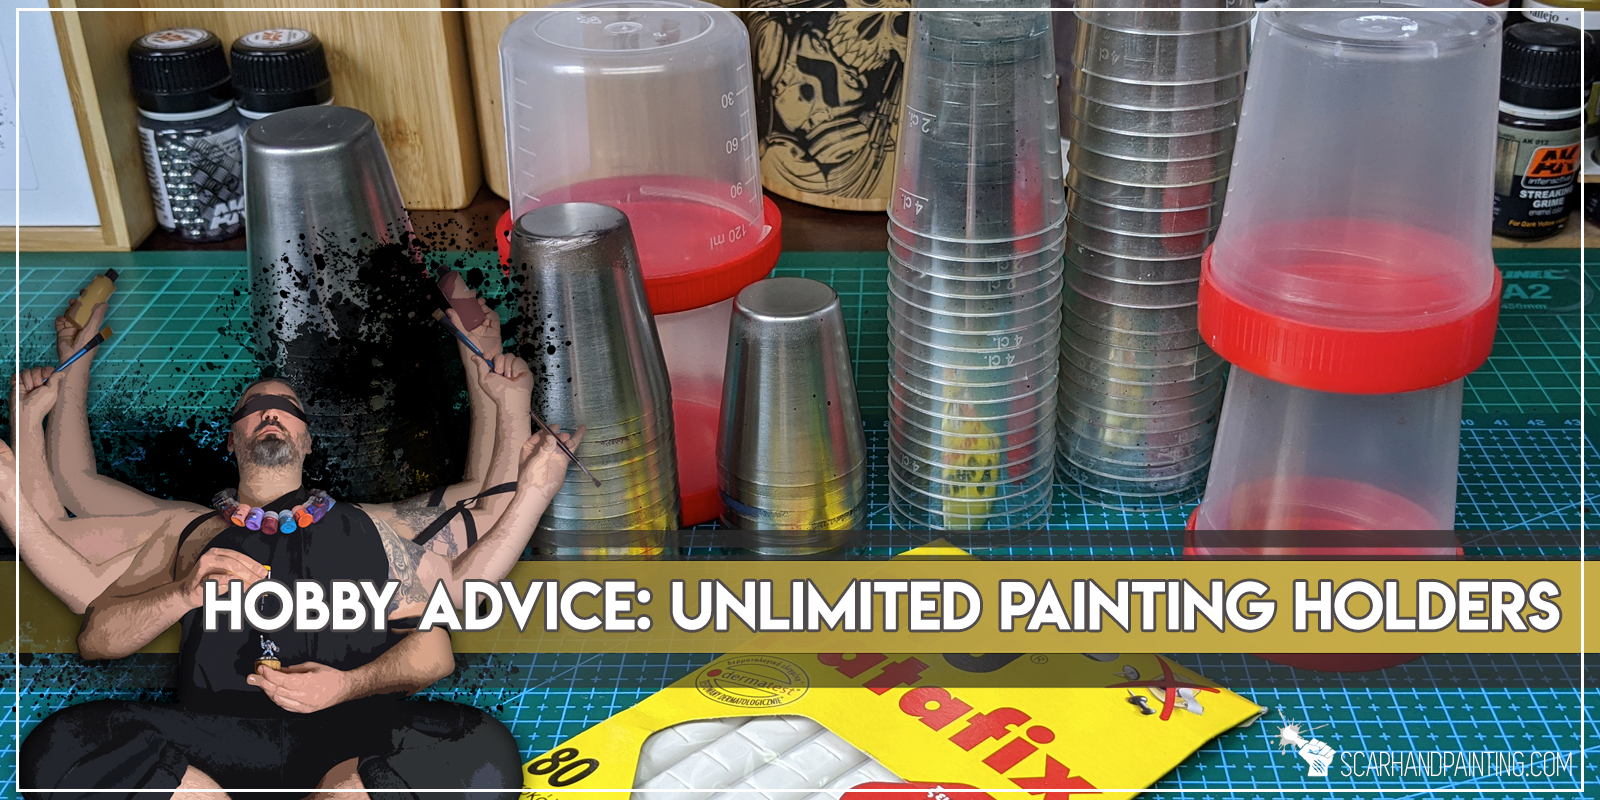

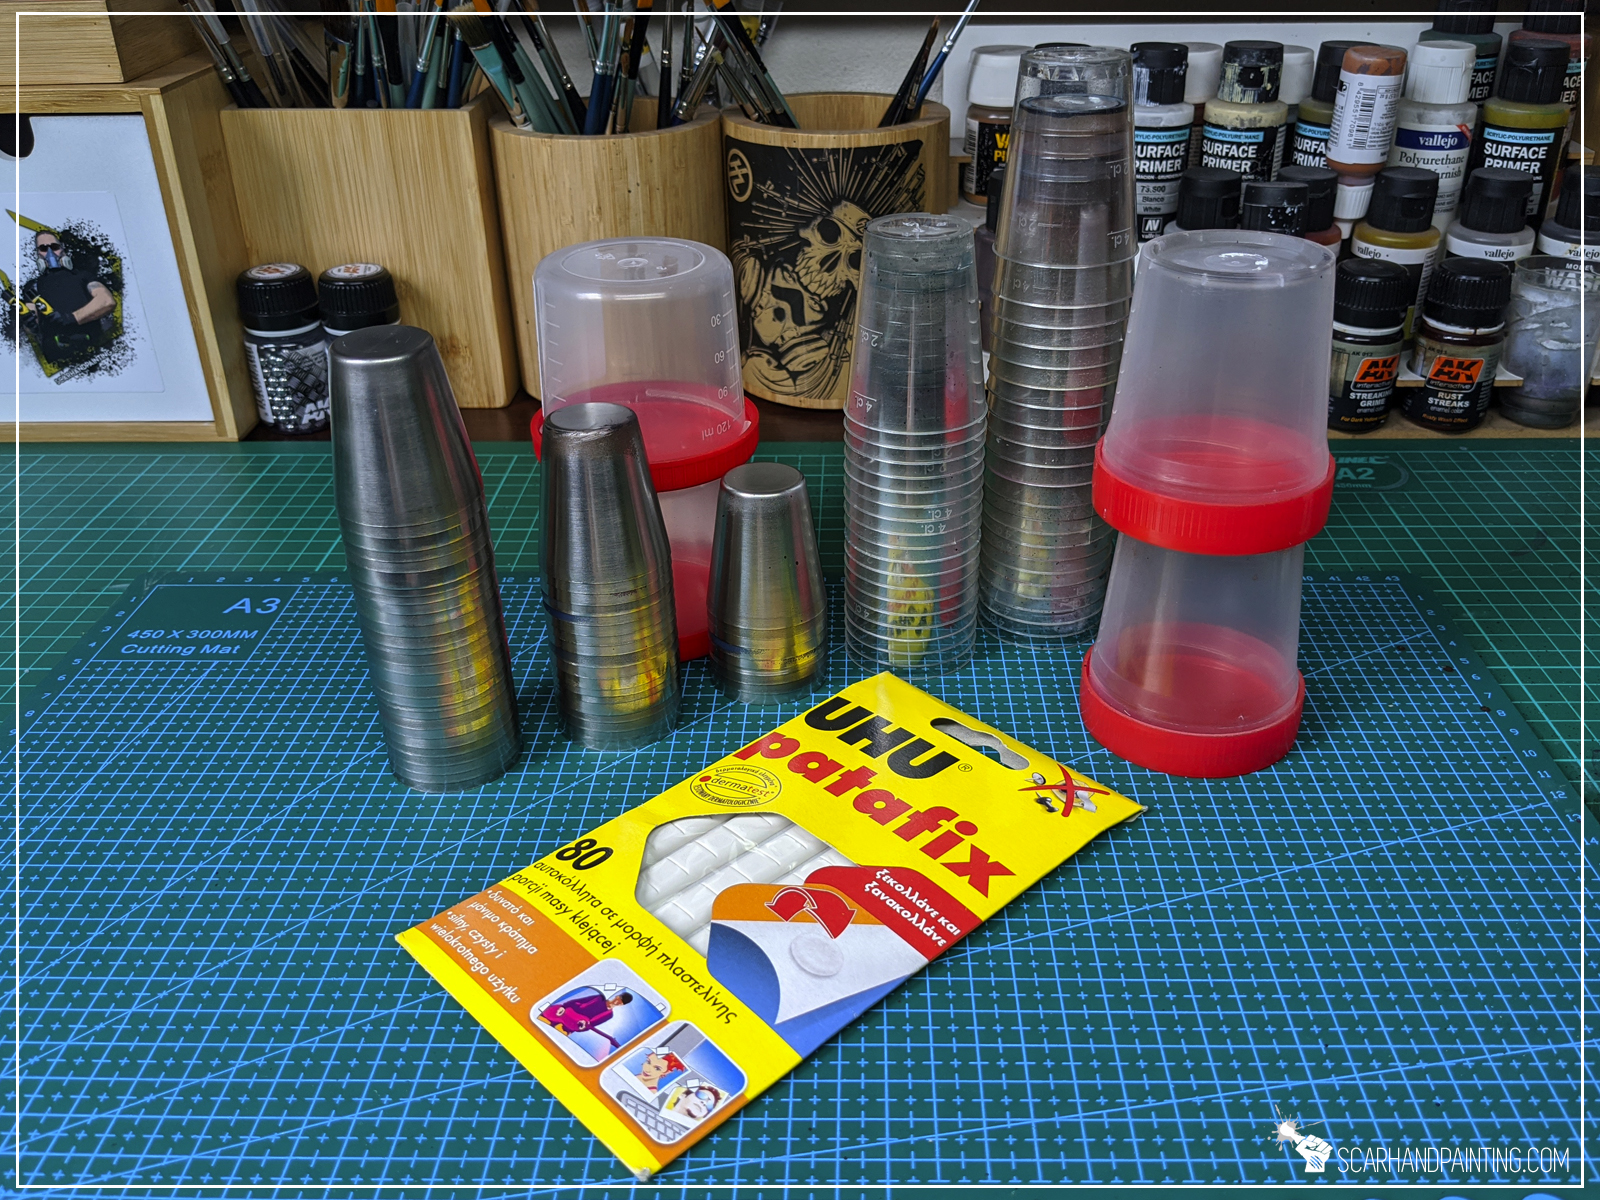
To create your own Painting Holders you will need any of these, or similar items:
* 30-40ml Plastic/Metal glass
* Plastic fluid container (from Pharmacy)
* Wooden cylinder
* BLU TACK

The choice of material, to create Painting Holders from, is up to you. Depending on what you choose the price, weight, re-usability, durability and aesthetics will vary.
Plastic is the cheapest, but also the least durable. Plastic glasses work best if glued one on top of another, to improve stability and durability. Even then it will break from time to time, plus is very light, which might lead to miniatures toppling down once set up on the workbench. Plastic is a very good choice for large Painting Holders, as they are stable and not too heavy. Plastic can be easily cleaned with solvents which is a bonus, when you want to mark some information with a marker.
Metal is very durable and has great re-usability. Can be cleaned with solvents, is medium weight. Compared to professional Painting Holders, metal glasses are still pretty cheap (You can probably get between two to five dozens for the price of a single Painting Holder!).
Wood is the heaviest and has the most adhesive friendly surface. It is also the most expensive of the three and is, in time, affected by water. Still it is very classy and feels great in hand. Wood is the only one to support pins. If you like to paint your miniatures unbased, or aim to get just a few Painting Holders, wood might be the best choice for you.
Personally I started with plastic, but got frustrated throughout the years and moved to metal as a result. I still use plastic for larger holders, as it seem to work fine when closed at the bottom.

Preparing your own Painting Holders is pretty easy. Press a ball of Blu Tack to the top of the glass/container and push a Miniature onto it. Just like that – it is done! Consider adding more Blu Tack for larger holders, so that miniatures are immobilized.
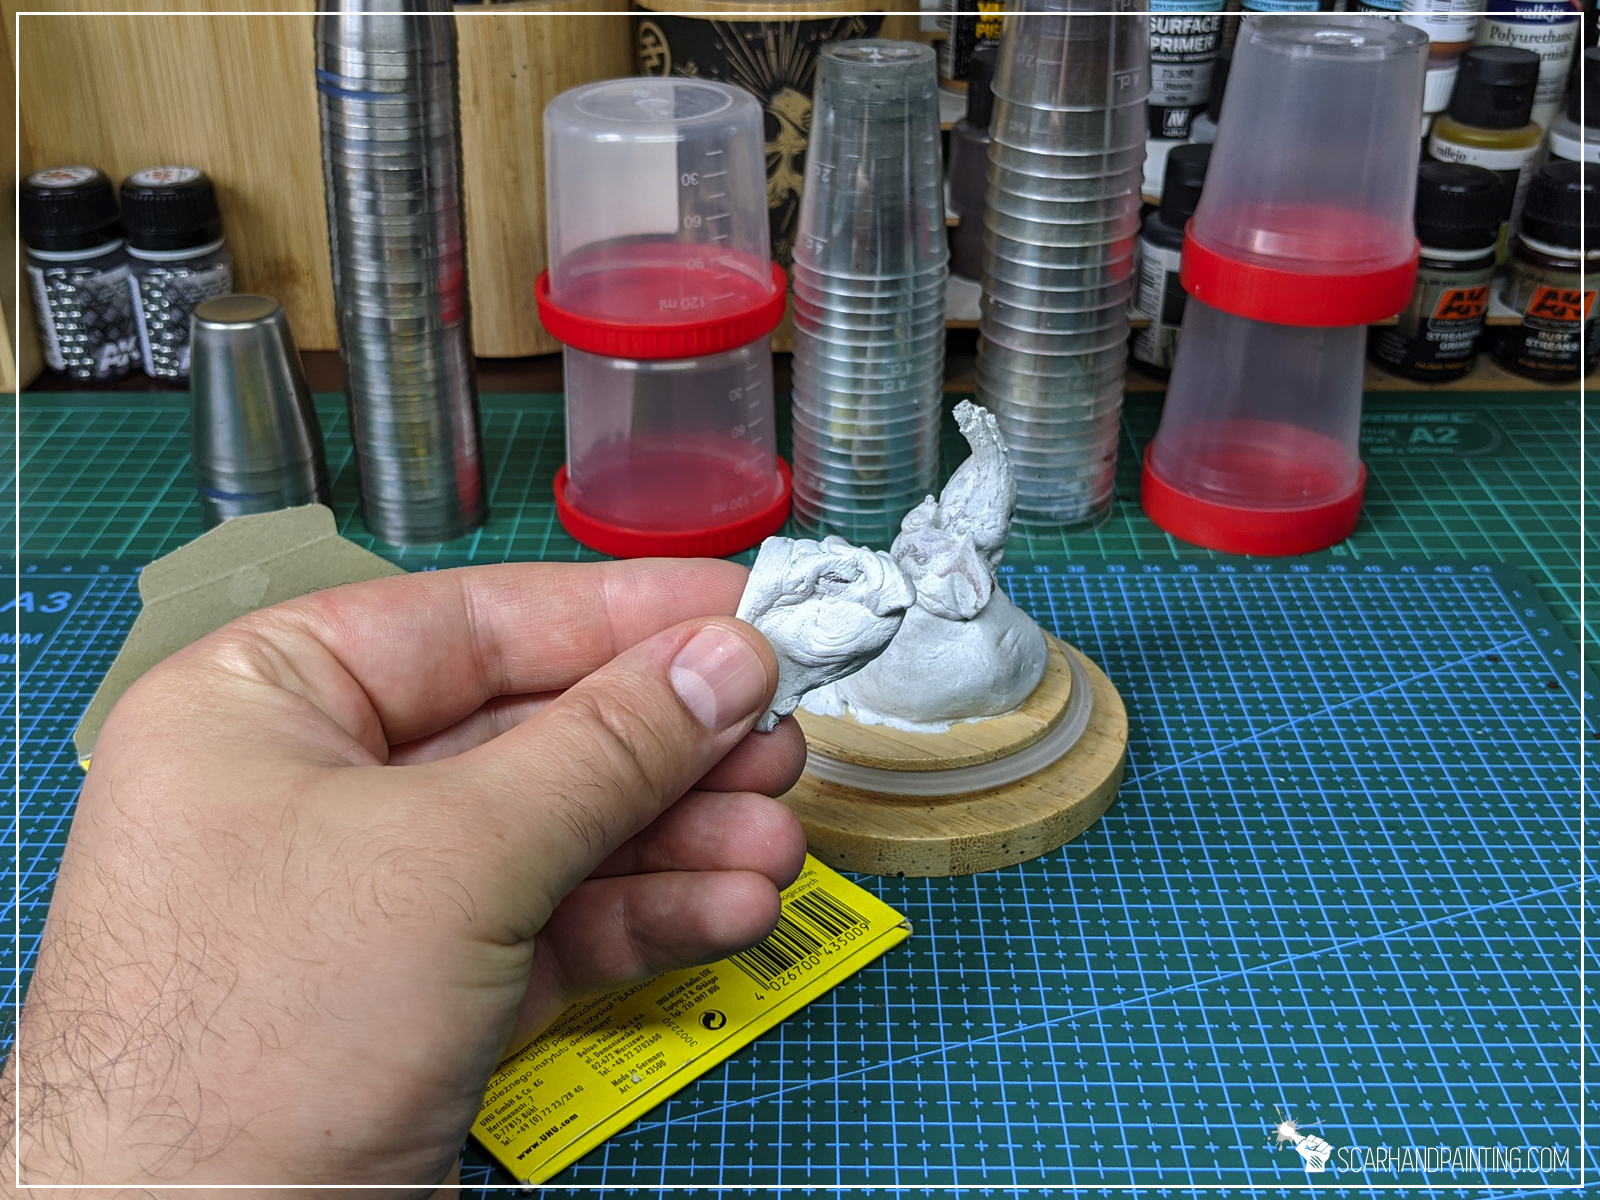
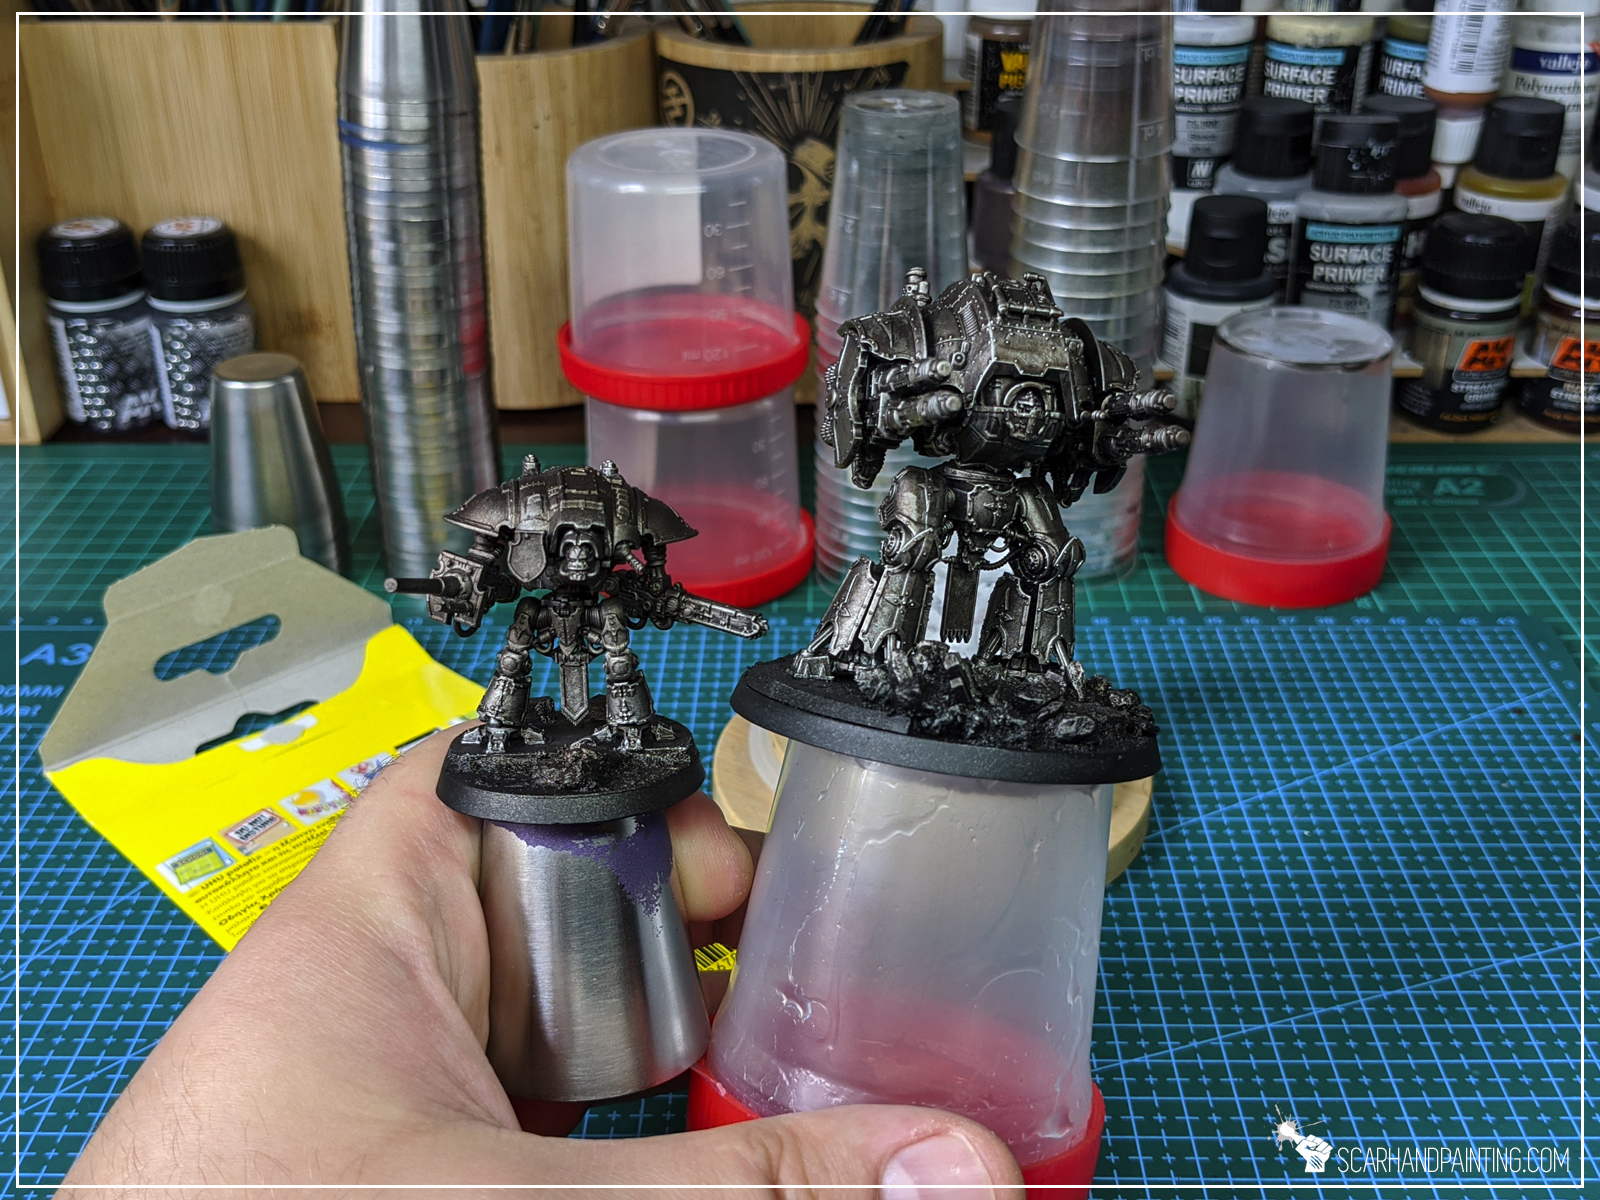
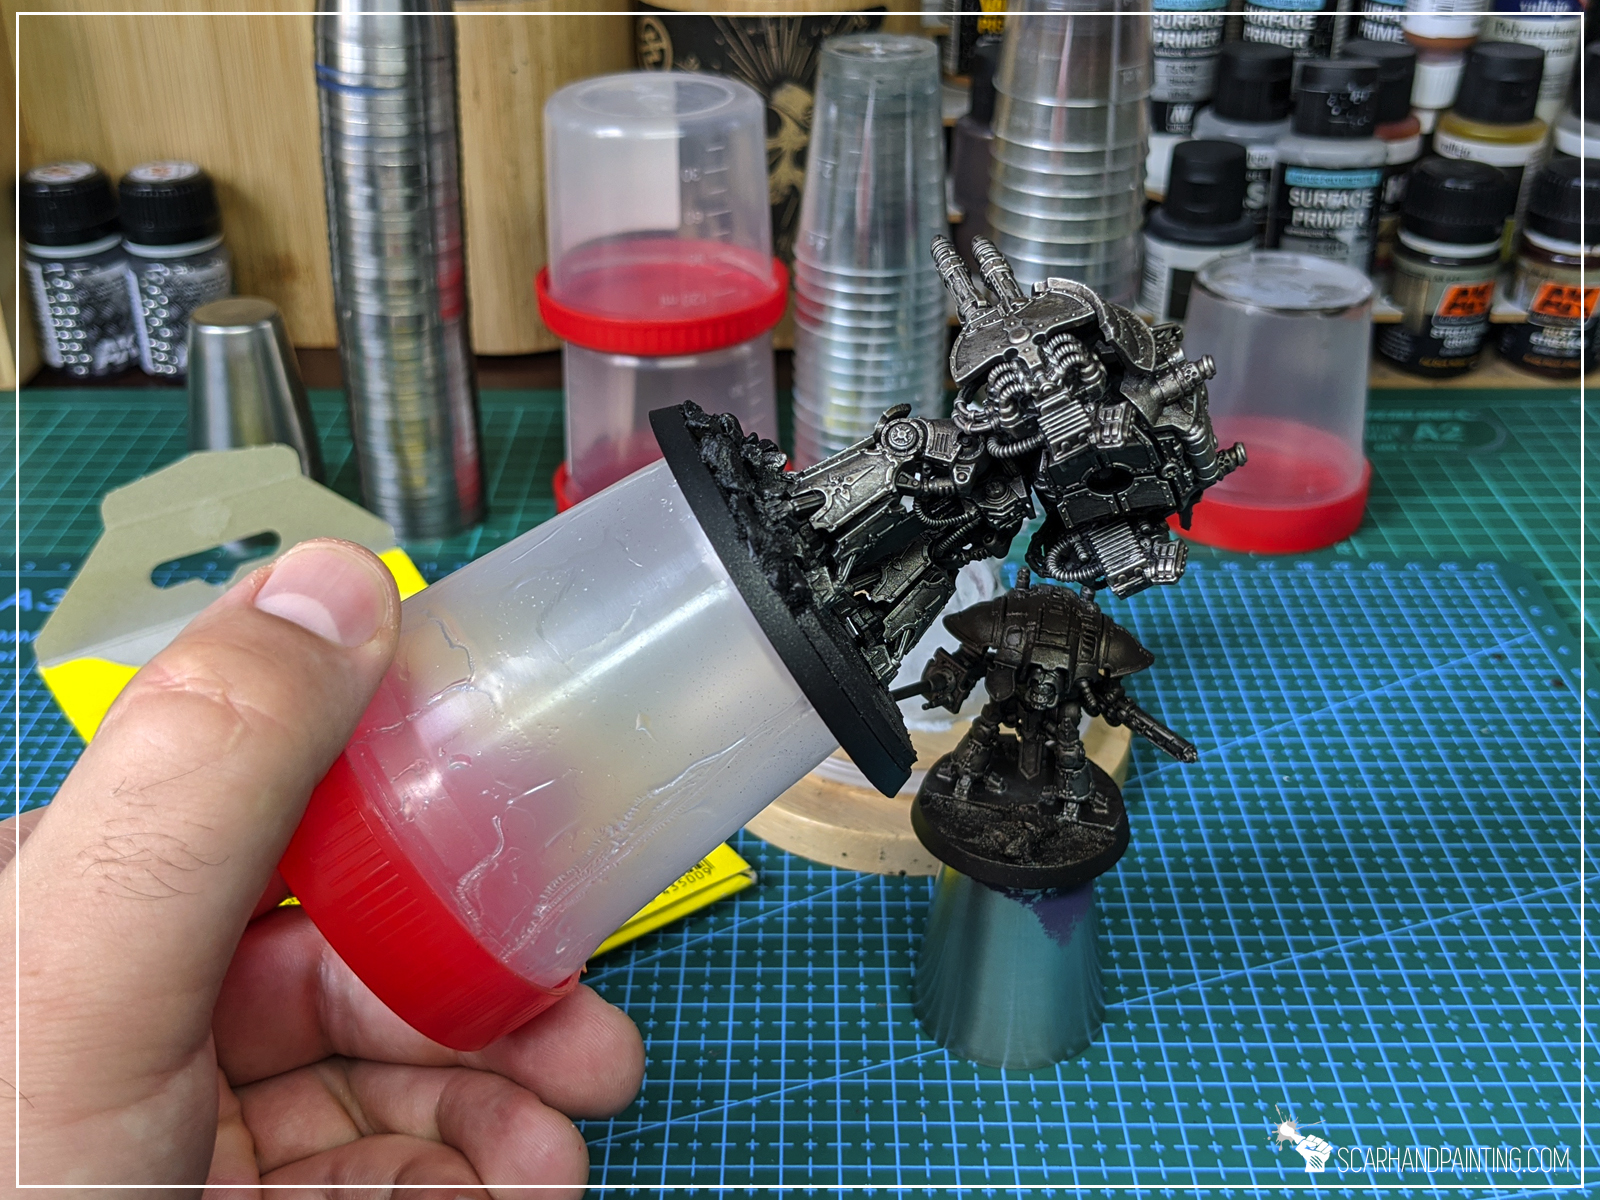
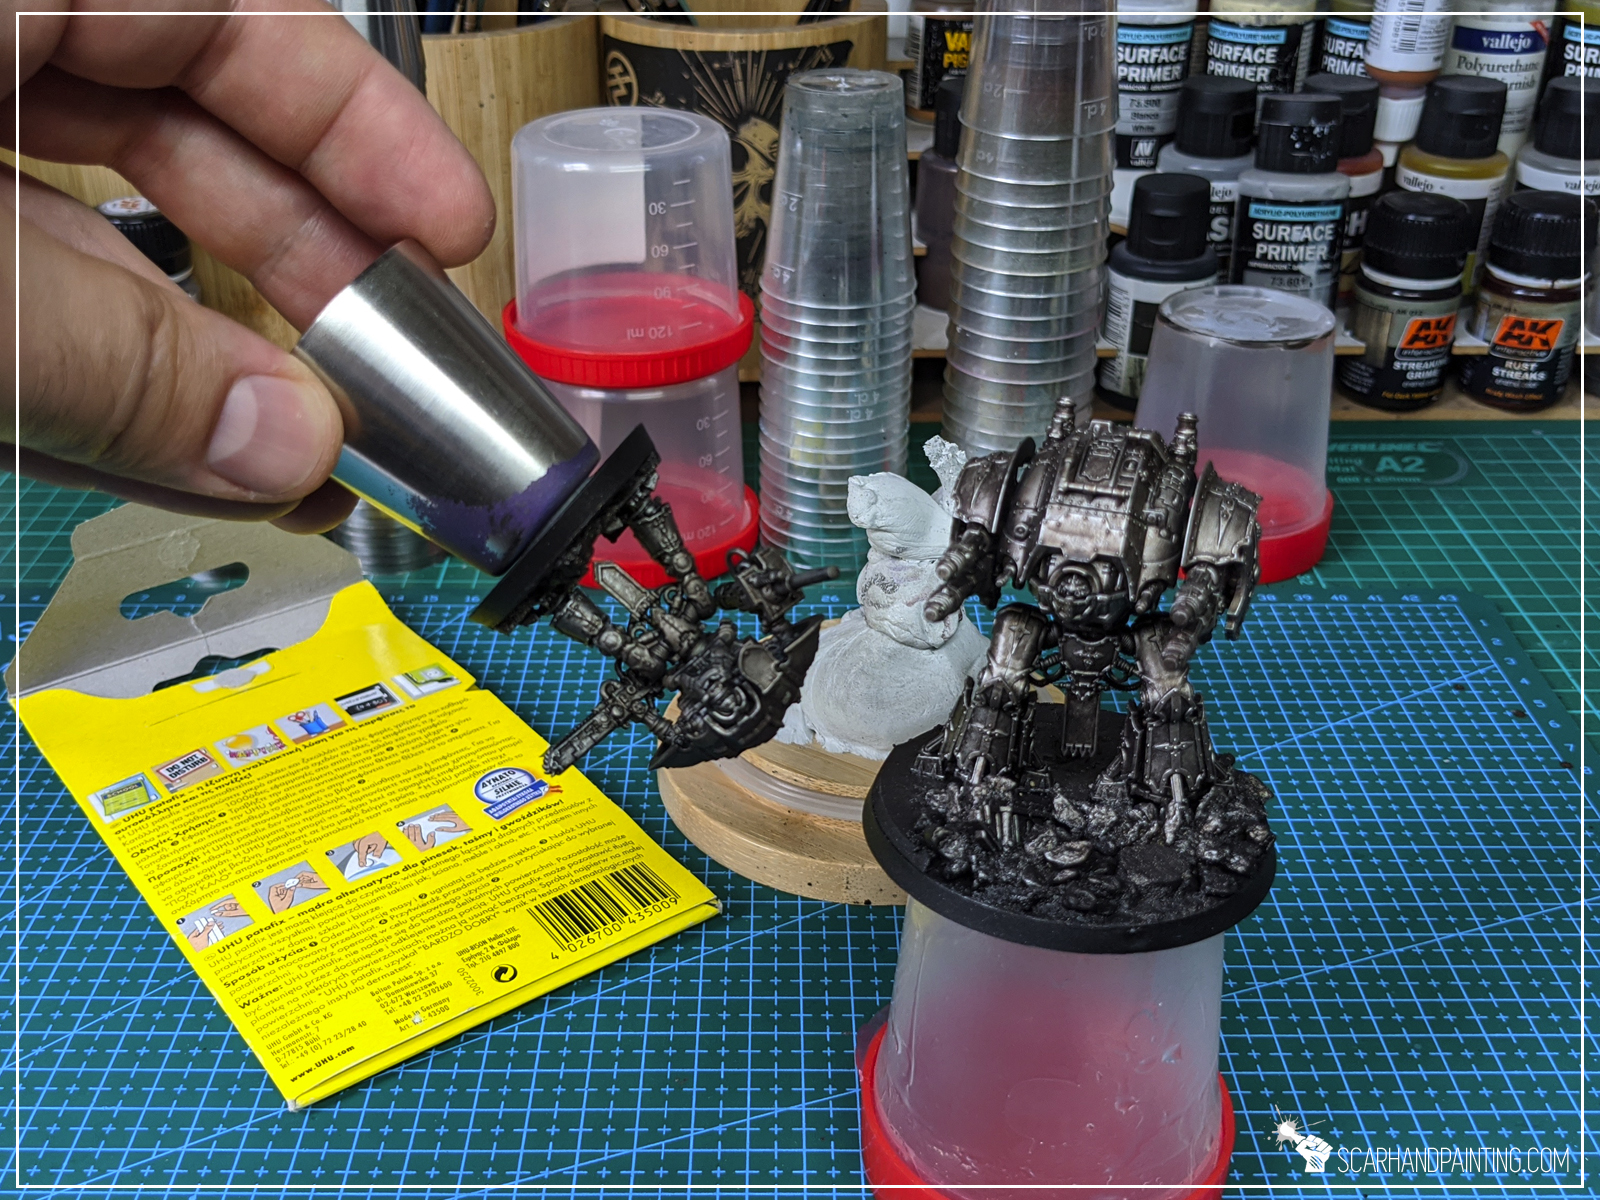

* No, if properly mounted the miniature would not fall off. I have painted hundreds of plastic/metal miniatures like this and none have ever fell off the Holder.
* When choosing items to be used as holders – stay open minded! In my case the revelation of using metal glasses instead of plastic came out of nowhere!


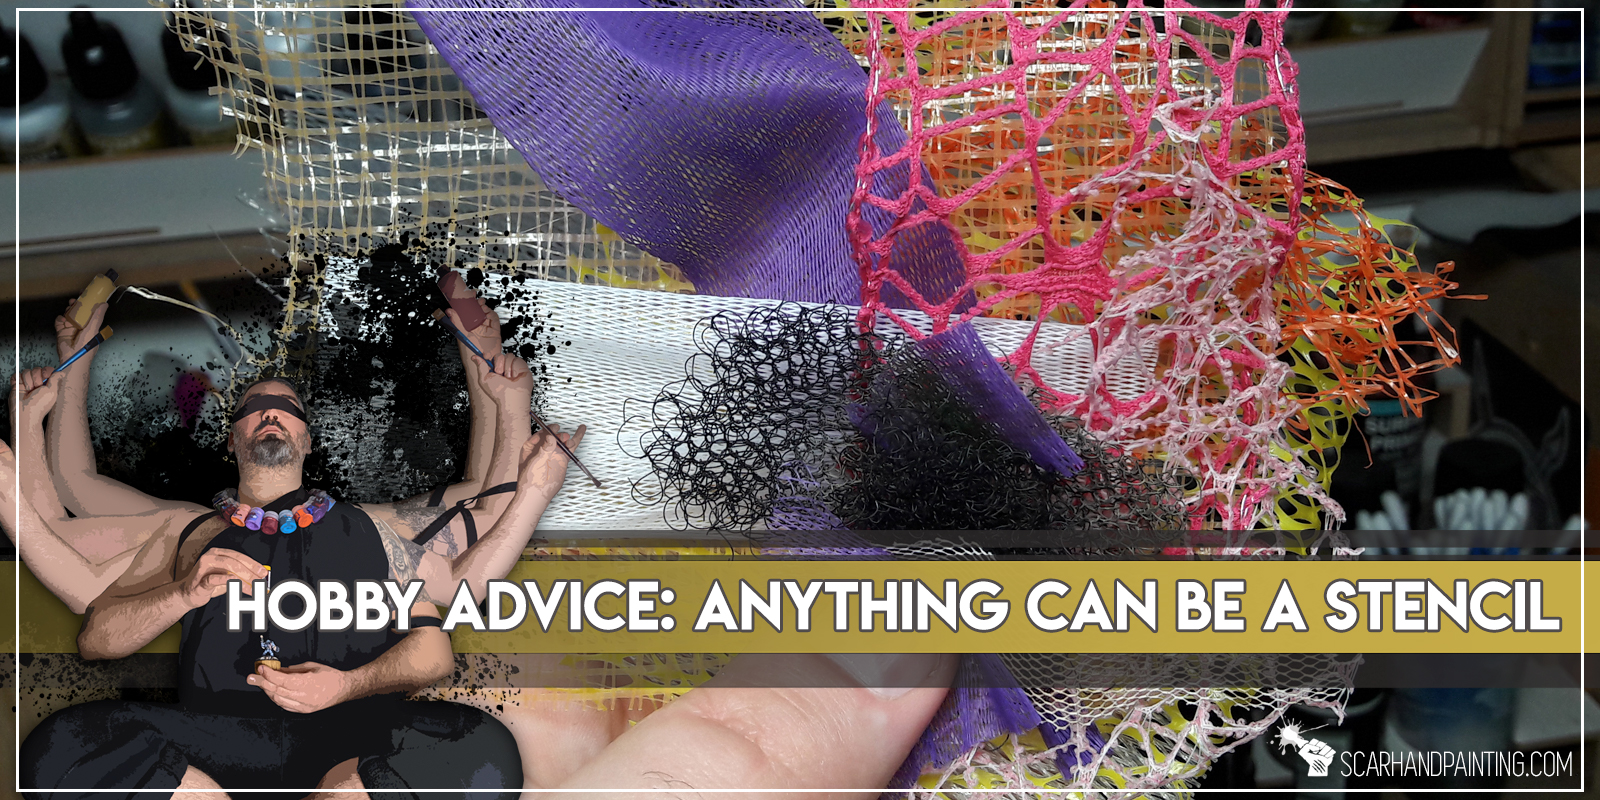
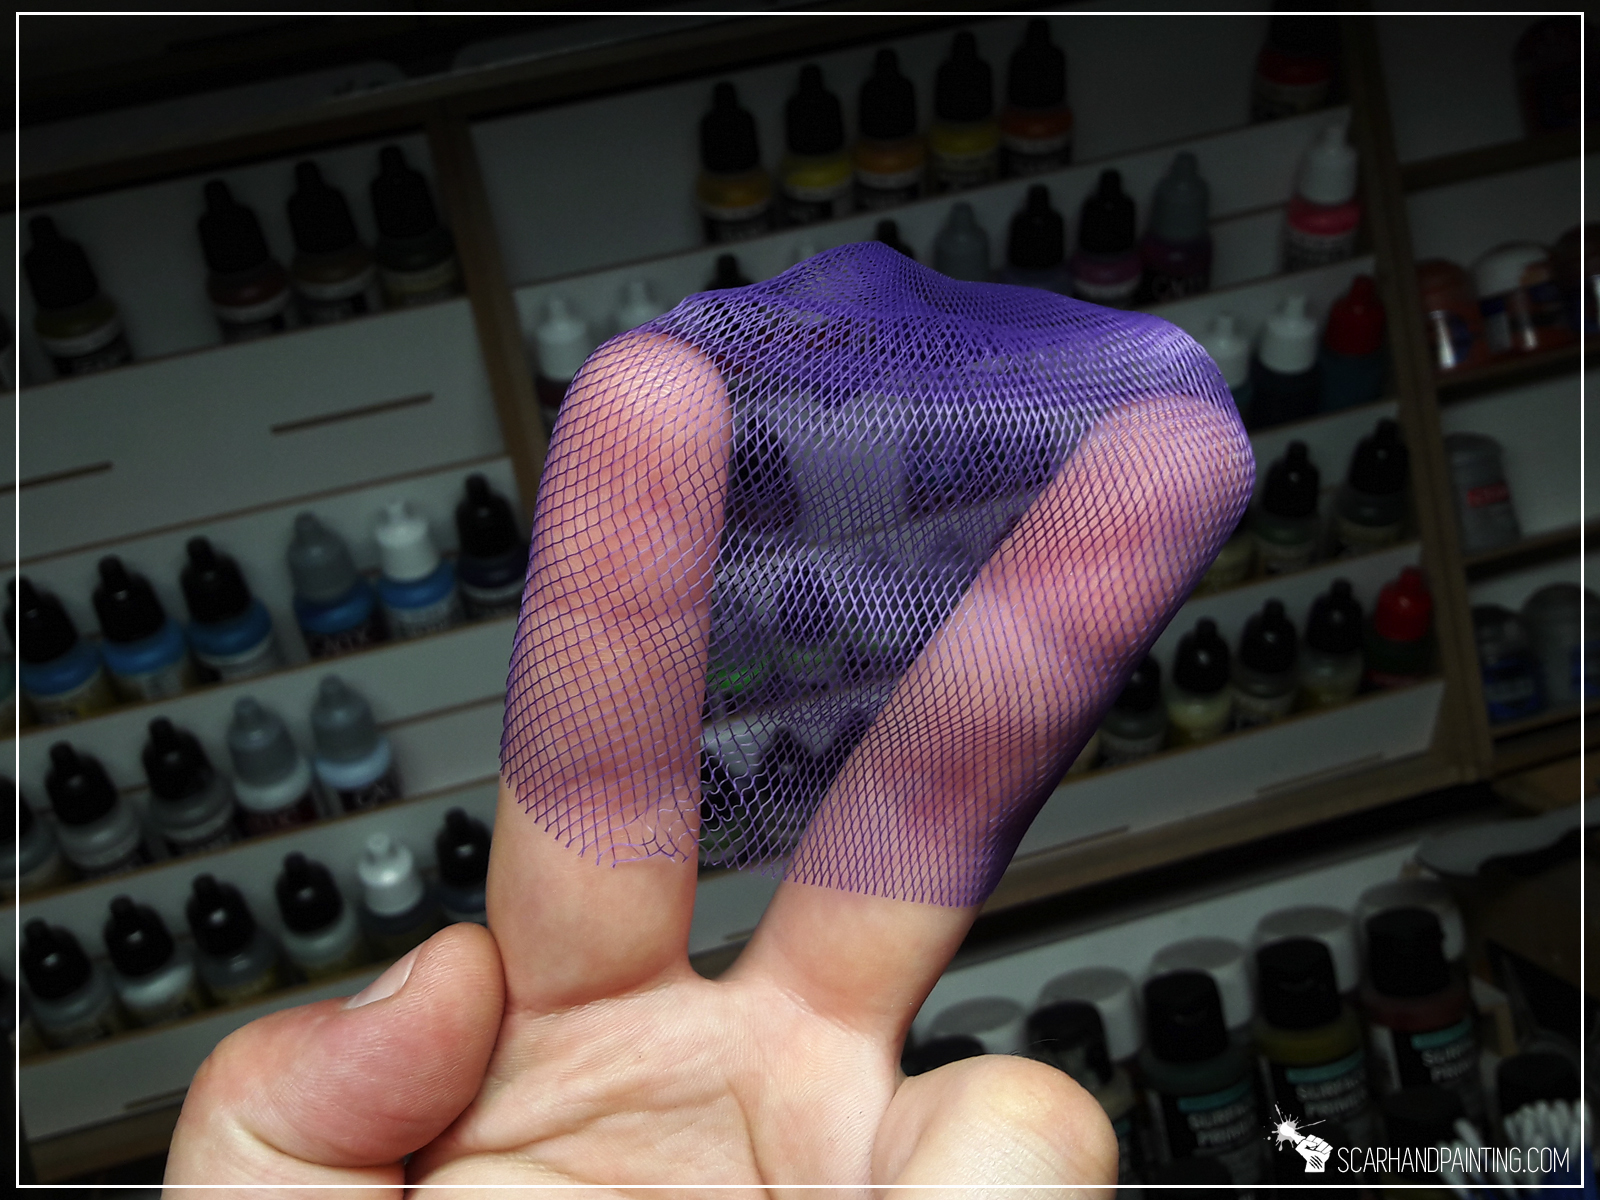
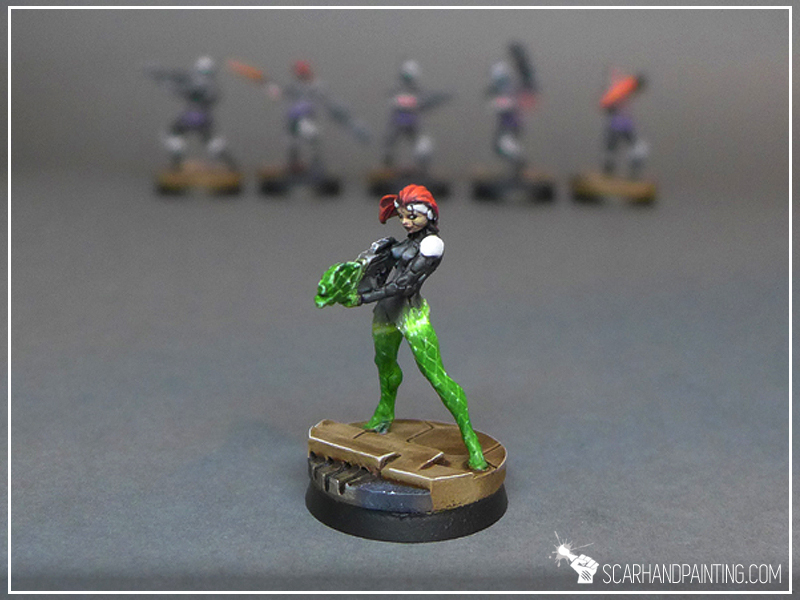
Let’s talk Stencils. There’s just so many awesome airbrush stencils out there. The world around us is filled with them, even though we’re used to pass them by without further notice…
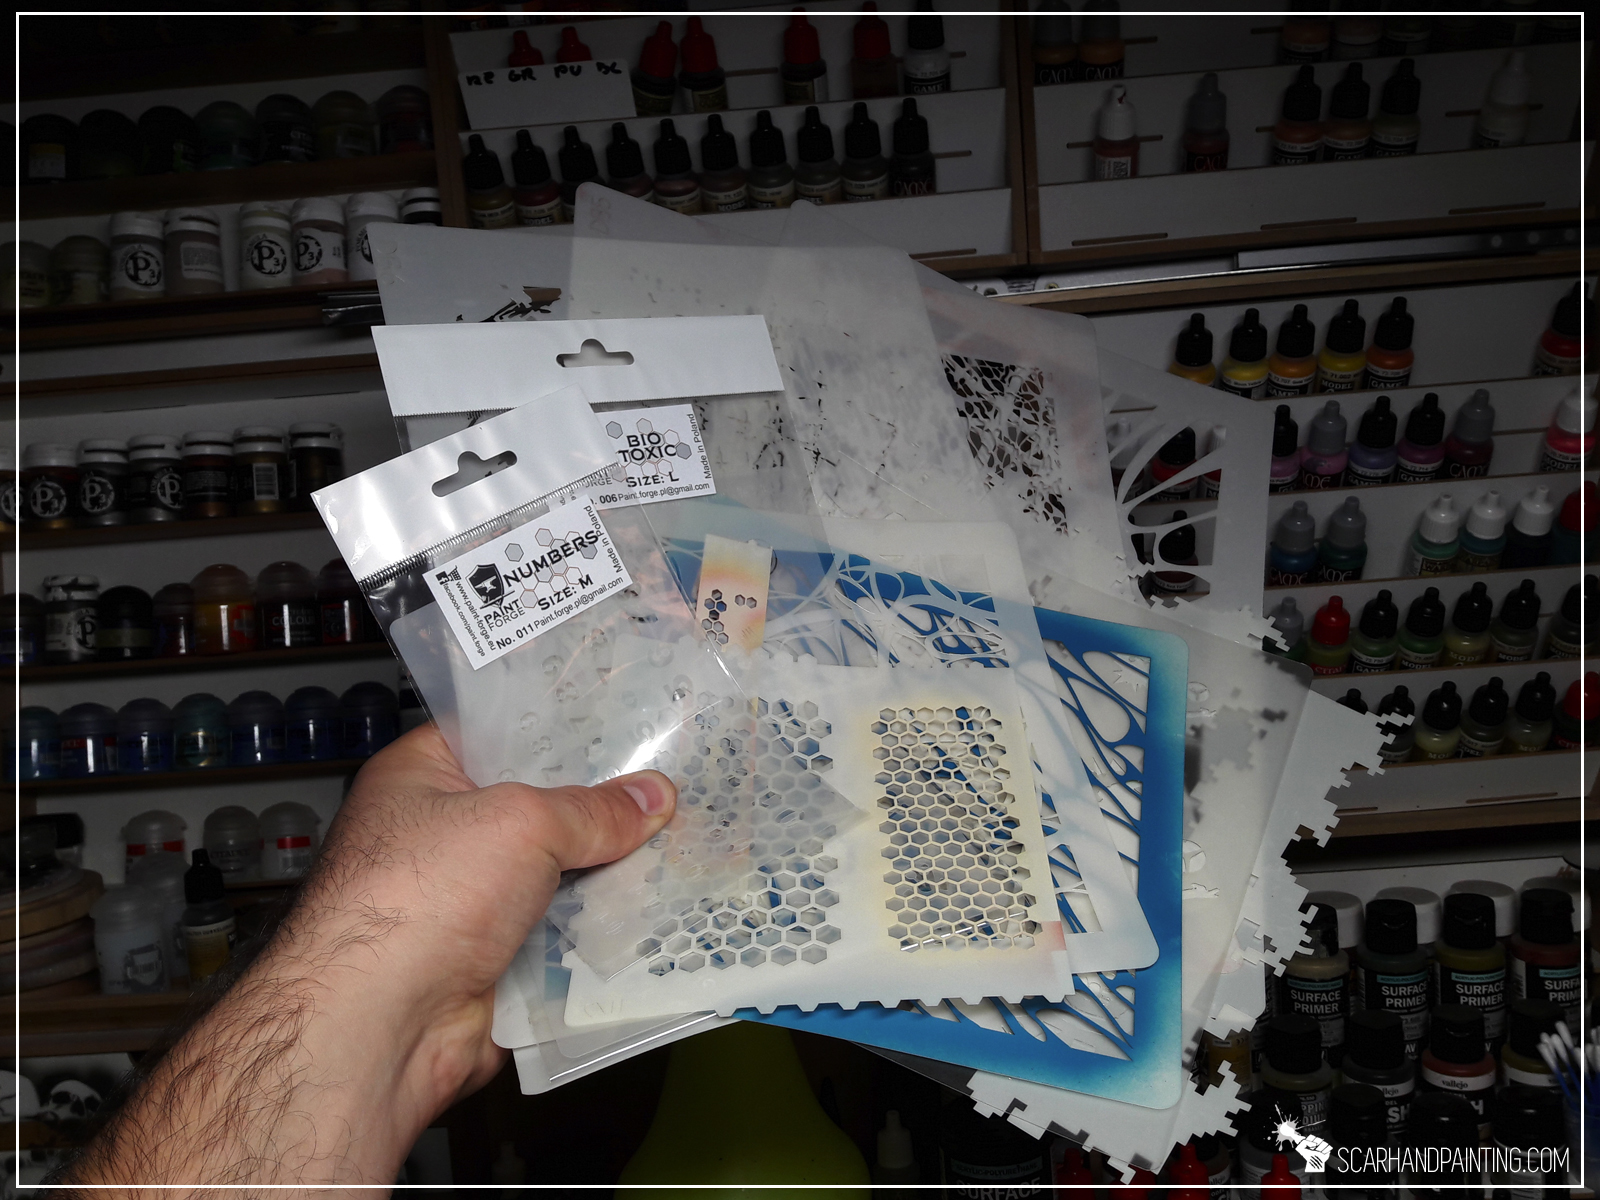
No, I ain’t talking about these! These are all professional stencils, some of which are crazy expensive! Nope – I’m talking about all the stencils that you might already have at home and not know about it! Some may be found in the kitchen, some inside your bathroom, some can even now be in your reach, across the hobby desk!
“But Maciej, you resourceful genius” I hear you say “how come?!”
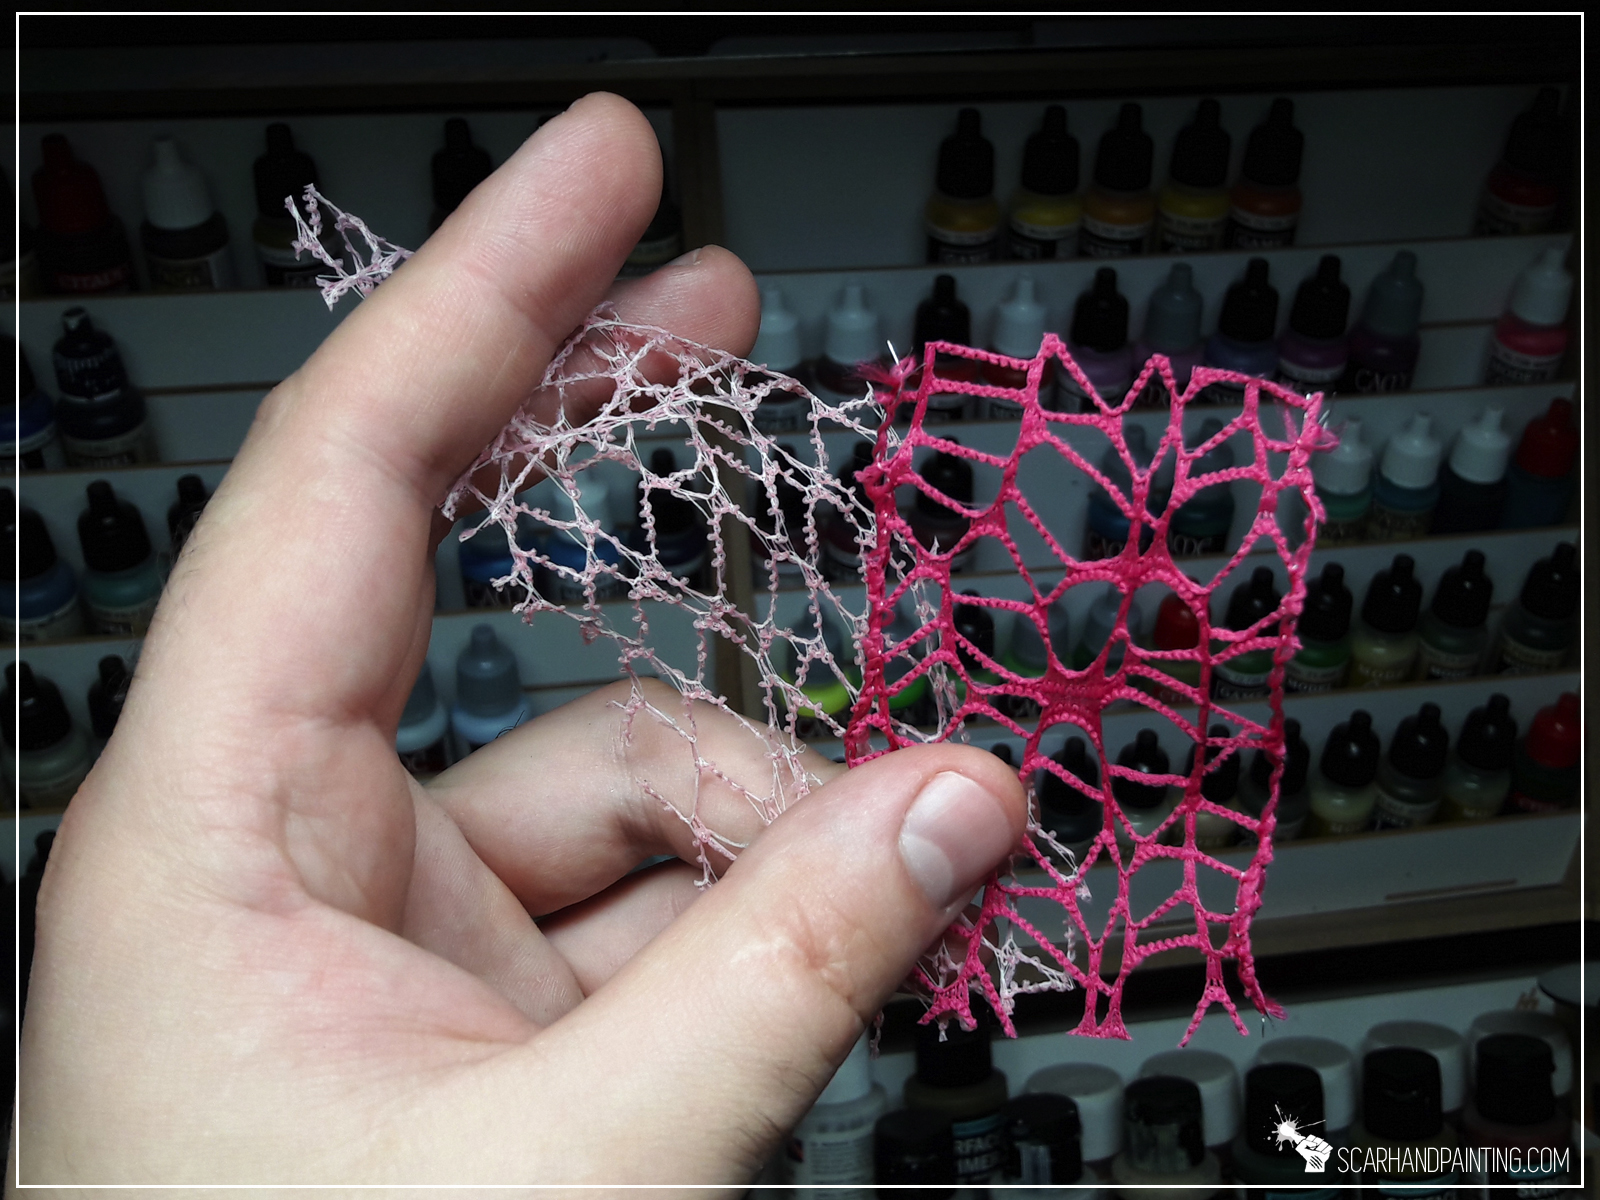
Here’s the thing: “Anything can be a stencil!” Still don’t believe me? Check these out!
Dirty, dusty effect – why not?


Still haven’t used, but I know there will come a time to do it 😛

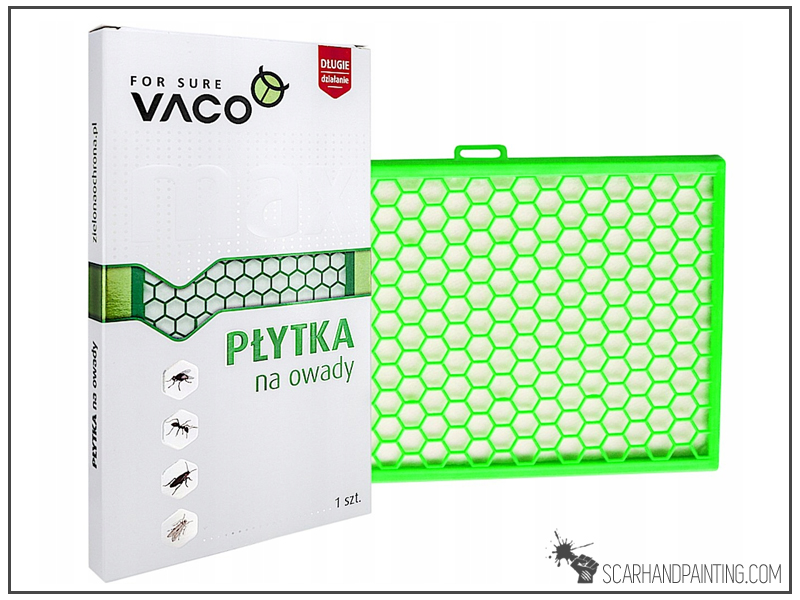
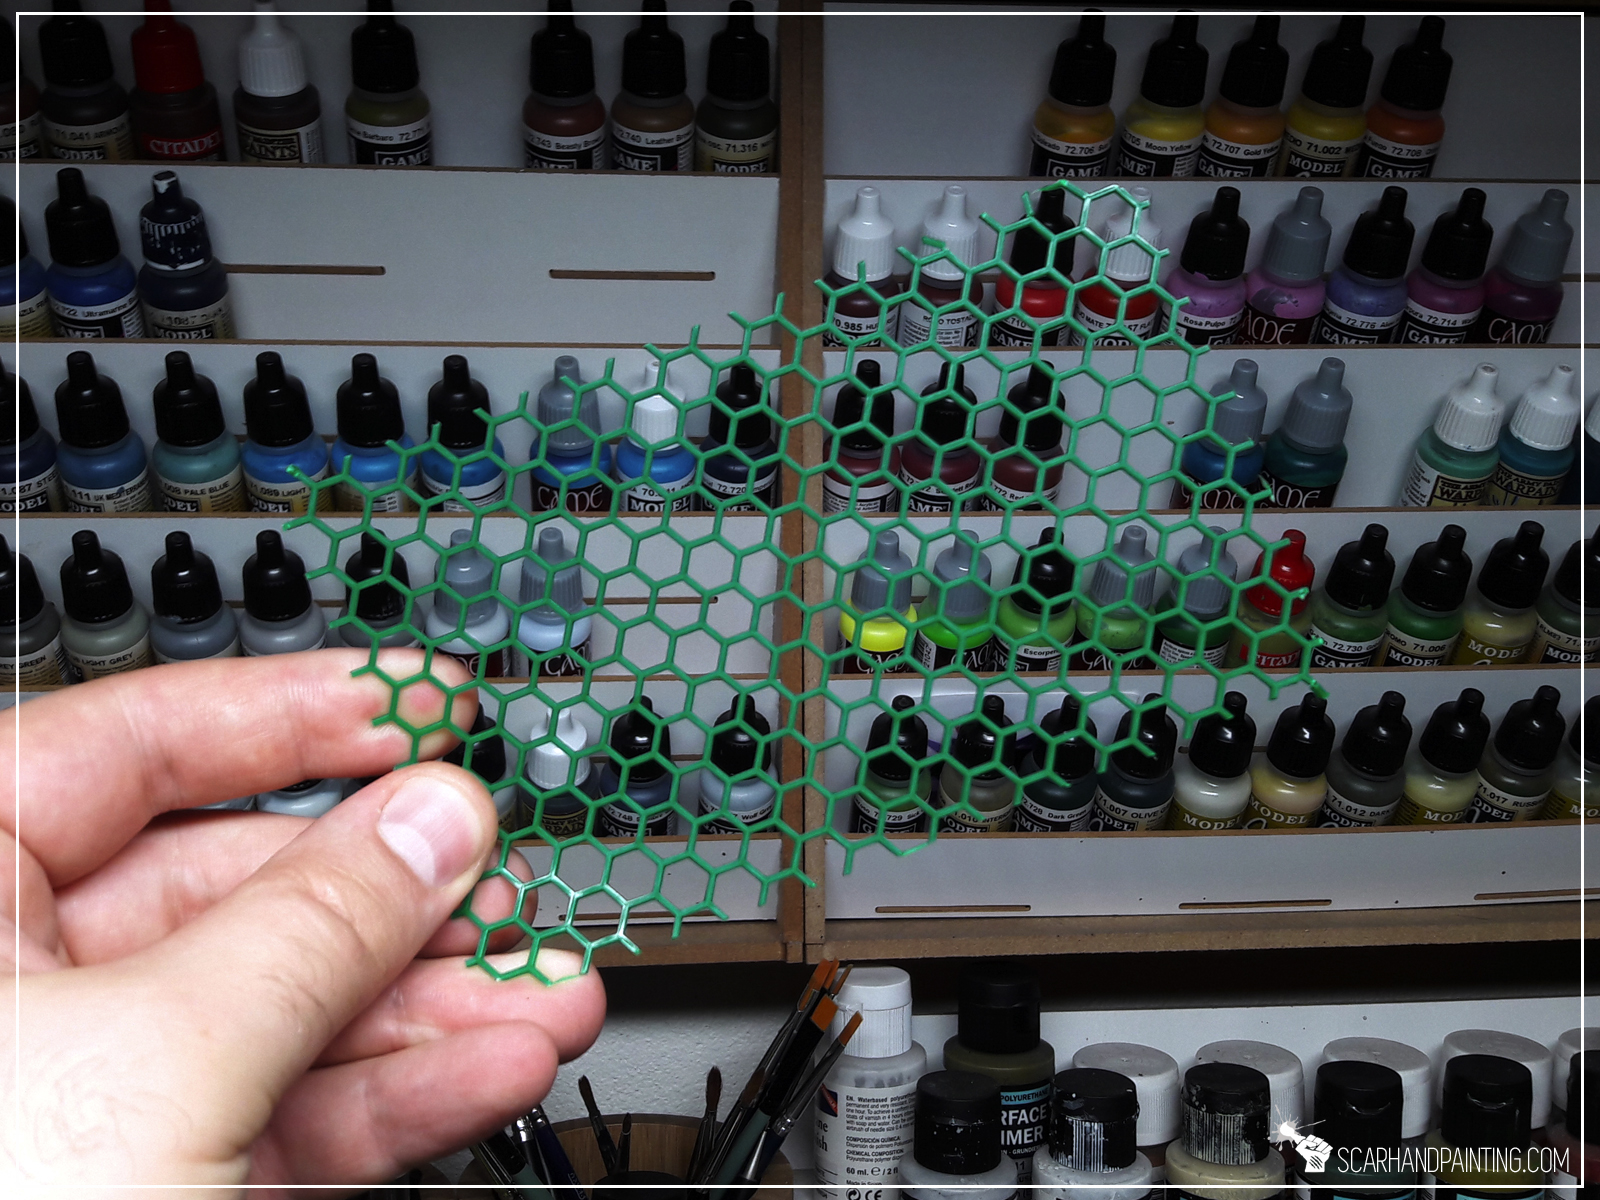
Cuz there’s never enough hex in your life!
I call upon thee God of Thunder!


Not a stencil, but totally worth consideration 😉
My favorite source of elastic, detailed stencils.


Feel inspired to rampage across your home and try to find as many stencils as possible? Feel like “gonna catch them all!”? I wish you good hunt!
PS: What are yours favorite DIY stencils? Let me know in the comments or under THIS facebook post 😉
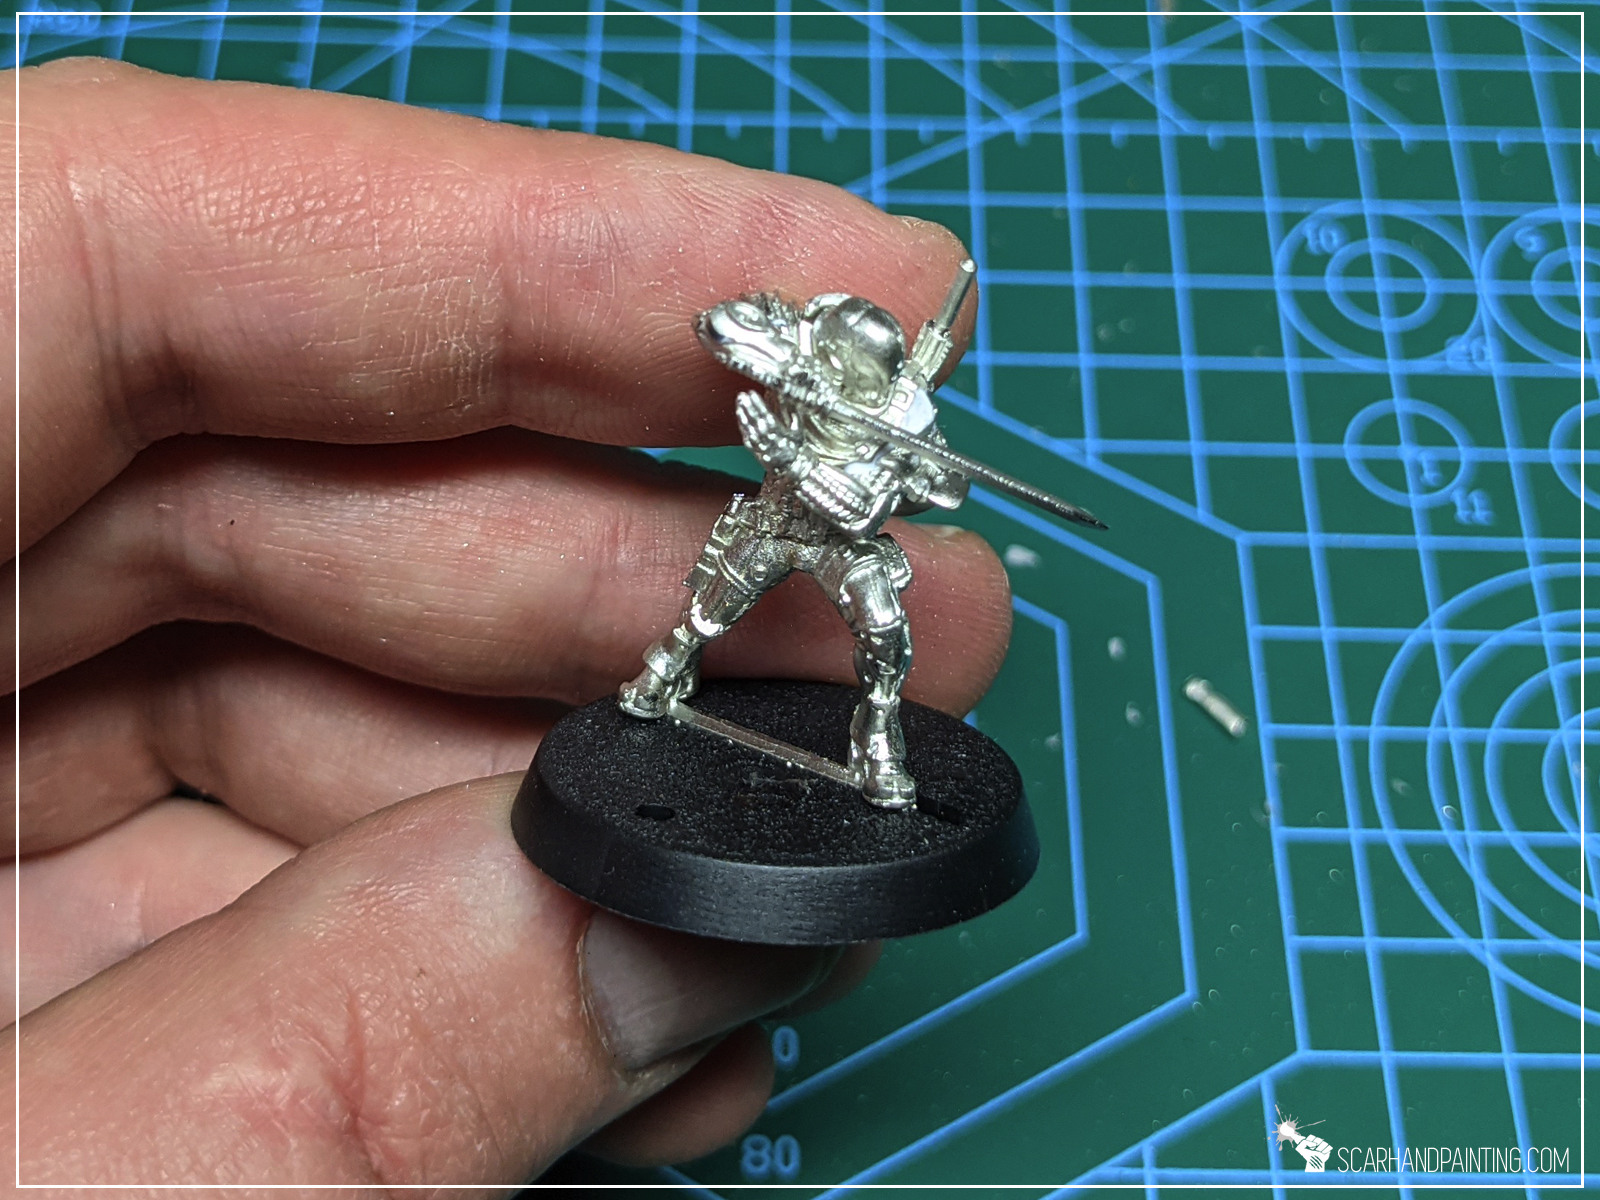
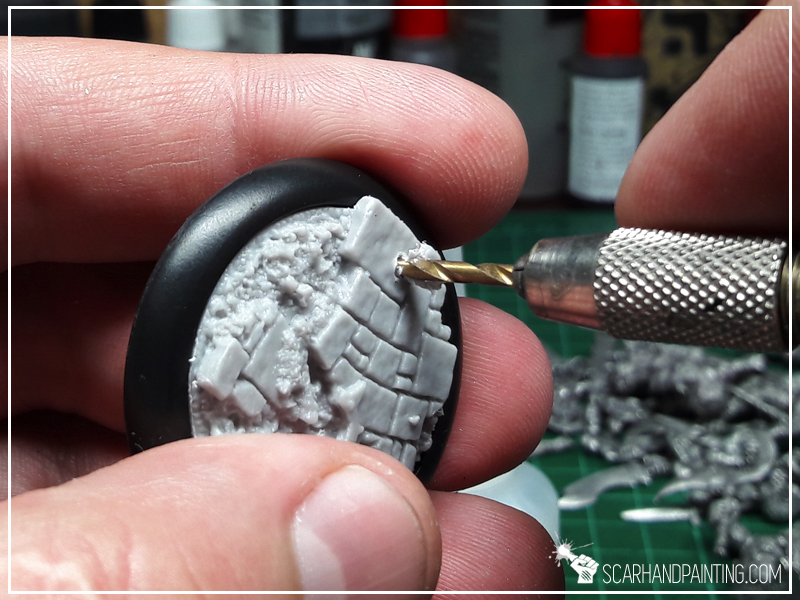
In this step-by-step tutorial I’m going to show you how to base miniatures.

Basing miniatures is an overall easy thing, still every now and then I stumble upon hobbyists asking on how to properly do it. Let’s start the answer with: “There’s no one proper way, but there are certainly plenty of bad ways to base miniatures.” A quick example of a “bad way” would be if you glued irregular sand on top of a base and tried to glue a miniature on top of it with cyanoacrylate glue. Glue would go on a rampage all over the sand while it won’t hold the miniature in place due to insufficient area of contact. Another example of a “bad way” would be gluing a miniature on top of a painted base without a pin resulting in miniature being glued to paint rather than the base. This can only end badly for the miniature and your paint job. Ok, so what are the “proper ways”? Here’s three major techniques I use:

Some miniatures seem stable and have a large, flat area at the bottom be it giant feet, or an underside of a robe. In this case I usually go with with no pin at all and trust in the vast area of contact to keep the miniature in place.
Here’s how I go about it:
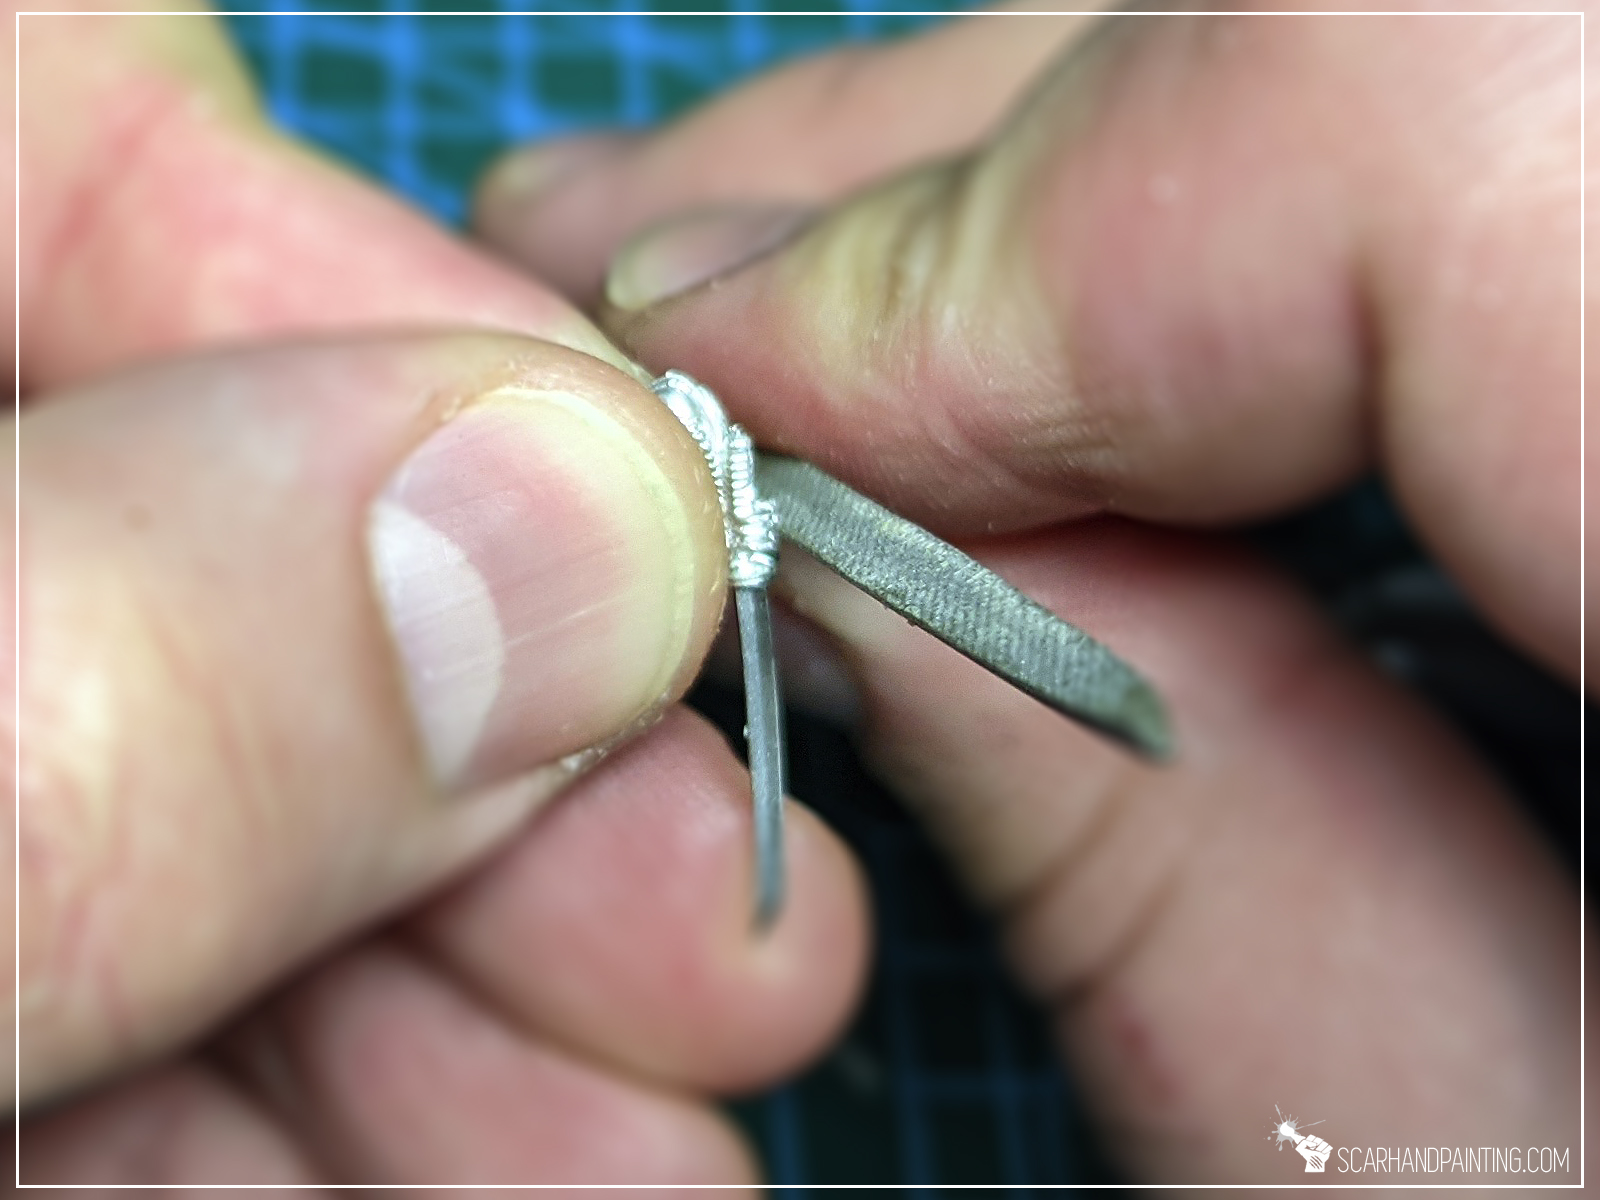
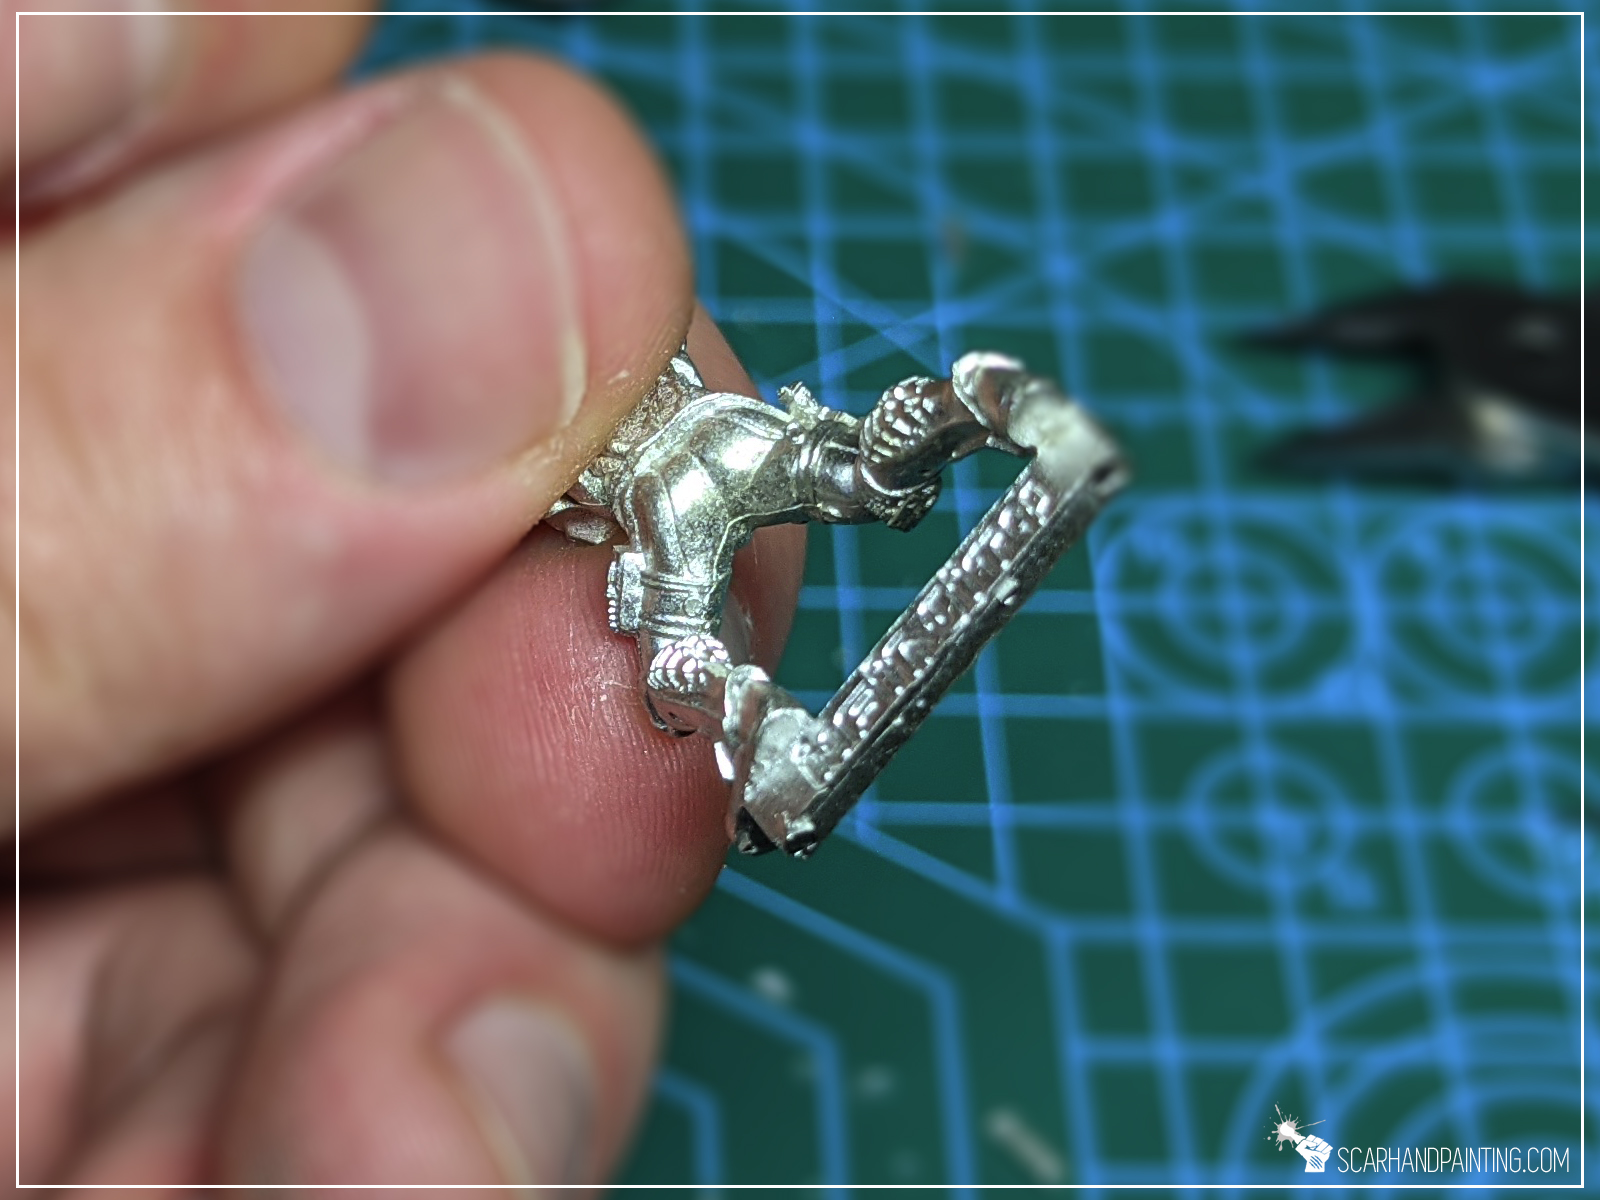
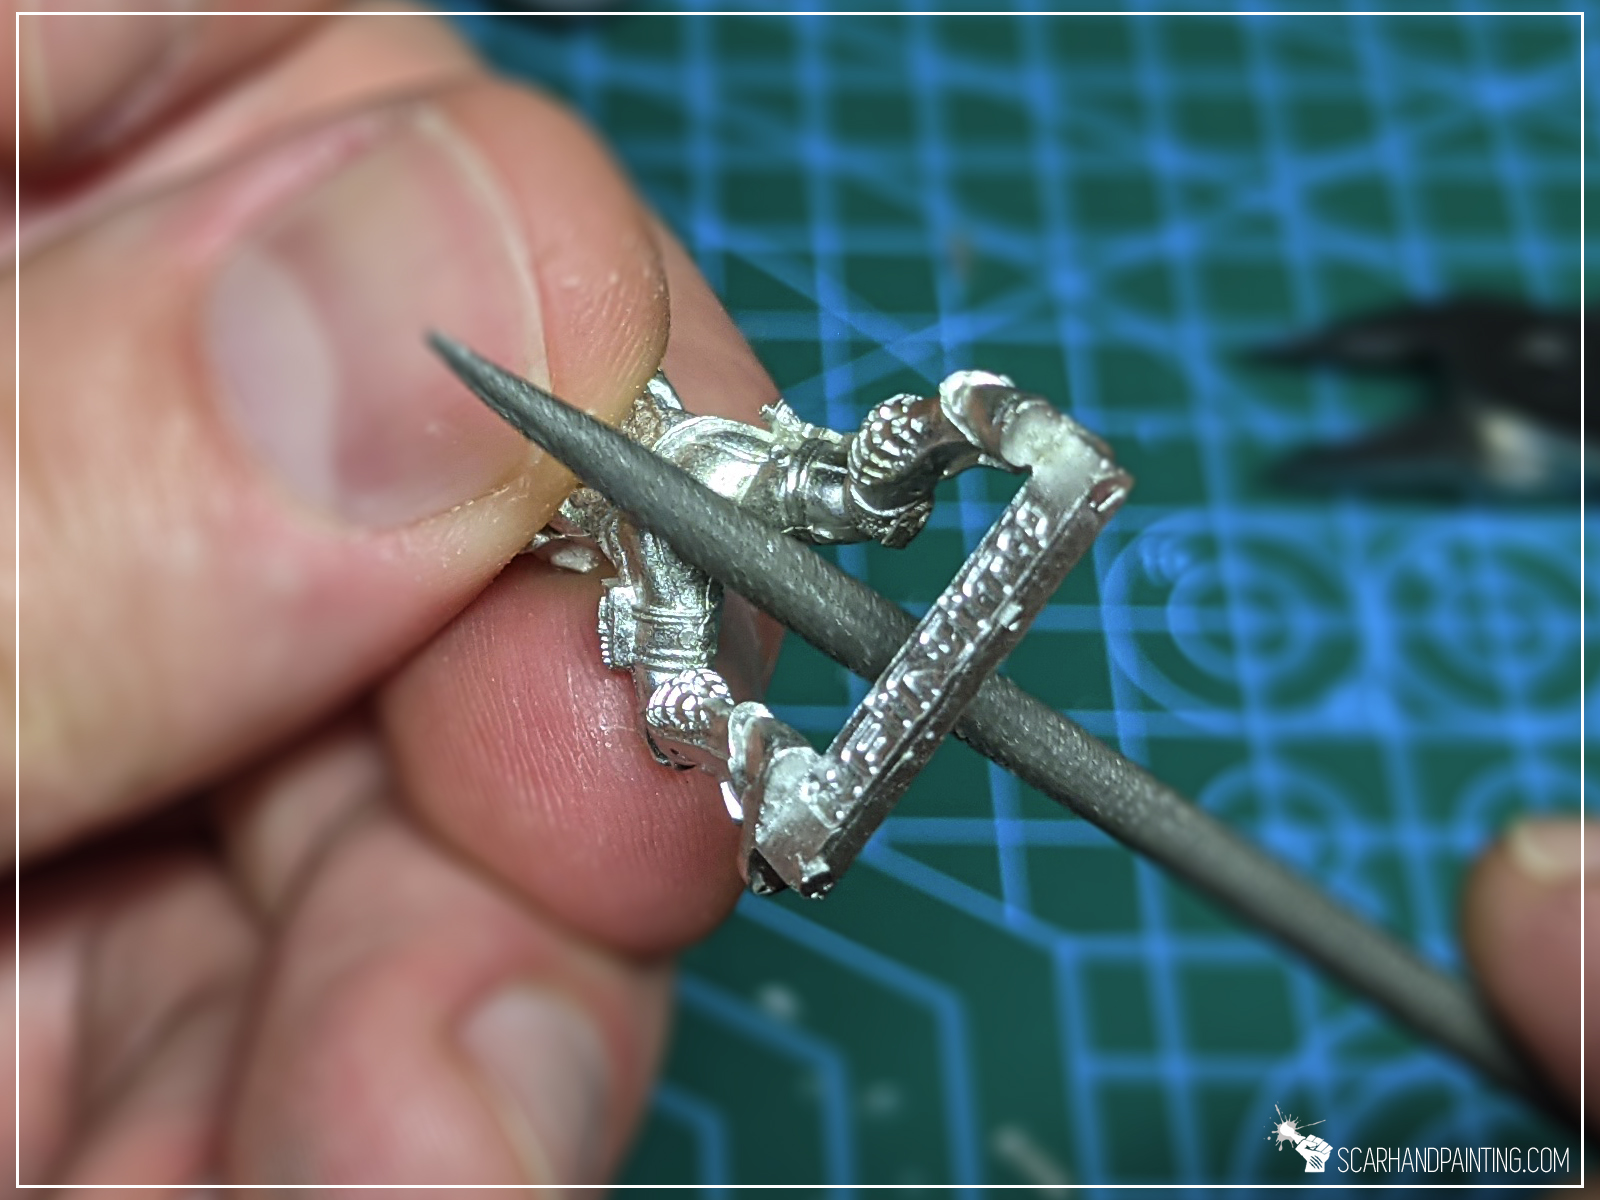
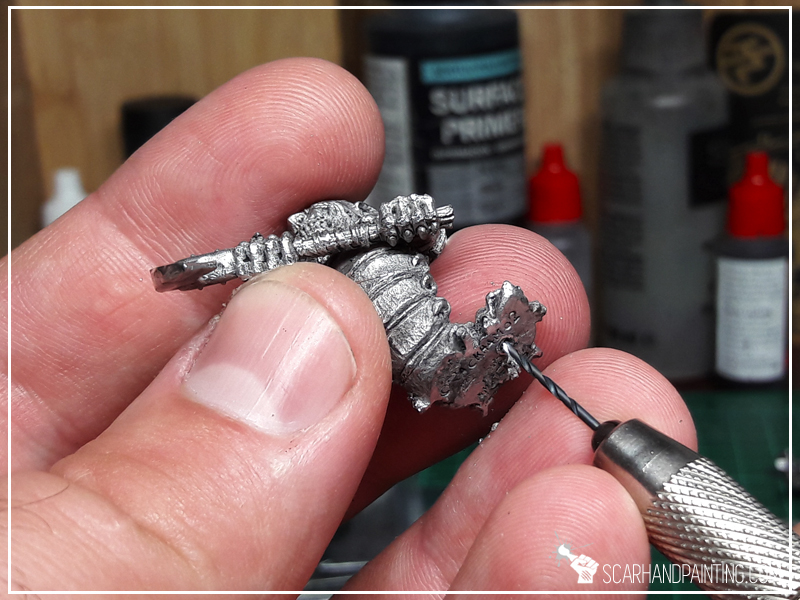
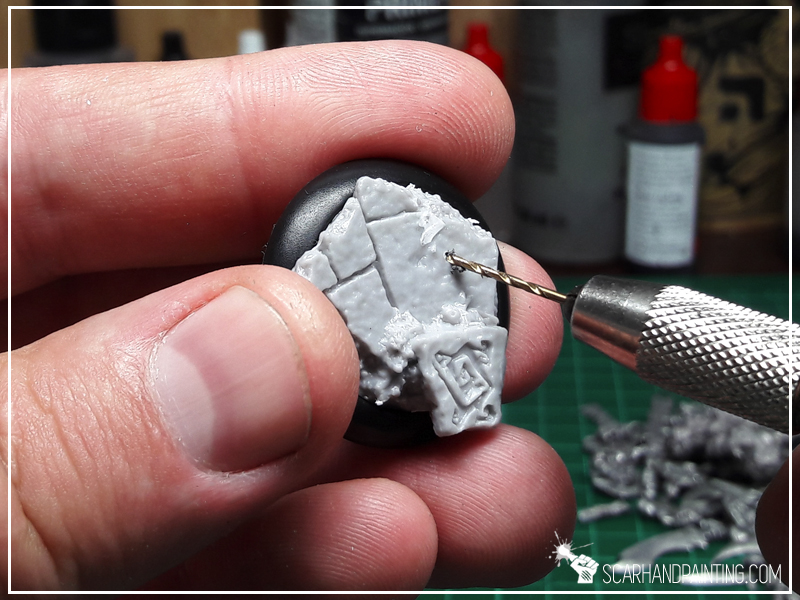
I use this method in case of wobbly miniatures with small area of contact that for some reason don’t have the rail. Such miniatures require to be pinned to the base to ensure their safety and durability. Note that pinning requires additional tools as well as proper pins. Alongside a trusted hand drill you can also purchase original hobby pins, but these are expensive. Depending on how thick is the miniature I use either paperclips or a thin steel wire.

The steps I undertake to pin a miniature:
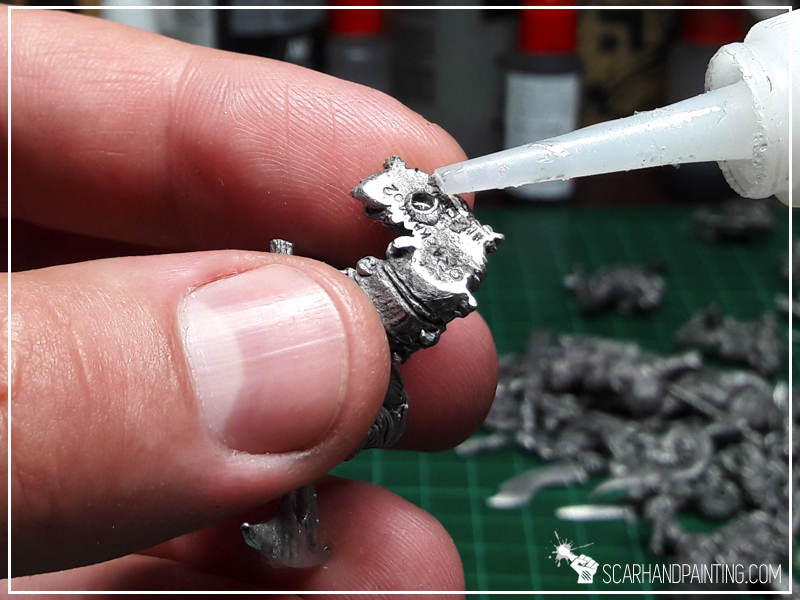
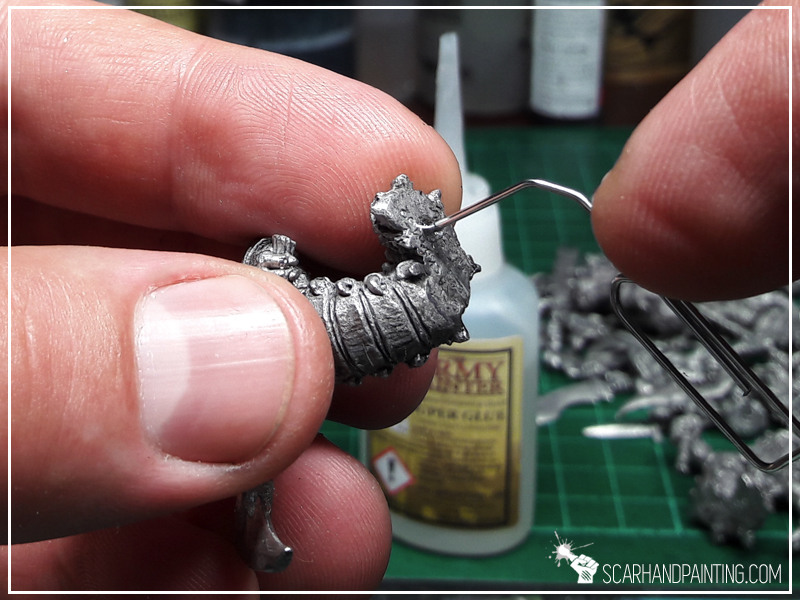


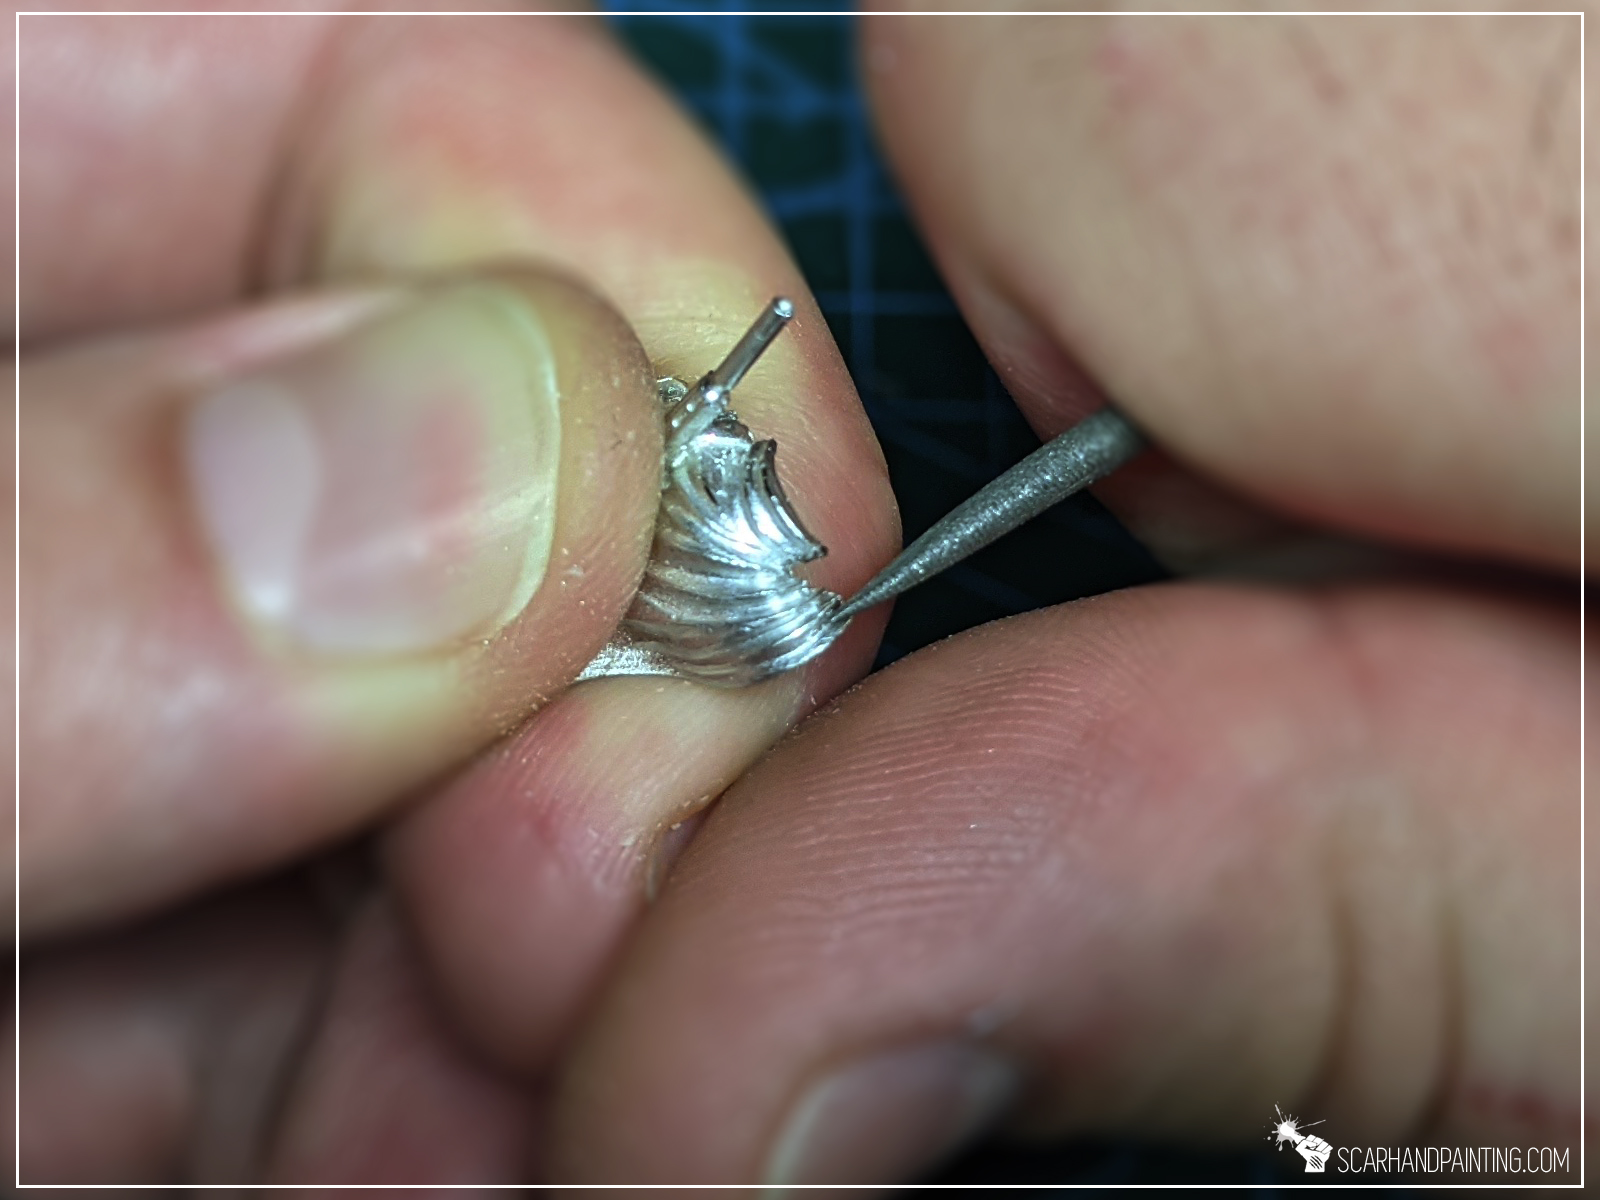
This is my favorite method. I believe that a natural part of the miniature is better at holding it in place rather than a smooth steel pin.
This is what I do:


From all the other methods this one works the best for me. Plus it’s faster than normal pinning. Just remember, there’s no one proper method. If you feel like a miniature might use a pin – Just follow your guts on this and pin it. Better safe than sorry.
I might drop another article on basing miniatures in the future. Maybe some Painting Philosophy type with insight on why I paint my miniatures based and not separately. If you think it’s an interesting topic and/or if you liked this article – consider letting me know in the comments or at my Facebook profile… or even share if you think the article deserves it. 😉
PS: Check this stuff out! It blown my mind! XD