- contact@scarhandpainting.com


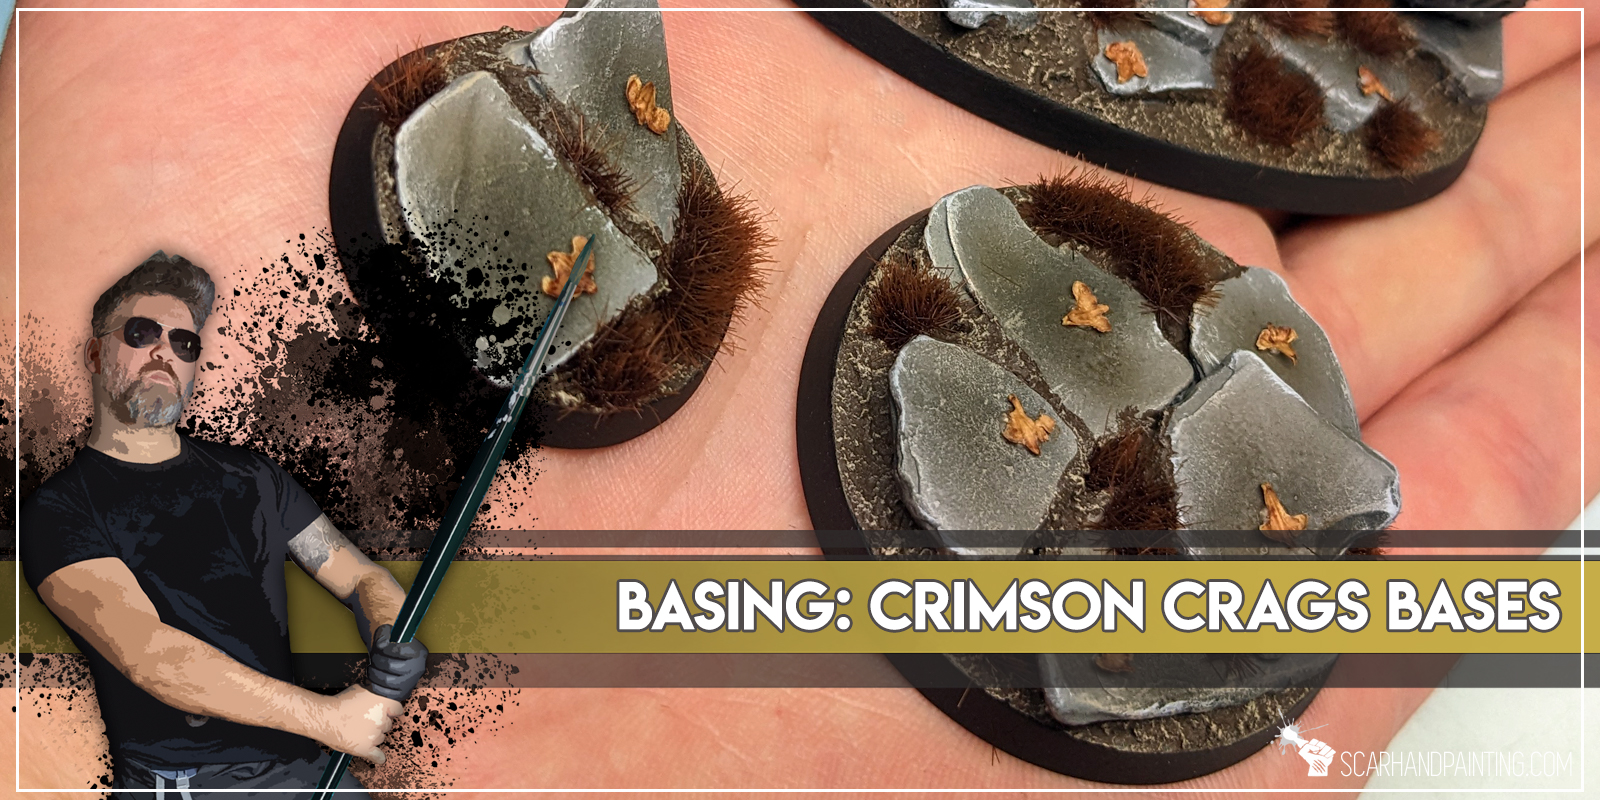
Welcome to Crimson Crags Bases tutorial. Here I will take you on a Step-by-step trip through the process of creating Crimson Crags themed Bases the same way as seen at: Gallery: Warhammer 40,000 Crimson Fists.
Before we start, some notes:
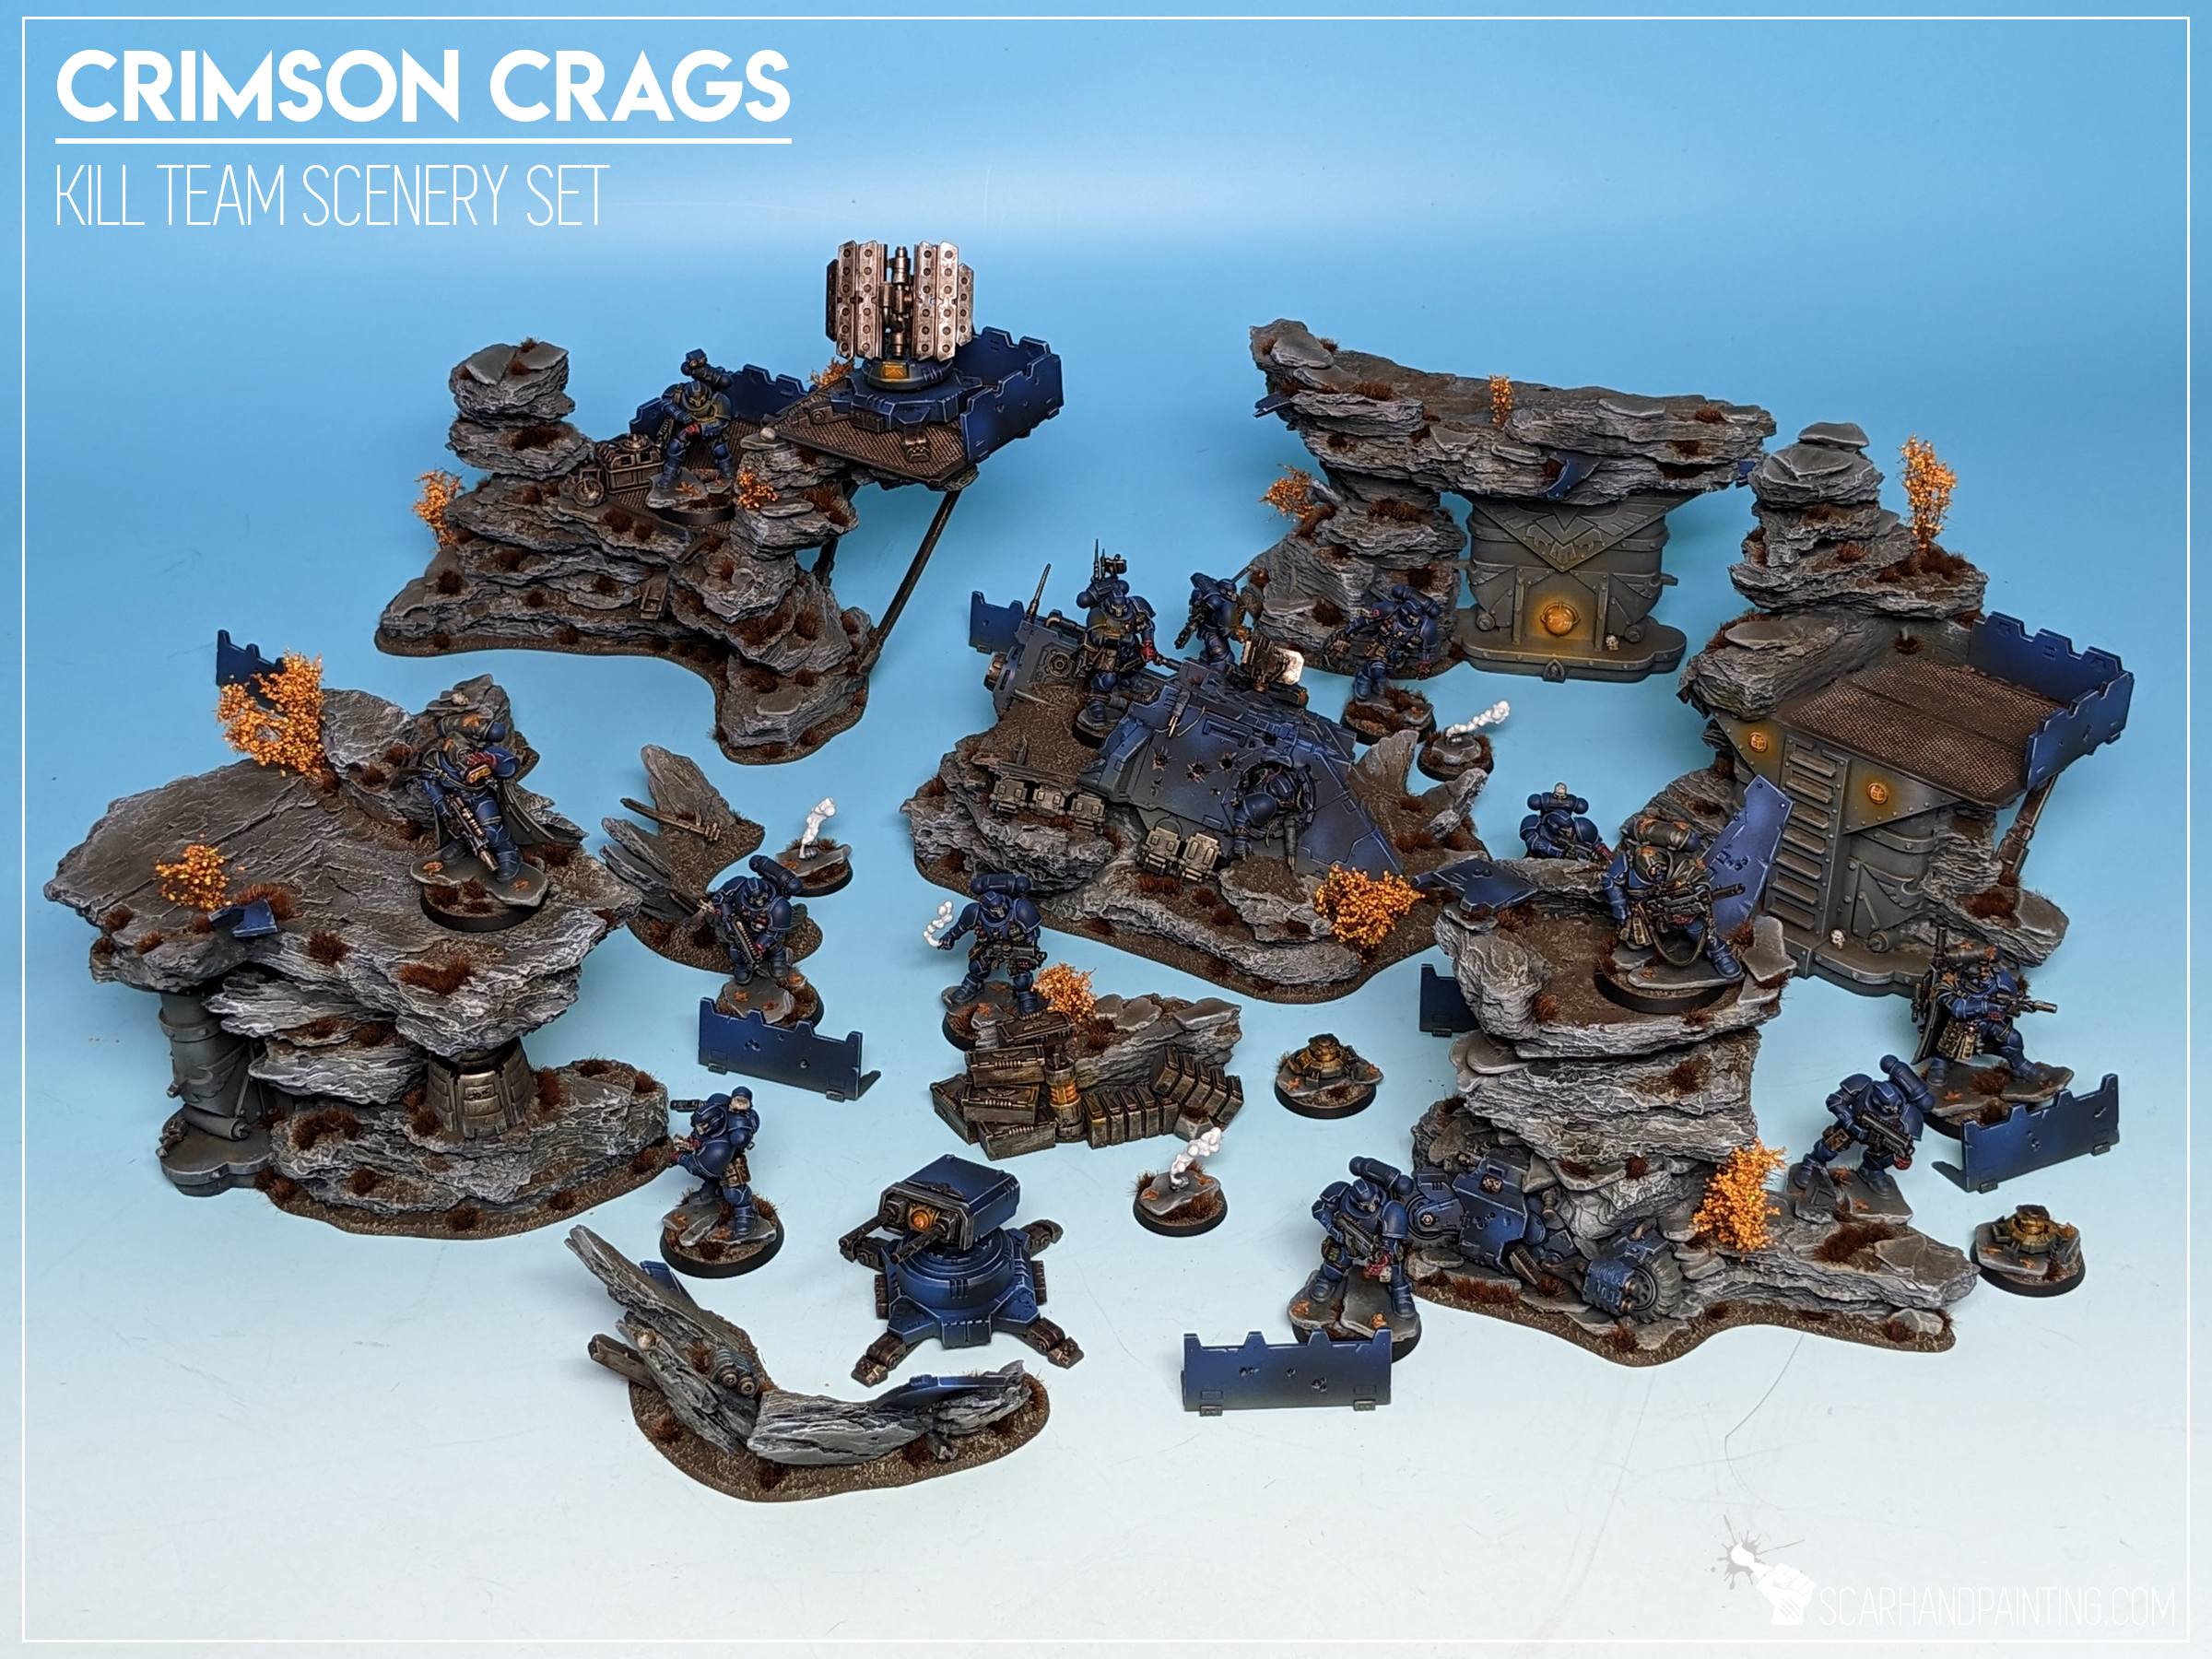
The “Crimson Crags” is a name of a self designed Warhammer 40,000/Kill Team scenery setting themed around my Crimson Fists Astartes collection. The idea behind the setting is reinforced rocky ravines ravaged by war. You can see more examples of the scenery and basing in the Killzone Crimson Crags gallery. I have already covered painting Crimson Fists and modeling the scenery in previous hobby articles. Now is time to present to you the basing.
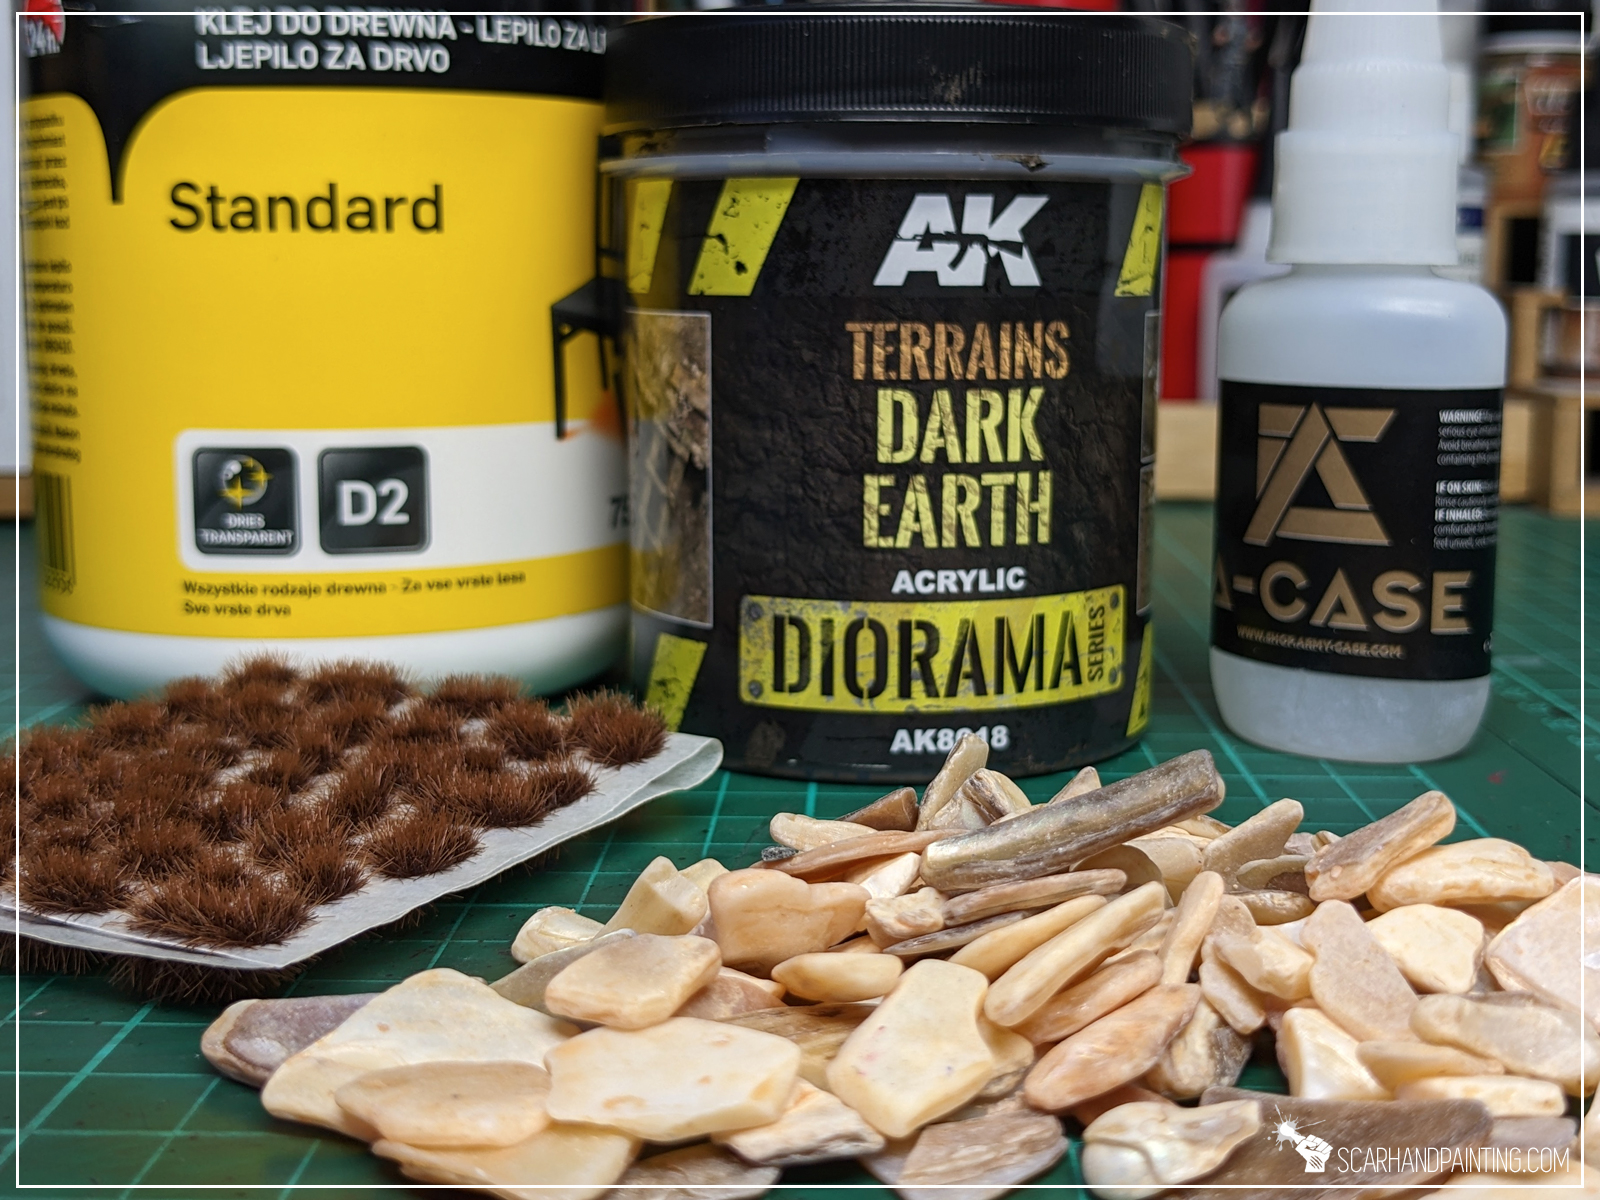
For this tutorial I will be using:
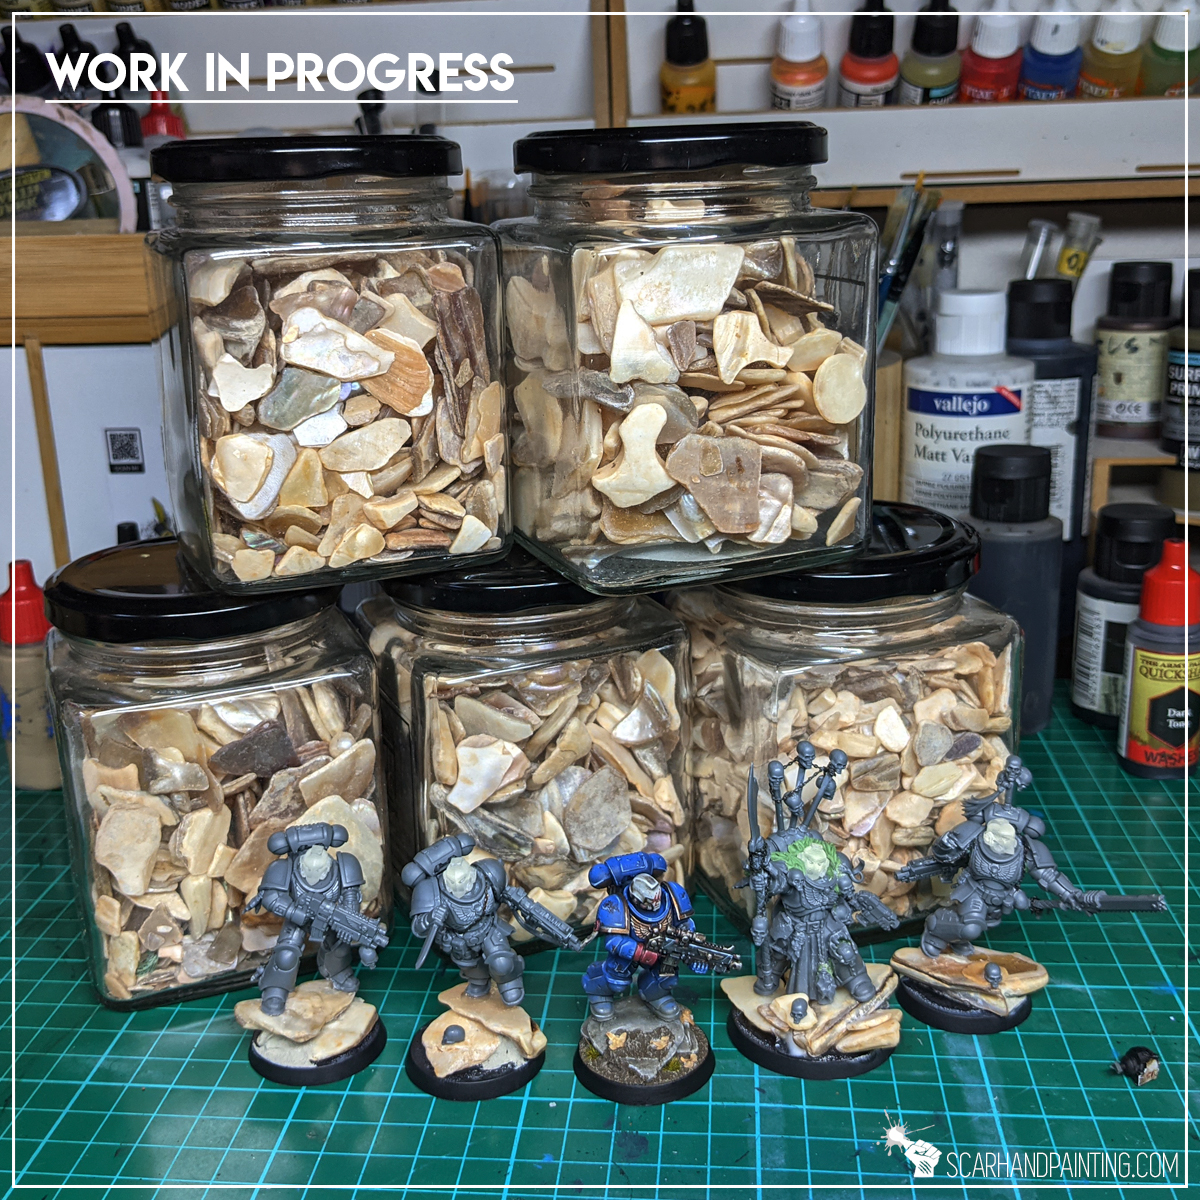
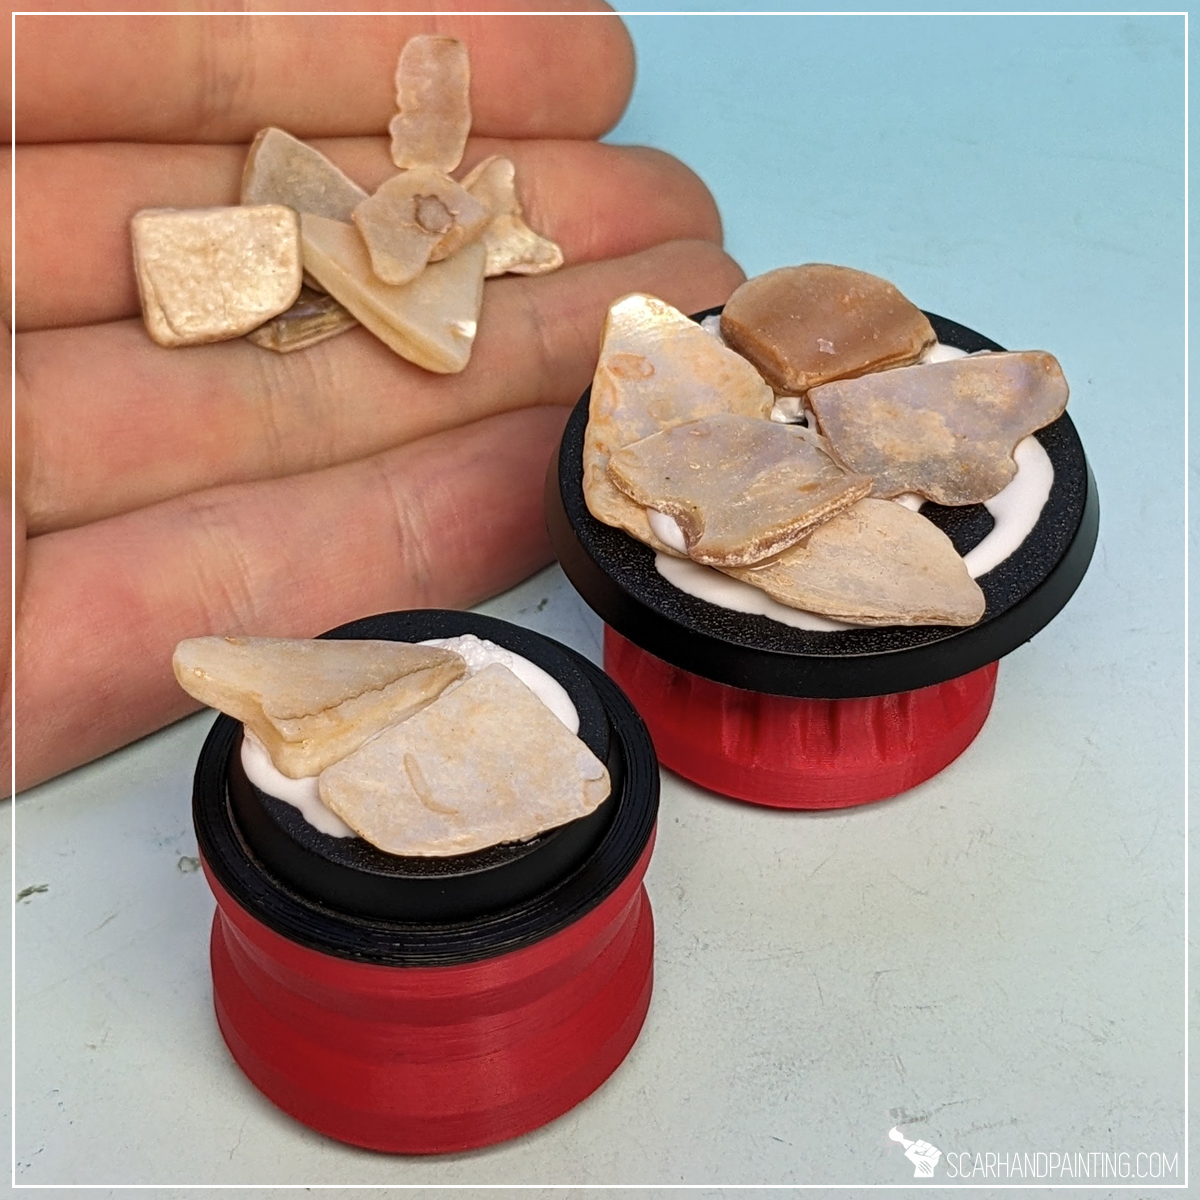
Let’s get it out of the way – yes, I am using natural stones. I like to have my miniatures heavy and stable on the board, plus trying to imitate the effect with self made elements would be rather time consuming. These particular stones are something I’m being asked about a lot, so here’s what I can tell you about them. The stones I’m using are regular decoration gravel from construction/home/garden stores. They are sold in small packages for about 1-2€. Unfortunately I do not know the professional name for this kind of stone, but am sure you will find similar stuff in either Ikea, or other home/garden stores. Below an old pic for reference.
Rocks out of the way, let’s rock! (You see what I did there?).
The modeling process is pretty straightforward, starting with base rock formation, after which the miniatures are mounted on top, everything gets undercoated then painted. Lastly the second part of modeling kicks in with textures and finishing touches.

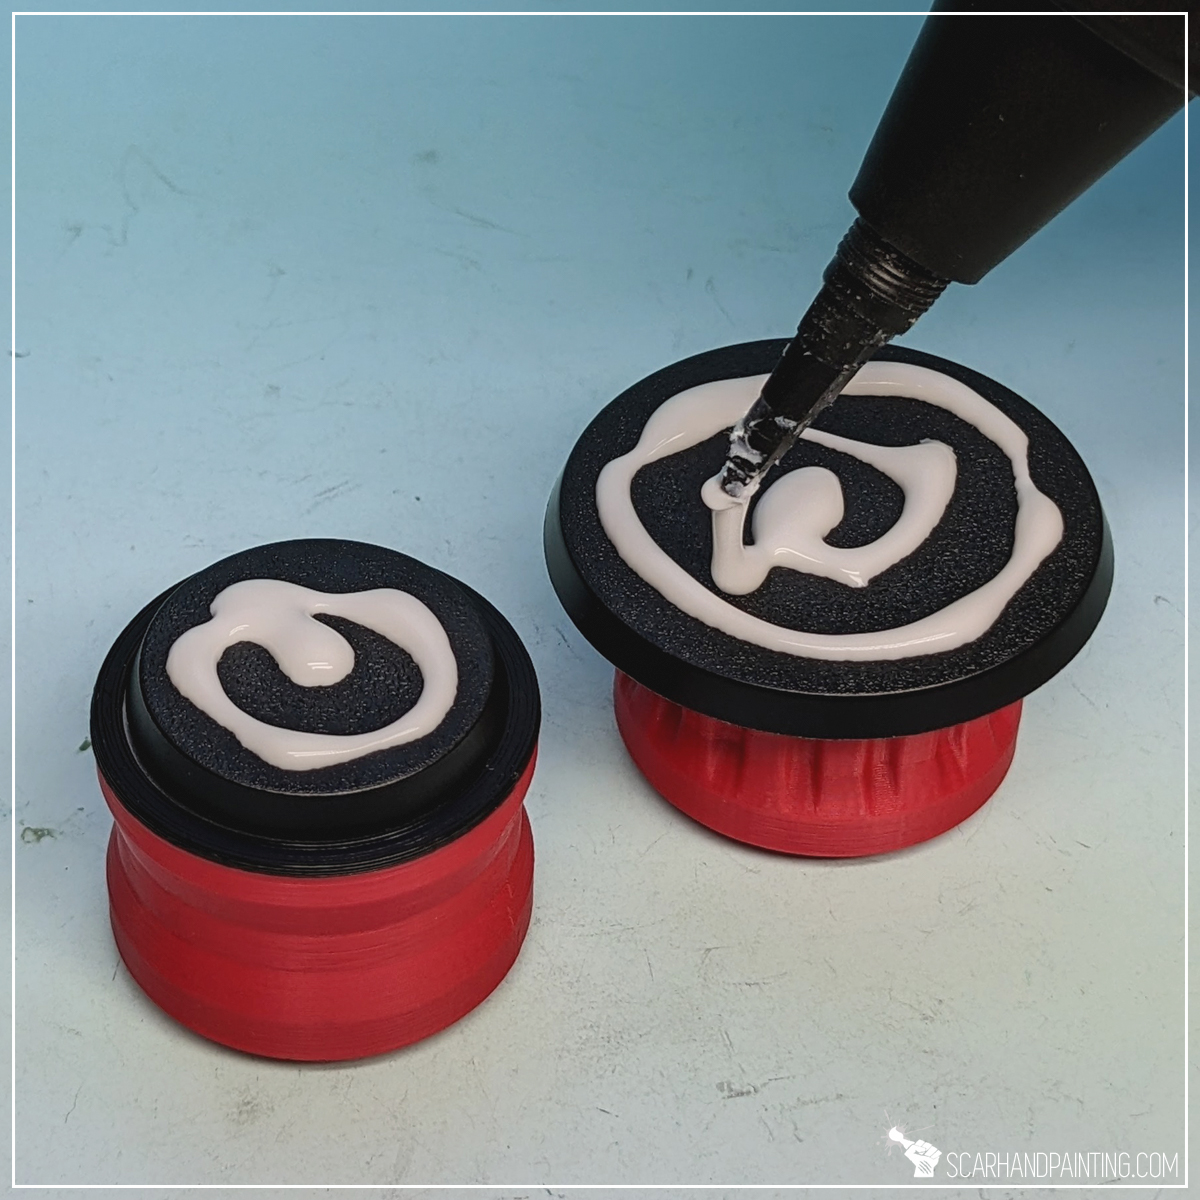
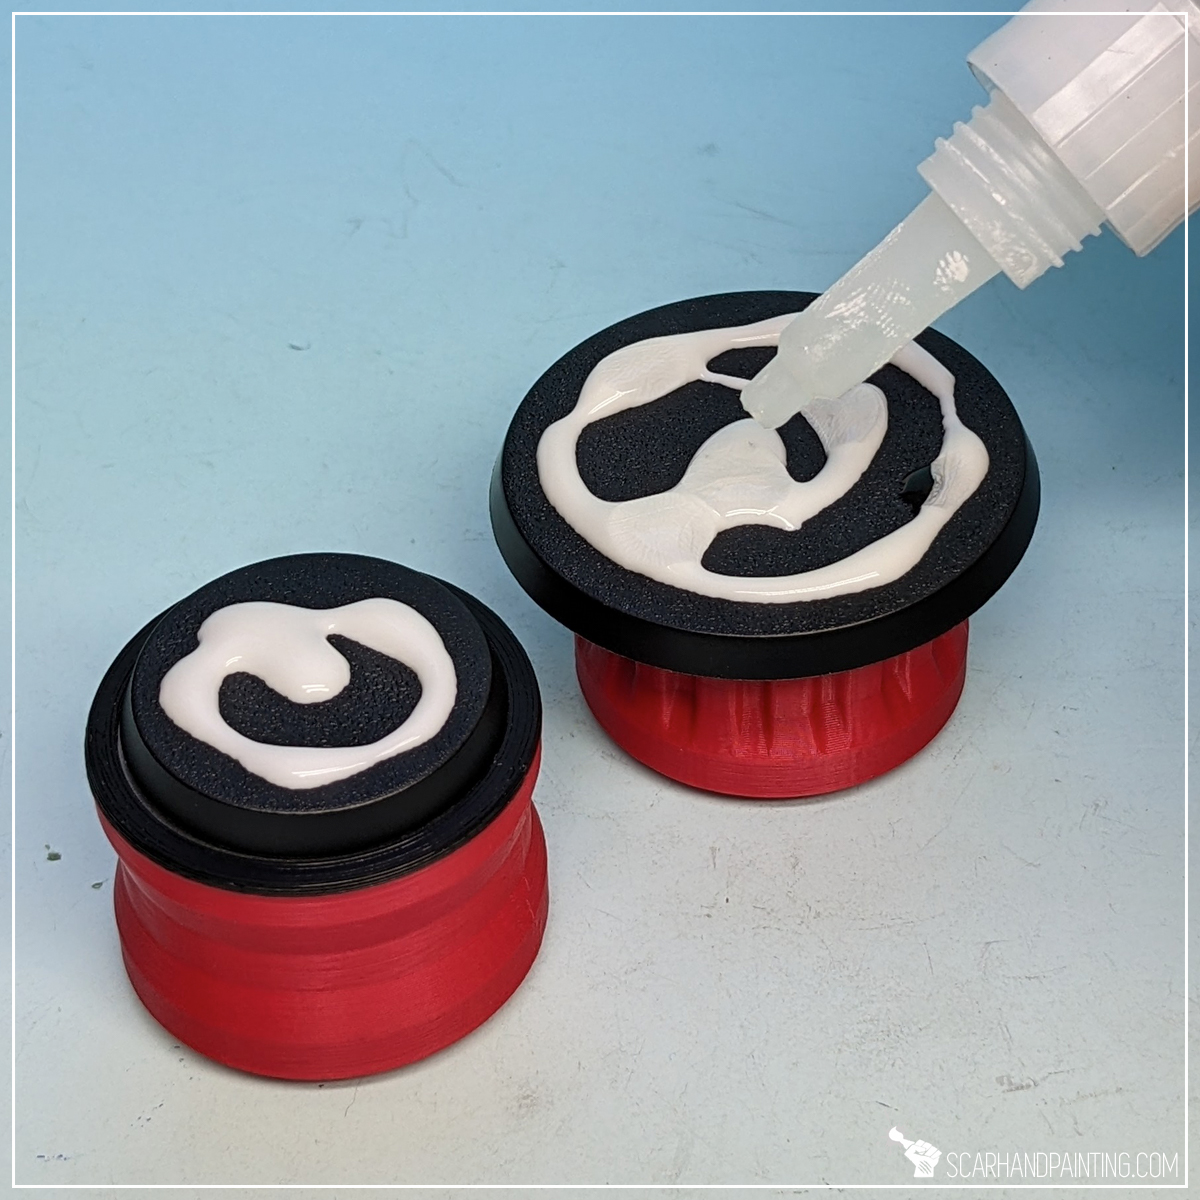
Step one: Rock formation
I started by applying PVA glue on top of the base. There’s no need to keep this one smooth – a clumsy random layer will suffice. Next I applied few drops of super glue on top. Finally I put few flat stones on top. Both glues mixed under preassure, filling most gaps between the stones and keeping them in place.

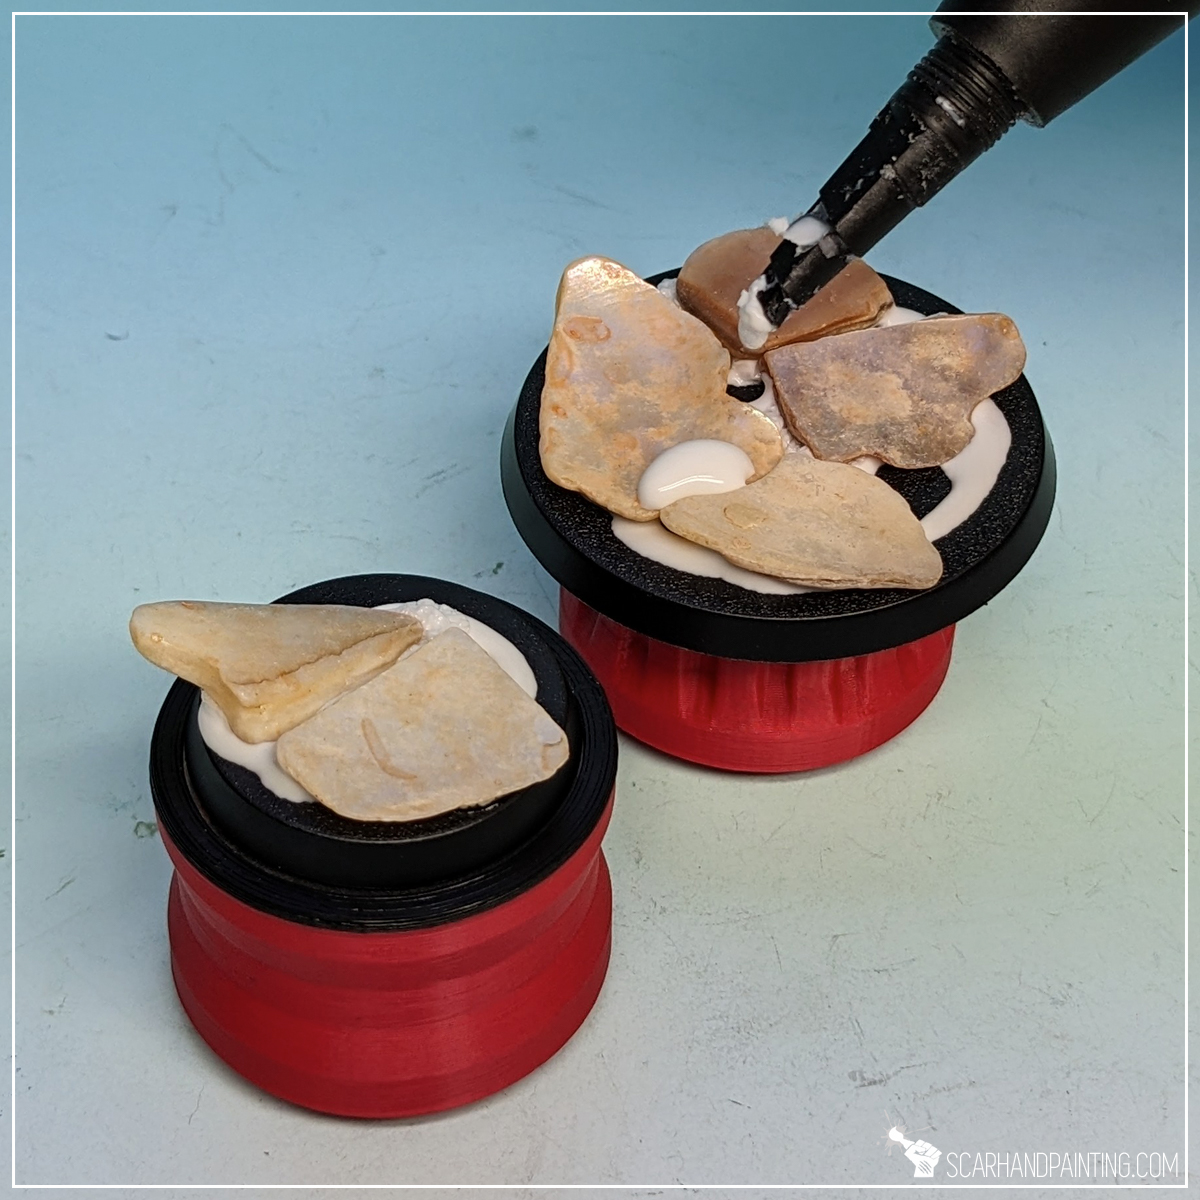
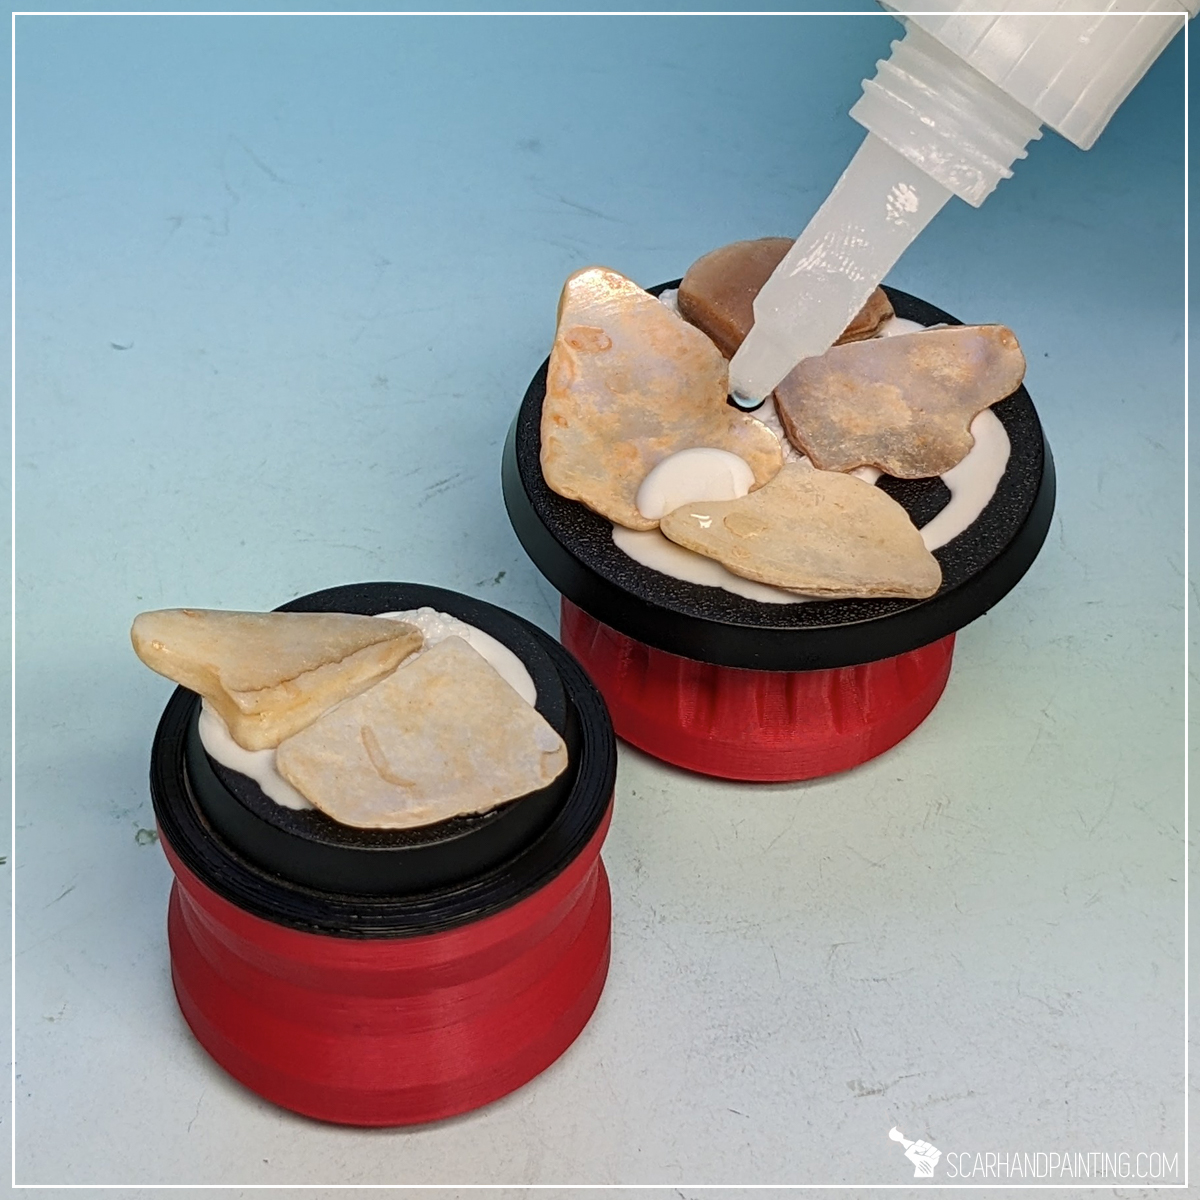
Step two: Increased Volume
Depending on the size and future assignment of the base I sometimes add volume to the rock formation. Some miniatures have one leg slightly raised, or I just want to get a more dynamic posing for my Astartes characters. Having that in mind I applied a drop of PVA glue followed by a drop of super glue and added another stone on top.
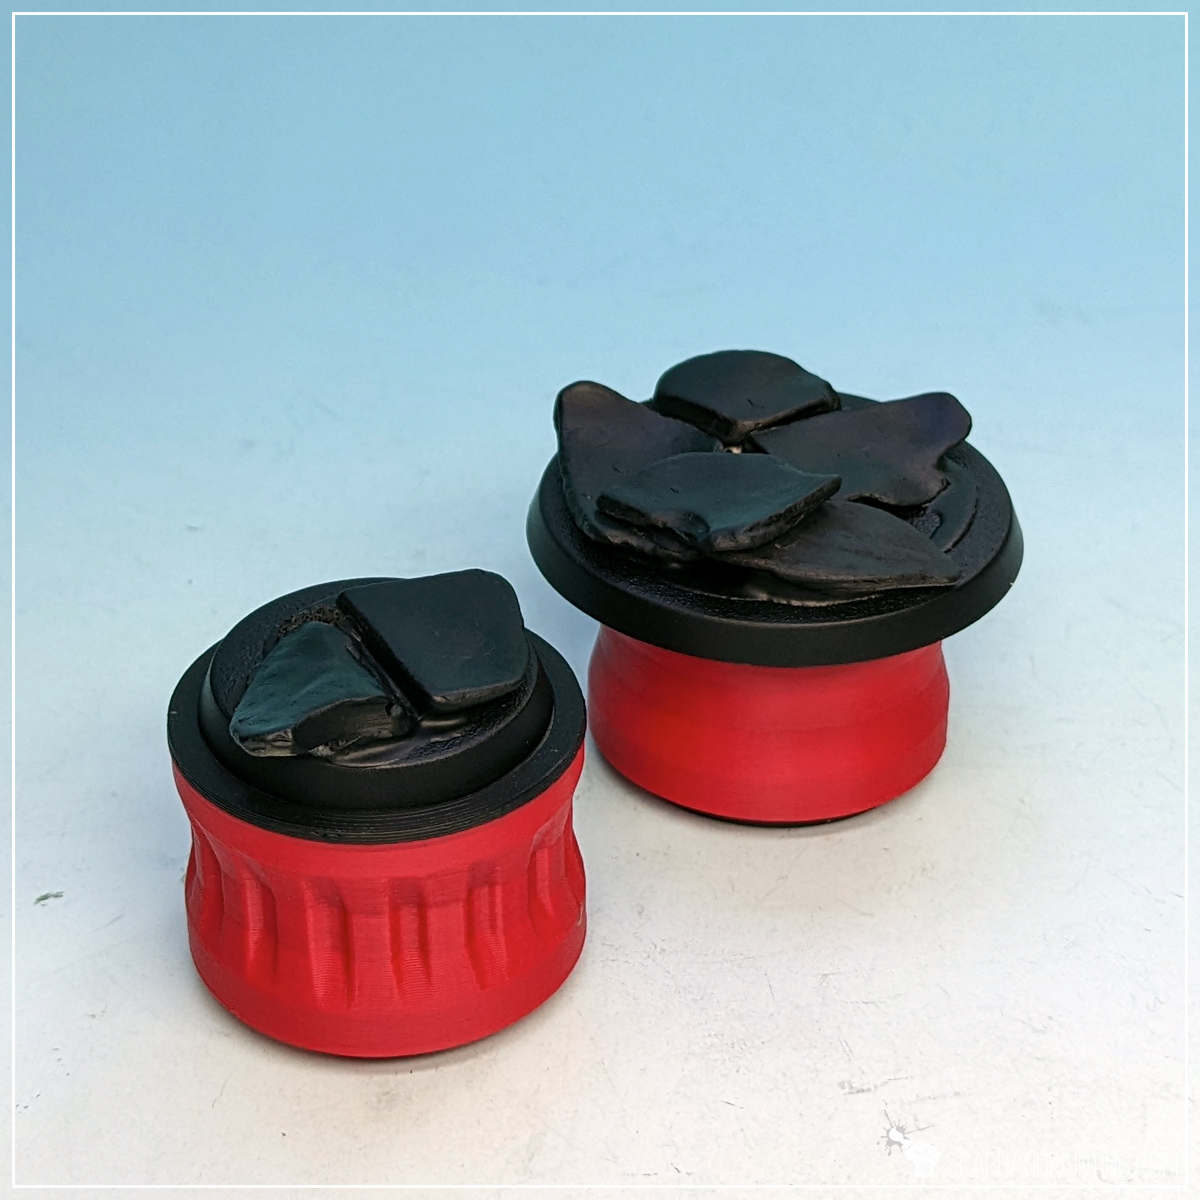
Step three: Undercoat
Once the mix of glue dried up nicely I moved to undercoating. This was done with a smooth layer of Citadel Chaos Black spray primer.
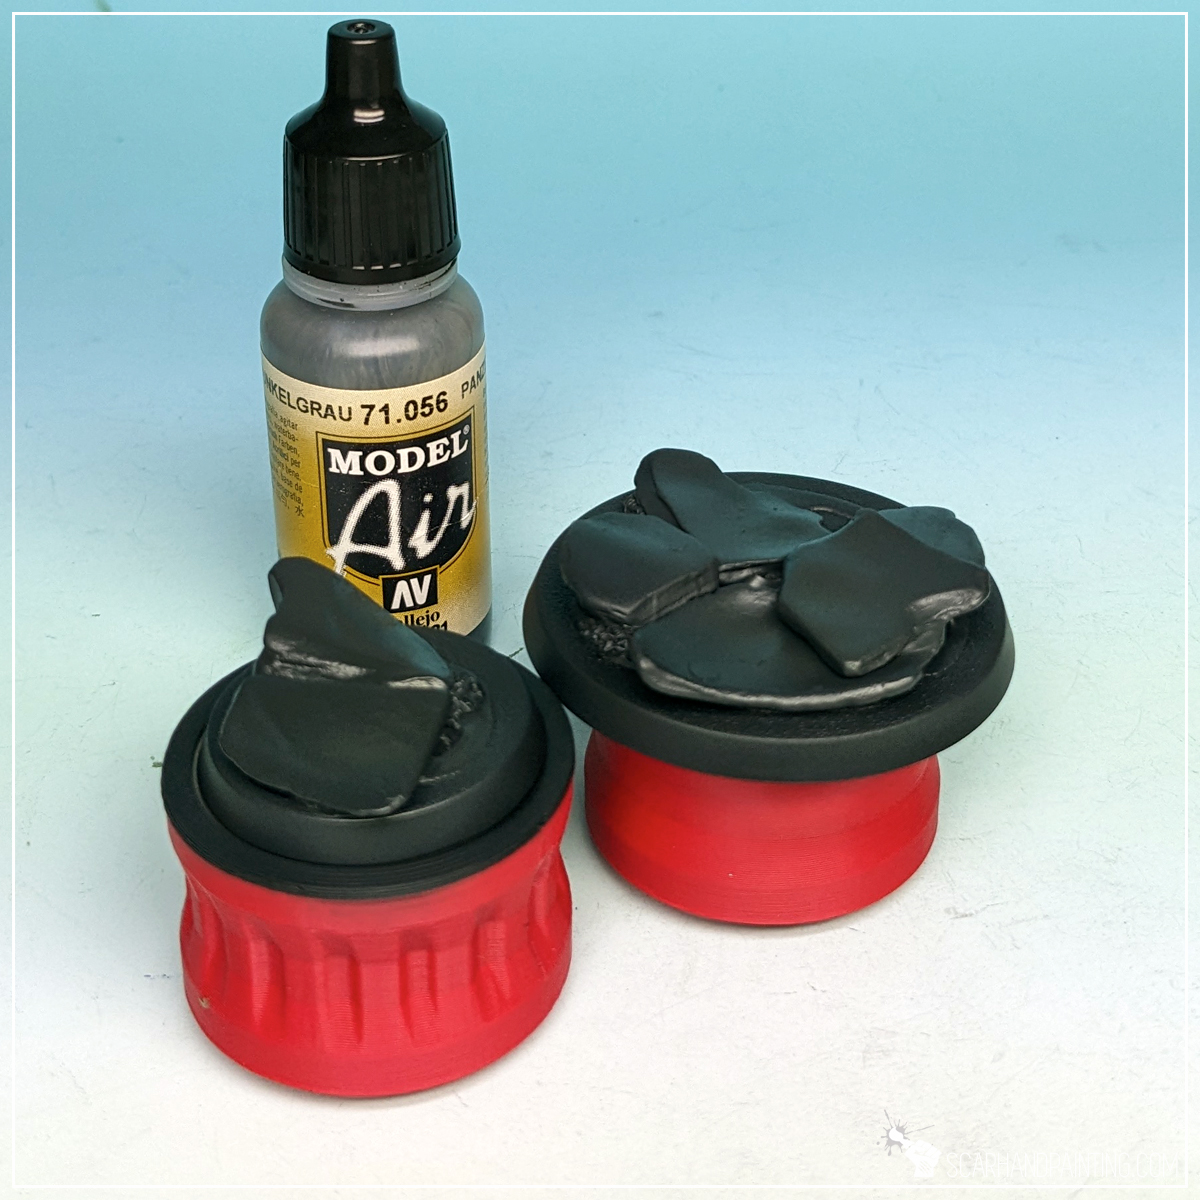
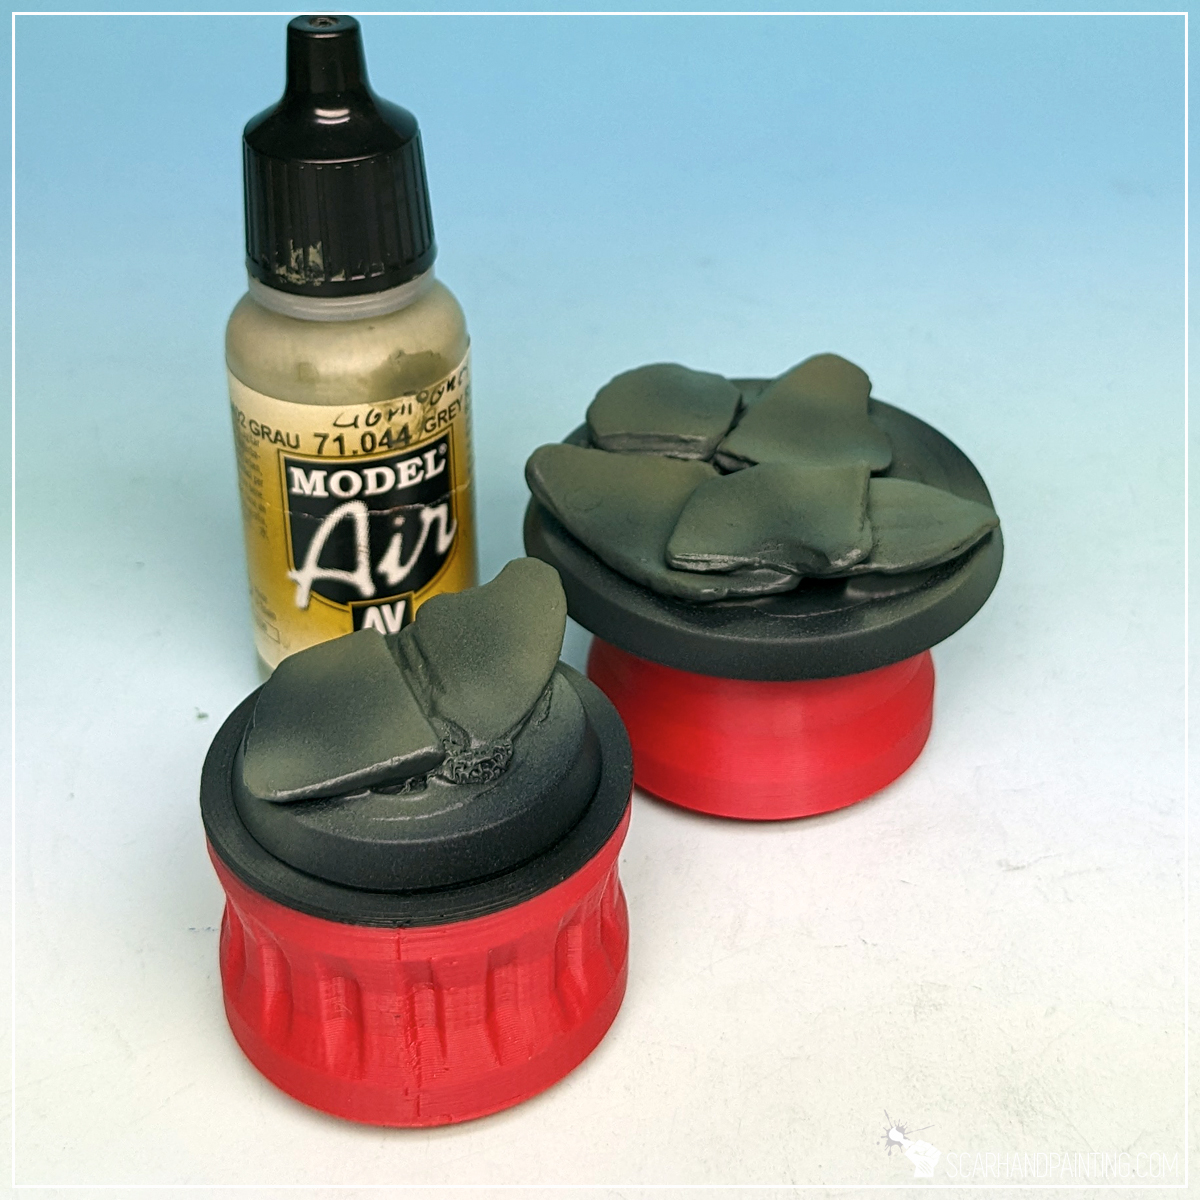
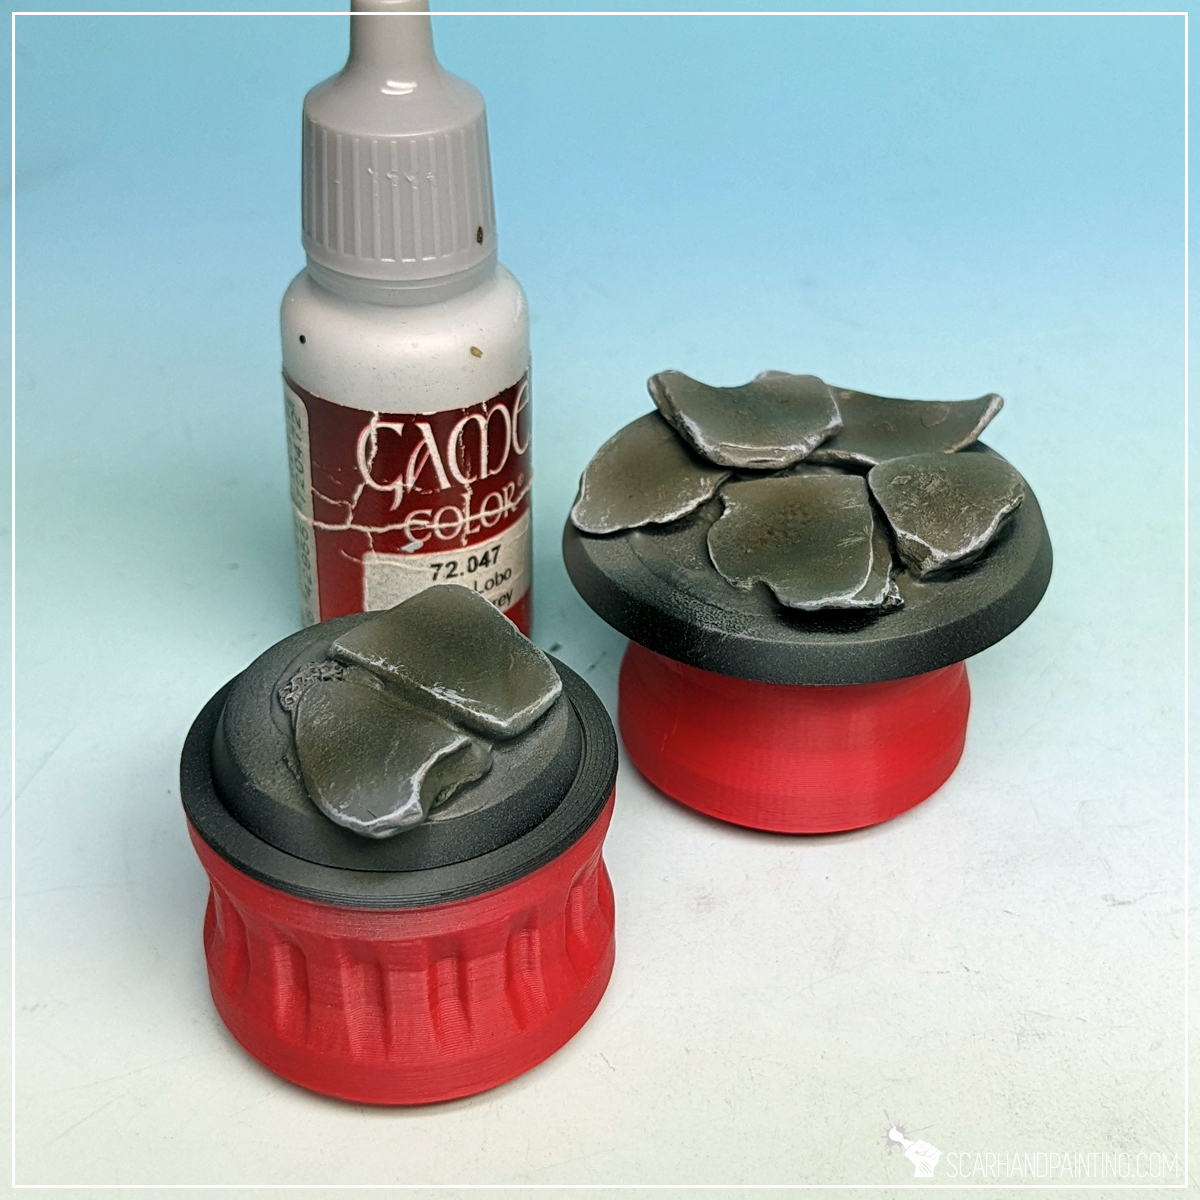
Step four: Base Color
I started painting by airbrushing a strong layer of Vallejo Panzer Dark Grey (air), straight from the pot. I then applied a slightly thinned Vallejo Light Grey Green (air), followed by Vallejo Cold Grey (air). In both cases I tried to reduce the area of paint to add color differentiation.

Step five: Highlights
Next I applied a drybrush of Vallejo Medium Sea Grey all over the bases, followed by edge drybrush of Vallejo Wolf Grey. Finally I softly airbrushed Army Painted Strong Tone Quickshade onto the middle points of each individual stone on the base, and slightly around. All of this to add more visual volume.


Step six: Final Highlighs
I then stippled a bit of Vallejo Wolf Grey on the edges of each individual stone, to make them stand out a bit more.
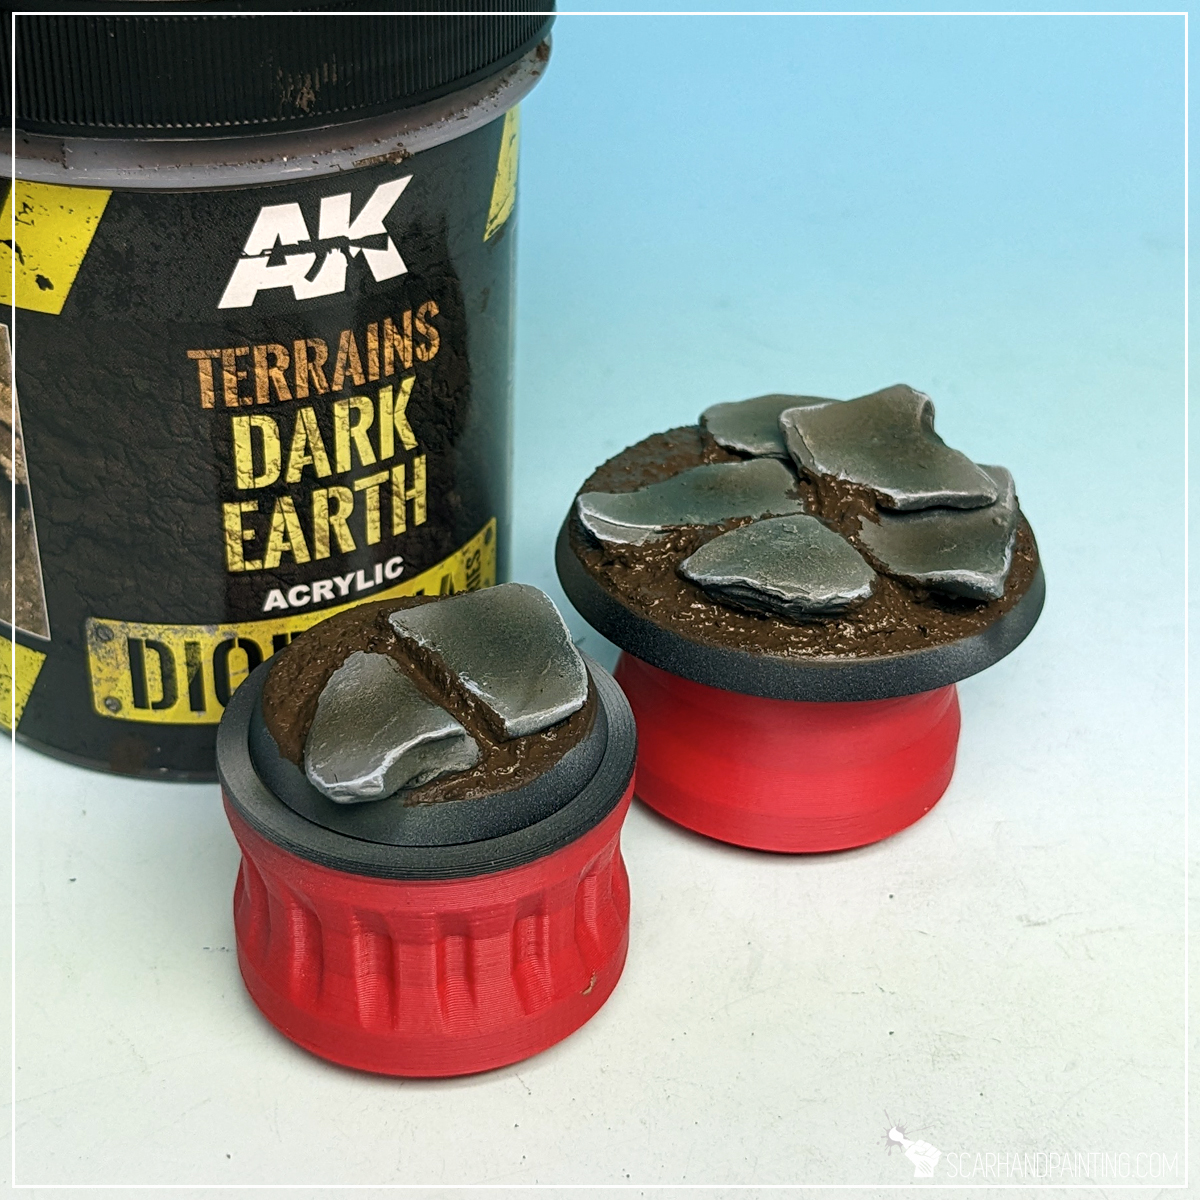
Step seven: Ground Texture
Next I moved to my favorite texture of all time – AK Interactive Dark Earth diorama series that you can learn more about here. I applied a thick layer of the texture, let it dry than drybrushed Citaled Karak Stone on top.

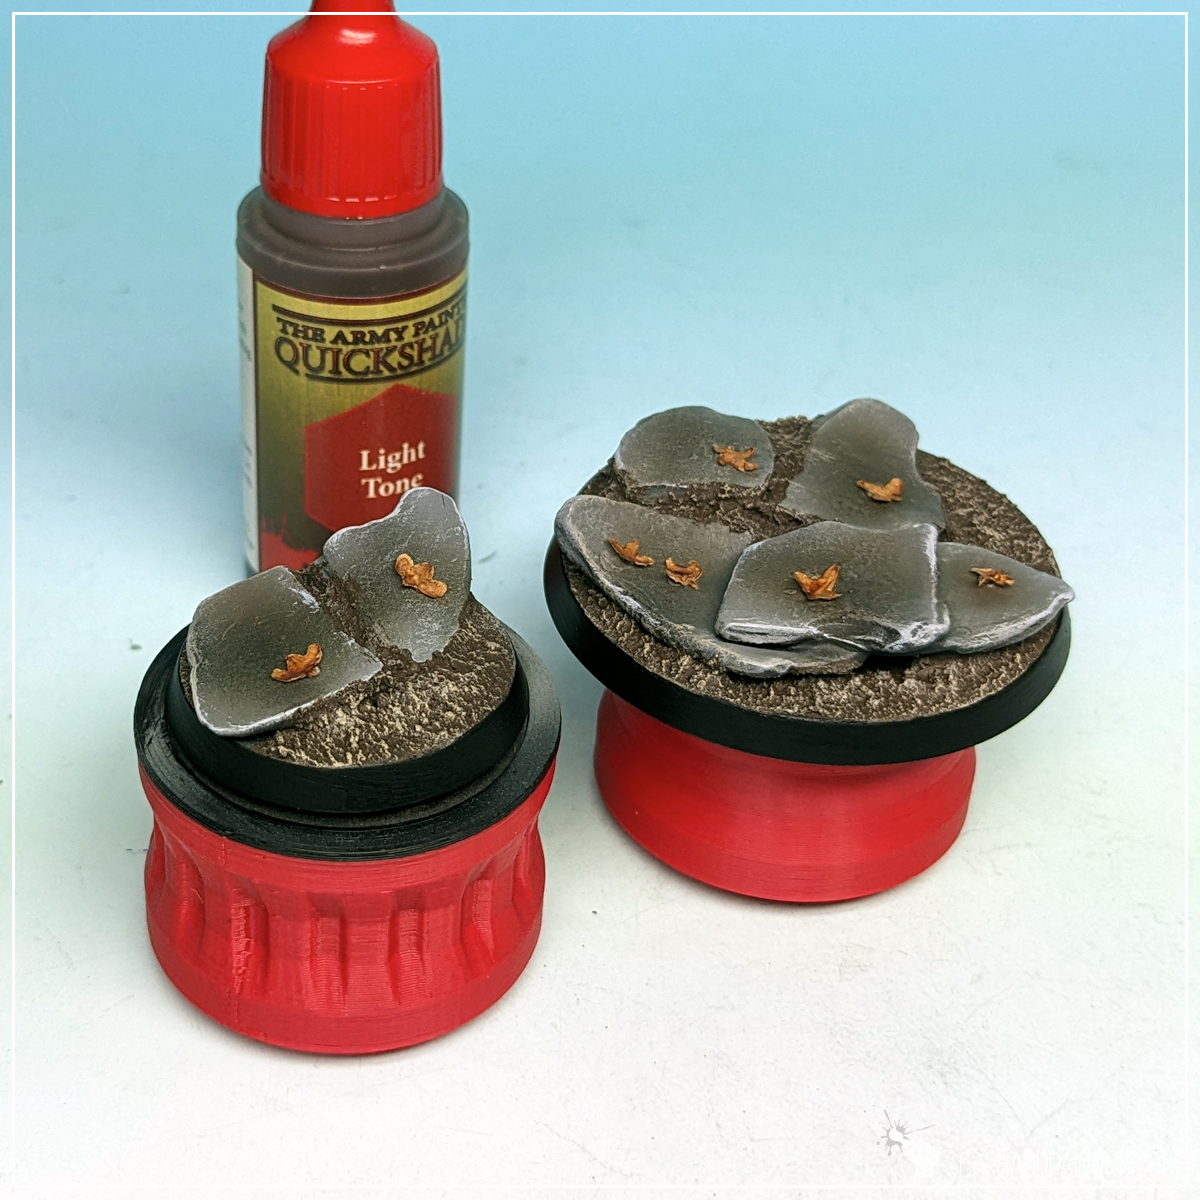
Step eight: Leaves
Then I applied few small drops of super glue and put a Birch tree seed on top of each. Once dry, leaves got painted with Army Painter Soft Tone Quickshade, to add color depth and just some durability.

Step nine: Final Touches
Finally I repainted base’s edges black and airbrushed a strong layer of Vallejo Polyurethane Matt Varnish all over. Job done.
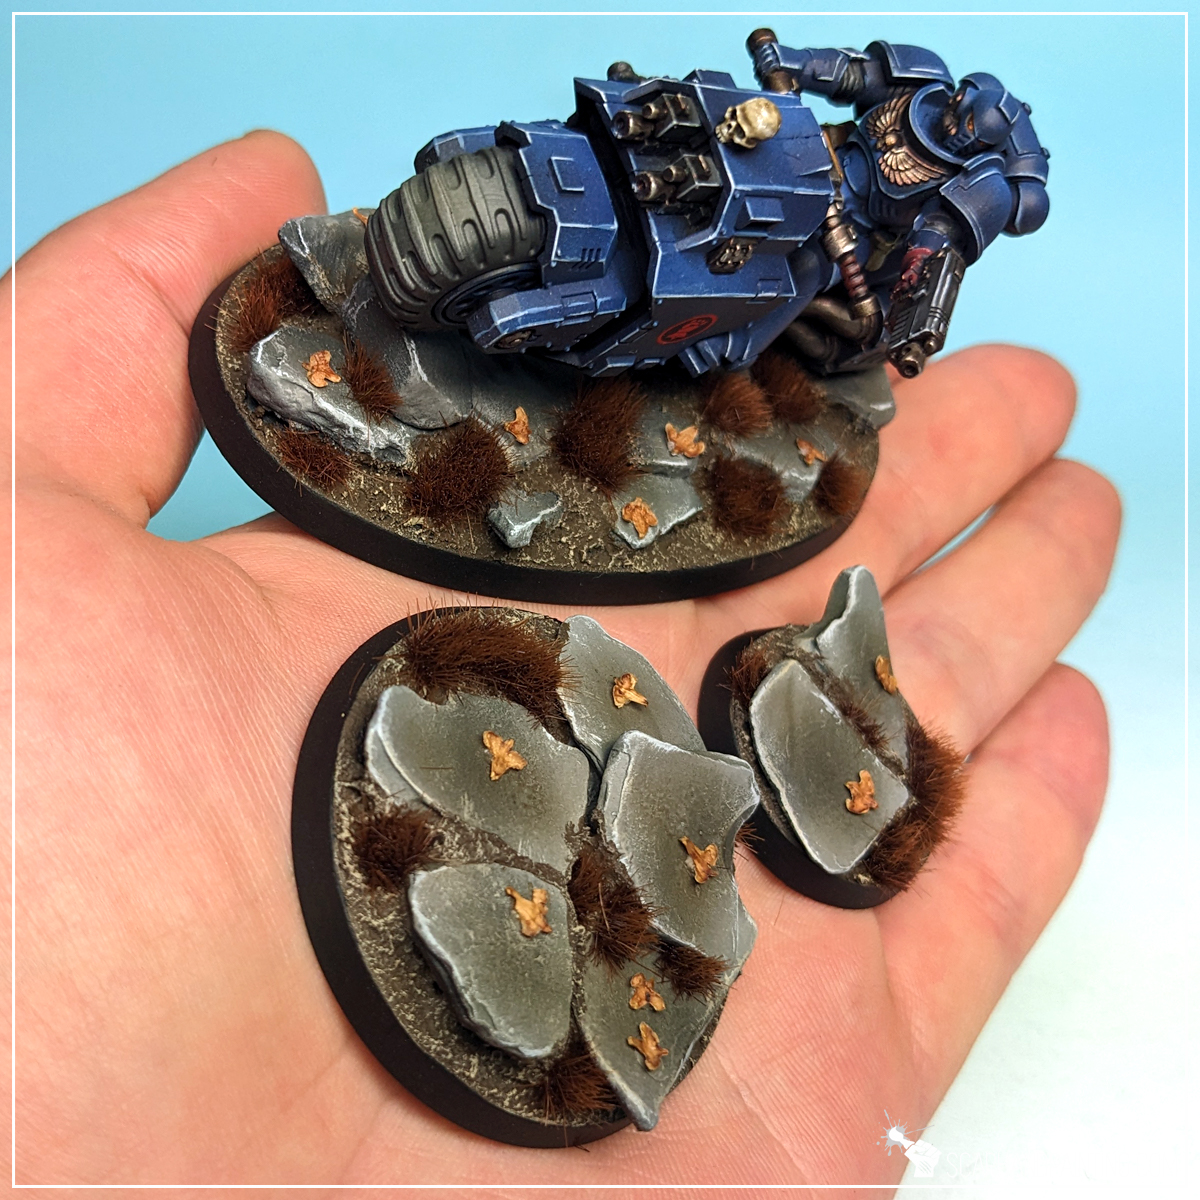
I hope you find this tutorial interesting. Be sure to let me know your thoughts in the comments below, or at Facebook or Instagram. I would also appreciate it if you considered sharing this content with your friends, who might find it useful. Finally if you are looking for a professional miniatures painting service, be sure to contact me with this contact form. I always reply within 24 hours, after which please check out your spam folder.
1 comment so far
MichalPosted on7:42 am - Apr 26, 2023
Really nice and well executed!