- contact@scarhandpainting.com


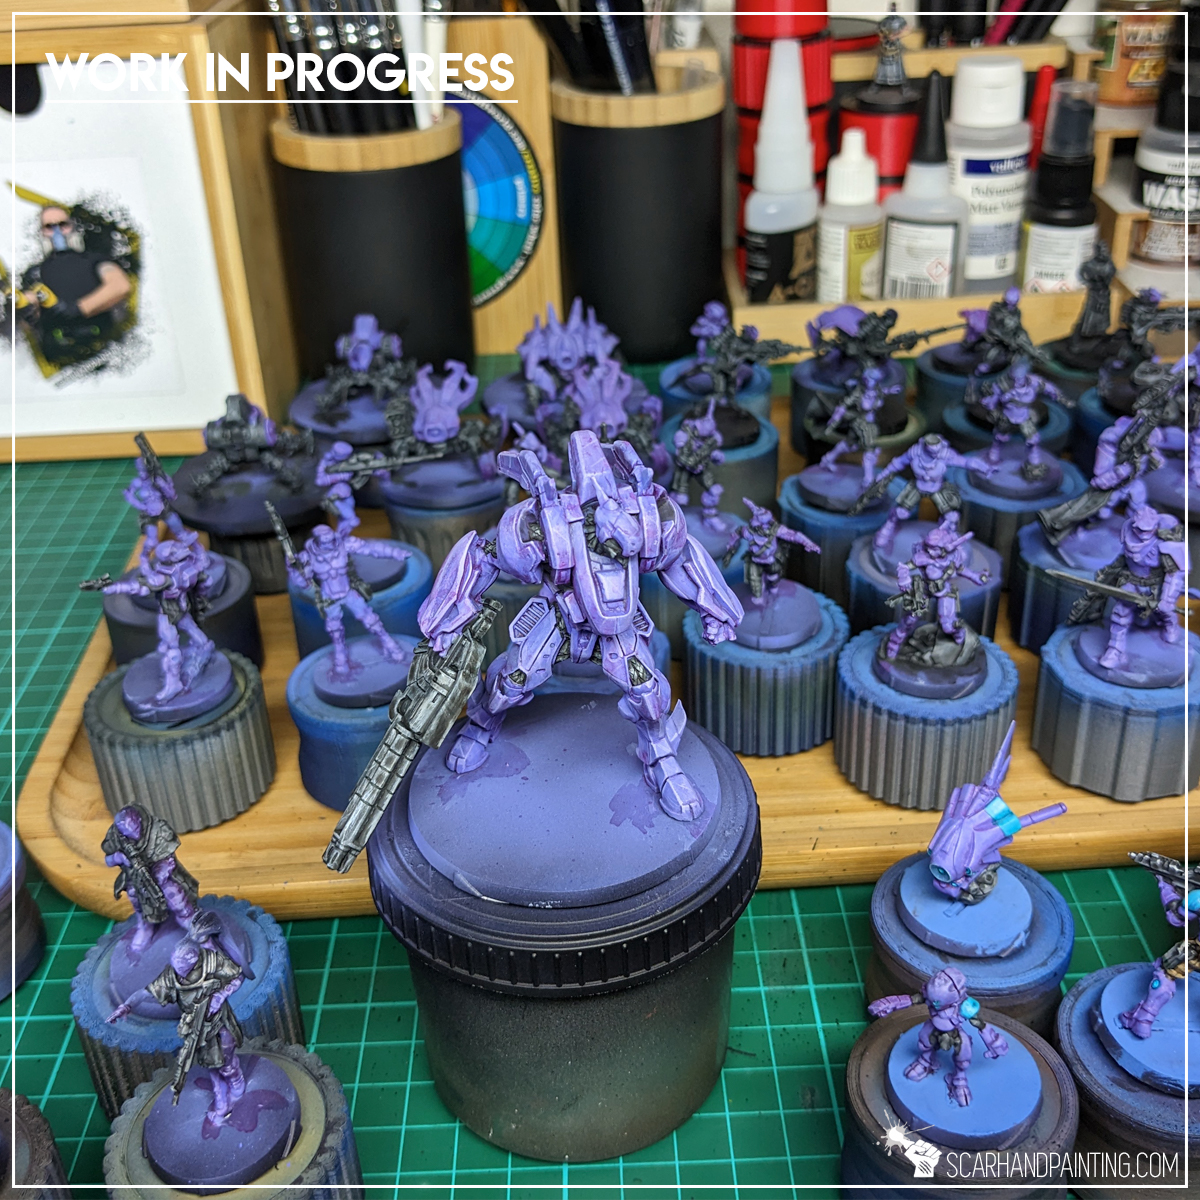
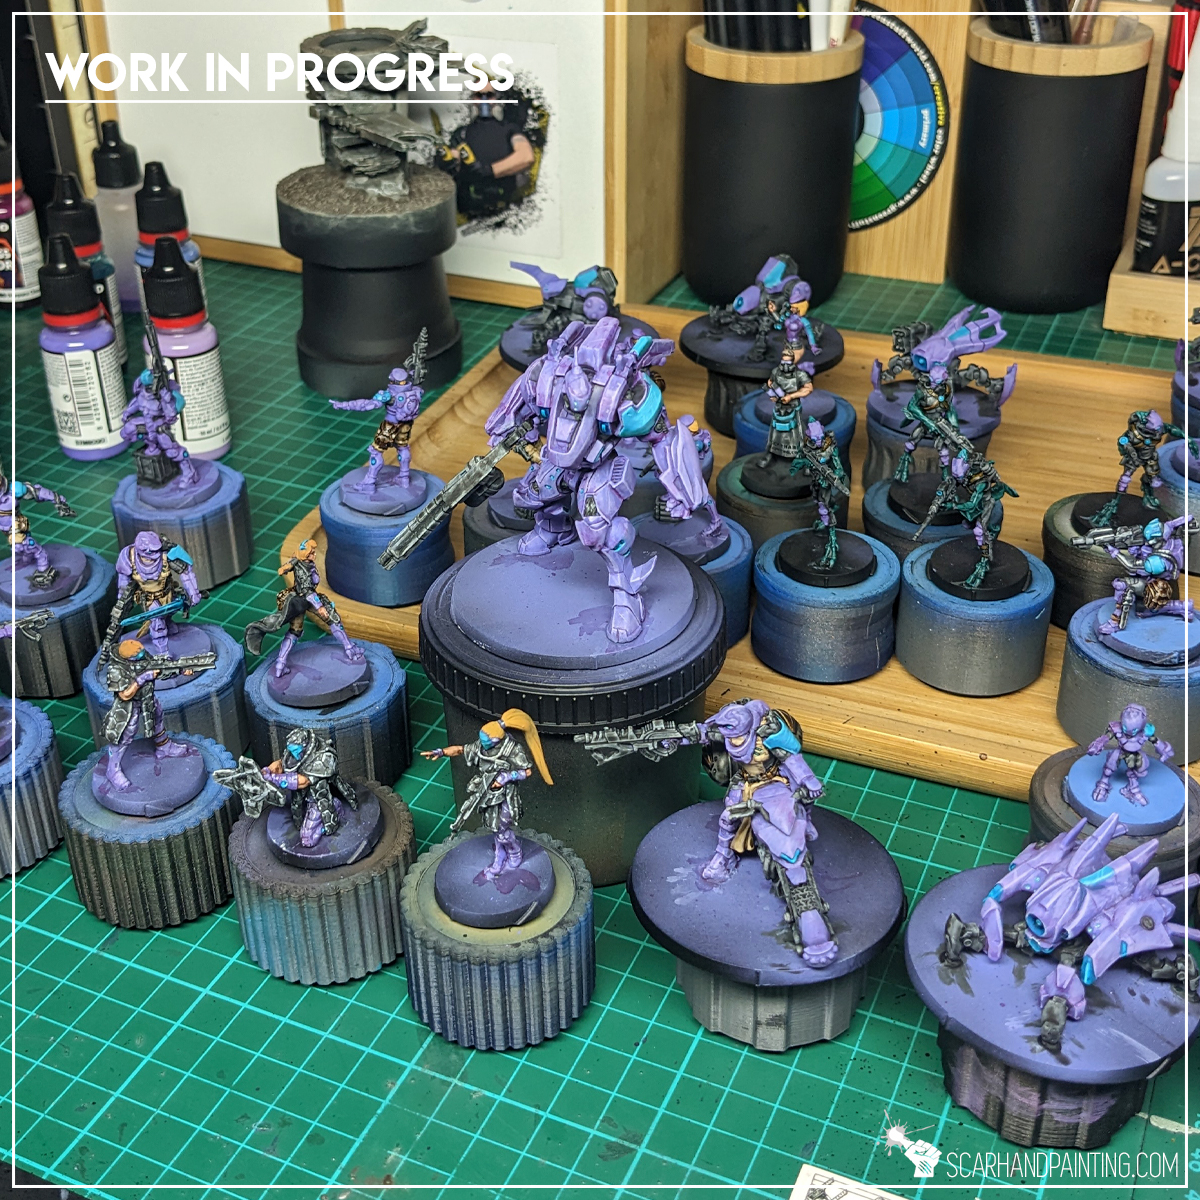
Here are some Color Recipes for Warhammer 40,000 Tau Empire from Gallery: Infinity Varuna. Please take note that this is a simple color scheme, not covering multiple overlapping layers and blends in between, that lead to the final product. It is supposed to be used as guideline not a step-by-step.

Purple Armor:
Mix Alien Purple (val) 1:1 Water, *
Lustful Purple (val), flbr
Mix Deep Purple (val xp) 3:1-1:1 Water, wash
Lustful Purple (val), l&p
Mix Lustful Purple (val) 1:1 Warm Grey (val), l&p
Turquoise Armor:
Hydra Turquoise (ap),
Aquamarine (val), flbr
Mix Snake Green (val xp) 1:3 Water, wash
Verdigris (val), l
Verdigris (val), p
Black Armor:
Panzer Dark Grey (val a),
Fenrisian Grey (gw), flbr
Pallid Wych Flesh (gw), flbr
Dark Tone Ink (ap), wash
Pallid Wych Flesh (gw), l&p
Off White (val), l&p
Skin:
Tan (val),
Mix 1:1 Tan (val), Dwarf Flesh (val a), flbr
Strong Tone Ink (ap), wash
Dwarf Flesh (val a), l&p
Brown:
Gorgon Brown (val),
Khaki (val), flbr
Copper Brown (val xp), wash
Strong Tone Ink (ap), wash
Strong Tone Ink (ap), wash
Lights:
Aquamarine (val),
Verdigris (val), p
Dark Turquoise (val ink), wash
Verdigris (val), p

l&p – lines and points,
l – lines, edge highlights,
p – points,
dl – deep lining,
bl – blend,
gl – glaze,
drbr – drybrush,
flbr – flatbrush,
lobr – loaded brush,
stpl – stippling,
*Airbrushed (with multiple layers and mixes)
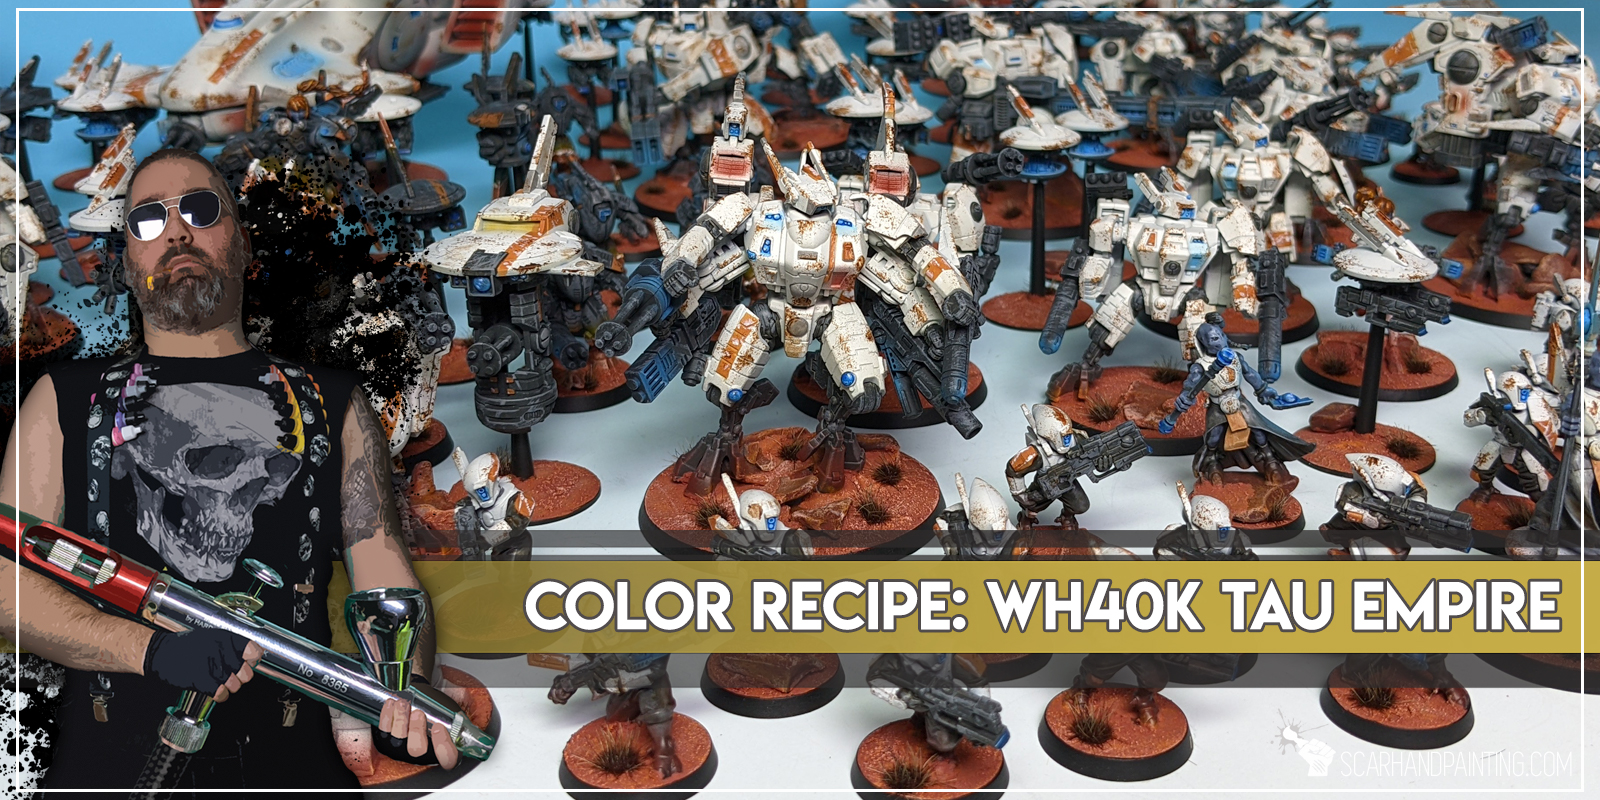
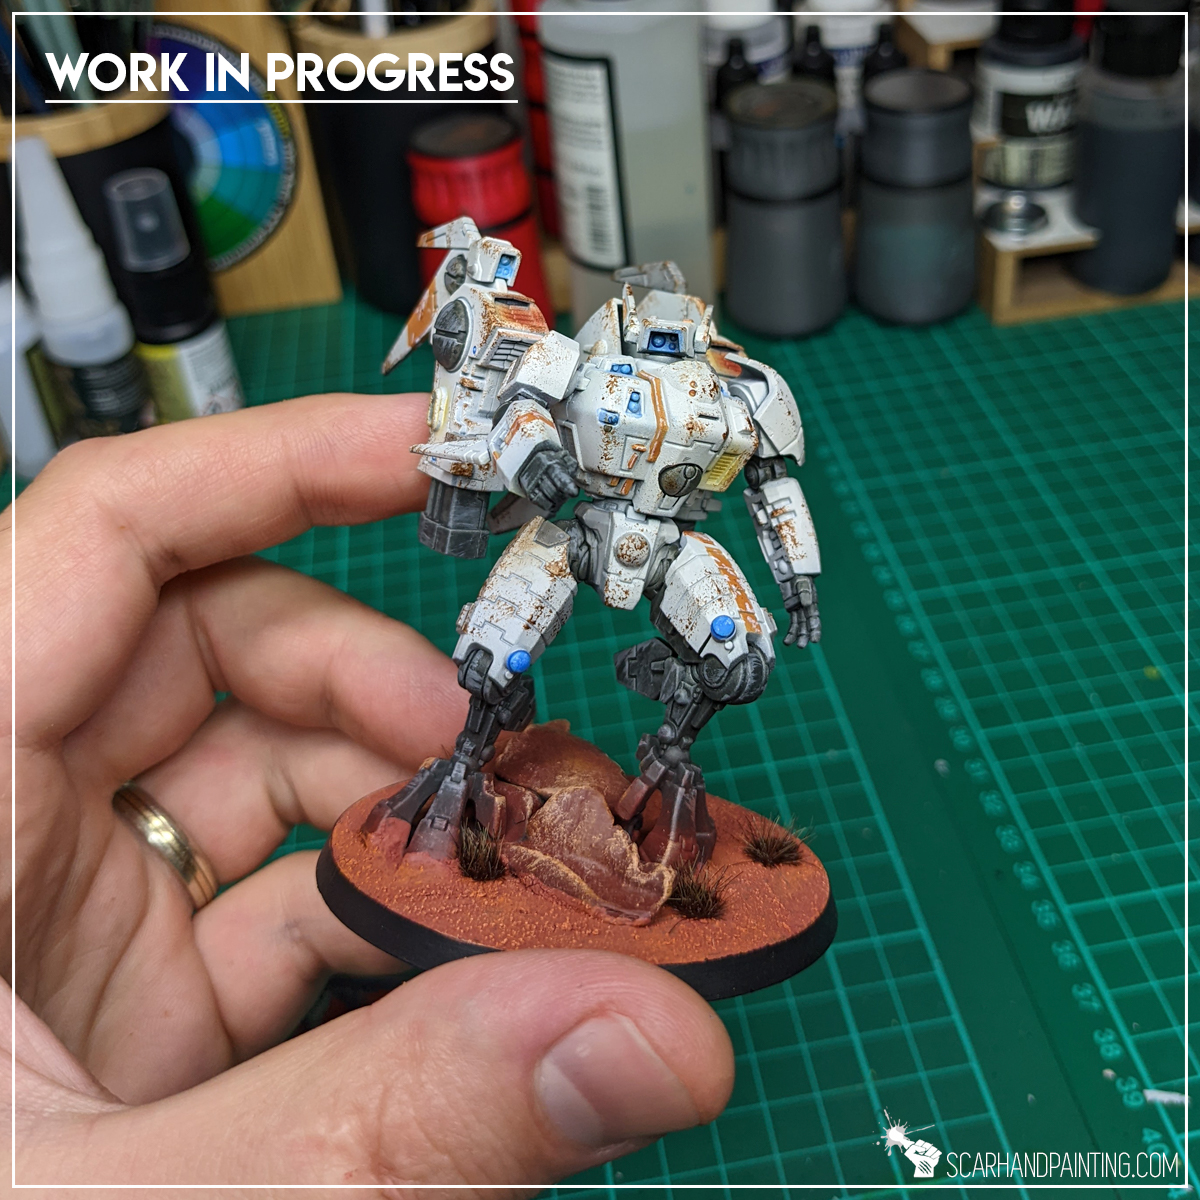
Here are some Color Recipes for Warhammer 40,000 Tau Empire from Gallery: Tau Empire. Please take note that this is a simple color scheme, not covering multiple overlapping layers and blends in between, that lead to the final product. It is supposed to be used as guideline not a step-by-step.
White Armor:
Desert Tan (val primer),
White (val primer),
Scrofulous Brown (val),* stencil stripes
White (val), scratches
Clothes / Mesh:
Panzer Dark Grey (val a) *
– White Armor –
Panzer Dark Grey (val a), wash
Cold Grey (val a), flbr
CLOTHES: Strong Tone Ink (ap), wash

Weapons:
Panzer Dark Grey (val a),
Cold Grey (val), weathering, edge highlight
Weathering:
Smokey Ink (val), stpl
Desert Yellow (val a),*
German Red Brown (val primer), *
Blue OSL:
Light Sea Blue (val a), bl / *
White (val), l&p
Guilliman Blue (gw), glaze
Bases:
German Red Brown (val primer),
Mix Martian Ironcrust (gw texture) 1:1 Martian Ironearth (gw texture), texture
Orange Fire (val), flbr
Lugganath Orange (gw), drbr
TUFT: Army Painter Wasteland Tuft
TUFT: Gamers Grass Burned Tuft

l&p – lines and points,
p – points,
dl – deep lining,
bl – blend,
gl – glaze,
drbr – drybrush,
flbr – flatbrush,
lobr – loaded brush,
stpl – stippling,
*Airbrushed (with multiple layers and mixes)
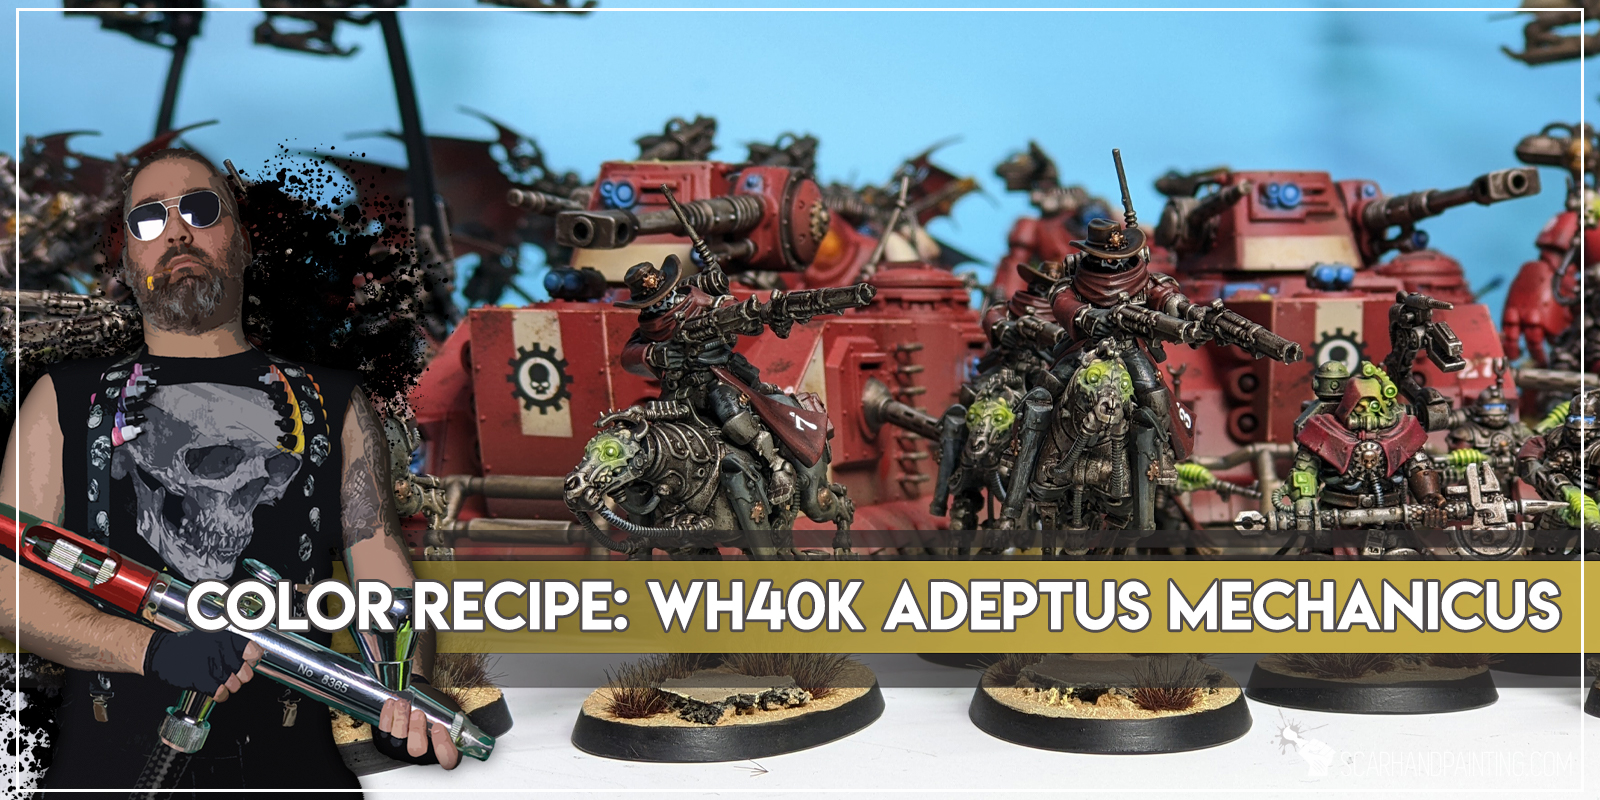
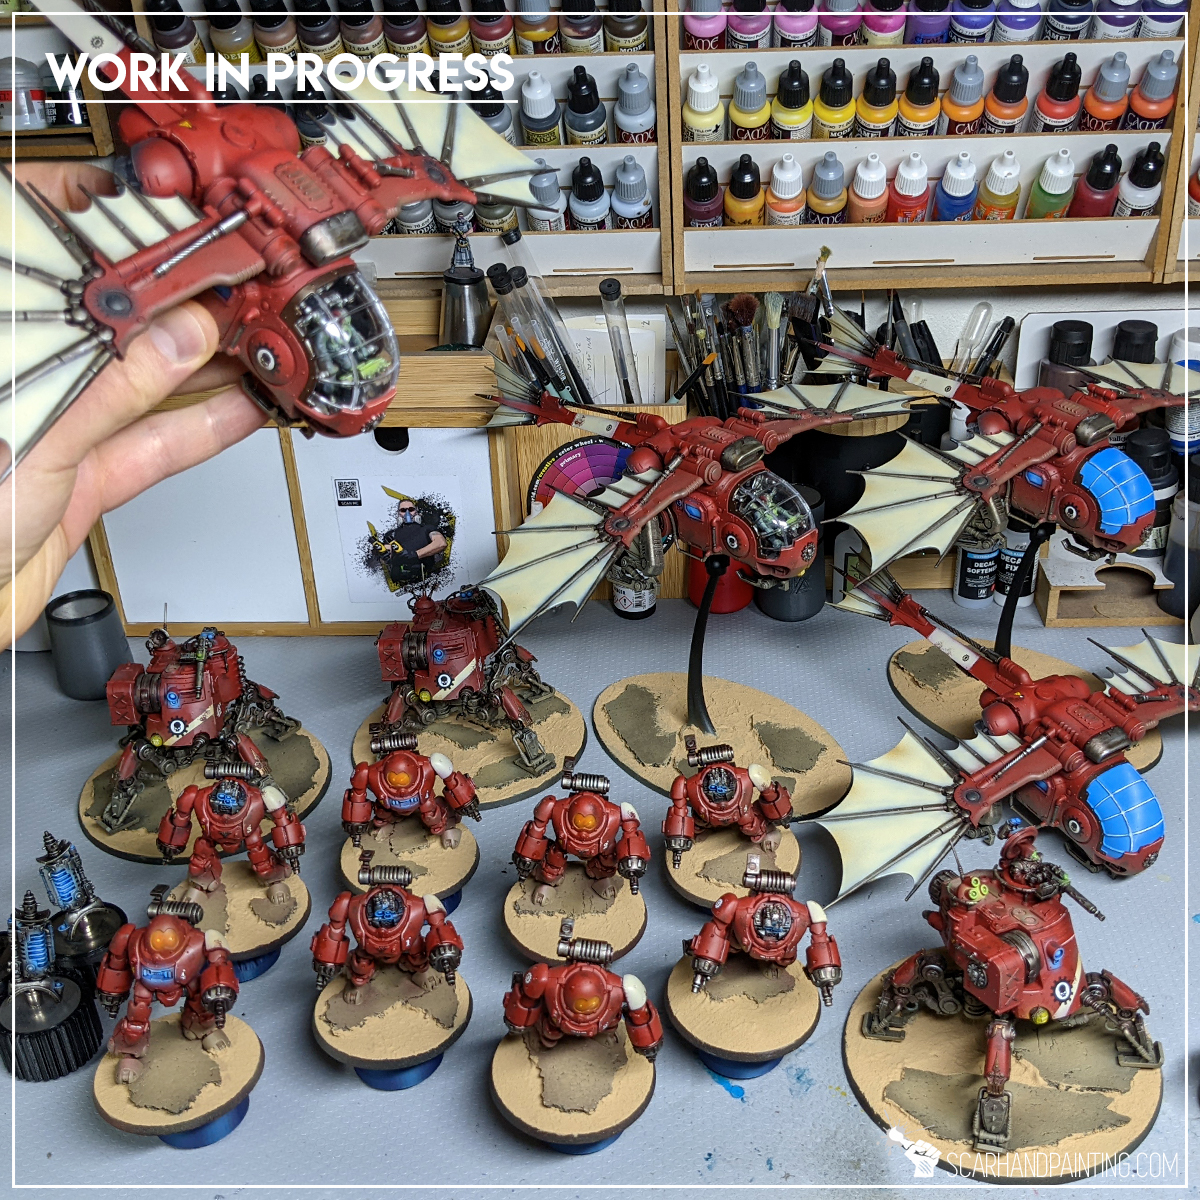
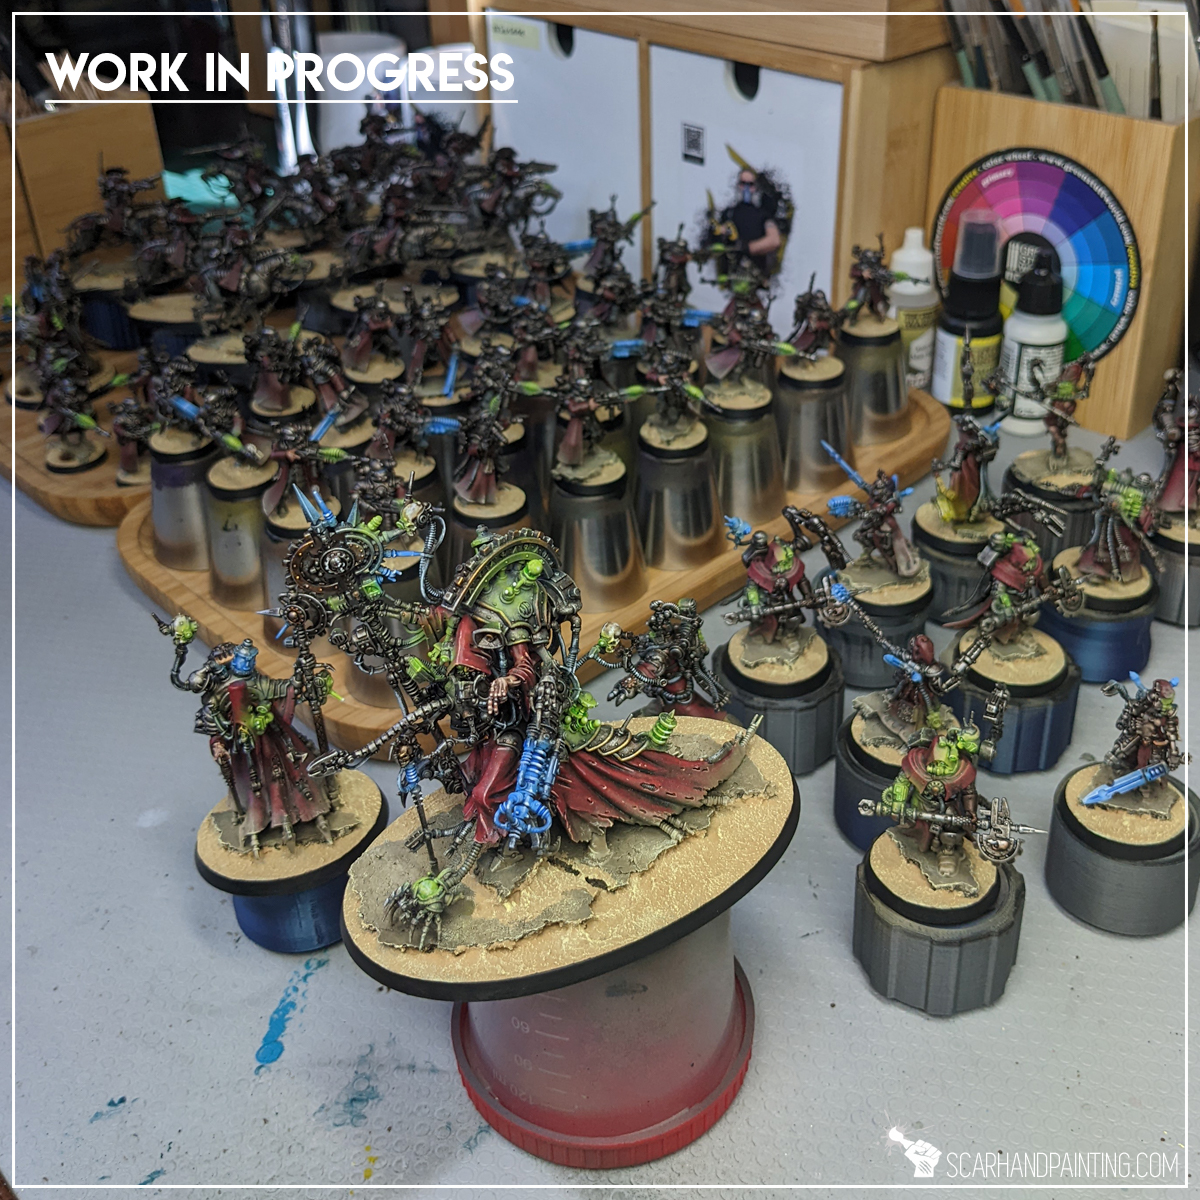
Here are some Color Recipes for Warhammer 40,000 Adeptus Mechanicus from Gallery: Adeptus Mechanicus. Please take note that this is a simple color scheme, not covering multiple overlapping layers and blends in between, that lead to the final product. It is supposed to be used as guideline not a step-by-step.
Metal:
Rust (val a),*
Gun Metal (ap), flbr
Shining Silver (ap), flbr
True Copper (ap), alternative spots
Strong Tone (ap), wash / wash*
Shining Silver (ap), l&p
RED Vehicles:
German Red Brown (val primer), *
Desert Tan (val primer), *preshade
Mix: German Red Brown 1:1 Red RLM 23 (val a),*
Bonewhite (val a), stencil stripes
Smokey Ink (val), weathering
Red Clothes:
Hull Red (val),
Strong Tone (ap), wash / wash*
German Red Brown (val primer), flbr, bl
German Red Brown (val primer), bl, edges
Scarlet Blood (val), edges
Black Clothes:
Panzer Dark Grey (val a),
Fenrisian Grey (gw), flbr
Hero: Ghost Grey (val), l&p
Strong Tone (ap), wash
Hero: Ghost Grey (val), l&p
Hero: Off White (val), l&p
Blue Light:
Light Sea Blue (val a), *
White (val a), *
Guilliman Blue (gw), wash
Off White (val), l&p
Purity Seals:
Hull Red (val),
Strong Tone (ap), wash
Rosy Flesh (val), p
/
Flayed One Flesh (gw),
Pallid Wych Flesh (gw), flbr
Strong Tone (ap), wash
Black markings,
Skulls:
Ghost Grey (val),
Strong Tone (ap), wash
Ghost Grey (val), p
Skin:
Tan (val),
Dwarf Flesh (gw), flbr
Flesh (val a),
Strong Tone (ap), wash
Hero: Flesh (val), l&p
Hero: Pale Flesh (val), l&p
Bases:
Earth (val a), *
Light Brown (val a), *
European Dust (val), *
Sandy Desert (AK texture),
Ice Yellow (val), drbr, flbr,
TUFT: Wasteland Tuft (ap),
TUFT: Burned 6mm wild (gg),

l&p – lines and points,
p – points,
dl – deep lining,
bl – blend,
gl – glaze,
drbr – drybrush,
flbr – flatbrush,
lobr – loaded brush,
stpl – stippling,
*Airbrushed (with multiple layers and mixes)
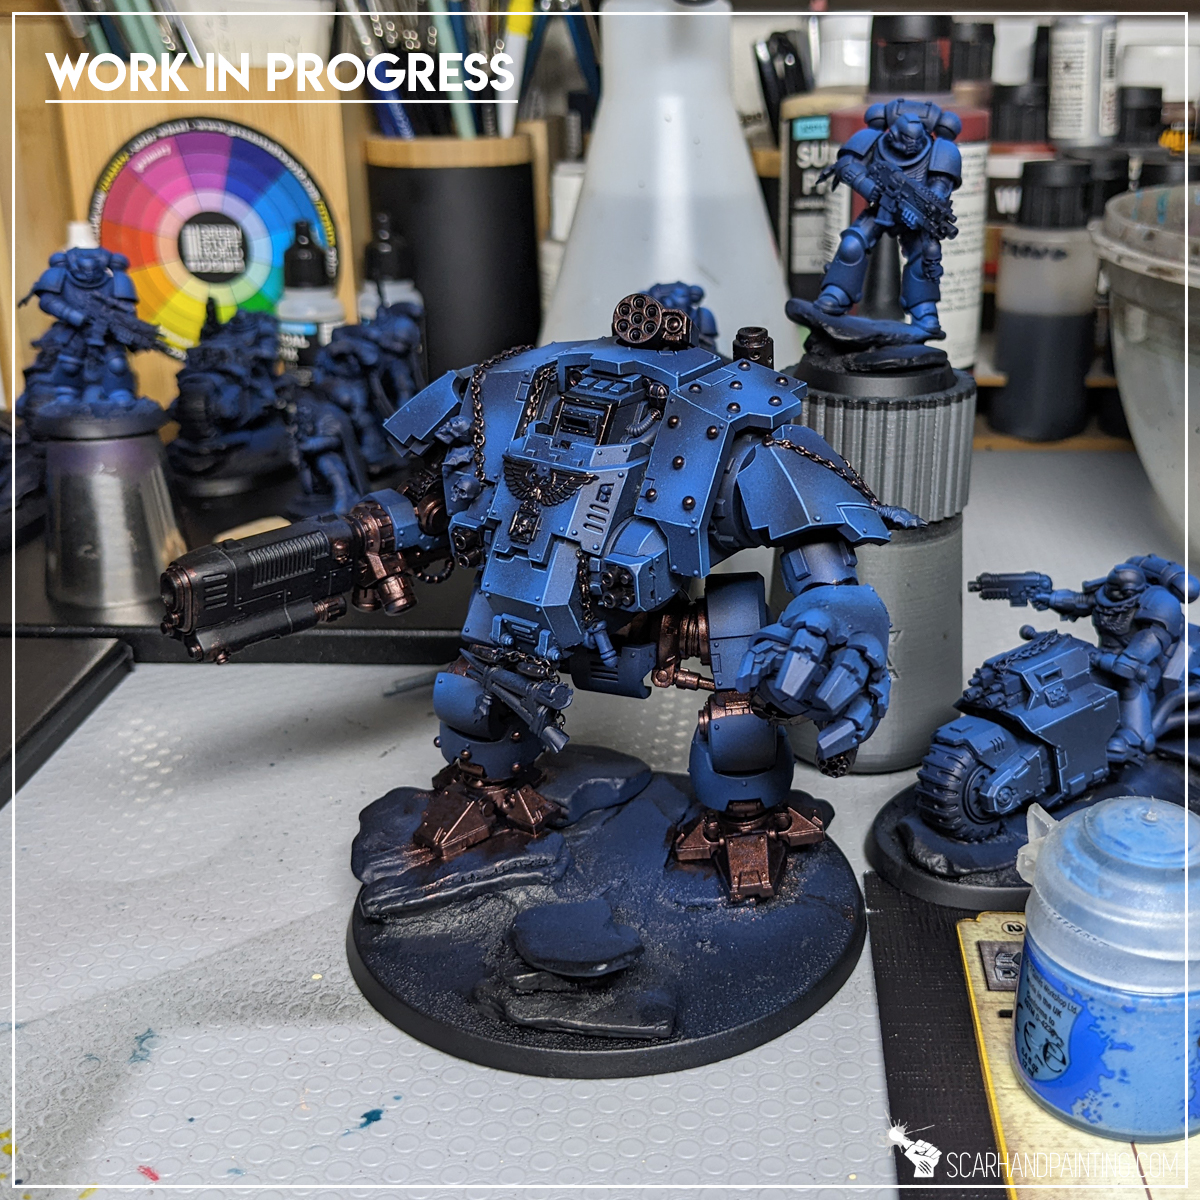
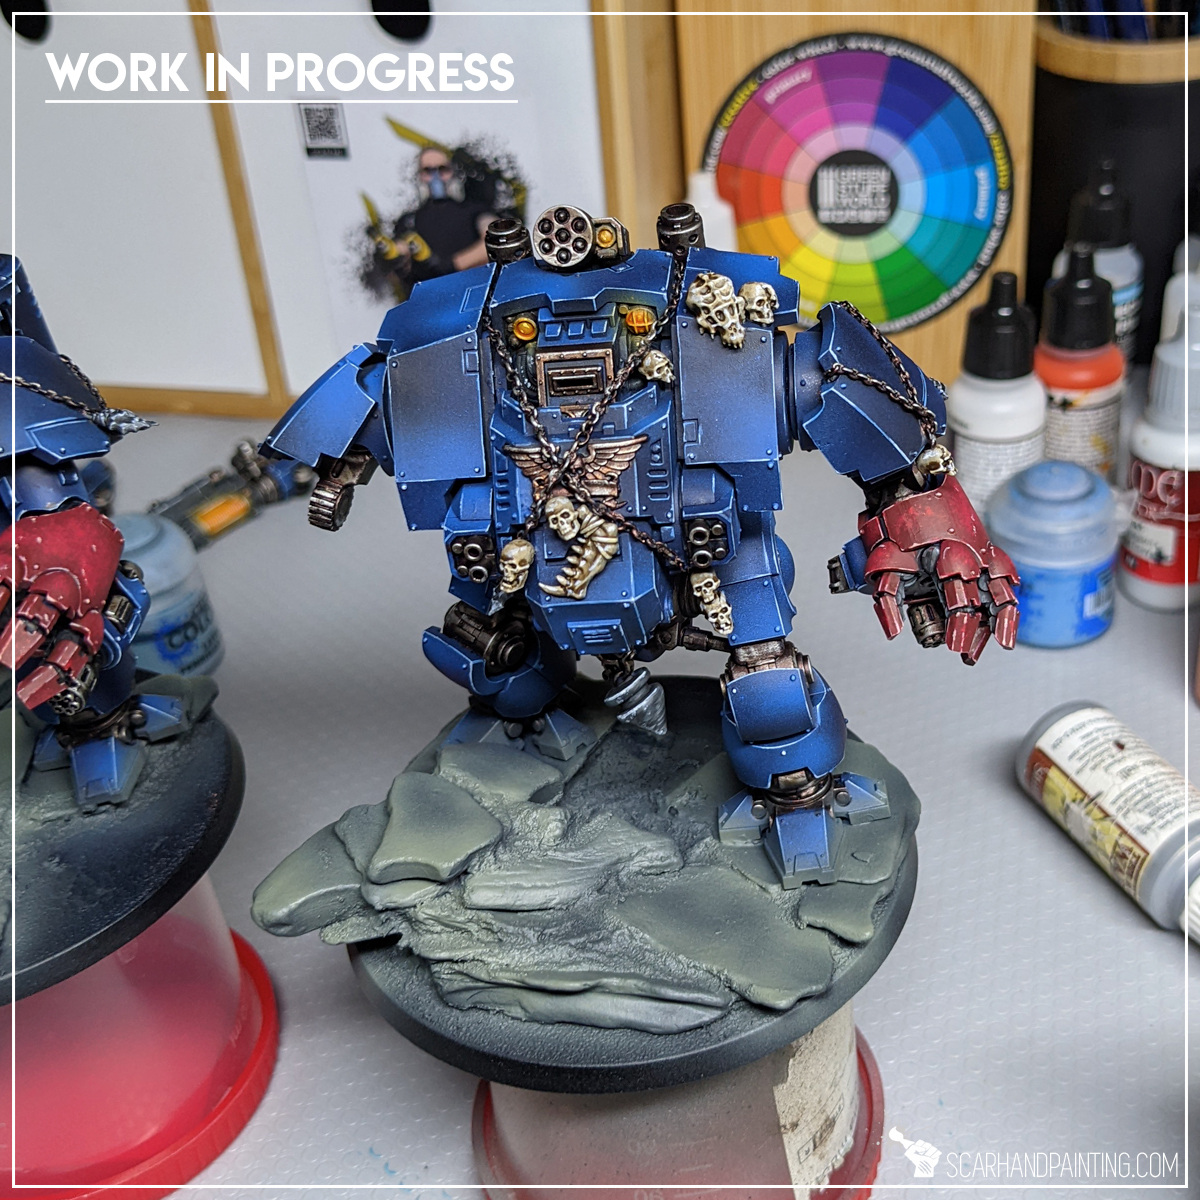
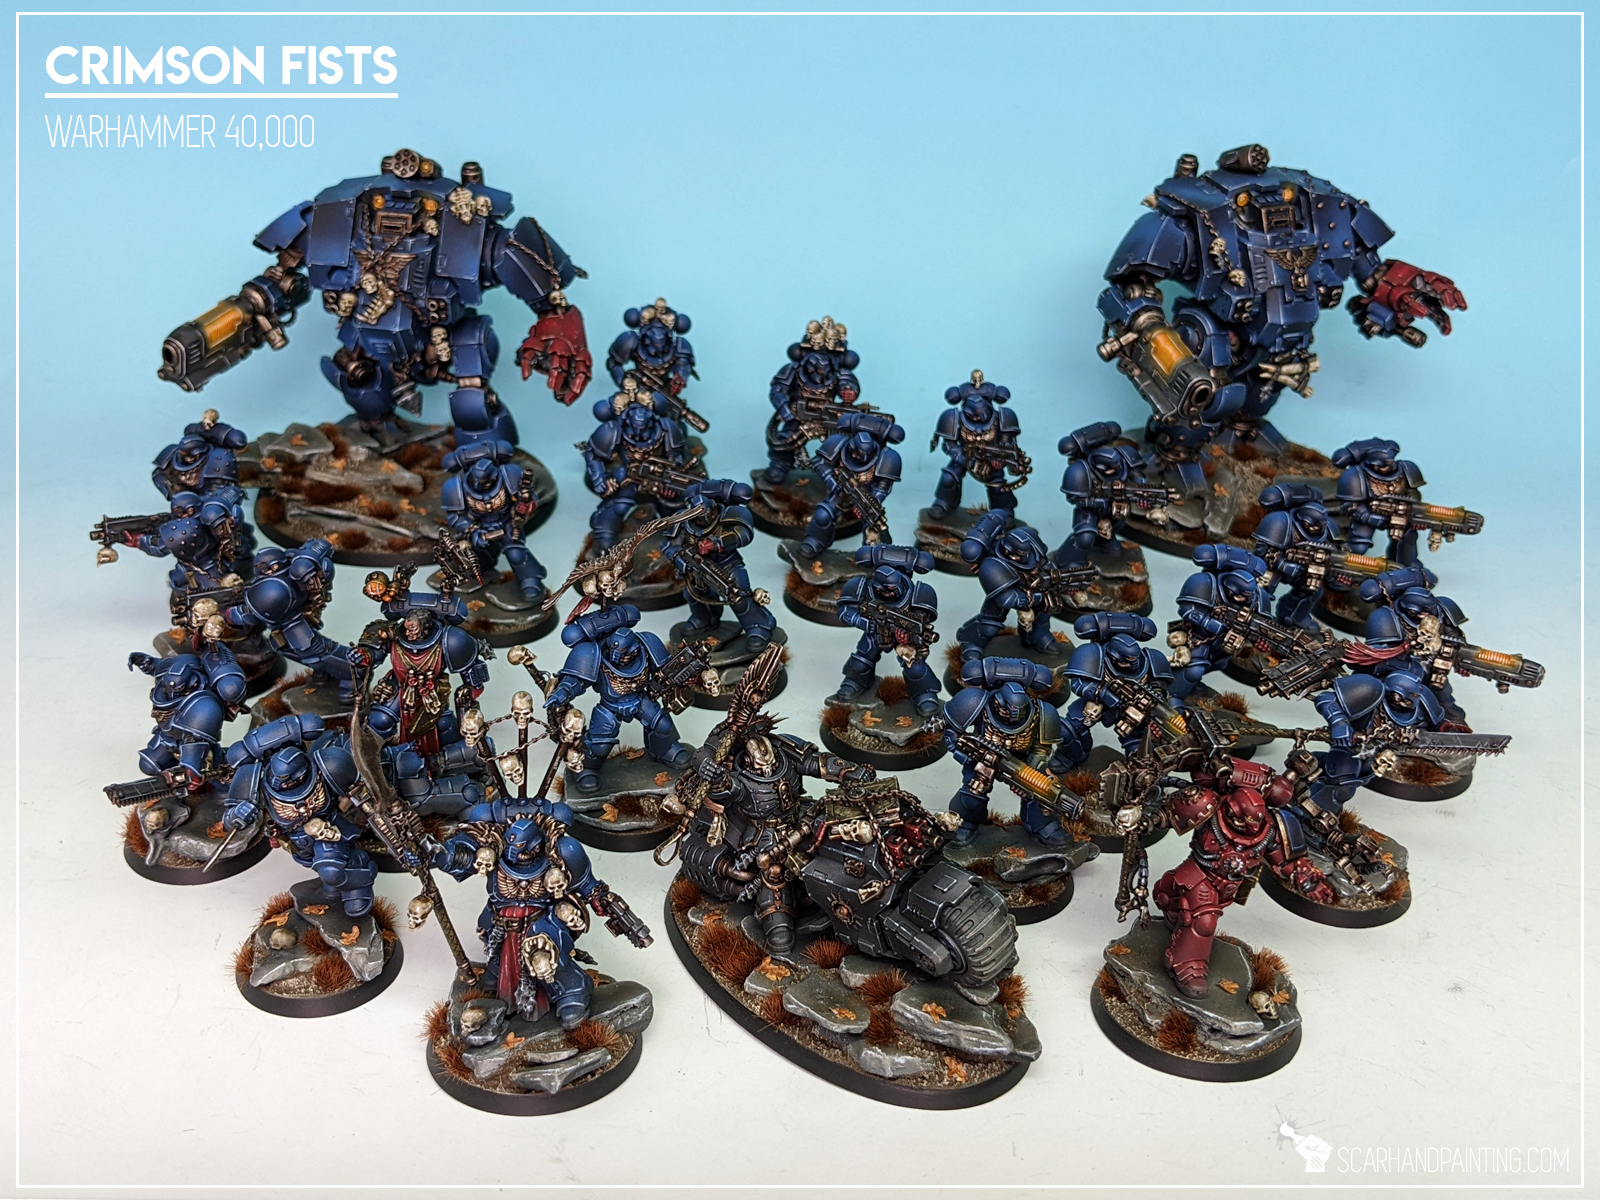
Here are some Colour Recipes for Warhammer 40,000 Crimson Fists from Gallery: Crimson Fists. Please take note that this is a simple colour scheme, not covering multiple overlapping layers and blends in between, that lead to the final product. It is supposed to be used as guideline not a step-by-step.

BLUE armor:
Black undercoat,
French Blue (val a), * around
Mix Ultramarine Blue (val a) 5:2 Light Sea Blue (Val a), * from top, points focused
Black Wash for Vehicles (val), * from bottom, points focused
Hoeth Blue (gw), l&p
Glacier Blue (val), p
RED armor:
Hull Red (val),
Burnt Red (val)
Flat Red (val), l&p, highlight flbr (x3)
Lugganath Orange (gw), l&p
Vehicles: Flat Red (val), stpl (large areas)
DARK mesh:
Panzer Dark Grey (val a),
Fenrisian Grey (gw), l&p
Dark Tone Ink (ap),
Glacier Blue (val), l&p / Ghost Grey for vehicles)
METAL:
Warplock Bronze (gw),
True Copper (ap) / Gun Metal (ap), flbr
Shining Metal (ap), l&p
Strong Tone Ink (ap),
Shining Metal (ap), l&p
BROWN detail:
Burnt Umber (val a),
Karak Stone (gw) l, detail filling,
Off White (val), l&p
Dark Olive Drab (val a), bl
Flayed One Flesh (gw), l&p
Mix: Strong Tone Ink (ap) 1:1:1 Soft Tone Ink (ap), Flesh Tone Ink (ap),
Flayed One Flesh (gw), l&p
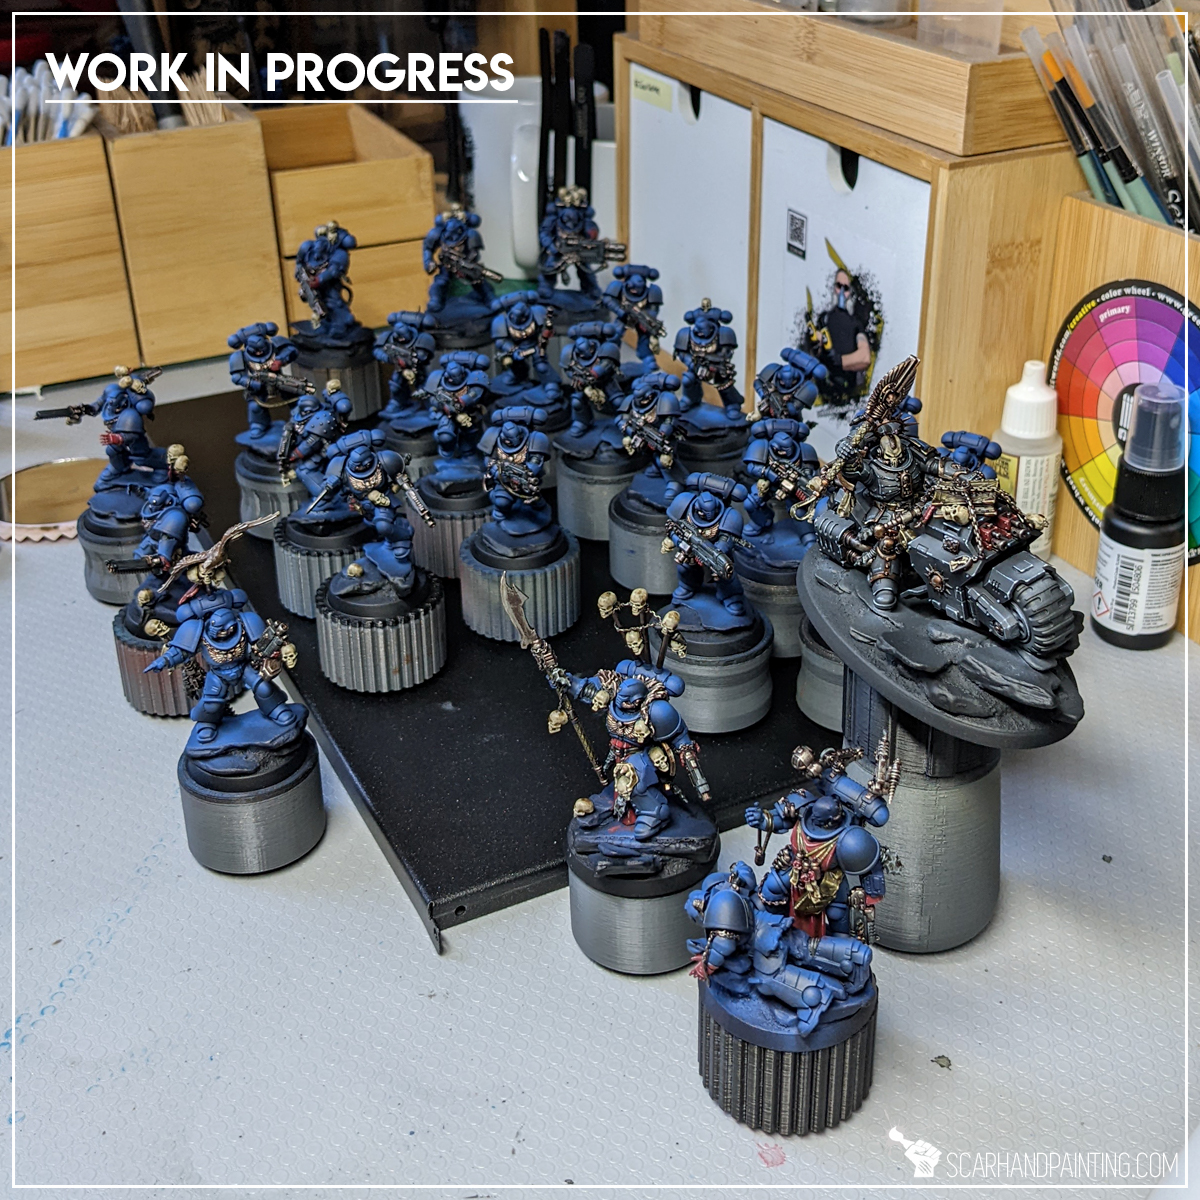
SKULLS & PAPER:
Karak Stone (gw),
Flayed One Flesh (gw), flbr
Mix: Off White (val) 1:2 Skeleton Bone (ap), flbr
Strong Tone Ink
Off White (val), l&p
ORANGE OSL:
White (val a), *
Hot Orange (val a), *
Off White (val), l&p
Hot Orange (val a), bl
EYES:
Flat Red (val),
Lugganath Orange (gw), dots
Hot Orange (val a), glaze

l&p – lines and points,
p – points,
dl – deep lining,
bl – blend,
gl – glaze,
drbr – drybrush,
flbr – flatbrush,
lobr – loaded brush,
stpl – stippling,
*Airbrushed (with multiple layers and mixes)
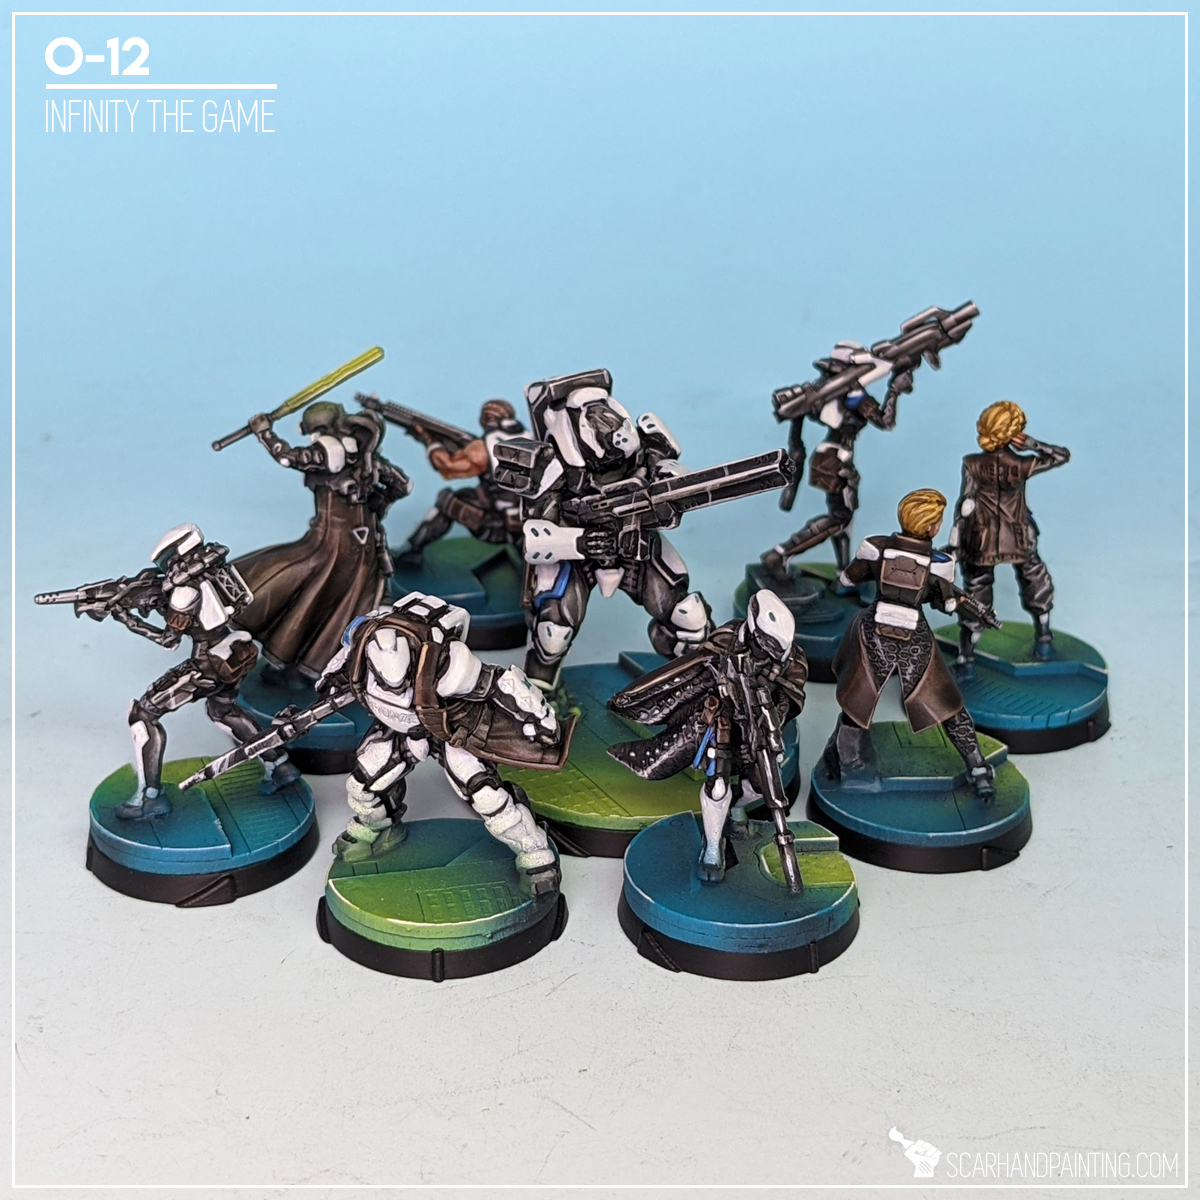
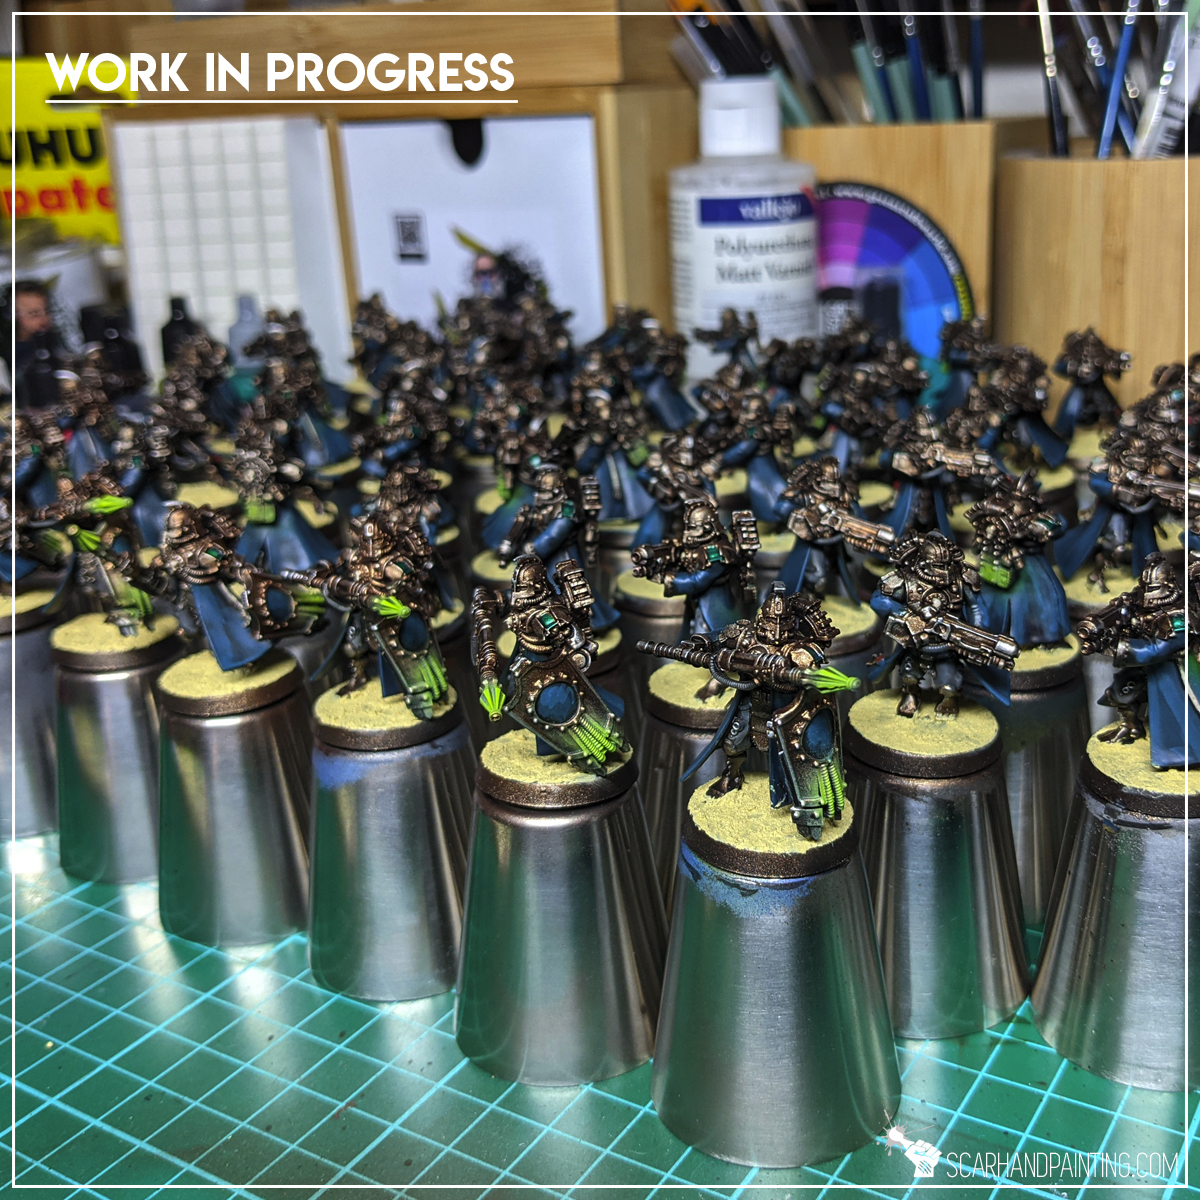
Here are some Colour Recipes for Infinity O-12 from Gallery: Infinity O-12. Please take note that this is a simple colour scheme, not covering multiple overlapping layers and blends in between, that lead to the final product. It is supposed to be used as guideline not a step-by-step.
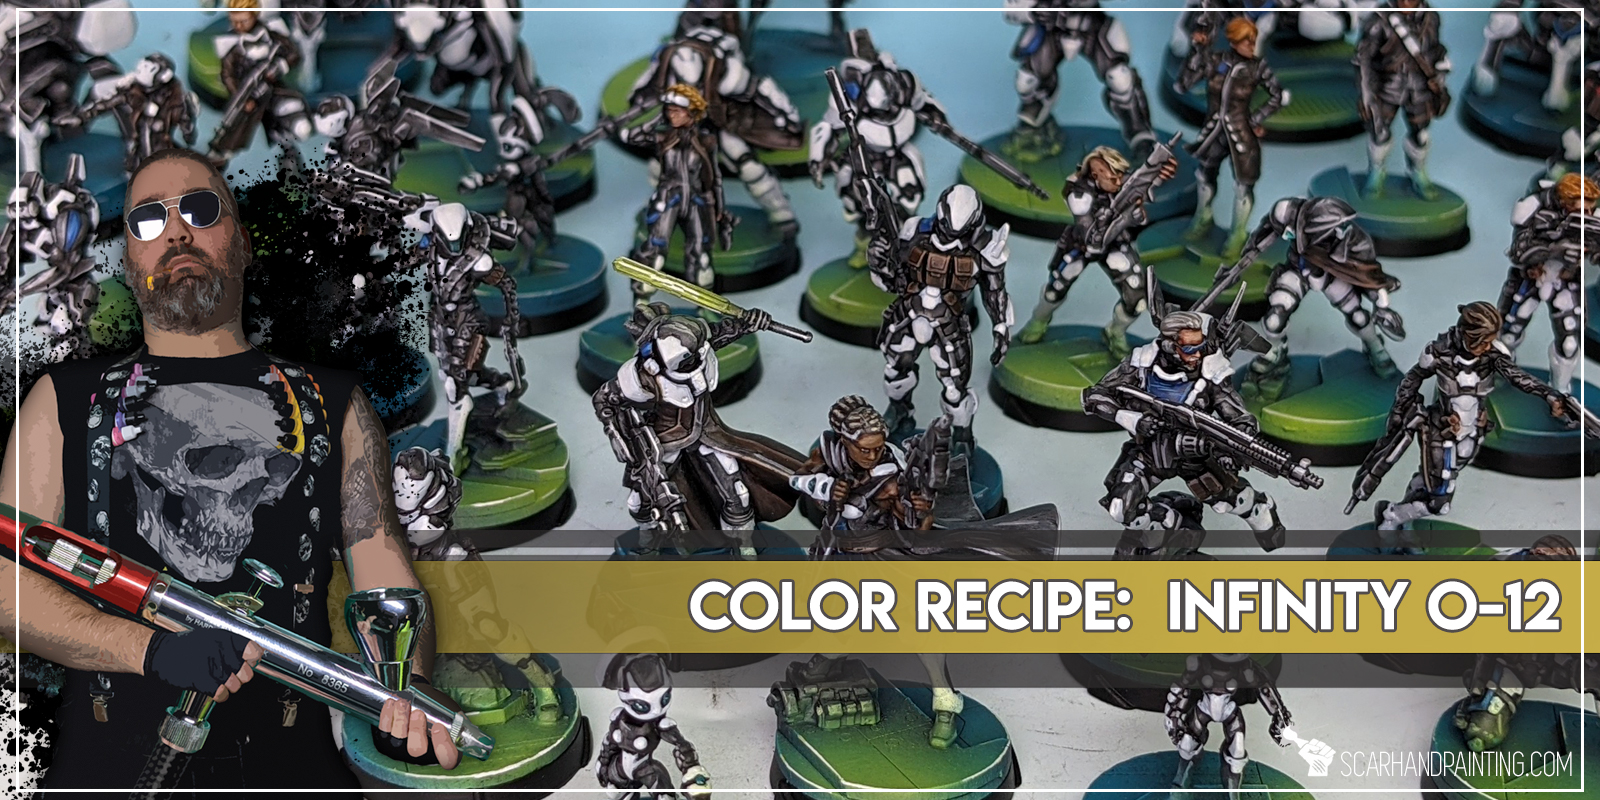
BLACK armor:
Chaos Black, undercoat
Pancer Dark Grey (Val a), *
Fenrisian Grey (GW), flbr
Pale Wych Flesh (GW), flbr, l&p
Dark Tone Ink (AP), wash
Pale Wych Flesh (GW), l&p
WHITE armor:
Mix Ghost Grey (Val) 1:1 Wolf Grey (Val a),
Mix Ghost Grey (Val) 1:1 Wolf Grey (Val a),
White (Val a), bl
Off White (Val), bl, l&p

BROWN clothes:
Black Armor base,
Dark Brown (Val A), bl
Mix Strong Tone Ink (AP) 1:1 Soft Tone Ink (AP), wash
Karak Stone (GW), l&p
BLUE elements:
French Blue (val a),
Ultramarine Blue (val a), l
Heth Blue (gw), l&p
Glacier Blue (val), l&p
VISIERS:
Emerald (Val),
Mix Emerald (Val) x:x Off White (Val), l&p
TURQUOISE helmet dots,
Coelia Greenshade (GW),

BASES:
Coal Black (P3), *
Turquoise (Val), *
Turquoise (Val), l
Pale Wych Flesh (GW), l
Duck Egg Green (Val a), OSL
Light Livery Green (Val a), OSL
Off White (Val), l
l&p – lines and points,
p – points,
dl – deep lining,
bl – blend,
gl – glaze,
drbr – drybrush,
fltbr – flatbrush,
lobr – loaded brush,
stpl – stippling,
*Airbrushed (with multiple layers and mixes)
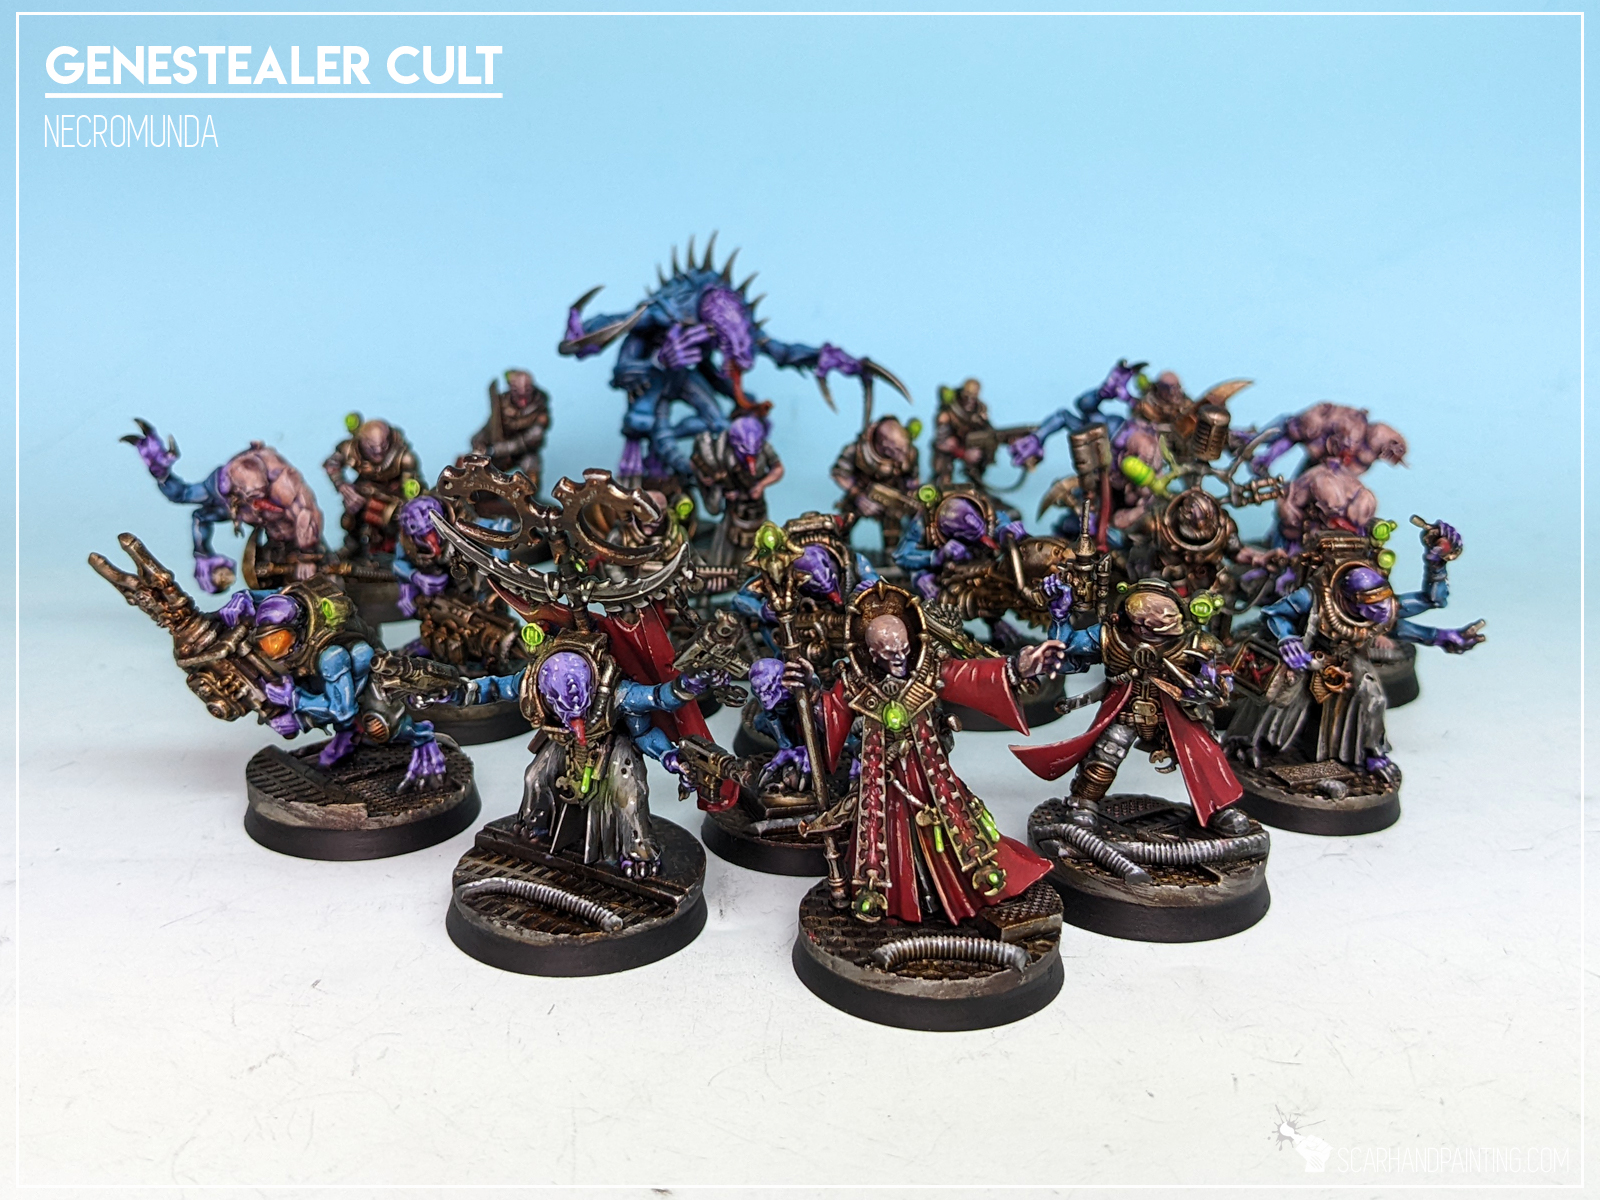
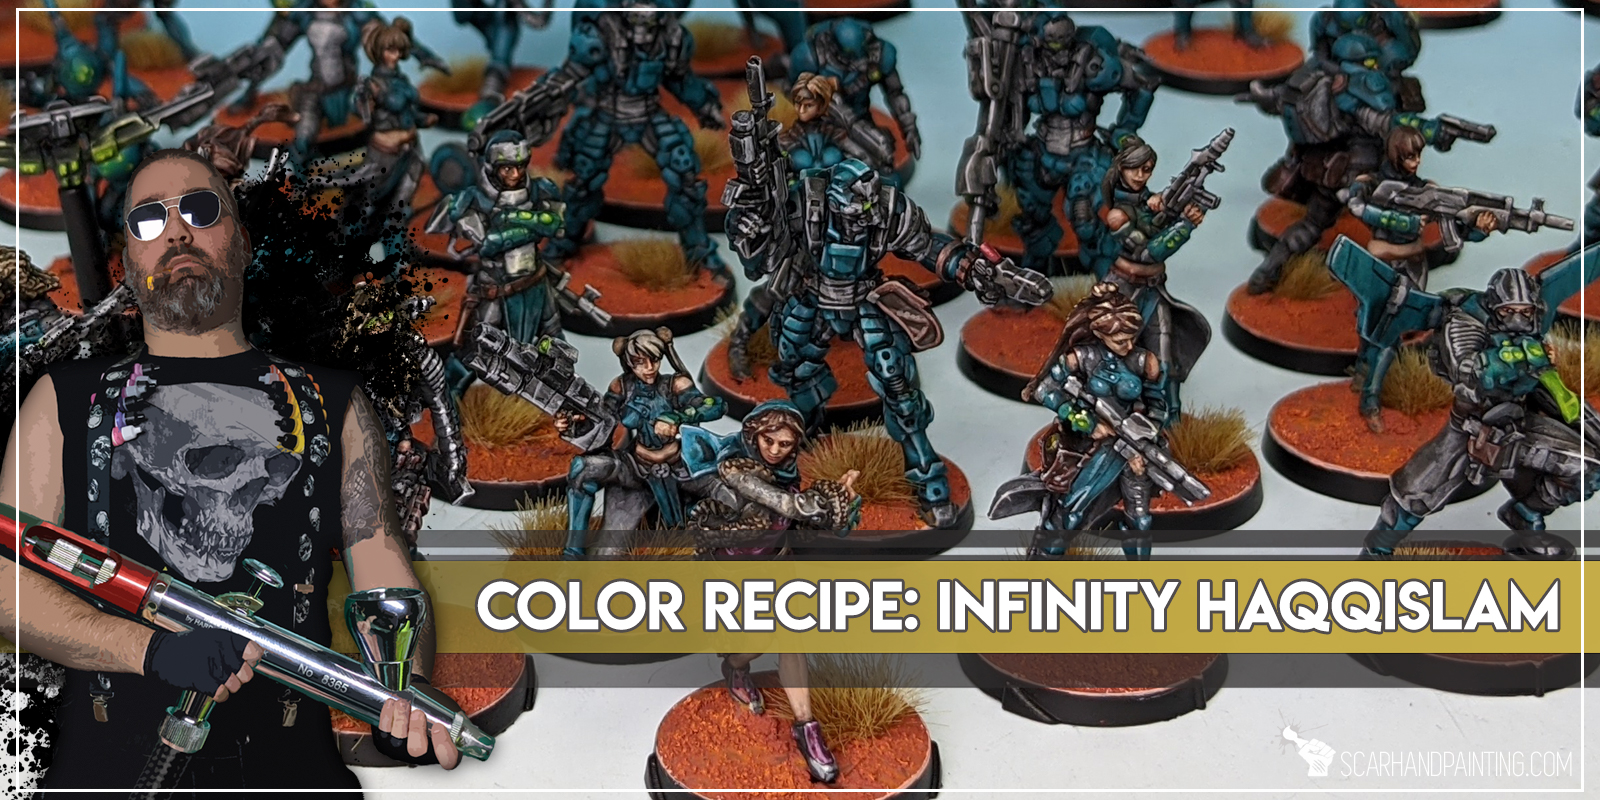
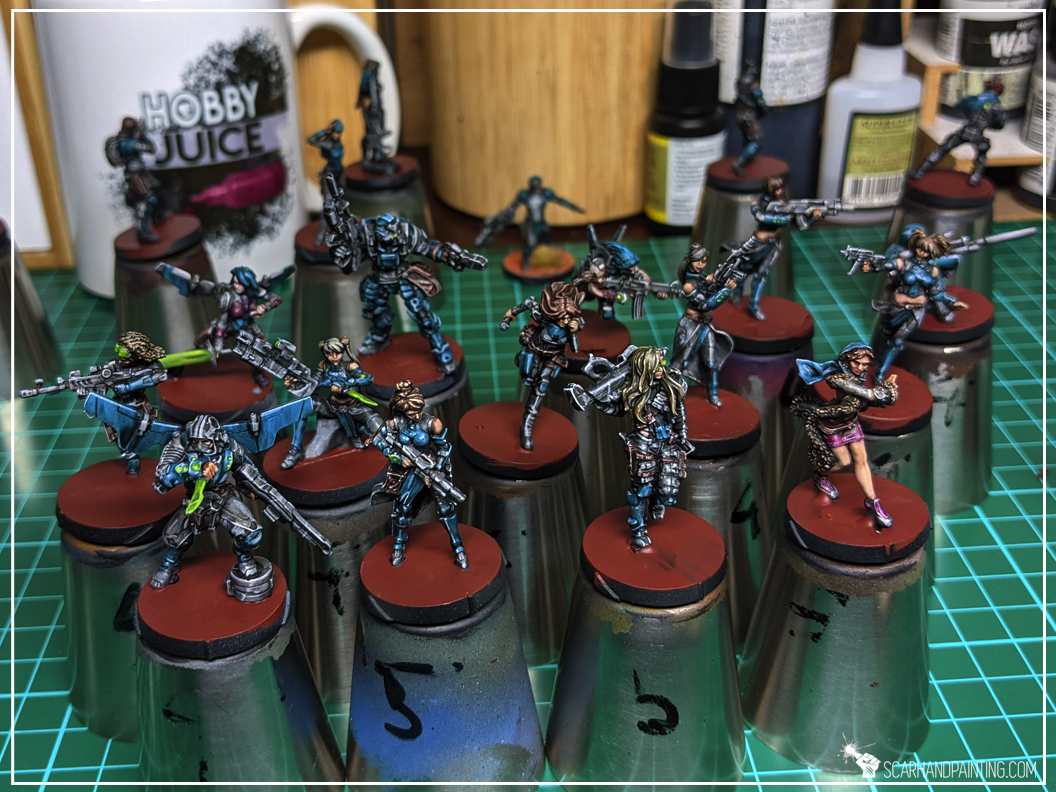
Here are some Colour Recipes for Infinity Haqqislam from GALLERY: GENESTEALER CULTS. Please take note that this is a simple colour scheme, not covering multiple overlapping layers and blends in between, that lead to the final product. It is supposed to be used as guideline not a step-by-step.
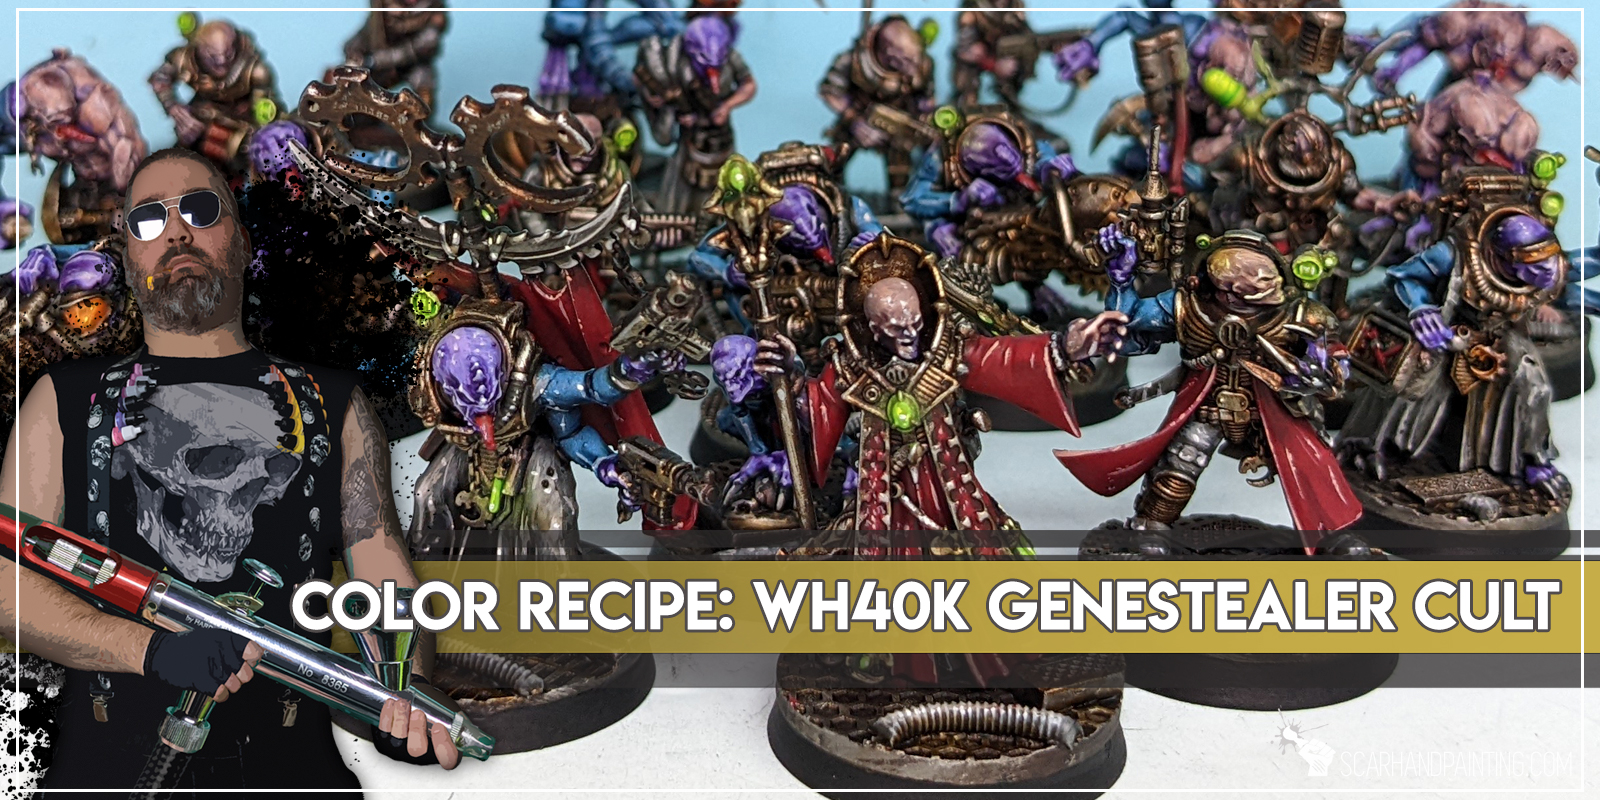
BLUE armor:
Black Undercoat,
Imperial Blue (val),*
Mix: Imperial Blue (val) 4:1 Electric Blue (val),*
Electric Blue (val),*
Mix: Electric Blue (val) 1:3 White,*
Blue Tone Ink (ap),
Pallid Wych Flesh (gw), l&p
Off White (val), l&p
METAL:
Warplock Bronze (gw),
Gun Metal (ap), / True Copper (ap), flbr
Shining Silver (ap), l&p
Mix: Strong Tone Ink (ap) 1:1 Soft Tone Ink (ap),
Streaking Grime (ak int),

PURPLE skin:
Black Undercoat,
Alien Purple (val),
Mix: Alien Purple (val) 2:1 Squid Pink (val), flbr
Mix: Alien Purple (val) 1:1:1 Squid Pink (val), Pale Flesh (val), flbr
Purple Tone Ink (ap),
Pallid Wych Flesh (gw), l&p
Off White (val), l&p
SKIN:
Alien Purple (val a),
Dwarf Skin (val a), flbr
Flesh (val a), flbr
Mix: Purple Tone Ink (ap) 1:1:1:1, Strong Tone Ink (ap), Soft Tone Ink (ap), Medium,
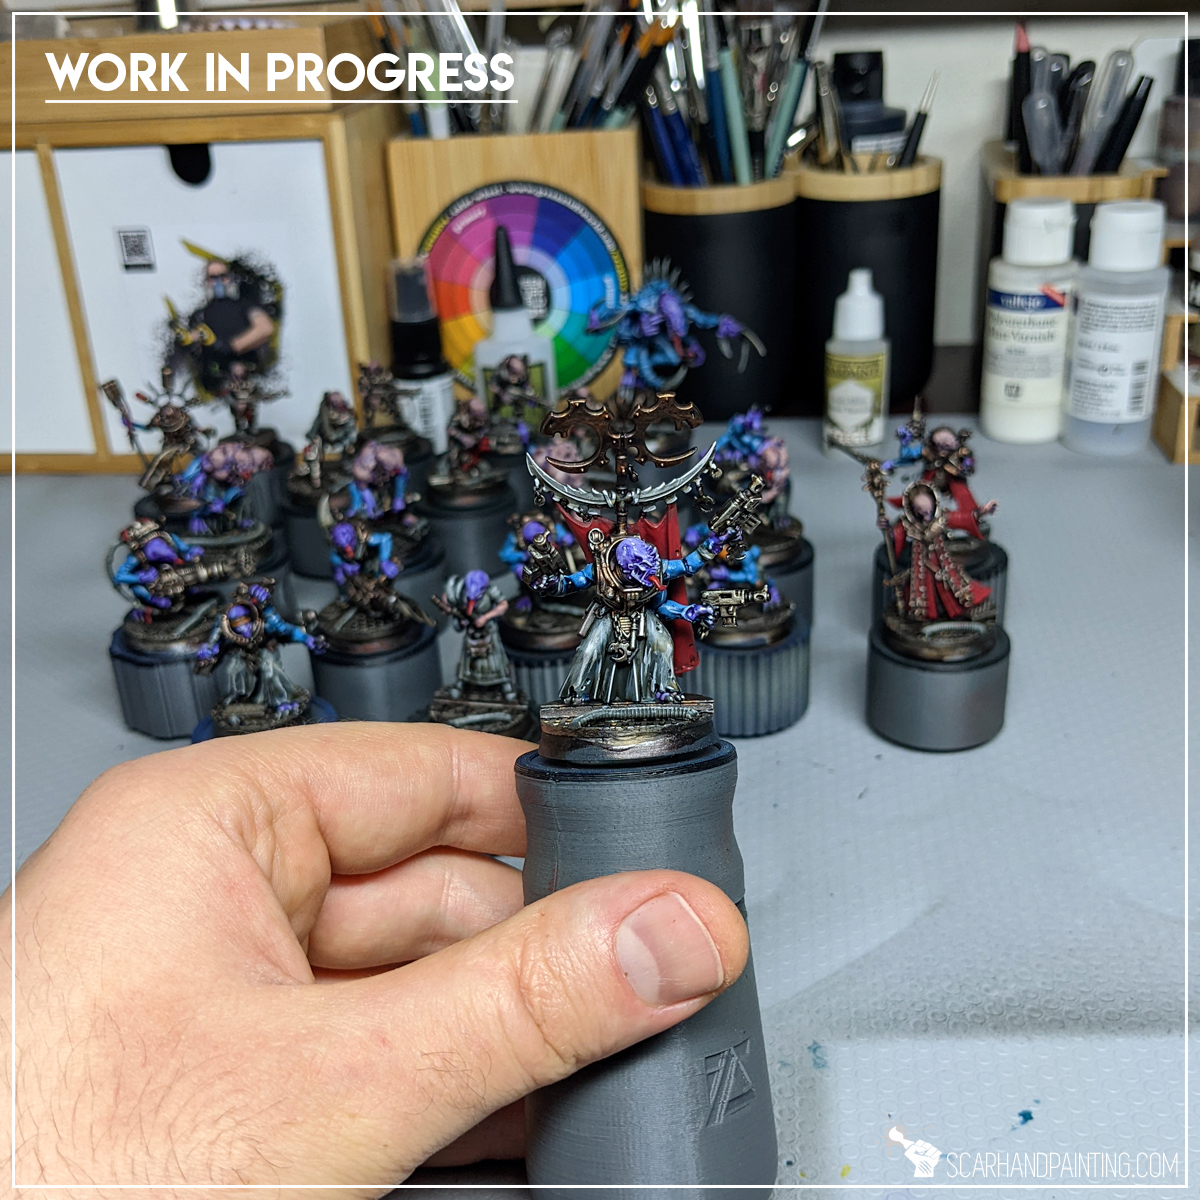
BLACK/GREY outfits:
Black Undercoat,
Panzer Dark Grey (val),
Cold Grey (val), flbr
Fenrisian Grey (gw), flbr
Pallid Wych Flesh (gw), l&p
Mix Strong Tone Ink (ap) 1:1 Soft Tone Ink (ap),
Pallid Wych Flesh (GW), l&p
Off White (Val), l&p
BROWN clothes:
Grey Outfits base,
Dark Brown RLM61 (val), bl
Mix Strong Tone Ink (ap) 1:1 Soft Tone Ink (ap),
Karak Stone (gw), l&p
Flayed One Flesh (gw), l&p
GREEN light:
Duck Egg Green (val a),
Off White (val), l&p
Light Livery Green (val a),*
Waywatcher Green (gw), wash
Off White (val), l&p
l&p – lines and points,
p – points,
dl – deep lining,
bl – blend,
gl – glaze,
drbr – drybrush,
fltbr – flatbrush,
lobr – loaded brush,
stpl – stippling,
*Airbrushed (with multiple layers and mixes)
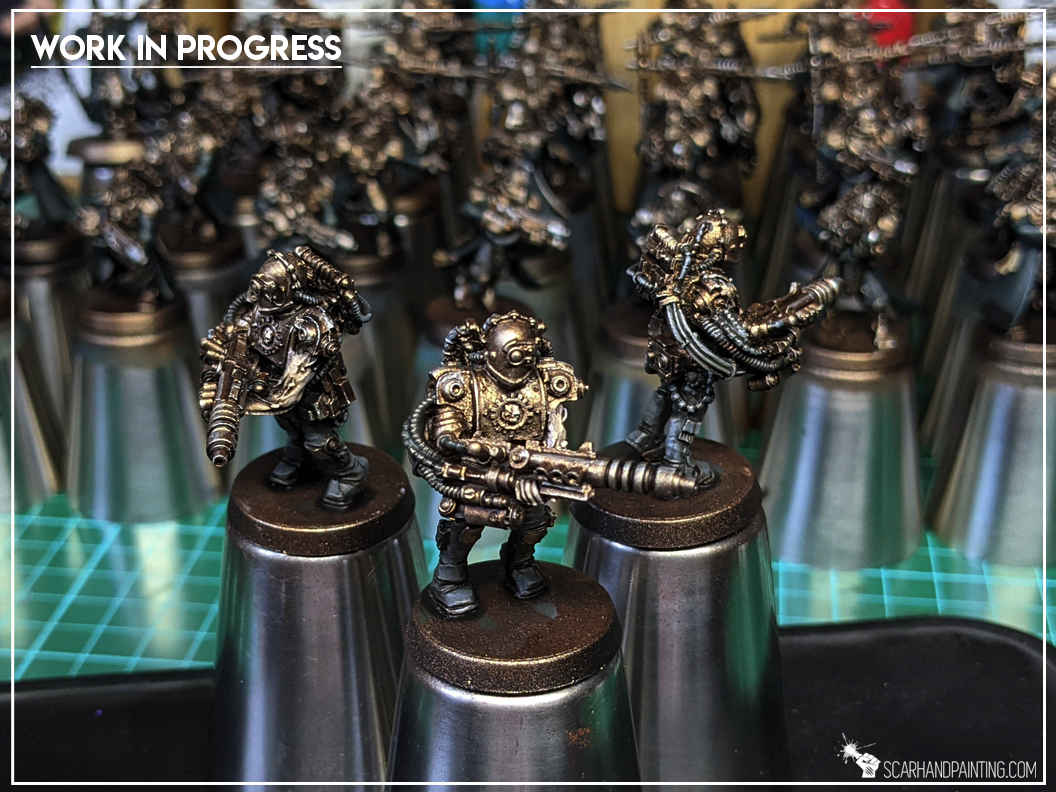
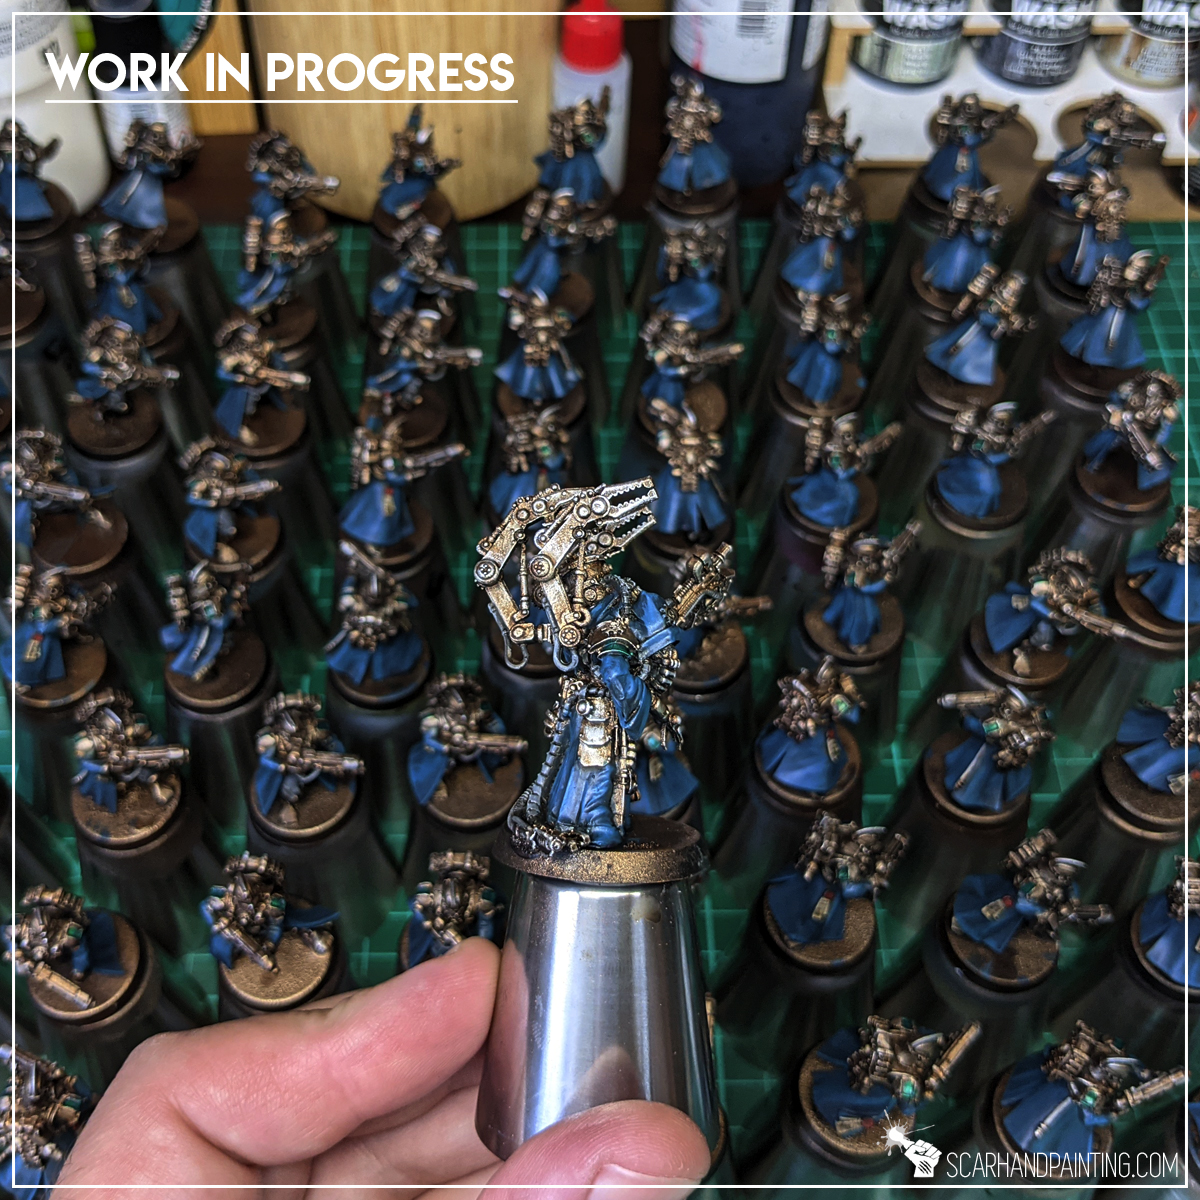
Here are some Colour Recipes for Horus Heresy Mechanicum from Gallery: Forge World Zhao Arkhad. Please take note that this is a simple colour scheme, not covering multiple overlapping layers and blends in between, that lead to the final product. It is supposed to be used as guideline not a step-by-step.
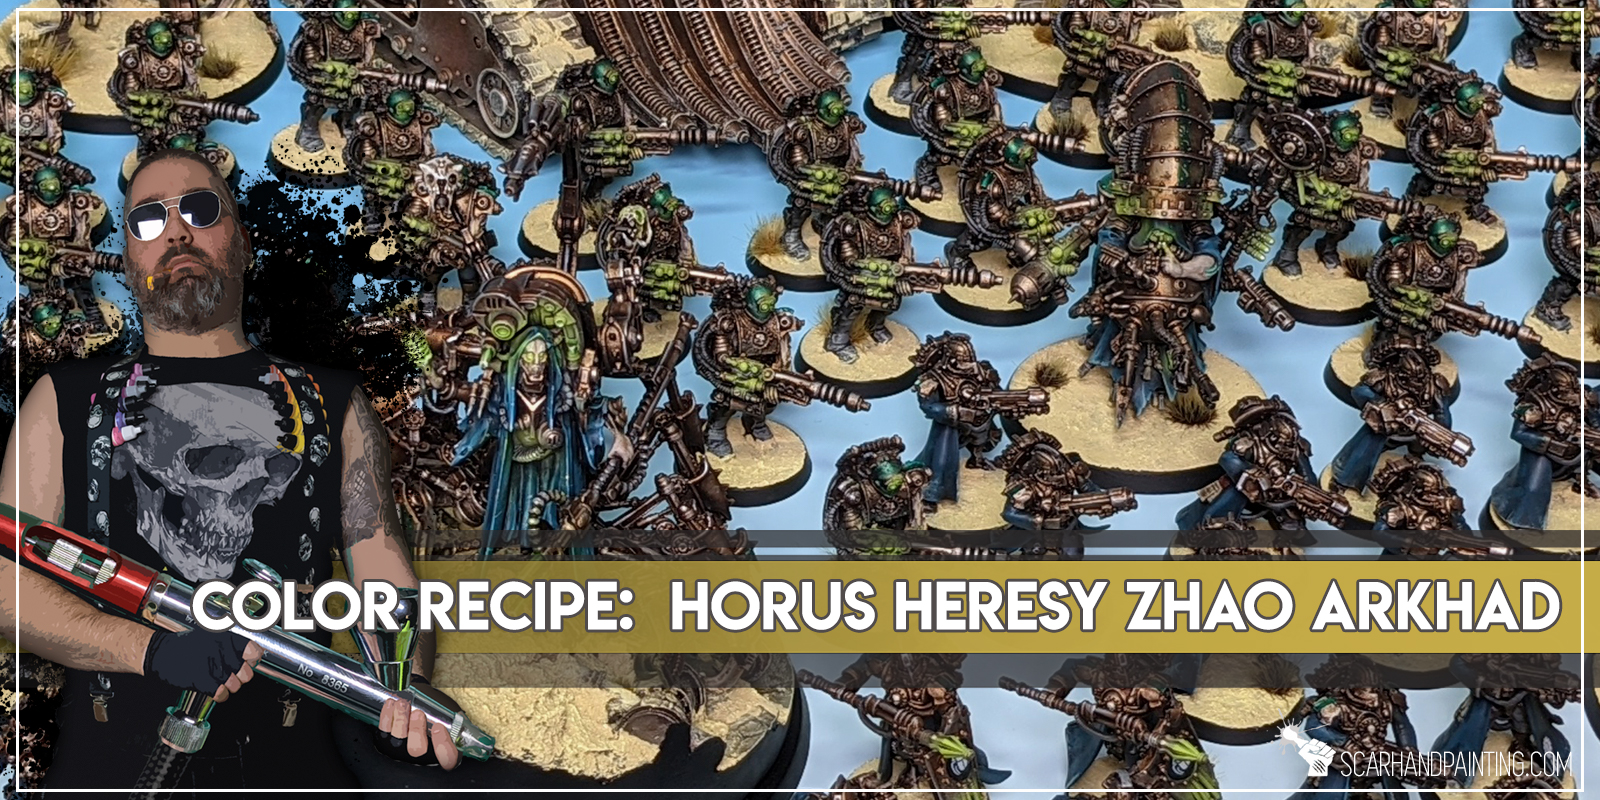
BRONZE armor:
Black Undercoat,
Mix Rust (val a) 1:1 Metallic Black (val a), *
Bright Bronze (val a), * zenithal
Shining Silver (ap), flbr
Strong Tone Ink (ap), wash / *
Shining Silver (ap), l&p
Soft Tone Ink (ap), wash dedicated
… GREEN metallic:
Jade Green (val), bl
TURQUOISE clothes:
Coal Black (p3),
Strong Tone Ink (ap), wash
Coal Black (p3),
Mix Coal Black (p3) 1:1 Turquoise (val), flbr
Mix Coal Black (p3) 1:2 Turquoise (val), bl
Turquoise (val), l&p
Ice Yellow (val), bottom drbr
SKIN:
Slaanesh Grey (gw),
Flesh (val a), flbr
Pale Flesh (val), l&p
Strong Tone Ink (ap), wash
Pale Flesh (val), l&p
BONES:
Flayed One Flesh (gw),
Ivory (val), flbr
Strong Tone Ink (ap), wash
Skeleton Bone (ap), l&p
Off White (val), l&p
GREEN osl:
Duck Egg Green (val a), *
Light Livery Green (val a), *
Off White (val), l*p
Waywatcher Green (gw), bl
DESERT bases:
Desert Sand (val texture), texture
Khaki (val a), * stones
Ice Yellow (val), drbr
Tufts:
Wasteland Tuft (ap),
Steppe Tuft 12mm (Paint Forge),
Steppe Tuft 6mm (Paint Forge),
l&p – lines and points,
p – points,
dl – deep lining,
bl – blend,
gl – glaze,
drbr – drybrush,
fltbr – flatbrush,
lobr – loaded brush,
stpl – stippling,
*Airbrushed (with multiple layers and mixes)

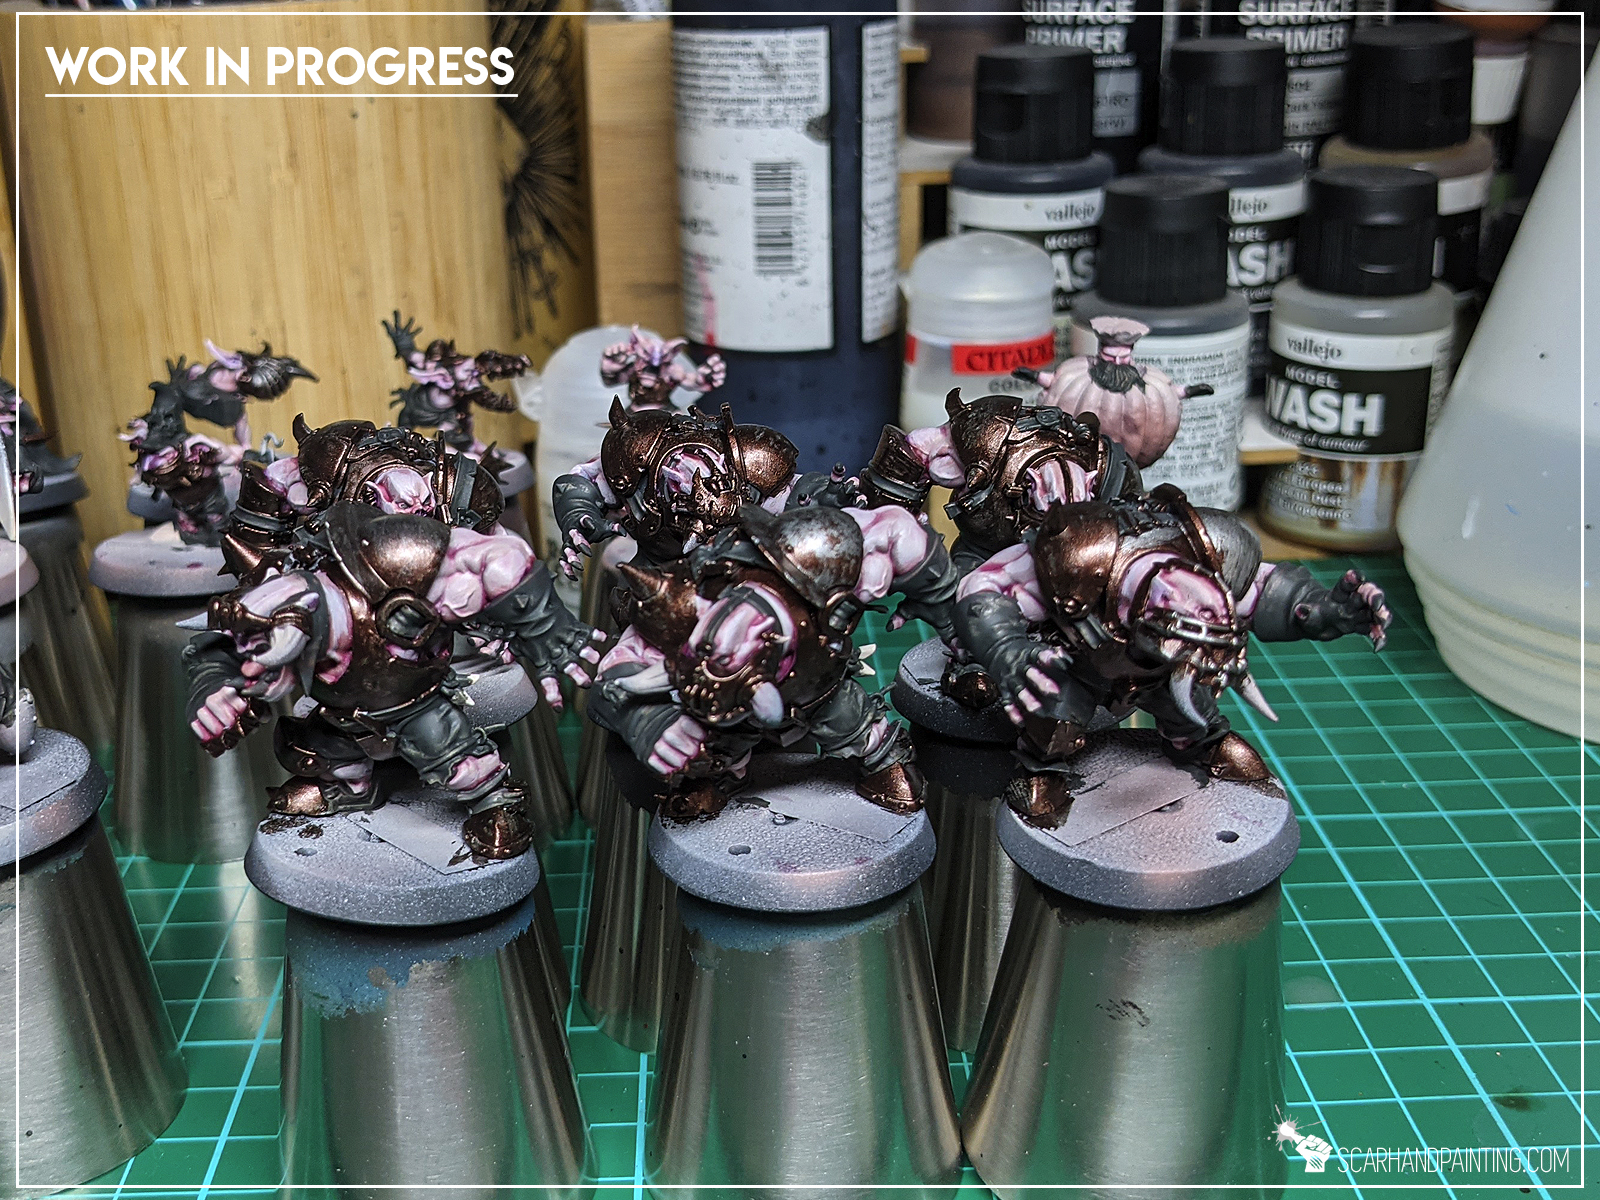
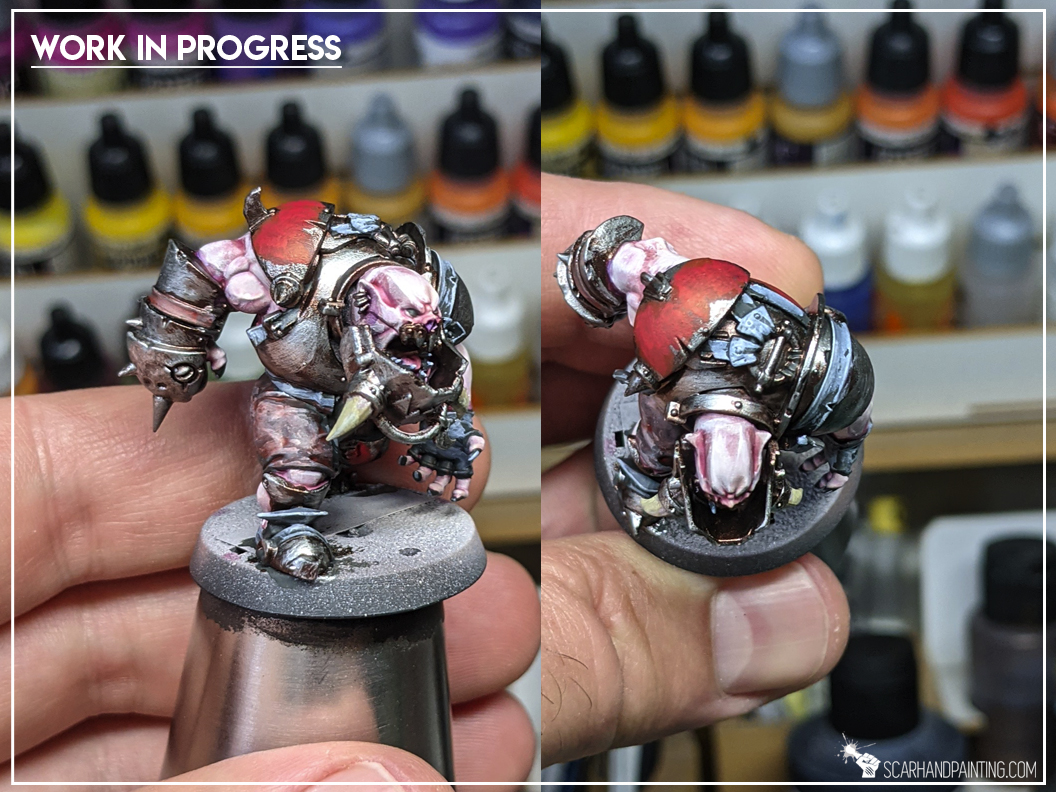
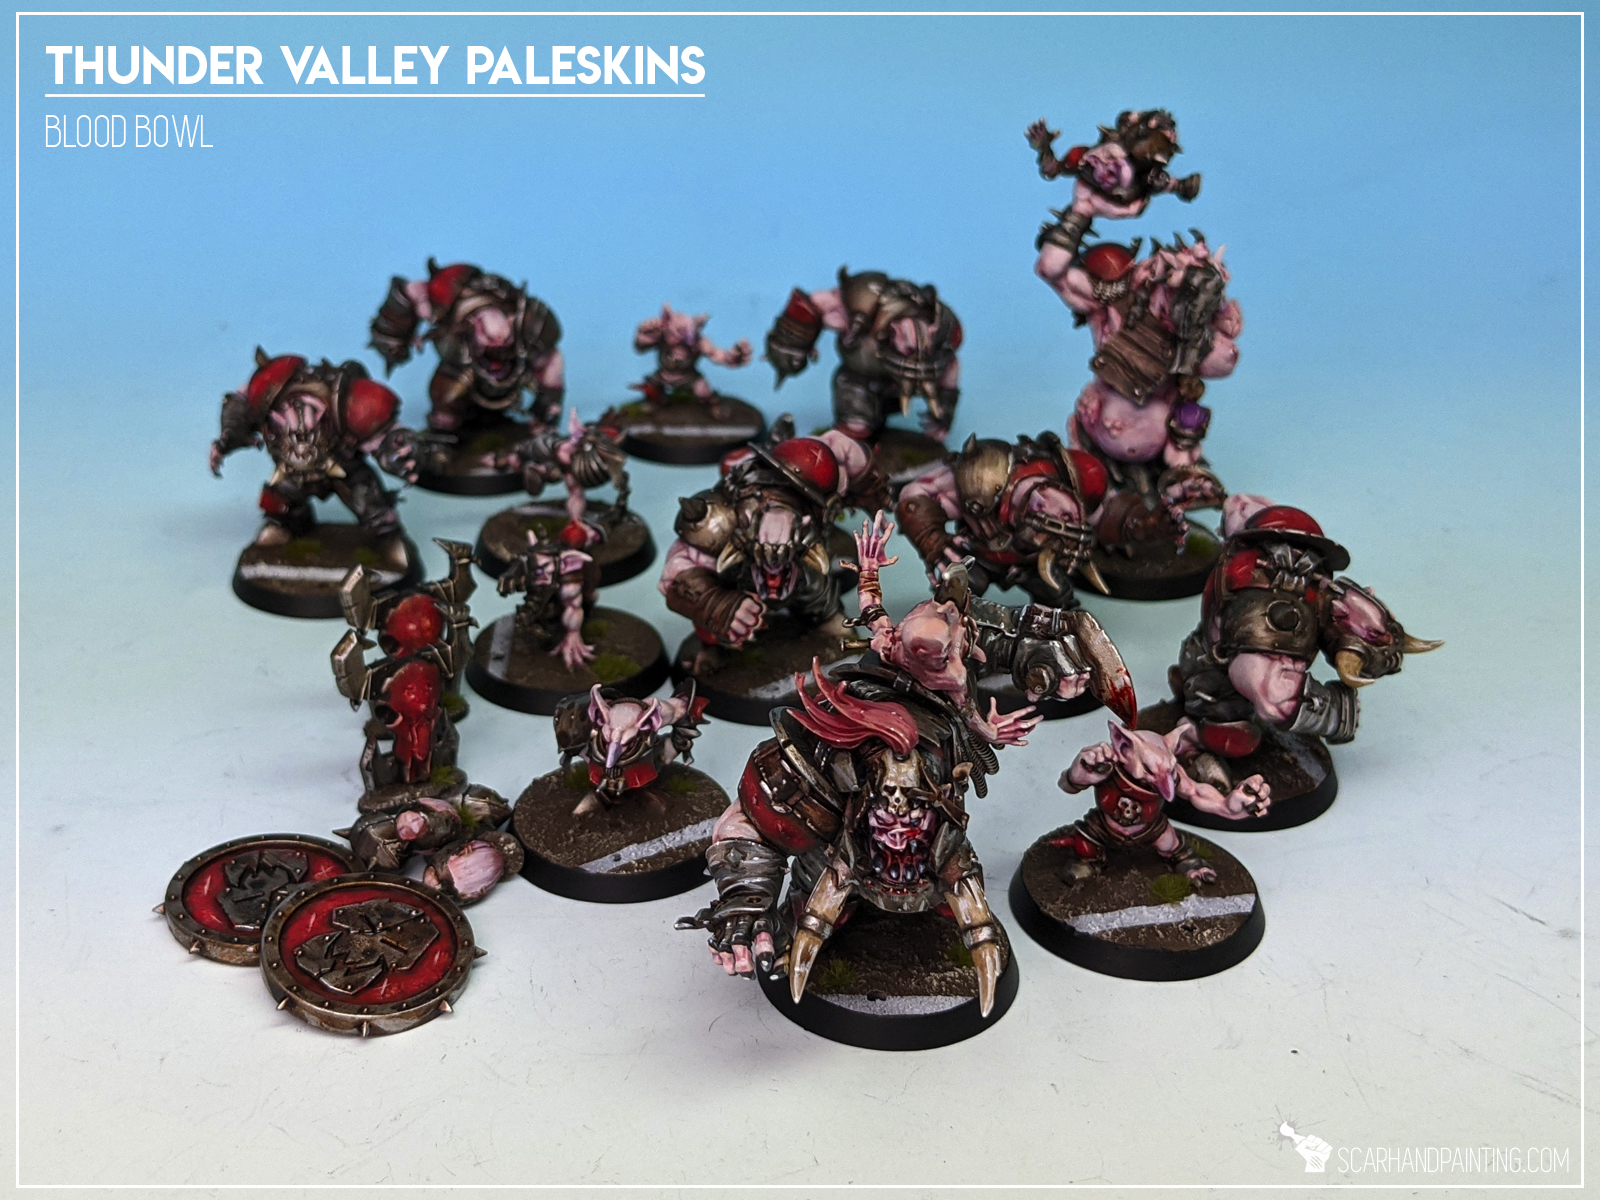
Here are some Colour Recipes for Blood Bowl Black Orcs team from Gallery: Thunder Valley Paleskins. Please take note that this is a simple colour scheme, not covering multiple overlapping layers and blends in between, that lead to the final product. It is supposed to be used as guideline not a step-by-step.
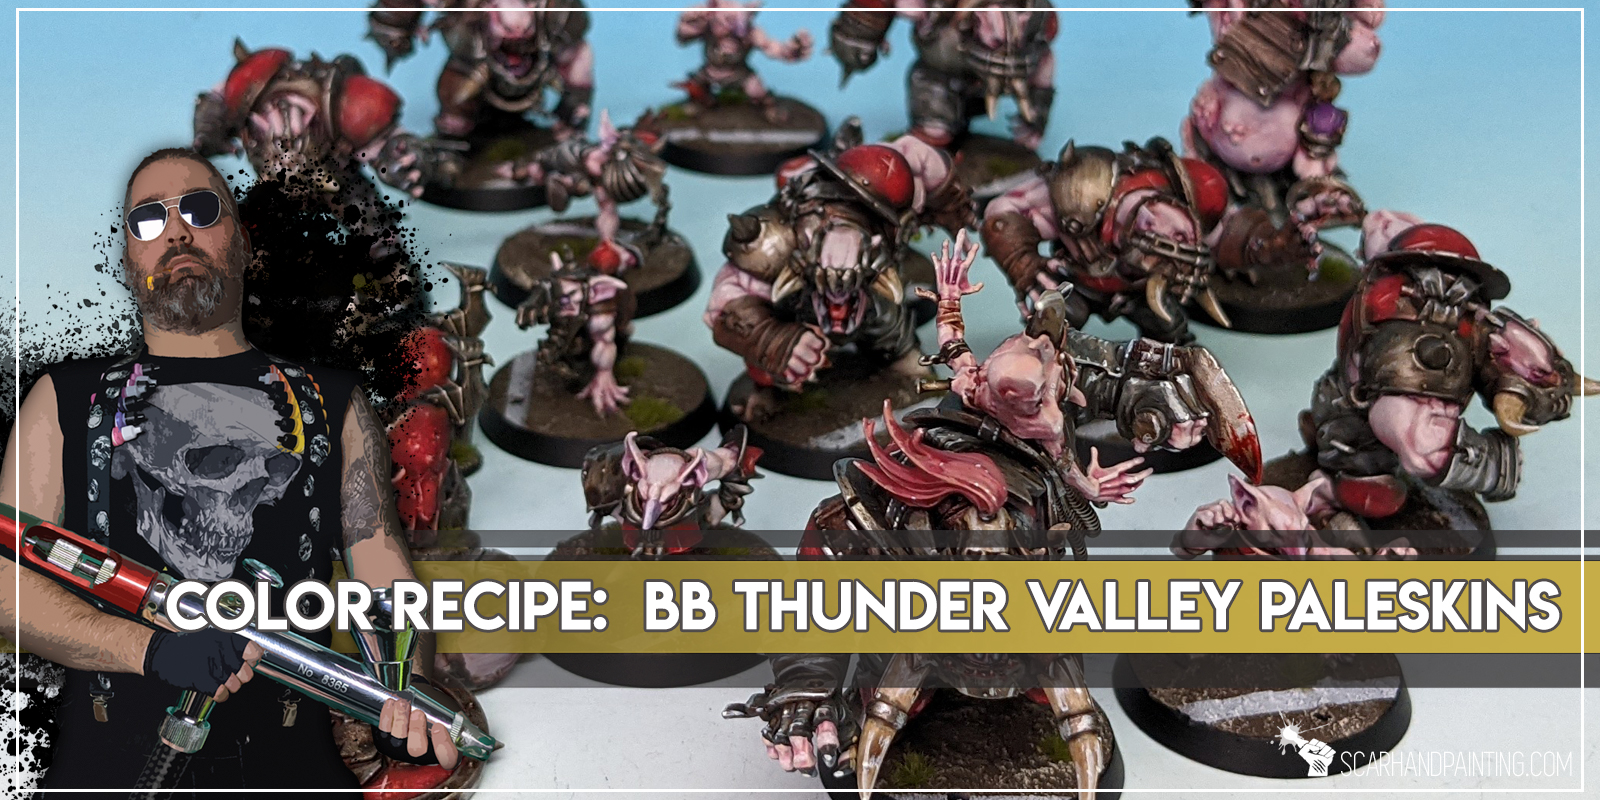
PALE skin:
Mix: Tan (val) 1:3:3 Flesh (val a), Squid Pink (val a), *
Flesh (val a), *
Pale Flesh (val a), *
Mix: Volupus Pink (gw) 1:5 Glaze Medium (gw),
Mix: Volupus Pink (gw) 1:5:1 Glaze Medium (gw), Purple Tone Ink (ap), deep lines
Mix: Volupus Pink (gw) 1:5:1 Glaze Medium (gw), Red Tone Ink (ap), deep lines
Pale Flesh (val), l&p
METAL armour:
Warplock Bronze (gw),
Gun Metal (ap),
Shining Silver (ap), l&p
Mix Strong Tone Ink (ap) 1:1 Soft Tone Ink (ap),
Shining Silver (ap), l&p
RED armour:
Red Terracotta (val), stpl
Flat Red (val), stpl
Strong Tone Ink (ap),
Orange Fire (val), stpl
Flat Red (val), bl
BROWN belts & strips:
Red Terracotta (val),
Pallid Wych Flesh (gw), flbr
Off White (val), l&p
Mix: Scorched Brown (val) 1:1:1 Dark Fleshtone (val), Medium,
Mix: Strong Tone Ink (ap) 1:1 Soft Tone Ink (ap),
GREY clothes:
Panzer DK. Grey (val),
Fenrisian Grey (gw), flbr
Pallid Wych Flesh (gw), l&p
Strong Tone Ink (ap),
Off White (val), l&p
BASES:
Dark Earth (ak texture),
Karak Stone (gw), drbr
Flayed One Flesh (gw), flbr
l&p – lines and points,
p – points,
dl – deep lining,
bl – blend,
gl – glaze,
drbr – drybrush,
fltbr – flatbrush,
lobr – loaded brush,
stpl – stippling,
*Airbrushed (with multiple layers and mixes)
Here are some Colour Recipes for Kings of War: Armada Empire of Dust from Gallery: Armada Empire of Dust. Please take note that this is a simple colour scheme, not covering multiple overlapping layers and blends in between, that lead to the final product. It is supposed to be used as guideline not a step-by-step.

GREY hulls:
Panzer Dark Grey (val), *
Cold Grey (val), *
Mix: Strong Tone Ink (ap) 1:1 Soft Tone Ink (ap),
Medium Sea Grey (val), drbr
Ghost Grey (val), drbr
BRIGHT BROWN decks:
Khaki (val), *
Flayed One Flesh (gw), flbr
Mix: Strong Tone Ink (ap) 1:1 Soft Tone Ink (ap),
Flayed One Flesh (gw), l&p

WHITE sails:
Khaki (val), *
Wolf Grey (val), *
White (val), *
GOLD ornaments:
Tin Bitz (gw),
Molten Bronze (p3), flbr
Shining Metal (ap), l&p
Mix: Strong Tone Ink (ap) 1:1 Soft Tone Ink (ap),
Shining Metal (ap), l&p
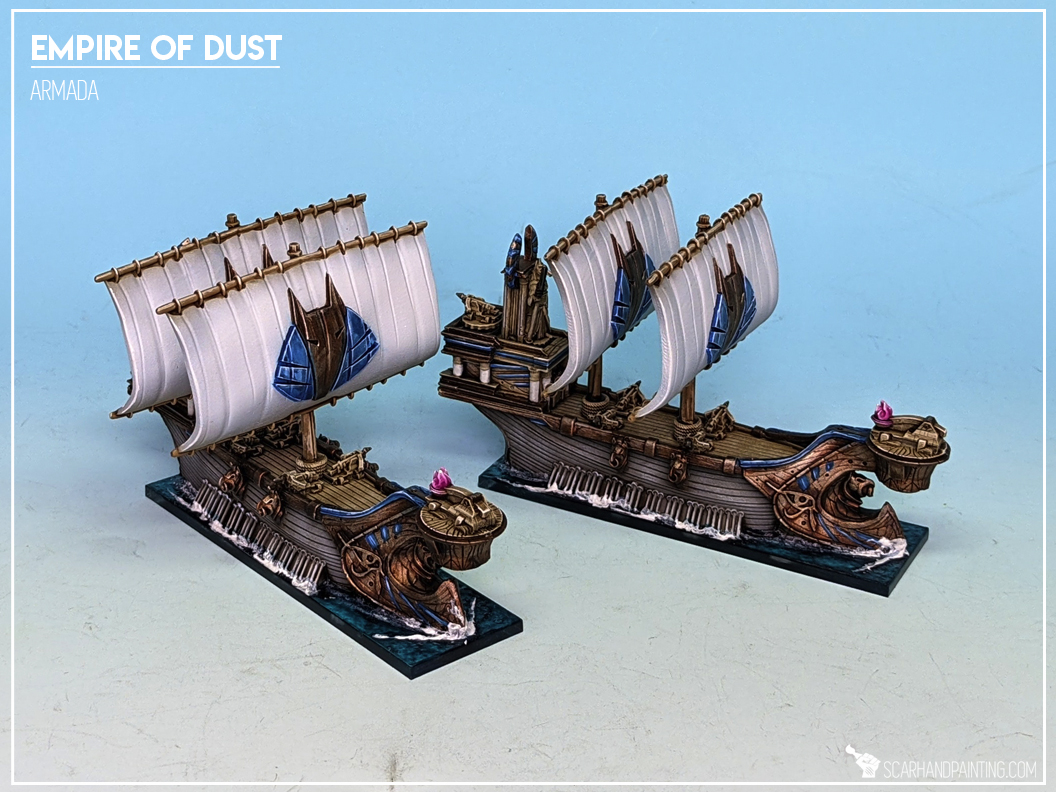
BLUE ornaments:
Magic Blue (val),
Electric Blue (val), flbr
Glacier Blue (val), l&p
Blue Tone Ink (ap),
Glacier Blue (val), l&p
PINK Flames:
Warlord Purple (val),
Mix: Warlord Purple (val) 2:1 Off White (val), flbr
Off White (val), l&p
Purple Tone Ink (ap), wash

l&p – lines and points,
p – points,
dl – deep lining,
bl – blend,
gl – glaze,
drbr – drybrush,
fltbr – flatbrush,
lobr – loaded brush,
stpl – stippling,
*Airbrushed (with multiple layers and mixes)
Here are some Colour Recipes for Infinity Haqqislam from Gallery: Quapu Khalqi. Please take note that this is a simple colour scheme, not covering multiple overlapping layers and blends in between, that lead to the final product. It is supposed to be used as guideline not a step-by-step.
BLACK/GREY outfits & weapons:
Black Undercoat,Panzer DK Grey (Val),
Panzer DK Grey (Val a), *
Barely Grey (Val a), *
Wolf Grey (val a), flbr
Pallid Wych Flesh (GW), l&p
Dark Tone Ink (AP), wash
Pale Wych Flesh (GW), l&p
Off White (Val), p

TURQUOISE armor:
Coal Black (P3),
Hydra Turquoise (AP), flbrMix Hydra Turquise (AP) 5:1 Pale Wych Flesh
GW), flbr
Arcane Blue (P3), l&p
Coelia Greenshade (GW), wash
Pale Wych Flesh (GW), l&p
Off White (Val), p
SKIN:
Carne Marron Tan (Val), Flow
Dwarf Skin (Val a),
Flesh (Val a), l&p
Mix Strong Tone Ink (AP) 1:1 Soft Tone Ink (AP),
Flesh (Val a), l&p
Pale Flesh (Val), l&p
BROWN elements:
Black/Grey outfits base,
Mix Hull Red (Val a) + Soft Tone Ink (AP), blend
Karak Stone (GW), l&p
Flayed One Flesh (GW), l&p
GREEN osl:
Olive Green (Val),
Duck Egg Green (Val a), * / standard
Pale Wych Flesh (GW),
Light Livery Green (Val a),
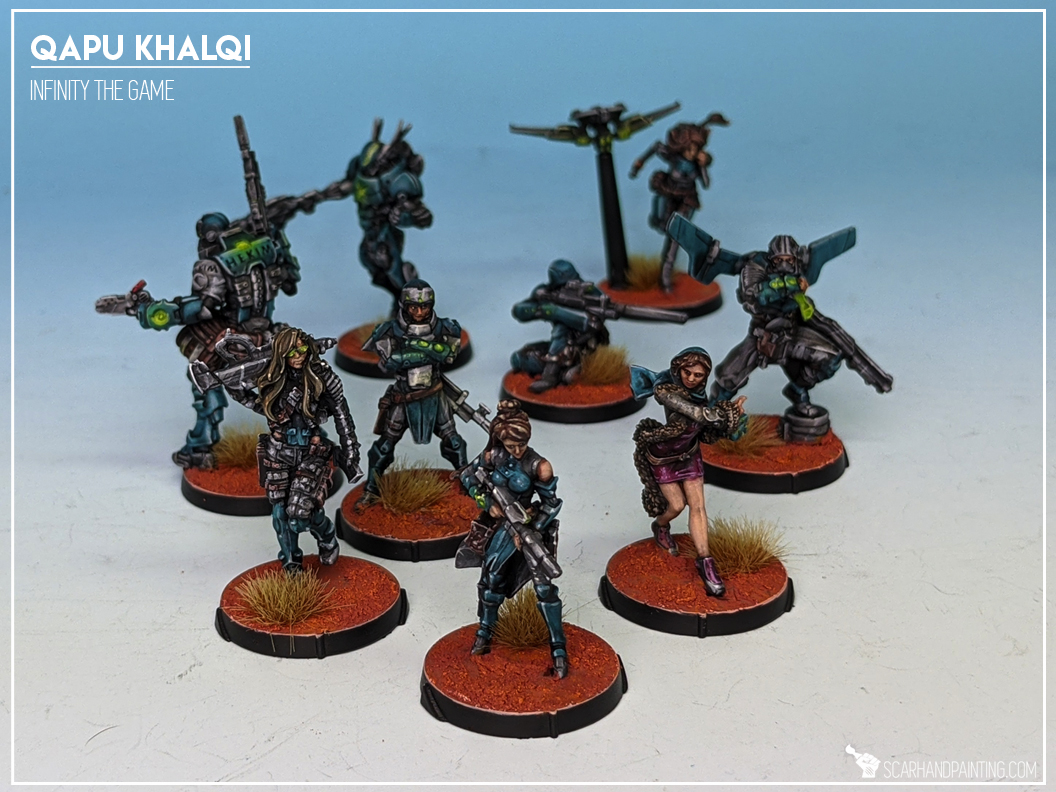
MARTIAN BASES:
German Red Brown (Val),
Martian Ironcrust (GW t),
Martian Ironearth (GW t),
Orange Fire (Val), drbr
AP Mountain Tufts & Paint Forge Steppe Tufts 12mm
l&p – lines and points,
p – points,
dl – deep lining,
bl – blend,
gl – glaze,
drbr – drybrush,
fltbr – flatbrush,
lobr – loaded brush,
stpl – stippling,
*Airbrushed (with multiple layers and mixes)