- contact@scarhandpainting.com


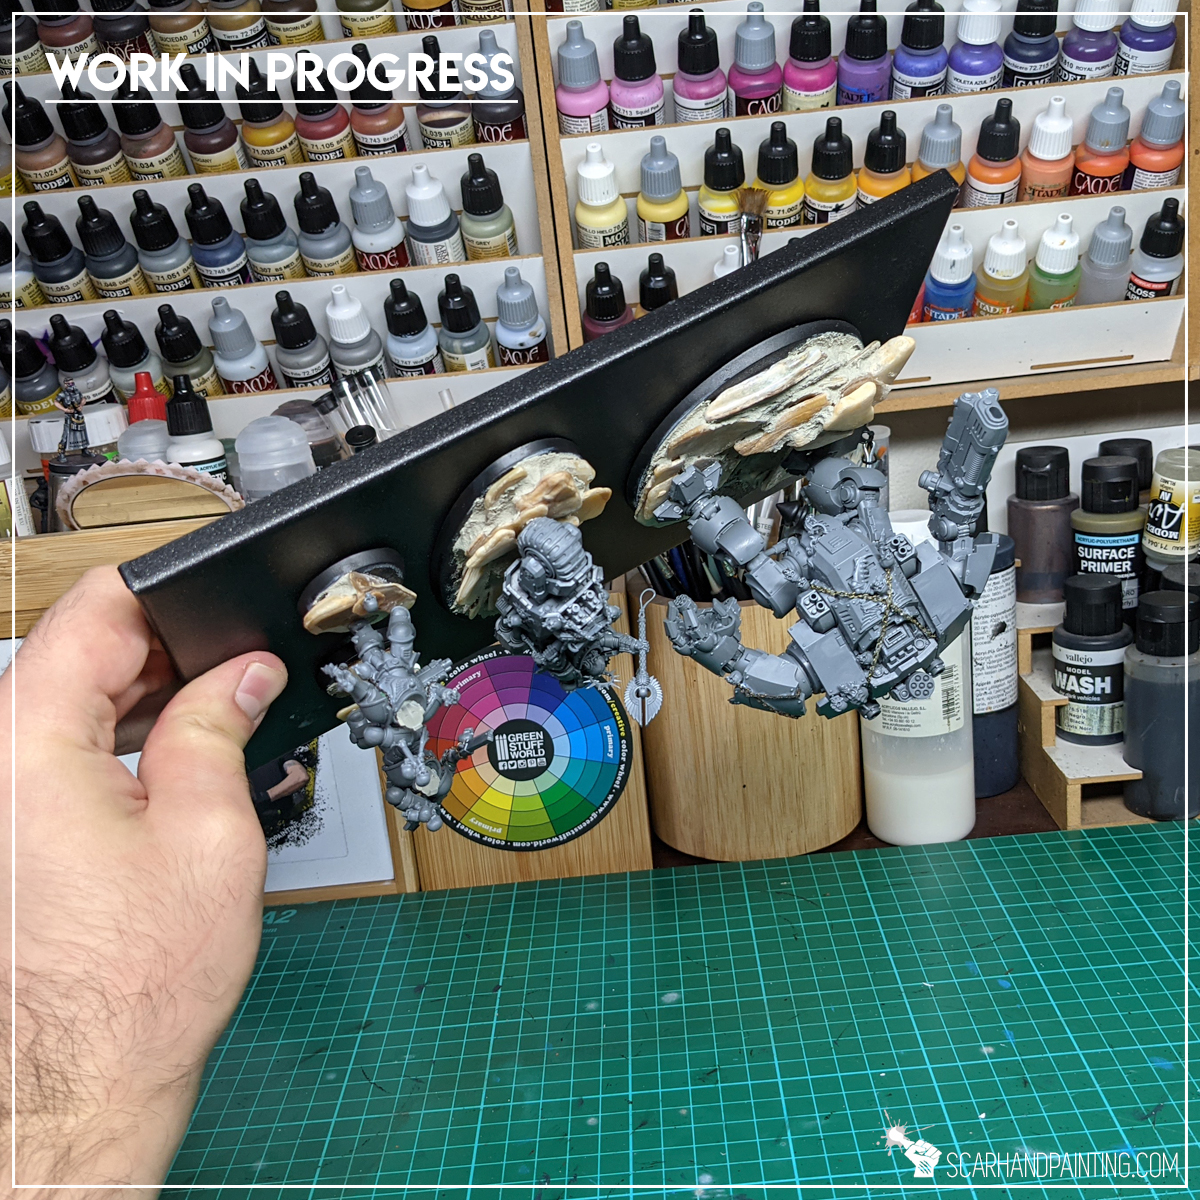
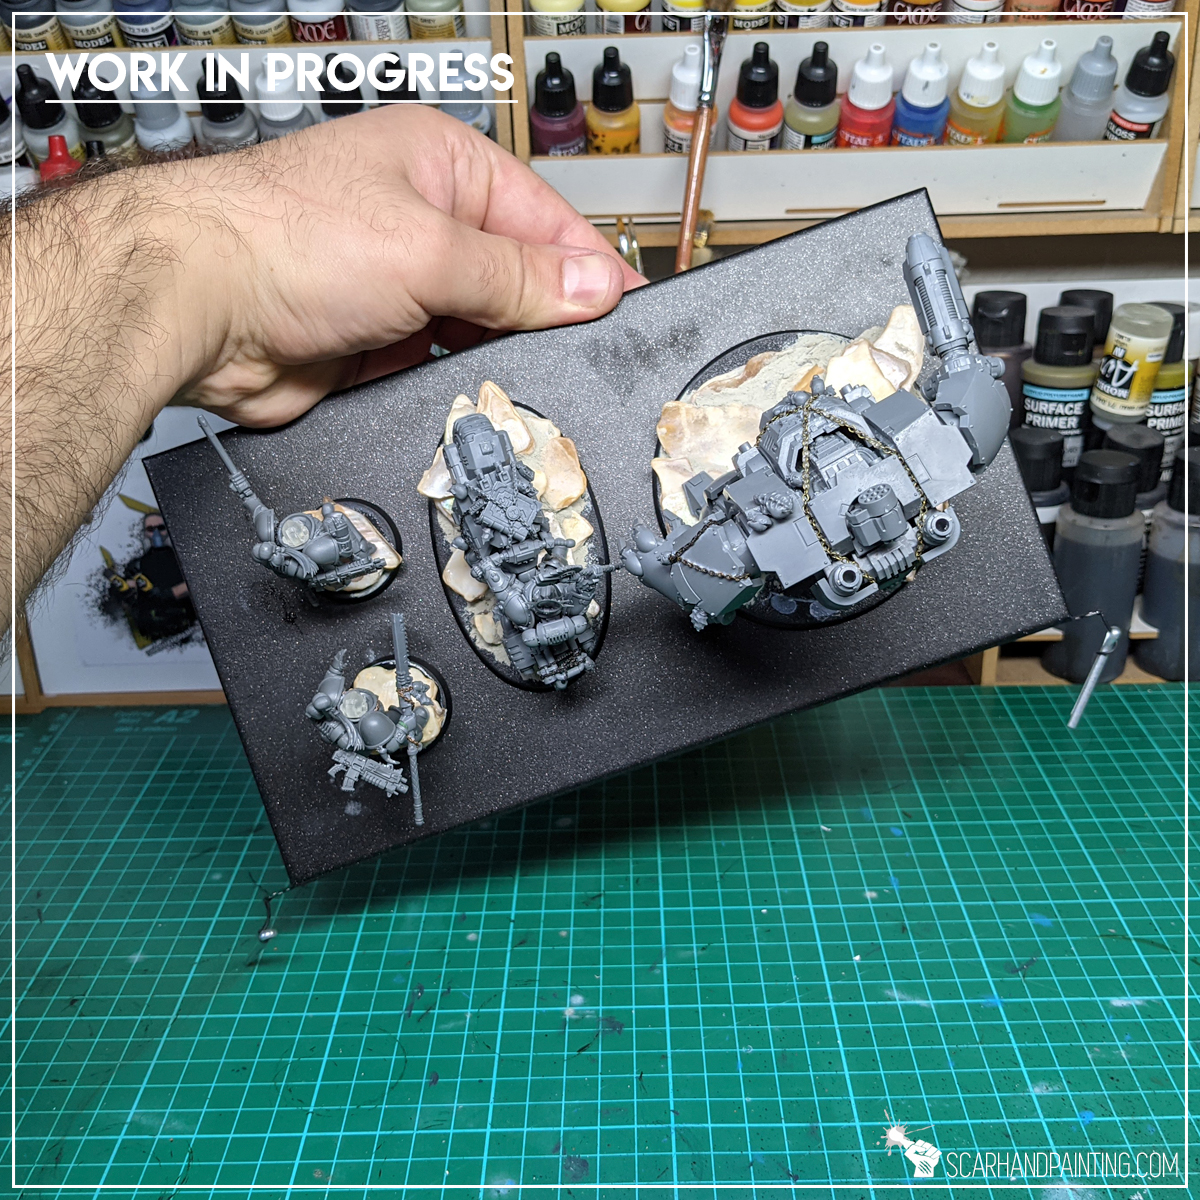
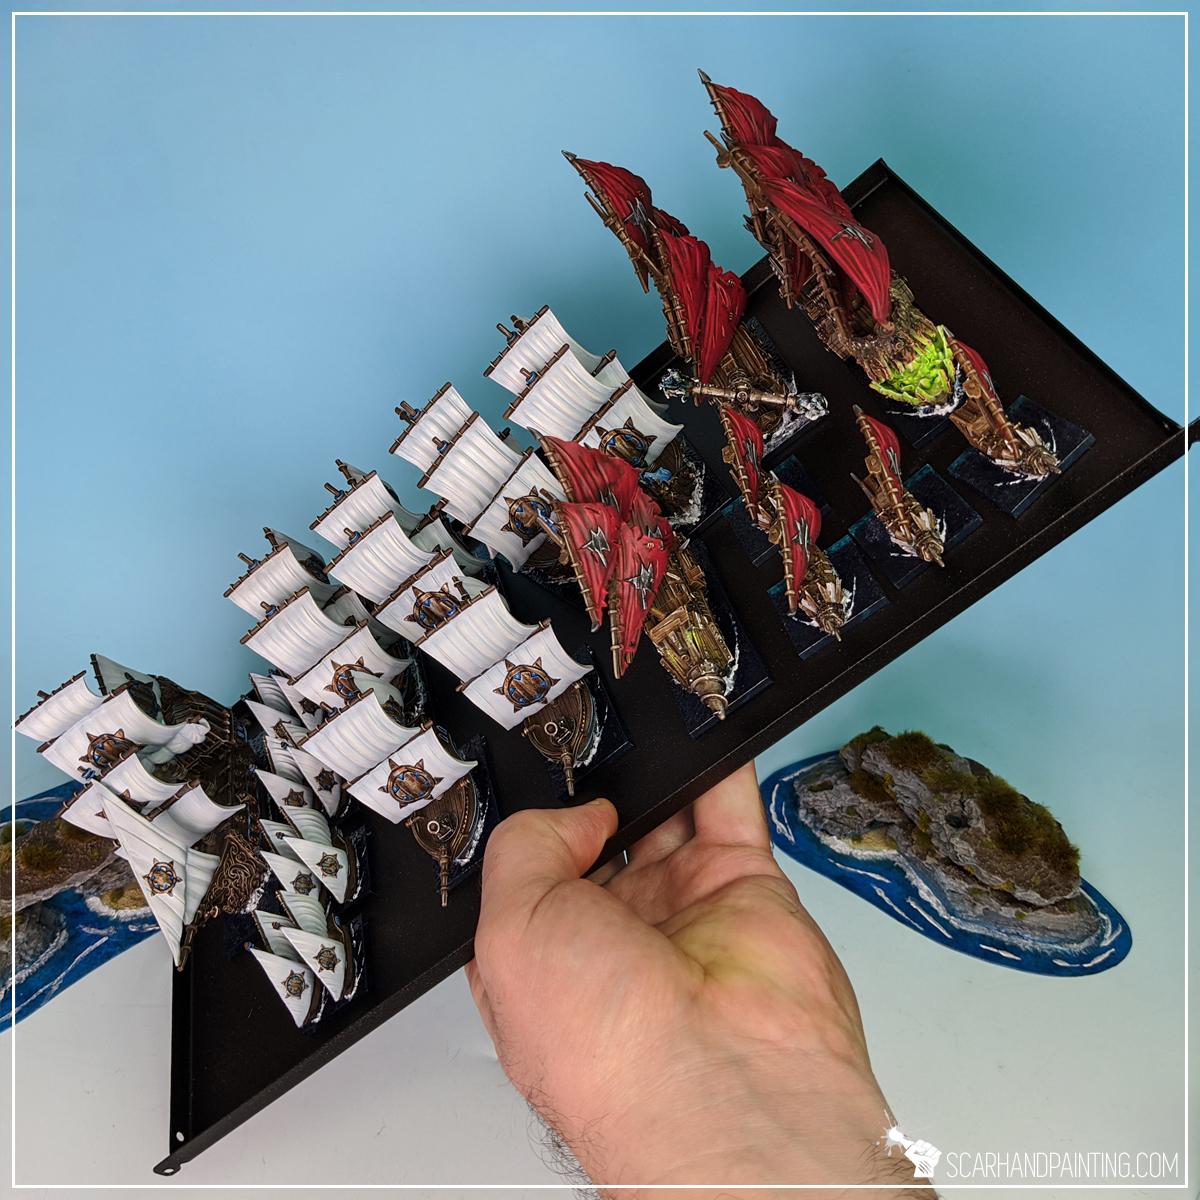
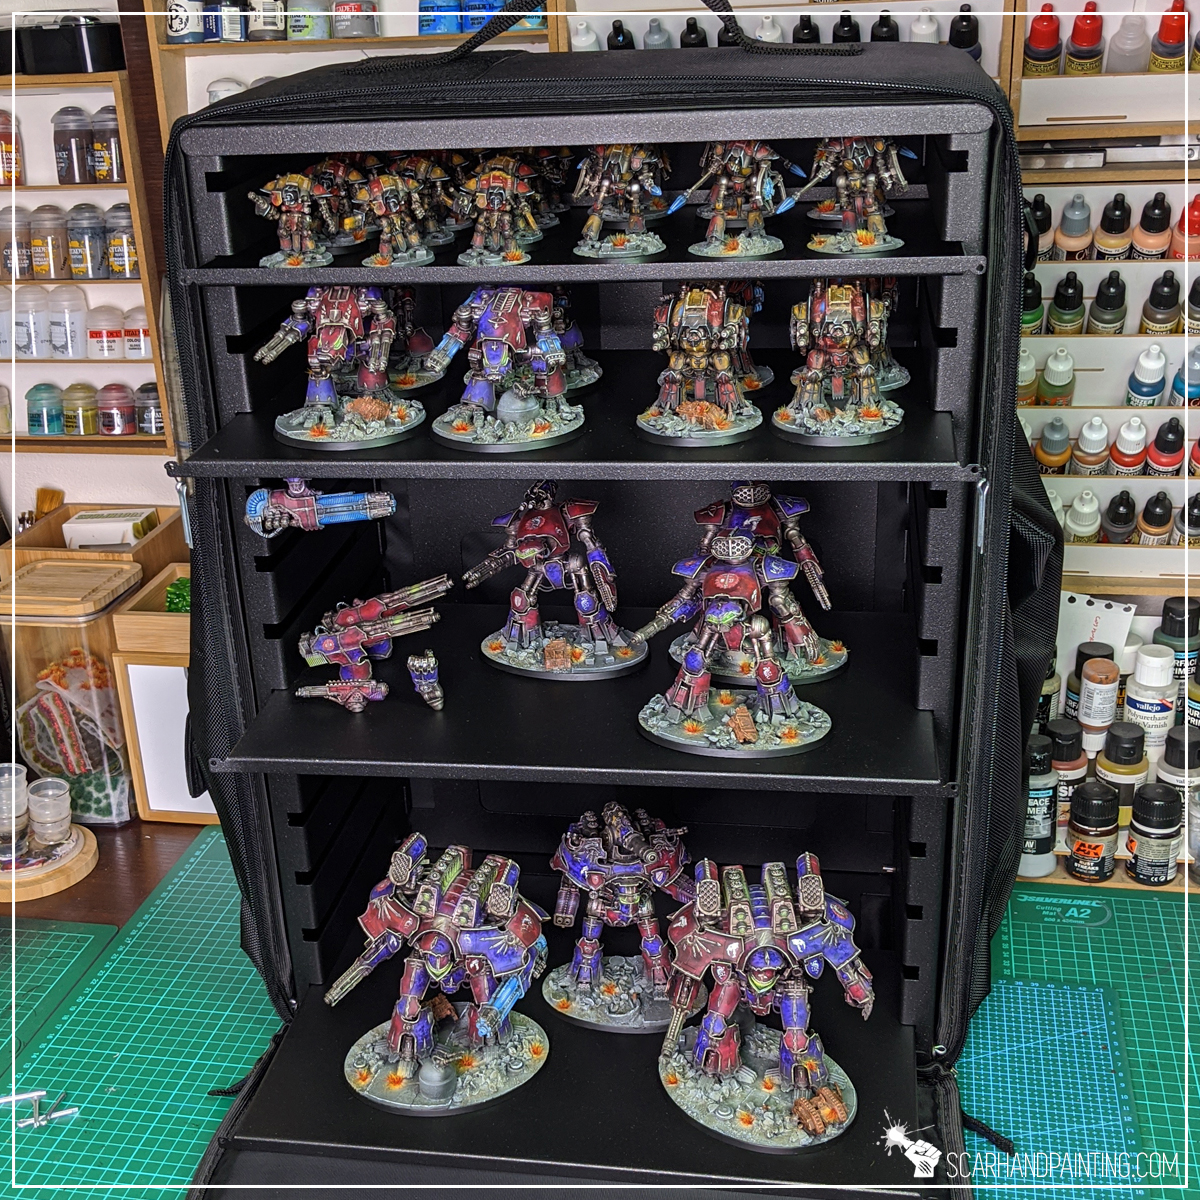
Magnetized bases is nowadays new hotness when it comes to miniatures transportation. This solution allows for comfortable transportation and fast deployment of your army. Once commited to this form of handling your plastic dudesmen, you will probably go back and magnetize all of your stuff. Regardless of choice of container, be it a professional carrying case like A-Case, or just a plain paper box with a piece of metal mounted at the bottom, first thing to do is actually magnetizing the bases.
And here’s where word of mouth and slight issues might discourage you from this glorious path to ultimate wargaming comfort. The internet is full of common misconceptions about magnetized miniatures. That is because a lot of hobbyists decide to go the most straightforward way and just glue a random magnet to the underside of a base YOLO style. This might result in a magnet falling off a base mid-transport, which in turn might transform your precious collection into a pile of scrap. Below I will show you how to avoid this fate with a very easy life hack.
Before we start, some notes:
This tutorial focuses on Games Workshop bases specifically as they tend to have empty undersides.
For conveniences sake I highly recommend magnetizing bases before painting.
Please take note that what works for me might not necessarily work for you.
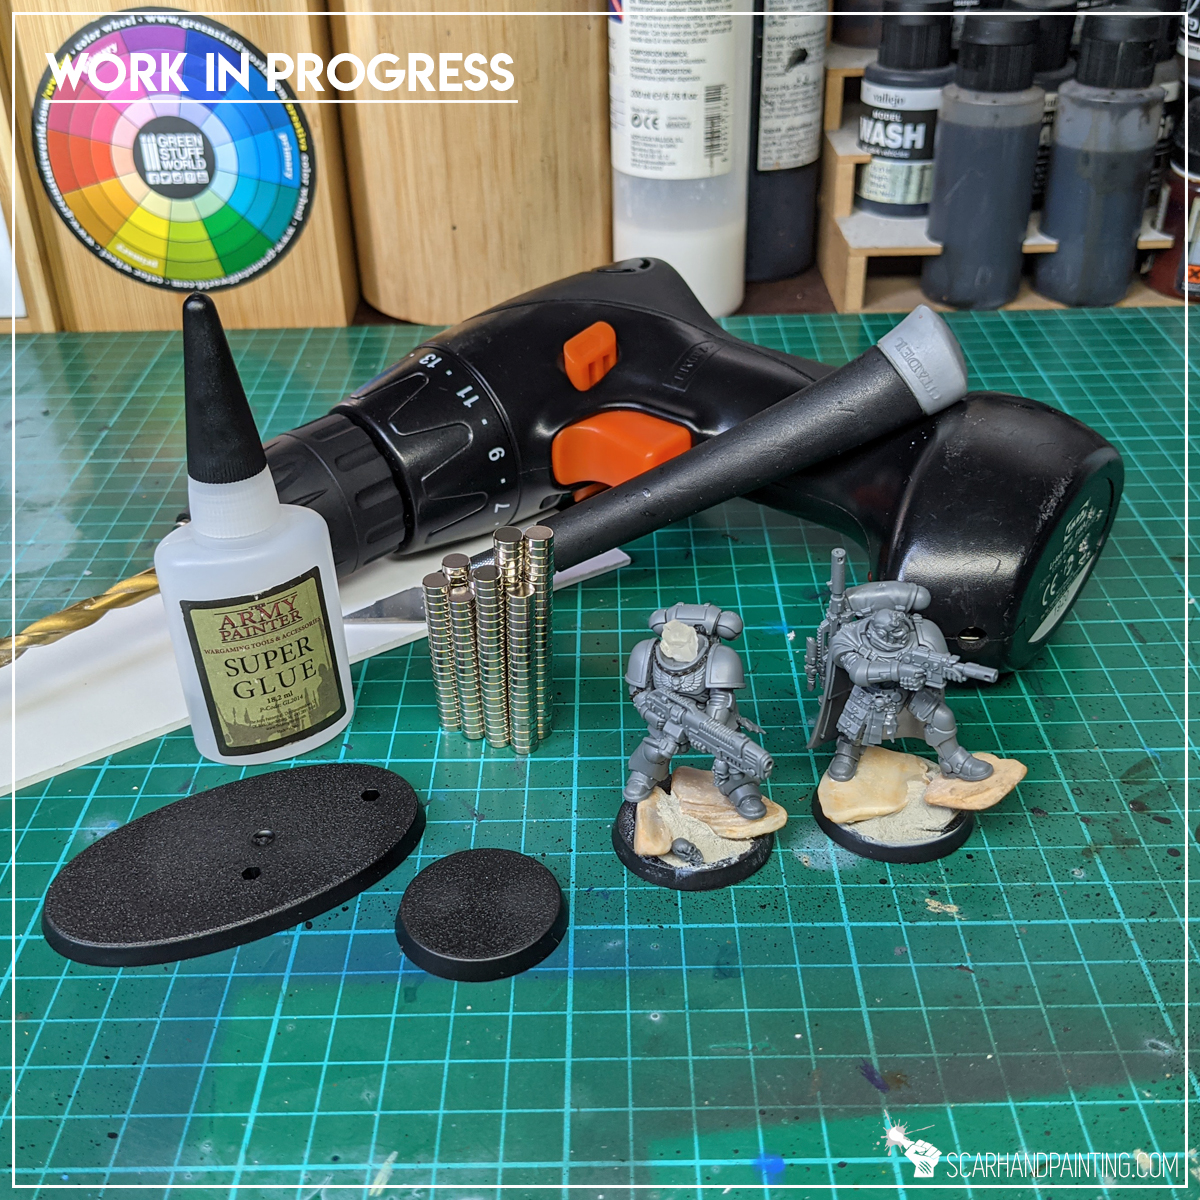
Let’s start by toppling the topic of magnets falling off a base. This happens because the entirety of miniature’s weight is held in place by a relatively tiny spot of contact between a magnet and a base. The smaller the area of contact and the heavier a miniature – the more probable a COVFEFE in your carrying case. To avoid this, but also keep the size of magnets reasonable, I propose to use sockets. A socket extends the area of contact to the sides of a magnet and greatly increases strength with which the magnet is held in place. A proper material for a socket will also increase the bond between the magnet and plastic base.

Another thing is choosing a right size and the amount of magnets for each miniature. Personally I tend to go with two magnets for infantry, three to four for large infantry and cavalry and more for anything larger, depending on weight. The size of these varies depending on what bases I work with. For Games Workshop bases I go with 5x2mm magnets, which work as a charm, providing just enough strength to keep miniatures in place, but not as much as to prevent me from comfortably picking the miniatures.
Boy oh boy, so much theory… “where’s the actual tutorial?!” you might ask. Ok, let’s just go straight for the easy step-by-step.
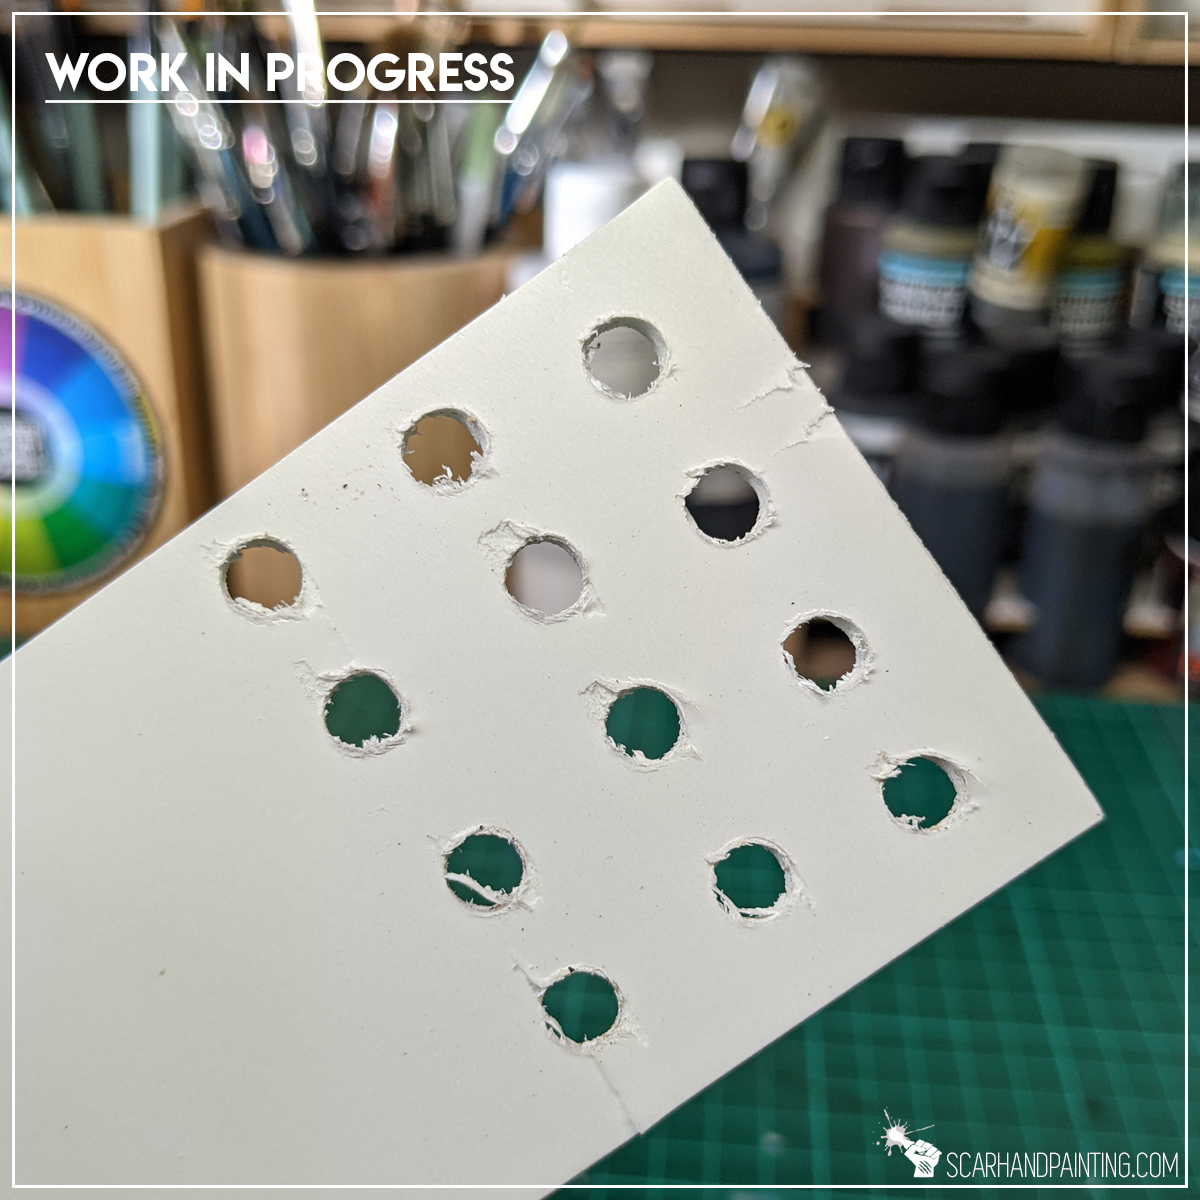
Step one: the PVC
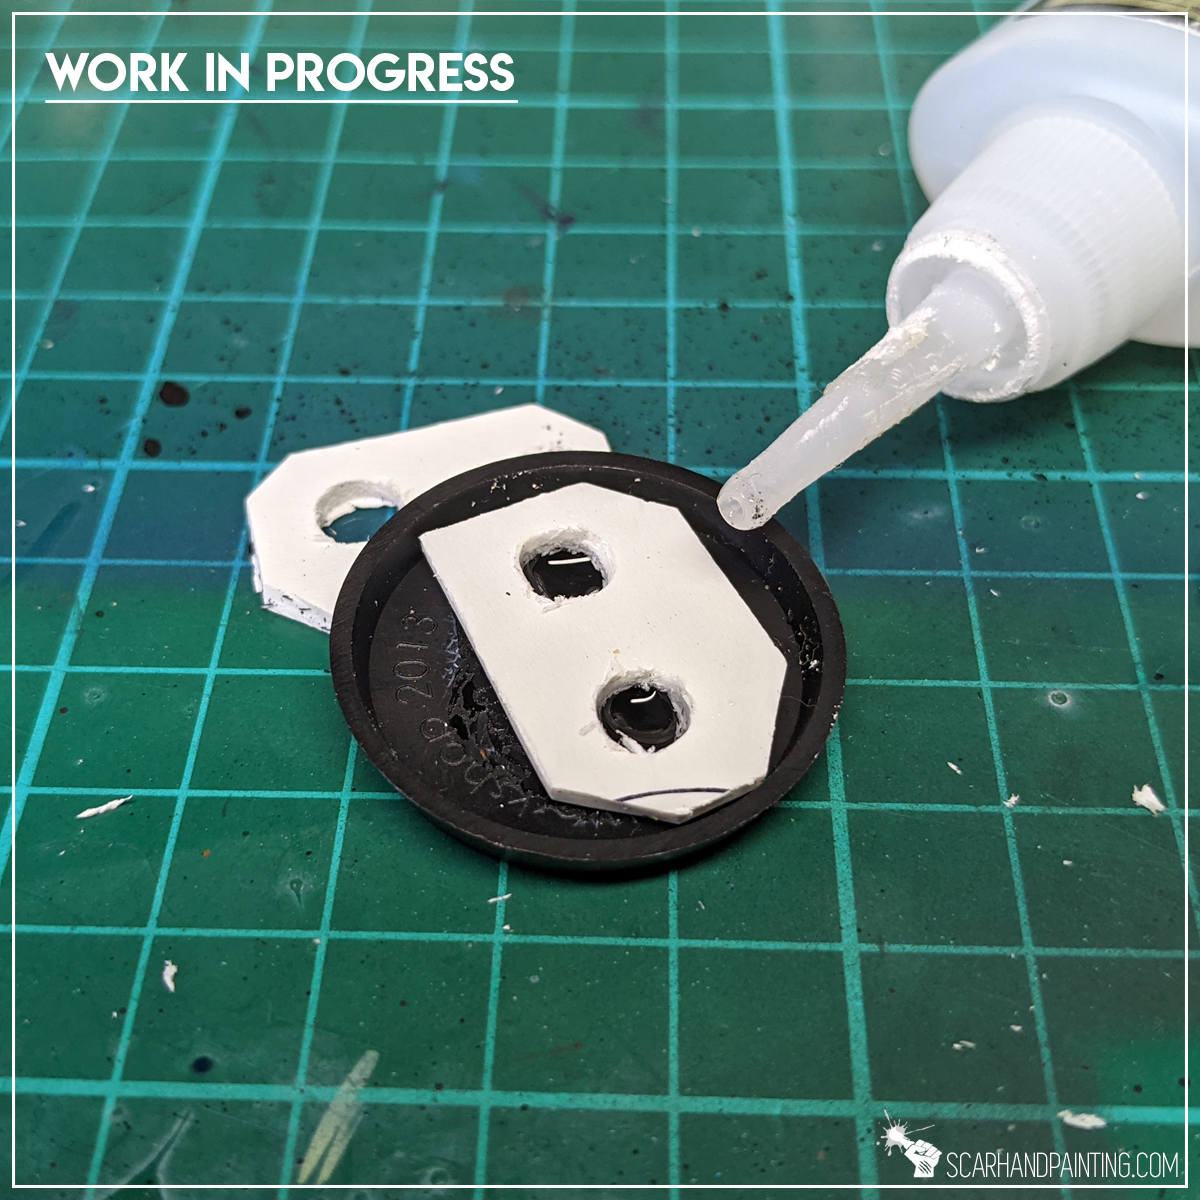
Start by drilling holes in the PVC one beside another with few mm in-between. No need to be very precise. Once done, use a hobby knife to cut the PVC into small two-holes pieces, as seen in the picture below. These are now “sockets” to hold the magnets in. Test if all sockets fit the bases, make some adjustments if necessary.

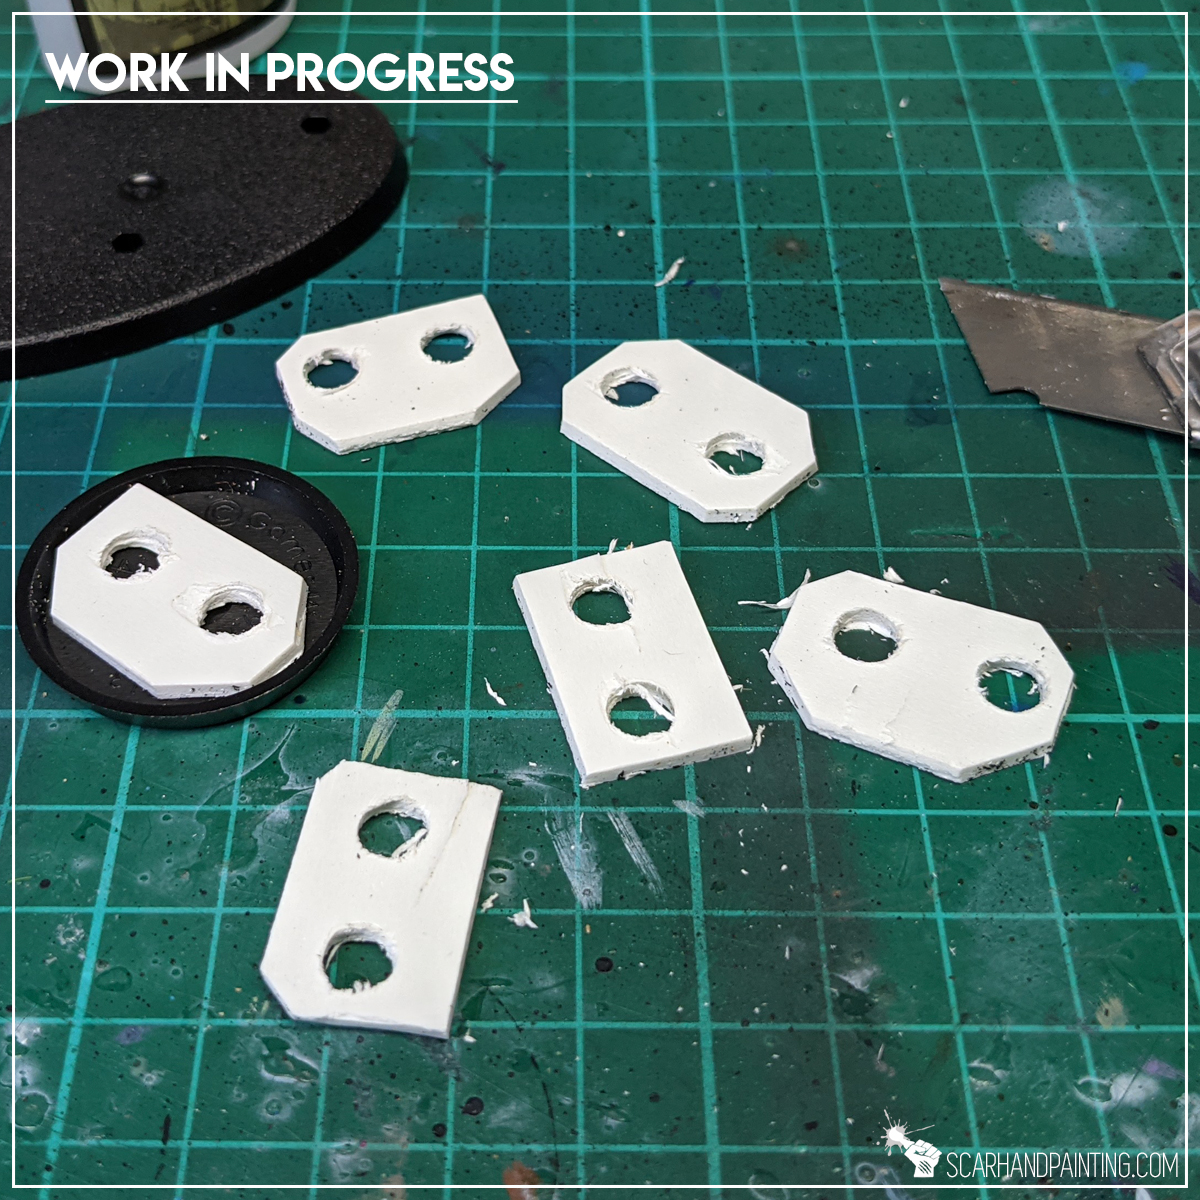
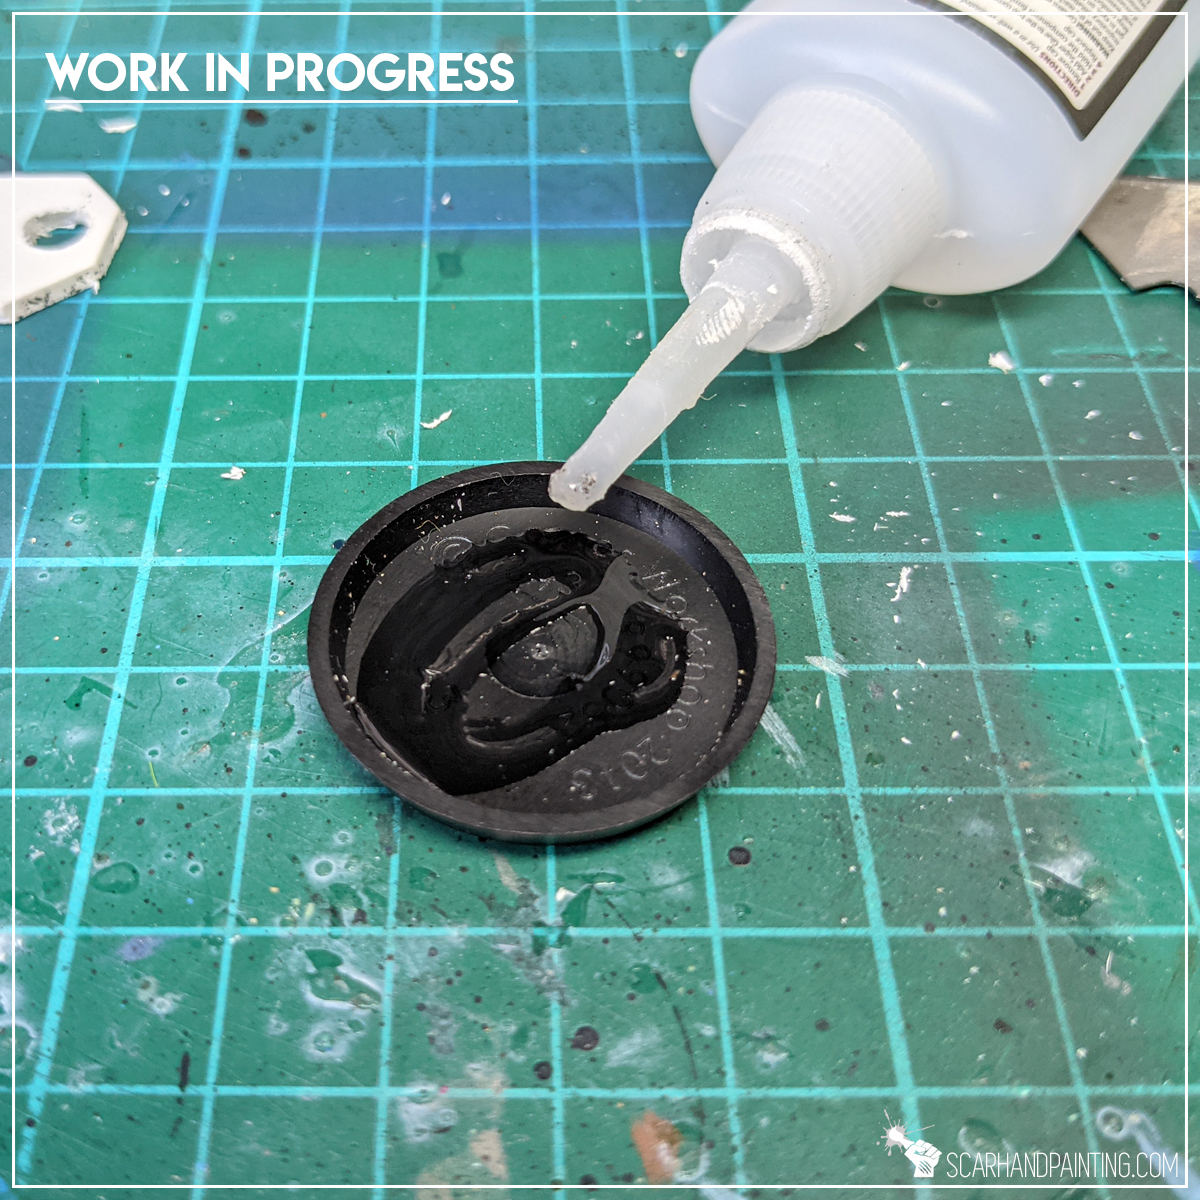
Step two: Mounting Sockets
Turn the base upside down, apply some Super Glue onto the surface and glue the socket on top. Avoid sticking your fingers through the holes as you might end up becoming one with the base by accident 🙂

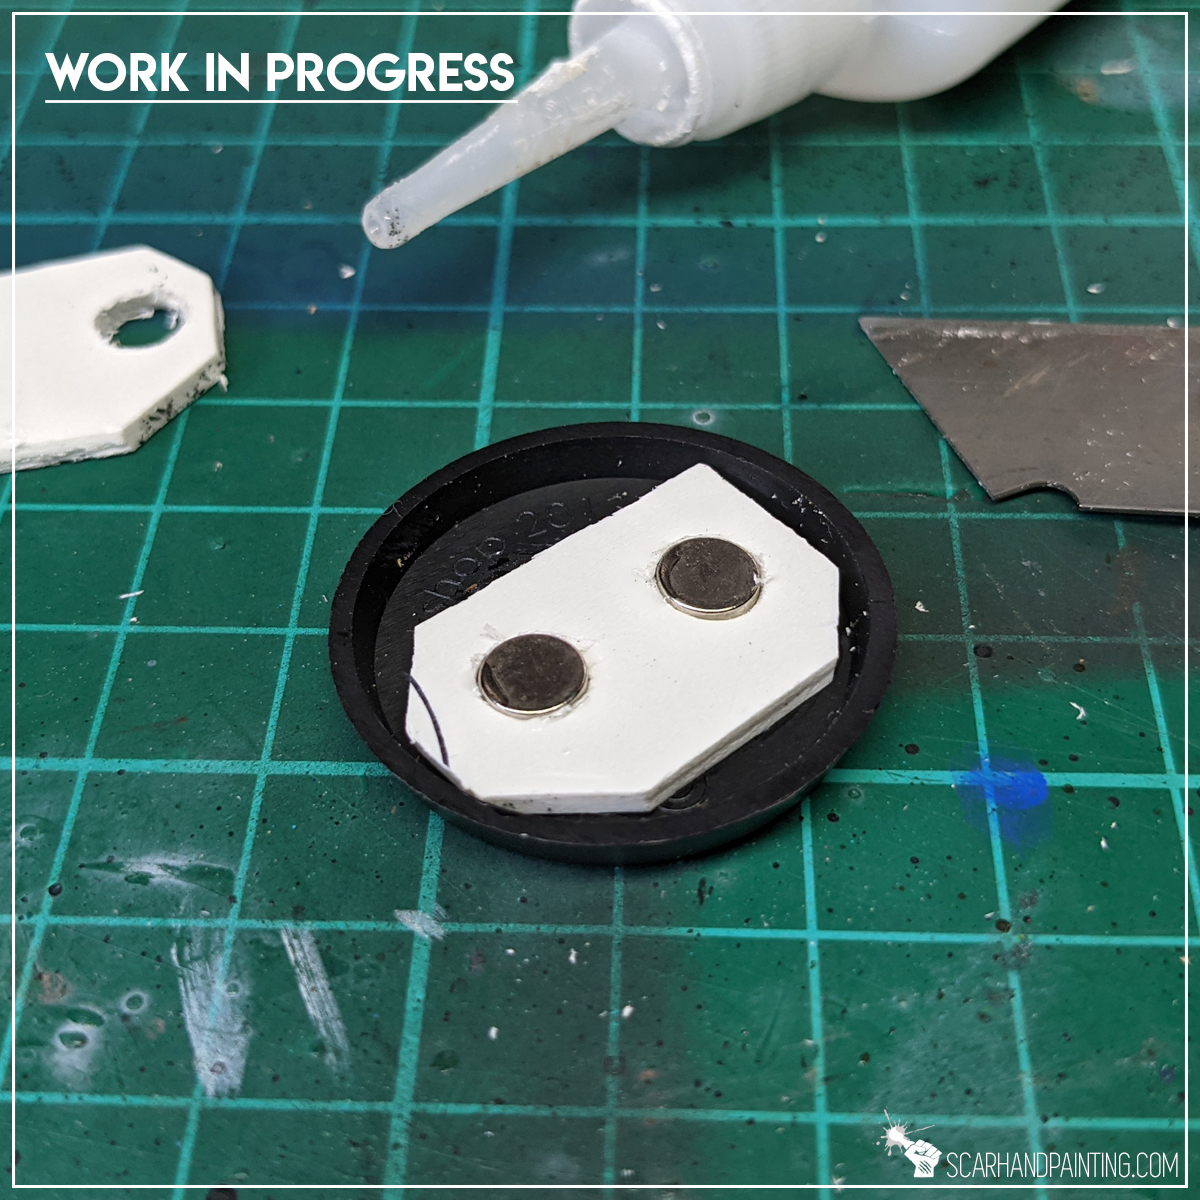
Step three: the Magnets
Apply Super Glue into the sockets and glue the magnets in. Try to glue all the magnets in same direction for better effect. I found that it is better to put the magnet just barely into the socket, then flip the base and push it on top of a flat surface. This way the magnet will slide inside a socket up to a level of the base’s edge, thus providing good connection to a future metal transportation surface.

Hey! That’s it! These three simple steps will greatly increase your magnets (and miniatures) survivability during transportation. I’ve been using this solution for couple of years now, with no bad experience what so ever and I hope it will work for you just as well.


I hope you find this tutorial interesting. Be sure to let me know your thoughts in the comments below or via Facebook.or Instagram. I would also appreciate if you considered sharing this content with your hobby buds, who might find it useful. Finally if you are looking for a professional miniatures painting service be sure to contact me via this contact form. I always reply within 24 hours, after which please check out your spam folder.
Cheers!
2 comments so far
KylePosted on4:06 pm - Mar 7, 2024
Dude, this is freaking *genius*. Will definitely be doing this when my case and metal trays show up today. Thanks so much!
ScarhandpaintingPosted on5:02 pm - Mar 7, 2024
Thank you very much for the appreciation. I have been testing this for some time now and can say that making holes with a Dremel (mini grinder) instead of a drill is far more precise and time-effective. Also there are some alternative ways to magnetize GW bases that are far less invasive and faster: I have made a short video presenting one such a way that I tend to use right now: https://www.instagram.com/reel/C2kqrUuBW-_