- contact@scarhandpainting.com


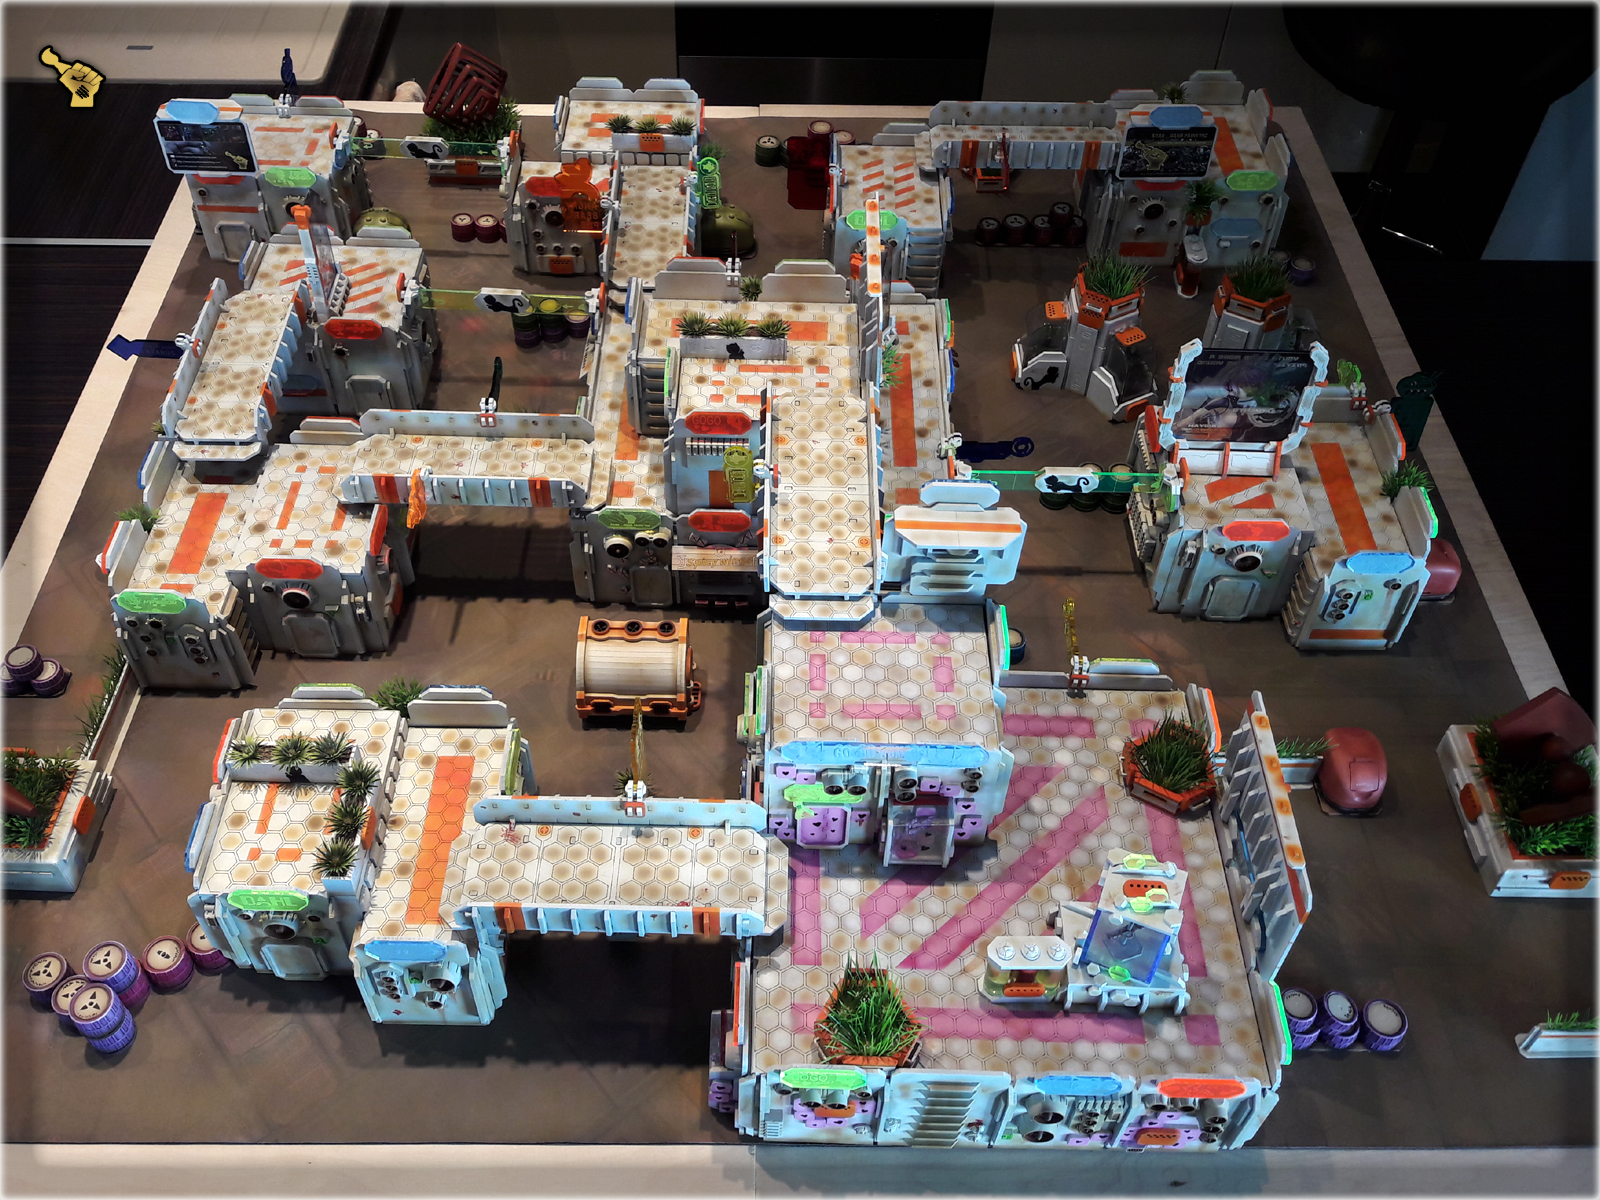
“The Colony” – an Infinity gaming board project that streaches in time and space.
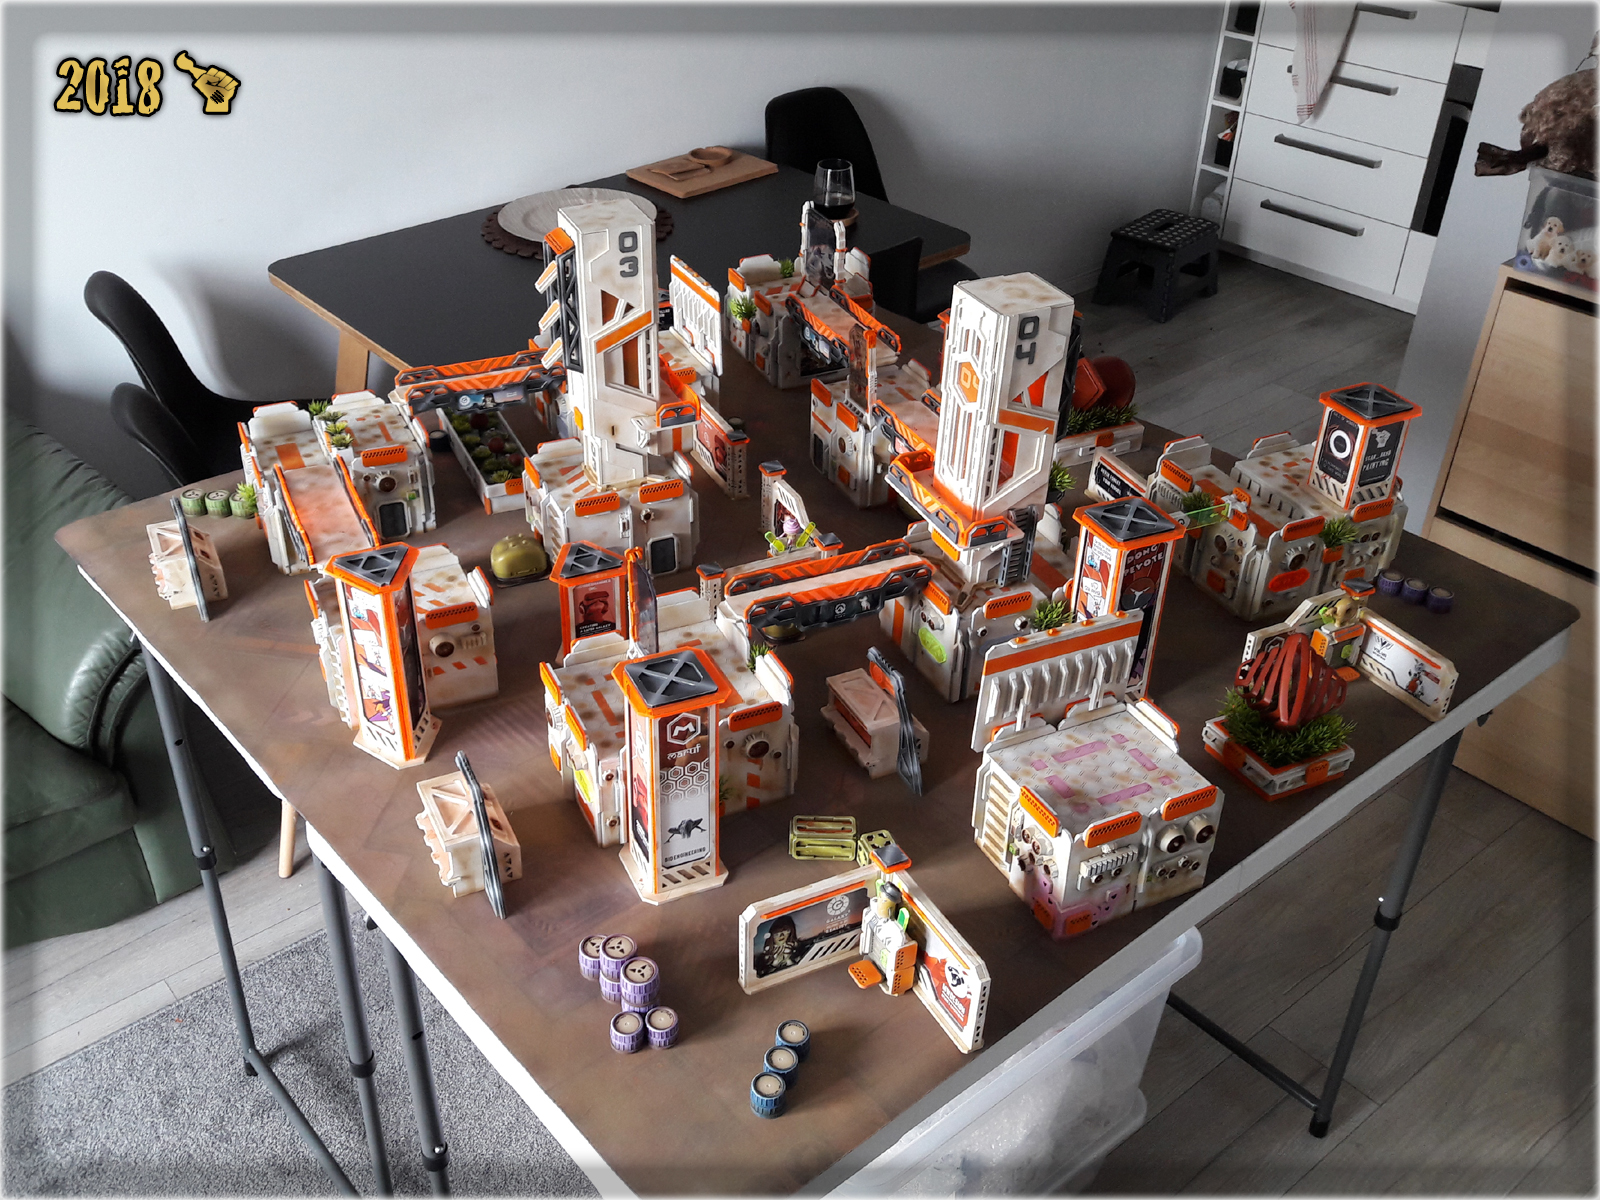
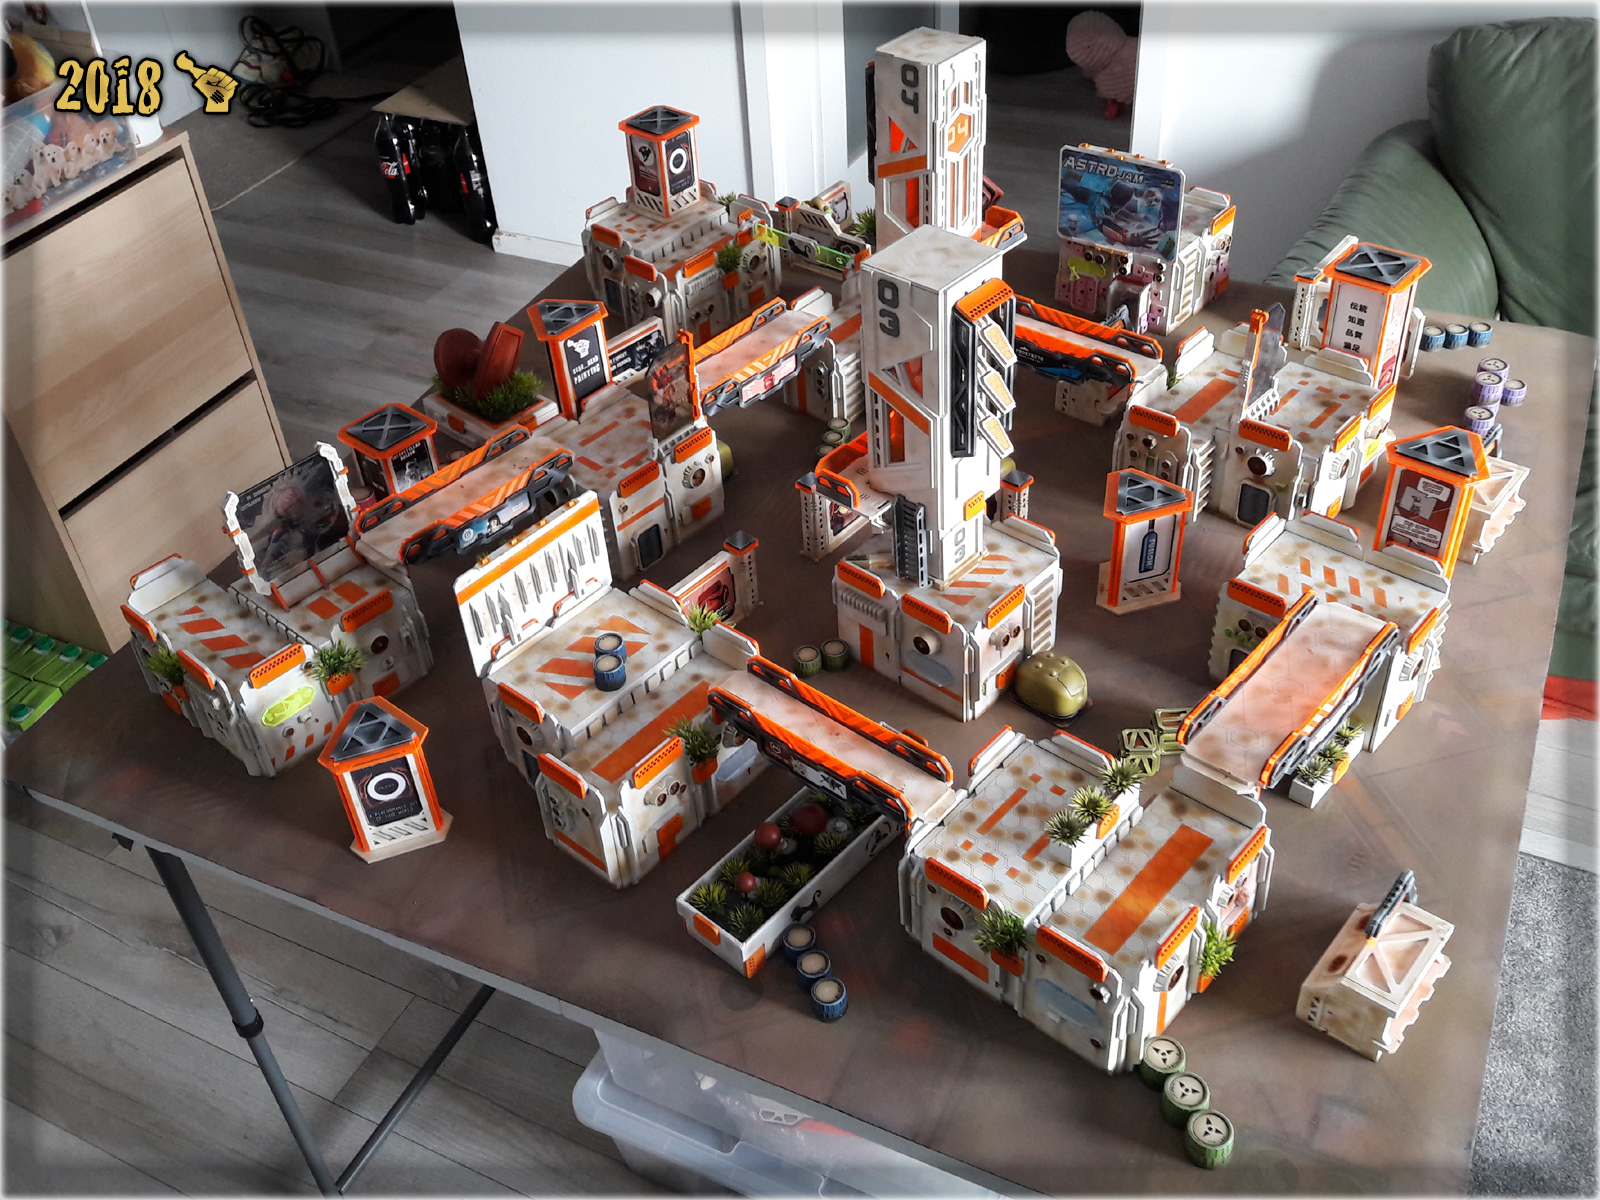
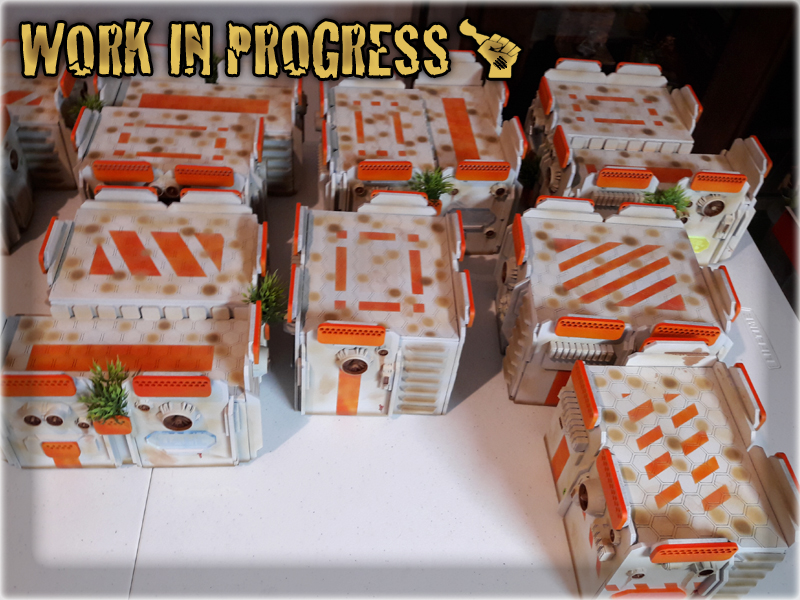
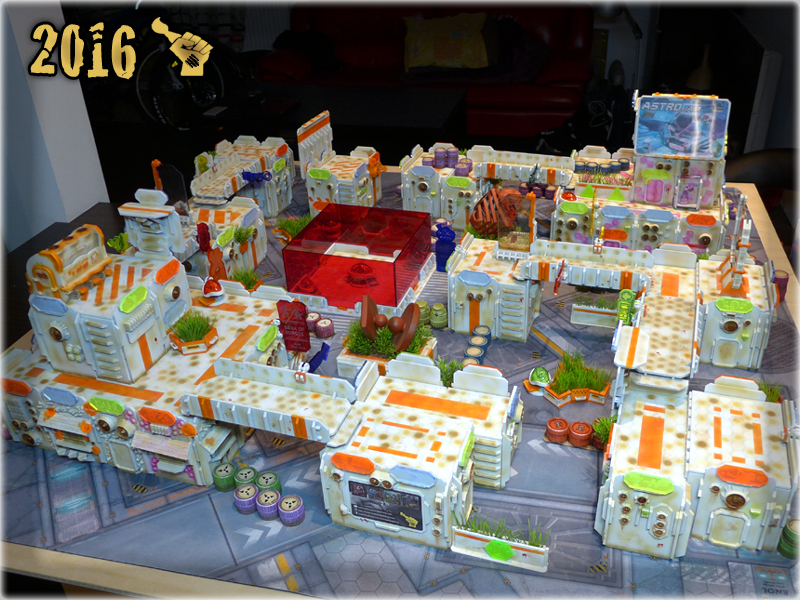
Yes – The Colony Special Project lives on and dayum! I almost run out of space to store it! Last time (“THE COLONY” SPECIAL PROJECT part nine) I was pretty sure that once I airbrush a bit here and there, The Colony would finally be completed. Imagine my surprise when I saw how the project expanded since last article. So, let’s dive straight into it…
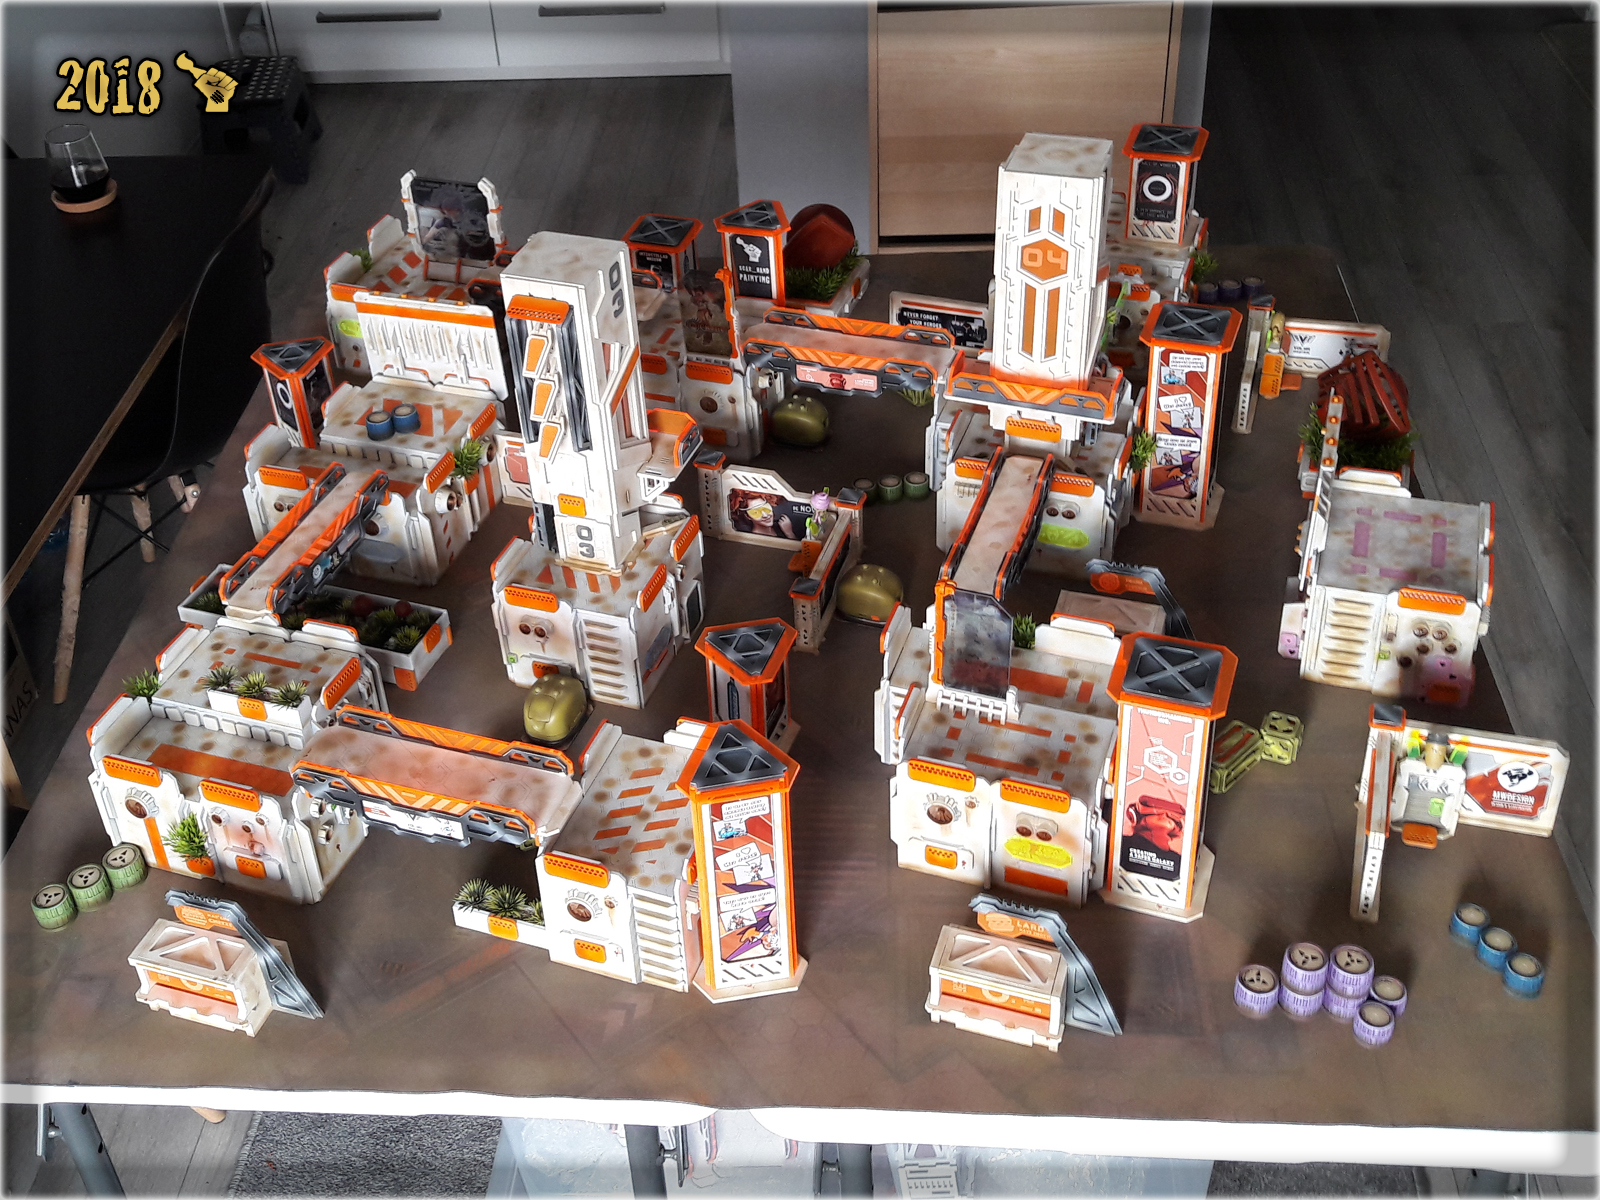
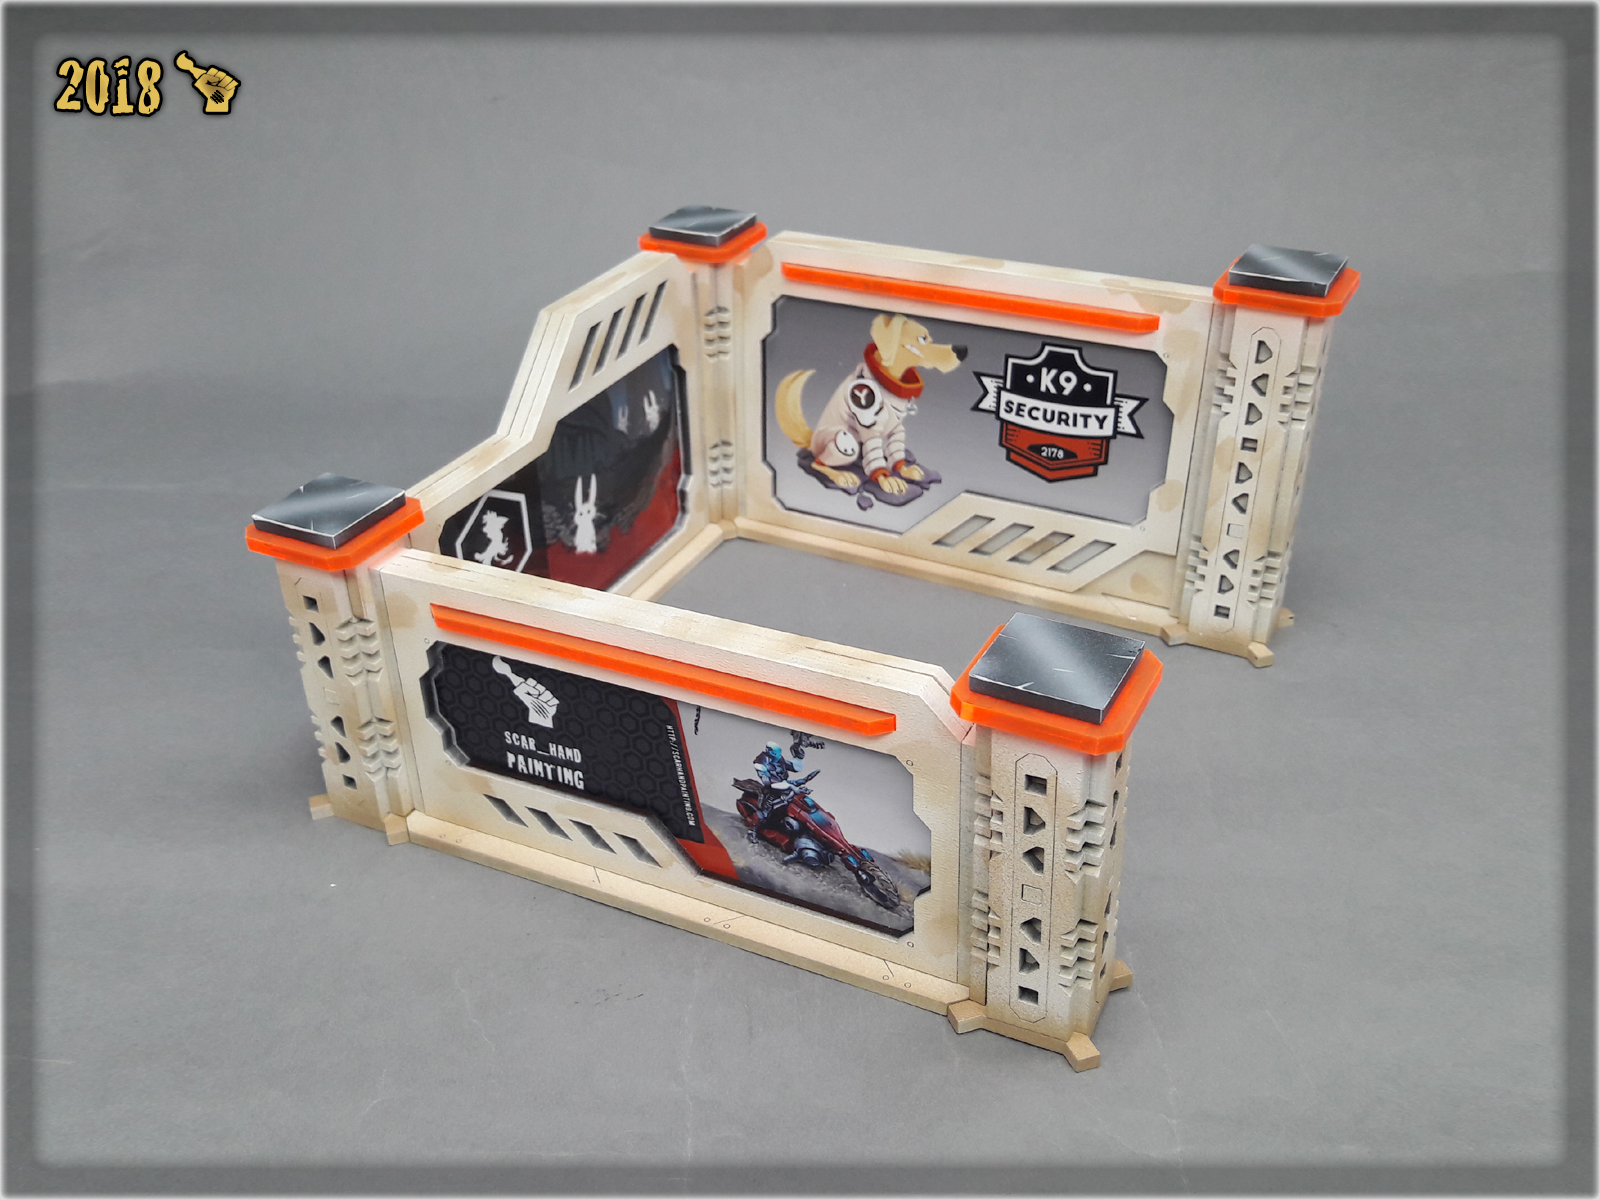
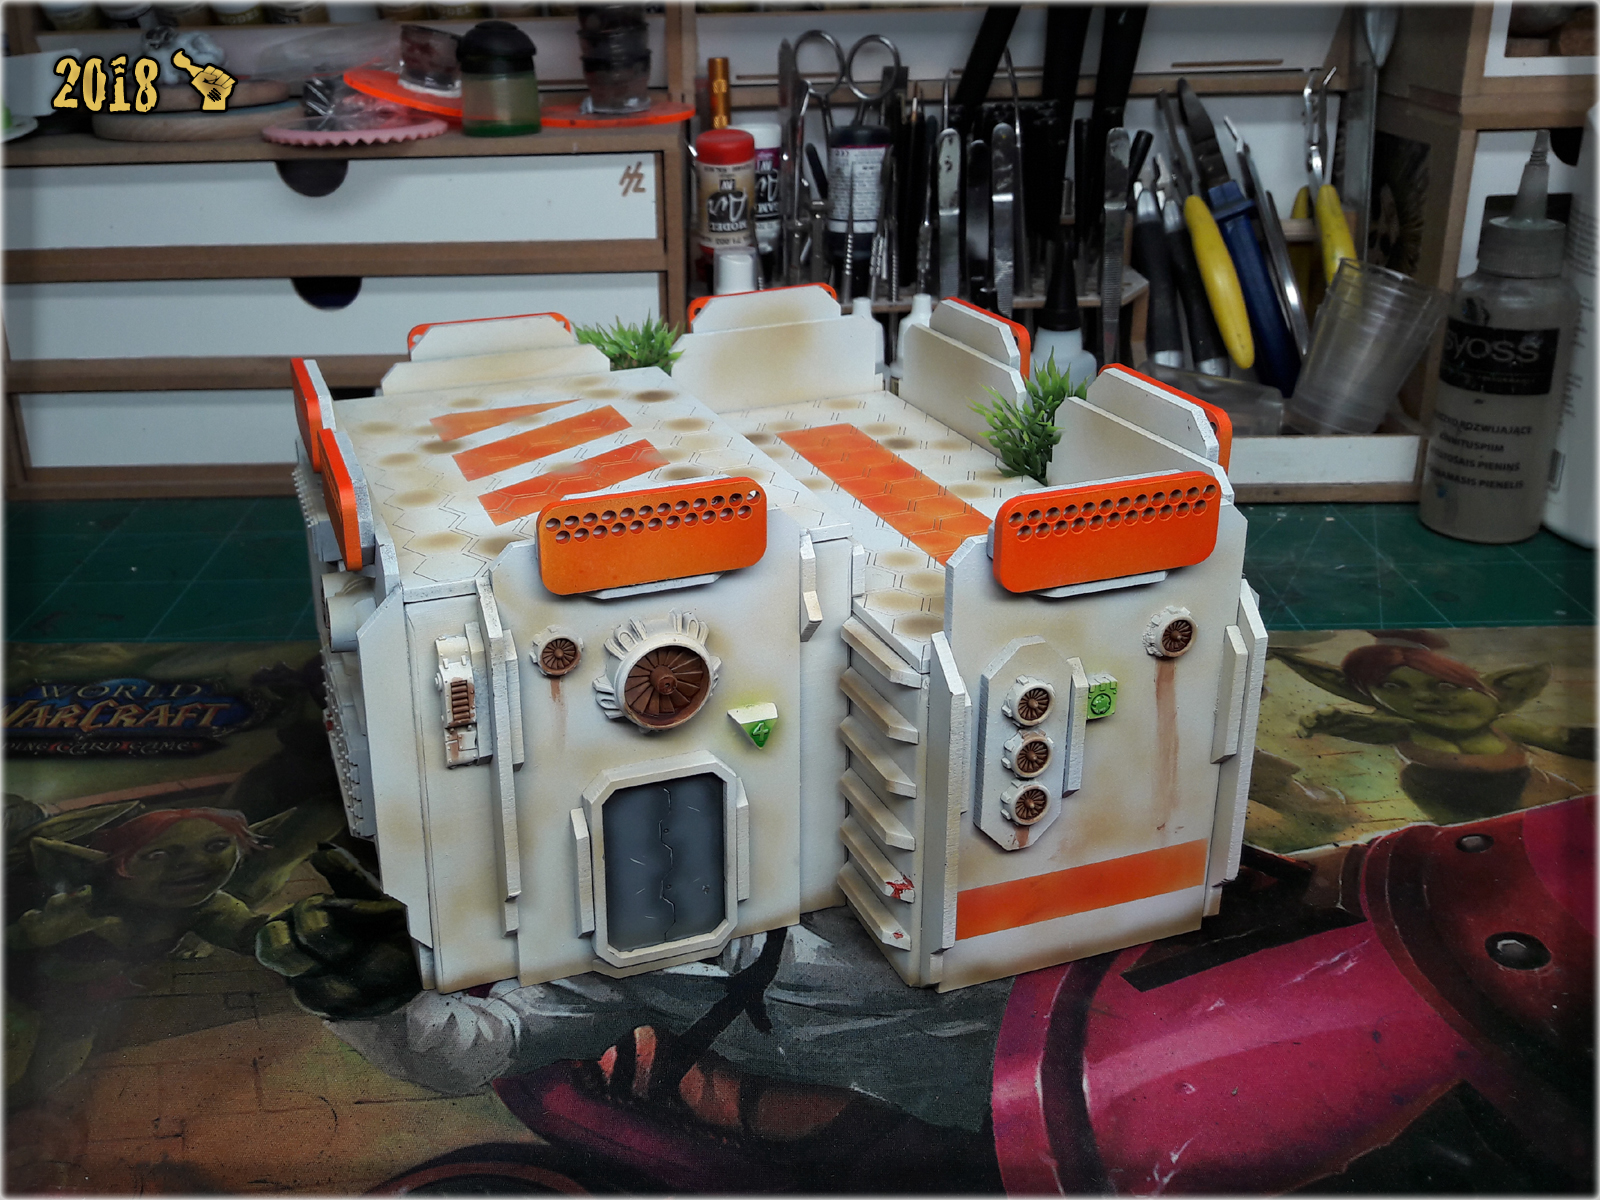
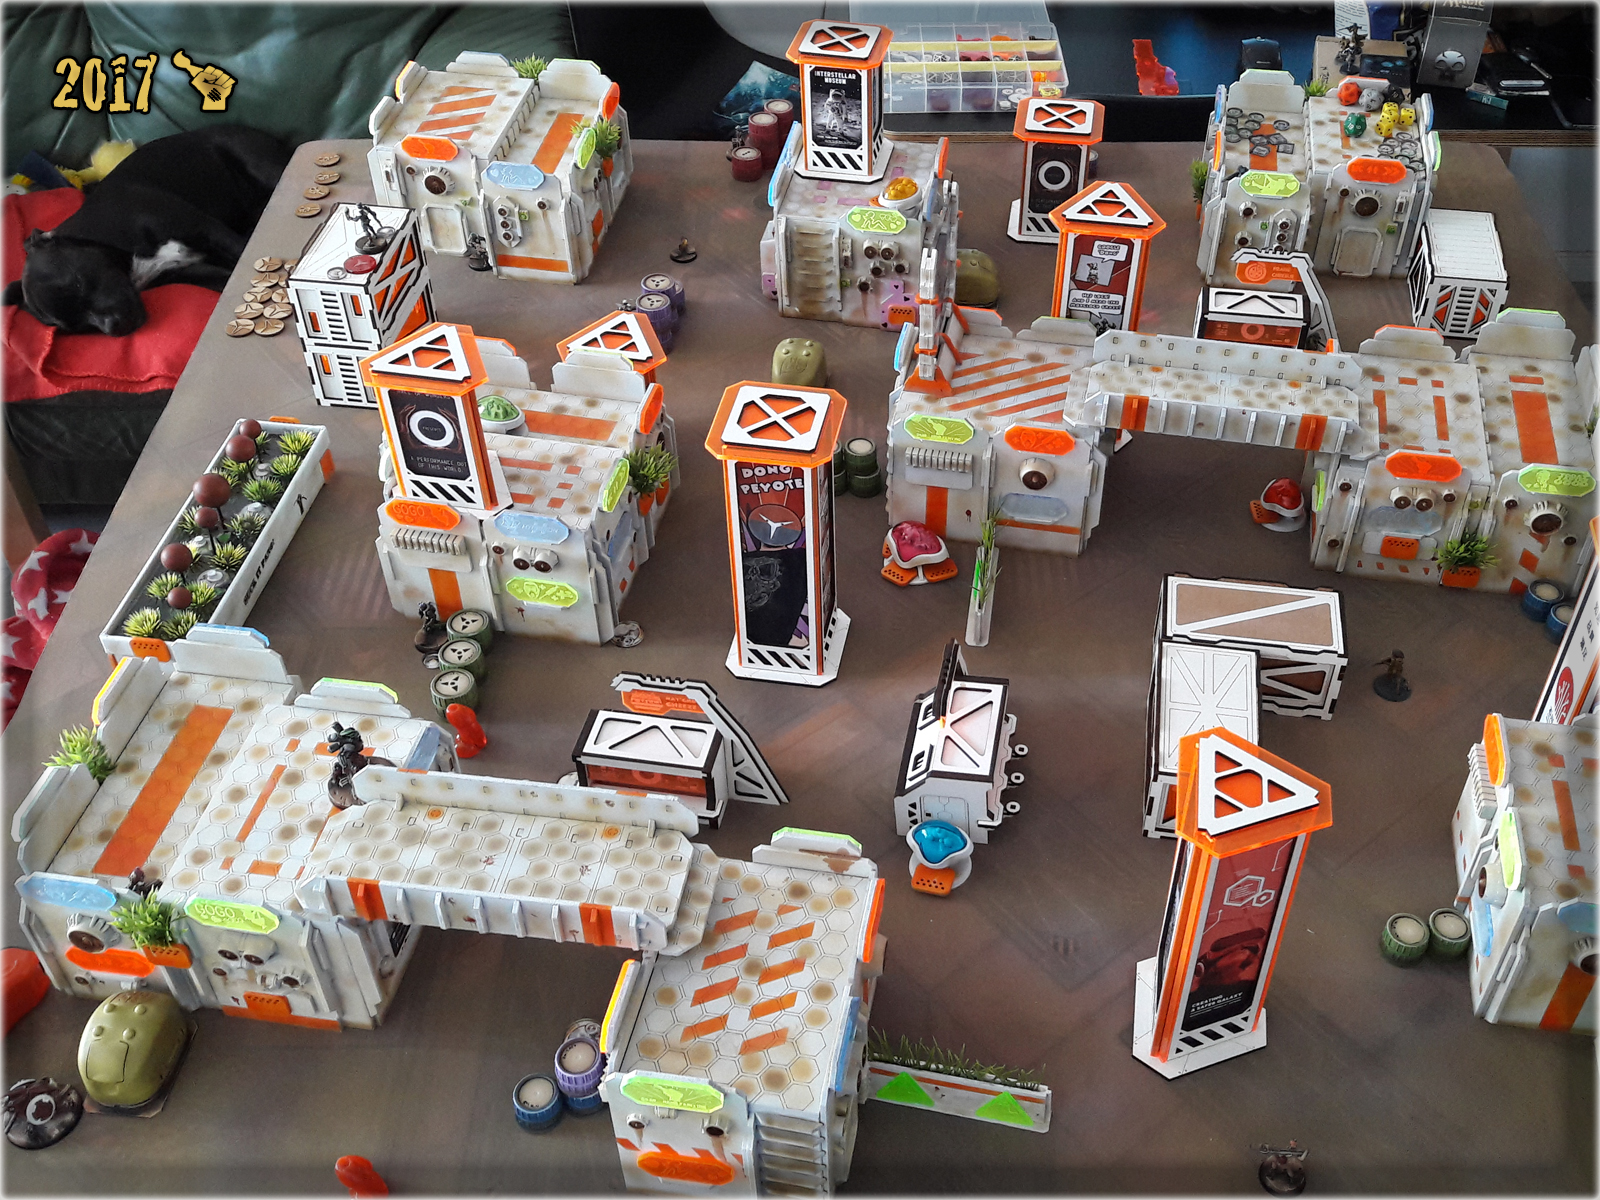
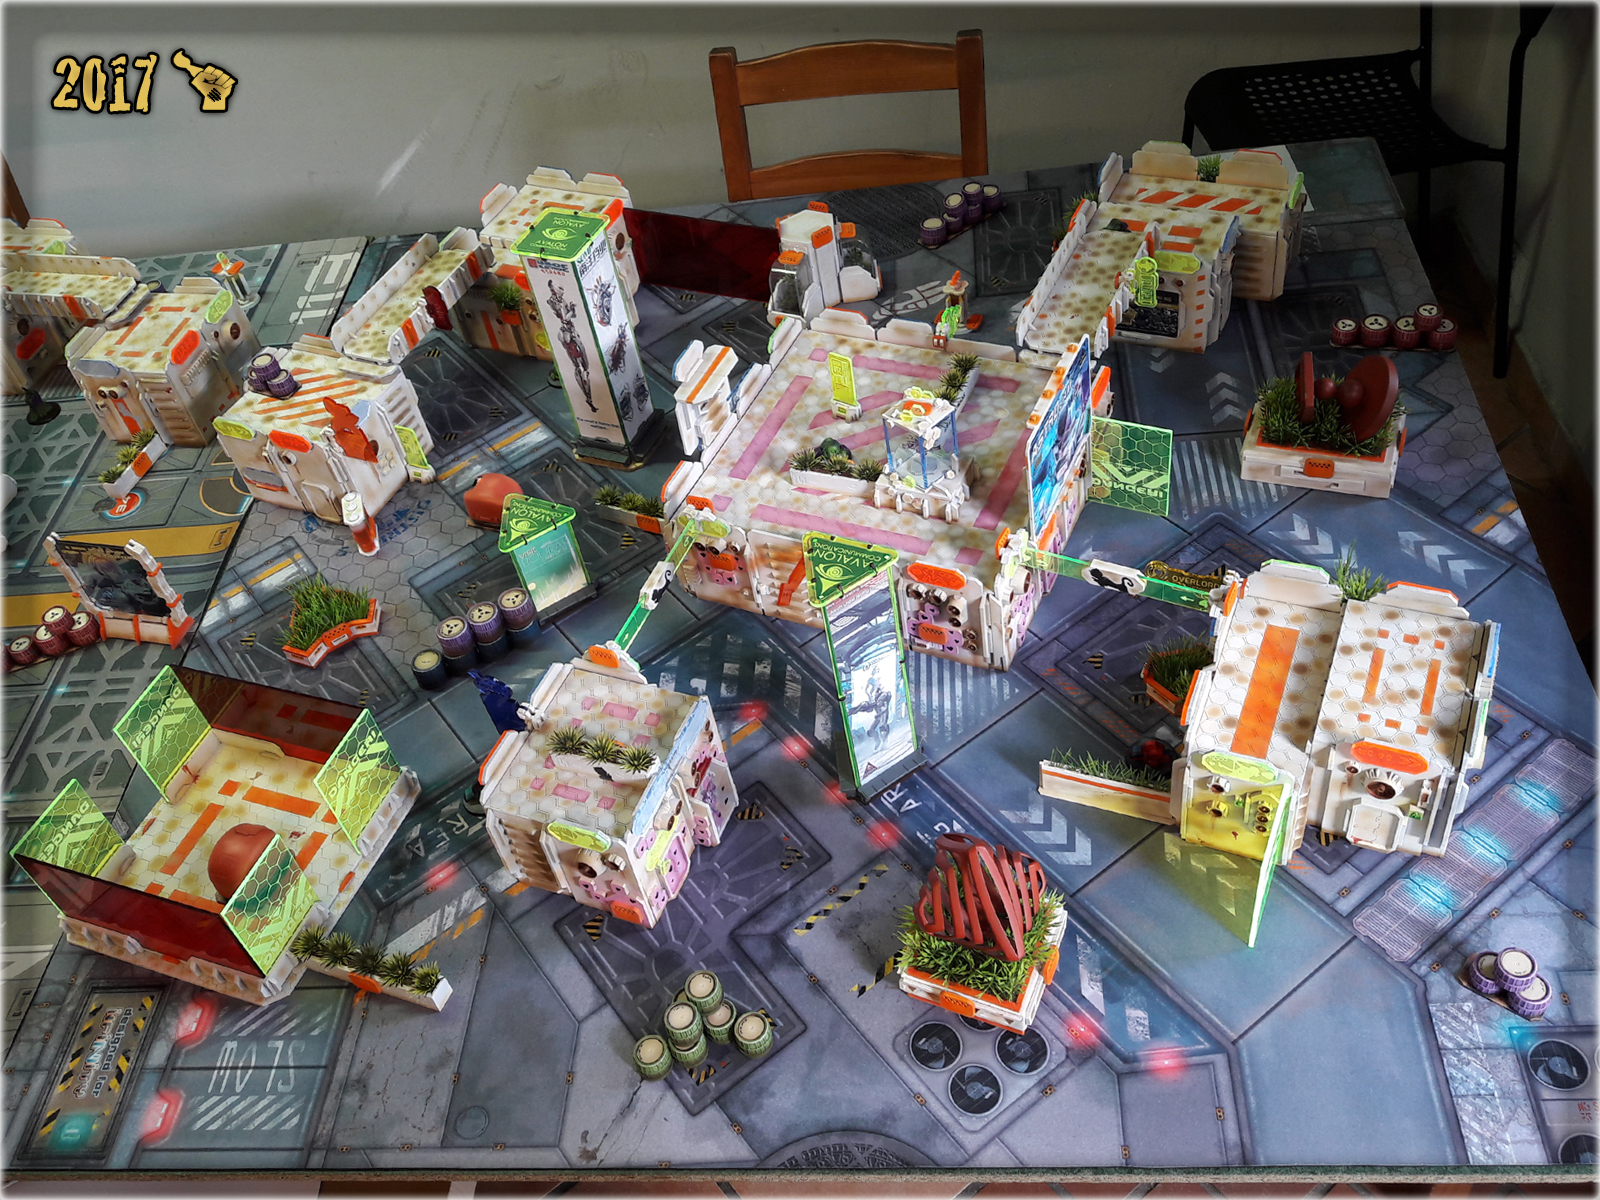
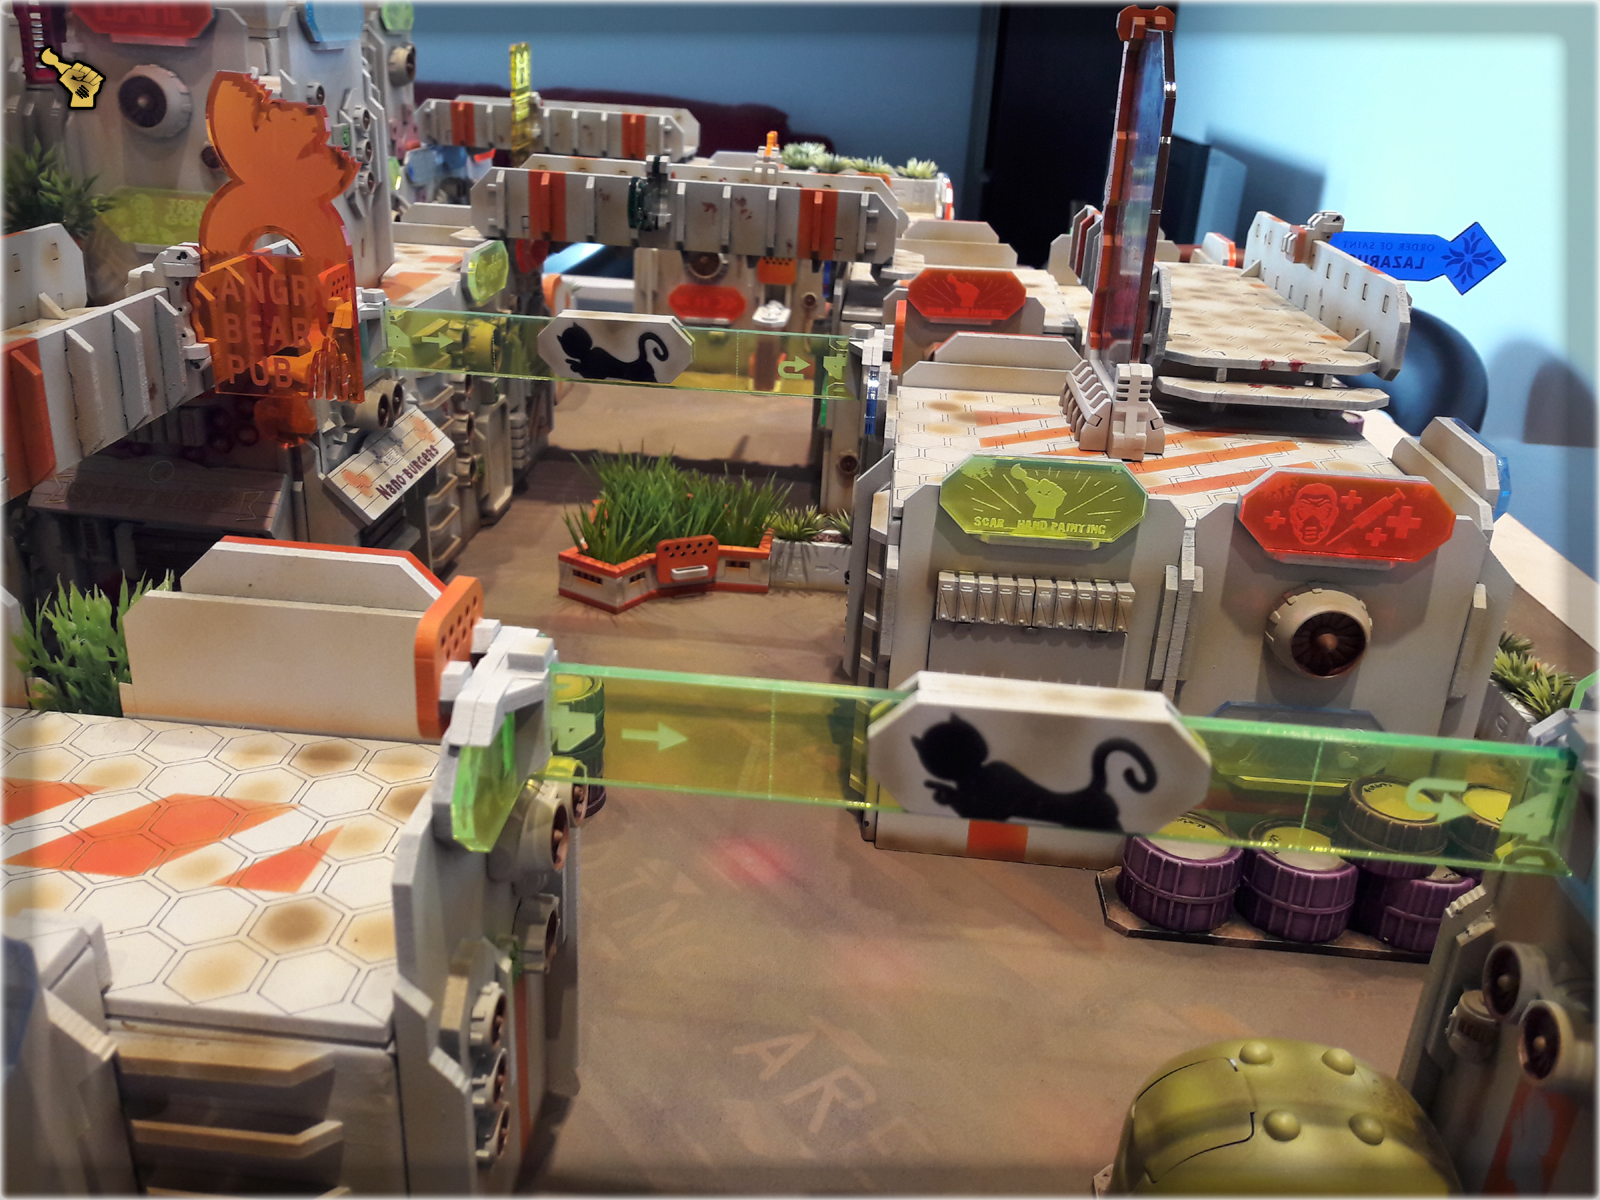
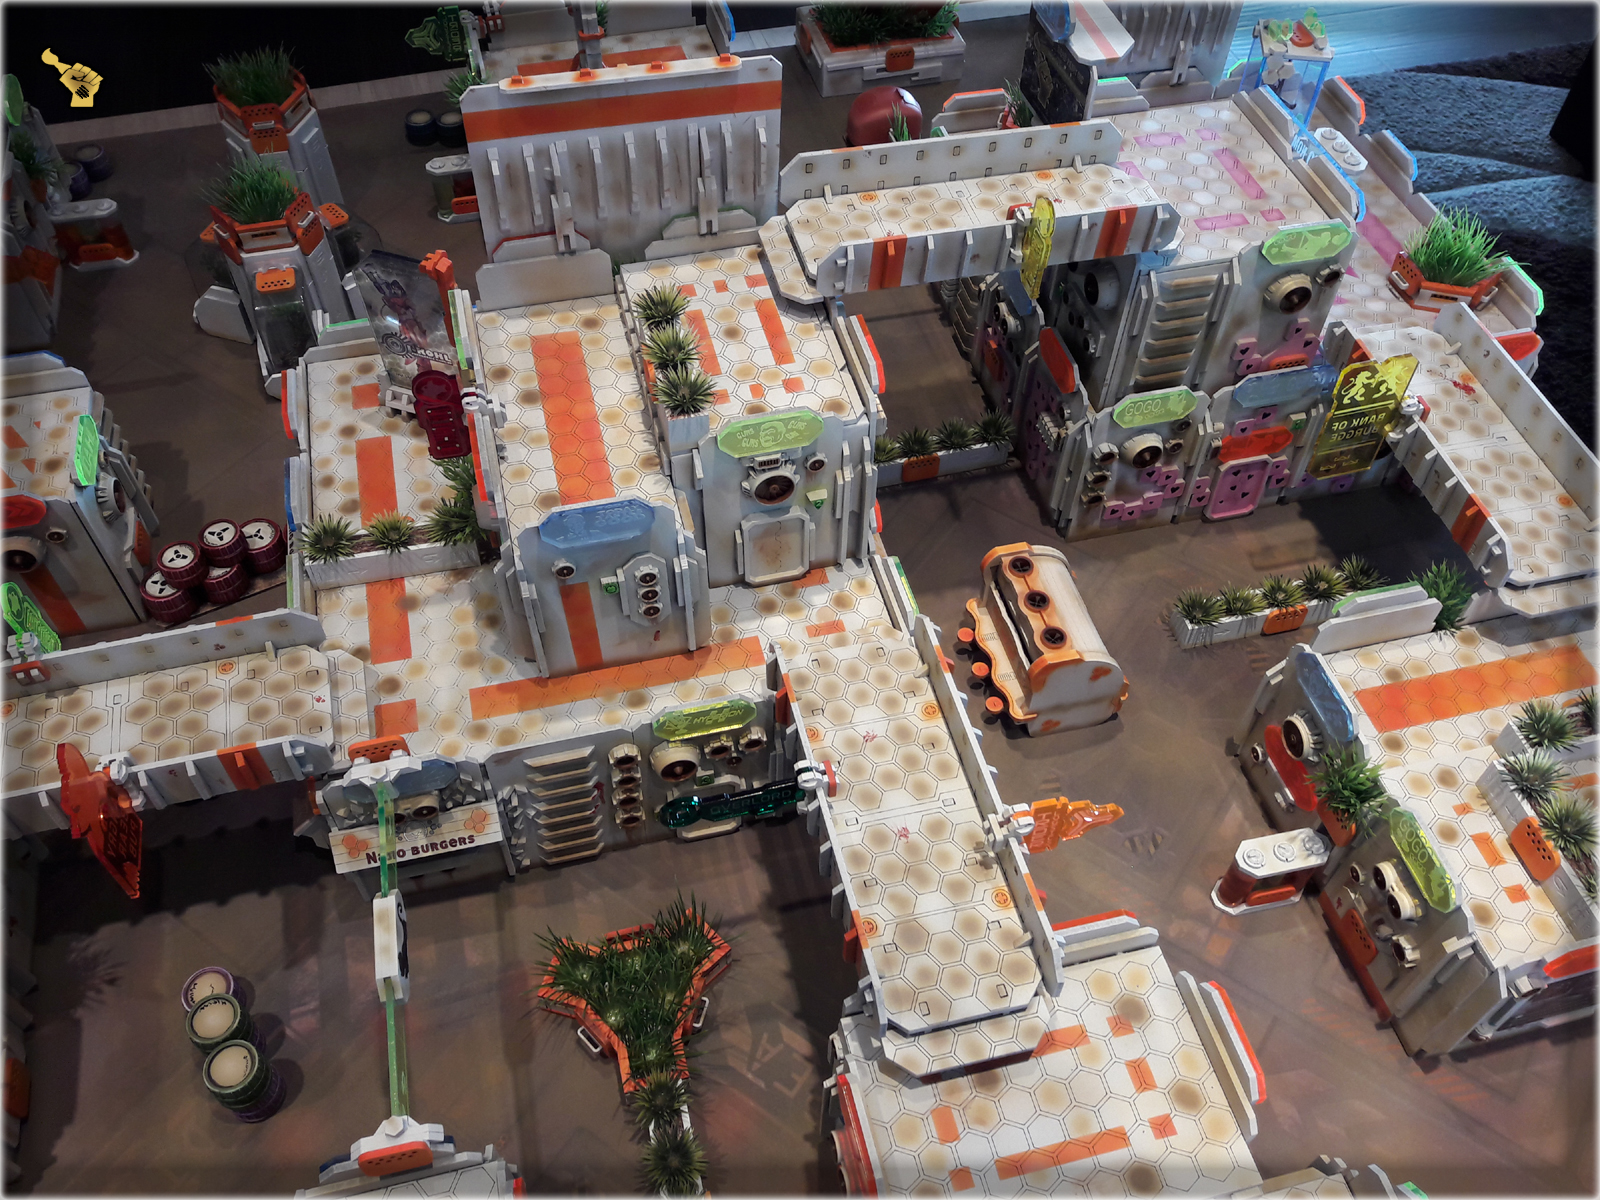
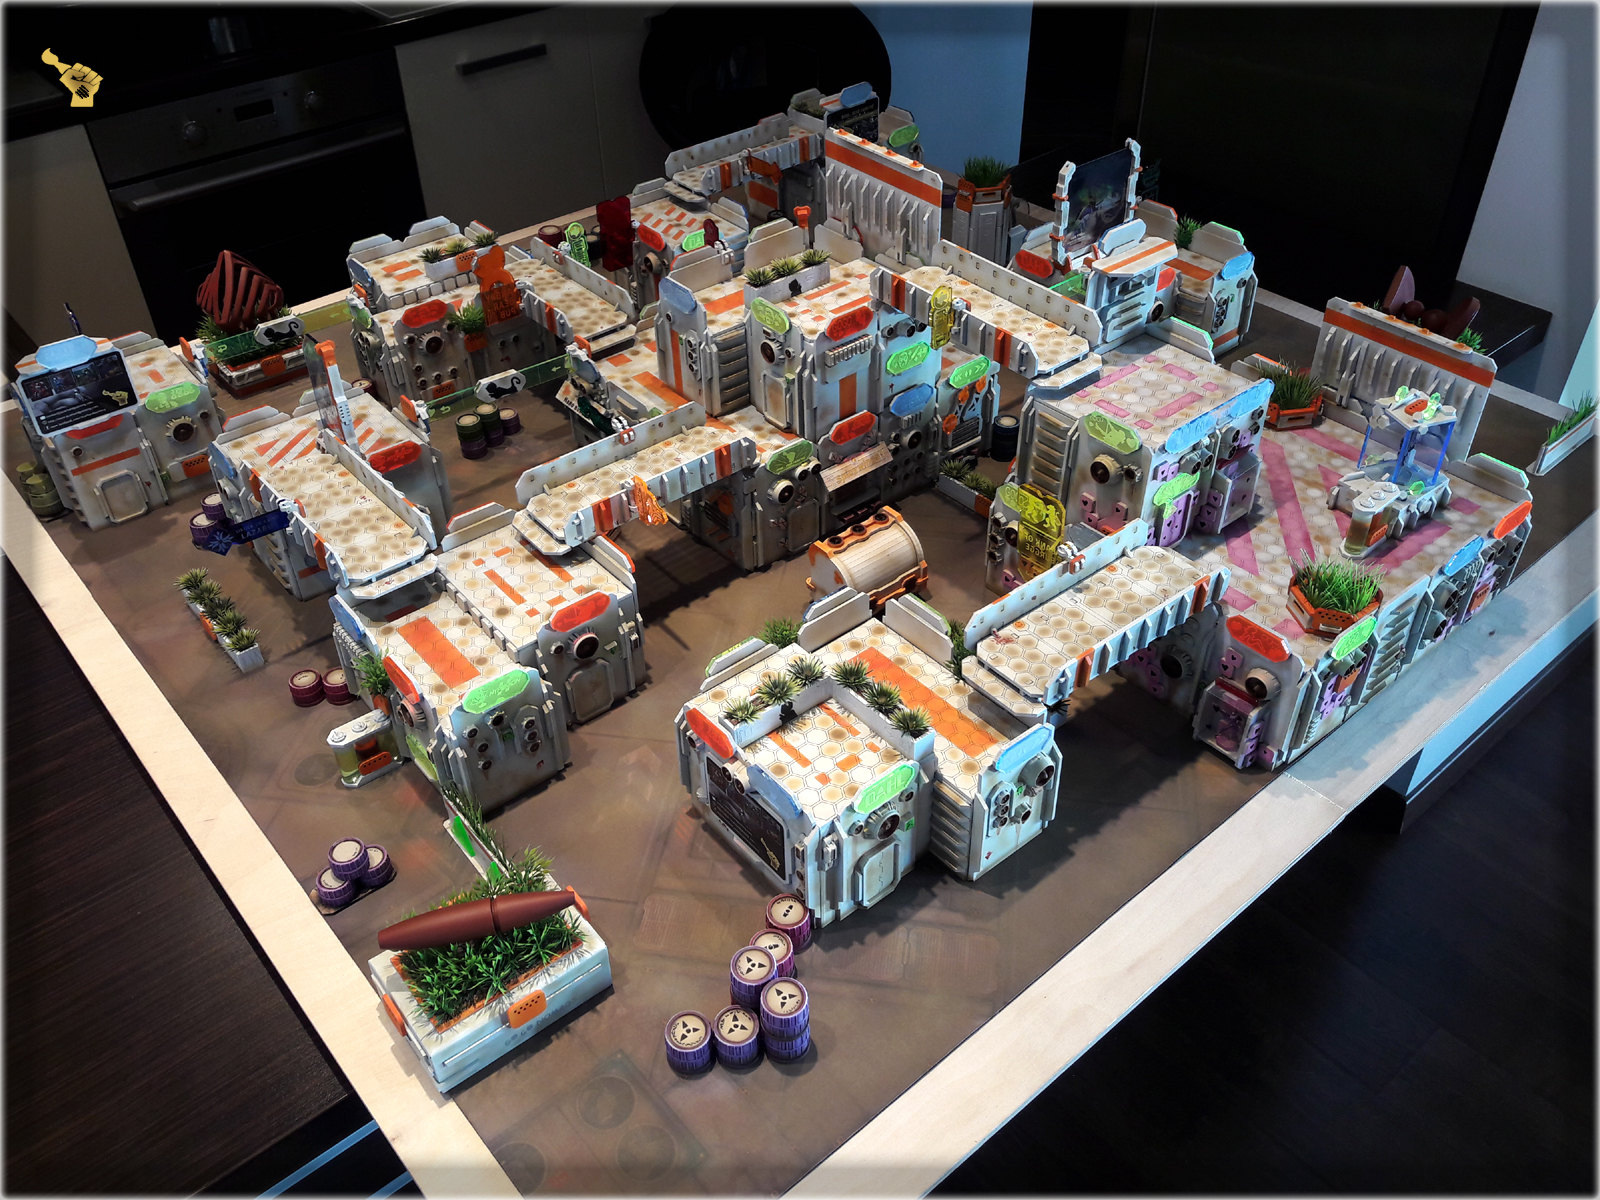
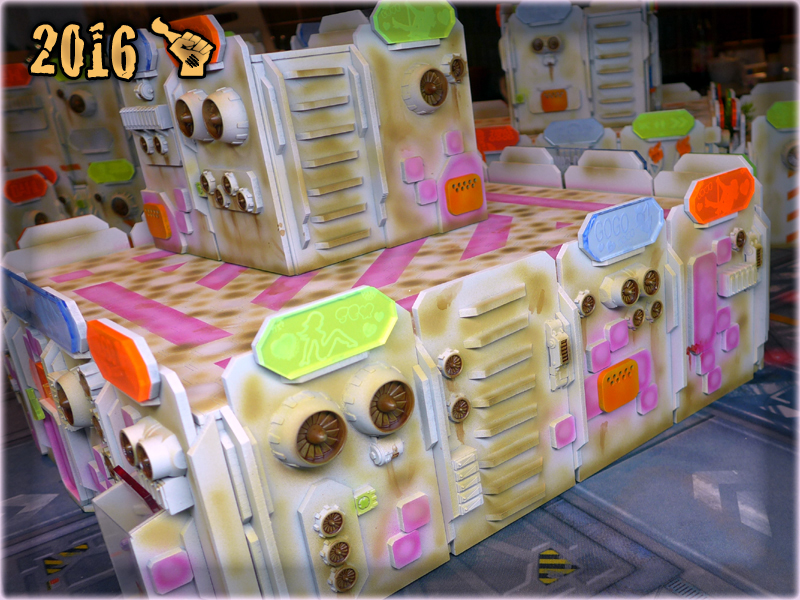
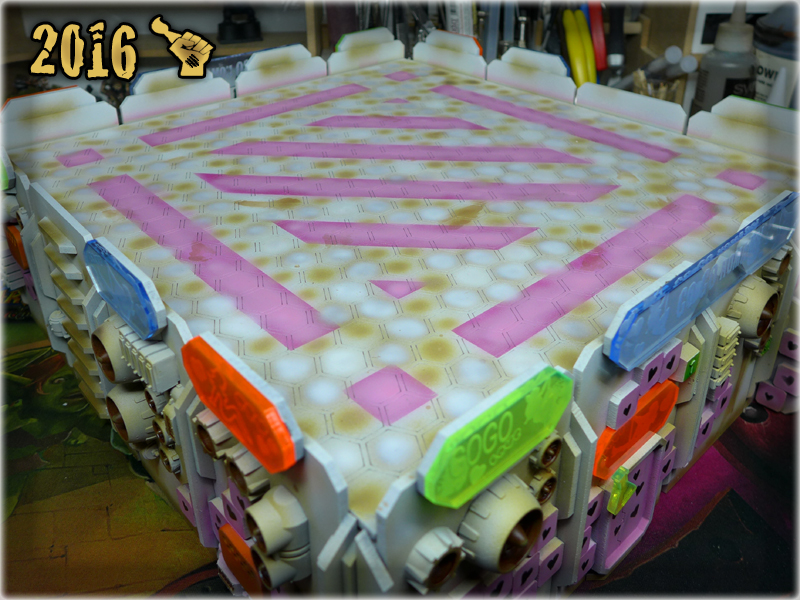
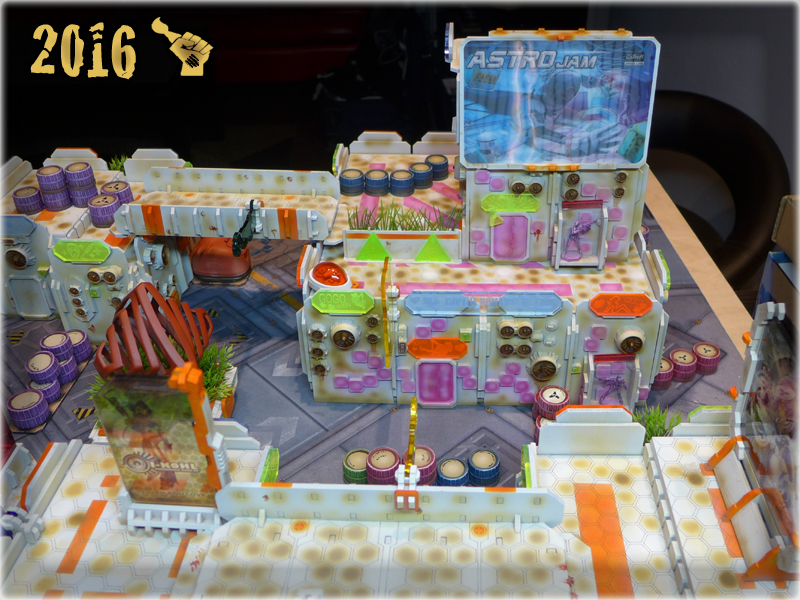
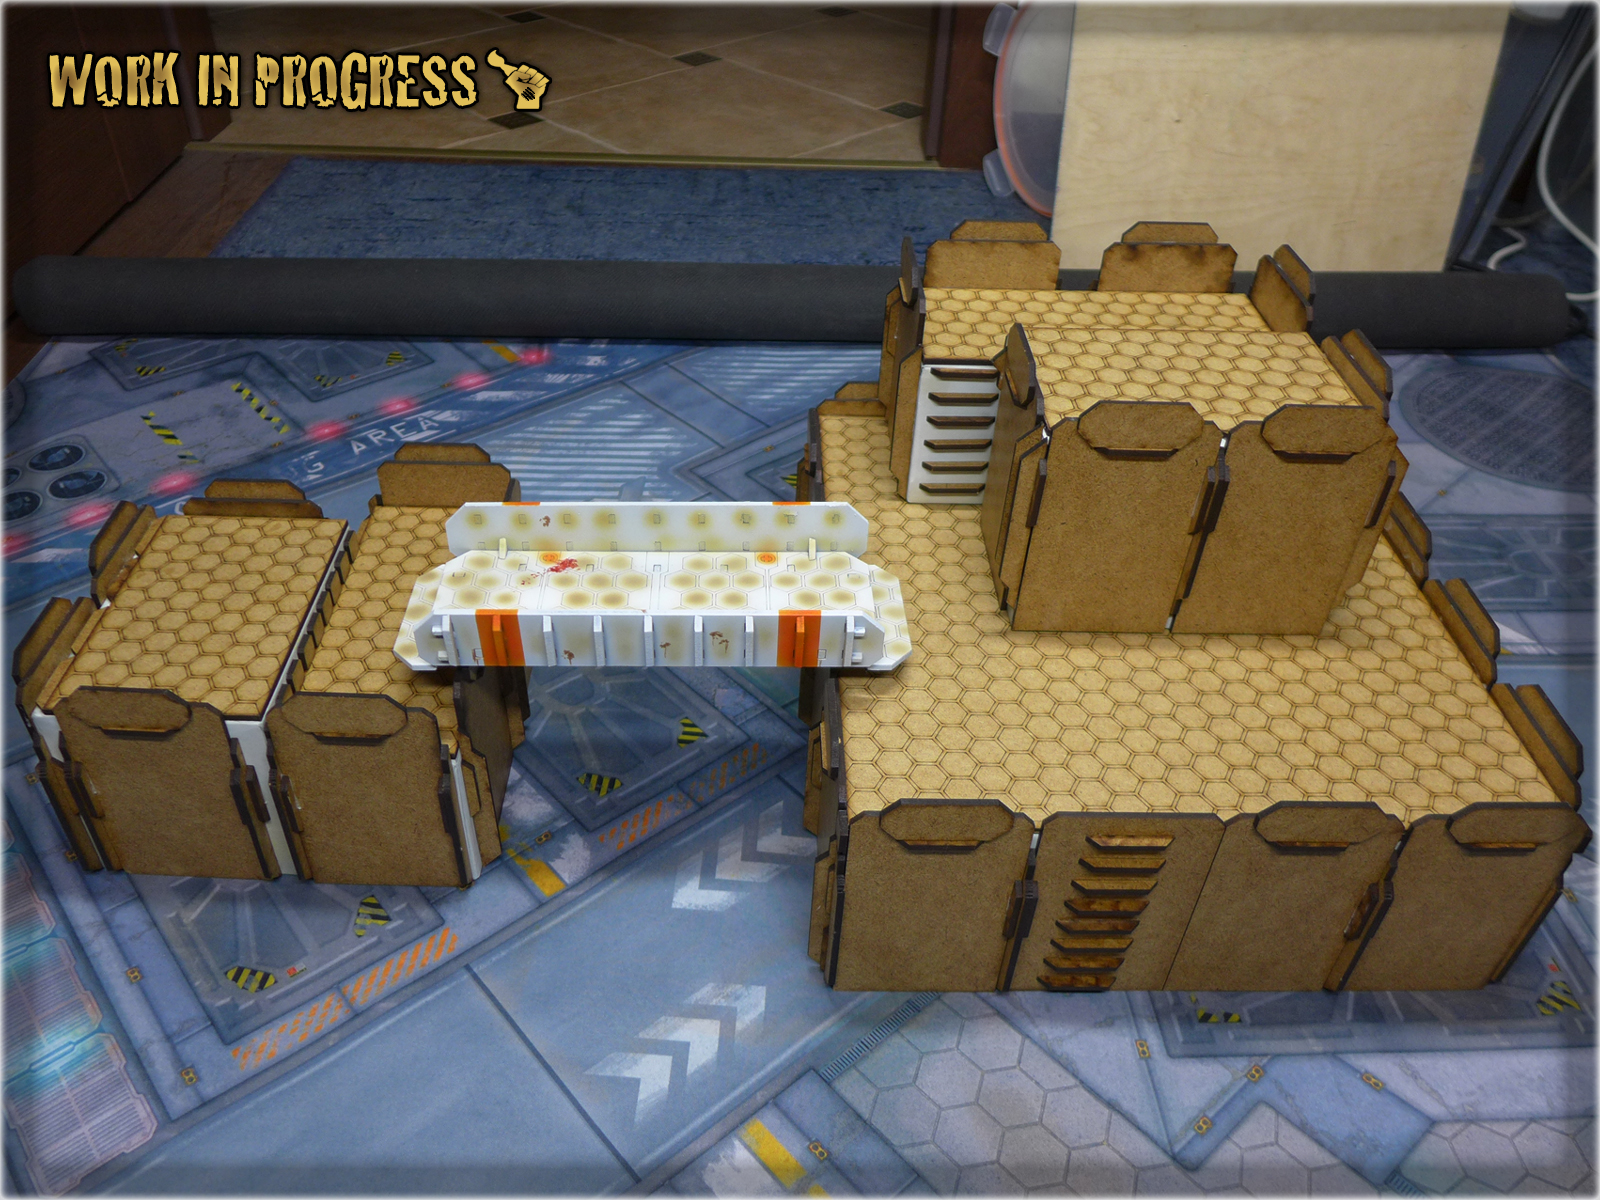
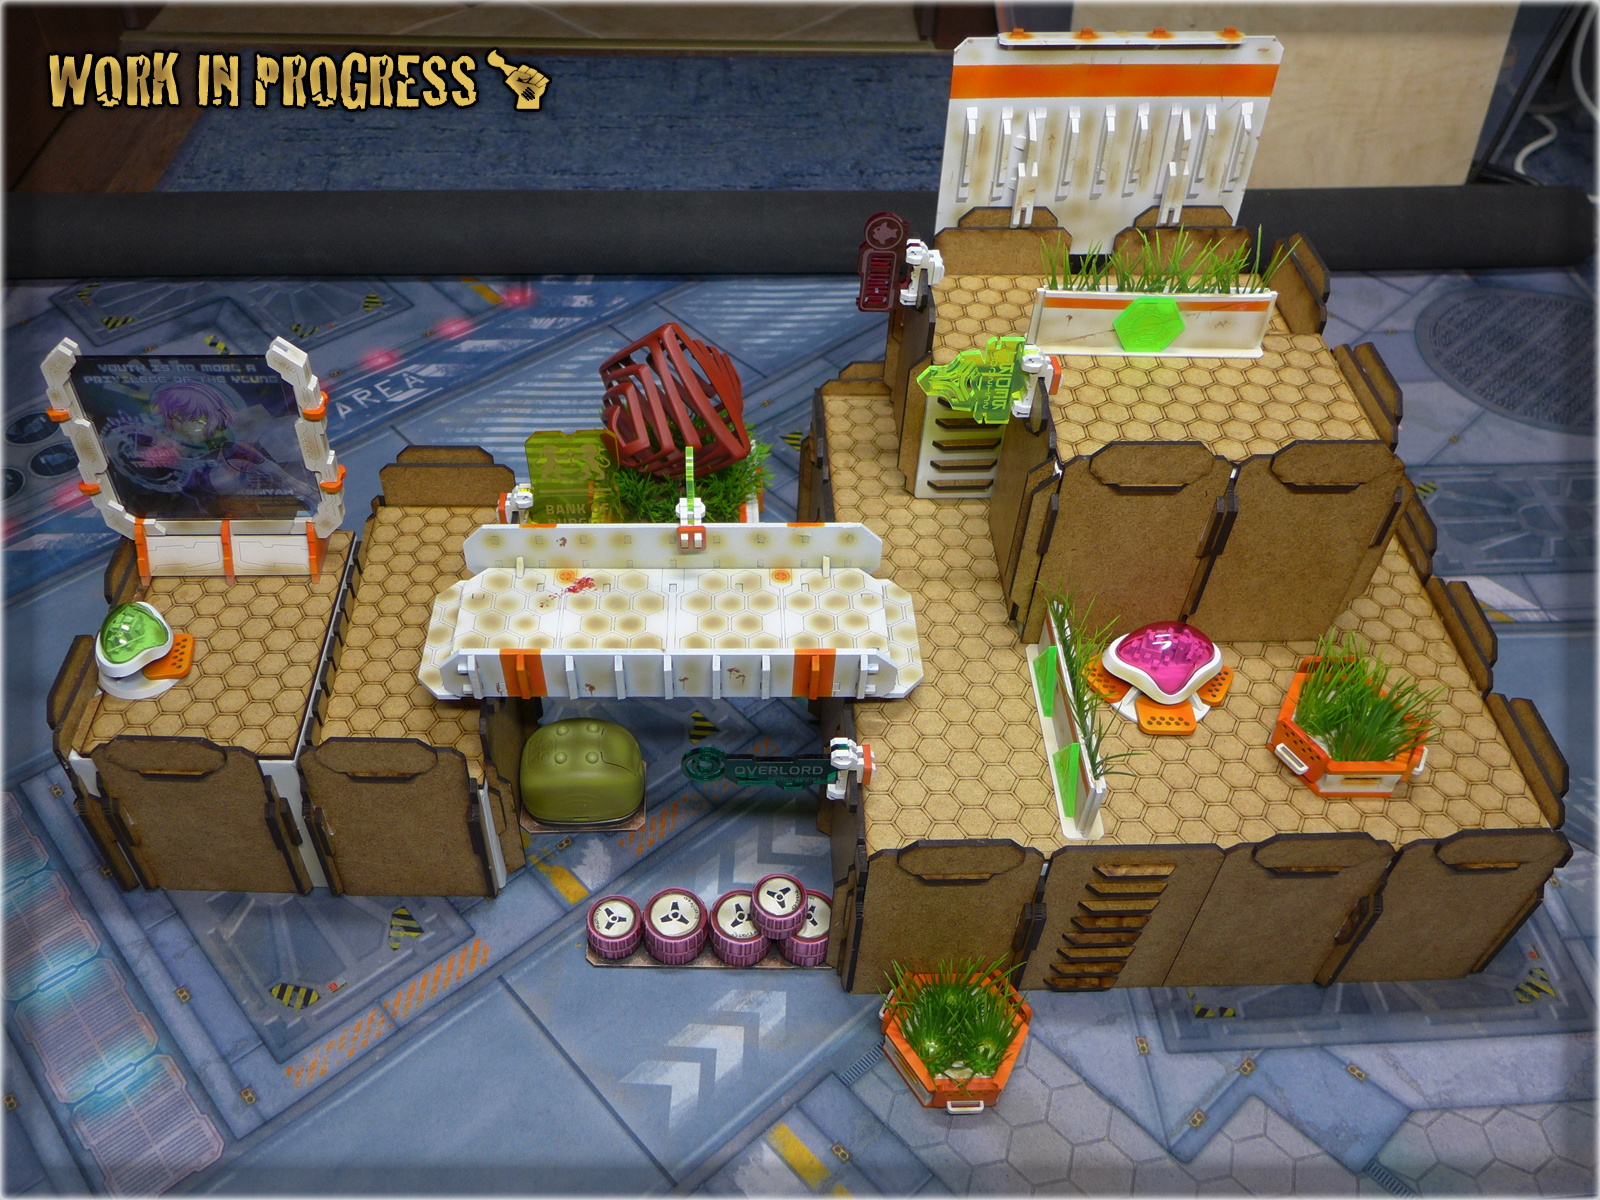
It finally happened – The Colony is now fully painted with no MDF, be it white or regular, visible. The project was set aside for few months, when all of a sudden I got new buildings from Gingermane and painted them to match my existing set. I then followed through with all the rest including bridges, food booths, walls and ad stands. Fortunatelly for me, Bocian from Gingermane is a cool bruh of mine and he cut thin paper pieces to cover all illustrations adorning his designs. I only had to take care to cover plexi elements by myself. Once done – my work went fast and easy. Few evenings was all it took.


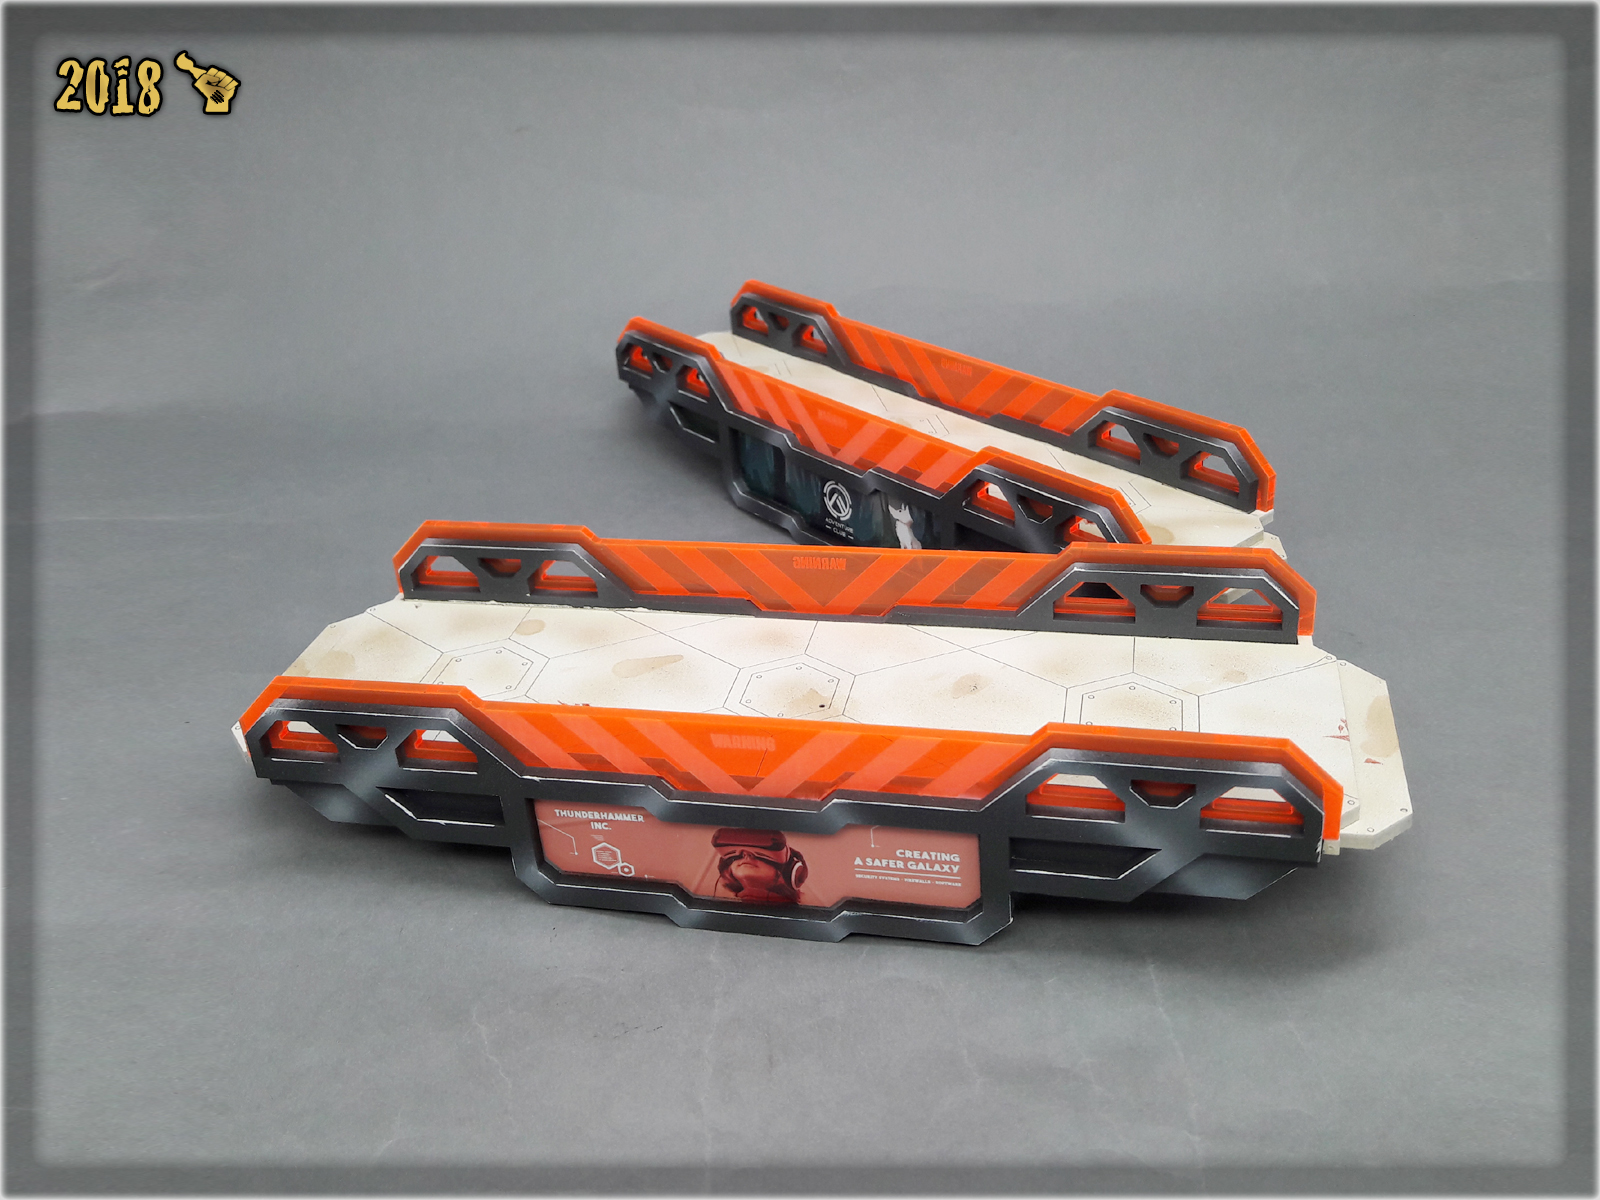
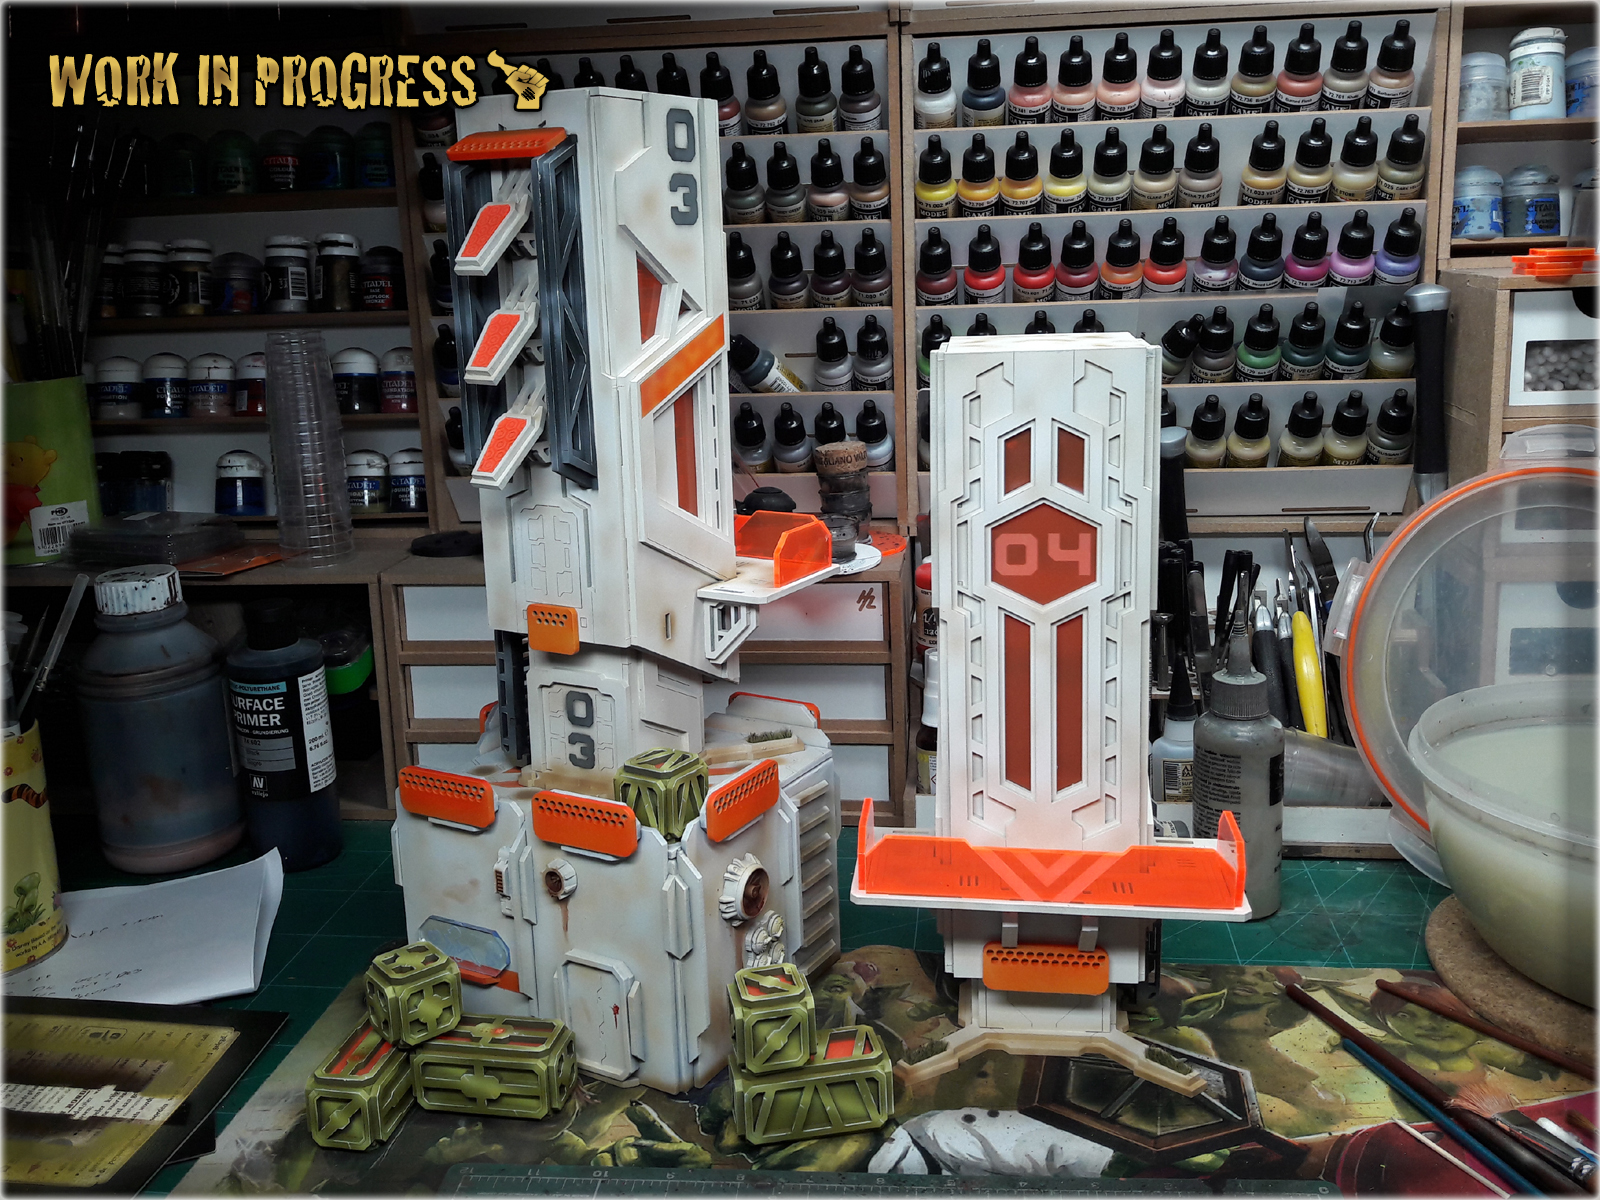
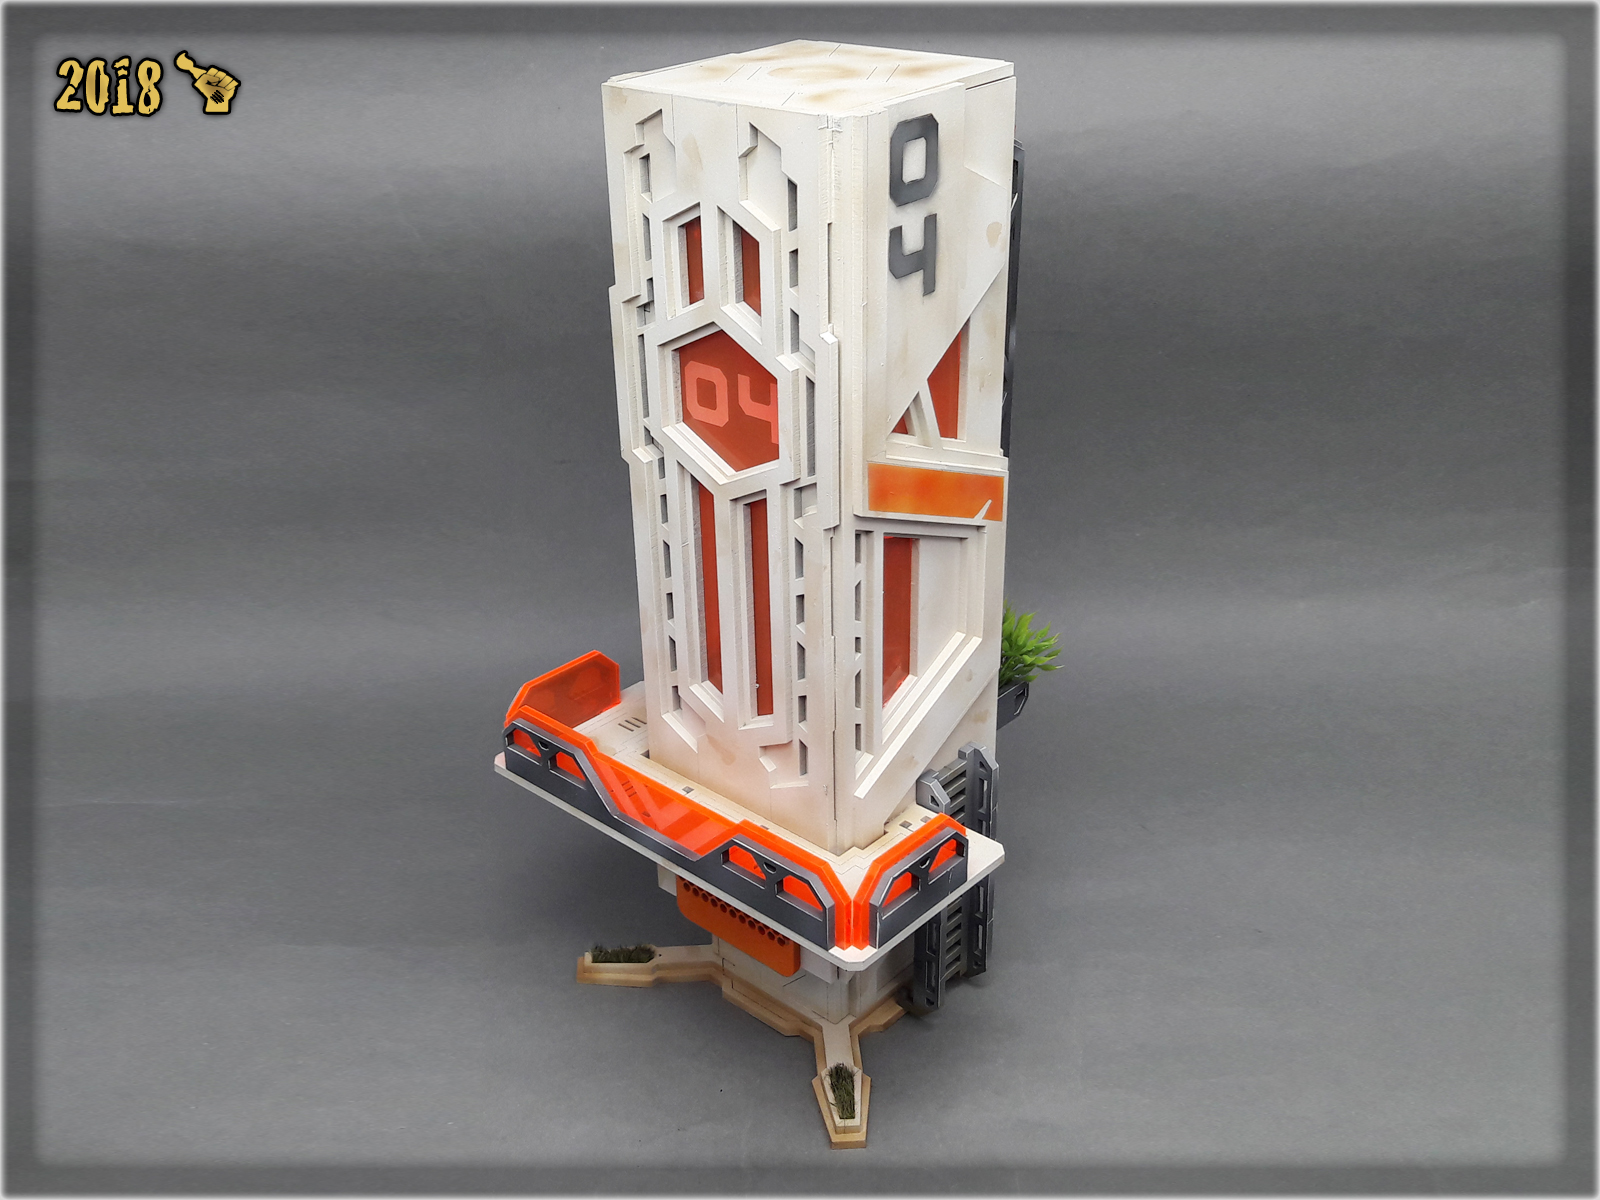
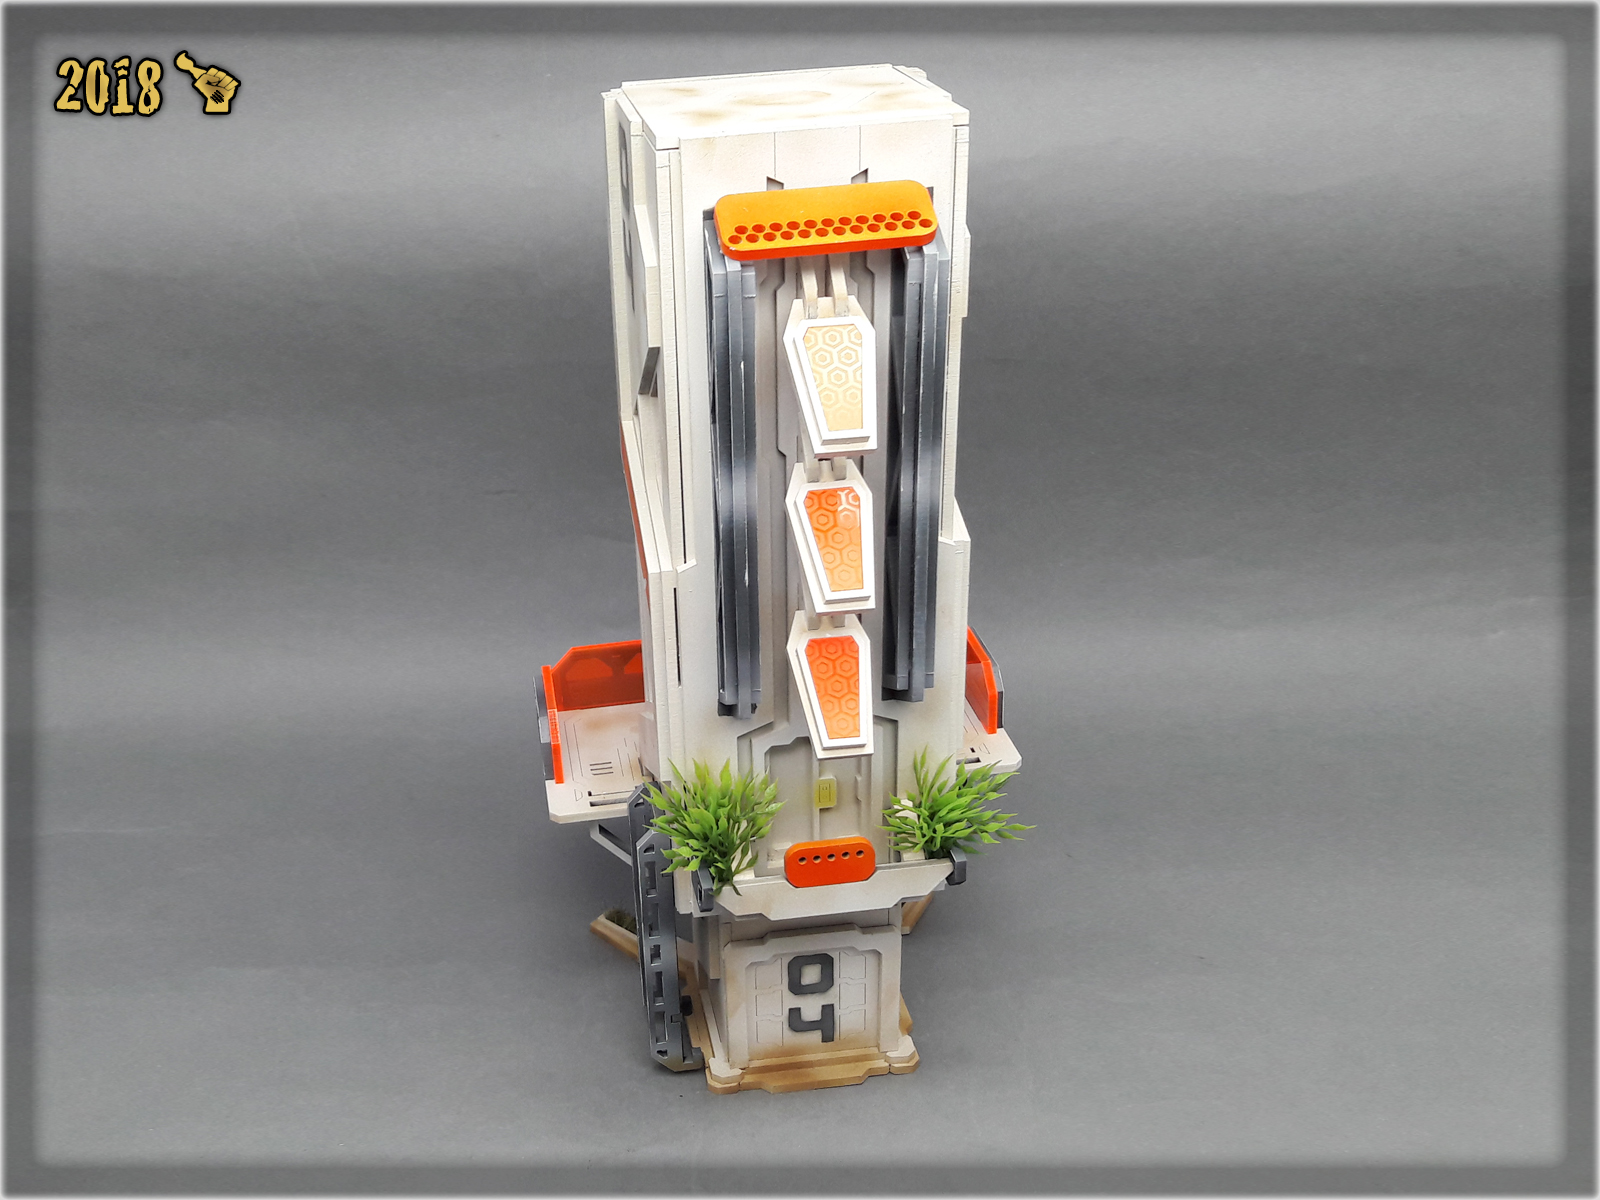
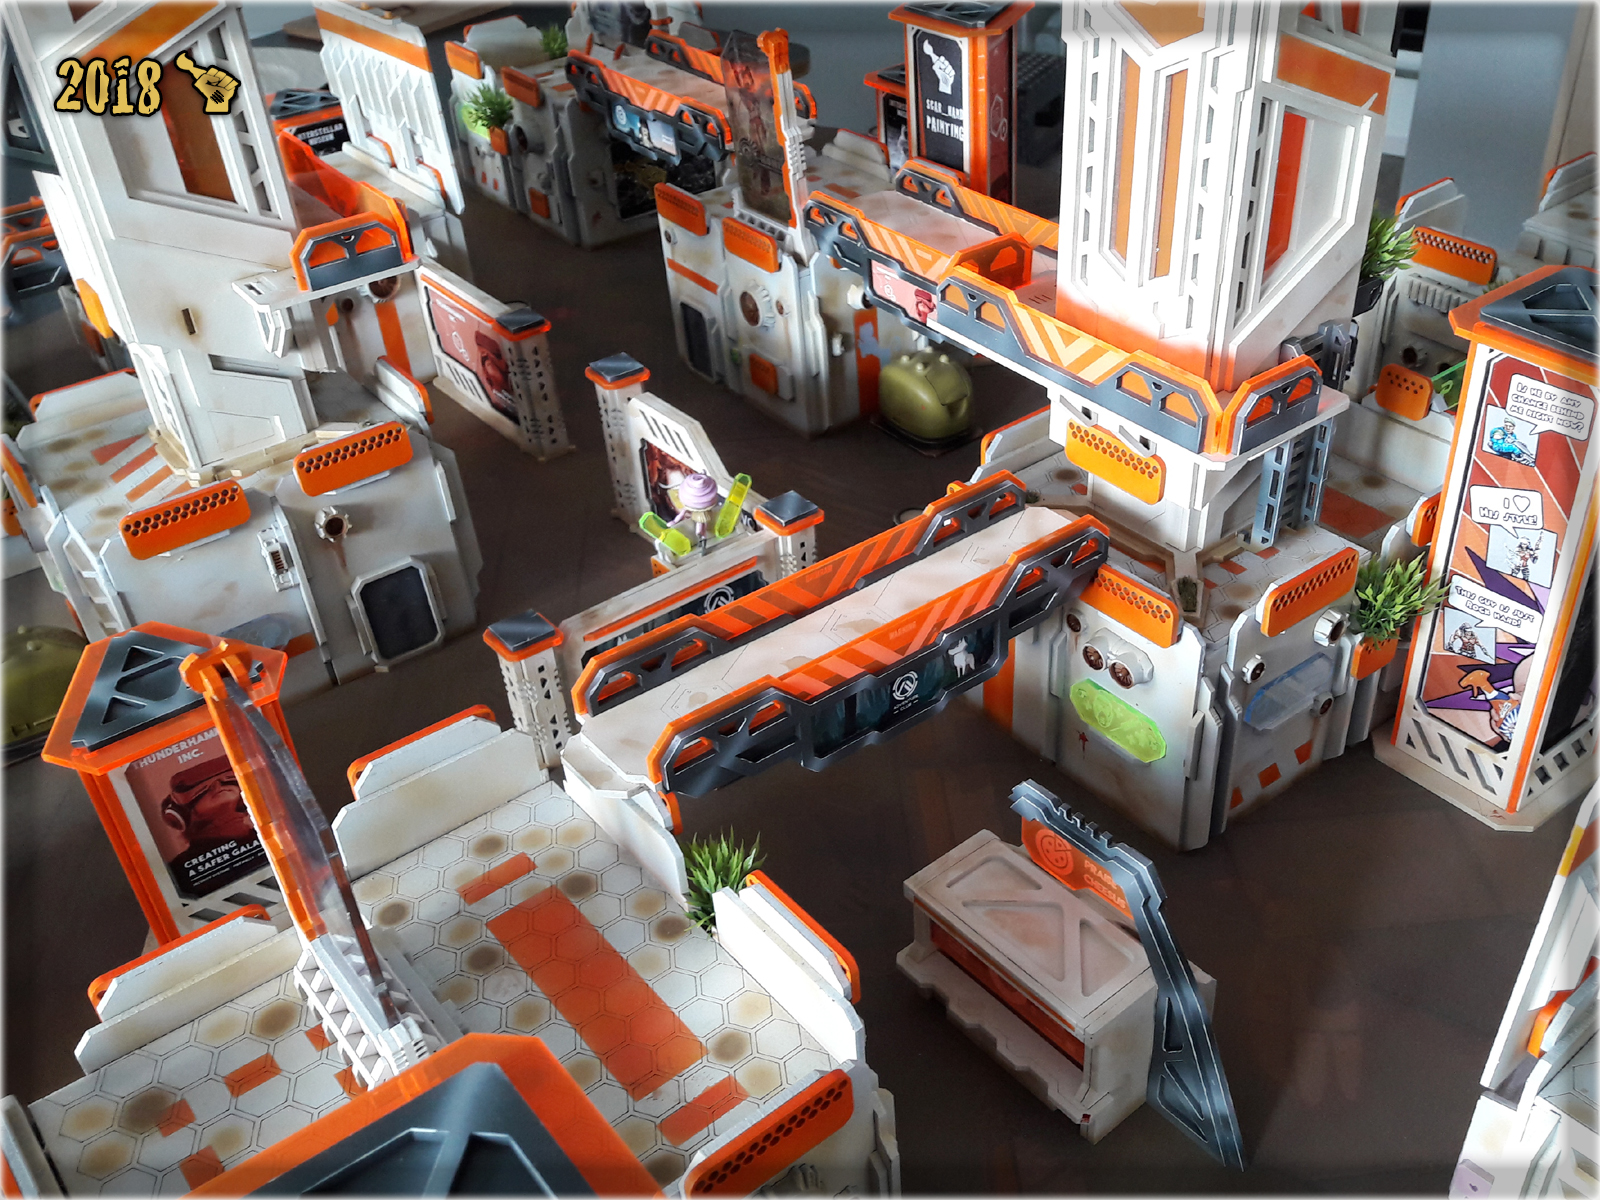
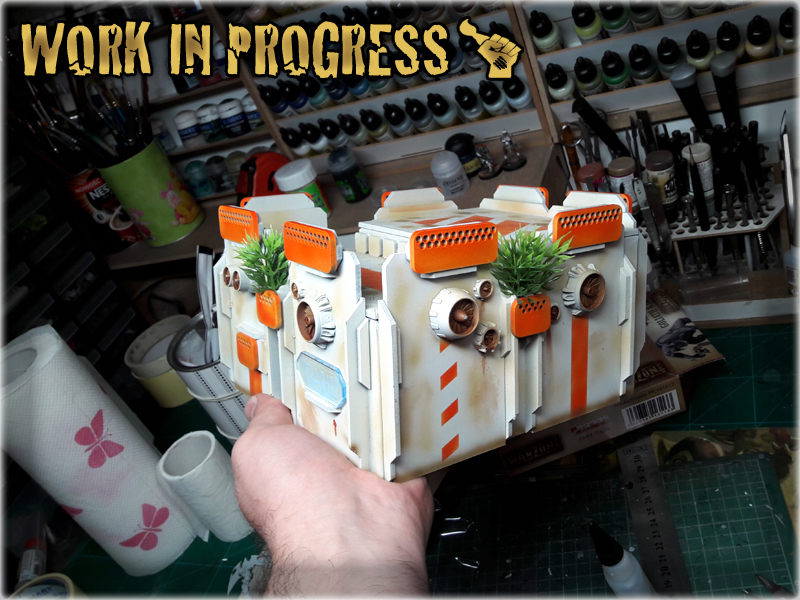
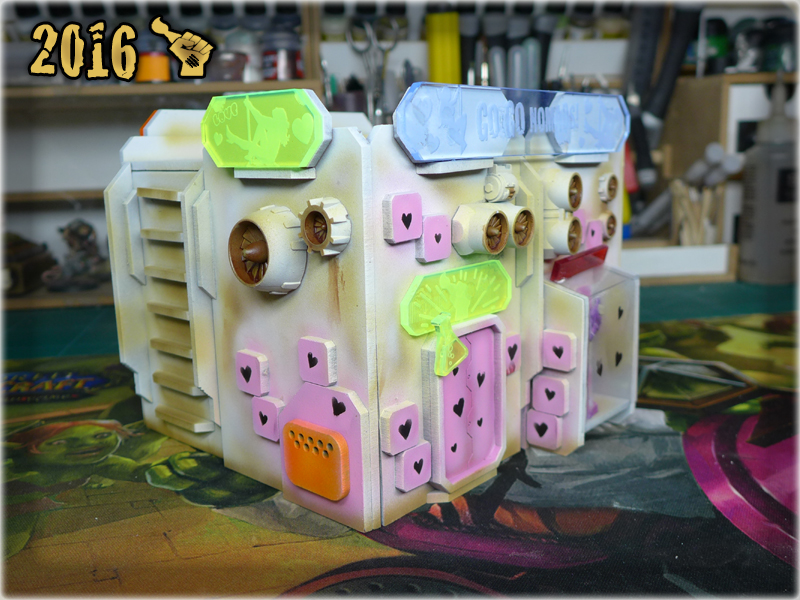
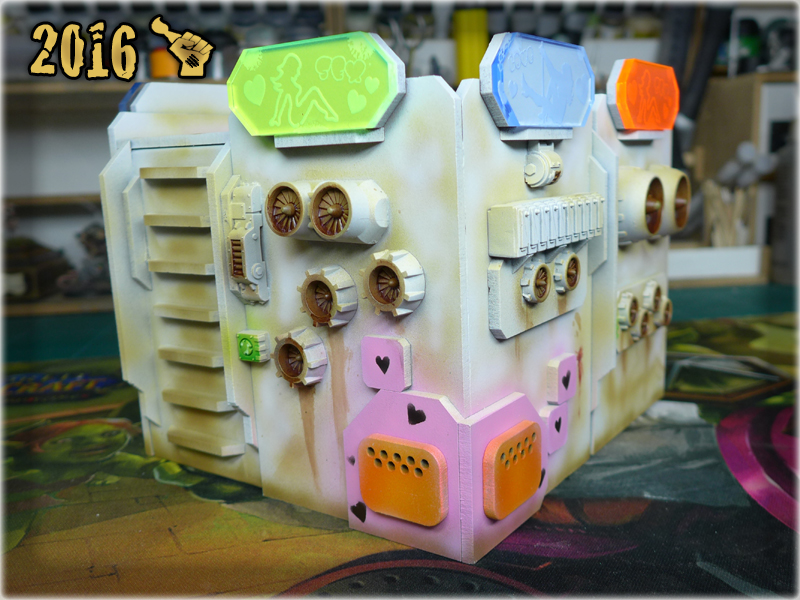
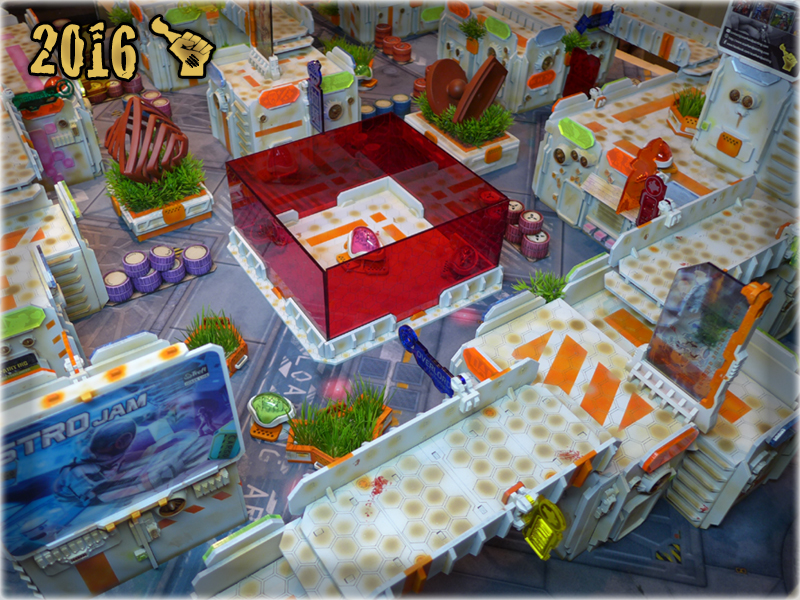
The Colony is vast already, but there’s always room for some extra terrain pieces. With new Gingermane designs appearing every month it’s difficult to stop expanding . It gets even harder, as he let’s me peek on work in progress designs and I sometimes get to buy some before release. Obviously when I saw ‘SF024 The Tower’ I freaked out and demanded these be handed to me emmediately. Gosh how I love these two…
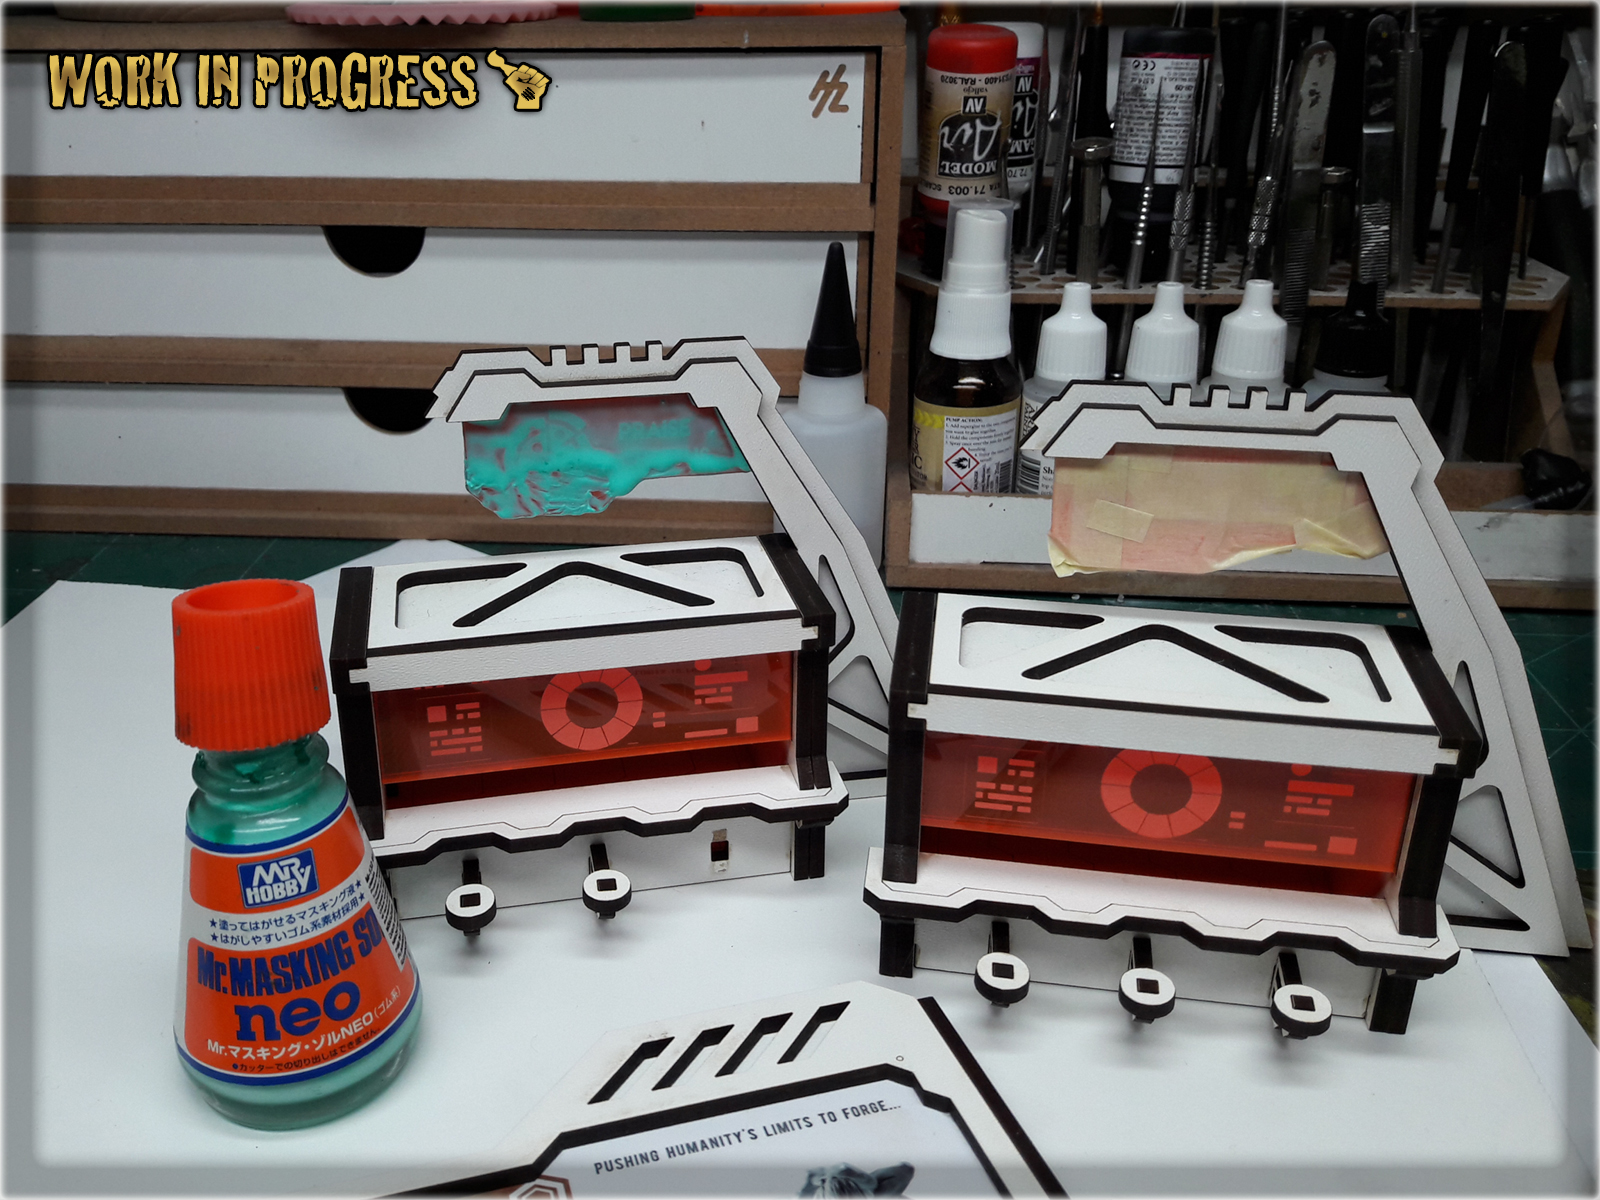
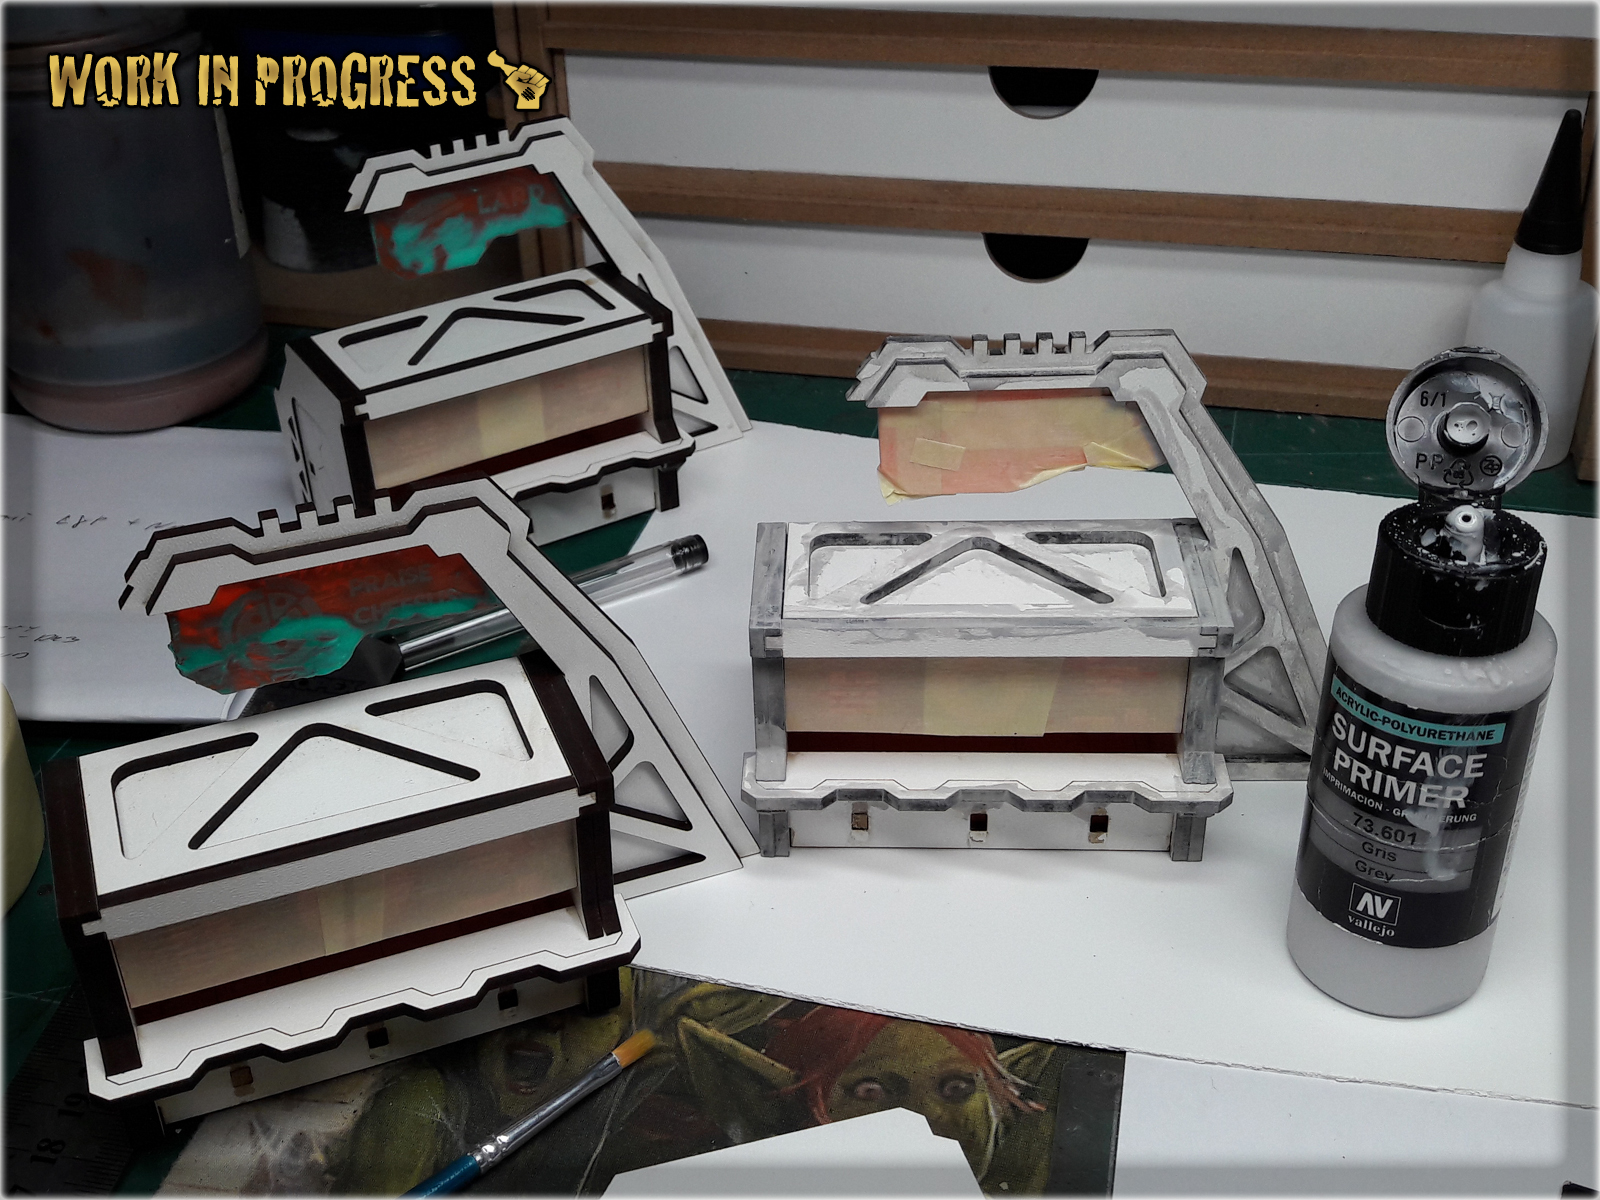
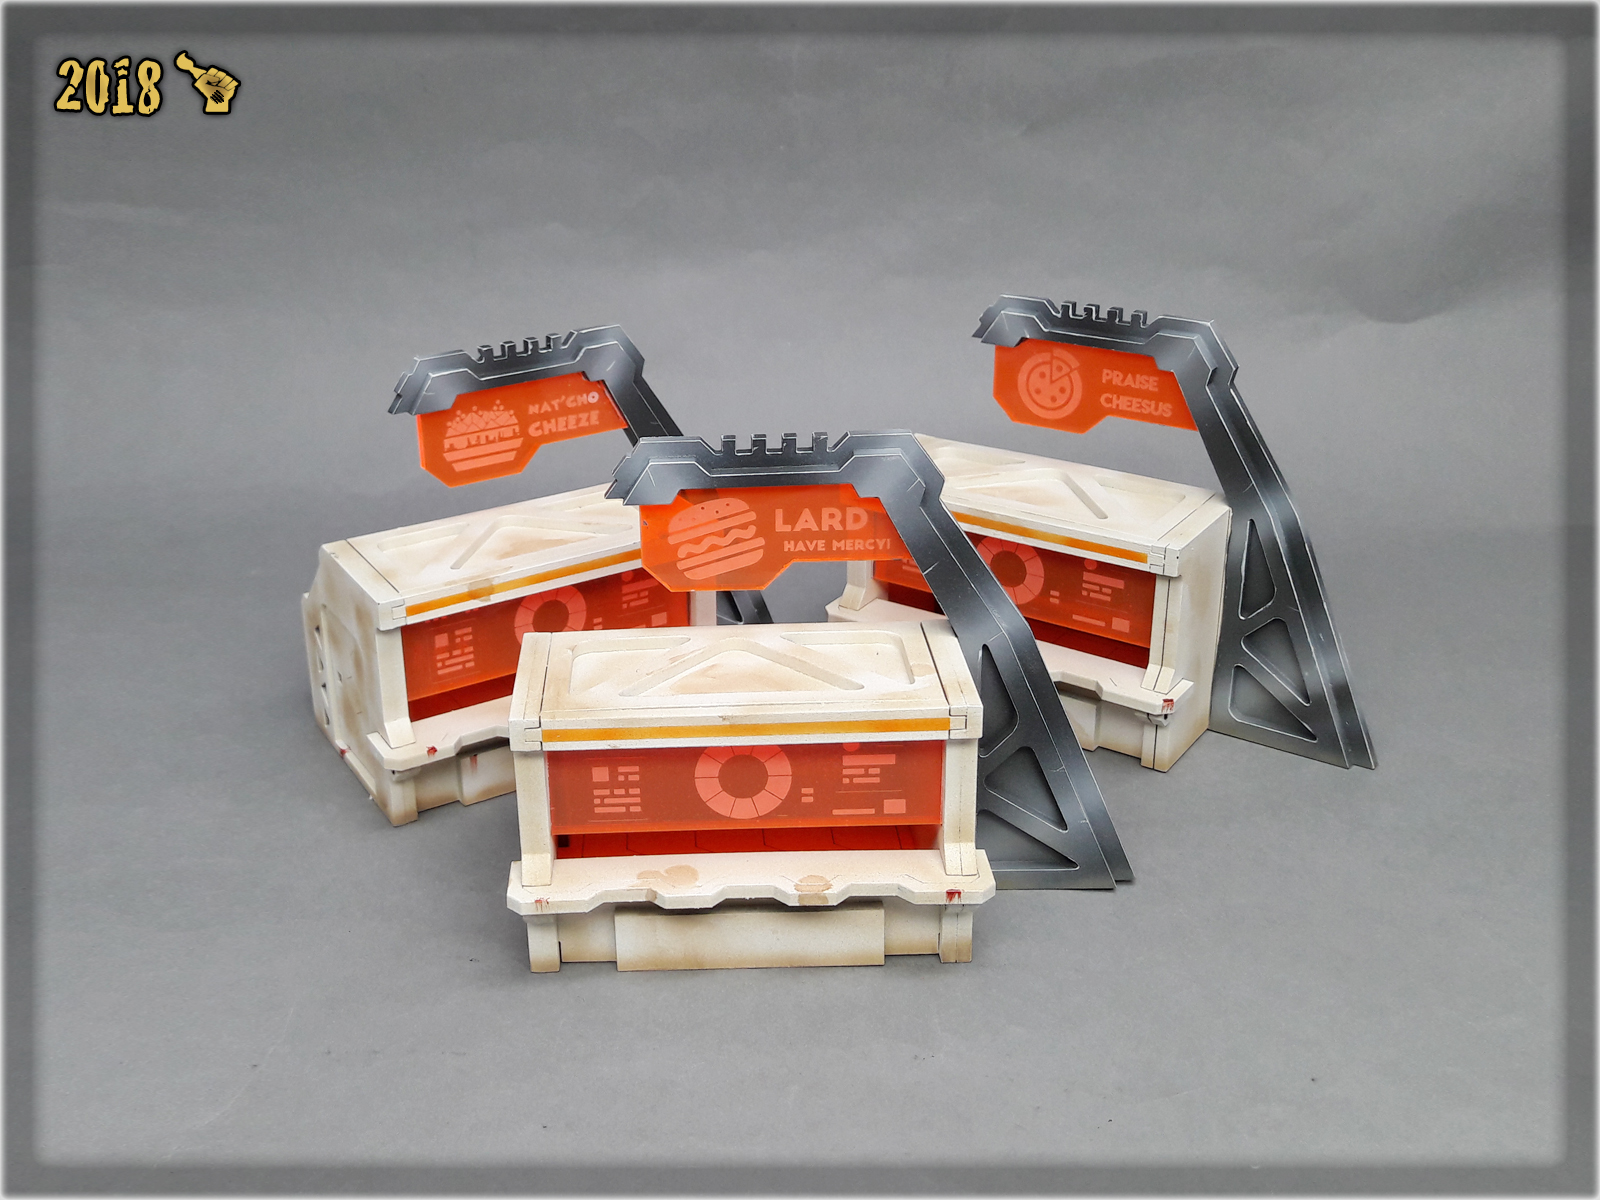
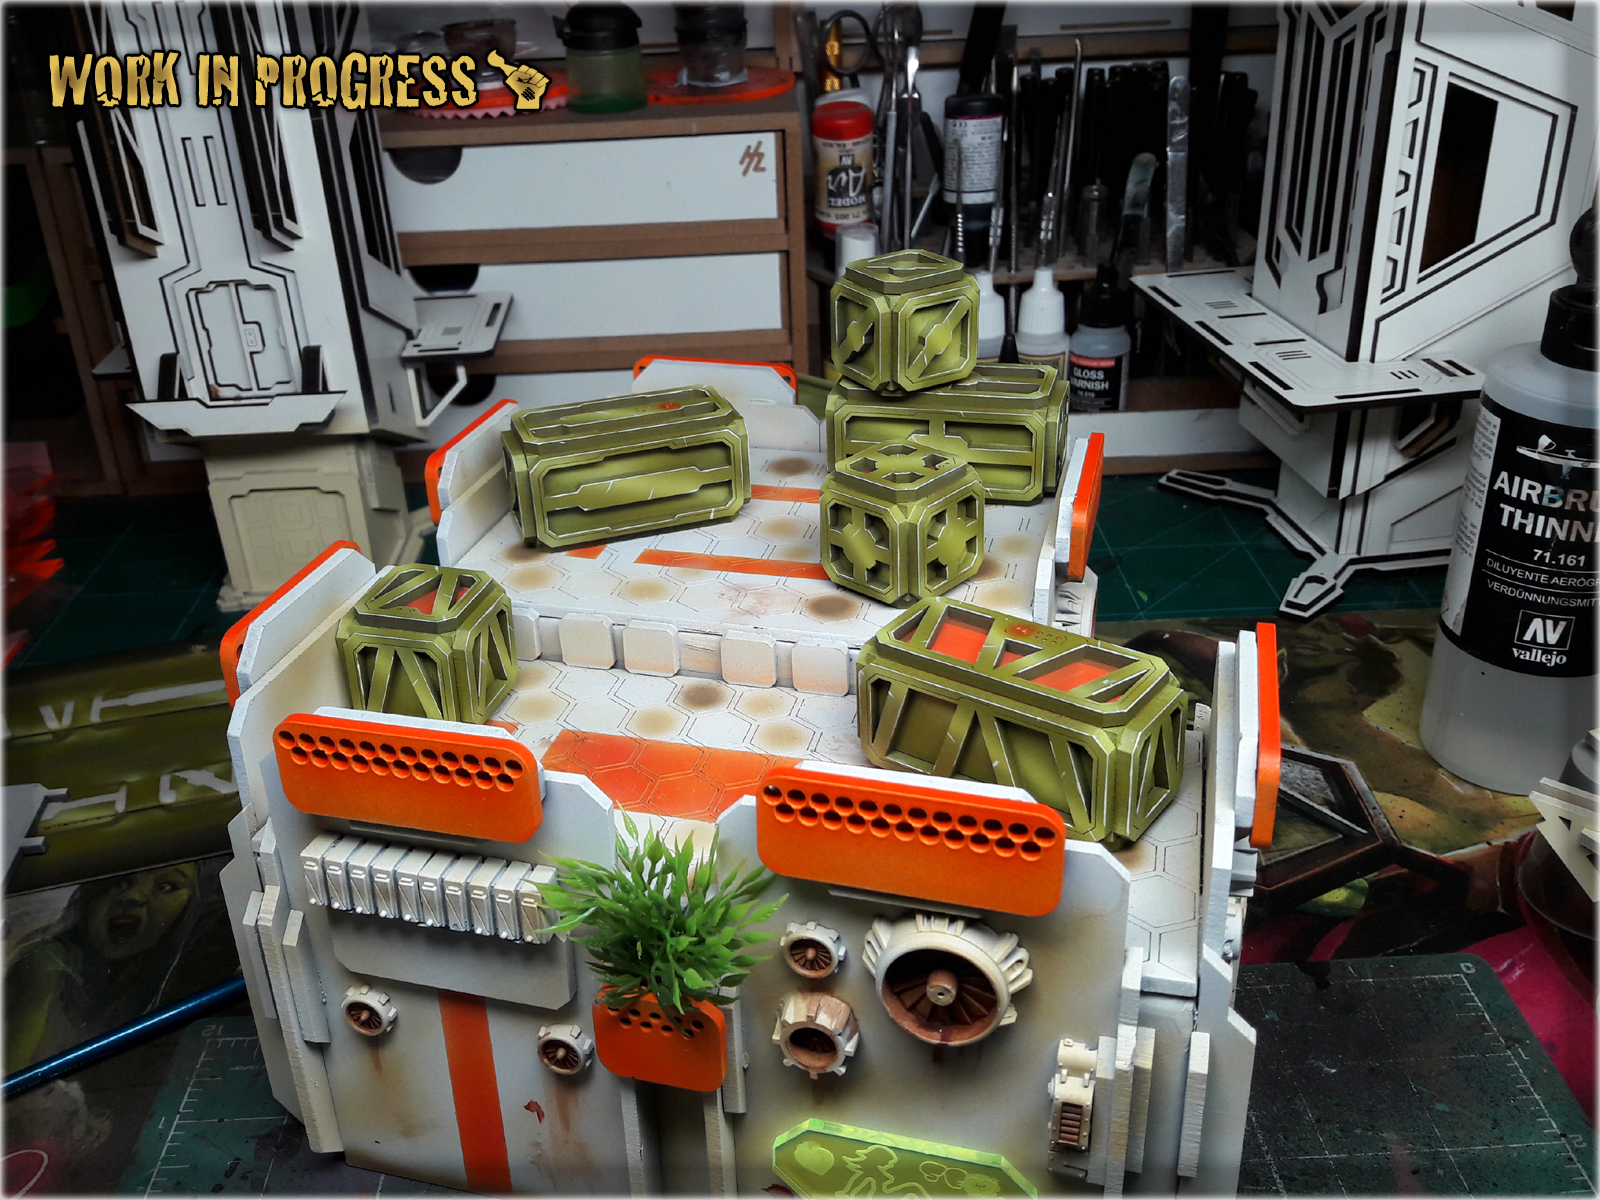
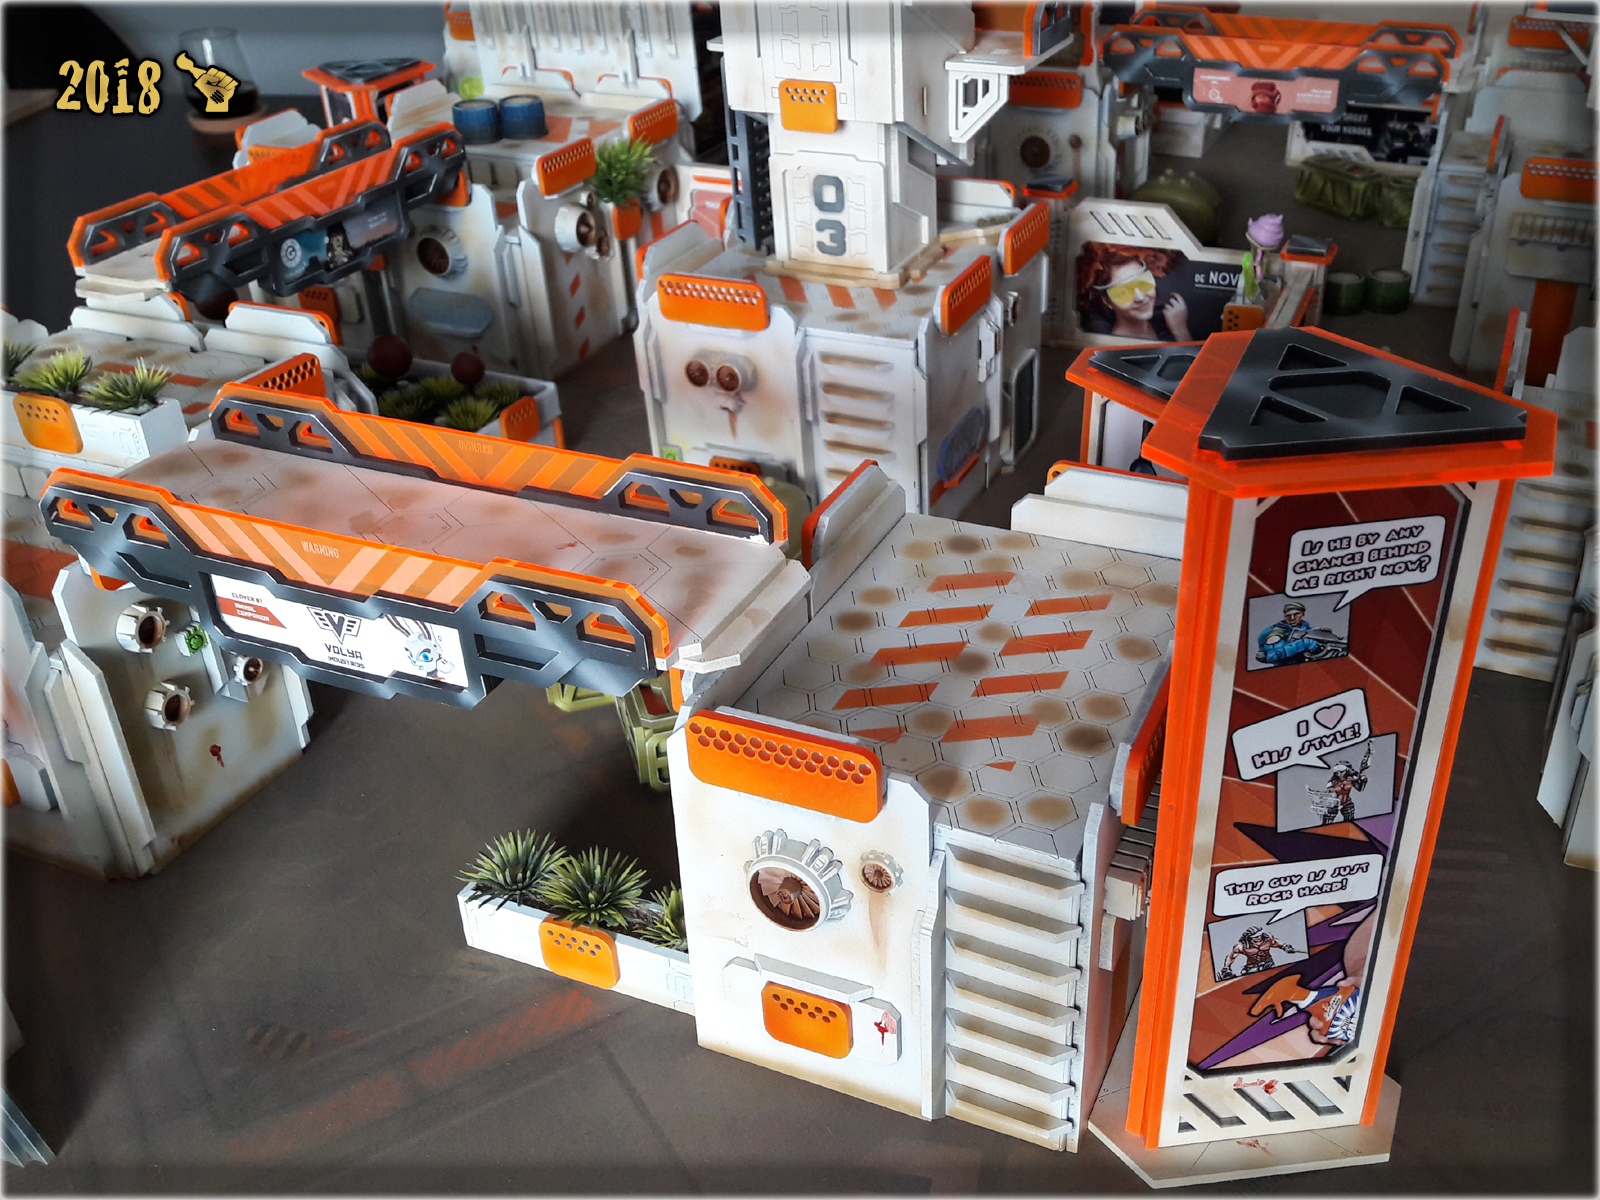
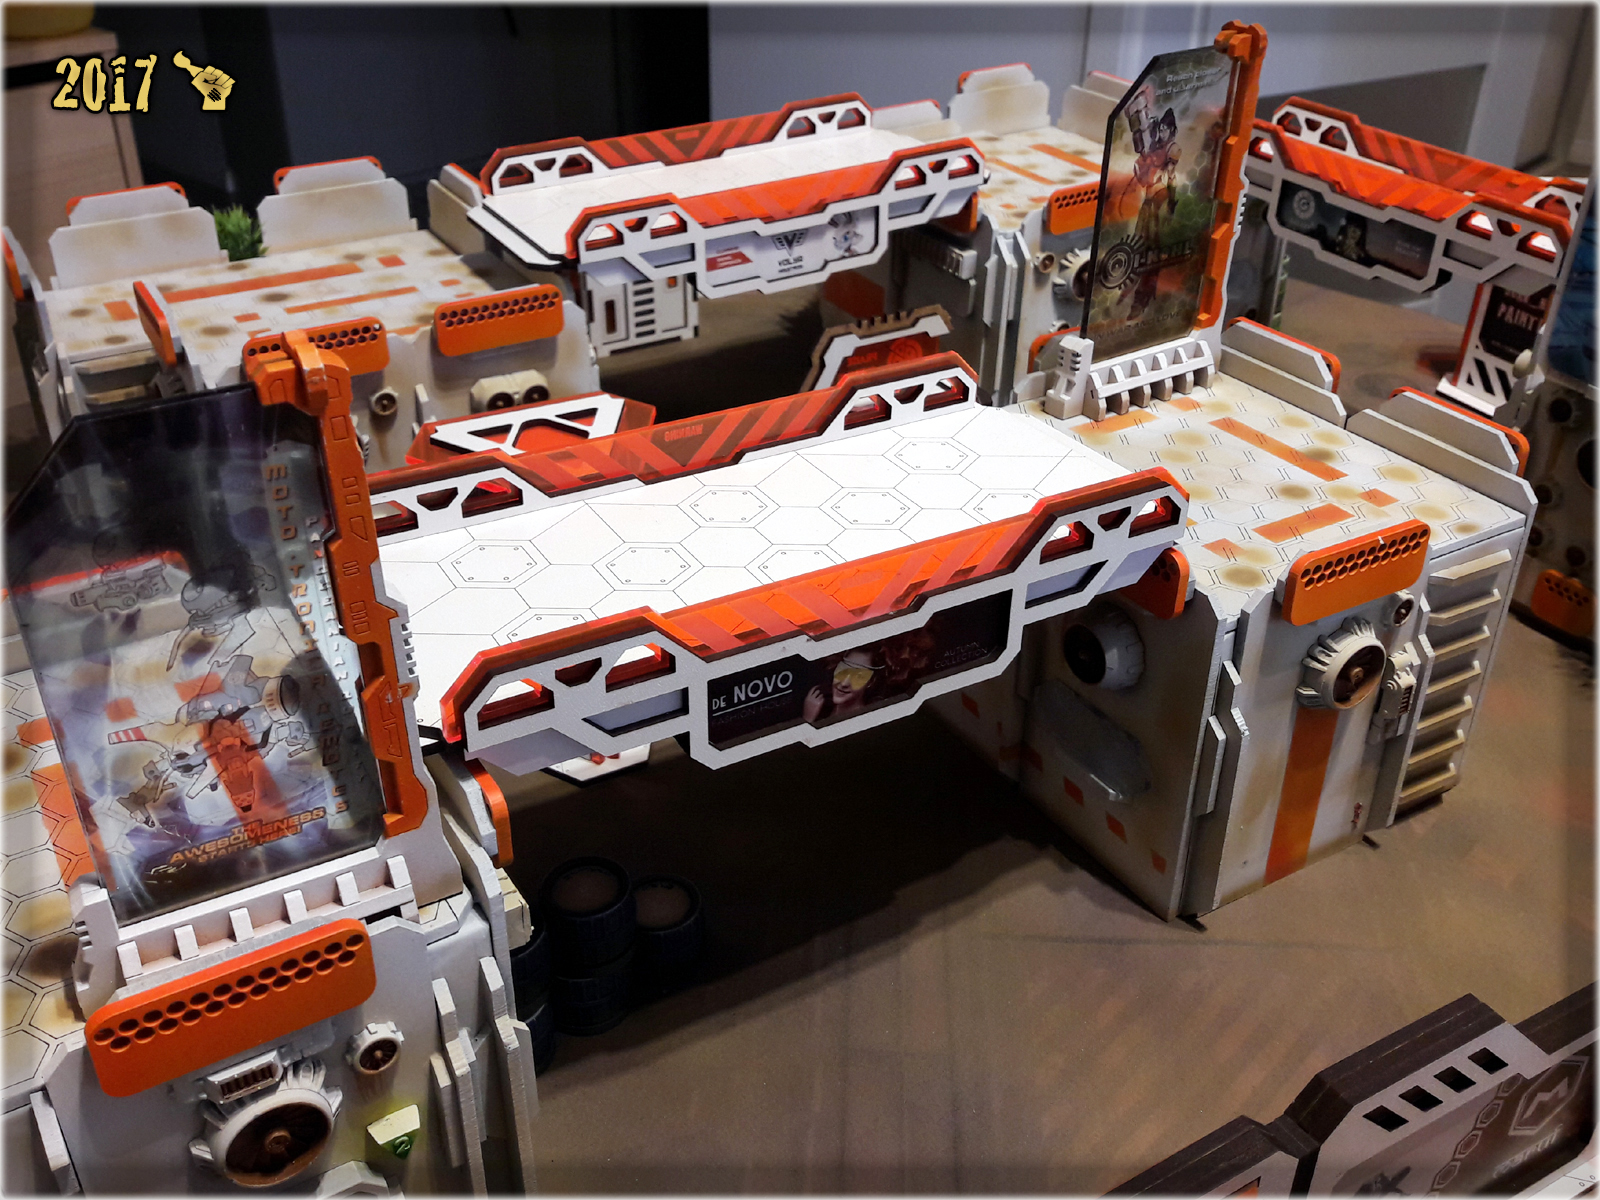
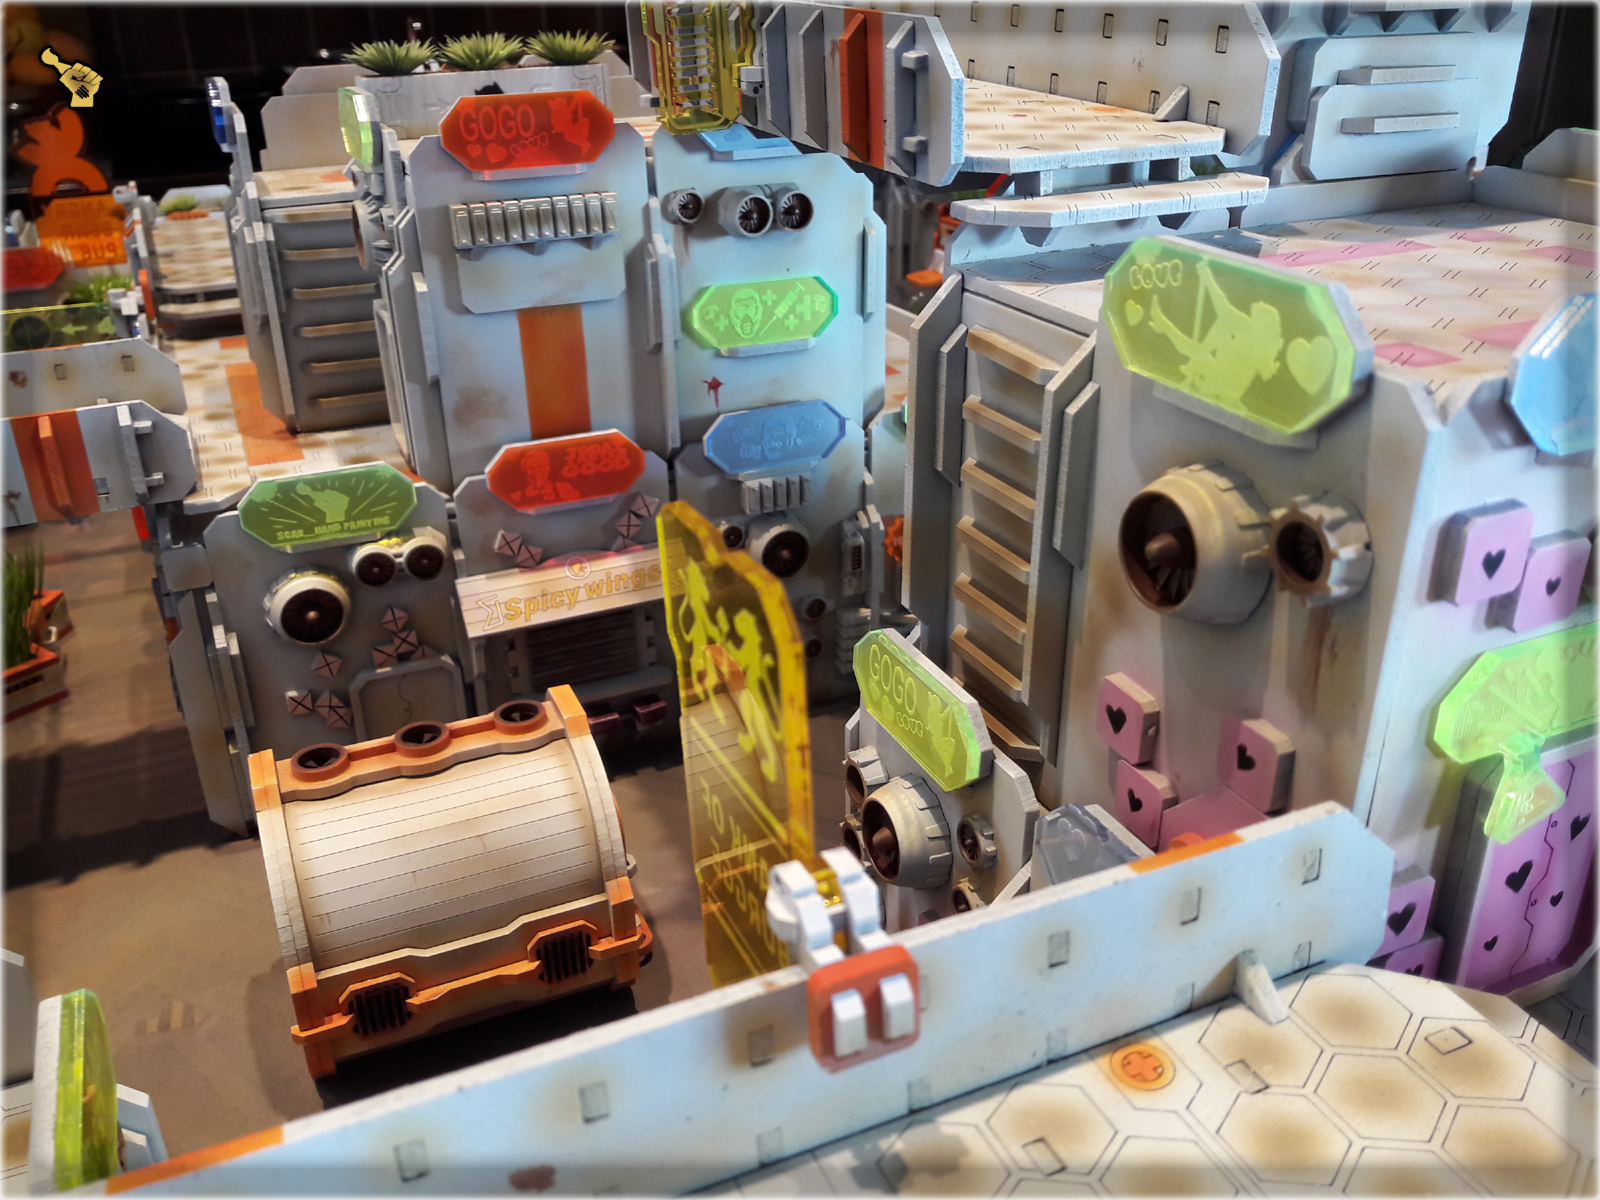
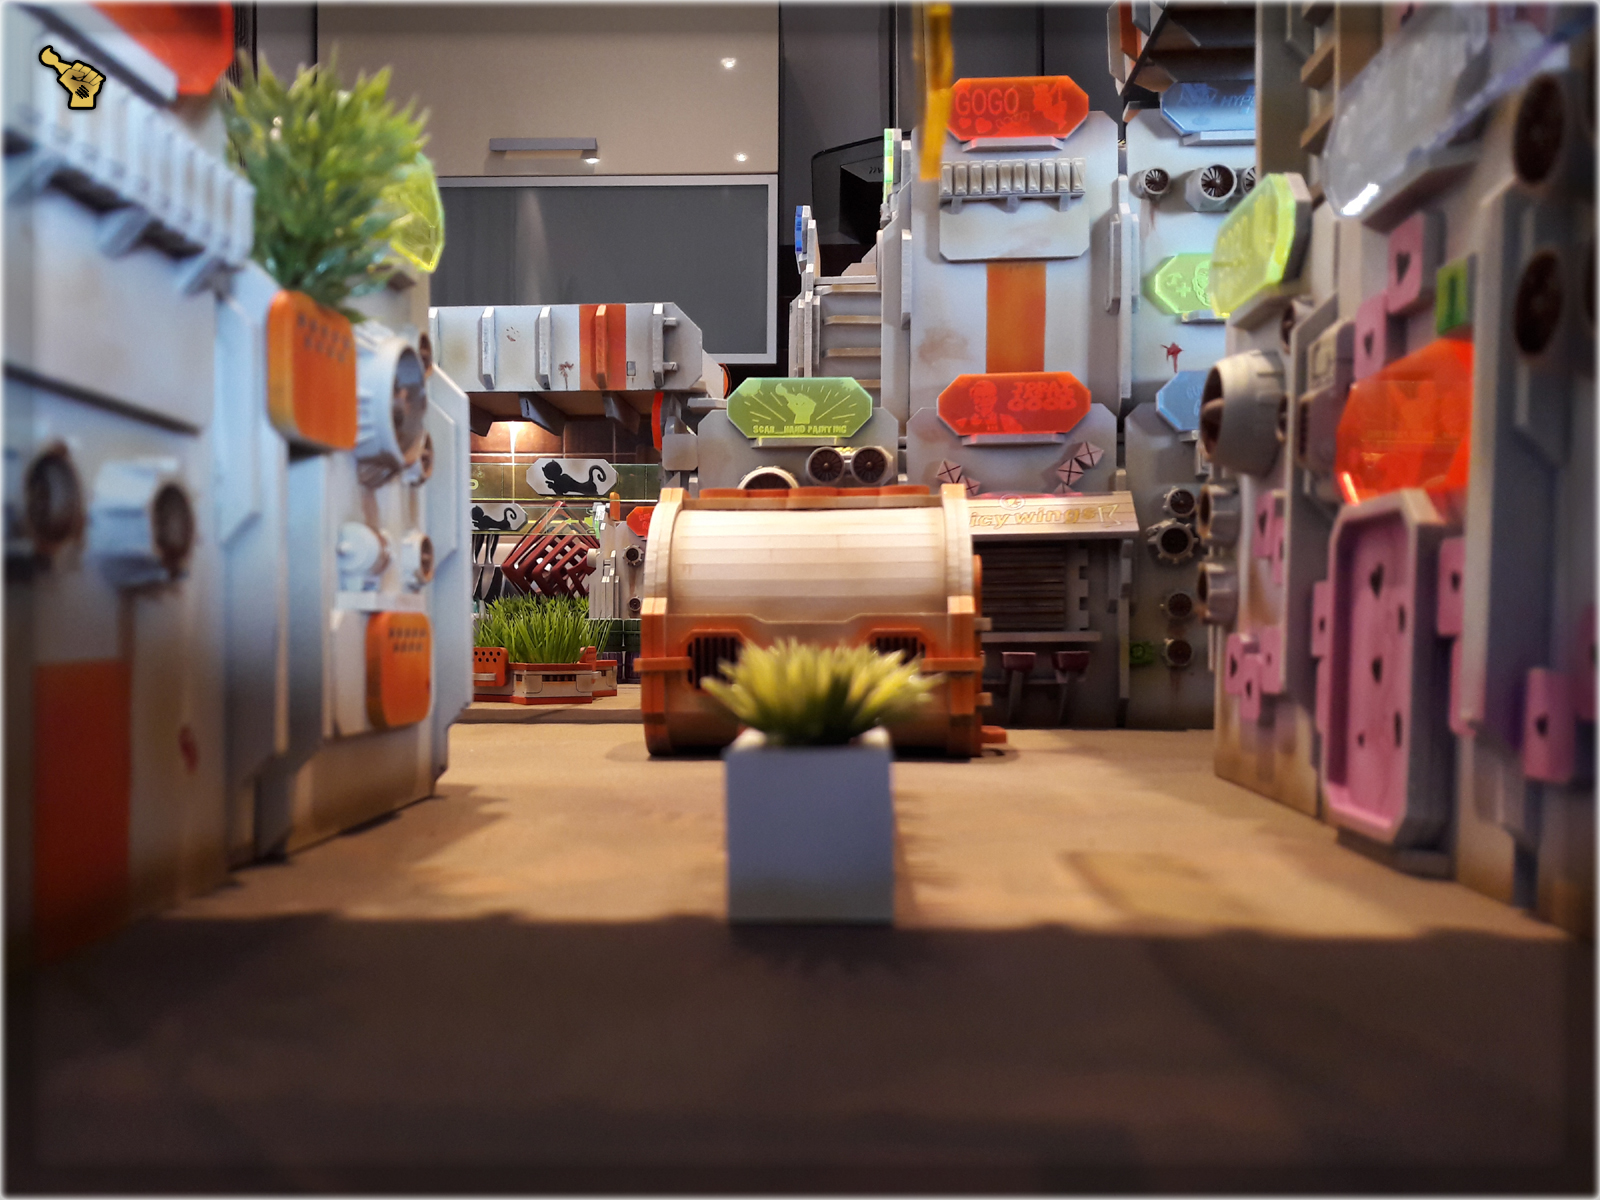
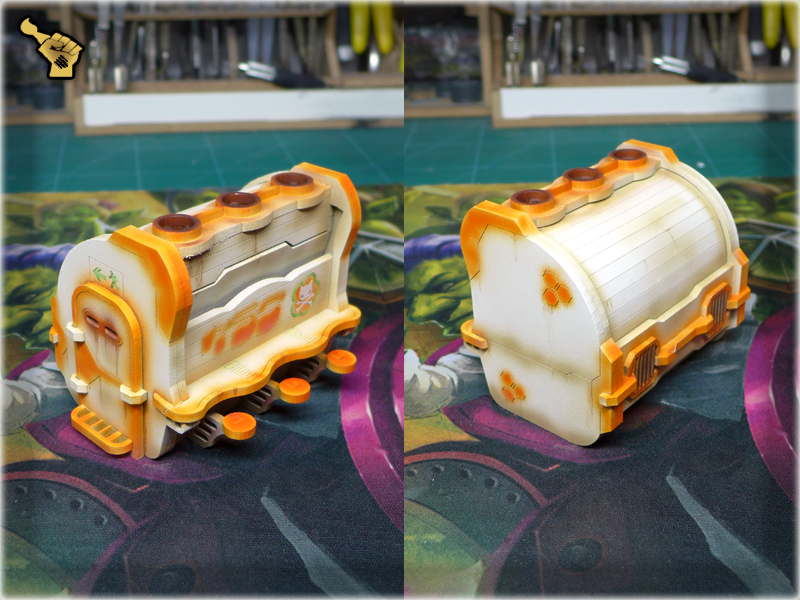
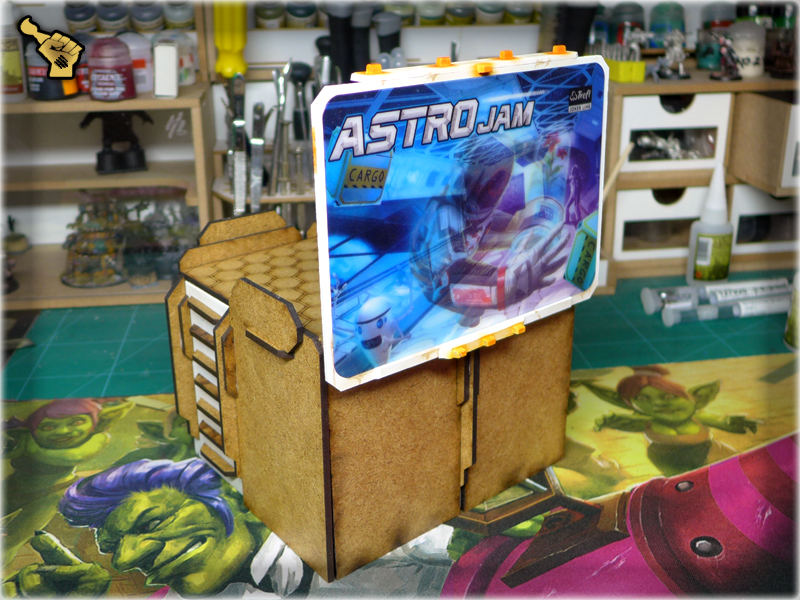
Another addition to The Colony – ‘SF010 Cargo Crates’. Slowly my own designs and scrap-built scenery are forced off the gaming board. I don’t mind it, cause at this point I’m already hooked on Gingermane’s stuff either way 😛

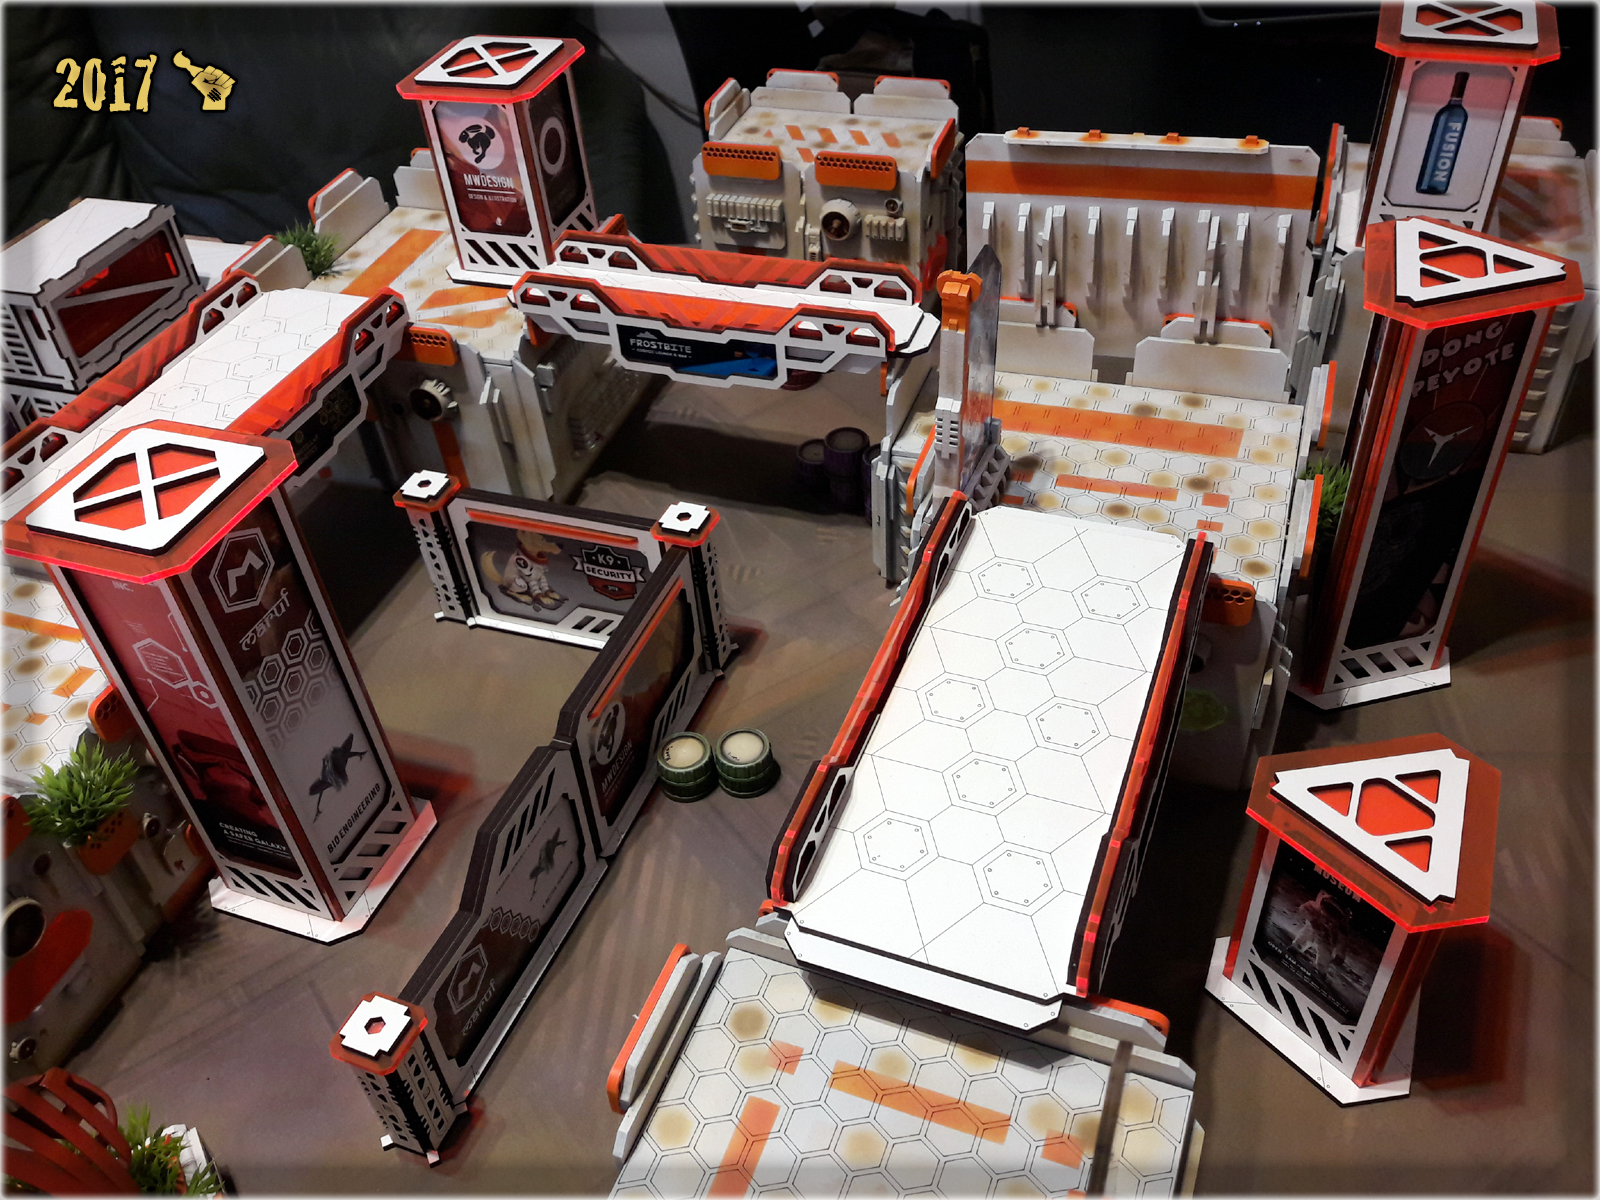
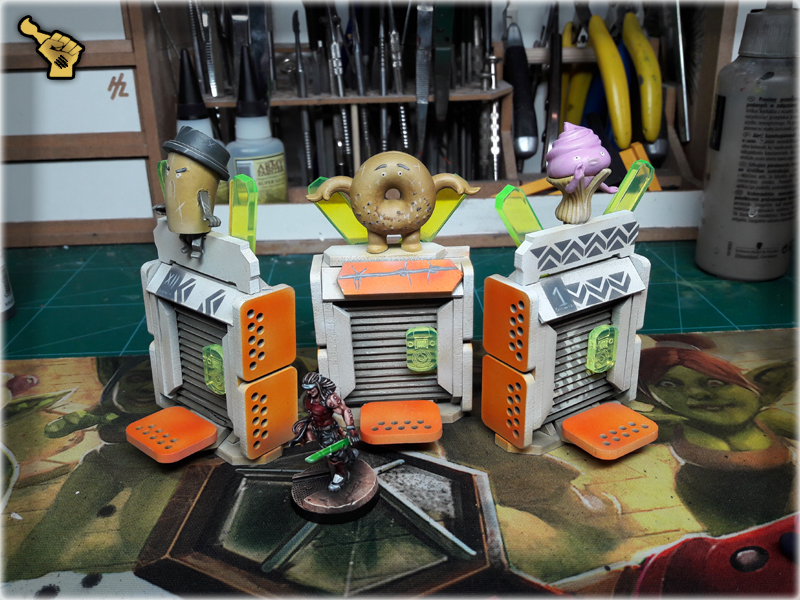
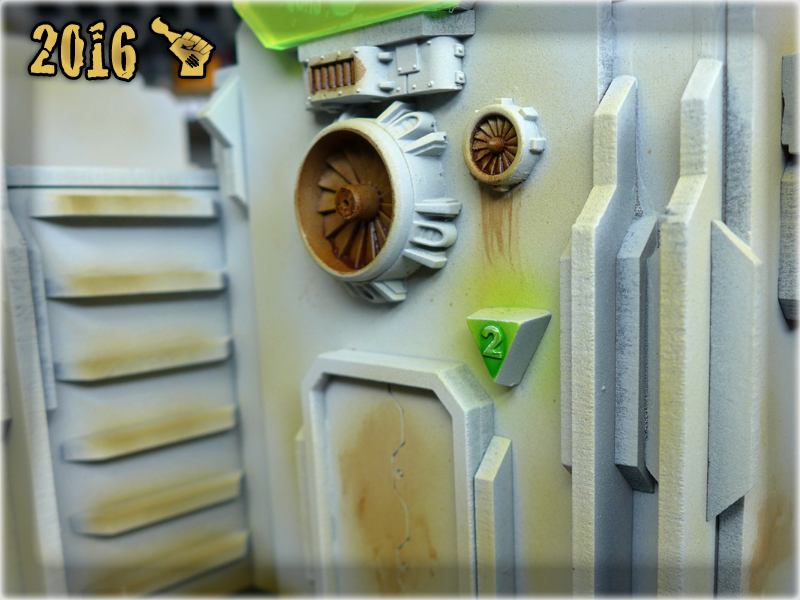
With ‘SF024 The Tower’ I intorudced black/grey colour to The Colony’s overall scheme. It seem to compliment the board so I followed up on this, going back to older scenery pieces. I wander if these, once paper box, buildings will ever rest…
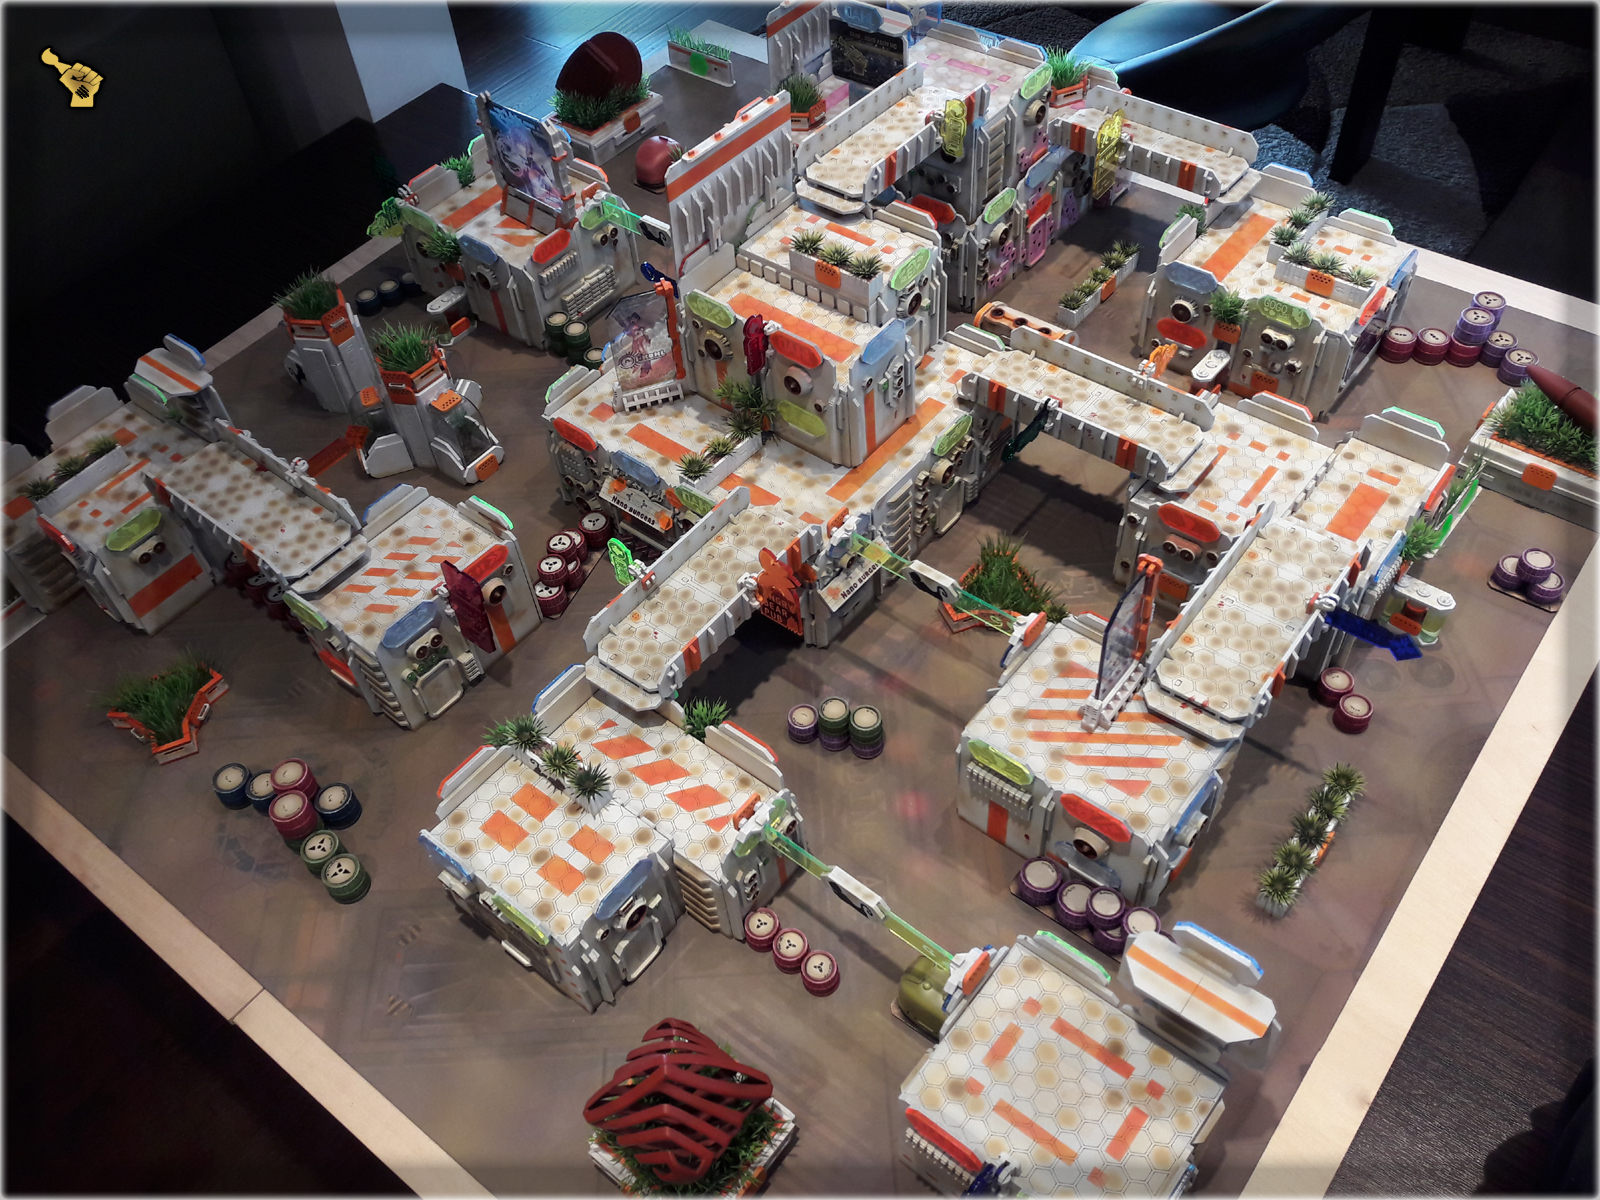
One day ‘The Colony’ will be finished, but seeing how it changes time and time again I can only say TO BE CONTINUED…

Six months is a lot of time to gather material for another project related article, and thus The Colony Special Project is back with entire new installment about this Infinity gaming board. I just couldn’t leave this project unattended for much longer.
Let me start by telling you this: I love my gaming board. That being said, at some point I felt like something didn’t quite bangt right. The board was finished, I got a lot of awesome, positive feedback about it, still deep down I felt something is off. There’s always place for improvement so my inner artist raged while being unable to pinpoint the exact reason of my discomfort. It took a while for me to understand that the board looked too chaotic to absorb. All the yellow, blue and deep clear-red did not work well with White-Sand-Orange-Green colour scheme.

I started introducing changes by dumping the obvious source of unfitting colours – the Holo Ads, and adding more green to the board with brand new set of Antenocitis Ad Stands. It partially worked but I wasn’t fully satisfied with the result…

The real change sweeped throughout The Colony quite suddenly. Everything, and I can’t stress this enough, because of the Gingermane Studio and it’s scenery. Long story short – there is this guy for whom I paint some Infinity miniatures, and one day he is like ‘I’m designing some scenery pieces, what you think?’ and I’m like ‘OMG I love this shit!’ and he’s like ‘Wanna grab some?’ and I’m like ‘Duuh! Shut up and take my money!’… All of the sudden I find myself knee deep in Gingermane’s scenery pieces which not only look amazing, but also fit right into my gaming board’s theme. They seem to be plucked straight out of my deepest desires – both in case of looks and playability.
This was the exact point at which I decided to finally ‘repair the damage’ I done to my gaming board and contain the colour palette of all the stuff that appears on it…

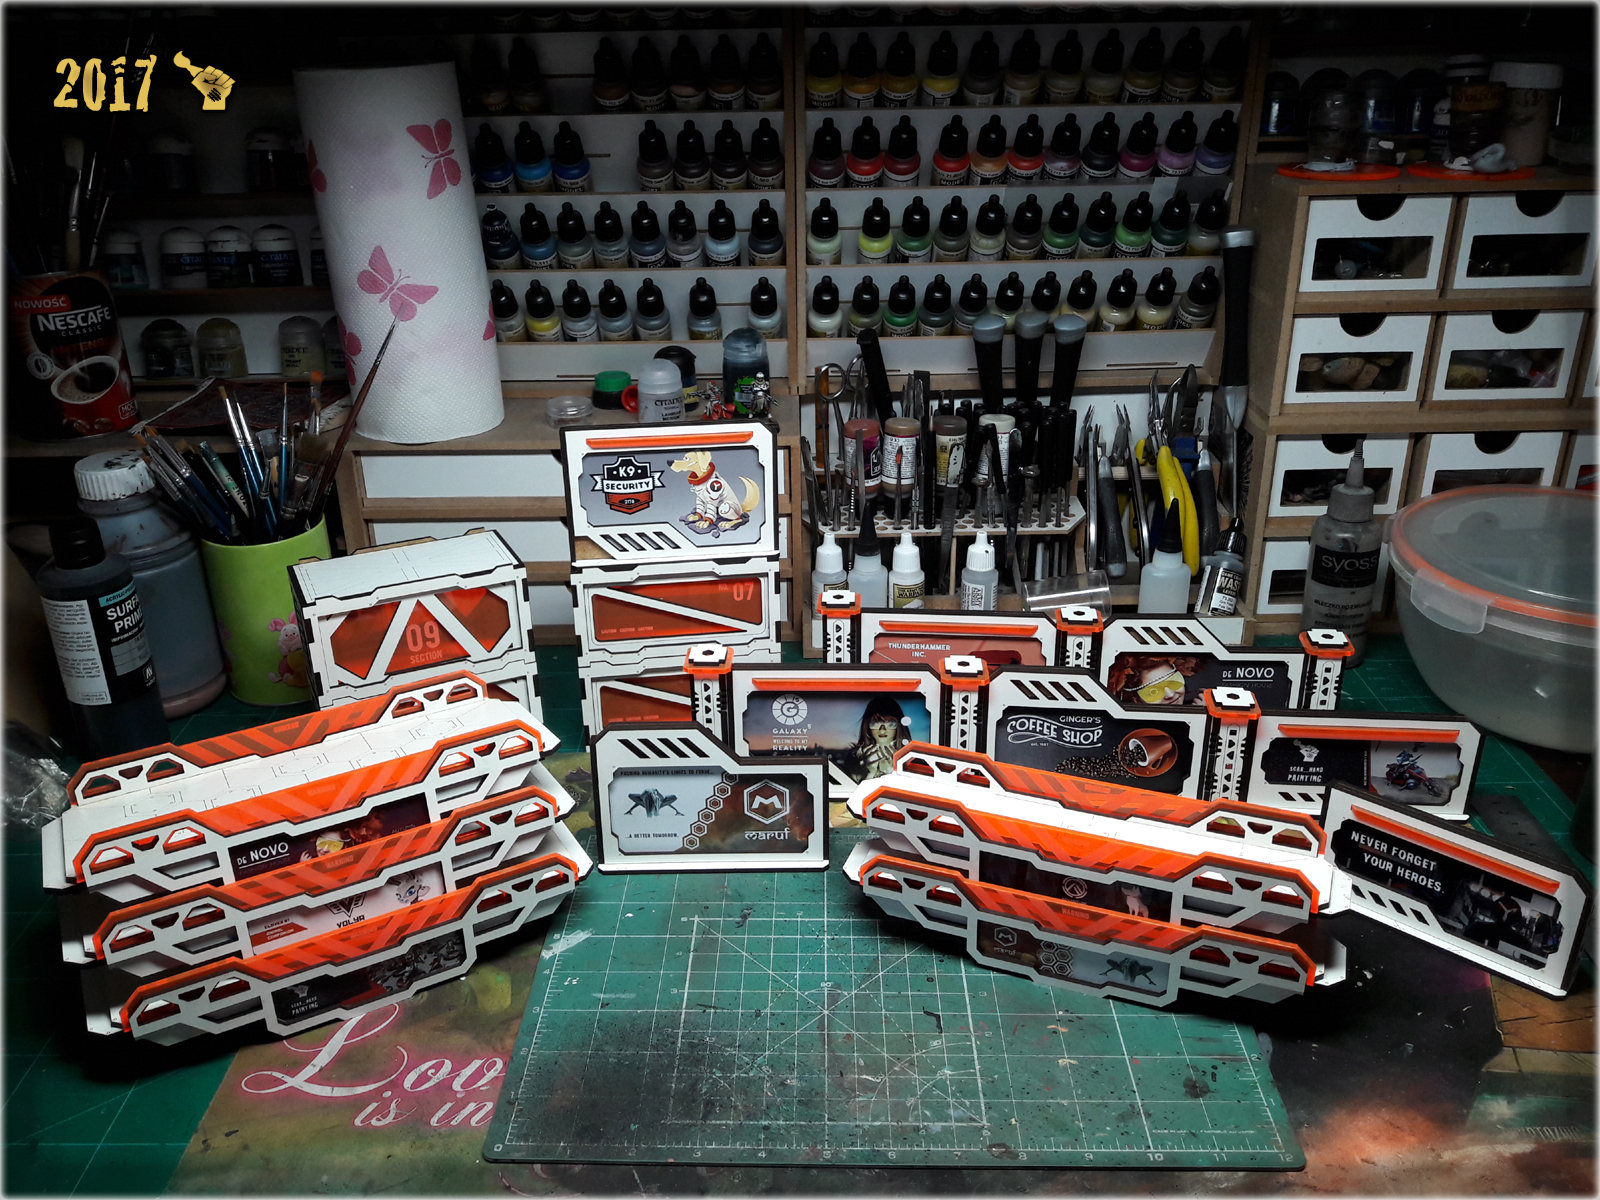
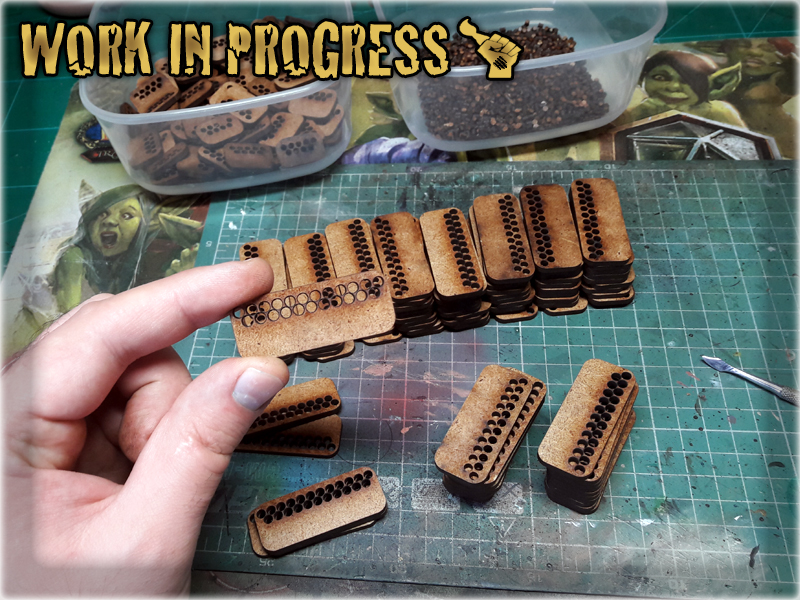
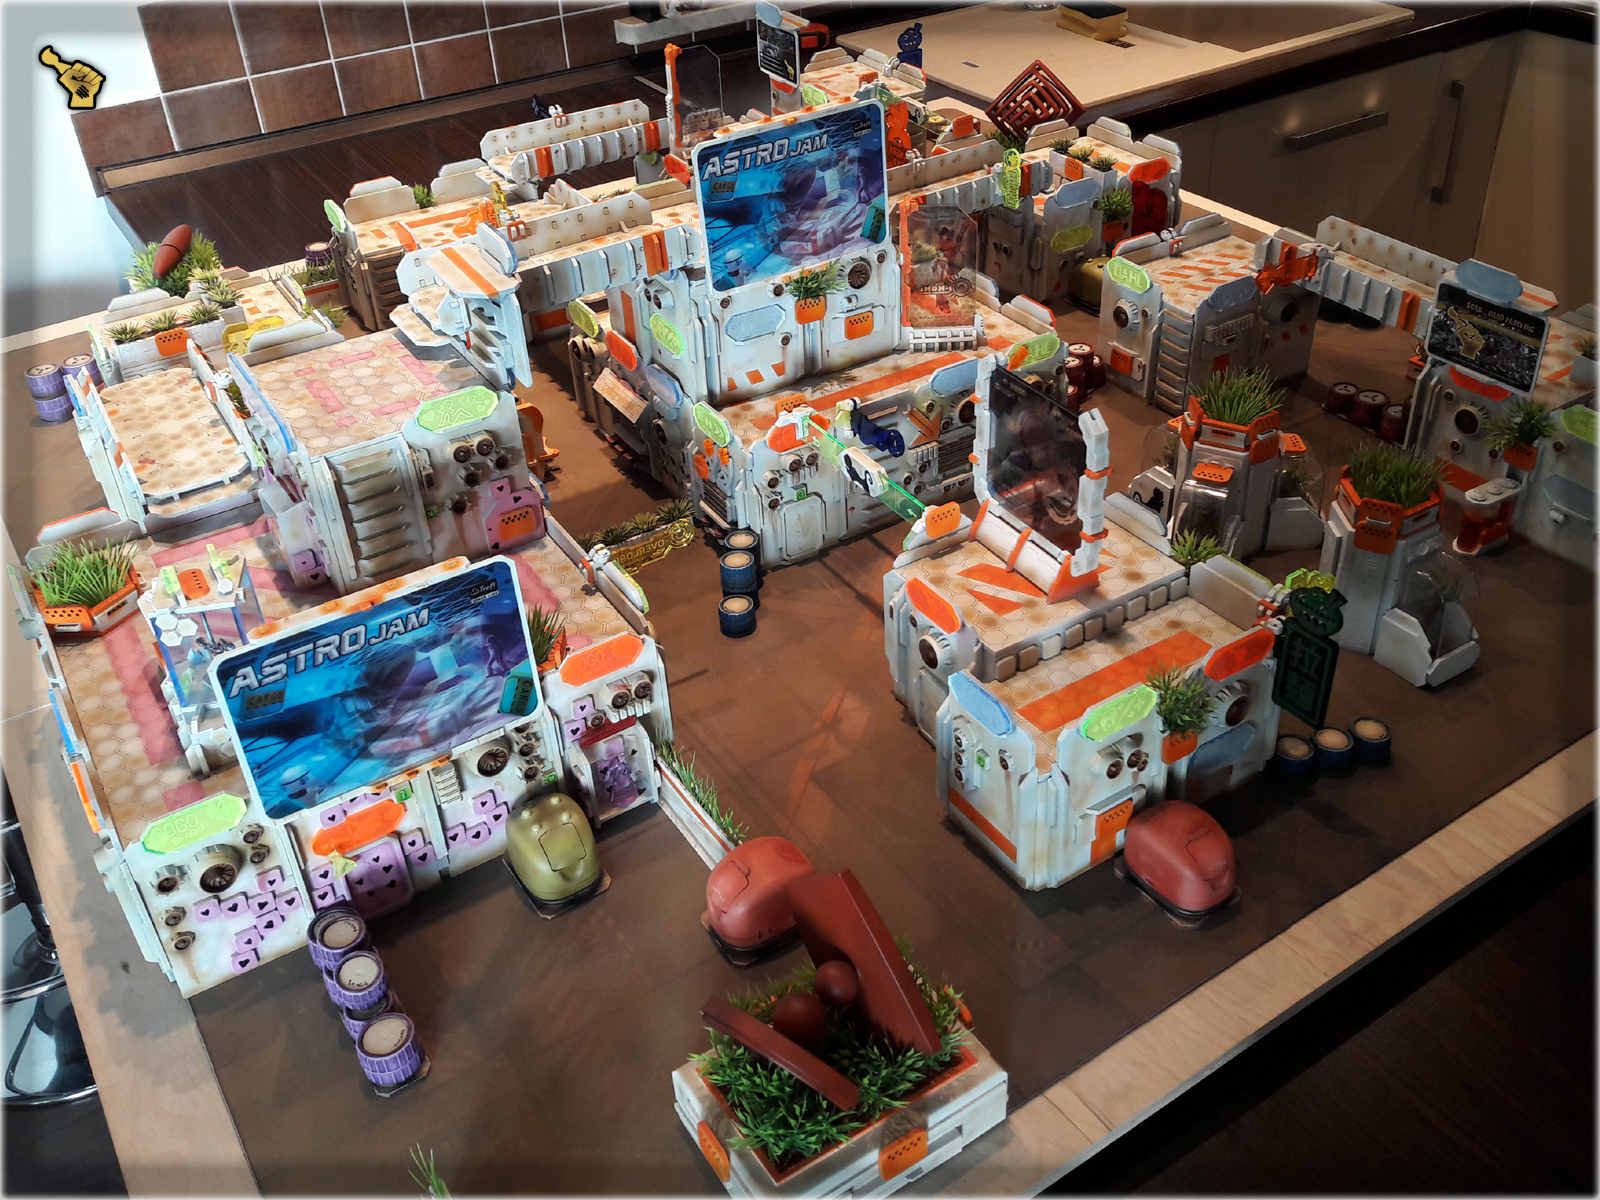
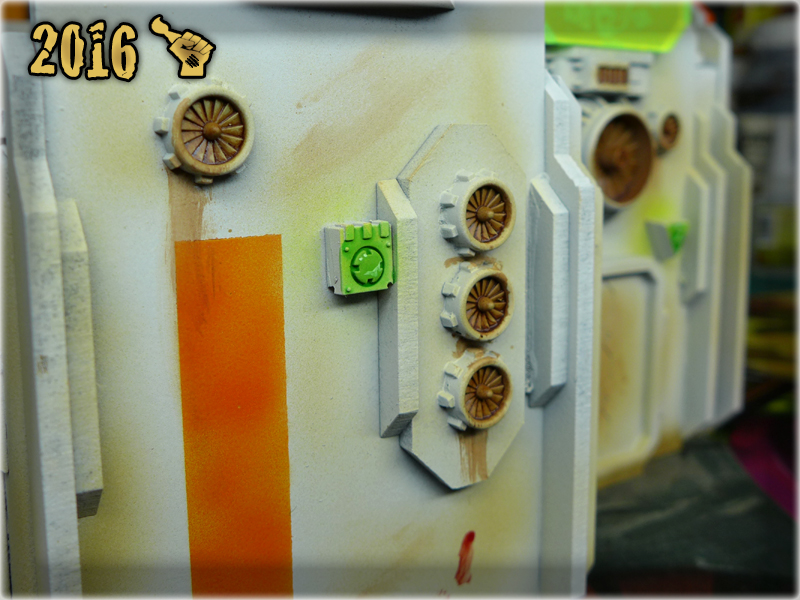
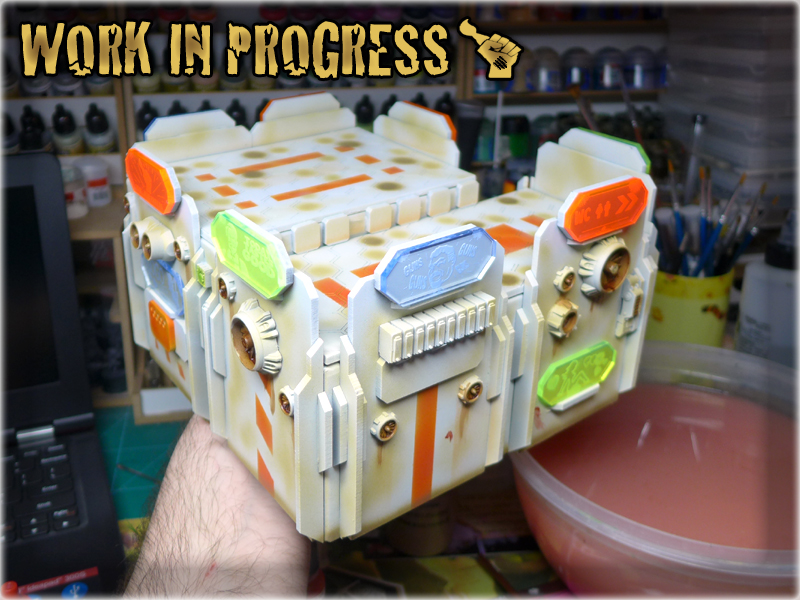
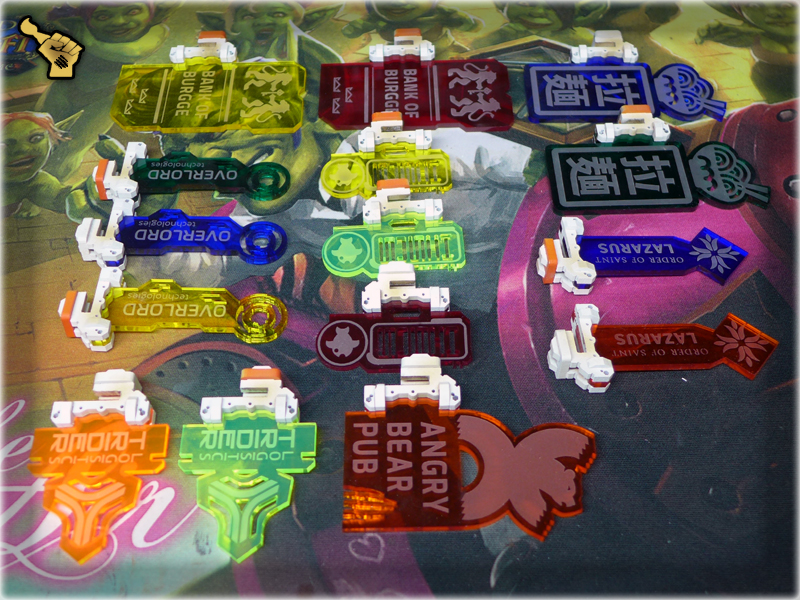
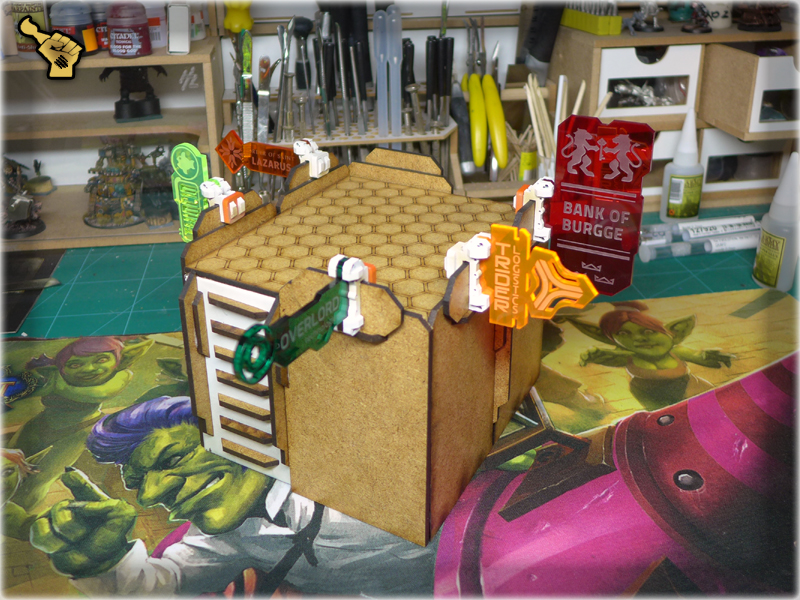
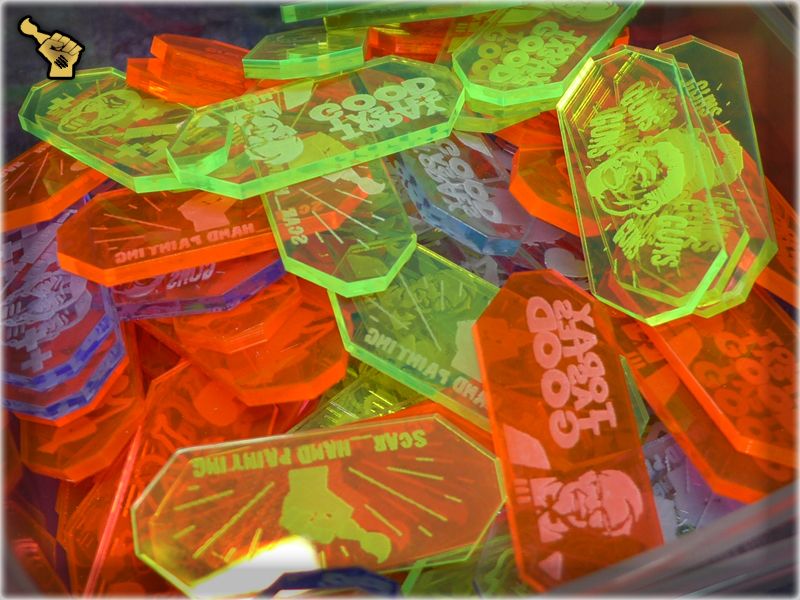
The final decision was made: Coloured Plexi Ads adorning the buildings had to go. Upon reaching this conclusion I instantly contacted my besties from Micro Art Studio and ordered a huge pile of replacement pieces. I’ve figured that a bigger version of ’rounded orange piece’ would work the best for the theme and overall looks. Soon after, I got a delivery of more than a hundred pieces necessary to finalize the ‘grand change’…
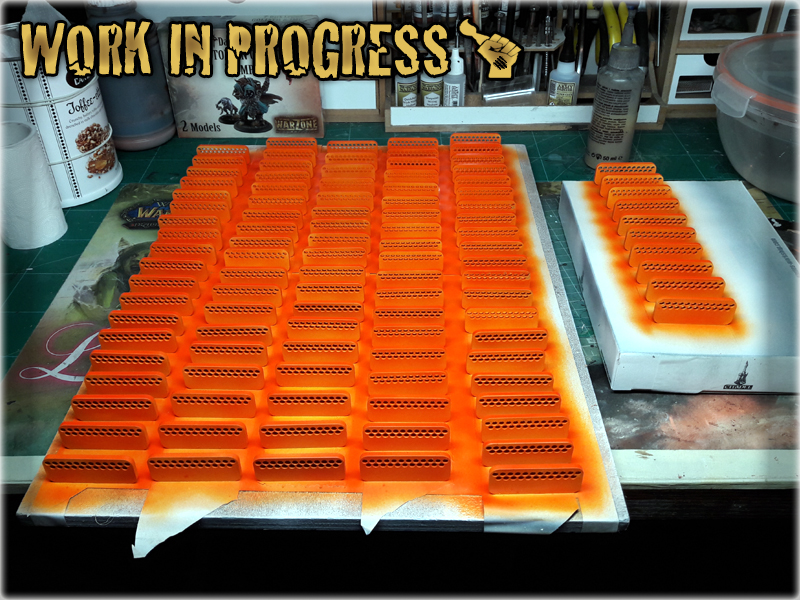
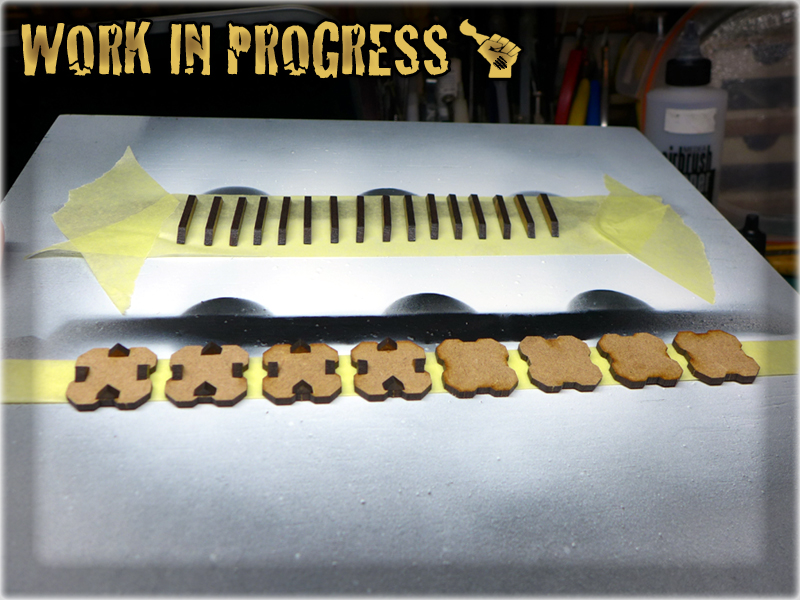
Preparing these was harsh. Had to clean them all of soot leftovers and remove small pieces left inside some of the laser-cut holes. Once done I painted all the pieces in a single go, then swaped Plexi Ads with them. The result is exactly how I hoped for.


The road to perfect gaming table streches before me and it’ll take some time till I get there, but I can see the destination. What’s left for me to do is to add dots of Vallejo’s Sandy Yellow here and there to tone down the Gingermane’s white a bit. Afterwards The Colony should be finally complete… at least for some time. I promis to bring you more of The Colony in next installment – probably six months from now :P.

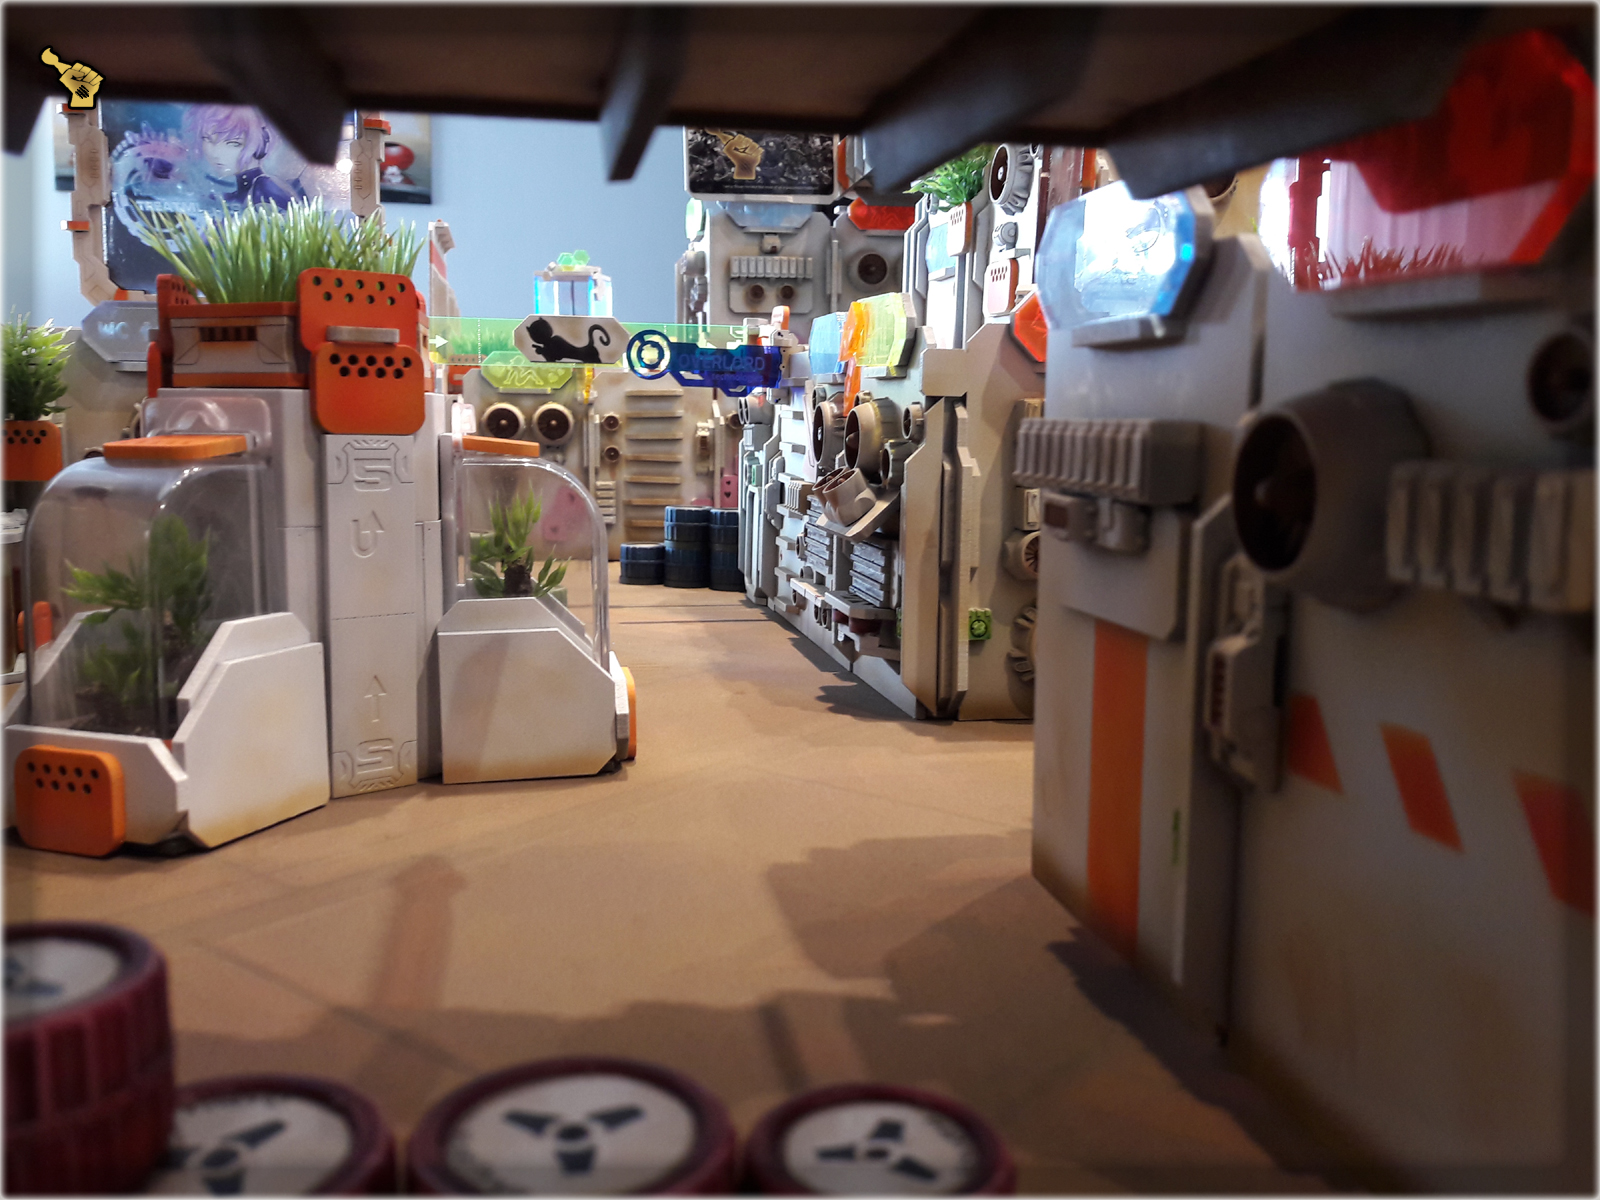
It has been six months of peace for The Colony Special Project. I’ve mentioned before that such grand projects are never fully complete – so here I am, adding even more stuff to the already vast collection of scenery. The reason for this is obviously the restless muse, but also I grew up to a decision to expand my scenery collection. On top of more variety I will be able to cover two gaming boards and that might come in handy from time to time…

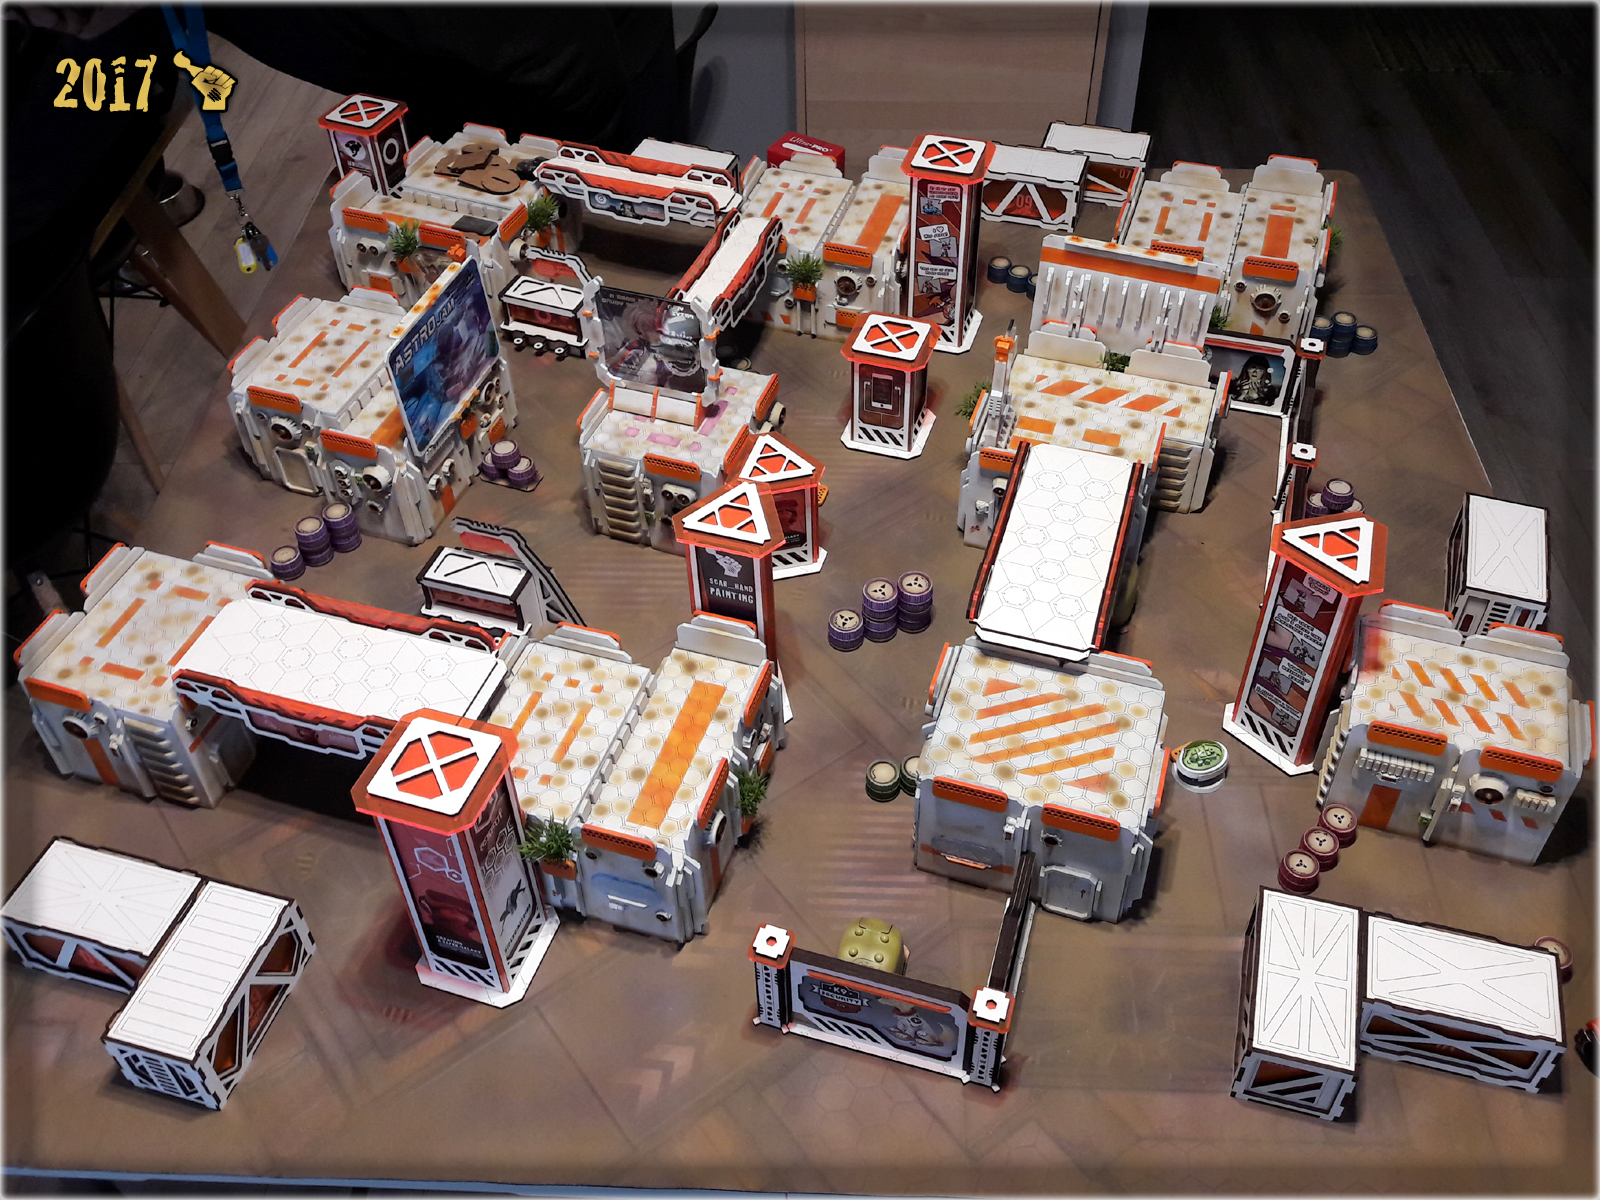
Not so long ago I have attended a big Infinity the Game event. About 40 participating players, including some of my friends. As a co-organizer I took The Colony with me, so that along with Micro Art Studio, Zen Terrain and After Hours Workshop, there were more fully painted tables at the event. I even streched my terrain set to cover two gaming tables, thus was hyped by the vision of creeping onto another 48×48″ board. At that point I already had some new stuff purchased at Antenocitis, so it’s not like I was ever going to stop anyway 😛
Still, once the dust settled and I had a moment to thik about it, I realized that more terrain was inevitable if I was to do it again in the future…
The idea was to build more interresting stuff to fill all the empty spaces between buildings. At that point more buildings were rather out of question as I’d rather produced terrain pieces to improove single gaming table, with an option to allow me to eliminate vast empty spaces if I went double…
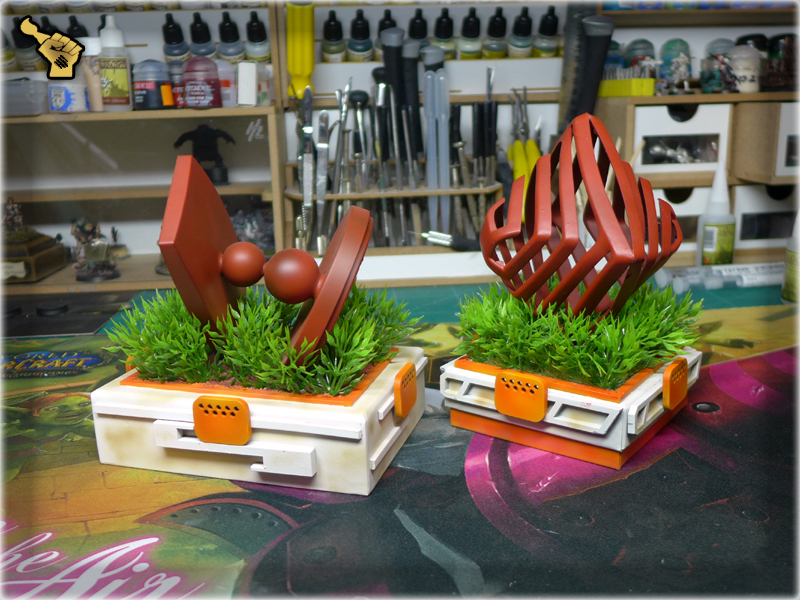
The obvious choice was to produce more sculptures, as these look nice, are awesome LOF blockers and work pretty well with the theme of The Colony.
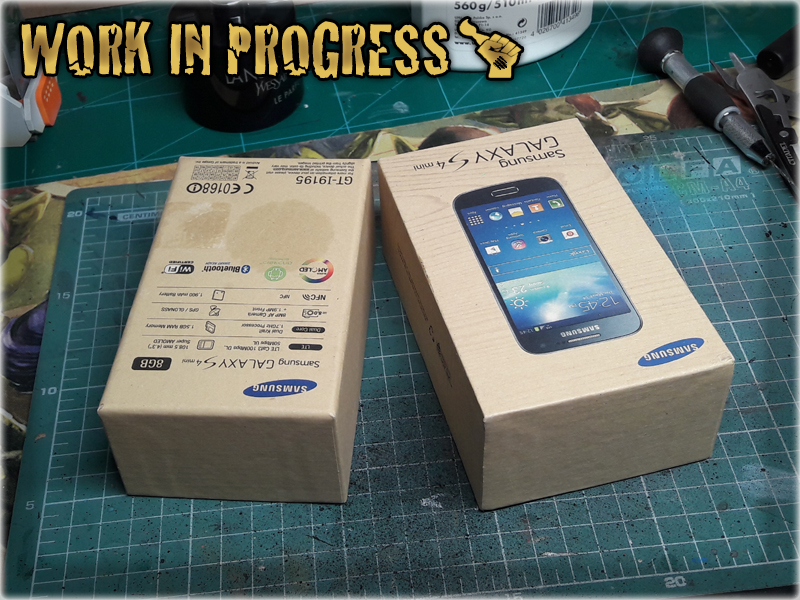
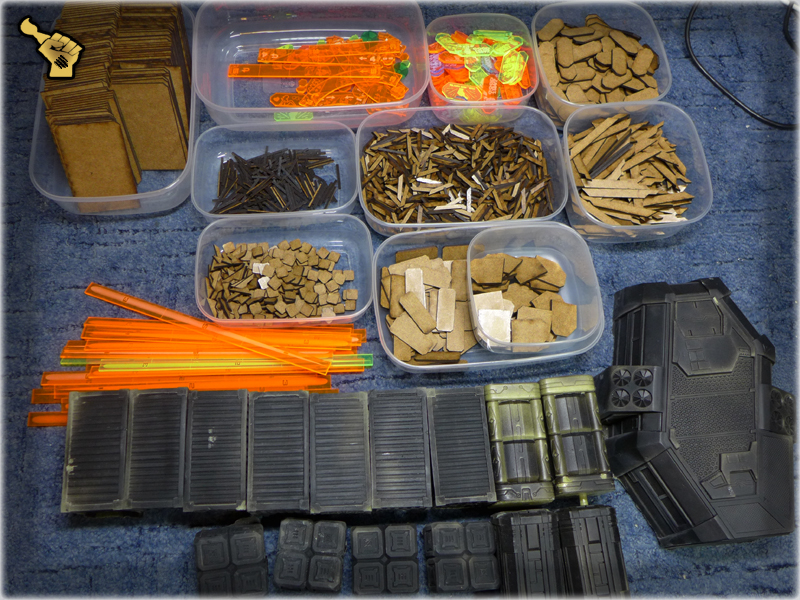
For this purpose I used a hard box and some random leftovers provided by friendly Terrain making companies and my wife.

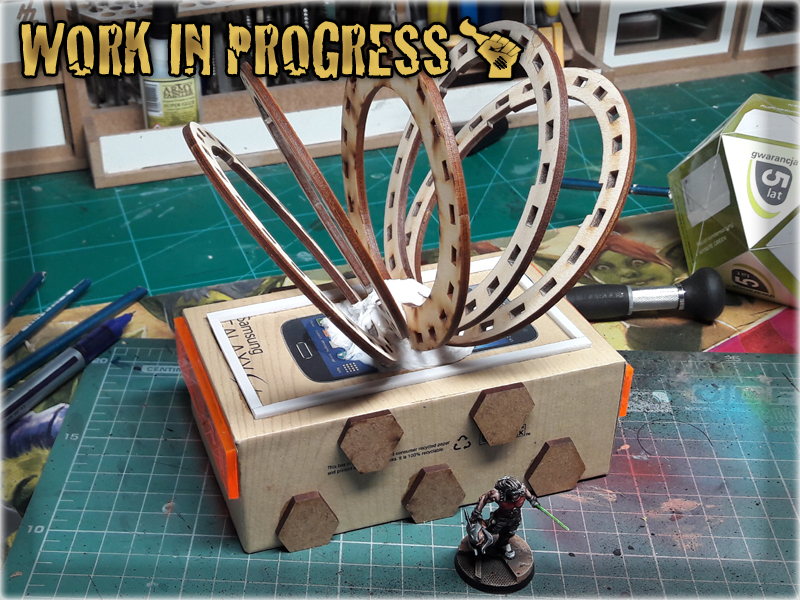
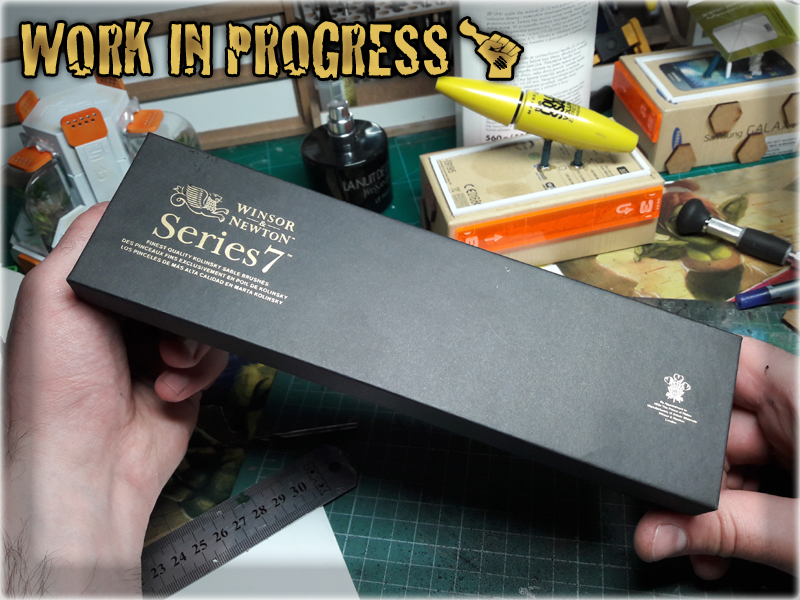
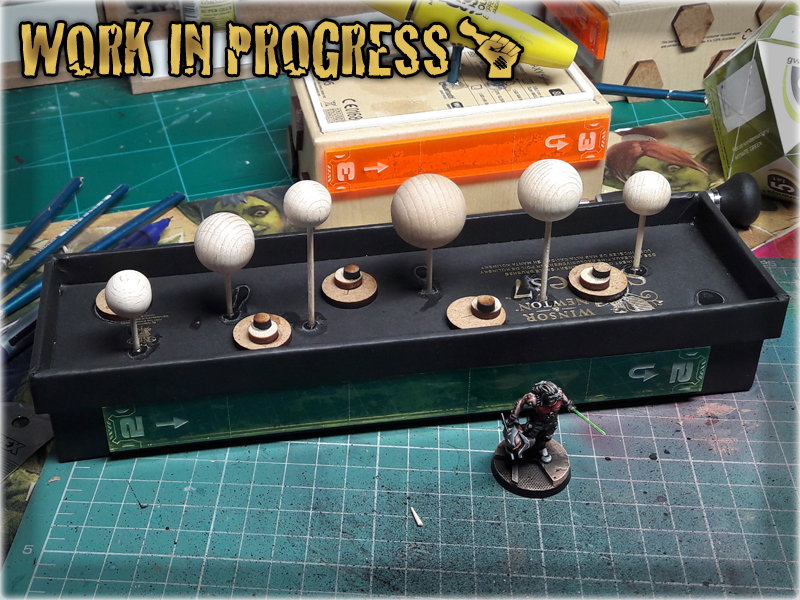
This one was a totally new approach to the ‘sculpture’ idea. The exclusive Winsor & Newton brush box was an inspiration on it’s own and summed with my newly acquired experience in using clear resin – a fountain or a pond was a must go. I decided to use wooden balls as a sculpture to compliment the water theme with their smooth oval shapes. Now I feel like a second Winsor & Newton box is soon to follow…
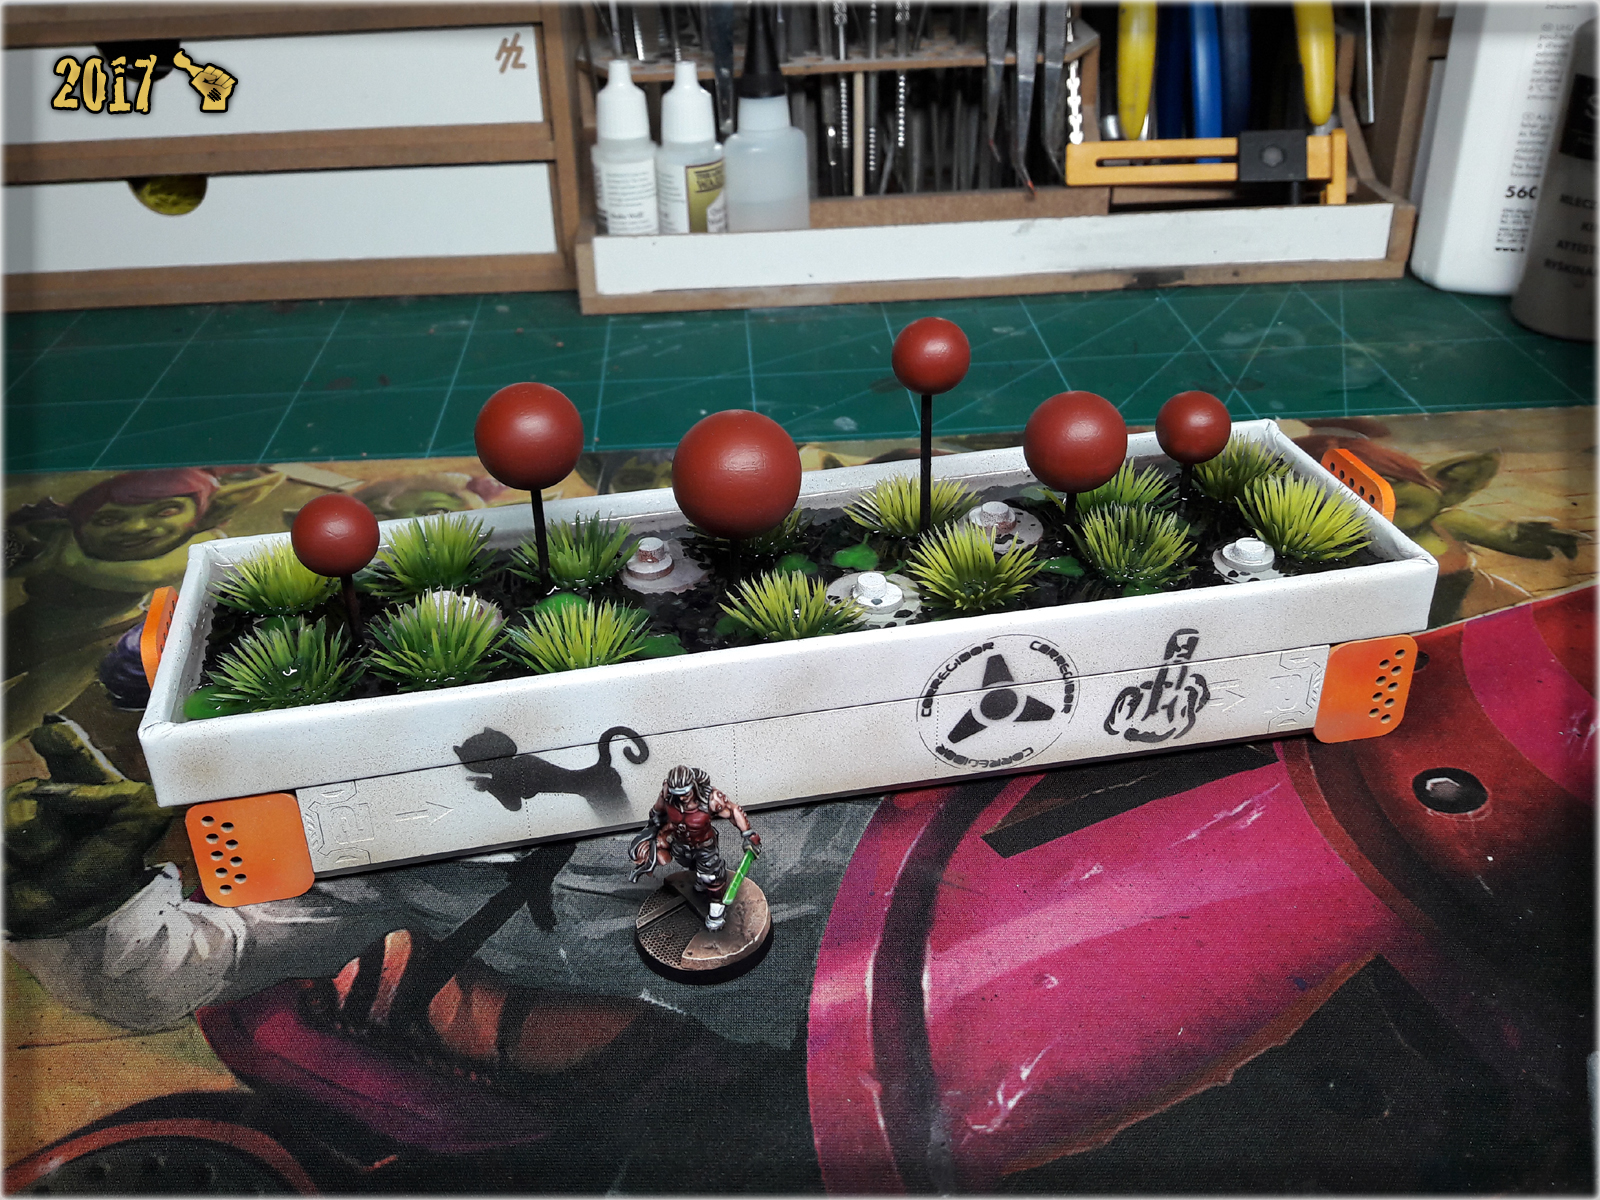
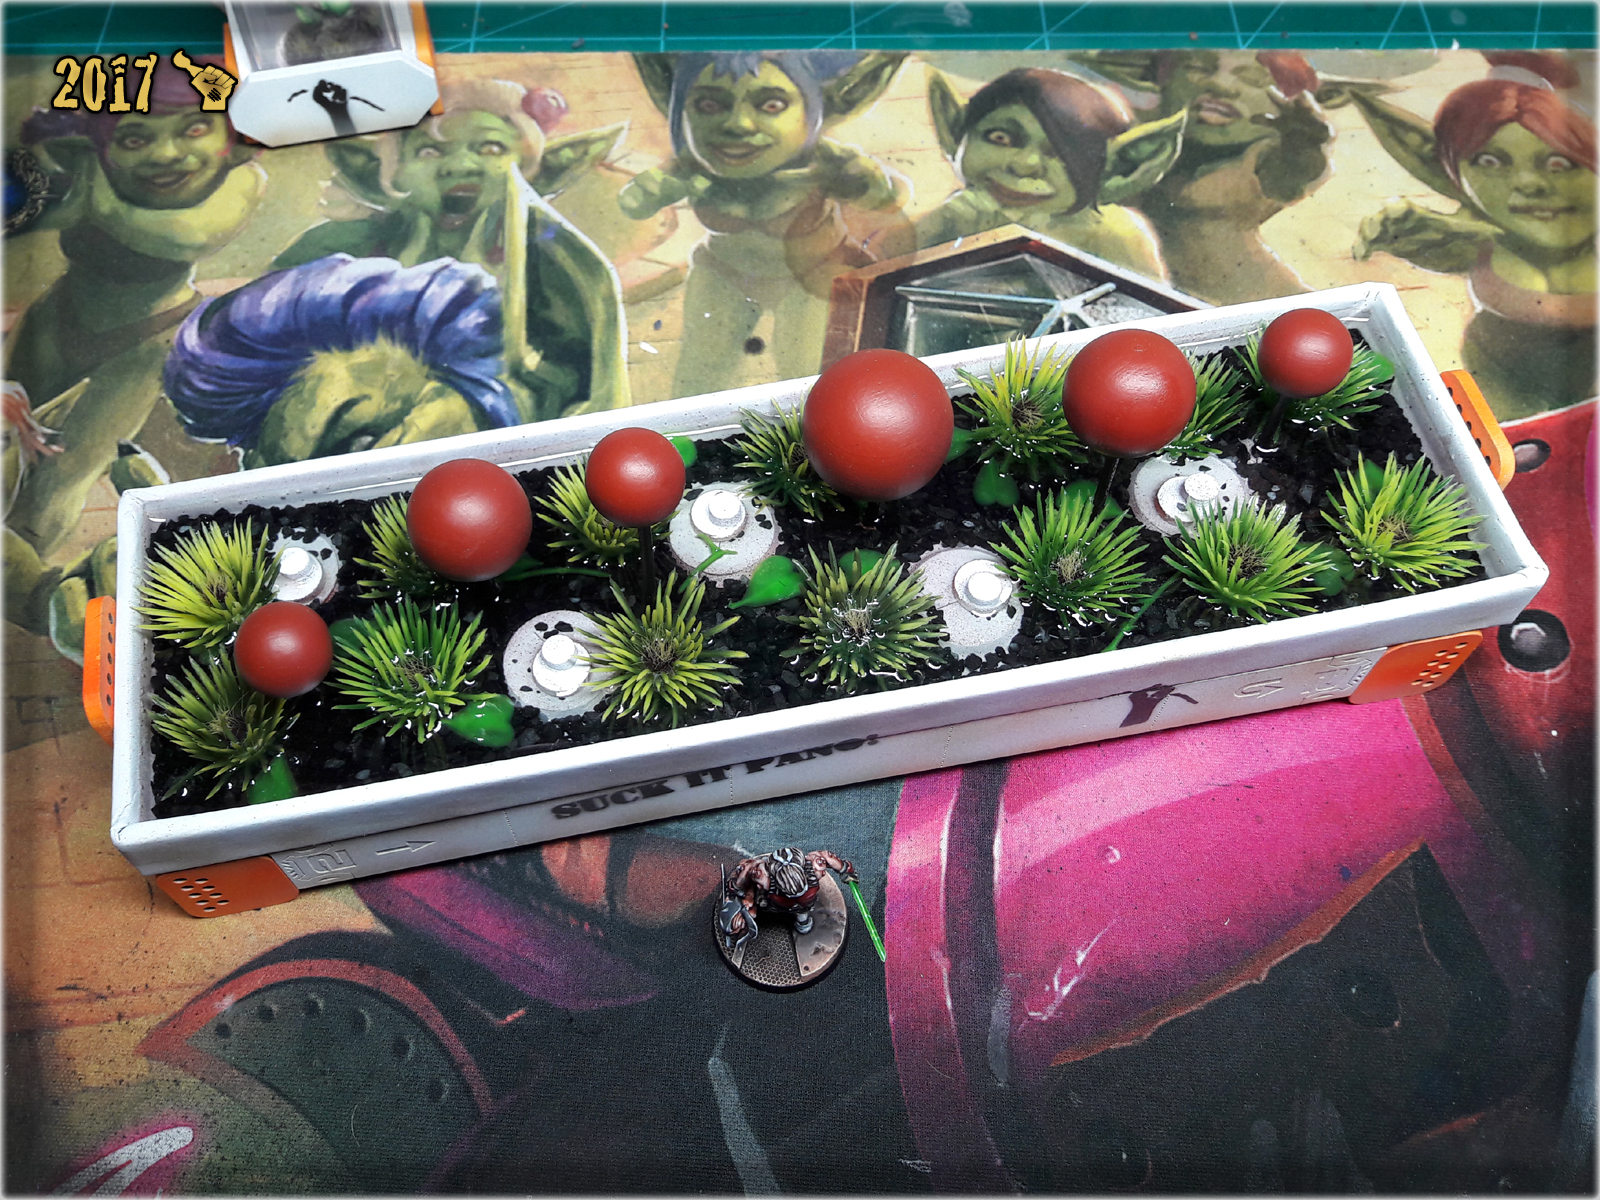
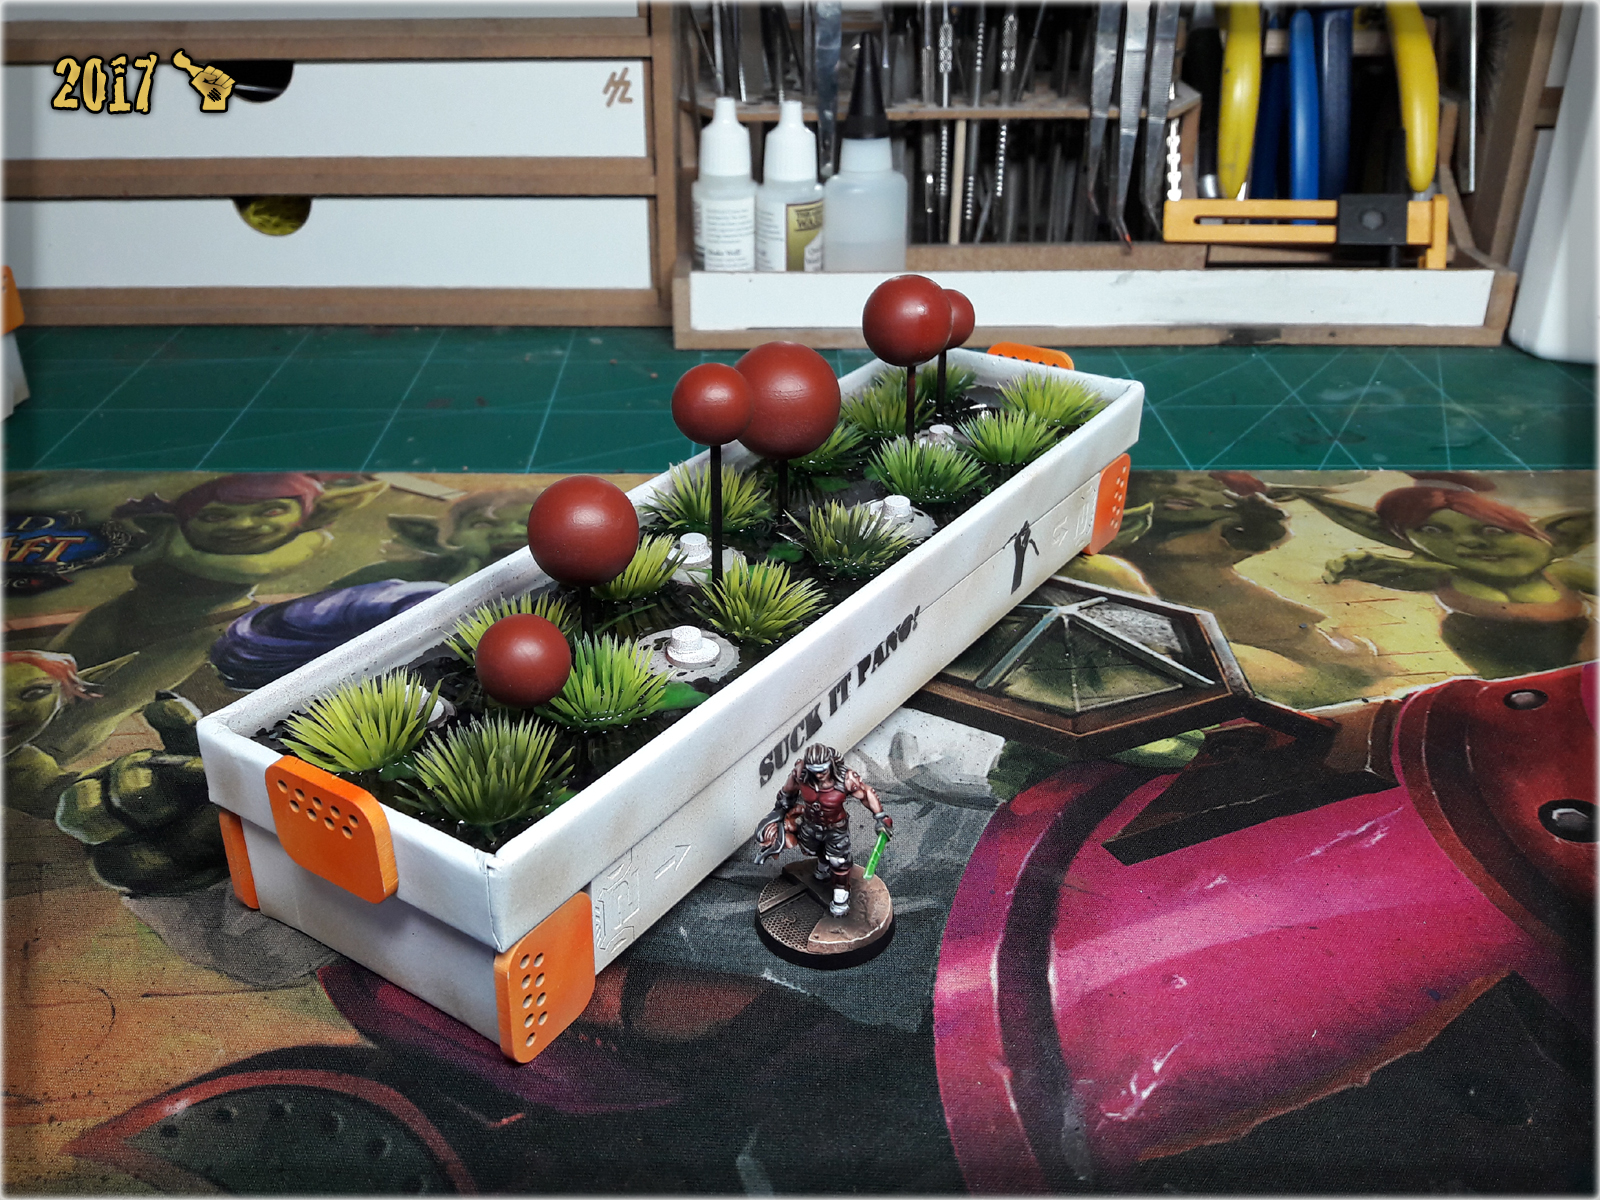
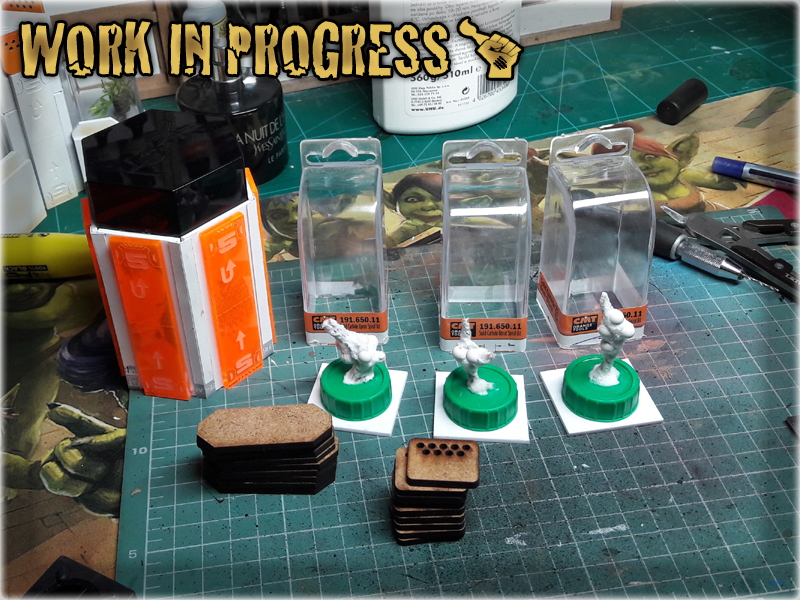
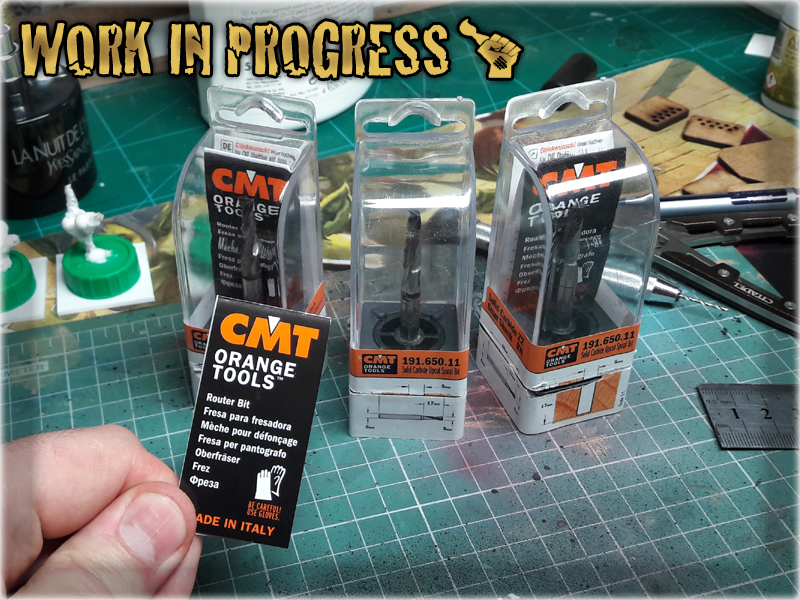
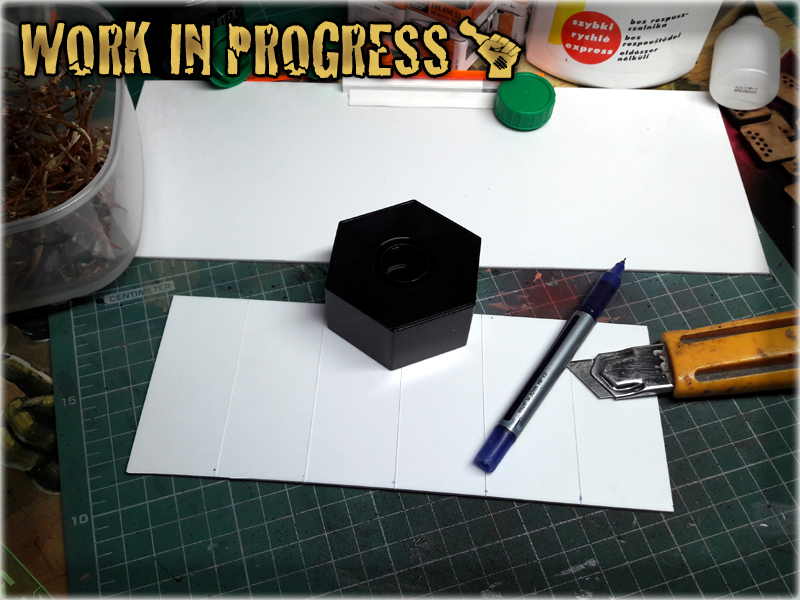
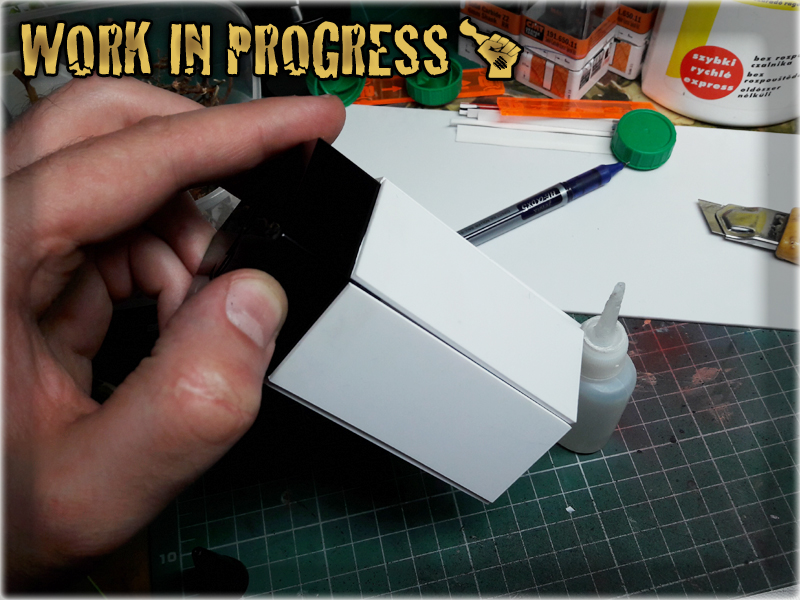
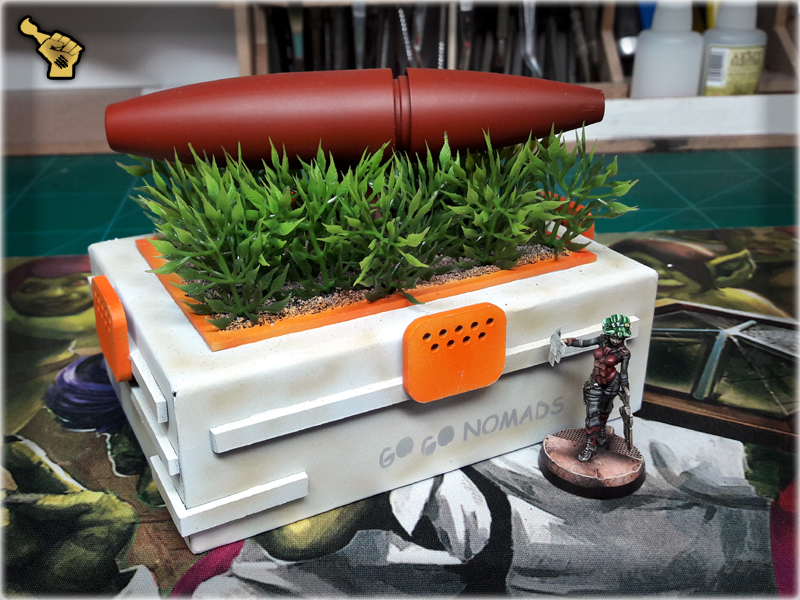
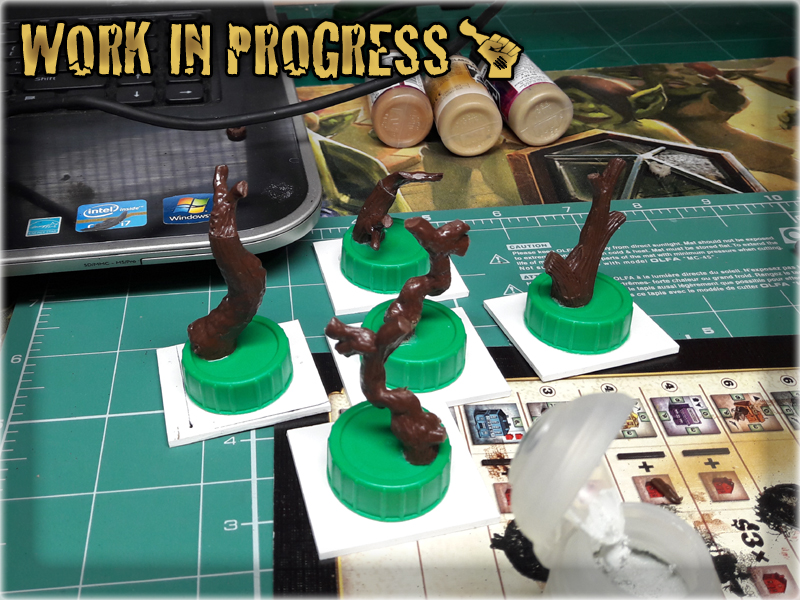
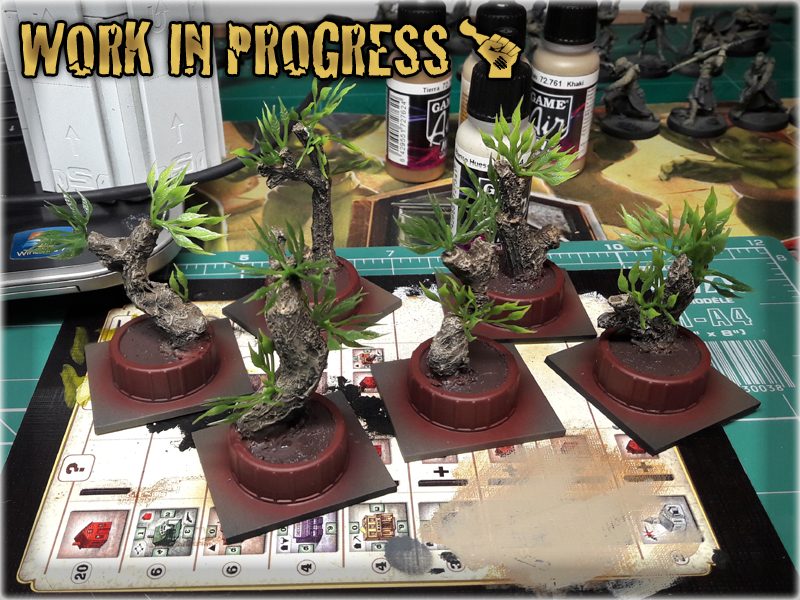
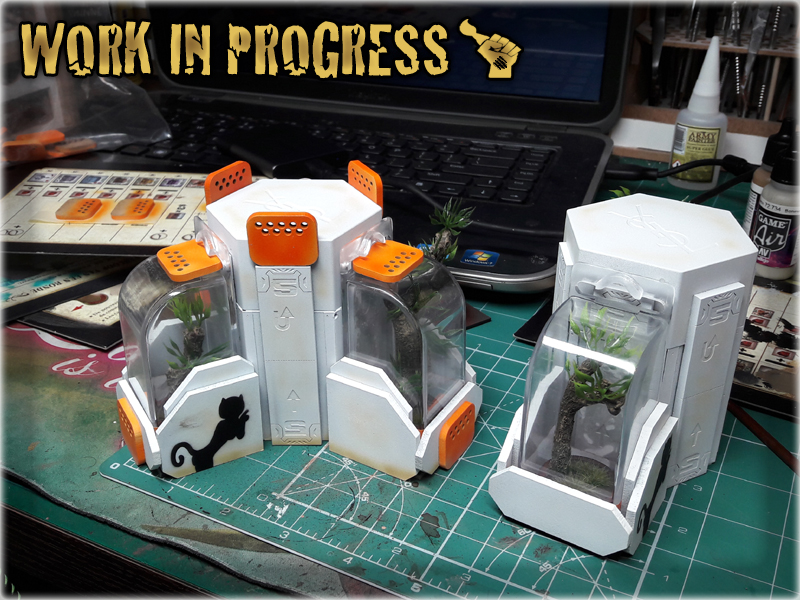
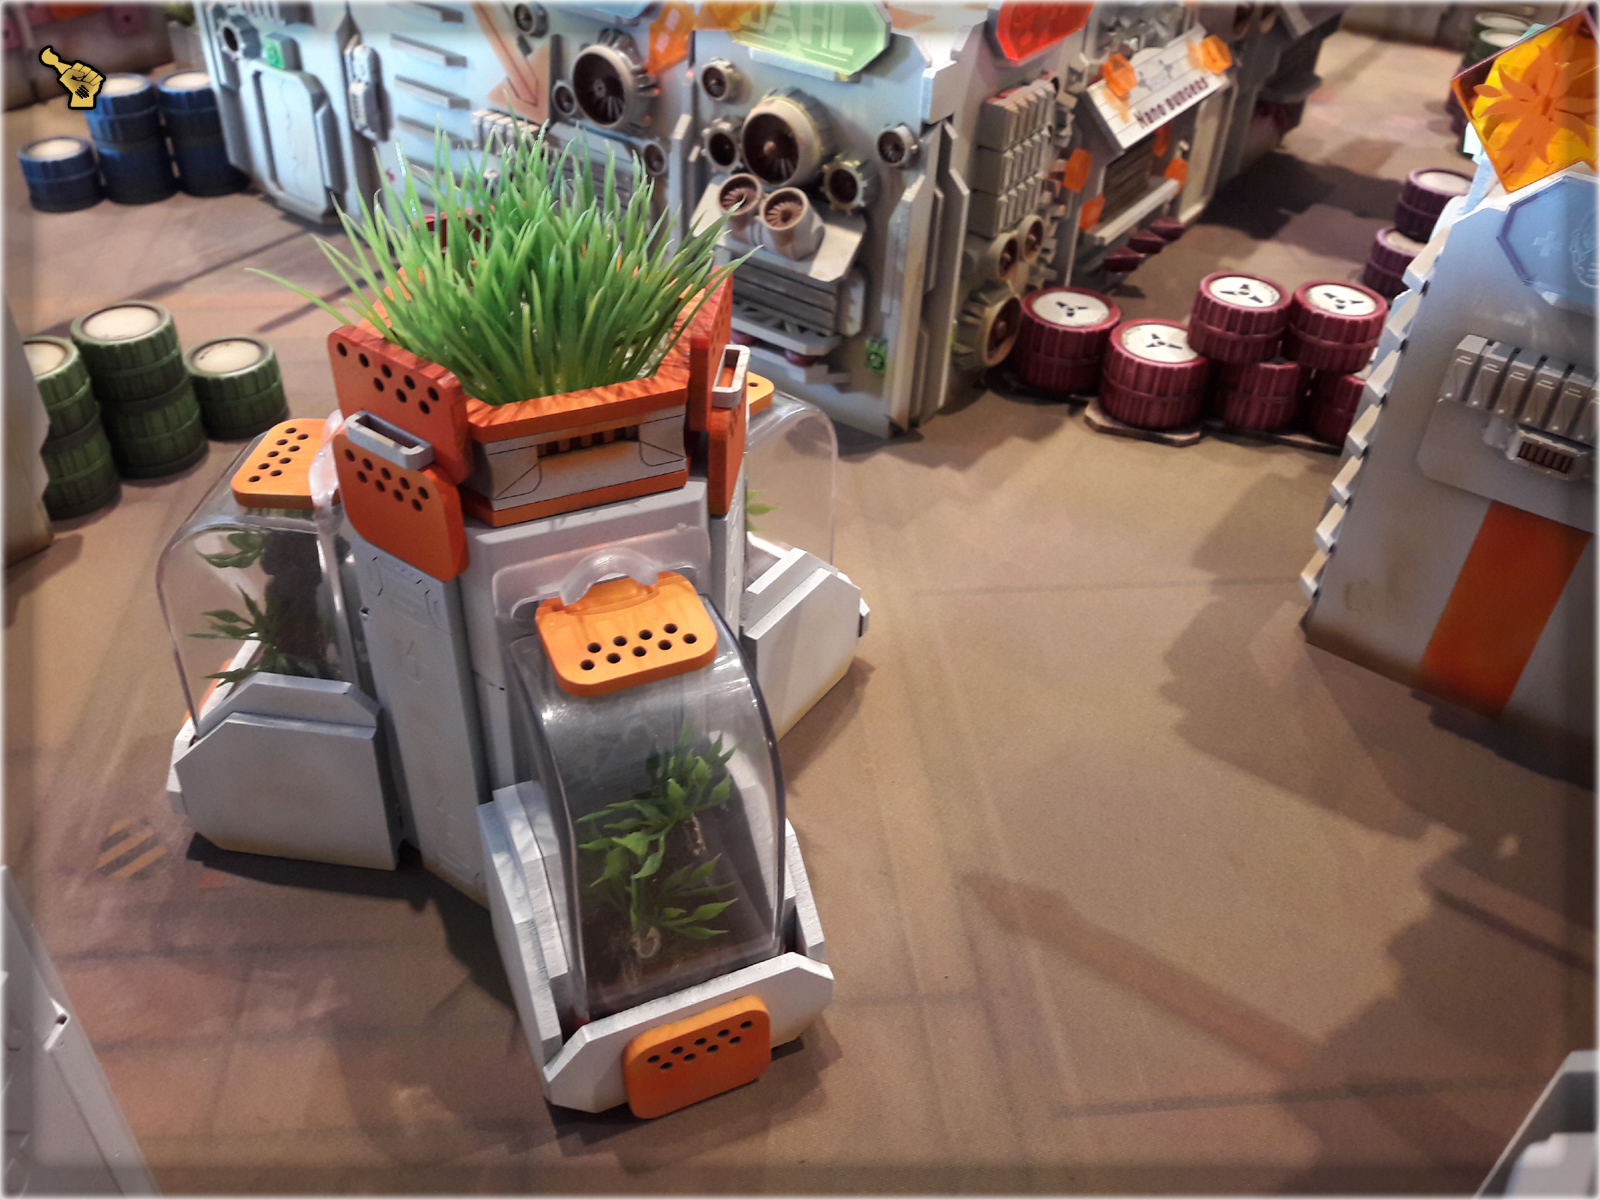
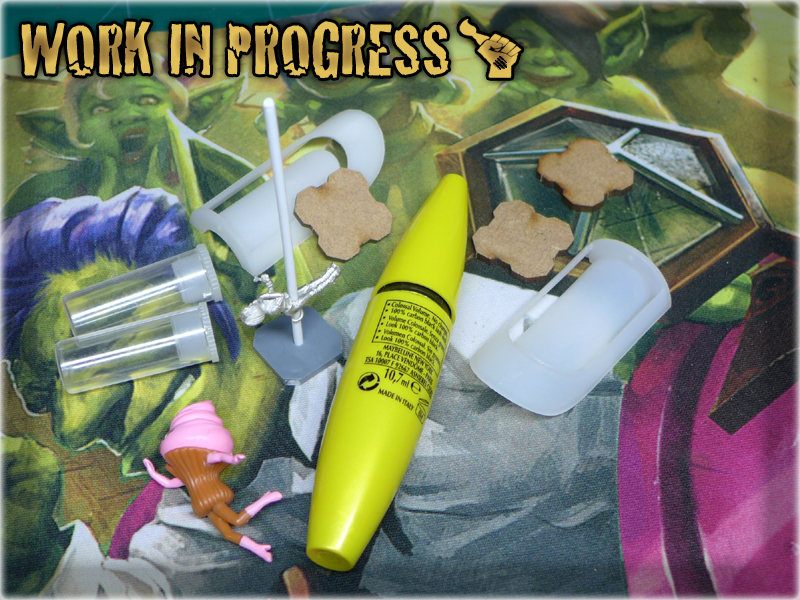
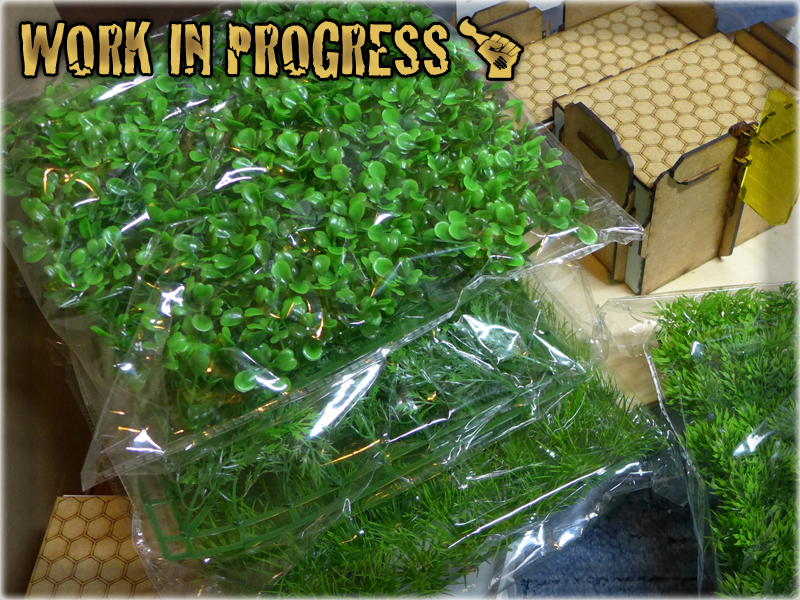
Plant compartments from THE COLONY – part seven: BEYOND are by far one of the best Infinity scenery pieces I have created. They have the looks but are also very playable, providing a lot of cover and breaking long shooting corridors. Yves Saint Laurent cosmetics plug and couple more drill covers, that I received from a friend, and an I was ready to build another Plant compartment. This time tho I lacked some of the MDF pieces, necessary to build an exact copy of the previous template. I decided to do some magic and tinker a bit with the design – using materials I actually had.


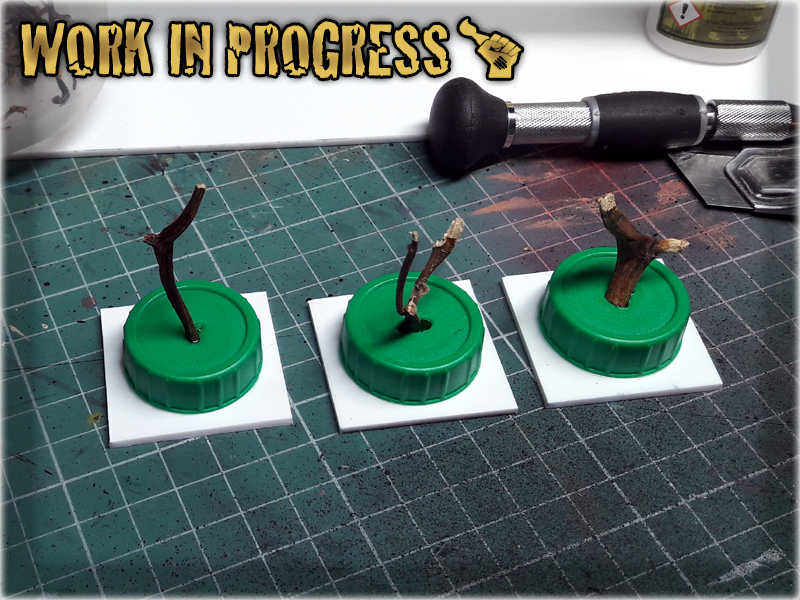
I also redesigned the plant to add variety on the table. These were made using a method from THIS TUTORIAL. It is simple and very effective and can be used to create many awesome shapes and textures. It took me around ten minutes to prepare three of these, so if you ever wandered if you should try the tutorial out – just go for it 😉

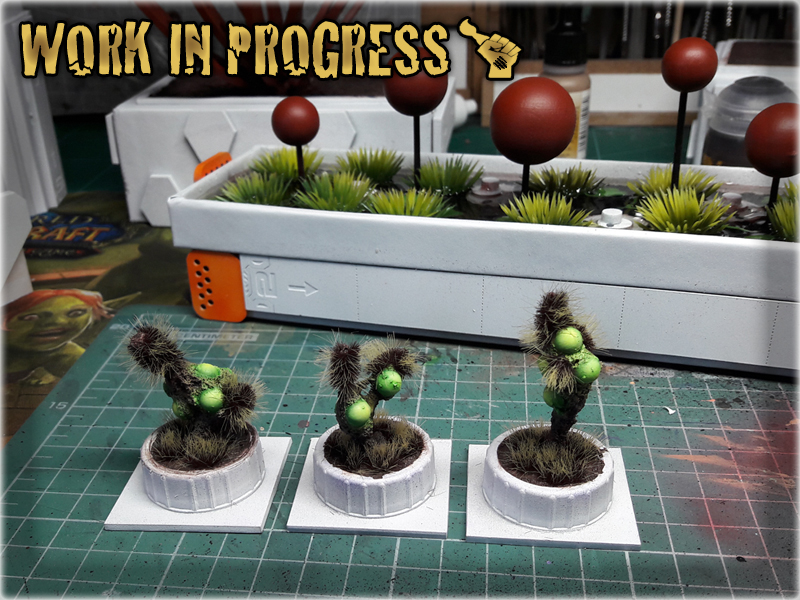
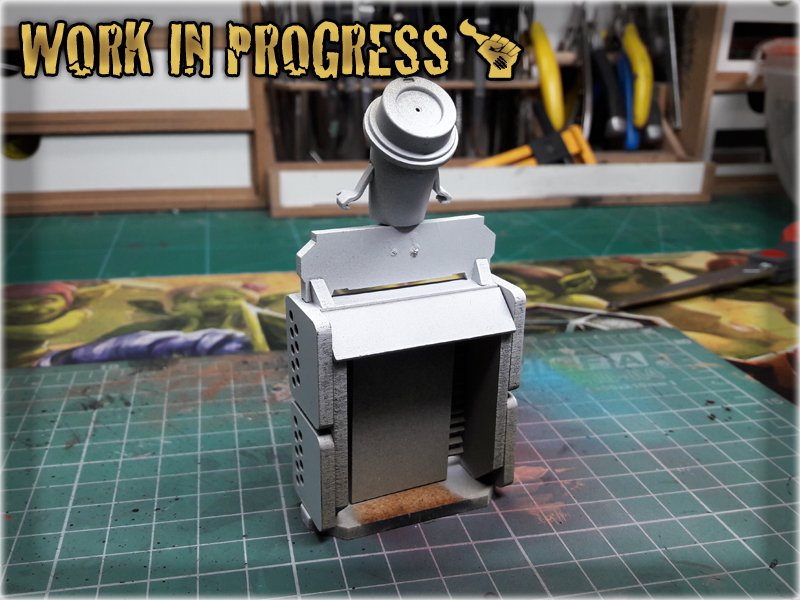
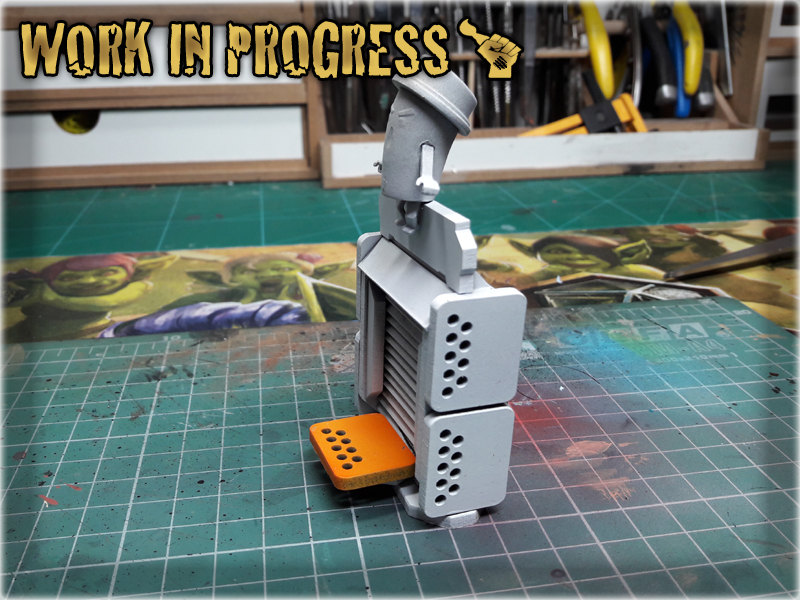
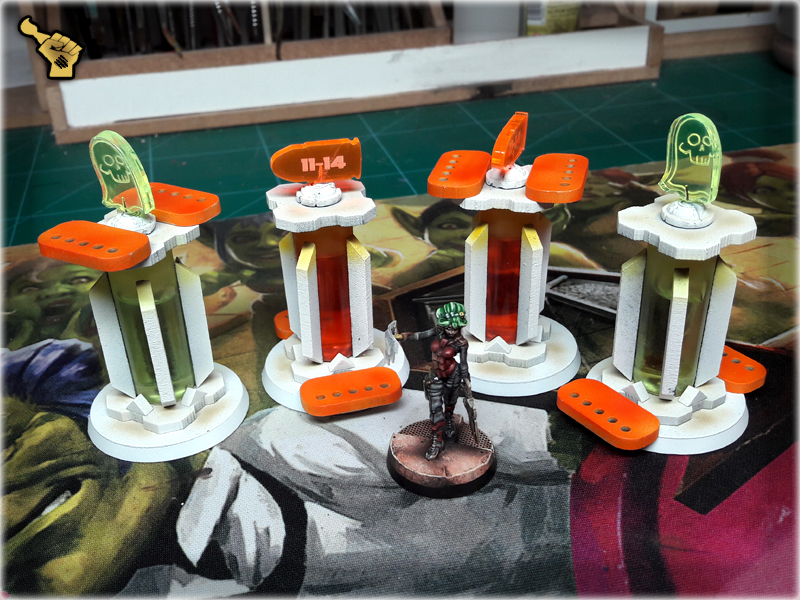
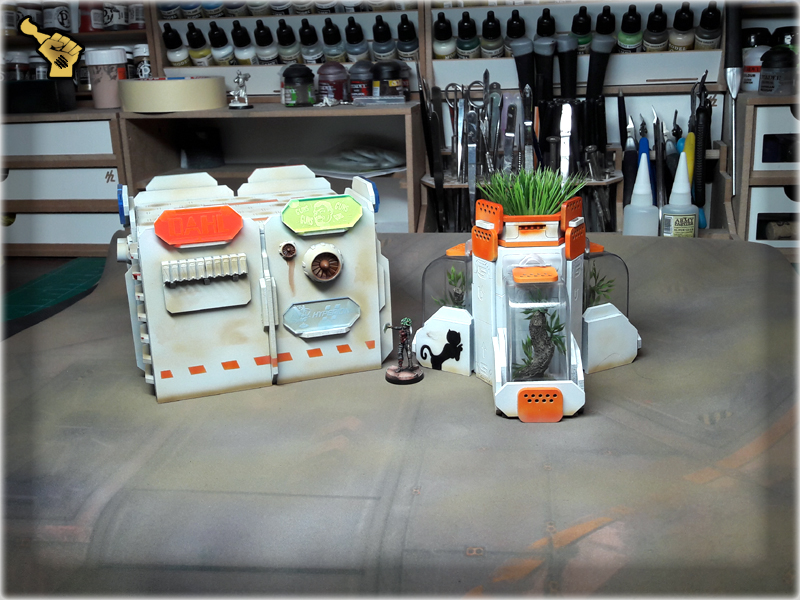
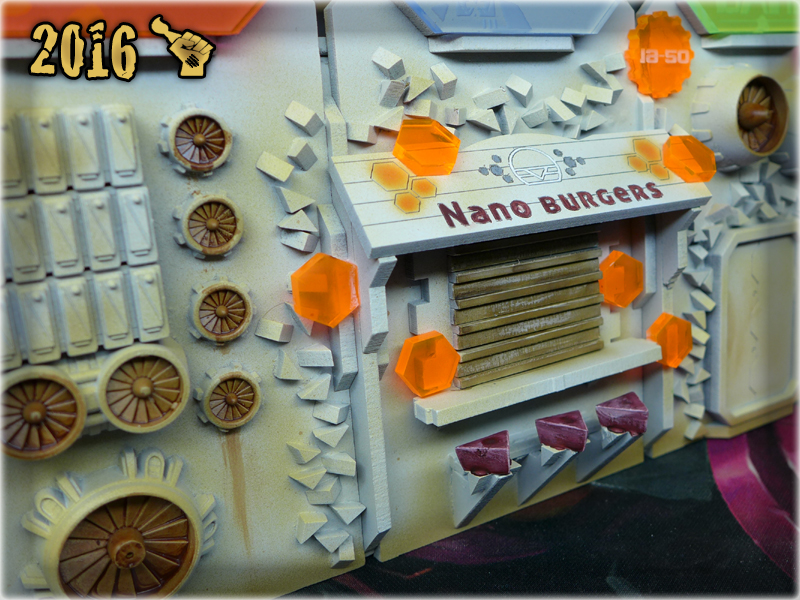
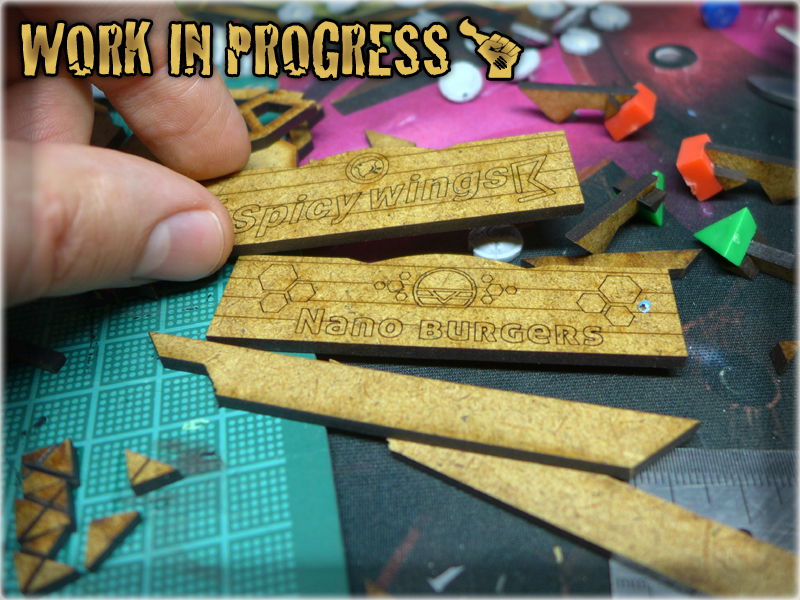
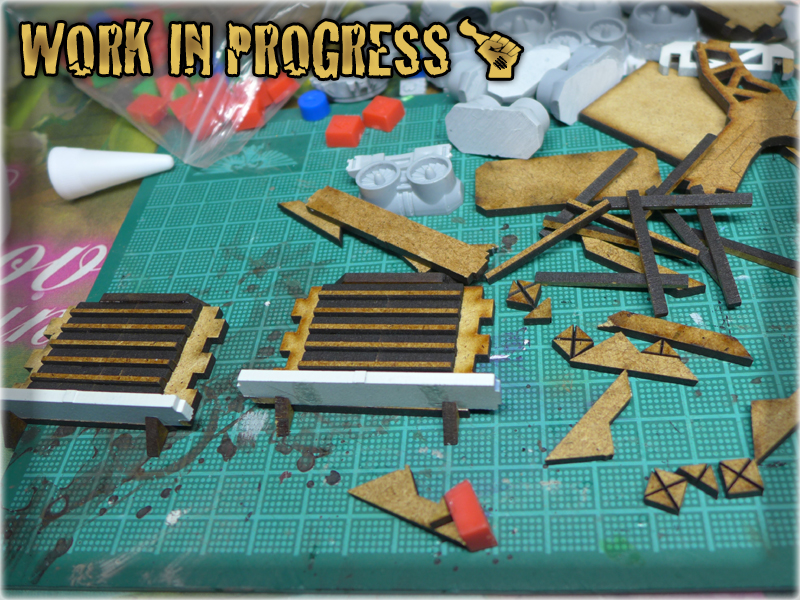
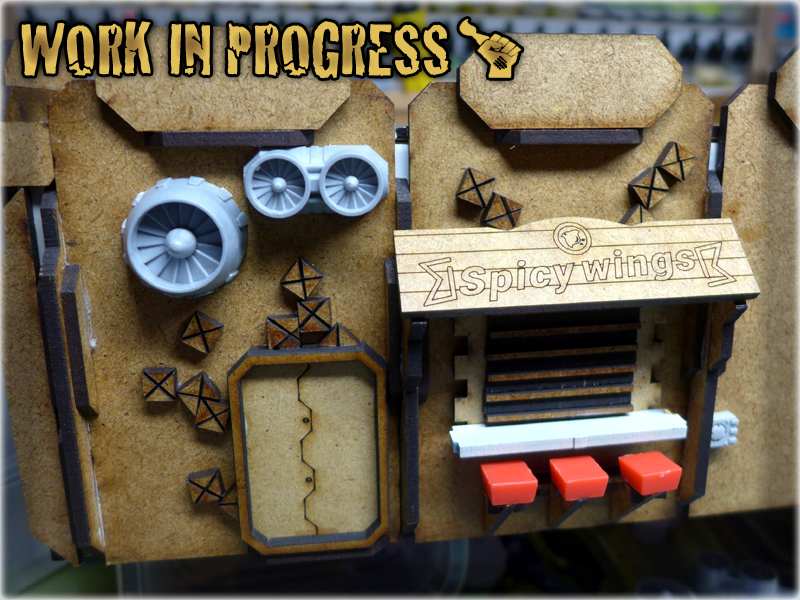
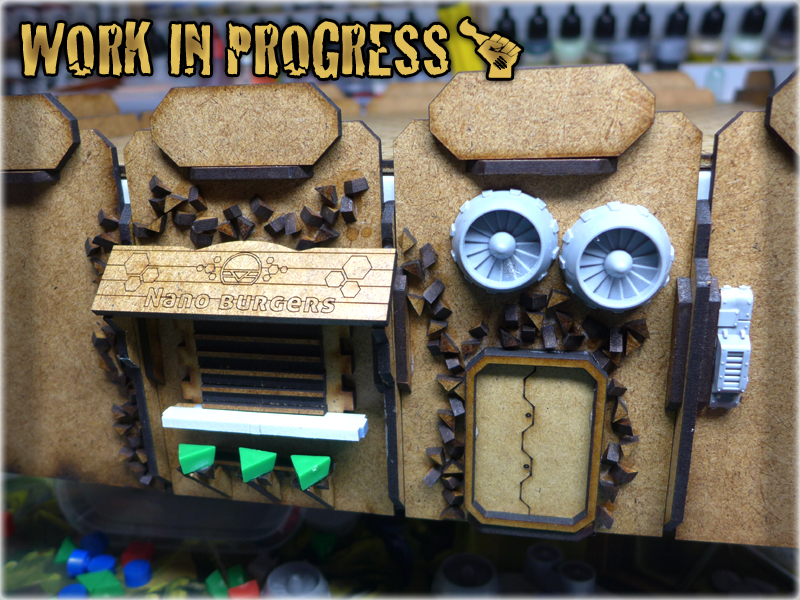
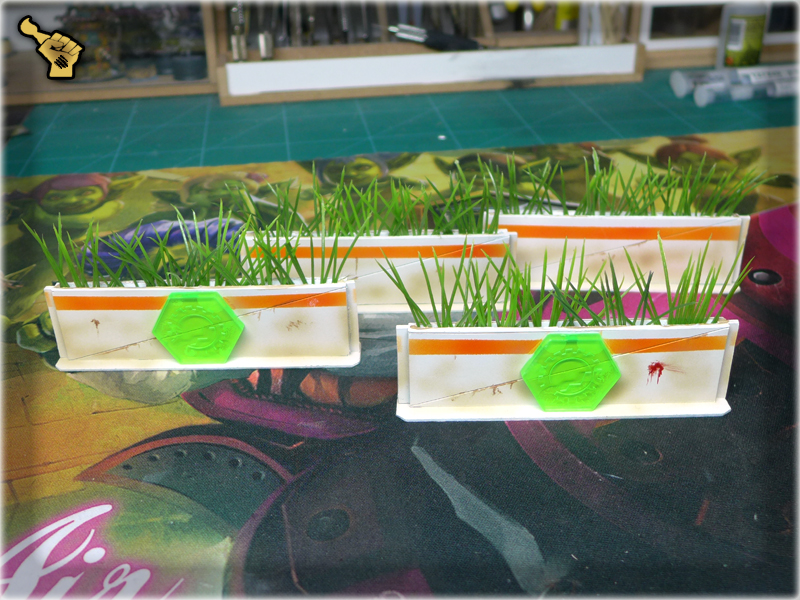
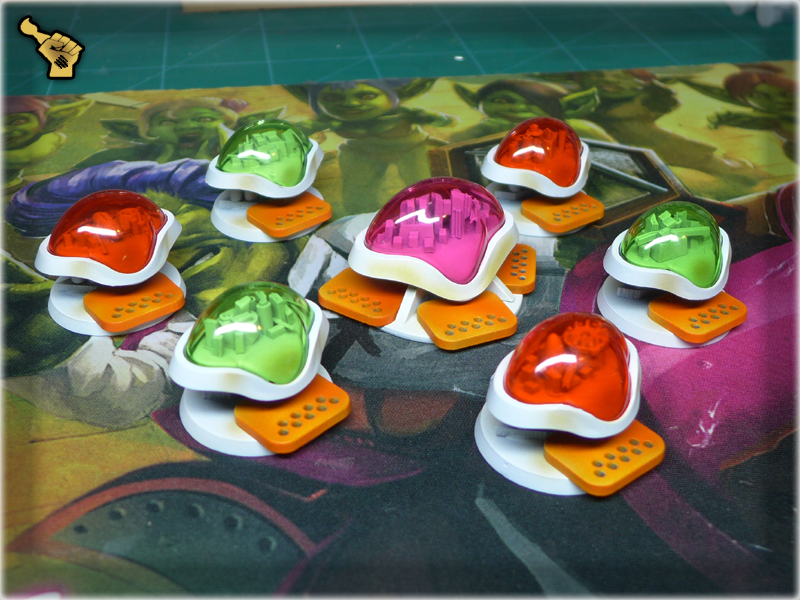
These three were inspired by boredom and awesome looking Orbit Gum pendants. Upon seeing the pendants I grabbed a bunch of them, knowing well that they will come in handy in the future. Did not took much time to try and use them for Infinity scenery and a set of Food Mashines (closed and secured cause ‘Nomads are in town’) are now complete. On top of three Orbit pendants I mostly used trash and leftovers, but there also are some special MDF pieces which you probably reckognize by now.
Another weekend well spent. Now I can’t stop to think about other ways of using clear resin, wooden balls, basing-super glue made plants and all the new stuff. Might also want to shift my attention to designing the actual MDF scenery as recently I’ve entered into an arrangement with Every Little War which will tweak some of my stuff, including Objective Room and provide it in the online offer. A lot of stuff to wait for XD
It’s been almost four months since I have ‘finished’ The Colony Special Project. Such grand endavours are the reason I’m into painting and miniatures wargaming. That wondrous feel of completion once a huge project hits the finish line. It always comes with a great satisfaction but once the dust settles, a void starts to grow inside my heart. I’m happy with results, yet long for the ‘process of creation’. That is why I consider every major project to be alive for at least as long as I am. In case of The Colony – well, a gaming table could always be improoved or use some more scenery. That is the exact way of thinking which led me to writing another part of this article…
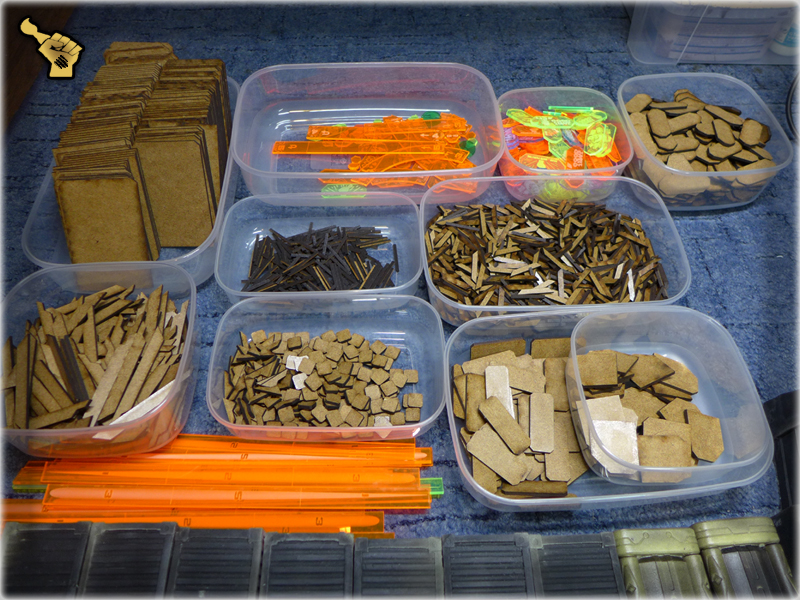
That being said I must confess that I wasn’t able to invest much time into The Colony in the last few months. Other artistic projects fell on me from all around the globe and I lived a prosperous life by lending my brush to all those in need of decent painting. Still, once in a while I stumbled upon some cool looking items that just screamed to be unleashed onto my gaming board in form of some sweet looking terrain. Many sources provided me with items of great value, among them my girlfriend (cosmetics), my friend Garran (his personal collection of ‘cool stuff’) and even some of befriended companies like Micro Art Studio, or Ekograf, who (knowing my tastes) sent me some of their leftovers. I sincerly thank all of you, my beloved providers, and proudly announce that I couldn’t resist the temptation and used all the items, you so willingly parted with, to further expand my scenery collection and bring The Colony’s theme beyond the bounds of my early predictions.

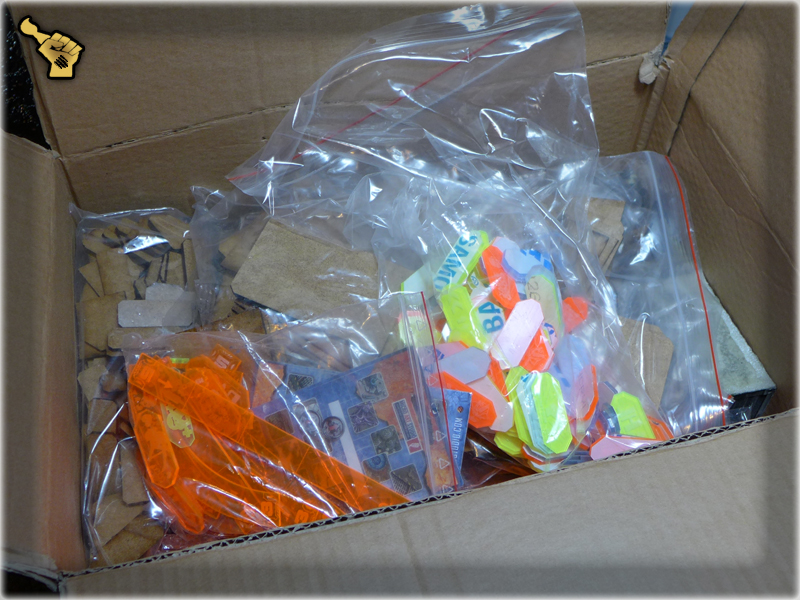
Anyone remembers that picture? It was published at the end of “THE COLONY” SPECIAL PROJECT part six article. Some of this stuff still awaits being used, but more than half of it has already reincarnated in a form of these scenery pieces:
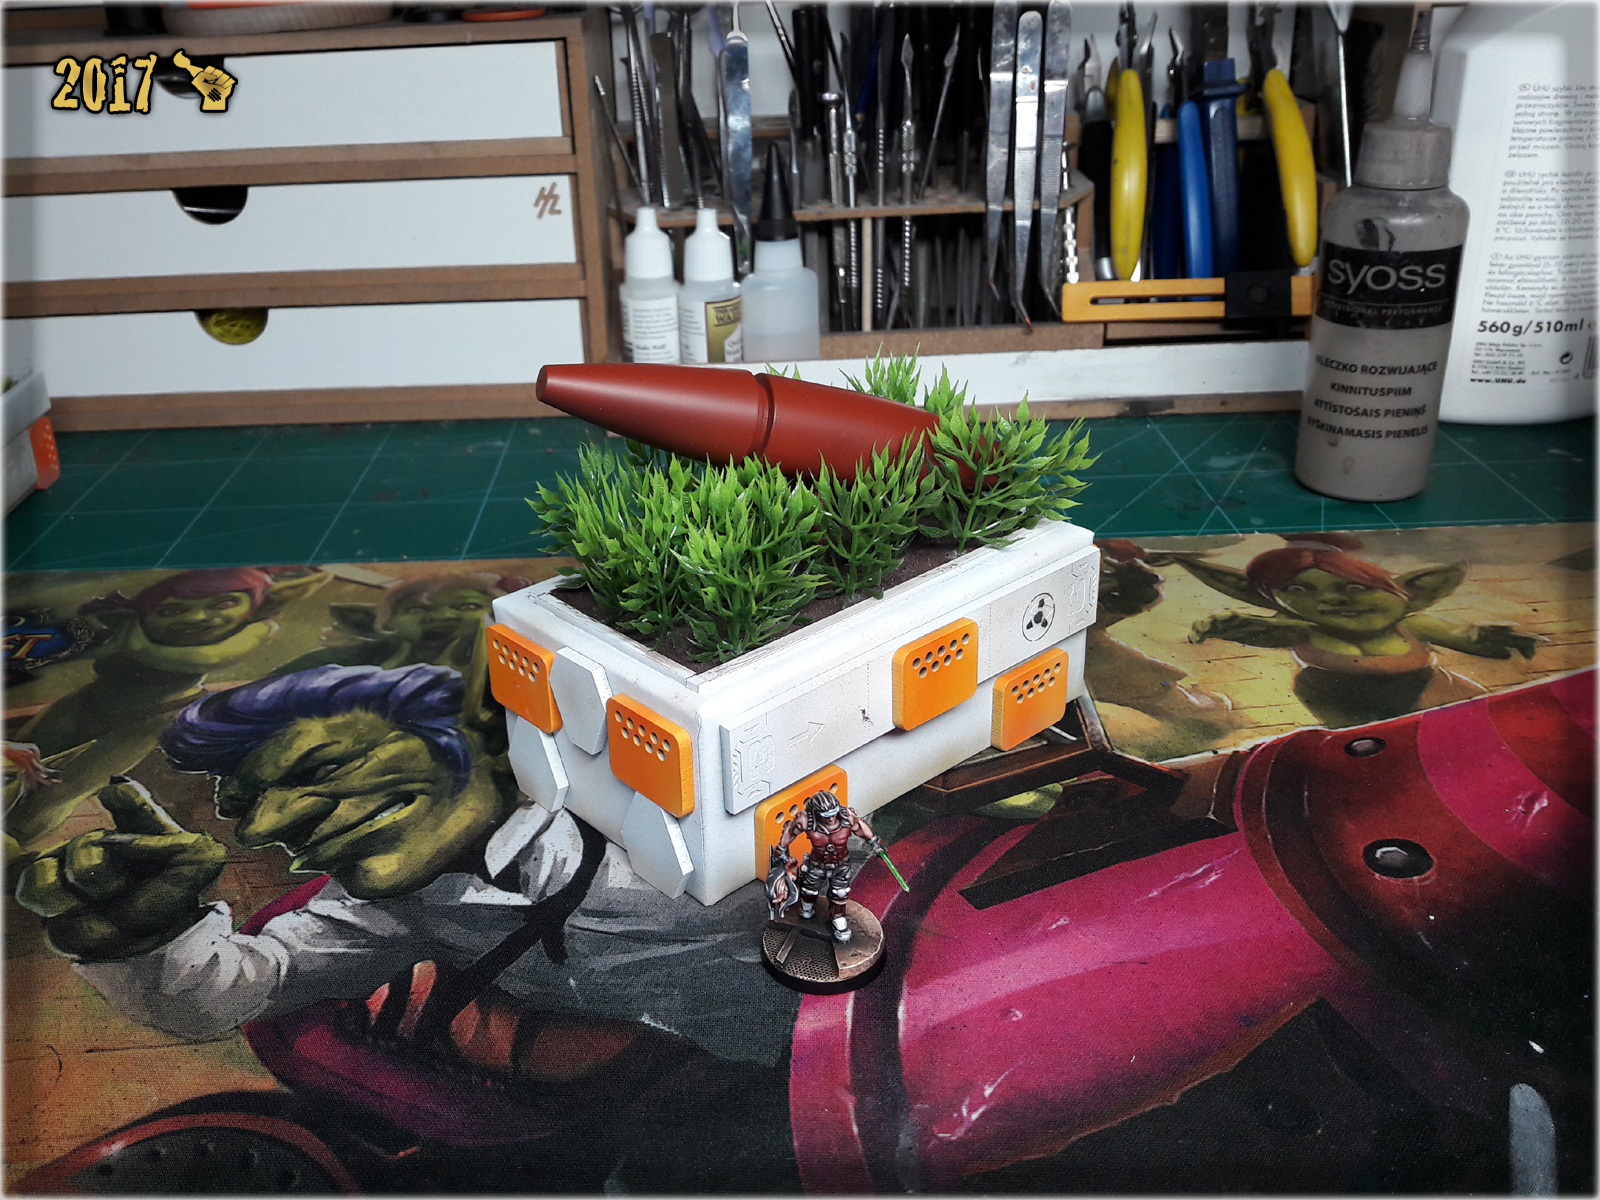
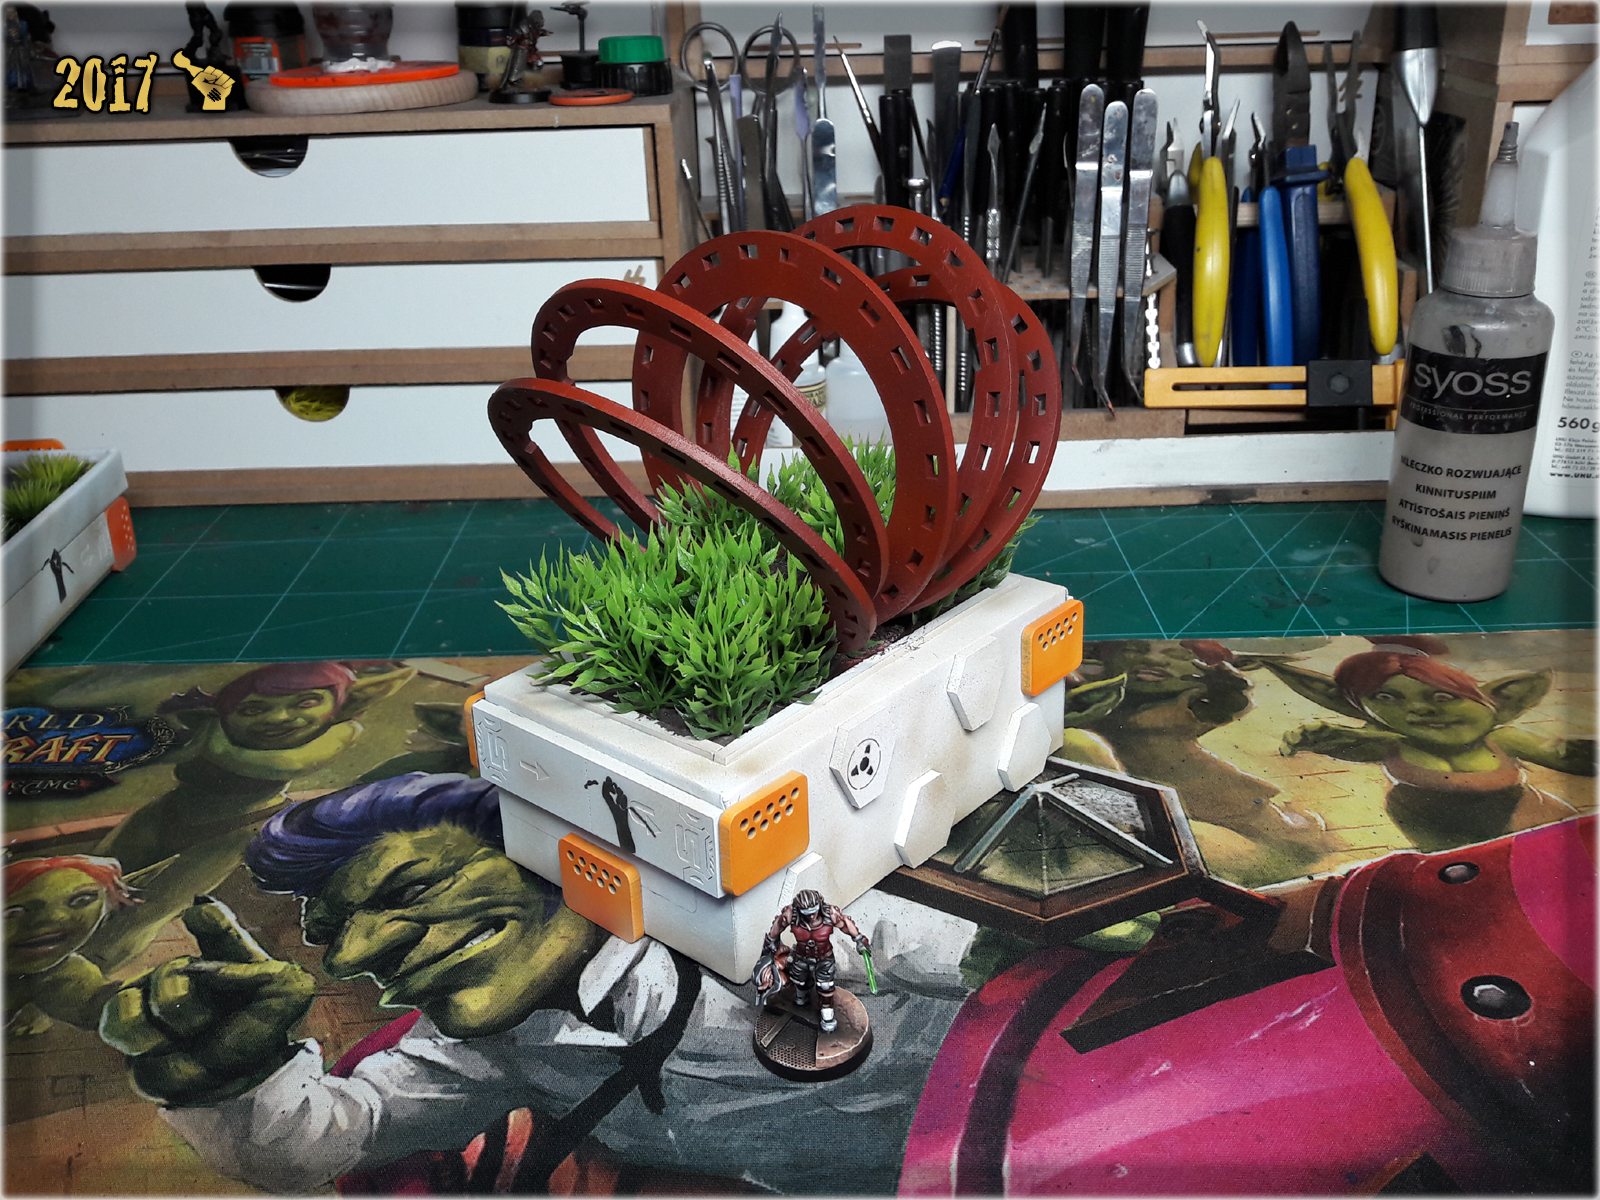
A futuristic sculpture made out of a Maybelline eyelashes mascara. Once I stole this precious item from my GF’s secret stash I had a real wrinkle with how to use it. So many ideas, including an antenna, a column, a laser tube – in the end I couldn’t decide so I got back into a well known territory of futuristic sculpures. It is only fair to use items stolen from my GF as pieces of art, otherwise she might not be swayed to turn a blind eye on my theft 😛


I got that awesome Dactari from my Girlfriend somewhere along two years of gaming. Untill now I hadn’t had use for it, as I was more into Corregidor-like miniatures, but finally I got the idea, made up what MDF pieces I will need to ‘cage’ this chick and ordered them from a friendly company. Once I got the stuff I just build the cage and here’s the result. It makes foir a nice rooftop piece or a great standalone scenery piece.
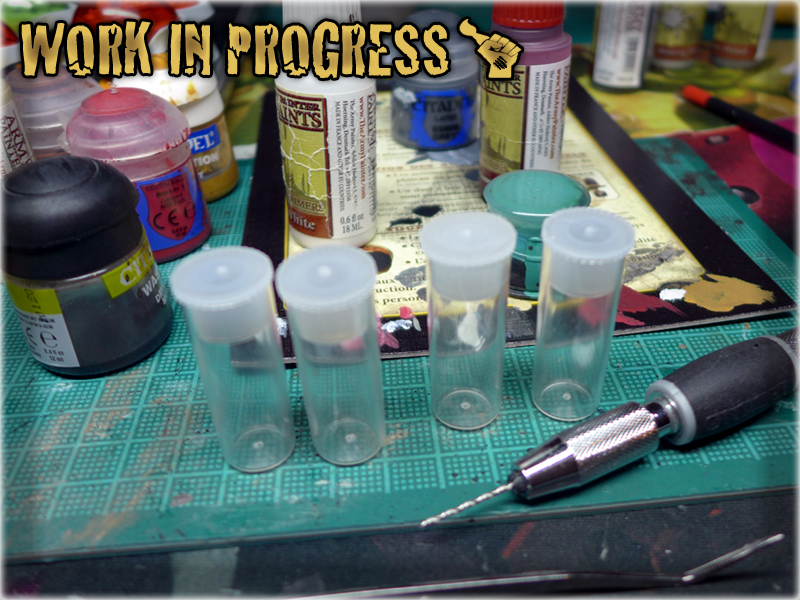
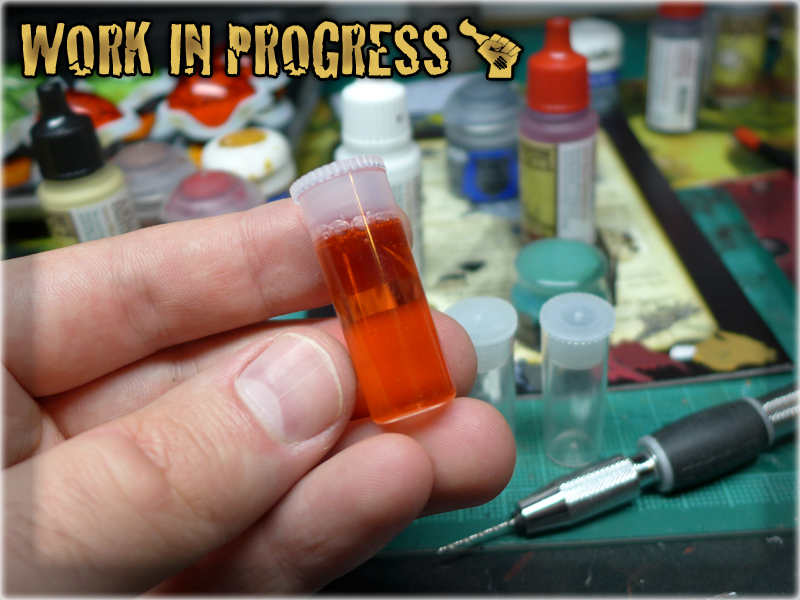
These can be used as objectives or just some random scenery pieces. I made them out of HDF pieces, leftovers and small plastic tubes* filled with shower gell. The tubes were given to me by Garran with which I tend to play Infinity, but also exchange concepts during our long painting/modelling talks. The guy is so nice as to share some of his stuff with me and I try hard not to let this gesture go to waste.
This is another source of endless inspiration. These are some throwbacks from Micro Art Studio’s production. MAS is very serious about their products – each and every one is checked for defects before it proceeds to packing. Once a defect is discovered, all imperfect products are kept as samples to avoid same kind of mistake in the future. In case of large quantities tho – some items may be sent to a friendly modeller to be used for awesome scenery building! One might even say that these can be used in a variety of crazy ways…
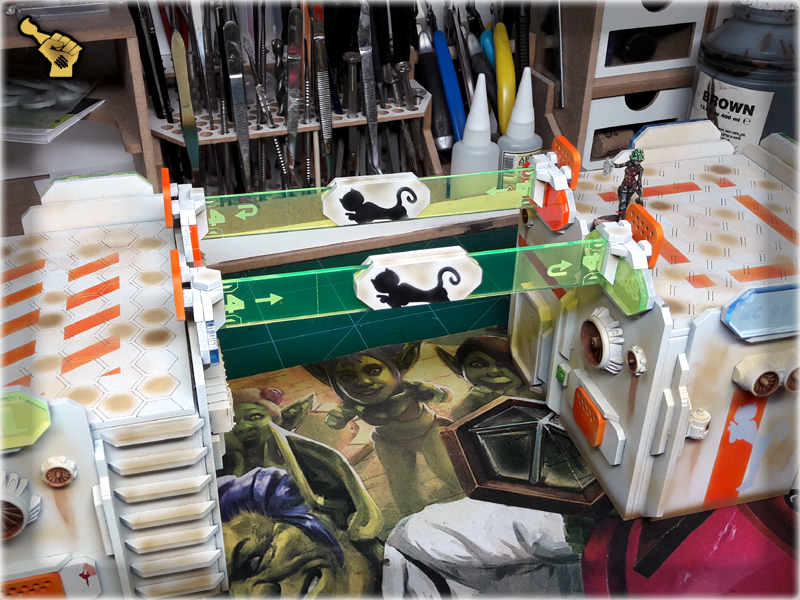
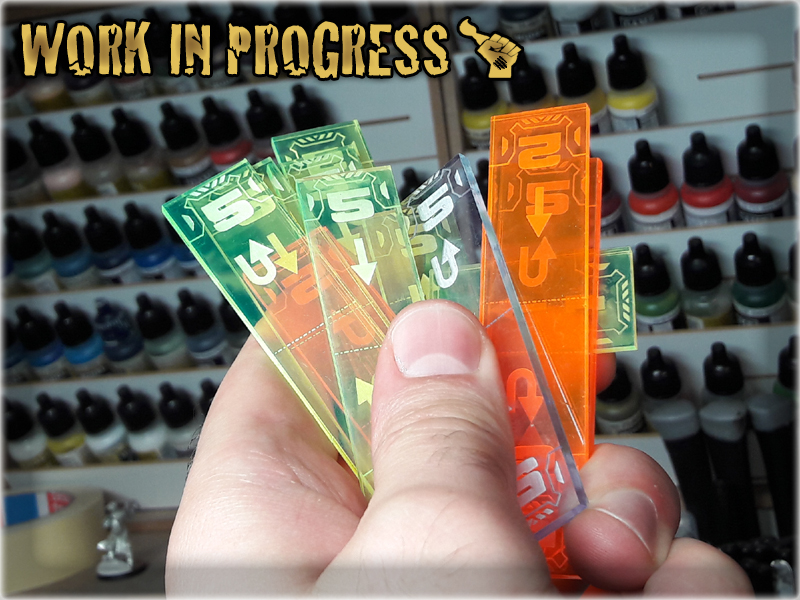
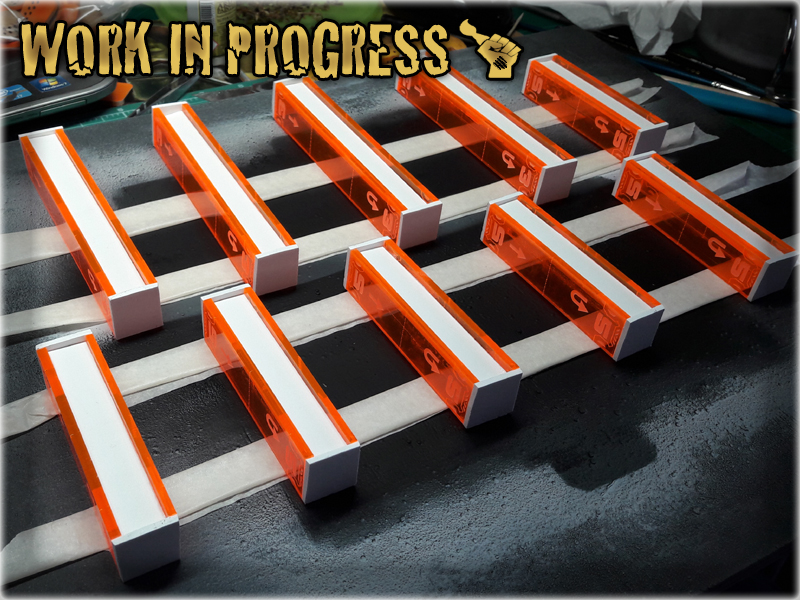
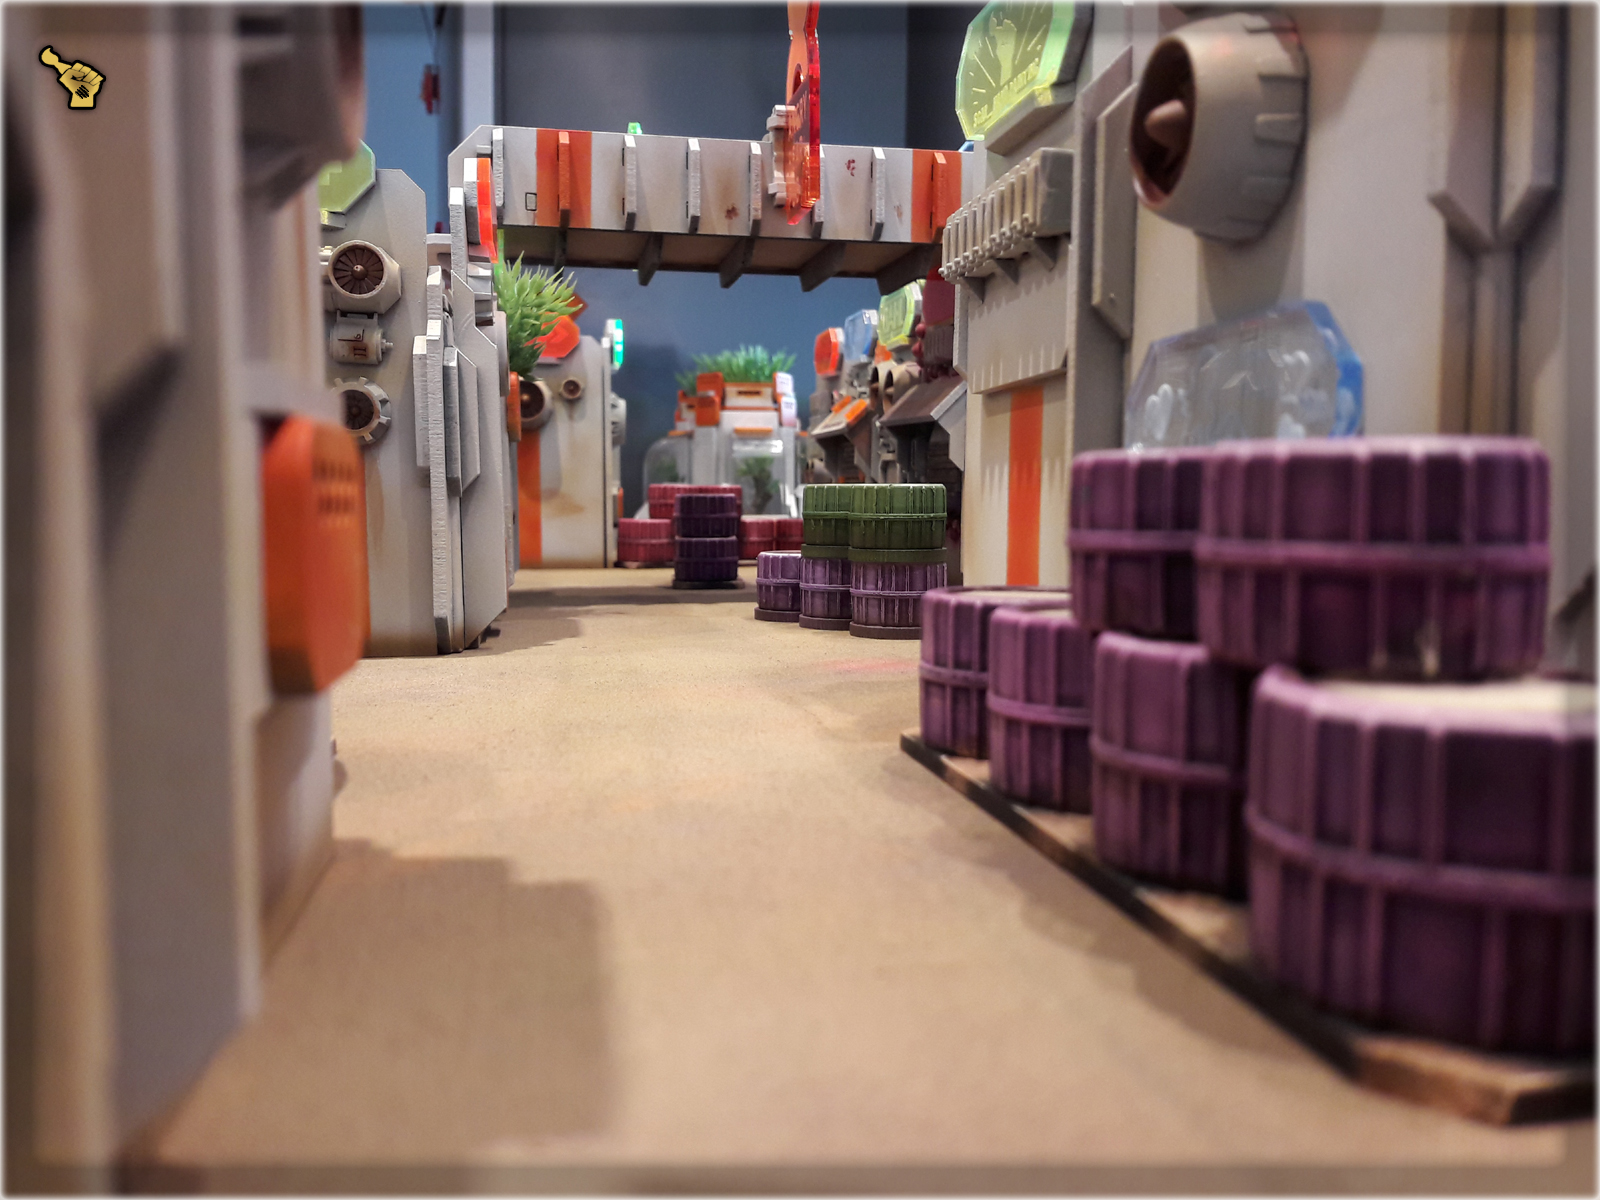
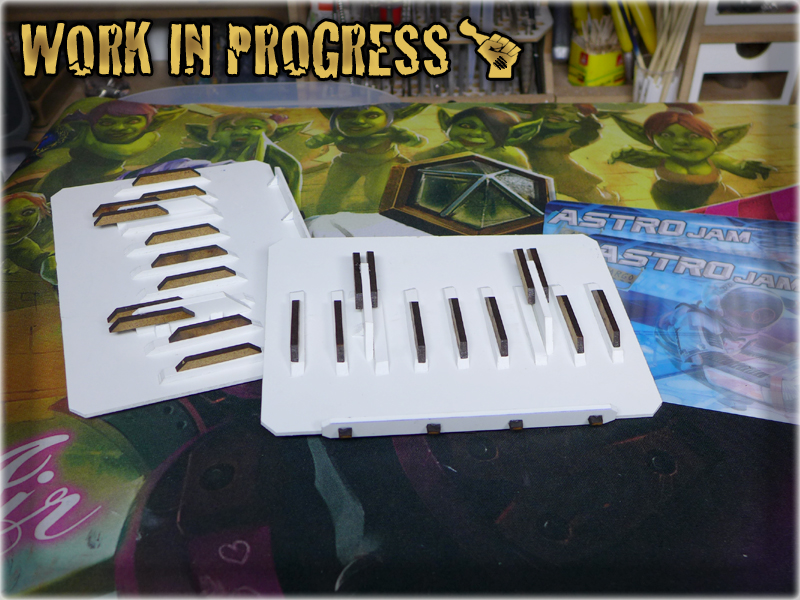
Six bridges are a bit too much on a 48×48″ table so I designed these scenery pieces to help me setup and then keep the gaming board in order. Simple yet effective, adding depth to streets and a nice futuristic note to the overall visual effect.
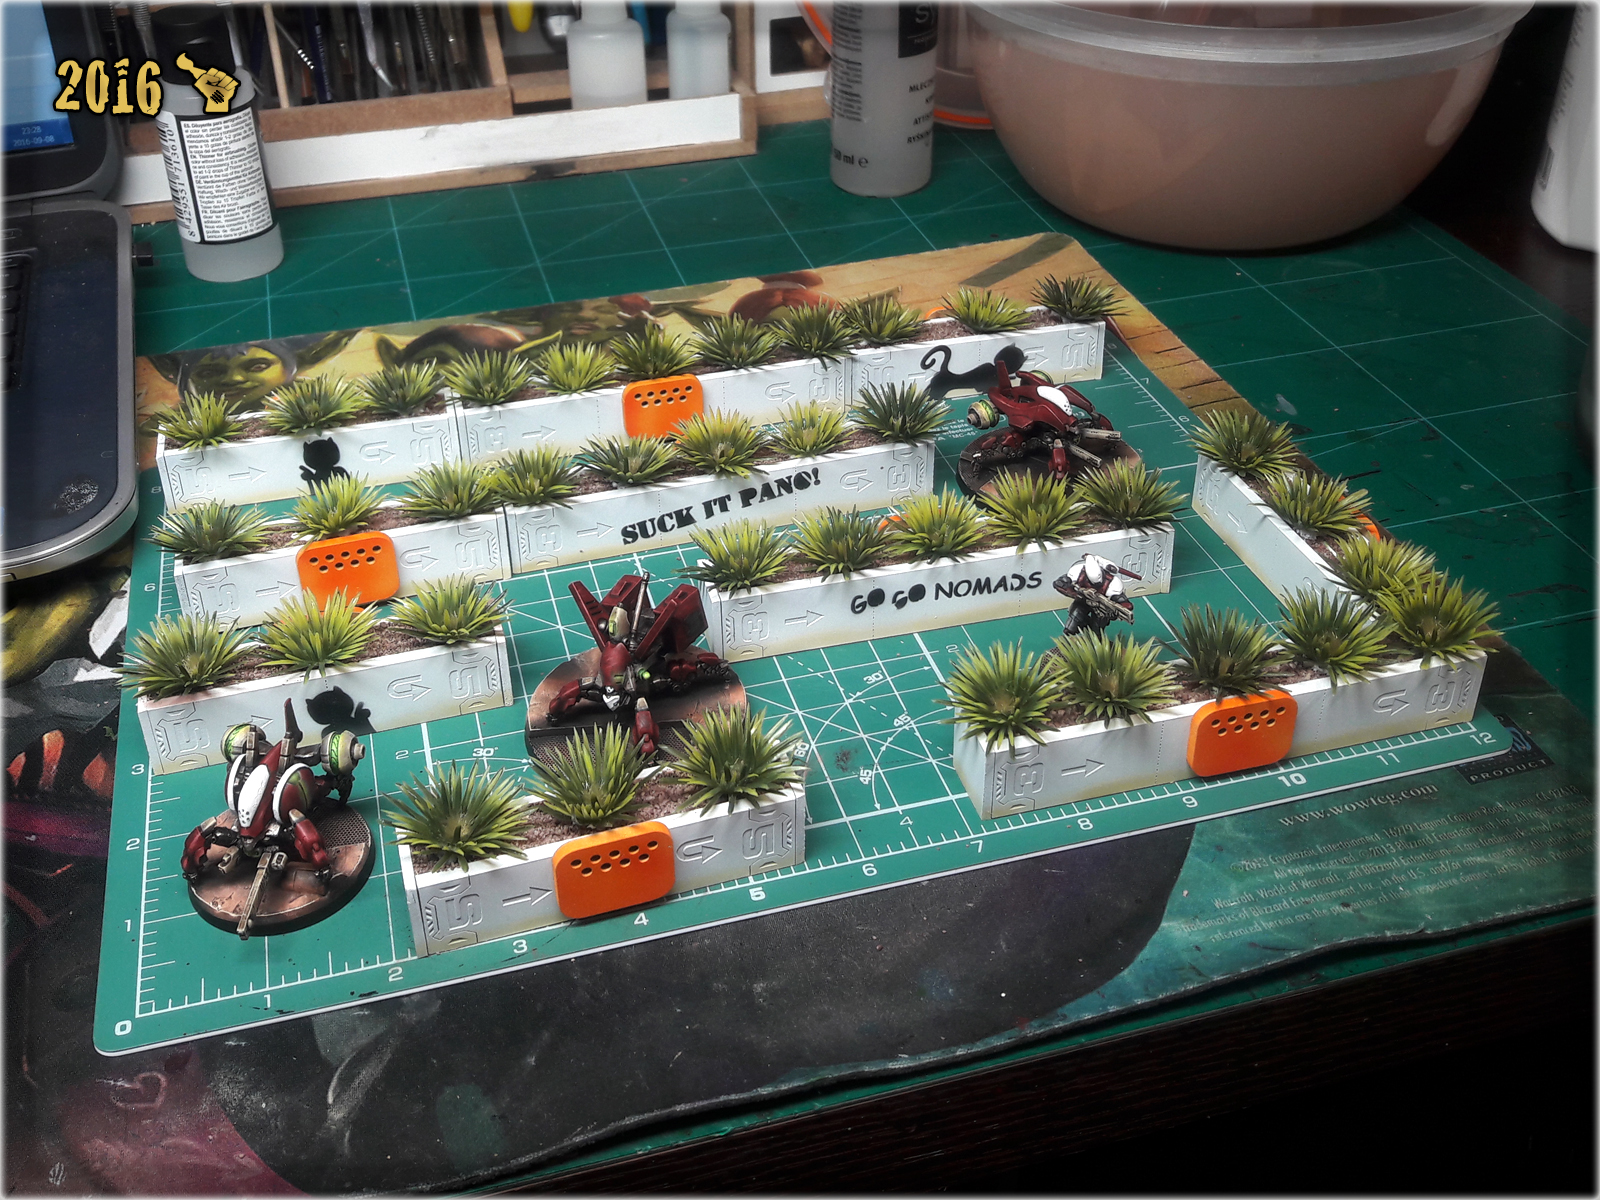
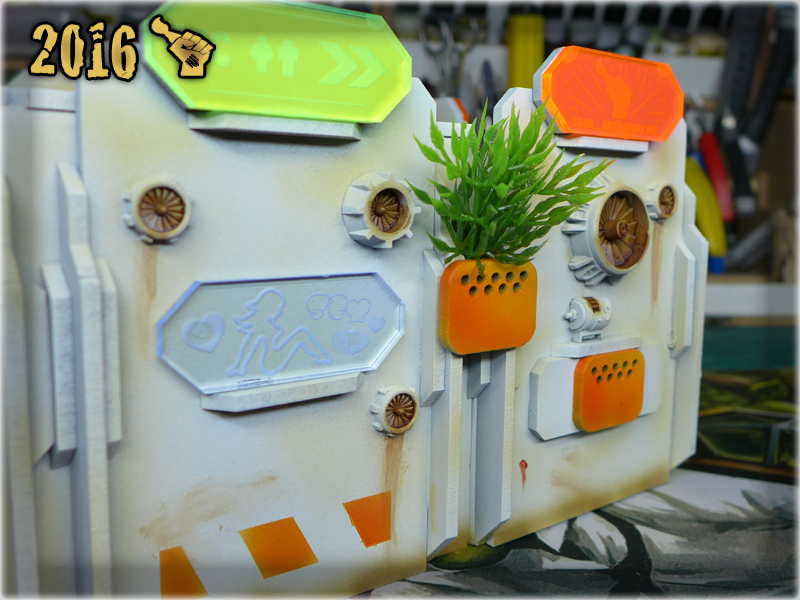
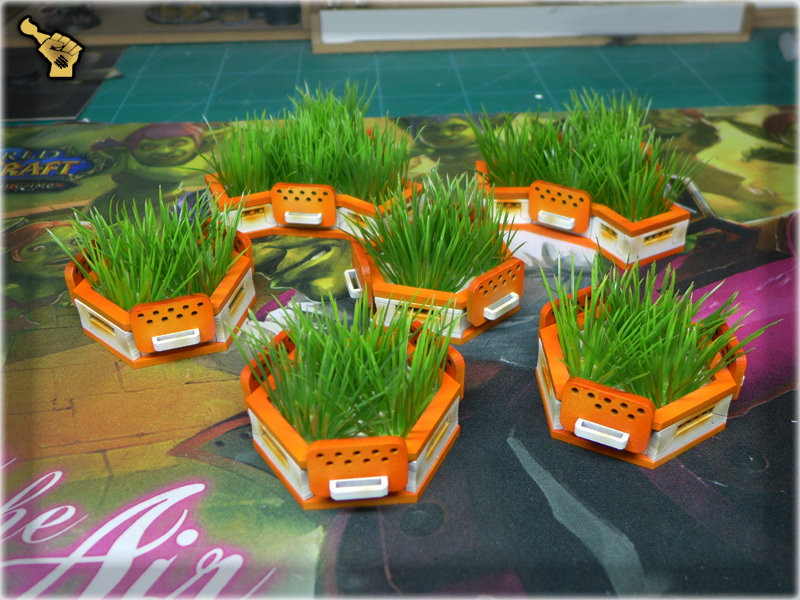
Made with playability in mind, these low planters are perfect to fill my choosen theme of white/orange/green scenery. They fit both at the ground level and in the rooftops. I made these using pleksi rulers to provide detail, while the rest is just plasticard cut to fit the empty spaces. The visuals vere enchanced by plants and HDF ‘orange’ pieces.
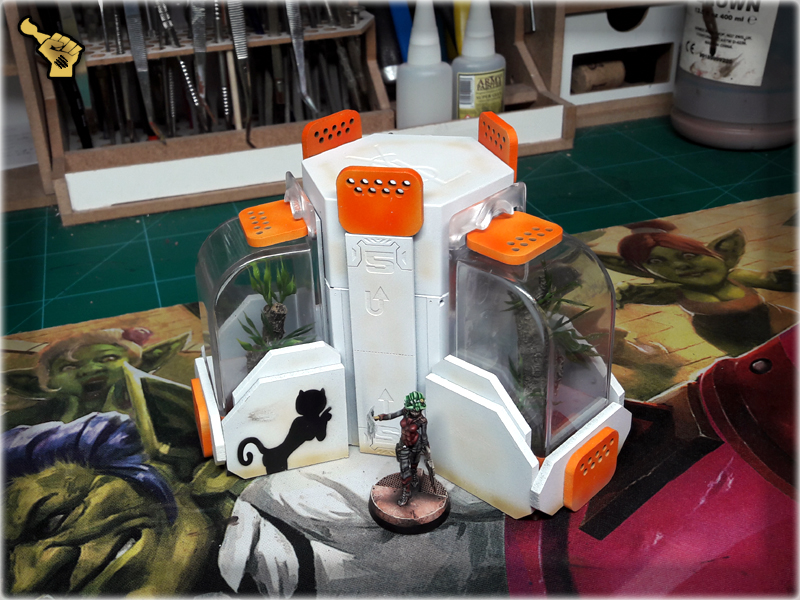
This plant compartment module is a pearl among the scenery pieces I’ve created lately. I’m really happy with how it came out. To think that I struggled for almost a year before I decided how to use two Yves Saint Laurent caps. But let’s get to the way these items (there are actually two identical scenery pieces) came to life. Some time ago I got a set of used up cutter casings from Ekograf to use in my quest of bringing imagination to reality. My friend Garran was the one to dig these out specially with me in mind (Once again thanks mate!). Once I layed my hands on these fine pieces I knew that something wondrous will come out of them. So I started planning and was quickly drawn to still unused Yves Saint Lauren caps. Their hexagonal shape fit perfectly to The Colony’s theme so I based the entire construction on them. After adding couple of PCV pieces to make the construction higher I used plexi rulers to add detail, then used cutter casings and some HDF leftovers to build particular compartments and mounted them around the central column. For the plants I used a fake Bonsai tree made out of gum. It was to fragile to be used as a standalone scenery piece, but inside the compartments it could easily outlive all the other terrain pieces. So I used glue and some tricks of my own to enchance the vicualts of tree stupms, added fake greenery and mounted these fine looking plants inside the compartments. ‘Orange’ elements followed and themed paint job done the rest. Now I have two LOF blocking pieces of scenery, that provide a lot of cover, fill empty spaces between the buildings and go along with the theme.
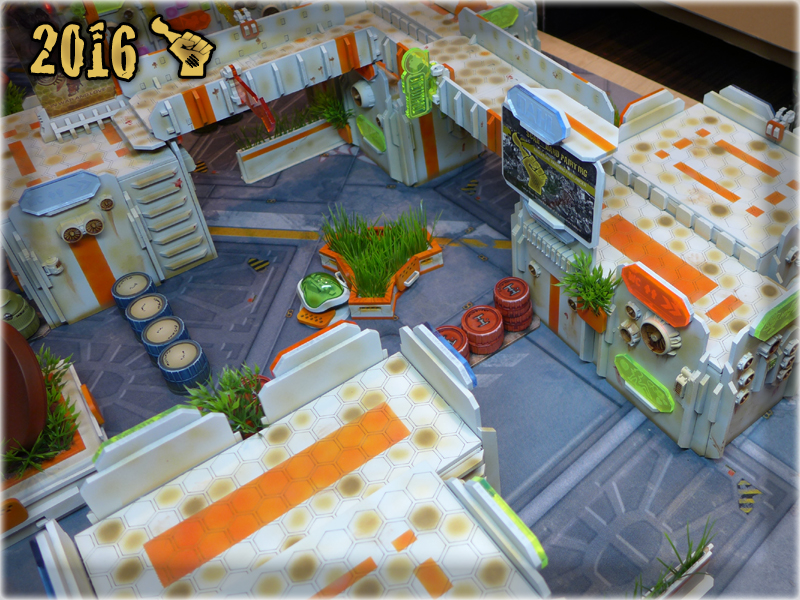
One thing still stood out of The Colony’s theme. The Micro Art Studio’s gaming mat (which I just love and don’t want to ever switch for anything else) was screwing with my colour scheme too much. I’ve figured to try and paint it, using sprays and airbrush. For this purpose I’ve airbrushed the entire mat with Vallejo’s German Red Brown, then used Vallejo’s white primer to lighten some spots and finished with Games Workshop’s Zandri Dust primer spray. Once the last layer was dry I moisted the gaming mat and used a piece of cloth on it to ensure that no paint will leave marks on my terrain, miniatures and accessories. Must say that MAS’s gaming mat holds the paint perfectly, while keeping it’s previous properties. The picture does not entirely cover the hue but rest assured that now the gaming mat fits perfectly to The Colony.

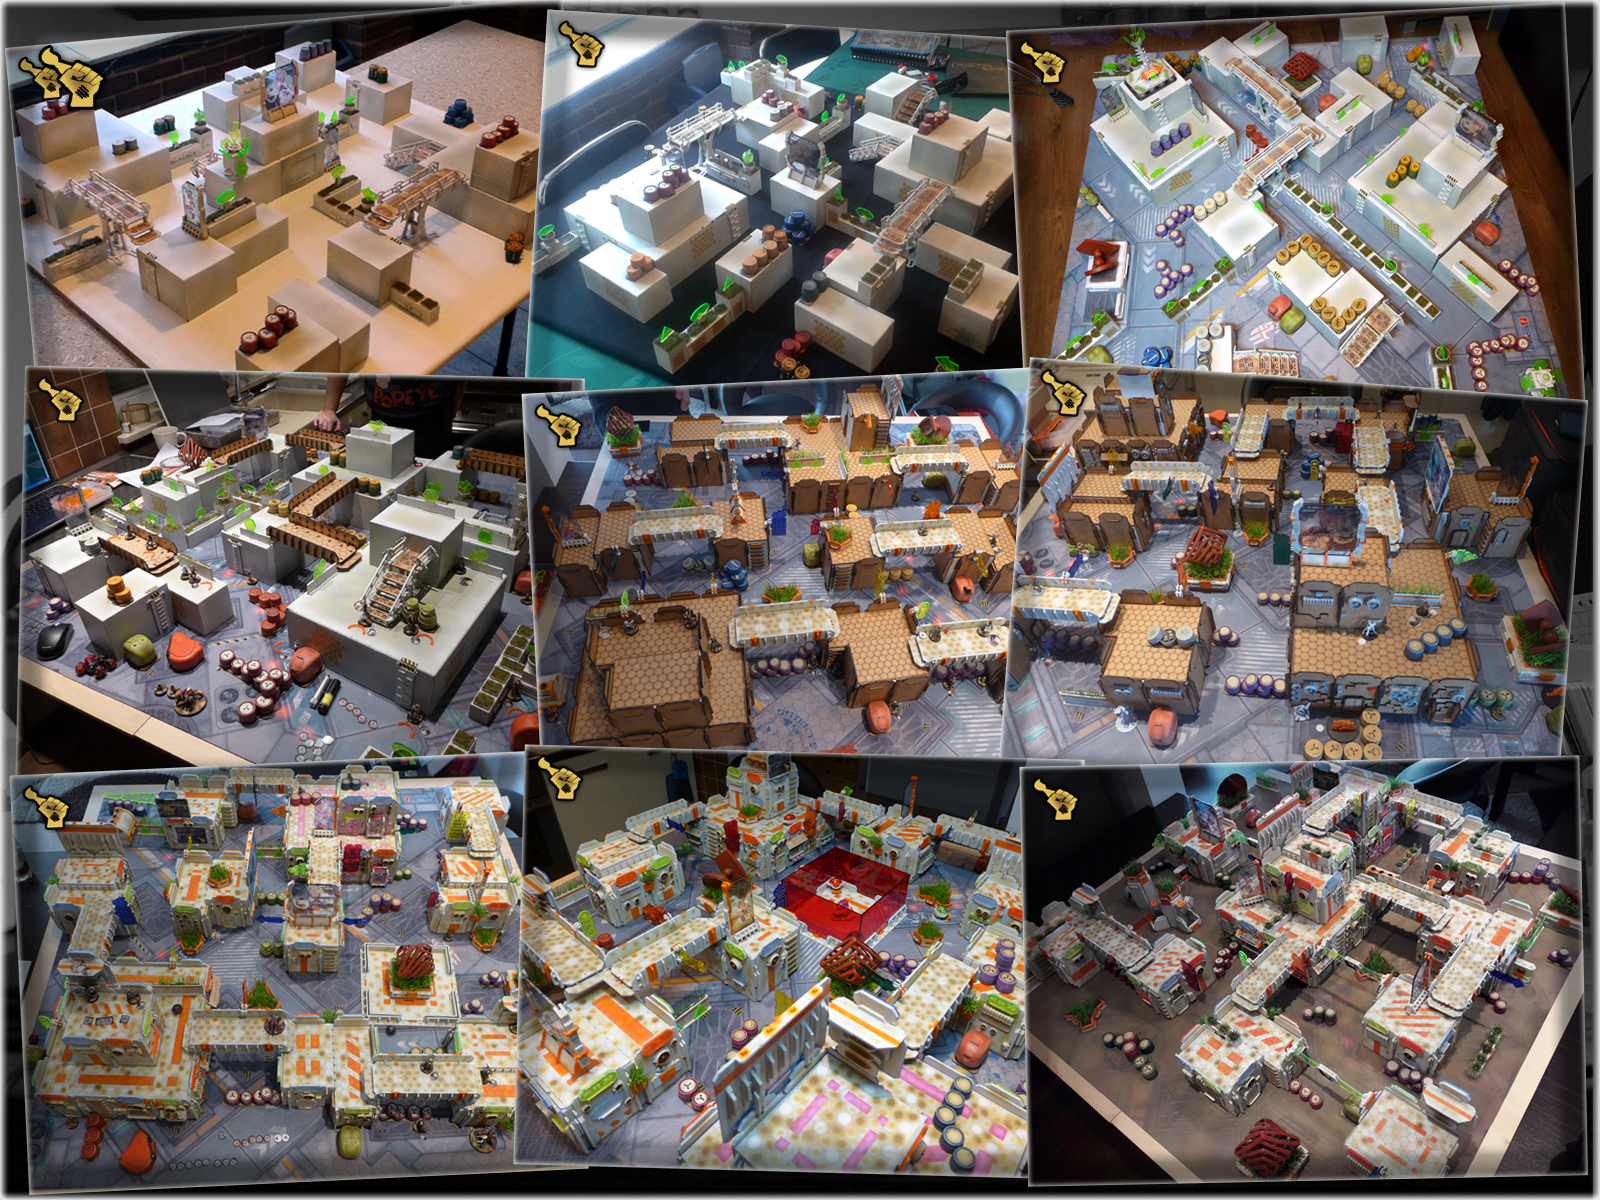
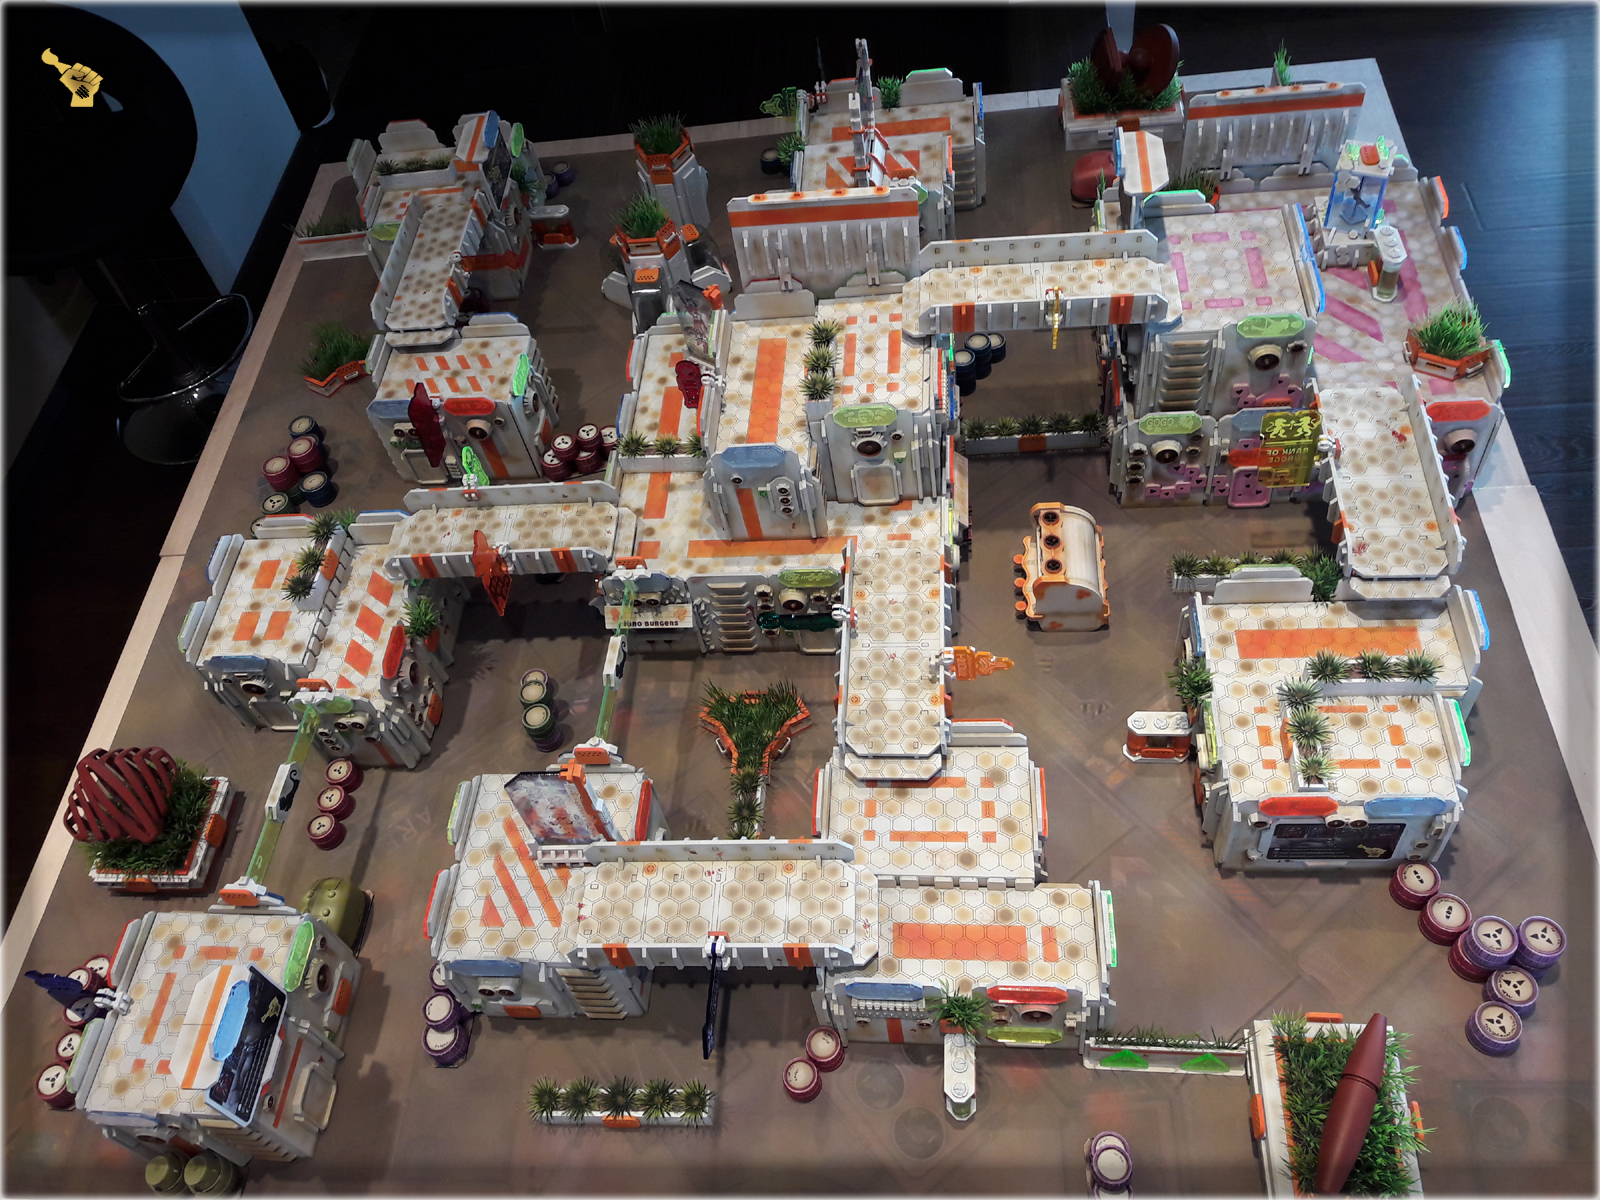
Last four months might not seen me The Colony-centered, still I’ve managed to improove the inicial concept of this gaming table. I’m really glad to be able to transform this:
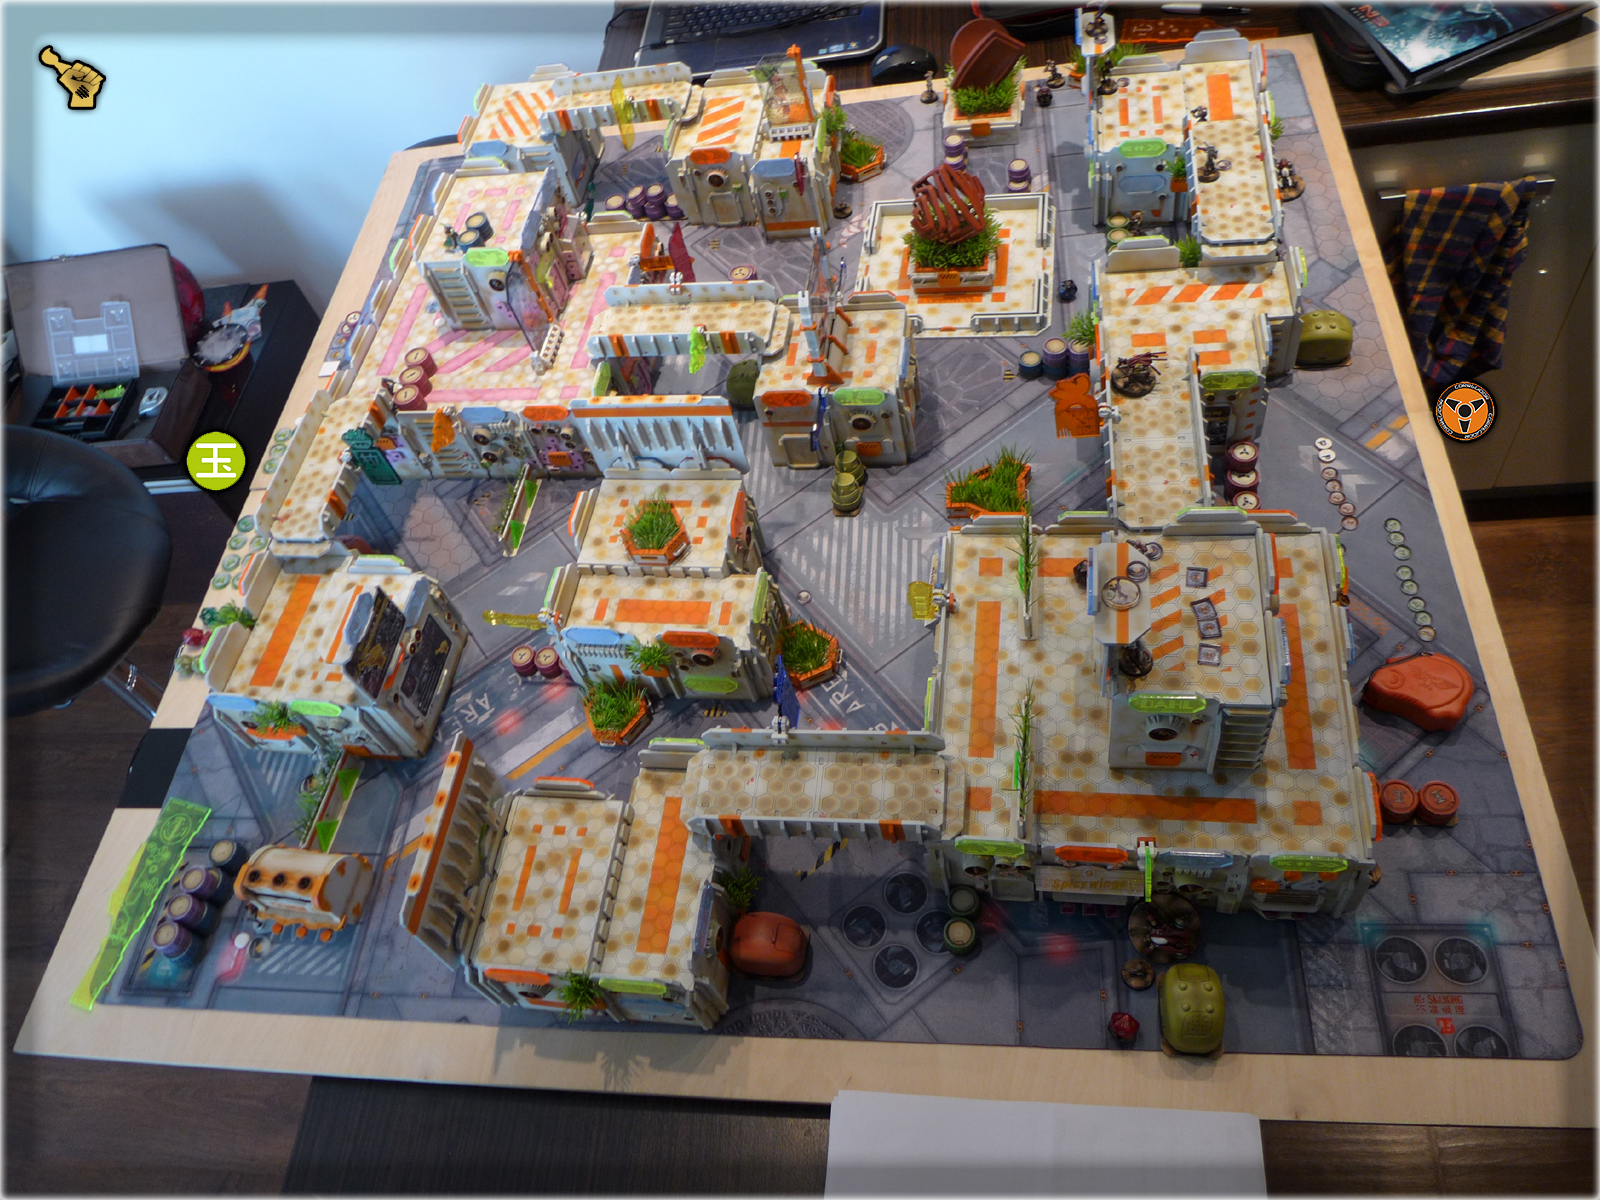
Into this:
Are more upgrades incomming? As long as I live and am into Infinity – that’s not a matter of if, but when. Stay tuned for more of The Colony.

You want to learn more about The Colony? Check out the entire series using THIS TAG
Half a year of waiting, two months of working and four days of painting have finally seen “THE COLONY” SPECIAL PROJECT finished. Last week, after adding some final detail which you can check out in “The Colony” Special Project part FOUR and FIVE, I was engaged with painting all the terrain. It was a hell of a hard work, as the enormity of surface being painted overwhelmed me to a point where I slept around three to four hours each day, woke up to paint, made a break, then got back to painting etc. Still, my work has paid off – as right now my gaming table for Infinity is complete!
Or so I have thought till the moment of taking first pictures came by. Not only the ‘GO GO NOMADS!’ night club looked like if painted by a three-years old, (Which my beloved GF announced just as soon as she layed eyes on my masterpiece…) but also some key colour wheel synergies were missing. Here and there I overkilled colours or just made plain mistakes. Couple of improovements had to be done ASAP, as otherwise I’ve risked my mind being overheated with self-directed anger. So I’ve started working on things that triggered my self-loathing, eliminating them one at a time.
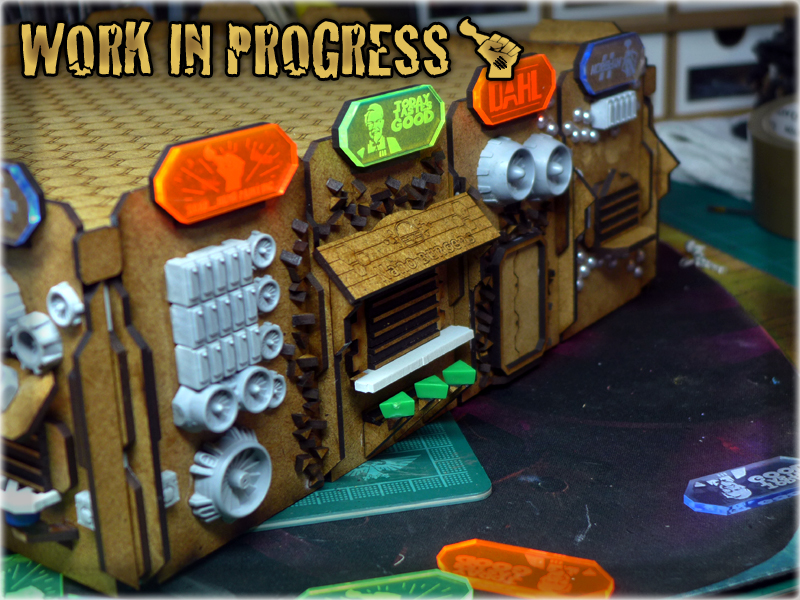
‘GO GO NOMADS! Night Club’ was the first one to undergo a small redesign. I’ve dimmed the pink, and ‘browns’, adding much more white to consolidate colour scheme and black to set a strong, but natural contrast. This change did the trick of dimming the effect of “child’s dream”… It’s still ugly as fuck, but my concious is clear – it was planned from the beginning to make this one into a nice easter egg.
Next thing to add was “detail” as my buildings clearly lacked it. The simplest way to do it was to use some already existing, tiny wall features, paint them using a variety of colour and also add more plexi-glass holos.
In the end I also harmonized the main colour scheme by adding much more green. I used aquarium plants and some MDF leftovers for this. Green plants broke the flat colour scheme of the walls, and complemented the overall colour scheme – now all the Holos were once again moved to the visual background.

Inbetween all these changes and upgrades, I was able to made a short photo session. You can view the entire GALLERY HERE, while below is a small sample:

Also as a bonus – I’ve already played one battle on the table – taking some in-game pictures and preparing a short video about how terrain was set up for it.


Is this the end of The Colony? Judging by how necessity is the mother of invention I think that we will see some more of The Colony in the future. Especially with such kind of things around… just be sure to visit this site from time to time 😉
The story of “The Colony” Special Project is closing to an end. In FOUR’th part of this article I’ve started to add detail to all my buildings. The quantity of vents and additional stuff was so enormous, that I had to support with a help of a friend, to prepare all of them – still it took more than a week to complete. Once vents were in place I started to paint all the buildings, which was a challenge in it’s own way. I never imagined that painting buildings can be so exhausting and so many mistakes can be made during such a (should be) easy and relaxating task. Still – I was confronted with the ‘unexpected’ and had to improvise more than couple of times…
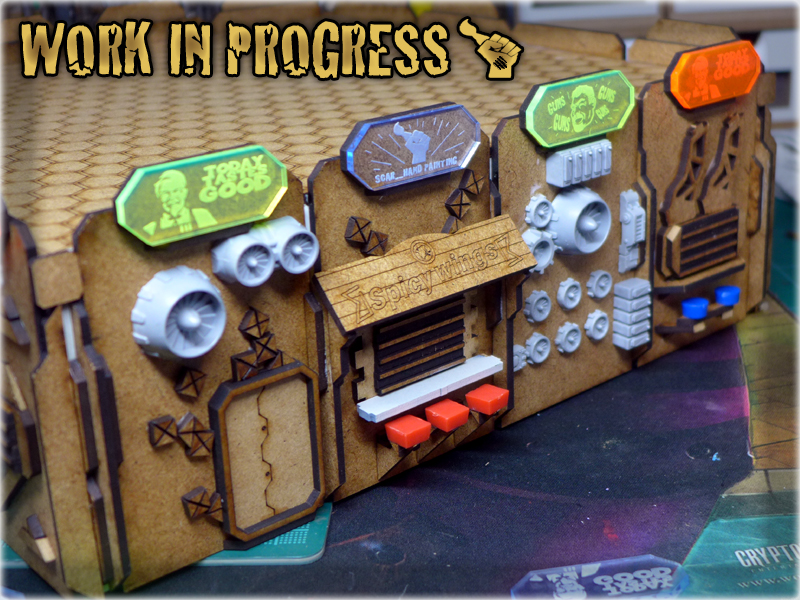
Before we proceed to actual ‘painting stuff’ it is vital for me to continue where I’ve finished “The Colony” Special Project part FOUR. I’ve introduced you to ‘Astro-Gastro Center’, which was one of my table’s centerpieces. A single picture is not enough to show the number of detailed food boths added all around the building…
The idea was born out of necessity. After deciding to differentiate both of the ‘big’ buildings – I had to find a nice theme for this one. I had a lot of trash and leftovers from purchased terrain sets. I was also supported with couple rare pieces (like Zen Terrain’s food both signboards) provided by a friend. I’ve picked the best pieces and decided to build the theme around them, for this building to be at least as special as the ‘GO GO NOMADS’ night club.
It started with some small adjustements to the building’s walls. Once I had the boths made and in place – I started to add some small elements to try to give each both a special theme.
One day’s work resulted in Astro-Gastro Center being born out of scratch.
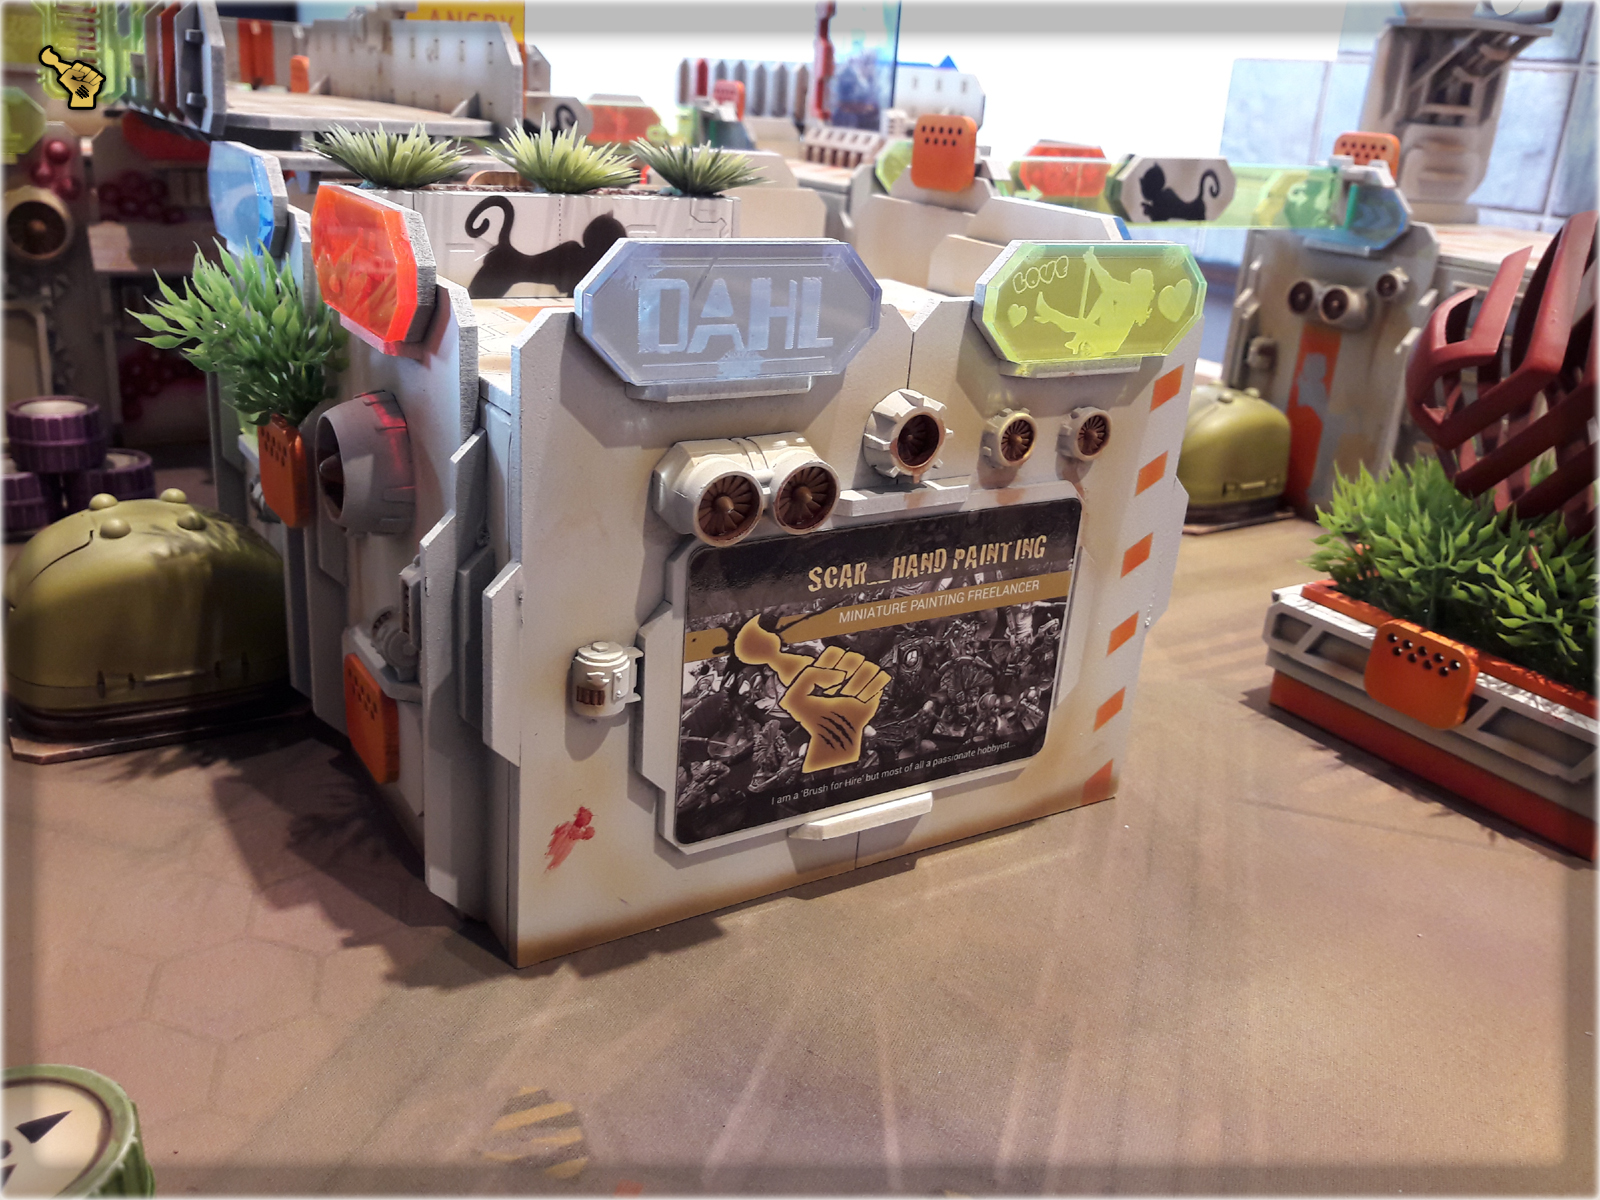
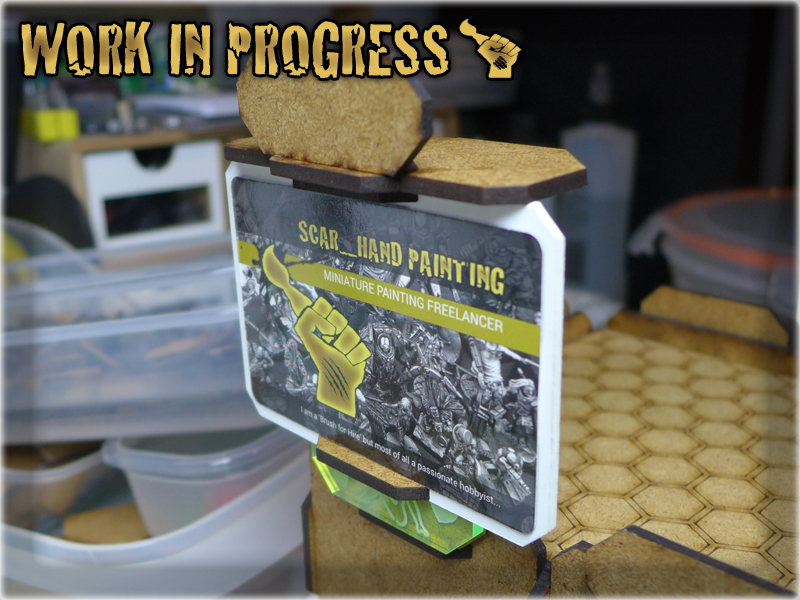
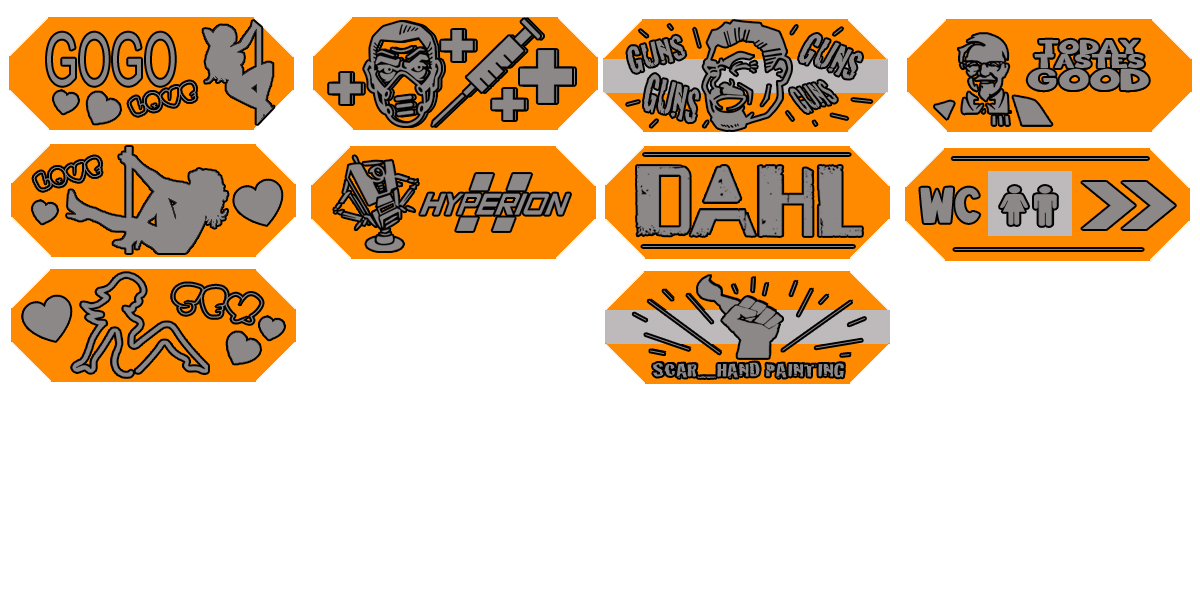
I’ve been already head to toe in building stuff, so I decided not to stop at decorating the buildings, but also work at adding some high placed spots, for snipers, forward obserwers and linked ‘shooty’ troops. Not too much – just enought to raise the area of play – one level up. I used what was left of my MDF pieces, added some Plasticard and prepared these, fully detachable advertisement banners. As a filler I used the only thing that I had around – the Scar_hand Painting bussiness cards 🙂
[I have already played on these – they have a nice impact on gaming style, along with just being useful).
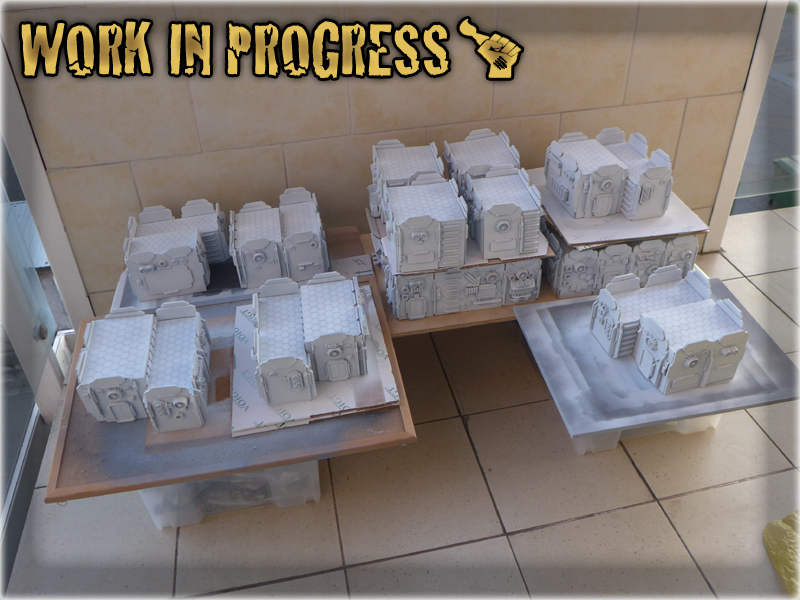
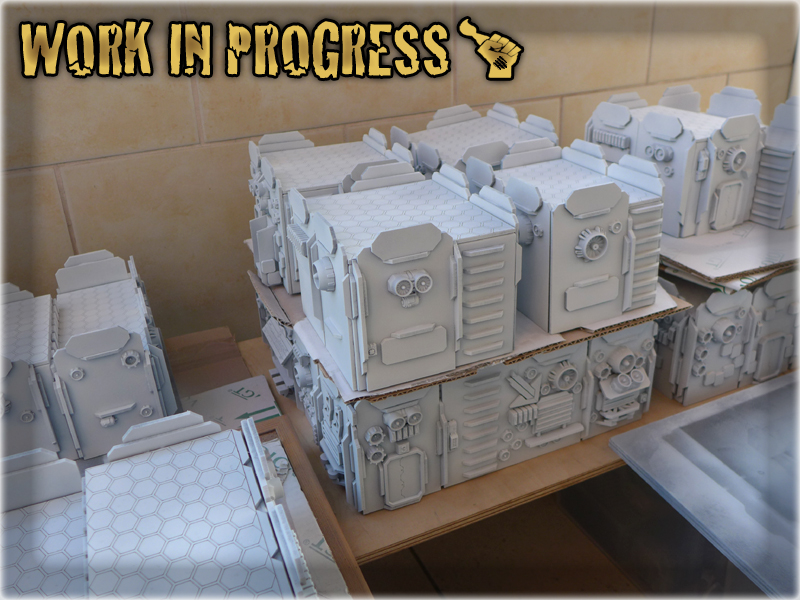
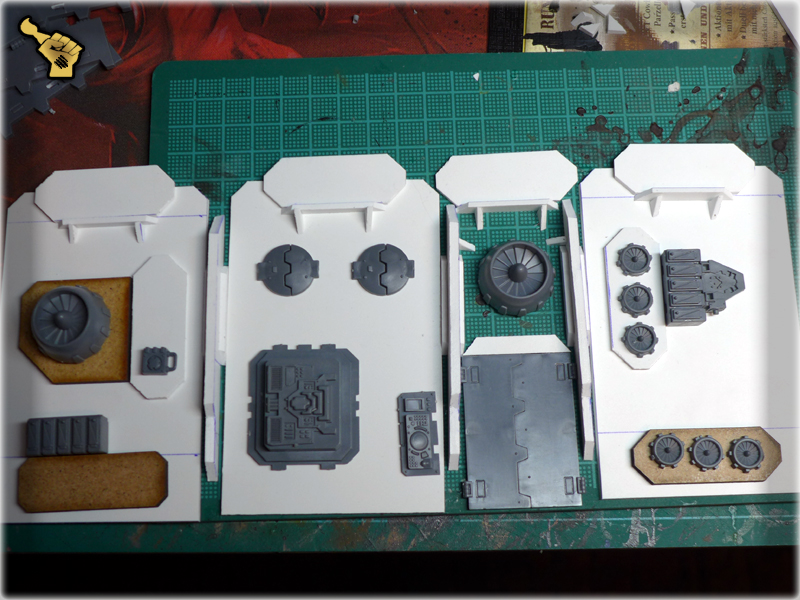
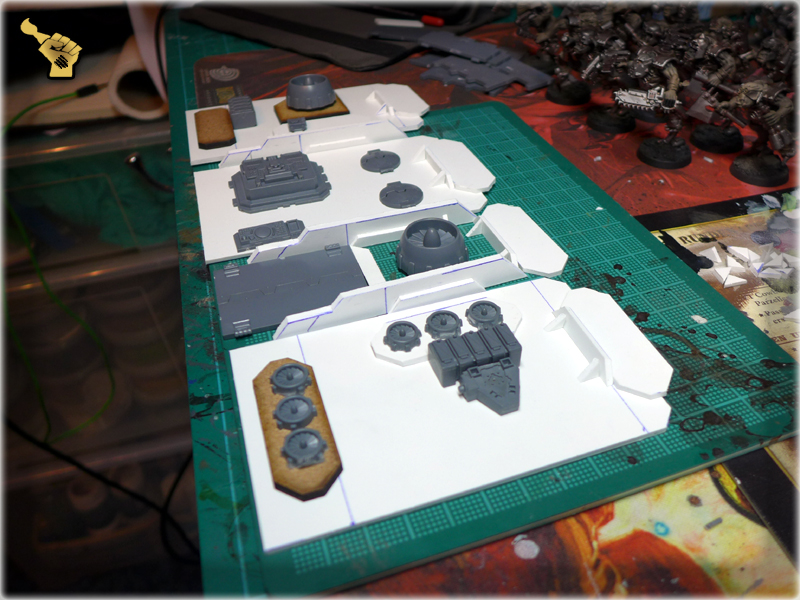
Now I can focus on the actual painting, which started just as it always does – with a proper undercoat. For my colour scheme I require three strong layers of undercoat. It starts with grey, proceeds through either creeme/bone or soft grey and finally get’s whitened with Games Workshop’s Skull White spray. Skull white is vital to the overall looks of this Colour Scheme, as it’s really white and matt. It goes well with MDF terrain, covering all with a nice, strong layer. Whole process of undercoating ate an entire day – with me sitting on a balcony, spraying each individual terrain piece – one after another. Three rounds of undercoating, with my nosdrills clogged, eyes irritated and head on a verge of exploding. At least my neighbors did not protest about the smell…
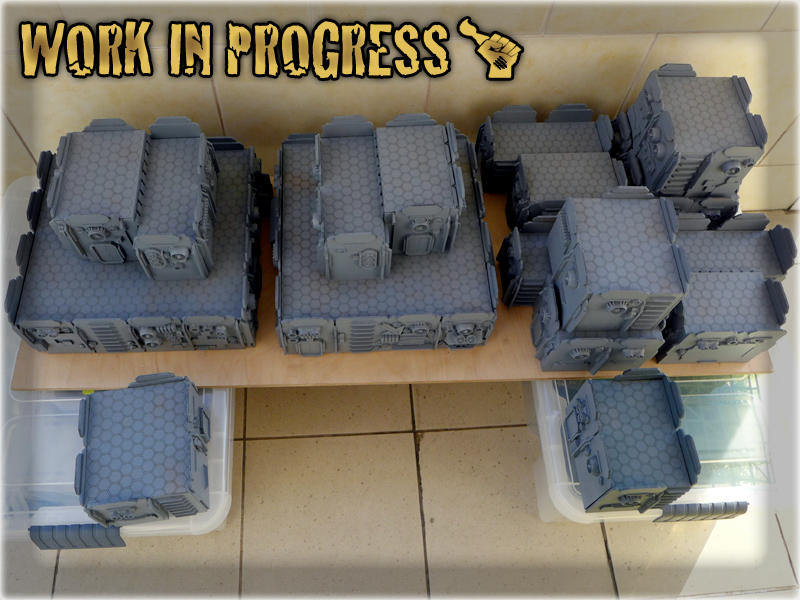

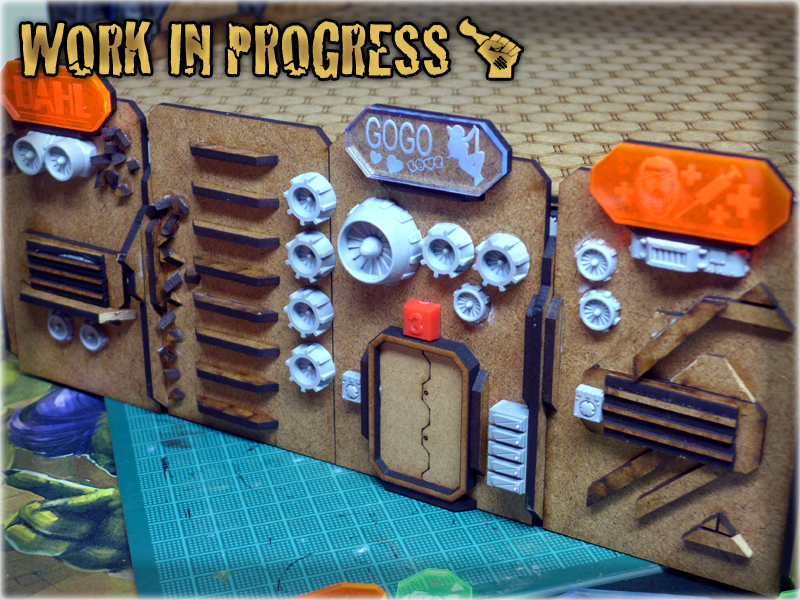
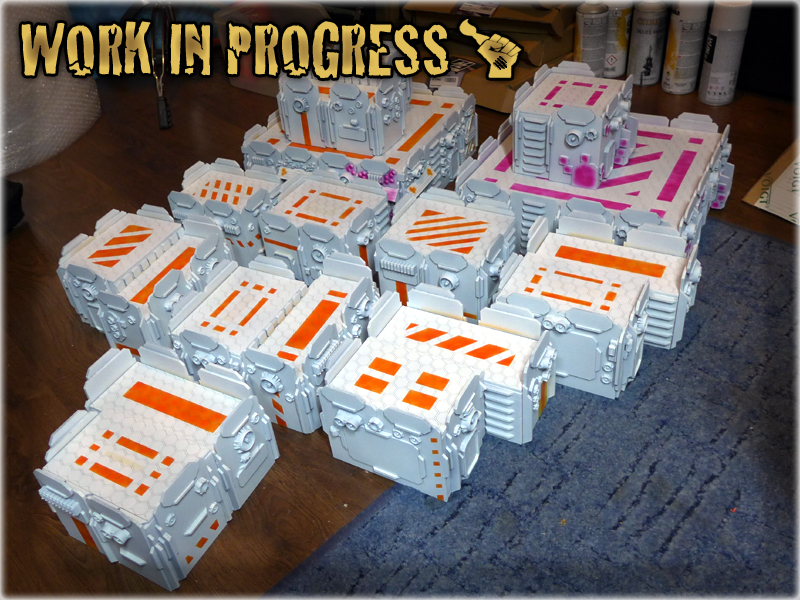
One day later the regular ‘painting’ started. It took three days of labour with a lot of painting and not much sleep. I used an Airbrush, while a regular brush applying some Fire Hot Orange to keep up with my table’s main theme (Orange + White/Creeme + Greenery). I used a masking tape for this – providing some curious, industrial shapes on the roofs and walls of all buildings. I also used a colour wheel to check out which colour will go well along with orange/green in a tri-colour scheme. The wheel told me that purple-pink should do, so I decided to try it out on ‘GO GO NOMADS!” night club. (which I actually regret by now as while ‘solo’ the building looks just ugly as fuck :P).
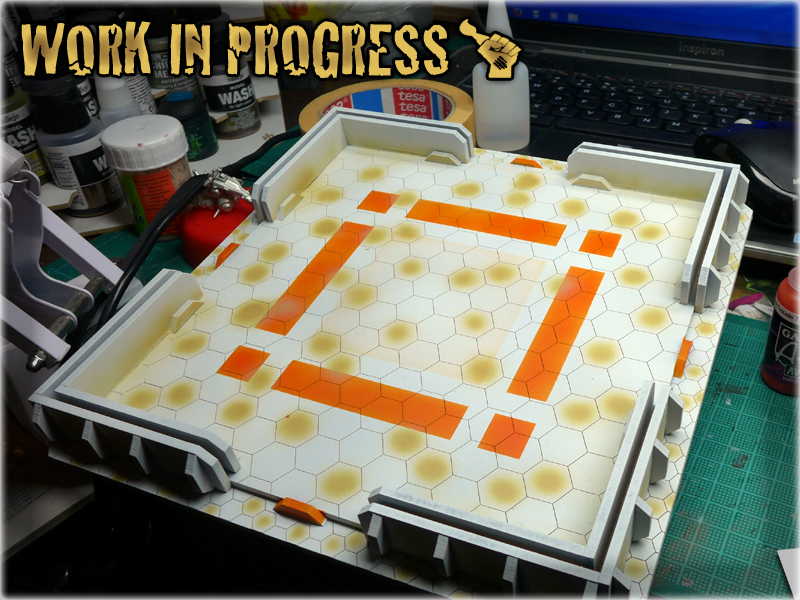
Another ‘layer’ was composed of sandy yellow and soft brown. I applied them both in certain hexes along the roofs and in much smaller quantity over the walls.
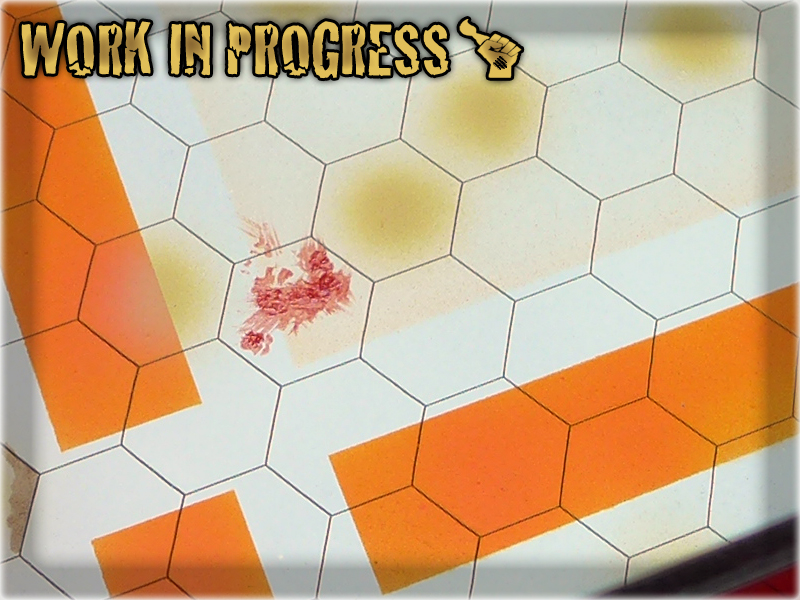
Finally added some blood splatters and grease, which sounds pretty easy if not taking their enormous quantity and dimensions of the buildings I had to work with.
I also added some soft points od dust and dirt along with smudges here and there. Then decided to fill all vents with dark brown/rust Vallejo effect and add more smudges – comming out of them.
My work is finally done and I have mixed feelings about the end result. While the entirety of “The Colony” presents itself great – particular buldings require some additional work. Especially the infamous “GO GO NOMADS!” night club is one to build up my concerns – will surely make some corrects and keep working on it in the days to come. A proper gallery is under construction but now I can provide you with this small sample of how “The Colony” looks like.
See you in “The Colony” Special Project part SIX next week 😉
The long awaited moment is finally here – I acquired all the materials necessary to proceed with “The Colony Special Project”! Somewhere along this month I have received packages filled with stuff from Titan Forge, Reycast and Micro Art Studio. Each time I got one, I almost jumped out of my pants with excitement, but kept my precious ‘bitz’ for later, when all the components be here. 26th of April the last delivery arrived and not being able to wait any moment longer, I jumped straight to this project! By the way – if you need to catch up to this project – visit “The Colony” Special Project part ONE, TWO or THREE. If you are like ‘Show me more of this stuff, now!’ then proceed below…
The longer I waited for the missing parts, the more ideas came to my mind. More designs were added to the toll and I kept ordering stuff from Micro Art Studio and Reycast. In my mind’s eye “The Colony” gaming table was expanding with each new addition. Having some of the parts at my immediate disposal, inspired me to improve some early solutions, along with creating new ones…
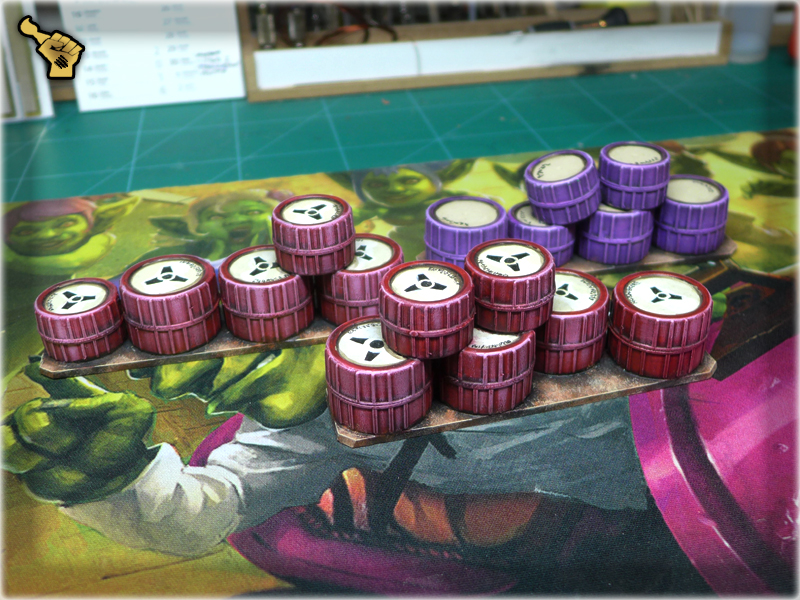
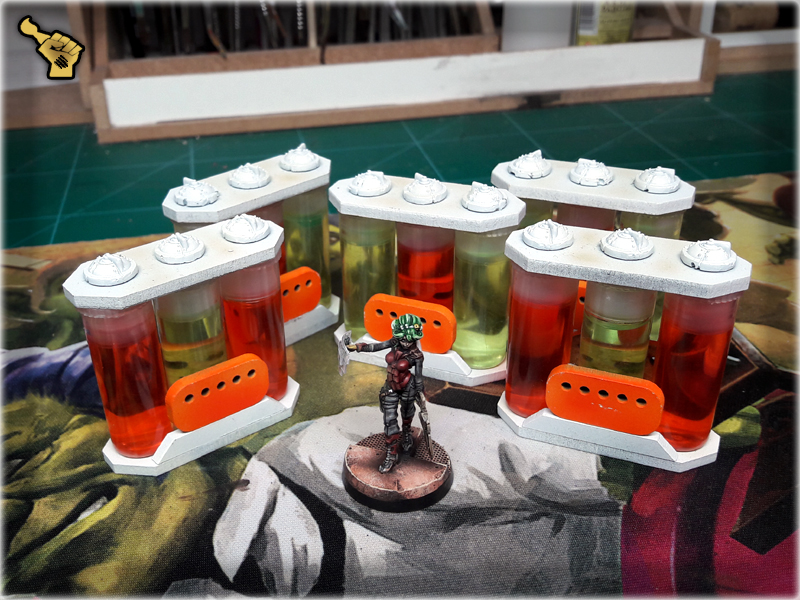
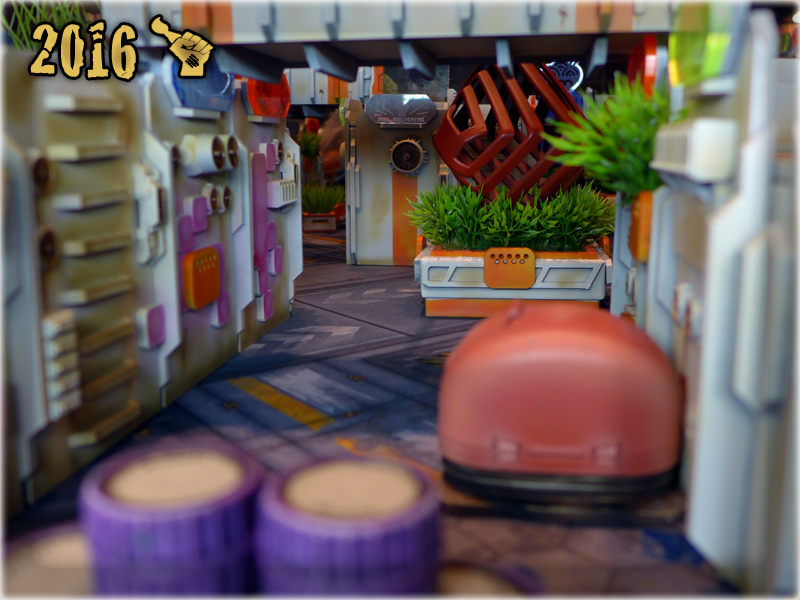
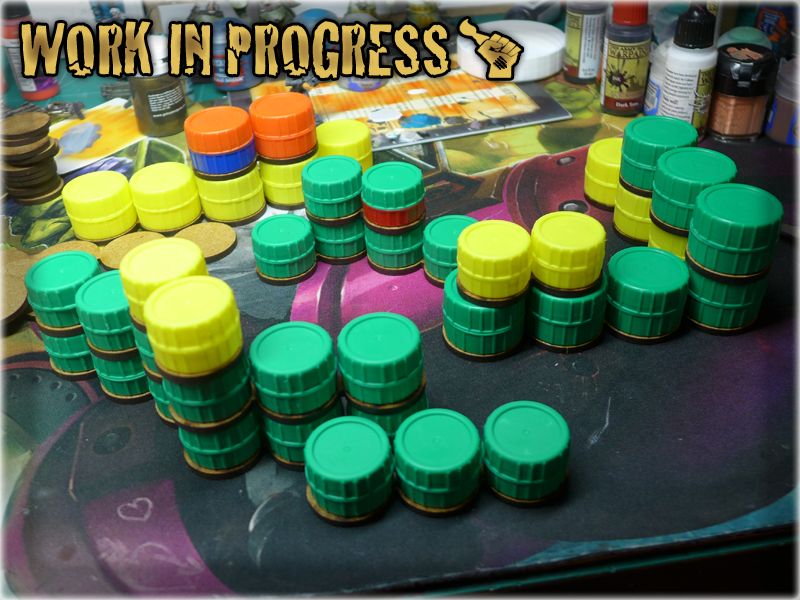
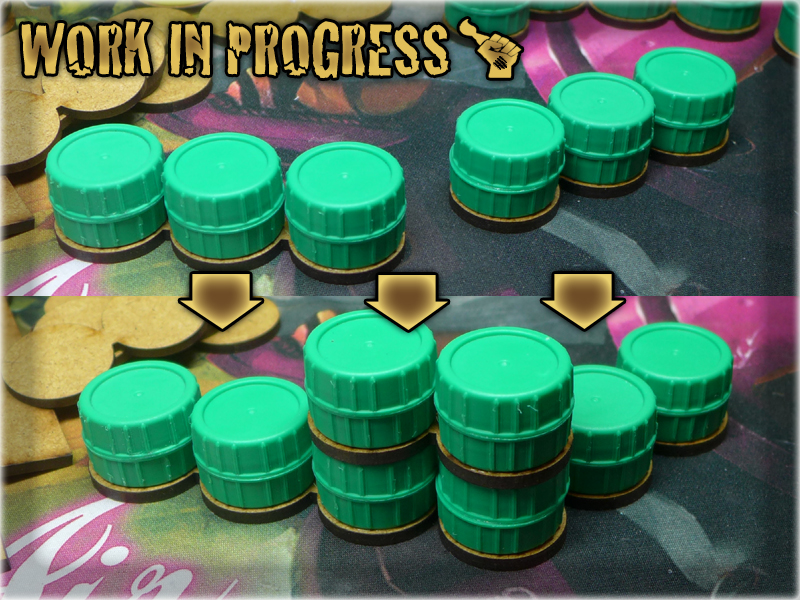
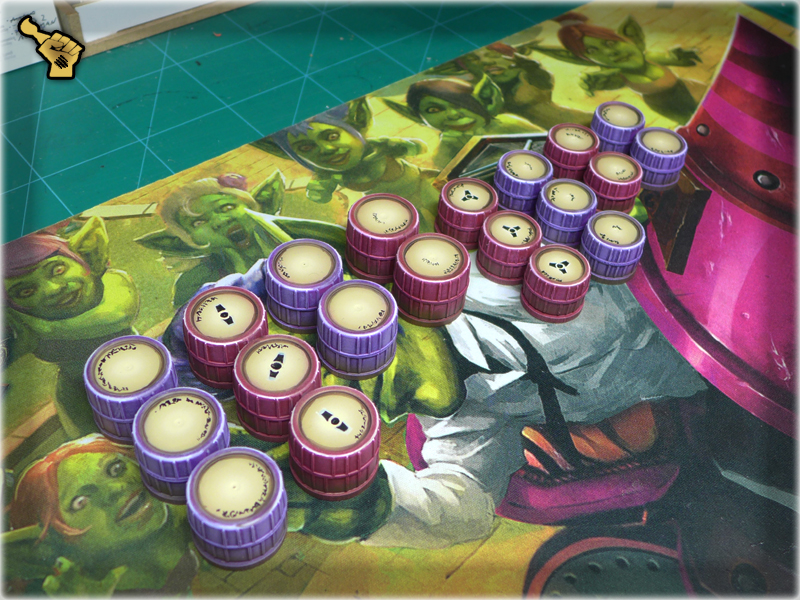
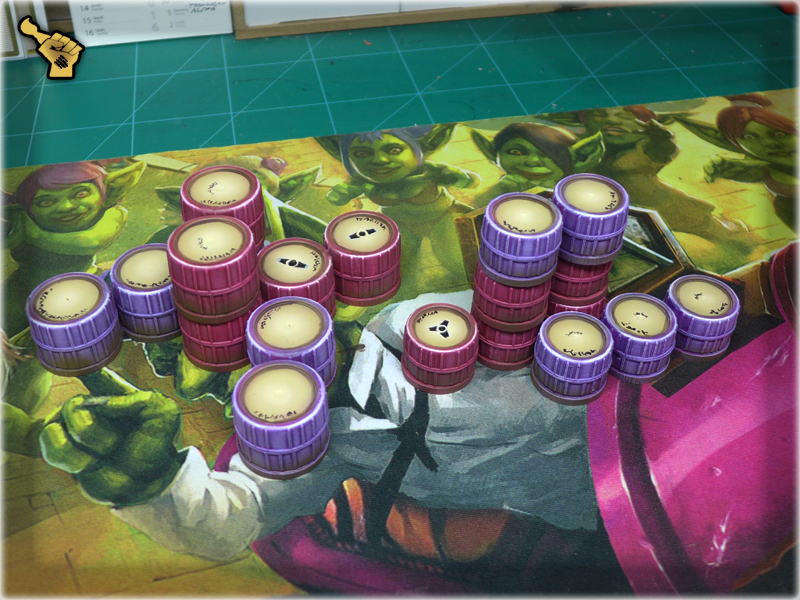
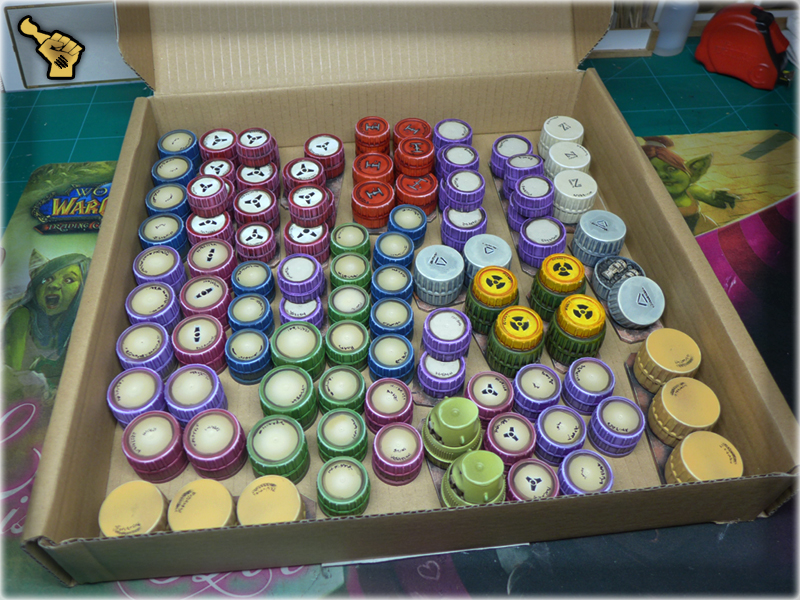
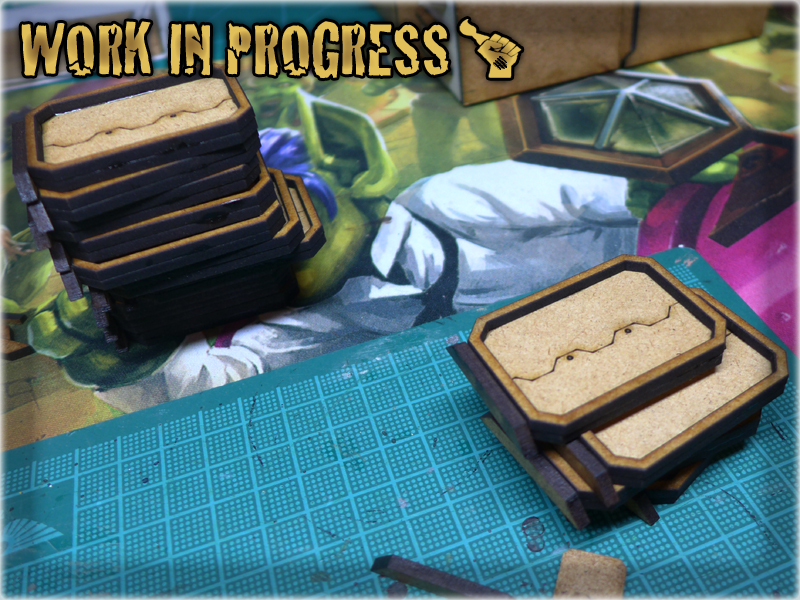
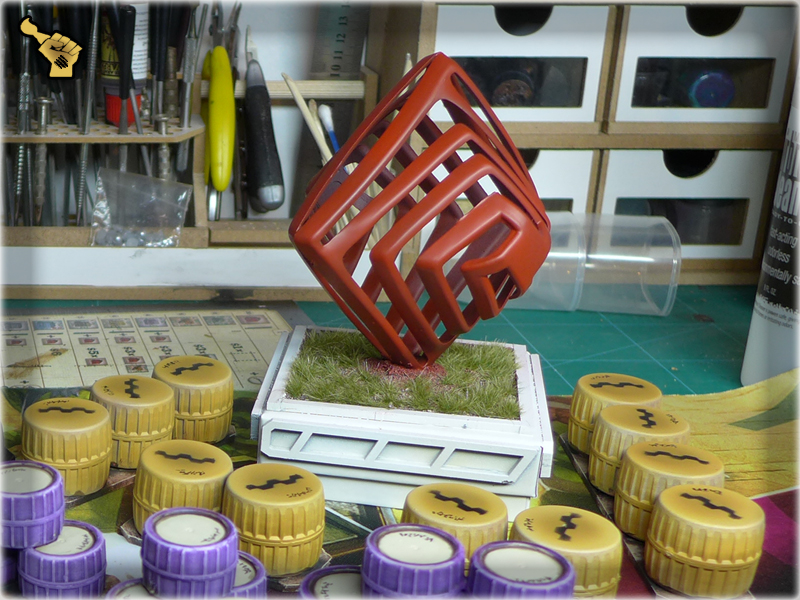
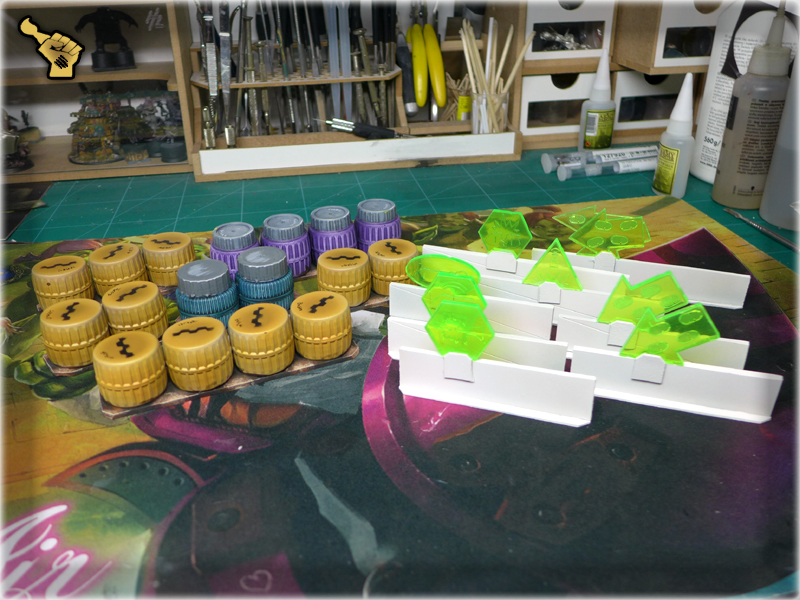
This one came to me just like that – one day I was totally happy with the way my cap-made barrels worked, next I was disgusted by how limited the idea was. My barrels were firm structures, with uncomfortable bases, difficult to shape them into a bigger mass. The solution was obvious – I had to get rid of the bases somehow. Still a base was the only thing that kept the barrels together and I really didn’t wanted to keep each barrel separate. (Which would be totally unplayable, with all the barrels moving around etc.) So I decided to improve, rather than remove the bases – a quick drawing and Micro Art Studio was working with my new design.
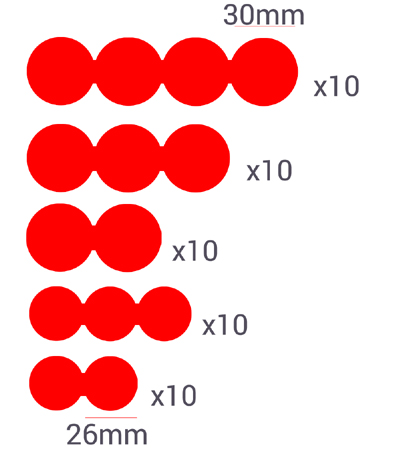 Using these re-designed bases let me combo my barrels in many new ways, while maintaning their firm and durable form.
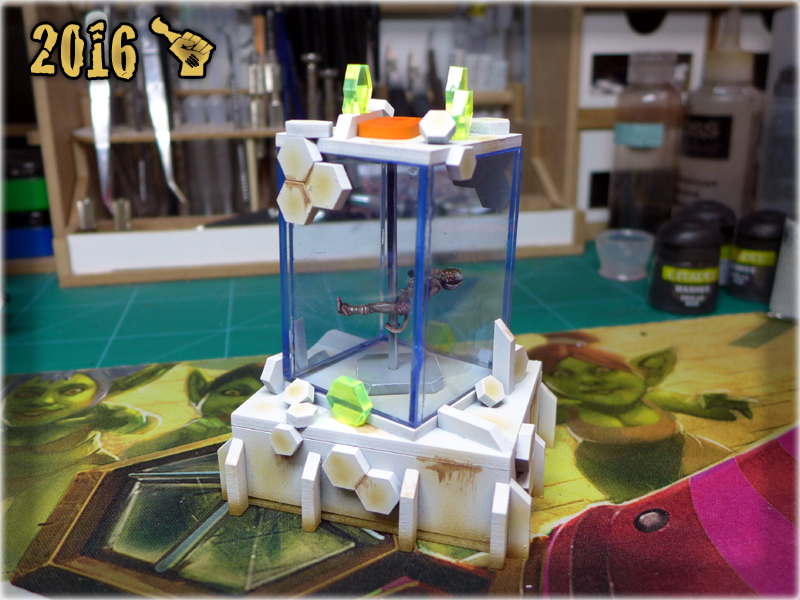
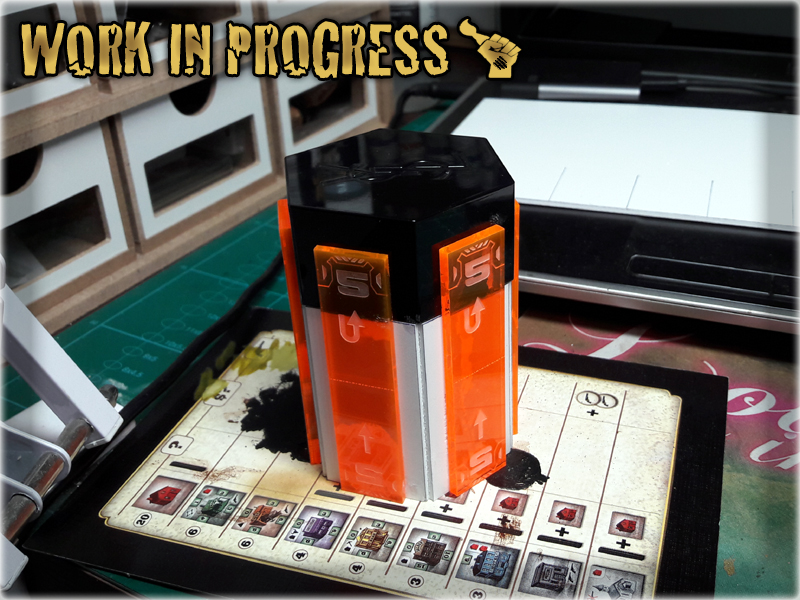
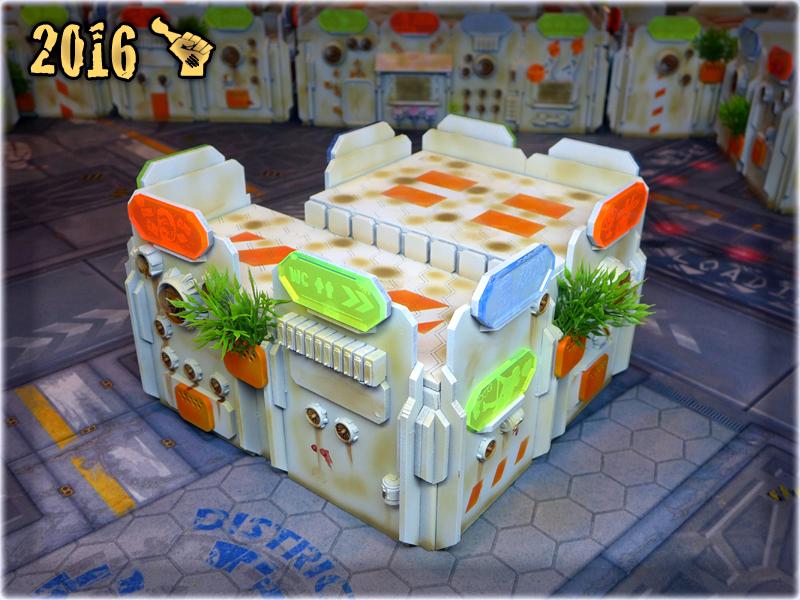
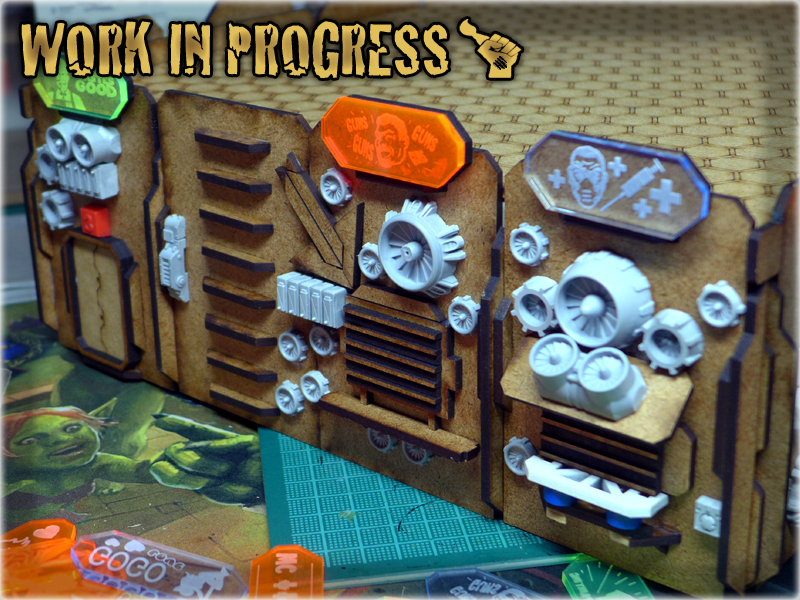
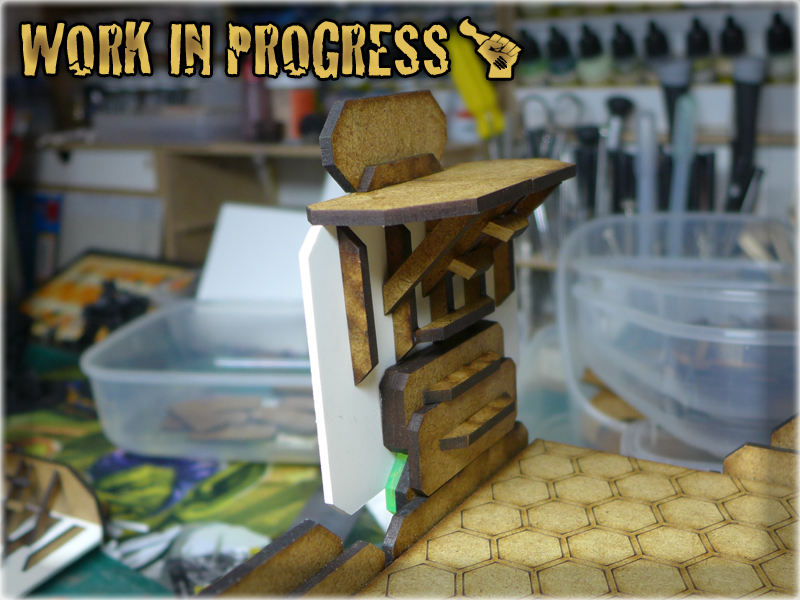
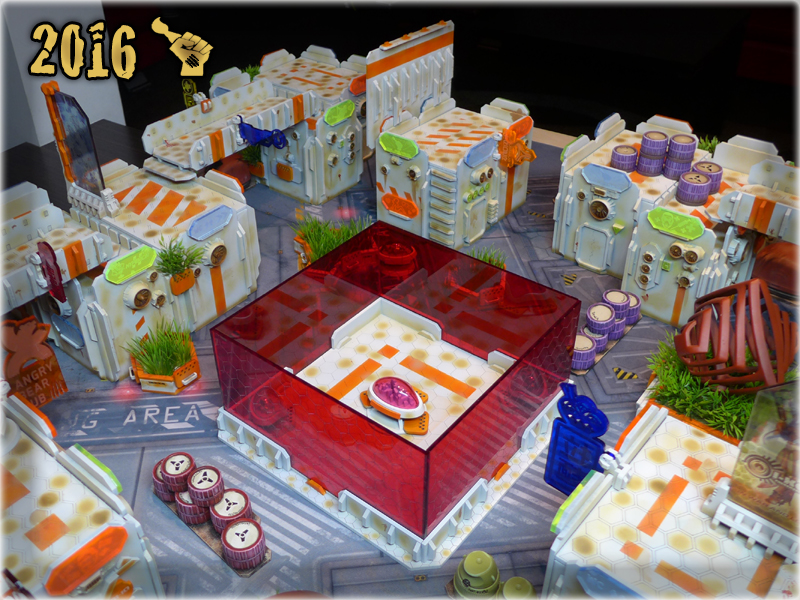
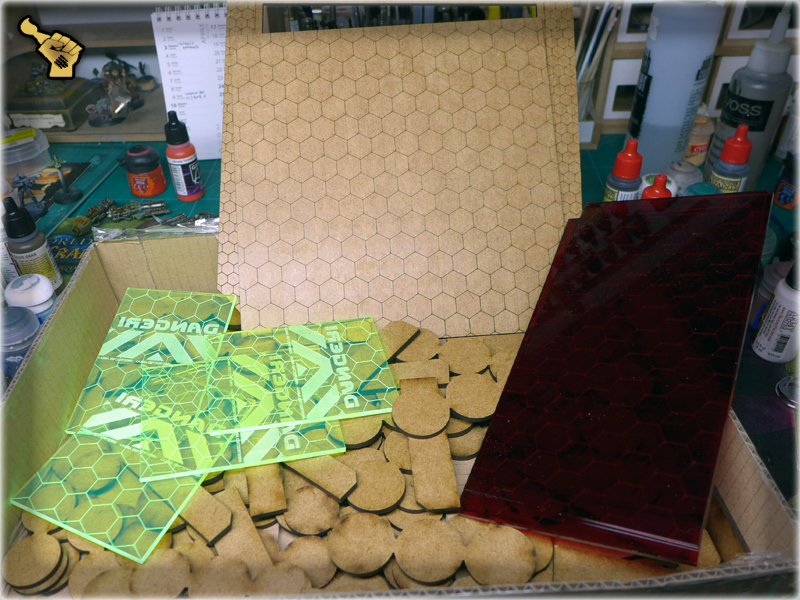
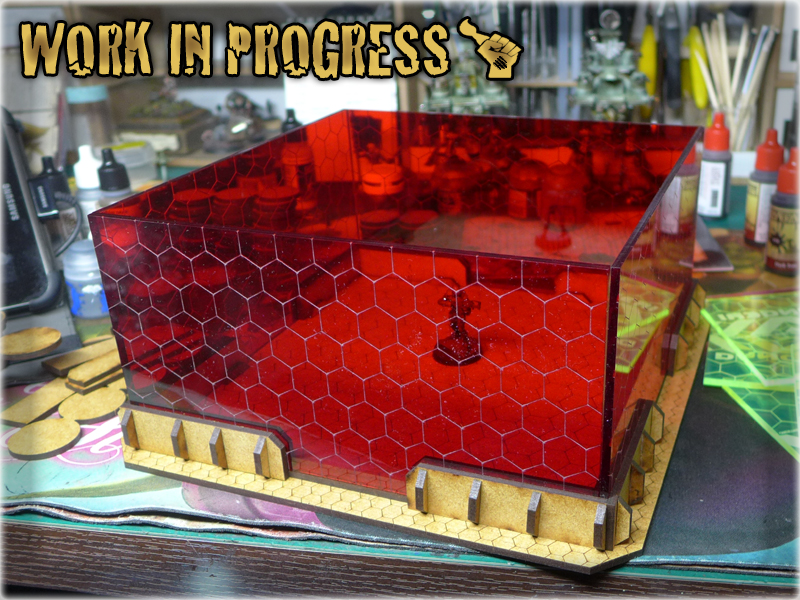
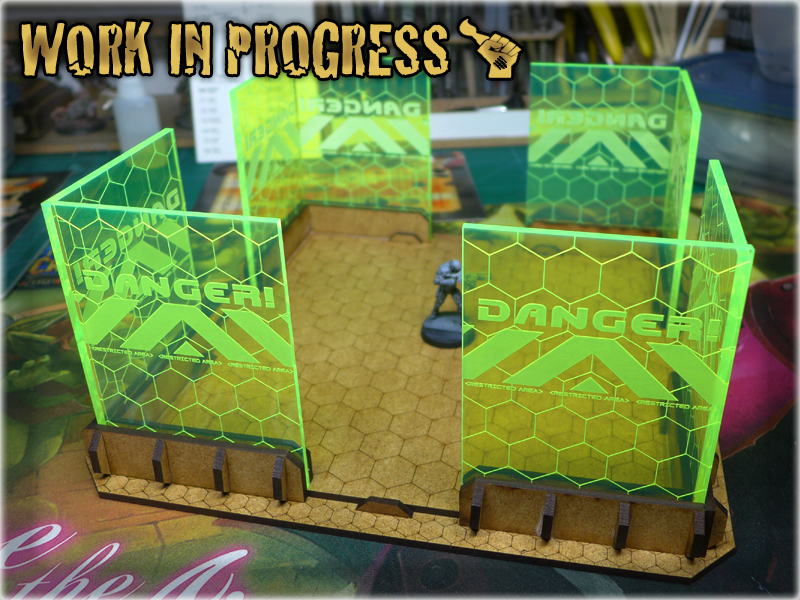
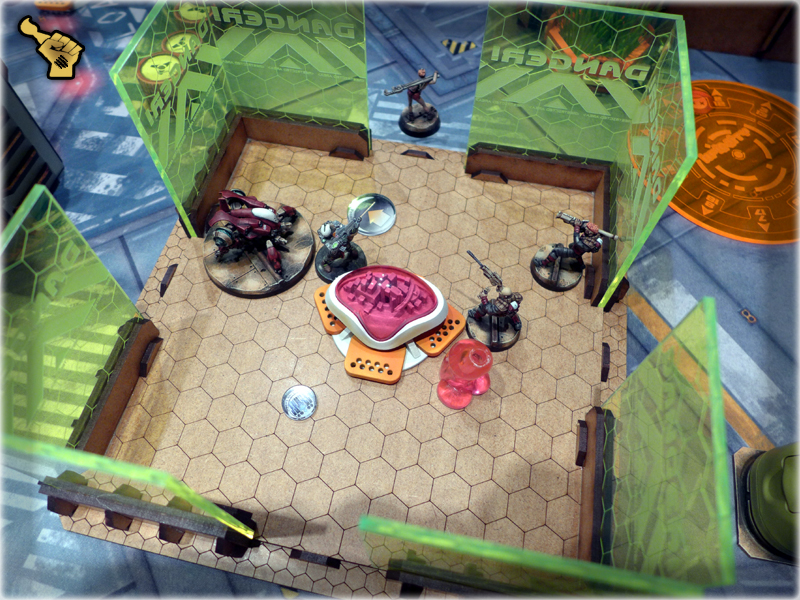
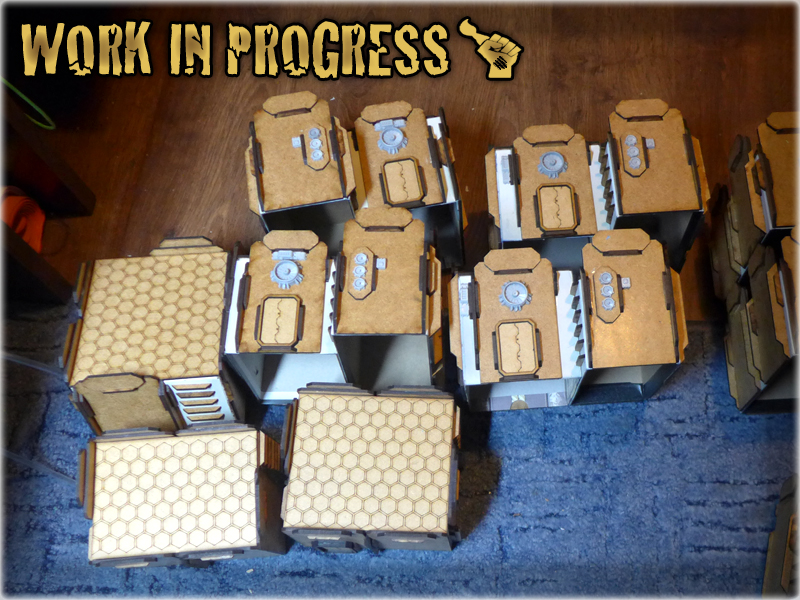
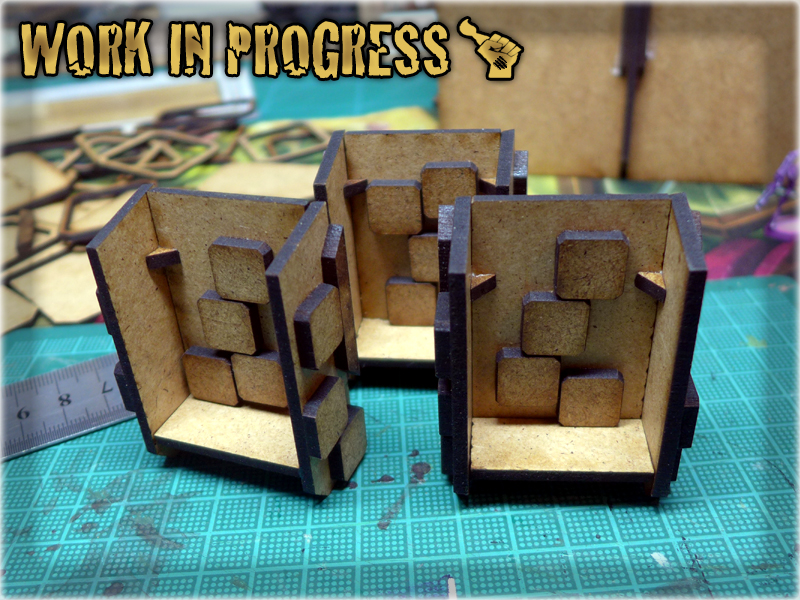
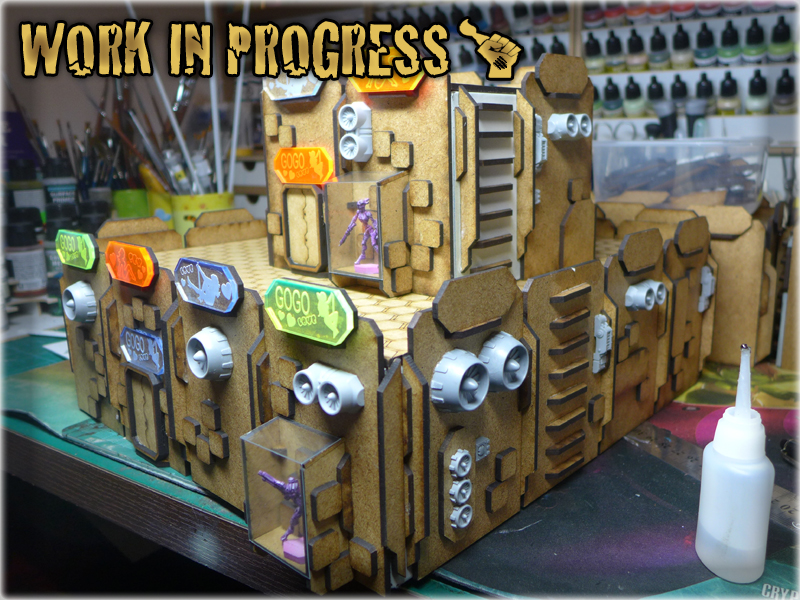
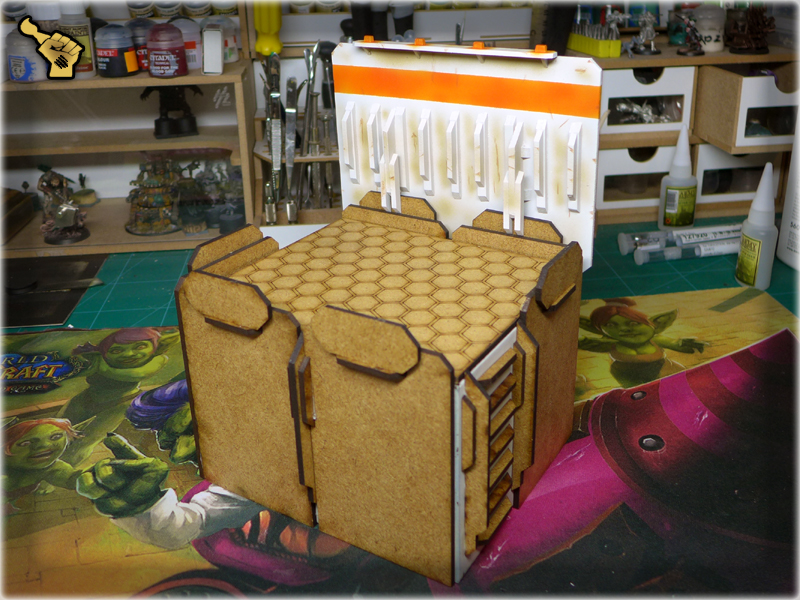
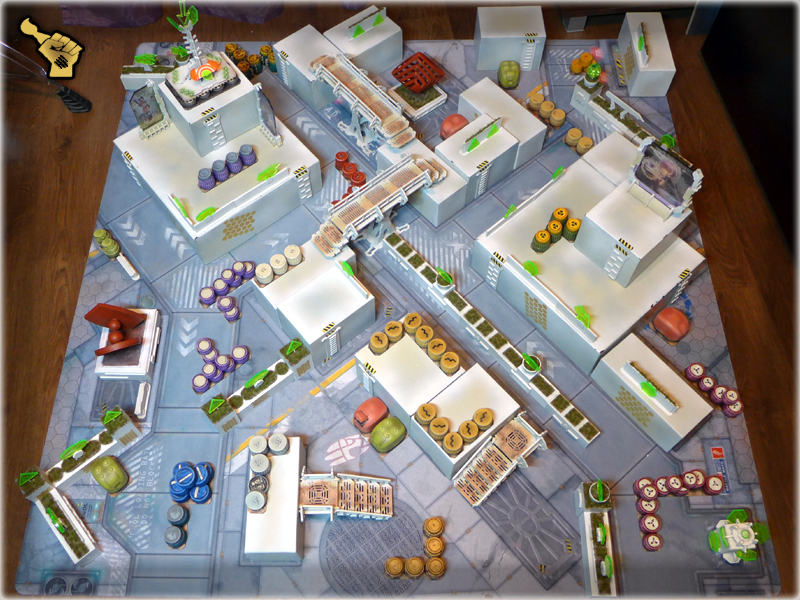
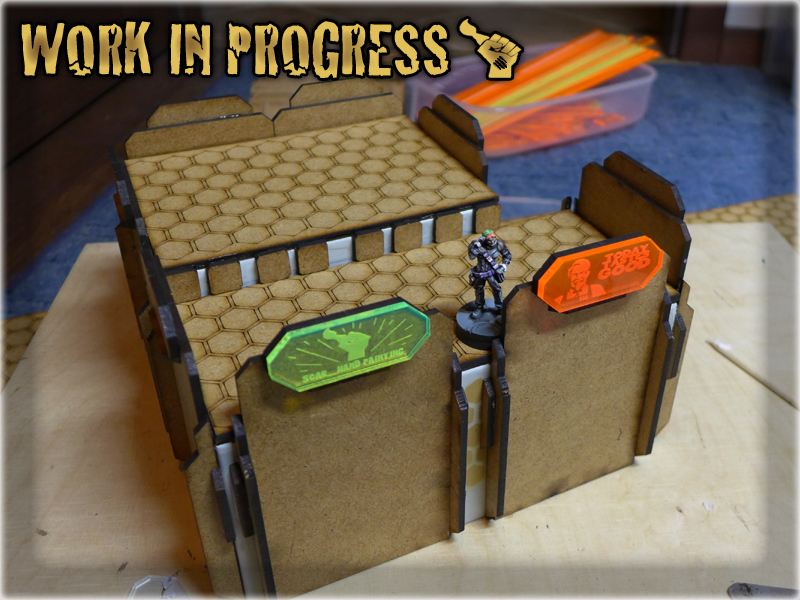
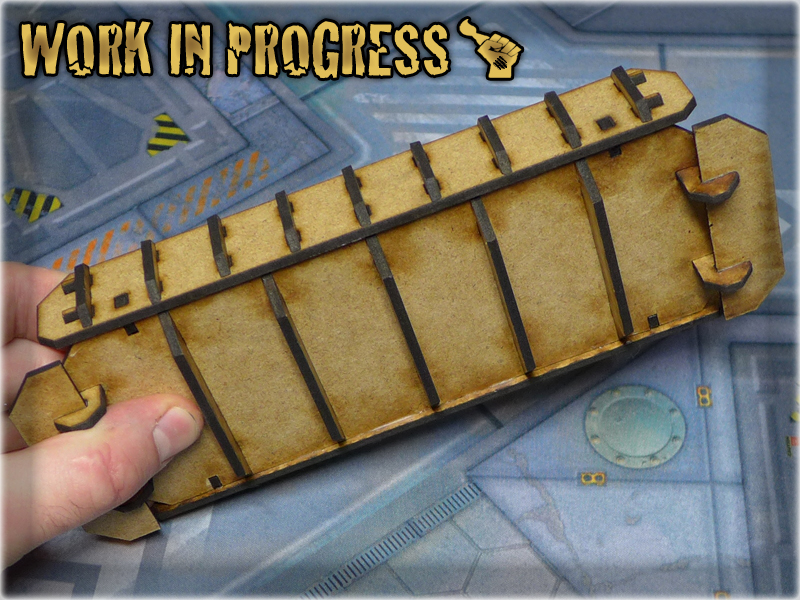
Somewhere between second and third part of this article I felt like something is amiss. Some vital part of gaming tables designed for Infinity that I hadn’t thought about. The ‘Objective Room’ – that was it! So important, yet I totally forgot about it when preparing my initial designs. I started thinking about choosing an Objective Room from among all the cool looking terrain provided by many different companies. In the end I couldn’t find any that would fit into “The Colony”. I wanted to implement something that would compliment all the sparkling holo-ads used to fill this gaming table at some point. In addition to that, I’m not a fan of roofed Objective Rooms. These should be of infinite height and I really wanted to design an objective room that could be considered to fill the role, not being a scyscraper at the same time. I’ve figured out to use a force field theme! It was perfect in it’s simplicity and would go well with holo-ads. In order to keep the cubic force field in the theme of “The Colony” I’ve designed a base that would be used to contain it. Just imagine a futuristic city space, where a permanent force fields are set up in the key locations, like around the antennas, some military consoles etc. VIP’s have access to these, while regular citizens are denied entry. So that’s the bassic idea of my Objective Room. It was made into reality by the courtesy of Micro Art Studio, which used my initial scetch to provide me with the final product. Just take a look at it…
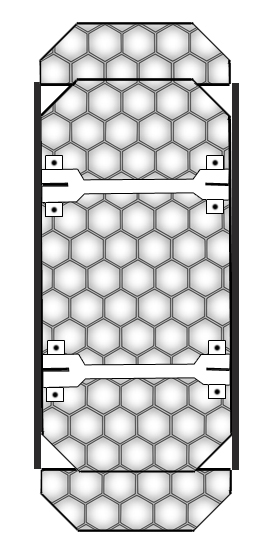
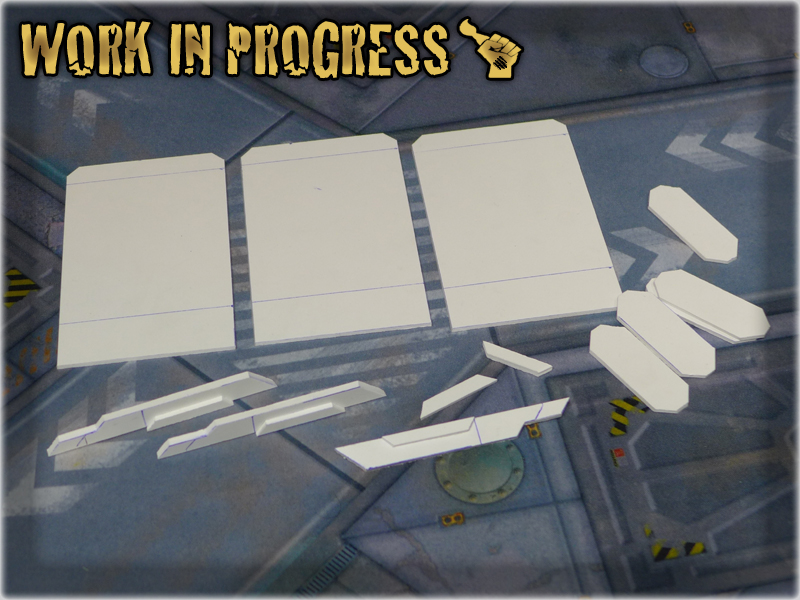
The idea on the paper:

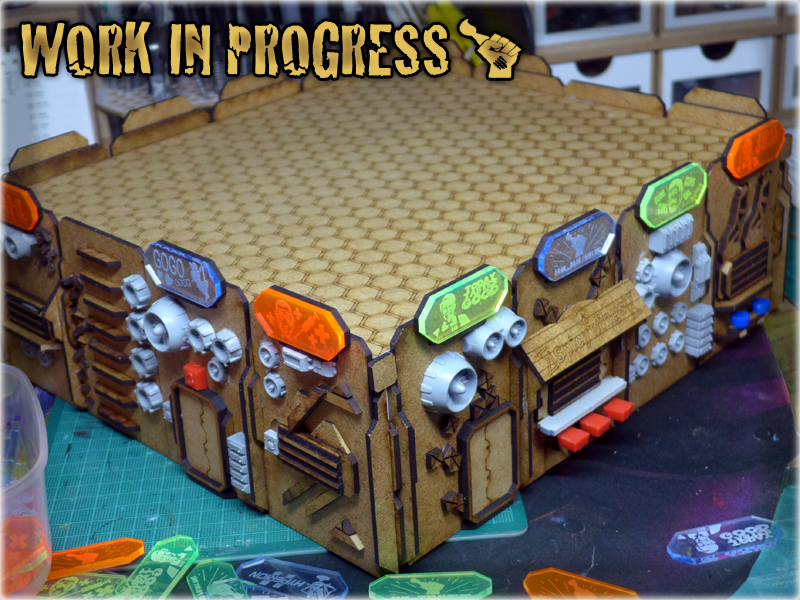
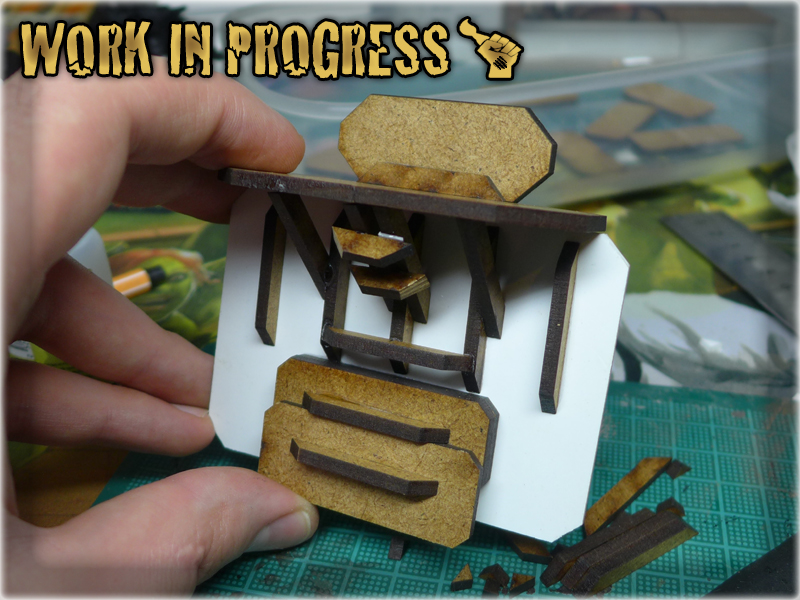
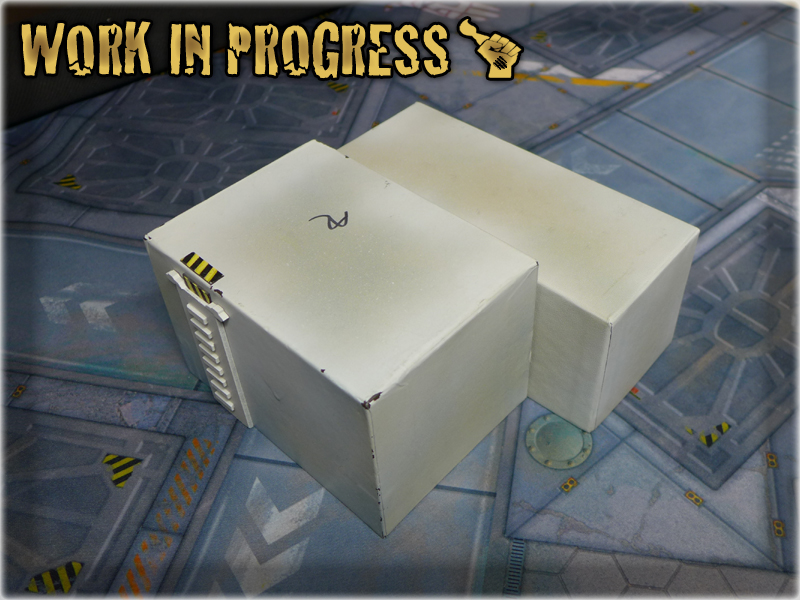
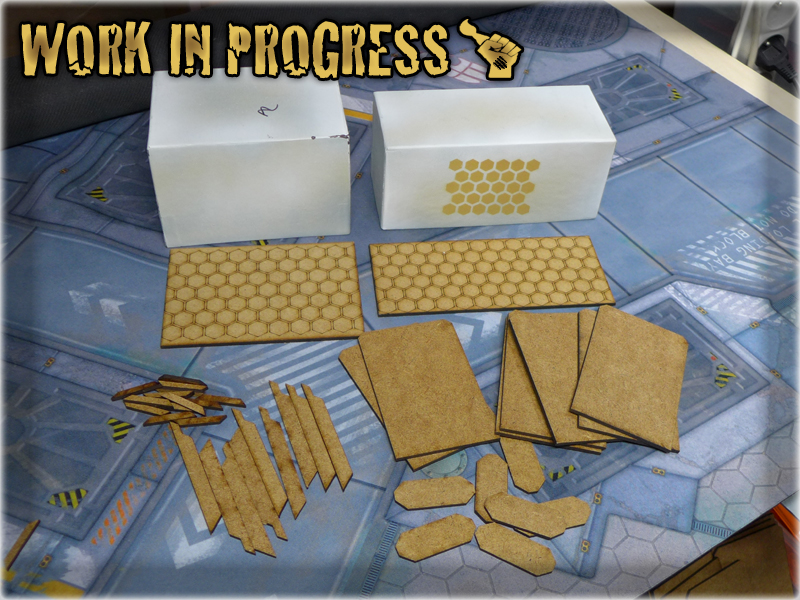
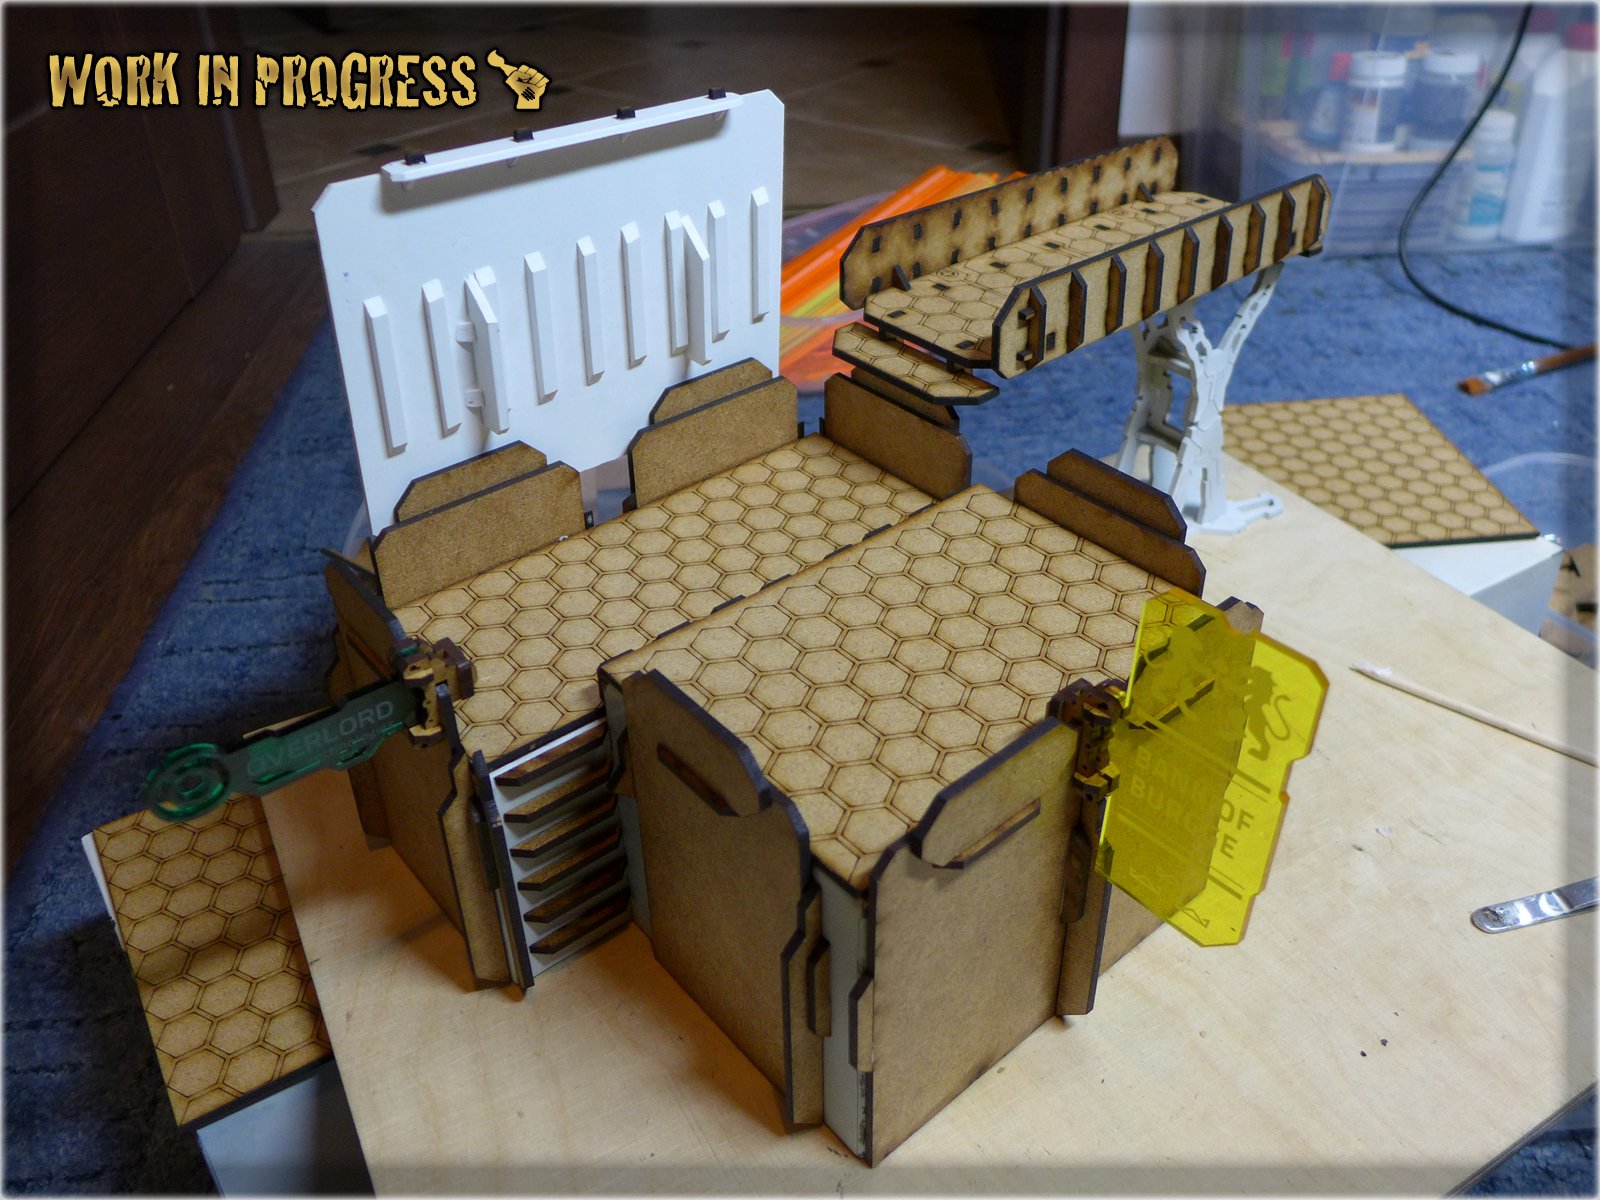
Pieces have arrived:
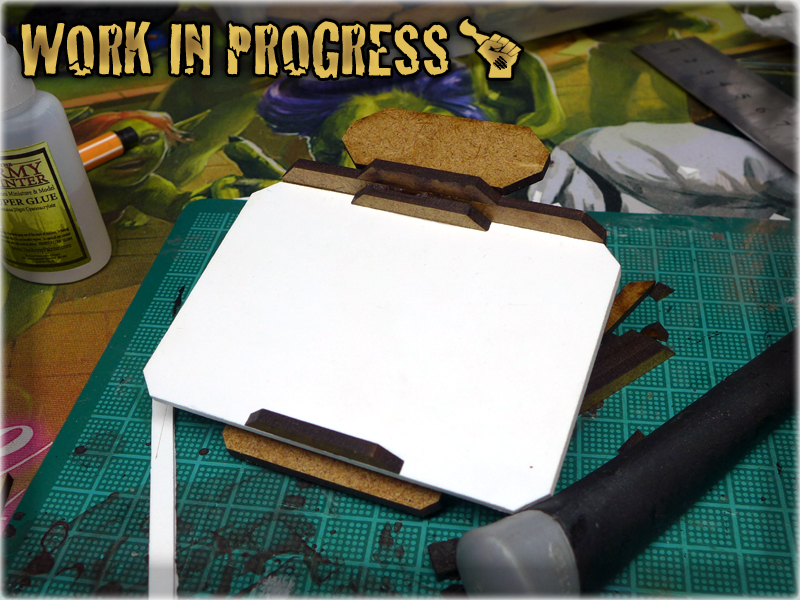
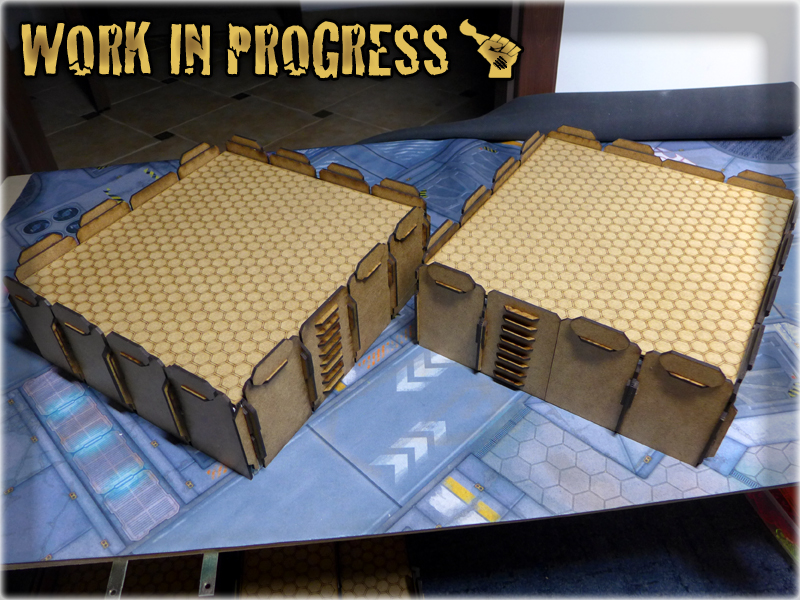
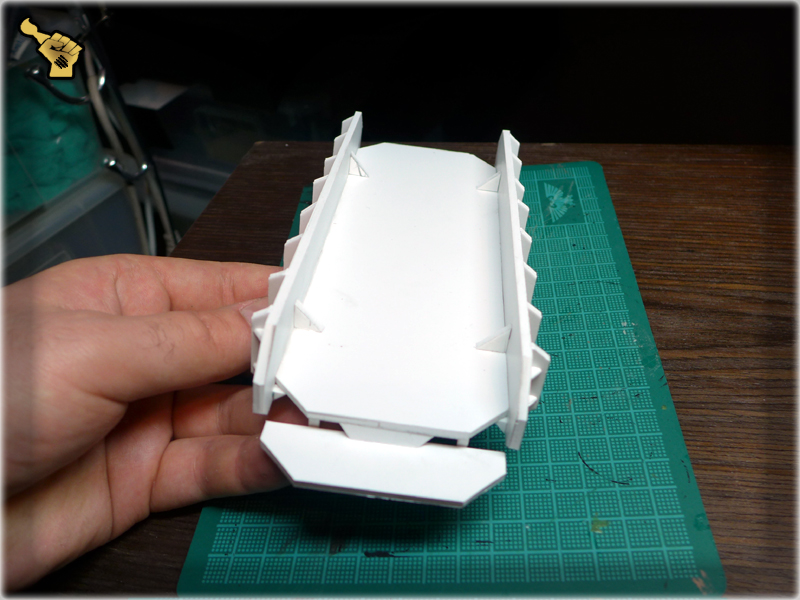
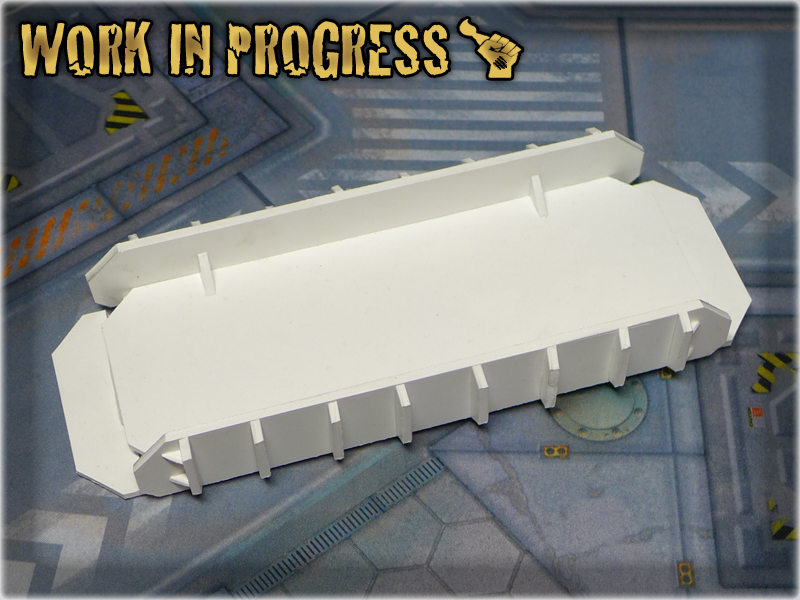
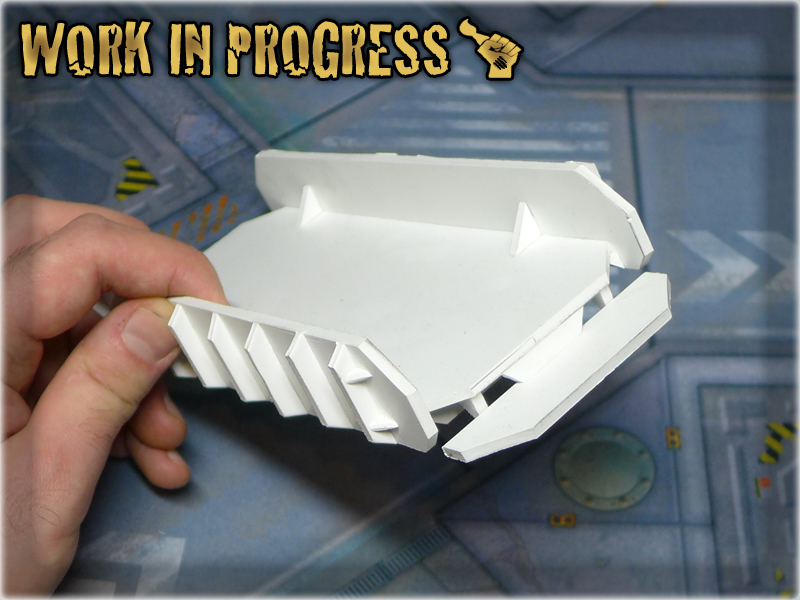
The base for the force field: Built using a method of errors and corrects, using one MDF piece as a universal ruler and the idea as an actual instruction…
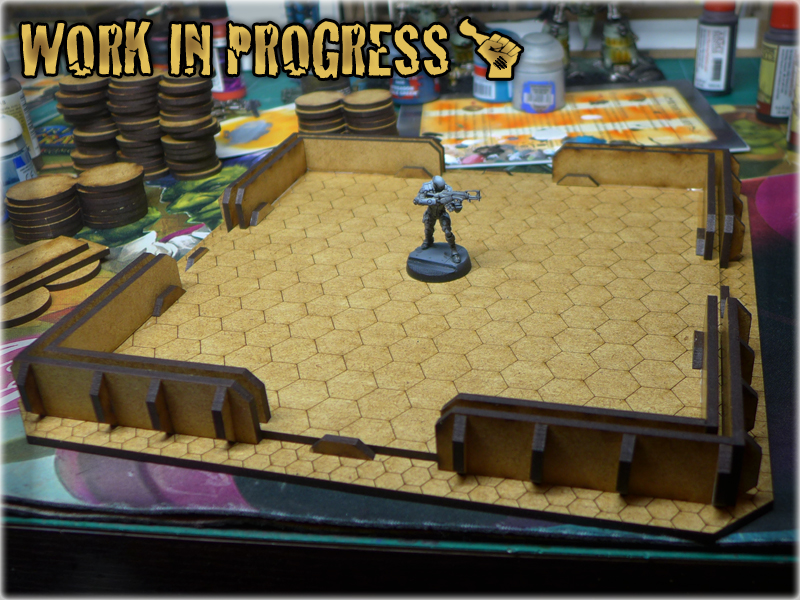
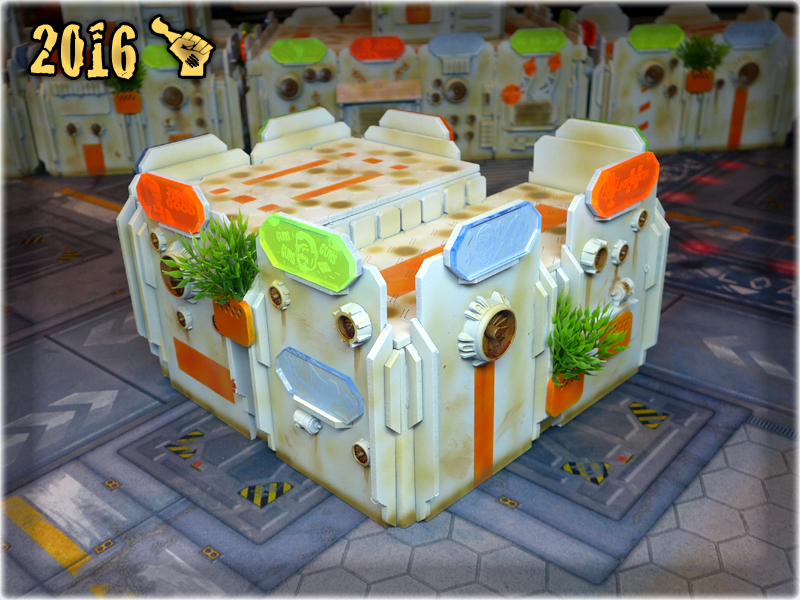
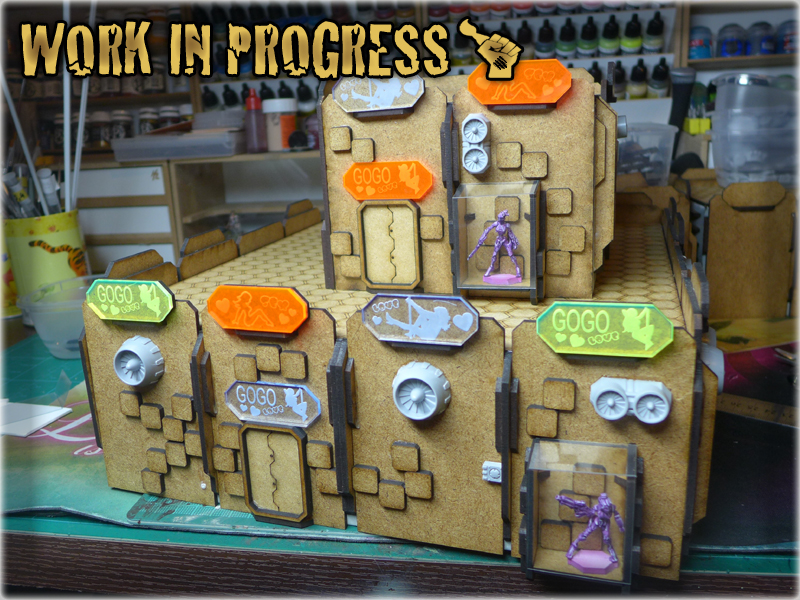
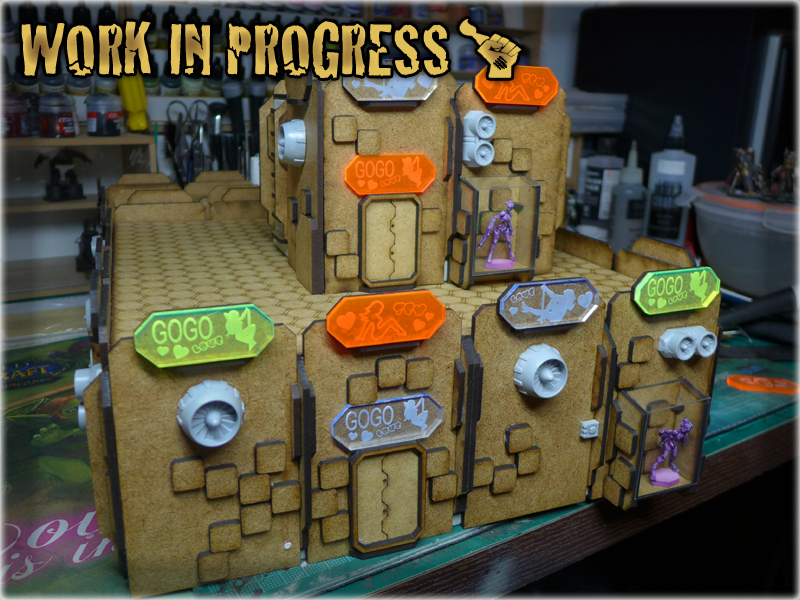
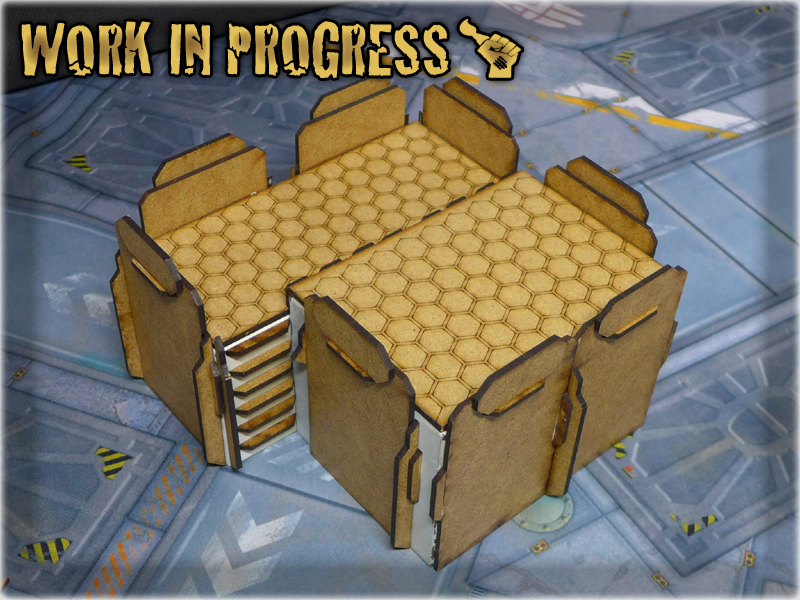
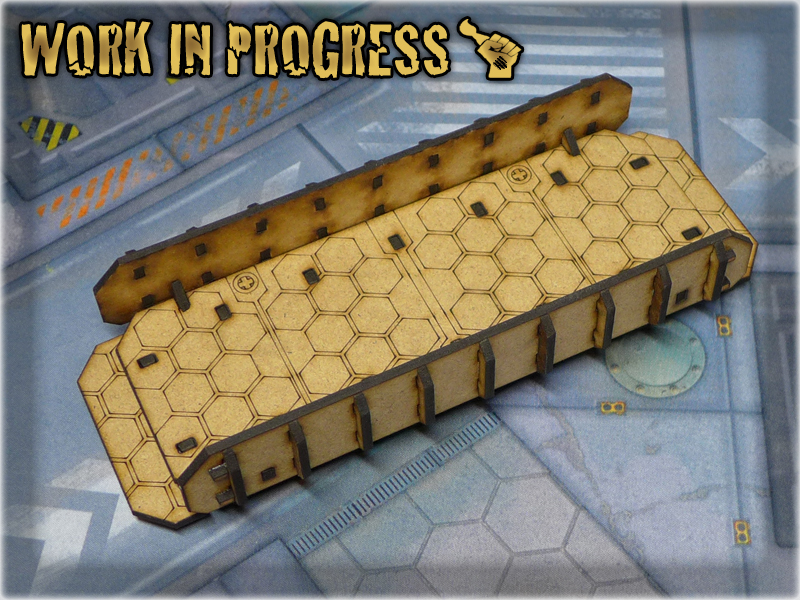
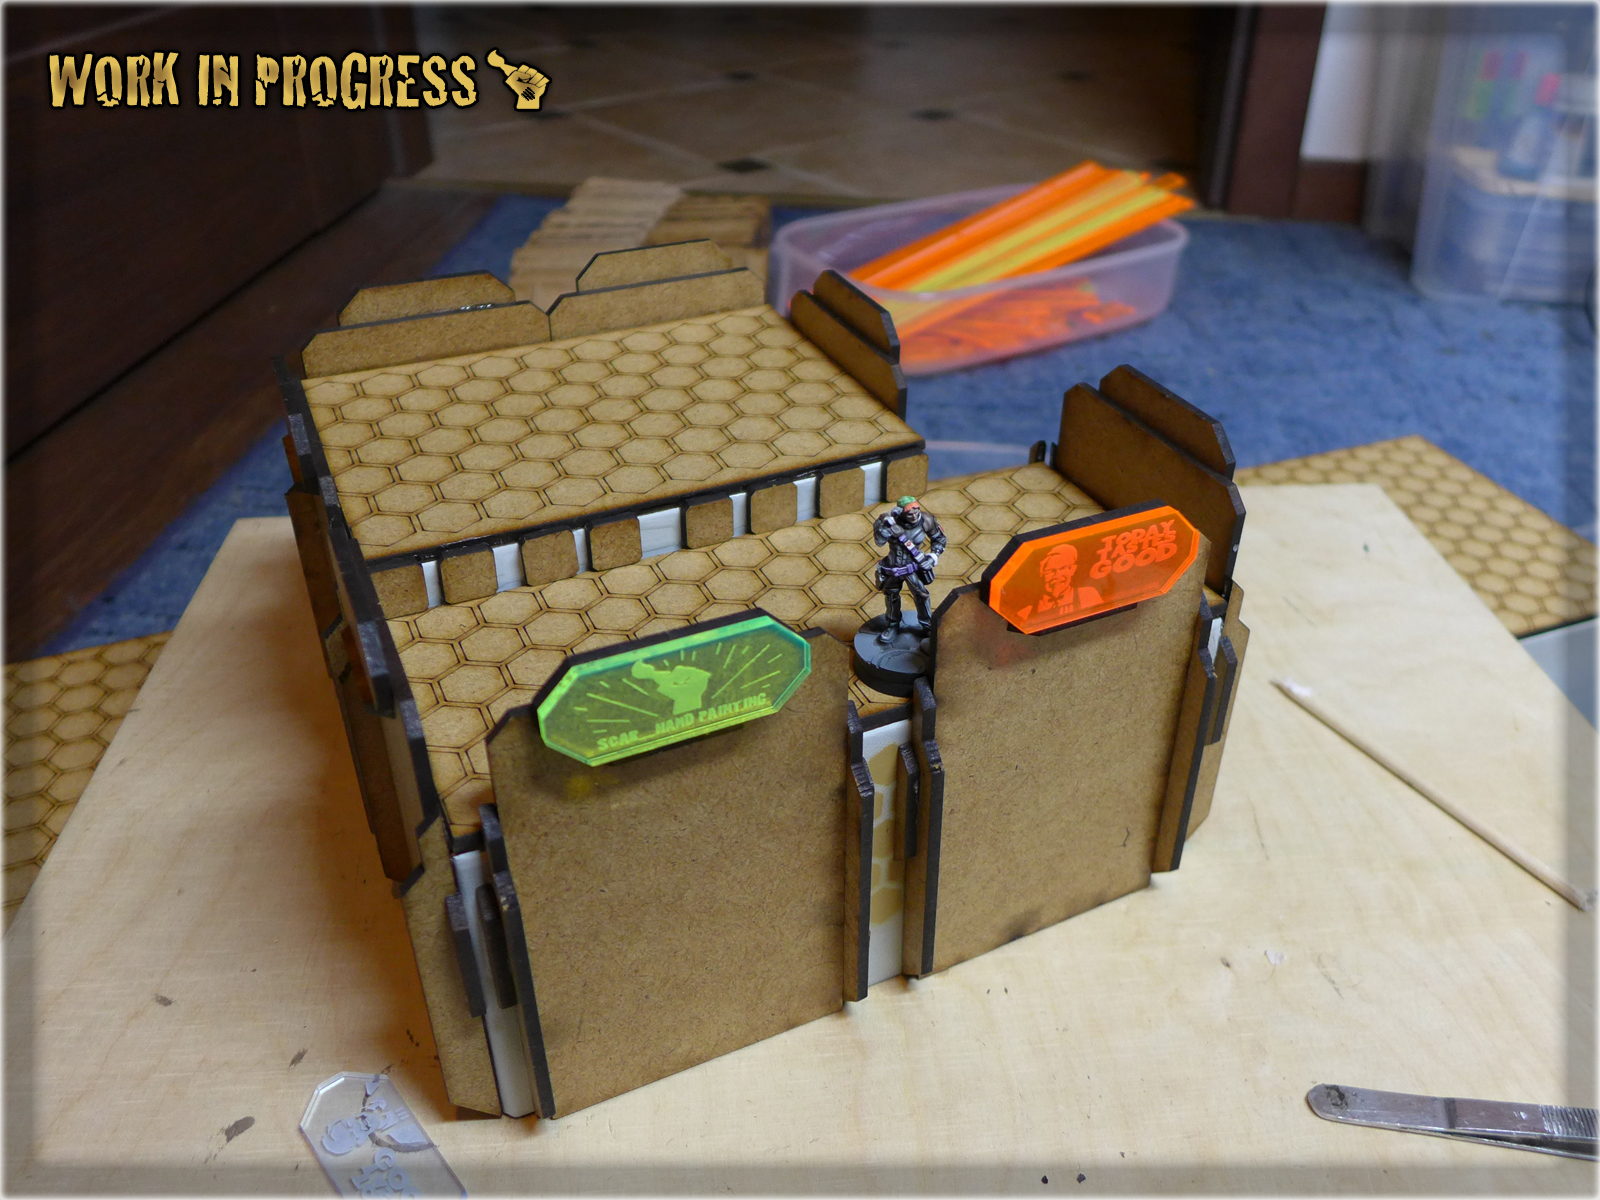
Objective room – closed doors (access denied):
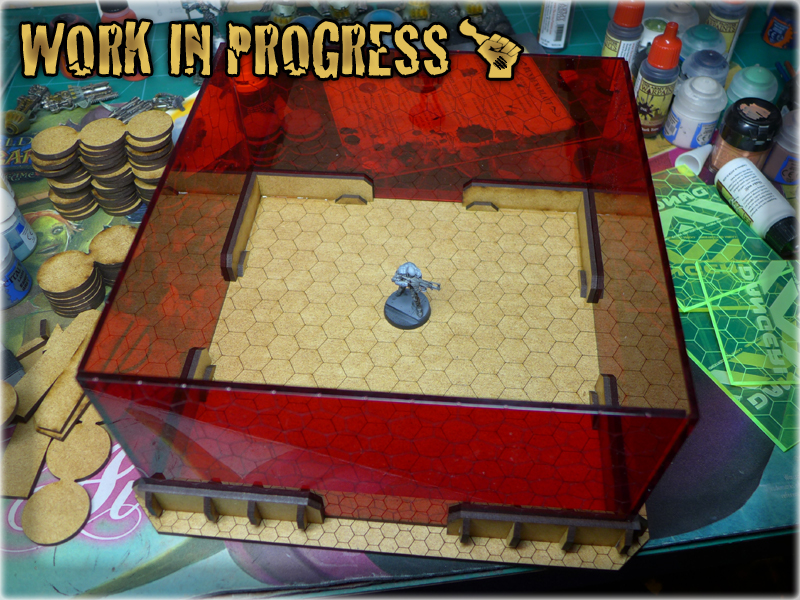
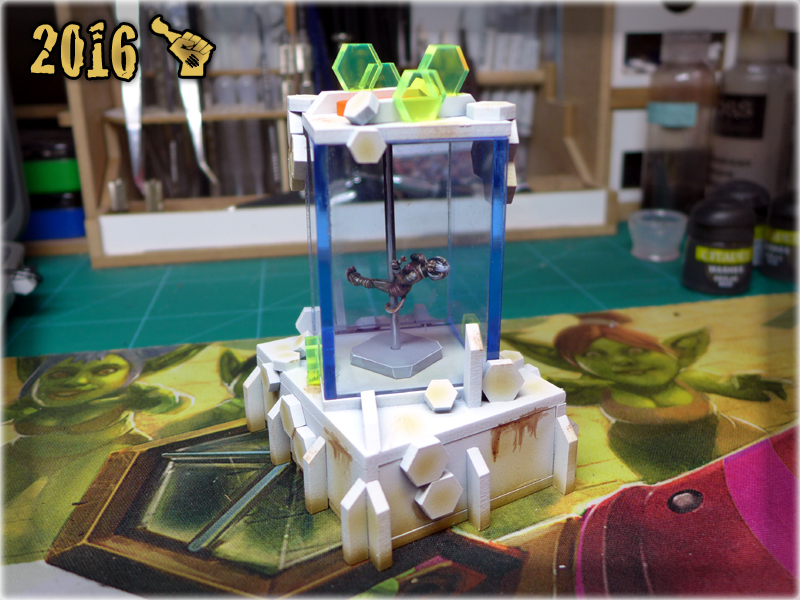
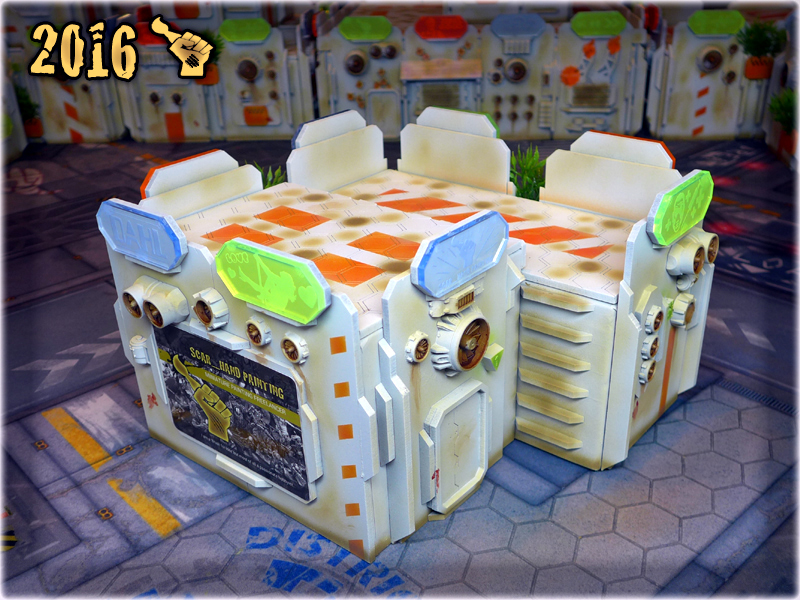
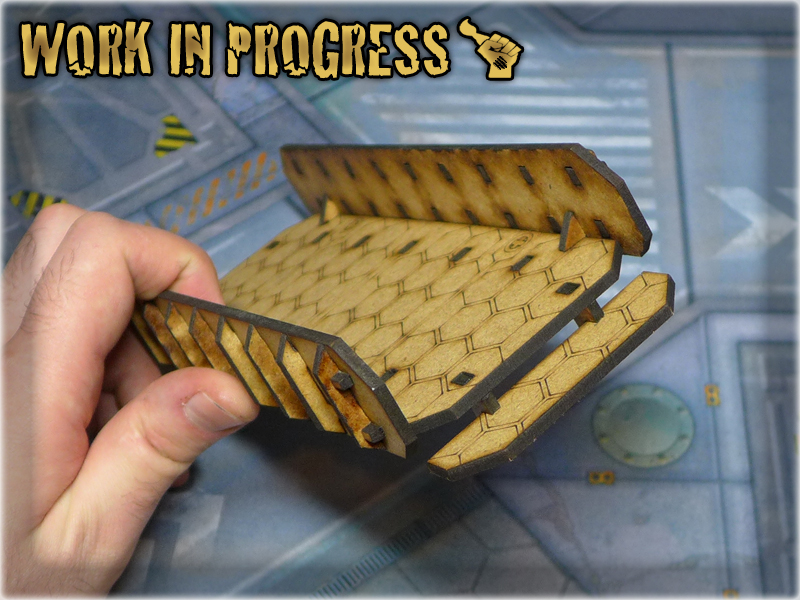
Objective Room – open doors (access granted):
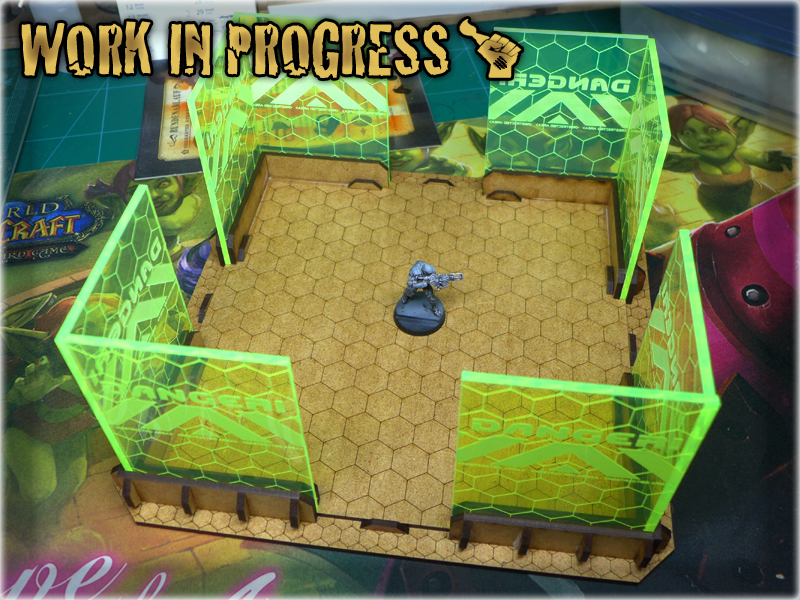
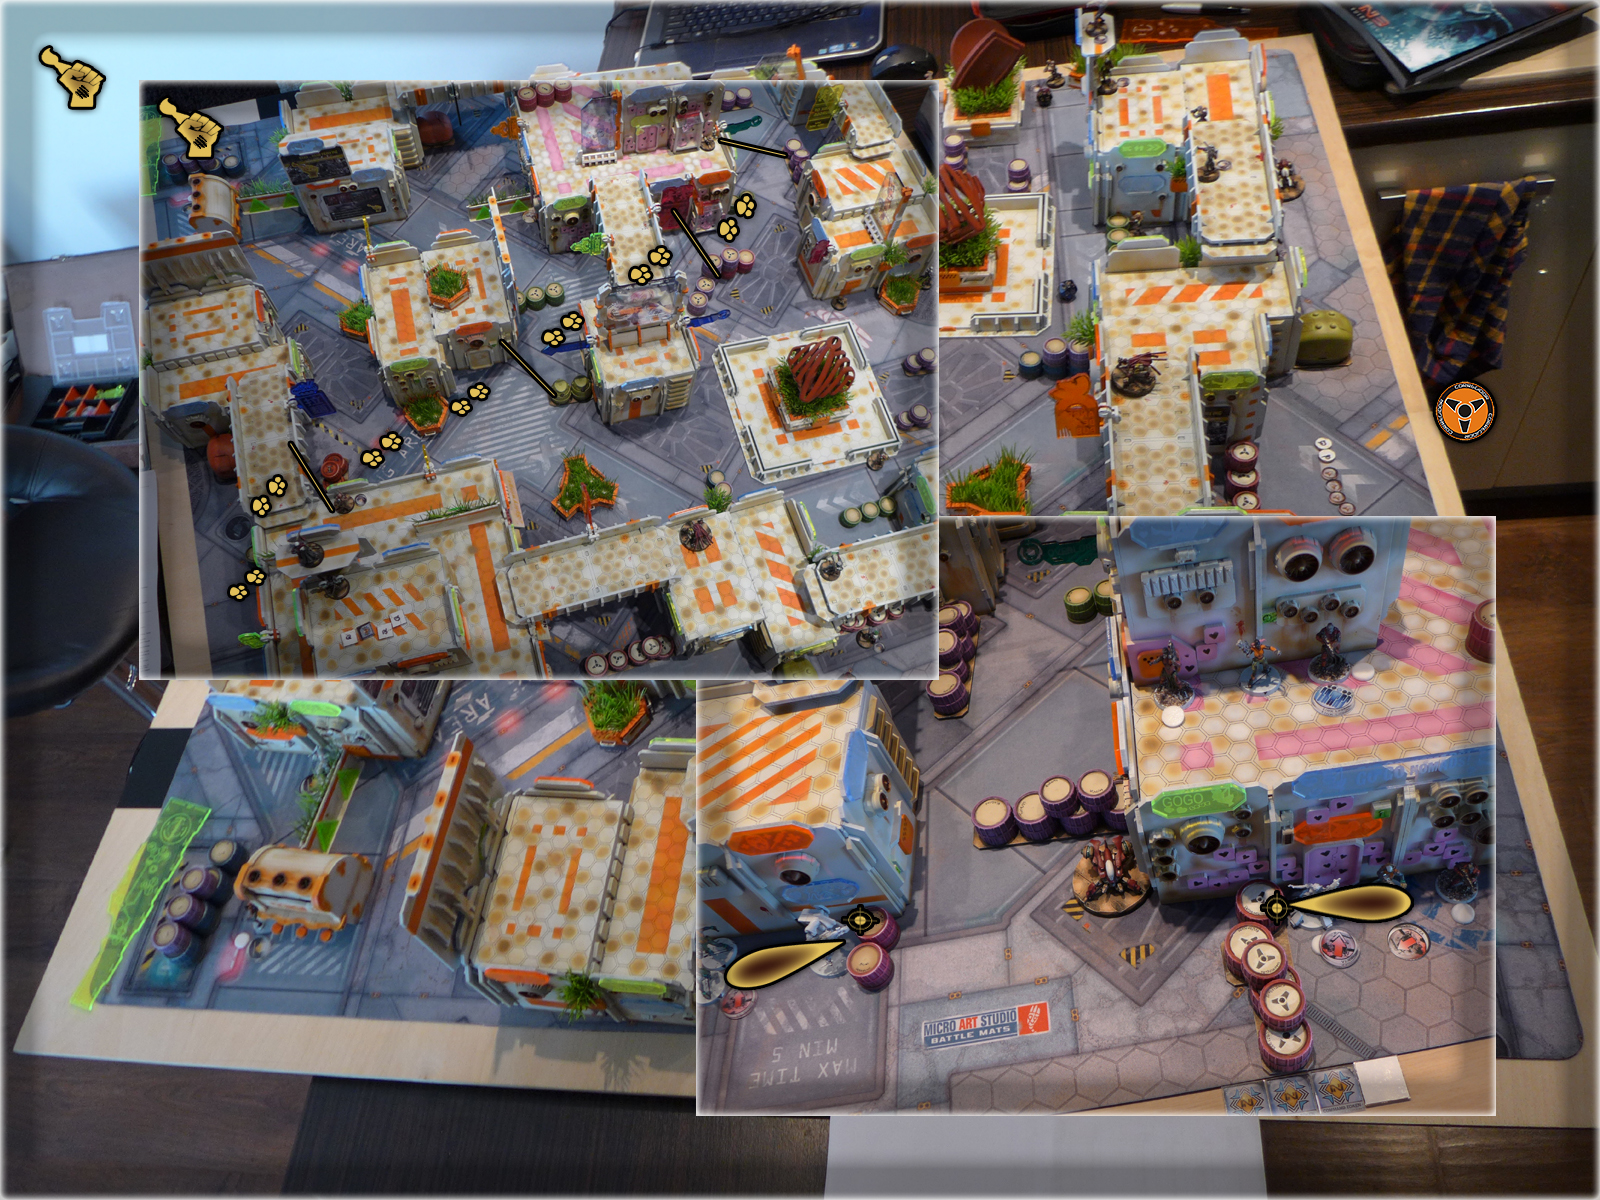
Ingame pictures:
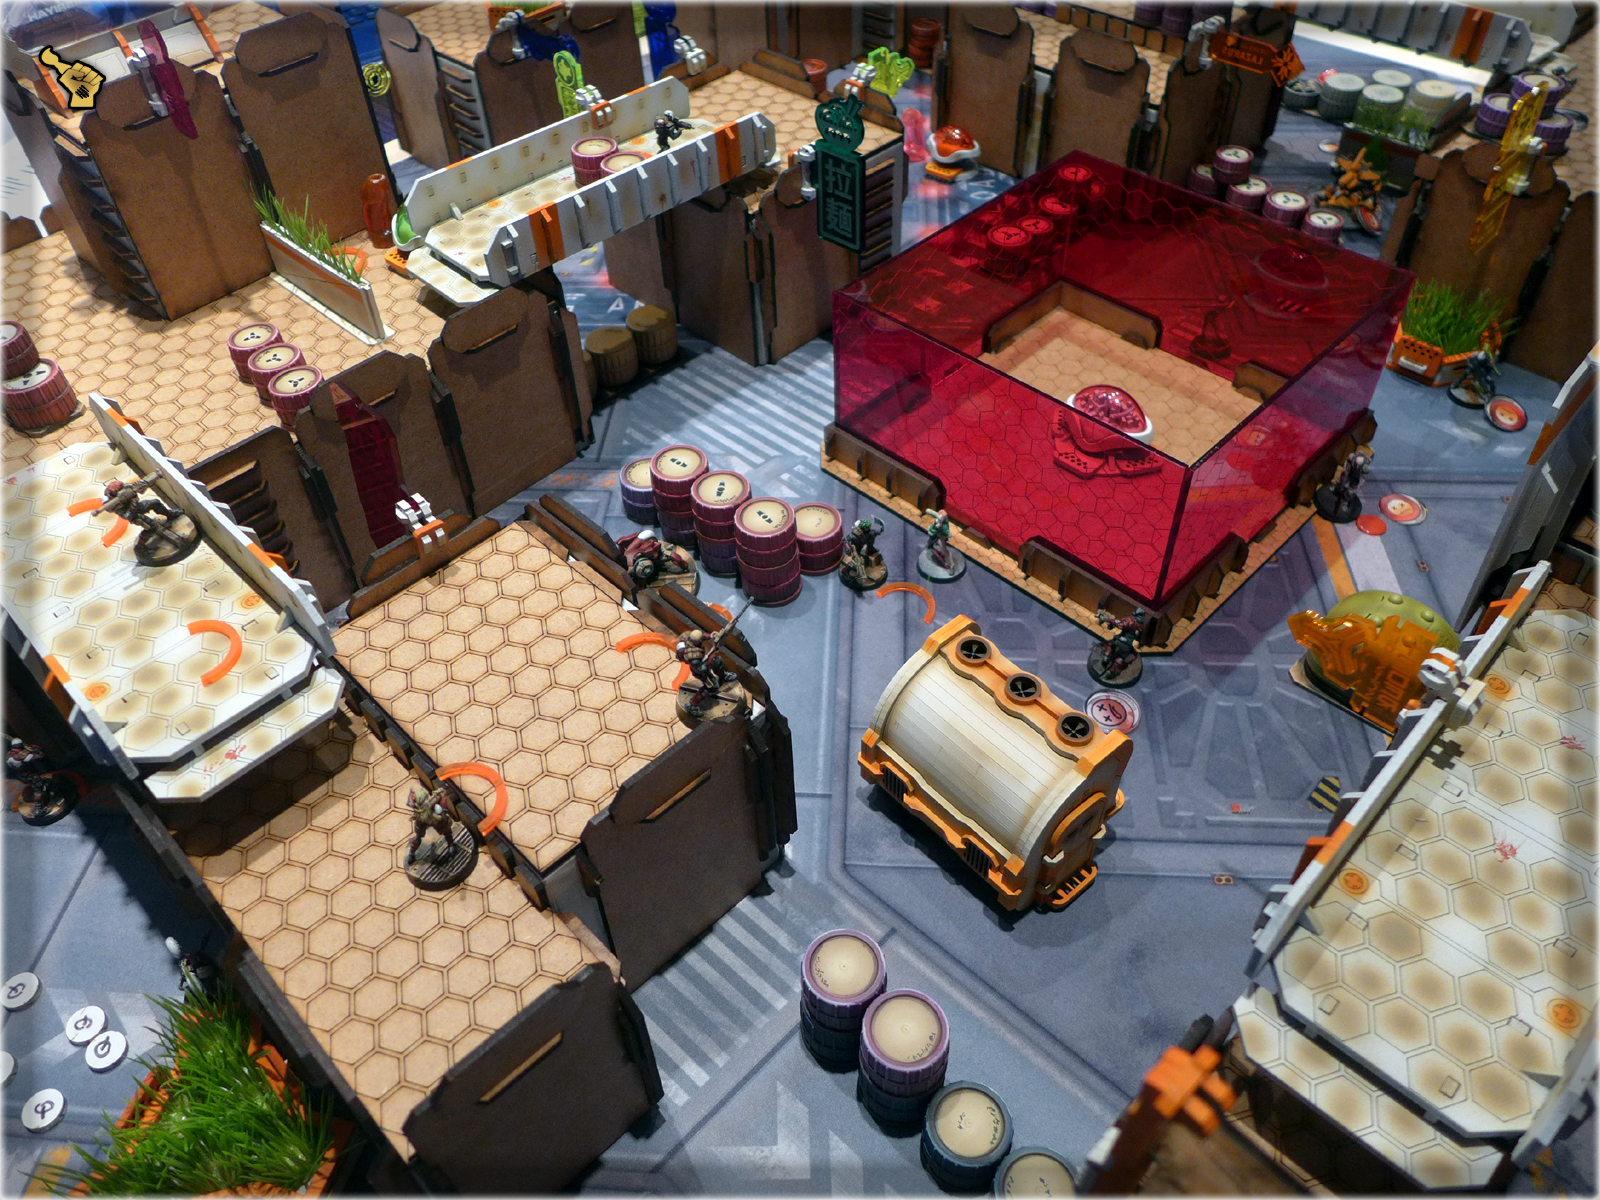
I really do like the end result, and cannot wait to paint this stuff. If anyone is interrested in purchasing one – please contact Micro Art Studio. It is somehow exclusive with a price set to around 50€ and that’s because of the production costs. Still I’d love to see my own design on some random battle report pictures around the internet. I hope that some of you will find the price sufficient and purchase one of these.
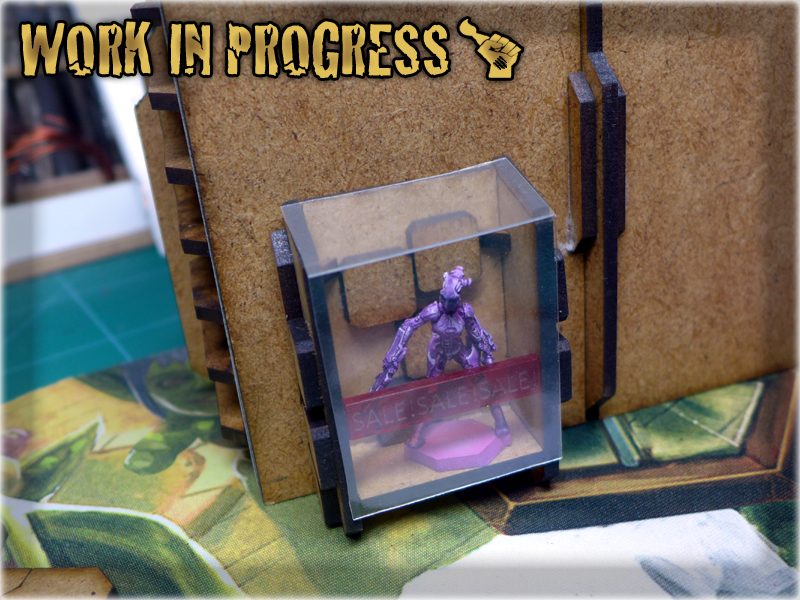
Up from the start the idea was to decorate my buildings, at some point, with use of cool looking stuff like vents, doors etc. My buildings are tall and without some detail – could look really intimidating and cold. In order to breathe life into my gaming table I had to forfeit a small percentage of my terrain’s playability tho. This decision was not an easy one, but in the end – once I started to decorate with common stuff – I just couldn’t force myself to stop and started adding some sweet looking details like food booths and Robo-Prostitues enclosed in special display casings. I also decided to distinct both big buildings by giving them a theme. One became a “GO GO NOMADS!” night club, while the other became a small restaurant center.
Doors:

Robo-Prostitutes displays: The idea goes like this: I liked Karakuri miniatures, ordered them to use them at some point, still didn’t had any idea how. Once they came, I figured to display them around the strip club. I made some simple math, asked Reycast to cut some pieces for me and once they came in, used some trash to complete my designs. In meantime I already painted Karakuris, leaving their weapons in place (Cause this is a Nomad club, and Nomads do love guns just as much as the robo-chicks!)

“GO GO NOMADS!” strip club: Is still being decorated, but I can show you how it looks by now. Will have to prepare some of the bitz to finish decorating tho – and I also ordered two larger Holo-Ads with club’s name – Will have to wait for these…
“Astro-Gastro Center”: The whole idea was about a big building with couple of food booths in it’s bowls. I had some leftovers from Zen Terrain’s food booth, along with some trash I used to create my won mini-bars. Some of them simple, while others with their personal theme and all. And here’s where I would like to stop this part of “THE COLONY” SPECIAL PROJECT article. I will leave you with shis little teaser. (Hope you don’t mind.)
I do hope to see you soon in the next part of “THE COLONY” SPECIAL PROJECT article. Keep your fingers crossed for me, as there’s a lot of work awaiting my attention. In meantime, feel free to ask any questions about this project – here, or at my Facebook.
Ever been in a situation when you really wanted to work on a certain project but couldn’t? I just found myself in such. I’m almost ready to paint my gaming table, with almost all of the pieces already assembled. I even purchased a big stock of sprays and paints required to complete “The Colony” in one go. (Yup – at this point I already picked a perfect Colour Scheme for “The Colony”, being White-Creeme with addition of Grey and Orange elements.) If you read “The Colony” Special Project part two – then you know that once I’m into something – I usually do it at once, regardless of weariness and time required to do it. This time I feel like a trapped animal. The erge to continue my project is killing me, but I cannot proceed without vital pieces that are still to arrive. That’s why I decided to deceive the system.
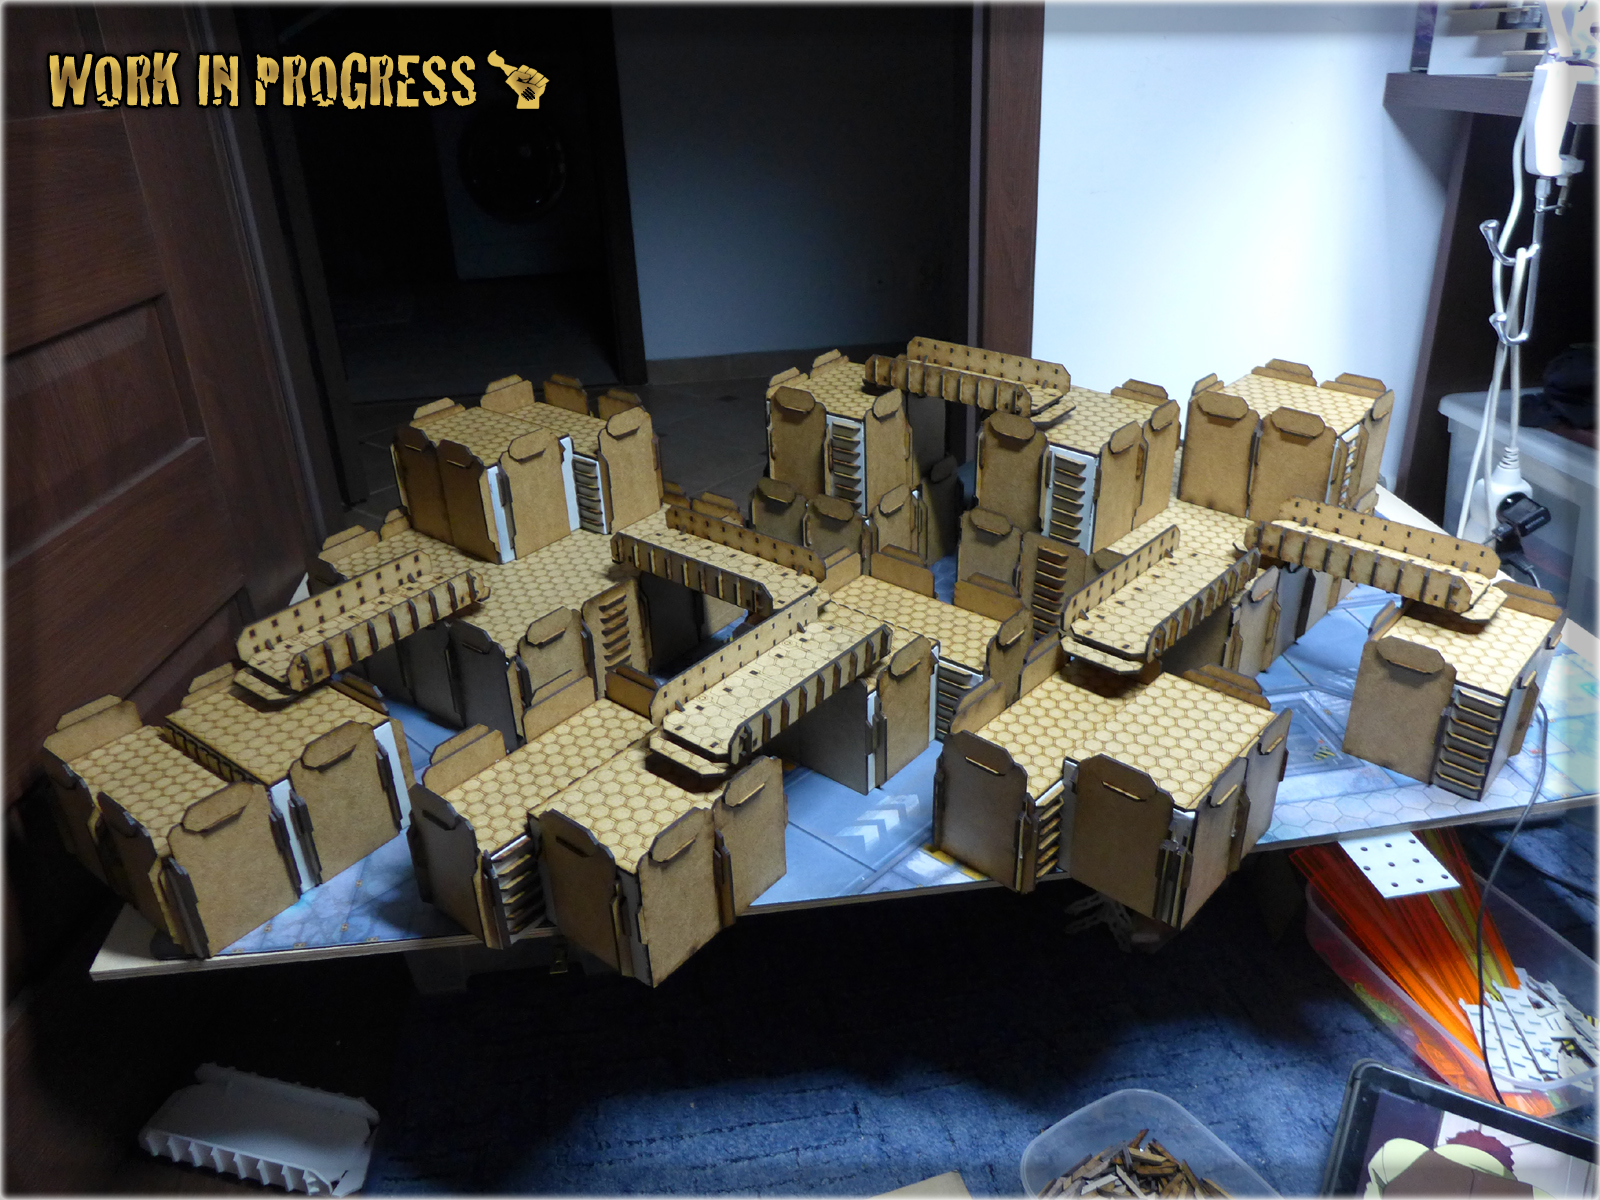
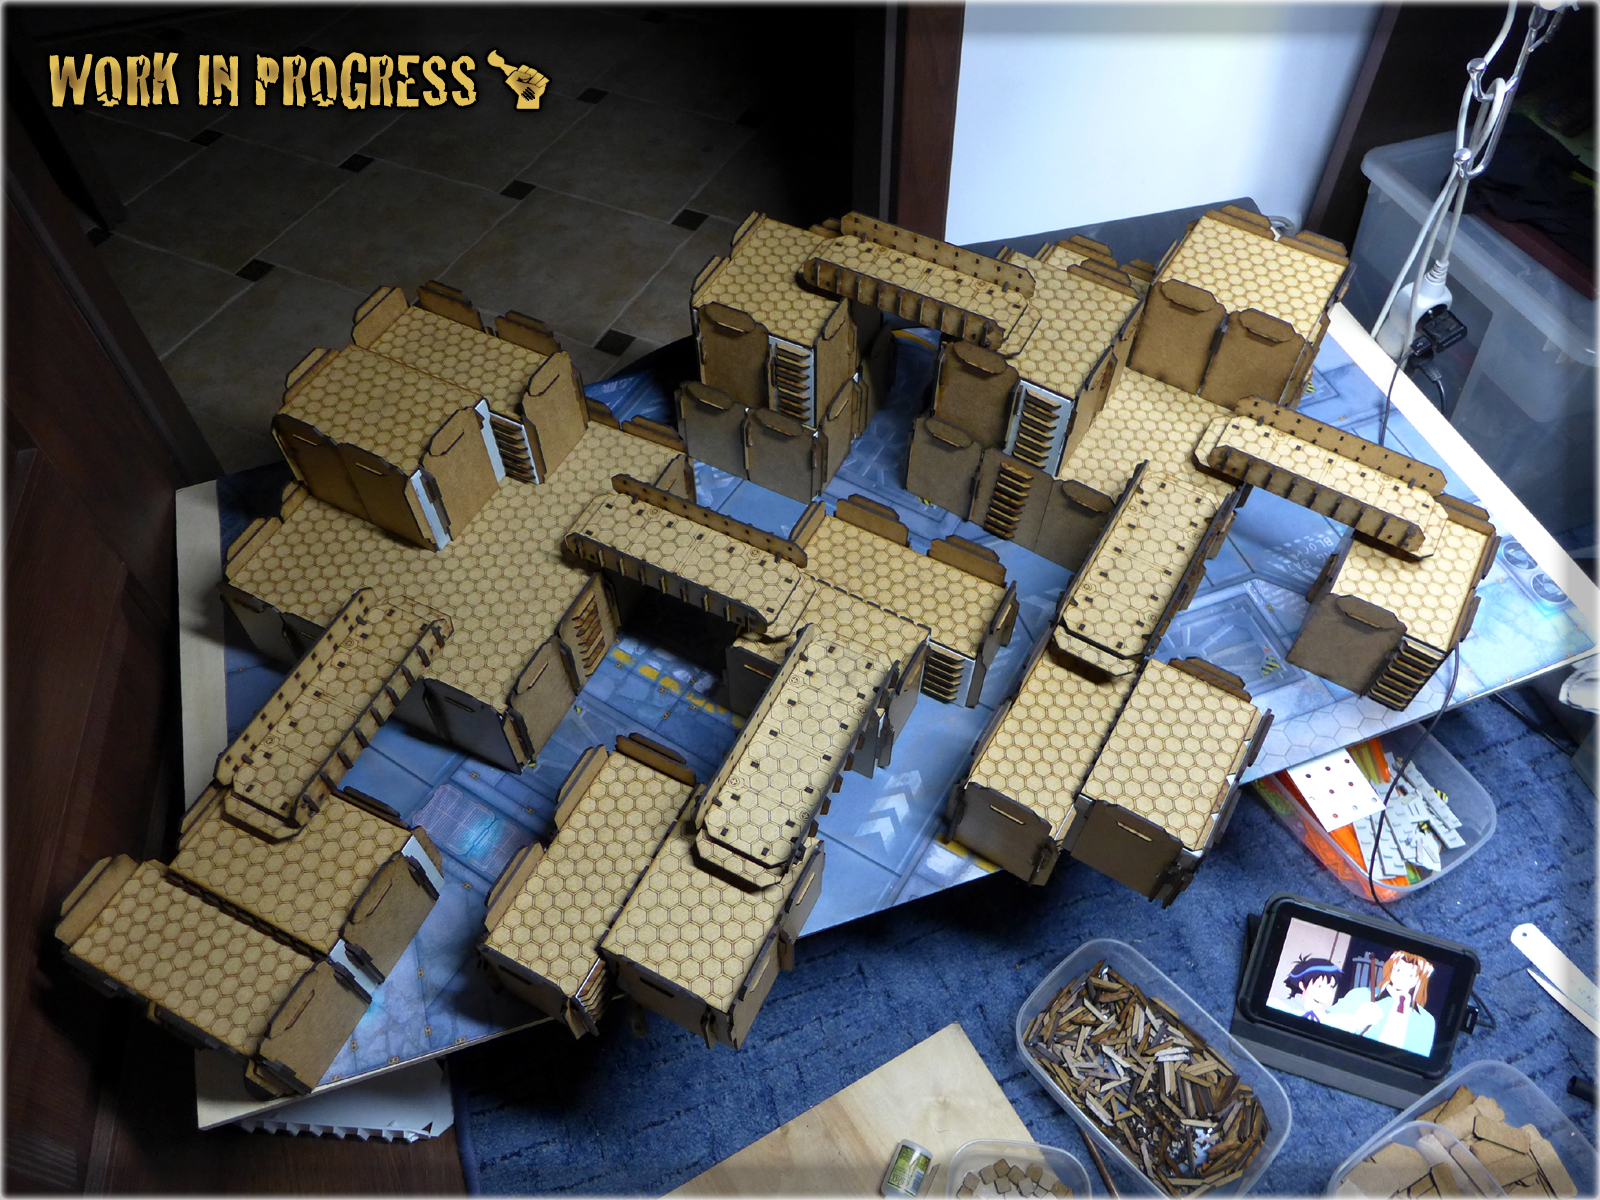
Being unable to proceed with “The Colony” buildings I focused on add-ons instead. I had some cool ideas for new ‘filler’ type terrain pieces, along with some old ones that needed refitting. If you have a gaming table than you know that buildings provide a variety of different levels and shooting corridors, but it is the fillers that build up the table’s theme and atmosphere. Just take a look at this picture:
Looks kinda empty doesn’t it? Well that’s because it is completely devoid of climate. Just like my old ‘White Boxes’ were. Ok – it is still very playable, with all the additional features, but for a gaming table to have a soul – there must be a plenty of small, sweet looking fillers to attrack the sight. As I am very impressed with Zen Terrain’s design, I decided to incorporate some of their style and colour scheme around my rather industrialised, cumbersome buildings.
Not much to say about these, except for a fact that they are just awesome – It’s love from the first sight 🙂
Micro Art Studio’s Kickstarter campaign just finished and I’m sure to purchase some of their new fillers. What I like the most are standing tripple-holo-ads and benches, but since these are not available for purchase right now – I concentrated on repainting a set of best in the market MAS Holo-Ads. One cannot complete an Infinity Gaming Table if one does not possess these!
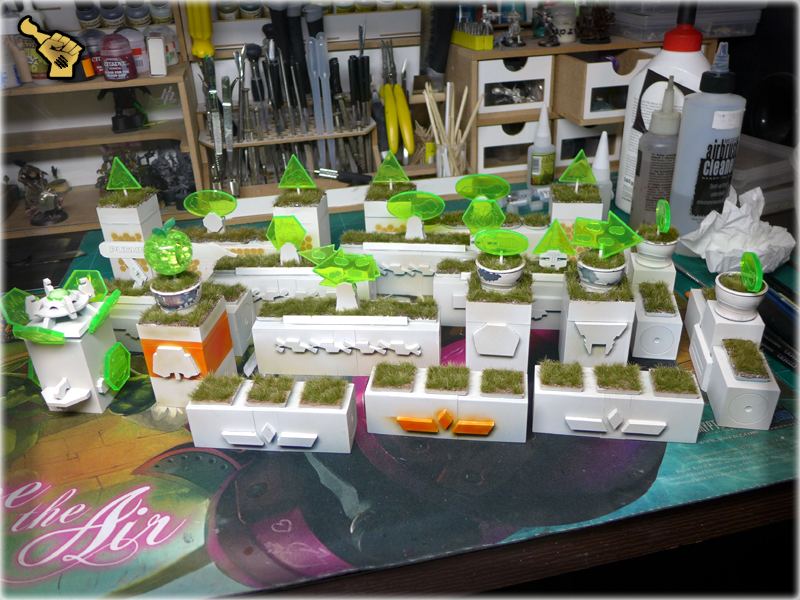
I already had a lot of fillers made for my previous gaming table. You can see them all in Tutorial: ‘Do it Yourself’ Gaming Terrain article. All of them could use some additional paint job, or rebasing to better suit the new theme, but the ones that needed it the most were: medium sized walls and (my favorite) futuristic sculptures. I really wanted to provide them with some extra love, cause they looked like this:
I invested some time to redevelop these pieces, adding cool looking plants and a new-themed paint job. I also used a Zen-based pieces to solidify the theme. The end result is exactly as it should – futuristic & juicy.
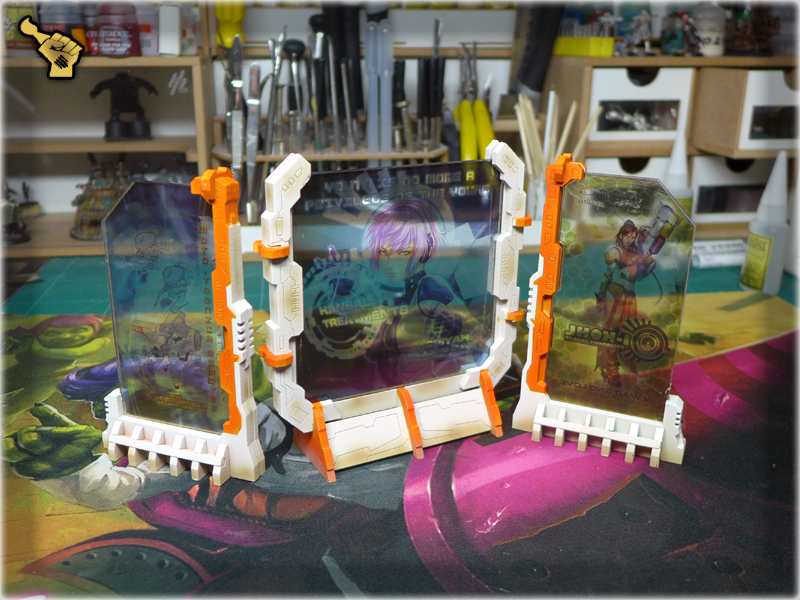
Inspiration strikes like a lightning and I’m pumped with urge of creation. New ideas come and go – some of them just too good to be skipped. One of such ideas came to me more than a year ago, when I saw a pile of leaflets. These were so ‘Infinity’ styled, that I took couple to use them at some point. As it happened – now, with a new project on the run – these funny, 3d hologram leaflets were perfect to base a terrain piece on. Just some PCV, MDF pieces and twenty minutes provided me with two of these:
Another idea came to me last week, during shower. It sounds stupid, but once you see the end result, you won’t be laughting 🙂 This was certainly the best idea of 2016, yet to be beaten. Infinity 3d Consoles instead of usual tokens, born out of thin air in a matter of two days.
You can read some more about how these were made in Tutorial: Infinity DIY Console. If you like them – be sure to spread the word, so that more people will see them 🙂
Having so much terrain pieces left me with a dilemma of what to do with some of them. Gaming on “White Boxes” required a lot of playable fillers to expand table’s properties. Now, with brand new design some pieces are too big, or too many to be used. Still don’t know if I should try to sell these, strip bare and re-use the parts or redesign against reason…
Now you have seen all the fillers I currently worked on. Why are they so important? Well… do you still remember that poor looking terrain at the top of this article? Take a look at this and tremble with ecstatic shiver!
There were supposed to be at least three parts of this article. With outdoor Objective Room in development, buildings awaiting some substantial parts, new table’s playability being regularly tested, Now I’m pretty sure that two to three more are yet to come. Who knows – If I have to wait more for a delivery of resin pieces – I might loose some of my sanity but also come up with some more ideas! Stay tuned for “THE COLONY” SPECIAL PROJECT part four!
Last time I wrote about how “The Colony” Special Project came to life. A road from a tiny speck of an idea to a fully developed gaming table is a long one and I just begun my travel. I have gathered almost all of the items required to build my terrain set. I have revised my ideas and made peace with some circumstantial decisions. I was ready to start the construction process!
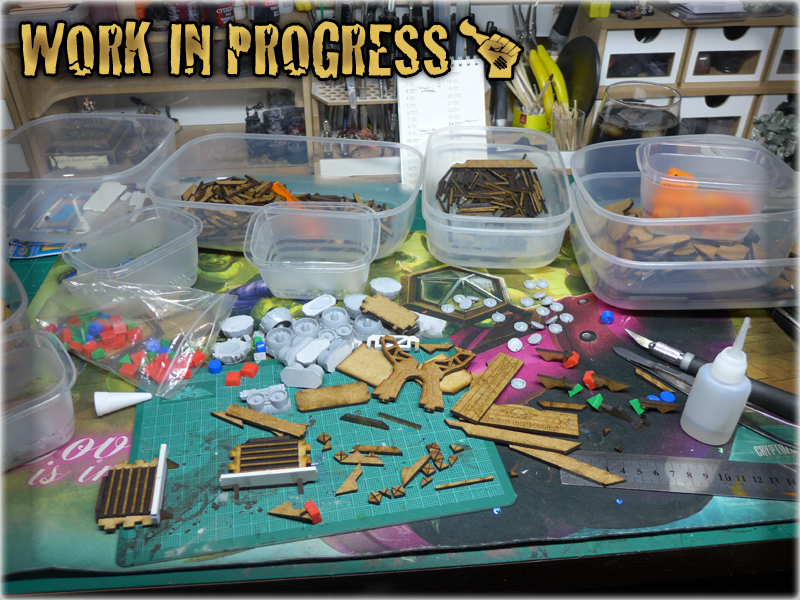
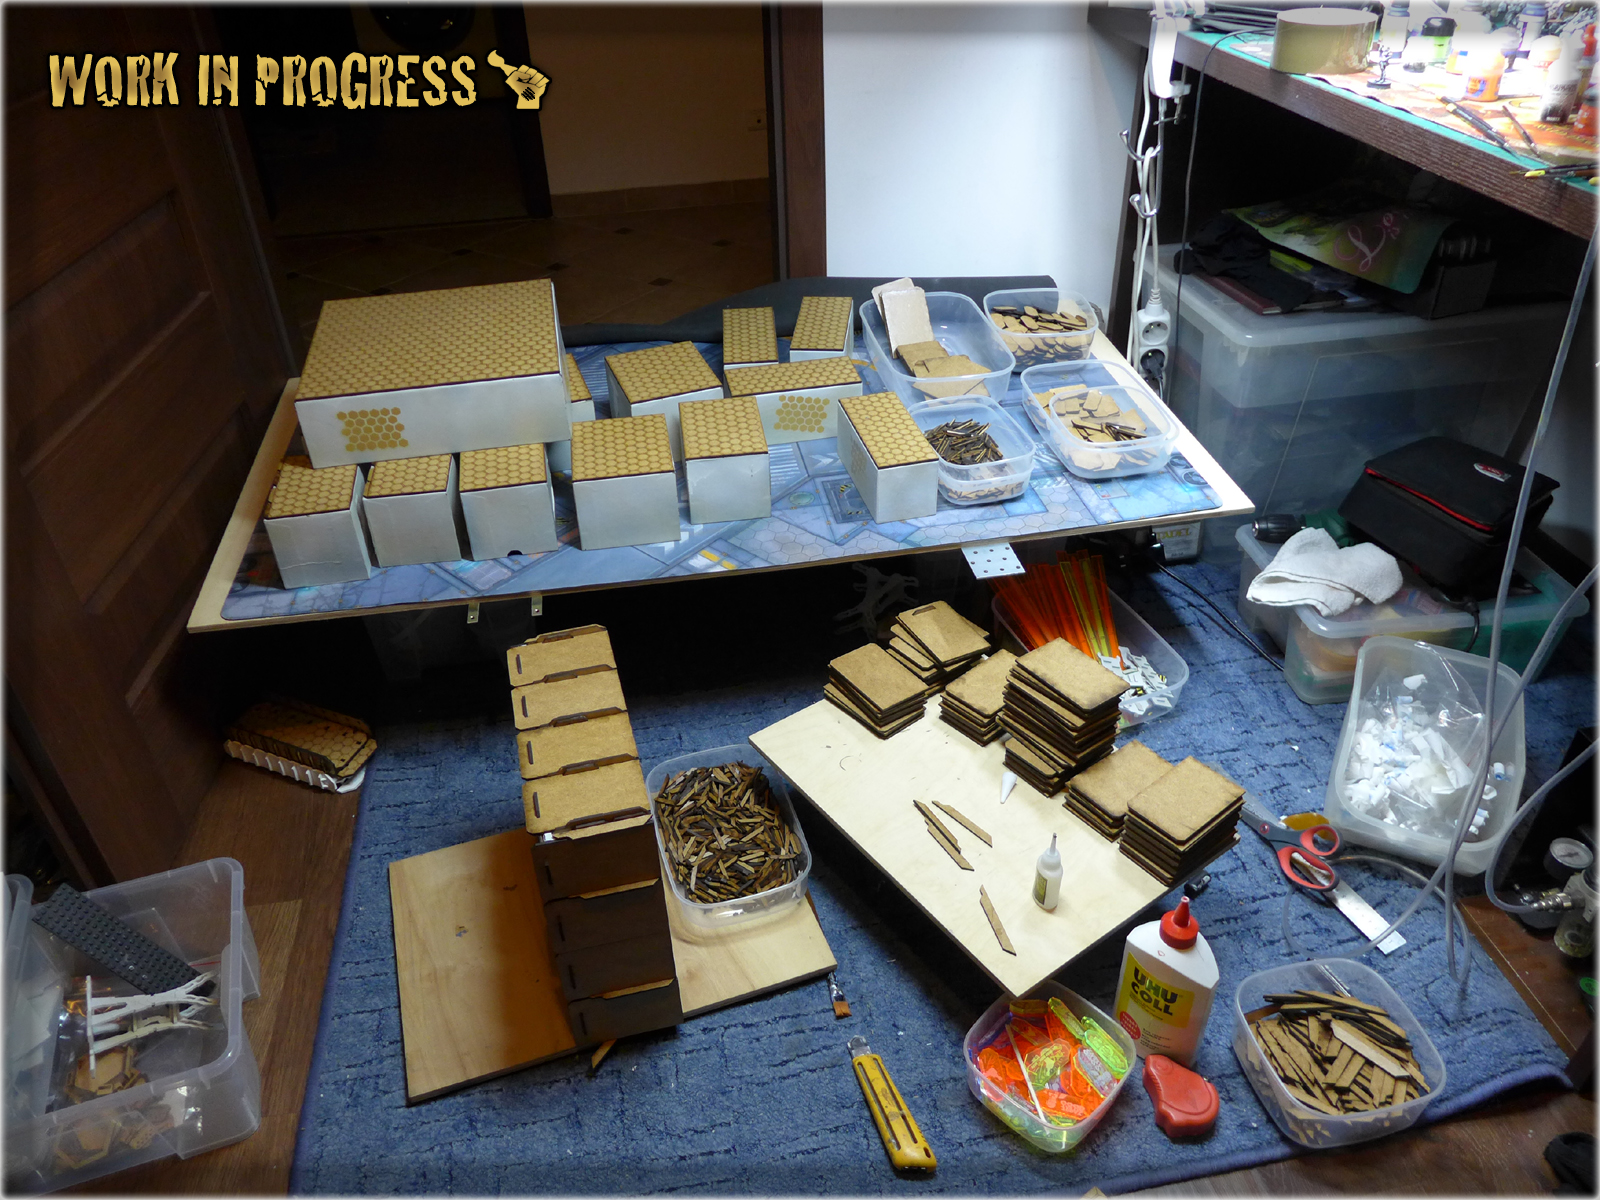
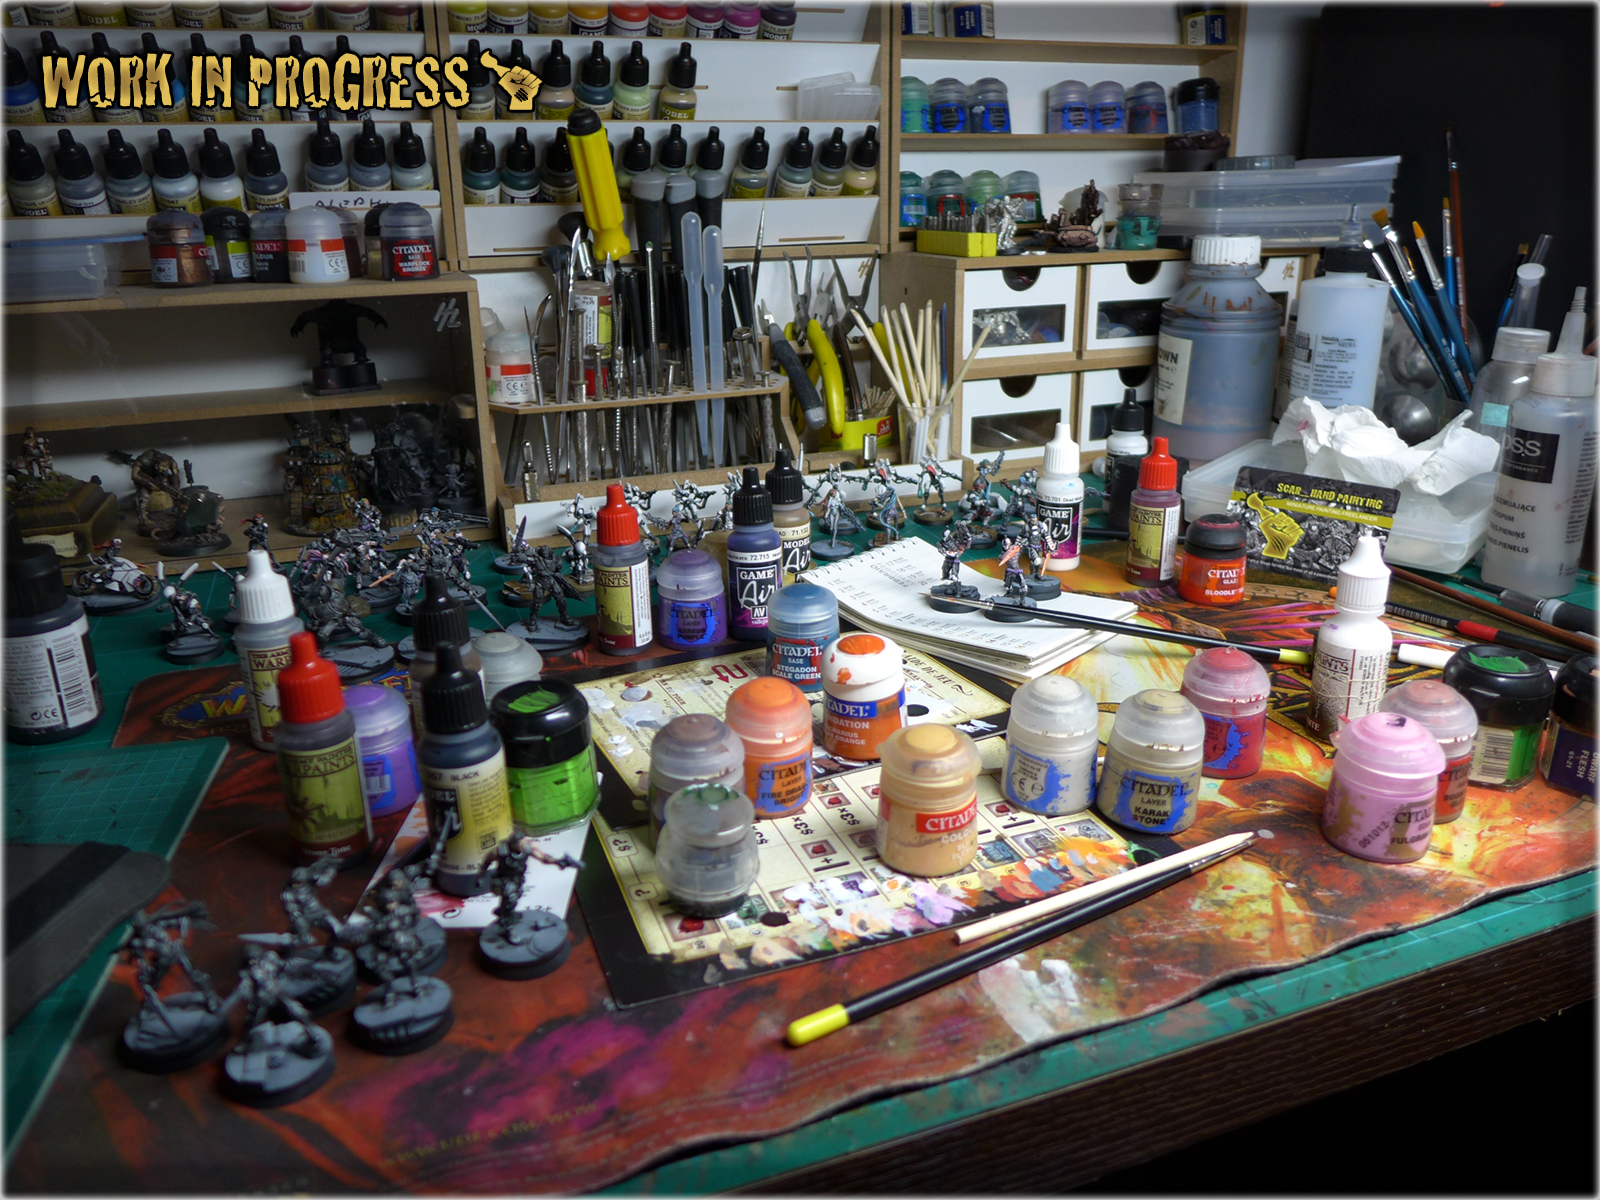
It all happened so quickly. One day I was engaged in my usual activities, painting miniatures, checking out facebook, writing articles… The other I got up to find myself knee deep in bitz, terrain elements, empty glue bottles and with my hands thickened with too much of dried out glue. It was as much glorious as scary. I couldn’t stop. Half kneeling on the ground, due to my workdesk being currently occupied with THIS – I felt like a child playing LEGO. Well – when inspiration comes a man is gotta do what a man is gotta do – I let myself be swallowed by passion and worked till all the buildings were ready to enter next stage.
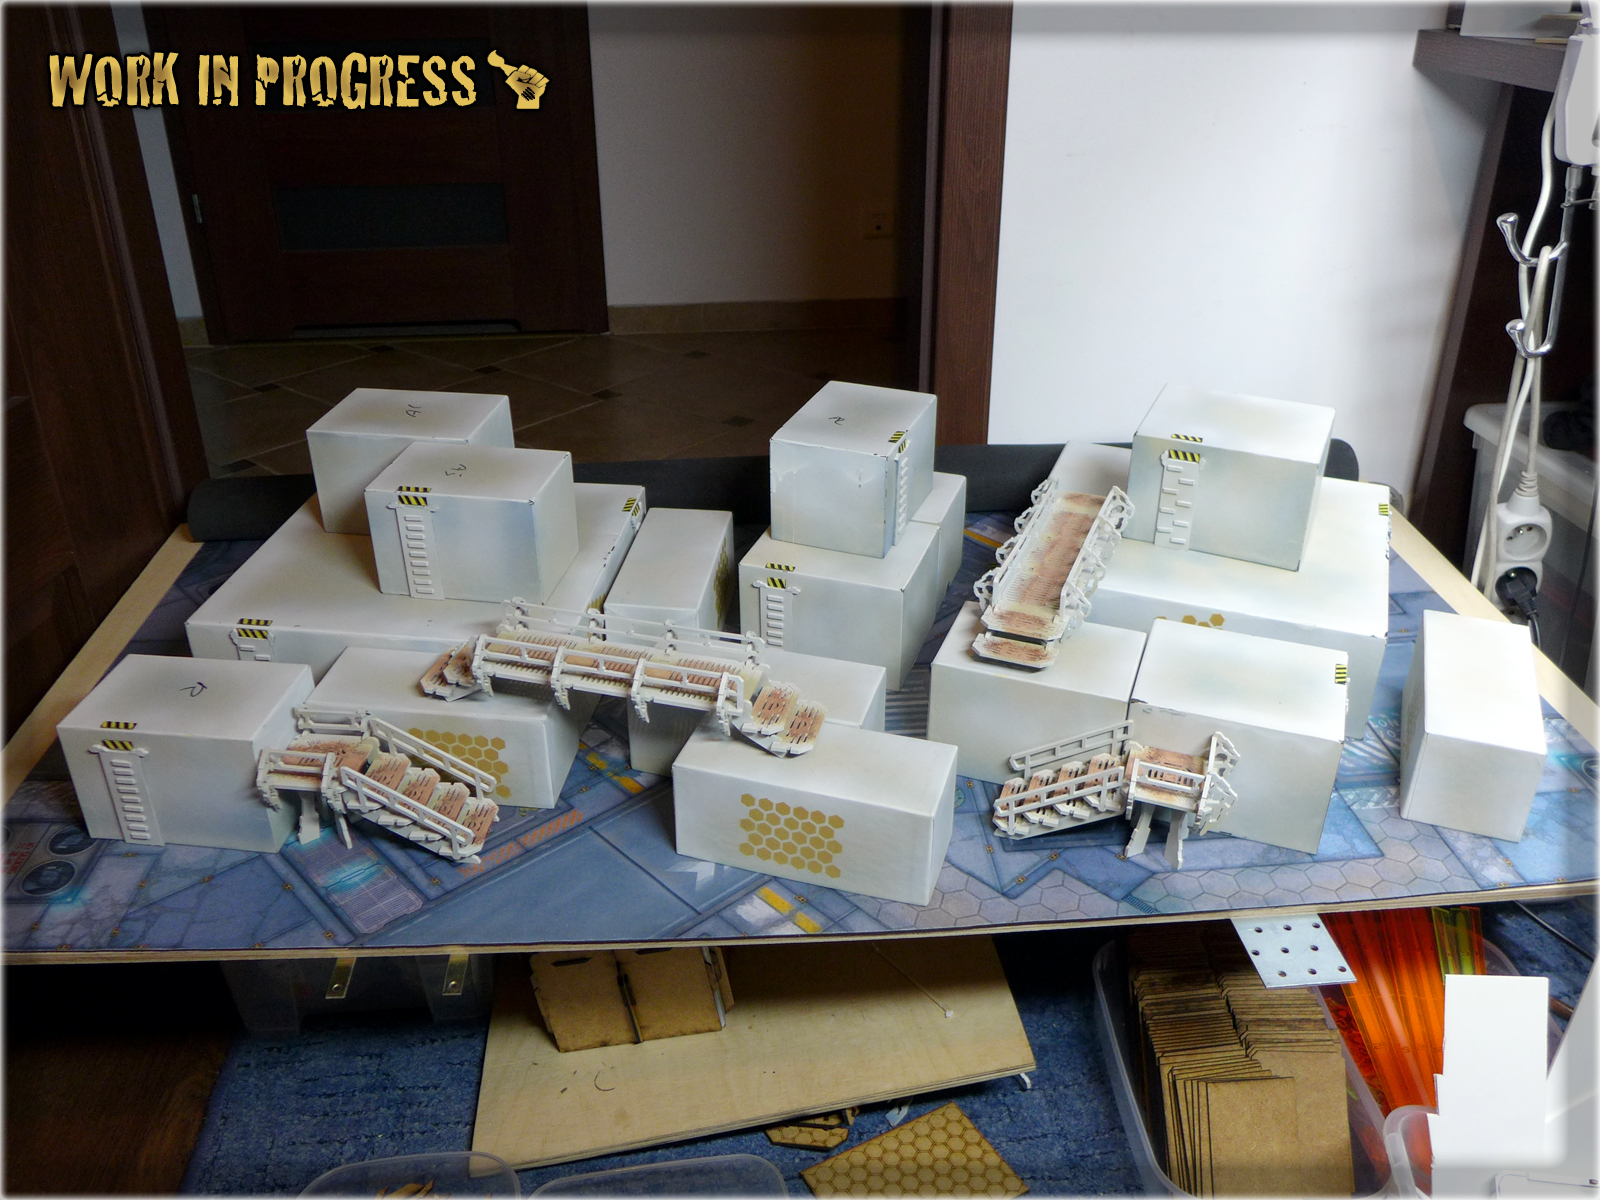
So – this is what I had to work with. My ‘white boxes’ in all their glory. So many different sizes, that excluding six thin ones, no two are alike! I really love these boxes. Thanks to them I was able to play a lot of Infinity games and they received a really good feedback from my oponents. Of course I adorned them with different smaller terrain pieces for the purpose of quality gaming. Still these are my favorites and I can’t imagine gaming at my place with a different buildings set. That was the main reason why I choose to expand their properties instead of exchanging the whole set…
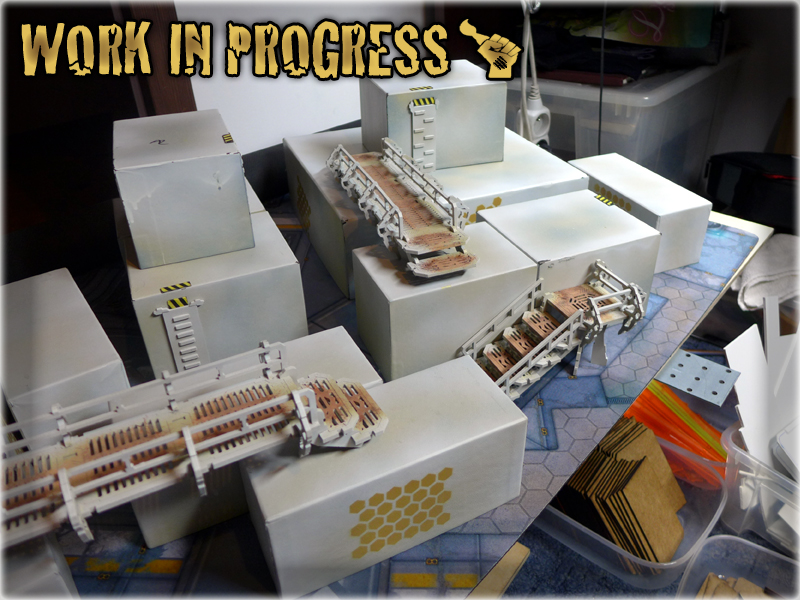
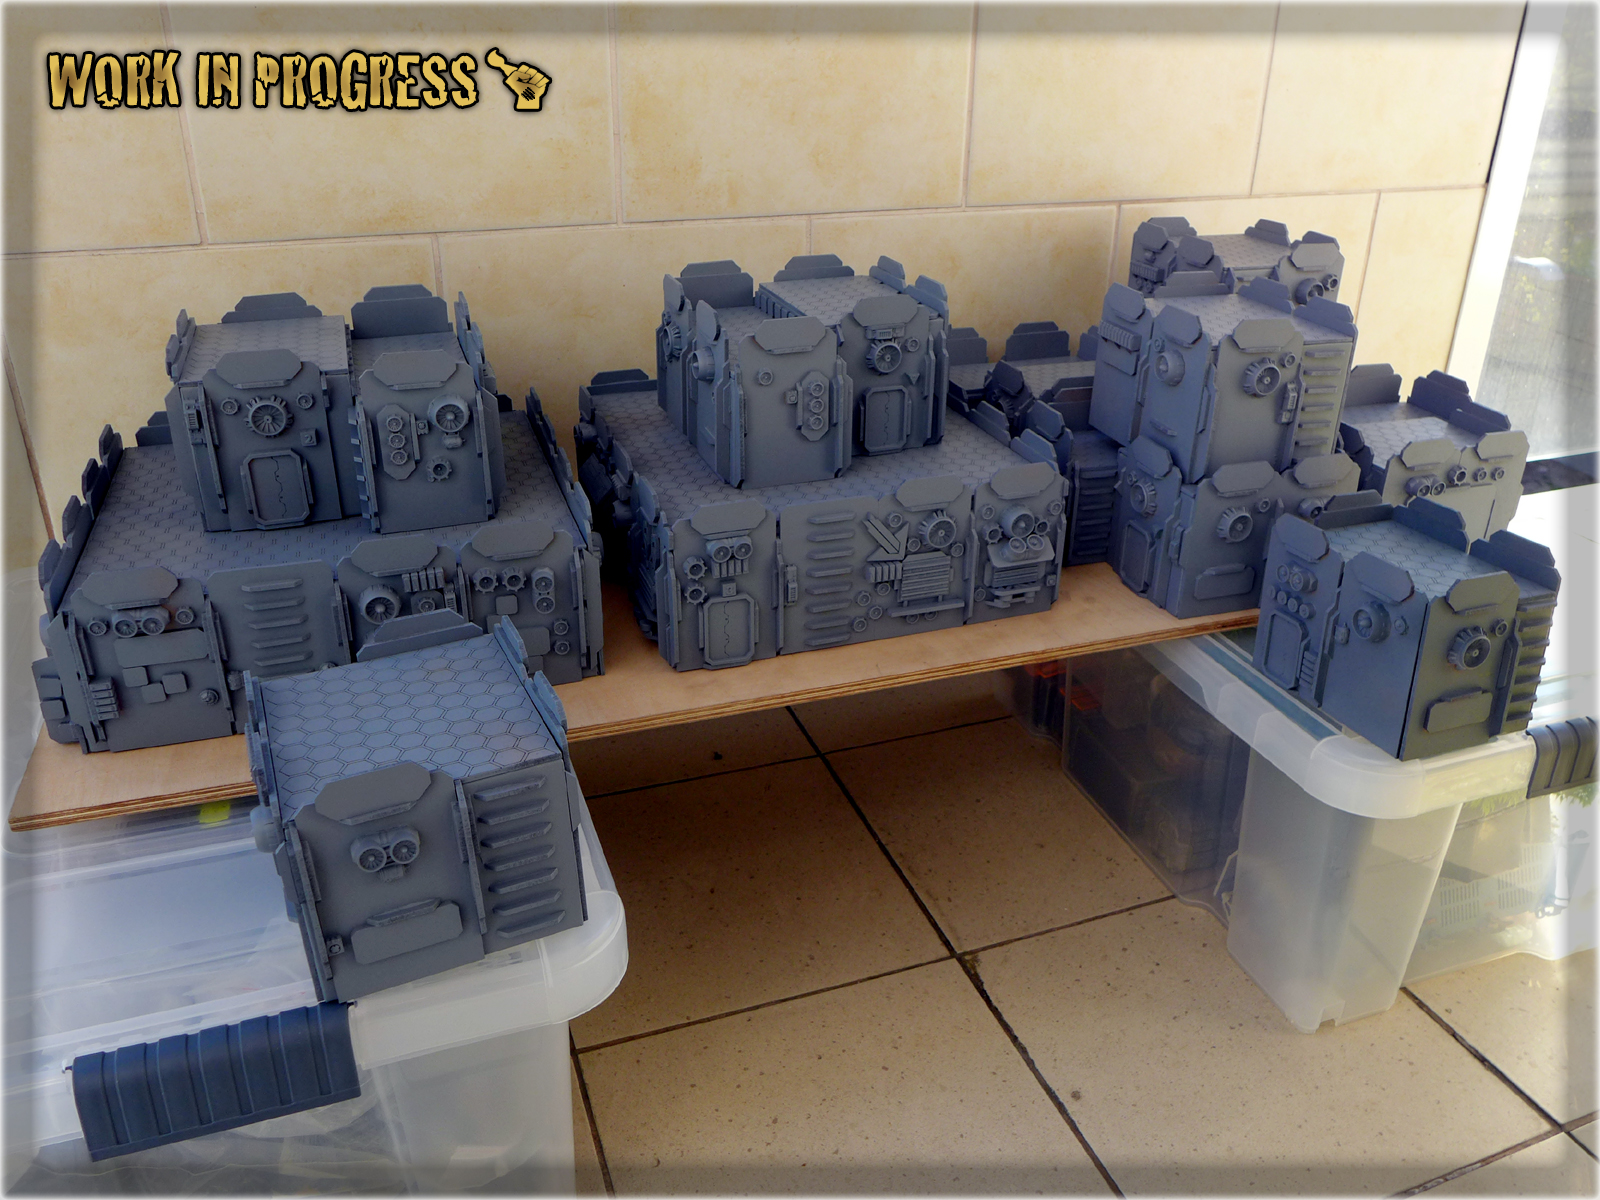
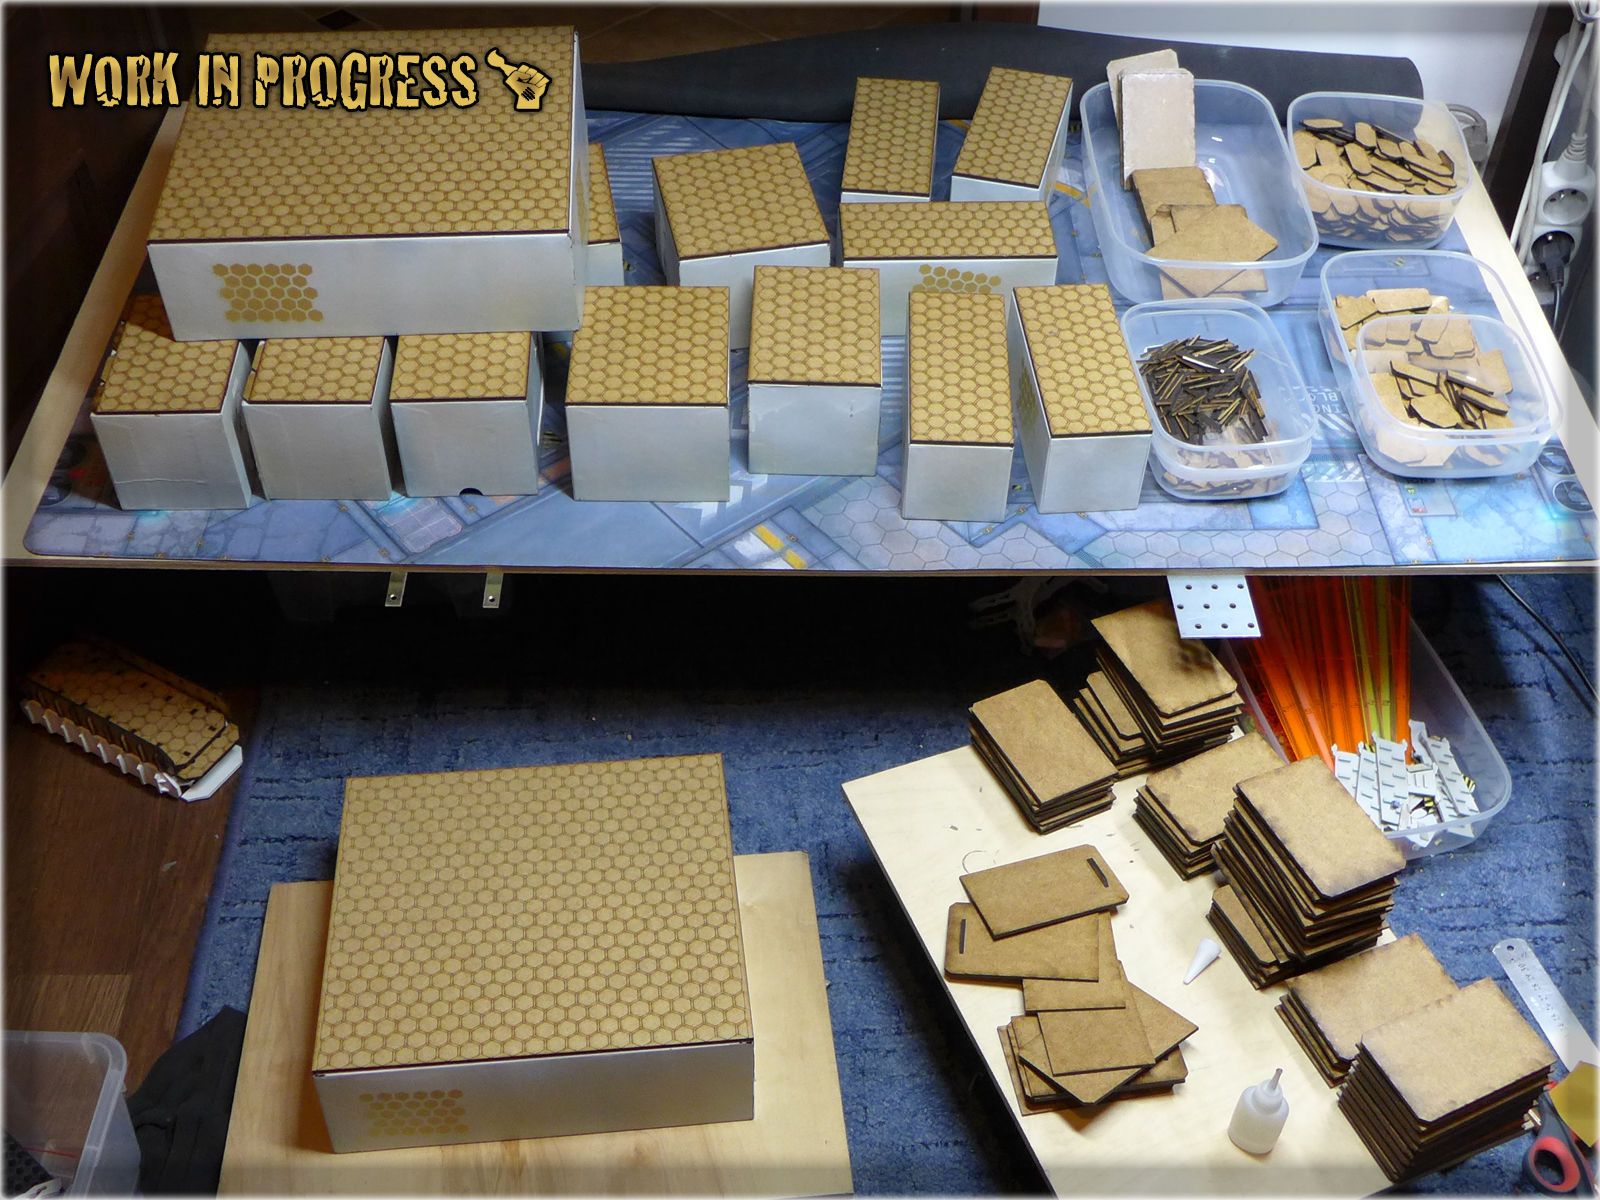
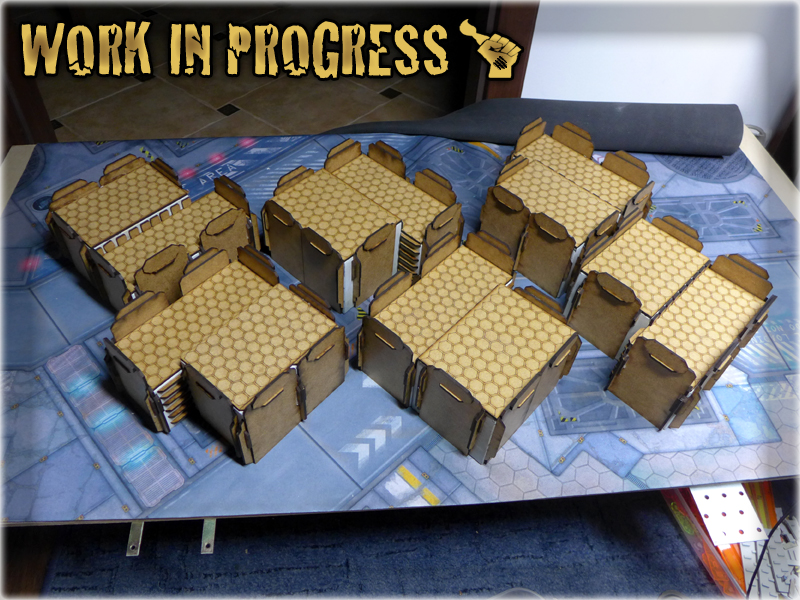
Fortunatelly for me both ReyCast and Micro Art Studio delivered a variety of cool pieces required to evolve my ‘to be’ buildings. It wasn’t easy and took over twelve hours to achieve, but I prevailed – I sorted all the pieces, counted them, divided them into groups (a separate group for each building type), marked my ‘white boxes’ for their corresponding rooftops and started putting walls together. A single test building at first, then whole set. I knelt on the ground, surrounded by a gaming table comming to life all around me…
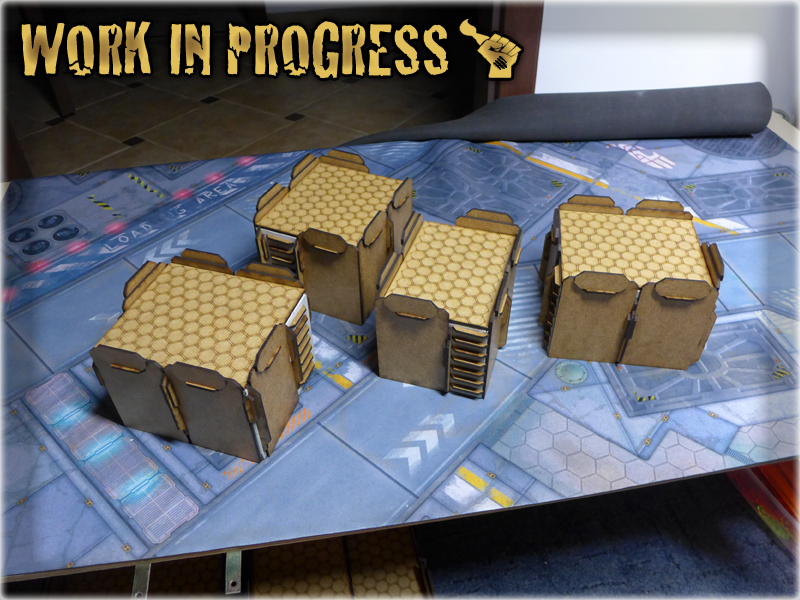
Test building,


Mass production,
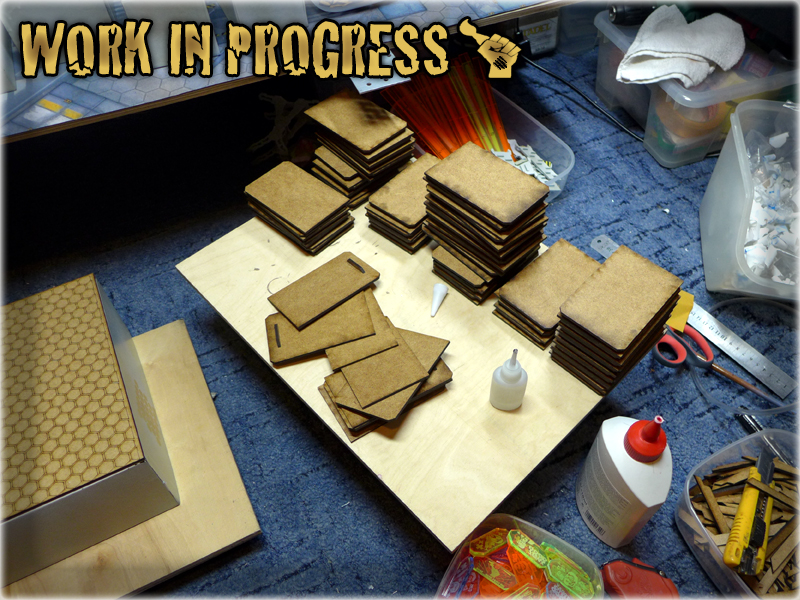
Somewhere about twelve hours, five Army Painter’s Super Glues spilled on my hands, their fumes stuck firm in my nosdrils, thousands of MDF pieces put together, dozen back hurts, hunders sporradic insane scientist’s laughters and one sympathetic look on my wife’s face, later – I was finally done! Done both literally and methaphisically, as my evil slavemaster – the muse – pushed me into yet another task. Battered, with my hands dirty and glued, with my head being dizzy – I started to write the first part of this article. I wasn’t even sure if it will be interresting to other hobbyists – just needed to write it. Couldn’t stop. Some of you know this feel for sure. But I’m starting to miss the topic – My gaming table was finally taken one step further on a road to it’s ultimate form.
Base layering stage is now complete. The buildings are ready to enter next stage, which is external layering along with addition of some cool looking details. Unfortunatelly I can’t proceed before receiving my order from the Titan-Forge. I don’t mind it, as except for the muse nagging me to work on this project, there’s no reason to rush things. At least I’m able to game on my good ol’ gaming table, taking advantage of all these cool new features. I just can’t wait to test these buildings next week. I’m sure they will not dissapoint me! If I’m lucky – delivery will come right after next game and I’ll be able to proceed to “THE COLONY” SPECIAL PROJECT part three. Keep your fingers crossed for me 😉
First of all I would like to announce that this project is huge. It is wast on a scale not seen here at Scarhandpainting.com ever before. The genesis of this project reaches January 2015, yet back then, I didn’t knew how things will go for this particular concept. To think that it started with a bunch of hardboard boxes being sprayed white makes me wanna laught. Right now some of you may recall ‘white boxes’ from my Tutorial: ‘Do it yourself’ Gaming Terrain. That is the right course of thinking as that gaming terrain and this Special Project have a particular thing in common – “Infinity the Game”. The hero of this article is none other than INFINITY GAMING TABLE: “THE COLONY”.
At first it was supposed to be, a cheap and easy to make, gaming terrain set. Me and my friends were hyped for Infinity and needed a proper table with a variety of terrain pieces. I am a man of action so in few days I had my first Infinity Gaming Table fully thinked through and half way done. The terrain set expanded steadily throughout the year to finally crystallize into a fully developed and densely packed gaming table. That was the end of stage one and a beggining of an entirely new concept. In the late 2015 I was pretty much sure that my gaming table is very playable. I got a lot of feedback from more experienced gamers and got to know Infinity as much as to make a final decision – I decided to use both my financial and material resources to transform my gaming table into a new and extraoridinary form. Once again I was overwhelmed by the need of creation and started to work…
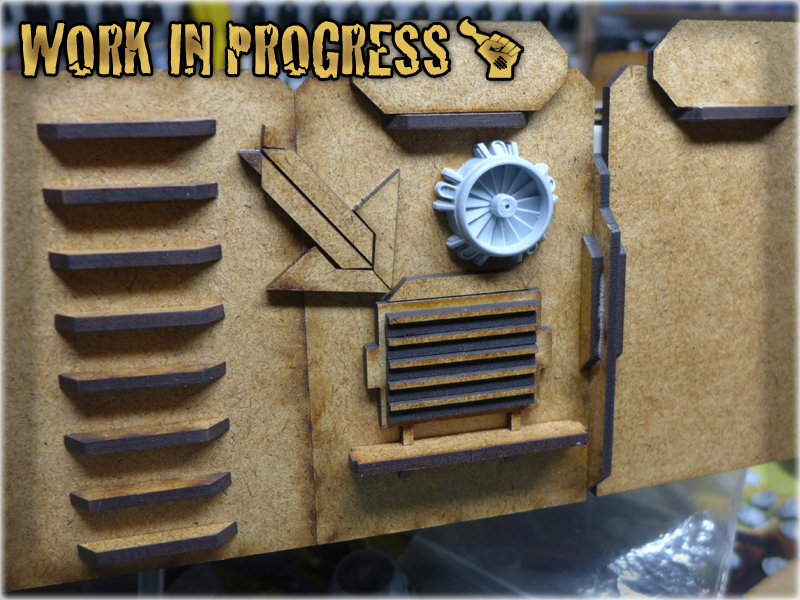
The easiest and most effective way to improove my existing terrain was to prepare a template for basic pieces and then use them to decorate my ‘white boxes’. The ideas came to me one by one and it took less than two hours to cut a sample for each type of piece needed. As they say – “One’s man trash is another’s man treasure” and that is more than true as I supported myself with some trash left out of Micro Art Studio’s bridge set. All the basic pieces you now see, were made using just a couple of HMD leftovers and a hobby knife. This way I prepared two major templates:
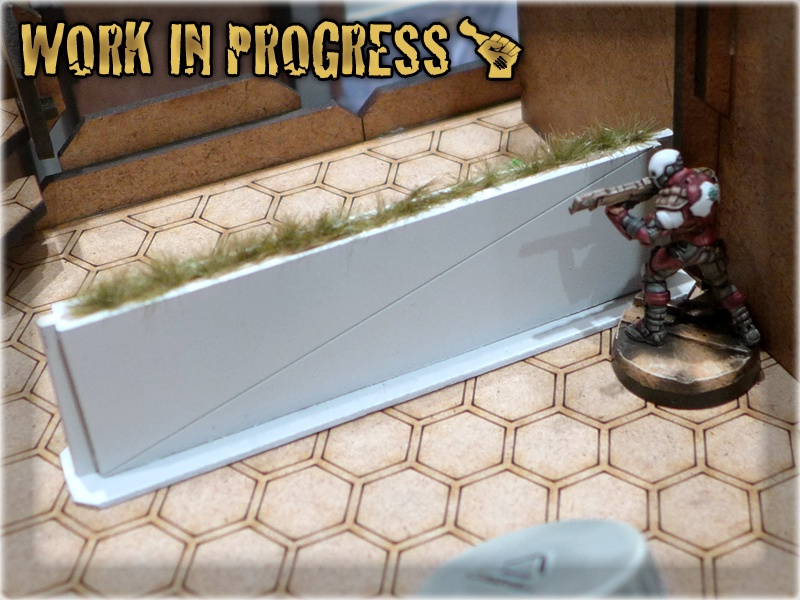
Walls: Designed as 7/11cm pieces to let me decorate each and every ‘white box’ from all sides. Some additional fillers were also designed, to fill the space, if a box happens to be too long for a certain number af wall pieces. I hoped to keep wall pieces separate to let players position their miniatures in selective cover, move with causions movement etc. Once these were done I used some Warhammer 40,000 bitz to see how the overall will look before painting. It passed the test.
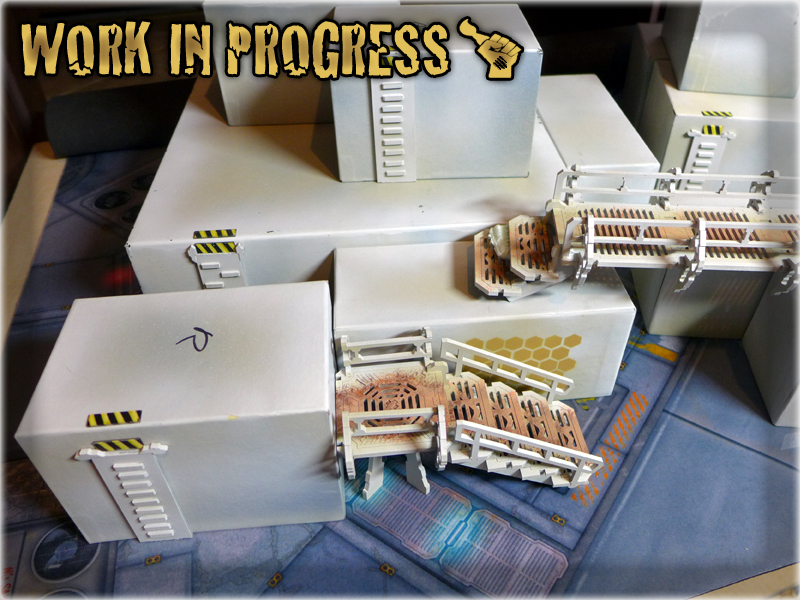
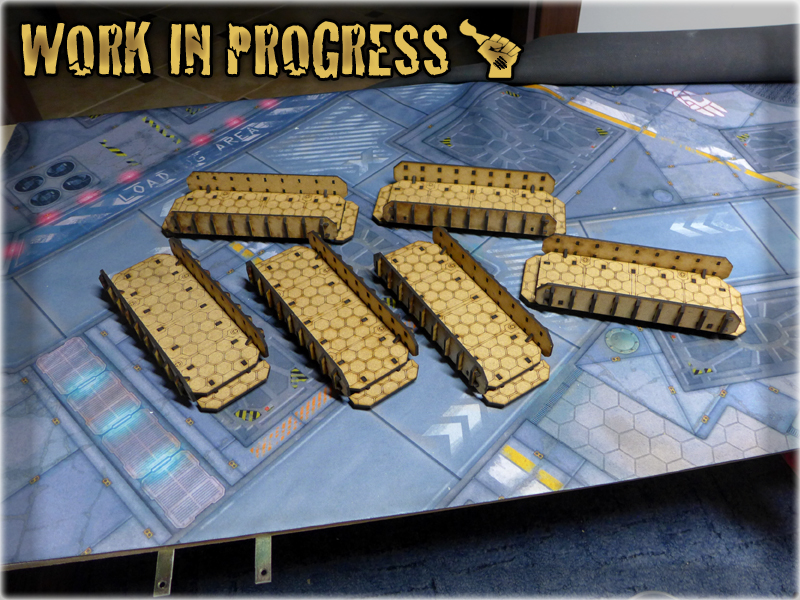
Bridges: It seemed that all the bridges in the market lacked something. In my opinion they were either cool looking and not very playable or playable but ugly. Left with no other choice I designed my own bridge to fit into my new gaming table theme and provide a good cover.

Now the only matter to attend was to copy these templates a dozen times and more. At that moment I knew that to achieve my goal I will need some help…
1 REYCAST
I went forth and back through Facebook in search of possible allies. An obvious choice appeared in form of ReyCast.pl who evidently had hype for Infinity terrain and seemed to be an honest guy. Not only he prooved to be just that but also joined me in my quest for glory. Once I provided him with my prototype he took the burden of drawing and then producing a Bridge. He also designed roofs that would later be used for my ‘white boxes’ and all for a really fair price.
My initial drawing and prototype:

 Final product:

ReyCast did a magnificent work for me and I was very satisfied with the results. The one thing he couldn’t provide was quantity. I required only couple of bridges and roofs but the walls – pieces varried in quantity from thirty up to four hundred with a total of over one and a half thousand pieces! We both decided that it would be better if I try and find another provider for these.
2 MICRO ART STUDIO
Thus I went straight to my good old friends from Micro Art Studio. We have a history me and MAS – For long time we gamed Warhammer 40,000 together at many tournaments. At some point I used to order a lot of different things from them including gaming tokens, bases and designs ‘for demand’. The final product they provided was always of the best quality and good price. Now I wonder why didn’t I go to them in the first place – but, spur of a moment – ReyCast was there, he was eager to cooperate and I was in the middle of my creation battle rage. I do not regret it as ReyCast did a hell of a good job for me and hopefully not for the last time. So I sent my project to Micro Art Studio and well… must say that they delivered in a crazy, fckn’ awesome way!
My initial drawings and prototype:

Final product:

And the package… I felt like if I had my tenth birthday. Let’s say that the guys from MAS bought my eternal loyalty and gratitude.
3 TITAN FORGE
For the final set of pieces – an enormous quantity of ventilators, electric boxes and other stuff used to decorate, I went to my friends fom Titan Forge. They possess both the technology and expertise needed to provide me with such quantity. Unfortunatelly I’m still waiting for this gargantuan order to be fulfilled – but hopefully I won’t be waiting long.
In modelling you never know what you will need unless you stumble upon it by accident. For me it happened during a local Infinity Tournament where I stumbled upon a gaming table designed by Zen Terrain. Soon after that, I purchased a set of sweet looking Neon City Signs and Planters. Surely I could have made my own but Zen Terrain has a unique desing that I just fell in love with.
I also ordered a set of plants to use in the end step of decorating my gaming table. As it happened the courier delivered these in less than two hours after MAS’s package came in. I was just finnishing a test building which can be seen in the picture below 🙂
After two months of waiting I was finally able to lay my hands on most of the items needed to continue my project. I managed to wall-up all the ‘white boxes’ which from now on are no more boxes, but buildings. All bridges are also done. I’m eager to share some pictures, but it is really late and I’m weary after over twelve hours of terrain making. “This projecs it huge” and it deserves at least three entries as much as I deserve some sleep. Let this building be a glorious end of the first part of this article. See you soon in “THE COLONY” SPECIAL PROJECT part two 😉