- contact@scarhandpainting.com


Last weeks I’ve been diverting more and more attention to Mordheim. Maybe that’s because I’ve been playing PC version lately. Either way, every couple of years I get that ‘Mordheim fever’ and delve deep into my imagination, staying up whole nights, making something cool for my own Mordheim collection. Right now I work on a brand new Mordheim gaming board thus I figured out to revive an old Tutorial from Mordheim Treasure Hunters blog and add it to the collection here at Scarhandpainting. More articles are already prepared, but I somehow felt like this one will be a nice way to close the 2016th.
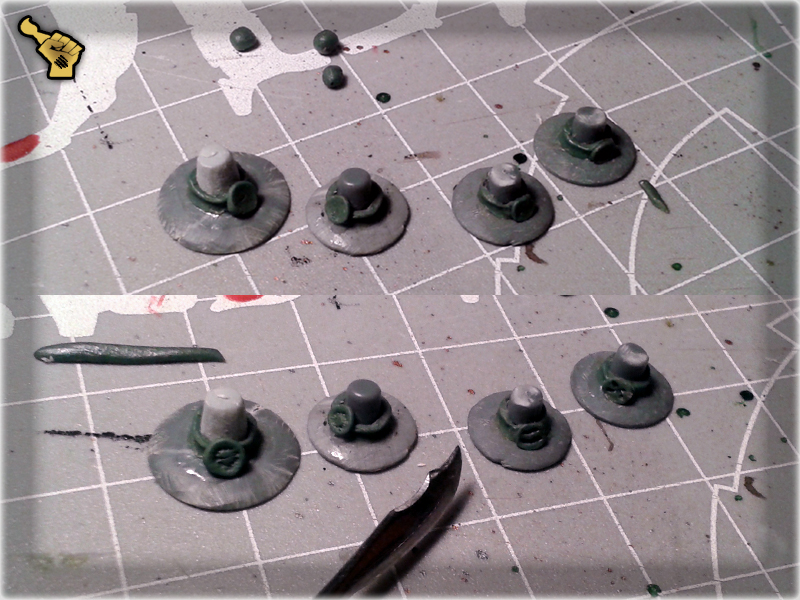
Below I will show you a quick way of making a Witch Hunter’s Hat with basic tools, some green stuff and some plastic leftovers. The thing about Witch Hunter’s Hats is that they are extremely rare and yet they look just awesome. A lot of miniatures can be reborn as proper Witch Hunters just by adding this small detail. So, here’s how I do it:
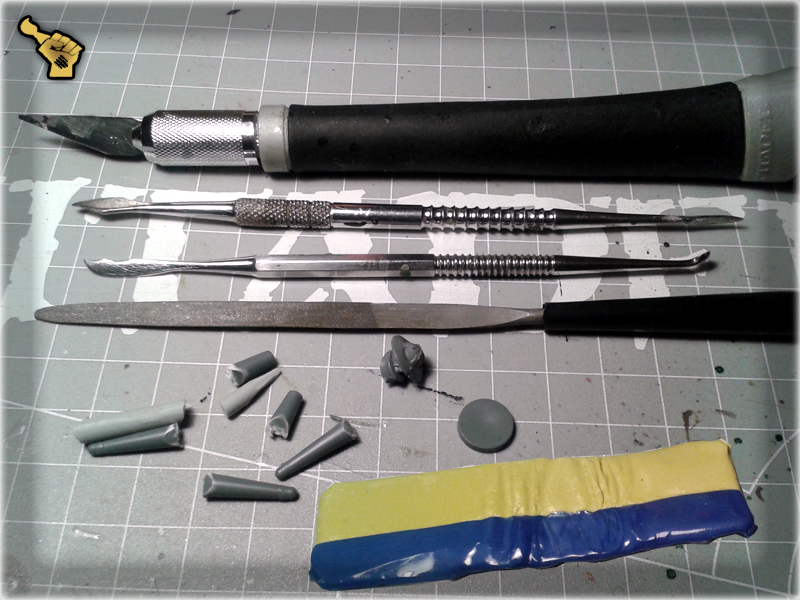
* Modelling Knife,
* Sculpting Tools,
* Modellin File,
* Green Stuff,
* Super Glue,
* Some round and flat plastic bitz (heads in helmets will do too),
* Some tubular sprue plastic bitz (easy to get as they’re in almost every sprue),
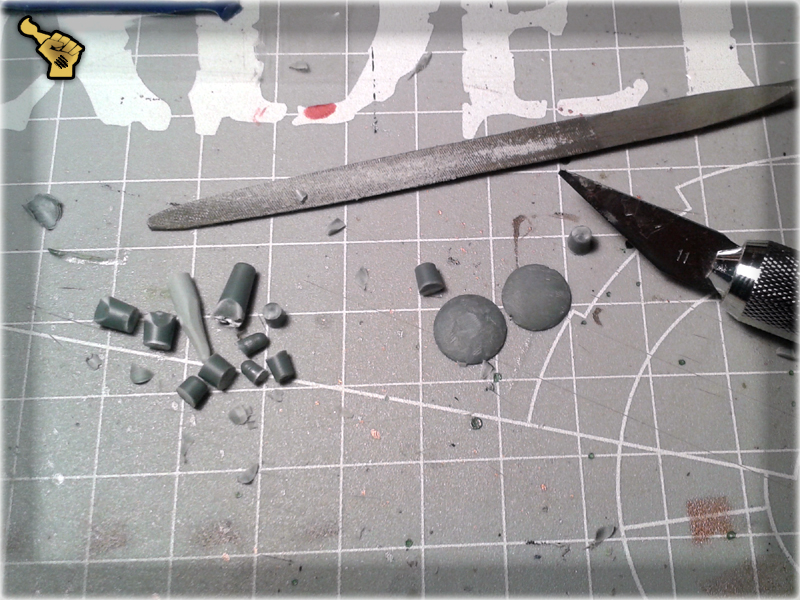
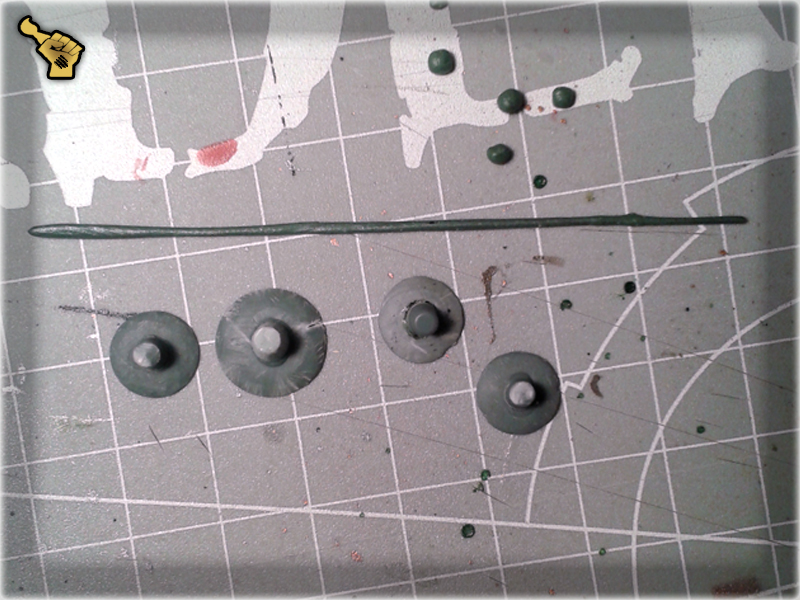
1 I started with preparation of hat parts. For this purpose I used round shaped plastic bitz, cutting off the excess of plastic with Modelling Knife first, then flattening the top area with a Modelling File. Next I used a Modelling Knife to cut tubular sprue bitz into nice hat top pieces. This is how it should look like when done:
2 I then glued the pieces together, prepared a piece of Green Stuff and rolled it into a thin line. I also cut small pieces of Green Stuff loose and rolled them into small balls.
3 I applied some Super Glue around the connection between hat's top and brim. I then applied a Green Stuff rolled piece onto the glue and flattened it with a Sculpting Tool modelling it into a strap. For this purpose I used a rounded part just behind the tip of a Sculpting Tool.
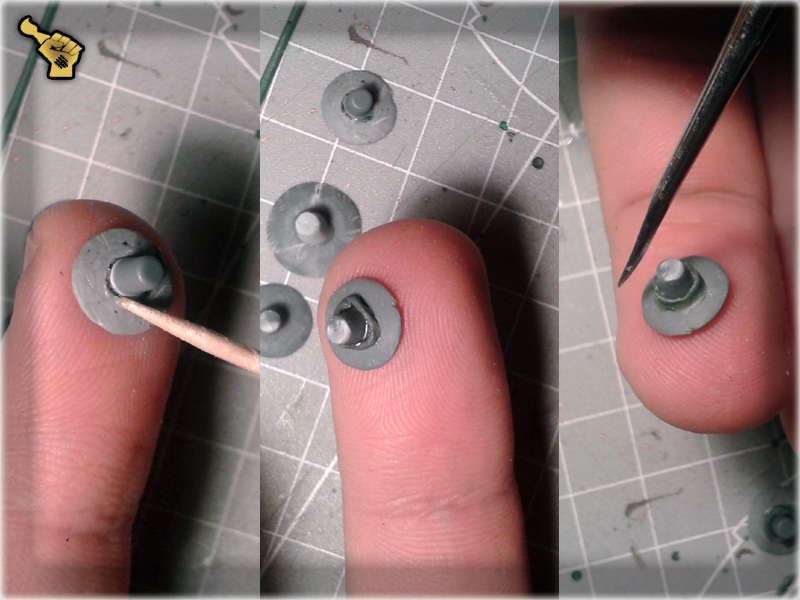
4 I smoothed the texture of starps using a Sculpting Tool dipped in water. I then left the hats to dry.
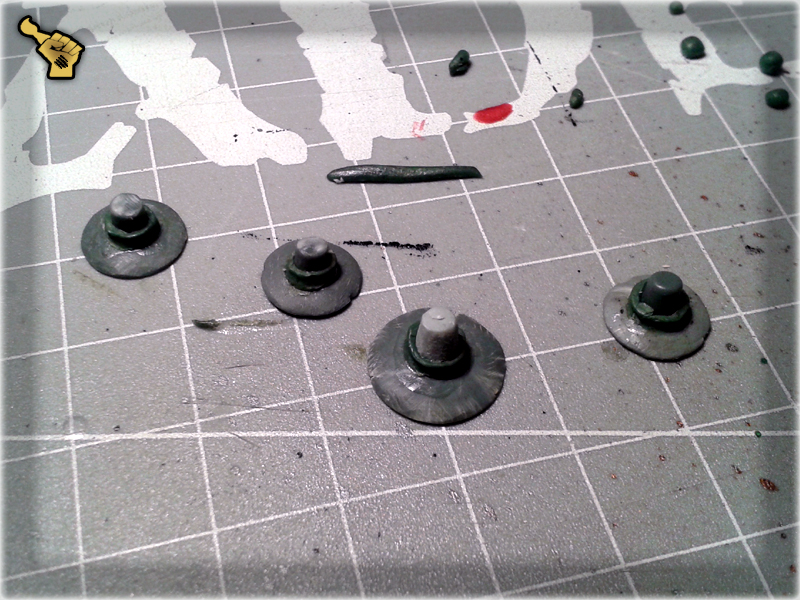
5 Once the Green Stuff dried out I applied Super Glue onto a piece of plastic, sticked a Green Stuff ball onto the tip of a Sculpting Tool, gently dipped it in the glue and applied it to a hat's strip. I also flattened the ball with the other (rounded) end of a Sculpting Tool thus creating a clasp.
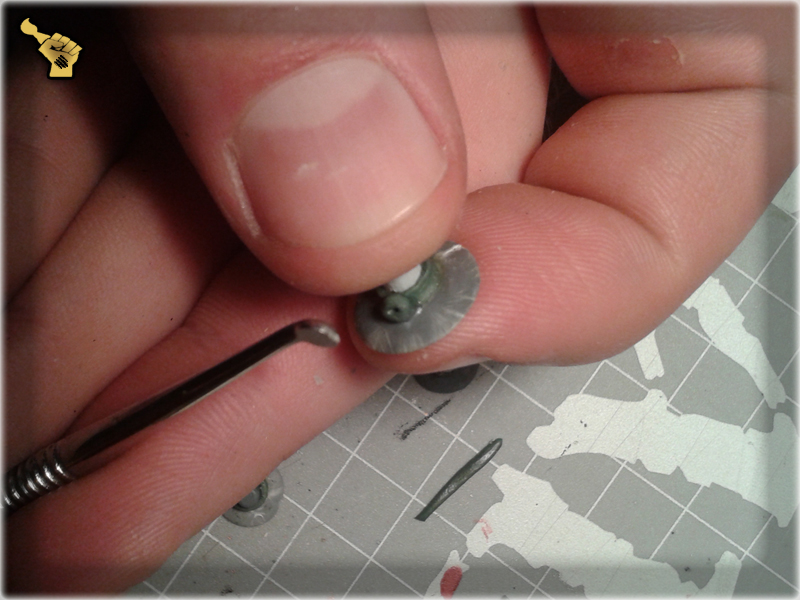
6 In the end I modelled a pattern on each clasp with the sharp tip of a Sculpting Tool. Once it was done I let the Green Stuff to dry out. Instead of modelling a clasp yourself, you can use any well sized bitz or even a piece of plastic. Actually anything fitting the hat's strap will do.
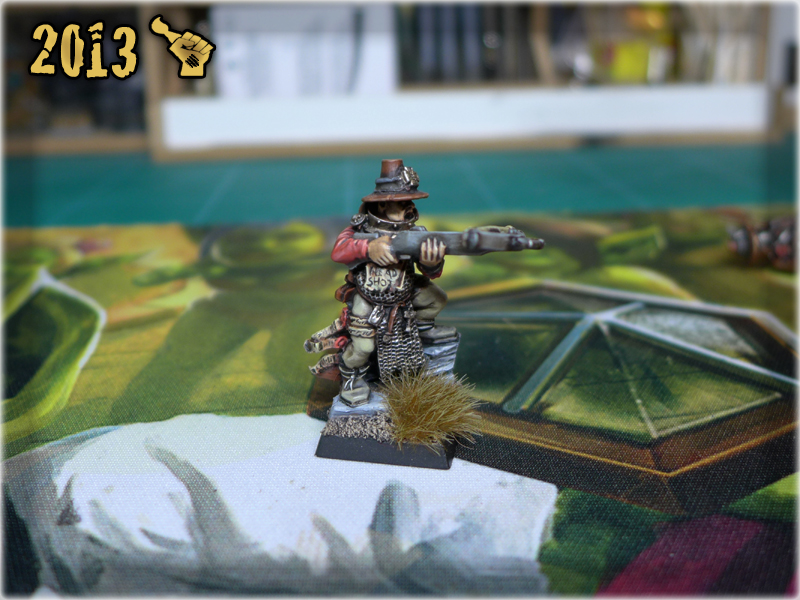
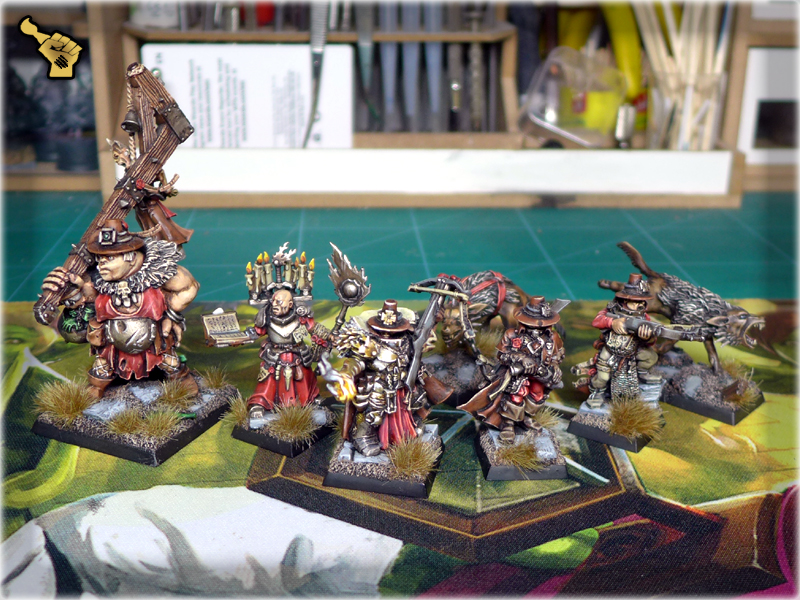
The final effect may not be outstanding but it will do the job of transforming your Imperial Mercenary, or any other miniature into a badass Witch Hunter. See for yourself in the Warband: ‘Scourge of the Witches’ gallery. Here’s a preview pic:
I hope you like the tutorial. It is an old piece but I really wanted to have it here at Scarhandpainting.
1 comment so far
Joe BPosted on3:16 am - Jan 8, 2017
Cool tutorial for the hats. It’s a nice touch with the seal on there too