- contact@scarhandpainting.com


Ahoy Sailors! As you know I am most and foremost a passionate hobbyist. That being said, I am also a pirate, a scoundrel and a fanatical enthusiast of Mantic Games Kings of War: Armada – a naval strategy game set in the rich world of Pannithor, pitting multiple wonderfully crafted and strongly themed factions against one another. Today I’m here to share some of my maritime experience.
Armada is a fast and relatively simple game to play. So far the Mantic games have done an amazing job keeping the rules mostly smooth and the faction balance in place. Still it is a wargame with (as of today) rules spread across three books and fifteen factions. With such a wealth of rules there is no way to avoid a few niche rules interactions that might feel a bit unintuitive to newer players, such as Baiting Collisions and awkward Visibility cases to name a few. This is also the case with ‘Slingshooting’ – an interaction allowing players to increase movement of their ships by leveraging Move based rules to sail through friendly ships.
There currently are two fleets capable of Slingshooting: the Tridern Realms (Fully Submerged) and the Ghost Fleets (Spectral Form). They both follow a similar slingshot mechanic, but with its own set of pros and limitations.
Fully Submerge, the Trident Realms faction rule
“Trident Realm ships can automatically Fully Submerge to avoid other ships that they would otherwise collide with during their own activation, as long as the Trident Realm ship can be placed with its rear base edge a few mm clear of the other ship, following the same initial trajectory. This completes the movement of that Move Step, and the ship continues with its normal activation. Any Shooting attack during this activation will be with an additional -2 to-hit modifier. This modifier is not cumulative with the -1 to-hit modifier for having rolled to evade during the activation. If the ship cannot be placed with its rear base clear of the other ship, the normal evade procedure must be undertaken. A Trident Realm ship may only Fully Submerge once during its activation.”
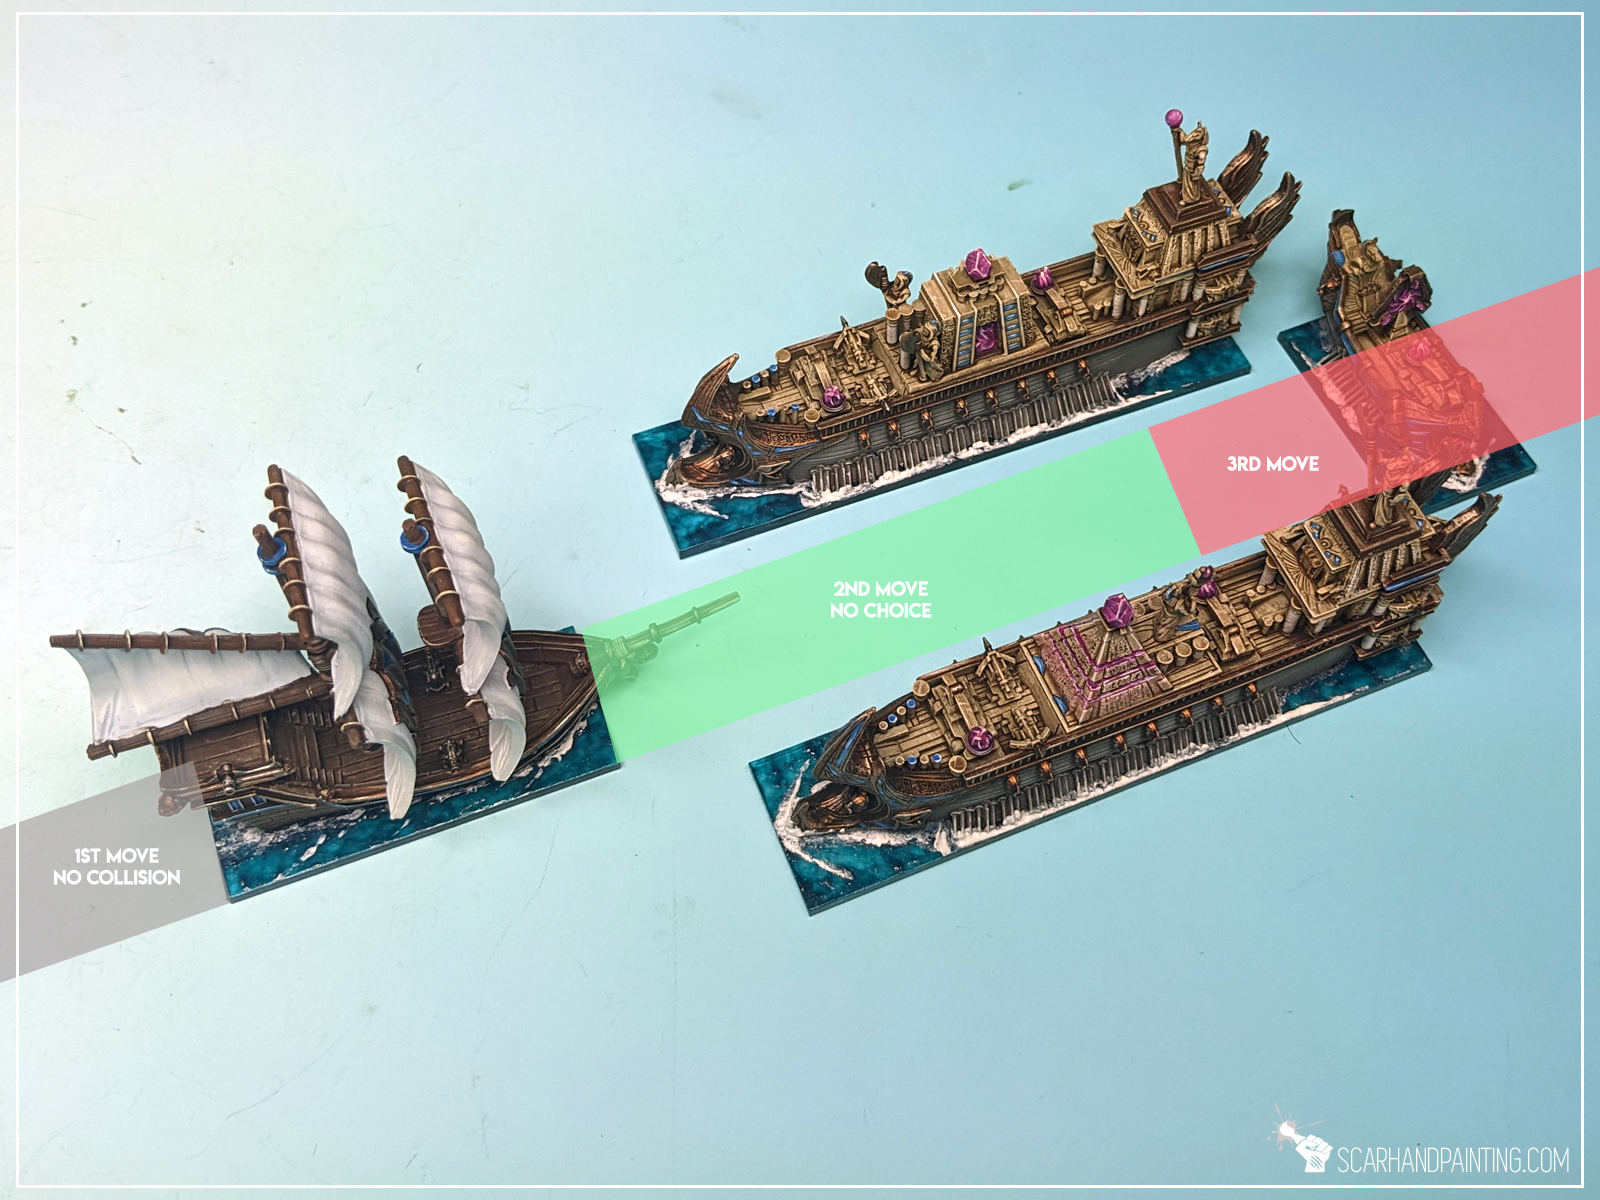
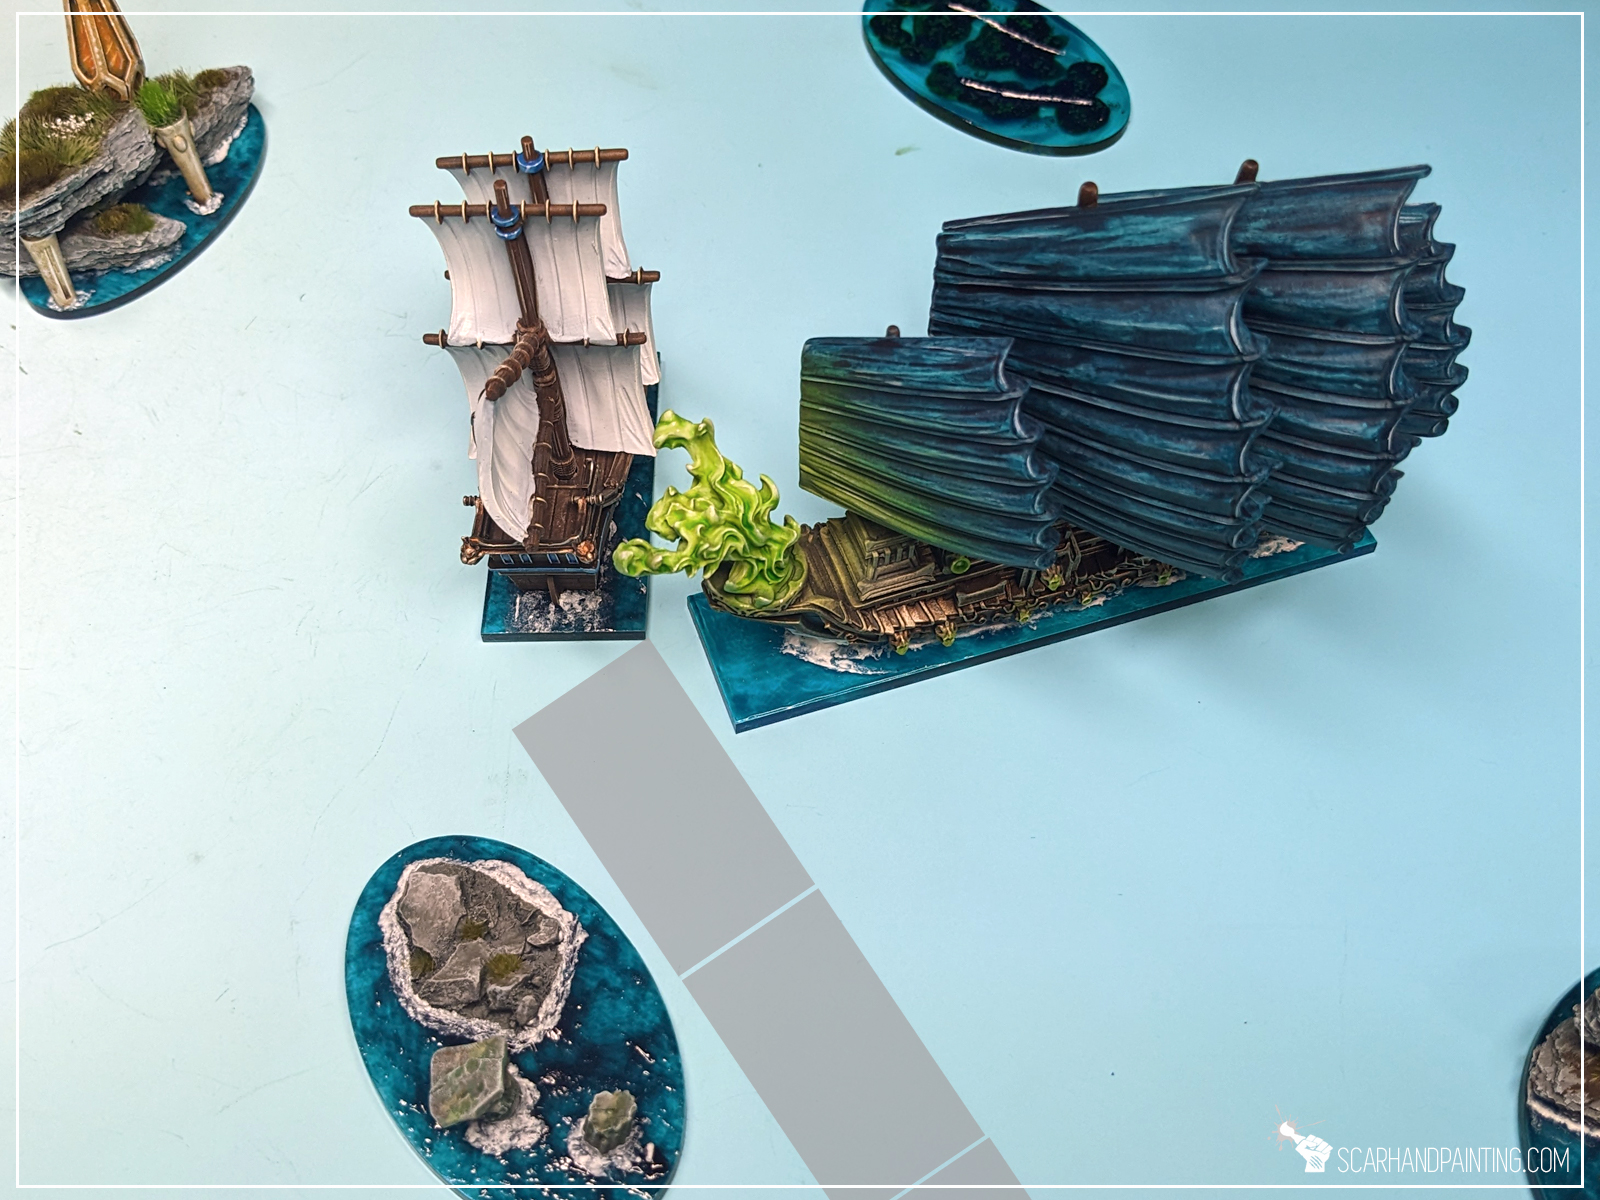
The Trident Realms ships are allowed to completely avoid one Collision per Activation, but going under and effectively moving to the other side of the obstructing ship instead. The procedure works as follows:
Although the Fully Submerge rule allows to avoid collisions, the Trident Realms ships are still a subject to the Avoid Collisions While Moving rule (Rulebook p.16) stating as follows:
“If it is not the last Move Step in a ship’s activation, ensure its forward movement in the next Move Step will not result in a potential collision (with terrain or another ship). If this would result in a potential collision, alter the ship’s turn to avoid this as much as legally permitted.
Sometimes however, due to forward momentum, lack of turn angle, poor planning or just bad luck, collisions will be unavoidable (see page 20).”
What this means is, even though the Trident Realms ships have a tool to “avoid other ships that they would otherwise collide with“, Rules as Written, they are still not allowed to set themselves for a “potential collision” during Move Steps other than the “last Move Step”.
Trident Realms painted by Michał “MiSiO” Ciemniewski
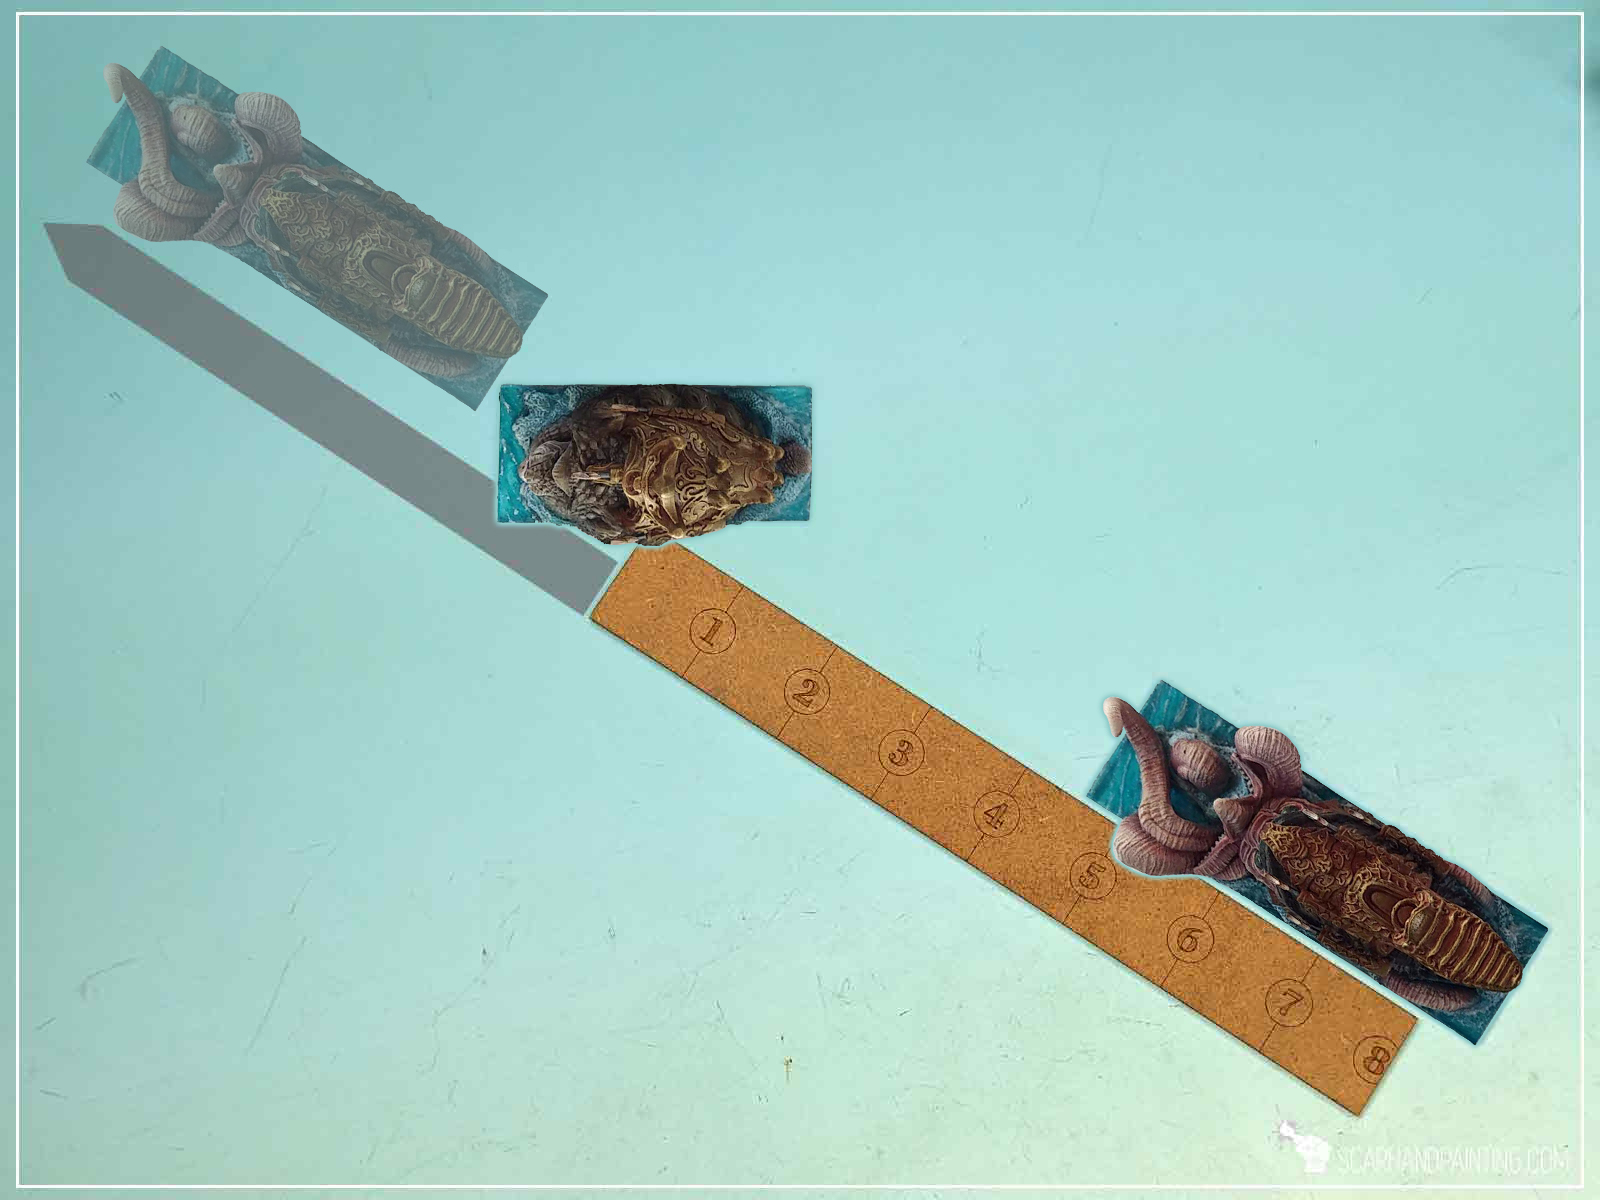
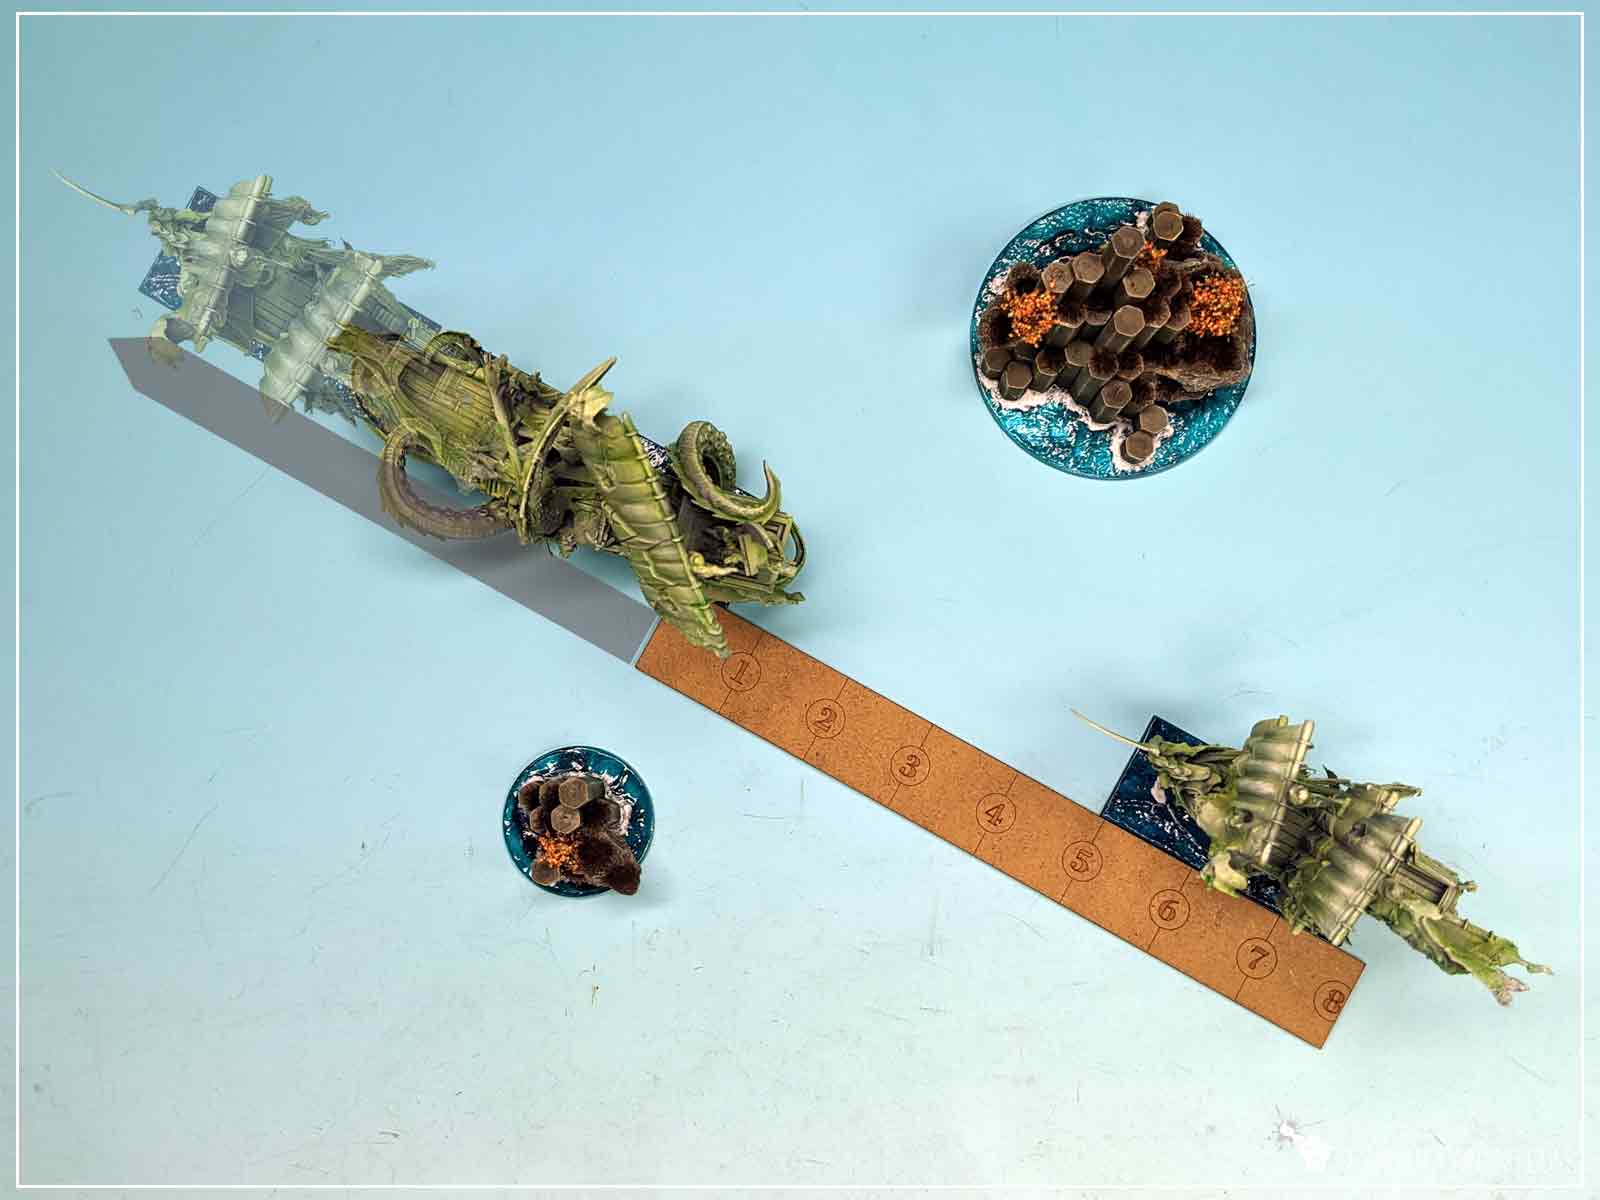
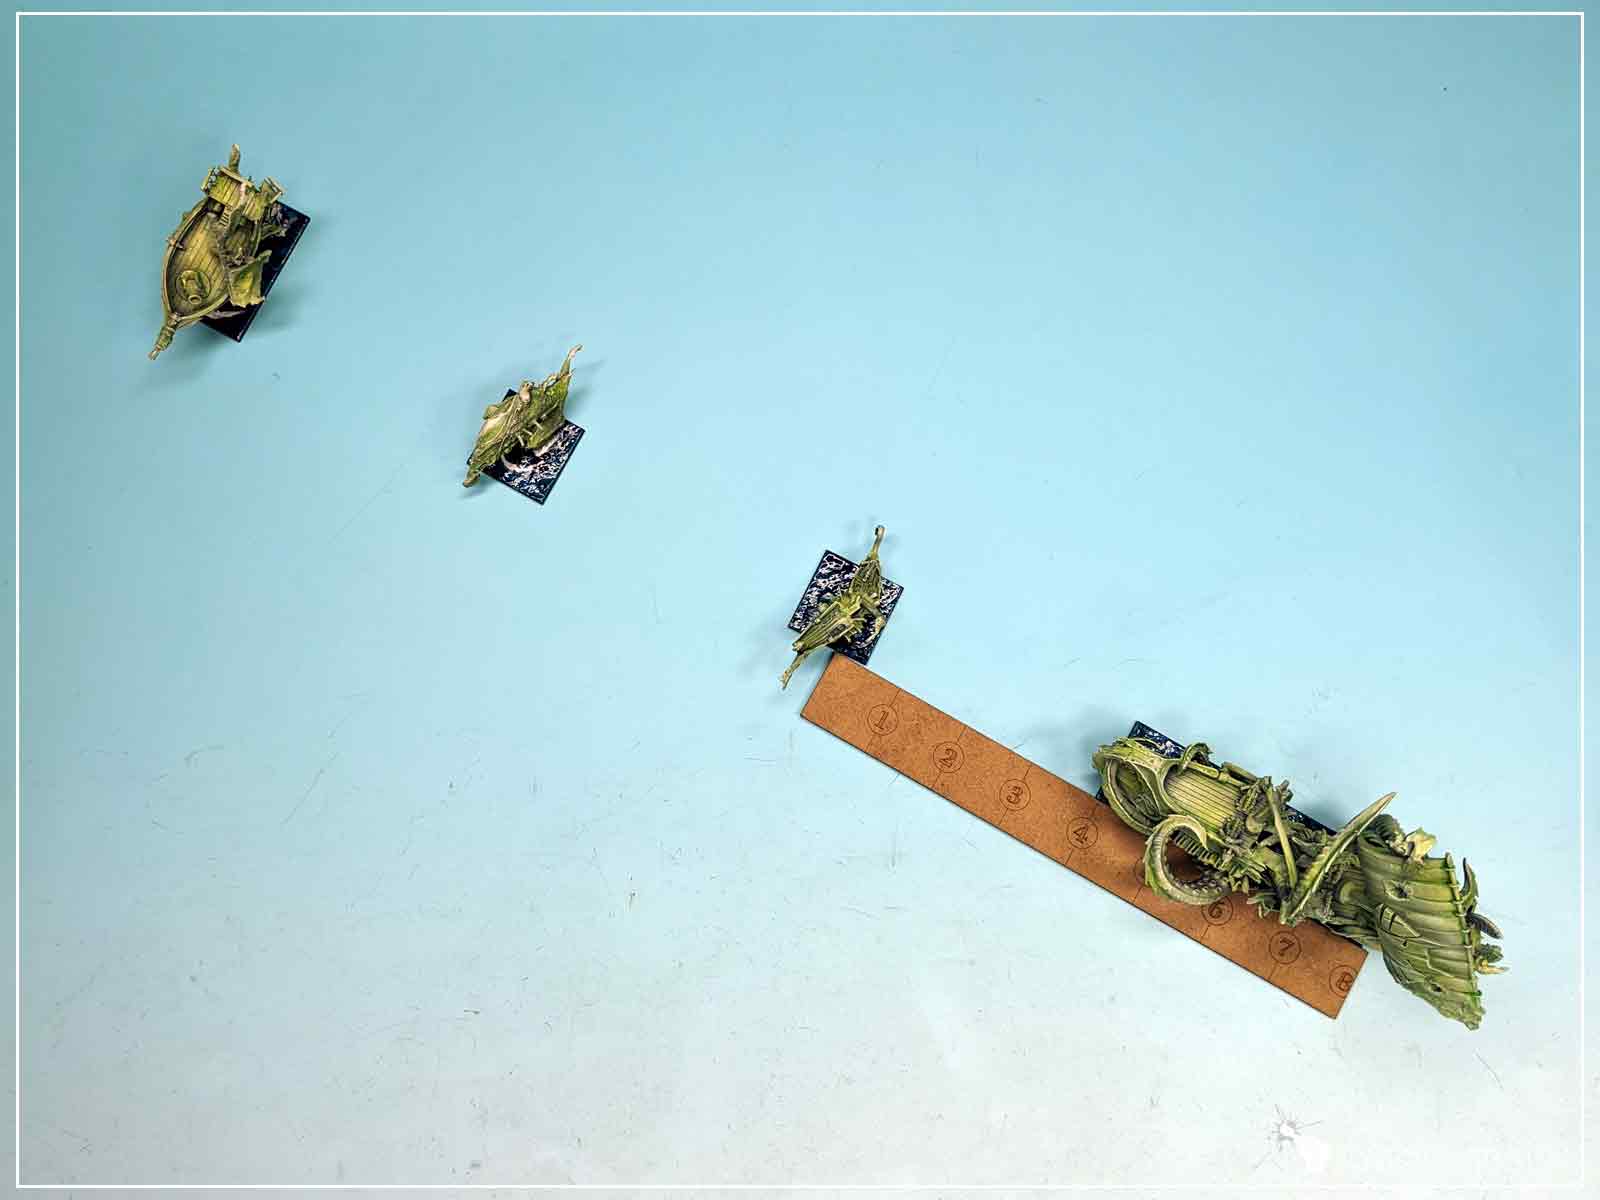
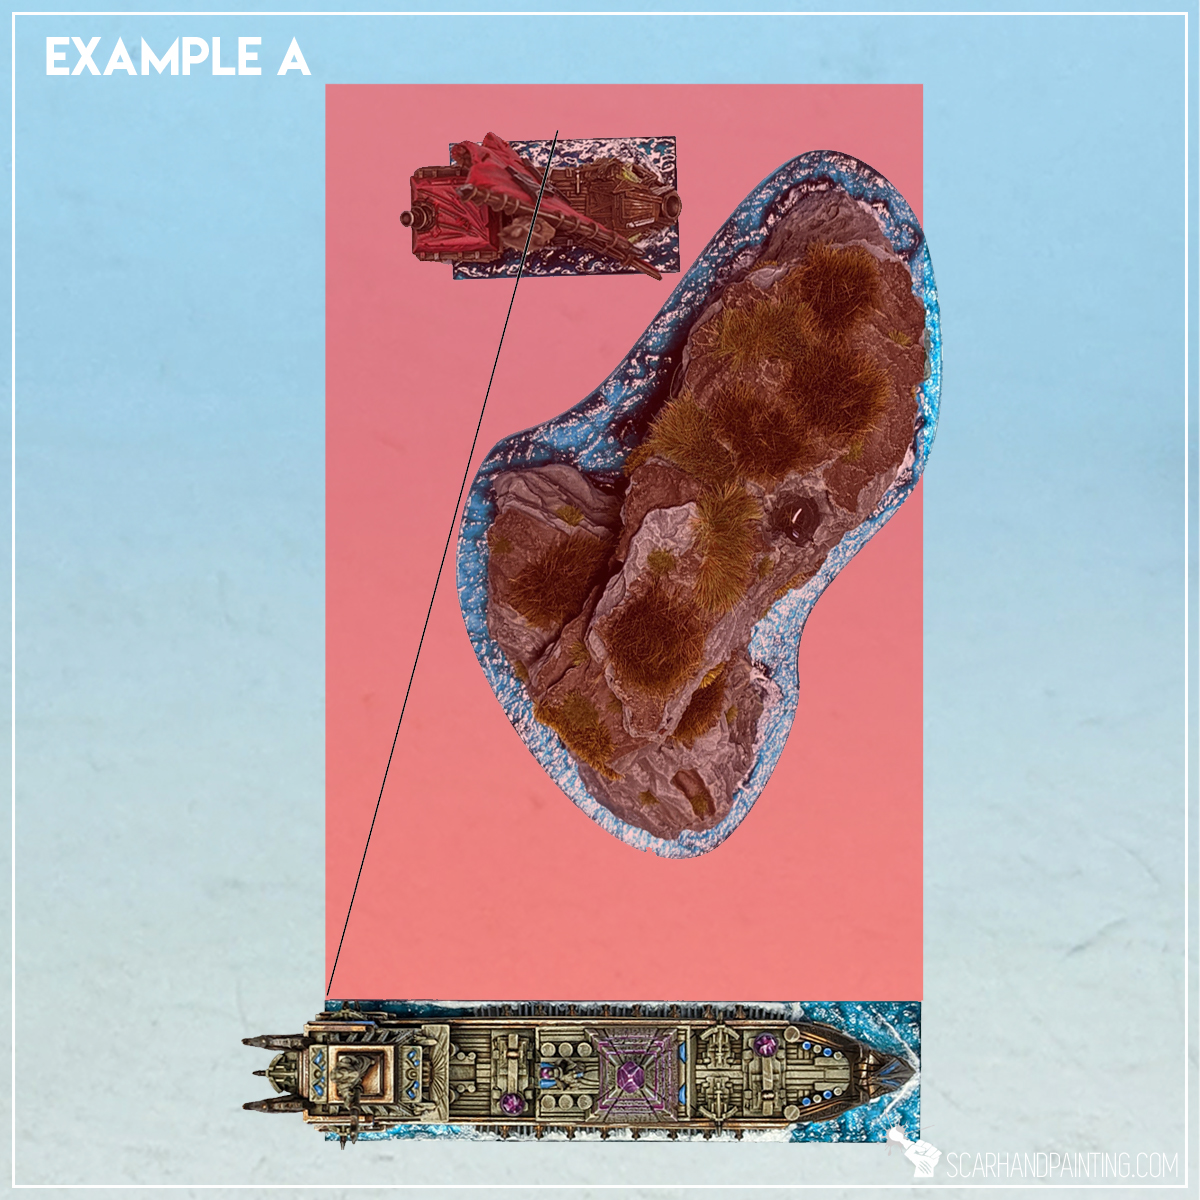
Example A: During Activation a Gun Turtle (Main Battleship M) sets itself up 4,5″ directly in front of a Giant Squid (Main Battleship L). When activated, during first Move Step the Giant Squid is on a collision course with the Gun Turtle, elects to Fully Submerge and moves behind the other ‘fish’ adding the length of both the Gun Turtle’s and its own base to the movement, effectively doubling the movement in this Move Step. It then continues the Activation as normal.
Trident Realms painted by Michał “MiSiO” Ciemniewski
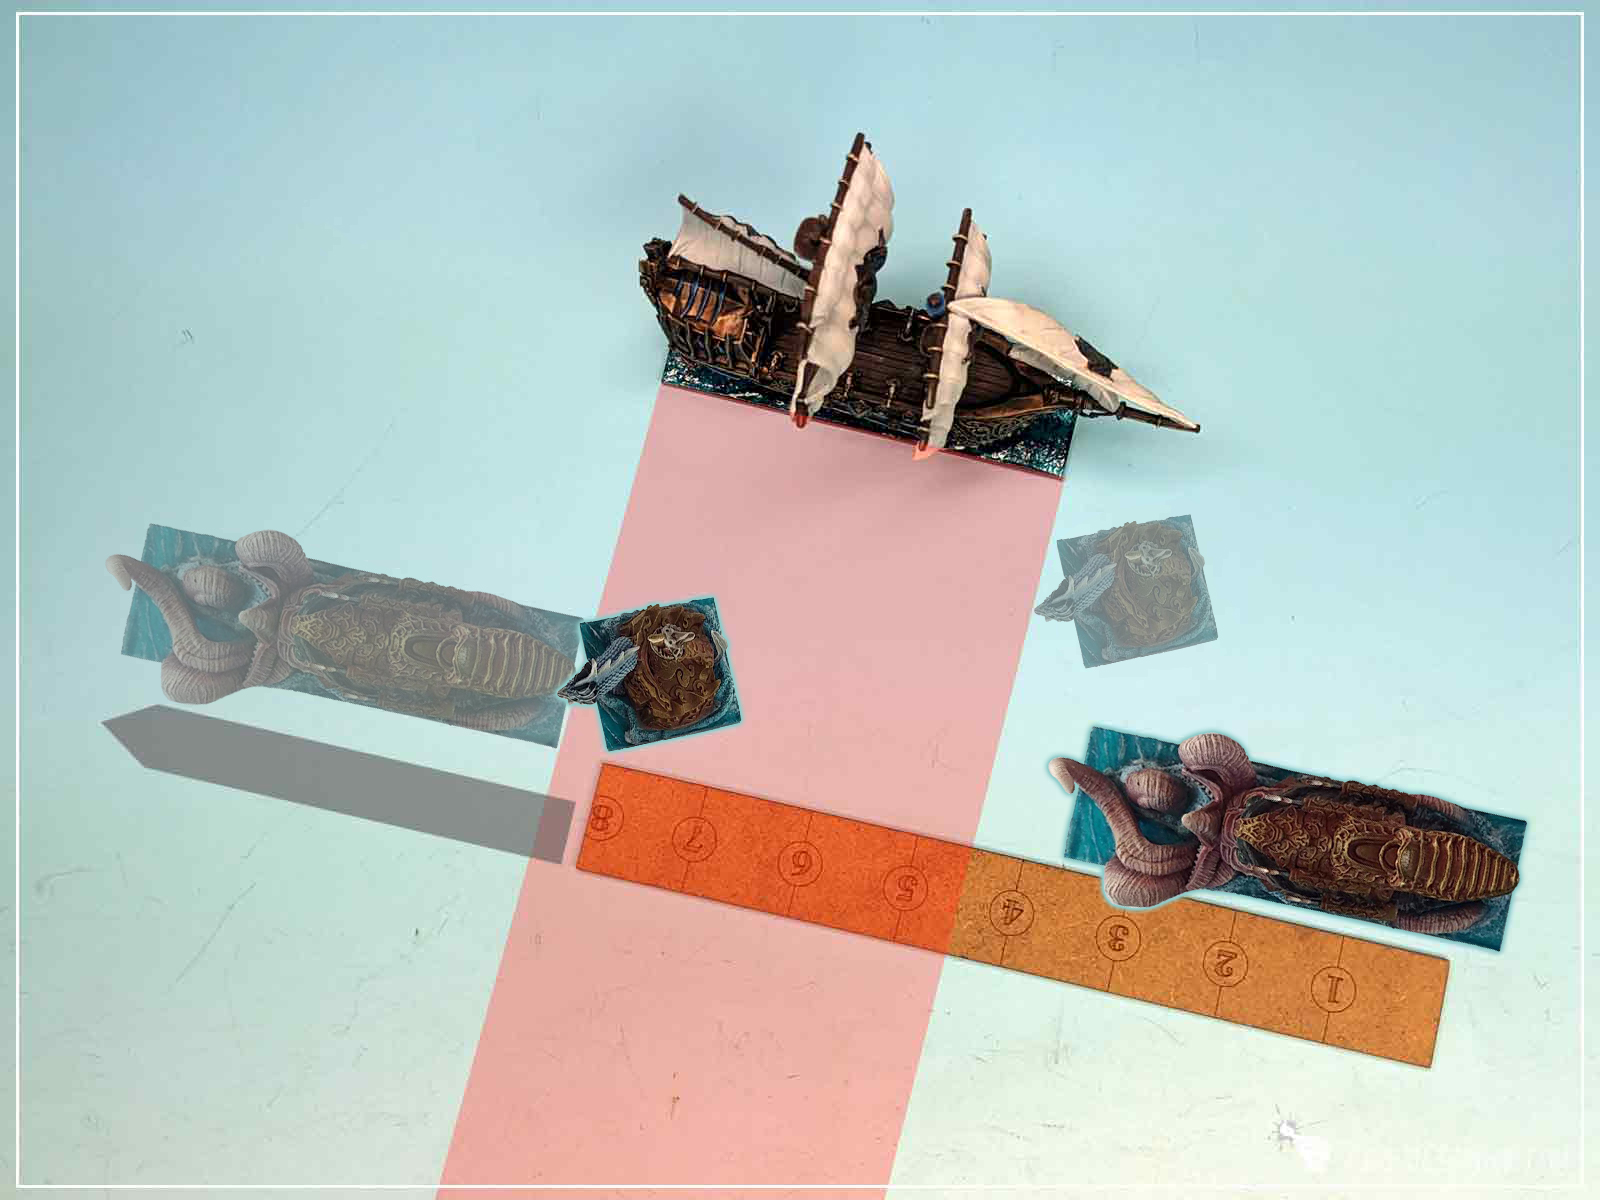
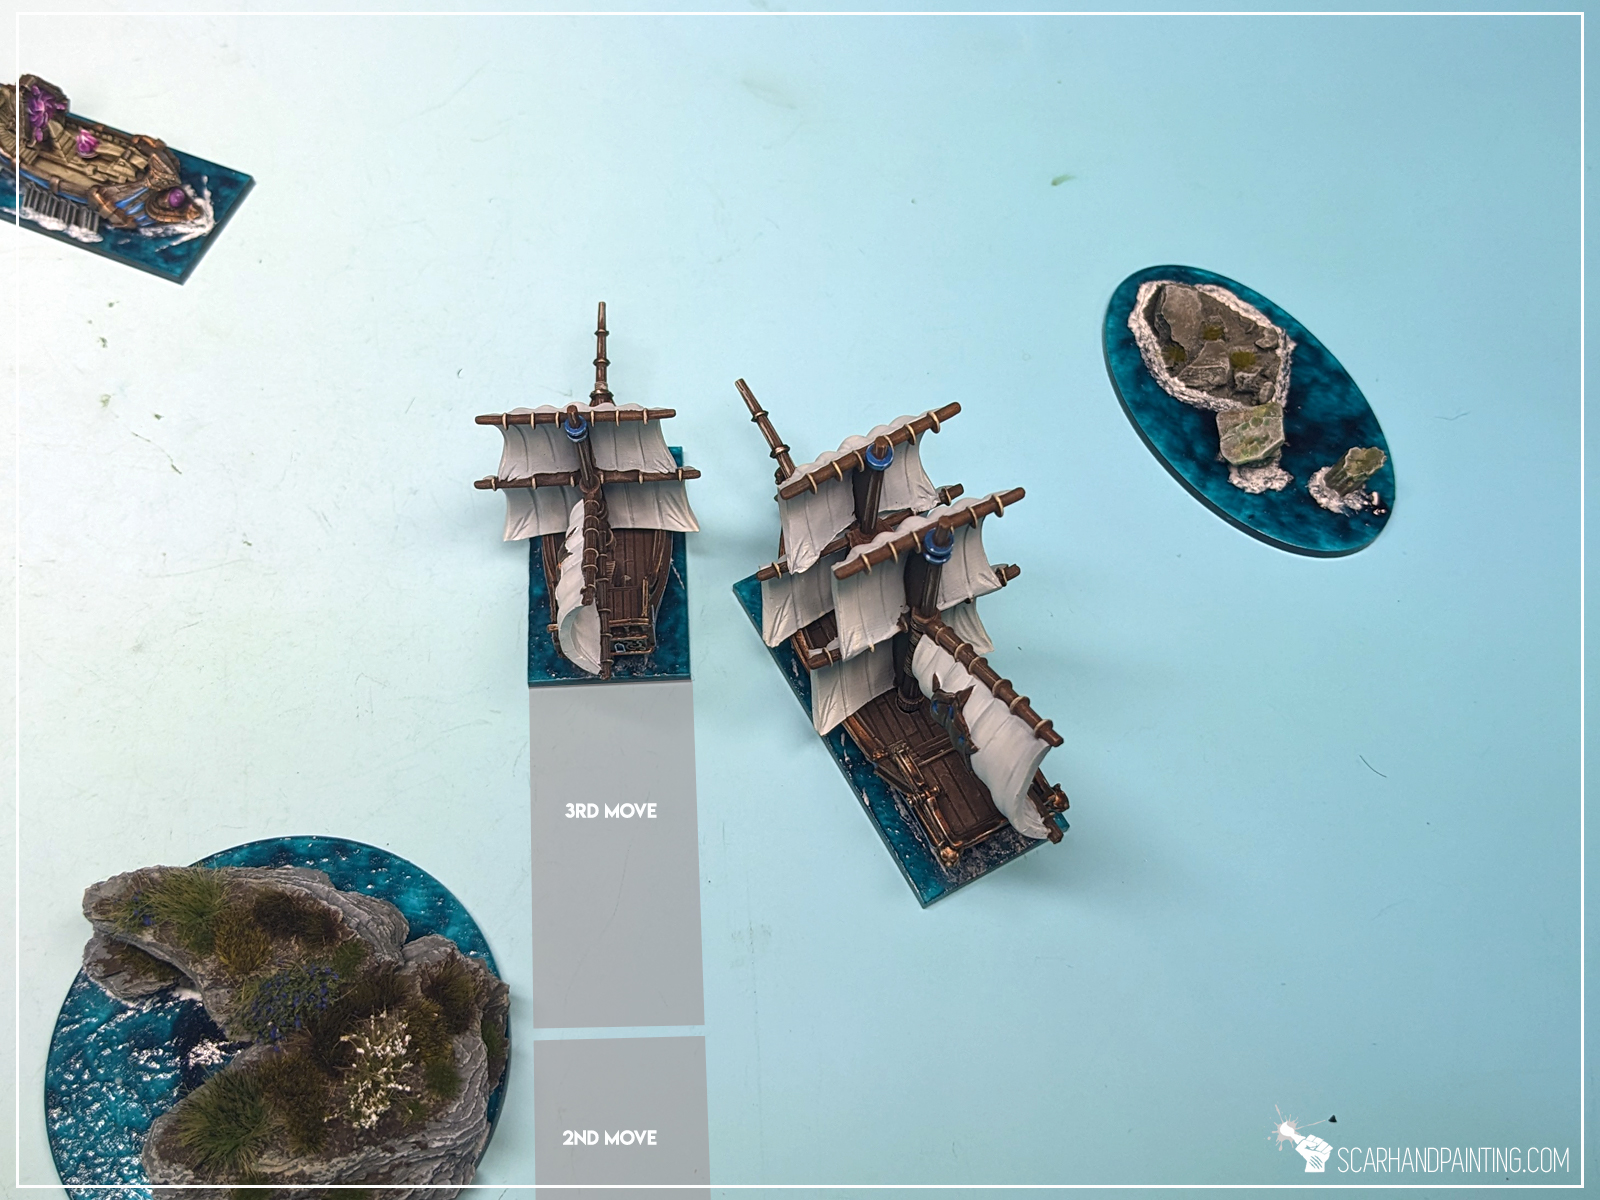
Example B: An enemy Abess (Main Battleship L) is positioned so that the Giant Squid (Main Battleship L) will inevitably end its first Move Step within the Basilean ship’s Broadside Arc and possibly trigger a Fire as She Bears salvo. The Wyrm-Drawn Sloop Squadron (Support Ship T) Activates next. To avoid the Basilean trap the Trident Realms player moves the Squadron 4,5″ in front of the Giant Squid. The Giant Squid Activates next and elects to Fully Submerge moving behind the Squadron and finishing Move Step outside of the Basilean Broadside Arc.
Even if the Basilean player decided to use Fire as She Bears against the Squadron, the Giant Squid would end up safe.

The Fully Submerge Slingshooting is free of any downsides other than planning ahead of time and setting up miniatures to be able to benefit from the extra movement. Depending on situation you can set up a fast smaller ship ahead of a heavier, much slower and much more melee capable fish, such as a Lieviathan, to close the distance in a single rapid hoop. What if it allowed the Larger ship to attempt a Grapple after an extended Battle Speed, when it would otherwise be unable to reach near the target? Or, when threatened with a Fire as She Bears, move chaff in the way to Slingshoot a more expensive ship beyond the enemy Broadside Arc. Sleazy fish tactics, or just naval superiority of the Trident Realms?
Spectral Form, the Ghost Fleets faction rule
“If a ship from this fleet Surrenders, is Grounded, or its SPs have been exceeded, remove the model from the table. Ghost ships do not suffer or inflict collisions with other ships. Instead, the activating ship completes its move as normal. If the activating ship would not end clear of the other ship, add enough movement until it does end clear, and then continue with the Activation. Each ship passed through (including the Ghost ship) will cause damage equal to a D10 plus its own CS to the other ship. e.g. An Elohi with CS 4 collides with a Spectre with CS 6. The Elohi inflicts 1D10 + 4 damage to the Spectre, and the Spectre inflicts 1D10 + 6 damage to the Elohi. Tiny ships take and inflict half damage (rounding up). Note that Ghost ships cannot deliberately ram/pass through an enemy ship. Ghost ships can never be set ablaze. Ghost Fleets always have Regular Crew, and this cannot be changed.“
The Ghost Fleet ships do not suffer Collisions with other ships, but pass through one another by adding movement necessary to do so. The procedure works as follows:
On most occasions this will happen naturally on a Ghost ship’s Activation – an Enemy ship is in the way, Ghost ship moves through, they both deal damage to one another, end of story. To avoid dealing devastating damage to the enemy fleet there’s a limiting factor in place in the form of “Note that Ghost ships cannot deliberately ram/pass through an enemy ship.”, similar to “Players must avoid deliberately ramming or colliding with other ships and terrain, unless a rule says otherwise.” from Collisions section in the Main Rulebook. Note the Spectral Form’s choice of words, that refers to “enemy” ships exclusively. This means that although passing through friendly ships will still cause damage to both ships, the Players are allowed to deliberately position their ships and move through friendlies.
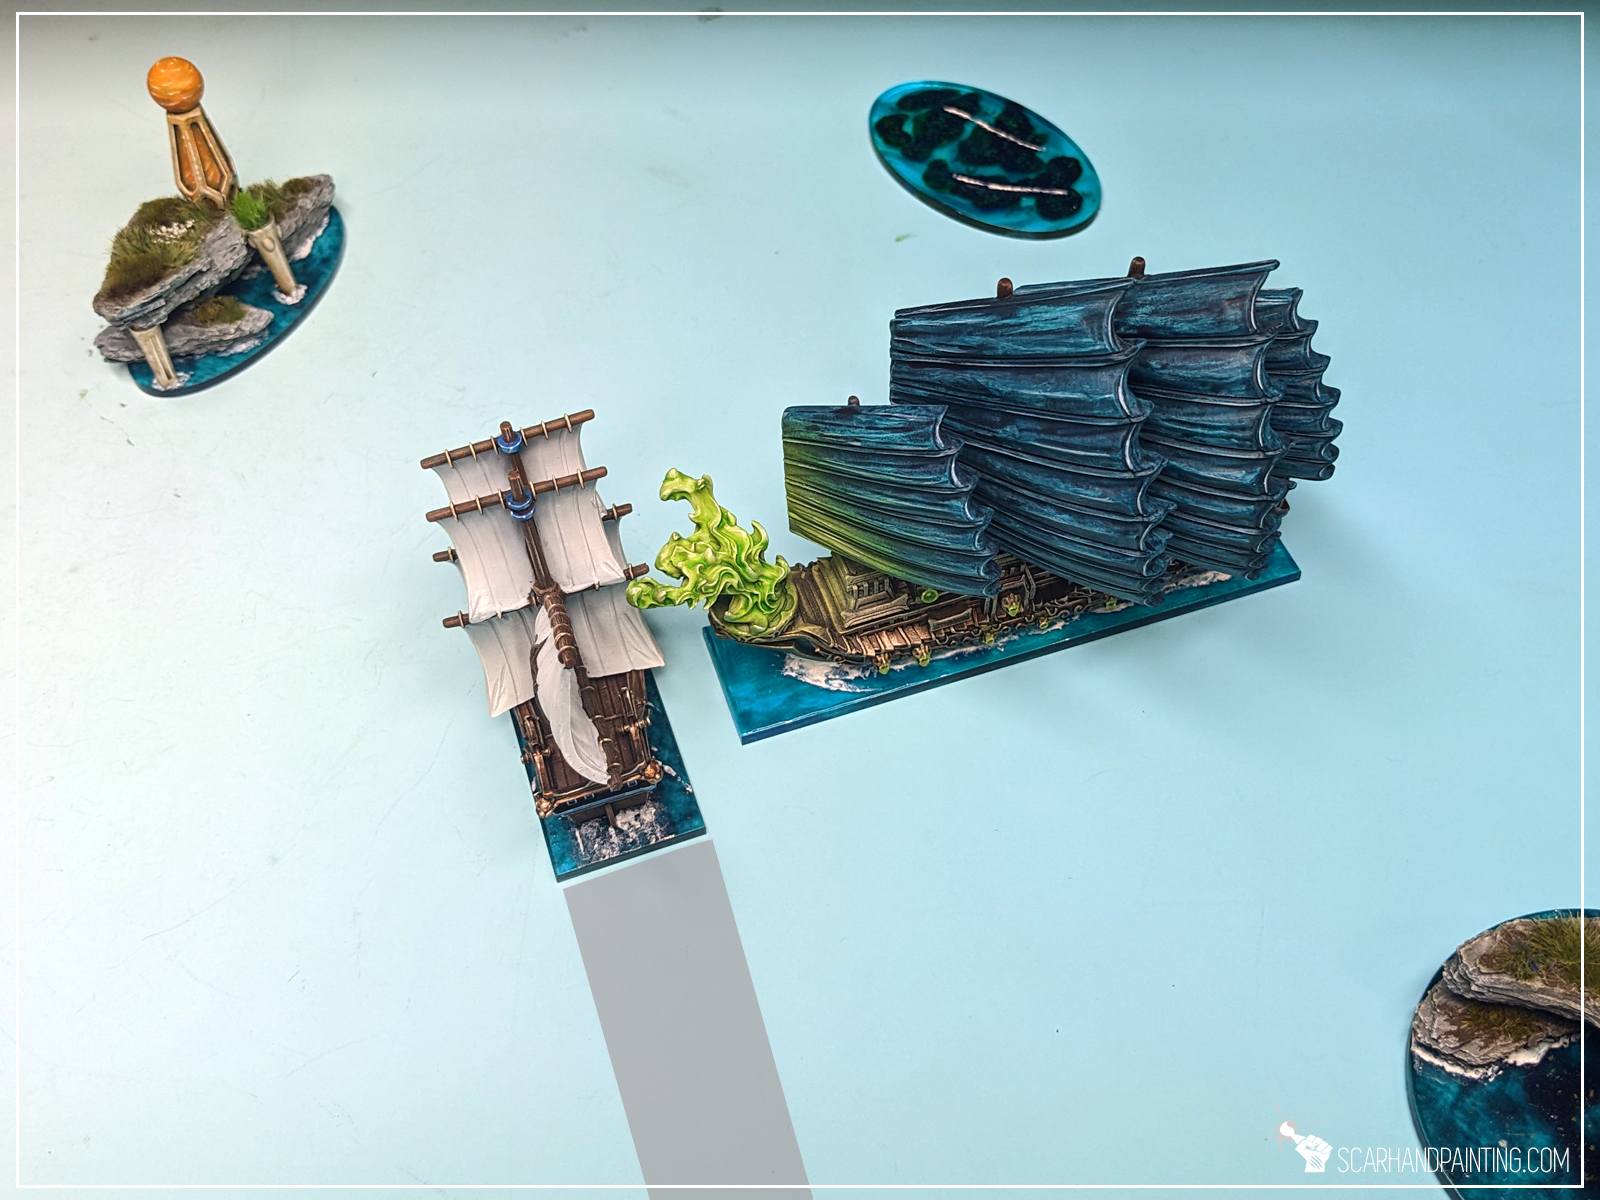
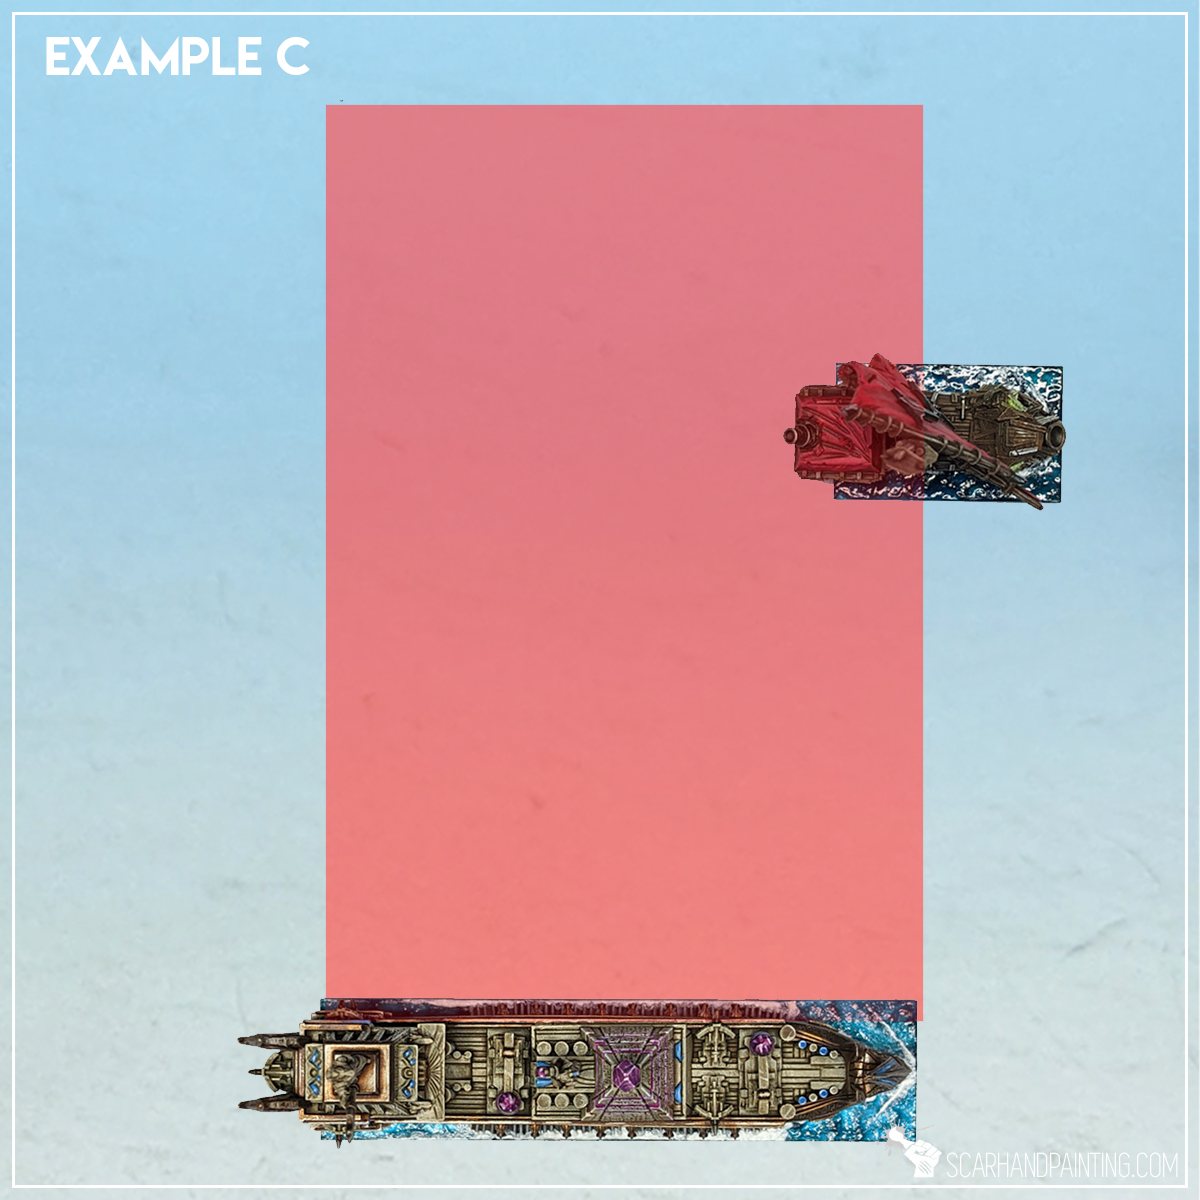
Example C: With its second Move Step a Phantom (Main Battleship M) sets itself up on a ‘collision*’ course with a Spectre (Main Battleship L) at a distance of 4,5″. On its next Move Step the Phantom will move 4,5″ and through the Spectre adding the length of both the Spectre’s and its own base to the movement, effectively doubling the movement in this Move Step. Both ships will deal damage to each other.
*Ghost Fleets ships are unaffected by Collision rules with other ships. I used ‘collision’ for a lack of a better term.
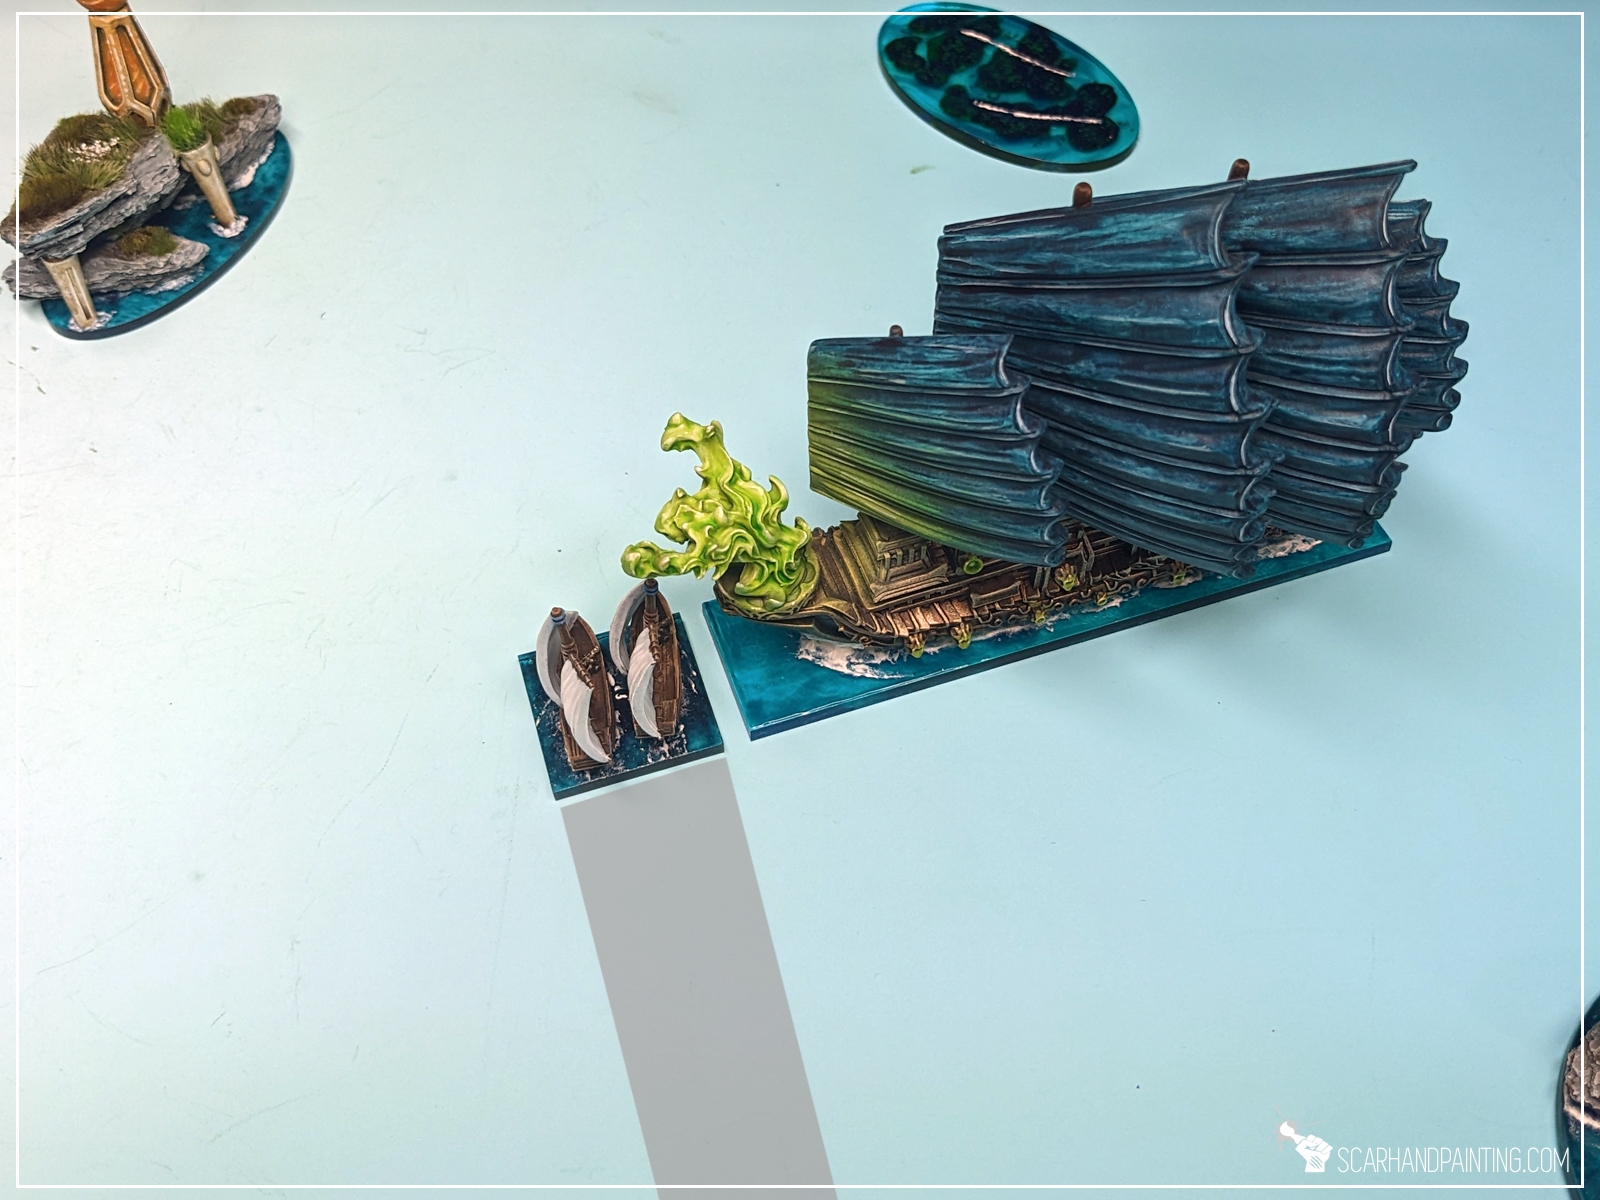
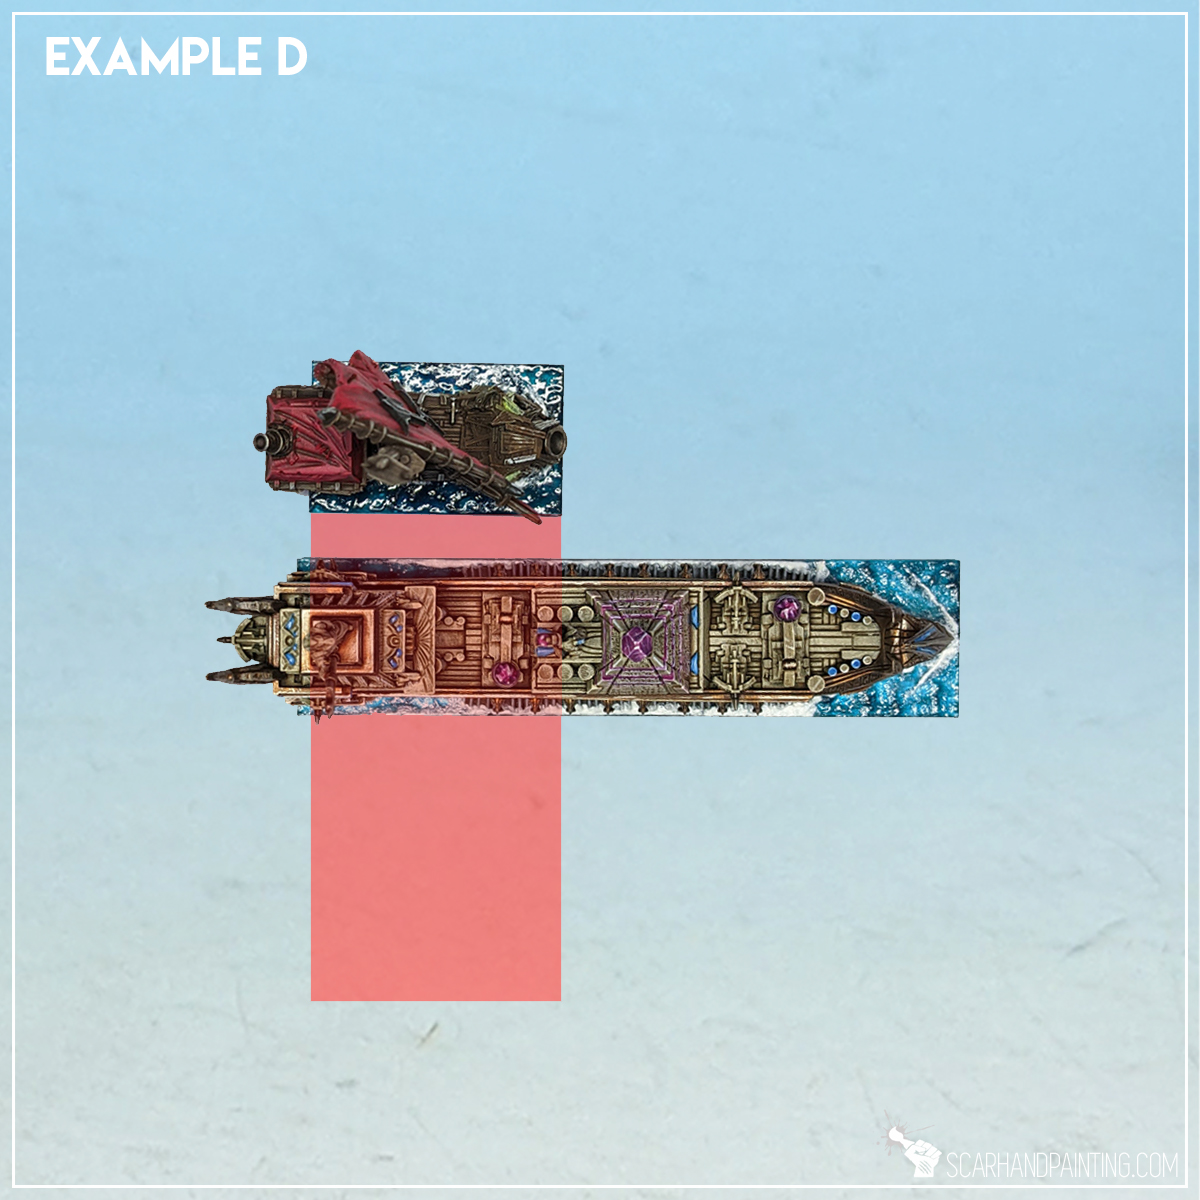
Example D: With its second Move Step a Spectre (Main Battleship L, base length about 4″) sets itself up on a ‘collision*’ course with a Shadow (Support Ship T) at a distance of 3,5″. On its next Move Step the Spectre will move 3,5″ and through the Shadow adding the length of both the Shadow’s and its own base to the movement – BUT – there is another Shadow in the way (further 3,5″ away) and then a Wight (Support ship S) another 3,5″ further. The Spectre would effectively multiply its movement exponentially, but will damage and in return be damaged by all three friendly ships.
*Ghost Fleets ships are unaffected by Collision rules with other ships. I used ‘collision’ for a lack of a better term.

Although much more risky than the Trident Realms Slingshooting, the Ghost Fleets mechanic has some niche uses. For starters let’s say that in the last turn of a seemingly lost game of ‘sink and survive’ type Scenario, the Ghost Fleets player may want to sacrifice some chaff (T ships are usually worth 0 VP when destroyed in such scenarios) to position the active Large / Extra Large ship in range of all weapons and try to sink a barely afloat enemy ship/s. Or in a ‘area control’ scenario friendly ships can be used as a springboard to Slingshot the active ship into the VP worth area on the board. Niche? Yes! But can it be meaningful? Definitely, to a point of winning the game with. Food for ghostly thoughts.

I hope you find this article interesting. Be sure to let me know your thoughts in the comments below or via Facebook or Instagram. I would also appreciate it if you considered sharing this content with your friends, who might find it useful. Finally if you are looking for a professional Warhammer miniatures painting service, be sure to contact me with this contact form. I always reply within 24 hours, after which please check out your spam folder.
Ahoy Sailors! As you know I am most and foremost a passionate hobbyist. That being said I am also a pirate, a scoundrel and a fanatical enthusiast of Mantic Games Kings of War: Armada – a naval strategy game set in a rich world of Pannithor, pitting multiple wonderfully crafted and strongly themed factions against one another. Today I’m here to share some of my maritime experience.
Brutal naval warfare of Armada is pure chaos. Ships colliding with one another is a common sight on the gaming board. Even though the rules forbid colliding on purpose* there are ways to exploit collisions for an advantage. This strategy is known as Collision Baiting and I will show you how to execute it, as well as what is and is not permitted by the rules.
*Unless special rules allow it like RAM (x) etc.
Avoid Collisions While Moving, Rulebook p.16
“If it is not the last Move Step in a ship’s activation, ensure its forward movement in the next Move Step will not result in a potential collision (with terrain or another ship). If this would result in a potential collision, alter the ship’s turn to avoid this as much as legally permitted.
Sometimes however, due to forward momentum, lack of turn angle, poor planning or just bad luck, collisions will be unavoidable (see page 20).“
Collisions Rulebook, p.20
“Players must avoid deliberately ramming or colliding with other ships and terrain, unless a rule says otherwise. Orcs for example, delight in the carnage caused by ramming their ships into the enemy!
However, on occasion, a newly Activated ship may have no option but to collide (perhaps due to poor planning!).
Only consider the bases of the ships (or terrain features) involved when checking for collisions.
If faced with more than one accidental collision target, the player using the Activating ship can choose which one to hit.”

Rules out of the way: During ship’s activation and when moving a ship, a player is not allowed to set a collision course for the NEXT MOVE STEP on purpose, unless there is no other choice or the ship has a special rule that would otherwise allow it. This does not affect the last Move step.
Some basic examples below.

The Gur Panther, moving at Battle Speed, just moved it’s first Move step. With a 30* turn the Gur Panther is capable, and so it must set a course to avoid a collision before it’s second Move.
The Gur Panther moving at Full Speed, that had just made it’s first Move. There is no immediate collision threat for the next Move, thus the Gur Panther does not have to turn and is allowed to maintain it’s course. It is legal to stay on course, even though, due to lack of other options, the ship will be forced to collide during third Move step.
After second Move the Gur Panther find’s itself in a position where it cannot avoid a collision. It is forced to stay on course and suffer the consequences.

The Monolith made a final Move of it’s activation. During final Move the ship is not forced to avoid potential collisions and can instead ‘prime itself’ for one. With favorable winds and failed Evasion tests the Monolith will crash into the Gur Panther on it’s next activation.
This example shows an “honest mistake” referred to by the rules. Let’s say the wind blew from the North. Gunbrig moved Full Speed to set itself between the Soulhunter and the Gur Panther. Being a small (priority) target makes it more difficult to hit by the Soul Hunter and with wind blowing from the North the plan is to activate right after and move out of the Gur Panther’s way. But oh no! The wind changes direction to North/East. This means the Gur Panther is to activate first and the Gunbrig is in it’s way. A potential collision is imminent.
We now know that under normal circumstances a ship is not allowed to deliberately move to collide during it’s activation. Still this leaves the doors open for a little exploitation. Players are allowed to set up their ships in the way of incoming enemy. This strategy is called Collision Baiting and apart from potential damage and negative mods dealt to enemy ship, it can also prematurely end it’s activation!
The basics is simple: End your ship’s Move upfront and close to enemy ship in a way that will force an Evasion test. If both ships fail their tests – CRASH!
This can be used to deal damage to enemy ships, but also disrupt (end) their next activation. More so, even a passed skill test to Evade will stack a negative -1 To-Hit mod on the enemy ship and can result in course alteration, forcing it to head out for another potential collision! Furthermore a ship cannot shoot throughout the Move step when it Evades.
Few examples below.
The Gur Panther finished it’s Move in front of Drake. Drake activates next and is forced to Evade and risk a collision. The Drake will suffer a -1 To-Hit for all it’s shooting and potentially suffer damage wasting it’s entire activation.
A Sloop Squadron finished it’s Move in front of Drake. Drake activates next and because Sloop Squadron is a Squadron, the Drake can elect to auto fail it’s Evasion test. If the Sloop Squadron fails as well, the resulting collision will not end Drake’s activation, but will still deal some damage and a -1 To-Hit mod.
Collisions with Squadrons do not force enemy ships to alter course, deal only half the damage and do not end ship’s activation. Still the -1 To-Hit mod can make a difference and the enemy ship will not be able to shoot during this Move step.
The Gur Panther decides to implement some nasty tactics. It ends it’s final Move step in front of Drake and in a way that will force the Extra Large ship to Evade. If any of the two succeeds Evasion Skill Test, the Drake will turn the minimum distance to clear the Panther – and as a result head straight for the Rocks. Rocks cannot be Evaded and apart from dealing damage and ending Drakes Activation, they will also ground the ship for good. Just brutal!
Now you know the variety of Collision Baiting tricks. Set sail and make enemy ships suffer. Just make sure not to set up in front of enemy ships with RAM (x), as the result might surprise you… in a bad way.
I hope you find this article interesting. Be sure to let me know your thoughts in the comments below or via Facebook or Instagram. I would also appreciate if you considered sharing this content with your friends, who might find it useful. Finally if you are looking for a professional Warhammer miniatures painting service, be sure to contact me with this contact form. I always reply within 24 hours, after which please check out your spam folder.
Ahoy Sailors! As you know I am most and foremost a passionate hobbyist. That being said I am also a pirate, a scoundrel and a fanatical enthusiast of Mantic Games Kings of War: Armada – a naval strategy game set in a rich world of Pannithor, pitting multiple wonderfully crafted and strongly themed factions against one another. Today I’m here to share some of my maritime experience.

Visibility rules in Armada are pretty straightforward, still every now and then I meet new players that get confused. In this article I would like to provide a little breakdown with solid examples. Hopefully this will help everyone to understand how Visibility and Partial Visibility works in Armada.
Visibility, Rulebook p.23
“A target must be at least Partially Visible in order to fire upon it.
Taking a bird’s eye view, if no line can be drawn in the Fire Arc from anywhere on the base of the shooting ship to any part of the target’s base without crossing another ship, model or terrain feature, then visibility to the target is Blocked and the ship may not shoot it.
When shooting, if either or both the following conditions are true, the target is Partially Visible to the weapons firing from a position/Fire Arc. The target may be fired upon, but it will be more difficult.
When checking Partial Visibility in other situations (e.g. Nerve Tests, see page 29), only consider the first condition above.
In all other cases, there is Full Visibility to the target.”


Right off the batt the Visibility rules focus on Partial Visibility and when it occurs, rather than the other way around. Allow me to provide a different approach to explain the rules.
If you CAN’T draw an unobscured line from any point of your ships base to any point of enemy ships base there is NO visibility.
If you CAN draw an unobscured line from any point of your ships base to any point of enemy ships base there is PARTIAL visibility.
Furthermore, if you CAN draw an unobscured line from any point of your ships base to MORE THAN HALF enemy ships base AND MORE THAN HALF enemy ships base is WITHIN your ships Fire Arc, there is FULL visibility.
In short: In order to achieve Full Visibility you have to be able to ‘see’ more than half enemy ships base and more than half of enemy ships base must be within Fire Arc of your ship. For anything else than Shooting you only need to ‘see’ more than half enemy ships base to achieve Full Visibility.
Take note that in order to shoot at an enemy ship, it must first be within the Weapon Position’s Fire Arc at least partially.
Now’s time for some in-game examples.
Example A: Monolith vs Boomboat
One condition met.
Result: Partial Visibility.
Example B: Monolith vs Boomboat
Both conditions met.
Result: Full Visibility.

Example C: Monolith vs Boomboat
One condition met.
Result: Partial Visibility.
Example D: Boomboat vs Monolith
One condition met.
Partial Visibility.
Example D might seem a bit counterintuitive. Both ships are broadside to broadside and it might feel odd for the Boomboat to be shooting at a -1 To-Hit, but this is how the rules work. In the other hand this approach simplifies things for general gameplay and works well within the core game mechanics.
I hope you find this article interesting. Be sure to let me know your thoughts in the comments below or via Facebook or Instagram. I would also appreciate if you considered sharing this content with your friends, who might find it useful. Finally if you are looking for a professional Warhammer miniatures painting service, be sure to contact me with this contact form. I always reply within 24 hours, after which please check out your spam folder.

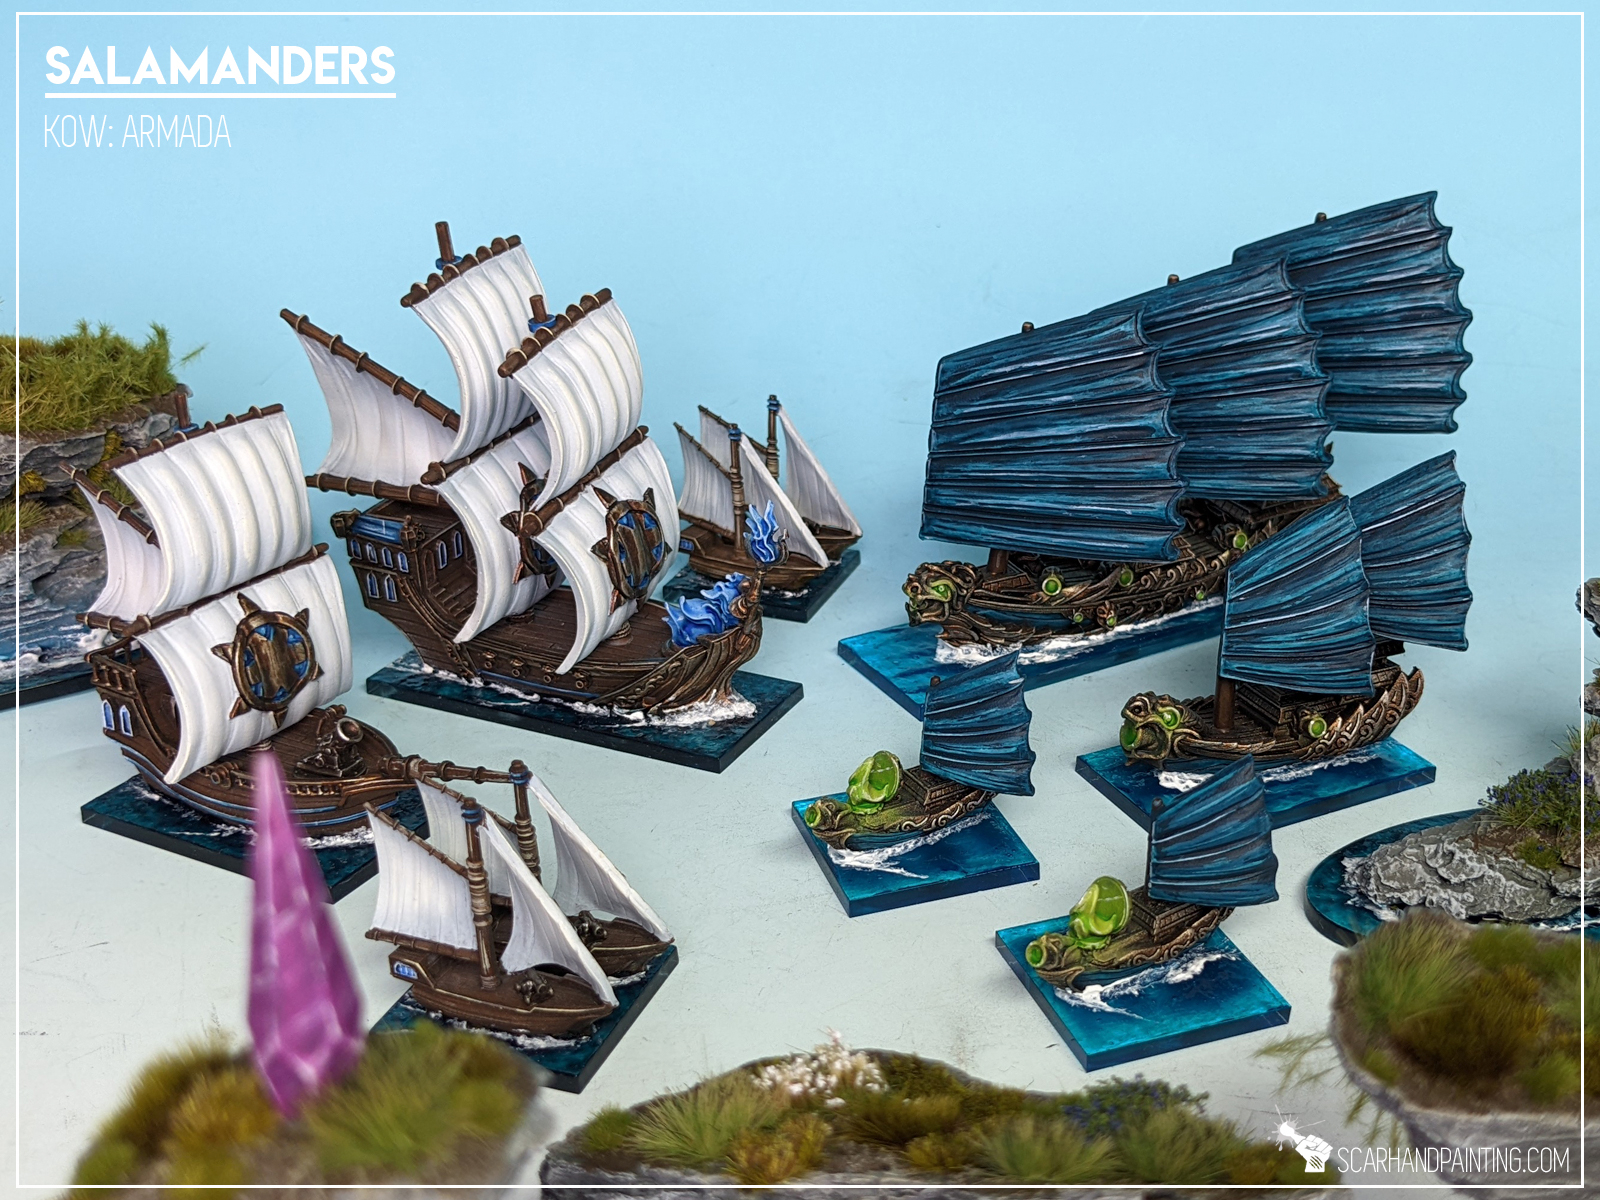
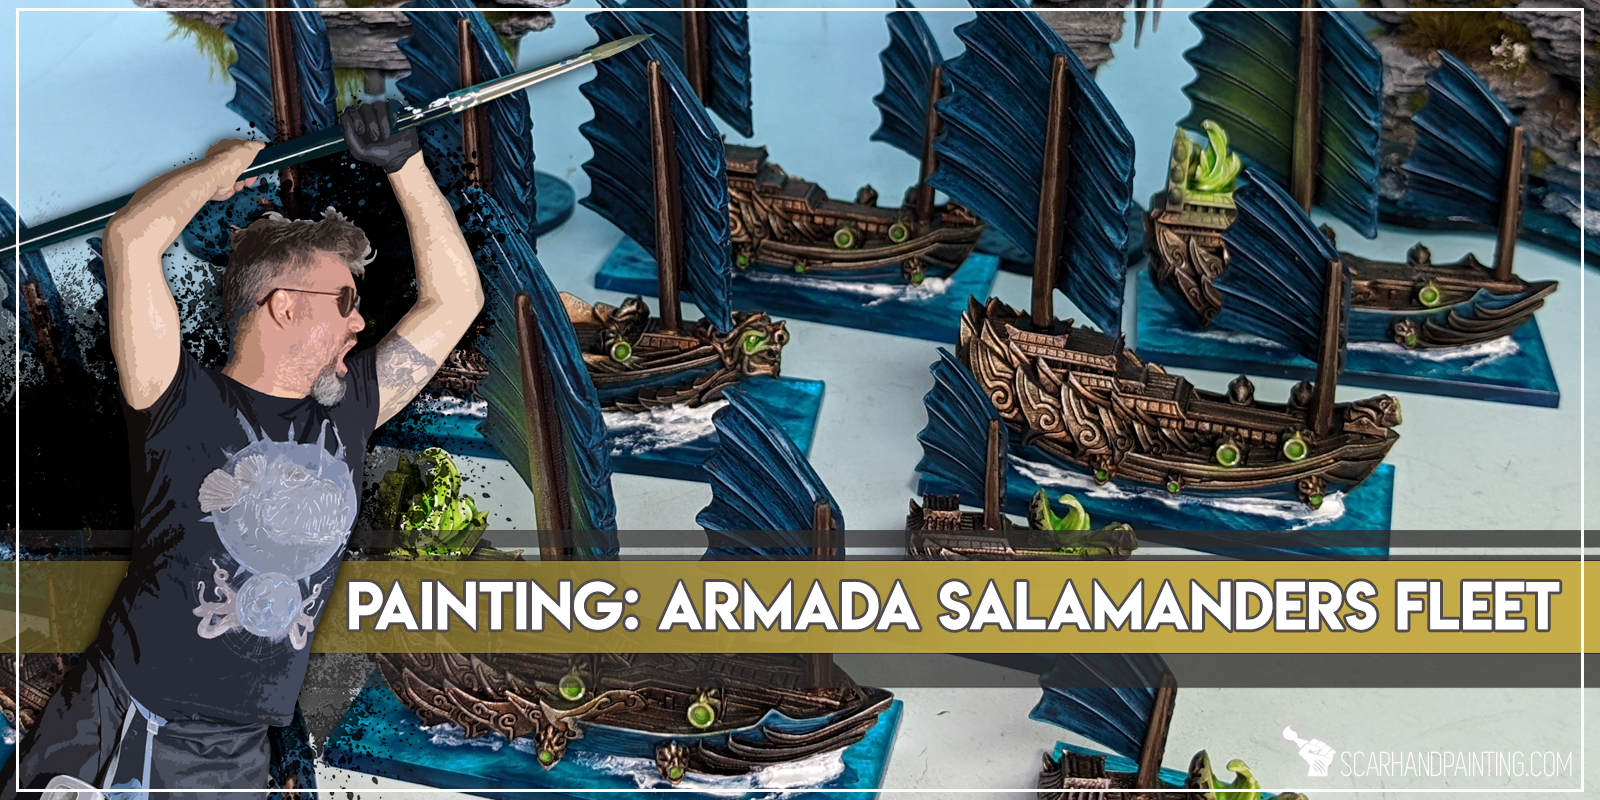
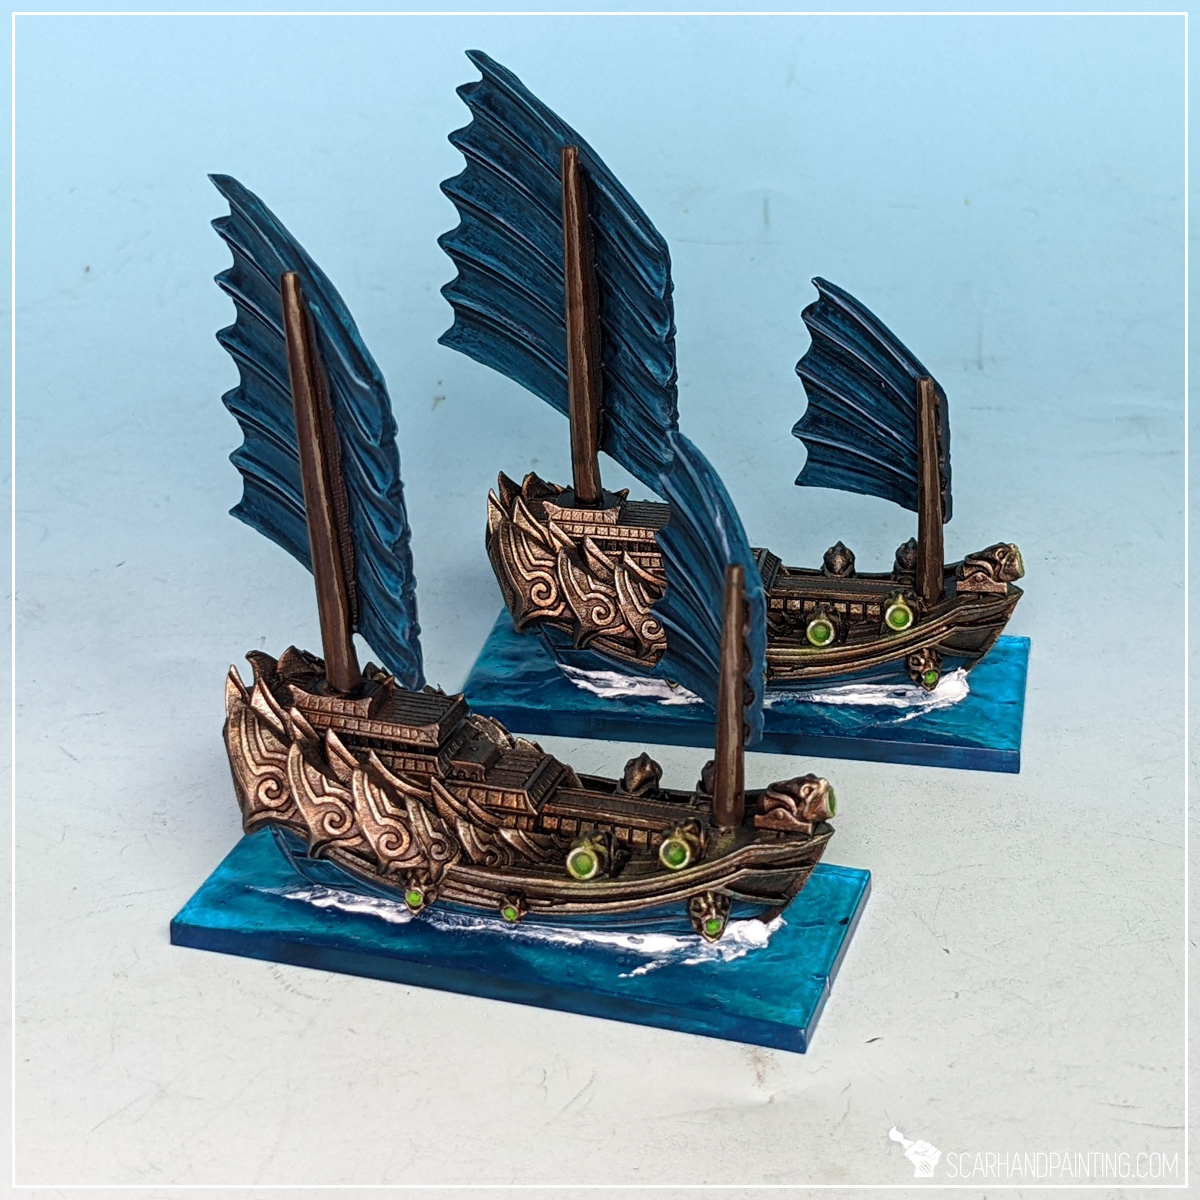
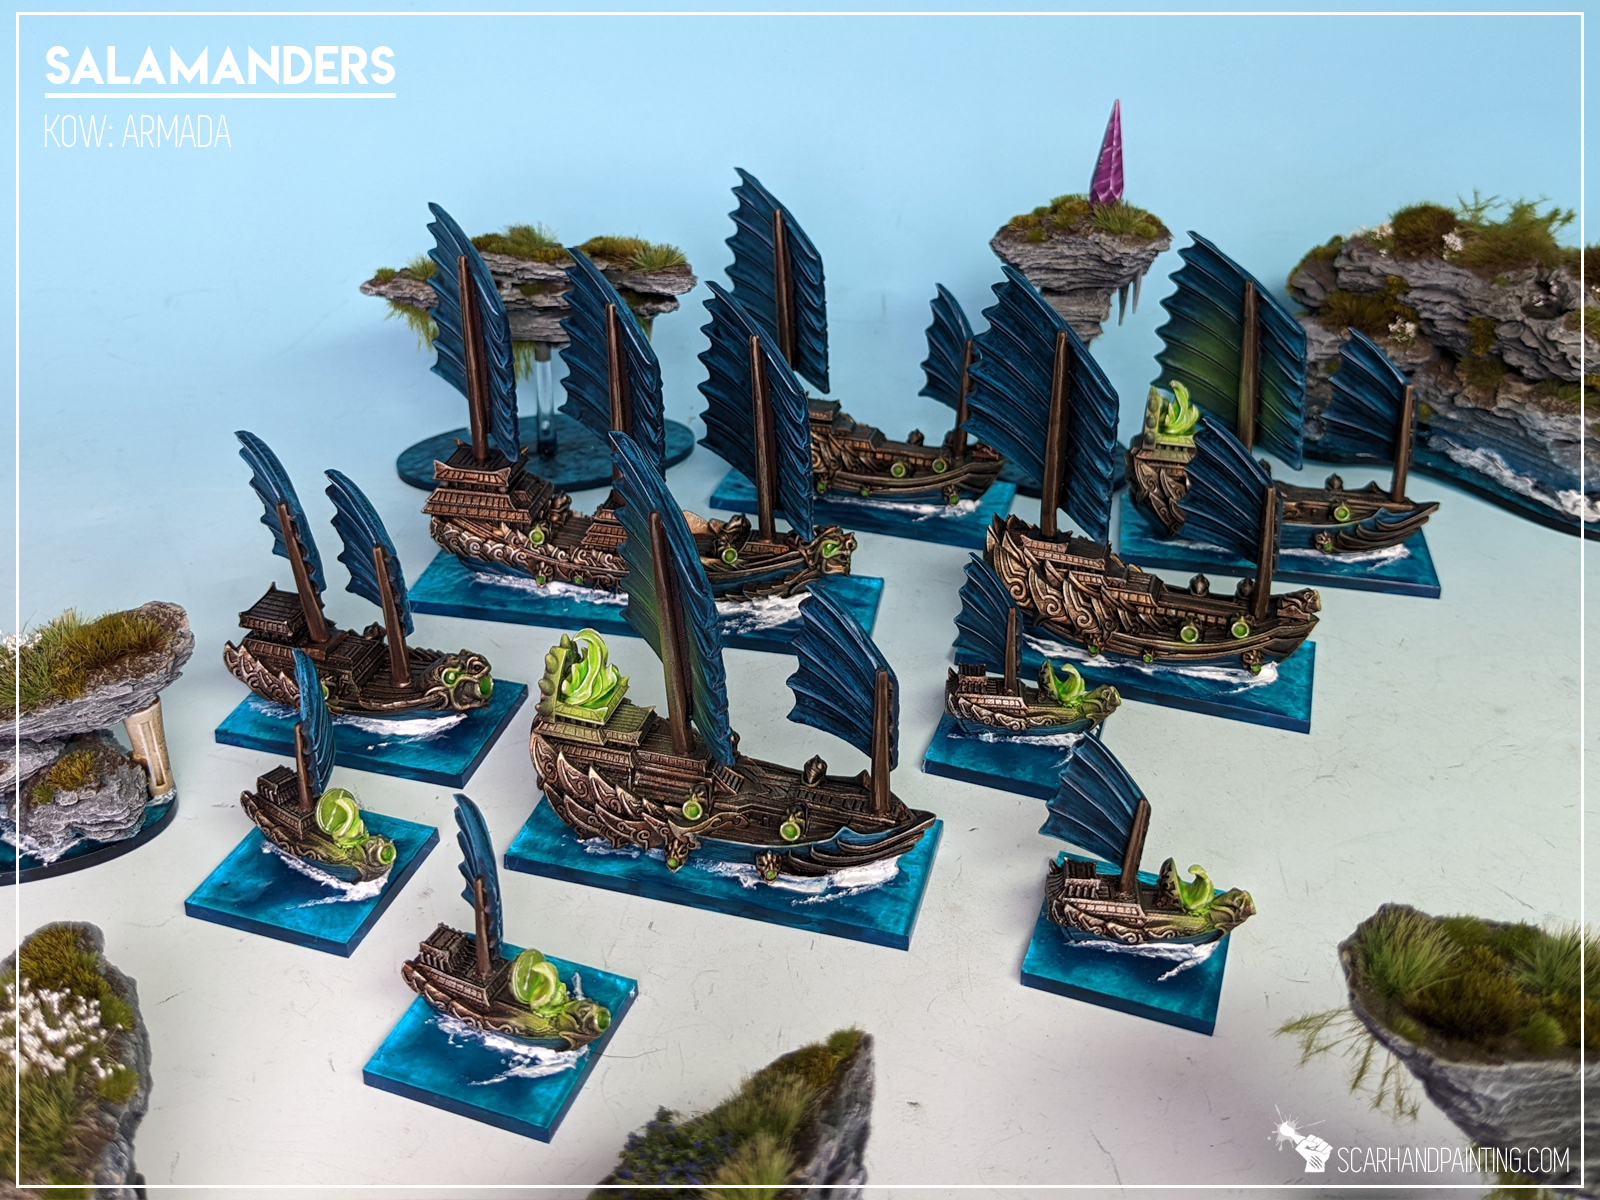
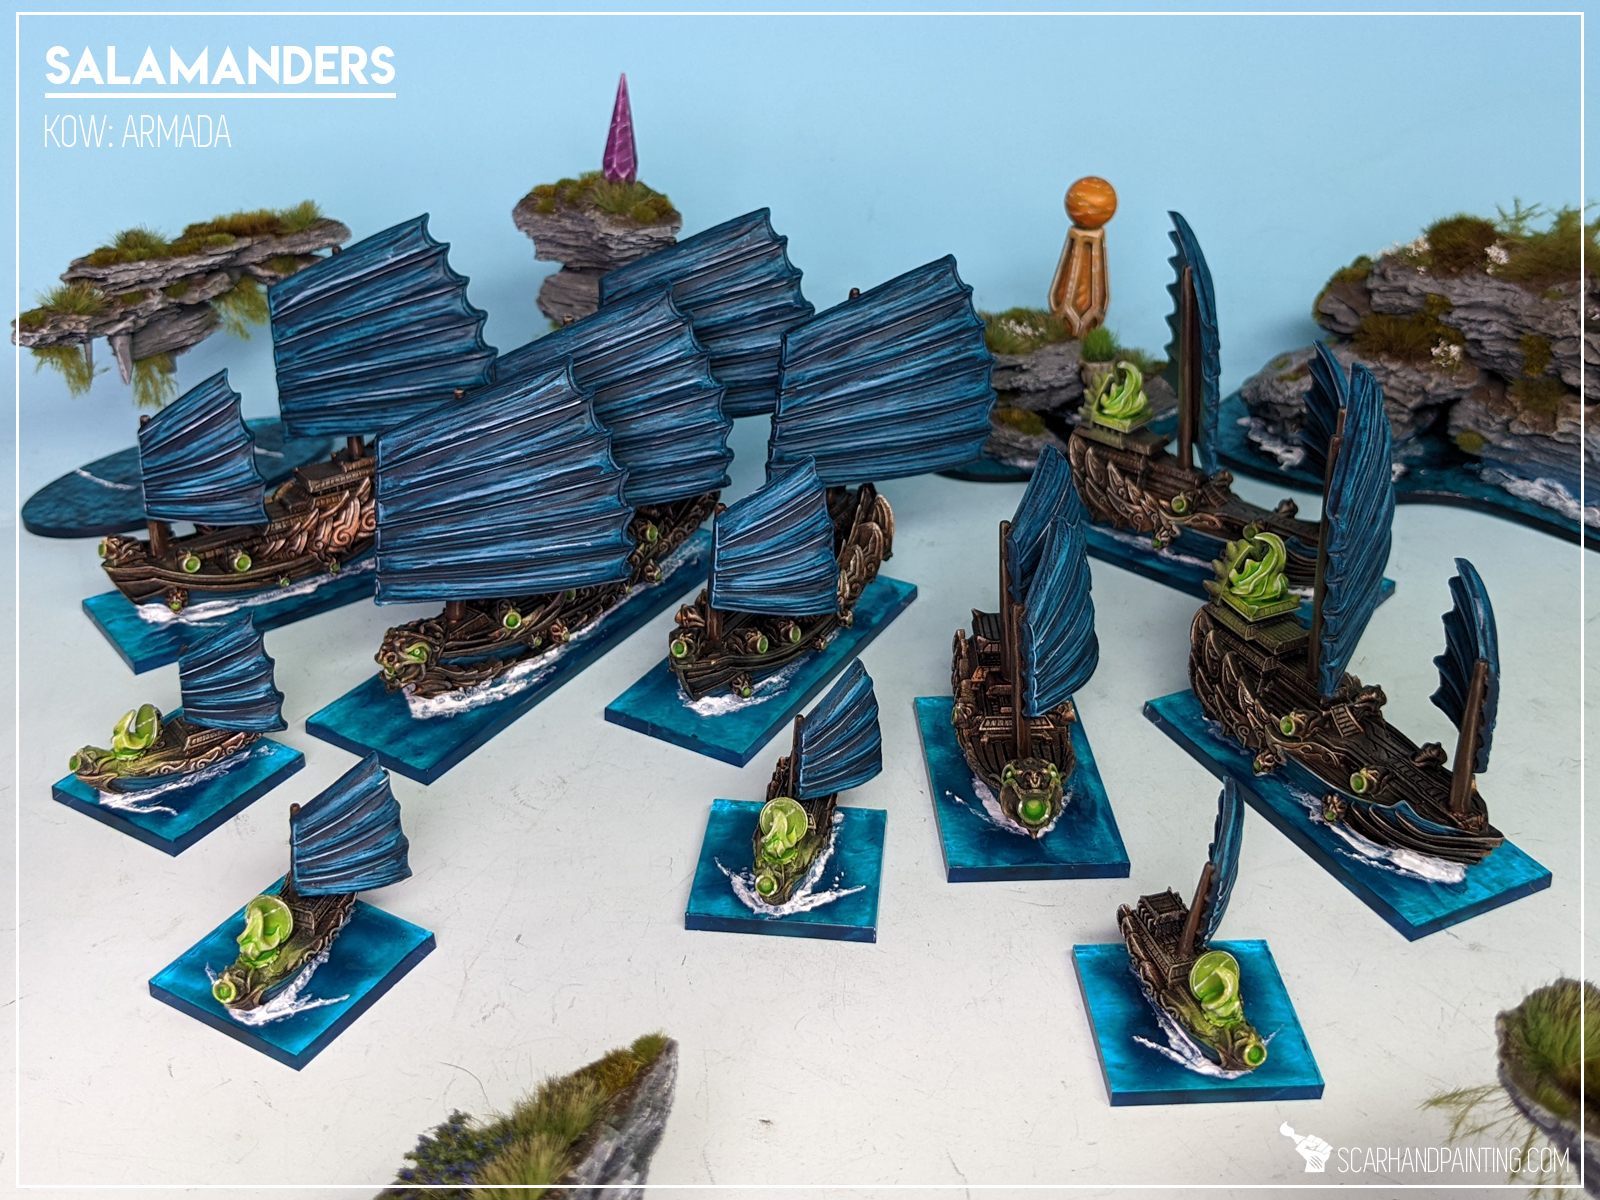
Kings of War: Armada is a fantastic game, full of beautifully crafted miniatures. Still some wargaming veterans might feel intimidated by the unusual scale and plentiful detail of Armada ships. Today I will present to you how easy it is to paint Armada Salamanders ships as can be seen in Gallery: Armada Salamanders. All techniques presented in step-by-step tutorial can be applied to different colors to produce a variety of awesome color schemes for your fleet.
Before we start, some notes:


Step one: Undercoat
I started with a thorough layer of Games Workshop Chaos Black spray. Chaos Black spray is my go to choice when it comes to undercoat, leaving a solid, durable layer with detail intact. Some might consider adding a zenithal preshade on top, but the techniques used in this tutorial would render such practice irrelevant.

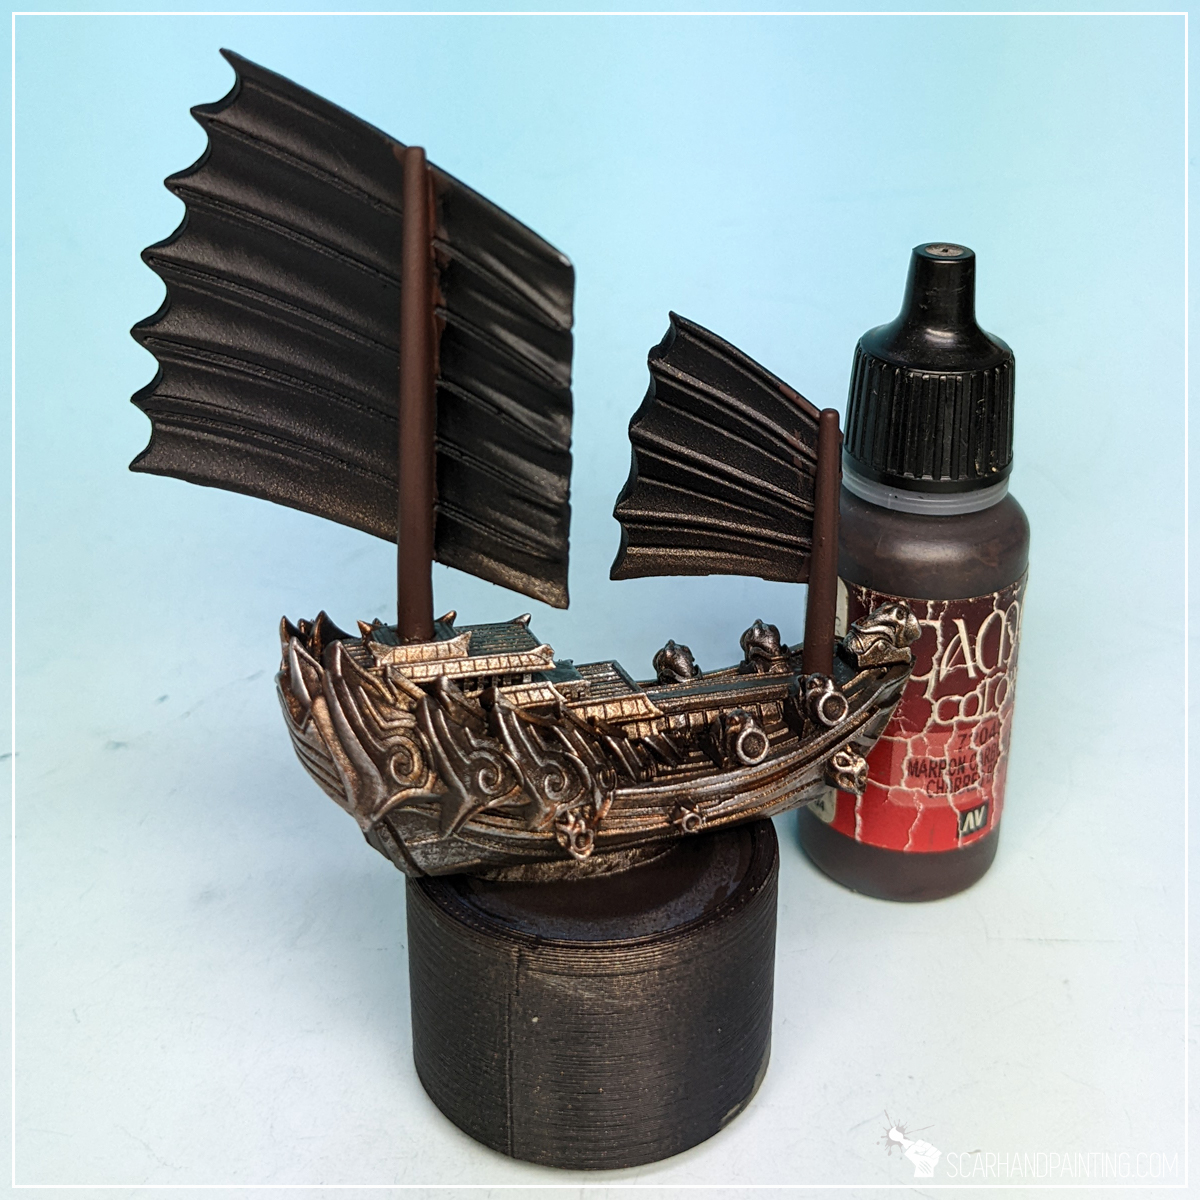
Step two: Hull base
Hull, being the largest and most detailed part of the ship, was my choice of where to start the actual paintjob. I applied a solid layer of thinned Games Workshop Warplock Bronze all over the miniature, except for sails. I used an airbrush, but this can easily be done manually.
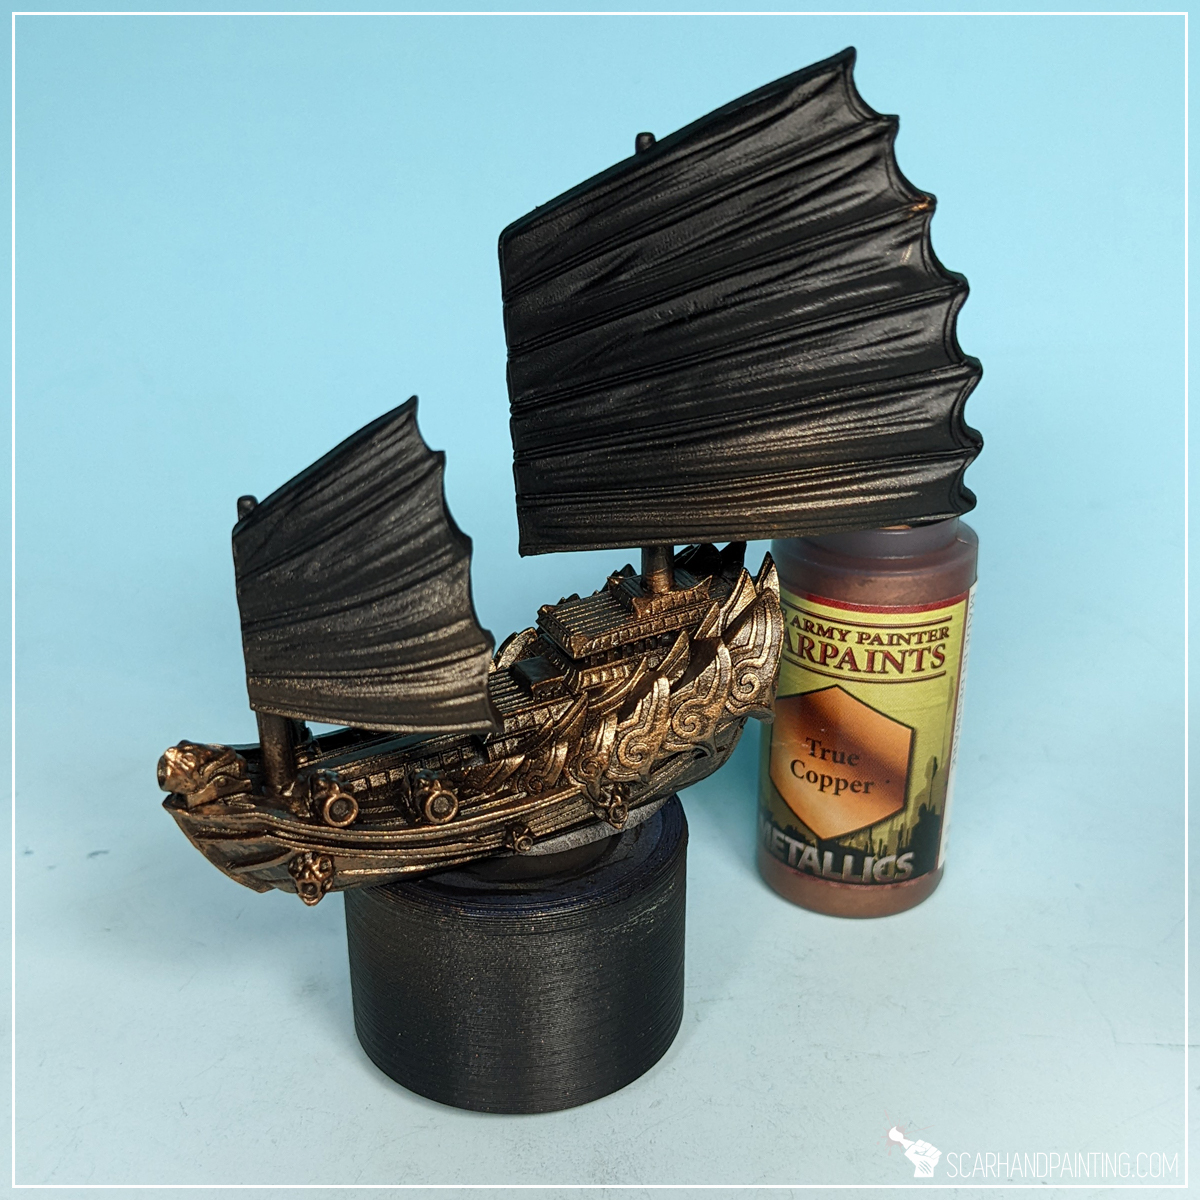
Step three: Hull highlight
Next, using a medium size, soft brush I applied a highlight of Army Painter True Copper. Flatbrush was my technique of choice for this one, as it applied a solid layer of paint sparing most recesses, thus leaving some of the previous layer still visible.
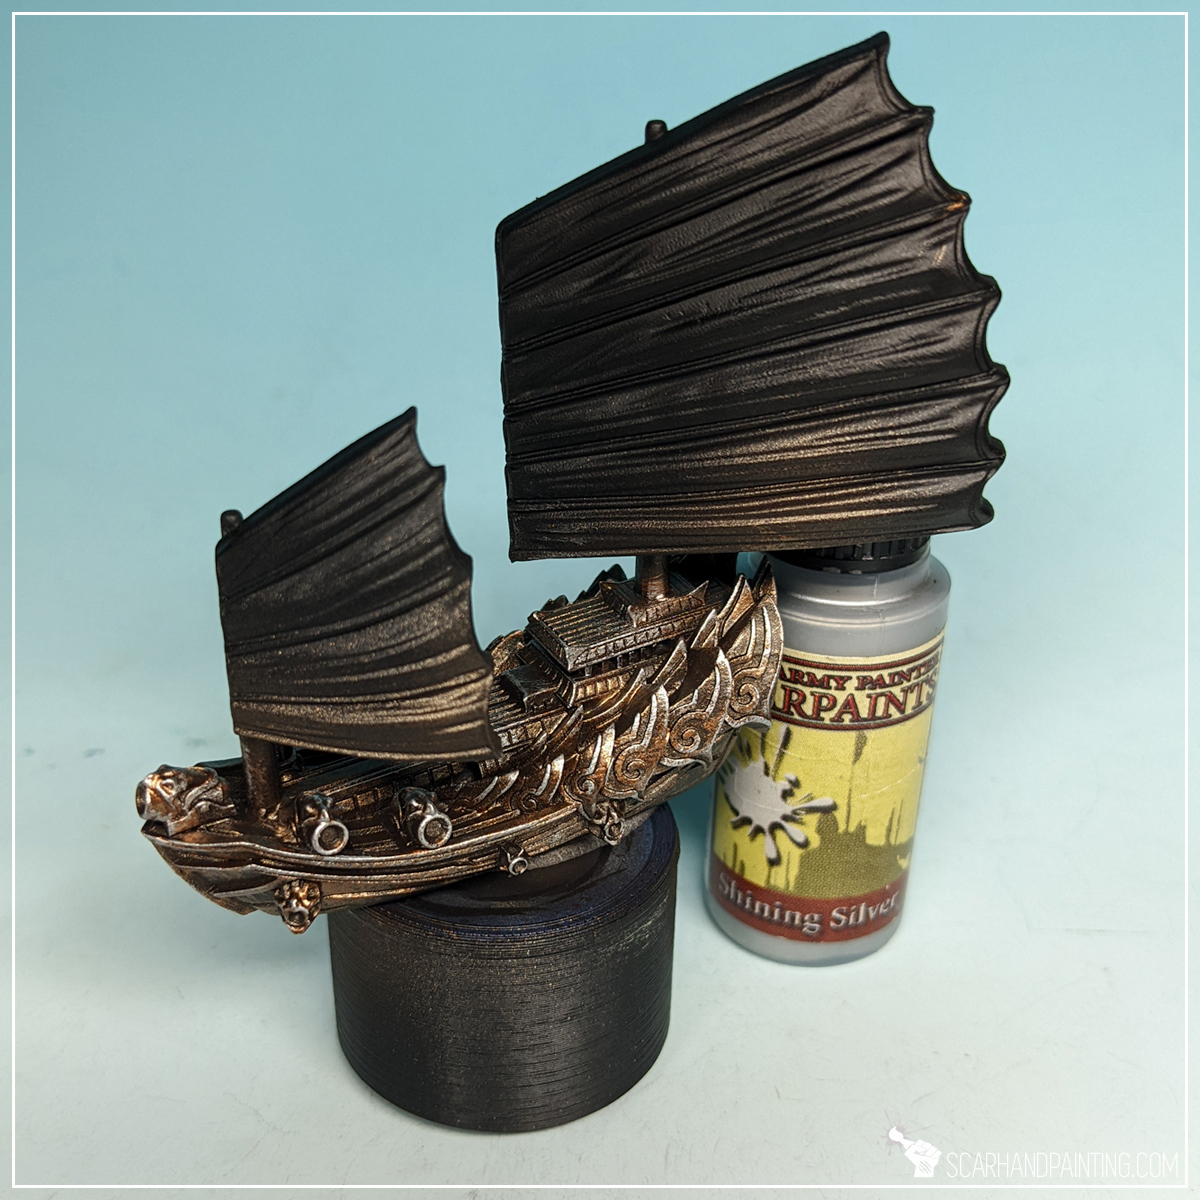
Step four: Hull final highlight
I then applied an edge highlight of Army Painter Shining Silver to make all the detail pop and provide a bit more contrast between recesses and exposed edges.
Step five: Masts base
I left the Hull for a bit and moved on to masts, applying a thick layer of Vallejo 72.045 Charred Brown. Once again I would like to point out that the colors I used are my personal preference and you can use any brand, or even any similar color, to achieve similar results.
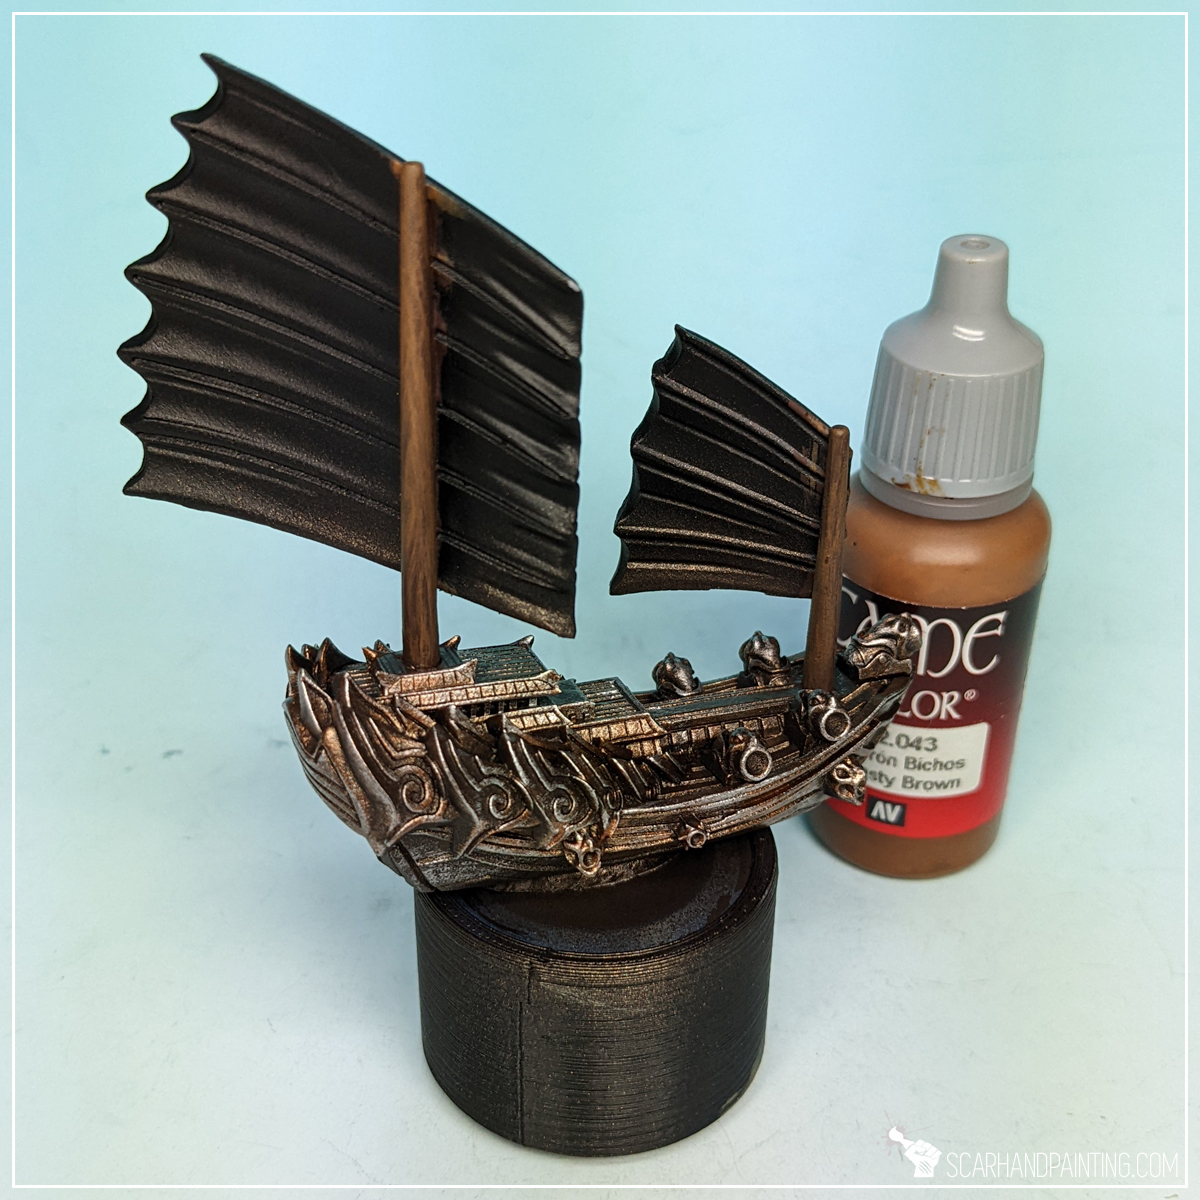
Step six: Masts highlight
Another step was to apply a slightly blurry highlight of Vallejo 42.043 Beasty Brown. By blurry I mean a thinned down paint applied with a relatively large, soft brush. You can see in the picture how this layer seem a bit misty, partially translucent and not as strong as usual base application. This can be achieved by keeping a brush barely loaded with thinned down paint and sliding its edge up and down the surface. If I ever decide to have a Patreon this technique will probably be the first thing I would like to do a deep dive into, but for now my chaotic description must do.
Step seven: Masts edge highlight
Due to masts shape they do not have edges on their sides, but they still can be imitated with standard edge highlight of Games Workshop Karak Stone. If you struggle with edge highlights check out this in-depth article from 2018, where I describe the process and share some related life hacks.

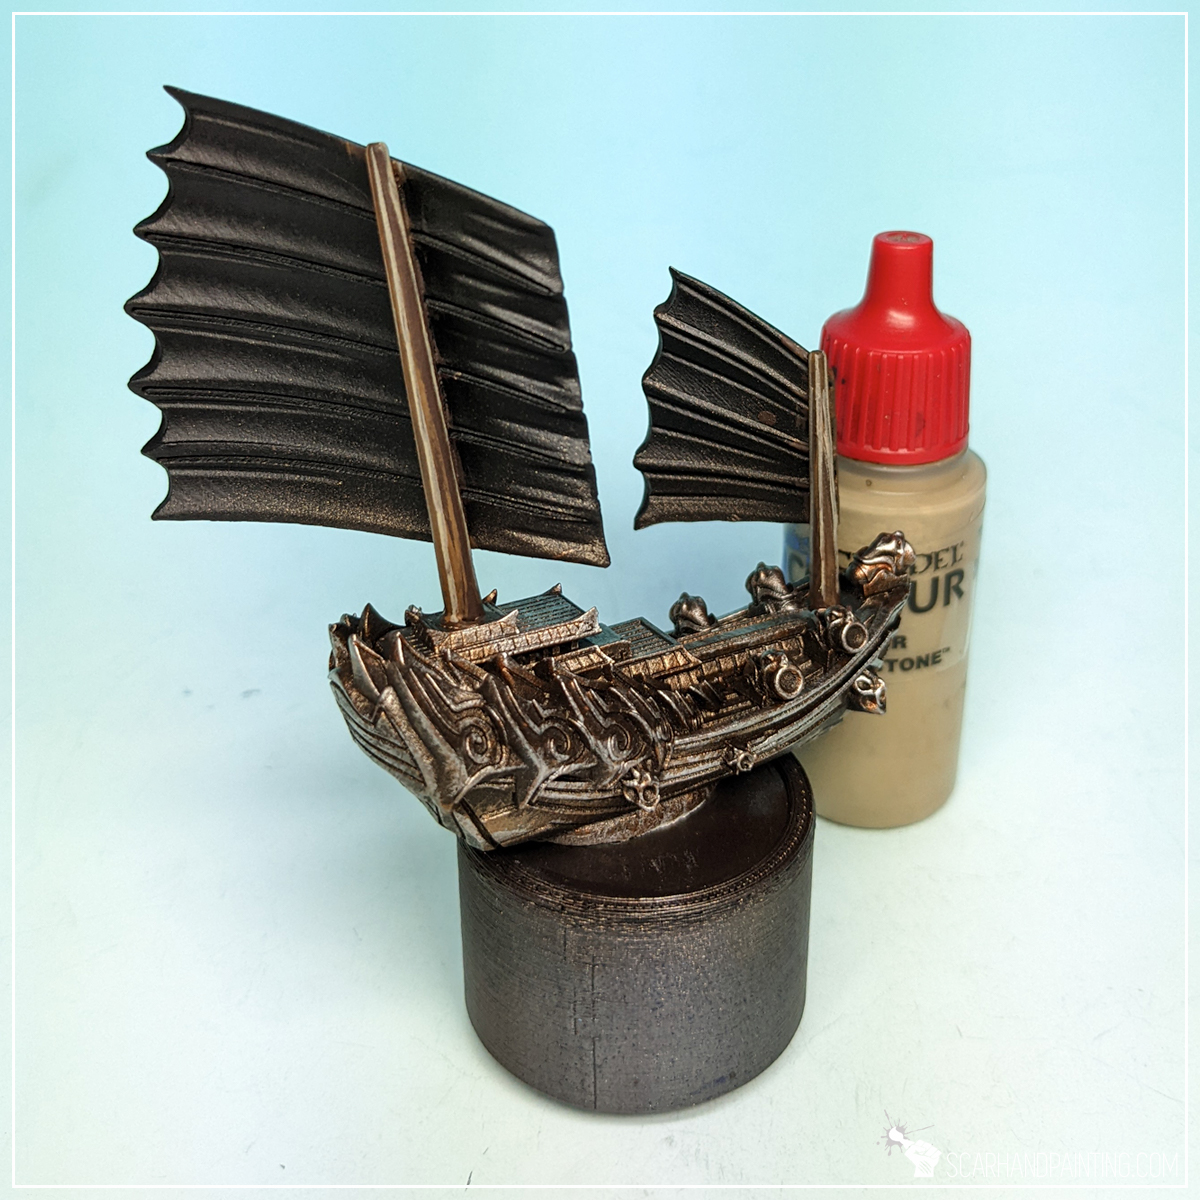
Step eight: Wash
Here’s where real magic happens. I applied a strong layer of Army Painter Strong Tone wash over the miniature. This is probably the most important moment of the entire paint job. Wash applied en-masse blends all the colors beneath, toning them down a bit, adding coherency and that extra juicy look. One thing to look out for is large drops of wash forming on flat areas and lower parts of the miniature, then leaving stains of very dark paint while drying. This can be avoided by removing the excess of paint with a soft wet brush few minutes after application.

Step nine: Sails base
Once wash dried out nicely I moved to Sails and lower hulls. I applied a thick layer of P3 Coal Black, which is something between dark turquoise mixed with dark grey.

Step ten: Sails highlight
Next I applied a flatbrush highlight of slightly thinned Vallejo 309 Periscopes. This exposed most texture of the sails why also providing a more juicy color overall.
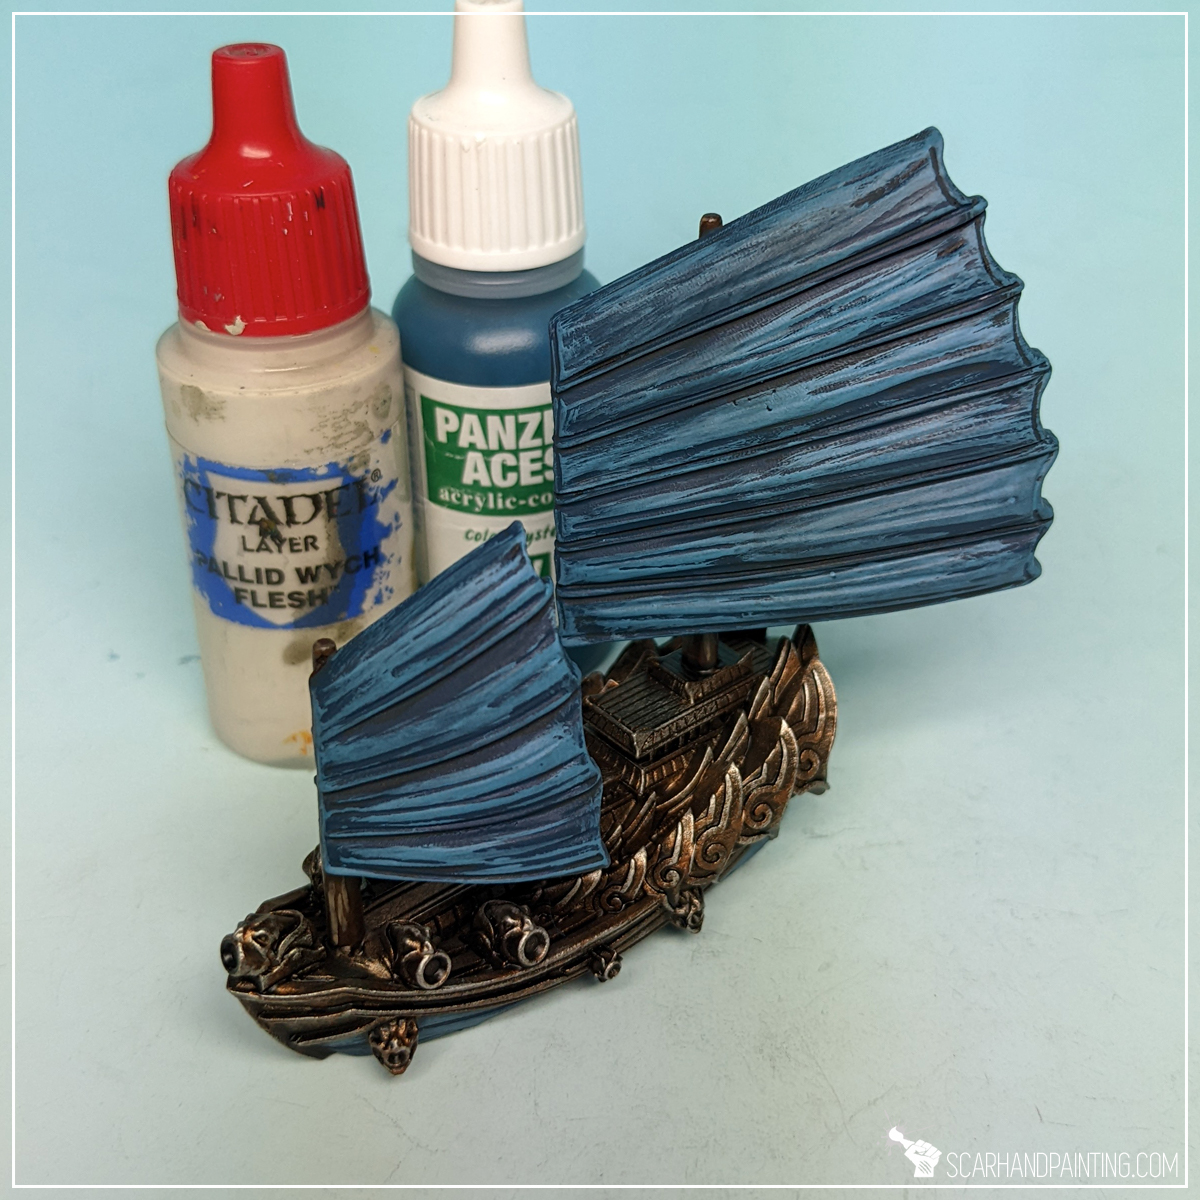
Step eleven: Sails highlight
Another highlight was applied with a 1:1 mix of Games Workshop Pallid Wych Flesh and Vallejo 309 Periscopes. A much more visible highlight to build volume.
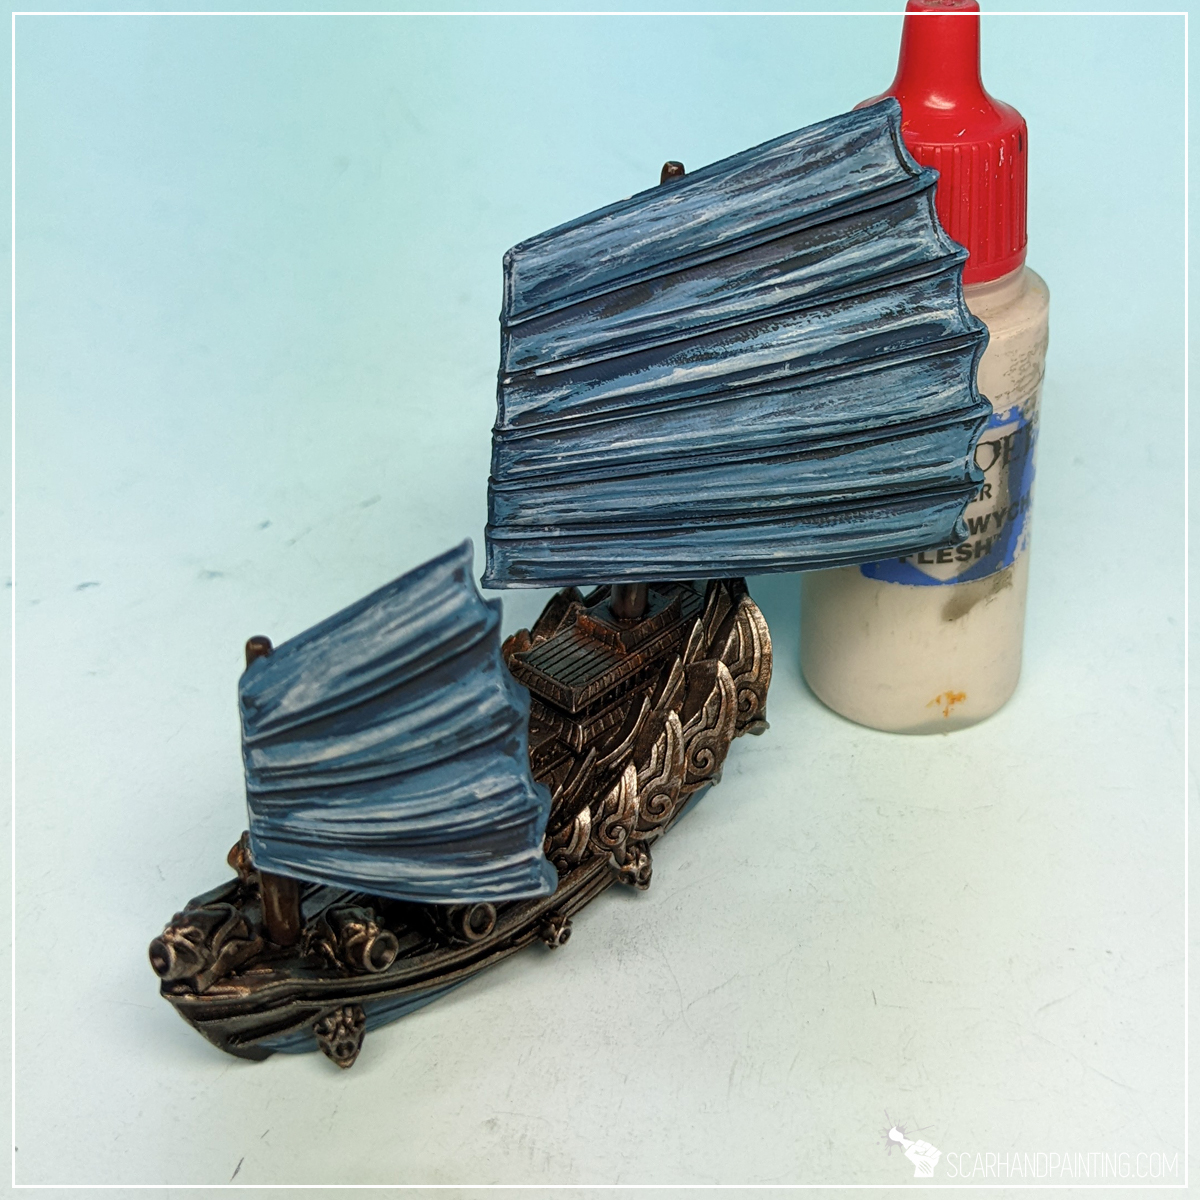
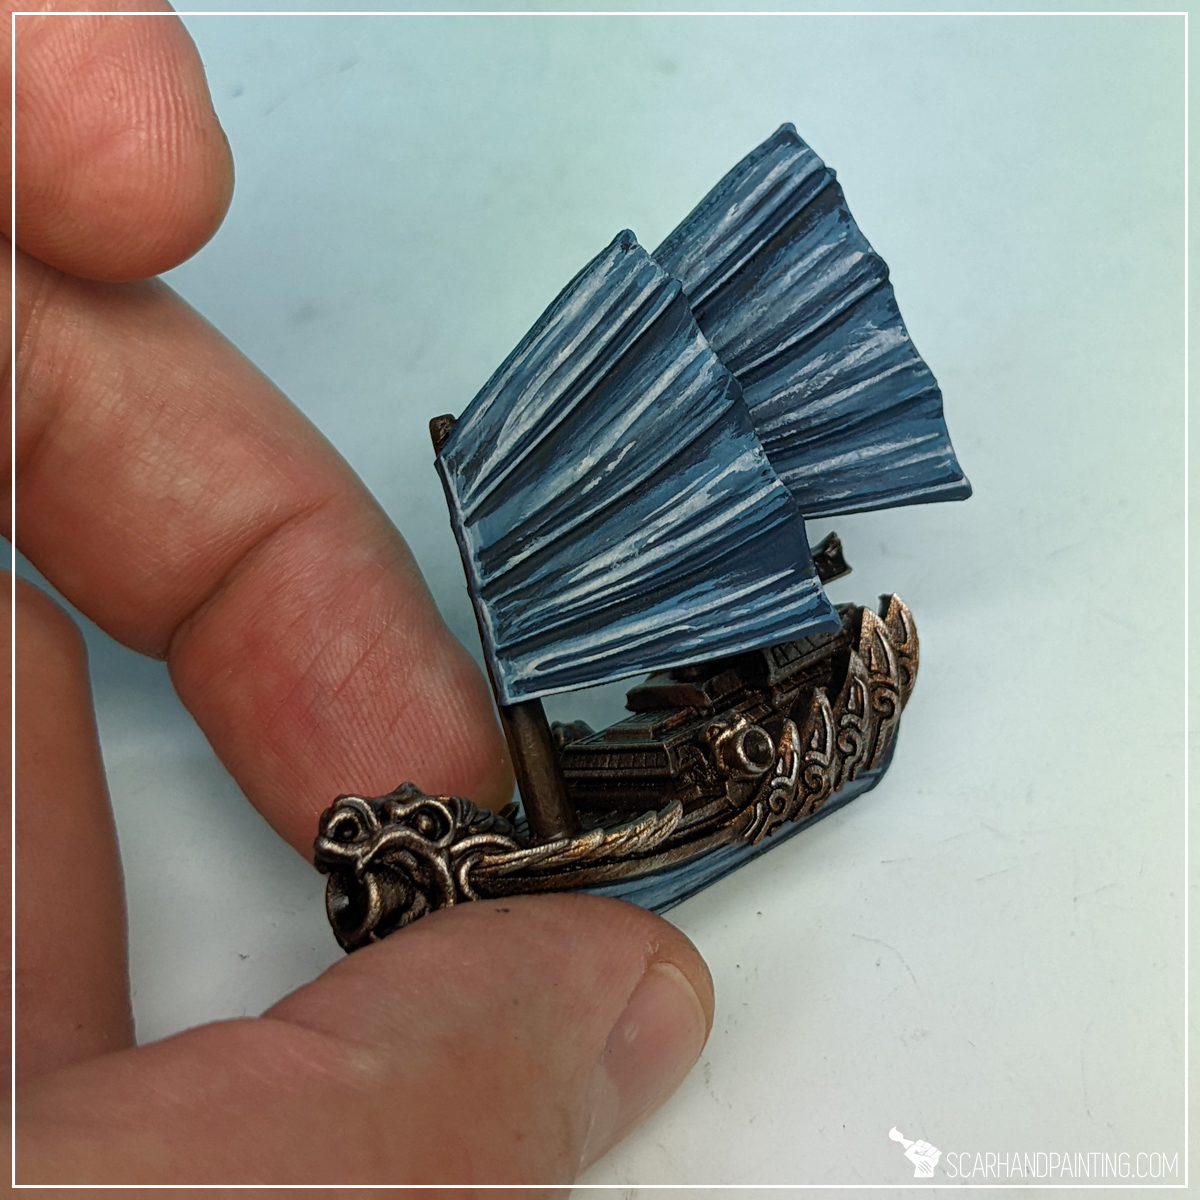
Step twelve: Sails final highlight
Final highlight was applied with pure Games Workshop Pallid Wych Flesh. Similar to edge highlight this one was applied to most exposed detail and edges on the sails. Looks messy and ugly, but everything goes according to a plan…
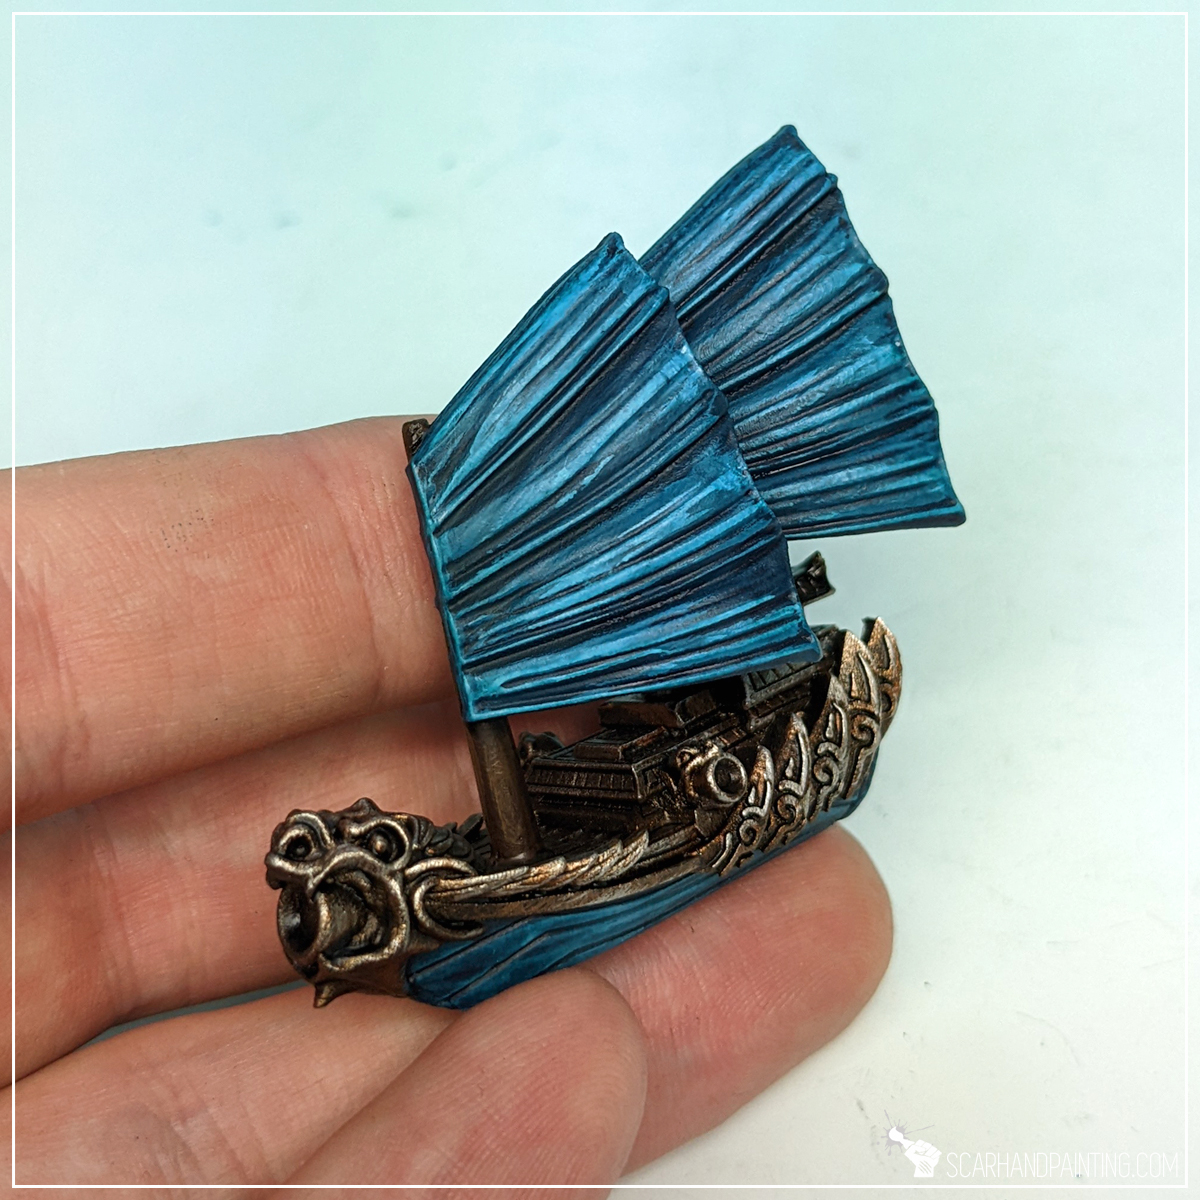
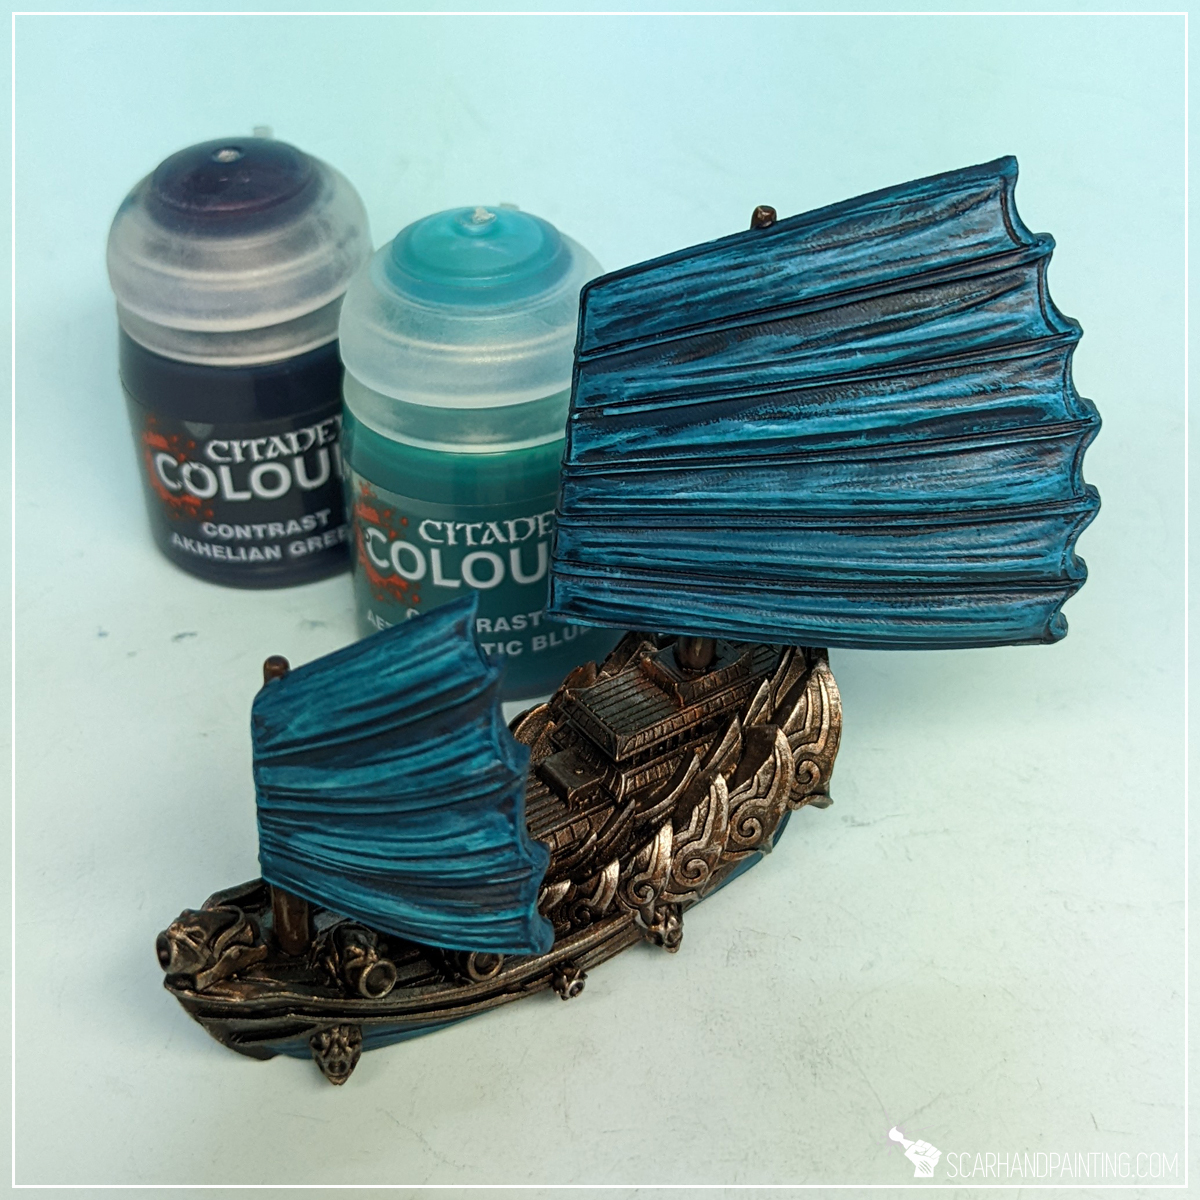
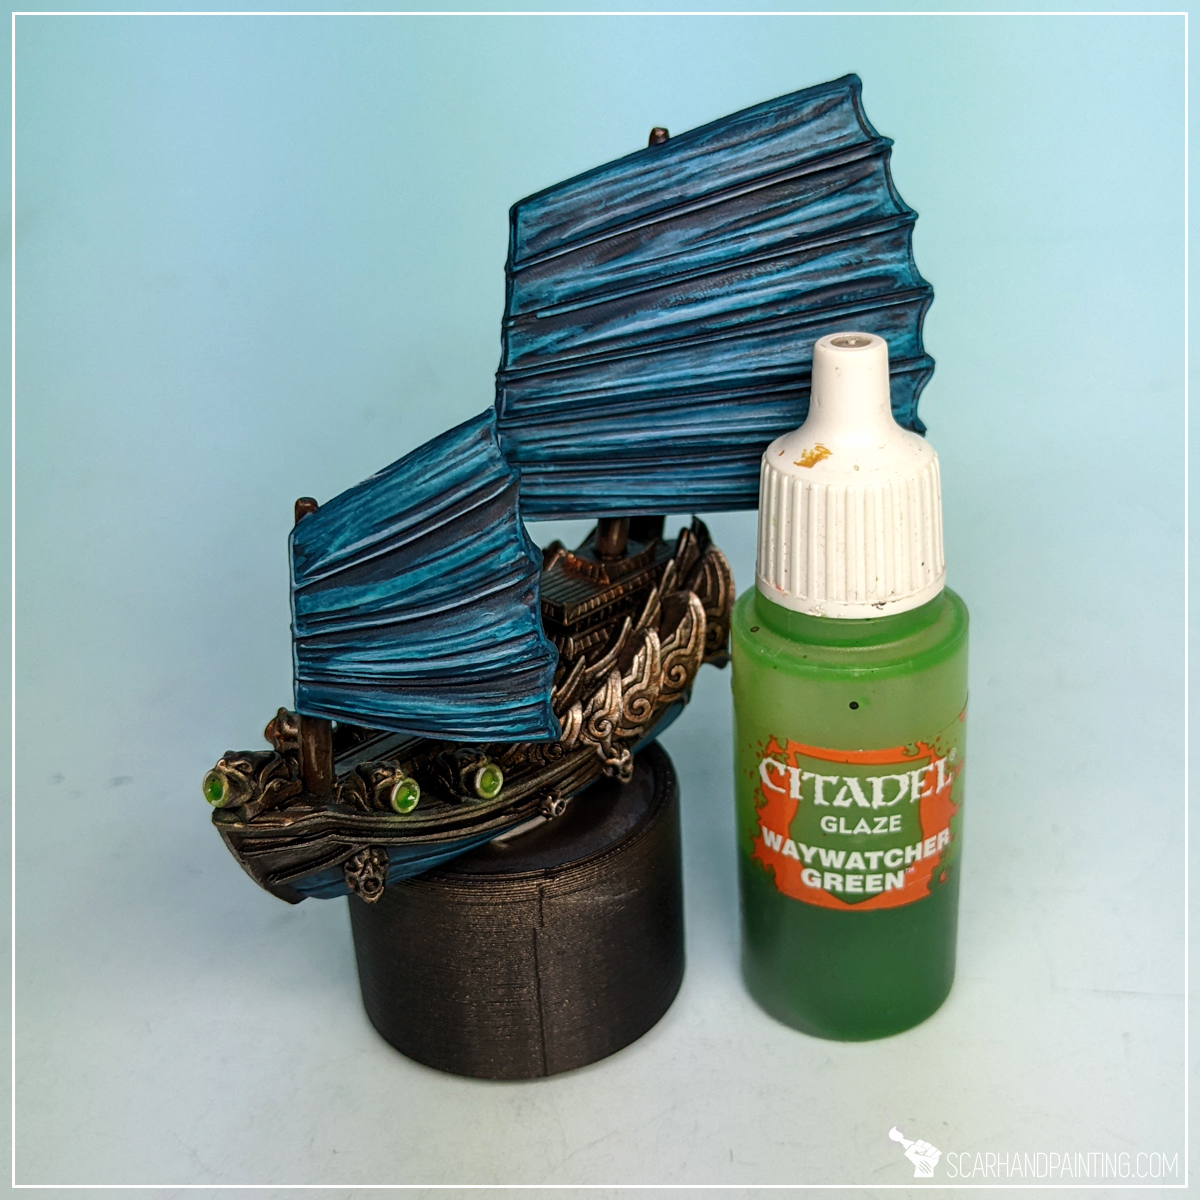
Step thirteen: Glaze
Glazing is a topic on its own that usually refers to rather time consuming and precise application of strongly thinned down paints. The way I apply glazes is more simplified. I apply them with a large, soft brush just like washes, except I avoid applying too much paint. This way I both smooth up and juice up the colors underneath. In case of Salamanders I used a 1:1 mix of Games Workshop Akhelian Green nd Aethermatic Blue contrast paints.


Step fourteen: Green osl
Final color range to add onto the miniature was Greens. I applied four paints one after another to build volume and then add depth to weapons and any fire elements across the fleet. In this tutorial I deliberately linked all the steps into one, as this particular topic was just recently covered in Tutorial: Painting Green Glow that you can read in order to get a better grasp of the entire process.
Step fifteen: Bases
The paint job done and sealed with a matt varnish the last thing left to do was a base. Again, this is something I covered before in KoW Armada Water Bases tutorial that I invite you to read in order to get to know the process. In case of Salamanders I simplified basing by applying one thick, smooth layer of AK Interactive Atlantic blue, then another rough layer of the same texture to finally add waves with AK Interactive Water Foam effect. Very simple while also quite effective.
This marks the end of the tutorial. Feel free to ask any questions in the comments below or via social media.
I hope you find this tutorial interesting. Be sure to let me know your thoughts in the comments below or via Facebook or Instagram. I would also appreciate if you considered sharing this content with your friends, who might find it useful. Finally if you are looking for a professional miniatures painting service, be sure to contact me with this contact form. I always reply within 24 hours, after which please check out your spam folder.

Ahoy Sailors! As you know I am most and foremost a passionate hobbyist. That being said I am also a pirate, a scoundrel and a fanatical enthusiast of Mantic Games Kings of War: Armada. The latter resulted in a few gaming/strategy related articles, one of which you found yourself reading right now.

Kings of War: Armada is a naval strategy game set in a rich world of Pannithor, pitting multiple wonderfully crafted and strongly themed factions against one another. Divided between a Fleet Starter, a Fleet Booster and multiple individual sets, each faction comes with a range of ships and units to choose from. It is quite common for new players to ask what to purchase next in order to expand a collection. Today I would like to present to you a quick guide to Kings of War: Armada purchases.
Although each Armada fleet differs from one another, they all seem to follow a similar path from first purchase up to a complete collection. To keep things easy I have divided collection sizes into tiers, each of which represents a certain milestone allowing for more list building flexibility and in-game shenanigans. When considering how to expand your existing collection, treat tiers as casual guidelines. If for example you own a Fleet Starter and a Fleet Booster, consider adding anything missing from tier 2, preferably in order it is presented. This should, in theory, expand your collection in a way that offers new playstyles, diversity and a power boost.
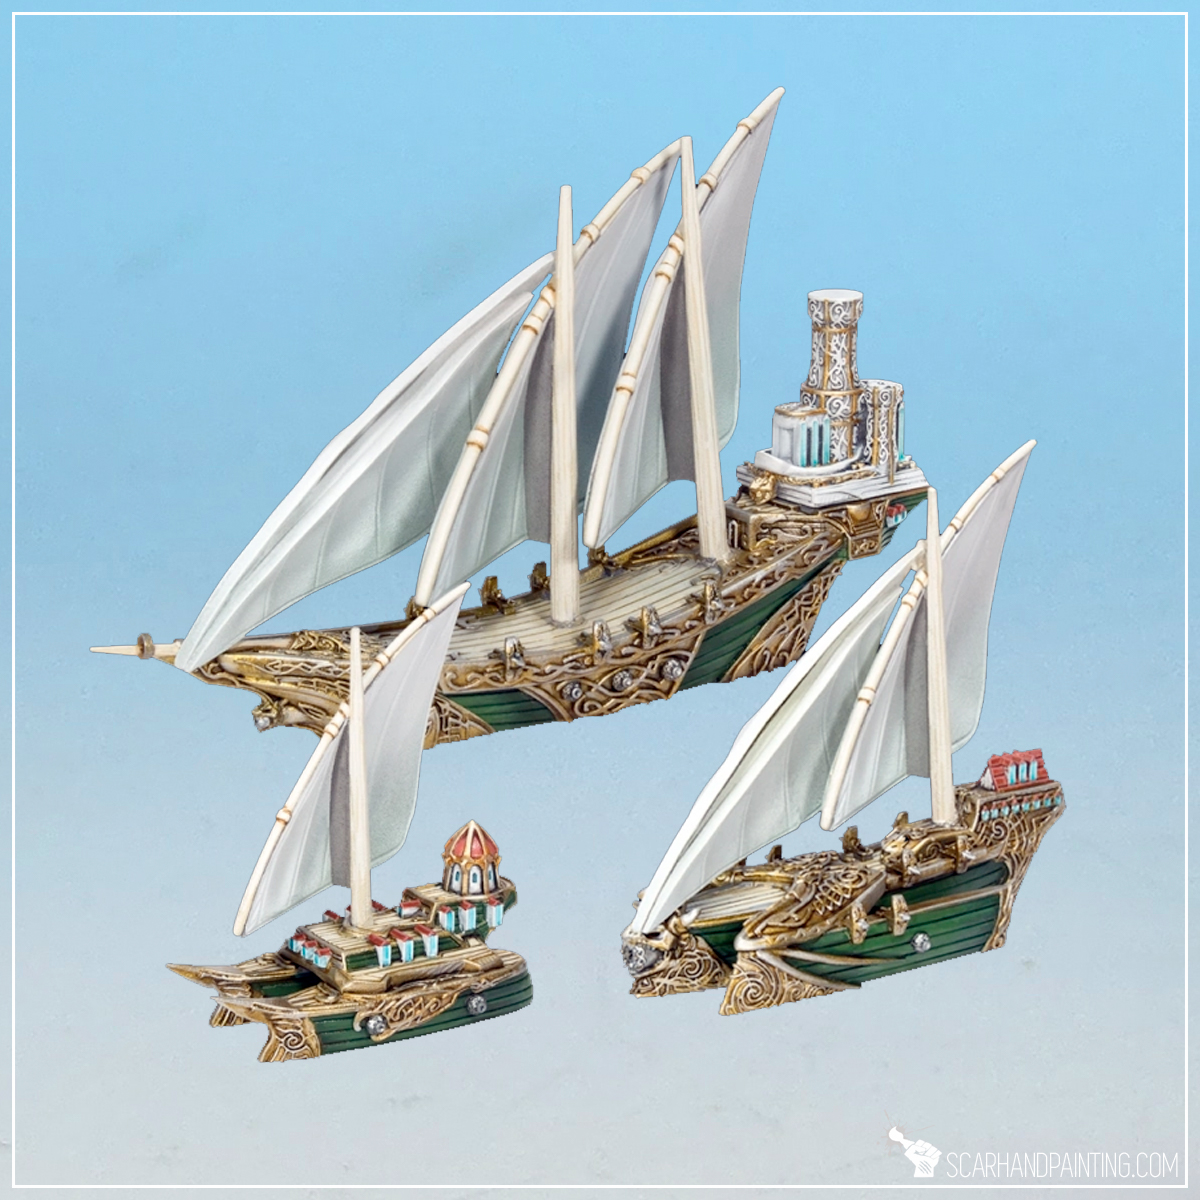
Tier 1: Basic
This tier represents the usual entry point into Armada. A relatively low price start, allowing for a number of builds within a 150-250pts. range.
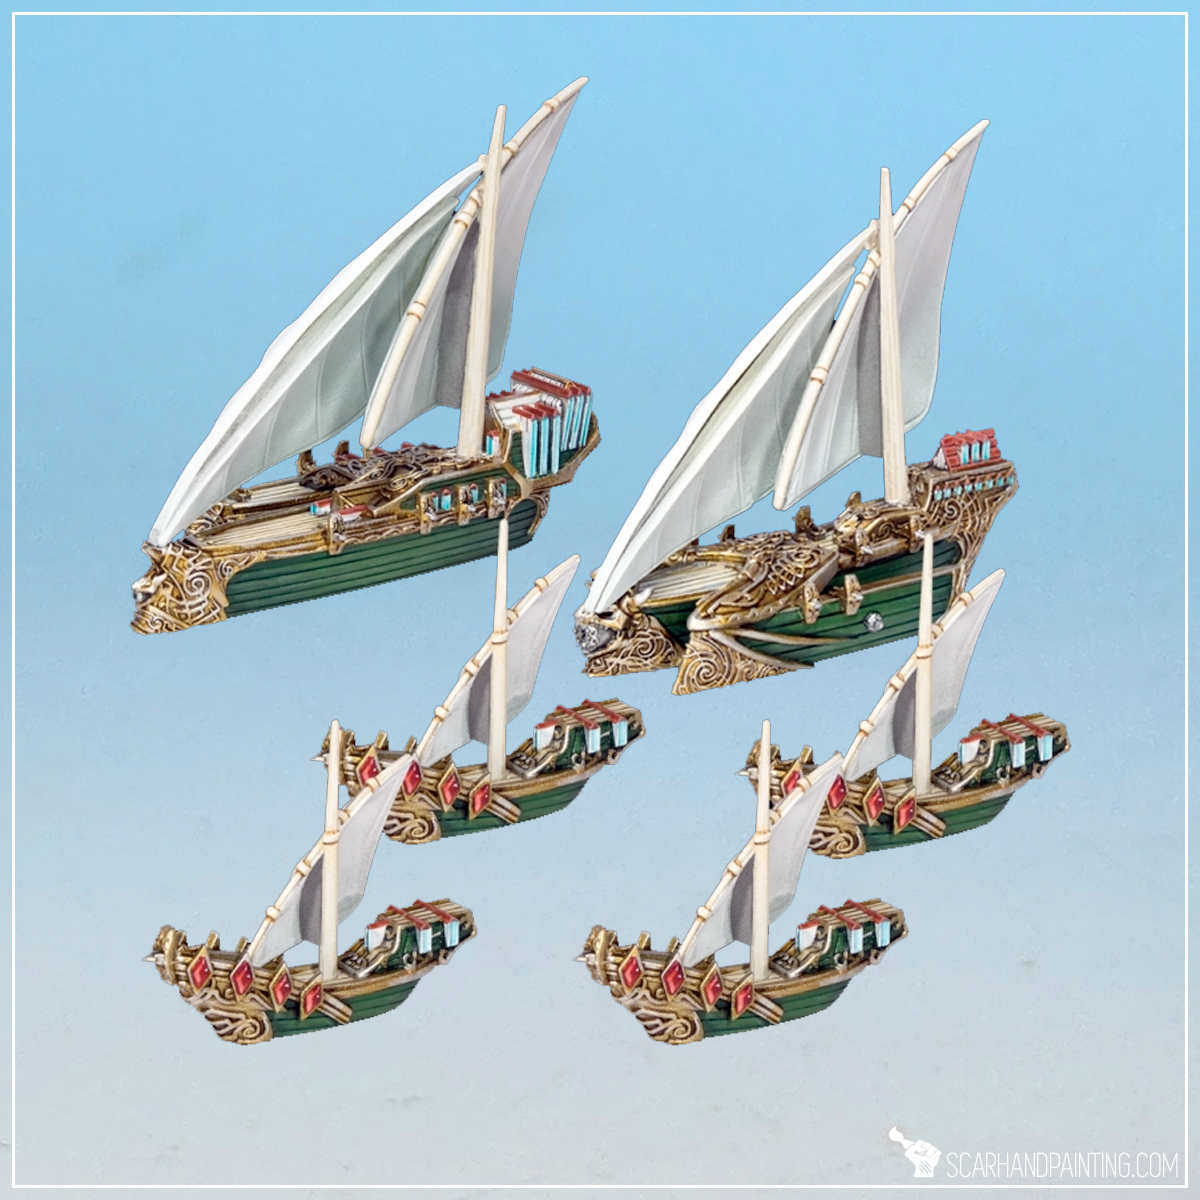
Tier 2: Standard
This tier, once achieved, is a golden tournament standard. An XL* Main Battle Ship, along with a pair of L and multiple M, backed with an array of Support Ships allows for flexible list building, enabling different playstyles and archetypes within a faction. Some players will stop right here, all tools already available.
* if available to your faction.
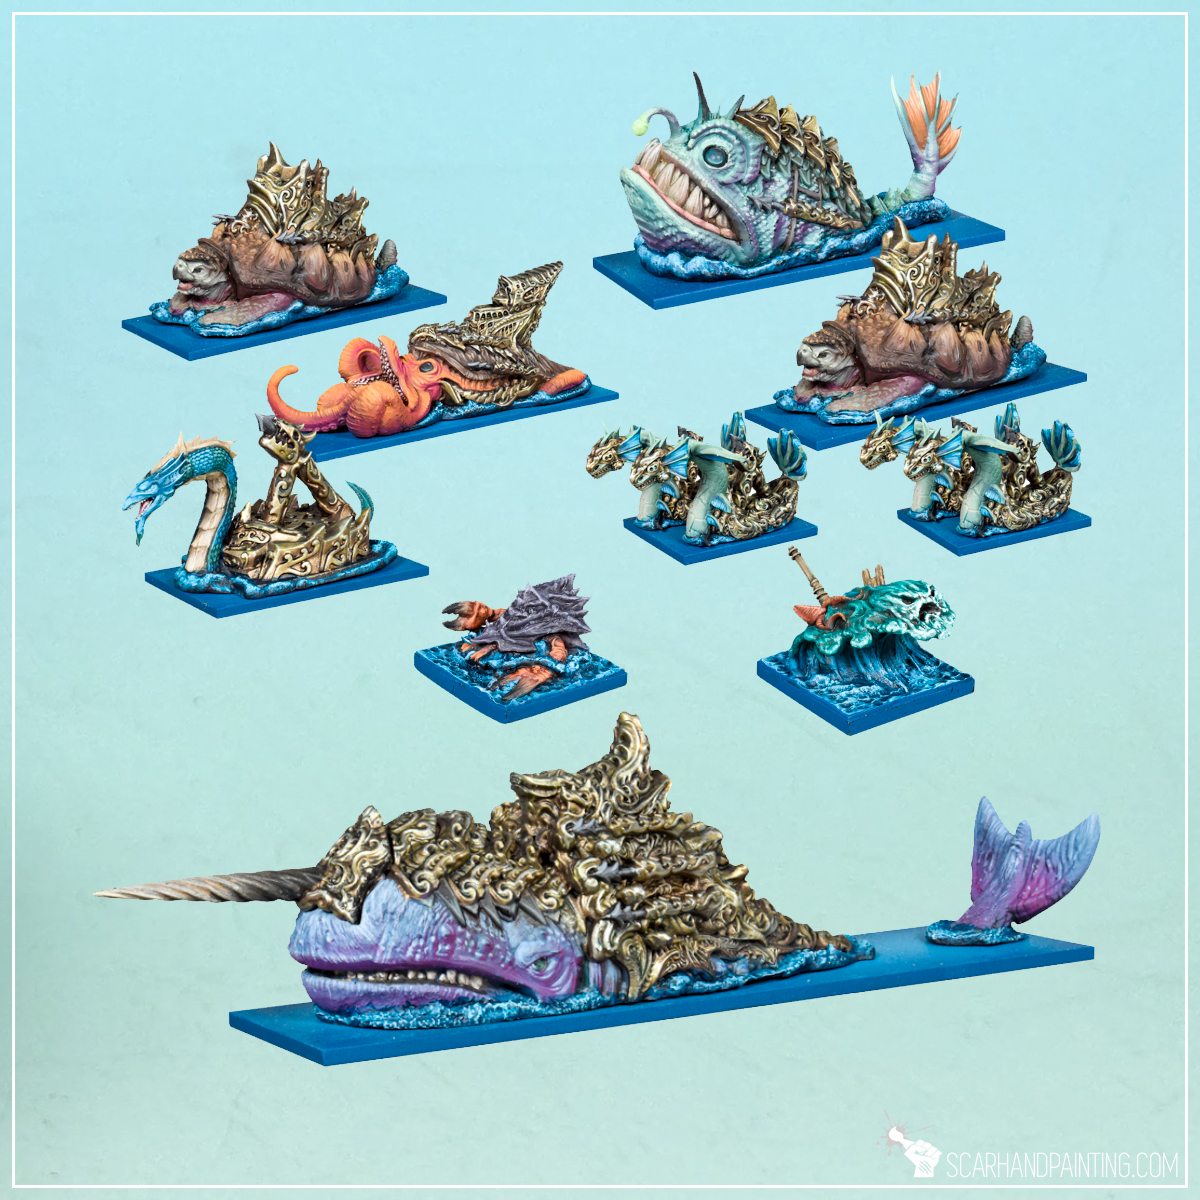
Tier 3: Advanced
Last tier is a complete collection including everything that you will ever need to build a wide range of 150-250pts. lists honed for specific scenarios and/or archetypes. Four copies od each Support Ship and a second XL allows for some edge case combo lists. Second pair of fliers, while not necessary, is always good to have, just in case of local meta going flier heavy in the future.
* if available to your faction.
Secret Tier X: Beyond
There’s no real gameplay advantage of adding more sets after tier 3, unless you plan on playing some huge climactic naval battles. Armada miniatures are truly beautiful and full of detail, thus I won’t judge you for further expanding your collection.

I hope you find this article entertaining. Be sure to let me know your thoughts in the comments below or via Facebook or Instagram. I would also appreciate if you considered sharing this content with your hobby buds, who might find it useful. Finally if you are looking for a professional miniatures painting service be sure to contact me via this contact form. I always reply within 24 hours, after which please check out your spam folder.
Cheers!
Ahoy Sailors! As you know I am most and foremost a passionate hobbyist. That being said I am also a pirate, a scoundrel and a fanatical enthusiast of Mantic Games Kings of War: Armada. The latter resulted in a few strategy related articles, one of which you found yourself reading right now.
If you still don’t know what Kings of War: Armada is, I strongly invite you to read some of the previous Armada related articles. In short Kings of War: Armada is a naval strategy game set in a rich world of Pannithor, pitting multiple wonderfully crafted and strongly themed factions against one another. Today I would like to focus on one such a faction and especially some common misconceptions surrounding it.
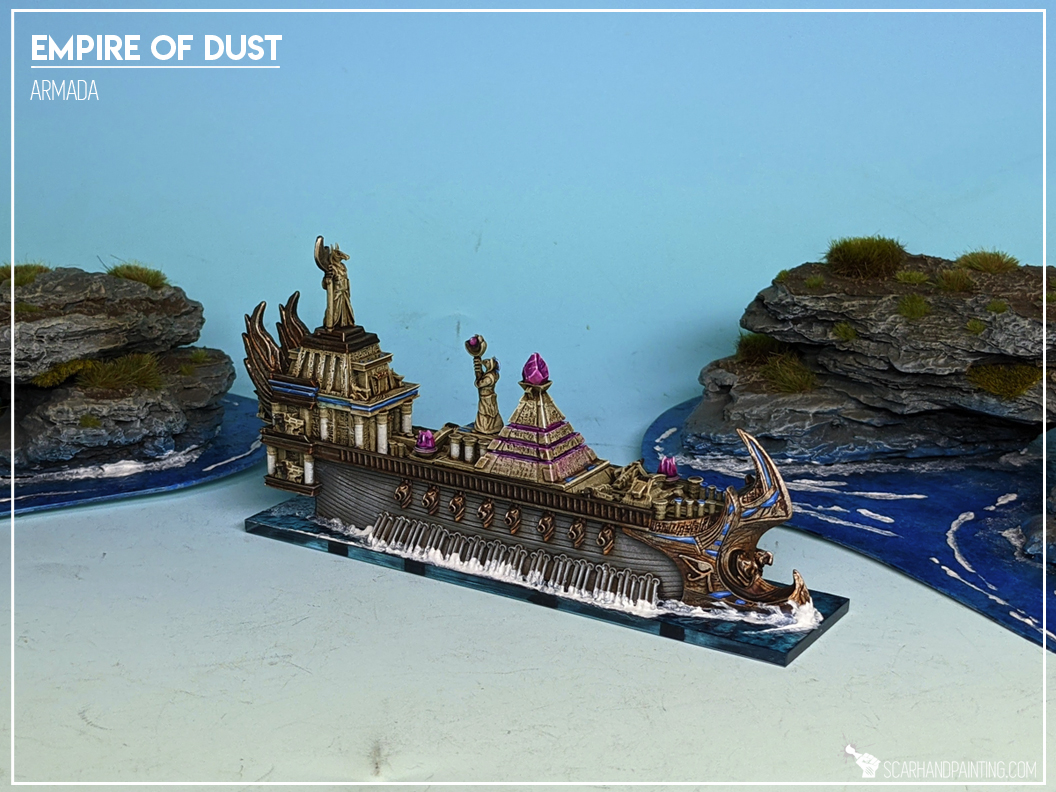
The Empire of Dust is ‘Weak’… not really
The Empire of Dust has it all. It has the looks, the special rules, ships of all sizes, access to all kinds of weapons, and yet it is commonly addressed as being weak and requiring a buff. Whereas some other factions are pretty one dimensional when it comes to list building and playstyle, the EoD comes across as a more advanced, ‘difficult’ fleet. The main fleet theme seem divided between particular ships and is very polarized. With devastating weaponry being shoved on top of Large and Extra Large ships, in exchange for extra Crew Strength and speed being transferred to Medium Main Battleships, it might seem like if the fleet as a whole, doesn’t know if it wants to shoot or board or both. Additionally, thanks to Kopeshiis being the most expensive Medium Main Battleships across the entire game, the list building process for the EoD is rather intimidating. It gets even harder when you realize that compared to other factions, the Slave Squadrons, which are supposed to be fillers, are also priced premium.
So yes, all of these issues might result in a faction being perceived as overall weak. Except it’s not! The Empire of dust is just difficult to master as I have learned the hard way…
Empire of Dust Main Archetype
The Empire of Dust has a very strong, although somehow hidden theme of heavy artillery bombardment. I wrote “hidden” even though the theme is there in plain sight. This is because at first glance, not all EoD ships seem to go along with the archetype. It is somehow unusual for an Armada fleet and might confuse players that are relatively new to the game.
The theme is centered around Large War Galleys and Extra Large Monoliths Main Battleships, both types packing Indirect Weapons (IDW) on the sides. There is no other fleet with an array of Broadside mounted IDWs. This is an exception throughout the entire game and has some huge list building and gameplay ramifications.
The rest of the EoD fleet is clearly honed to provide support for the L and XL centerpieces, mostly by intercepting hostile ships, engaging them up close and denying access to EoD artillery pieces, thus extending the ‘Bombardment’ duration.
Further main archetype improvements come from EoD’s Upgrades, Magic Upgrades and Captains.
Empire of Dust has partial access to Oars and Light Oars which makes positioning for a kill or simply keeping a healthy artillery formation so much easier. Entire fleet also benefits from Curse of the Undeath, potentially mitigating results of enemy Boarding attempts.
Finally, stat wise, the EoD excels at Nerve Value and this in not a coincidence. With a bulk of the fleet serving as speed bumps and reliable obstacles, high Nerve Value translates into their survivability, resulting in increased duration of the ongoing artillery bombardment served by the main pieces.
Once you take a deep dive, everything in Empire of Dust revolves around the main theme.
The Empire of Dust List Building
So now that we’ve toppled the main archetype of the Empire of Dust, where does this leave us in terms of list building? First of all the EoD should definitely be built around L or XL centerpieces. Being ‘forced’ to field a War Galley or a Monolith is a bit of a crutch, but at the same time these ships are probably what drove you into playing the Empire of Dust in the first place, so… there’s that. Once you decide between aggressive and passive playstyle and build an appropriate configuration for a centerpiece, just fill the remaining points with a protective screen of Kopeshii (s), and a mix of Support Ships that best suit that playstyle.
Off course I could go for another round over each ship and describe in detail what it does and how to use it, but at this point you probably already have a grasp on what each ship’s roll is. Plus there’s no better learning process than to play the actual game, so instead, allow me to present some Ship Configuration ideas that I myself use. This should allow you to intuitively place a ship on a mental power scale and ‘feel’ it’s designated role.
Veteran Crew, Balefire, Additional Weaponry (Broadside) – IDW+1, Magical Rudder/Soul Snare, Lucky Crew/Master Gunner.
Veteran Crew, Balefire, Arkhanten the Cursed Slayer, Kedge Anchor, Soul Snare.
Veteran Crew, Balefire, Additional Weaponry (Broadside) – IDW+1, Lucky Crew/Master Gunner.
Veteran Crew, Balefire, Arkhanten the Cursed Slayer, Soul Snare.
Veteran Crew, Ogre Mercenaries, Fire Oil.
Inexperienced Crew, Sturdy Construction.
Regular Crew/Veteran Crew, Crow’s Nest.
Regular Crew/Veteran Crew, Sturdy Construction.
Inexperienced Crew/Regular Crew.
Sample Fleet Lists
Below are sample EoD lists that, in my opinion, represent the EoD preferred archetype well.
Monolith: Veteran Crew, Balefire, Additional Broadside, Magical Rudder, Lucky Crew. 137p.
Kopeshii: Veteran Crew, Ogre Mercenaries, Fire Oil. 54p.
Dust Chaser: Inexperienced Crew, Sturdy Construction. 13p.
Dust Chaser: Inexperienced Crew, Sturdy Construction. 13p.
Soul Hunter: Veteran Crew. 24p.
Slave Squadron. 9p.
250pts.
Monolith: Veteran Crew, Balefire, Additional Broadside, Magical Rudder, Lucky Crew. 137p.
Kopeshii: Regular Crew, Ogre Mercenaries, Fire Oil. 45p.
Slave Squadron. 9p
Slave Squadron. 9p
200pts.
War Galley: Veteran Crew, Balefire, Additional Broadside, Lucky Crew. 89p.
Kopeshii: Veteran Crew, Ogre Mercenaries, 52p.
Dust Chaser: Inexperienced Crew, Sturdy Construction. 13p.
Dust Chaser: Inexperienced Crew, Sturdy Construction. 13p.
Soul Hunter: Veteran Crew. 24p.
Slave Squadron. 9p.
200pts.

All in all the Empire of Dust is a solid faction, on par with other Armada fleets, offering an interesting (if somehow rigid) playstyle. It is hard to master which might lead to some initial disappointments, but once you put some games in and get a grasp of how things work, the EoD is a very rewarding fleet. Is it good in everything? No. Is it good in some things? Oh yeah, definitely. Is it fun to play? Totally!
I hope you find this article entertaining. Be sure to let me know your thoughts in the comments below or via Facebook or Instagram. I would also appreciate if you considered sharing this content with your hobby buds, who might find it useful. Finally if you are looking for a professional miniatures painting service be sure to contact me via this contact form. I always reply within 24 hours, after which please check out your spam folder.
Cheers!
Ahoy Sailors! As you know I am most and foremost a passionate hobbyist. That being said I am also a pirate, a scoundrel and a fanatical enthusiast of Mantic Games Kings of War: Armada. The latter resulted in a few strategy related articles, one of which you found yourself reading right now.
Kings of War: Armada is a game of fantastical sea warfare. Set in a rich world of Pannithor the Armada clashes wonderfully crafted and strongly themed factions against one another. As much as miniatures go, KoW Armada offers a selection of beautiful miniatures from across multiple factions, with more being released every few months. These ships vary in size and power from Tiny Squadrons zigzagging between larger vessels to XL flagships capable of dealing devastating damage with a single broadside. With size comes the firepower and capacity but at a cost of speed and maneuverability. Is a spamy fleet capable of competing with a centerpiece type fleet? Is, in general, a particular ship size more optimal than the other? Today I will ponder a question:
Let’s start by stating the obvious: Yes, in Armada the size does matter a lot. The larger a ship, the more firepower it brings and the more devastation it is capable of with a single Activation. But large size does not come without some drawback, most obvious being speed and maneuverability. A ship’s hull can be bristling with guns, but what if it is unable to draw a proper line of fire to a group of smaller, more agile enemy ships? Let’s talk about pros and cons of large size and see if they hold merit.

* The larger the ship the more guns it brings.
Large ships are more expensive and so they pack more guns than their smaller counterparts. Having more guns allows them to deal more damage in a single Activation. So much so as to potentially Cripple or even Sink an enemy ship (or ships!) before subsequent Activation.
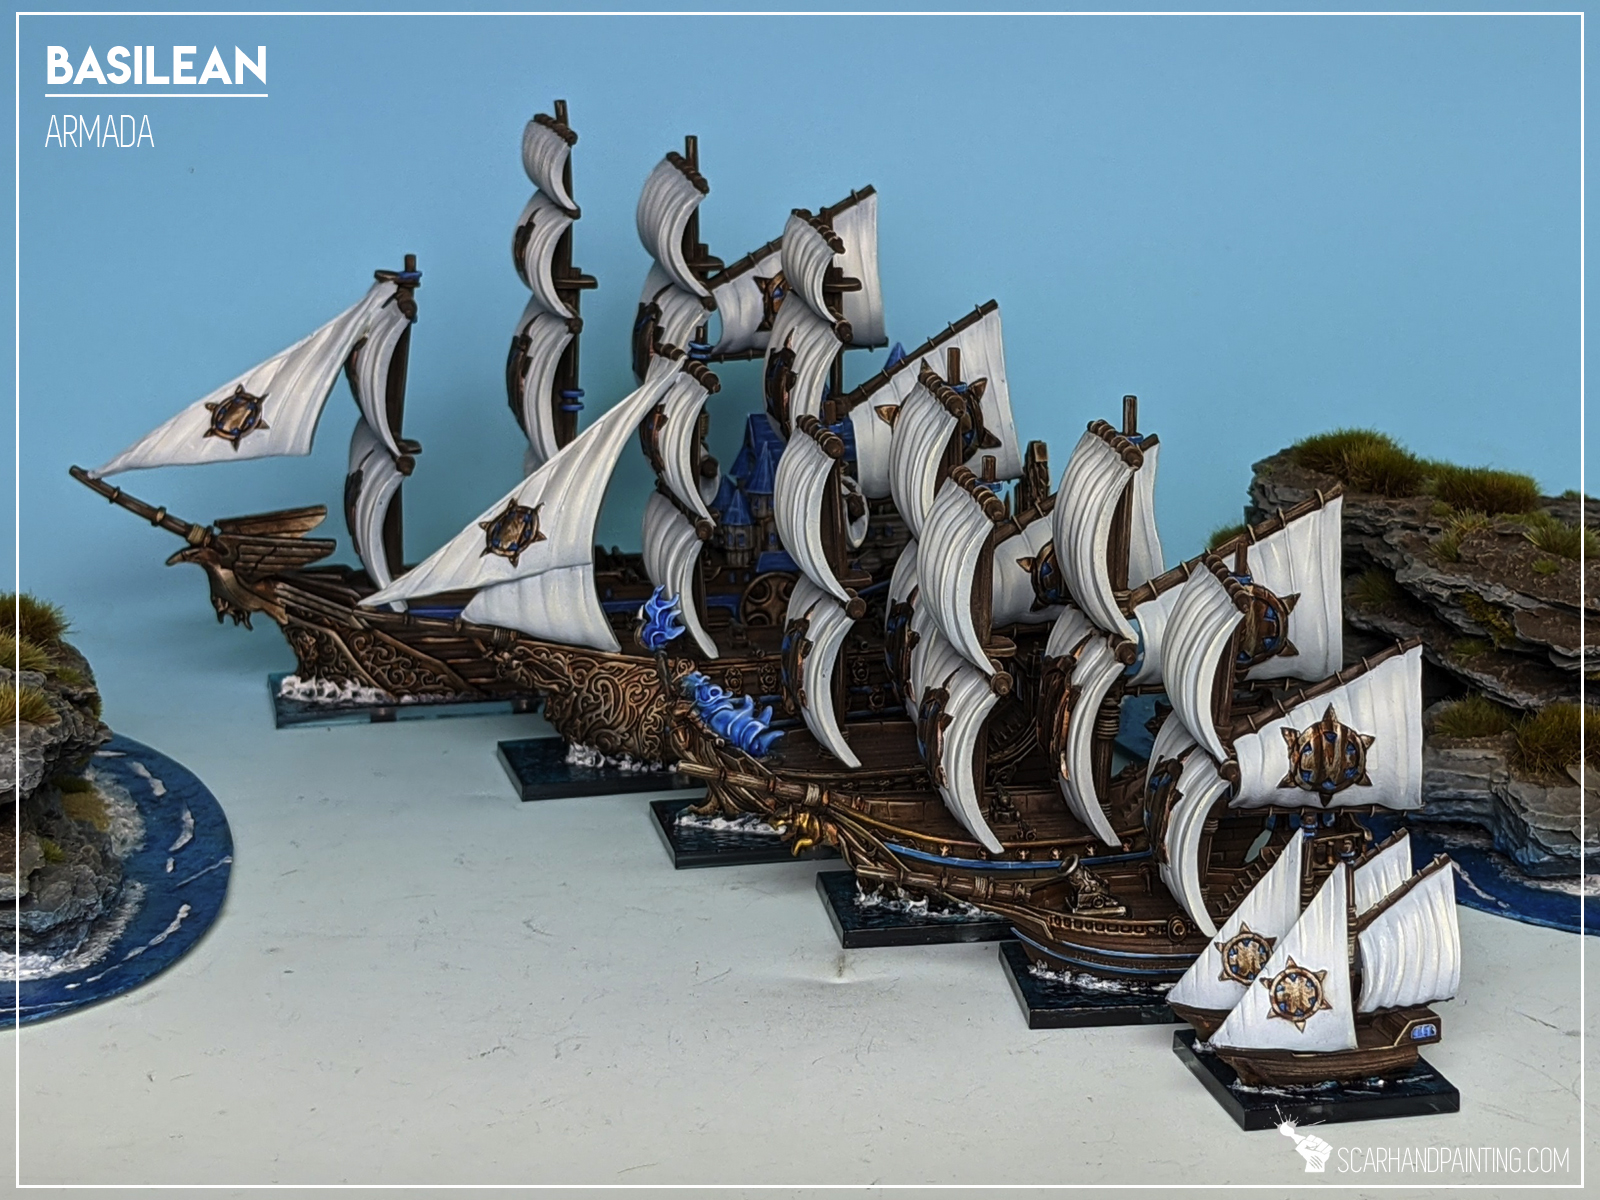
Interestingly, more often than not, the same points value spent on a variety of smaller Main Battle Ships will result in more guns on the gaming board. This is obvious to see for some factions, while a bit more obscured for others. Basilean fleet, being pretty vanilla, with same type of armaments across all three Main Battle Ships, is perfect to represent this:
A Basilean Dictator has less broadside guns than three Elohis combined. 2H less to be precise.
Basilean Dictator: 90pts, 4H, 3L, 3C
Basilean Abess: 62pts, 3H, 2L, 2C
Basilean Elohi: 30pts, 2H, 1L, 1C
* Larger size equals more upgrade slots.
Capacity increases with size, which allows for more upgrades for a ship. This can lead to some pretty nasty combos or just increase efficiency of some upgrades. For example a Master Gunner allows for a reroll of an entire salvo. This upgrade has a much more impact on a Dictator’s devastating salvo of 4H, 3L and 3C, than on Elohi’s 2H, 1L and 1C. Furthermore it will cost three times the cost of a Master Gunner, to equip three Elohi’s.
Fielding a variety of smaller ships is not without it’s merits though, as it allows to add important fleet-wide-buff upgrades for cheap and not take up a valuable slot on an expensive vessel. More so, the cost of such upgrades can be decreased by degrading a Crew Level to Inexperienced. “Okarina of Korgaan” and “War Drum of Spite” are good examples. Of course nothing prevents mixing ship sizes to achieve the same result.
* Larger ships have more Crew Strength.
Large ships pack a lot more CS, which means a huge advantage over smaller opponents during Boarding Actions. Advantage that is not mitigated by the current Multiple Grapple rules. Even though most Large and Extra Large ships might be unable to grapple fast moving enemy ships (Full Speed etc.), usually there will be some opportunities to do so throughout the game. Furthermore having high CS ensures fast Ongoing Boarding Action resolution, thus freeing a larger ship from being pinned by a smaller, cheaper vessel.
On the other hand a single powerful ship can become entangled in melee, thus significantly reducing the firepower of an entire fleet. A fleet of more ships will still be mostly operational if one get’s caught in a Boarding Action, allowing the rest to deal damage and go after objectives unhindered.
* More Structure Points in one place for larger ships.
Larger ships come with more Structure Points, which makes them more difficult to Cripple/Sink, resulting in more time of full effectiveness. A fleet composed of three Elohis will probably gradually lose it’s firepower while ships get damaged and subsequently Crippled, or Sunk. At the same time a single Dictator can be expected to stay operational for longer, before reaching the threshold.
* Repairs Bonus.
Large and Extra Large ships receive a Repairs bonus of +2 SP regained with a Repairs action.
Multiple smaller ships, faster and more maneuverable by default, are capable of putting constant pressure on a larger vessel, while being able to take turns, speeding out of immediate danger to undertake Repairs.
* Area of effect.
Thanks to the size of their bases, L and XL ships are easier to Rake enemy ships. Wider Broadside is easier to position for a solid Raking Fire. This leads to larger ships being more difficult to go around and combined with high durability, makes them perfect area denial pieces.
* Speed decreases with size.
The larger a ship the slower it usually is. High Movement allows to go around slow enemy ships, zoom out of danger and go after objectives. Fast ships are capable of crossing the entire board in a matter of barely few Activations, resulting in a much higher effective range of their weaponry.
* Maneuverability decreases with size.
On top of a (usually) yellow Turn Arc, larger ship bases are more difficult to maneuver with. More so, L and XL movement is more hindered by Sandbanks, Islands and dense battlefields.
This can be partially mitigated with Kedge Anchor and Magical Rudder upgrades.
* Less is sometimes more.
Large and Extra Large ships are points intense. Adding these to a list results in a small size fleet, which in turn leads to easier general maneuvering. Wielding a numerous fleet is not an easy task, potential collisions dealing high amount of self inflicted damage.
* Some scenarios favor small size.
While a large SP count is good, there are some scenarios that favor smaller ship sizes and/or greater numbers. Not every scenario devolves into sinking more enemy ships.
* Large targets are easier to Hit.
L and XL ships are easier to hit, providing an additional +1 To-Hit bonus for shooting opponents. There is a catch though. Due to how Partial Visibility rules work, S ships are unable to gain Full Visibility to XL ships when side by side.
And now we’re left with a question: Go big or go for numbers? There’s not a straight answer. Extra Large ships are monsters, capable of dominating entire game. They are though, reliable and deadly. On the other hand Large and Medium size ships are just as well optimized and excel in areas outside of XL’s capabilities. Are Extra Large ships overpowered? Certainly not. Are they generally “better”? Maybe, depending on the faction, but not by a large margin. My guts tells me they are just easier to successfully implement in a game. I am inclined towards an opinion that in time, when meta clarifies and players get used to everyday maneuvering, we will see a shift from more cumbersome XLs towards Medium and Large. Regardless, with how well balanced Armada seem to be right now, the XLs are definitely worth the points investment and are fun to wield. I for one, love me some of that Dictator swinging and greatly enjoy having an Extra Large ship on the table. If you haven’t already, be sure to give Extra Large ships a try. GLHF.

I hope you find this article entertaining. Be sure to let me know your thoughts in the comments below or via Facebook or Instagram. I would also appreciate if you considered sharing this content with your hobby buds, who might find it useful. Finally if you are looking for a professional miniatures painting service be sure to contact me via this contact form. I always reply within 24 hours, after which please check out your spam folder.
Many thanks to M.L., R.Z. and K.R. for providing valuable input. Your feedback and suggestions is what made this article possible.
Cheers!
Ahoy Sailors! As you know I am most and foremost a passionate hobbyist. That being said I am also a pirate, a scoundrel and a fanatical enthusiast of Mantic Games Kings of War: Armada. The latter resulted in few strategy related articles, one of which you found yourself reading right now.

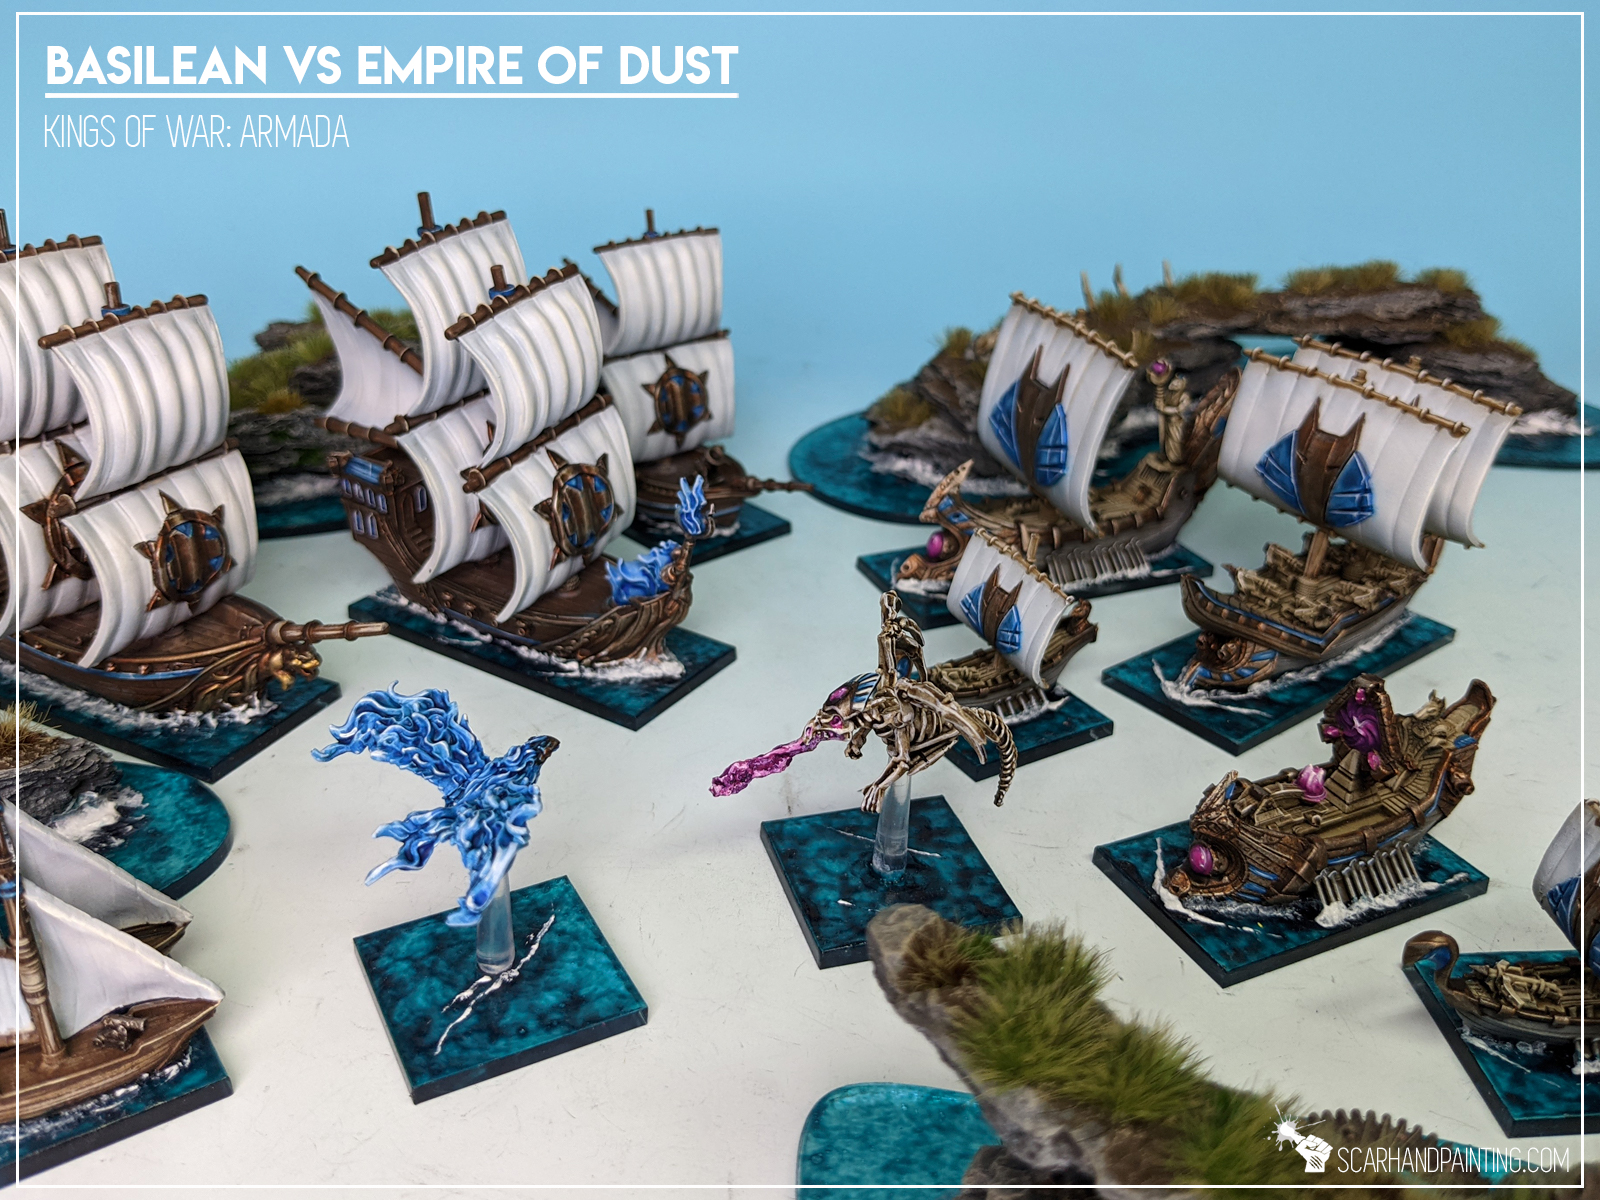
Kings of War: Armada is a game of fantastical sea warfare. Set in a rich world of Pannithor the Armada clashes wonderfully crafted and strongly themed factions against one another. As much as miniatures go, KoW Armada offers a selection of beautiful miniatures from across four factions, with more being released every few months. These factions vary between themselves, not just visually but also on-tabletop, offering different playstyles, themes, strengths and weaknesses. Below I will focus on each faction individually, pointing out some pros and cons, but also offering insight into possible strategies.

Before we start, some notes:
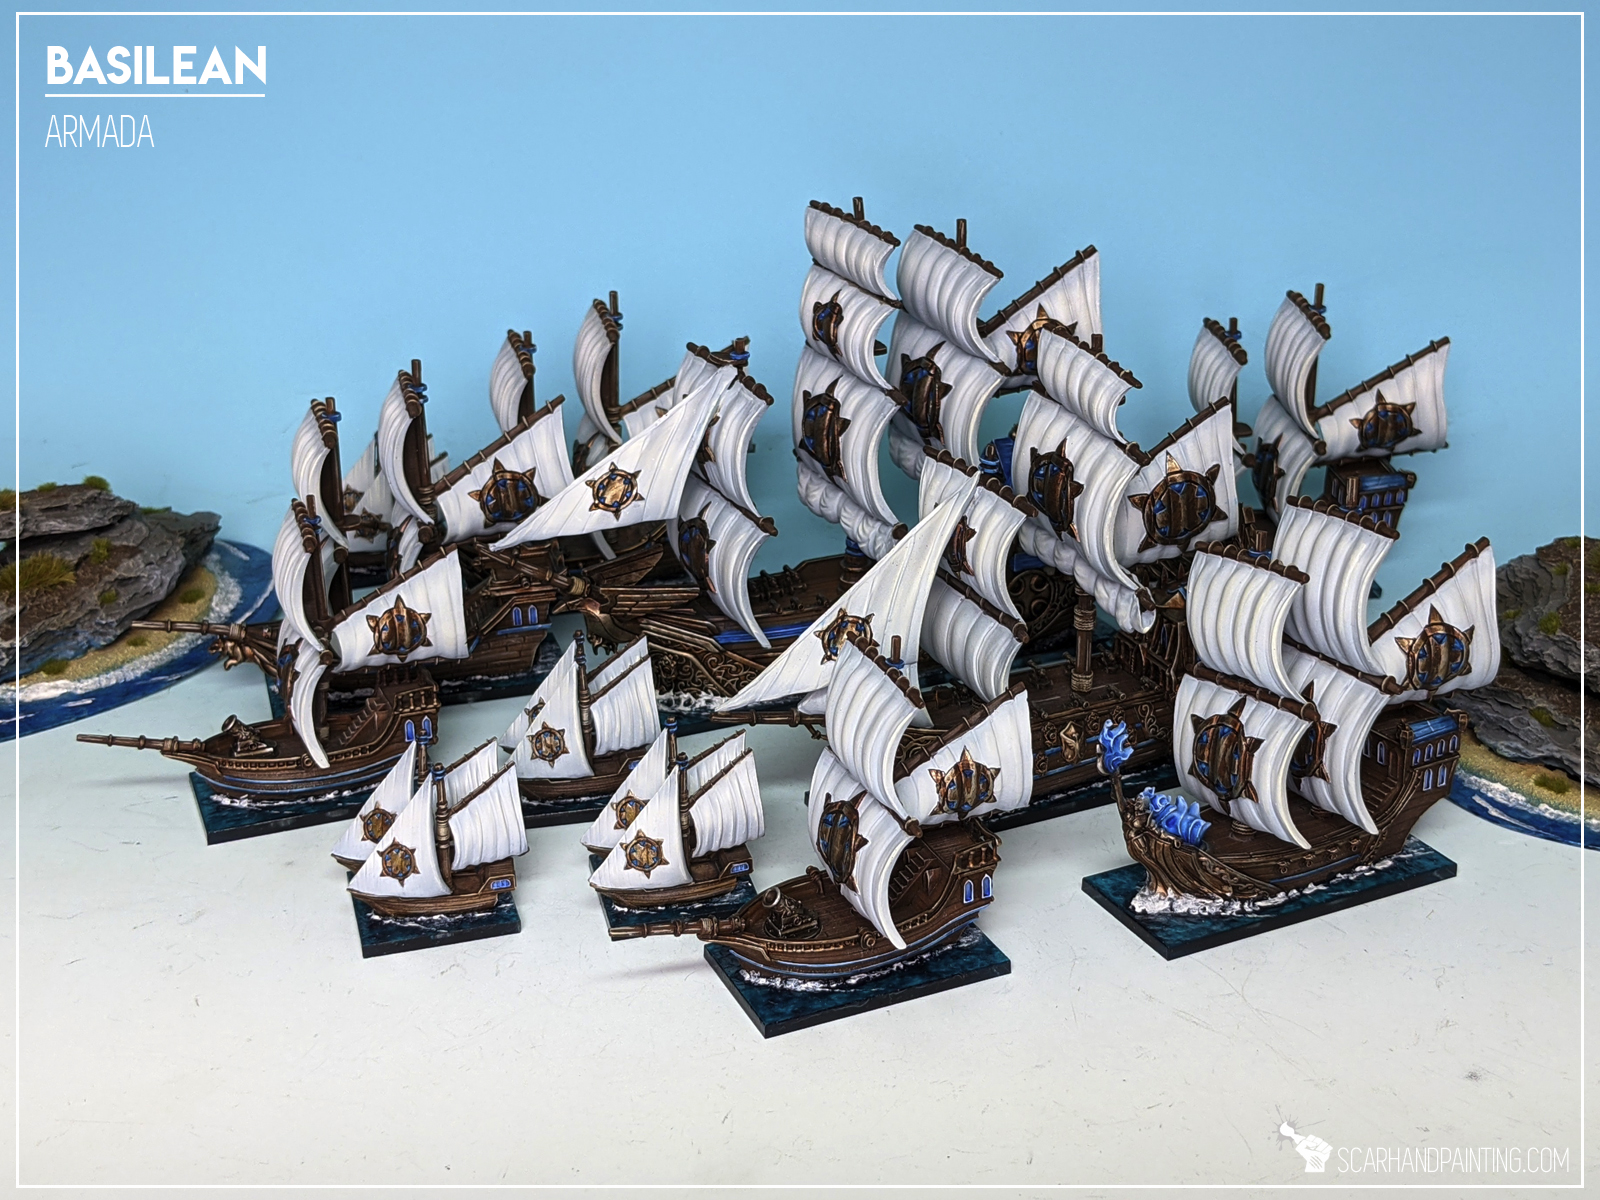
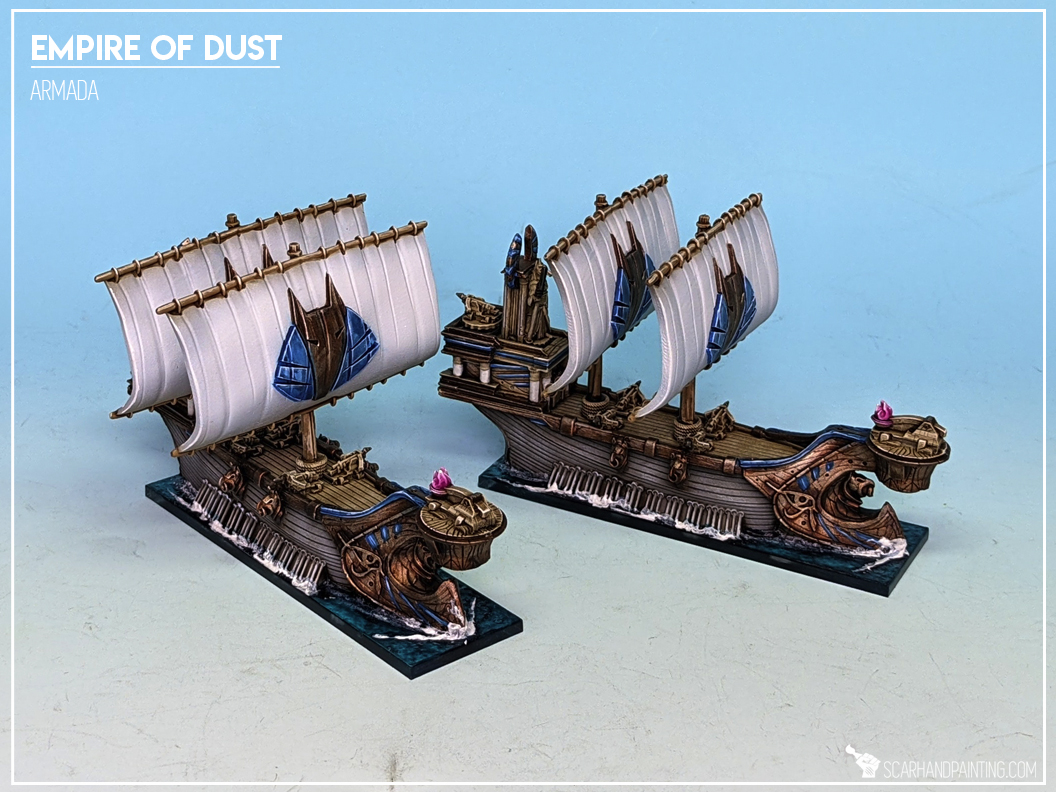
Basilean – Cleric Faction.
Cheapest on average, best SP to points cost ratio. Not standing out at anything except Move, SP/point cost ratio, healing and damage reduction capabilities (Aegis Shield, Blessed Hull, Light of Ekhos, Halo of Light, Helping Hand).
Ship of interest: Gur Panther with 28SP for 12pts, can be used to screen Heavy Hitters from enemy fire, providing closest target to enemy inexperienced/standard crewed ships.
Basileans can cheat activation order (Jaymes Ellias) to deal unexpected (both direction) broadsides pain with a Heavy Hitter.
Strategy proposal: Avoid close quarters, make use of H, L, IDW going slow and with a side to enemy fleet, while also repairing damage suffered. Going slow means hitting easier, but also being hit easier, here’s where repairing comes into play. Once close go in between enemy ships and fire both ways. Use Gur Panthers for screen against Ram and incoming fire.
Basilean Average strengths:
Movement to cost ratio,
Nerve to cost ratio,
*Structure Points to cost ratio,
Crew Strength to cost ratio,
*Heavy weapons to cost ratio,
Light Weapons to cost ratio,
Close Quarters Weapons to cost ratio,
Indirect Weapons to cost ratio,
Red Turning Angle availability,
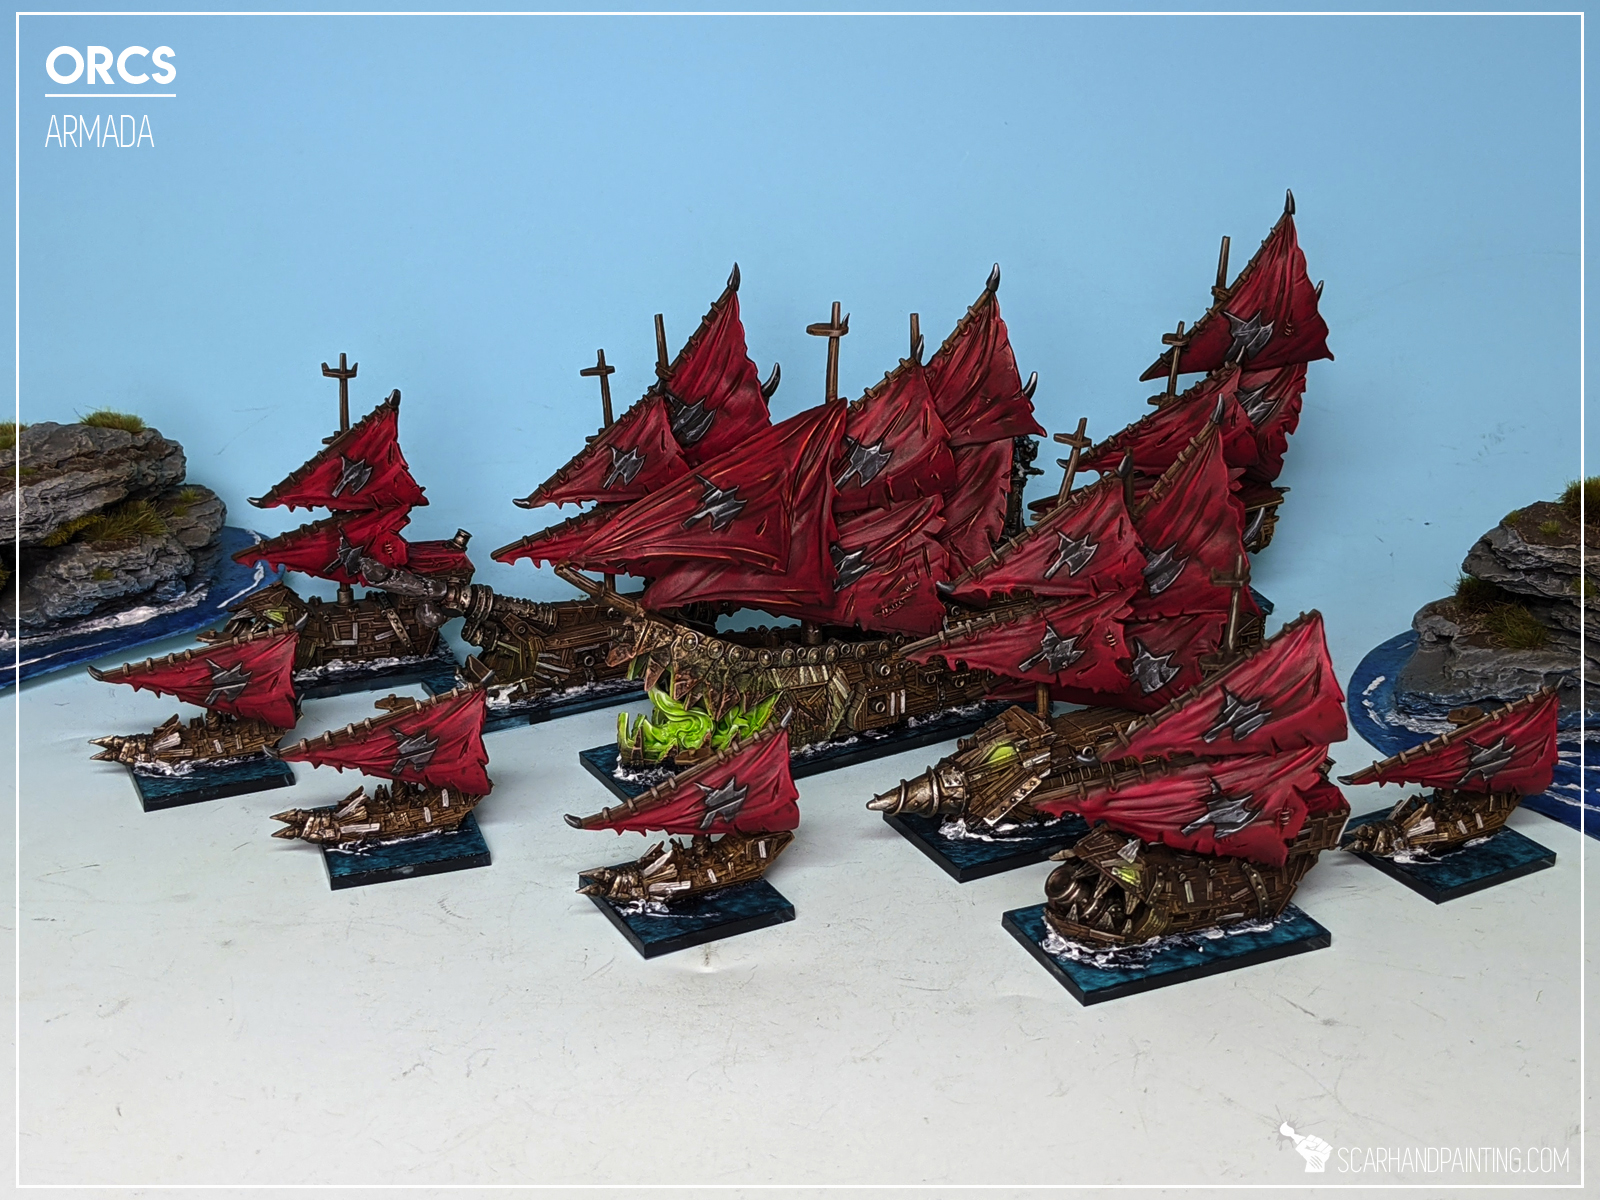
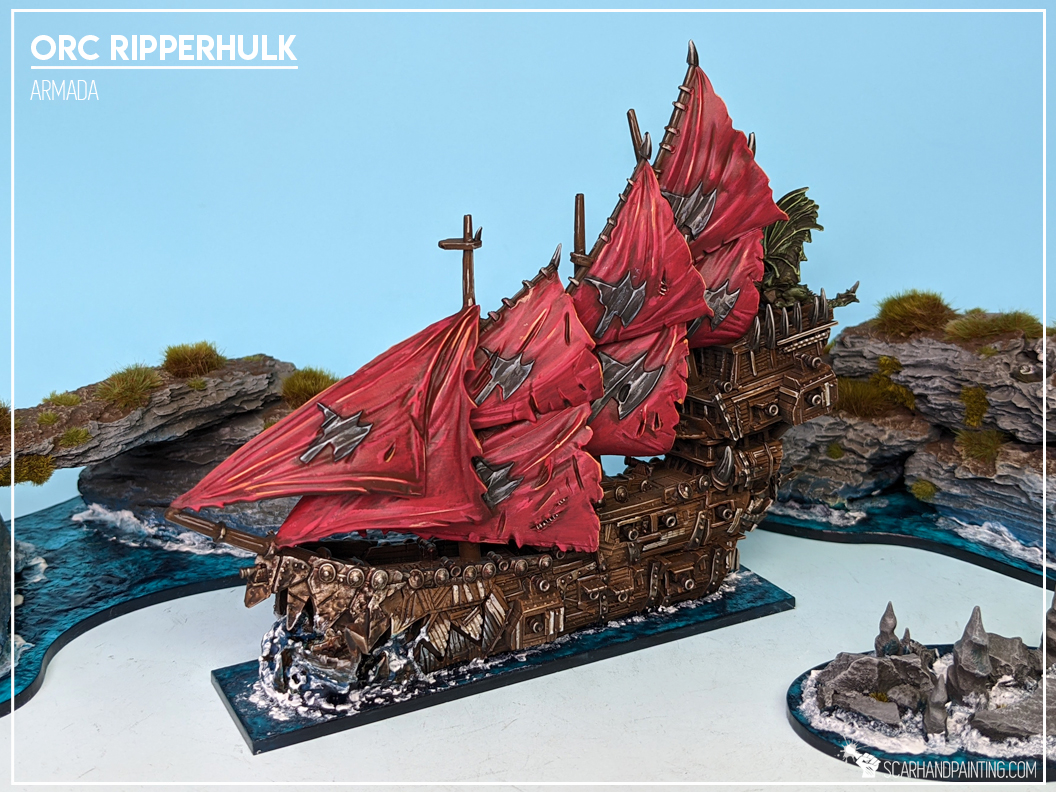
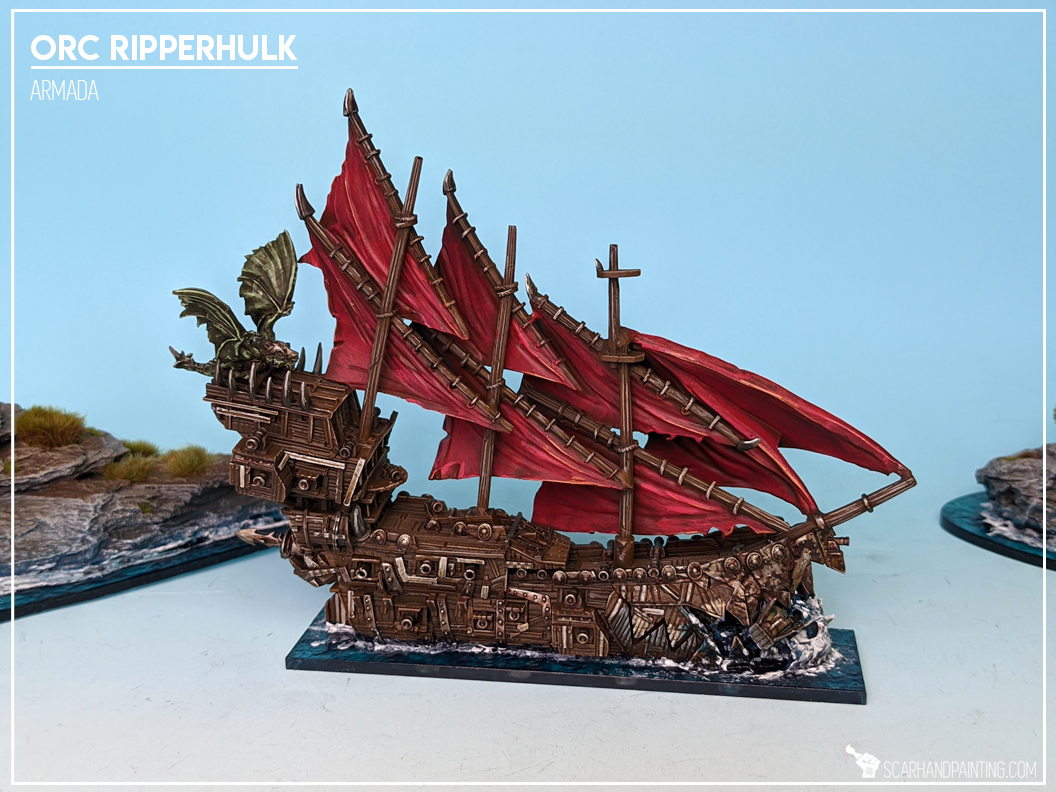
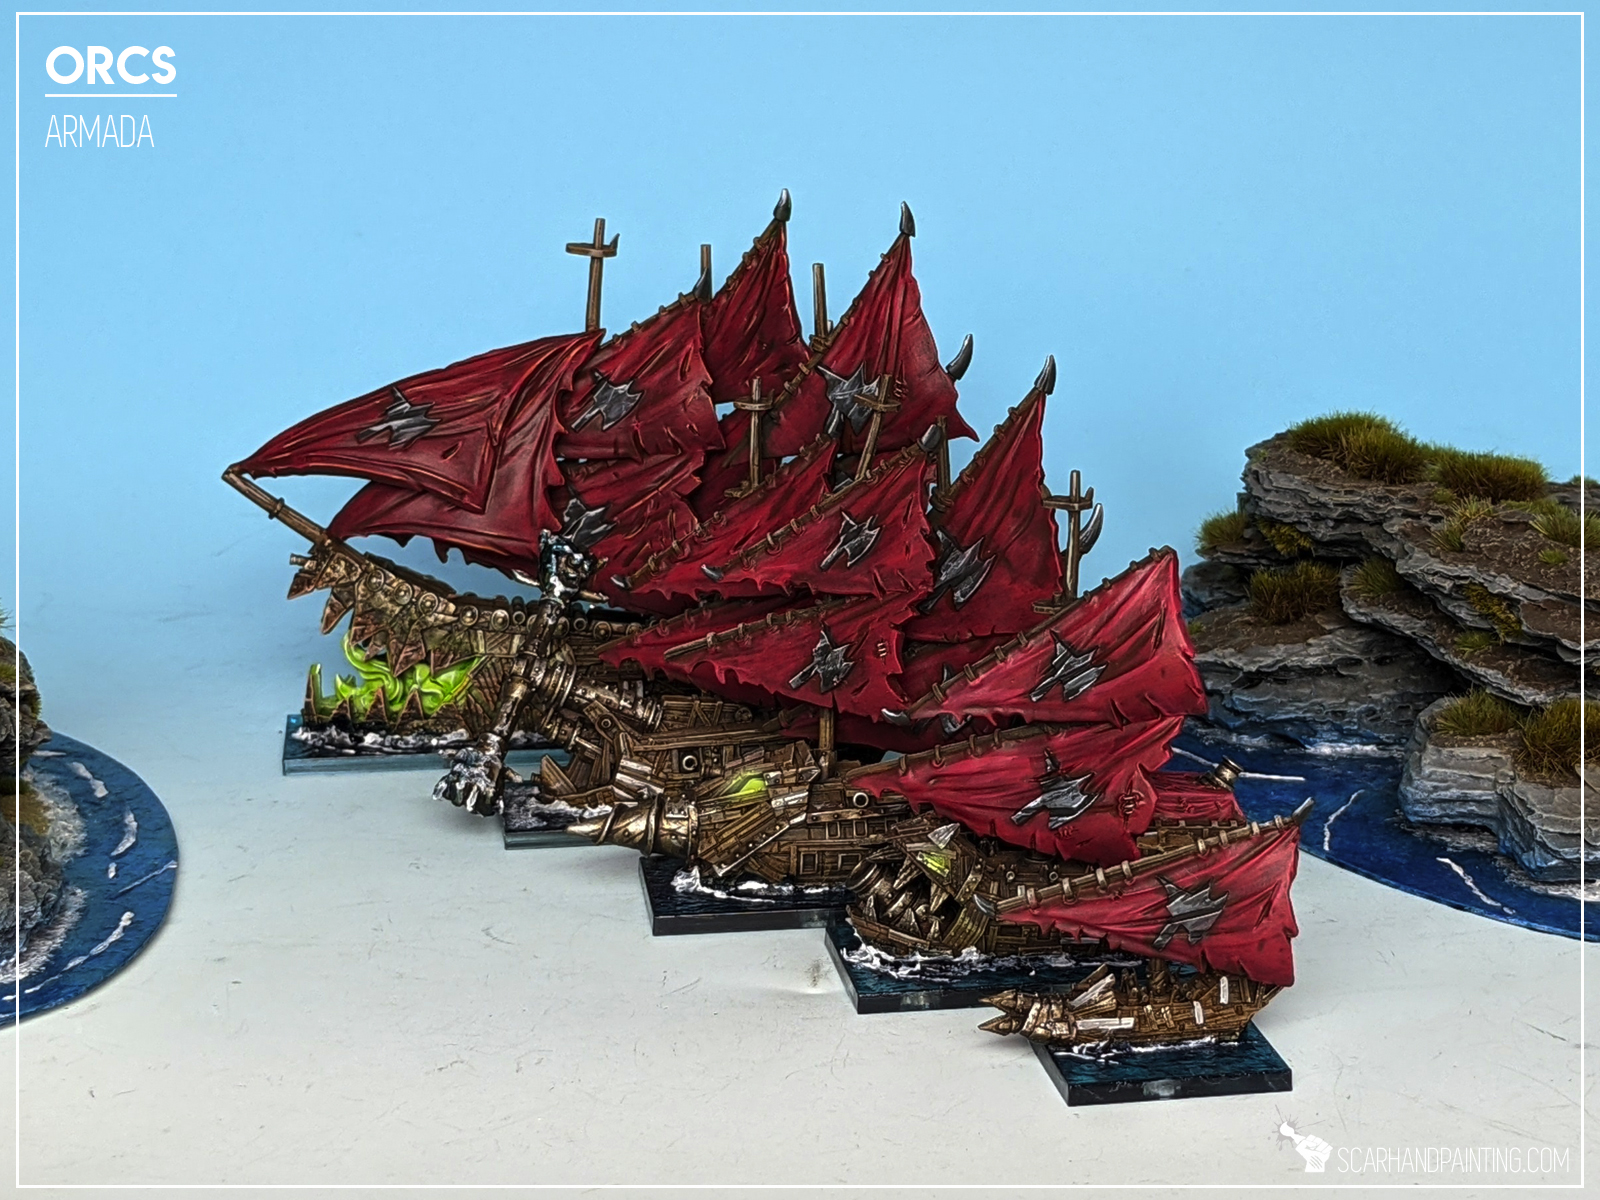
Orc – Berserker faction.
Least durable, but also good SP to points cost ratio makes Orcs a Glass Cannon faction. Orc main strength is Boarding Action, ease and damage increase with which it comes into play (Ram, Morax, War Drum of Spite, Ensnared, Rabble Rousing, Grappling Arm, Crew Strength, Let’s Get Them). Although Orcs excell in boarding, they can also pack a solid punch. There’s a tone of C weapons which can be buffed to a point of madness (Morguns, Yinn Greythunder) and can be leveraged for good positioning (Gorfang Bluejaw).
Strategy proposal: Go hard and fast using Boomboats to disorganize and divide enemy fleet formation (IDW). Fish for solo easy targets with important Heavy Hitters, while ganging up on enemy Heavies with your cheap stuff, ram (deal some damage), immobilize (grapple) and keep them occupied – guns silent, move into position with your Heavies and bomb entire cluster into splinters, cheap Orc ships included. In late game use boomboats to their maximum potential, shooting all directions amidst enemy ships.
Orc Average strengths:
Movement to cost ratio,
Nerve to cost ratio,
Structure Points to cost ratio,
*Crew Strength to cost ratio,
Heavy weapons to cost ratio,
Light Weapons to cost ratio,
*Close Quarters Weapons to cost ratio,
*Indirect Weapons to cost ratio,
Red Turning Angle availability,
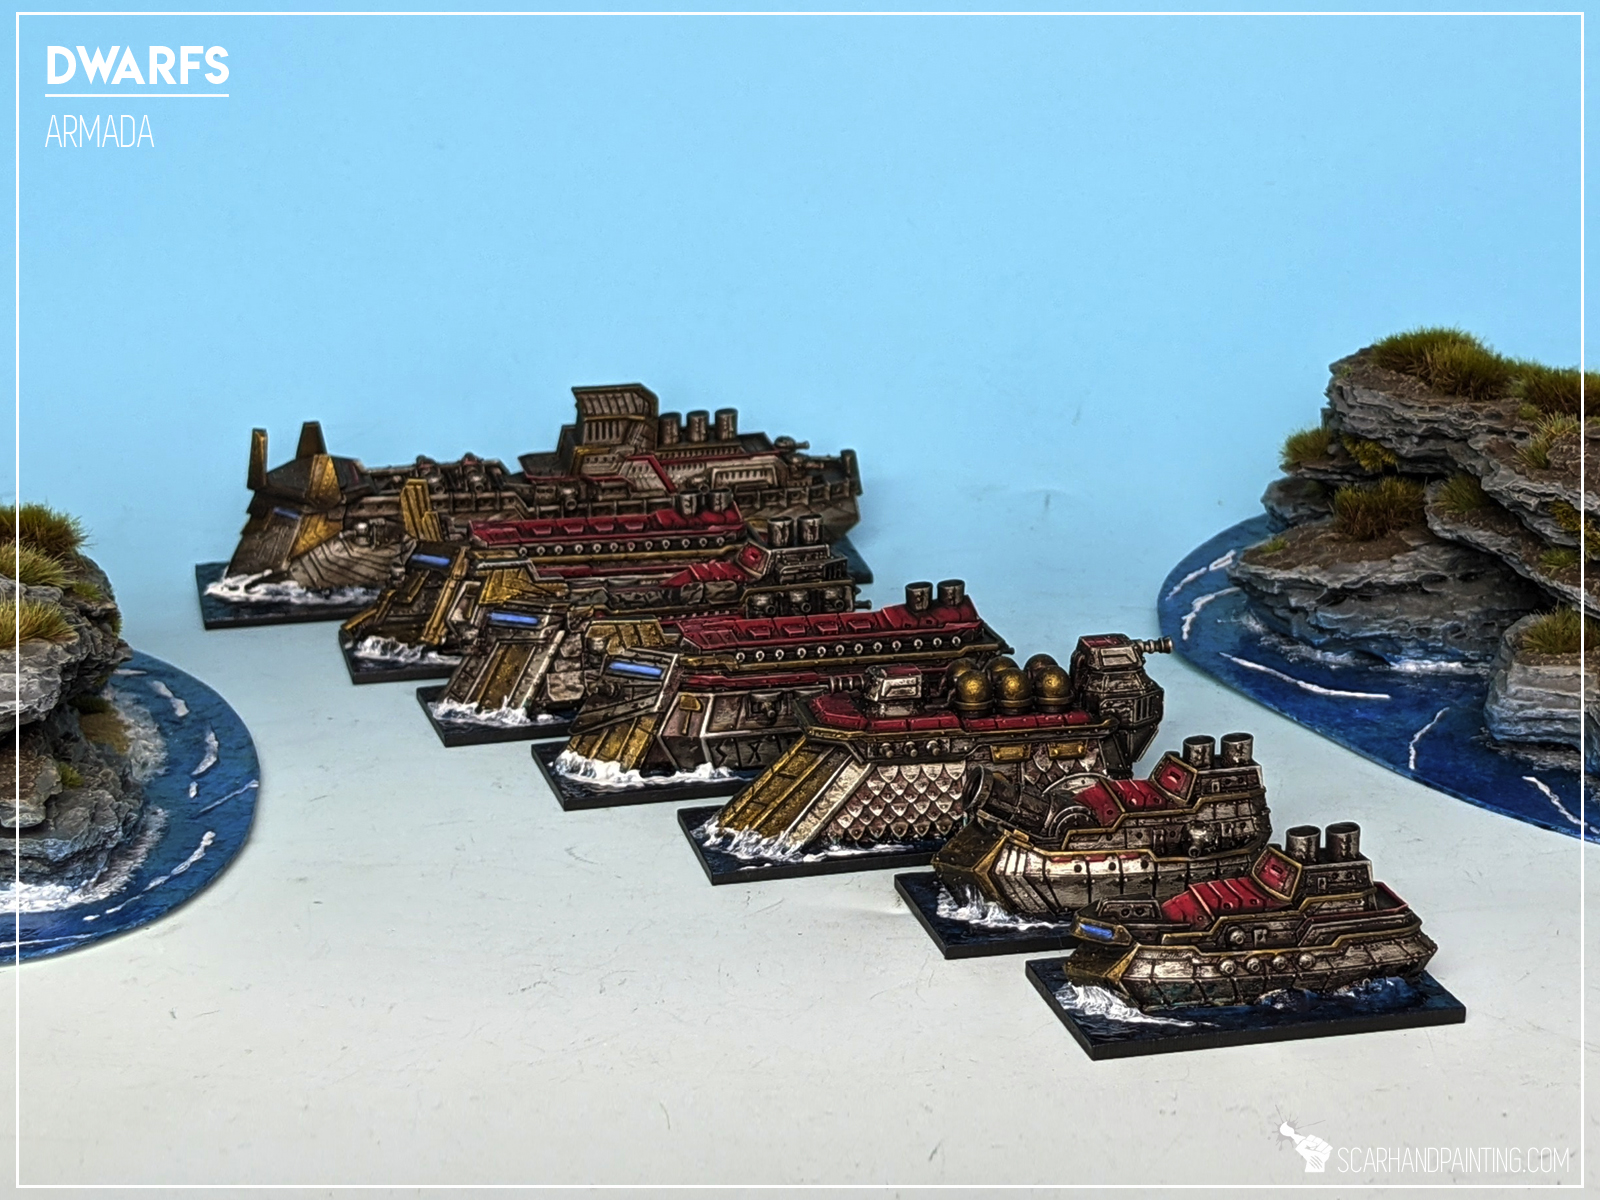
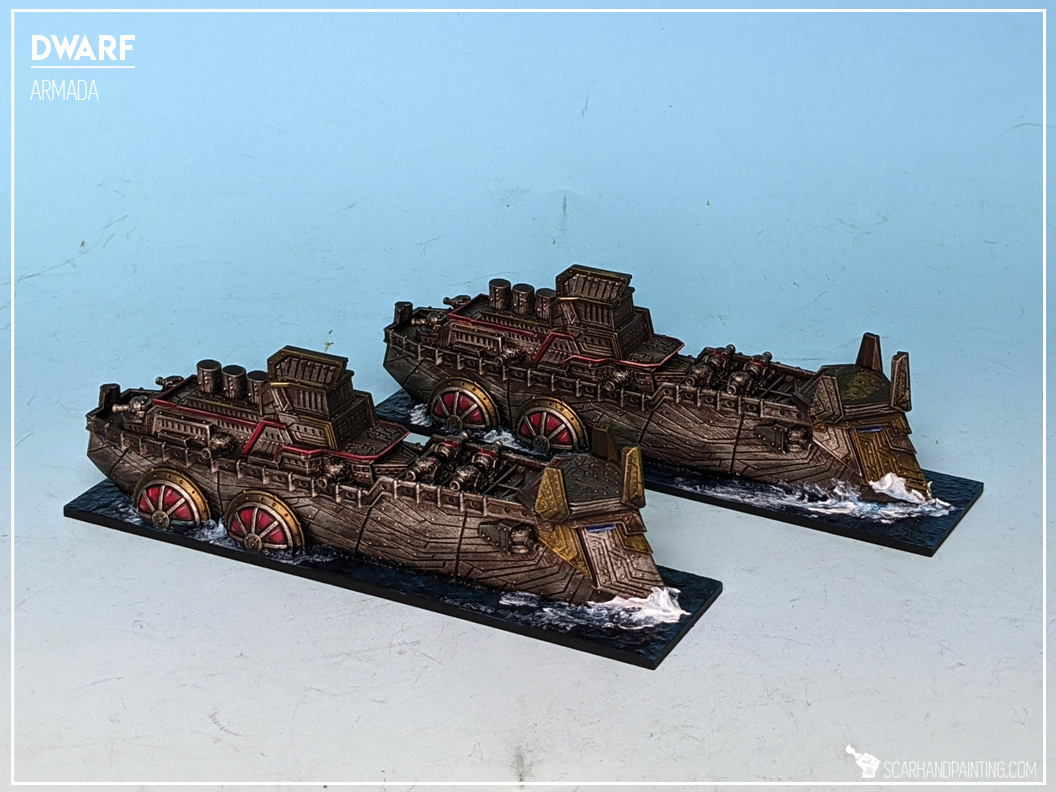
Dwarf – Hammer faction.
Most durable sledge hammer of a faction, packing top numbers of L-H weapons across the fleet. On top of a Nerve re-roll (Headstrong) Dwarfs have access to a large spectrum of upgrades that can fill any holes in their overall straightforward play style. You need durability? Done! (Master Engineer, Advanced Construction). You need to deal with these pesky Boarders? Easy! (Dwarven Ale). Wanna pack even more punch? Dwarfs got your back! Flame Belchers, Ironwatch Marines). This allows to hone certain ships for specific jobs, like Boarding counter, a tank or a heavy damage dealer.
Dwarfs come in steady and focused, thanks to almost flat speed across entire fleet. Once they pierced your fleet – they’ll be back to bite a piece of your stern. (red arcs, Advanced Engines on entire fleet).
Ship of interest: Hunter, packing a solid 3L and 15SP on a 10pts. expendable platform.
Strategy proposal: Go fast and hard, divide and conquer enemy fleet. Dwarfs seem like a faction that want’s to charge, guns blazing, then go through the middle of enemy fleet, wreaking havoc. Pick weakened targets of opportunity for GrimmStones and Furies. Make use of Engines and red Turn Arcs setting up for Raking Fire. Remember about special tools in your fleet – ships, that thanks to proper upgrades, are very good at one particular thing.
Dwarf Average strengths:
Movement to cost ratio,
Nerve to cost ratio,
Structure Points to cost ratio,
Crew Strength to cost ratio,
Heavy weapons to cost ratio,
*Light Weapons to cost ratio,
Close Quarters Weapons to cost ratio,
Indirect Weapons to cost ratio,
*Red Turning Angle availability,
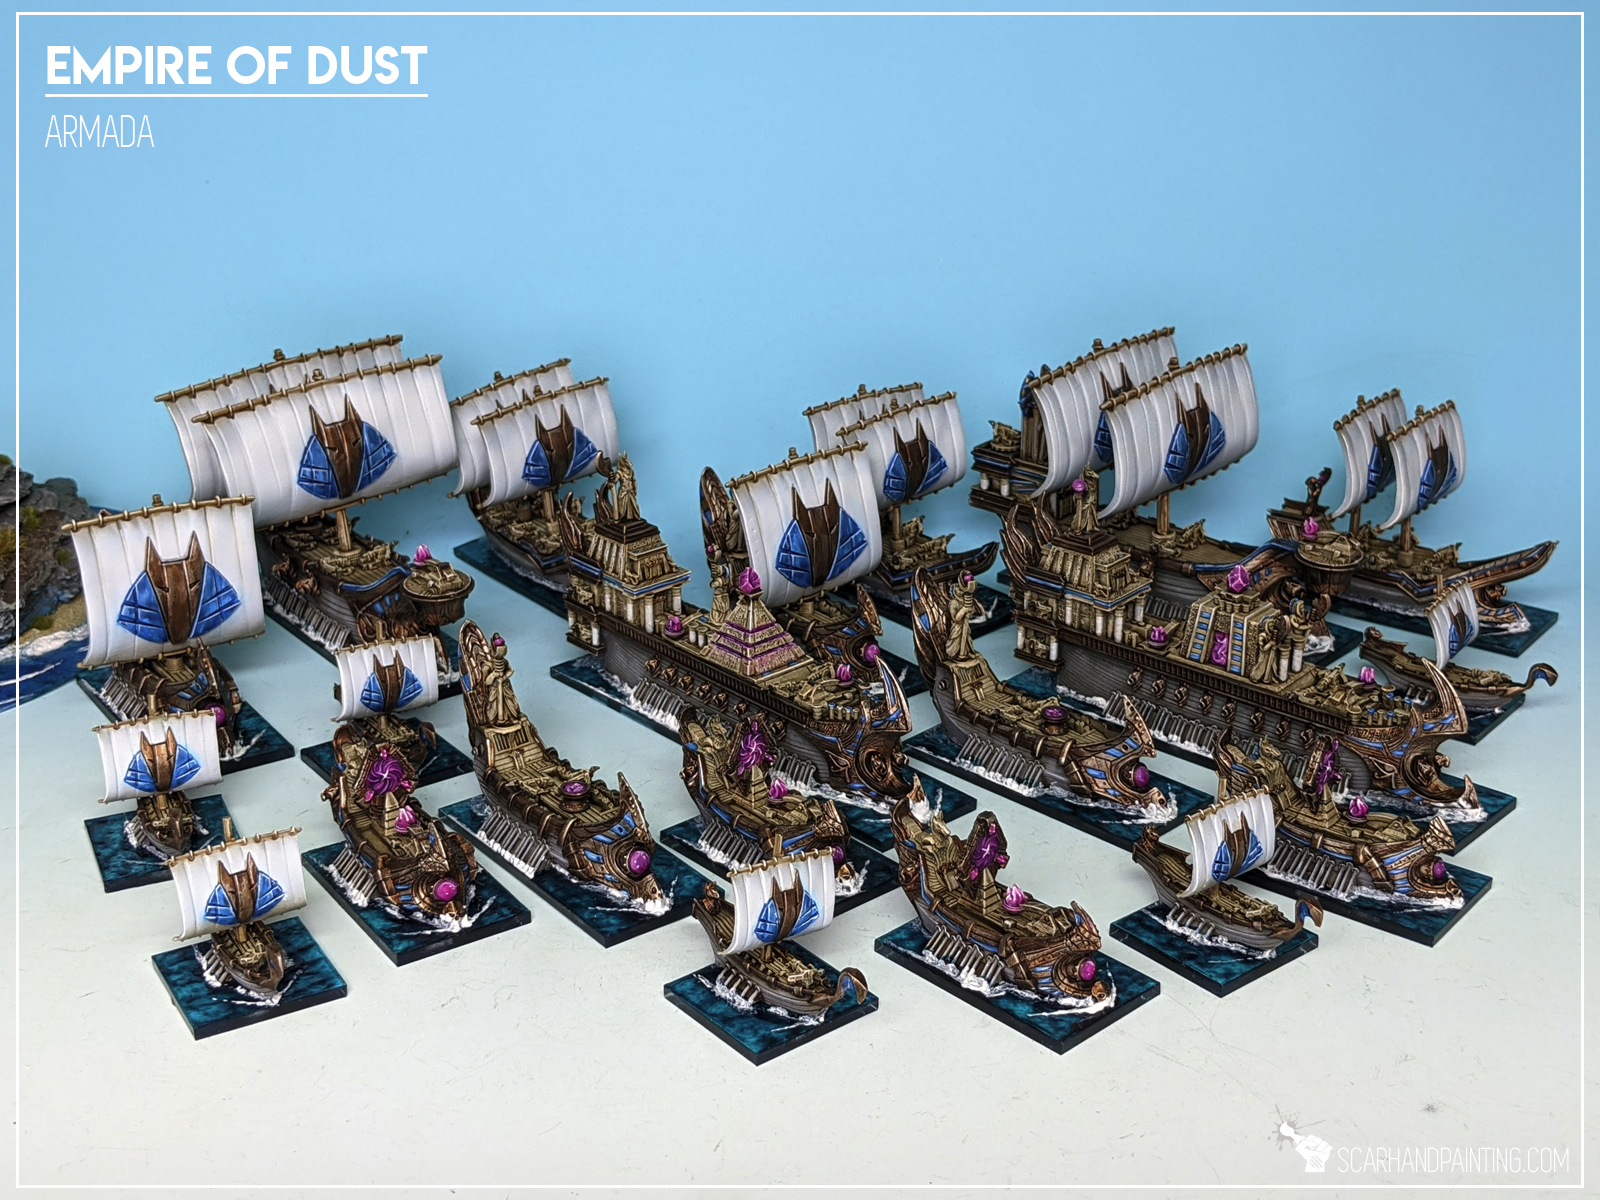
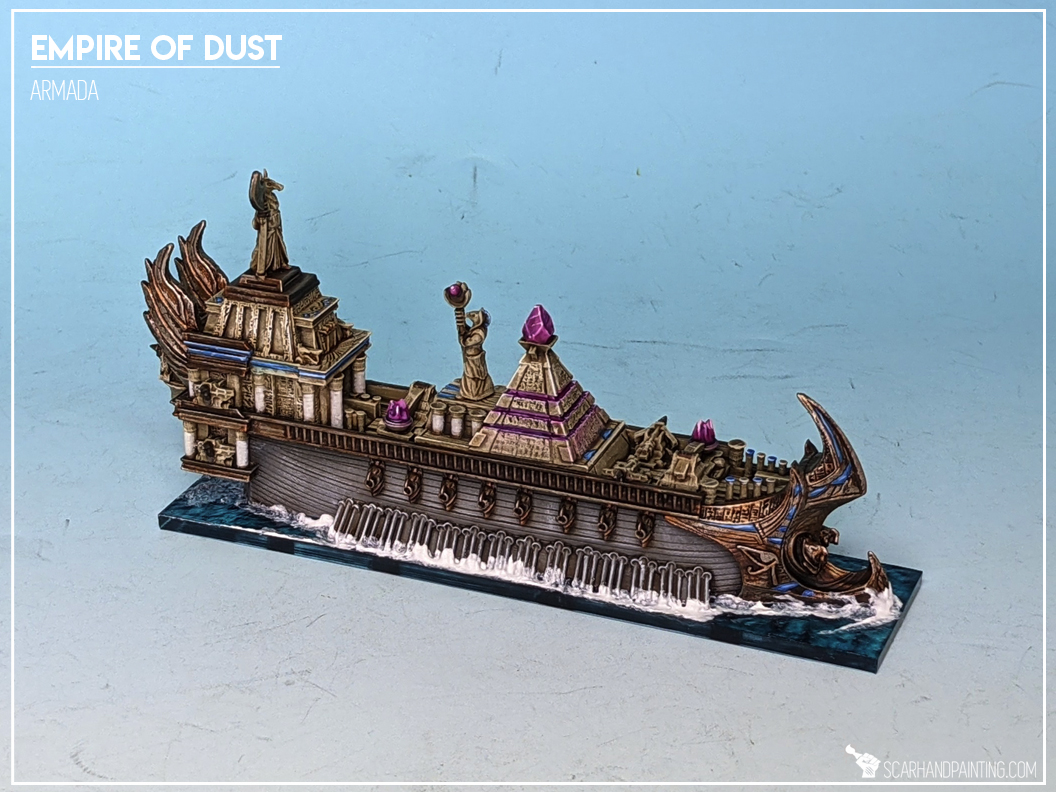
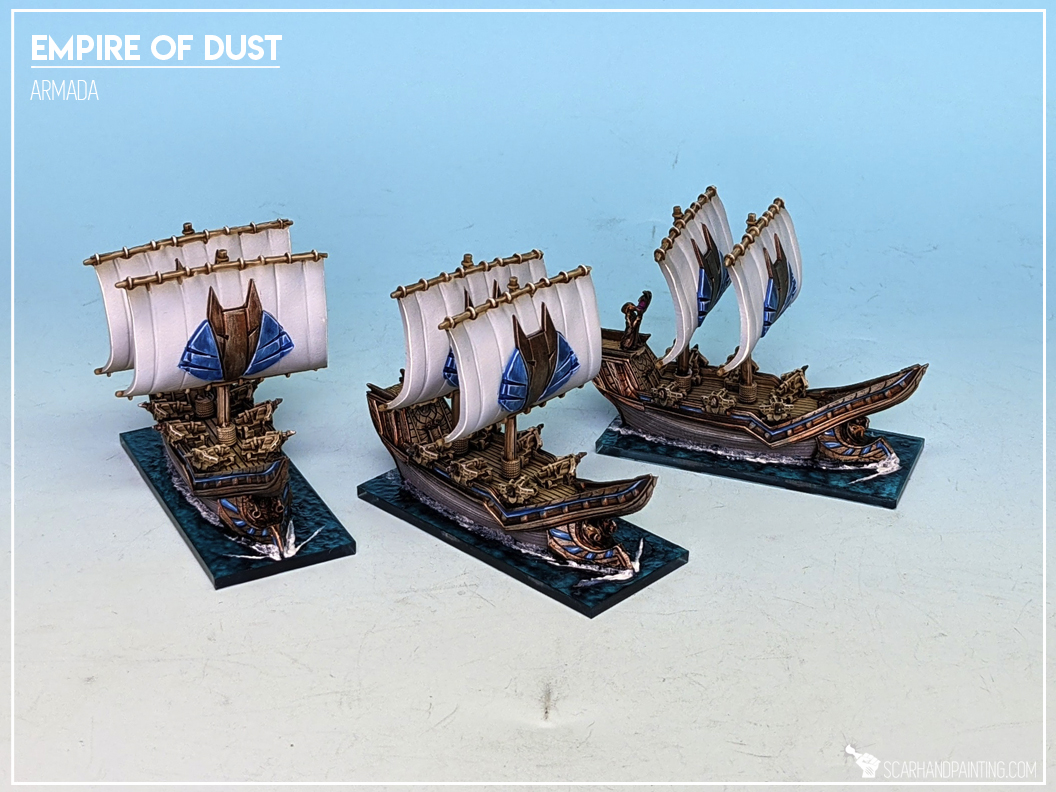
Empire of Dust – Artillery faction.
Straight off the bat the EoD fleet might come as pretty average. Their stat specialty is NV and they excel at IDW. There seem not to be a common theme across the faction, except Boarding Action mitigation (Curse of Undeath, Terror) and bad turning (Yellow Turn Arc all over the place). Yet the EoD comes with a lot of surprises. Different ships specialize in different things and this is what makes this faction Interesting. Empire of Dust is all about where and when… and with which tool. You need to break an incoming blob of enemy ships? War Galley and Soul Hunter will bomb from afar with all that sweet IDW, while rest will add some H and L to the mix. You need to intercept or go hunting for juicy artillery at the back of enemy line? Kopeshi is the fastest ship in the game and has a solid CS, Terror and Curse of Undeath to sway it’s chance in any Boarding Action. Dust Chaser is a Gur Panther with Light Oars, capable of taking a punch while screening your heavies. Most importantly you can extend your heavies lifespan by cheating SP (Slave Squadrons, Expendable).
EoD is also the trickiest faction, being able to deal damage in pretty unexpected places. On top of situational maneuverability (Windblast, High Priest T’Mork, Light Oars) EoD has a range of damage dealing tools (Balefire, Arkhanten the Cursed Slayer, Soul Thirst, Lightning Bolt, Soul Snare).
Strategy proposal: Leverage IDW and keep enemy at a distance. Screen your fleet with Dust Chasers and make a good use of Slave Squadrons to eat up some of enemy fire. Once amidst tight battle, outflank with Kopeshii to pick valuable targets, while the rest of the fleet does some Soul Hunting AoE, IDW up close and bring down carnage.
Empire of Dust Average strengths:
Movement to cost ratio,
*Nerve to cost ratio,
Structure Points to cost ratio,
Crew Strength to cost ratio,
Heavy weapons to cost ratio,
Light Weapons to cost ratio,
Close Quarters Weapons to cost ratio,
*Indirect Weapons to cost ratio,
Red Turning Angle availability,
Hungry for more empire of Dust in-depth analysis? Visit the Empire of Dust is Stronger than
You Think article and learn how to master the undead fleet!
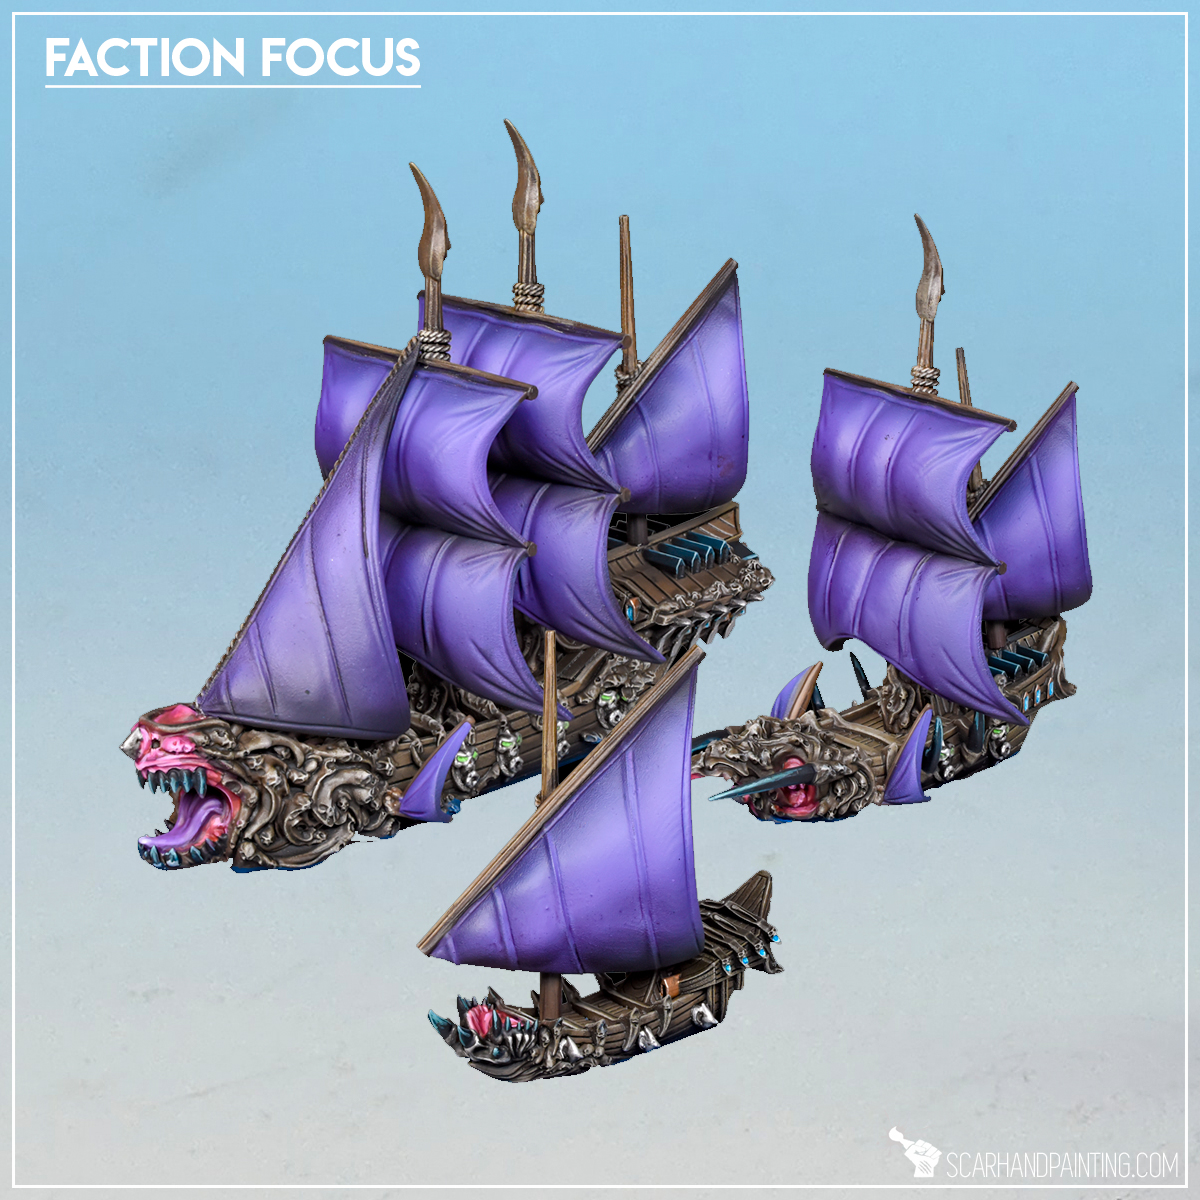
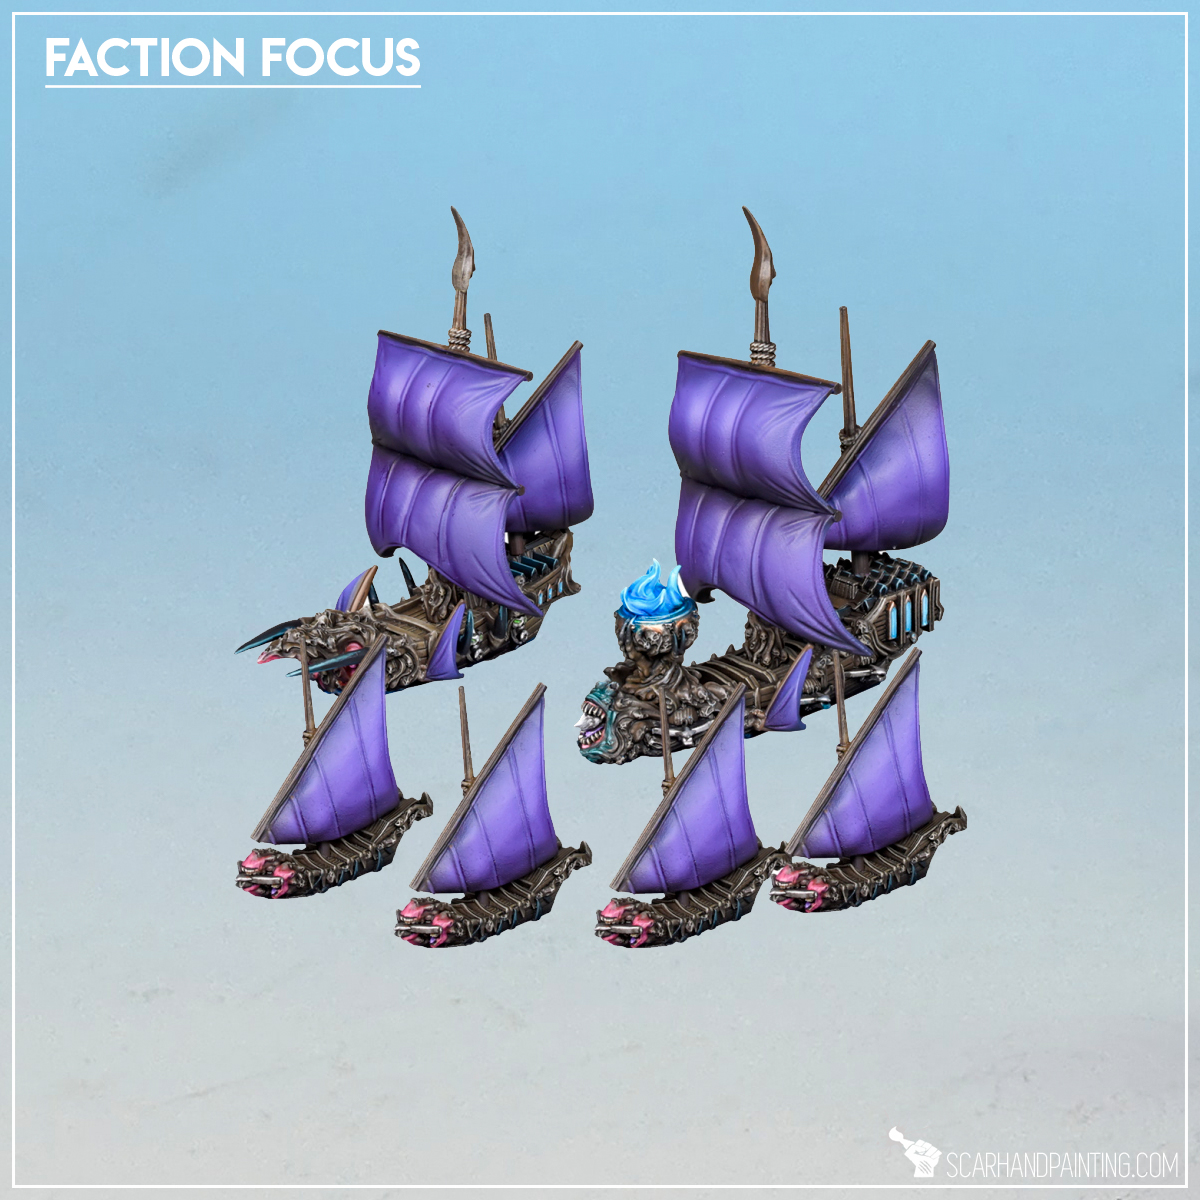
The Twilight Kin – Assassin faction.
Stat wise the Twilight Kin fall into the same archetype as Orcs – the Glass Cannon. This is clearly backed by the highest Crew Strength to Points Cost ratio, 2nd best Close Quarter Weapons to Points Cost ratio and the fact that C Weapons are present on every single ship, except Tiny Needlefangs.
The main difference between the two factions is how they go about dealing damage and the consequences of getting close.
Where Orcs seem a bit more flexible* and prone to sacrifice with crippled suicide Ram exchanges, the more maneuverable Twilight Kin are focused on well placed Boarding Actions and Glass Cannon engagements, dealing massive damage and aiming to cripple, as any retaliation will be devastating to in-fleet synergies.Orc have access to IDW, XL ships, can build ships for either Boarding Actions or Shooting with Morax / Morguns.
Being by far the fastest fleet, combined with access to Shroud (enemy gets -1 to Hit over 8″) the Twilight Kin will get close – it’s a fact. Once in range, assuming key pieces are in place Grappling enemy ships is just a formality (Ensnare, Barbed Harpoons and common upgrades), then it’s Boarding Actions. Here’s where Twilight Kin excel. Blade Dancers, Decimate, Banshee’s Wail improve the odds of defeating enemy ships, but it is the synergies that allow them to outshine the Orcs. Being caught between attacking Blade Dancers and a Banshee’s Wail seem like a quick trip to the bottom of the sea.
Strategy Proposal: When it comes to Shooting the Twilight Kin strength lays in their maneuverability and speed. Coming in fast, turning just before enemy prow to avoid Fire as She Bears Broadsides, unleashing a Raking Fire C salvos up close would be a go to strategy. Then Grapple, then GG. Once Grappled, enemy ships cannot Fire as She Bears, the rest of the fleet can safely position themselves behind a target, either joining Boarding Action or just bombing it with a C Stern Rake.
One thing to keep in mind is the Domino effect. The Twilight Kin rely on in-faction synergies and initial Damage far more than Orcs. When crippled the Orcs can simply throw themselves to Ram, usually getting a great deal out of it. The Twilight Kin have a very high NV to Points cost ratio, but they lack XL ships to hold the fleet together. Once the Twilight Kin start to crumble, the synergies will dim down, the fleet will start to loose momentum and Damage output necessary to pull preferable deals off. Because of that you want to go fast, hard and move to safe positions, be it Boarding Actions or over 8″ and outside deadliest enemy firing arcs.
On a side note: Compared to initial fleets gameplay the Twilight Kin seem like a difficulty level went up. I do believe this is a trend that we will see continued with new releases.
Twilight Kin Average strengths:
*Movement to cost ratio,
*Nerve to cost ratio,
Structure Points to cost ratio,
*Crew Strength to cost ratio,
Heavy weapons to cost ratio,
Light Weapons to cost ratio,
*Close Quarters Weapons to cost ratio,
Indirect Weapons to cost ratio,
*Red Turning Angle availability,

The Kingdom of Men – Marksman faction.
Fast and hard hitting the Kingdom of Men is in my opinion the strongest mid-long range Armada faction. The KoM is basically Basilean ships on steroids, maintaining good Movement, maneuverability and low Cost, while trading fancy rules, IDW and durability buffs for pure Damage output, To-Hit modifiers and insane Nerve shenanigans. With access to Spotter Gunboat Squadrons and Motley Crew, the Kingdom of Men Light and Heavy Weapons shooting is very potent.
The fleet is all about tight formation around Main Battle Ships and two important auras to build around: Solid Command will keep the ships in the fight, even after being crippled, while Spotter will ensure more hits. Large and Extra Large ships can also benefit from a War Wizard, which is a powerful tool to deal with foes that came too close invading KoM’s zone of comfort. Putting a Blaze Marker on an enemy ship is an easy way to force a bad choice between shooting and a risk of being blown up on a roll of “1”, on next activation.
The Kingdom of Men Flagship can be improved with choice of Captains. Kraiger is a solid Nerve buff, while Dead Eye McHardy turns unmodified “9” into Crits, doubling the Crit chance. On a ship like a Conqueror, which is basically a Basilean Dictator, the Critical Hit chance buff is pretty deadly.
Strategy Proposal: Staying at Steady Speed in a tight formation ensures all ships benefit from auras and allows Gunboat Squadrons to keep up. Enemy IDW might be a problem so unless there are C heavy ships closing in, IDW should be the main target, as otherwise the Kingdom of Men dominates Long Range Shooting. For this purpose it is imperative that all ships are equipped with Crows Nests. In case of no IDW and slow enemy fleets the KoM can Anchor comfortably to increase To-Hit chance, except Frigates. Inexperienced Crew, Sturdy Construction Frigates are perfect to be used to screen the fleet and force enemy ships to fire at an unfavorable targets. Because of that they should always be moving, thus more difficult to hit.
Finally, as Nerve is not an issue, the KoM can baldly undertake some high risk high reward actions if things get to close and personal.
Ship of note: Conqueror, packing a solid 6H, 3L, 3C with a cheaper Veteran Crew and Critical Hits on “9-10” is just a must have. With Master Carpenter, Dead Eye Hardy, Motley Crew and Crow’s Nest this beast is barely 99 points. *Drops the mike*, or rather an Anchor.
*Movement to cost ratio,
Nerve to cost ratio,
*Structure Points to cost ratio,
*Crew Strength to cost ratio,
*Heavy weapons to cost ratio,
*Light Weapons to cost ratio,
Close Quarters Weapons to cost ratio,
Indirect Weapons to cost ratio,
Red Turning Angle availability,
Elves – Spearmen Faction
Fast, nimble and precise, the Elves sail into Armada with a very interesting set of stats. Although average speed is being dragged down a notch by XL ships, the Elves are the fastest faction on a ship by ship basis. With a Red Turn Arc on par with Dwarfs and the Twilight Kin, the Elves claim the very top thanks to Masters of the Waves skill, which allows them free extra turns at the end of first Move during each Activation. Combined with an immense arsenal of Light Weapons, this extra agility allows for some deadly shenanigans.
When it comes to weaponry the Elves pack the highest L/ship across the fleets and a solid number of H Weapons. They also have access to one IDW vessel type with lack of C being the only drawback to the fleet’s arsenal. This mid-long range weaponry setup is further enhanced with Elven Eyes, allowing Elves to ignore -1 To-Hit for long range shooting.
Up Close is where Elves does not feel comfortable. They come with average CS, lowest SP/Cost ratio, worst NV on average and no C weapons. To put it simply – unless necessary, you really don’t want to engage the enemy fleet up close.
Strategy Proposal: Go steady and keep the enemy fleet at length, making full use of Elven Eyes, buffed IDW and Auto Criting Enchanted Bolt Thrower. Adjust speed to keep Argus Squadrons within aura range and add that extra umpf to your Crits and eventually aura heal with Green Lady’s Blessing before you commit to full scale sailing. Once the opponent starts to catch up, increase Speed and go around and on the back of enemy formation. With low SP and no C Elven ships are a bit too fragile to risk cutting through against probable Fire as She Bears. If you went with Therennian Sea Guard and are within Kindred Bond you may consider Boarding Action to entangle important enemy damage dealer and buy time for your heavy hitters to sink easier targets. Otherwise avoid unfavorable Boarding Actions until no other choice.
Assume proper strategy in line with choice of captain: Stormwing Captain (adds another free turn from Masters of the Waves) or Madriga (once per game counts one shooting position as Point Blank for Damage purposes). Both can give you an edge when facing against heavy damage dealers.
*Movement to cost ratio,
Nerve to cost ratio,
Structure Points to cost ratio,
Crew Strength to cost ratio,
Heavy weapons to cost ratio,
*Light Weapons to cost ratio,
Close Quarters Weapons to cost ratio,
Indirect Weapons to cost ratio,
*Red Turning Angle availability,
Salamanders – Shieldwall Faction
To put is simply – the Salamanders are sea turtles. They come slow and steady, in a tight ‘shell’ formation that enhances their many short range auras and synergies (Elemental Roar aura, Clan Ensign aura, Shield aura, Blessing of the Three Kings). Ignoring Critical Hits (Blessing of the Three Kings) combined with canceling Crippled (Shield) and being able to re-roll extinguish fire Skill tests makes the Salamanders the most resilient fleet up to date. They have exceptional damage reduction, yet that doesn’t mean the Salamanders are not capable of bursting into movement and doing some shenanigans up close. Still I feel like they’d rather take all the advantage of their many long range weapons (including double IDW) and Blaze related tricks (Red Hot Shot) – softening their prey right before engulfing it in close range fire and boarding (Corsairs).
Stat wise, the Salamanders excel at Nerve, Heavy and Light Weapons, but it is the lack of evident drawbacks that makes them stand out. They are, at the very least, average on all other stats. Add access to all ship sizes and you have a solid base to build all the combos and strategies on top of.
Salamanders come with two interesting Captains choices, both adding FREE additional upgrades that doesn’t take up slots on the ship. This allows for turning a L or XL ship into a real deal top tier vessel, bristling with upgrades. Additionally Arhkblash Deezelo comes with a fancy rule of forcing re-rolls of successful extinguish fire tests on enemy vessels… which is just nasty.
Strategy Proposal: Take advantage of all the H, L and IDW by going steady and slow. Keep in tight formation, depending on auras to reduce incoming damage even against enemy IDW. Prolonged long range bombardment should soften enemy fleet to a point where it is optimal to fire up Elemental Roar and Clan Ensign and just go for it, choosing targets of opportunity and concentrating on crippling as many ships as possible before closing the formation for a long come about around the table. Use Corsairs and Boarding to your advantage, intercepting CS heavy enemy ships before they catch to your weaker ships. Remember that once Ablaze, enemy ships are forced to do nothing or risk getting blown into shreds, thus it might be wise to ignore ships on fire, switching attention to a more immediate threat.
Movement to cost ratio,
*Nerve to cost ratio,
Structure Points to cost ratio,
Crew Strength to cost ratio,
*Heavy weapons to cost ratio,
*Light Weapons to cost ratio,
Close Quarters Weapons to cost ratio,
Indirect Weapons to cost ratio,
Red Turning Angle availability,

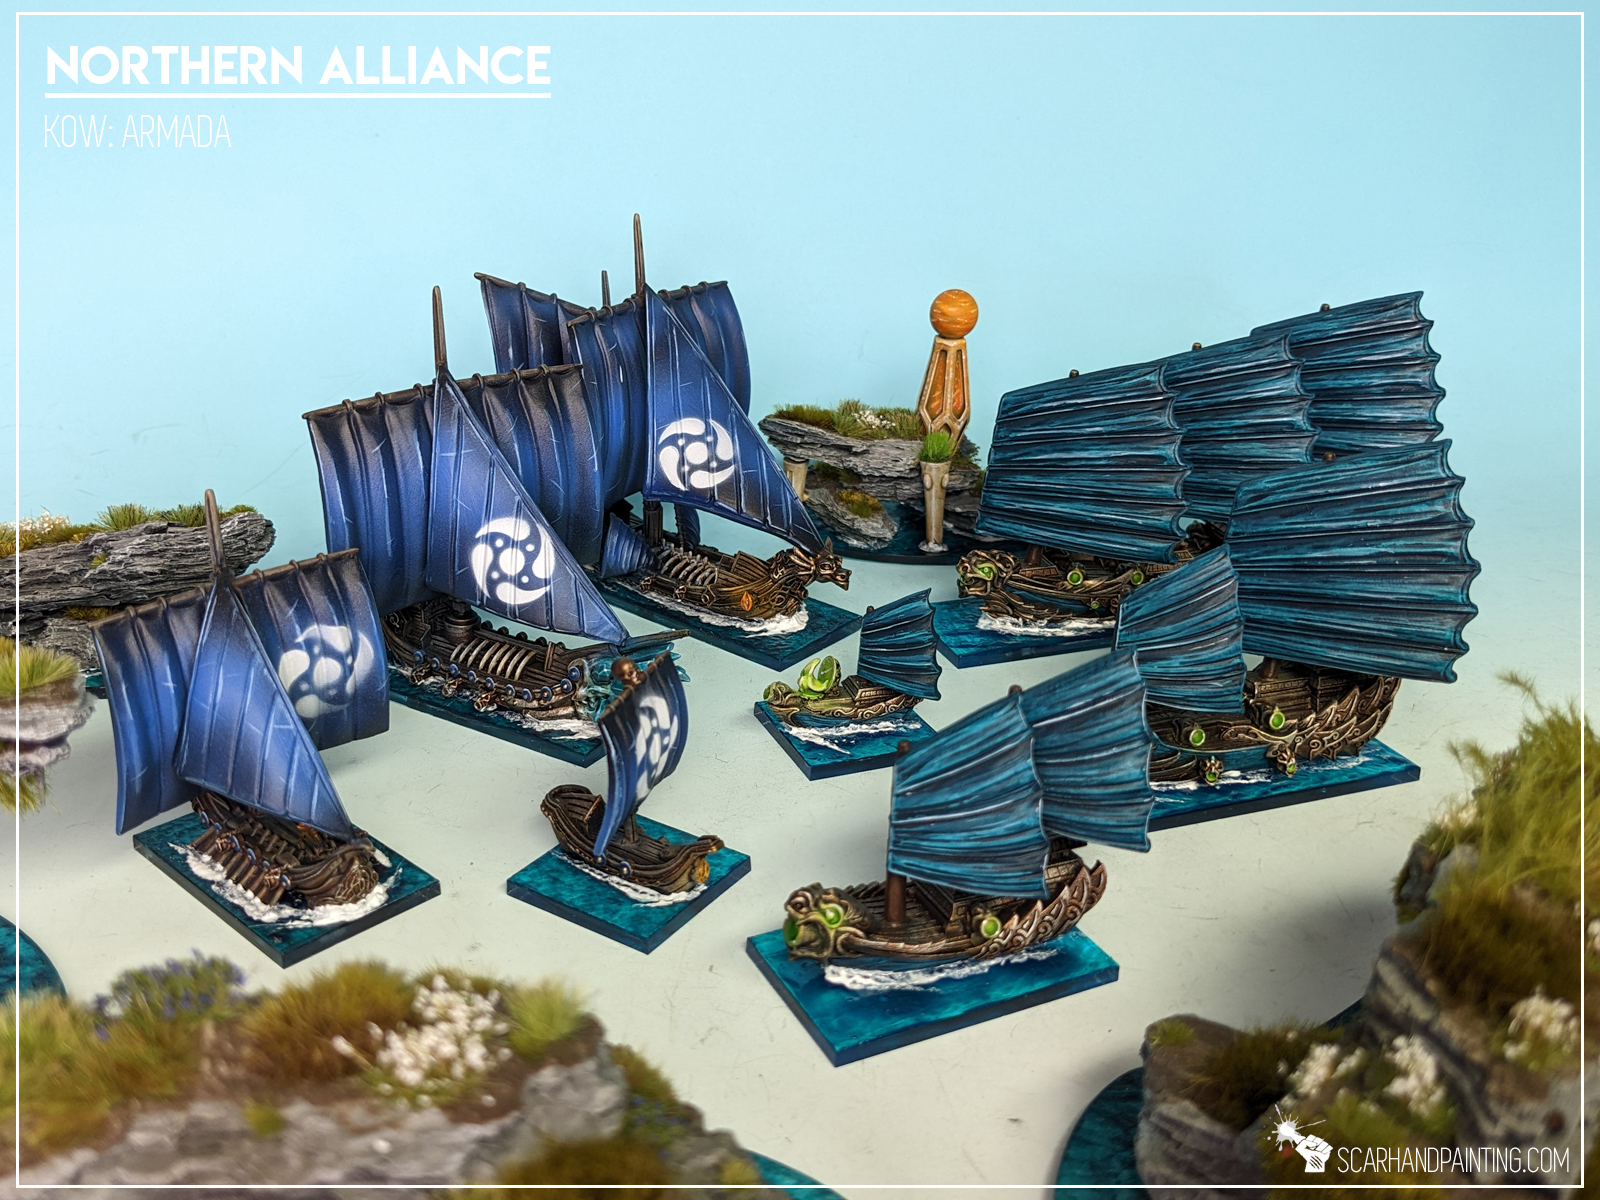
Varangur – Heavy Cavalry Faction / Northern Alliance – Light Cavalry Faction
At first glance both the Varangur and the Norther Alliance are very much close quarters specialized fleets that would benefit from closing the distance with enemy fleet as soon as possible. Smaller, more maneuverable ships pack an array of mainly L and H weapons and a variety of rules supporting high maneuverability (Oars, Navigator, Light Oars) allowing them for easier ‘Cross the T’ damage dealing and pursuing or dispersing depending on the situation. Starting with L size ships the damage output up close increases drastically, as here is where almost all the C weapons of both fleets is located. Large and Extra Large ships are a bit slower, but much more devastating – definitely focus points of the fleets around which the battles will be decided.
Stat wise both factions are very similar with Nerve and Structure Points to points cost ration being slightly weaker than standard, but at the same time thanks to XL ships C and IDV ratio being one of the highest.
The biggest difference between the two fleets is their playstyle, which comes mainly from Fleet Rules and Upgrades. Both fleets would benefit from fast approach, yet whereas the Varangur would happily stop right upon ‘impact’, exchanging blows to hopefully start a chaotic Boarding Action brawl, the Northern Alliance would rather disperse and come about for another charge. The difference can best be seen in how both named XL ships are armed, Reaper’s Mask (Varangur) packing a solid 3C up front and a broadside 2IDW / Vallellion (Norther Alliance) with 2IDW up front and a 3C at its rear.
Rules wise the Varangur is centered around punishing the enemy for getting too close. With additional shooting (Infernal Runes) and melee damage (Retribution, Sons of Korgaan), combined with some nasty tricks (God Runes of the Deceiver, Ohthere Bloodhair) the enemy captain should think twice before entangling their fleet with the Varangur. Add an array of potent maneuverability tricks (Var’Kyr Gloamspryte, Oars, Light Oars, Navigator) and a punishing maneuverability debuff (Gaze of Korgaan, Ram) and you can easily imagine enemy fleet stopped dead in place. surrounded and picked one by one in a brutal brawl.
The Norther Alliance, at the other hand, is more about spearing through the enemy formation. Increased speed (Glide) allows for some unexpected speed boosts, whereas increased maneuverability (Oars, Light Oars, Navigator) combined with enemy options hindrance (Stormcaller, Skadi) will leave the enemy fleet disoriented. All the while the Nothern Alliance ships will come about for another round of damage dealing. Still these are not all of the tricks employed by the fleet. Ships redeployment (Aelfred), increased Nv (Dwarfen Clan Beer) and damage reduction (Ice Naiad Ensnarers) combine into a picture of increased reliability.
To sum both fleets up I would say Varangur is ‘more brutal, here and now’ brawlers while the Northern Alliance is more ‘powerful blows and disorienting tactics employed with precision’ ambusher type of faction.
Strategy Proposal: Go straight for the kill, screening vital fleet elements with full speeding Skeids and Icebreakers (damage sponges). Once close use Ram to remove smaller enemy ships from the equation. Slide in with main damage dealers then, depending on fleet (Varangur/Northern Alliance), either initiate Boaring Actions (Karvi Squadron might be helpful), or disperse and pick the targets of opportunity from behind. Maneuverability is your main strength, thus redirecting your ships while leaving enemy entangled should be the main focus. When setting up for a kill of larger enemy ships, use oars and light oars to set up inconvenient ‘domino’ collisions, denying them a chance to fire broadsides. Do not fear to initiate/take Boarding Actions with similar ship sizes, especially when playing Varangur.
*Movement to cost ratio,
Nerve to cost ratio,
Structure Points to cost ratio,
Crew Strength to cost ratio,
Heavy weapons to cost ratio,
Light Weapons to cost ratio,
Close Quarters Weapons to cost ratio,
*Indirect Weapons to cost ratio,
Red Turning Angle availability,
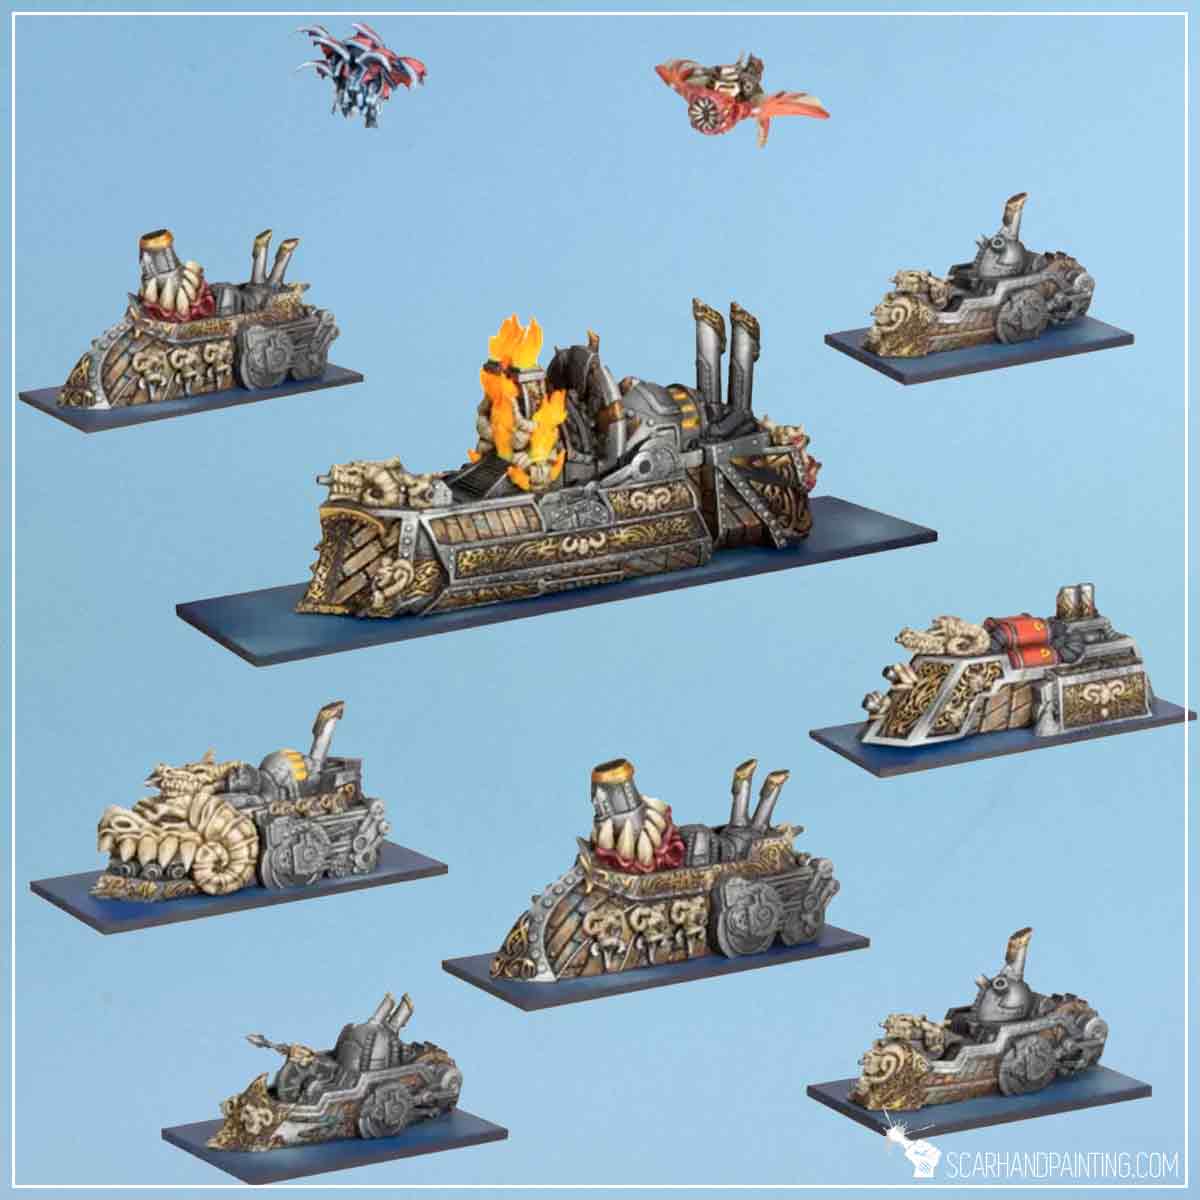
Trident Realms – Swarm Faction
The Trident Realms are a faction like none other. It makes the faction difficult to put in perspective. For starters the Trident Realms ‘ships’ does not have ANY broadside nor rear Weapon Positions and instead pack a lot of firepower up front. This means they cannot profit from Raking Fire, but also that they can focus all their efforts at moving towards enemy fleet and shoot all their weaponry at the same time.
As (Partially Submerged) sea creatures the Trident Realms ‘ships’ impose a -1 To-Hit modifier to any shooting directed at them, giving them an edge.
More so, the sea creatures leverage some very potent movement shenanigans. They do not have a Turning Arc on their ship cards, but can use a particular type of turn depending on declared speed. (Hunters: Yellow on Full Speed, red on Battle Speed and a pivot of up to 180* if Steady Speed or Anchored). Turning is not the end of their heightened maneuverability. Combined with being able to move underneath enemy ships instead of Evading (Fully Submerged) can lead to the Trident Realms ships gaining a huge positioning advantage.
Last, but not least, the Trident Realms fleet does not have any Fliers, but can include Tidal Terrors instead. These Tiny sea creatures behave more like Squadrons, but can Grapple enemy ships and impose heavy debuffs on them while doing so.
Upgrade wise, the Trident Realms pack an array of interesting choices. Not only can each ship be equipped with insanely potent damage reduction (Armored Scales), but also deal some auto damage in freshly initiated Boarding Action (Naiad Heartpiercers). The fleet is also strong in fleet-wide buff department with access to one turn Skill Test buff (The Will of The Sea), or a Tidal Terror Crew Strength buff (Captain Papacito). Last on the list is Captain Eckter buffing Nerve Tests and packing an additional 360* 1L attack that pushes enemy ships directly away.
Finally, when it comes to stats, the Trident Realms ships emerge relatively strong at Movement to cost ratio, pack impressive number of Heavy weapons and thanks to Tiny Wyrm-Drawned Sloop Squadrons and Small Knucker Chariots have the best access to Indirect Weapons in the entire game. On the downside the Trident Realms are rather low on Structure Points and have the worst Nerve Value amongst all the fleets. One might summ up the fleet as fast, cunning and brutal, but not long term reliable.
Strategy Proposal: With prow mounted weapons and built in -1 To-Hit mod, do not fear to go straight for the toughest enemy ship. Go forth, guns squirting to deal as much damage as possible, before slowing down to Battle Speed (to avoid speed related -1 To-Hit mod). Shoot at Point Blank range for maximum affect, then dive underneath the target, grapple for extra damage (Naiad Heartpiercers) or wait at the other side for your next Activation. Remember to keep a Kyr-Angler (Blinding Beacon) in range to avoid getting shot Point Blank in retaliation and you should be good to start your next turn slowing down further for that sweet 180* pivot and another round of squirting glory.
Cunning enemy can try to make your life harder by speeding up to Full Speed, but it’s nothing that a Giant Squid (Tentacles), a Leviathan (Ram x) or a nasty Evade debuff (Ensnaring Nets) and a durable Gun Turtle speedbump can’t handle.
*Movement to cost ratio,
Nerve to cost ratio,
Structure Points to cost ratio,
Crew Strength to cost ratio,
*Heavy weapons to cost ratio,
Light Weapons to cost ratio,
Close Quarters Weapons to cost ratio,
*Indirect Weapons to cost ratio,
*Red Turning Angle availability,
Abyssal Dwarf – Anvil Faction
On the surface the Abyssal Dwarf fleet might seem similar to their Dwarf brethren, but when you delve into the ‘abyss’ of things – this couldn’t be further from the truth. The ‘Evil Dwarfs’ might come in similar size and likely equipped with powerful Engines, but the faction theme is much more focused on Reliability with a pinch of risk. For starters the Hellforged Engines allow to use Oars/Engines rule at the start of each Movement Step, but at a risk of taking damage (Fortunately mitigated by the Ironcaster upgrade). The fleet is also less impacted by Nerve Tests with NV increasing upgrades (Immortal Guard), Support wide Nv buff (Slave Crew fleet rule), Nv re-roll Auras (Sacred Horn of Zarak Magical Upgrade) and a Captain (Vadak Ratbane – Supreme Taskmaster).
The assortment of weapon carried by the Abyssal Dwarf fleet is truly deadly. Most ships carry Close Quarters Weapons (C) and thanks to Ariagful’s Flame fleet wide rule, are allowed to re-roll any to-hit rolls of “1” when shooting these. Ariagful’s Flame is especially good on Decimator (Support M) synergizing with its Dragon Fire Team, capable of applying Blaze to targets hit with Close Quarter Weapons.
The fleet is also very potent when it comes to Indirect Weapons, available on not one but two platforms. The Katsuchan is your standard support artillery piece with 2IDW and a solid, if a bit risky Overcharging Guns rule, allowing for more reliable damage output at a cost of sporadic Blaze erupting on the ship itself. Angkor in the other hand is a Main Battle Ship with a Hellmortar rule, that reduces the IDW to-hit modifier to -1 and allows to roll 2D6 for damage and then pick the highest roll.
On the side of upgrades the Abyssal Dwarfs bring some potent melee onto the table (Immortal Guard), Hellforged Engines damage mitigation combined with Fire Extinguish bonus (Ironcaster), solid Nerve Test re-roll aura (Sacred Horn of Zarak, increased mobility (Captain Dravak Dalken addint a Red Turning Angle and some other bonuses) and the aforementioned Captain Vadak.
Strategy Proposal: To get the best of Nerve buffs and auras the fleet should move in tight formation. Increased Nerve allows for some risk that other fleets wouldn’t feel comfortable with. Bring the Abyssal Dwarf fleet close blasting with IDW’s then start obliterating enemy ships point blank with all those deadly C weapons. Engines are a great tool to outmaneuver enemy ships, come in through tight gaps and set your ships for perfect rakes. High risk – high reward, but not without some safeguards 😉
Movement to cost ratio,
*Nerve to cost ratio,
Structure Points to cost ratio,
Crew Strength to cost ratio,
Heavy weapons to cost ratio,
Light Weapons to cost ratio,
*Close Quarters Weapons to cost ratio,
*Indirect Weapons to cost ratio,
*Red Turning Angle availability,
Ghost Fleets – Shift Faction
In many ways the Ghost Fleets are an exception to core game mechanics. First of the Ghost Fleet ships do not deal (nor can be dealt) Critical Hits (“Spectral Fire”). More so they never multiply damage dealt to enemy ships for neither the Point Blank range nor Raking Fire. This results in the usual brutal close range fire exchanges turning into more of a slug fest. Add to it some regeneration abilities (“Souls Surge”, “Soul Drain” and “Soul Transference”) and you should get a glimpse of how tanky the faction is.
Next there’s the firepower itself, which is another exception. All Ghost Fleets weapons deal D3 damage each, regardless of type with Indirect Weapons getting a plus 3 damage (D3+3 from “Fire & Brimstone”) and all can be further improved with plus 1 damage (“Fury of the Damned” standard upgrade).
Then there’s the movement. The Ghost Fleets ships are exempt from Collisions (Do not suffer nor can be dealt Collisions due to “Spectral Form”). They (or the enemy ships) will never Collide and if forced on a collision course, will simply move through one another, each being dealt a CS based damage (1D10+CS) by the other.
Finally ghosts are completely Blaze proof making them one of the few hard counters against Blaze based factions such as the Empire of Dust, or the Salamanders.
On the downside, although seemingly durable, the Ghost Fleet ships will be removed from play if Grounded (Surrender as well) and they can never improve or degrade their Crew level (auto-Regular).
All of this makes for a widely ‘different’ and new type of an Armada fleet.
In the Upgrades department the Ghost Fleets get a mix of durability and deadly force with a solid Nerve buff (“Wards of Binding” Standard Upgrade), damage buff (“Fury of the Damned” Standard Upgrade), and regeneration (“Soul Surge” Magical Upgrade). They ain’t lacking in the choice of choice of Captains is also nicely spread with Boarding Action buff (“Kali the Dark On”) and one of the best shooting buffs in the entire game (“The Ferryman”) capable of doubling all broadside weapon positions of a ship, on a kill.
Strategy Proposal: Focus the fleet building aspect around one or two well equipped Mains such as the Wraith (1), or Spectre. The rest of the fleet is support and Objective grabbers, although not without some solid, if a bit unreliable, punch. Being unable to benefit from crossing the T and Point Blank fire (yet being very much vulnerable to them) be sure to keep your distance. Do not overestimate this fleets melee capabilities and focus on fishing for those sweet rolls of “5” and “6” on a D3, delivering solid chunks of damage and keeping your ships out of the harms way in the process.
Movement to cost ratio,
Nerve to cost ratio,
Structure Points to cost ratio,
Crew Strength to cost ratio,
Heavy weapons to cost ratio, not applicable
Light Weapons to cost ratio, not applicable
Close Quarters Weapons to cost ratio, not applicable
Indirect Weapons to cost ratio, not applicable
Red Turning Angle availability,

These are the Kings of War: Armada factions available for now. I will be revisiting this article to provide updates and add new content from time to time so stay tuned. Personally I hope to get some Twilight Kin and Elves commissions to add more pictures in the future, but for now glorious Four is all I have.
I hope you find this article entertaining. Be sure to let me know your thoughts in the comments below or via Facebook or Instagram. I would also appreciate if you considered sharing this content with your hobby buds, who might find it useful. Finally if you are looking for a professional miniatures painting service be sure to contact me via this contact form. I always reply within 24 hours, after which please check out your spam folder.
Cheers!
Ahoy Sailors! As you know I am most and foremost a passionate hobbyist. That being said I am also a pirate, a scoundrel and a fanatical enthusiast of Mantic Games Kings of War: Armada. The latter resulted in few strategy related articles, one of which you found yourself reading right now.

Kings of War: Armada is a game of fantastical sea warfare. Set in a rich world of Pannithor, the Armada clashes wonderfully crafted and strongly themed factions against each other. As much as miniatures go, KoW Armada offers a selection of beautiful miniature ships from across four factions, with more being released every few months. Although colliding prow first into enemy ships is forbidden by the rules, some ships are designed to Ram. This usually ends up with both ships getting crushed to ribbons, which led to a lot of misconceptions about Ramming in general. Most common being “Ramming is a weak faction mechanics”. Today I will topple the topic and prime you for successful Ramming. Hold on to the decking and All Ahead Full!
Ramming for Dummies
Allow me to start by saying this: Ramming is a very strong and rewarding mechanics.
That being said let’s focus on what makes a Faction oriented mechanics good. For starters a Faction game mechanics should be synergic with faction strengths (and weaknesses). It should allow for leveraging the common rules to faction’s advantage. A Faction game mechanics can be a strong independent rule, or a synergic one in which case the more synergy the stronger rules combo becomes.
For instance Baseilan ships have the best Structure Points to Points Cost ratio in the game. They have upgrades like Aegis Shield which reduces damage taken and Blessed Hull which allows them to Repair more efficiently. Basileans also have Slopes with Helping Hand increasing Repair efficiency even more. There is a theme to these rules which translates into a strong Faction Mechanics. Worth noting is the fact that it takes more than a single rule to achieve this synergy. Like, Elohi’s Halo of Light is useless in a vacuum, but kicks in when combined with other pieces of the puzzle.
Back to Ramming, RAM(n) allows to deliberately Collide with enemy ships and auto fail the Evade test. It also adds (n) damage to the total dealt to enemy ship in case of a successful collision.
In a vacuum the rule is very swingy. Unless (and sometimes regardless if) you Ram a much smaller target, there is a chance of taking more damage than dealt to enemy ship.
On a wider scale RAM(n) goes along the common Orc main theme: High damage output and expendable ships.
Orc ships are all about C weapons, which have best damage output, but the shortest range from among all shooting weapons. This means you need to get close and inevitably take some damage before you can unleash your C volleys in a devastating salvo. Orc ships, on average, are also cheap and have a second best Structure Points to Points Cost ratio in the game.
Still the main Faction mechanics for Orcs is Boarding Actions. On average, Orcs have more Crew Strength than other factions. They also have access to upgrades that further boost Crew Strength (Morax, War Drum of Spite, Rabble Rousing etc.). Going all ahead full to get close and use all the C weapons means Orcs are also close enough to Board and they even come with cheaper Boarding Hooks and a rule allowing them to try to Grapple enemy ships moving at Full Speed! And as I already pointed out – Orcs are great at Boarding Actions.
So the most efficient strategy should follow the most efficient mechanics:
– Go at Full Speed towards enemy to get close as soon as possible to start dealing damage, plus be harder to hit.
– Use C weapons once you’re in range. Best if moving between enemy ships to be able to fire both sides for more damage output.
– Initiate Boarding Actions to protect your ships from being shot at during enemy activation, plus further increase damage output.
Where does that leave RAM(n)?
RAM(n) is just a tool. It is not a main faction strength, but rather another synergic mechanics in a wide arsenal of increasing damage output. It is more of a situational tool, rather than go to strategy.
To be successful at Ramming you must master “when” and “where”.
Proper Ramming:
* Your ship is low on Structure Points and will probably get sunk in the next enemy Activation. Might as well deal a lot of damage in a blaze of glory, especially if it also carries a Crystal Keel of Retribution.
* Large, dangerous enemy ship is next to Activate, but is also on a brink of being Crippled.
* Your main C damage dealer is soon to Activate, but an enemy ship (low on SP) is the closest target blocking line of fire to much juicier targets.
* Enemy ship has not Fired as She Bears yet and you need to avoid getting in it’s side Fire Arc, electing to Ram head on and trying to initiate Boarding Action afterwards to keep it from Firing at your incoming fleet.
* Last turn, enemy ship holds an objective, Ramming has potential to sink the ship, thus swinging the game result in your favor.
Dummy Ramming:
* You main strategy is to prioritize Ramming over Shooting and Boarding Actions.
* You use Ram as an opening move in a battle.
* You just want to see the world burn and don’t care who goest to the bottom of the sea.
* You Ram same size or larger enemy ships with no additional goal to achieve with this action.
In short: Treat Ram(n) as a tool of opportunity, a strong Glass Canon type of Damage dealing. Accept Ramming means sacrificing your ship and be sure to Ram if it’s worth the sacrifice, or if it allows you to achieve important long term goals.
I hope you find this article entertaining. Be sure to let me know your thoughts in the comments below or via Facebook or Instagram. I would also appreciate if you considered sharing this content with your hobby buds, who might find it useful. Finally if you are looking for a professional miniatures painting service be sure to contact me via this contact form. I always reply within 24 hours, after which please check out your spam folder.
Cheers!
Welcome to Painting Empire of Dust Monolith tutorial. Here I will present to you a Step-by-step of an easy and fast painting process for Mantic Games Empire of Dust Monolith as can be seen in Gallery: Armada Empire of Dust.
Before we start, some notes:
Step one: Undercoat
I started with a thorough layer of Games Workshop Chaos Black spray.
Step two: Deck
I airbrushed Vallejo Khaki (air) over main deck and all top structures. I then flatbrushed GW Flayed One Flesh on top of Khaki layer.
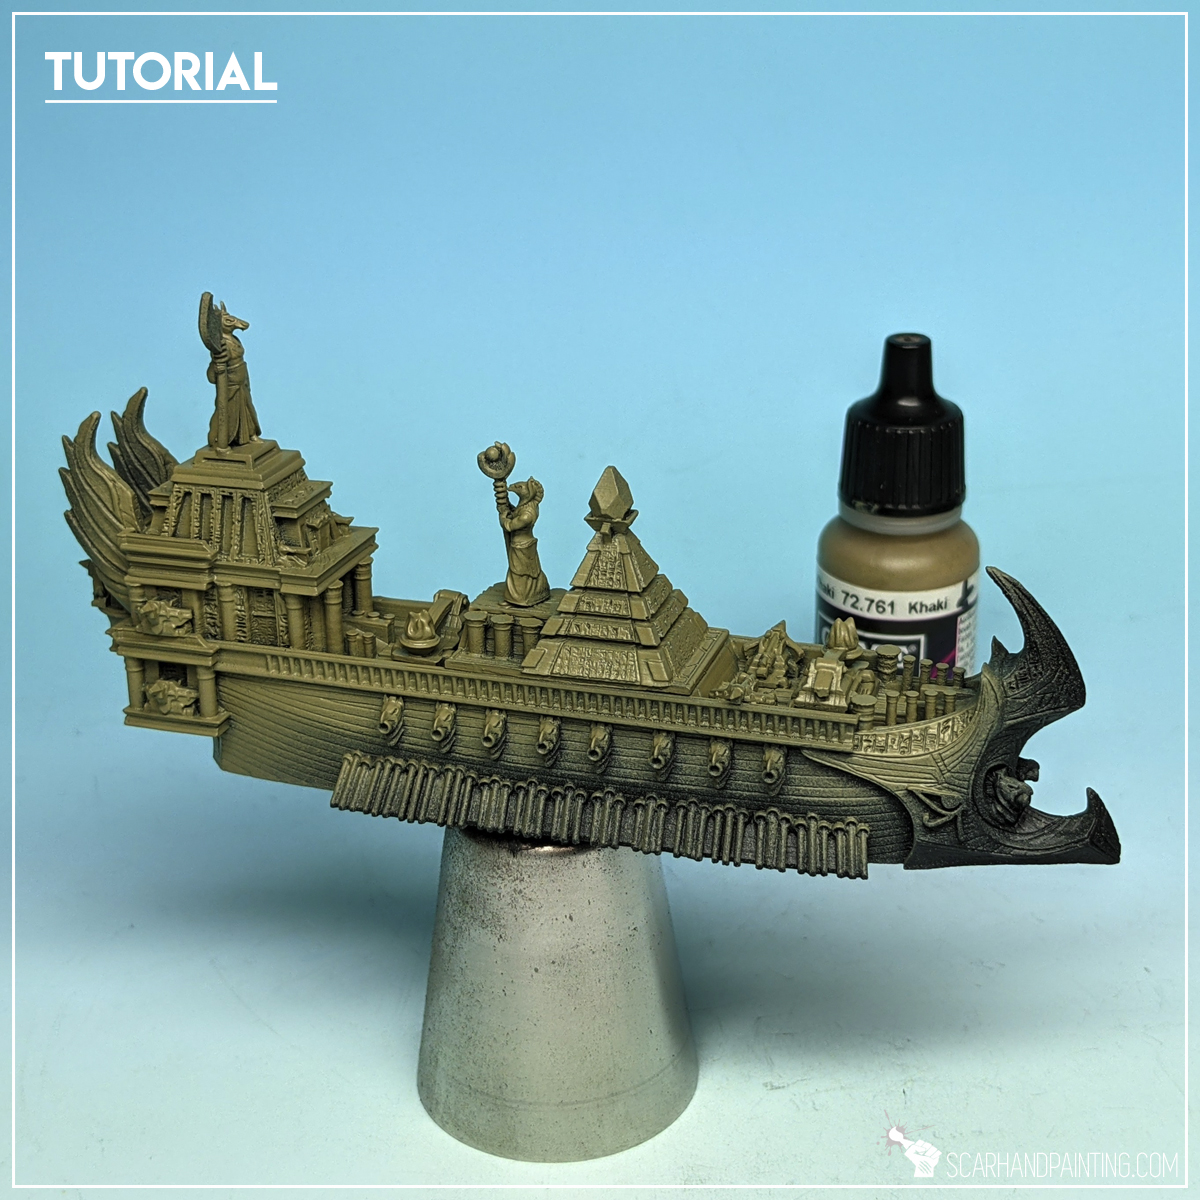

Step three: Broadside
I airbrushed Vallejo Panzer Dark Grey (air), followed by a layer of Vallejo Cold Grey (air).
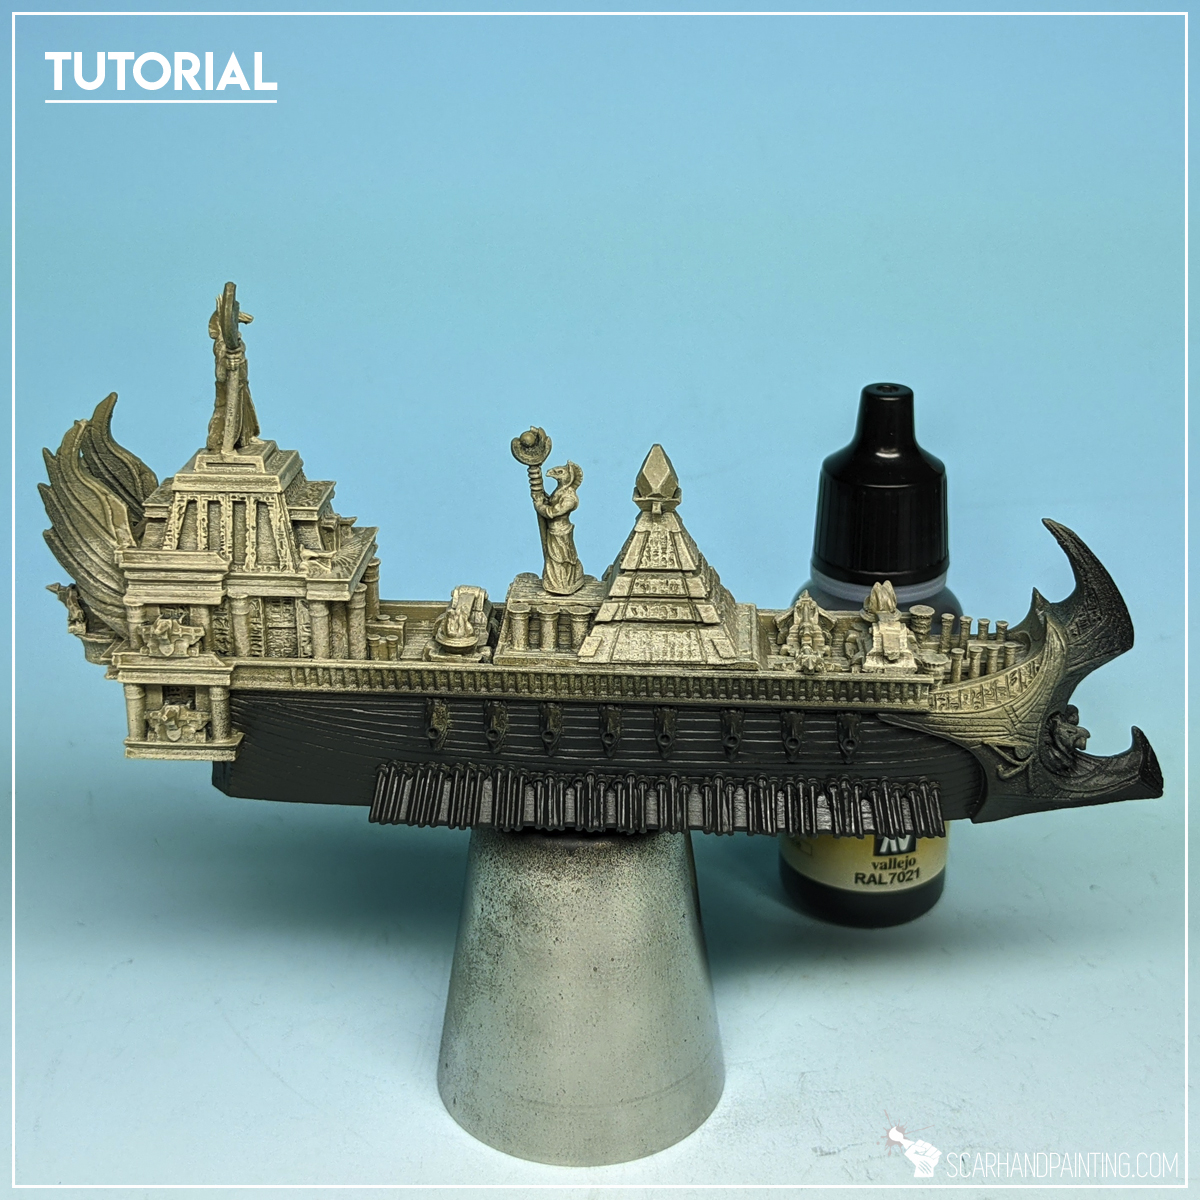
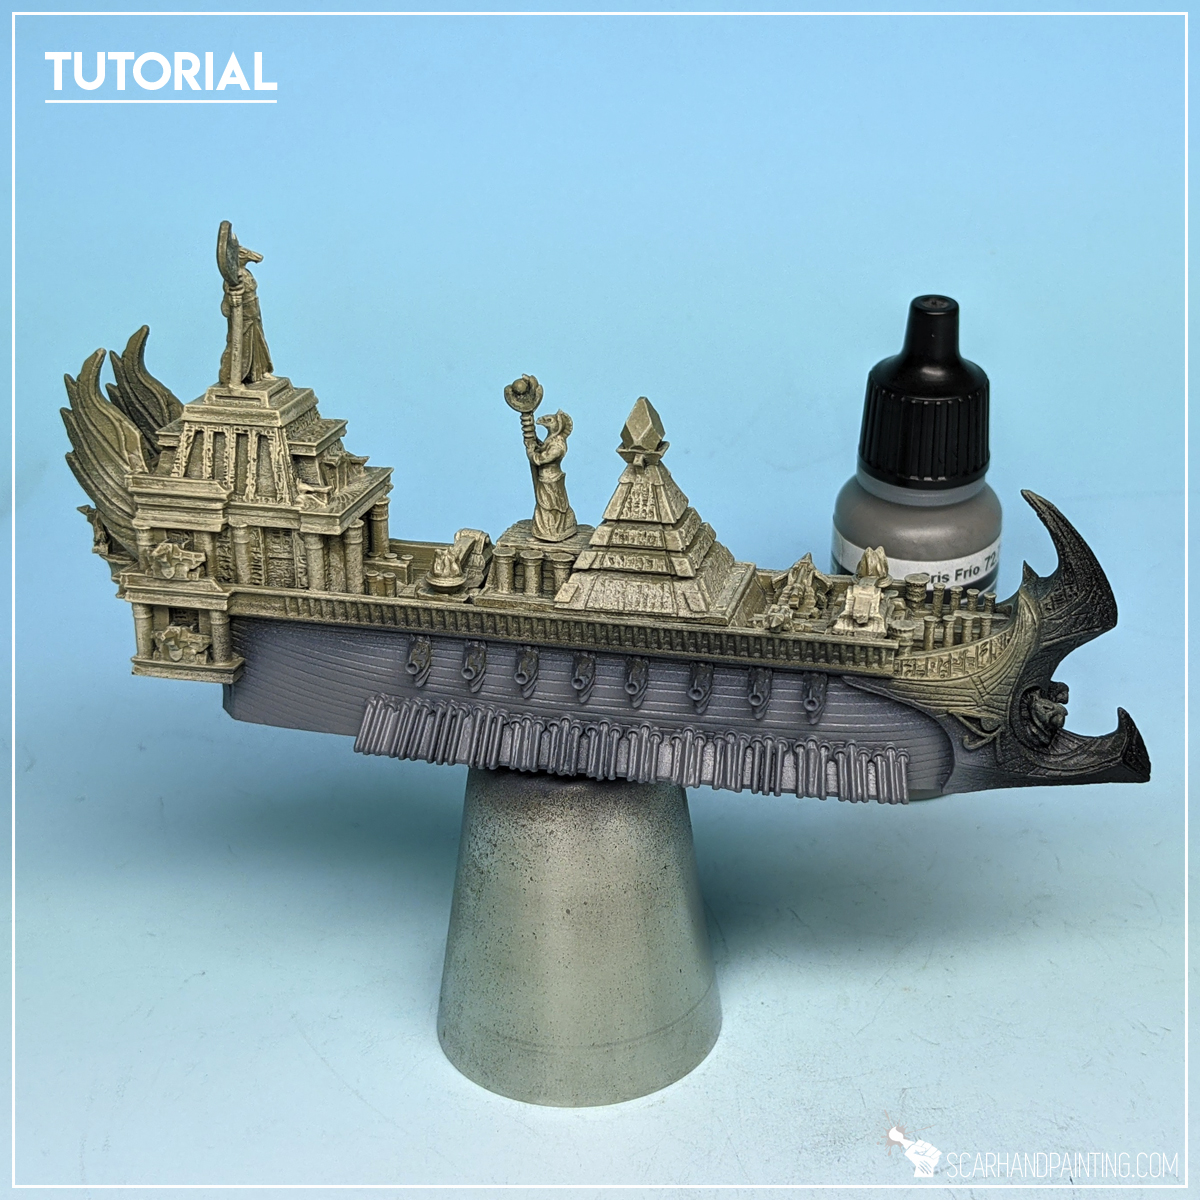
Step four: Gold
I then painted front and side ornaments, plus some additional detail with GW Warplock Bronze, followed by a solid flatbrush of P3 Molten Bronze and a highlight of Army Painter Shining Metal.
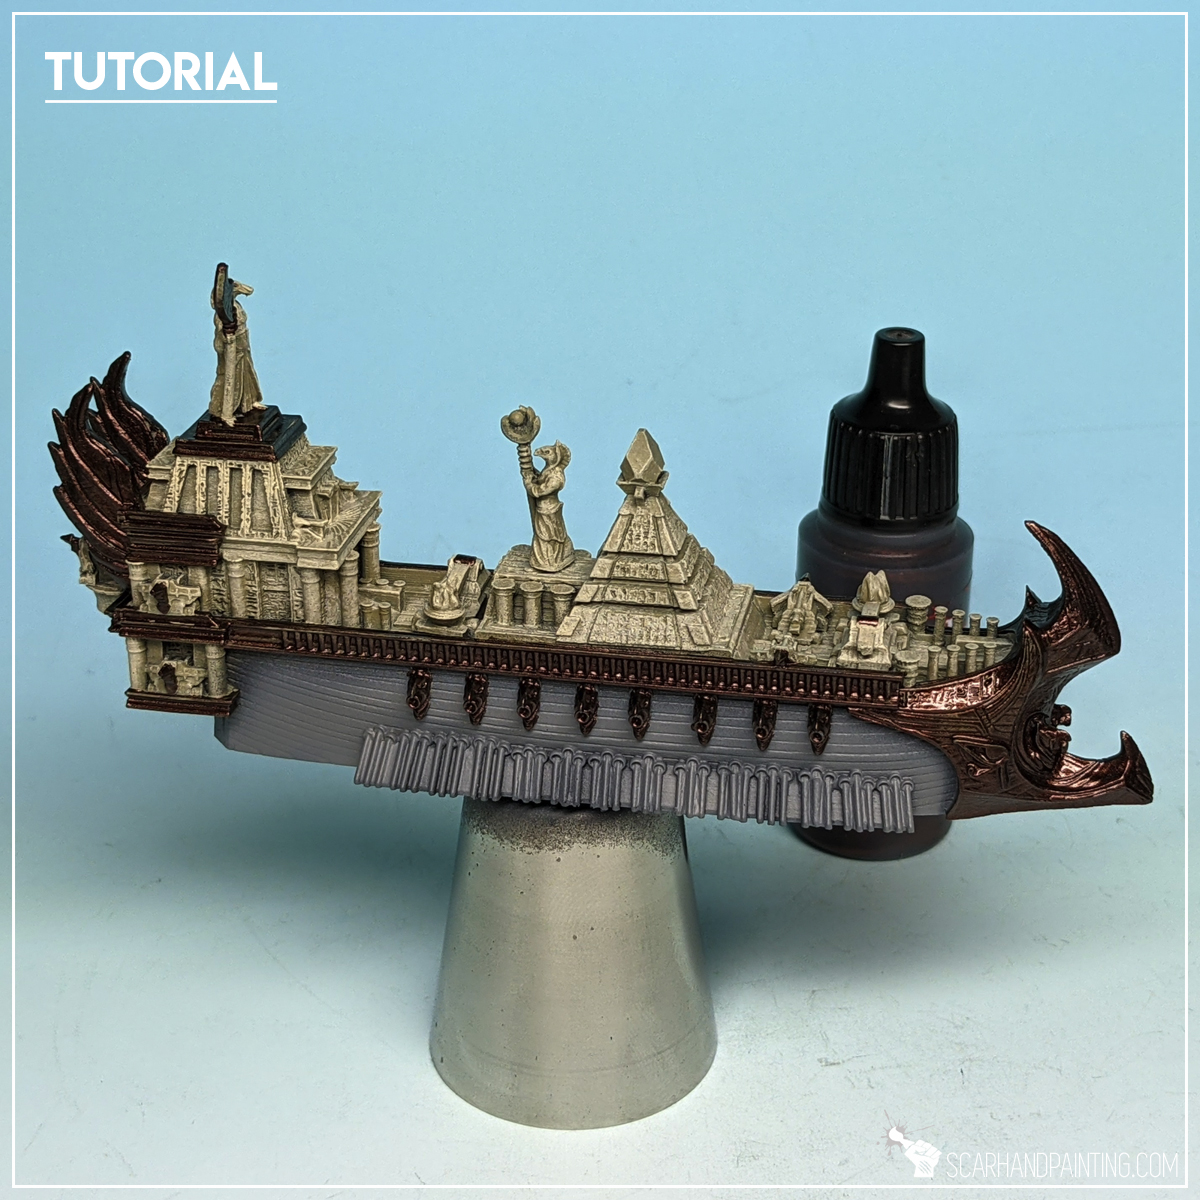
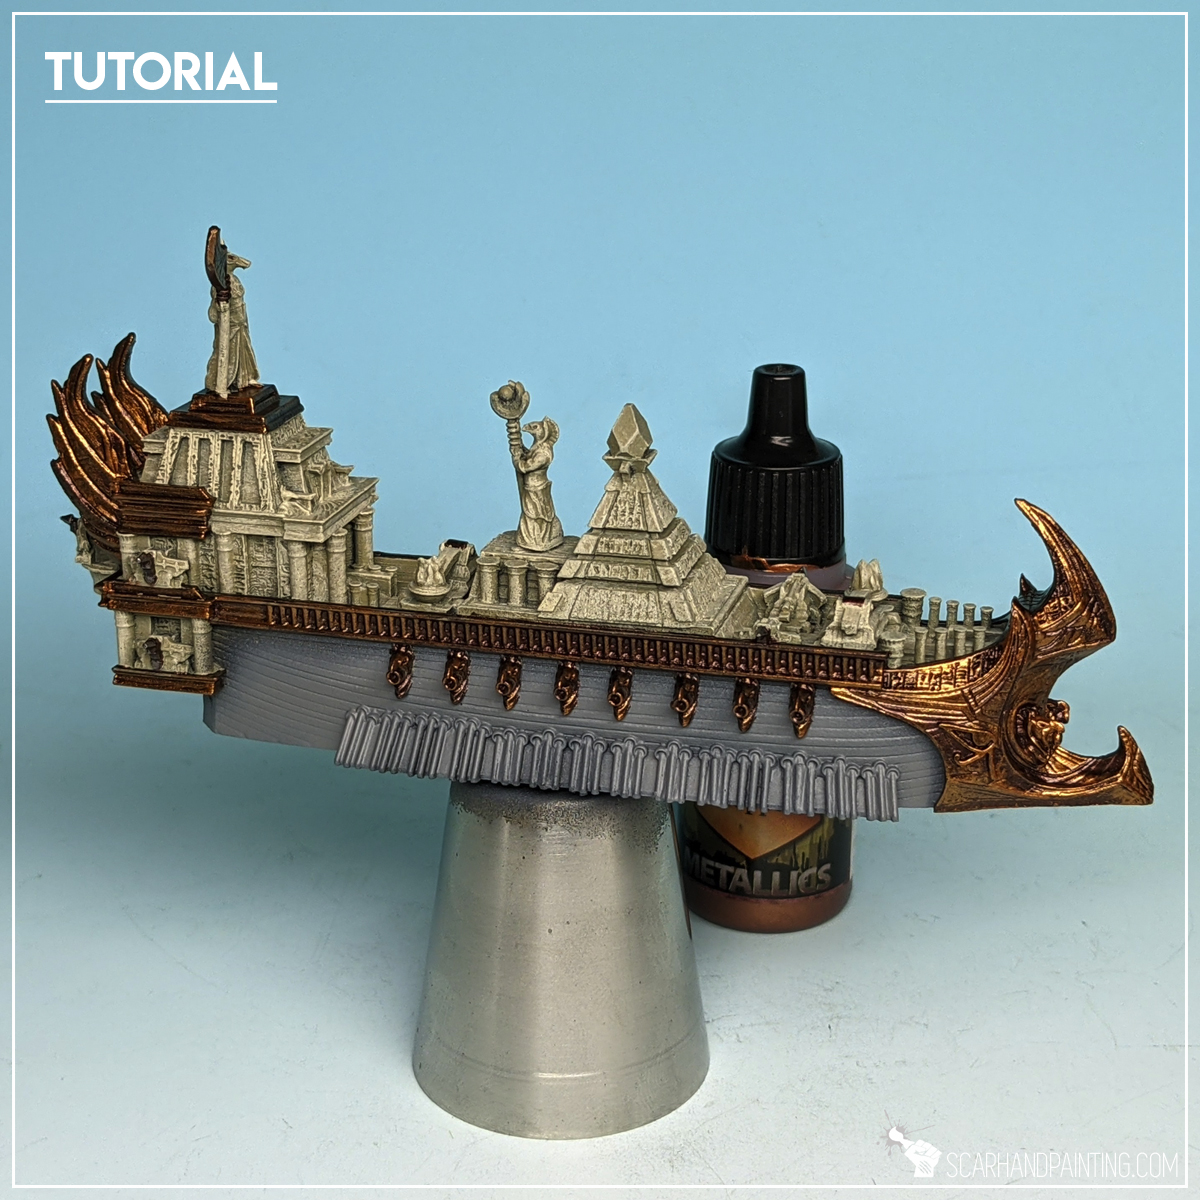
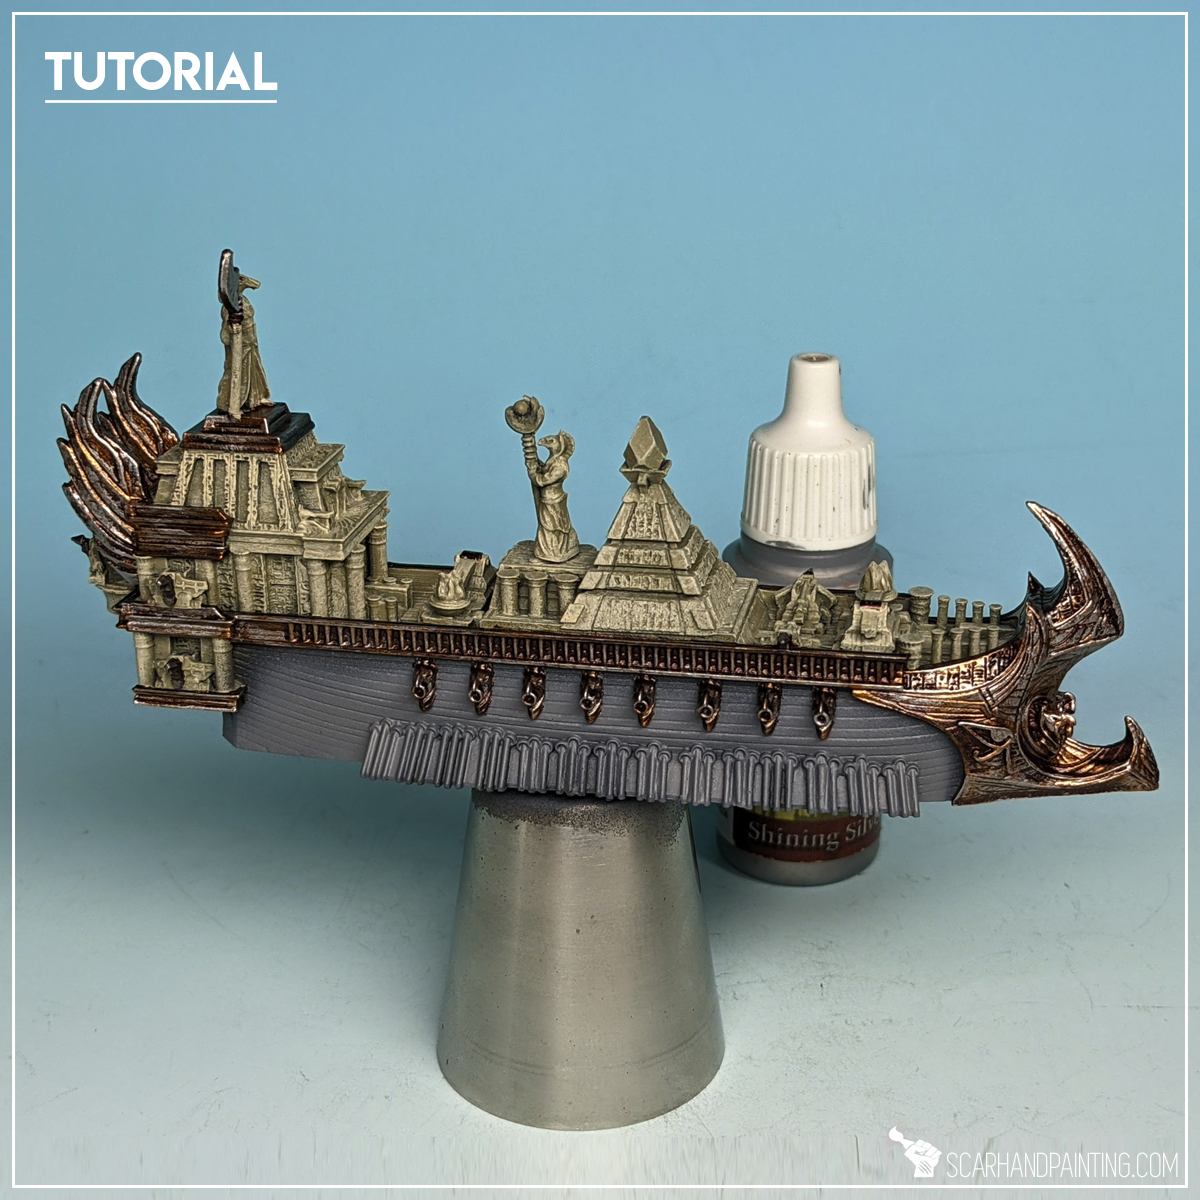
Step five: Wash
I then applied a lot of wash mix of Army Painter Strong Tone Ink 1:1 Army Painter Soft Tone Ink.
(If you followed my other tutorials you know at this point that the mixture is one of my very best friends in all painting.)

Step six: Main highlights
Once wash was dry I drybrushed broadsides with Vallejo Medium Sea Grey and then with Vallejo Ghost Grey. (I forgot to take pics). I then flatbrushed deck and top structure elements with GW Flayed One Flesh and edge highlighted with Vallejo Off White.

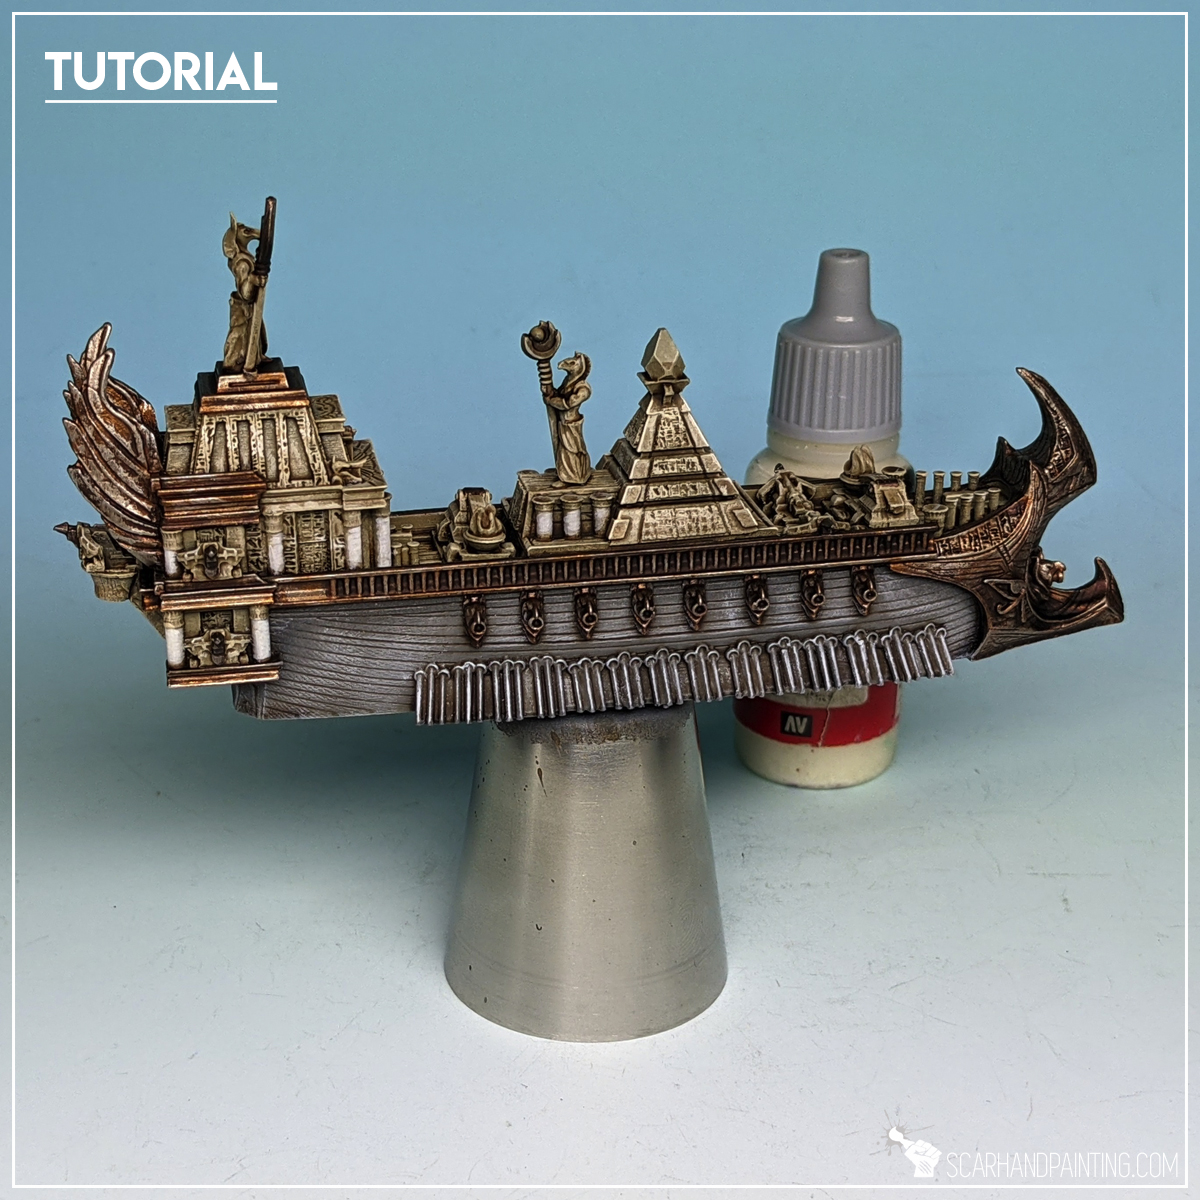
Step seven: Blue
I added accents of blue by manually painting chosen elements with Vallejo Magic Blue (air). I then highlighted with Vallejo Electric Blue, followed with Vallejo Glacier Blue. Furthermore I applied a wash layer of GW Guilliman Blue (glaze). Finally I added points of focus and thin highlights with Vallejo Glacier Blue.

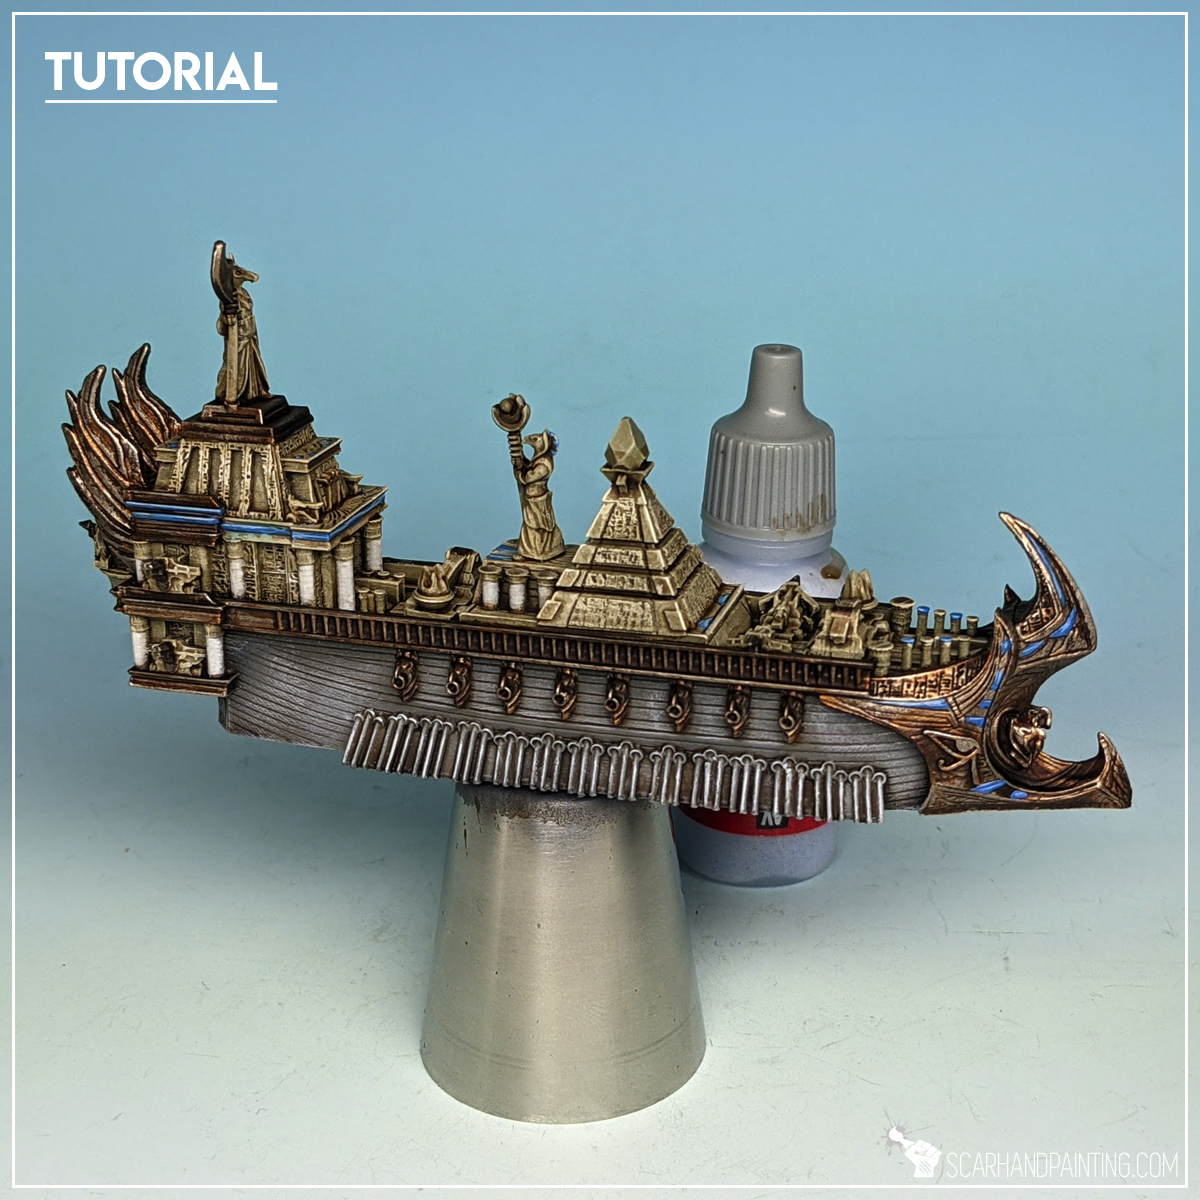
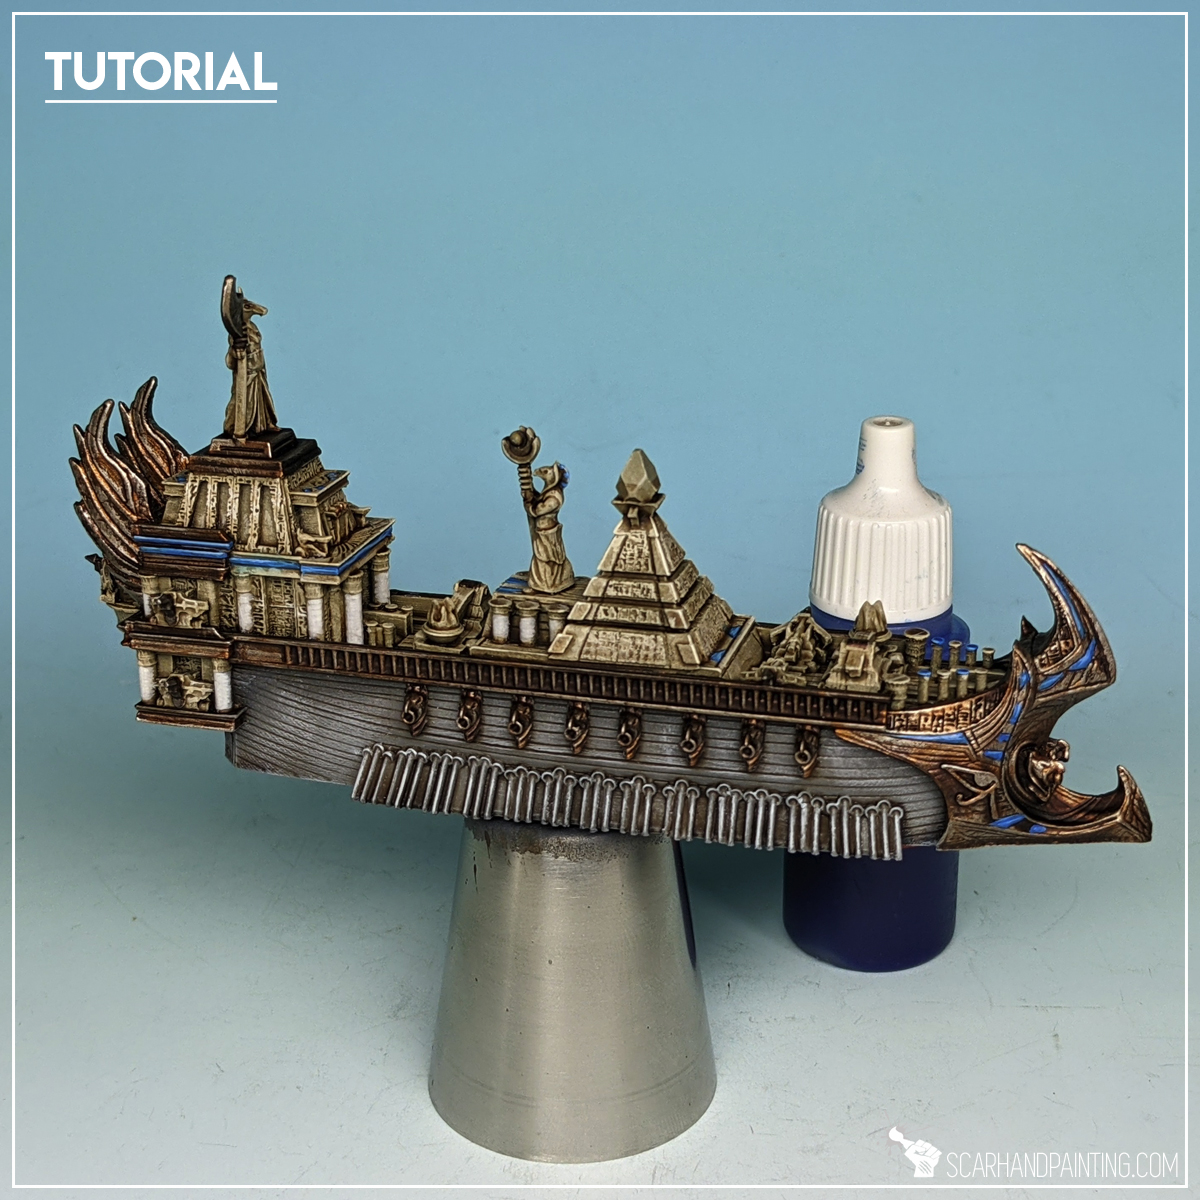

Step Eight: Purple/Pink
I applied Vallejo Warlock Purple onto chosen areas, including top gem, piramid inner lines and catapult flames. I then applied couple successive highlights with different mixes of Vallejo Warlock Purple and Vallejo Off White. With few highlights made with pure Vallejo Off White I moved to glaze Army Painter Purple Tone Ink into few areas of choice. This was contained mostly to top gem and recesses in catapult flames (and around).
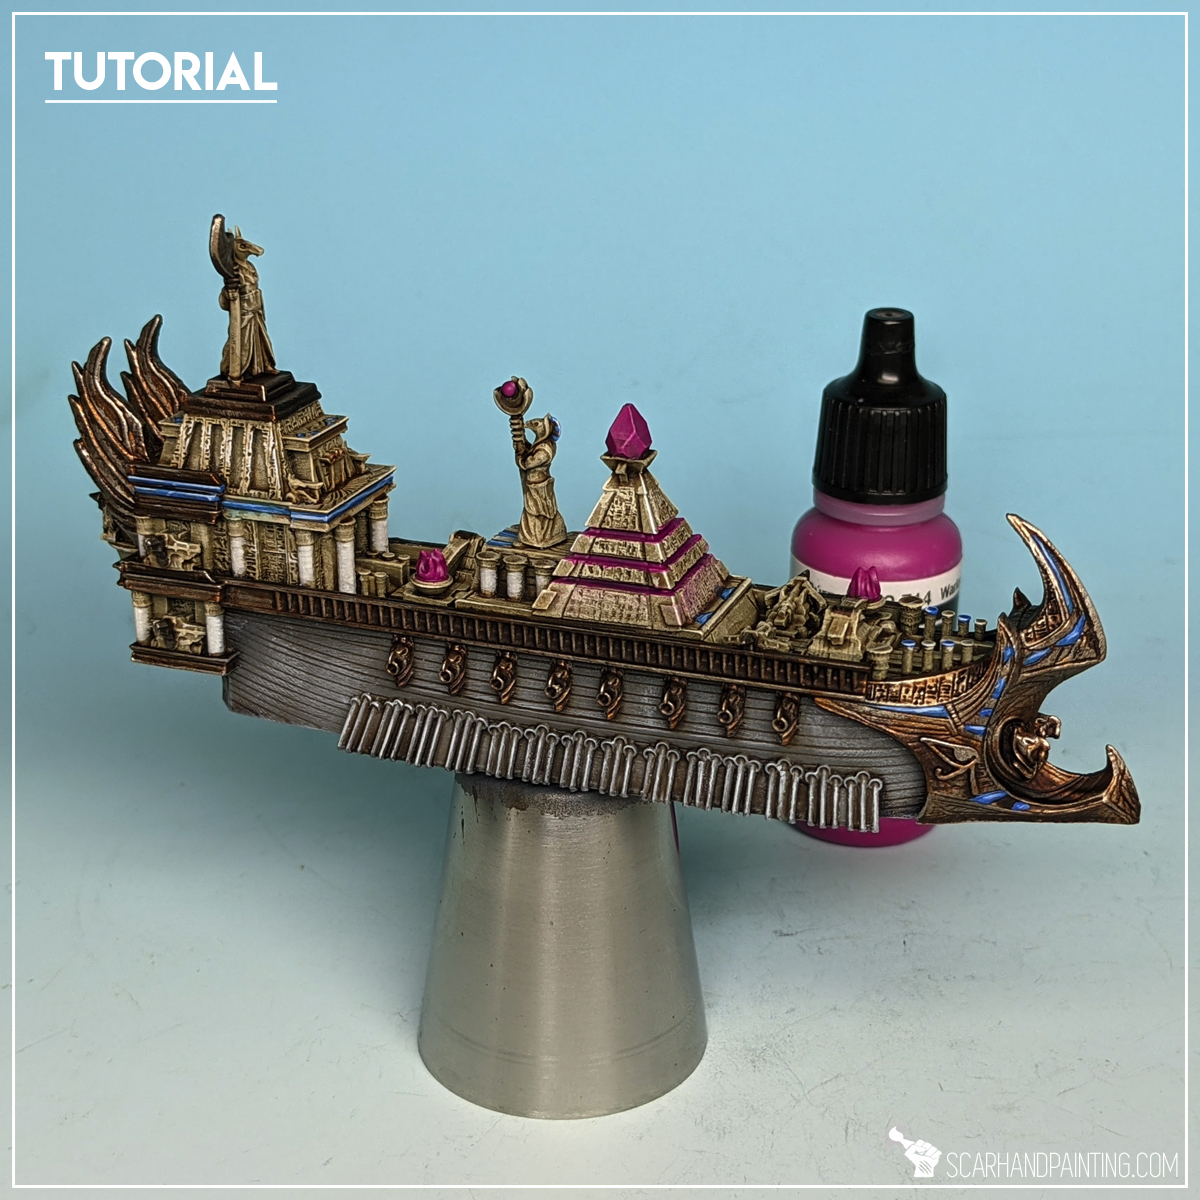
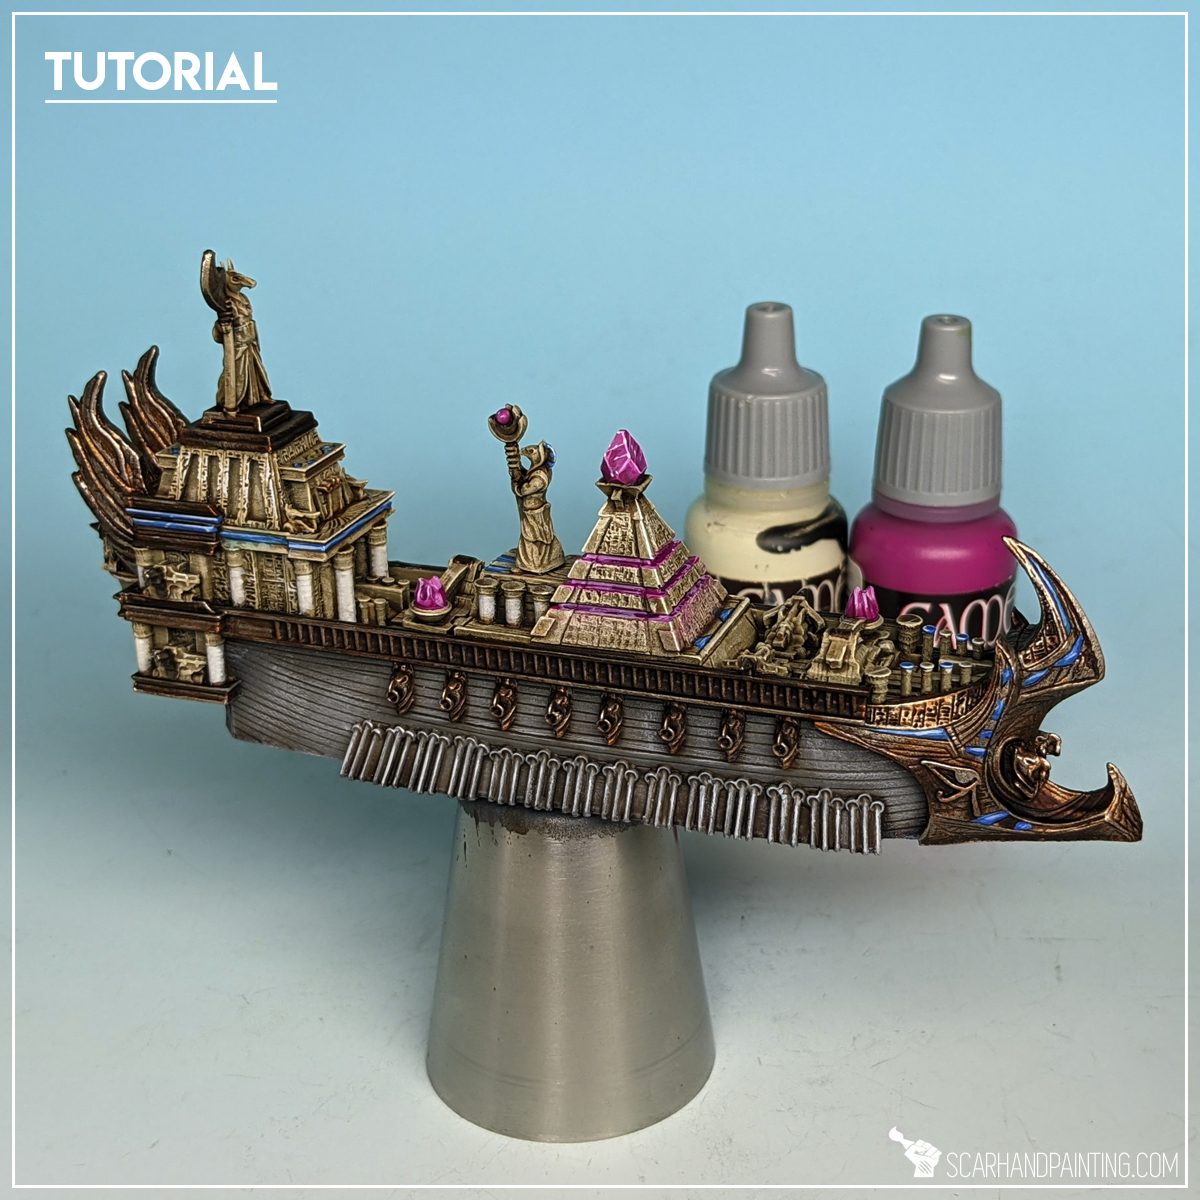
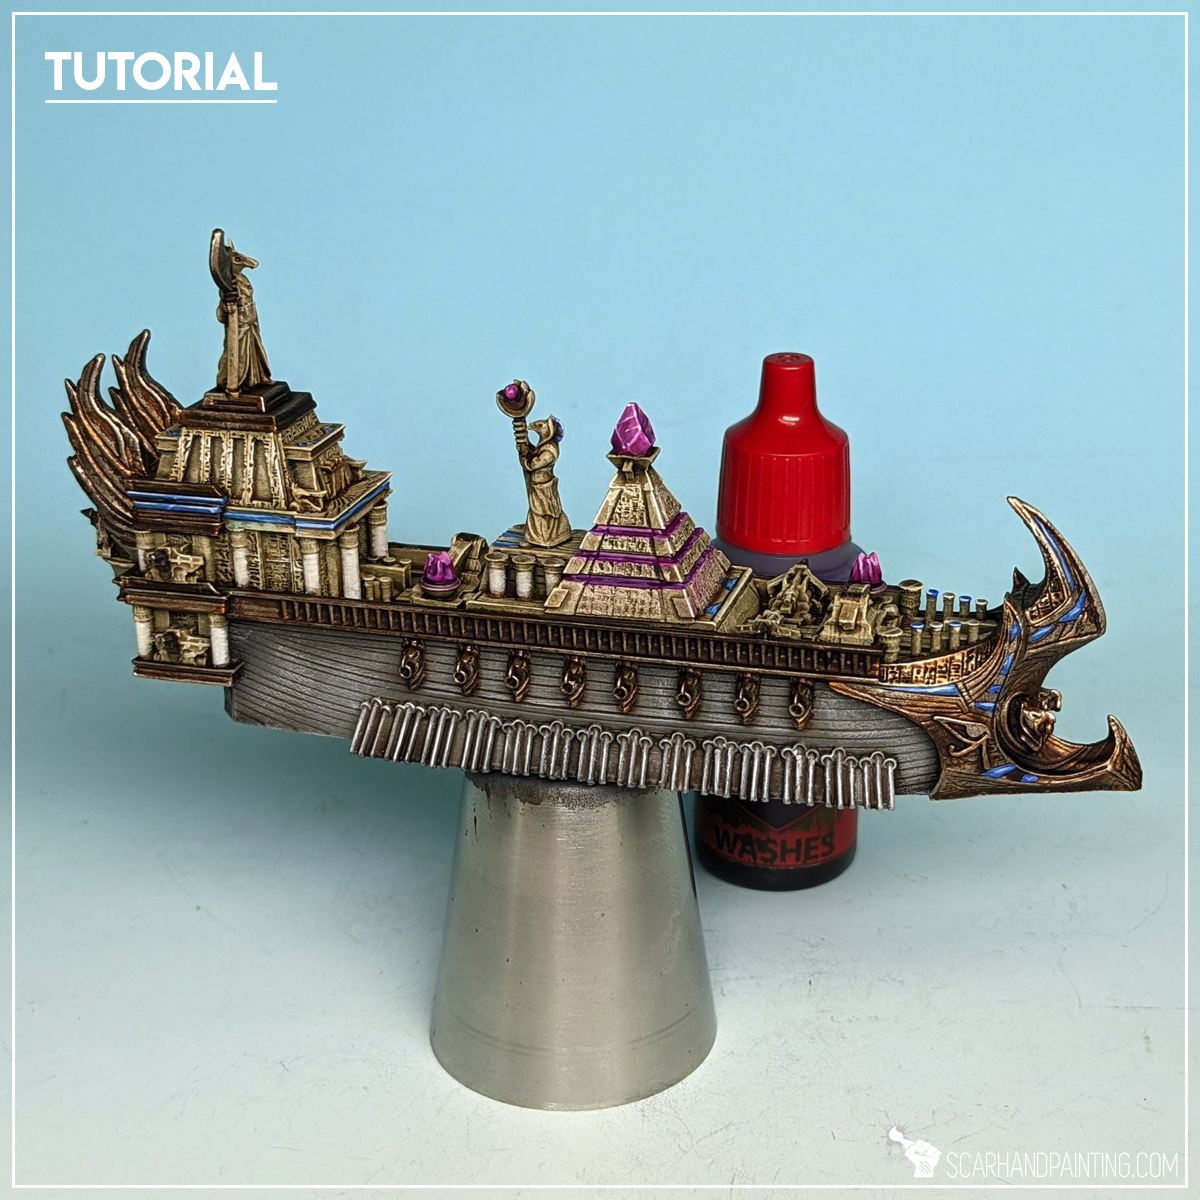
Such prepared miniature I airbrushed with two coats of Vallejo Polyurethane Matt Varnish and mounted on a base, following Tutorial: KoW Armada Water Bases.
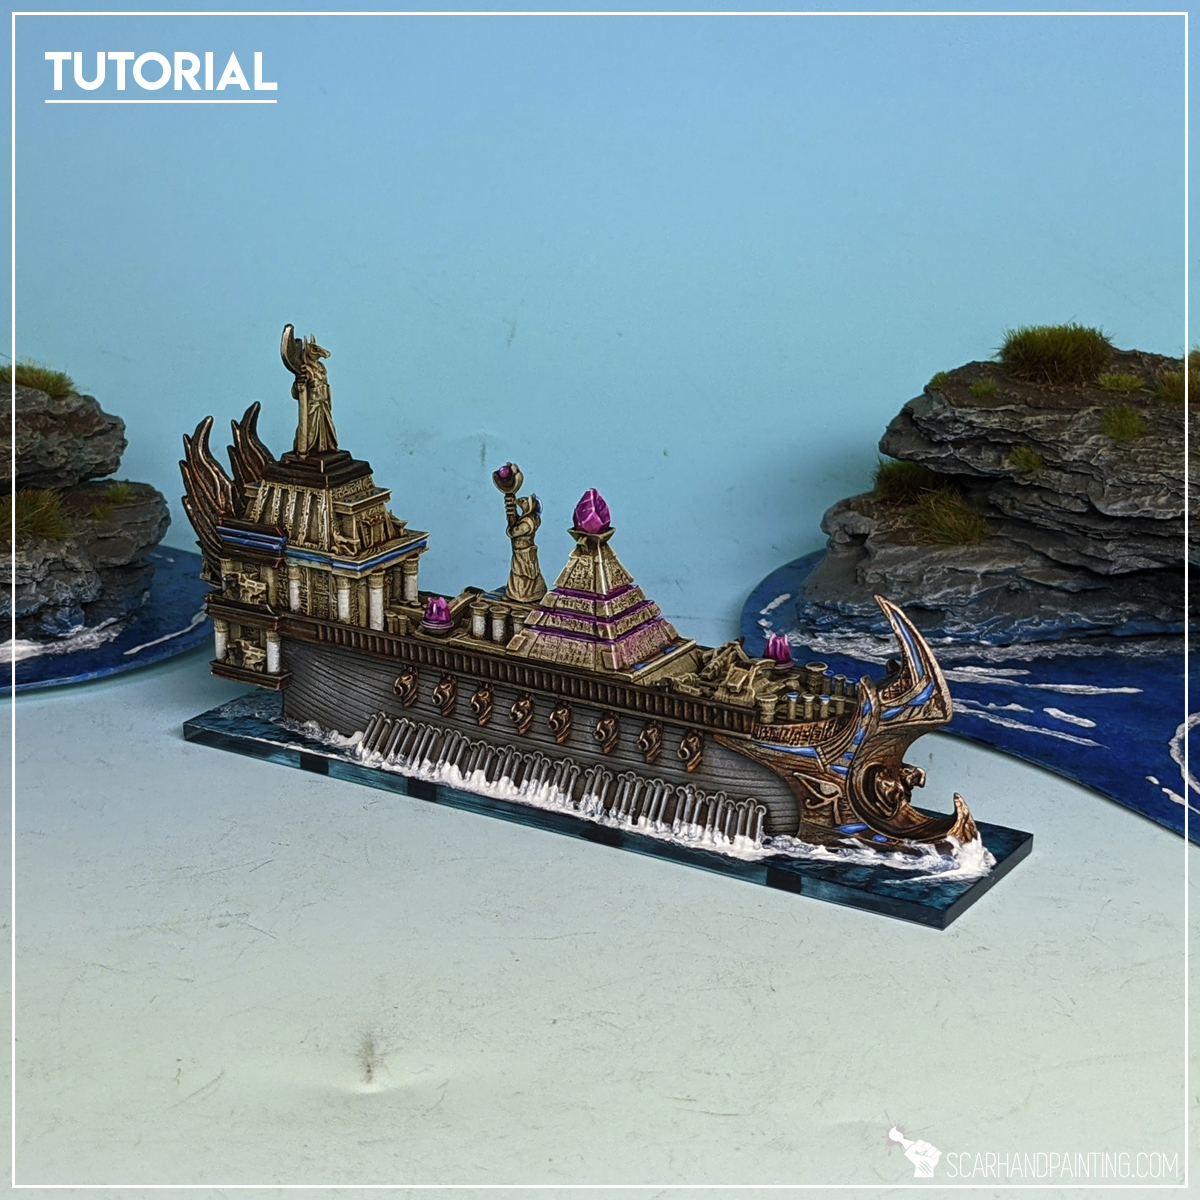
I hope you find this tutorial interesting. Be sure to let me know your thoughts in the comments below or via Facebook or Instagram. I would also appreciate if you considered sharing this content with your friends, who might find it useful. Finally if you are looking for a professional miniatures painting service be sure to contact me with this contact form. I always reply within 24 hours, after which please check out your spam folder.