- contact@scarhandpainting.com


Who wouldn’t like to play games on a highly detailed, great looking scenery? Fortunately for us – hobbyists, we’re living in times of abundance. Not only is the market saturated with ready to buy awesome scenery elements, but there are many ways to make our own scenery from scratch. Today I’m here to share with you the latter – my method of scratch building well textured, interesting looking trees, of any size and shape!

Before we start, some notes:
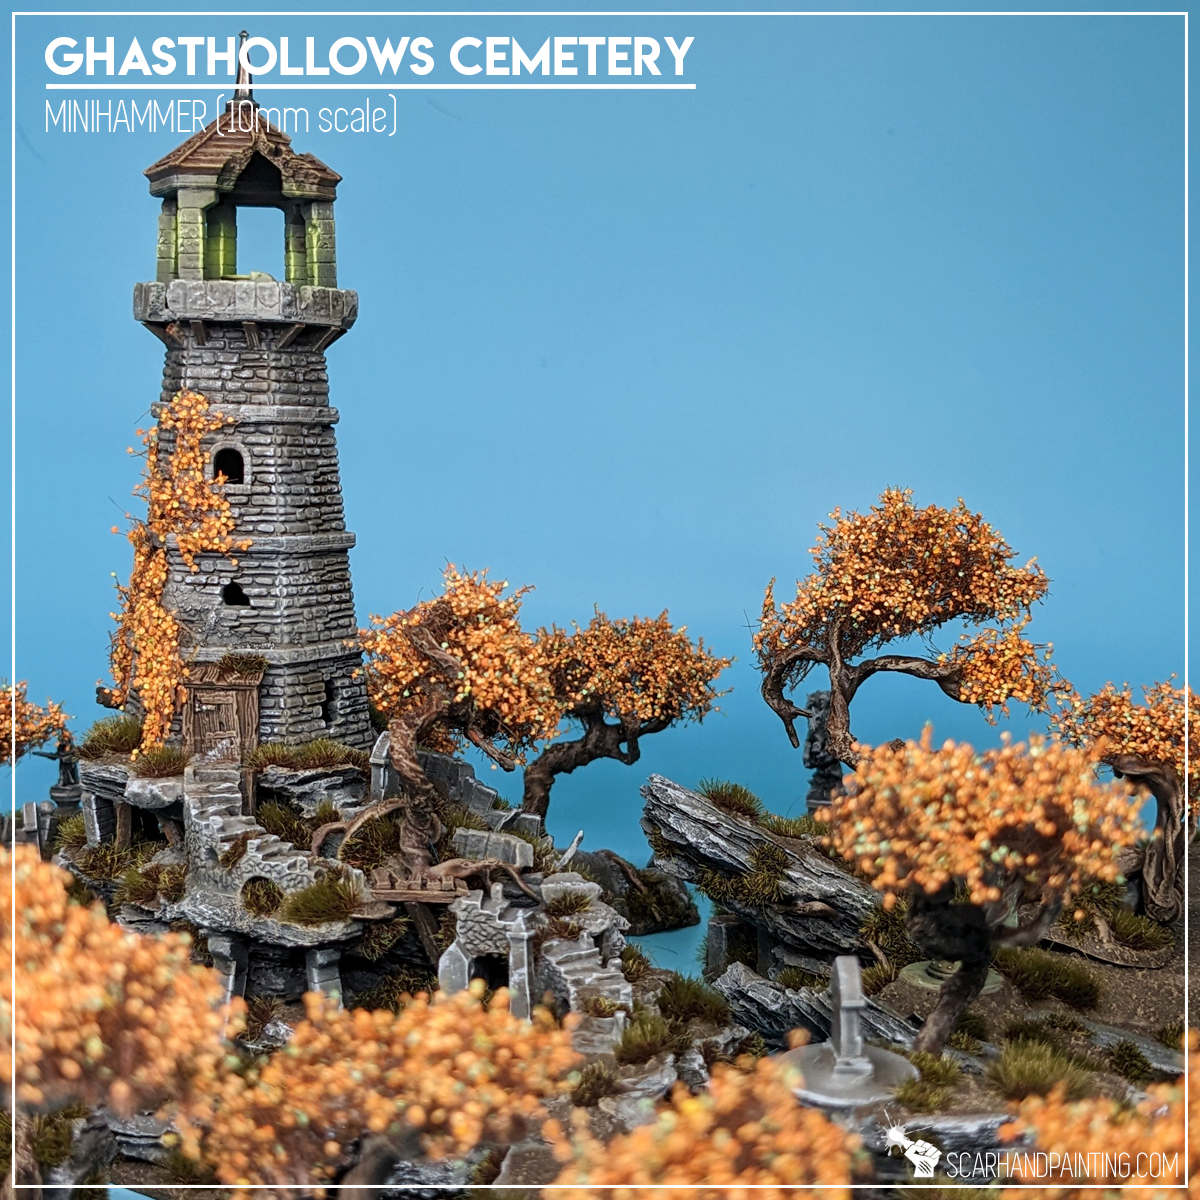
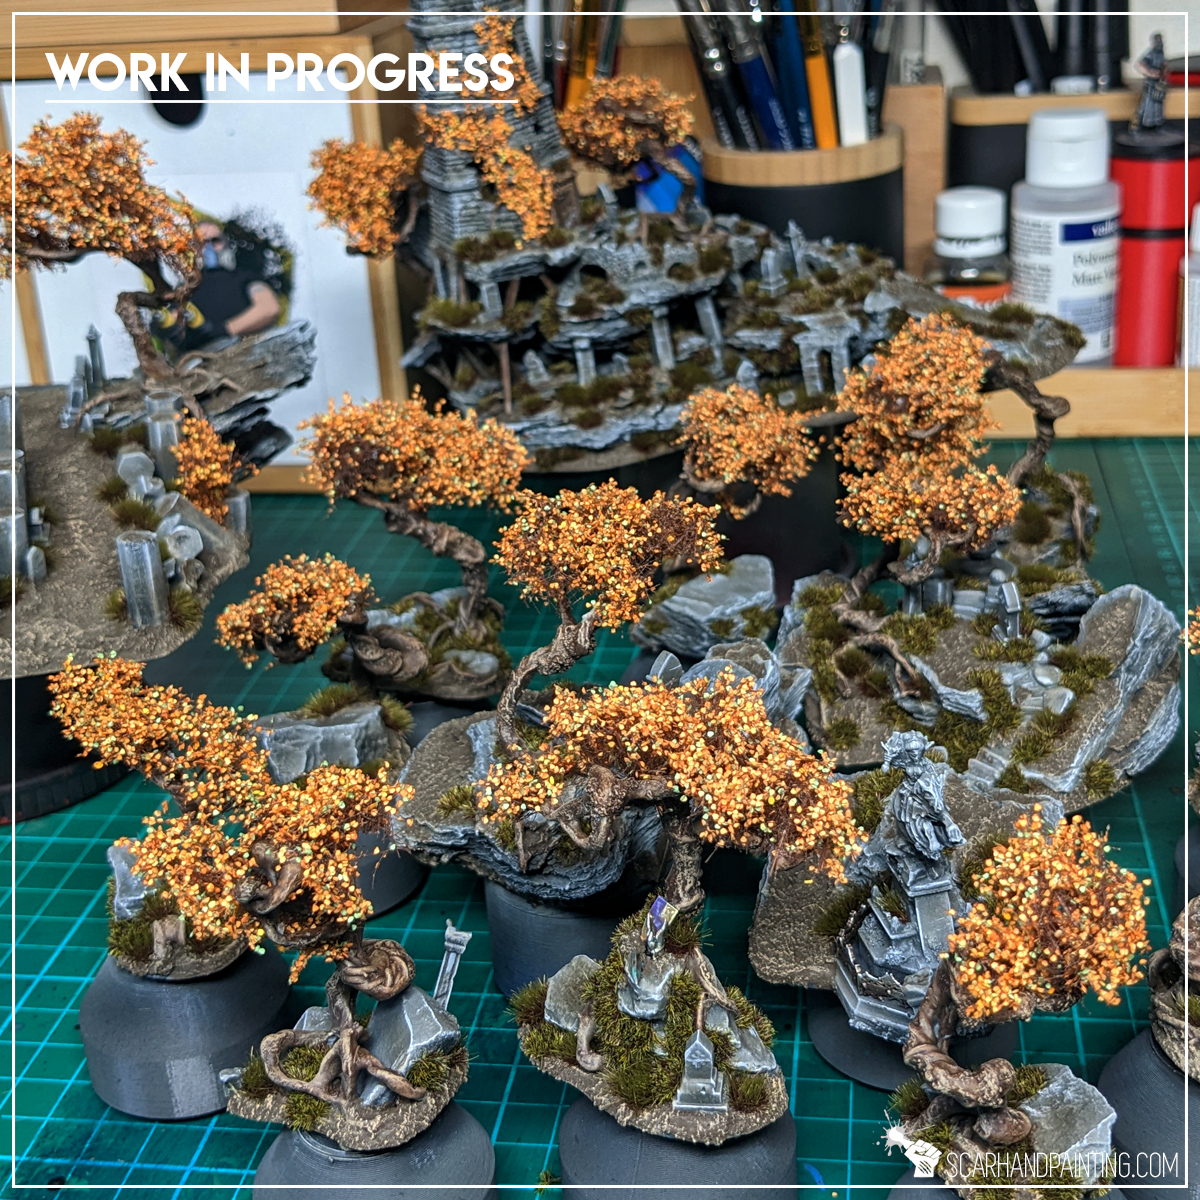
Just recently I decided to finally let my 10mm scale itch loose and commit to a new scenery related project. I chose a dark, fantasy theme for it, so alongside crumbling ruins, rocky hills peppered with tombstones I needed some twisted, creeping trees to better tell a story of the glory times long gone. Making scenery from scratch allows us to tell a different short story with each individual piece. This can only be enhanced with self made trees of any size and shape, thus I decided to go this route. The resulting Ghasthollows Cemetery set speaks for itself.
Without further ado here’s how I went about it…
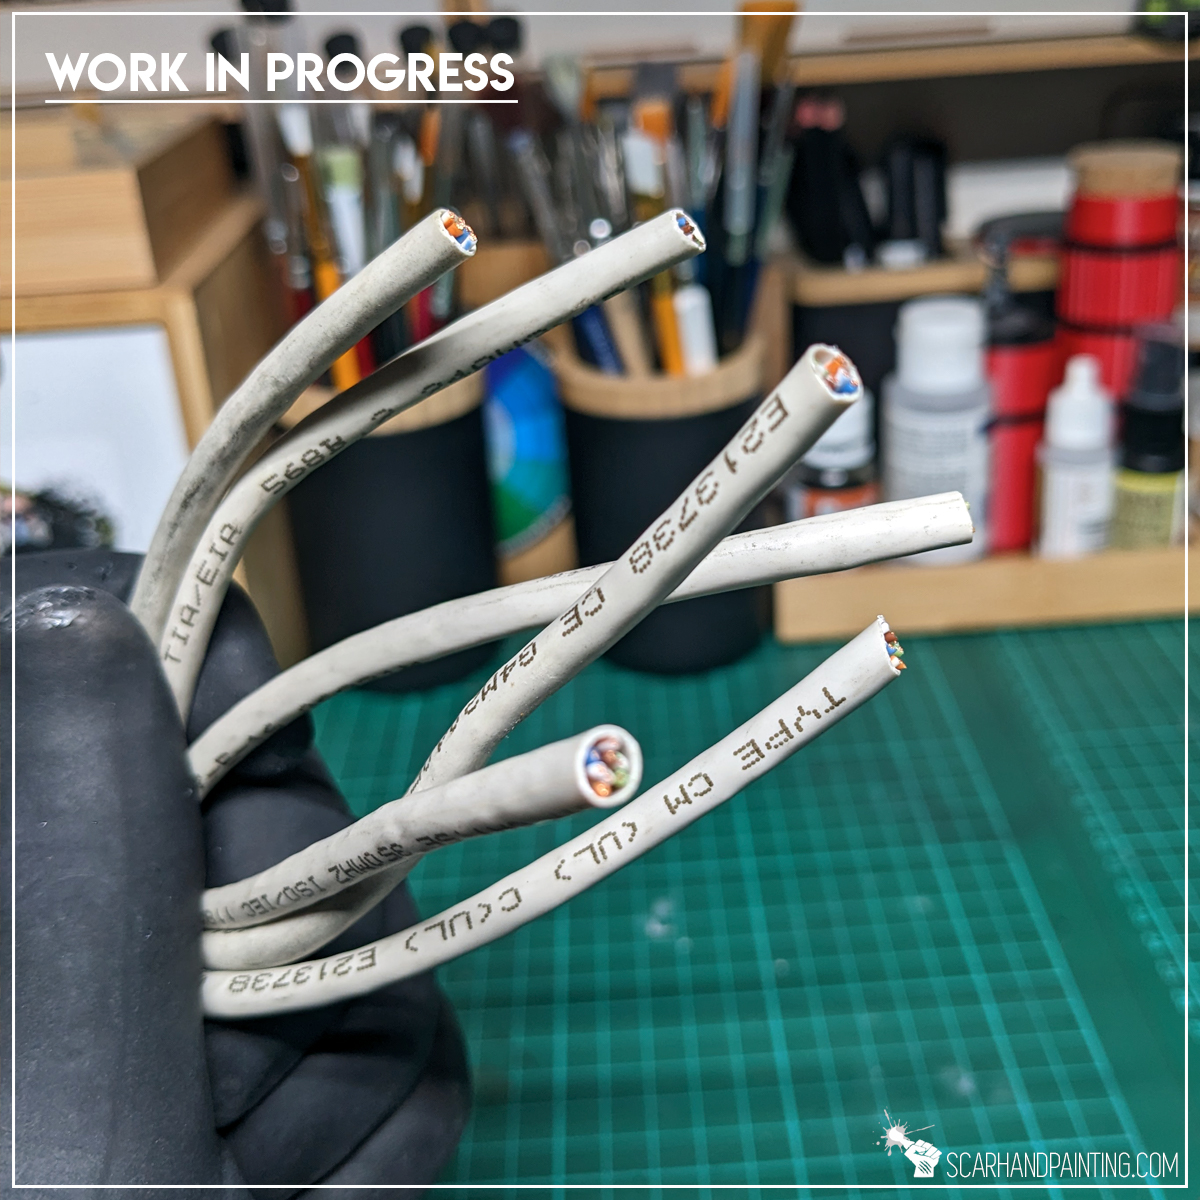
Step One: Trunks
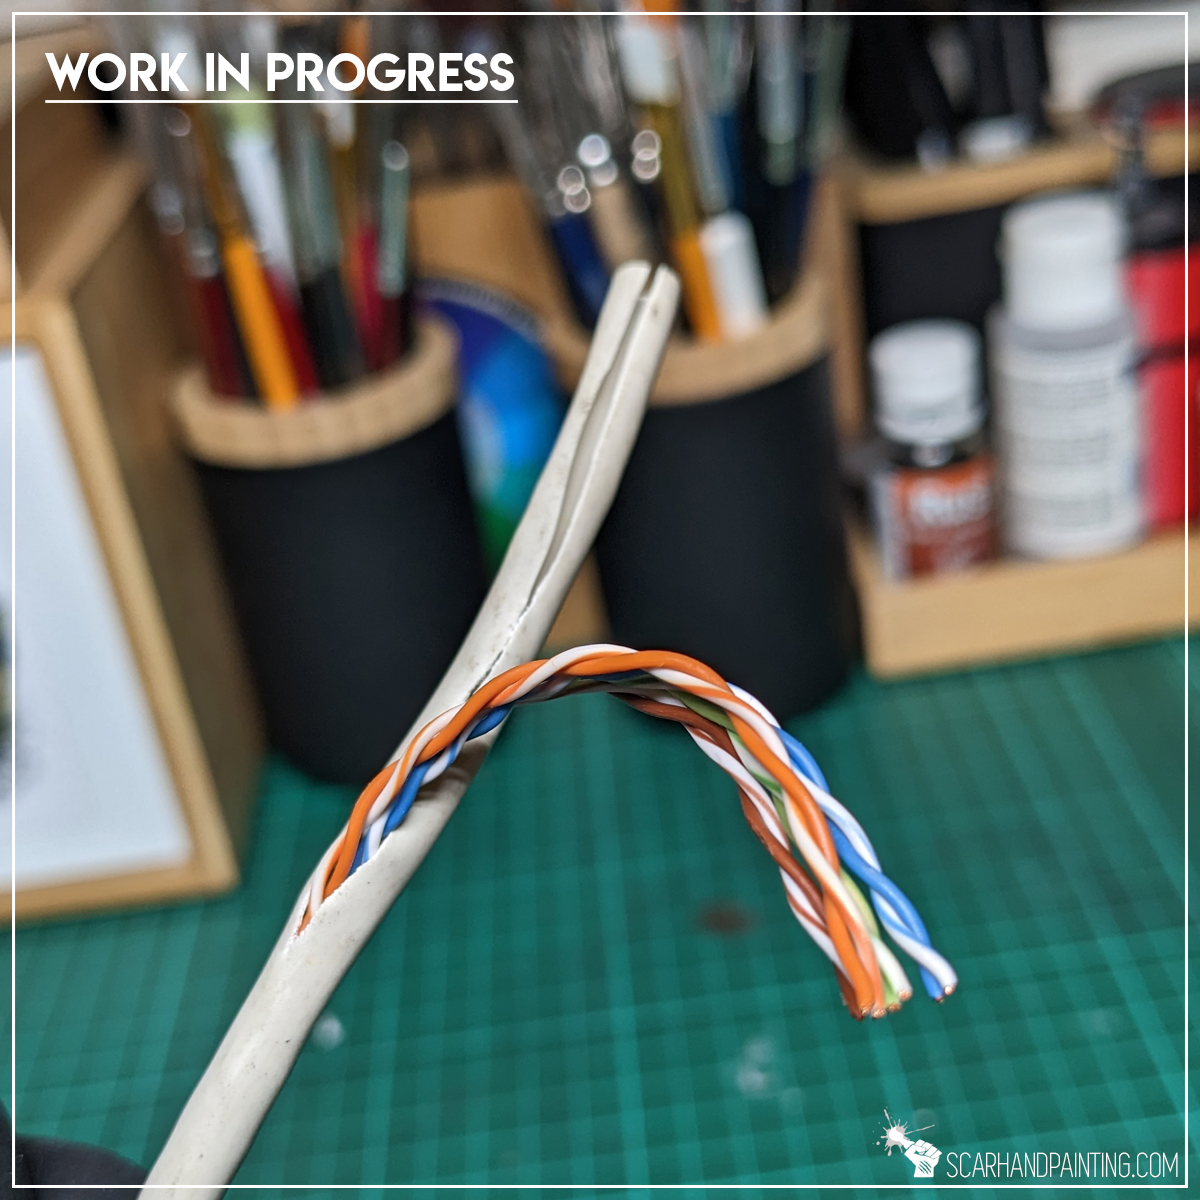
I have started by butchering an old Ethernet cable, removing the rubber cover and pulling out small rubber protected ones. I deliberately chose this type of cable because of the rubber shielding the wires inside. I have observed paint sticking onto it much better than to smooth metal surfaces.
Next I have cut a few pieces of similar size and bundled them together, twisting them in the middle to form tree trunks and leaving top and bottom parts separated.

Step Two: Roots and Branches
Next I based the tree, first forming roots from the lower wires with a set of solid tweezers and then sealing them alongside the trunk with Super Glue. Once dry I then formed upper branches and sealed them with Super Glue using the same method.
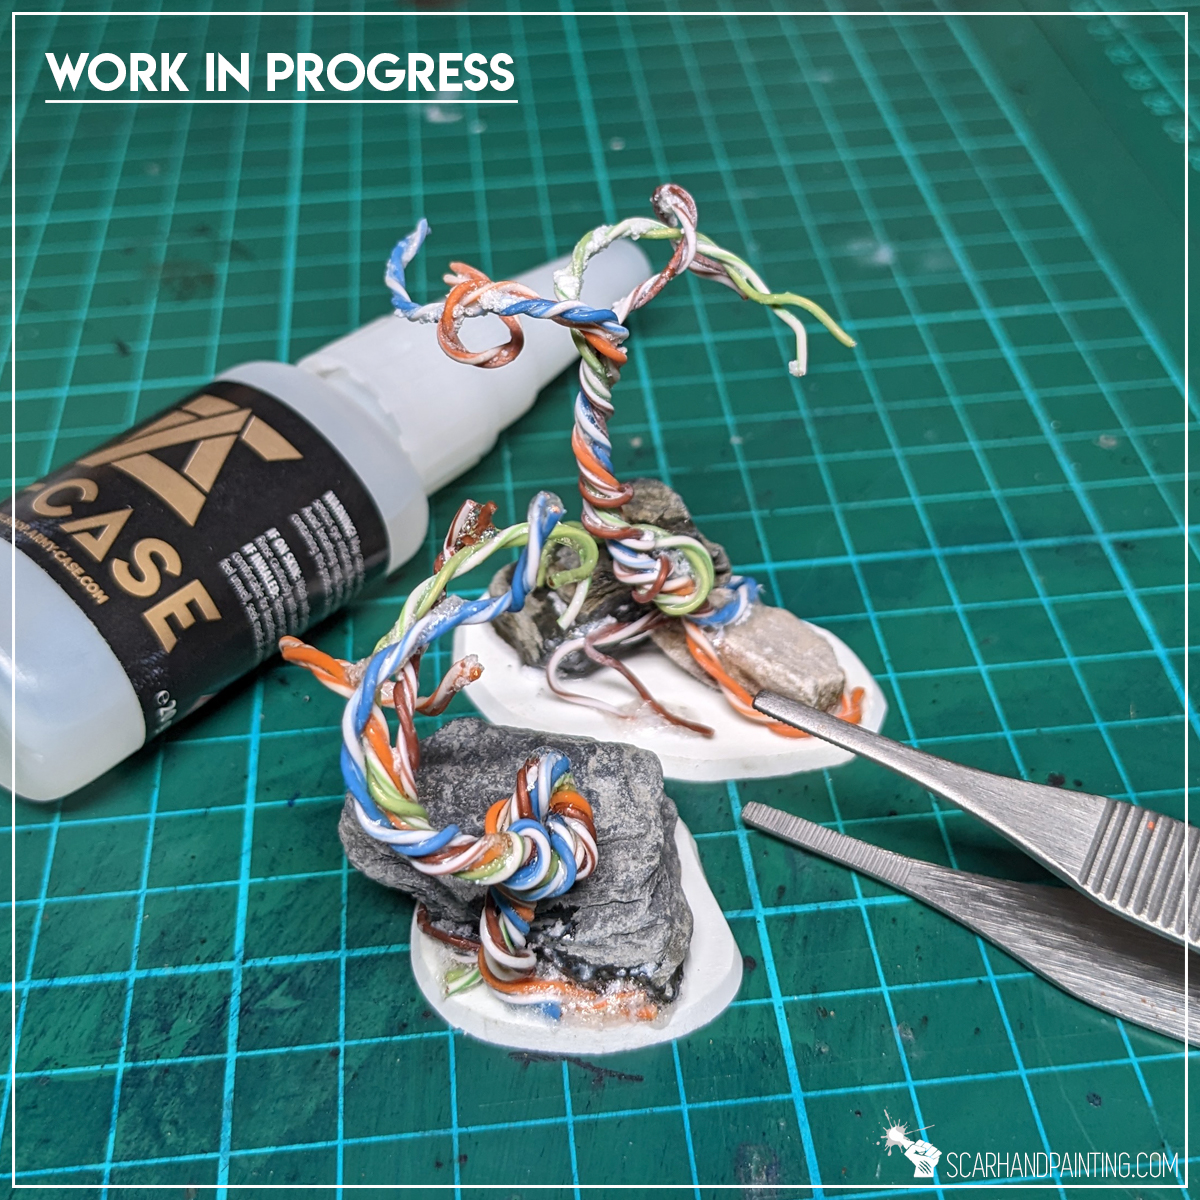
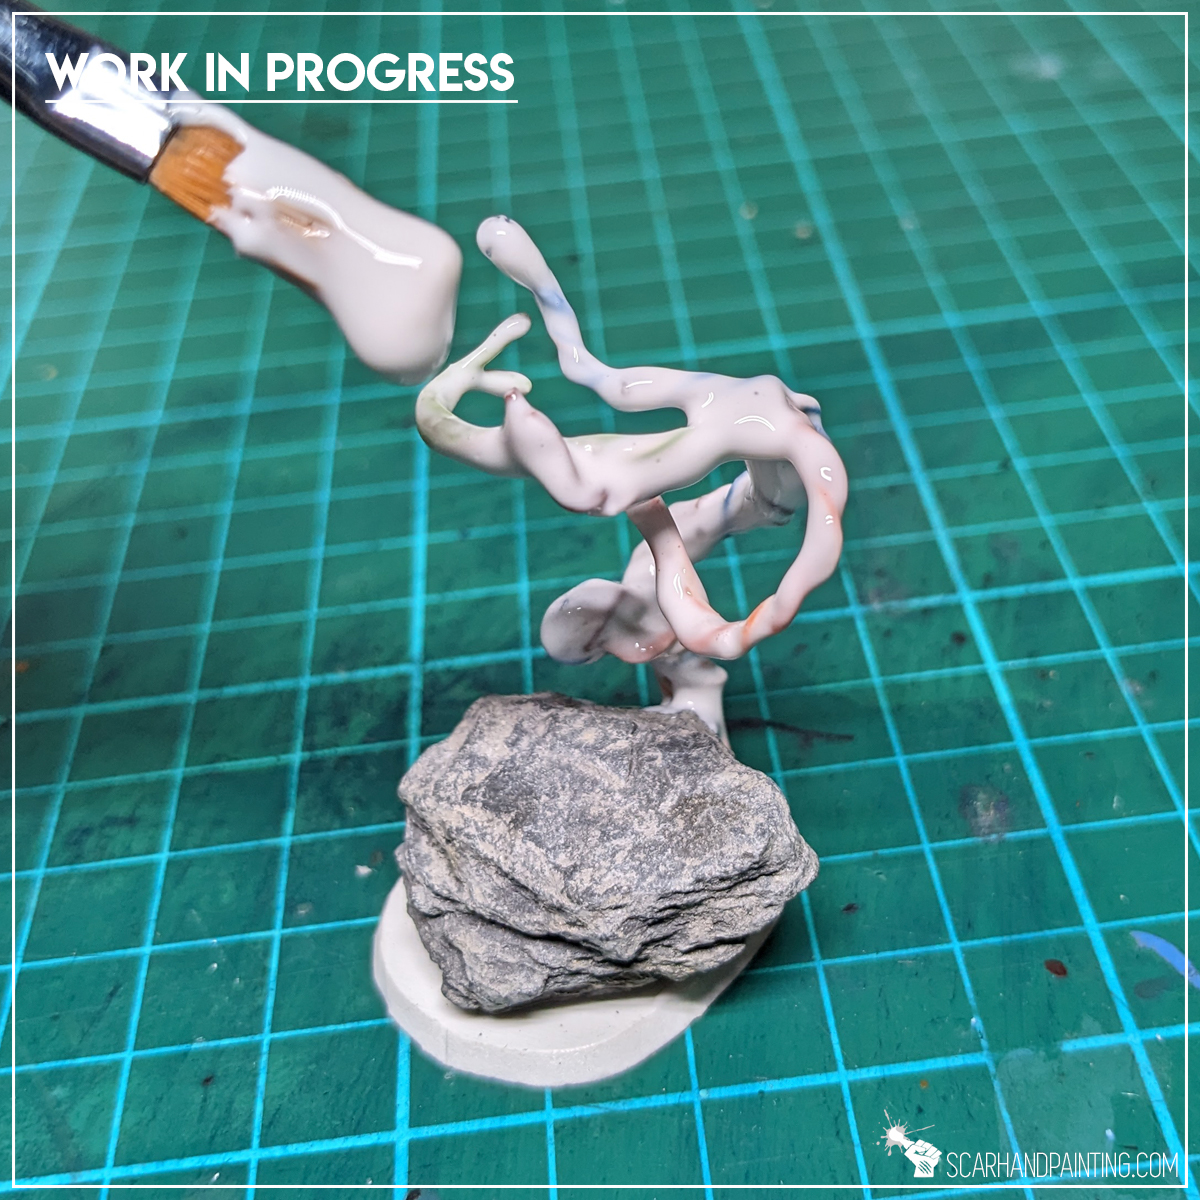
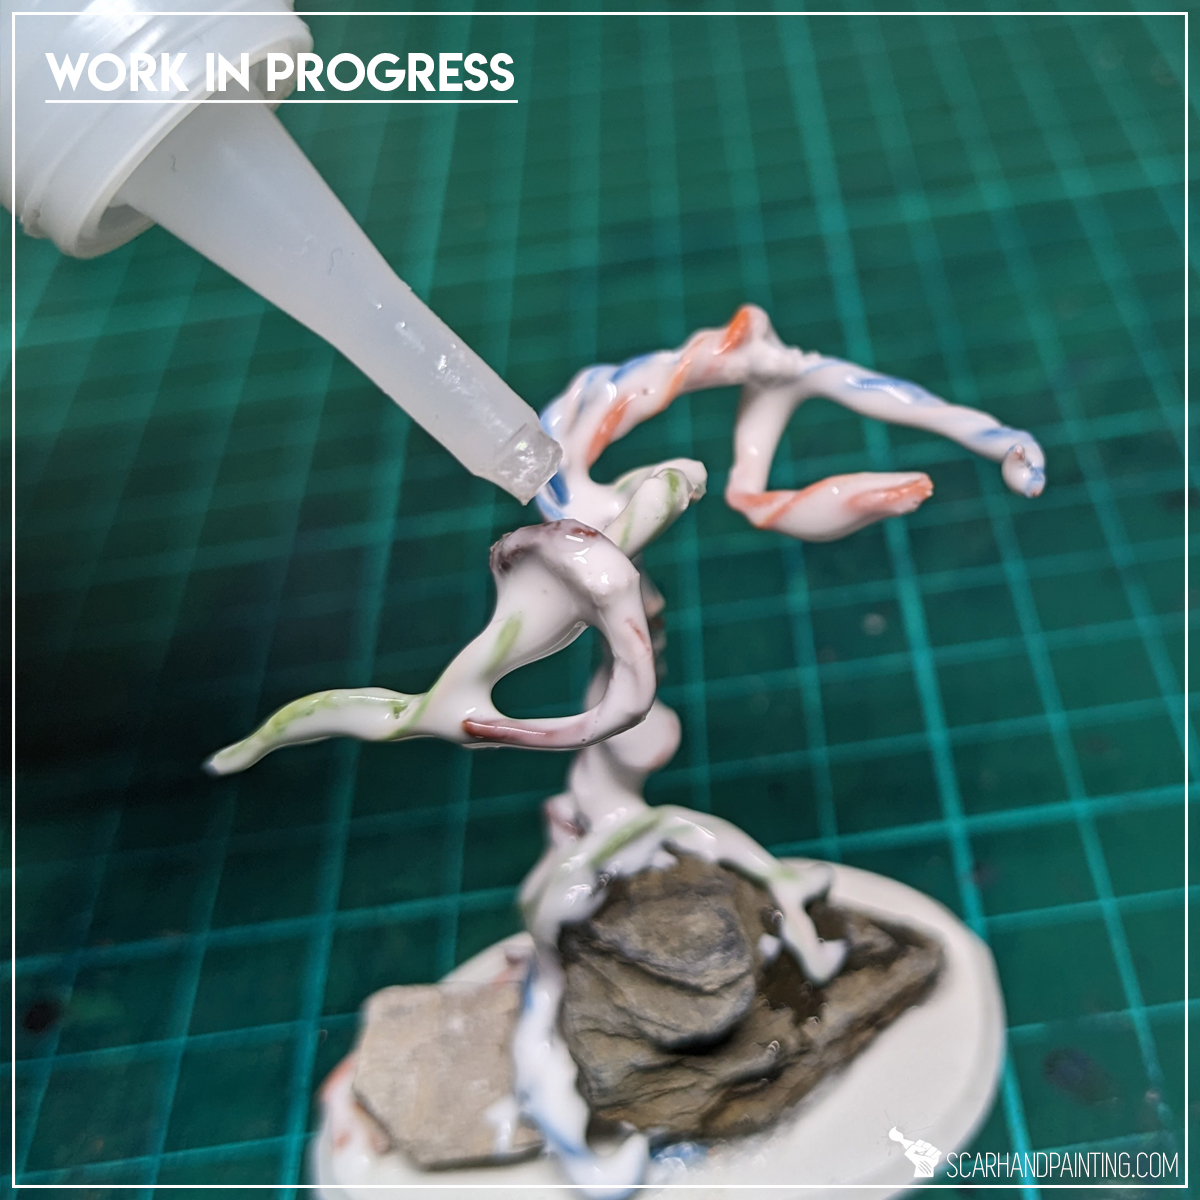
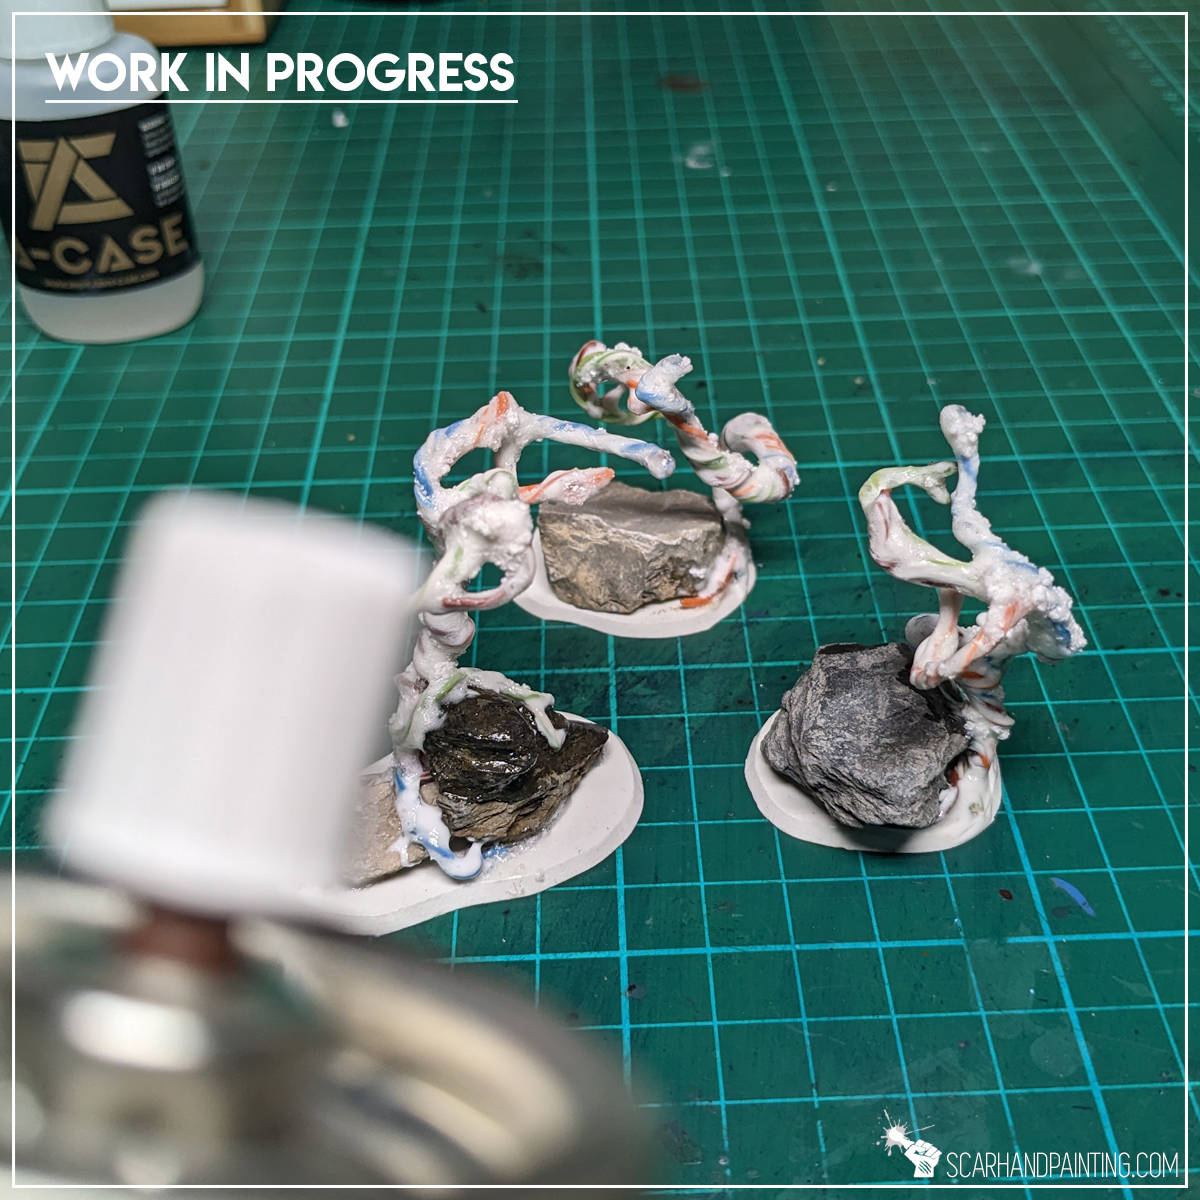
Step Three: Texture
To add texture and increase durability I covered the entire tree with PVA glue, immediately applied Super Glue on top and sealed it with Super Glue Activator. This way I ended up with solid, sturdy trees covered with a mix of twisted veins / rough bark-like texture.
…Painting
This one I leave up to you. Everyone have their own painting preferences, depending on scale and the effect they’re aiming for. My set was painted with grey pre-shades on black undercoat, then covered in brown contrast like paint to finally get a drybrush od bright sandy-brown. Nothing special, but on a 10mm scale it really does the job.
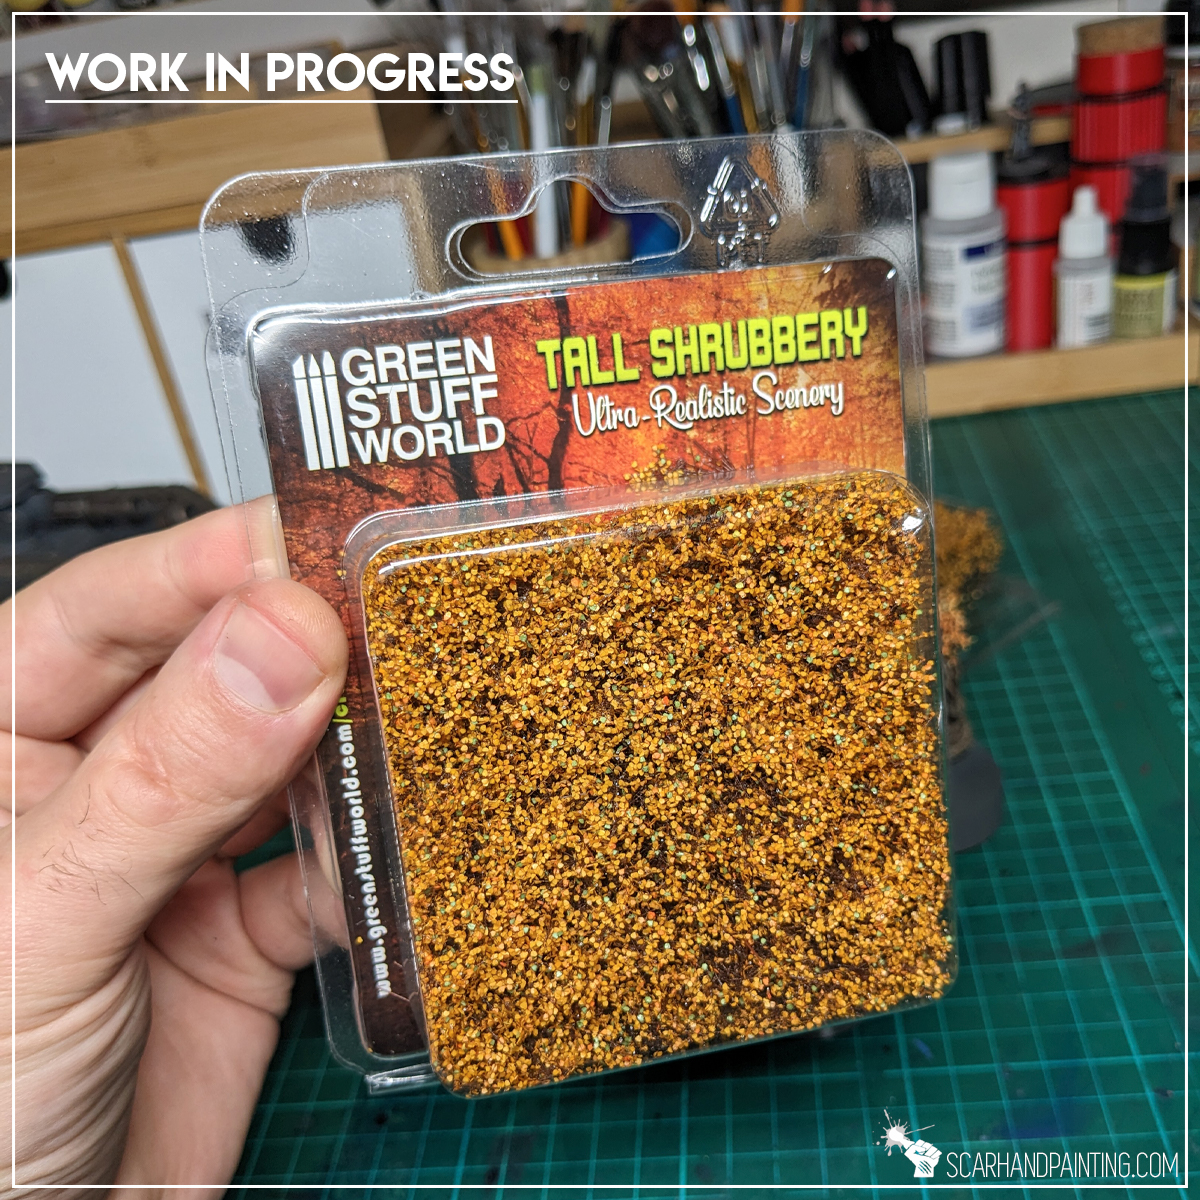
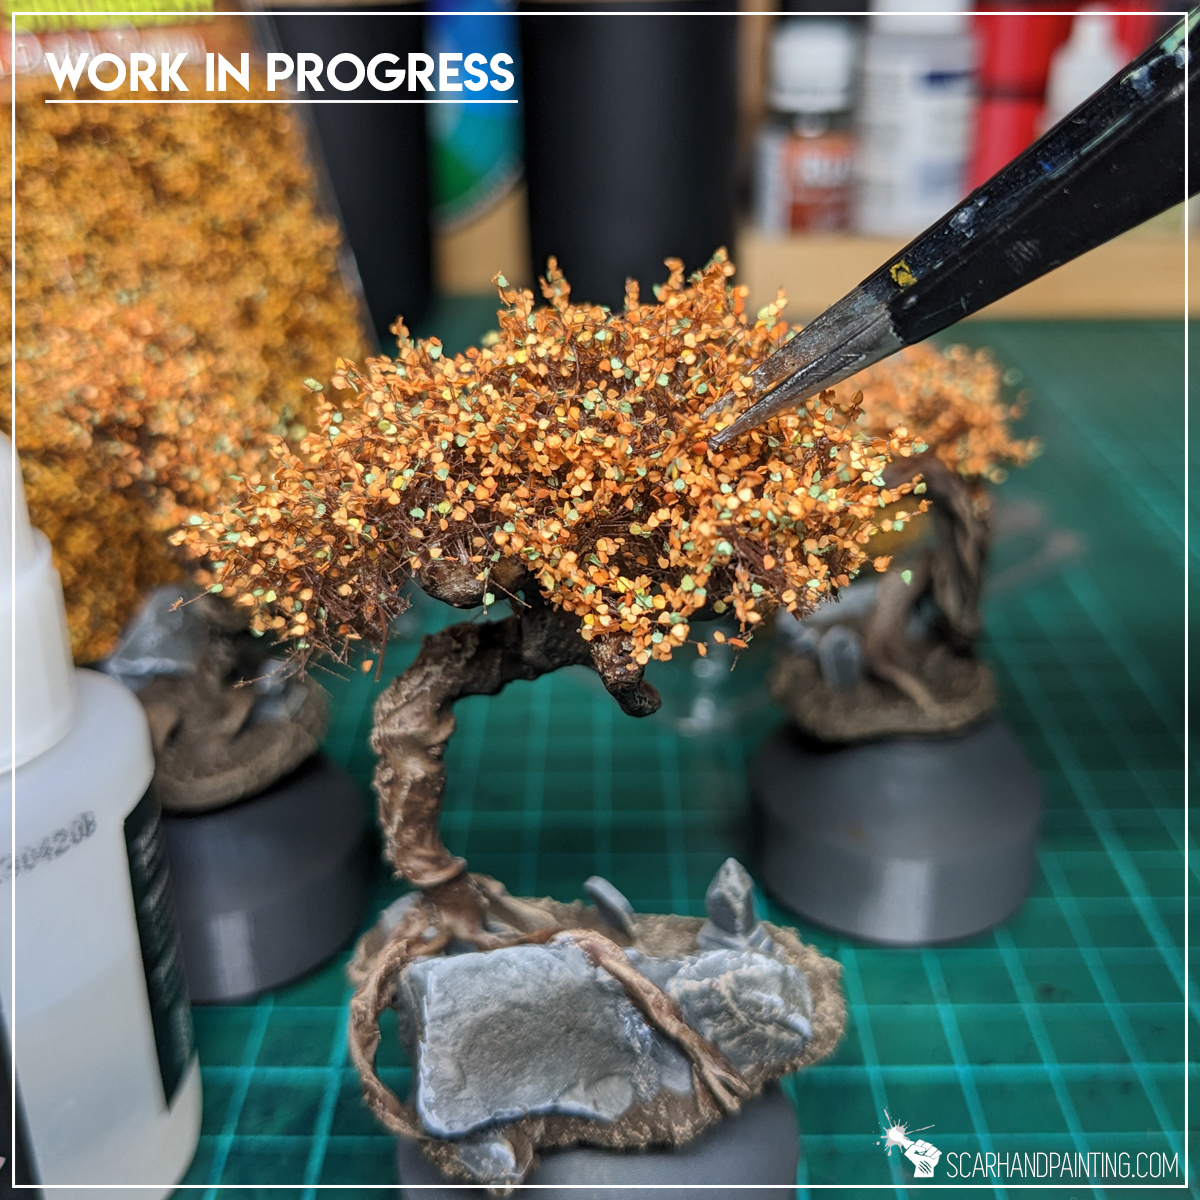
Step Four: Foliage
As a final touch I applied just a bit of Super Glue on top of each branch then, using a set of tweezers, glued a small canopy made of Green Stuff World Tall Shrubbery on top. I then sealed it with Vallejo Polyurethane Matt Varnish airbrushed all over, to keep small specks from falling off.
That’s all – a set of awesome looking trees for miniatures is now within your reach. As a final word I recommend staying open minded – there’s plenty of different materials you can use to make your own trees, not just the ones I presented. It is worth experimenting. Be sure to share your result with me.

I hope you’ve enjoyed this article. Be sure to let me know your thoughts in the comments below or via Facebook or Instagram. I would also appreciate it if you considered sharing this content with your friends, who might find it interesting. Finally if you are looking for a professional miniatures painting service, be sure to contact me with this contact form. I always reply within 24 hours, after which please check out your spam folder.