- contact@scarhandpainting.com


Welcome to Kings of War Armada Islands tutorial. Here I will take you on a Step-by-step trip through the process of creating and painting DiY islands scenery for Mantic Games Kings of War Armada as presented in the picture below.

Before we start, some notes:

Playing a friendly game on a set of fully painted and modeled scenery is always a great experience. In my opinion there’s nothing better than to let yourself go “full immersion mode” during a game of plastic dudesmen, or in this case – resin boats. That’s why I decided to create a set of appropriate scenery and use this opportunity to let you in on some of my hobby secrets.
When planning the set and how to make it my priorities were ease of build (and copy), durability, stability and obviously cool looks! Thus choice of material being mostly PCV and stones. PCV sheets are easy to work with, stay flat and are very glue friendly, whereas stones provide cheap and easy to use terrain features that will add weight and improve stability of the scenery pieces. With that in mind – let’s begin!
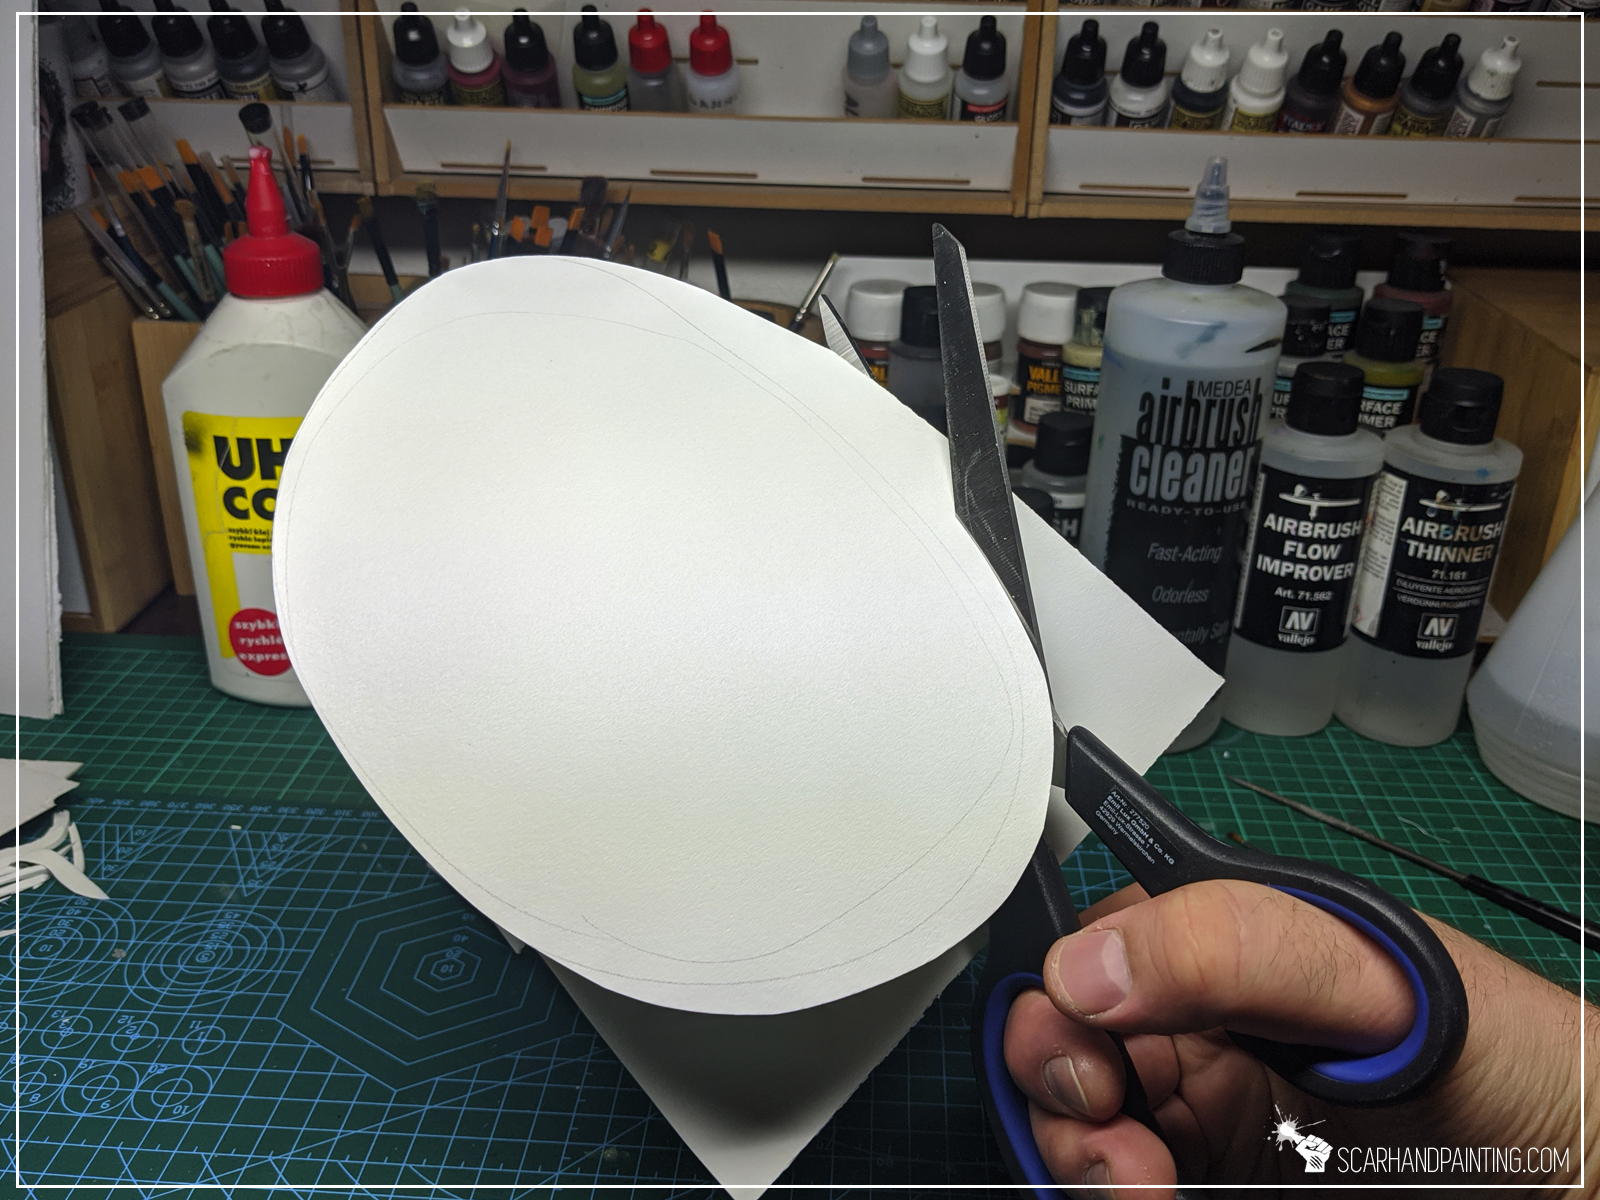
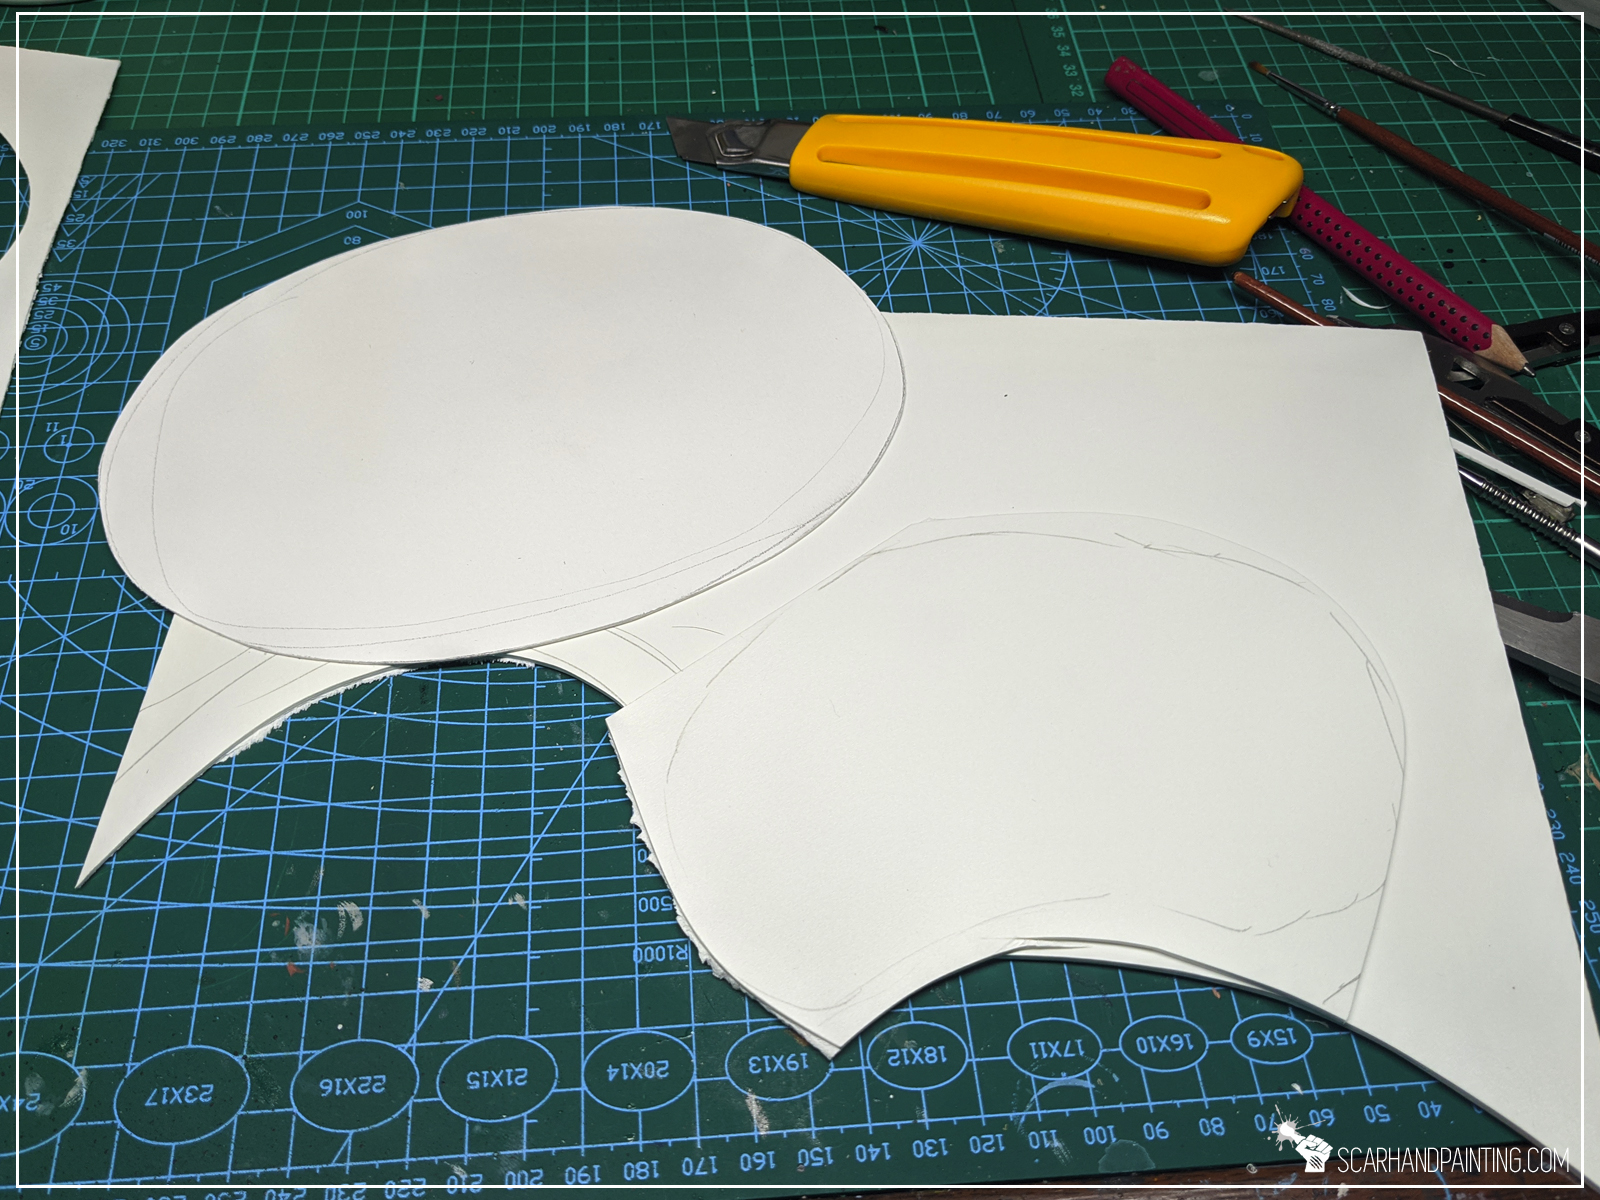
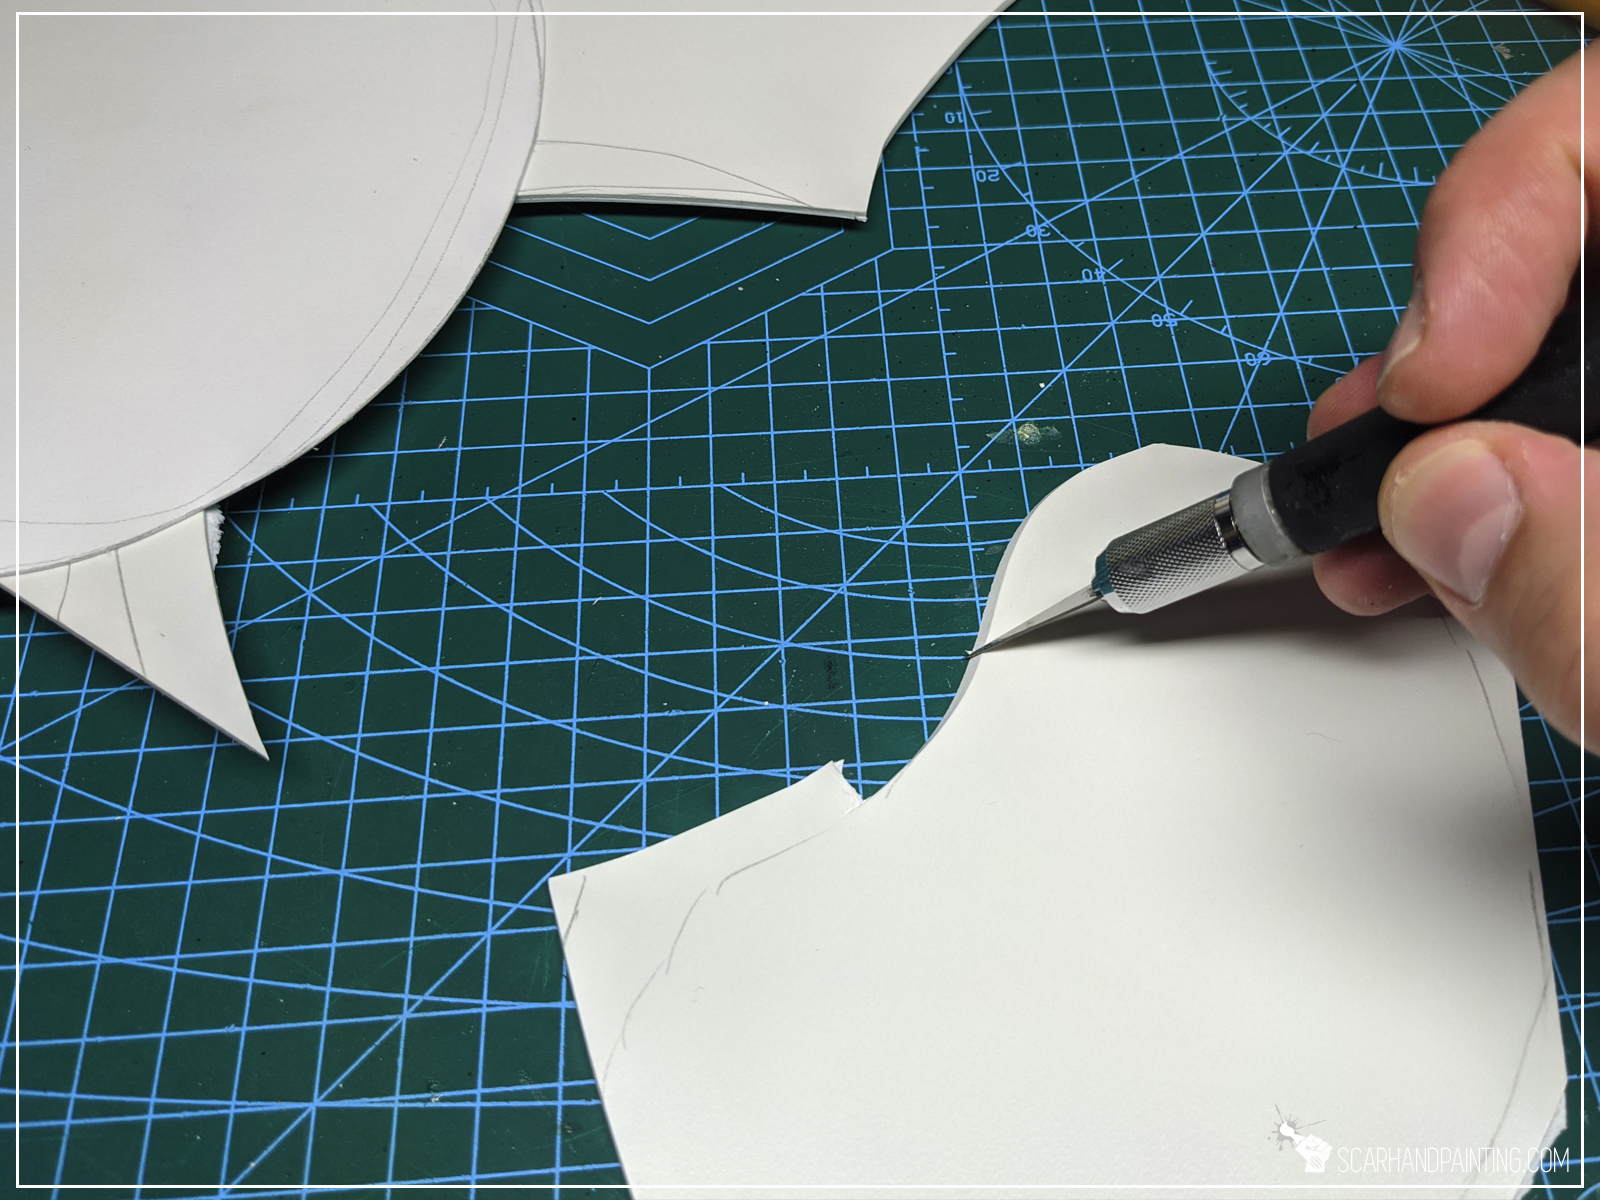
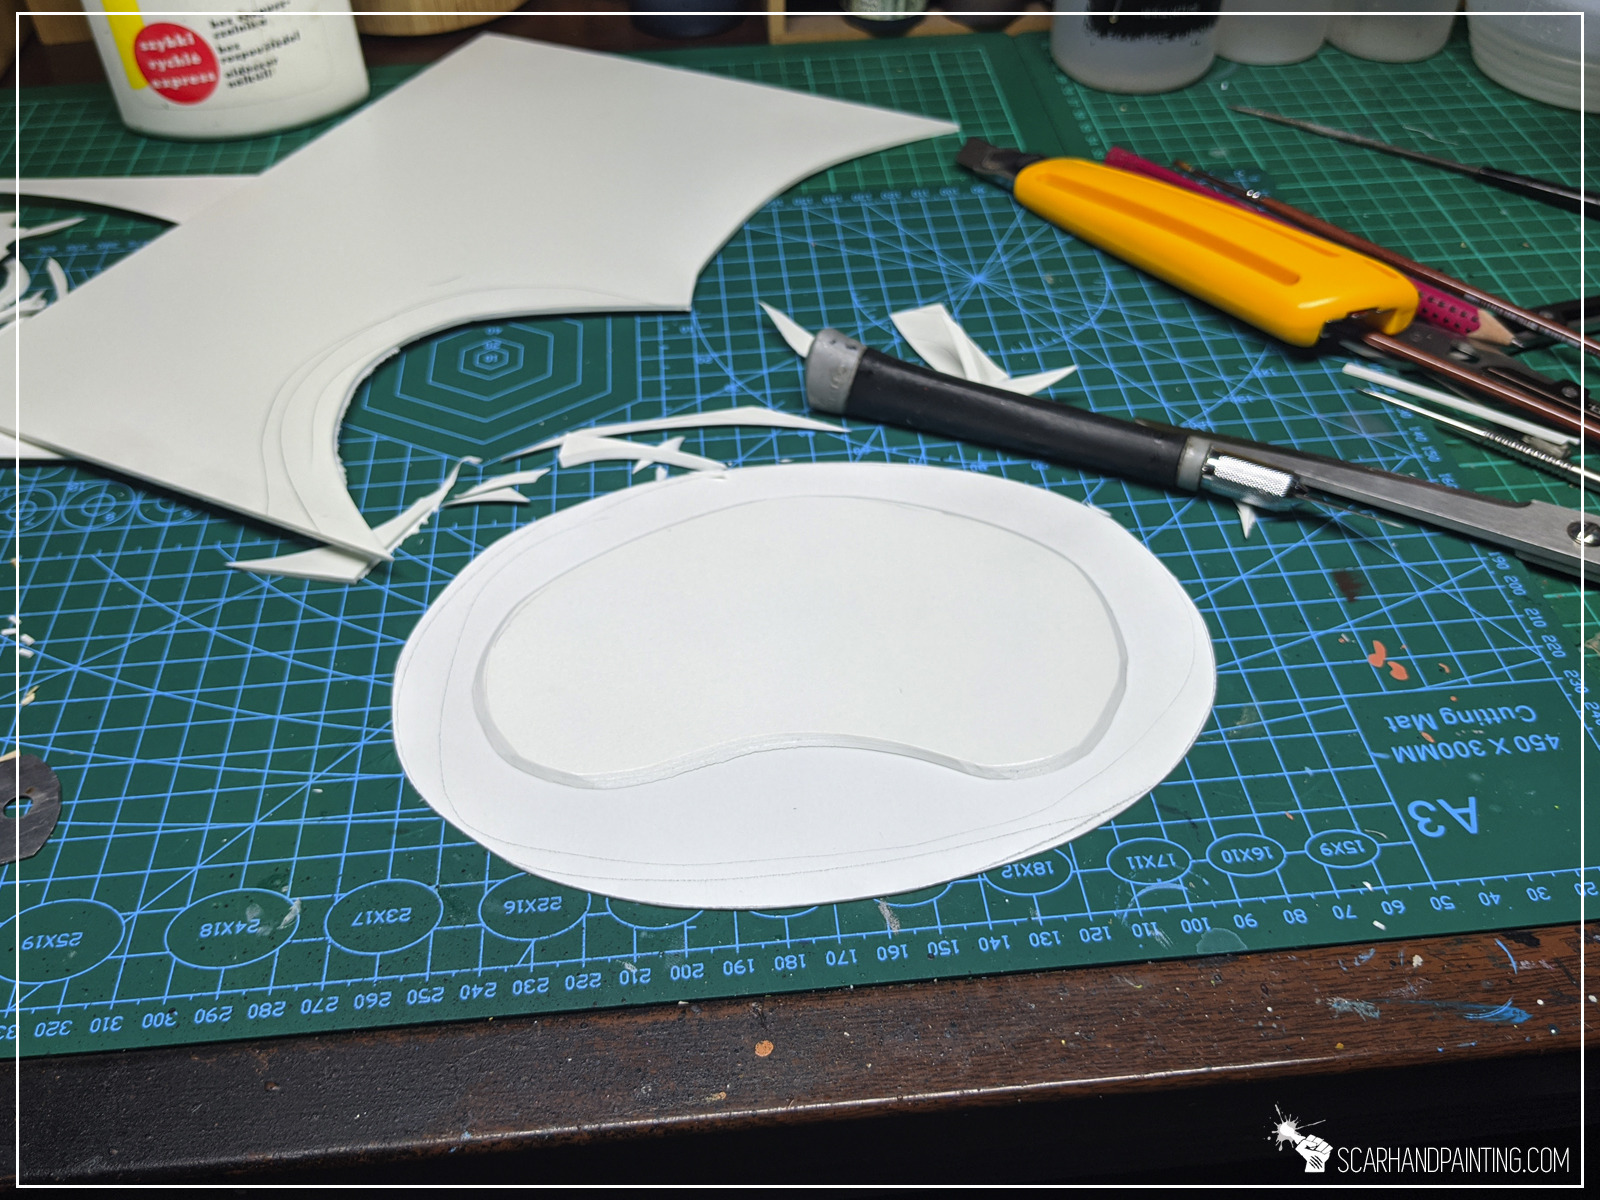
Step one: Basic shapes
I started by cutting a island’s base out of 1mm thick PCV sheet with a pair of scissors. I then smoothed the edges with a piece of sandpaper.
Next, using a hobby knife, I cut the island itself. This time I used 3mm thick PCV and cut the edges at a 30-45* angle, leaving approximately 1,5cm of the base all around the island. Once done I glued both pieces together, using Army Painter’s Super Glue.

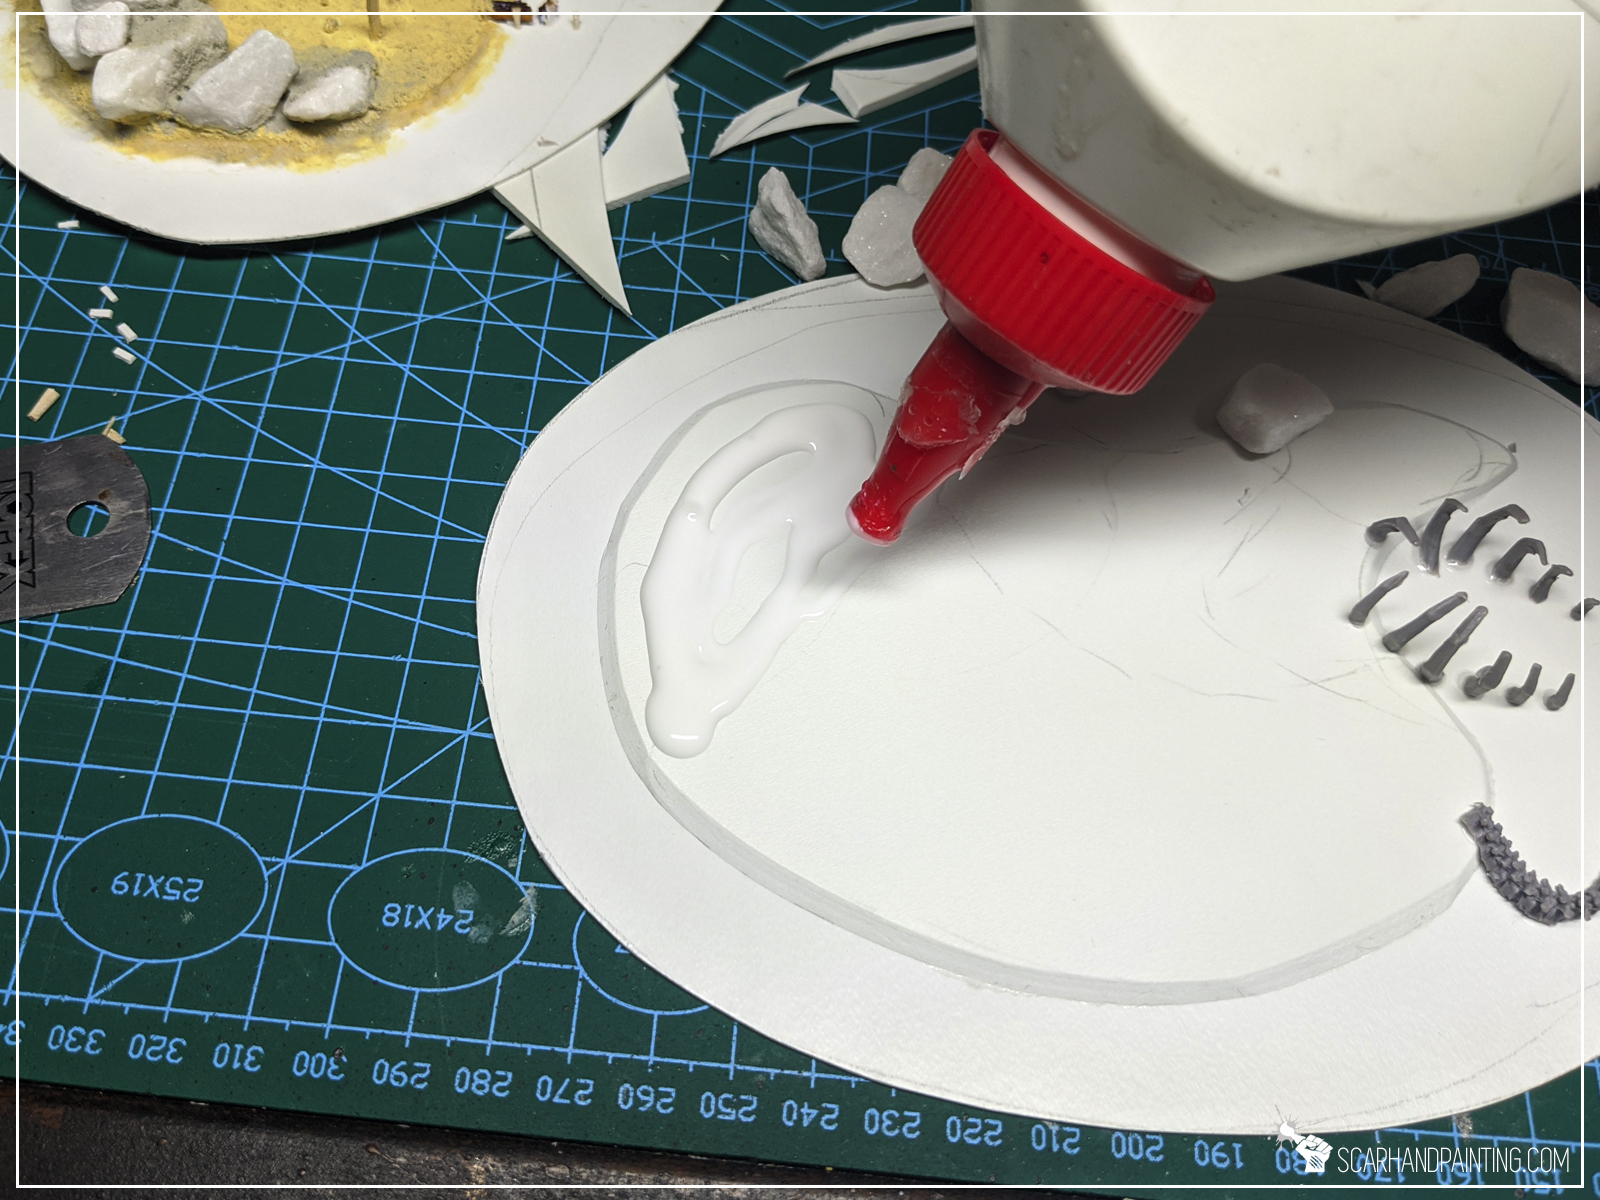
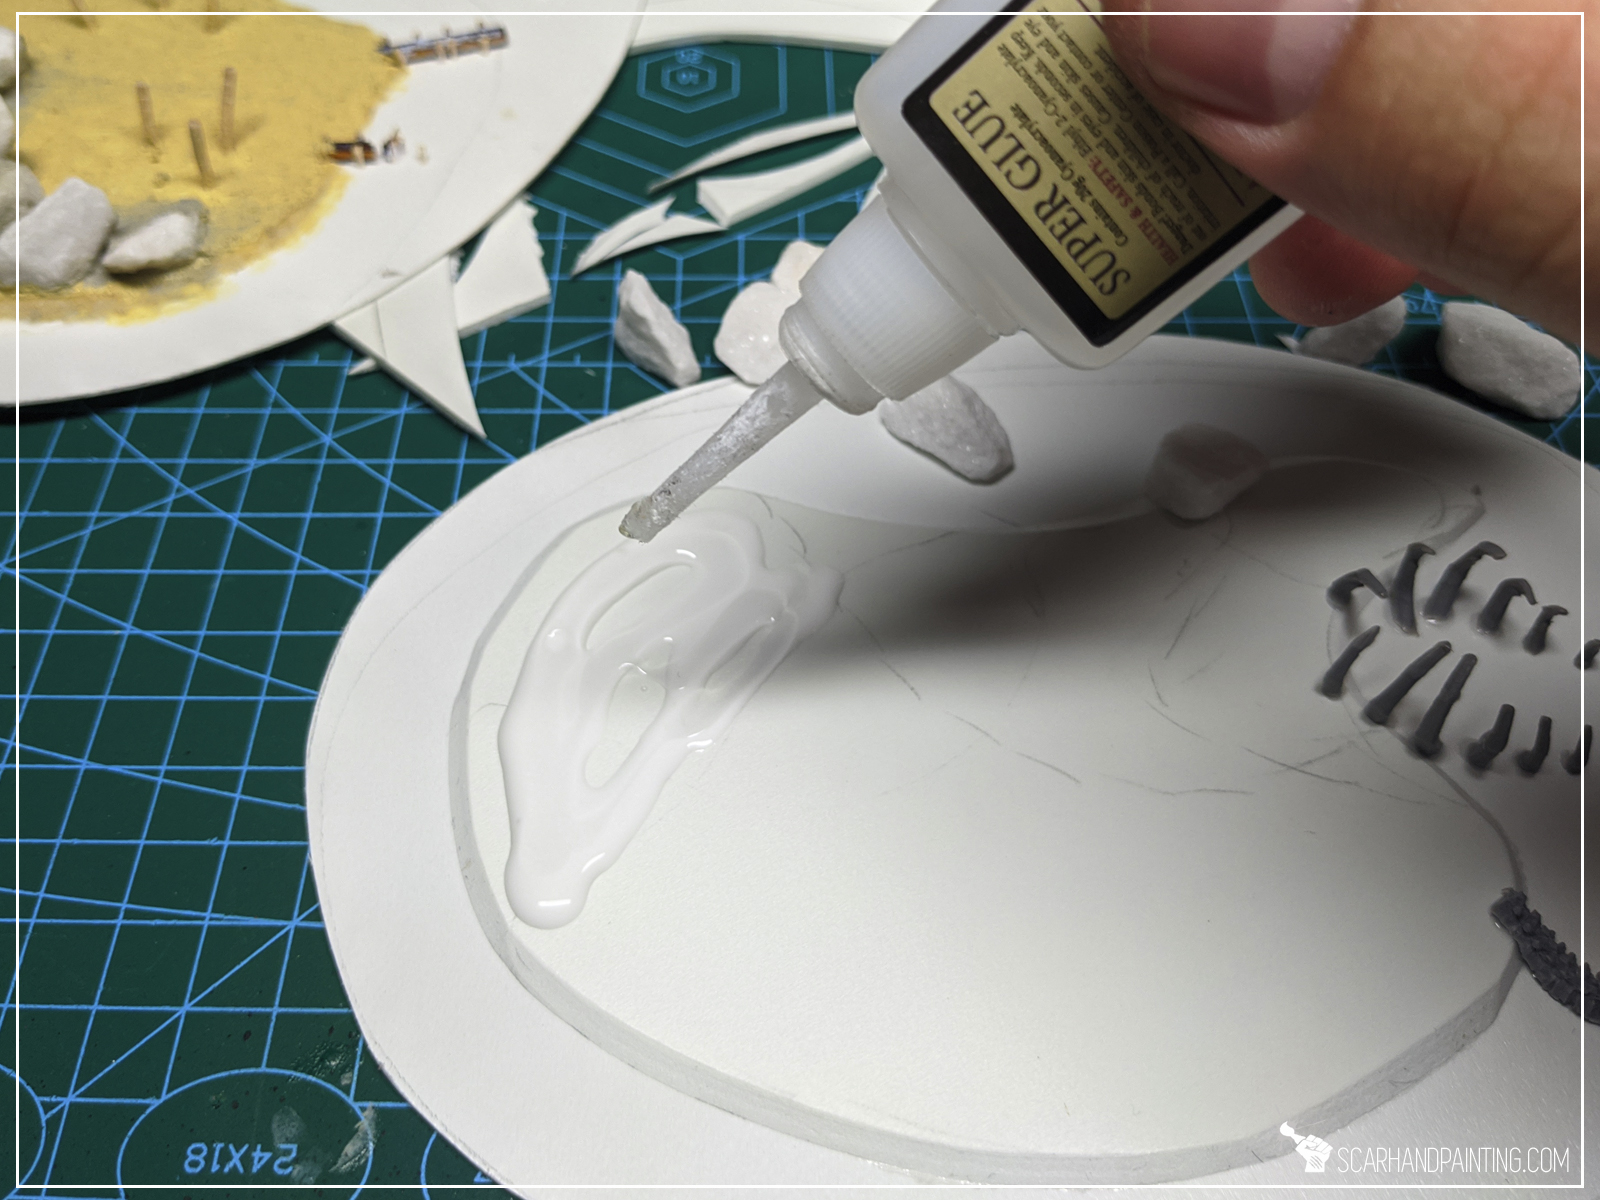
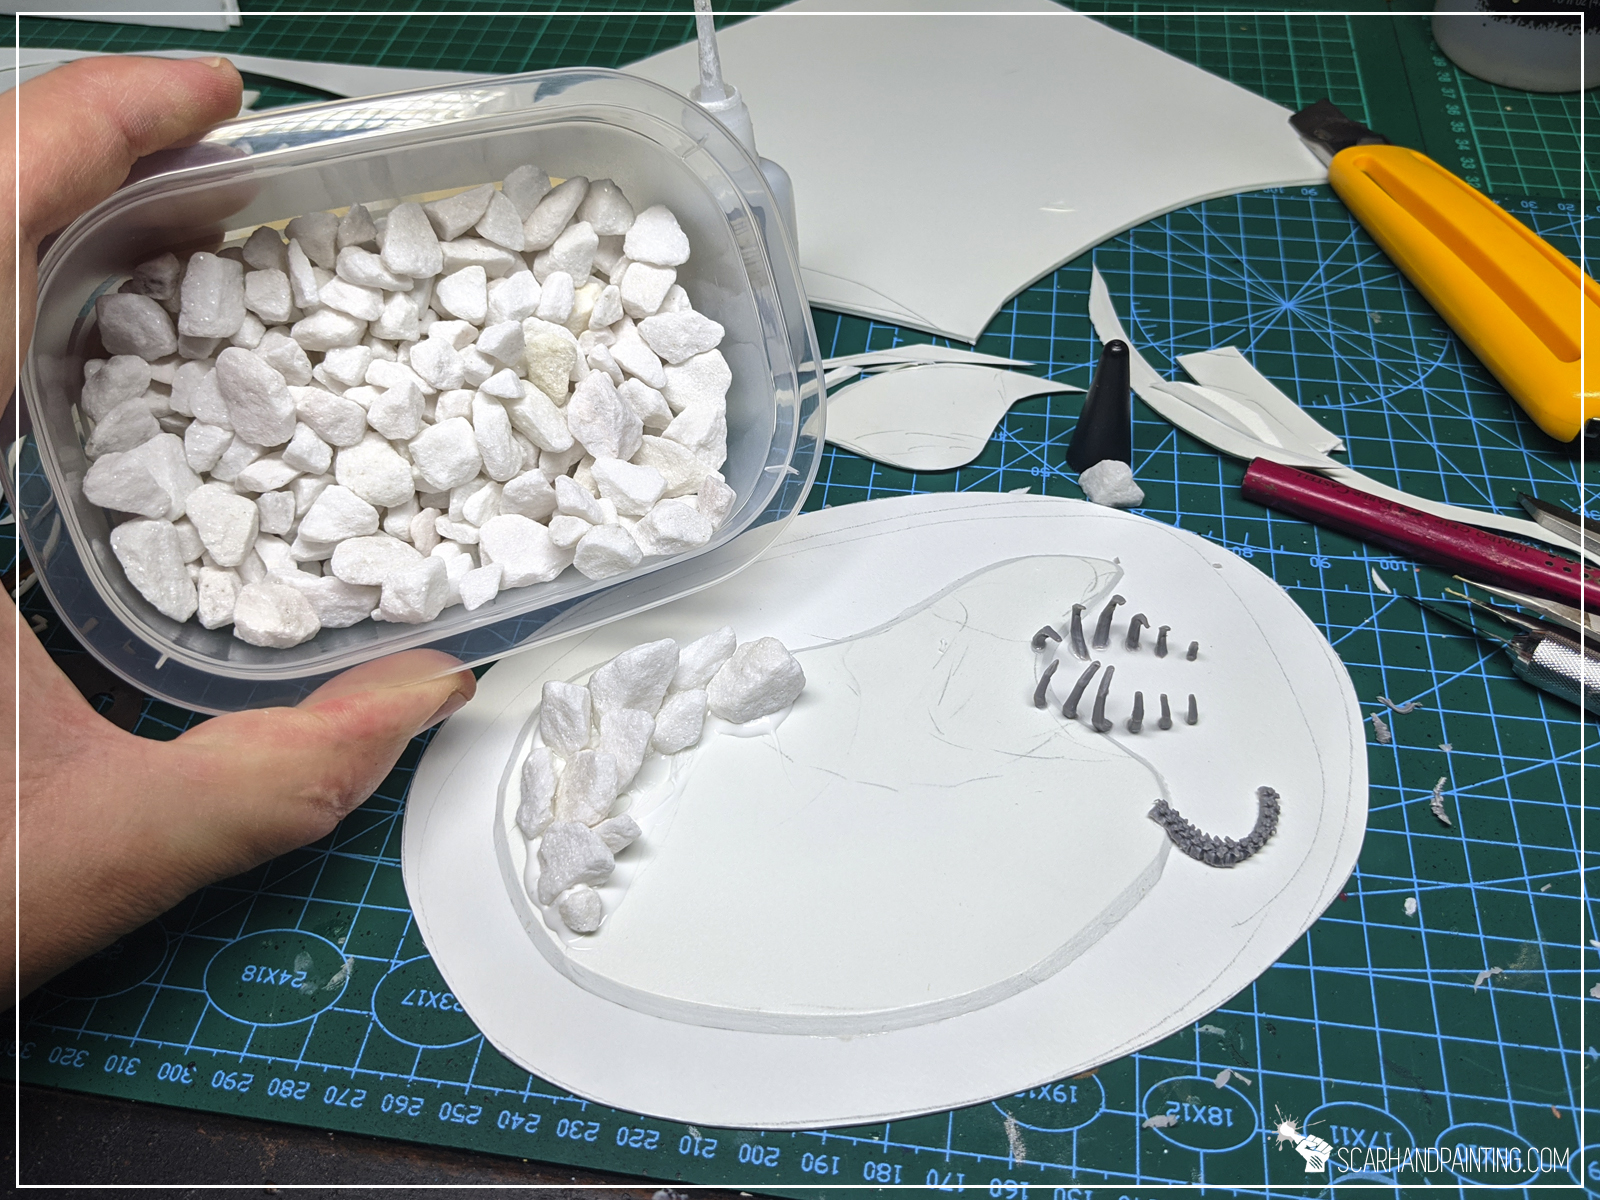
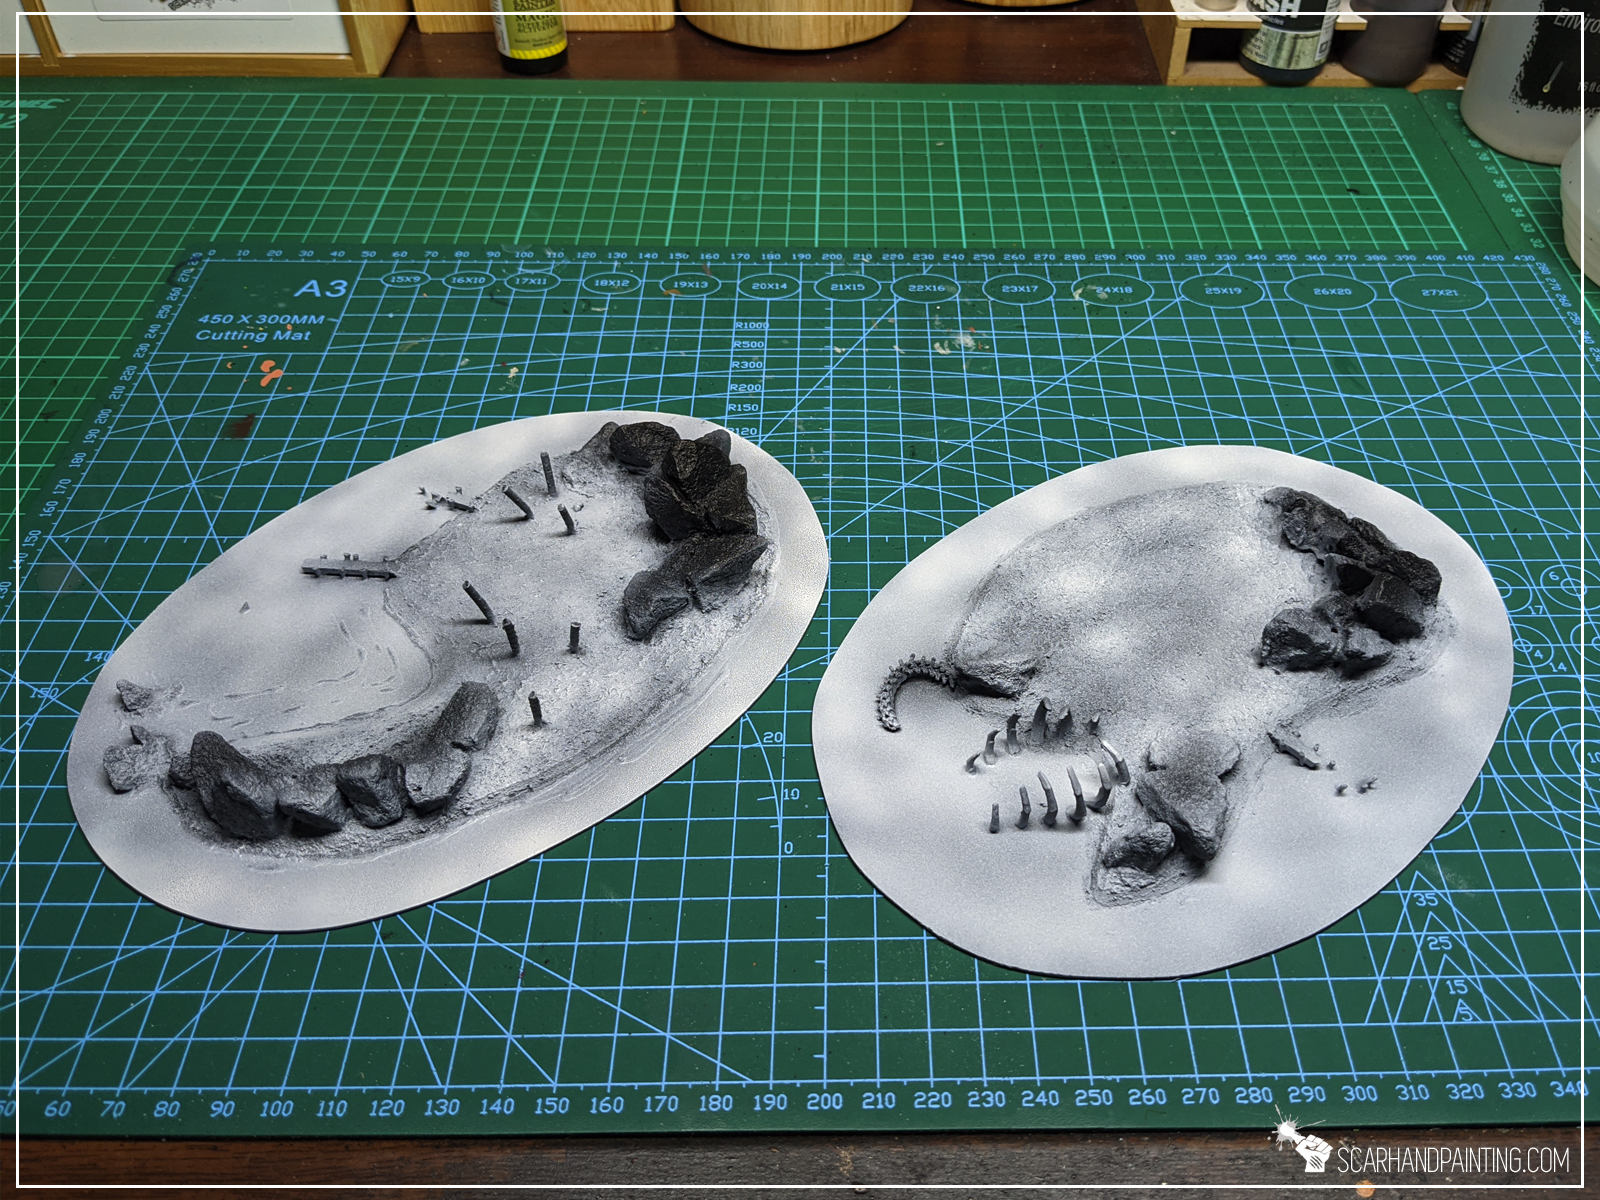
Step two: Rocky features
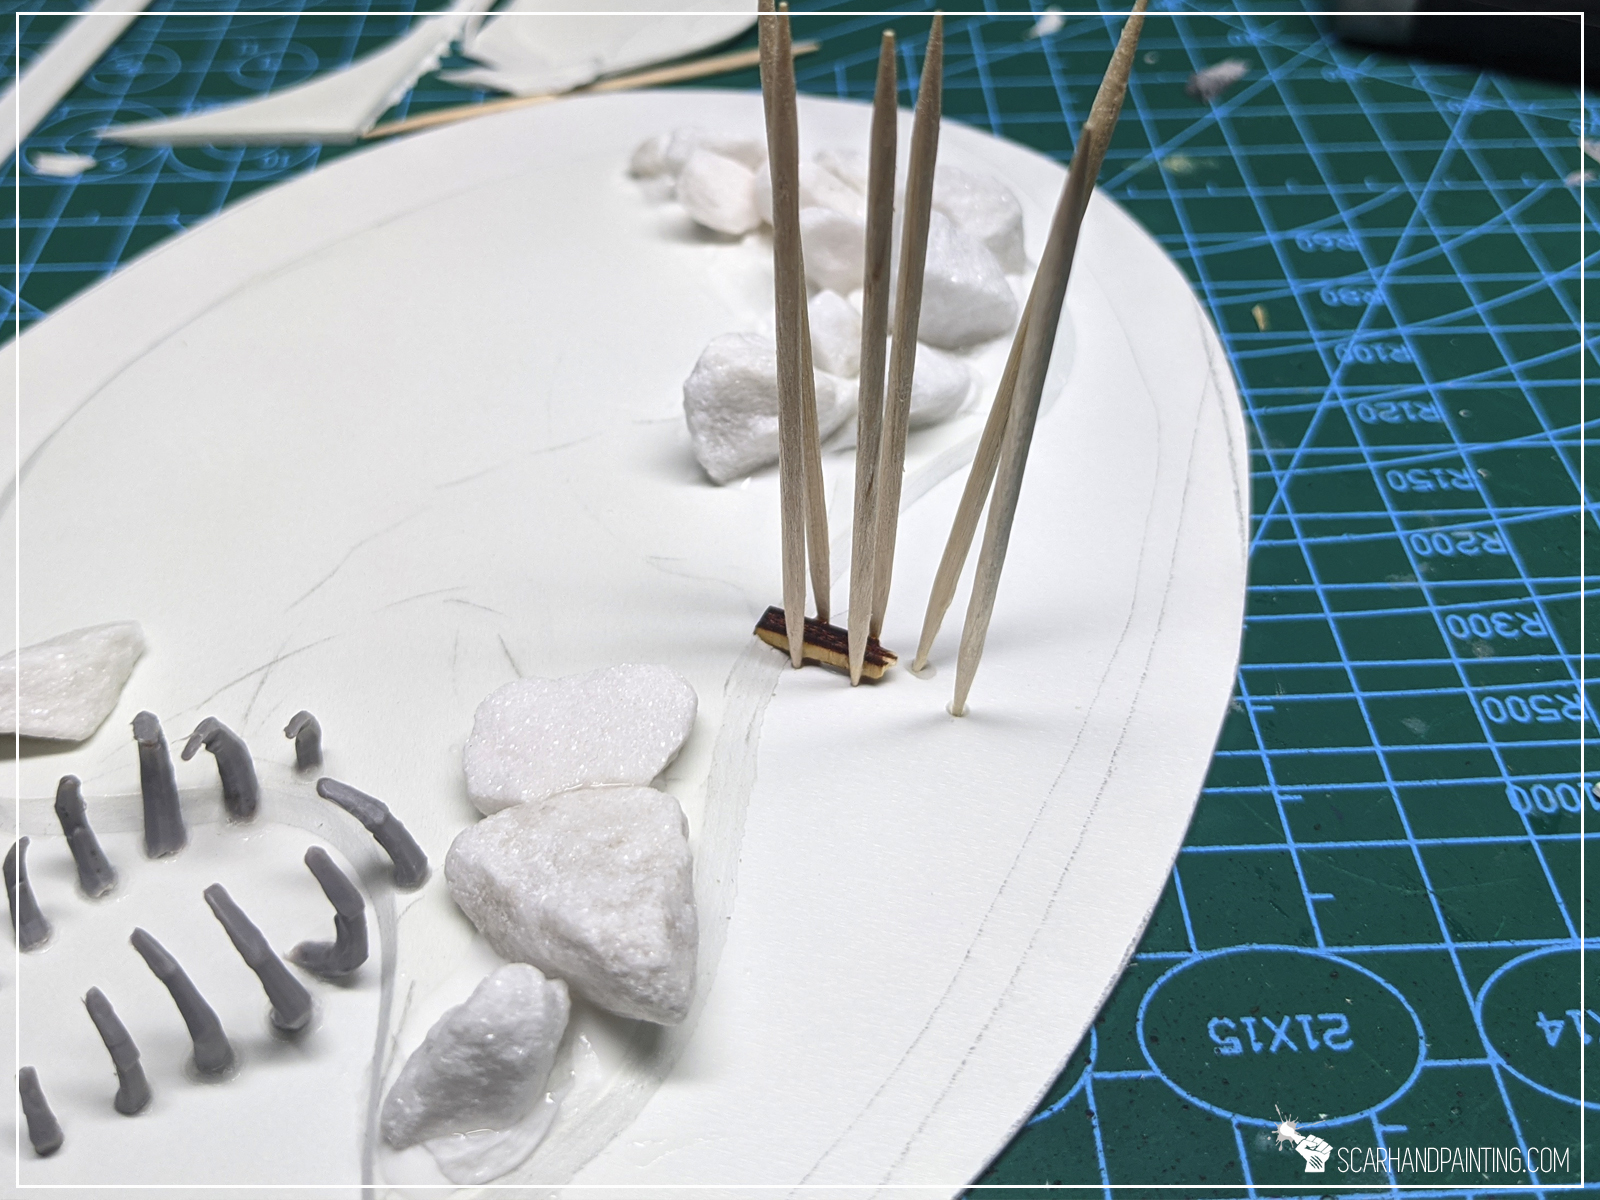
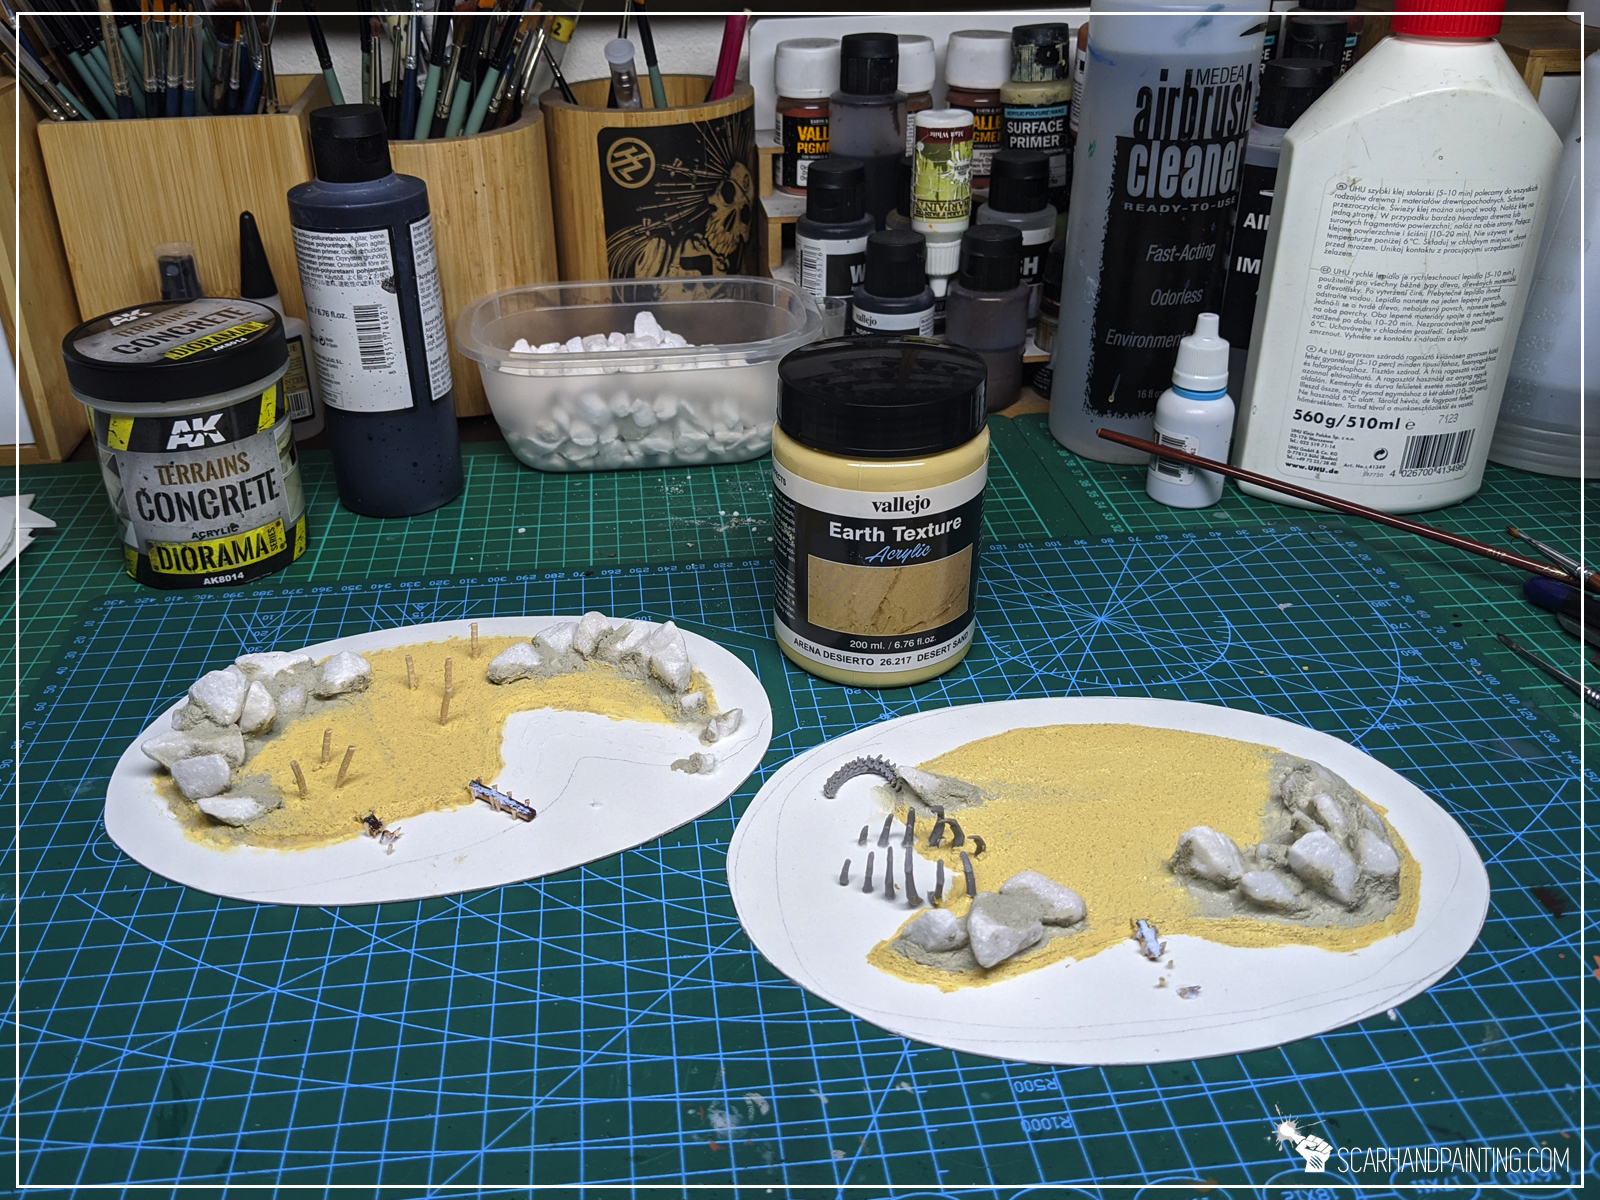
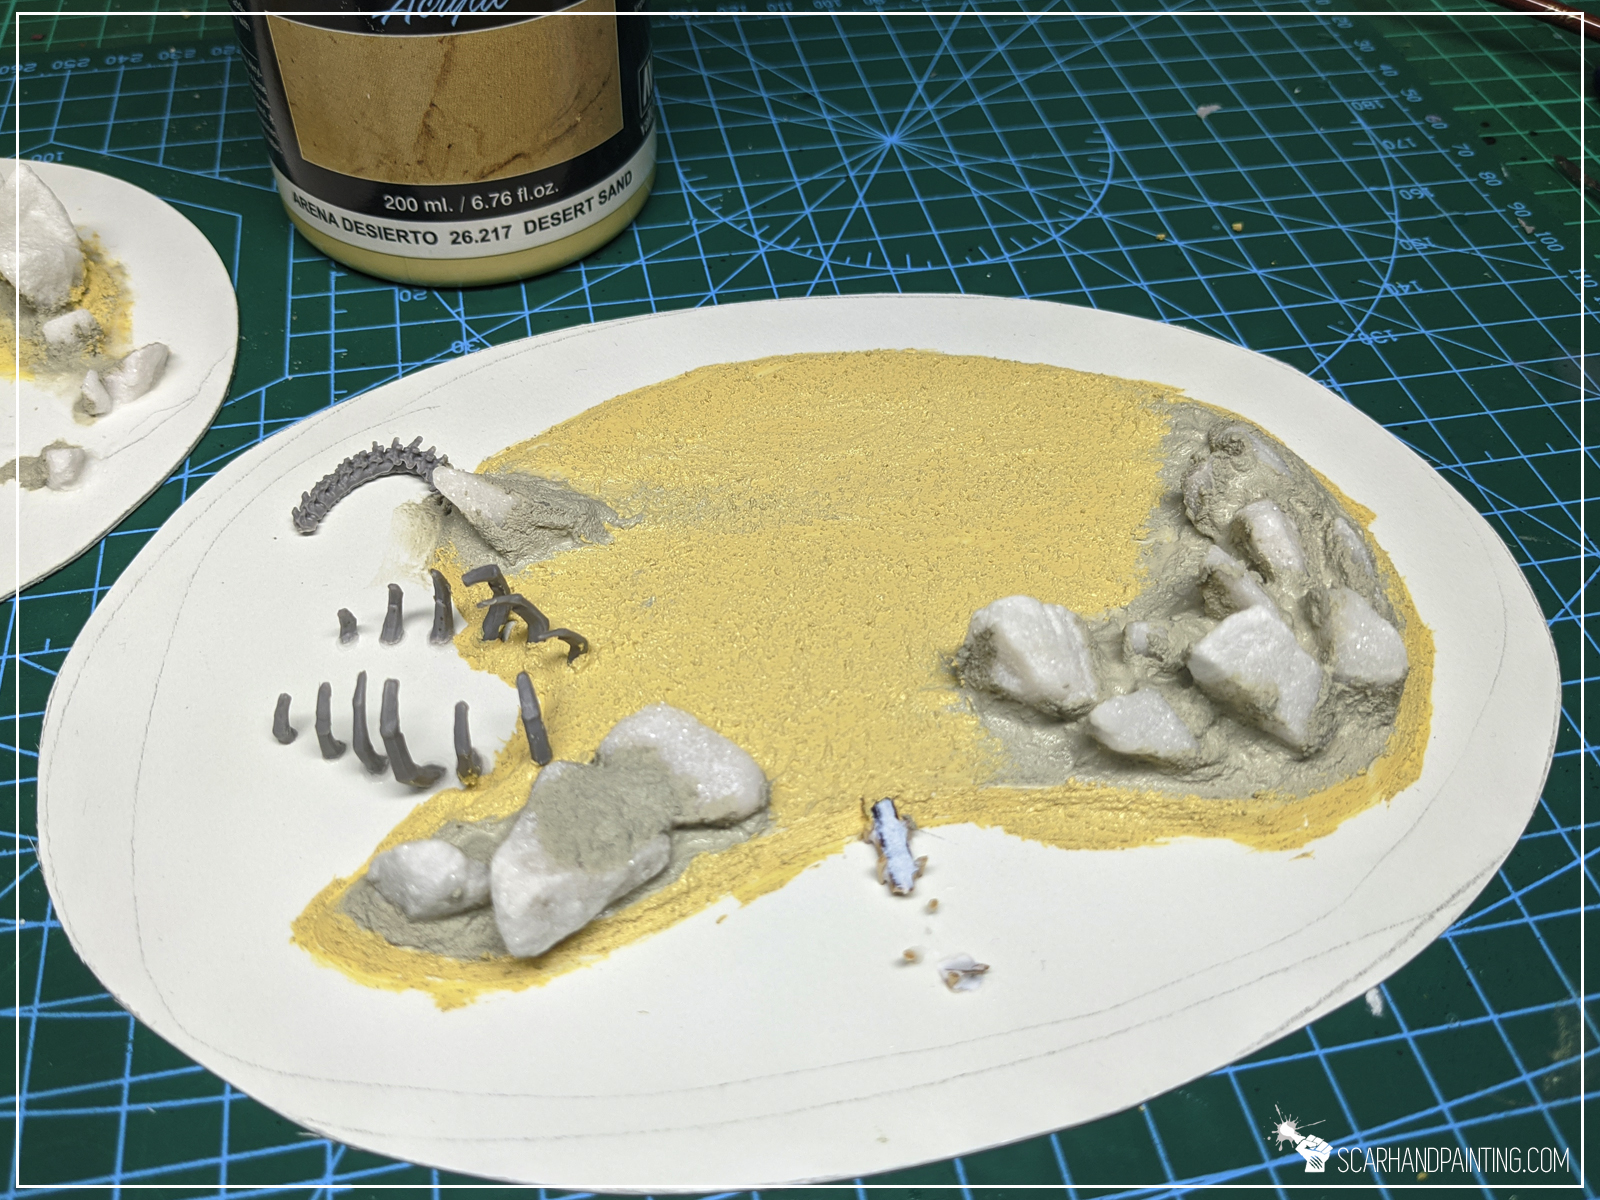
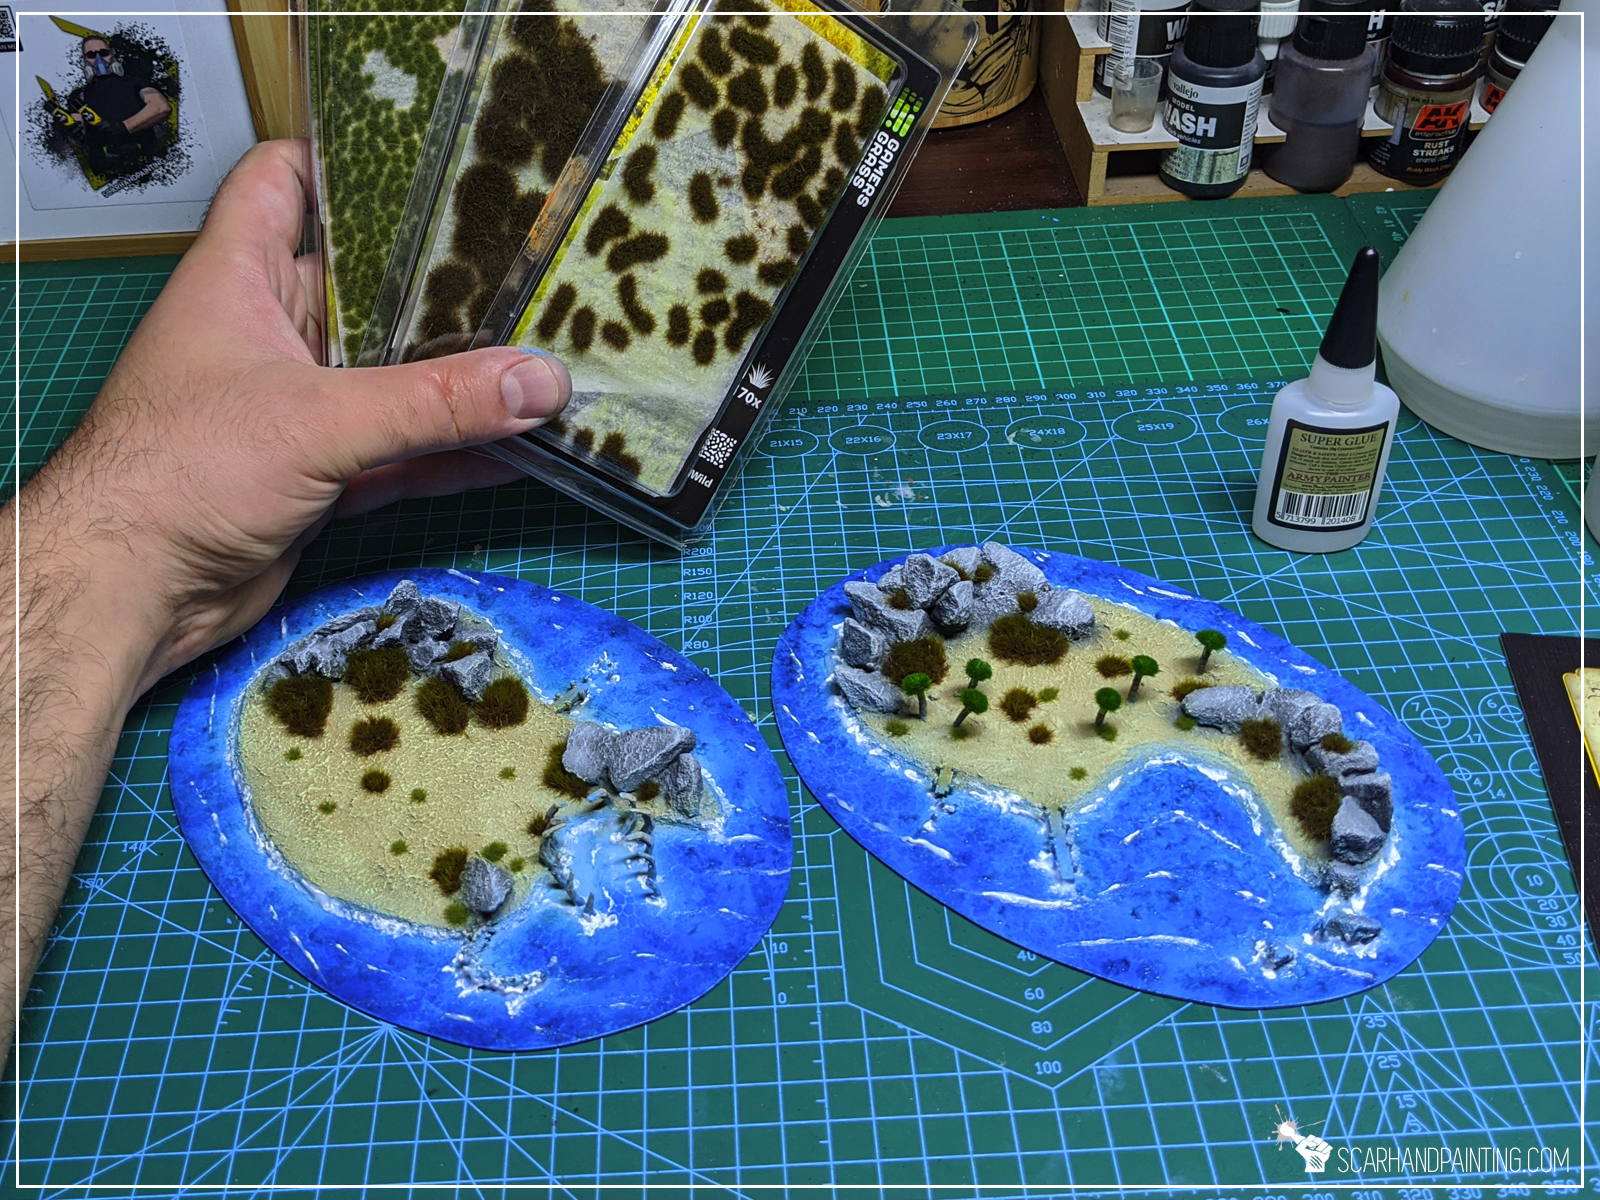
I then applied PVA glue to some areas on the island, followed by AP’s Super Glue and finally Rocks – repositioned to look interesting. I also added some bitz, but I leave it up to you to decide if you want to do the same.
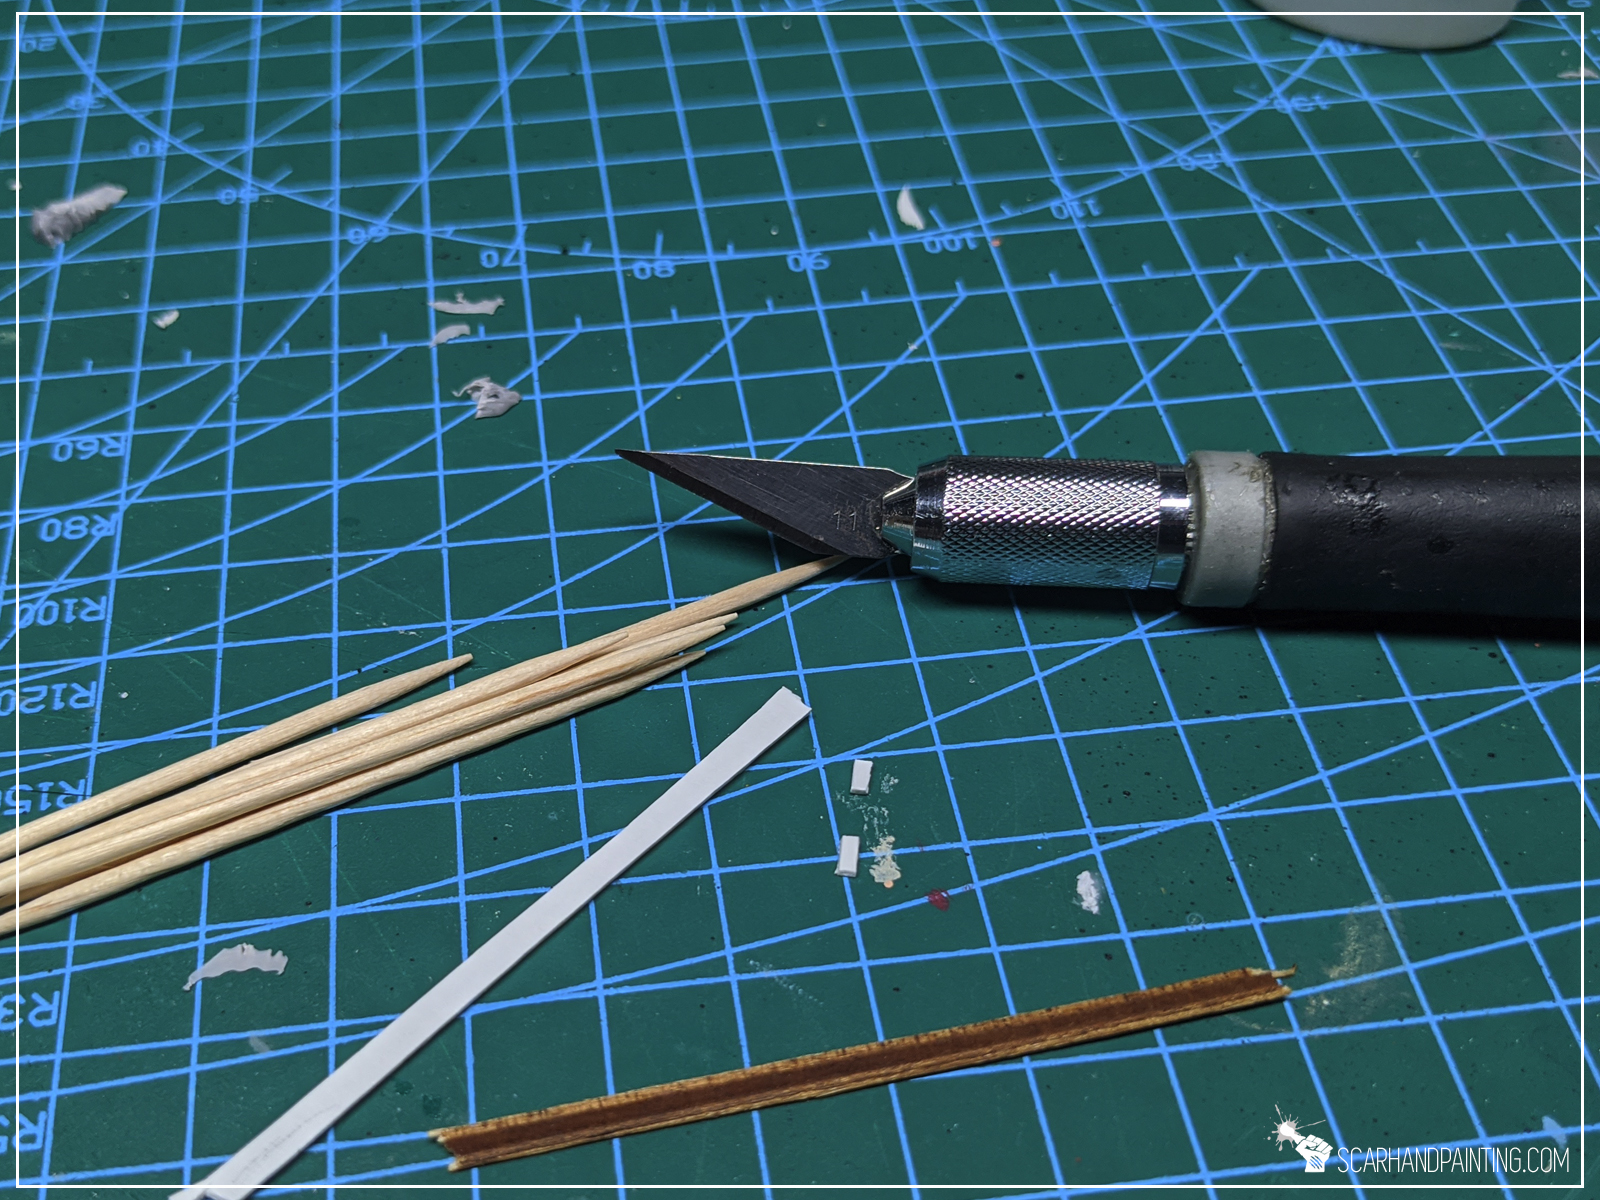
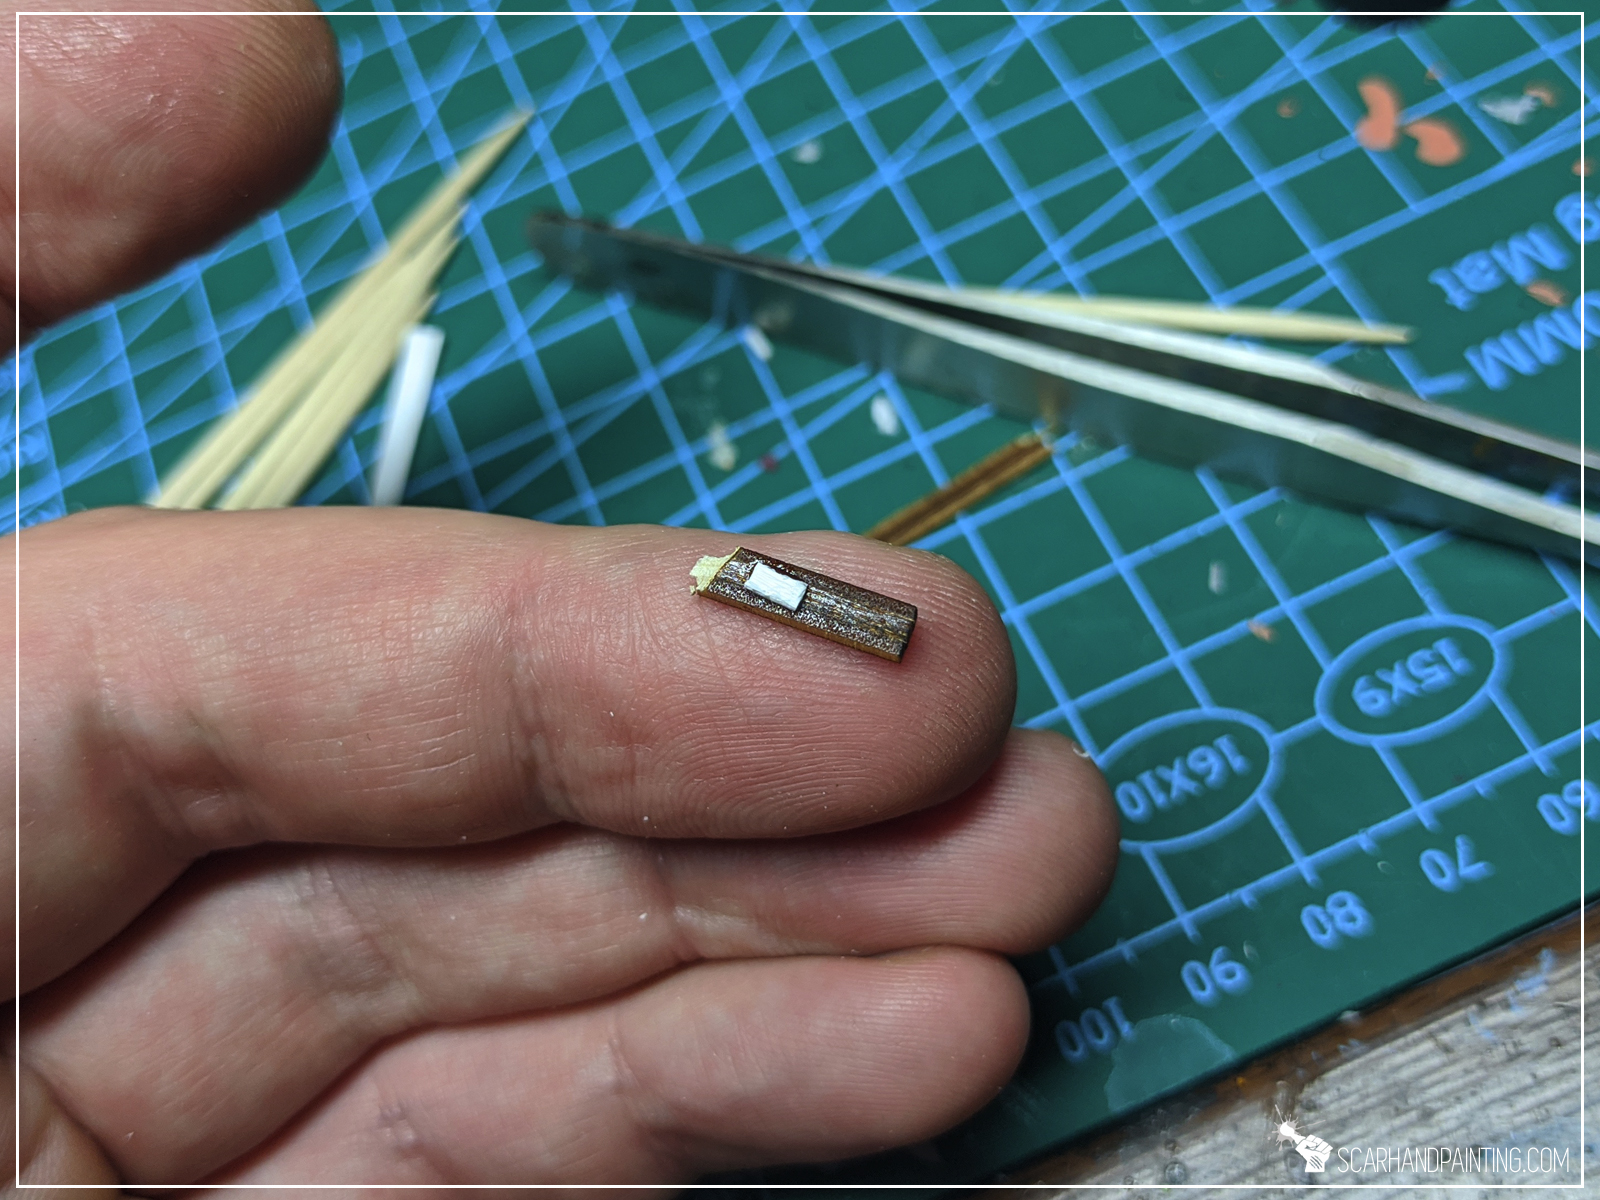
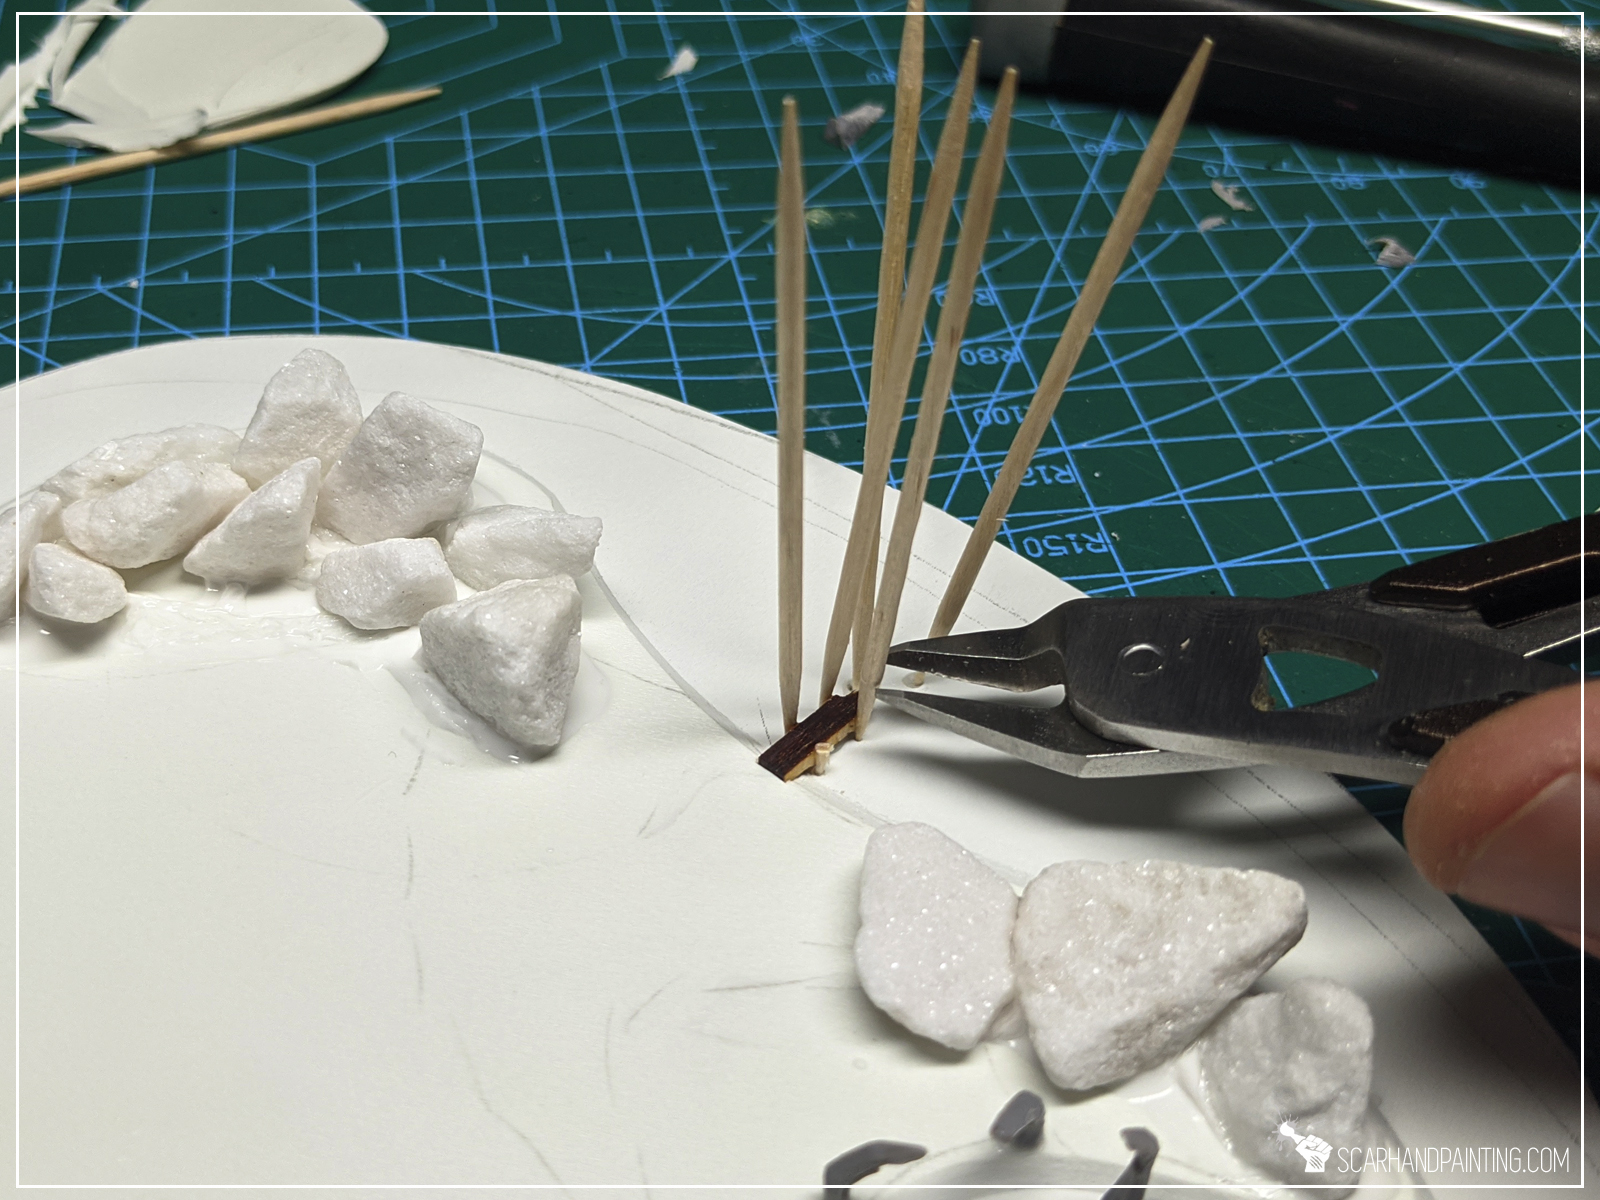
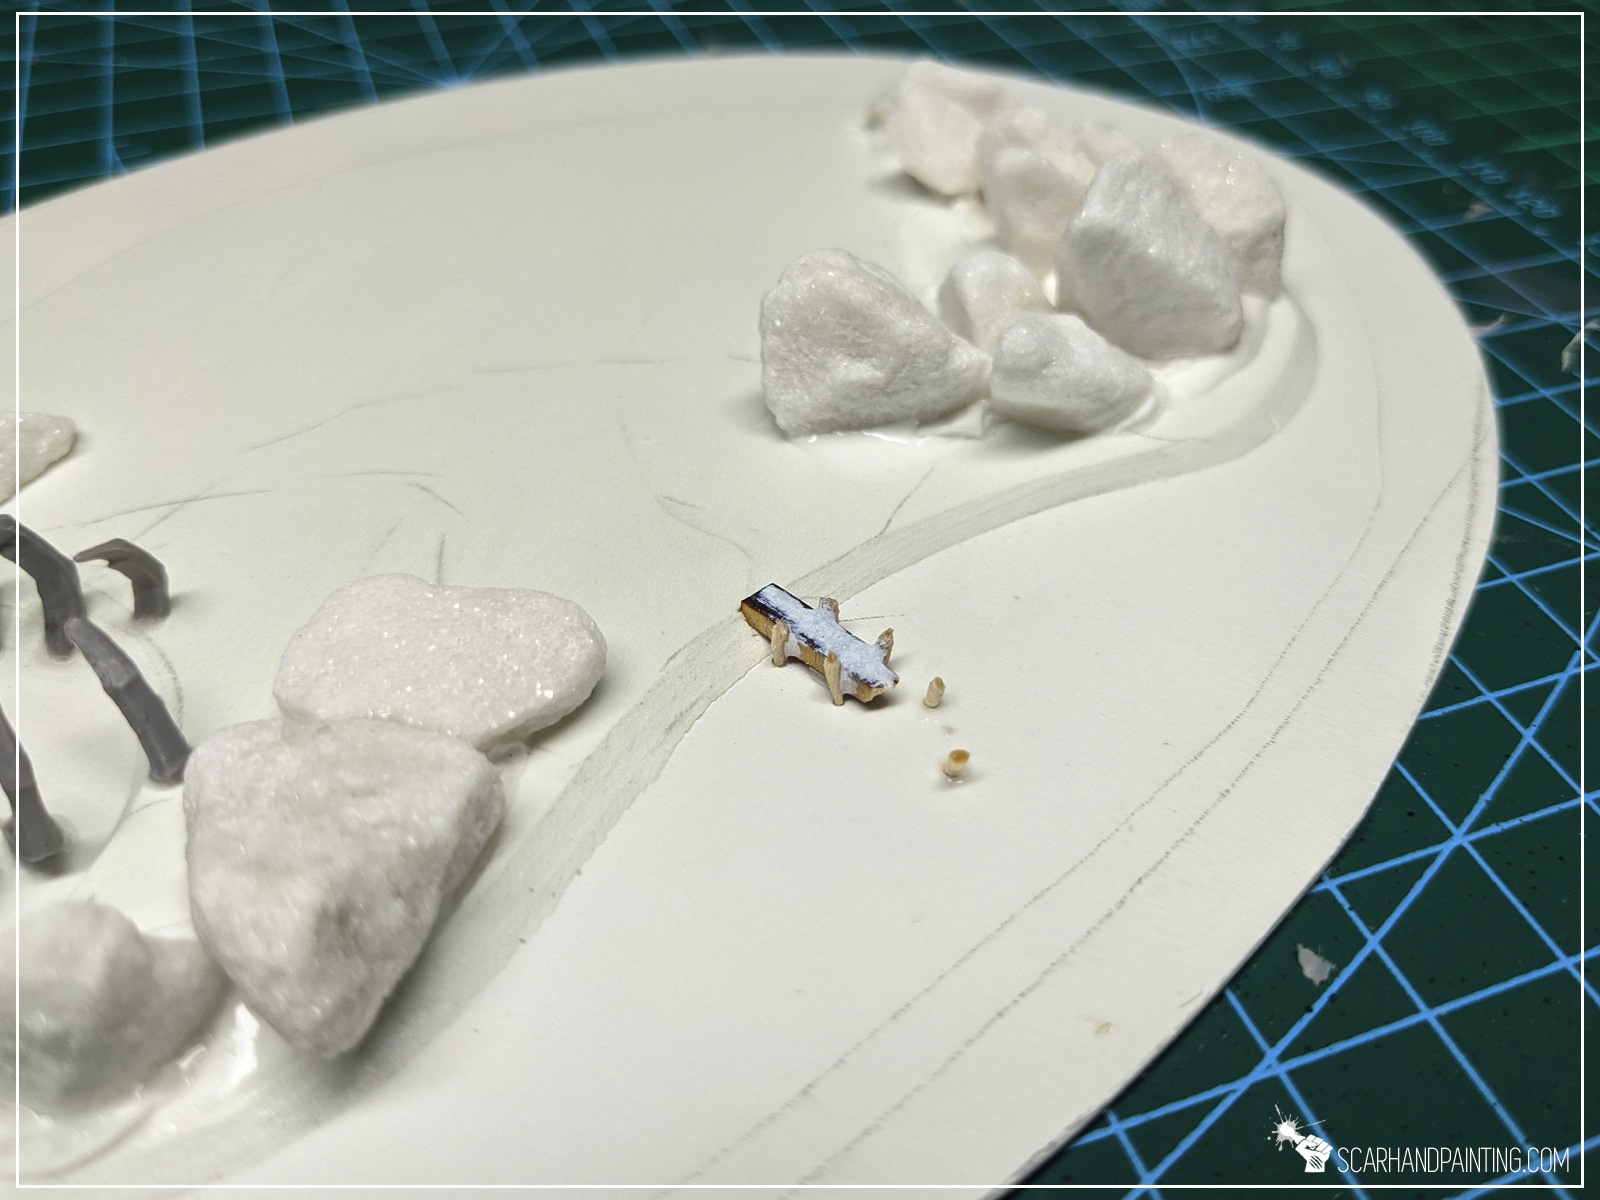
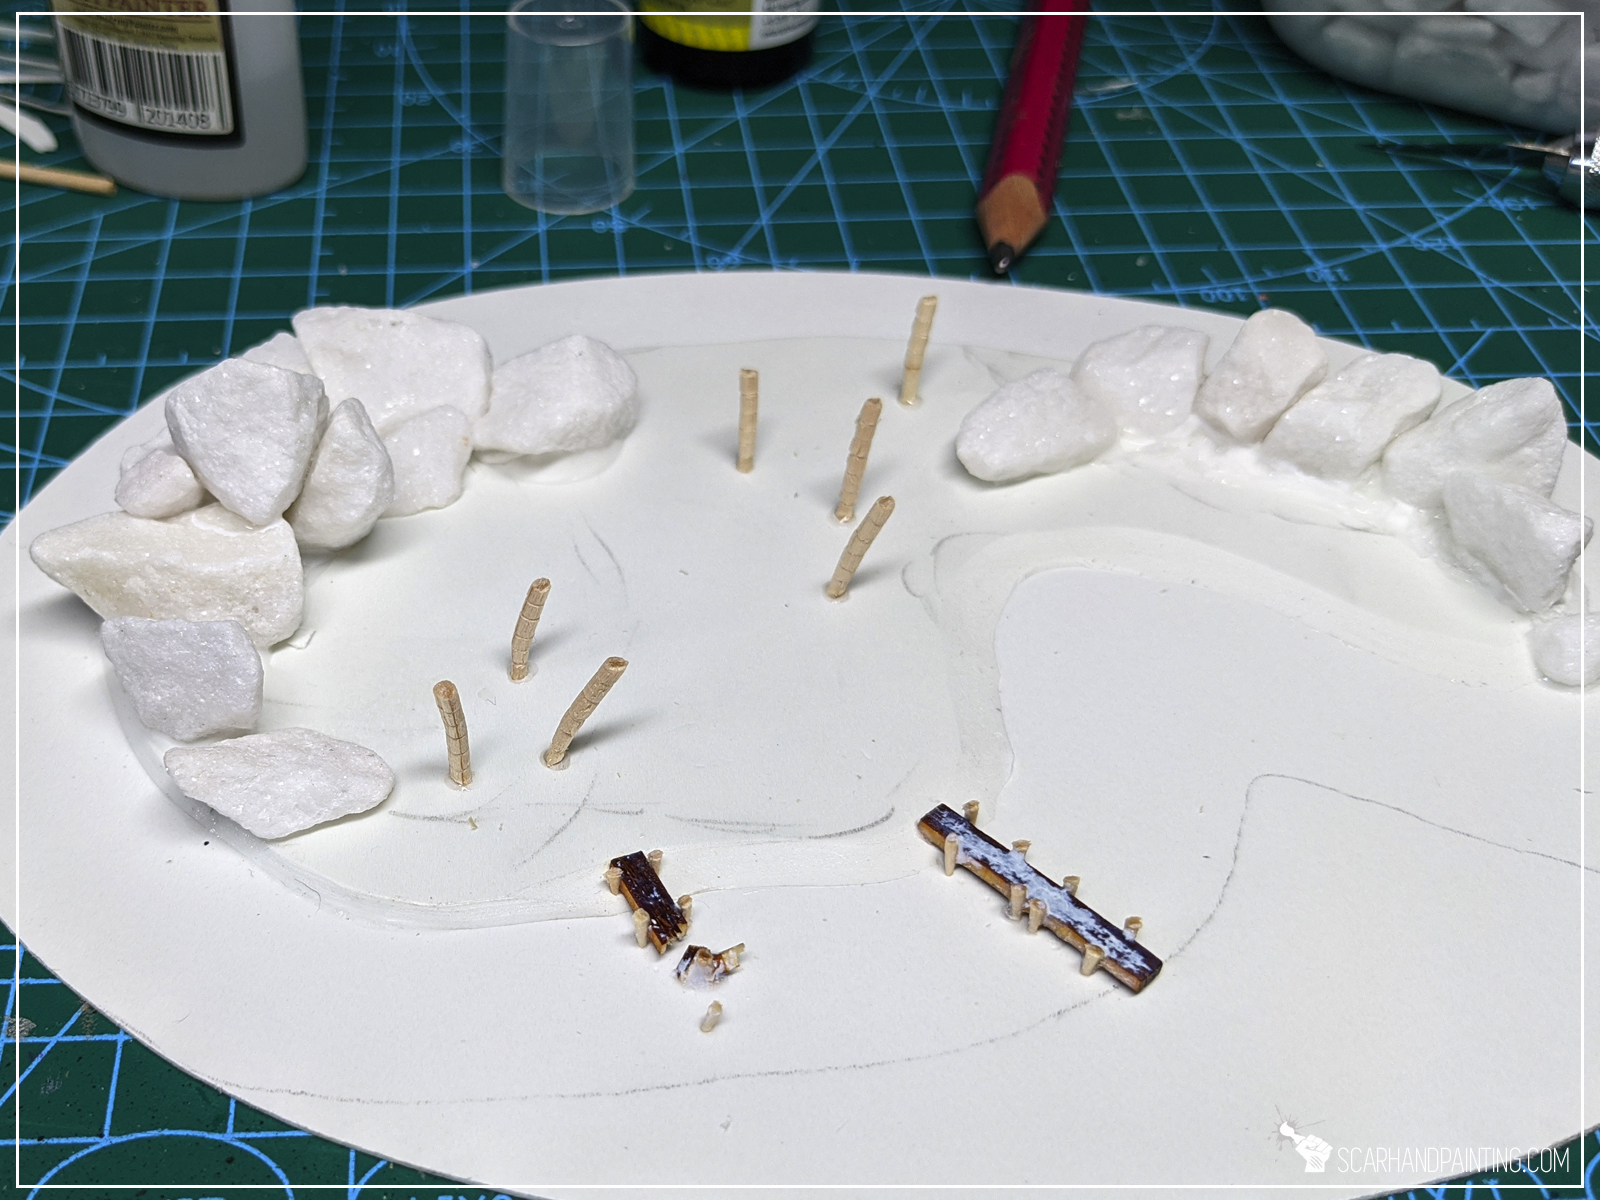
Step three: Wooden piers
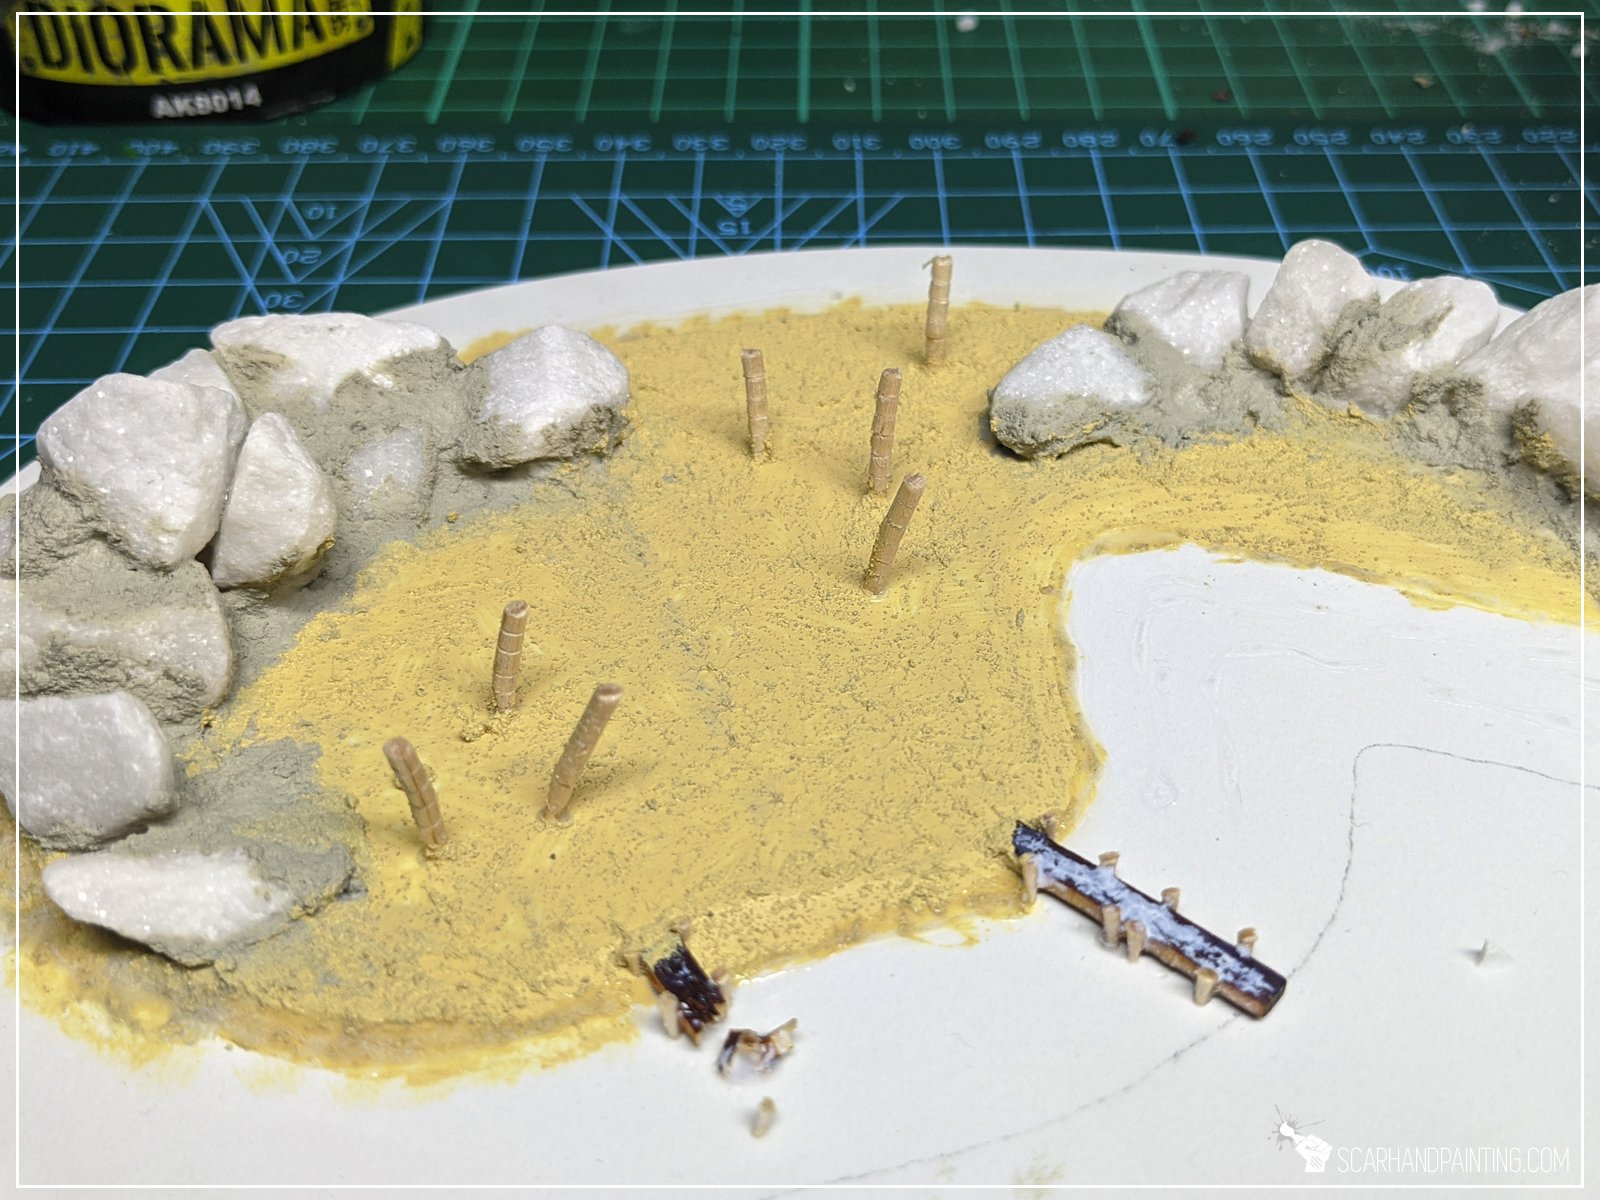
Next I decided to add a bit of character with an old, damaged wooden pier jutting into the sea. I used a piece of MDF cut into a thin strip as a base for the pier, but you can really use anything – including 1mm thick PCV. Just cut a strip, glued tiny bit underneath, then glued it on top of the island and it’s base. Finally marked tiny holes along the sides of the pier and ‘superglued’ toothpicks in place, just to cut them off close to the pier’s level. Done.

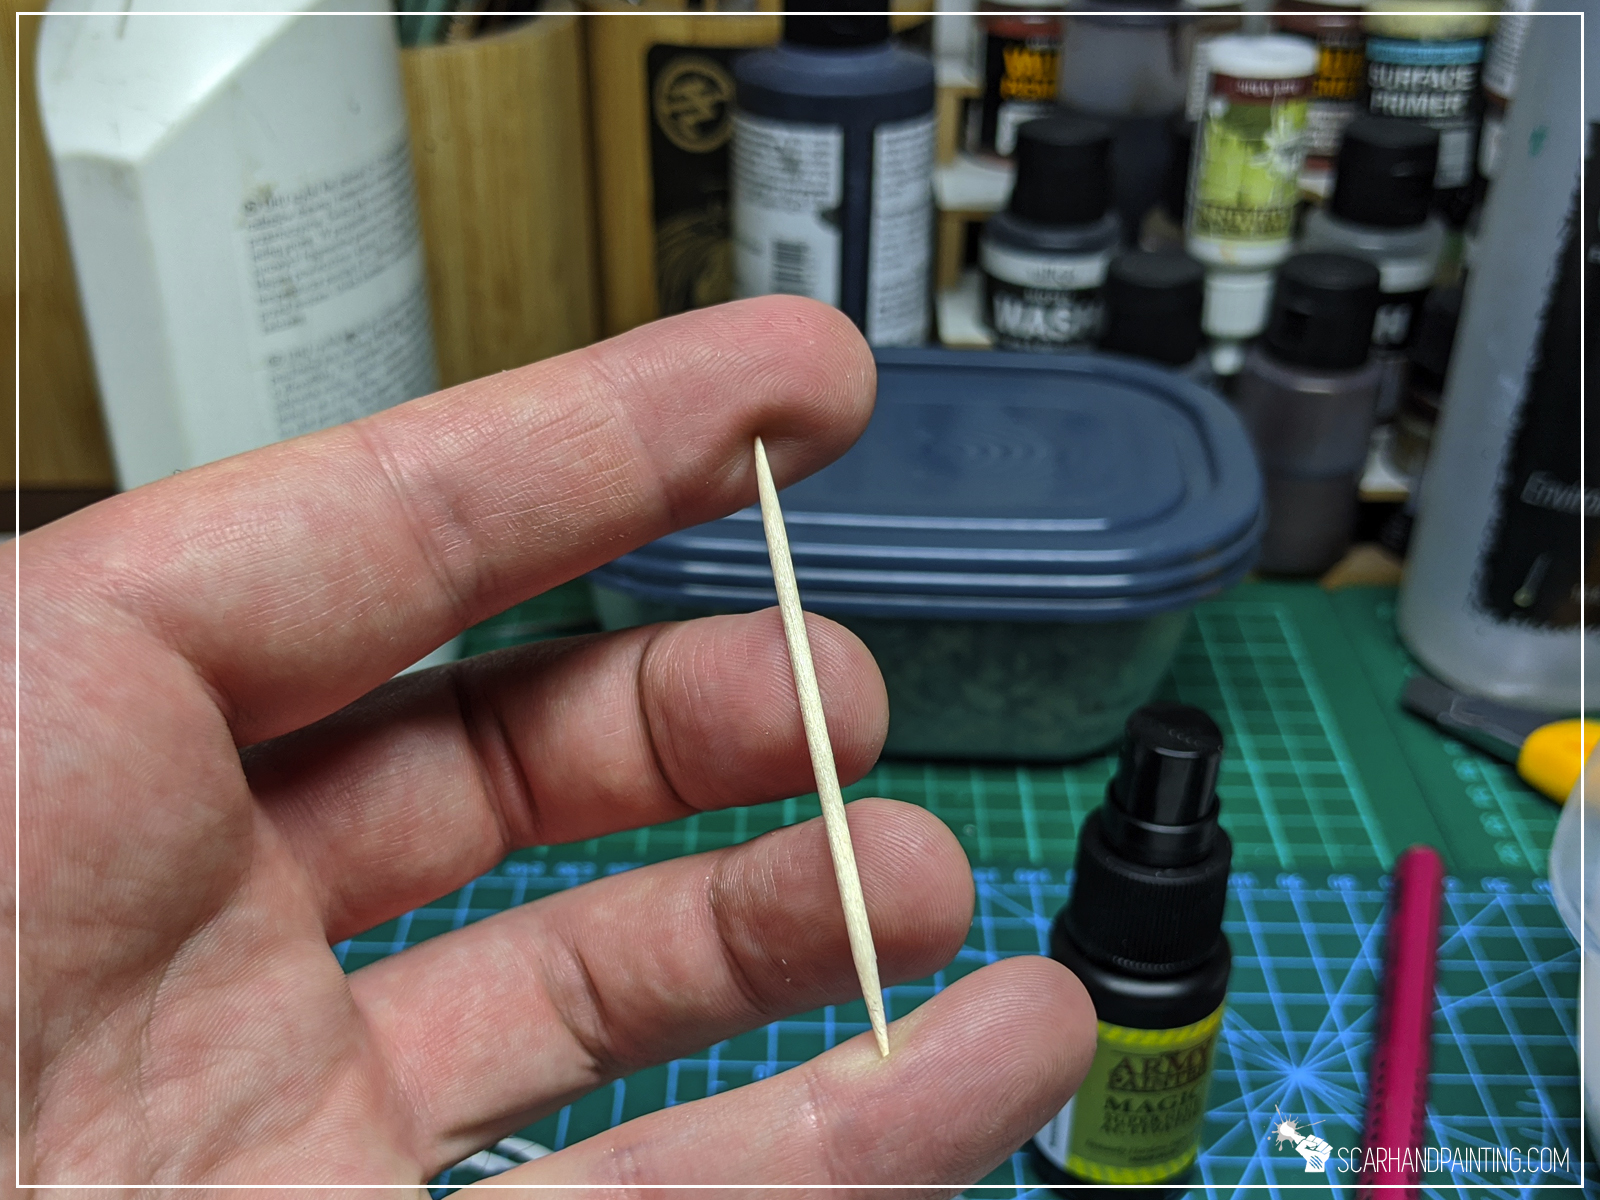
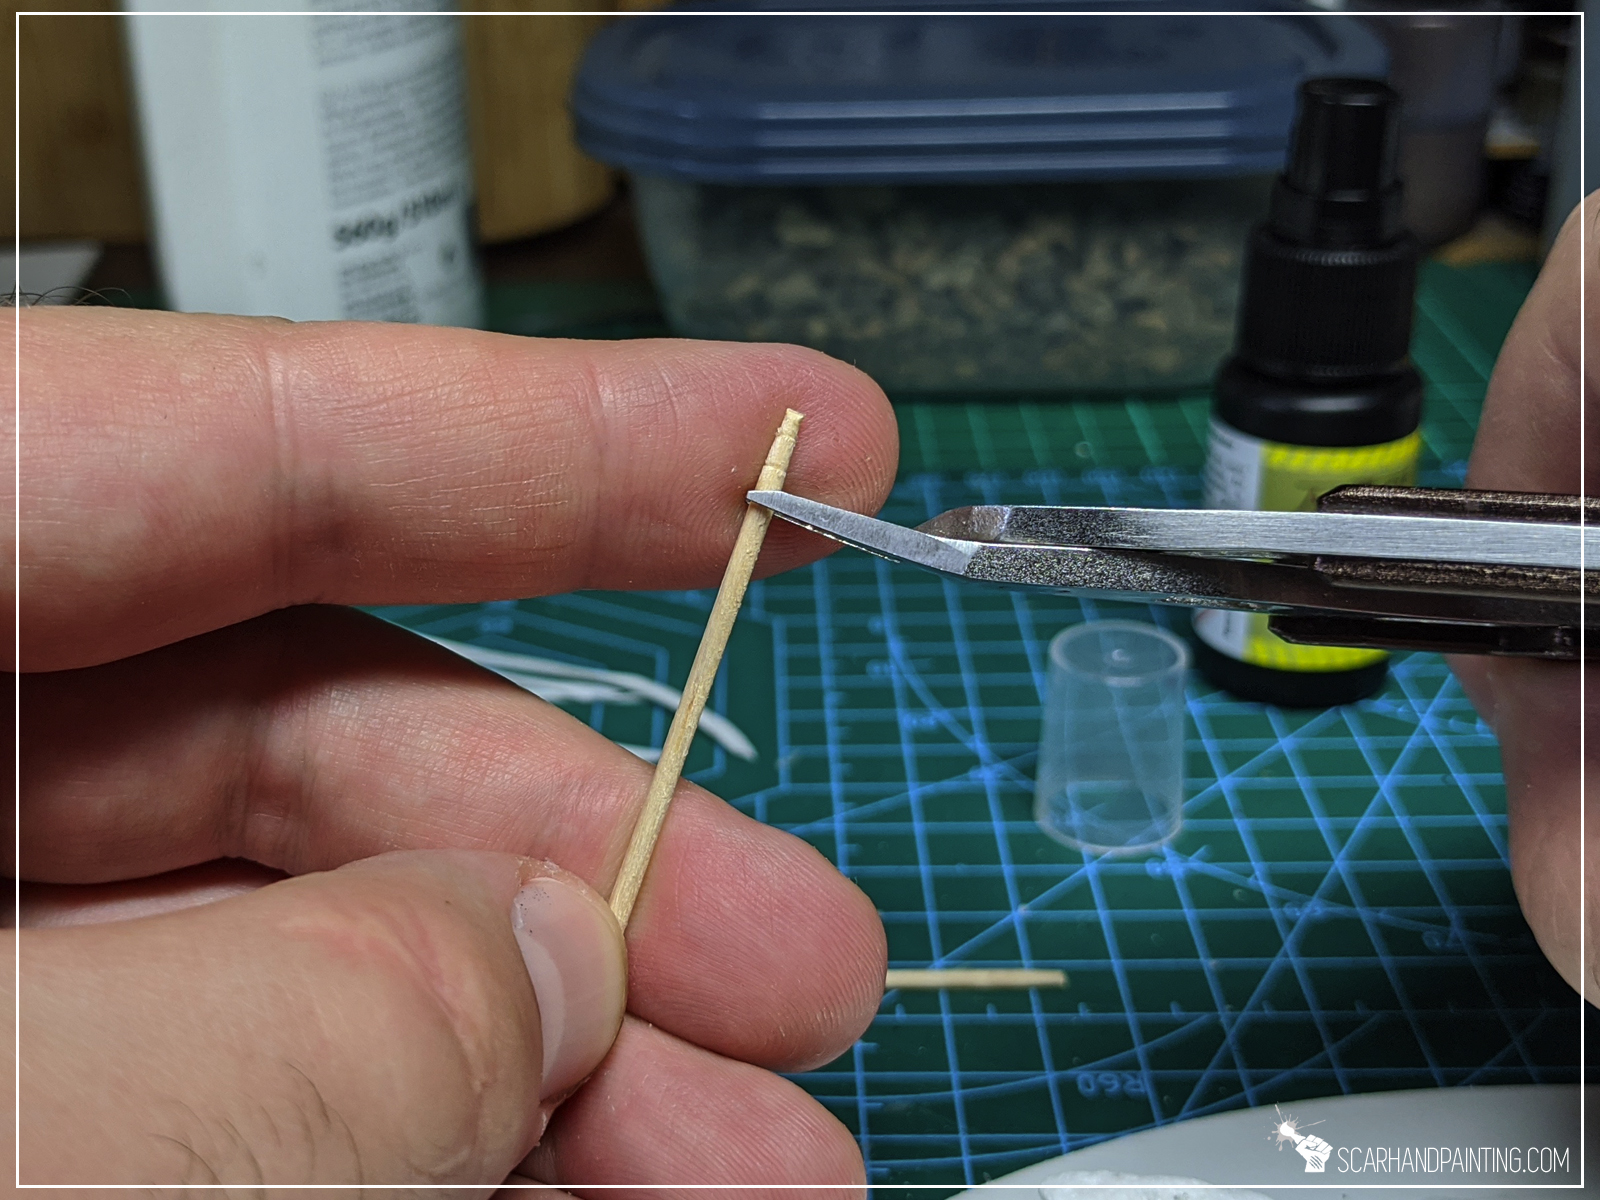
Step four: Palm trees
At that point I didn’t wanted to waste good toothpicks and here’s where palm trees idea originates from. I gently squeezed the blunt tip of a toothpick with cutters and moved it around. I made this every two or so mm on the length of the toothpick. I then cut a piece off and gently bent it. With palm trees trunks ready to be added on top to the island, I just pushed a sharp tool into the PCV to create tiny holes and glued the trunks into it.


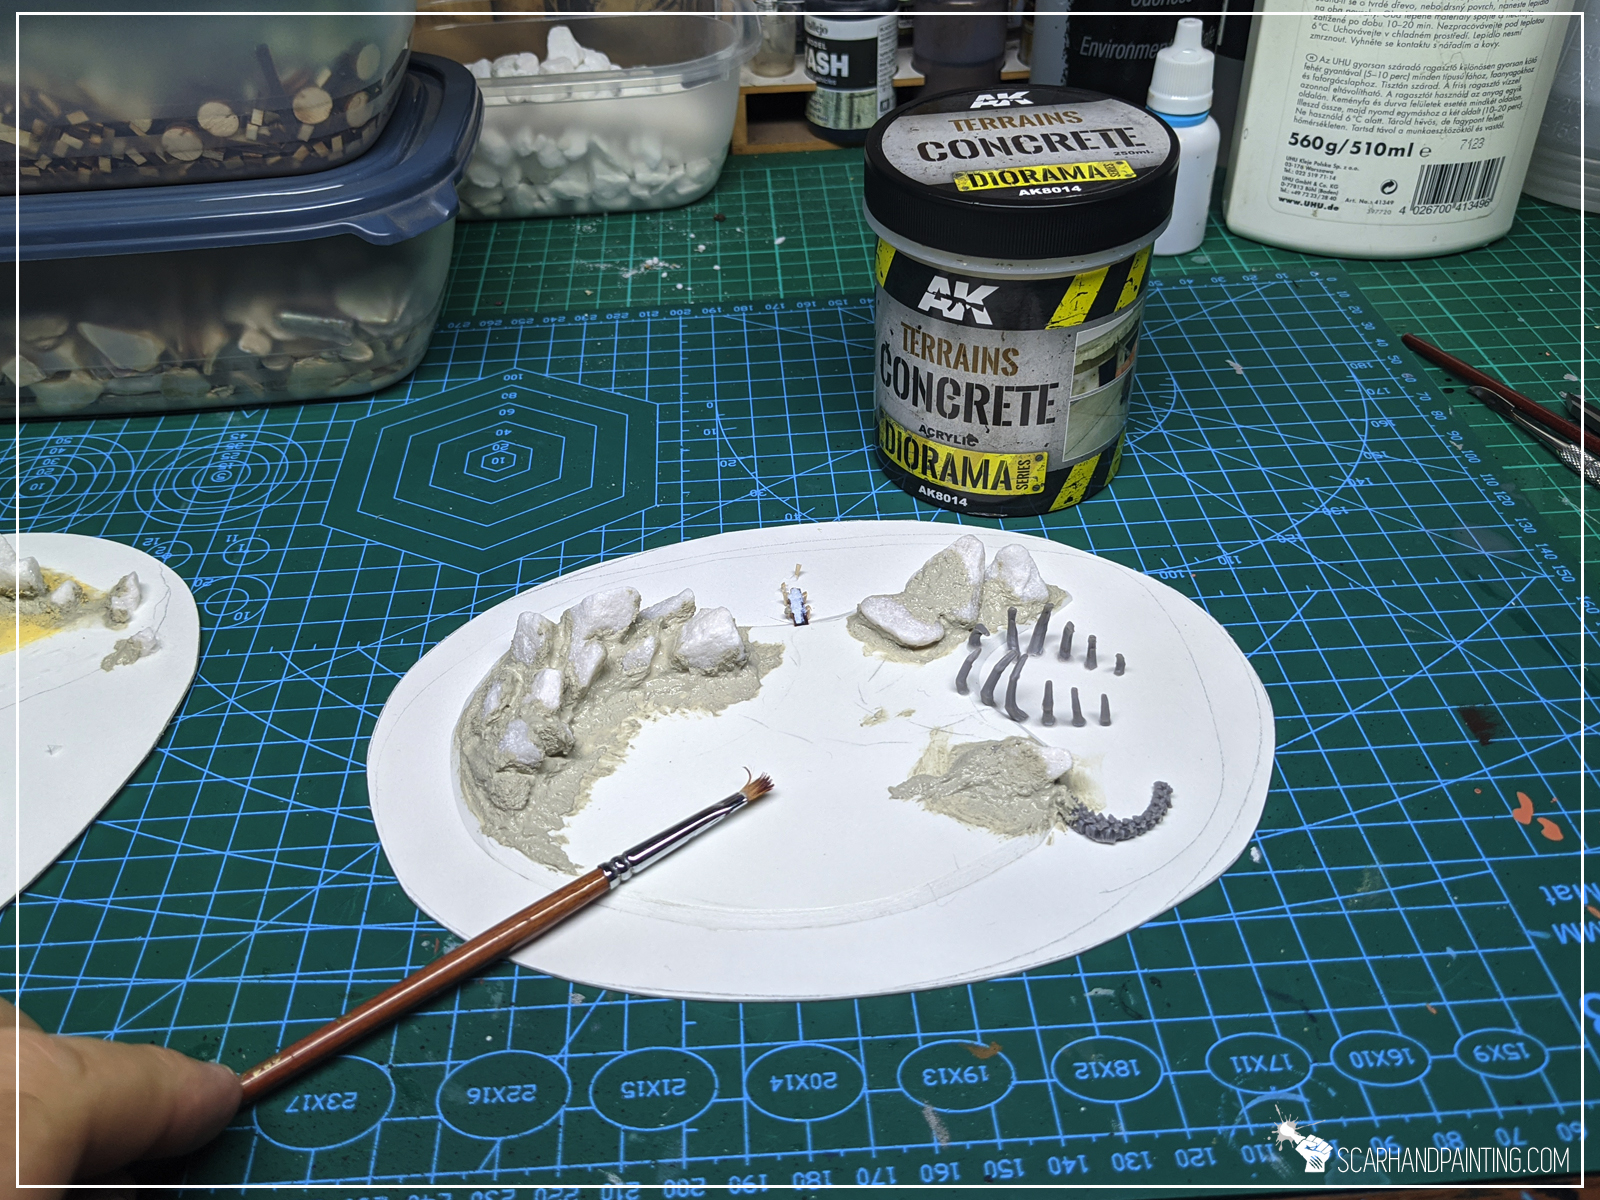
Step five: Textures
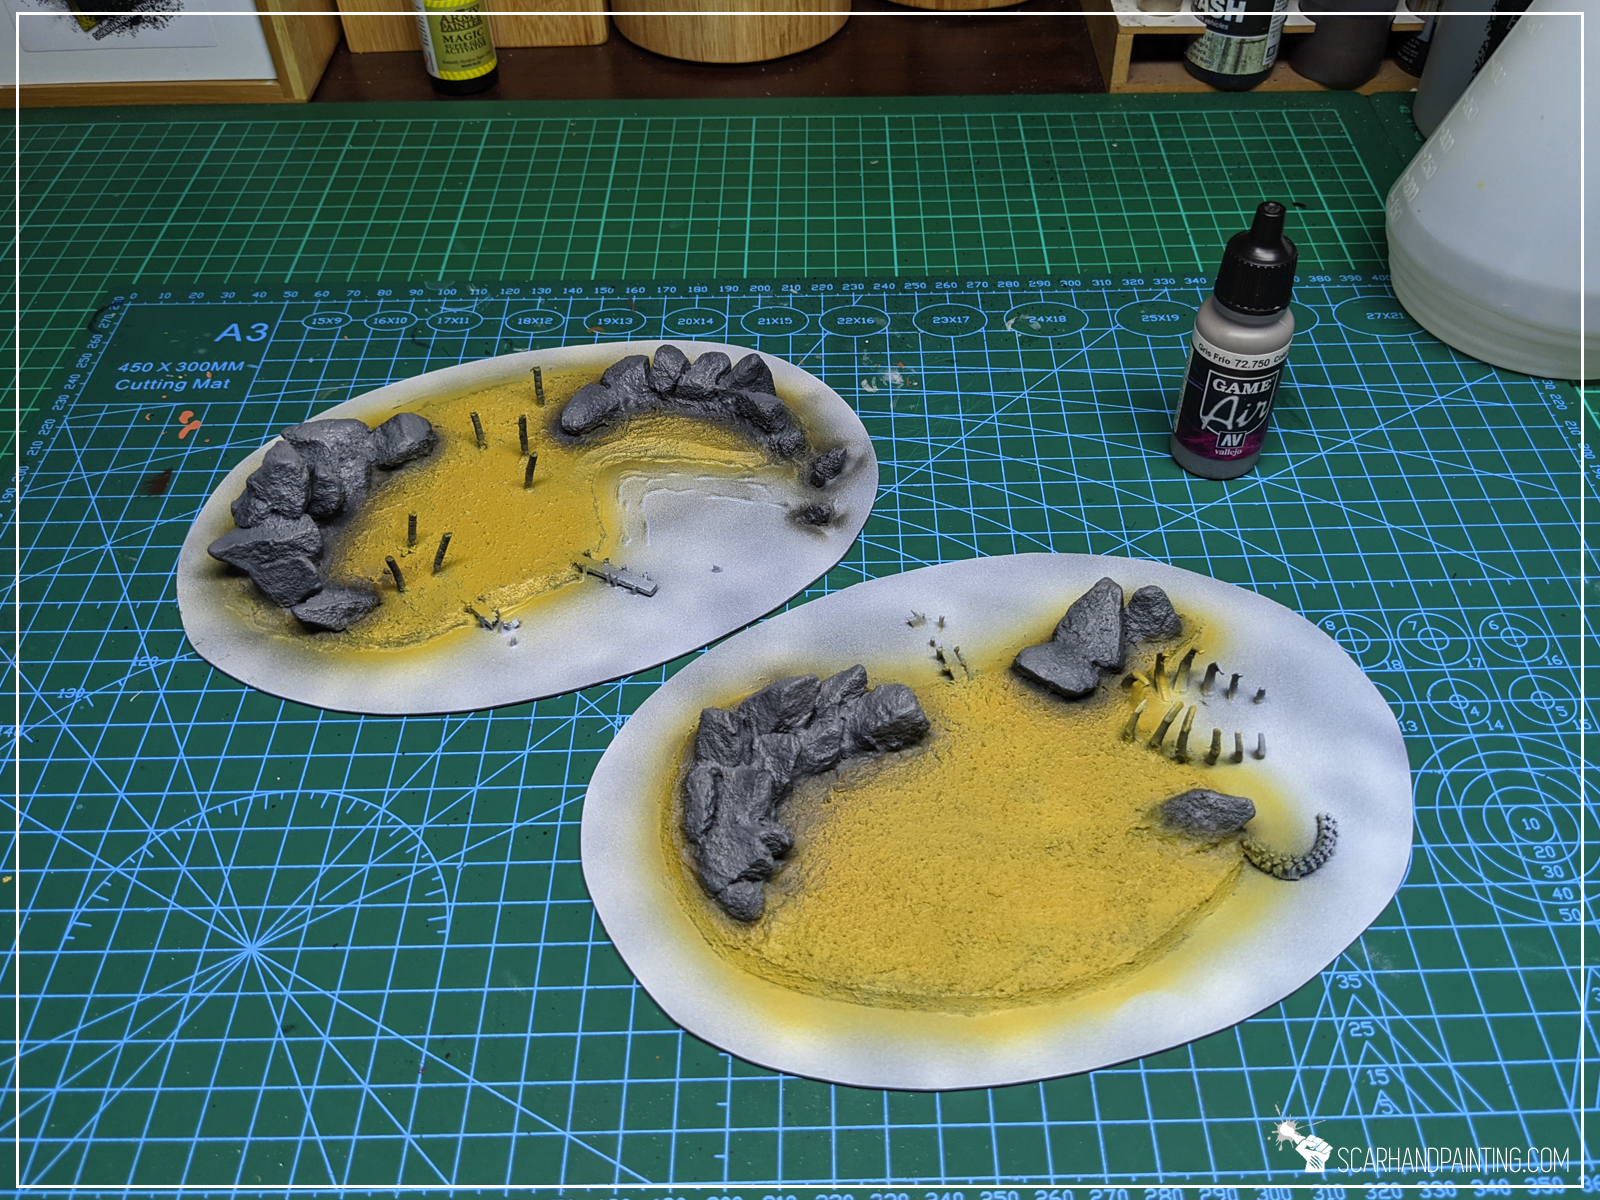
Final modelling step was to apply textures. First I filled gaps and surrounding areas between stones with AK Interactive Concrete from diorama series. I then covered rest of the island with Vallejo Desert Sand texture.

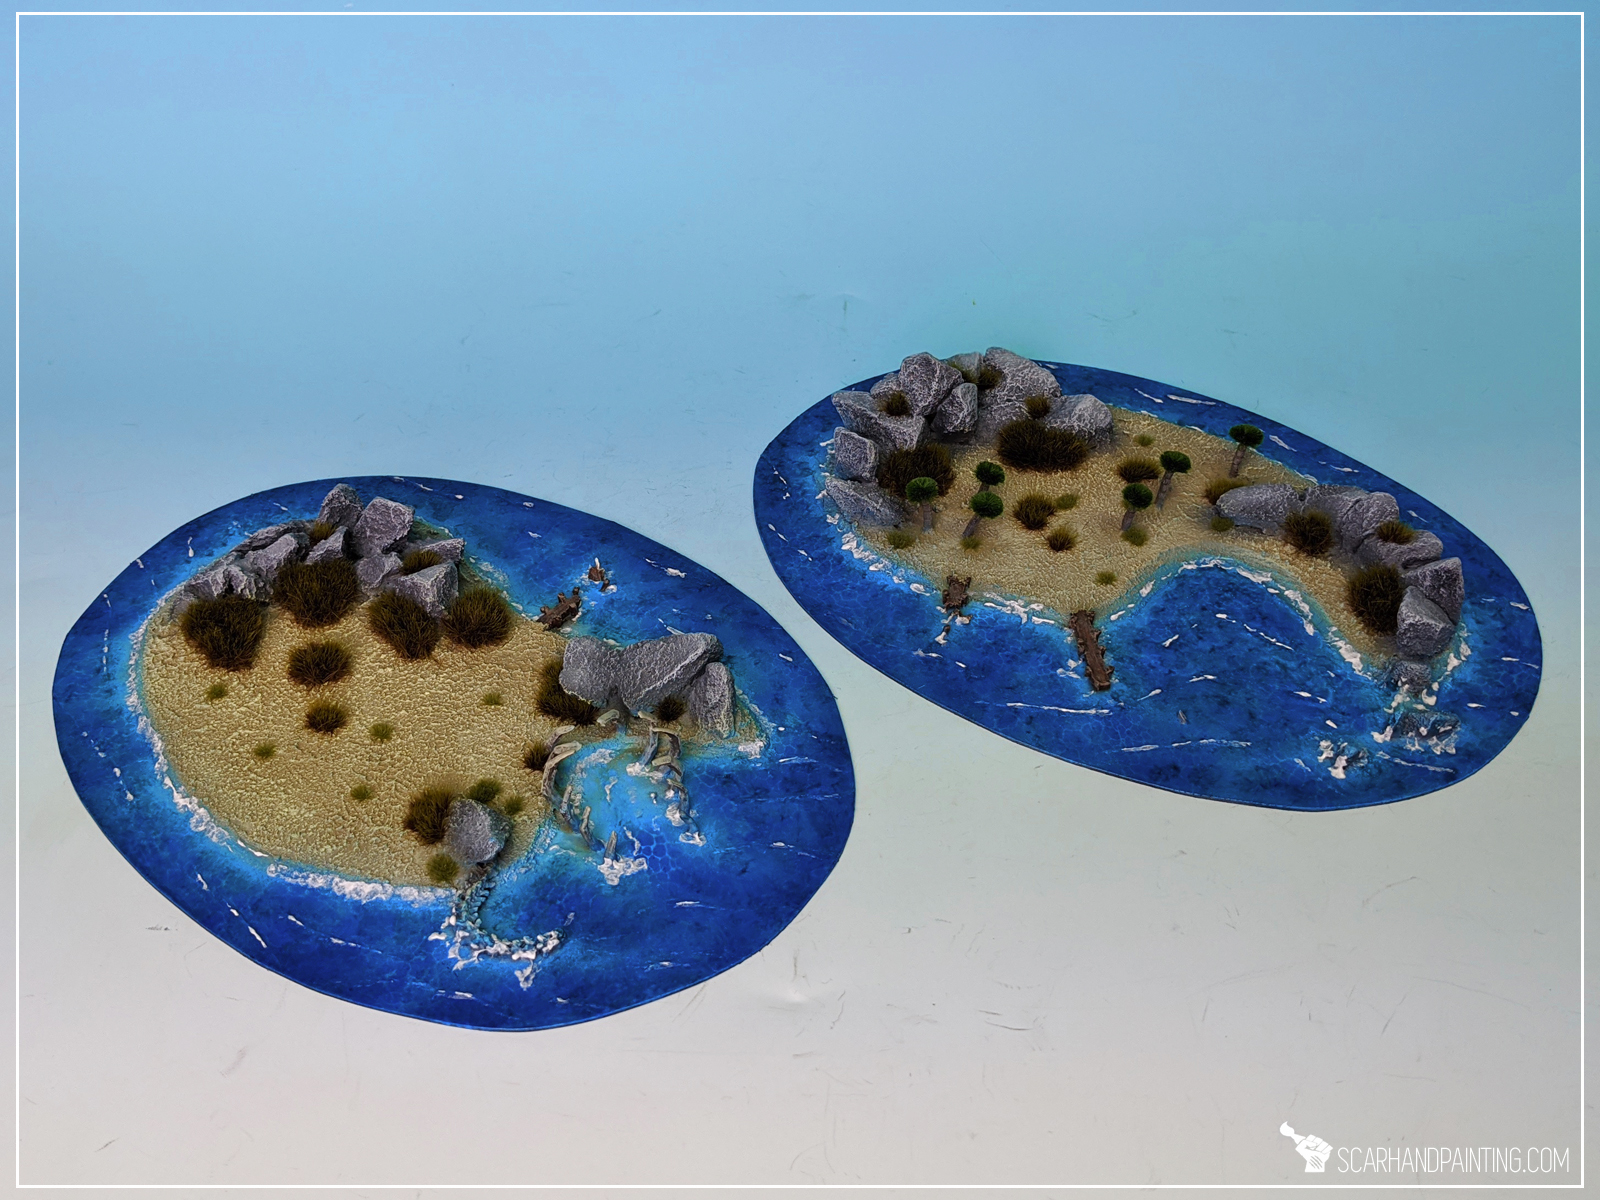
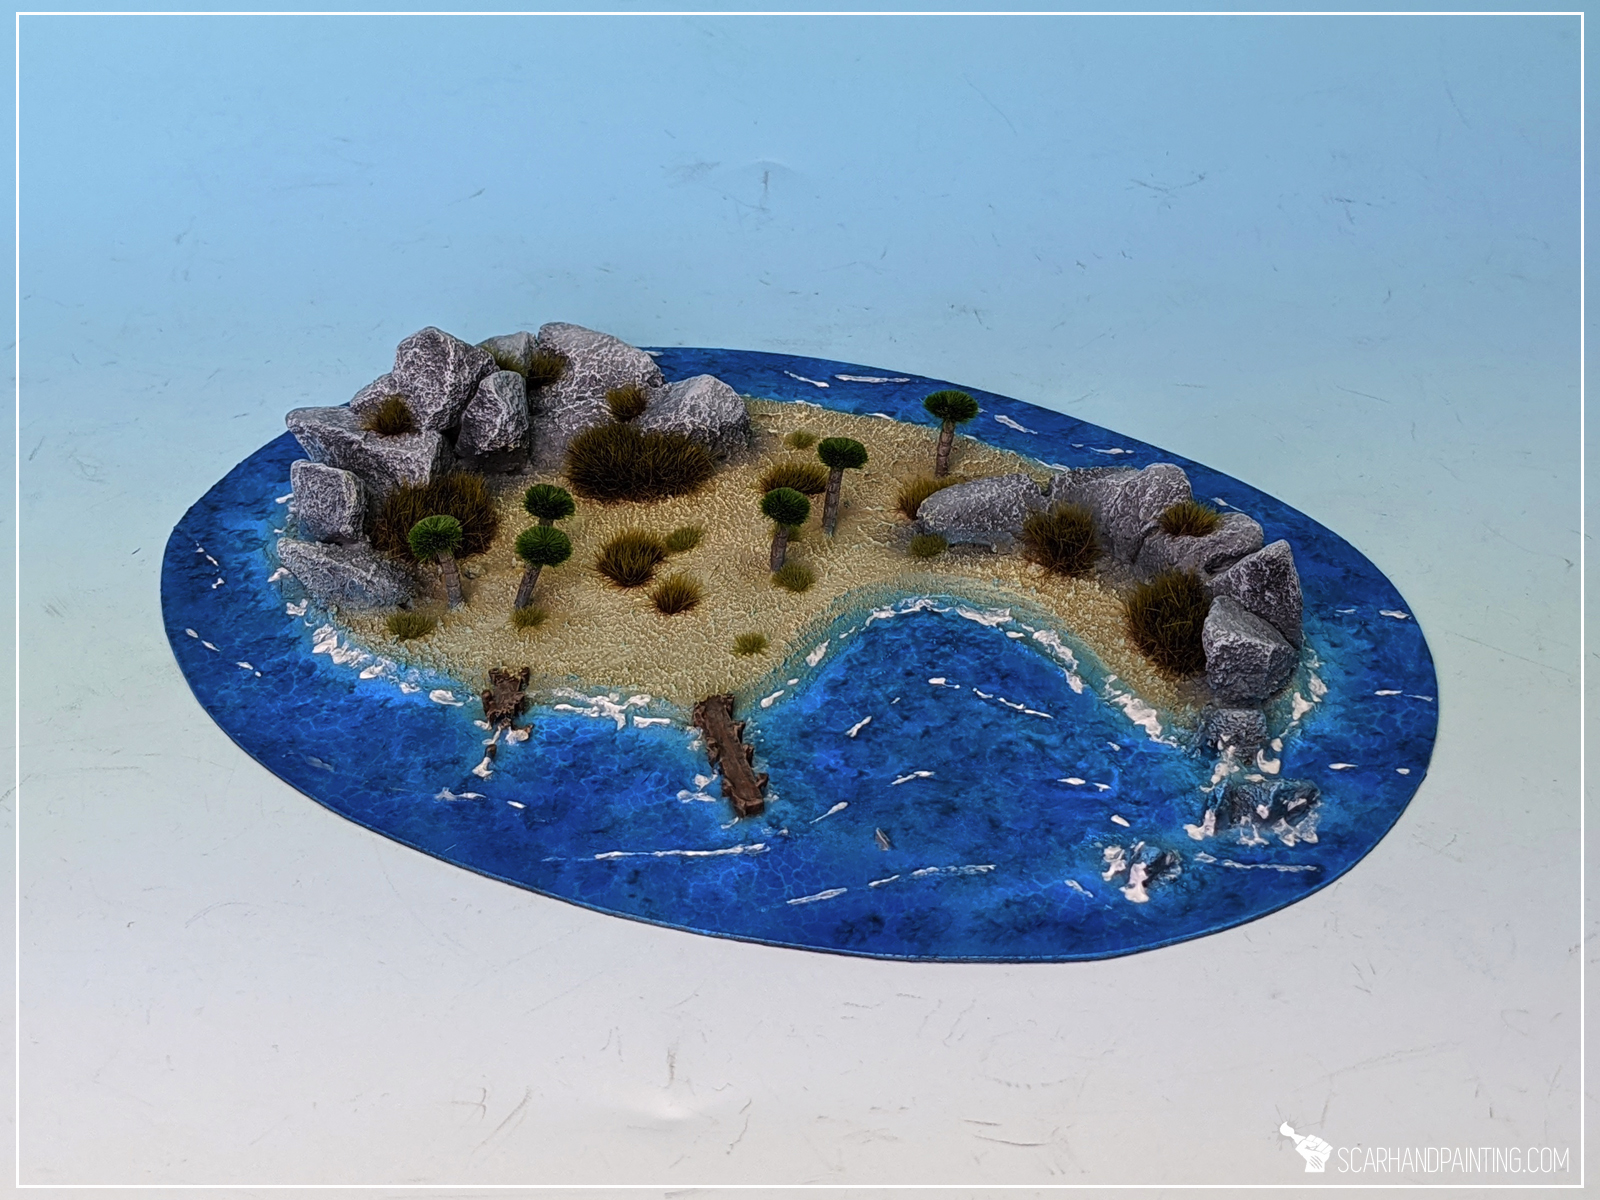
Sandy beaches, rocky coast and vibrant blue water around. With such theme in mind I started the paint job.
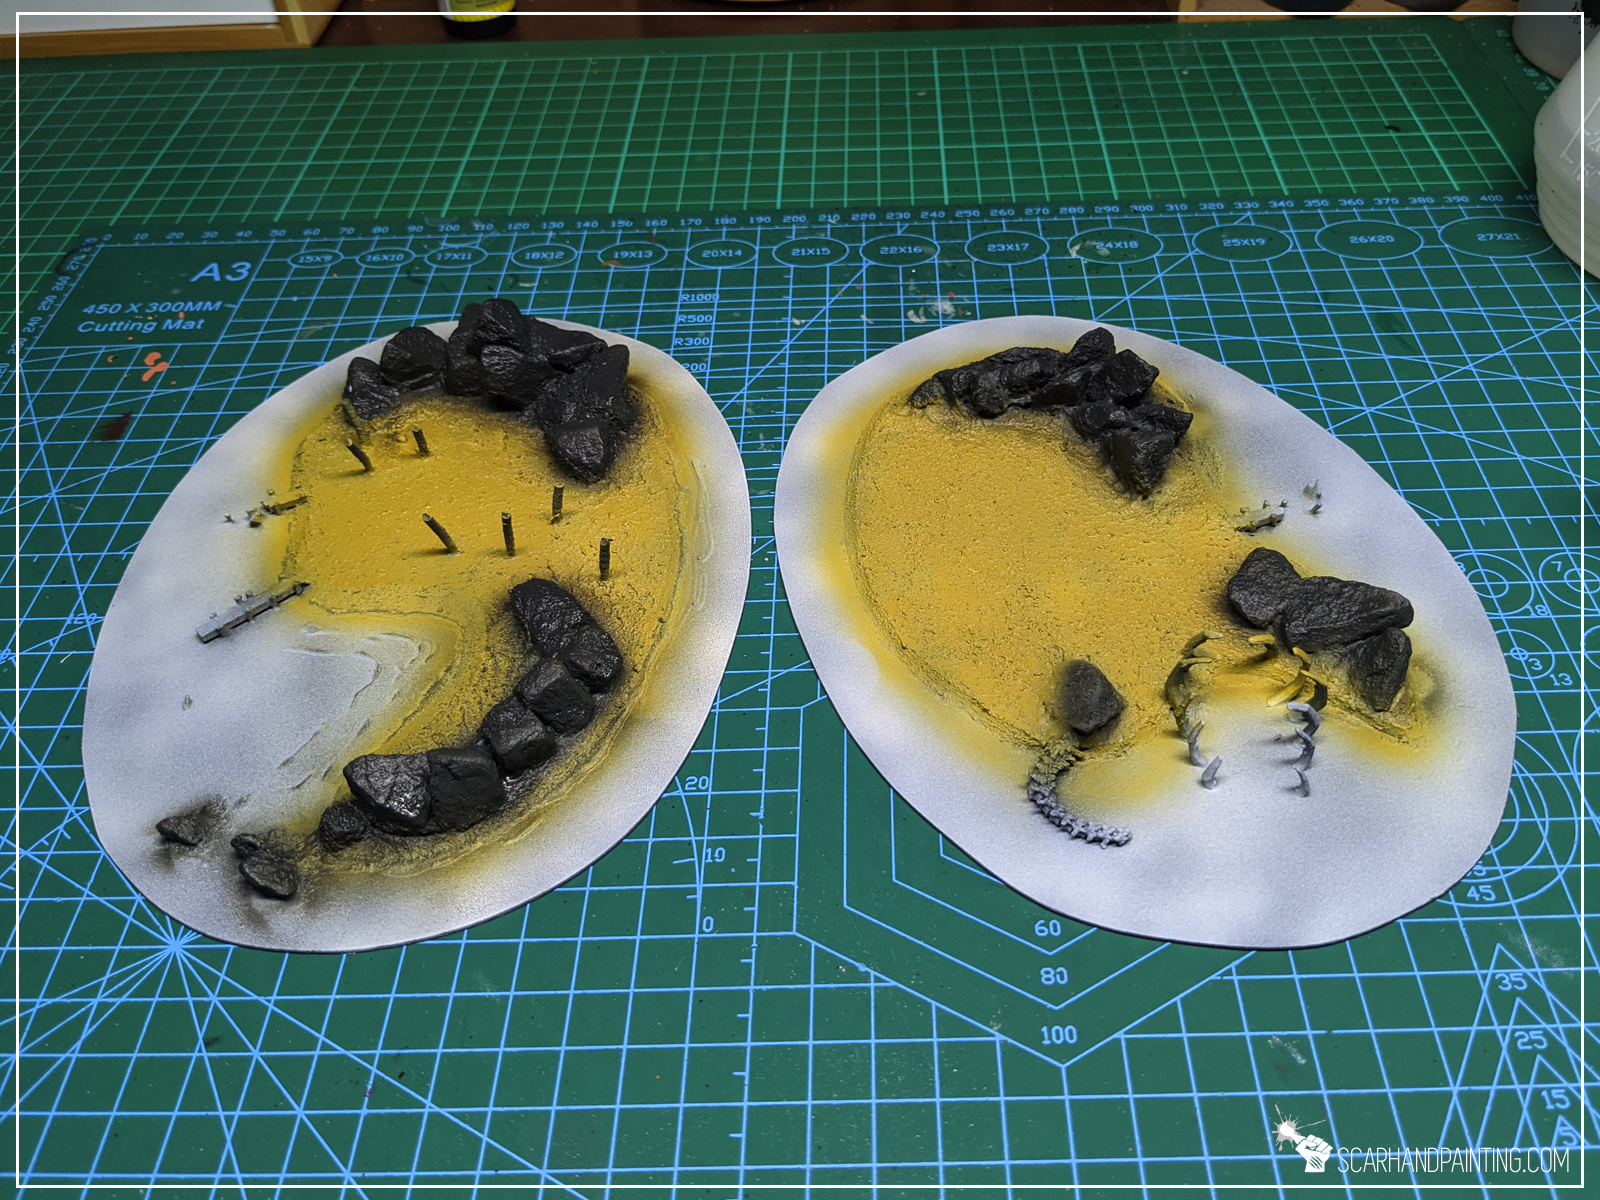
Basics:
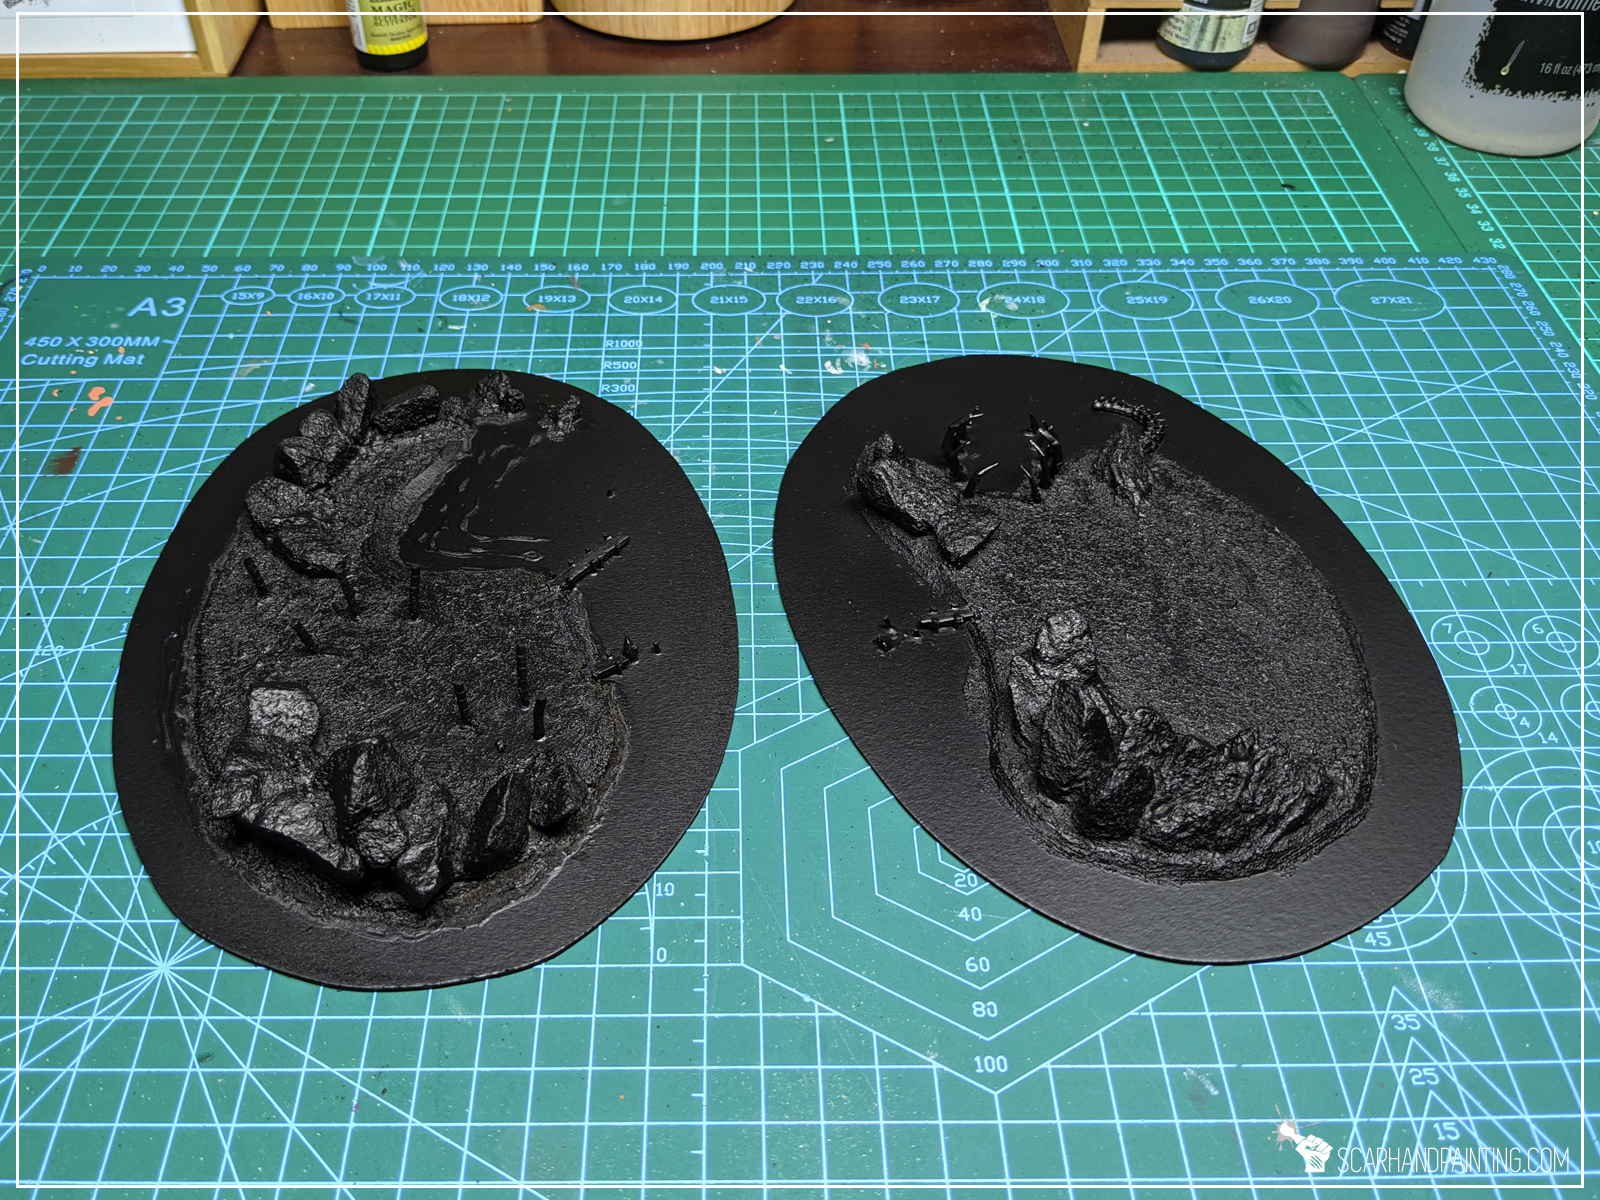
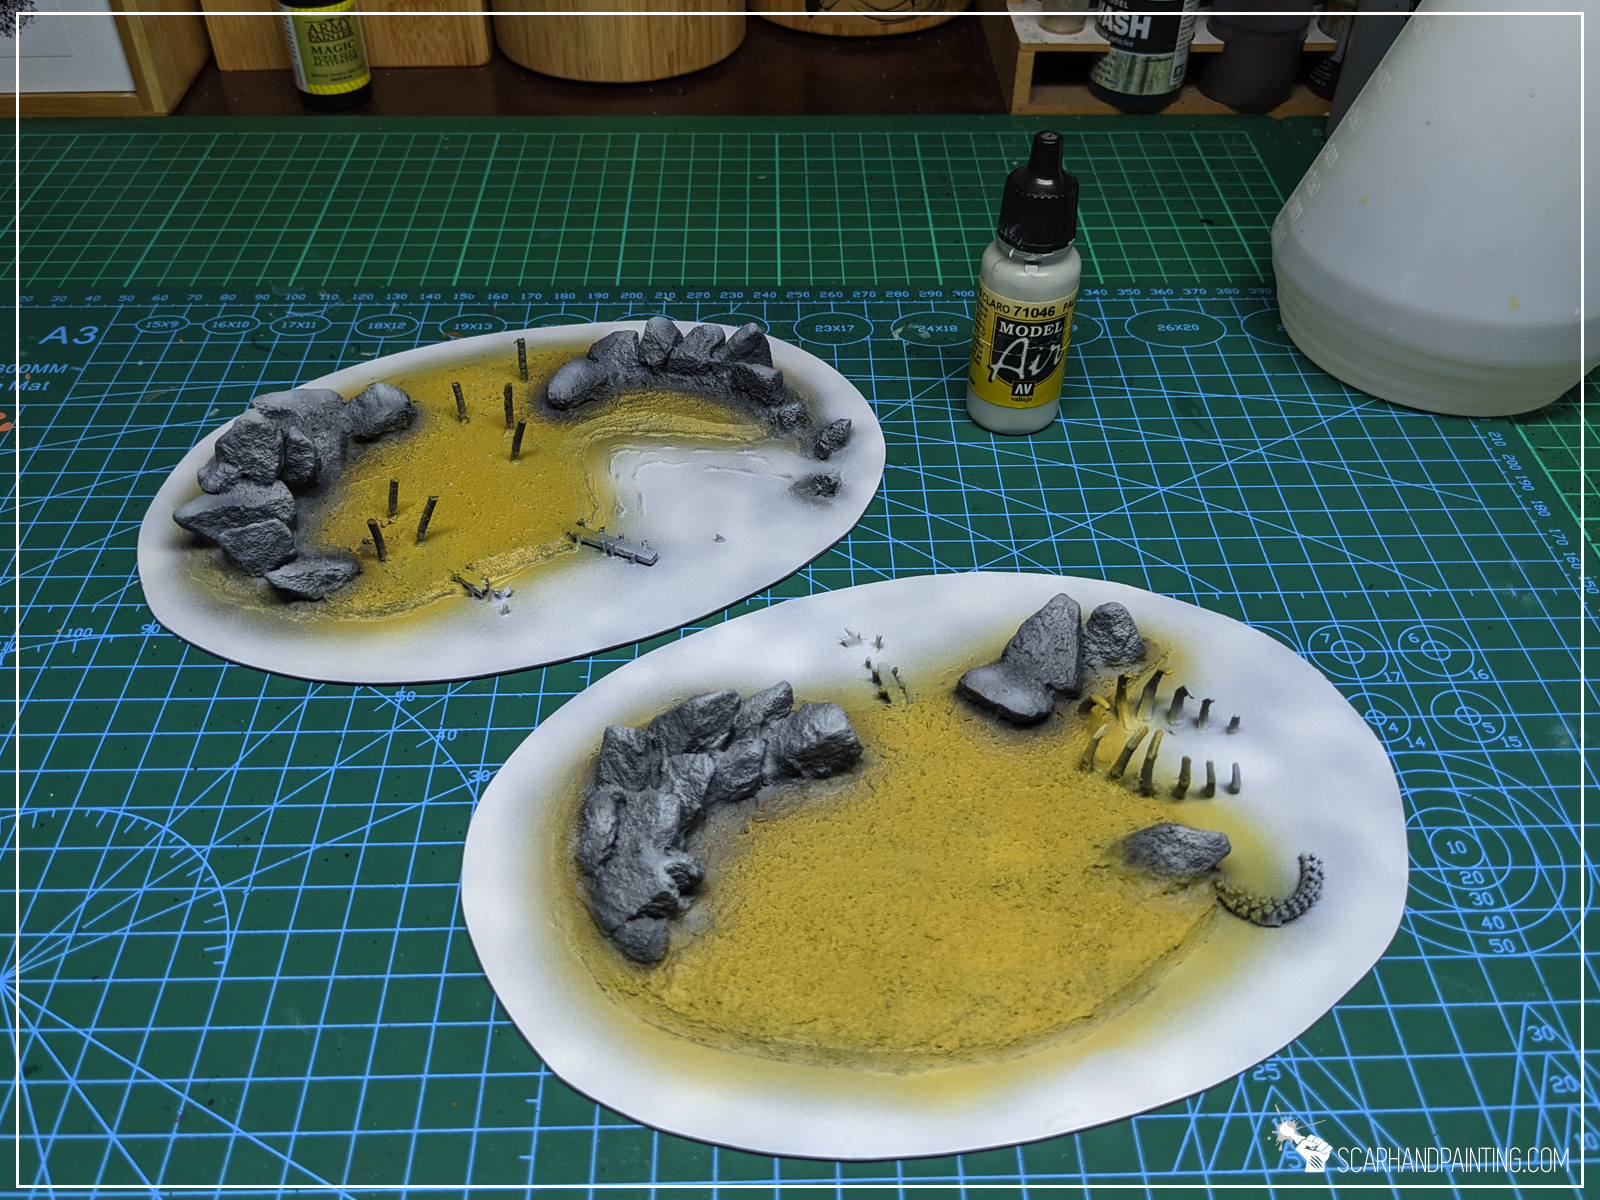
First step was to undercoat the islands black and then airbrush white all over it to create a nice base for both water and sand colors.
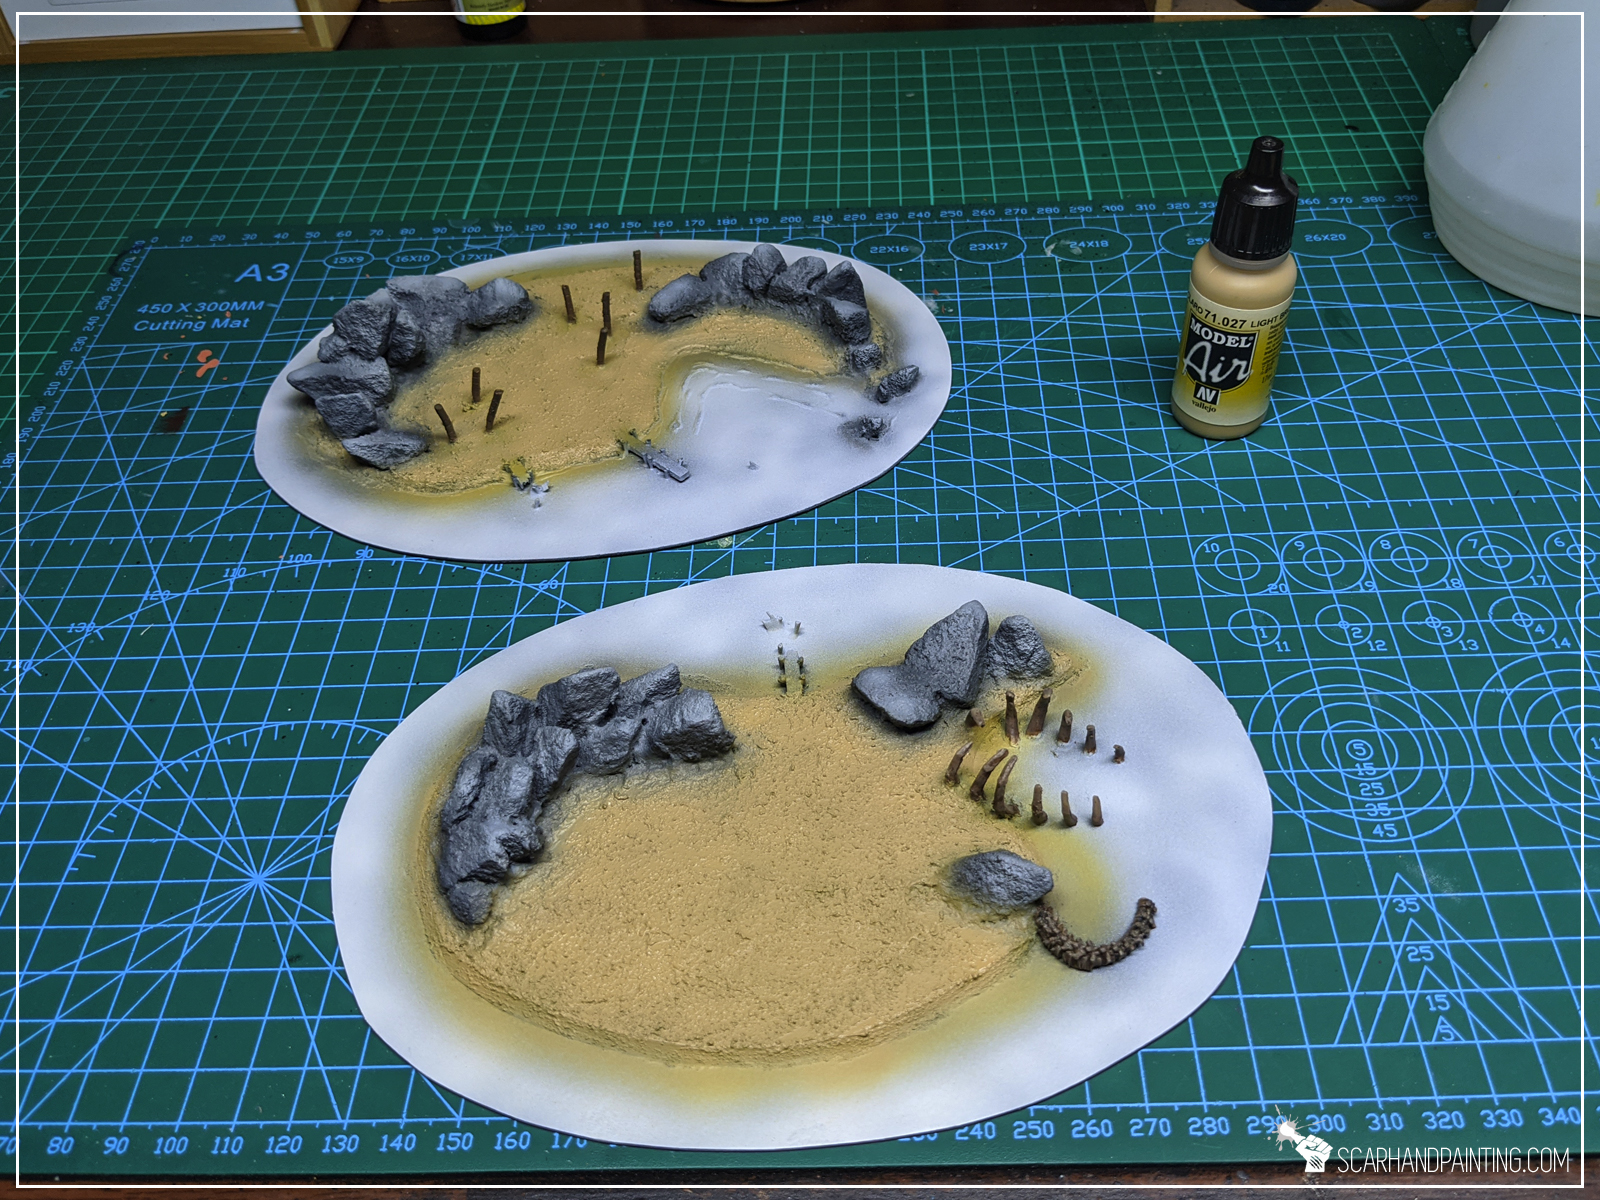
Sand:
Sand was painted using airbrushed Vallejo Desert Sand, followed by Light Brown and finally drybrushed with Ice Yellow.
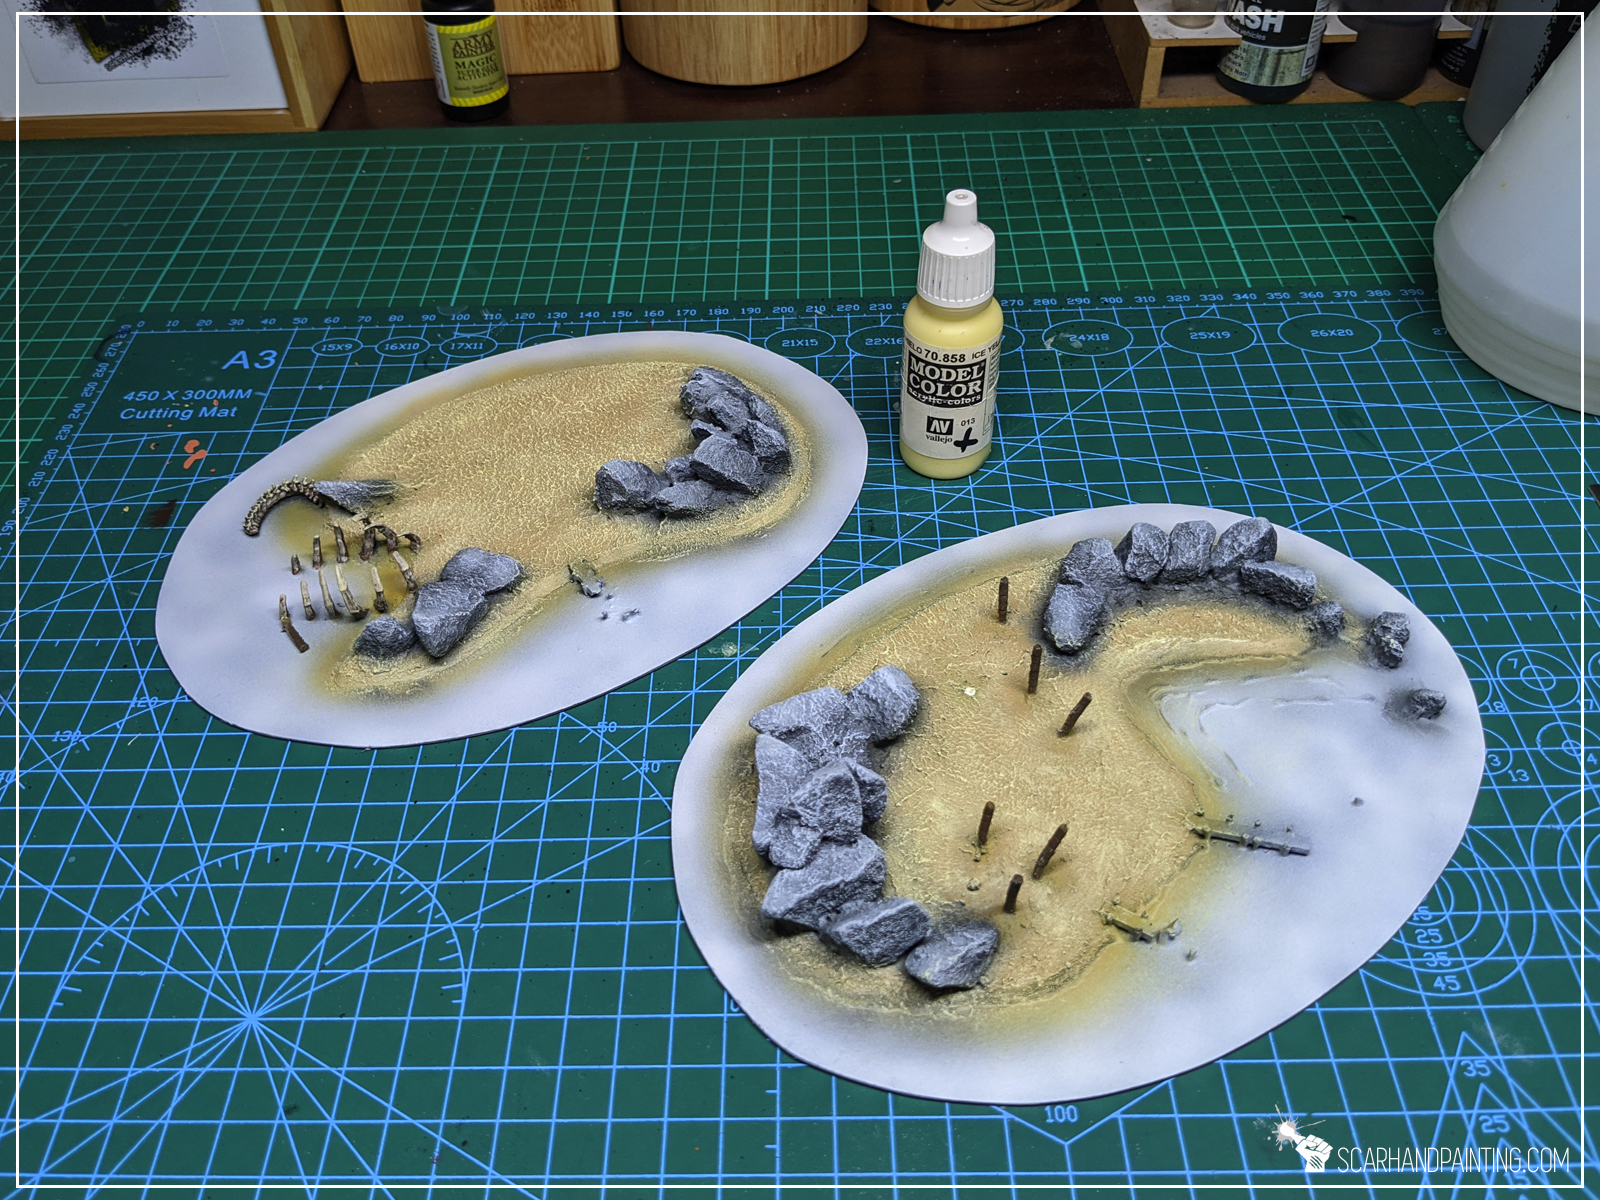
Rocks:
Rocks followed with a similarly easy recipe being airbrushed Vallejo Dark Panzer Grey, Cold Grey, Pale Grey Blue and drybrushed Ghost Grey.

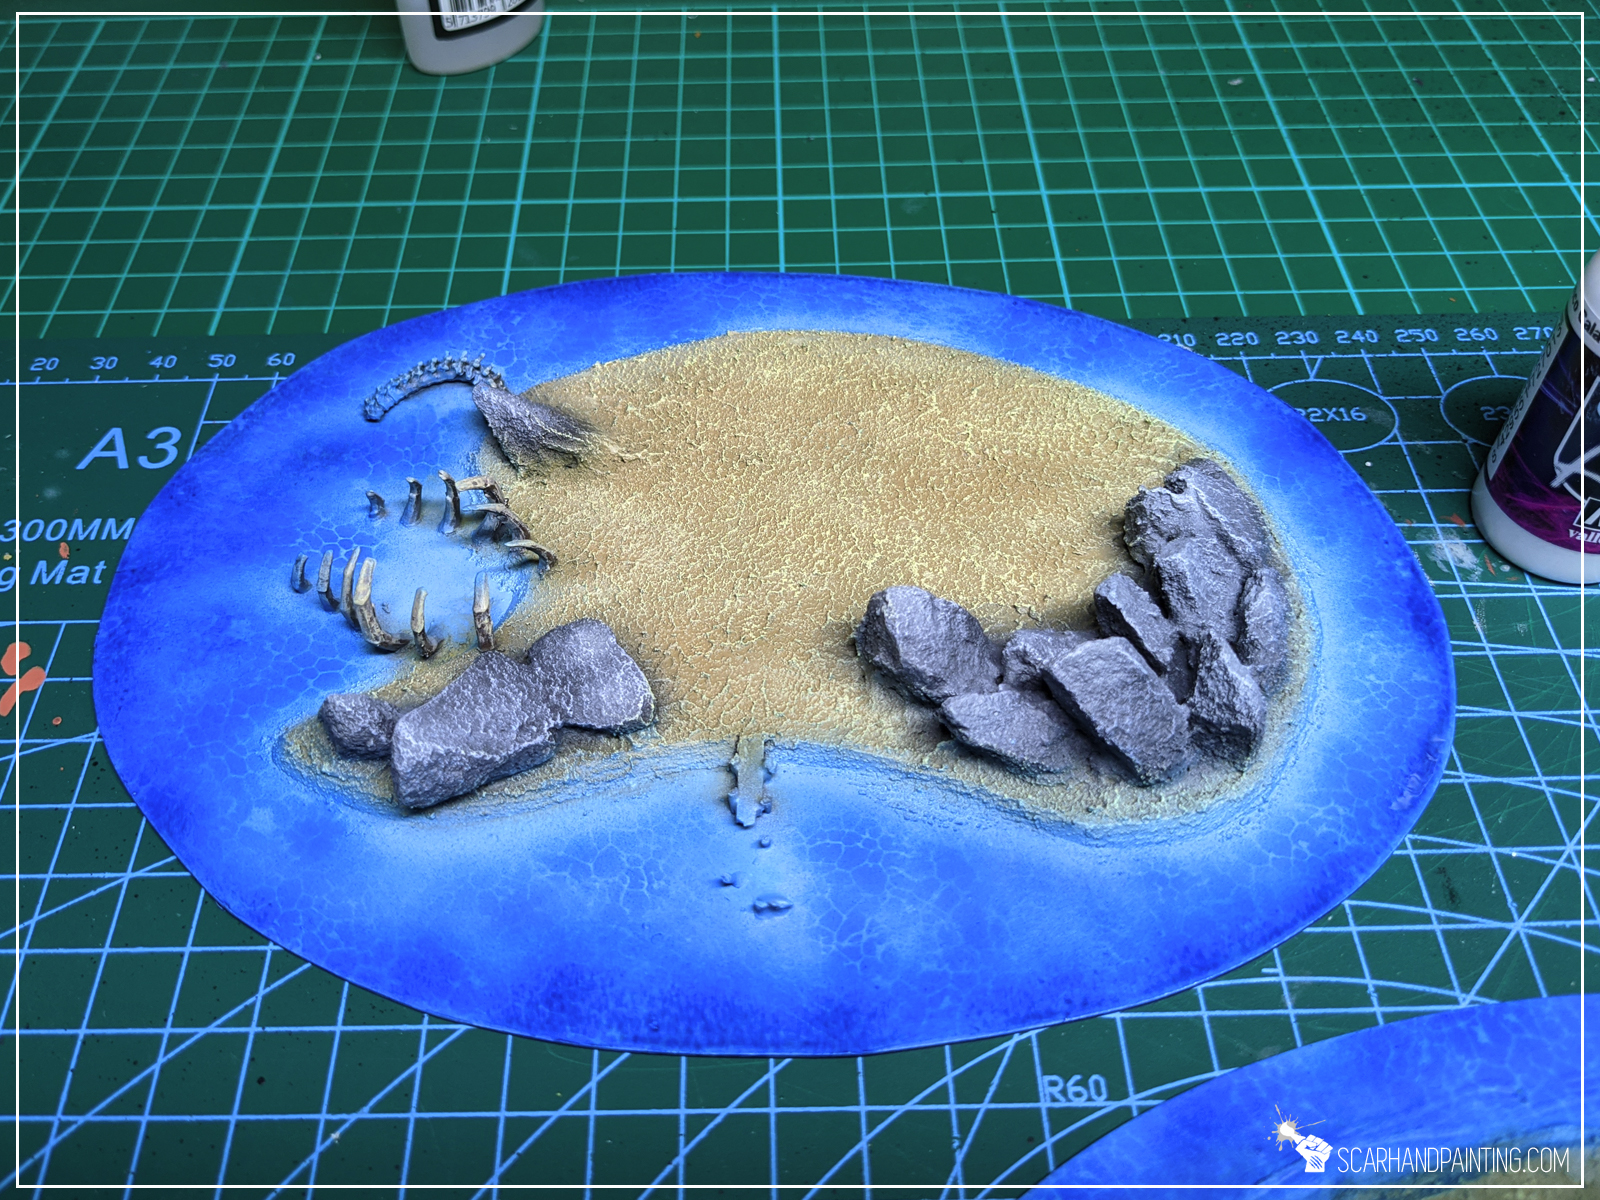
Water:
Here’s the tricky one. I decided to go hard with stencil airbrushed Vallejo Light Sea Blue, Magic Blue and spots of airbrushed Army Painted Blue Ink. I then sealed it with airbrushed Gloss Varnish.


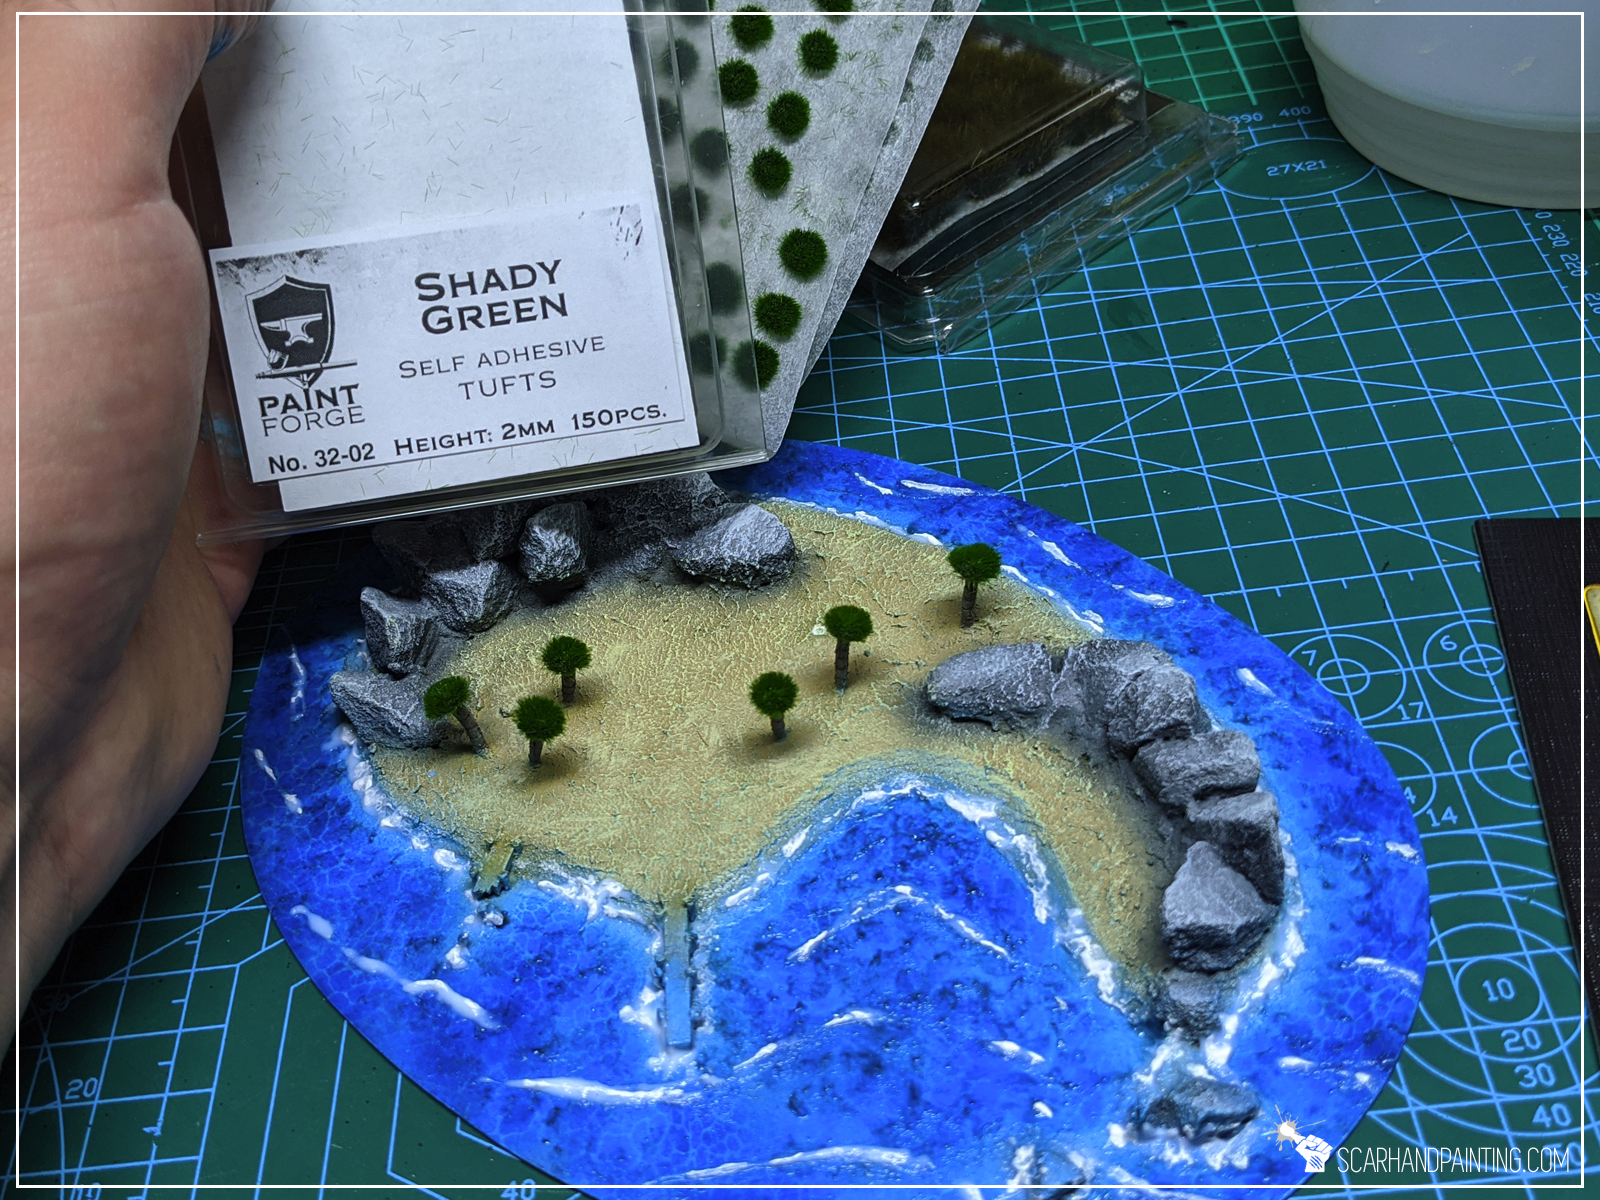
I added some final touches by manually applied AK Interactive effects creating waves and water foam. To add a nice color diversity on top of the island I also applied Gamers Grass Dry Green and Swamp tufts. Pal trees got finished with Shady Green tufts from Paint Forge.


First two islands discovered, I’m ready to head up for the unknown waters. More scenery to come, following the same template. If you stick a while at my blog you’re bound to see more islands and other scenery types, including deadly rocks and shipwrecks. Be sure to visit Scarhandpainting next time you hit a port! Ahoy!

2 comments so far
MiSiOPosted on8:39 am - Sep 21, 2020
Zaorane. Nakładanie rozjaśnień przez “wzornik” zrobiło cały efekt.
Myron HaskellPosted on4:56 pm - Mar 28, 2022
I love the beached sea terror skeleton! I need some island terrain for my game and you’ve given me some good ideas.