- contact@scarhandpainting.com


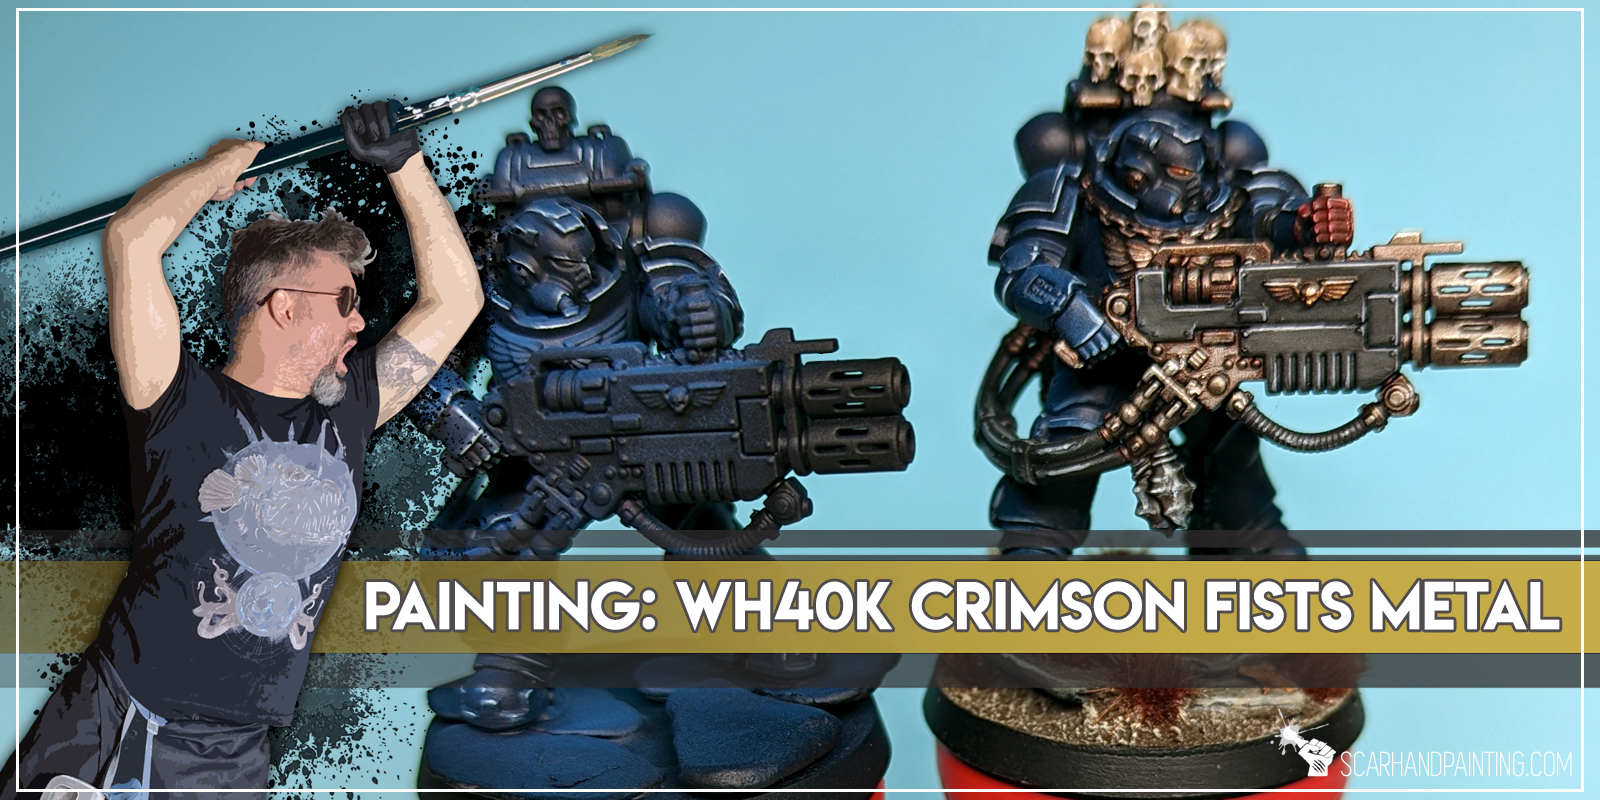
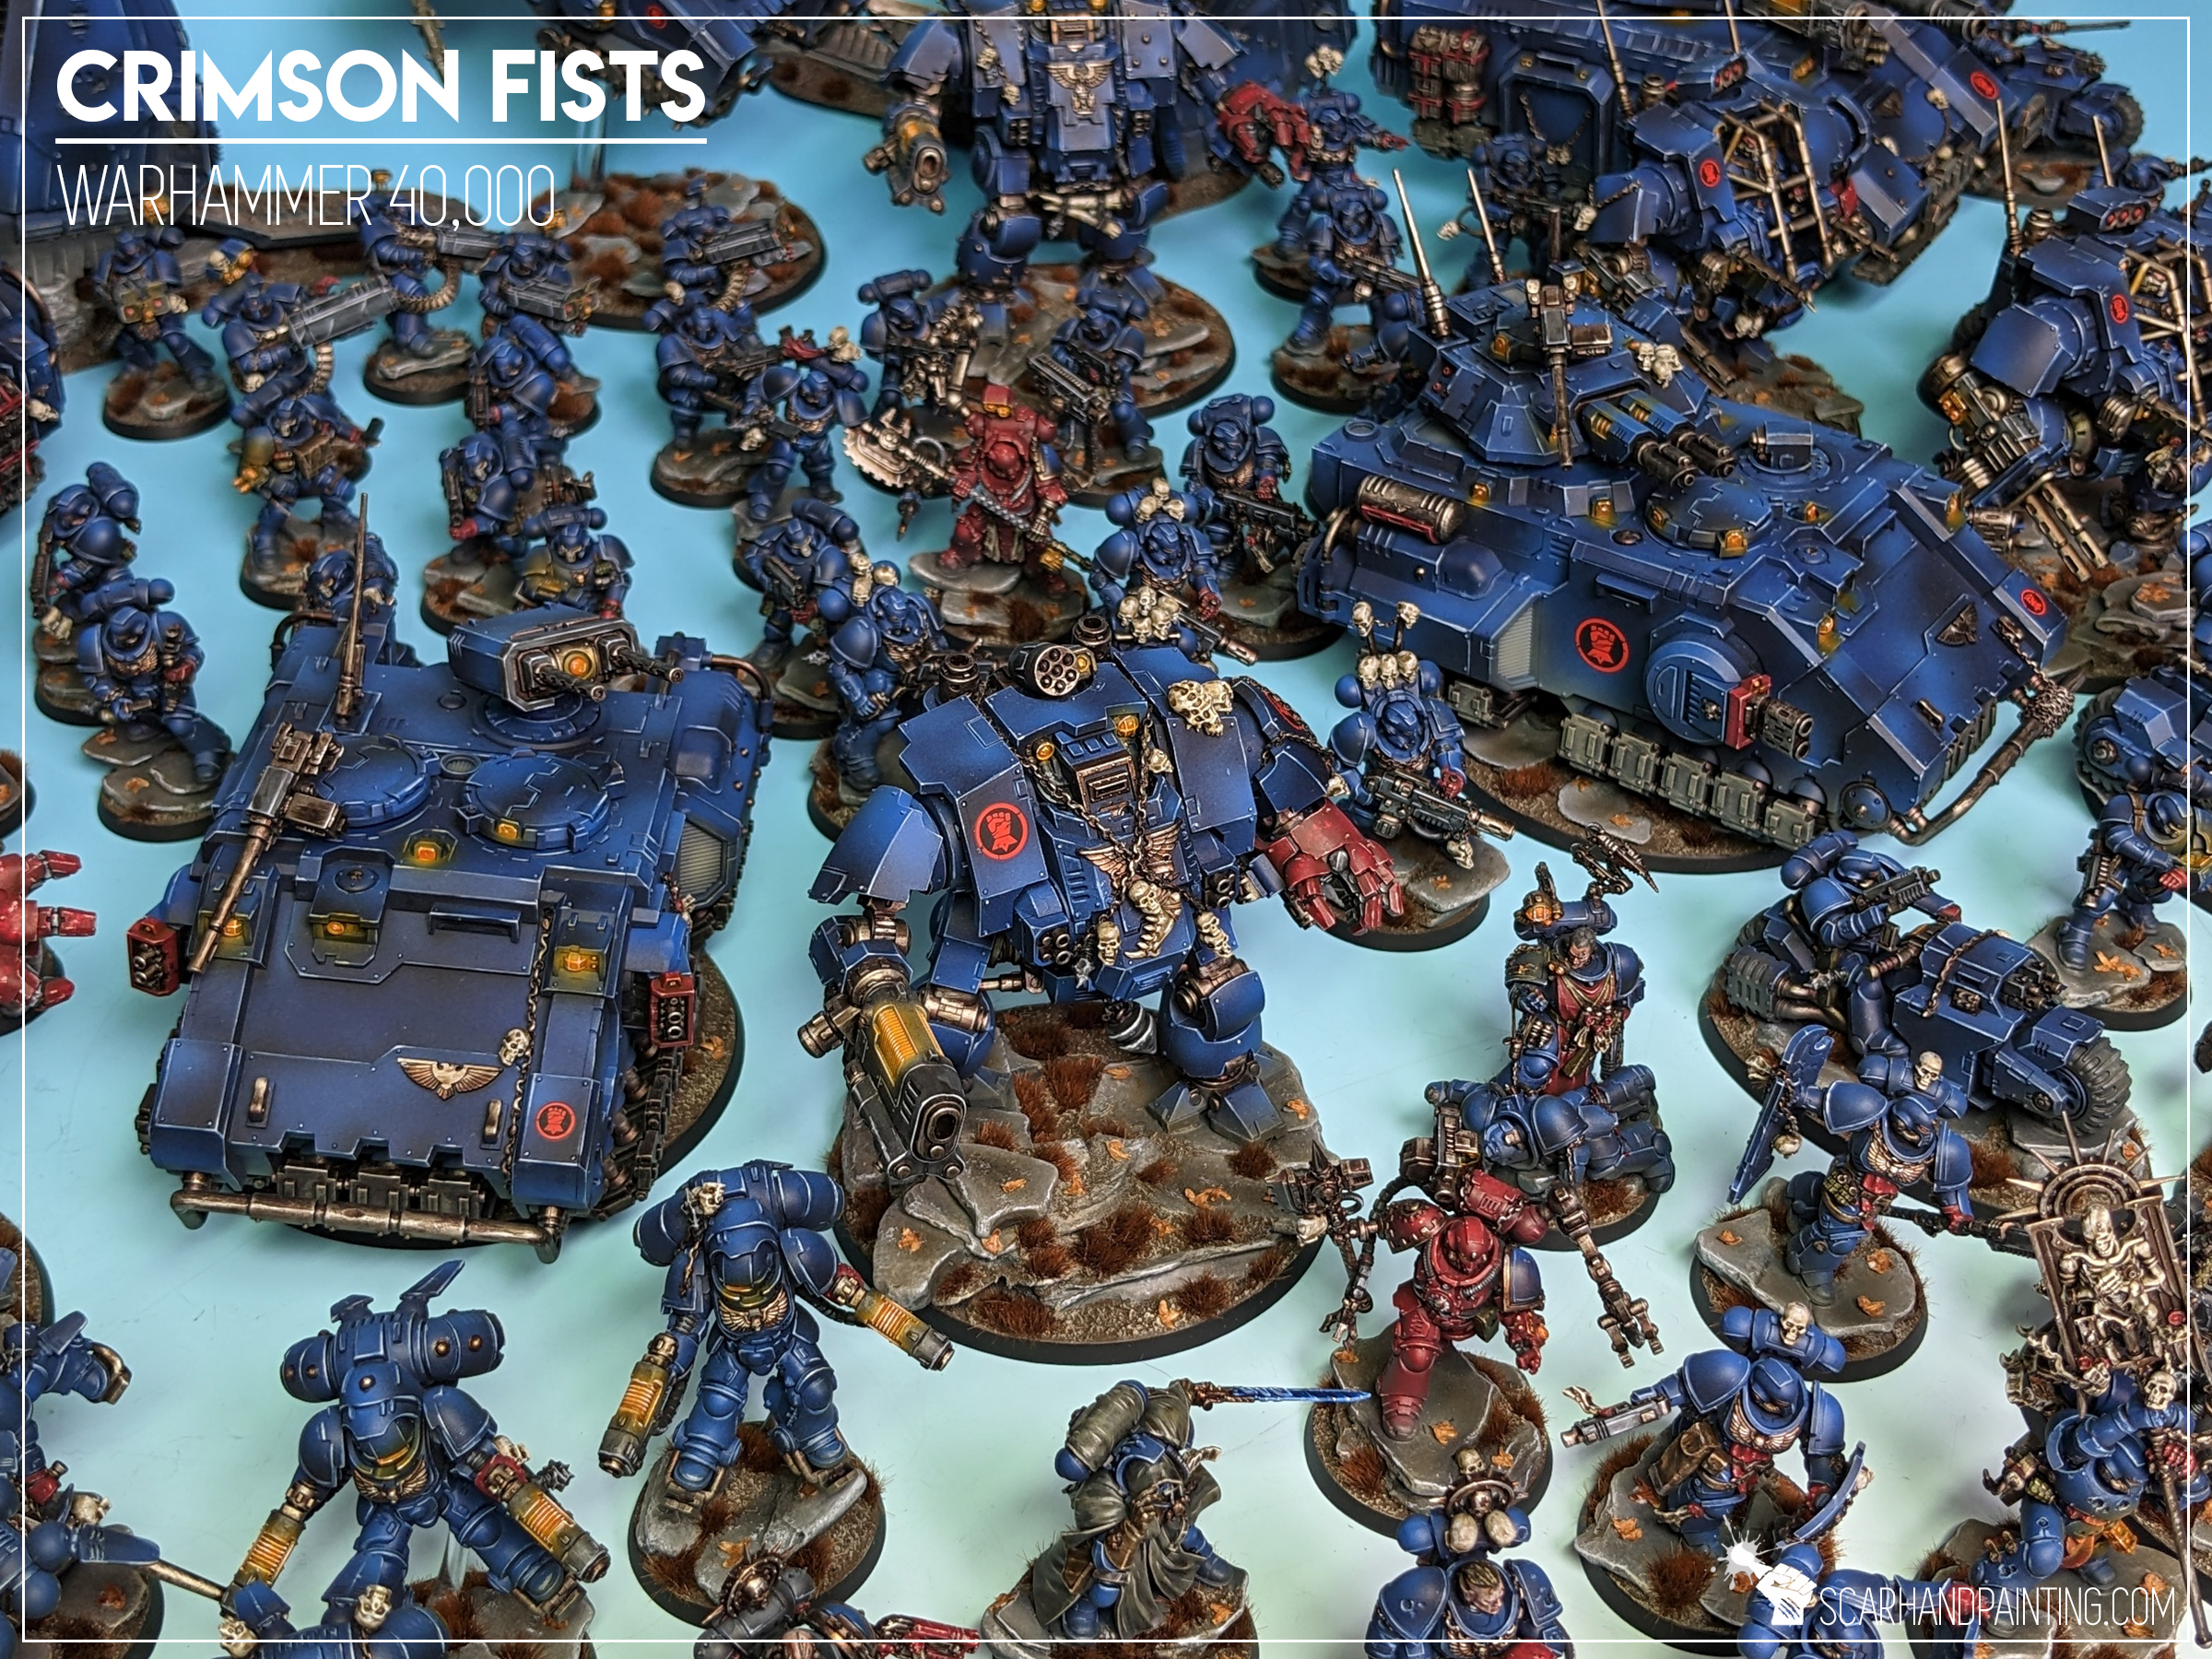
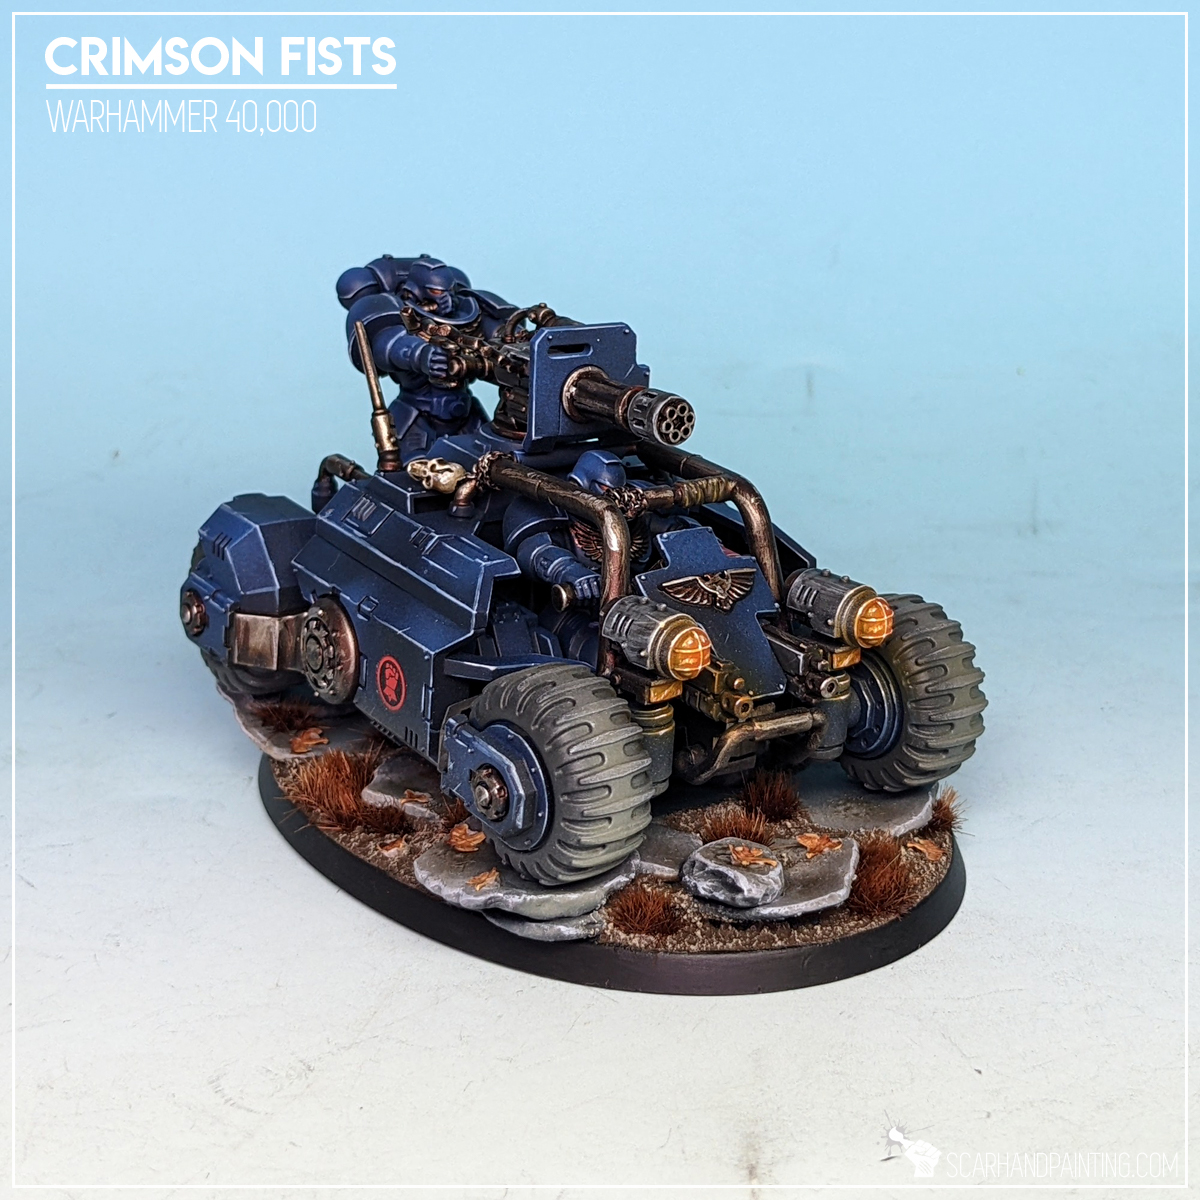
Welcome to Painting Warhammer 40,000 Crimson Fists tutorial. Here I will present to you a Step-by-step of an easy and fast painting process for Games Workshop Crimson Fists Primaris Marines metal as can be seen in Gallery: Crimson Fists.
Before we start, some notes:
Previous steps: Blue Armor
Although metal elements can be painted separately I strongly recommend following part one of the article before moving to this color. Visit Tutorial: Painting Warhammer 40,000 Crimson Fists part one Blue Armor for more information.
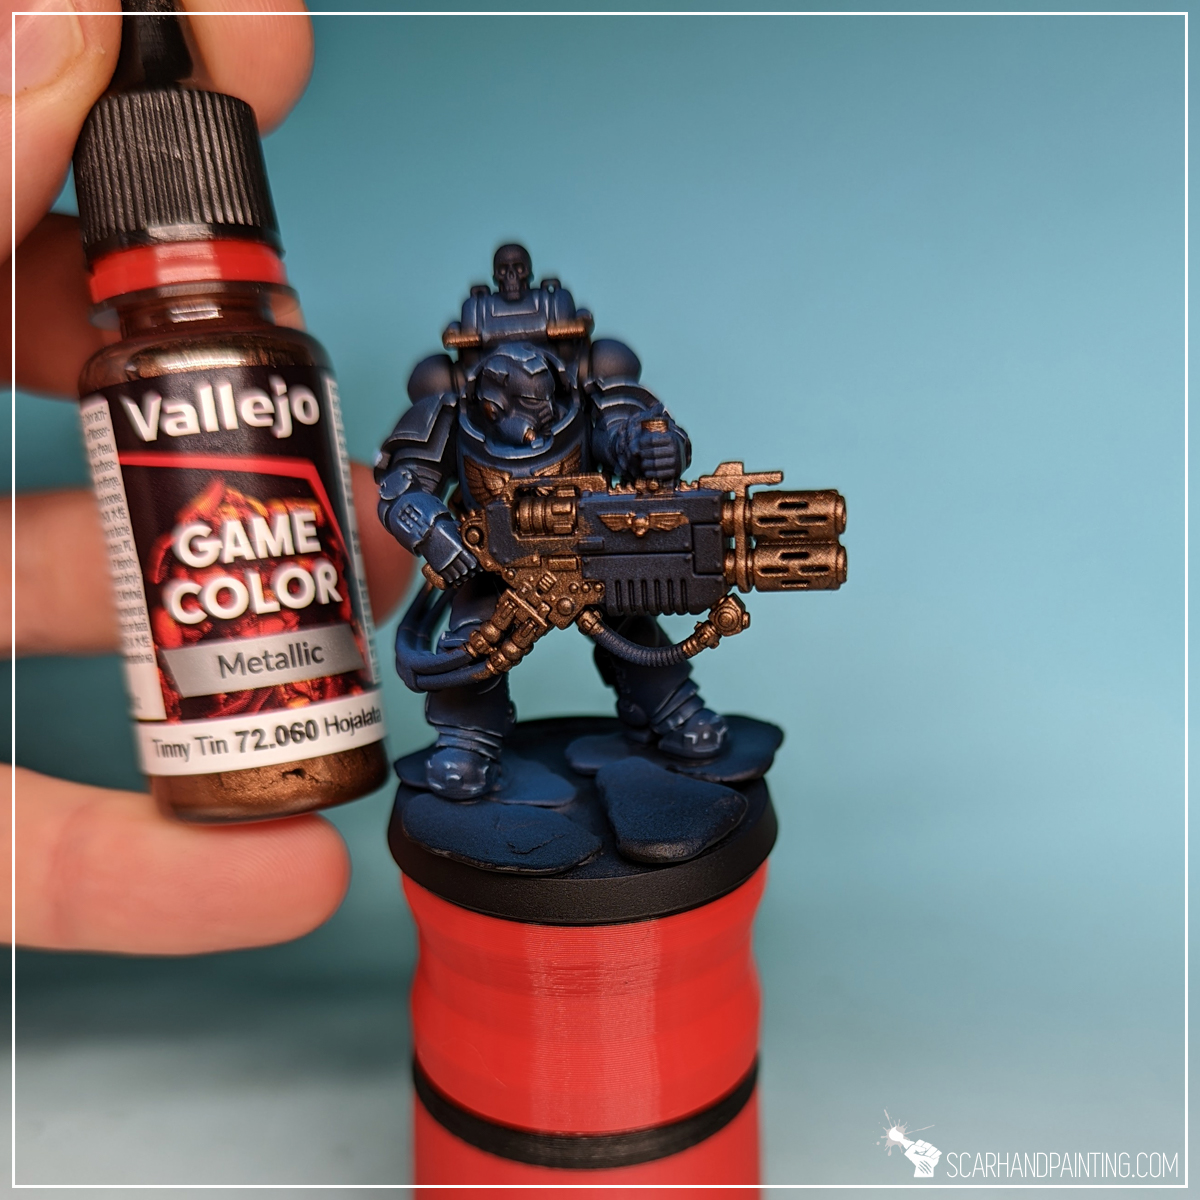
Step one: Base Color
The initial layer was painted manually (no airbrush) with Vallejo Game Color – Tinny Tin (72.060). The color is relatively thin making it easy to move into any recesses, but also maintains a strong coverage, which is good because covering the entire surface is imperative for this particular layer.
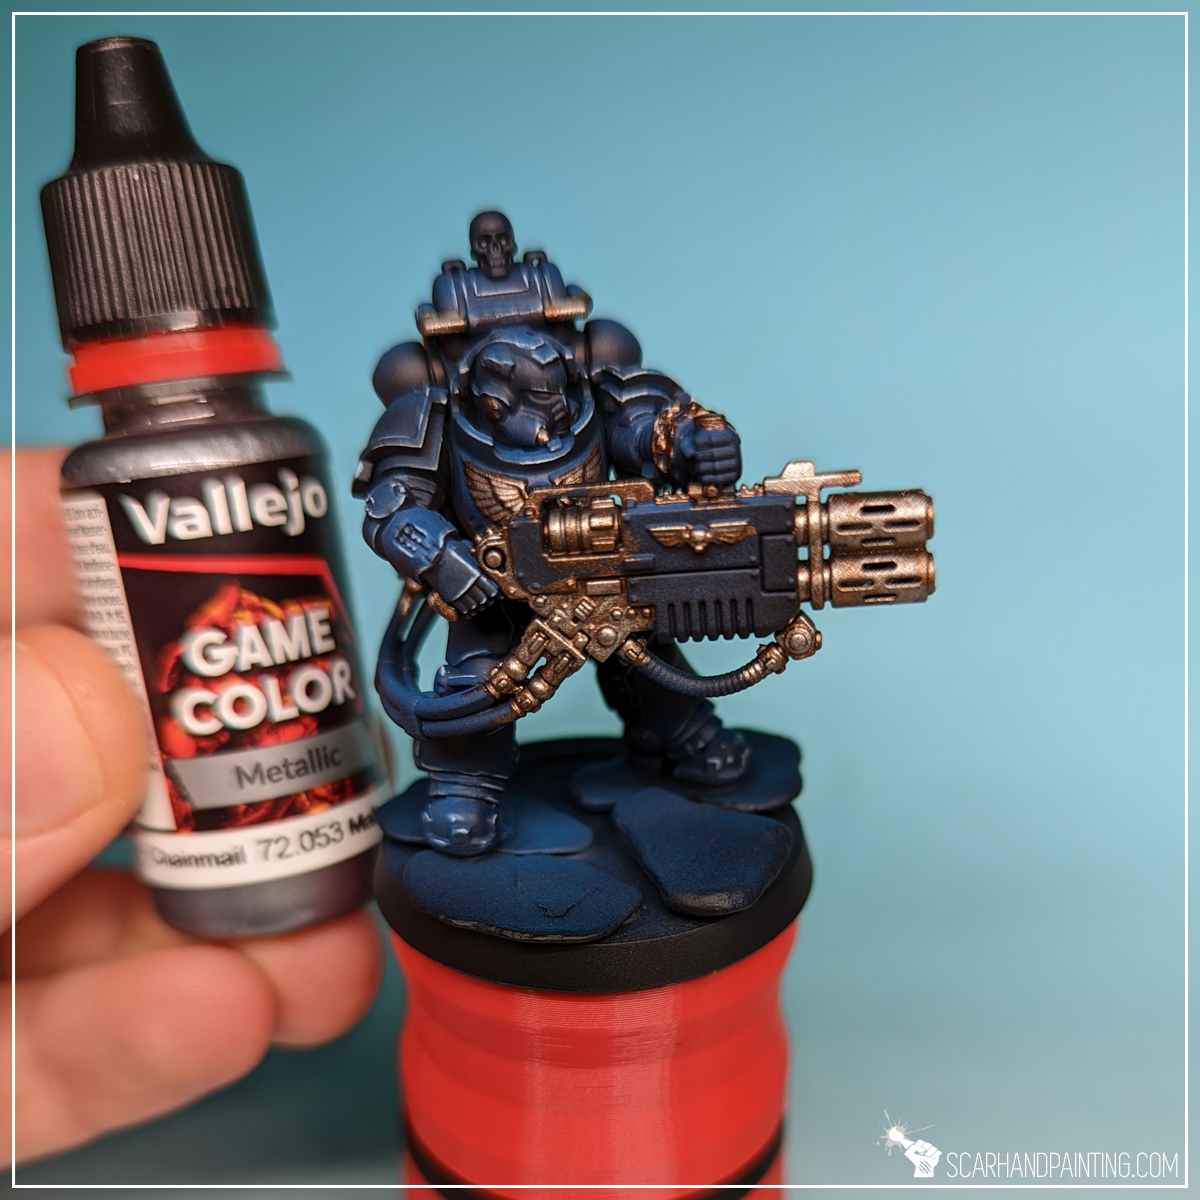
Step two: Highlight
Next I manually applied a large area (flatbrush) highlight of Vallejo Game Color – Chainmail (72.053). A much brighter steel color with strong pigmentation to cover most of the surface, except recesses.
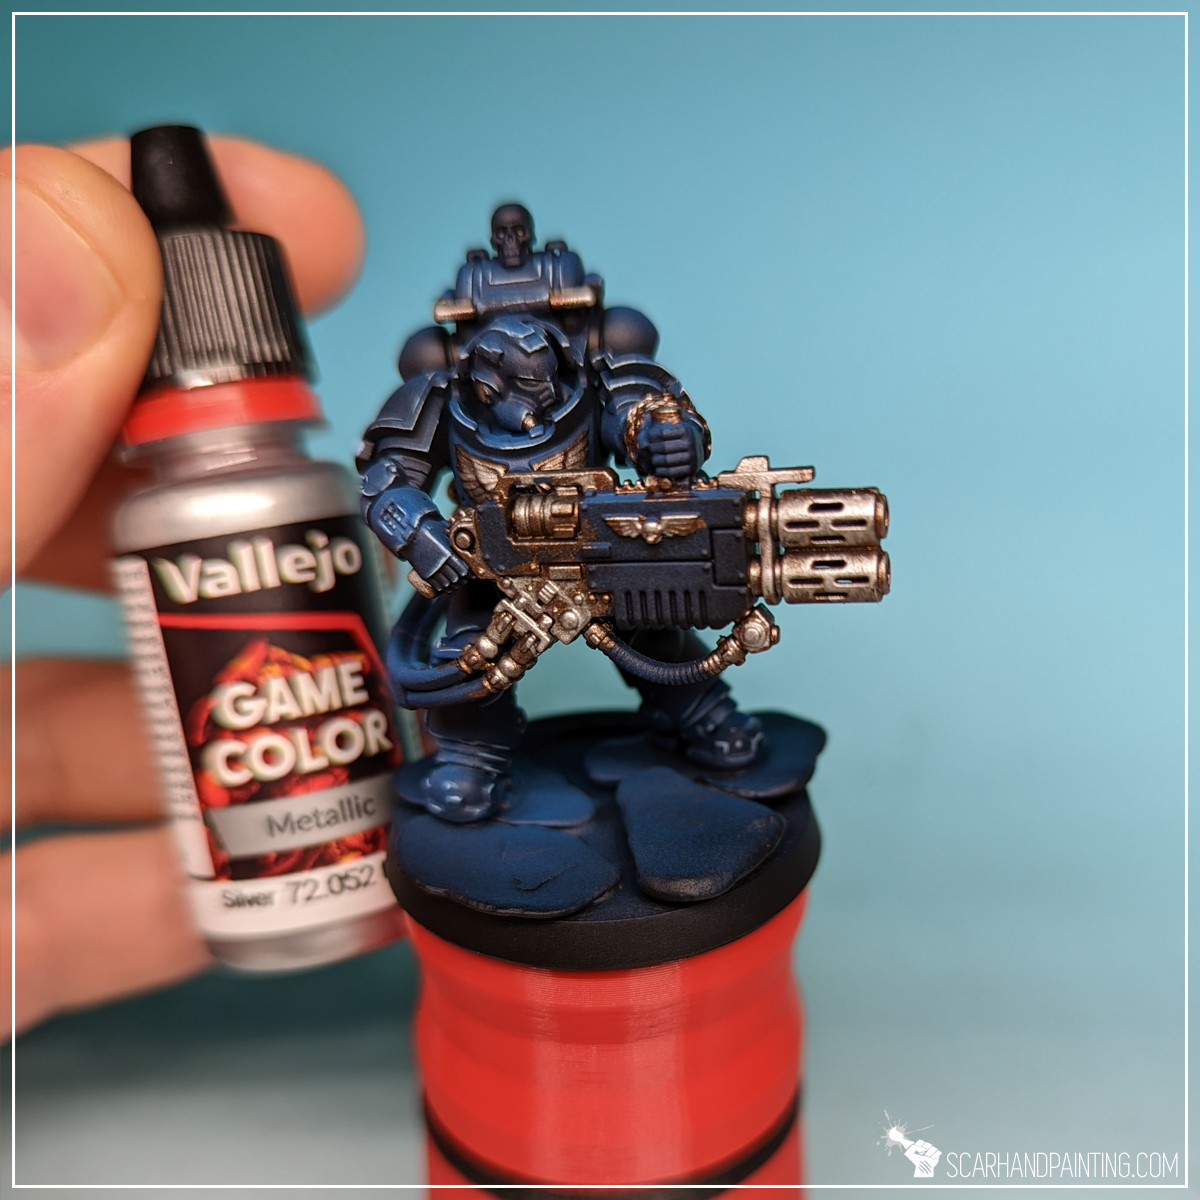
Step three: Highlight
I then applied a more contained highlight of Vallejo Game Color – Silver (72.052), switching between edge highlight and flatbrush.
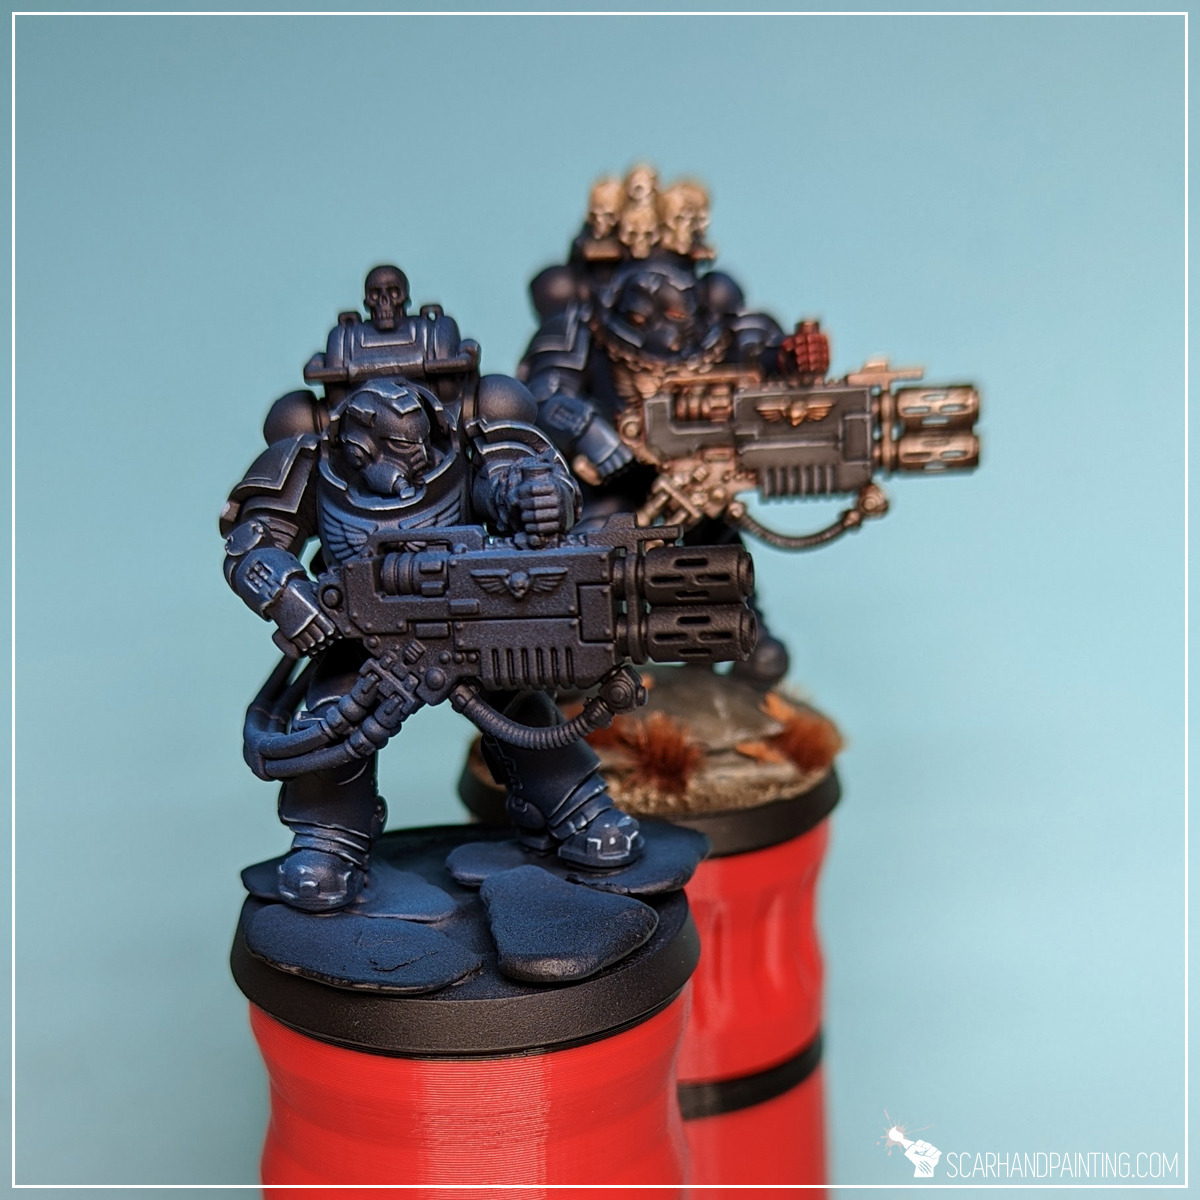
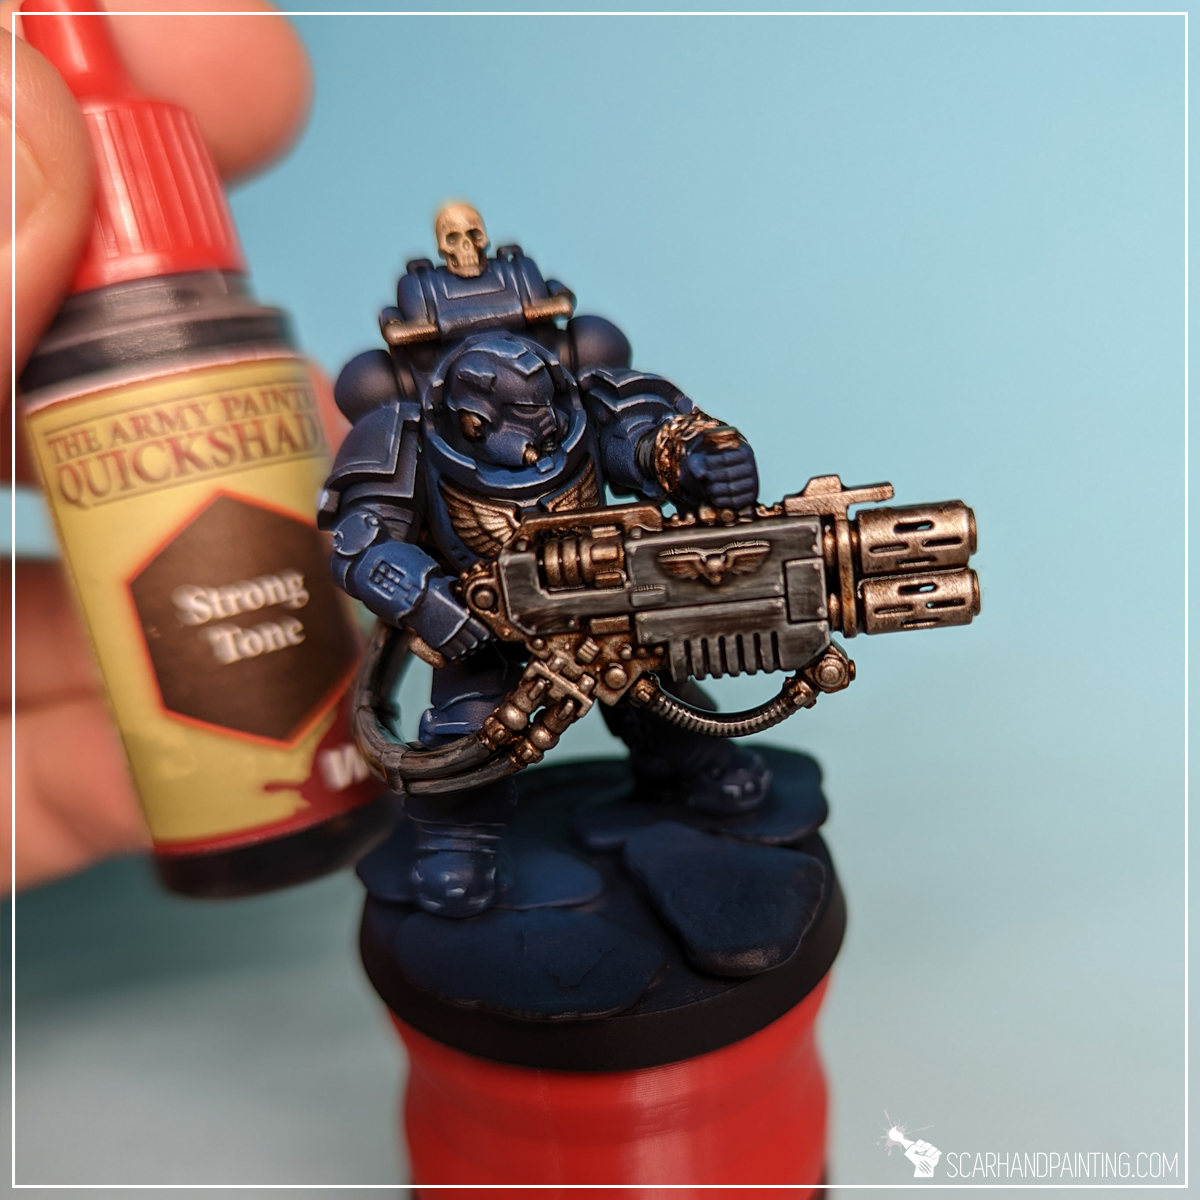
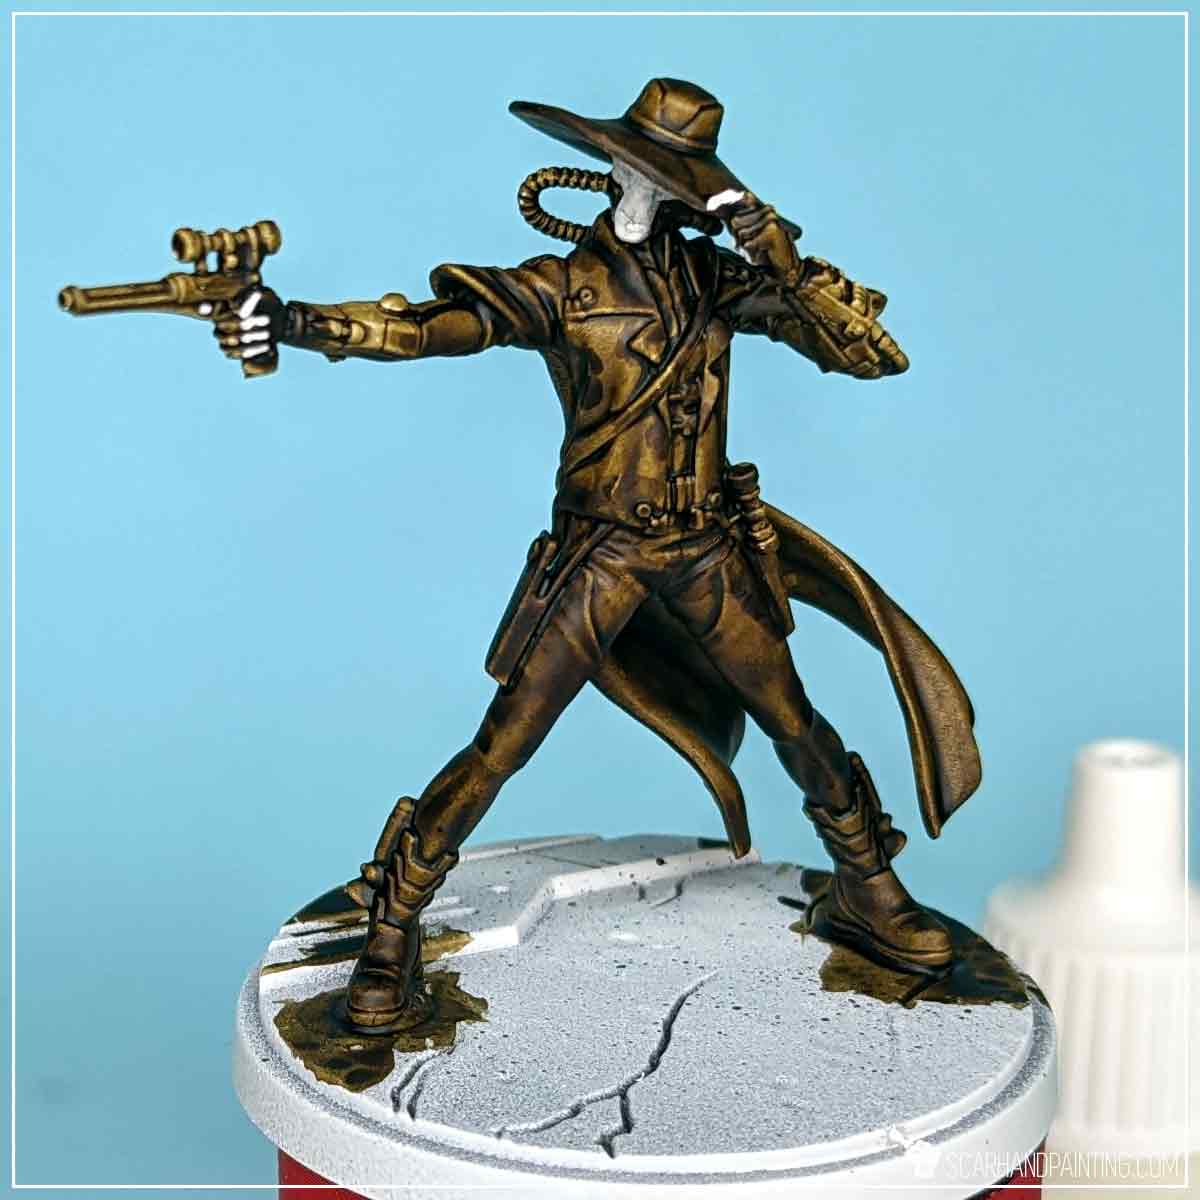
Step four: Wash
Lastly I applied a lot of The Army Painter – Strong Tone Wash. I like to go hard on washes, applying lots and lots of them to allow for pigmentation to do its thing.
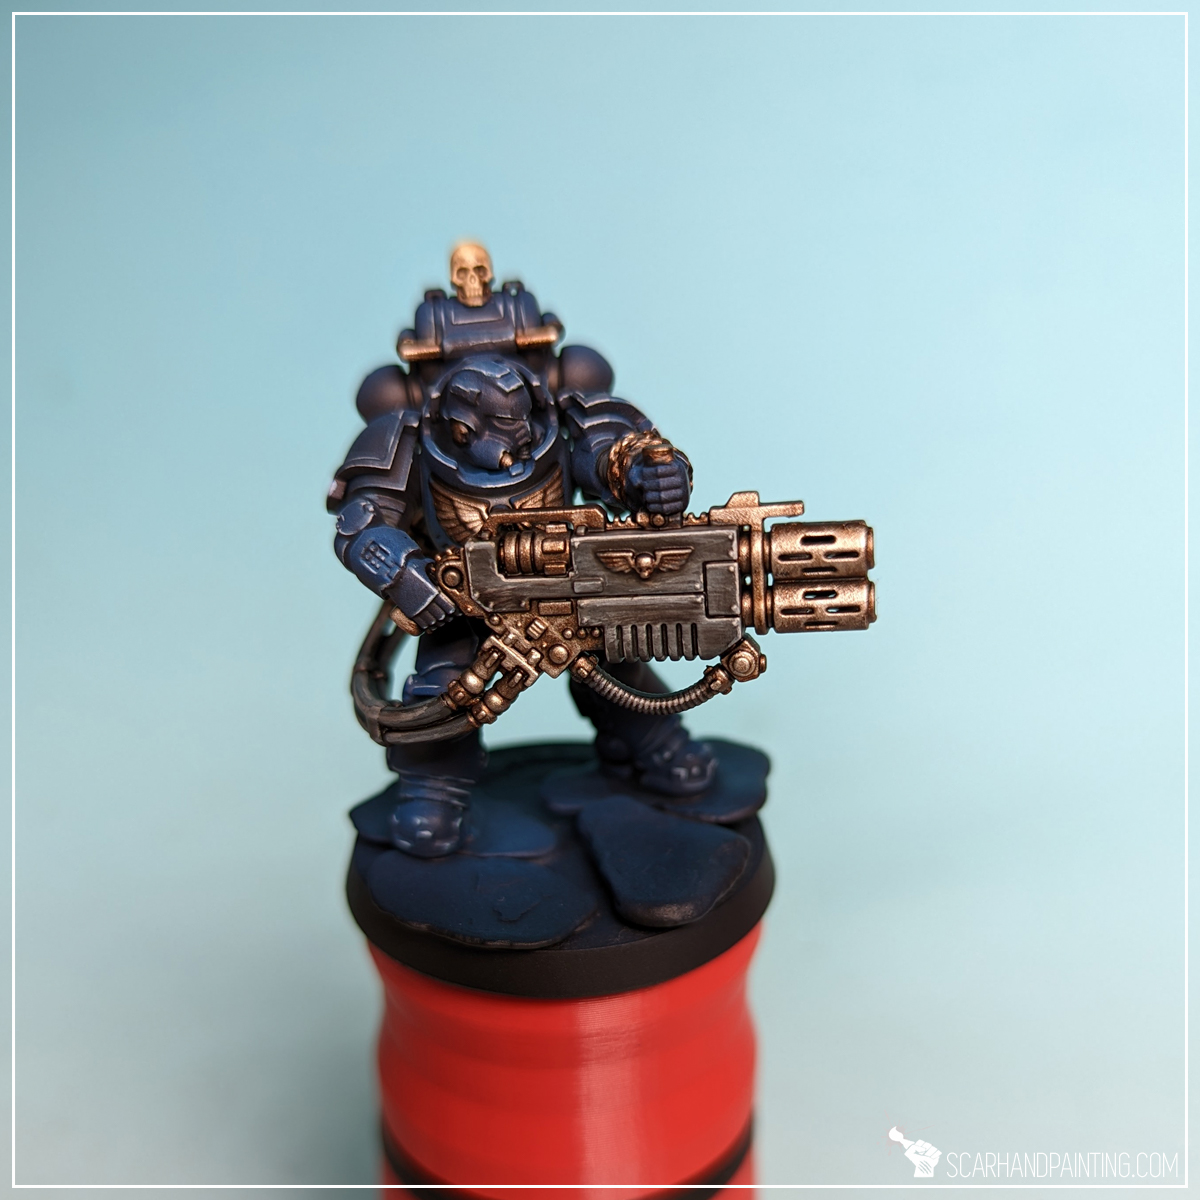
Extra Step: Final Highlight
Depending on the level of paint job I sometimes apply a final, soft highlight of Vallejo Game Color – Silver (72.052). This might work especially good for tiny detail such as chains, Imperial Aquila and similar, making steel look crisp and sharp. Unfortunately I skipped this part for the Eradicators so you’d have to take my word for how it works, or see other Crimson Fists miniatures for reference.
I hope you’ve enjoyed this article. Be sure to let me know your thoughts in the comments below or via Facebook or Instagram. I would also appreciate it if you considered sharing this content with your friends, who might find it interesting. Finally if you are looking for a professional miniatures painting service, be sure to contact me with this contact form. I always reply within 24 hours, after which please check out your spam folder.
Welcome to Painting Warhammer 40,000 Crimson Fists tutorial. Here I will present to you a Step-by-step of an easy and fast painting process for Games Workshop Crimson Fists Primaris Marines red as can be seen in Gallery: Crimson Fists.

Before we start, some notes:
Previous steps: Blue Armor
Although red elements can be painted separately I strongly recommend following part one of the article before moving to this color. Visit Tutorial: Painting Warhammer 40,000 Crimson Fists part one Blue Armor for more information.
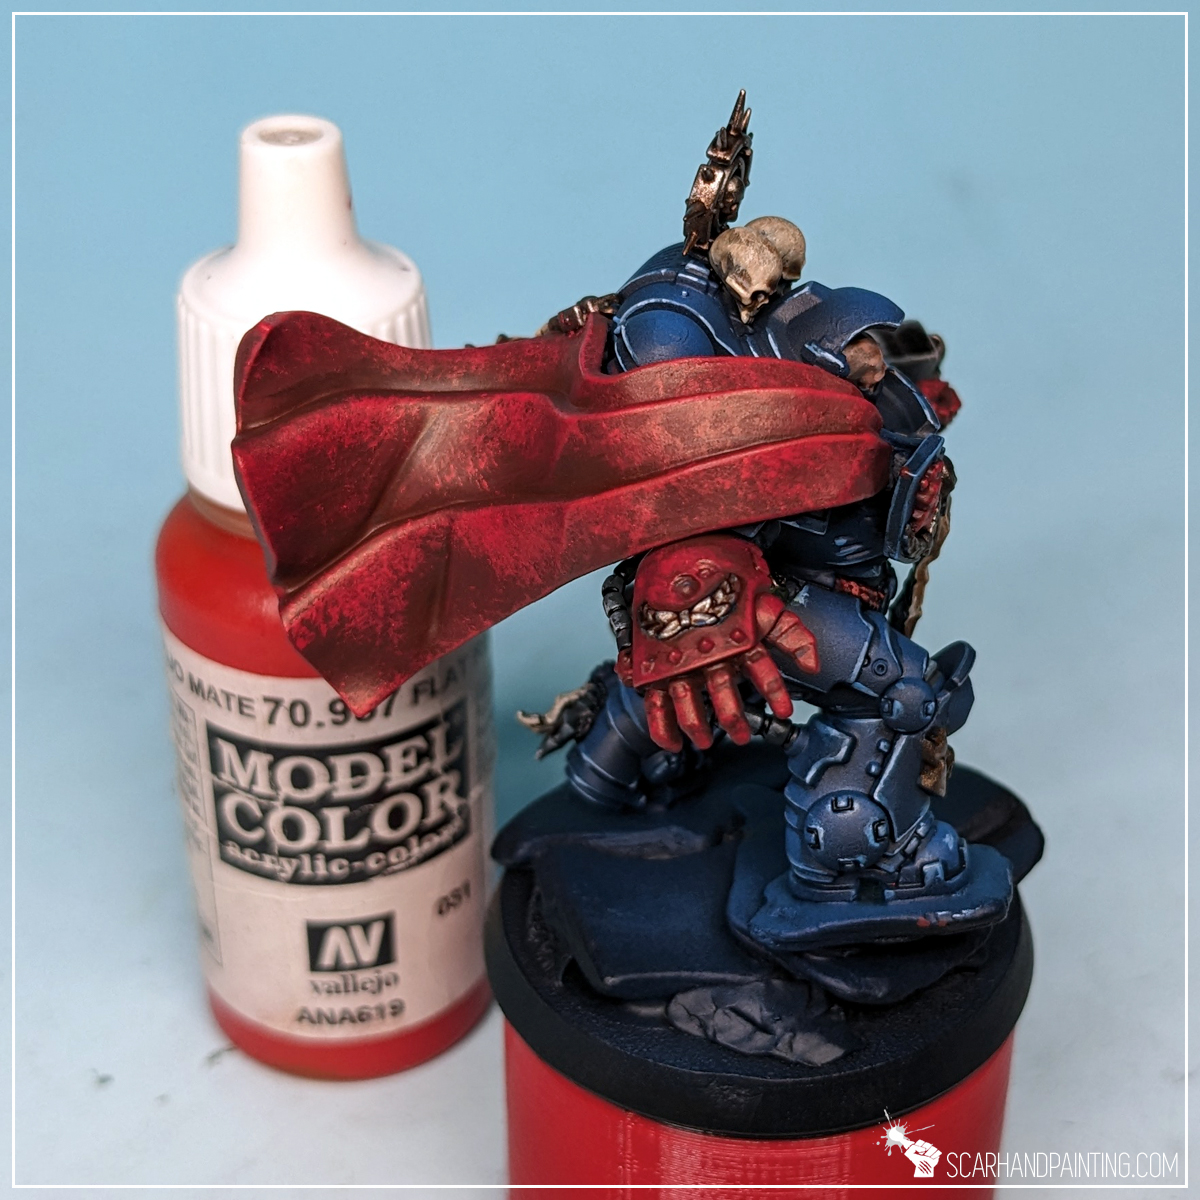
Step one: Base Color
The initial layer was painted manually (no airbrush) with Vallejo Model – Hull Red (70.985). The color is thick resulting in strong coverage. I deliberately avoided going back to places where the undercoat might be visible, not to build too much paint in the area. Other layers will take care of that.

Step two: Highlight
Next I manually applied a large area highlight of Vallejo Burnt Red (70.814). A bit brighter and slightly pastele, the color has a relatively good coverage. I focused on covering all edges and exposed areas, less on recesses and inner folds.

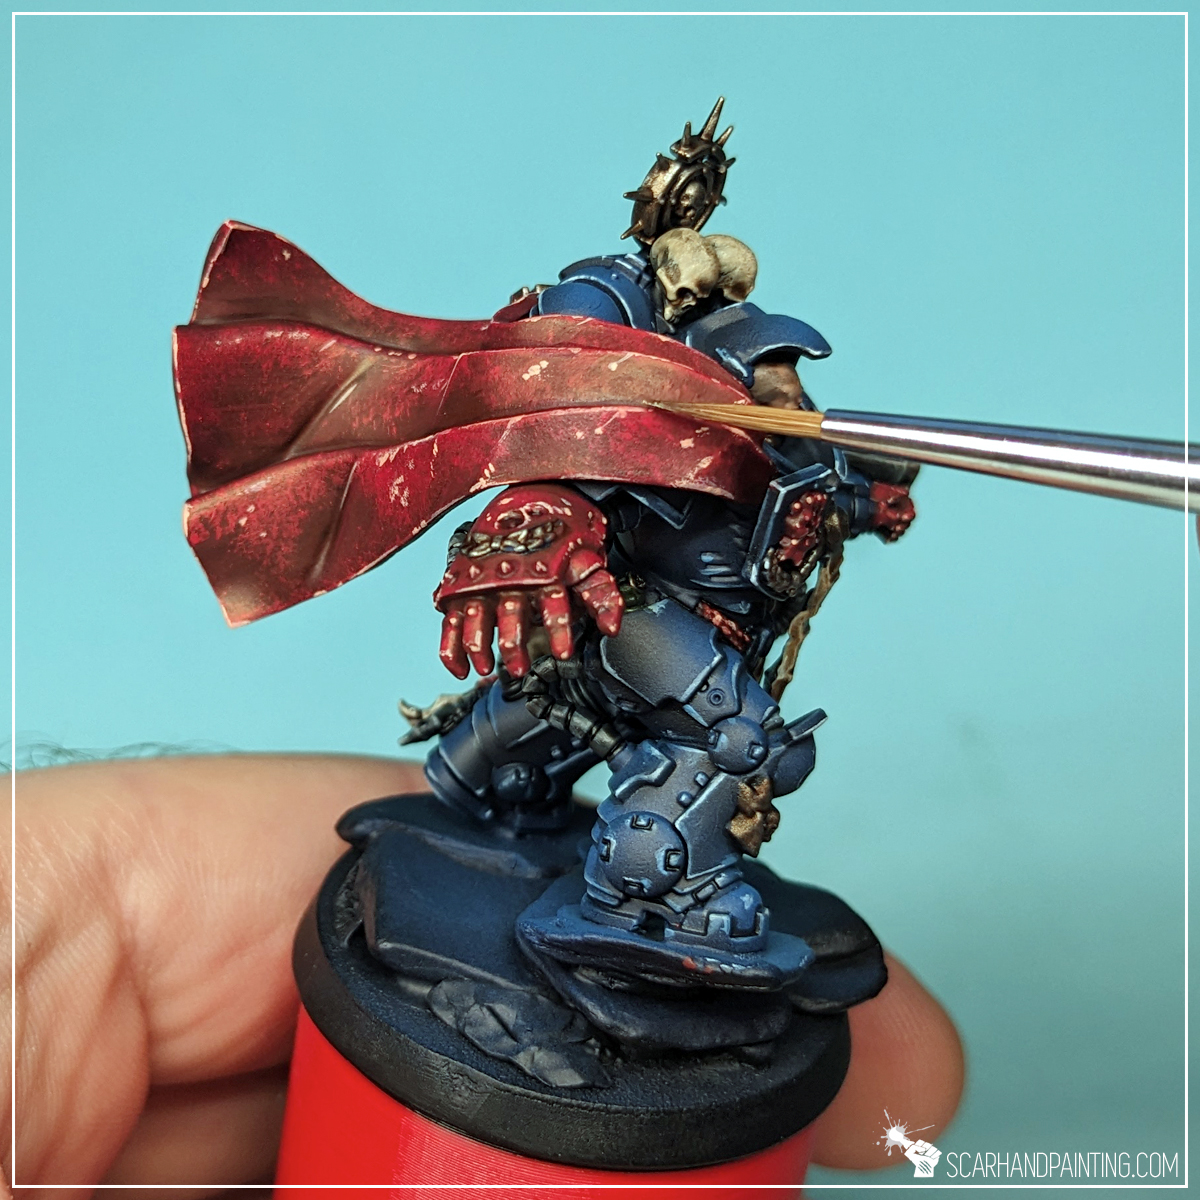
Step three: Texture Highlight
I then applied a mix-method layer of Vallejo Flat Red (70.957)*, switching between edge highlight and stippling. This added much needed texture and vibrancy.
* Warning: I am convinced my Vallejo Flat Red is bugged. I have purchased a number of bottles and the one used for my Crimson Fists is clearly mixed up. There sadly is no comparable color in the entire Vallejo range that I am aware of (and I got each Red they make to test it). I recommend choosing any strong, vibrant, well pigmented red for this step instead.
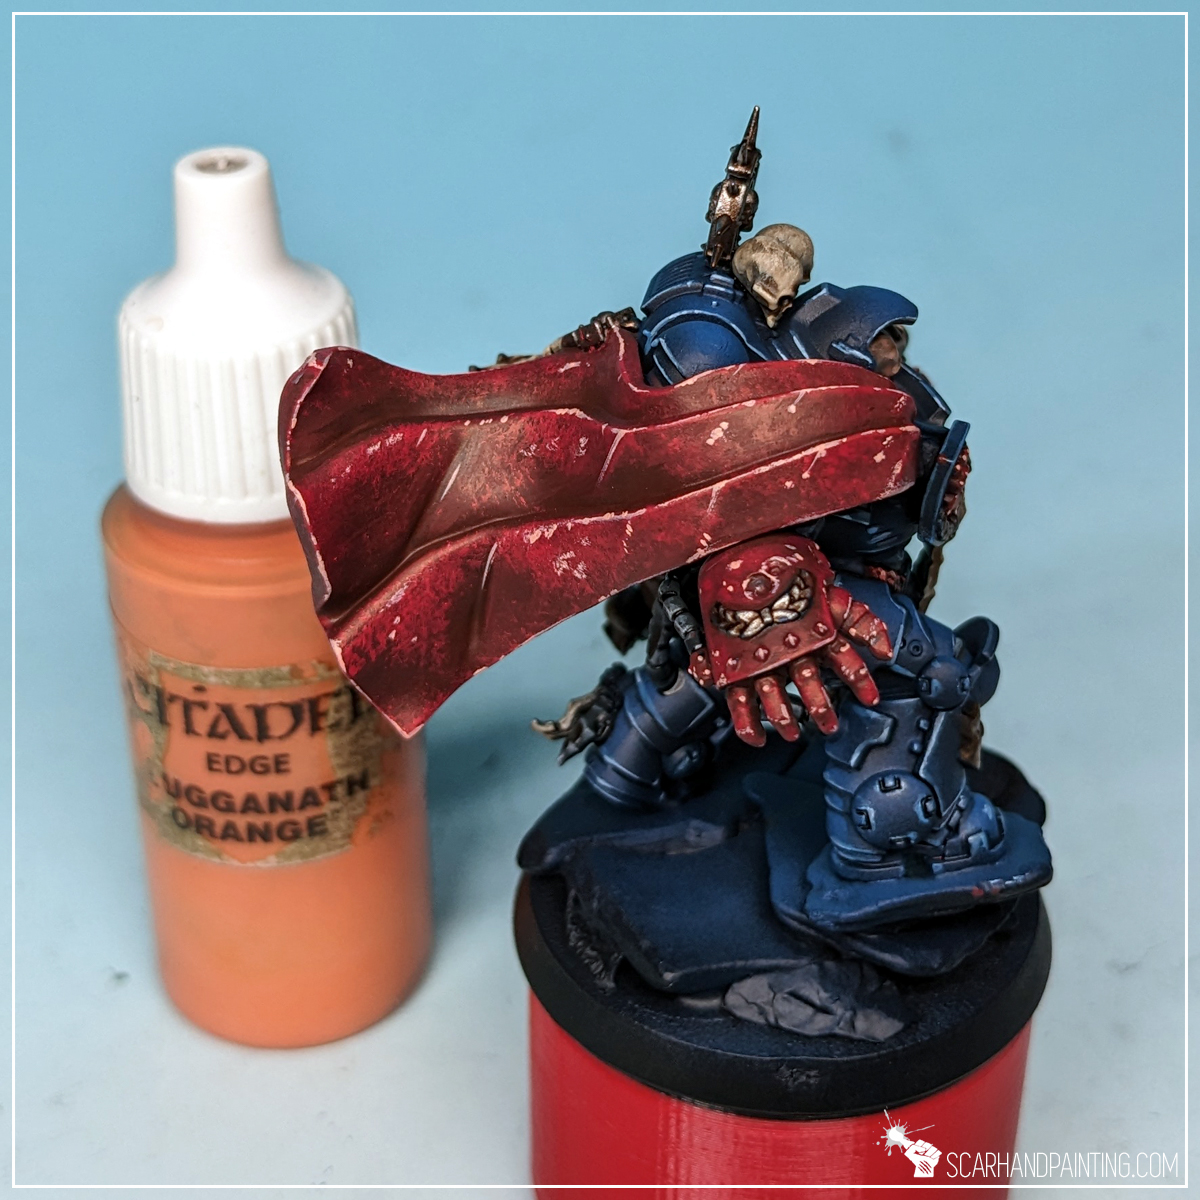
Step four: Final Highlight
In the last step I added a limited highlight of Citadel Lugganath Orange. The paint is thick and I used it without thinning. Just a few lines on the edges, a few irregular dots in certain areas. Not to much, not to change the expression of the overall color.

That wraps up red. Four layers of paint to imitate eye catching, vibrant tone. Two most important colors out of the way, the rest is a topic for another day. Stay tuned for part three of the tutorial.
I hope you’ve enjoyed this article. Be sure to let me know your thoughts in the comments below or via Facebook or Instagram. I would also appreciate it if you considered sharing this content with your friends, who might find it interesting. Finally if you are looking for a professional miniatures painting service, be sure to contact me with this contact form. I always reply within 24 hours, after which please check out your spam folder.
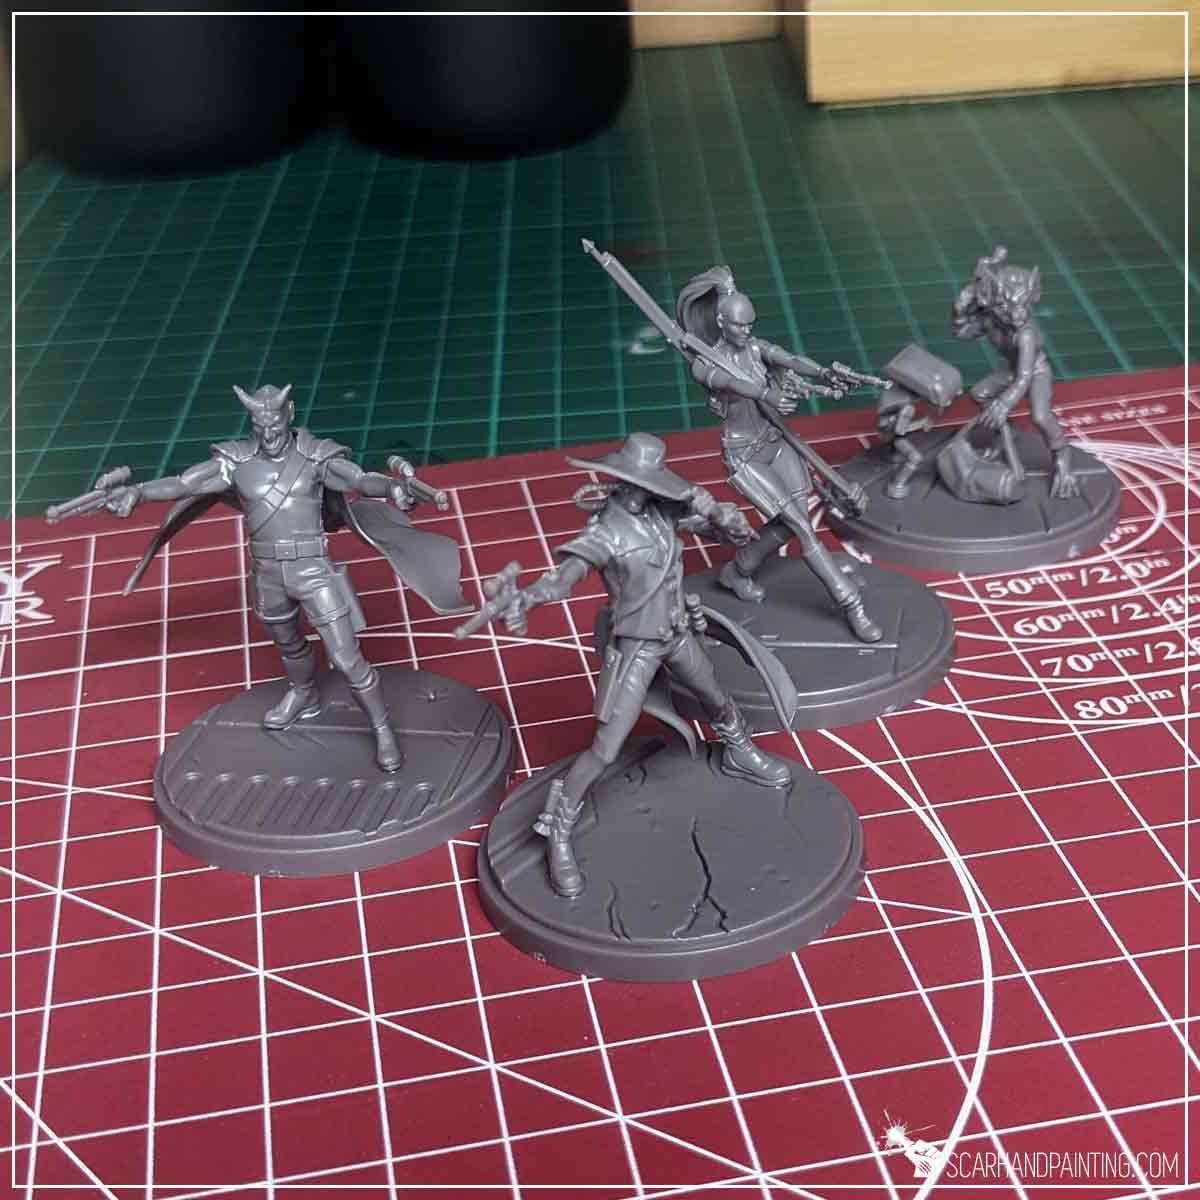
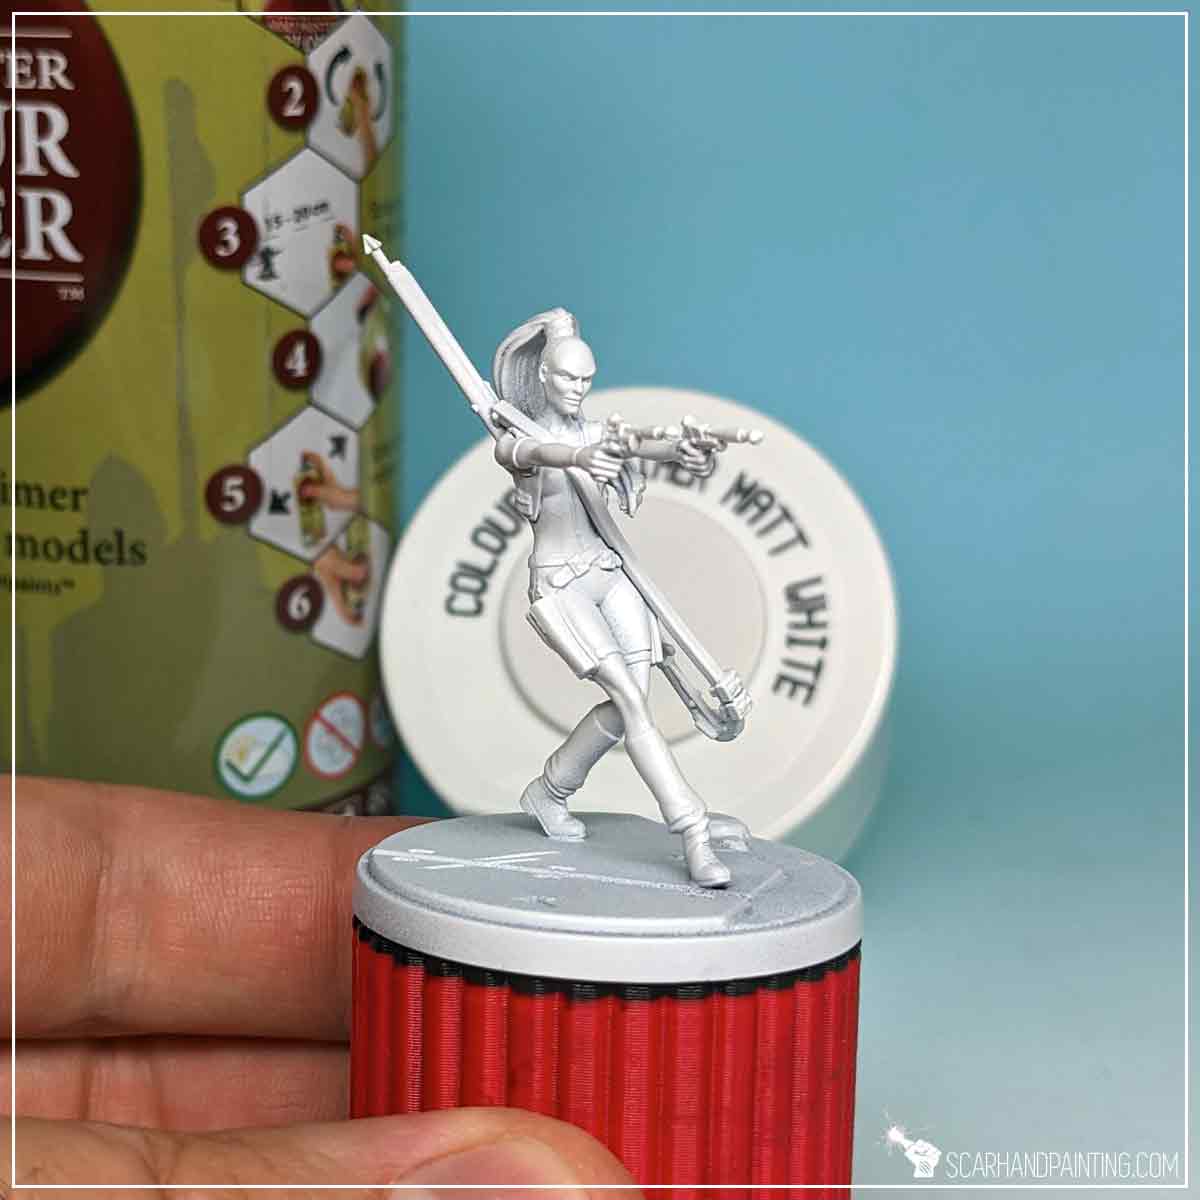
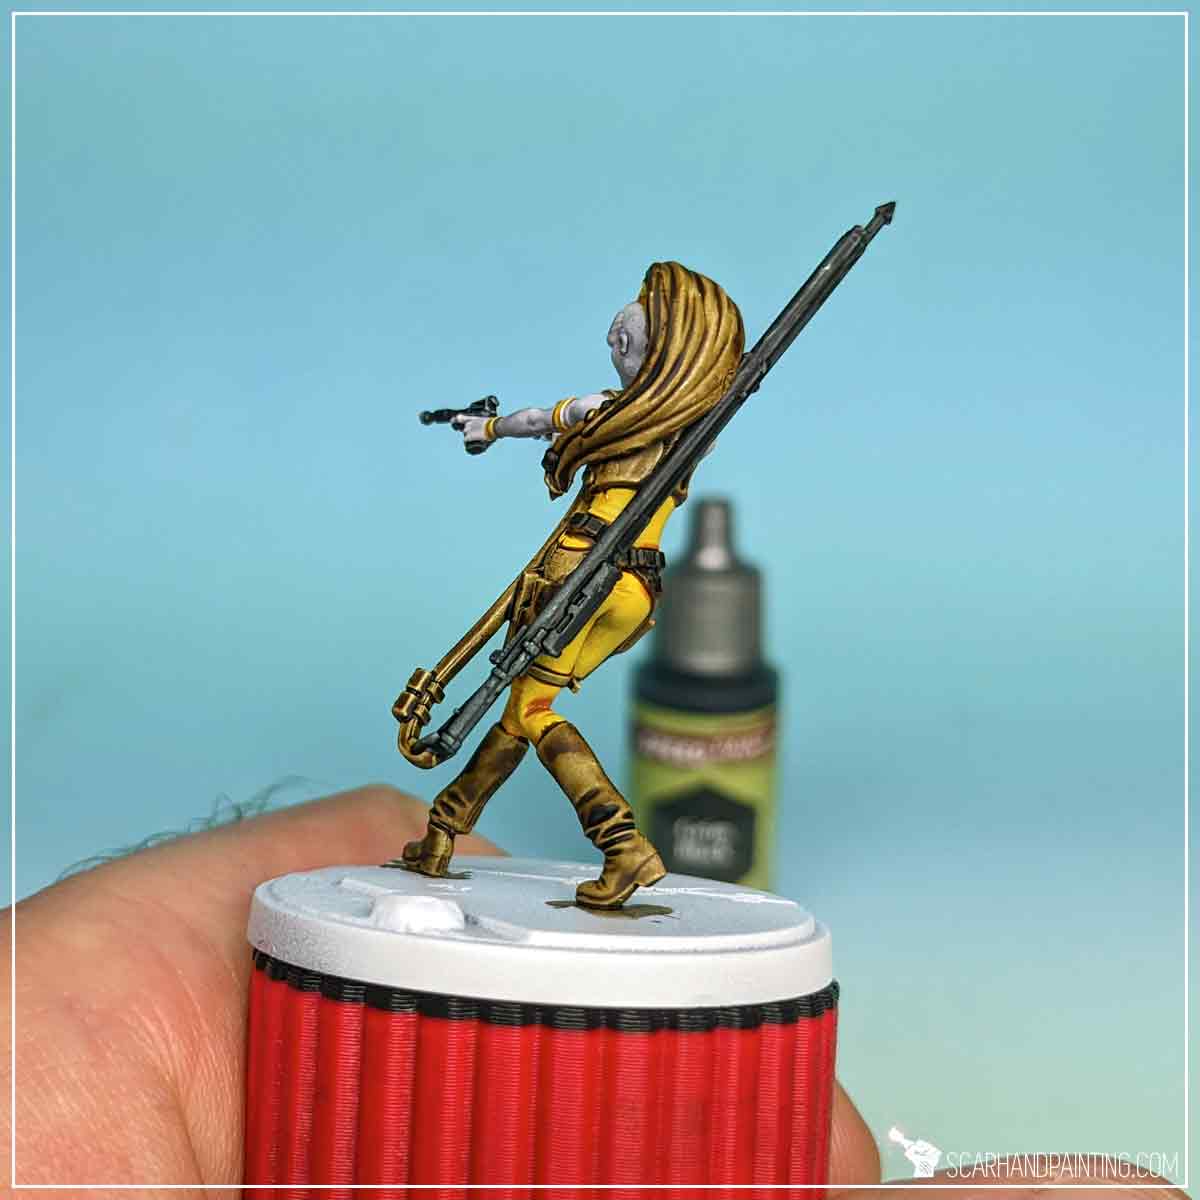
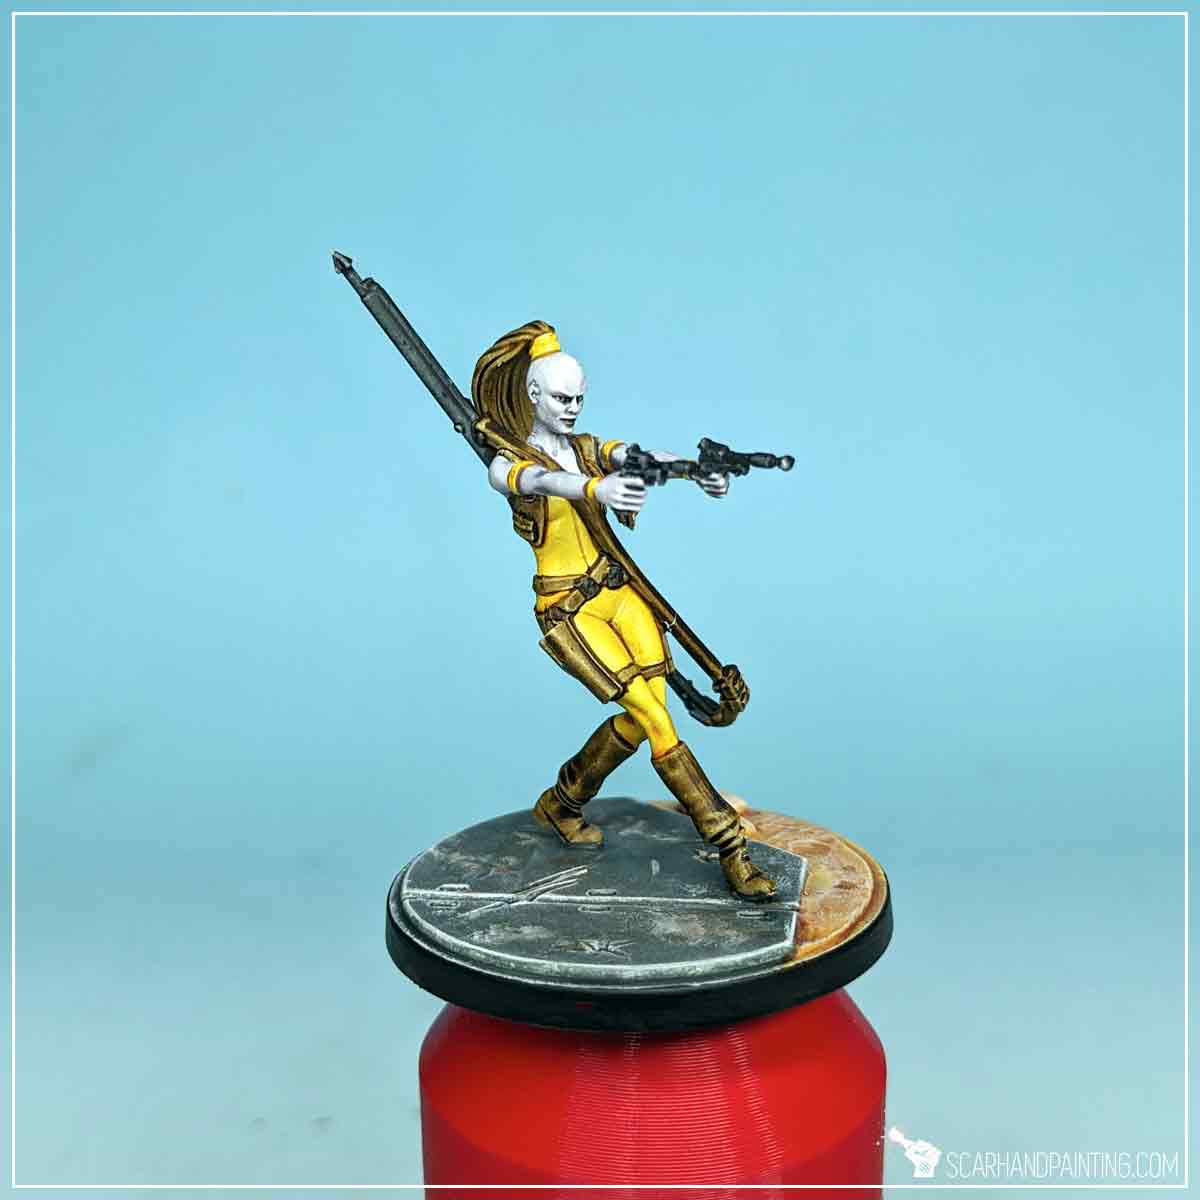
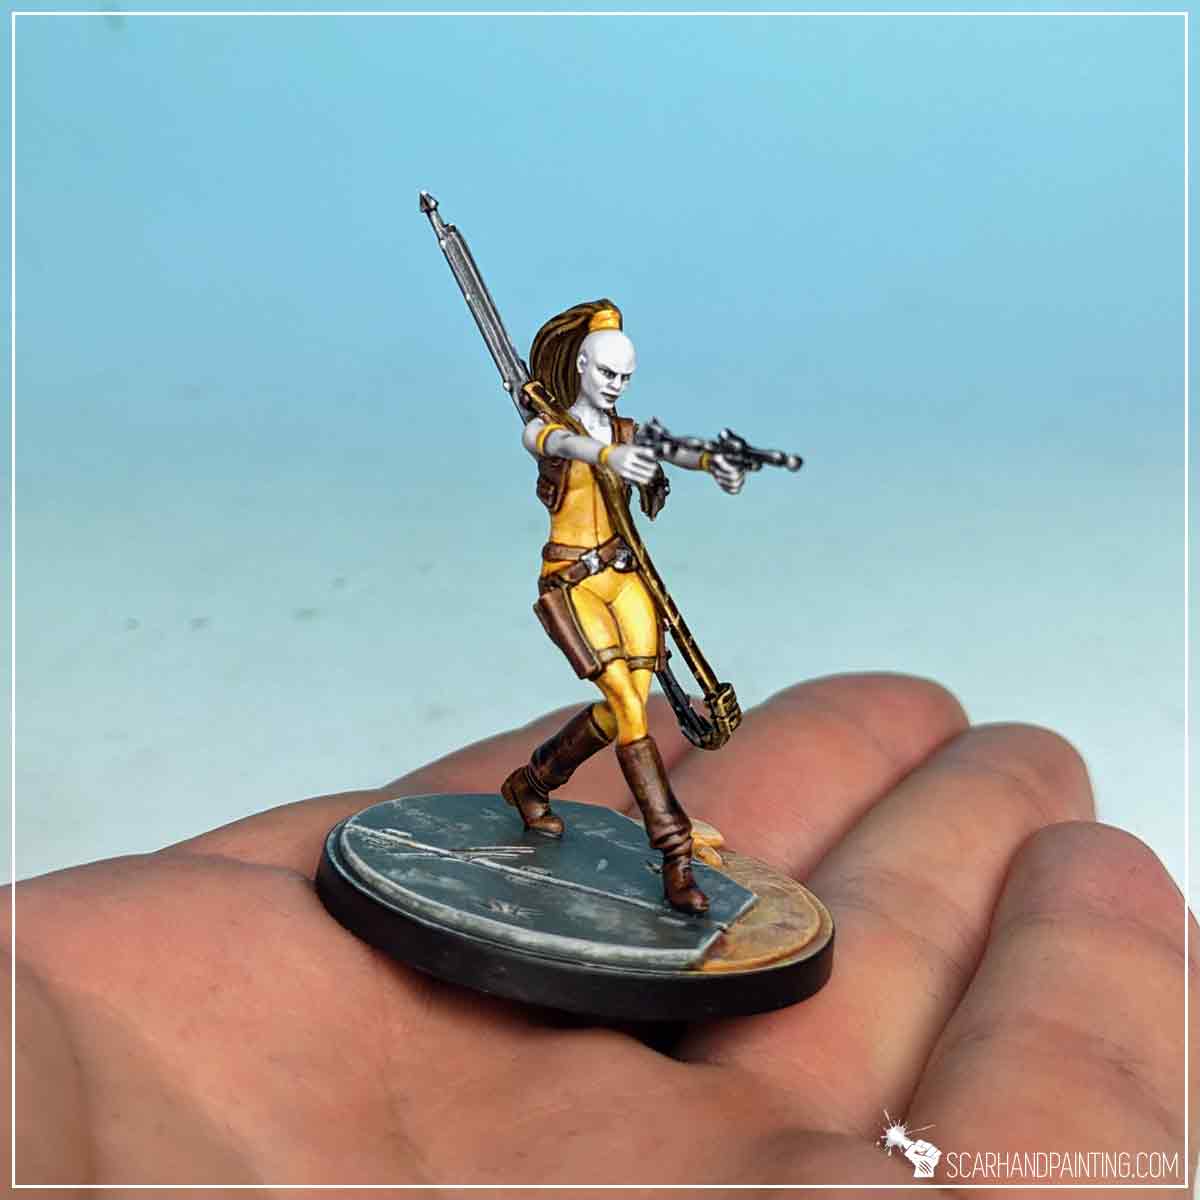
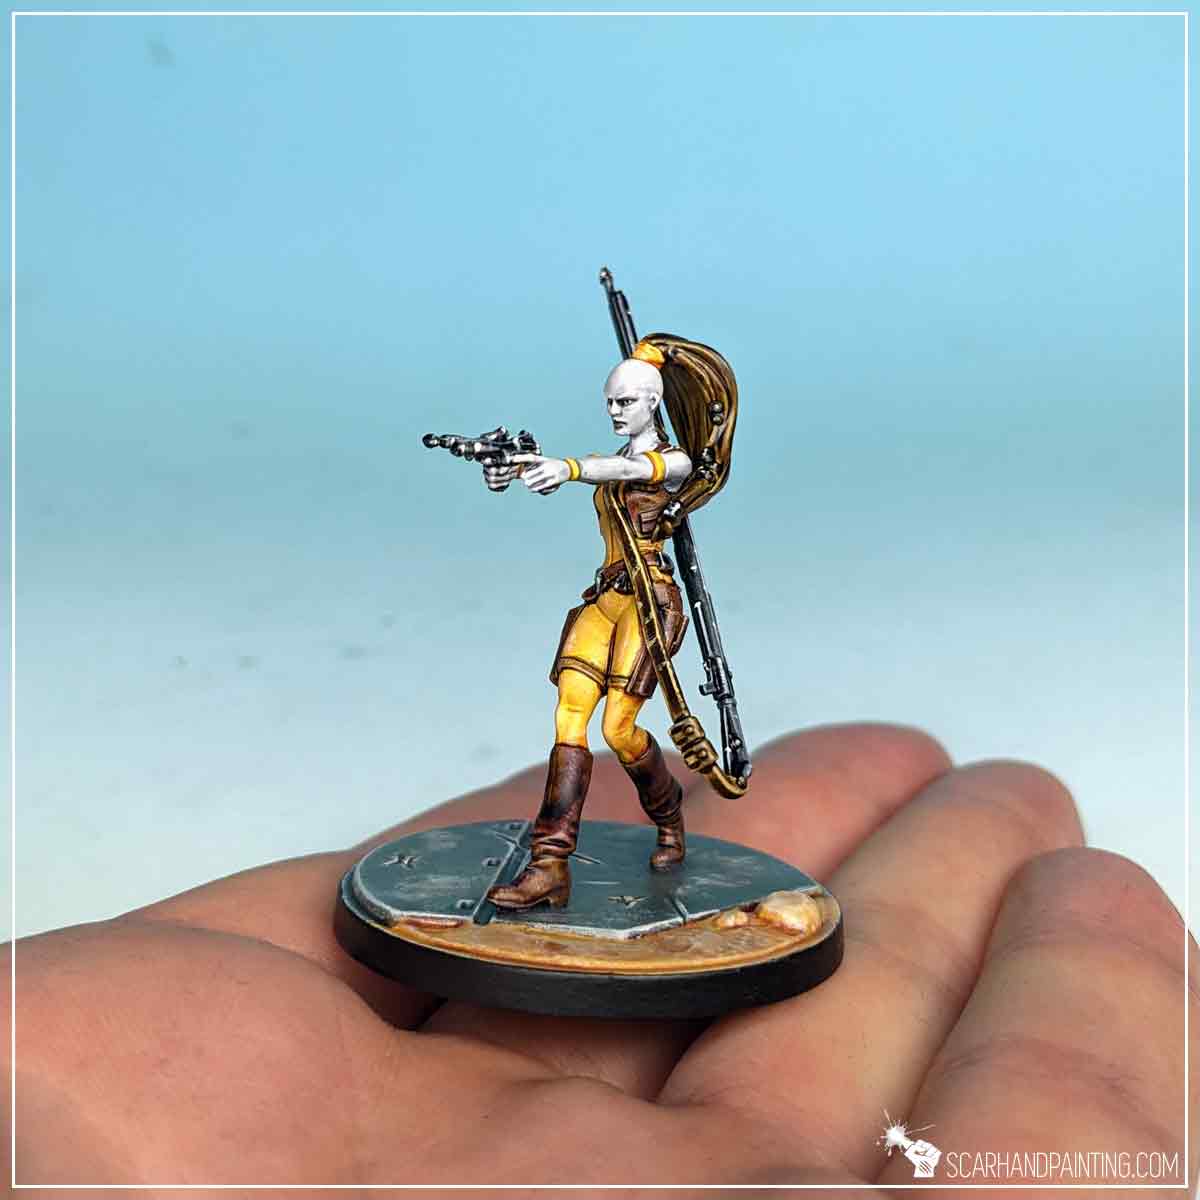
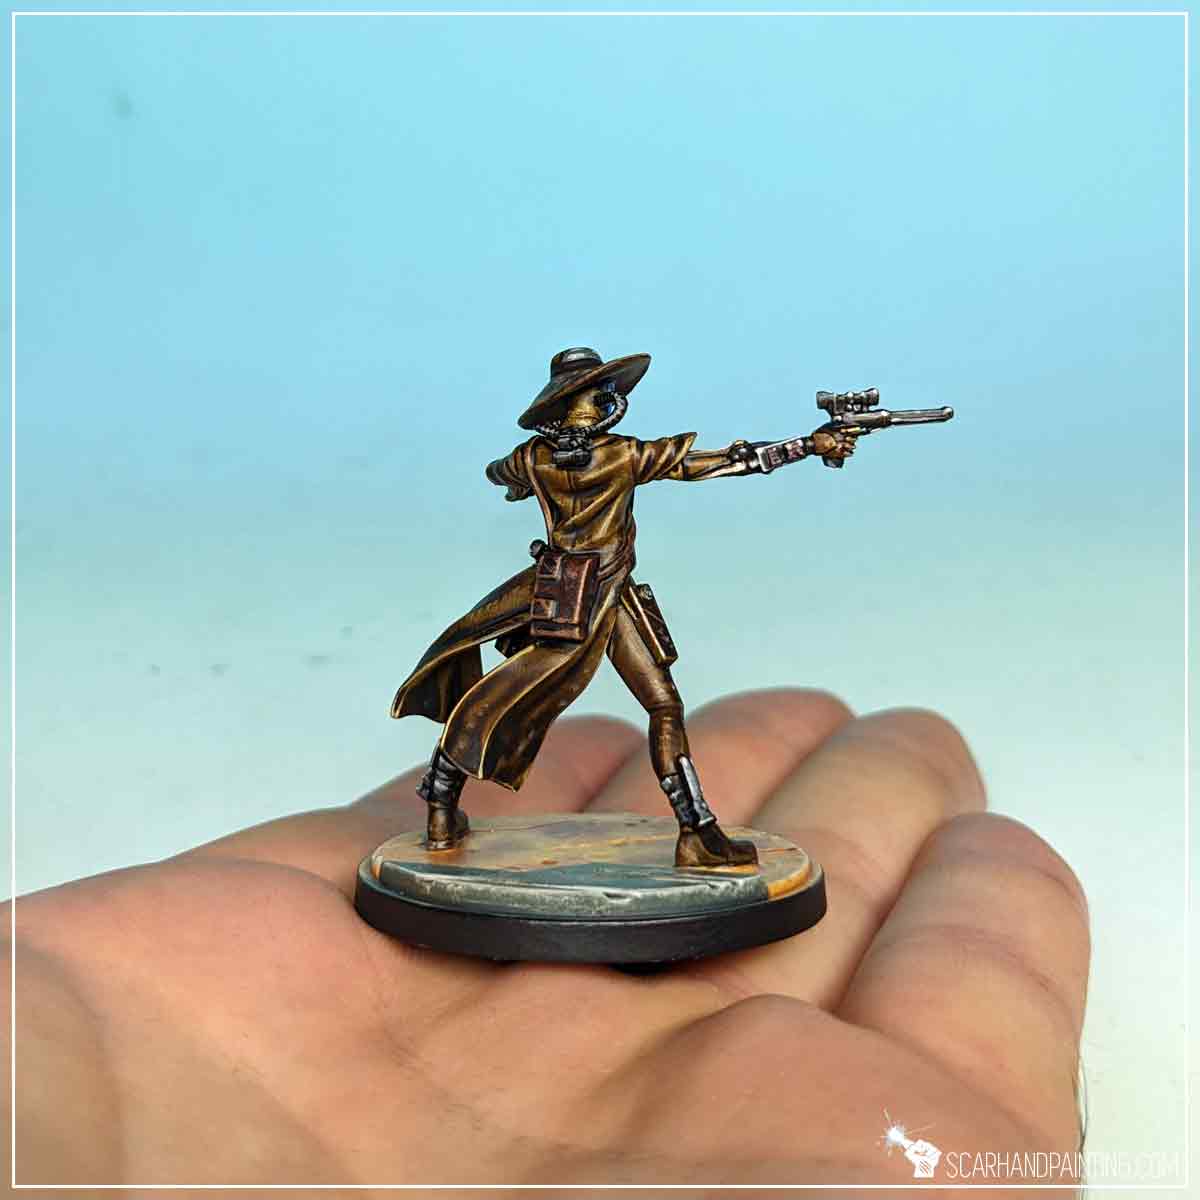
Welcome to Painting Star Wars: Shatterpoint Cad Bane tutorial. Here I will present to you a Step-by-step of a basic painting process for Fistful of Credits Aurra Sing miniature and a few extras.

Before we start, some notes:
Both Mandalorian Super Commandos were prepared in the same way as previous Shatterpoint miniatures. Visit Tutorial: Painting Star Wars Shatterpoint Clone Troopers article for a detailed step-by-step guide.
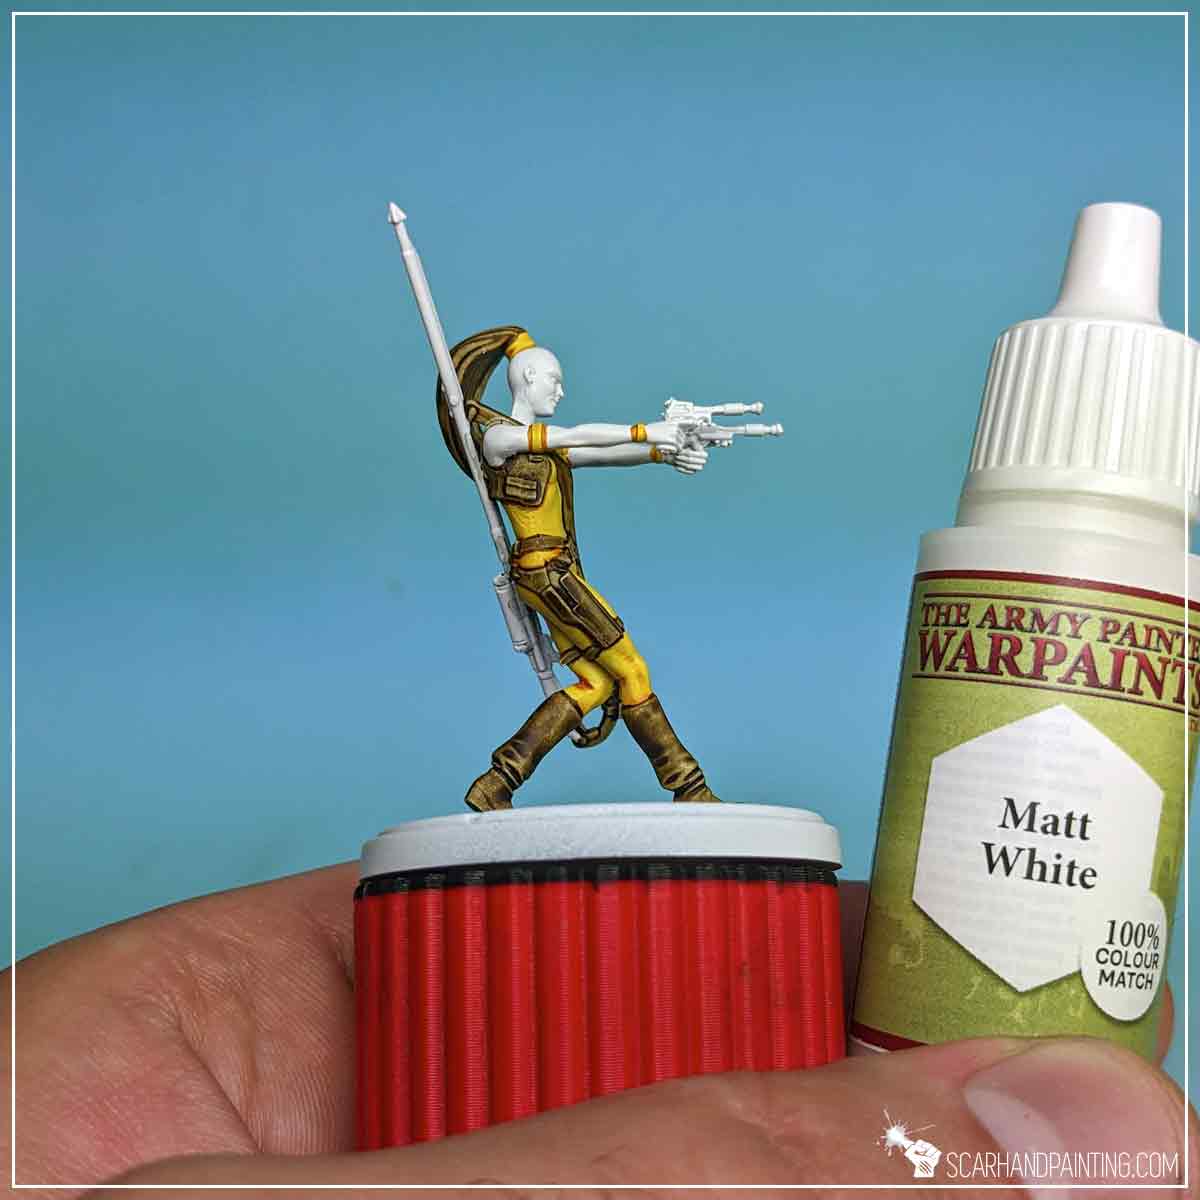
I mounted the miniatures on a stick with a piece of Blu-Tack, then undercoated them with The Army Painter White Matt Primer.
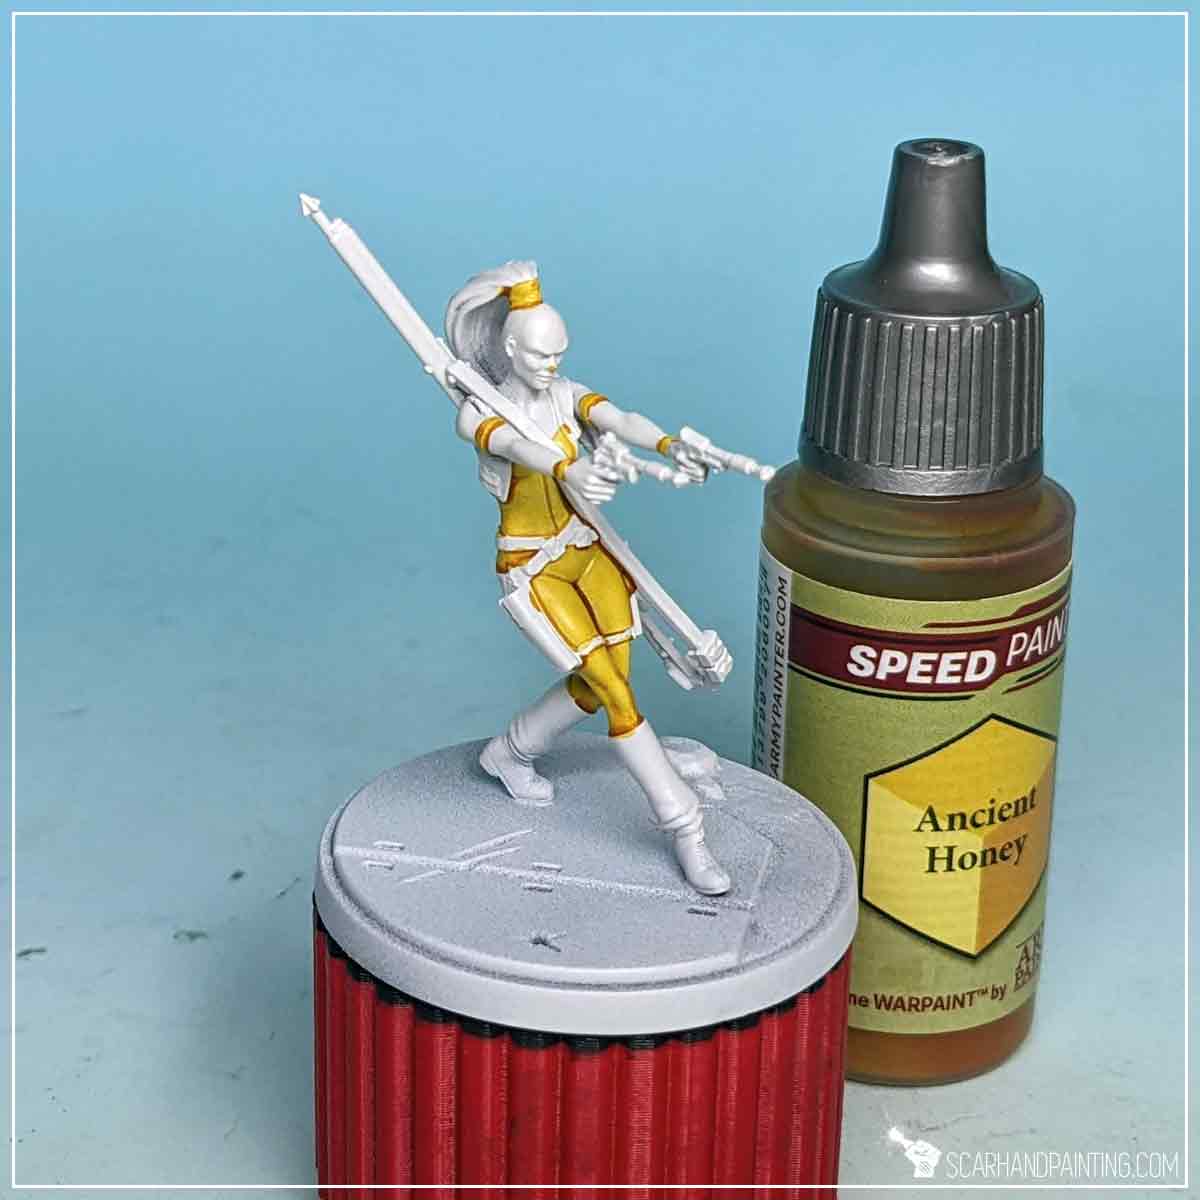
Aurra Sing is commonly represented in either opaque orange or yellow clothes. I decided to base this paint job on Fistful of Credits box art, so honey yellow. Using Wargamer: Character Brush I have painted all clothes with Ancient Honey Speedpaint.
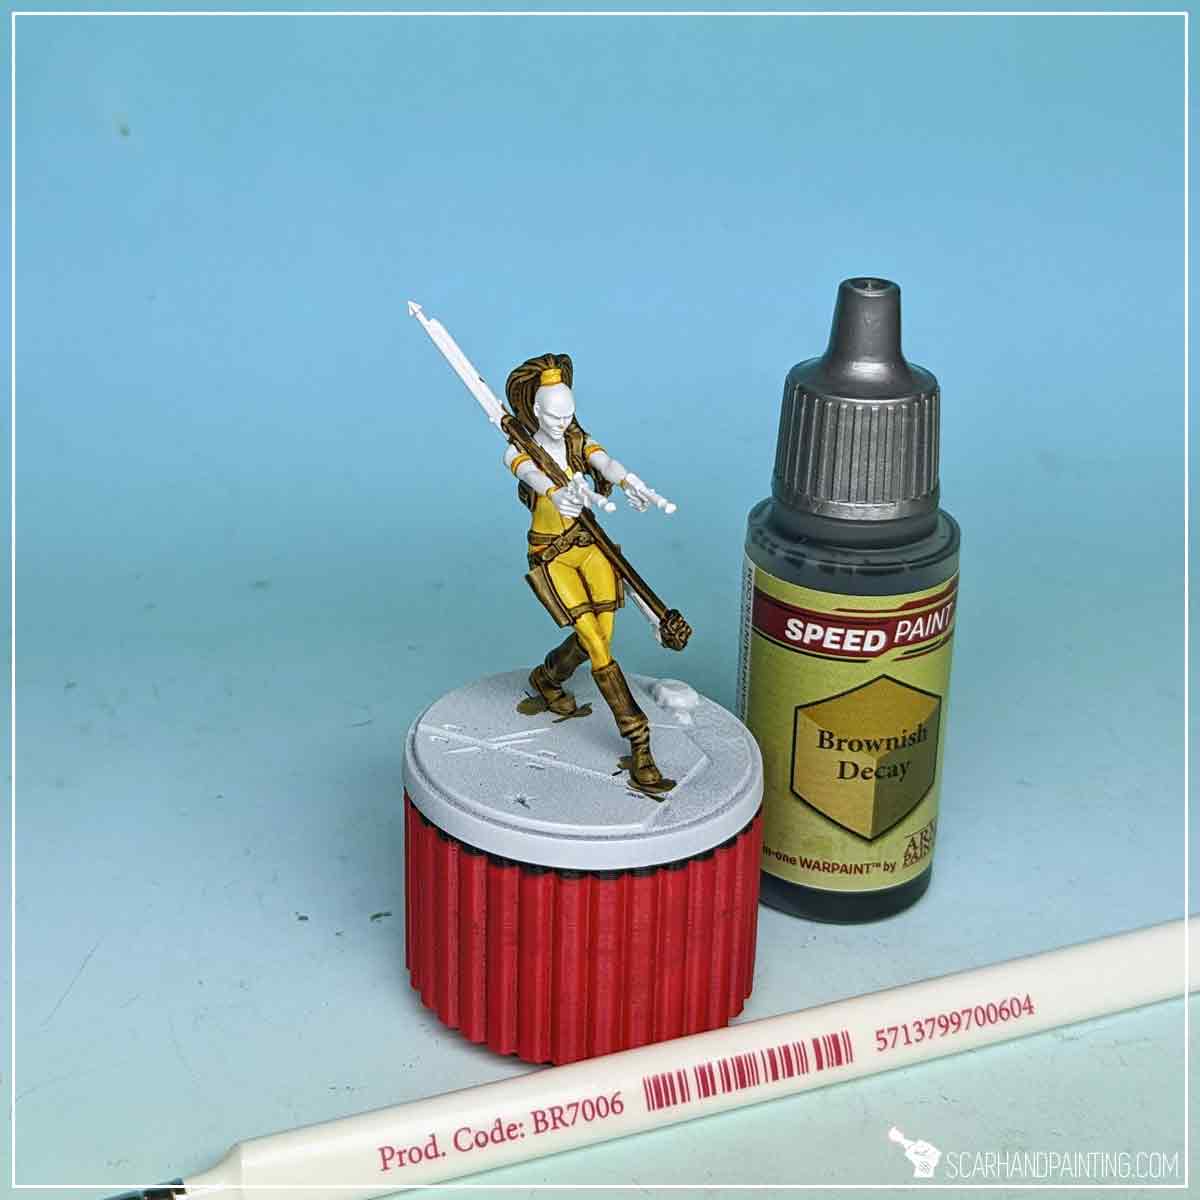
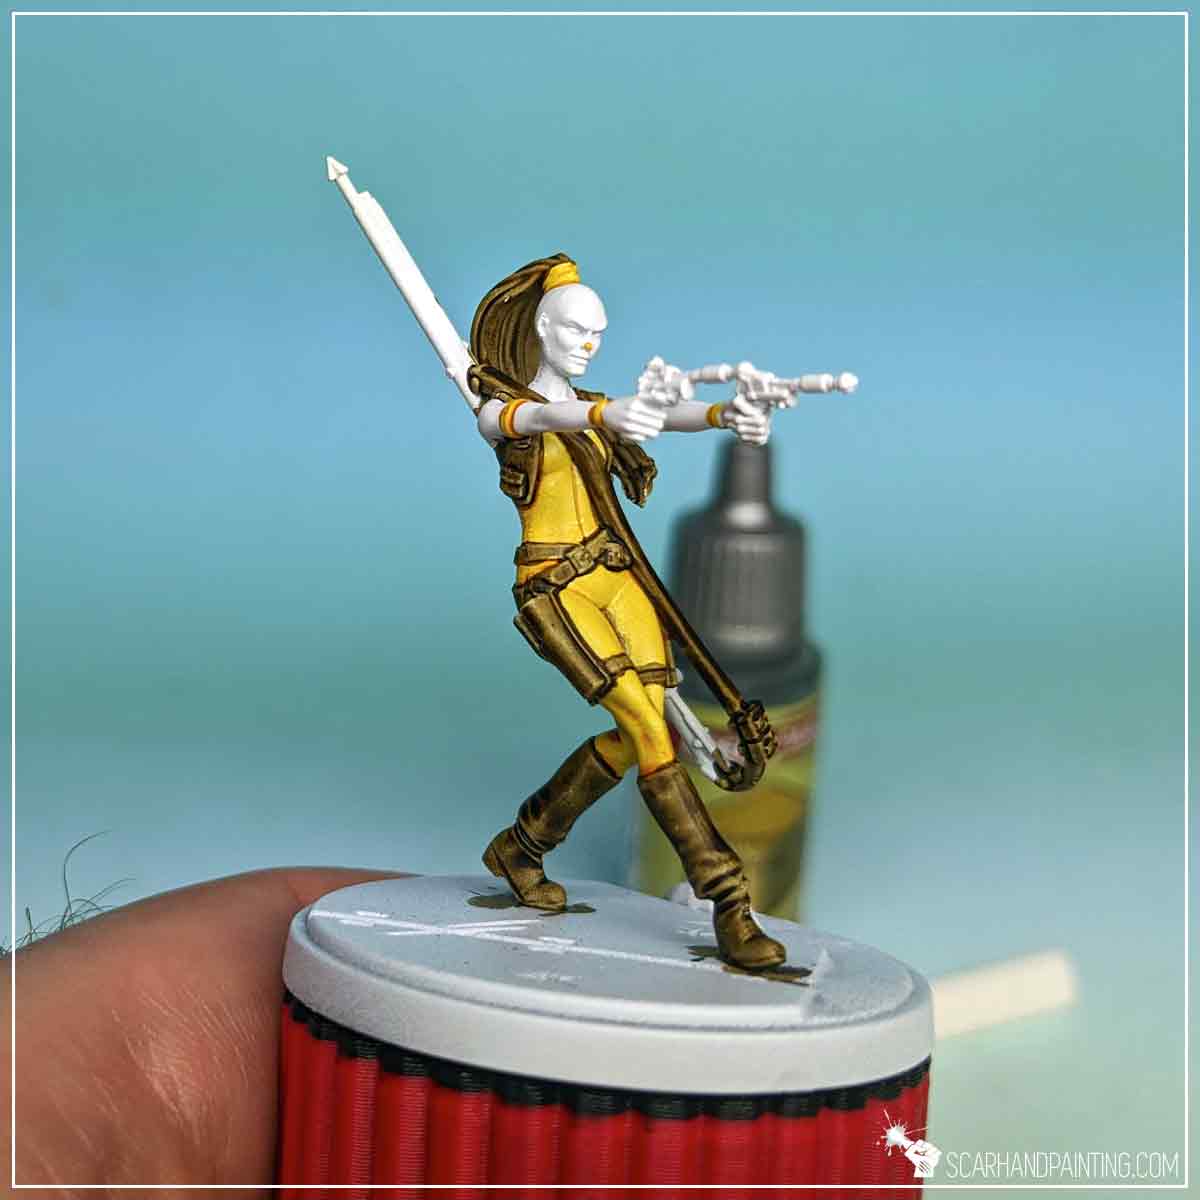
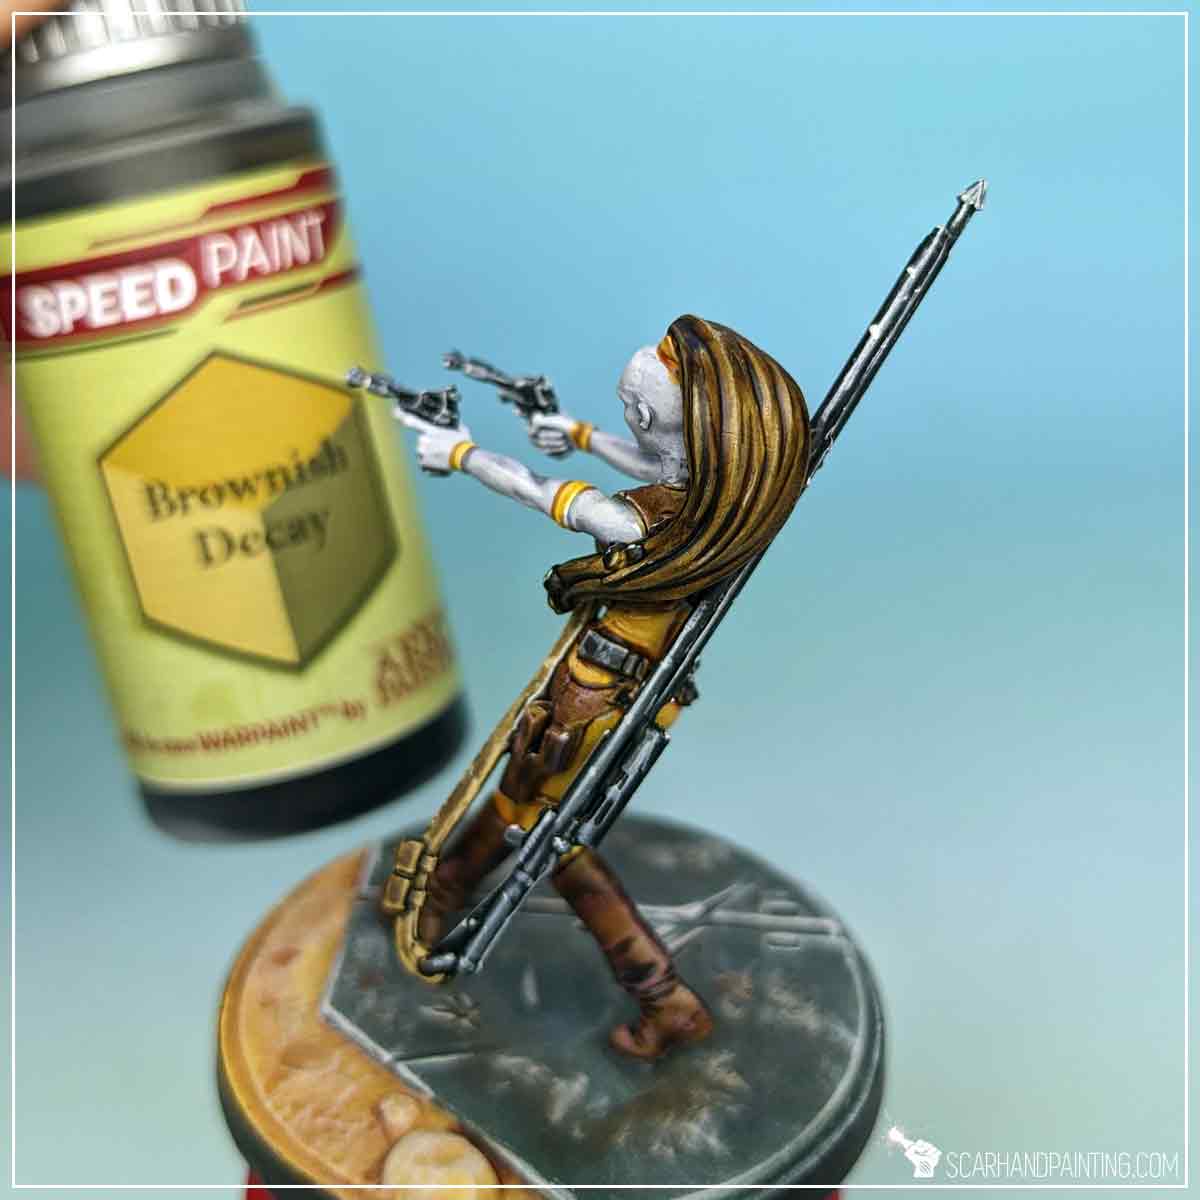
Next, using the same brush, I’ve painted boots, weapon holsters, straps, hair and vest with Brownish Decay.
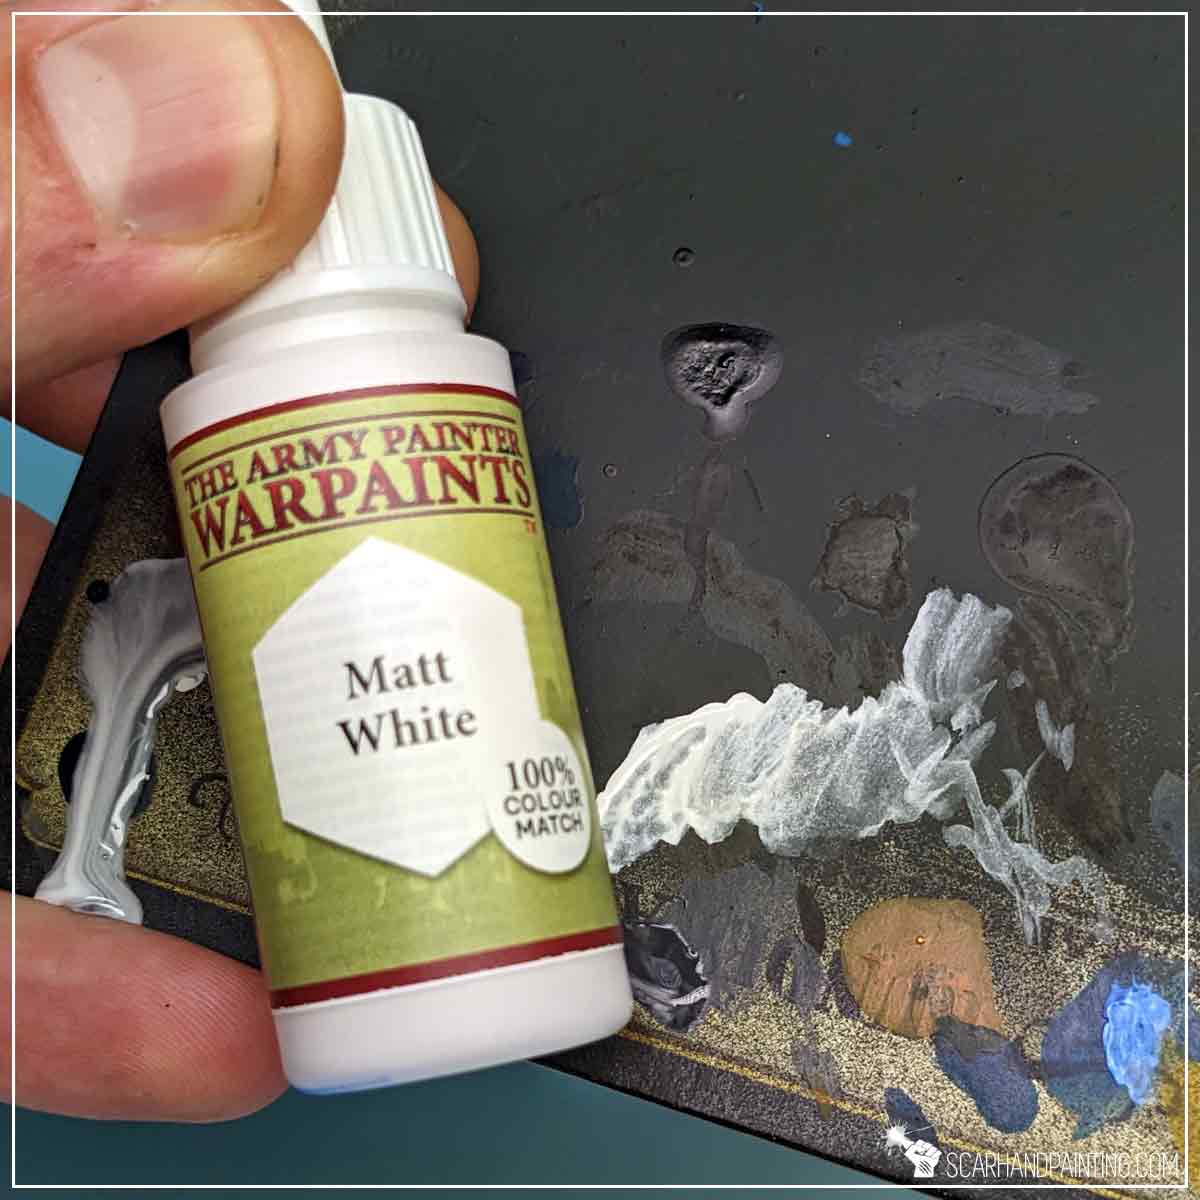
I’ve made quite a few mistakes with previous layers that I have corrected in this step using Matt White.
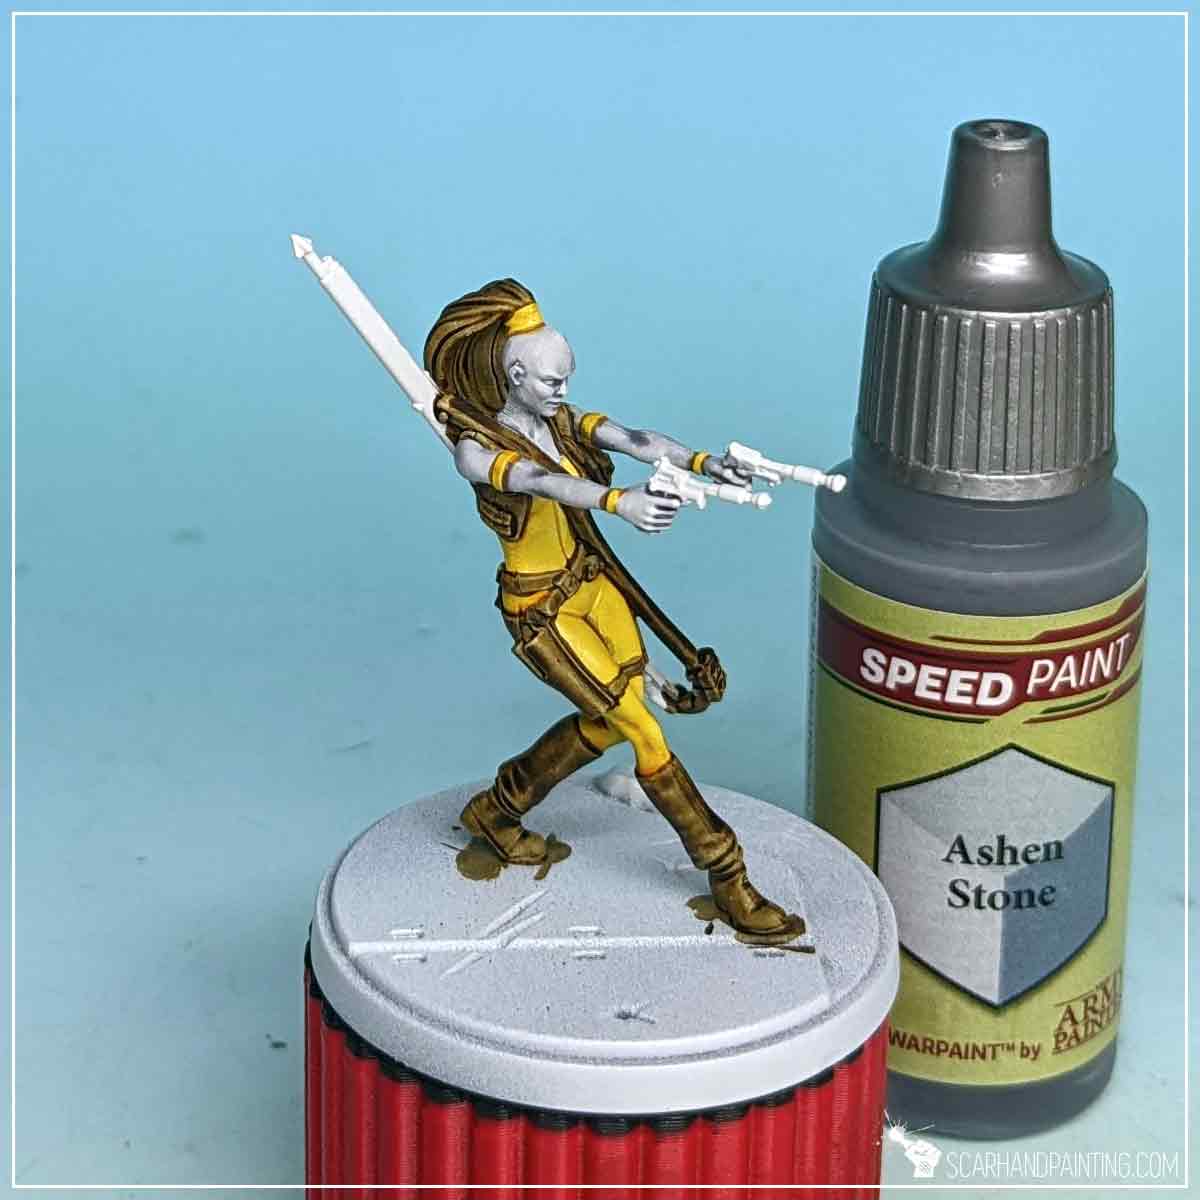
To better represent Aurra’s pale grey’ish skin tone I applied a layer of Ashen Grey.
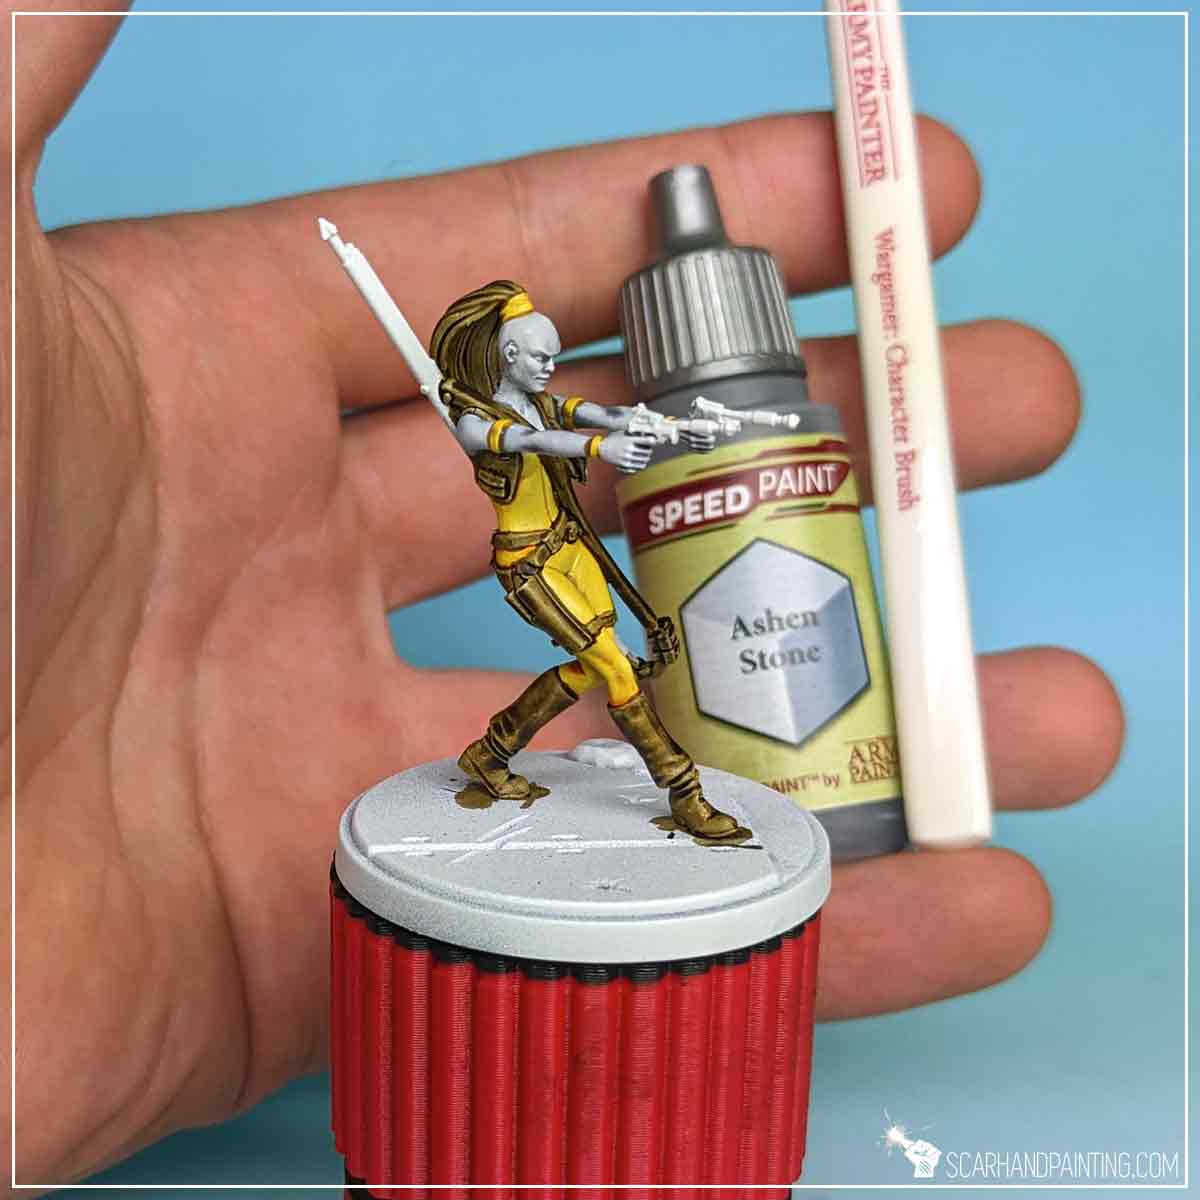
I then painted weapons, strap buckles and hair jewelry with Grim Black Speedpaint.
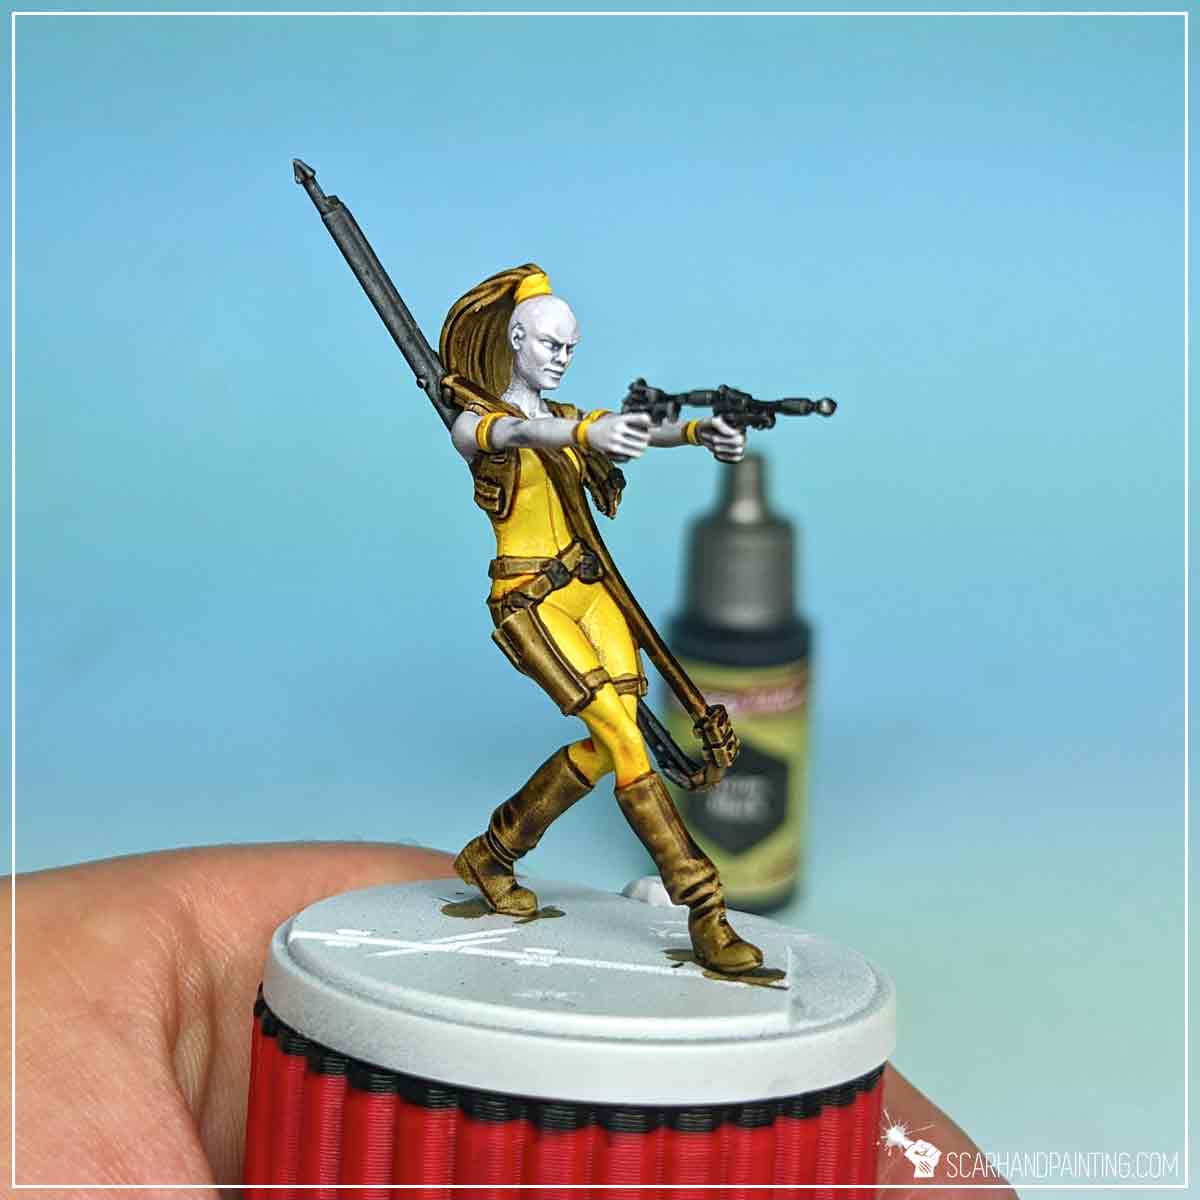
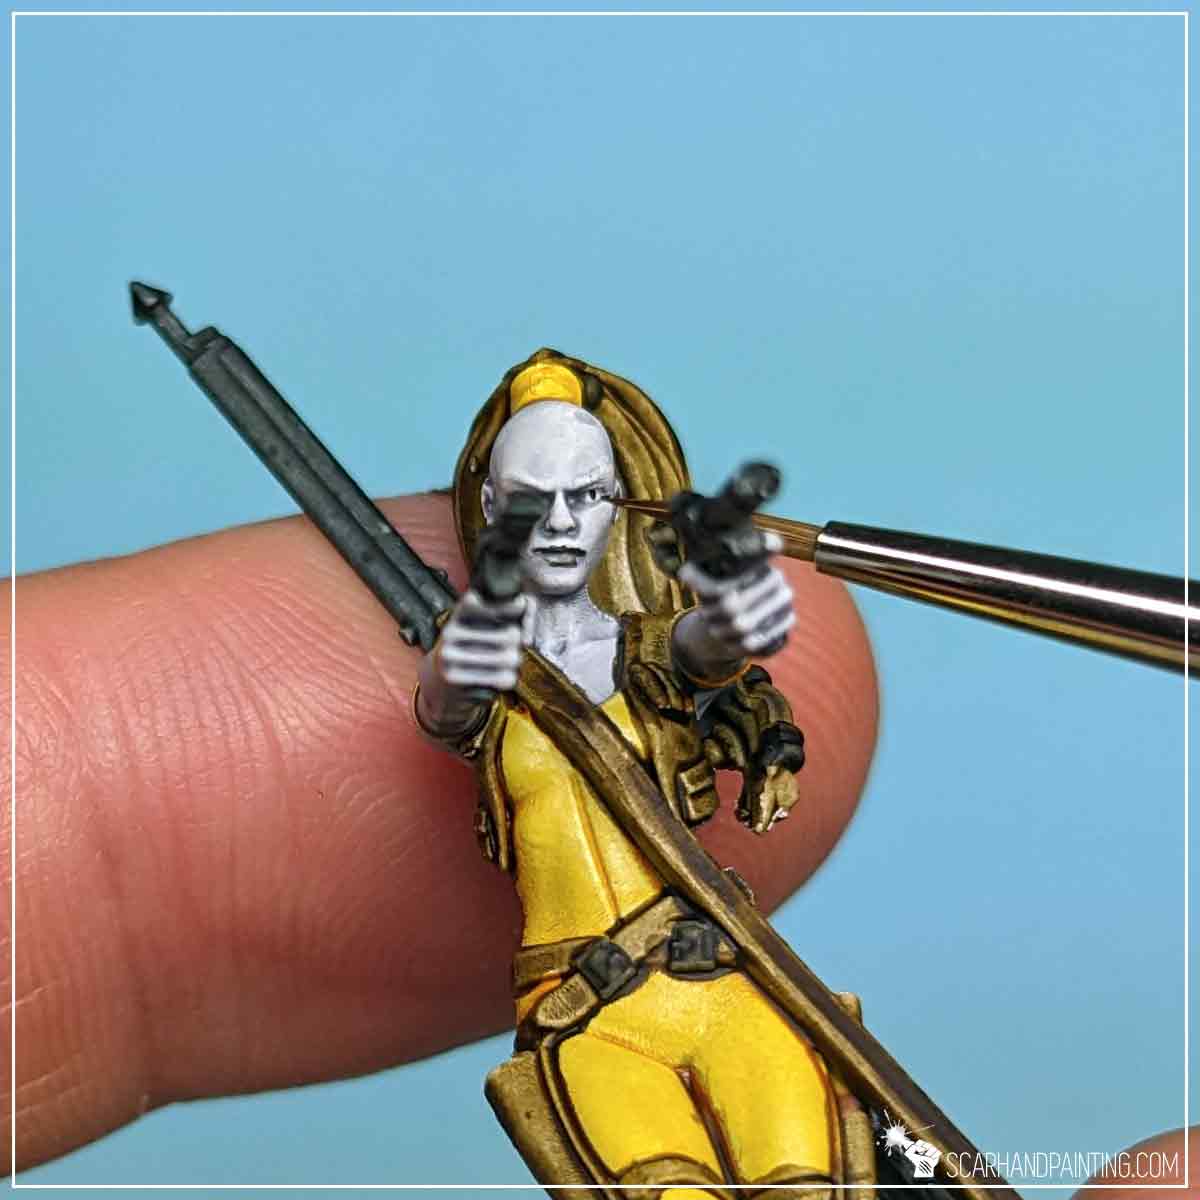
Painting eyes is a craft in its own category. Fortunately for Aurra here two small dots of Matt Black followed by delicate ‘touches’ of Dark Tone wash worked like a charm. I also applied Dark Tone wash to her lips. Wargamer Detail Brush was perfect for this step.
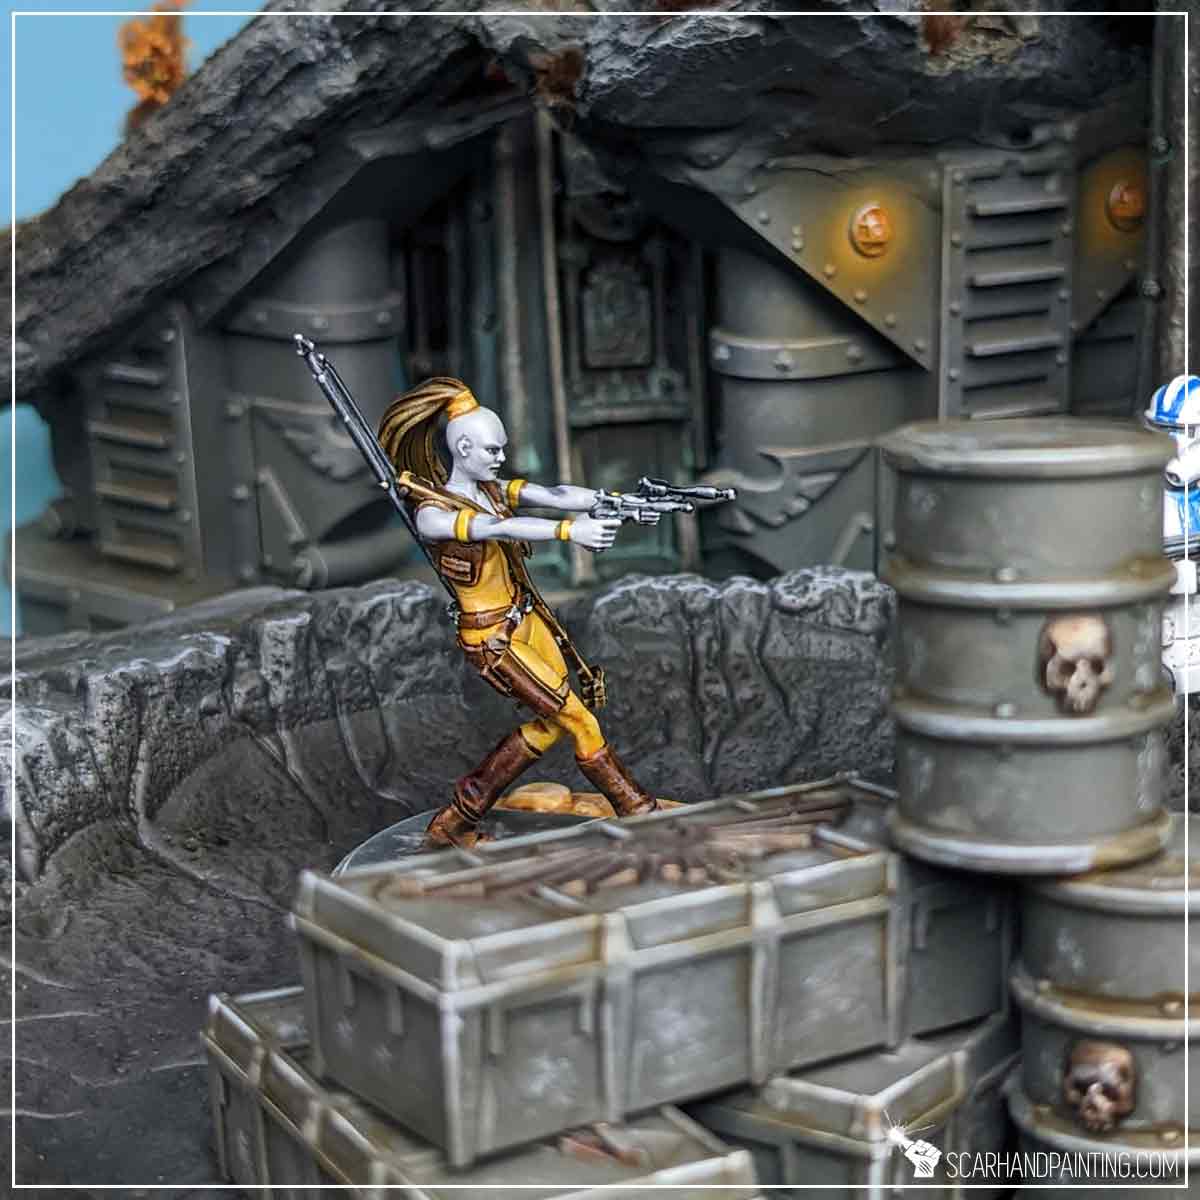
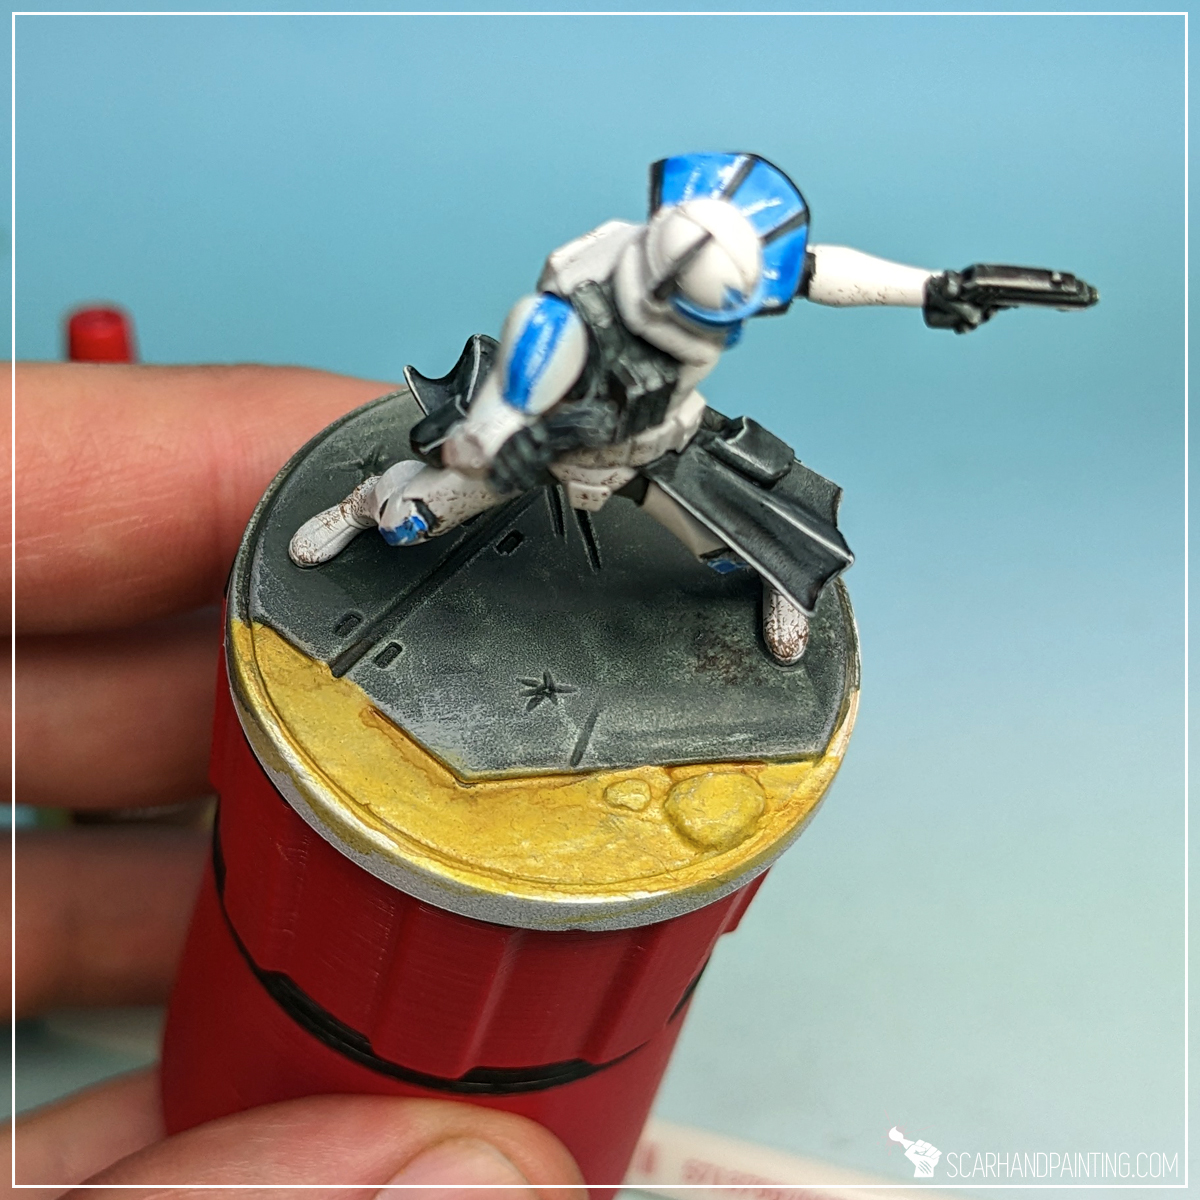
Finally I have painted the base following steps previously presented in the Tutorial: Painting Star Wars Shatterpoint Clone Troopers article, at which point the basic painting process was over and the miniature might have been considered done… but why not take it further?
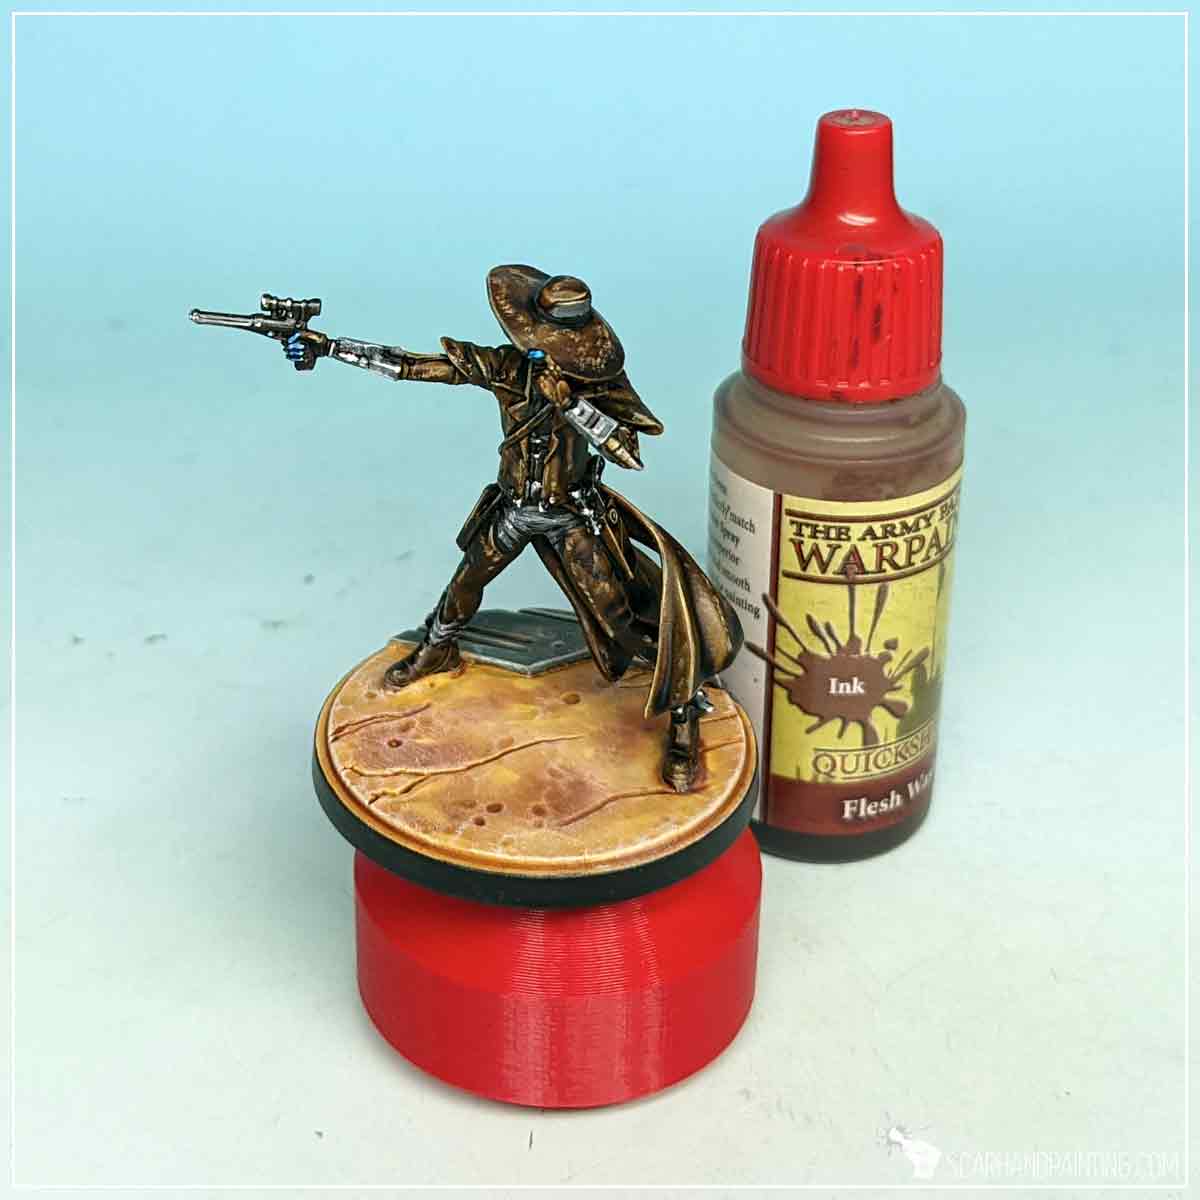
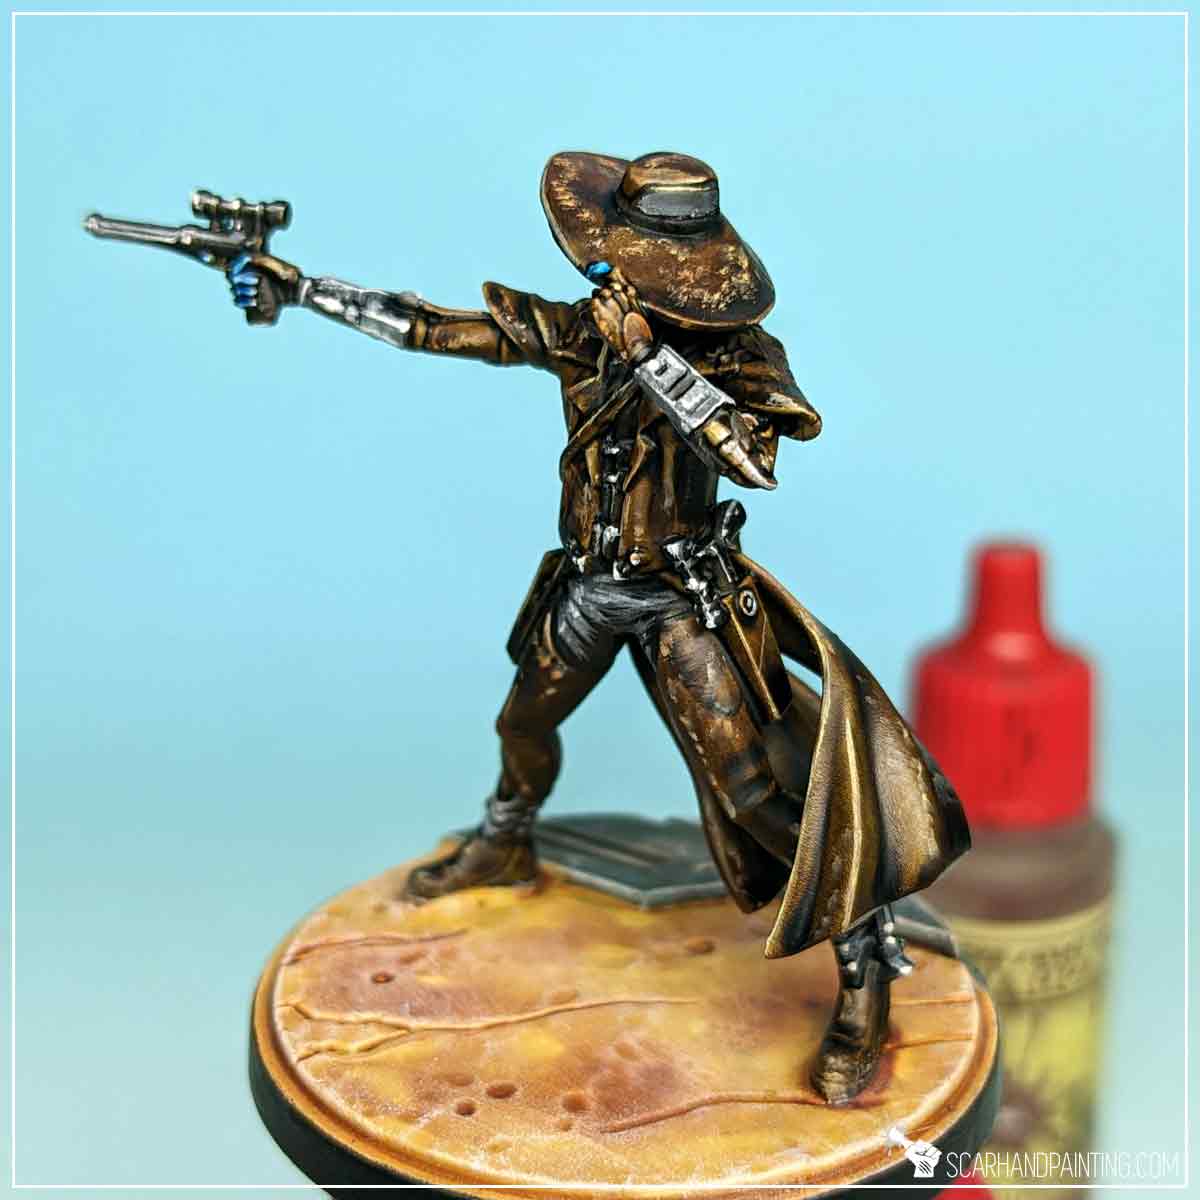
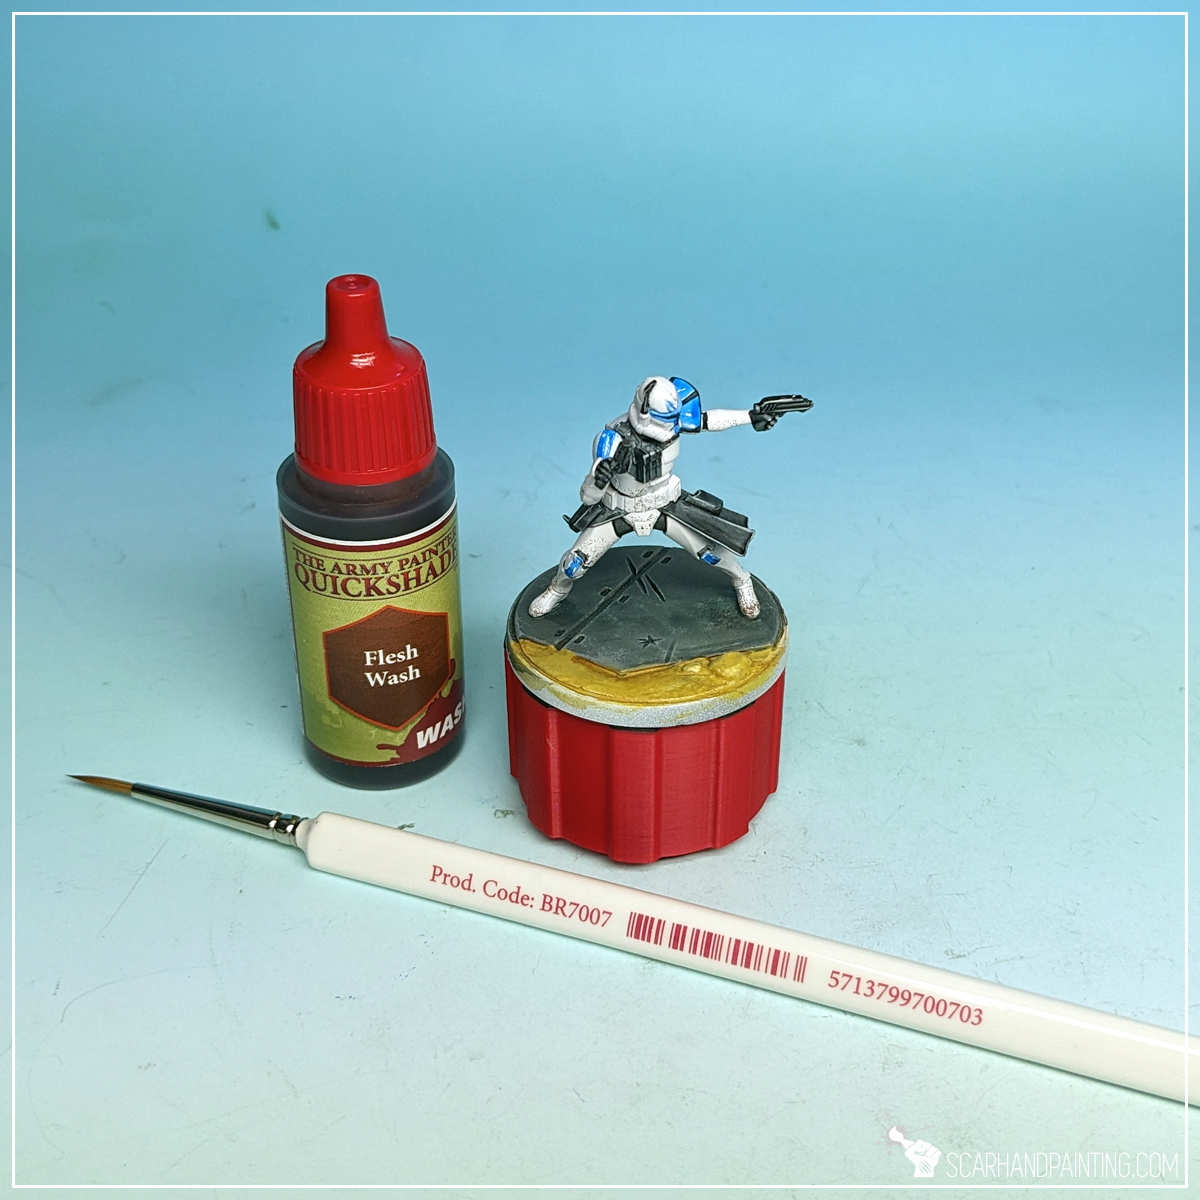
To bring more depth to Aurra’s clothes I applied a layer of Flesh Wash.
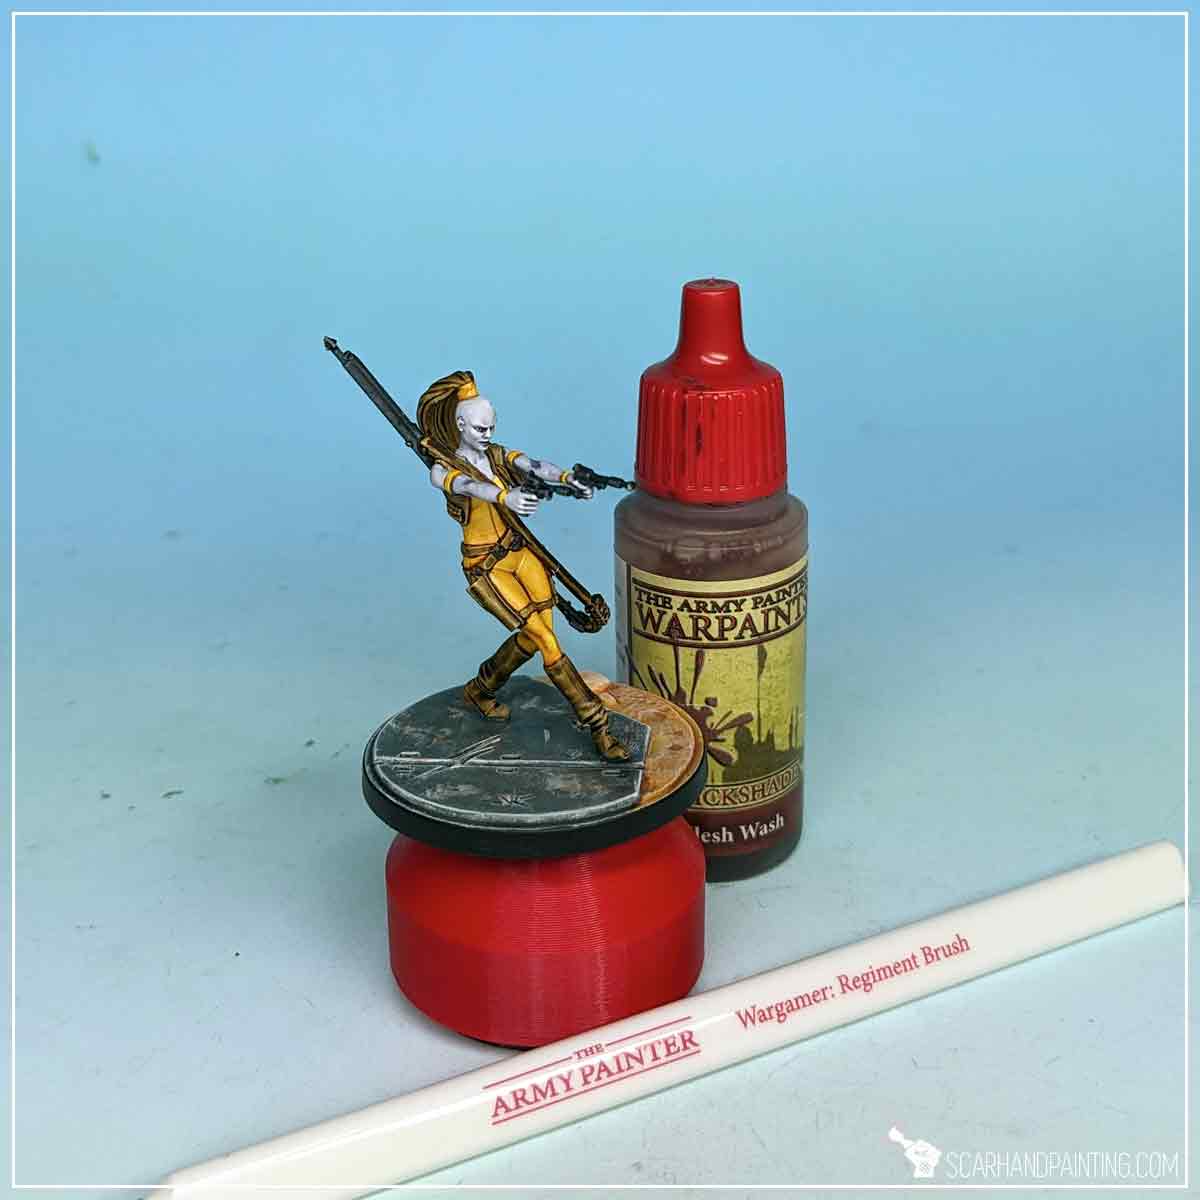
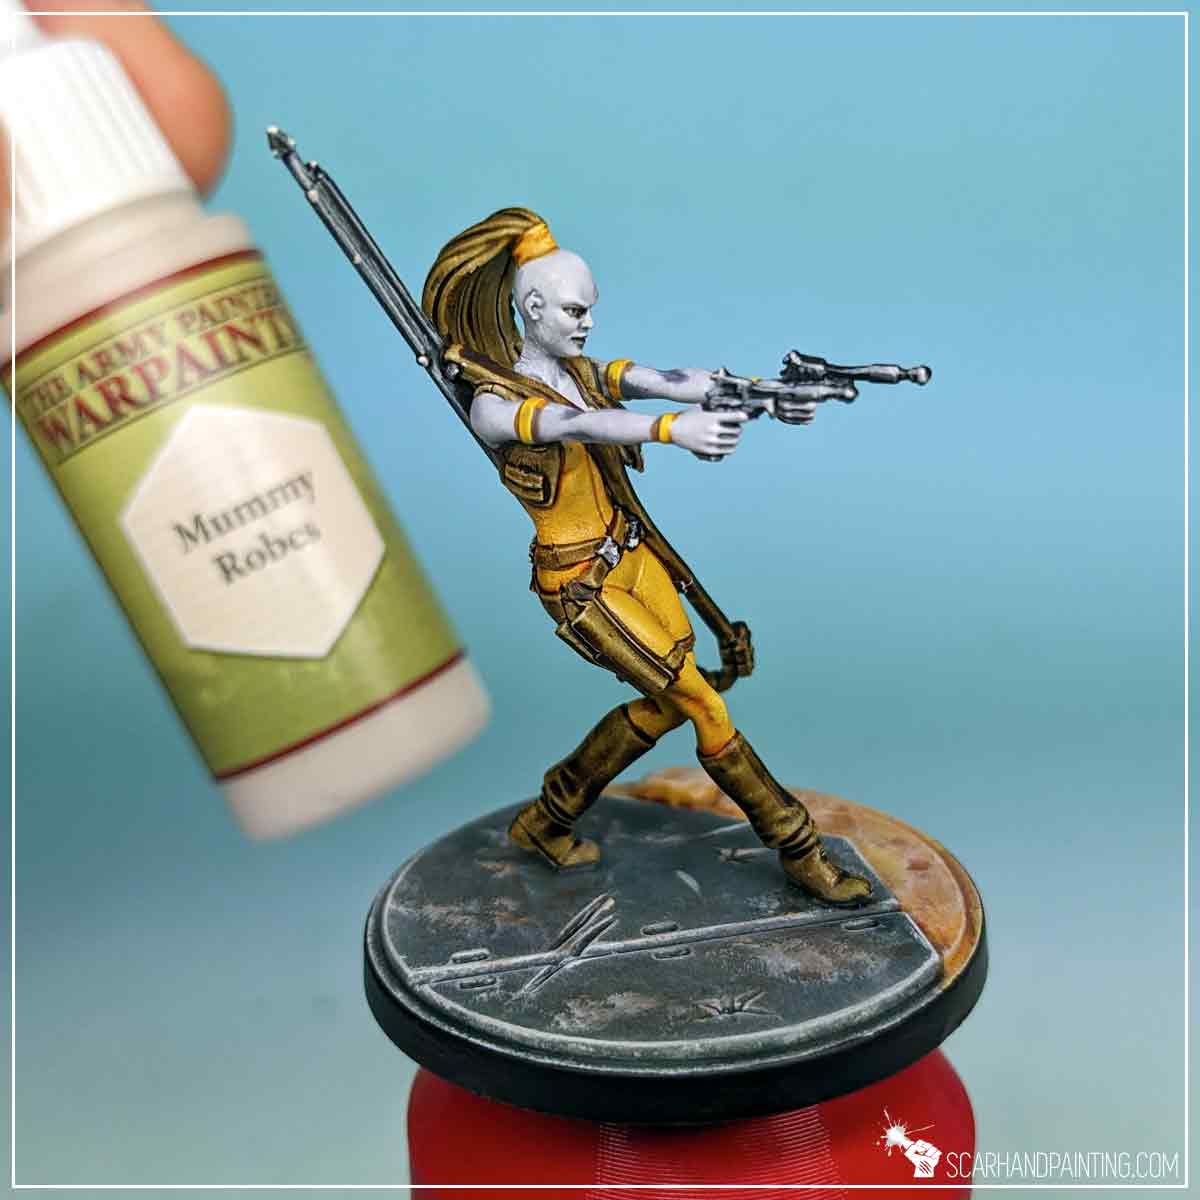
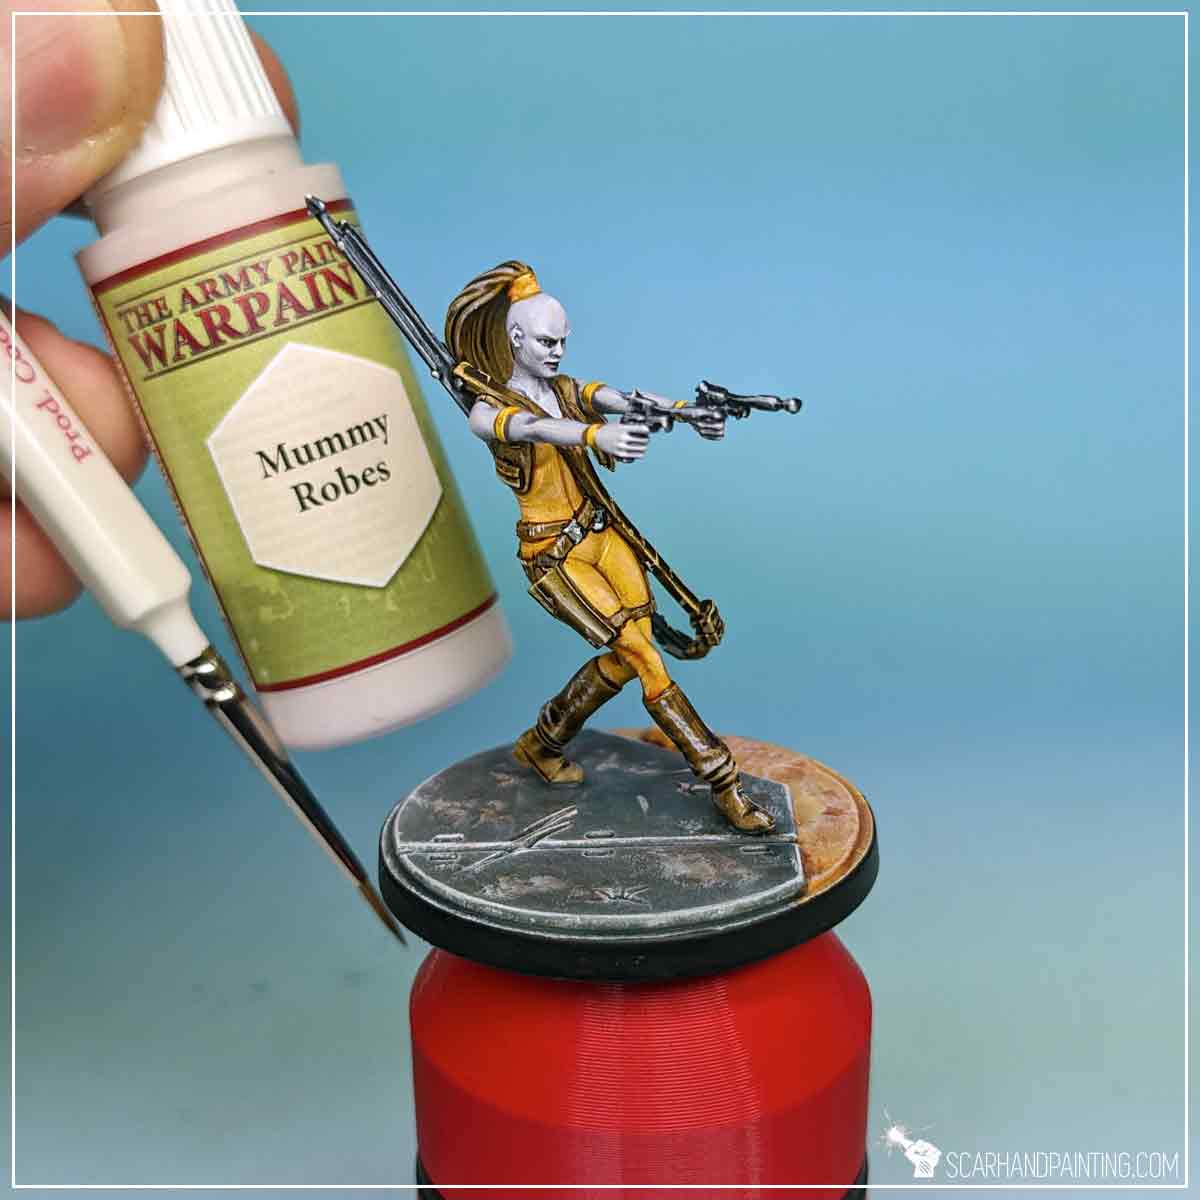
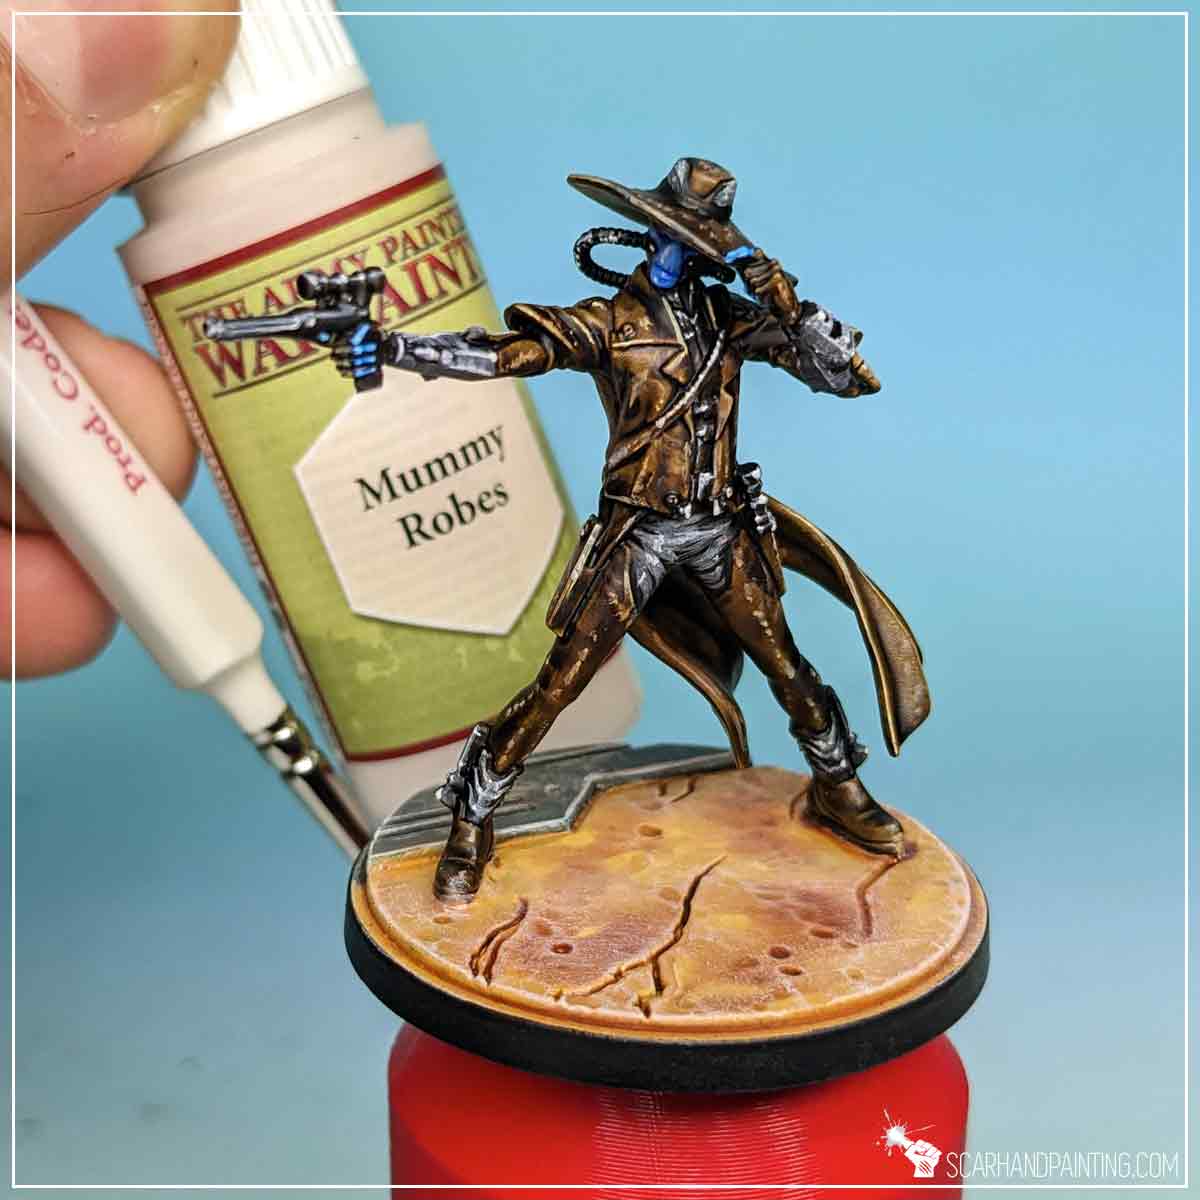
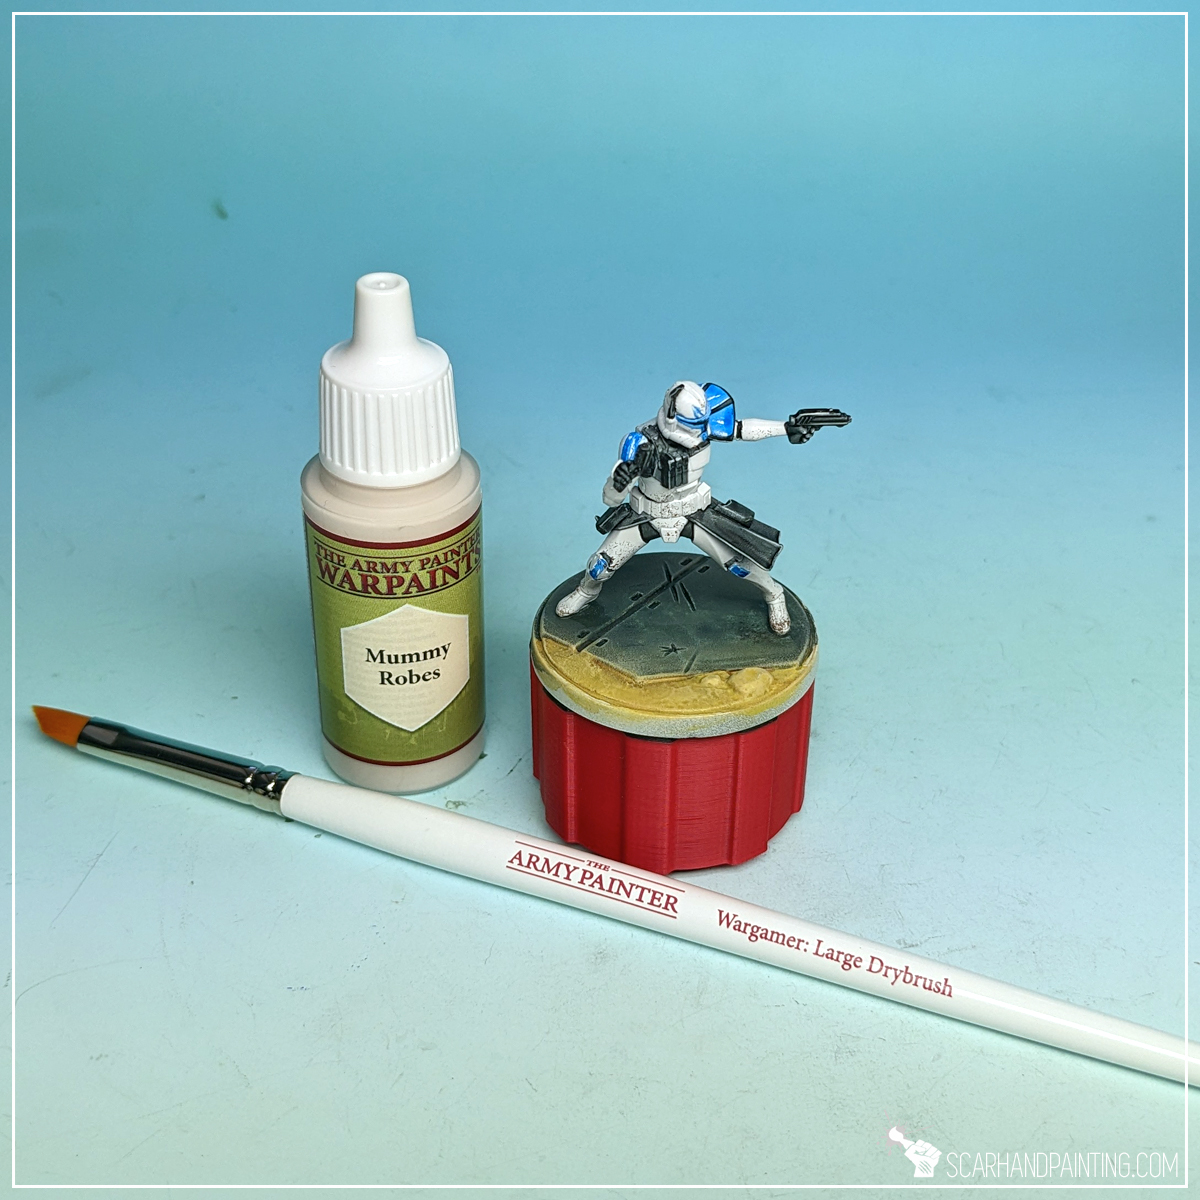
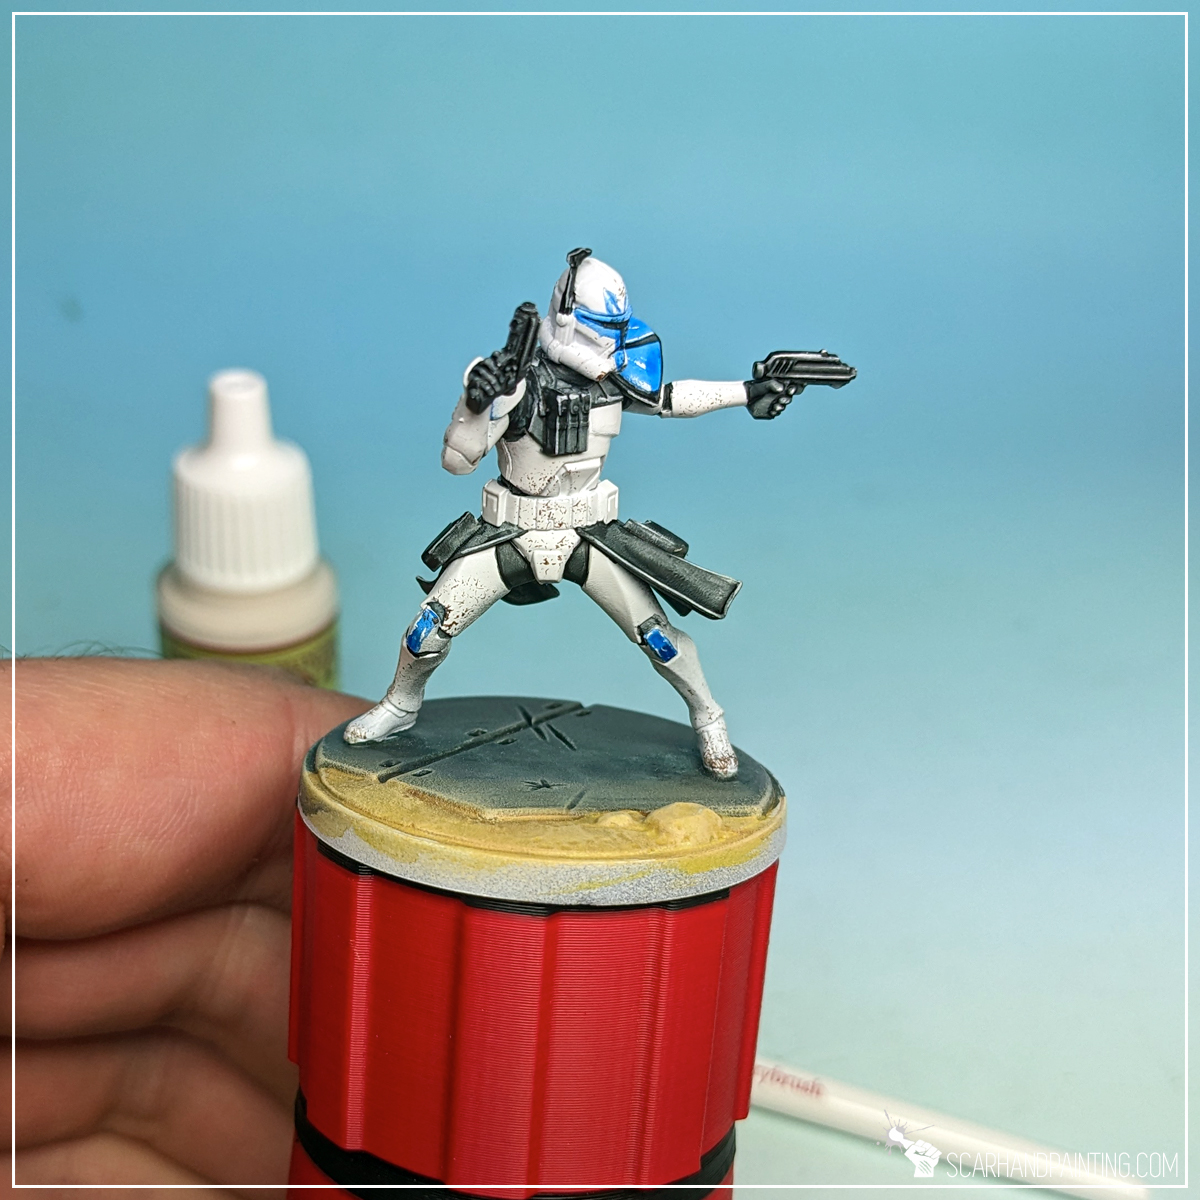
With Wargamer: Detail Brush I applied thin lines of Mummy Robes to the sharp edges of weapons and strap buckles. I also applied a few tiny dots to selected spots on weapons, buckles and hair jewelry. Dots of bright colors create focus points that result in more contrast within a particular color range.
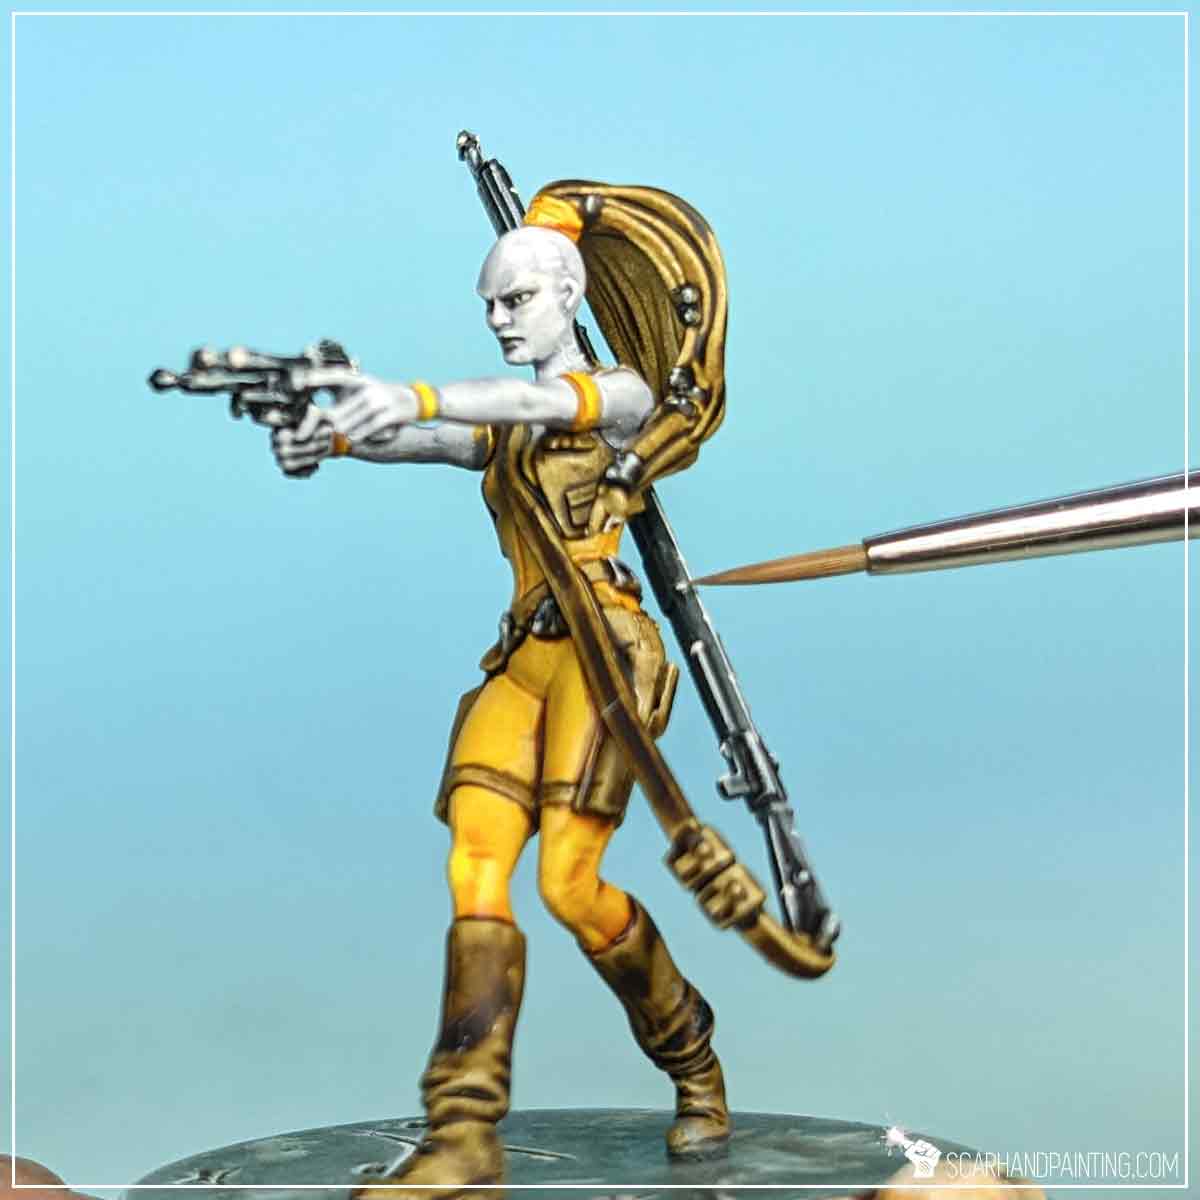
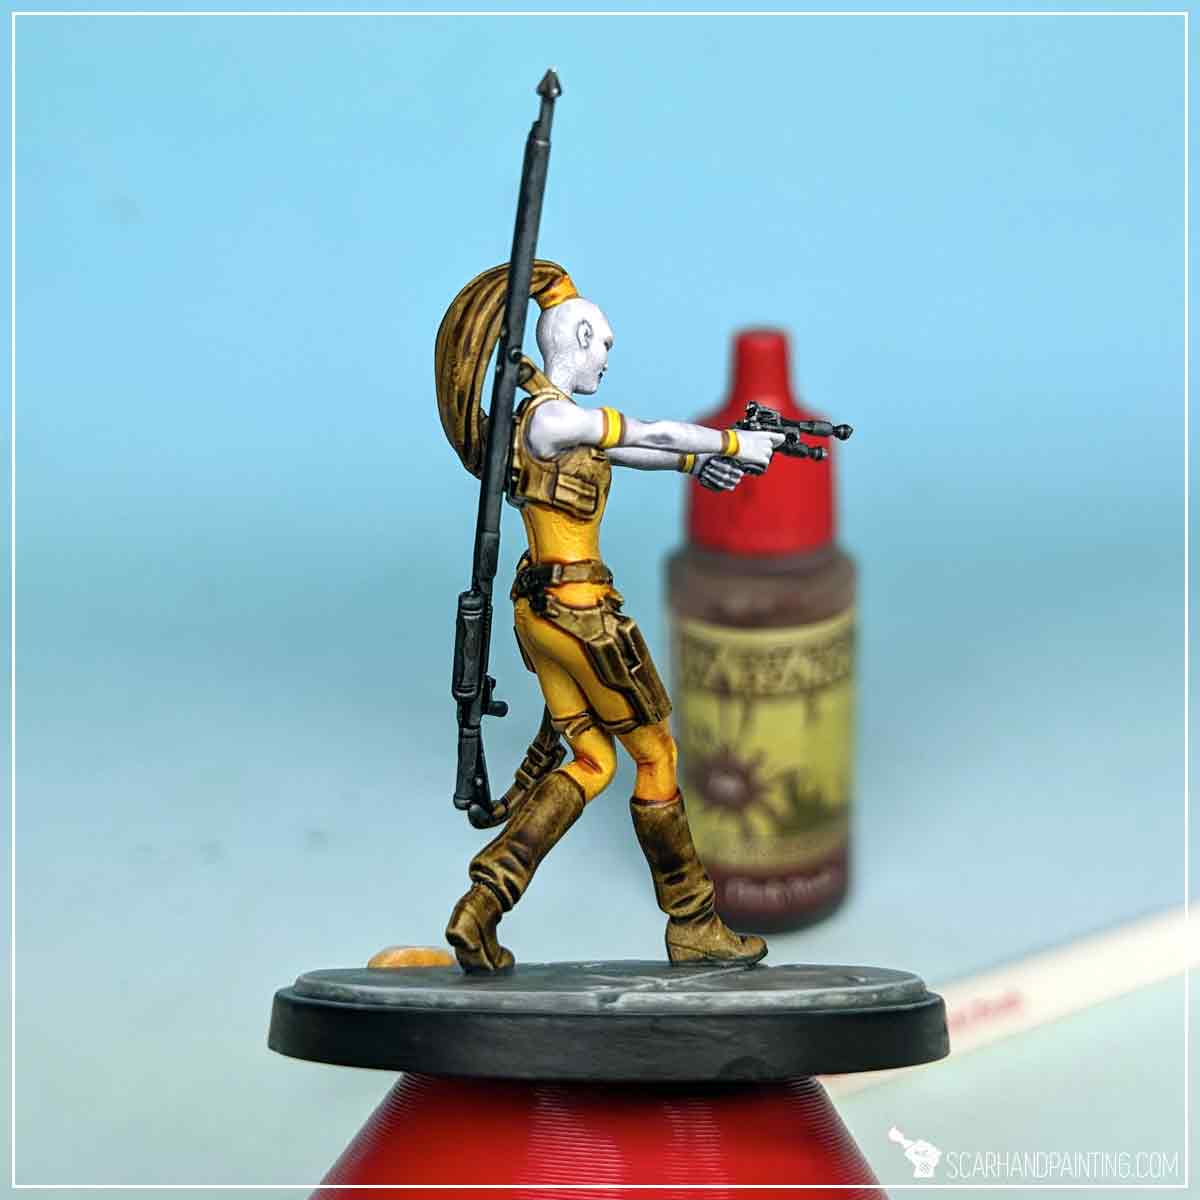
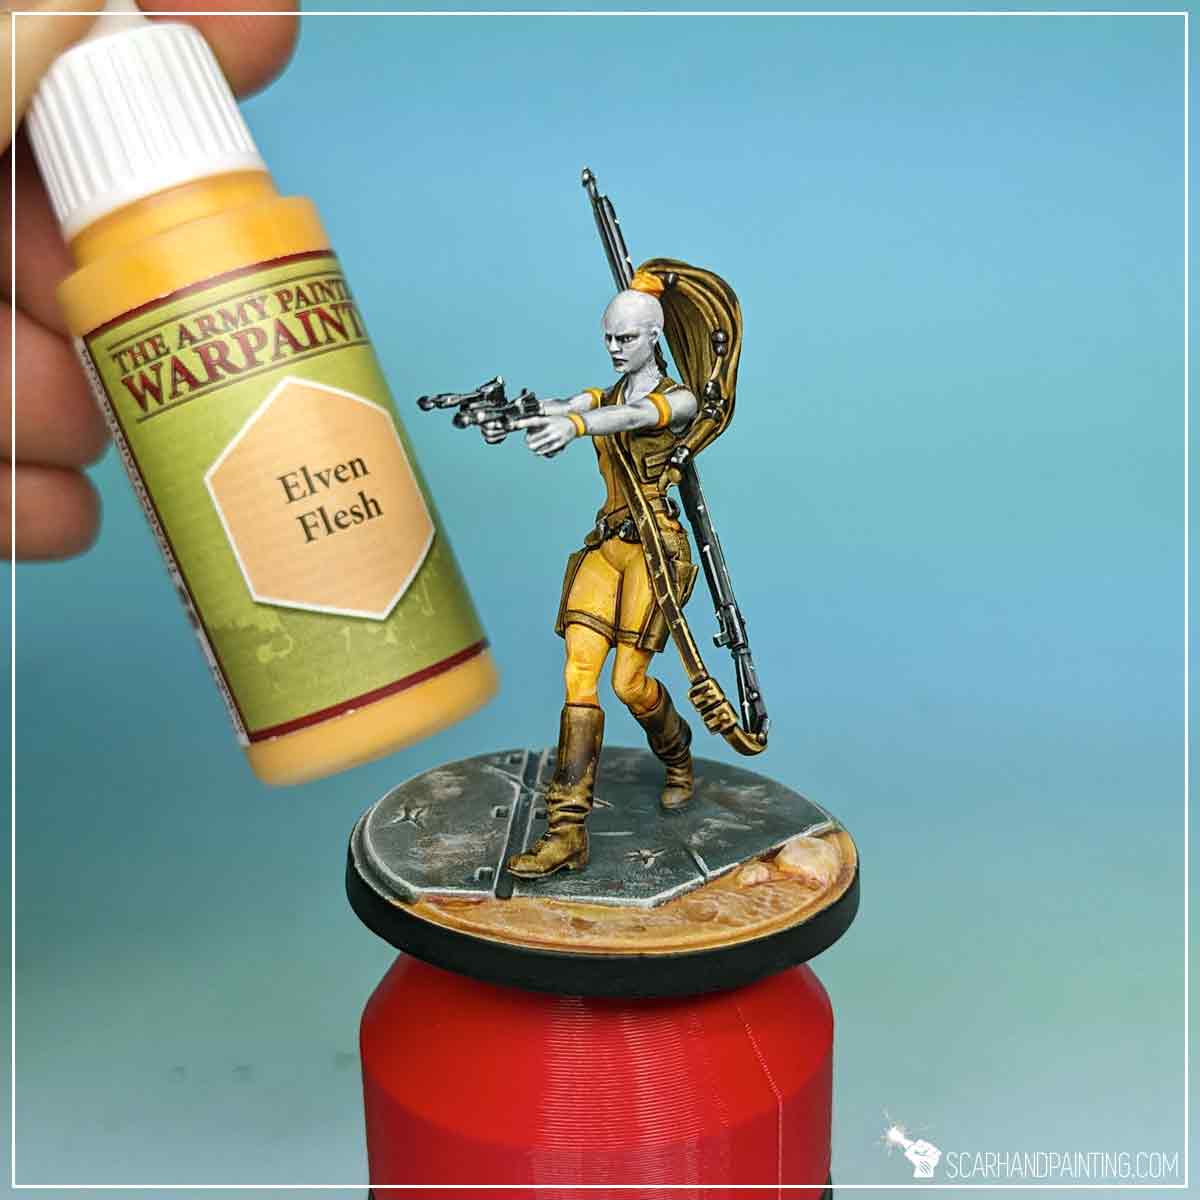
Next I applied similar lines and dots to the weapon strap with Elven Flesh color.
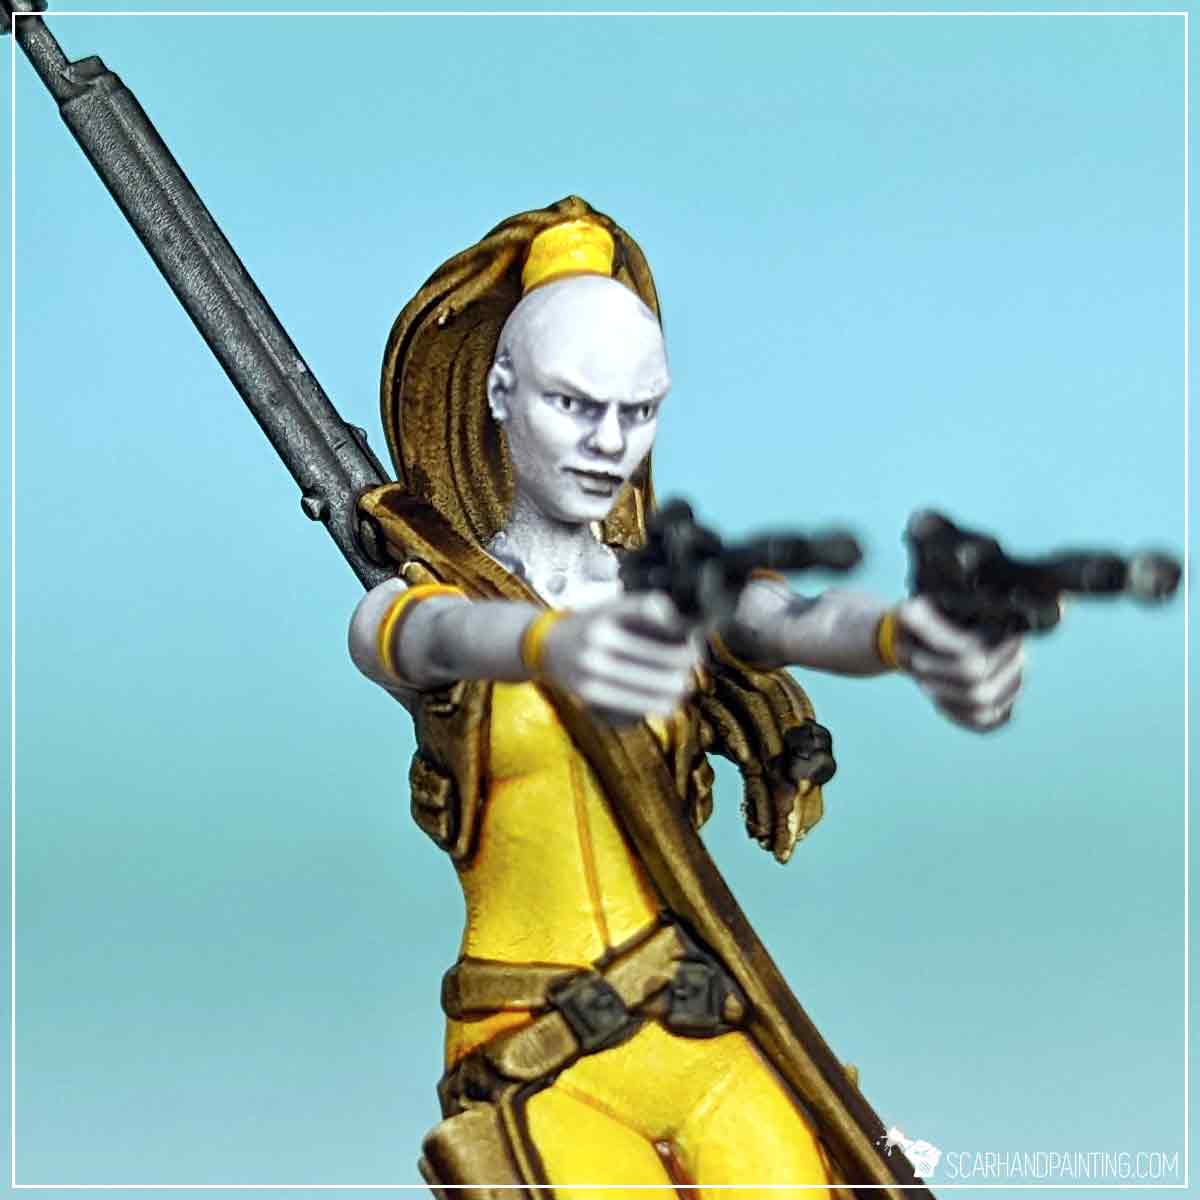
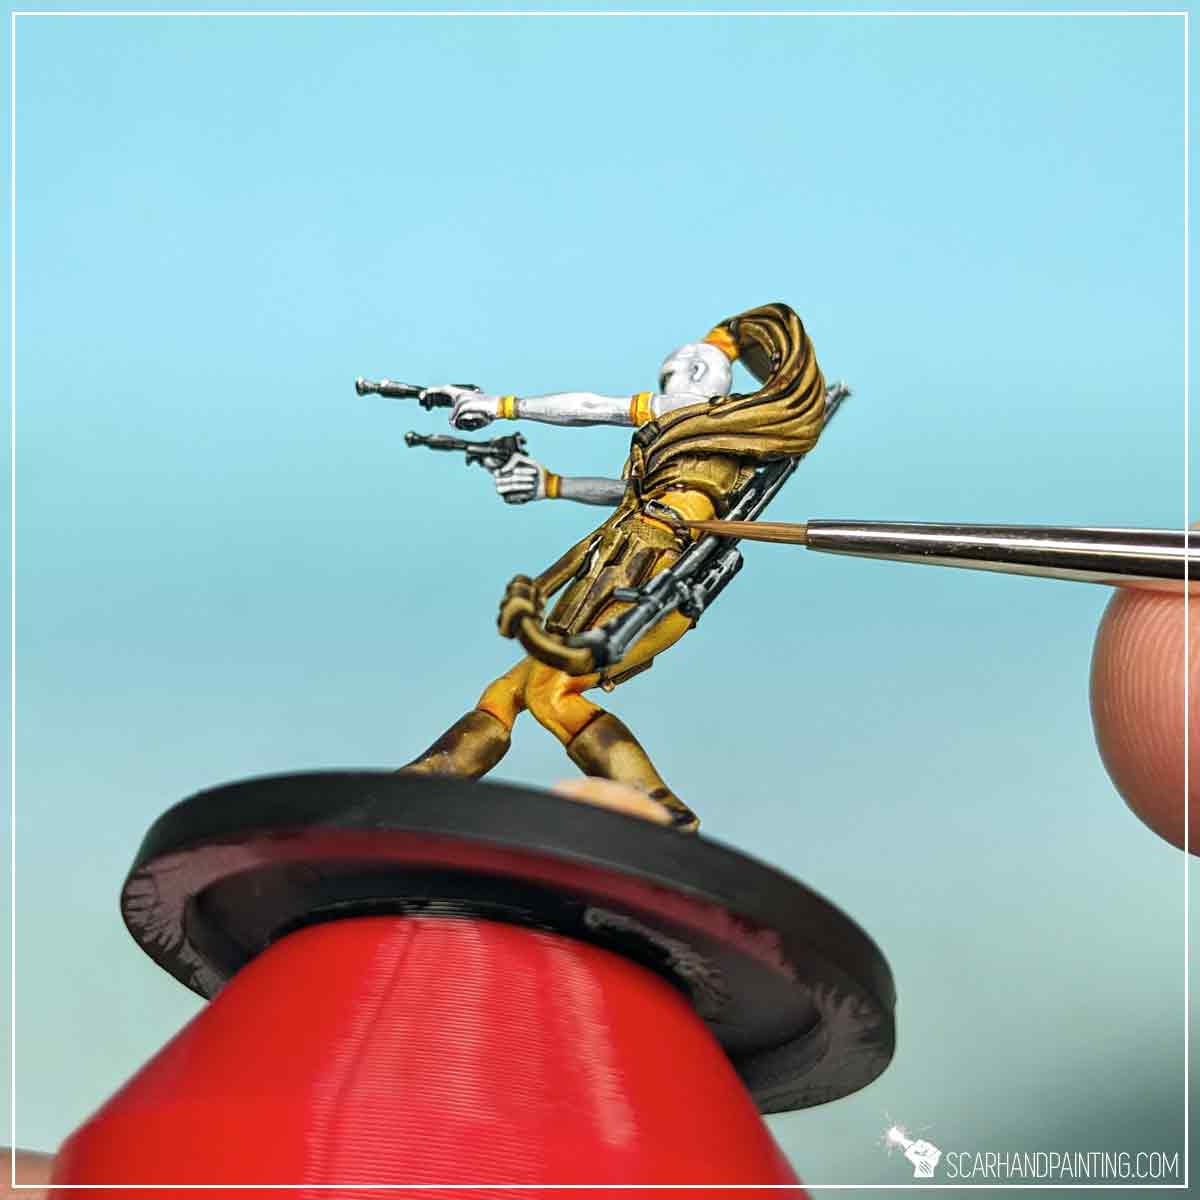
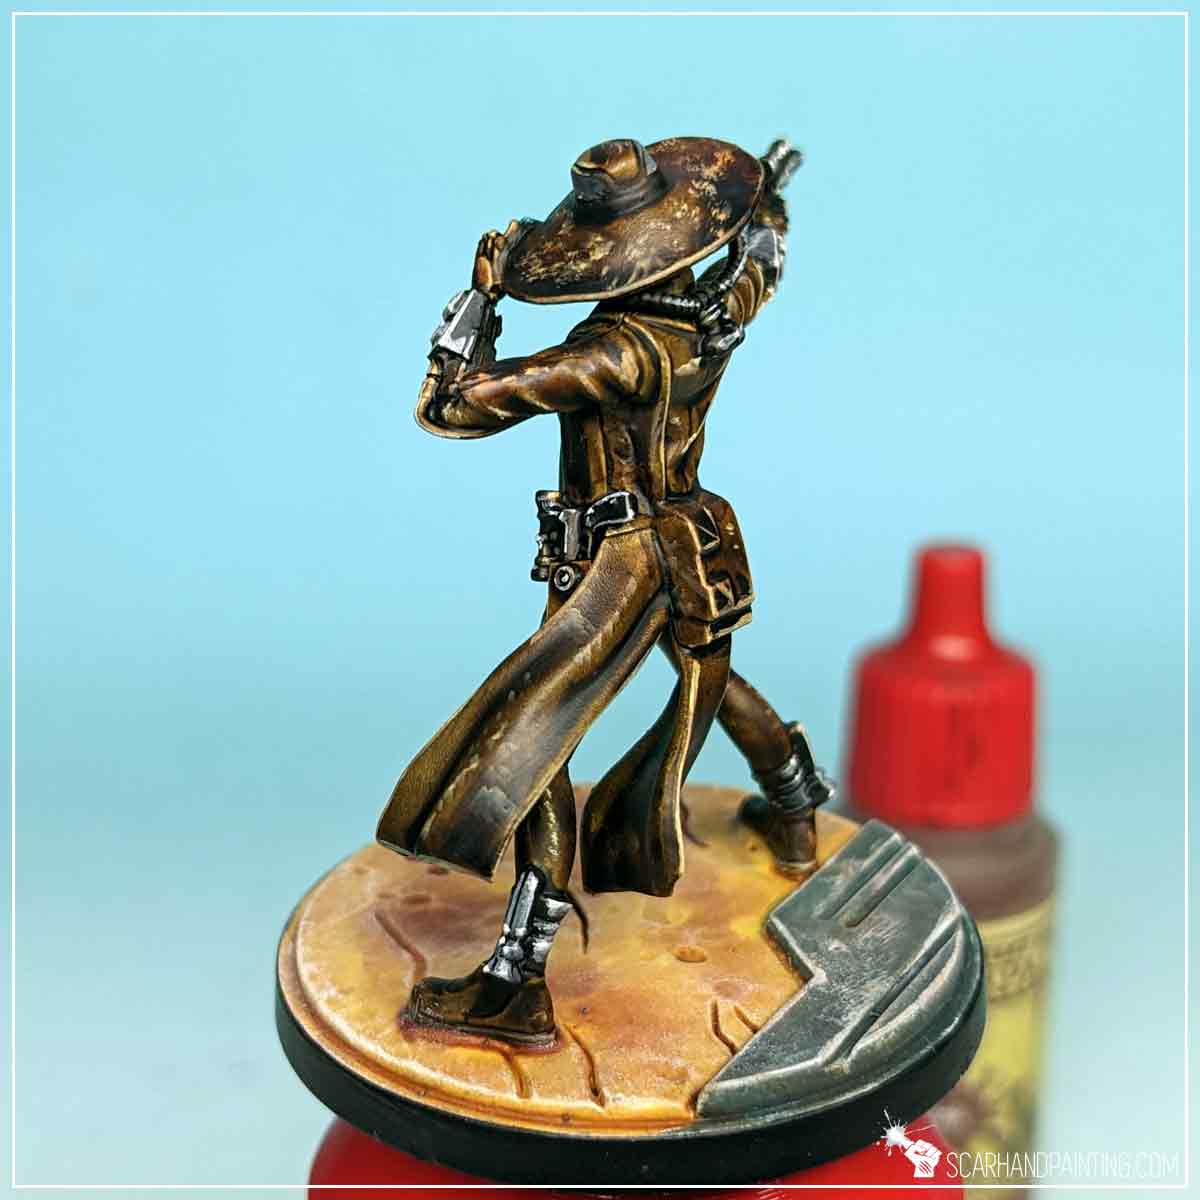
All other browns, including straps, hair, boots and weapon holsters, I have highlighted with lines and dots of Mummy Robes to prepare them for upcoming color filters.
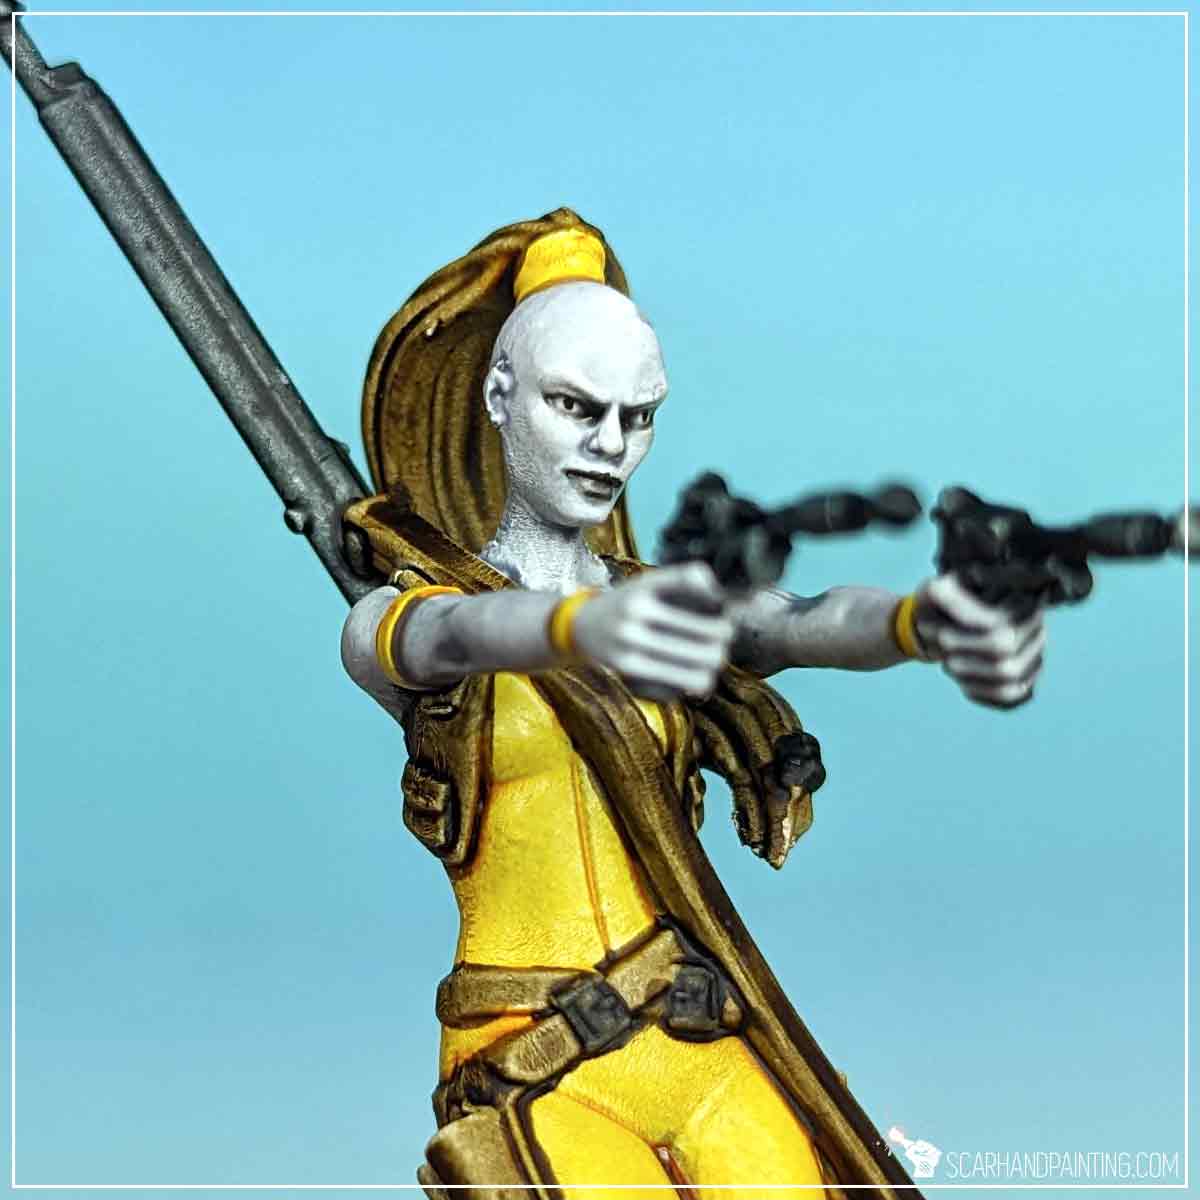
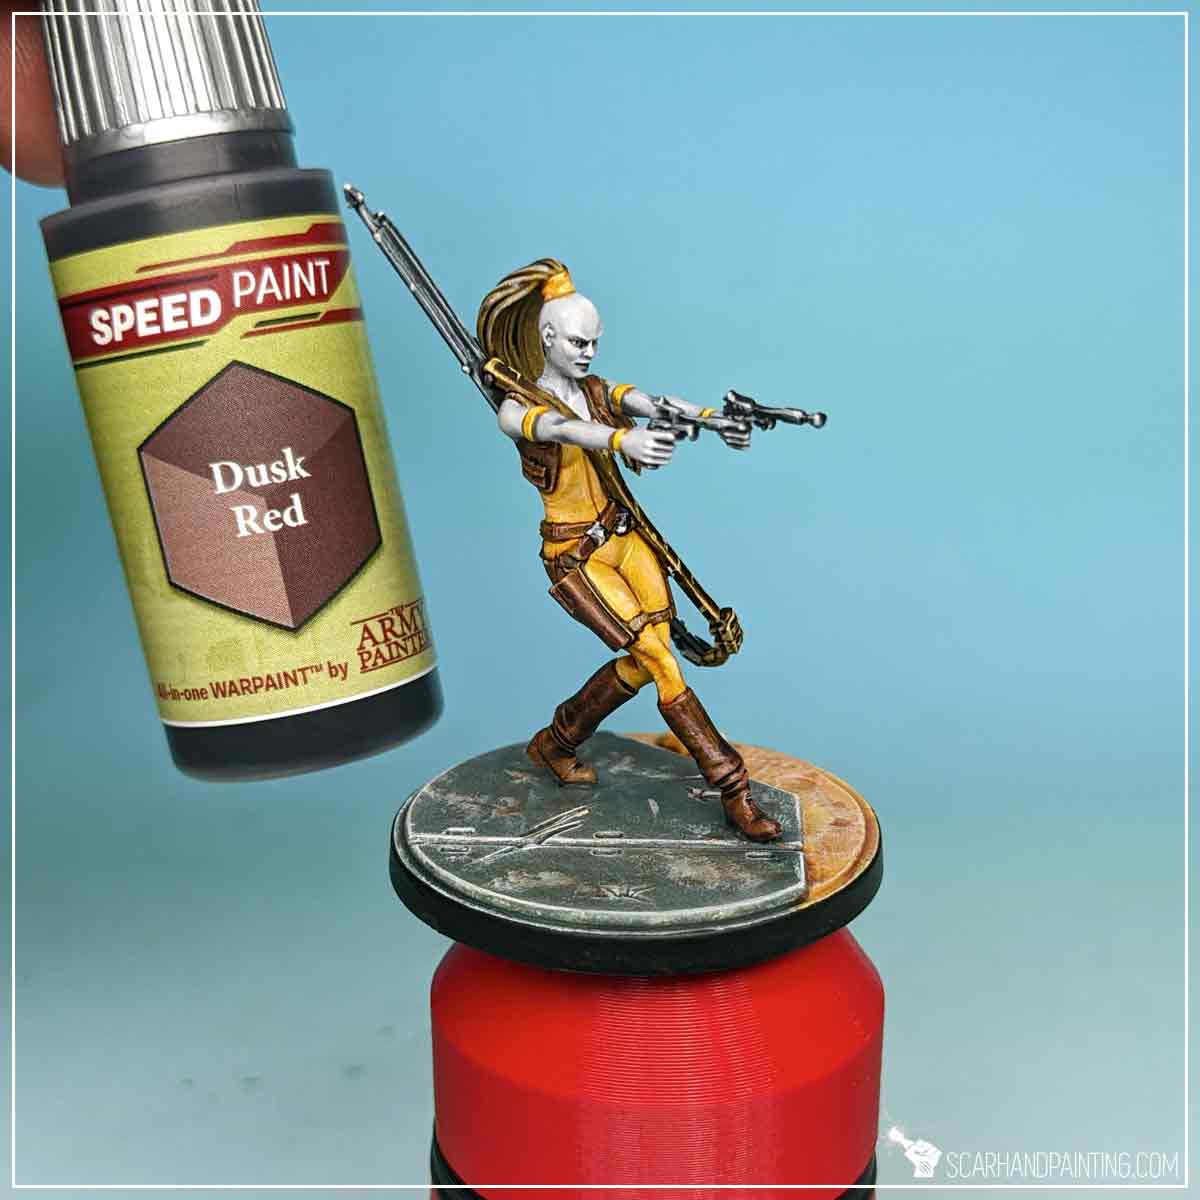
Next I have applied slightly thinned down Dusk Red to all elements, except for hair that got Brownish Decay treatment instead. Combined with well punctuated weapon strap the miniature ended up with a nicely diversified range of browns.
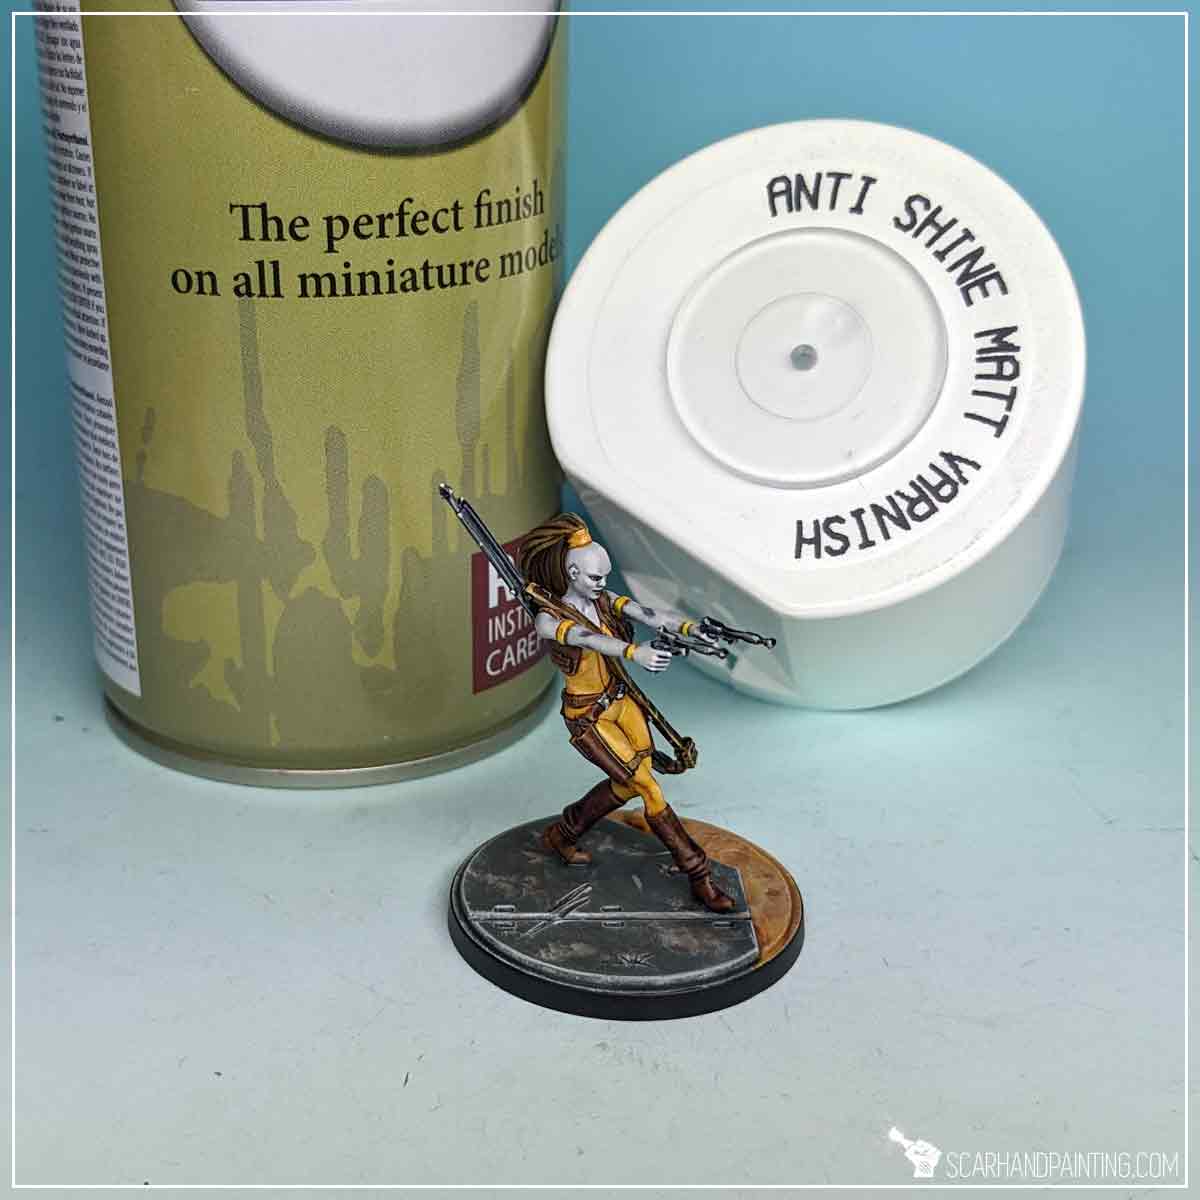
Finally I Varnished the miniature the same way as presented in the Tutorial: Painting Star Wars Shatterpoint Clone Troopers article.

I hope you find this tutorial interesting. Be sure to let me know your thoughts in the comments below or via Facebook or Instagram. I would also appreciate it if you considered sharing this content with your friends, who might find it useful. Many thanks to Rebel.pl for sponsoring this content. Stay tuned for more Star Wars: Shatterpoint tutorials.
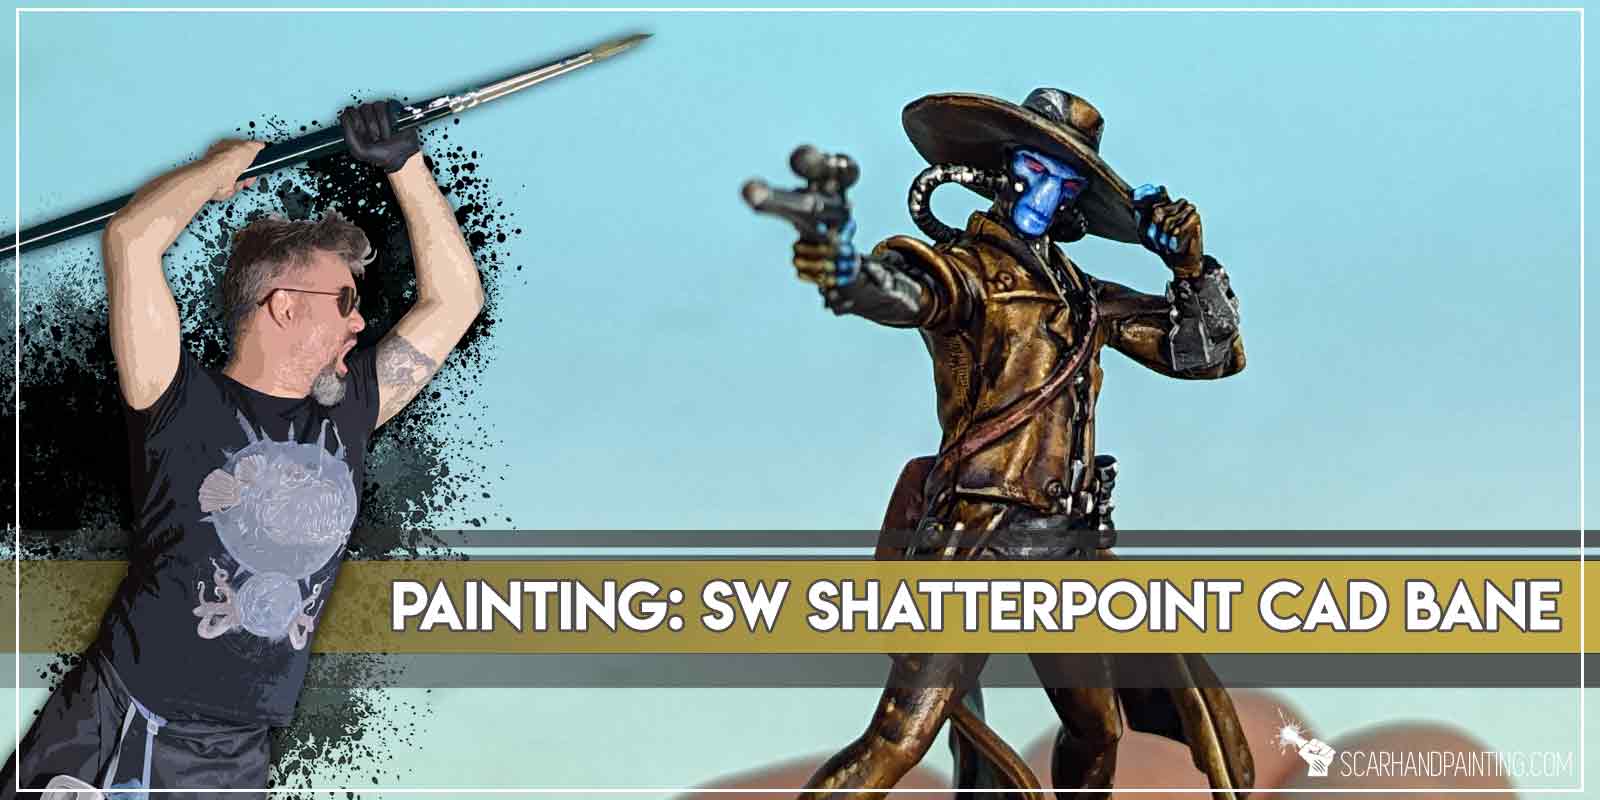
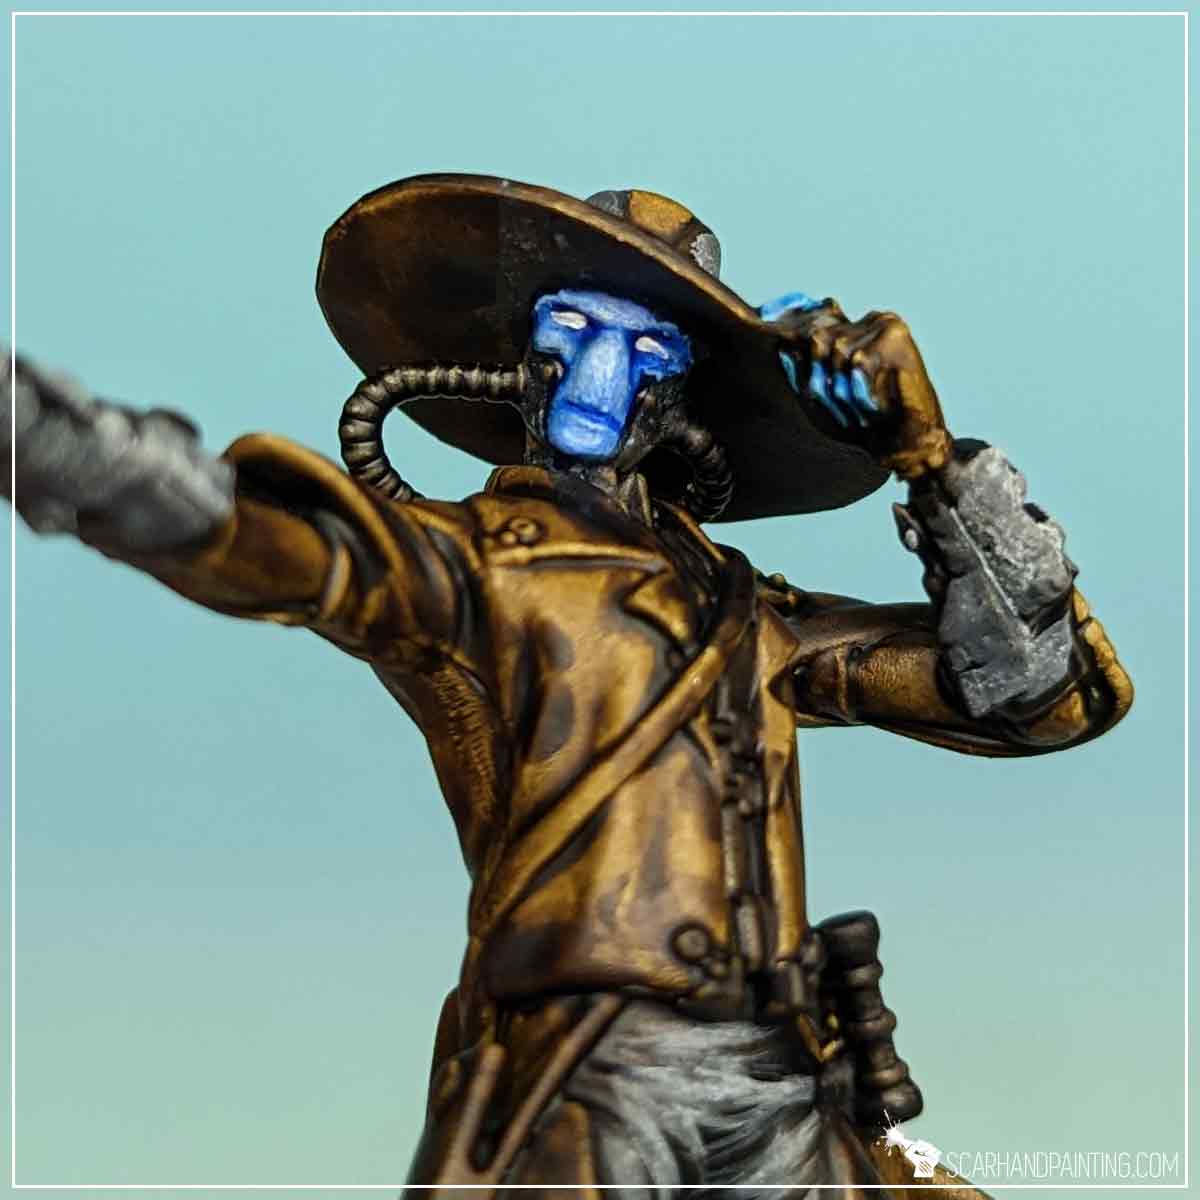
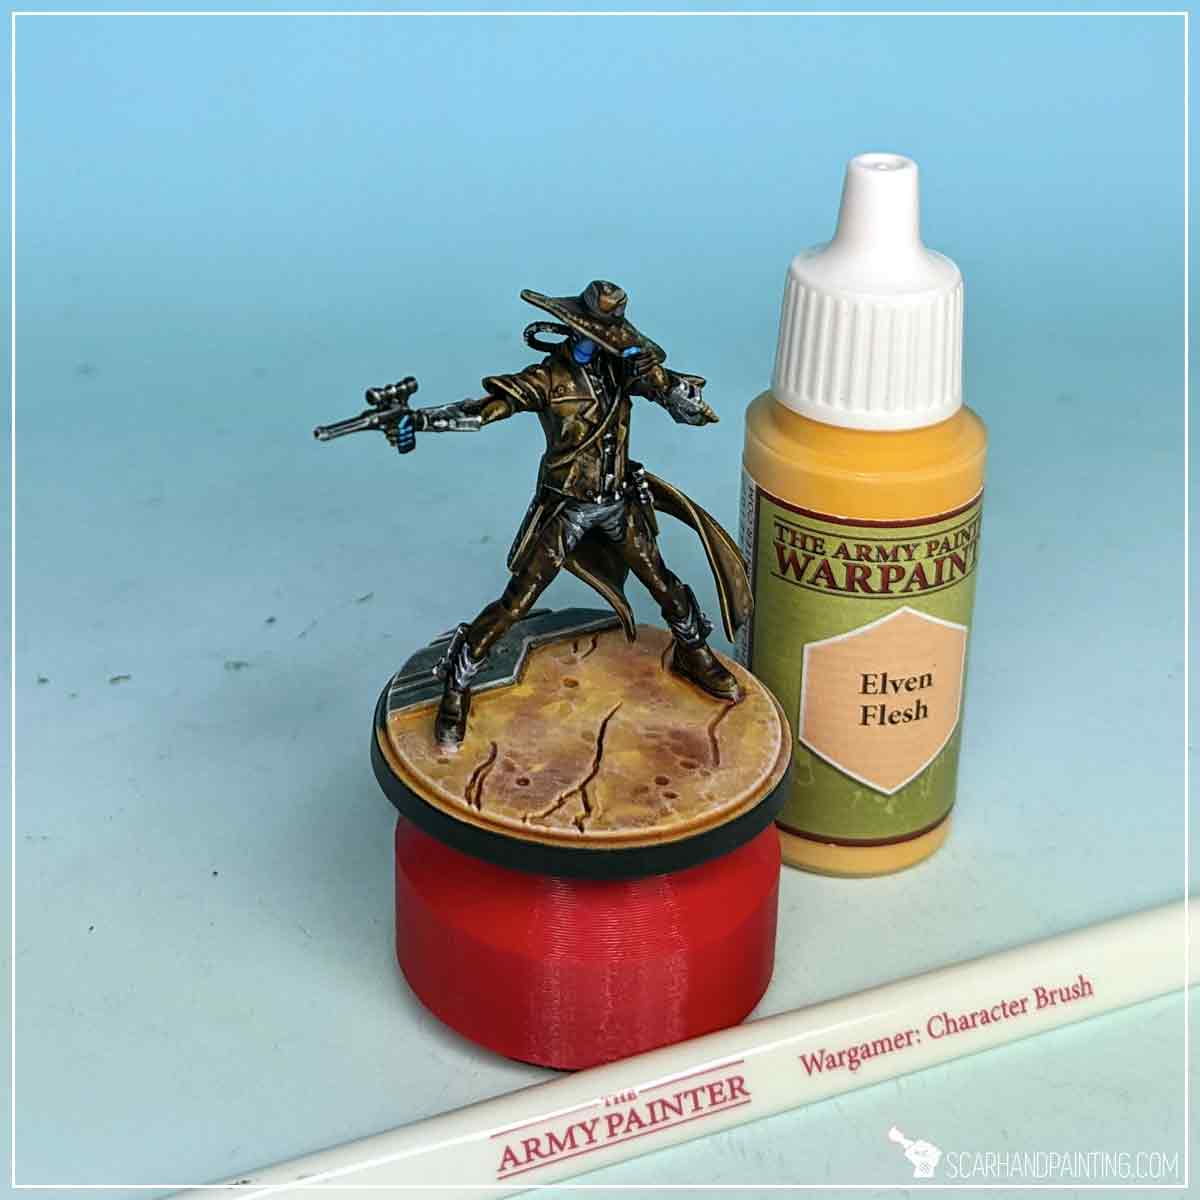
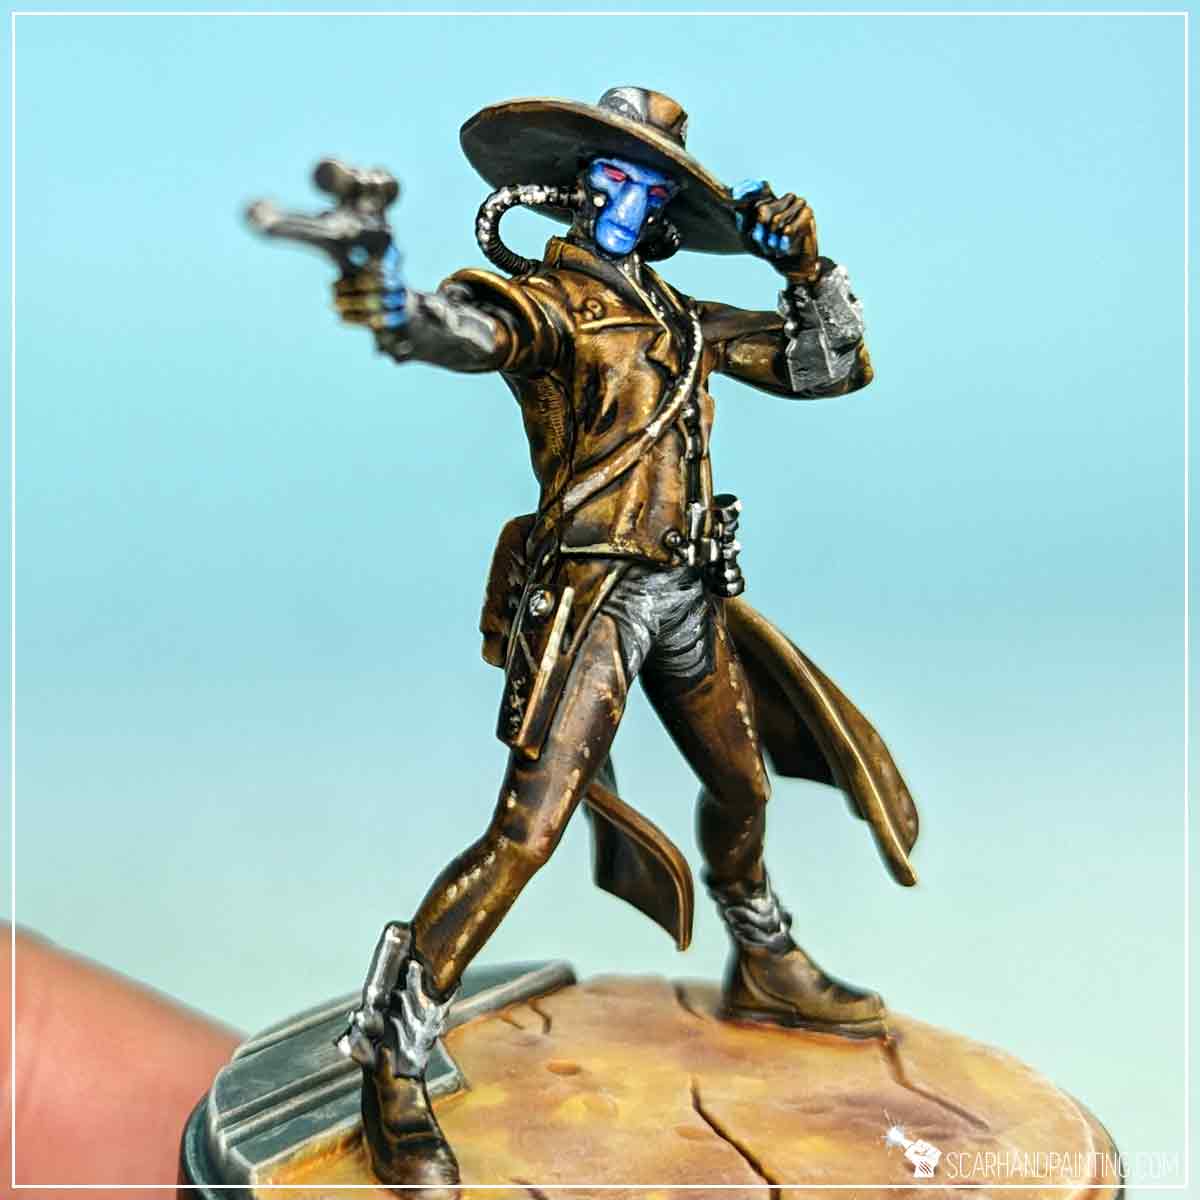
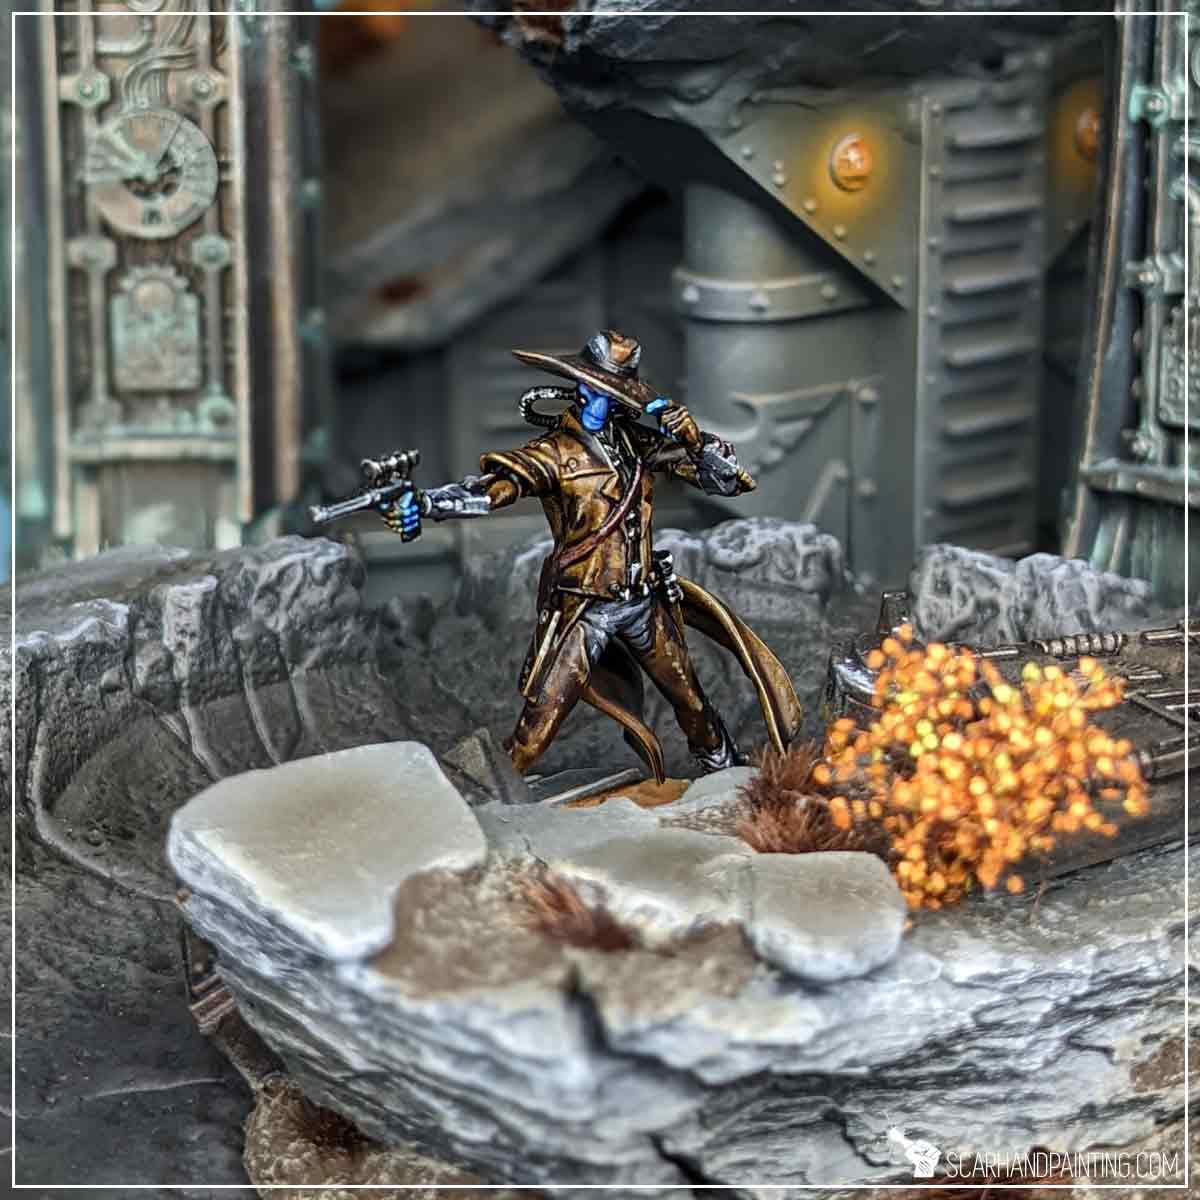
Welcome to Painting Star Wars: Shatterpoint Cad Bane tutorial. Here I will present to you a Step-by-step of a basic painting process for Fistful of Credits Cad Bane miniature and a few extras.
Before we start, some notes:
Both Mandalorian Super Commandos were prepared in the same way as previous Shatterpoint miniatures. Visit Tutorial: Painting Star Wars Shatterpoint Clone Troopers article for a detailed step-by-step guide.
I mounted the miniatures on a stick with a piece of Blu-Tack, then undercoated them with The Army Painter White Matt Primer.
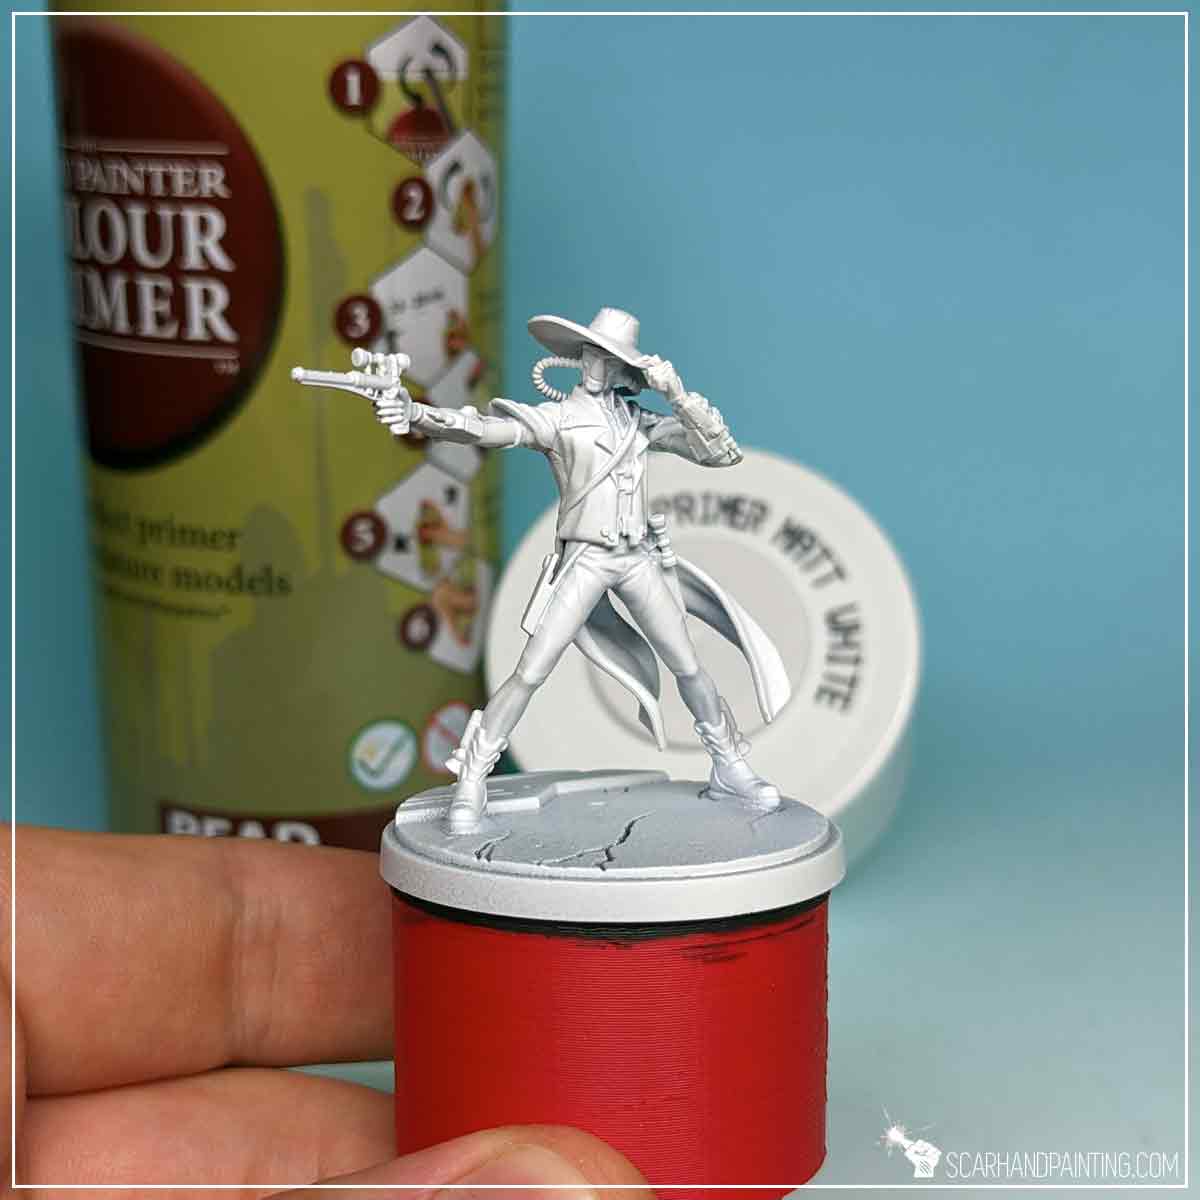
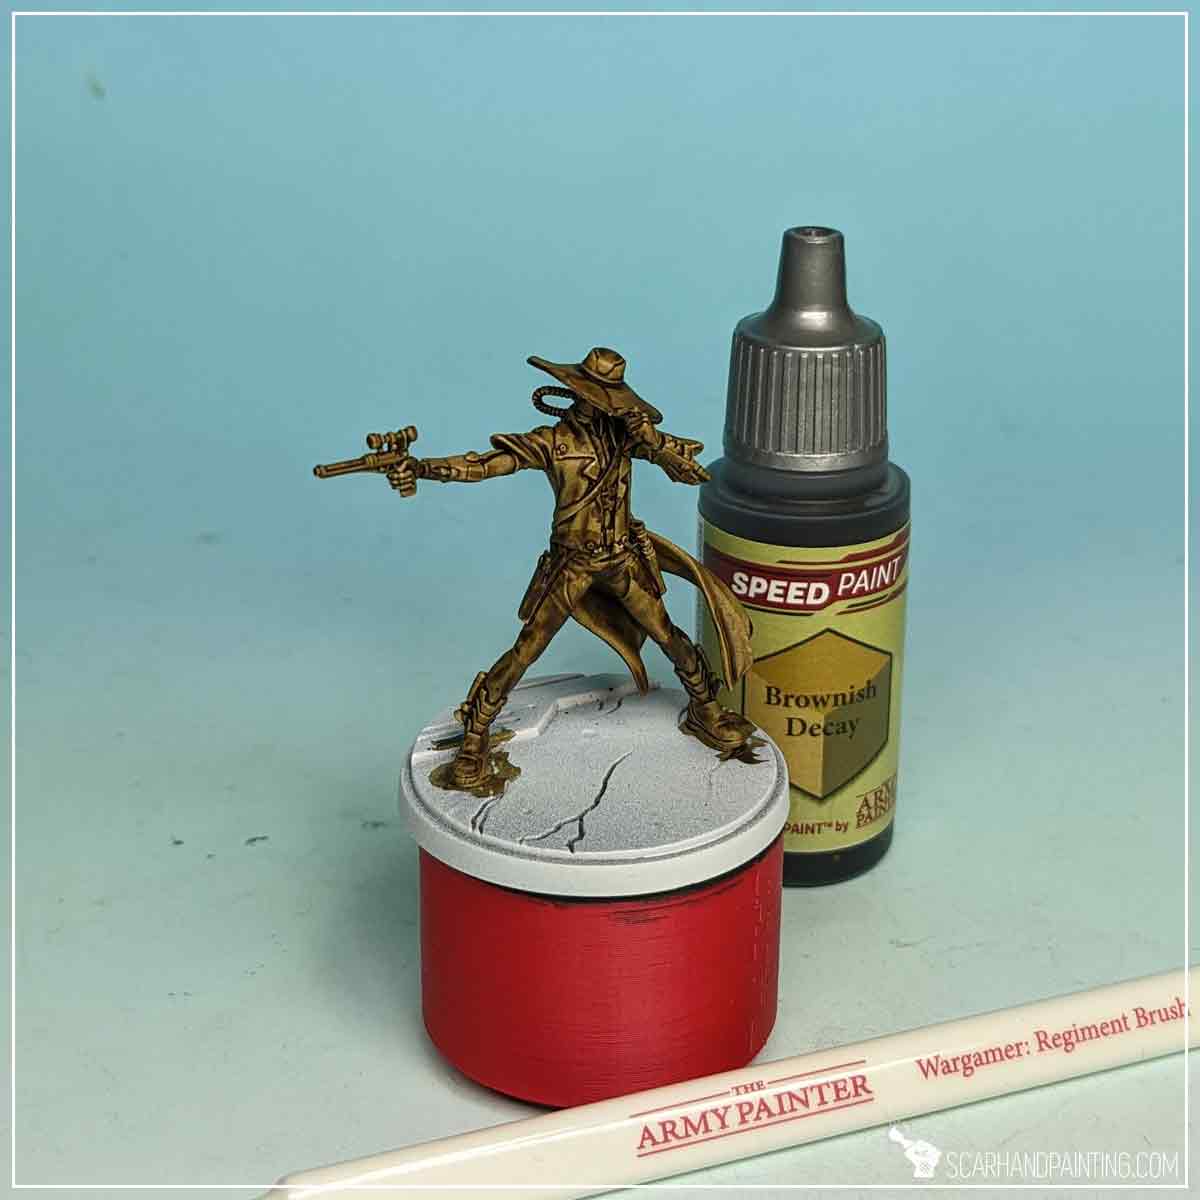
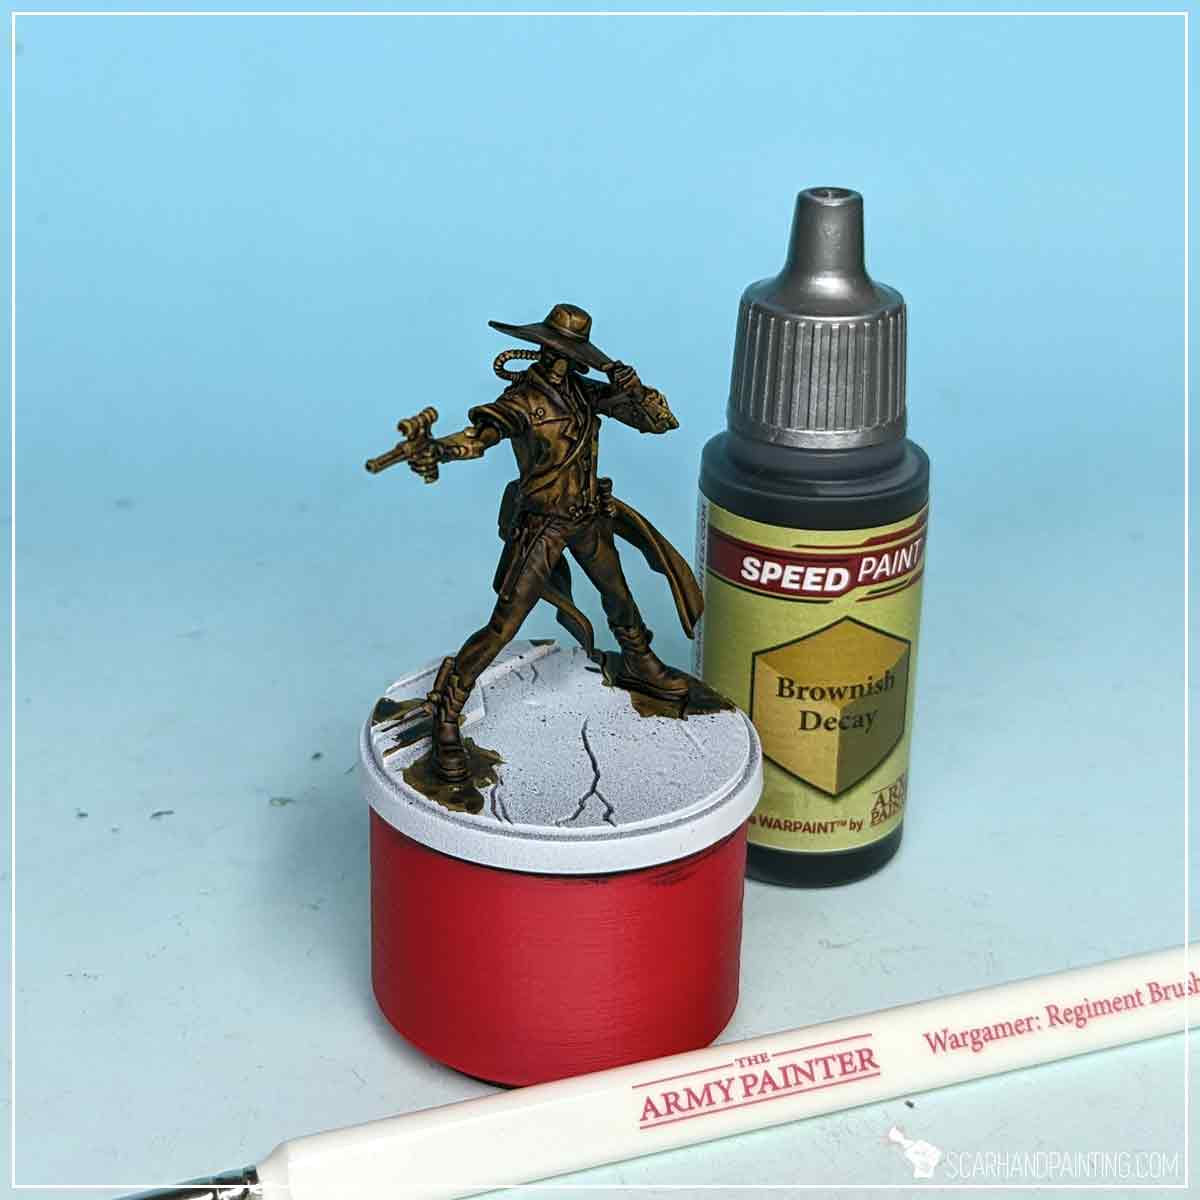
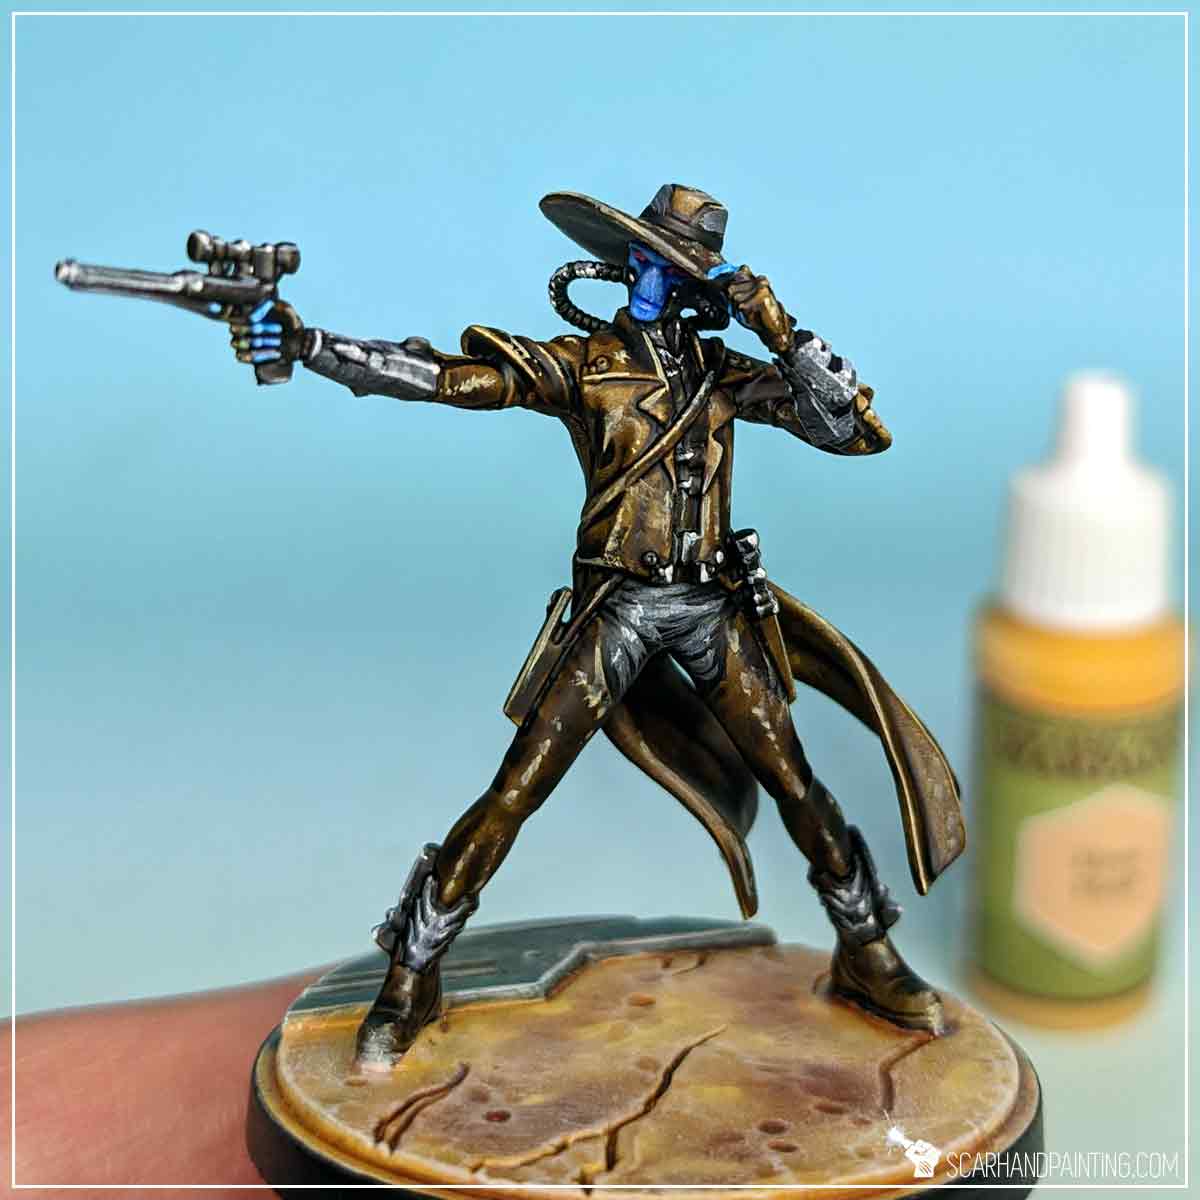
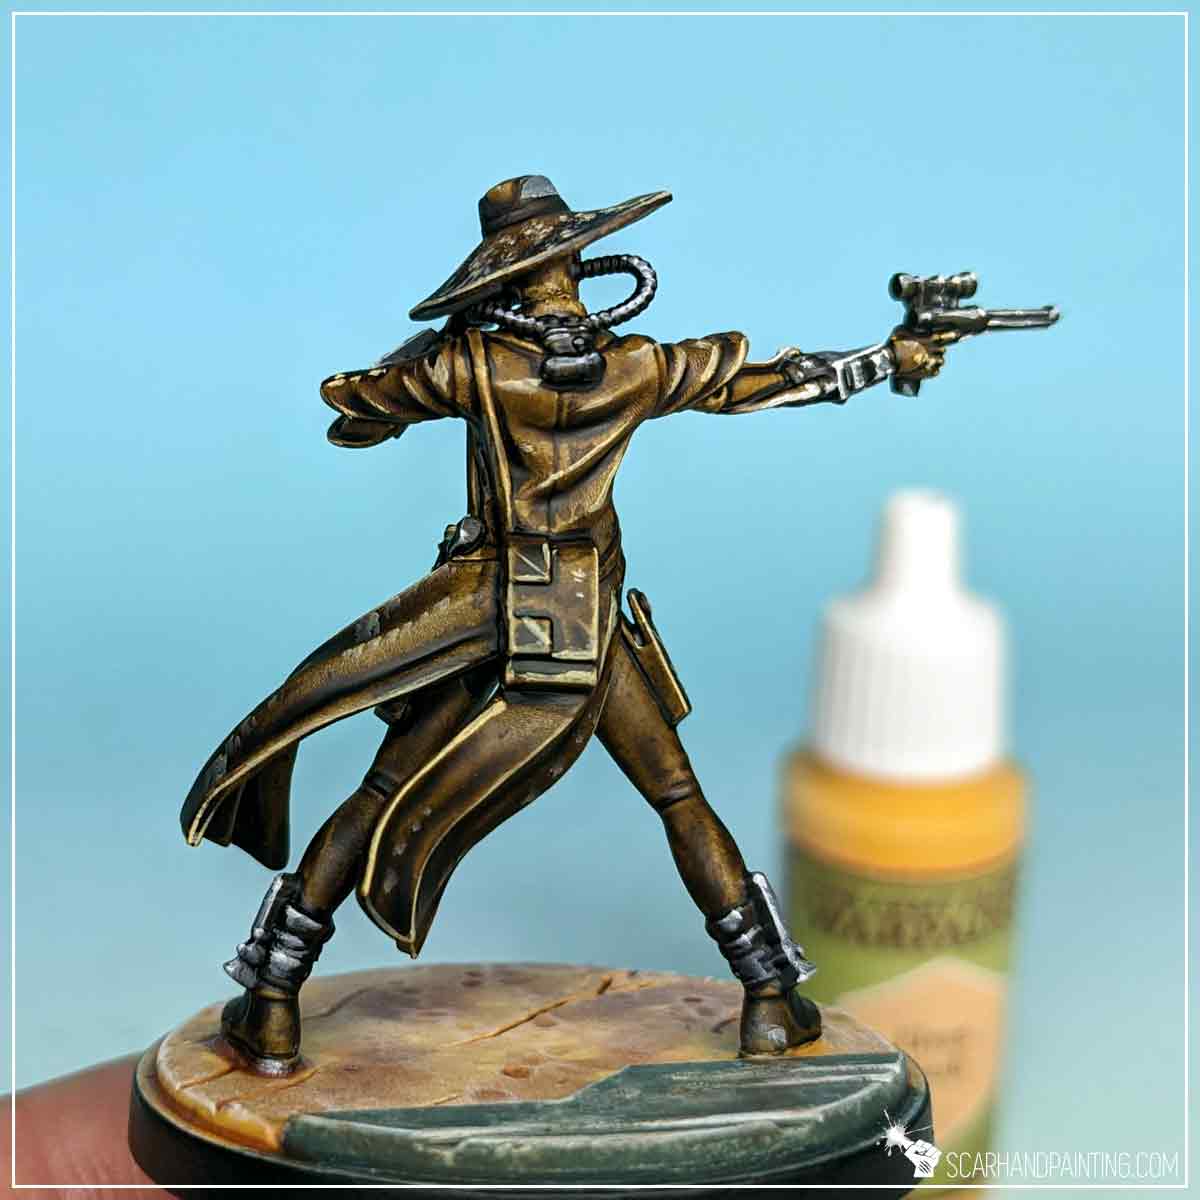
Mostly clothed in brown, the Cad Bane clearly favors comfort over style, or at least this is what I tell myself. The color is so prominent that I have decided to start with it and build from there. Using a Wargamer: Regiment Brush I have covered the entire miniature with Brownish Decay Speedpaint.
Then, once the first layer dried out completely, I repeated the process by applying another layer of Brownish Decay.
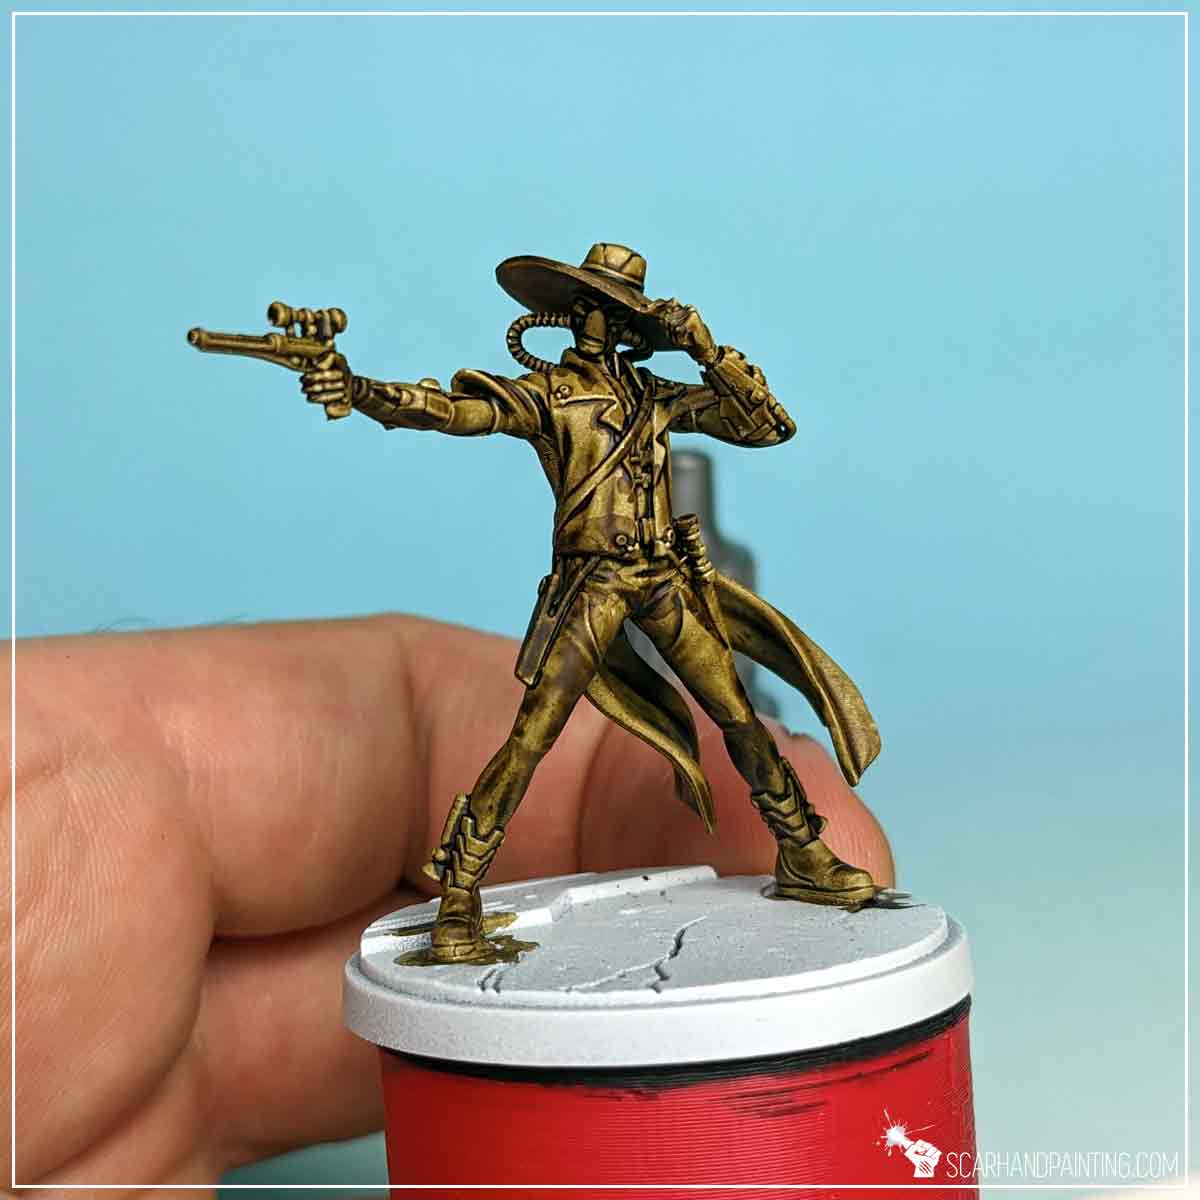
Usually I would have left some areas unpainted, but in this case painting around just a few spots (mainly face and fingers) was too much of a hassle, not worth the time investment. Instead I have repainted these areas with Matt White, thus creating a nice base for the upcoming Speedpaint coloration.
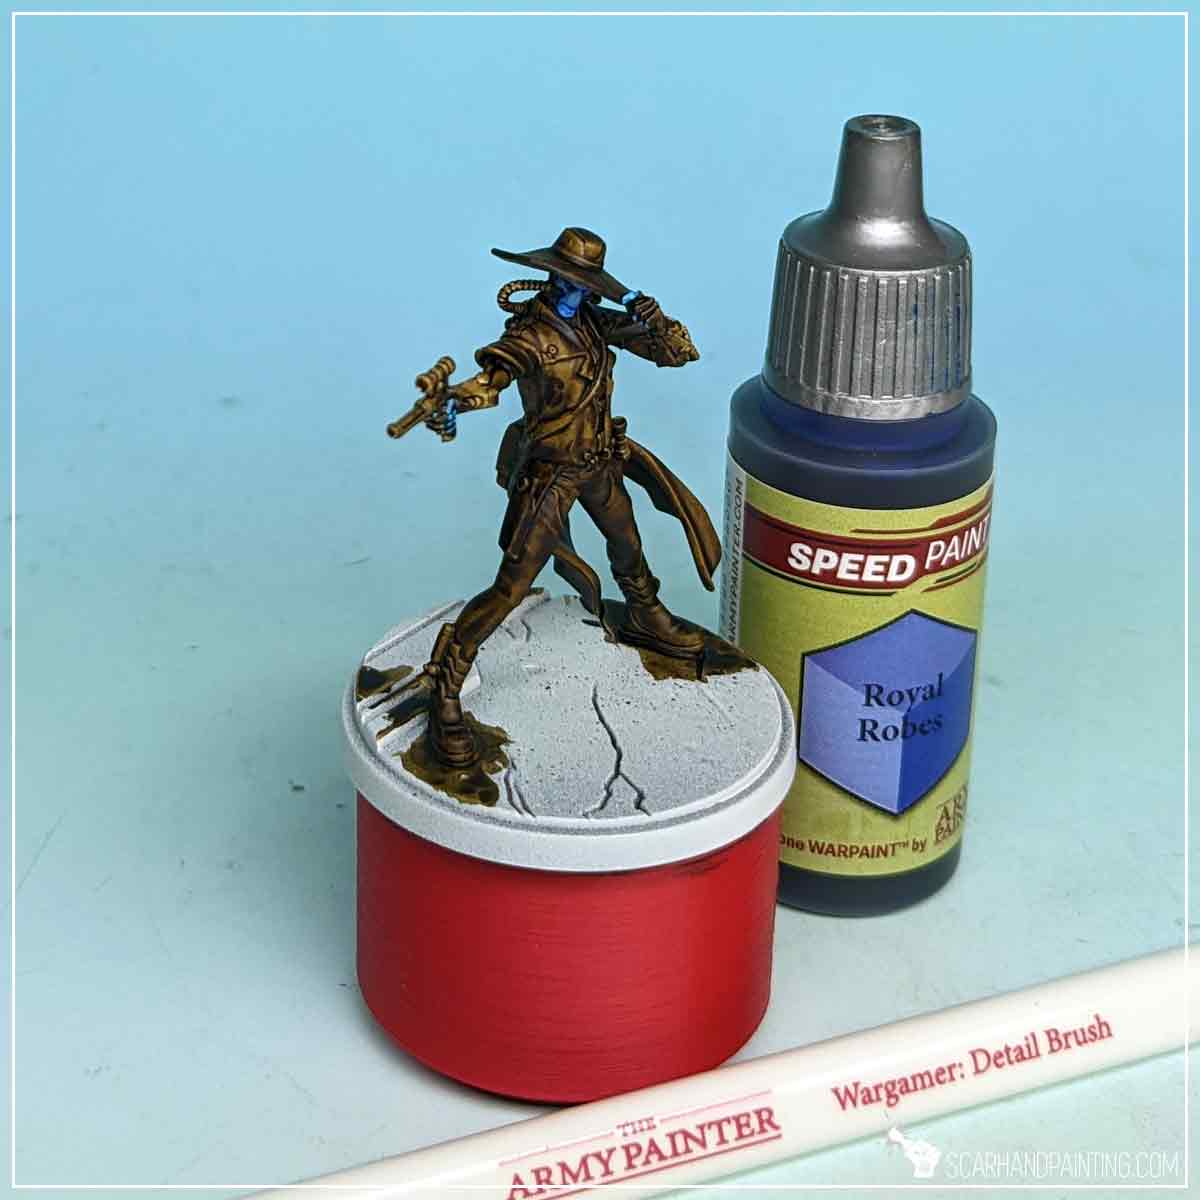
Next, with a Wargamer: Detail Brush, I applied Royal Blue Speedpaint to the face and the exposed fingers of the miniature.
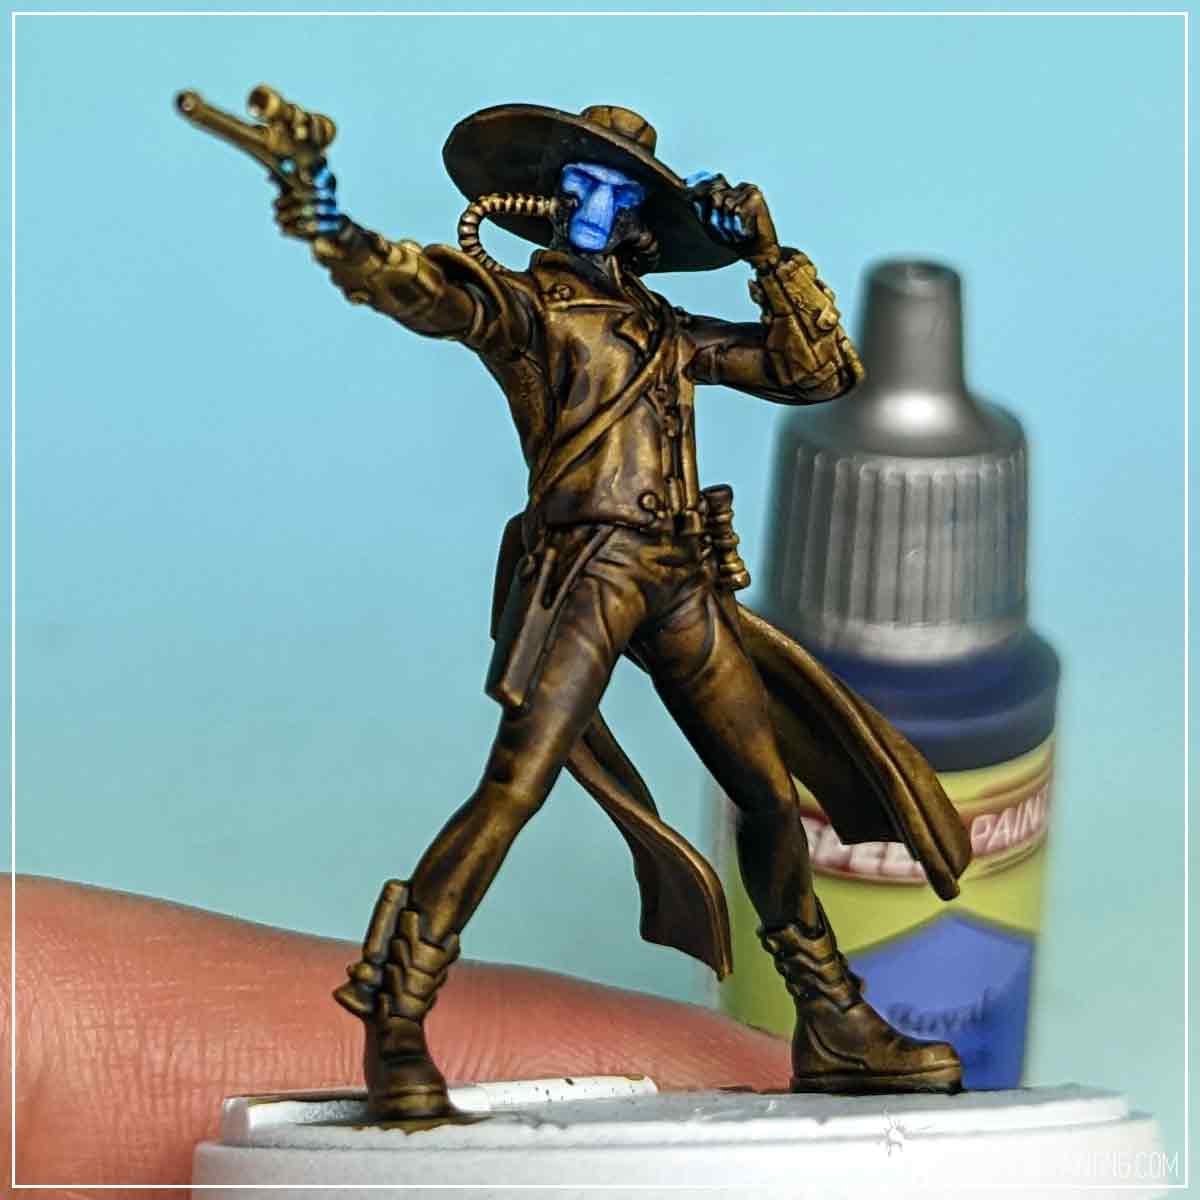
Weapons, breathing pipes, armor, had detail and the ‘under’ pants I have painted black with Grim Black Speedpaint, darkening them and creating a solid base for future highlights.
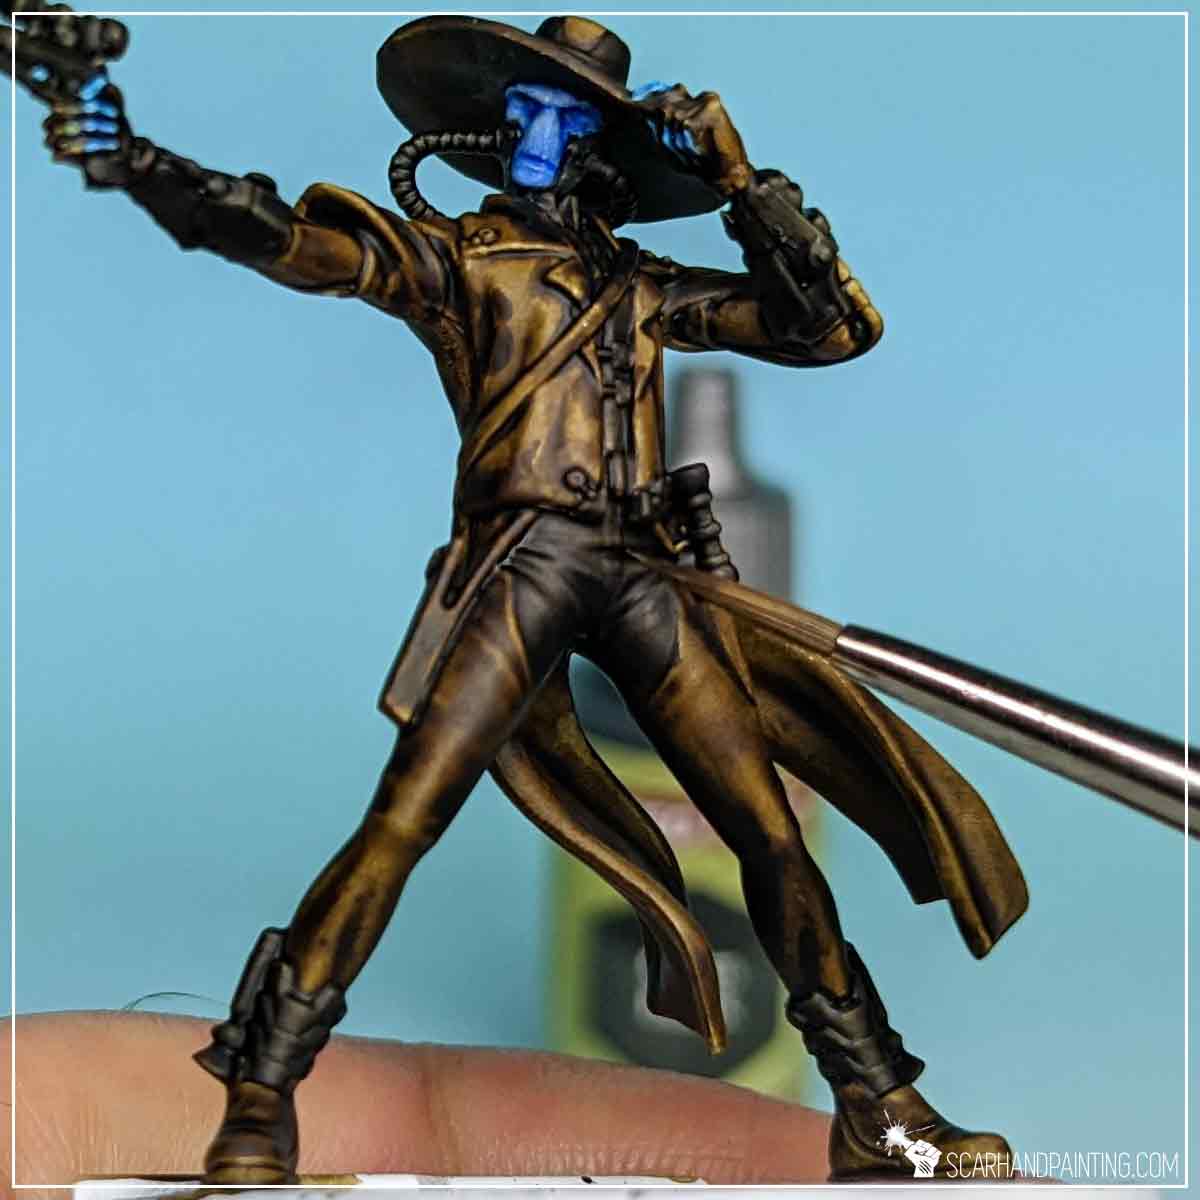
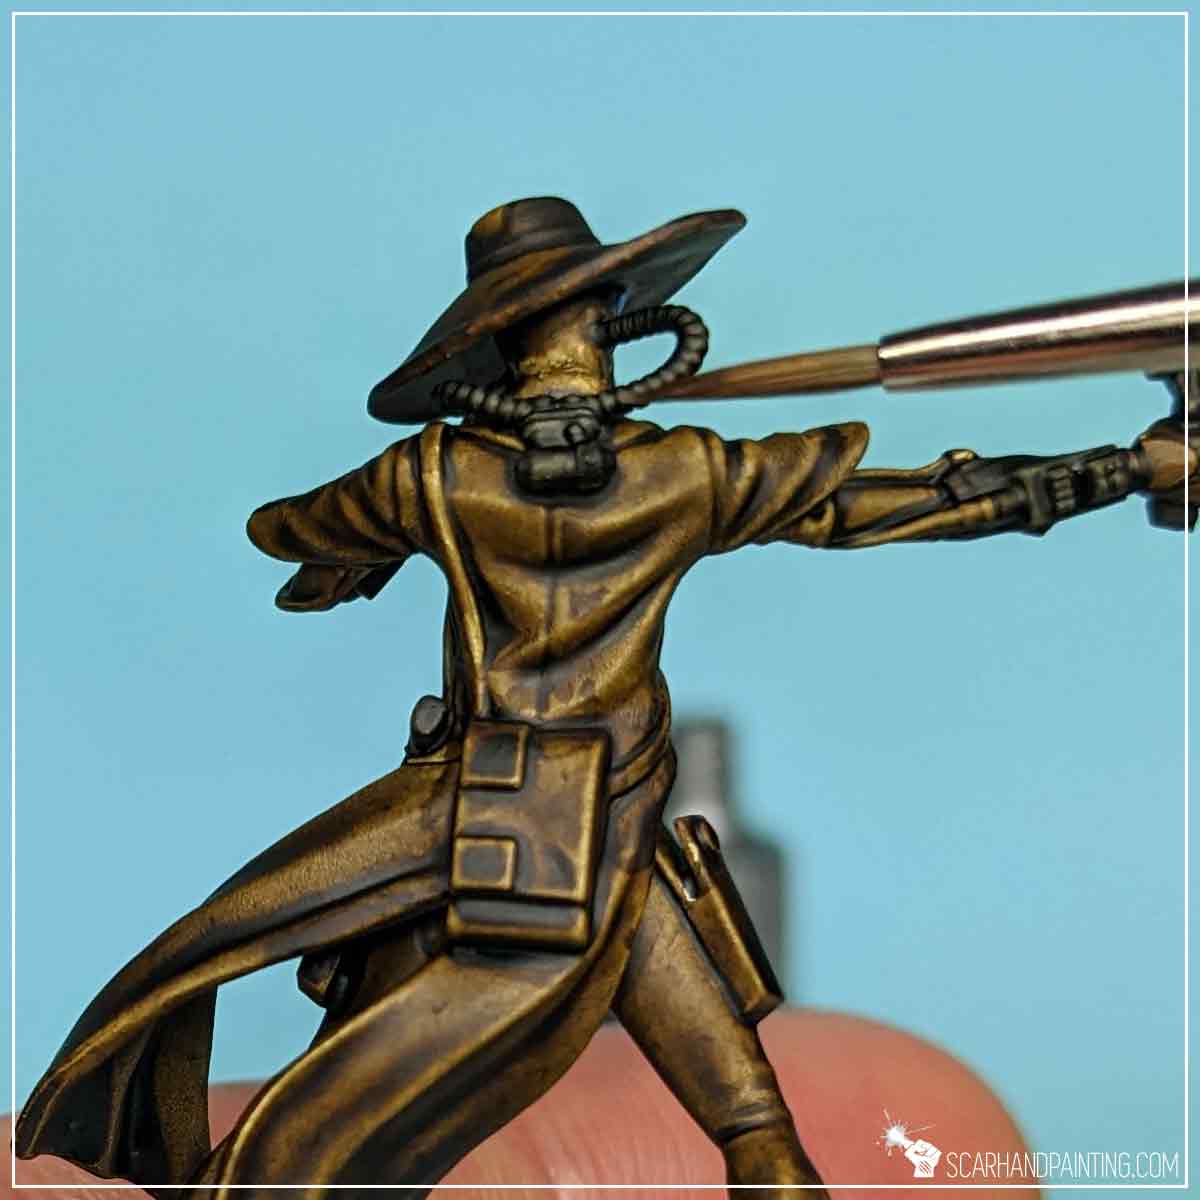
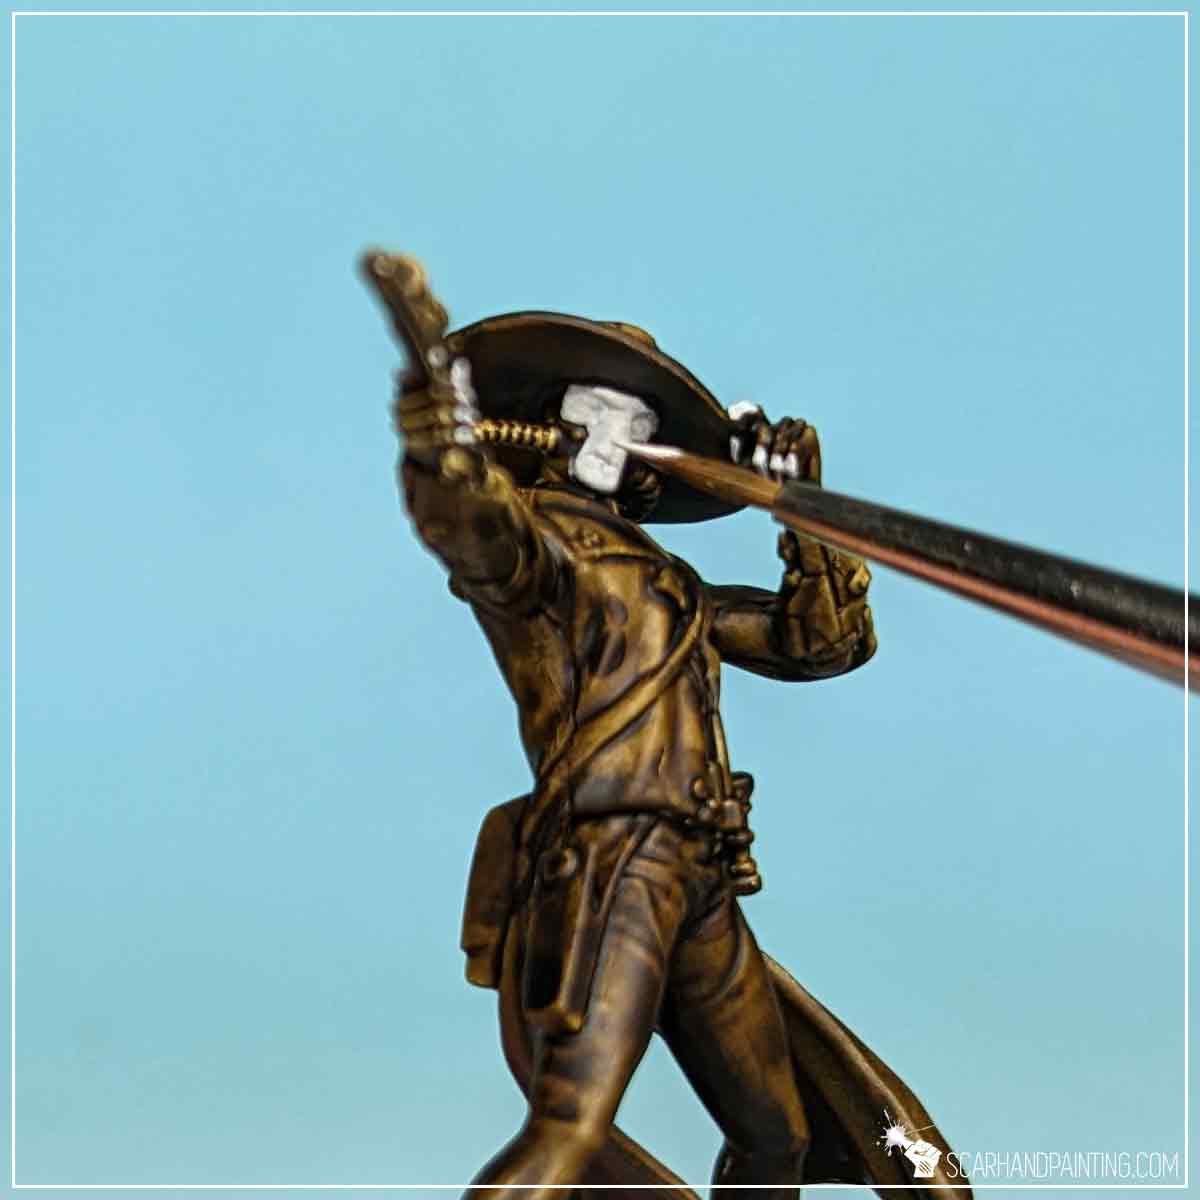
I then followed up with semi-highlights of flatbrushed Matt White. I tried to leave the excess of the paint on a dry palette and move the tip of the brush back and forth leaving blurred lines of paint on chosen surfaces. I deliberately skipped the pistols.
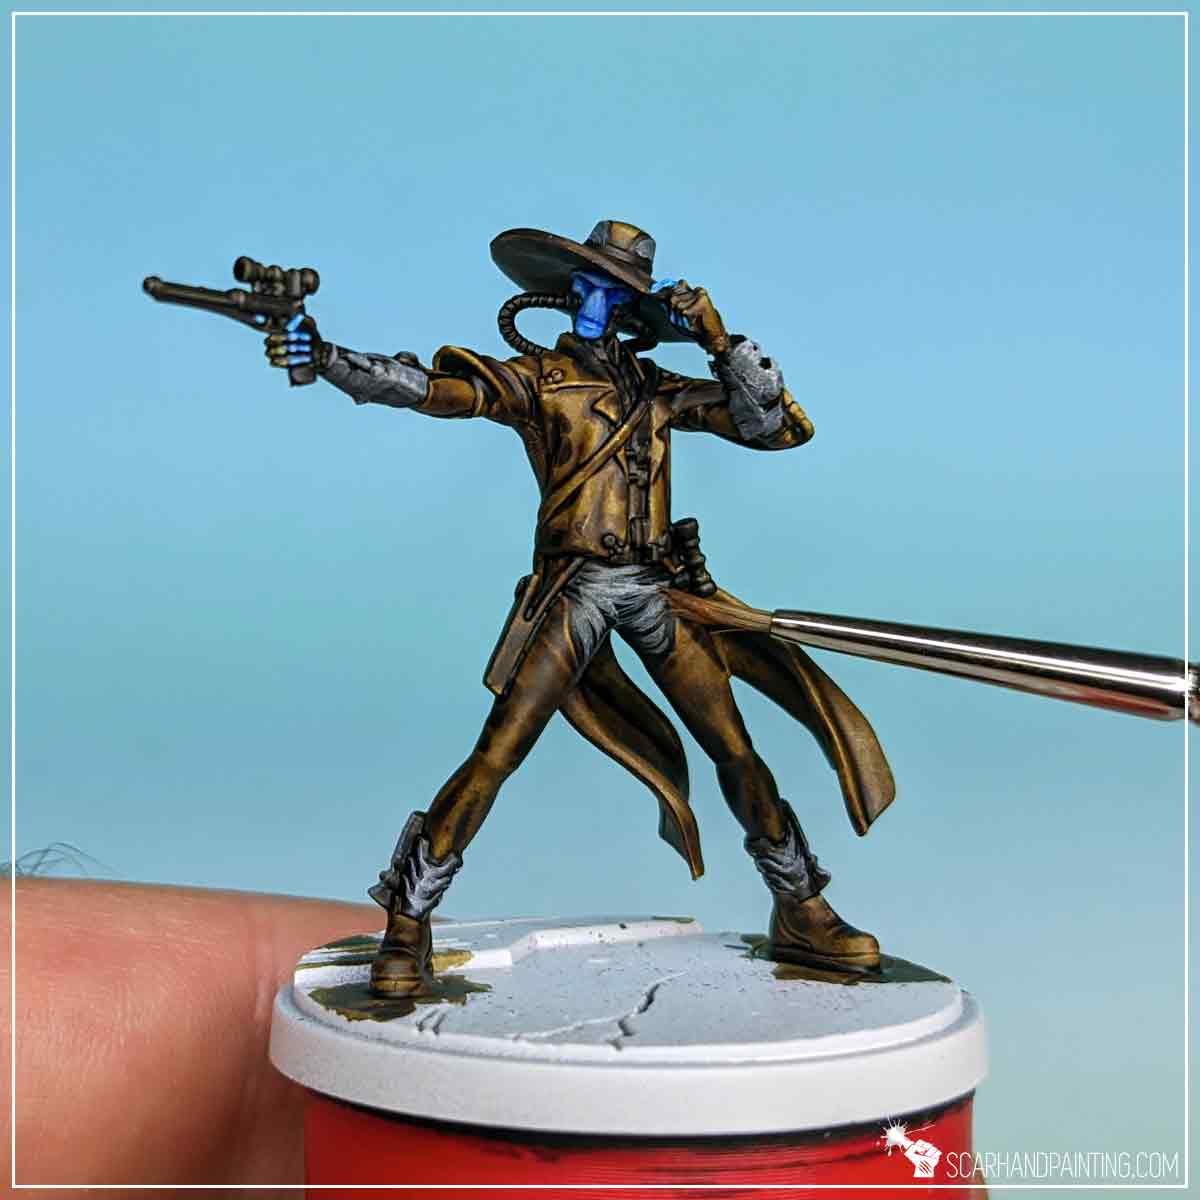
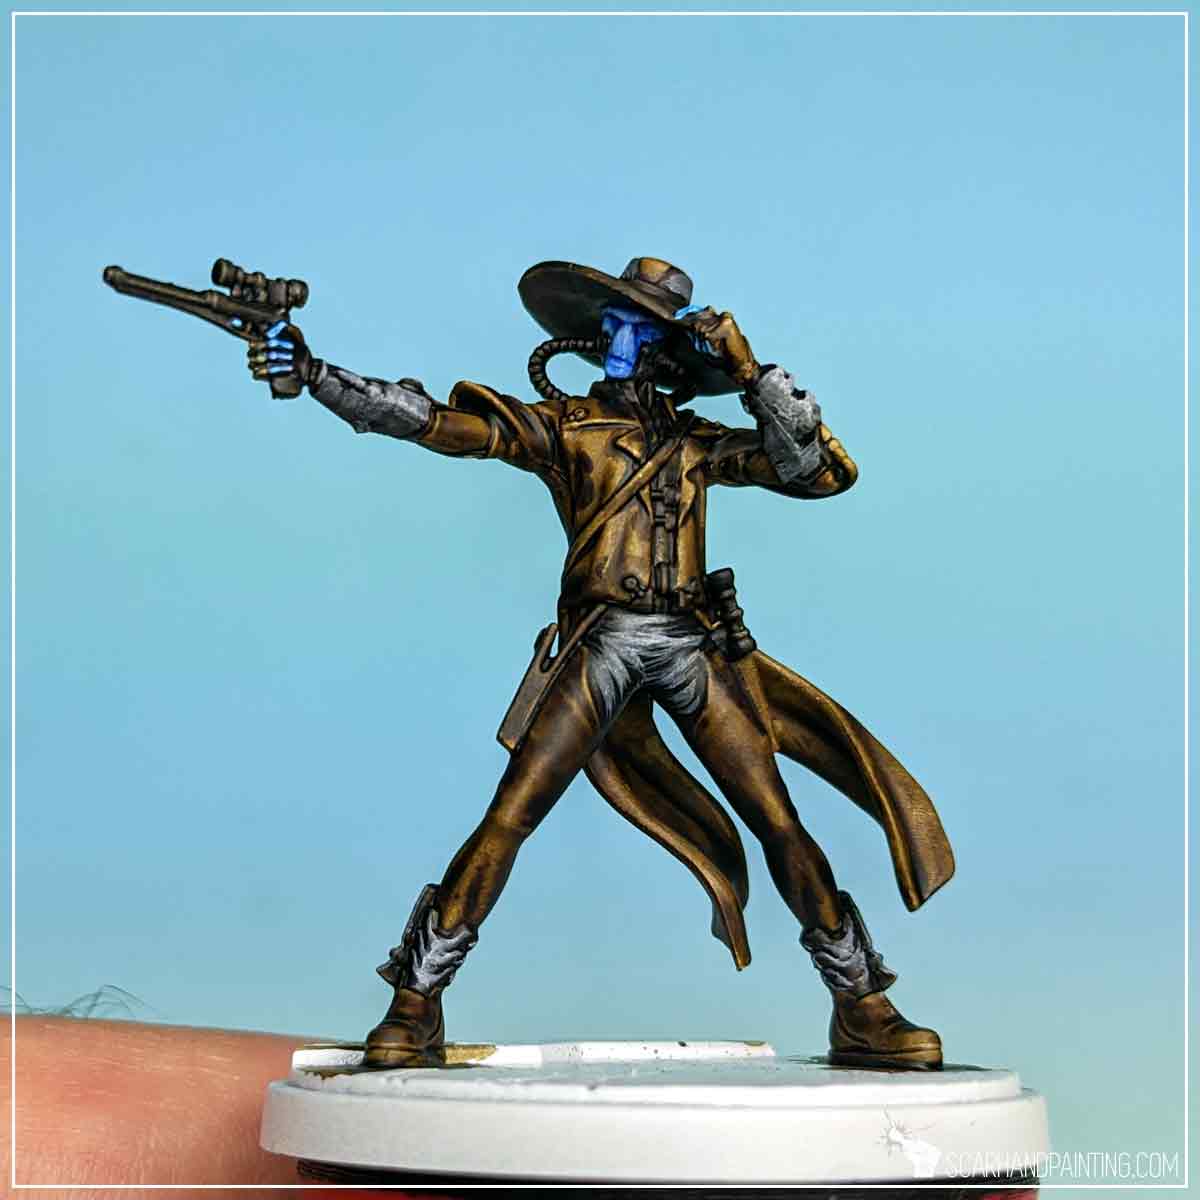
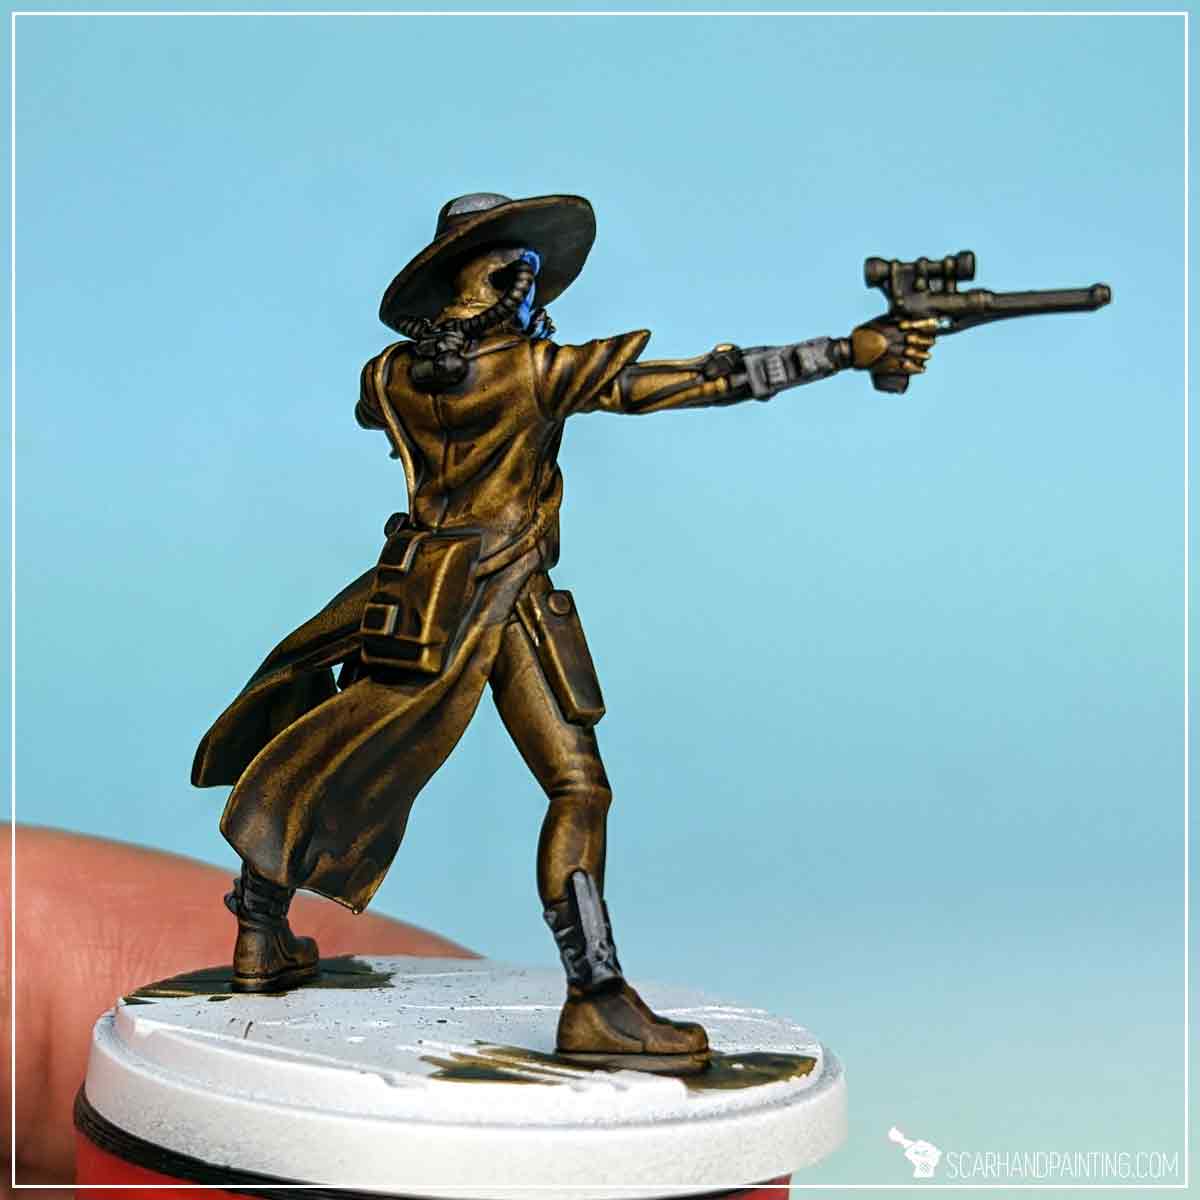
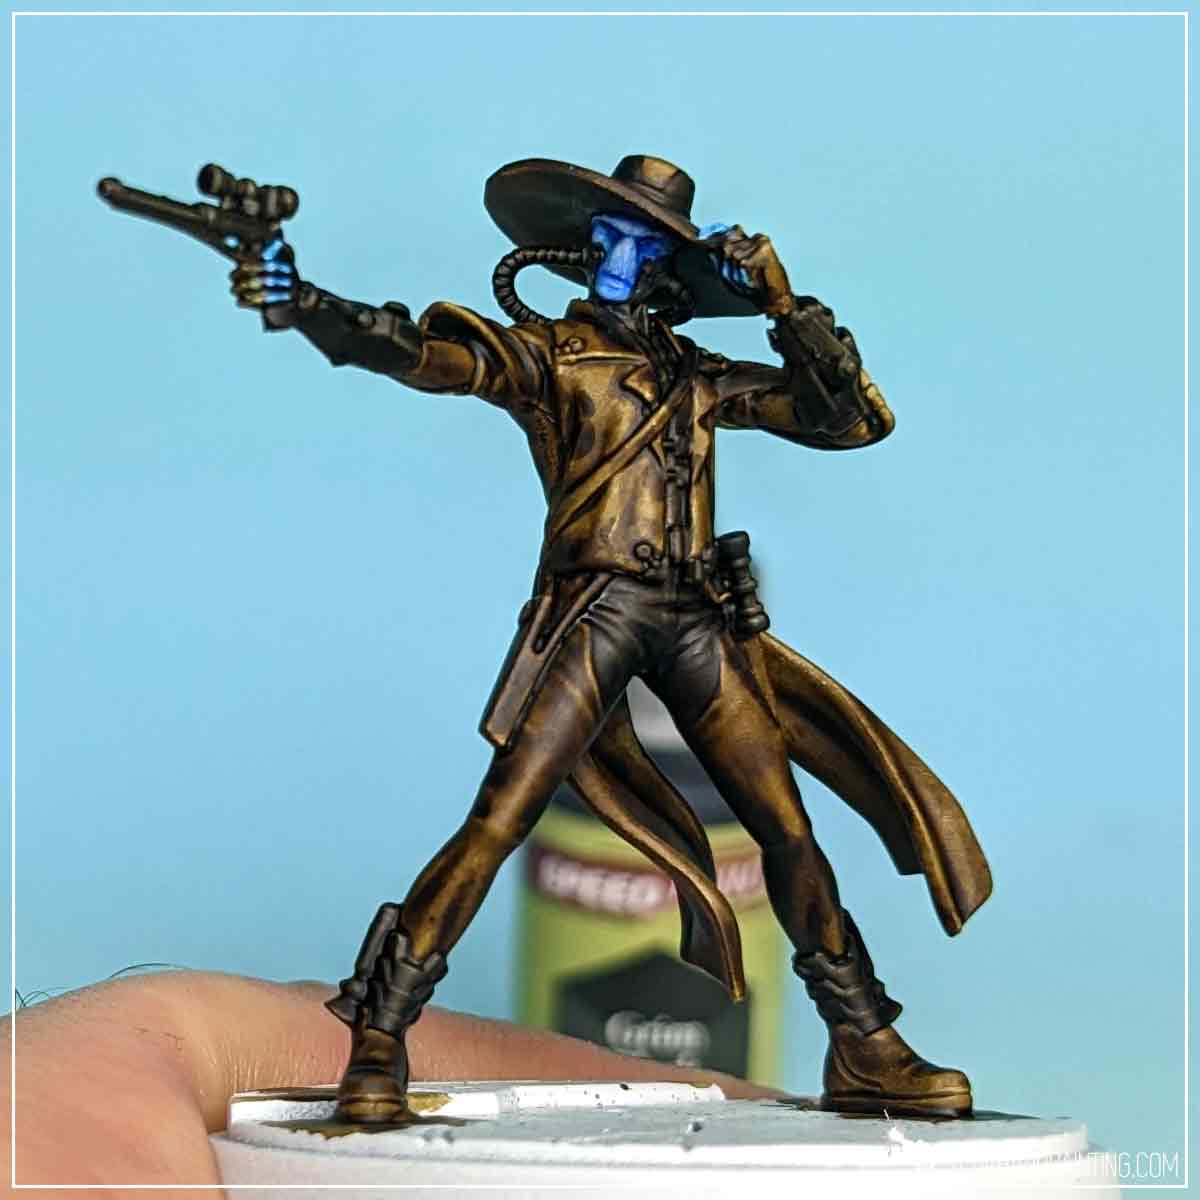
For eyes I used a Wargamer: Detail Brush, applying lines of Matt White, followed up by a touch of Poppy Red Speedpaint.
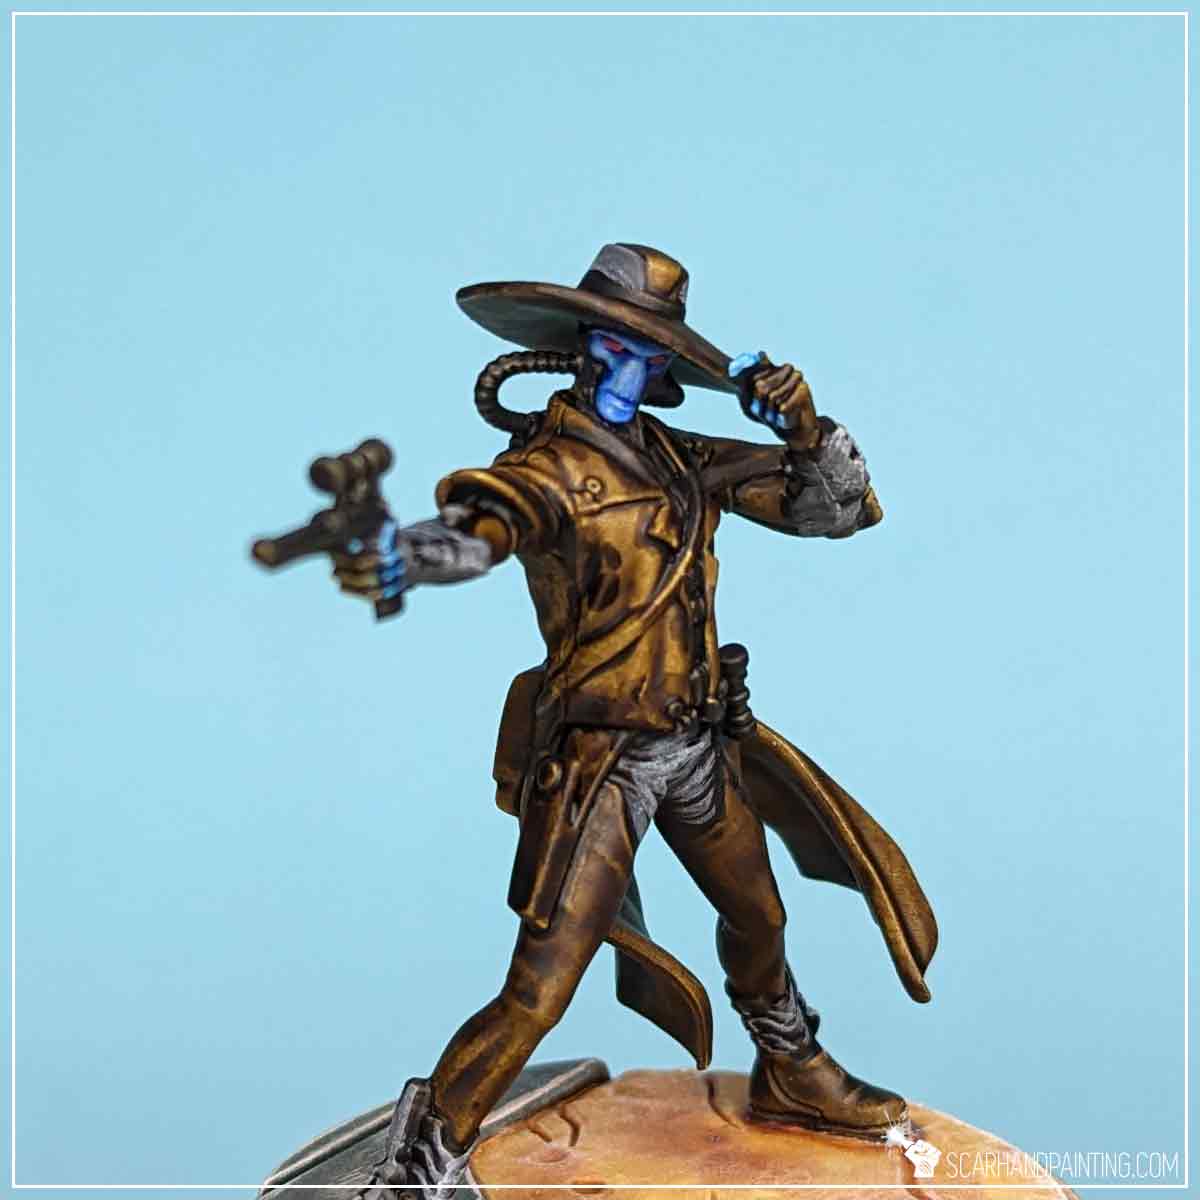
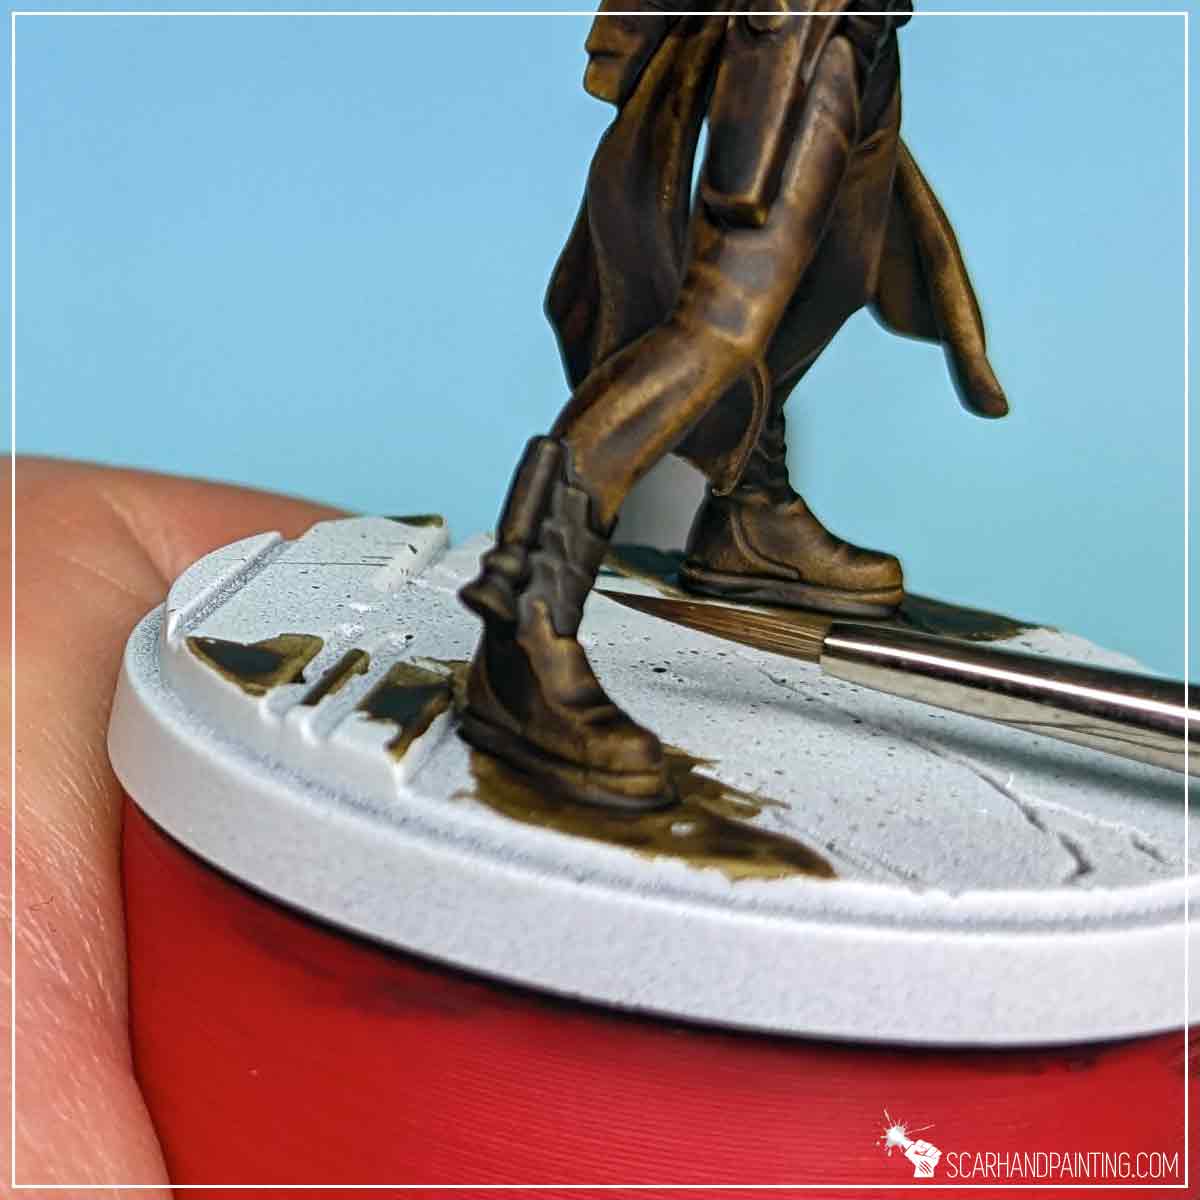
Finally I have painted the base following steps previously presented in the Tutorial: Painting Star Wars Shatterpoint Clone Troopers article, at which point the basic painting process was over and the miniature might have been considered done… but why not take it further?
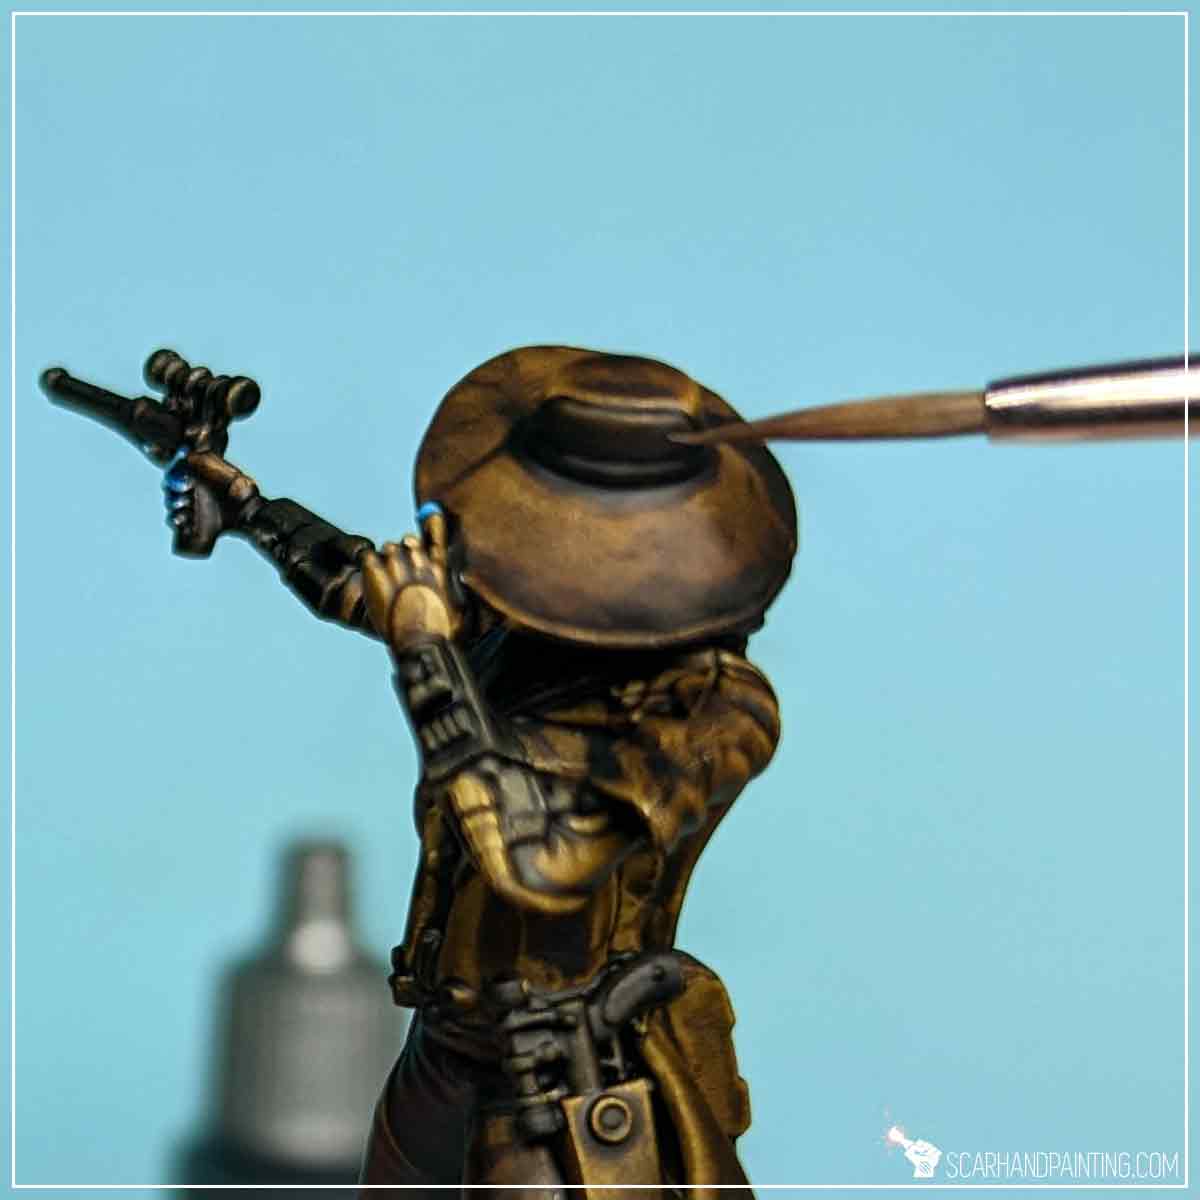
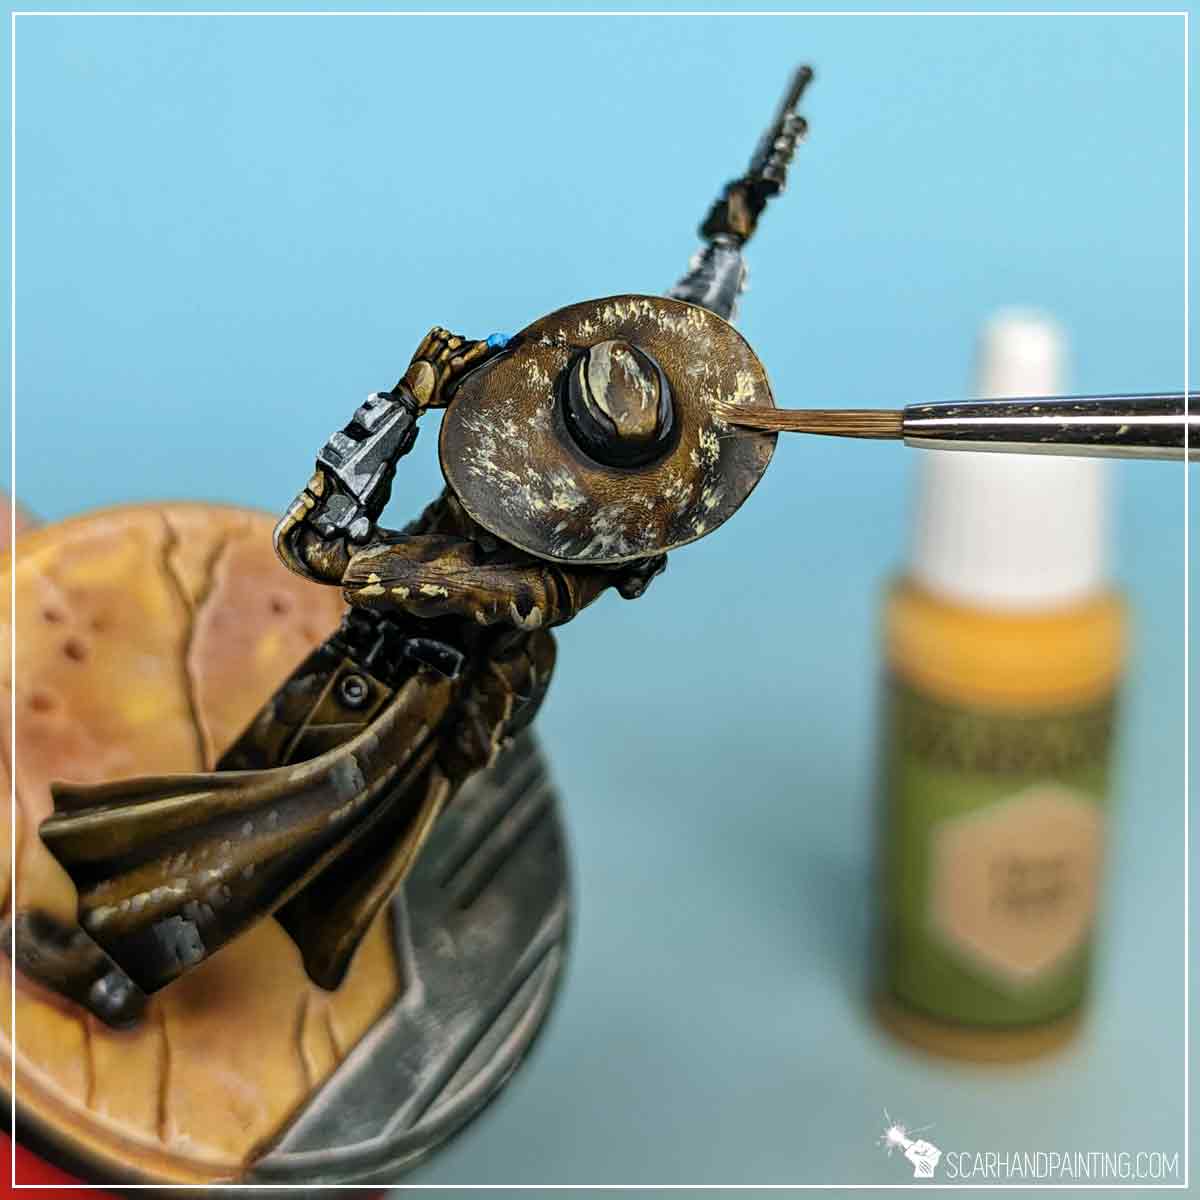
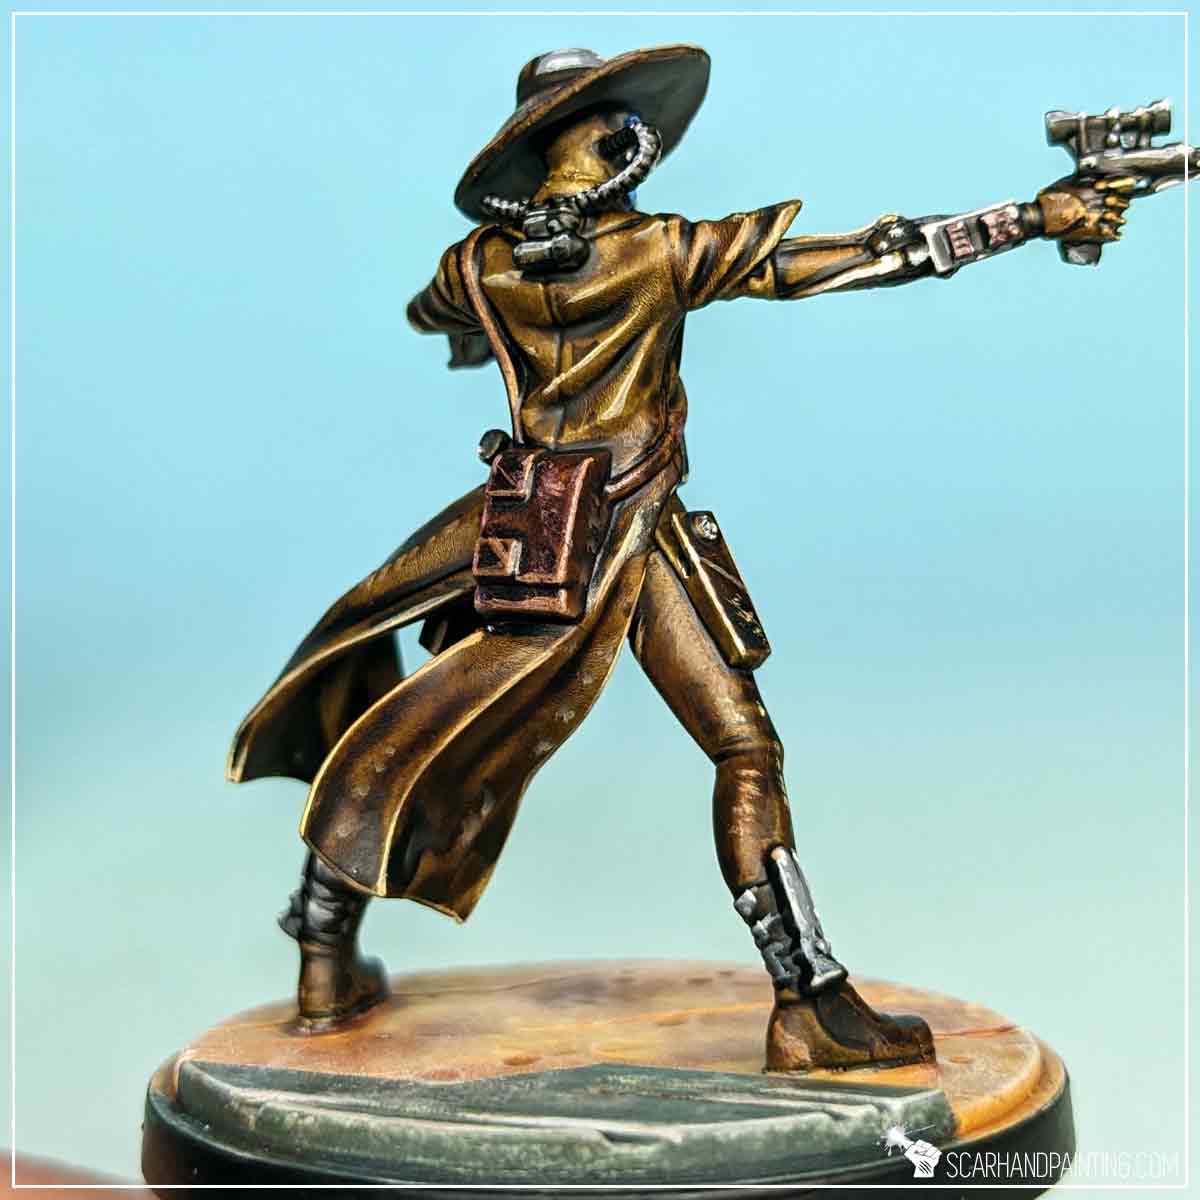
With Wargamer: Character Brush I applied thin lines and dots of Mummy Robes paint on the edges and in selected spots of weapons, breathing pipes, pants, armor and dark had elements. Dots of bright colors create focus points that result in more contrast within a particular color range.

I then did the same for Browns, switching Mummy Robes for Elven Flesh which has a warmer feel to it, thus is more compatible with brow. For large, flat areas I applied small smudges and scratches of Elven Flesh with a tip of the brush, creating an interesting texture.
Next I applied a ‘filter’ of Flesh Wash all over browns, that toned down (and ‘browned down’) the excessive highlights.
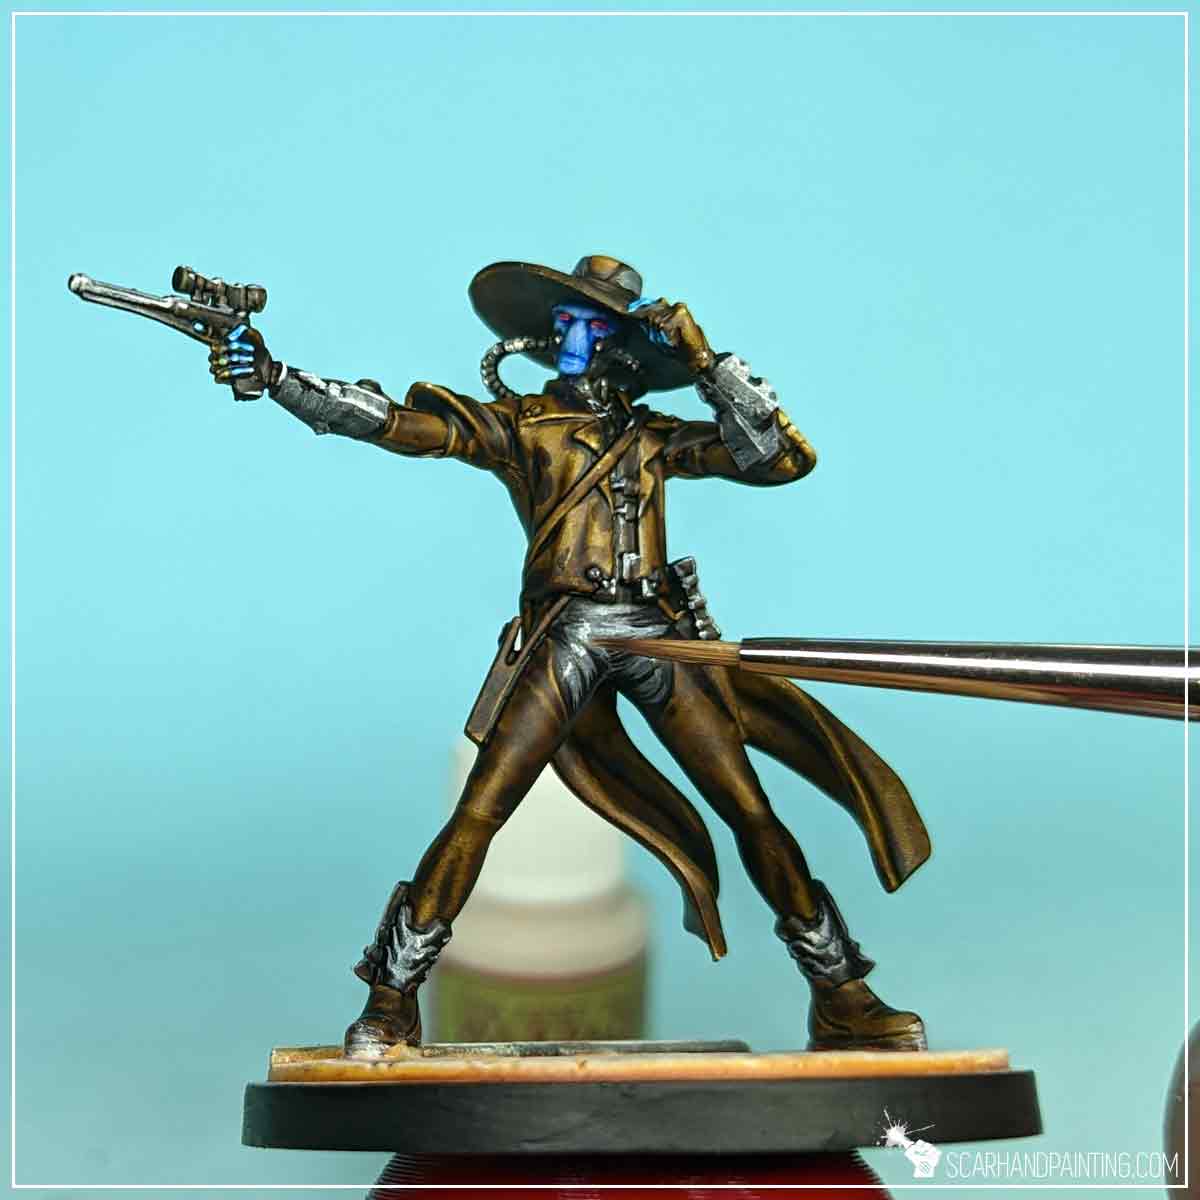
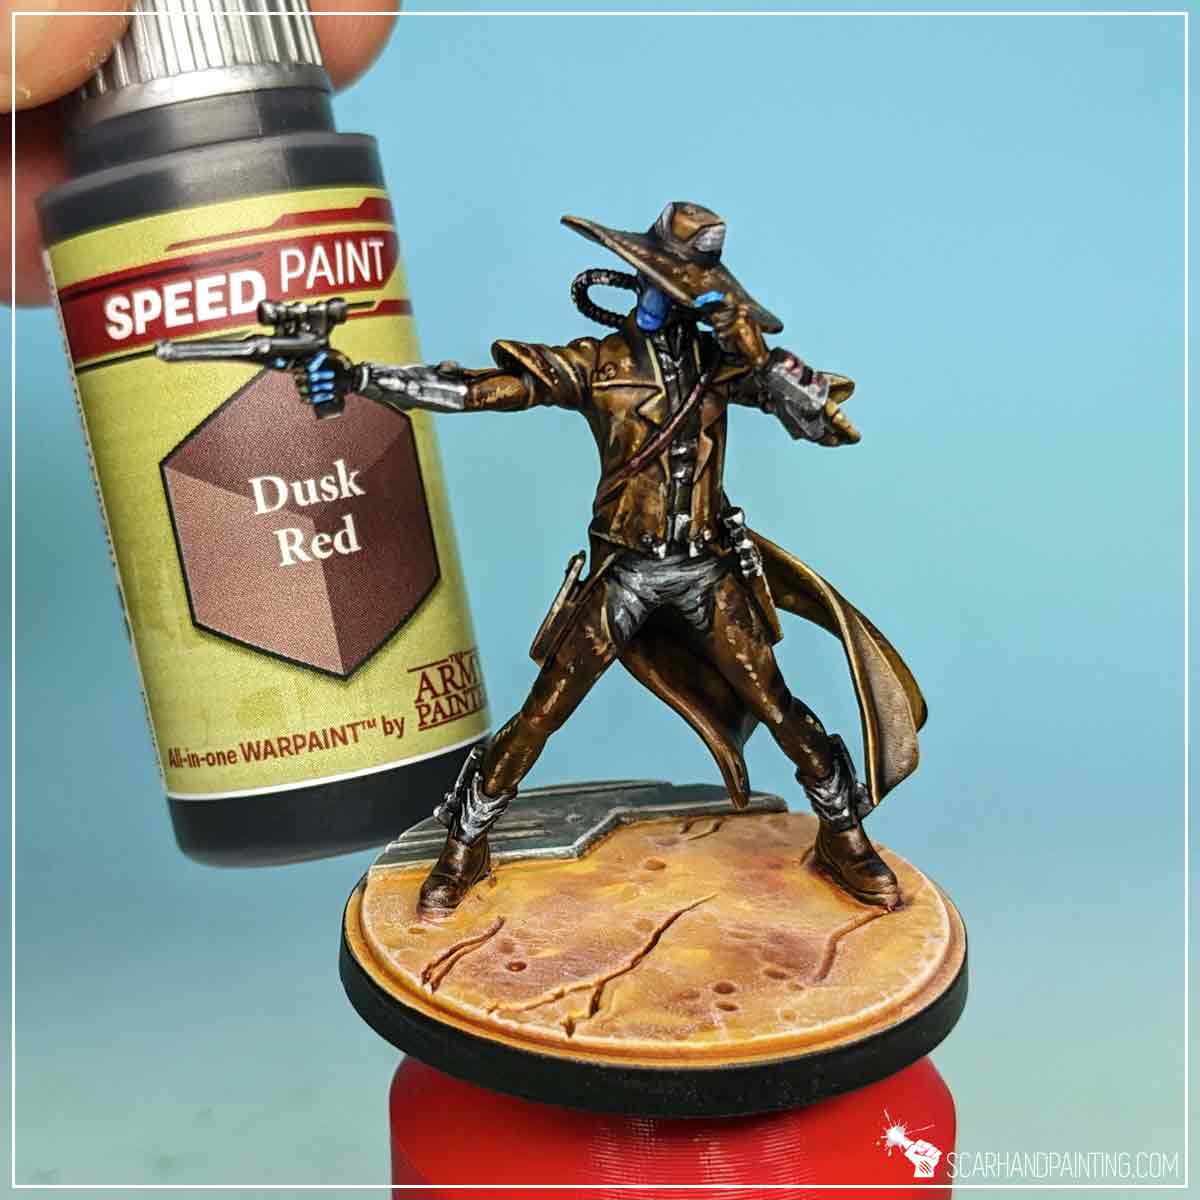
Following the box art I’ve decided to diversify browns a bit, by first applying lines and scratches of Mummy Robes on the edges alongside the satchel, gun holsters and the top of the boots. I used the opportunity to apply a few small dots of Mummy Robes to the face of the miniature as well, adding a nice highlight.
I then applied a ‘filter’ of slightly thinned down Rusk Red Speedpaint to the satchel, boots and holsters, adding a nice red’ish feel to them.
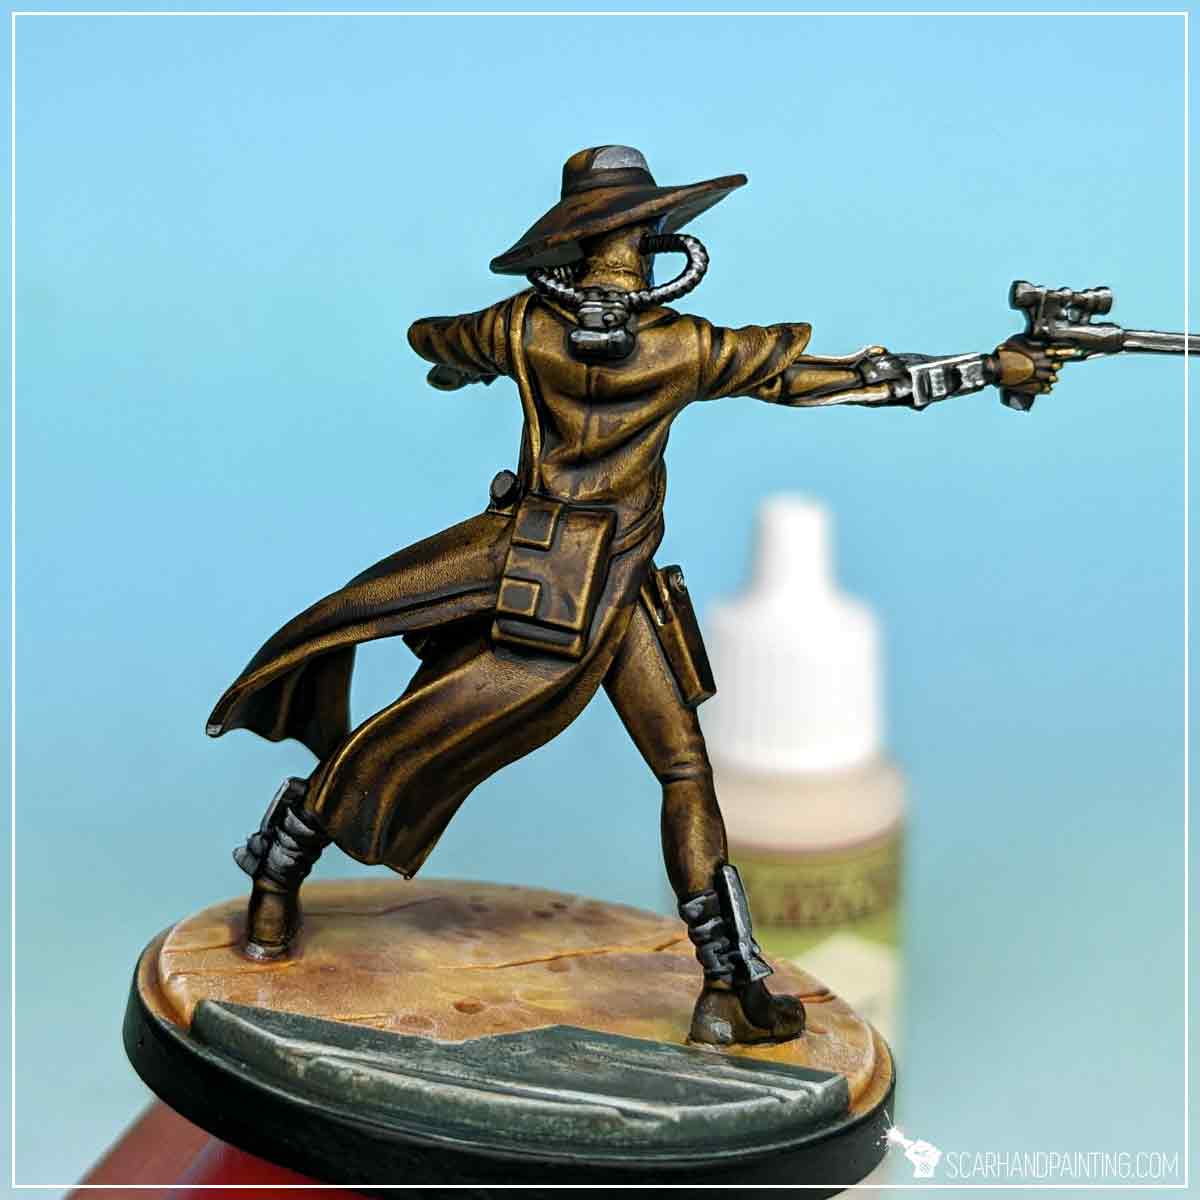
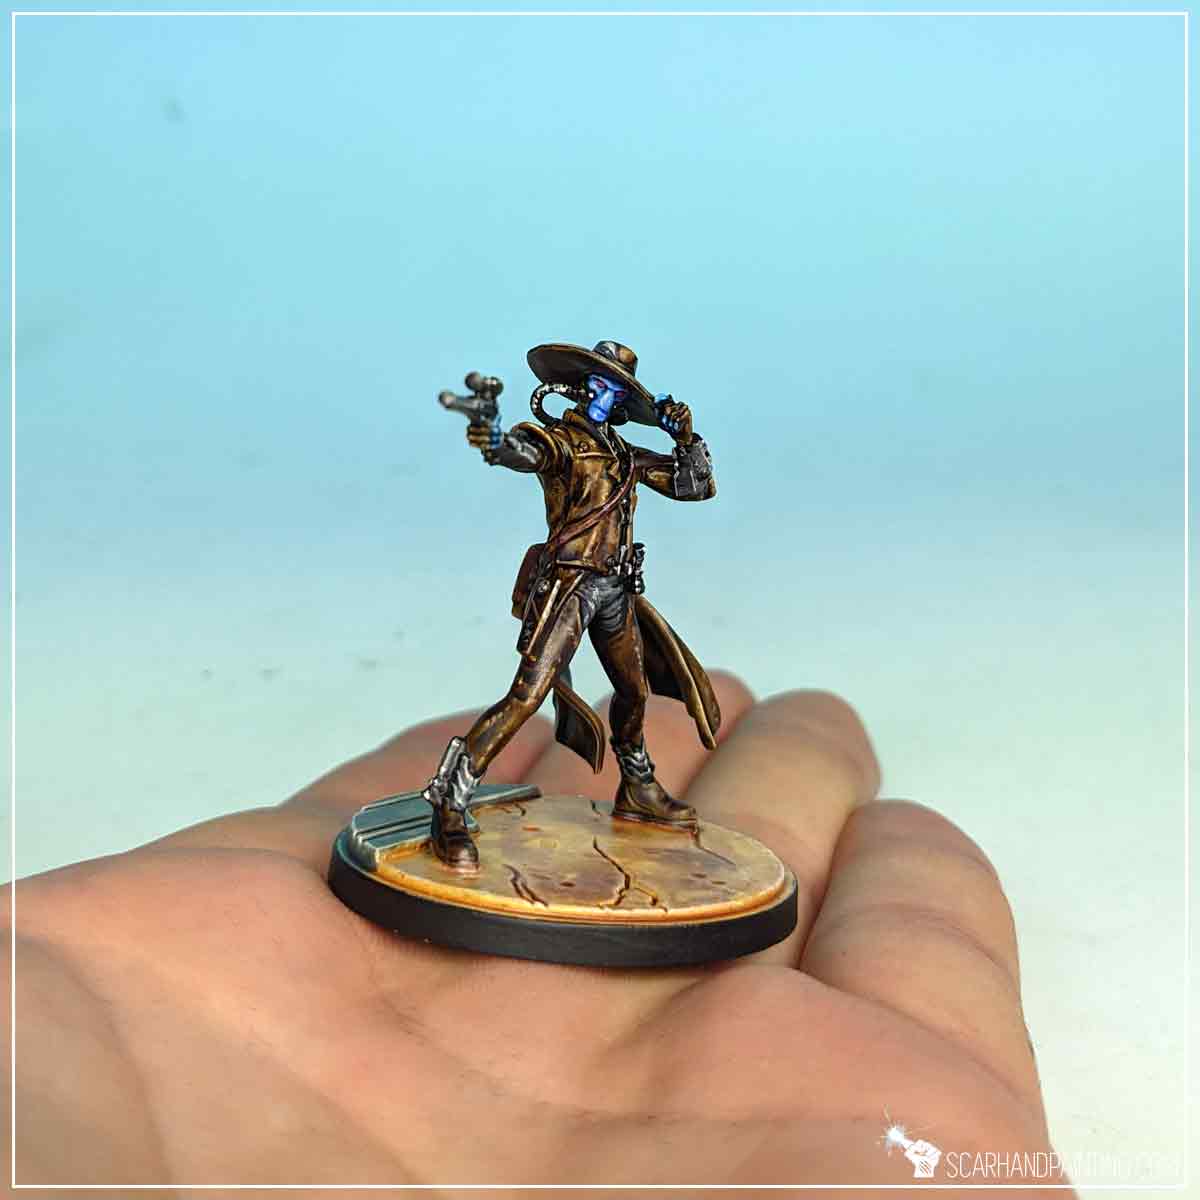
Finally I Varnished the miniature the same way as presented in the Tutorial: Painting Star Wars Shatterpoint Clone Troopers article.
I hope you find this tutorial interesting. Be sure to let me know your thoughts in the comments below or via Facebook or Instagram. I would also appreciate it if you considered sharing this content with your friends, who might find it useful. Many thanks to Rebel.pl for sponsoring this content. Stay tuned for more Star Wars: Shatterpoint tutorials.
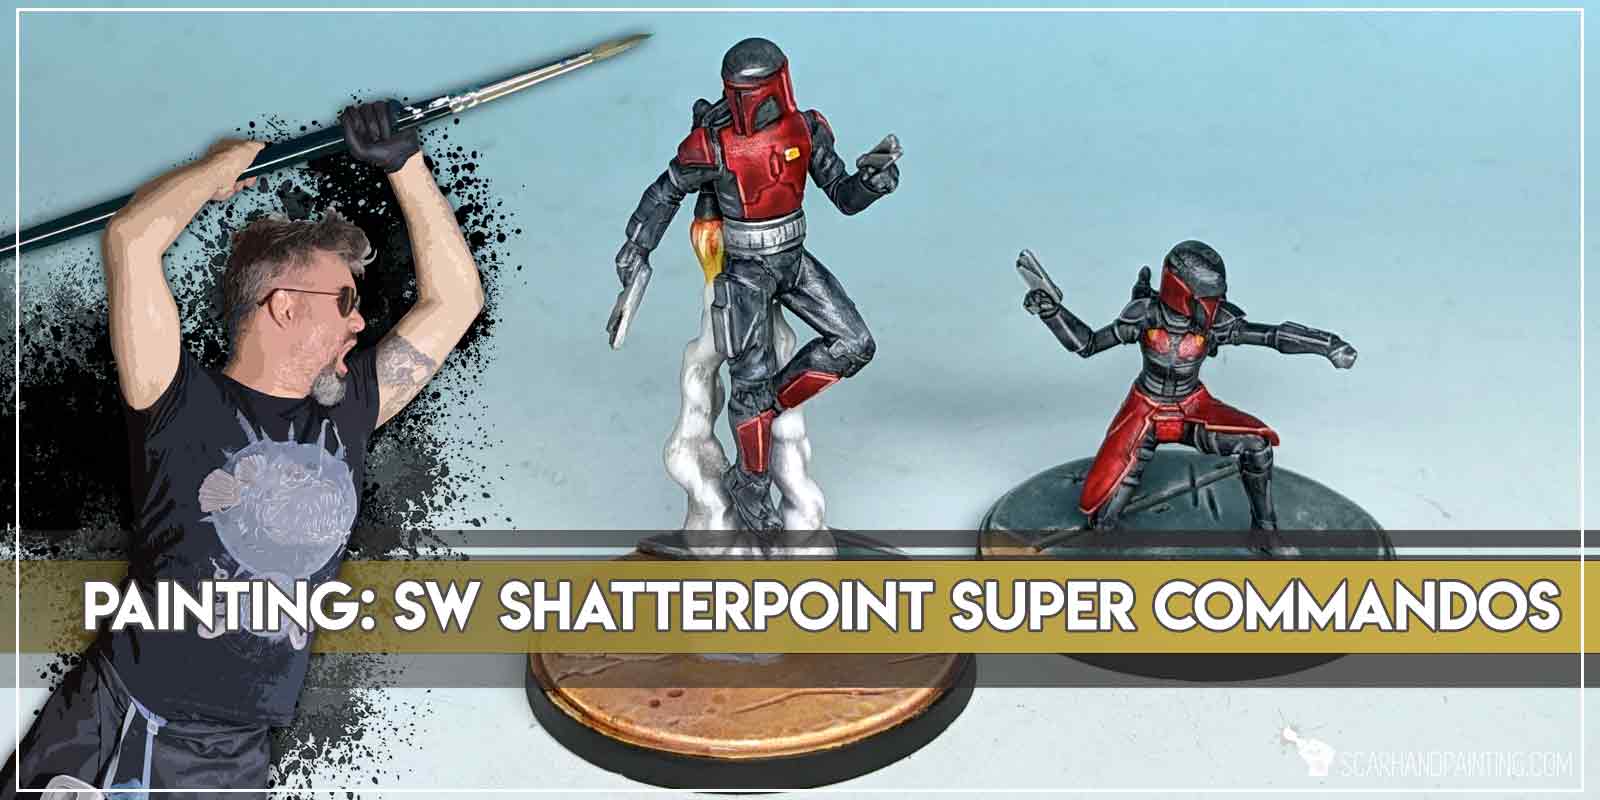
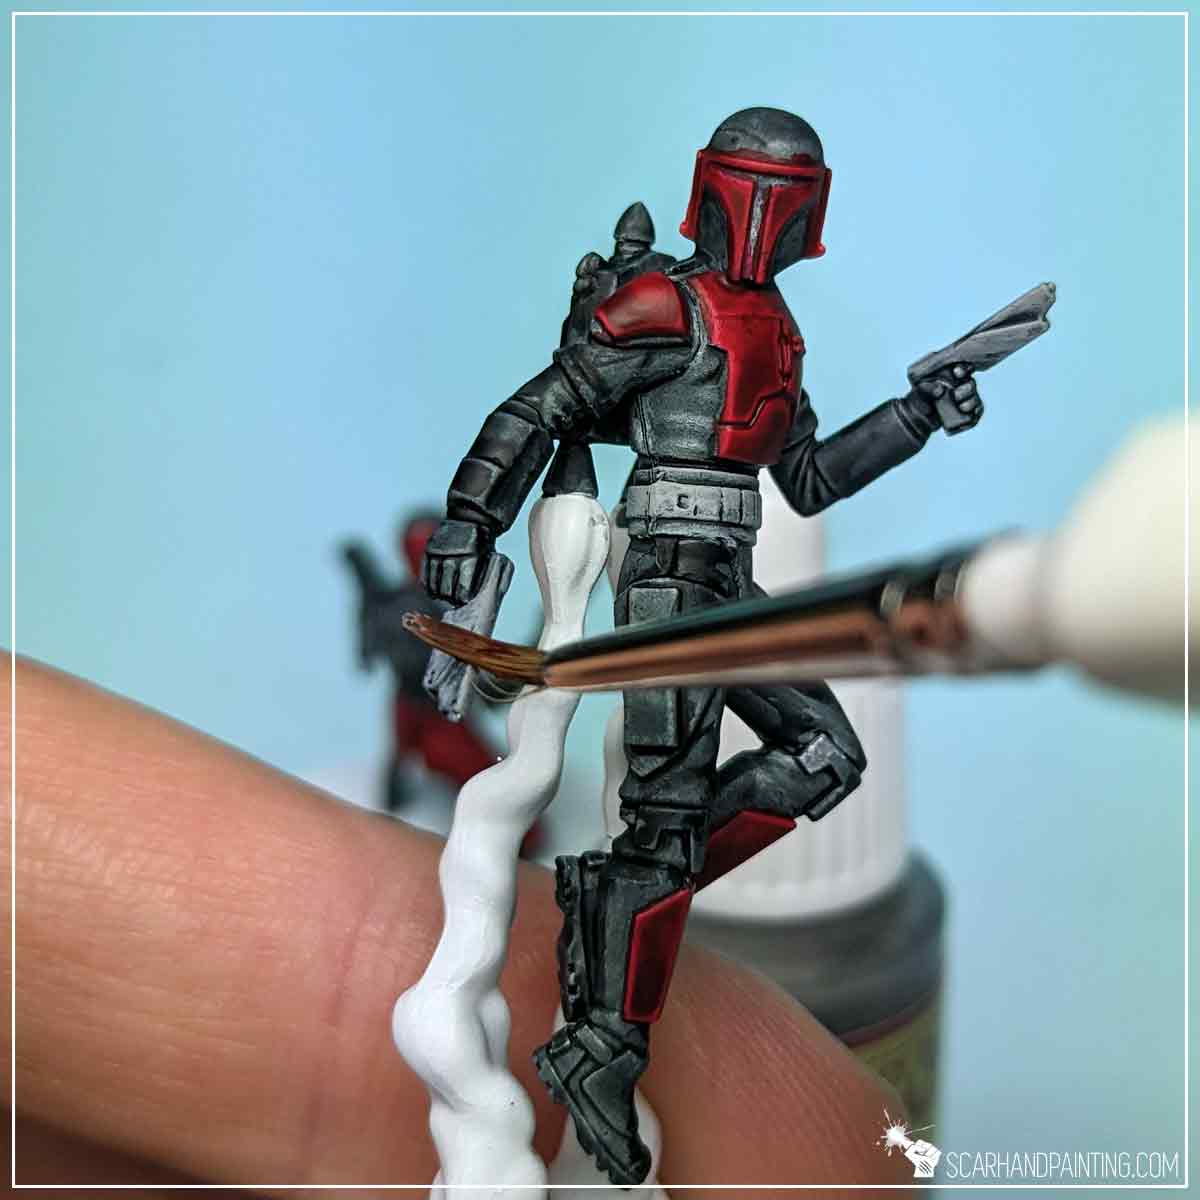
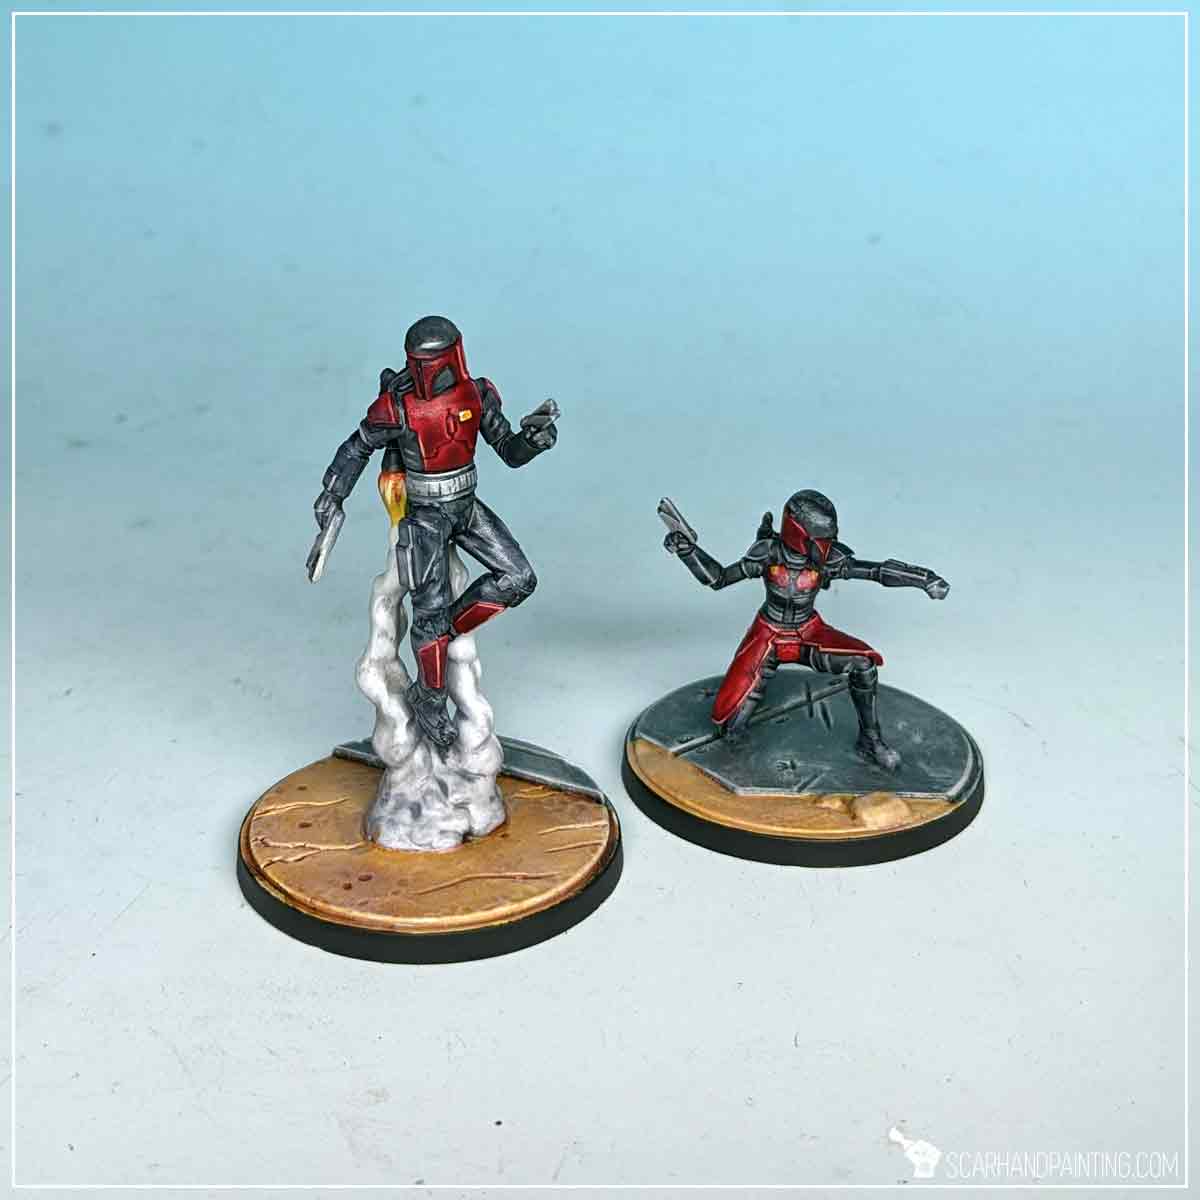
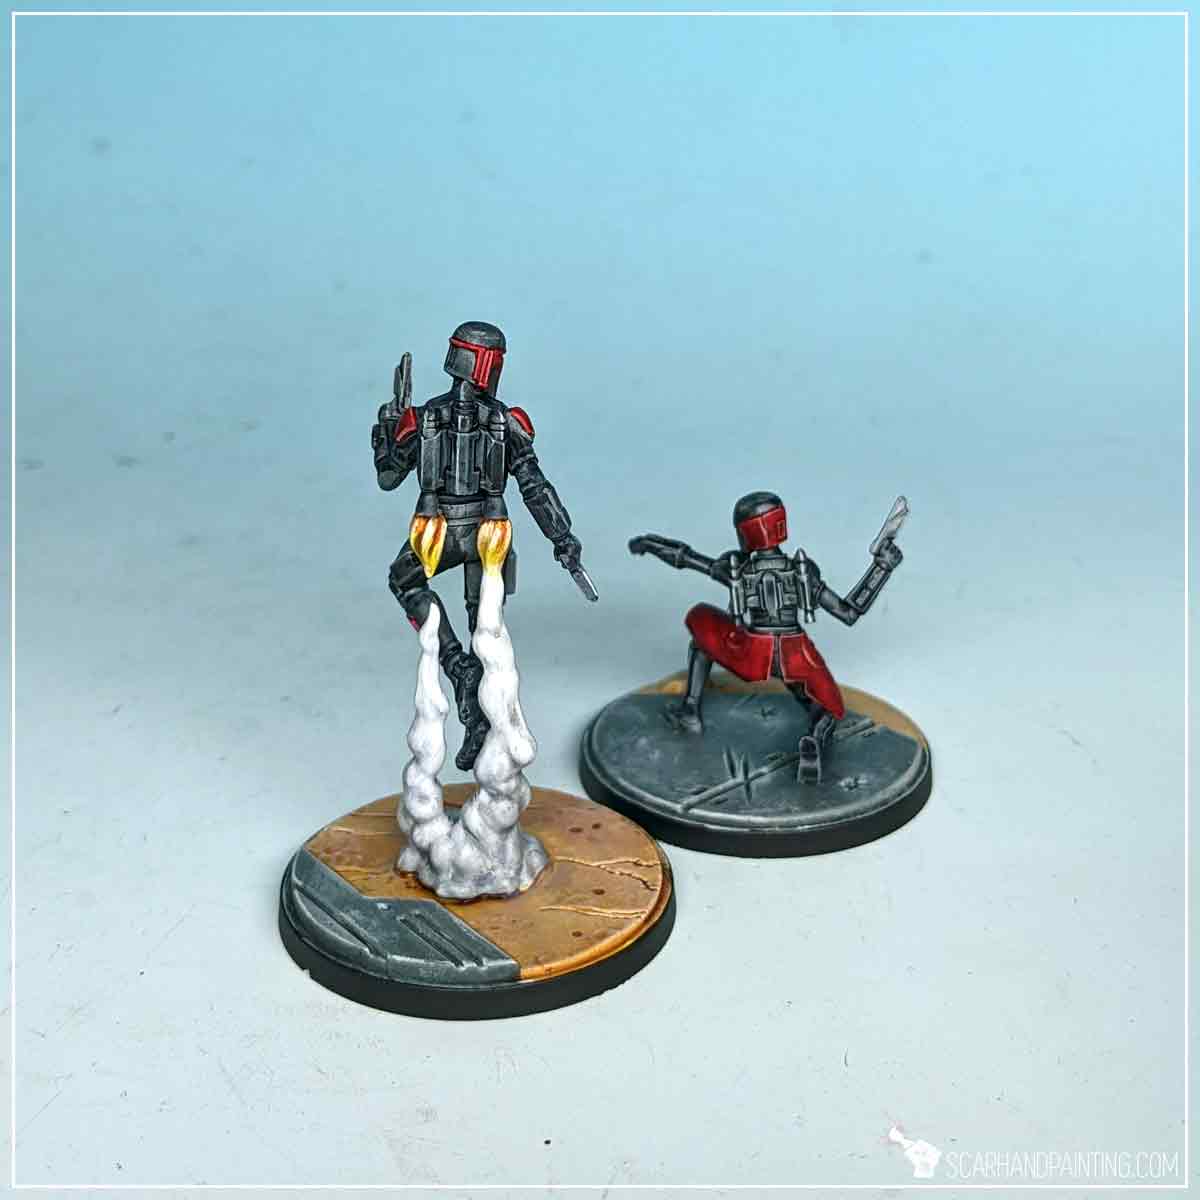
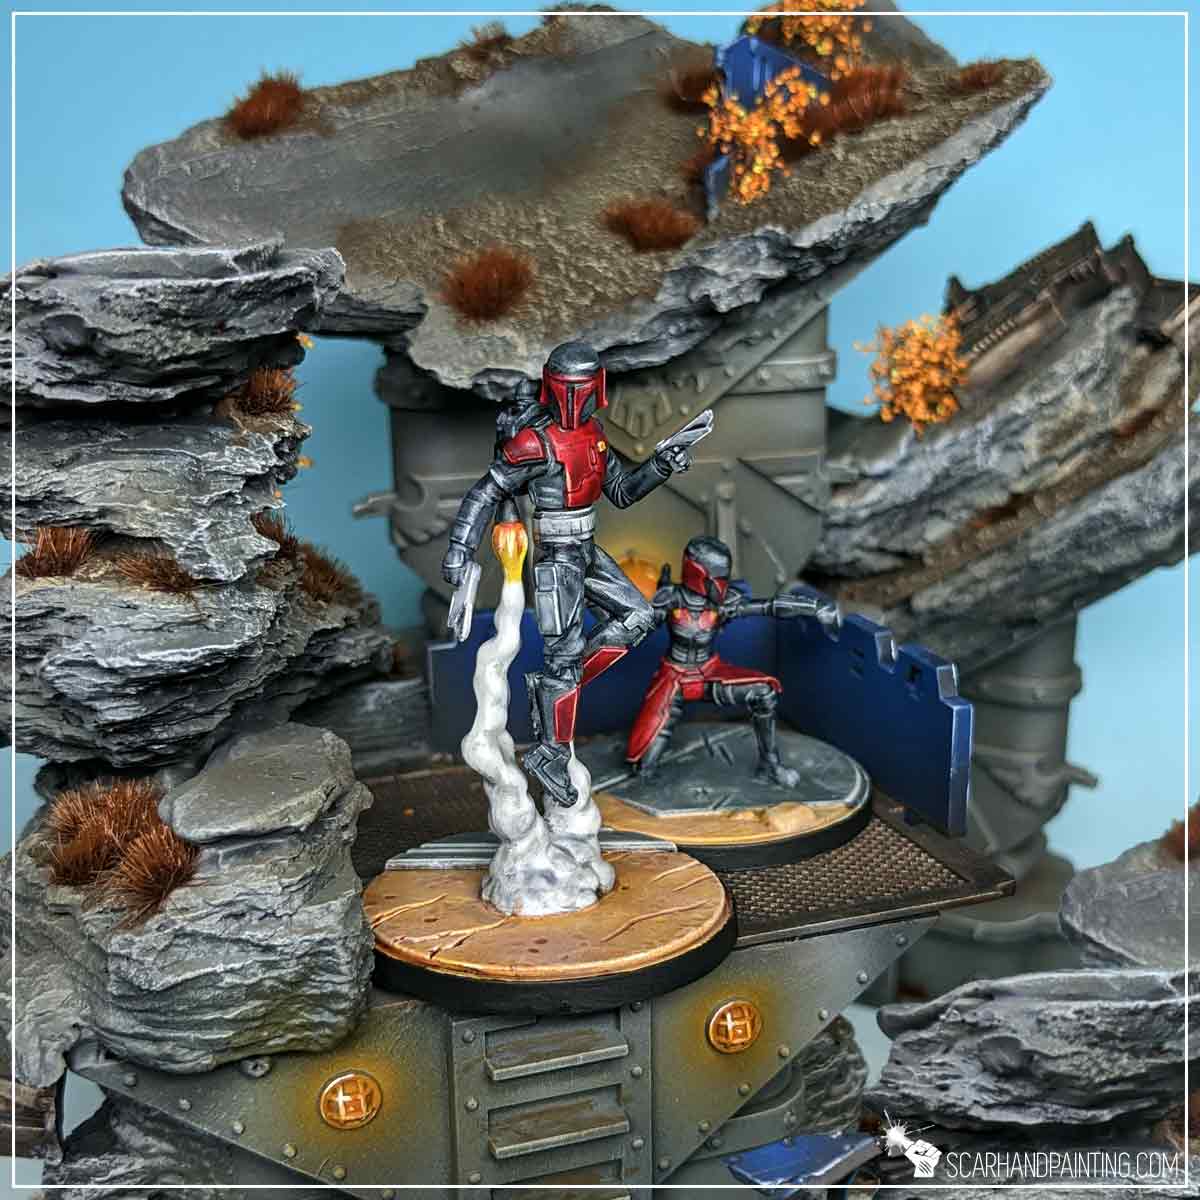
Welcome to Painting Star Wars: Shatterpoint Super Commandos tutorial. Here I will present to you a Step-by-step of a basic painting process for Mandalorian Super Commandos and a few extras.
Before we start, some notes:
Both Mandalorian Super Commandos were prepared in the same way as previous Shatterpoint miniatures. Visit Tutorial: Painting Star Wars Shatterpoint Clone Troopers article for a detailed step-by-step guide.
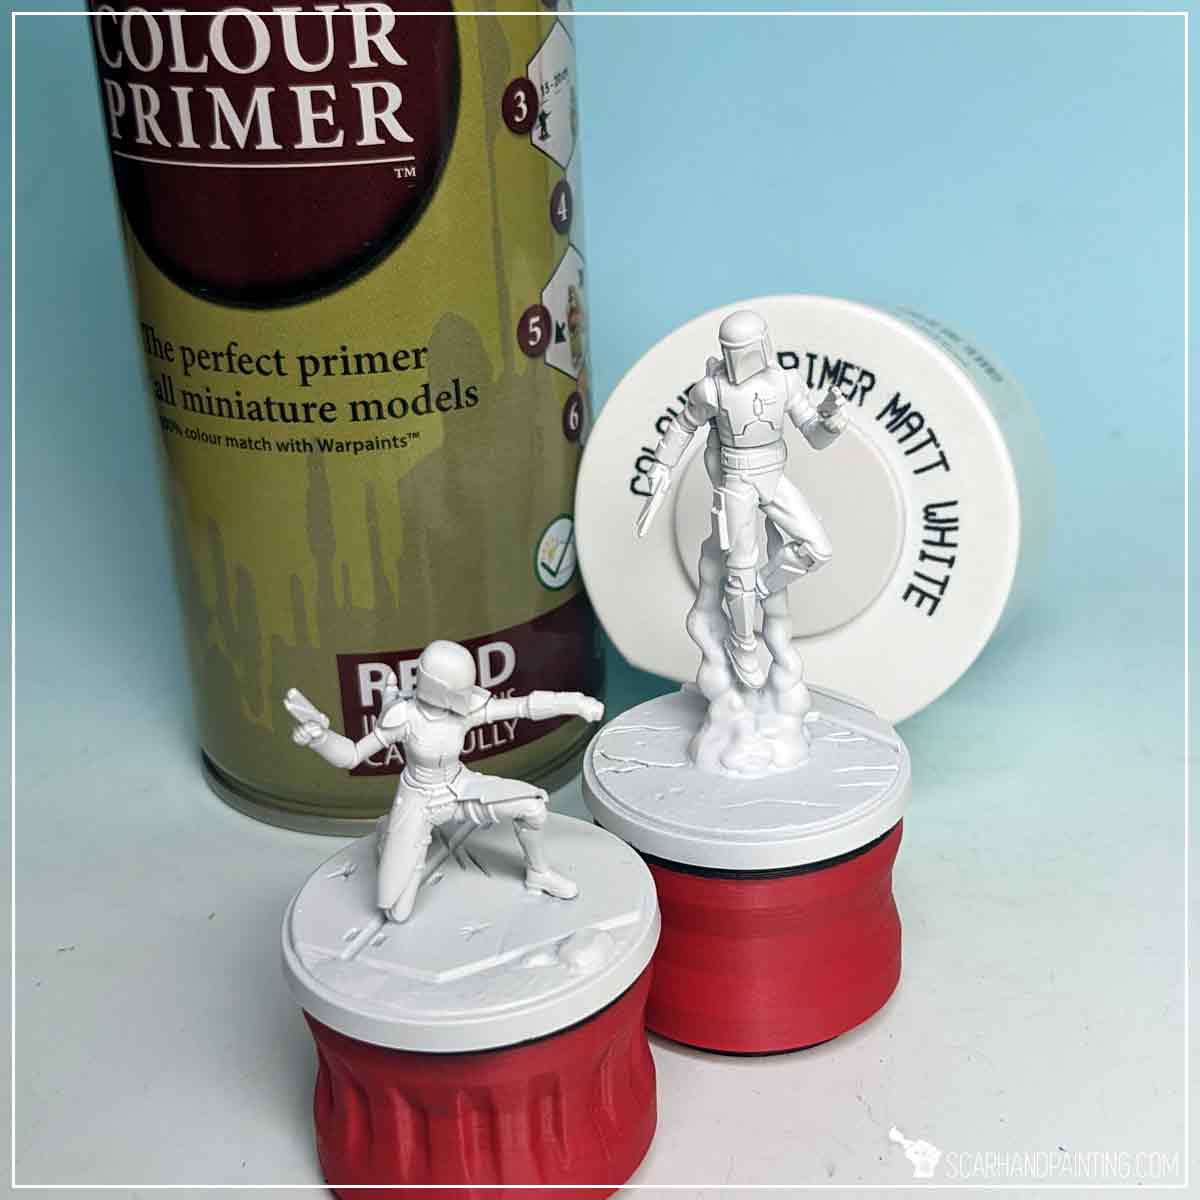
I mounted the miniatures on a stick with a piece of Blu-Tack, then undercoated them with The Army Painter White Matt Primer.
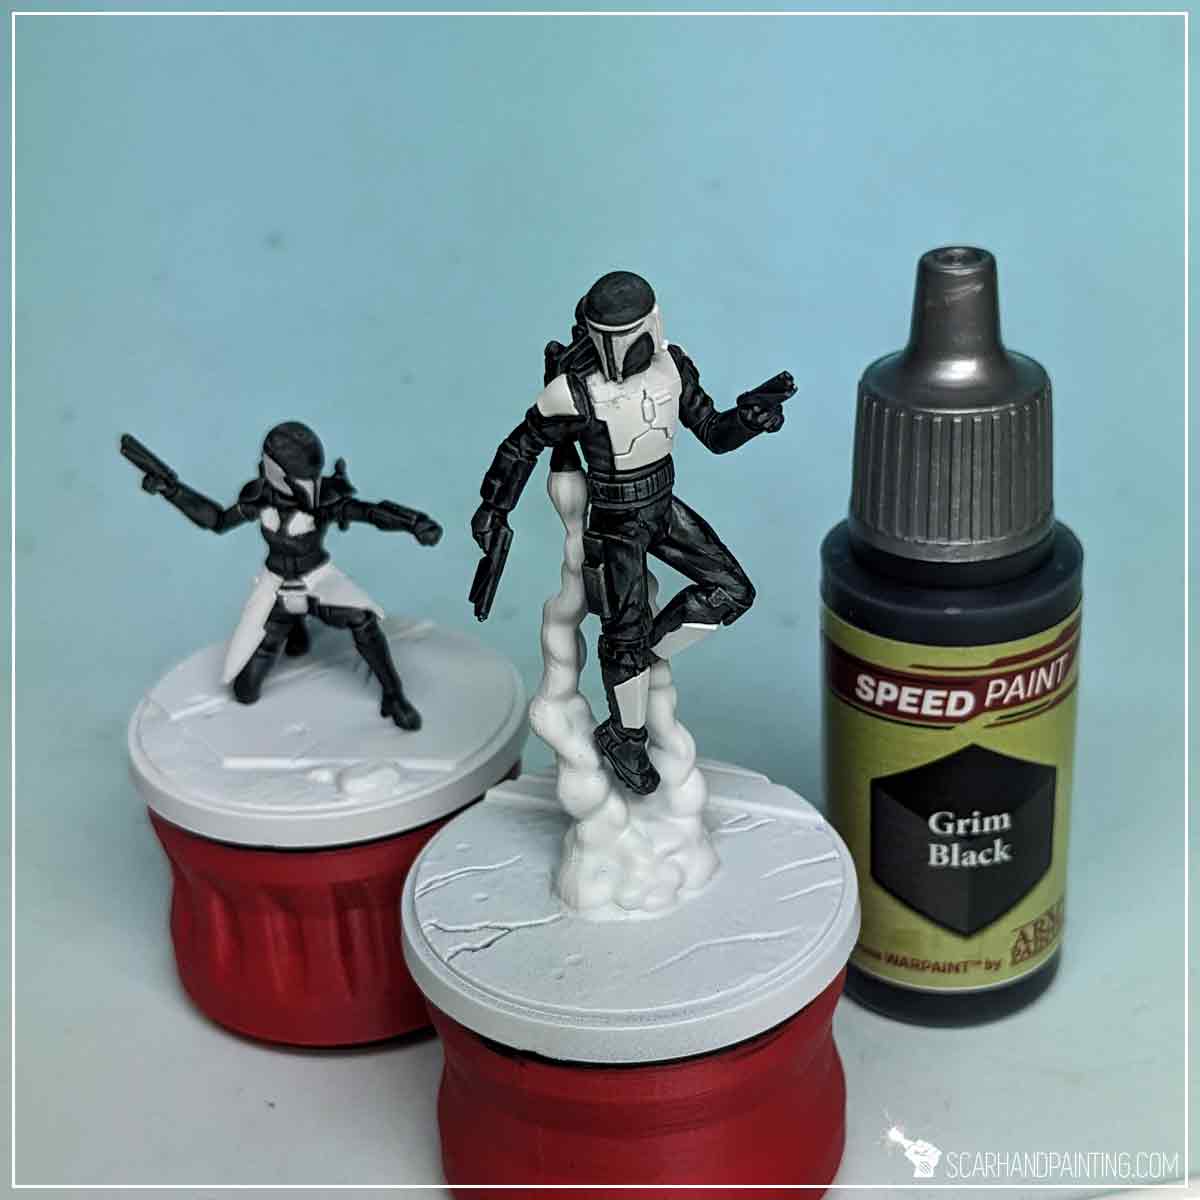
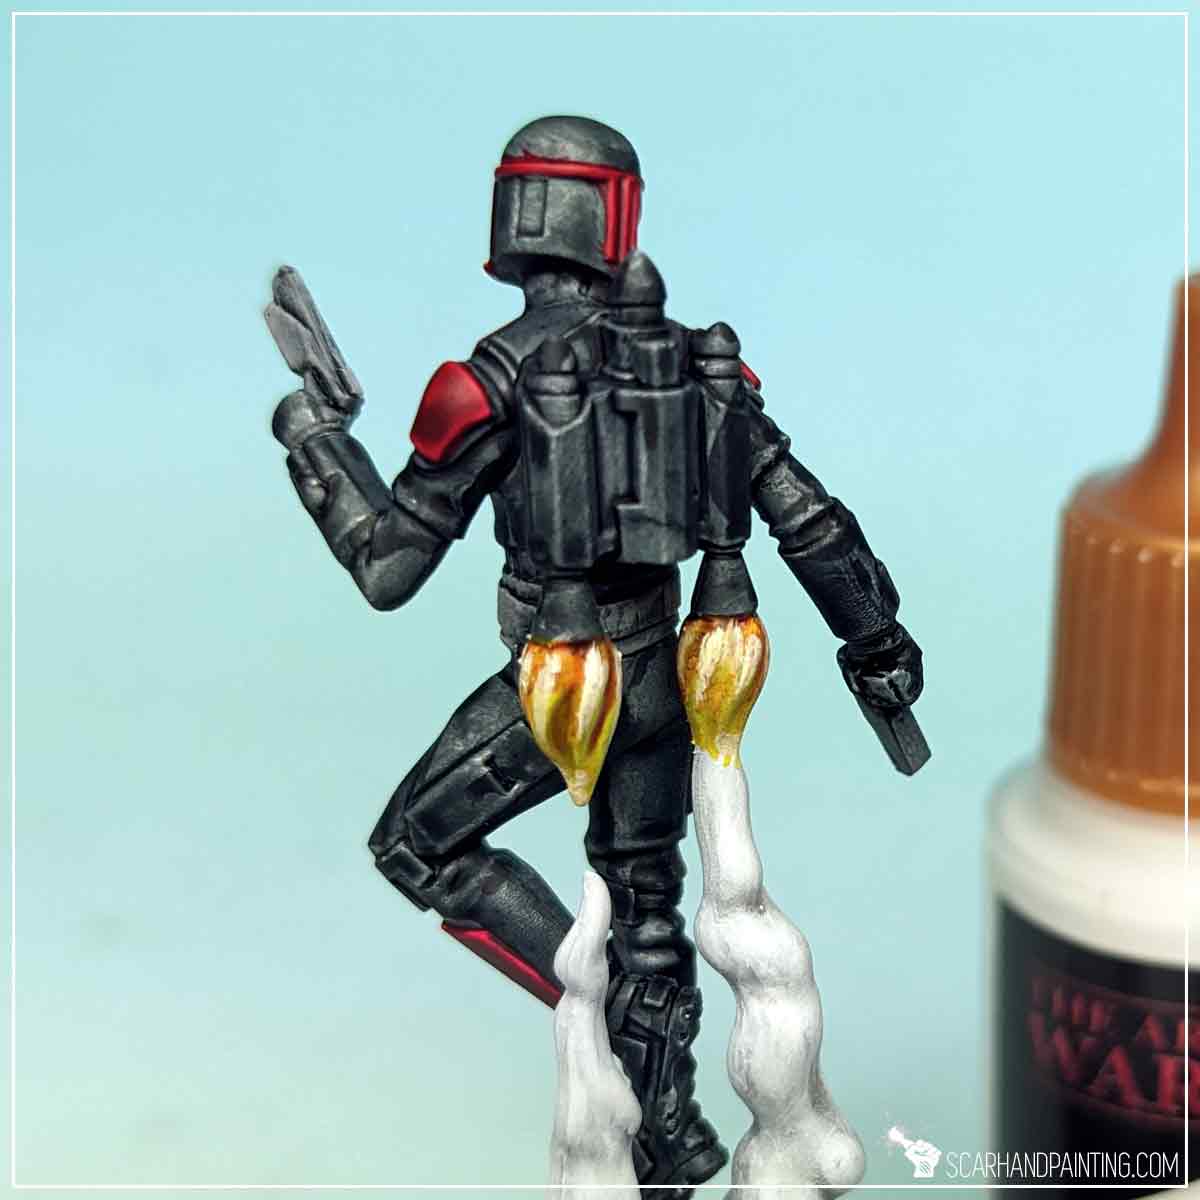
I started by applying Grim Black Speed Paint to most of the miniature, leaving out only a few selected armor elements and backpack exhaust fumes. My brushes of choice were Wargamer: Regiment Brush and Wargamer: Character Brush.
TIP: I then used a tip of a toothpick to softly scratch any mistakes of black paint getting where it wasn’t supposed to.
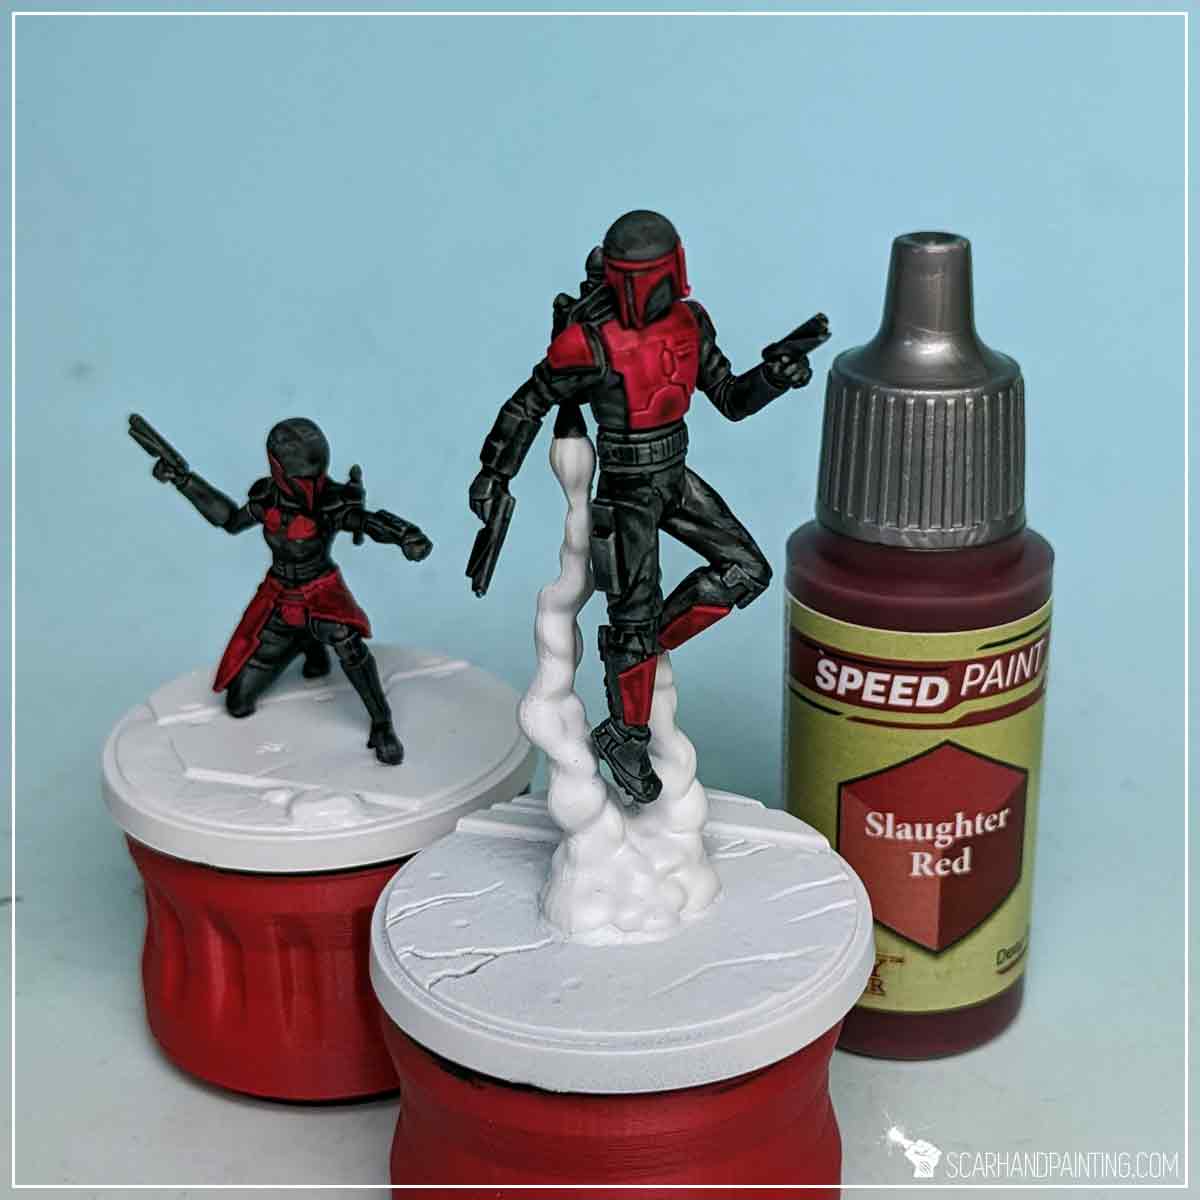
Next, using the same two brushes, I applied Slaughter Red Speed Paint onto white armor plates.
I then repeated the process, adding another layer of Slaughter Red to add warmth and deepen the red color.
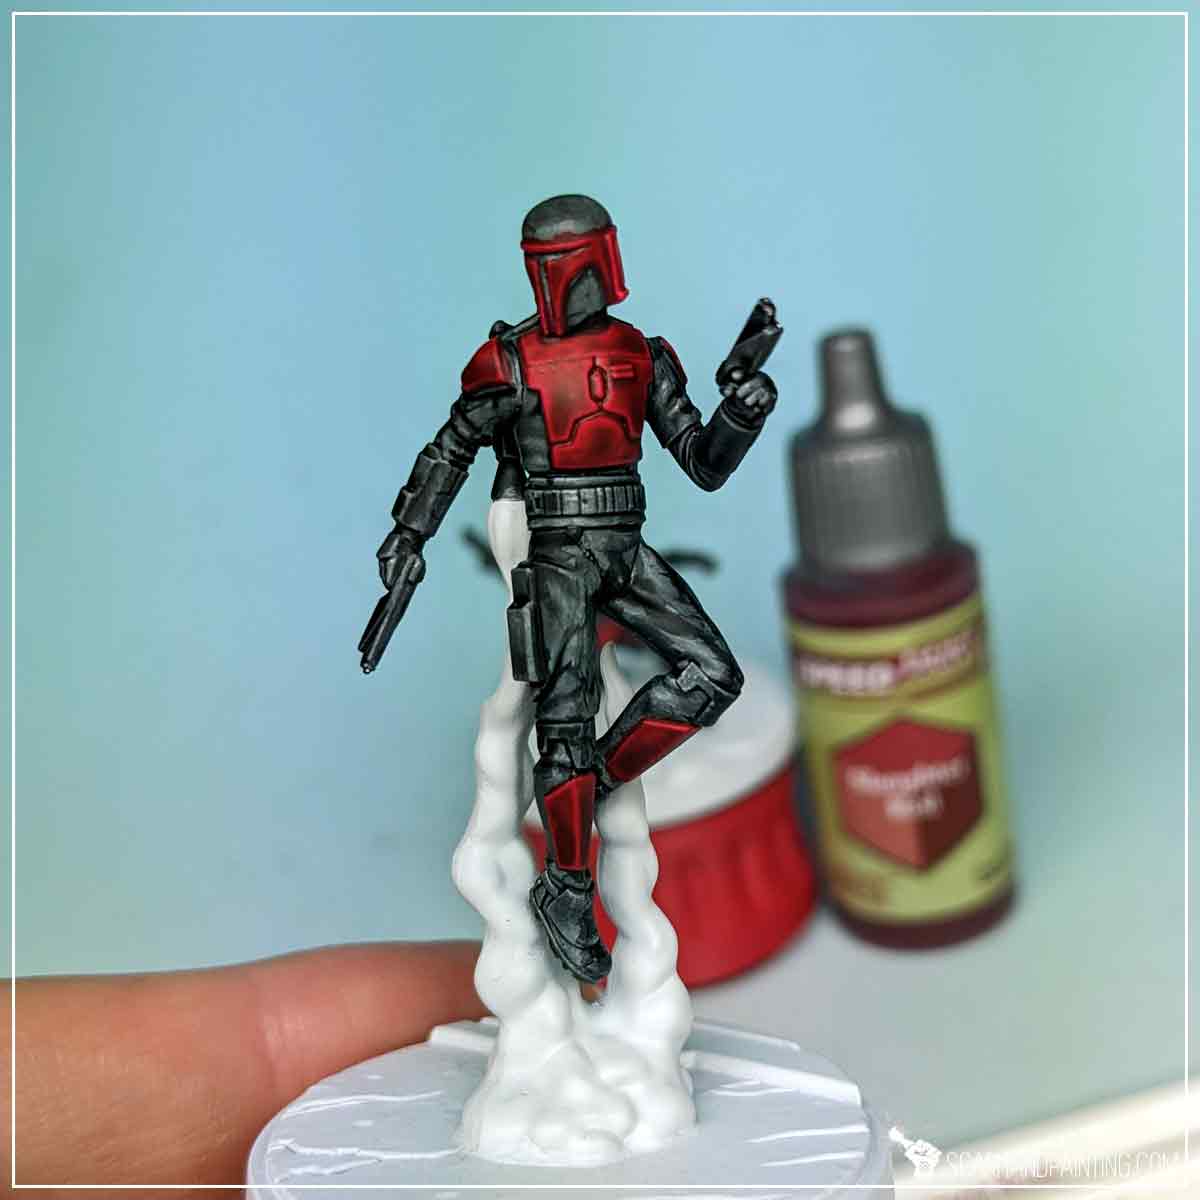
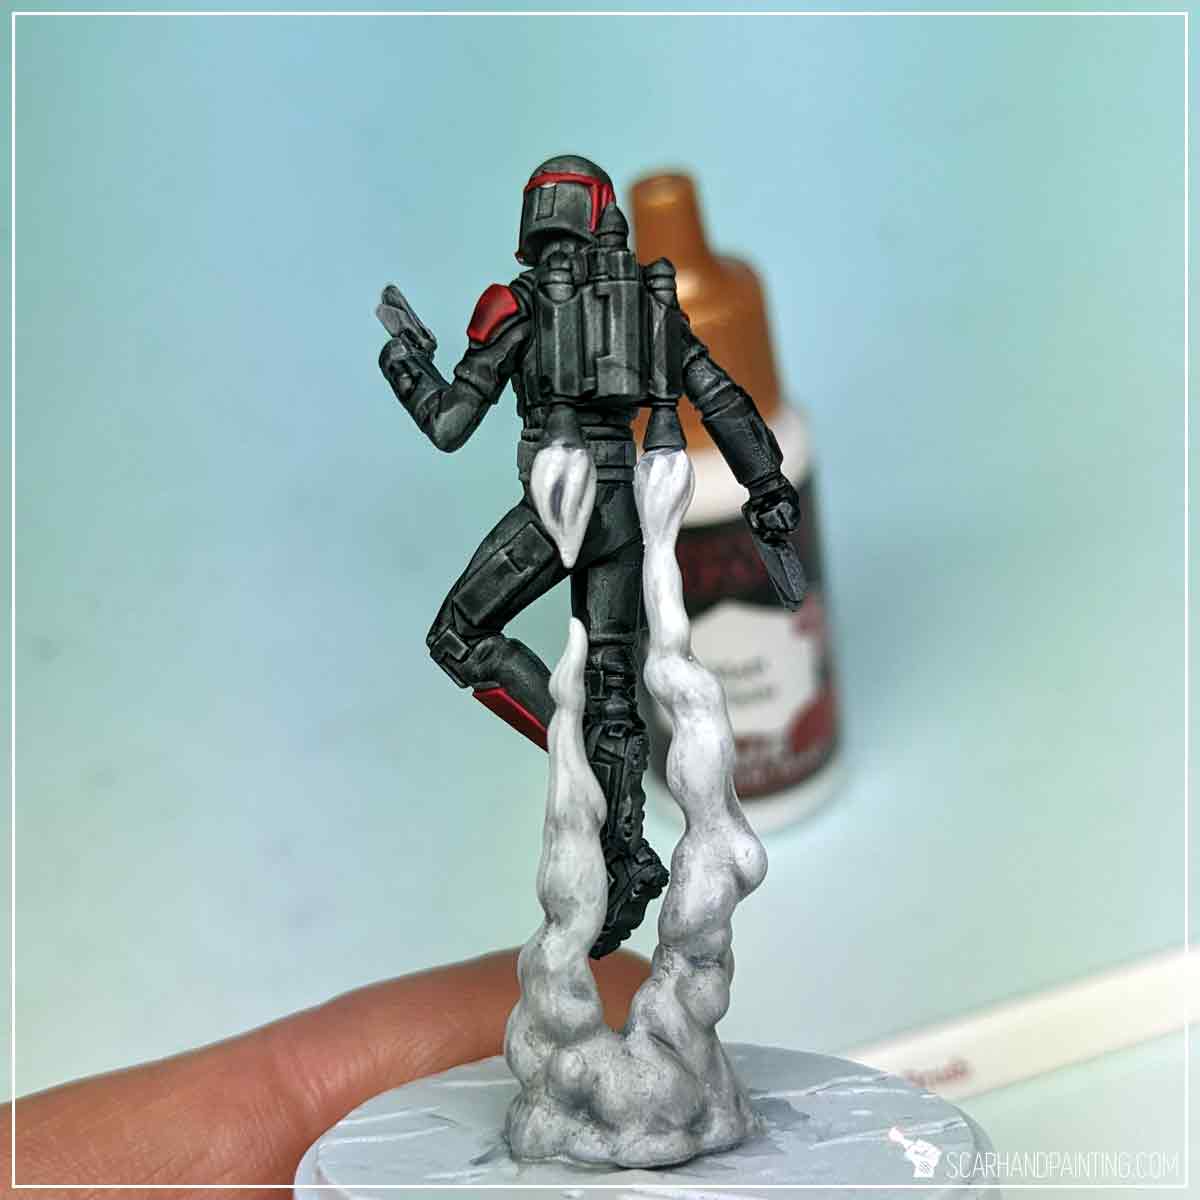
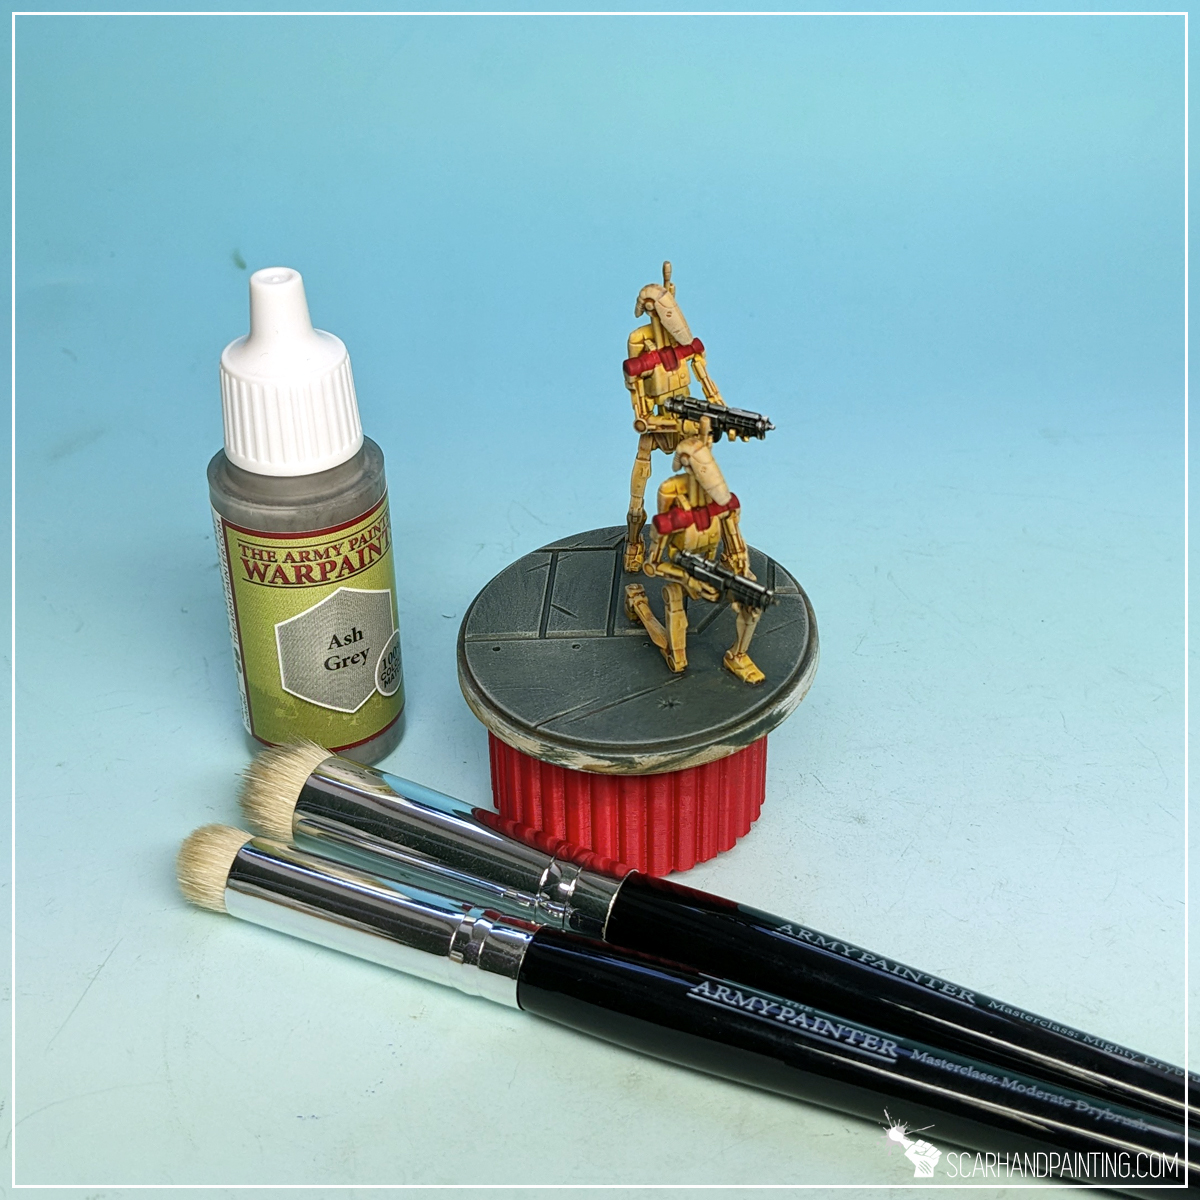
For Belts and Weapons I applied a layer of Ash Grey. I used the Wargamer: Character Brush and the Flatbrush technique to do this.
TIP: Flatbrushing is done by putting the tip of a brush in paint, then brushing the excess paint off onto a piece of paper or other smooth surface material, then brushing the remainder of the paint onto the chosen surface, in one direction and perpendicular to any edges. This technique works best with brushes equipped with a long “head” or synthetic brushes with a long “belly” part. You can learn more about the technique HERE.
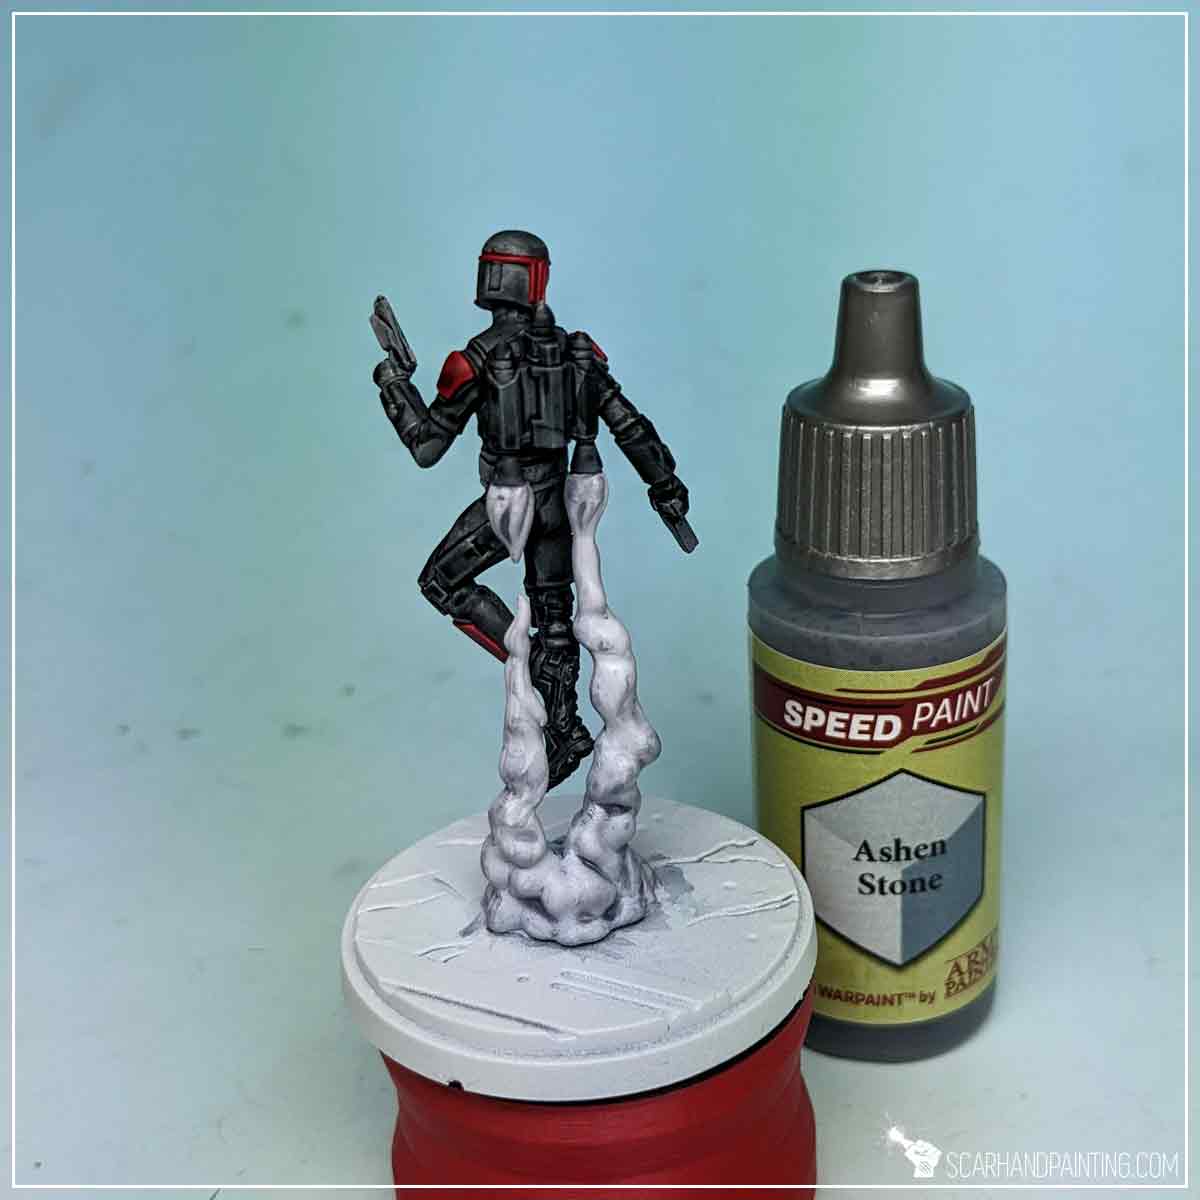
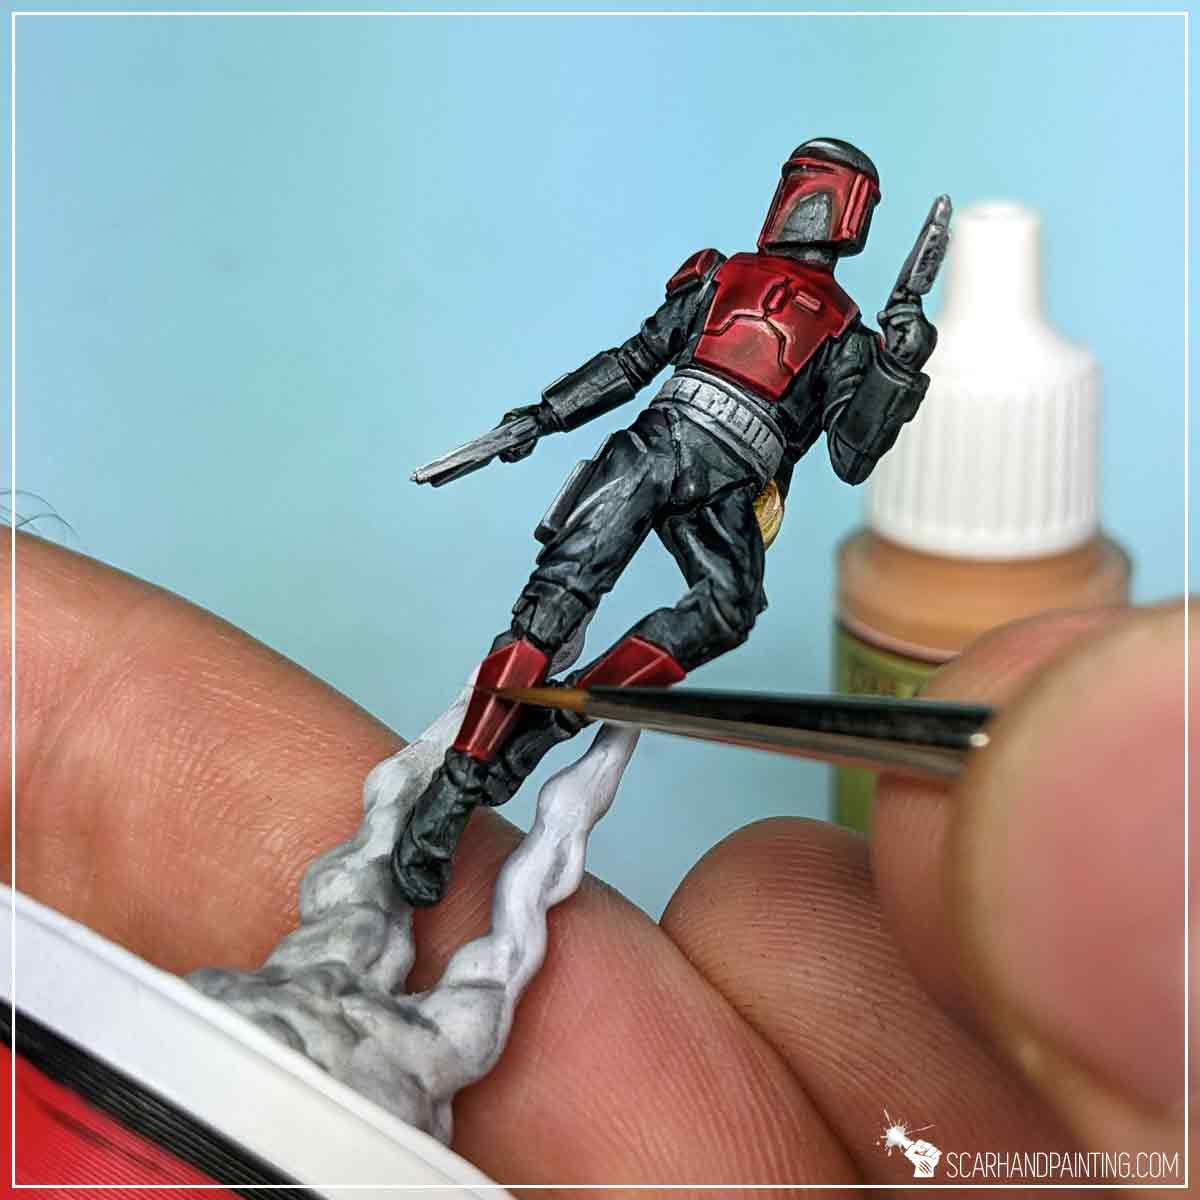
Focusing on easy methodology I built a volume of smoke like color by thinning Ashen Stone Speed Paint with water, and covering the entire surface with the resulting mix.
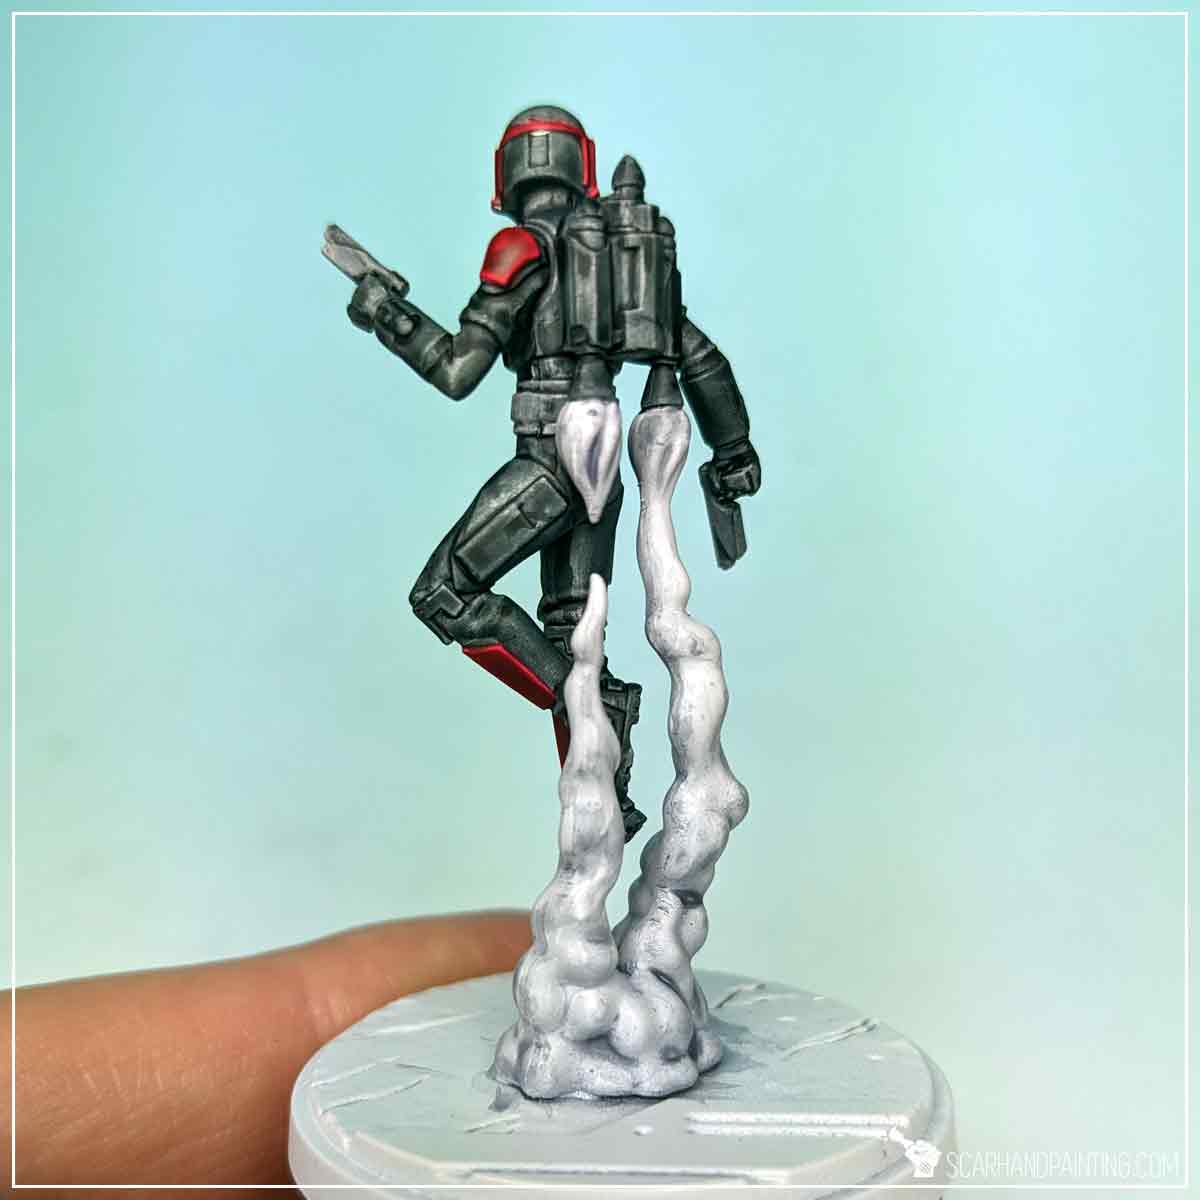
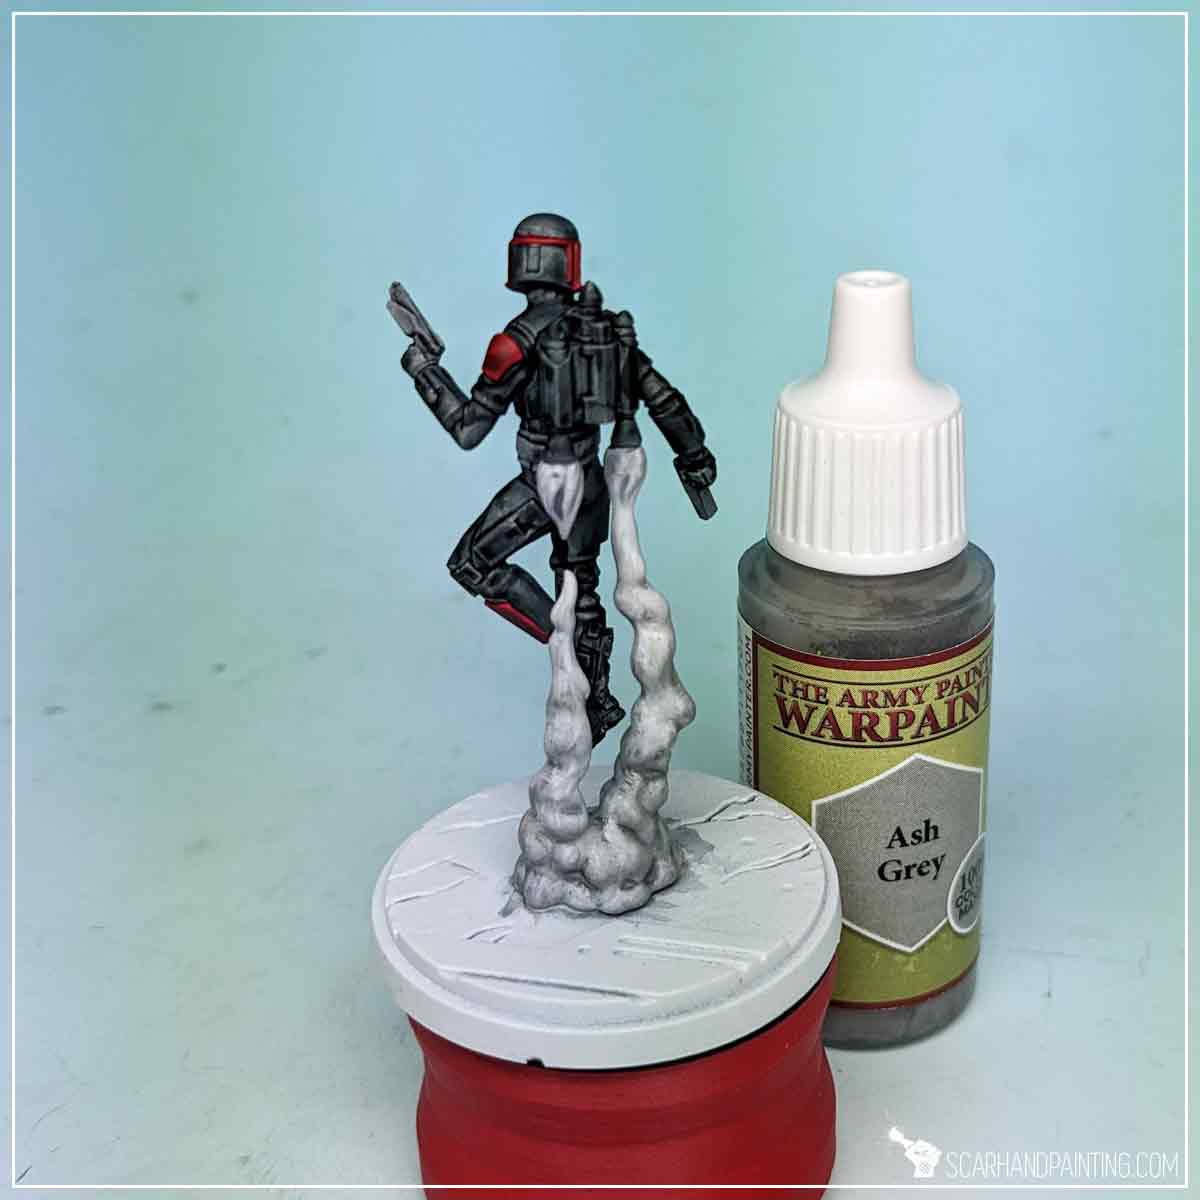
I then applied another mix. This time I used water to thin down Ash Grey in a 1:1 ratio.
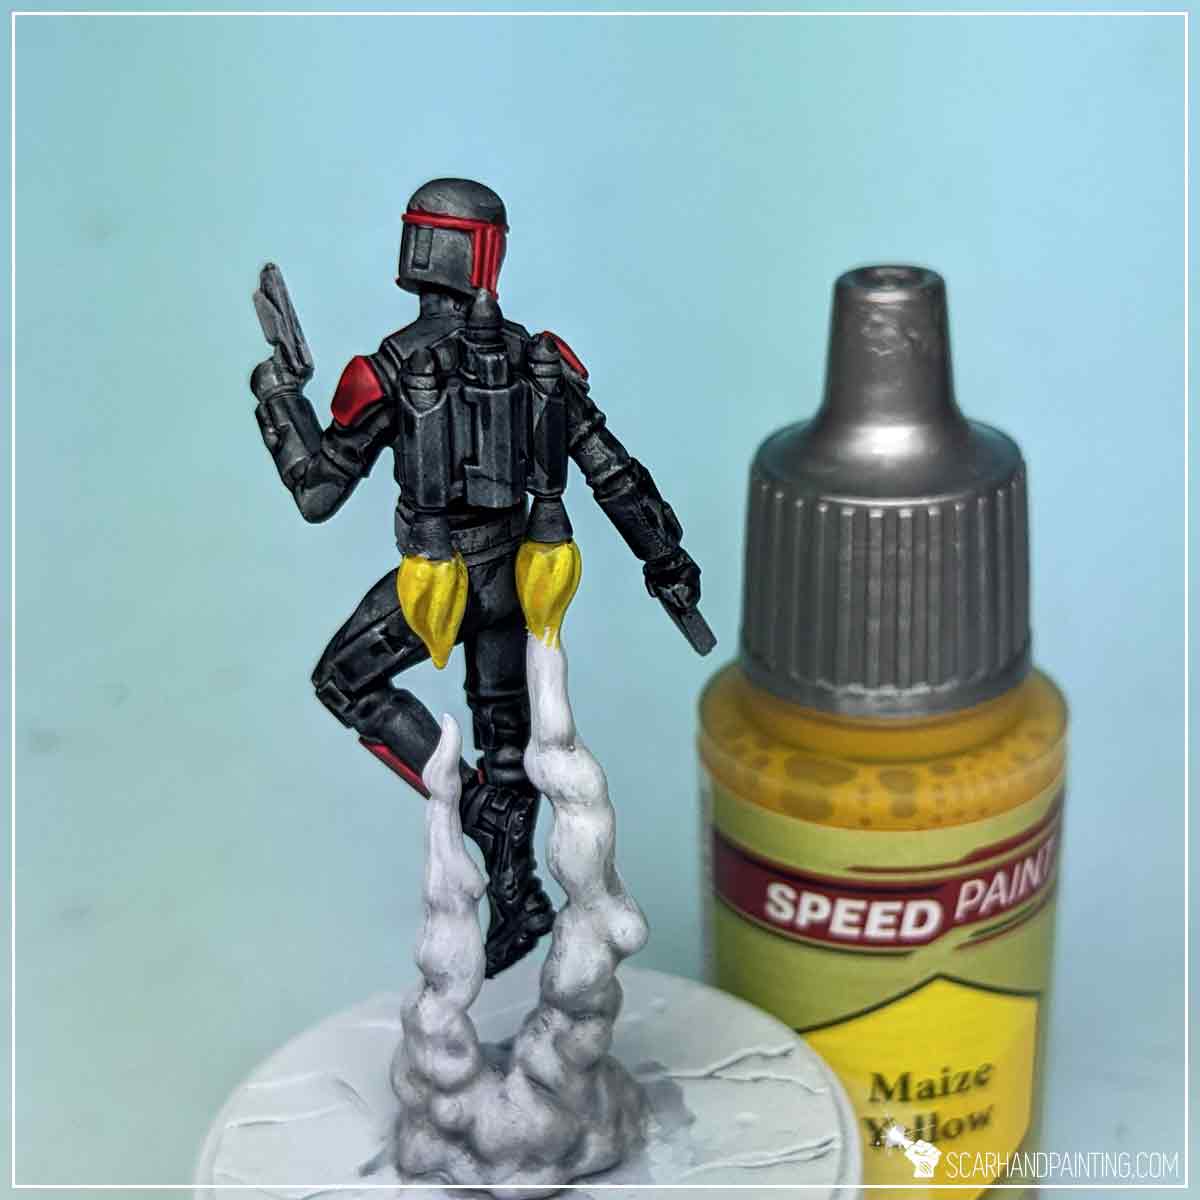
Next I manually applied some Matt White (Air) to the upper, most exposed parts. Air paints are thin by nature, which resulted in a nice color gradation between upper and lower areas of fumes.
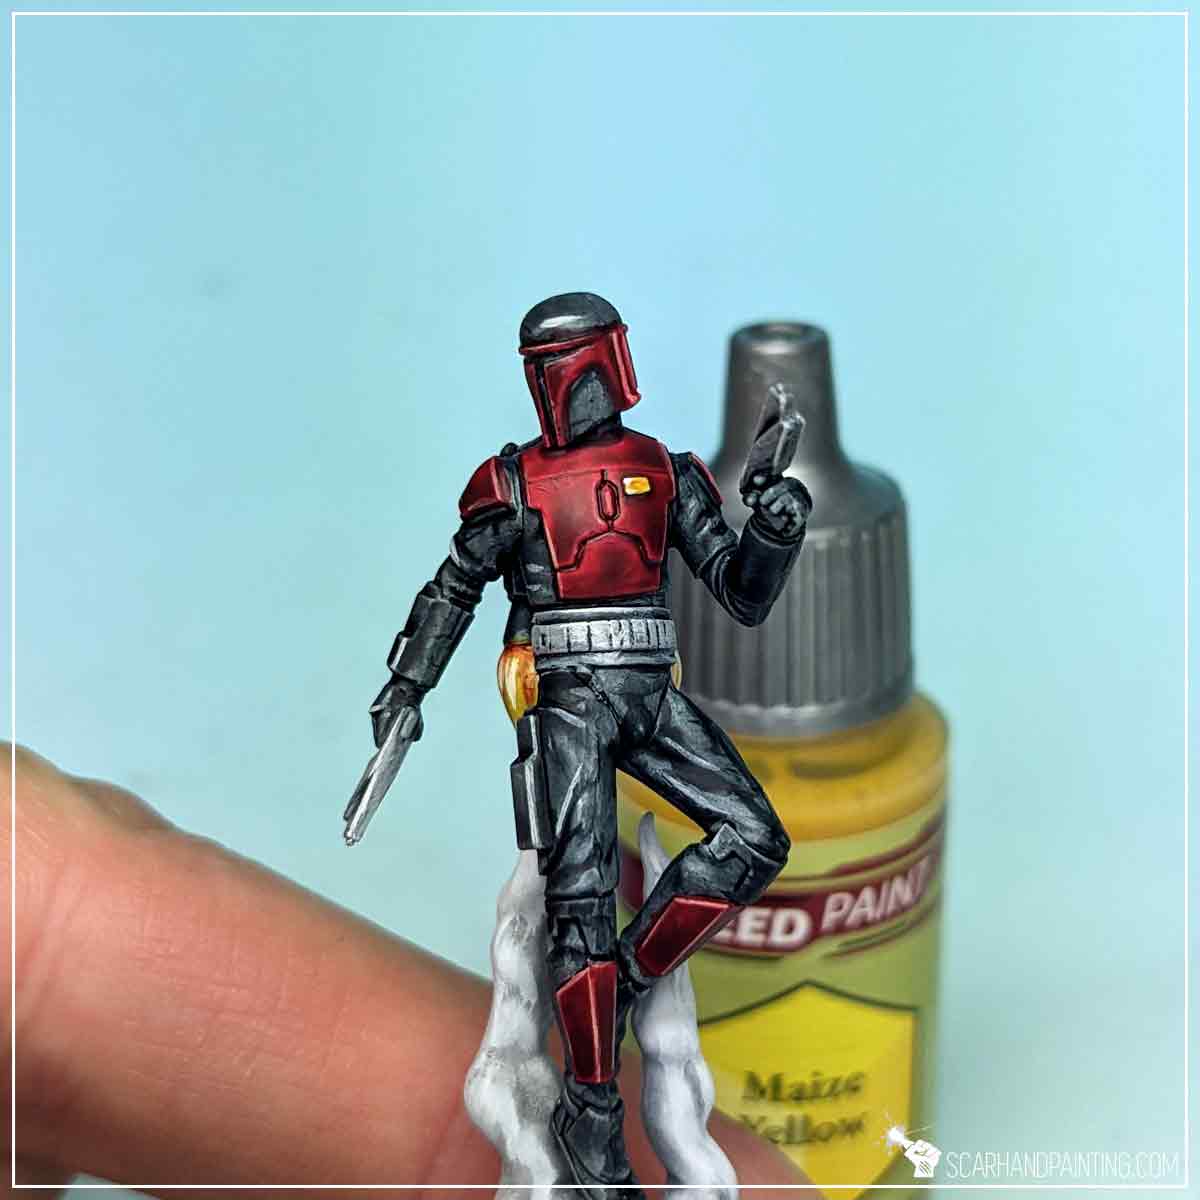
Finally I painted the top of the exhaust fumes with Maize Yellow Speed Paint, followed short by Nuclear Sunset Speed Paint at the very top.
To make the colors pop I drew a few lines of Matt White along the most exposed areas.
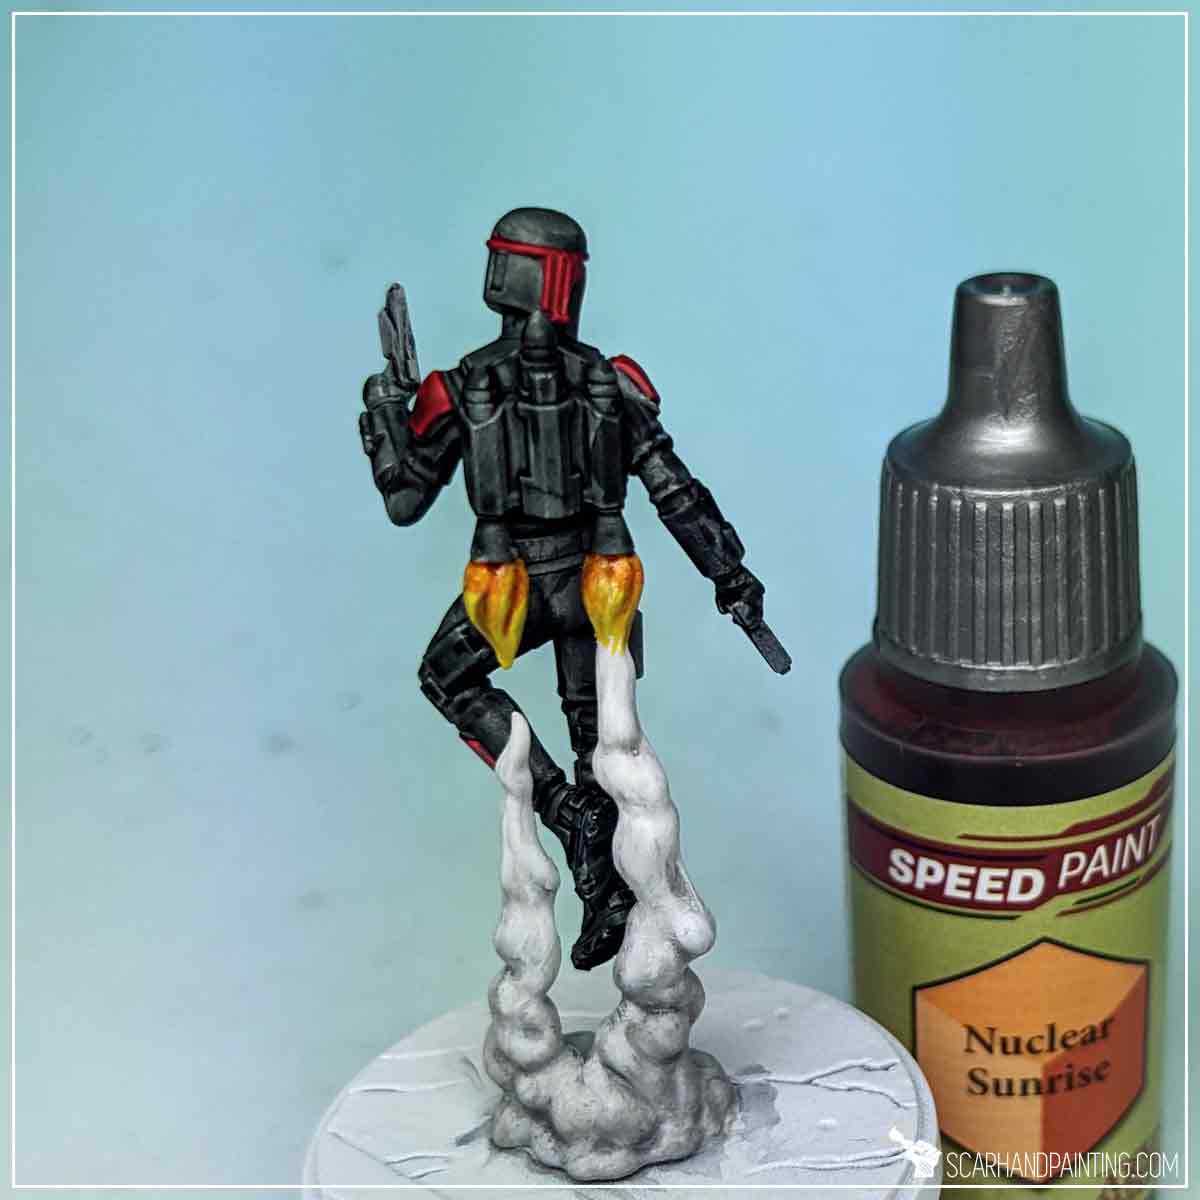
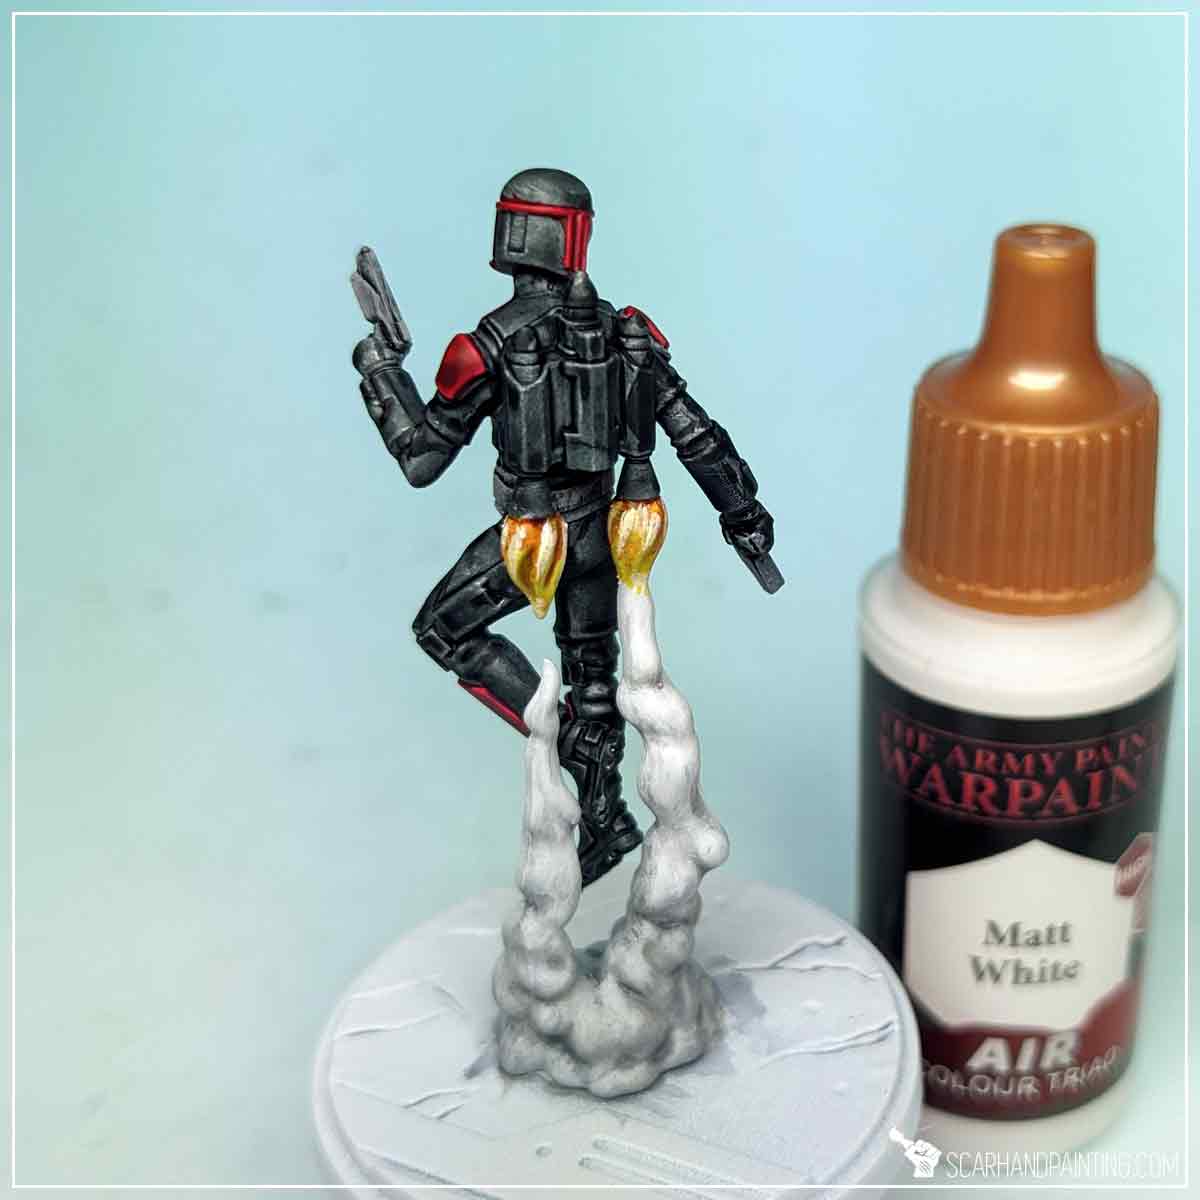
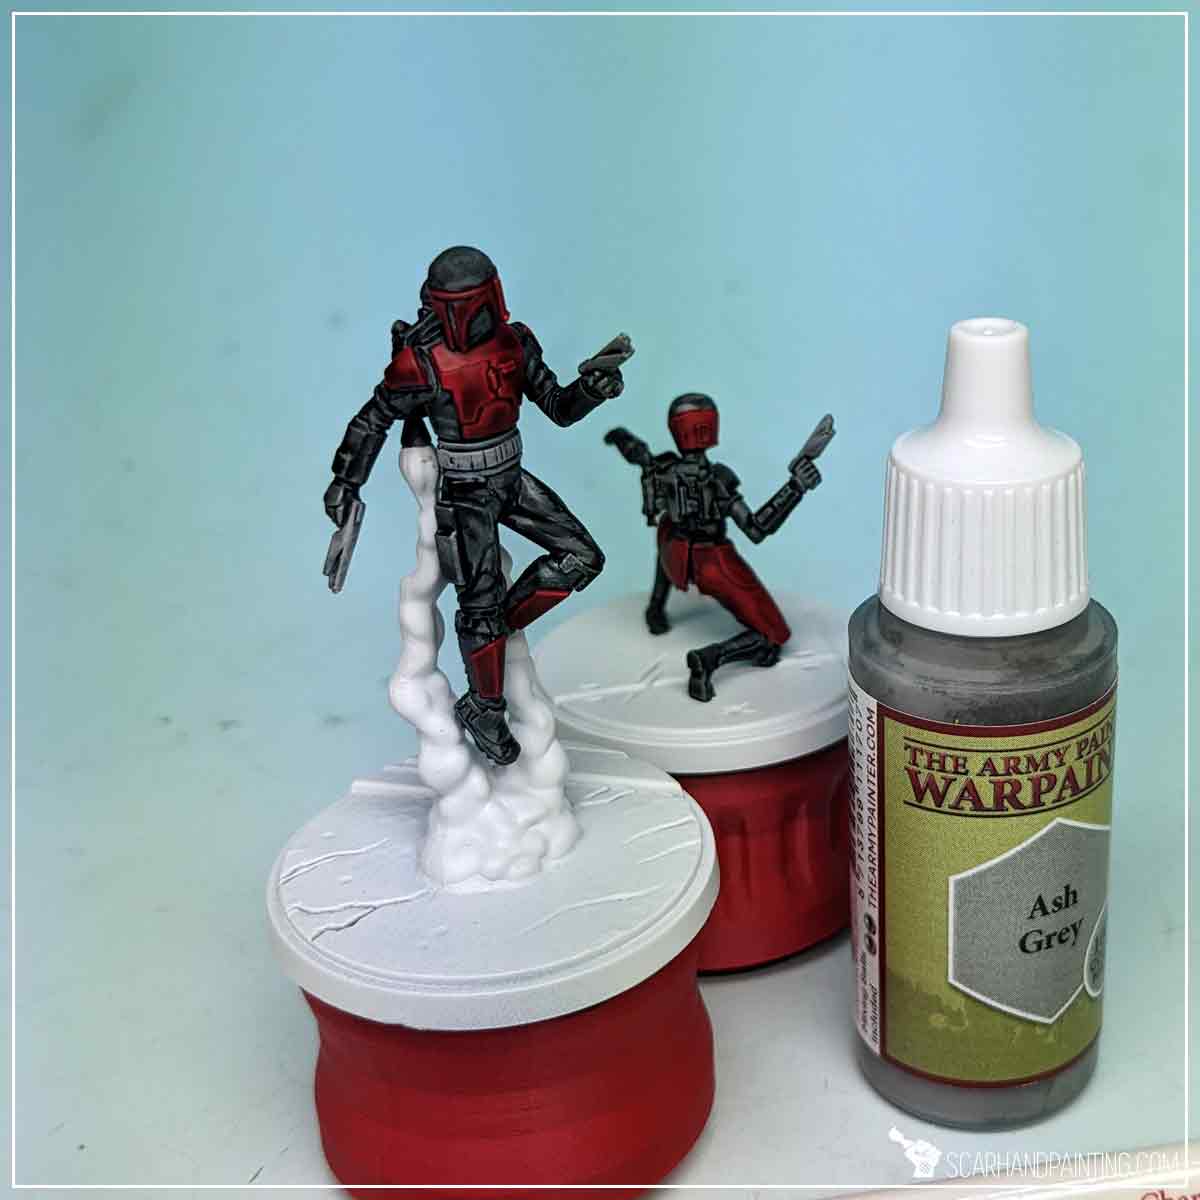
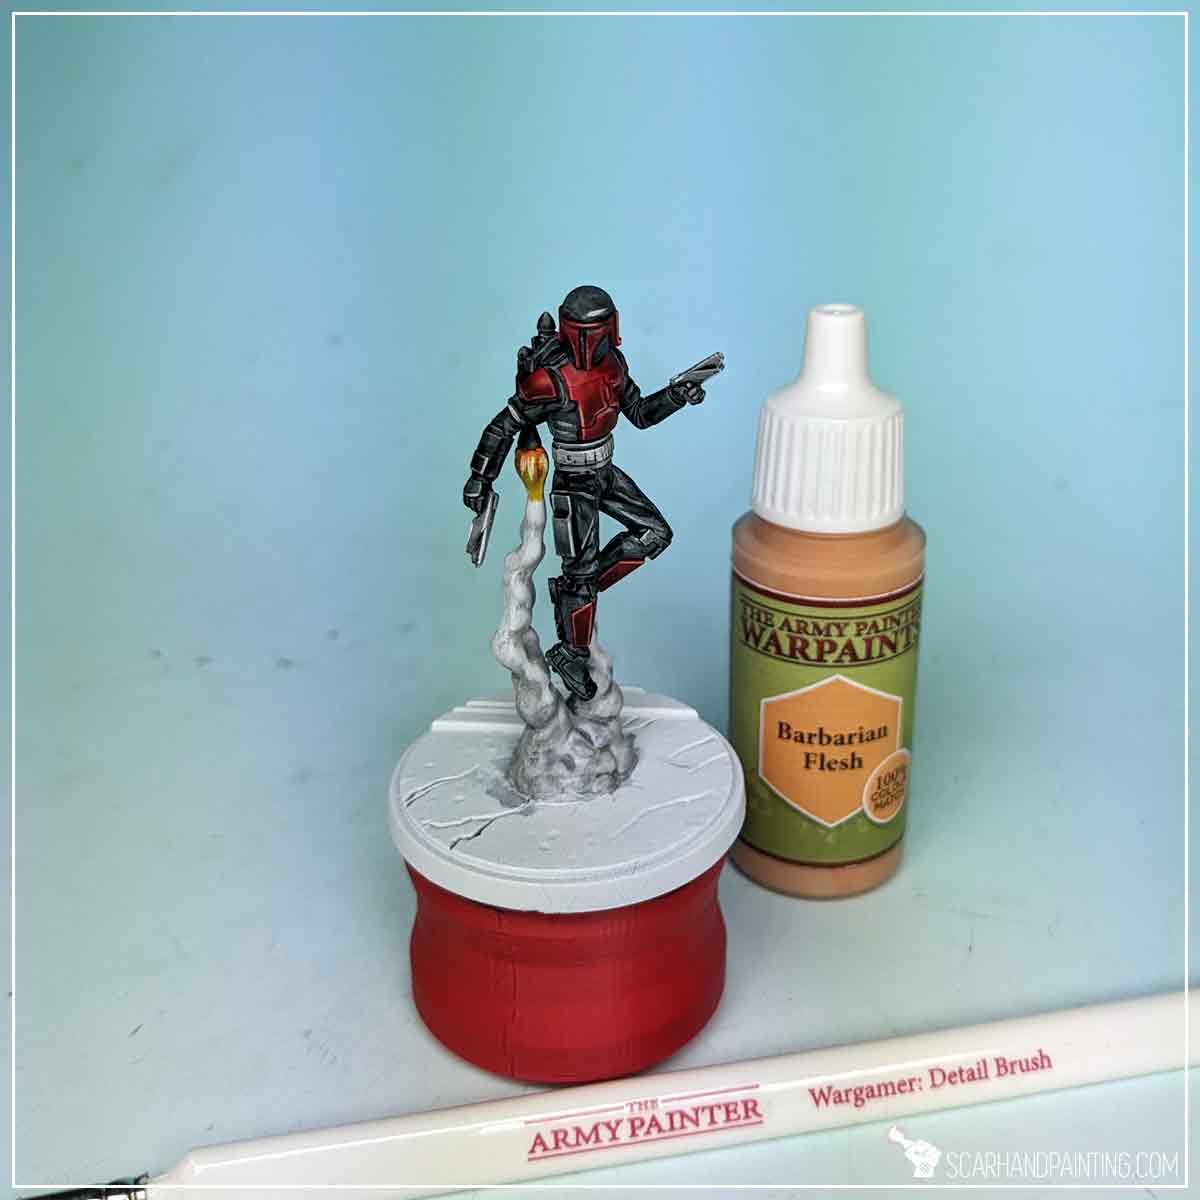
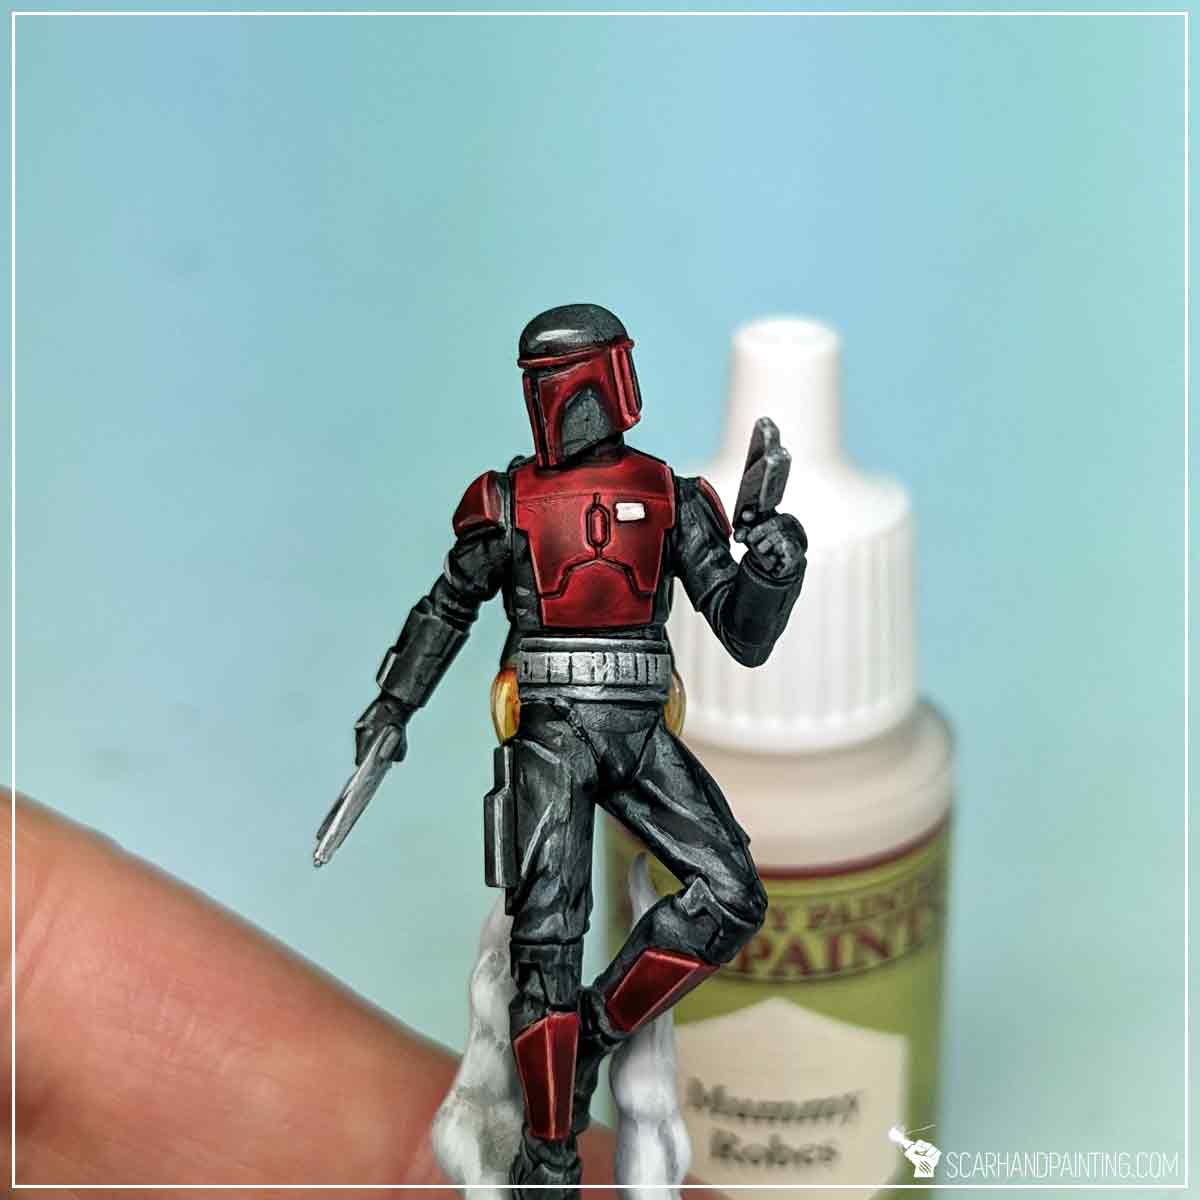
To make dark clothes, armor, belt and weapons pop I applied a simple, selective highlight of Mummy Robes. I focused on the most exposed, easy to access edges, painting thin lines with a side of Wargamer: Detail Brush.
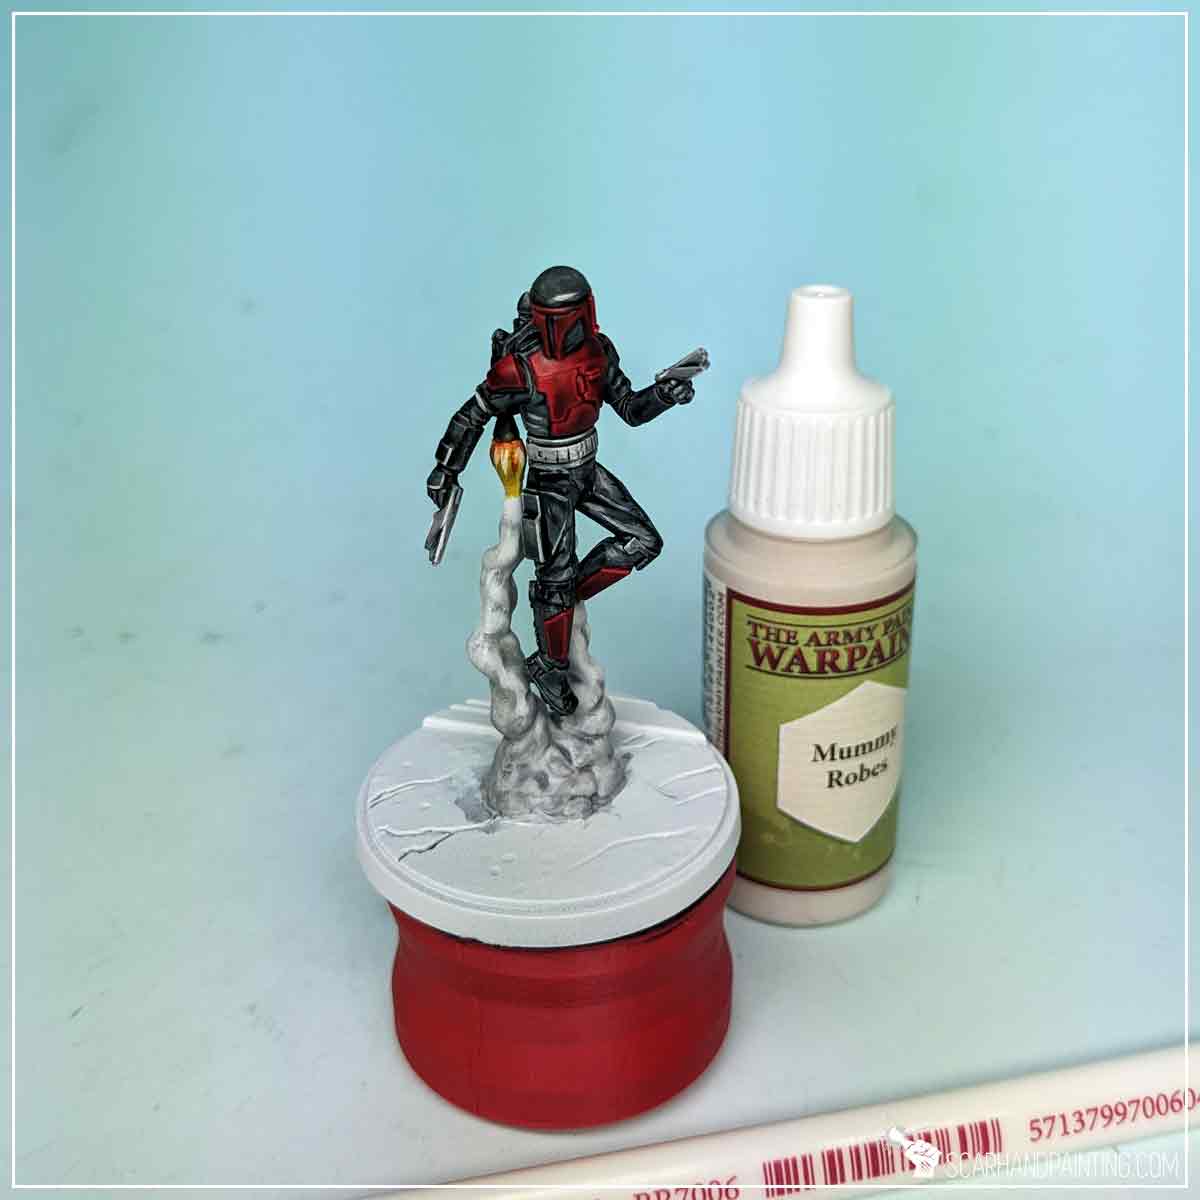
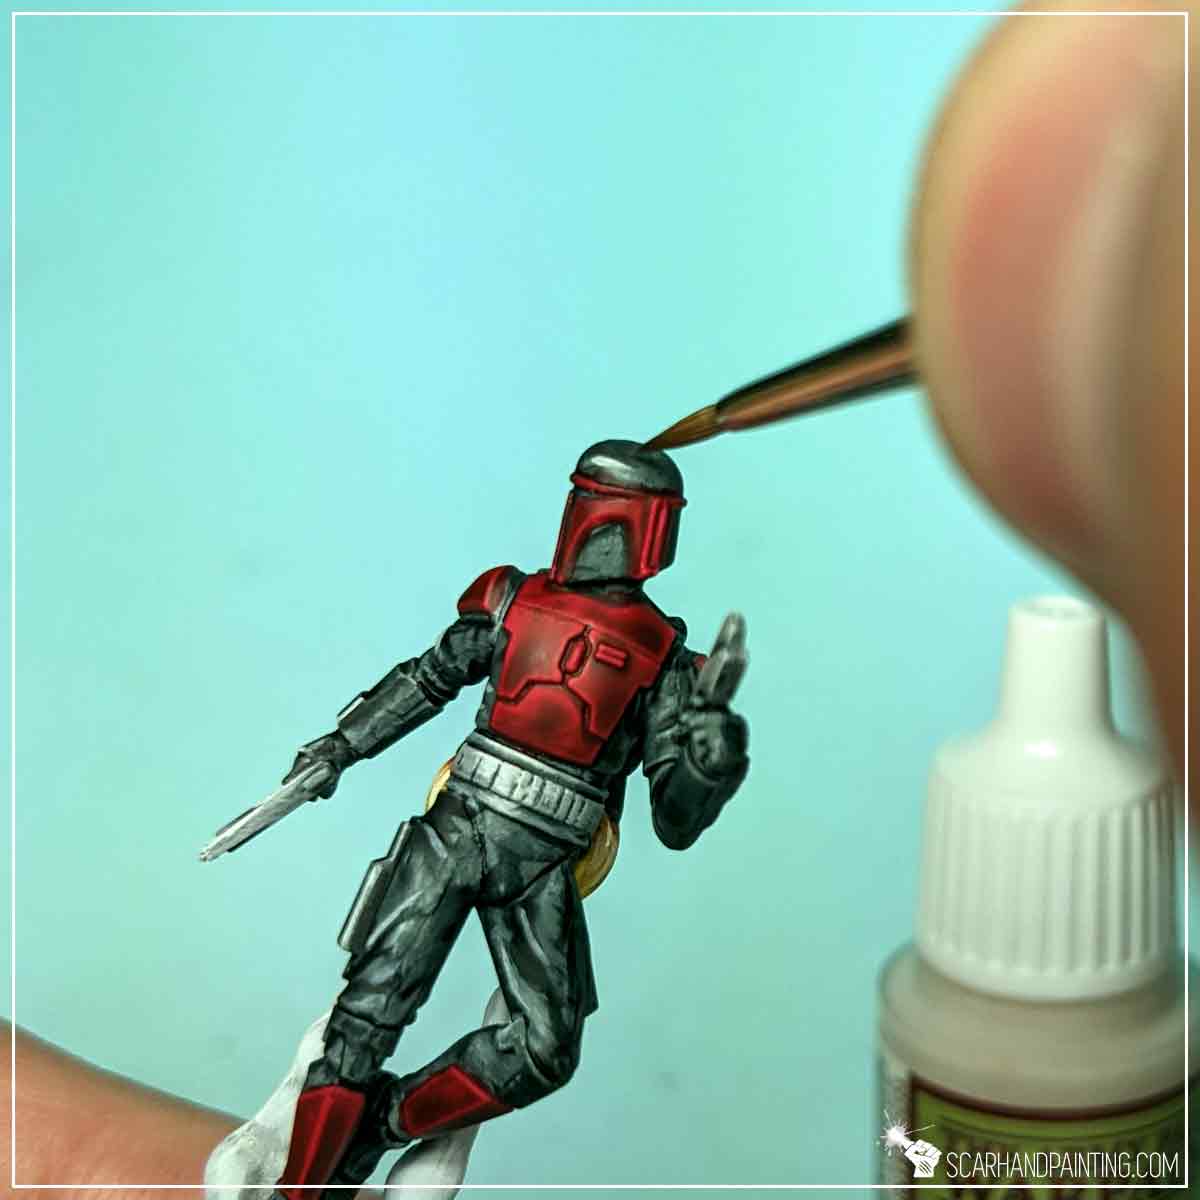
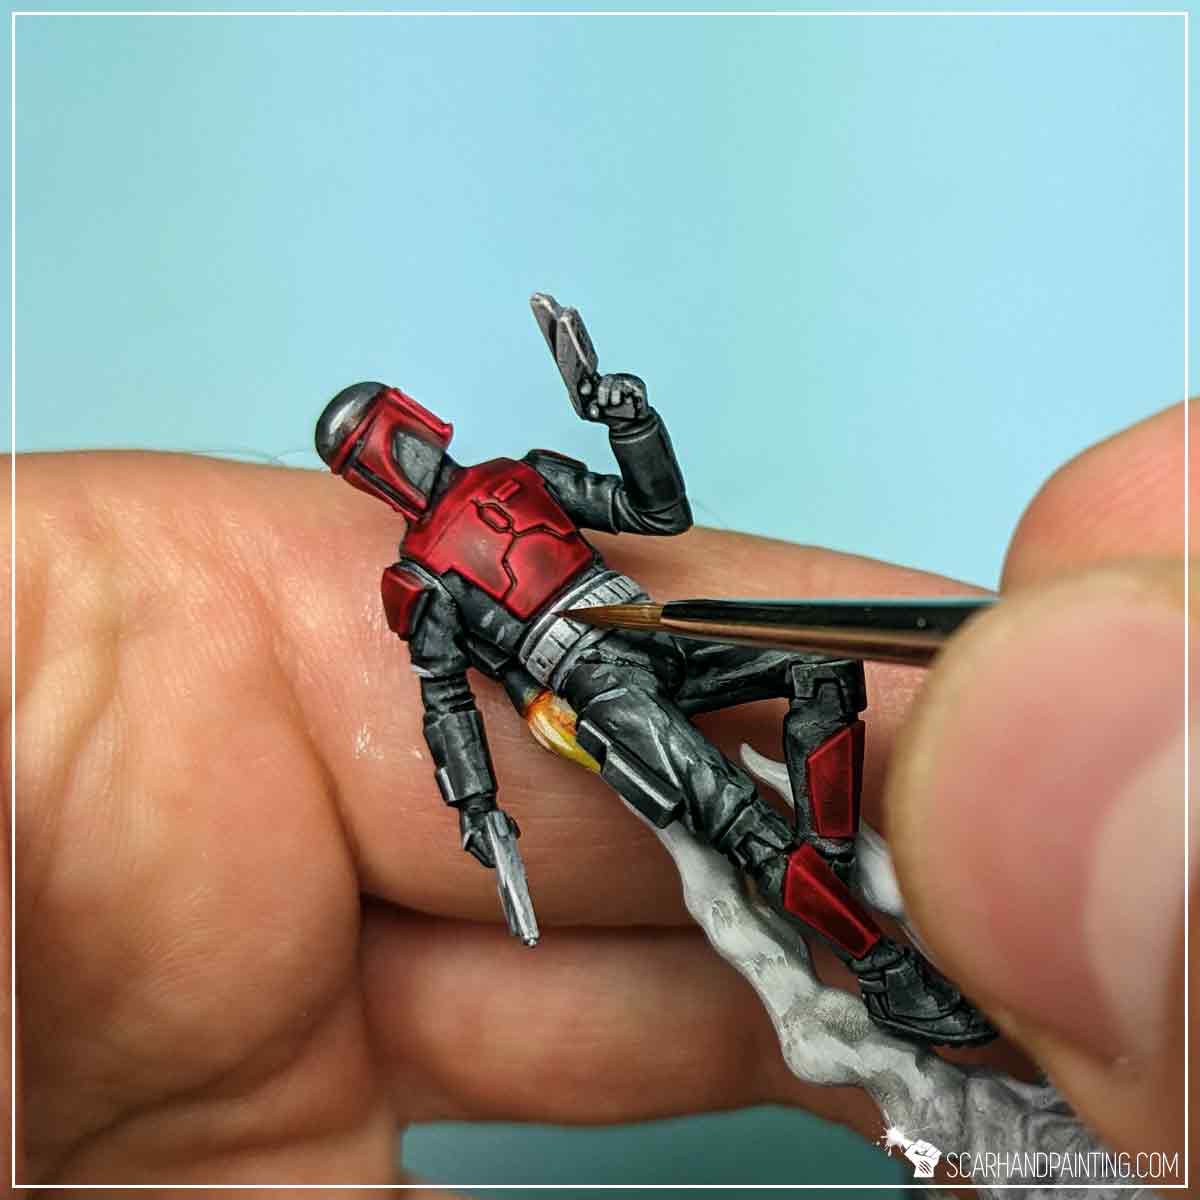
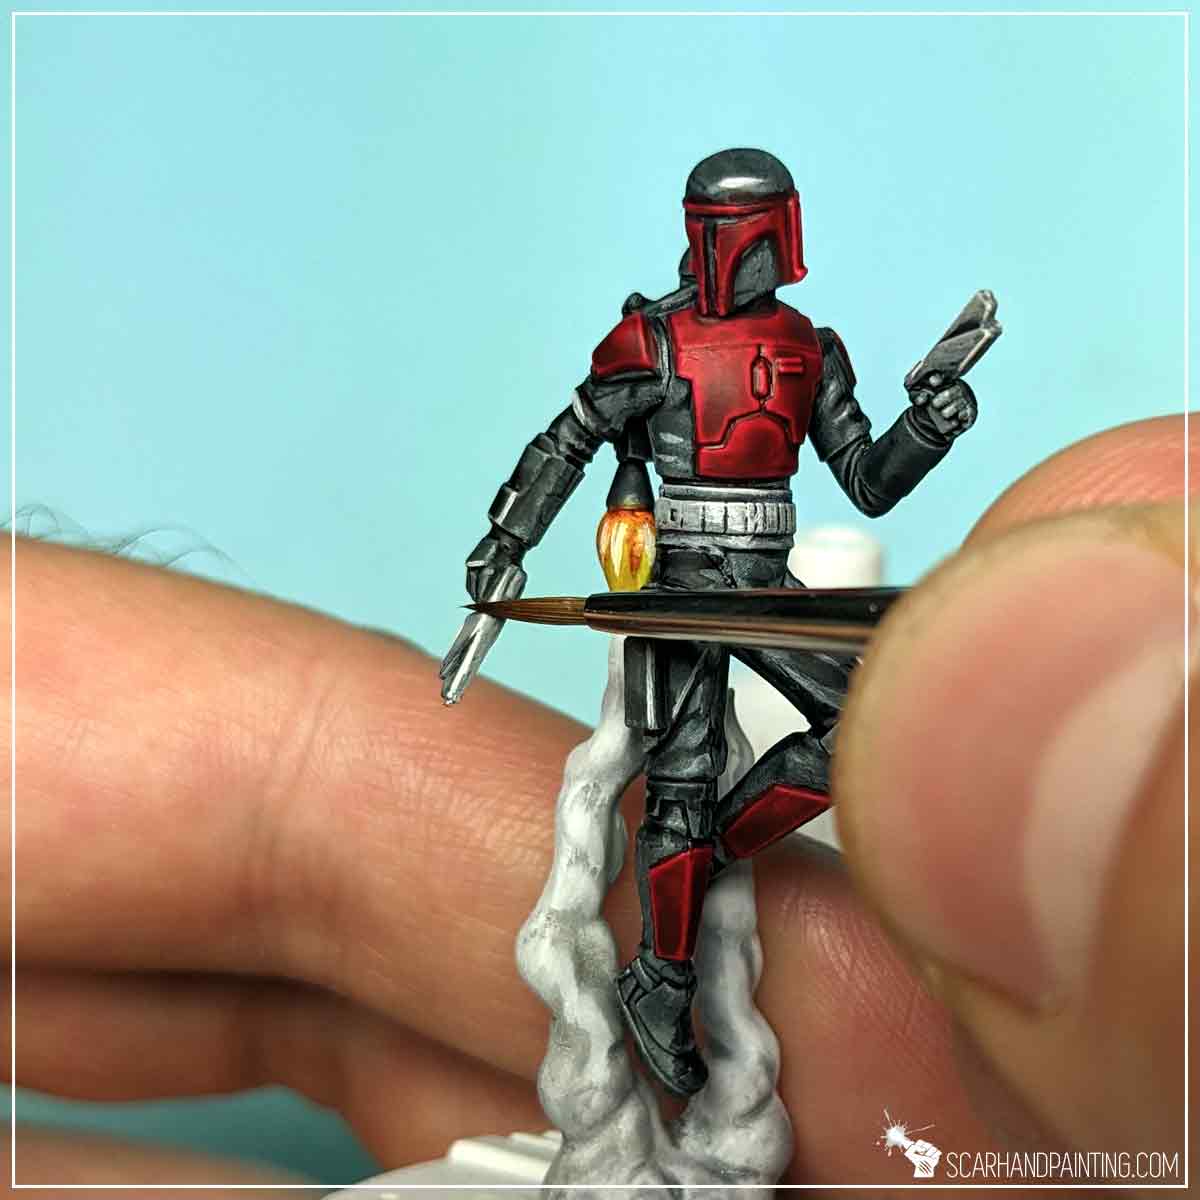
I have switched paint to Barbarian Flesh and repeated the process for Red armor.
To add a final touch I have painted the chest armor pin Matt White, followed short with Maize Yellow Speed Paint.
Finally I have painted bases and Varnished both miniatures following steps previously presented in the Tutorial: Painting Star Wars Shatterpoint Clone Troopers article.
I hope you find this tutorial interesting. Be sure to let me know your thoughts in the comments below or via Facebook or Instagram. I would also appreciate it if you considered sharing this content with your friends, who might find it useful. Many thanks to Rebel.pl for sponsoring this content. Stay tuned for more Star Wars: Shatterpoint tutorials.
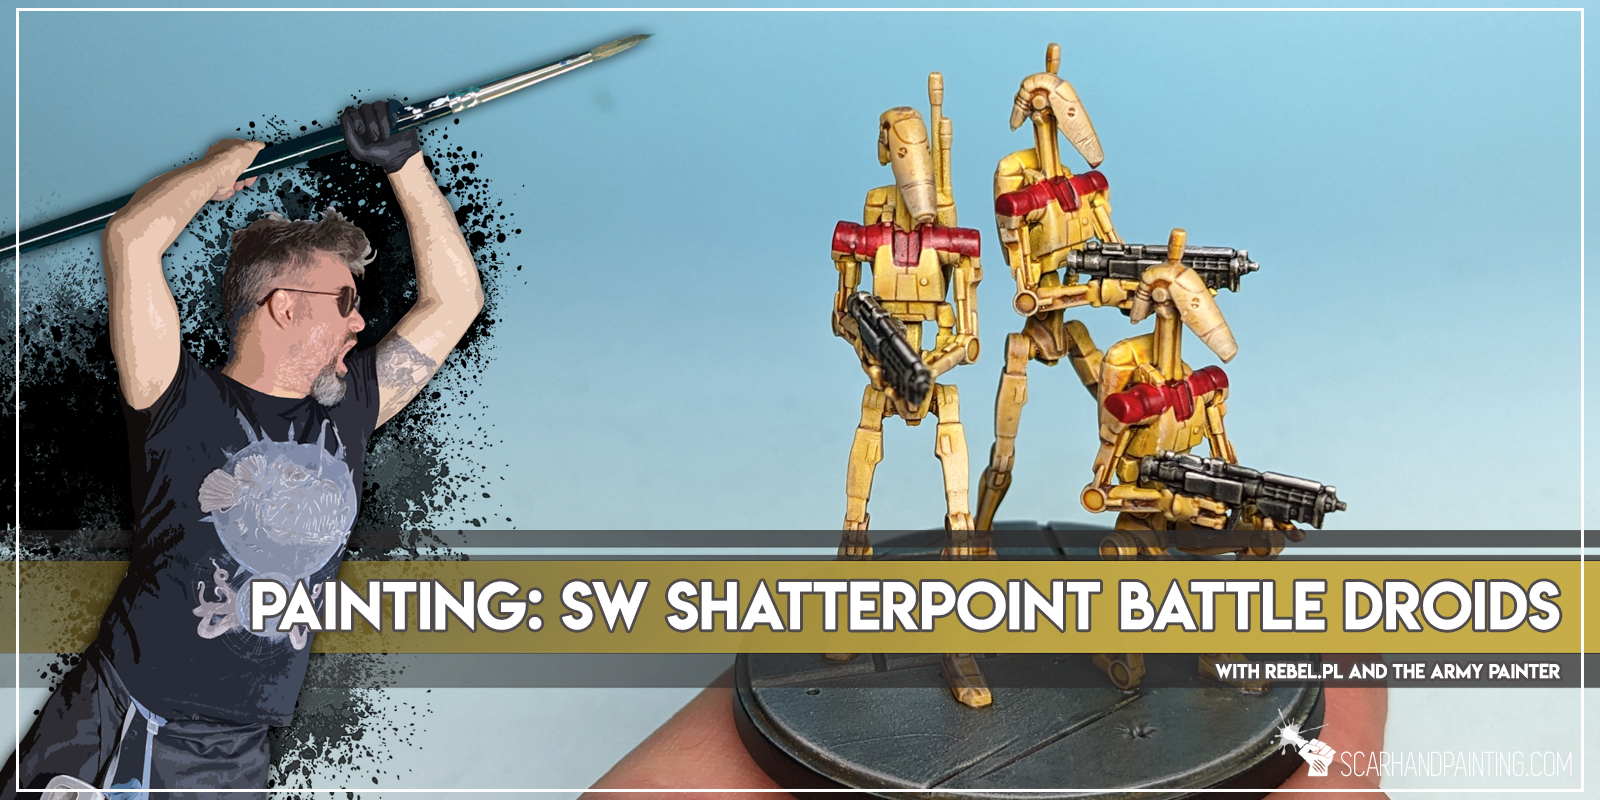
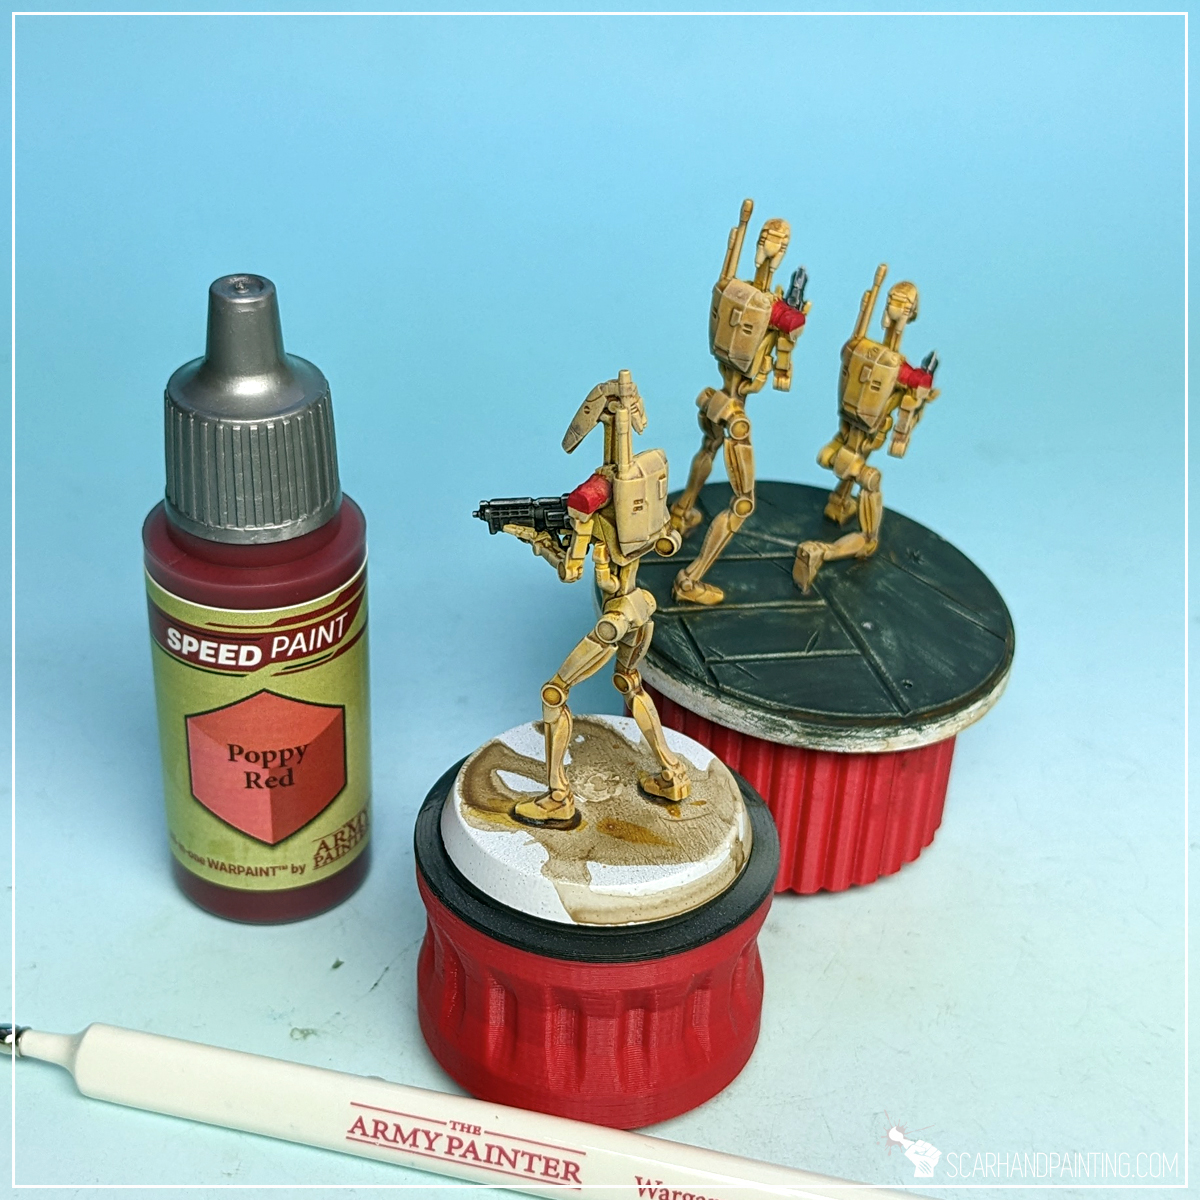
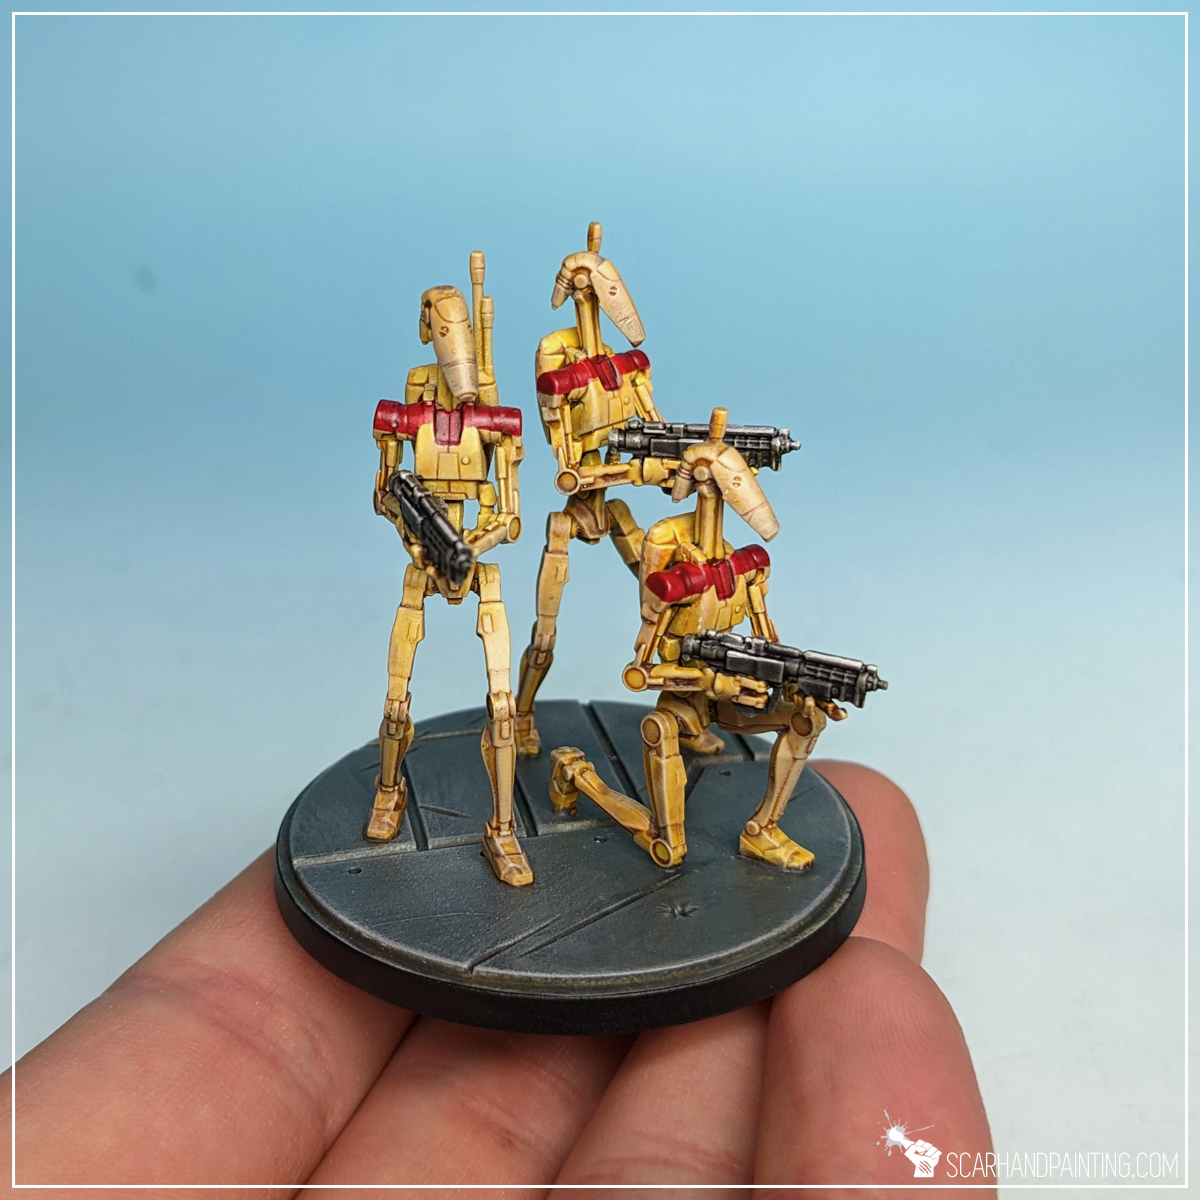
Welcome to Painting Star Wars: Shatterpoint Battle Droids tutorial. Here I will present to you a Step-by-step of a basic painting process for Battle Droids.
Before we start, some notes:
In case you are totally unfamiliar with the hobby, I have prepared a short guide on Shatterpoint miniatures preparation and assembly, including some in-depth notes regarding priming and particular painting techniques. You can find it in the previous article: Tutorial: Painting Star Wars Shatterpoint Clone Troopers.
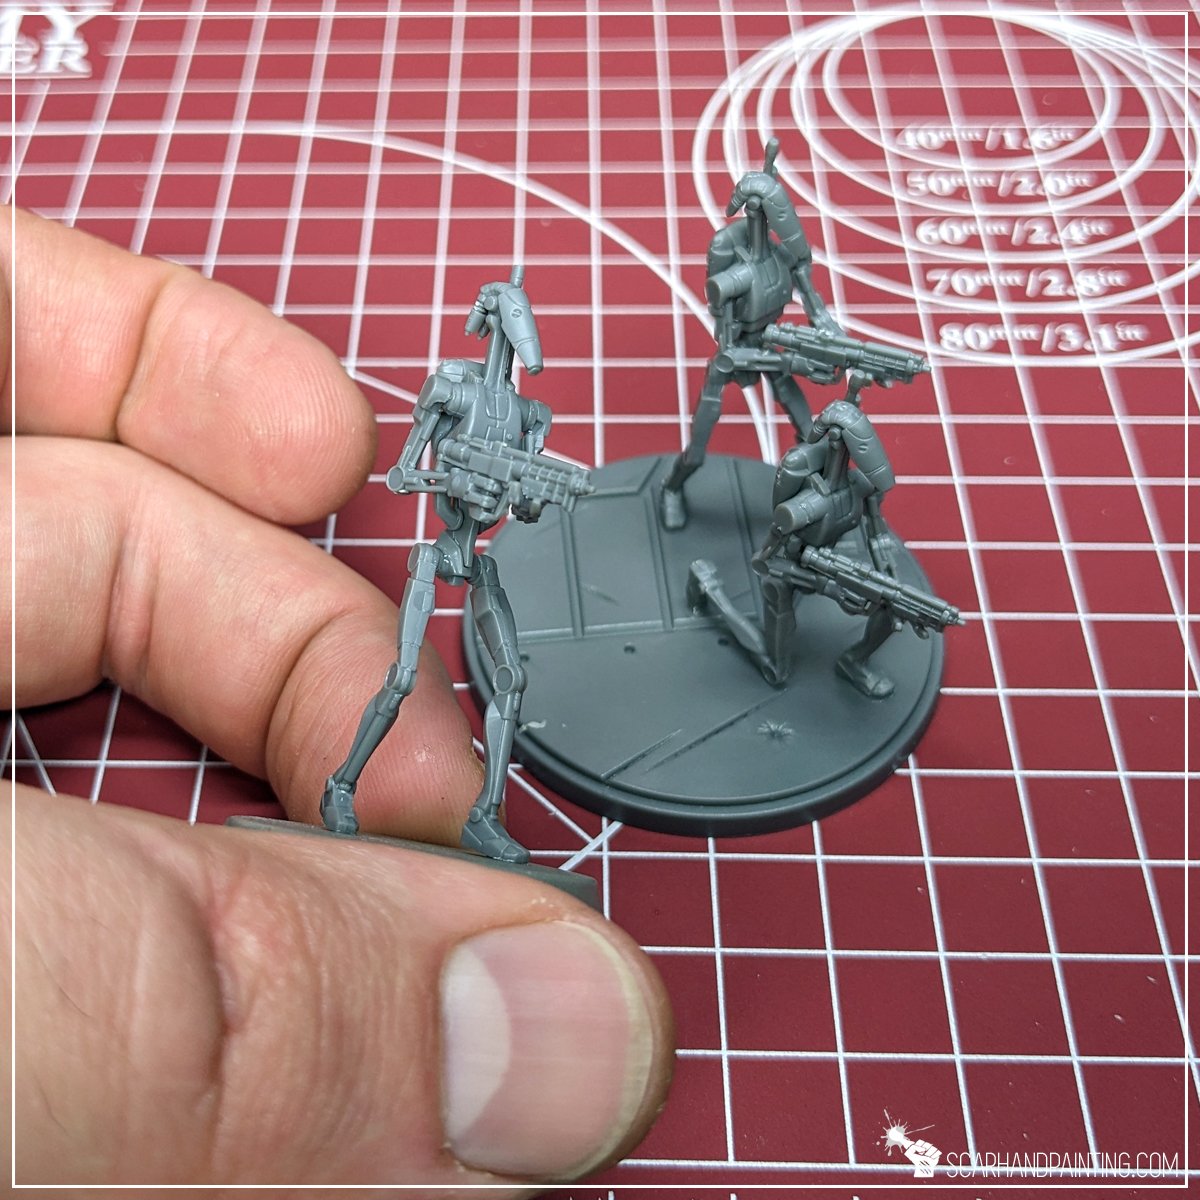
TIP: To better present the painting process I have kept one Droid on a separate base. If you feel it might be difficult to paint multiple miniatures glued to a single base, you can paint them separately, then glue together just before the Varnish step.
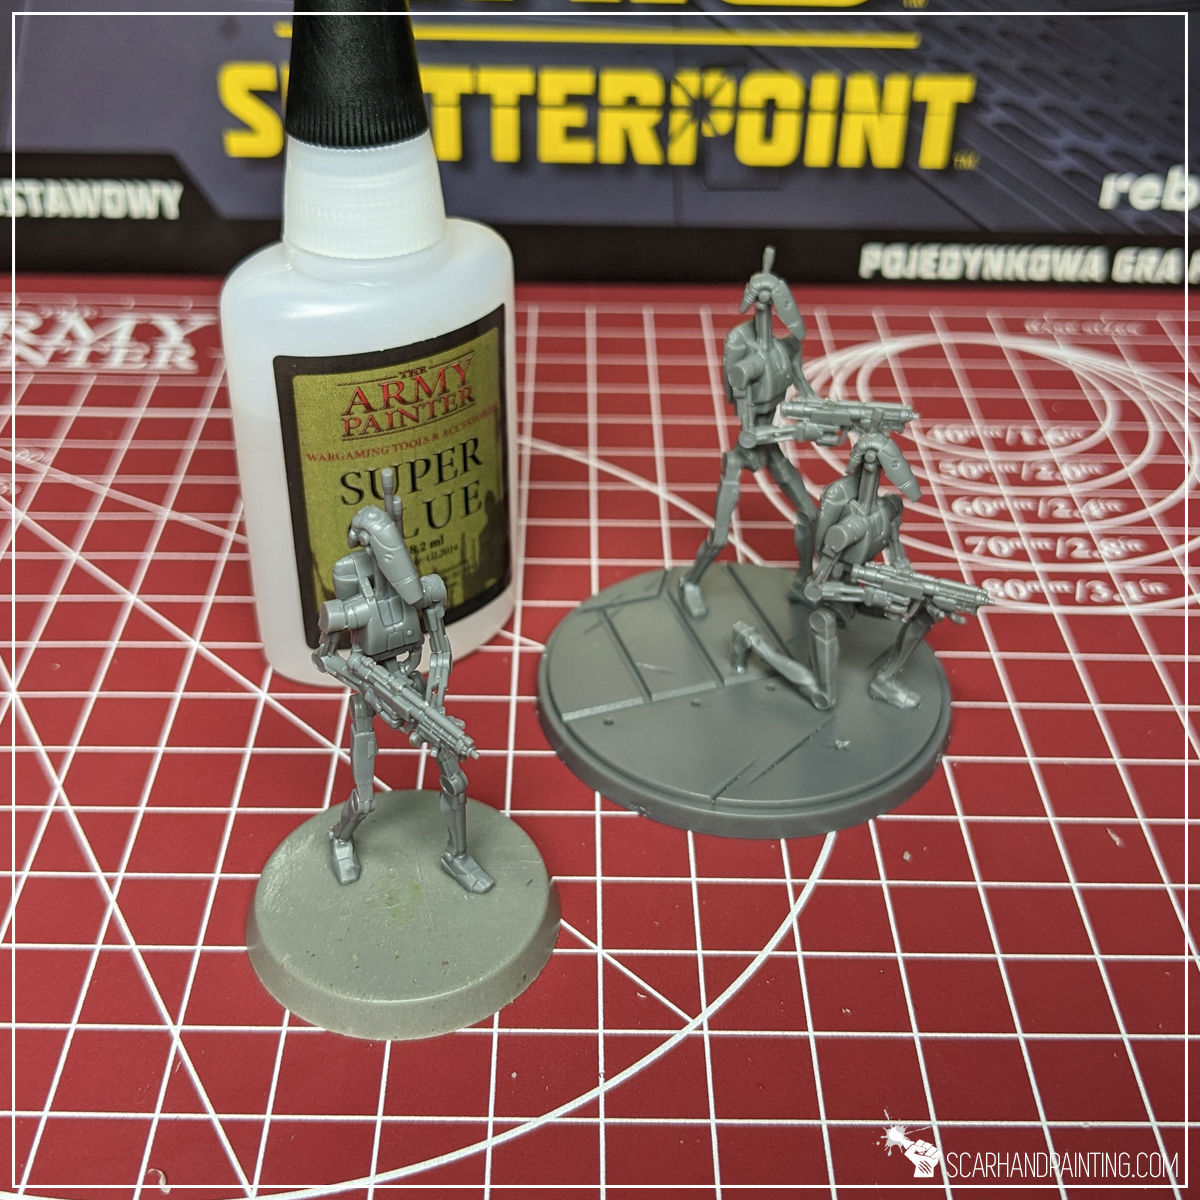
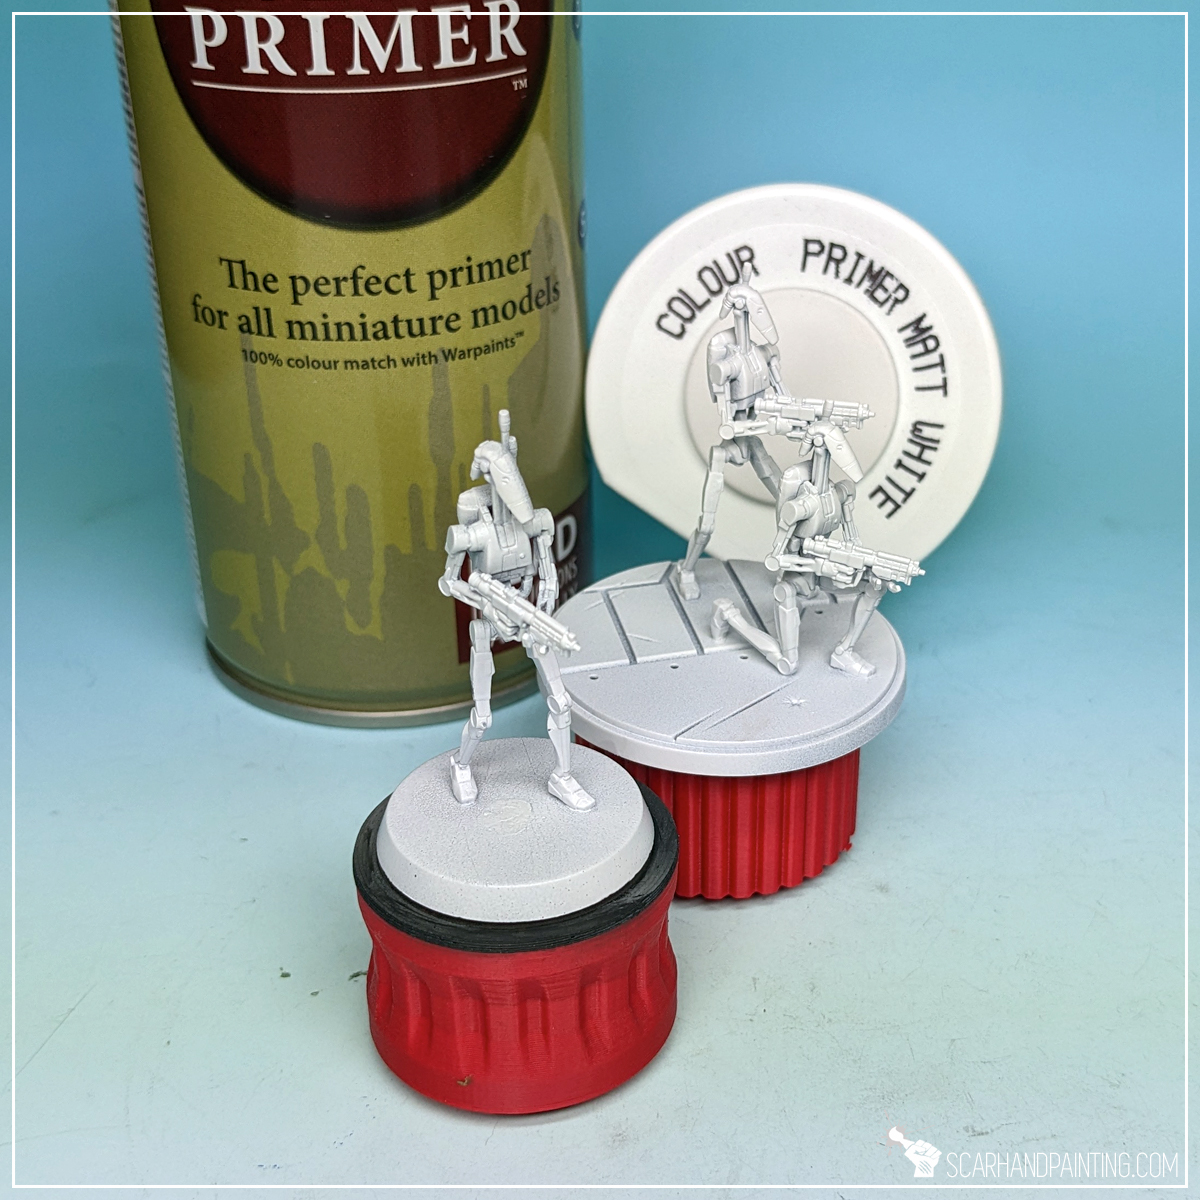
I mounted the miniatures on a stick with a piece of Blu-Tack, then undercoated them with The Army Painter White Matt Primer.

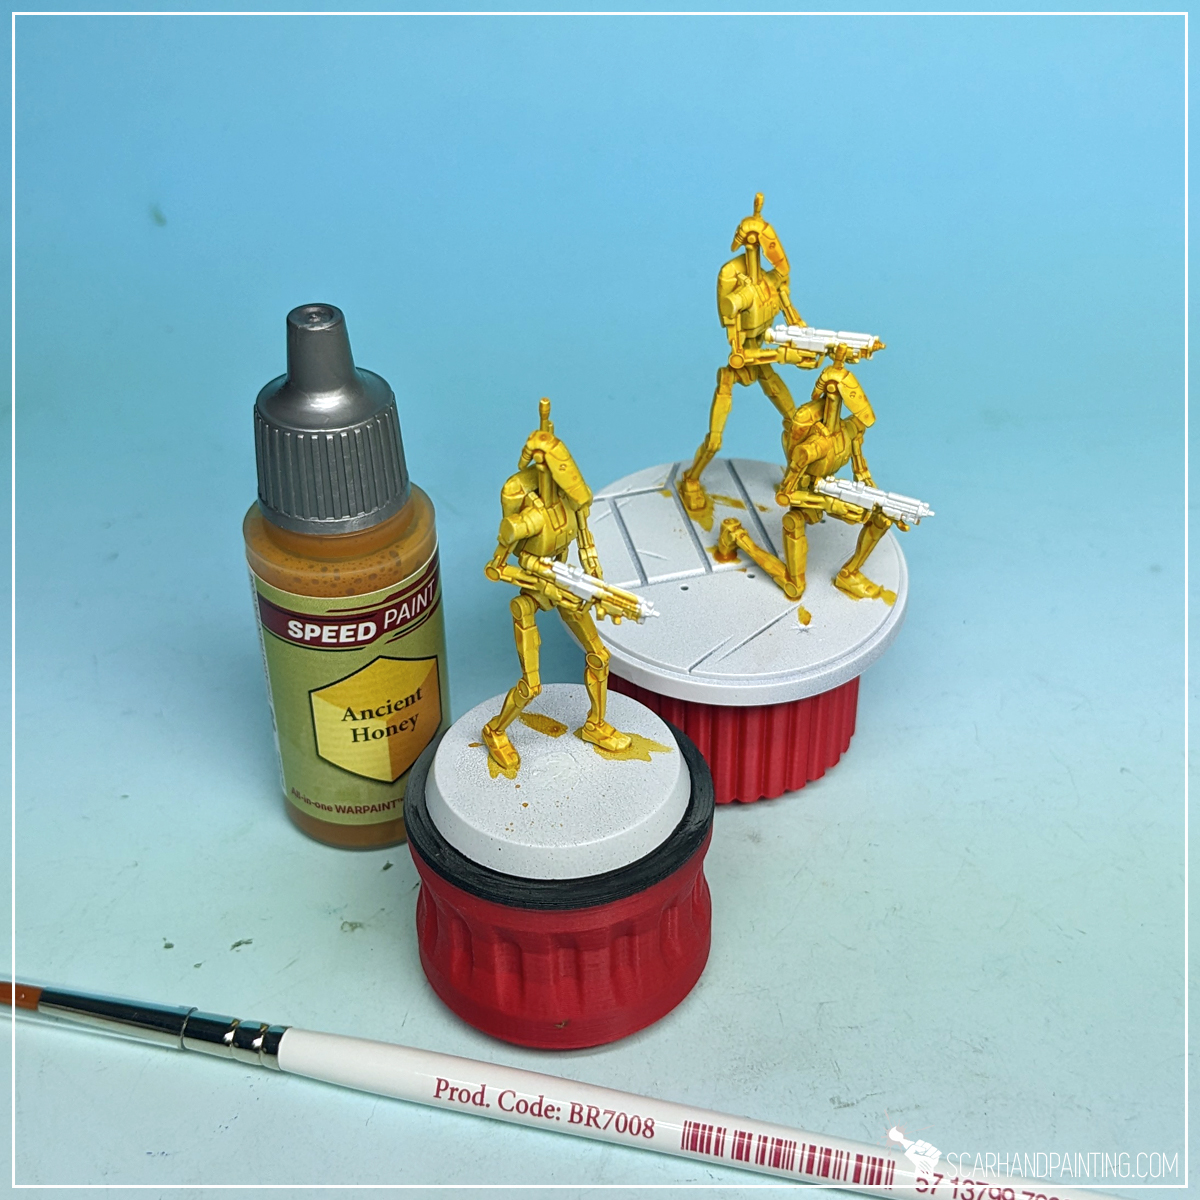
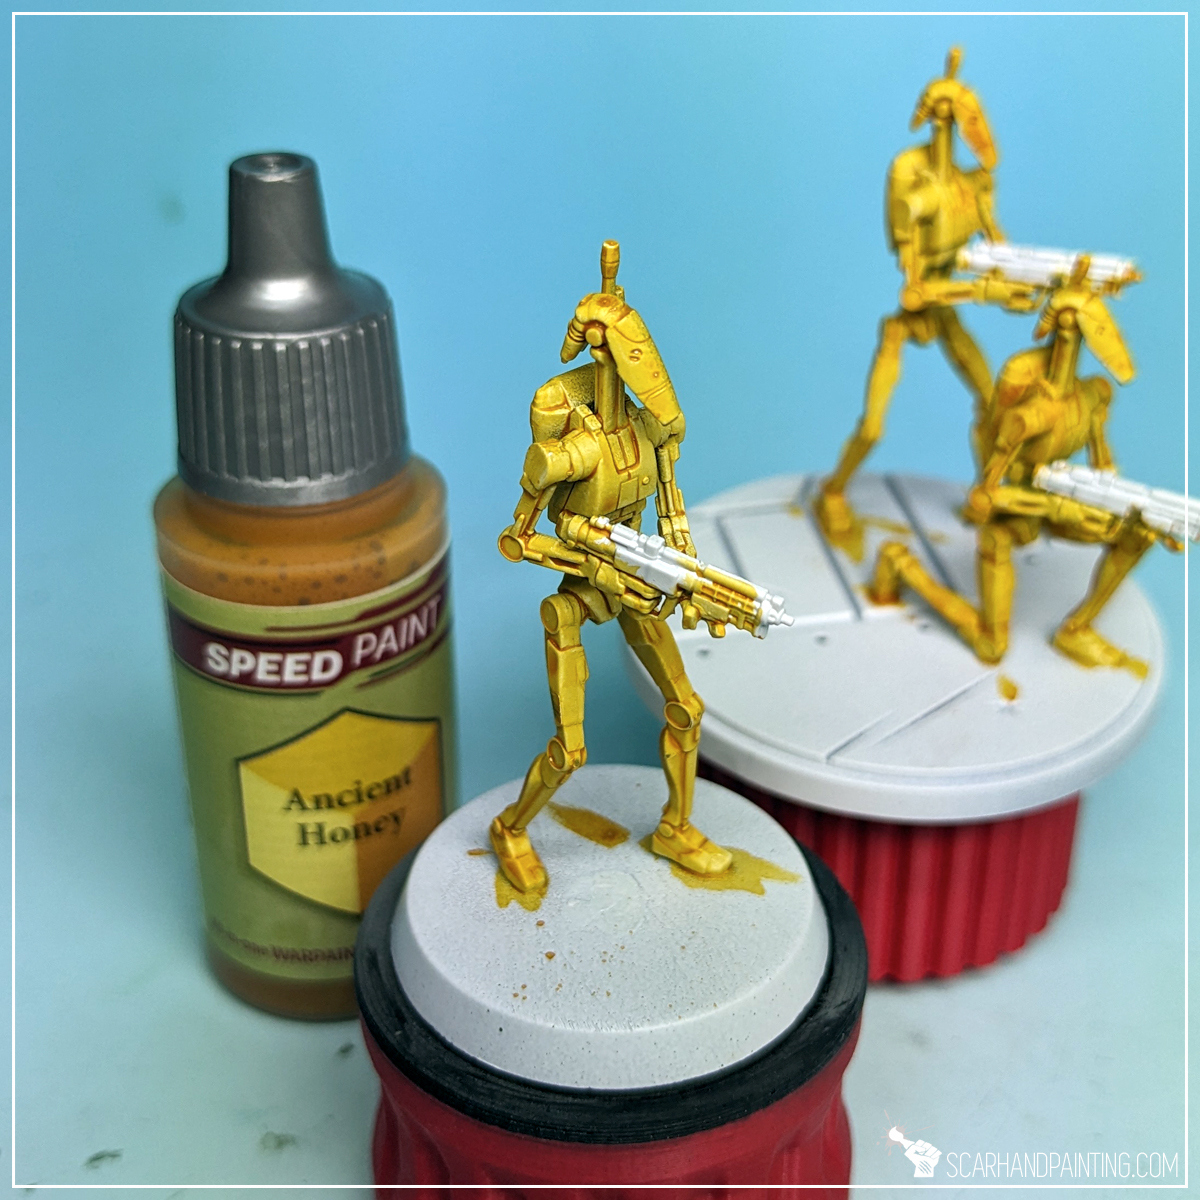
With Wargamer: Monster Brush I have applied a thick layer of Ancient Honey Speed Paint over the miniatures, except for weapons. This created a strong, bright base color.
TIP: No need to worry about the weapons too much. The painting process was designed to cover any mistakes made at this point.
Next, with a softer Wargamer: Regiment Brush, I applied a solid layer of Soft Tone all over the armor. Washes, such as Soft Tone, provide strong pigmentation in all recesses, adding color depth. They also tone down the entire color a bit, which in case of Battle Droids, works to our advantage.

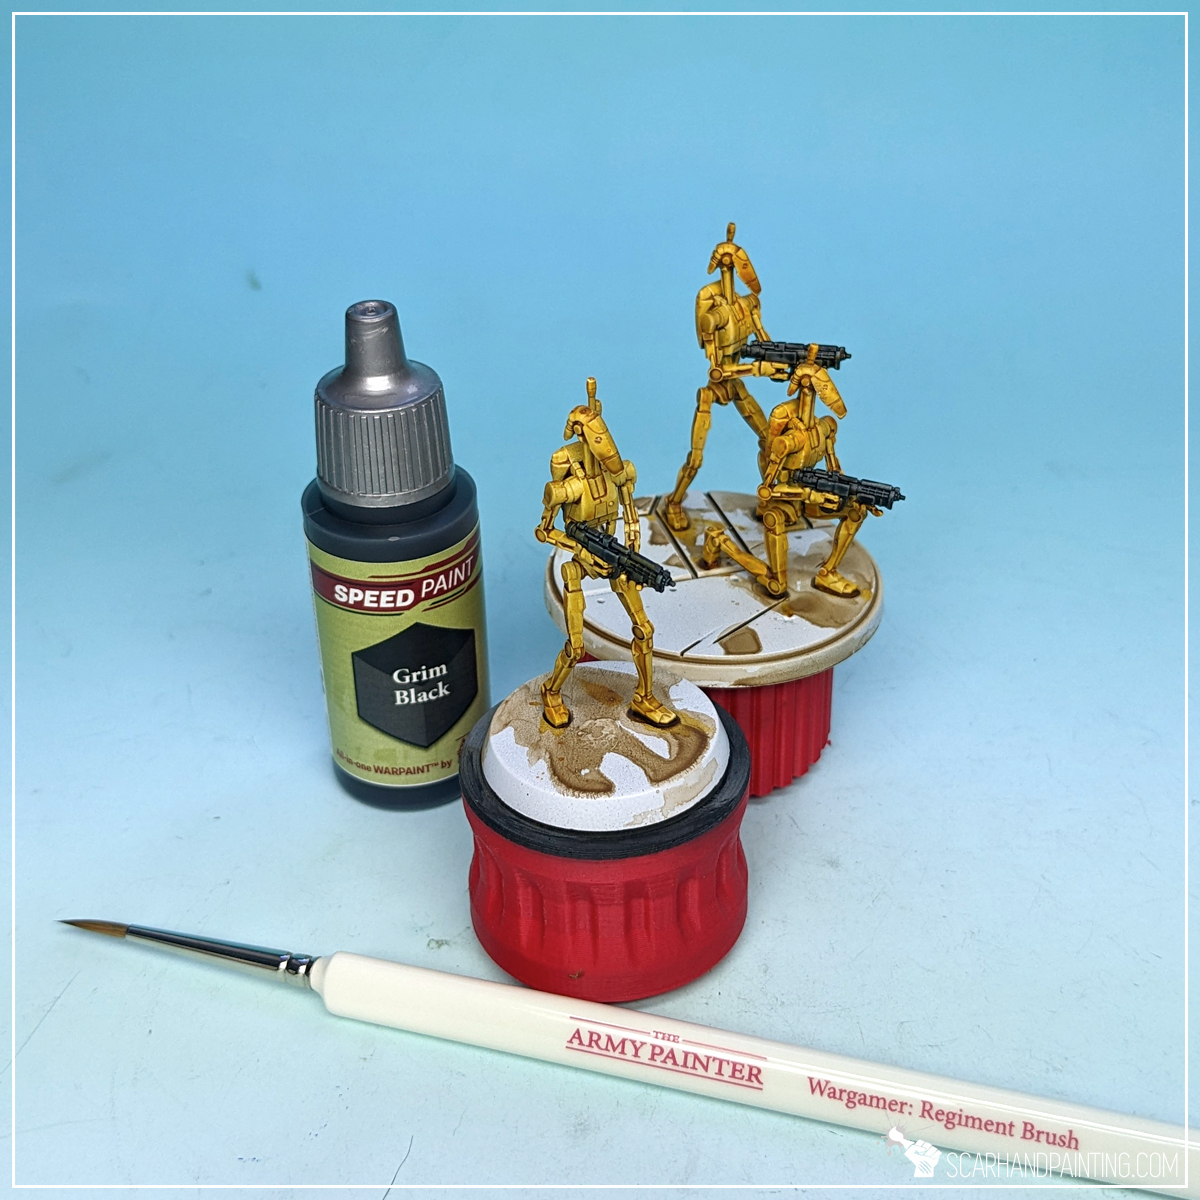
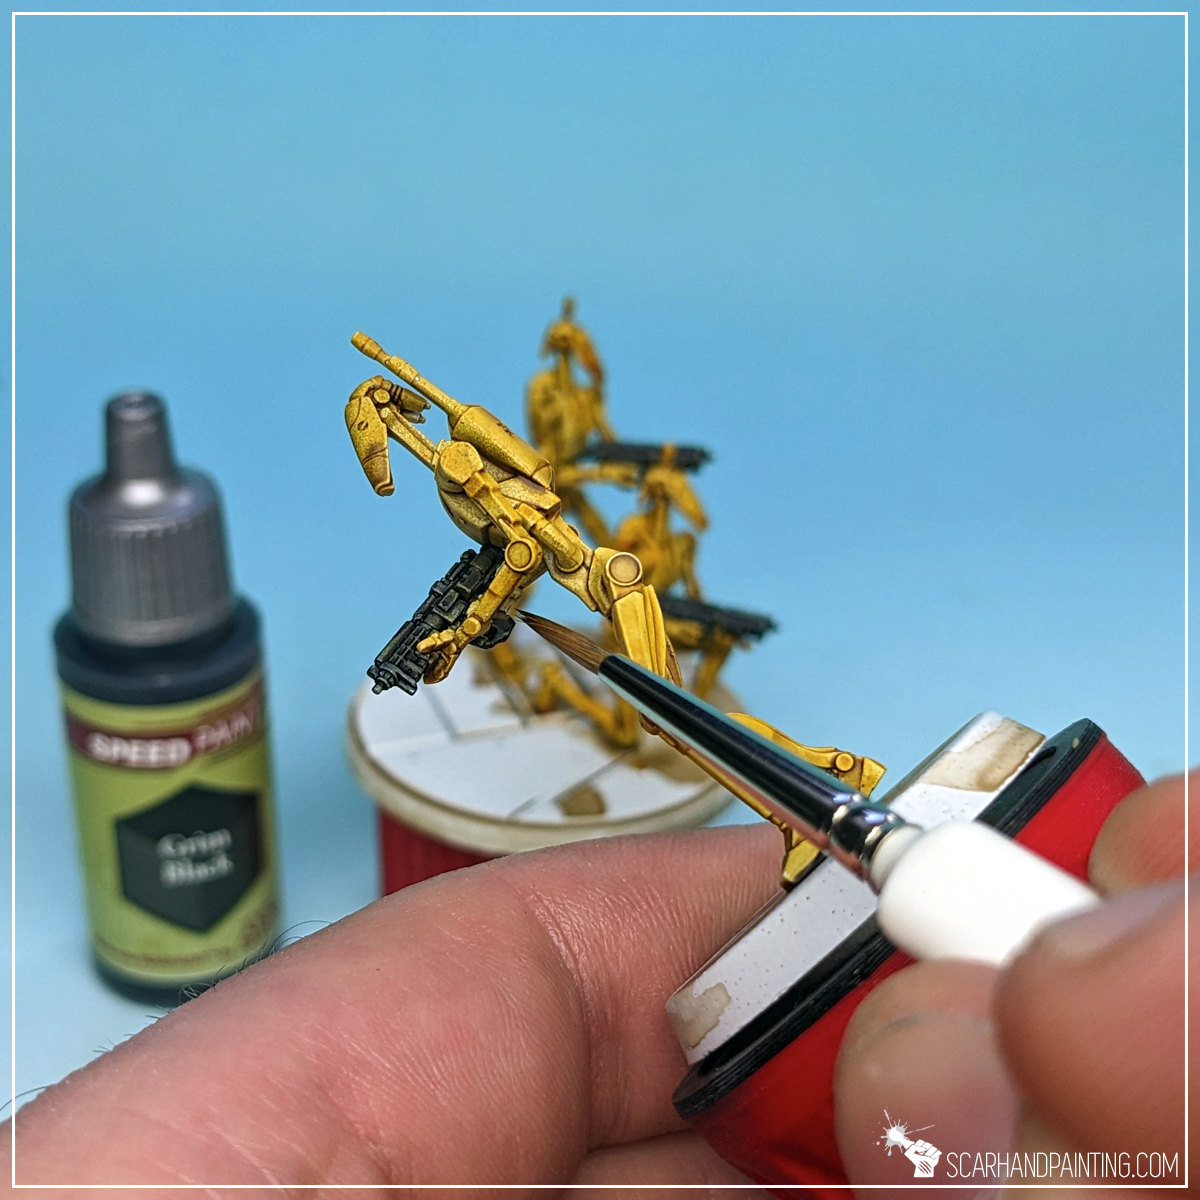
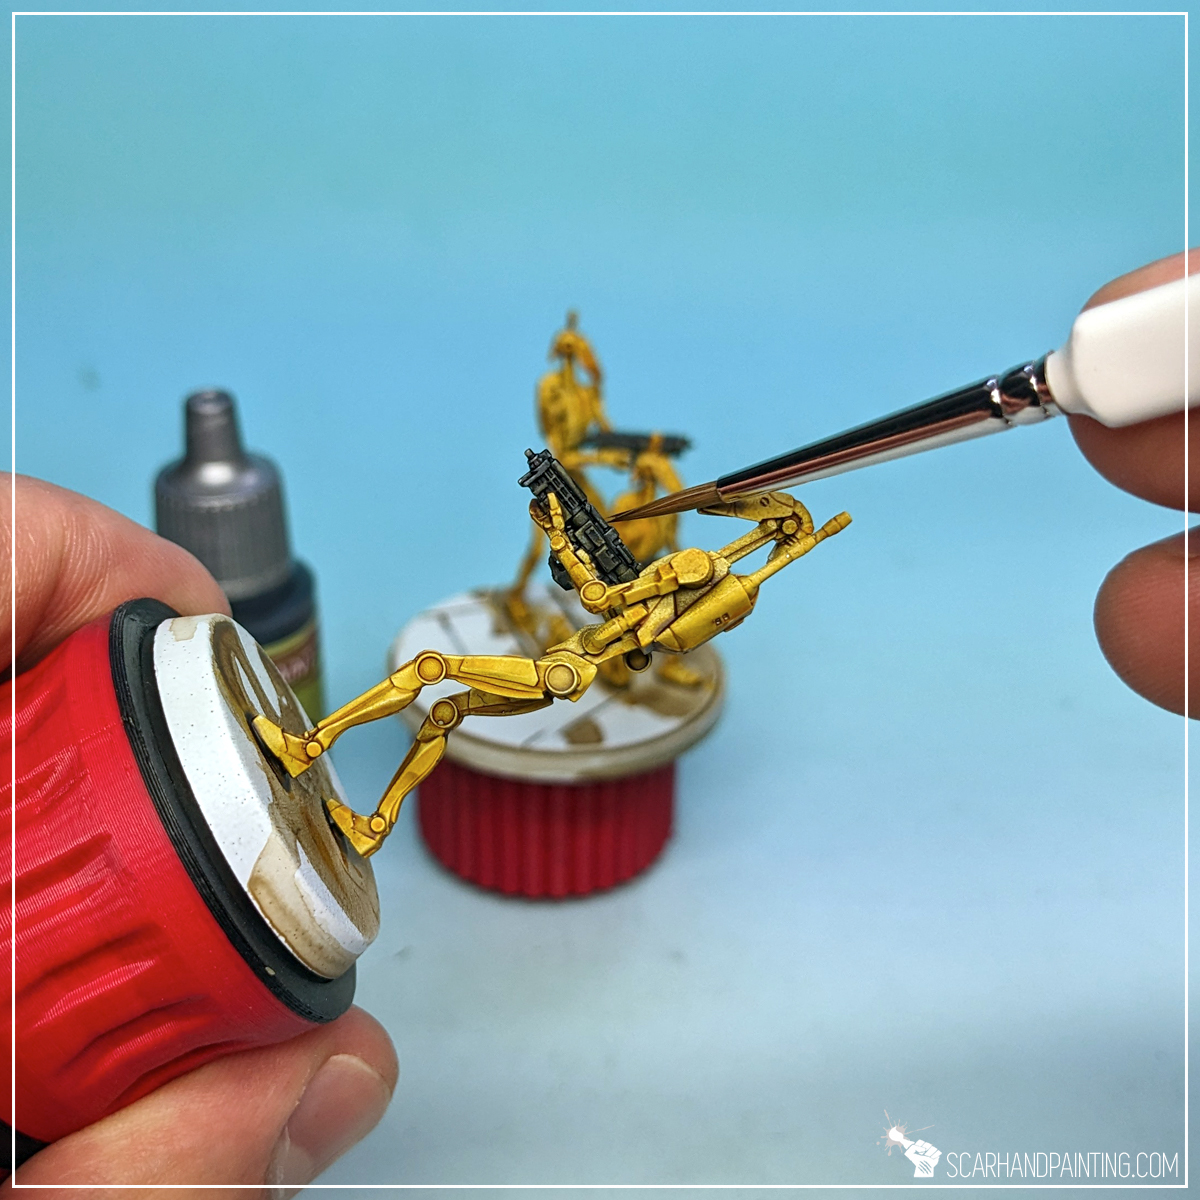
For weapons I went with the Grim Black. This Speed Paint was already tested during the Clone Troopers tutorial, so I knew it would cover any previous mistakes left on the painted areas. I used a Wargamer: Regiment Brush and did my best to avoid messing up the bright Droid armor.
TIP: This might be a difficult step for anyone not familiar with a brush. I recommend switching between different brush sizes and moving the miniature around for easier access. Speed Paints are thin, so you do not have to ‘lead’ the tip of the brush too much. Delicate touches will do.
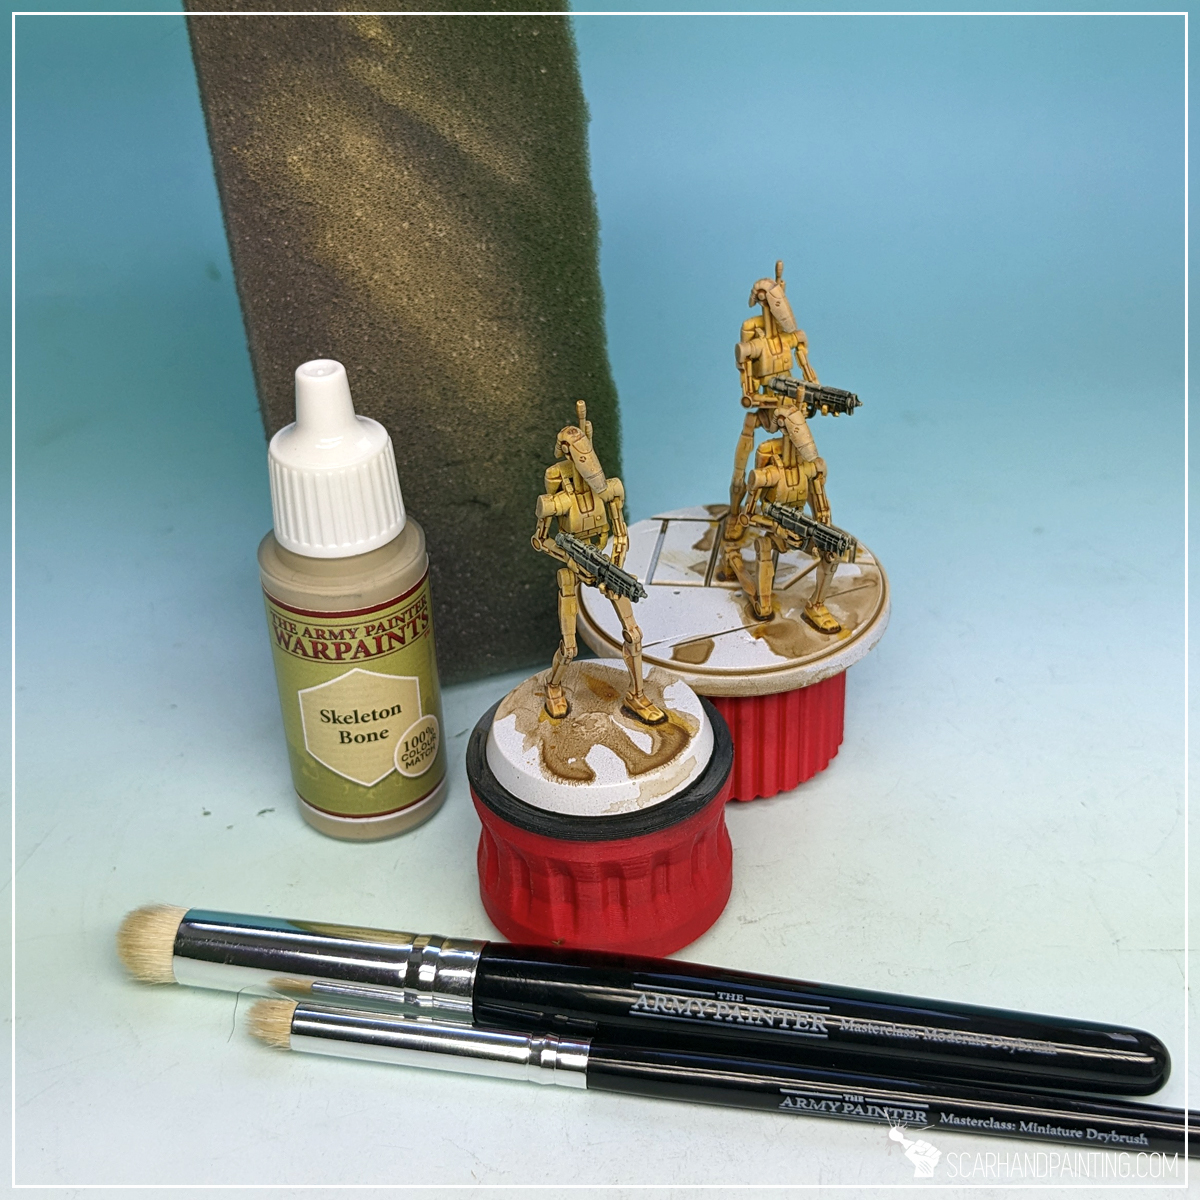
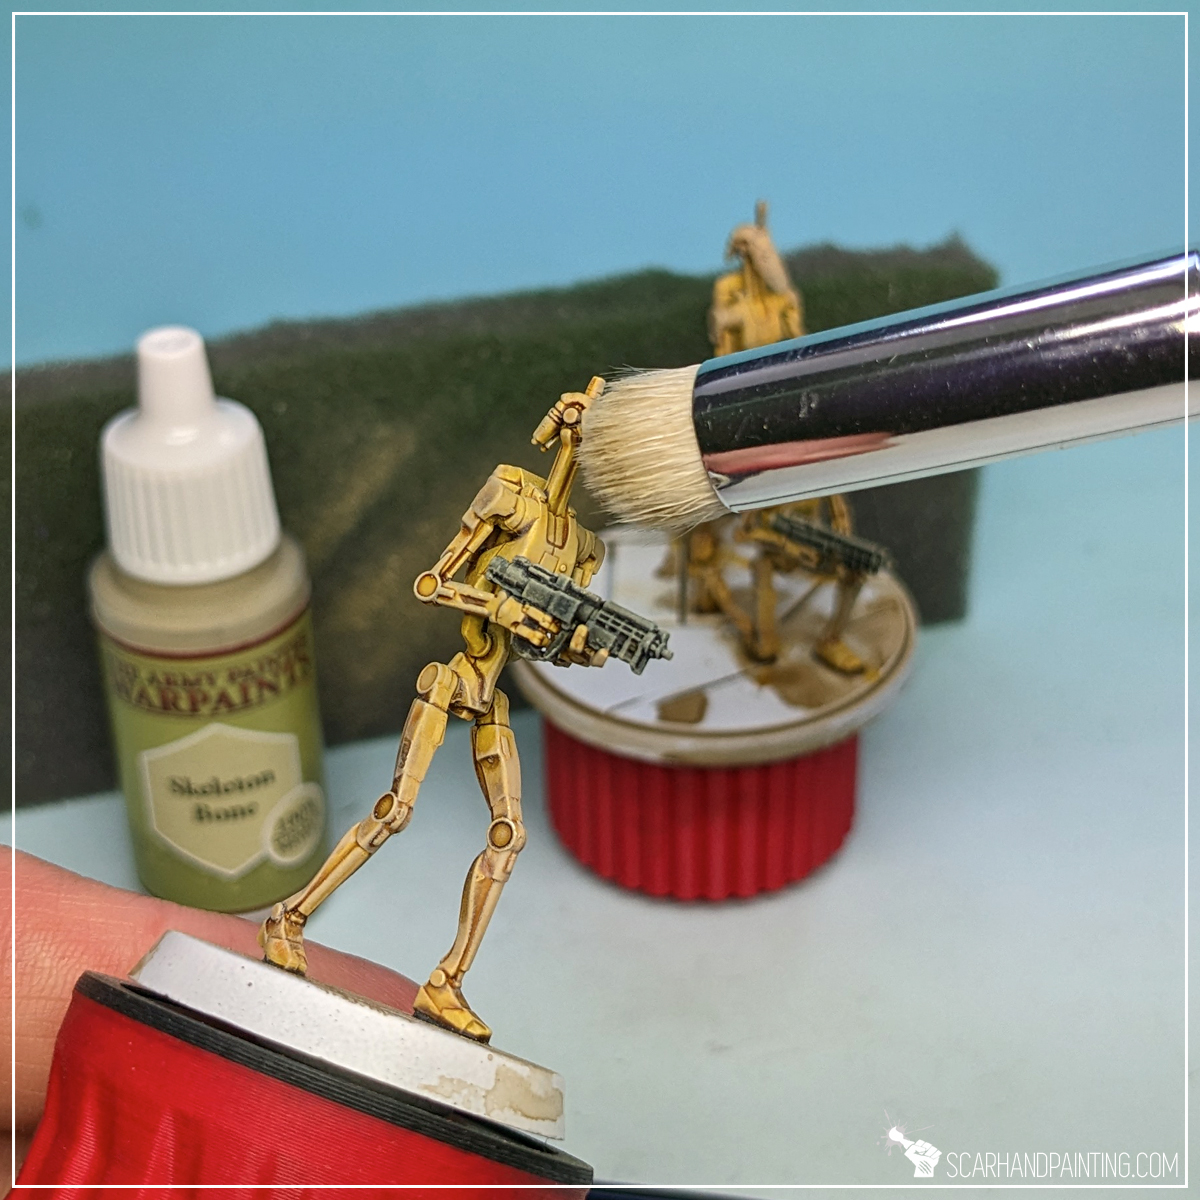
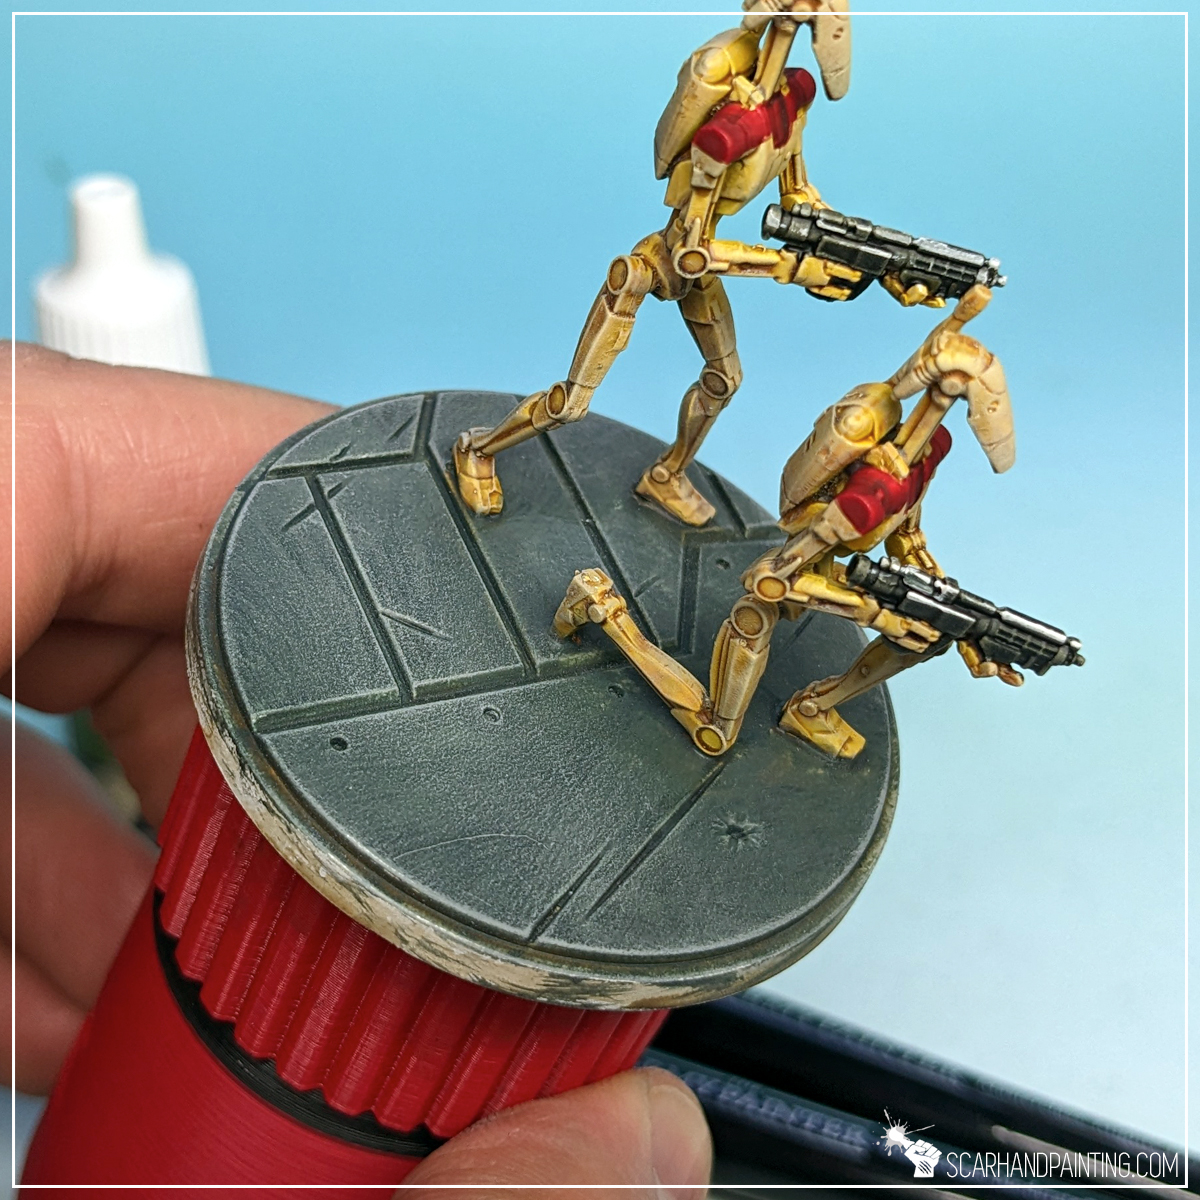
To apply an overall highlight I Drybrushed Skeleton Bone all over the miniature. I used Masterclass Mighty and Moderate Drybrush for this, but it can be done with Wargamer: Large Drybrush as well.
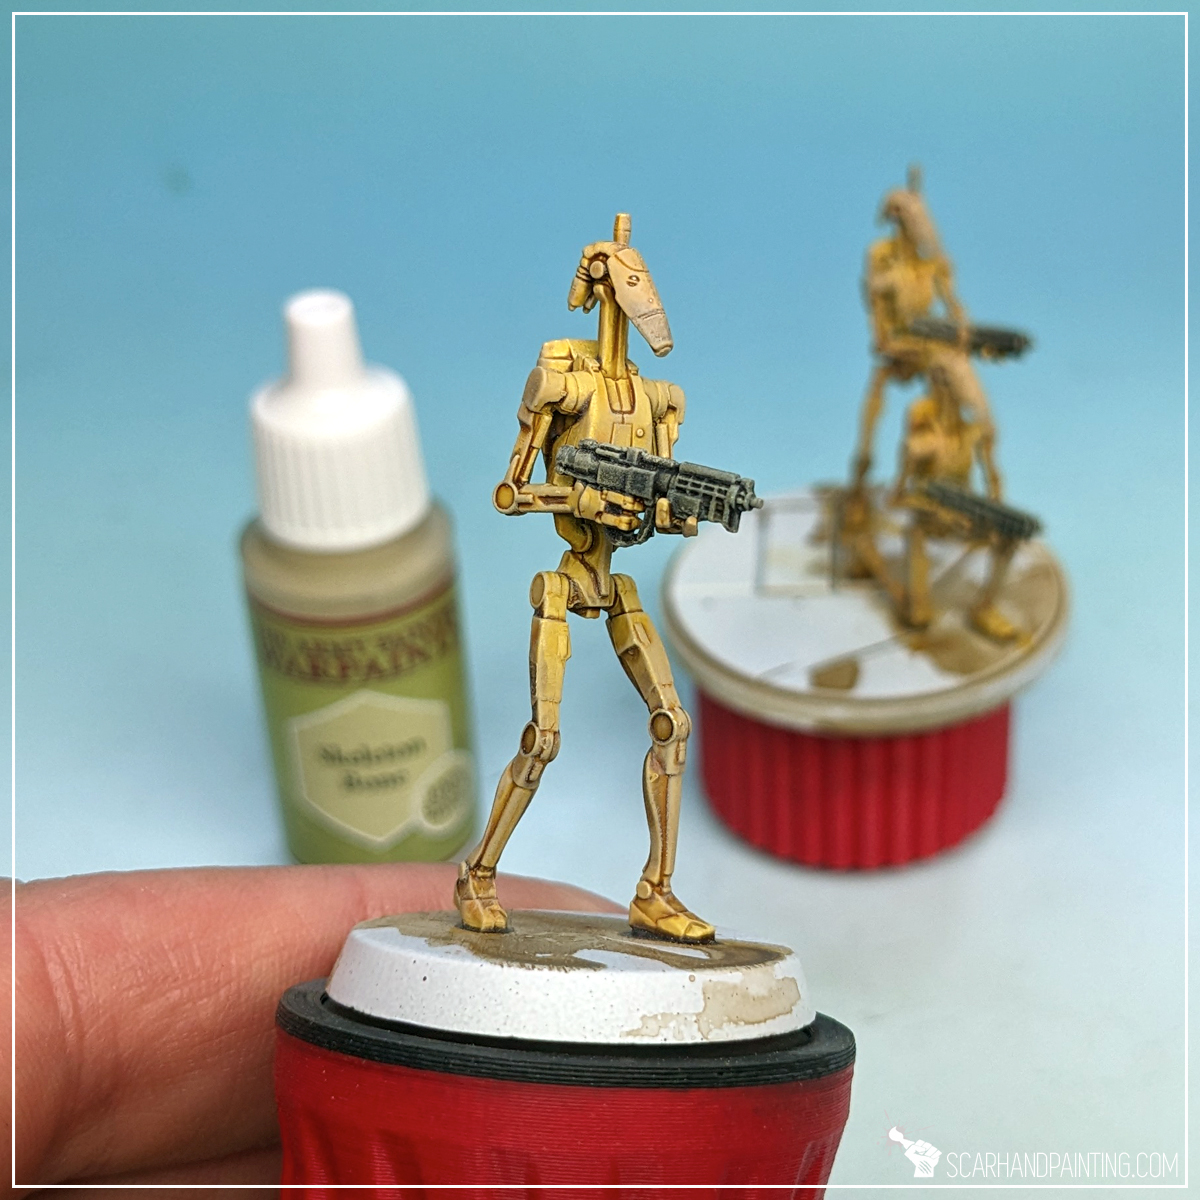
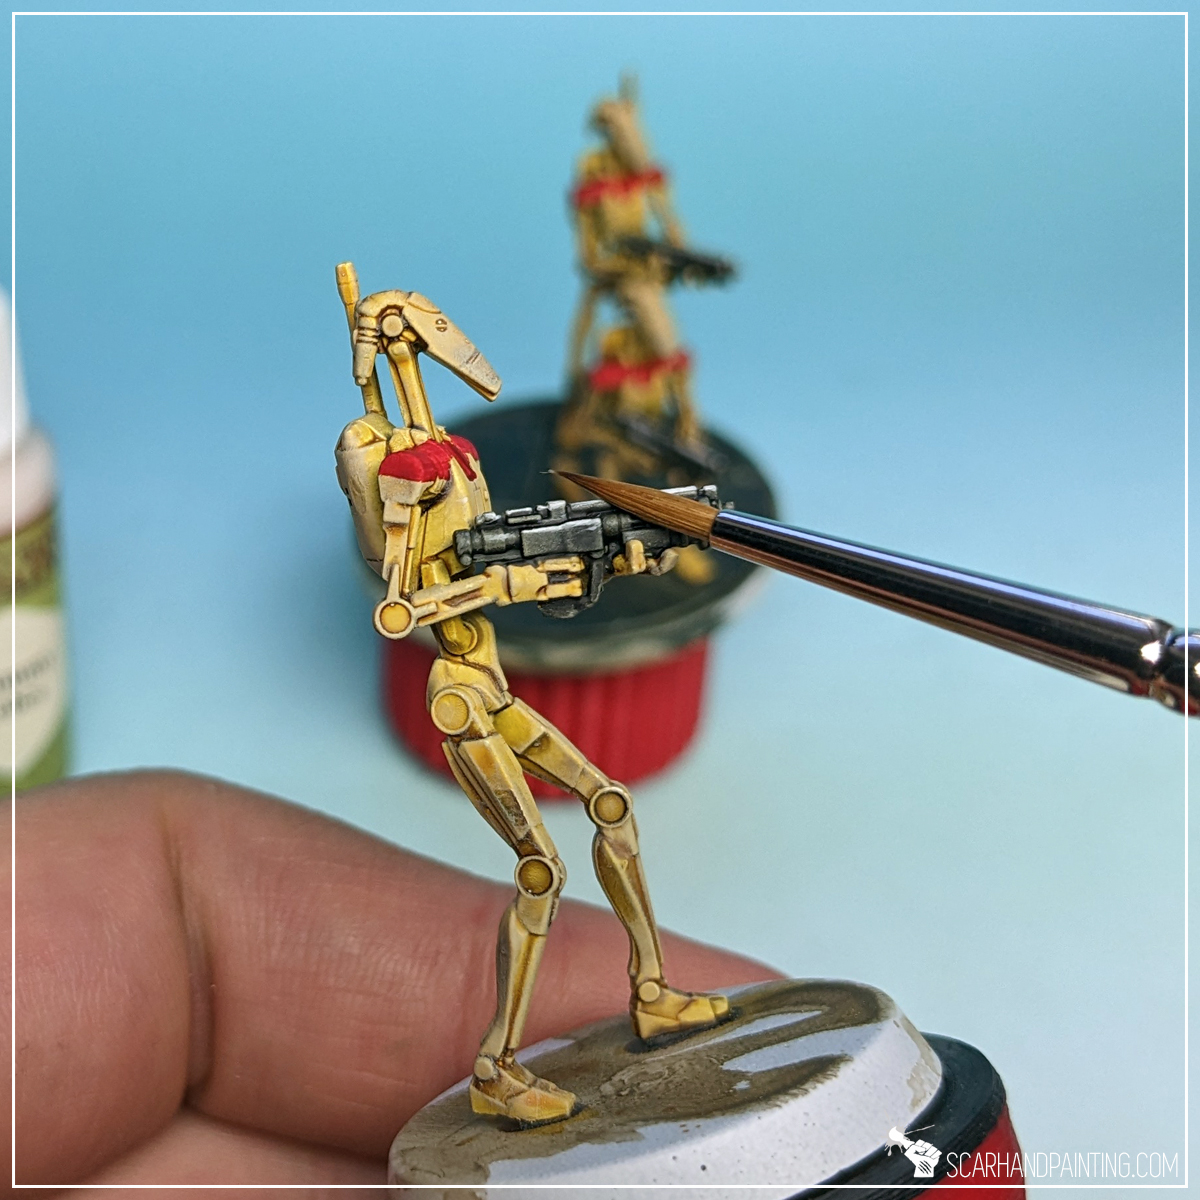
I used Poppy Red Speed Paint and applied it on top of chosen areas with Wargamer: Insane Detail Brush. As a Speed Paint the Poppy Red is perfect to cover bright paints underneath, including edges, previously highlighted with Skeleton Bone.

Next I applied a layer of Red Tone wash on top, to add depth and darken the color just a bit.
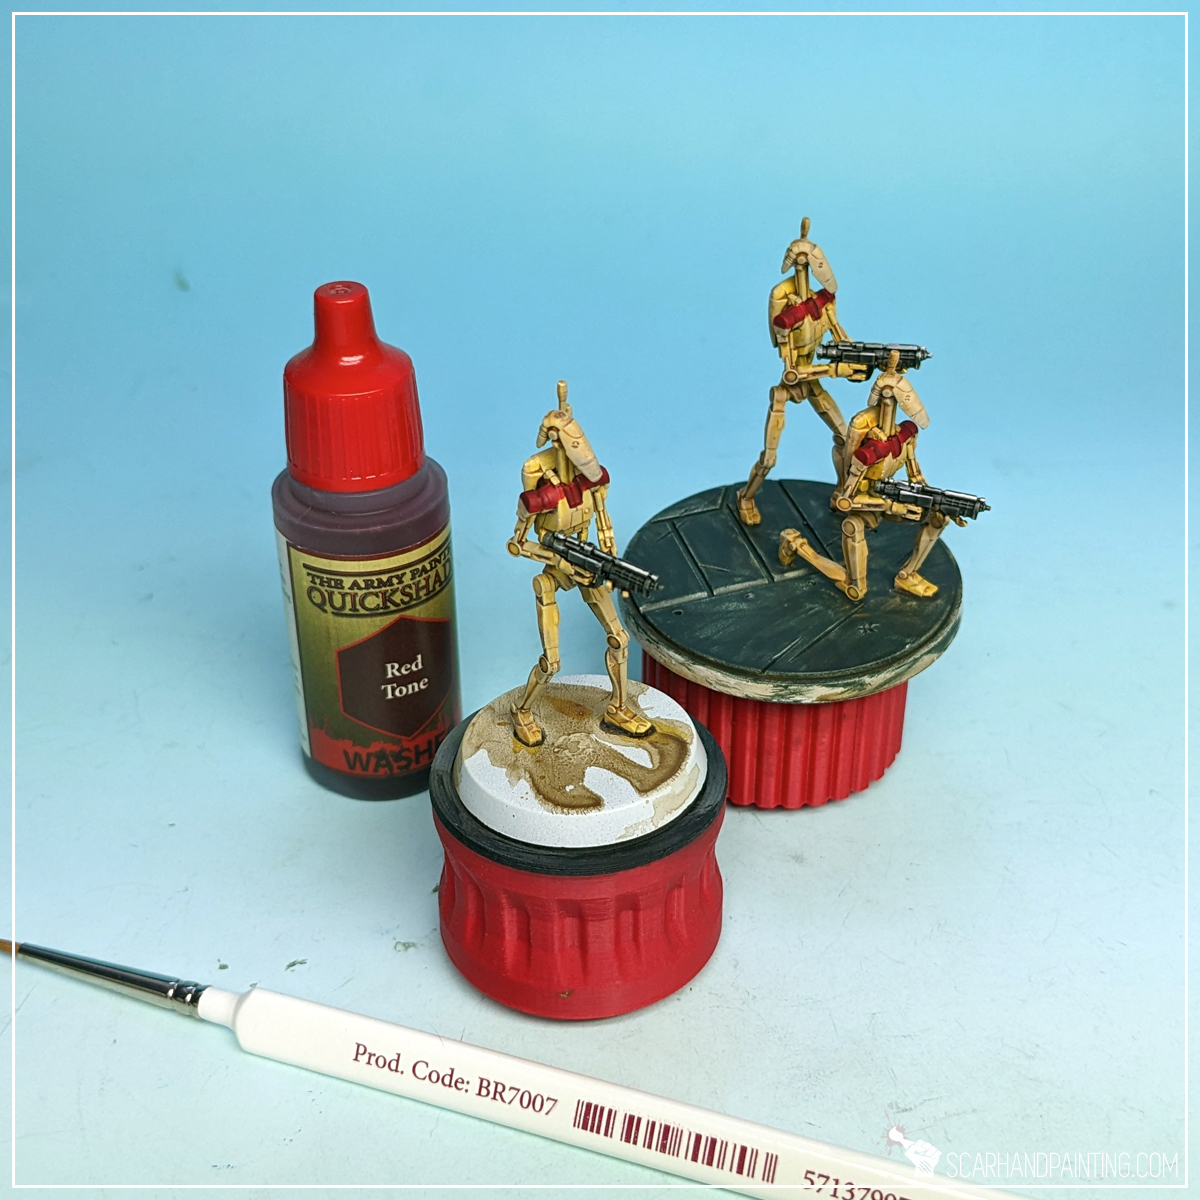
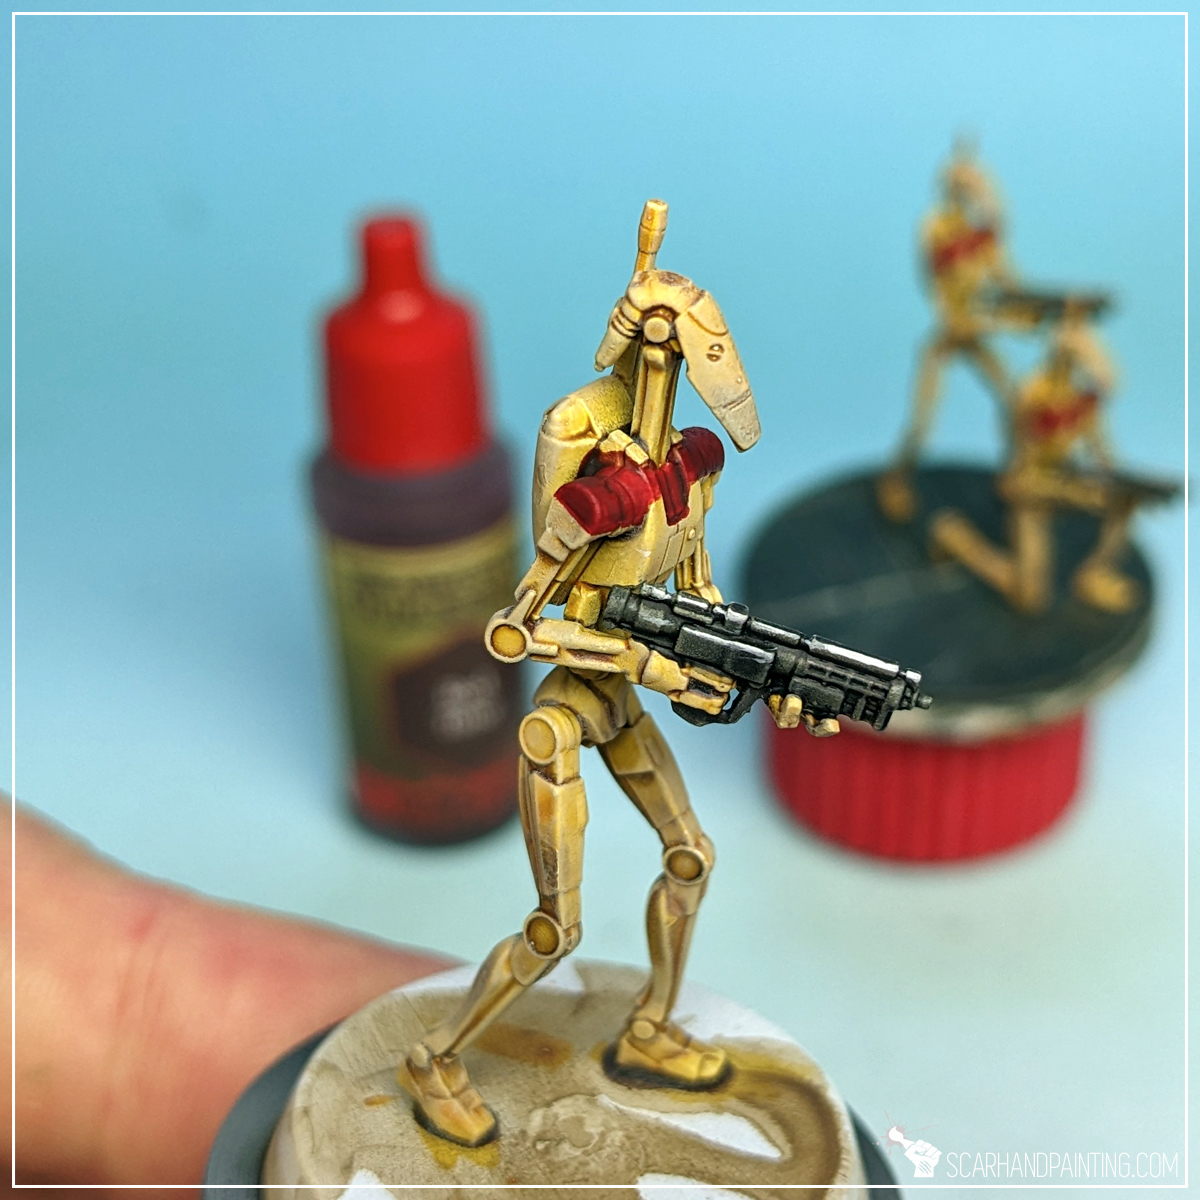
To make weapons pop, I used a Wargamer: Regiment Brush and applied a Dark Tone wash over them.
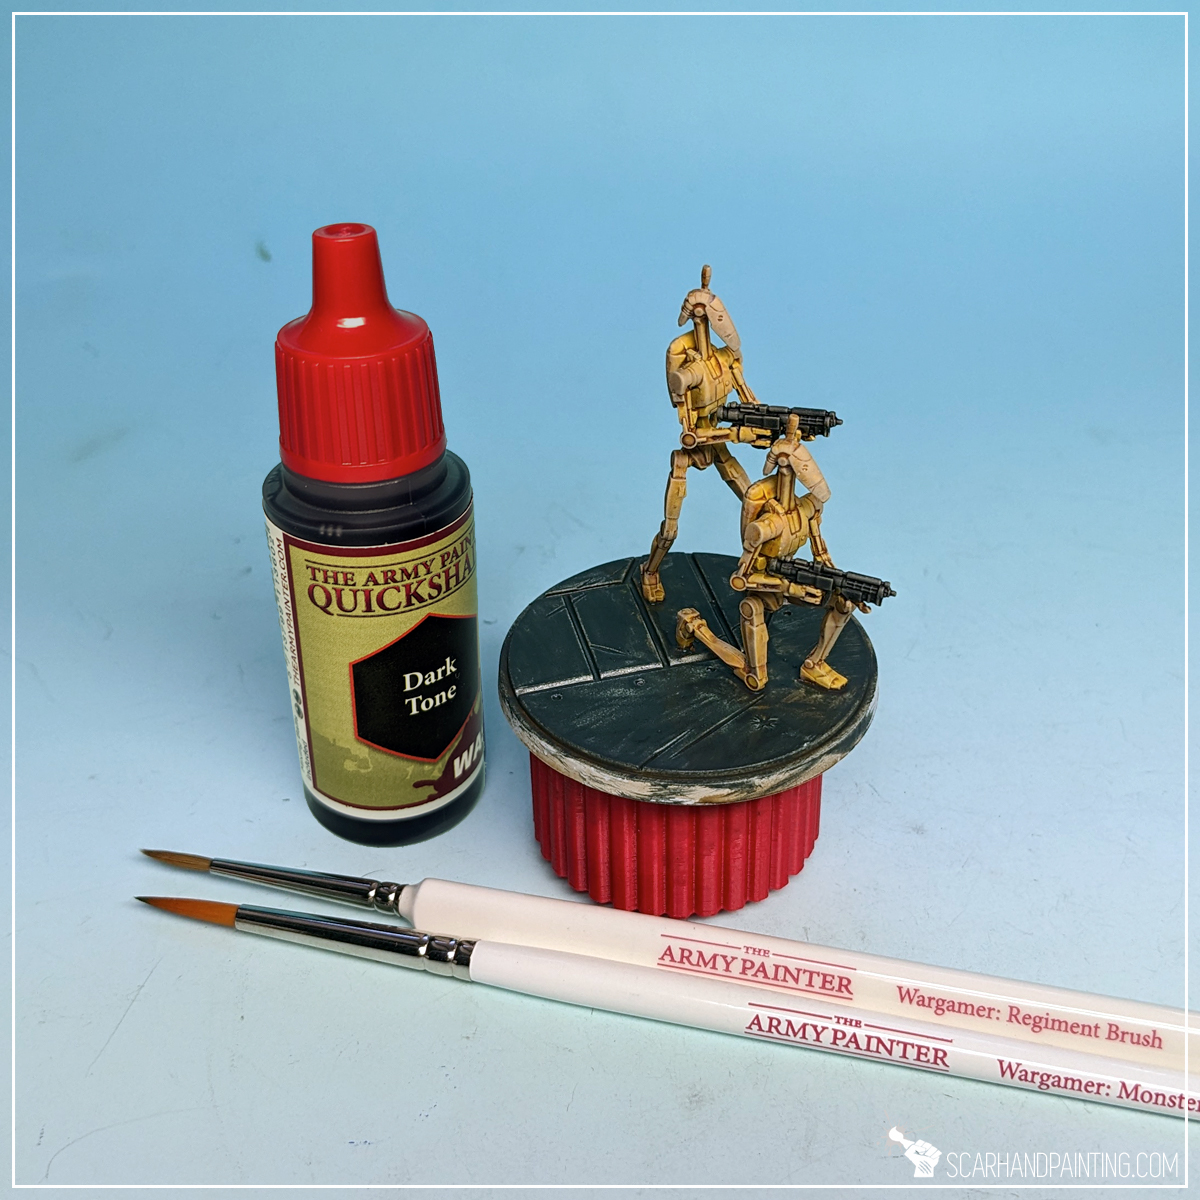
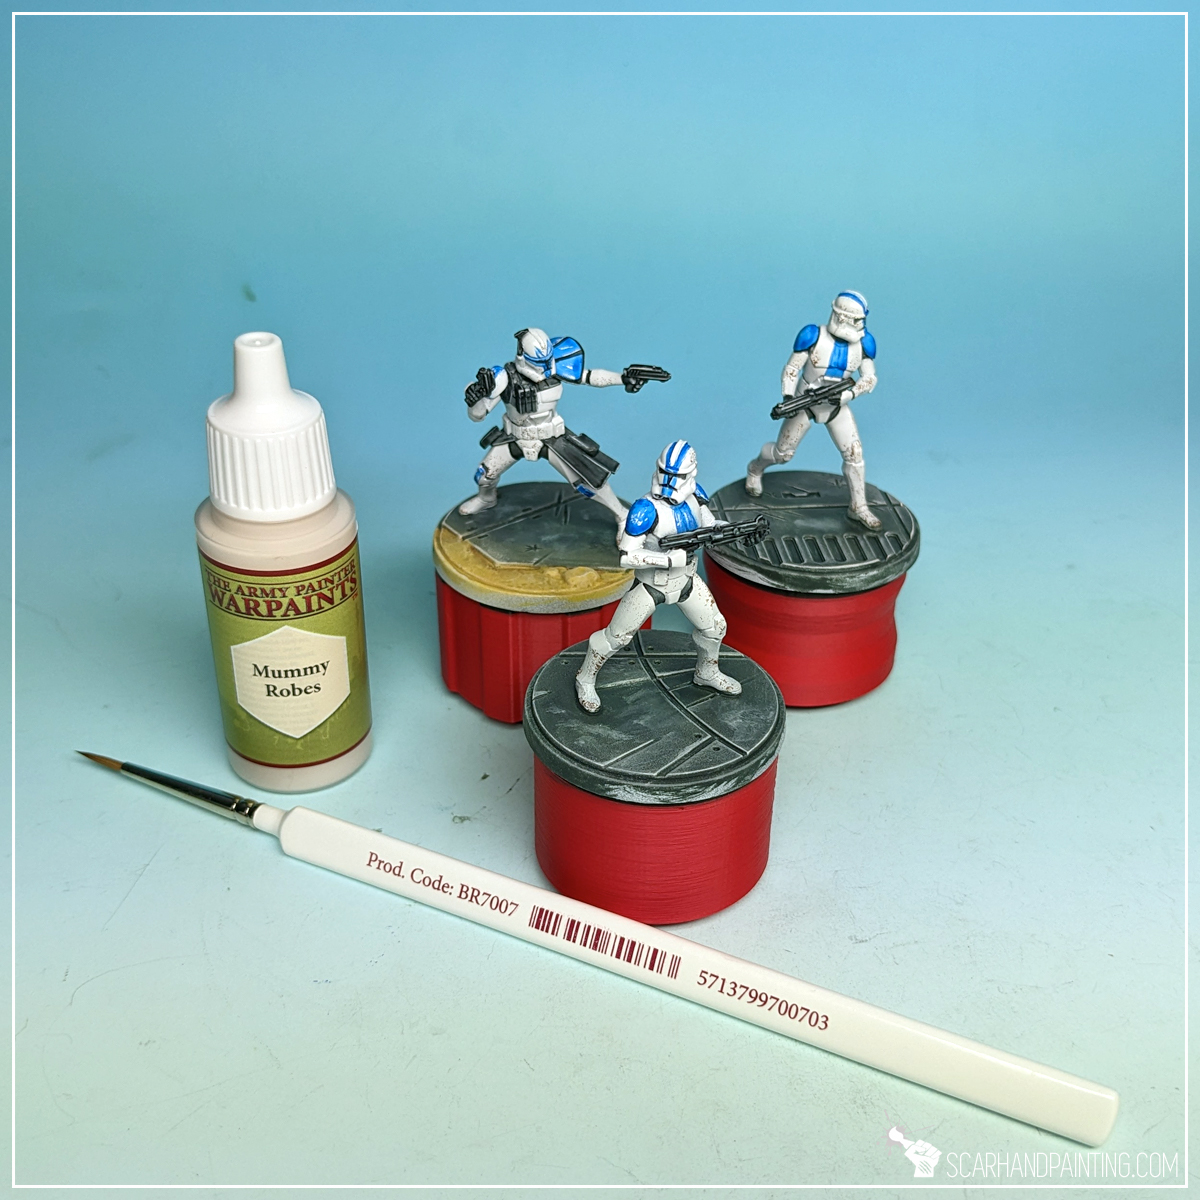
I then highlighted the edges with Mummy Robes, similar to how I did it in the Clone Troopers tutorial.
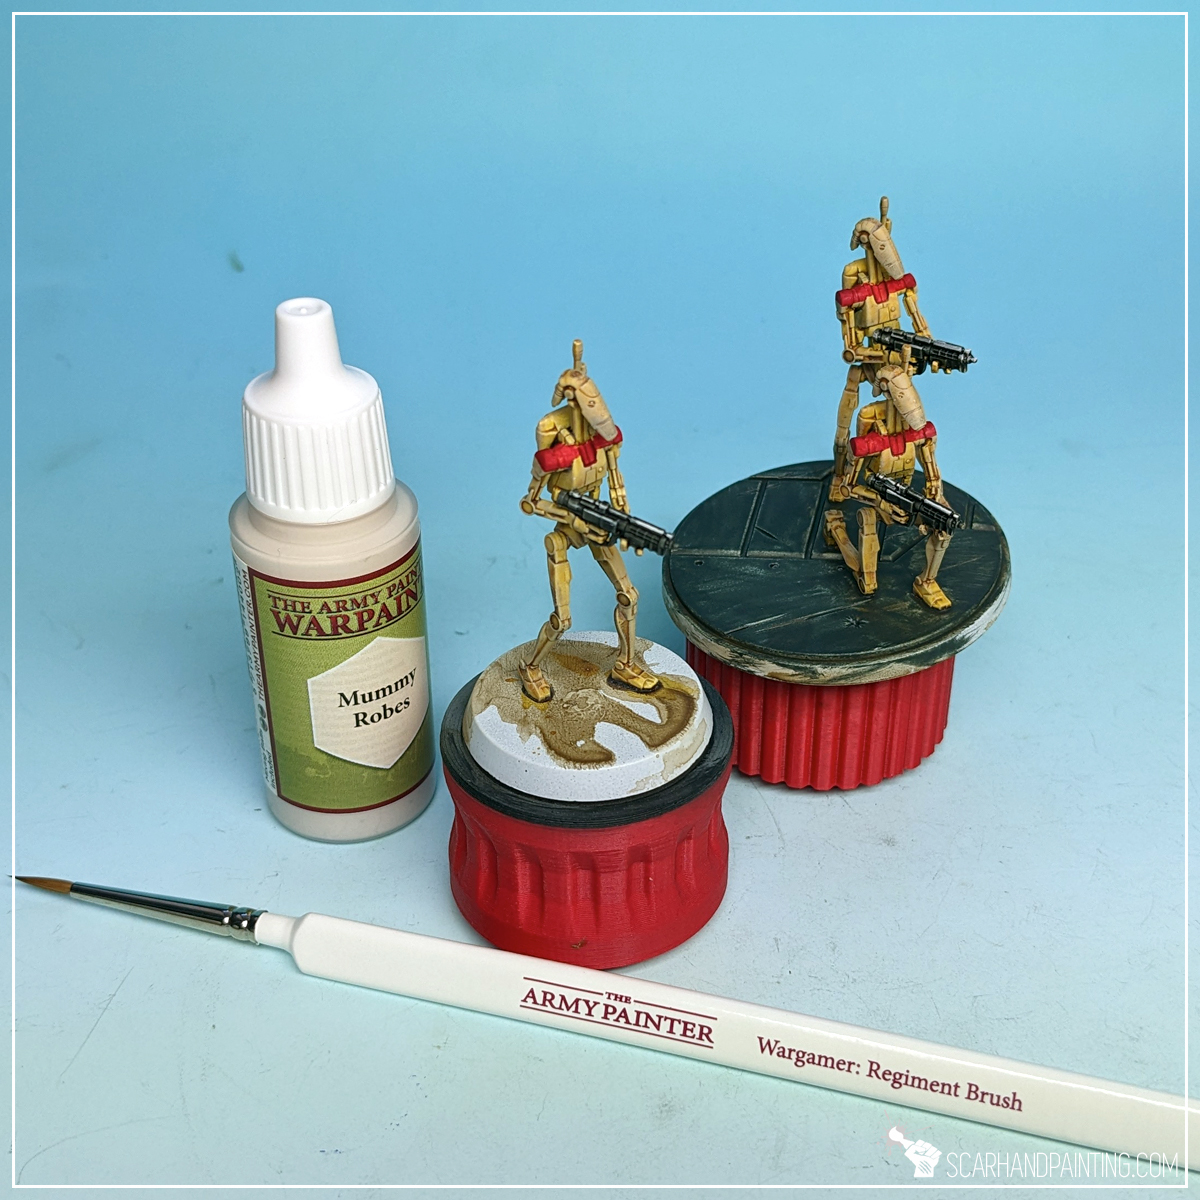
For bases I applied a layer of Raven Black (air) with a Wargamer: Regiment Brush. Just like with Clone Troopers, I deliberately used air series paint for an extra messy end result.
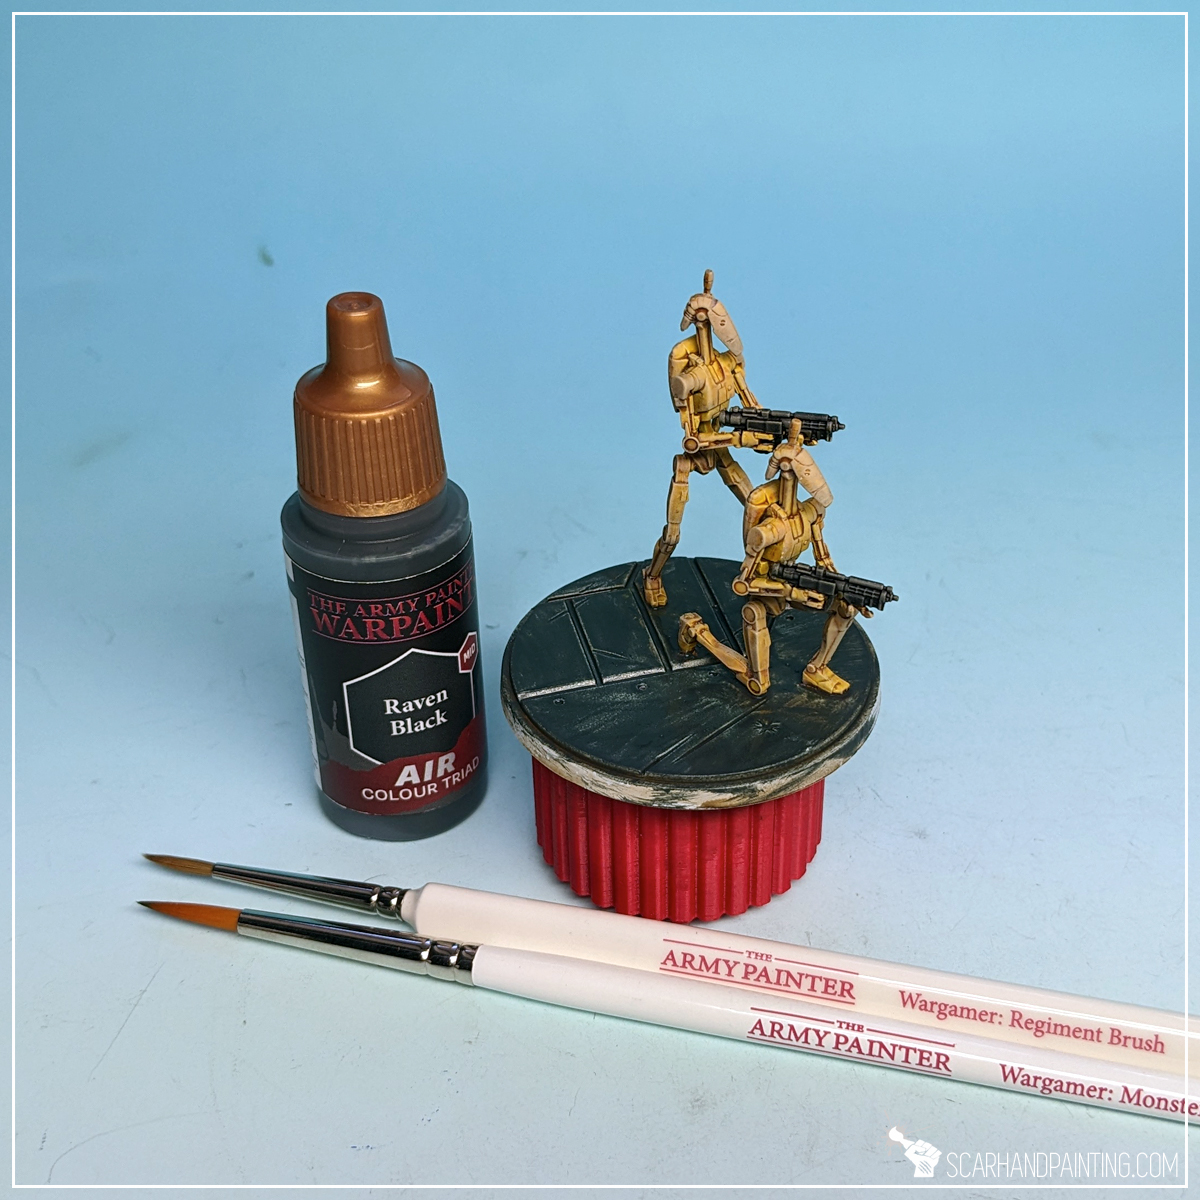
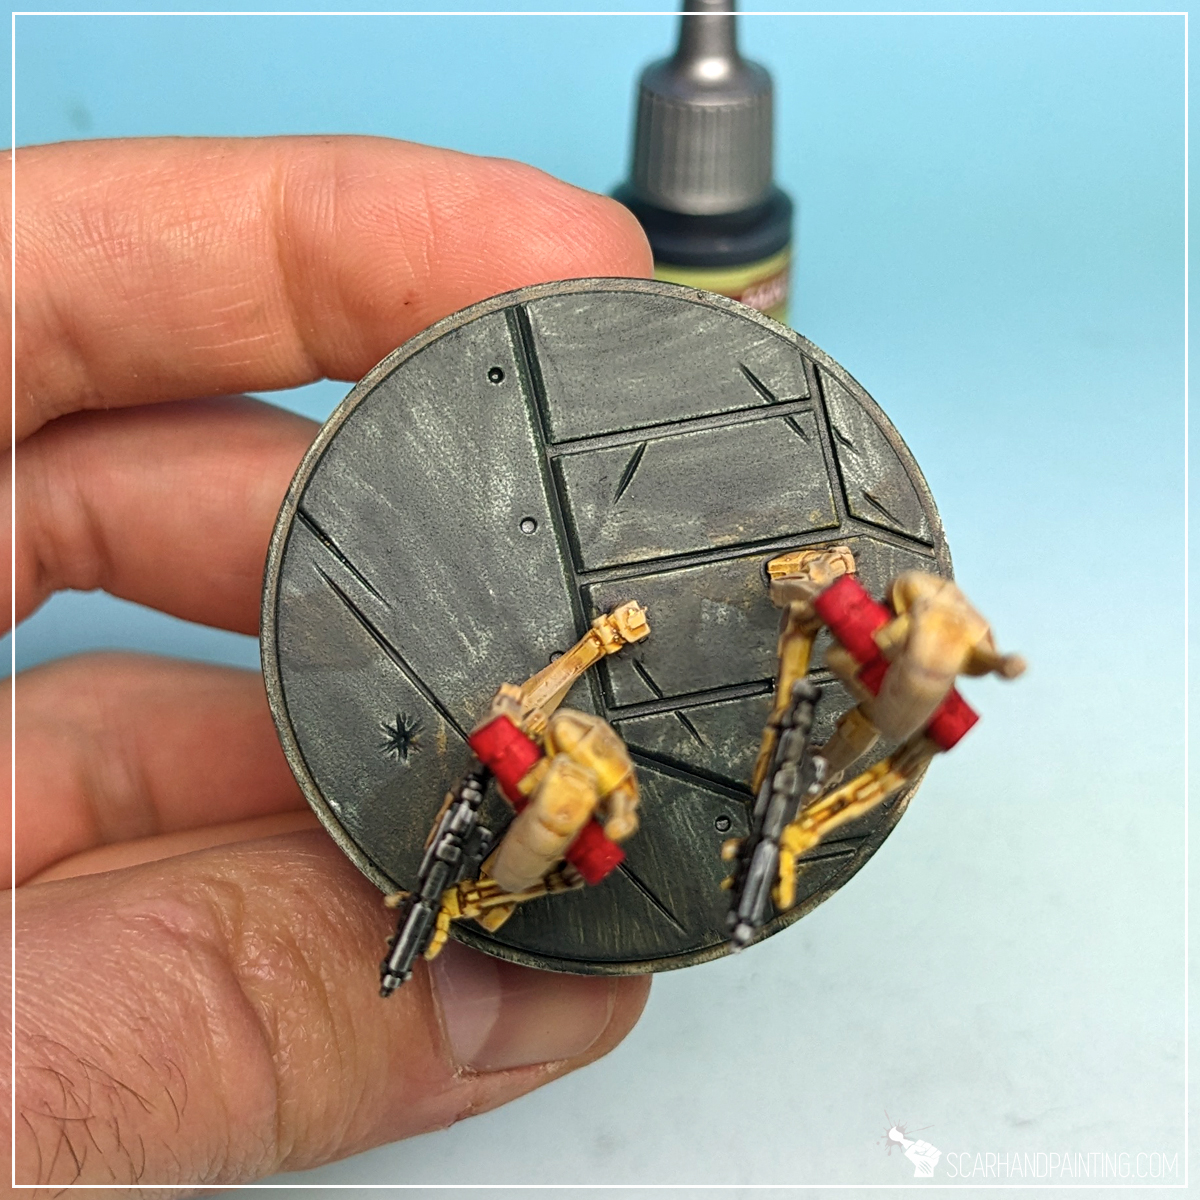
I then applied a strong drybrush of Ash Grey all over the bases and feet of the miniatures.
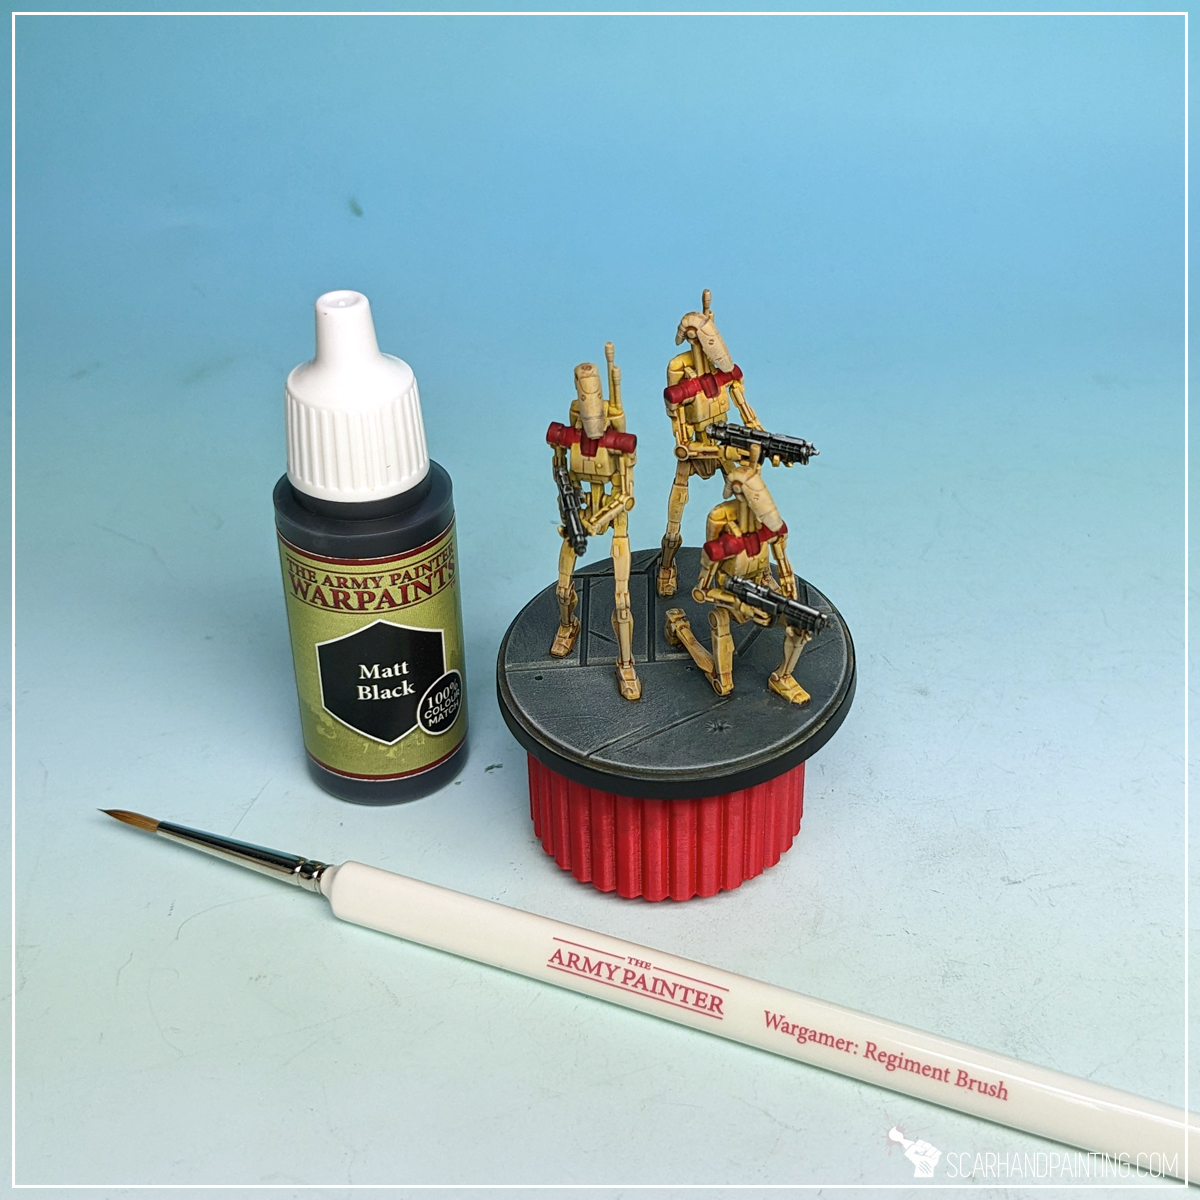
Finally I finished the bases with smooth, black edges. One layer of Matt Black, applied with Wargamer: Regiment Brush.
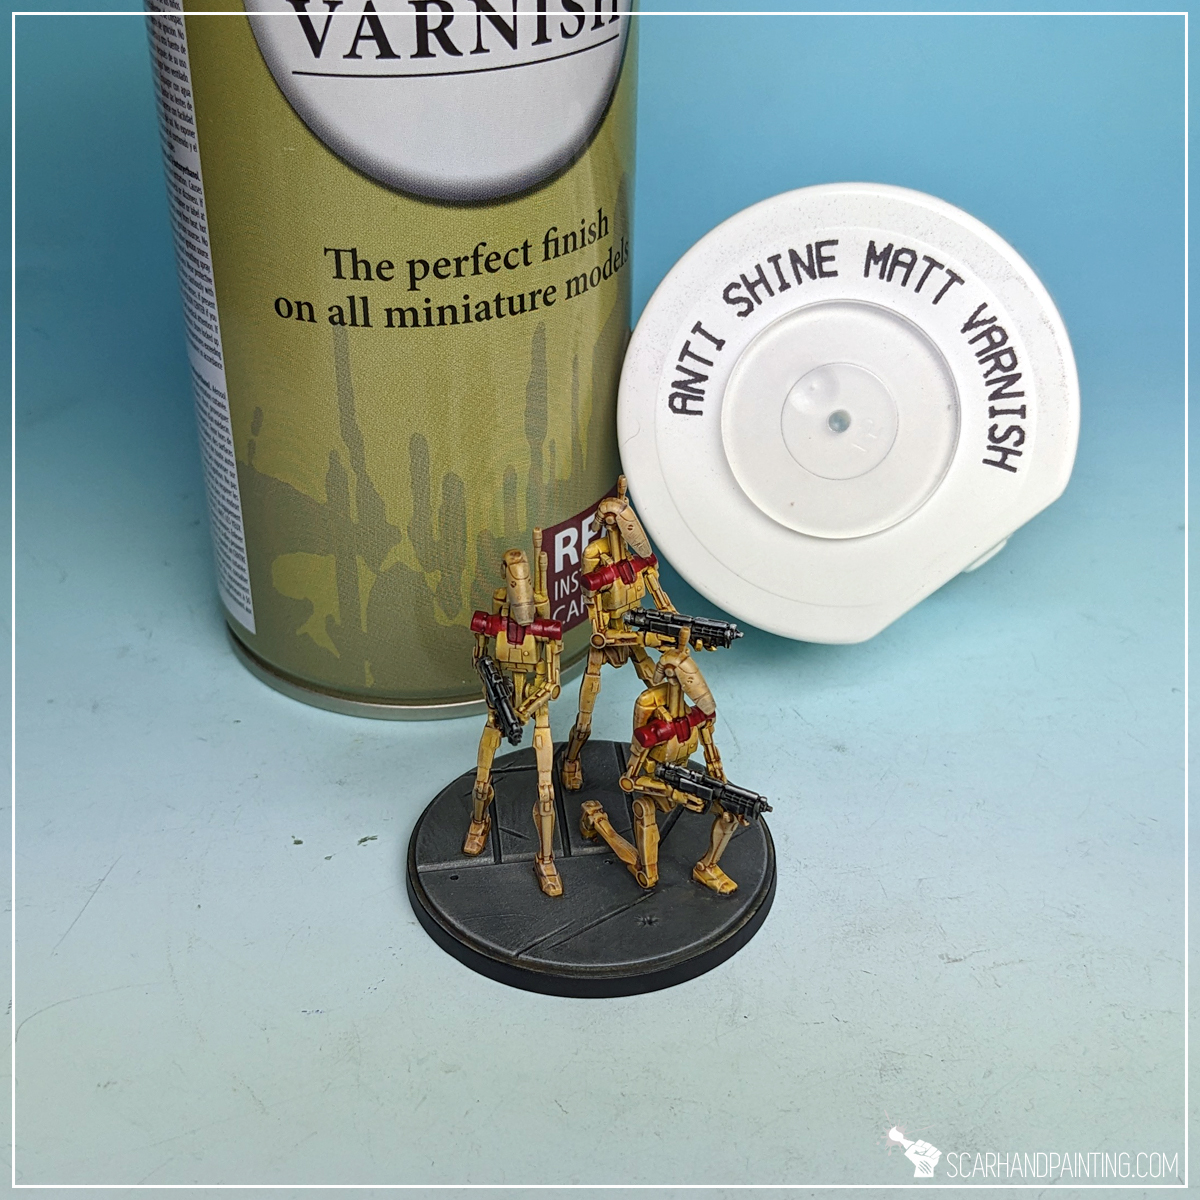
Lastly I sealed the paint job with Anti Shine Matt Varnish.

I hope you find this tutorial interesting. Be sure to let me know your thoughts in the comments below or via Facebook or Instagram. I would also appreciate it if you considered sharing this content with your friends, who might find it useful. Many thanks to Rebel.pl for sponsoring this content. Stay tuned for more Star Wars: Shatterpoint tutorials.
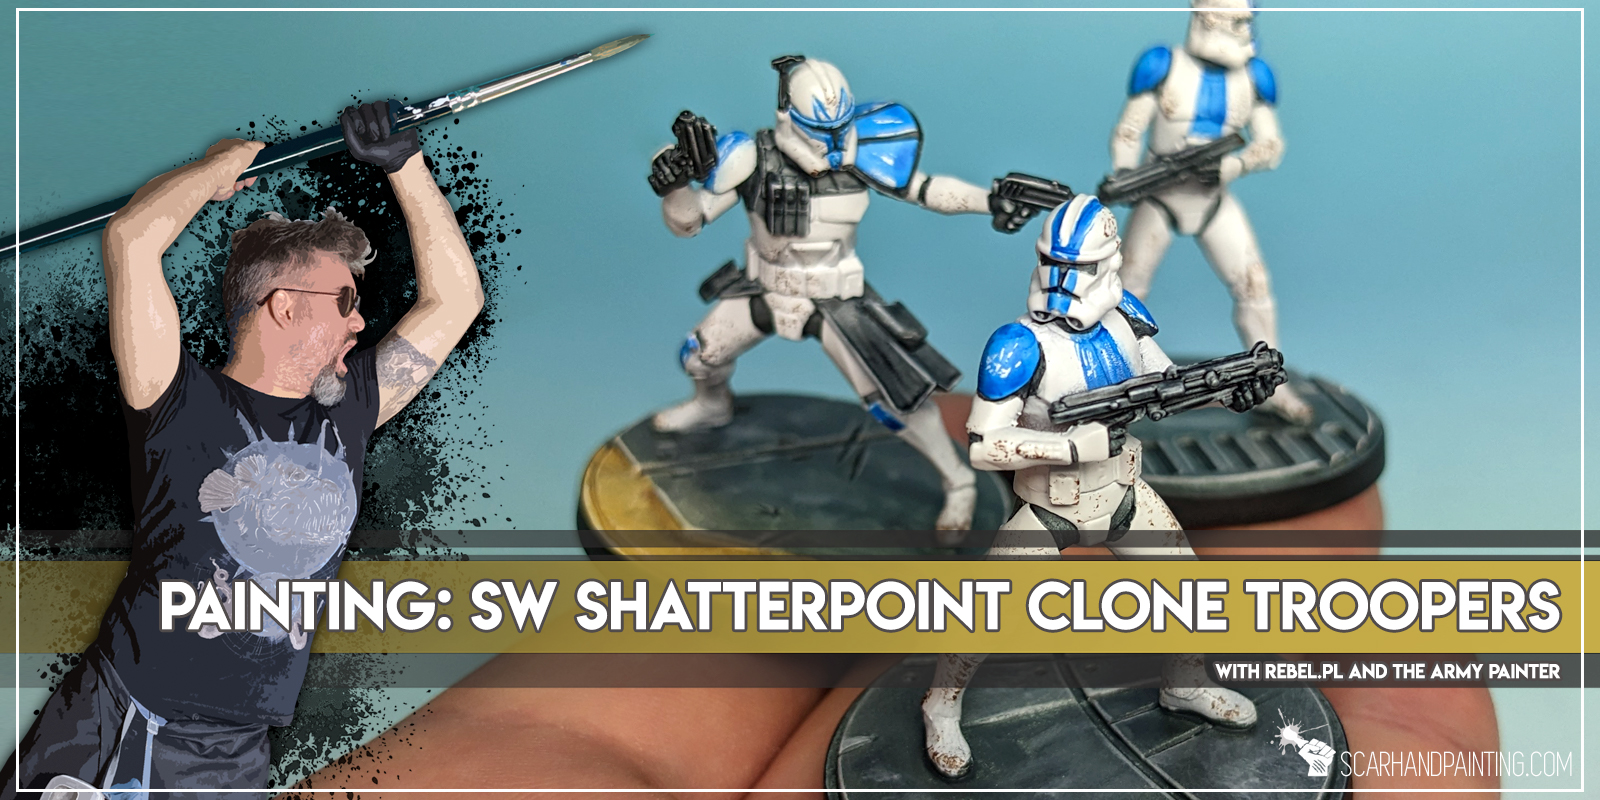
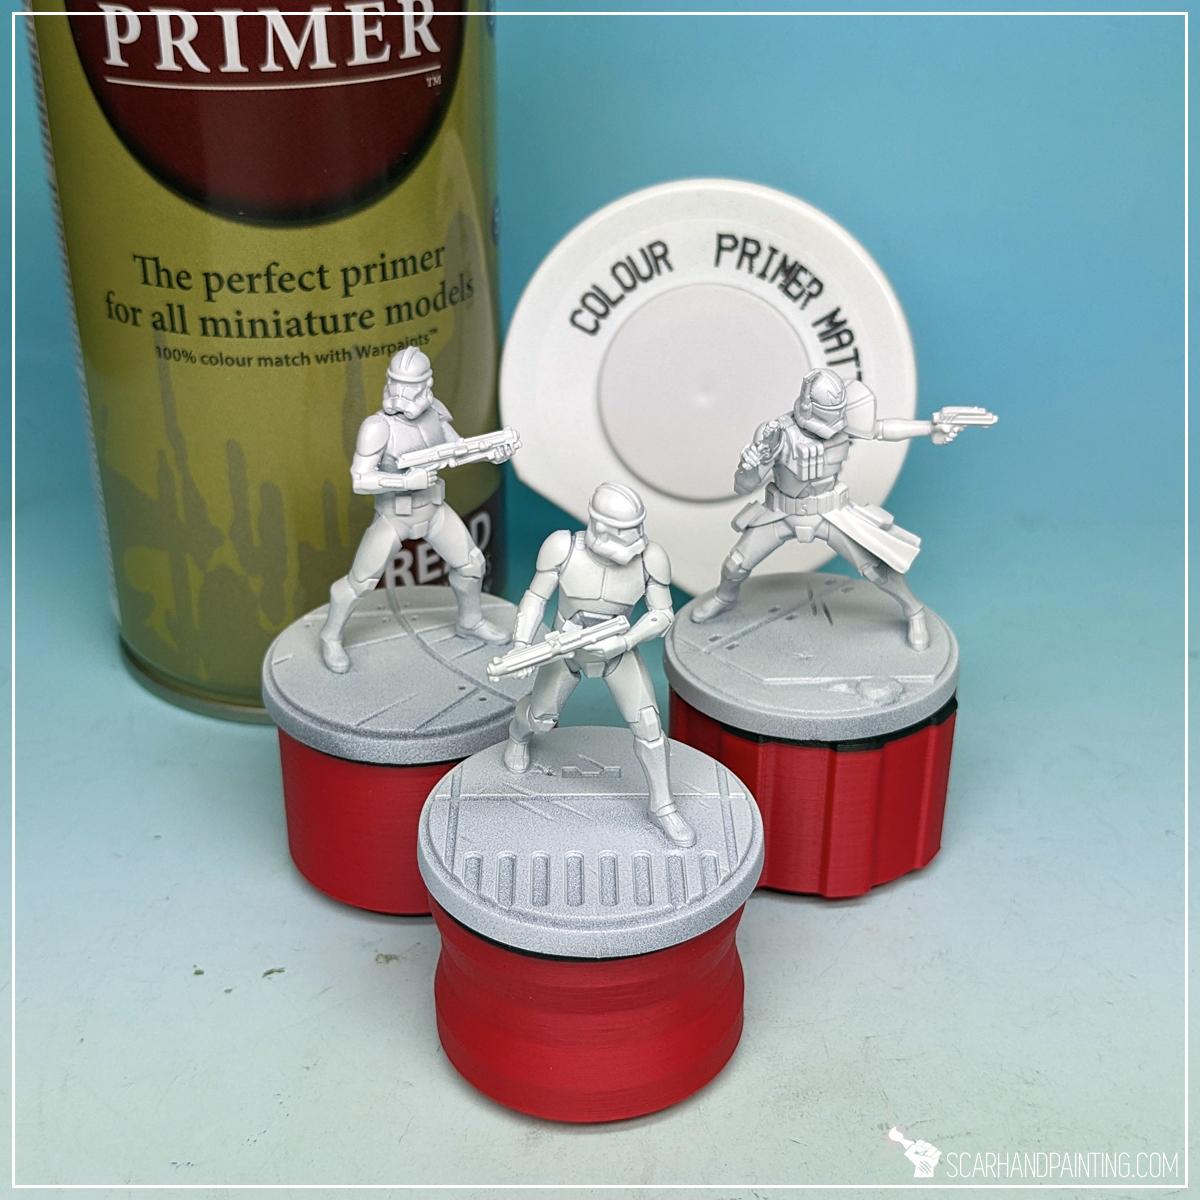
Welcome to Painting Star Wars: Shatterpoint Clone Troopers tutorial. Here I will present to you a Step-by-step of a basic painting process for Clone Troopers, with few optional extras.
Before we start, some notes:
In case you are totally unfamiliar with the hobby, Star Wars: Shatterpoint being your very first step into the overall Wargaming, below are a few basic steps of miniatures build and preparation.

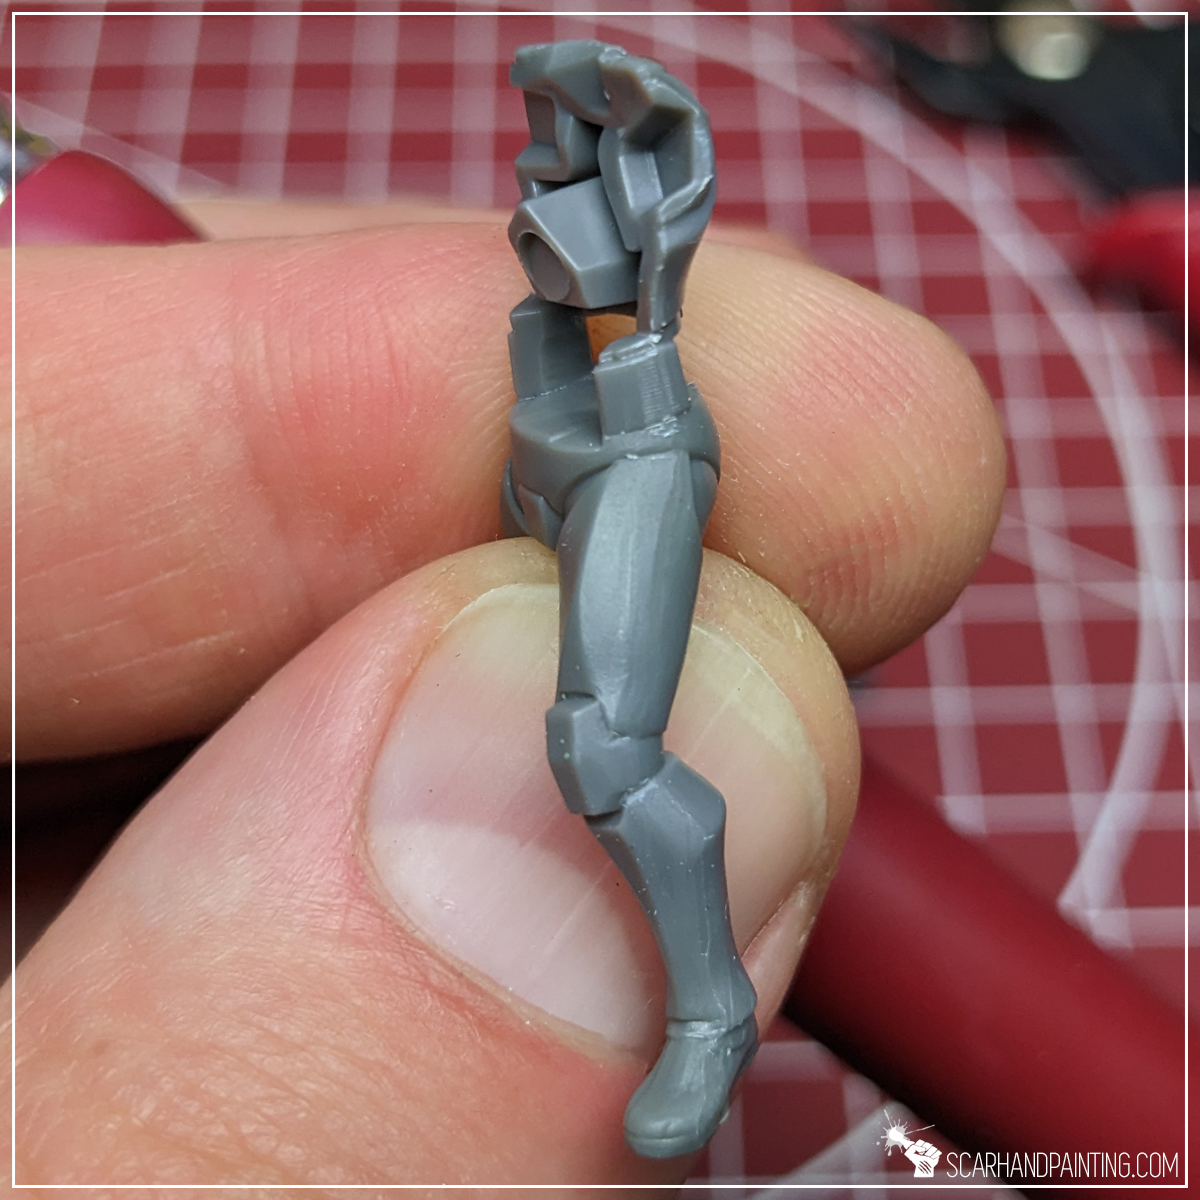

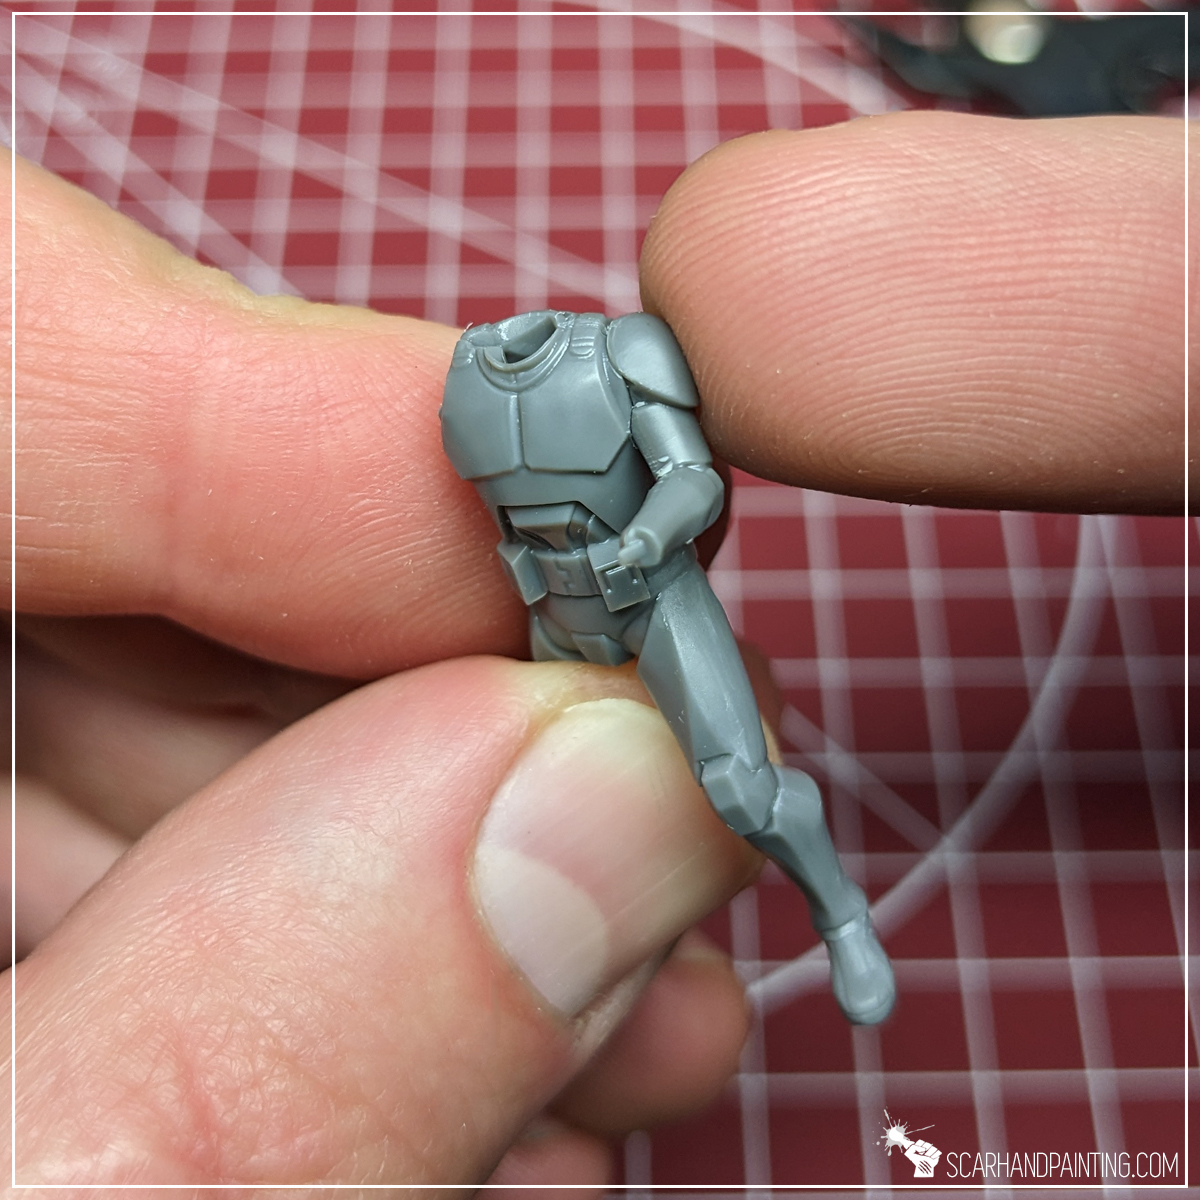

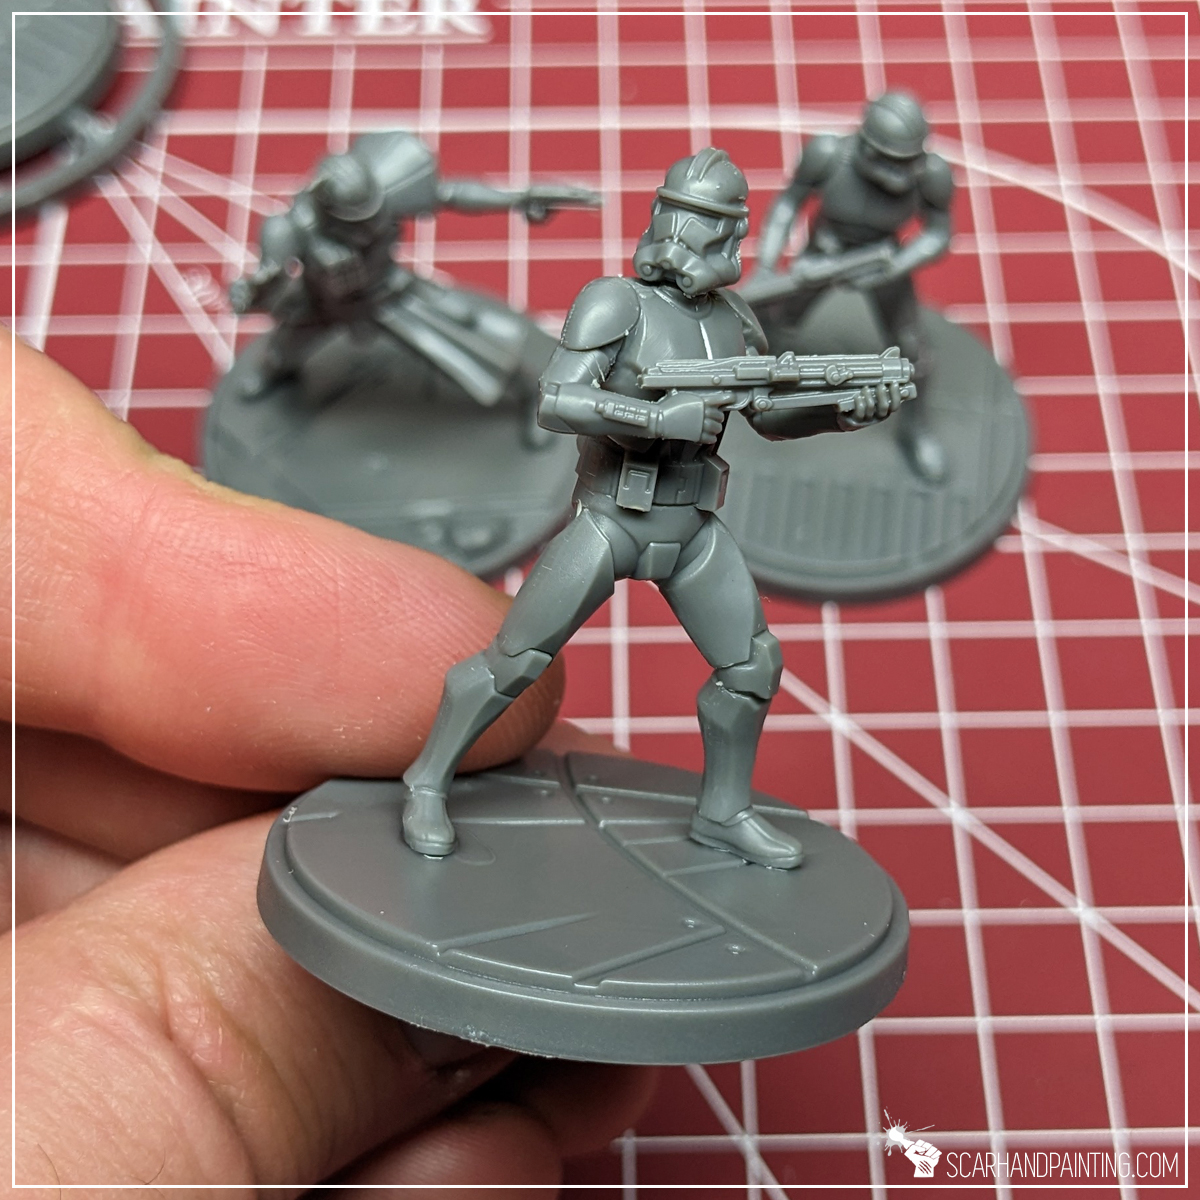
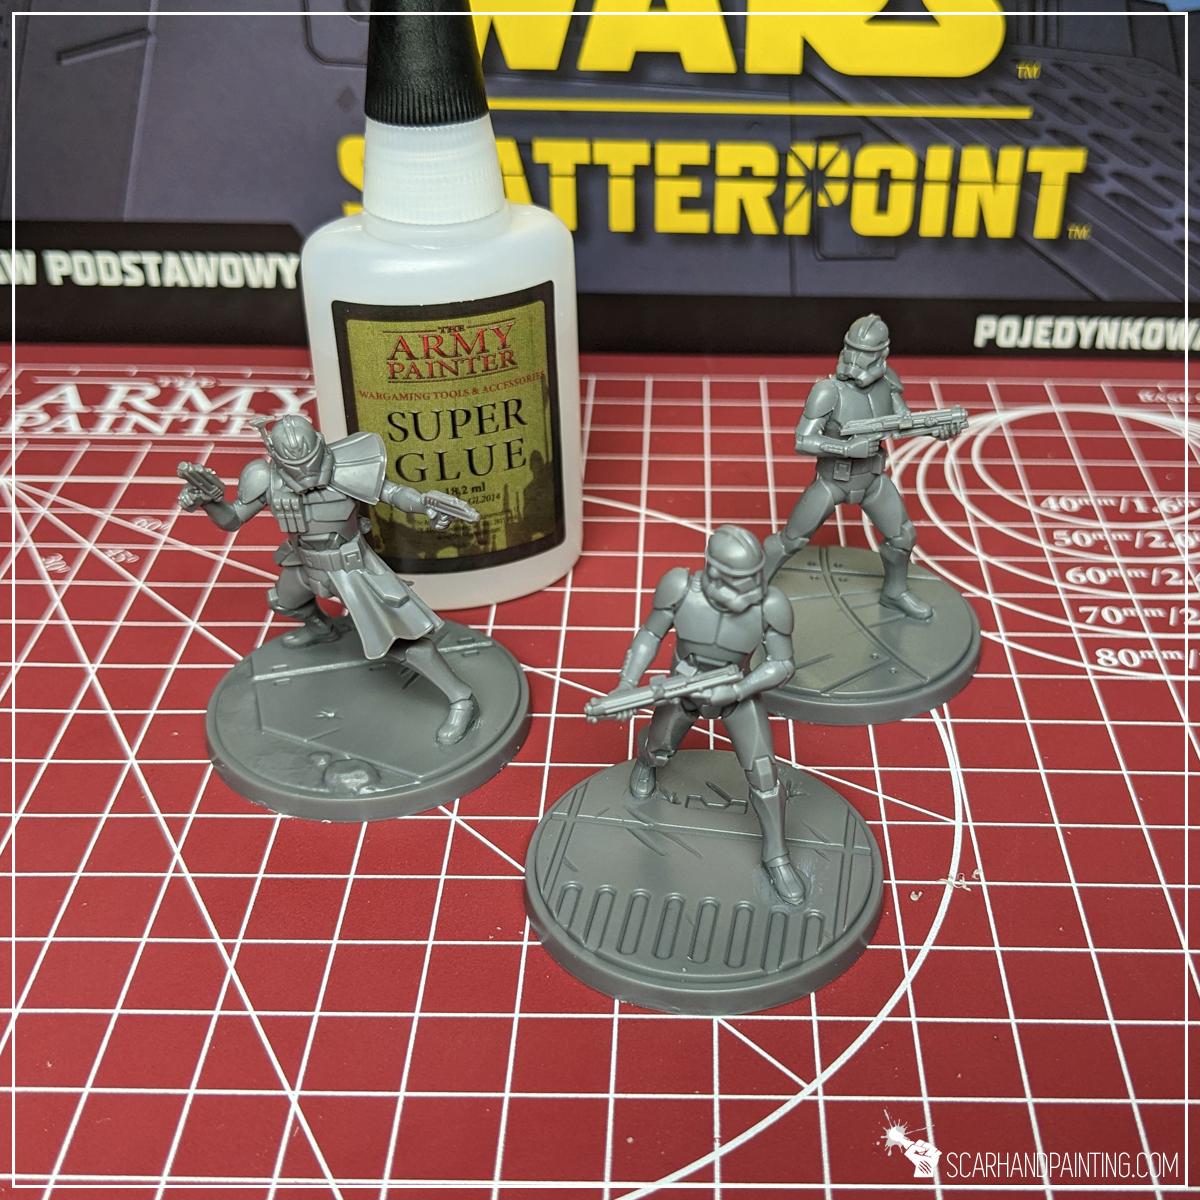
Undercoating miniatures is a topic on its own. Each primer color and technique of application has some advantages. For this tutorial I chose The Army Painter White Matt Primer and sprayed the miniatures around, mounted on a stick with a piece of Blu-Tack. This resulted in a durable, smooth surface, perfect for this kind of paint job. It also allowed me to skip an otherwise difficult first step – white armor.
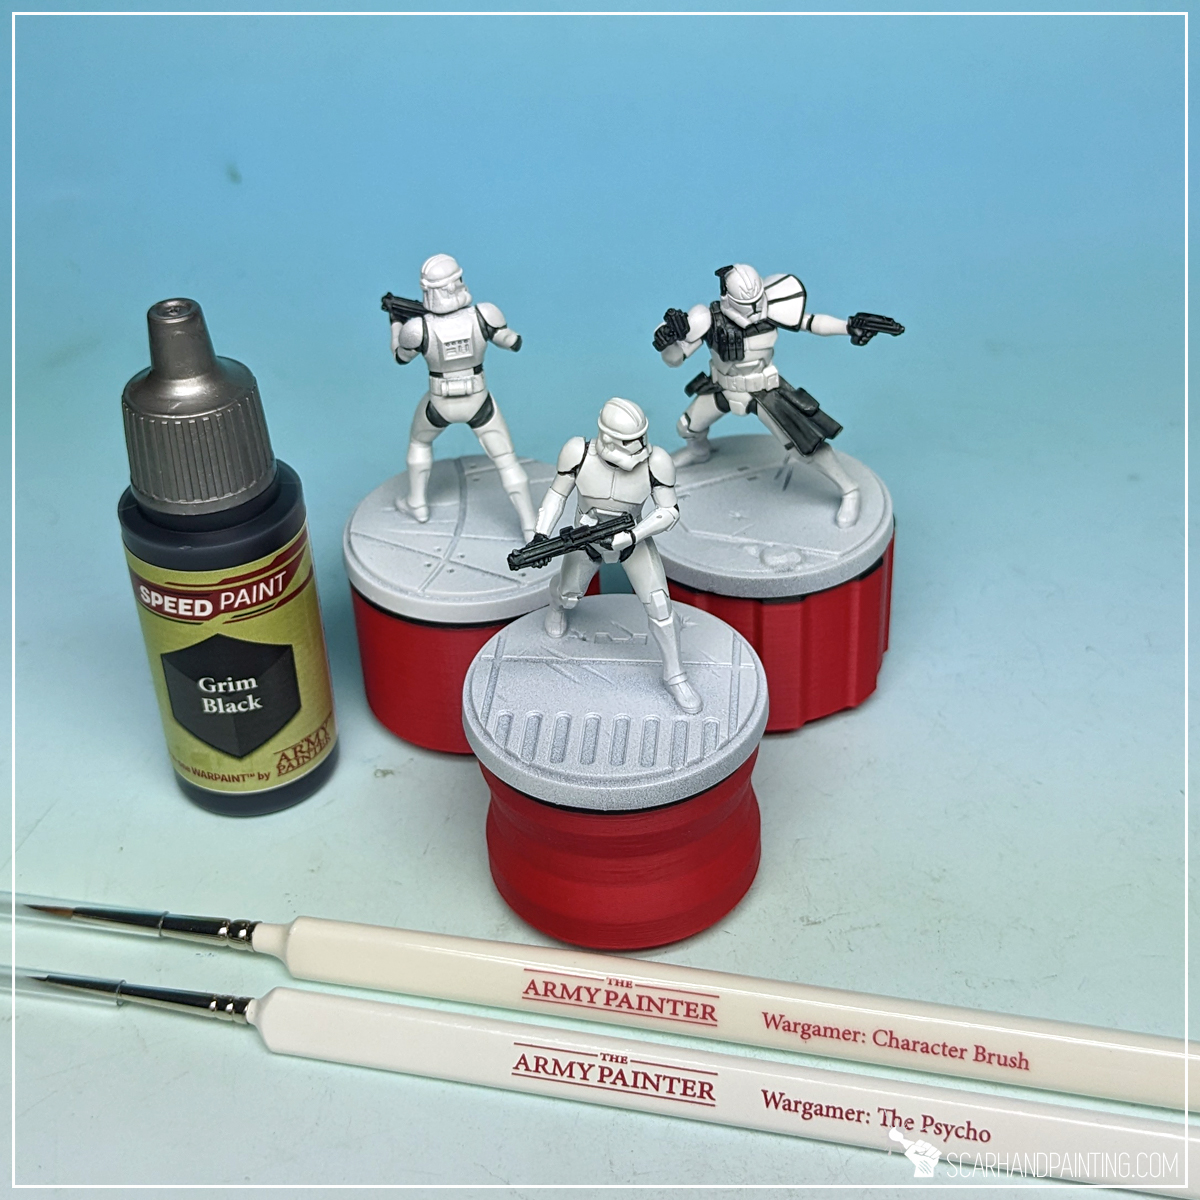
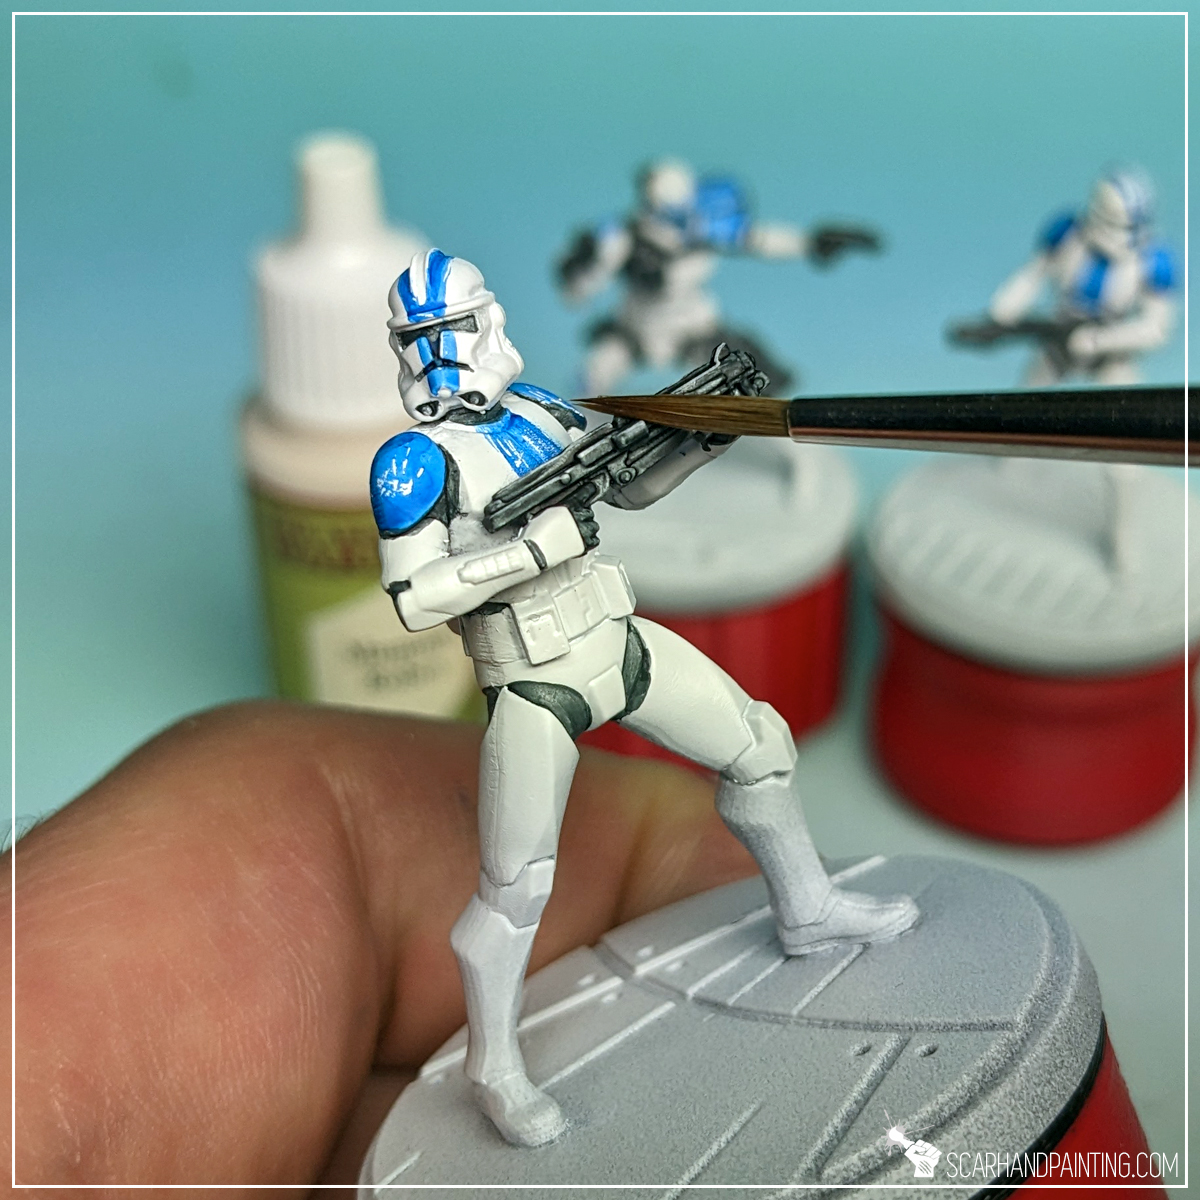
With a Wargamer: Character brush I applied Grim Black Speed Paint over weapons and cloth. I then switched to Wargamer: The Psycho to apply more paint into recesses between armor and onto helmet visors.
TIP: This step is a bit tricky. A lot can go wrong. Fortunately, thanks to spray undercoat’s durability and smoothness, any bloopers can be erased using a toothbrush soaked in water. Simply soak the tip of a toothpick in water, then flatten it with a pair of pliers to make an ultimate bloopers eraser.


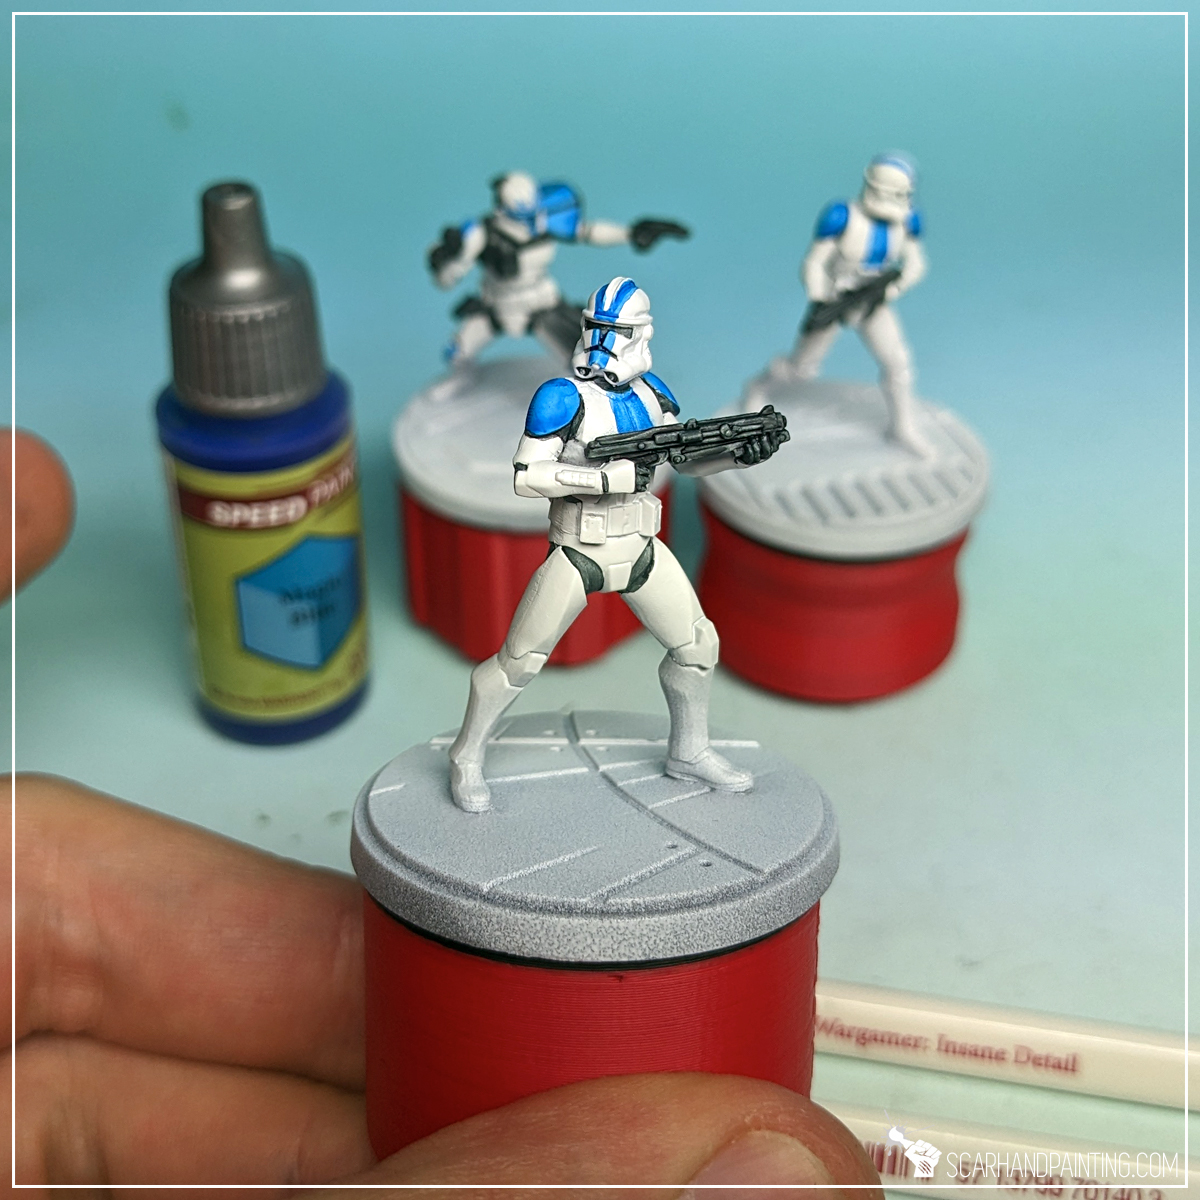
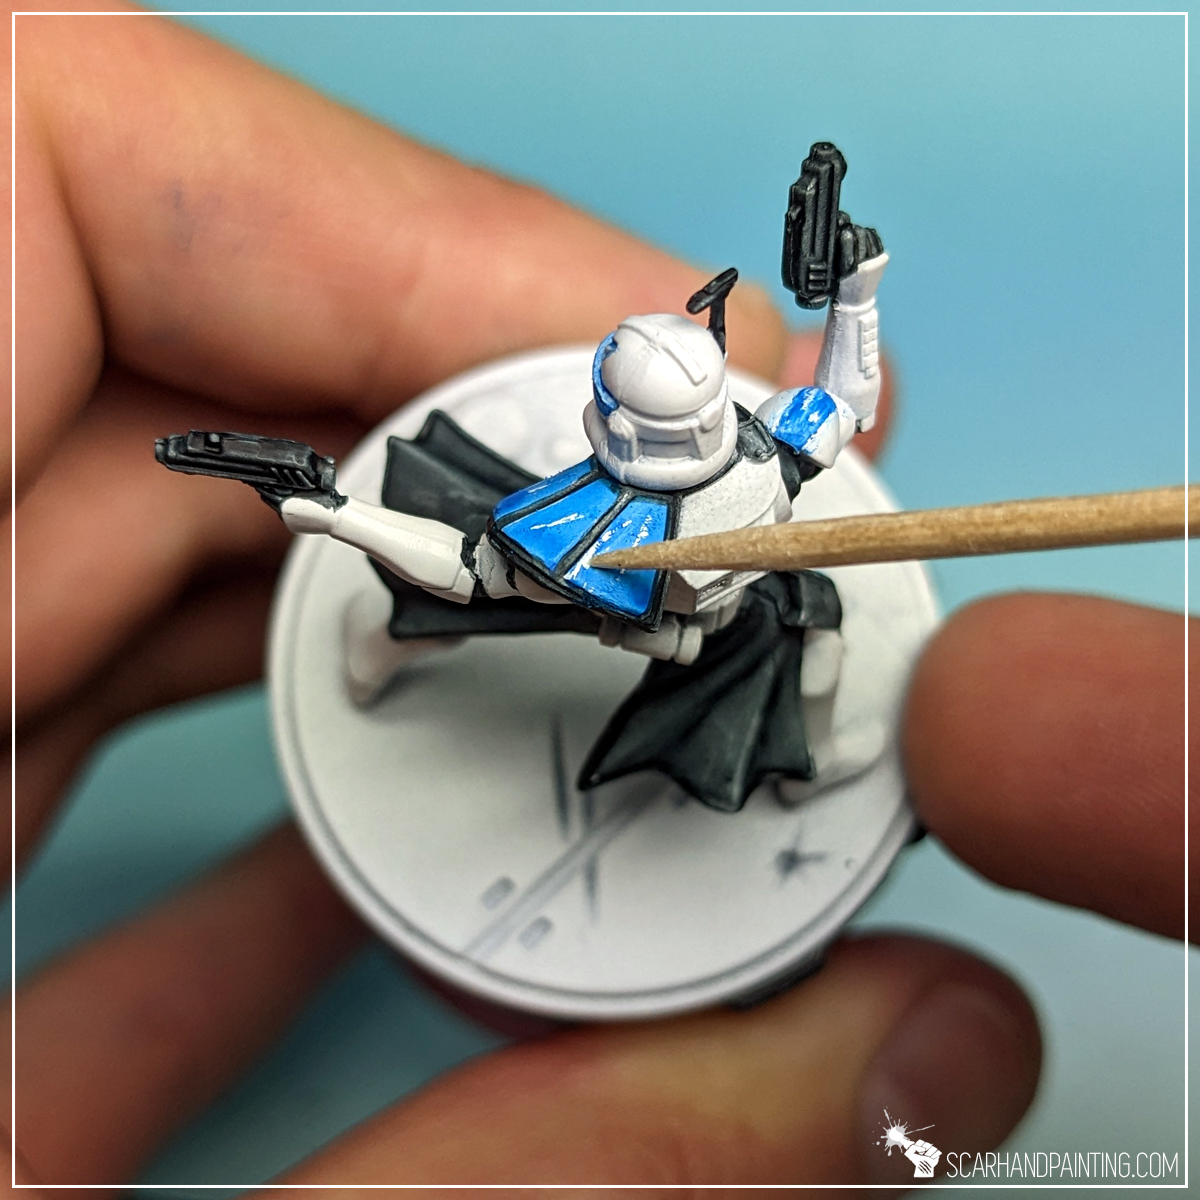
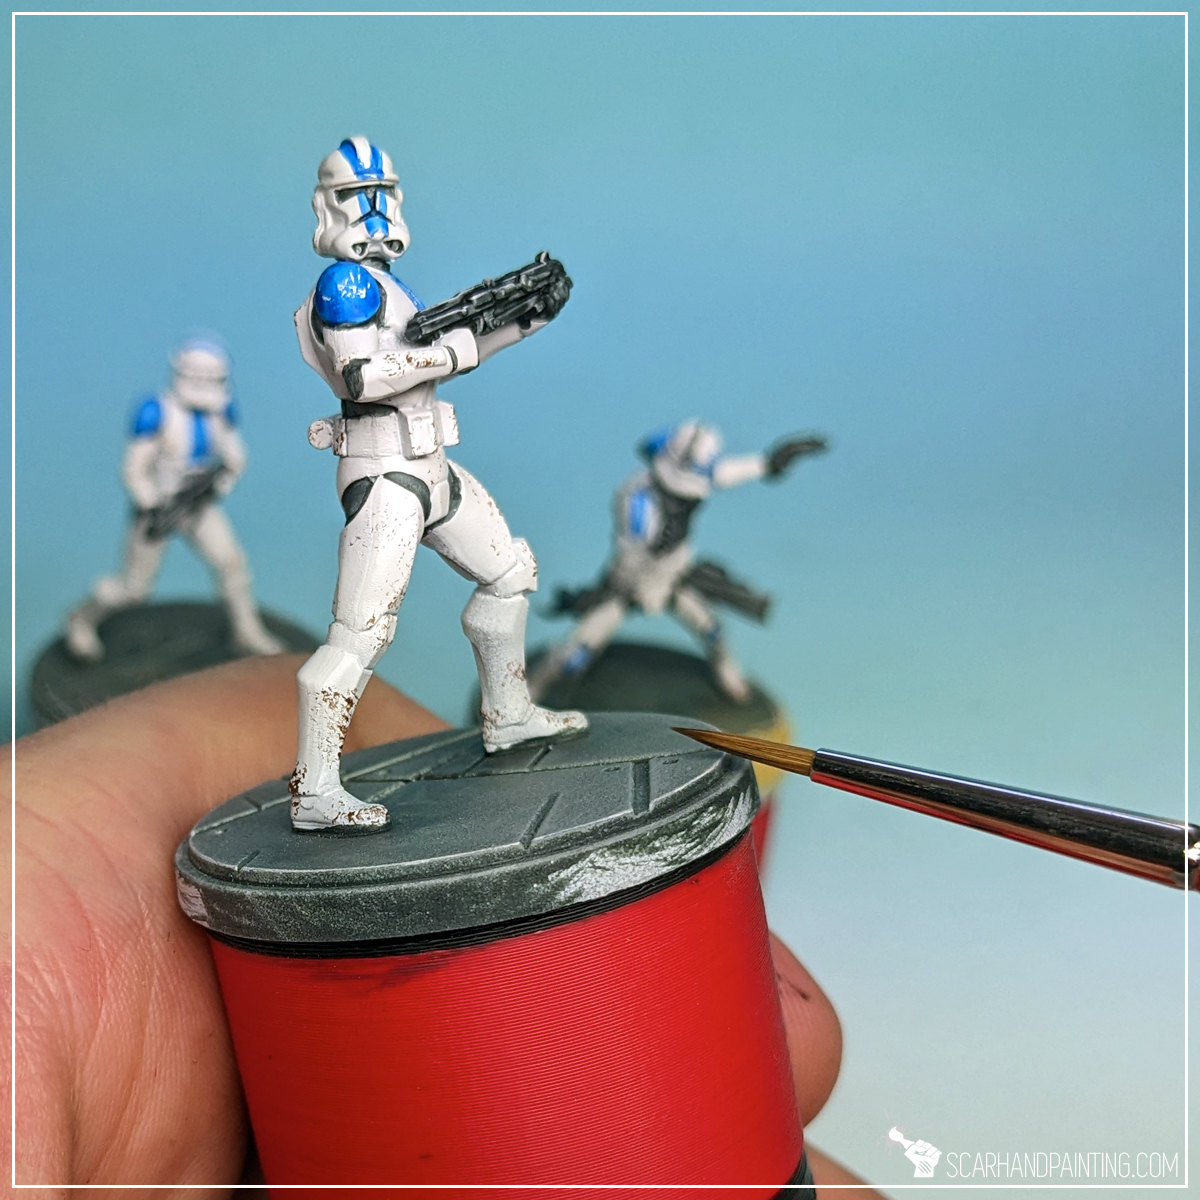
Next I applied Magic Blue Speed Paint onto shoulder guards and in selected areas on helmets and chest plates. I used Wargamer: Insane Detail and Wargamer: The Psycho brushes for this. Usually, when using thin paints such as Speed Paints I go with larger brushes, but here I aimed at precise application.
I then used a tip of a toothpick to scratch blue surface, adding some character with thematic battle damage. This wouldn’t be possible on most undercoats, but The Army Painter primers leave a really strong plastic-like surface.

Using a Wargamer: Regiment Brush I then applied a highlight of Mummy Robes onto the top edges of the guns. Due to wider, more sturdy heads, I find larger brushes better for this kind of job. The key was to keep the paint to a minimum and slide the brush perpendicularly across the top surface of each gun.

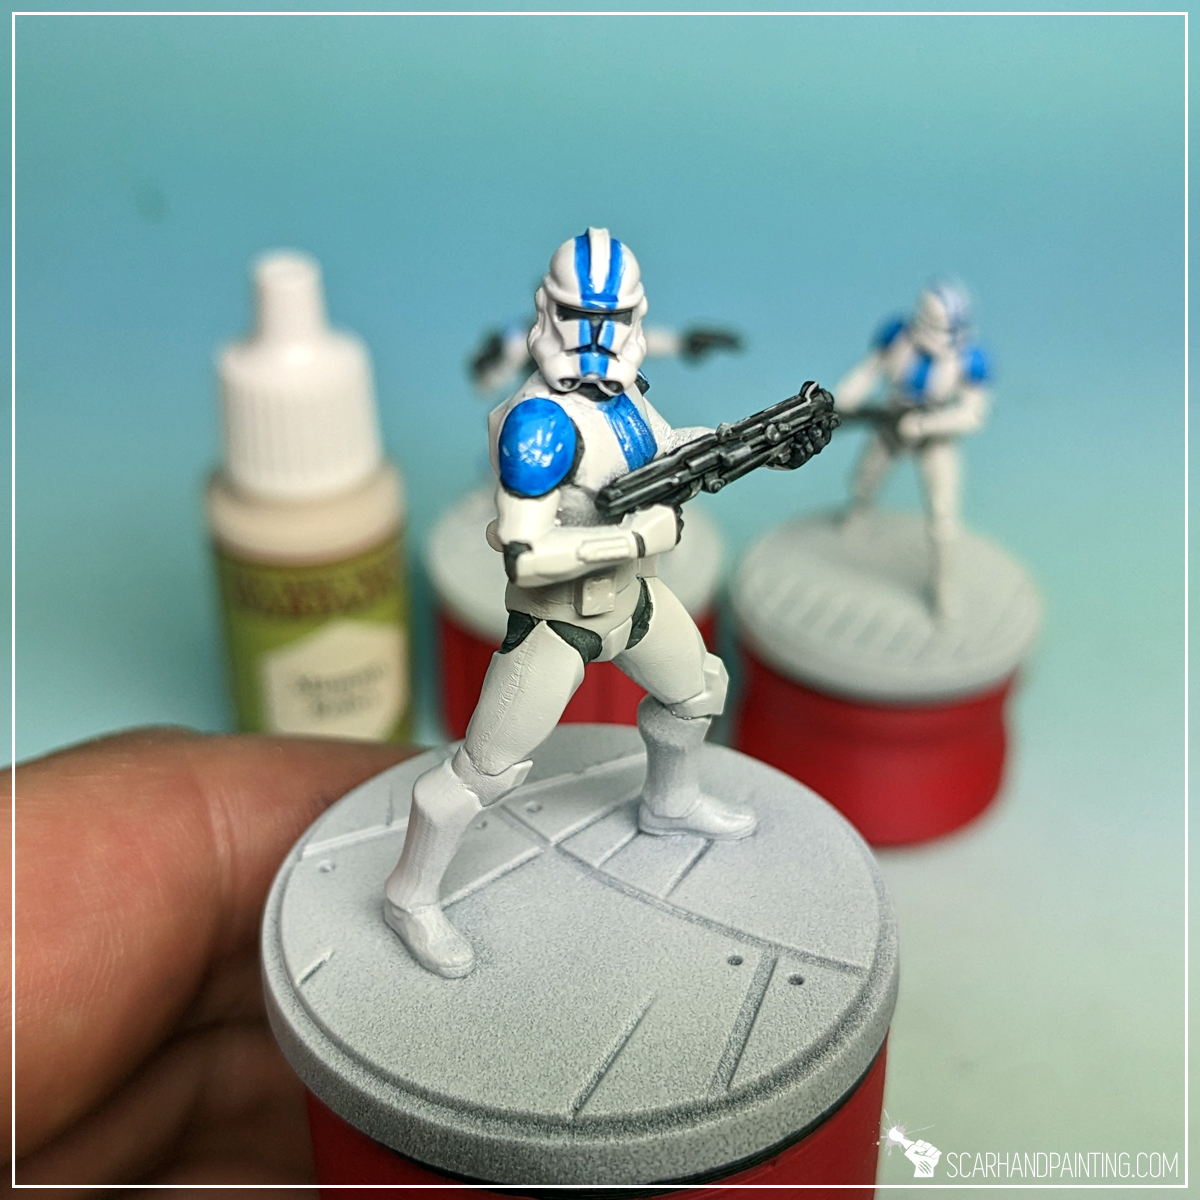
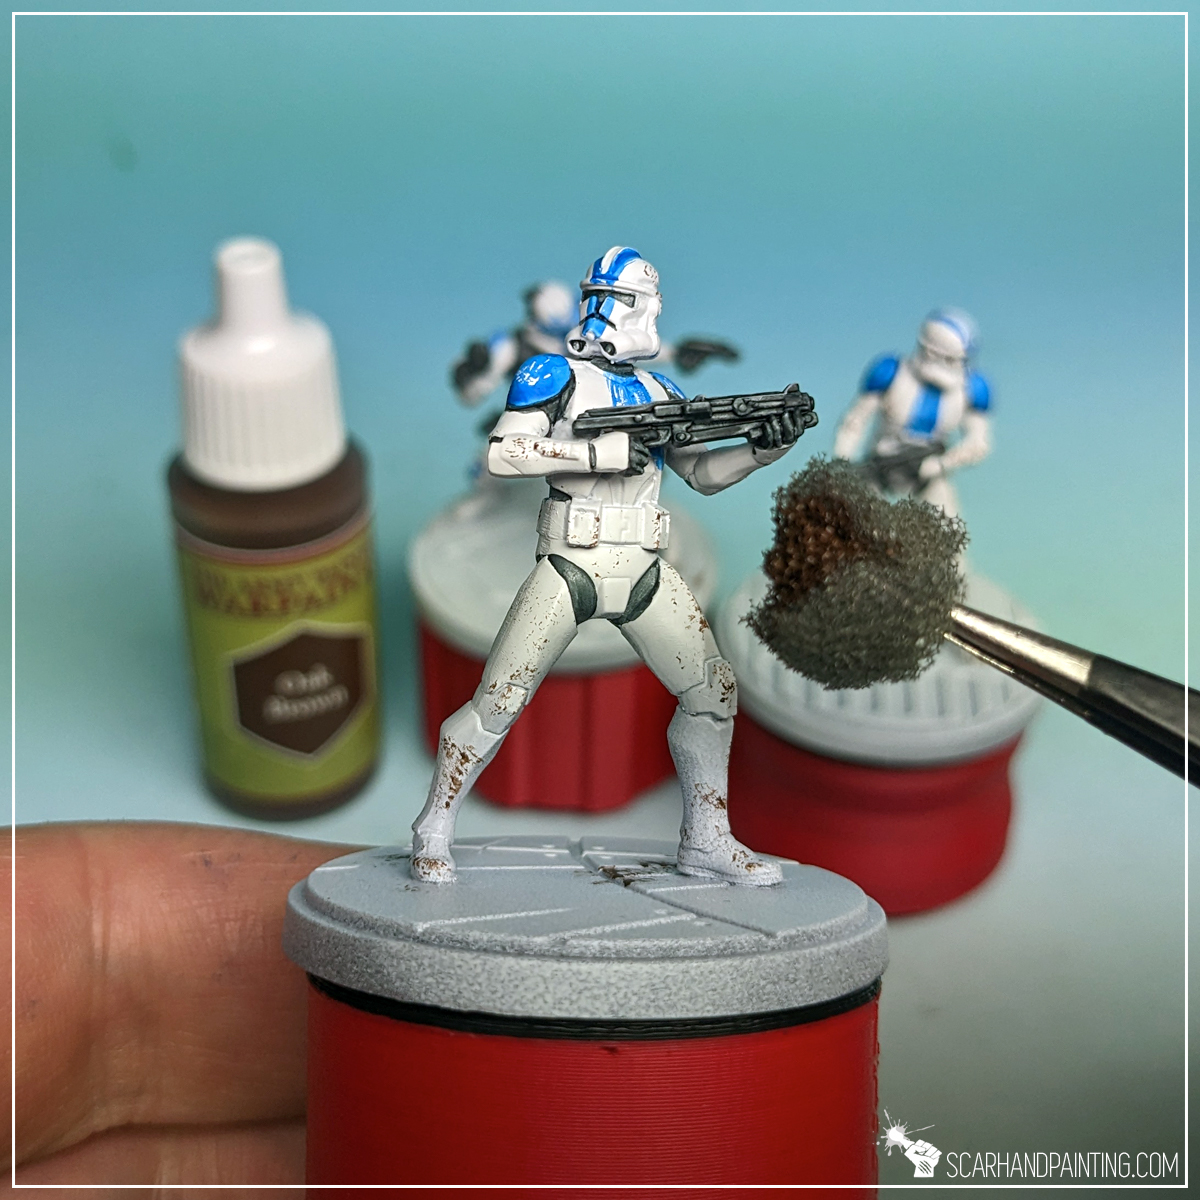
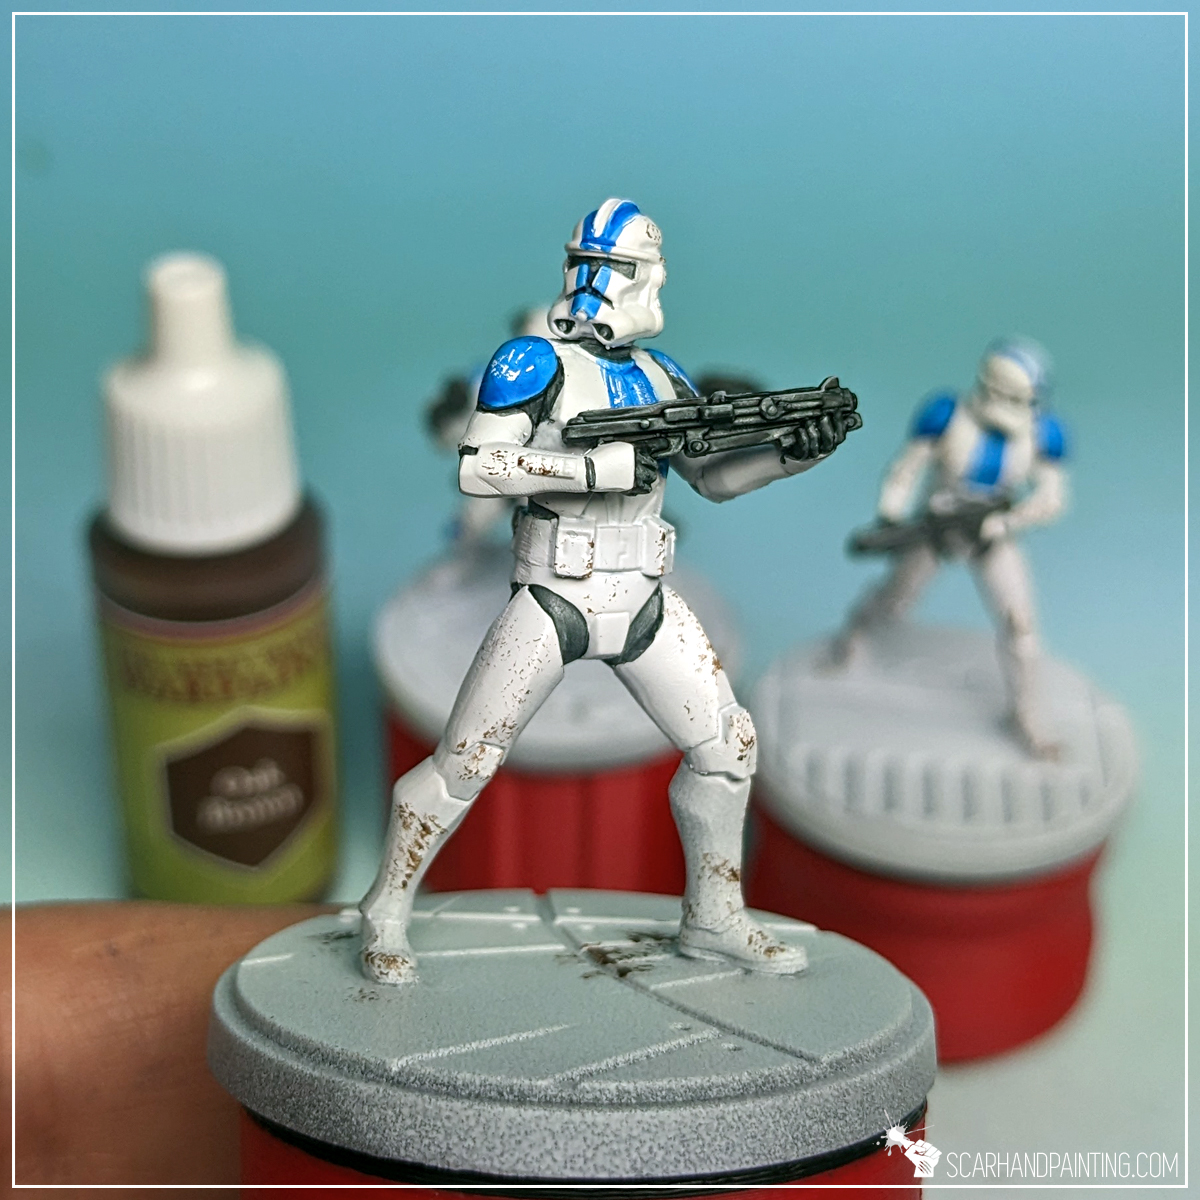
I then used a pair of tweezers and a piece of foam to stipple Oak Brown all over the armor plates. This broke the otherwise flat looking armor and provided additional detail to the miniatures.

For bases I decided to keep them relatively simple, to make the miniatures stand out. First I applied a layer of Raven Black (air), starting carefully around the miniature’s feet, then expanding outwards. I deliberately used air series paint for an extra messy end result – free details on the painted surface. I used Wargamer: Regiment Brush for this and the next layer.
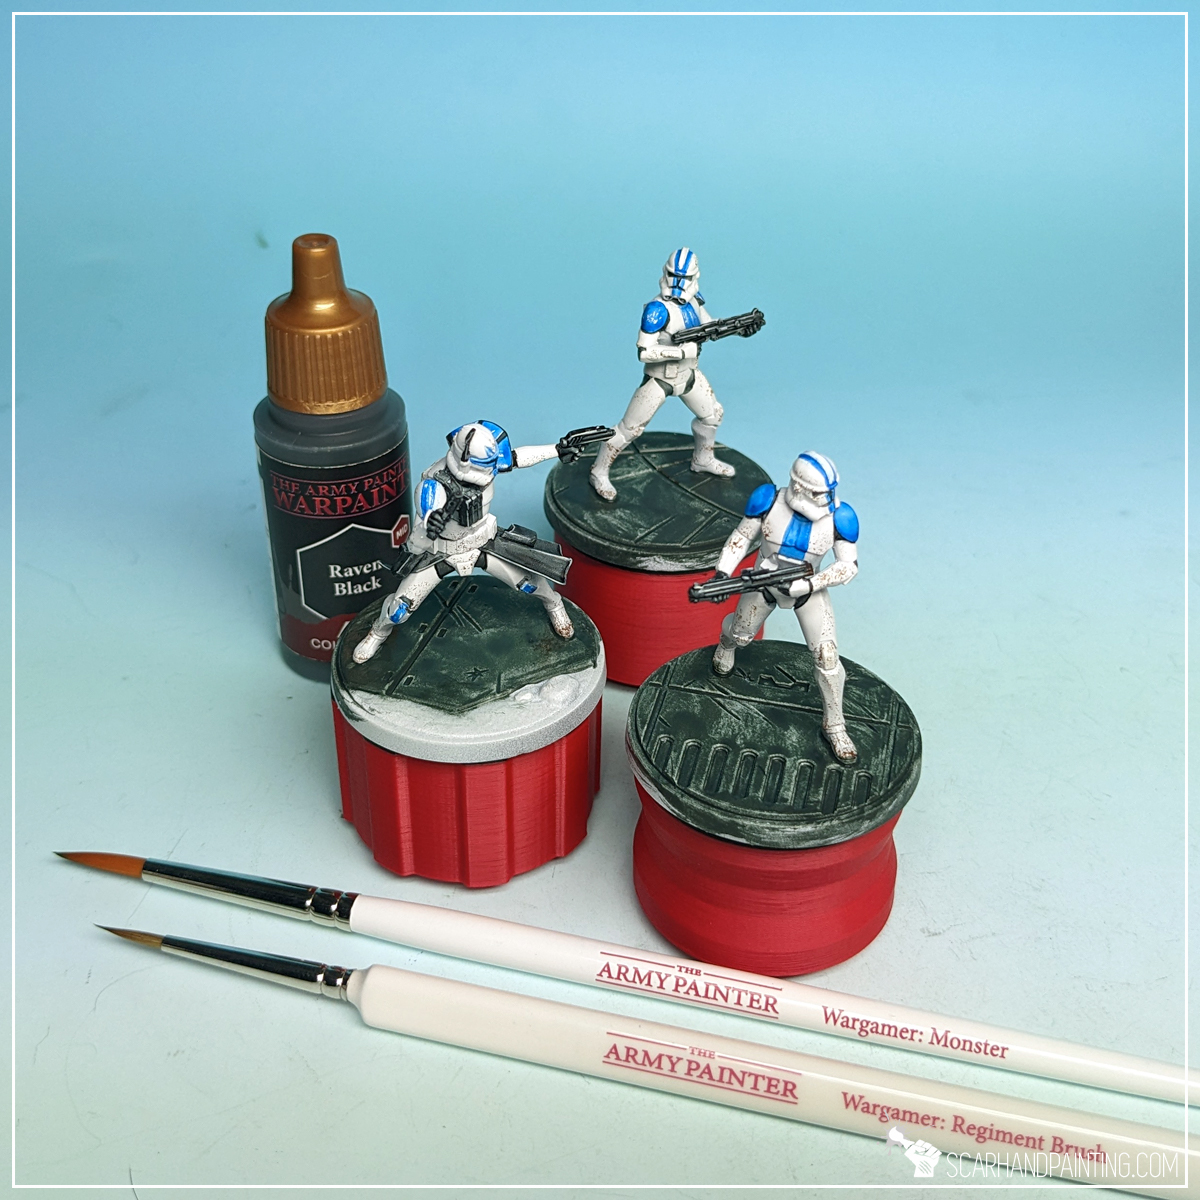


Next, using the same methodology, I followed up with Crow Hue.
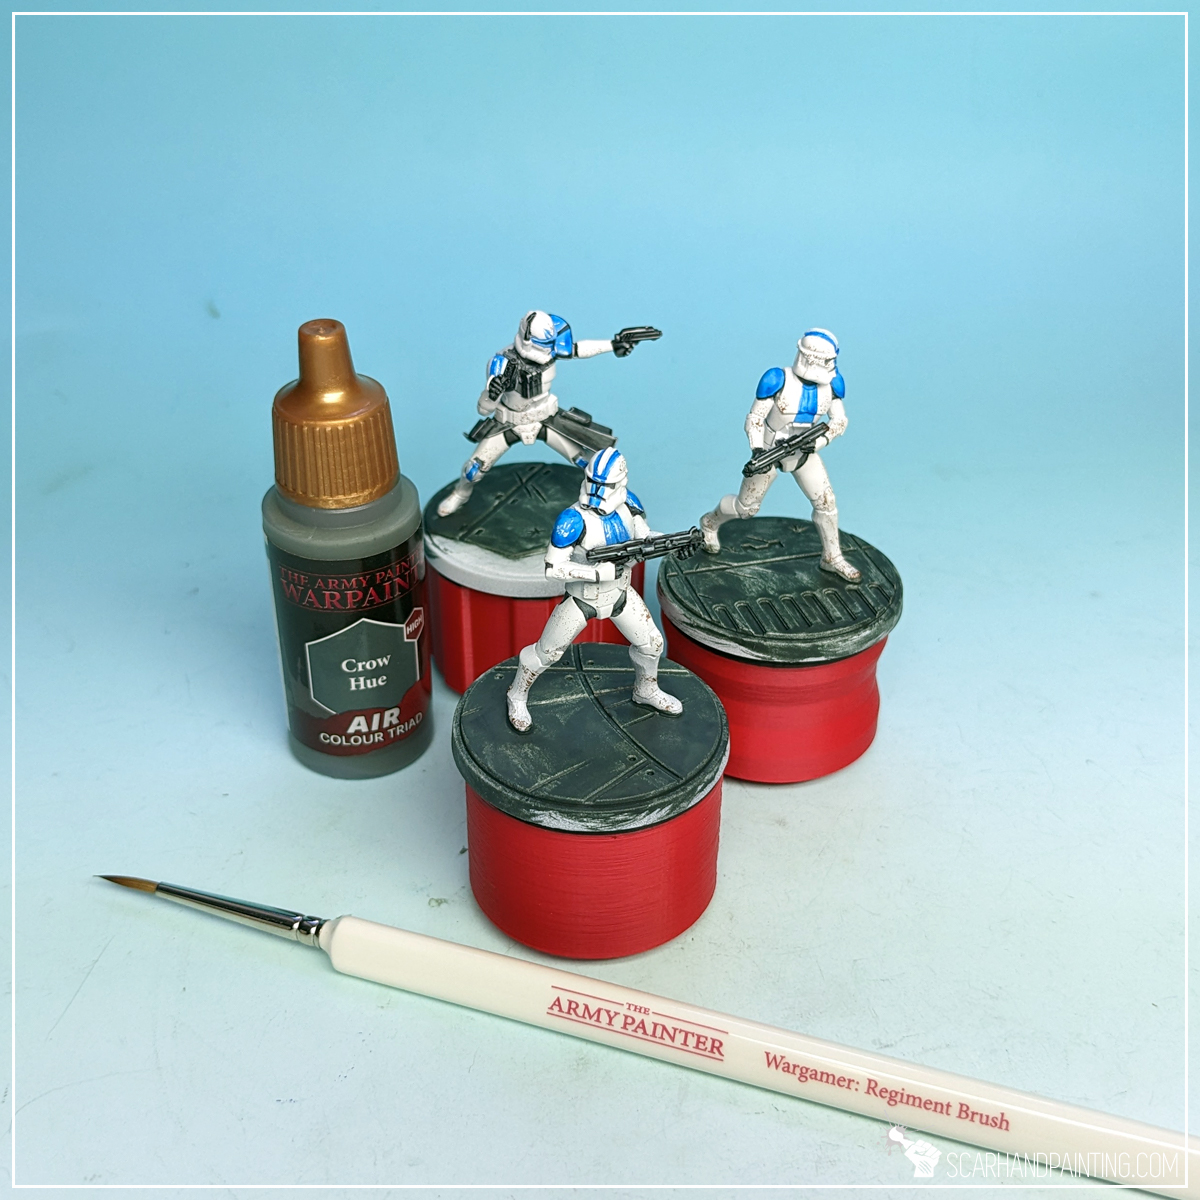

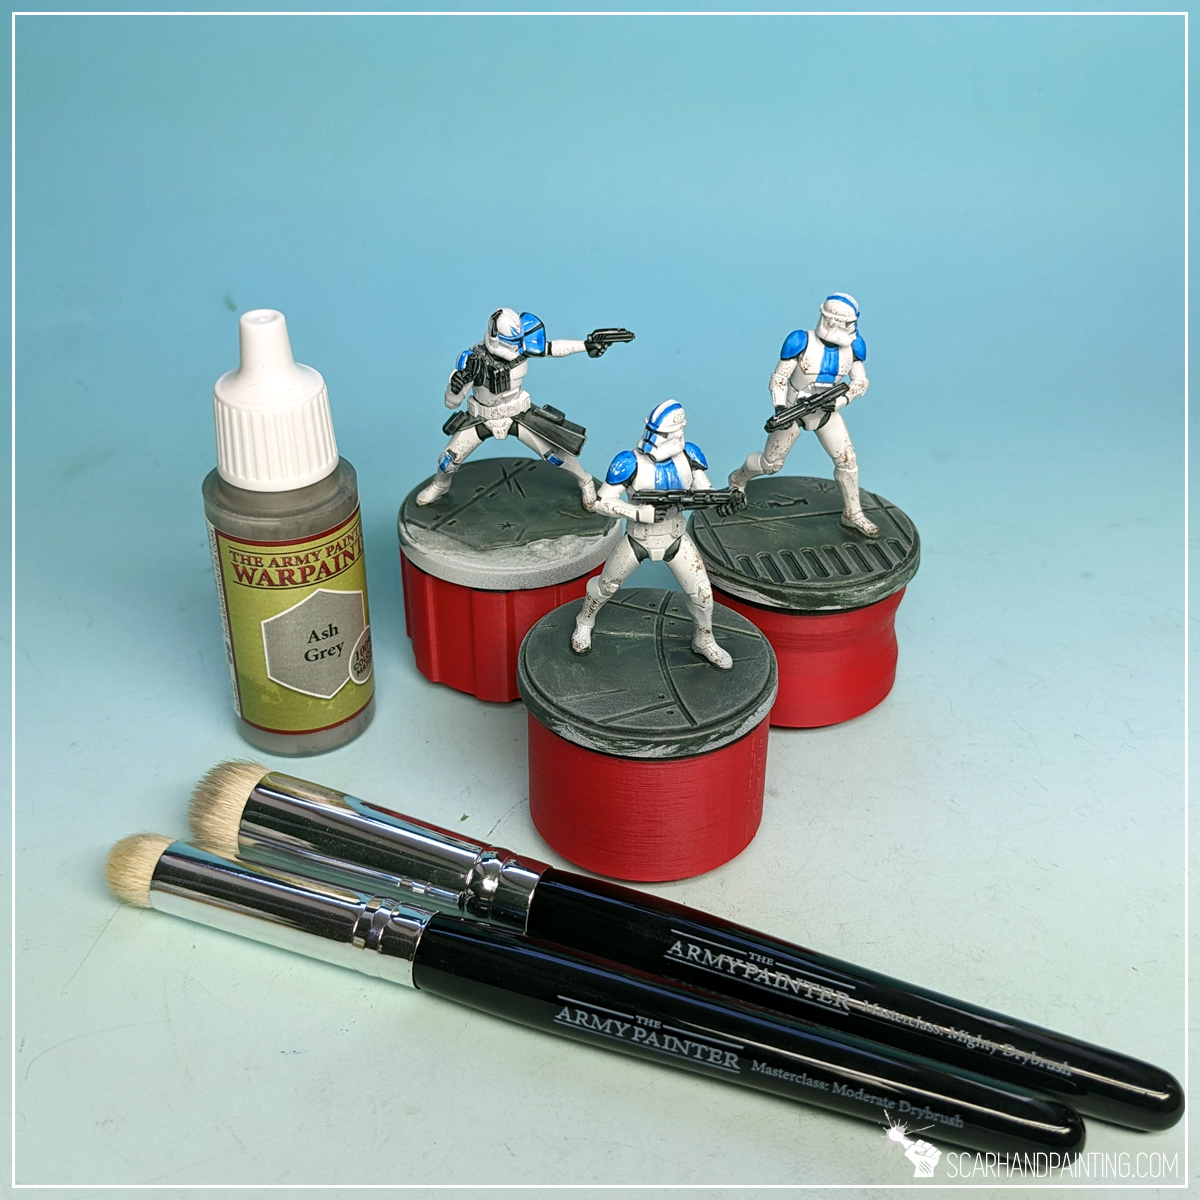
I then drybrushed entire base with Ash Grey.
TIP: Drybrush is done by putting the tip of a brush in paint, then brushing the excess paint off onto a piece of paper, foam or some other material, then brushing the remainder of the paint onto the chosen surface. This can be done with either standard Small/Large Drybrush, or Masterclass for easier, faster application.
For sand I applied Yellow Dune (air), followed by a wash with Flesh Wash paint.
TIP: Washing is done by applying Washes, or Inks in large quantities and letting them dry. The pigmentation goes into recesses, highlighting any raised areas.

Next I drybrushed sand and surrounding areas with Mummy Robes.

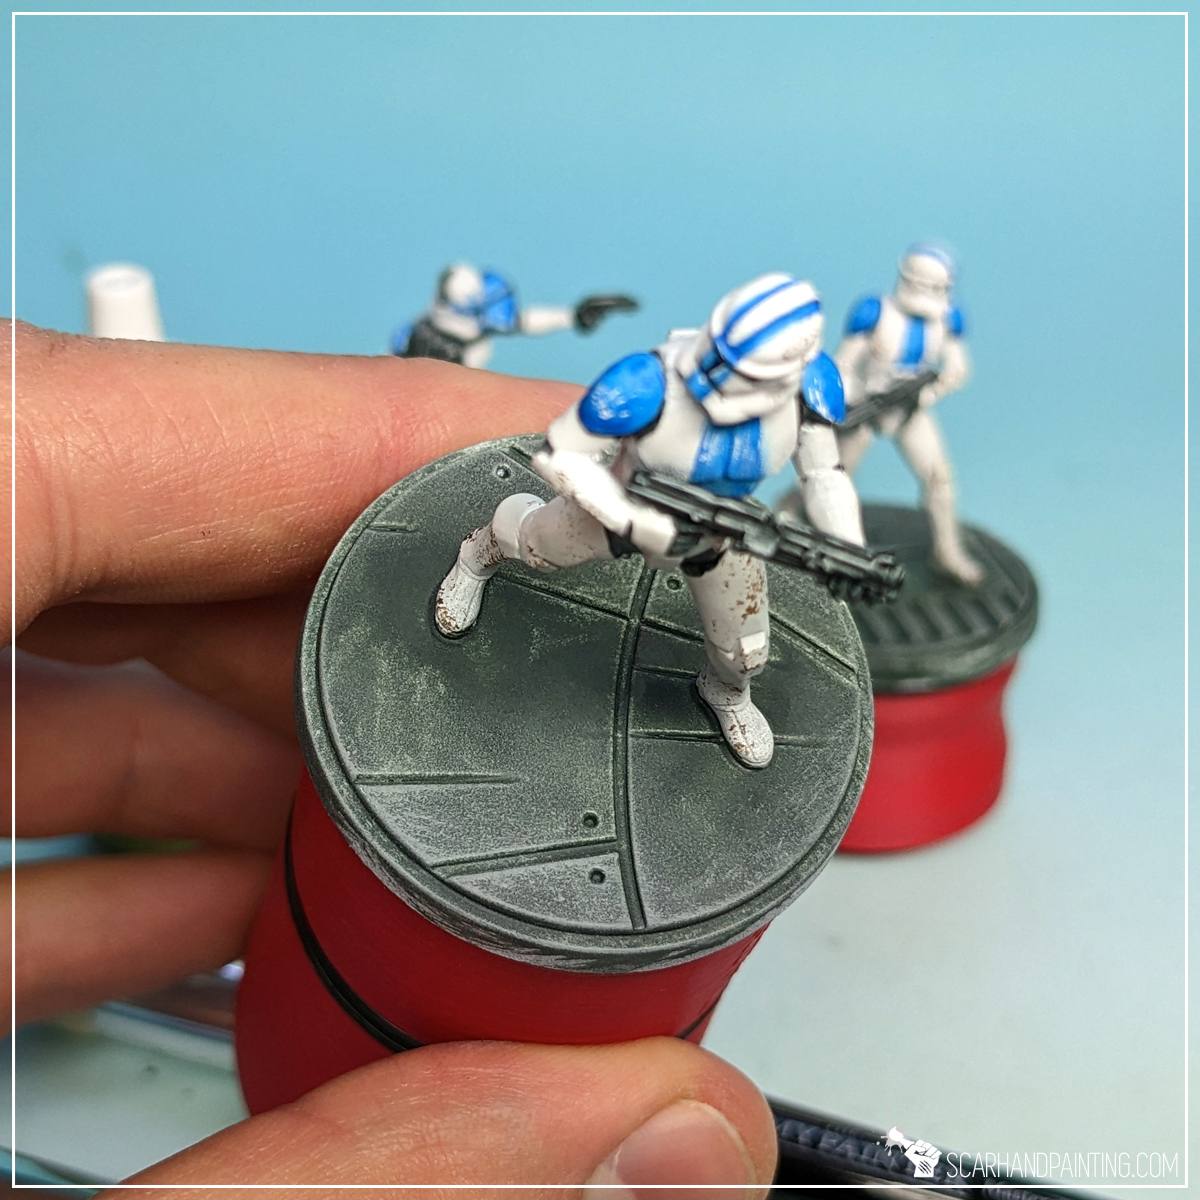
To add depth I highlighted concrete plates edges with Mummy Robes…
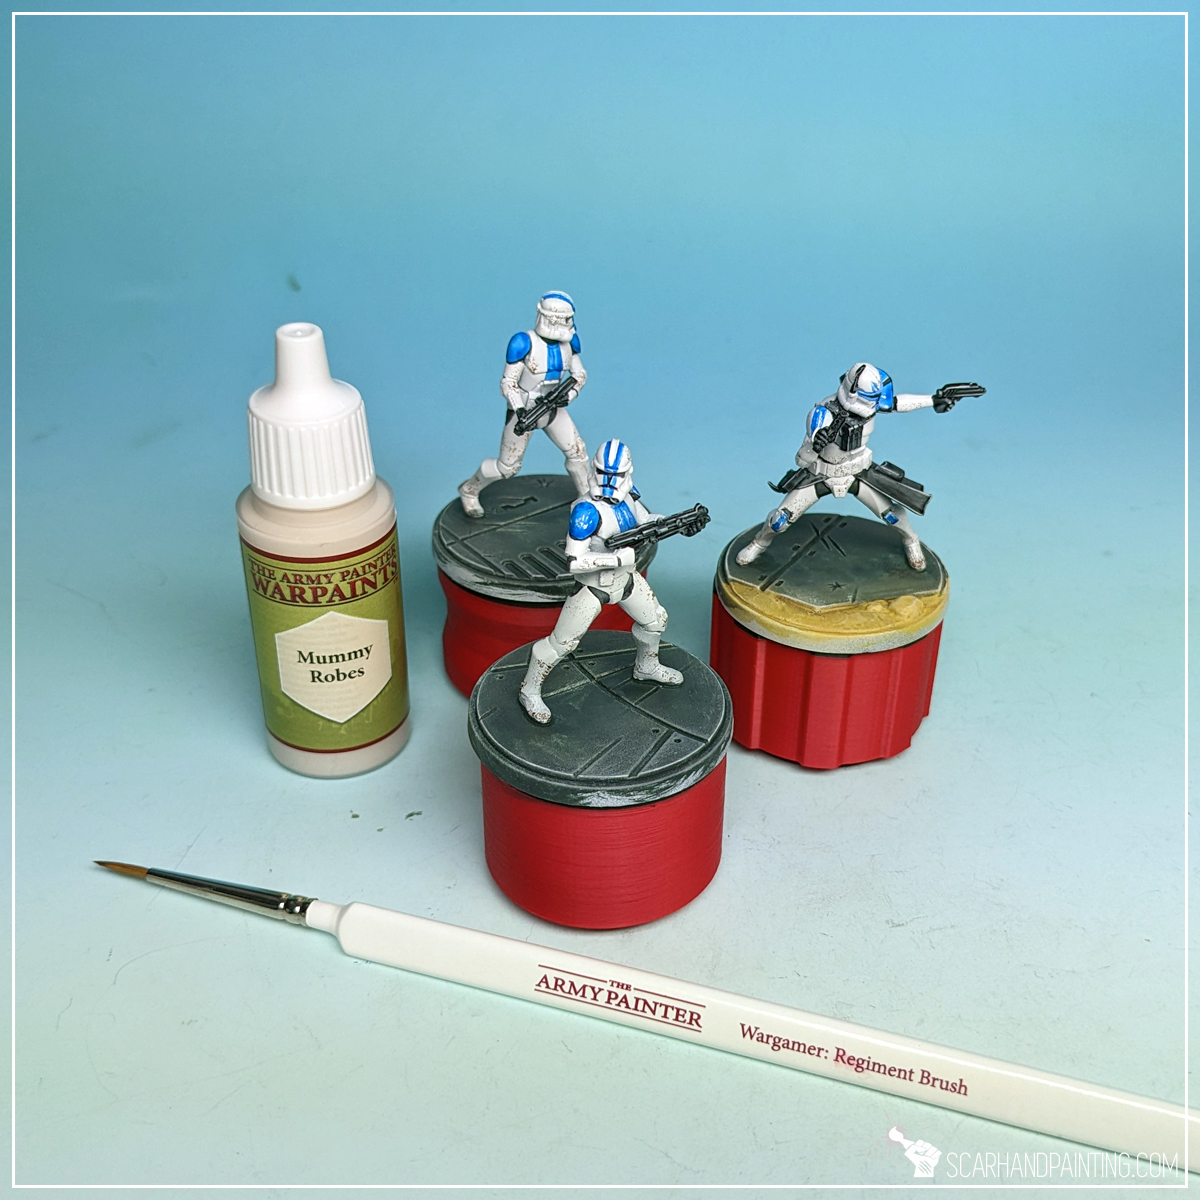
… then thinned Mummy Robes with a bit of water and wiped the brush off with a series of semi random movements, onto flat concrete areas. I used Wargamer: Regiment Brush.

To make the miniatures stand out and underline them, I painted bases’ edges with Matt Black. Wargamer: Regiment Brush again.

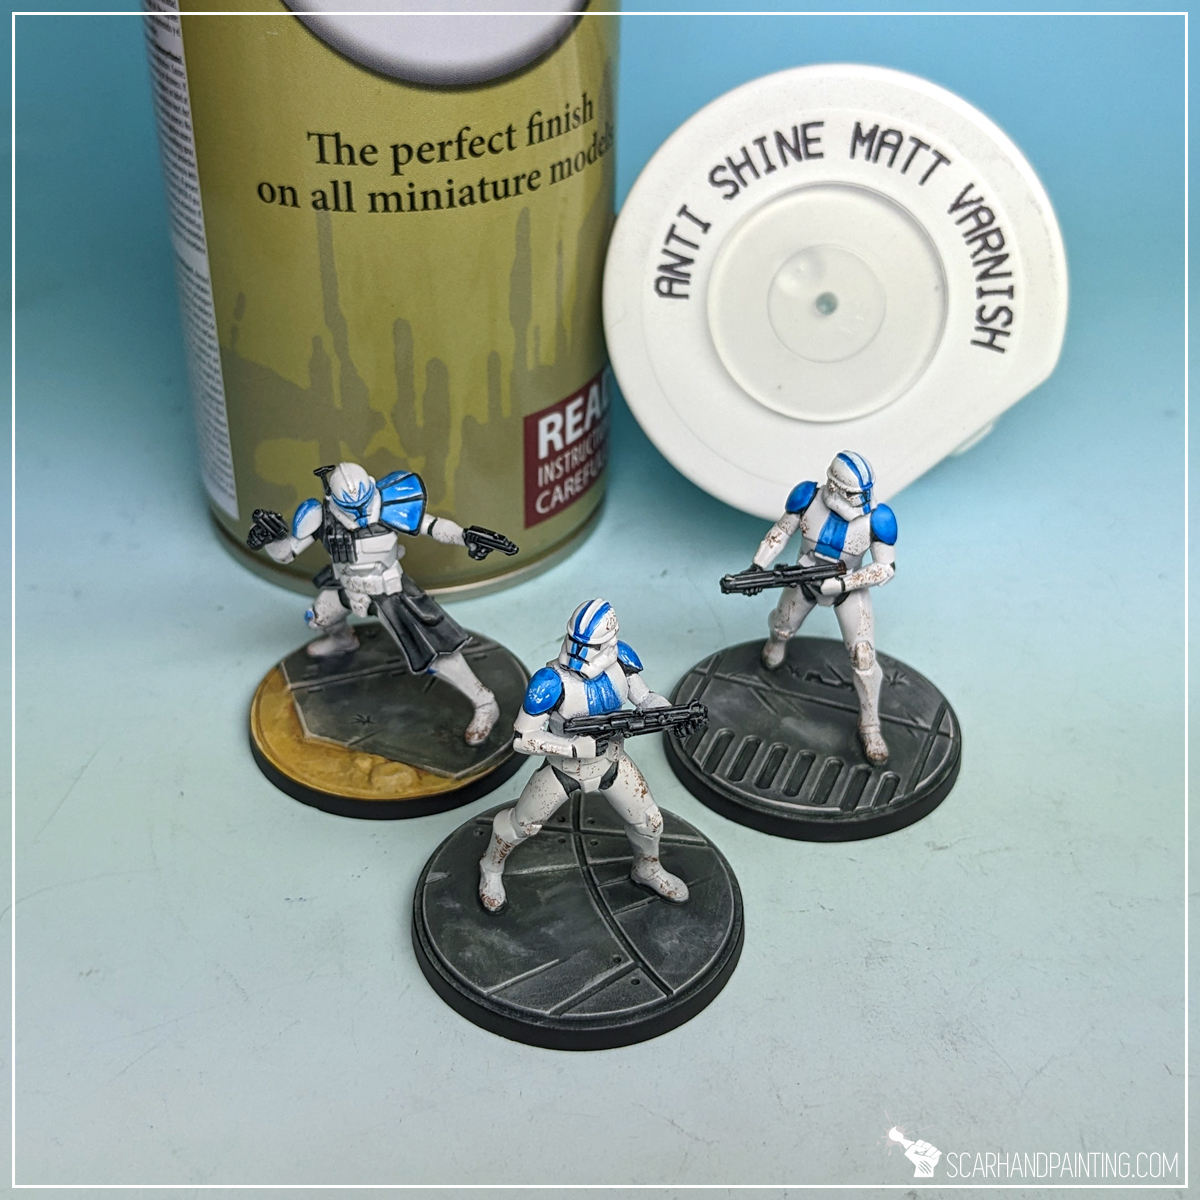
Finally I sealed the paint job with Anti Shine Matt Varnish. This protective layer will keep my Clone Troopers secure from damage, while I game them into oblivion. With this I have finished the paint job.

I hope you find this tutorial interesting. Be sure to let me know your thoughts in the comments below or via Facebook or Instagram. I would also appreciate it if you considered sharing this content with your friends, who might find it useful. Many thanks to Rebel.pl for sponsoring this content. Stay tuned for more Star Wars: Shatterpoint tutorials.
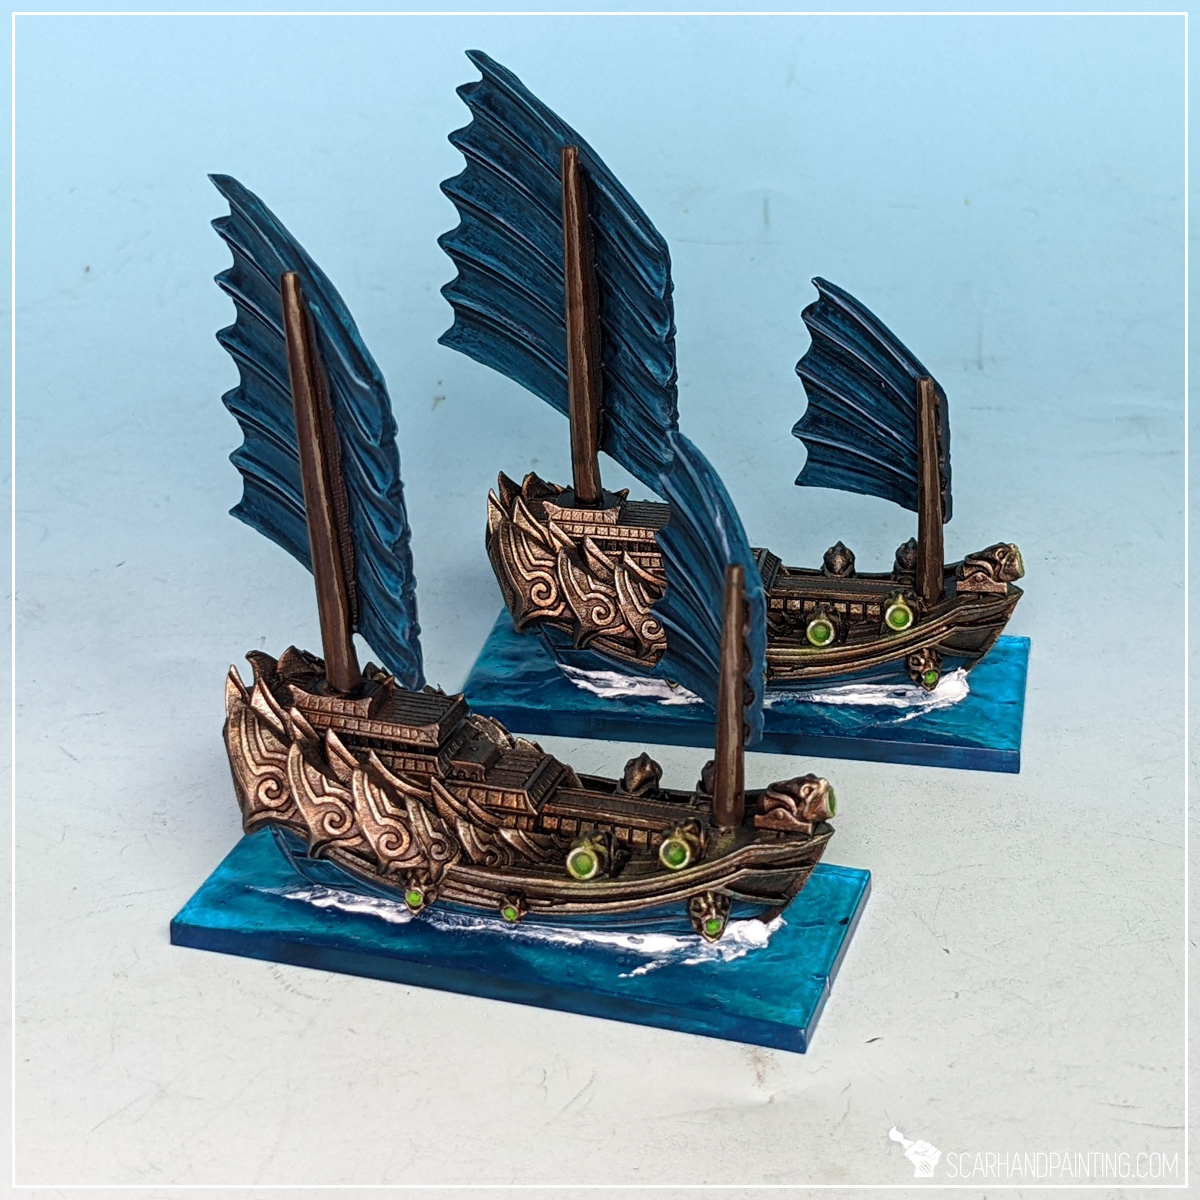
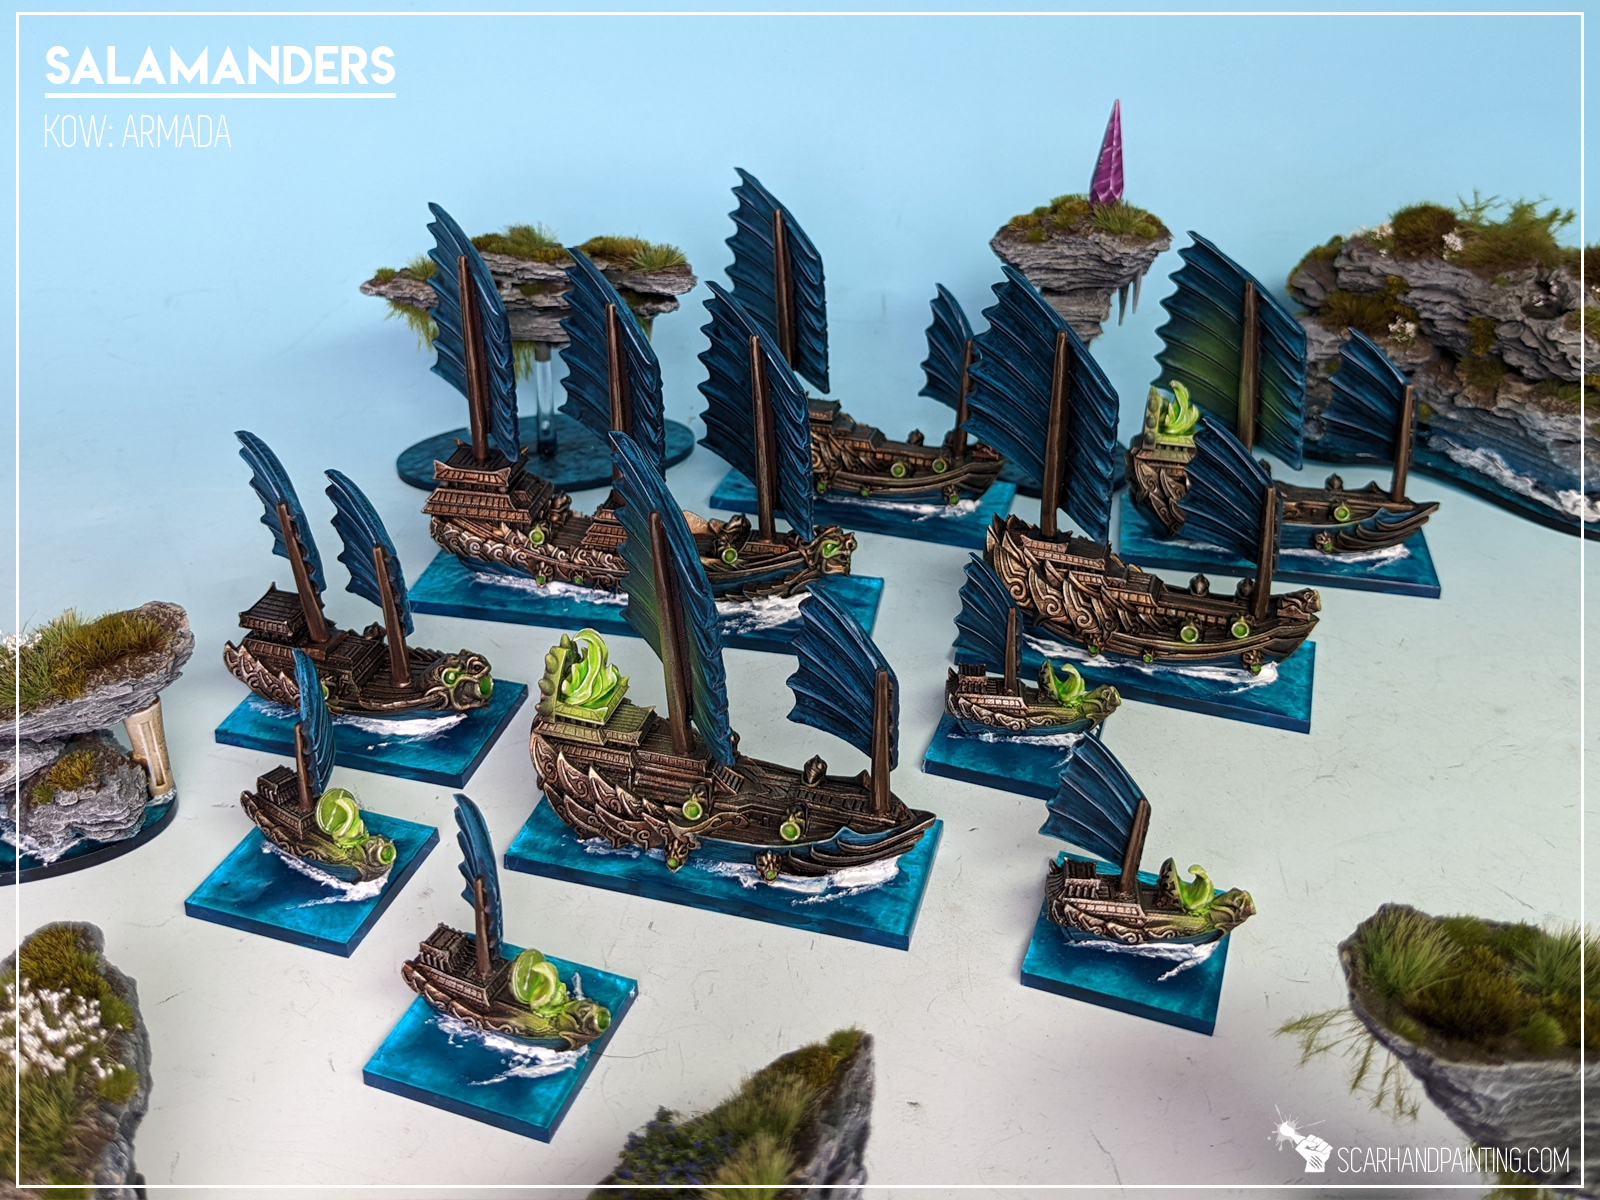
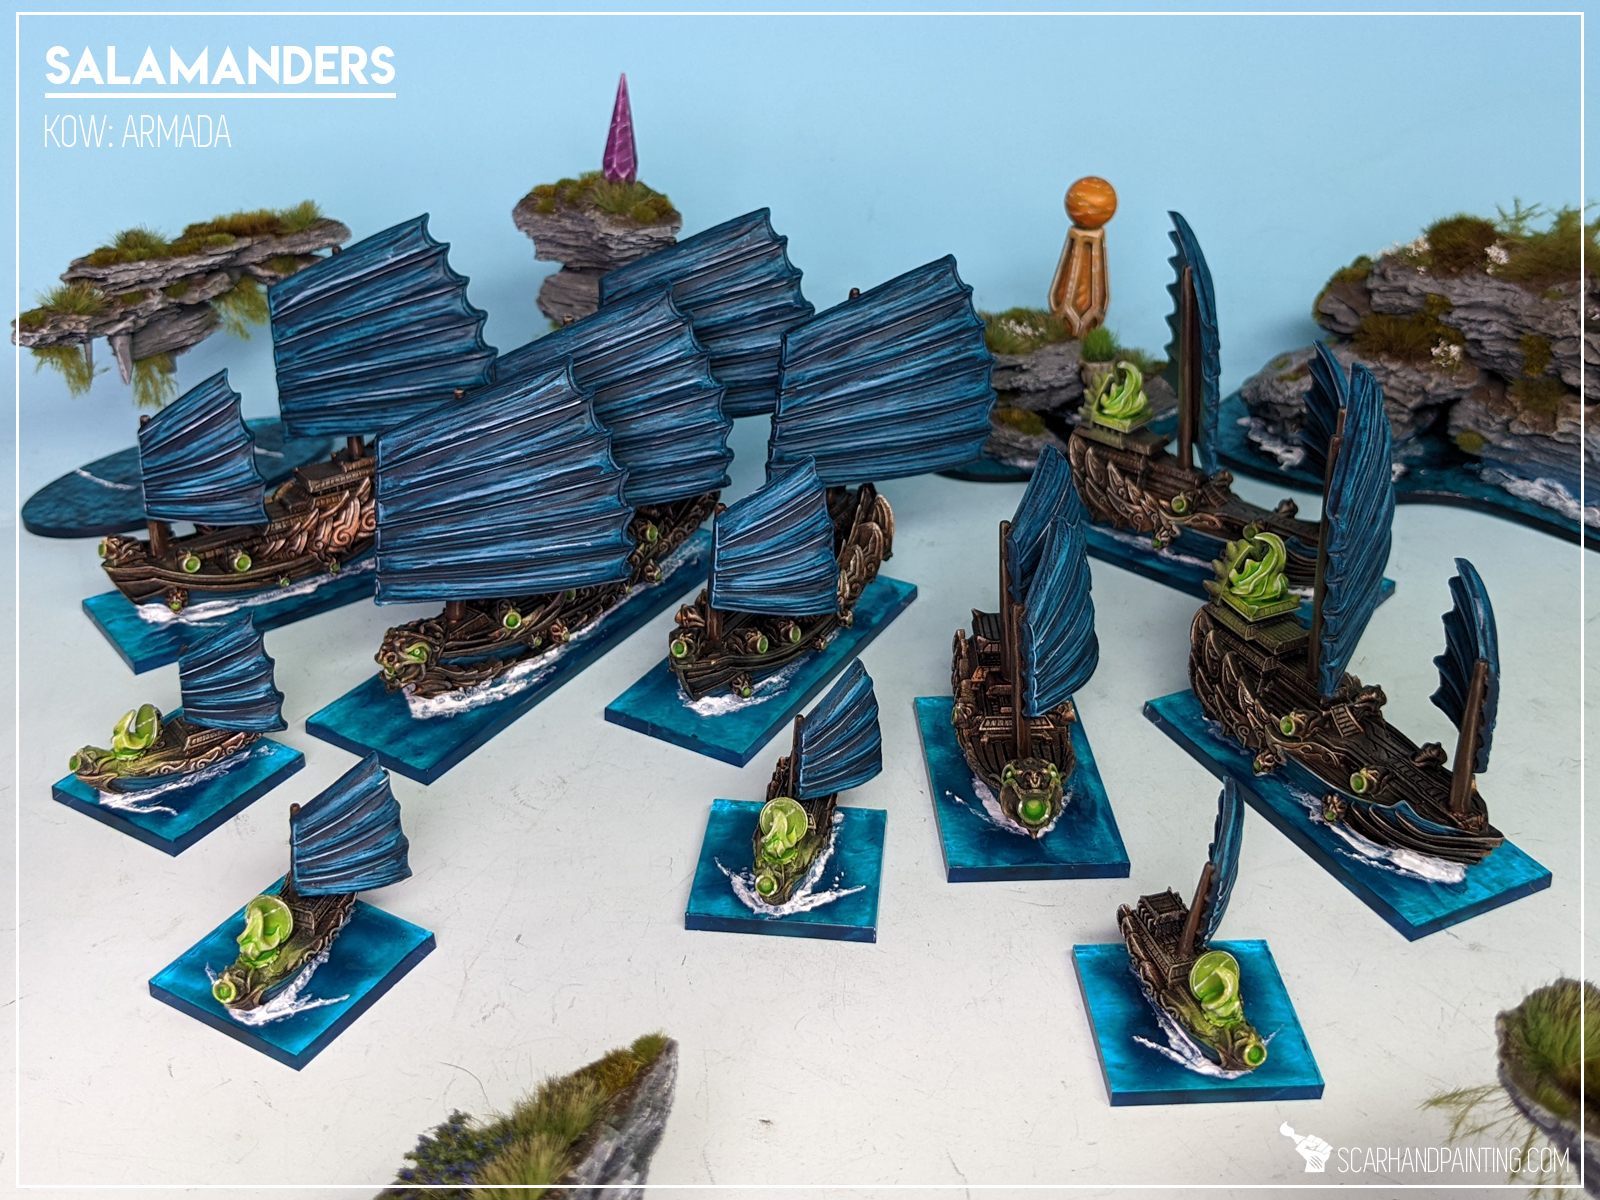
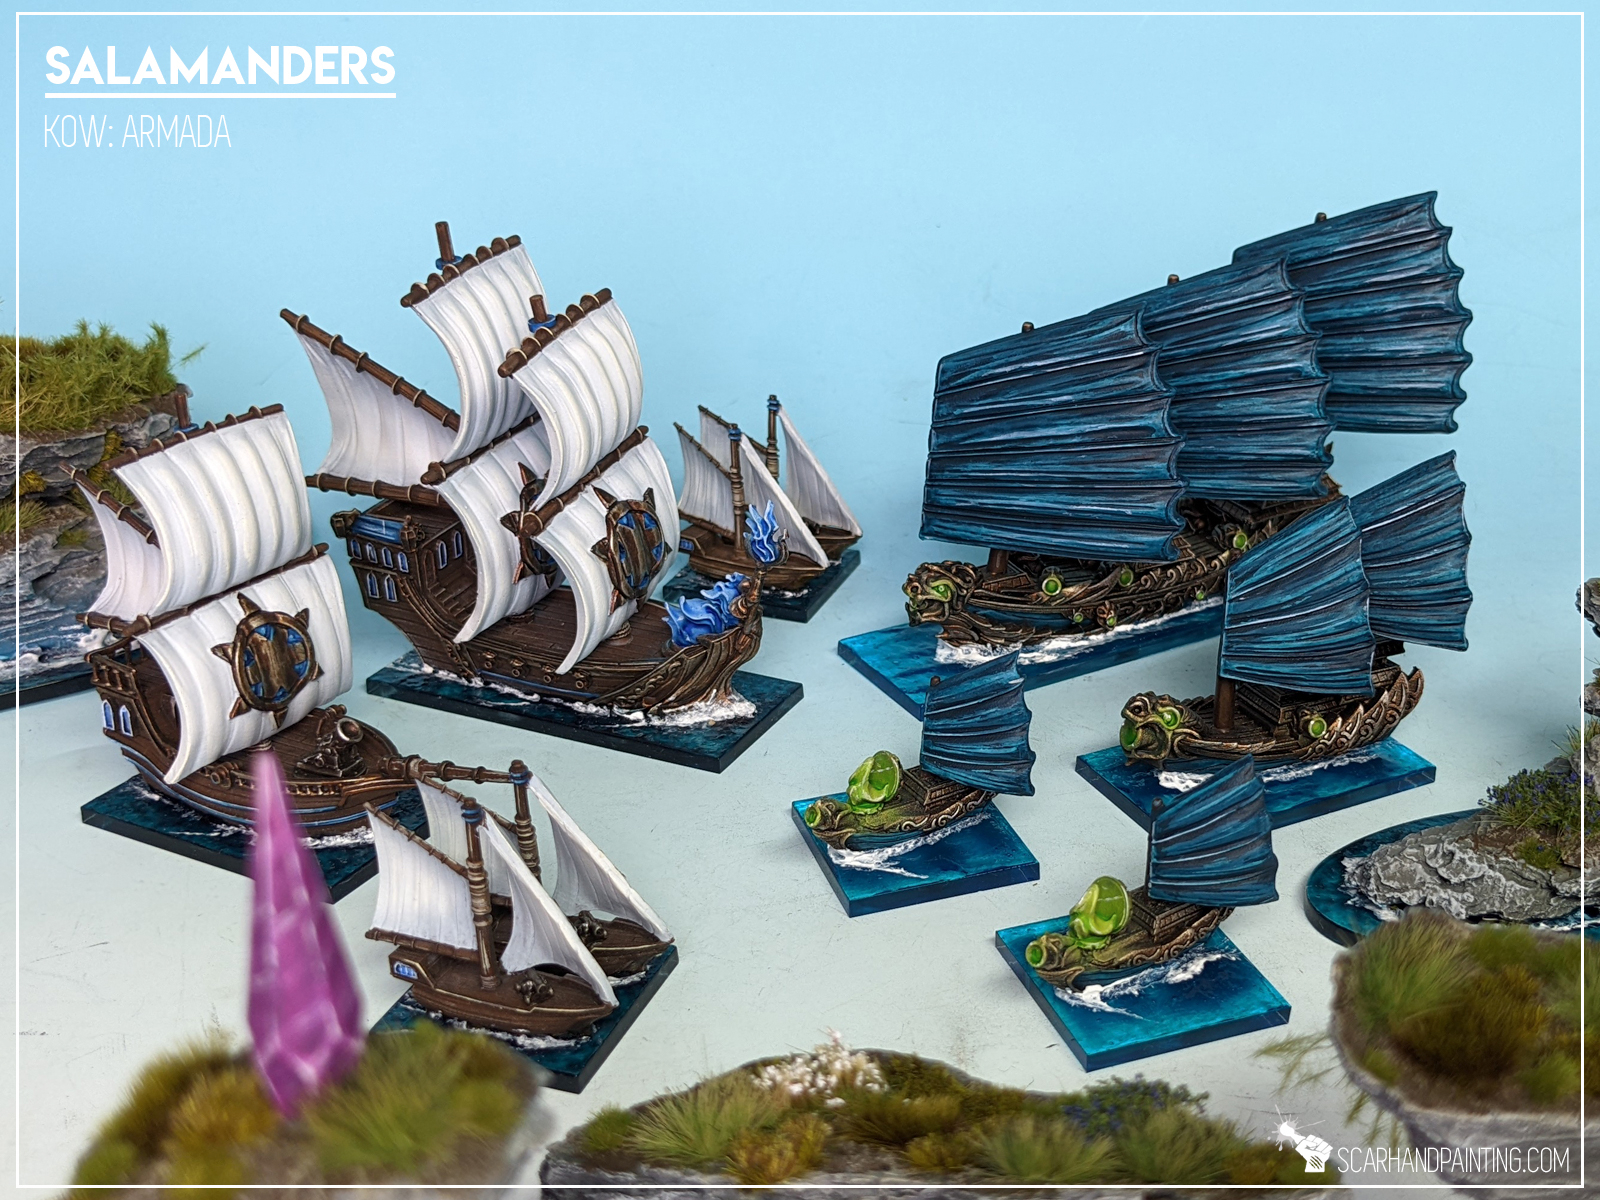
Kings of War: Armada is a fantastic game, full of beautifully crafted miniatures. Still some wargaming veterans might feel intimidated by the unusual scale and plentiful detail of Armada ships. Today I will present to you how easy it is to paint Armada Salamanders ships as can be seen in Gallery: Armada Salamanders. All techniques presented in step-by-step tutorial can be applied to different colors to produce a variety of awesome color schemes for your fleet.
Before we start, some notes:


Step one: Undercoat
I started with a thorough layer of Games Workshop Chaos Black spray. Chaos Black spray is my go to choice when it comes to undercoat, leaving a solid, durable layer with detail intact. Some might consider adding a zenithal preshade on top, but the techniques used in this tutorial would render such practice irrelevant.

Step two: Hull base
Hull, being the largest and most detailed part of the ship, was my choice of where to start the actual paintjob. I applied a solid layer of thinned Games Workshop Warplock Bronze all over the miniature, except for sails. I used an airbrush, but this can easily be done manually.
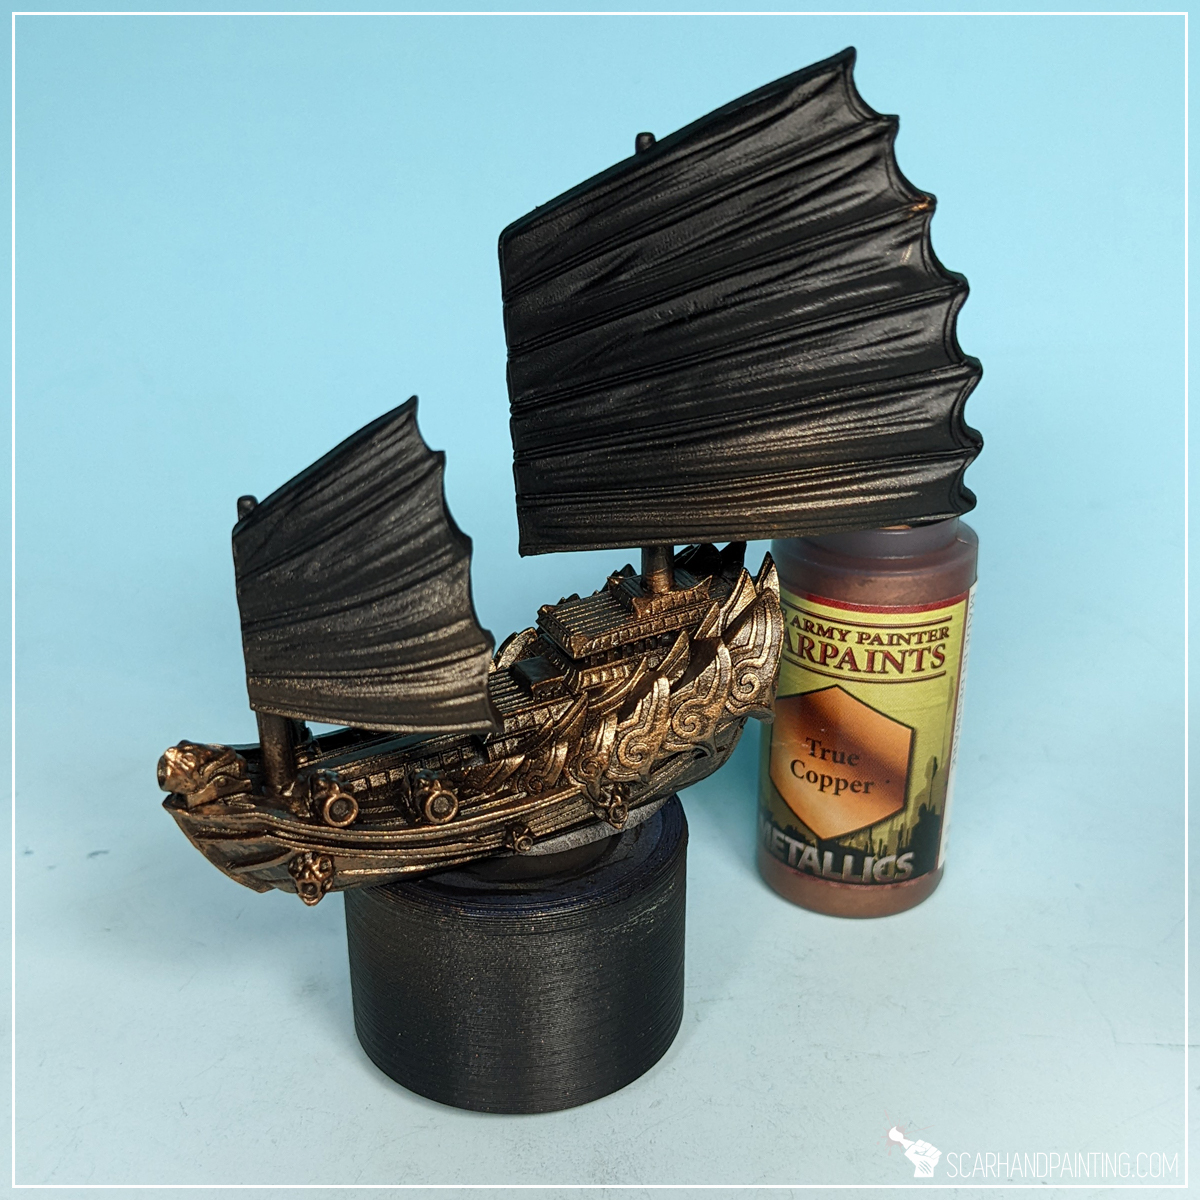
Step three: Hull highlight
Next, using a medium size, soft brush I applied a highlight of Army Painter True Copper. Flatbrush was my technique of choice for this one, as it applied a solid layer of paint sparing most recesses, thus leaving some of the previous layer still visible.
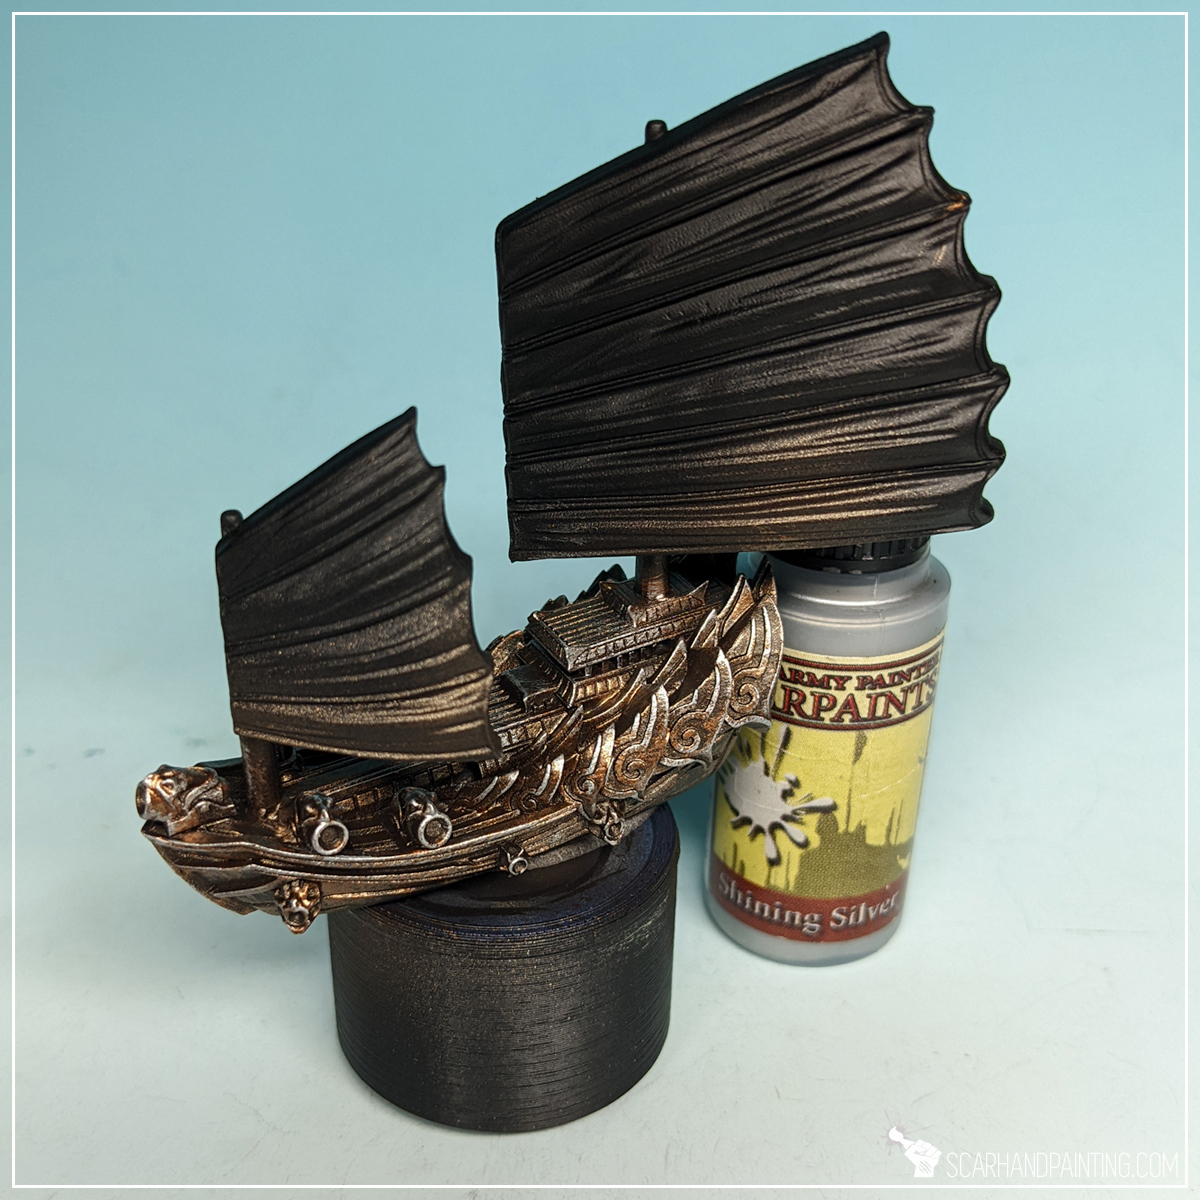
Step four: Hull final highlight
I then applied an edge highlight of Army Painter Shining Silver to make all the detail pop and provide a bit more contrast between recesses and exposed edges.
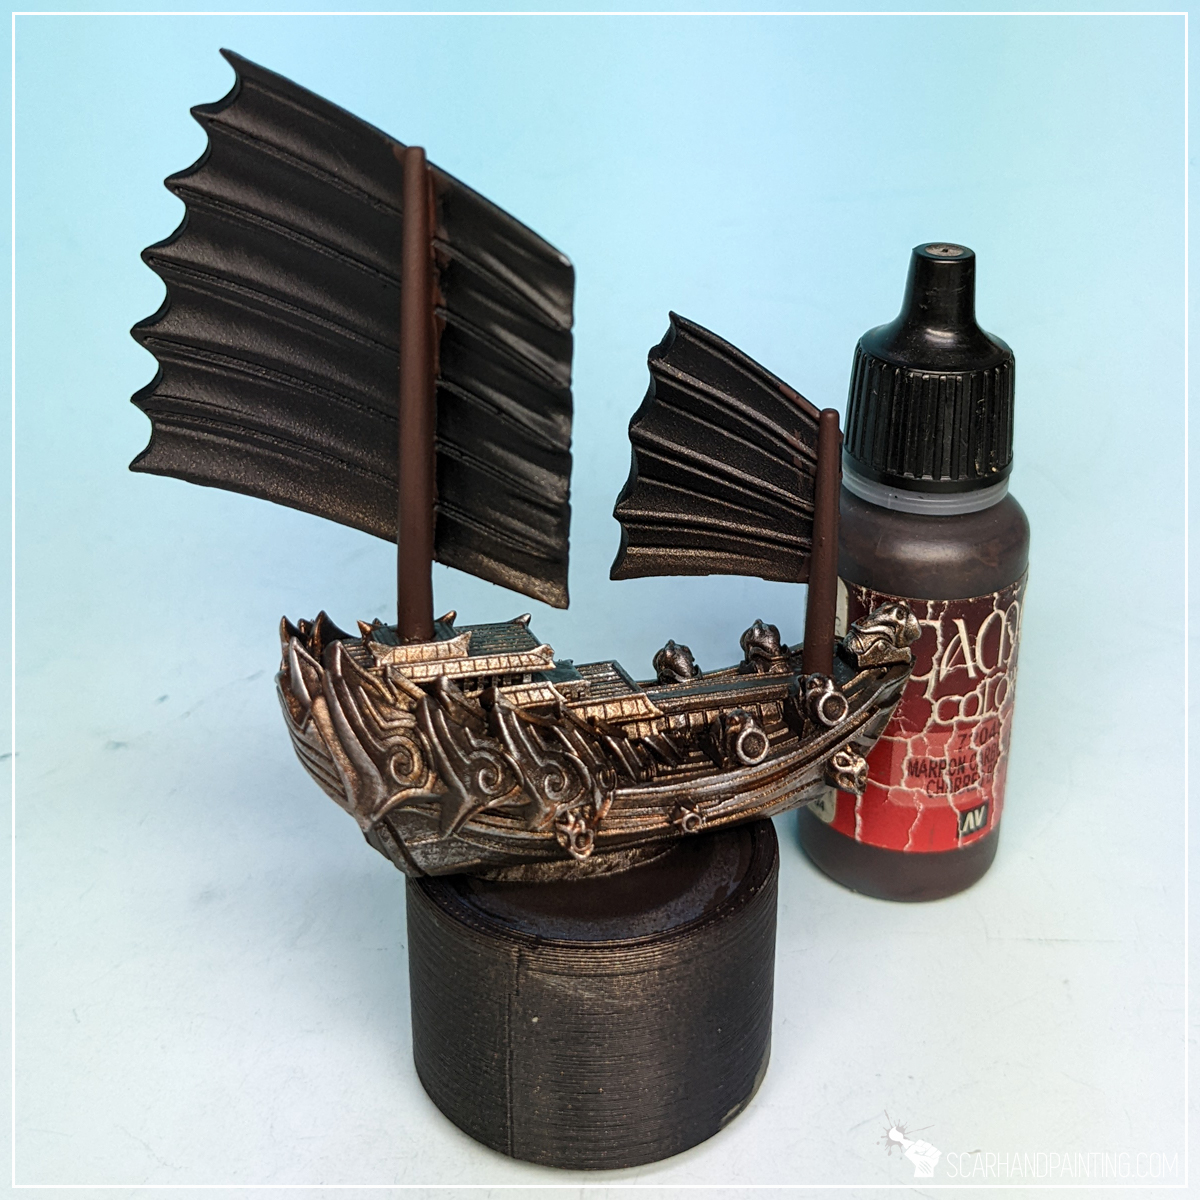
Step five: Masts base
I left the Hull for a bit and moved on to masts, applying a thick layer of Vallejo 72.045 Charred Brown. Once again I would like to point out that the colors I used are my personal preference and you can use any brand, or even any similar color, to achieve similar results.
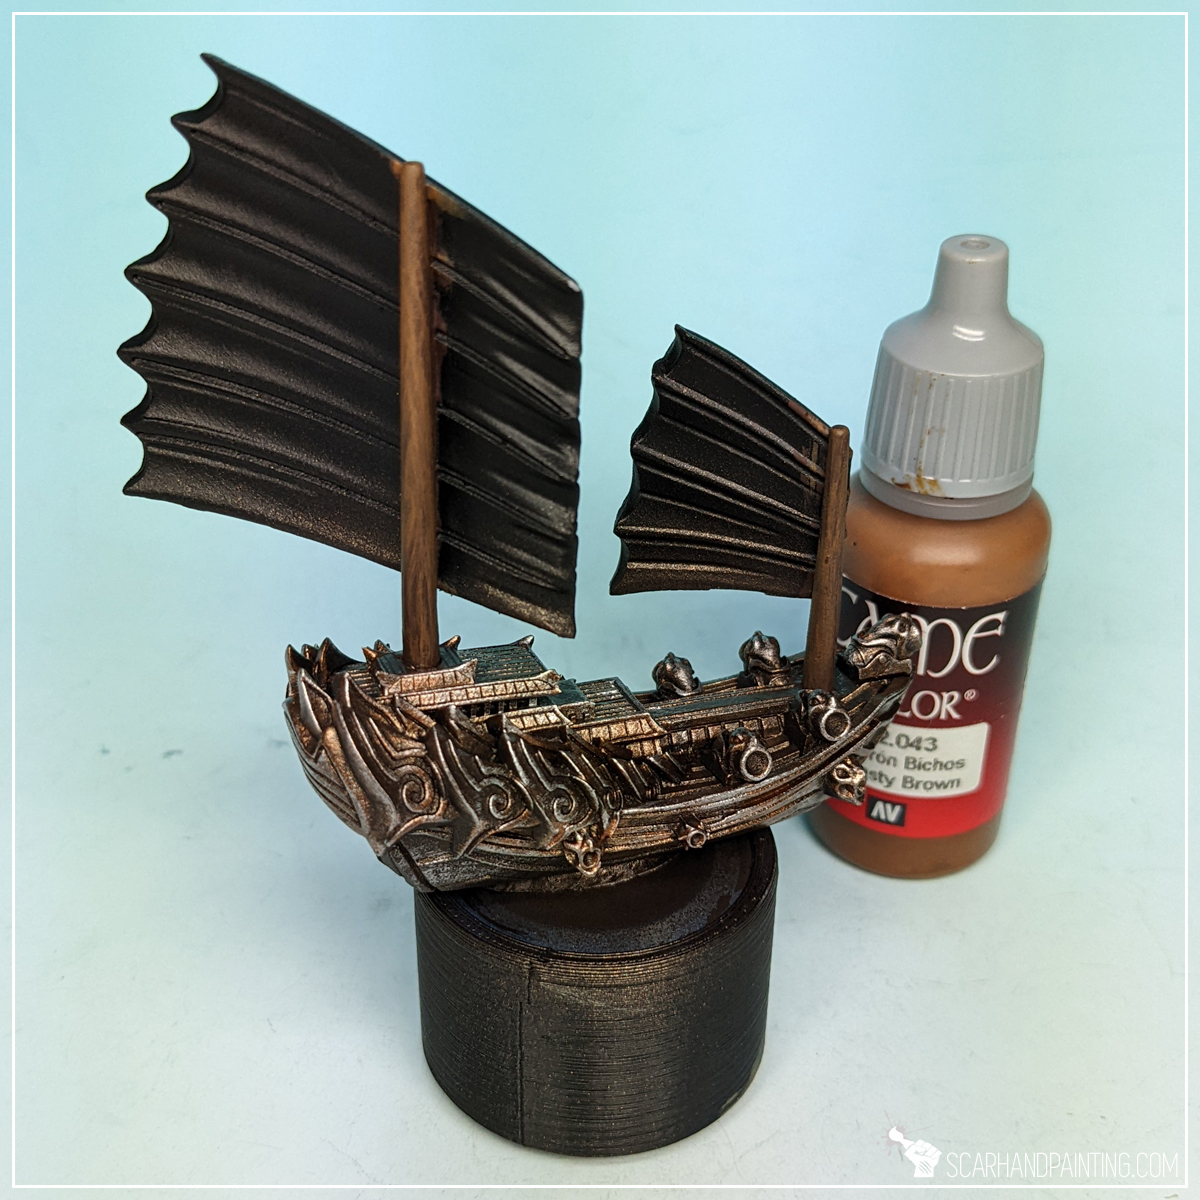
Step six: Masts highlight
Another step was to apply a slightly blurry highlight of Vallejo 42.043 Beasty Brown. By blurry I mean a thinned down paint applied with a relatively large, soft brush. You can see in the picture how this layer seem a bit misty, partially translucent and not as strong as usual base application. This can be achieved by keeping a brush barely loaded with thinned down paint and sliding its edge up and down the surface. If I ever decide to have a Patreon this technique will probably be the first thing I would like to do a deep dive into, but for now my chaotic description must do.
Step seven: Masts edge highlight
Due to masts shape they do not have edges on their sides, but they still can be imitated with standard edge highlight of Games Workshop Karak Stone. If you struggle with edge highlights check out this in-depth article from 2018, where I describe the process and share some related life hacks.

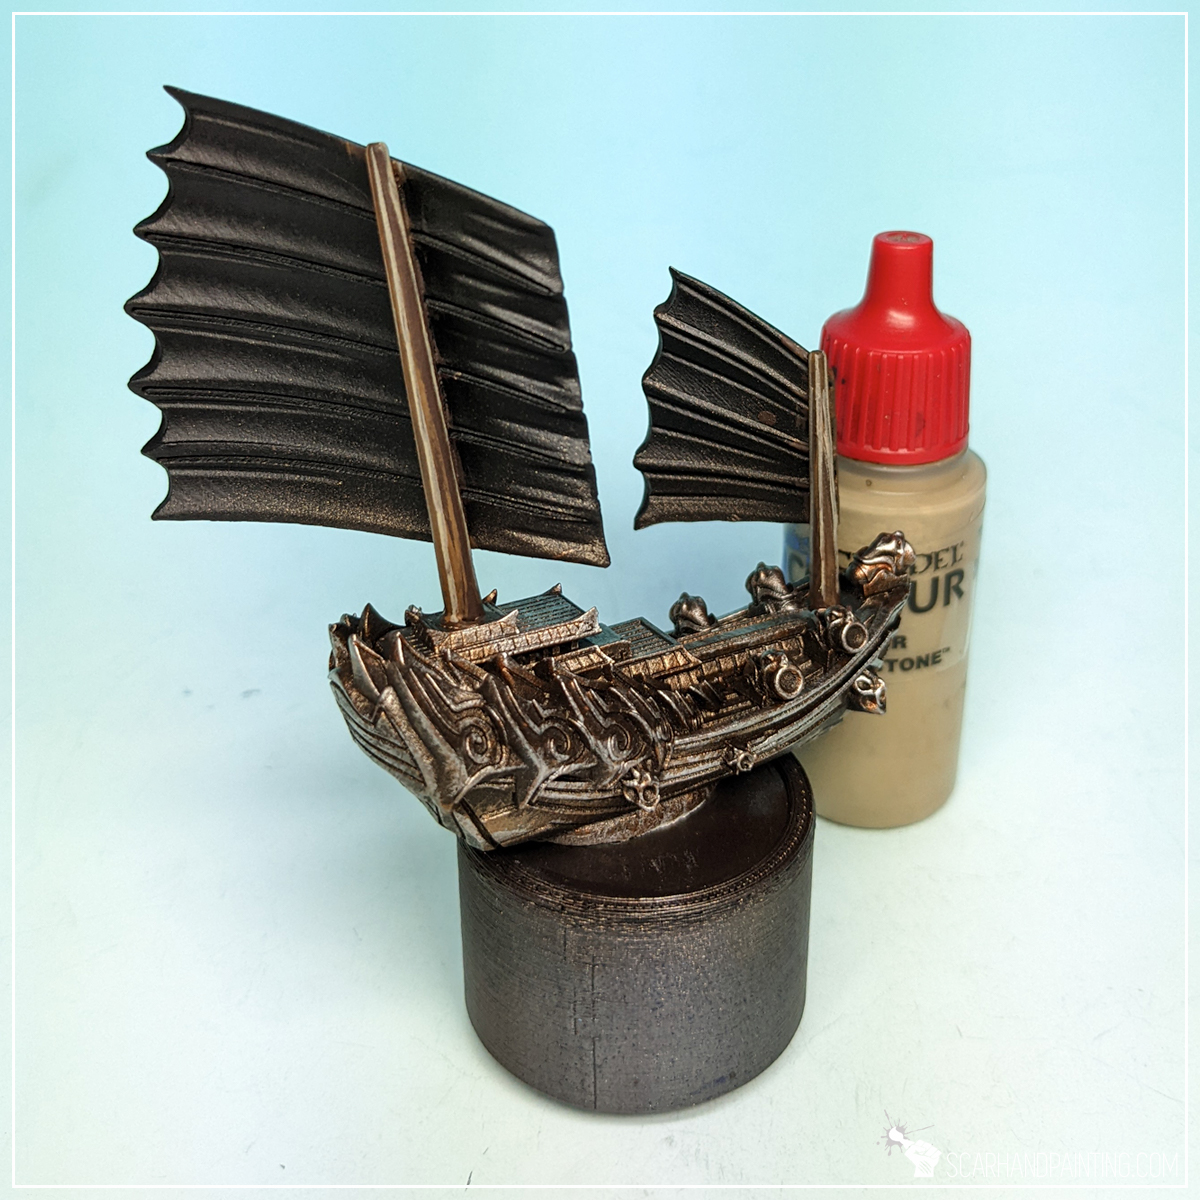
Step eight: Wash
Here’s where real magic happens. I applied a strong layer of Army Painter Strong Tone wash over the miniature. This is probably the most important moment of the entire paint job. Wash applied en-masse blends all the colors beneath, toning them down a bit, adding coherency and that extra juicy look. One thing to look out for is large drops of wash forming on flat areas and lower parts of the miniature, then leaving stains of very dark paint while drying. This can be avoided by removing the excess of paint with a soft wet brush few minutes after application.

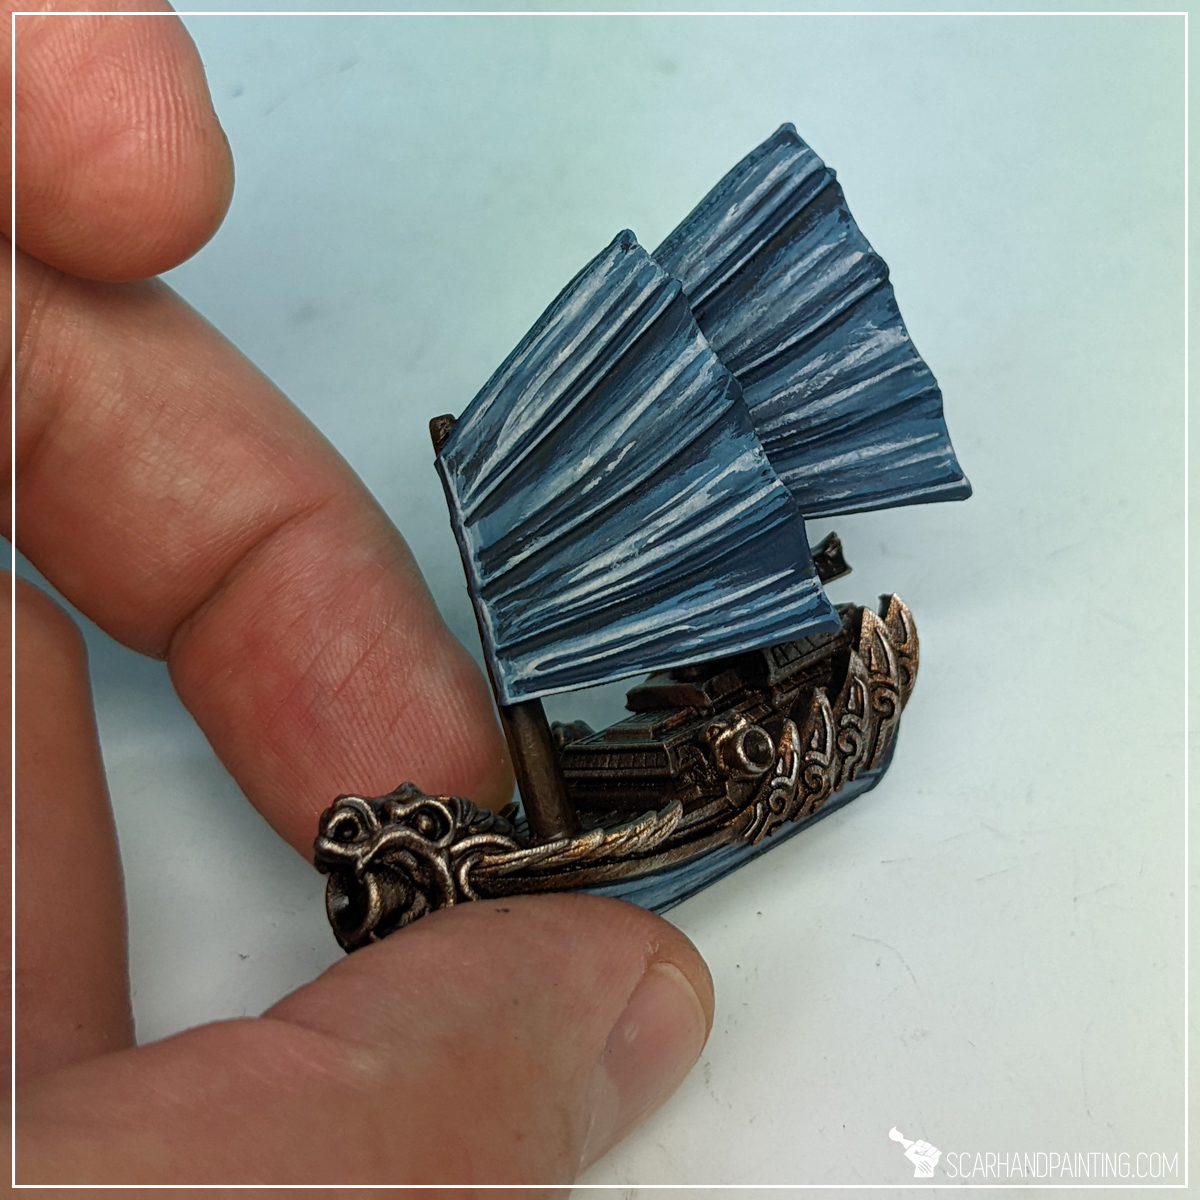
Step nine: Sails base
Once wash dried out nicely I moved to Sails and lower hulls. I applied a thick layer of P3 Coal Black, which is something between dark turquoise mixed with dark grey.

Step ten: Sails highlight
Next I applied a flatbrush highlight of slightly thinned Vallejo 309 Periscopes. This exposed most texture of the sails why also providing a more juicy color overall.
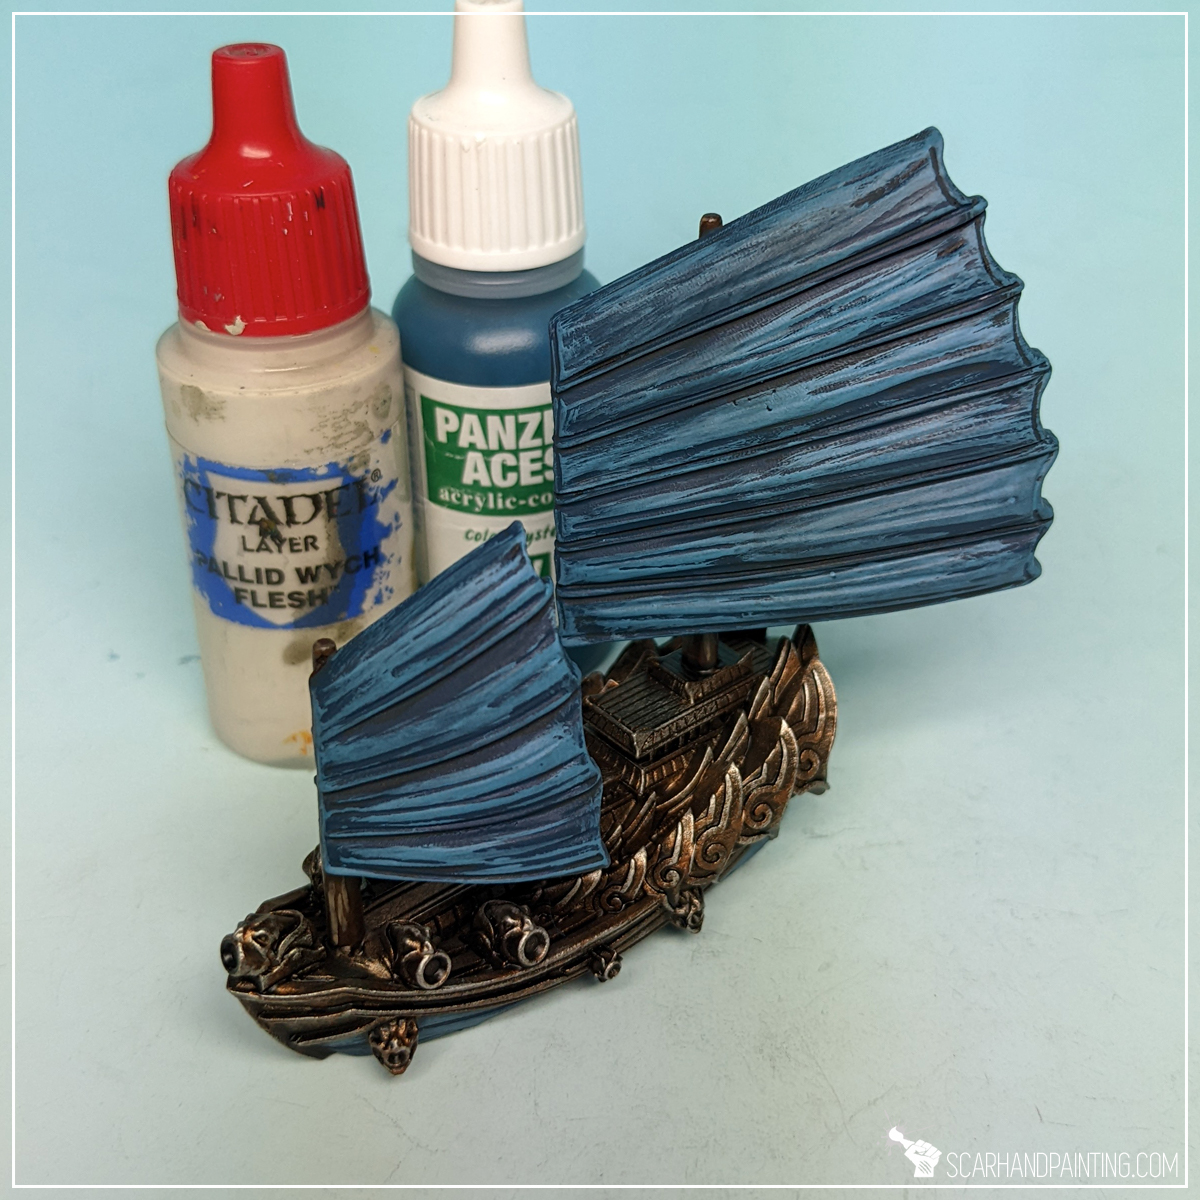
Step eleven: Sails highlight
Another highlight was applied with a 1:1 mix of Games Workshop Pallid Wych Flesh and Vallejo 309 Periscopes. A much more visible highlight to build volume.
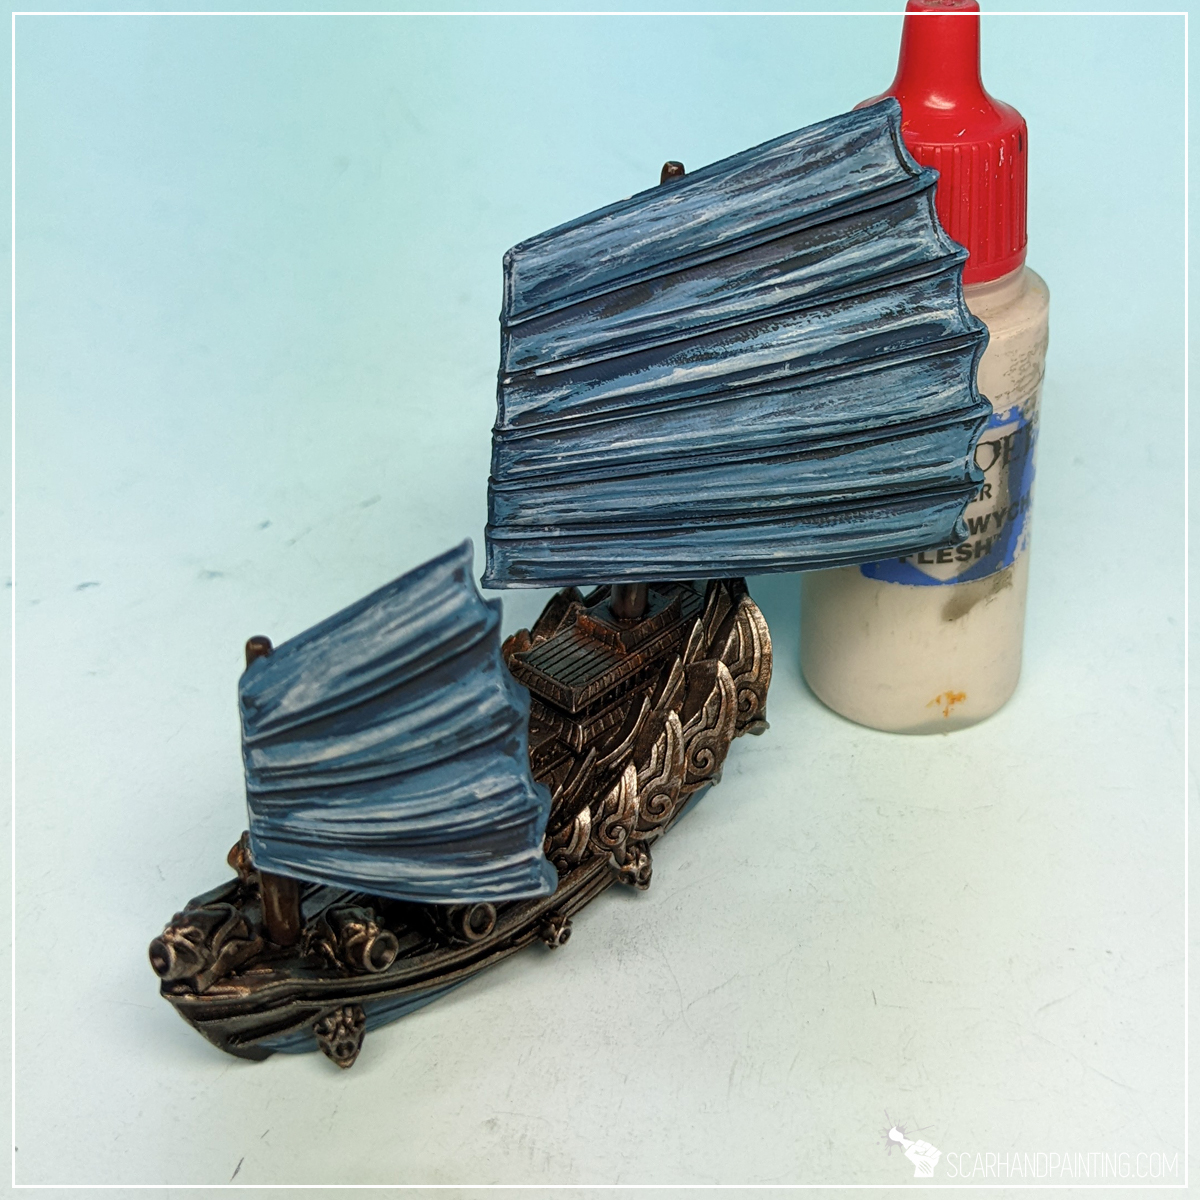
Step twelve: Sails final highlight
Final highlight was applied with pure Games Workshop Pallid Wych Flesh. Similar to edge highlight this one was applied to most exposed detail and edges on the sails. Looks messy and ugly, but everything goes according to a plan…
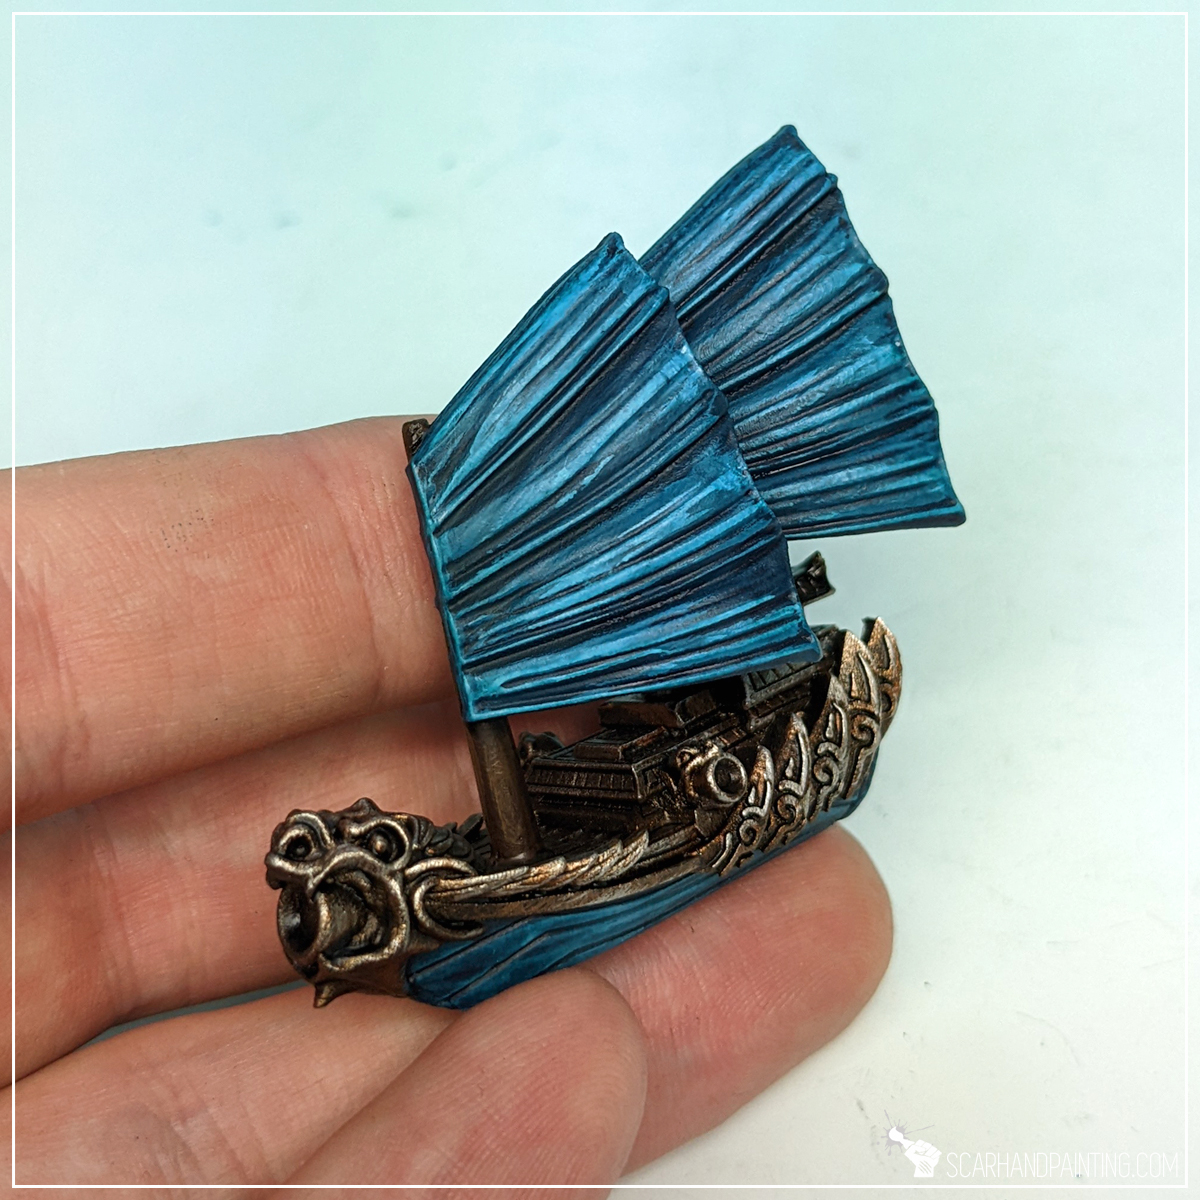
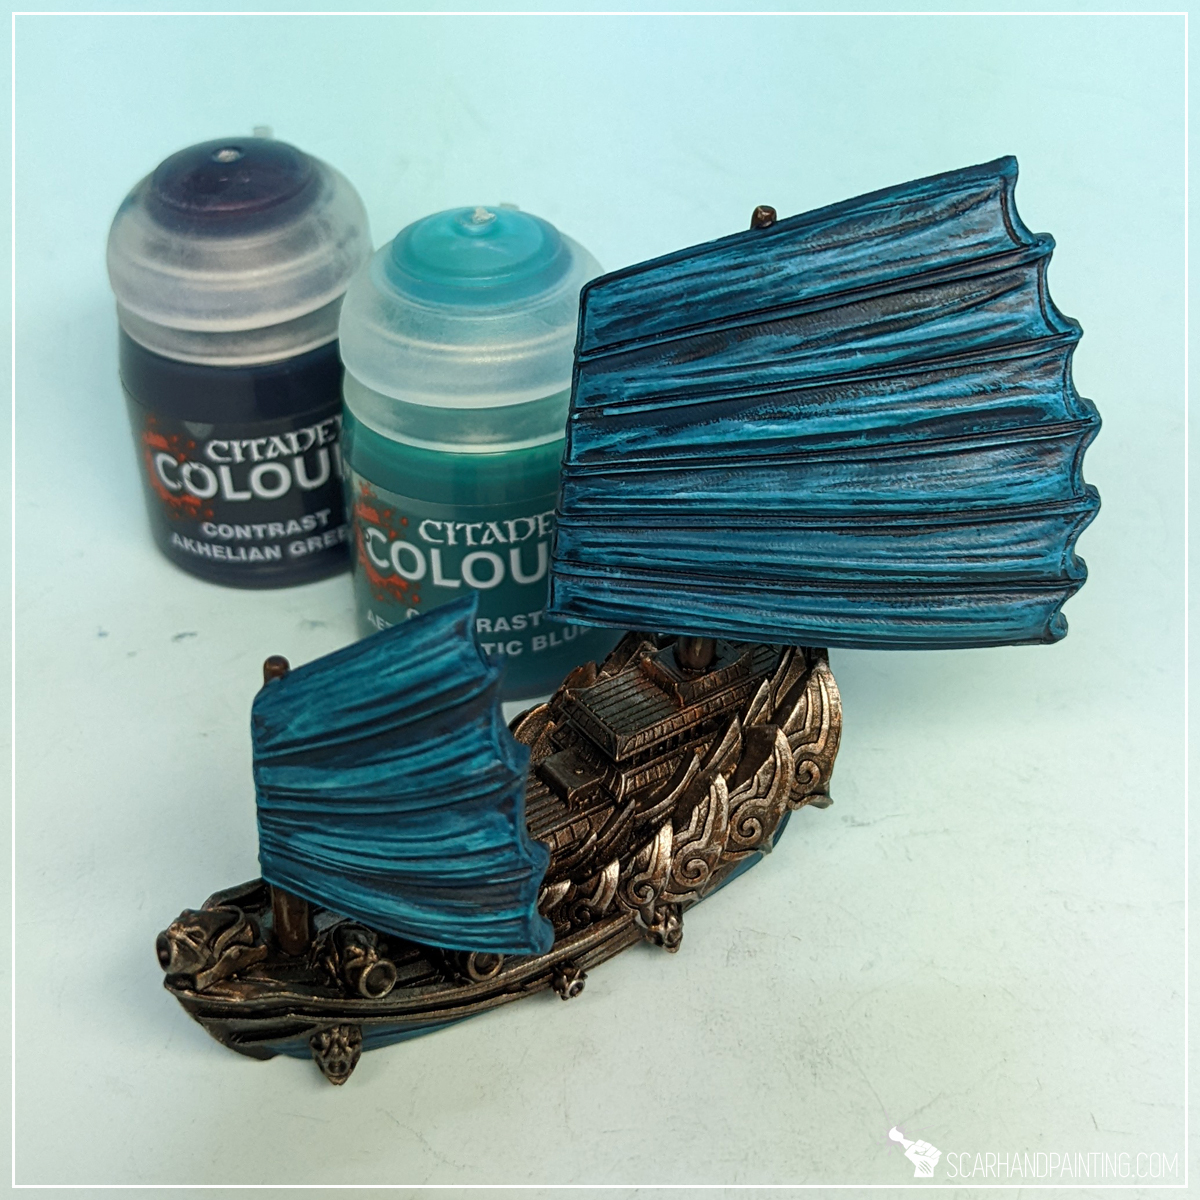
Step thirteen: Glaze
Glazing is a topic on its own that usually refers to rather time consuming and precise application of strongly thinned down paints. The way I apply glazes is more simplified. I apply them with a large, soft brush just like washes, except I avoid applying too much paint. This way I both smooth up and juice up the colors underneath. In case of Salamanders I used a 1:1 mix of Games Workshop Akhelian Green nd Aethermatic Blue contrast paints.


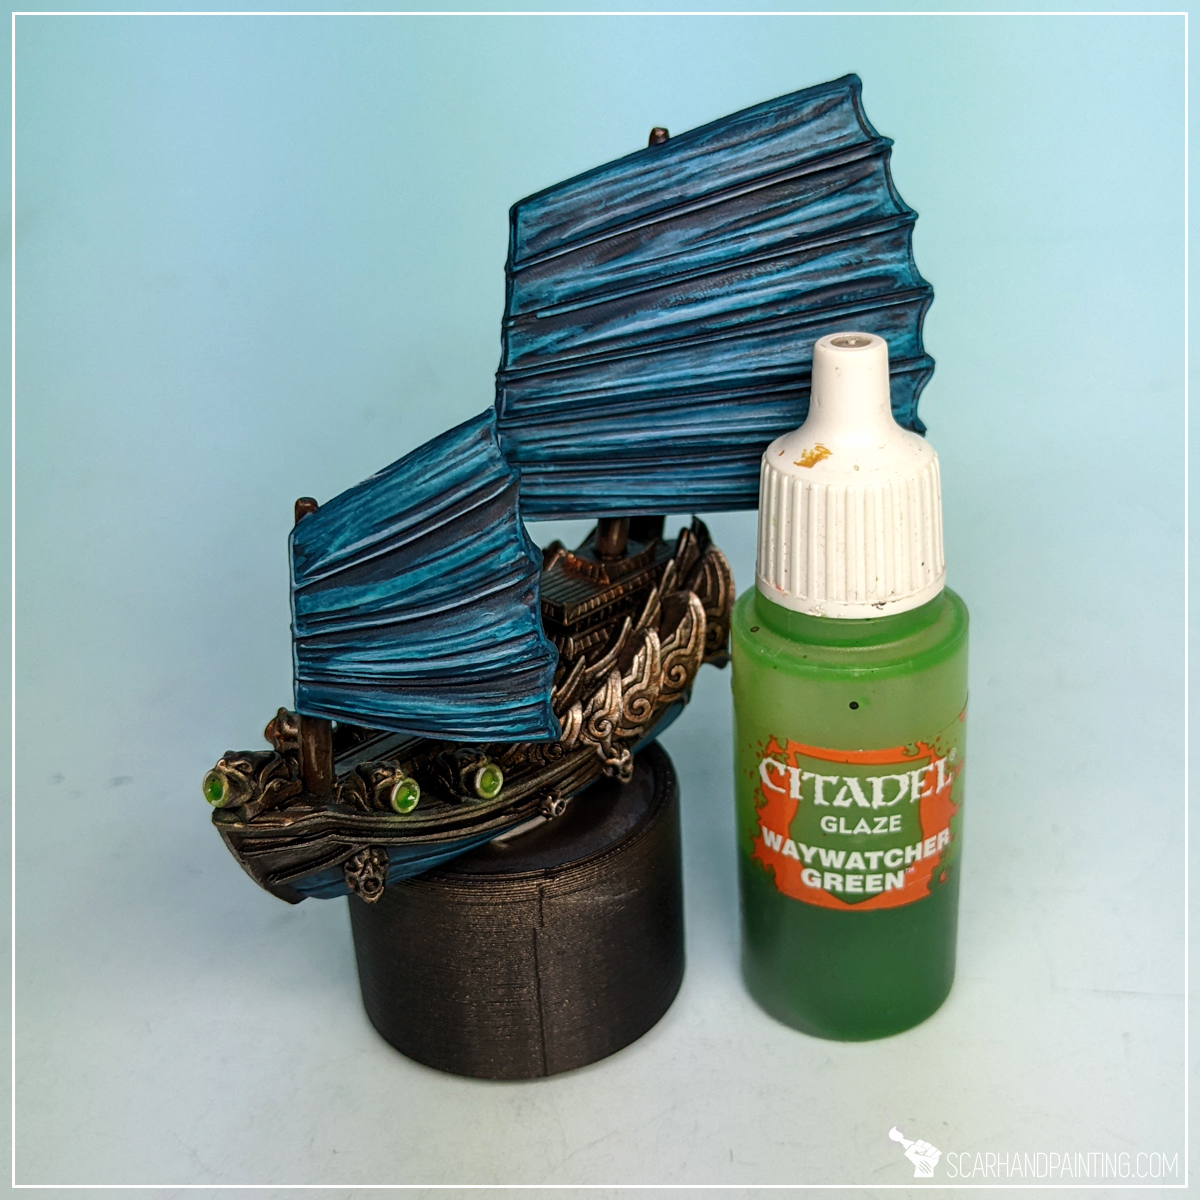
Step fourteen: Green osl
Final color range to add onto the miniature was Greens. I applied four paints one after another to build volume and then add depth to weapons and any fire elements across the fleet. In this tutorial I deliberately linked all the steps into one, as this particular topic was just recently covered in Tutorial: Painting Green Glow that you can read in order to get a better grasp of the entire process.
Step fifteen: Bases
The paint job done and sealed with a matt varnish the last thing left to do was a base. Again, this is something I covered before in KoW Armada Water Bases tutorial that I invite you to read in order to get to know the process. In case of Salamanders I simplified basing by applying one thick, smooth layer of AK Interactive Atlantic blue, then another rough layer of the same texture to finally add waves with AK Interactive Water Foam effect. Very simple while also quite effective.
This marks the end of the tutorial. Feel free to ask any questions in the comments below or via social media.

I hope you find this tutorial interesting. Be sure to let me know your thoughts in the comments below or via Facebook or Instagram. I would also appreciate if you considered sharing this content with your friends, who might find it useful. Finally if you are looking for a professional miniatures painting service, be sure to contact me with this contact form. I always reply within 24 hours, after which please check out your spam folder.

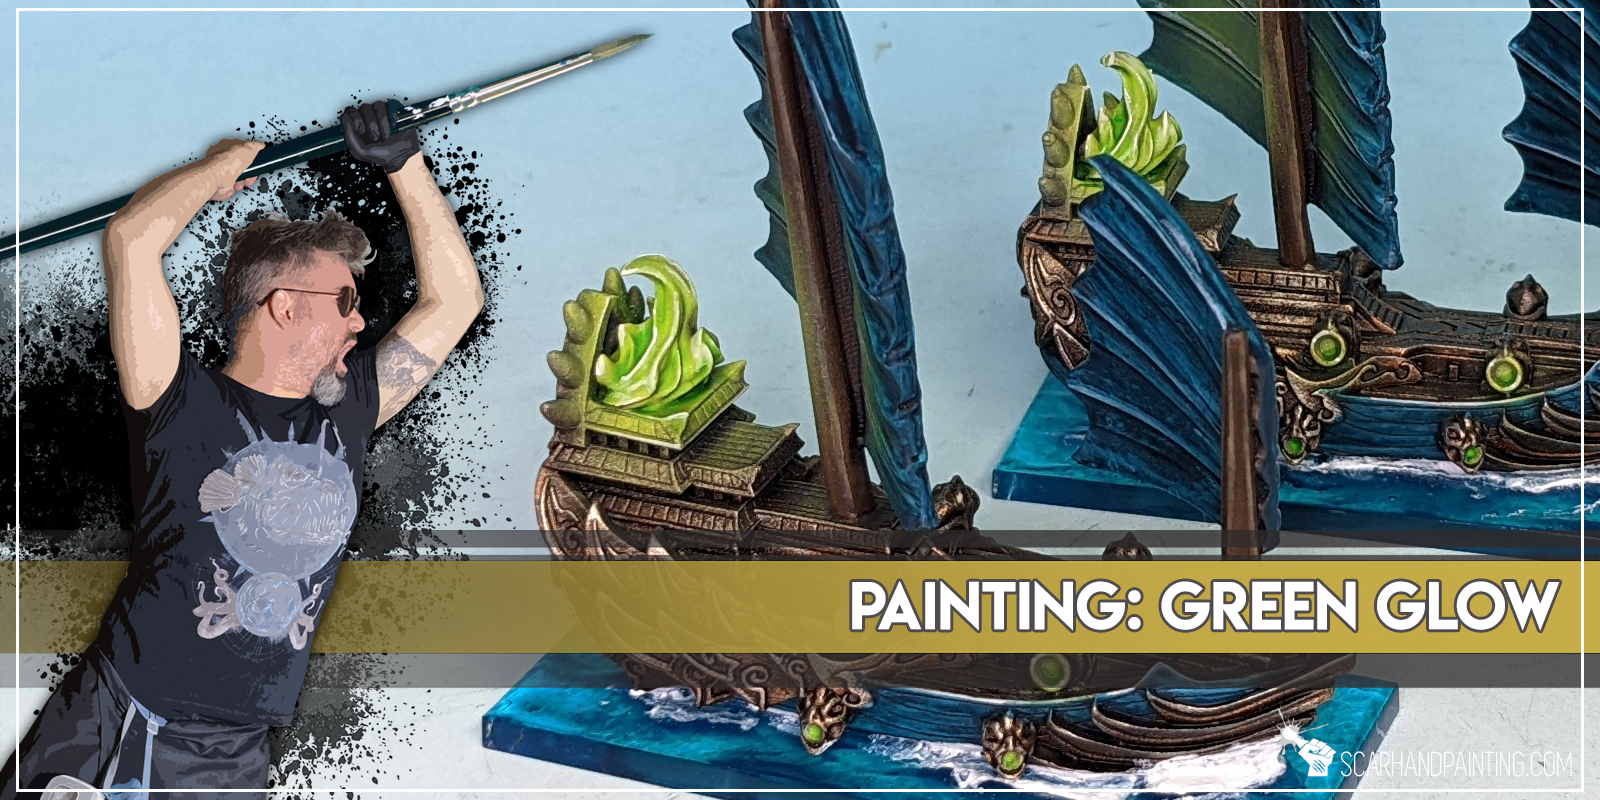
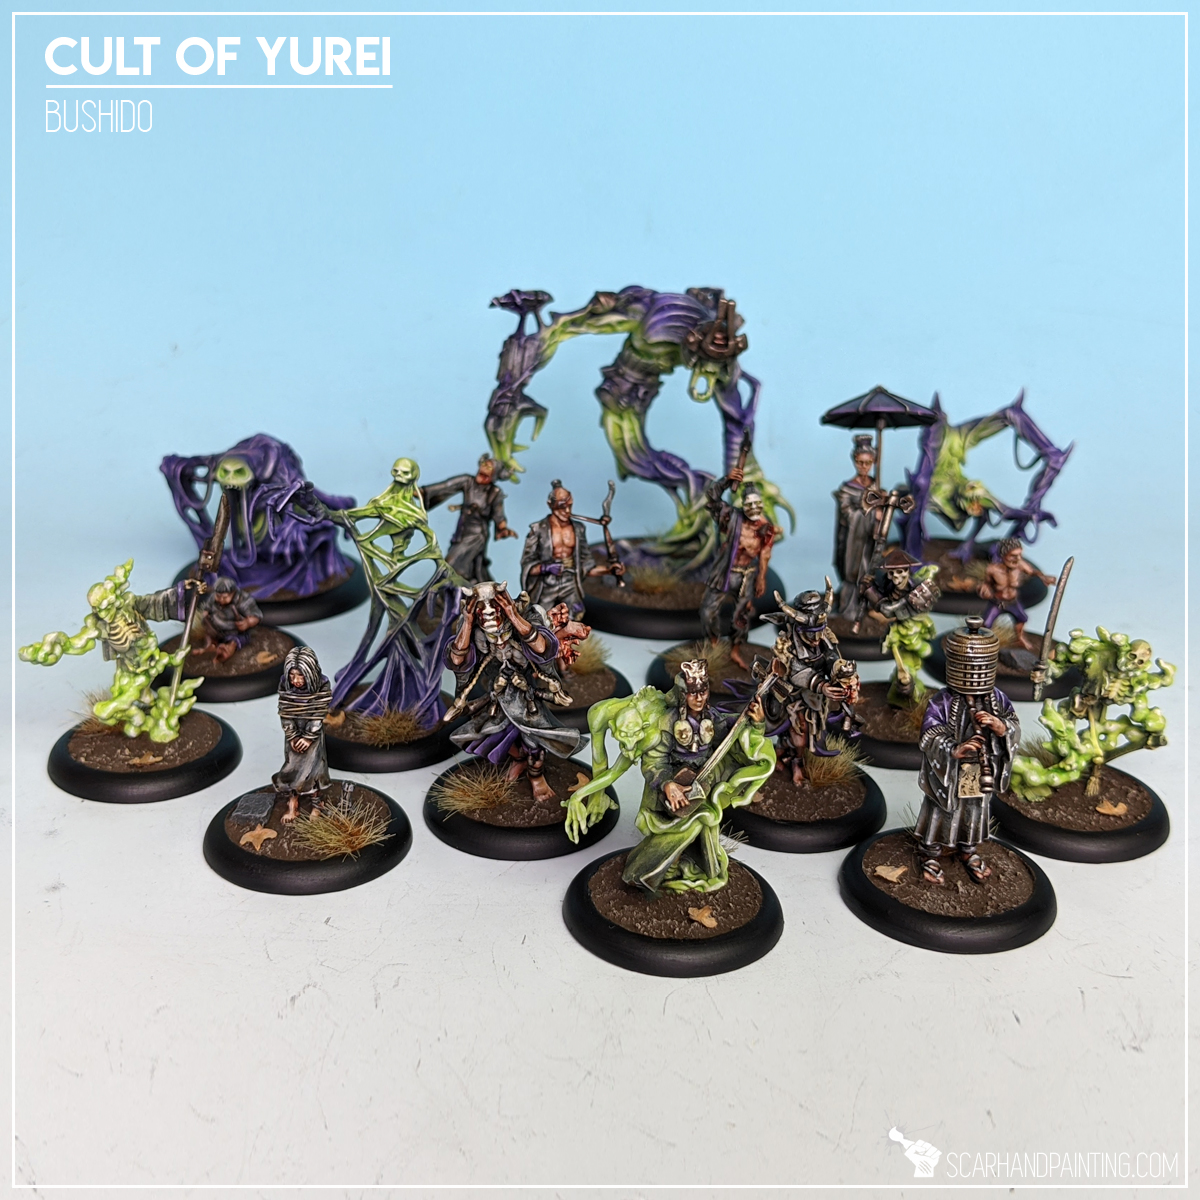
As a full time professional miniatures painter I strive to specialize in techniques that provide the maximum effect on the gaming board, while being relatively simple and easy to mass duplicate. Here I will present to you a Step-by-step guide to painting green glow effect similar to that used in most of the projects, for example Gallery: Cult of Yurei and Gallery: Legio Vulpa.
Before we start, some notes:
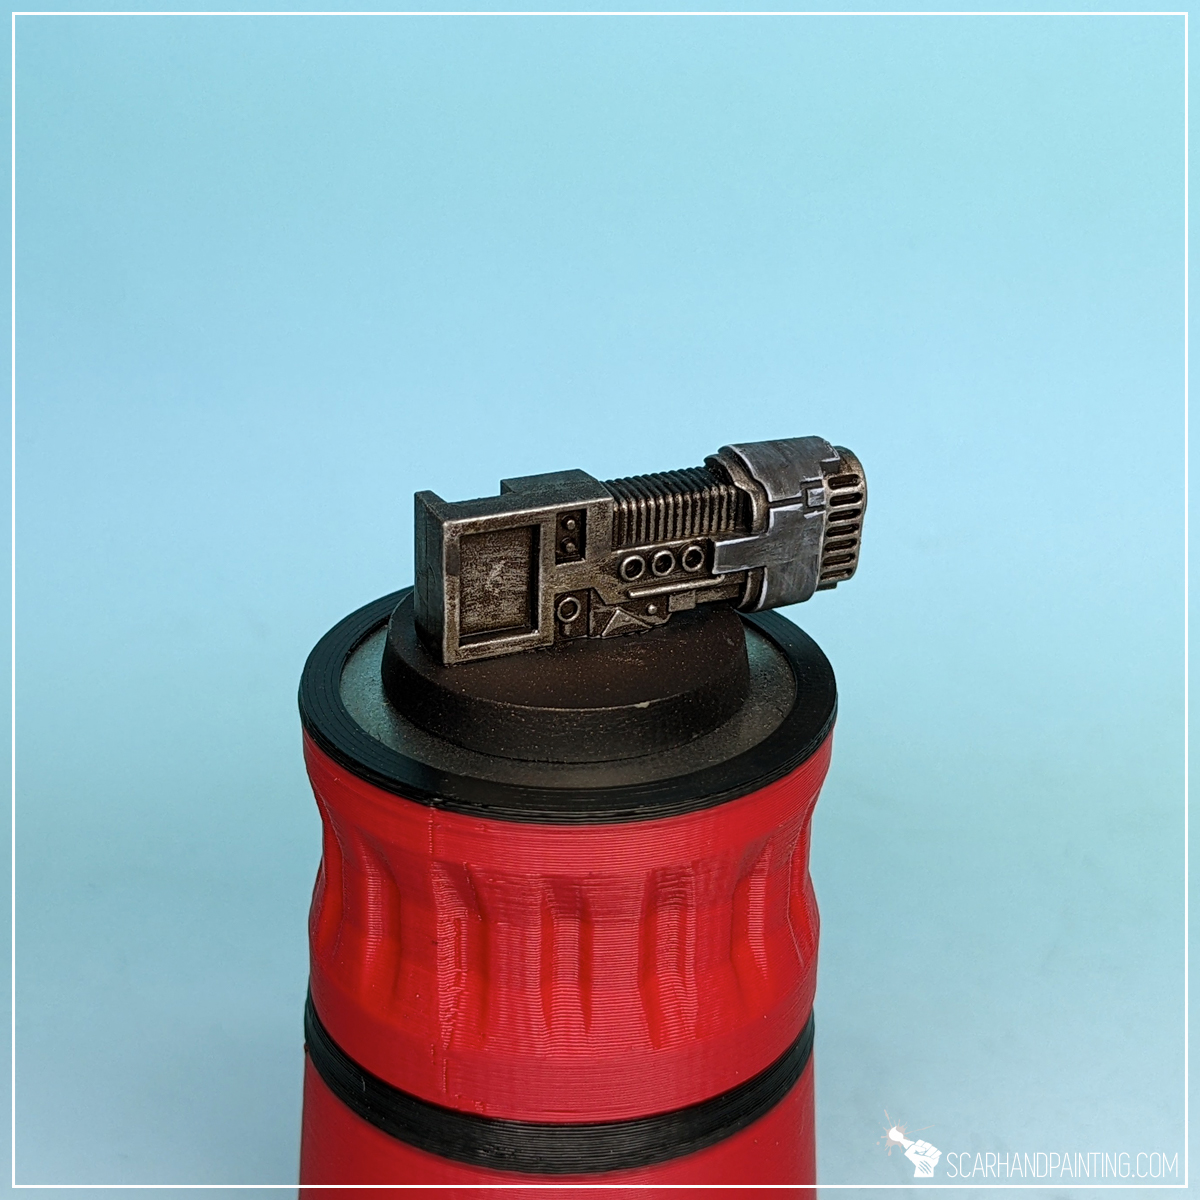
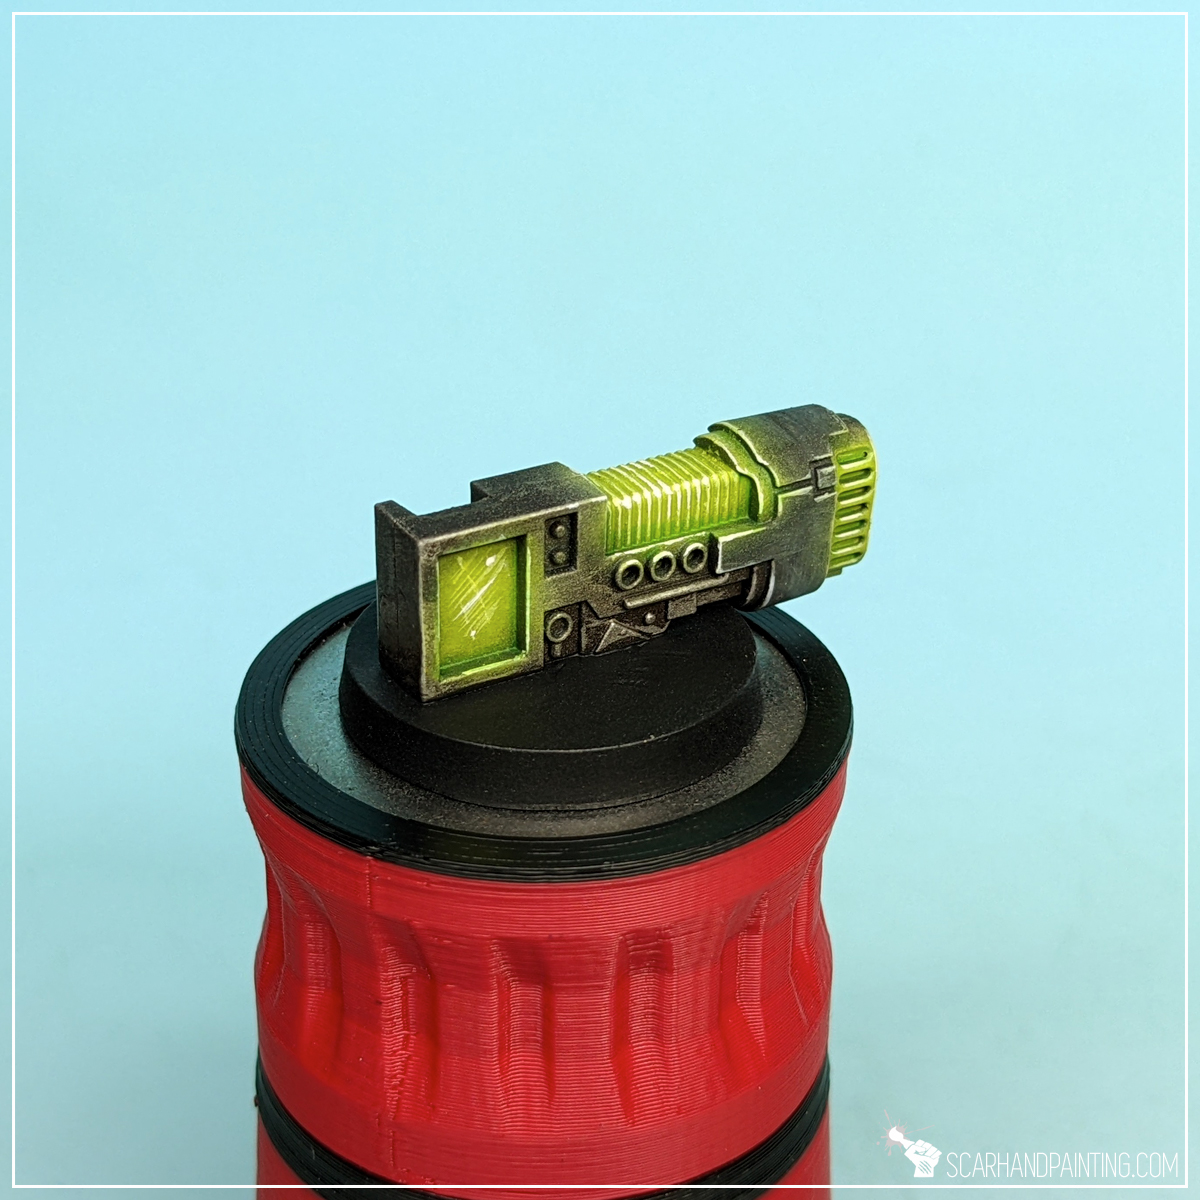
Step one: Duck Egg preshade
I started with a soft layer of slightly thinned airbrushed Vallejo 71.009 Duck Egg Green (air). While airbrushing I made sure to cover potential light source areas plus the immediate surroundings.

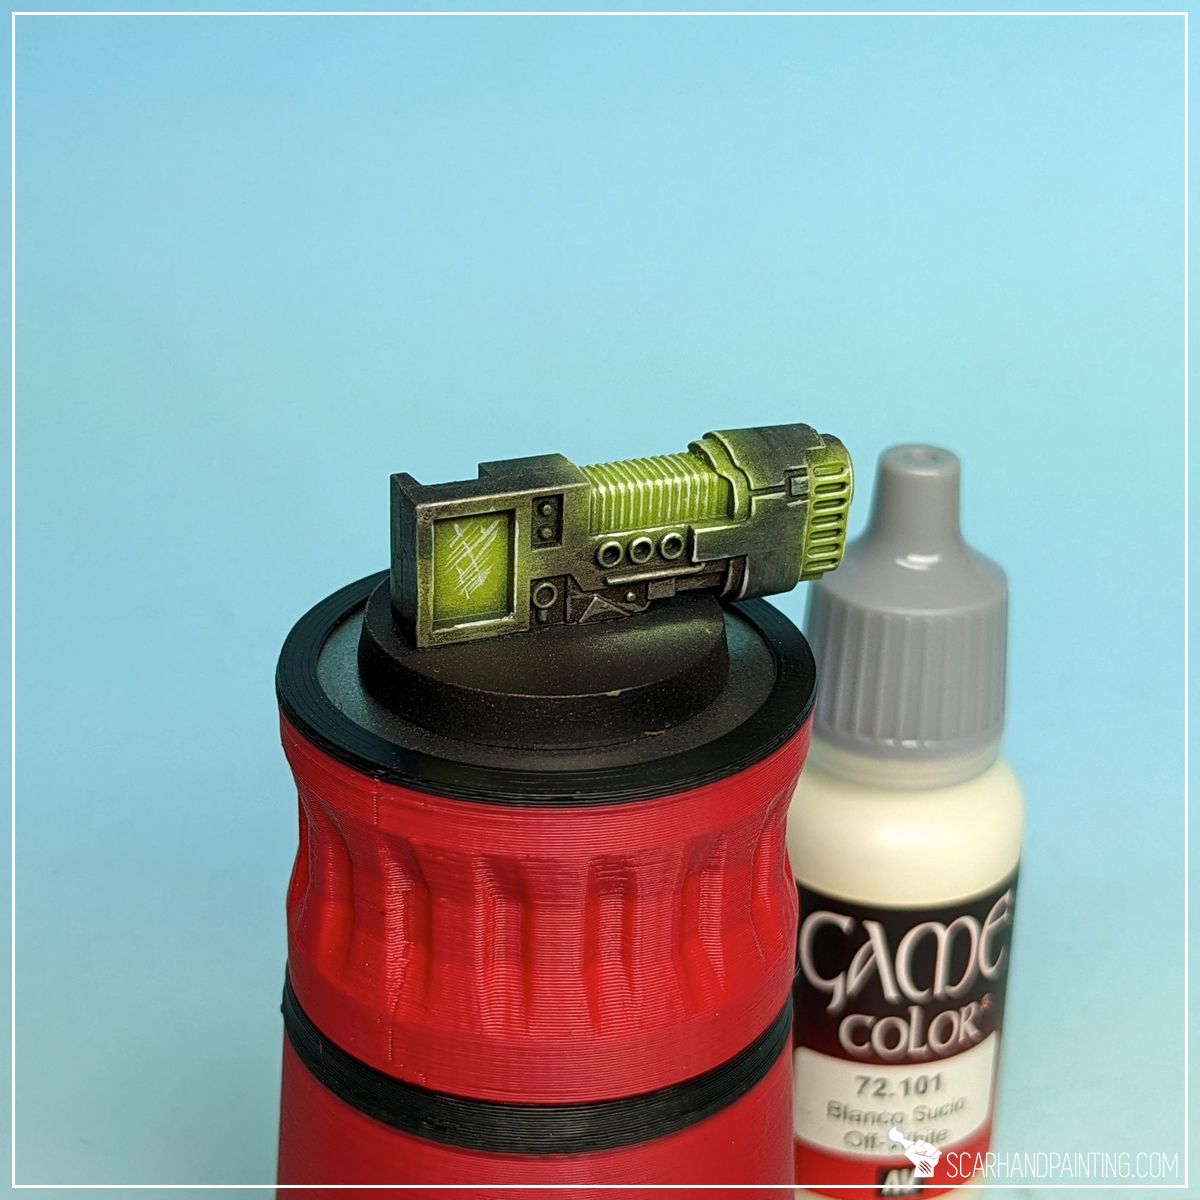
Step two: Green base
Next I airbrushed a layer of Vallejo 72.733 Light Livery Green (air) without thinning. This layer was applied on top of previously airbrushed Duck Egg Green.

Step three: highlight
I then highlighted green with Vallejo 72.101 Off-White, pulling the edges out to create a solid base for future juicing up back to strong toxic green.
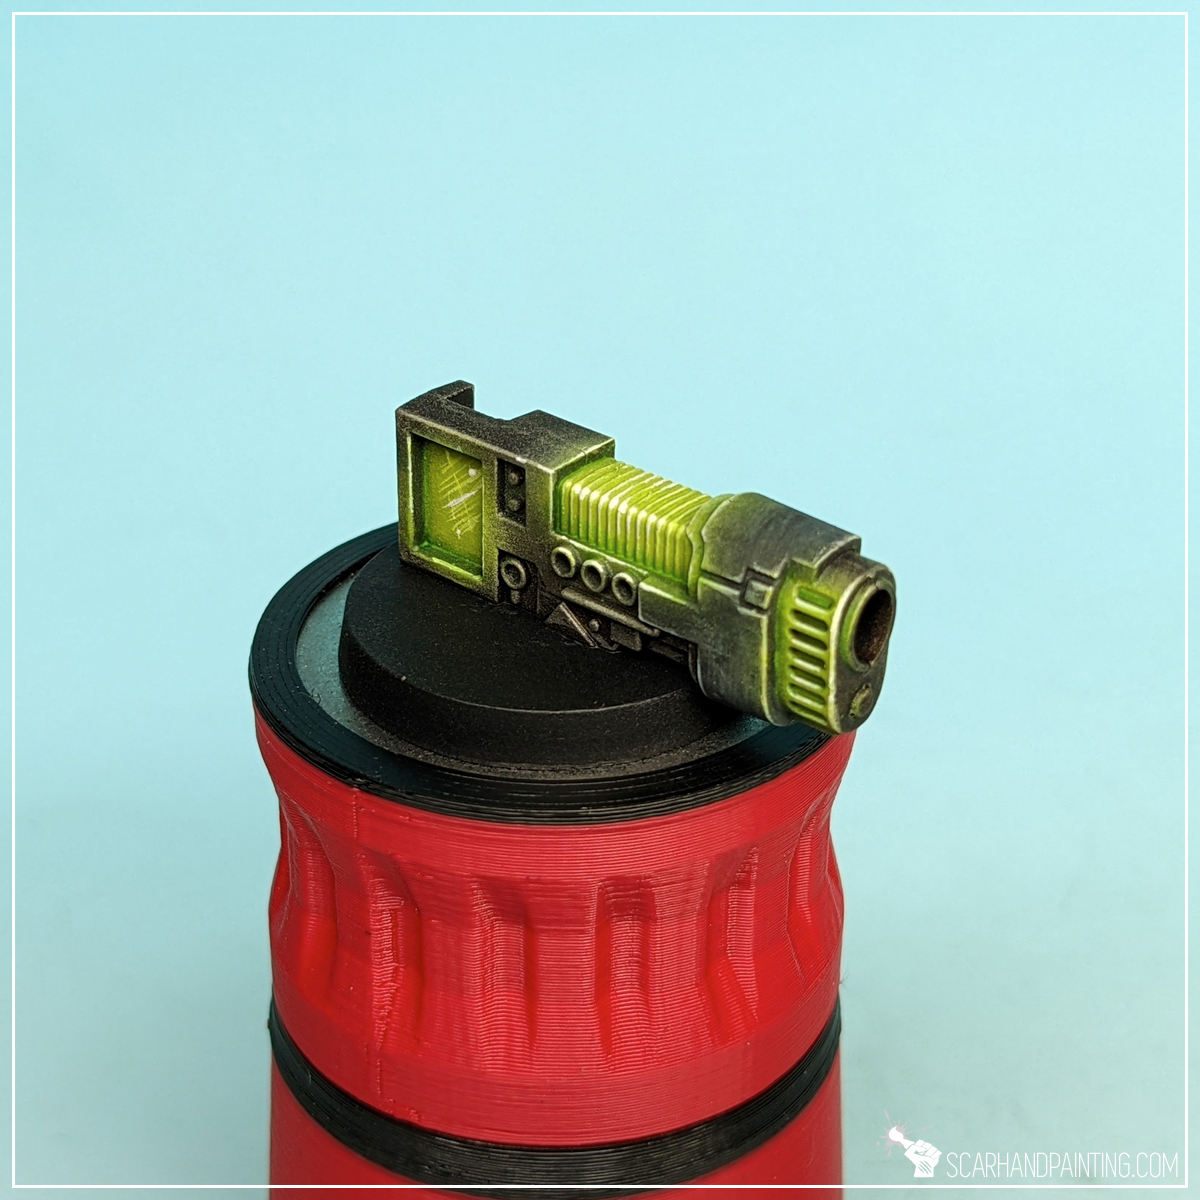
Step four: glaze
Next I manually applied a glaze of slightly thinned down Vallejo 72.733 Light Livery Green over the most intense green parts of the miniature. This includes plasma coils, glow on the side of the barrel and large rectangle area at the back.
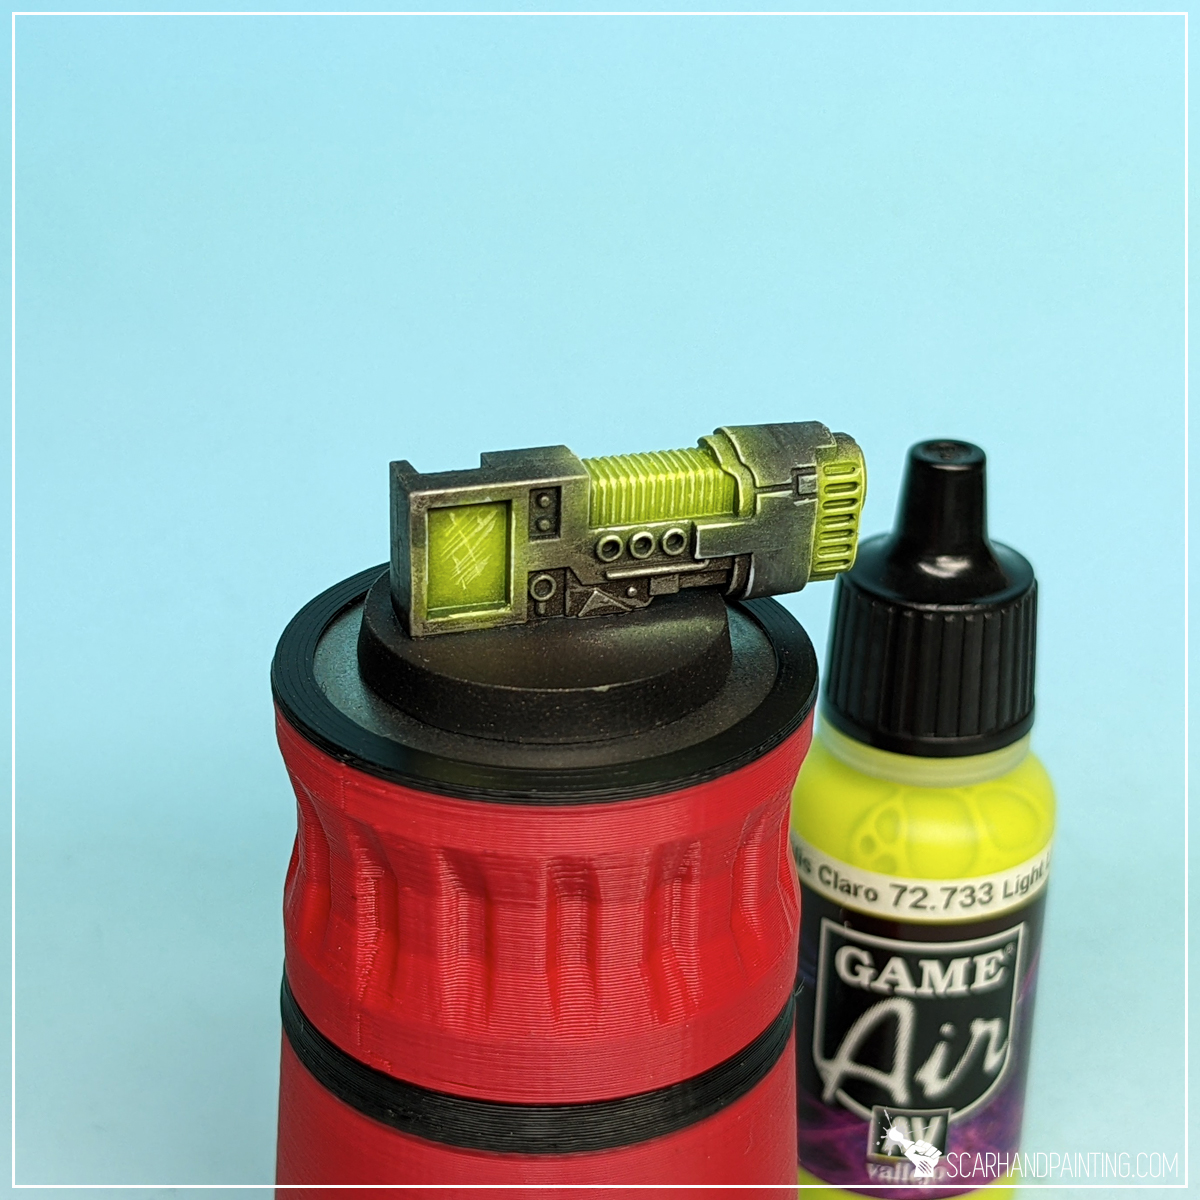
Step five: highlight
Then, I once again applied a highlight of Vallejo 72.101 Off-White. This time I kept it contained to most exposed areas, barely few lines and dots to add focus points and add more overall contrast on the piece.

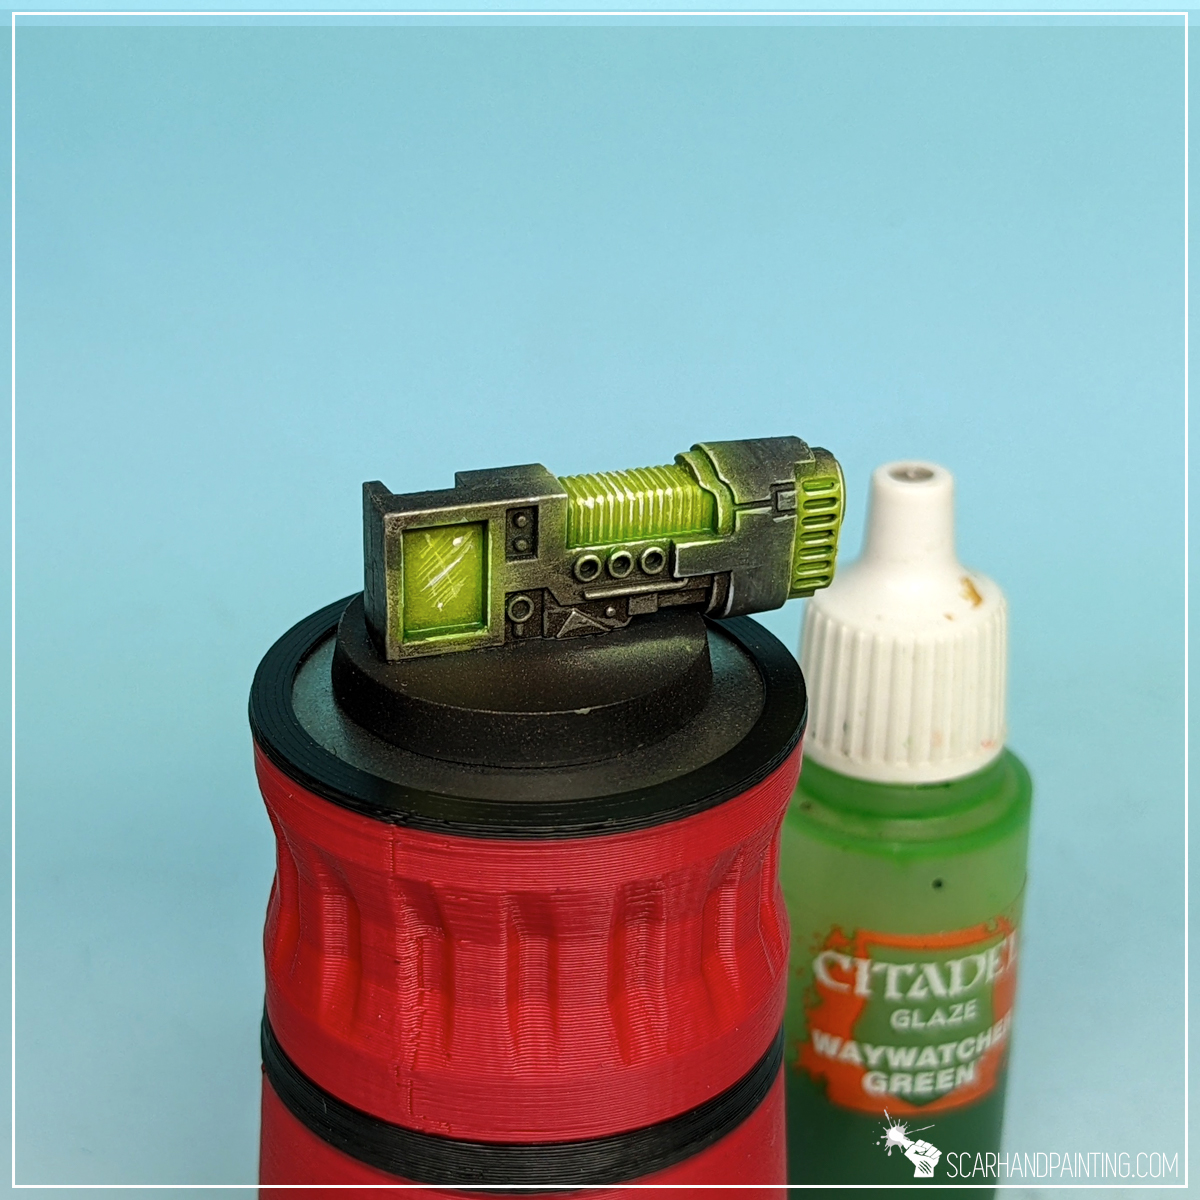
Step six: wash
Finally I applied a mix* of Vallejo 72.089 Green Ink ( 3 drops), Vallejo 72.085 Yellow Ink (2 drops) and water (10 drops). I made sure to apply the paint to deepest recesses only, avoiding exposed plasma coils and edges.
* You might notice a GW Waywatcher Green bottle in the picture below. The Vallejo mix is a recipe for GW Waywatcher Green, that is out of production. You can find more GW Glaze – Vallejo mix recipes in this article.
Work complete. Four colors, six layers an an interesting effect of toxic green plasma coils / ghosts / goo is done!


I hope you find this tutorial interesting. Be sure to let me know your thoughts in the comments below or via Facebook or Instagram. I would also appreciate if you considered sharing this content with your friends, who might find it useful. Finally if you are looking for a professional warhammer 40k miniatures painting service, be sure to contact me with this contact form. I always reply within 24 hours, after which please check out your spam folder.
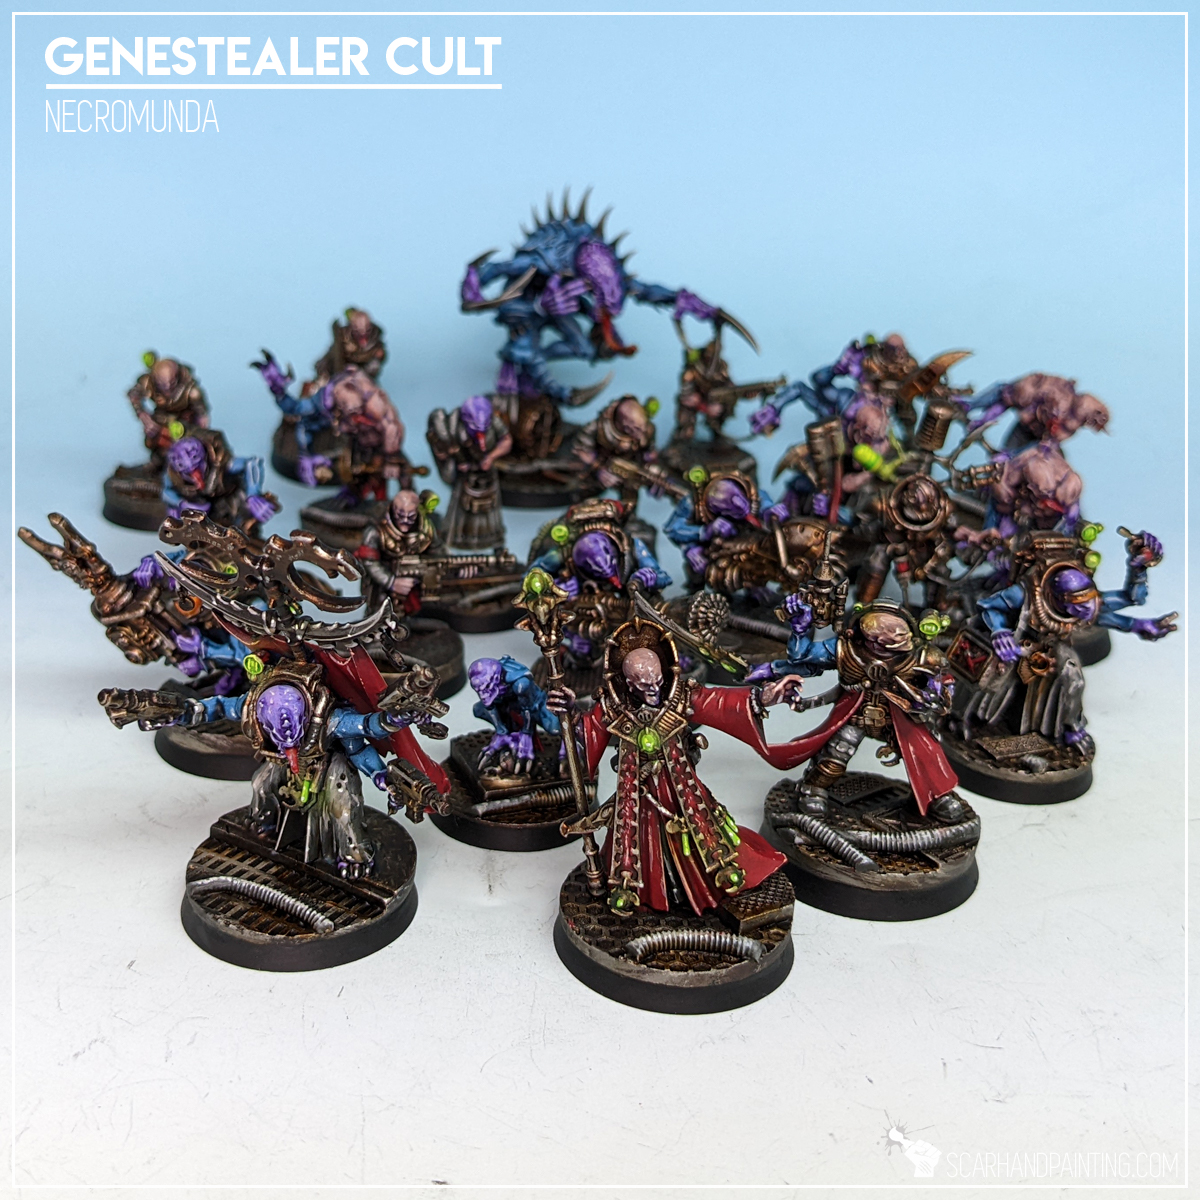
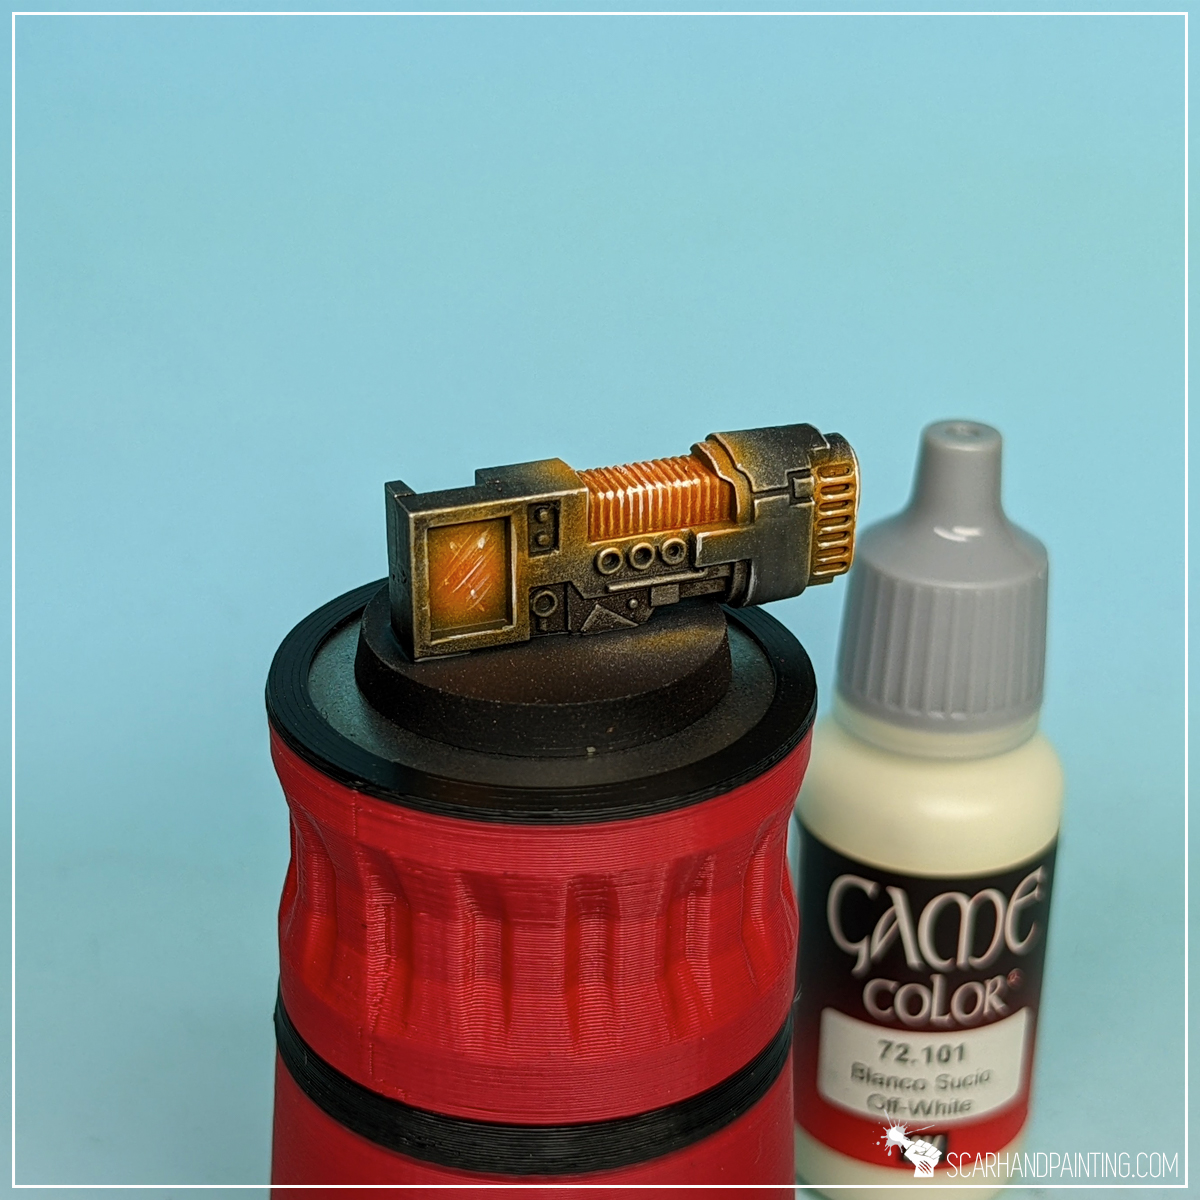
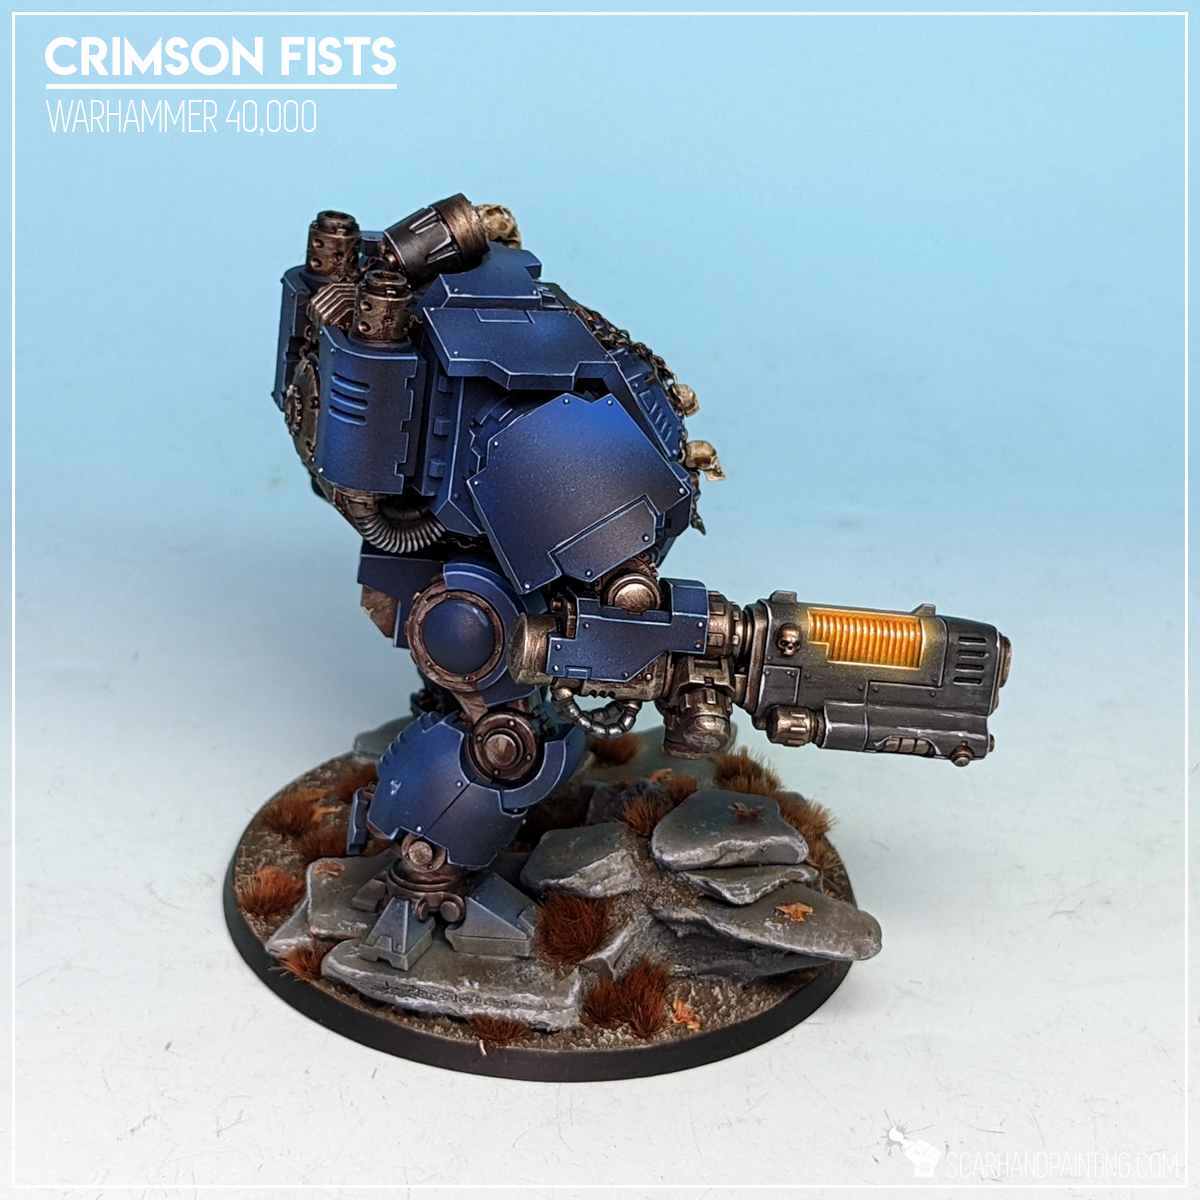
As a full time professional miniatures painter I strive to specialize in techniques that provide the maximum effect on the gaming board, while being relatively simple and easy to mass duplicate. Here I will present to you a Step-by-step guide to painting orange glow effect similar to that used on my Games Workshop Crimson Fists army as can be seen in Gallery: Crimson Fists.
Before we start, some notes:
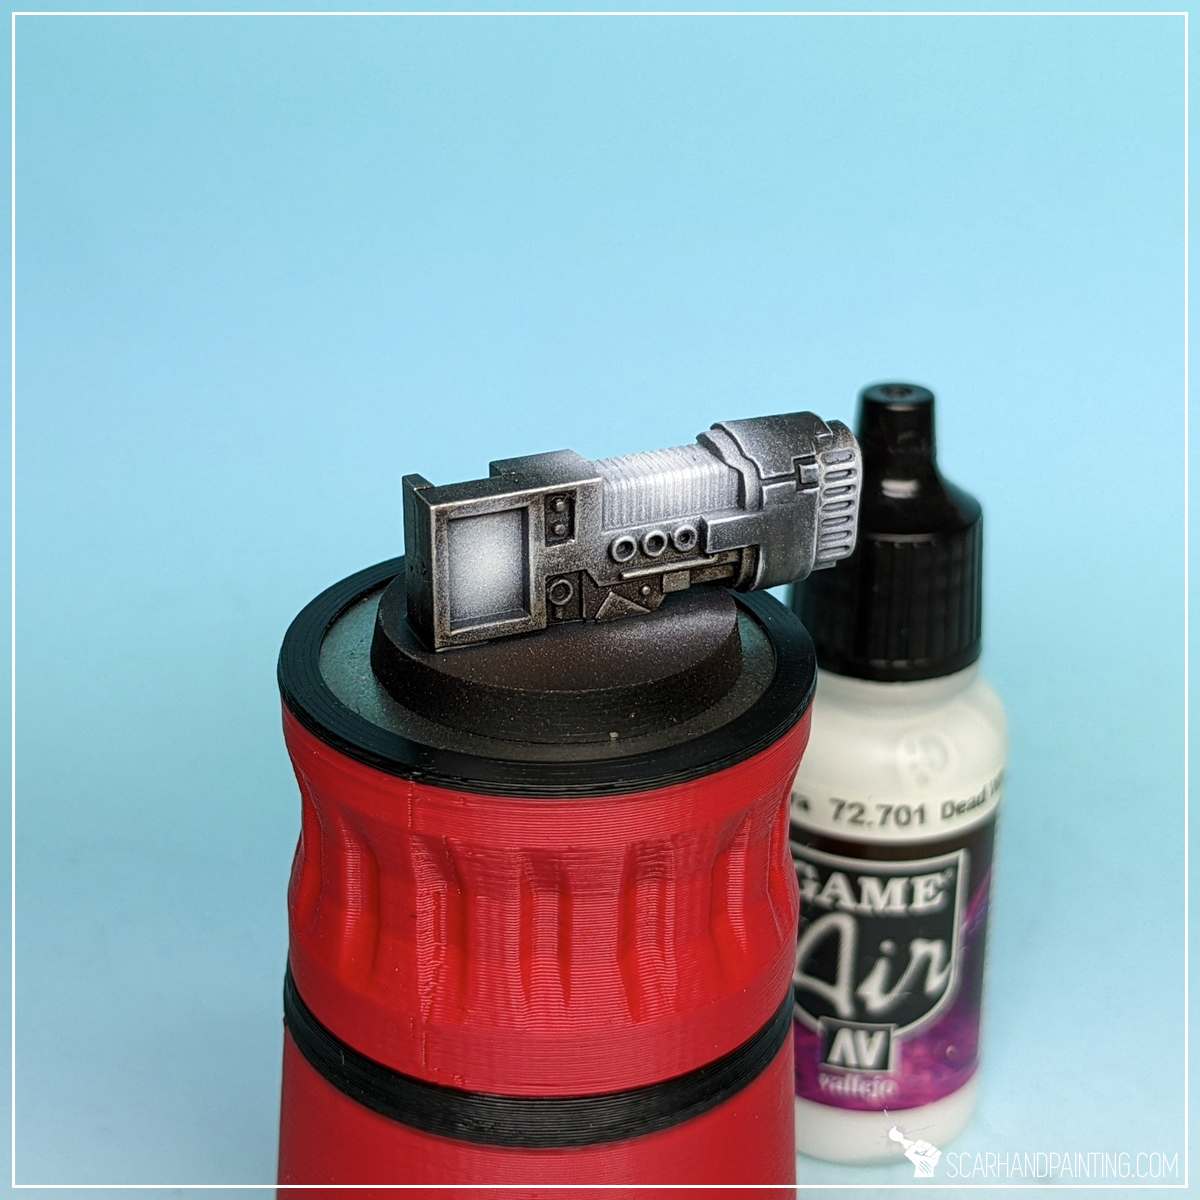
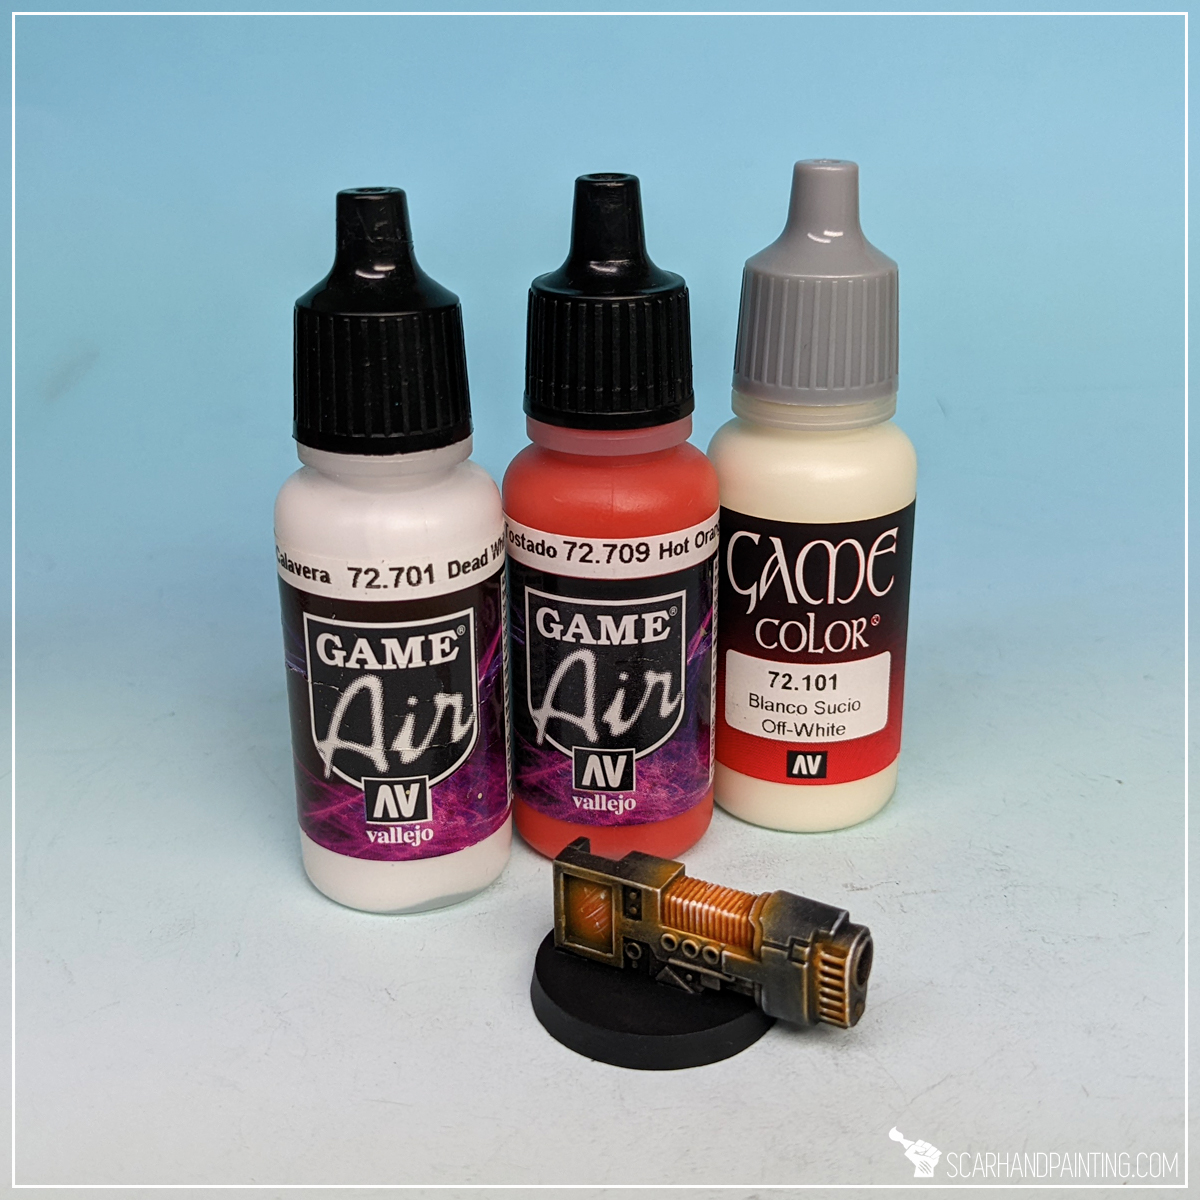
Step one: White preshade
I started with a soft layer of airbrushed Vallejo 72.701 Dead White (air). For the purpose of this tutorial I went straight from the bottle, although usually I thin the paint down just a bit with a drop of Flow Improver and a drop of Airbrush Thinner, resulting in less speckling. While airbrushing I made sure to cover potential light source areas plus the surroundings.
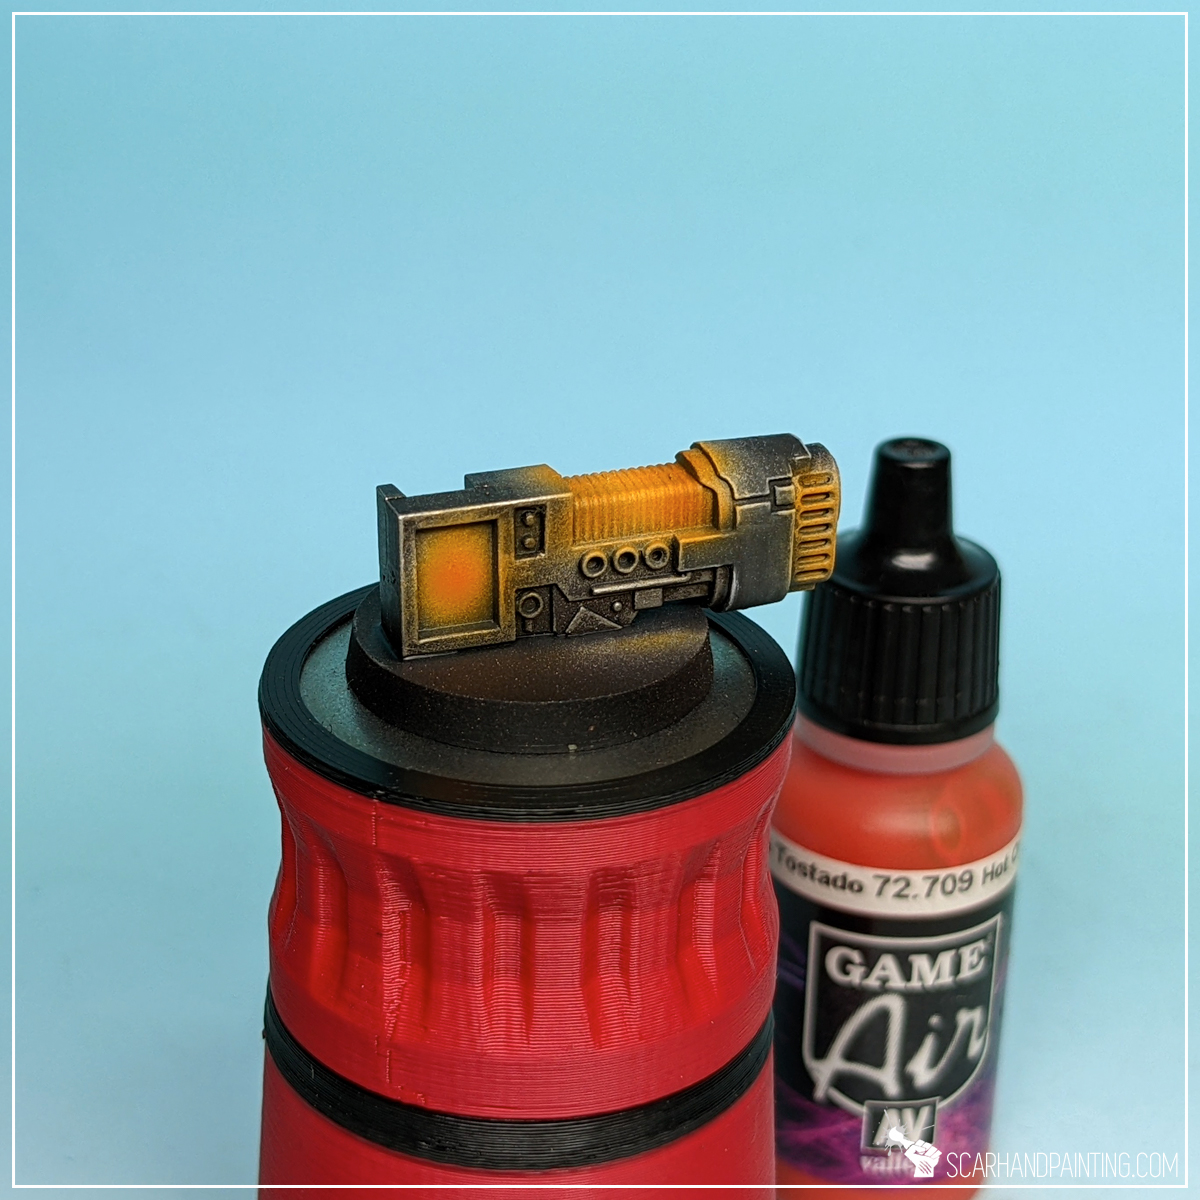
Step two: Orange base
Next I airbrushed a layer of Vallejo 72.709 Hot Orange (air) without thinning. This layer was applied on top of previously airbrushed Dead White.
Step three: highlight
I then highlighted orange with Vallejo 72.101 Off-White. Such a bright color might seem like an overkill, but this one is a bit cream’ish and can get juiced up to bright orange easily later on.

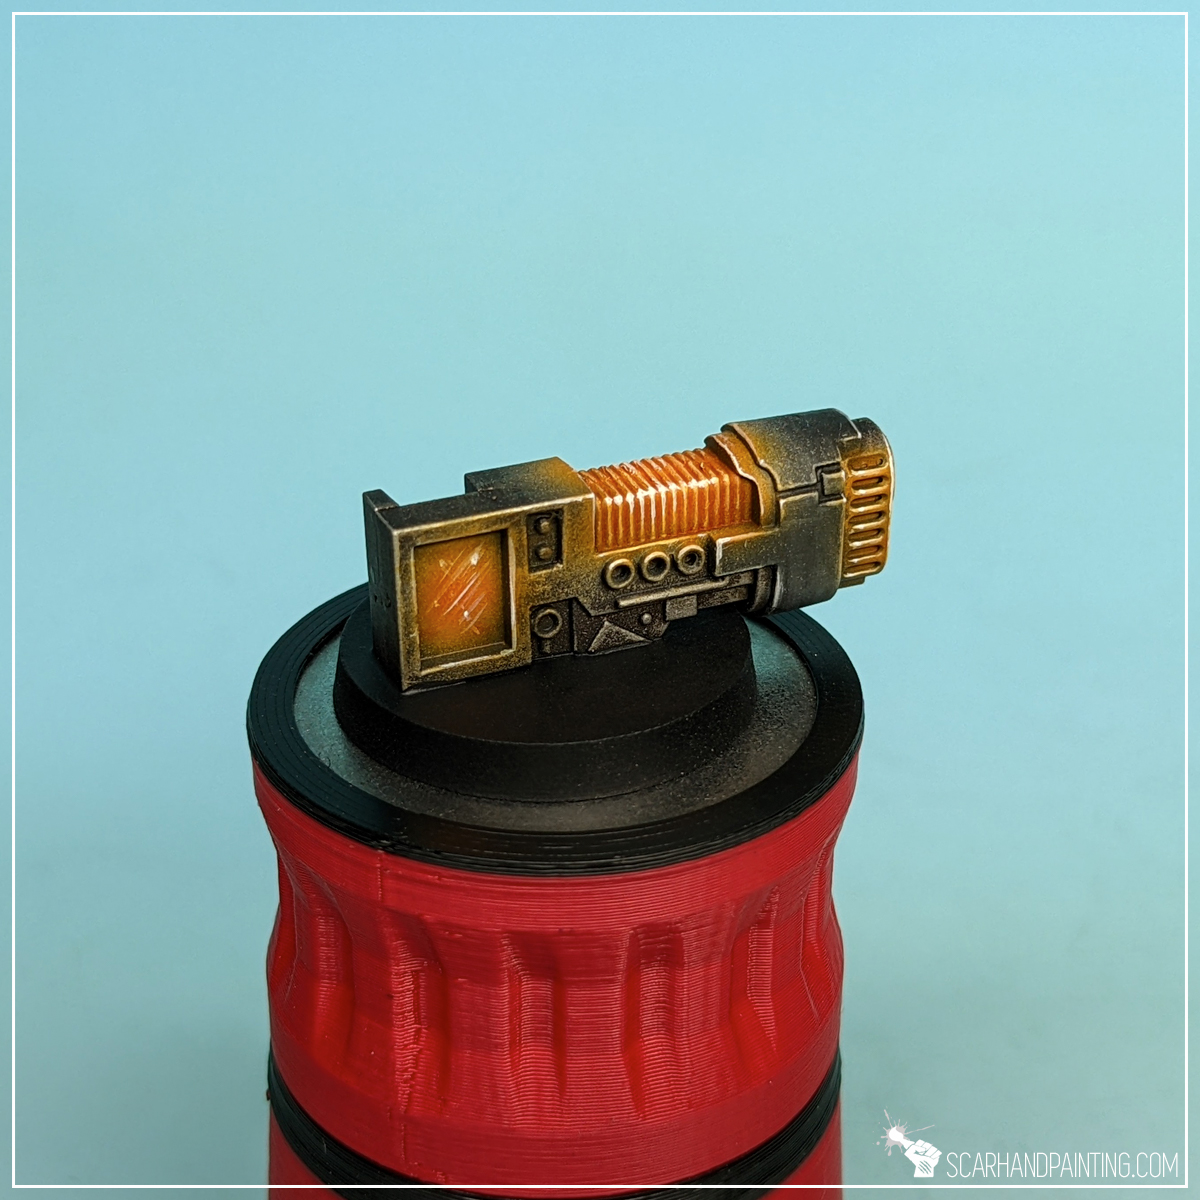
Step four: glaze
Here’s where real magic started. I thinned down Vallejo 72.709 Hot Orange (air) with a bit of water and manually glazed over the most intense orange parts of the miniature. This includes plasma coils, glow on the side of the barrel and large rectangle area at the back. Vallejo air series are perfect for hard glazing, retaining a lot of ‘juice’ even after thinning.

Step five: highlight
Finally I once again applied a highlight of Vallejo 72.101 Off-White, but this time limited to barely few dots and lines in the most exposed areas. This created focus points for the eye, while also providing better overall contrast on the piece.
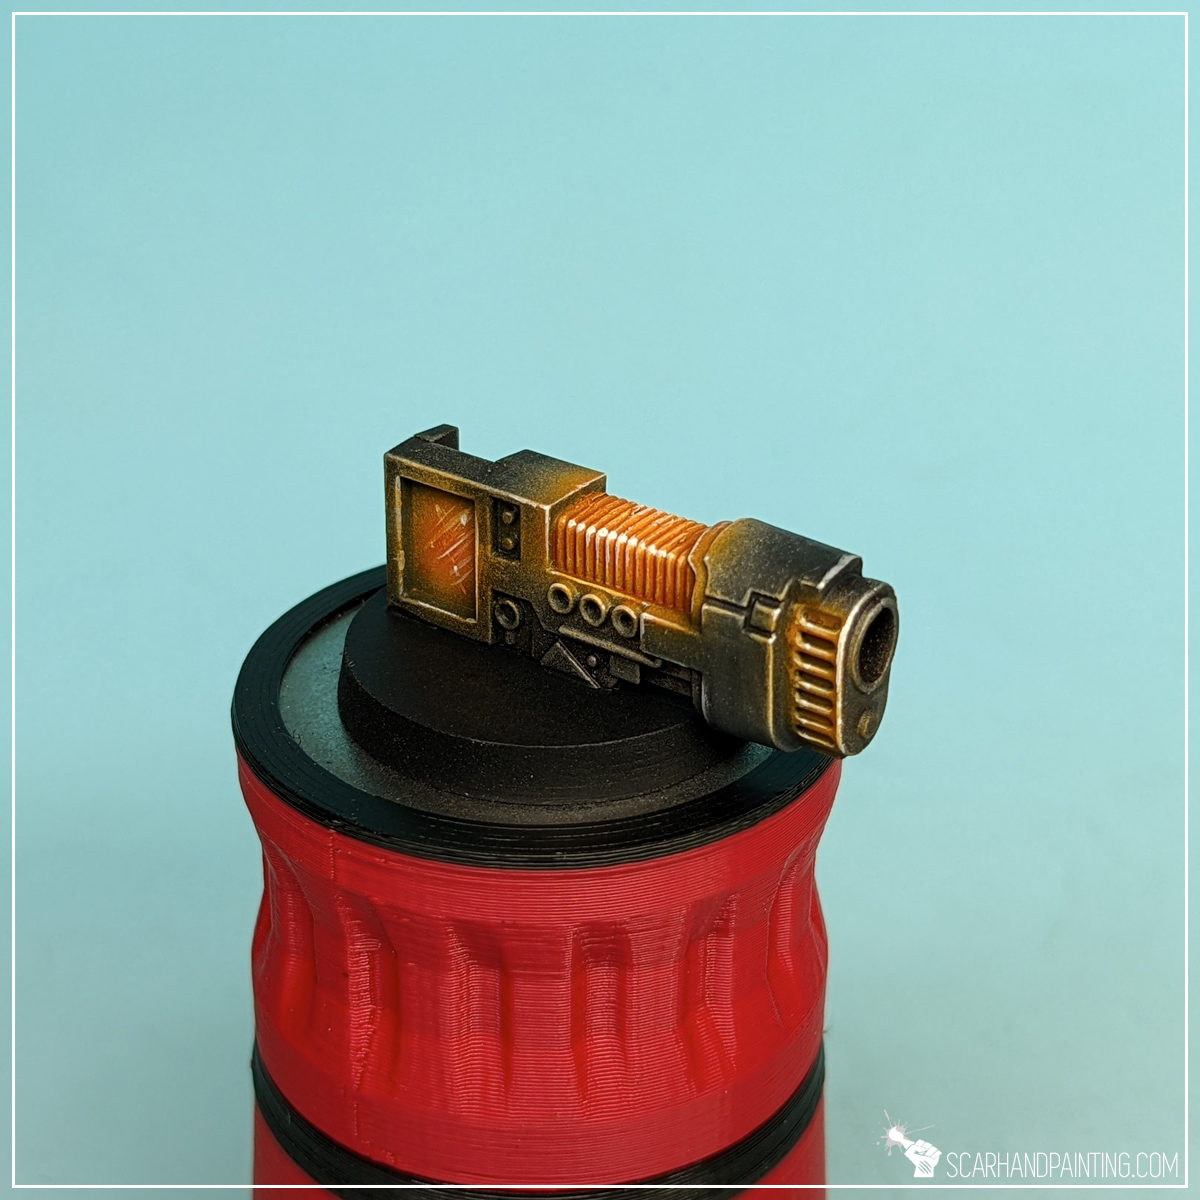
Job done. Three colors, five layers is all it takes to achieve an interesting effect that will steal a glance or two on the gaming board.

I hope you find this tutorial interesting. Be sure to let me know your thoughts in the comments below or via Facebook or Instagram. I would also appreciate if you considered sharing this content with your friends, who might find it useful. Finally if you are looking for a professional warhammer 40k miniatures painting service, be sure to contact me with this contact form. I always reply within 24 hours, after which please check out your spam folder.