- contact@scarhandpainting.com


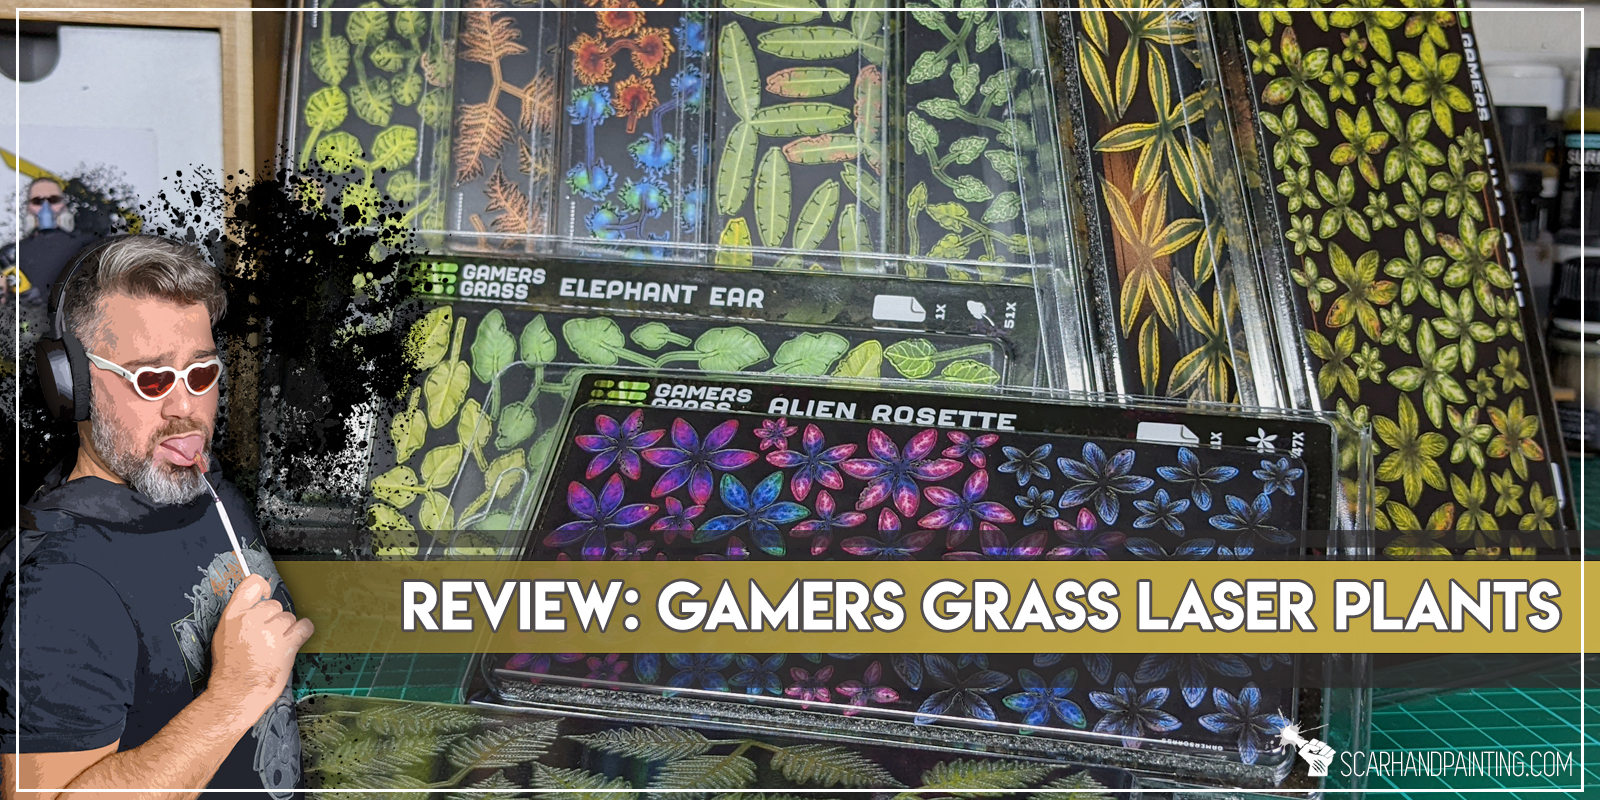
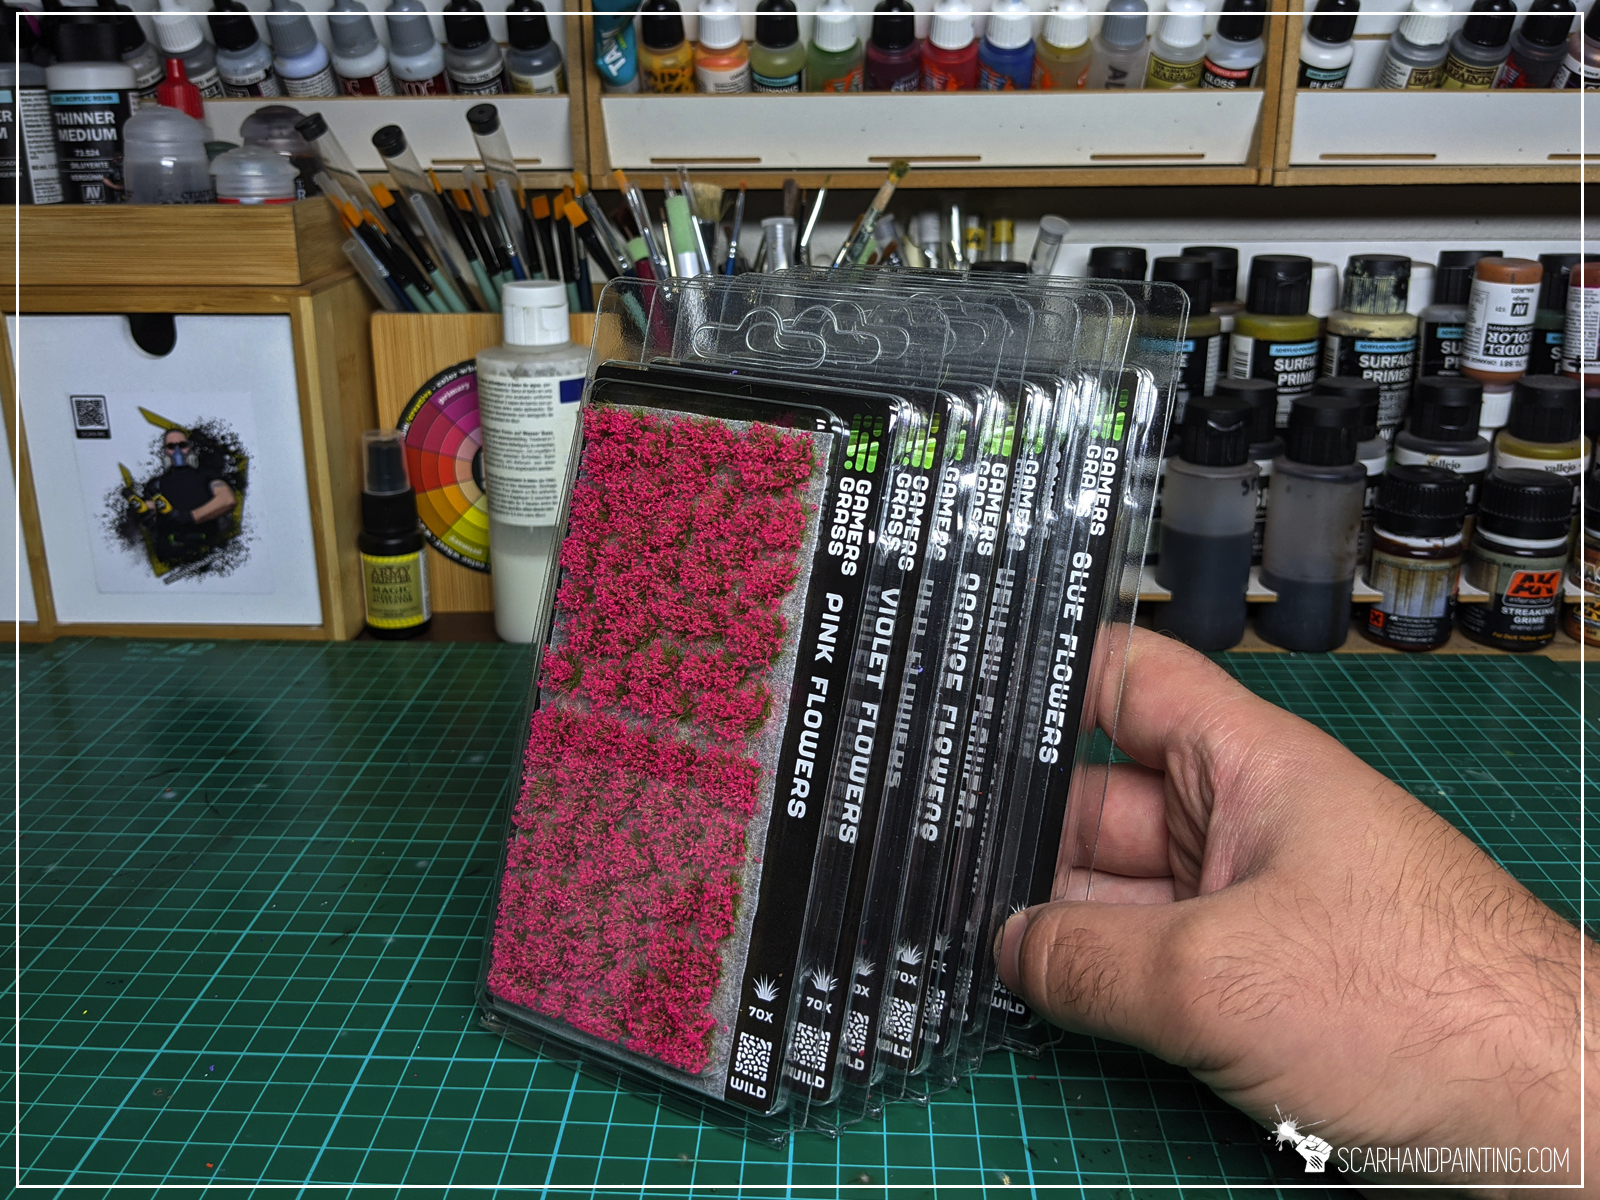
Gamers Grass – is a Portuguese company producing a wide range of high quality basing accessories. For me Gamers Grass is a trustworthy, go to supplier of everything basing related. If you hadn’t had an opportunity to get to know their range, I recommend previous articles: Review: Gamers Grass Tufts, Review: Gamers Grass Flowers. Third time’s a charm and today I will go through GG’s innovative line of products: Laser Plants.
For those of you who follow my articles it is a well known fact that I am a quality freak. When I choose tools and material to work with I always prioritize the very top of the line. At this point with dozens upon dozens of Gamers Grass products testes – I’m just positively biased towards their releases. Easy to say GG done it once again, introducing a high quality line of products that make me feel like a little kid coming to a hobby store for the first time. Everything looks breathtaking!

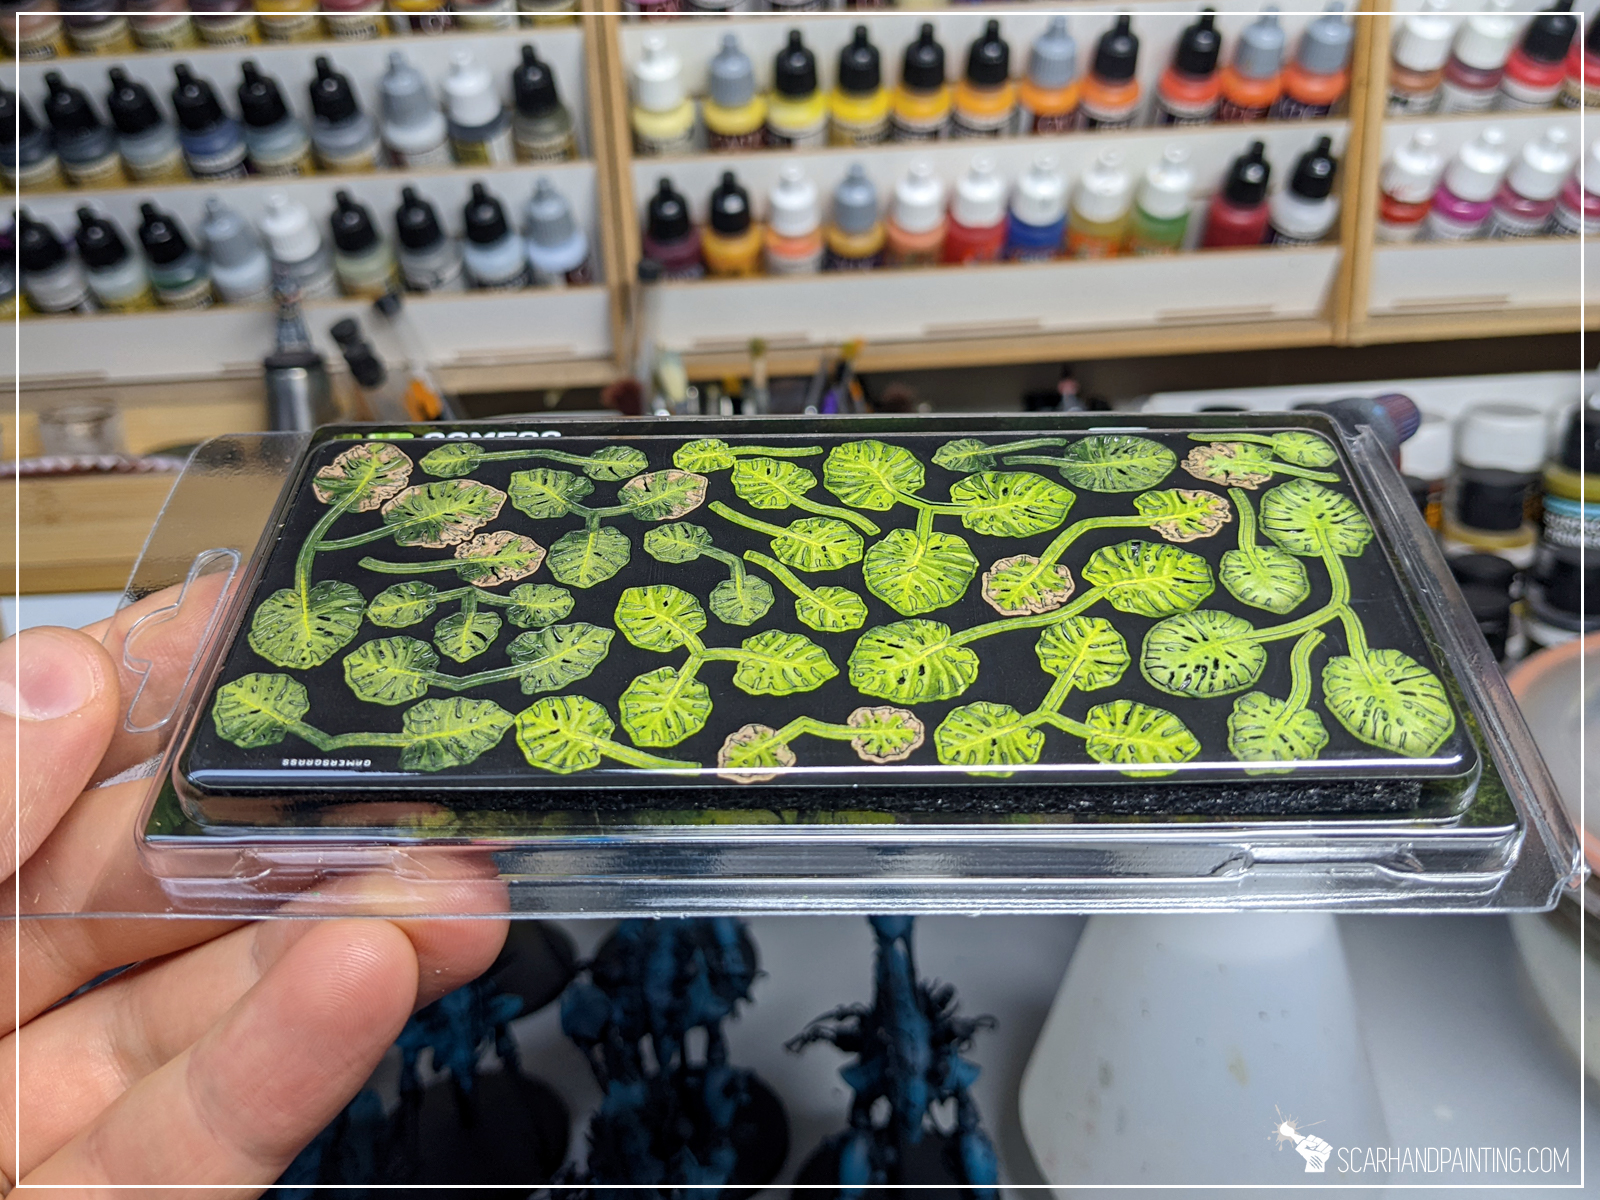
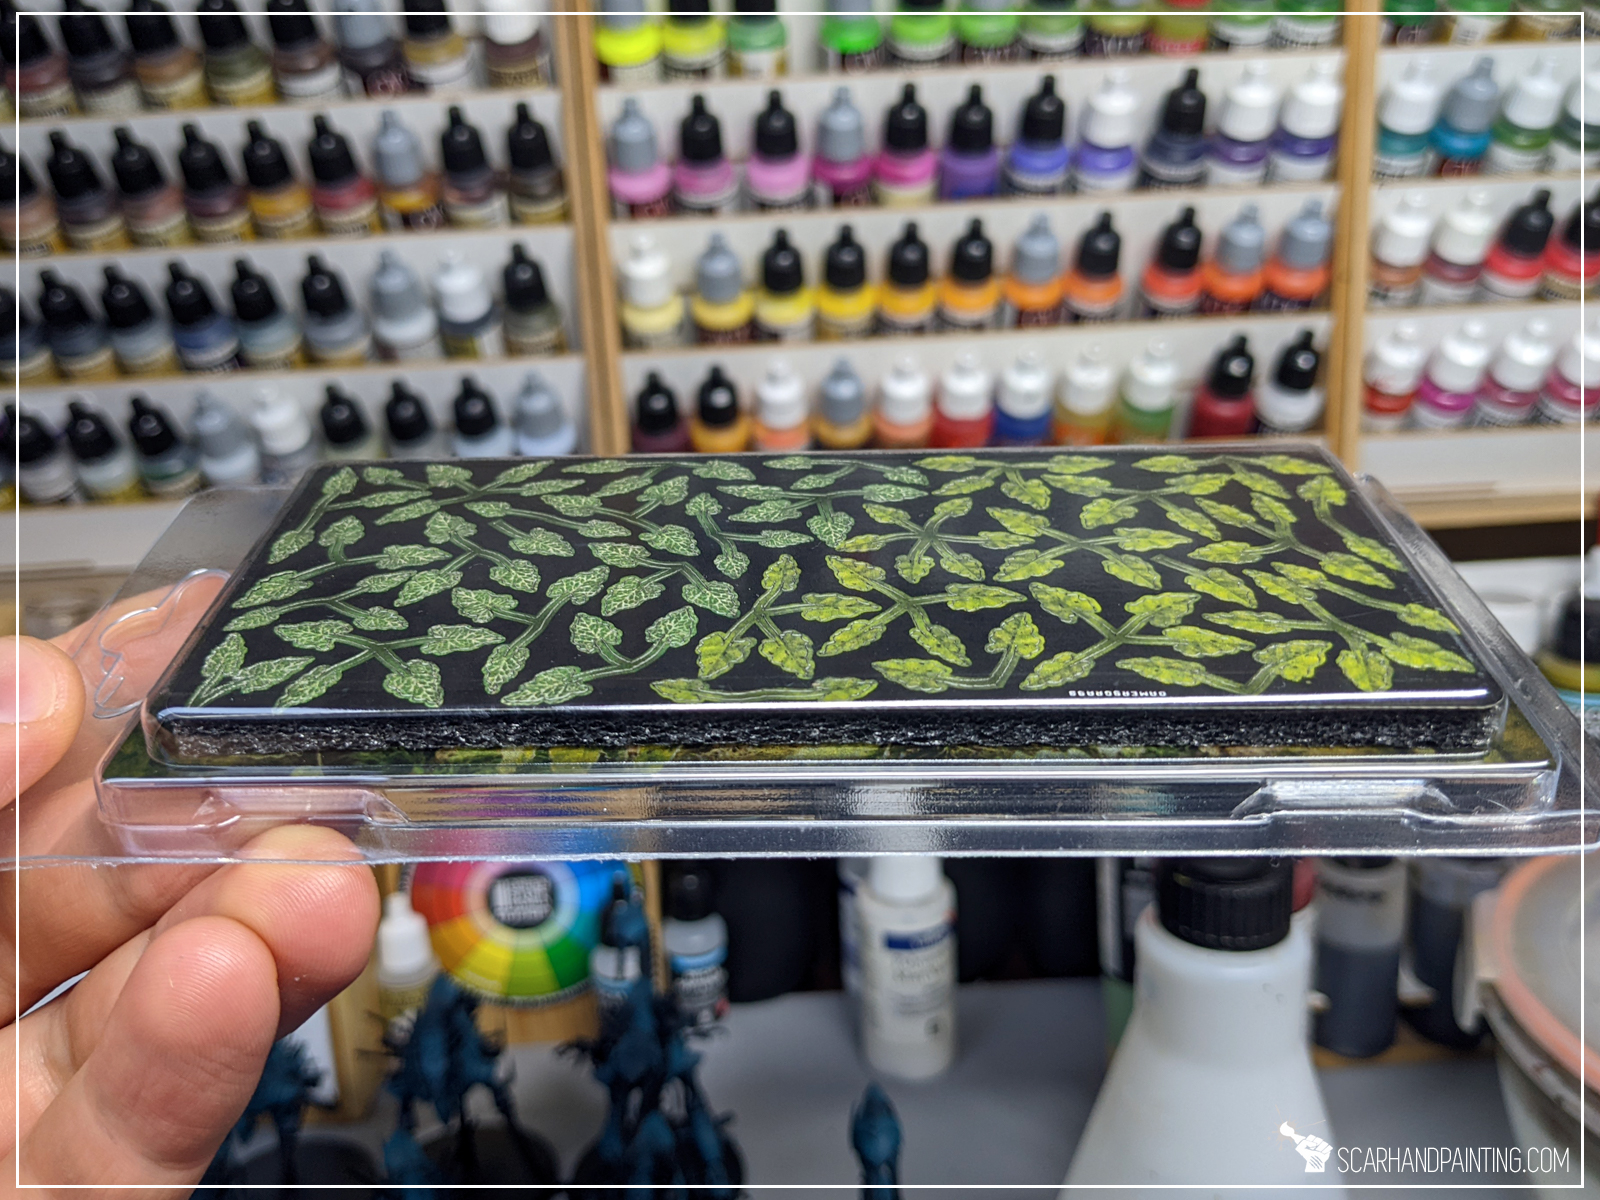

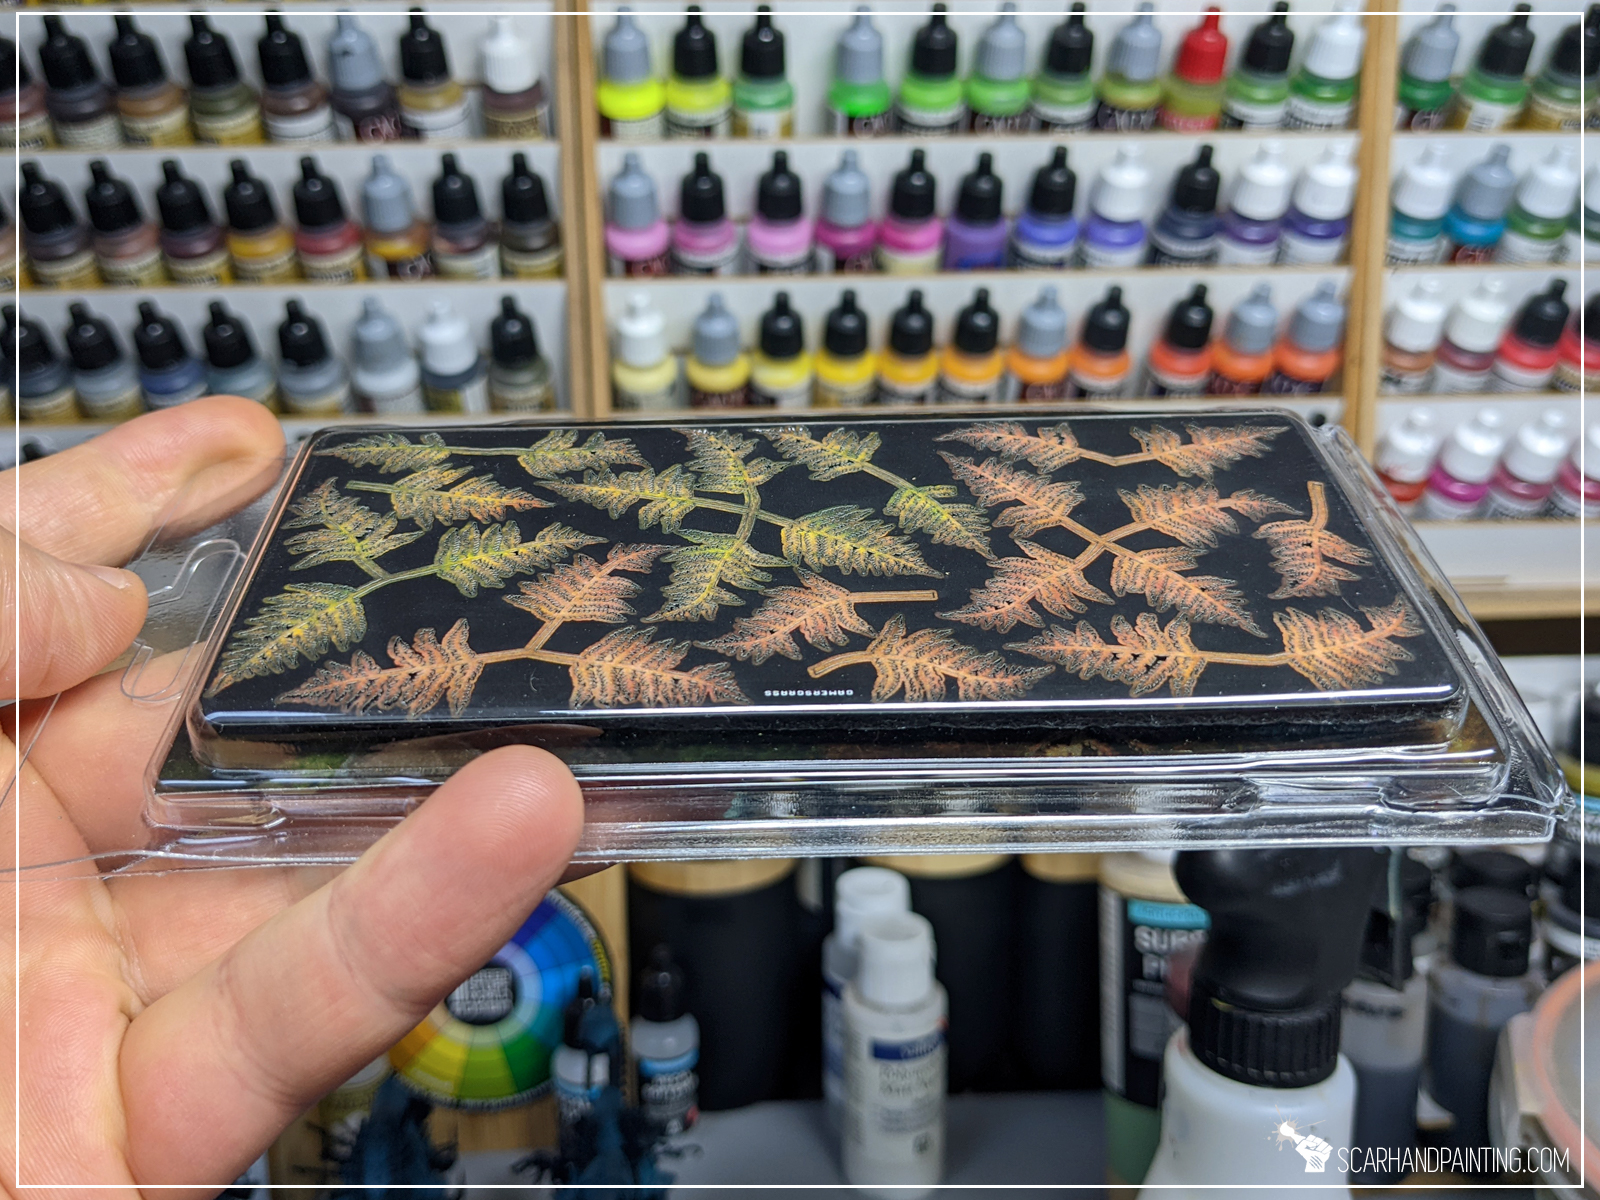

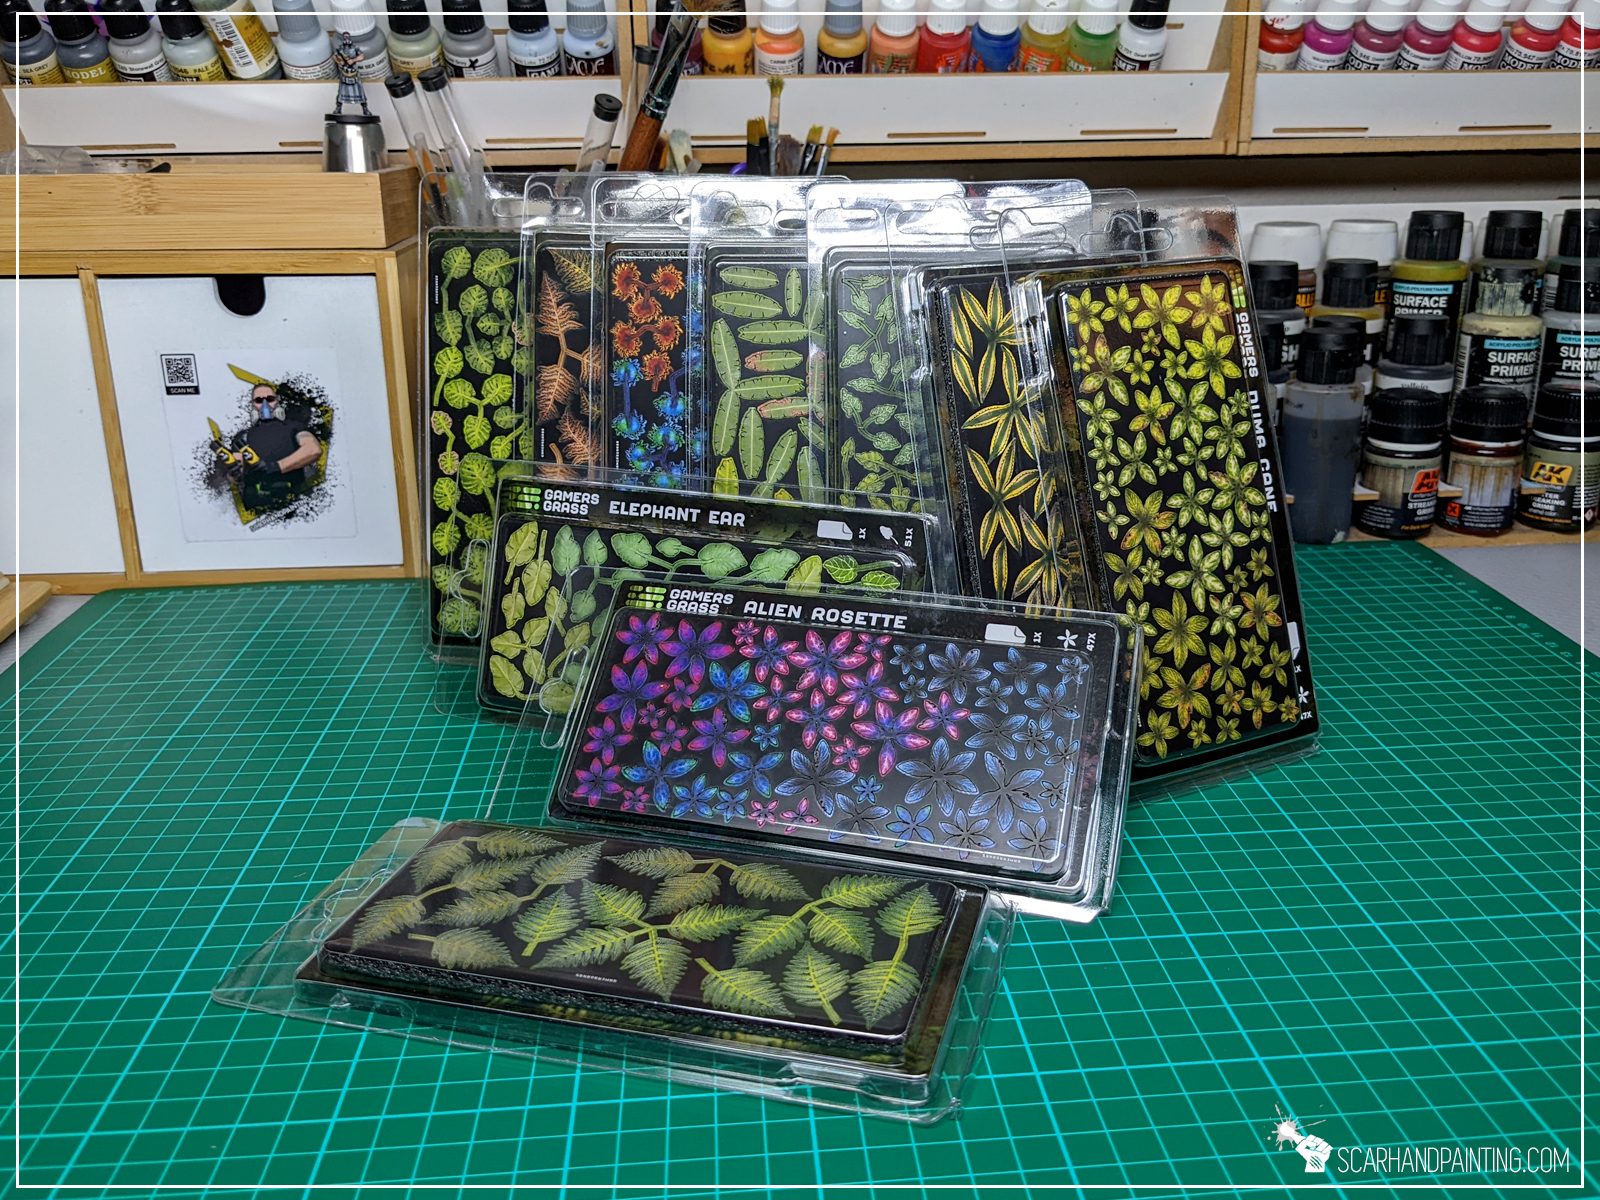
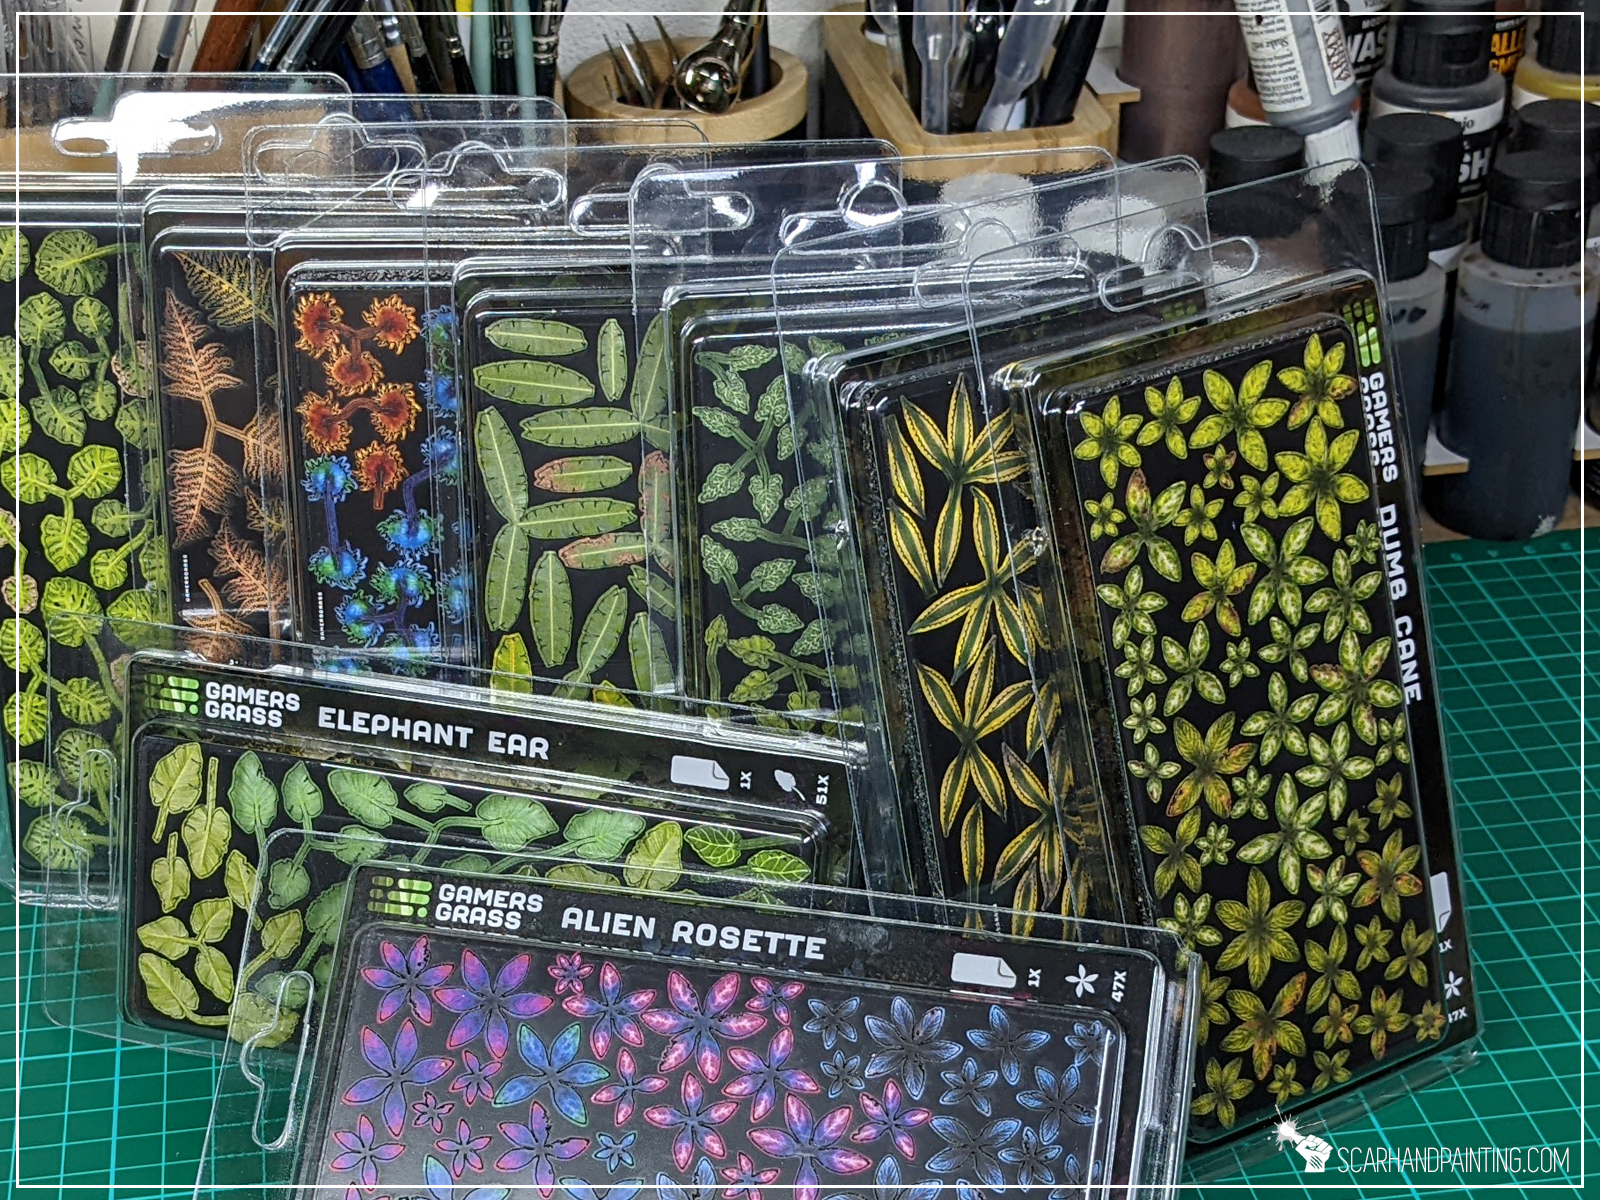
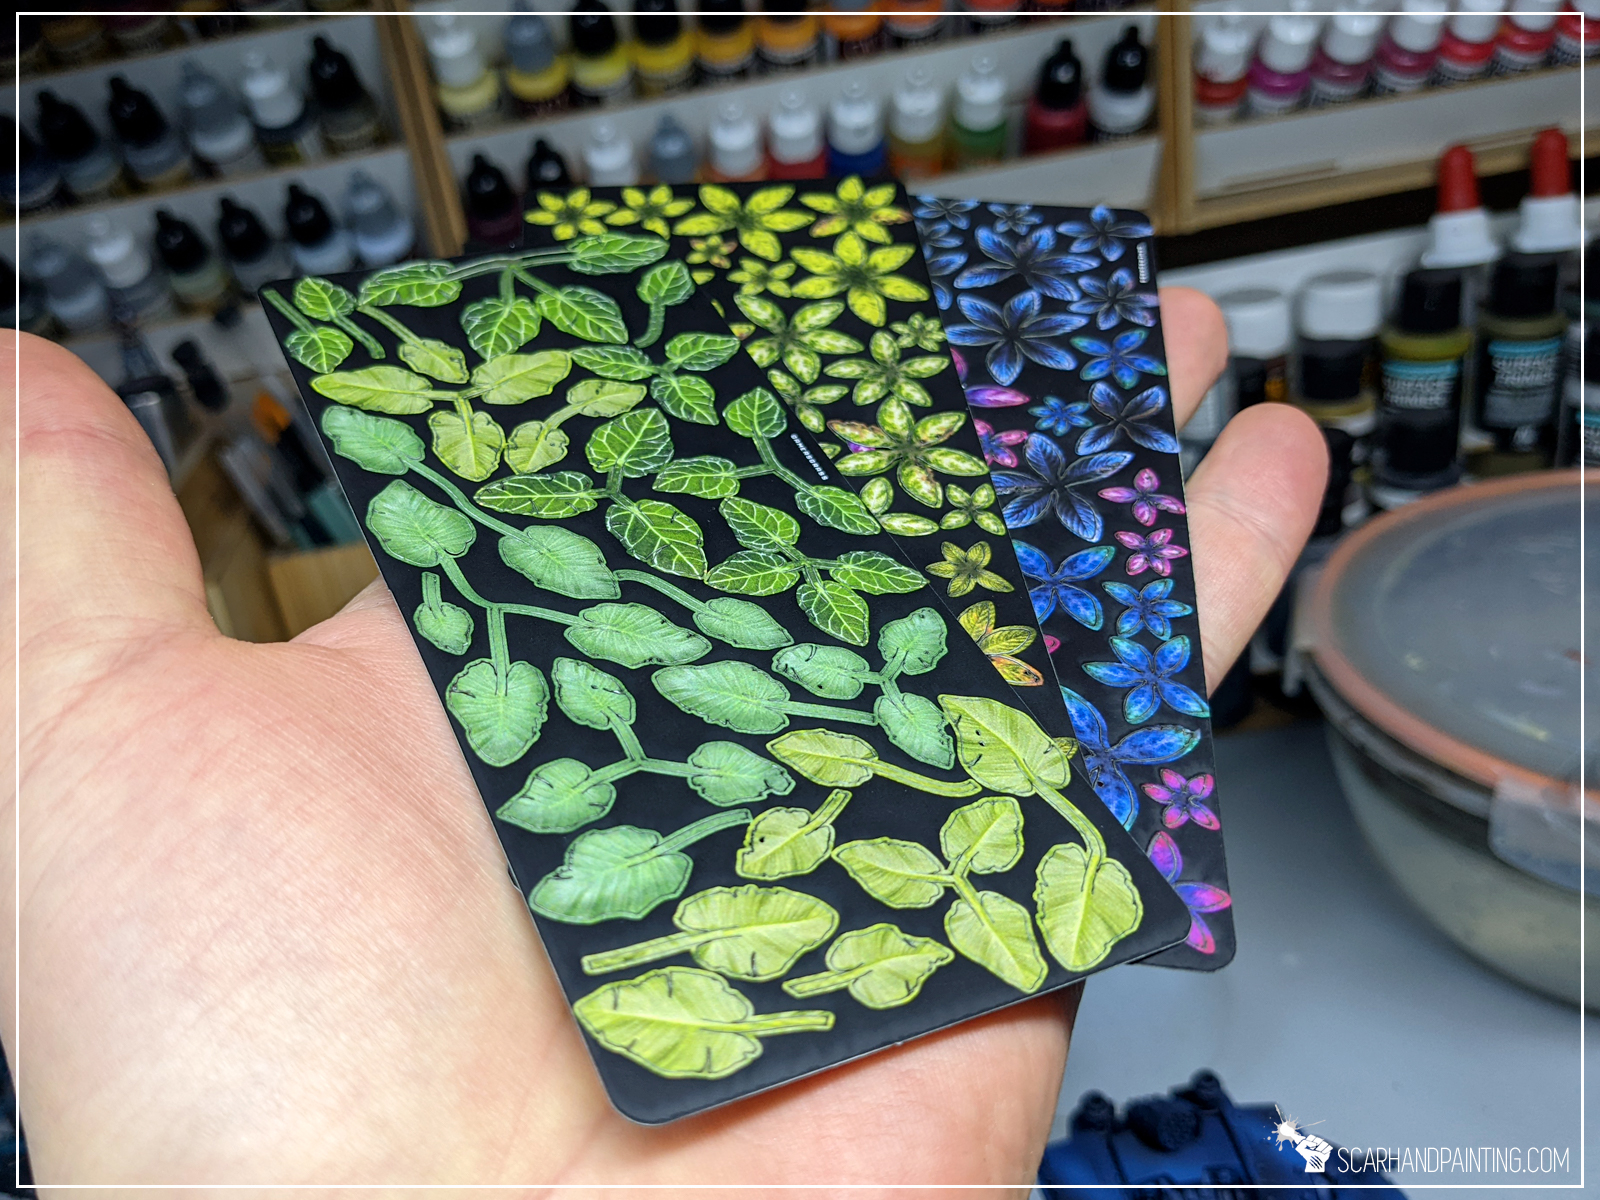
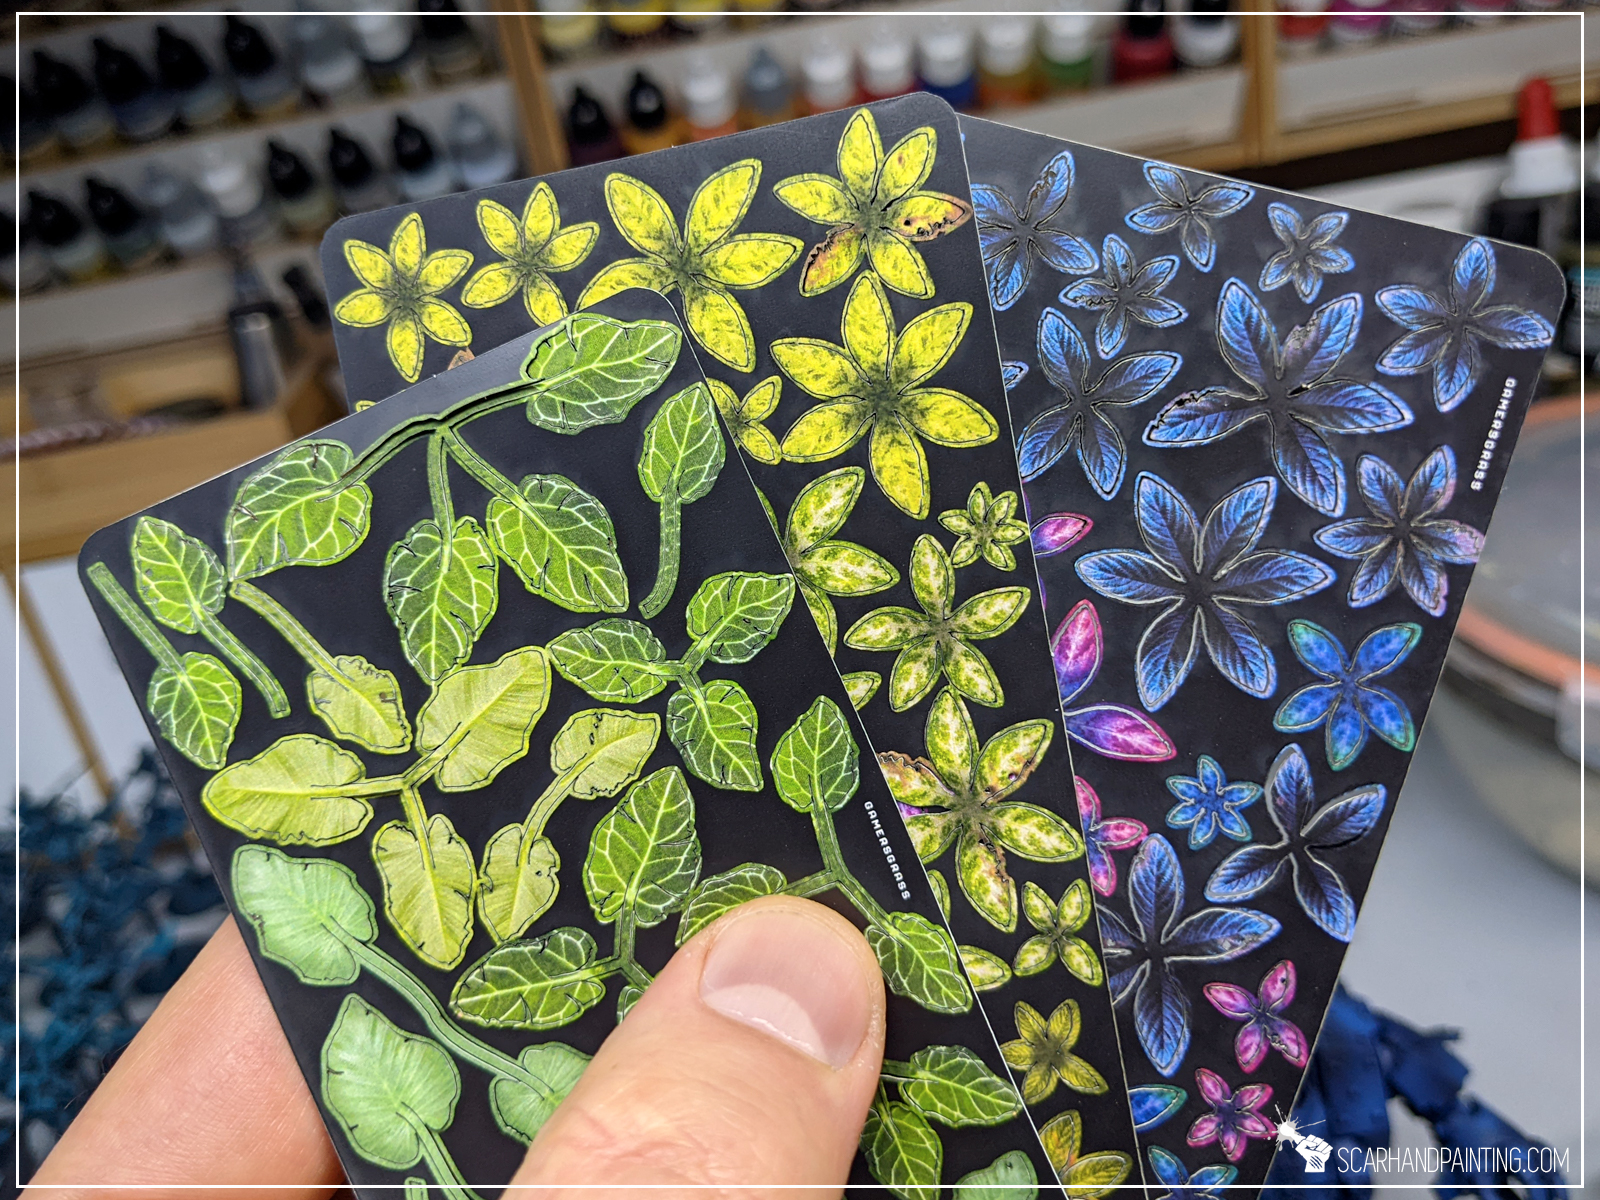
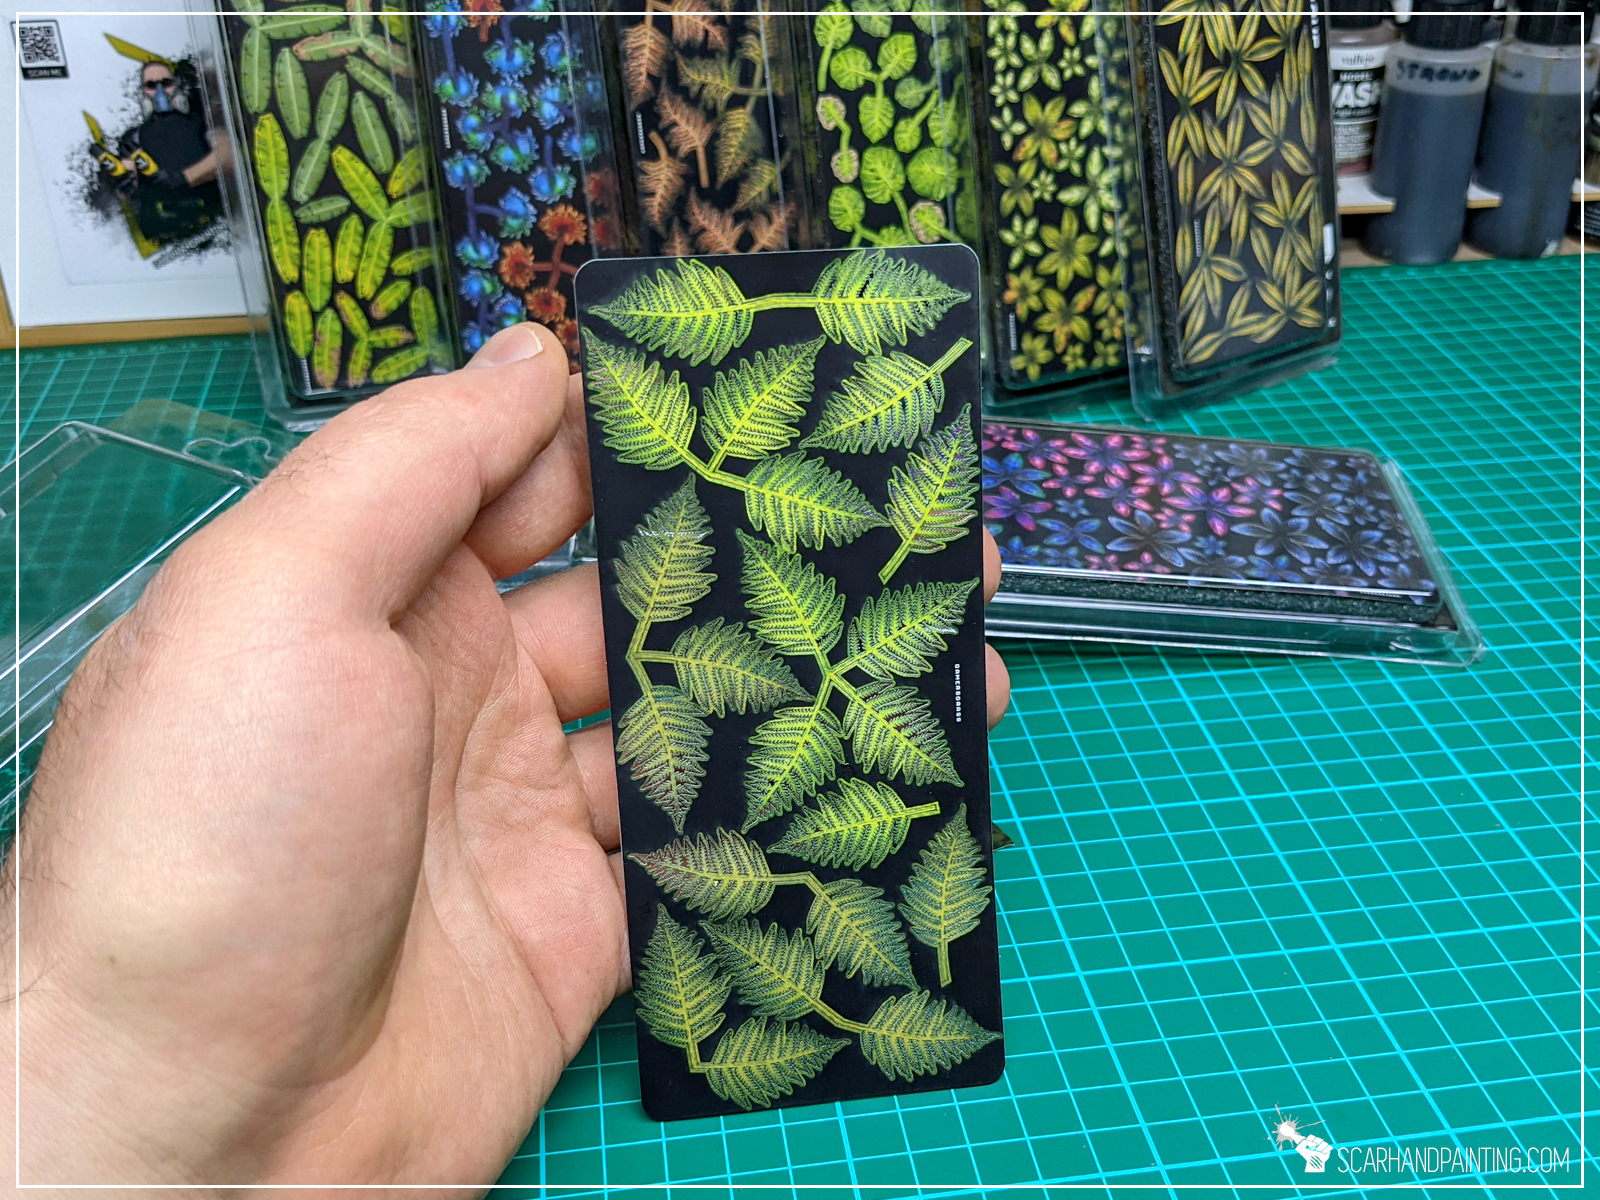
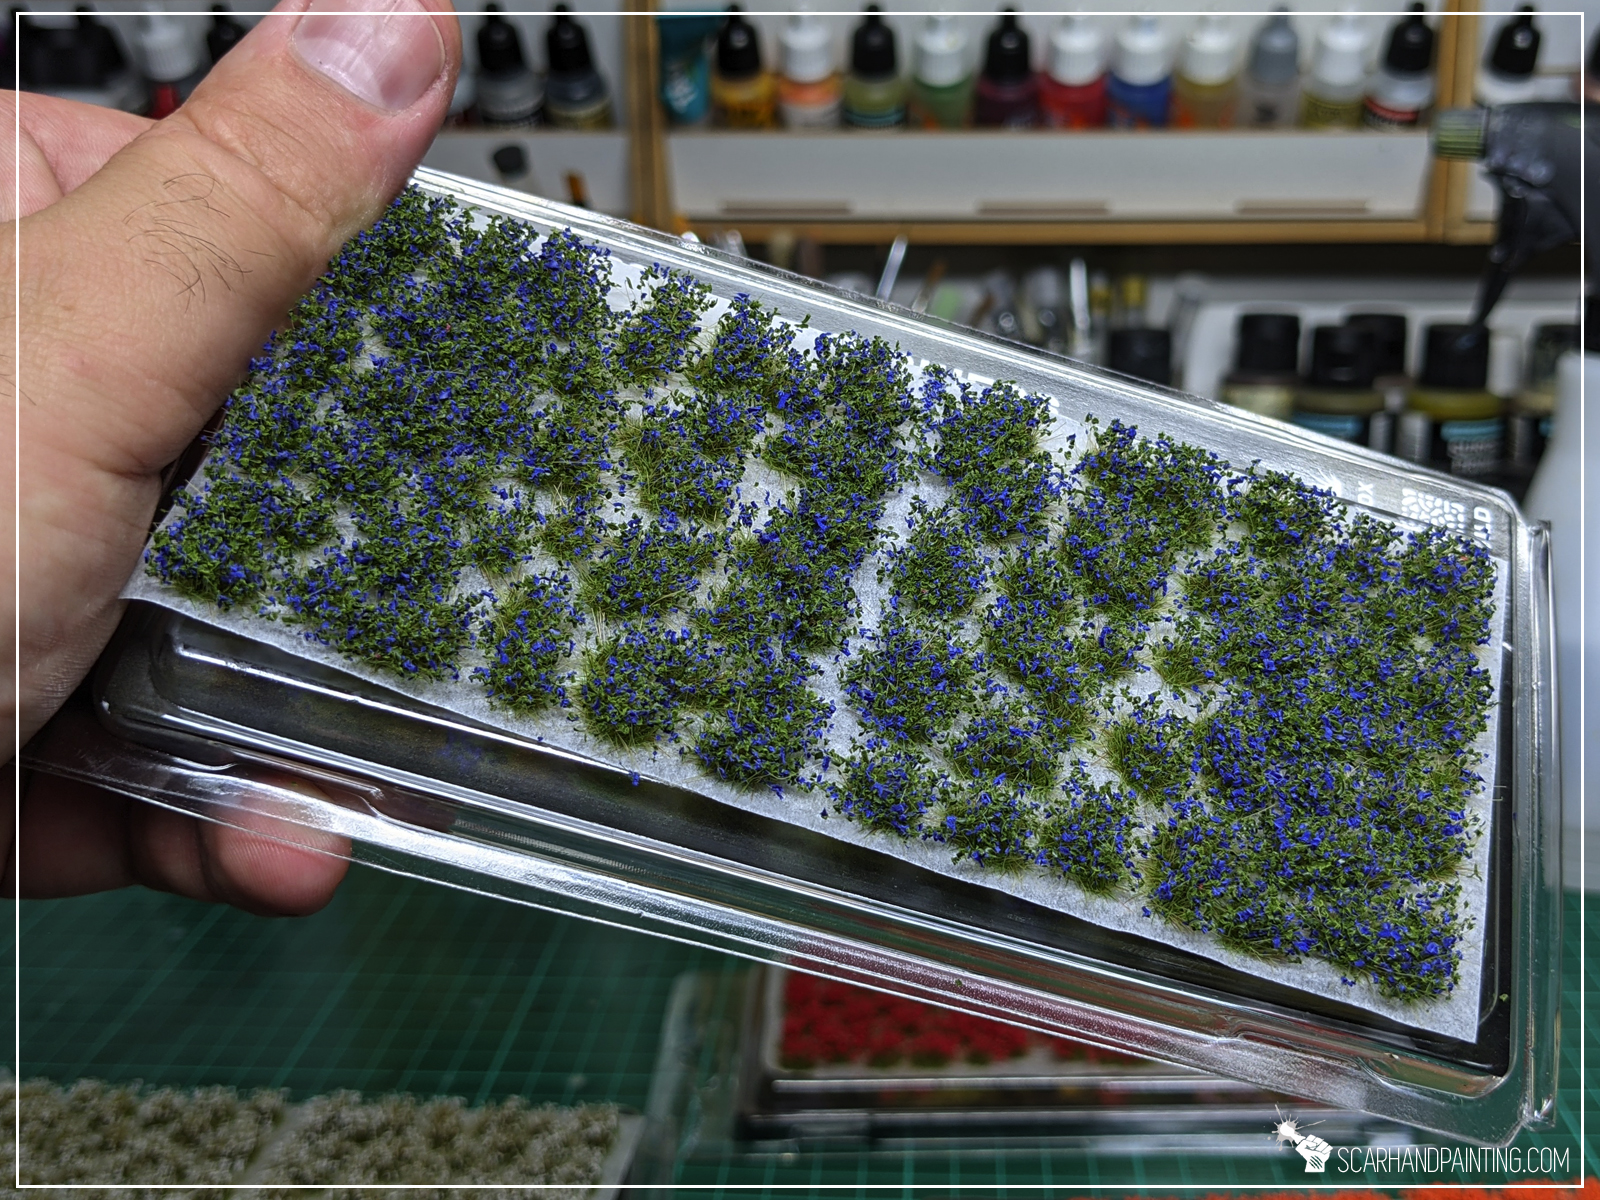
Hype aside, the quality is amazing. Prints are clean and on point, with crisp detail. Color depth looks great and each particular plant is well cut. The plants are much more durable than any paper counterparts found in the market and material is far less problematic than typical brass favored by modeling companies.
When it comes to visuals Gamers Grass Laser Plants look stunning. Nothing that I saw in the market can even compare. They are colorful, interesting, diverse and just beautiful. Ready to turn any base in to a small work of art.

I never was a fan of laser cut / etched plants. This is because although they fill a very specific niche in basing products, what used to be available in the market was never functional. Paper is difficult to work with and is susceptible to damage, etched brass plant are easy to form but also very easy to chip the paint off of. Both usually require painting, and it translates to a lot of time spent on painting something that is secondary to the actual miniature. Sure, there are some pre-painted paper plants available, but the quality of paint job is not that great and it is just too easy to break tiny stalks, ruining the base.
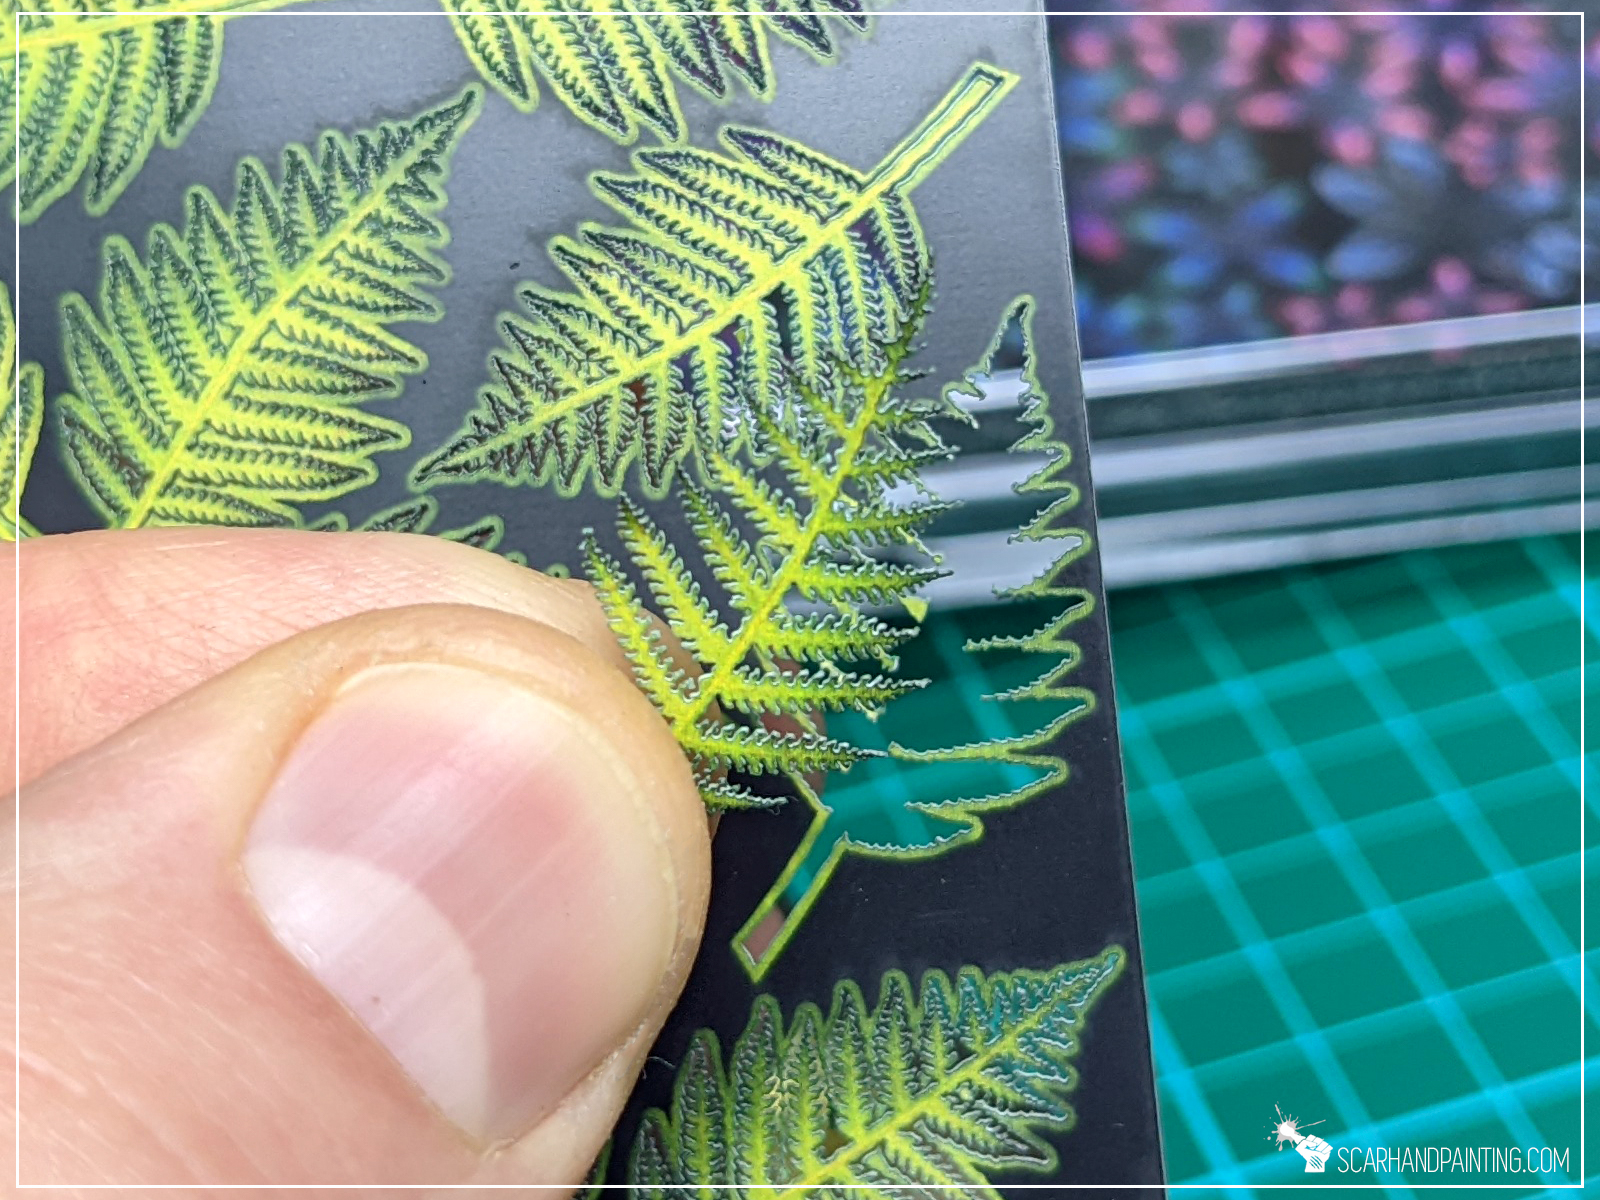
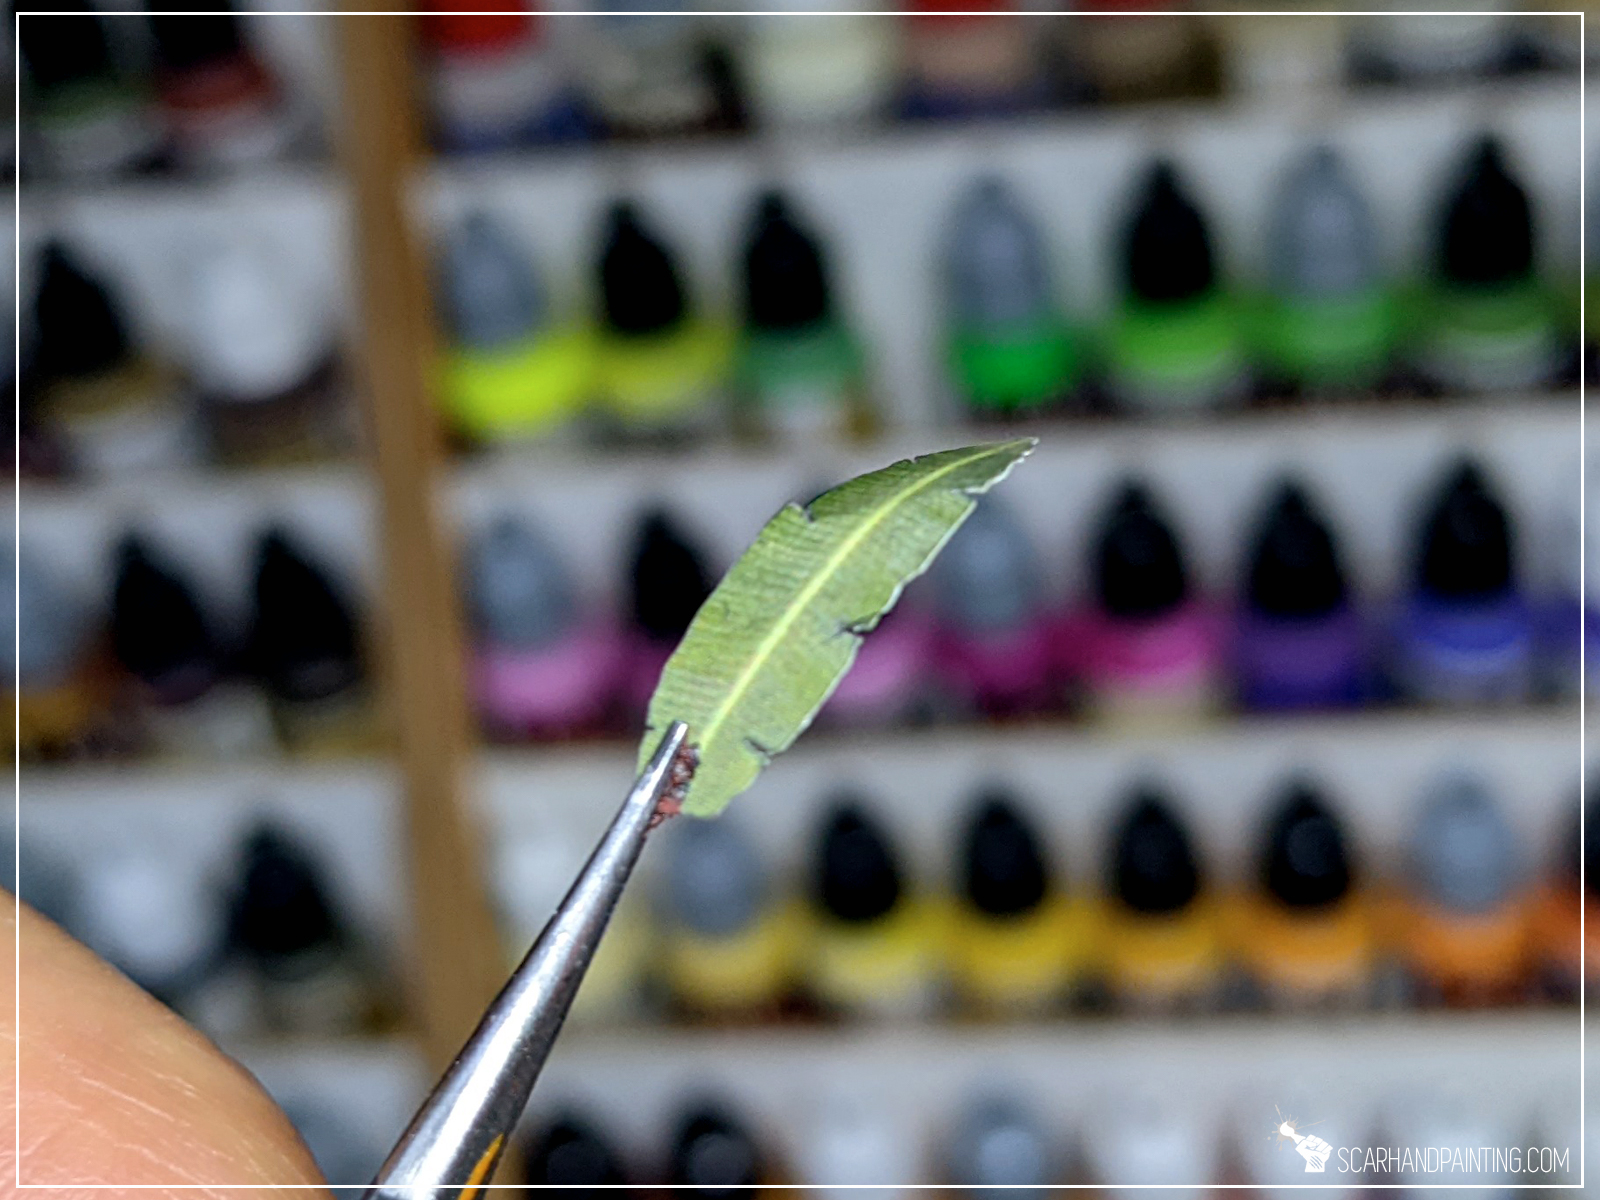
Here’s where Gamers Grass Laser Plants come in. Each plant is precisely cut from what seem to be a thin plastic sheet. They are easy to take out of the sheet and very – VERY – durable. Prints look great and are good to go from the moment of opening the box. No need for additional painting, although it can be done. One issue I found is repositioning the plants without creating hard angles, but after some testing I was able to produce good results by soaking the plants in hot water beforehand. These are really fun and easy to work with, which is not something I was expecting 🙂


Time to take in the price factor. I’ve done quick research and putting Etched Brass plants aside (as the market is full of these and price range is just too vast to compare) here’s how it looks like against immediate competition:


I have a limited experience with laser cut / etched brass plants and all was rather disappointing. On the other hand Gamers Grass Laser Plants are very simple to use from the get go and look amazing. With stunning visuals these plants stand out amongst the competition and are fairly priced on top.
I might be a Gamers Gras shill at this point, but these plant are awesome and I appreciate the innovation.
What’s your opinion? Let me know in the comments.
You can order through Gamers Grass official store, or try out your luck in a local hobby store. To make things easier for you, Gamers Grass prepared this awesome Store Locator.
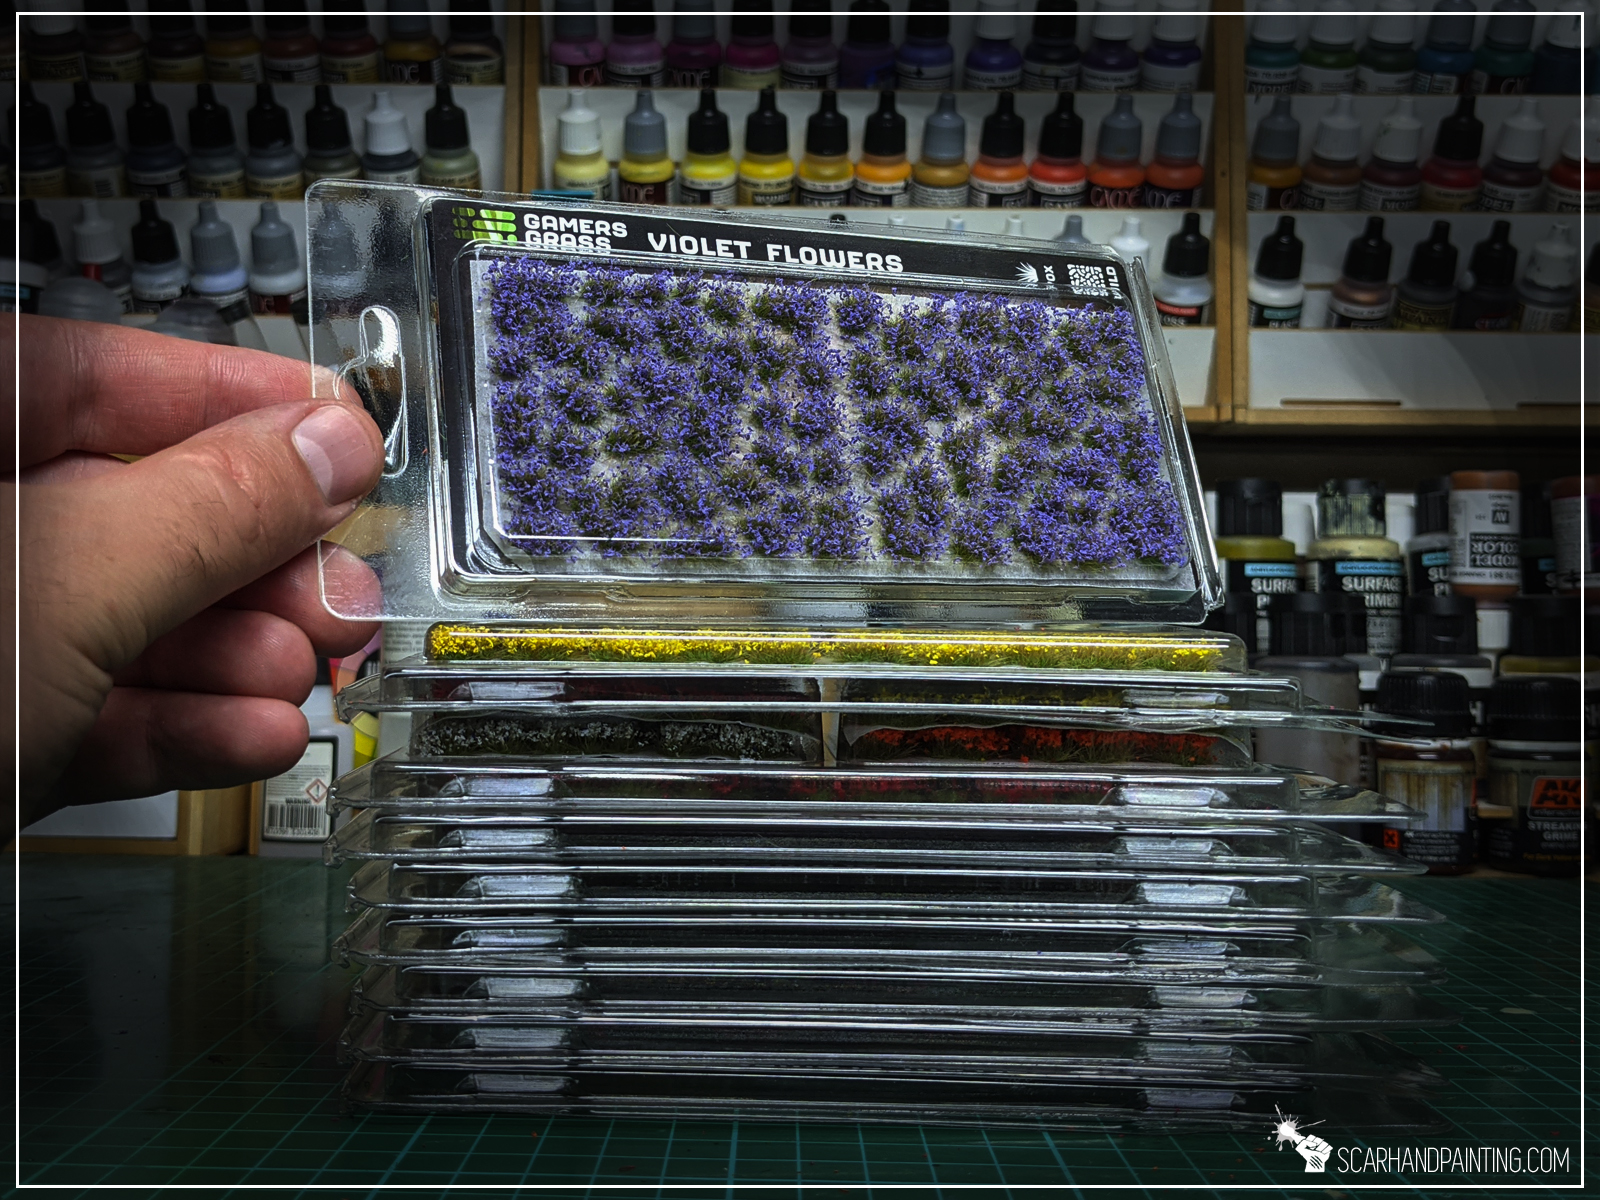
Gamers Grass – is a Portuguese company producing a wide range of high quality basing accessories. For me Gamers Grass is a trustworthy, go to supplier of everything basing related. If you hadn’t had an opportunity to get to know their range, I recommend this article: Review: Gamers Grass Tufts. Now, all that introduction done, allow me to share my excitement over a new series of products: Flowers.
Painting miniatures is my hobby, but is also my job. Good quality tools and products used for modeling can save a lot of time (and nerves). This is why I strive to use only the very best stuff. I’ve been working with Gamers Grass range for quite some time now and can honestly say they meet my high standards.
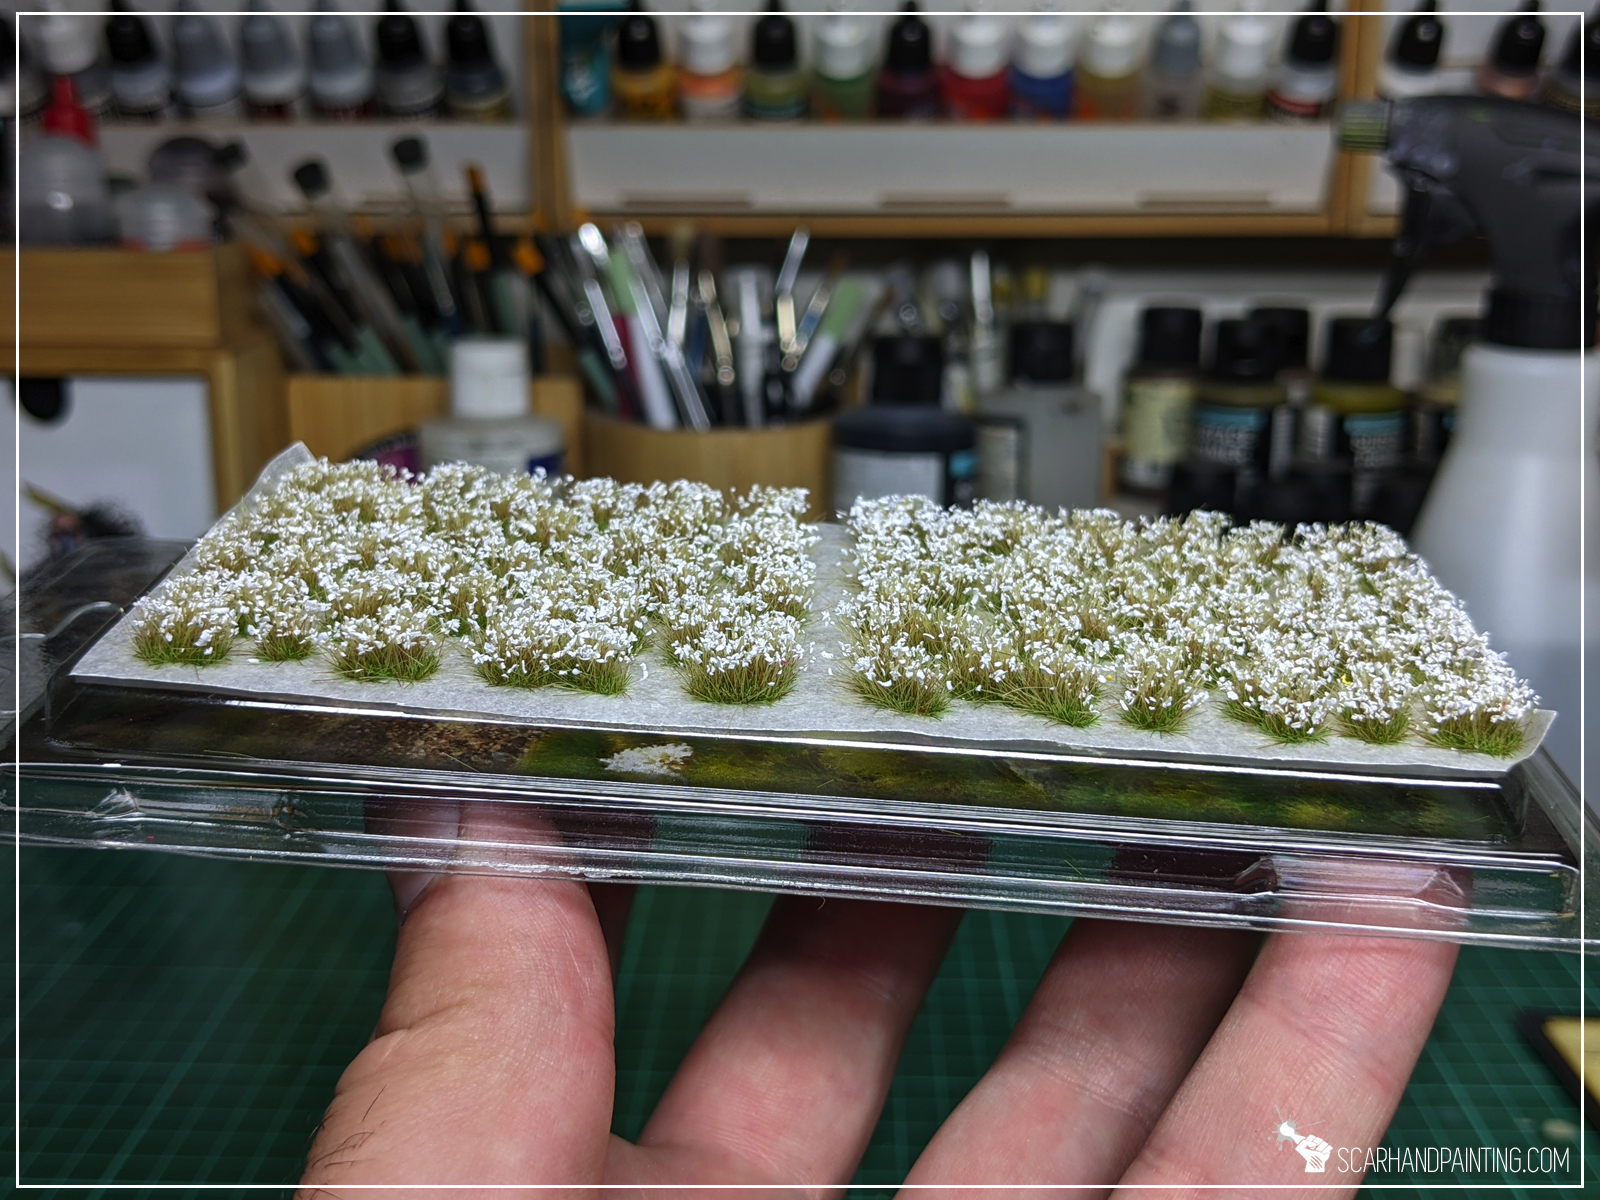

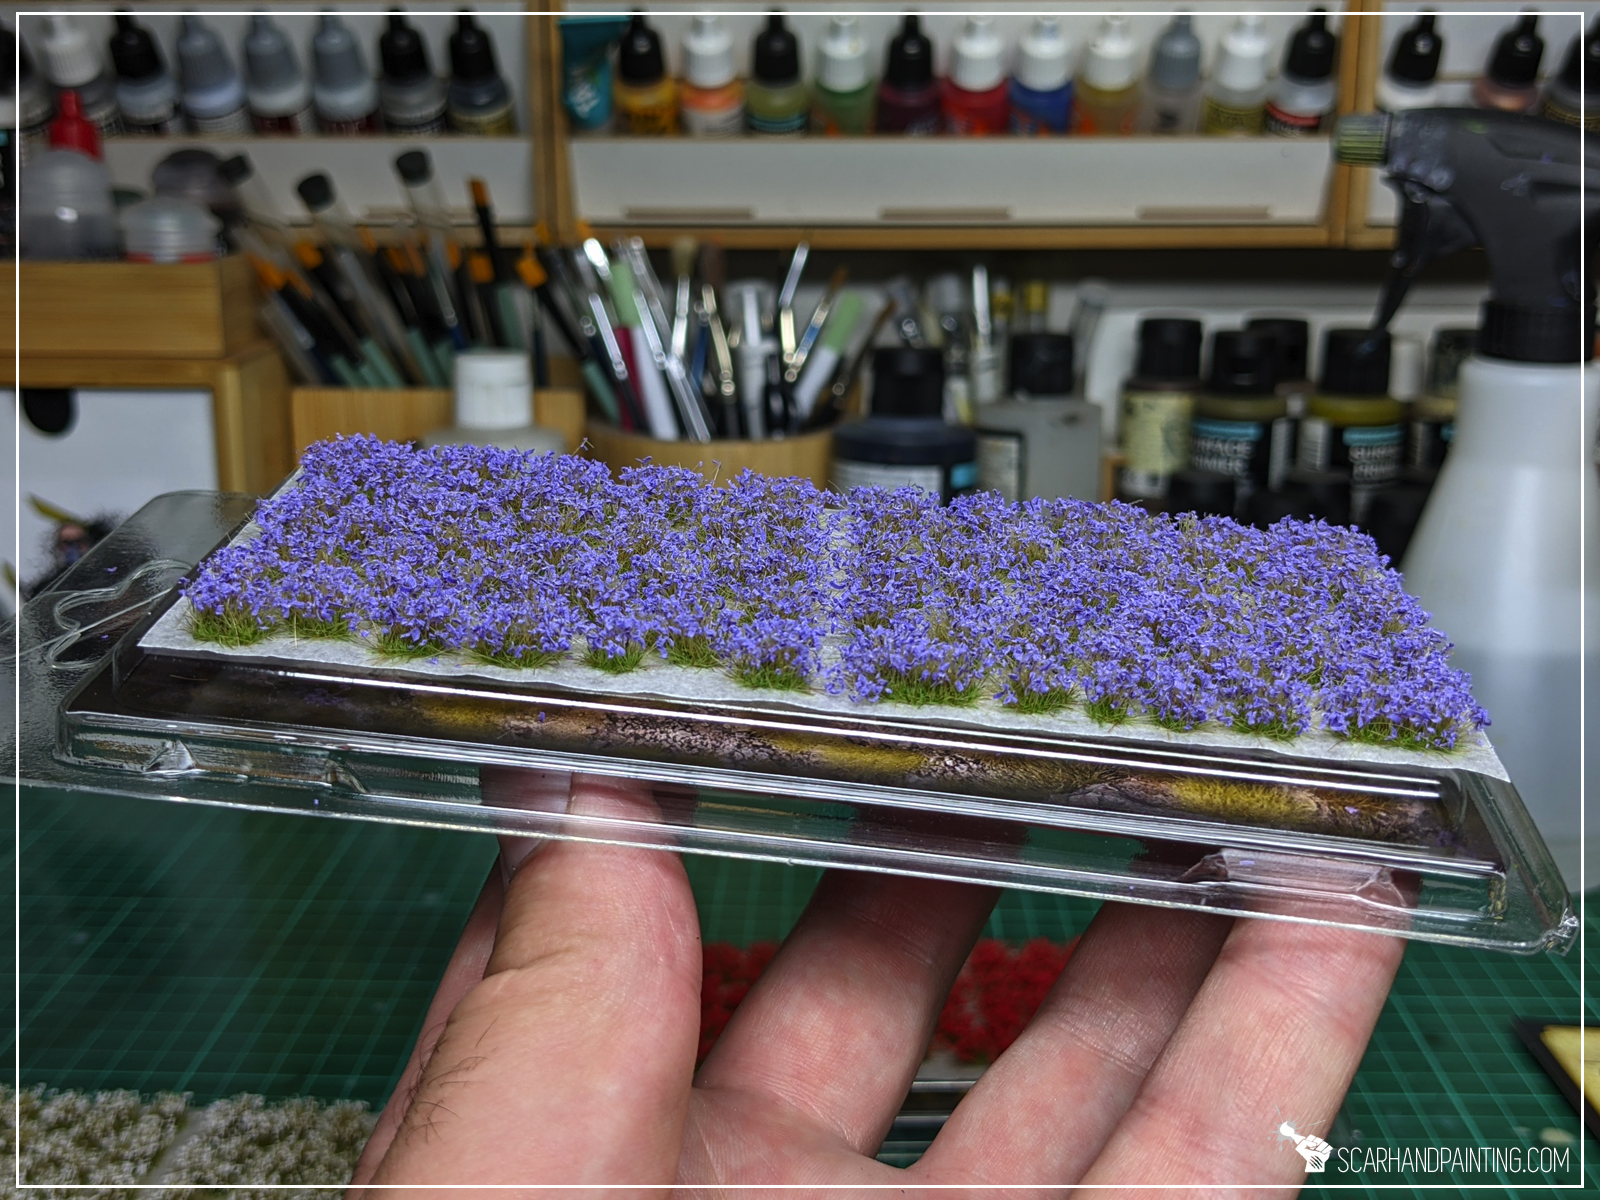


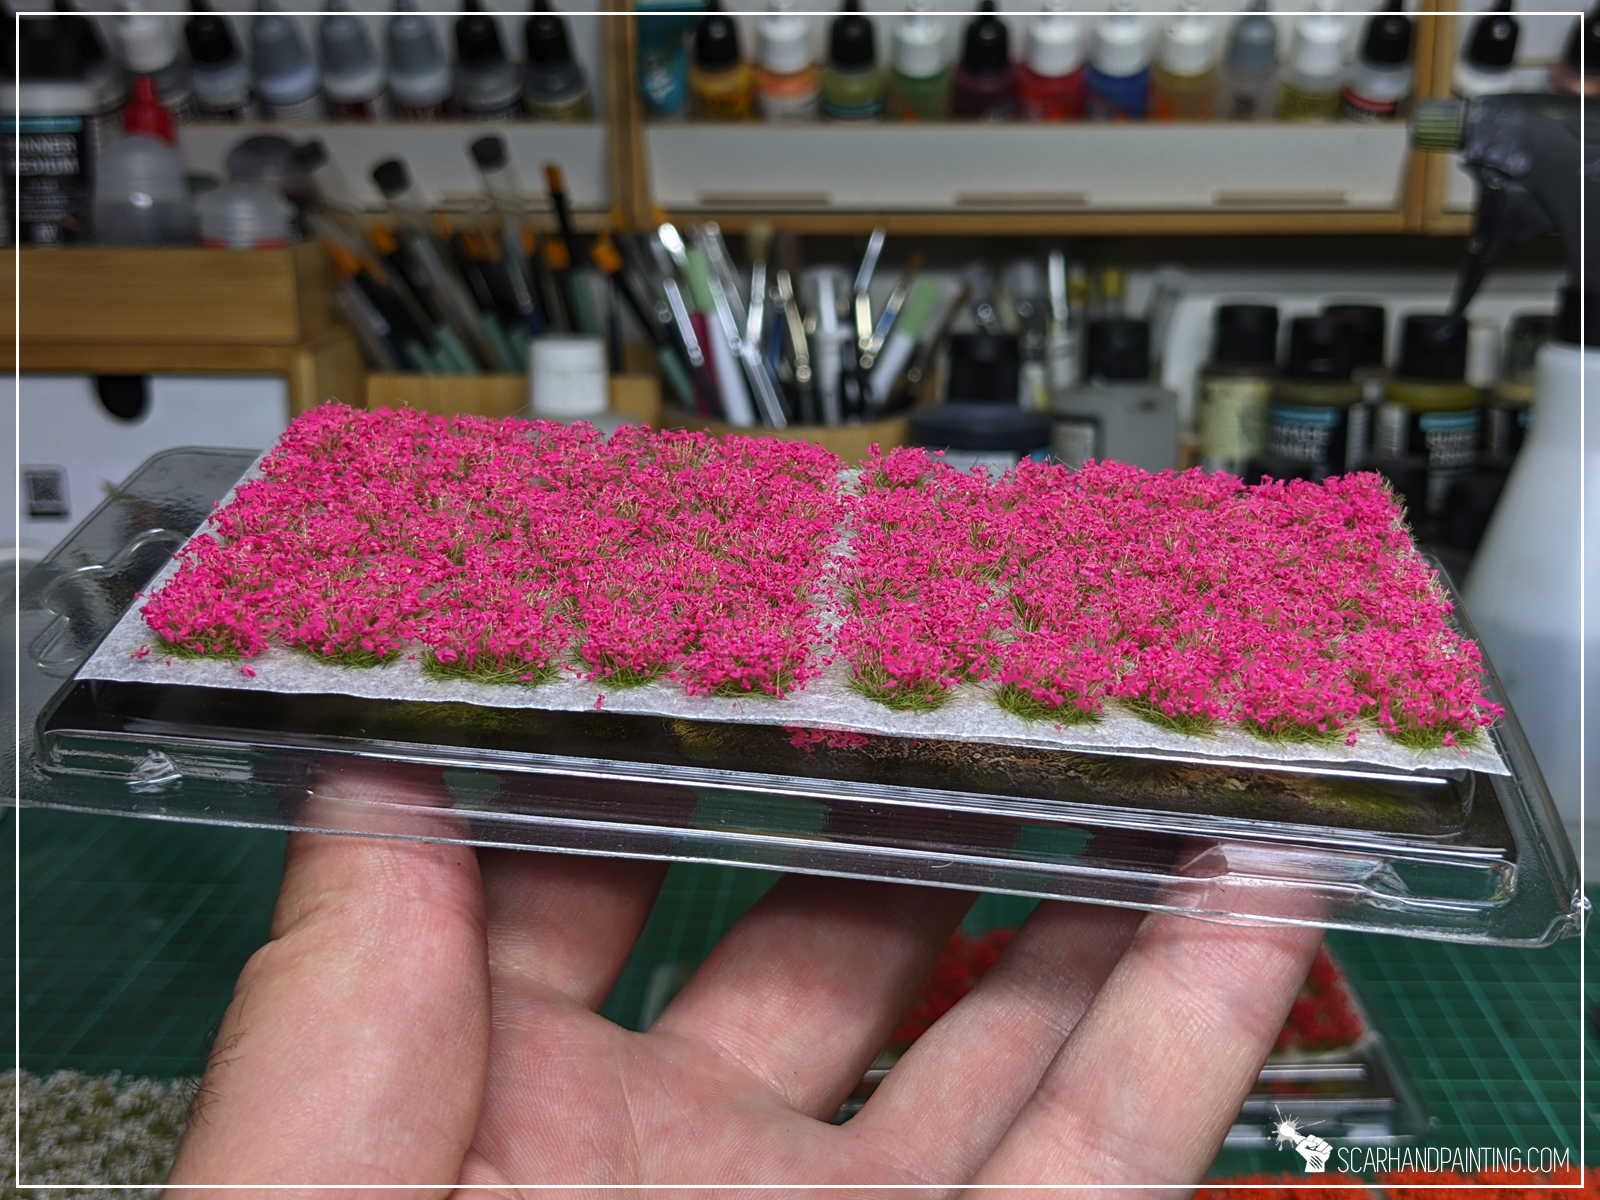
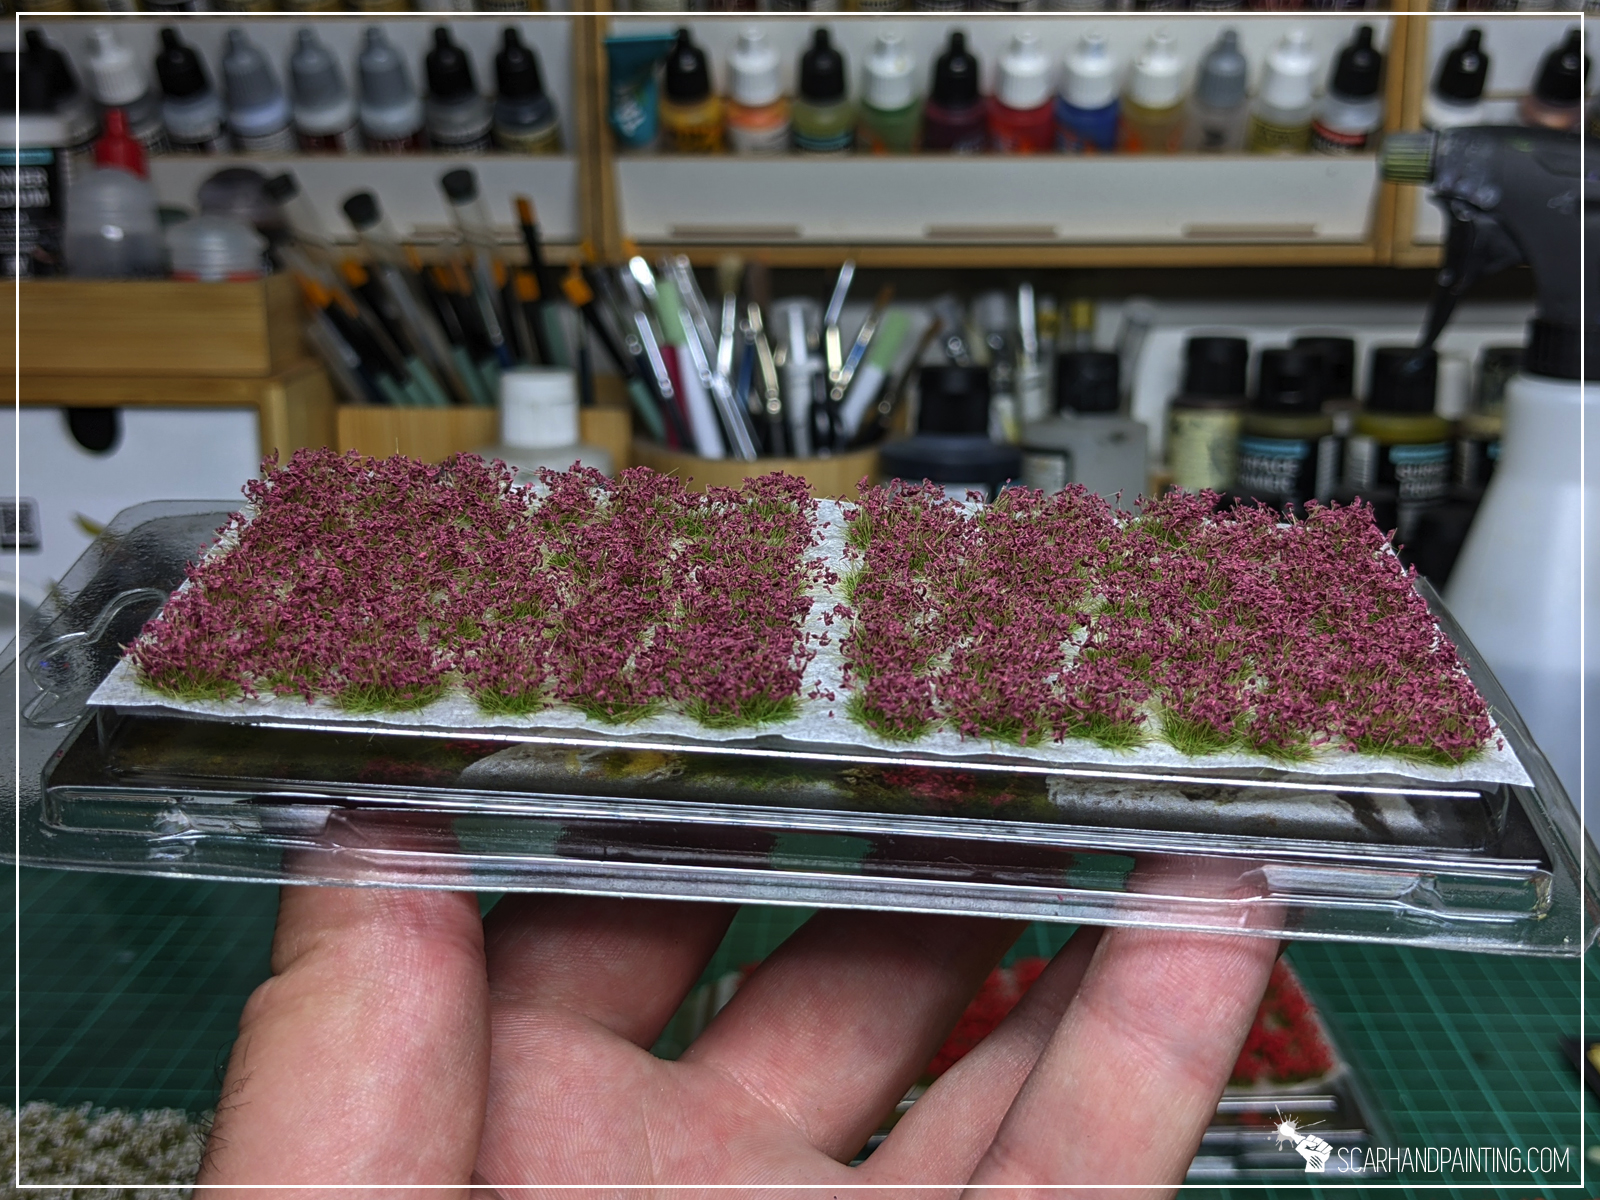
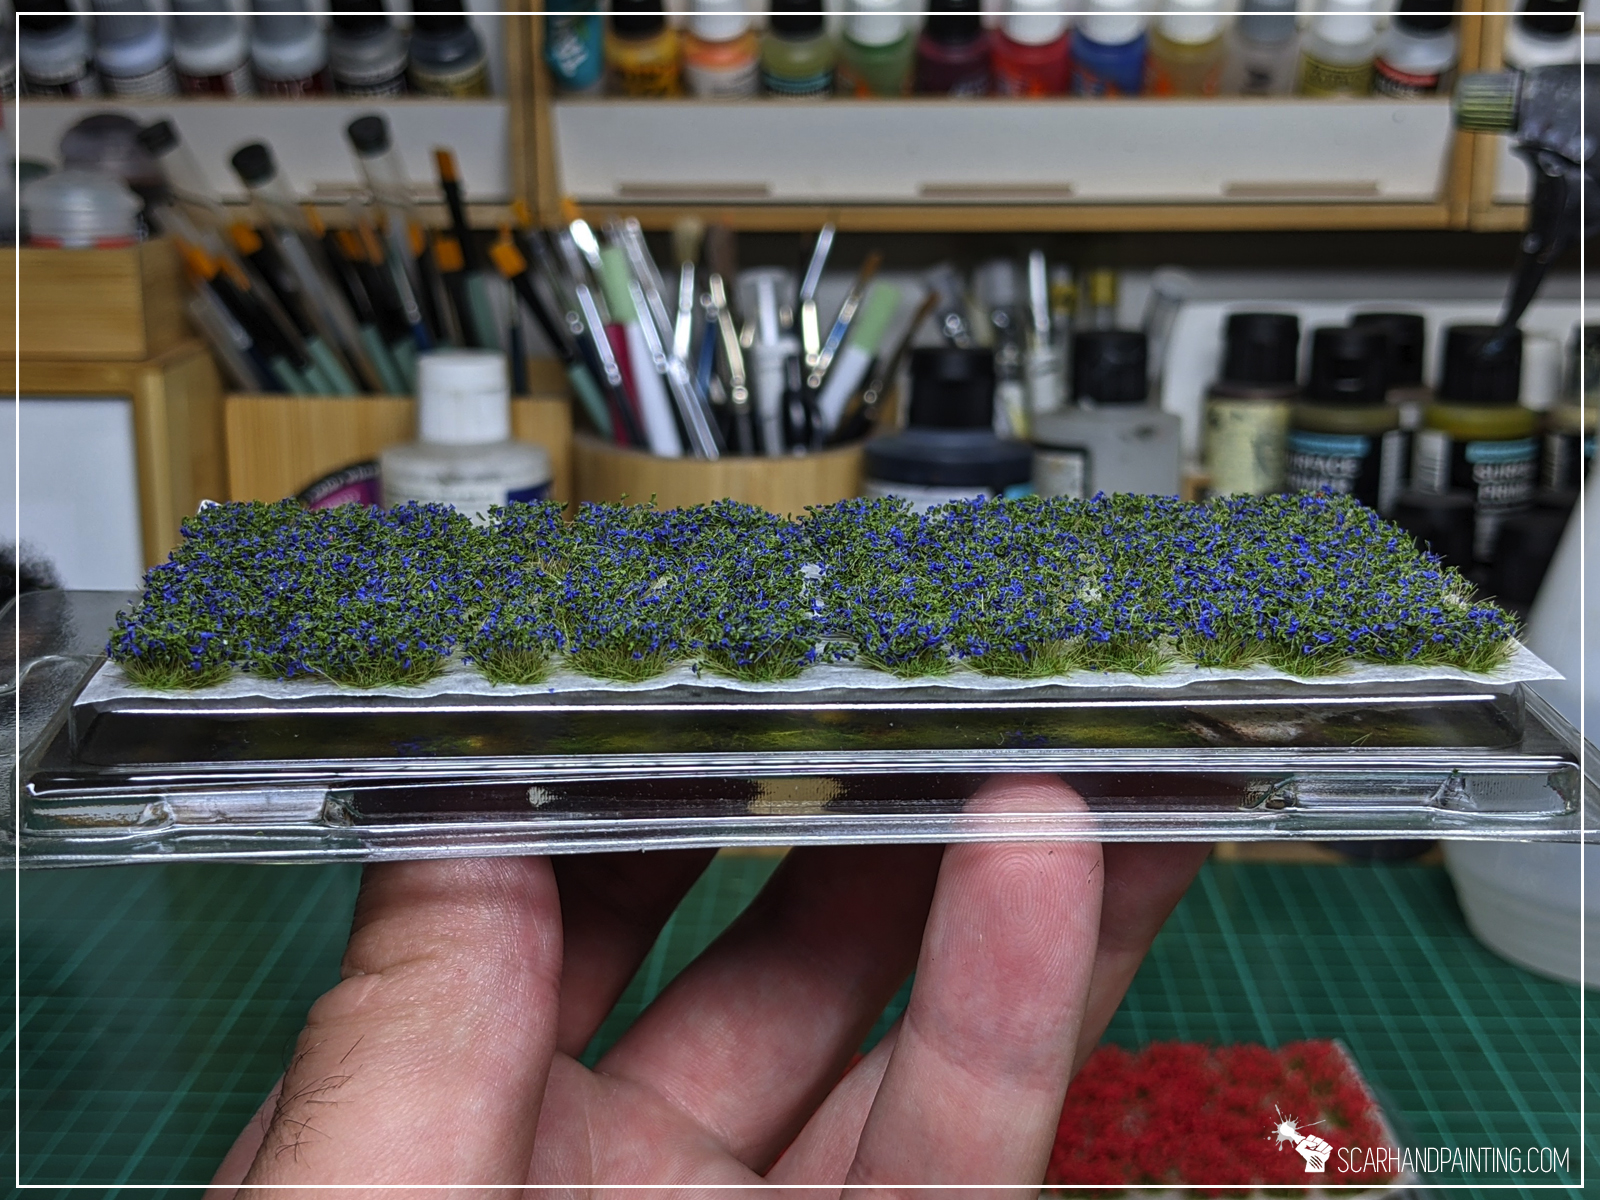
Flower beds are precisely shaped with base being thinner in a natural way. Not many stray stalks protrude out of the main body. These are all done very precisely. The bottom is covered with a strong adhesive, capable of sticking into a variety of surfaces. I have no negative feedback to give about these. Most importantly, due to a more natural shape and no powdering Gamers Grass flowers present themselves much better than competition. Just see below:
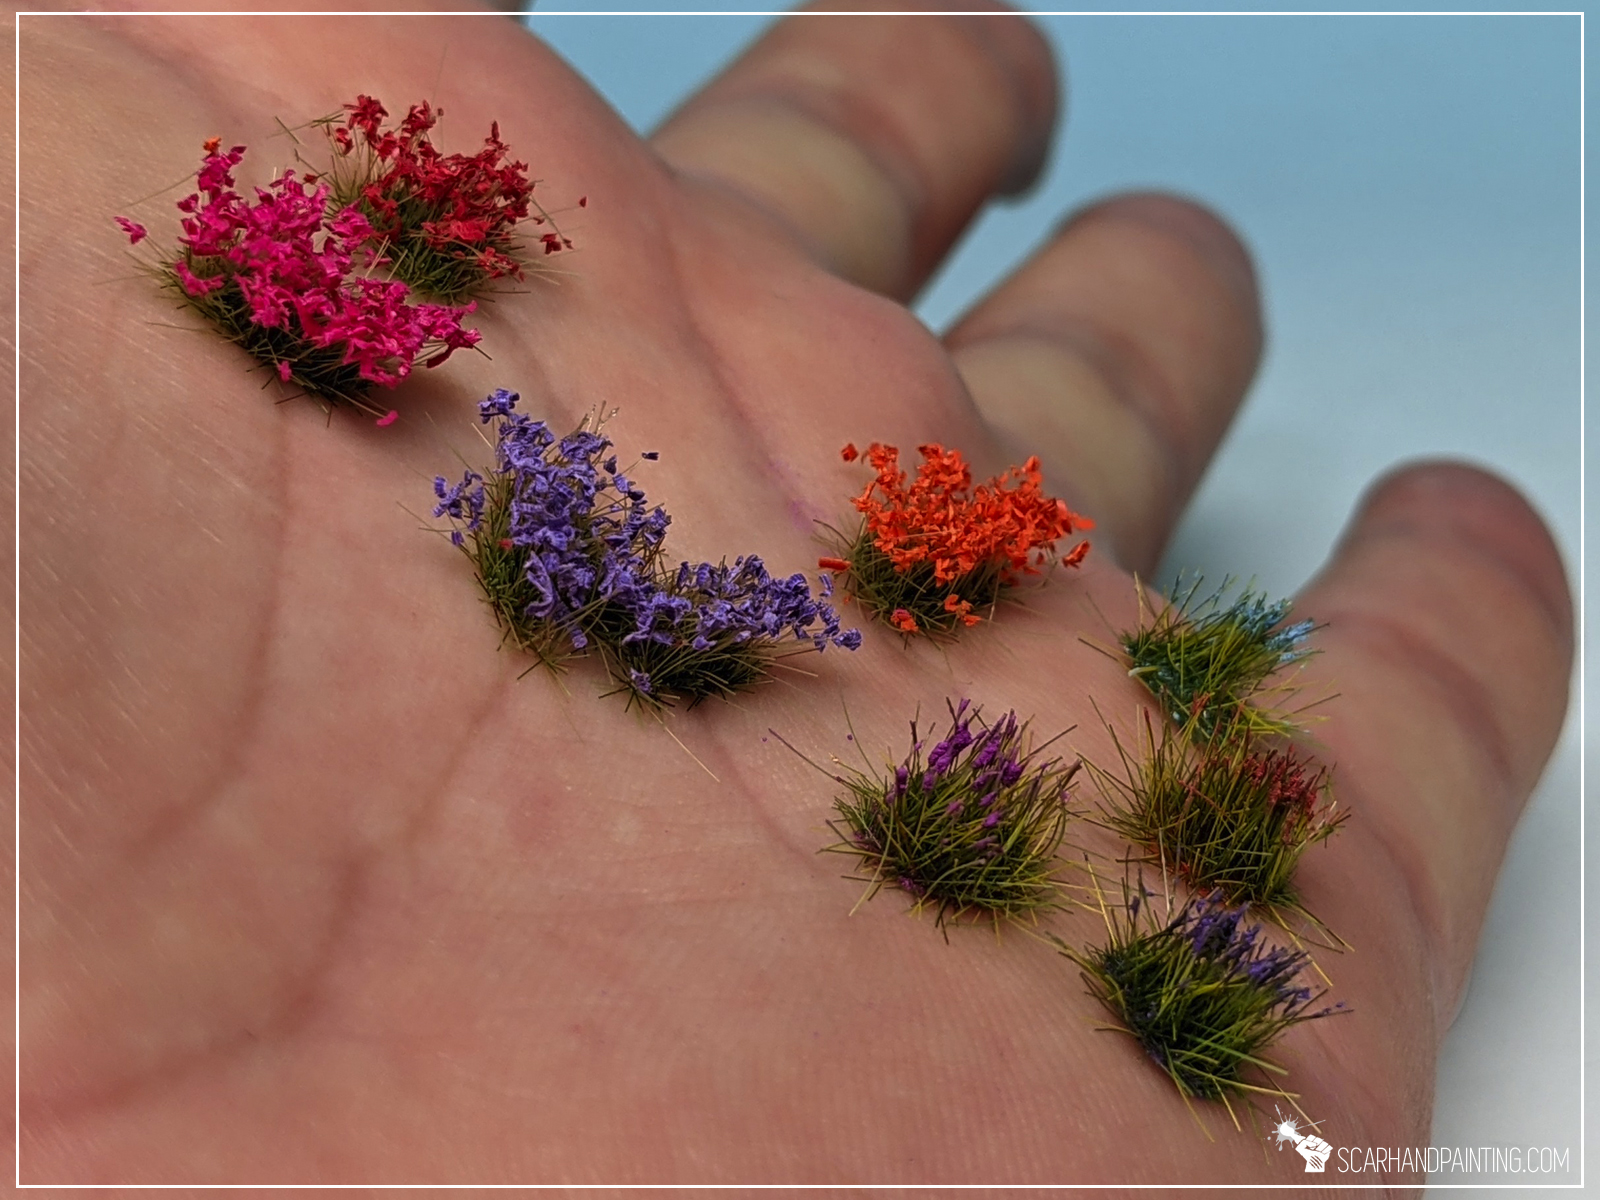
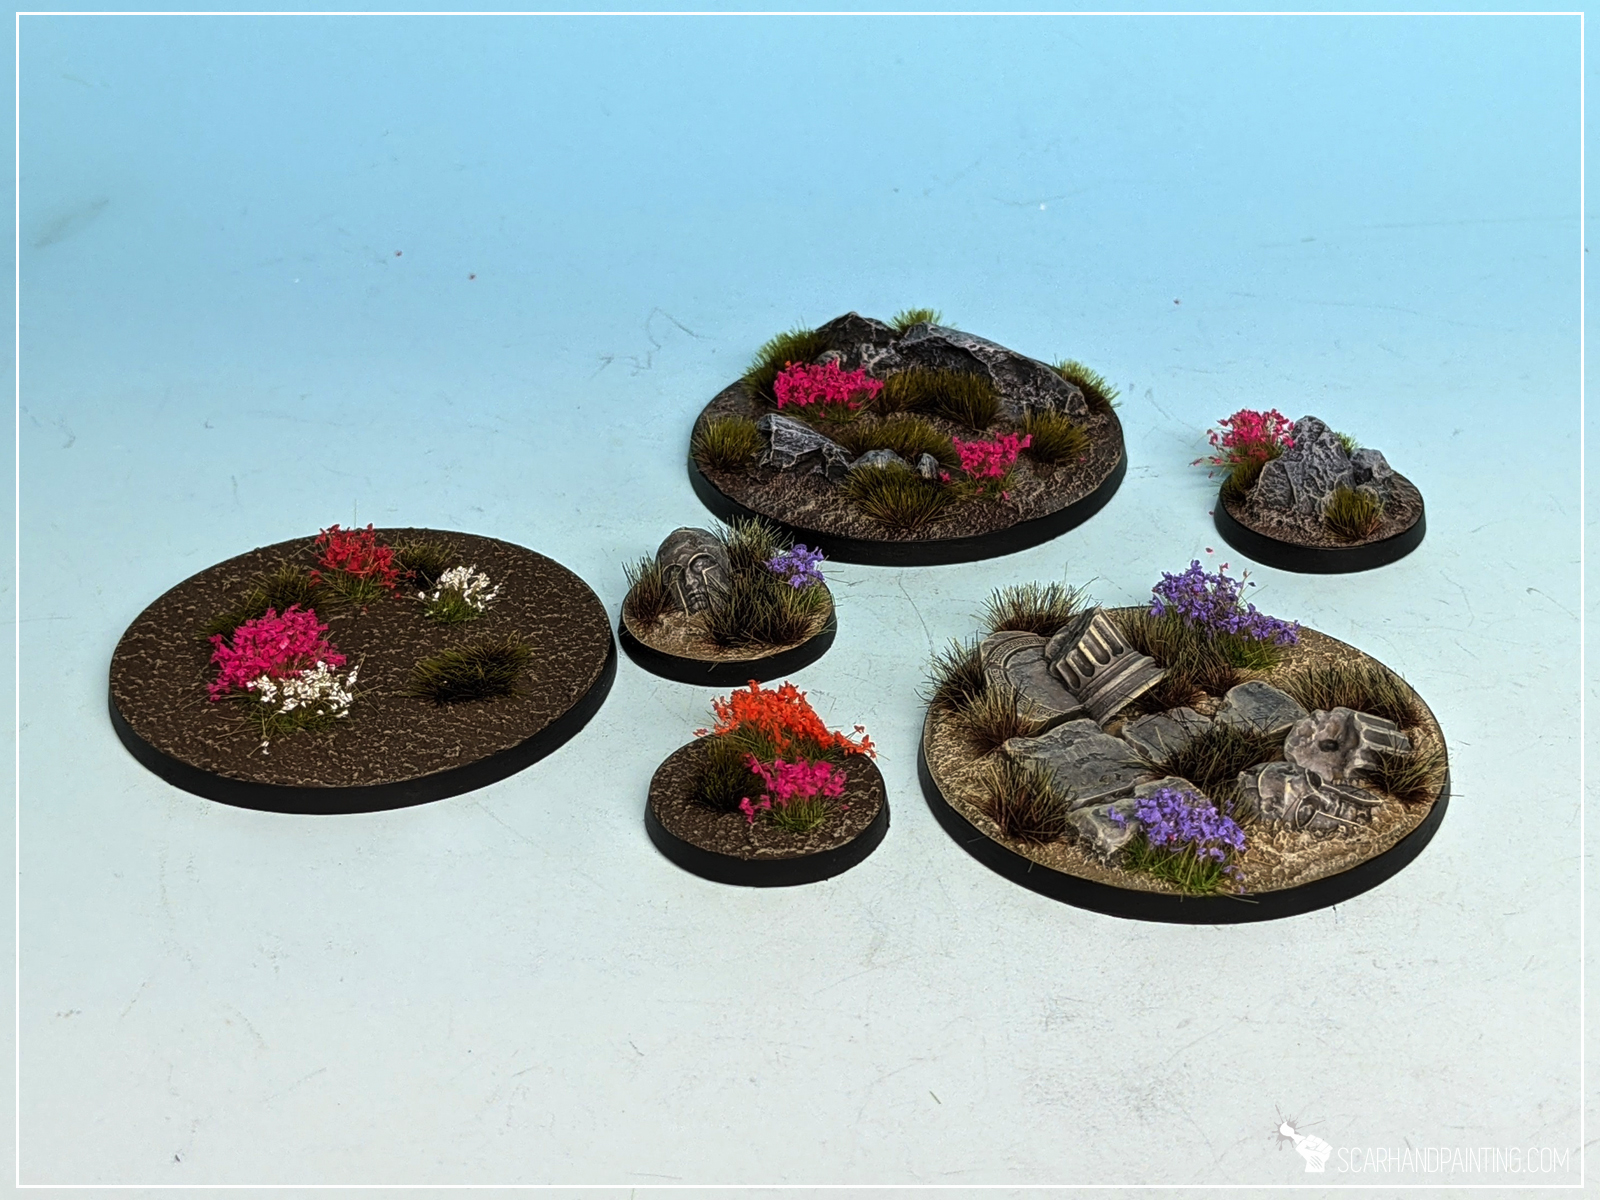
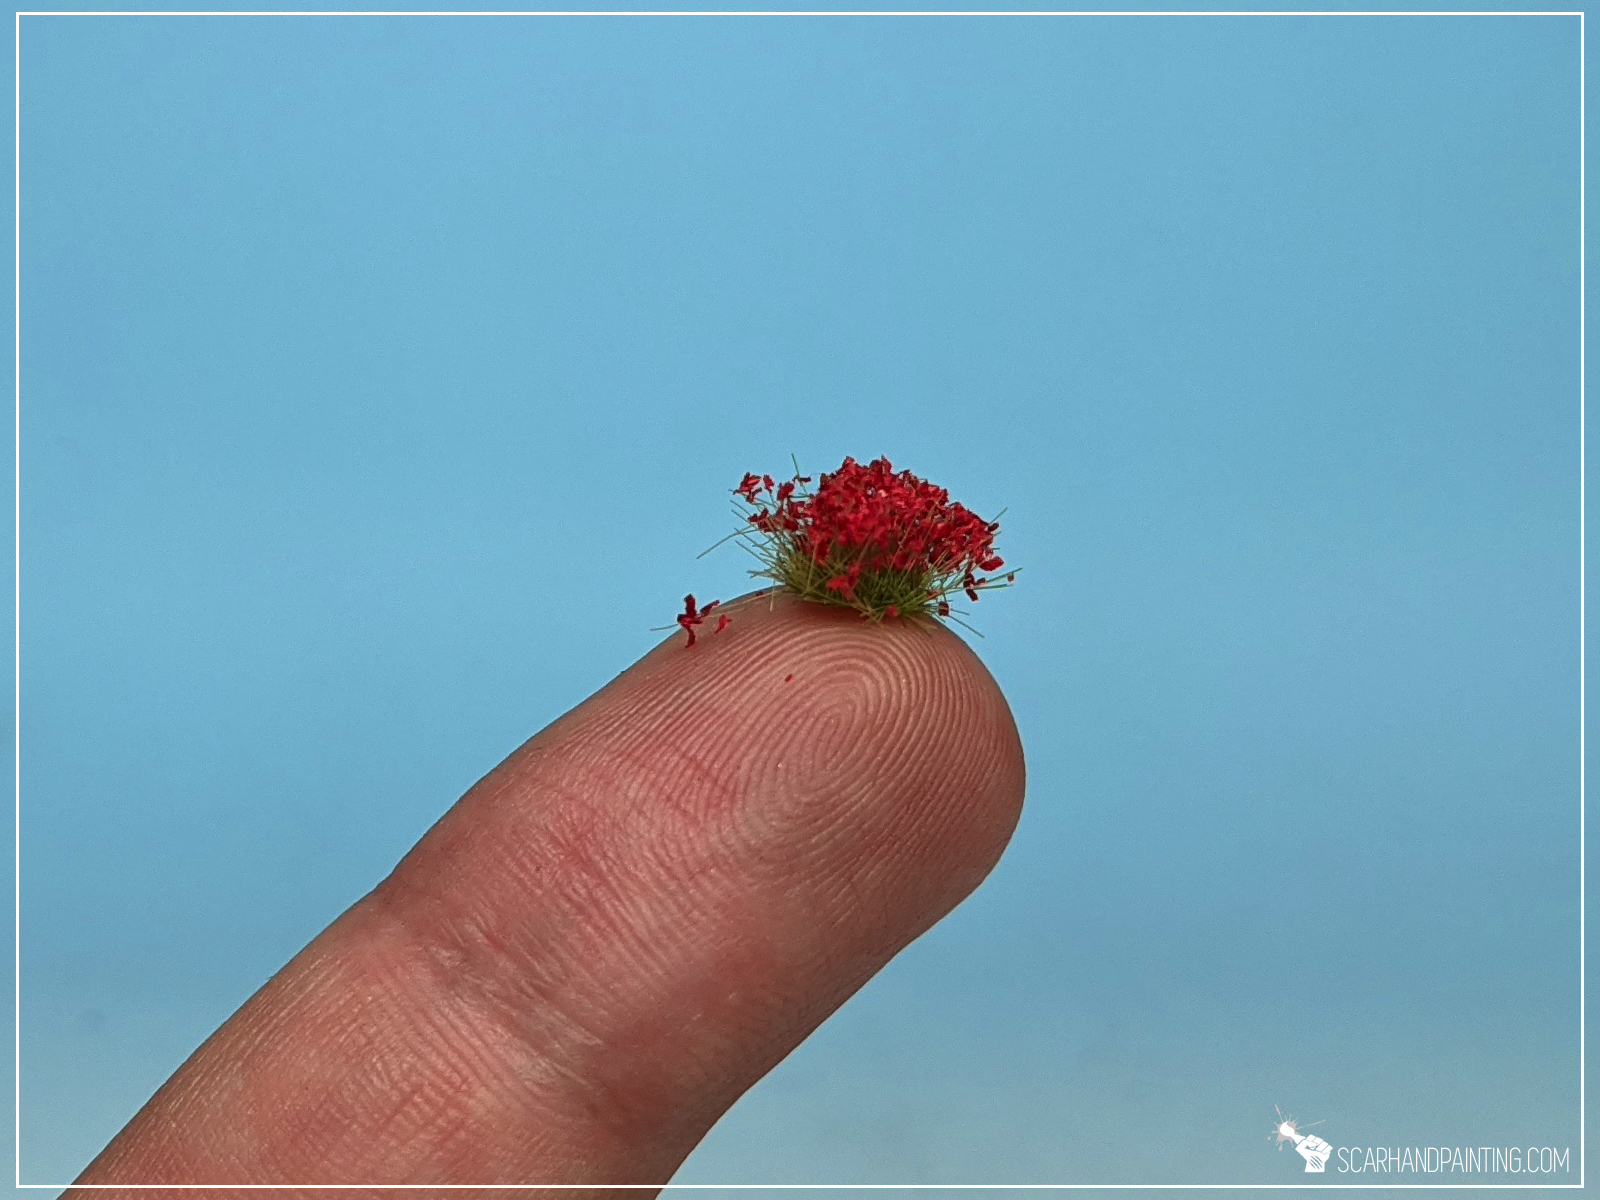
Visually Gamers Grass Flowers present themselves great. A palette of colors to choose from, some strong, some a bit pastele, makes the range fit into all variety of projects and styles. There’s also a variety of shapes which makes flowers look more natural.
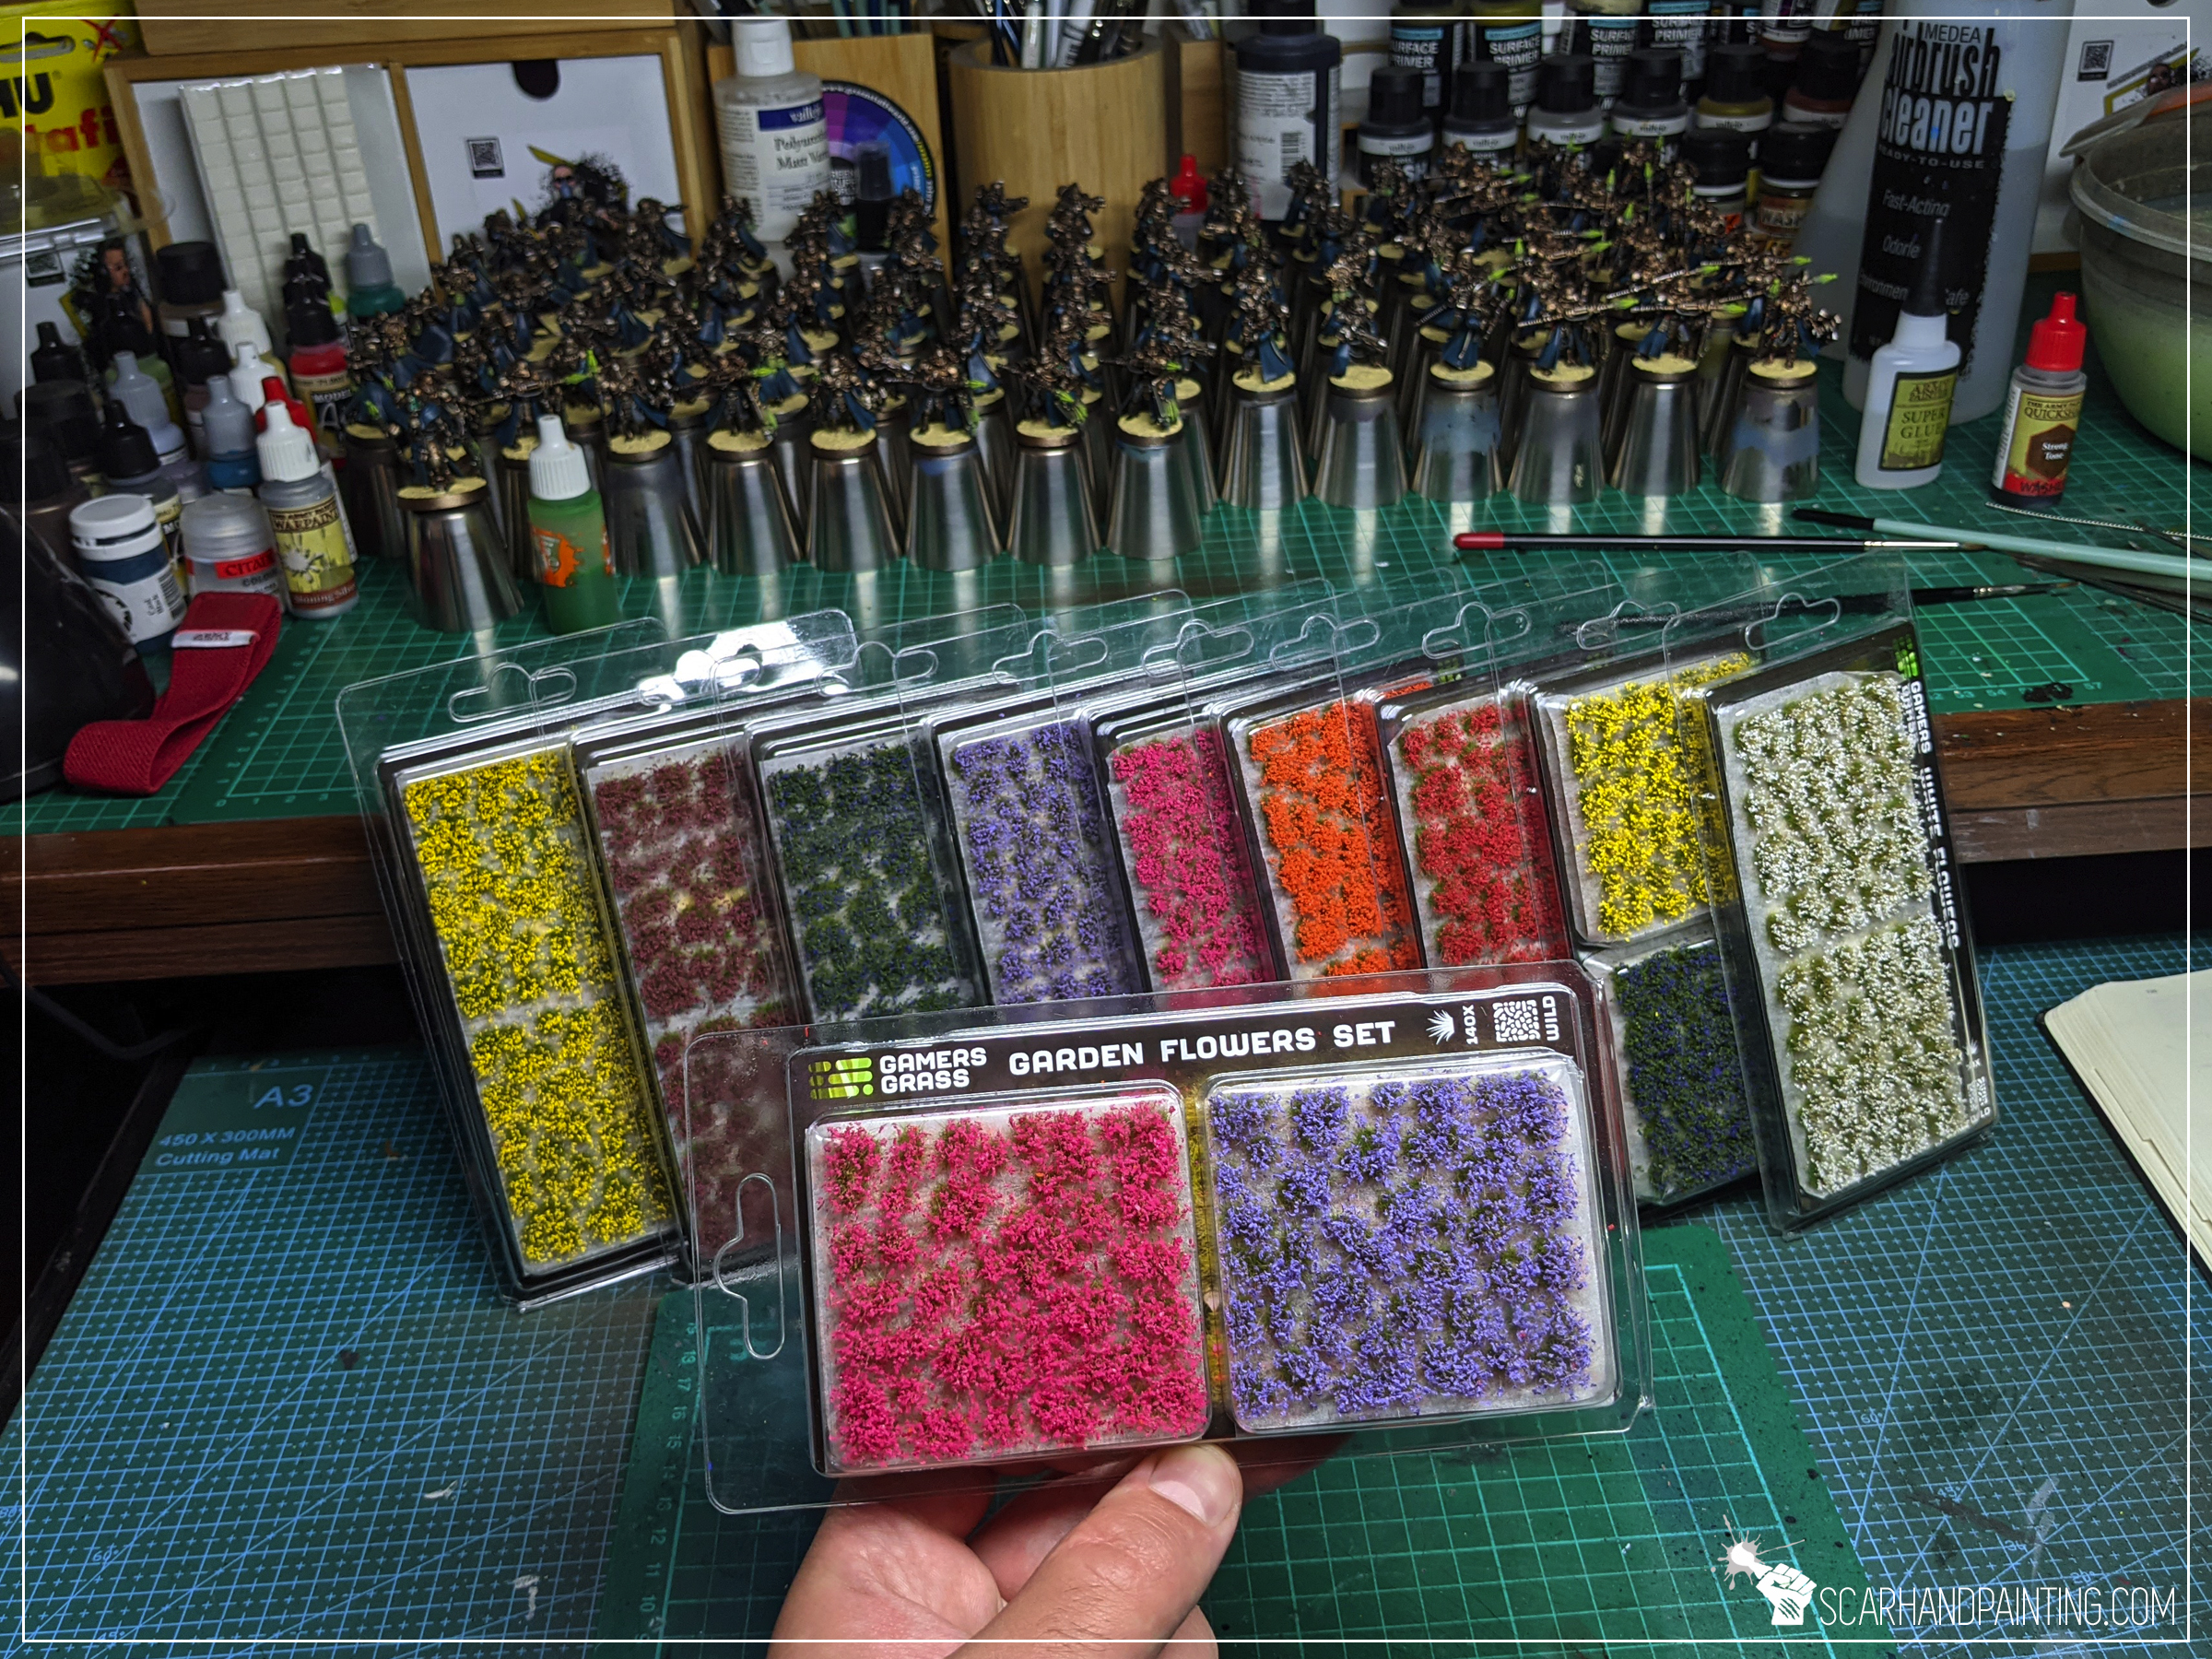
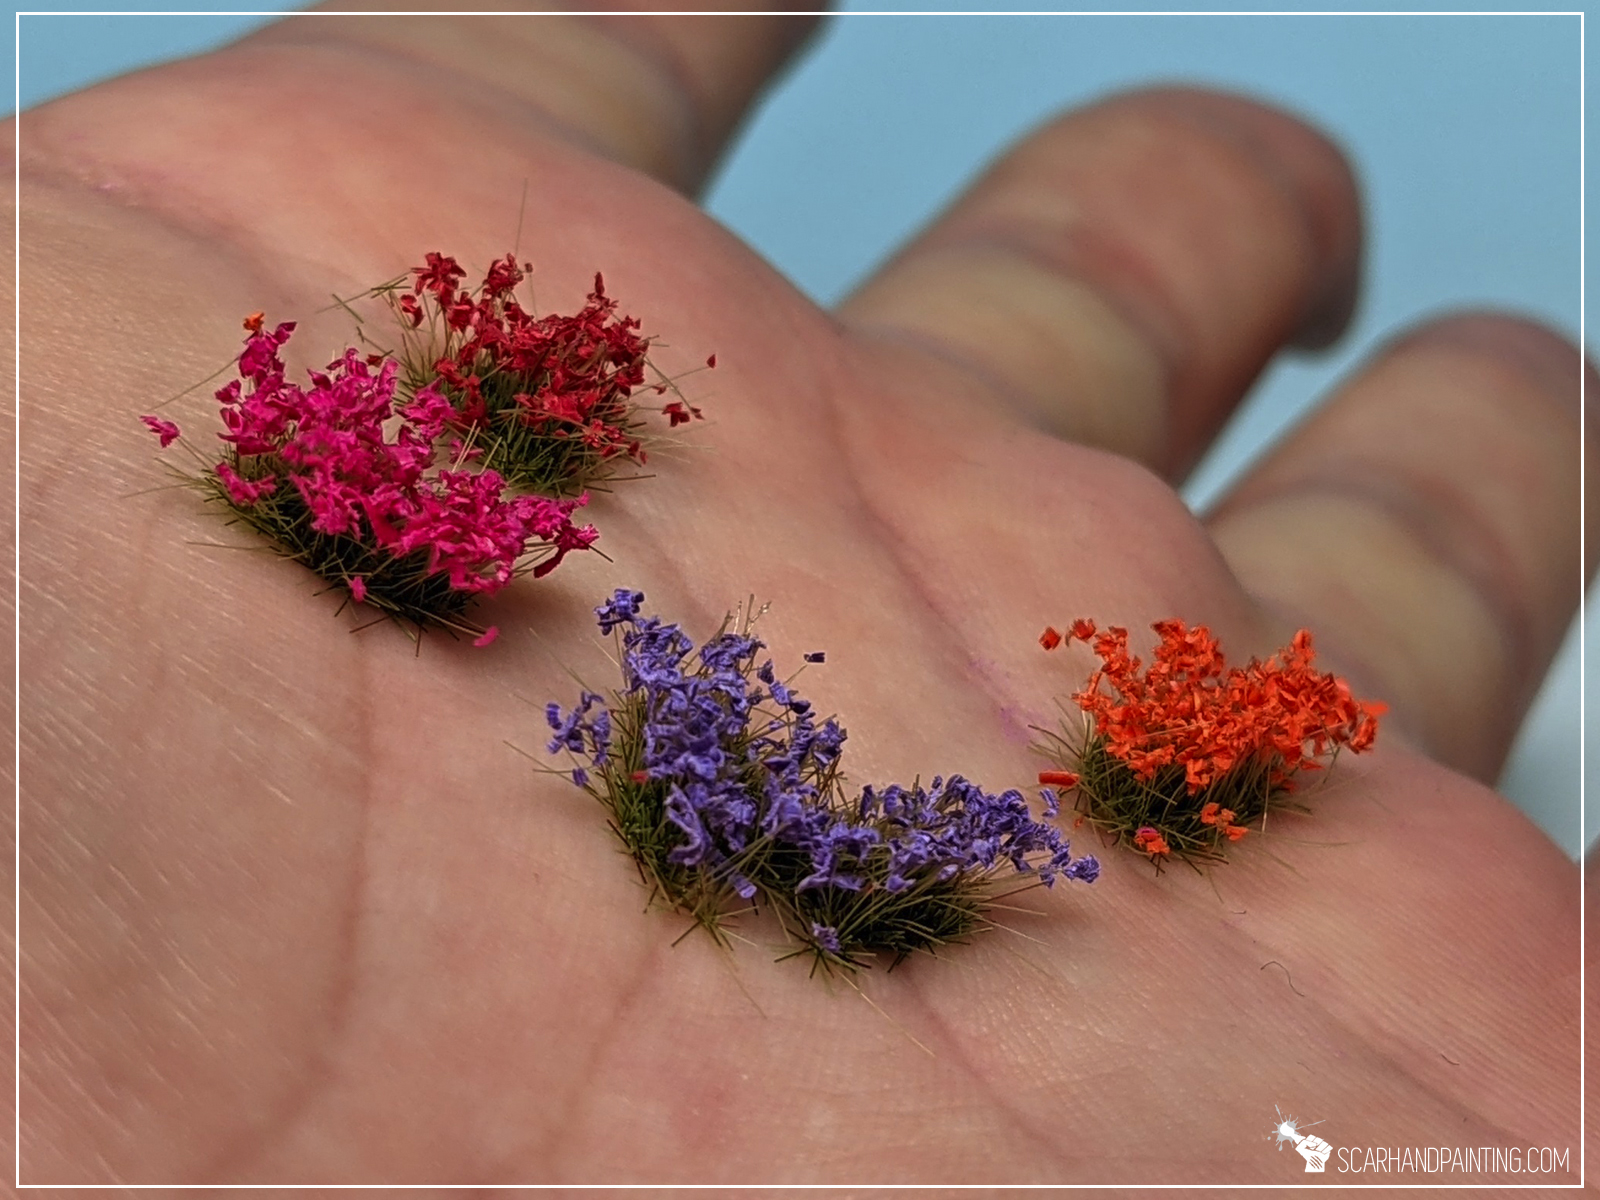
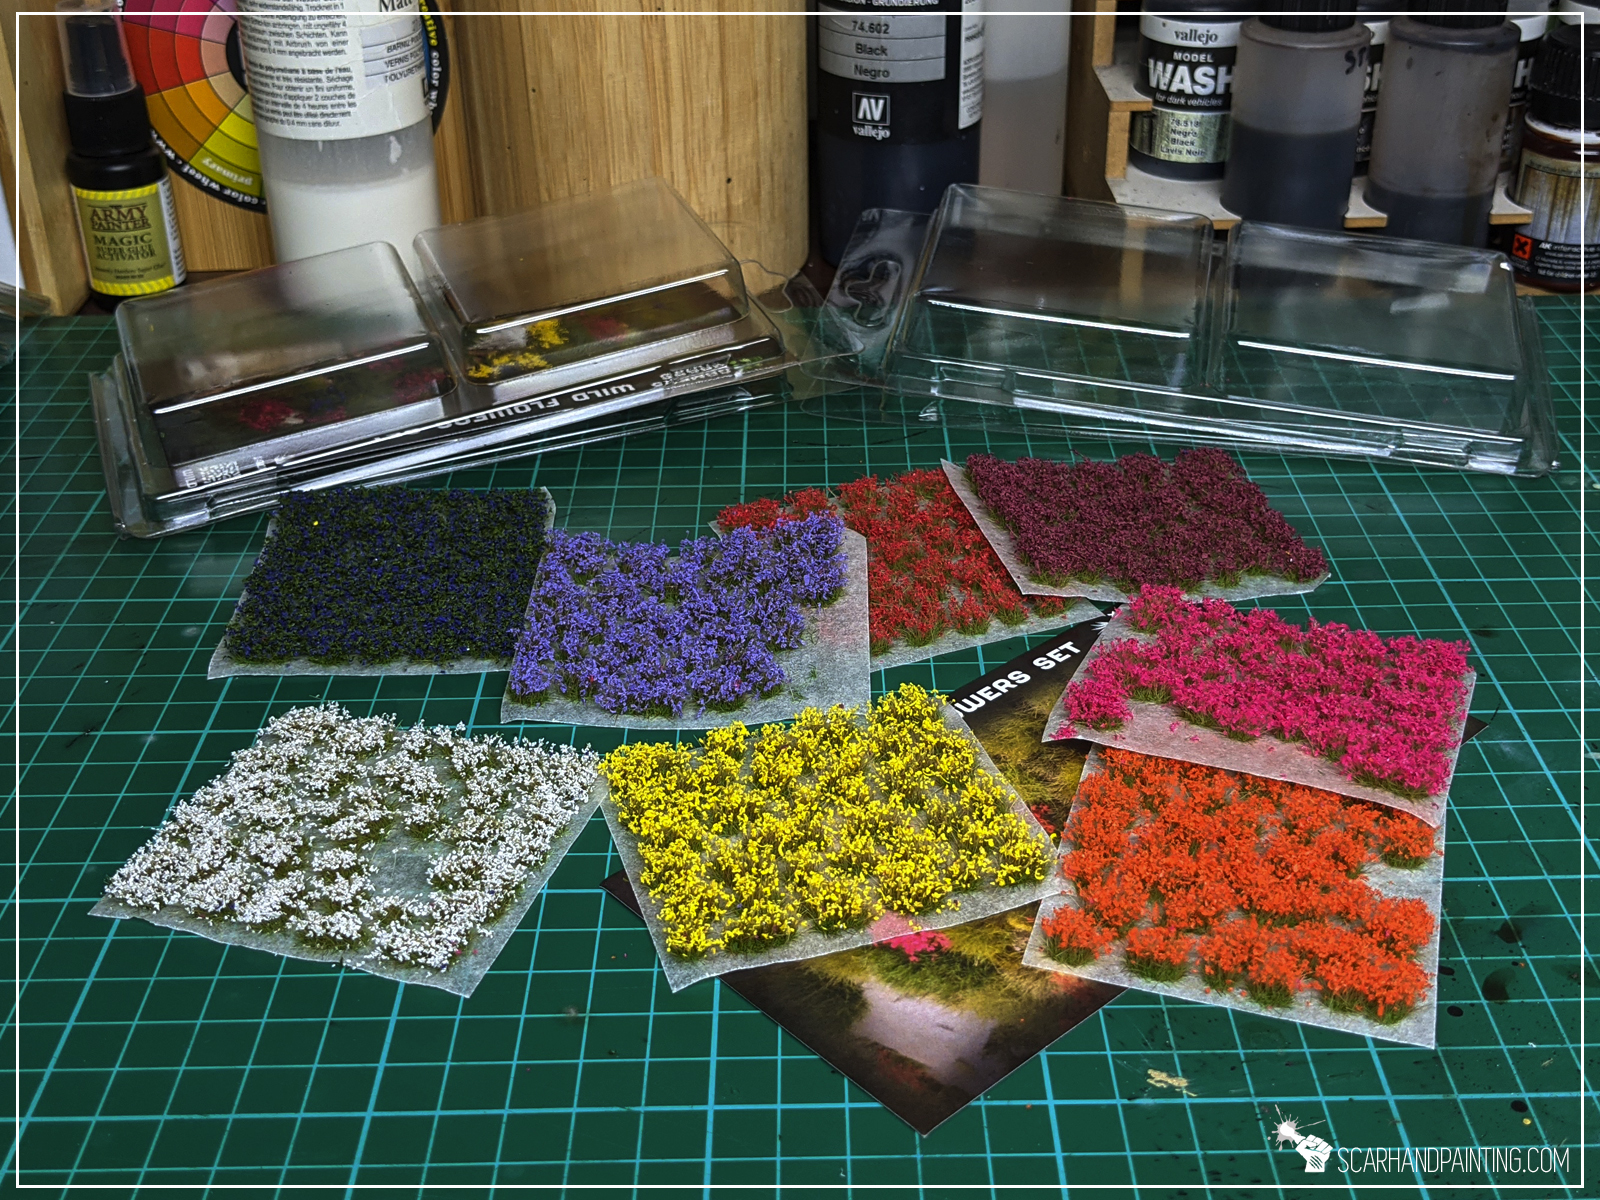
All flowers types are user friendly and there’s no quality difference between particular colors . There’s a clear separation between every piece on the sheet. Glue is strong and sticks to a range of different surfaces. There’s not many stray hair that require removal after application onto a base. Once used, flowers hold their shape nicely. Joy to work with. Additionally they come in two formats, one being four different colors packed into a single blister. This is a great way to get a lot of variety in a single cheap purchase, or a cool anniversary bouquet for your partner!
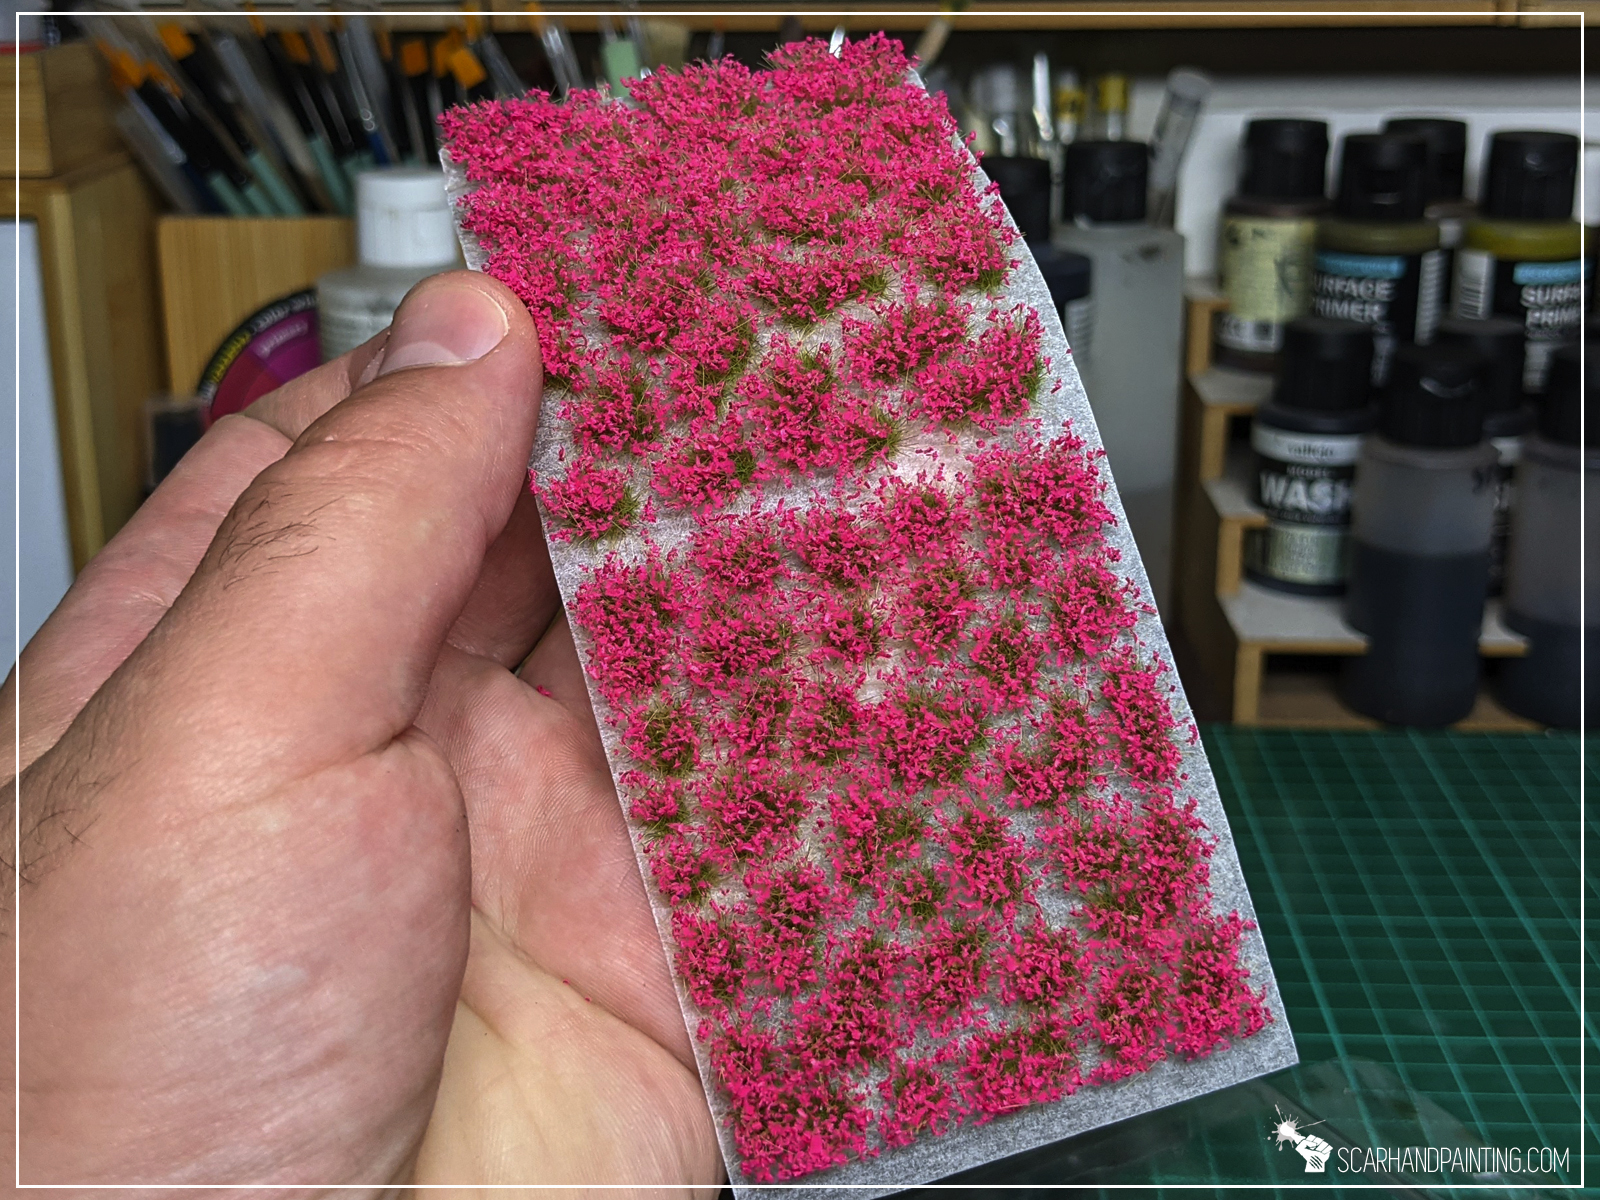

I generally don’t expect modelling flowers to make a good impression. This is because usually they are messy and not very user friendly, dragging other beds out of the sheet alongside them, leaving powder everywhere etc. That being said, the Gamers Grass Flowers are awesome. Easy and Fun to use, clean, well shaped. Just awesome.

Time to take in the price factor. I’ve done quick research and here’s how it looks like against immediate competition:
It seems that Gamers Grass is the more expensive, even though not that much.
To sum things up: I have tested about a dozen different suppliers in the past few years and compared to competitors, the Gamers Grass Flowers stand out both in quality and functionality. Visuals are great, range is wide. Price might use a tweak, but in my opinion the product is totally worth the extra. Also due to reality we now live in, more suppliers will probably increase their pricing throughout the year. Call me a sucker and a fanboy of the Gamers Grass range, but for me price is not a decisive factor when compared to such high quality!
What’s your opinion? Does quality top price or vice versa? Let me know in the comments 😉

You can order through Gamers Grass official store, or try out your luck in a local hobby store. To make things easier for you, Gamers Grass prepared this awesome Store Locator.

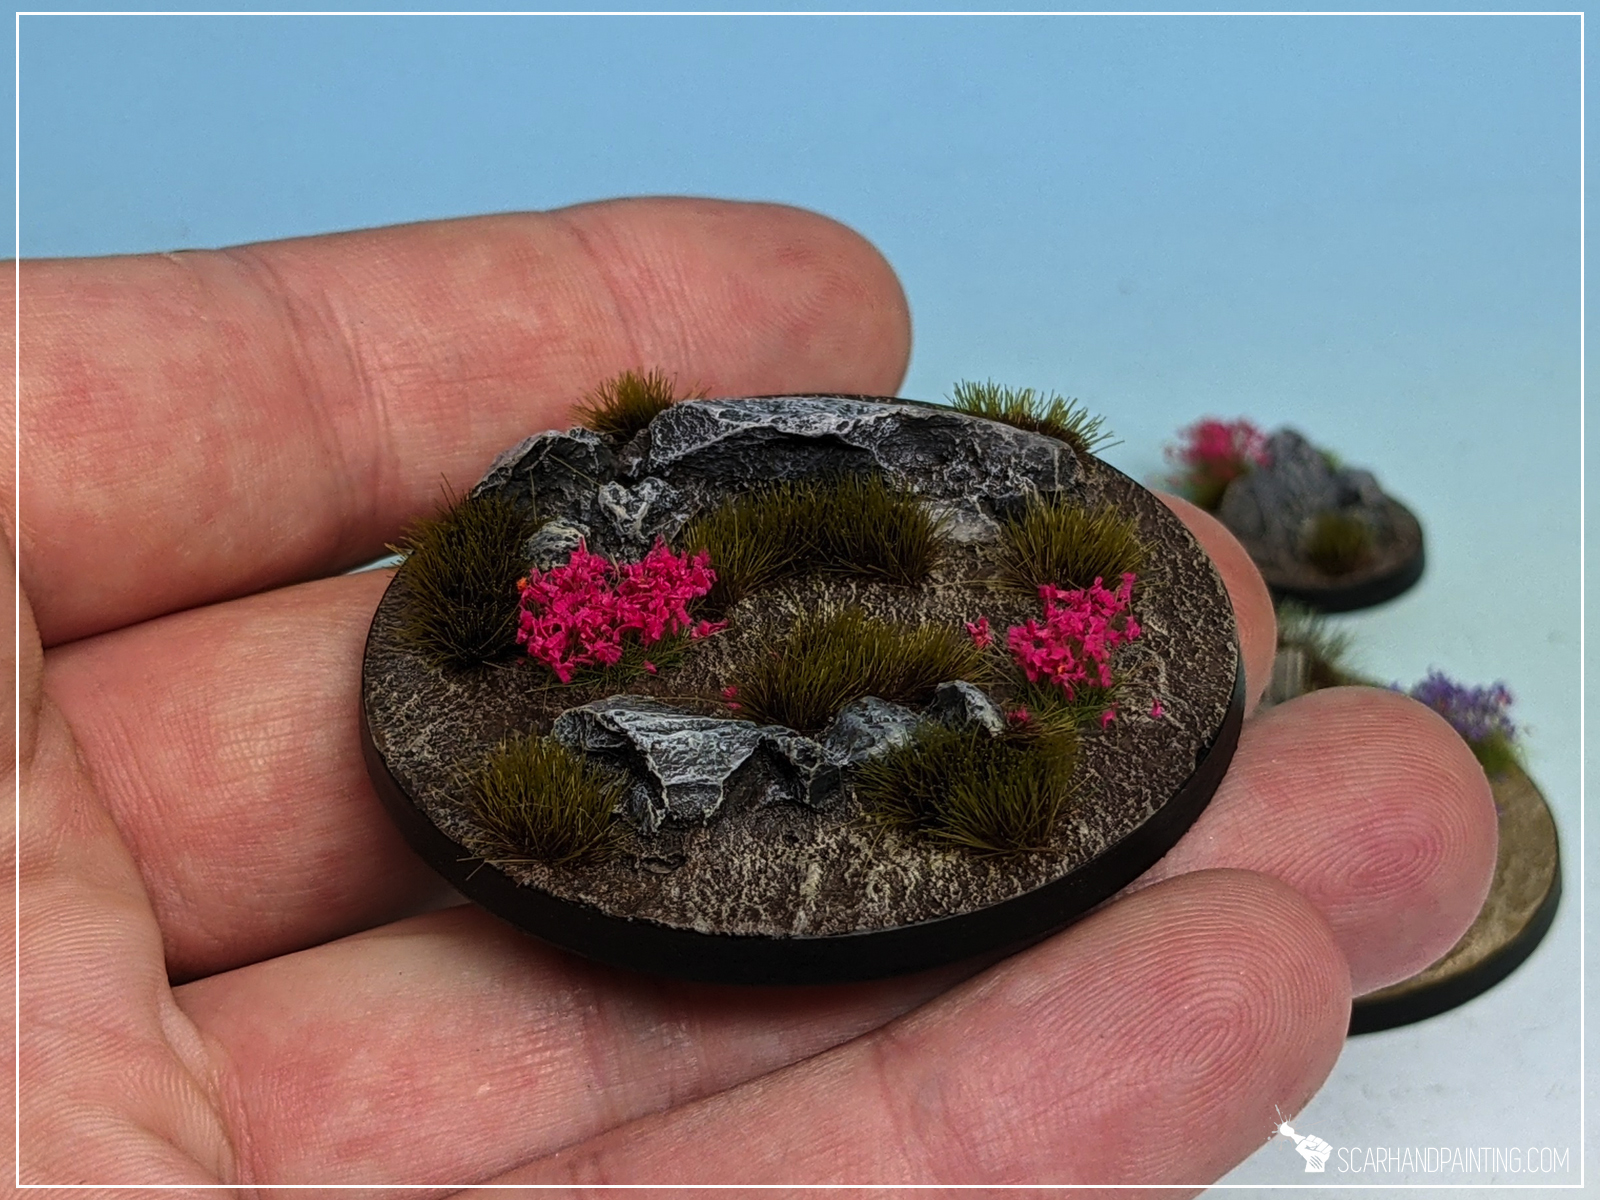
Welcome to Rocky Bases tutorial. Here I will take you on a Step-by-step trip through the process of creating and painting Rocky Bases as presented in the picture below. This adventure is possible thanks to generosity of Gamers Grass and their easy to use, fantastic products.

Before we start, some notes:

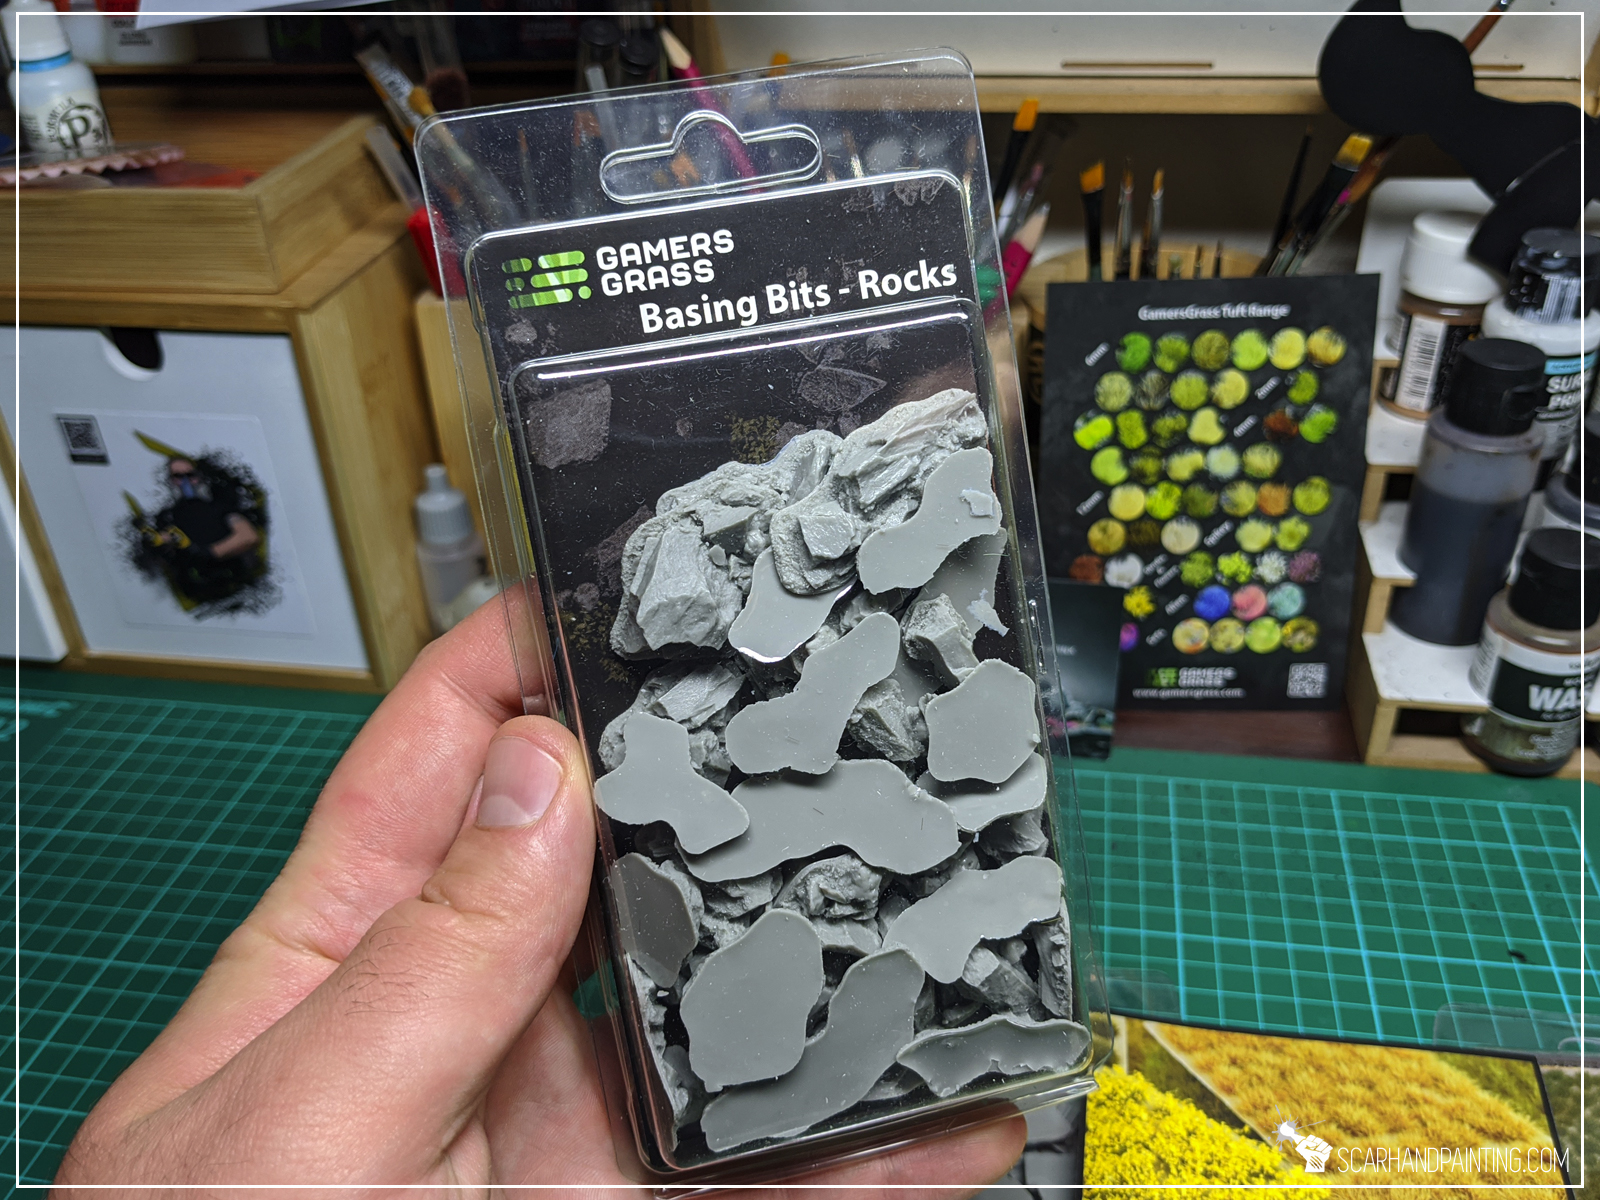
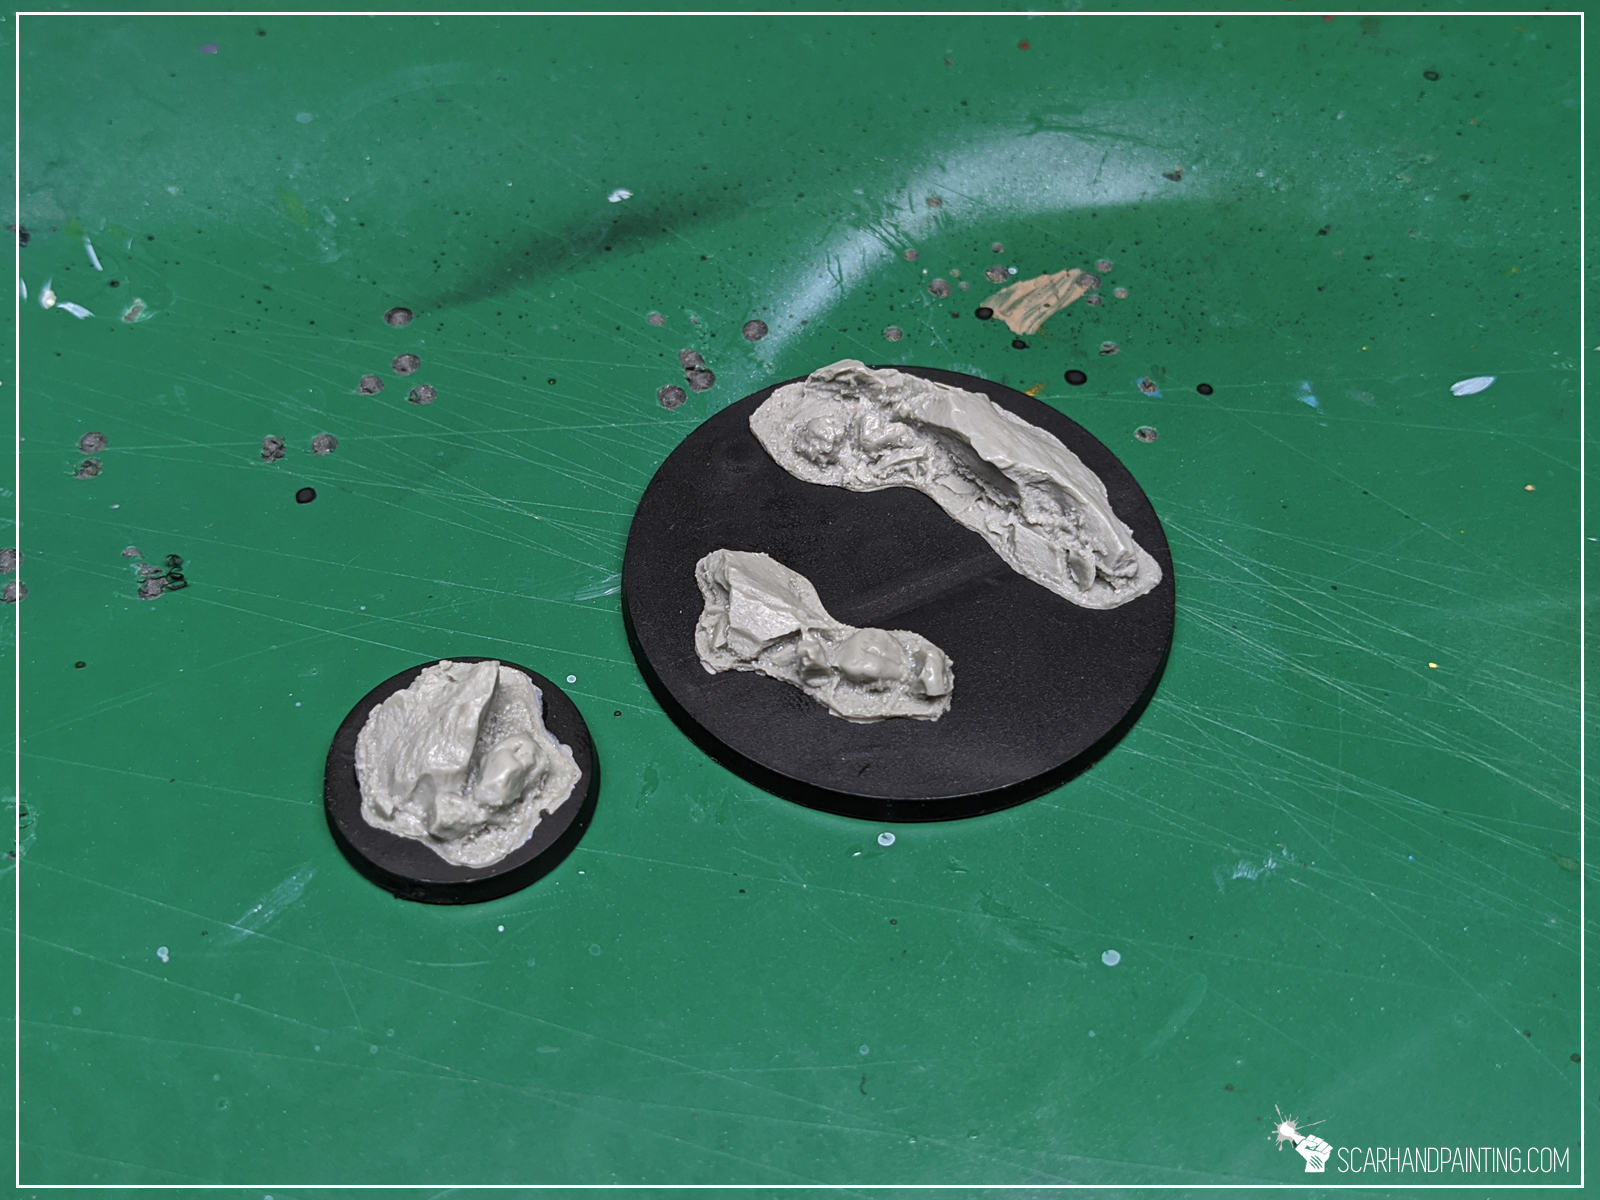
As mentioned in previous Tutorial, when making bases, I usually aim for fast, simple, yet effective solutions. It is important to pick a basing method that is easy to copy onto large quantities of miniatures or coming back to a project. This is why I consider Gamers Grass Basing Bits a perfect solution. Nicely textured, ready to use straight out of the box – glue them on, add some texture around – you’re ready to paint. All that being said – for this particular base type I choose Gamers Grass “Rocks” basing bits.
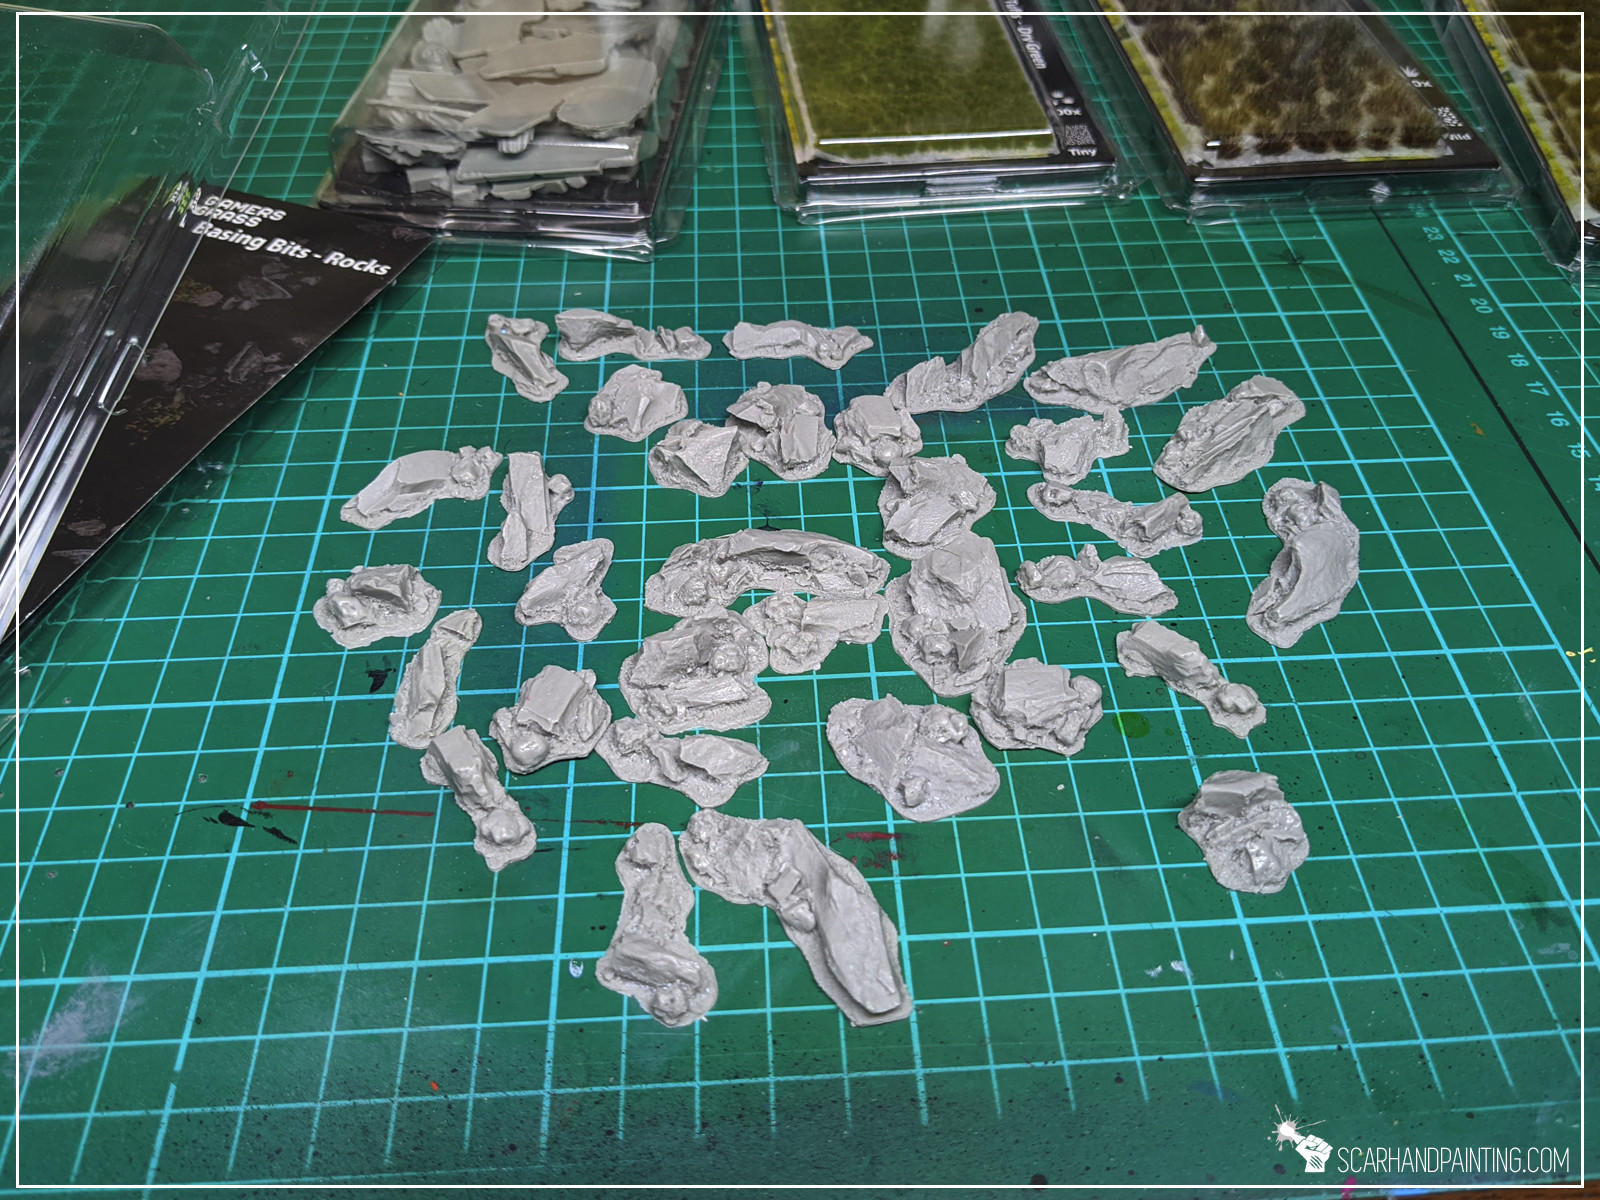
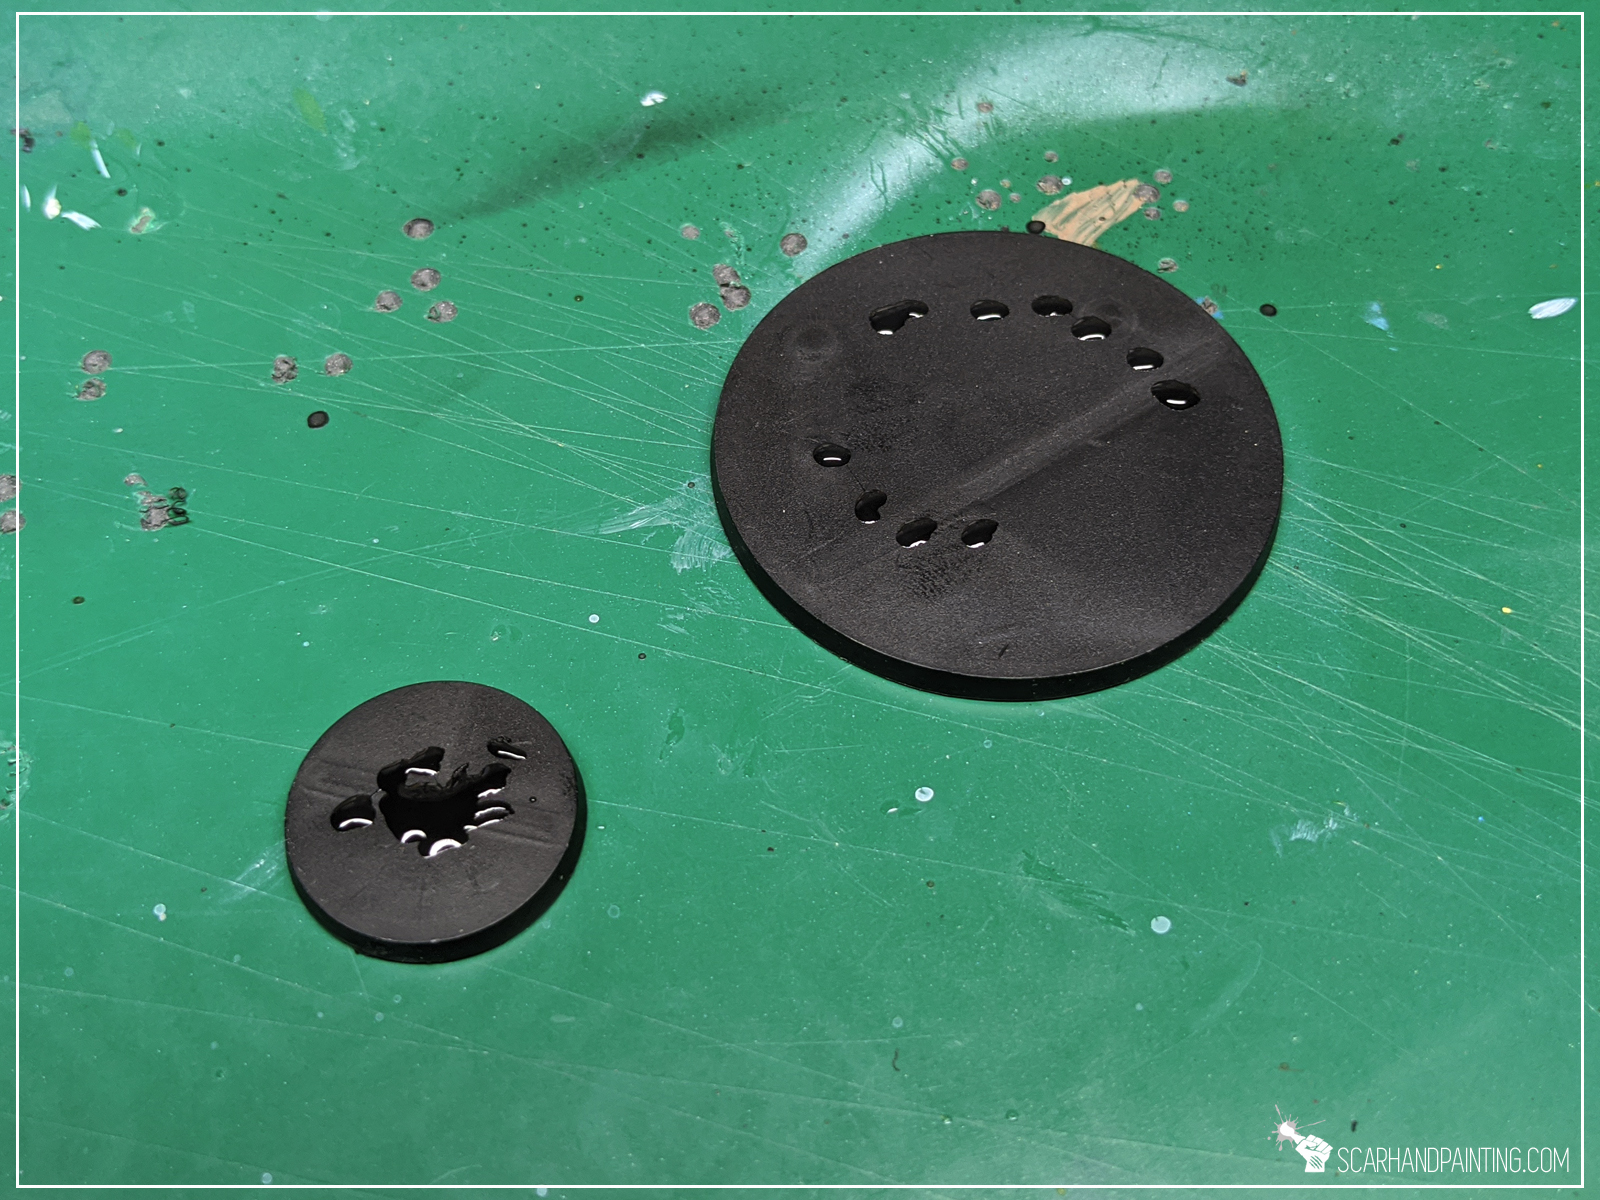
Step one: Applying basing bits
I started by applying glue onto the base and gluing few basing bits on top.

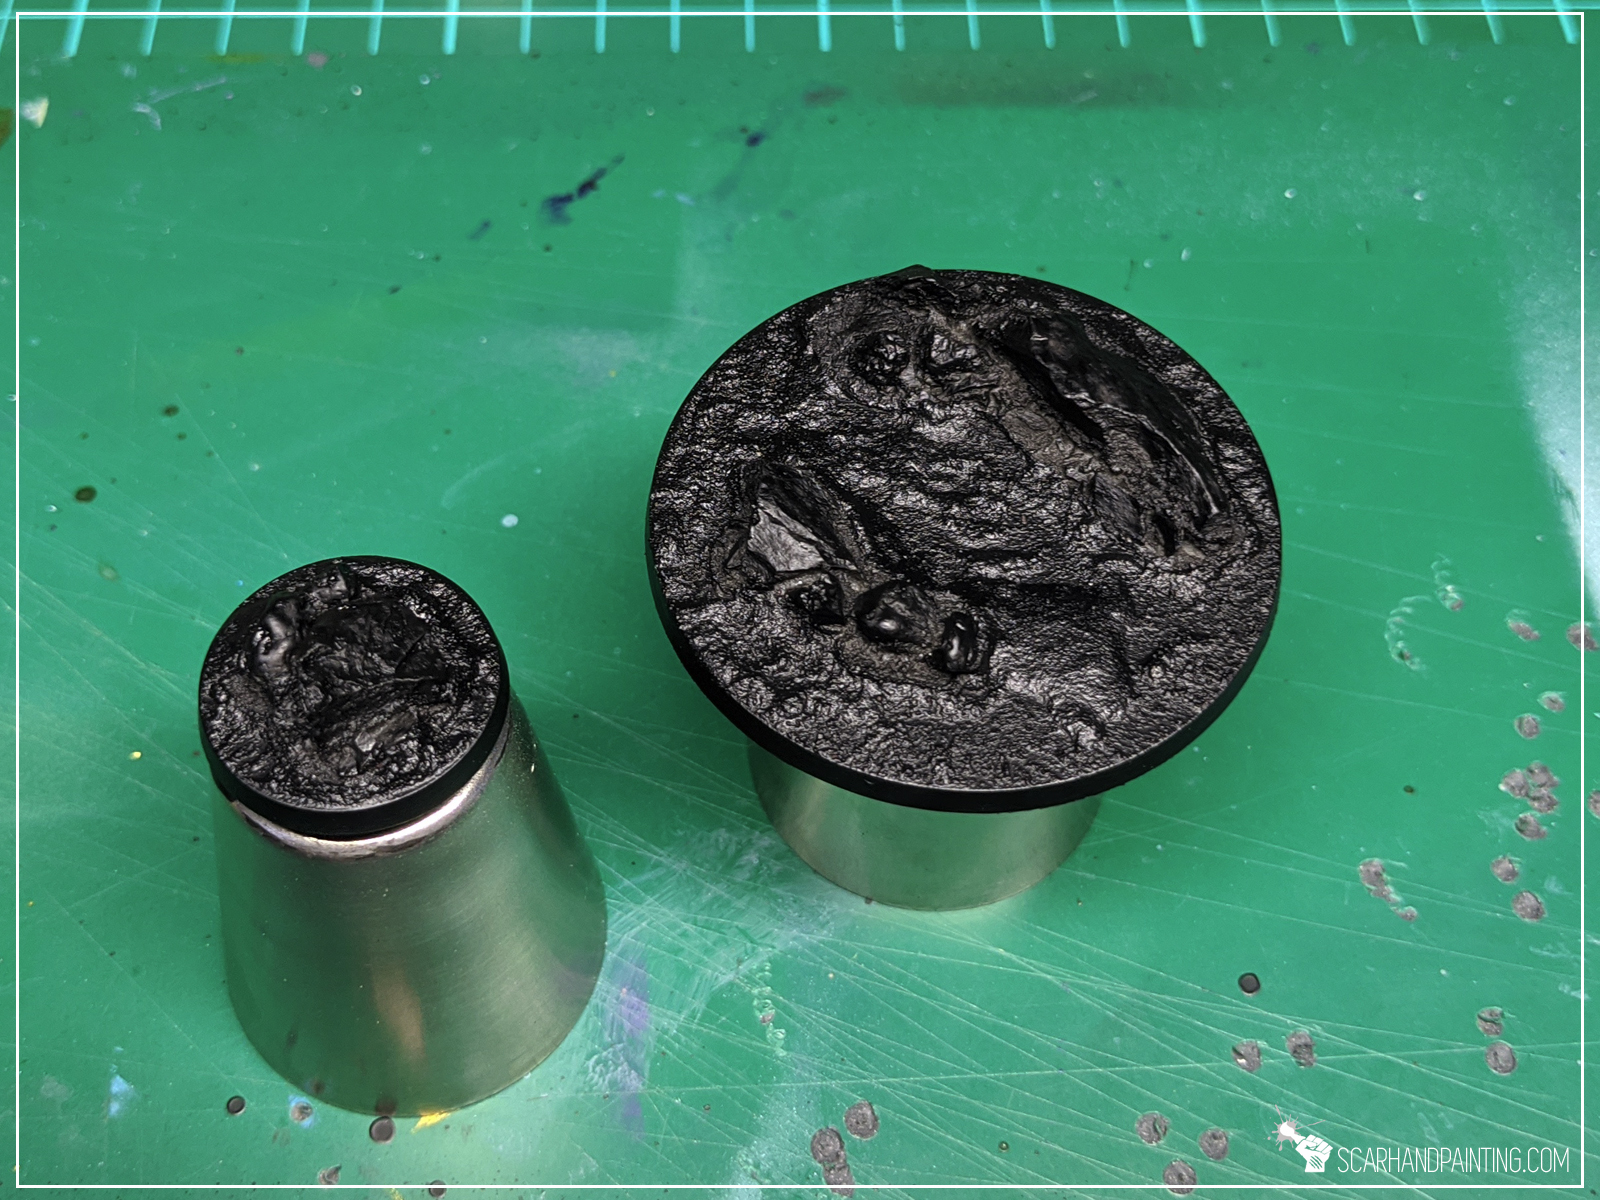
Step two: Applying texture
I then applied texture with Games Workshop Stirland Mud.


At this point entire “Modelling” part is done. If it seem fast it’s because it really is. Just two steps and you’re ready to paint!

I choose to paint these Rocky bases in a classic Bron plus Grey style. Assuming these are meant to be used for a large collection, I want to keep things simple. Would be perfect to close in about three layers per color, with a single type of tufts on top. Just your everyday nice looking, coherent bases. Here’s how I went about it…
Step two: Undercoat
I applied a black undercoat.
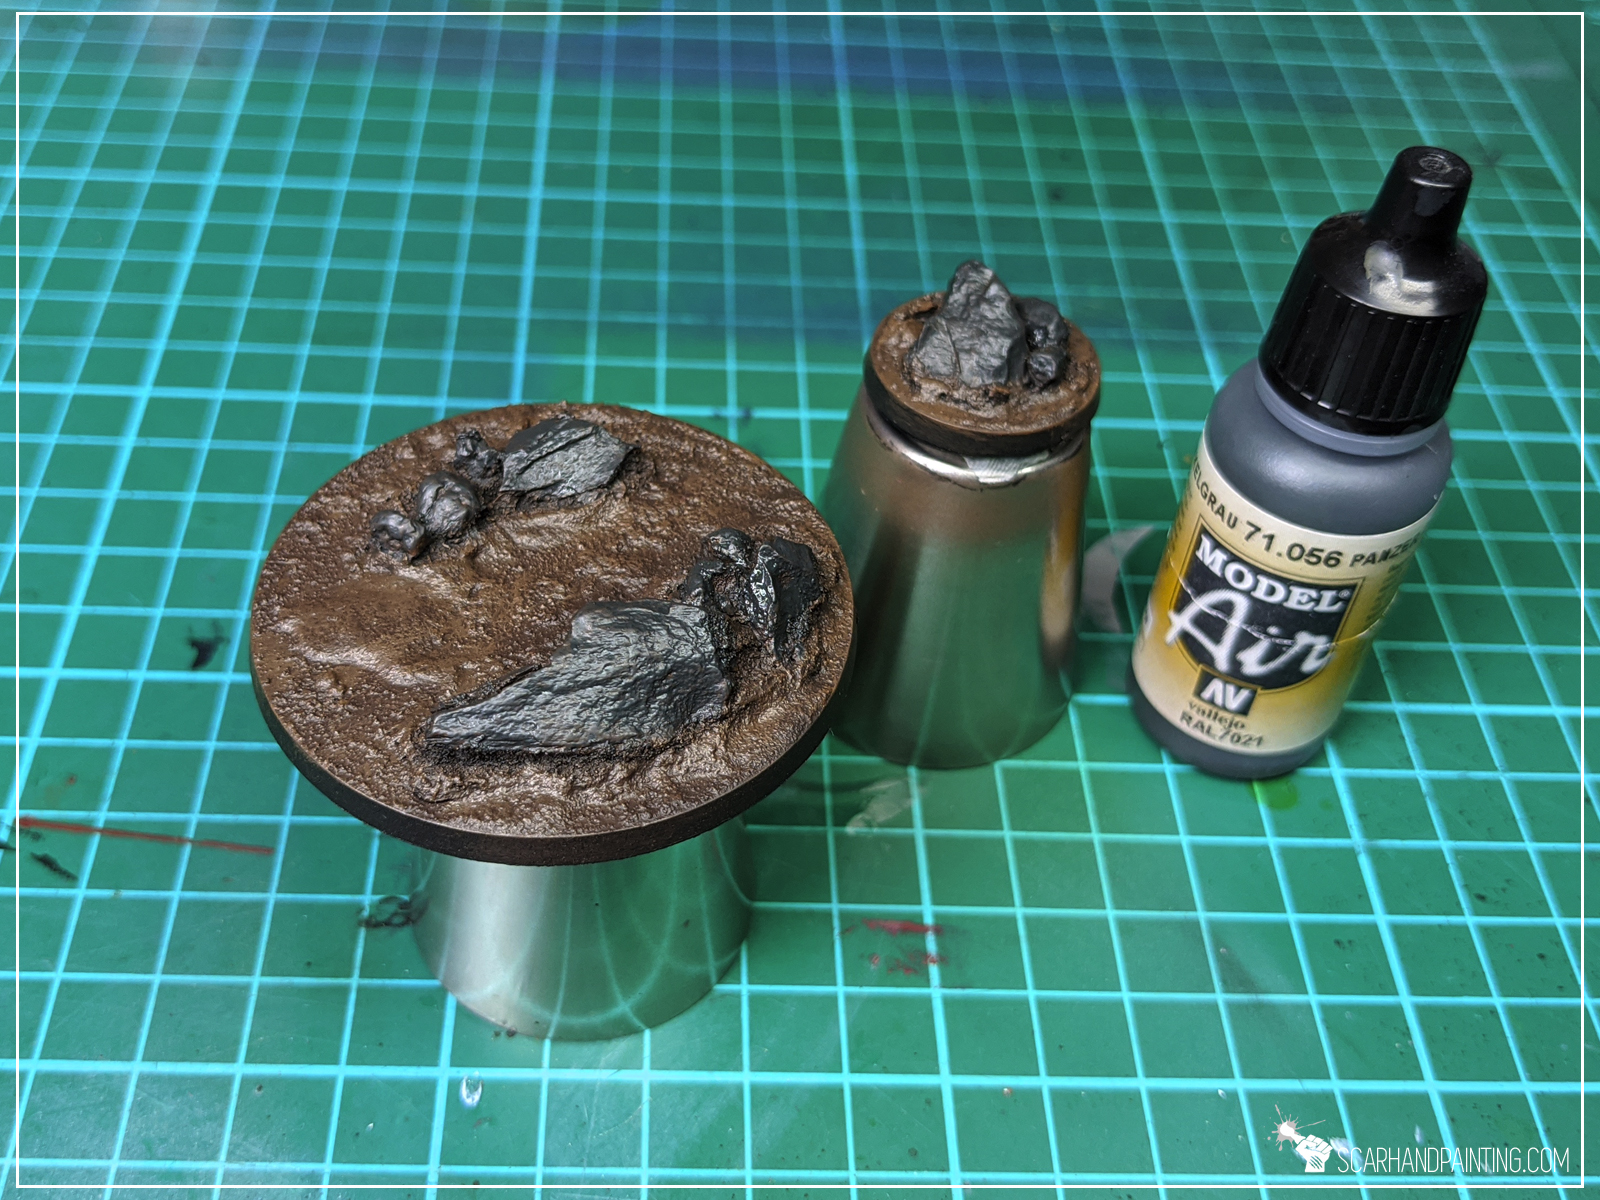
Step two: Main color
I then painted entire base with Vallejo Charred Brown. Once dry I drybrushed Games Workshop Calthan Brown on top.


Step two: Secondary color
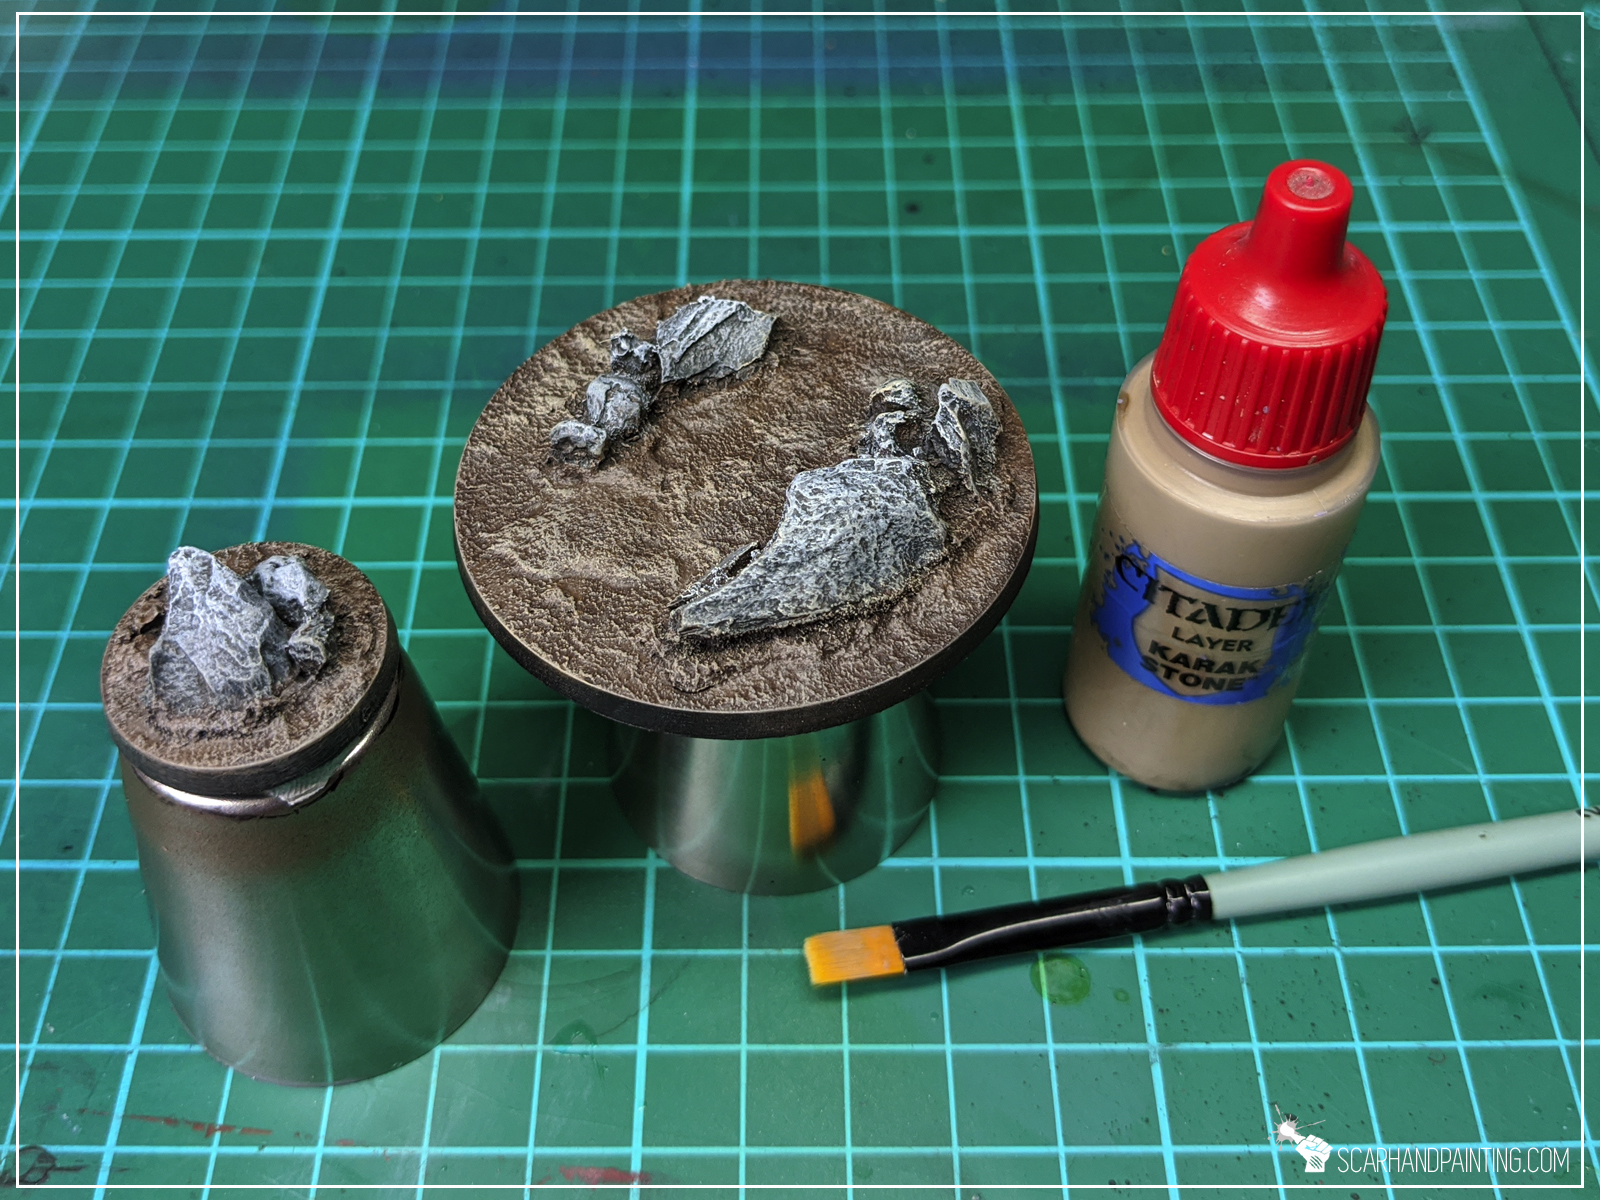
For rocks I went with Vallejo Panzer Dark Grey, followed by a drybrush of Games Workshop Fortress Grey.
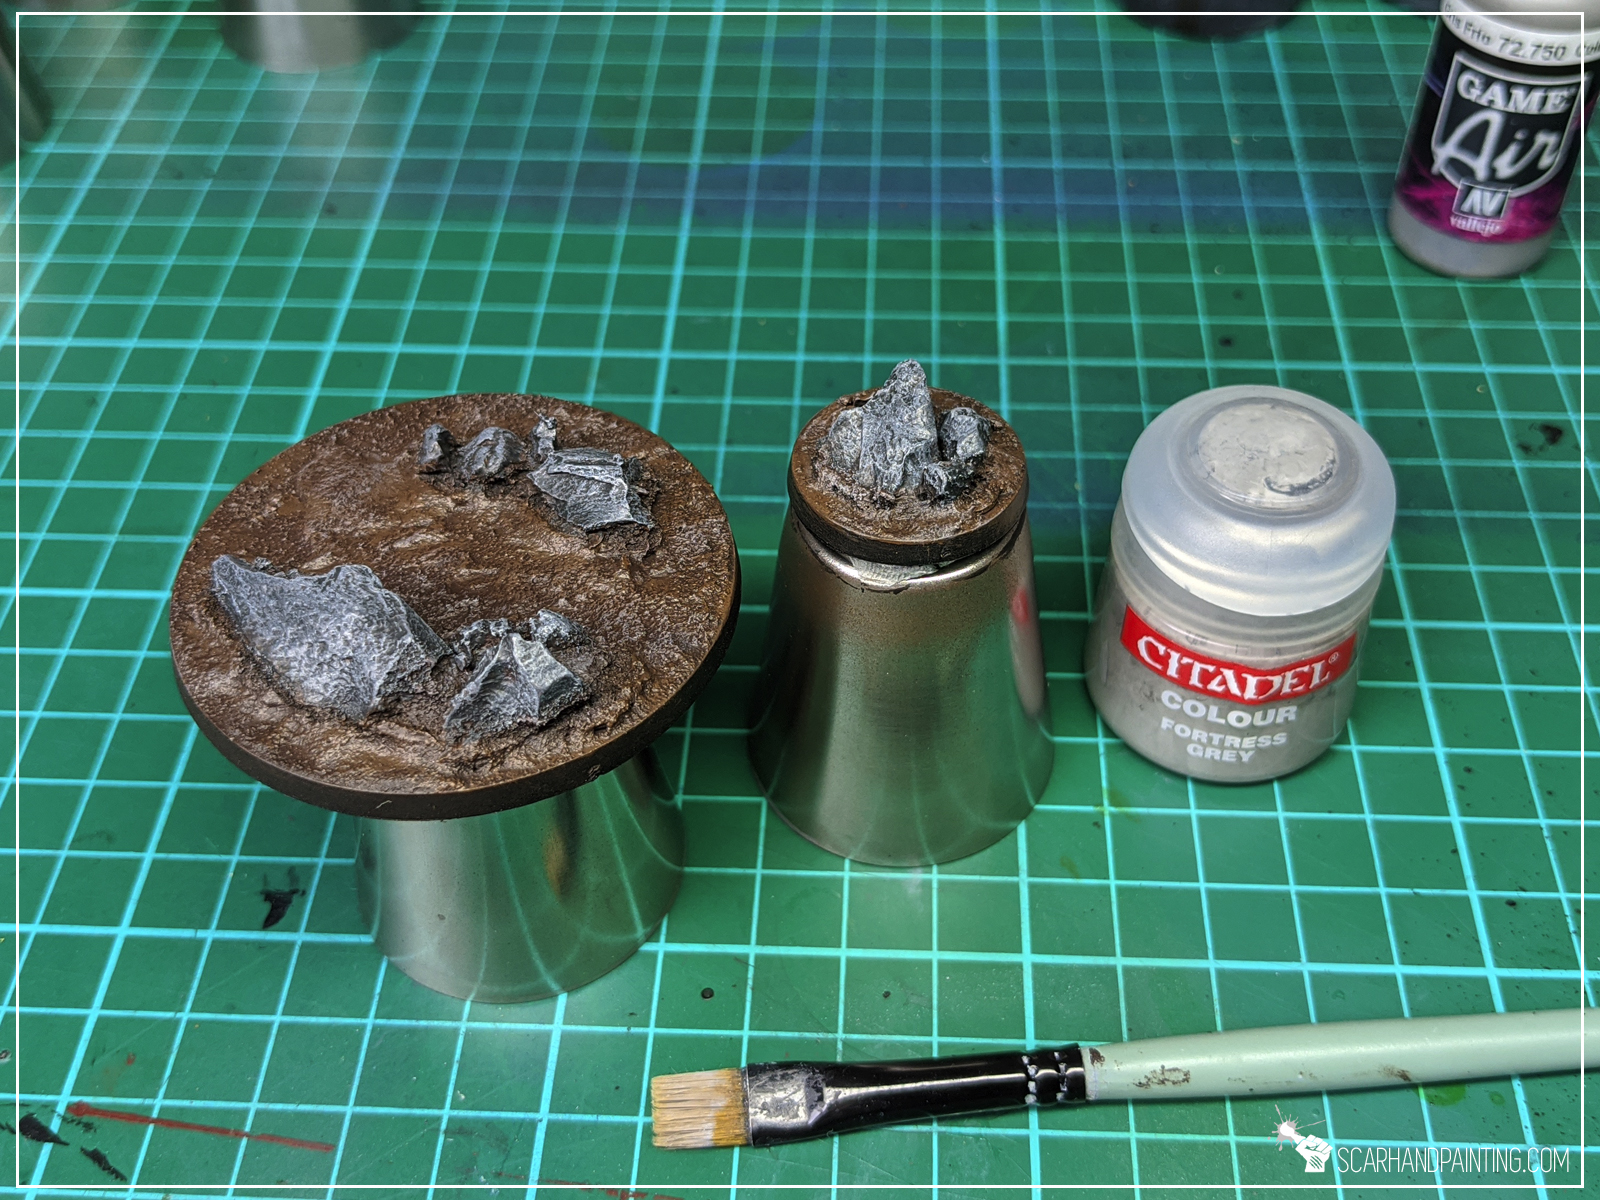
Step tree: Highlights
Final highlight was done with a drybrush of Games Workshop Karak Stone for brown and a drybrush of Vallejo Ghost Grey for rocks.

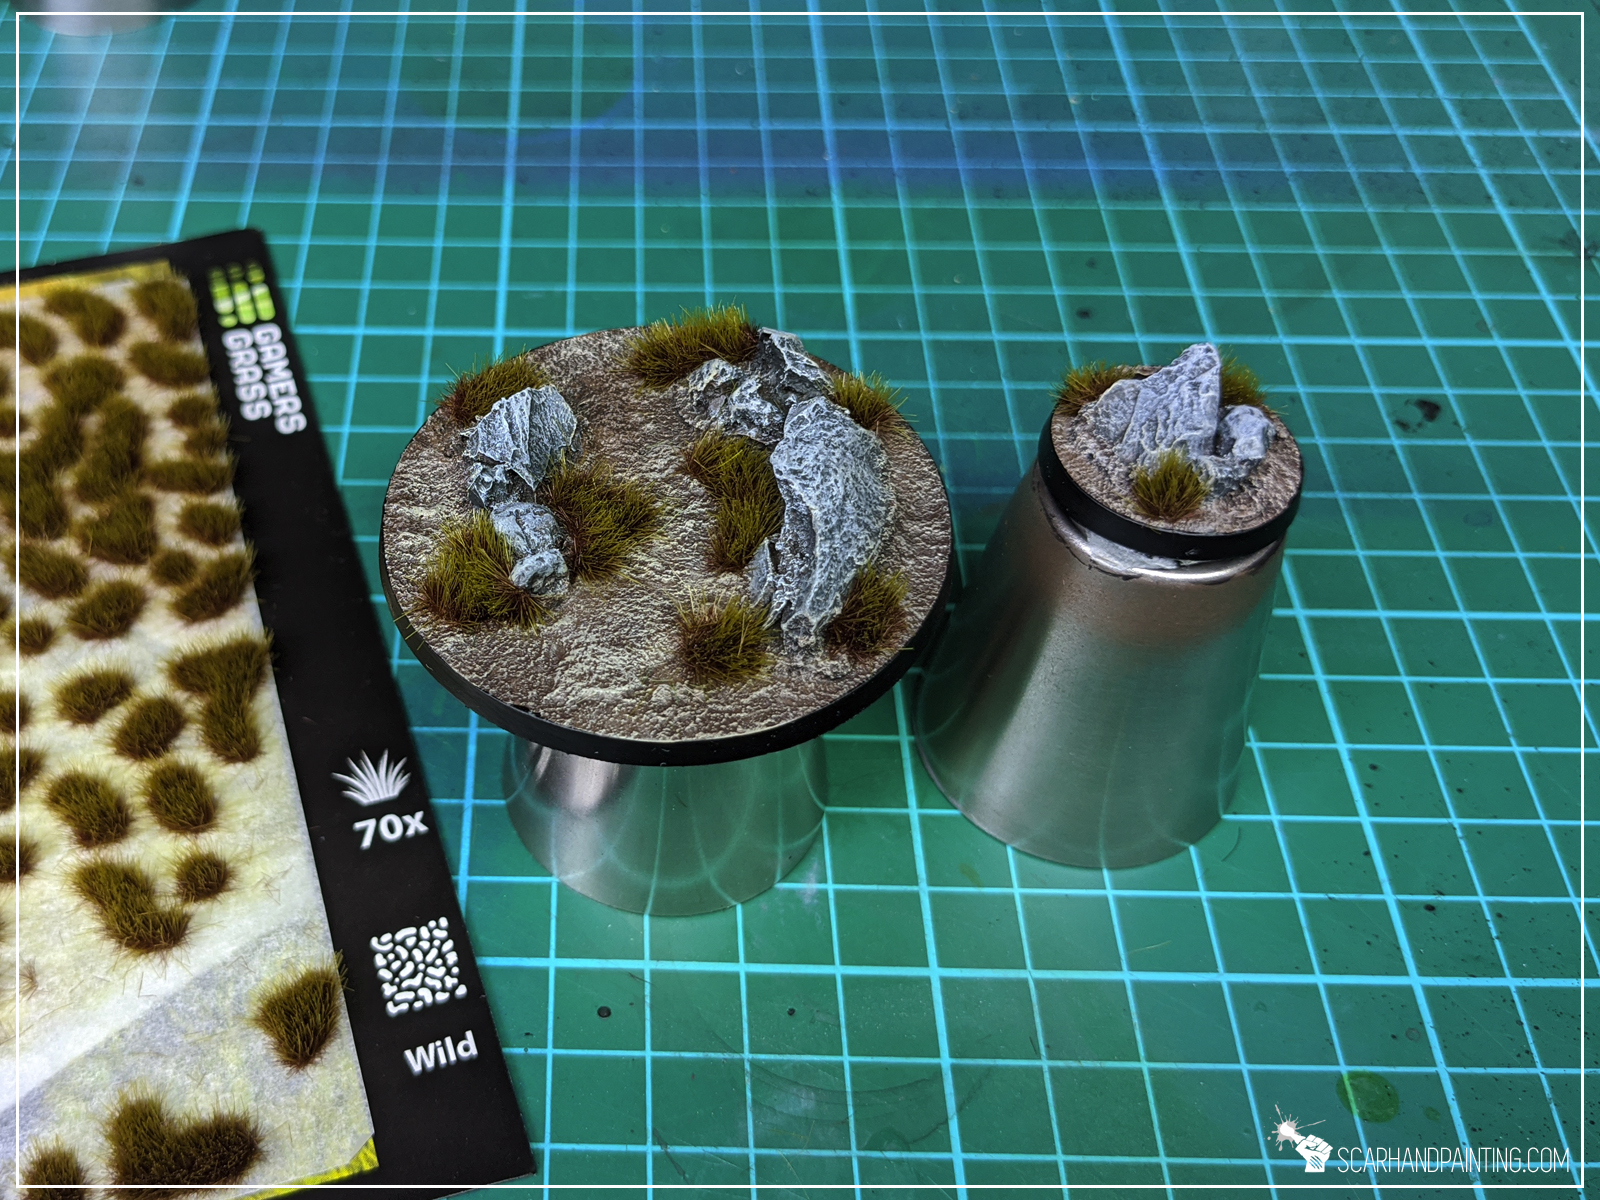
Step tree: Tufts
Finally I applied Gamers Grass Swamp Wild Tufts.

And with that the job was done! Fast and easy – as all bases should be. I hope this was a pleasant tutorial and that you saw how simple the process is. If you want to learn more about Gamers Grass products – here’s my review:
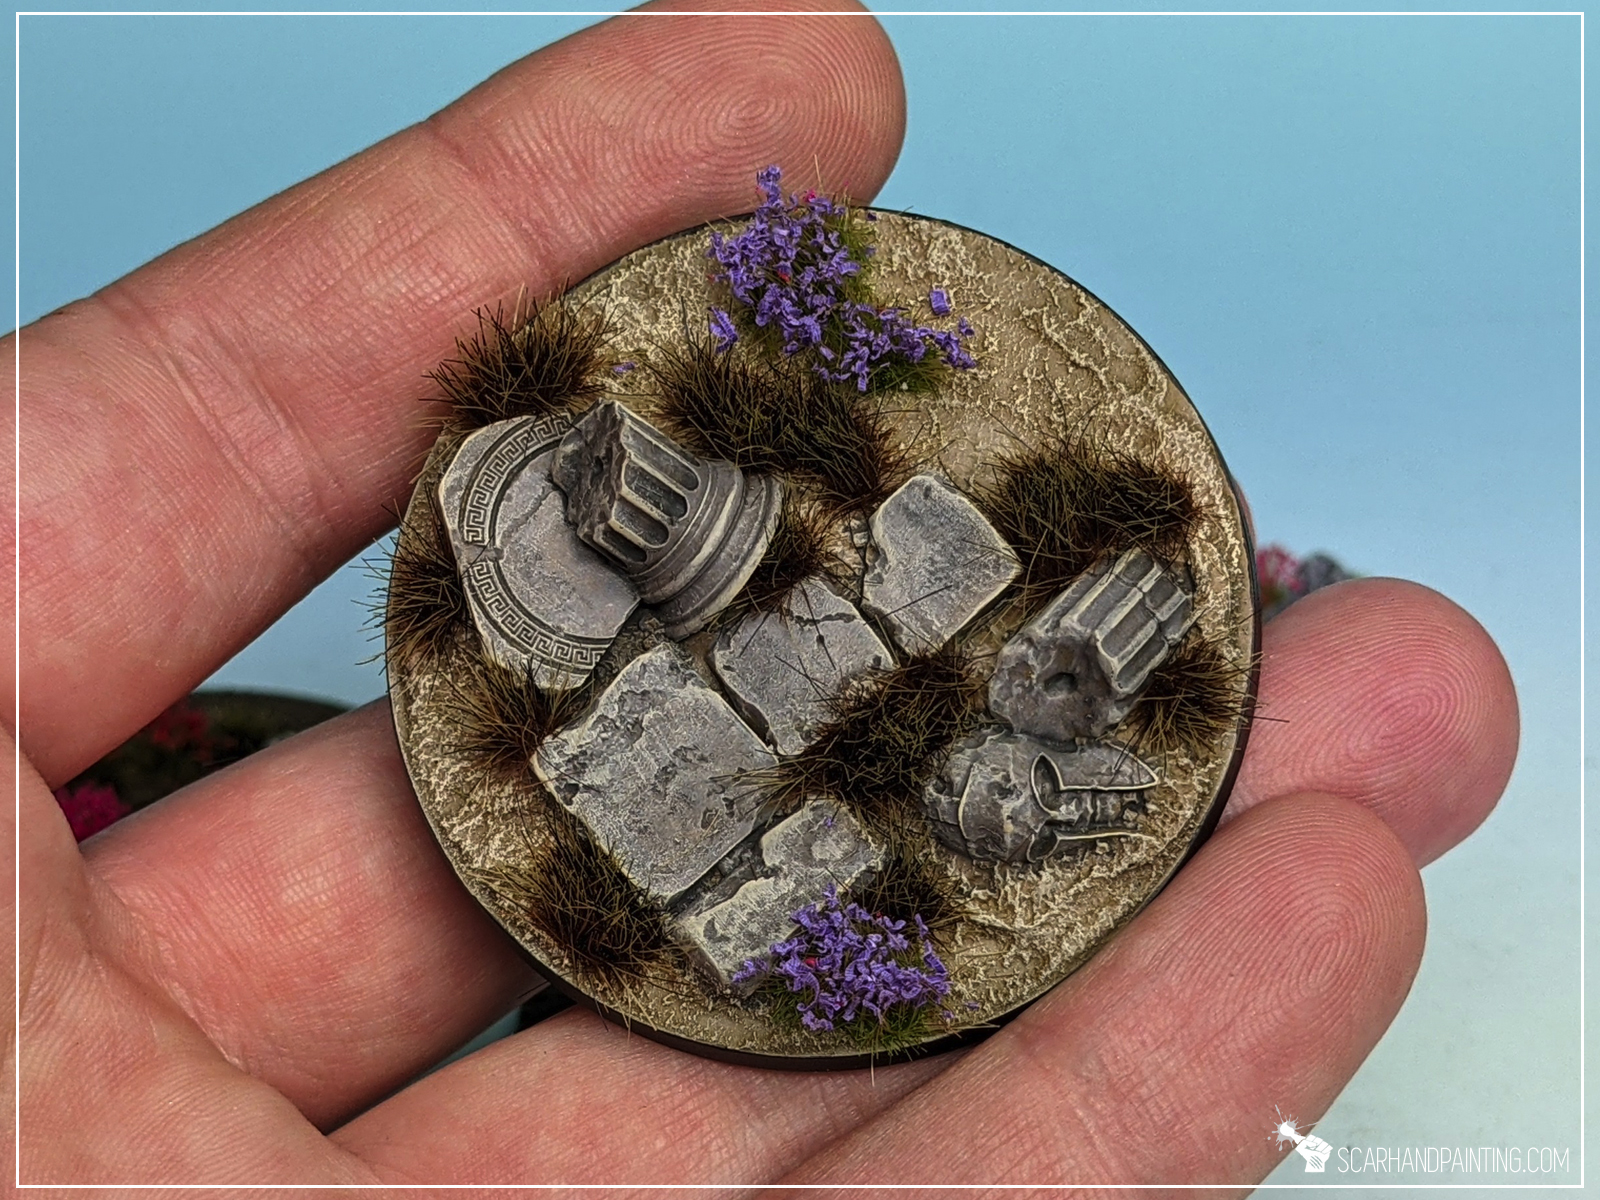
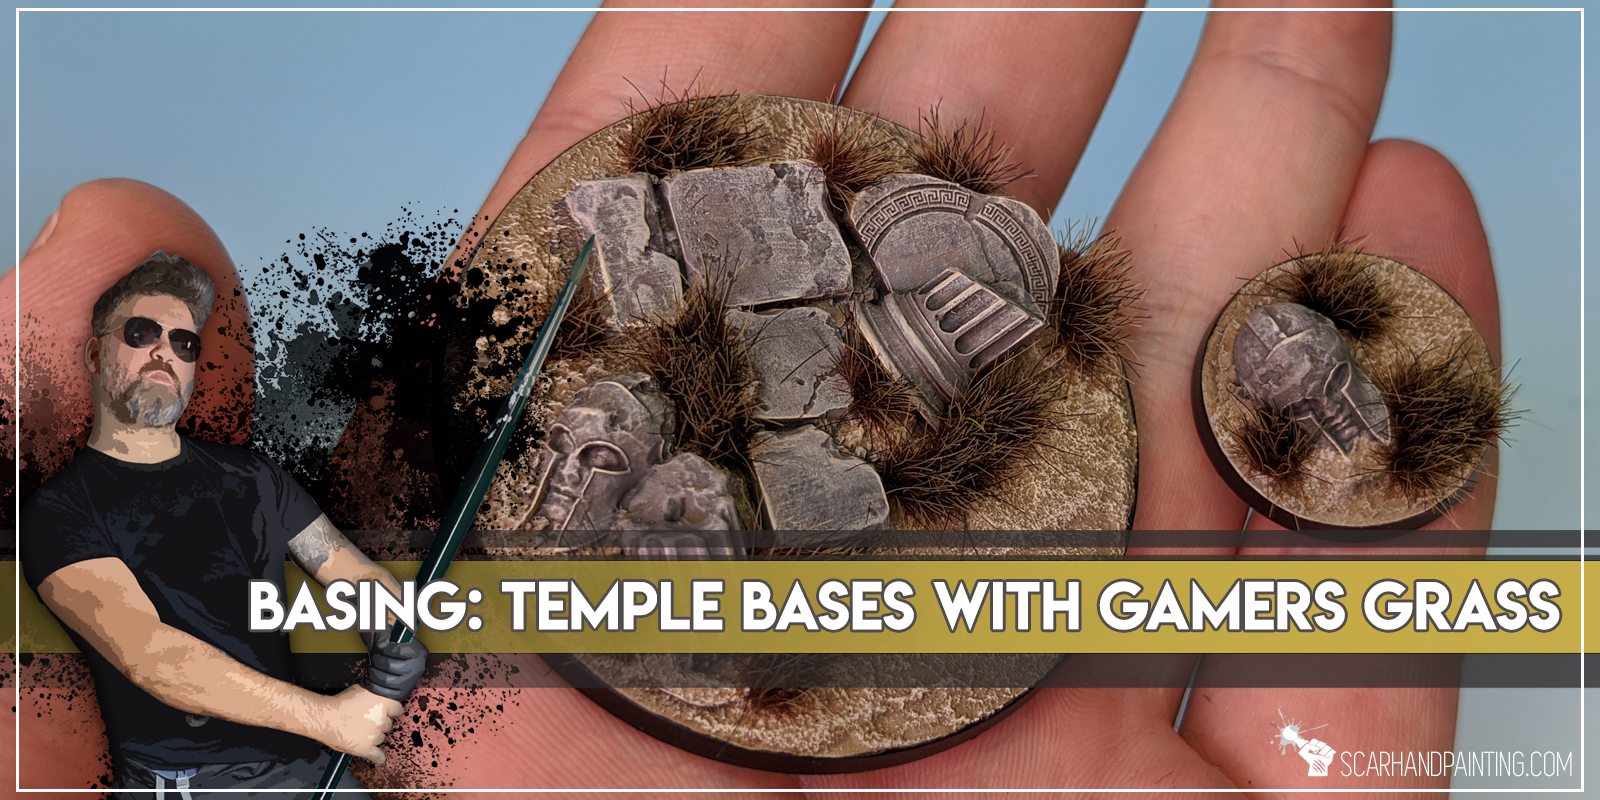
Welcome to Temple Bases tutorial. Here I will take you on a Step-by-step trip through the process of creating and painting Temple Bases as presented in the picture below. This adventure is possible thanks to generosity of Gamers Grass and their easy to use, fantastic products.
Before we start, some notes:
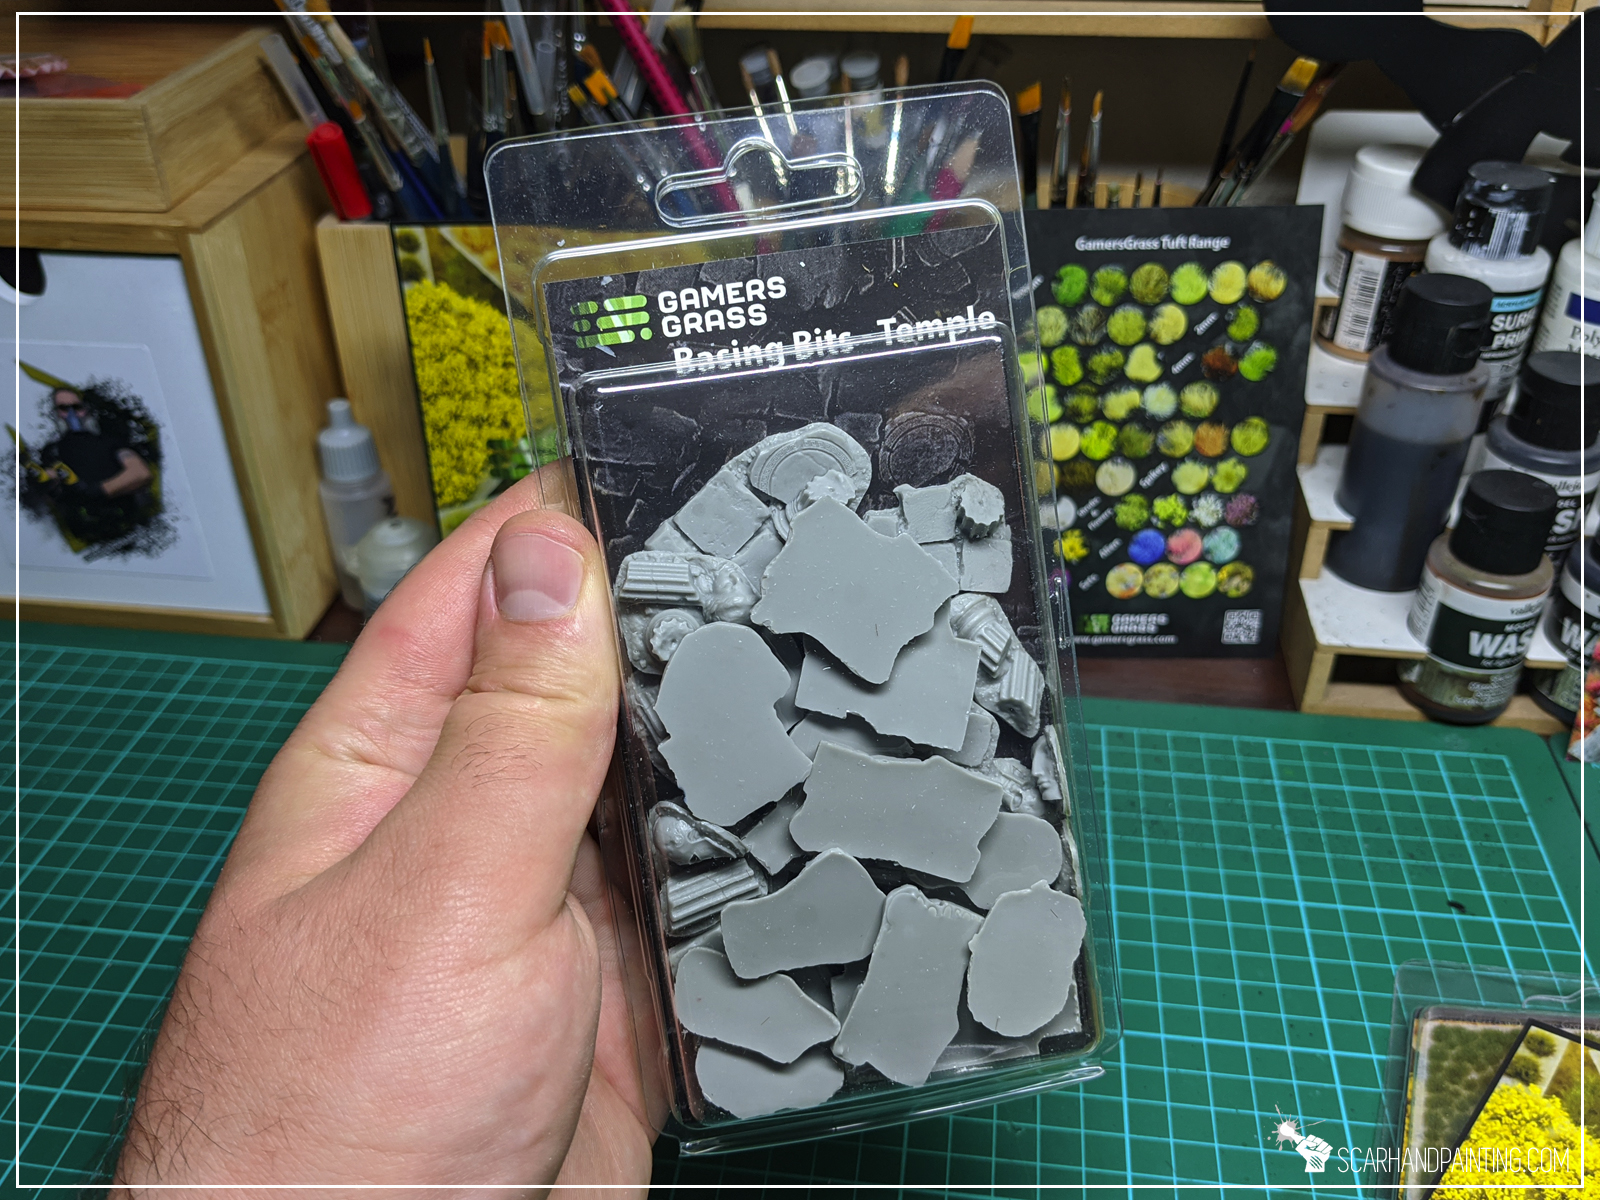
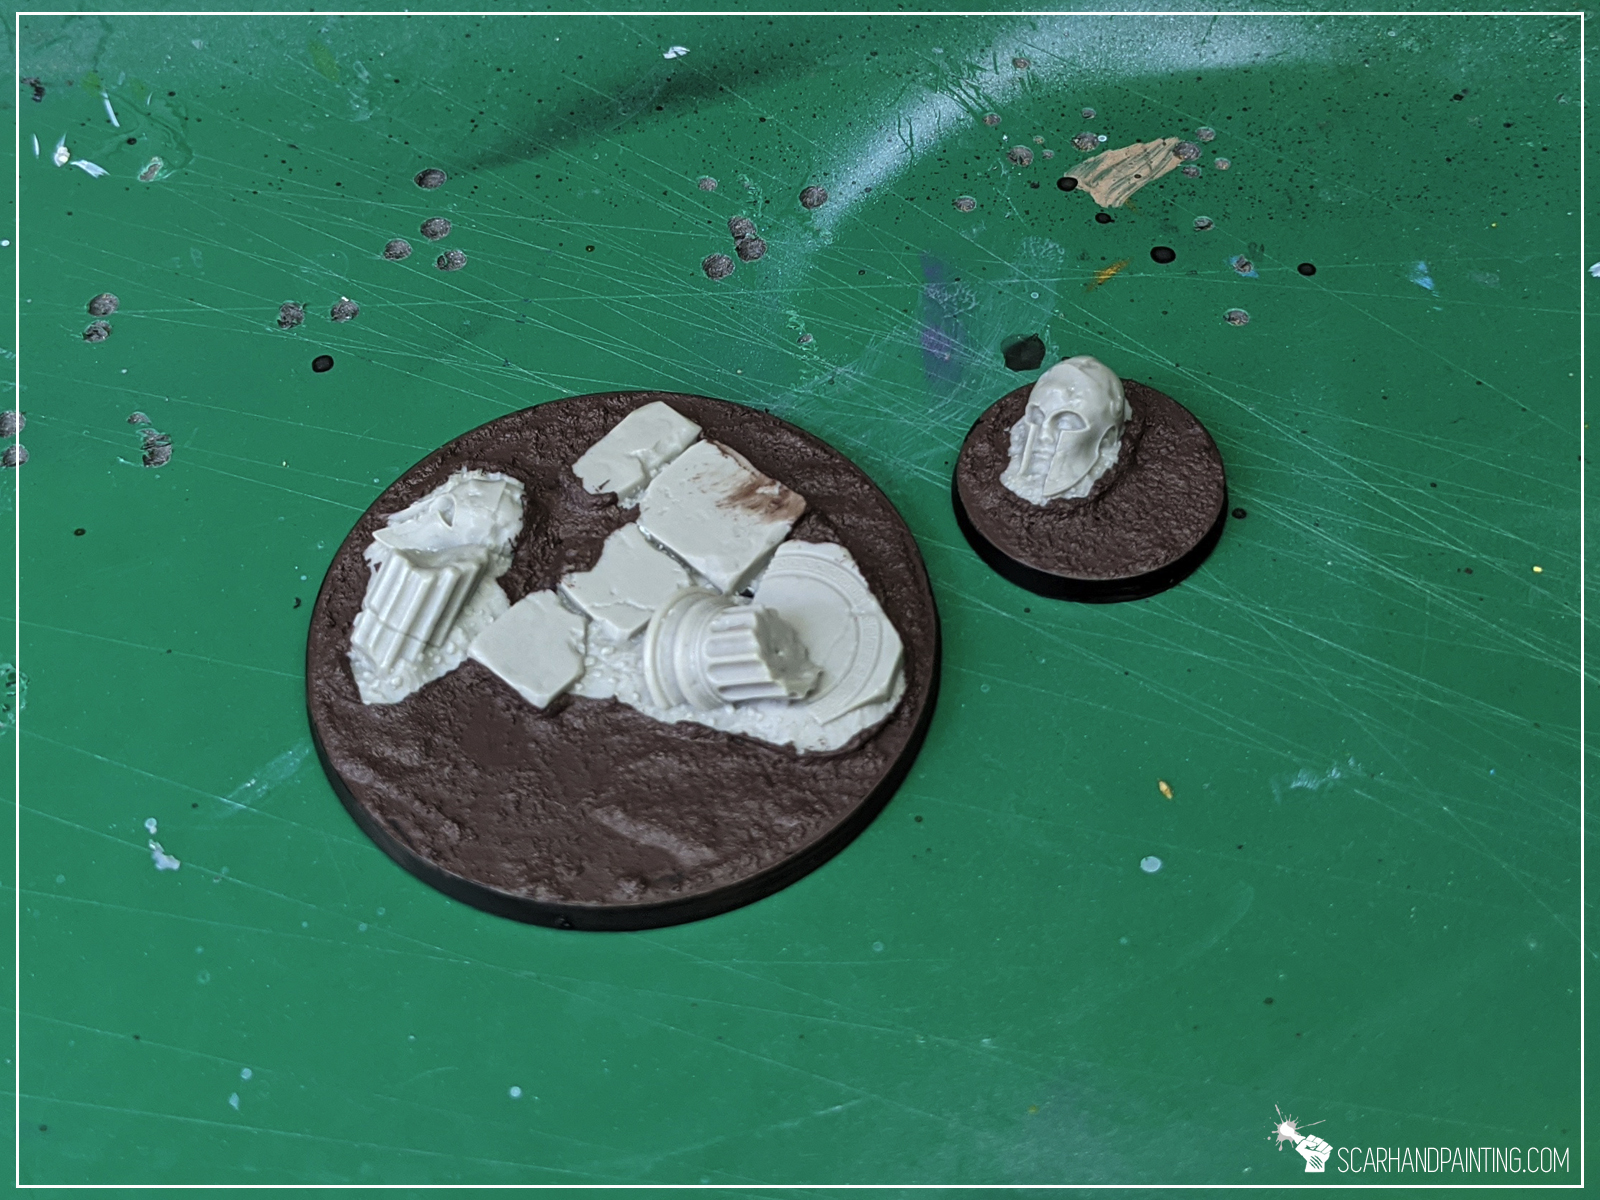
In my opinion base is supposed to complement a miniature, not steal the spotlight. For this reason, when making bases, I usually aim for fast, simple, yet effective solutions. Important thing to note when deciding on what to use for your bases is to pick a method that is easy to copy. This is why I consider Gamers Grass Basing Bits a perfect solution. Nicely textured, ready to use straight out of the box – glue them on, add some texture around – you’re ready to paint. All that being said – for this particular base type I choose Gamers Grass “Temple” basing bits.
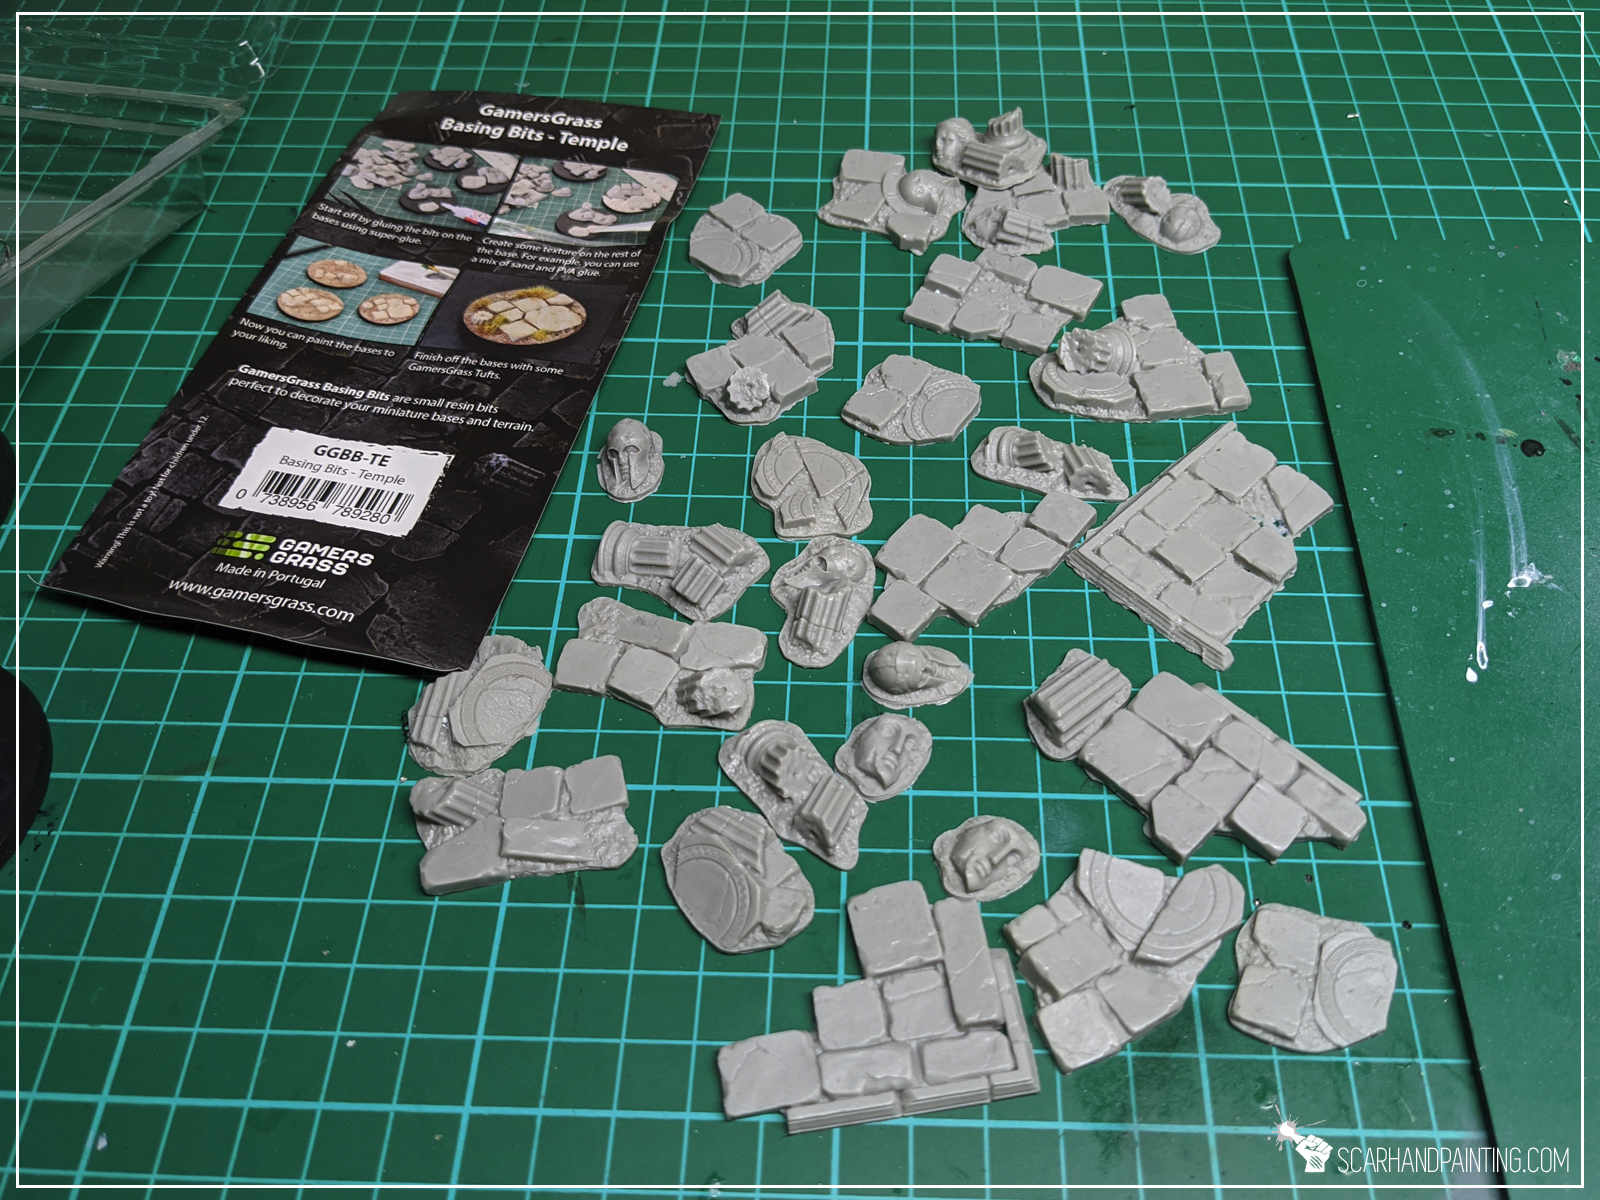
Step one: Applying basing bits
I started by applying glue onto the base and gluing few basing bits on top.


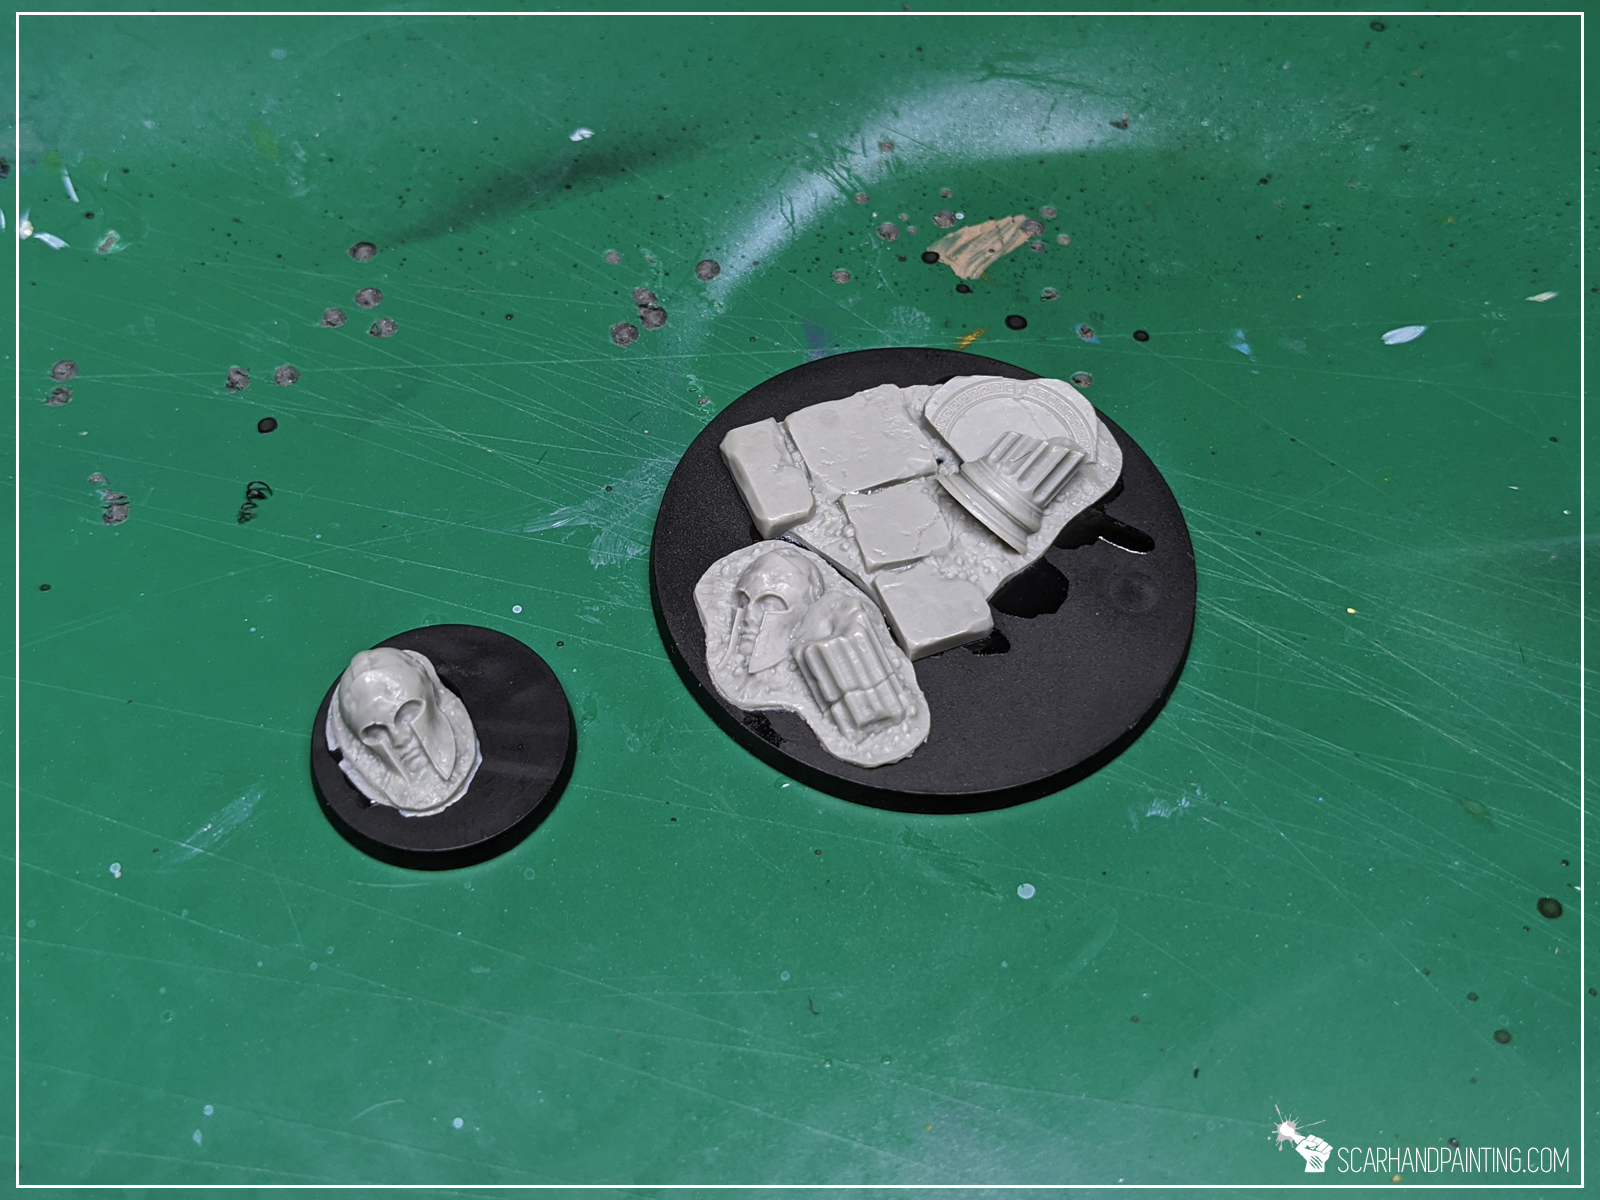
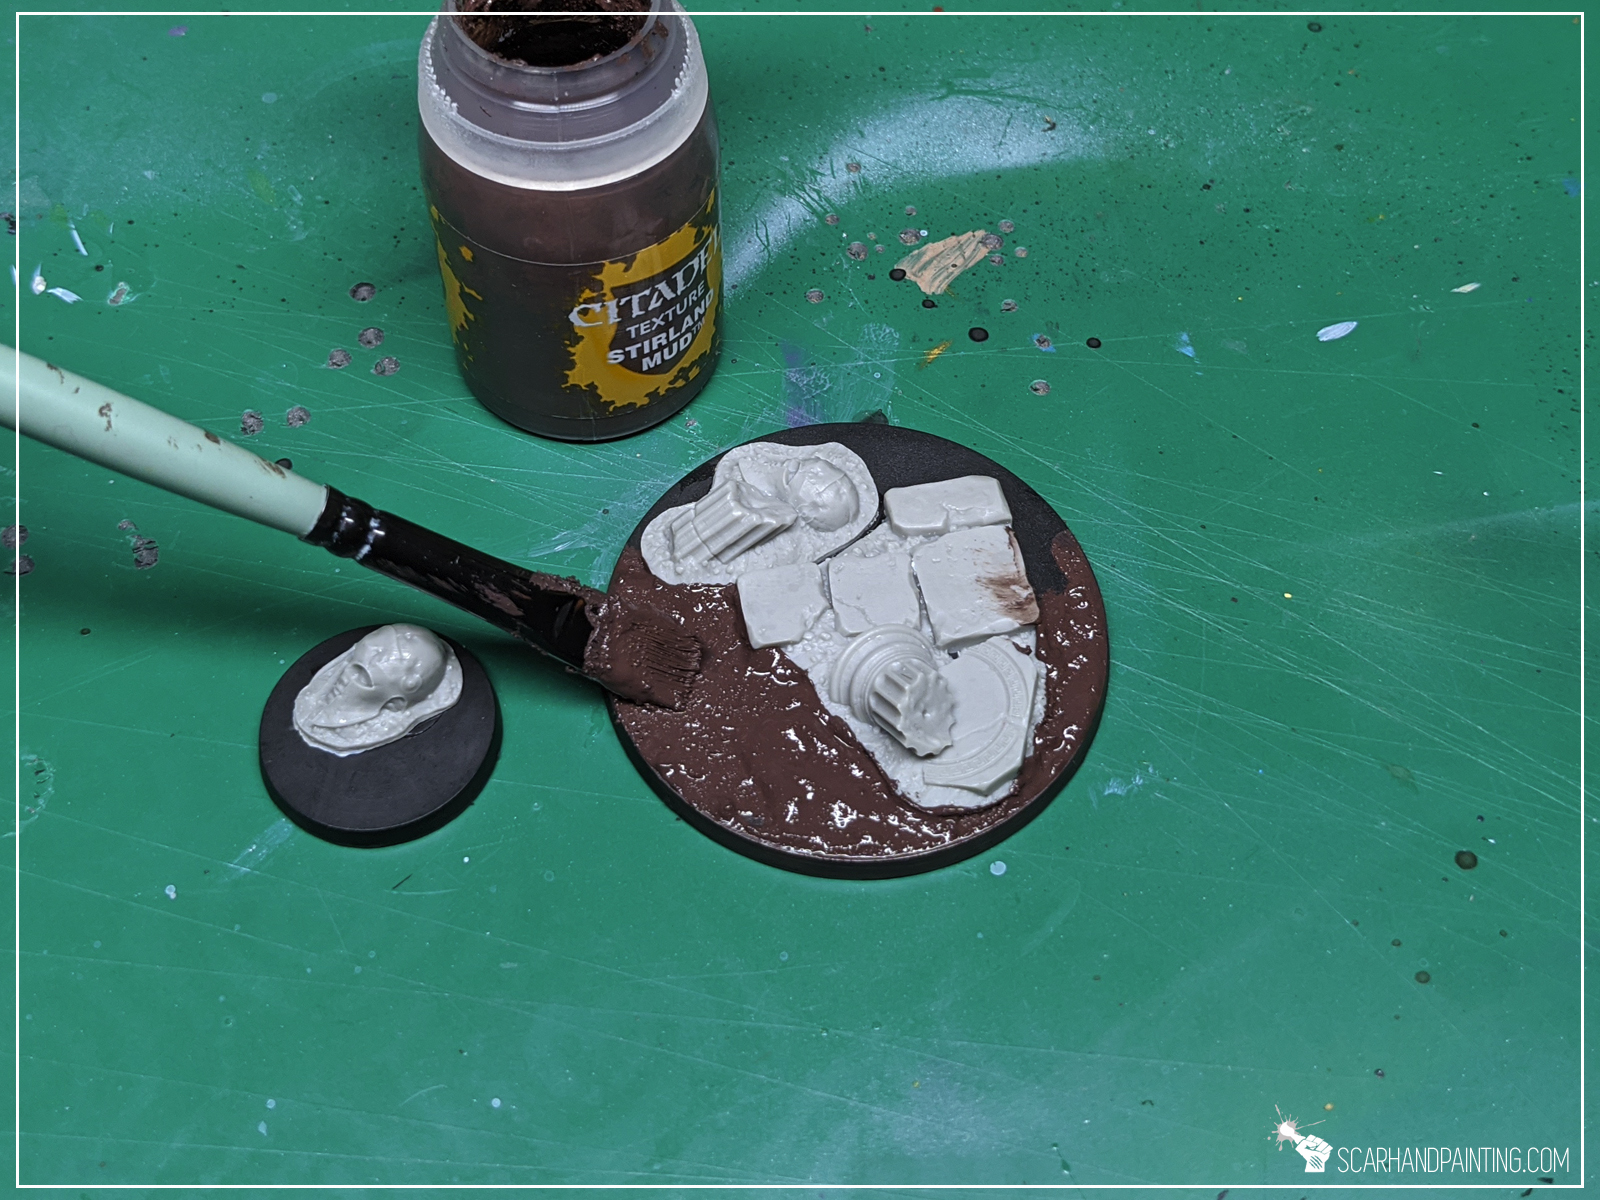
Step two: Applying texture
I then applied texture with Games Workshop Stirland Mud.
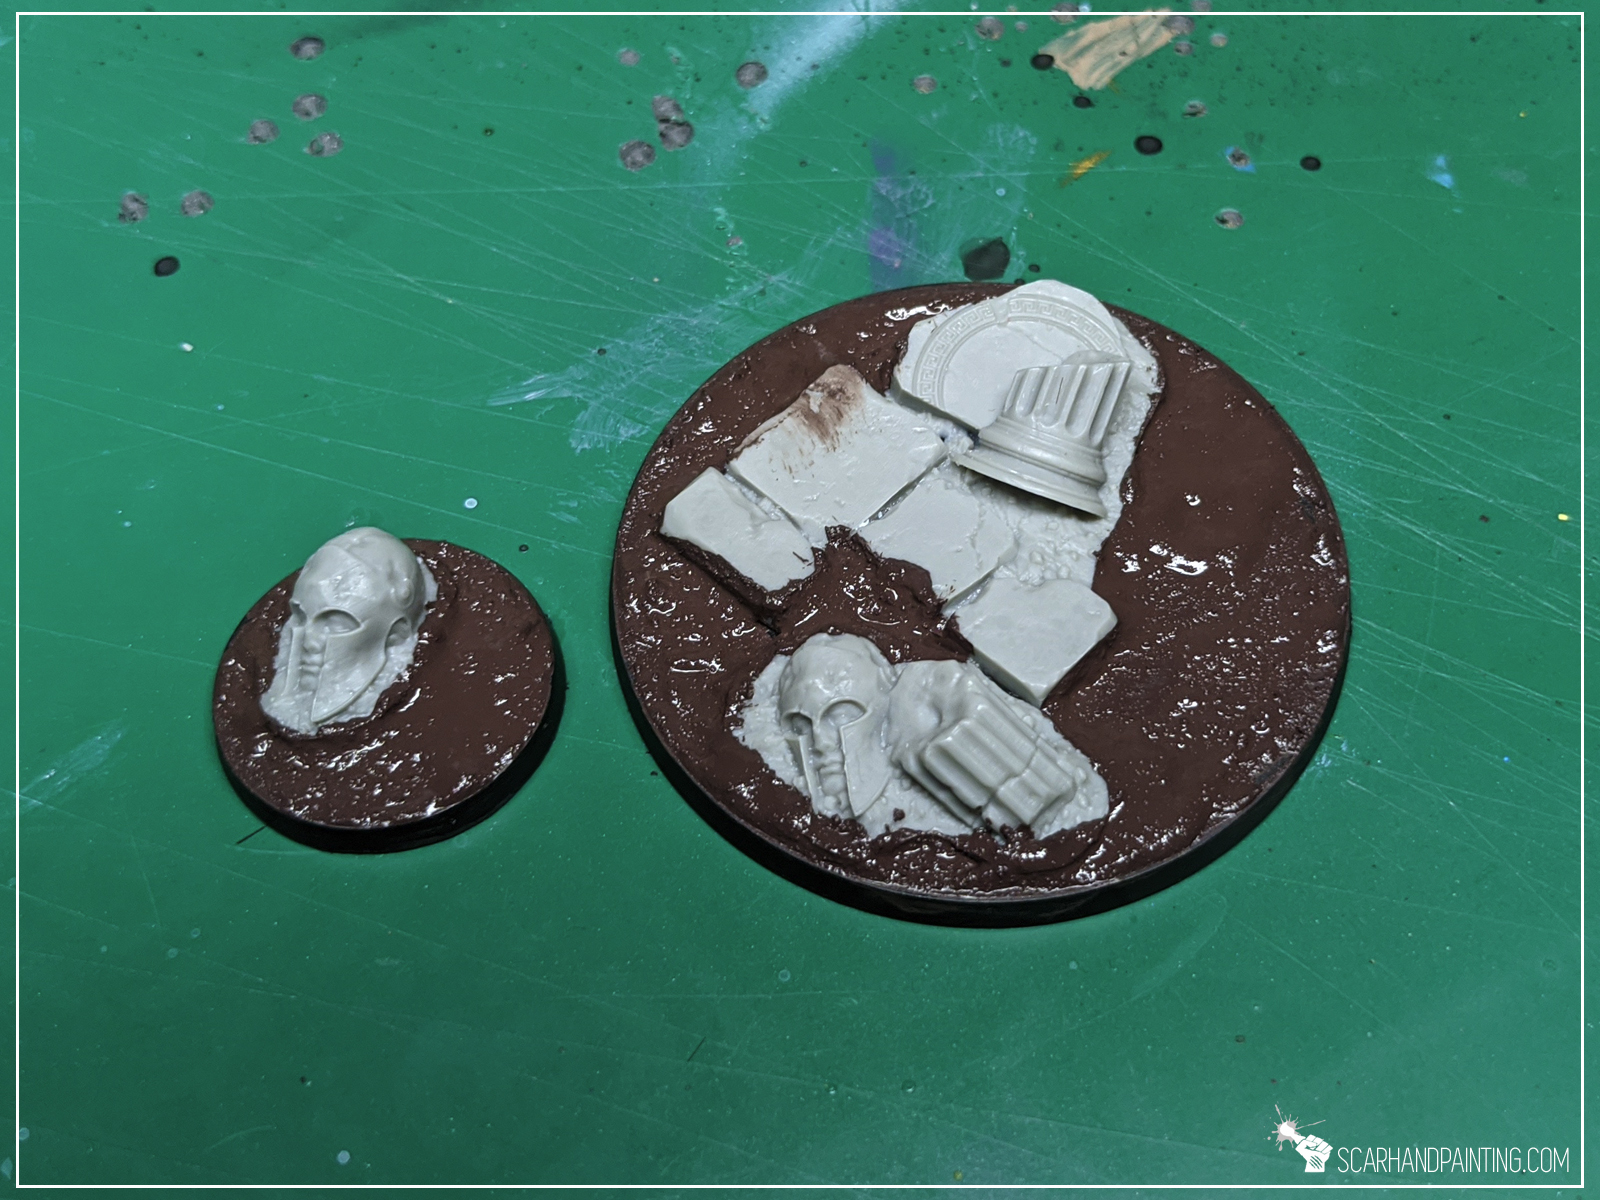
At this point entire “Modelling” part is done. If it seem fast it’s because it really is. Just two steps and you’re ready to paint!
I choose to paint these Temple bases in a bit of a Desert’ish style. Let’s say these are meant to be used for a large army. I want to keep things simple, best if within three layers per color, crowned with a single type of tufts. Nothing fancy, just nice looking, coherent bases. Here’s how I went about it…
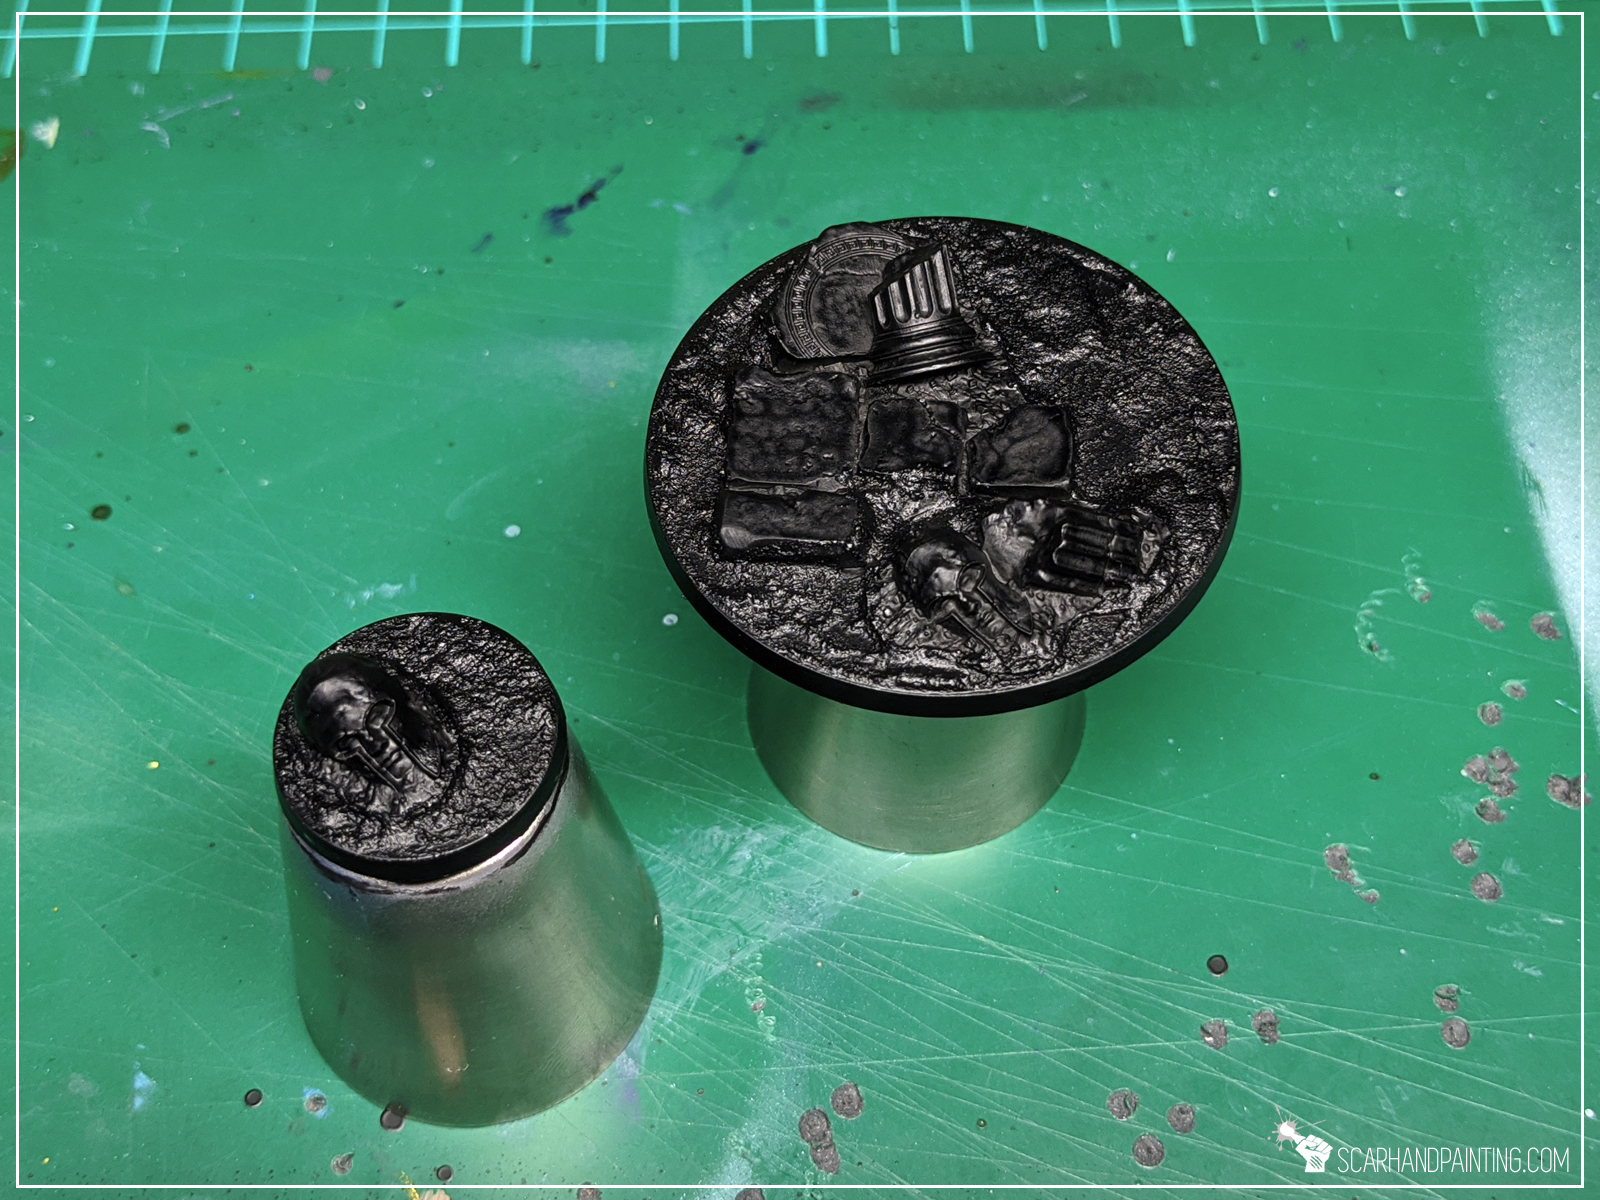
Step one: Undercoat
I applied a black undercoat. This is my usual start for everything 😛
Step two: Main color
I then airbrushed Vallejo Desert Yellow over entire base. Once dry I applied Vallejo European Dust Wash.
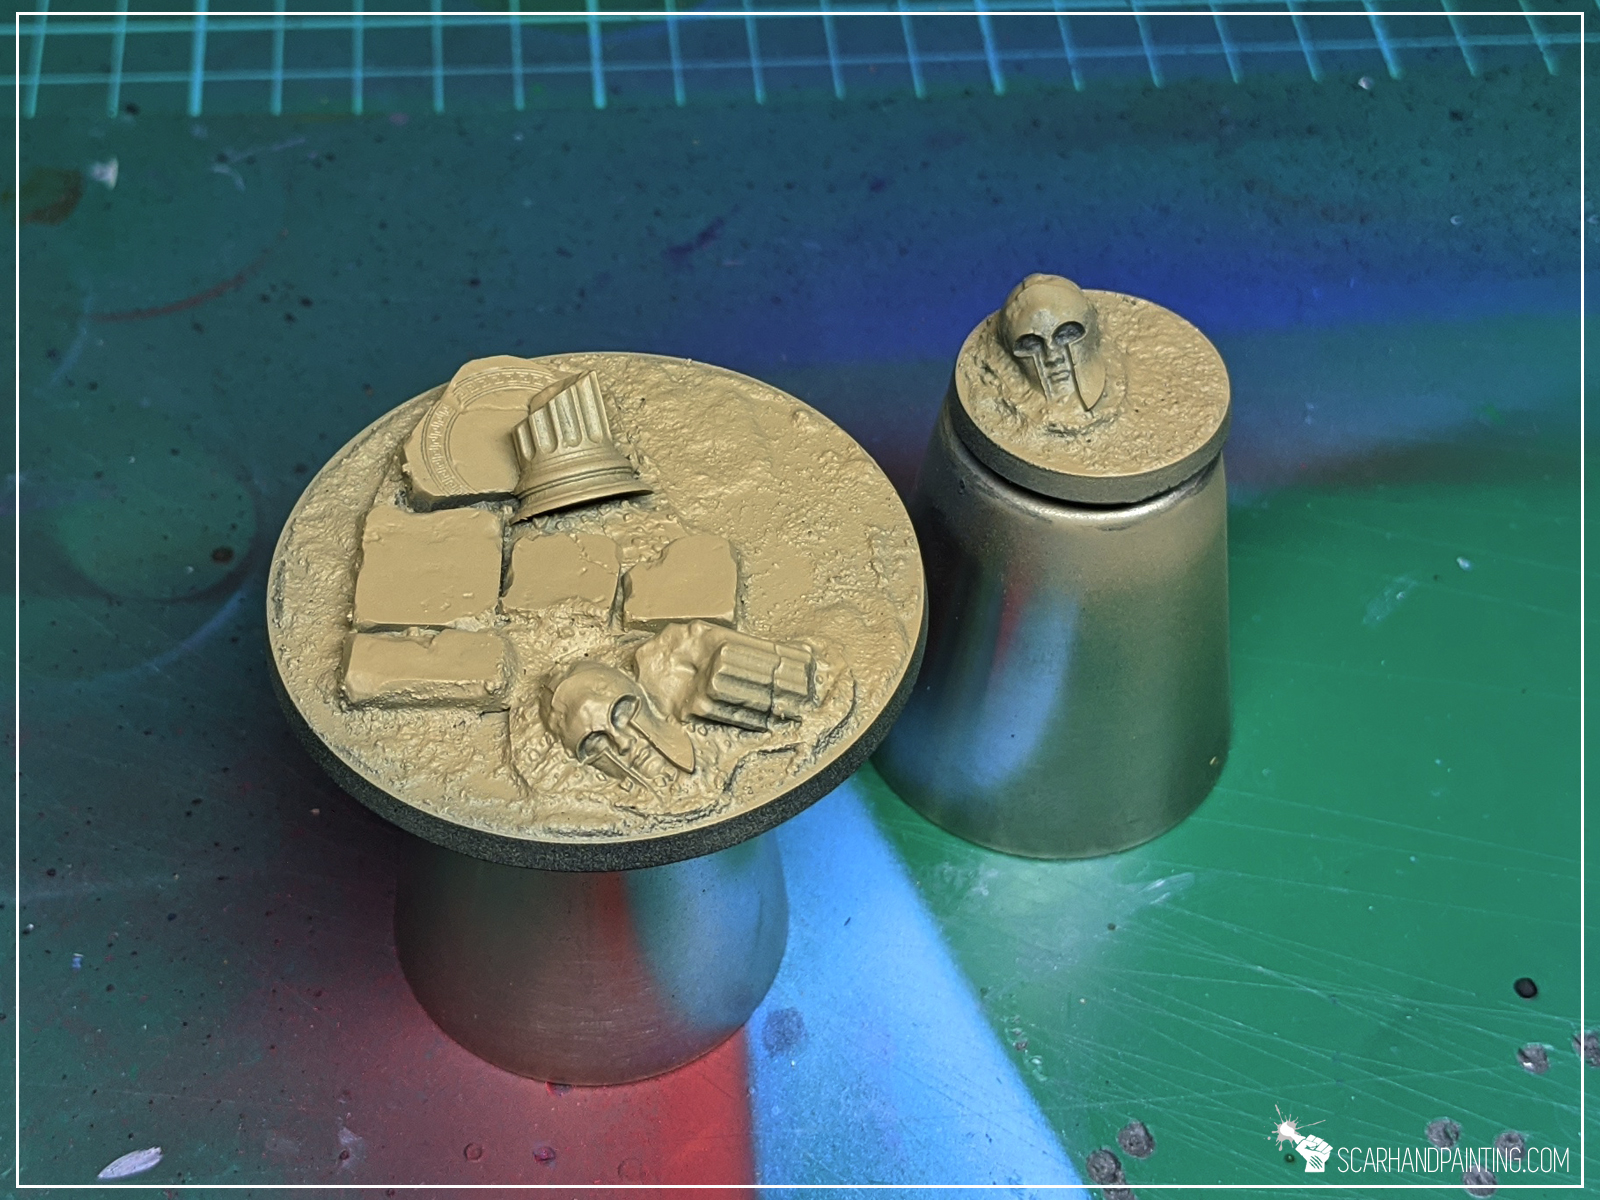
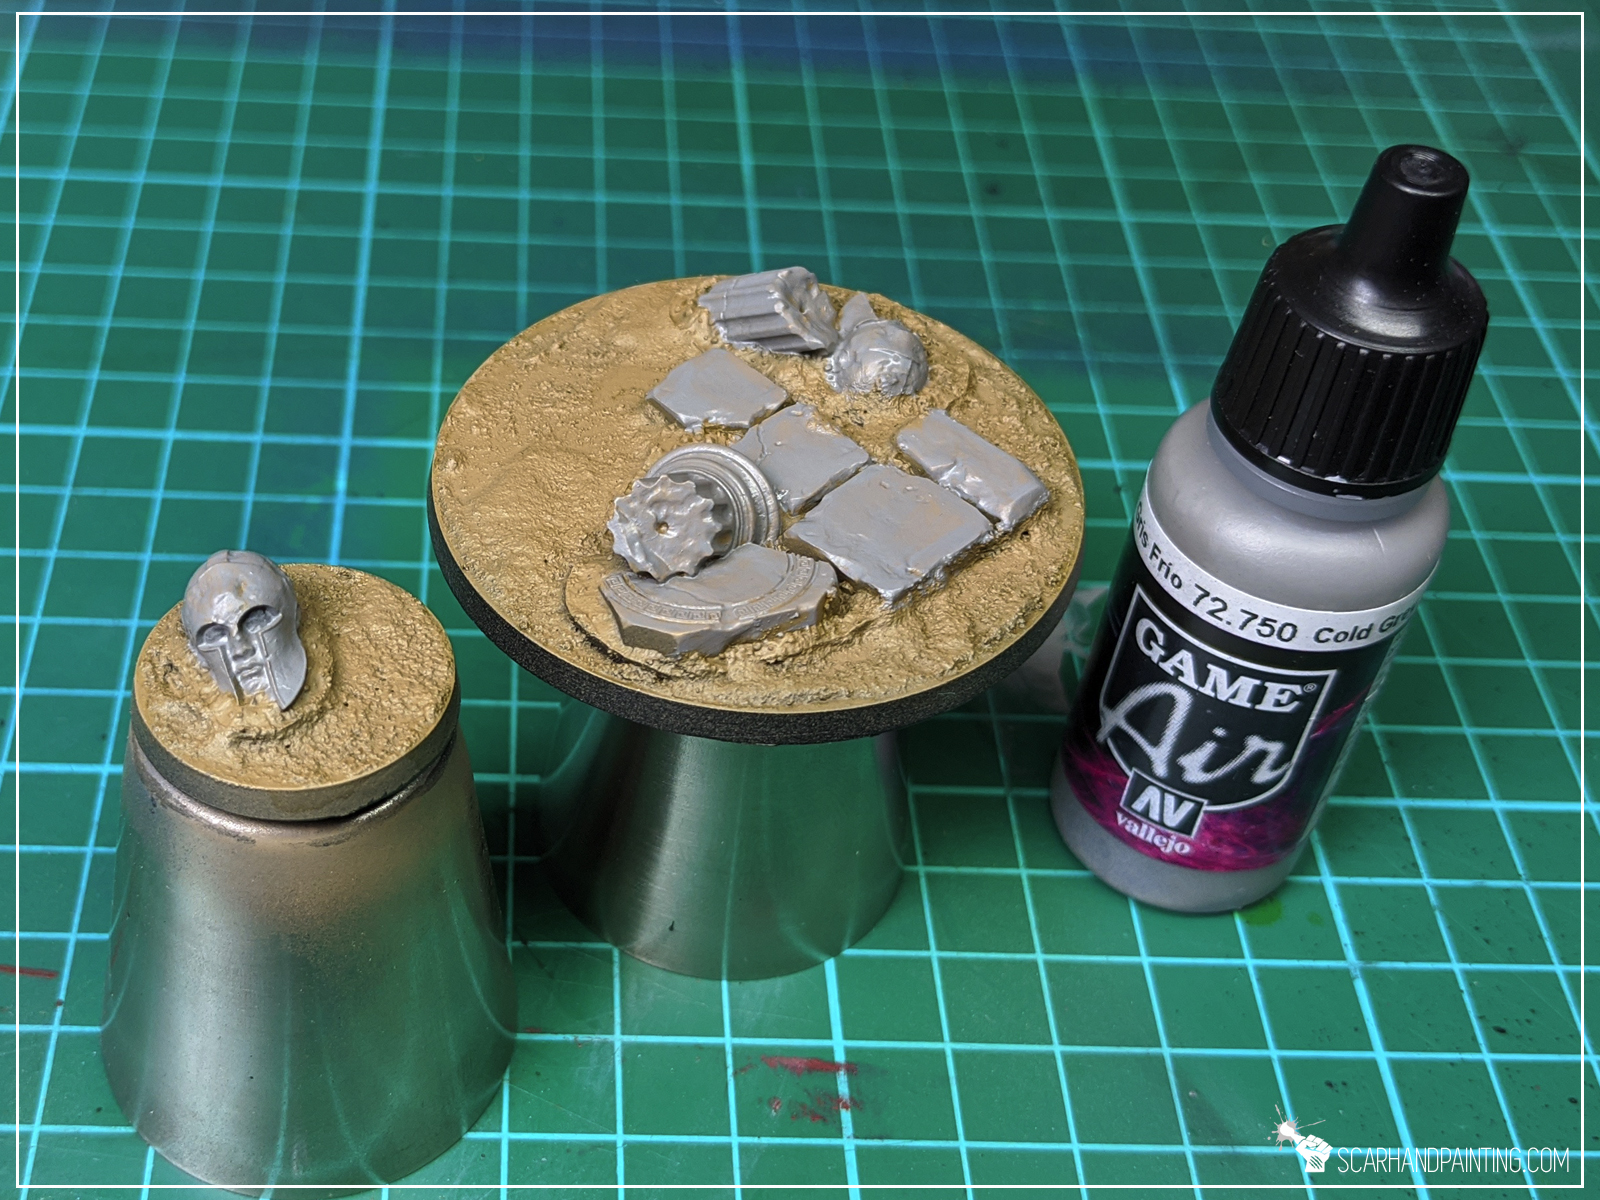
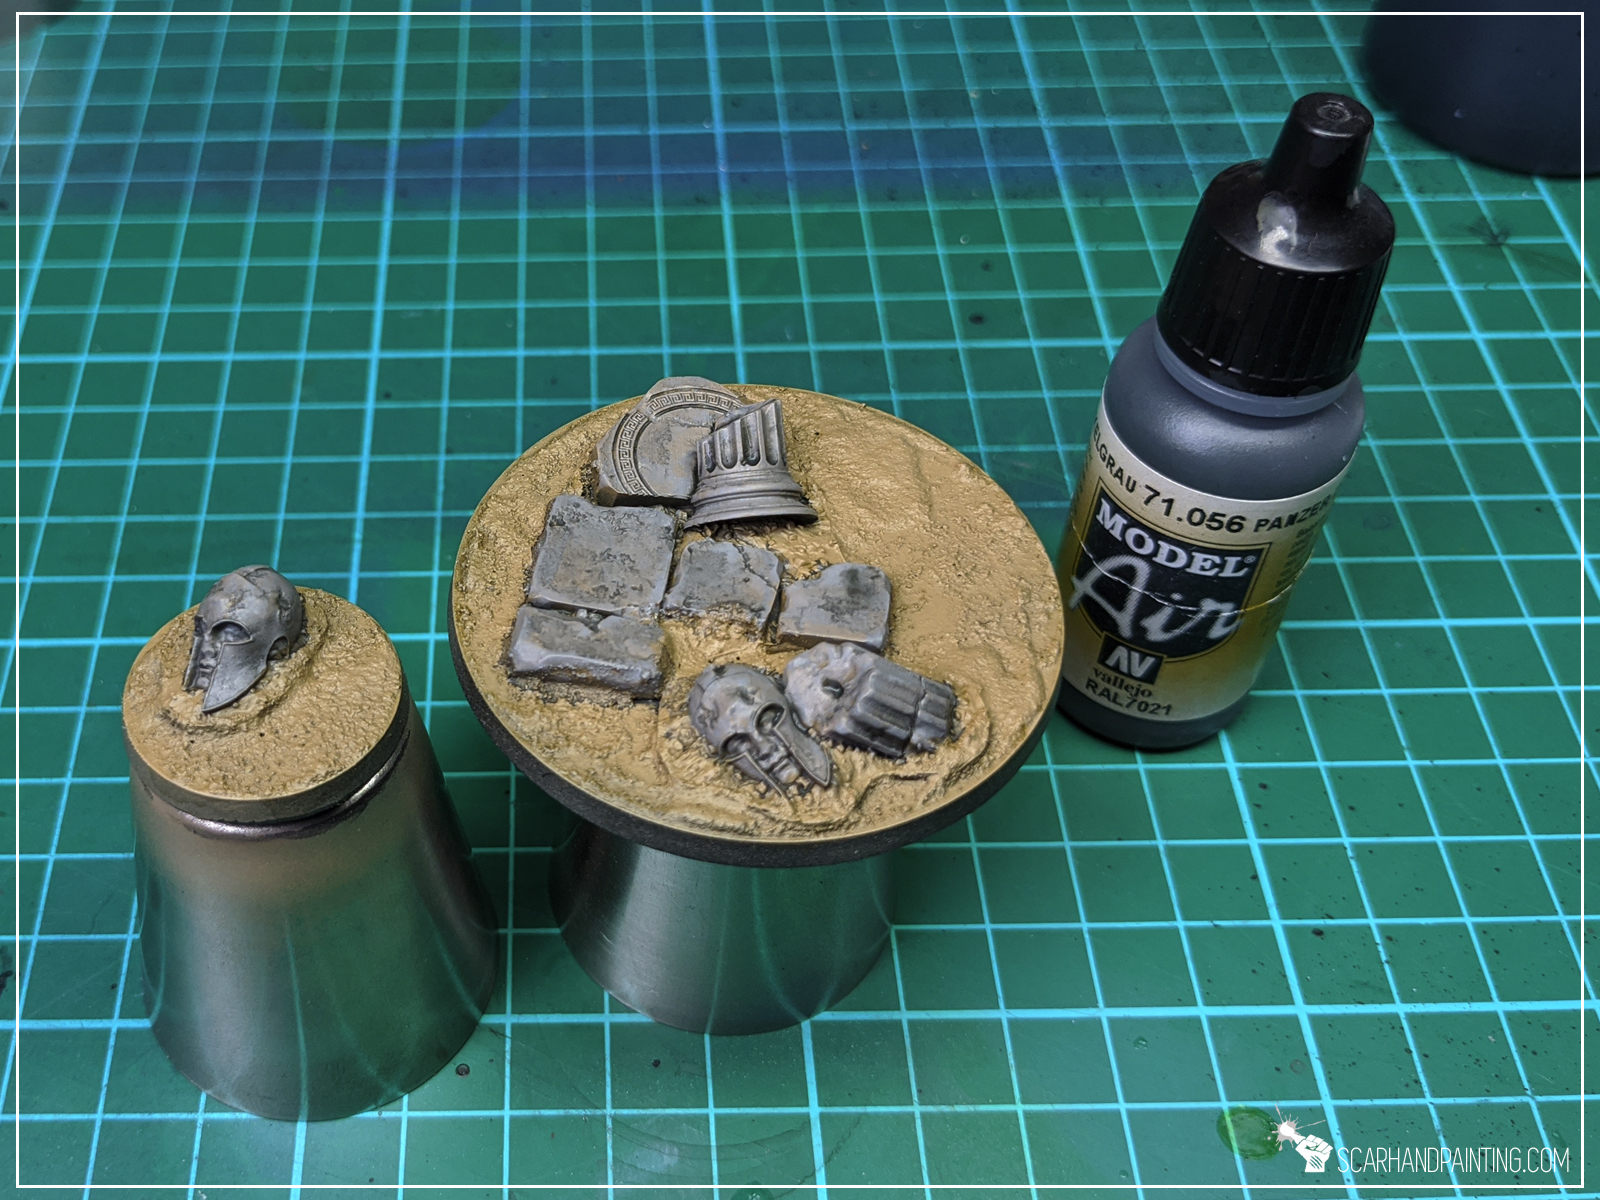
Step two: Secondary color
For ruins I choose Vallejo Cold Grey, followed by a wash of water thinned Vallejo Dark Panzer Grey.
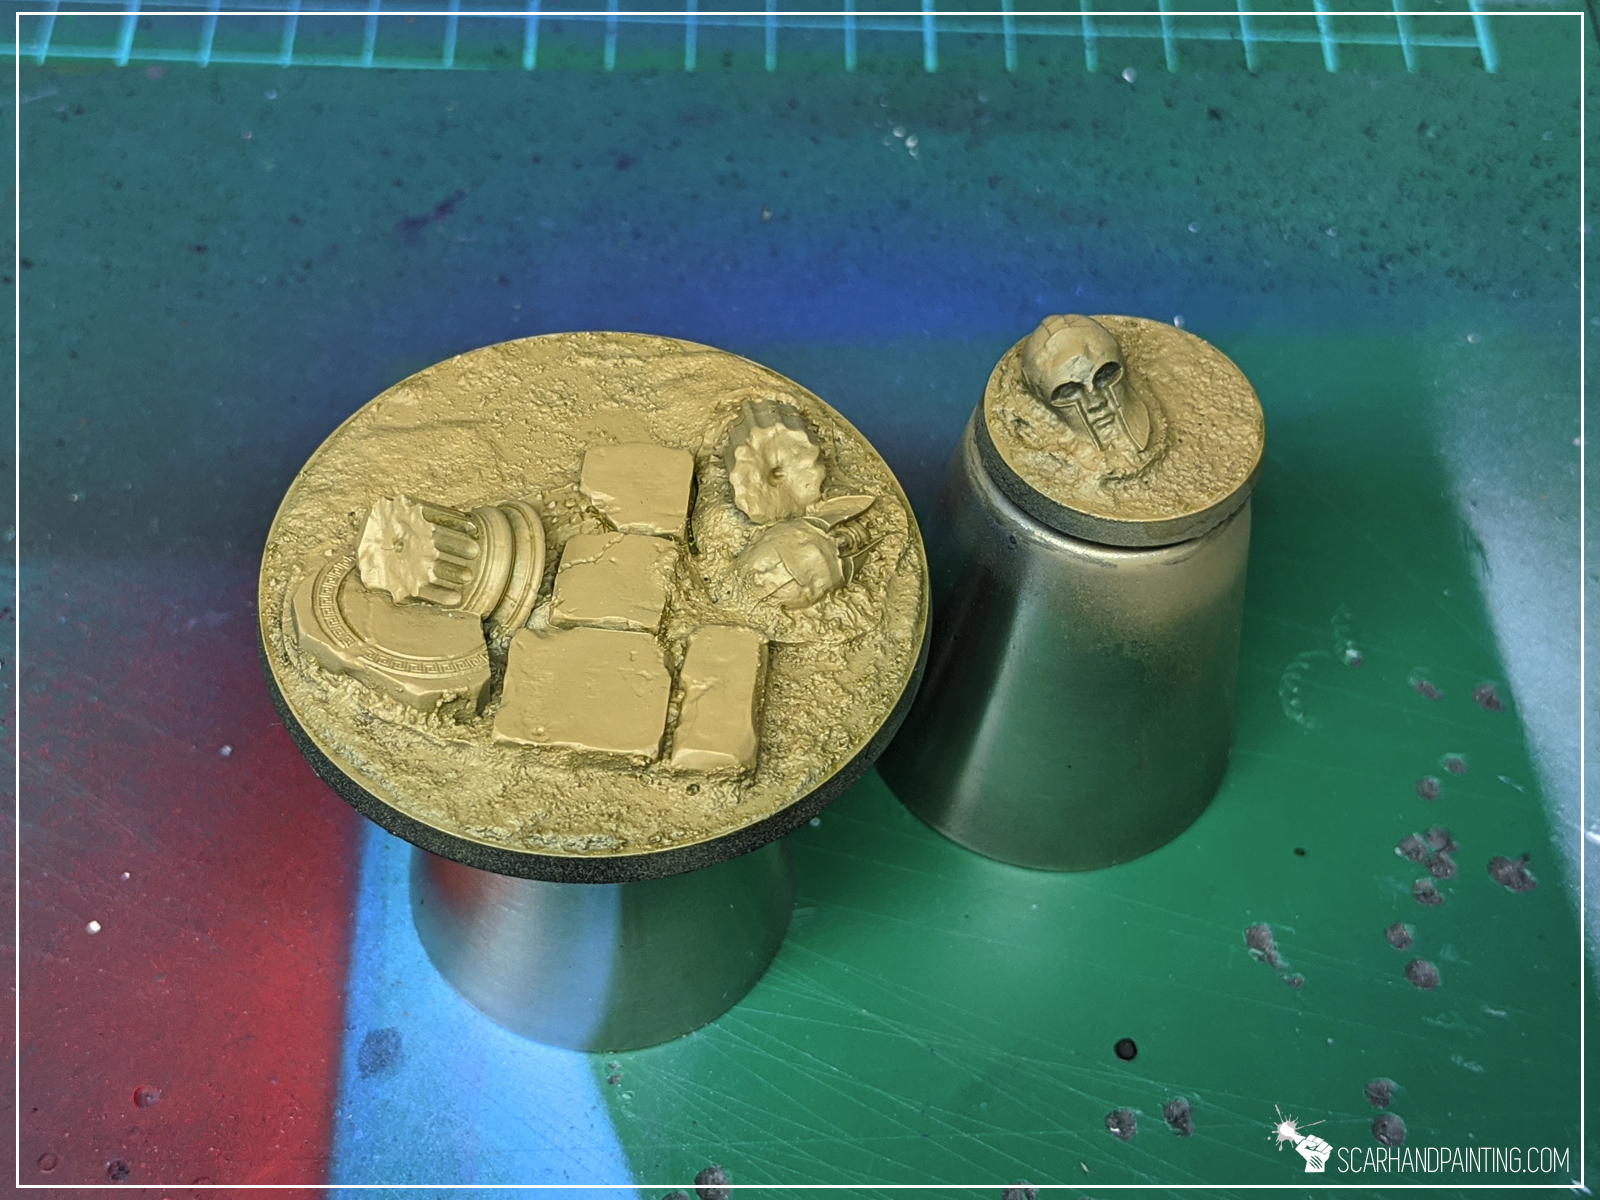
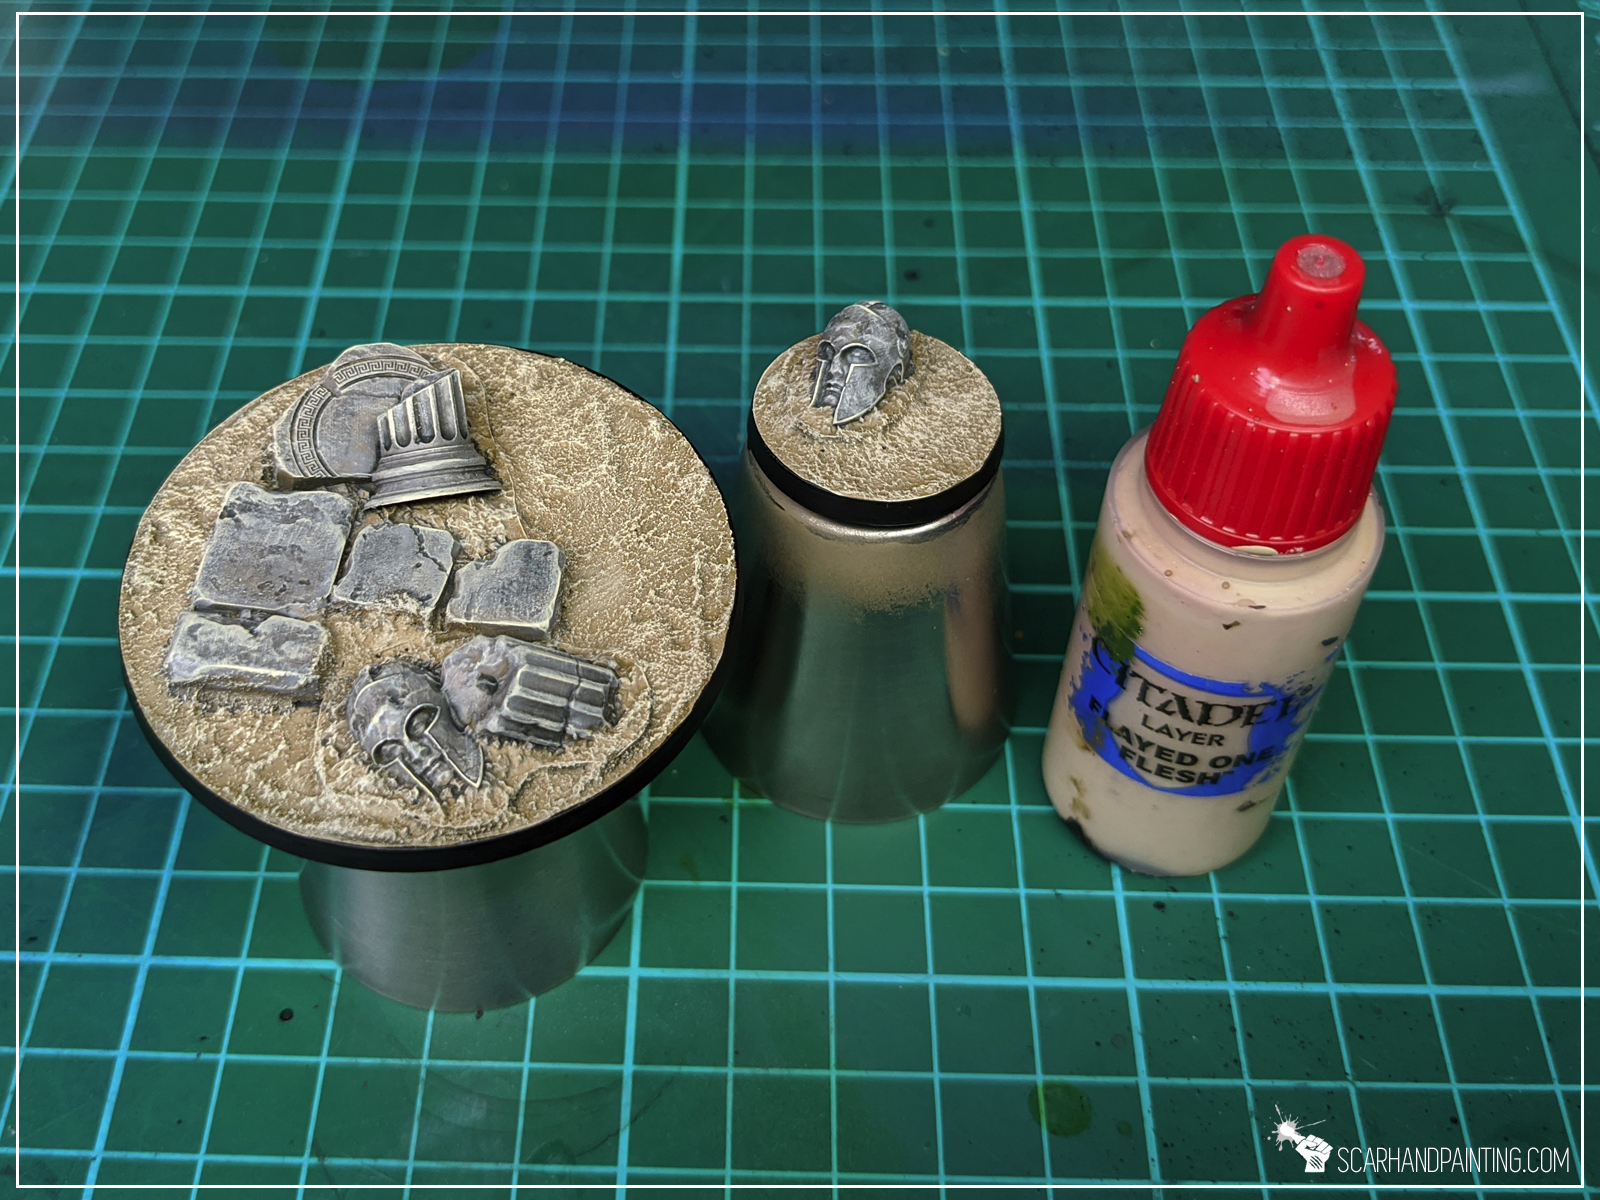
Step tree: Highlights
I then highlighted both colors with a soft drybrush of Games Workshop Flayed One Flesh. I also applied some highlights with the same color on the edges of ruins – just a bit to make them pop.

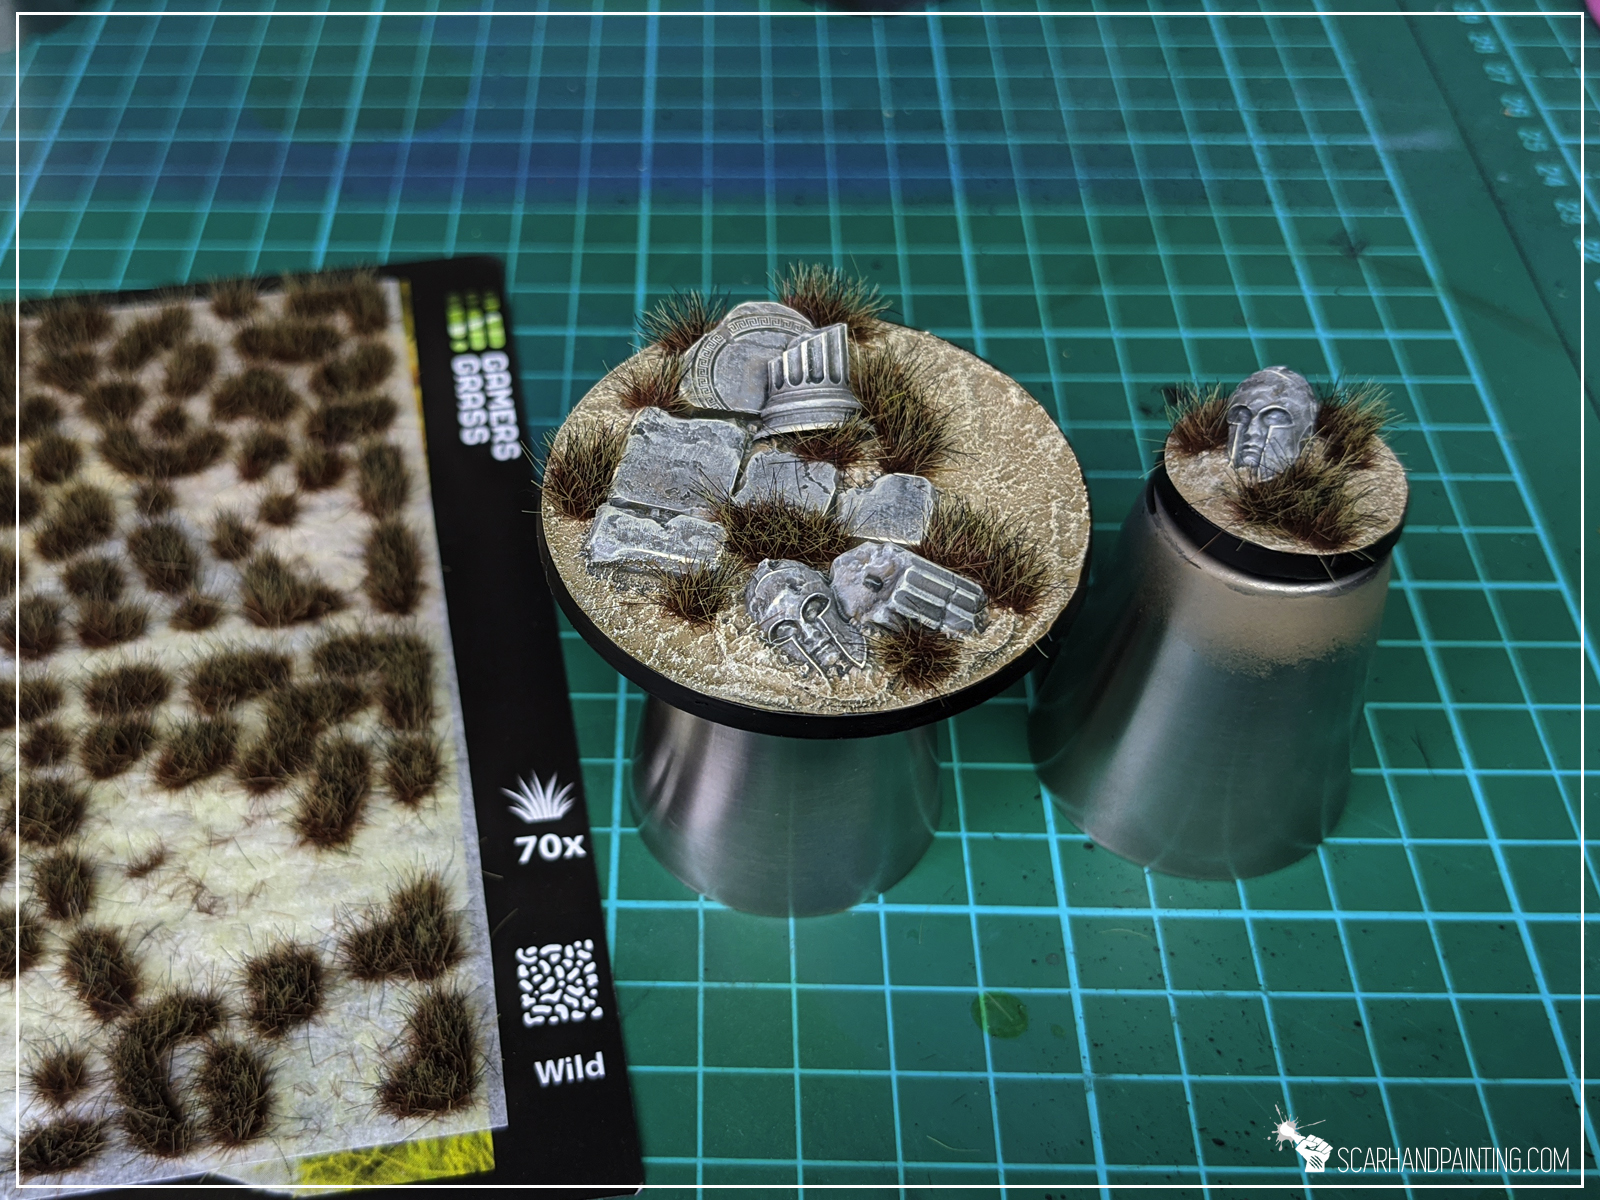
Step tree: Tufts
Finally I applied Gamers Grass Burned Wild Tufts.

Job done! There’s some poetry in both starting and finishing a base using products from the same company 😛 Either way – I hope this was a pleasant tutorial and that you saw how simple the process is. If you want to learn more about Gamers Grass products – here’s my review: