- contact@scarhandpainting.com


Welcome to second part of the “Mortician’s Pitch” Special Project part 1 article in witch I take you on a ride from bare meshed wood planks to a finished Guild Ball pitch. Stick around and see how “Mortician’s Pitch” came to being.
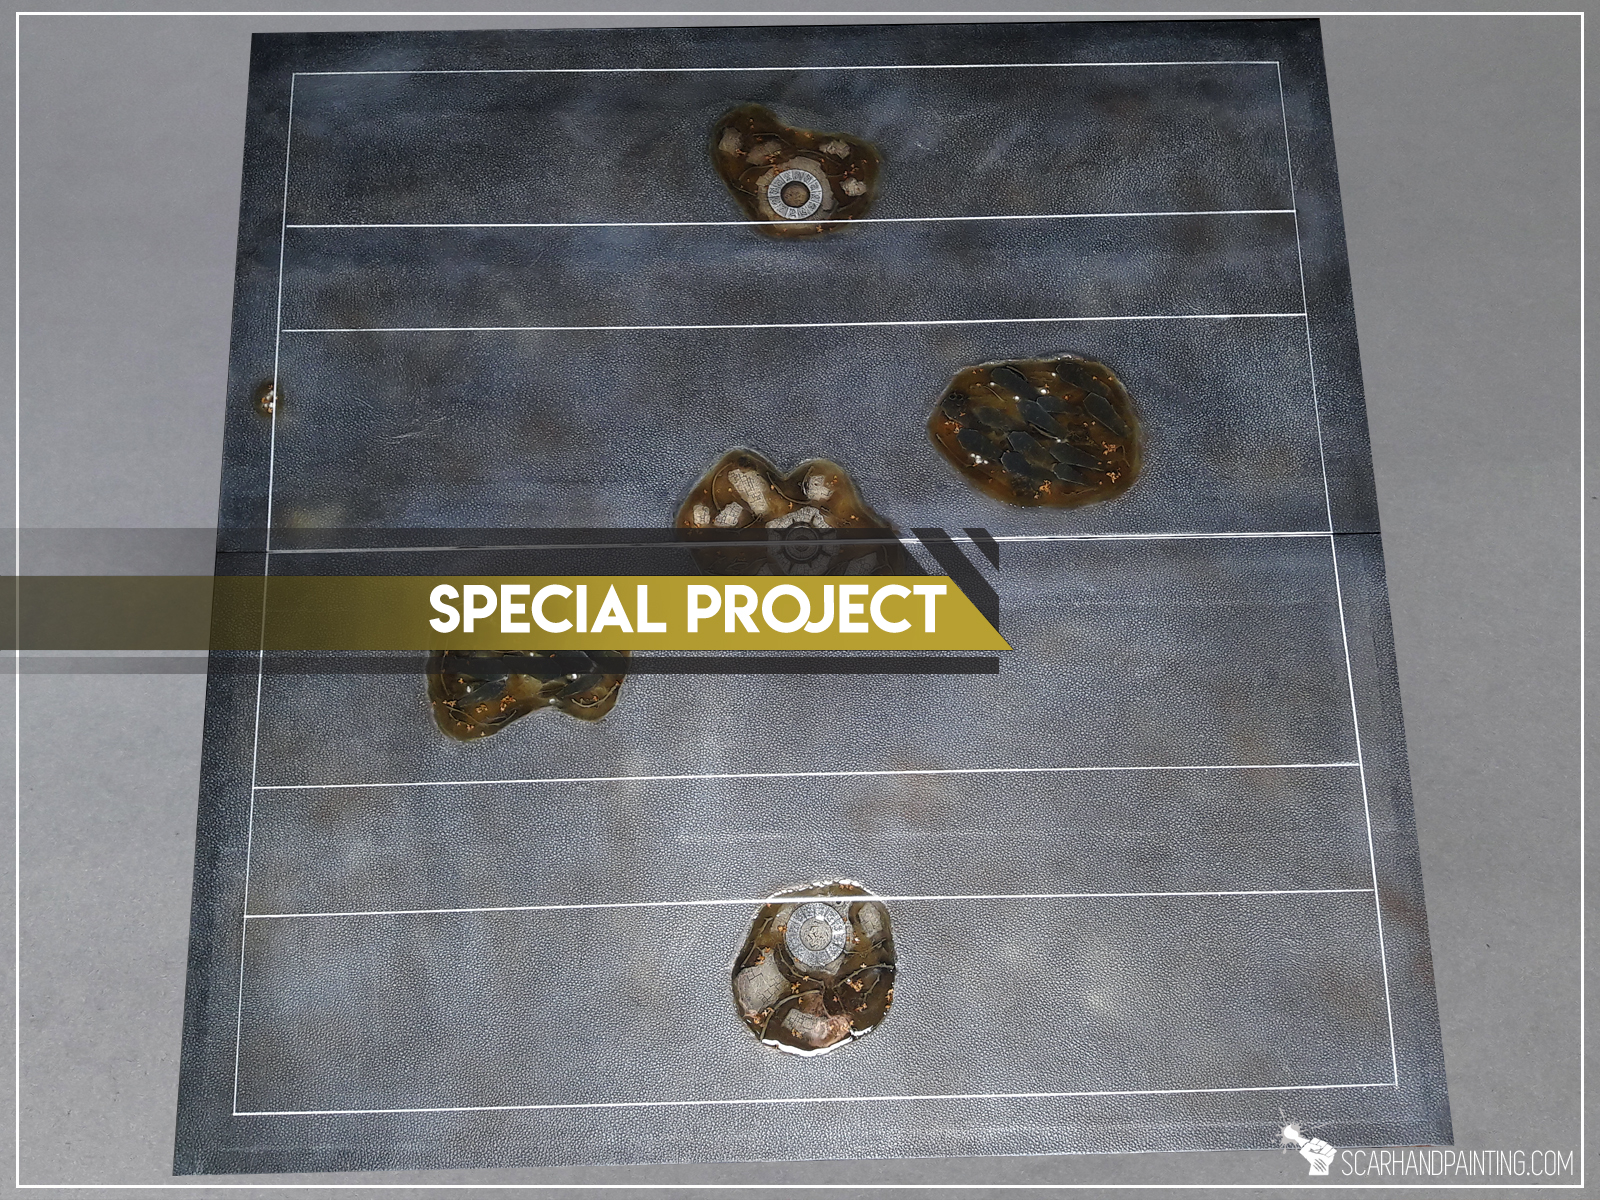
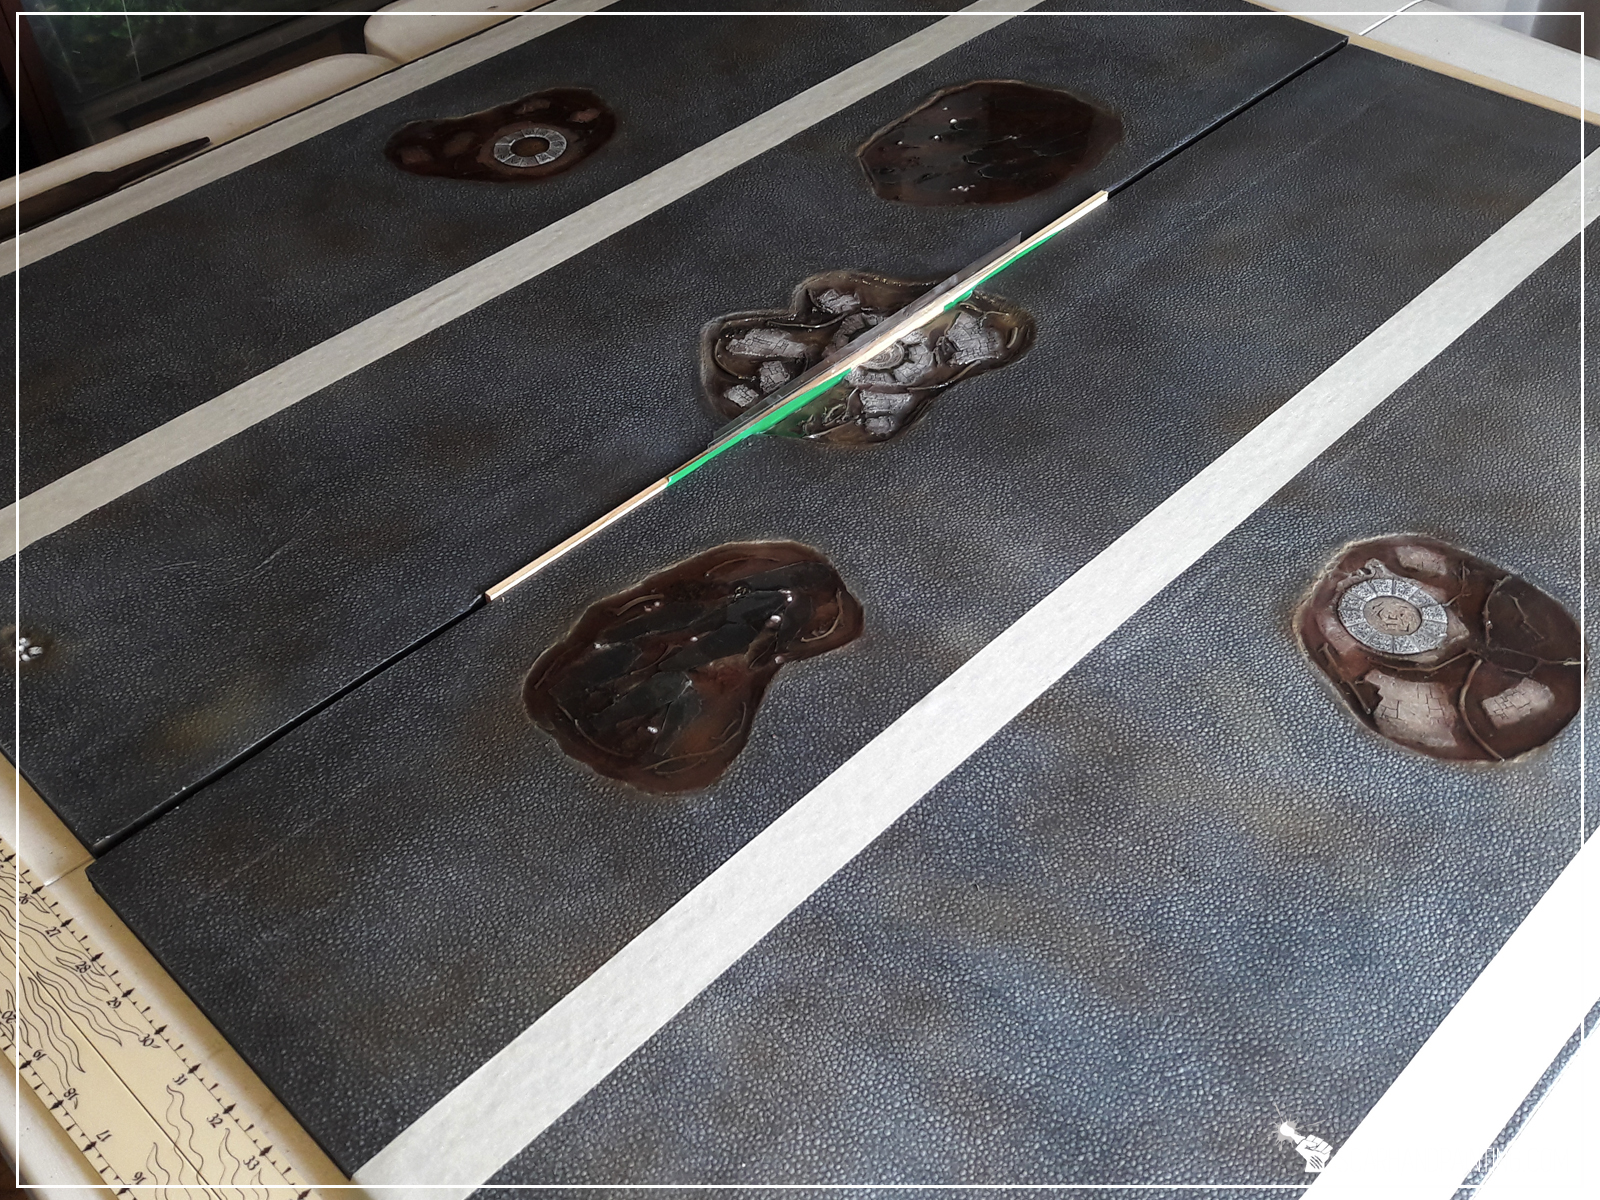
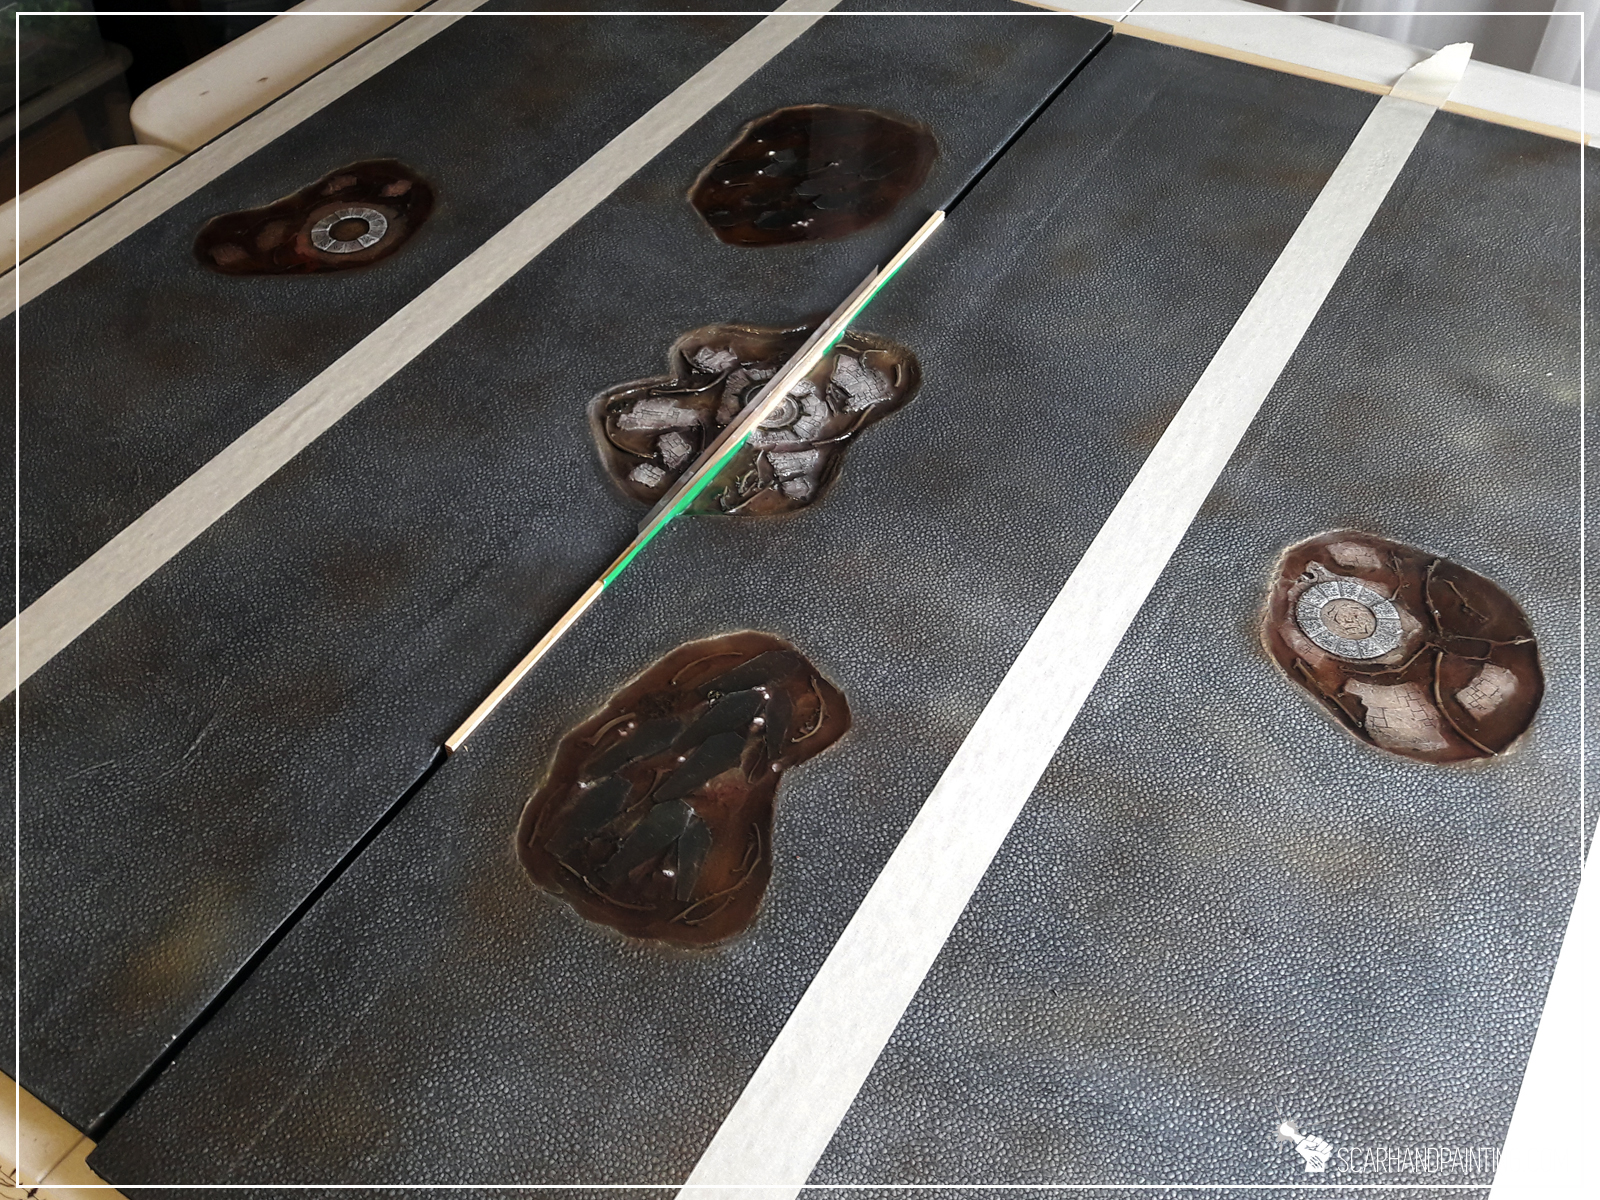
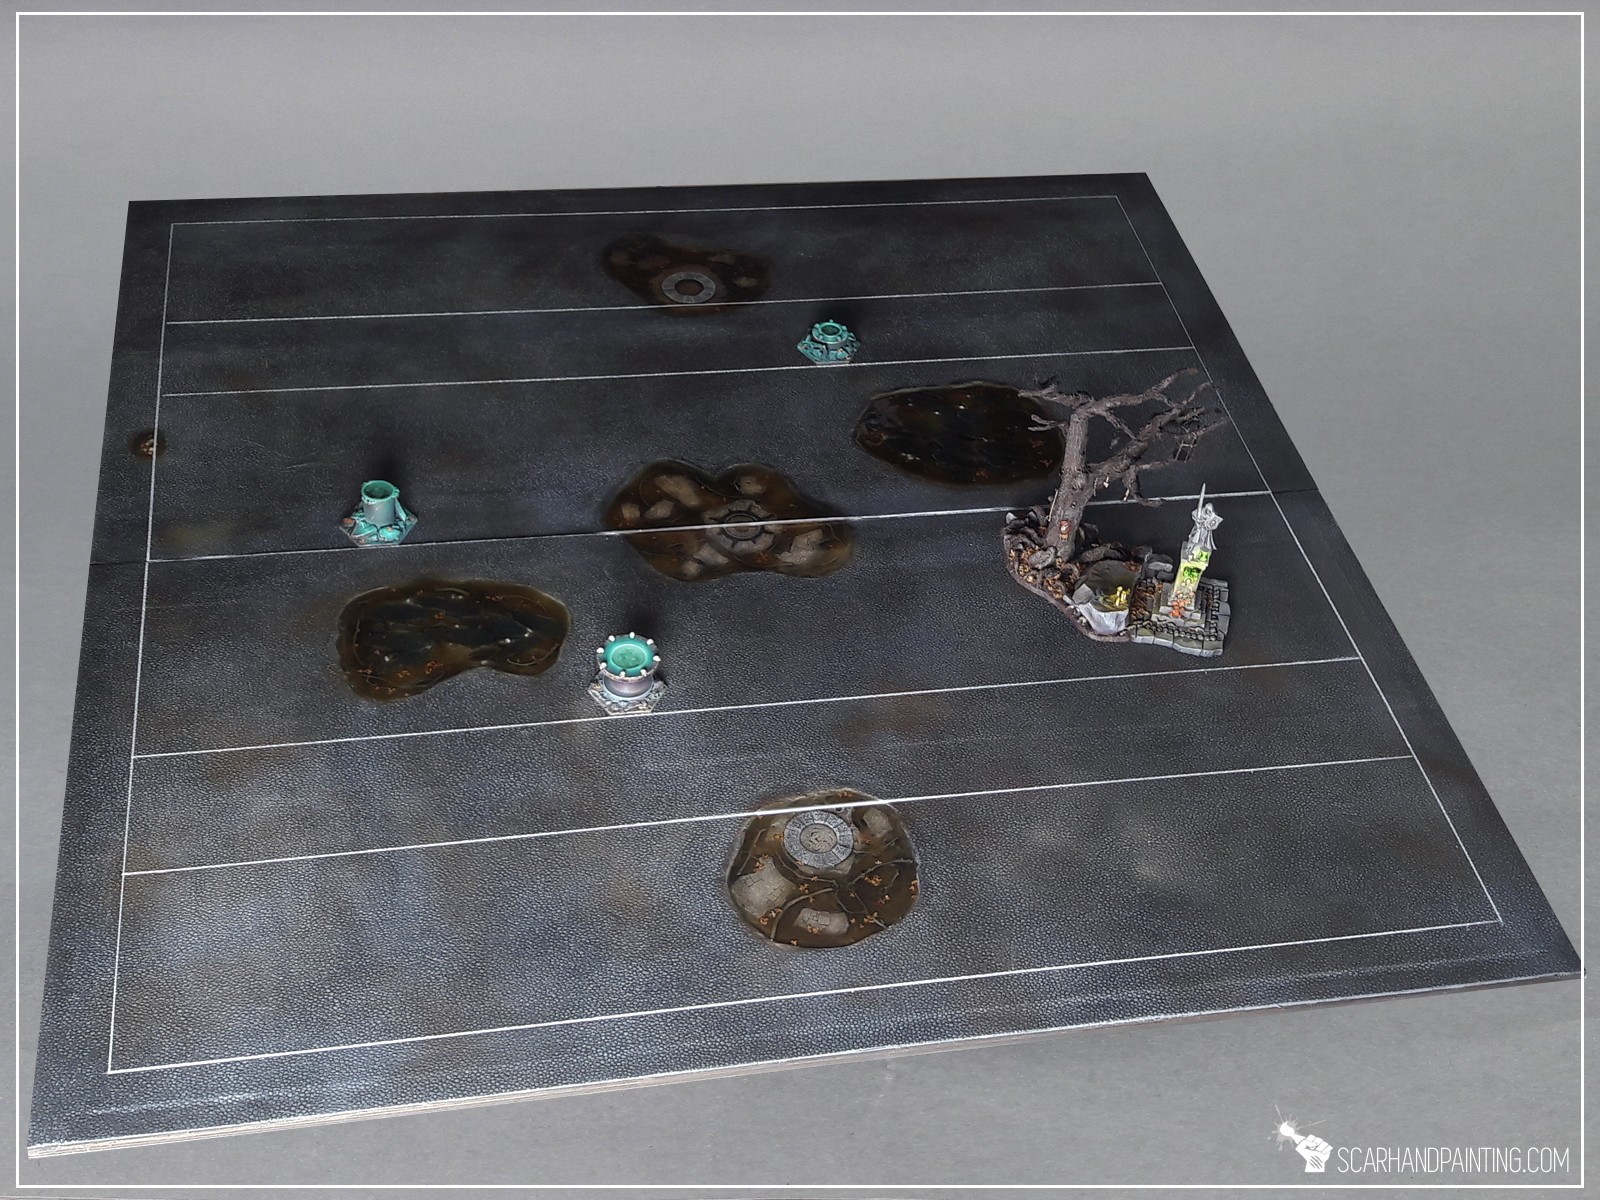
Let’s pick up where the previous article ended: Two thin coats of black wall paint followed up by a Chaos Black sprayed undercoat. All to reinforce the surface and prep it for a paint job. The paint job itself was divided into three parts: “paving stones”, “grave holes” and “pitch lines”.
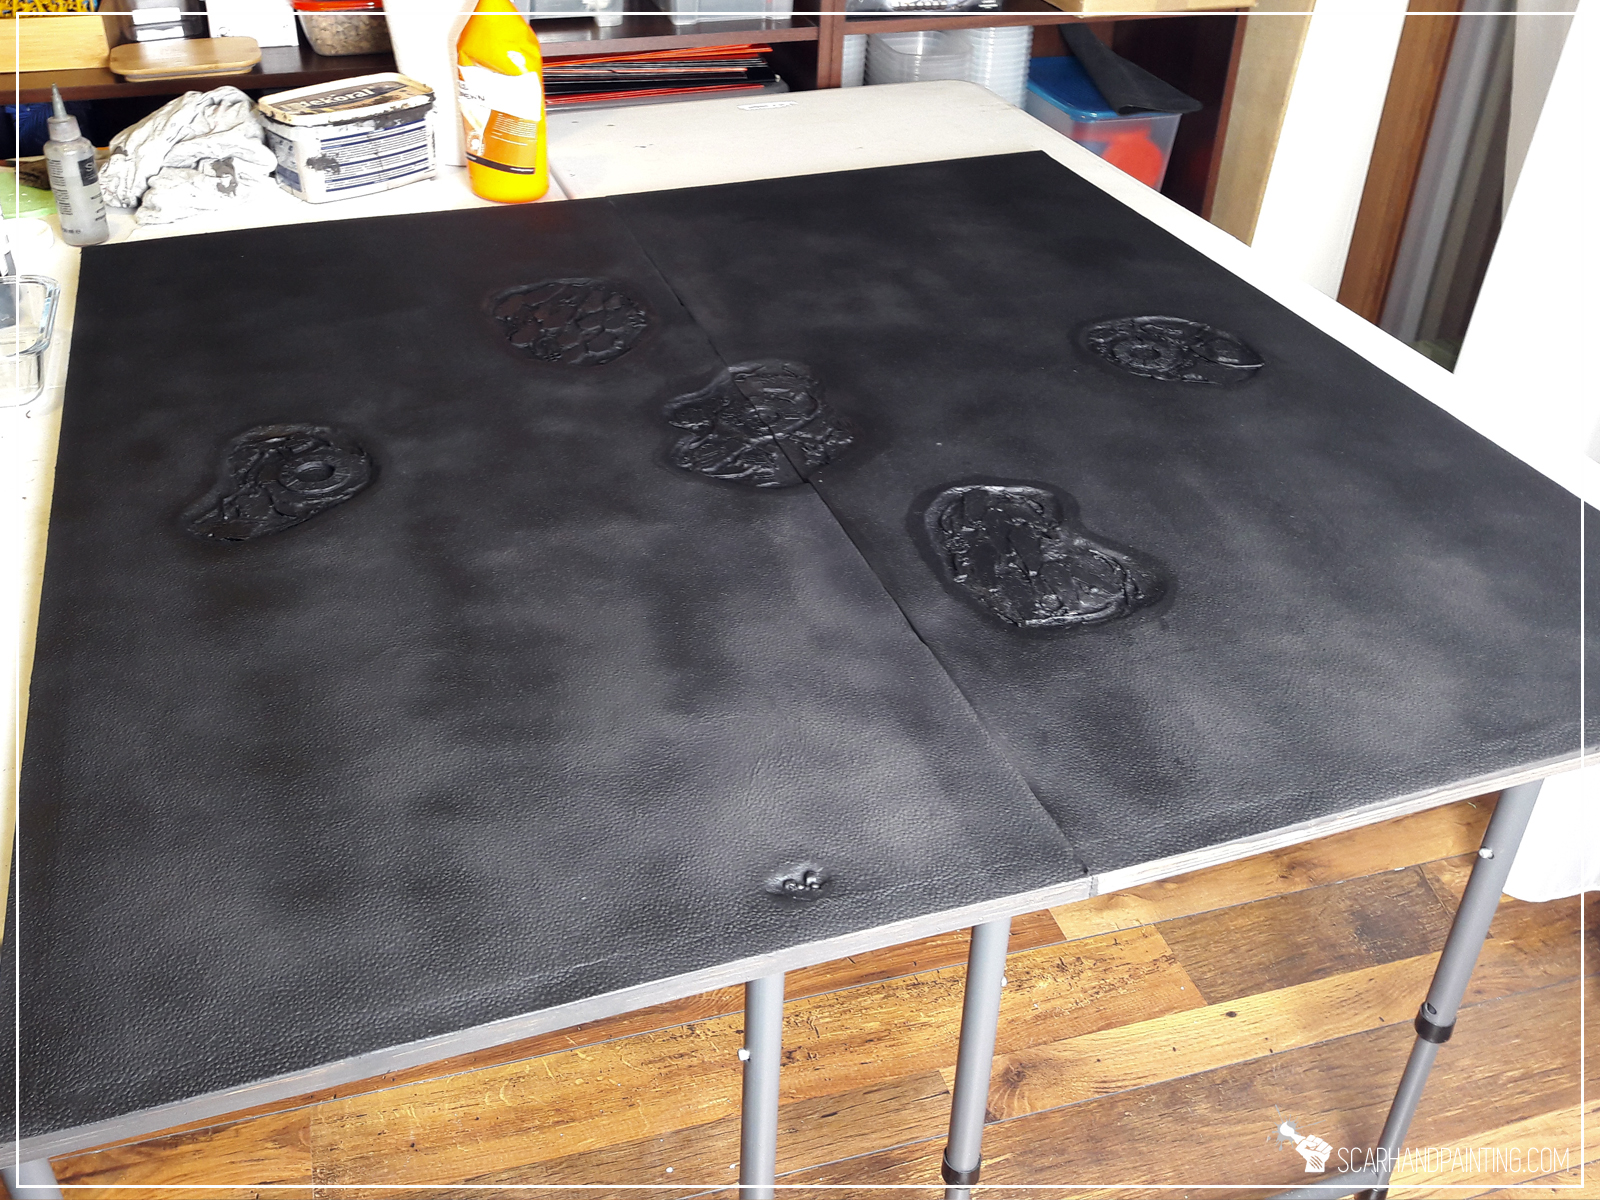
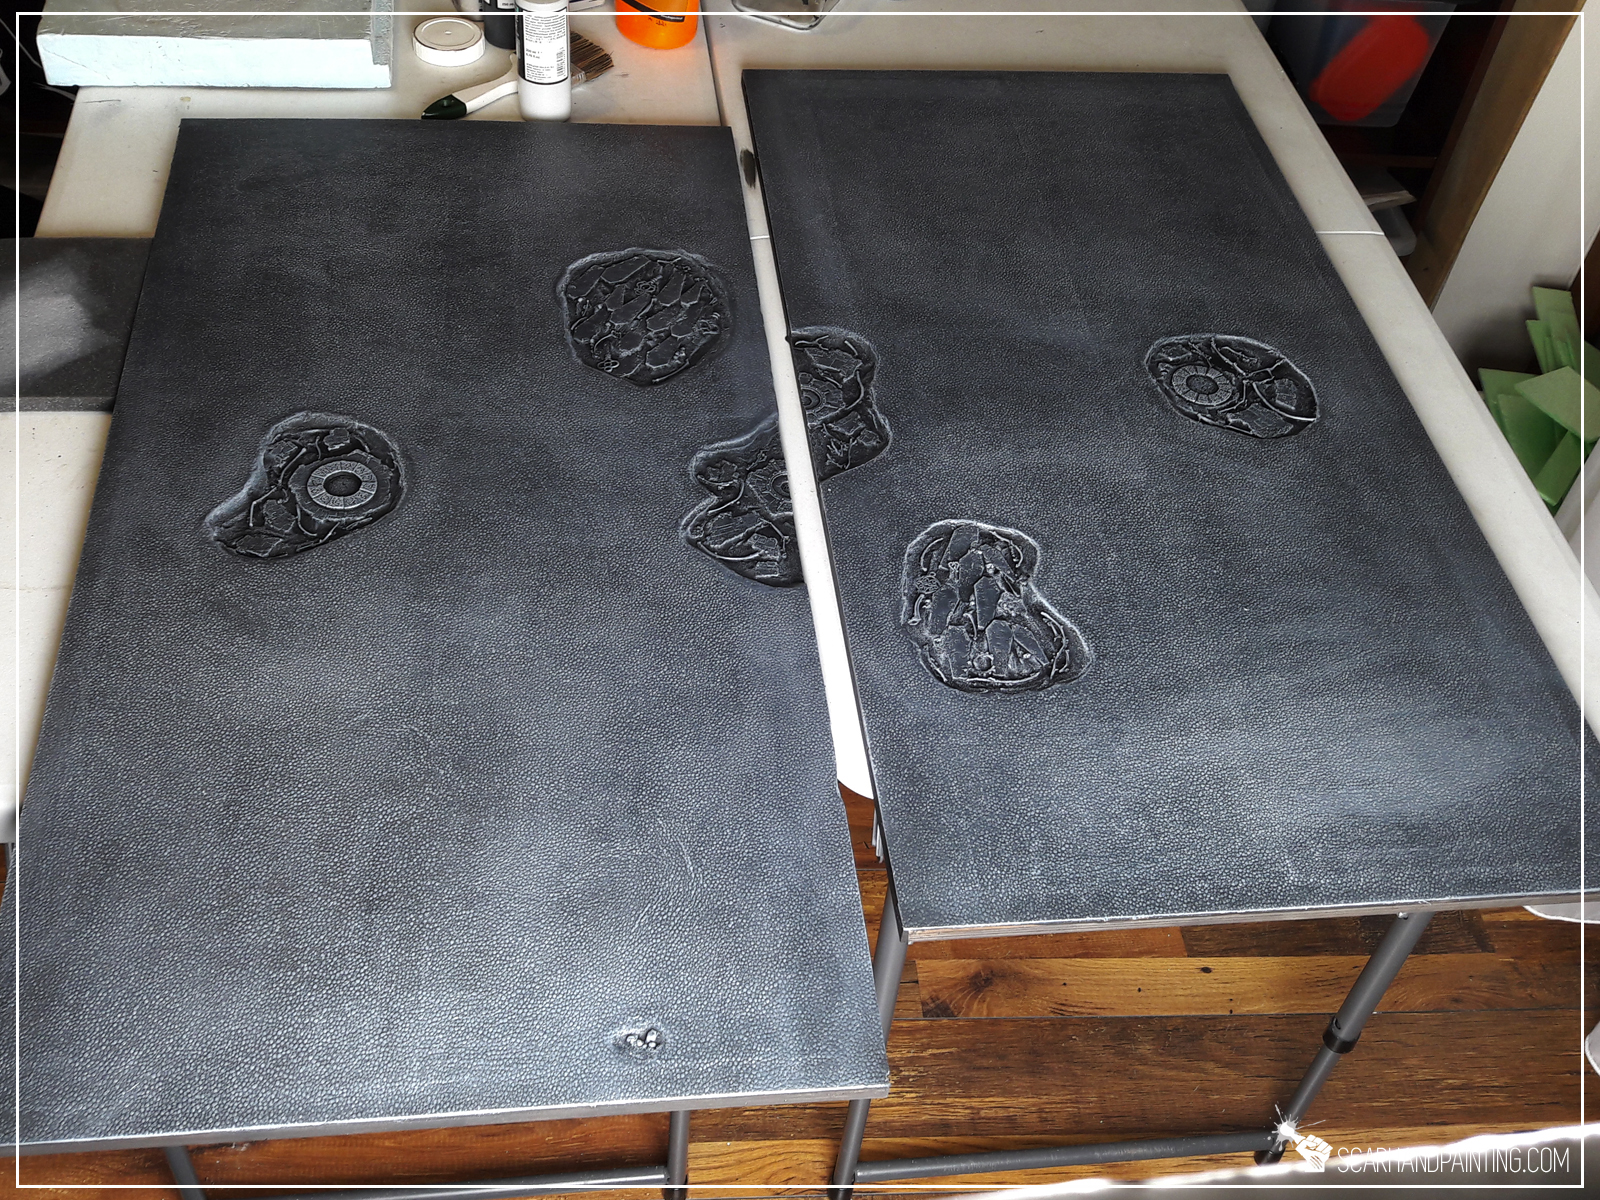
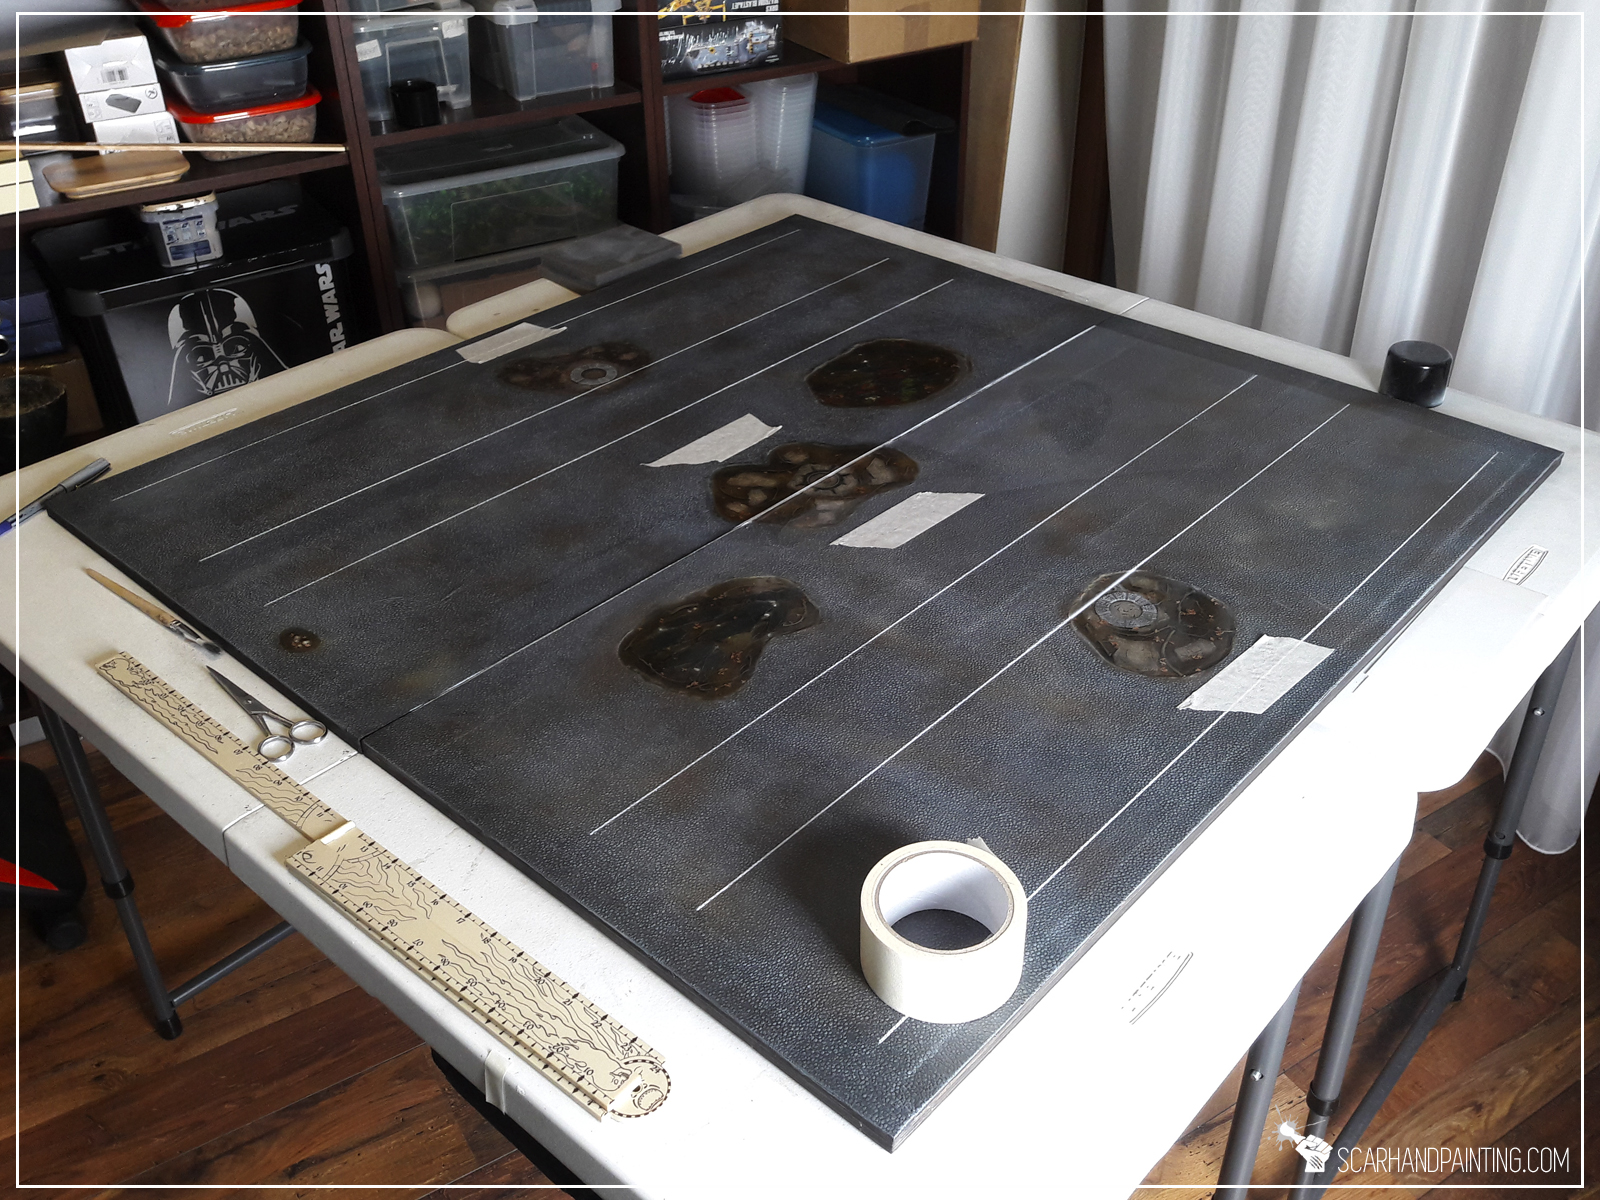
This part was pretty easy. A solid coat of Vallejo 74.603 German Panzer Grey, followed by a 1:1 mix with Vallejo 74.601 Grey drybrush and then with pure Vallejo 74.601 Grey drybrush. All done with a 4″ wide brush. With these three layers done some brown haze was airbrushed here and there with Vallejo Air 71.133 Dirt and Vallejo Air 71.042 Cam. Black Brown.

Next part was to paint the insides of the detailed holes. I airbrushed most of it with a mix of browns, and then grays. A soft bright grey drybrush over stone elements, one layer highlight of the coffins and bony paint job of skulls – all complicated a bit due to the sheer size of the board pieces, but other than that simple and easy. That is because I planed for water effect to be darkened with few drops of brown ink. Paint job just didn’t need to be intricate.


Most dangerous part of the project was Resin. Working with resin is very difficult. The thing is messy AF, sticky, gotta be carefully prepared and poured in, but most importantly – a single tiny hole and entire thing ends up on the floor and all over the underside of a project. I know this, because it happened in the past with. More so, a tiny drop on your hand and you can be sure of glossy stains everywhere! With Mortician’s Pitch I actually came prepared. I prepped solid plastic barriers for the half-holes at the middle of the board. I also sealed any potential holes with a thin layer of PVA glue. The resin got poured in and the long wait started…
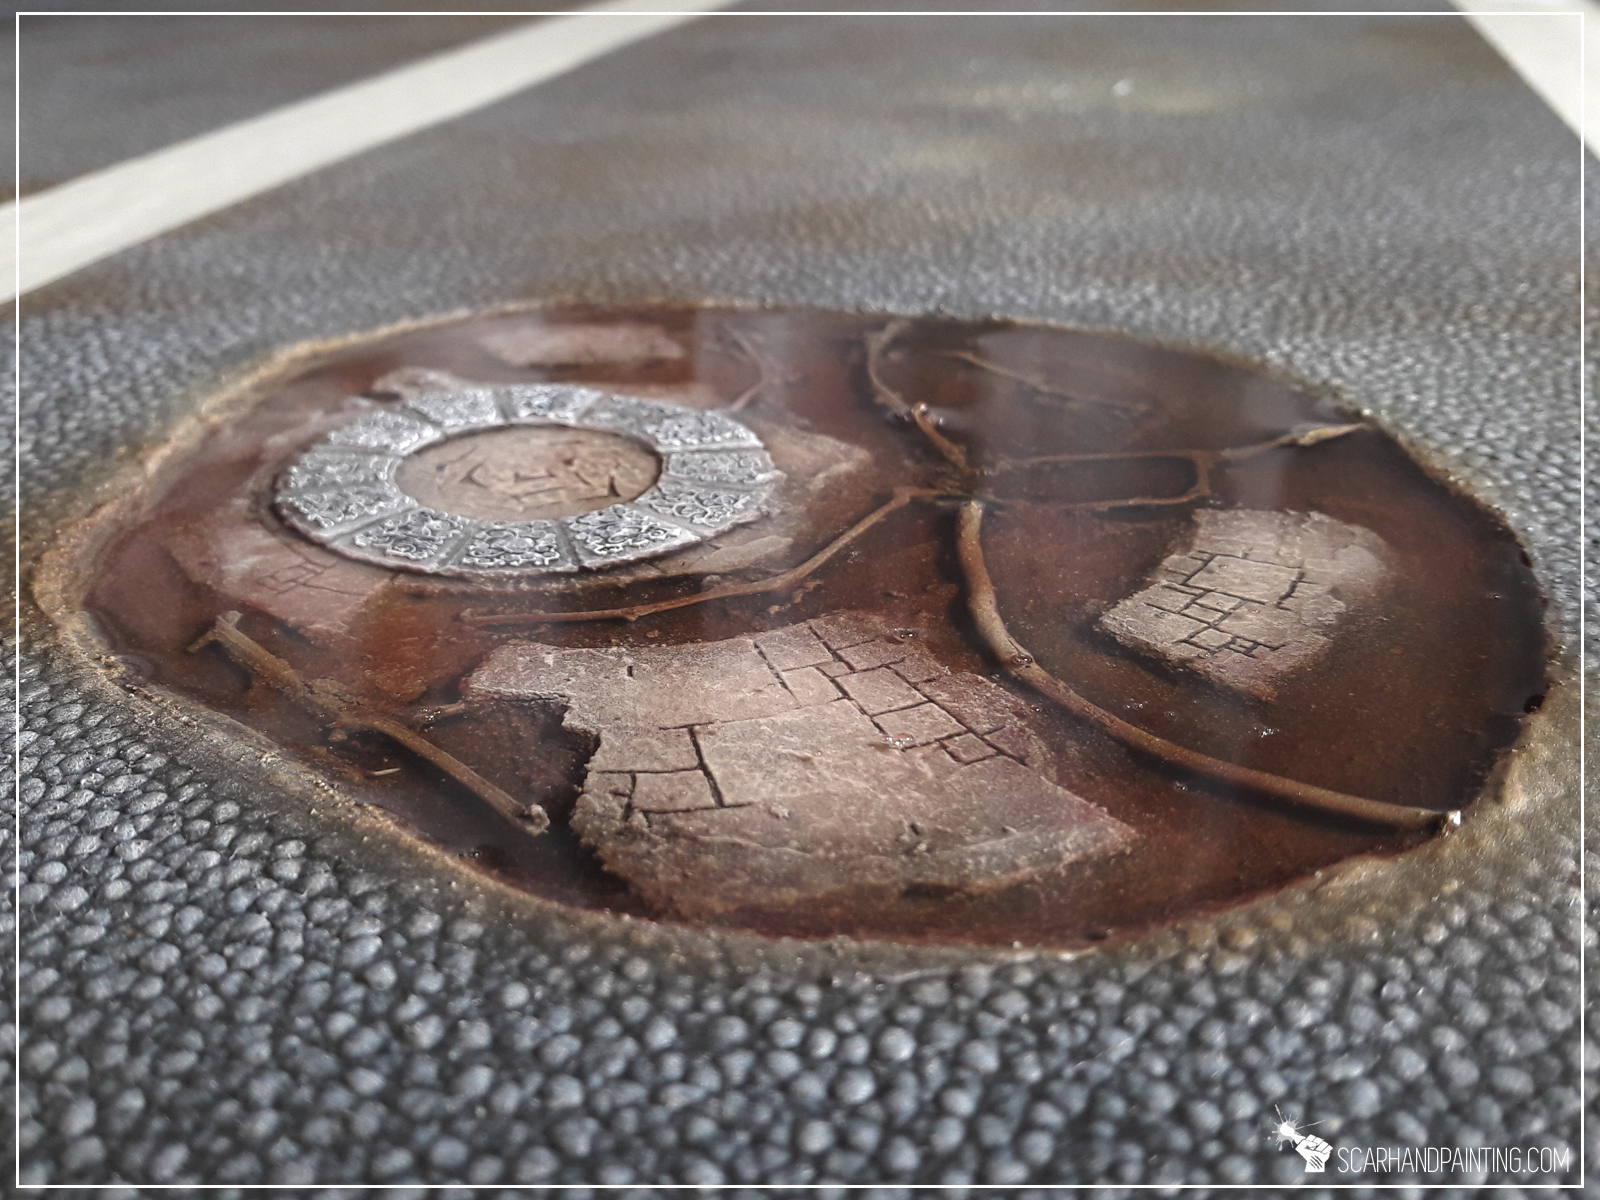


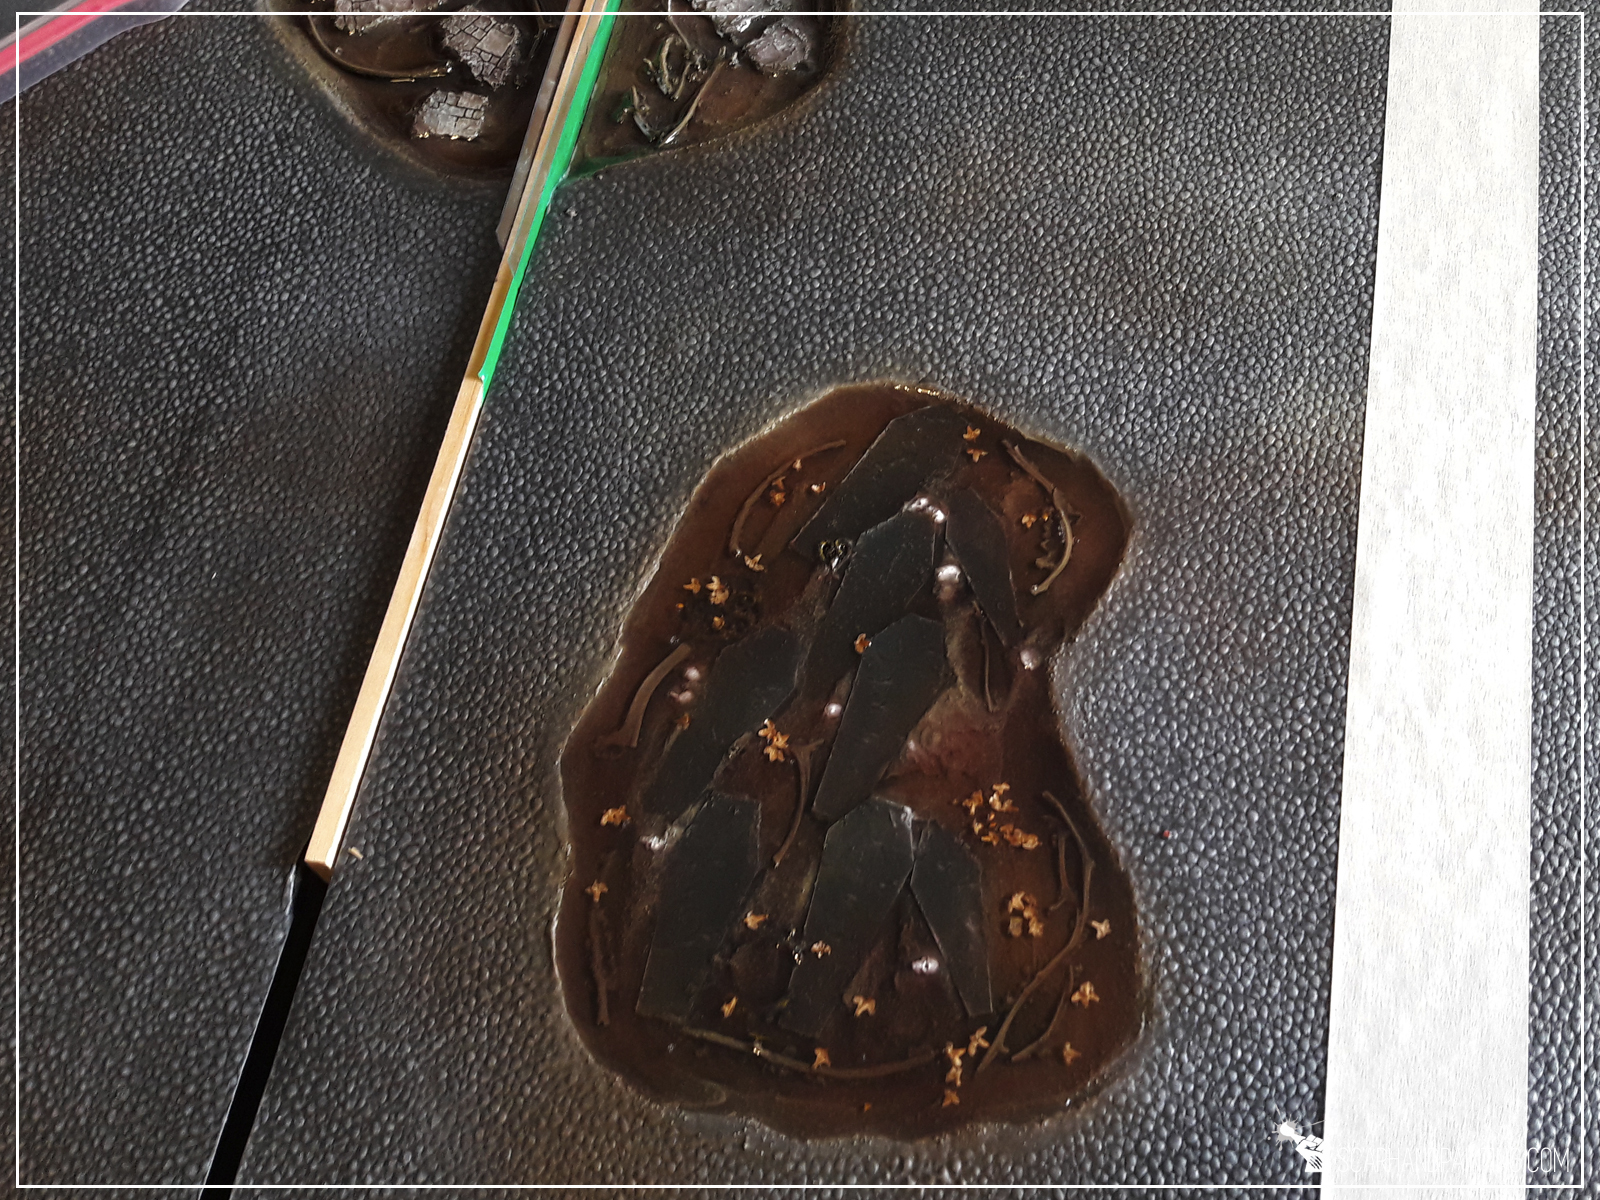

… and it all went to shit when over 24hrs later I realized that resin is still sticky. I gave it another day to coagulate with no positive result. If you worked with resin you probably know what that means – if resin is still sticky after 48 hours it will stay this way forever. I must had messed up proportions when mixing two ingredients with colored ink. A revitalization process started, with me spooning gummy “goo” out, carefully not to damage paint job underneath. Was very difficult and took few days to accomplish, but I finally landed at a point where it was possible to apply another (this time properly mixed) layer and seal it.
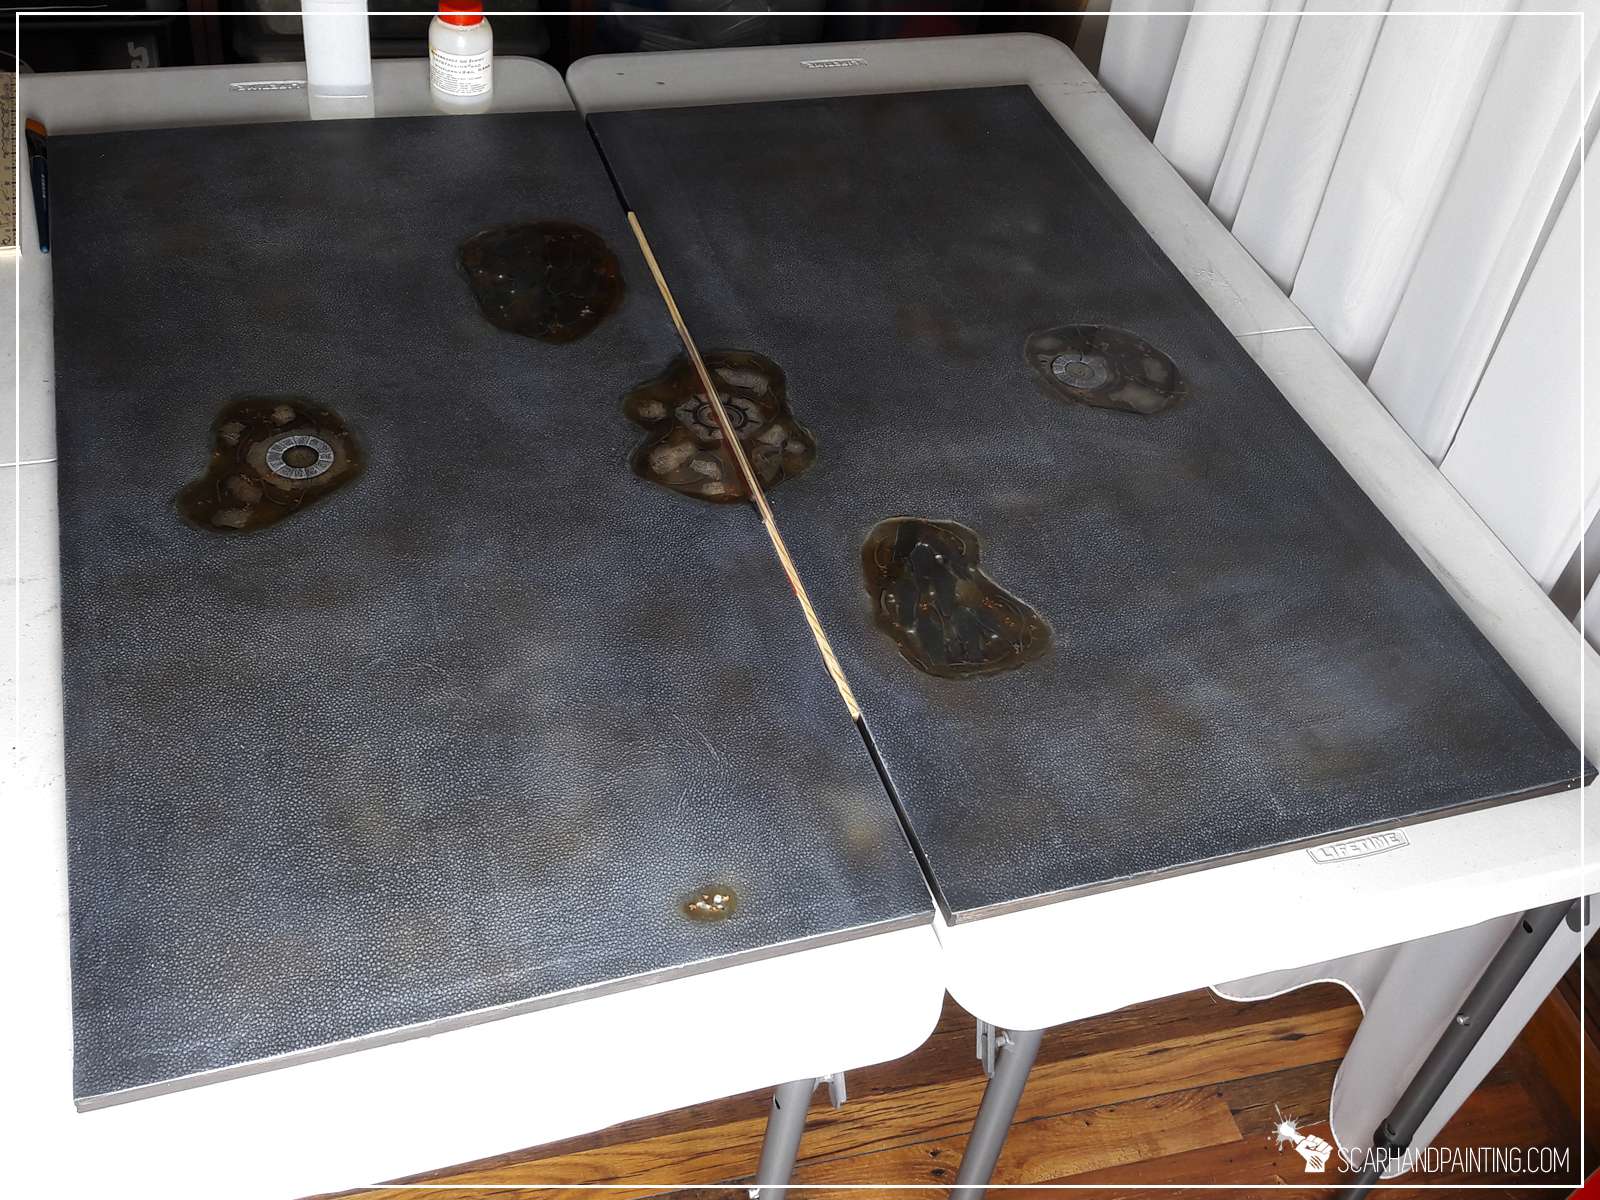
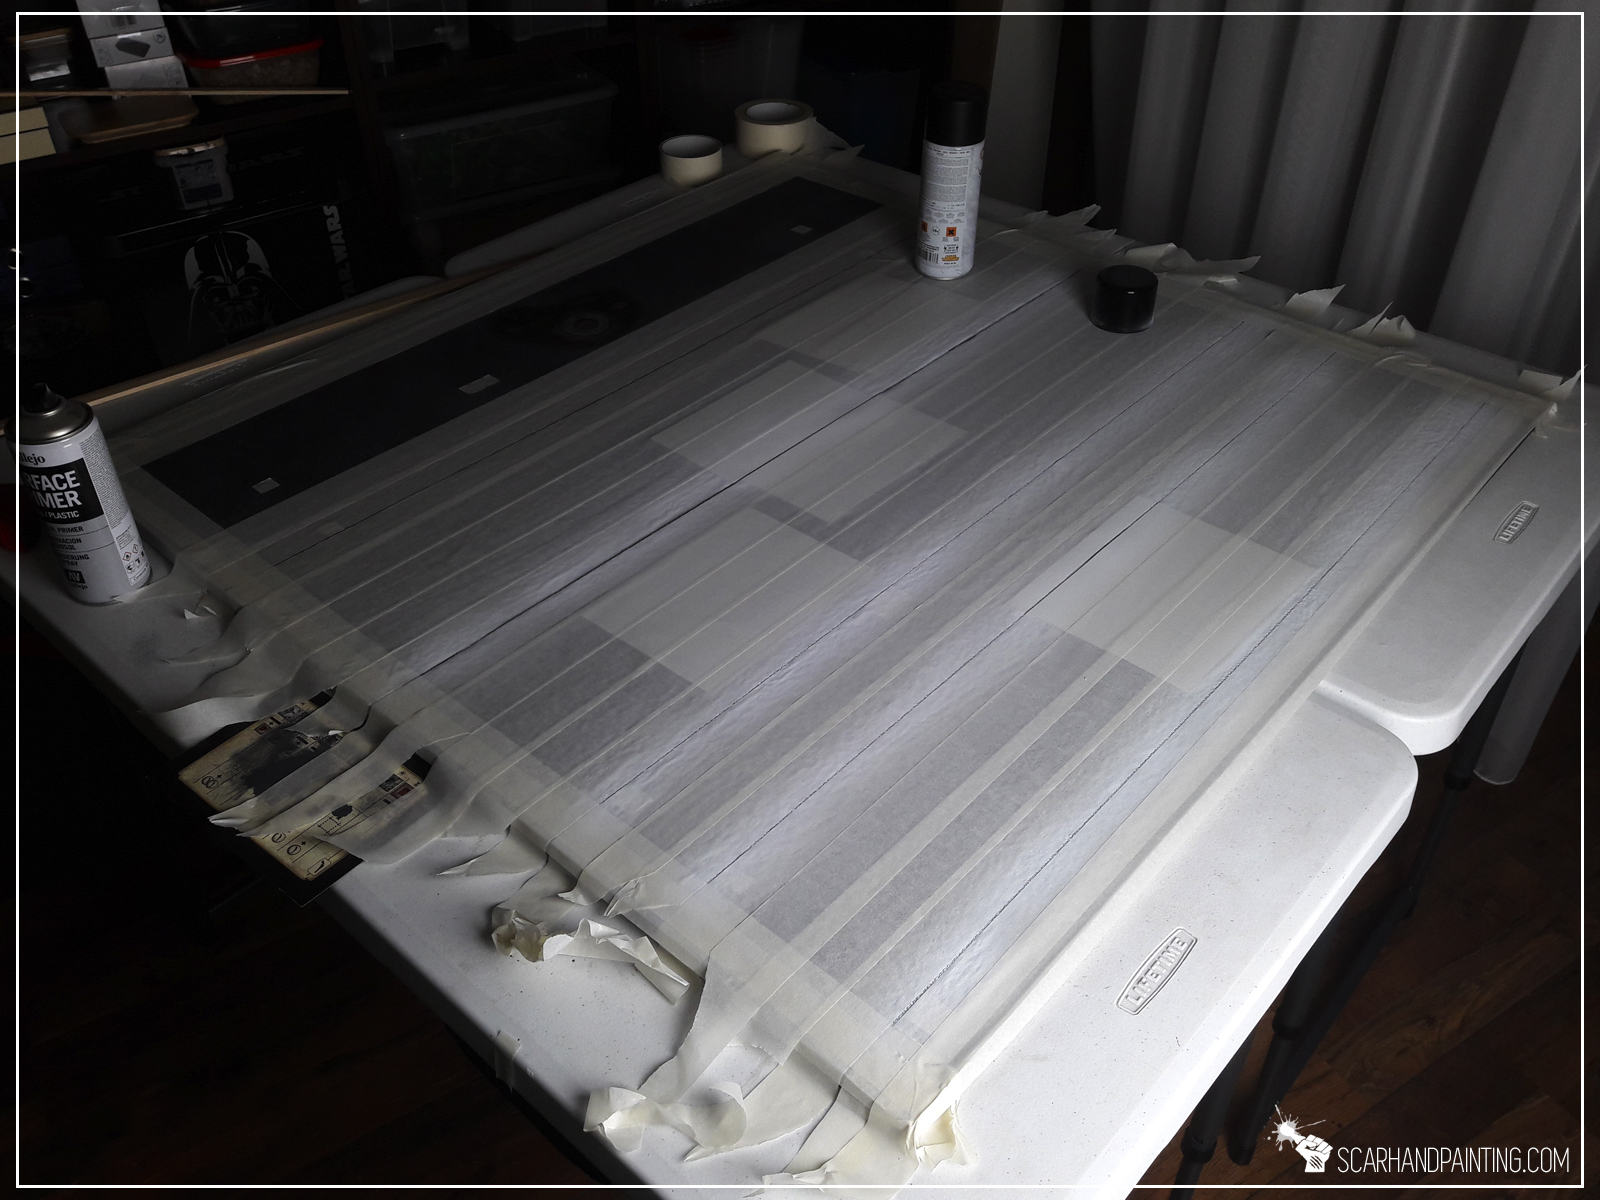
Last part of the paint job, finally possible due to resin being properly hard. I carefully measured distances around the board, covered resin parts with paper thin plasticard and used painting tape to mask most of the board. I then airbrushed the lines with pure white paint.
Revealing the final effect was hell of an excitement. Now I gotta play some games on this troublesome new board!


I hope you like the article. Don’t be a stranger and let me know what you think either in the comments or at my Facebook page.