- contact@scarhandpainting.com


Welcome to another entry in the ‘Painting Philosophy’ series, where I let you in on ‘how’ and especially ‘why’ I do some things in a certain way. In my opinion a proper approach to painting is crucial to maintain a healthy, rewarding experience and to produce satisfactory results. Today I will focus on a technique that, for lack of a better term, I refer to as “Flatbrush “.
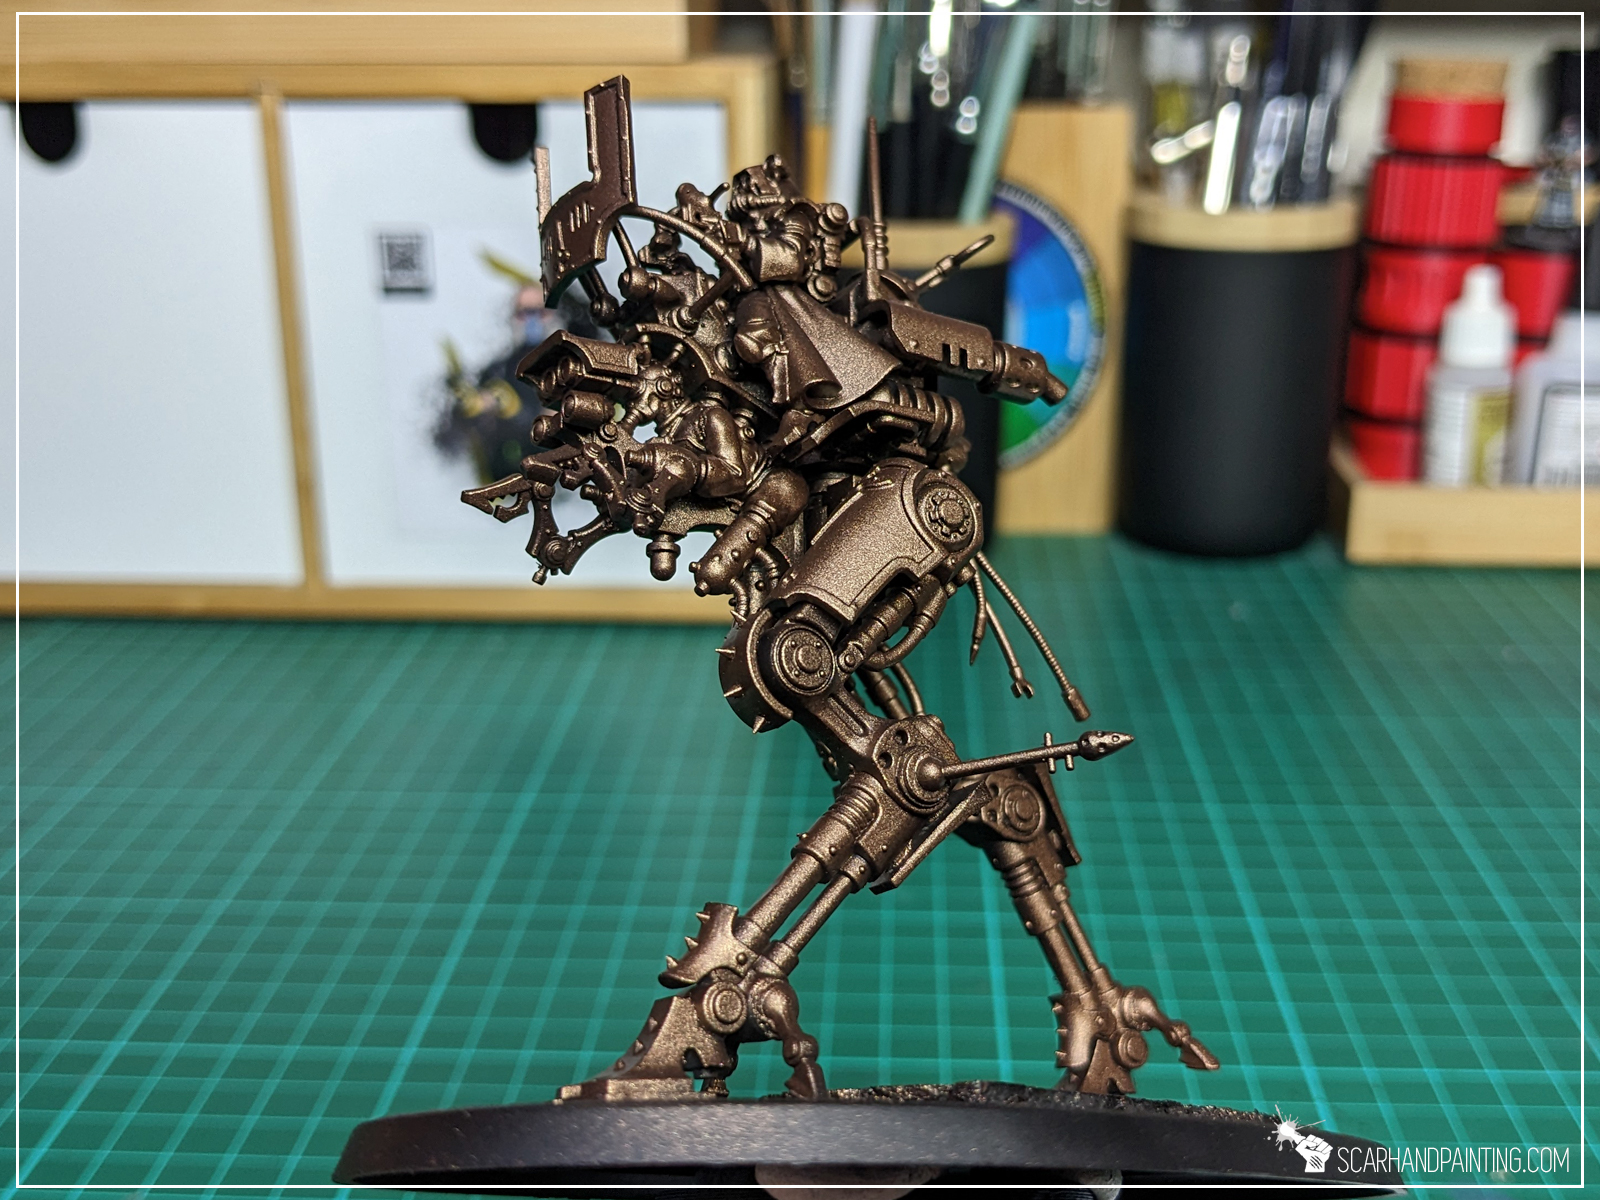
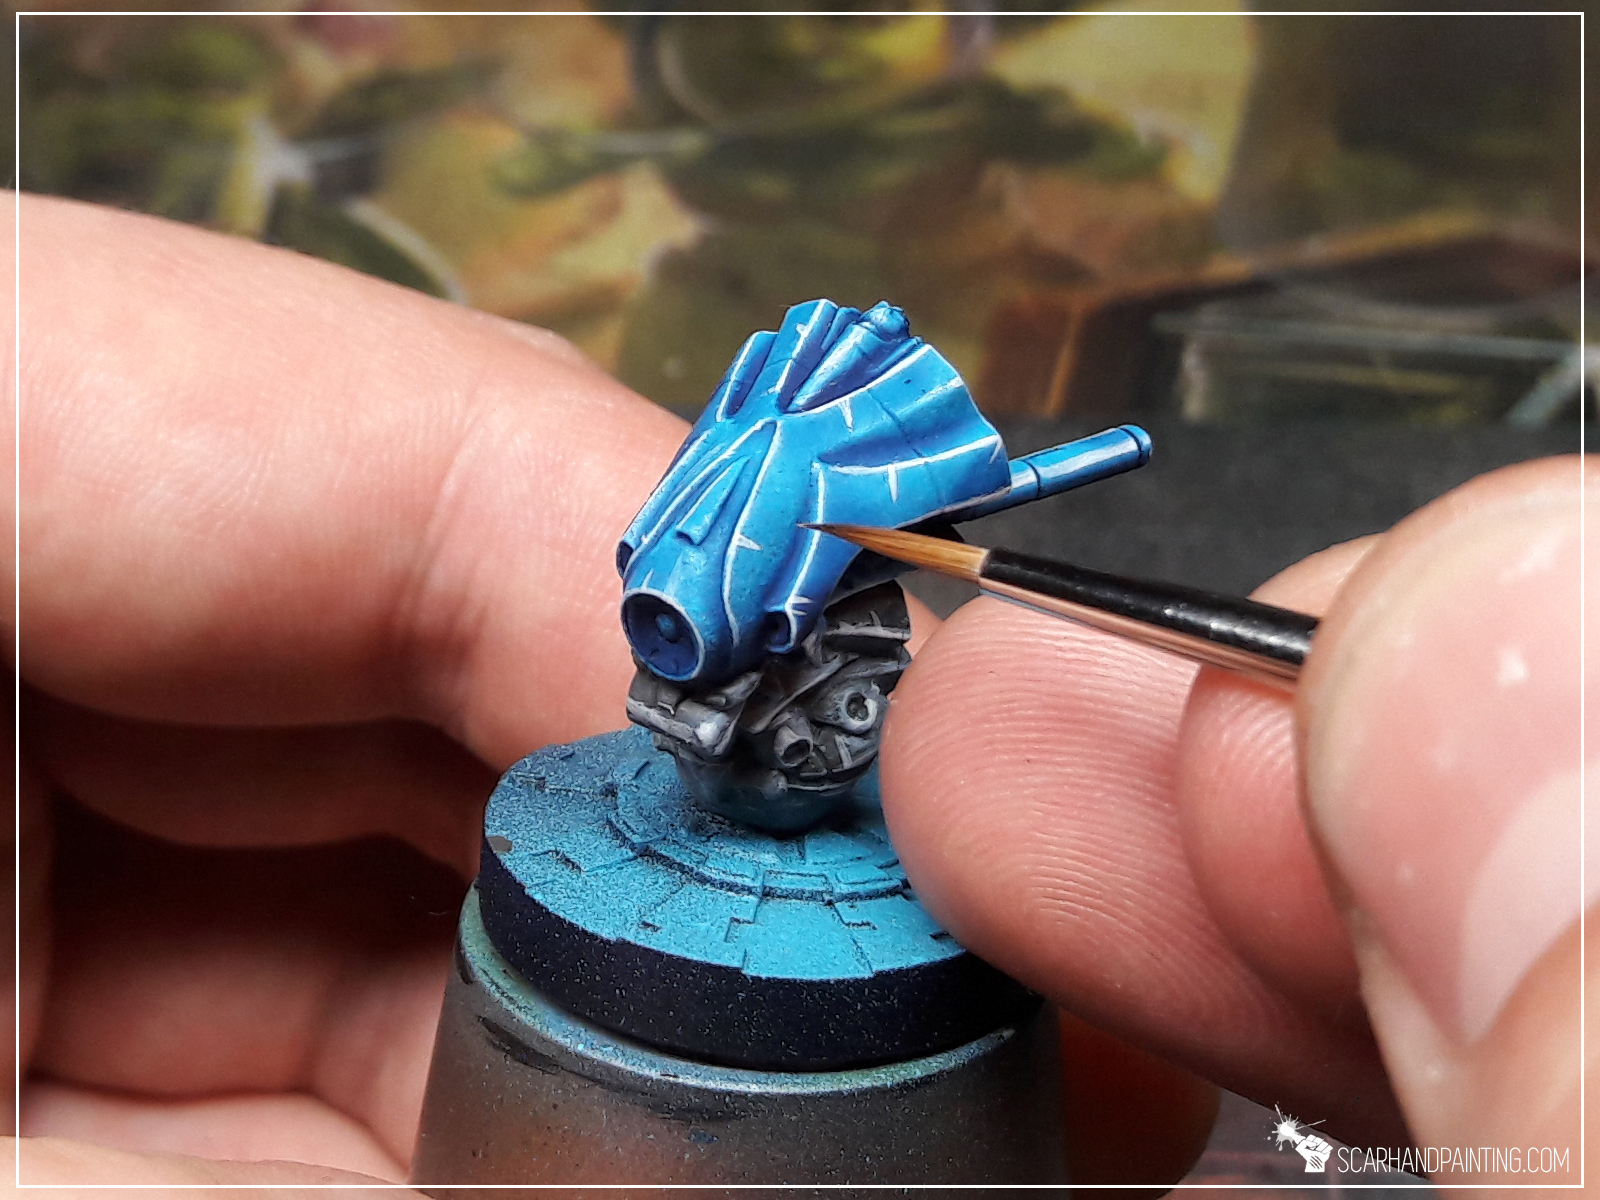
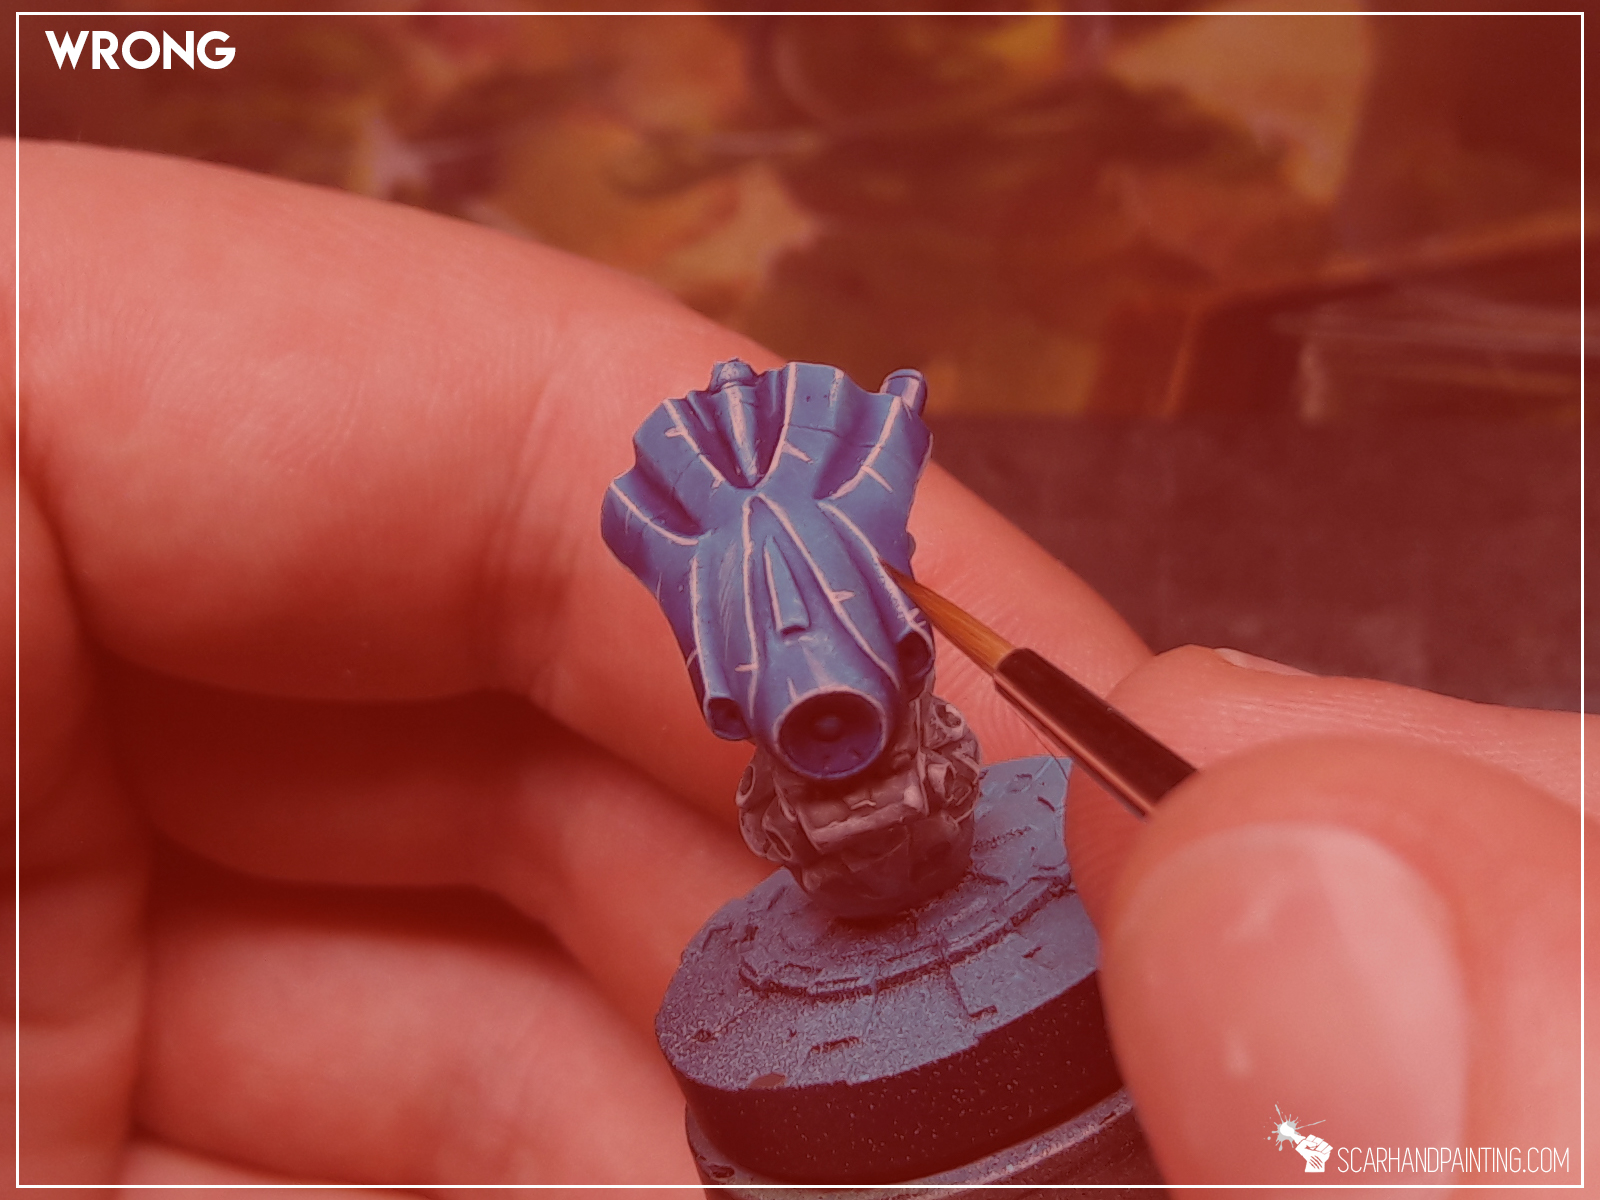
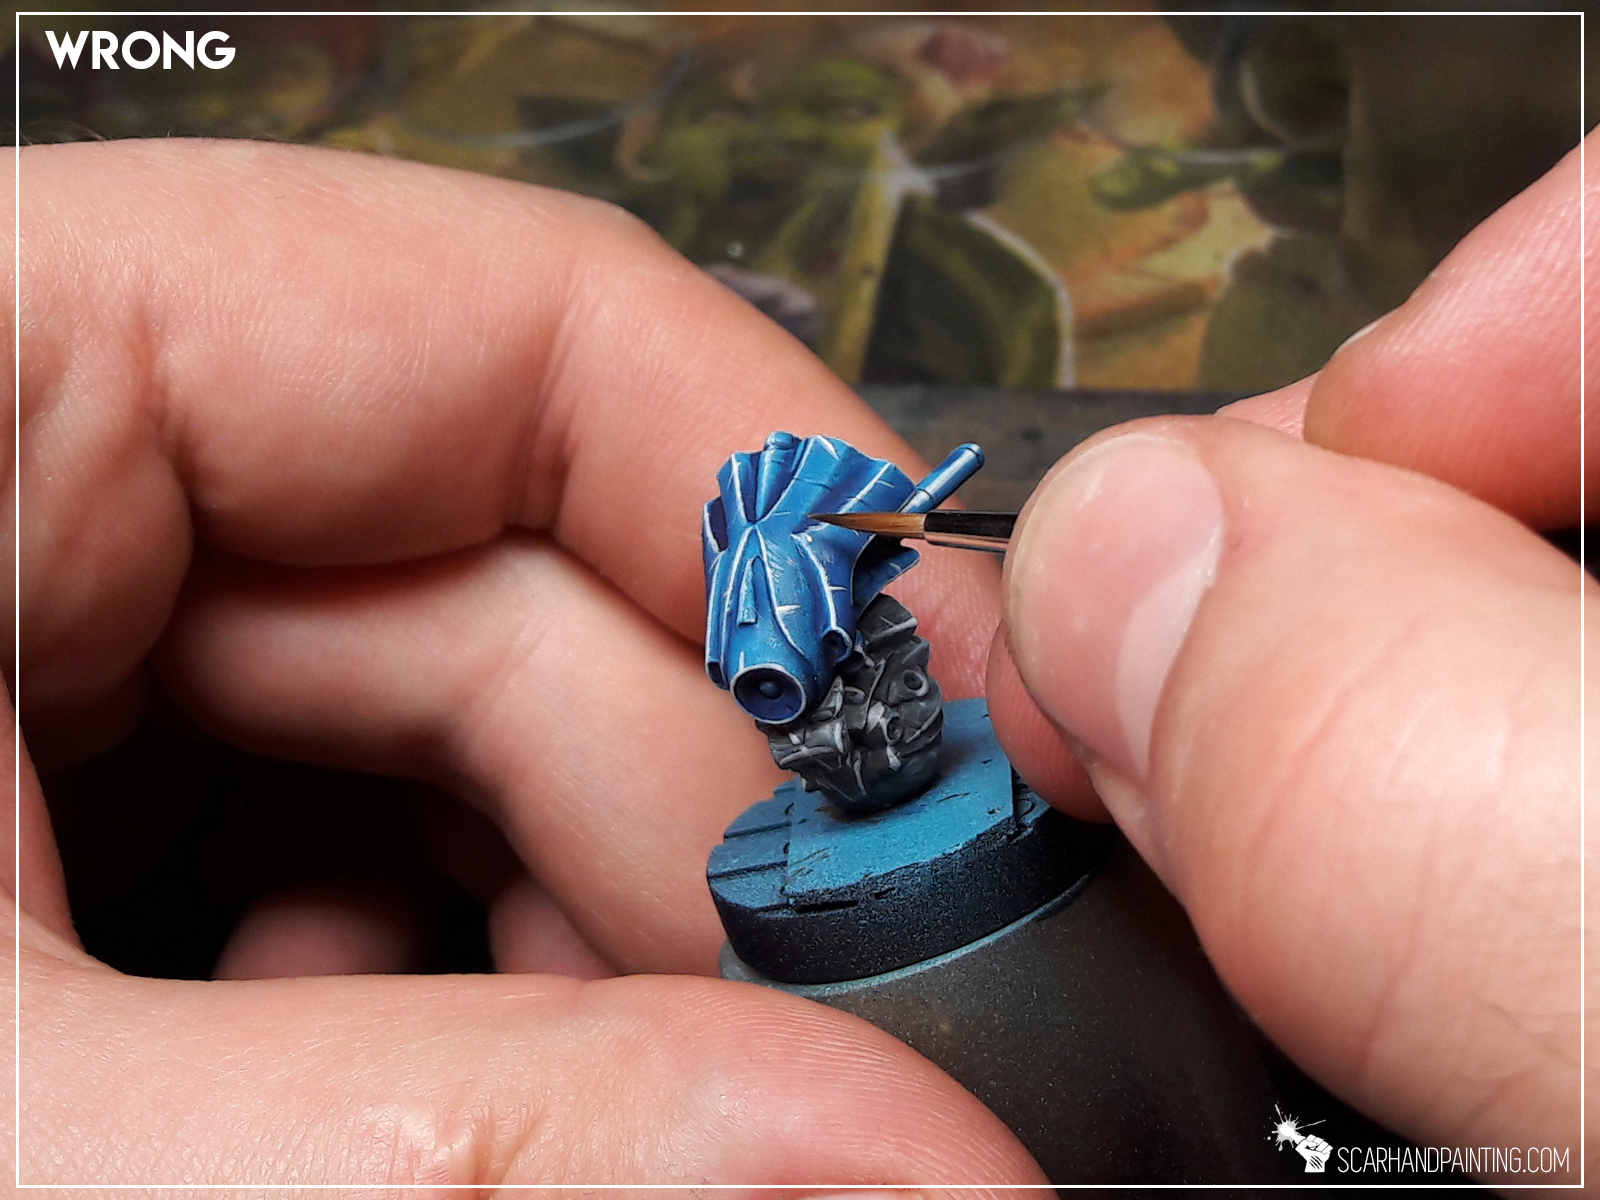
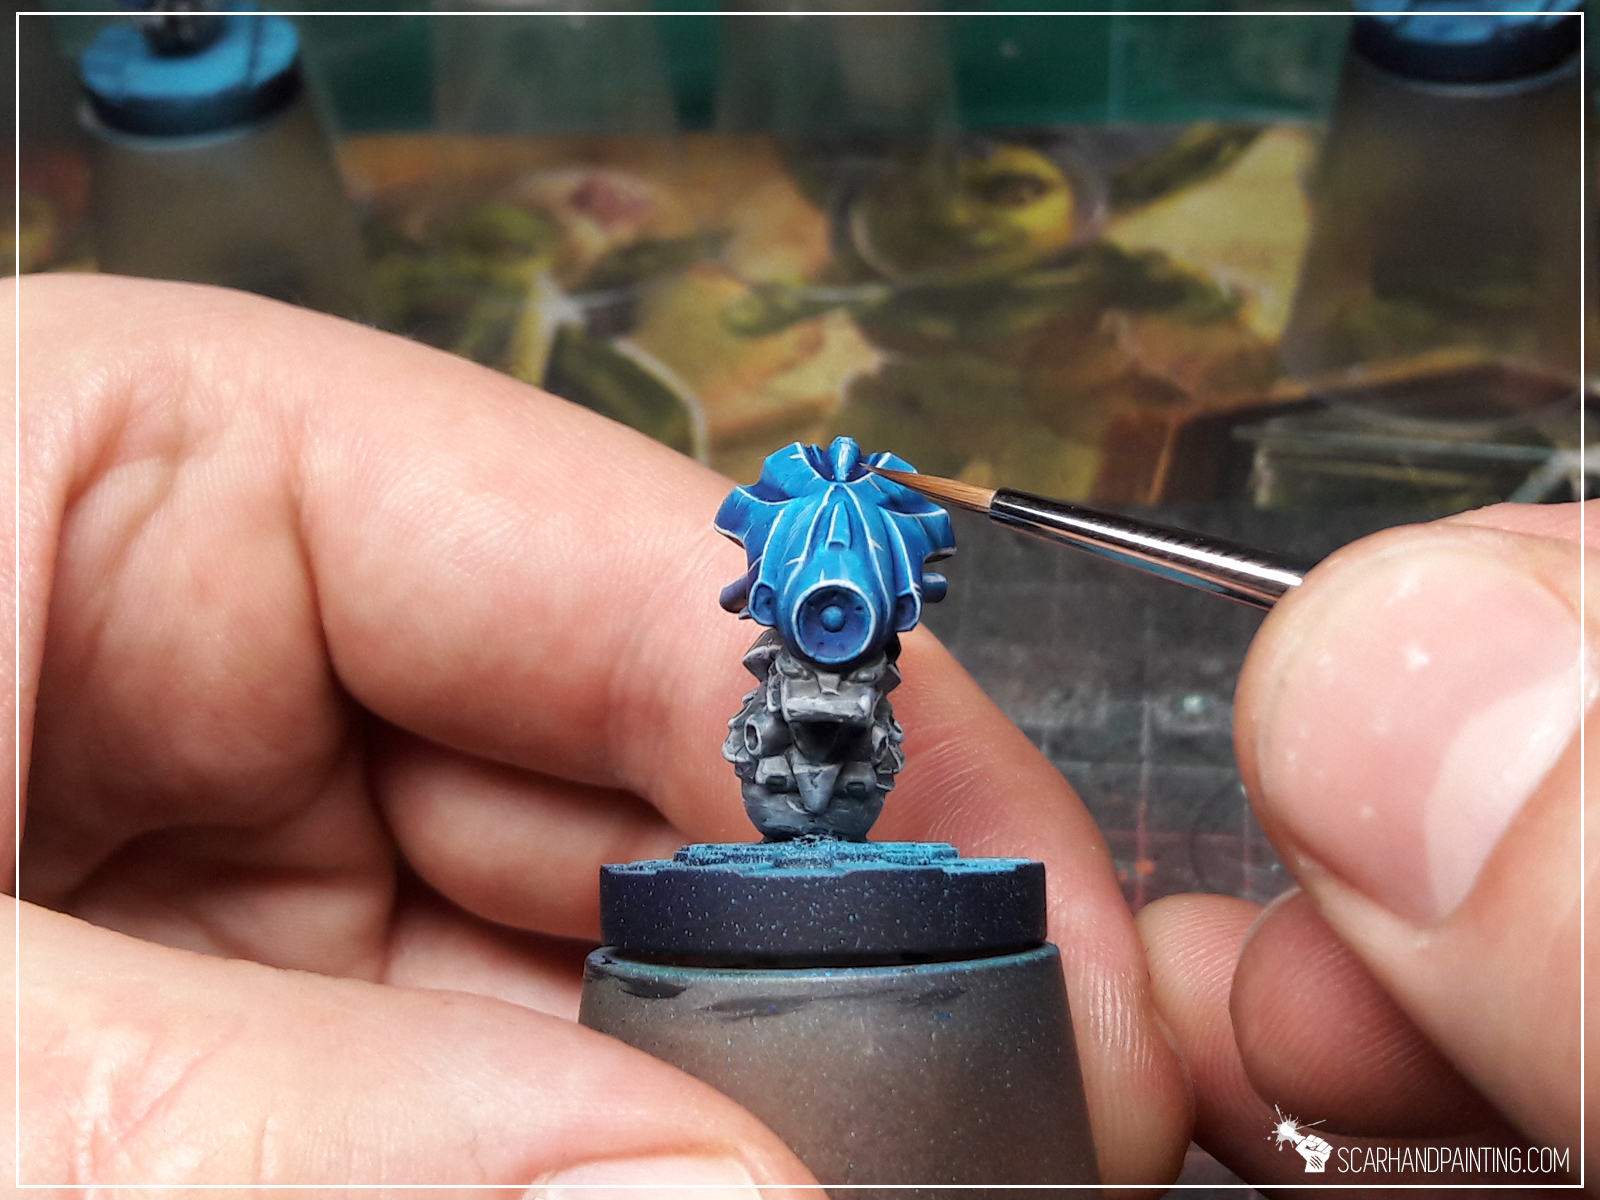
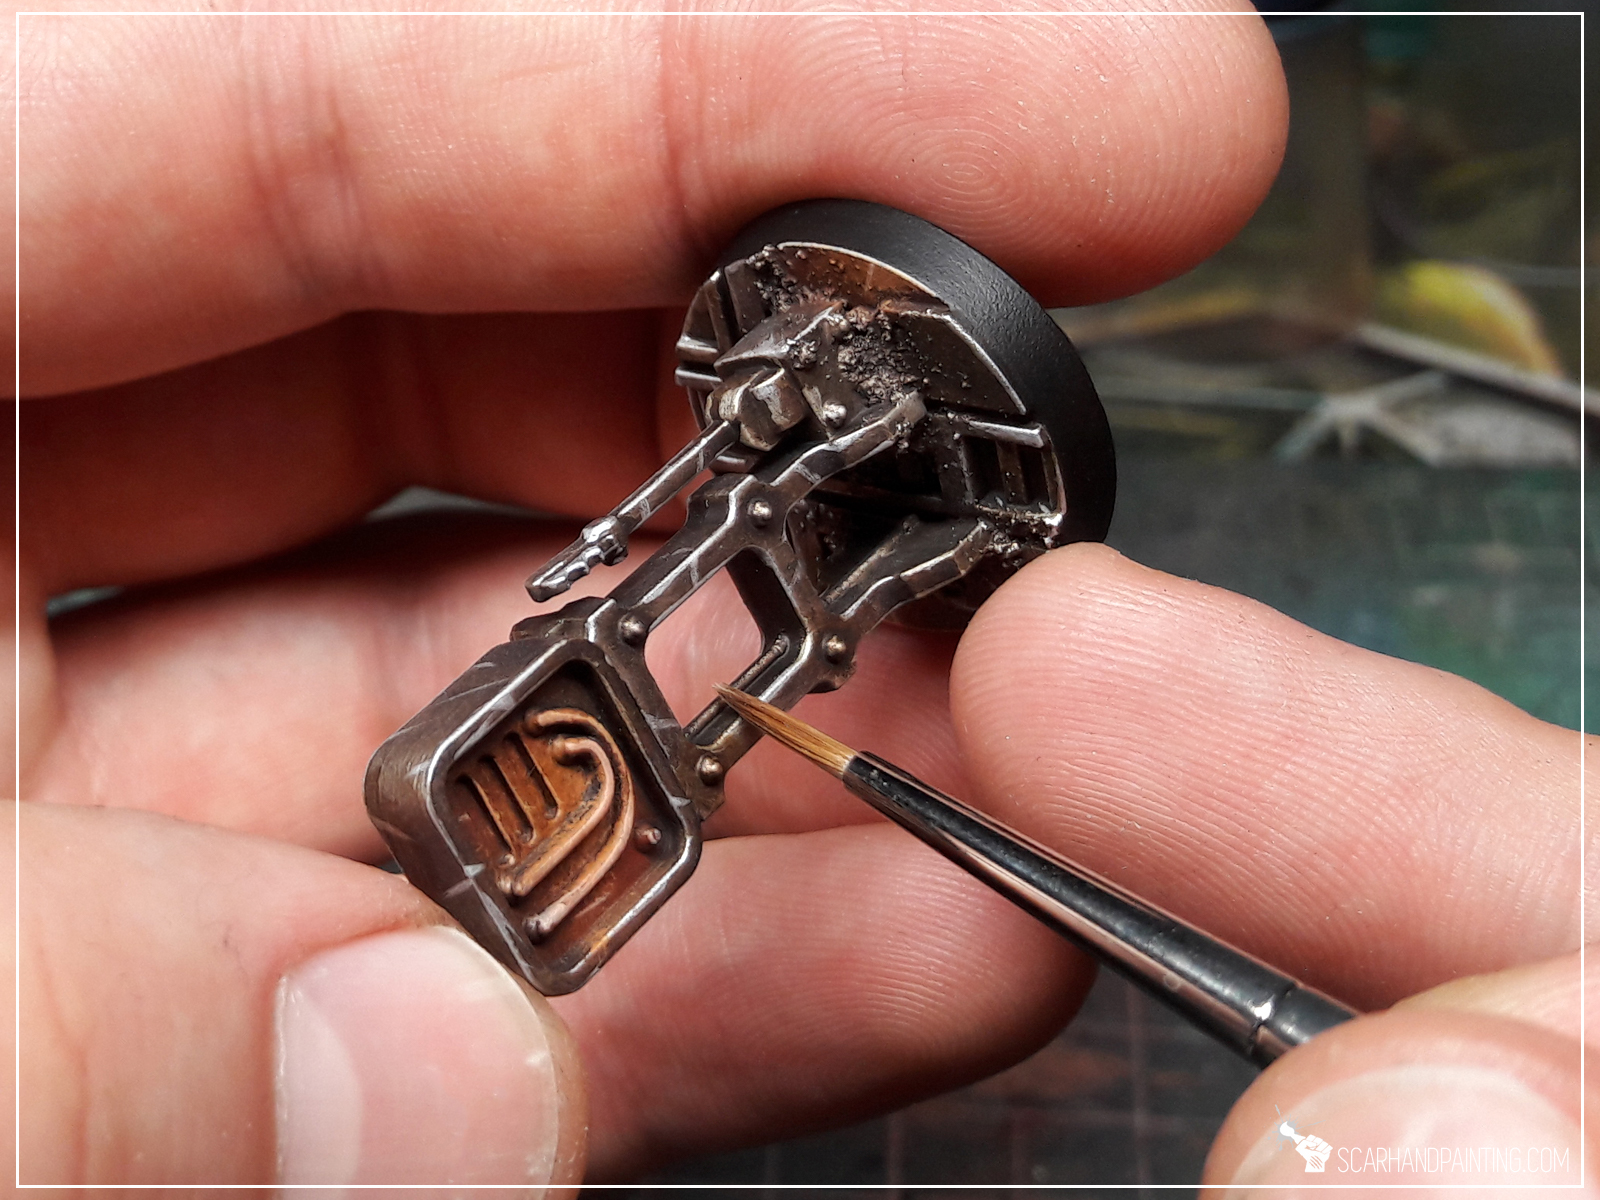
Contrary to what the nickname suggests the flatbrush technique does not require an actual flat brush. The technique, as I see it, revolves around applying a highlight with multiple single direction movements using the belly of the brush. In a way it is similar to drybrushing, except the paint is usually semi-moist and bristles are held highly inclined towards the painted surface, rather than perpendicular. As a result a smooth, solid layer of paint is applied to any exposed areas, leaving any perpendicularly positioned recesses unpainted.
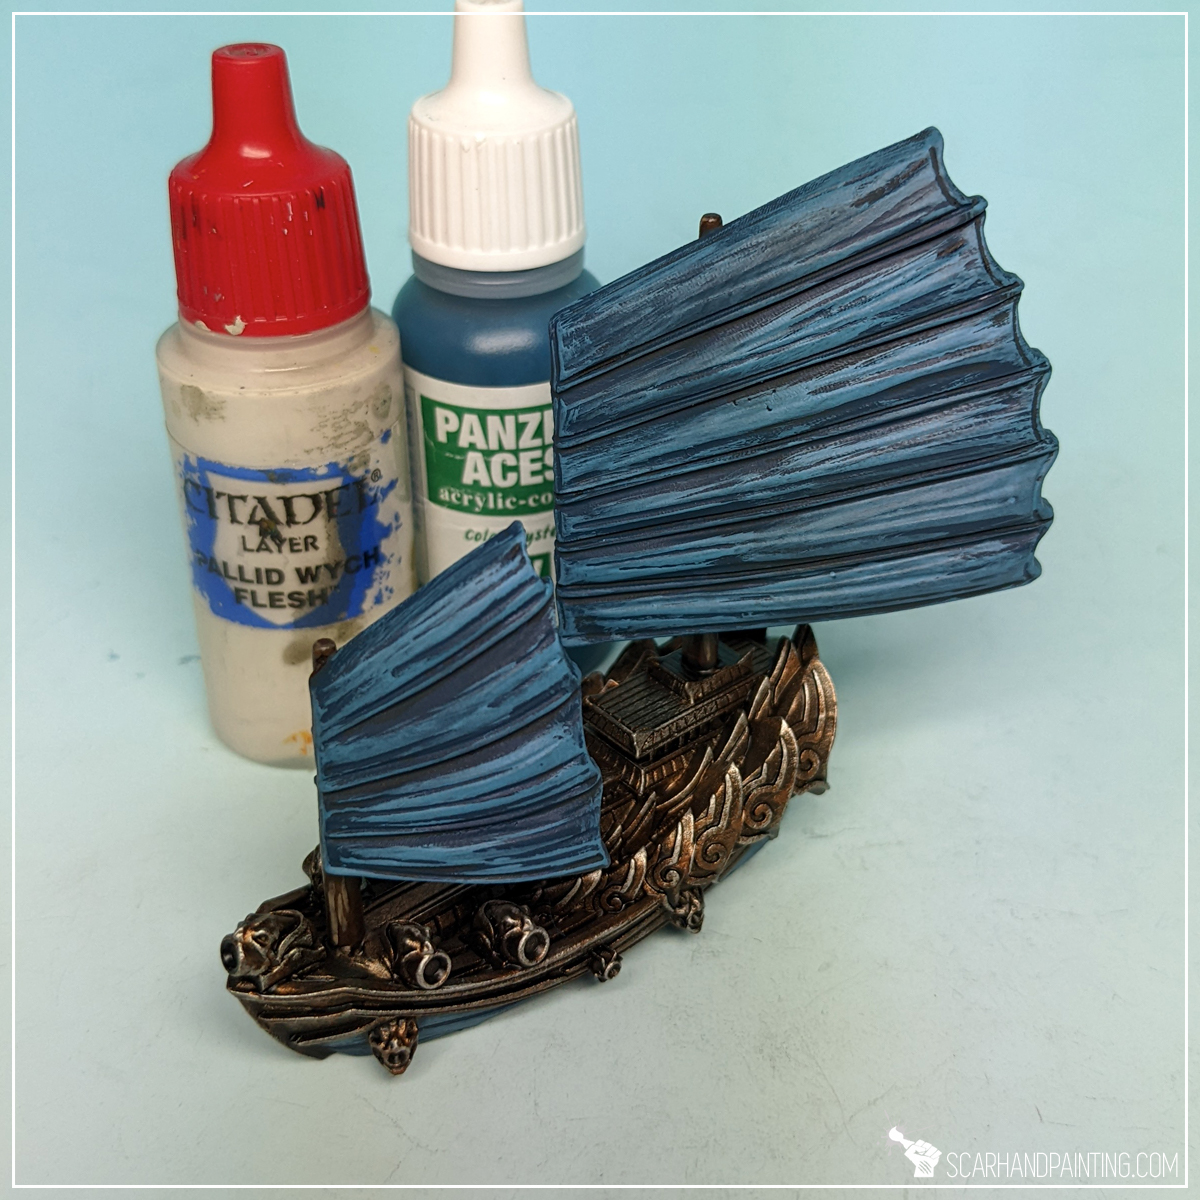
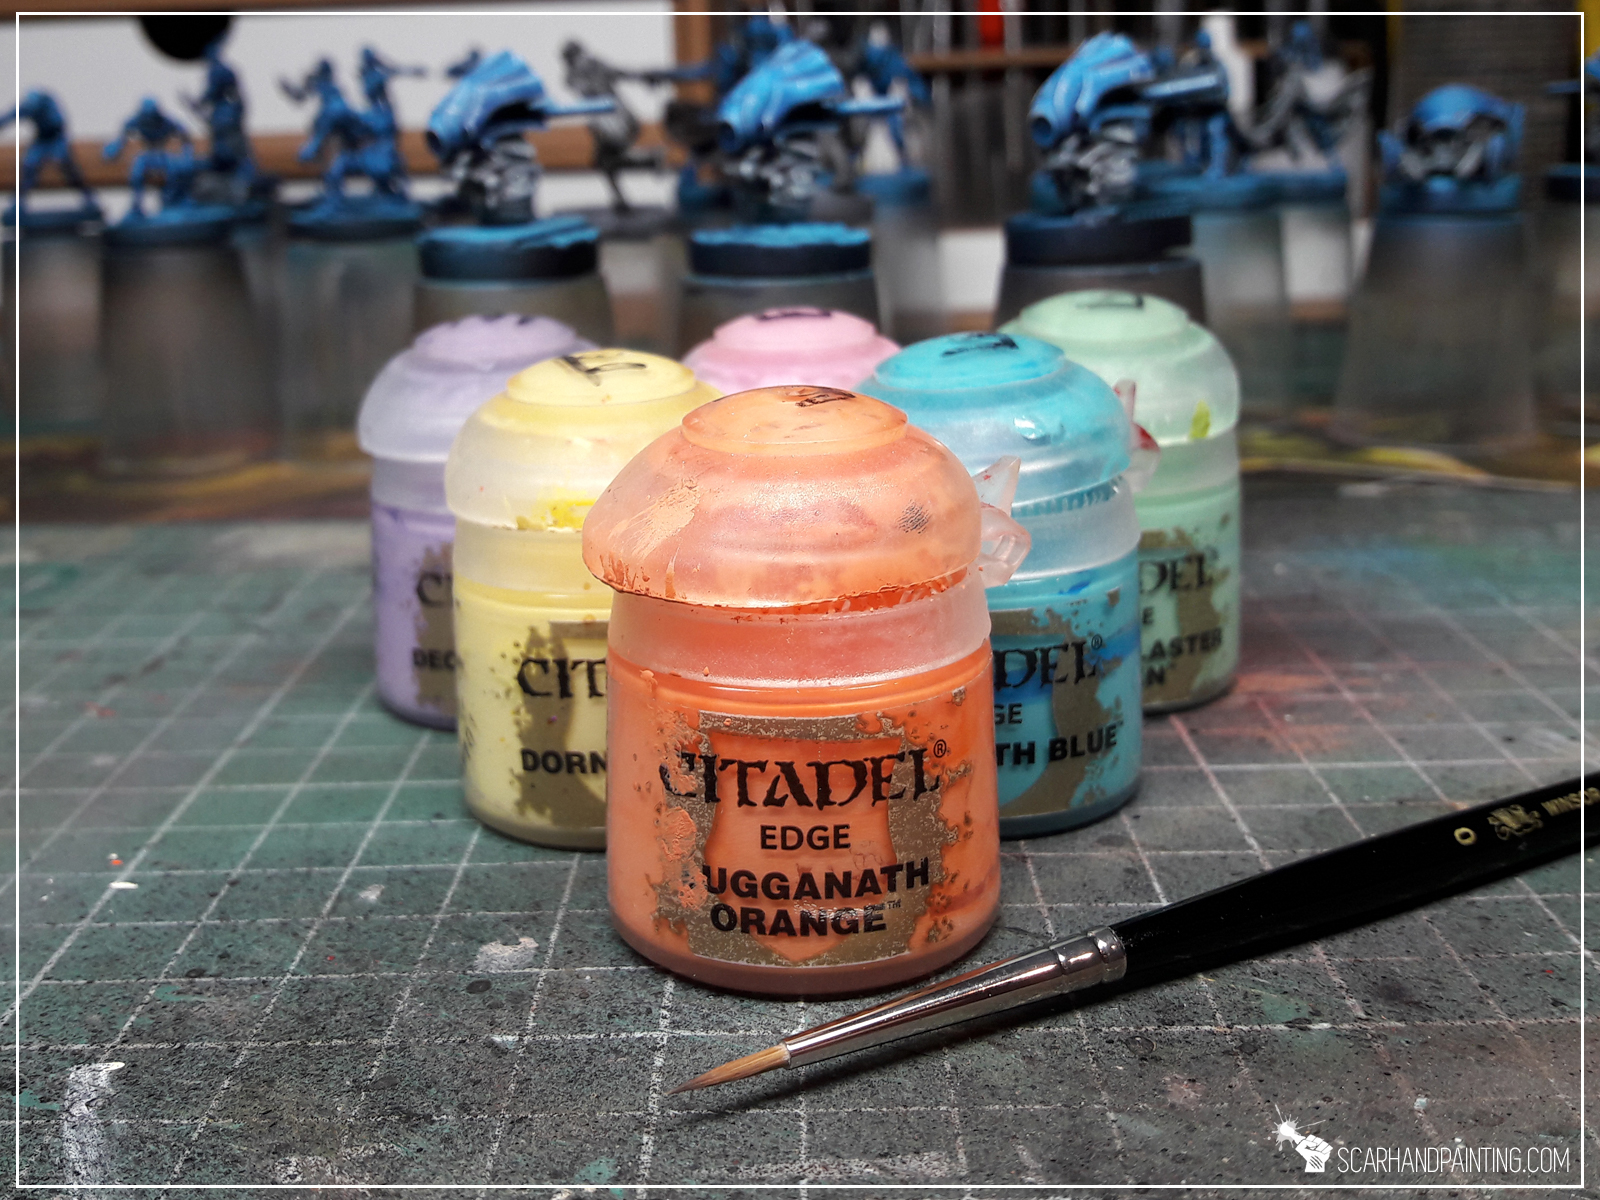
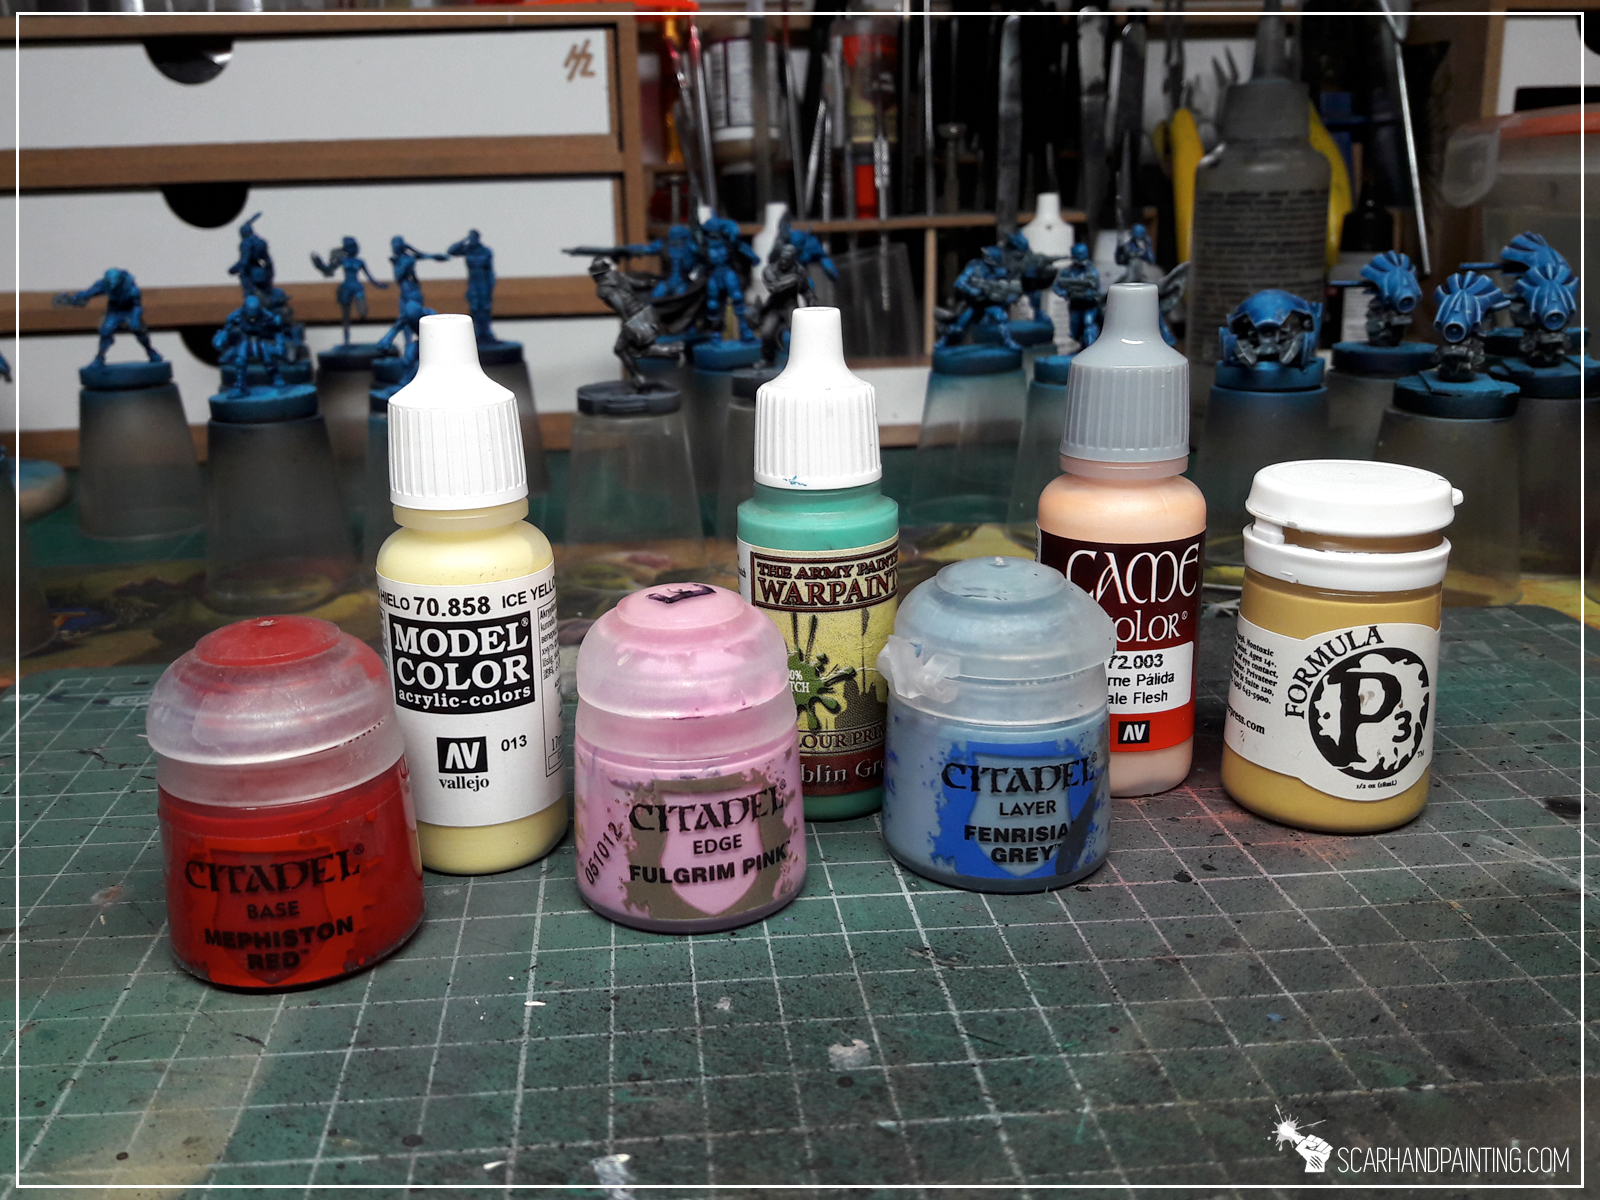
The flatbrush technique works best with well pigmented, standard density paints, such as Citadel metallic, layer, base colors, regular and metallic Army Painter, Vallejo Game Color and Model Color including metalic range, regular and metallic P3… the list goes on. Due to low or high density any washes, inks, air series, most special effects etc. will not work well with flatbrush. Some high density paints such as Citadel Dry, or just your standard but a bit old partially dried paints, can still be used while thinned slightly.
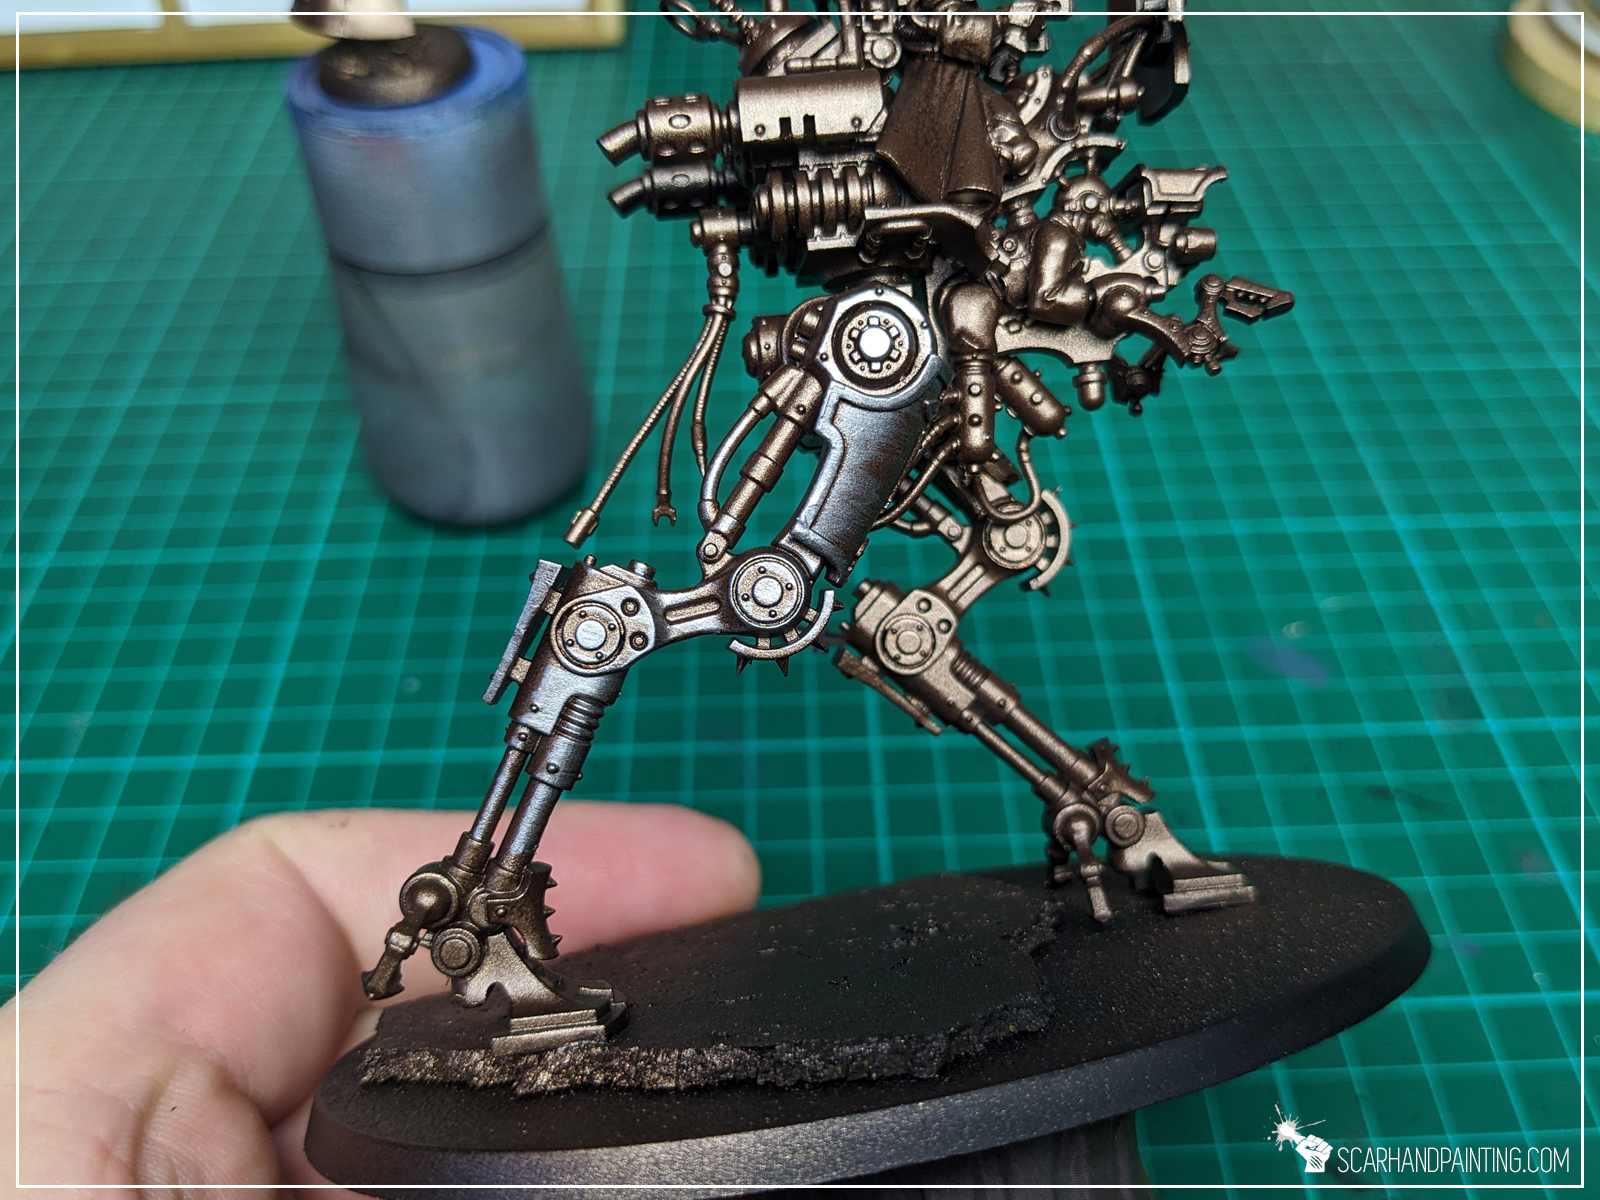
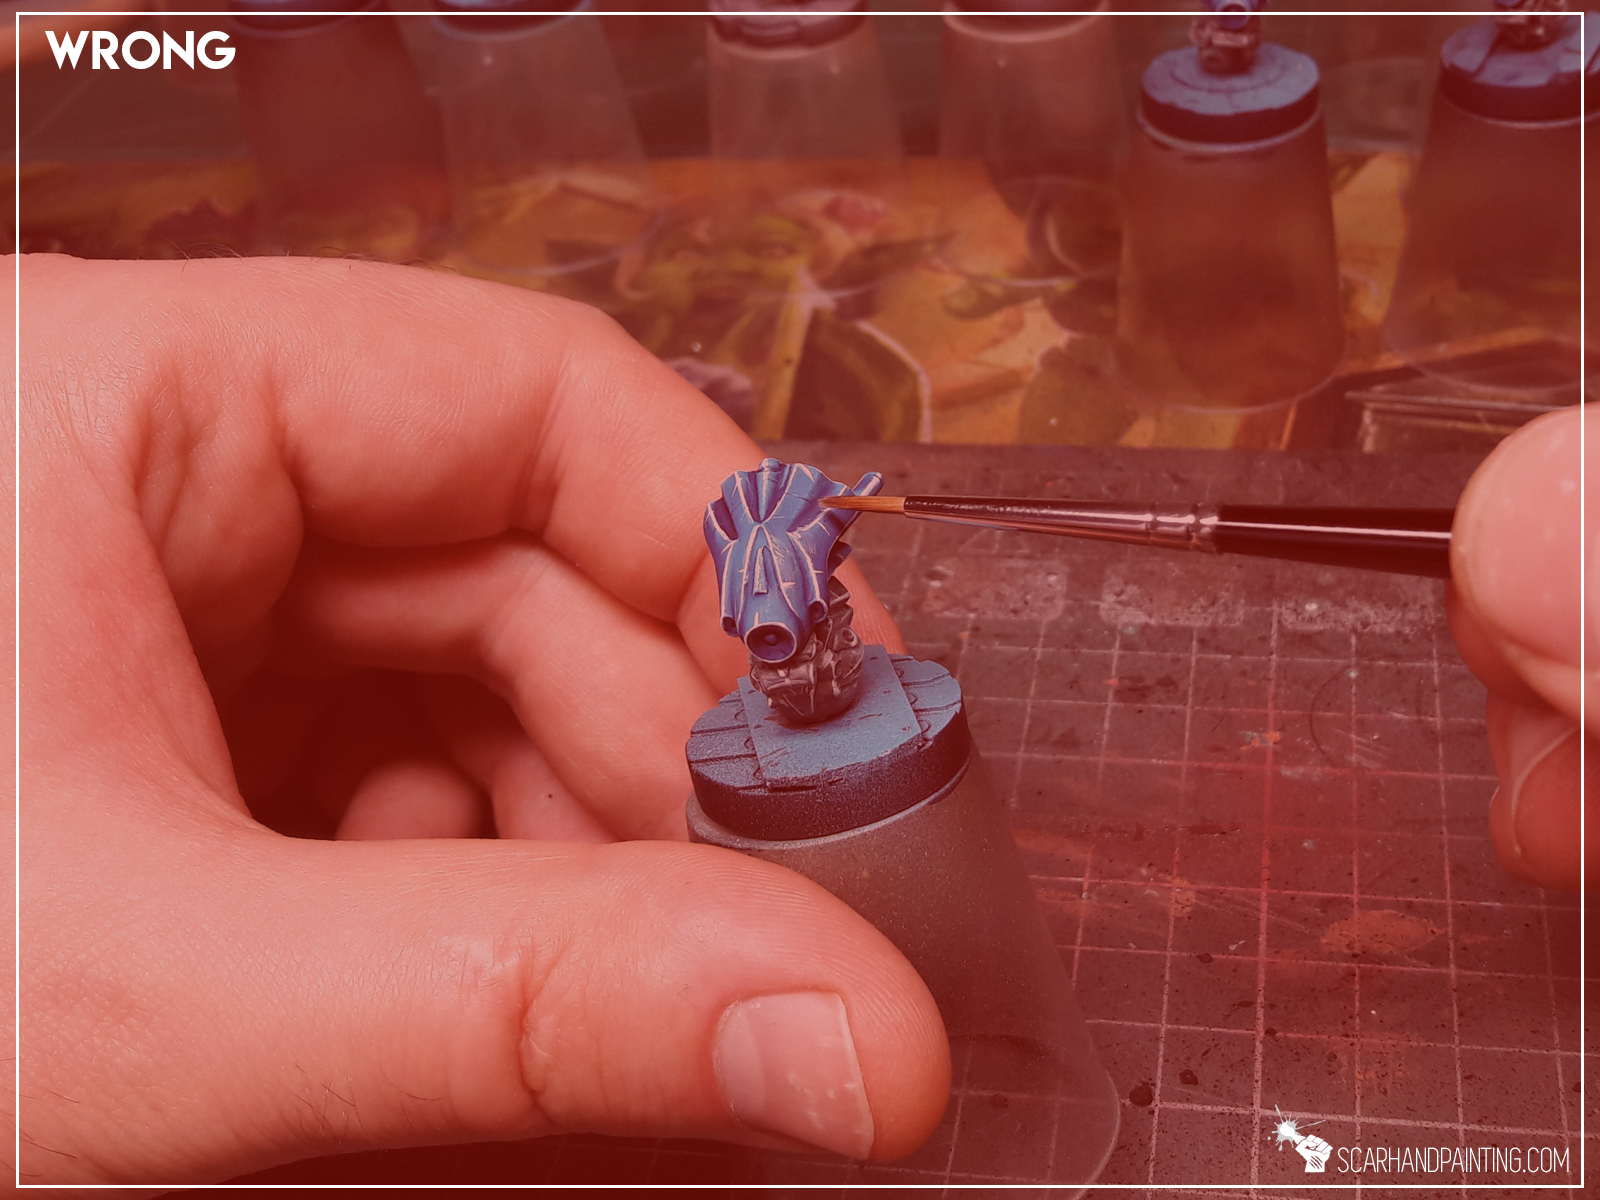
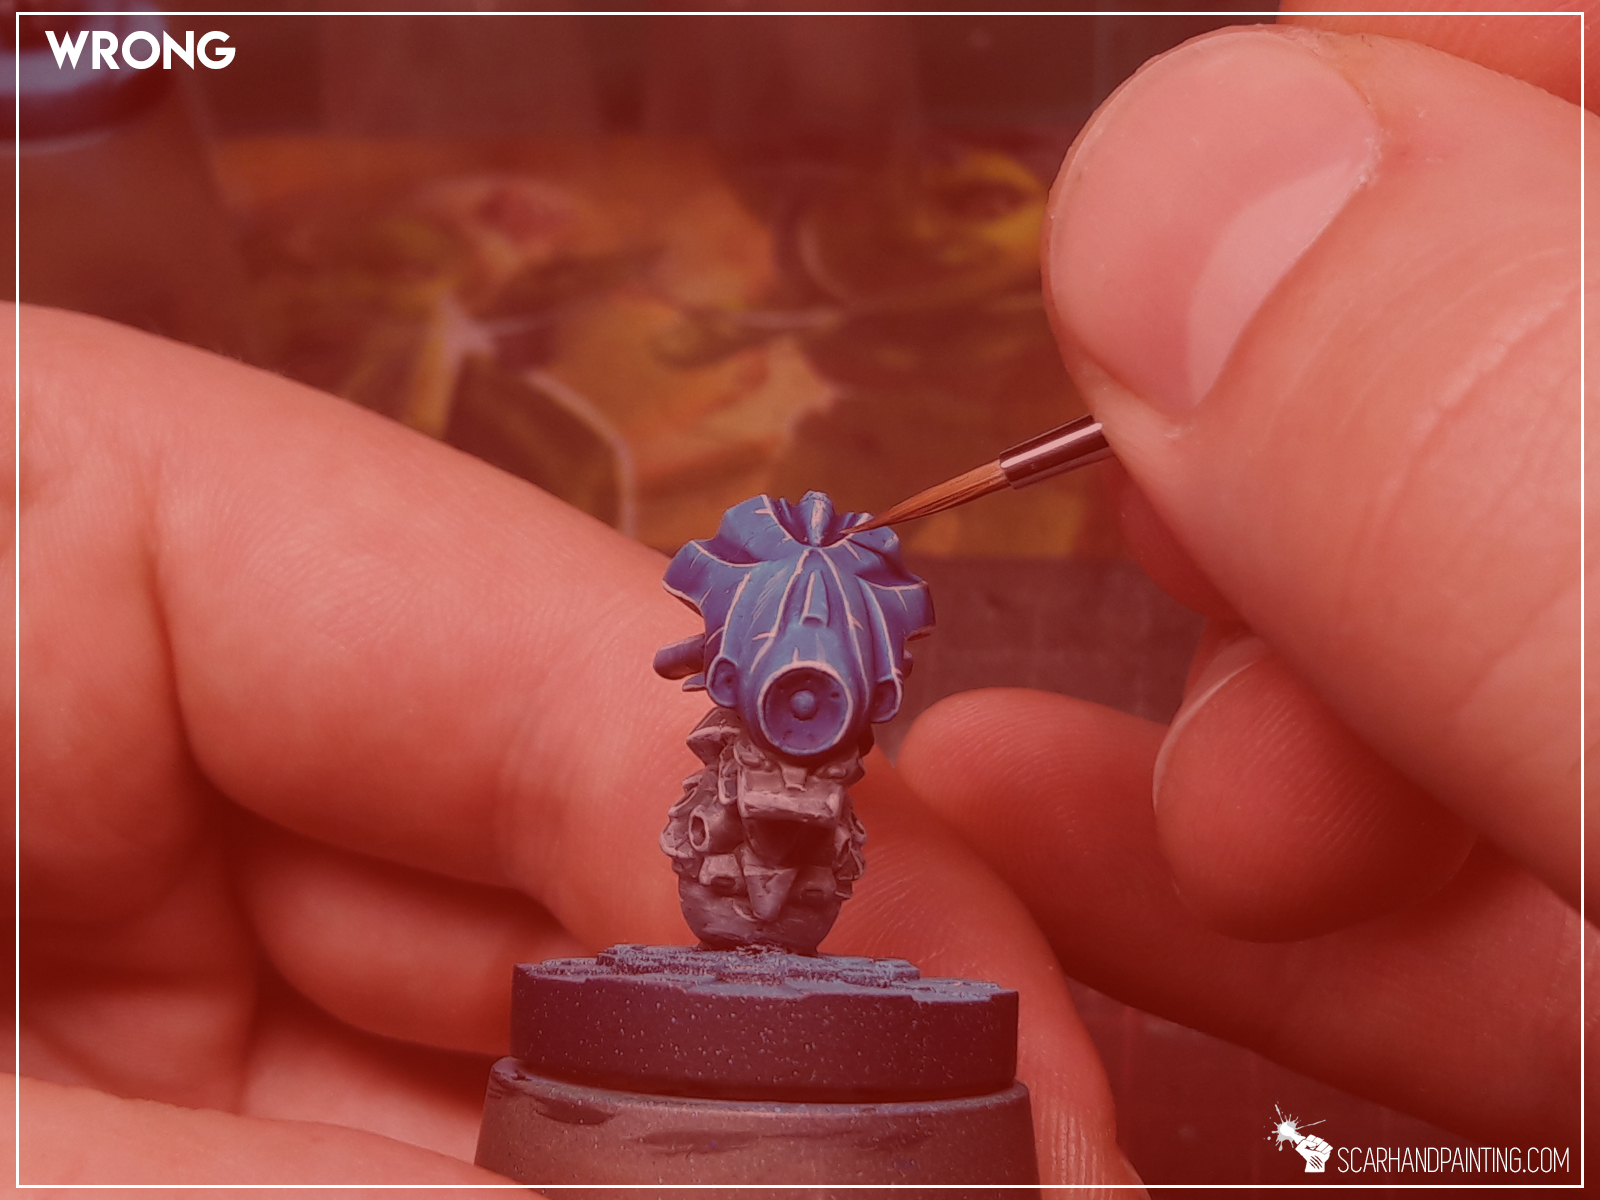
The key is to get just enough paint on the brush to be able to apply a semi-moist, smooth layer on the miniature, rather than overflowing the detail and recesses. For that purpose, in order to control the volume of paint on the brush, I very much recommend a dry palette. This does not to be anything special. An old CD, or a lacquered piece of paper will do.


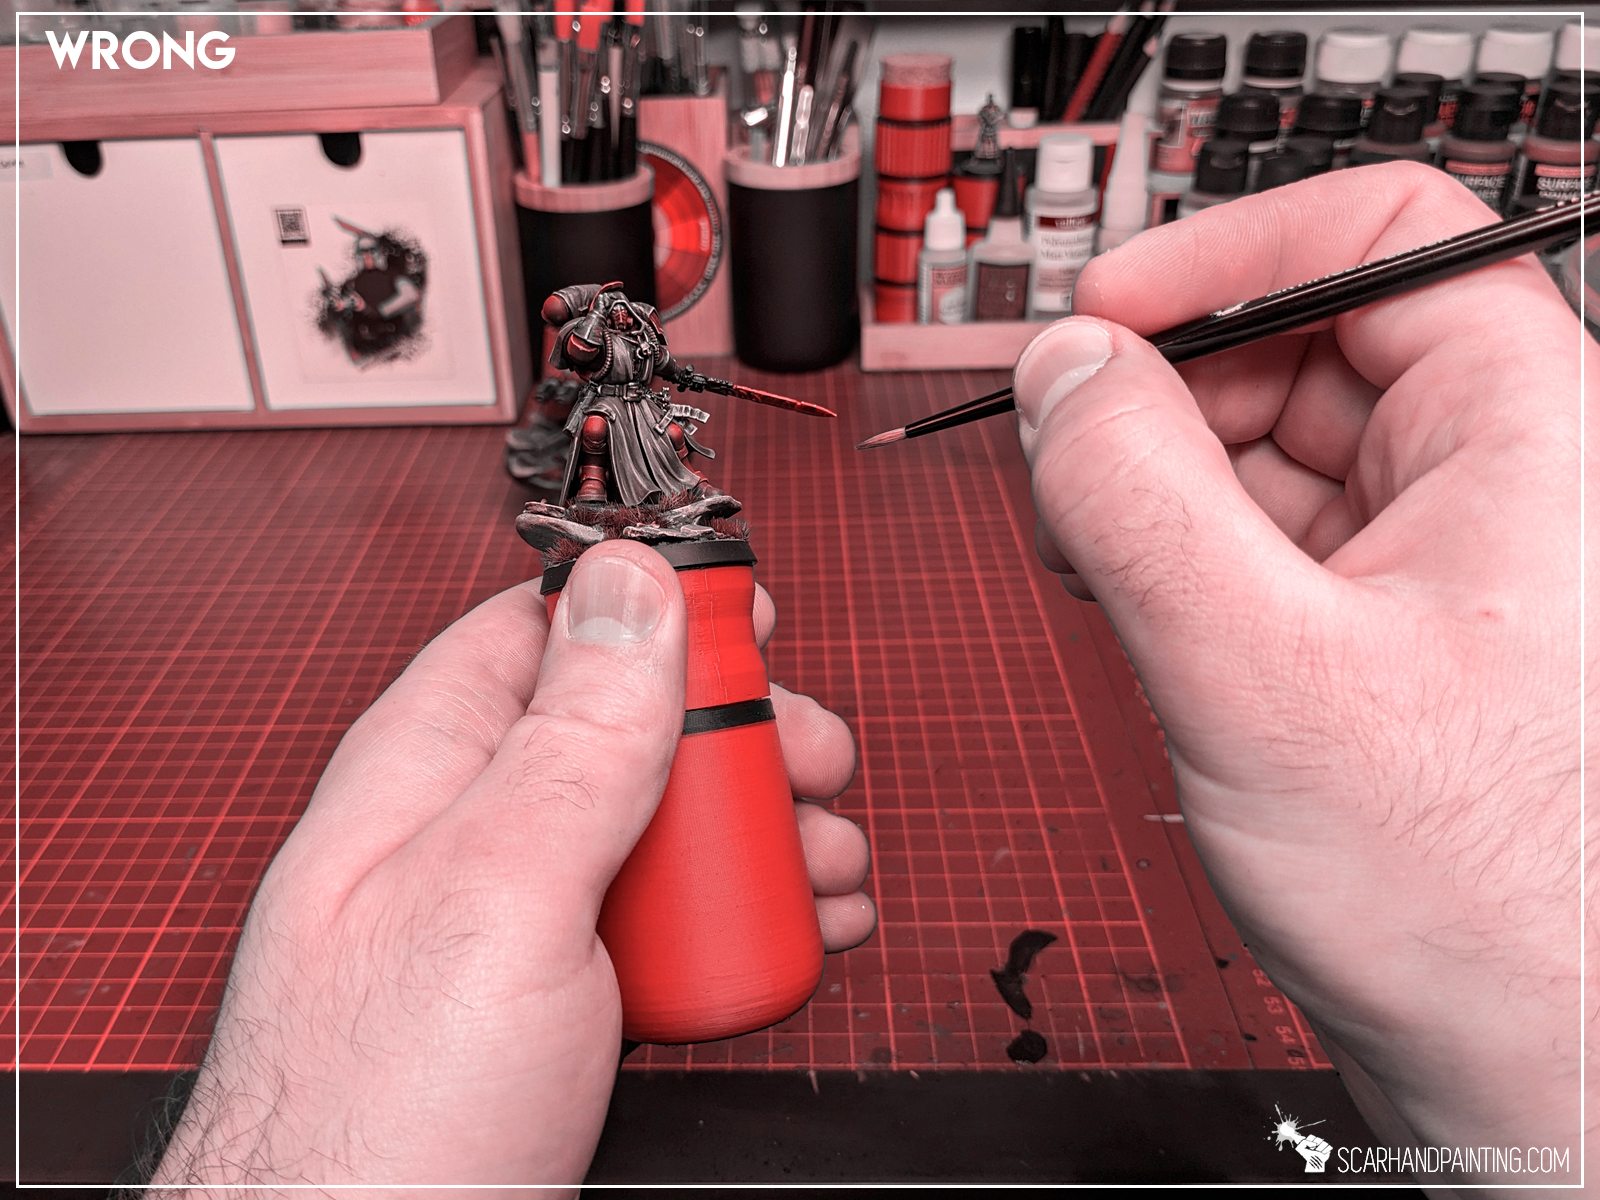
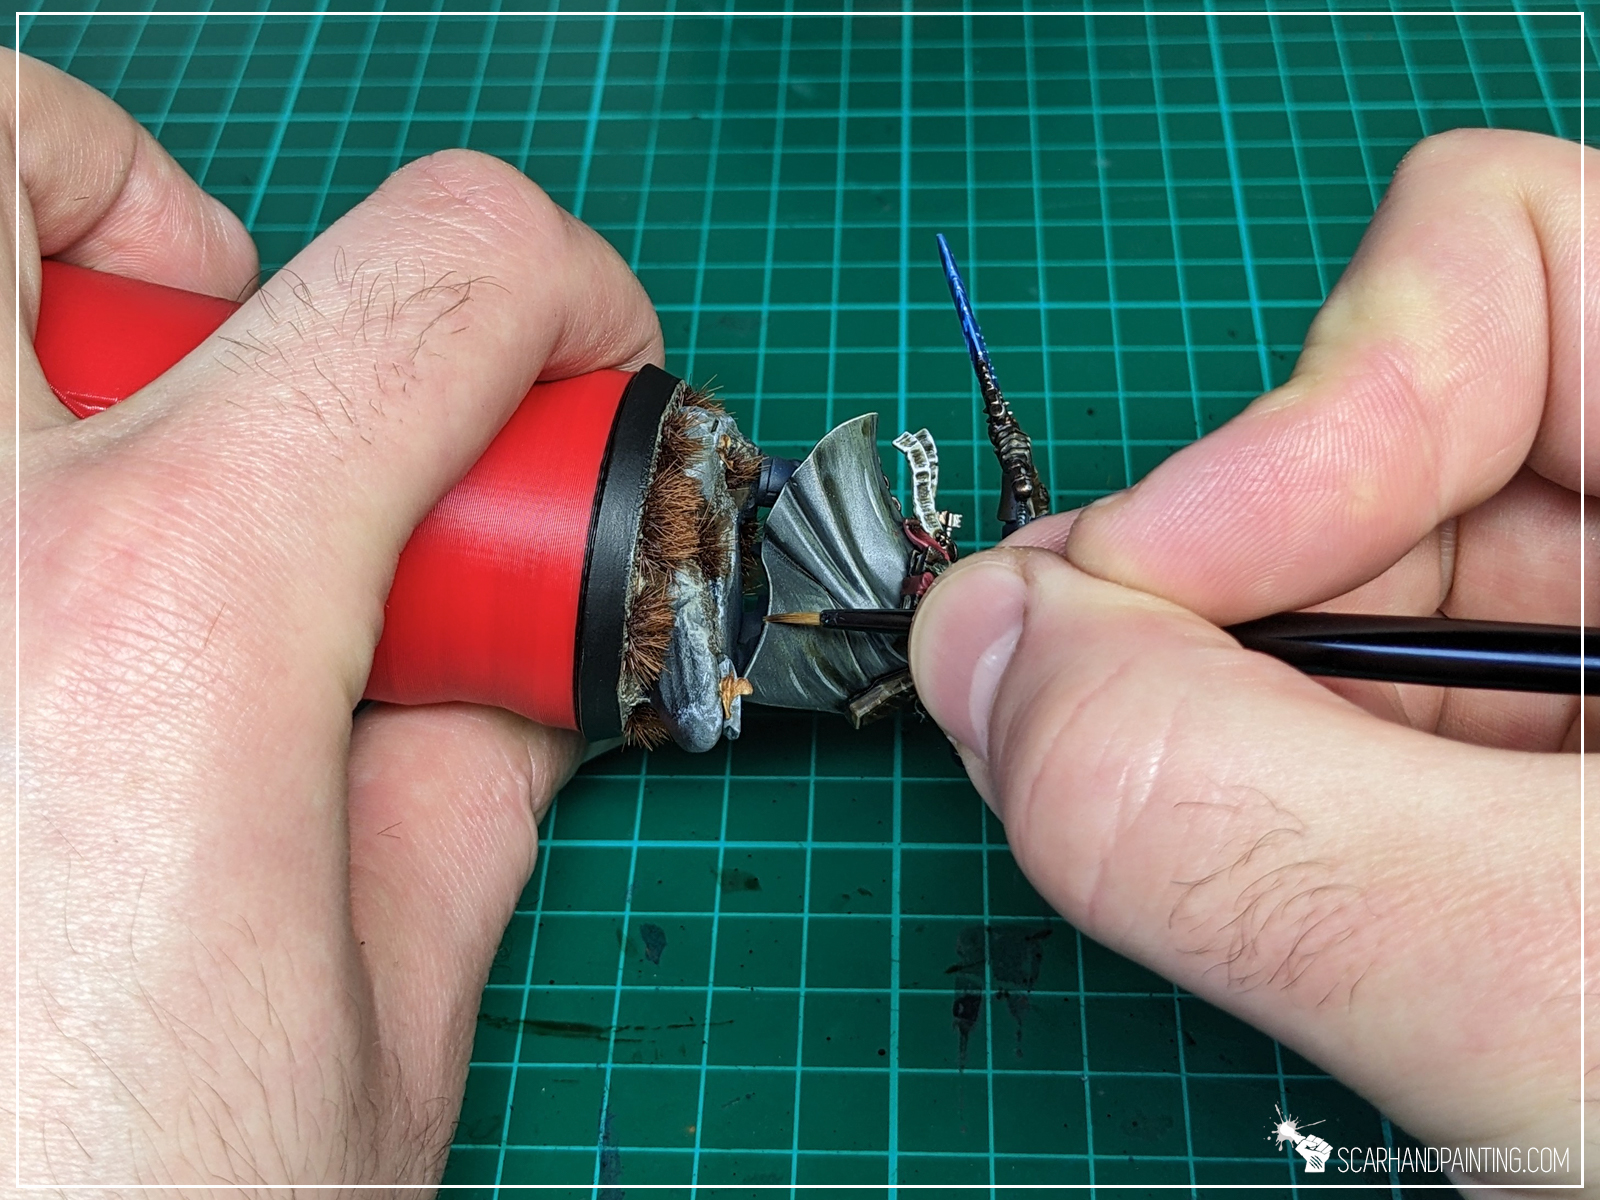
The process itself is very simple. Once there’s just enough paint on the brush (no longer flows) I use multiple, soft, one direction moves to highlight particular parts of a miniature. I try to paint with the belly of the brush and in order to avoid the tip being too aggressive with recesses, I keep the belly of the brush inclined towards the painted surface.

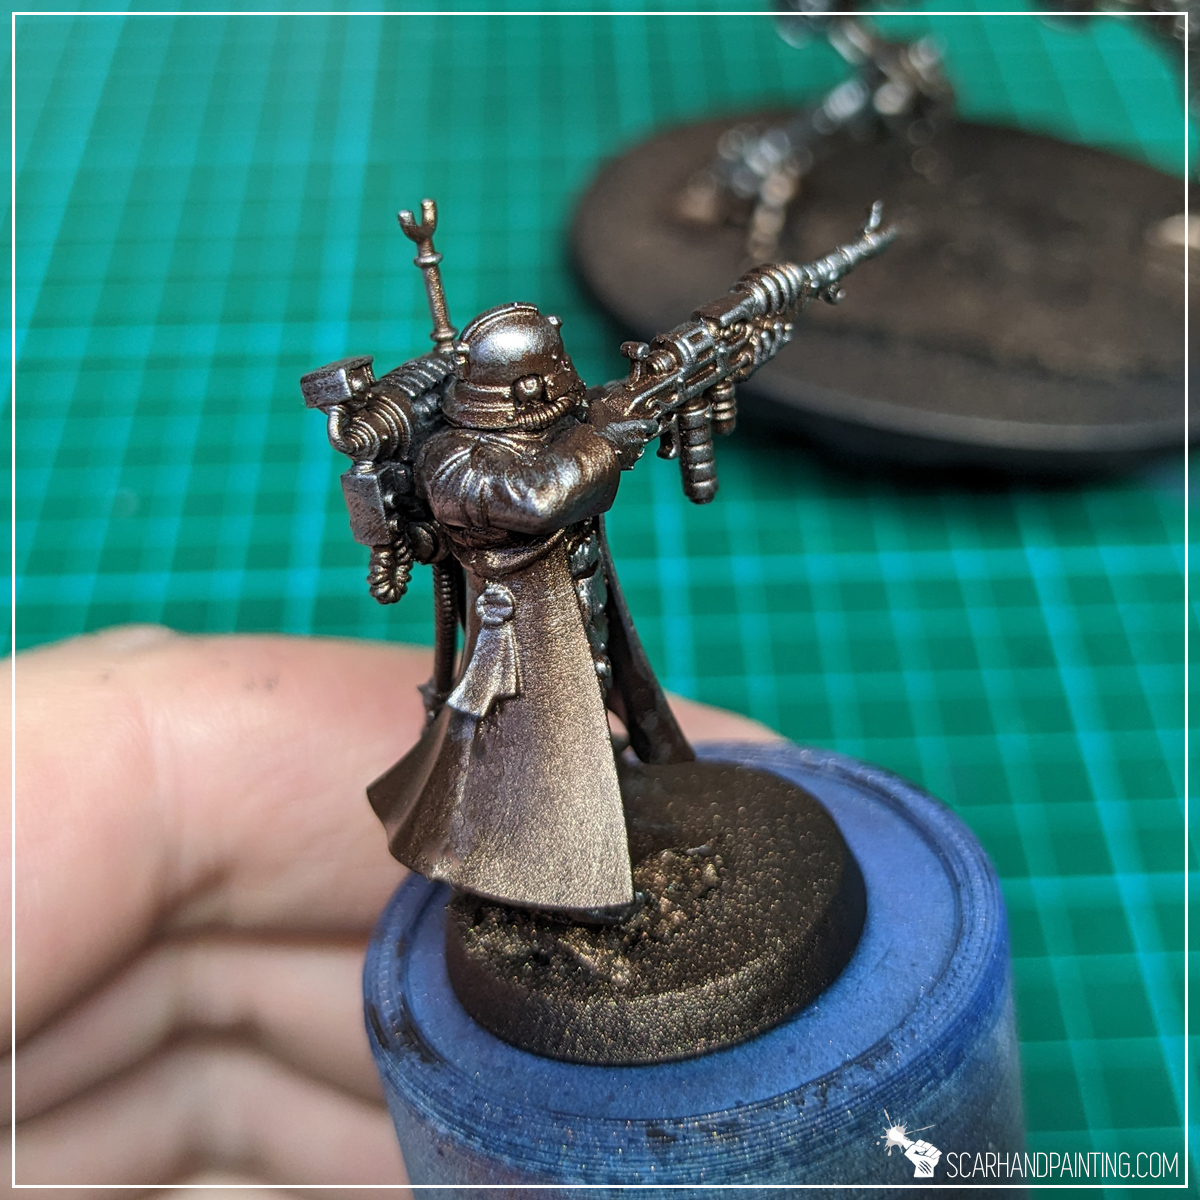
Extra Tip: In order to stabilize my hands during painting, I usually keep both of my wrists supported on the edge of a painting desk. However flatbrush does not necessarily require much precision. On some occasions, depending on particular surface being painted, the movement of the brush comes from the entirety of the hand, rather than wrist and fingers. (Learn more about hands stabilization in The Way of the Brush article here.)

I’ve been painting miniatures for over two decades now. Sometime along the way the flatbrush technique developed itself as a tool to apply initial highlights in timely fashion. It is a simple, fast and very rewarding technique, that produces nice effect. Maybe it comes at a different name. Maybe it is widely implemented or even just a part of another painting technique. I don’t know as I failed to find much about it. Either way I’m sharing my take on flatbrush, because I refer to it a lot in Scarhandpainting articles. At least now you know what I mean by that.


I hope you find this tutorial interesting. Be sure to let me know your thoughts in the comments below or via Facebook or Instagram. I would also appreciate if you considered sharing this content with your friends, who might find it useful. Finally if you are looking for a professional Warhammer miniatures painting service, be sure to contact me with this contact form. I always reply within 24 hours, after which please check out your spam folder.

Welcome to another entry in the ‘Painting Philosophy’ series, where I let you in on ‘how’ and especially ‘why’ I do some things in a certain way. In my opinion a proper approach to painting is crucial to maintain a healthy, rewarding experience and to produce satisfactory results. Today I will focus on brush handling and hand support during painting.
Handling a brush is a personal thing. It depends mostly on your experience, preferences and muscle memory. It would be inappropriate for me as a painter to tell you how to handle your brush, but I can definitely share some of my own habits. For starters, brush control and hand support, both heavily impact precision of the painting process. I found these skills worth practicing early on.

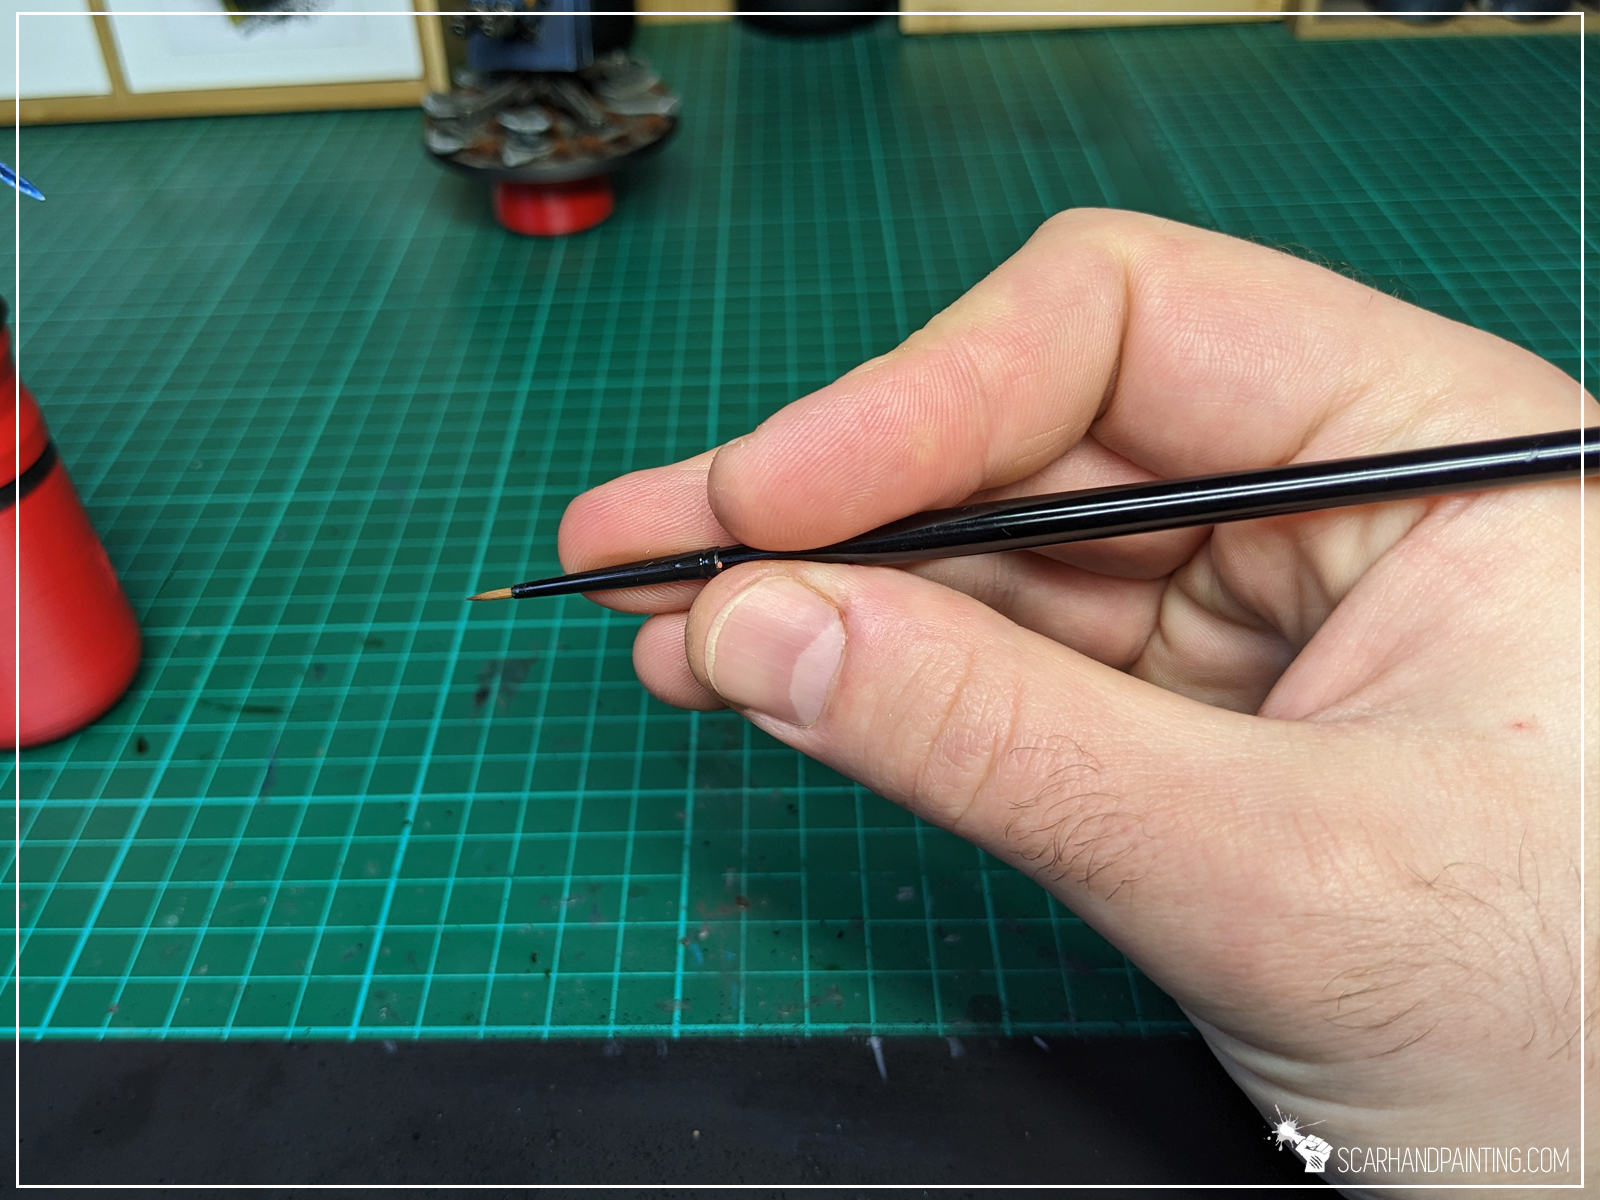

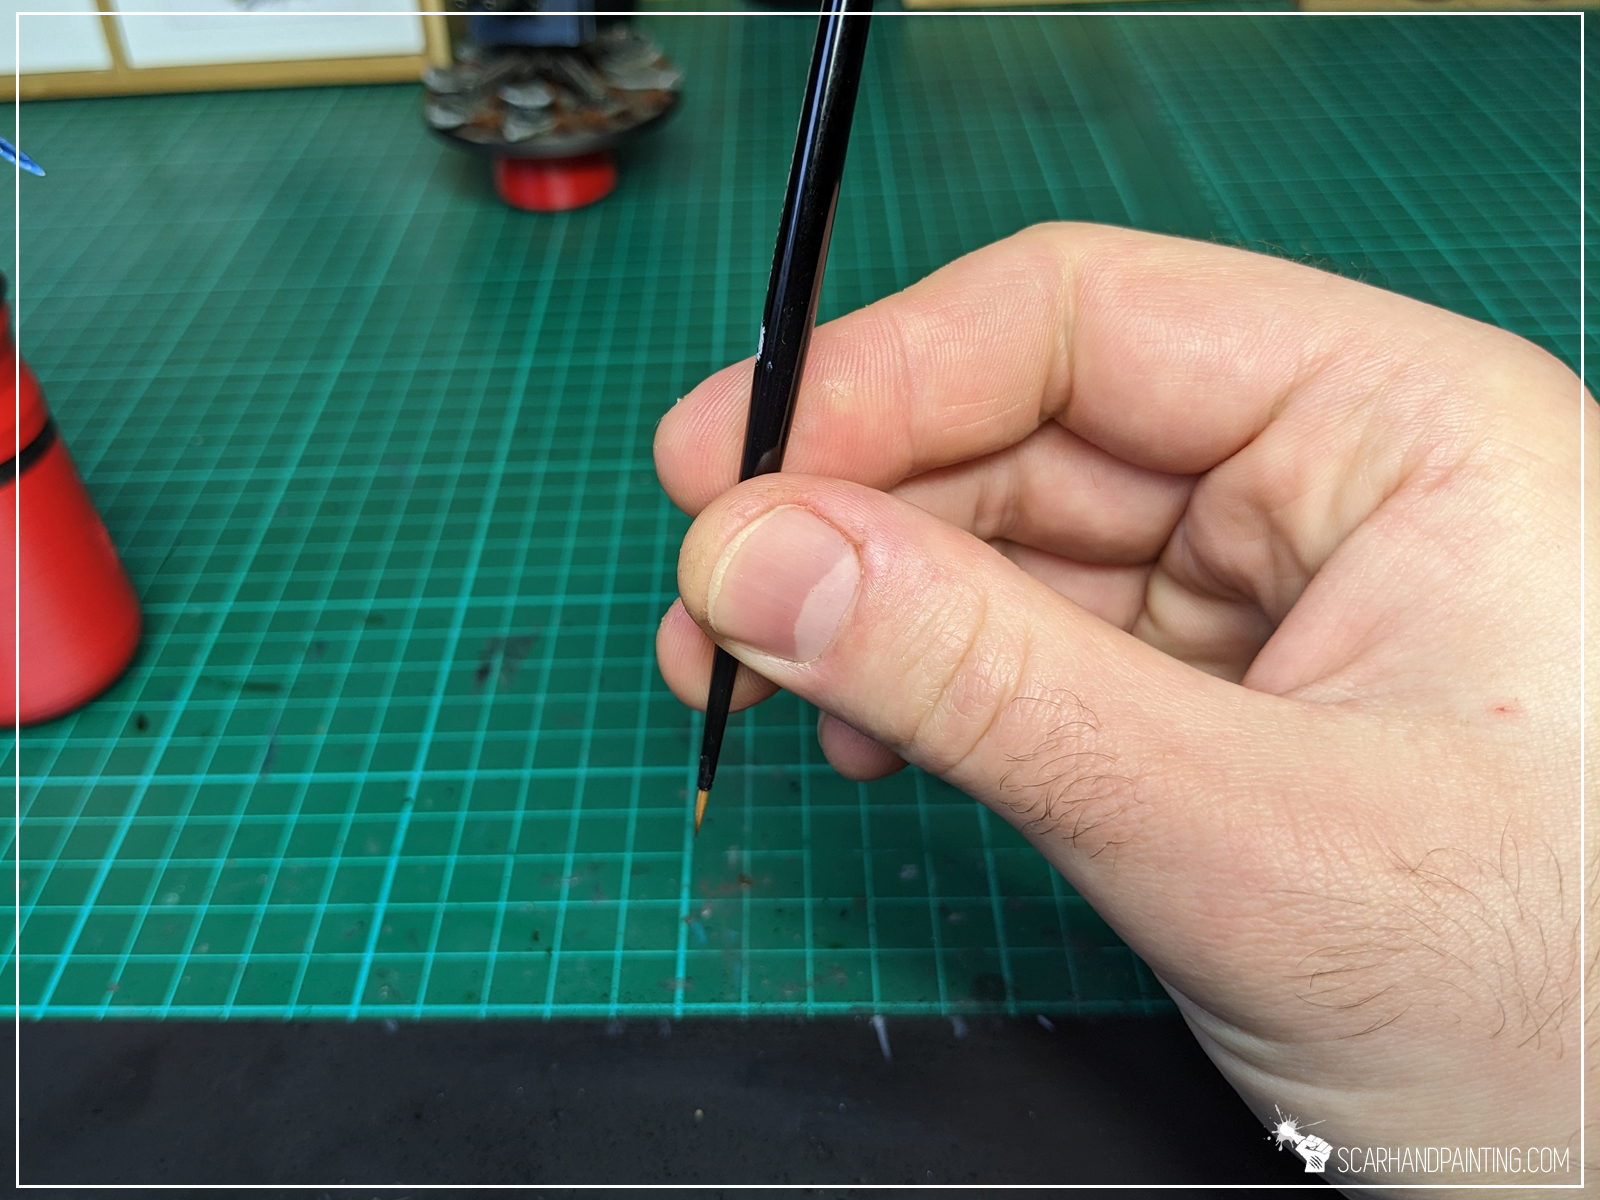
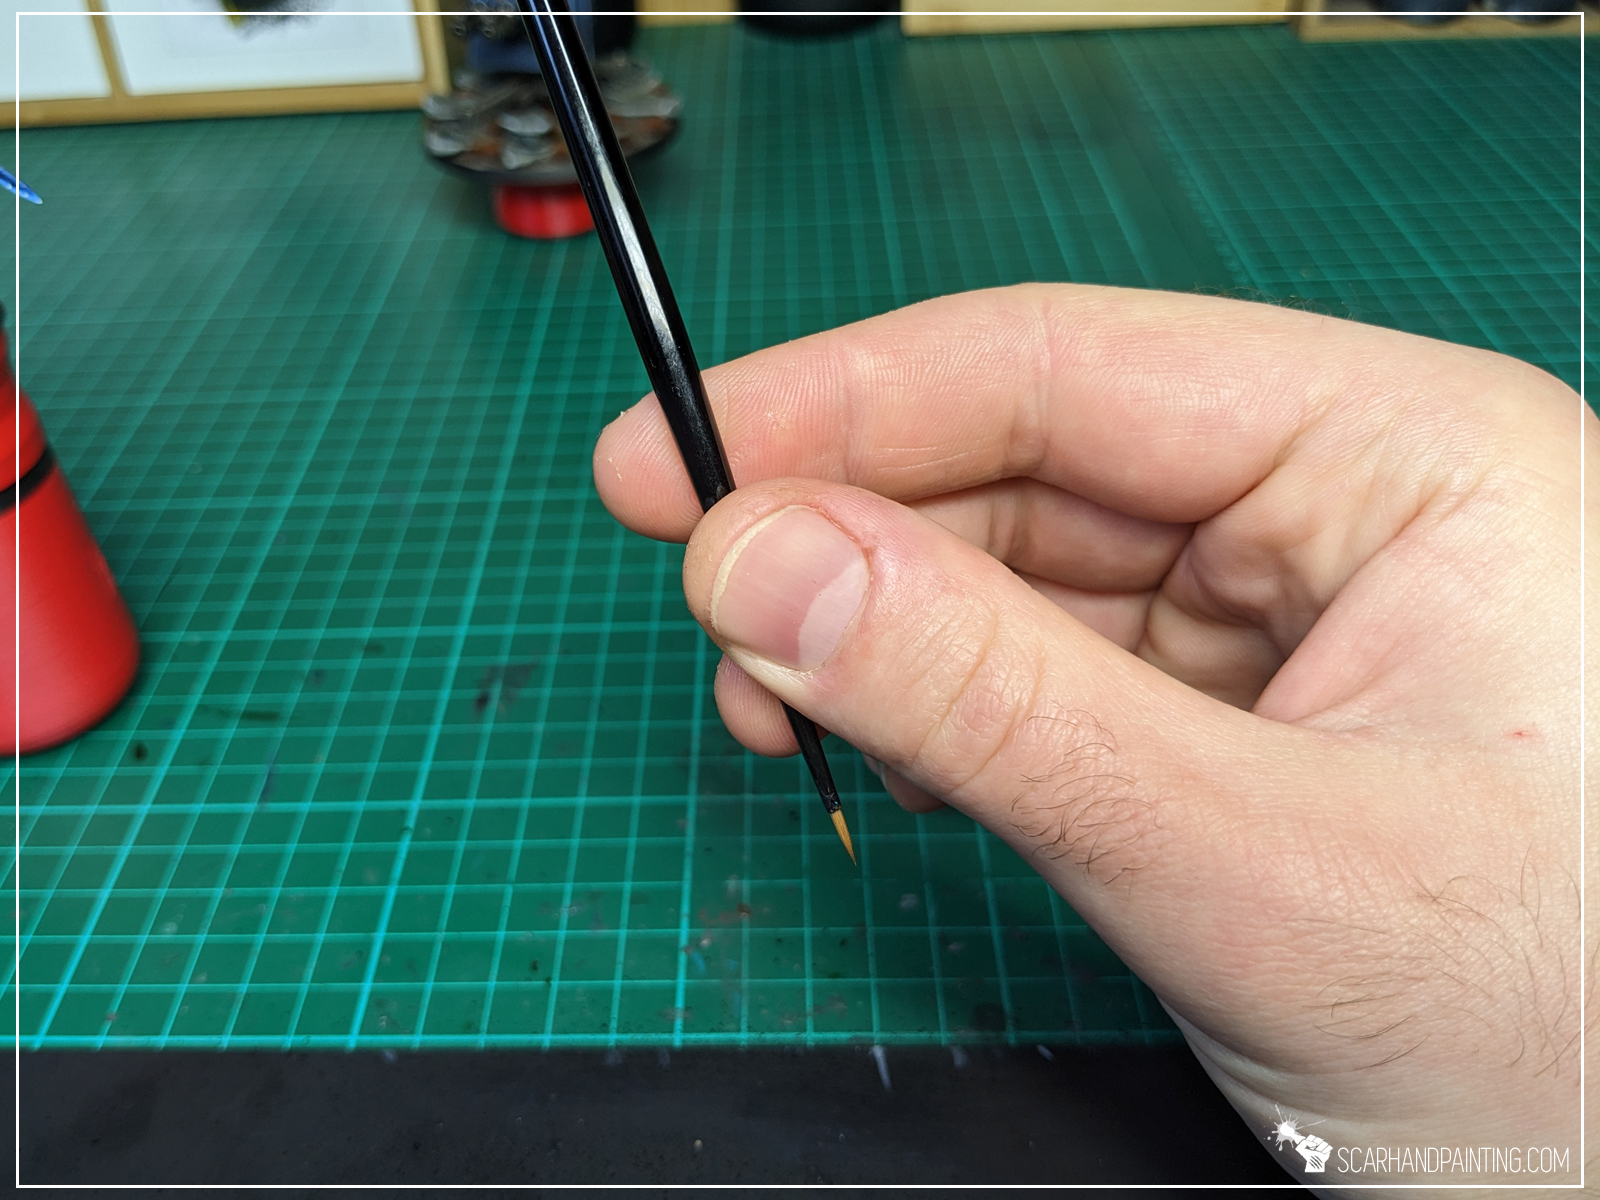
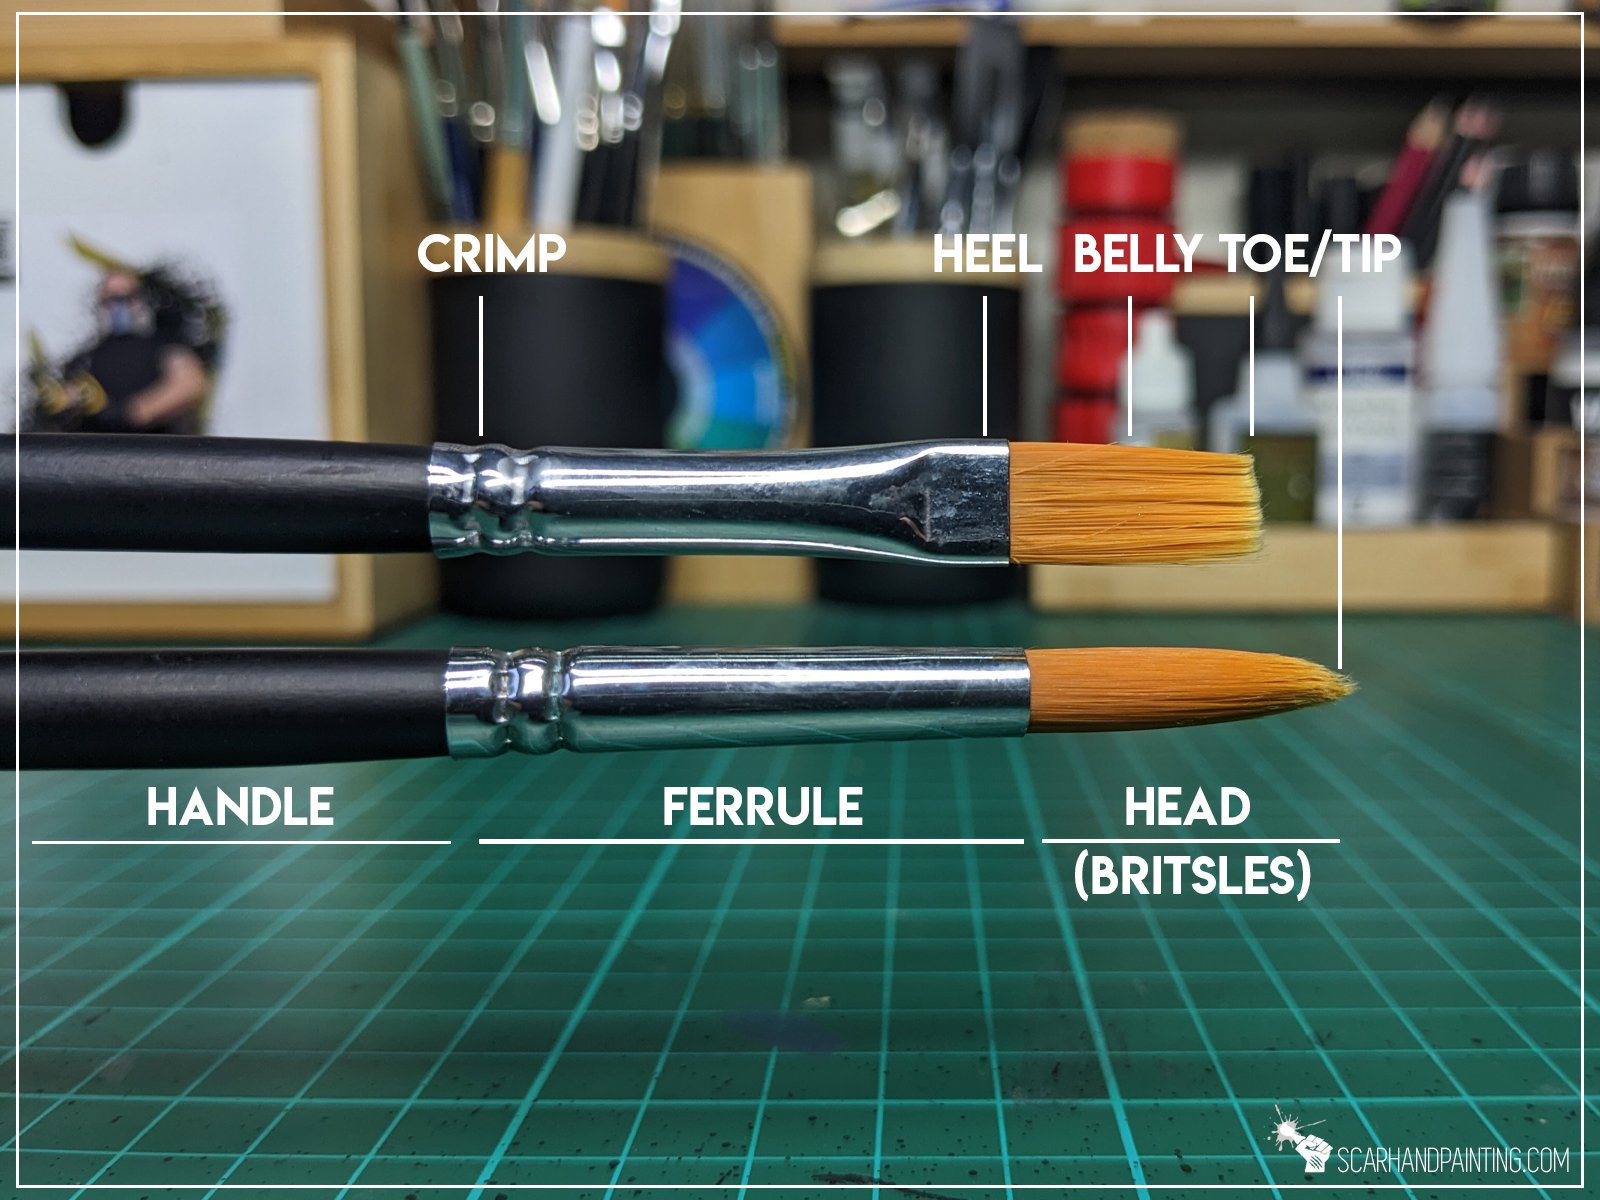
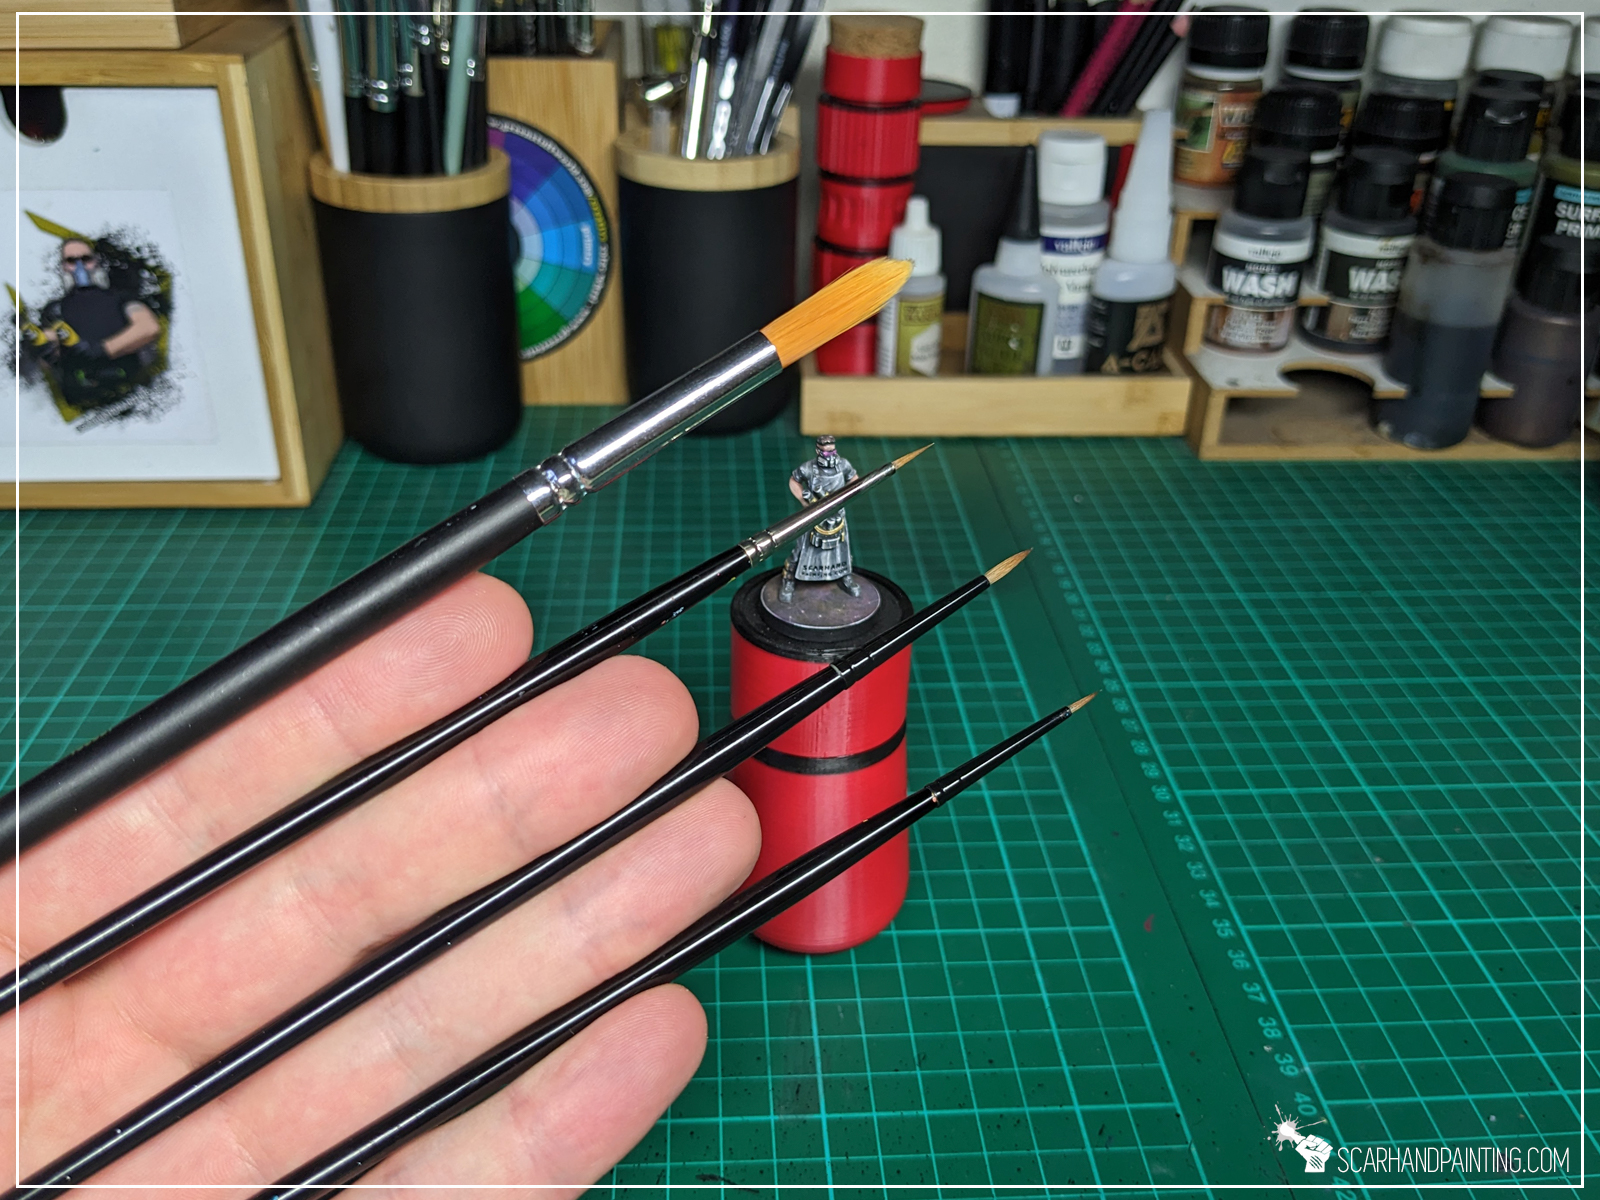
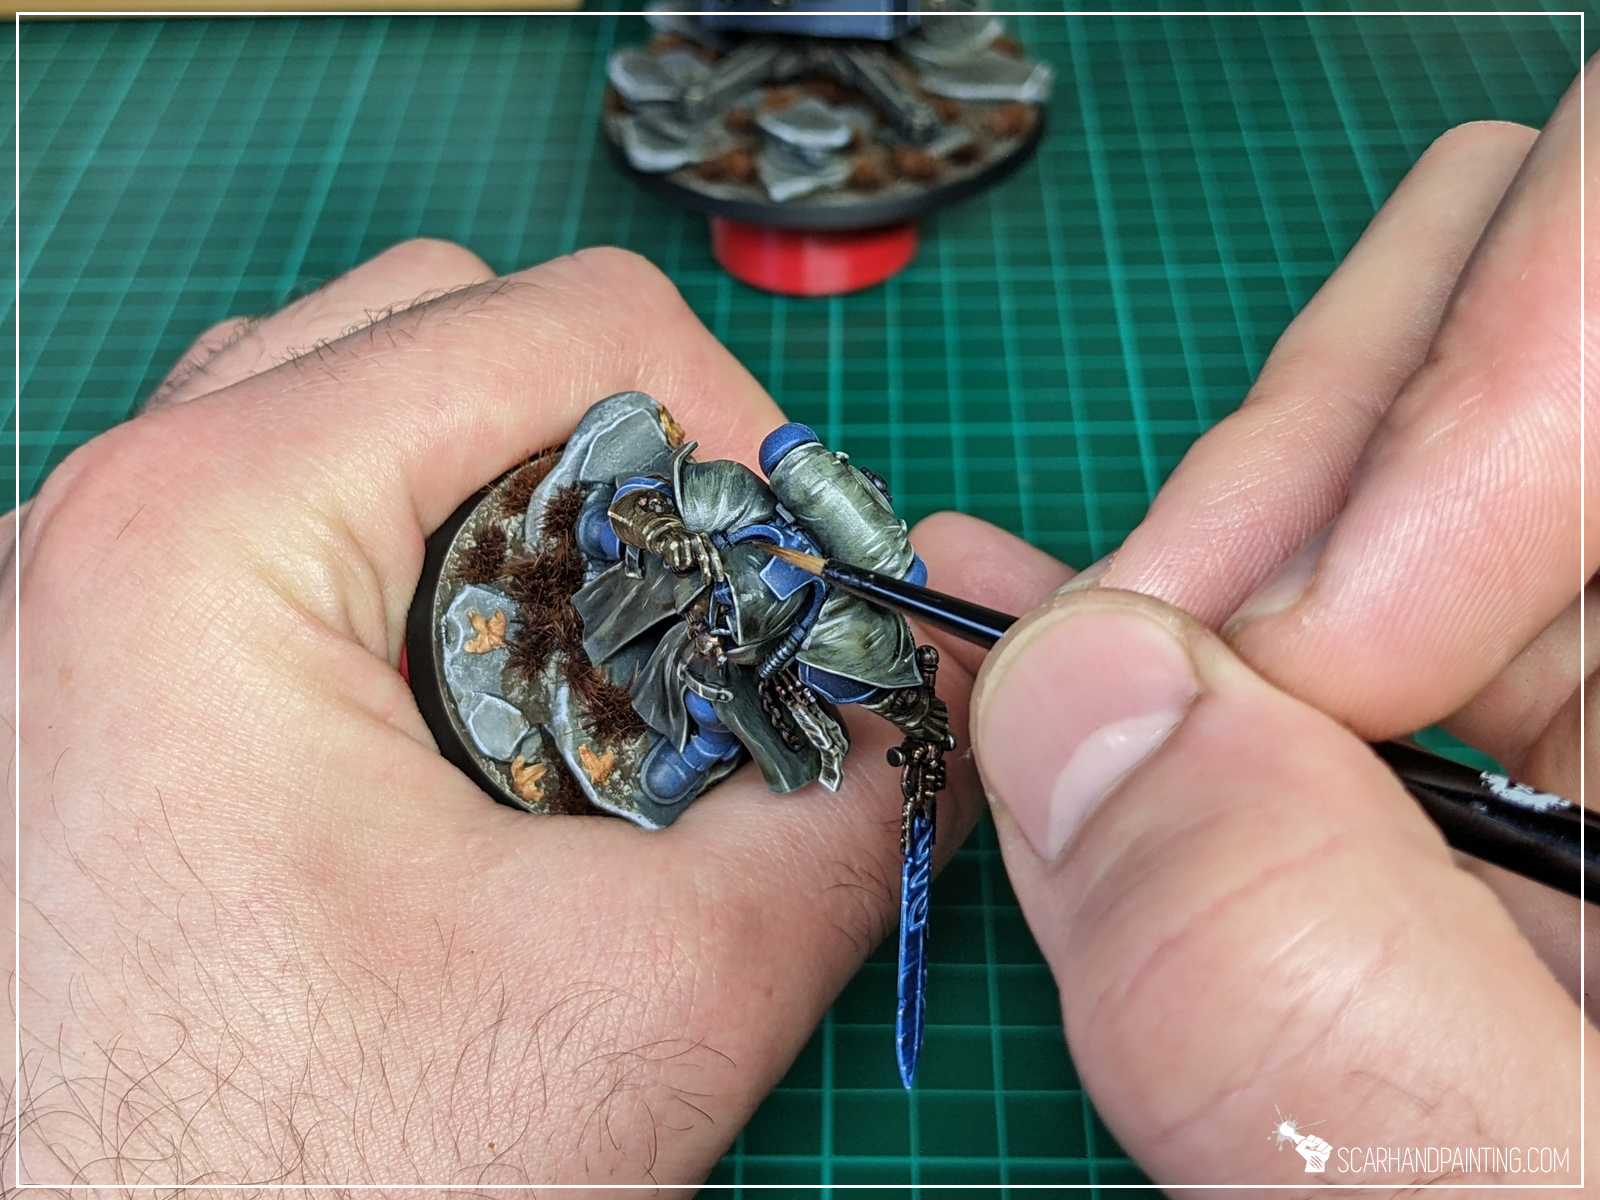
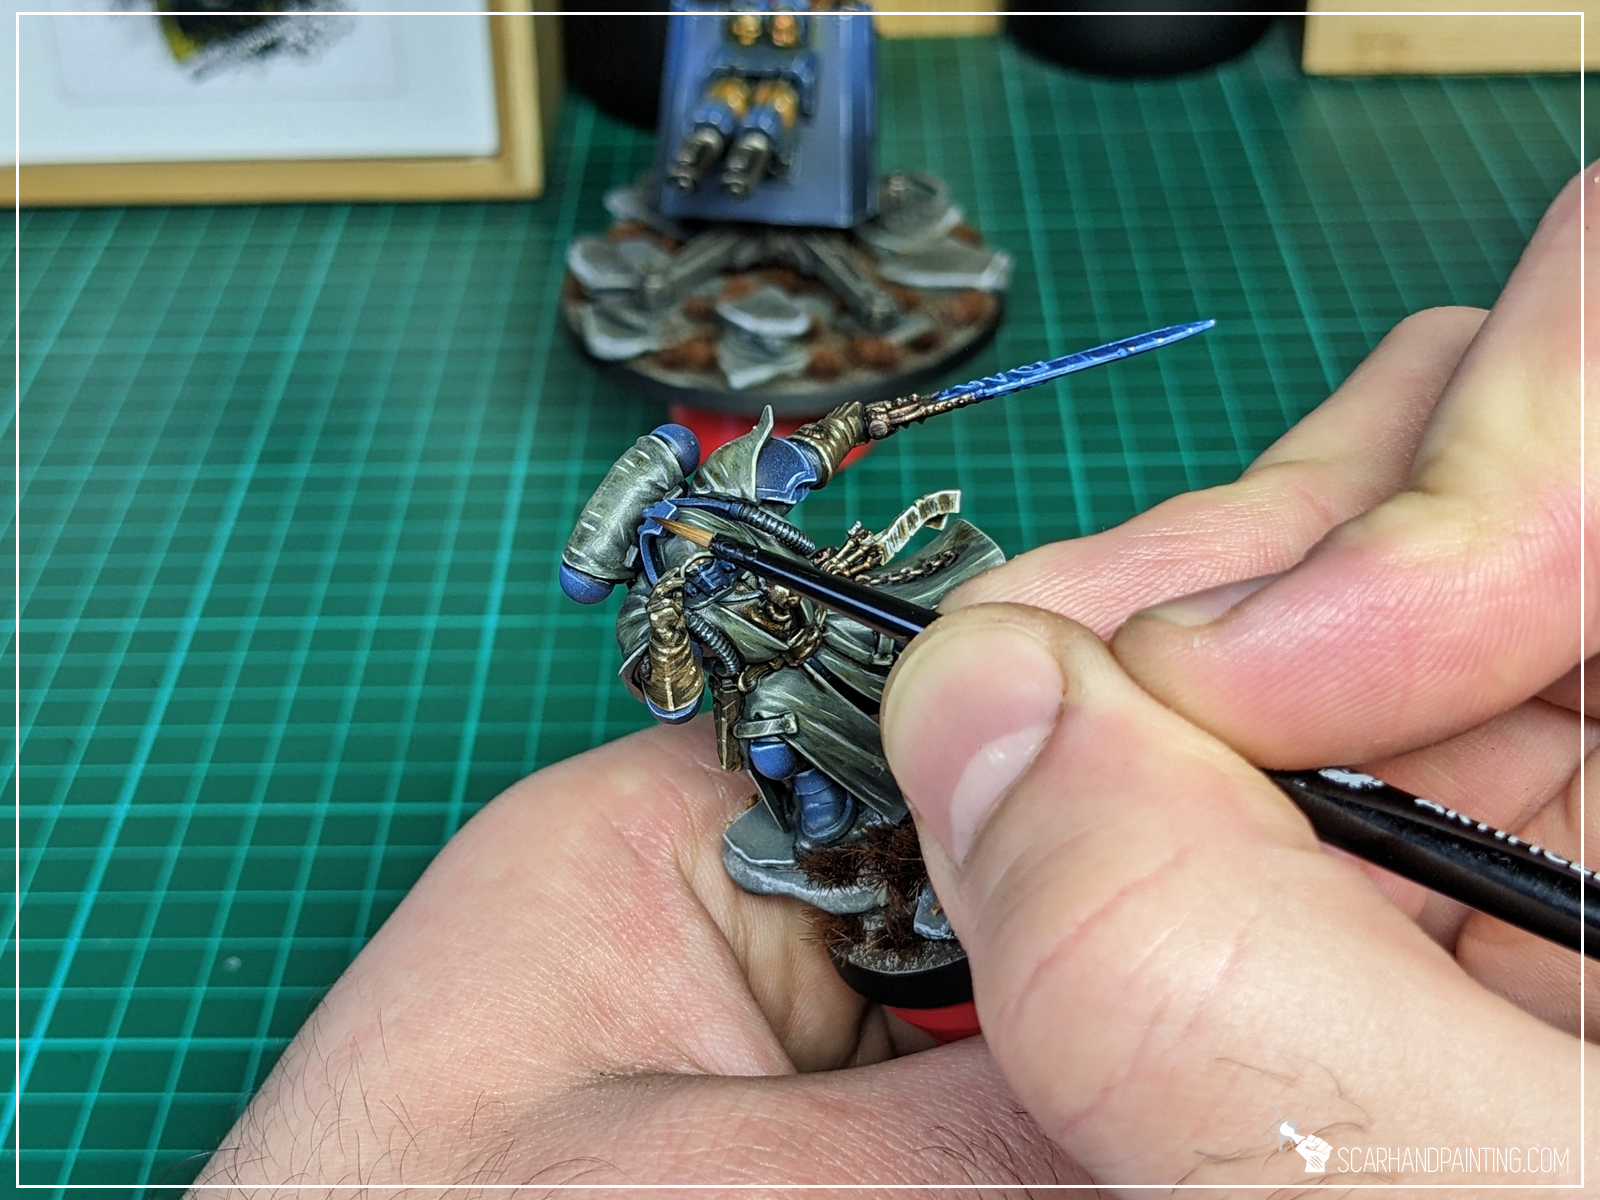
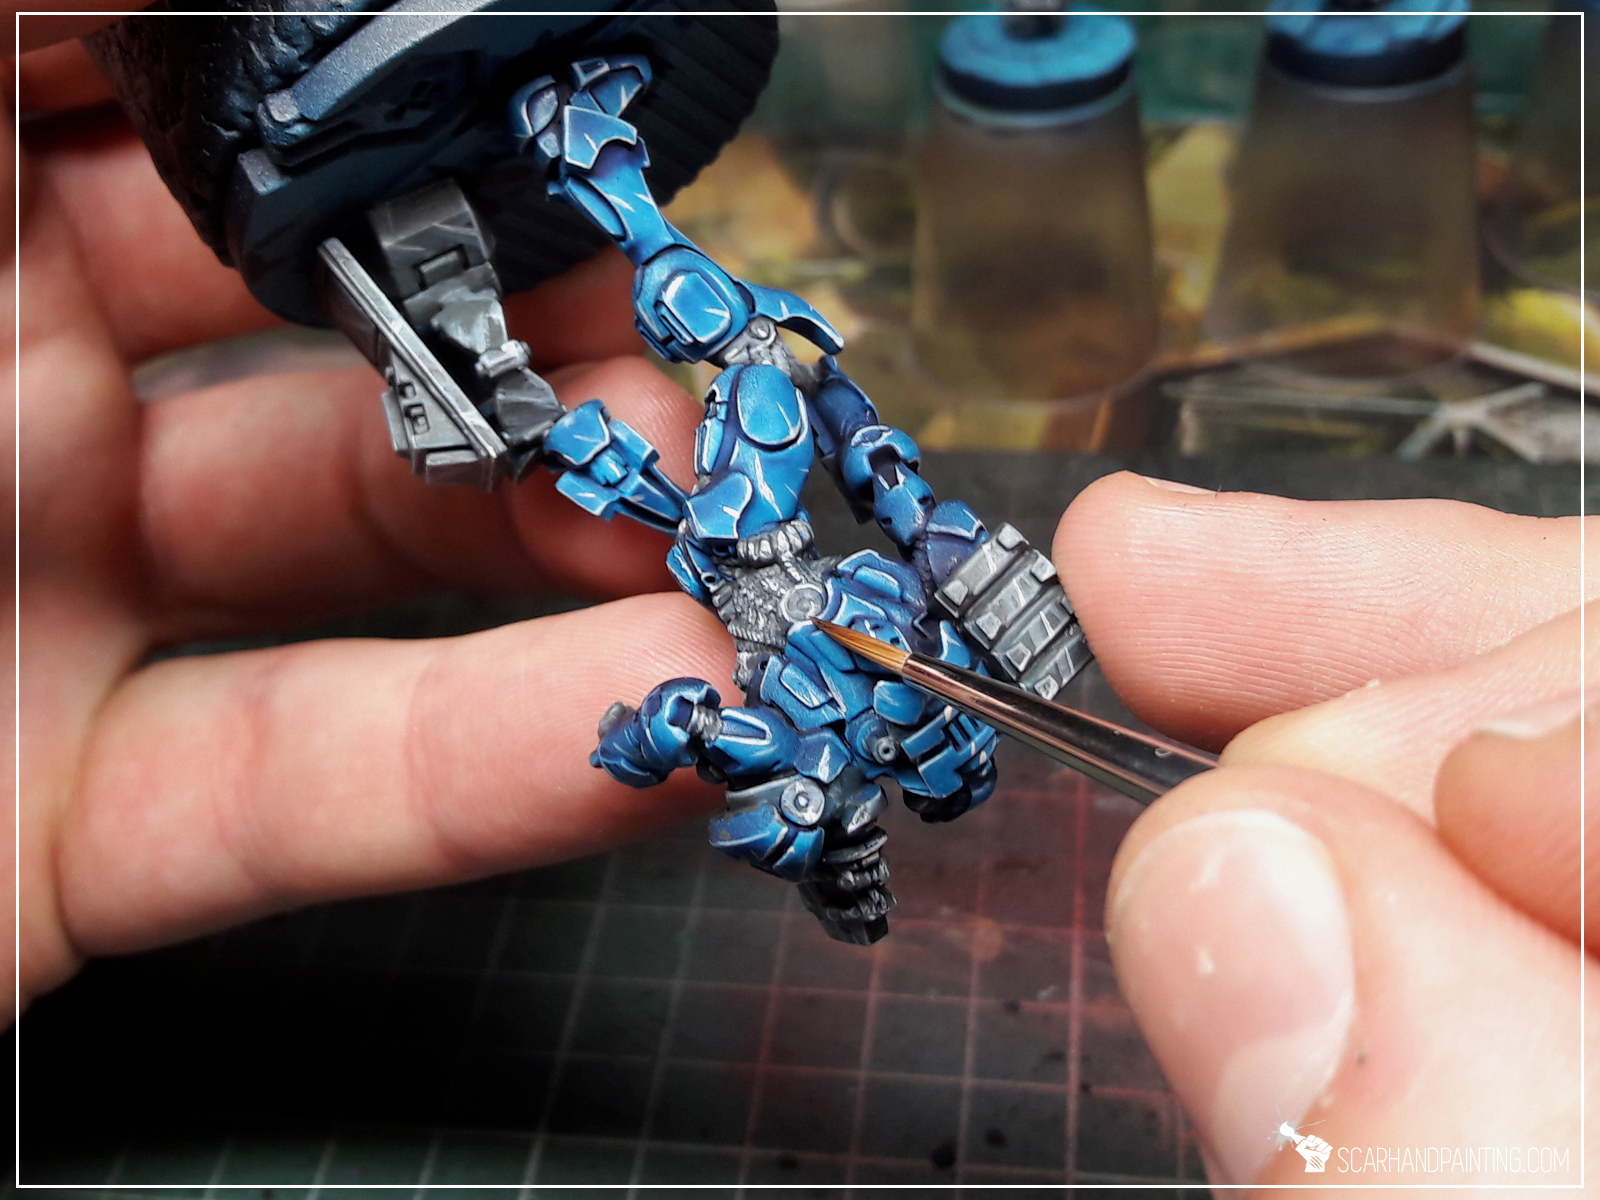
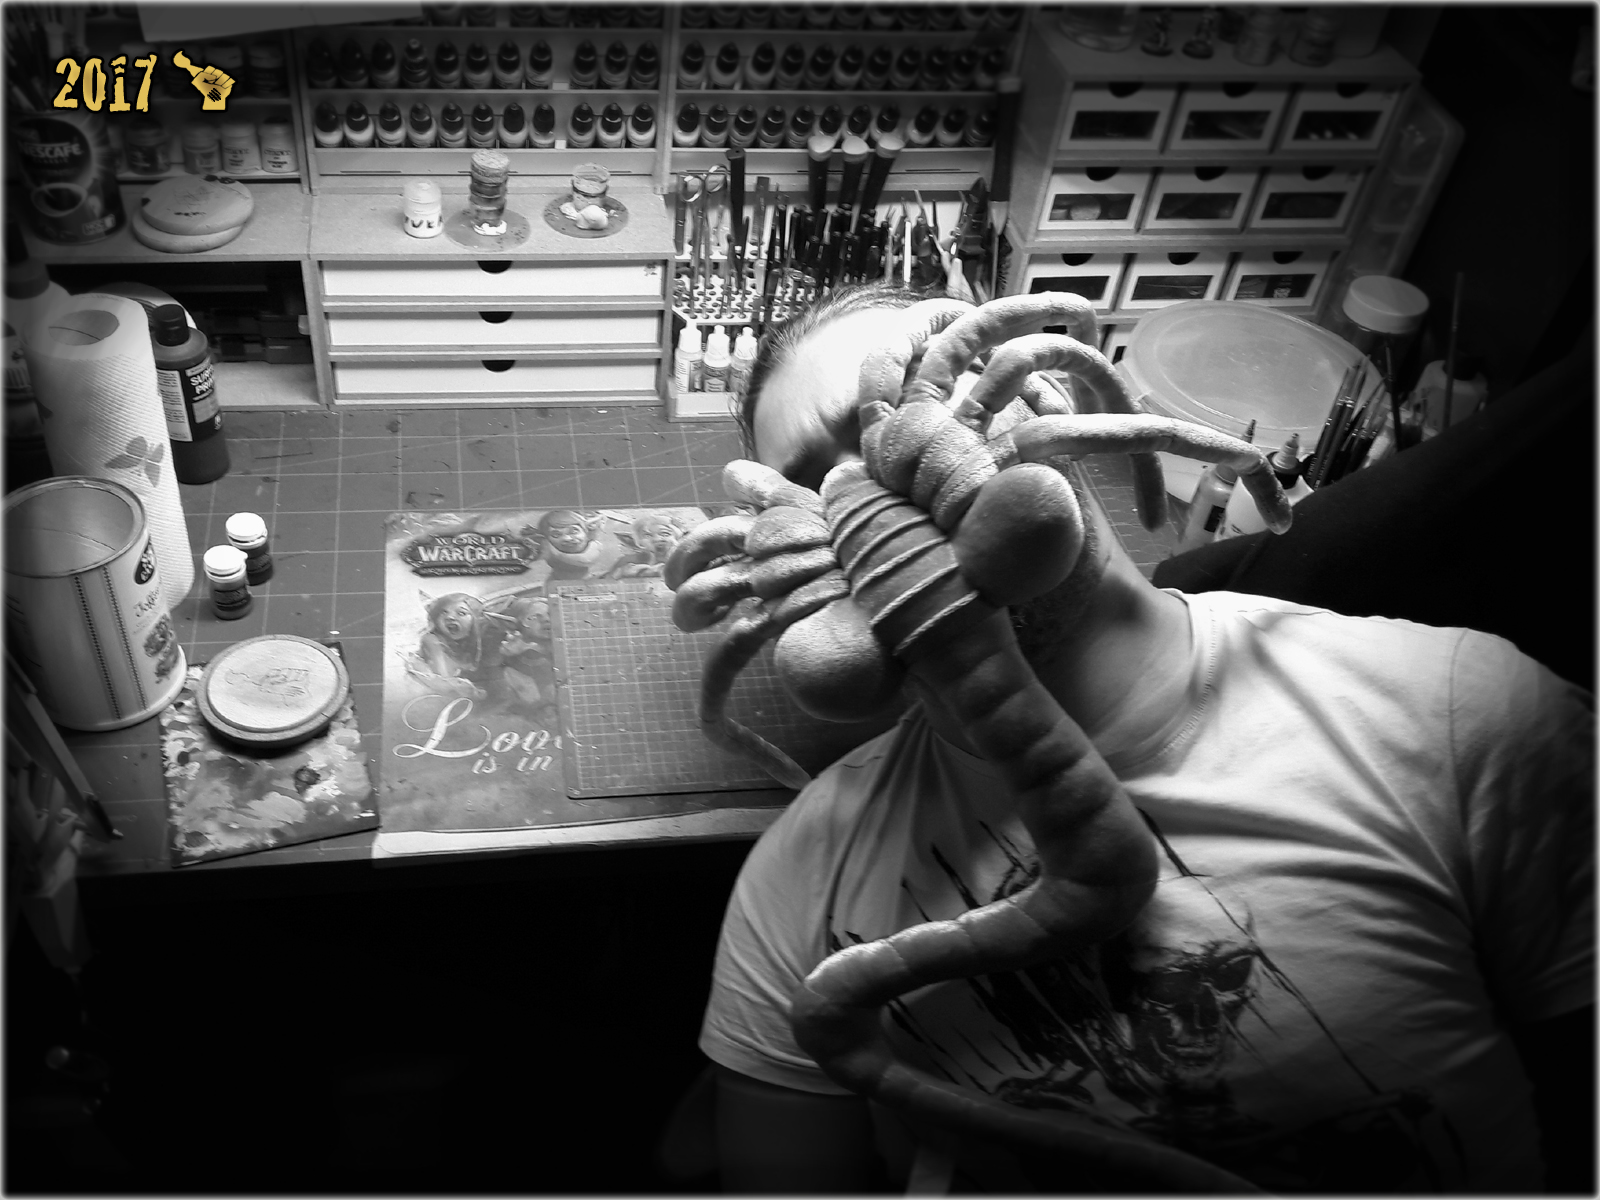
When painting, I usually hold a brush with three fingers (see pics) and control it with small movements of my fingers and wrist. This is where most of the brush movement originates from, regardless of inclination. I tend to hold brushes close to the “crimp” on the ferrule, which gives me better control over the tip. Most of the time I loosely support the handle of the brush on my hand, between the pointing finger and thumb. This decreases brush vibrations and makes it follow the movement of the hand much smoother. On occasion, in the midst of painting, I might raise the handle off of my hand to gain access to a spot that is otherwise difficult to reach (such as painting obscured eyes), but most of the time it stays in the resting position. All of this combined allows for a wide range of smooth, precise movements with which to work with.
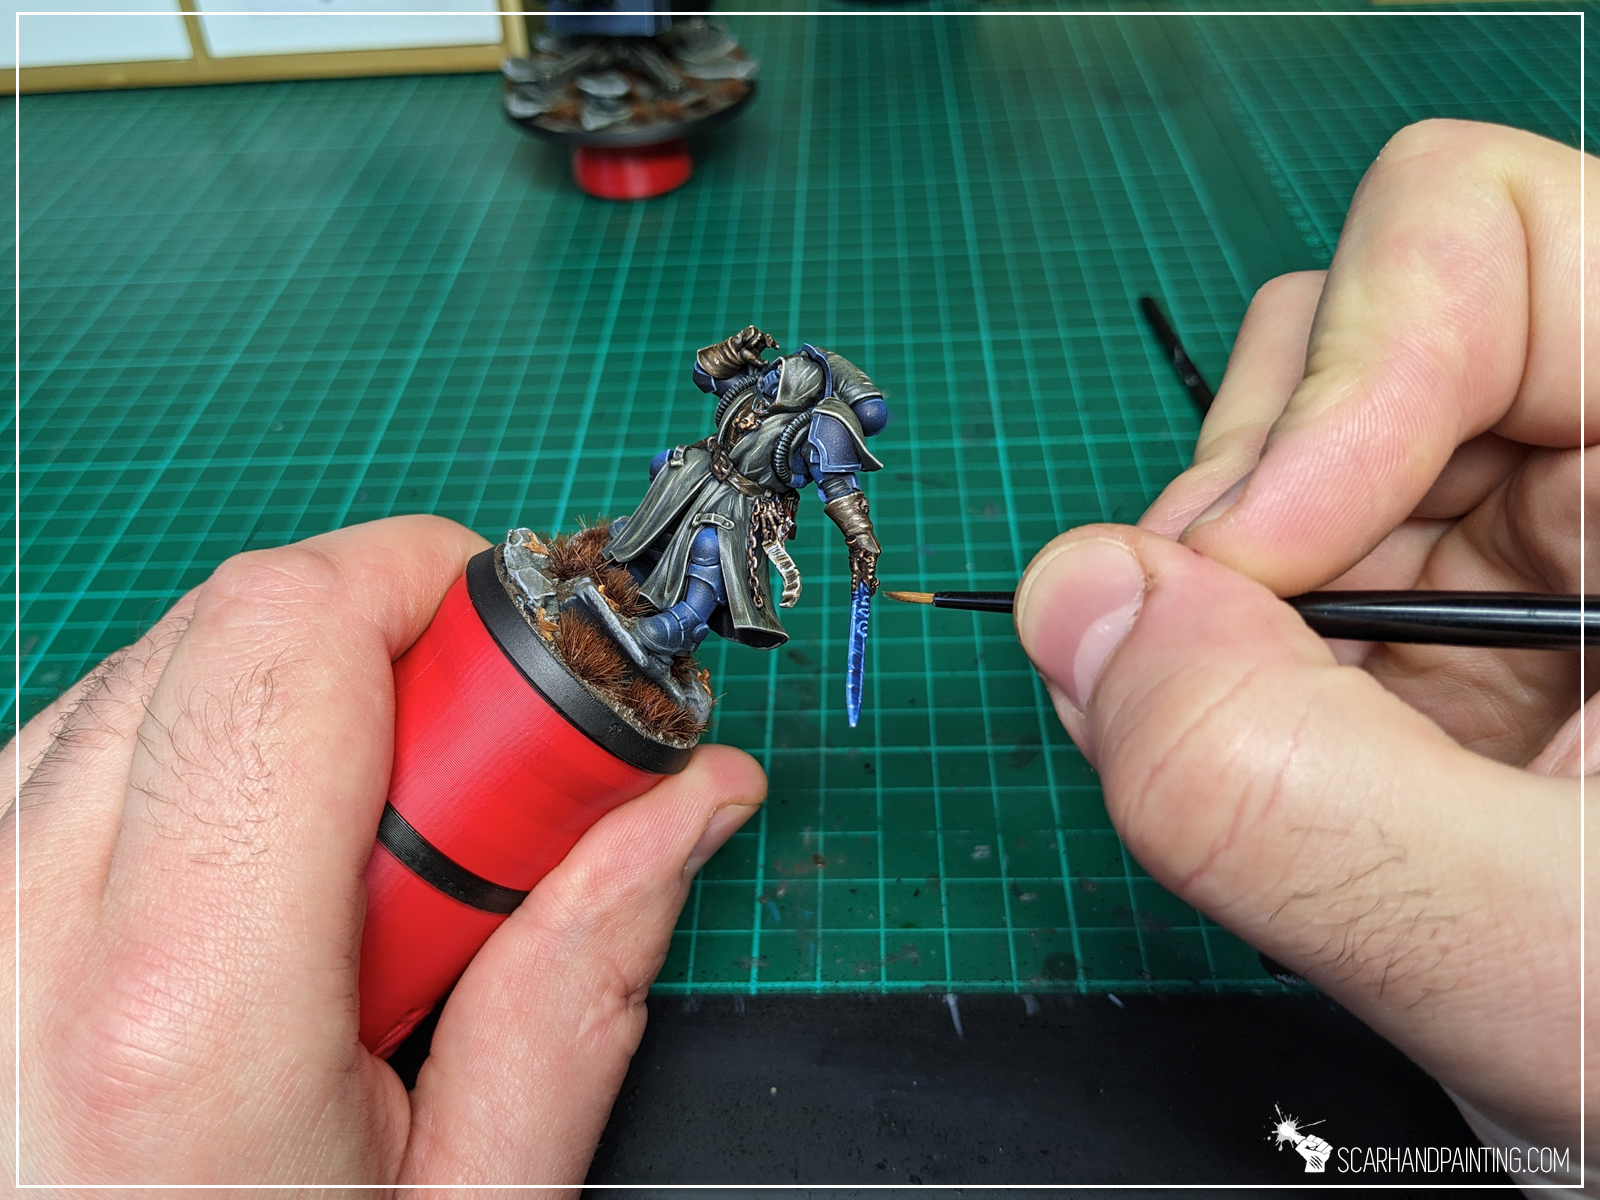
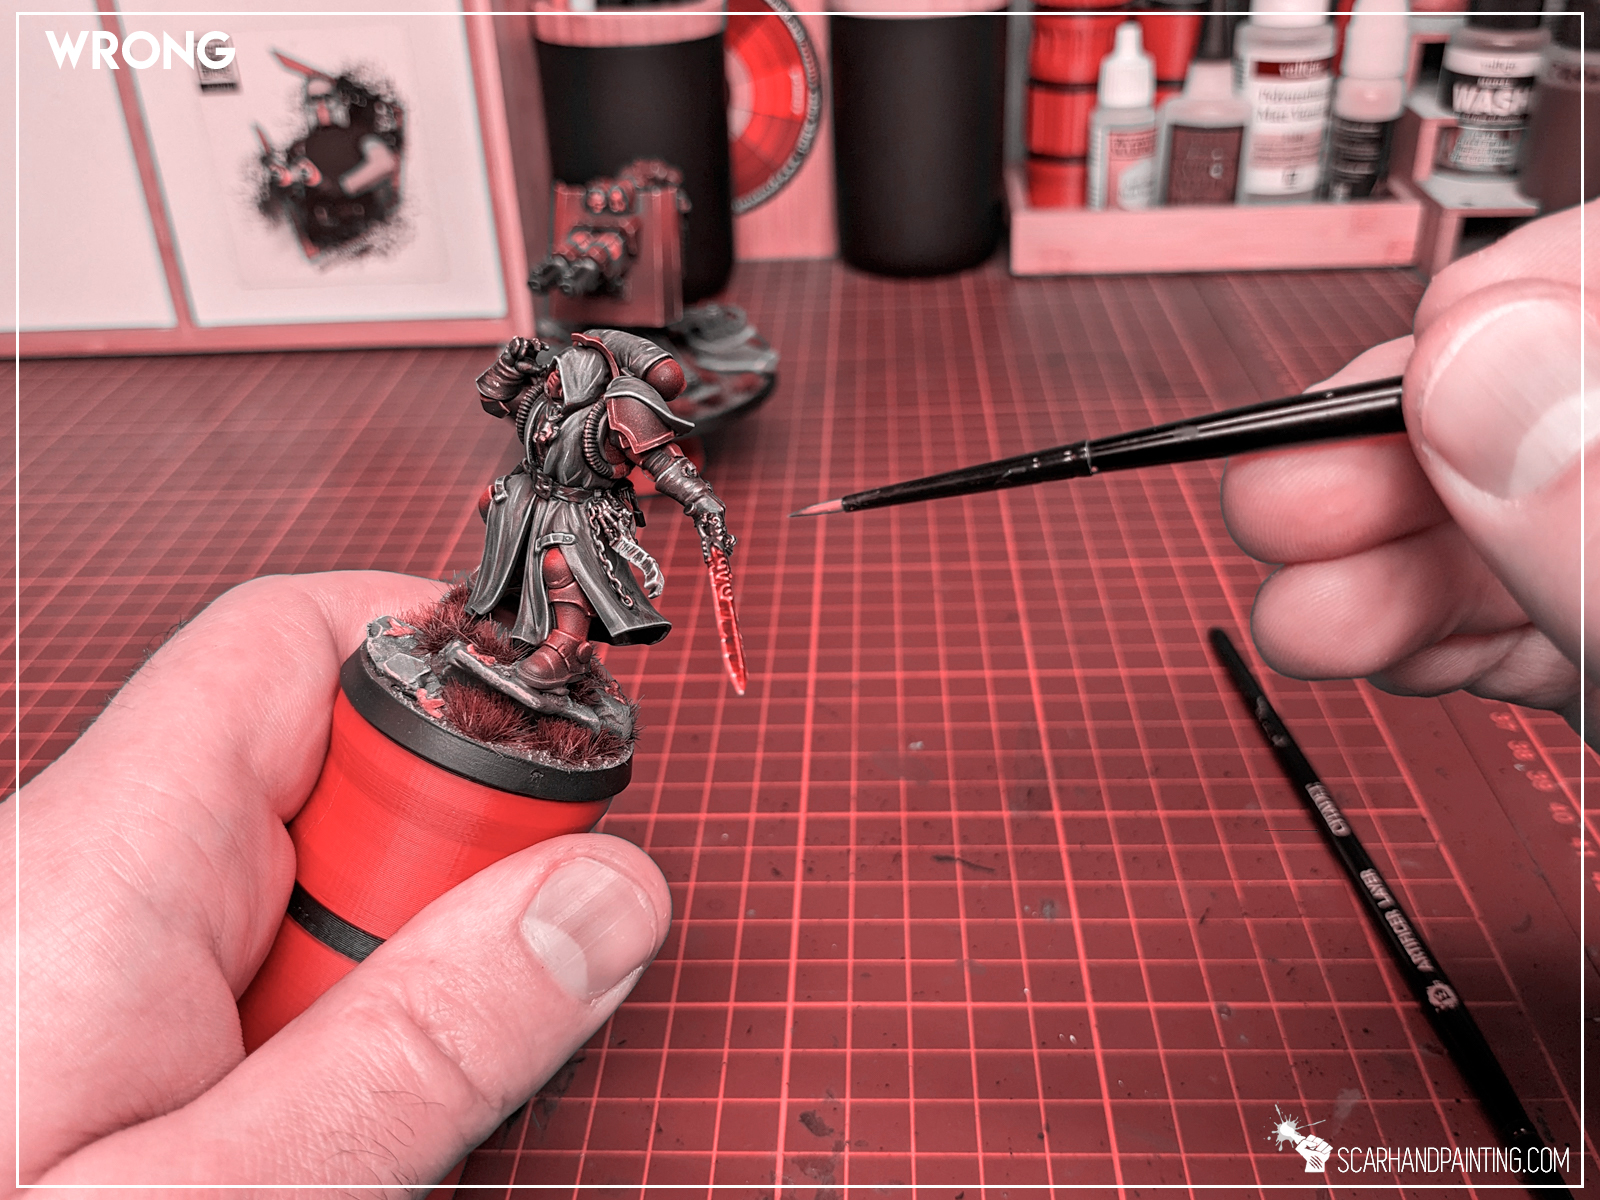

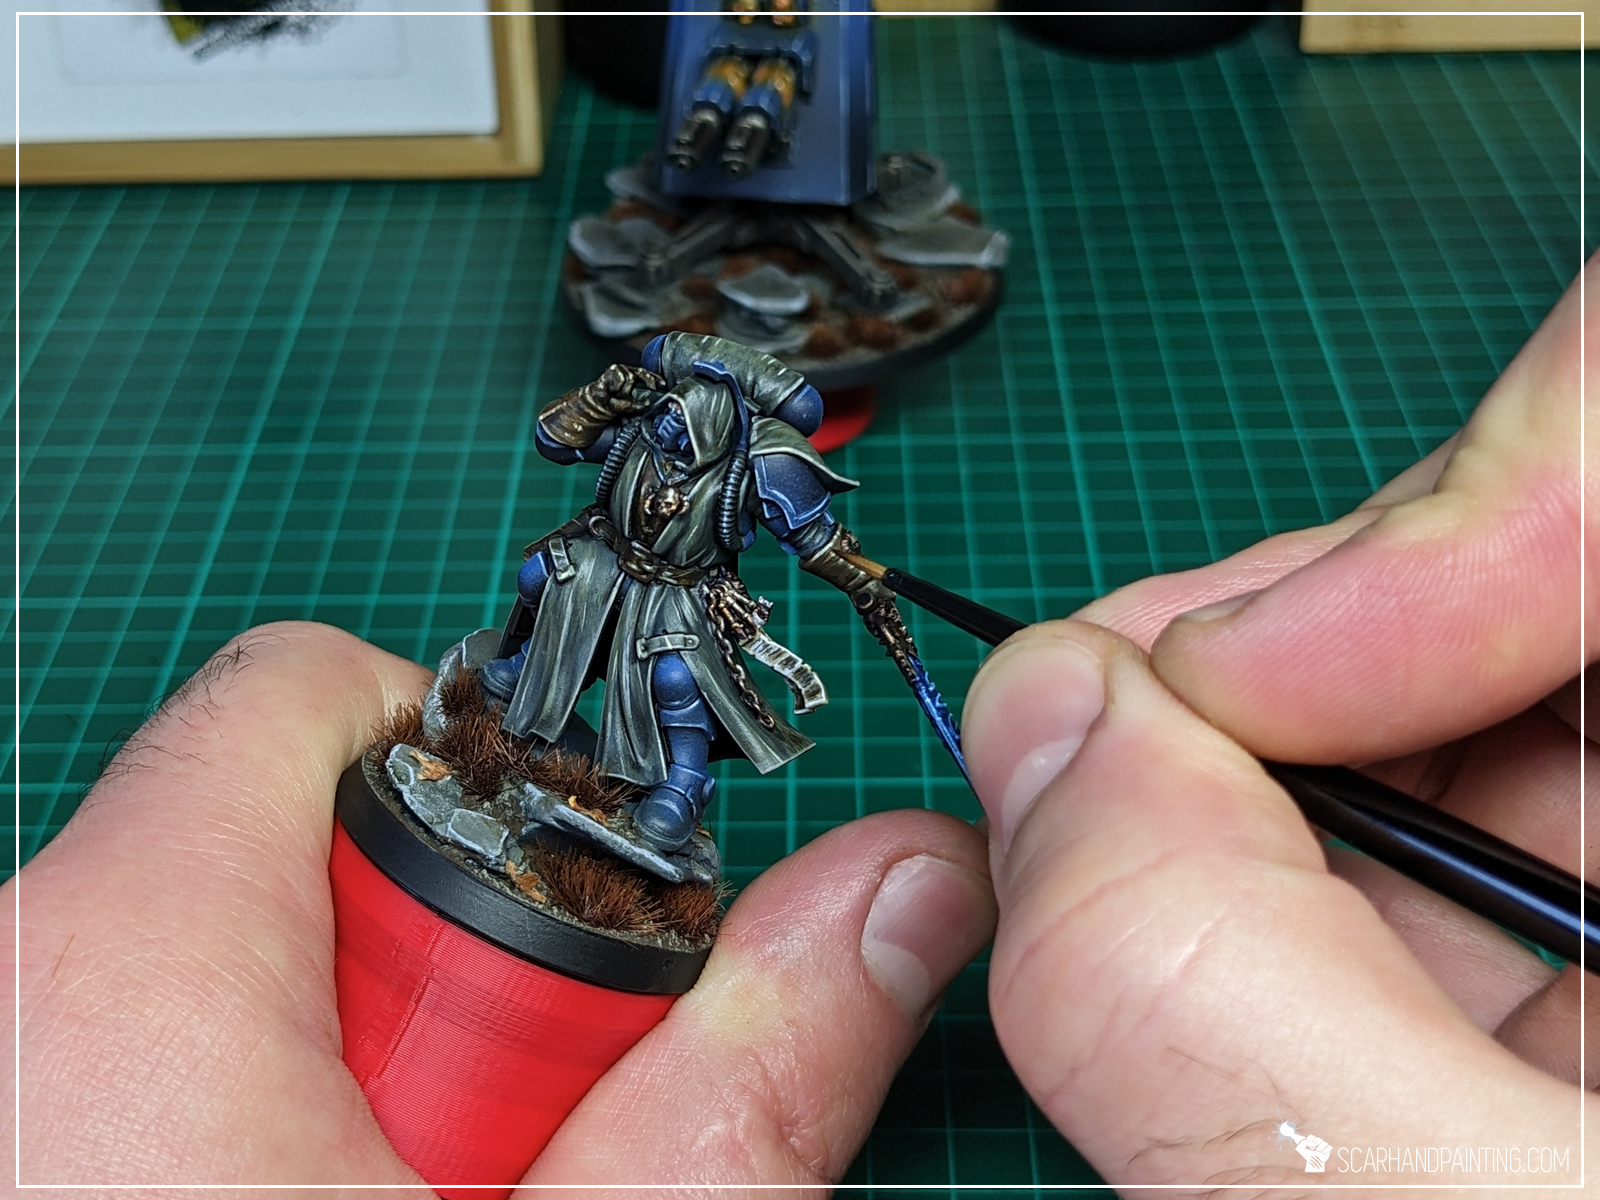
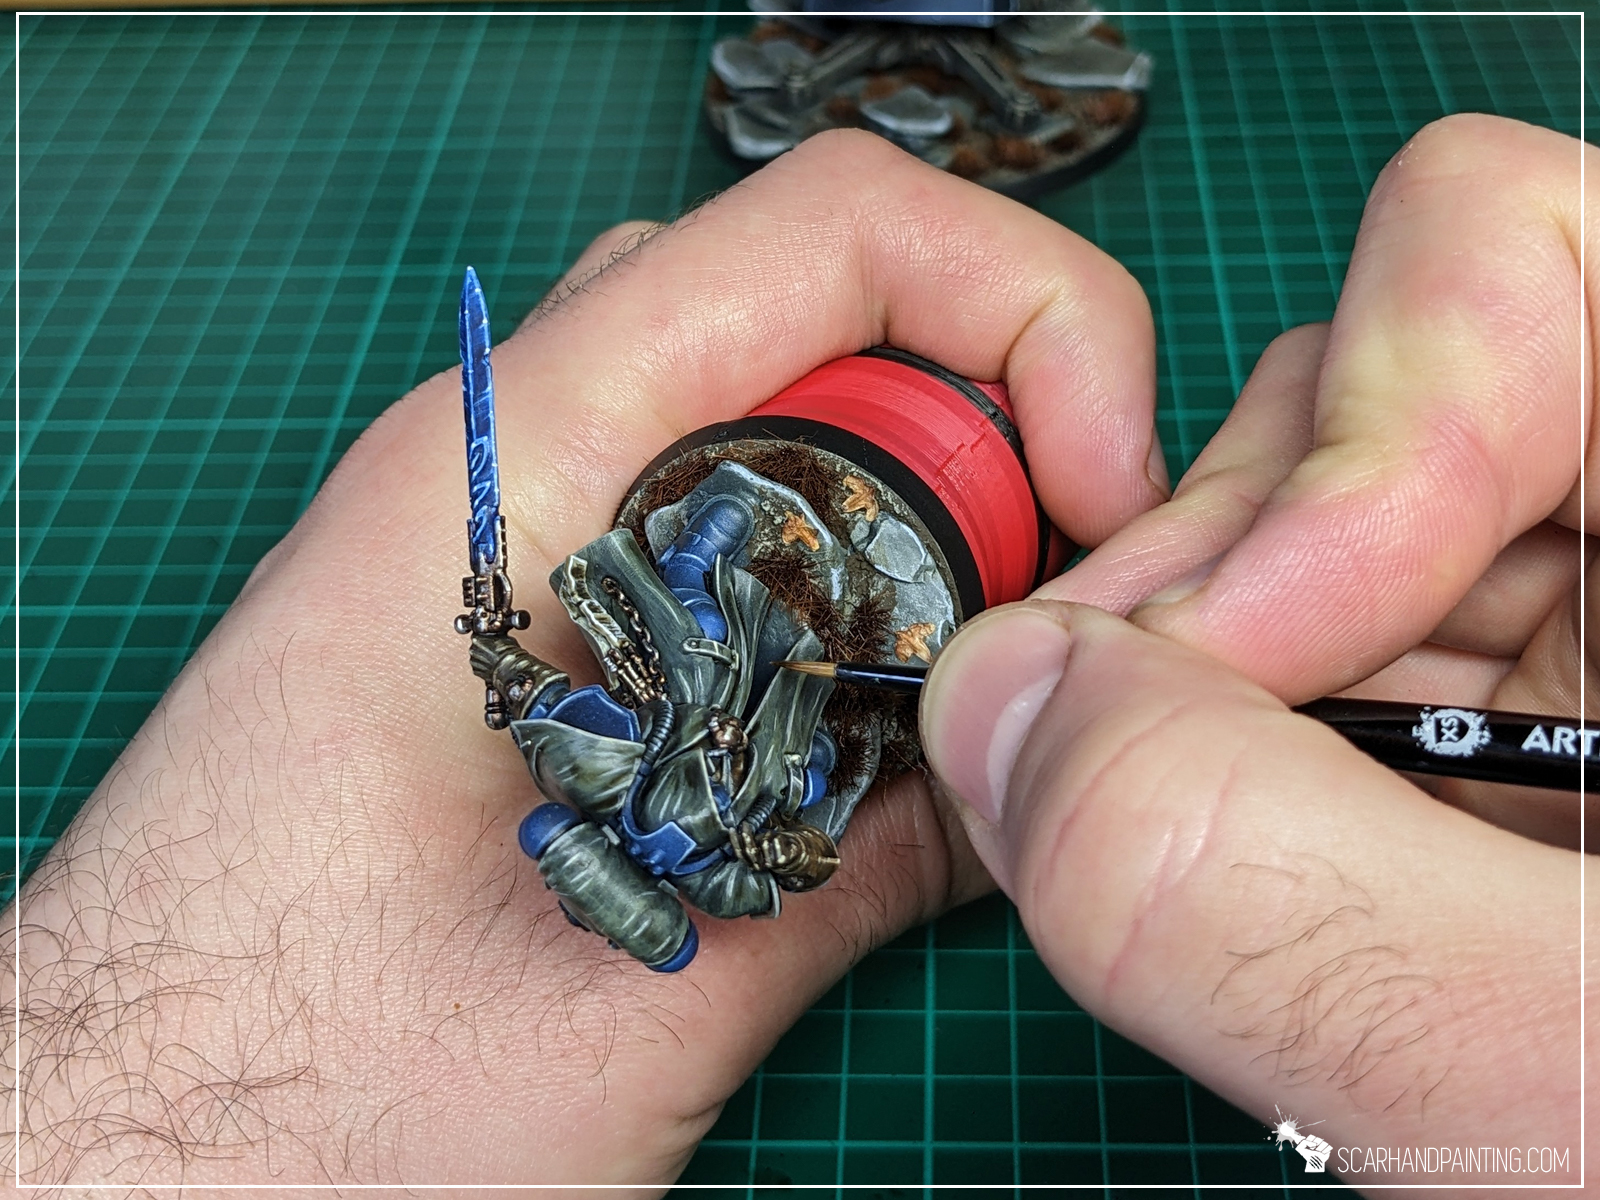
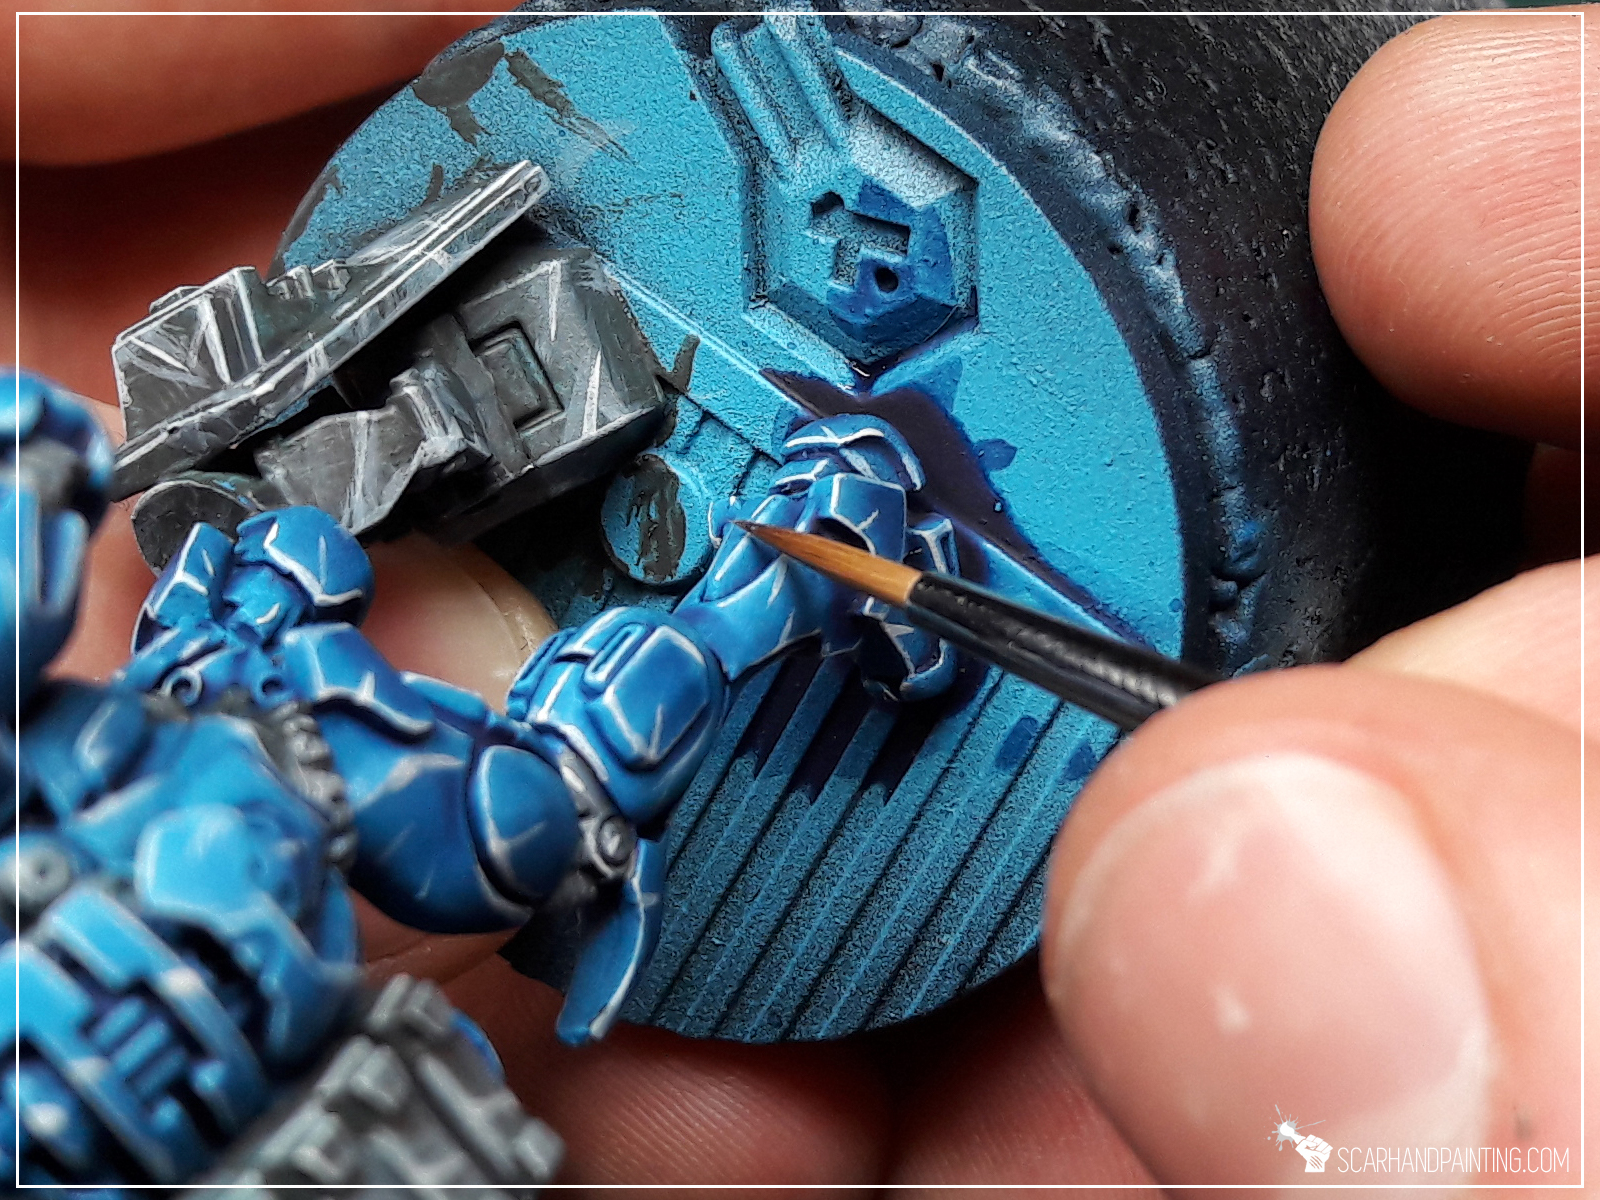
Shaky hands or just unnecessary movement might render even the most professional brush handling ineffective. I always keep my wrists supported on the edge of a painting desk. This is to properly immobilize the miniature but also reduce any macro movement (breathing, elbows etc.) translating onto the brush. To make this a bit less uncomfortable for my wrists I use smooth edge covers for furniture permanently glued onto a working desk (you can learn more about this life hack here).
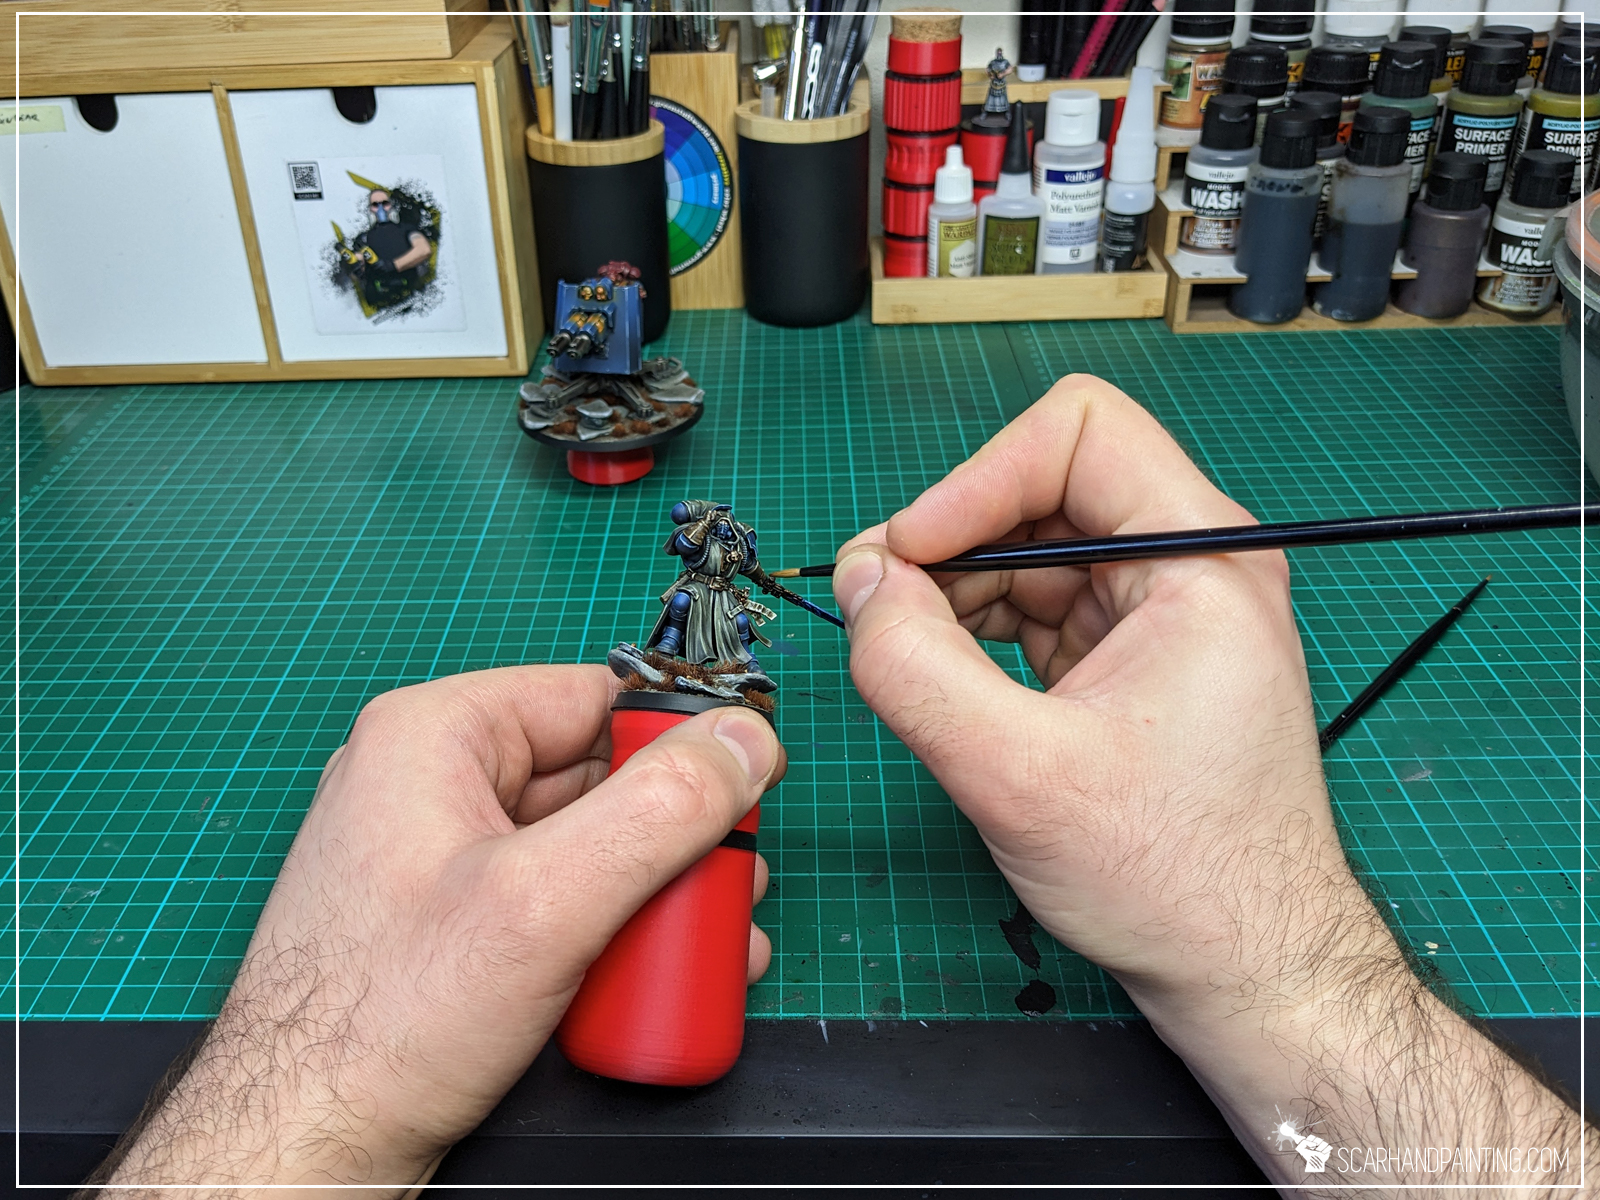

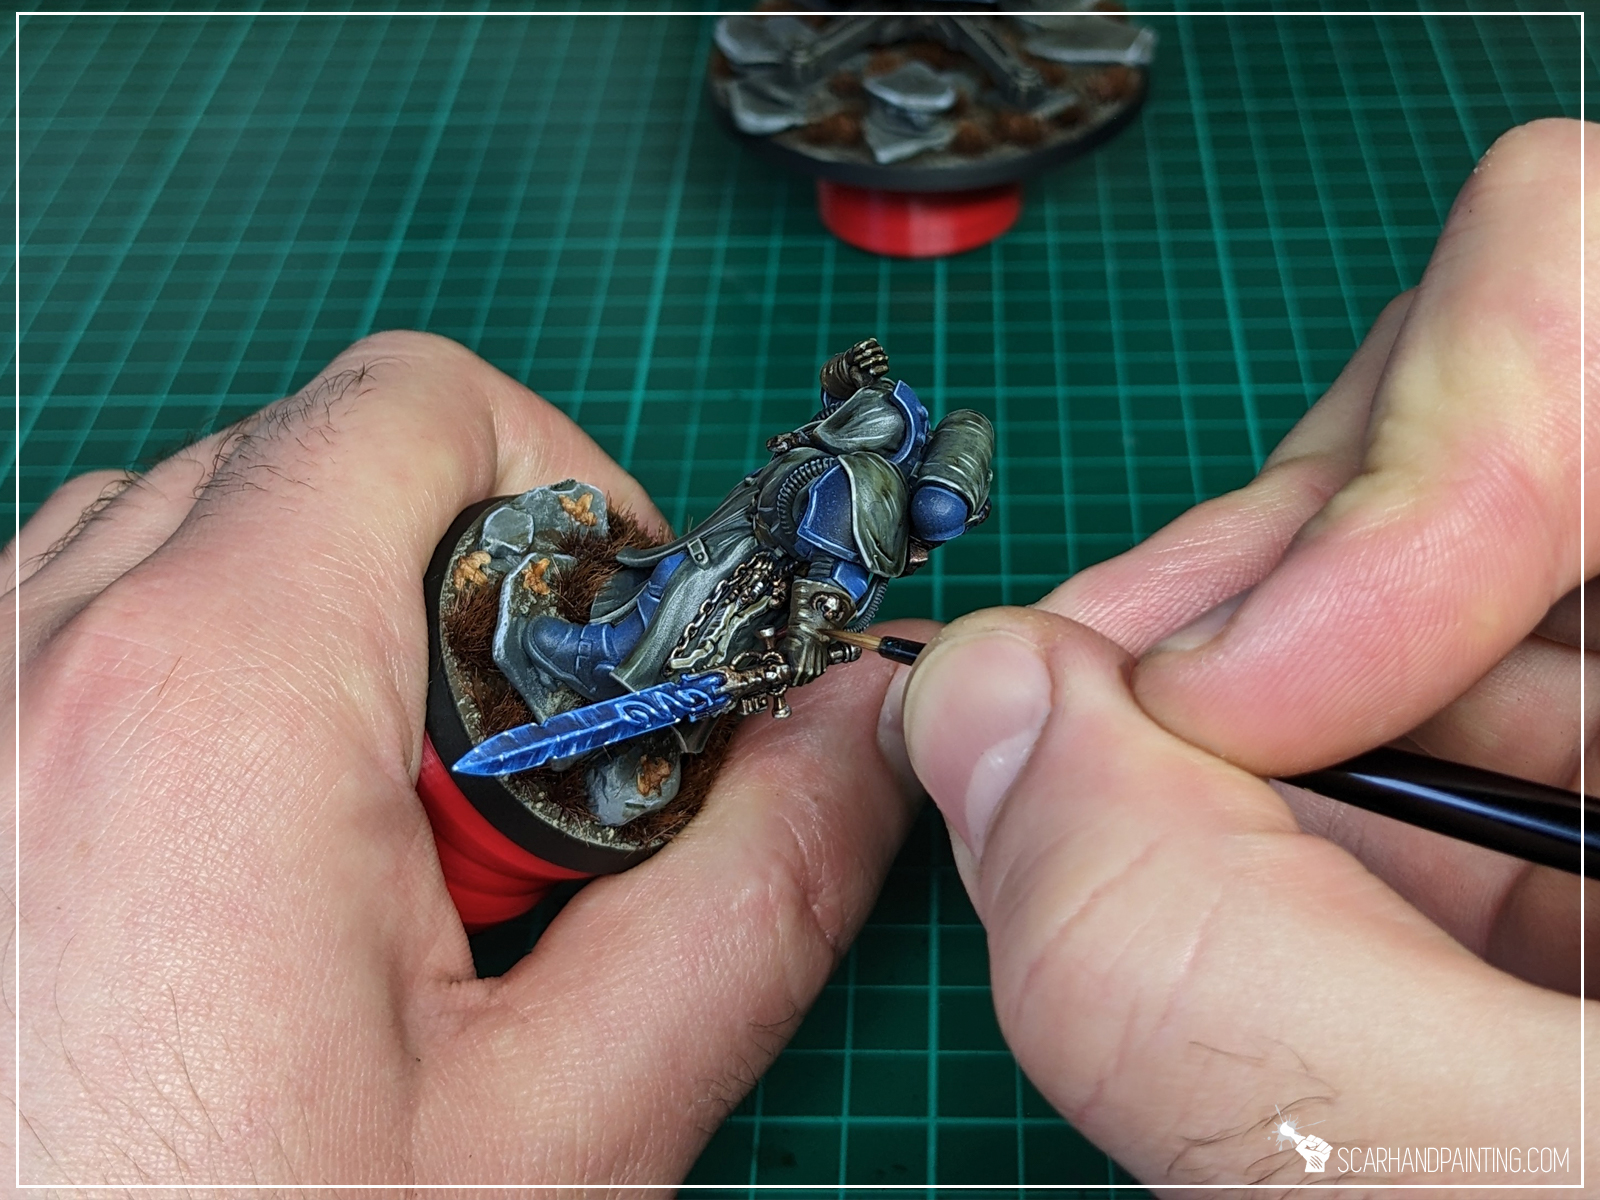
When in need of increasing precision even further, I like to ‘link’ my hands, supporting brush hands pinky on the hand that I hold the miniature with. Both hands micro movements synchronize and I get more control over the tip as a result.

Frankly speaking, the aforementioned methodology does not work the same for every painting technique. Depending on the size and type of the miniature I sometimes deviate from the norm. Some techniques, such as drybrushing or washing, might not require much precision, whereas detail heavy techniques will definitely benefit from proper brush handling and hand support.
I hope you found this tutorial interesting. Be sure to let me know your thoughts in the comments below or via Facebook or Instagram. I would also appreciate if you’d consider sharing my content with your friends, who might find it useful. Finally, if you are looking for a professional Warhammer miniatures painting service, be sure to contact me via this contact form. I always reply within 24 hours. If you don’t see anything from me by then, please check your spam folder.
Third time’s a charm thus welcome to the third ‘Painting Philosophy’ article, where I let you in on ‘how’ and especially ‘why’ I do some things in a certain way. In my opinion a proper approach to painting is crucial to maintain healthy and rewarding experience. Final result depends on it in the same way as on techniques, know-how and tools being used. Nowadays internet is full of painting tutorials yet it takes some inner understanding of our own capabilities to find what suits us best and fully benefit from all acquired knowledge. That being said – In this series I will reveal what works best for me as a painter. I hope you will find some wisdom in it…
In last article I wrote a lot about the edge of a base and what it represents. Do not let yourself be fooled by a similar title, as today we’re talking a completely different topic. I introduce to you the ‘Edge highlight technique’. Something that I used to avoid, but at some point got lured by Games Workshop to try out. Before that I struggled to keep colors juicy and interesting, preferred dark, murky color schemes and avoided any type of lining, including edges. I was a bit disappointed with my own work as a result – so a not very healthy relationship with paints and miniatures. It all changed once I got my hands on GW’s Edge paints, which was the first step to realize how important strong edges, combined with proper lining, are.
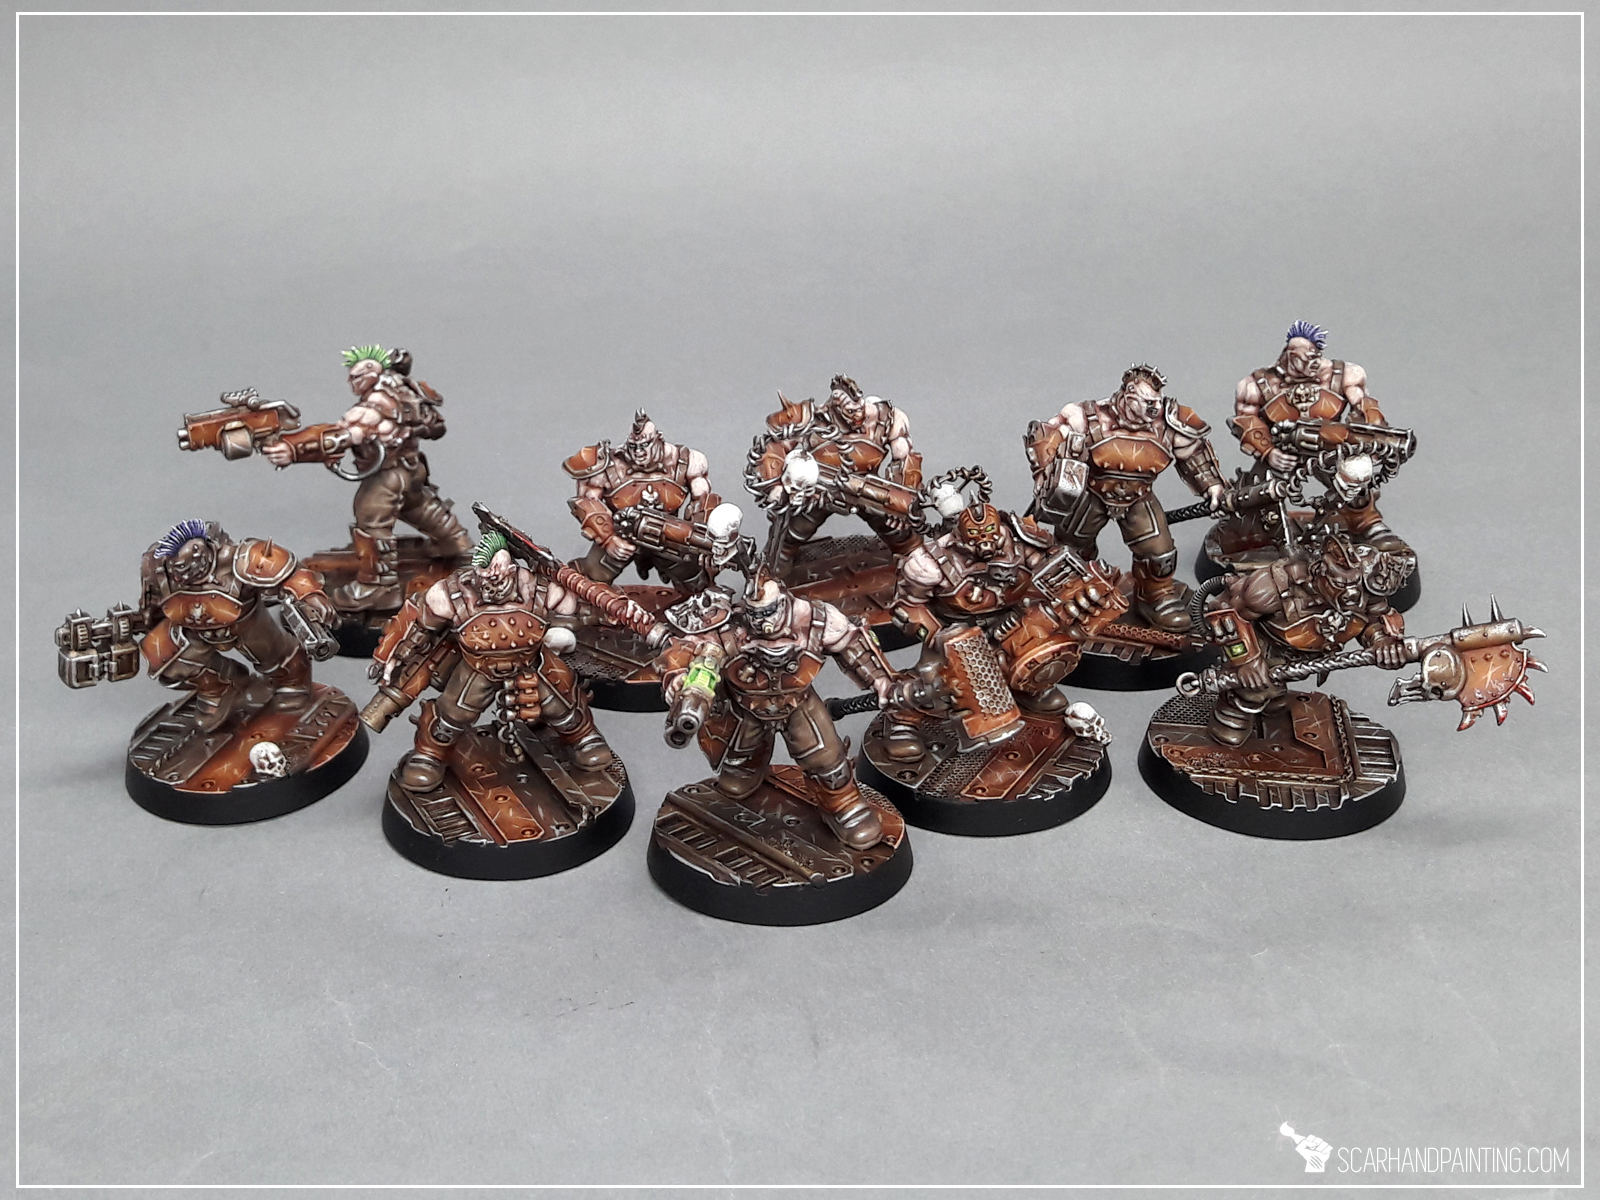
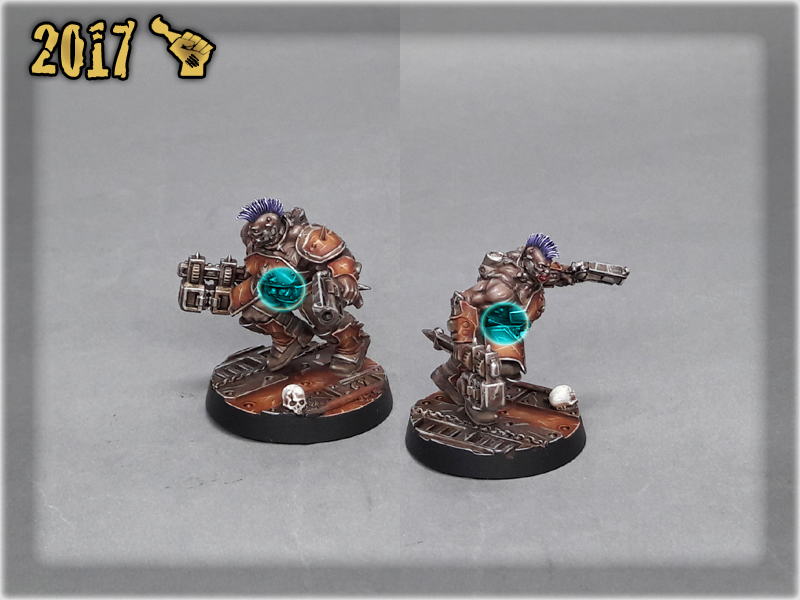
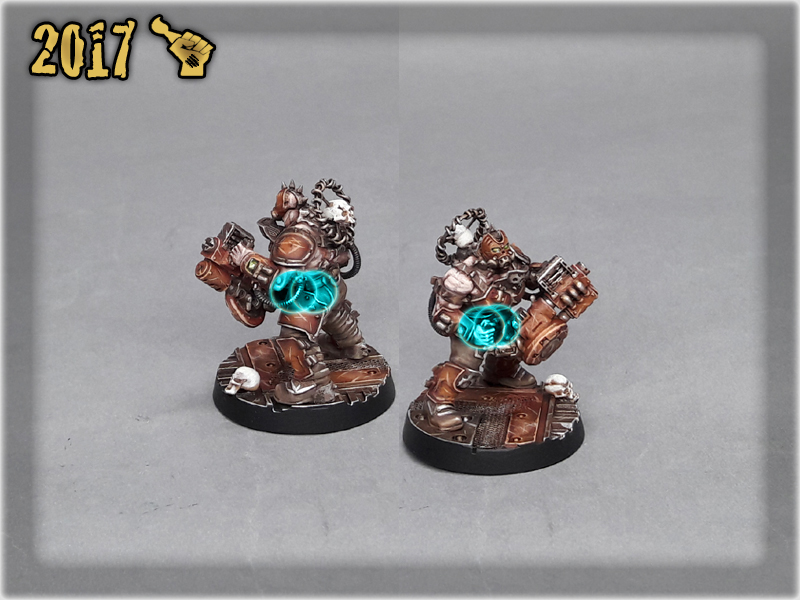
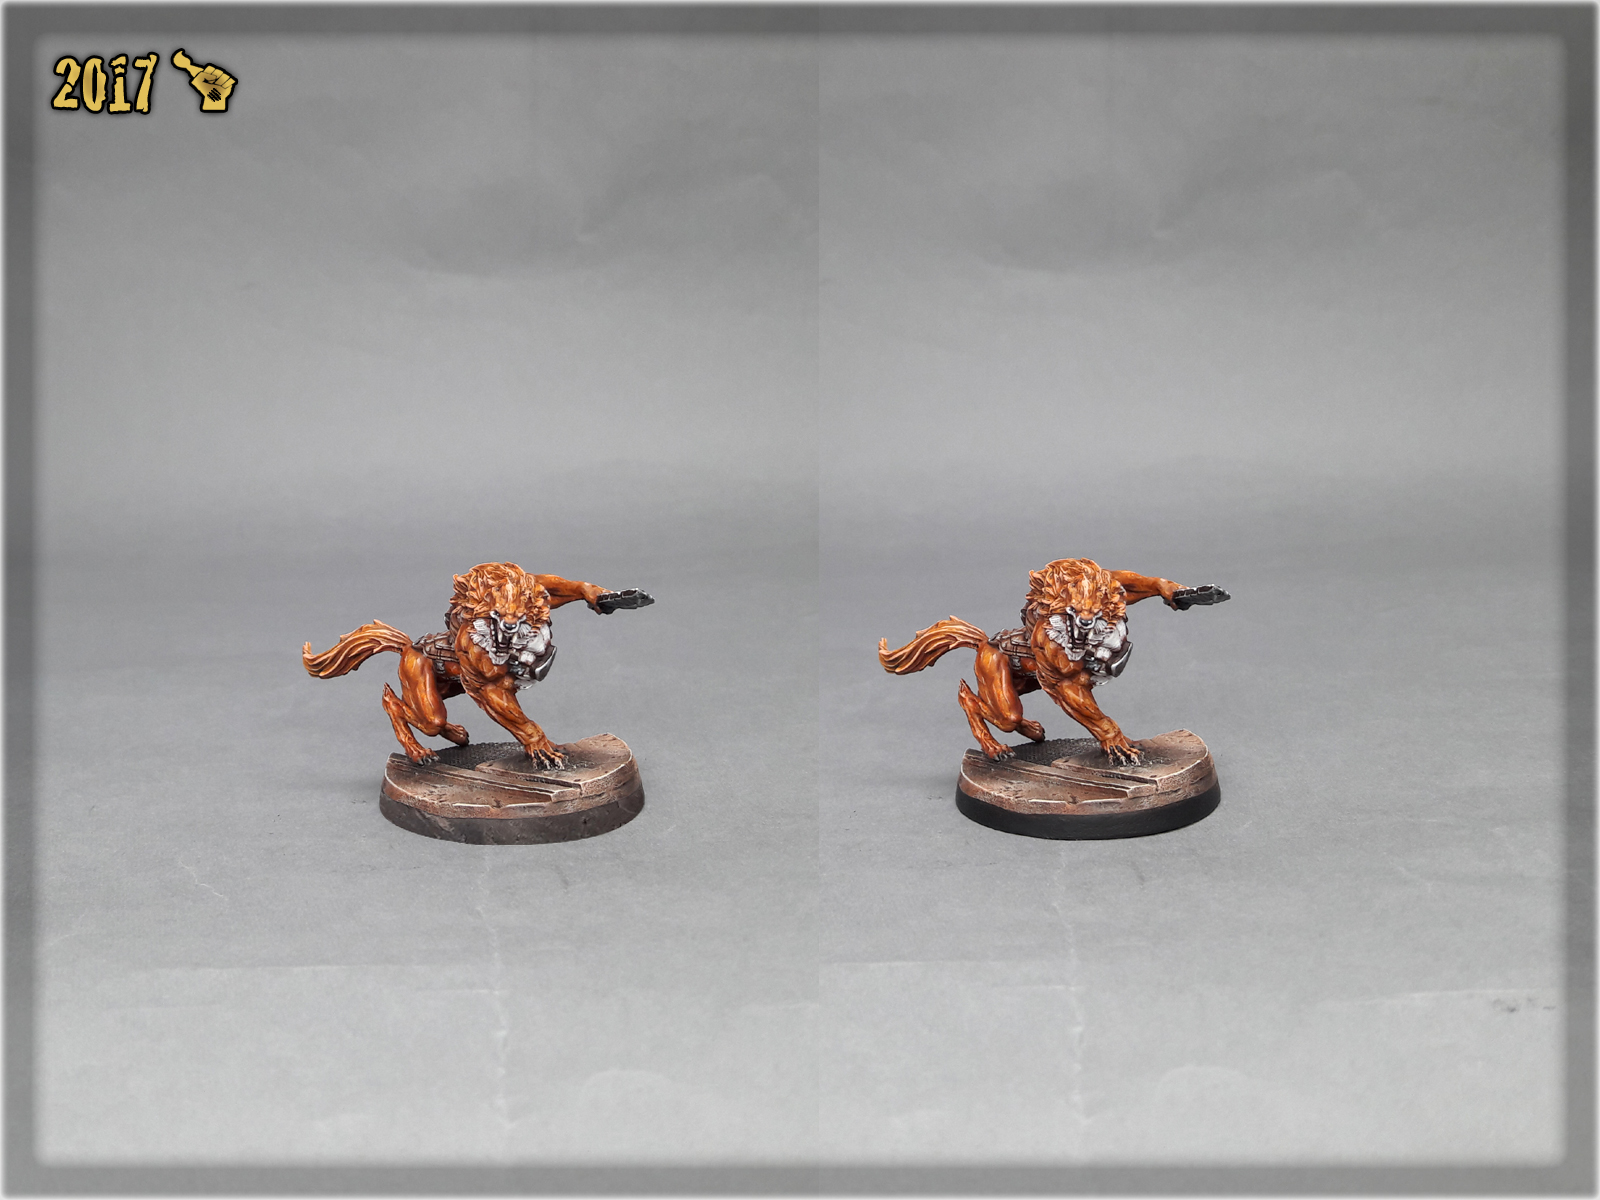
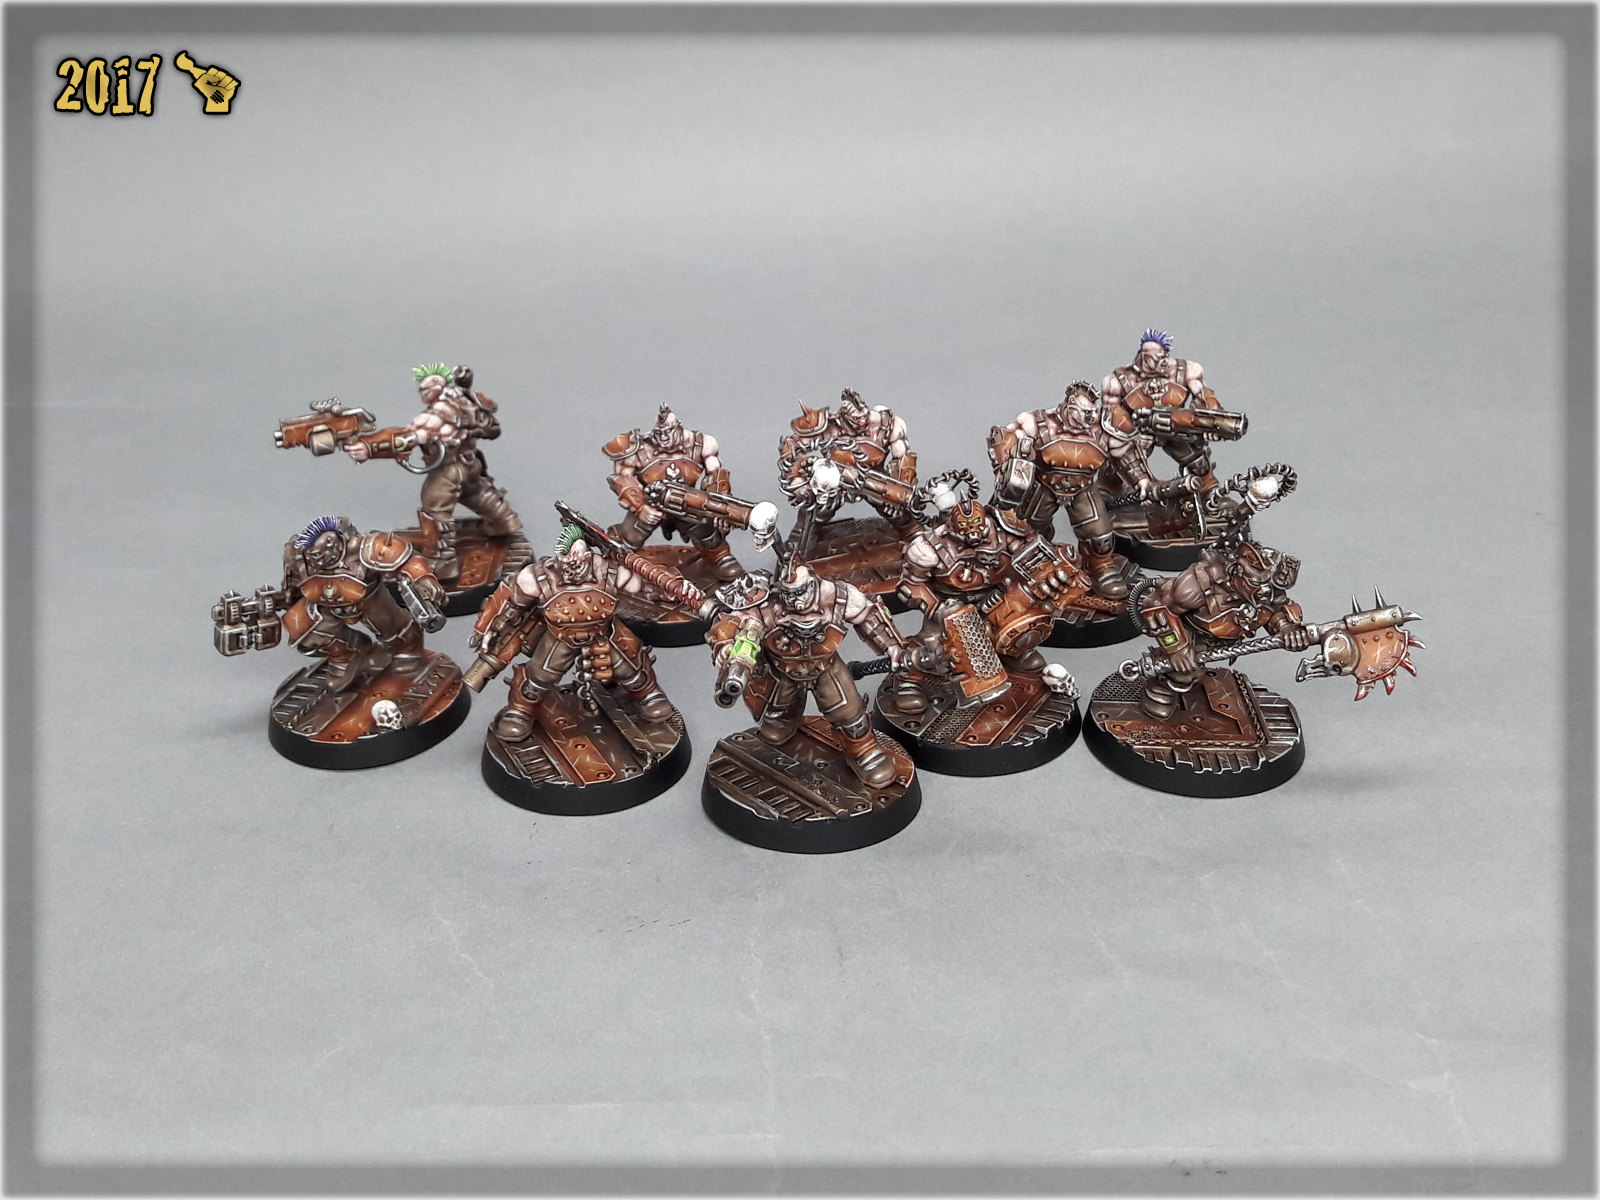
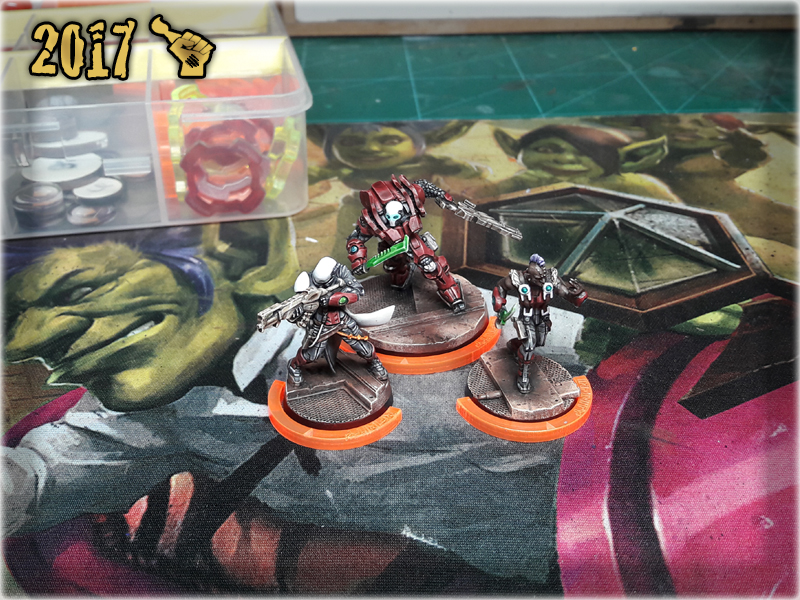
Edge highlights is a technique of applying paint to the natural edges of a surface, resulting in strong contrast and nice surface outlining. I find edge highlighting, combined with lining, to be a great way to make a color pop and literally change how an eye can perceive it. It works especially well with multi-layered surfaces of detailed miniatures but should work for you regardless of what miniatures you paint. Here’s an example of edge highlights in action – two sets of miniatures painted the same, except one set was then edge highlighted (with barely few extras):
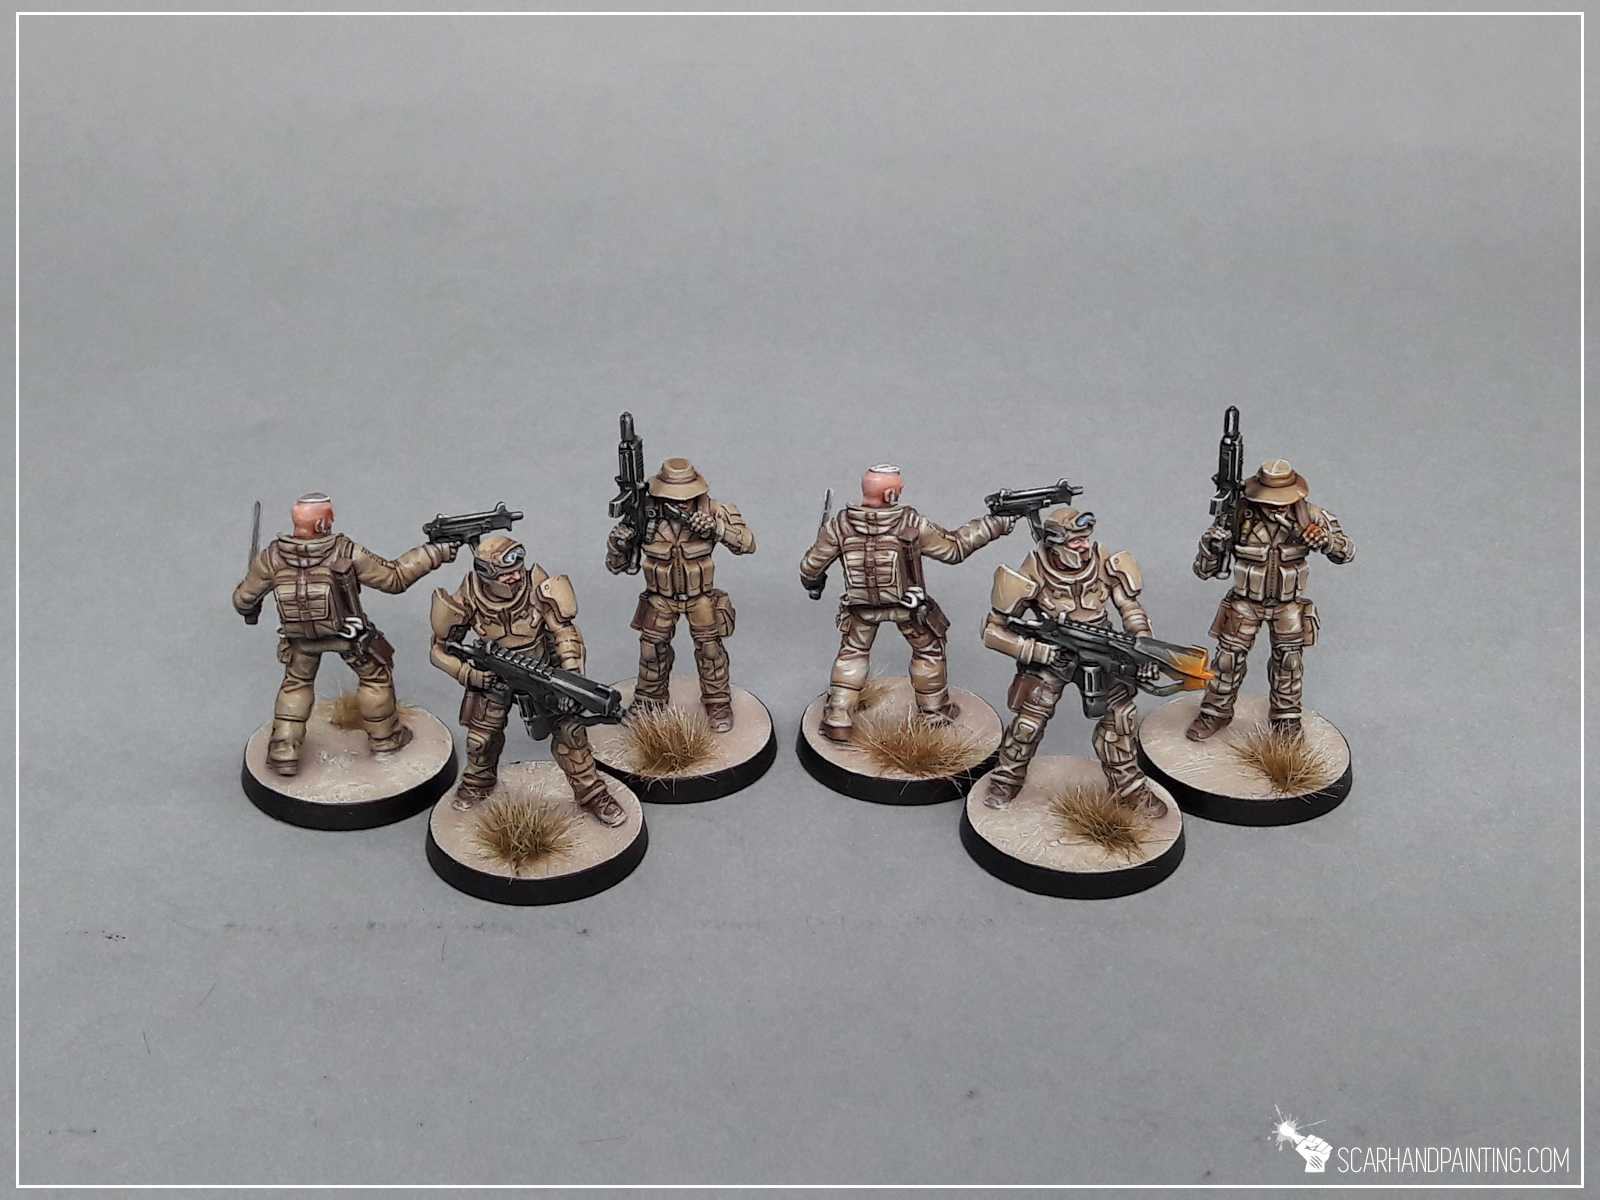
I’m not a guy that looks at miniatures through magnifying glass. Being a commission painter I paint projects related to gaming and this kind of miniatures should be able to catch an eye while being used on the gaming board. I like my miniatures to pop, to be sharp and ‘edgy’, to have personality and coherent color scheme. For me edge highlights provide all that and more.
First of all, like with most painting methods, I avoid overloading my brush with too much paint. This is very important as too much paint would run down and ruin a crisp, sharp edge. Other than that I try to:


Now you know how I approach edge highlighting and with that I would like to close third the Painting Philosophy article. Please take note that what works for me, might not necessarily work for you – still there are many ways to accomplish certain things – mine is just one of them. I encourage you to try and experiment with this technique. As usual I put a lot of effort into preparing this article, but if it helps at least one painter out there – I consider it a time well spent.
I hope you found this tutorial interesting. Be sure to let me know your thoughts in the comments below or via Facebook or Instagram. I would also appreciate if you’d consider sharing my content with your friends, who might find it useful. Finally, if you are looking for a professional Warhammer miniatures painting service, be sure to contact me via this contact form. I always reply within 24 hours. If you don’t see anything from me by then, please check your spam folder.
Back in the days I decided to start the ‘Painting Philosophy’ series to let you in on ‘how’ and especially ‘why’ I do some things in a certain way. In my opinion a proper approach to painting is crucial to maintain healthy and rewarding experience. Final result depends on it in the same way as on techniques, know-how and tools used. Nowadays internet is full of painting tutorials yet it takes some inner understanding of our own capabilities to find what suits us best and fully benefit from all acquired knowledge. That being said – In this series I will reveal what works best for me as a painter. I hope you will find some wisdom in it…

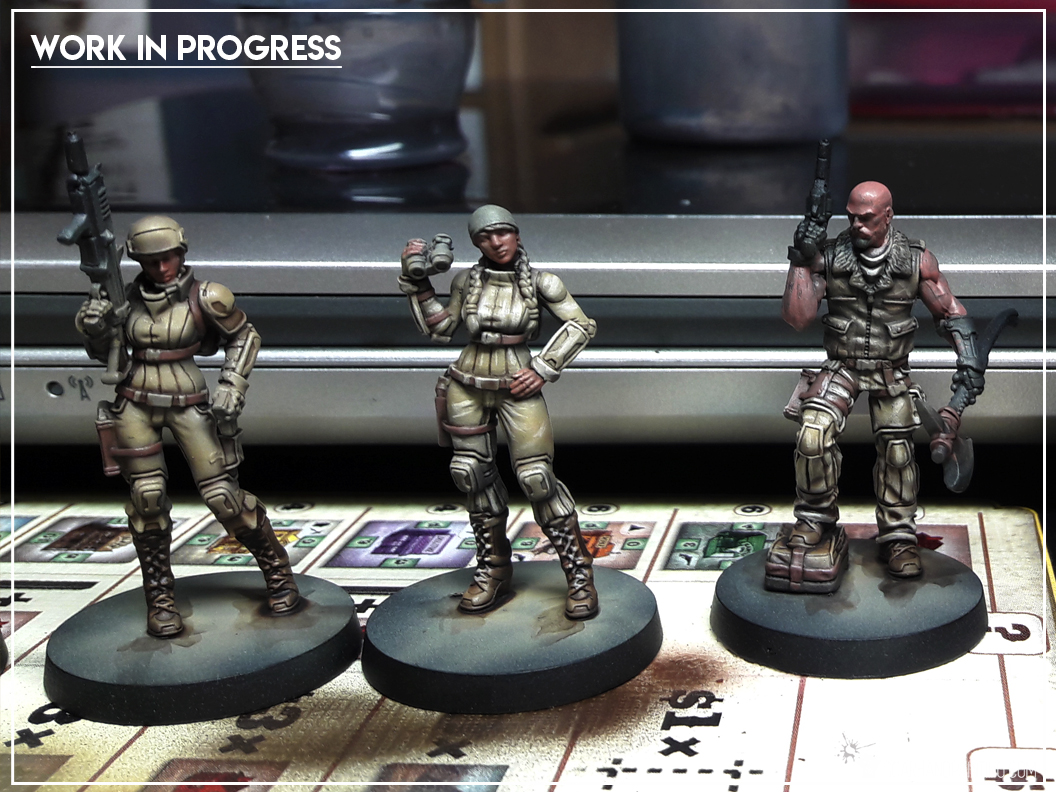
Painting in groups is a term that I use to describe painting entire groups of miniatures, usually one layer at a time. There are many different approaches to painting miniatures. Some painters prefer to paint a single miniature from start to finish, one layer at a time. Others avoid painting by layers and instead paint a single piece of a miniature, applying all the colors, before proceeding to next part. I on the other hand, feel most comfortable when painting groups of miniatures. The size of such groups might vary between six to about a hundred pieces at a time. They don’t even need to follow the exact same colour scheme as long as they share majority of layers. Off course this method is reserved for armies and collections and would not benefit a single miniature project.

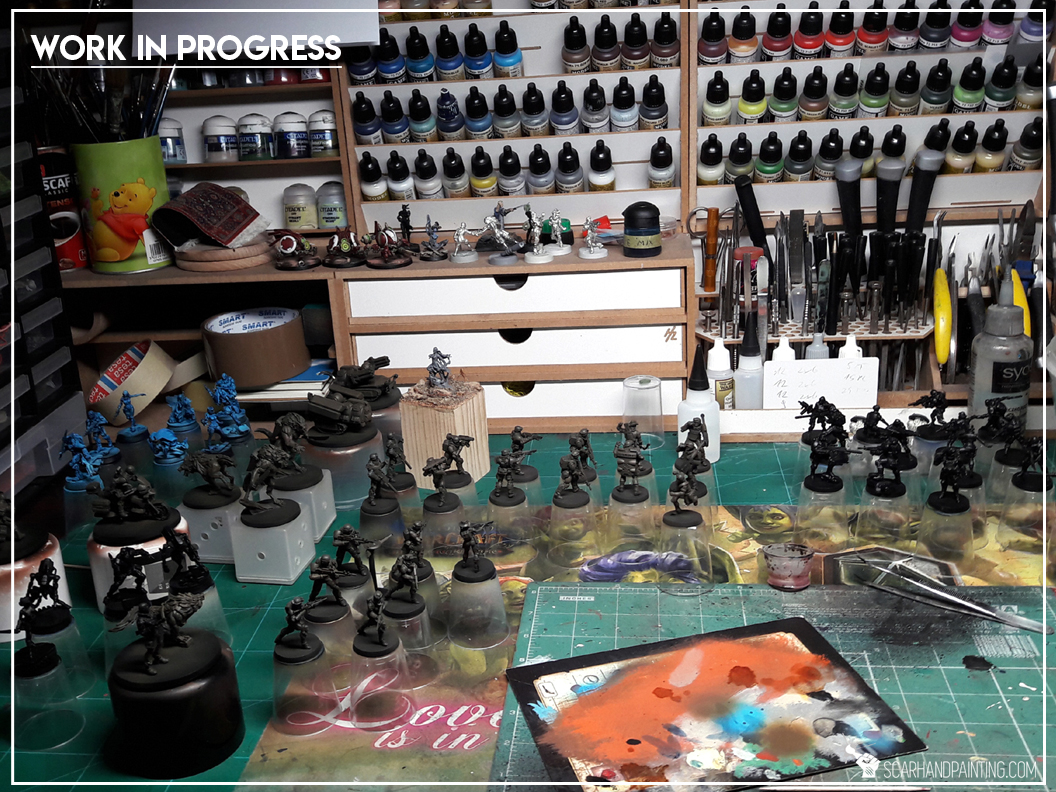
After years of practice this method triggered somehow on itself. I love painting miniatures but get really excited once projects enter final stages. I’m really hooked up on that feeling of accomplishment. That’s why I like to plan projects so that by not undertaking unnecessary actions I save time. If I have a bunch of miniatures to get painted I’d rather prepare and undercoat them all in one go, instead of repeating this for every single miniature, one at a time. It not only quickens the process but also leaves a ‘not entirely fun’ part, of a project, behind at some point. It is not limited to undercoat only and instead translates to all the layers. Every accomplished layer brings me a bit closer to the final steps of a project – the place where ‘choirs’ are left behind, most stuff looks pretty cool already and there’s most fun for me to have.

I maintain my motivation by taking small, but important steps. My main goal is to accomplish a project, but there are many small targets to achieve between the start and the finish line. I set obtainable targets, then once accomplished I check if I have energy for another round. Never force myself to take more than one step at a time – this one step is important, but all the rest is just a bonus, and as mentioned before – each step brings me closer to project’s completion. In practice it might look more or less like this:

START
step: Black Undercoat,
MAIN STEP COMPLETE
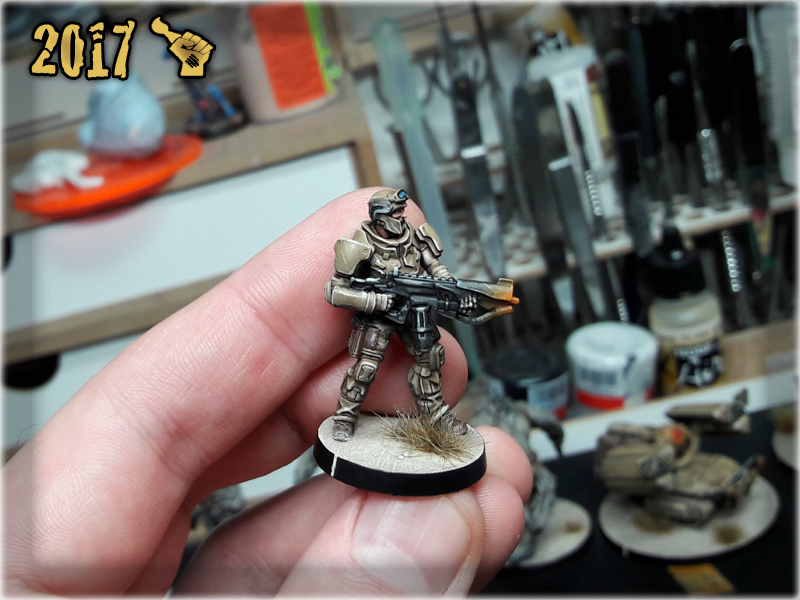
DESERT Armour & Uniforms:
step: Airbrushed layers (main colour), Dark Earth (Vallejo),
step: Airbrushed layers (main colour), Light Brown (Vallejo),
step: Highlights on the main colour, Light Brown (Vallejo),
step: Wash, Mix Strong Tone Ink (AP) 1:1 Soft Tone Ink (AP),
MAIN STEP COMPLETE
step: Edges on the main colour, Flayed One Flesh (GW),
step: Edges on the main colour, Pallid Wych Flesh (GW),
MAIN STEP COMPLETE
BROWN elements:
step: Secondary colour layer, Olive Drab (Vallejo),
step: Secondary colour layer, Gorthor Brown (GW),
step: Secondary colour layer, Gorthor Brown (GW) + Pallid Wych Flesh (GW),
step: Secondary colour Wash, Mix Strong Tone Ink (AP) 1:1 Soft Tone Ink (AP),
MAIN STEP COMPLETE
step: Edges on the secondary colour, Karak Stone (GW),
MAIN STEP COMPLETE
BLACK/GREY outfits & weapons:
step: Secondary colour layer, Skavenblight Dinge (GW),
step: Secondary colour layer, Fenrisian Grey (GW),
step: Secondary colour layer, Pallid Wych Flesh (GW),
step: Secondary colour Wash, Dark Tone Ink (AP),
MAIN STEP COMPLETE
step: Edges on the secondary colour, Pallid Wych Flesh (GW),
step: Edges on the secondary colour, White,
MAIN STEP COMPLETE
SKIN:
step: Secondary colour layer, Bugmans Glow (GW),
step: Secondary colour layer, Dwarf Flesh (GW),
step: Secondary colour layer, Dwarf Flesh (GW) + Pale Flesh (Vallejo),
step: Secondary colour layer, Pale Flesh (Vallejo),
step: Secondary colour Wash, Mix Strong Tone Ink (AP) 1:1 Soft Tone Ink (AP),
MAIN STEP COMPLETE
step: Edges on the secondary colour, Pale Flesh (Vallejo) + Pallid Wych Flesh (GW),
MAIN STEP COMPLETE
OTHER COLOURS…
step: Tetriary colours…
etc…
MAIN STEP COMPLETE
VARNISH:
step: Applying Varnihs,
MAIN STEP COMPLETE
BASES:
step: Modelling bases,
step: Painting bases,
step: Painting base edges,
MAIN STEP COMPLETE
step: Applying tufts and additional elements to the bases…
COMPLETION

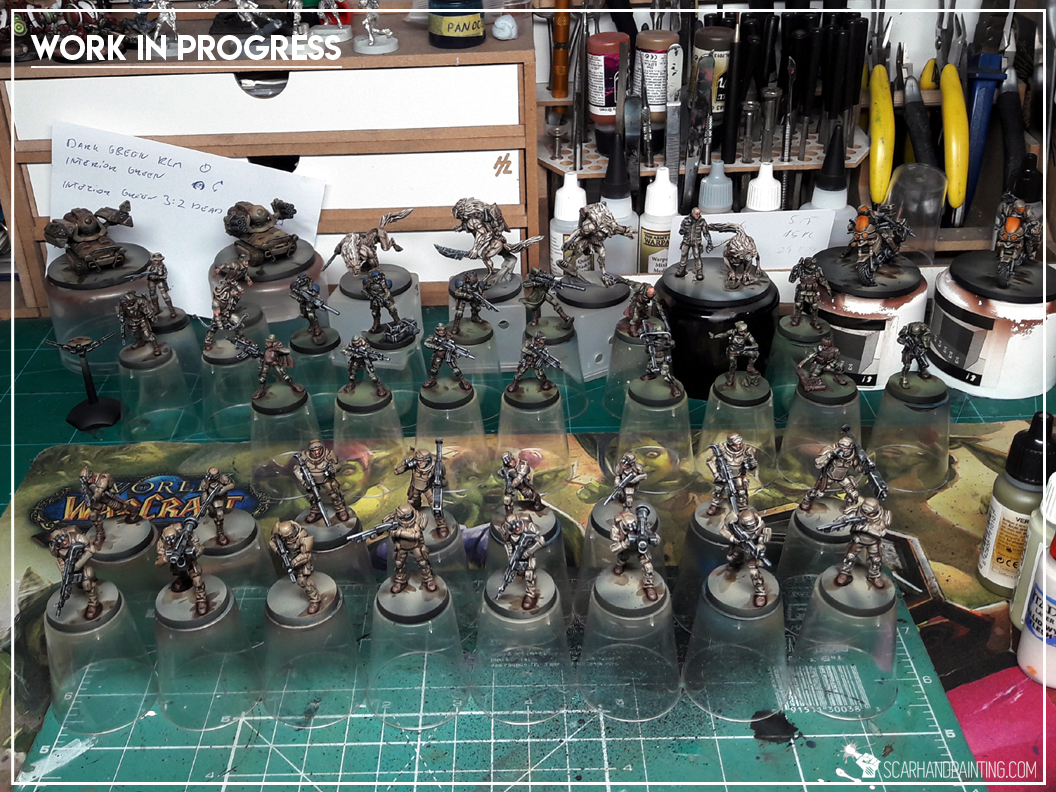
As you can see there are approximately thirty steps required to accomplish this project so if I manage to take one step every day I will finish the project in about a month. Let’s say there are just six miniatures in the entire project. Would it be so difficult to accomplish one step with six miniatures in one day? How long can it actually take? It is not some extremely difficult, time consuming task. Easy to motivate myself to do that. Now let’s say I had a free weekend and managed to accomplish a MAIN STEP instead. This is worth between two to five regular steps. Let’s say I took out five. I just moved five days ahead of schedule. Can spend that time being lazy or move to another step… and there’s that – this is how the process works for me.


Coherent Colour Scheme – Painting in groups, one layer at a time, translates to a more coherent colour scheme. No need to mix paints between miniatures and try to achieve same exact tones – paint is prepared for entire group and will look exactly the same between first and last miniature. In the end this will provide a nice, coherent look of the entire project.
Understanding Through Repetition – After few miniatures of the same kind muscles get used to the detail naturally. Instead of interpretting every miniature I can follow a sort of ‘programmed muscle memory’ to paint much more efficiently, and thus faster. Quality also benefits from this, as there are no ‘uncertain’ brush strokes.
Reaching Ultimate Concentration – Repetition allows me to find myself in a state of utter concentration that won’t get disturbed by music or audio book, still lets me appreciate and take in anything that plays in the background, including videos. I know it’s not a super-power level state of mind and it is common among painters, still not being forced to reset every time and then to mix paints or plan the paint job helps to lenghten the ‘in the mood’ periods.
Purity of Purpose – With clear, obtainable targets in reach and a plan layed down before me it is easier for me to move forward, each step taken being deduced from the list. This makes my motivation thrive.

If you read through all of this banter – I hereby deem you worthy! With wisdom I bestowed, You now possess knowledge necessary to use the Multi-Miniature Ninja Painter technique. Use it wisely and with good intent and it will benefit you greatly. Do not fear to step in and teach other ‘Muggles’ some of that magic.
I have put a lot of effort into preparing this article, yet I am sure I missed something important. If you happen to have any questions related to it – feel free to hit me with them either at my Facebook profile, or via e-mail. Also take note that what works for me, might not necessarily work for you – still there are many ways to accomplish certain things – mine is just one of them.

Welcome to the fourth installment into the ‘Painting Philosophy’ series, where “I let you in on ‘how’ and especially ‘why’ I do some things in a certain way. In my opinion a proper approach to painting is crucial to maintain healthy and rewarding experience. Final result depends on it in the same way as on techniques, know-how and tools used. Nowadays internet is full of painting tutorials yet it takes some inner understanding of our own capabilities to find what suits us best and fully benefit from all acquired knowledge. That being said – In this series I will reveal what works best for me as a painter. I hope you will find some wisdom in it…”

Today I would like to talk less about painting and more about basing and composition, cause it does not matter how great your paint job is – if you based a miniature poorly it will look off, so there’s that. By ‘basing and composition’ I understand the way a miniature is set up on a base. It’s not enough that a miniature is just mounted on top of a base. In the end base is a display for our miniature and together they create a composition, that should be both stable on the gaming board and tell a little story about the miniature itself…
Basically, every humanoid miniature has a center of gravity. In most cases it is located slightly below the chest and over the pelvis of a miniature. If a miniature is armed with giant gun or standing with hands spread, the center of gravity might shift a little to encompass additional weight. In these cases both gun (big, heavy part) and main body of the miniature are treated as a single ‘body’ and the center of gravity is shifted away from natural position and towards additional part/parts evenly.
The key is to base a miniature so that it’s center of gravity is alligned with the center of the base. It does not have to be exact, but let’s just say the closer the better. In case of more complex miniatures it is possible that aligning shifted center of gravity with center of the base will move main body of the miniature to one side of the base (for example to the back of the base). This is ok for as long as the miniature stays within the invisible lines of the base’s edge and seem to still occupy the top of the base evenly.


To put it simply – because it looks better and adds feeling of ‘physics’ to the composition. As mentioned before a base and miniature are a single composition. This means that the way you mount a miniature on the base will translate into a short story about what is actually going on. Imagine a base to be a visualisation of physics of your miniature. For example:
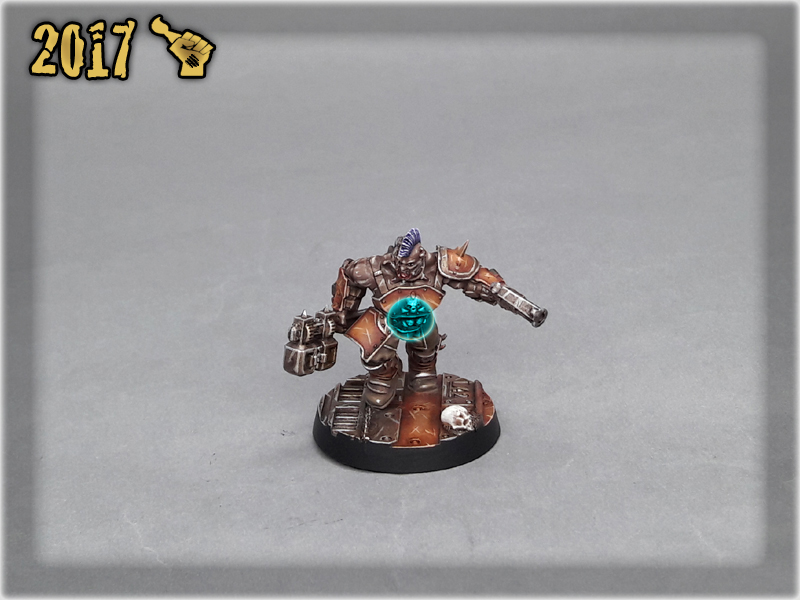
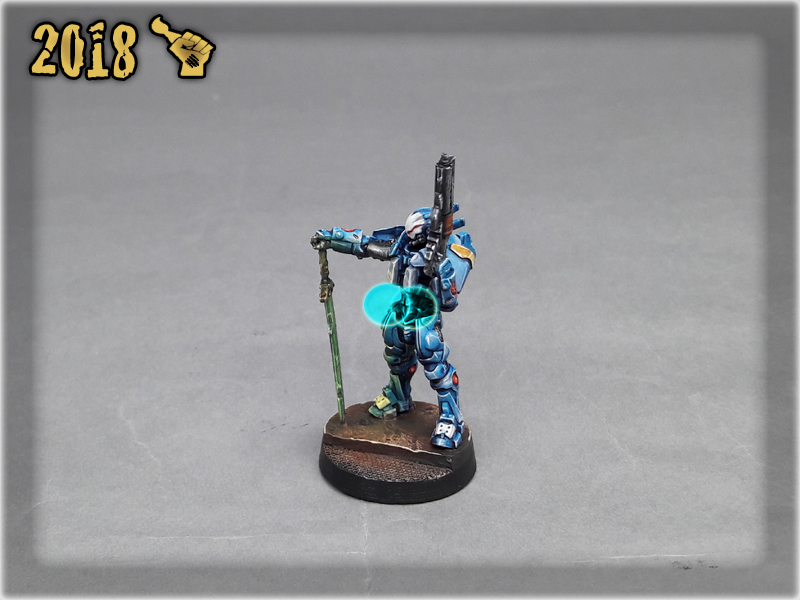
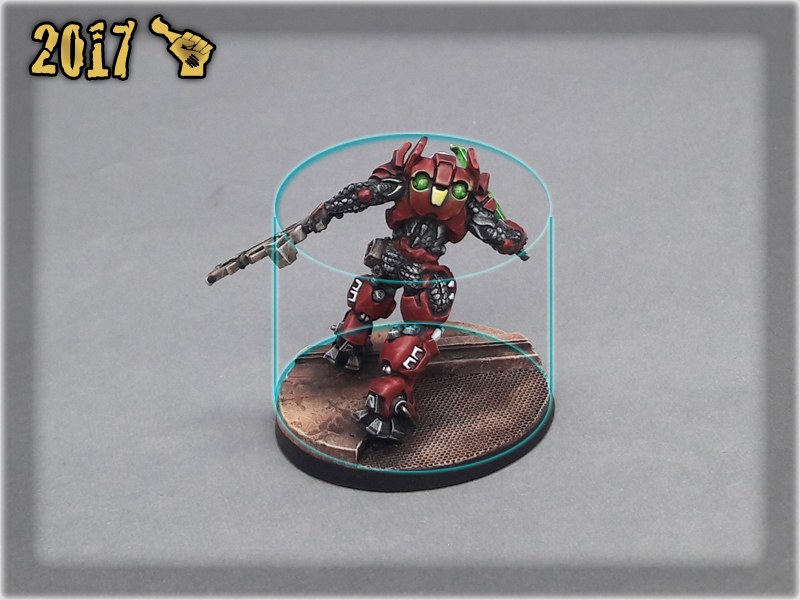
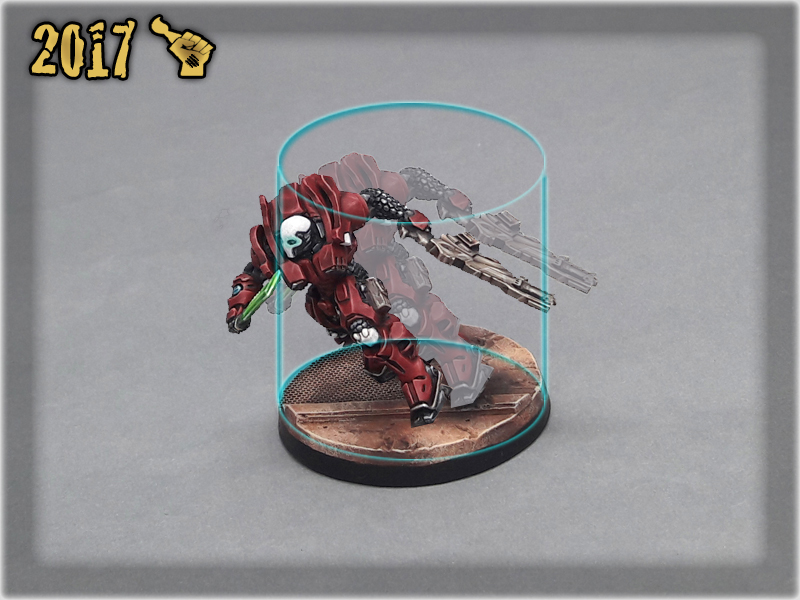
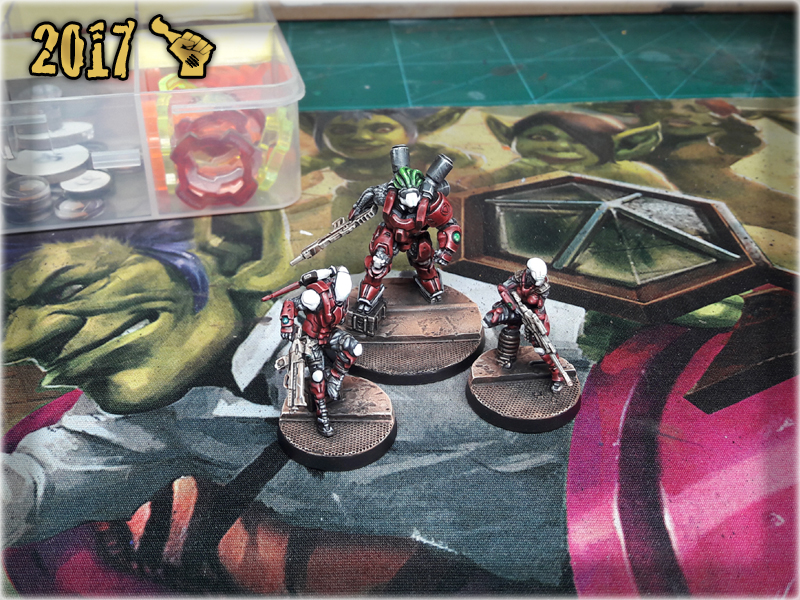
‘Bakunin Taskmaster charging, using his right pauldron like a battering ram to slam through enemies…’ You can see this guy is heavy and moving forward. This is achieved by shifting center of gravity to the back of miniature, towards extended armed hand and aligning it with center of the base. This guy is moving forward and you can actually see his immediate destination on the base he’s moving over.

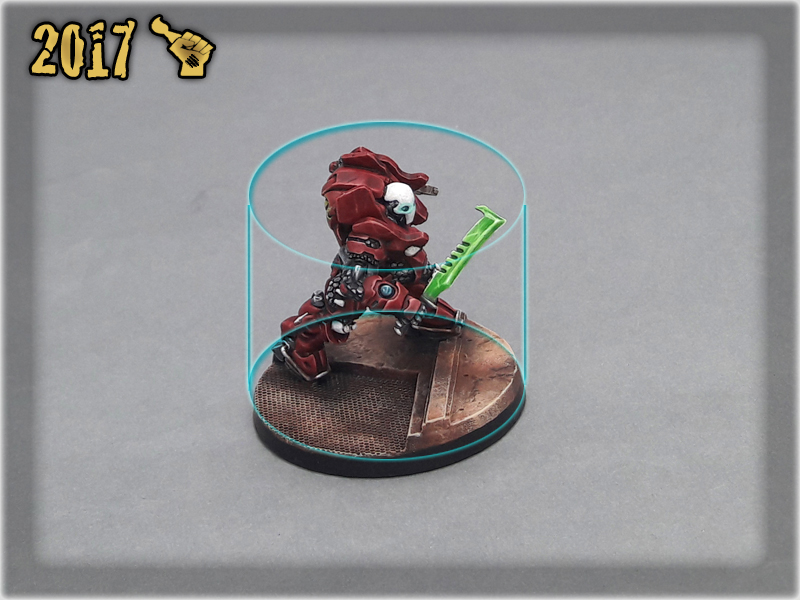
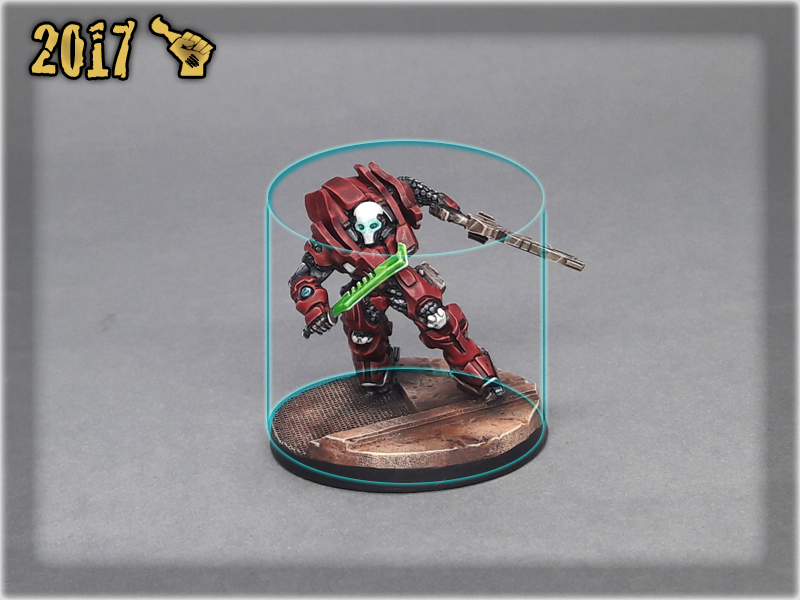
Now imagine how stupid it would look like if Bakunin Taskmaster was mounted with his feet at the center of the base instead. You don’t actually have to imagine, cause I will show you. Now this giant of steel, polimer and fiber muscles looks like he lost his footing and is jumping off a cliff as a result. Entire right hand and part of the pauldron is off the base and seem to drag the rest of the miniature along.
Here’s a set of examples I dug in the web and how I see them performed.

You have now finished the fourth Painting Philosophy article. This series is all about sharing forbidden knowledge so if it drove you insane, just stay calm and paint some. You get back to normal once it settles up in your mind. As usual – ‘Please take note that what works for me, might not necessarily work for you – still there are many ways to accomplish certain things – mine is just one of them’. If you find this article helpful – be sure to leave me some feedback. Have a nice hobbying 😉
“Many fall in the face of chaos. But not this one, not today.”
This is a second installment in the ‘Painting Philosophy’ series in which I let you in on ‘how’ and especially ‘why’ I do some things in a certain way. “In my opinion a proper approach to painting is crucial to maintain healthy and rewarding experience. Final result depends on it in the same way as on techniques, know-how and tools used. Nowadays internet is full of painting tutorials yet it takes some inner understanding of our own capabilities to find what suits us best and fully benefit from all acquired knowledge. That being said – In this series I will reveal what works best for me as a painter. I hope you will find some wisdom in it…”
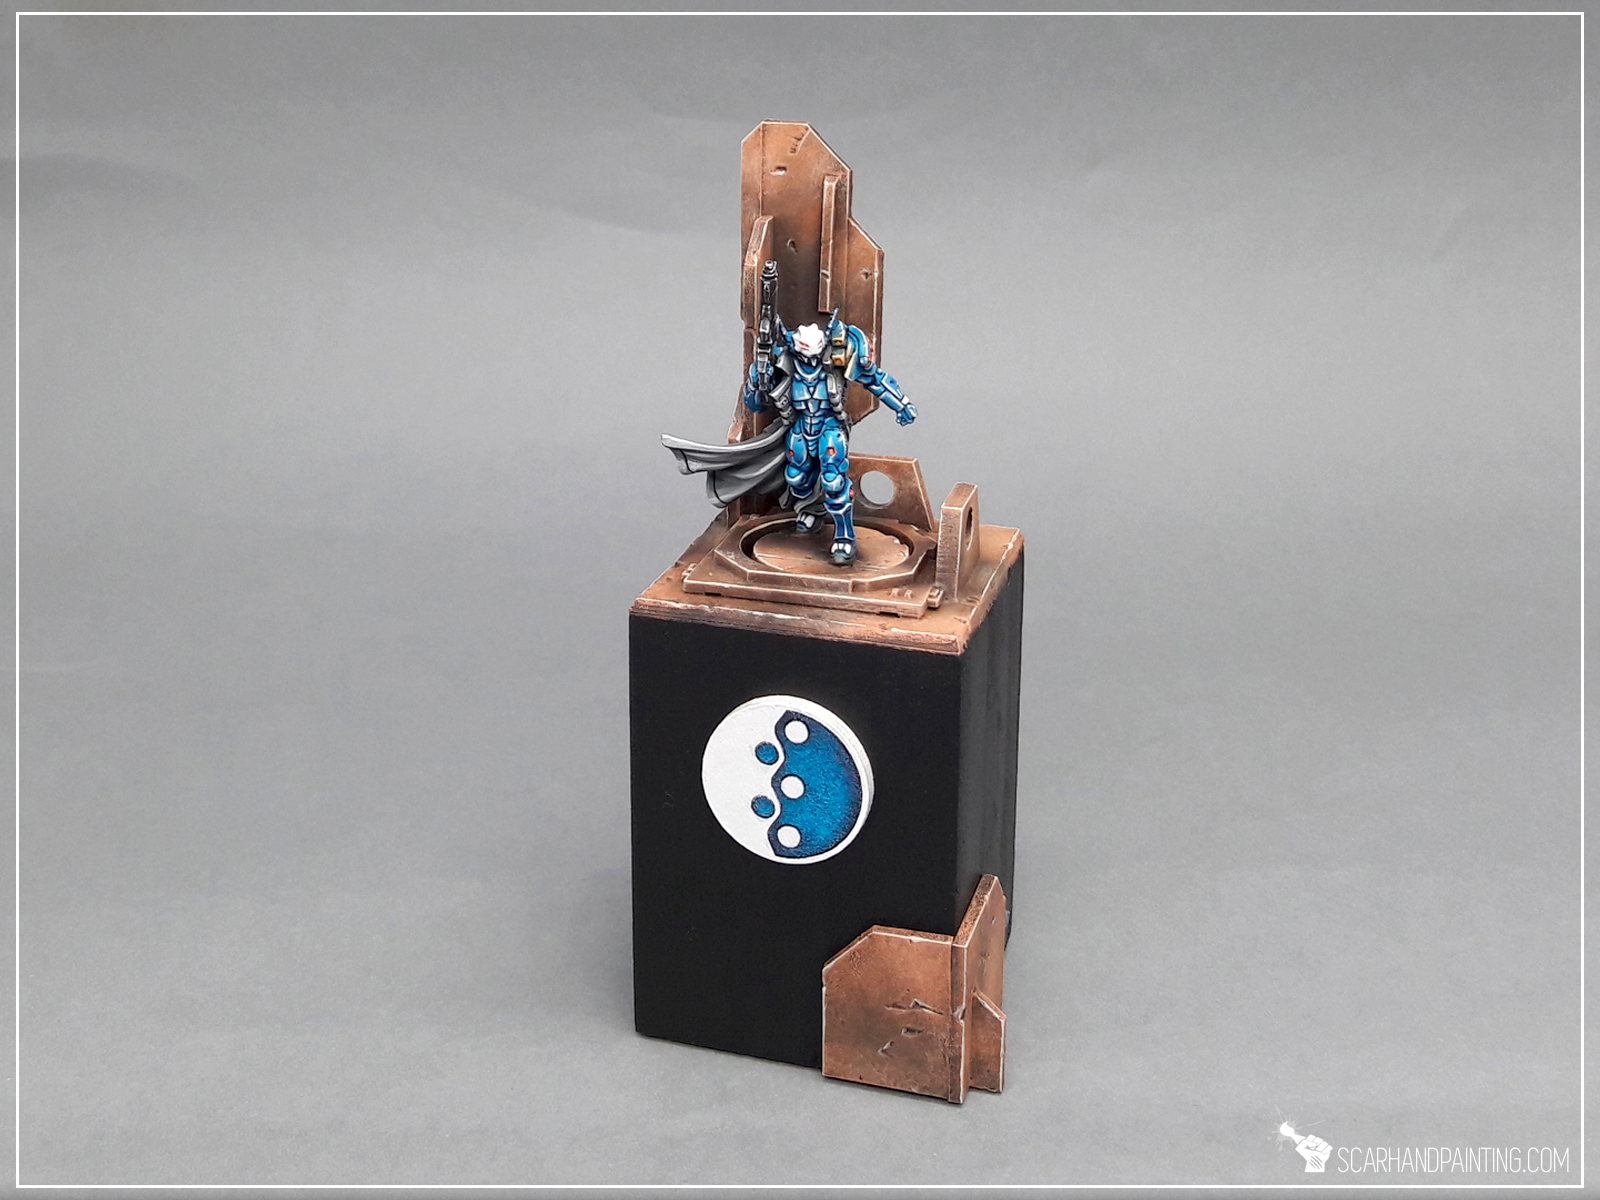
The edge, a plastic frontier between a piece of art and the rest of the world. It divides a miniature from the surrounding chaos. It defines the paint job. It underlines the final result of your work, enhancing the visual effect. In short, a properly painted edge of a base will enclose the miniature just like a frame around a painting. Can you imagine a ‘Mona Lisa’ in a dirty styrofoam frame? Well, that’s what I see each time I look upon a picture of awesomely painted miniature on a base, with dirty, unprepared edge. No matter the quality of paint job, a piece of art turns into a kid with chocolate smeared all over it’s face. I just can’t appreciate ‘that’. But is the difference so evident? Don’t take my word for it – see for yourself…
This actually IS the exact same miniature, with the only exception of one base’s edge being covered with a dirty base edge Photoshopped from a work in progress picture. But enough about ‘how I feel’ and let’s skip to ‘how I do’. For me there’s only one paint capable of fully POPing a miniature on the battlefield and it’s BLACK!
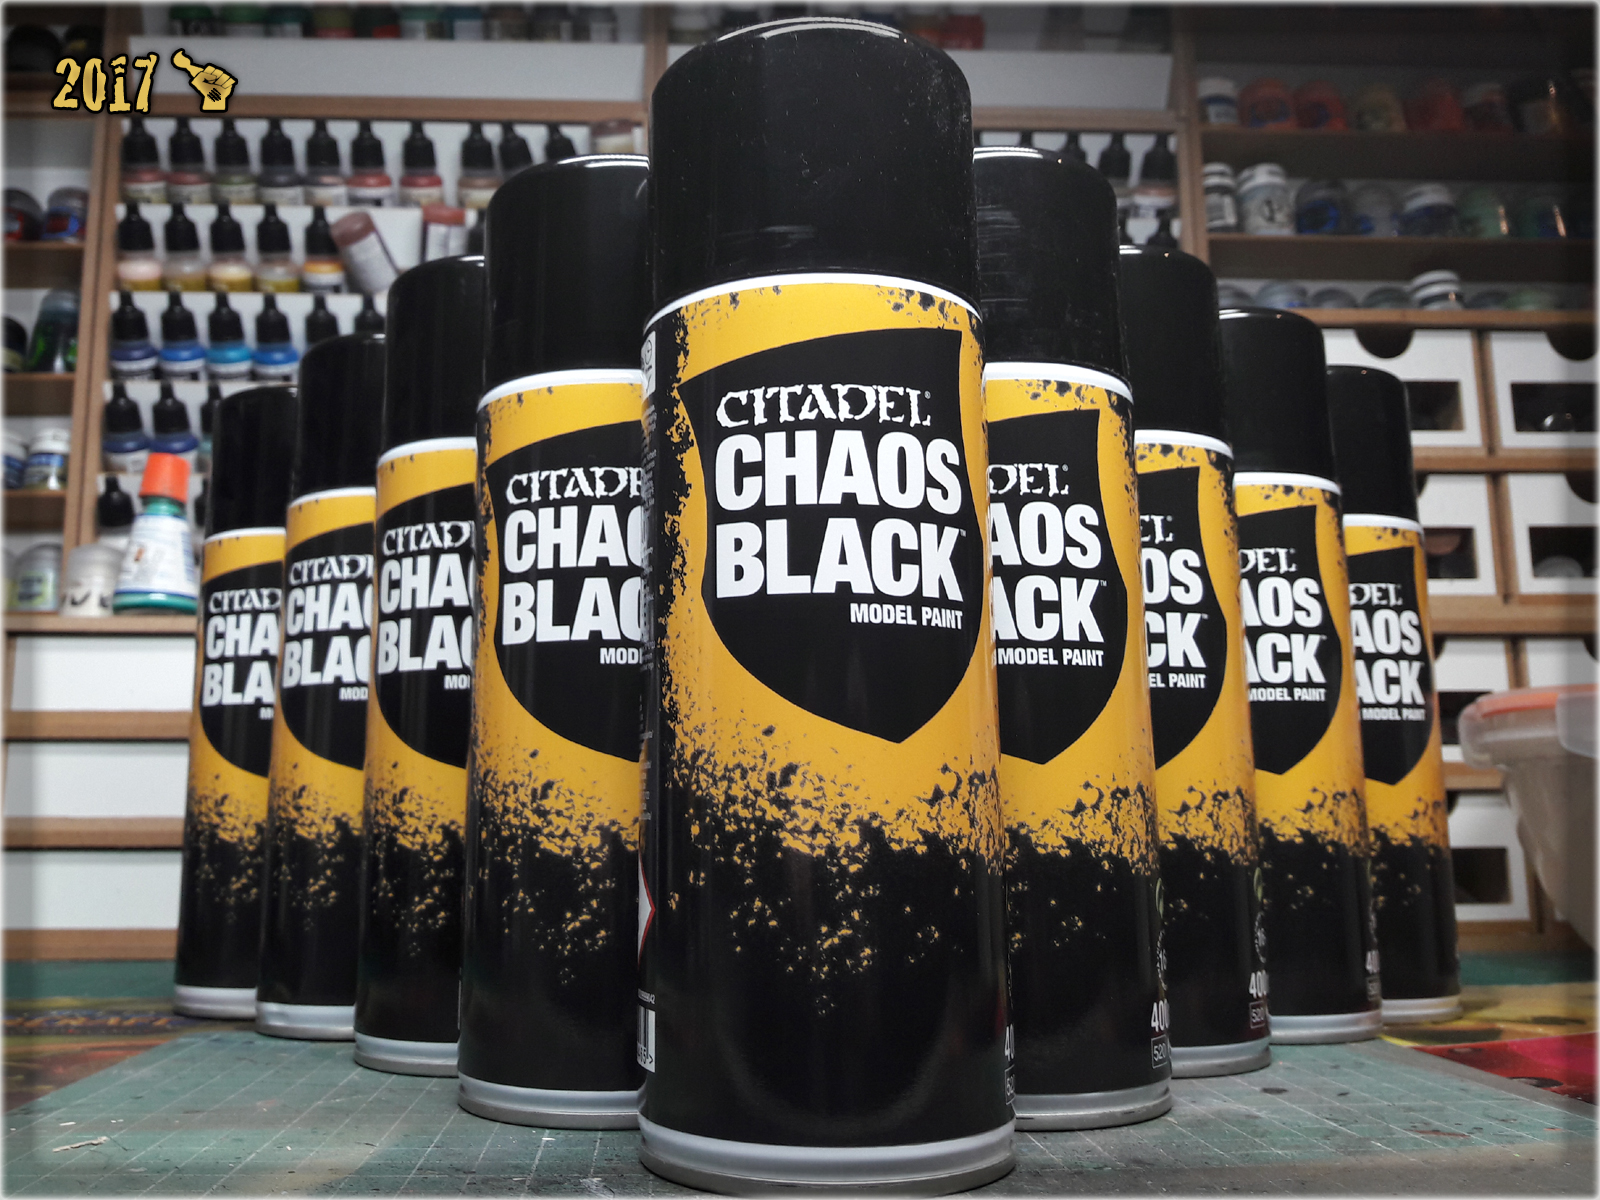
In light spectrum black is not even a color per se, being an ultimate lack of color instead. In the world of hobby paints black is technically a color, due to pigments used to create black paint. This particular colour will work with whatever color scheme you choose for a miniature, enhancing the effect of what’s on the base. It is worth mentioning, that black paint usually surpasses other colors when it comes to opacity, therefore it is much easier to provide a smooth, opaque layer using black than most other paints.
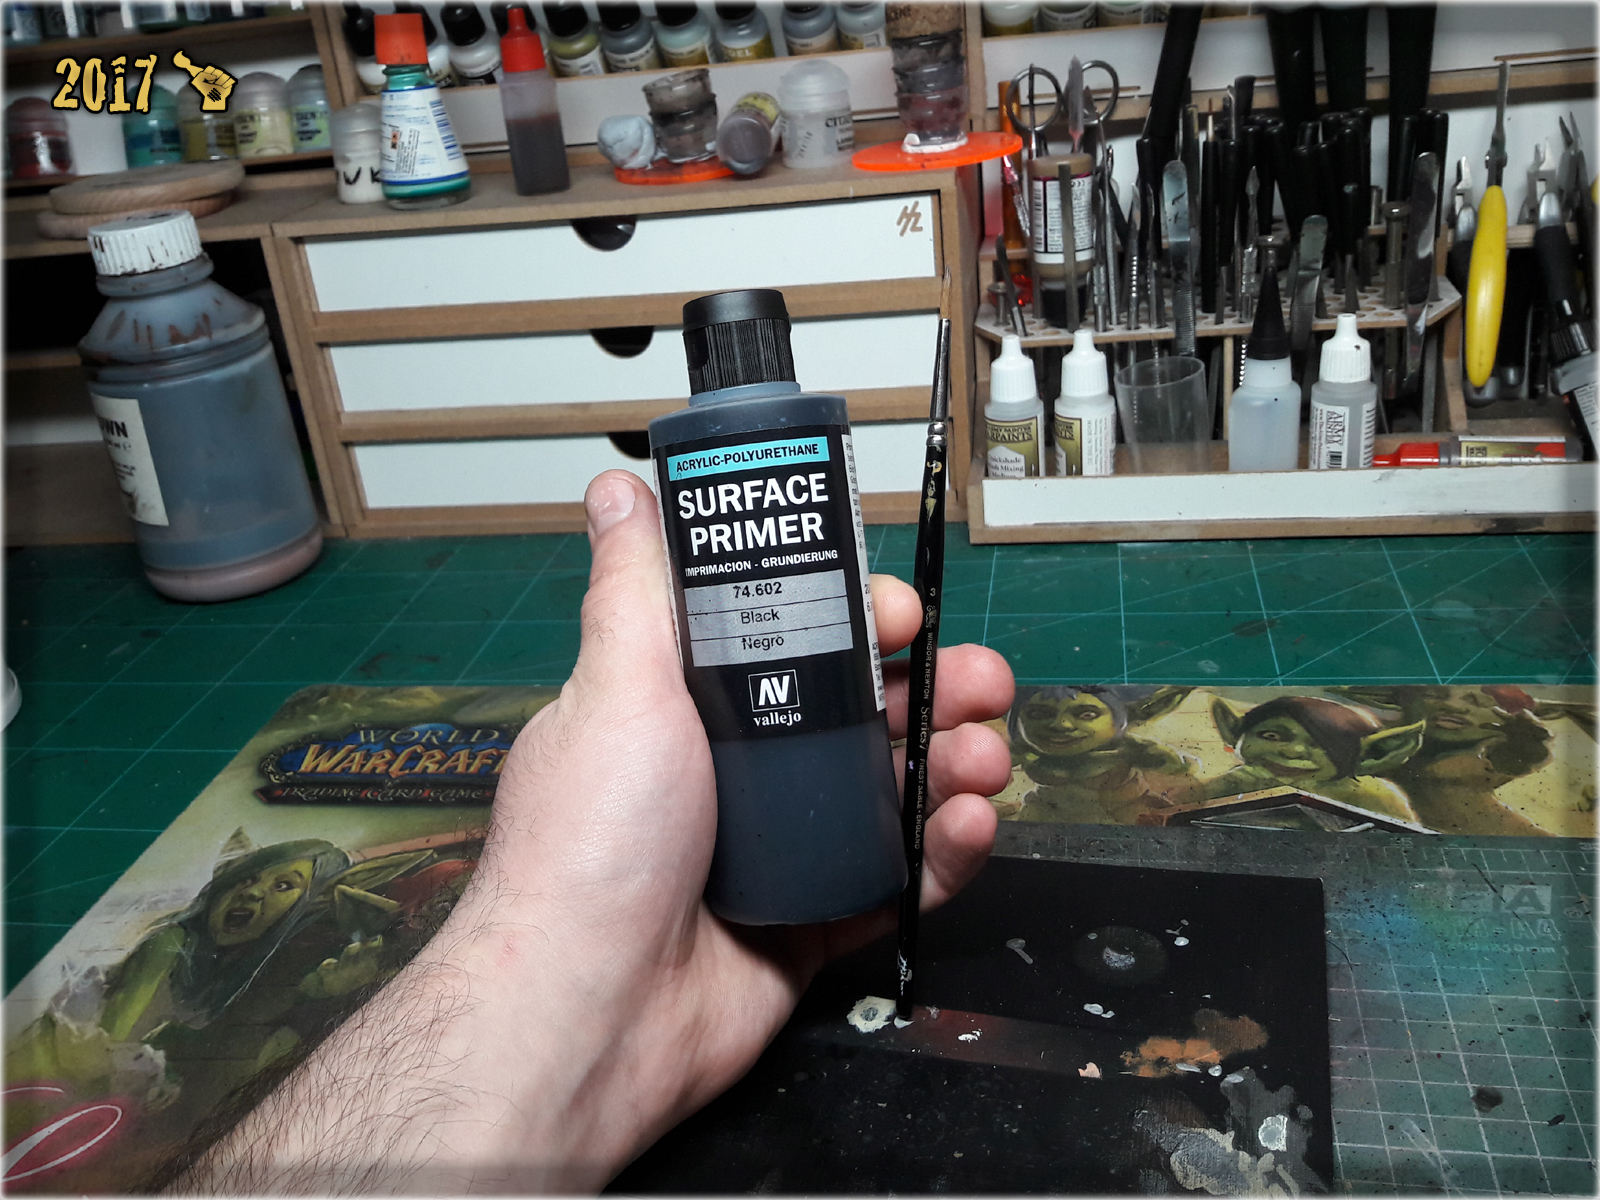
I go about it in a simple, old school manner – with regular medium sized brush and a good, trusted paint. After testing a lot of different black paints I chose Vallejo 74.602 Negro Surface Primer. It works great both with brush and surface. Usually one layer is all that is needed to fully cover the edge, if not – second one is always enough. This paint leaves a nice, smooth, thick layer, hiding some irregularities that might happen to cover the edge of the base. It is worth pointing out, that the base’s edge is always the last thing I paint, before finishing a project. First I thoroughly clean up my painting space of any project leftovers, then I apply varnish and just then move to painting black edges. This way both Varnish and edges are clear of any dust particles and unwanted stuff that might stick to them.
How do I deal with a situation, when a game requires the base to be marked / split or otherwise painted so that the arc of vision or other feature is clearly visible? I prefer to either:
* Use a modelled on-base feature to clearly indicate the direction a miniature is facing,
* Use a marker instead,
When painting a project for someone else I’m sometimes asked to add an ‘arc of sight’ on the base’s edge. If possible I provide small markings to minimize the other colors impact on the otherwise black edge. This seems to work pretty well and keeps the initial feel of a miniature being underlined.
So here we are, at an end of the second installment in the Painting Philosophy – a series that is meant to ‘infect’ you with some of my hobby ideals. Hope you found this one interesting and helpful.
As usual – I have put a lot of effort into preparing for this article, yet I am sure I missed something important. If you happen to have any questions or suggestions related to it – feel free to hit me with them. Also take note that what works for me, might not necessarily work for you – still there are many ways to accomplish certain things – mine is just one of them.
All right, sweethearts, you’re a team and there’s nothin’ to worry about. We come here, and we gonna conquer, and we gonna paint some, is that understood? That’s what we gonna do, sweethearts, we are going to go and paint some. All right, people, on the ready line! Are ya lean?