- contact@scarhandpainting.com


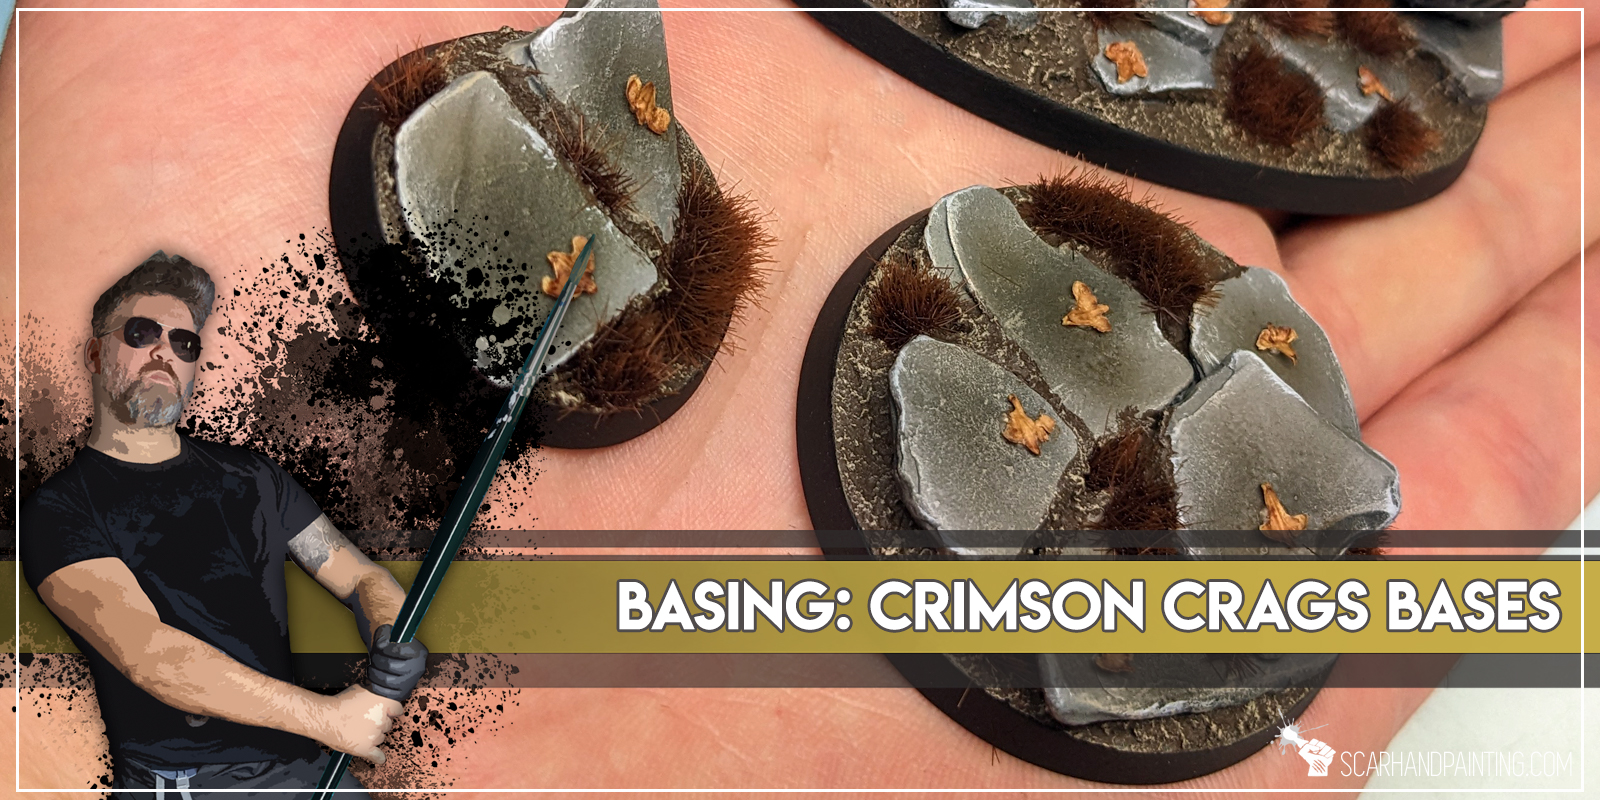
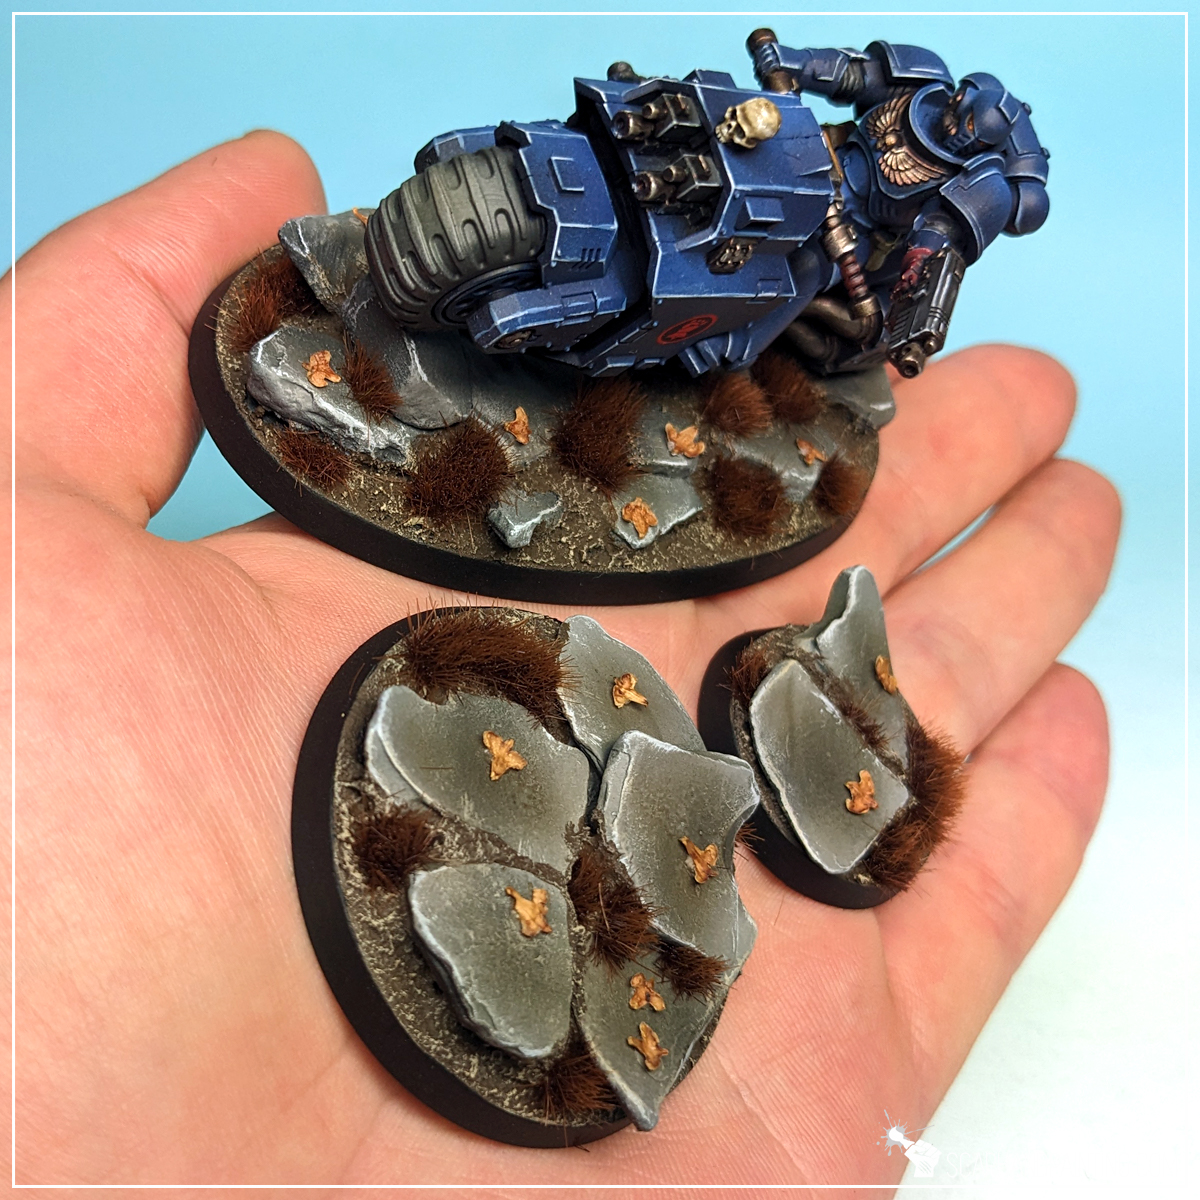
Welcome to Crimson Crags Bases tutorial. Here I will take you on a Step-by-step trip through the process of creating Crimson Crags themed Bases the same way as seen at: Gallery: Warhammer 40,000 Crimson Fists.
Before we start, some notes:
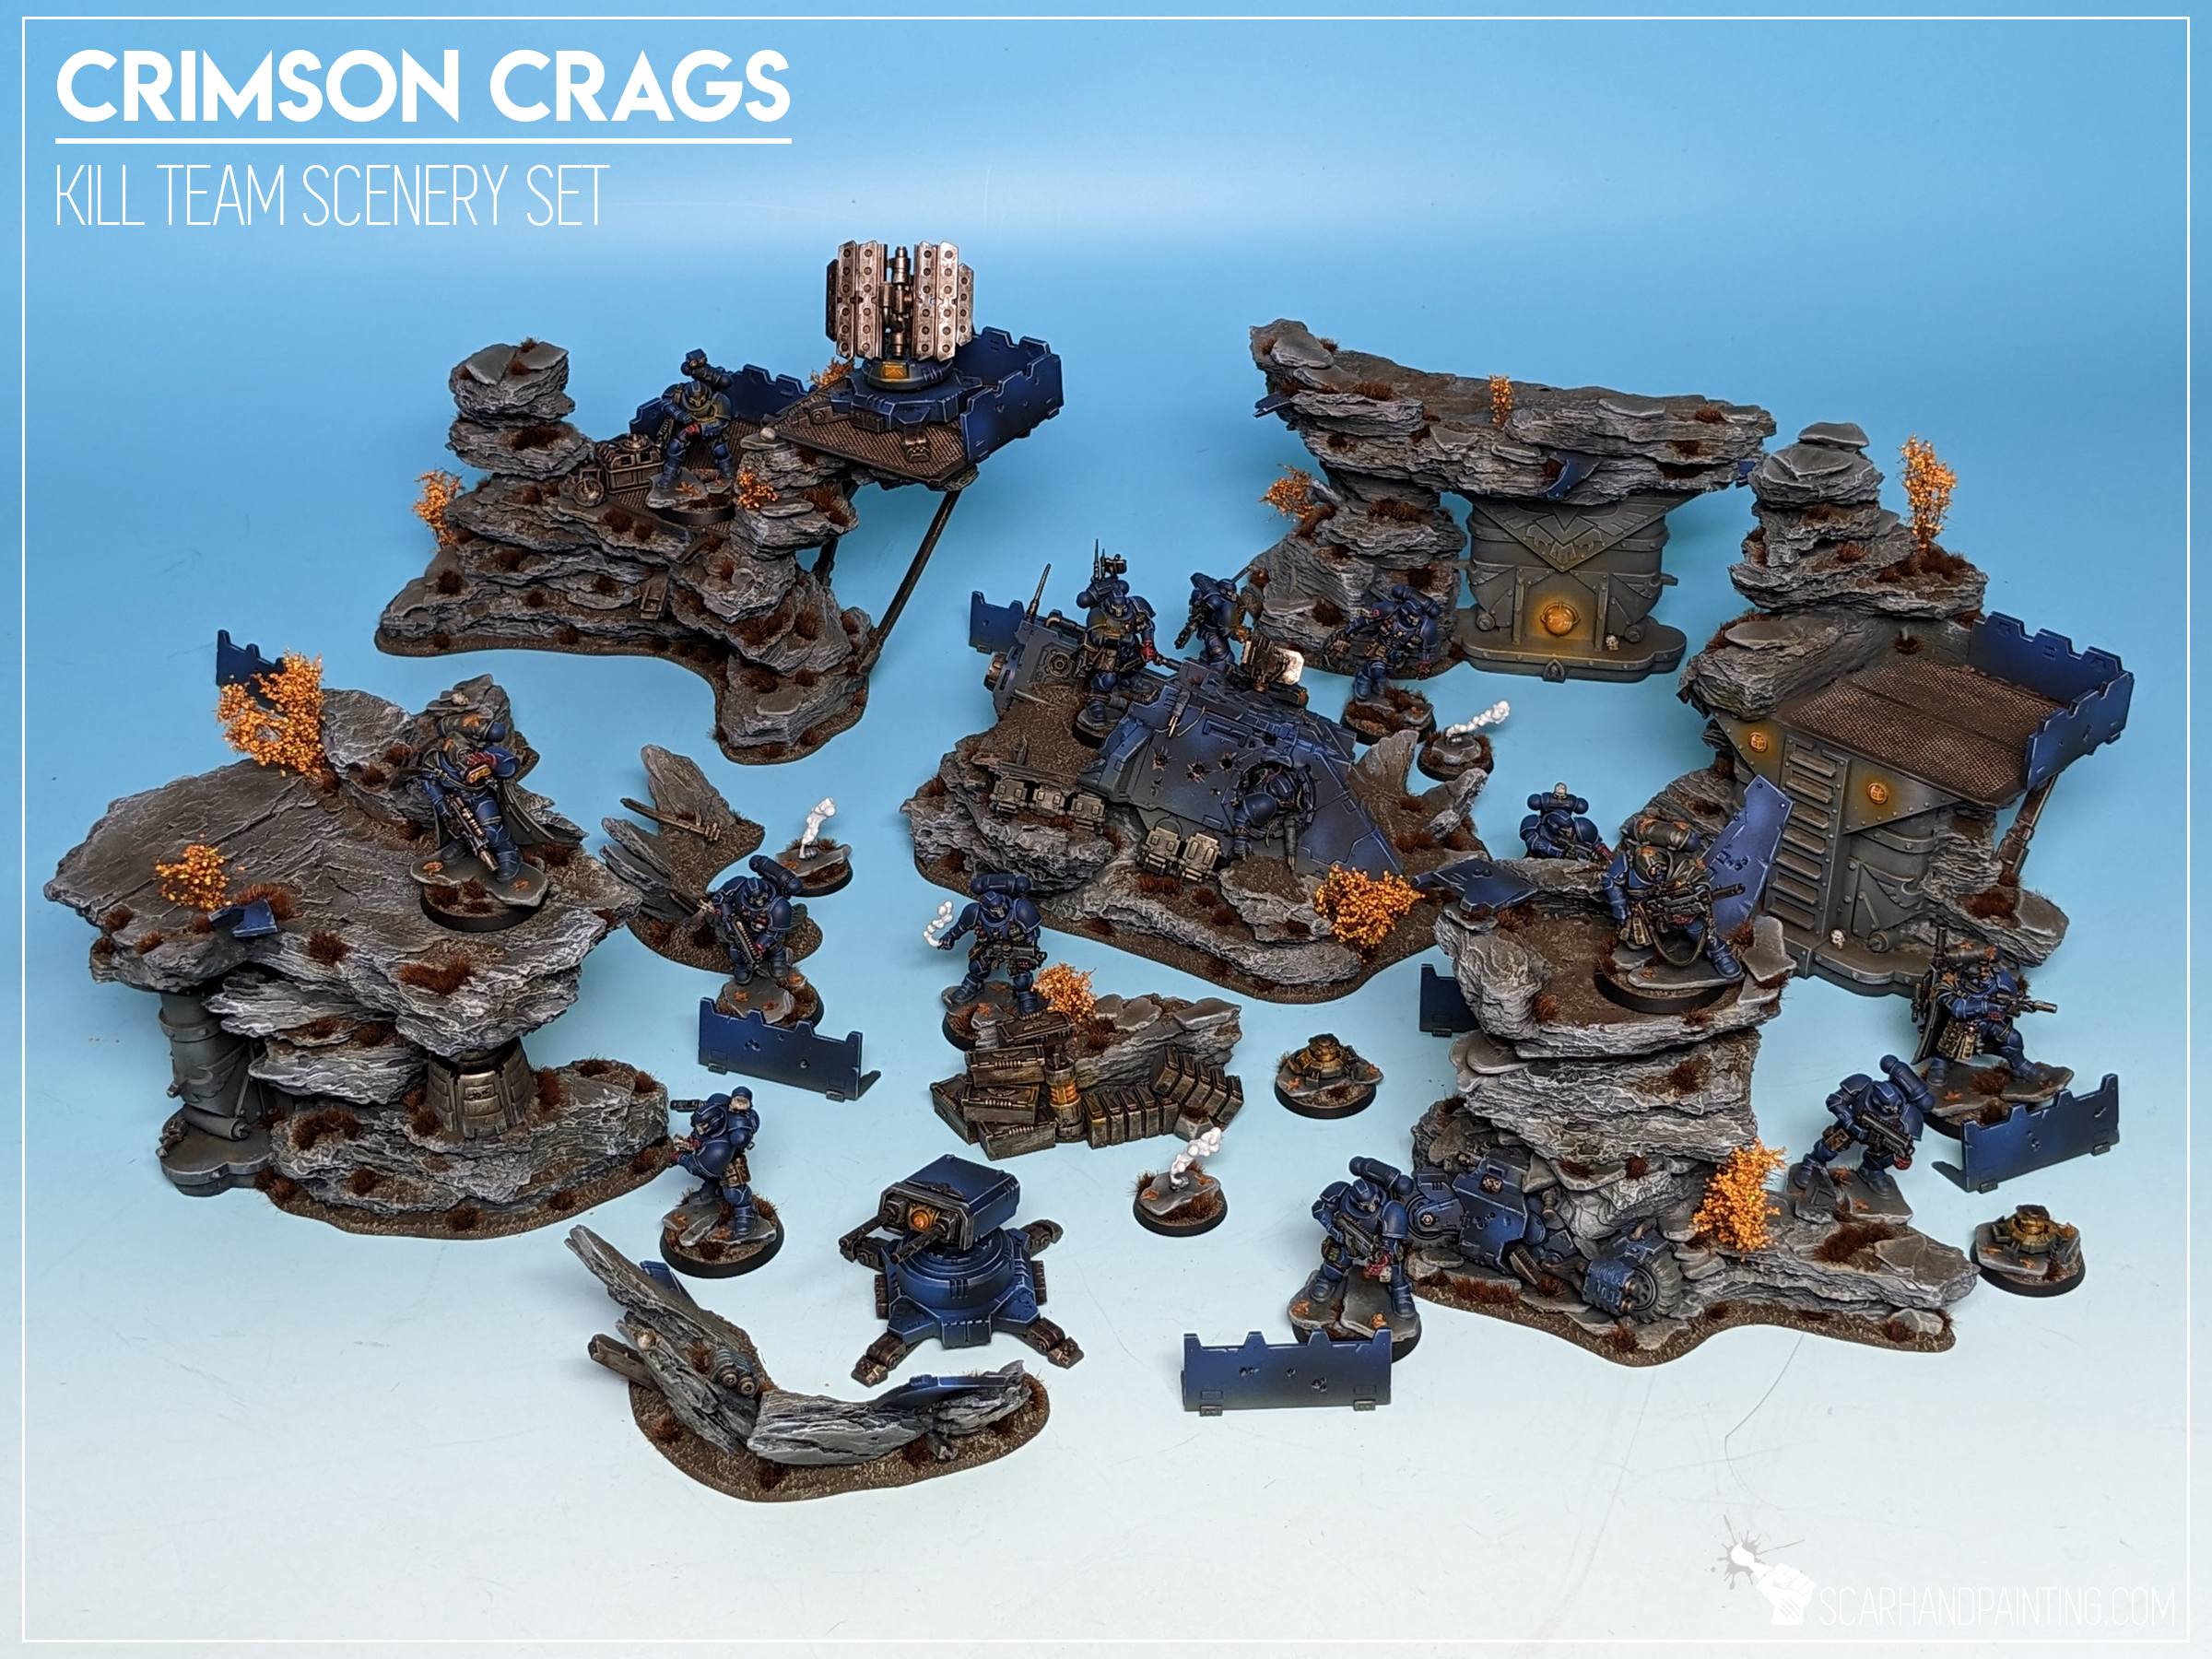
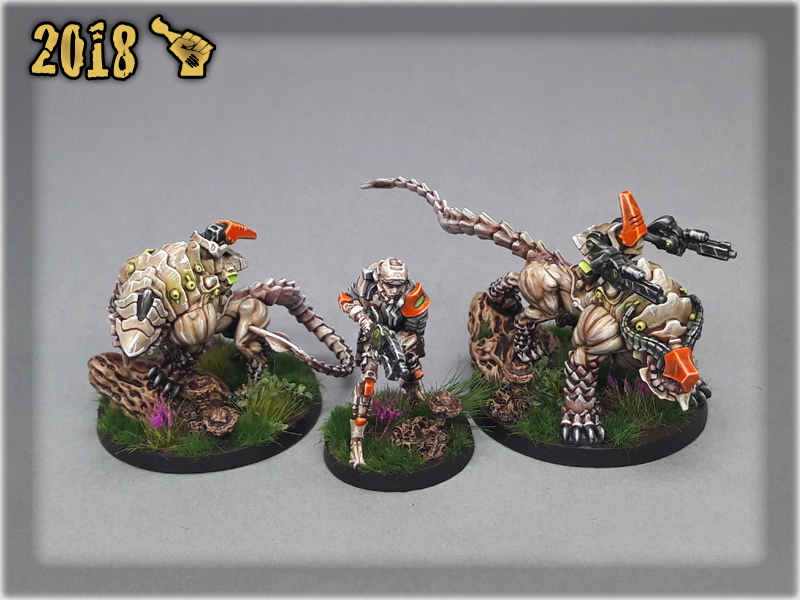
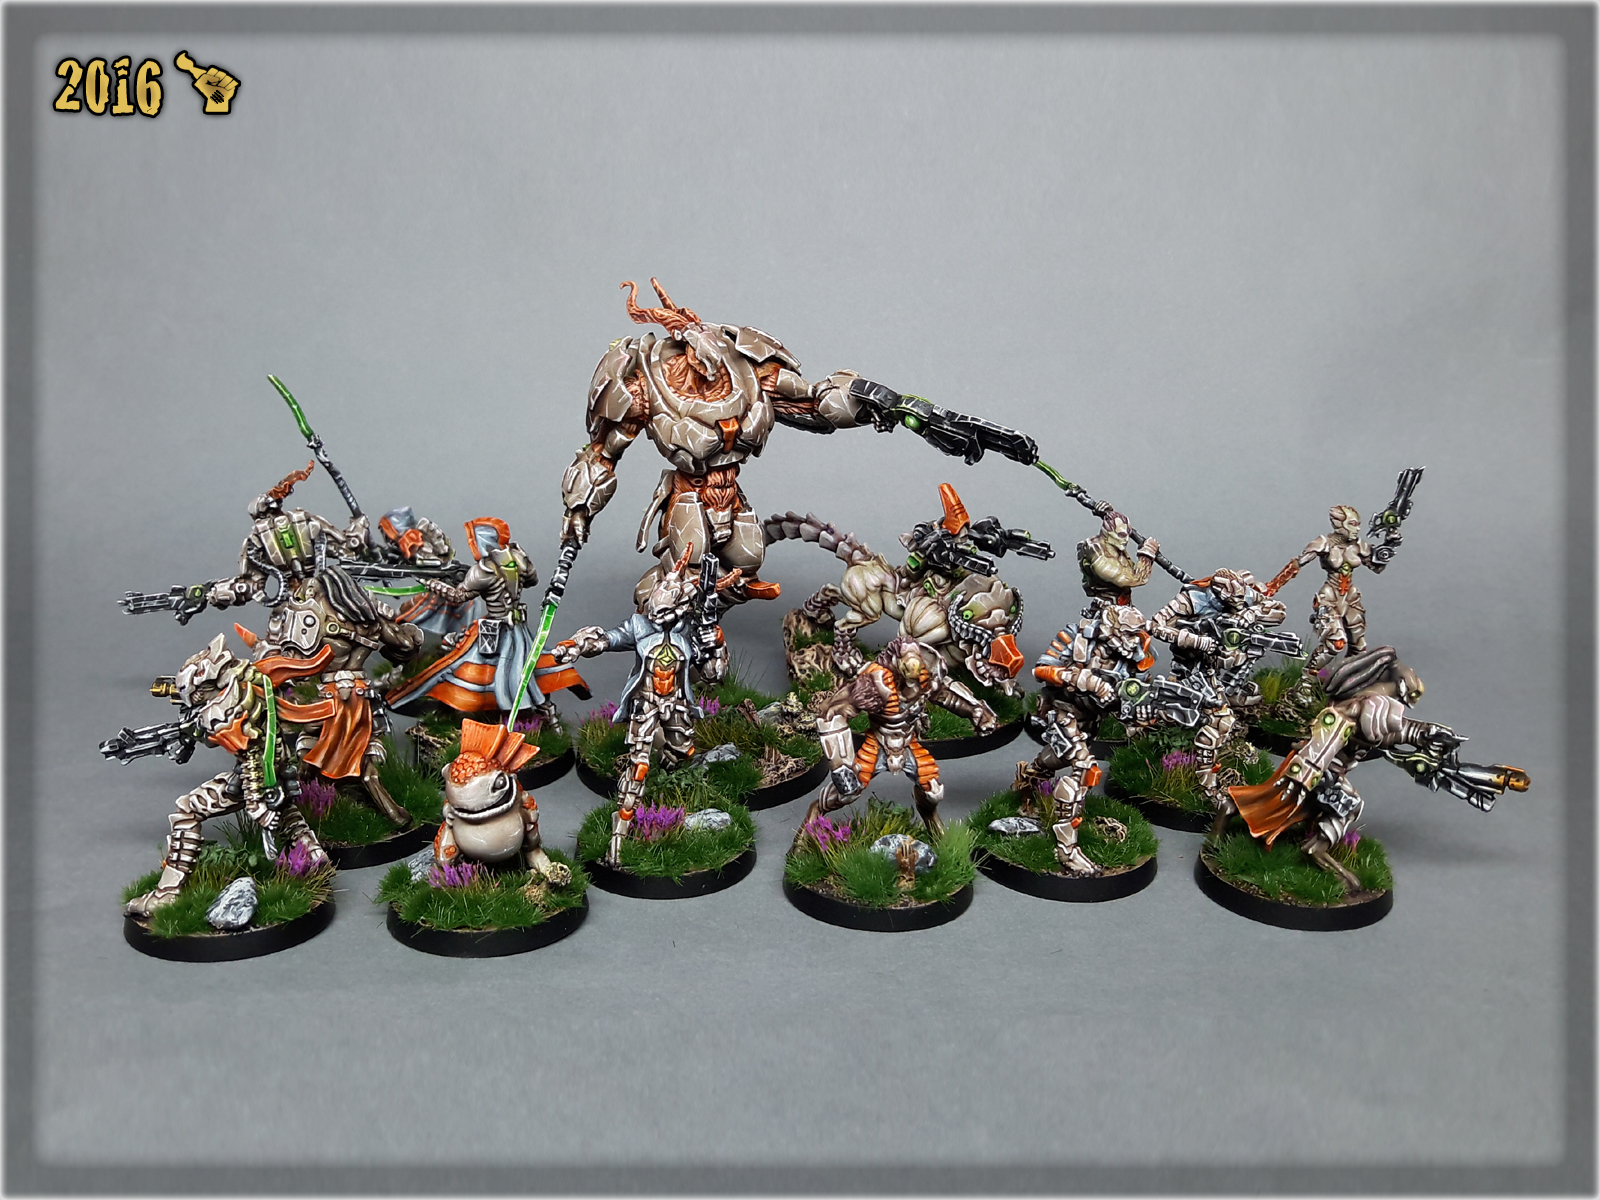
The “Crimson Crags” is a name of a self designed Warhammer 40,000/Kill Team scenery setting themed around my Crimson Fists Astartes collection. The idea behind the setting is reinforced rocky ravines ravaged by war. You can see more examples of the scenery and basing in the Killzone Crimson Crags gallery. I have already covered painting Crimson Fists and modeling the scenery in previous hobby articles. Now is time to present to you the basing.
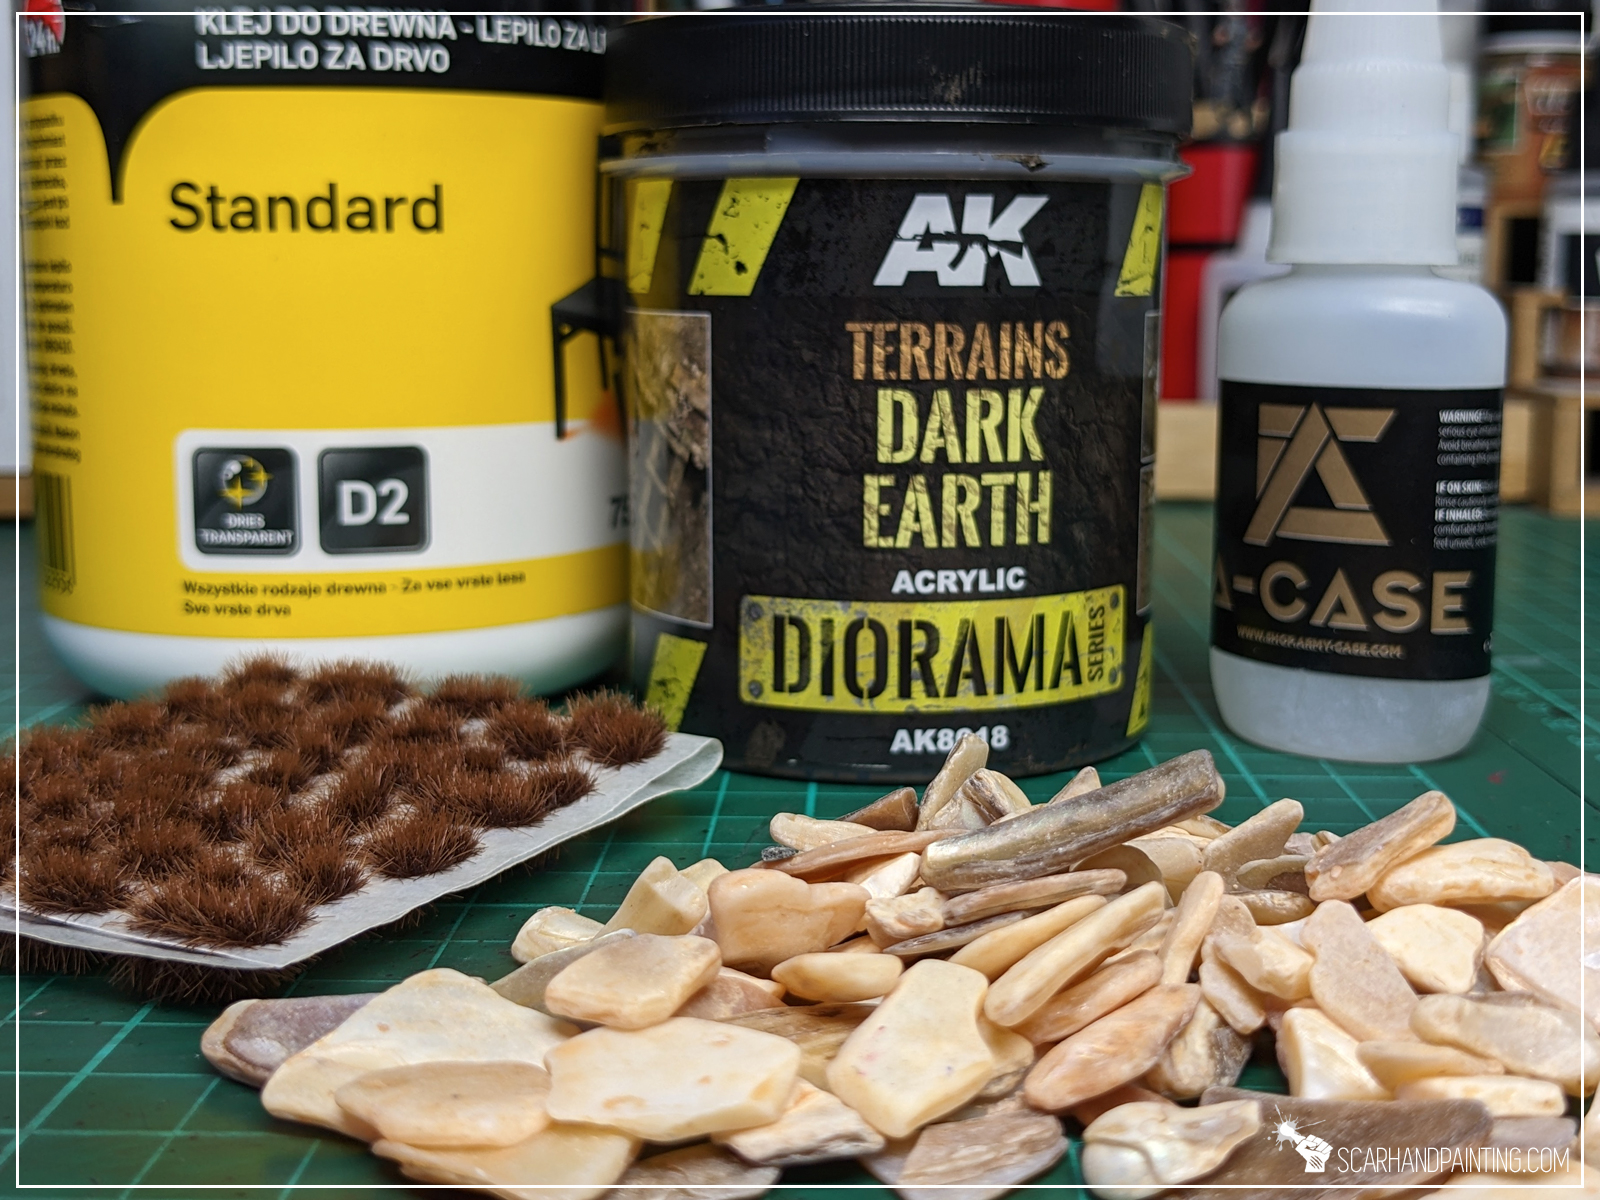
For this tutorial I will be using:
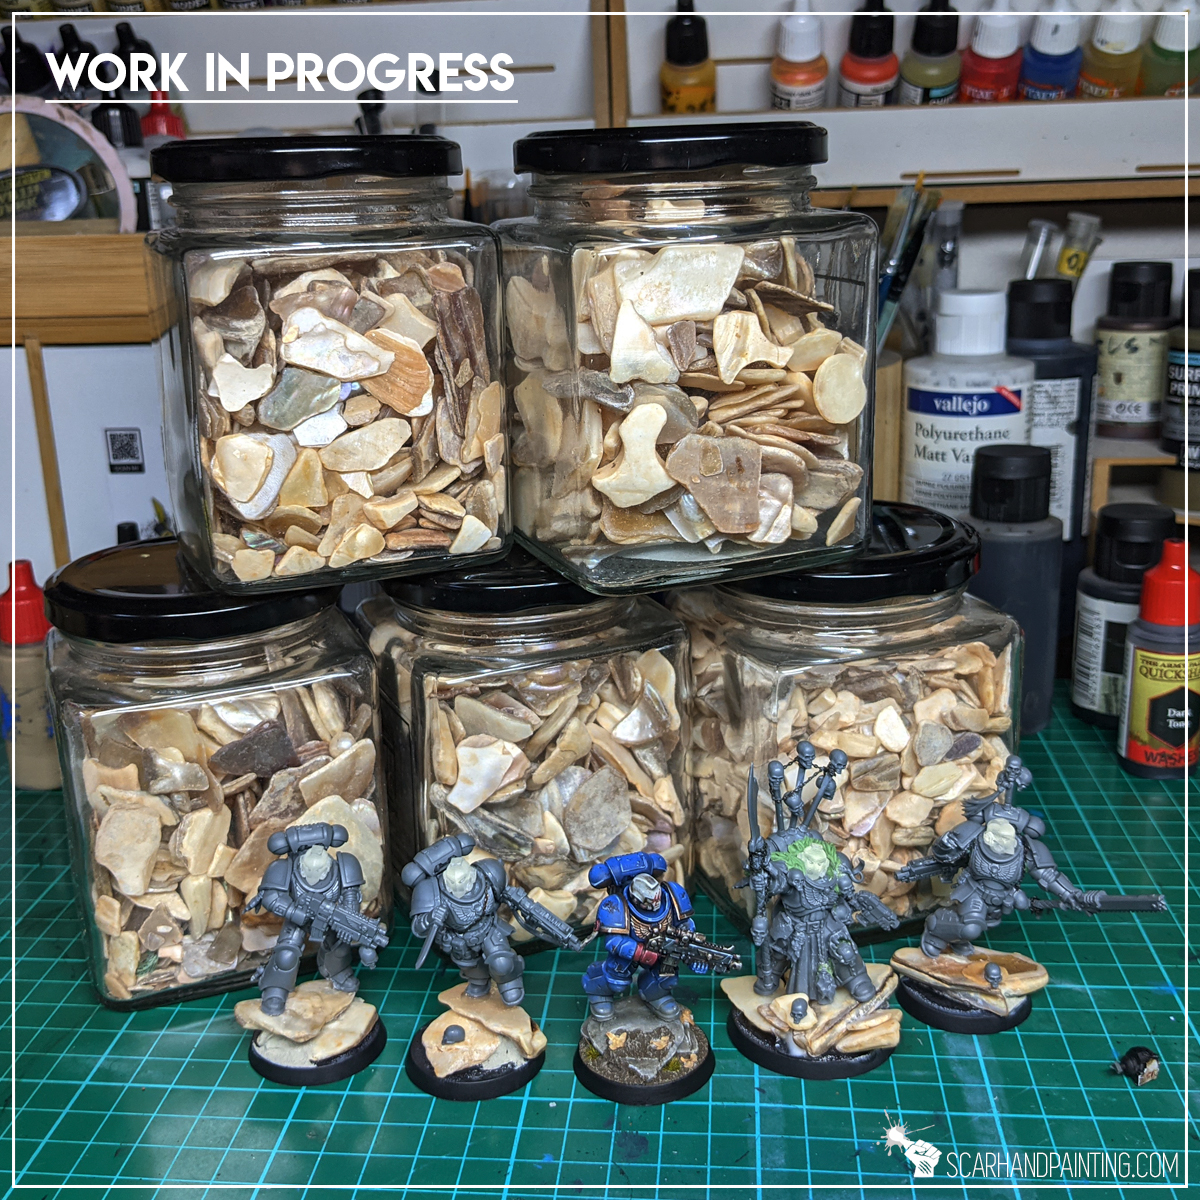
Let’s get it out of the way – yes, I am using natural stones. I like to have my miniatures heavy and stable on the board, plus trying to imitate the effect with self made elements would be rather time consuming. These particular stones are something I’m being asked about a lot, so here’s what I can tell you about them. The stones I’m using are regular decoration gravel from construction/home/garden stores. They are sold in small packages for about 1-2€. Unfortunately I do not know the professional name for this kind of stone, but am sure you will find similar stuff in either Ikea, or other home/garden stores. Below an old pic for reference.
Rocks out of the way, let’s rock! (You see what I did there?).
The modeling process is pretty straightforward, starting with base rock formation, after which the miniatures are mounted on top, everything gets undercoated then painted. Lastly the second part of modeling kicks in with textures and finishing touches.

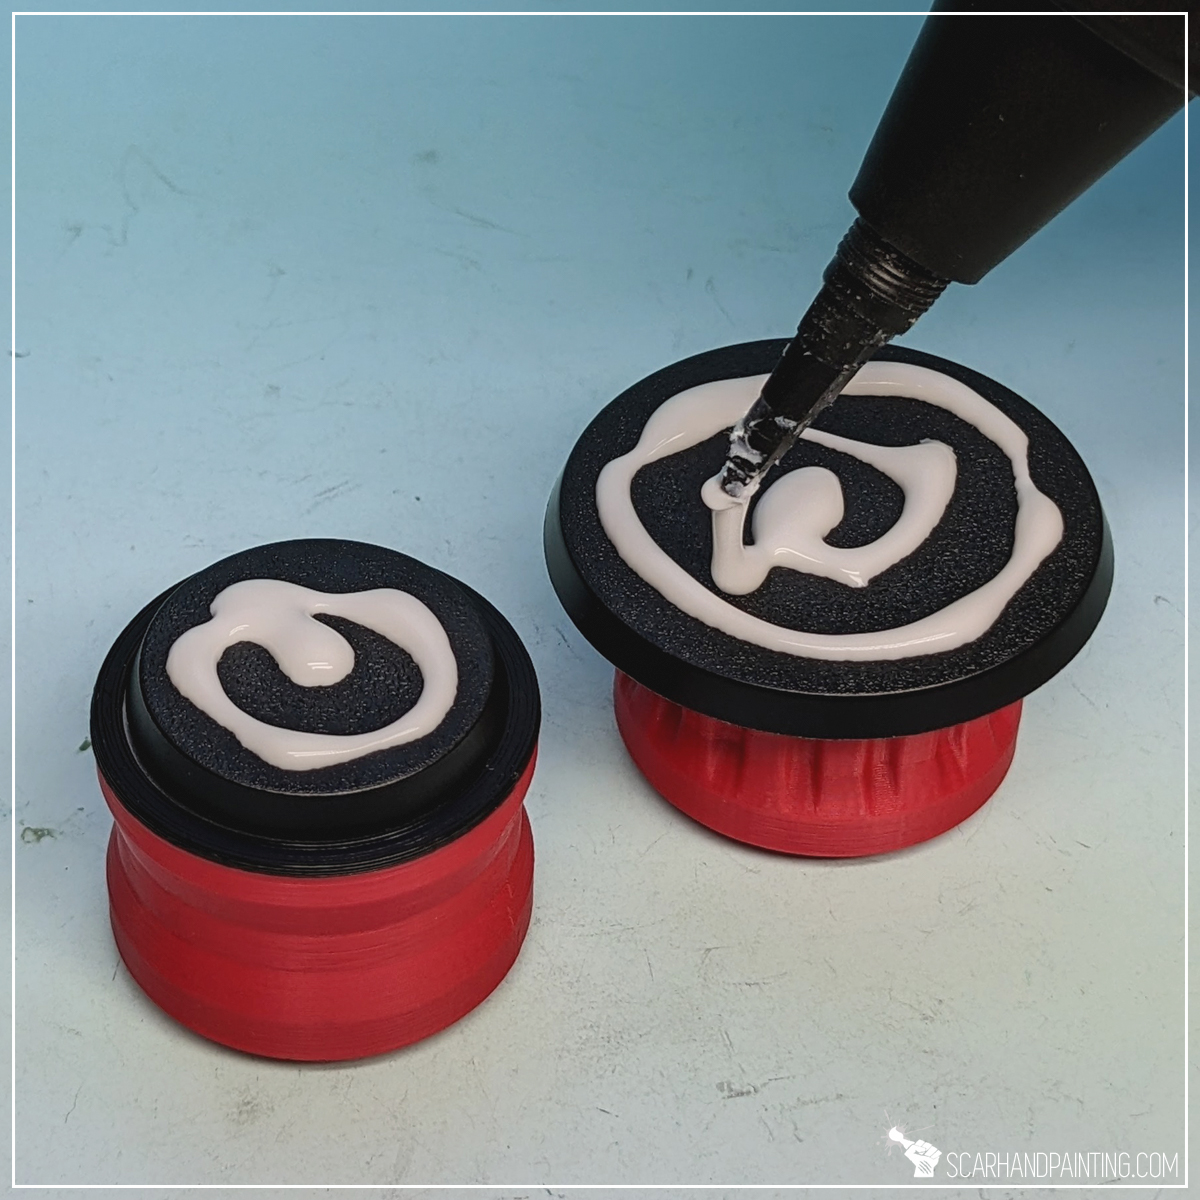
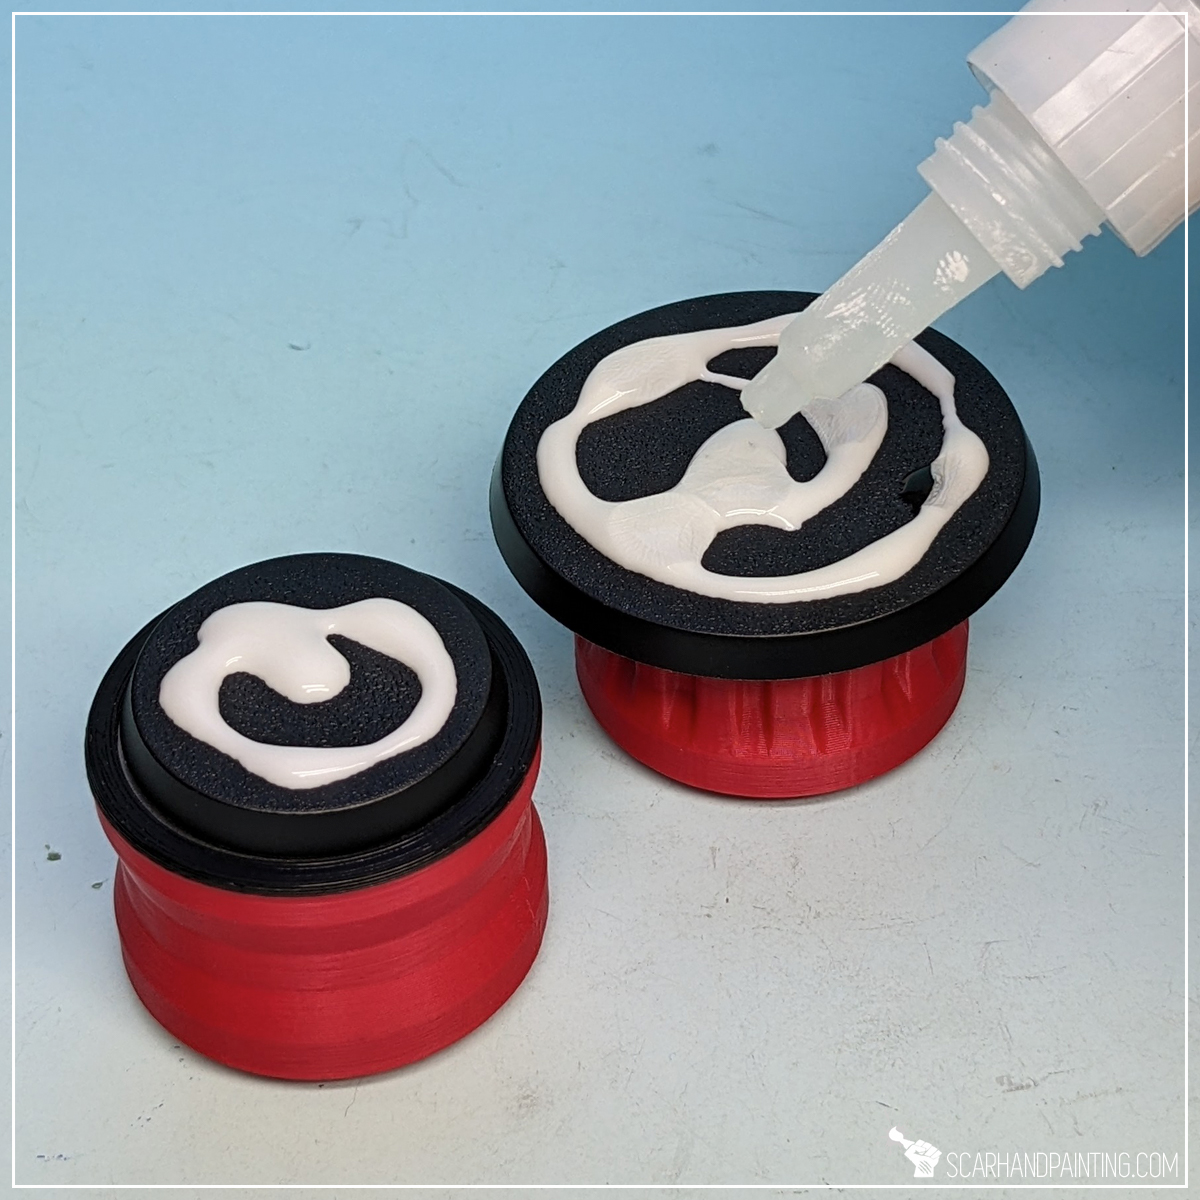
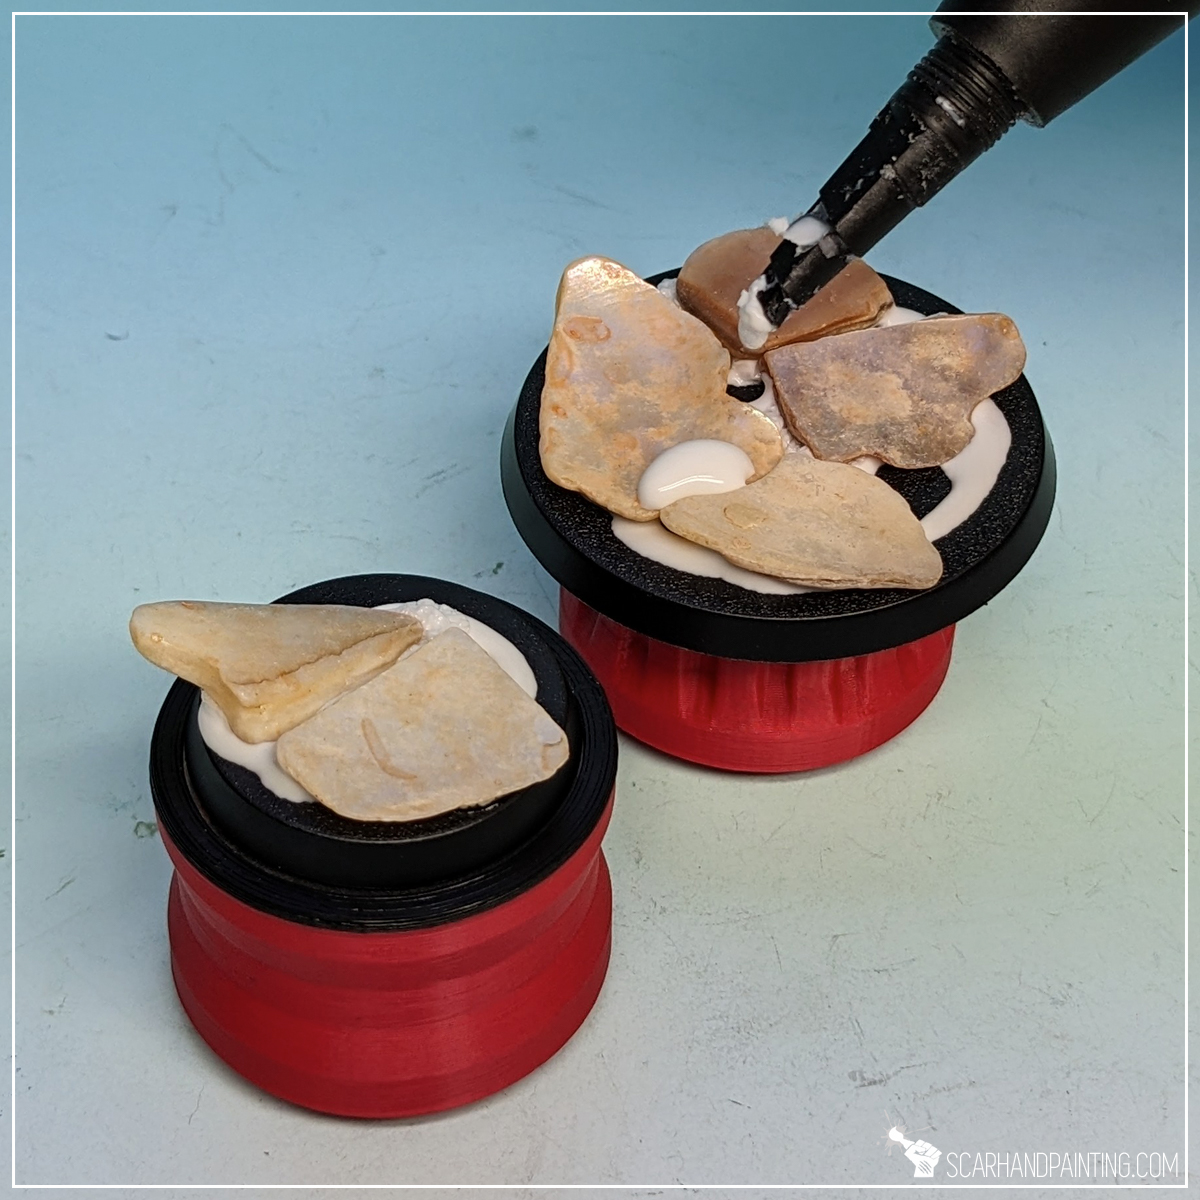
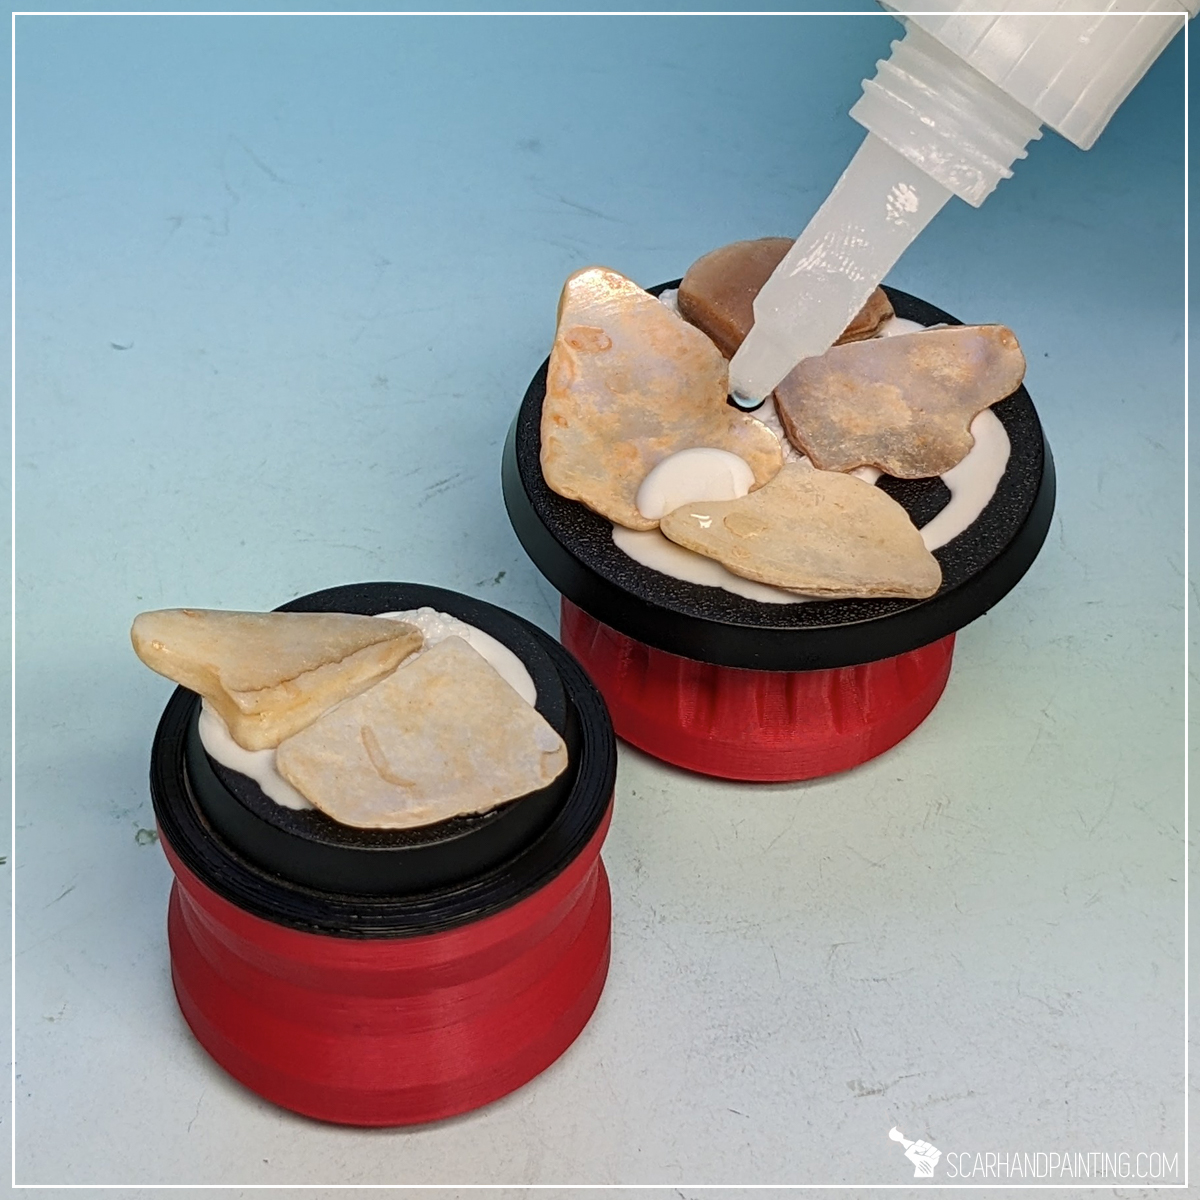
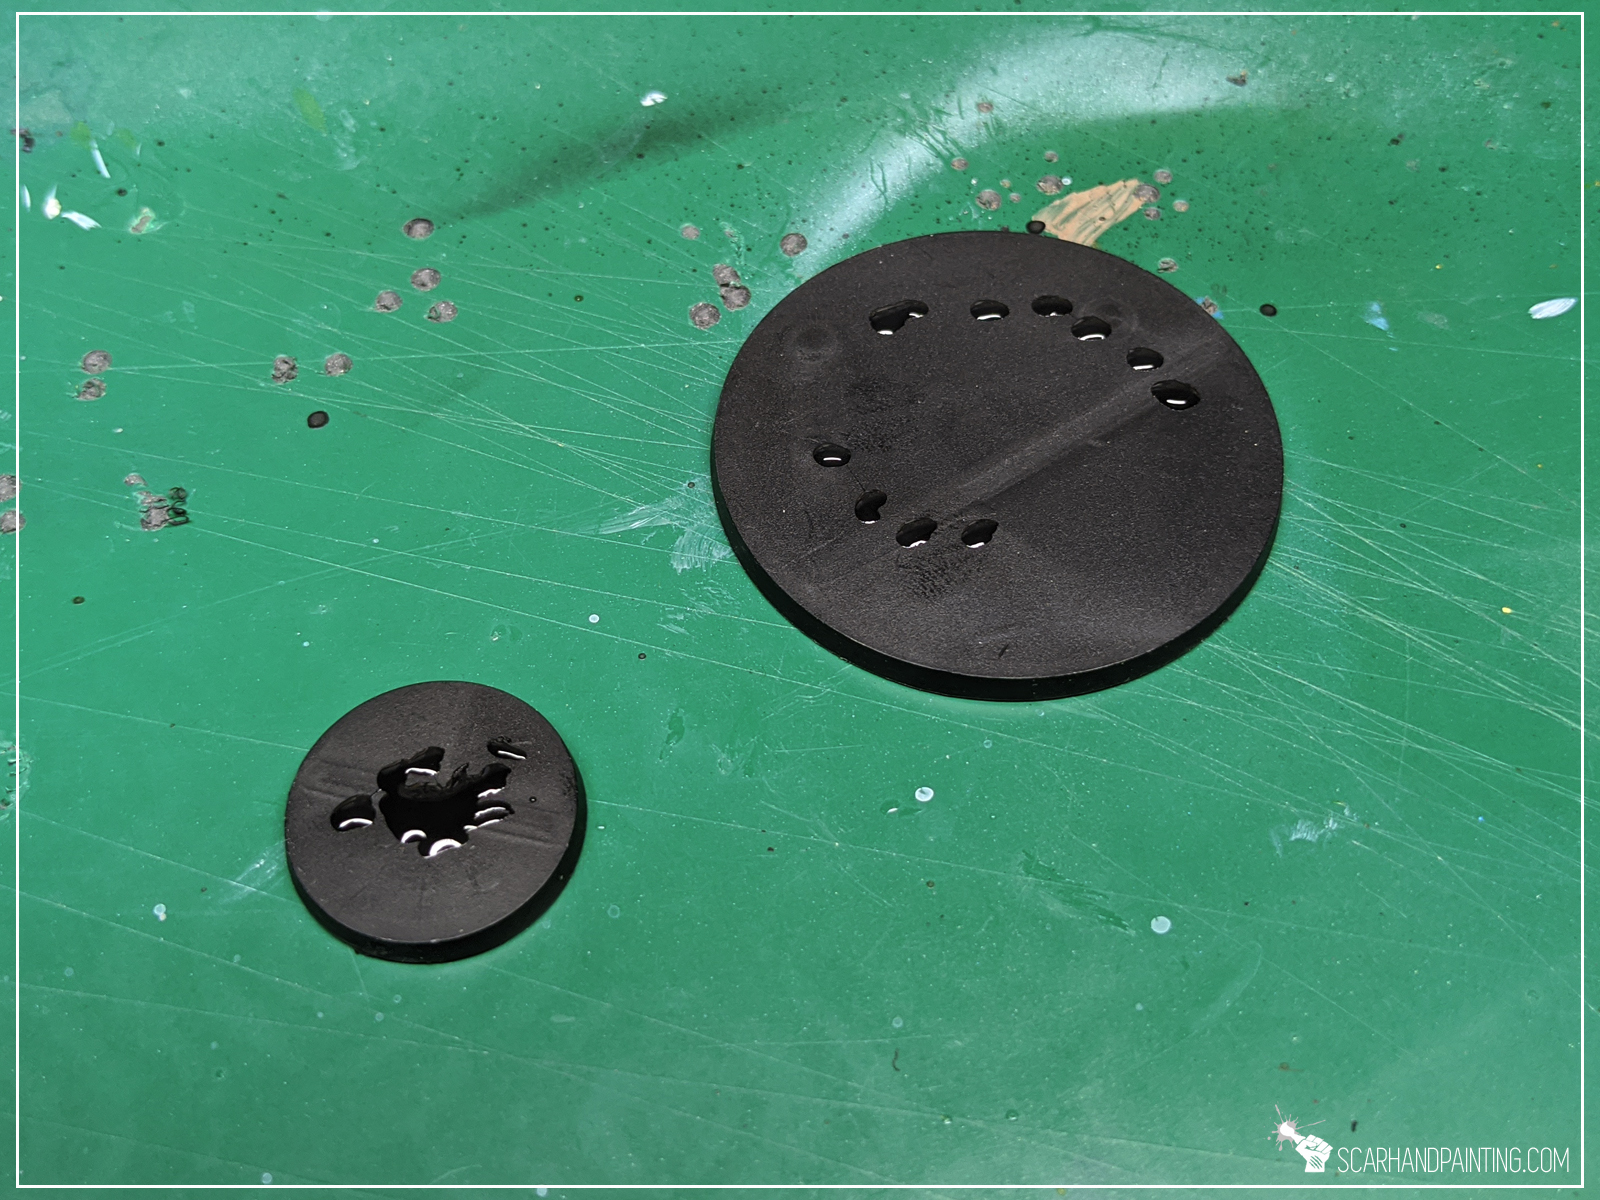
Step one: Rock formation
I started by applying PVA glue on top of the base. There’s no need to keep this one smooth – a clumsy random layer will suffice. Next I applied few drops of super glue on top. Finally I put few flat stones on top. Both glues mixed under preassure, filling most gaps between the stones and keeping them in place.

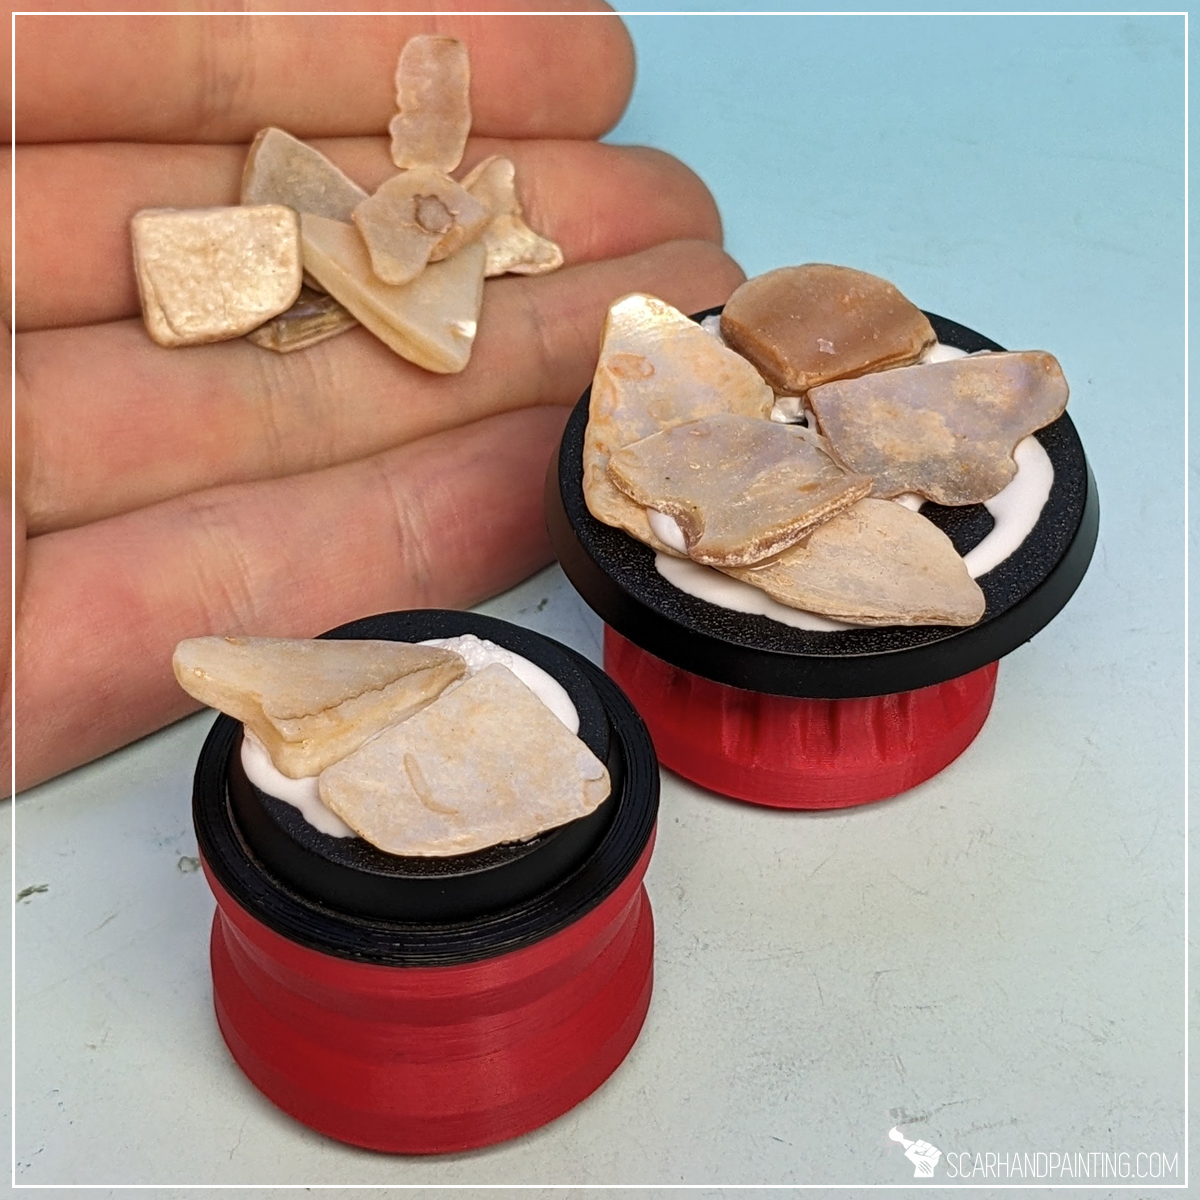
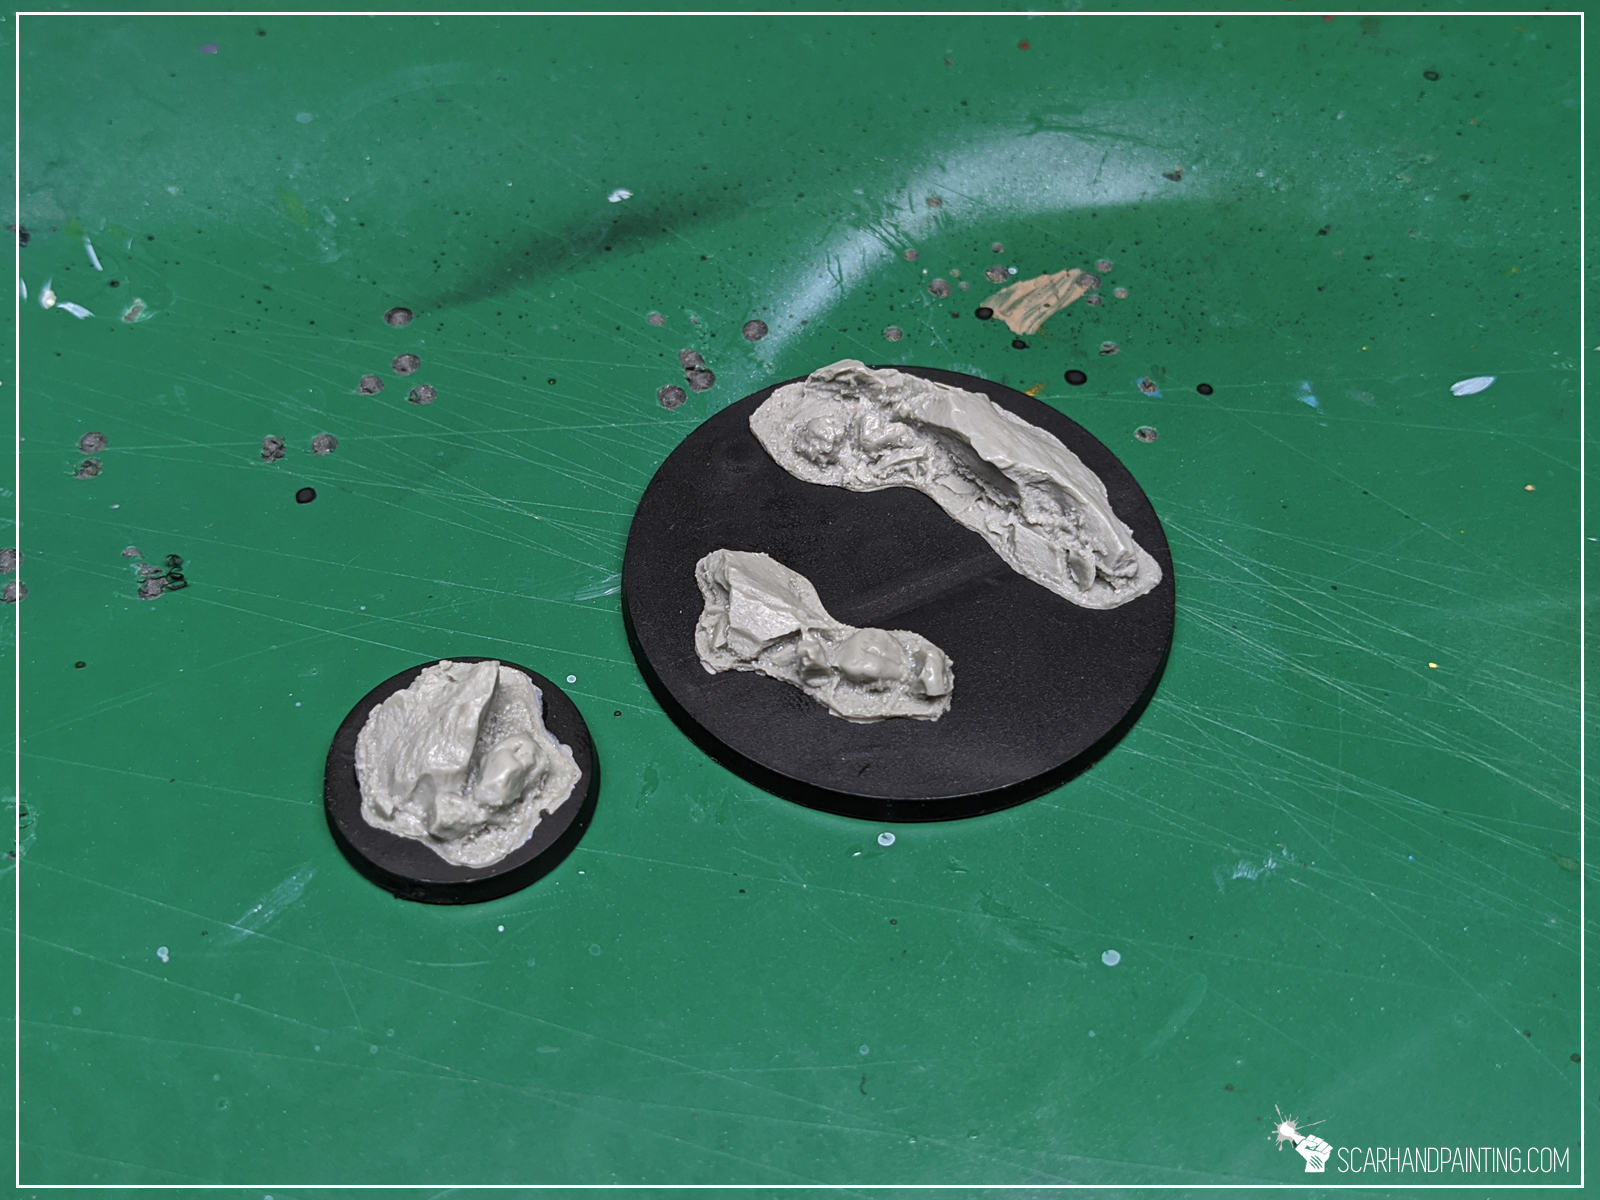
Step two: Increased Volume
Depending on the size and future assignment of the base I sometimes add volume to the rock formation. Some miniatures have one leg slightly raised, or I just want to get a more dynamic posing for my Astartes characters. Having that in mind I applied a drop of PVA glue followed by a drop of super glue and added another stone on top.
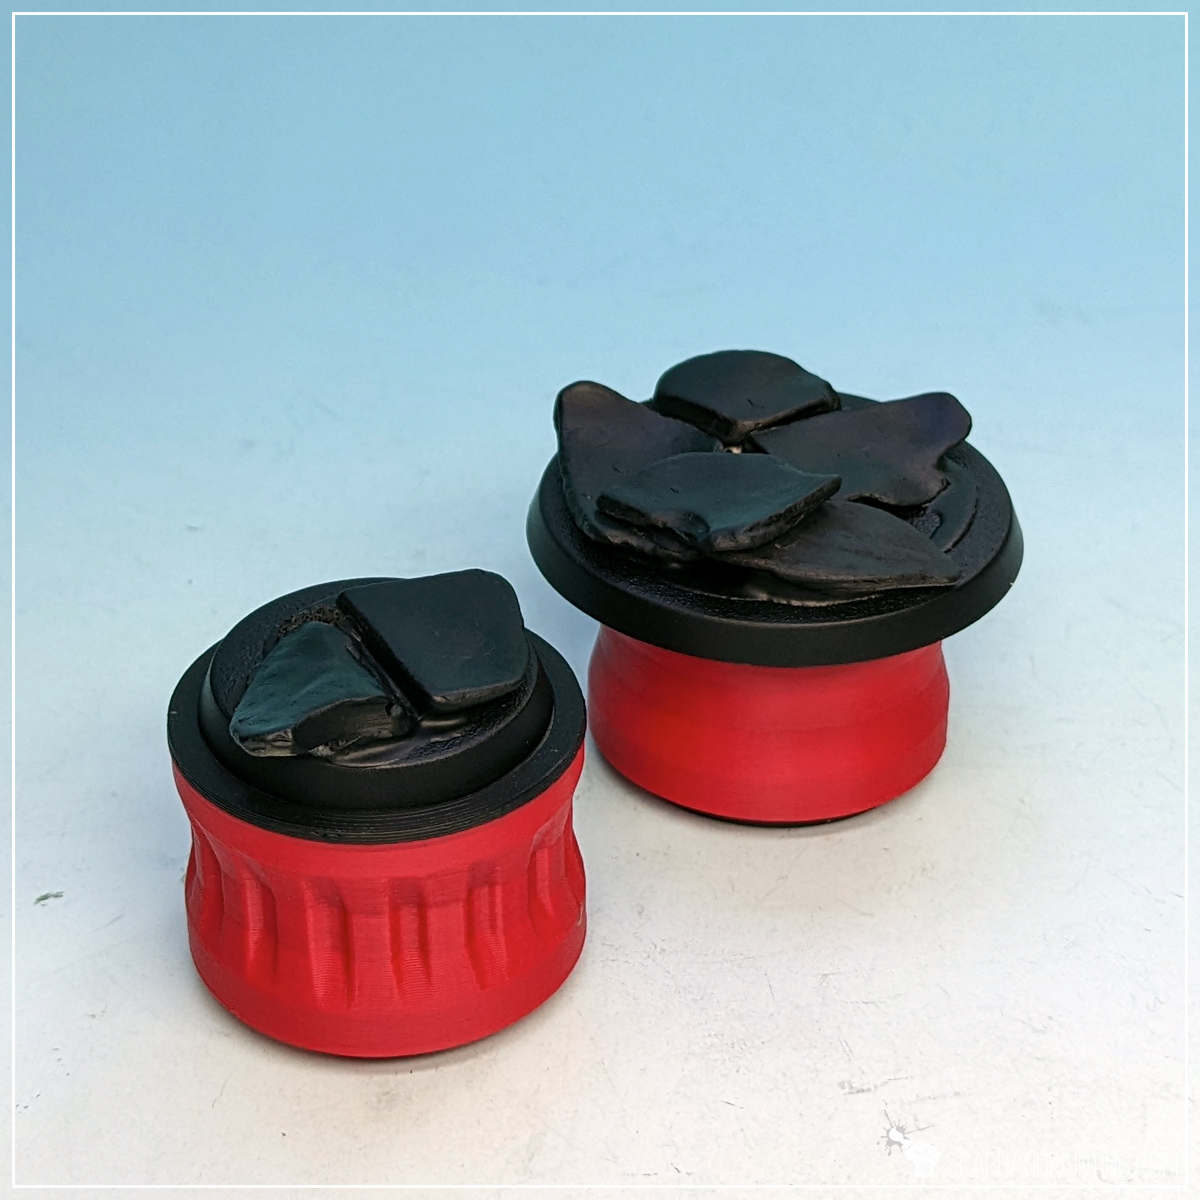
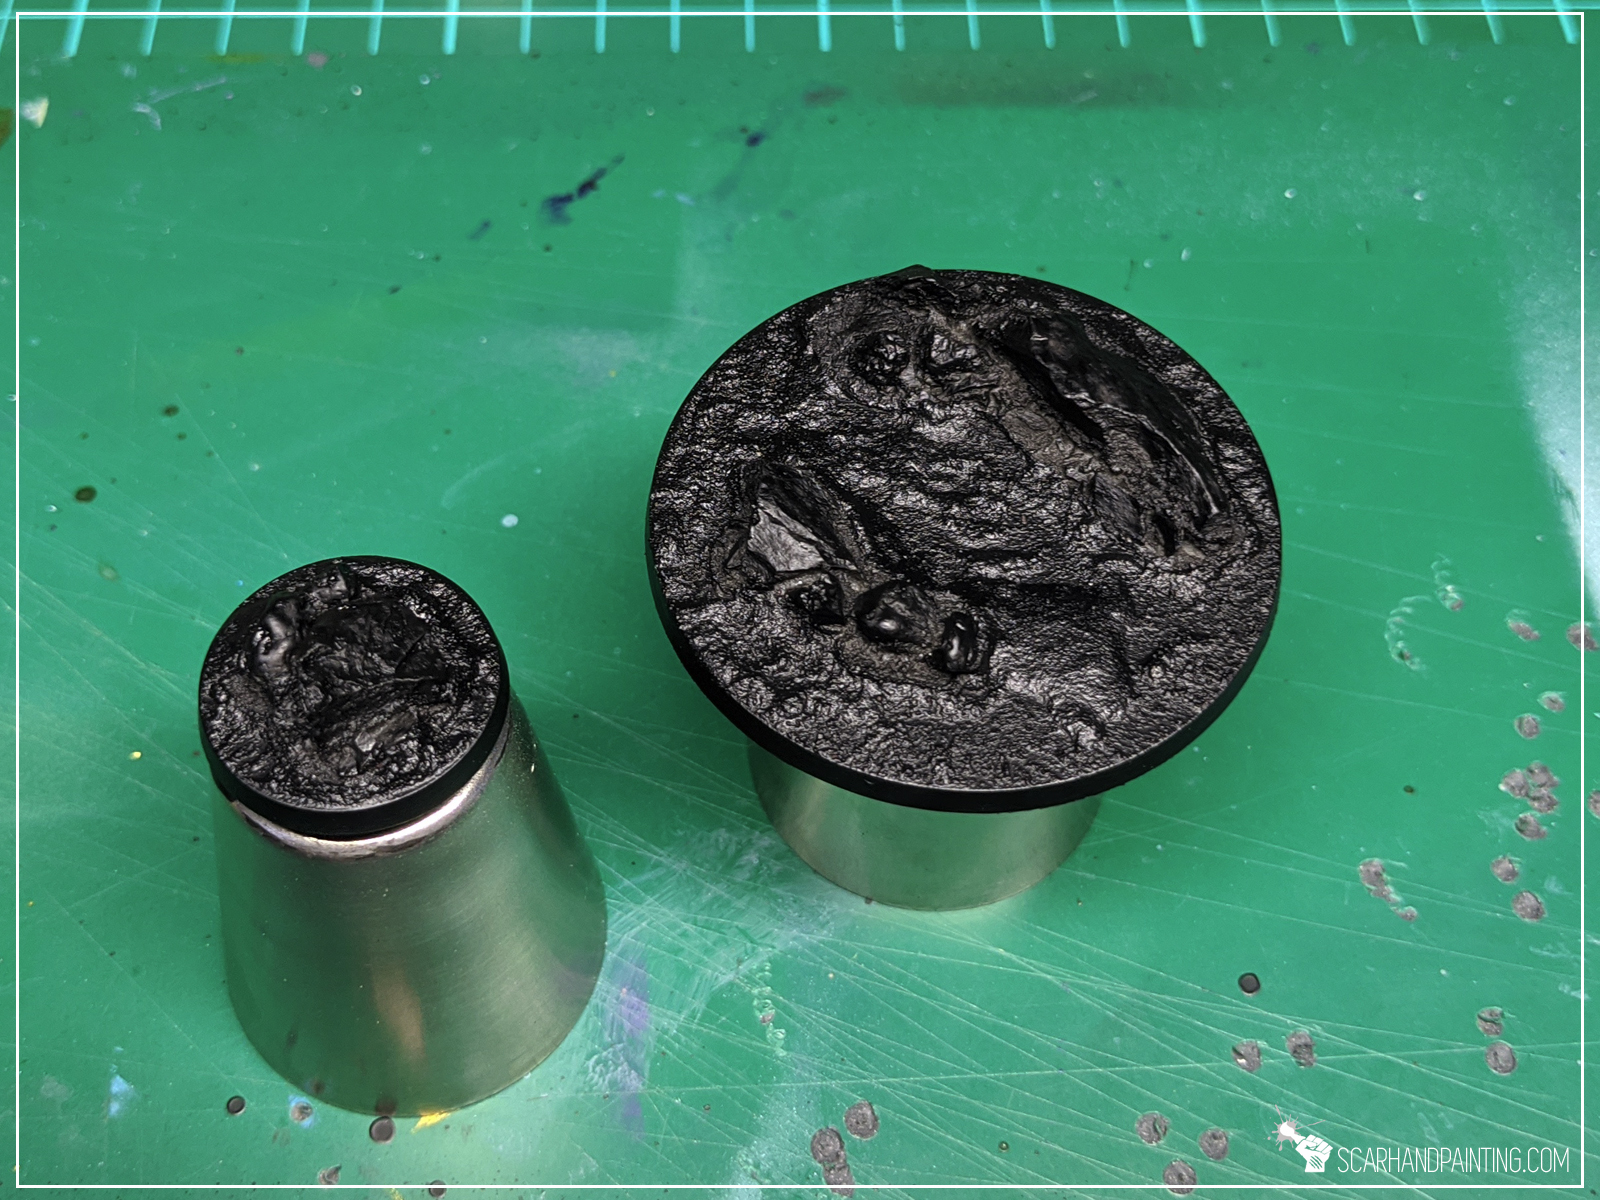
Step three: Undercoat
Once the mix of glue dried up nicely I moved to undercoating. This was done with a smooth layer of Citadel Chaos Black spray primer.
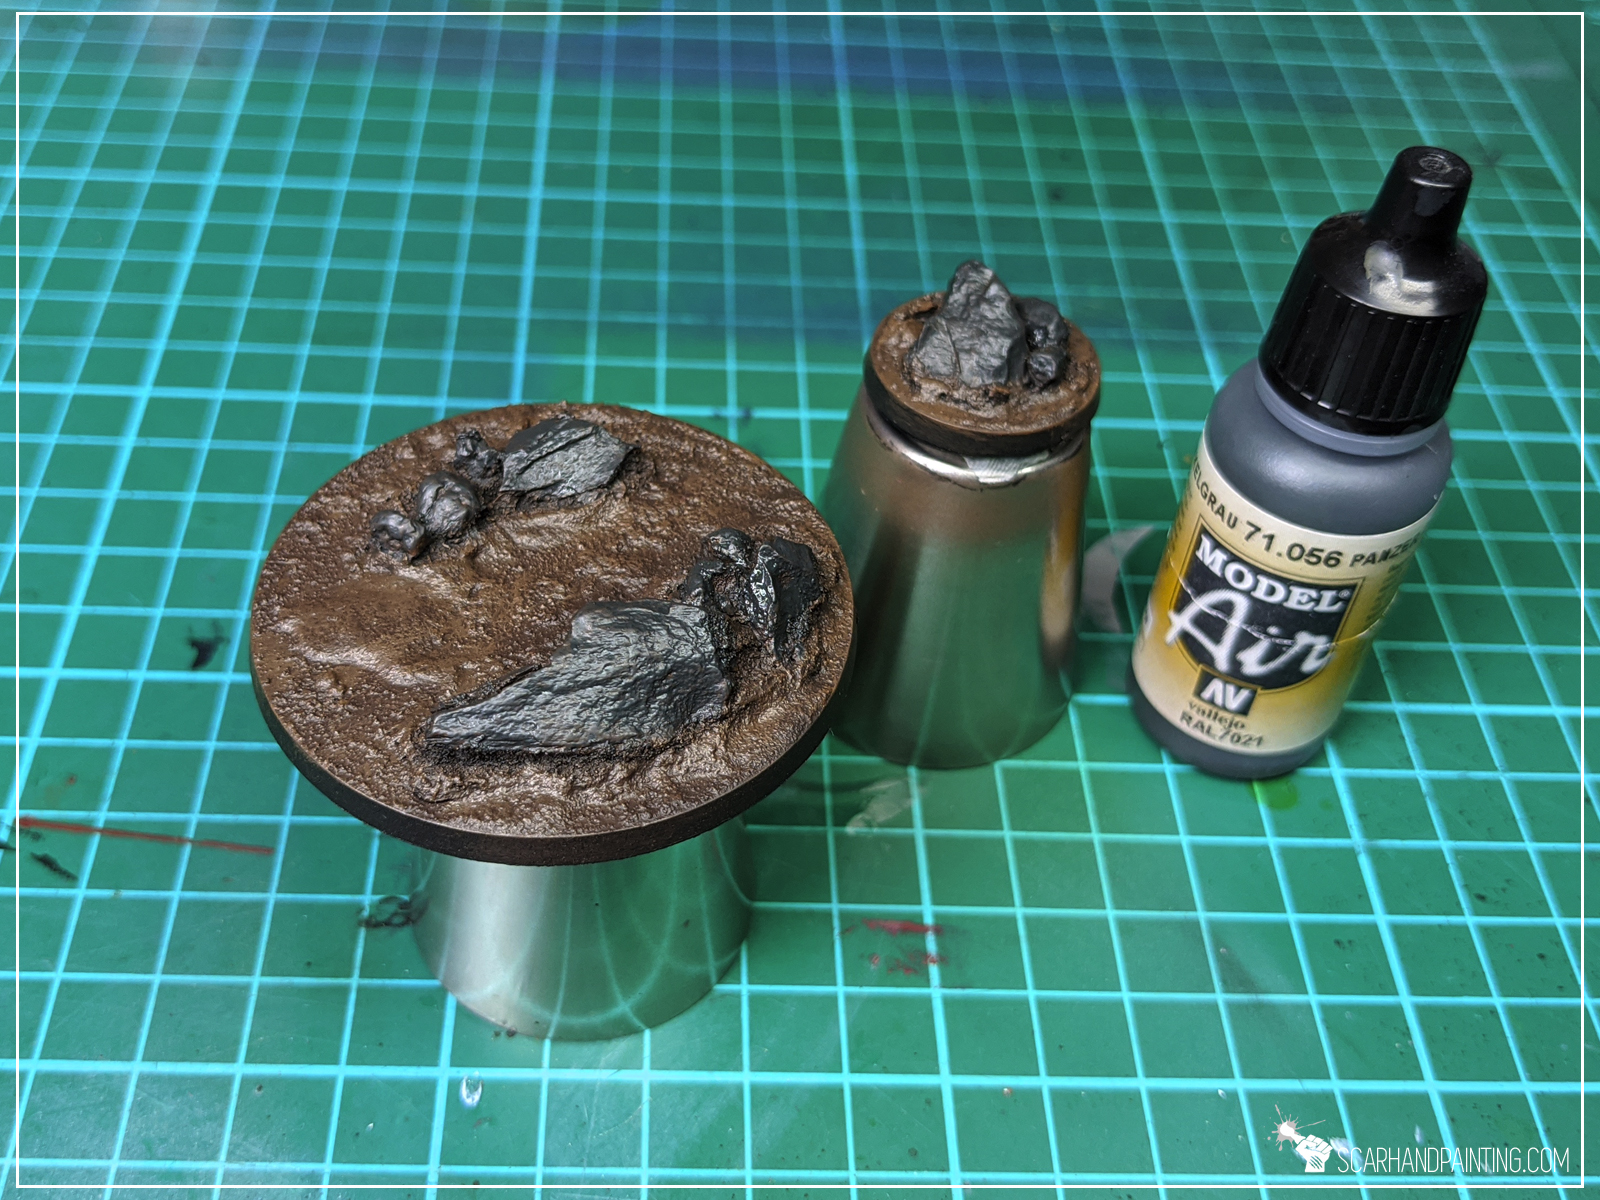
Step four: Base Color
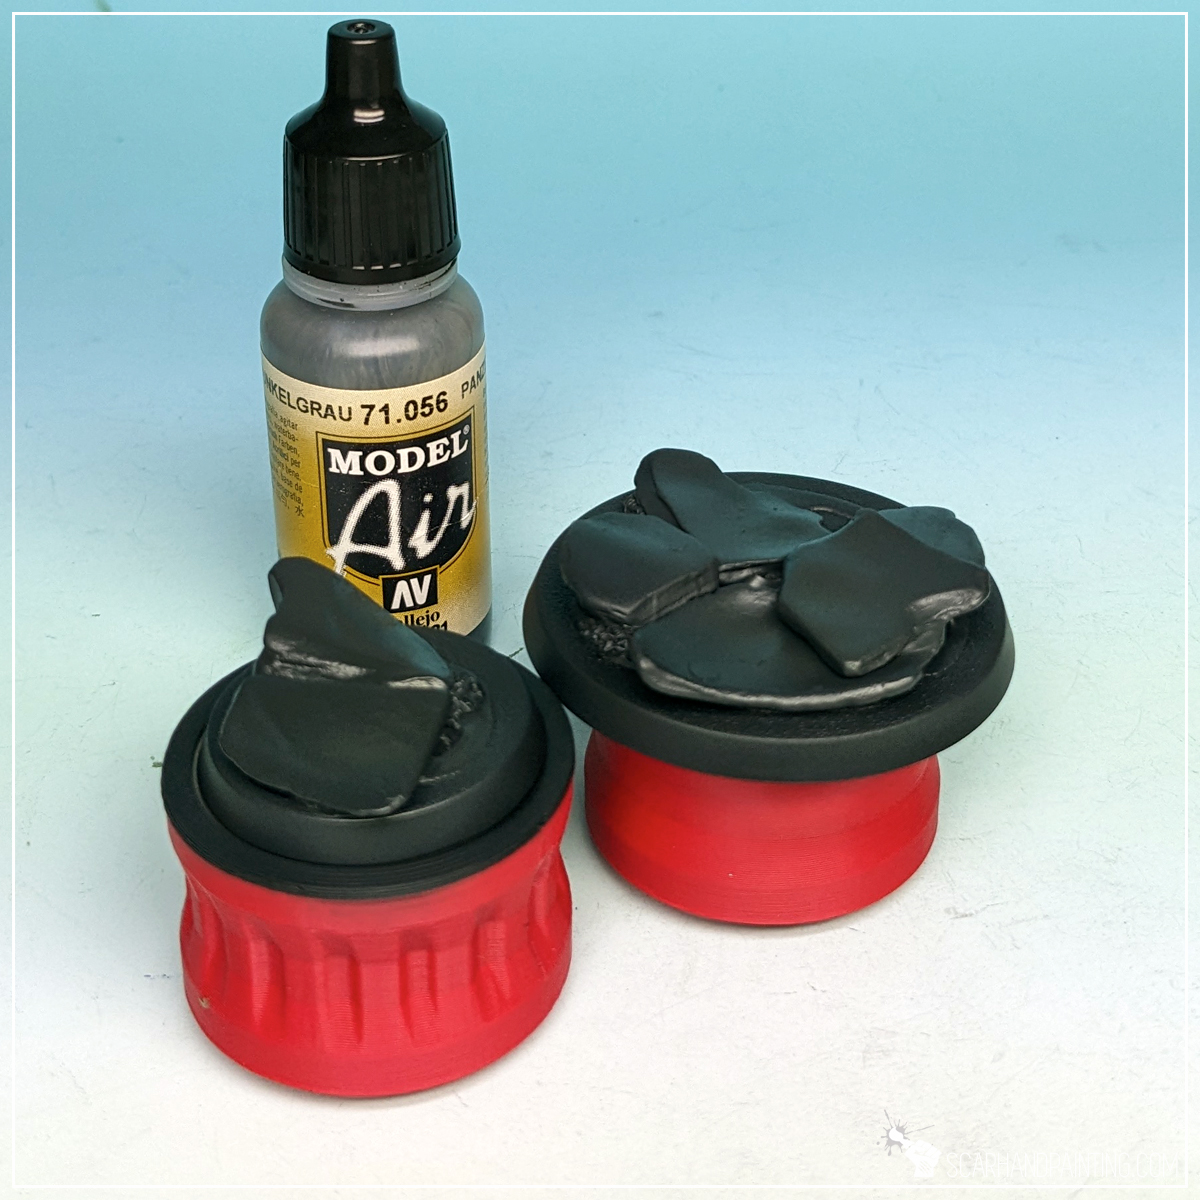
I started painting by airbrushing a strong layer of Vallejo Panzer Dark Grey (air), straight from the pot. I then applied a slightly thinned Vallejo Light Grey Green (air), followed by Vallejo Cold Grey (air). In both cases I tried to reduce the area of paint to add color differentiation.
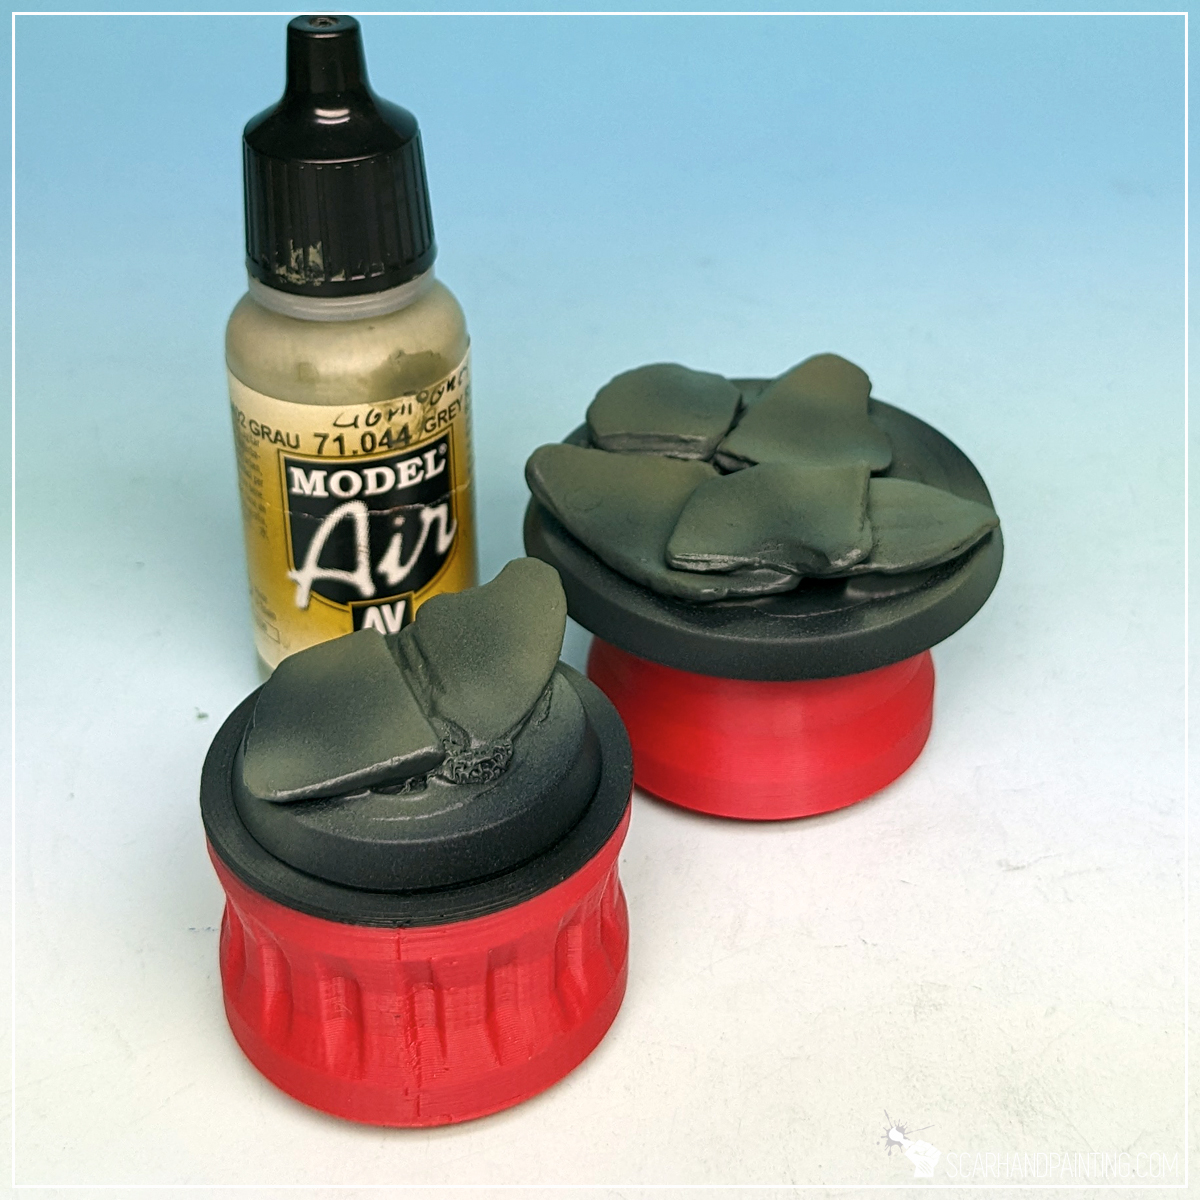

Step five: Highlights
Next I applied a drybrush of Vallejo Medium Sea Grey all over the bases, followed by edge drybrush of Vallejo Wolf Grey. Finally I softly airbrushed Army Painted Strong Tone Quickshade onto the middle points of each individual stone on the base, and slightly around. All of this to add more visual volume.


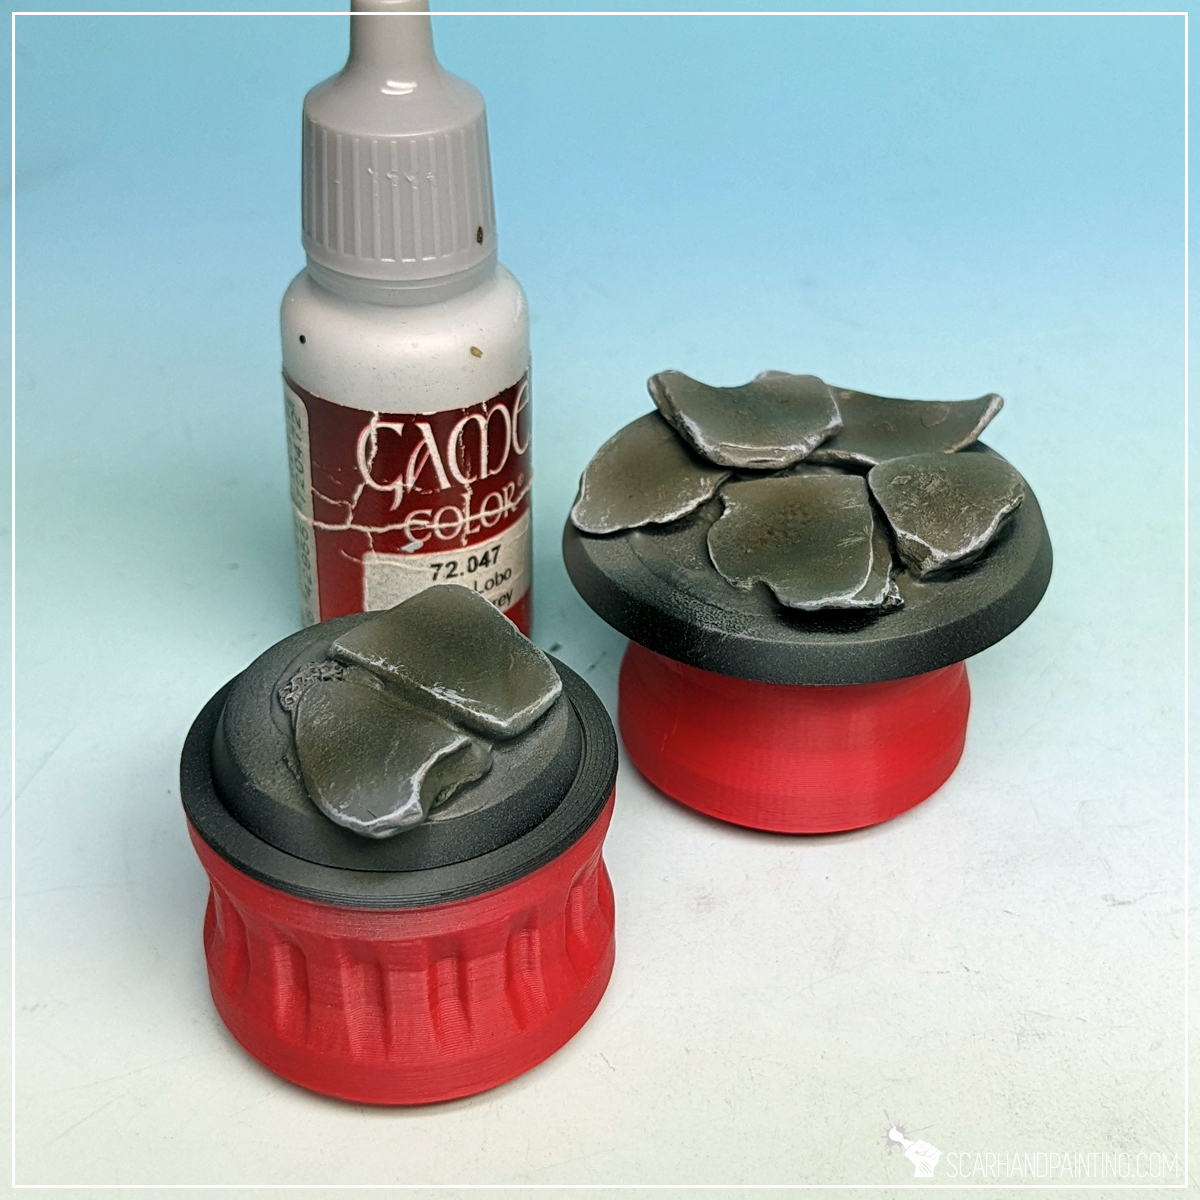
Step six: Final Highlighs
I then stippled a bit of Vallejo Wolf Grey on the edges of each individual stone, to make them stand out a bit more.
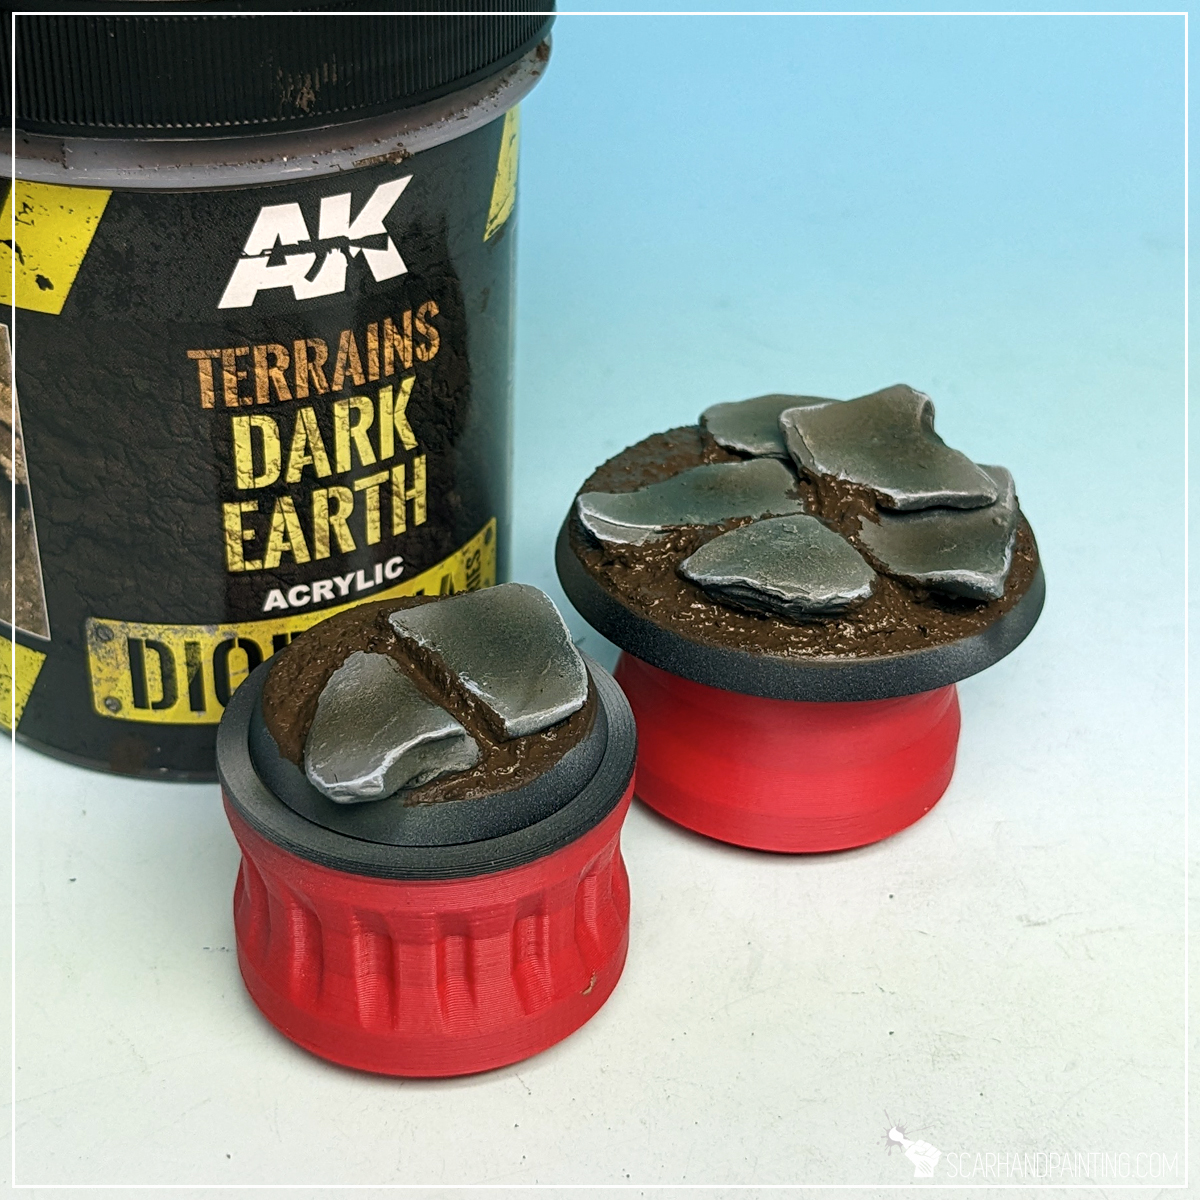
Step seven: Ground Texture
Next I moved to my favorite texture of all time – AK Interactive Dark Earth diorama series that you can learn more about here. I applied a thick layer of the texture, let it dry than drybrushed Citaled Karak Stone on top.

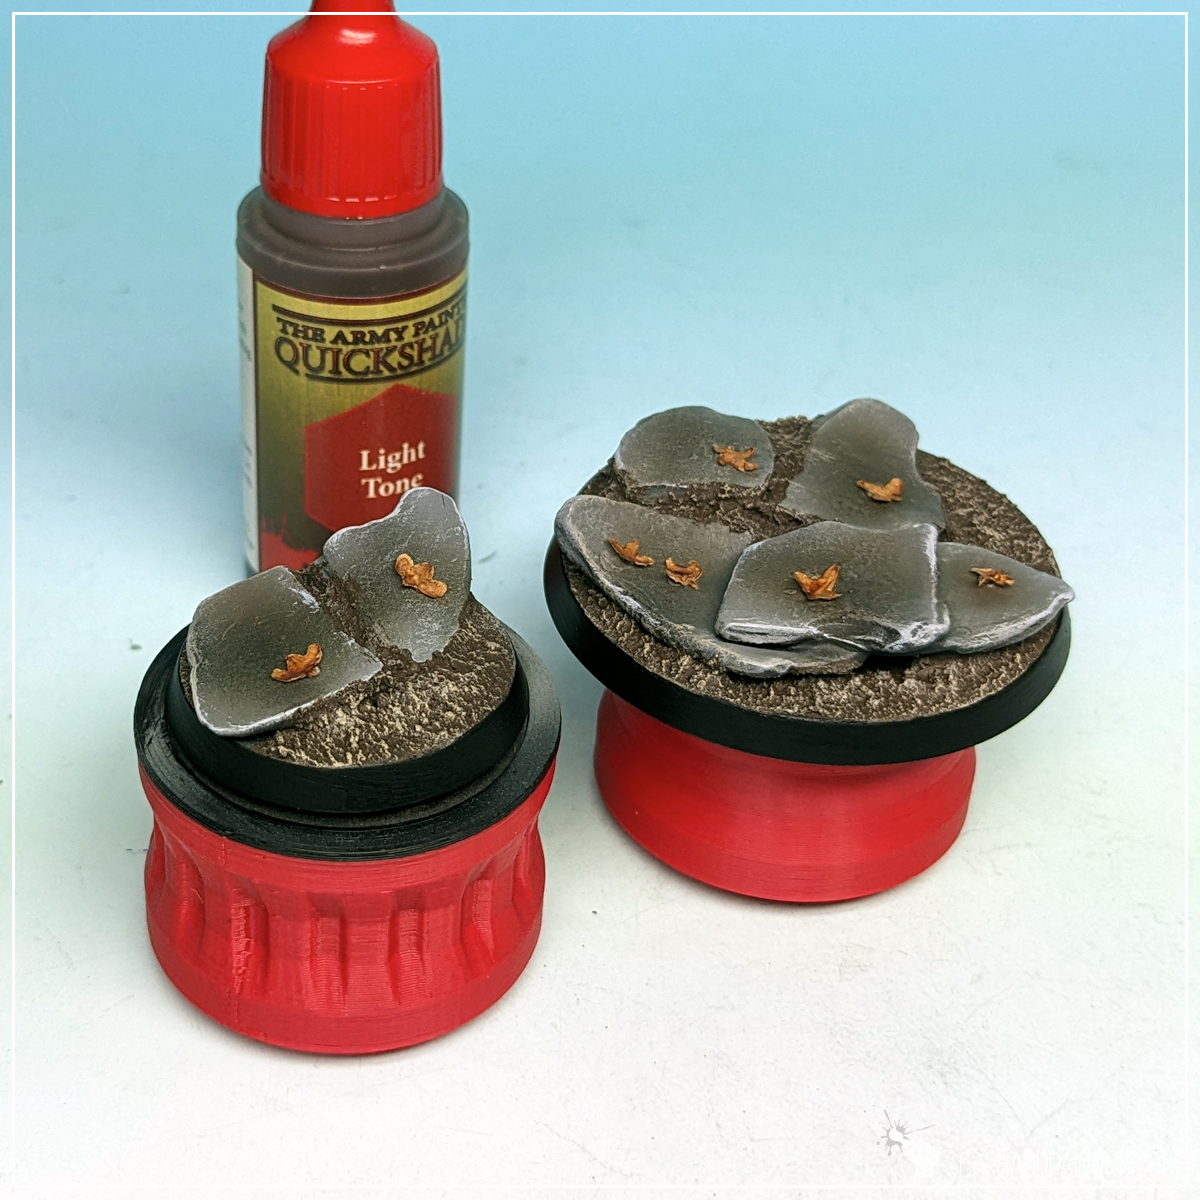
Step eight: Leaves
Then I applied few small drops of super glue and put a Birch tree seed on top of each. Once dry, leaves got painted with Army Painter Soft Tone Quickshade, to add color depth and just some durability.

Step nine: Final Touches
Finally I repainted base’s edges black and airbrushed a strong layer of Vallejo Polyurethane Matt Varnish all over. Job done.
I hope you find this tutorial interesting. Be sure to let me know your thoughts in the comments below, or at Facebook or Instagram. I would also appreciate it if you considered sharing this content with your friends, who might find it useful. Finally if you are looking for a professional miniatures painting service, be sure to contact me with this contact form. I always reply within 24 hours, after which please check out your spam folder.
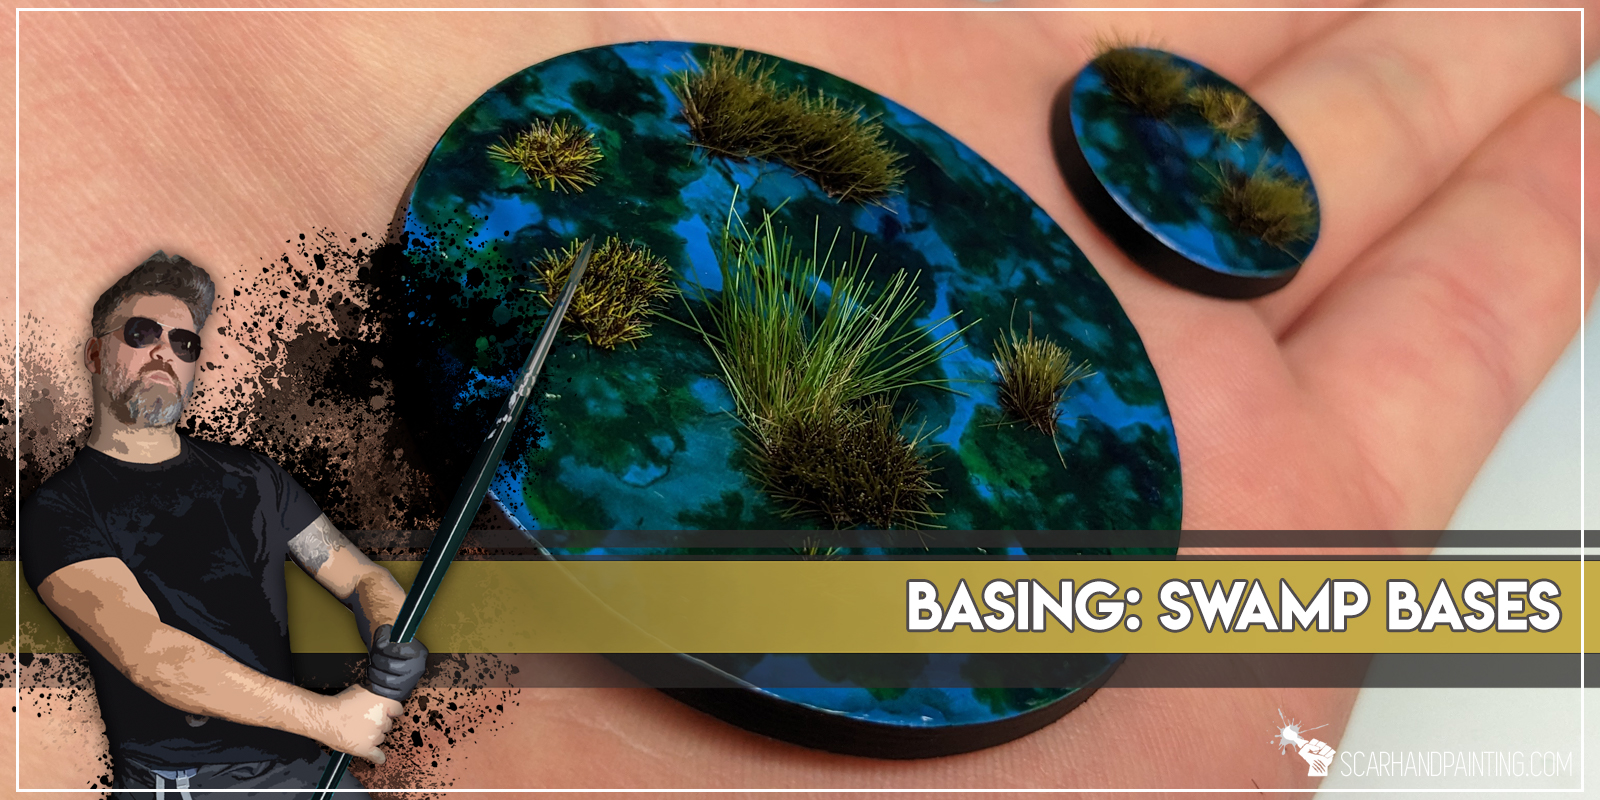
Welcome to Painting Swamp Bases tutorial. Here I will take you on a Step-by-step trip through the process of creating Swamp Bases the same way as seen at: Gallery: Infinity Varuna.
Before we start, some notes:

Step one: Undercoat
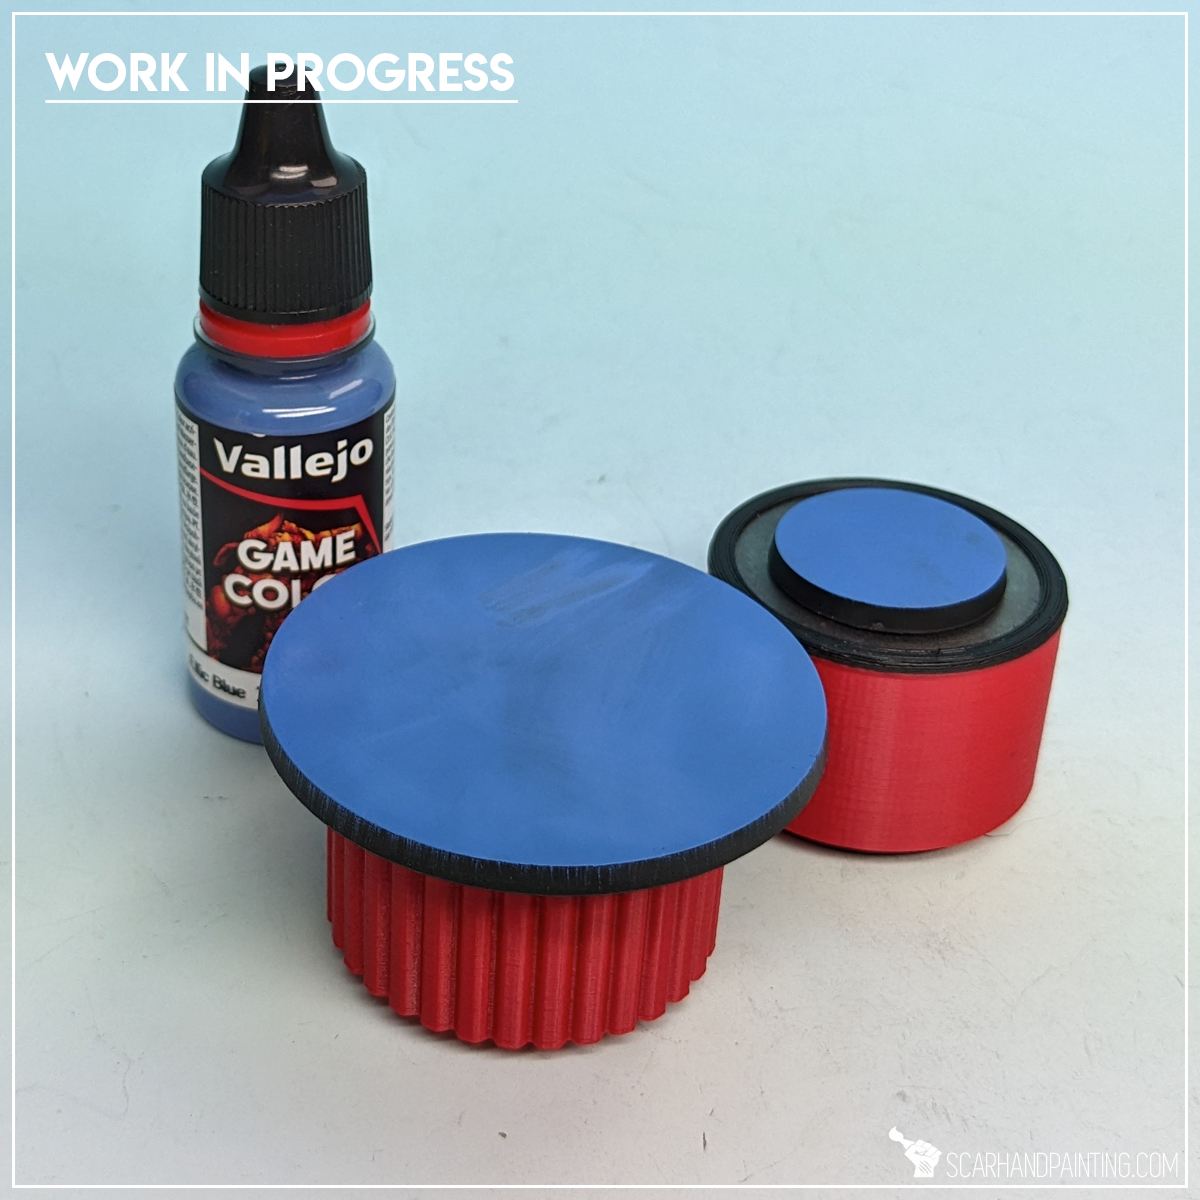
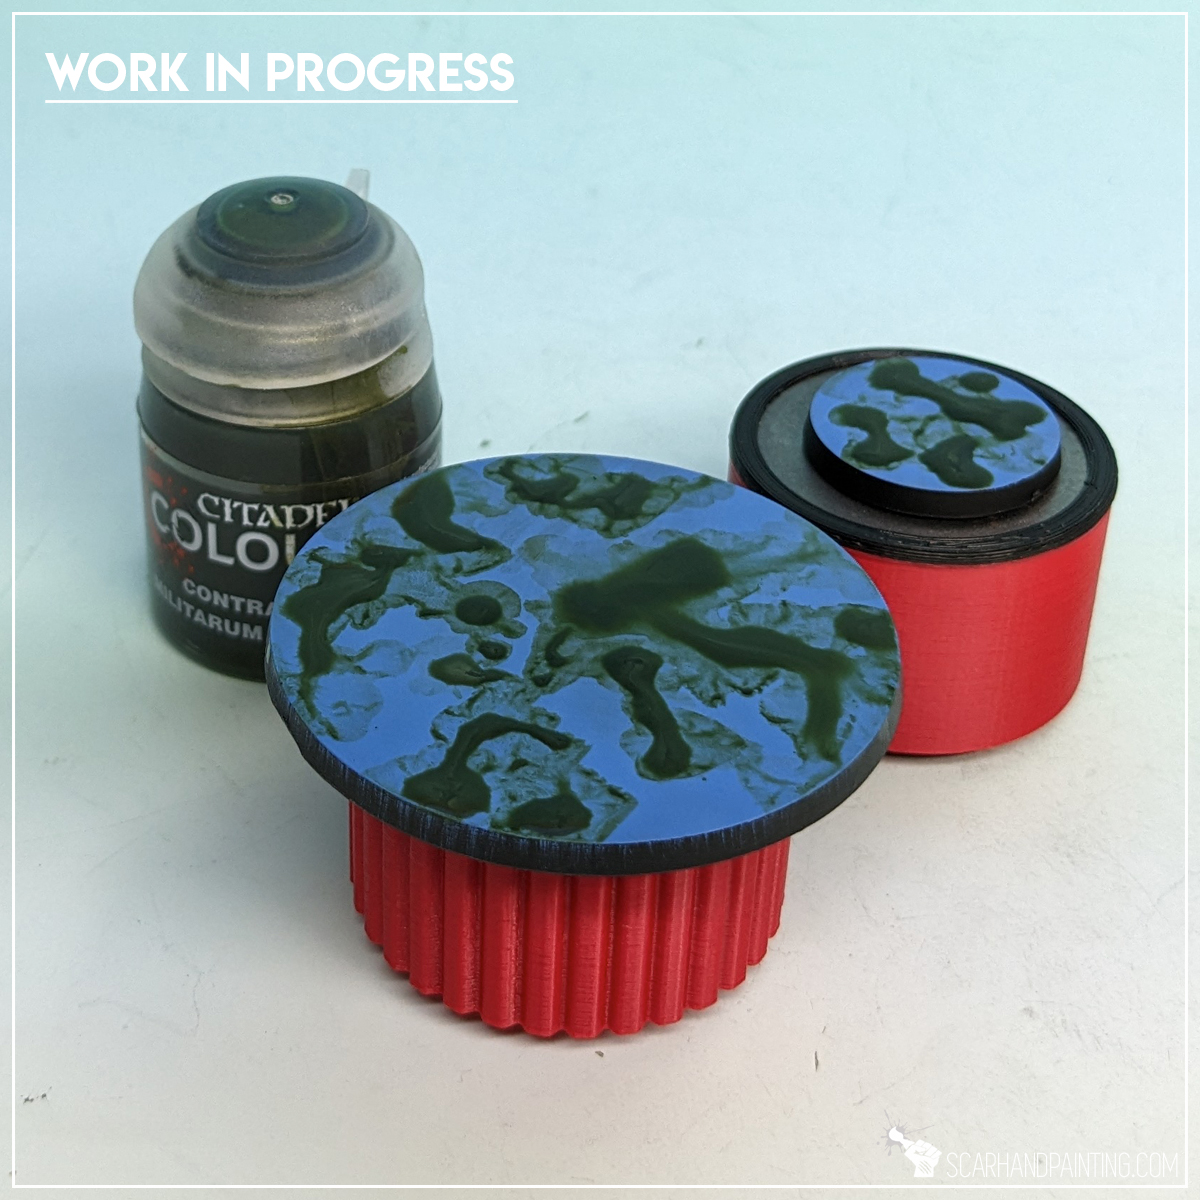
I started with a relatively smooth layer of Vallejo Elfic Blue. Any similar color would fit and I encourage you to experiment.
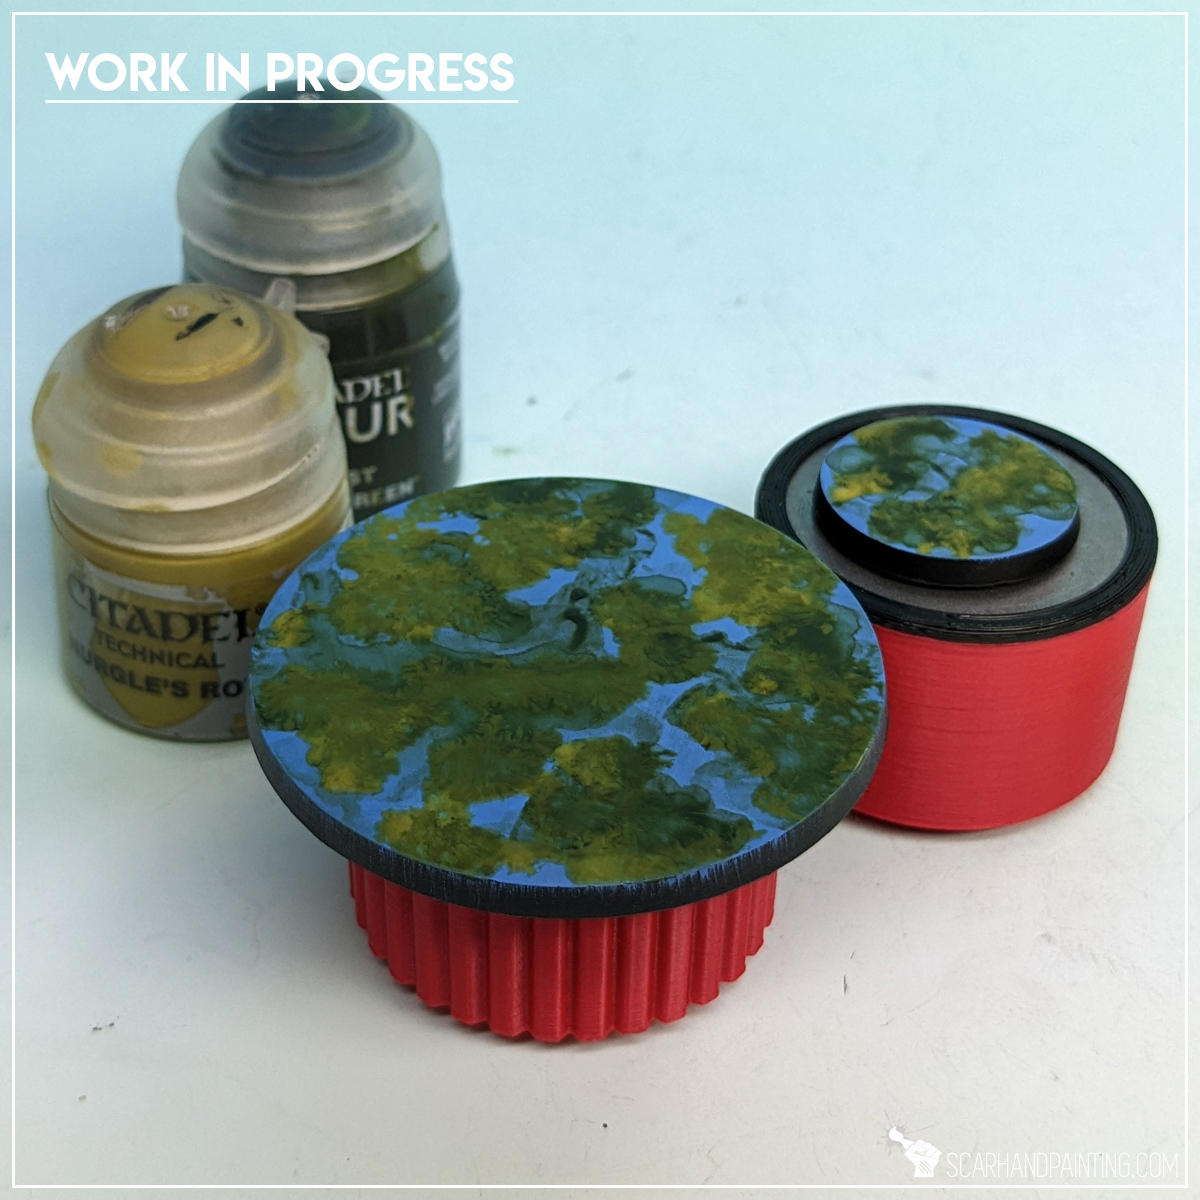
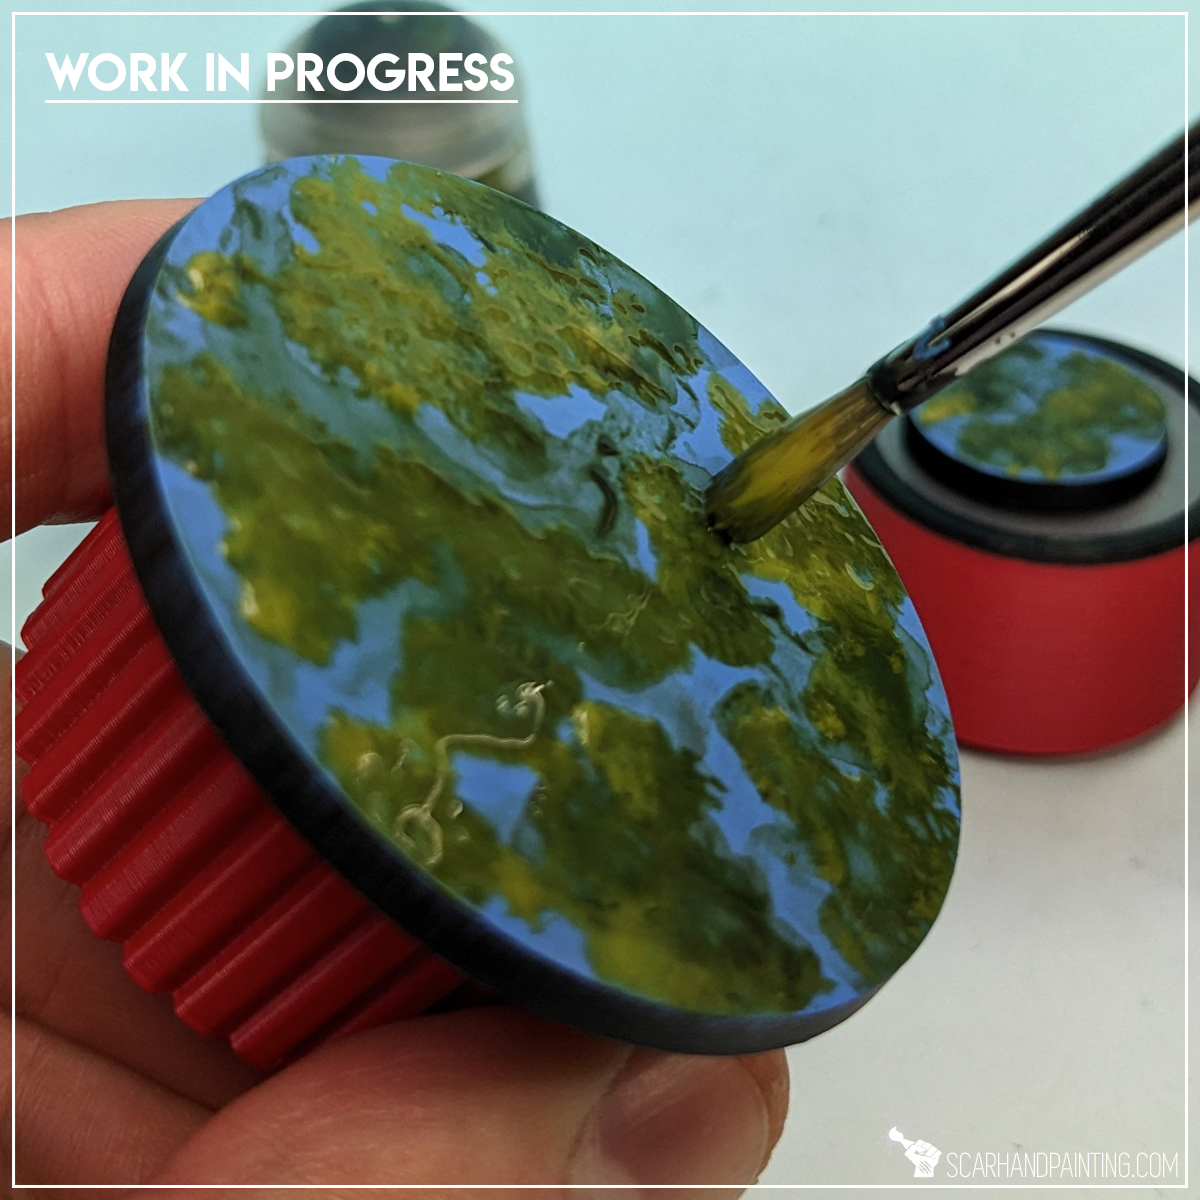
Step two: Underwater Plants
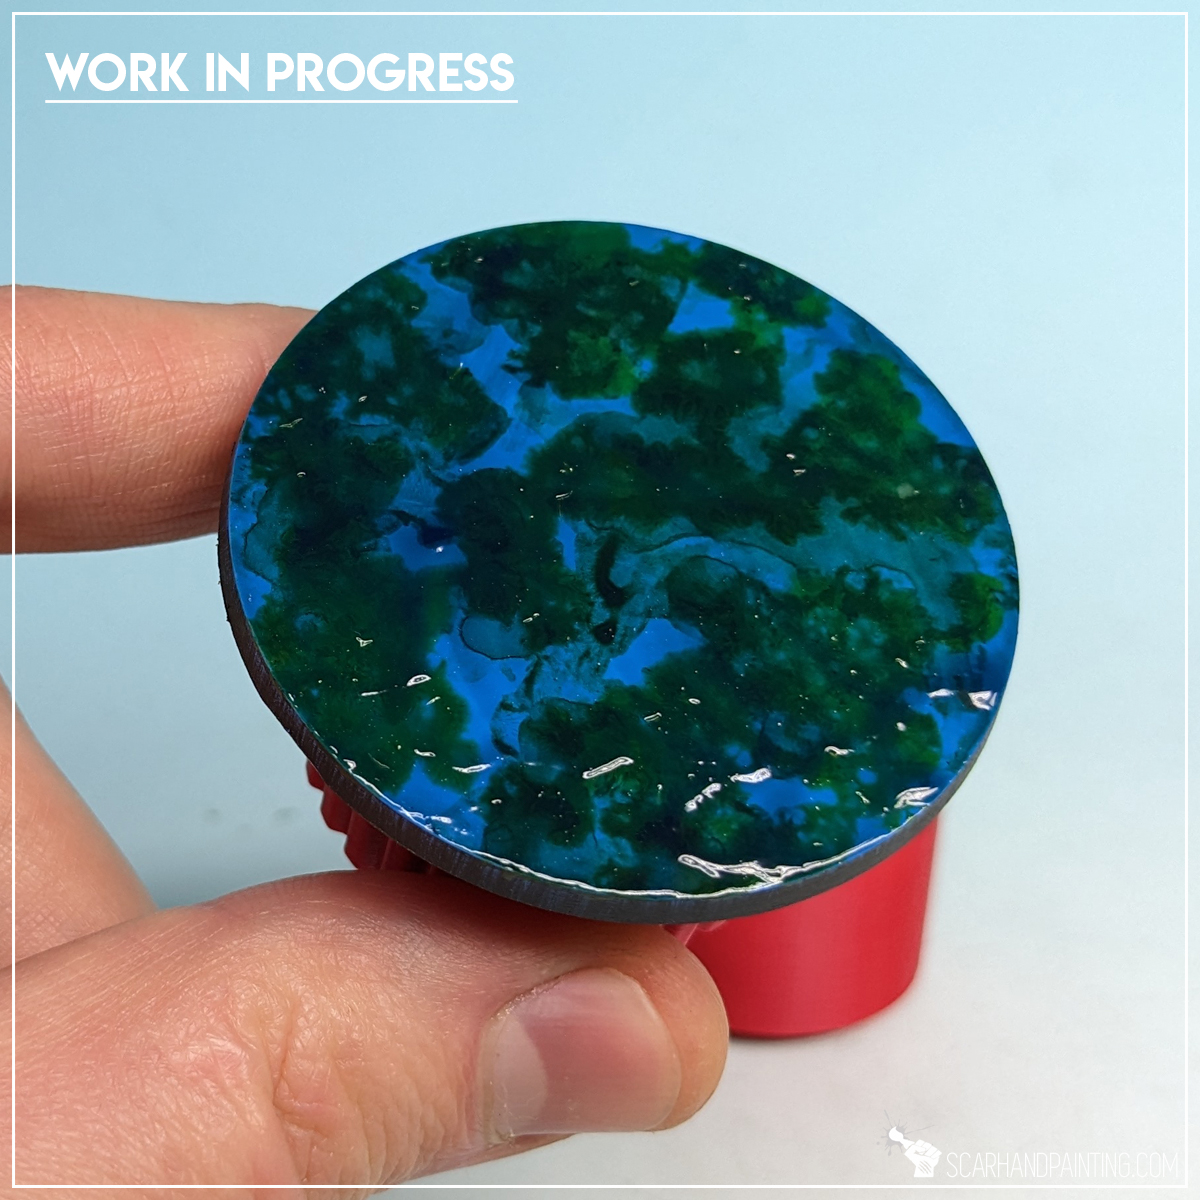
Next I applied spots of Games Workshop Militarum Green Contrast mixed with a bit of water, followed short by Games Workshop Nurgle’s Rot on top. I used relatively large, soft brush to ‘stipple’ Nurgle’s Rot on top of still wet Militarum Green. These paints do not mix well, precipitating and creating interesting patterns in result.
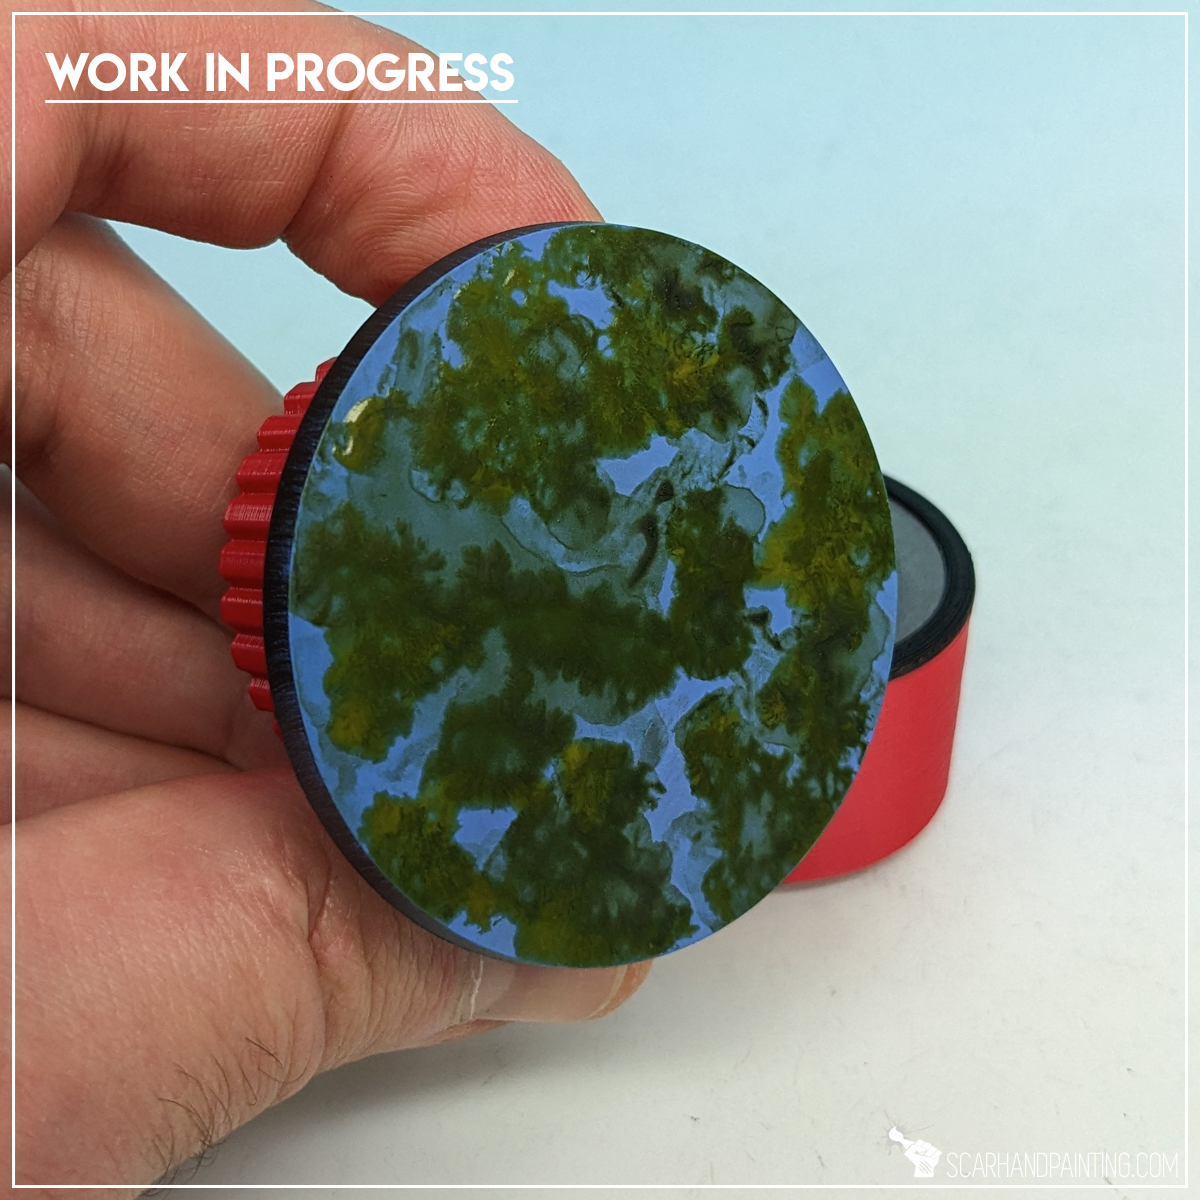
Step three: Water Effect
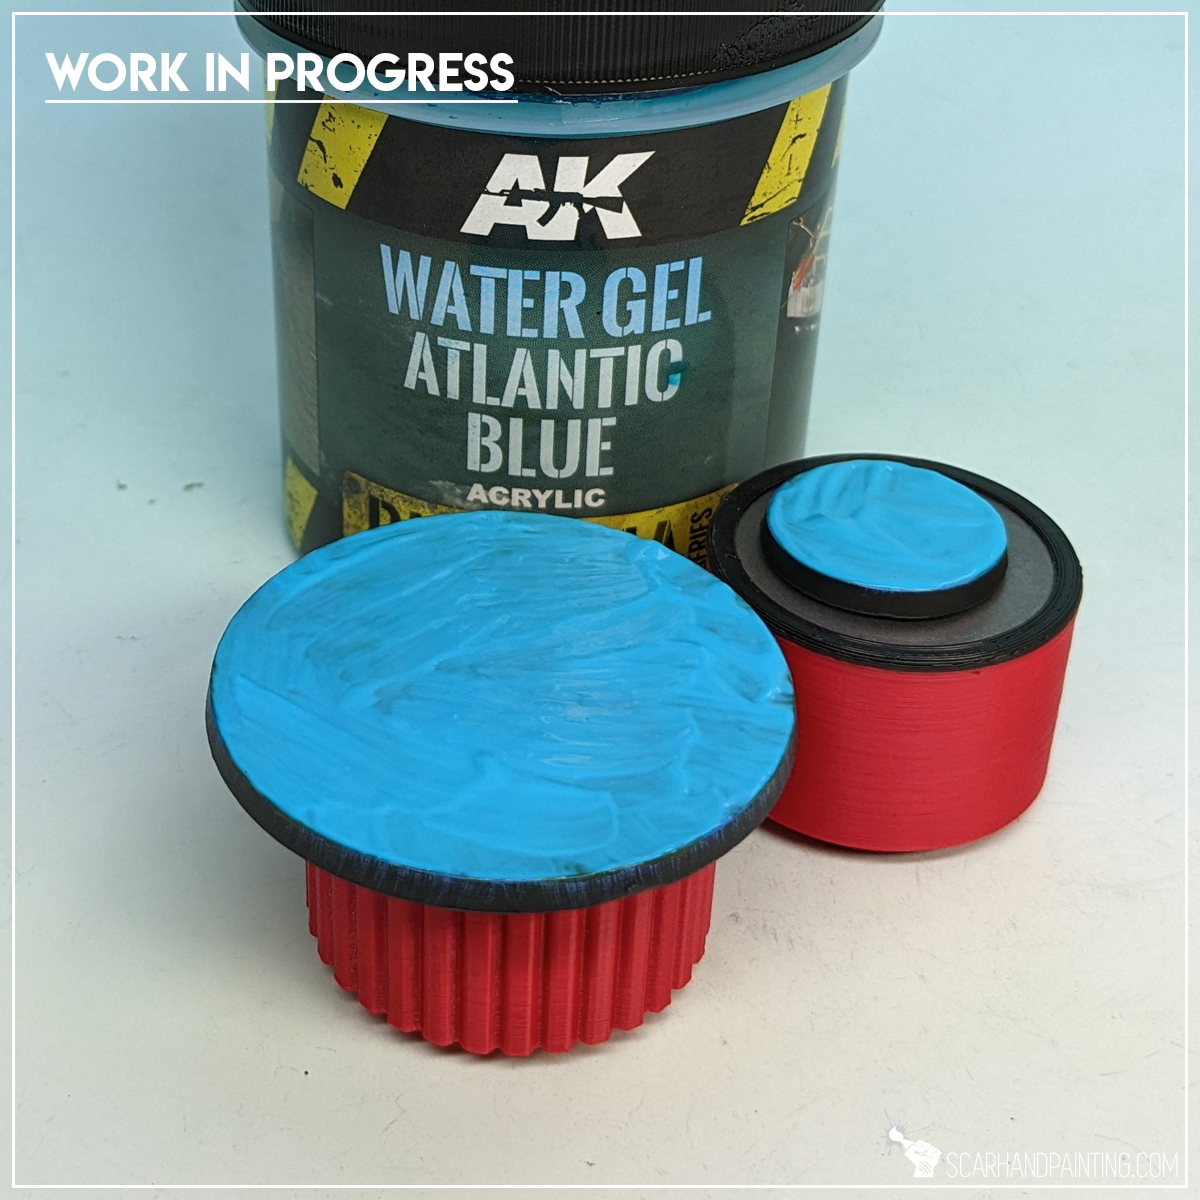
Once the previous layer dried, I covered entire base with a thick layer of AK Interactive Atlantic Blue texture and left it for half an hour to dry well.
Step four: Tufts
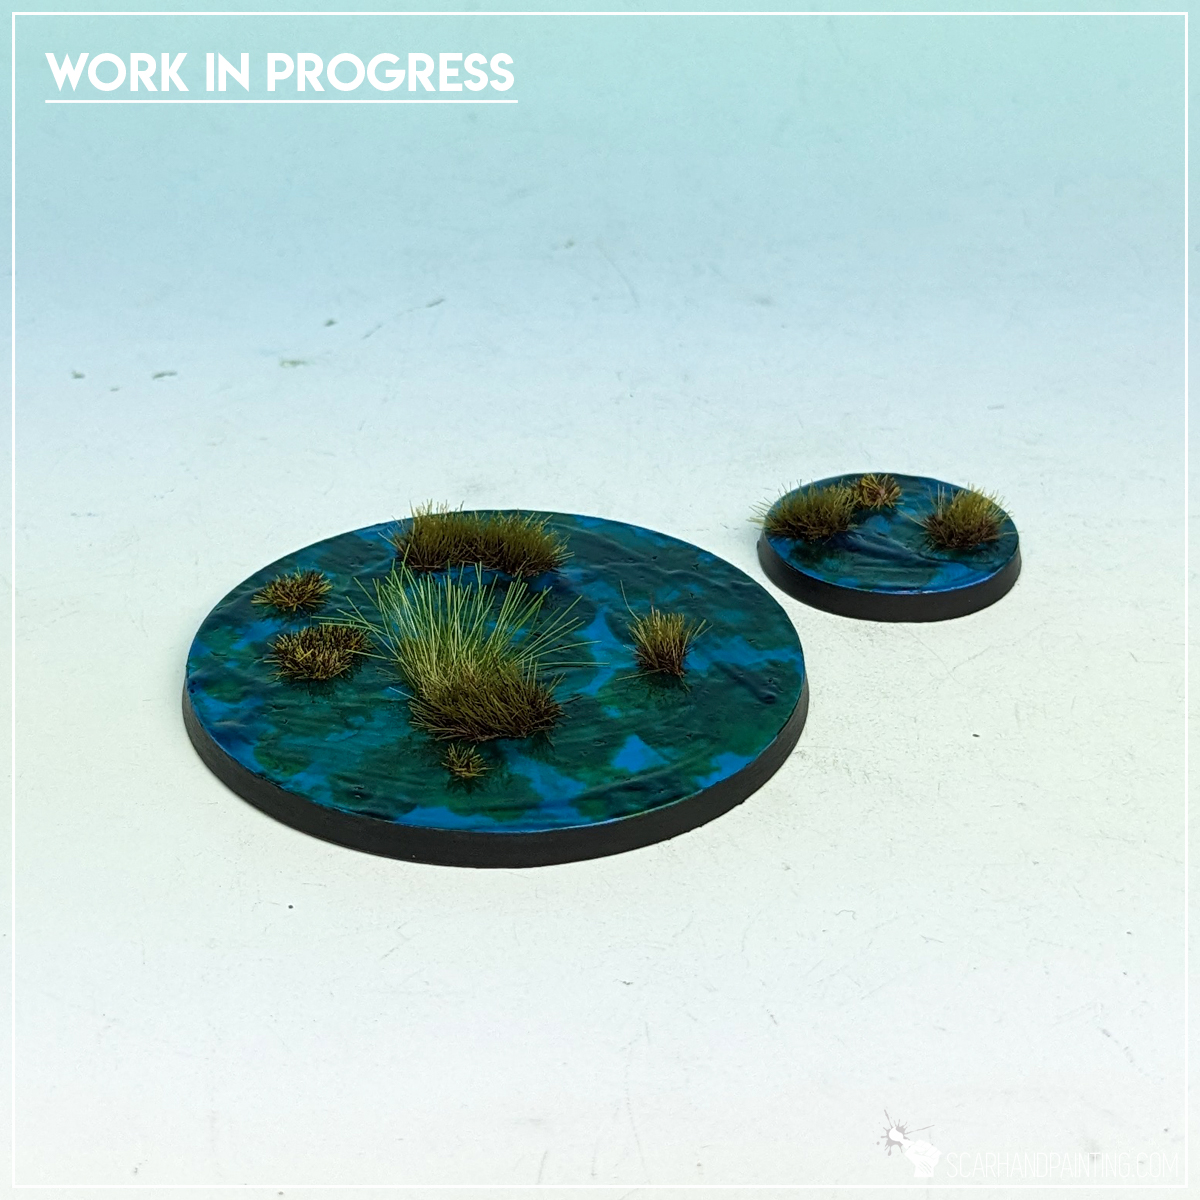
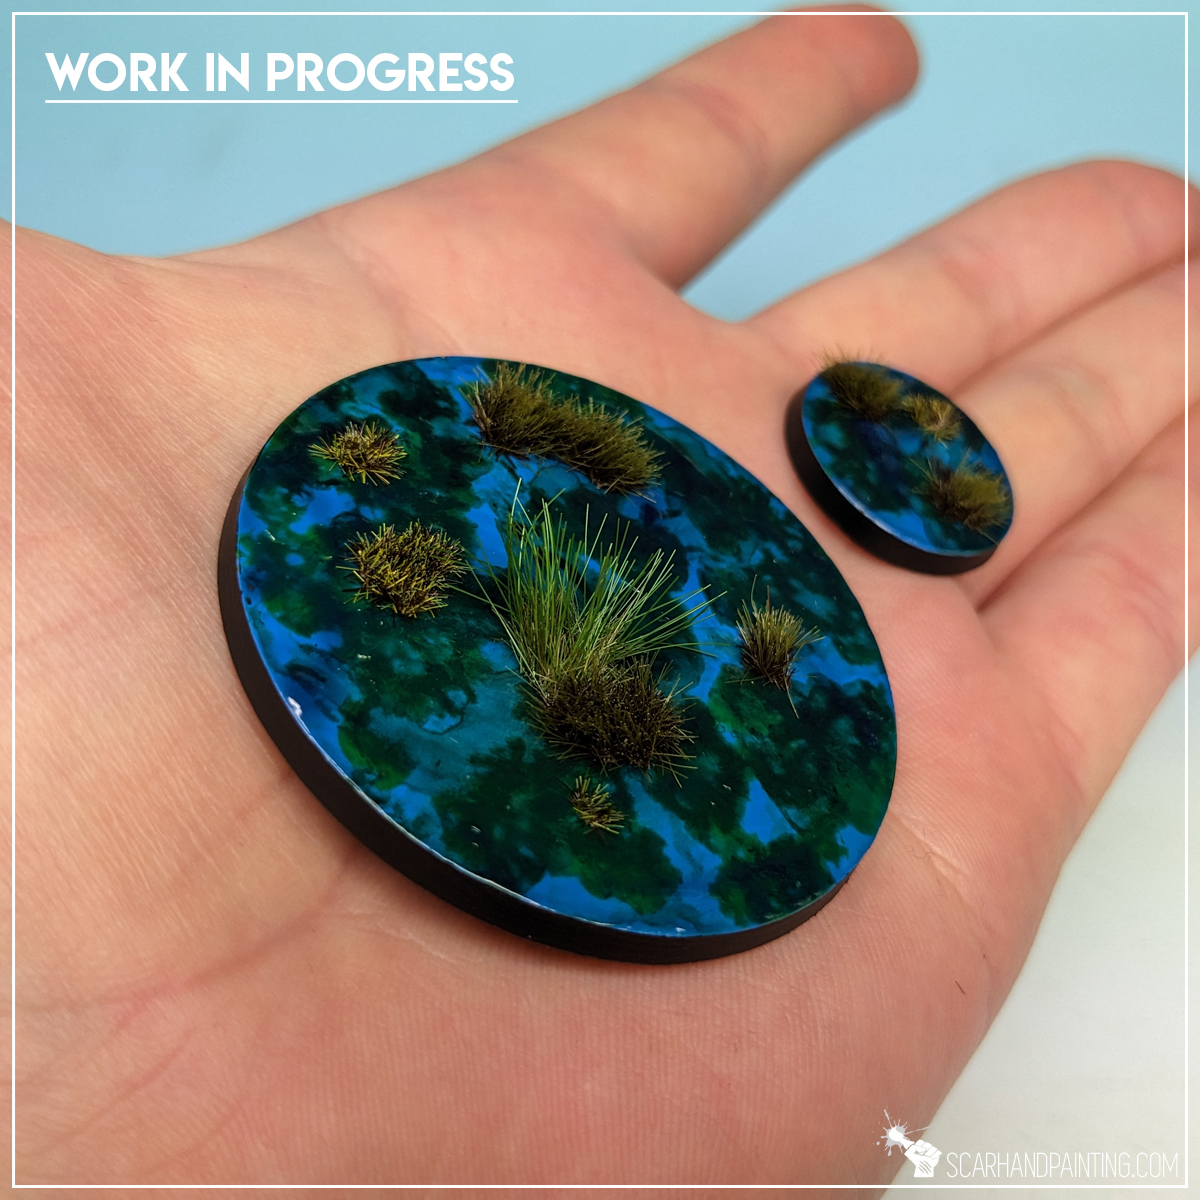
Finally, (after some black edge ninja painting) I applied some tufts. I used a mix of Gamers Grass Swamp and Dark Moss tufts to add volume to the base.

As you can see the process is super easy but provides an interesting, eye catching final result. I strongly suggest you take the process further and experiment with different colors and overall volume. I believe there is a lot of potential in this method.

I hope you find this tutorial interesting. Be sure to let me know your thoughts in the comments below or via Facebook or Instagram. I would also appreciate if you considered sharing this content with your friends, who might find it useful. Finally if you are looking for a professional warhammer 40k miniatures painting service, be sure to contact me with this contact form. I always reply within 24 hours, after which please check out your spam folder.
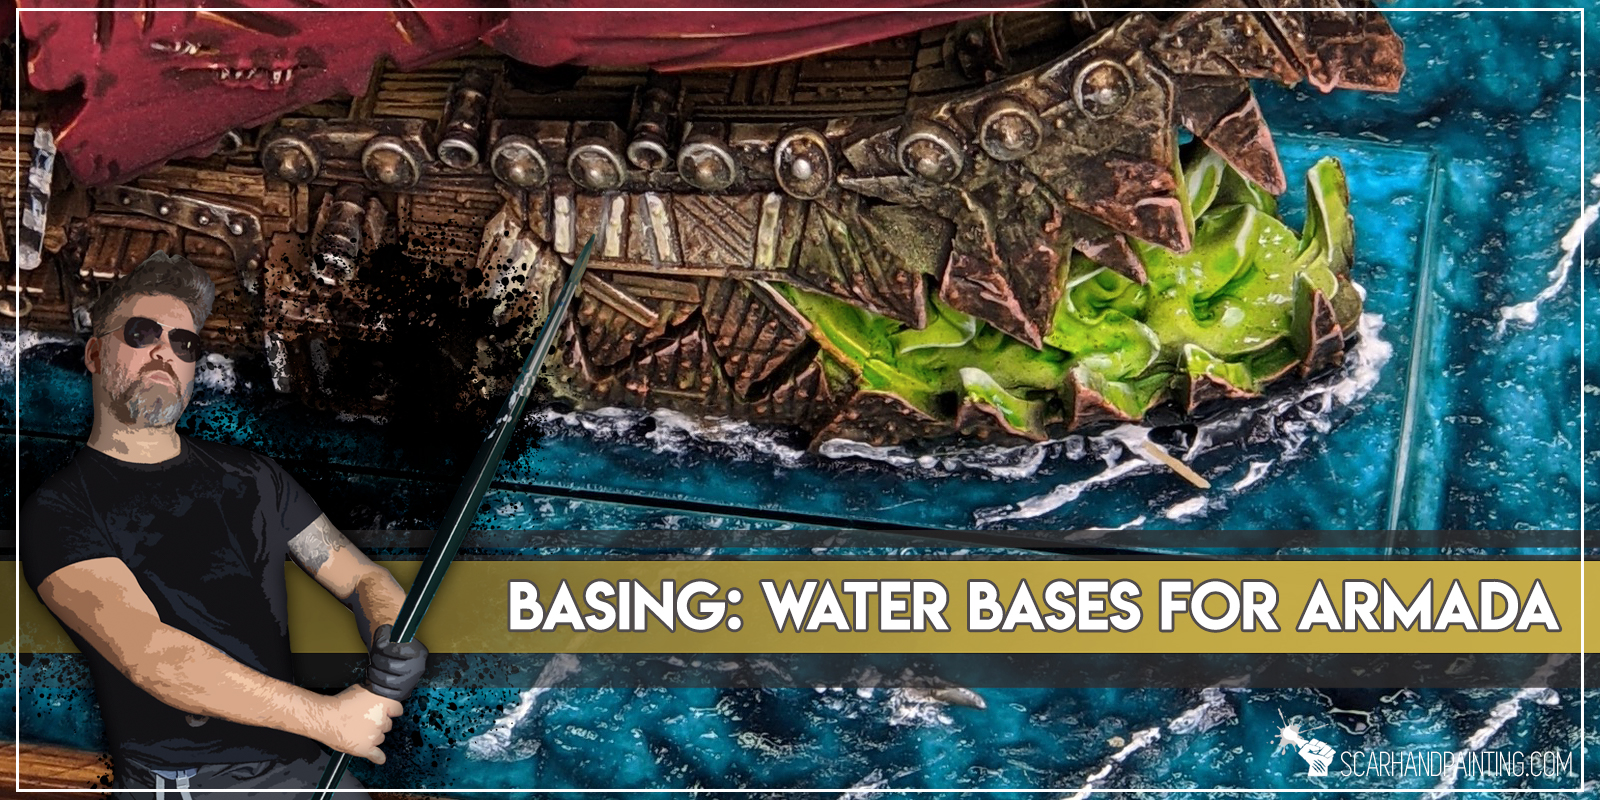
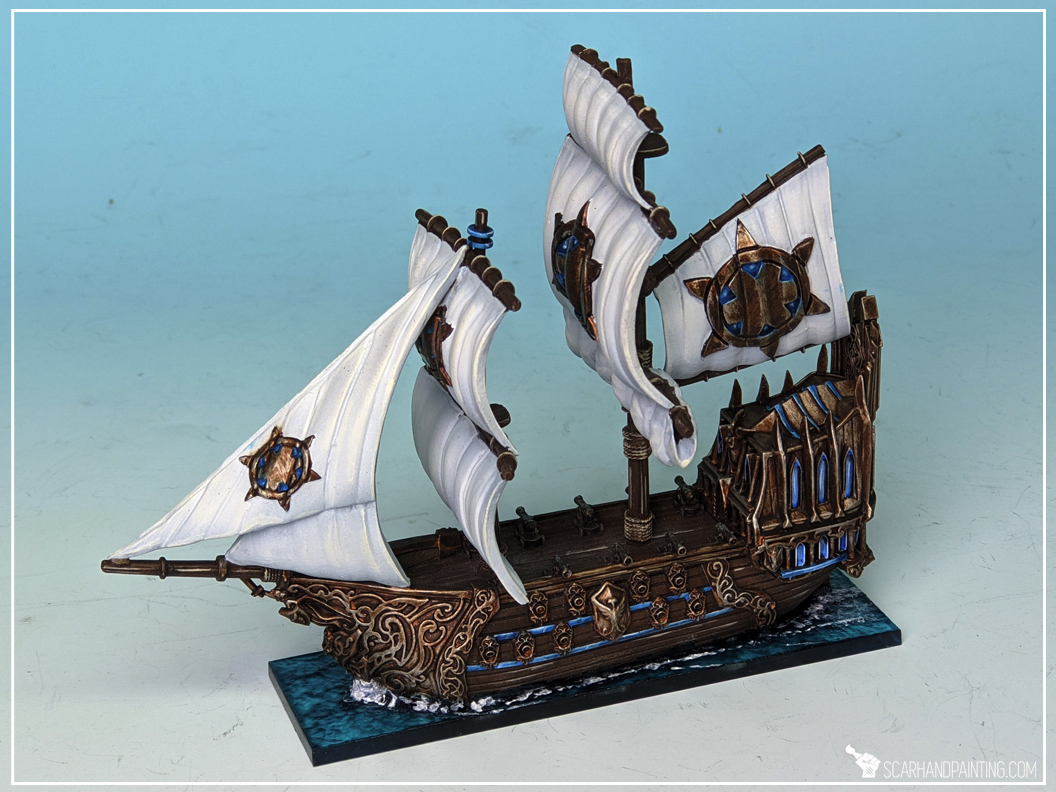
Welcome to Kings of War Armada Water Bases tutorial. Here I will take you on a Step-by-step trip through the process of creating and painting bases as can be found in the Gallery: Armada Basileans from Mantic Games Kings of War Armada.
Before we start, some notes:
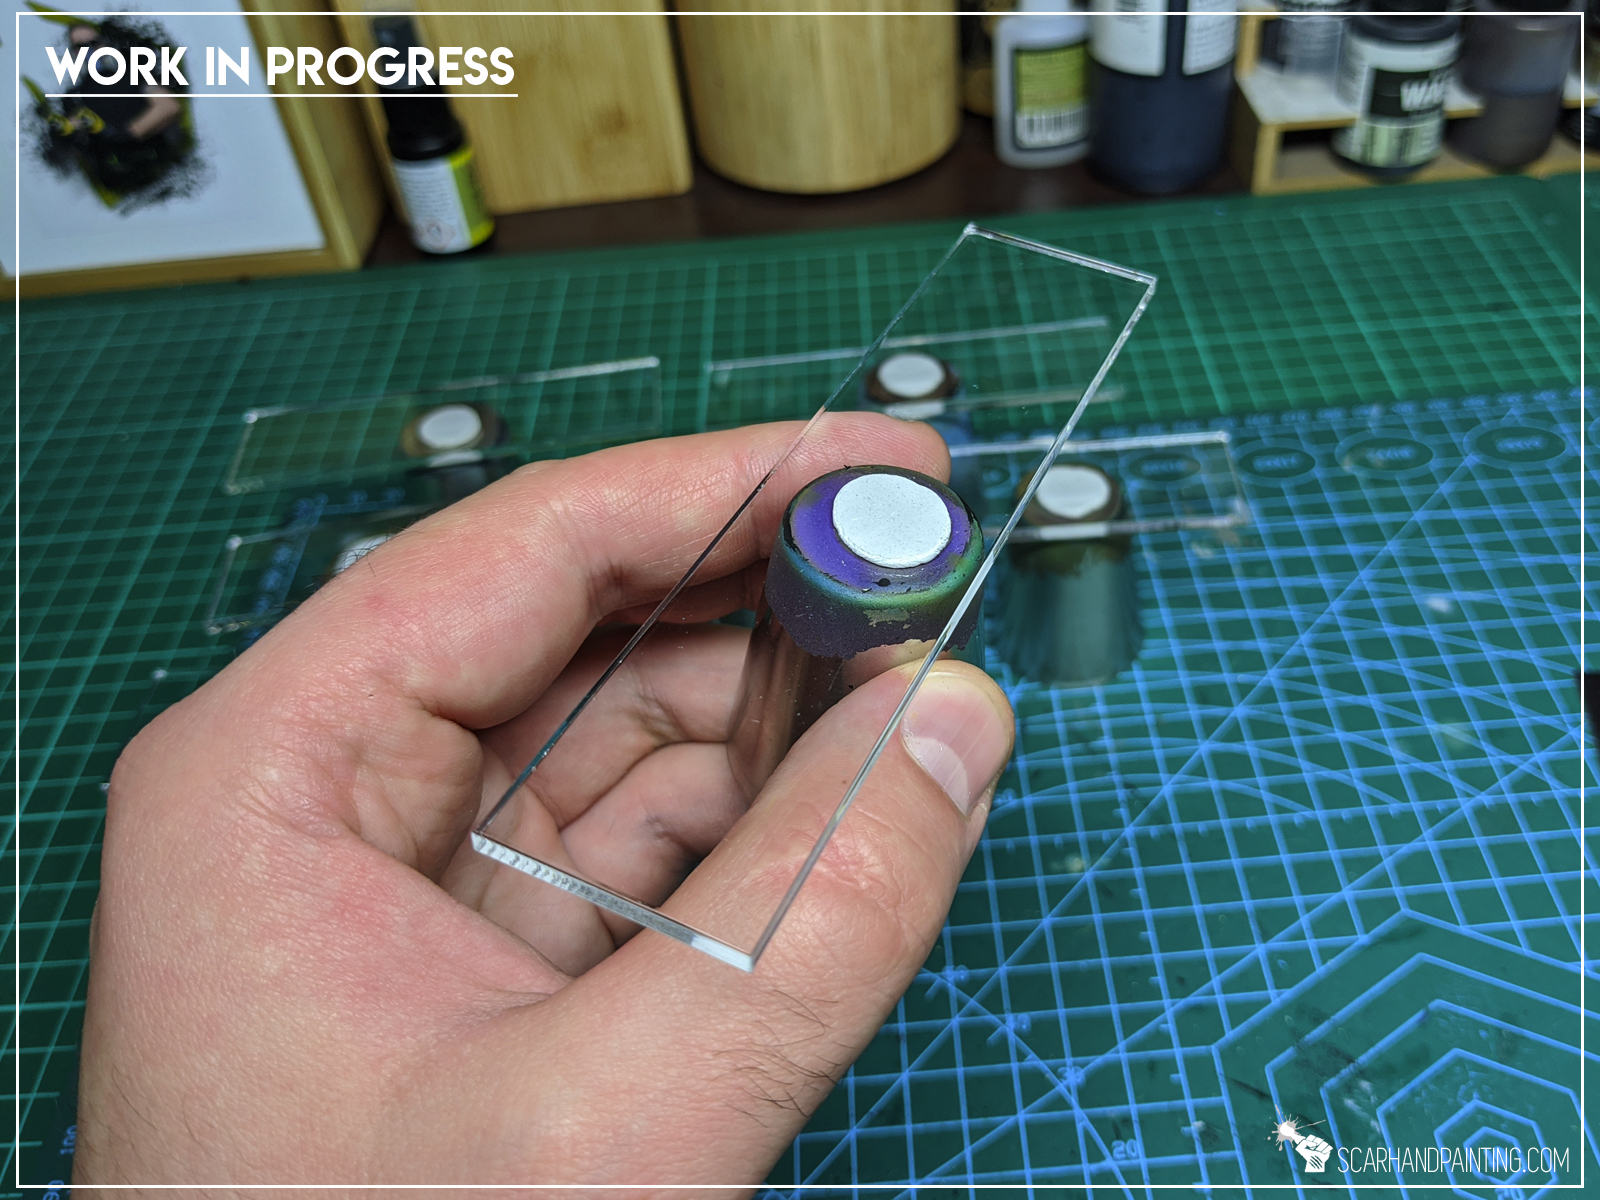
I plan to go all-in with Mantic’s KoW: Armada. This means a lot of ships from across numerous fleets. To keep my bases easy to paint and visually coherent I decided to limit myself to some water effects and simple tricks. Instead of going through a lot of effort, trying to build multiple layers of transparent water, I switched out standard MDF bases for clear acrylics.
That doesn’t mean the method wouldn’t work with MDF’s. If you’d rather stick with Mantic’s bases – undercoat them white, then paint sides with some dark blue and you’d be ready to go. That being said, this method was developed with clear acrylic bases in mind so please take that into account when trying different approaches.
Without further ado, let’s get these bases wet!
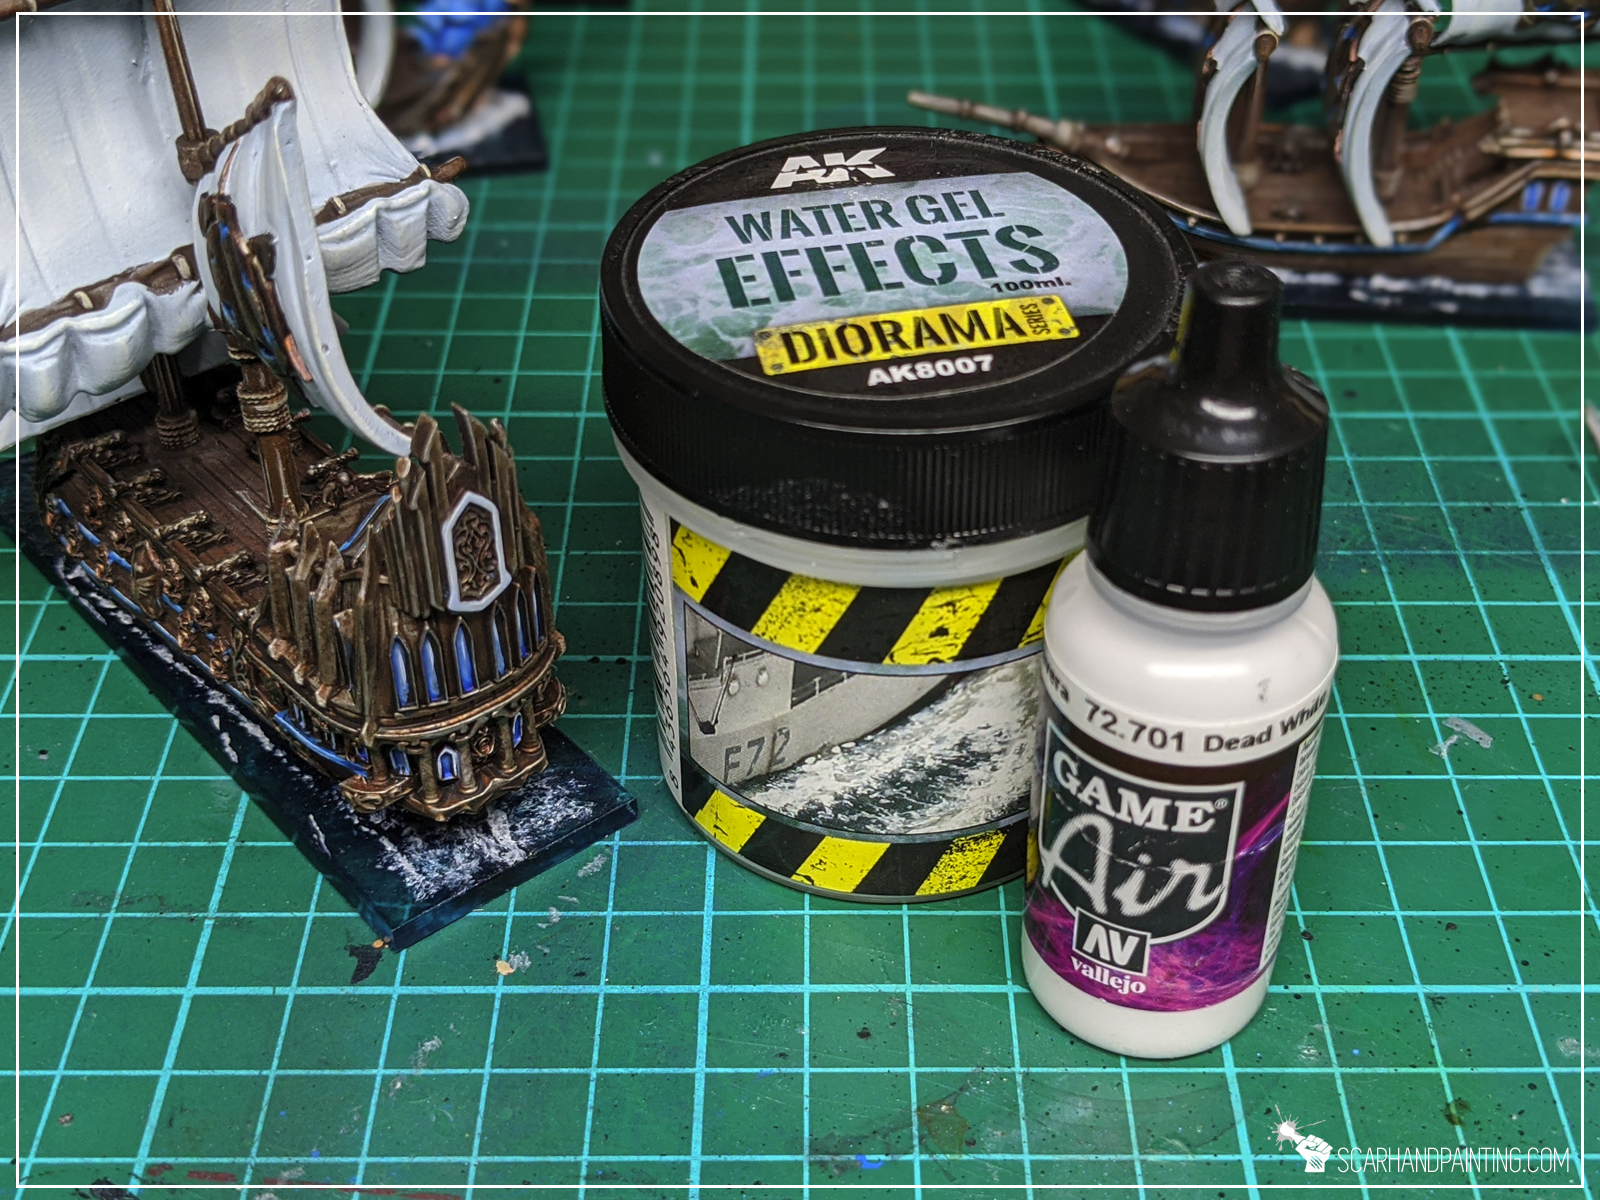
I used:

Step one:
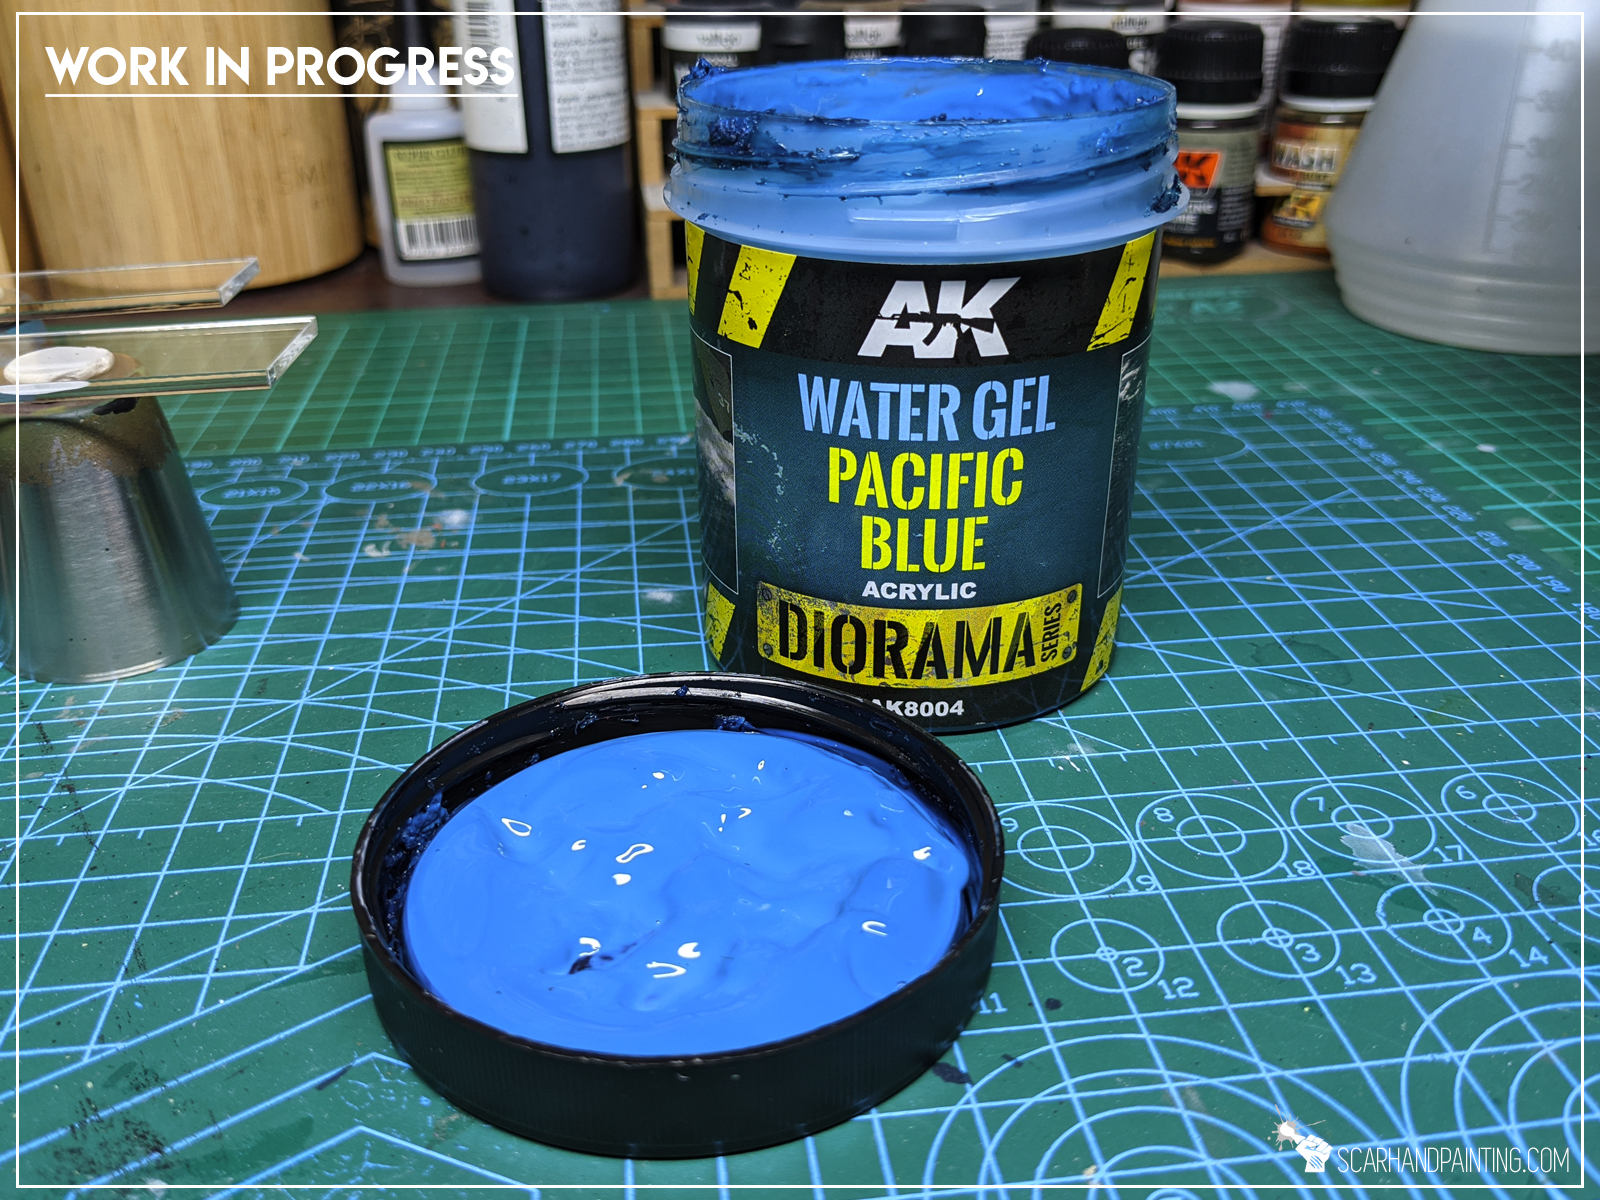
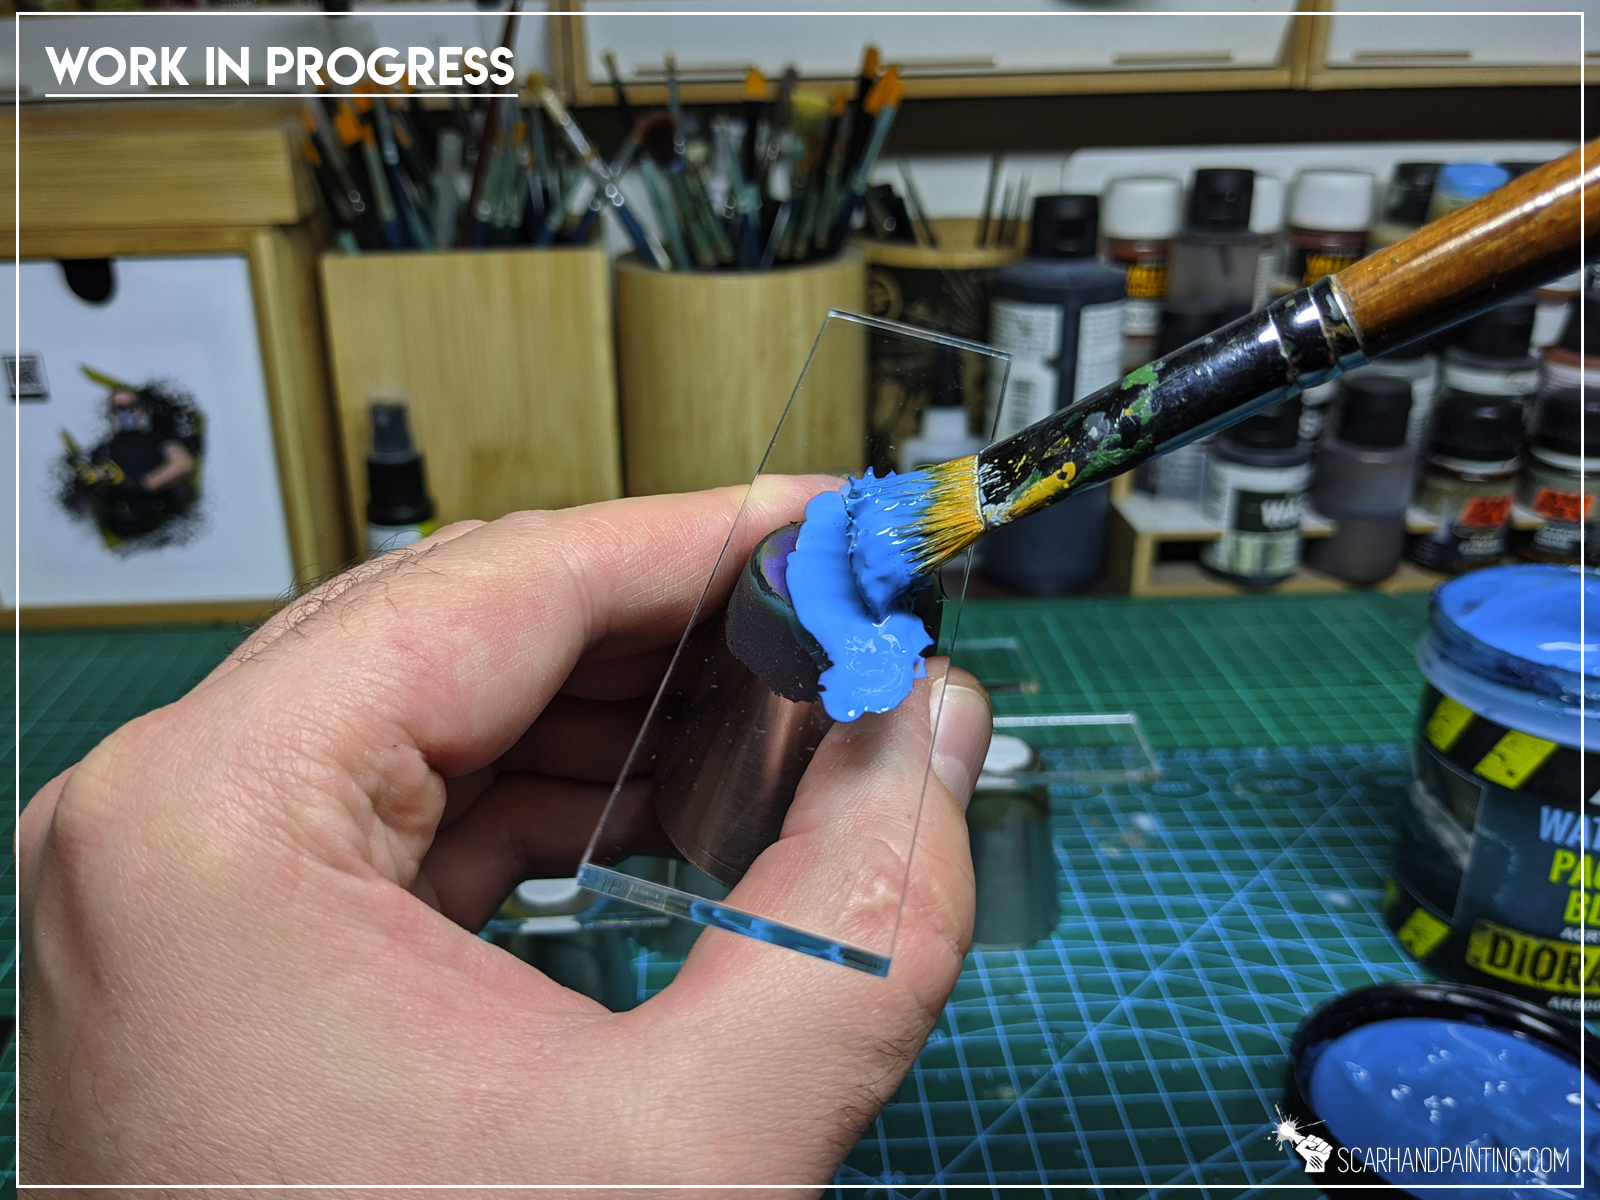
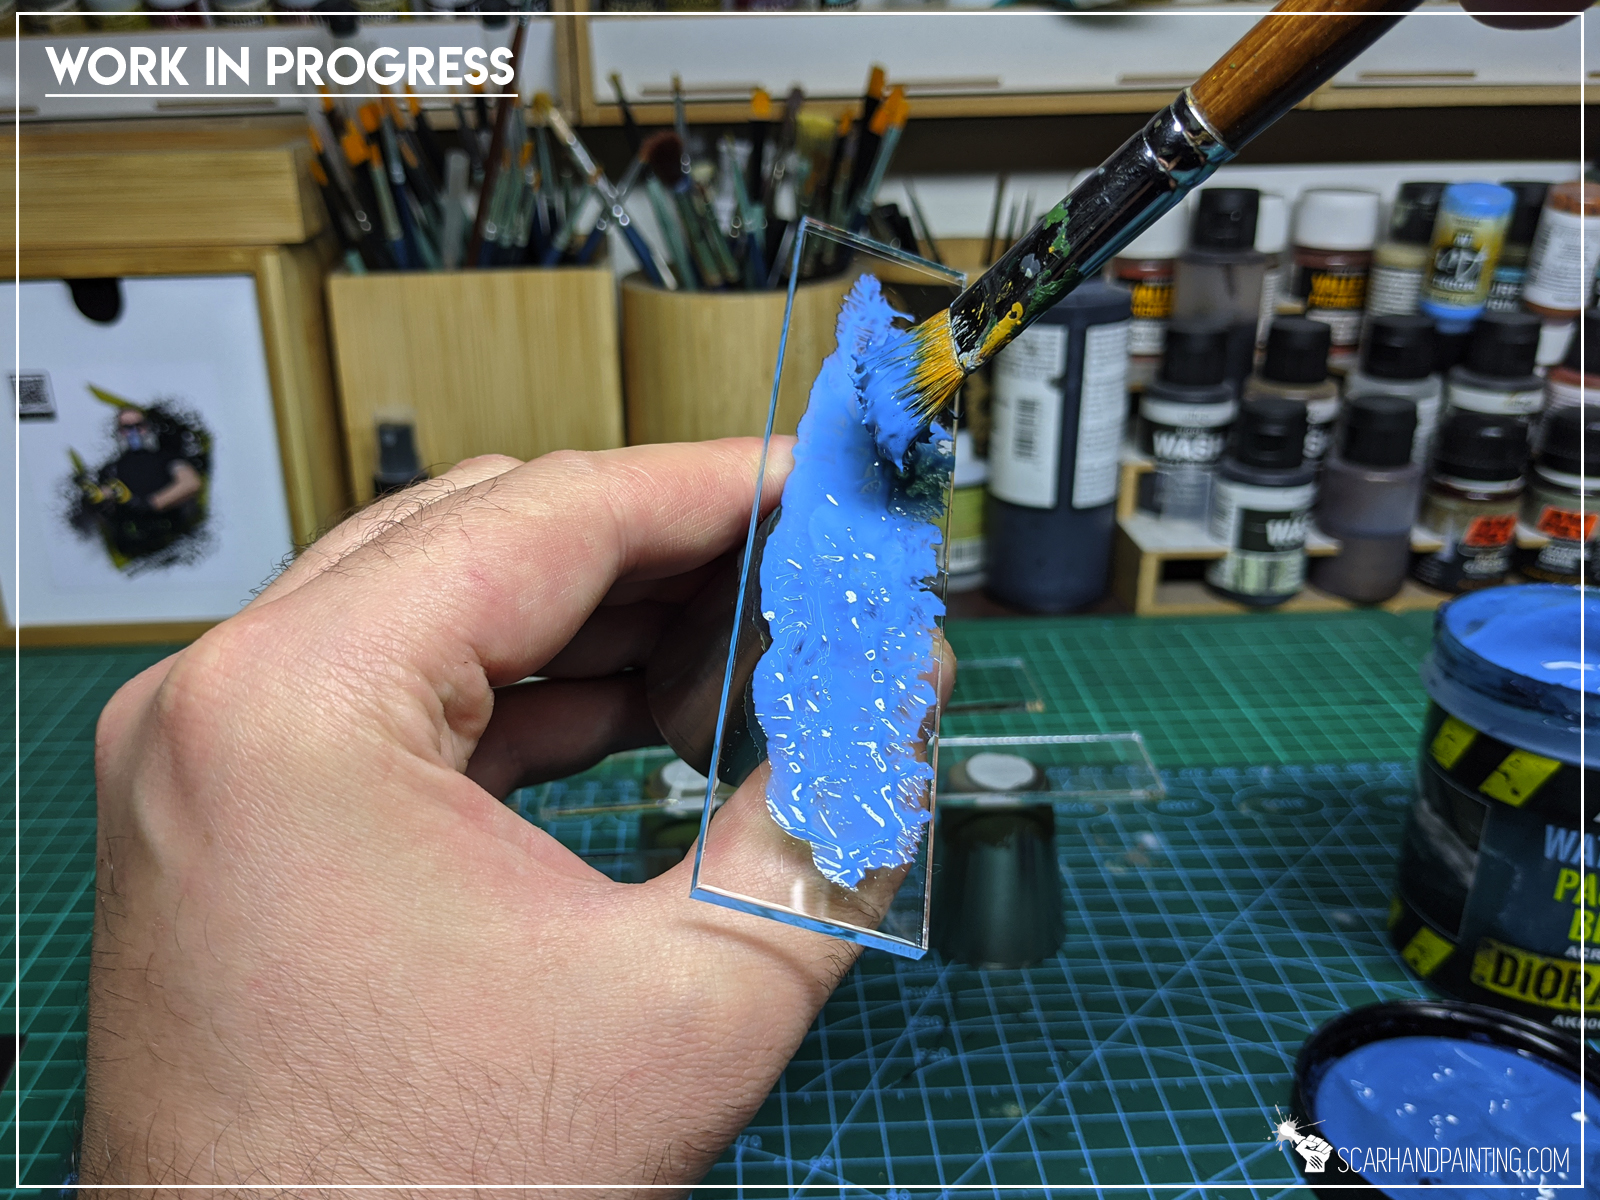
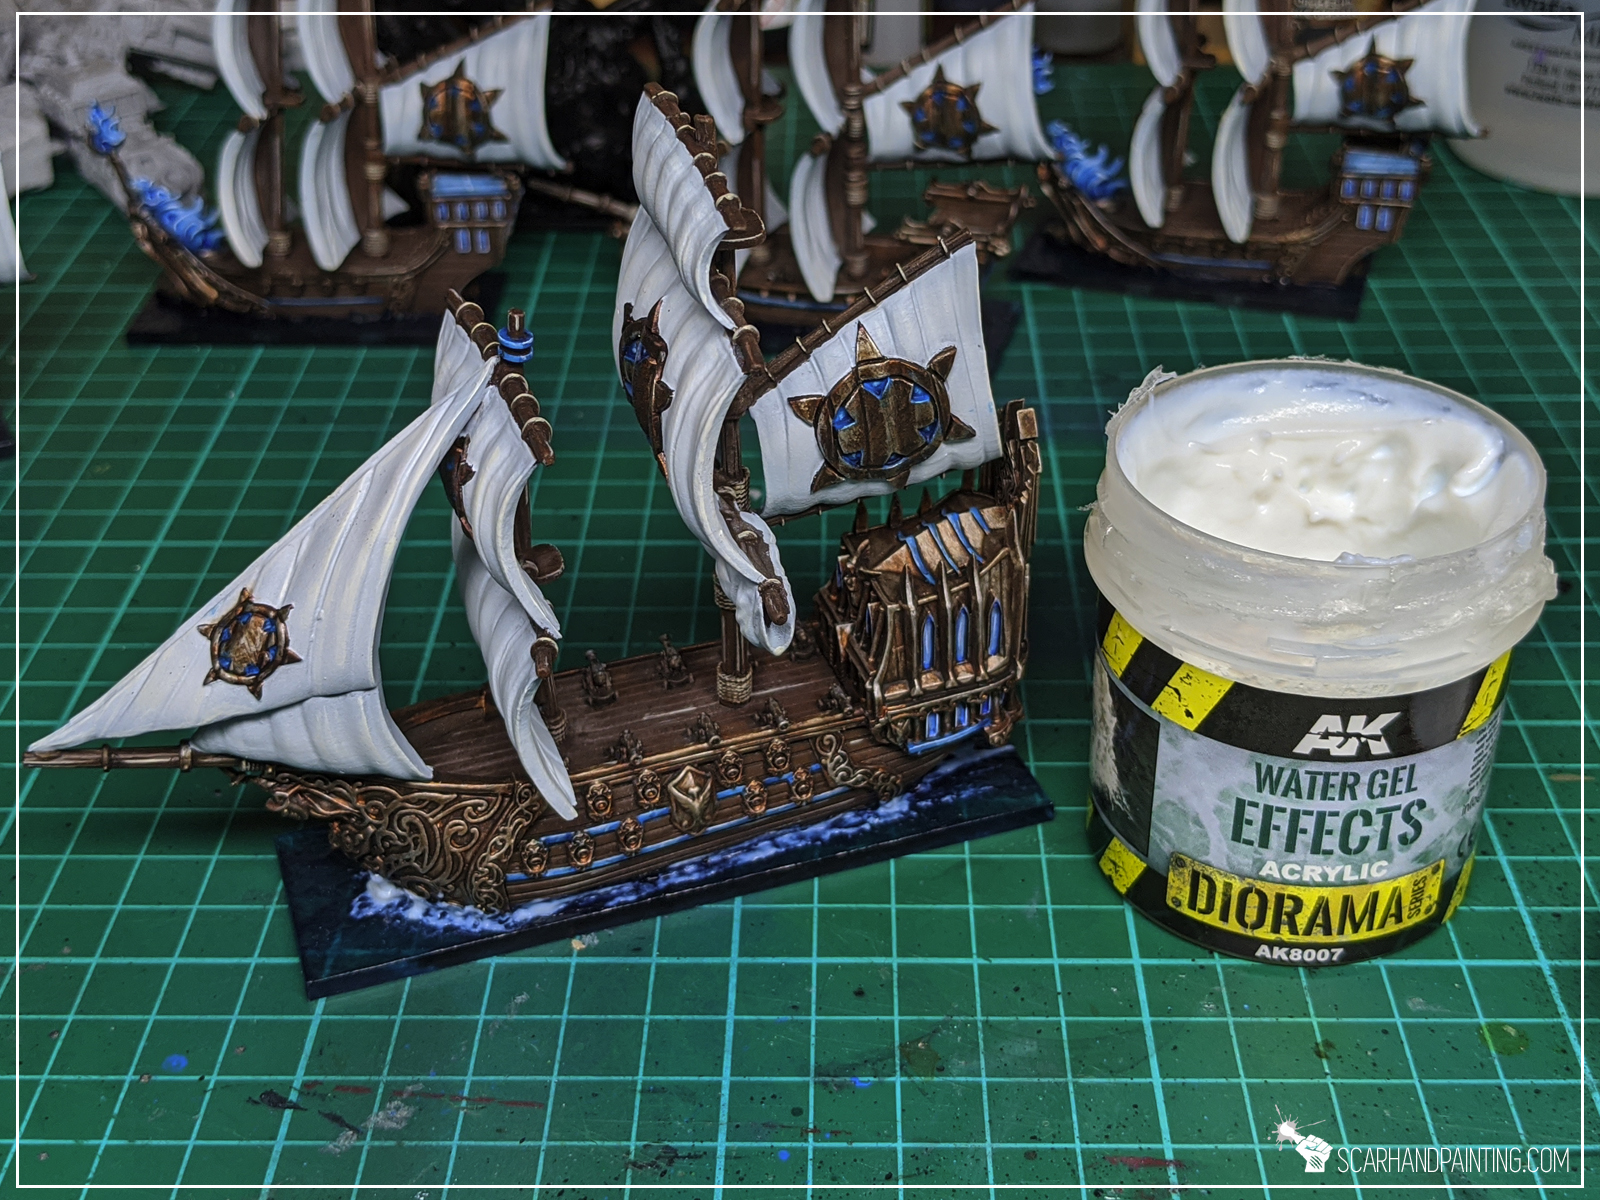
I used a large brush to apply AK Interactive Diorama Series: Pacific Blue Water Gel onto entire surface of the base. I then stippled a bit to create an uneven surface. Lastly I used a finger to remove the excess gel from the sides of the base.


Step two:
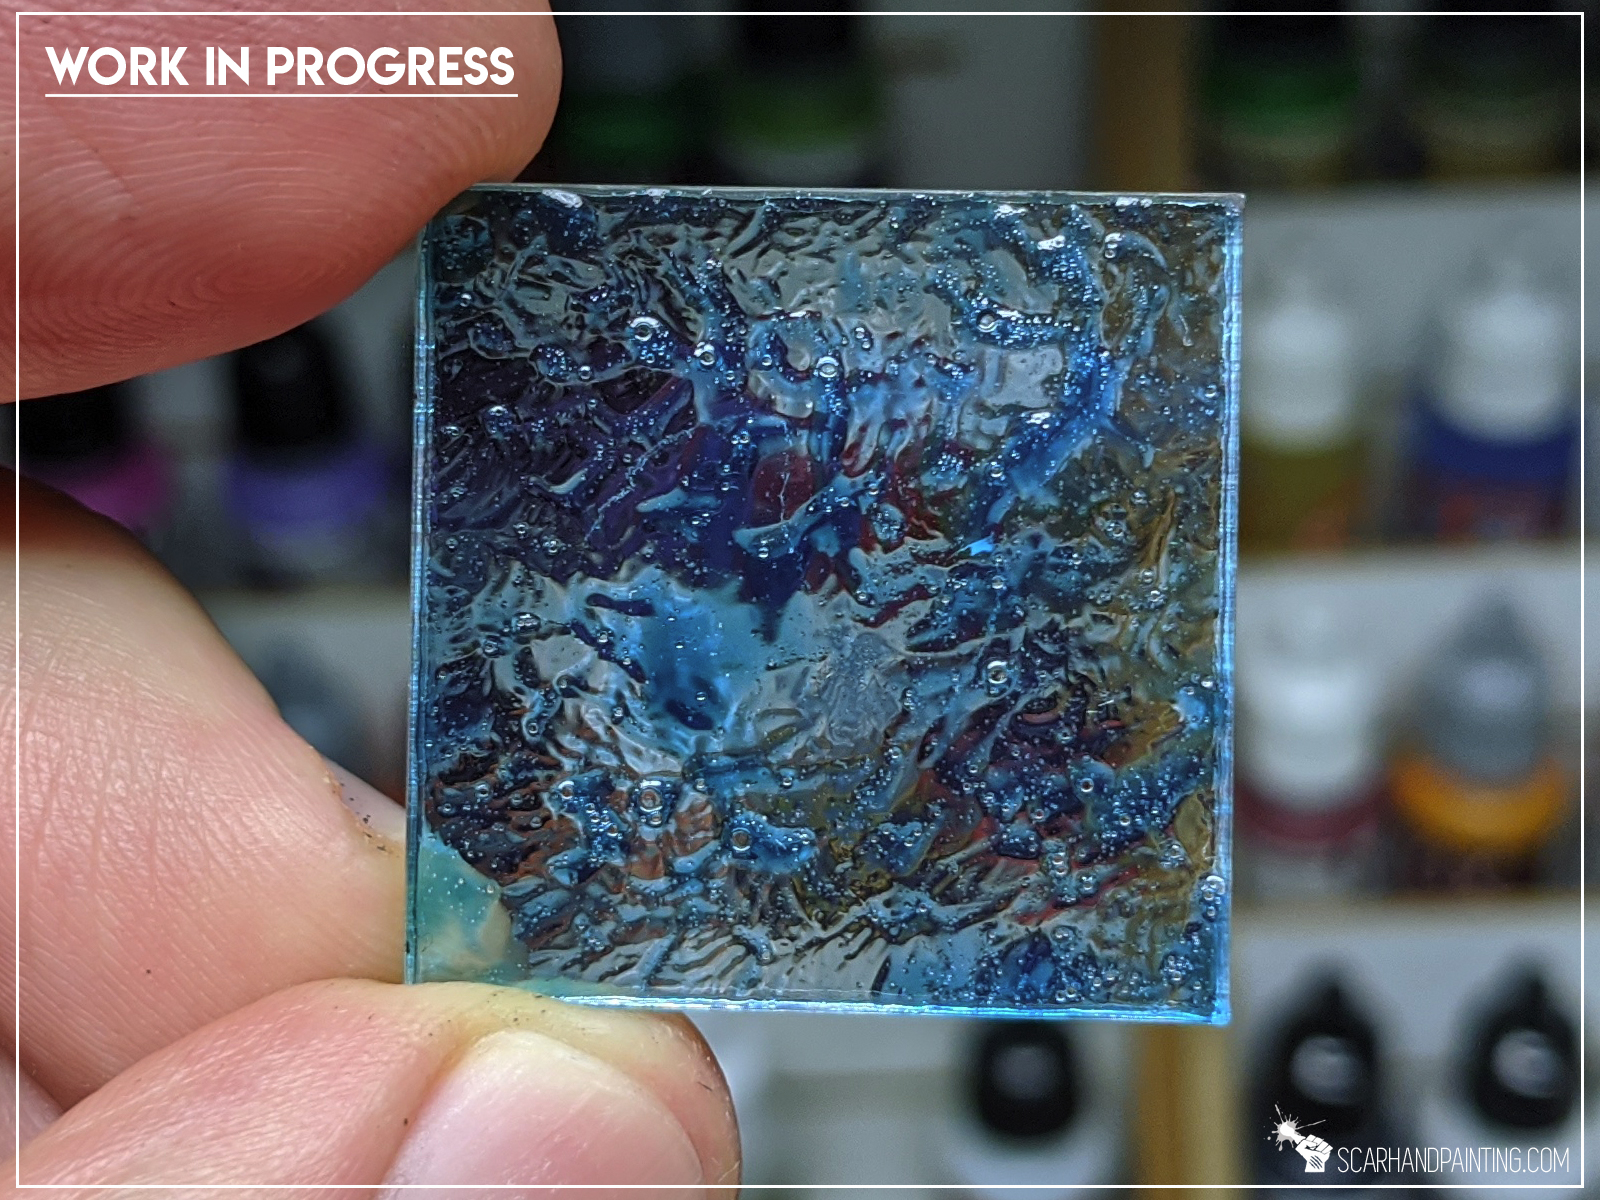
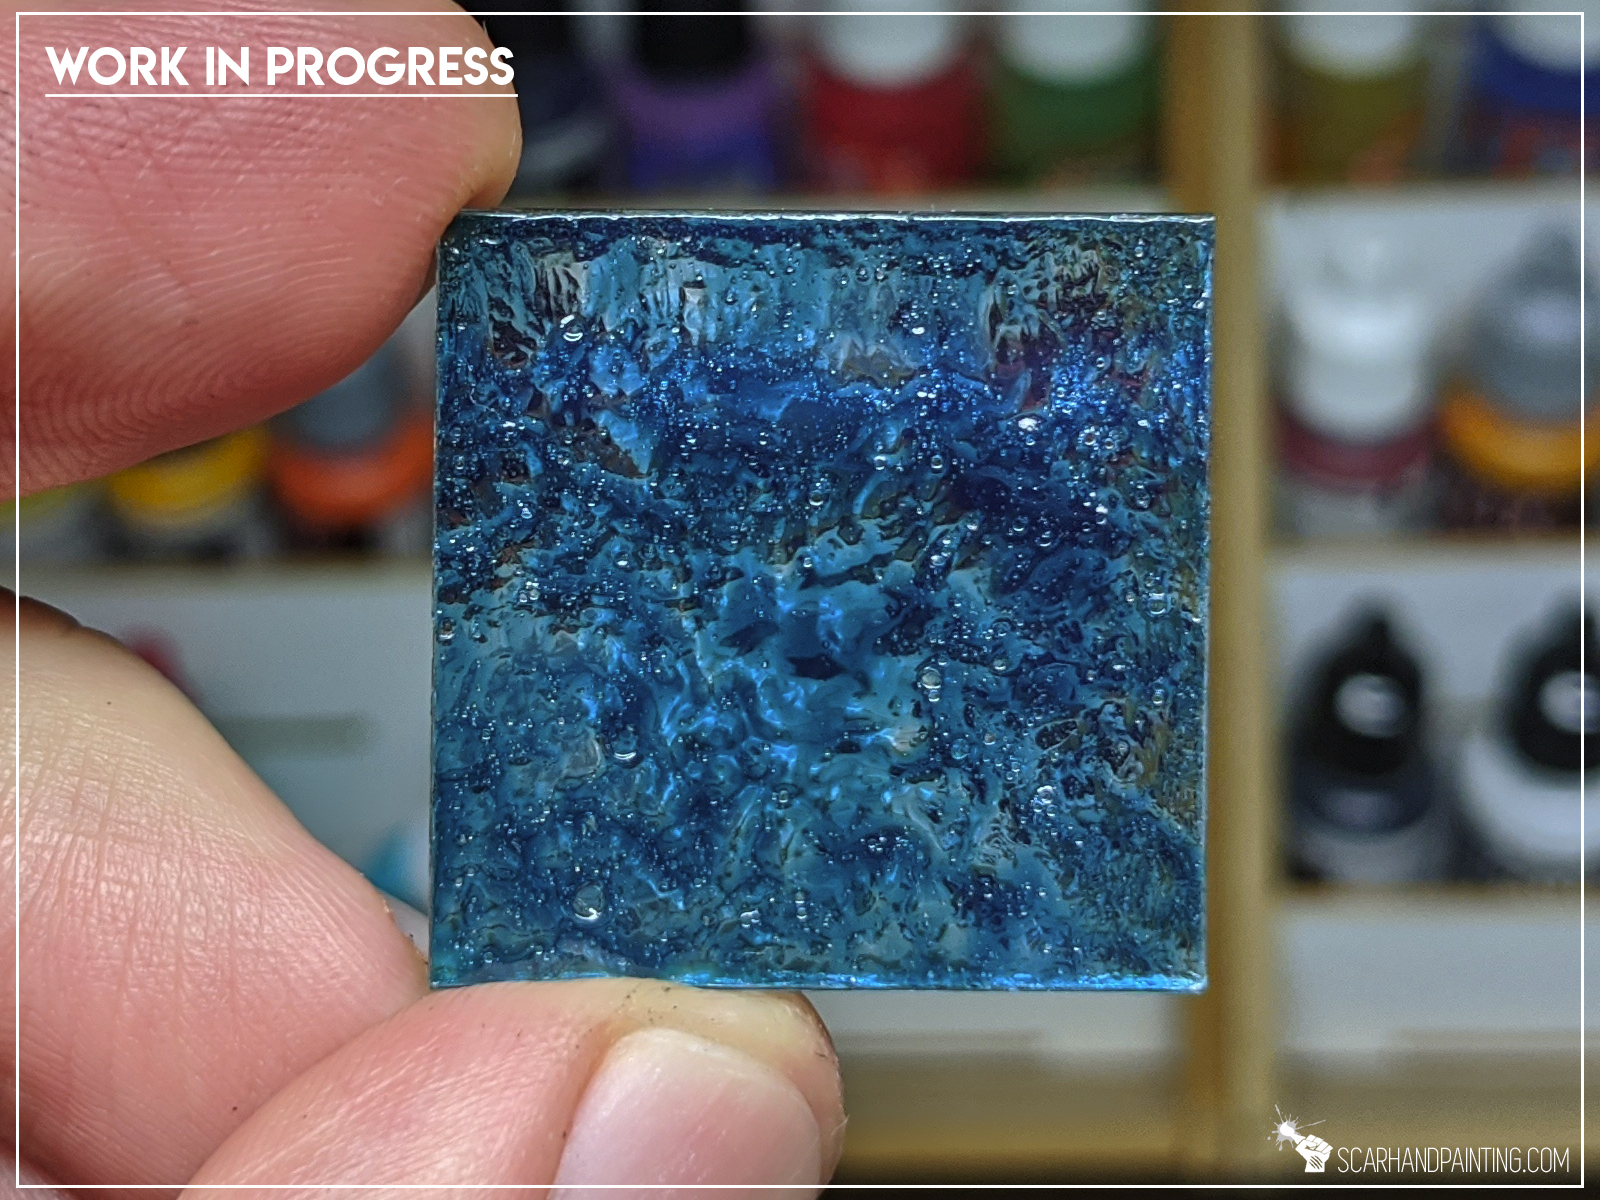
I repeated first step two more times, leaving the paint to dry between each repeat. This darkened the base significantly and resulten in a nice solid layer with a lot more detail on top of the first one.

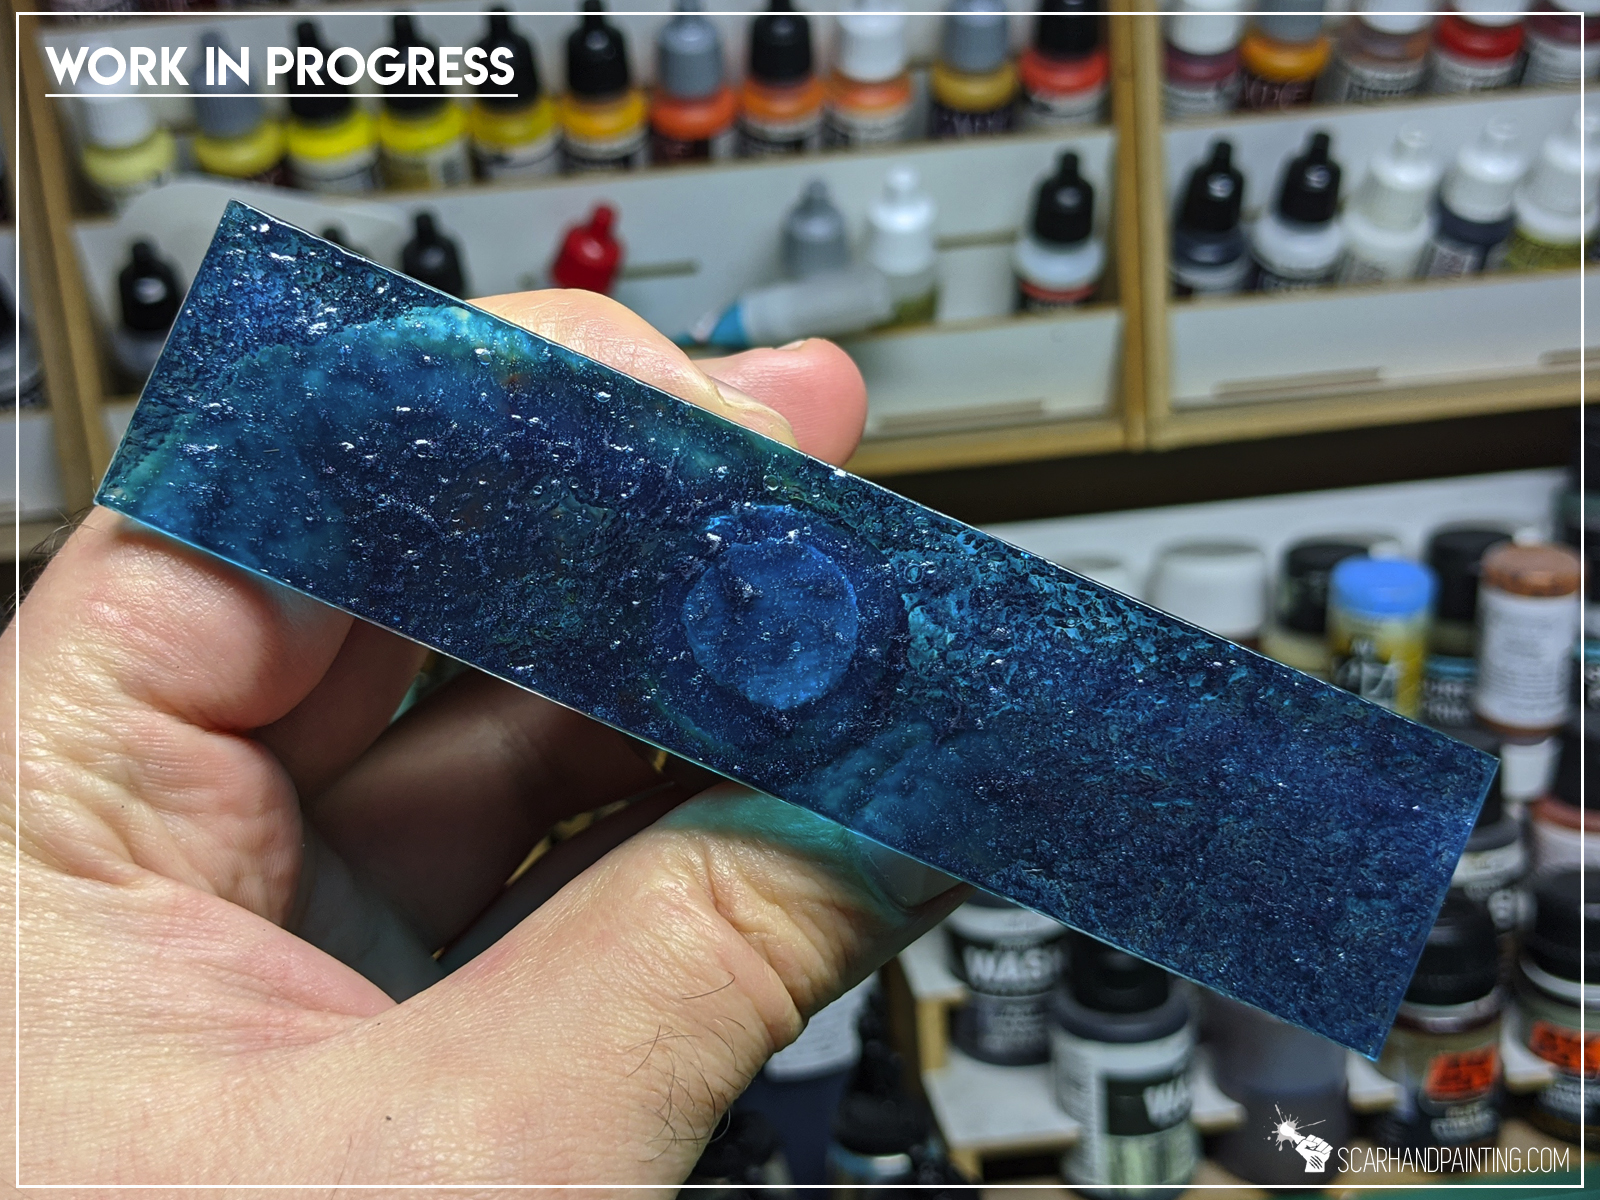
Step three:
Once I was done painting ships I applied AK Interactive Pacific Blue Gel at the edges of each ship’s underside. I then followed with Super Glue through the middle and glued the ship on top of a base. Excess gel was queezed out and filled any holes between the ship and the base.
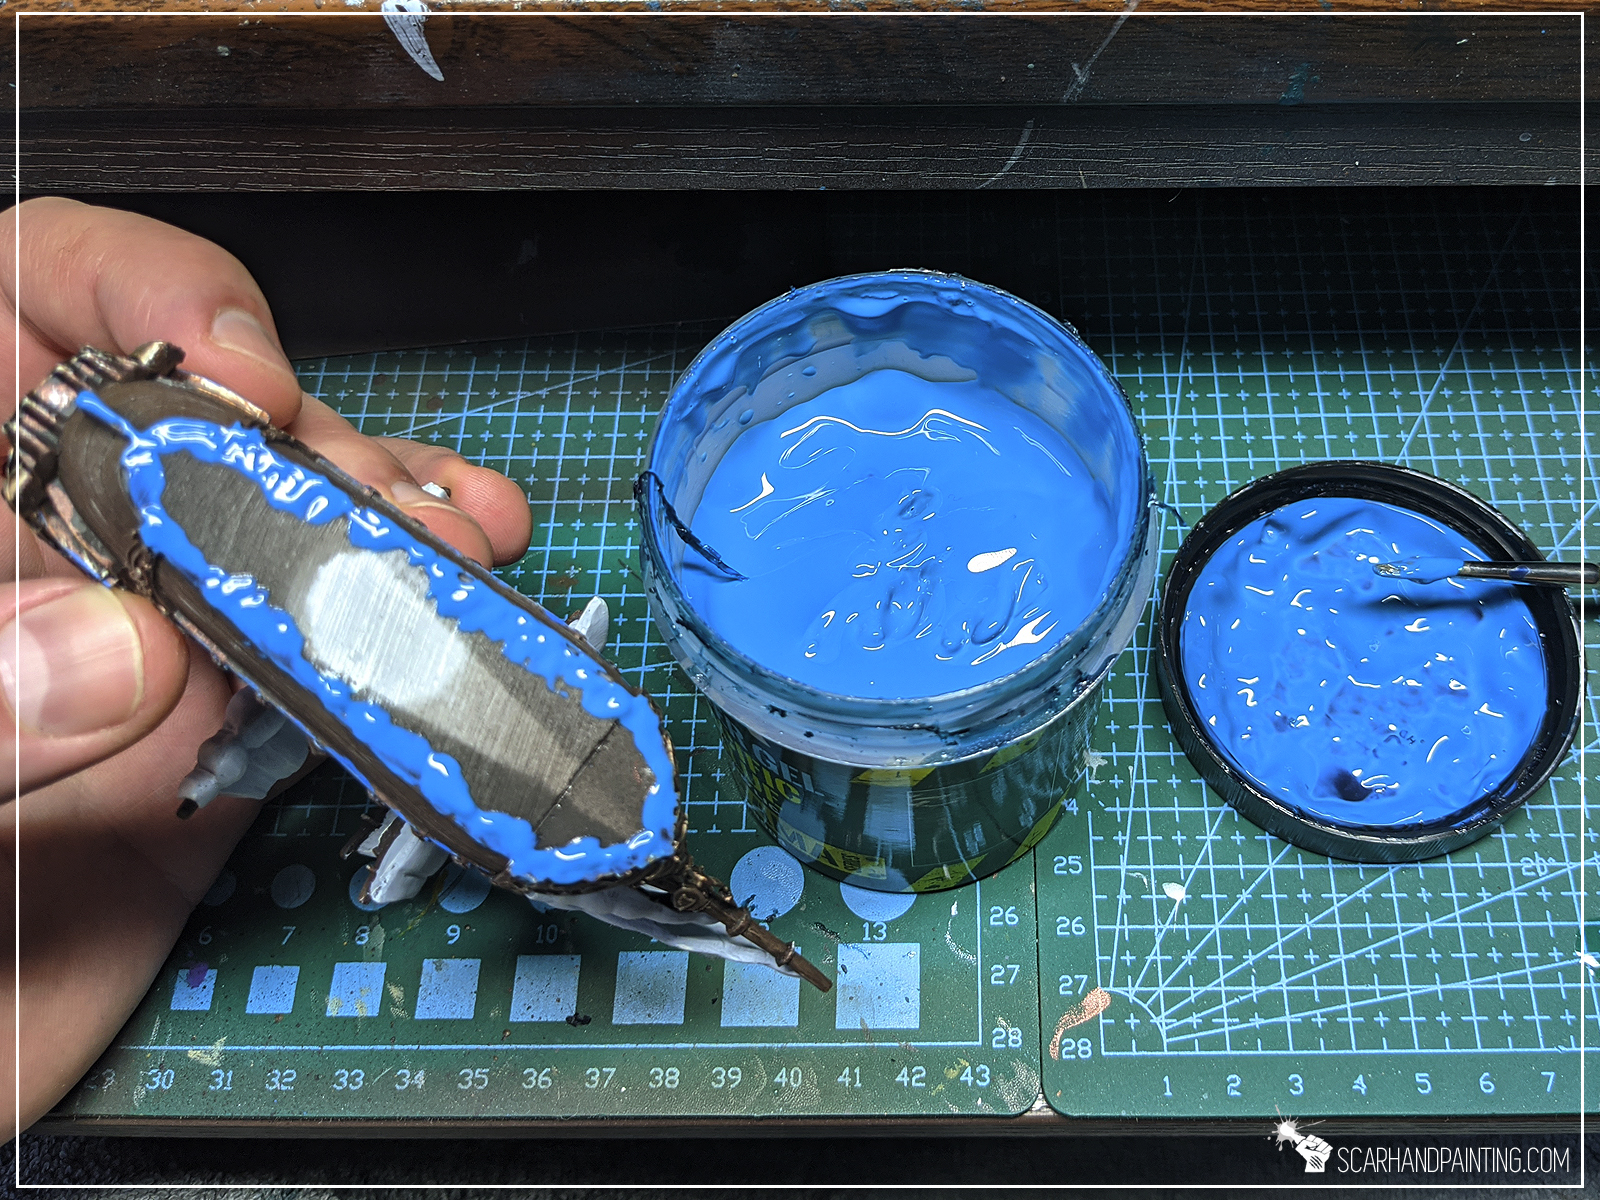

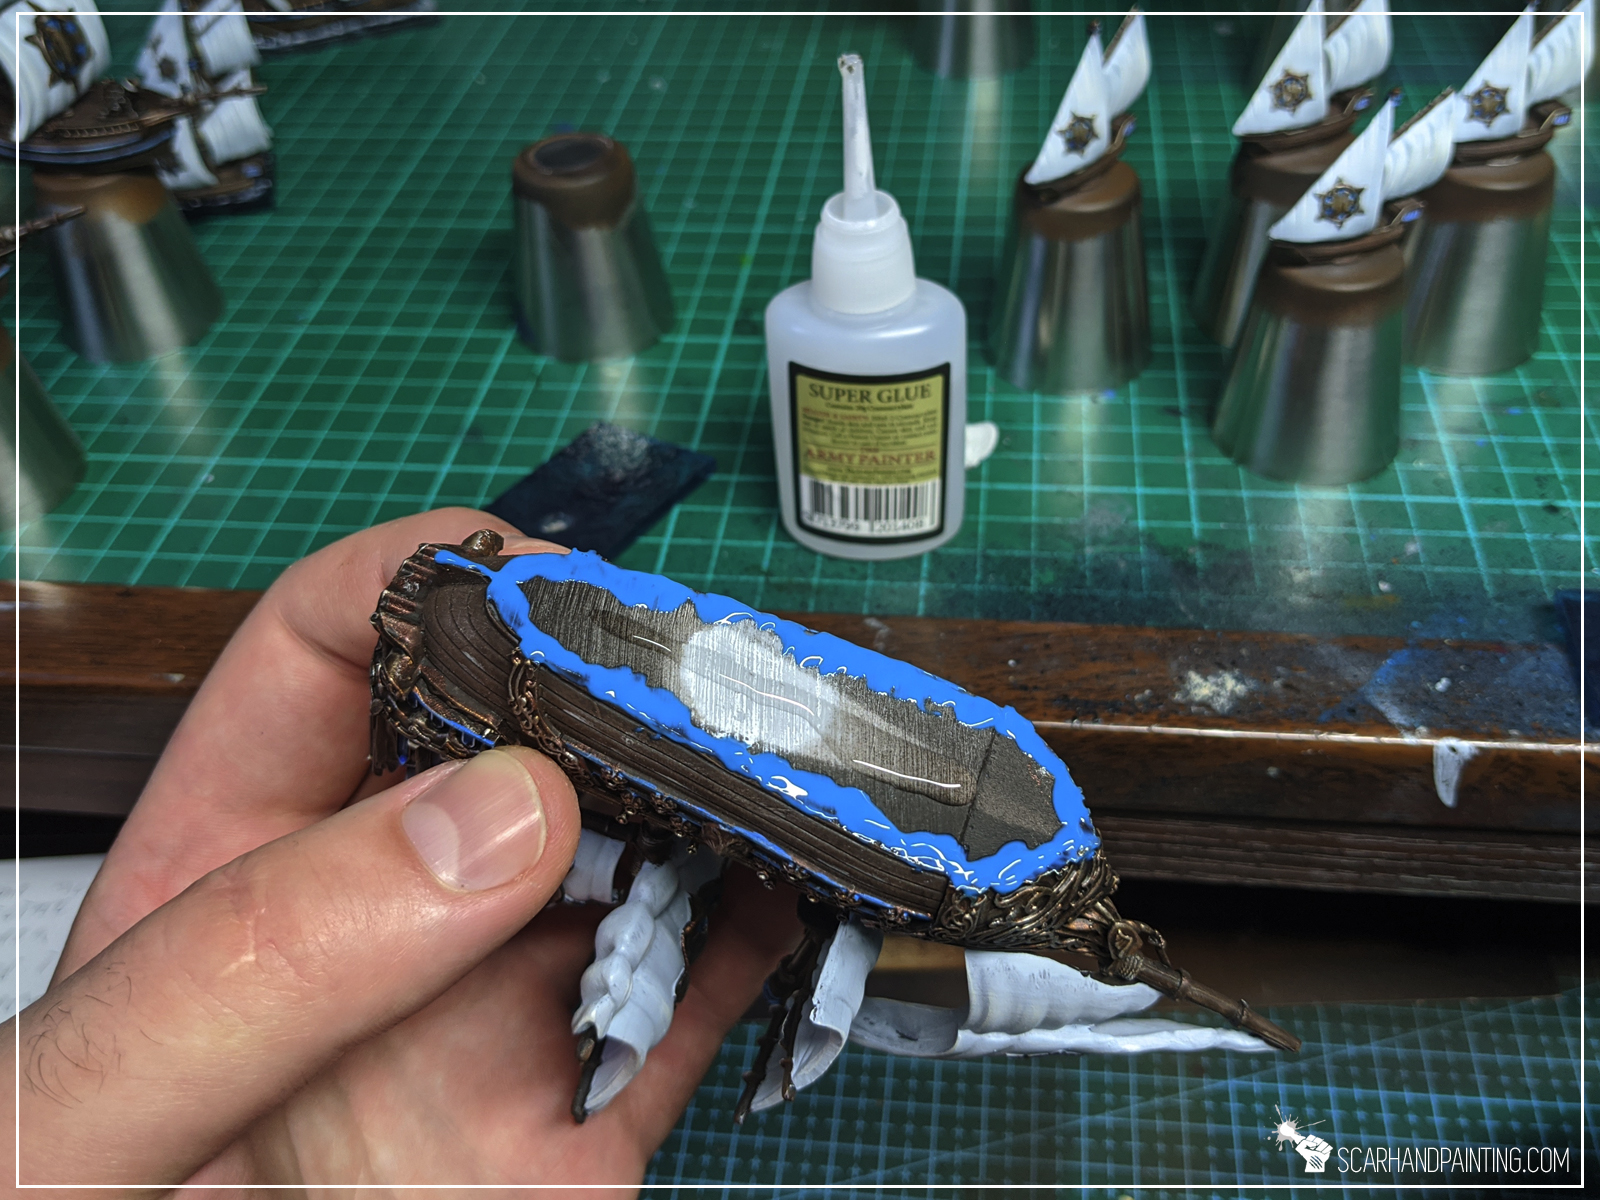
Step four:
I then applied more Pacific Blue Gel around the ship. It was a bit messy so I used a clean flat brush to move any excess gel from the ship’s sides and onto the base.


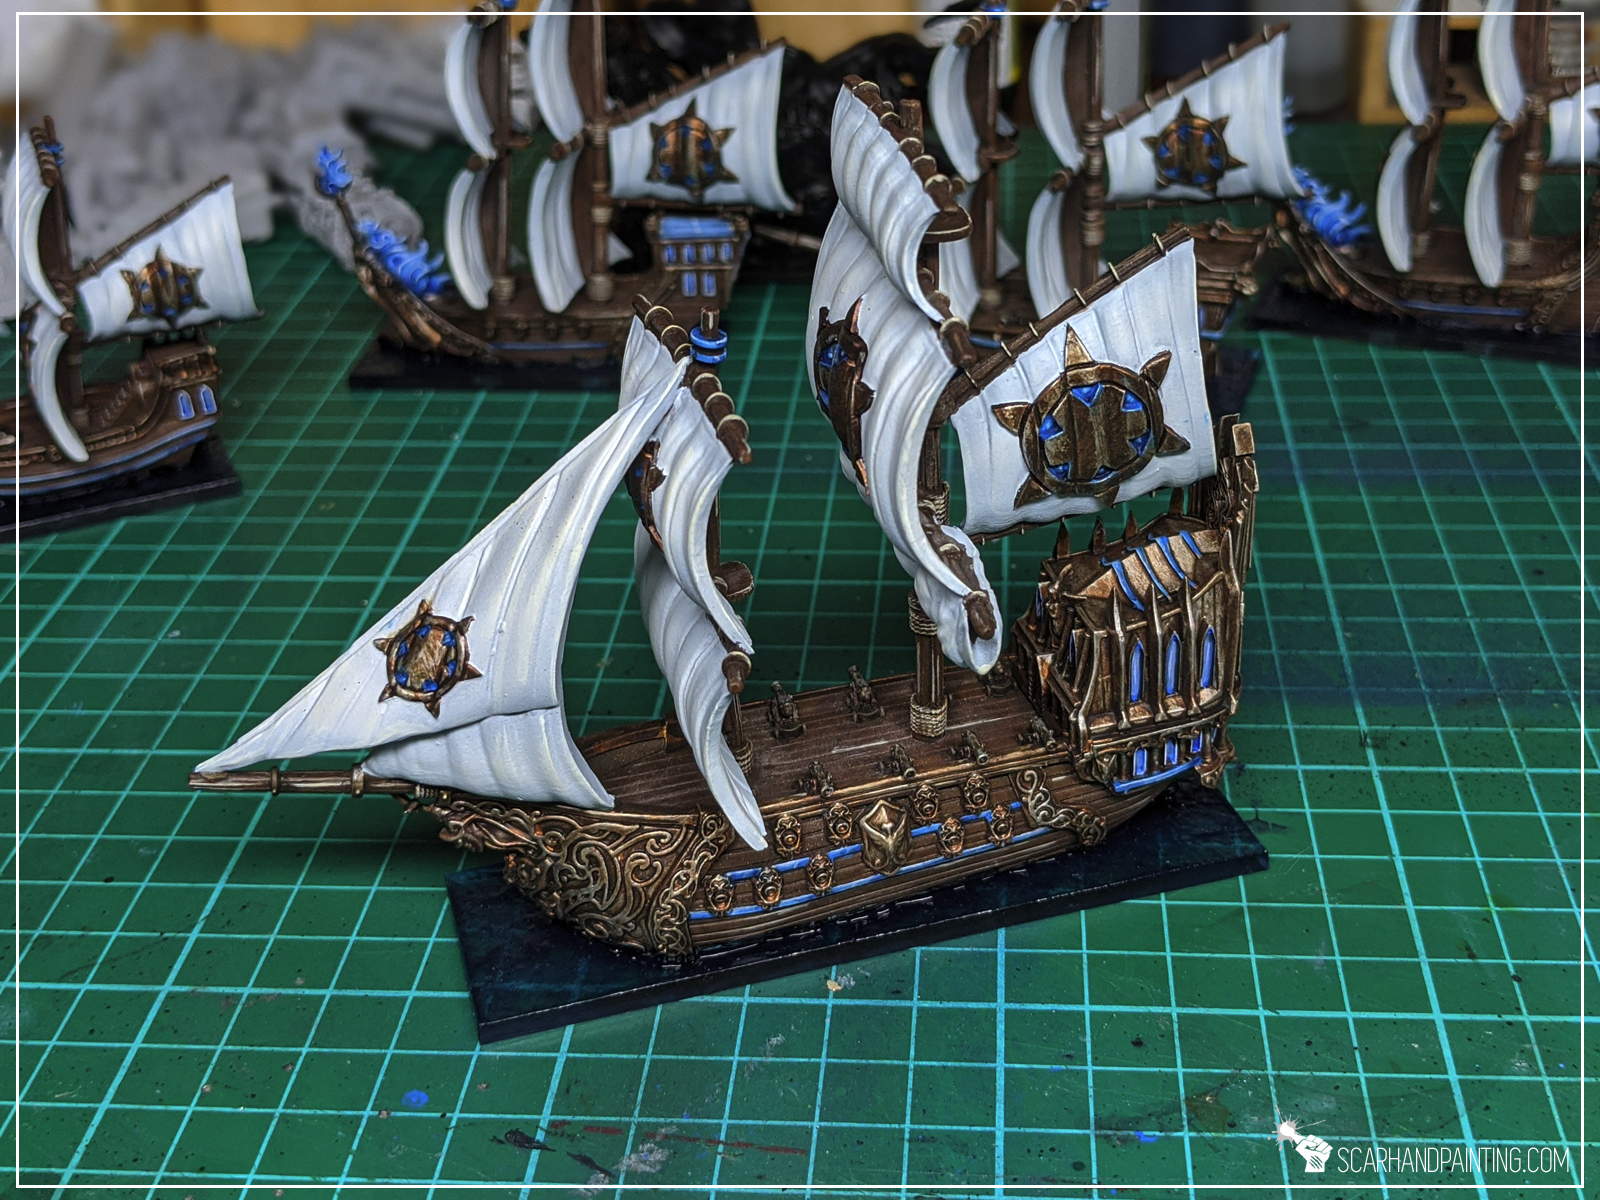
Step five:
Some time later I applied AK Interactive clear Water Gel effects around the ship. I used a small brush and slowly built the mass of splashing water at the front and on the sides of the ship. This time I didn’t care about messing up the hull.
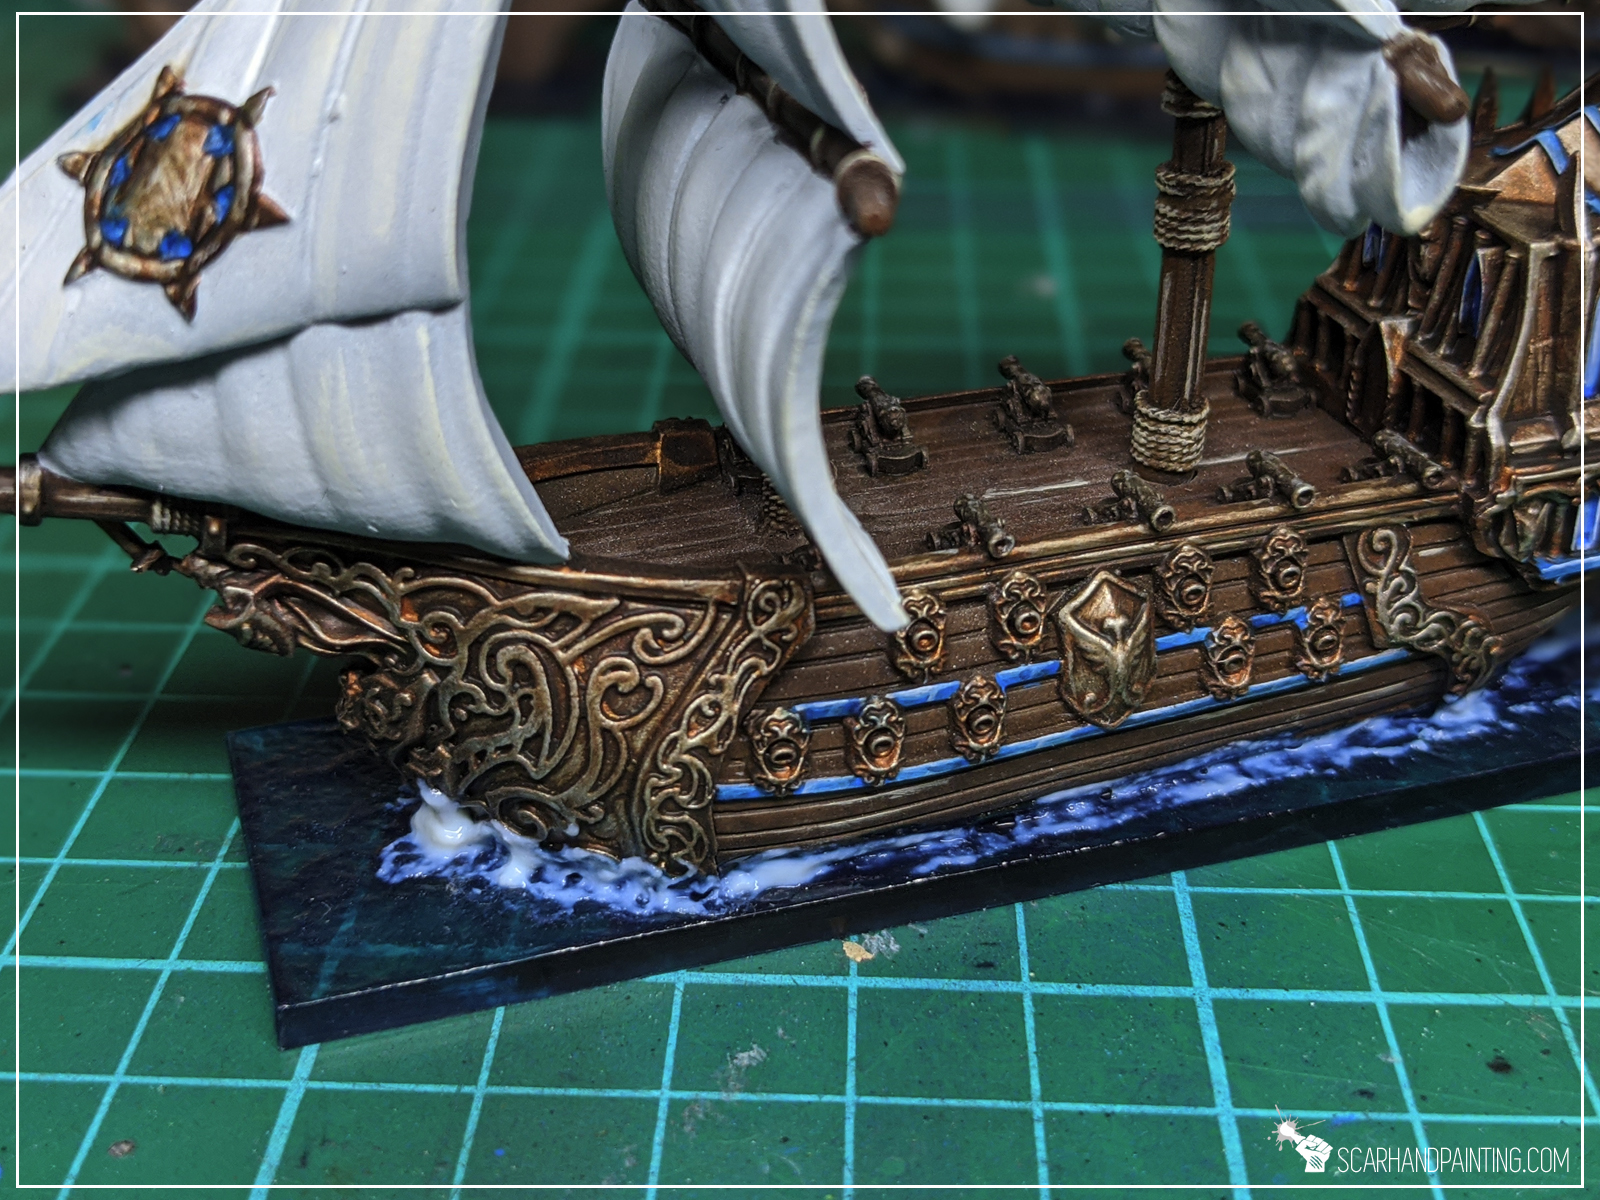
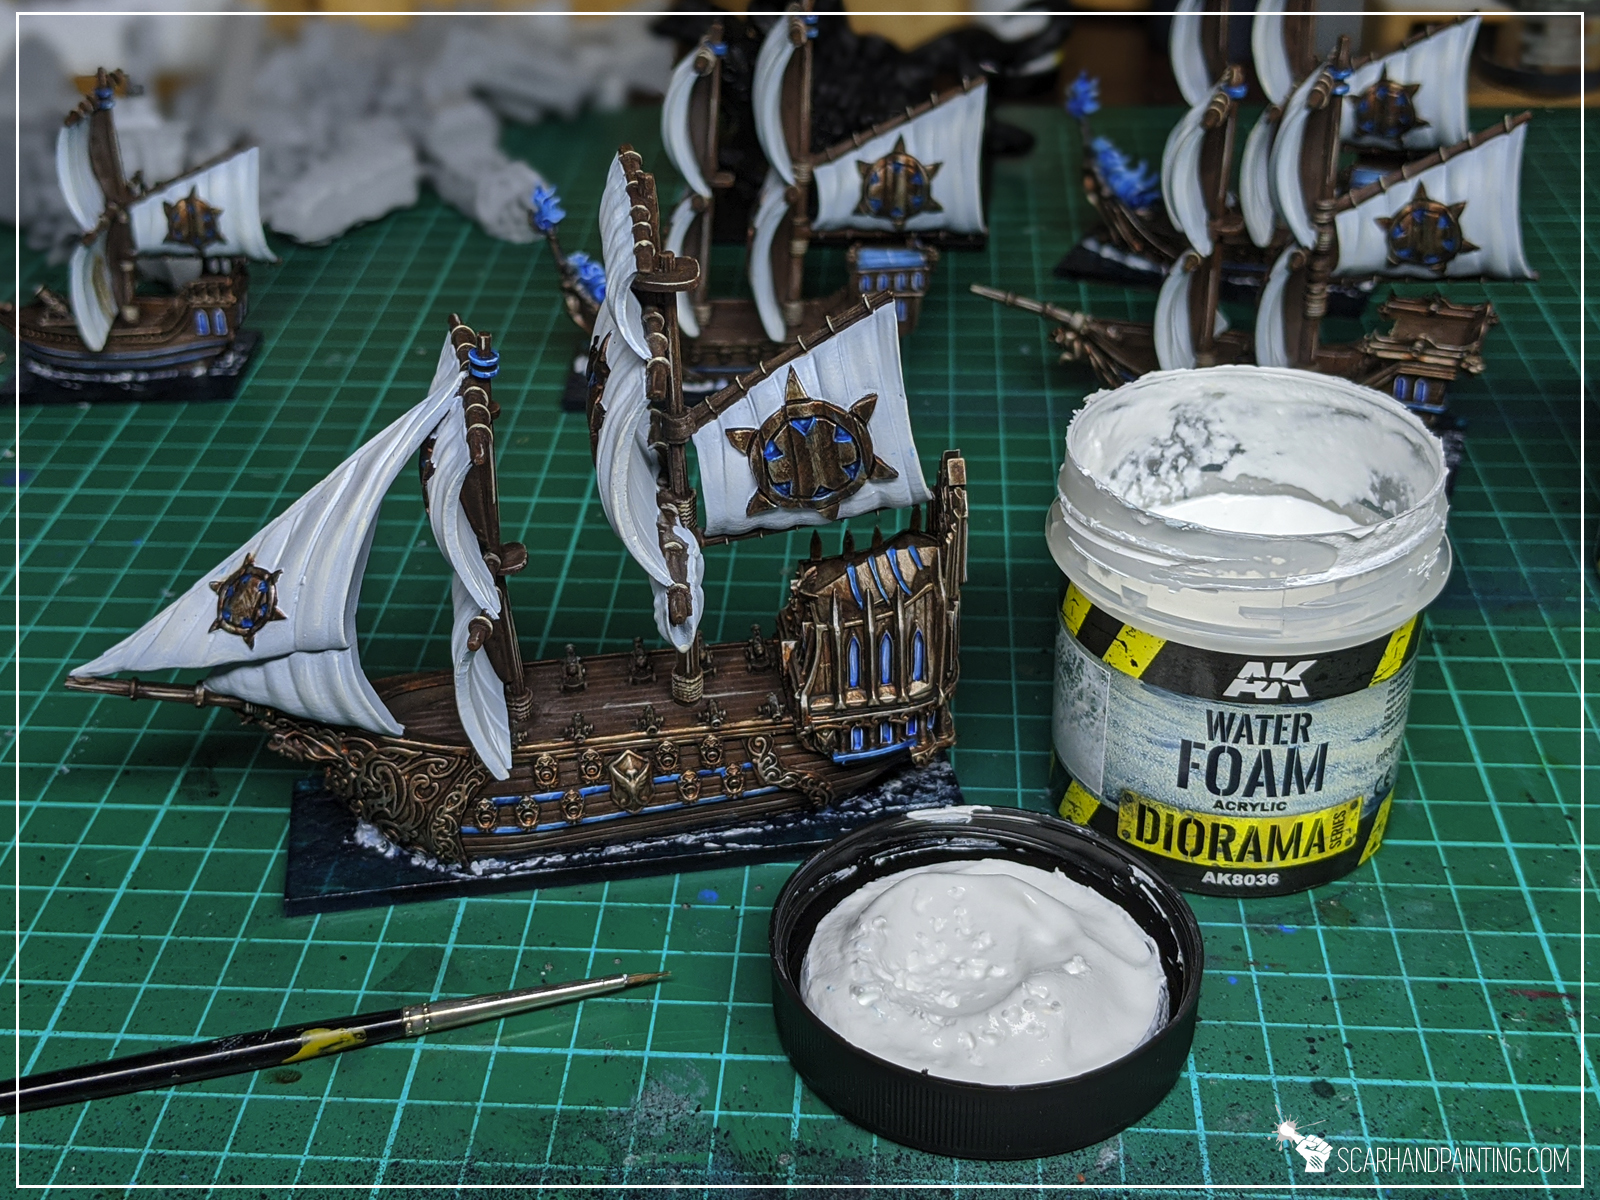
Step six:
Next I applied AK Interactive Water Foam. Using a small brush I applied small dots of the effect on top of previous layer. This one is very white so I tried to avoid applying to much. Mistakes were removed with a clean flat brush – pushed into more tight lines, where necessary.
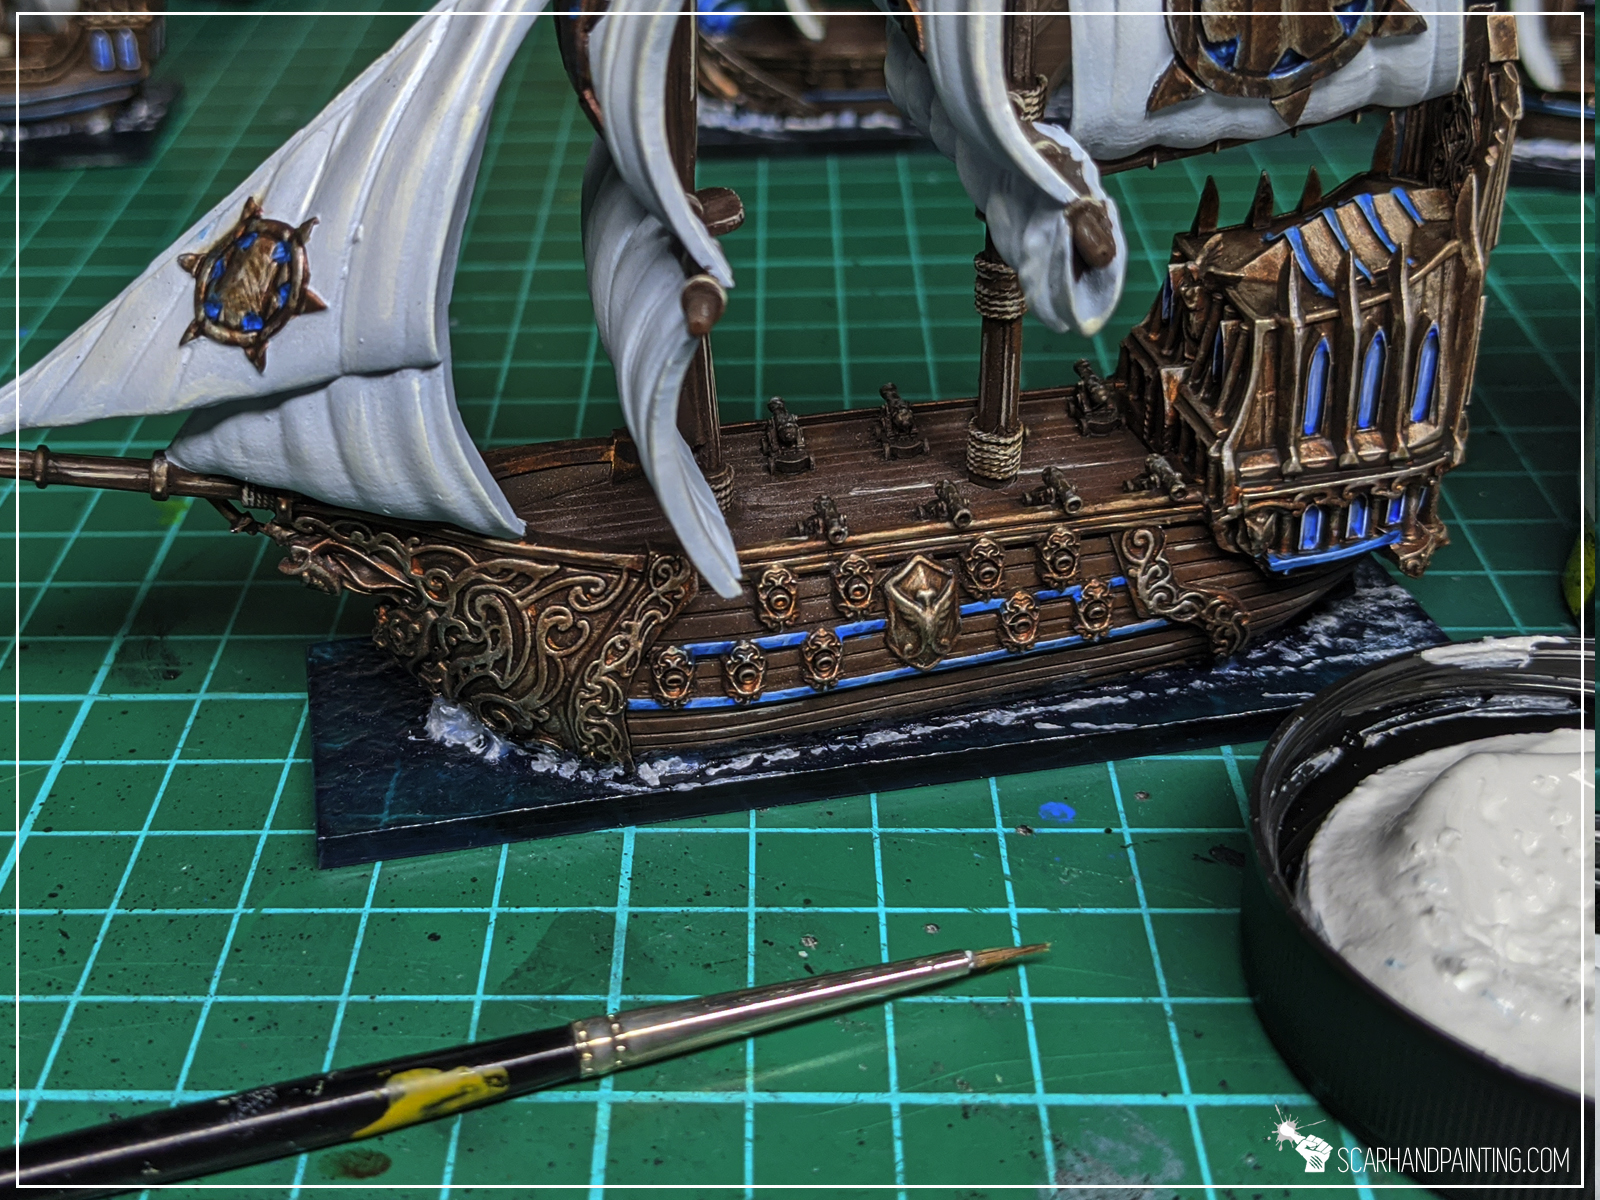
Step seven:
Lastly I mixed white paint, water and AK Interactive clear Water Gel effect and stippled a bit behind and around the ship to create a nice effect of dissolving water foam.

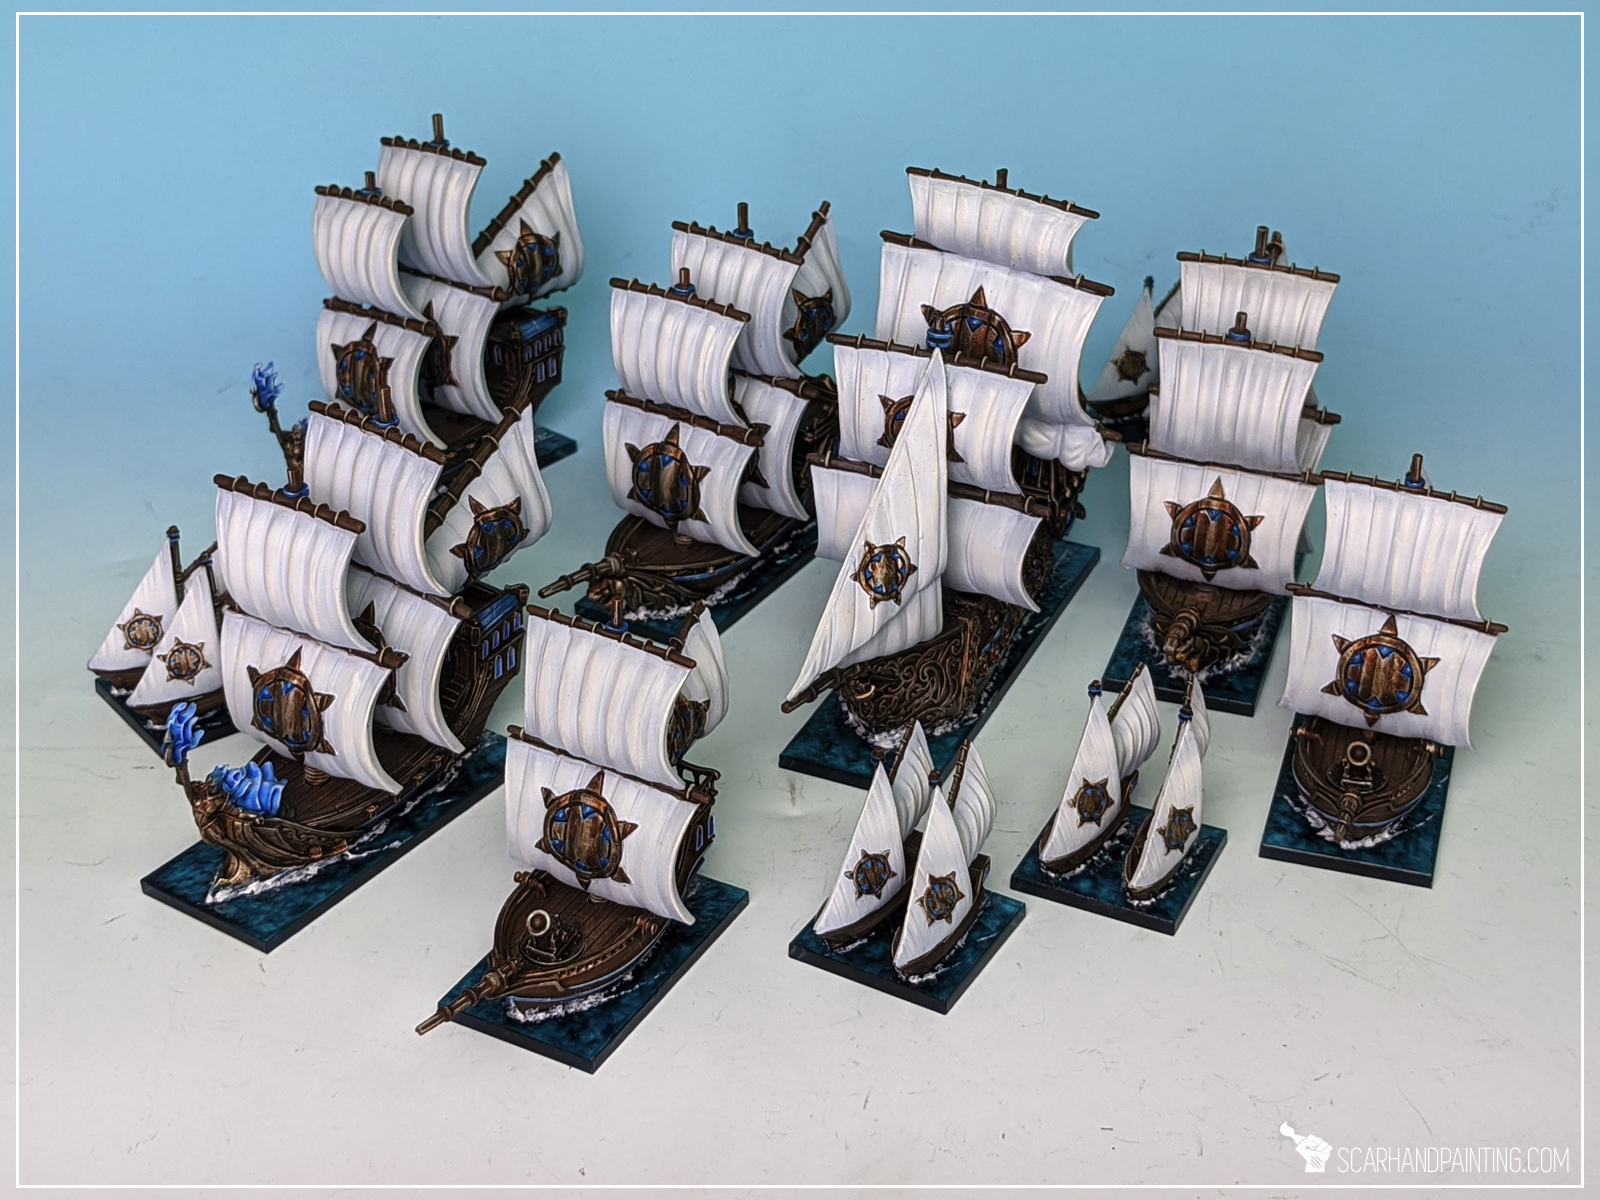
Task complete! The fleet is now sailing into the unknown. I hope you like this tutorial. For more pictures of finished fleet visit Gallery: Armada Basileans
Be sure to let me know your thoughts on the method either in the comments below or at my facebook profile.
Please link this tutorial to anyone who likes to learn new hobby tricks.
Lastly I also invite you to follow me at Instagram, where I drop some nice pictures from time to time.
All speed ahead and see you in the next article!
Welcome to Rocky Bases tutorial. Here I will take you on a Step-by-step trip through the process of creating and painting Rocky Bases as presented in the picture below. This adventure is possible thanks to generosity of Gamers Grass and their easy to use, fantastic products.

Before we start, some notes:
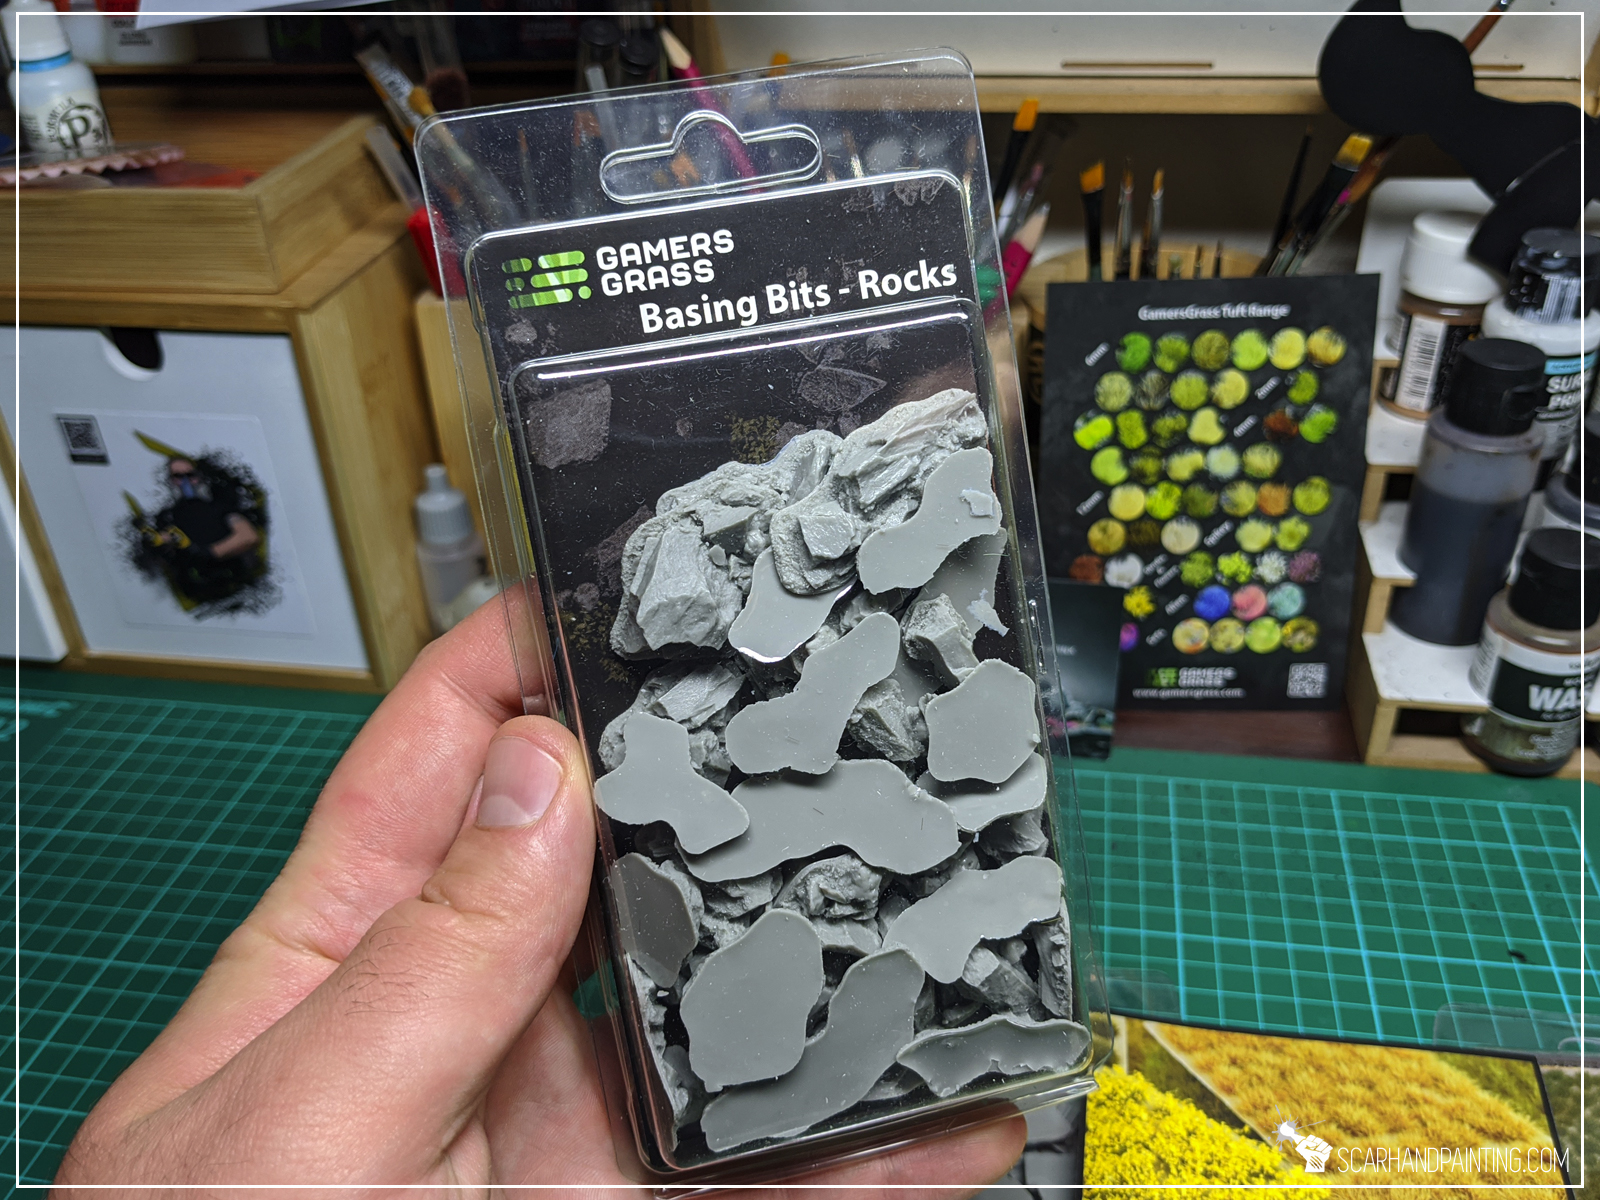
As mentioned in previous Tutorial, when making bases, I usually aim for fast, simple, yet effective solutions. It is important to pick a basing method that is easy to copy onto large quantities of miniatures or coming back to a project. This is why I consider Gamers Grass Basing Bits a perfect solution. Nicely textured, ready to use straight out of the box – glue them on, add some texture around – you’re ready to paint. All that being said – for this particular base type I choose Gamers Grass “Rocks” basing bits.
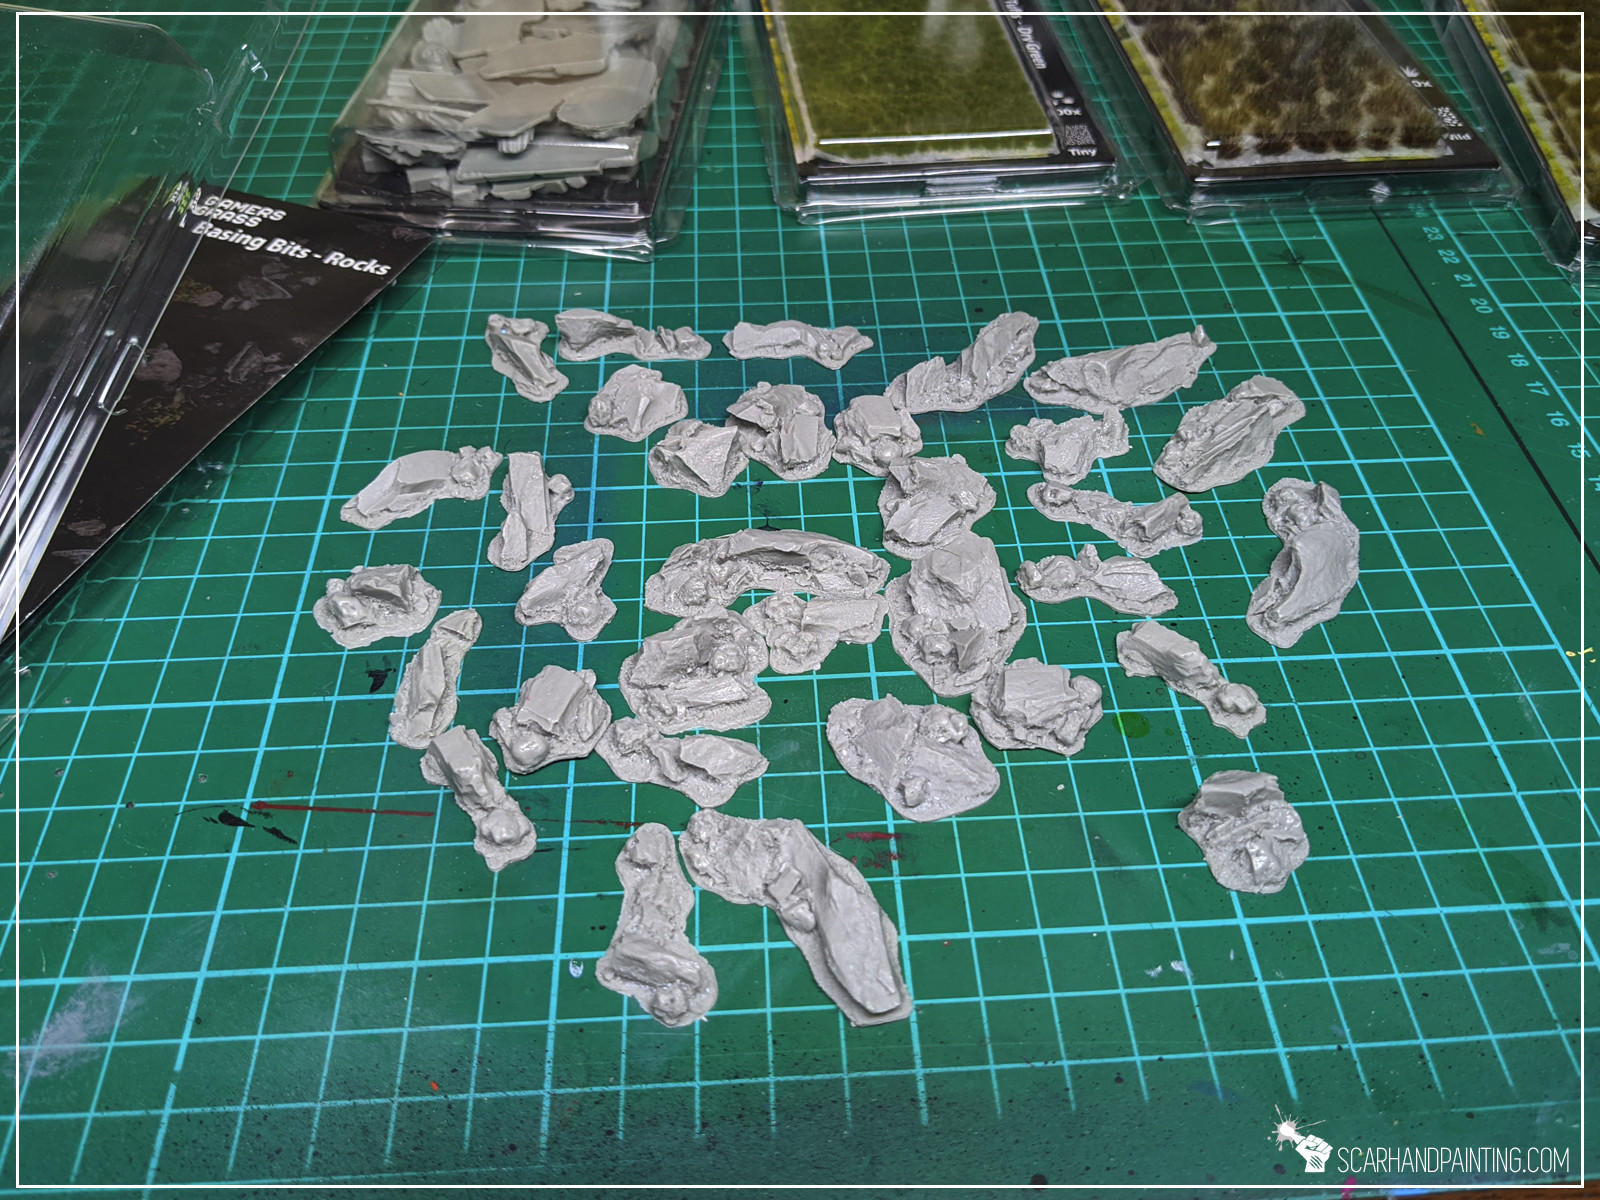
Step one: Applying basing bits
I started by applying glue onto the base and gluing few basing bits on top.

Step two: Applying texture
I then applied texture with Games Workshop Stirland Mud.


At this point entire “Modelling” part is done. If it seem fast it’s because it really is. Just two steps and you’re ready to paint!

I choose to paint these Rocky bases in a classic Bron plus Grey style. Assuming these are meant to be used for a large collection, I want to keep things simple. Would be perfect to close in about three layers per color, with a single type of tufts on top. Just your everyday nice looking, coherent bases. Here’s how I went about it…
Step two: Undercoat
I applied a black undercoat.
Step two: Main color
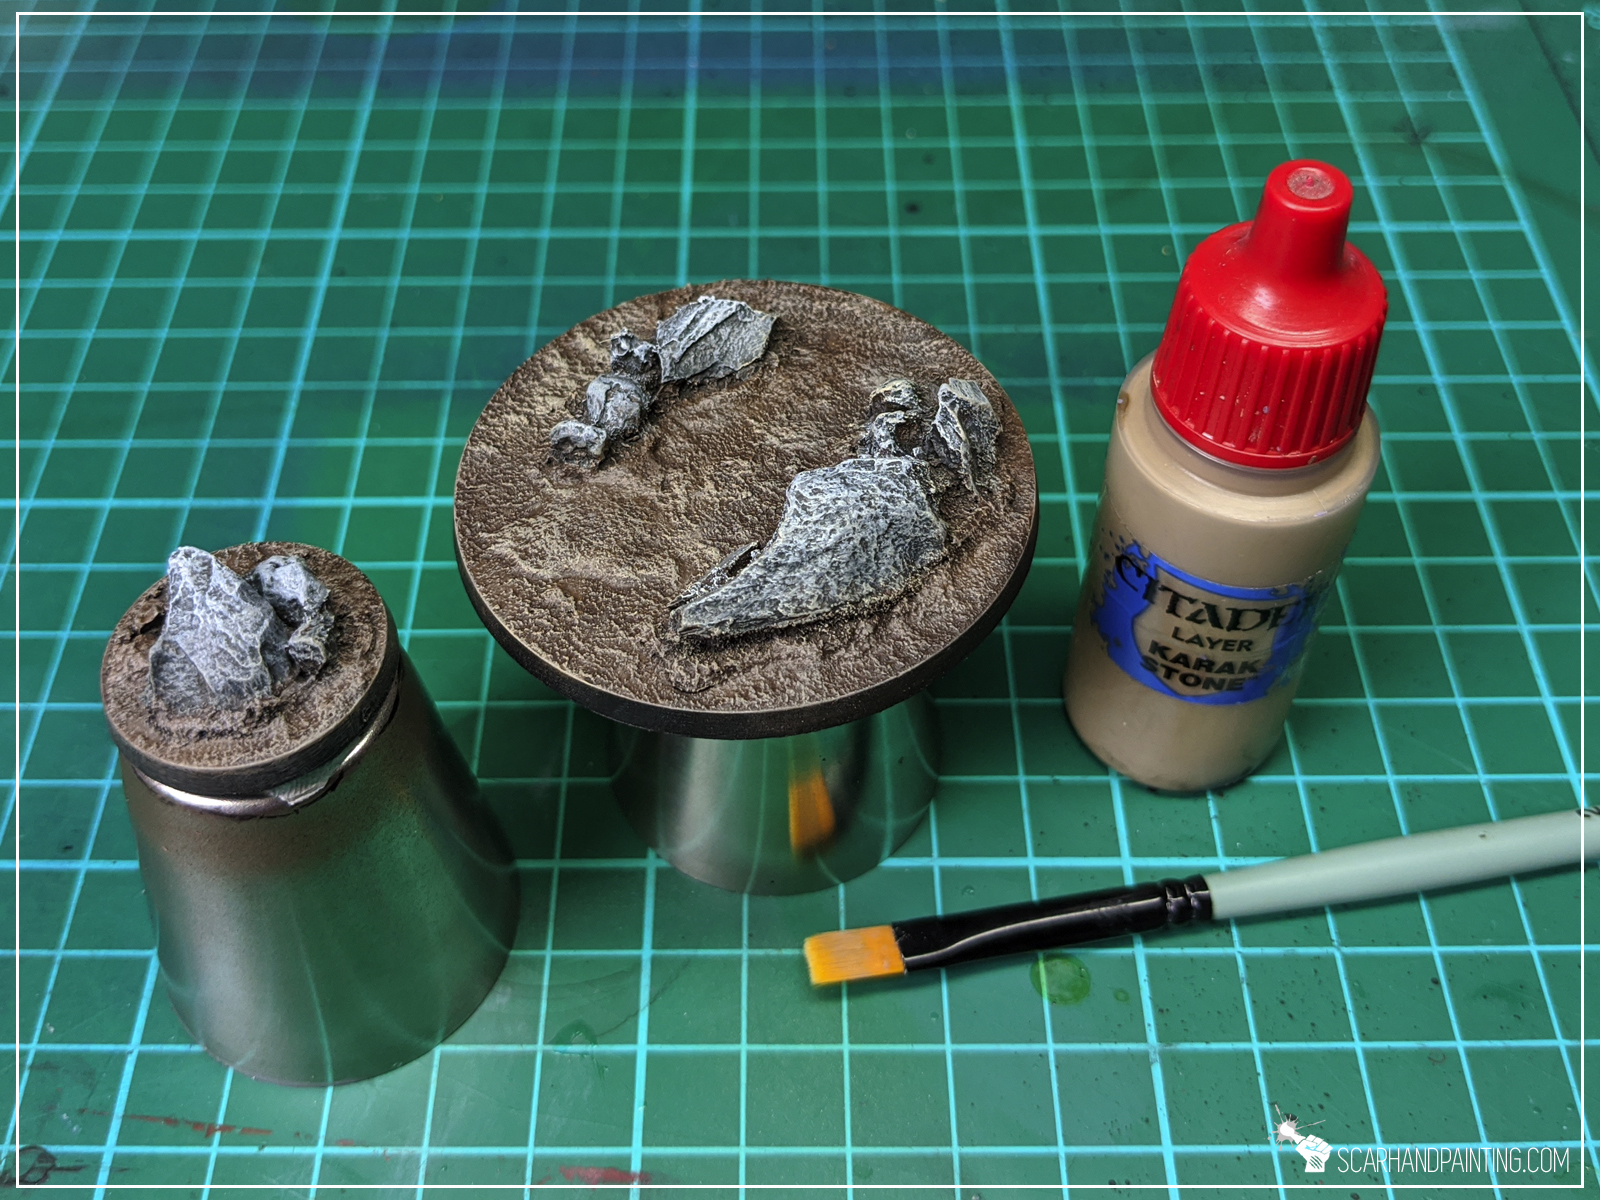
I then painted entire base with Vallejo Charred Brown. Once dry I drybrushed Games Workshop Calthan Brown on top.


Step two: Secondary color
For rocks I went with Vallejo Panzer Dark Grey, followed by a drybrush of Games Workshop Fortress Grey.
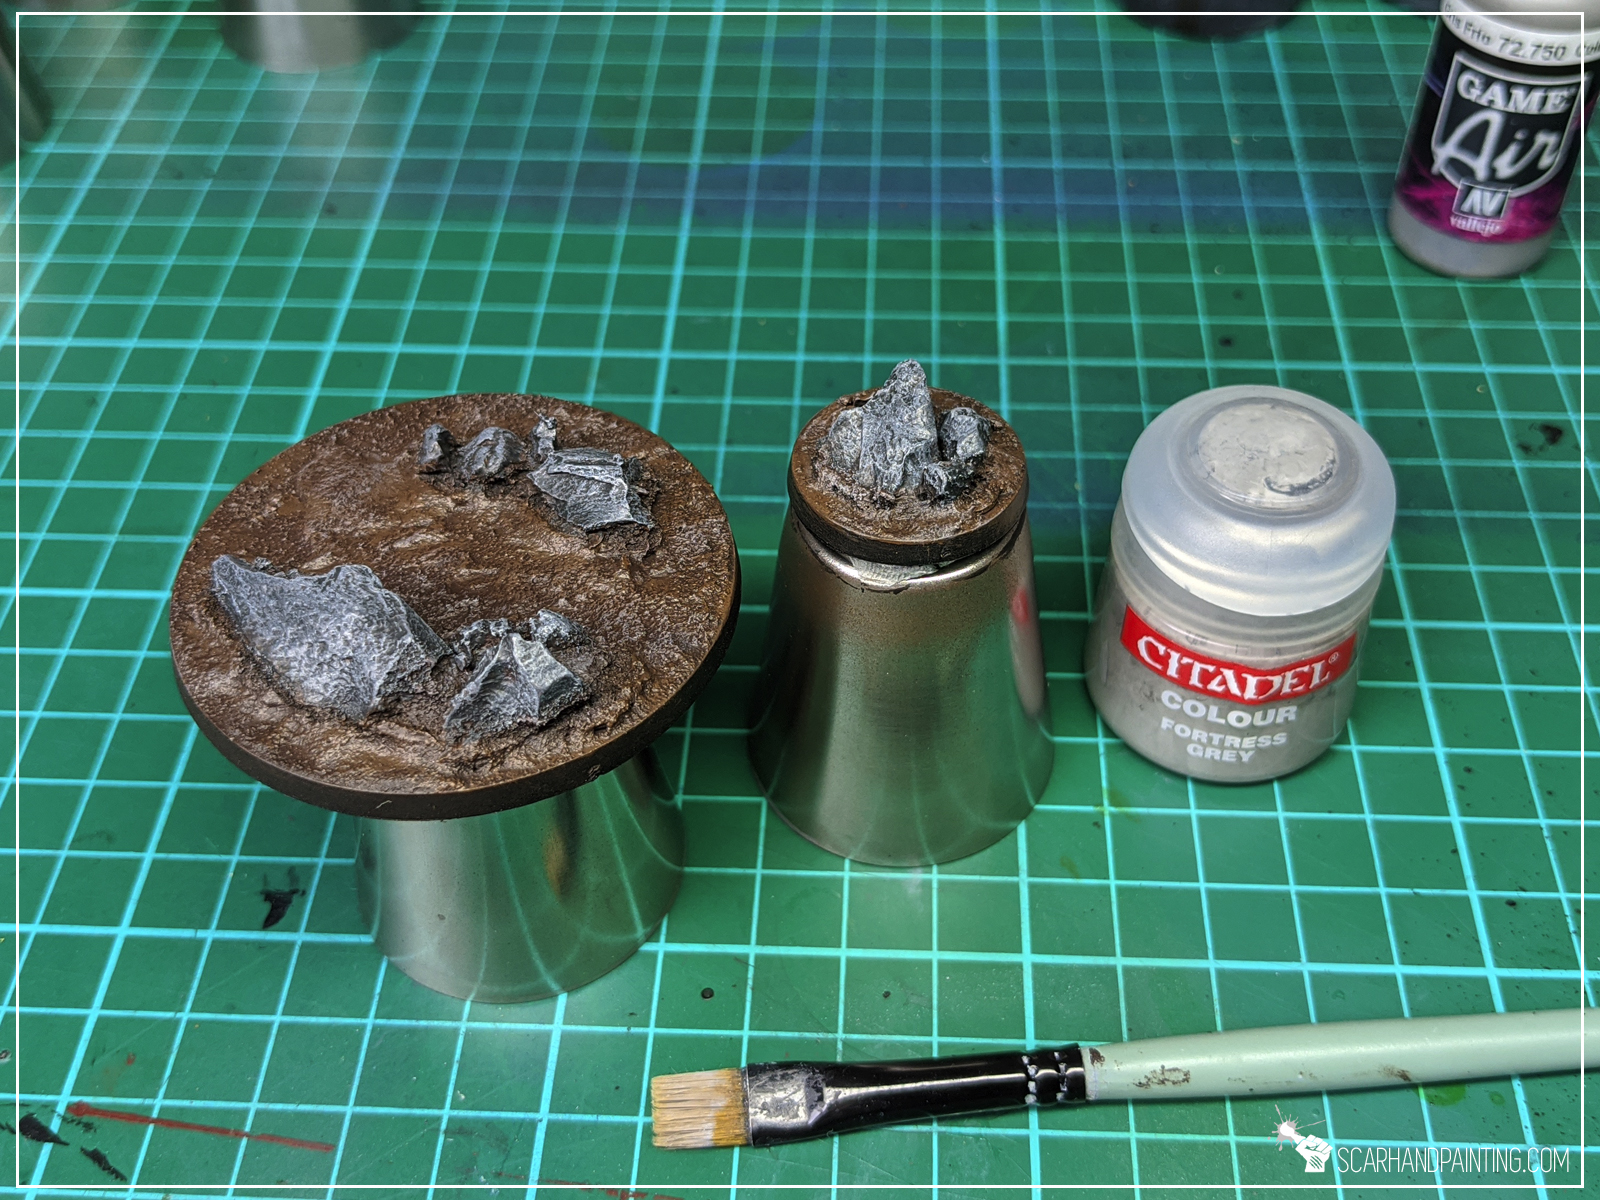
Step tree: Highlights
Final highlight was done with a drybrush of Games Workshop Karak Stone for brown and a drybrush of Vallejo Ghost Grey for rocks.

Step tree: Tufts
Finally I applied Gamers Grass Swamp Wild Tufts.
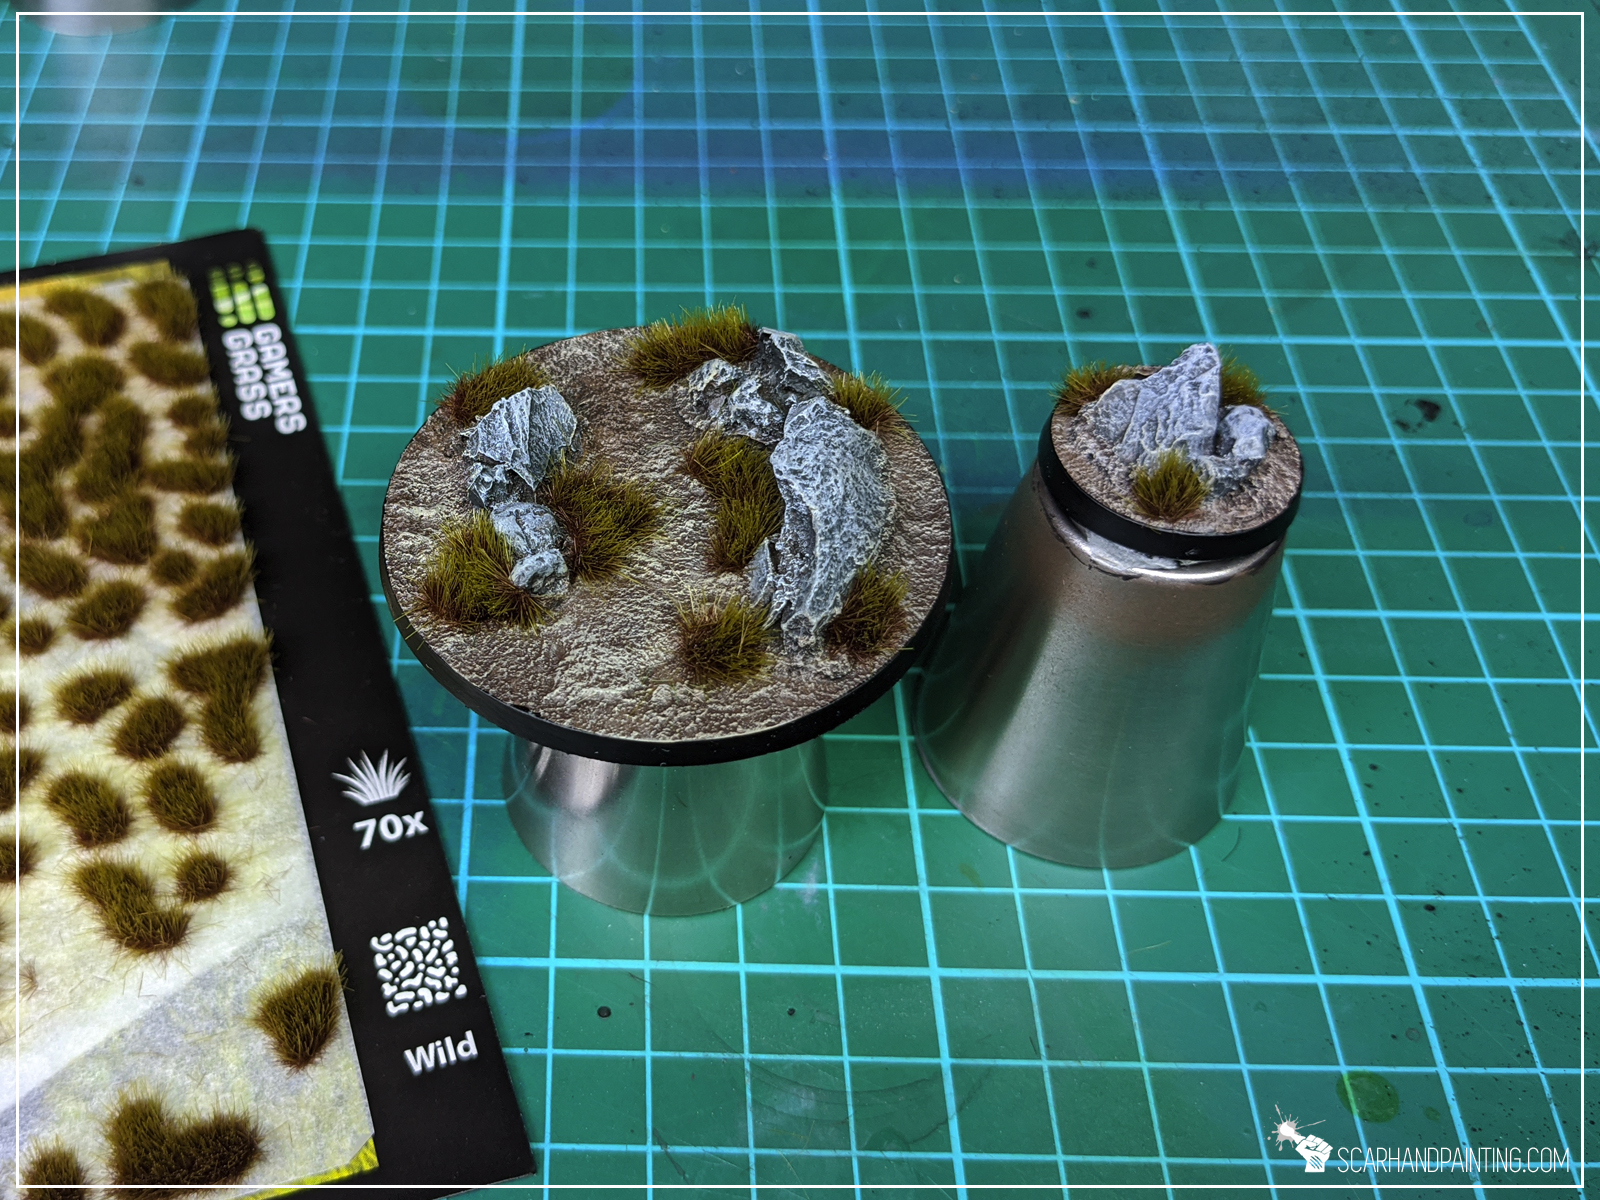

And with that the job was done! Fast and easy – as all bases should be. I hope this was a pleasant tutorial and that you saw how simple the process is. If you want to learn more about Gamers Grass products – here’s my review:
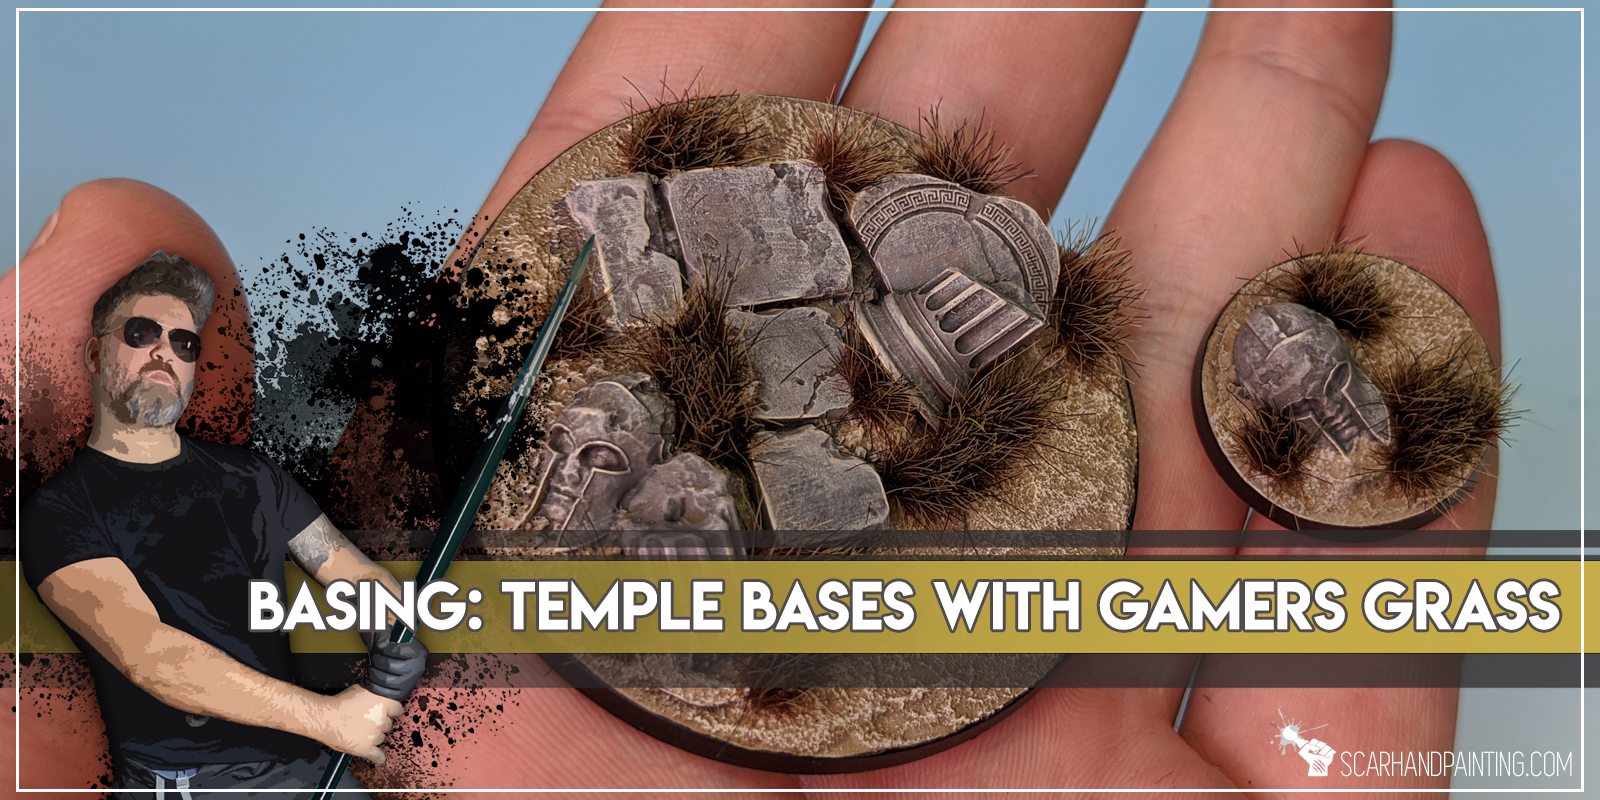
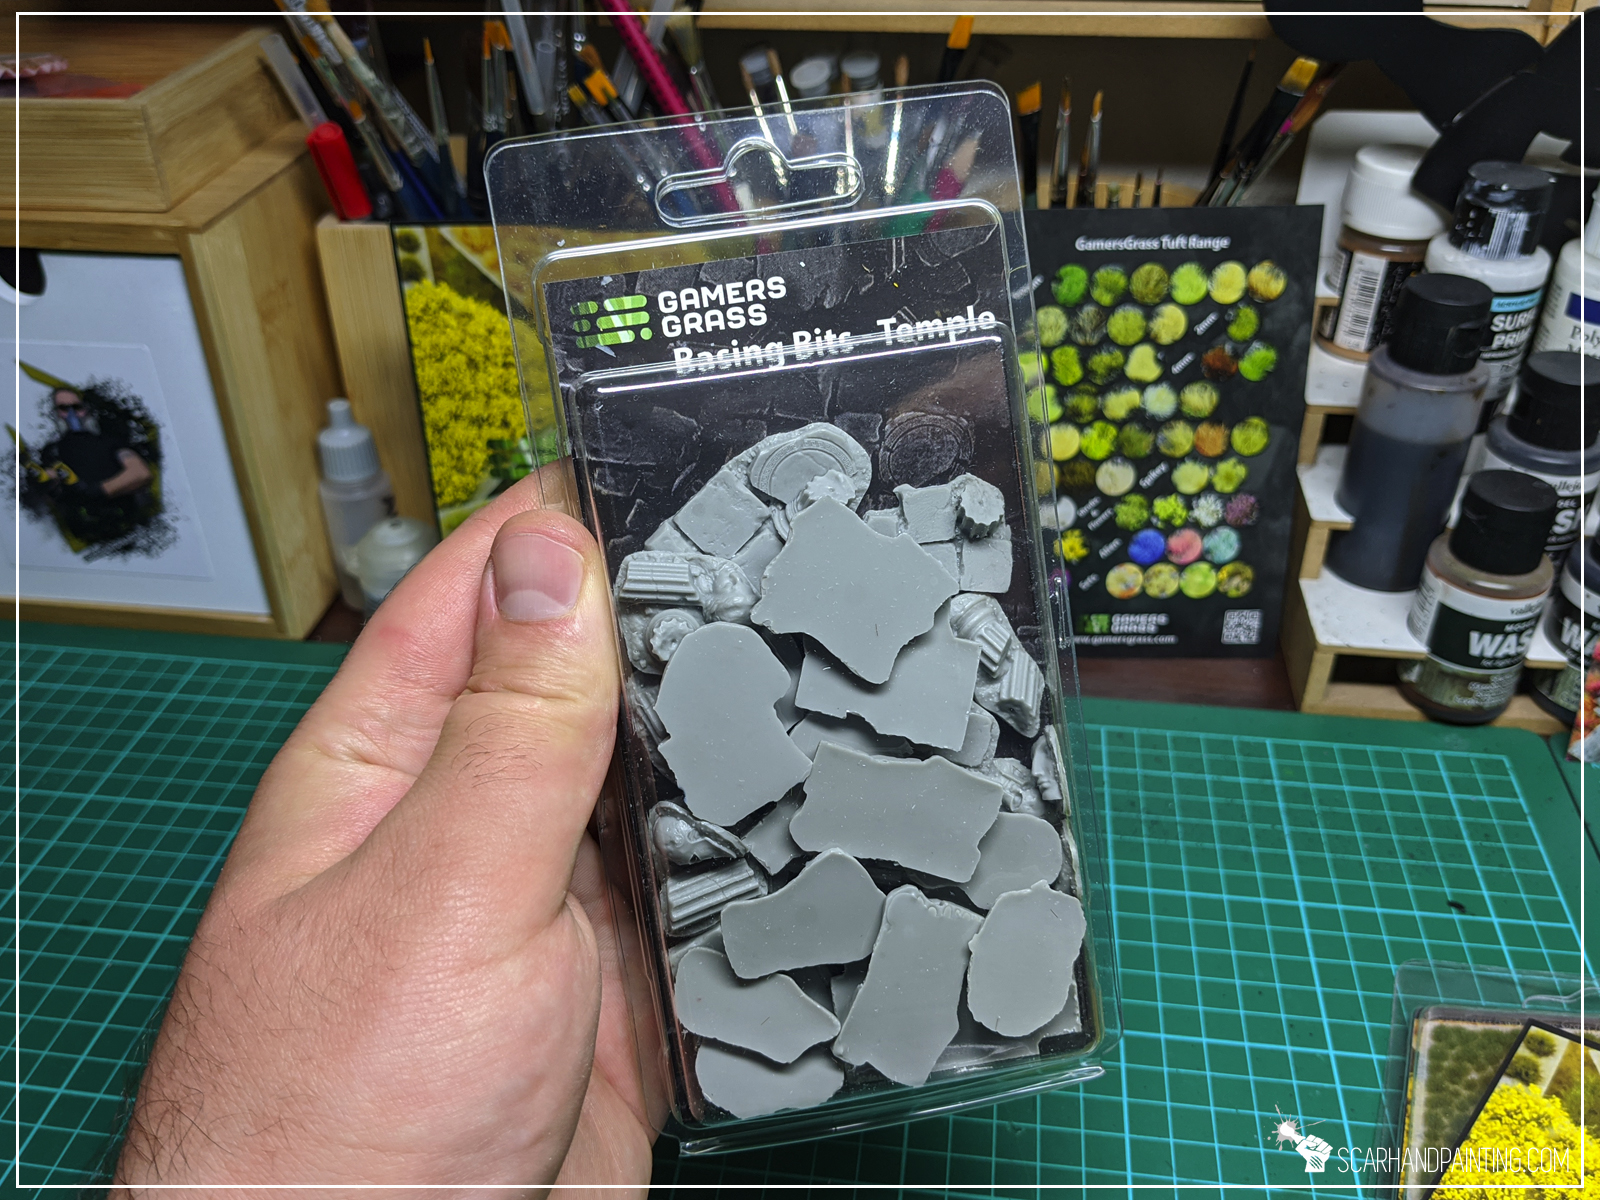
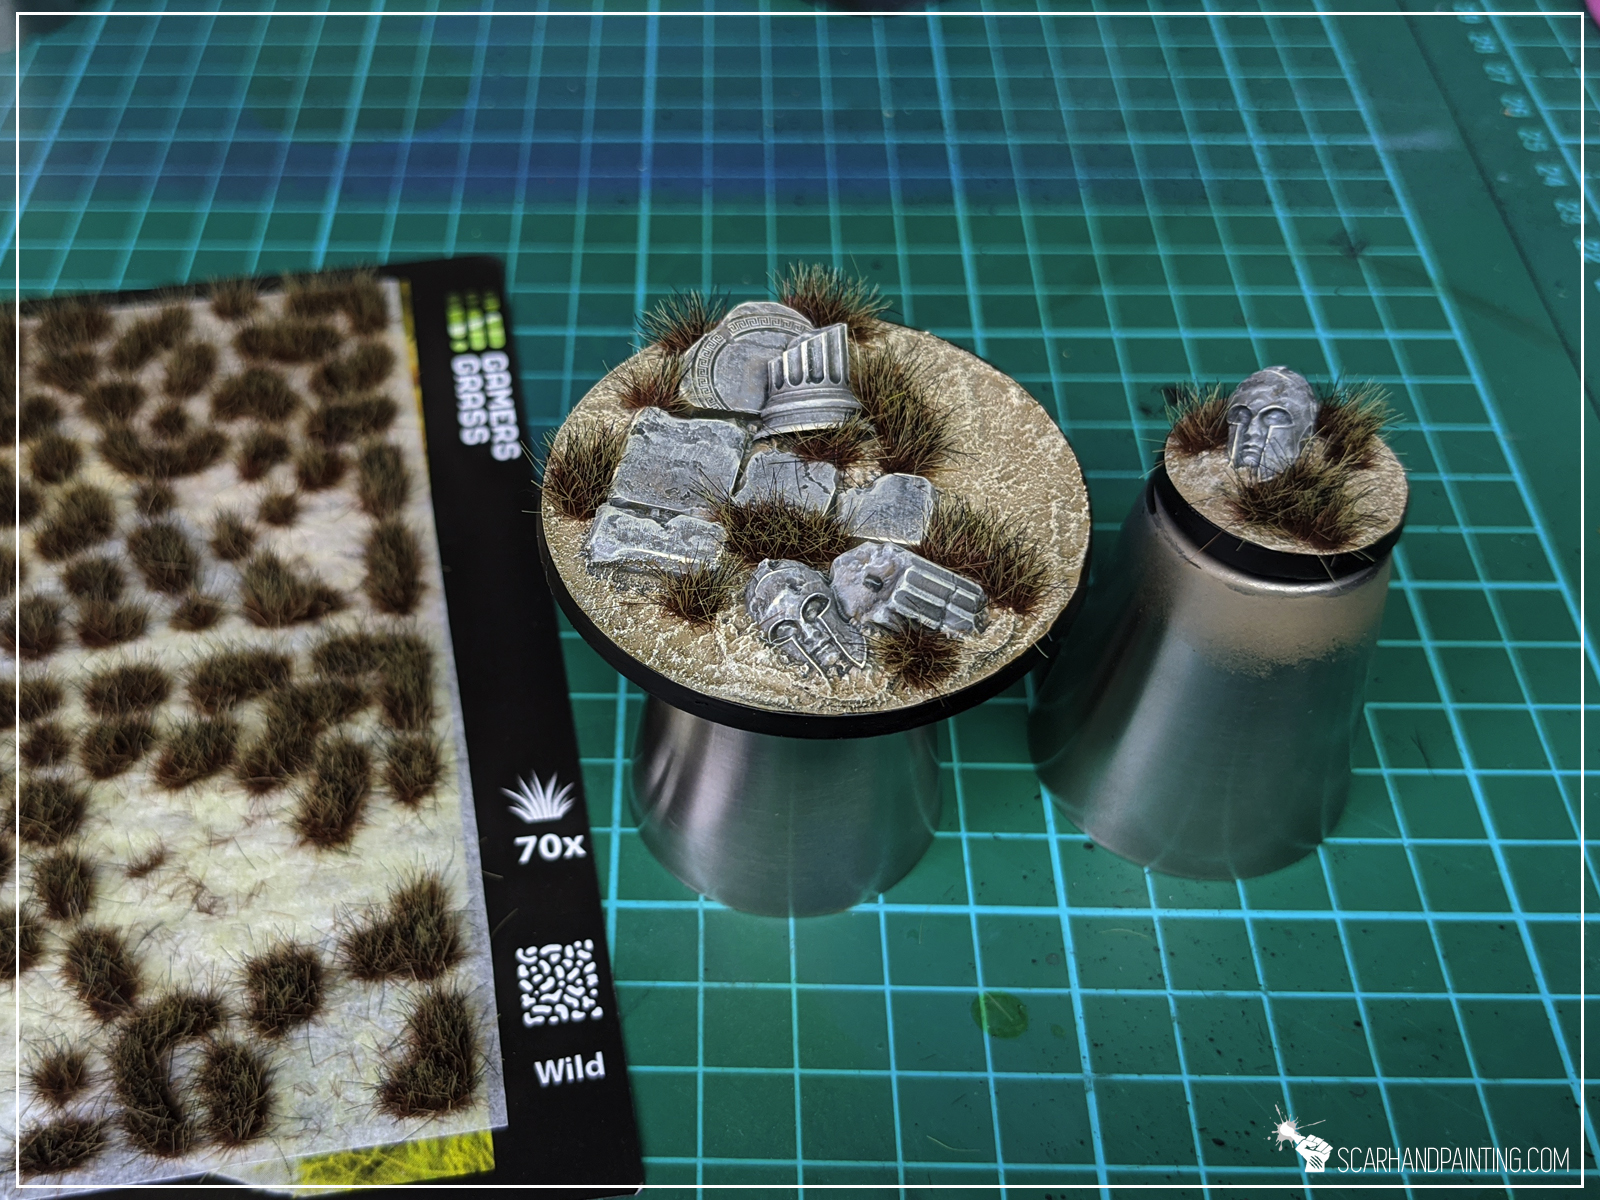
Welcome to Temple Bases tutorial. Here I will take you on a Step-by-step trip through the process of creating and painting Temple Bases as presented in the picture below. This adventure is possible thanks to generosity of Gamers Grass and their easy to use, fantastic products.
Before we start, some notes:
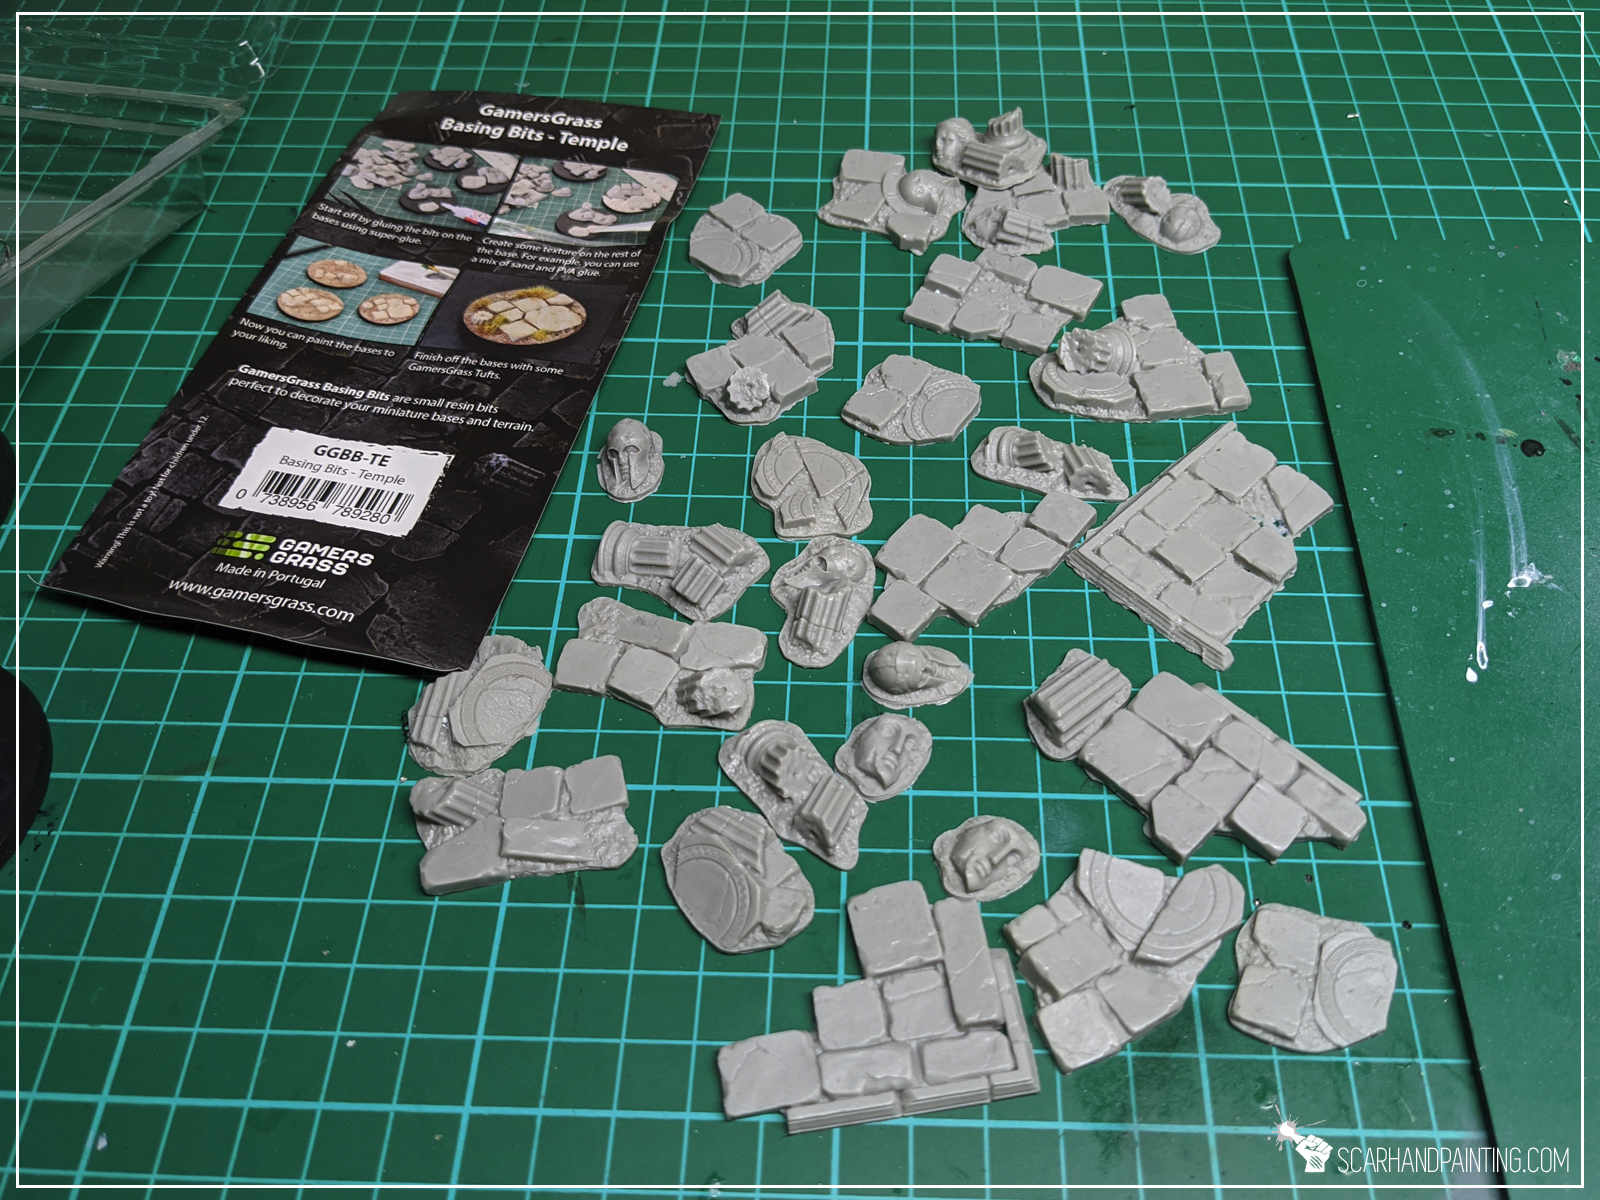
In my opinion base is supposed to complement a miniature, not steal the spotlight. For this reason, when making bases, I usually aim for fast, simple, yet effective solutions. Important thing to note when deciding on what to use for your bases is to pick a method that is easy to copy. This is why I consider Gamers Grass Basing Bits a perfect solution. Nicely textured, ready to use straight out of the box – glue them on, add some texture around – you’re ready to paint. All that being said – for this particular base type I choose Gamers Grass “Temple” basing bits.
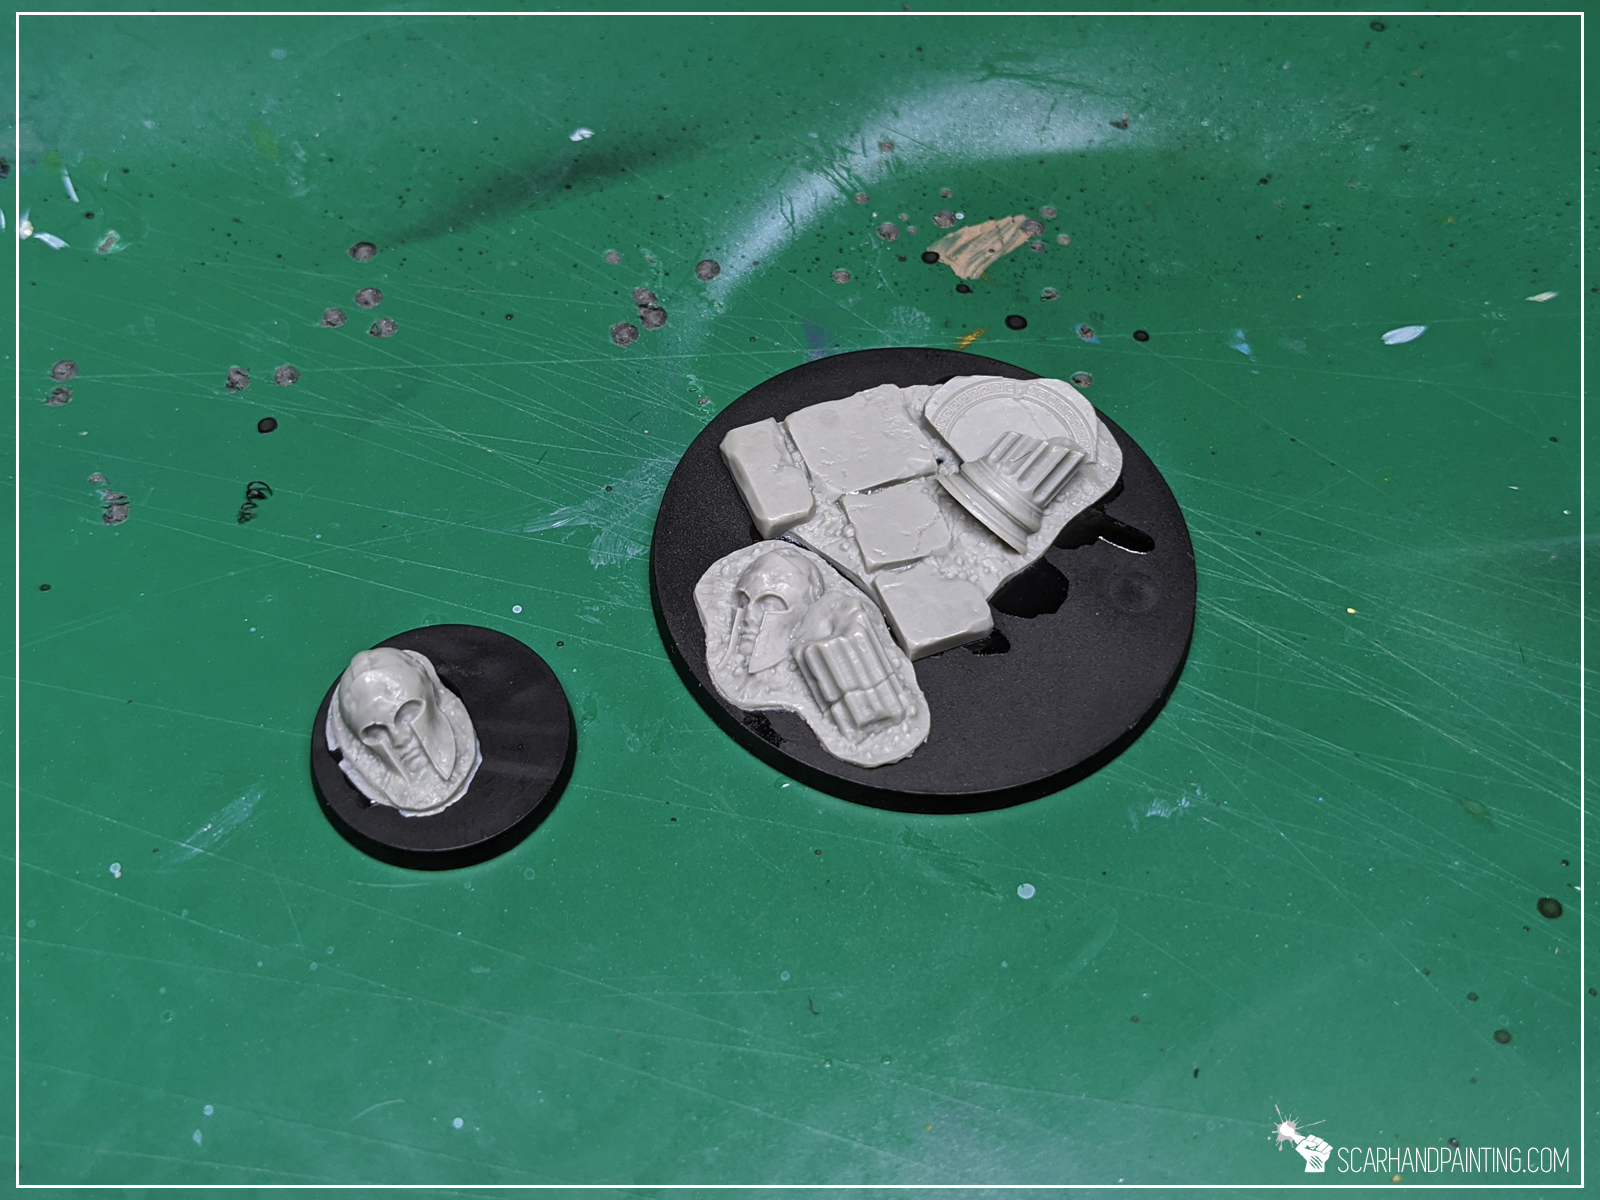
Step one: Applying basing bits
I started by applying glue onto the base and gluing few basing bits on top.


Step two: Applying texture
I then applied texture with Games Workshop Stirland Mud.
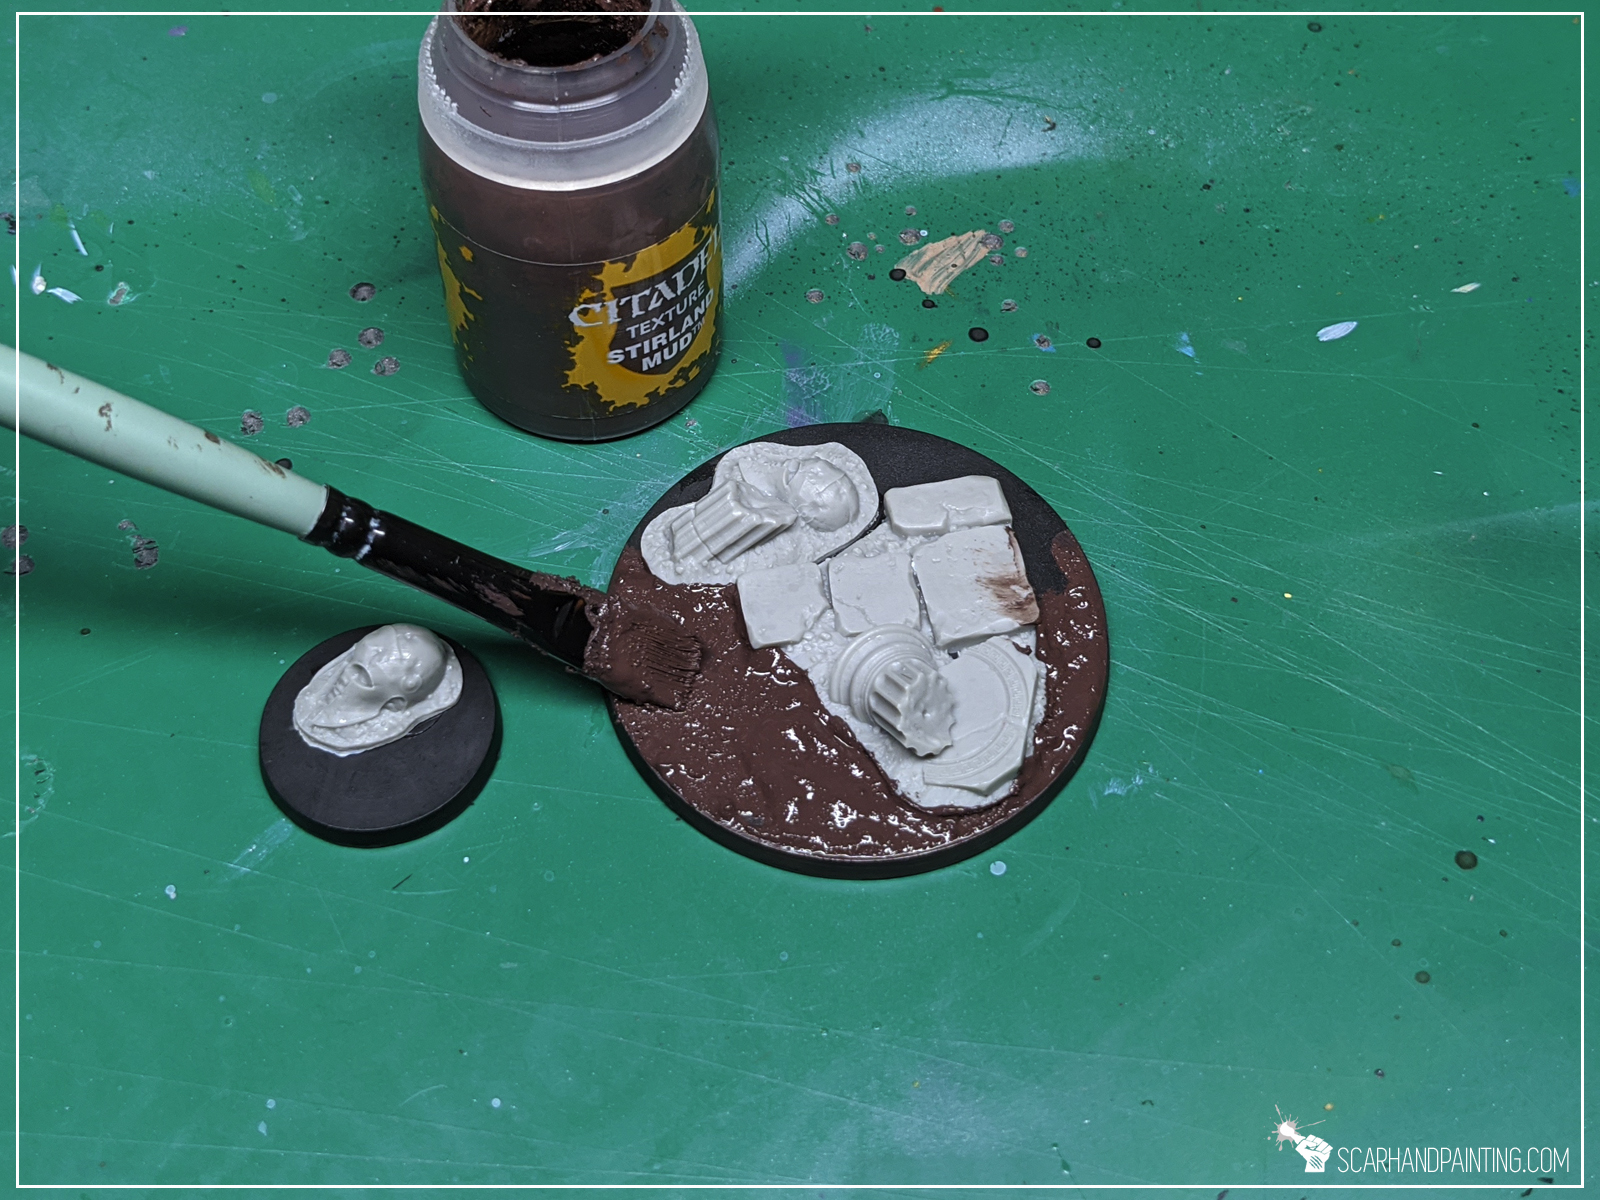
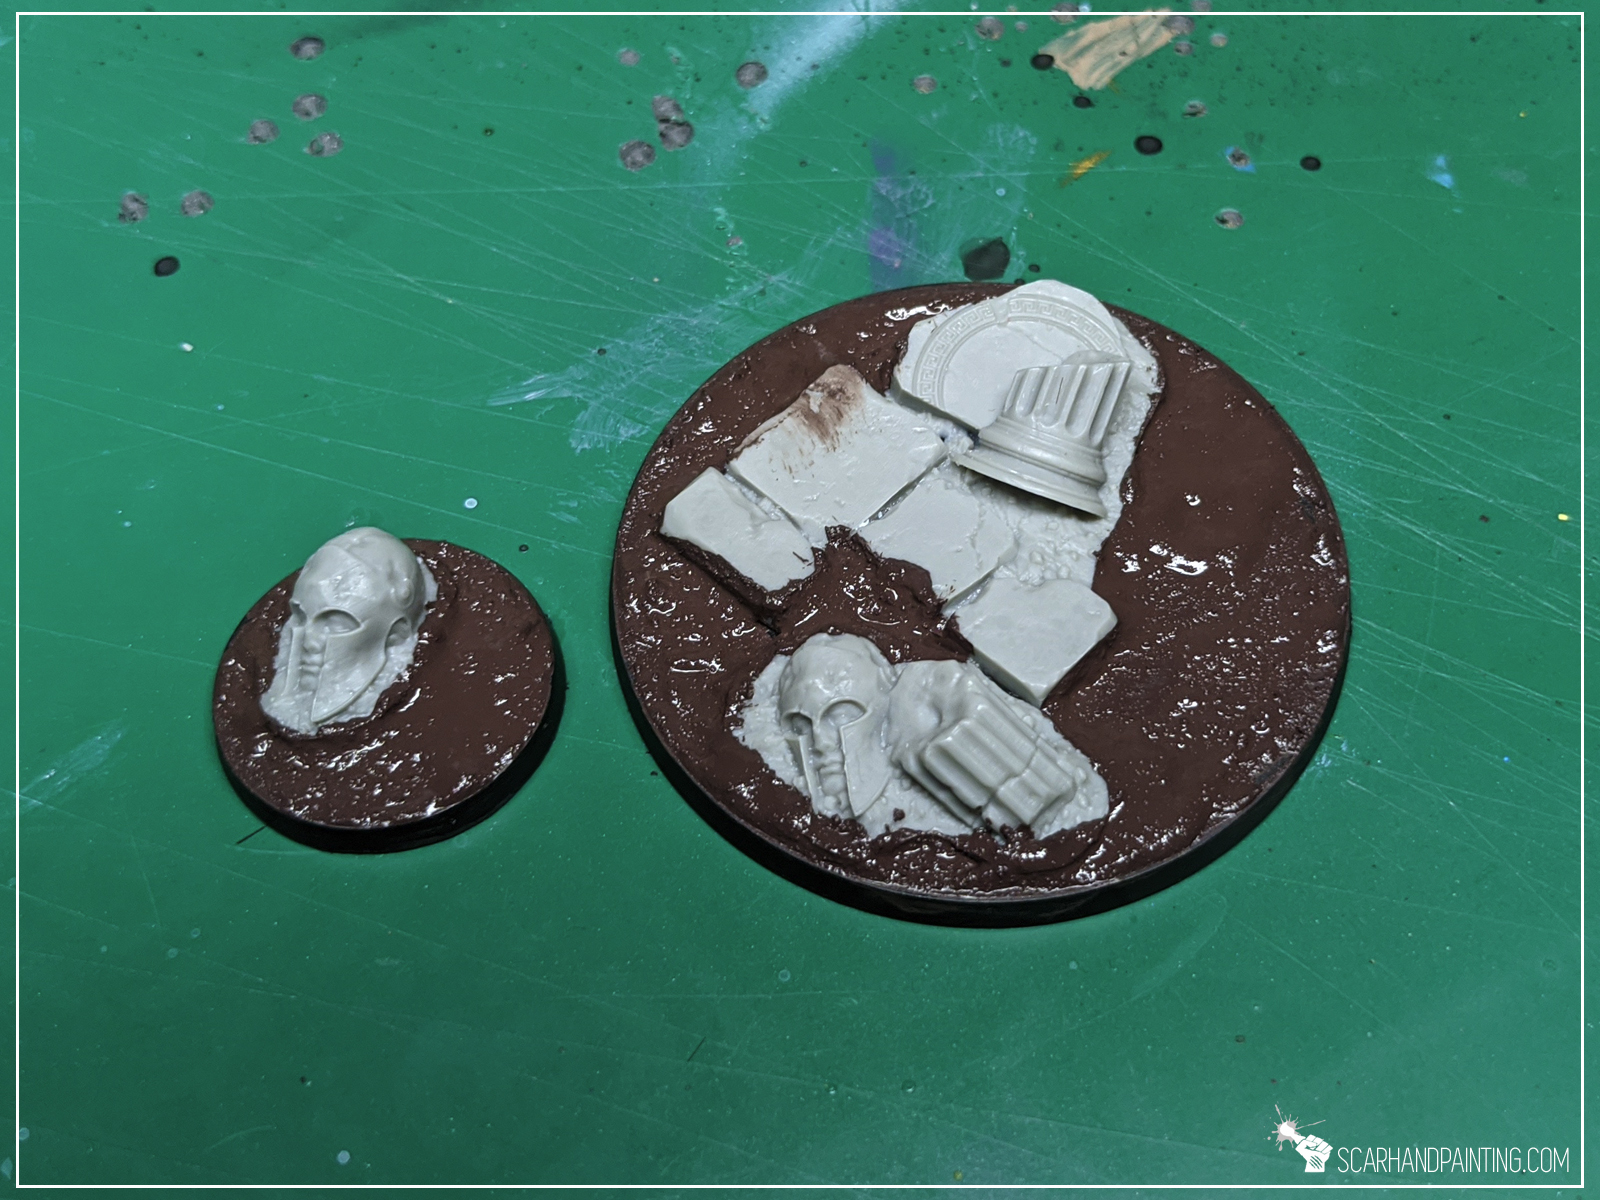
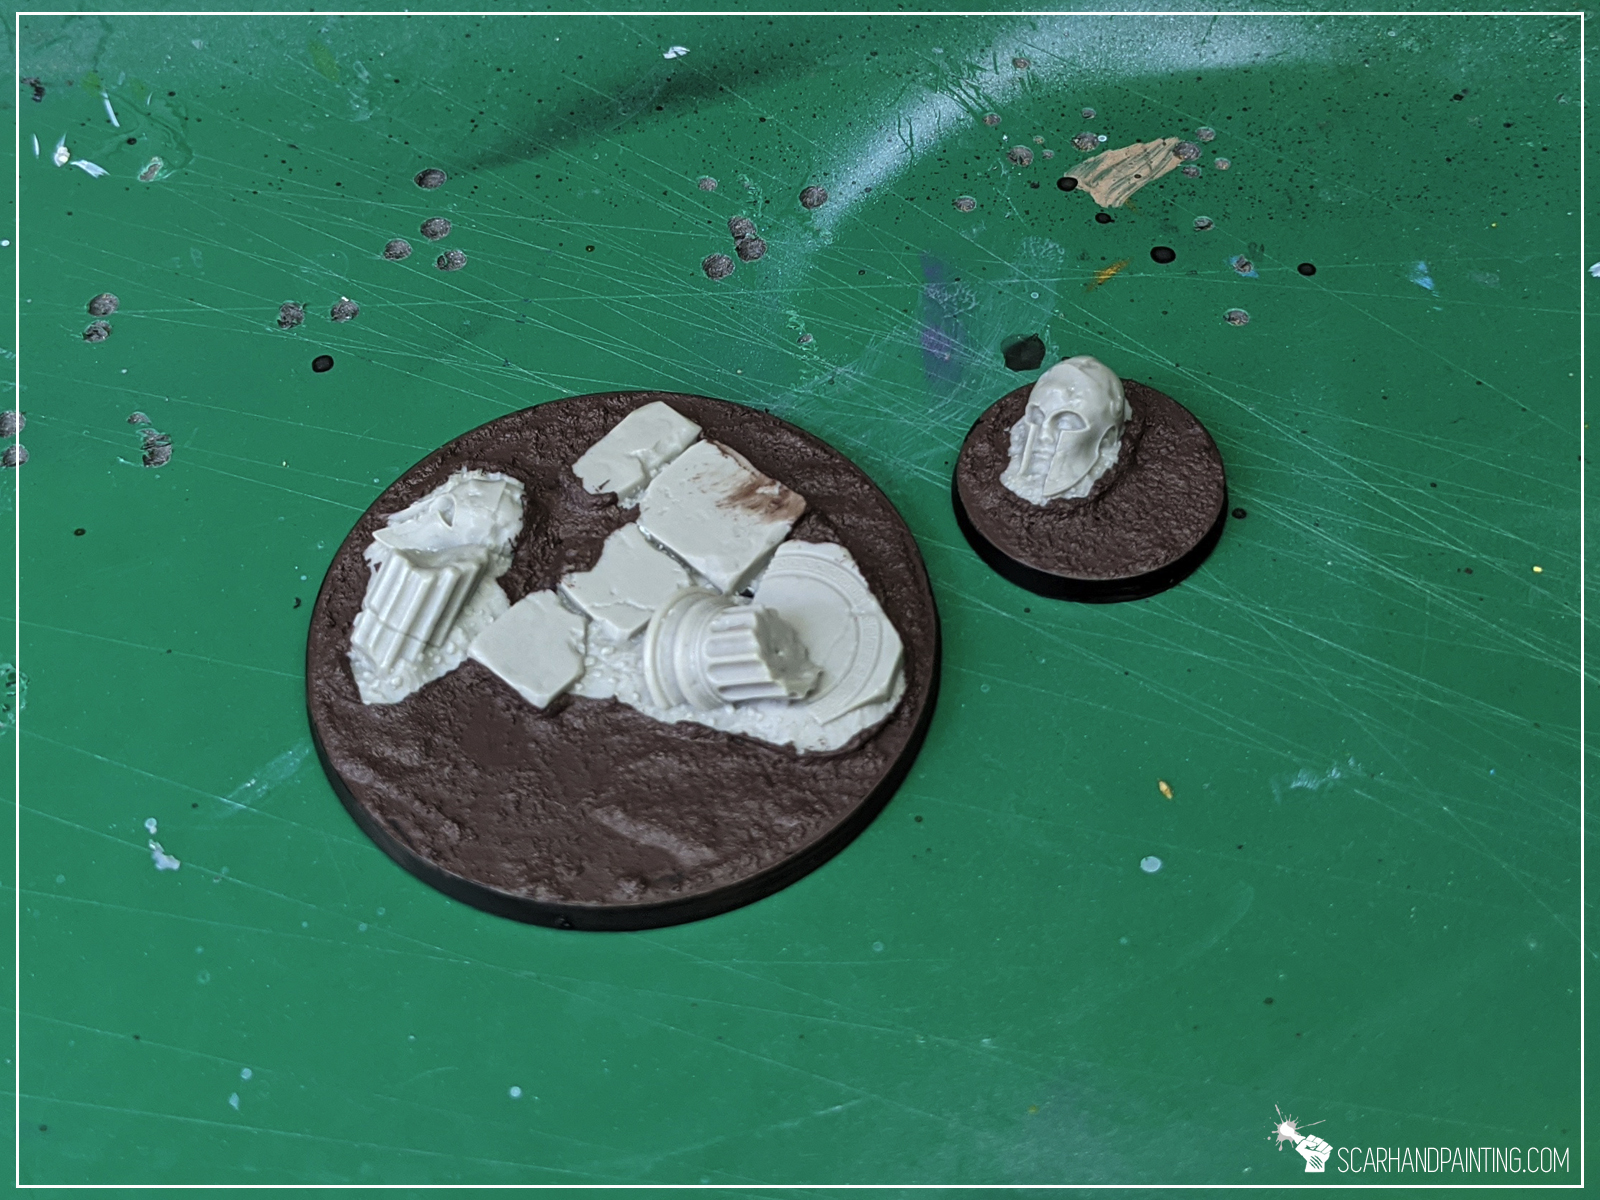
At this point entire “Modelling” part is done. If it seem fast it’s because it really is. Just two steps and you’re ready to paint!
I choose to paint these Temple bases in a bit of a Desert’ish style. Let’s say these are meant to be used for a large army. I want to keep things simple, best if within three layers per color, crowned with a single type of tufts. Nothing fancy, just nice looking, coherent bases. Here’s how I went about it…
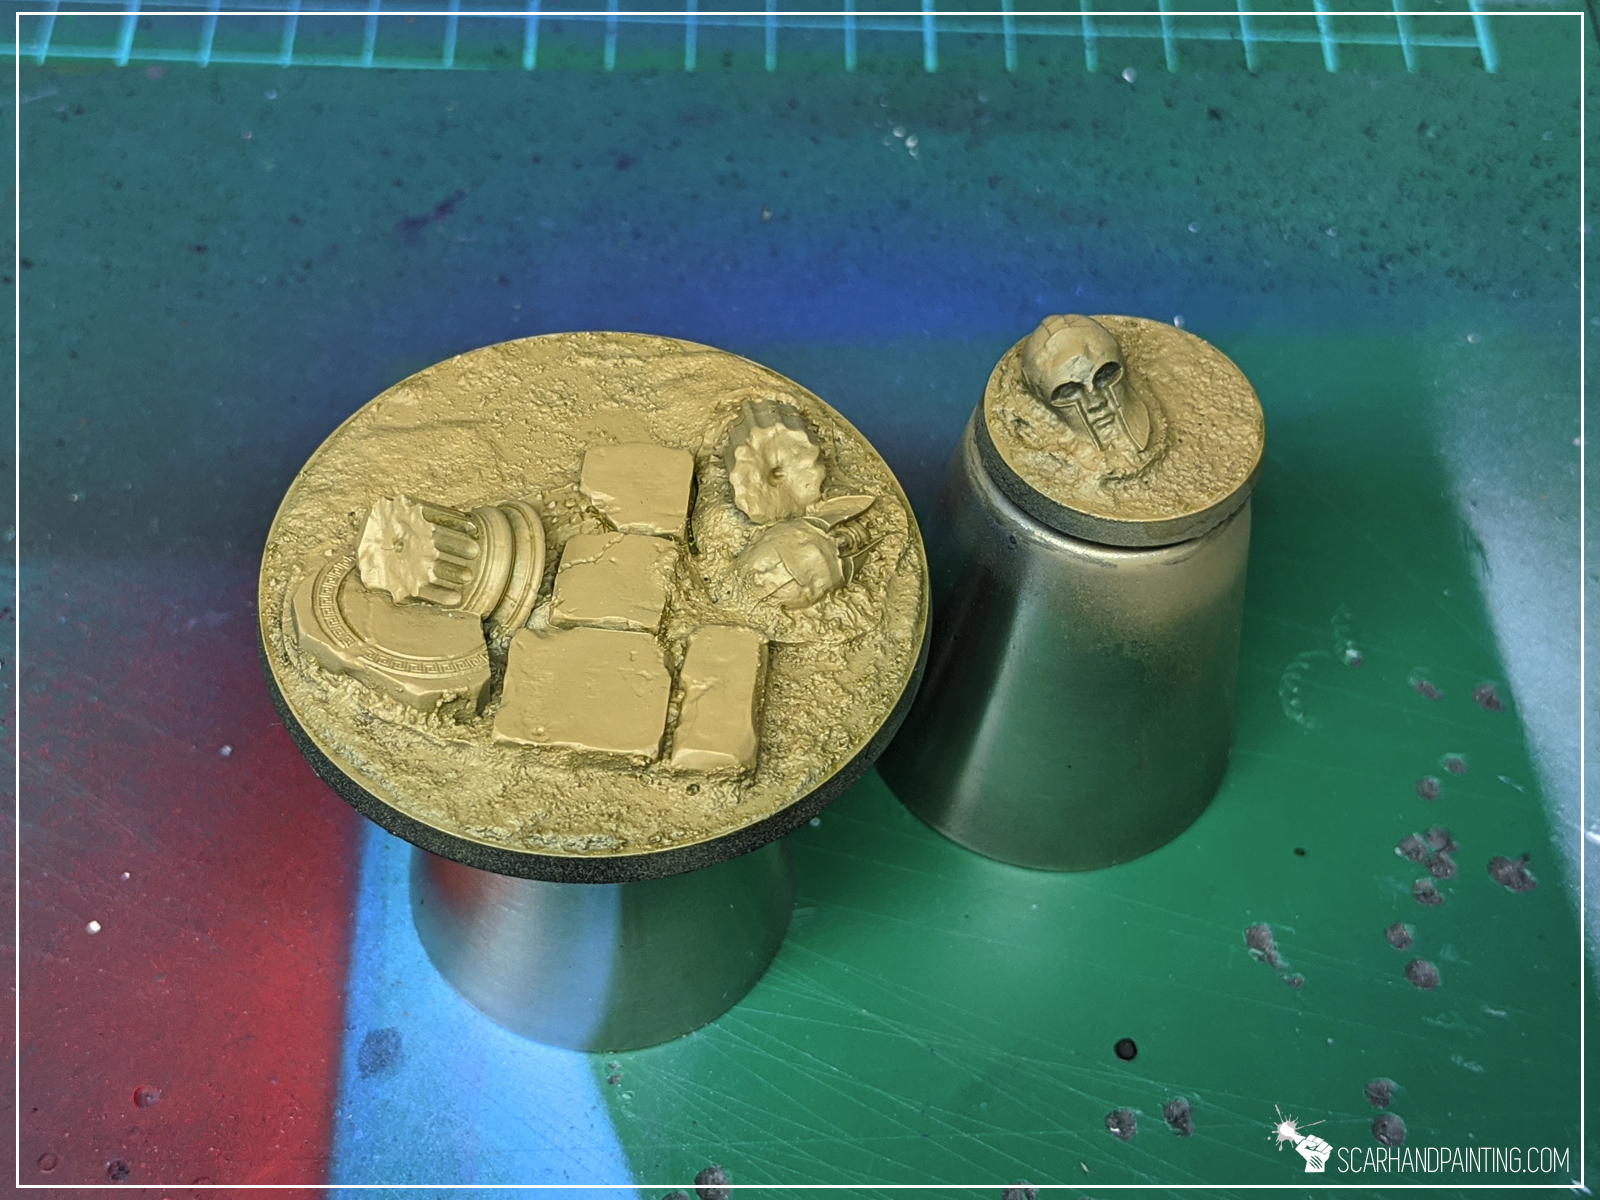
Step one: Undercoat
I applied a black undercoat. This is my usual start for everything 😛
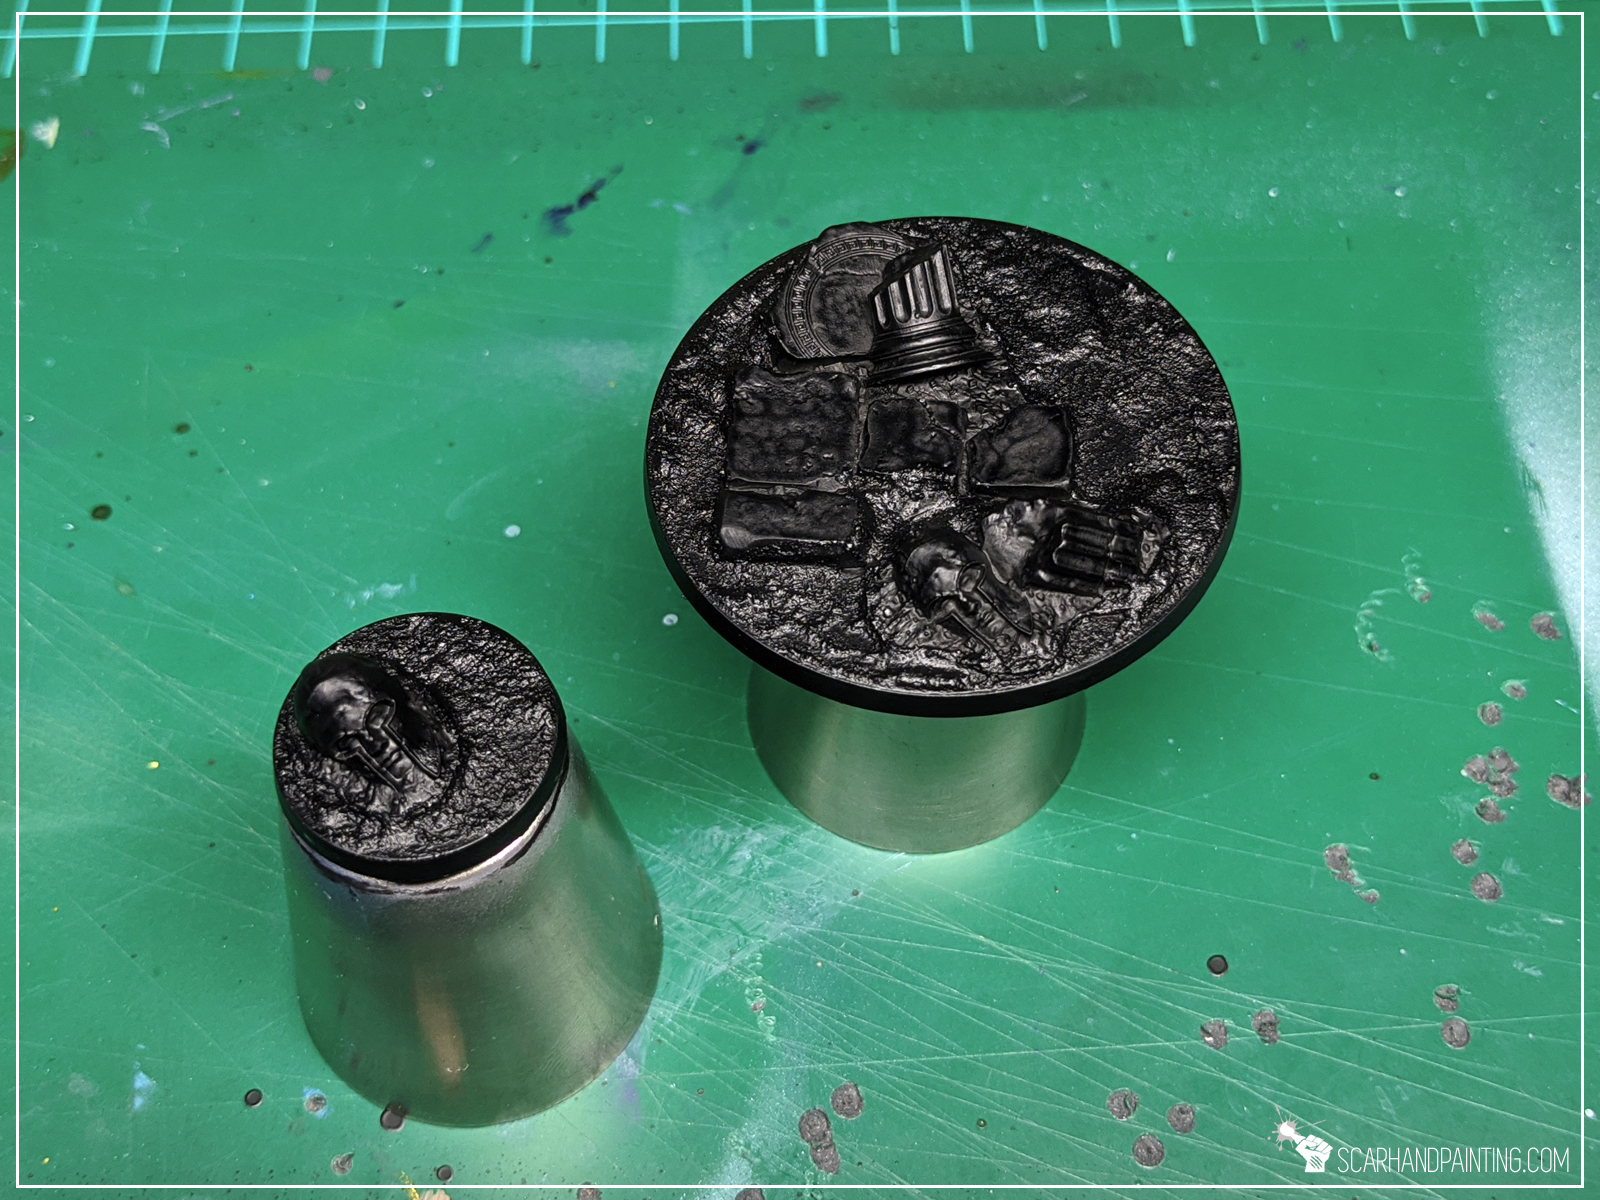
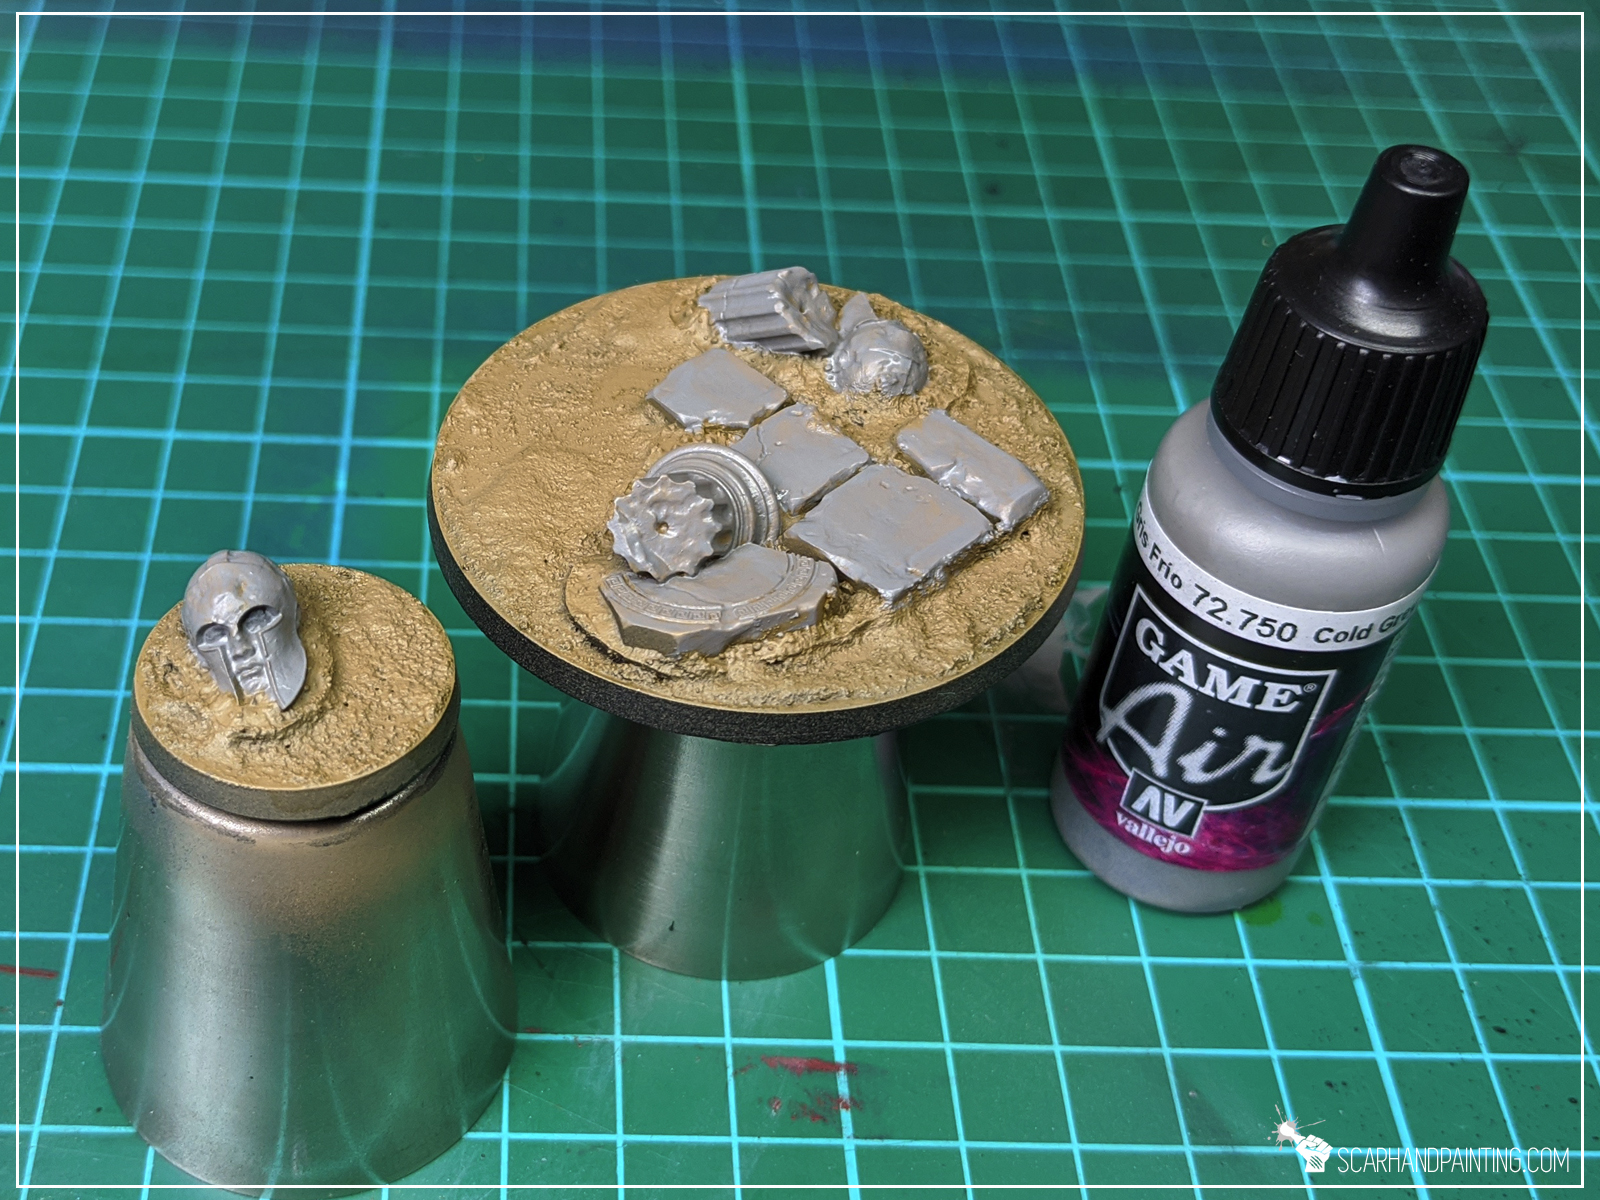
Step two: Main color
I then airbrushed Vallejo Desert Yellow over entire base. Once dry I applied Vallejo European Dust Wash.
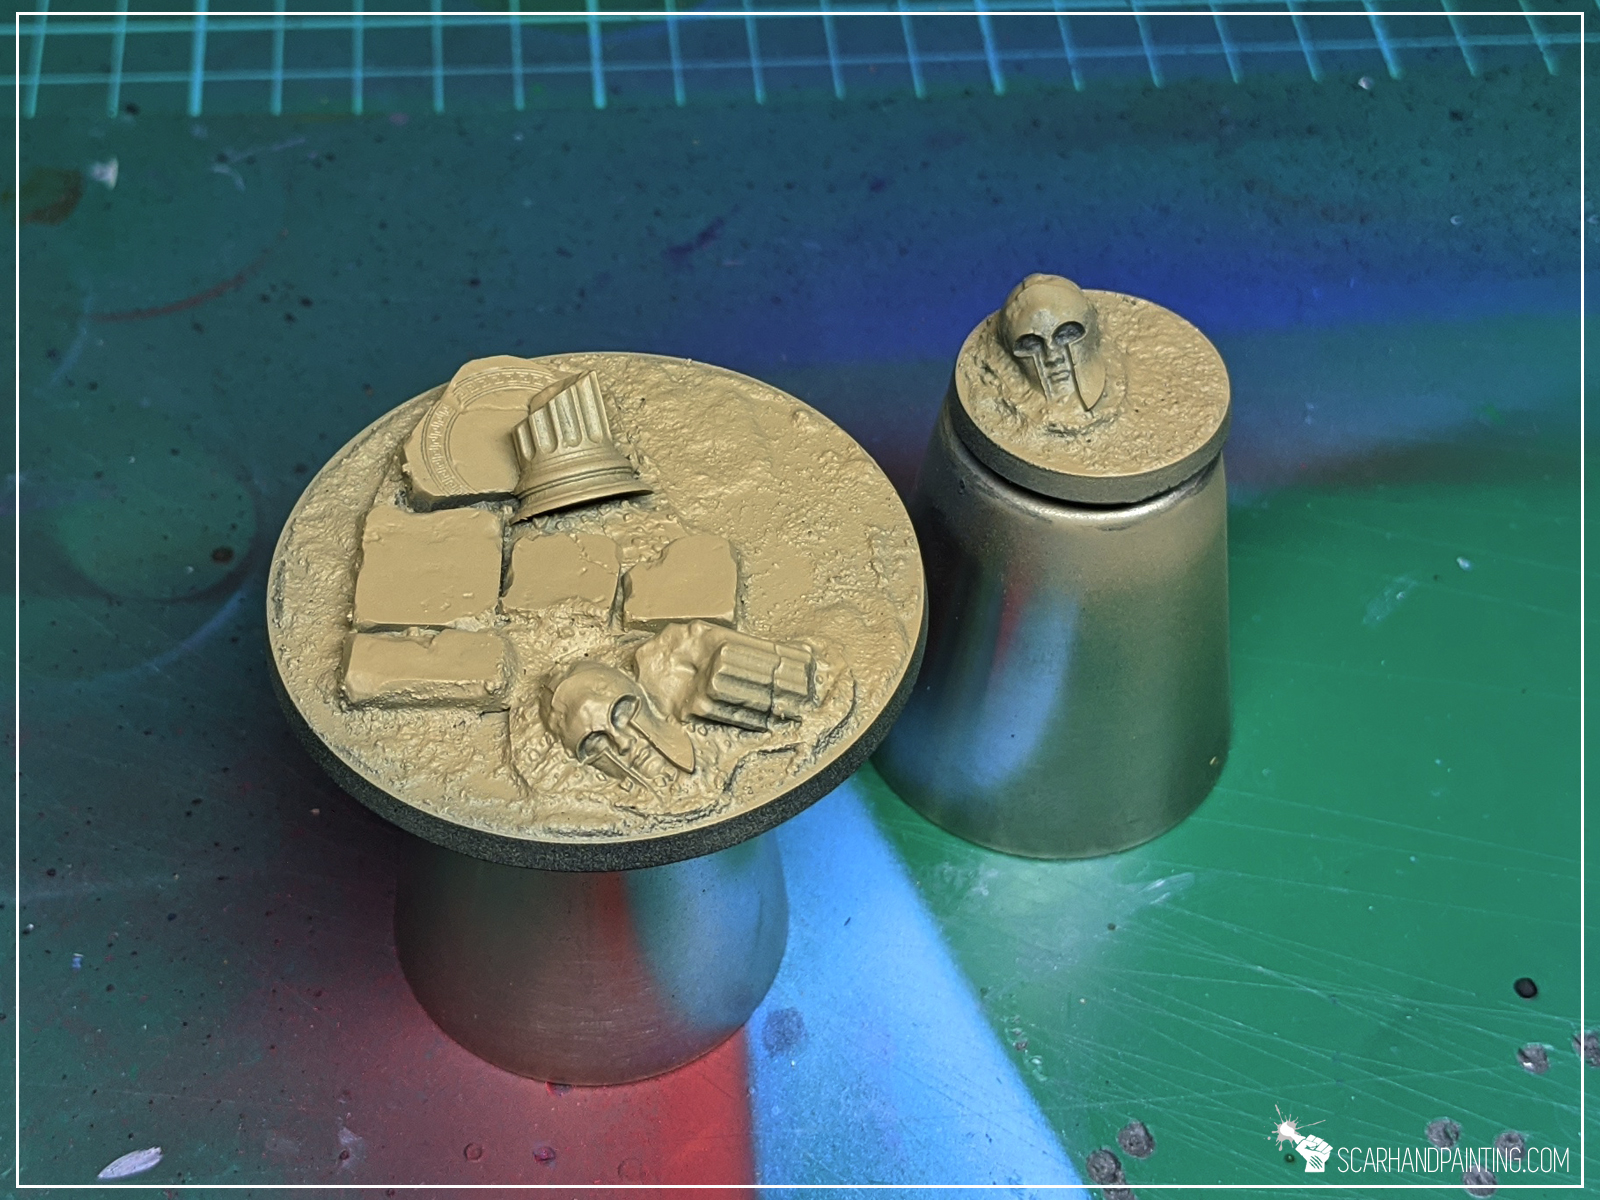
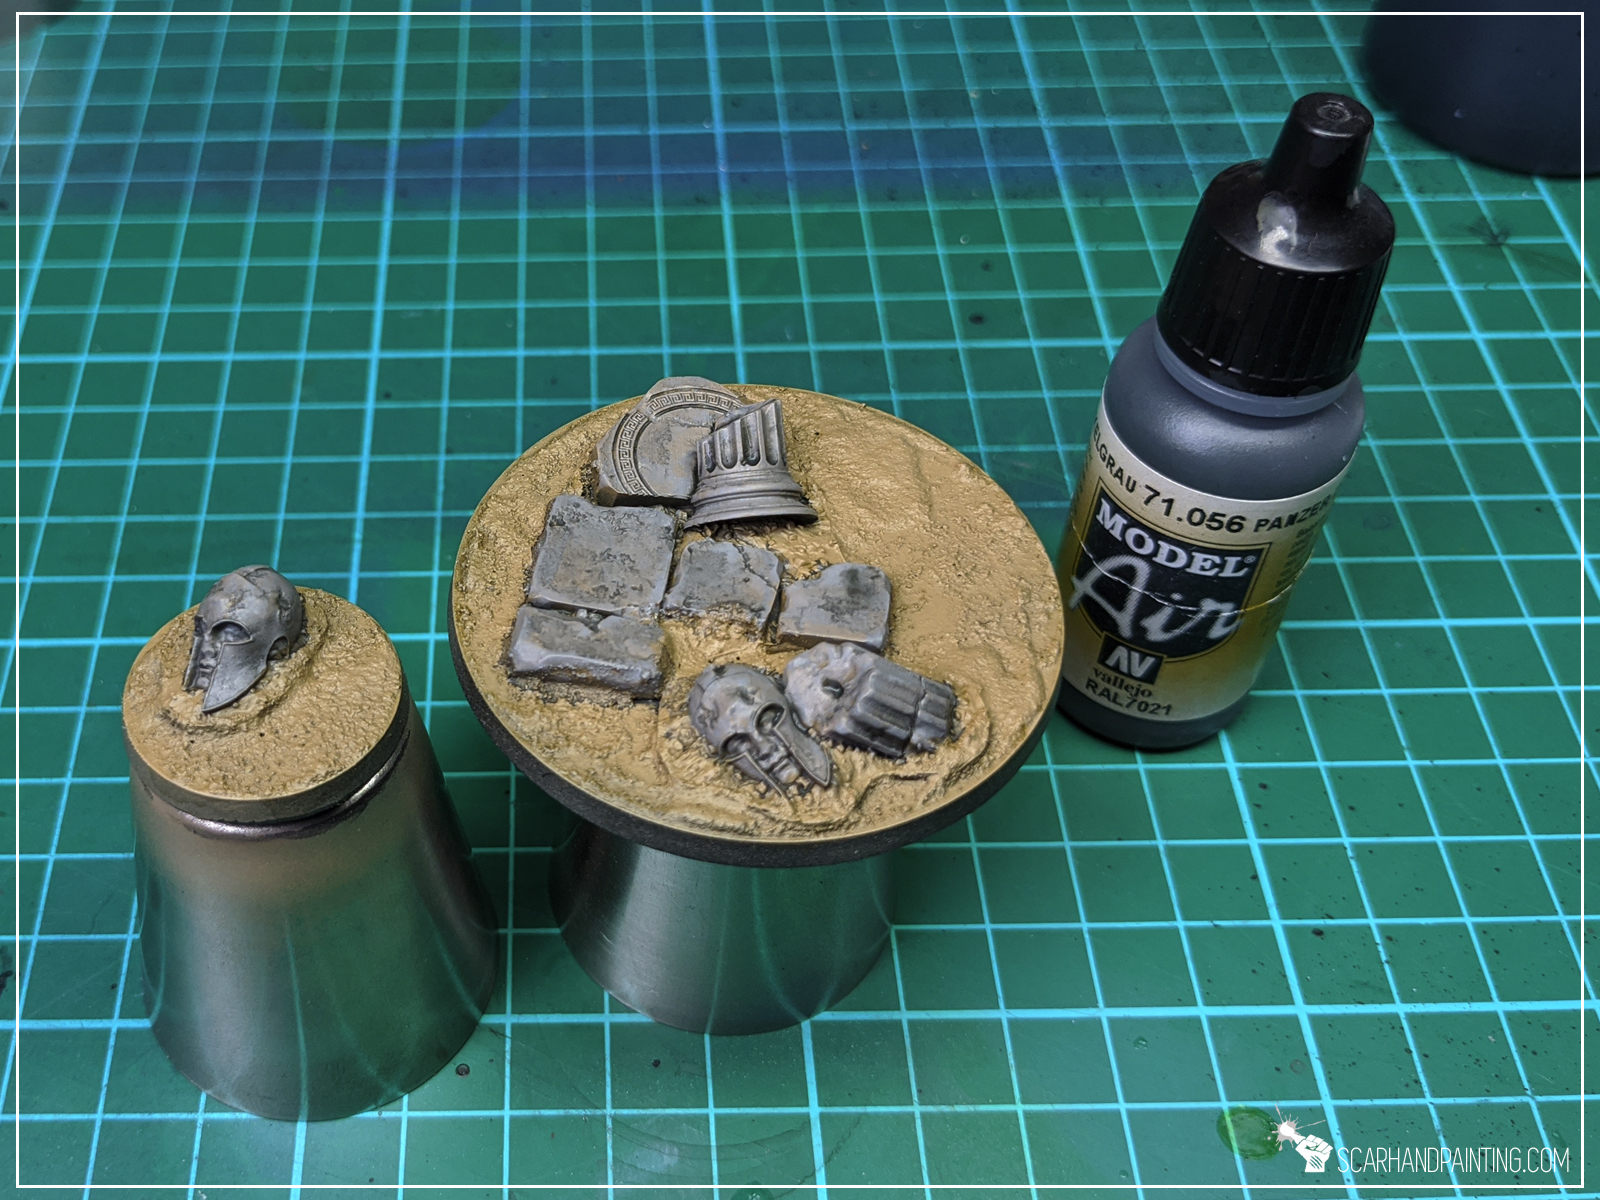
Step two: Secondary color
For ruins I choose Vallejo Cold Grey, followed by a wash of water thinned Vallejo Dark Panzer Grey.
Step tree: Highlights
I then highlighted both colors with a soft drybrush of Games Workshop Flayed One Flesh. I also applied some highlights with the same color on the edges of ruins – just a bit to make them pop.

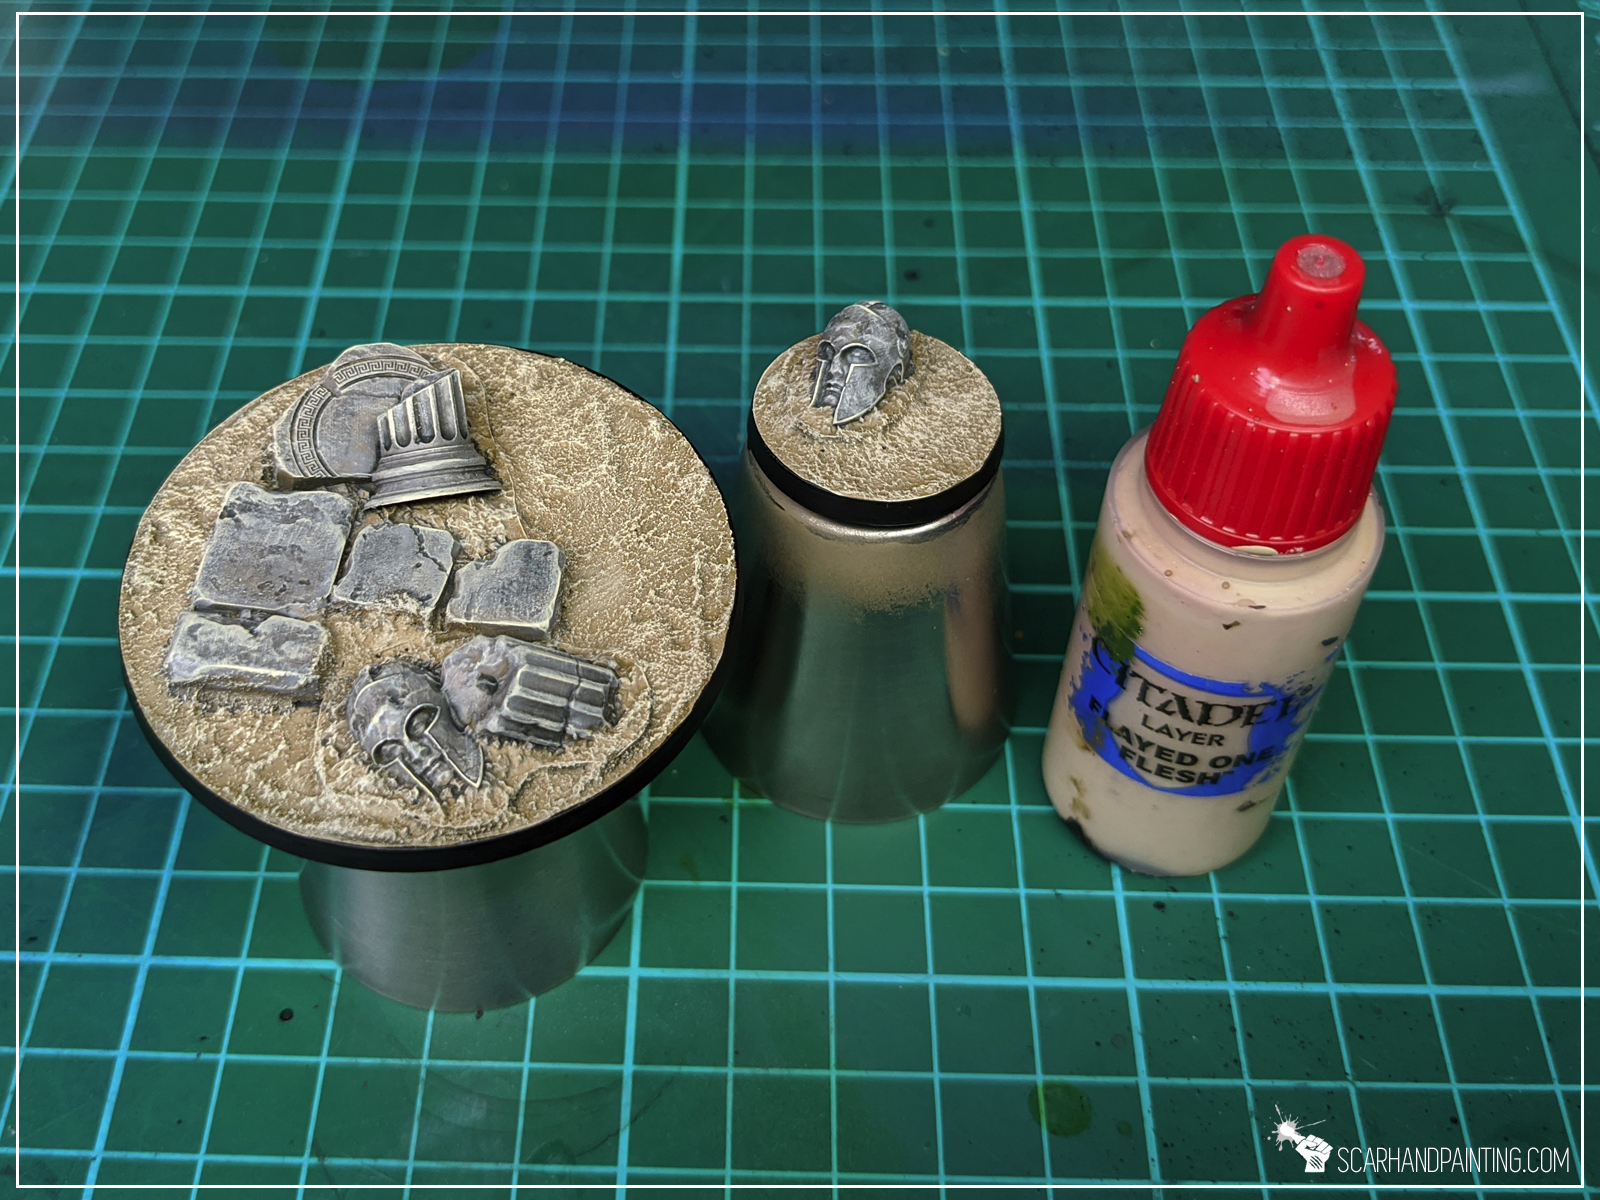
Step tree: Tufts
Finally I applied Gamers Grass Burned Wild Tufts.

Job done! There’s some poetry in both starting and finishing a base using products from the same company 😛 Either way – I hope this was a pleasant tutorial and that you saw how simple the process is. If you want to learn more about Gamers Grass products – here’s my review:
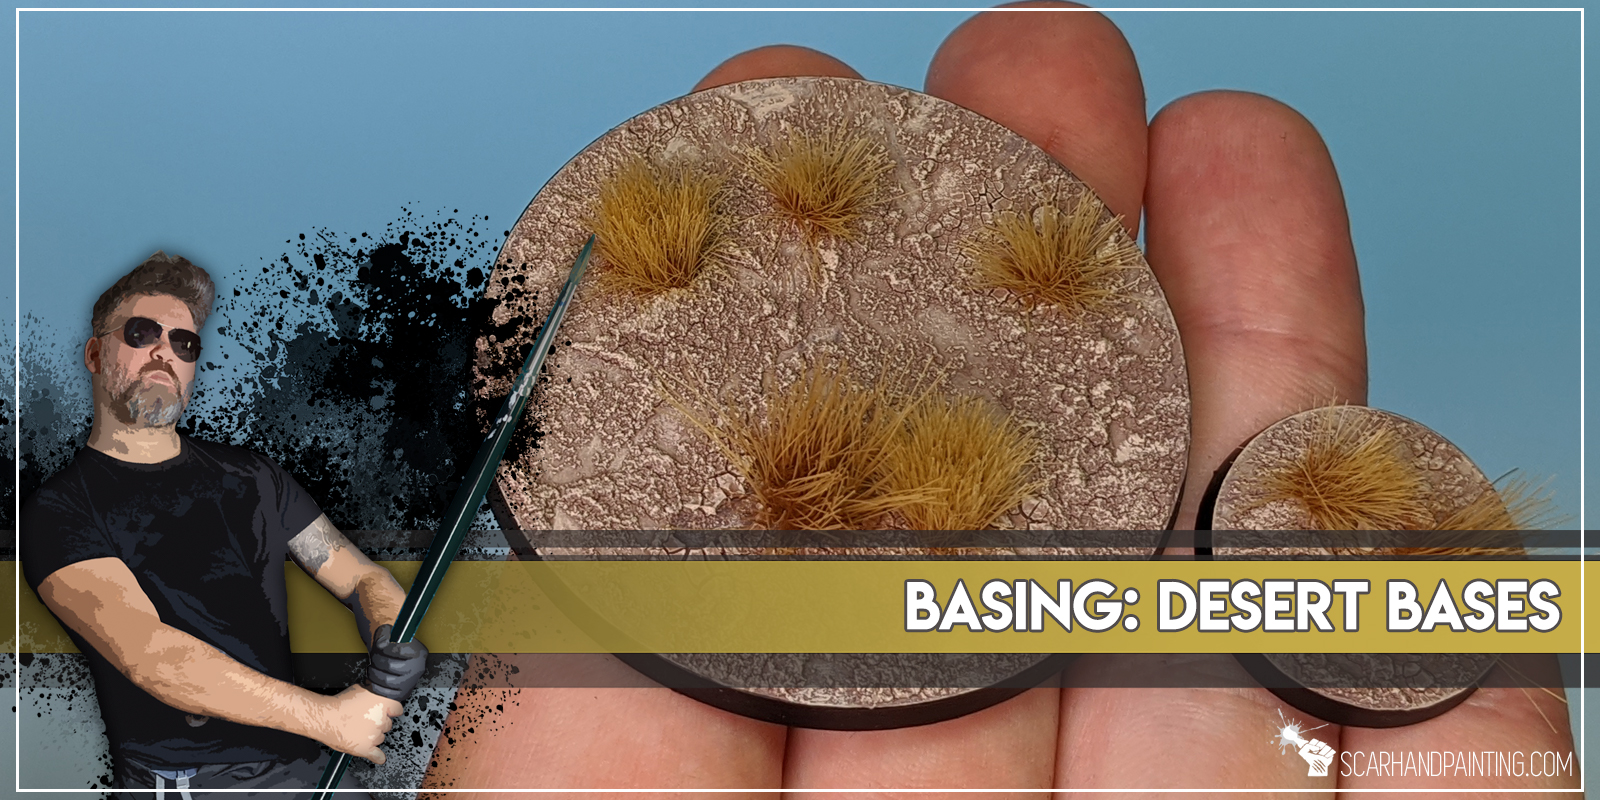
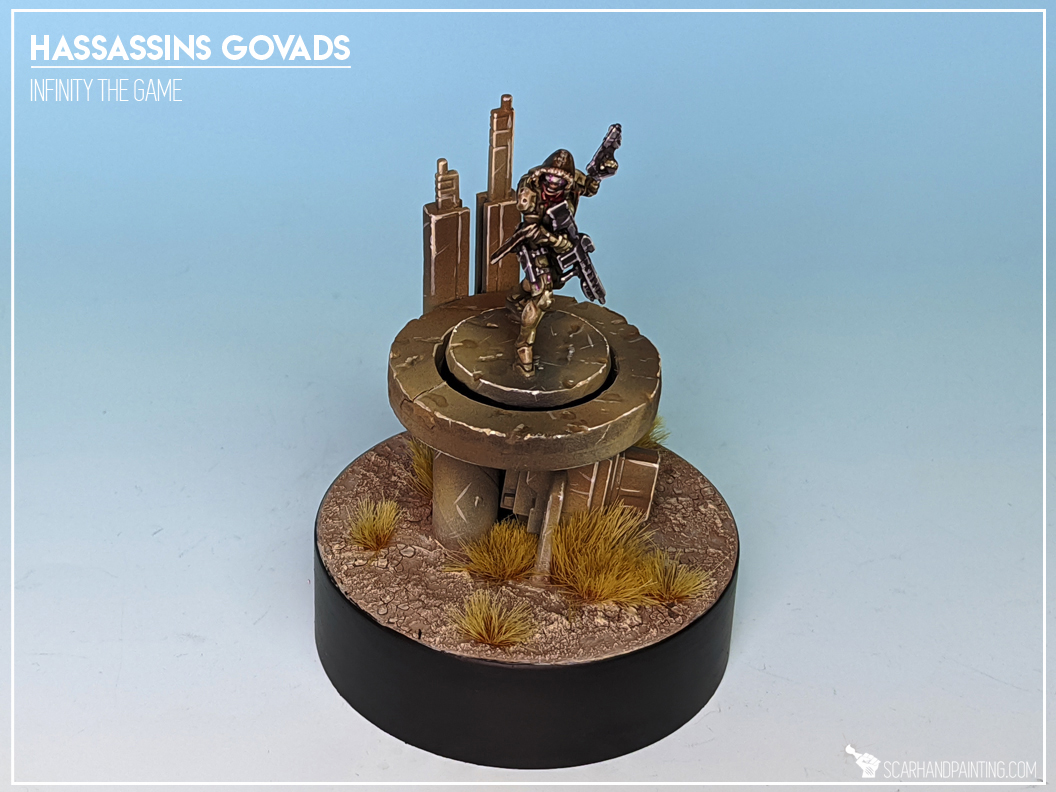
Welcome to Painting Desert Bases tutorial. Here I will take you on a Step-by-step trip through the process of painting Desert Bases the same way as seen at: Gallery: Infinity USARF
Before we start, some notes:
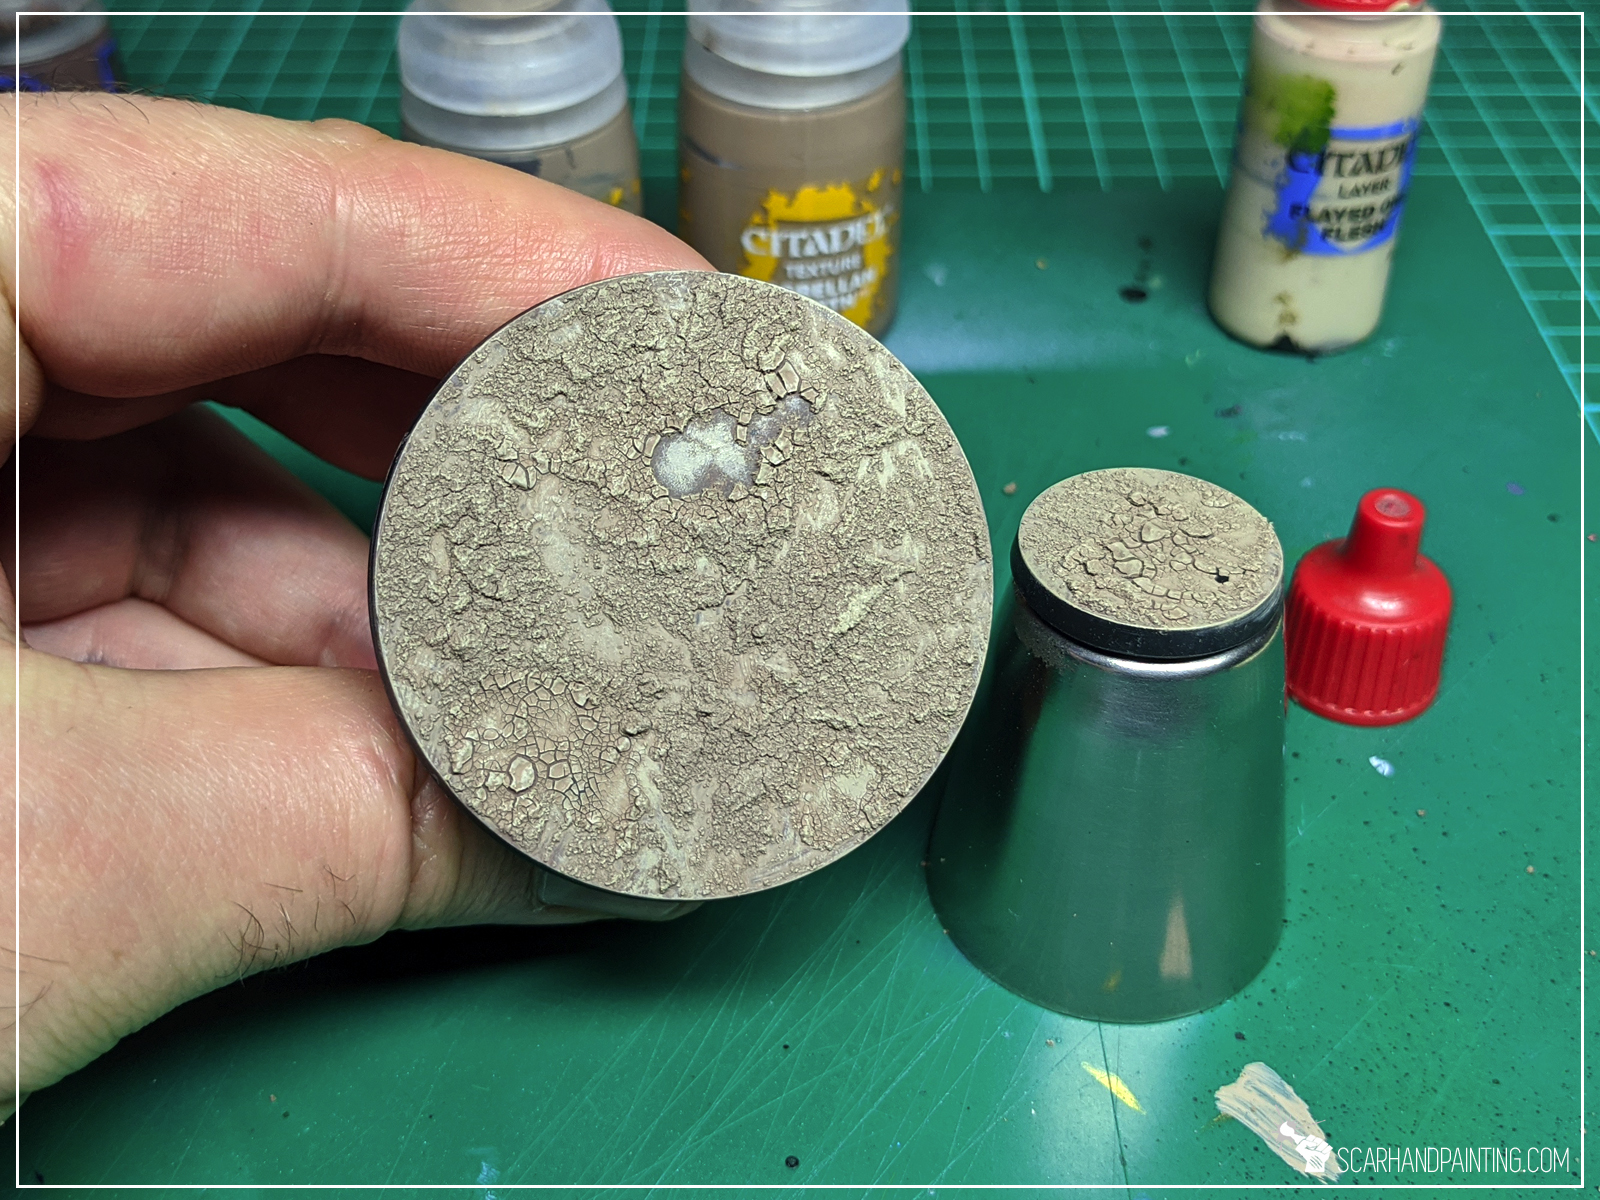
Step one: Undercoat
I started with a lazy layer of Games Workshop Gorthor Brown. Any similar colour would do and the layer doesn’t need to be thorough.

Step two: Base texture
I applied a solid irregular layer of Games Workshop Agrellan Badlands with some points of Games Workshop Agrellan Earth on top.
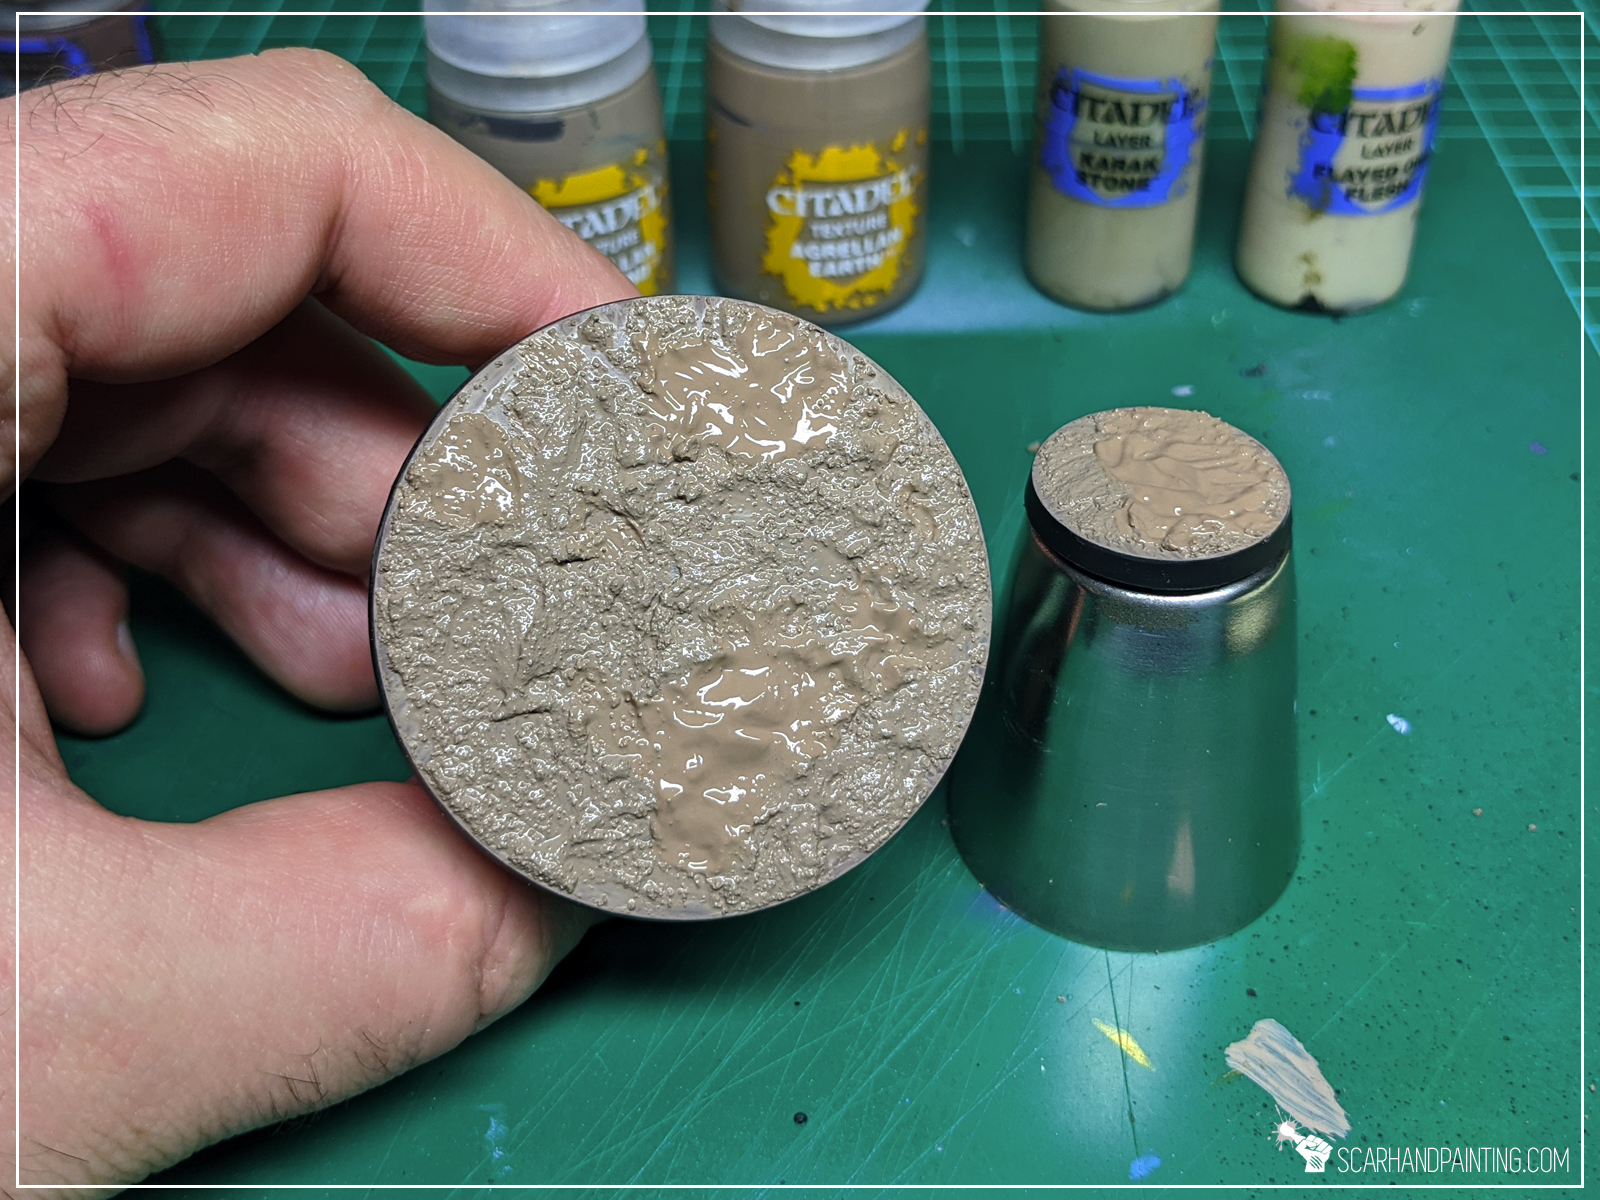
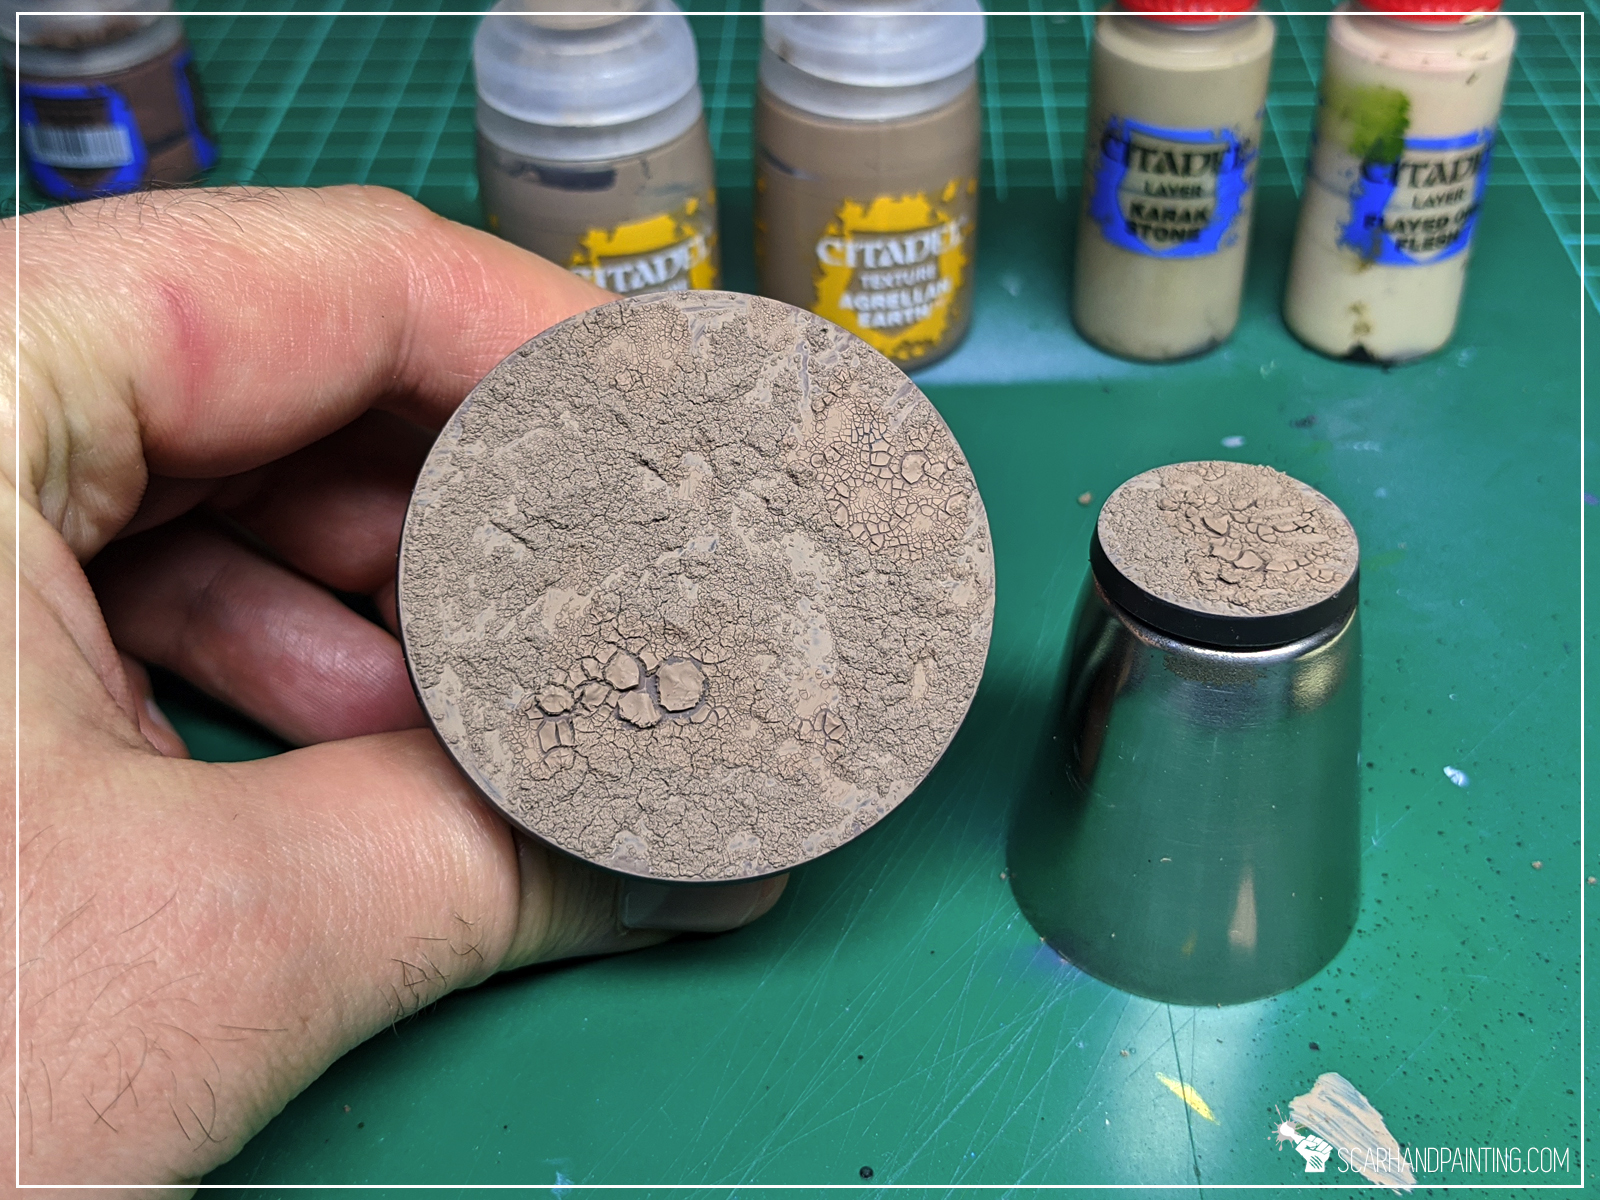
Step three: Highlight
Next I drybrushed a layer of Games Workshop Karak Stone. Some pieces of cracked earth fell off, but that doesn’t matter in the long run.
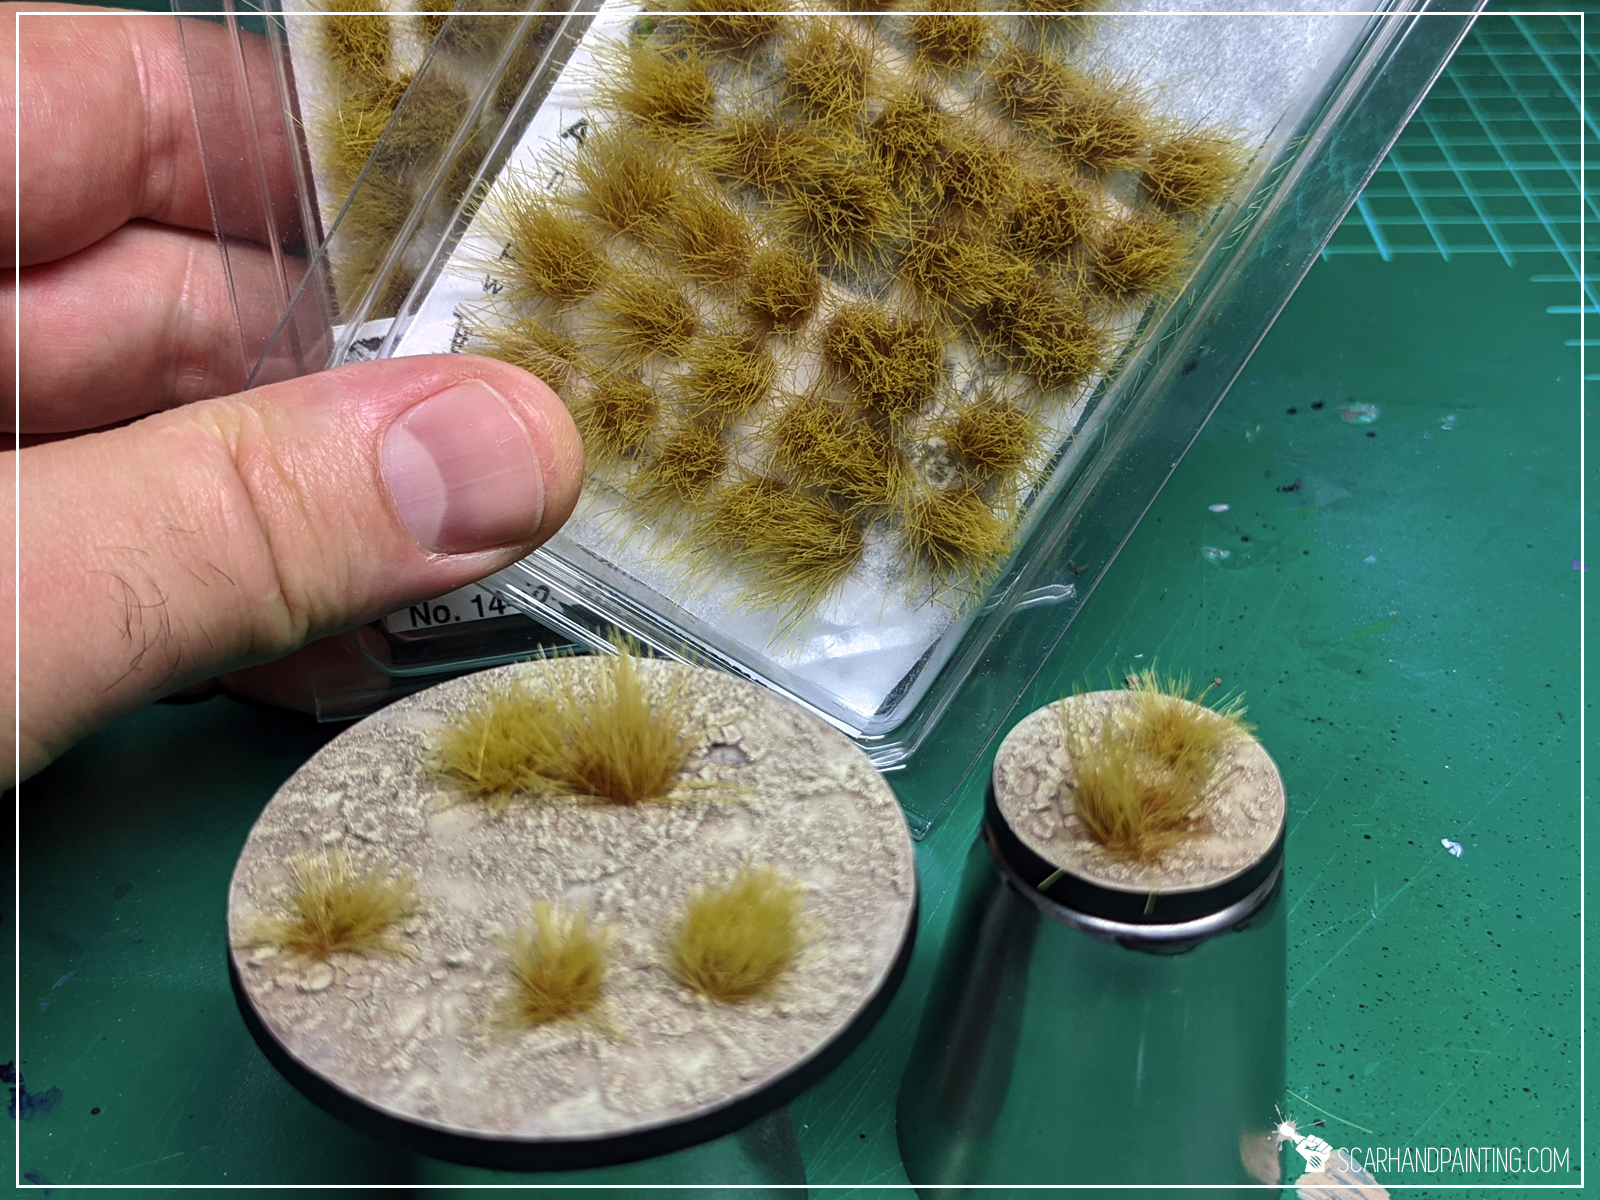
Step four: Highlight
I drybrushed again, this time with Games Workshop Flayed One Flesh.

Step five: Tufts
I glued Paint Forge Steppe tufts on top of the bases, ensuring that any points where cracked earth fell off got covered.

Here’s how the finished base looks like. 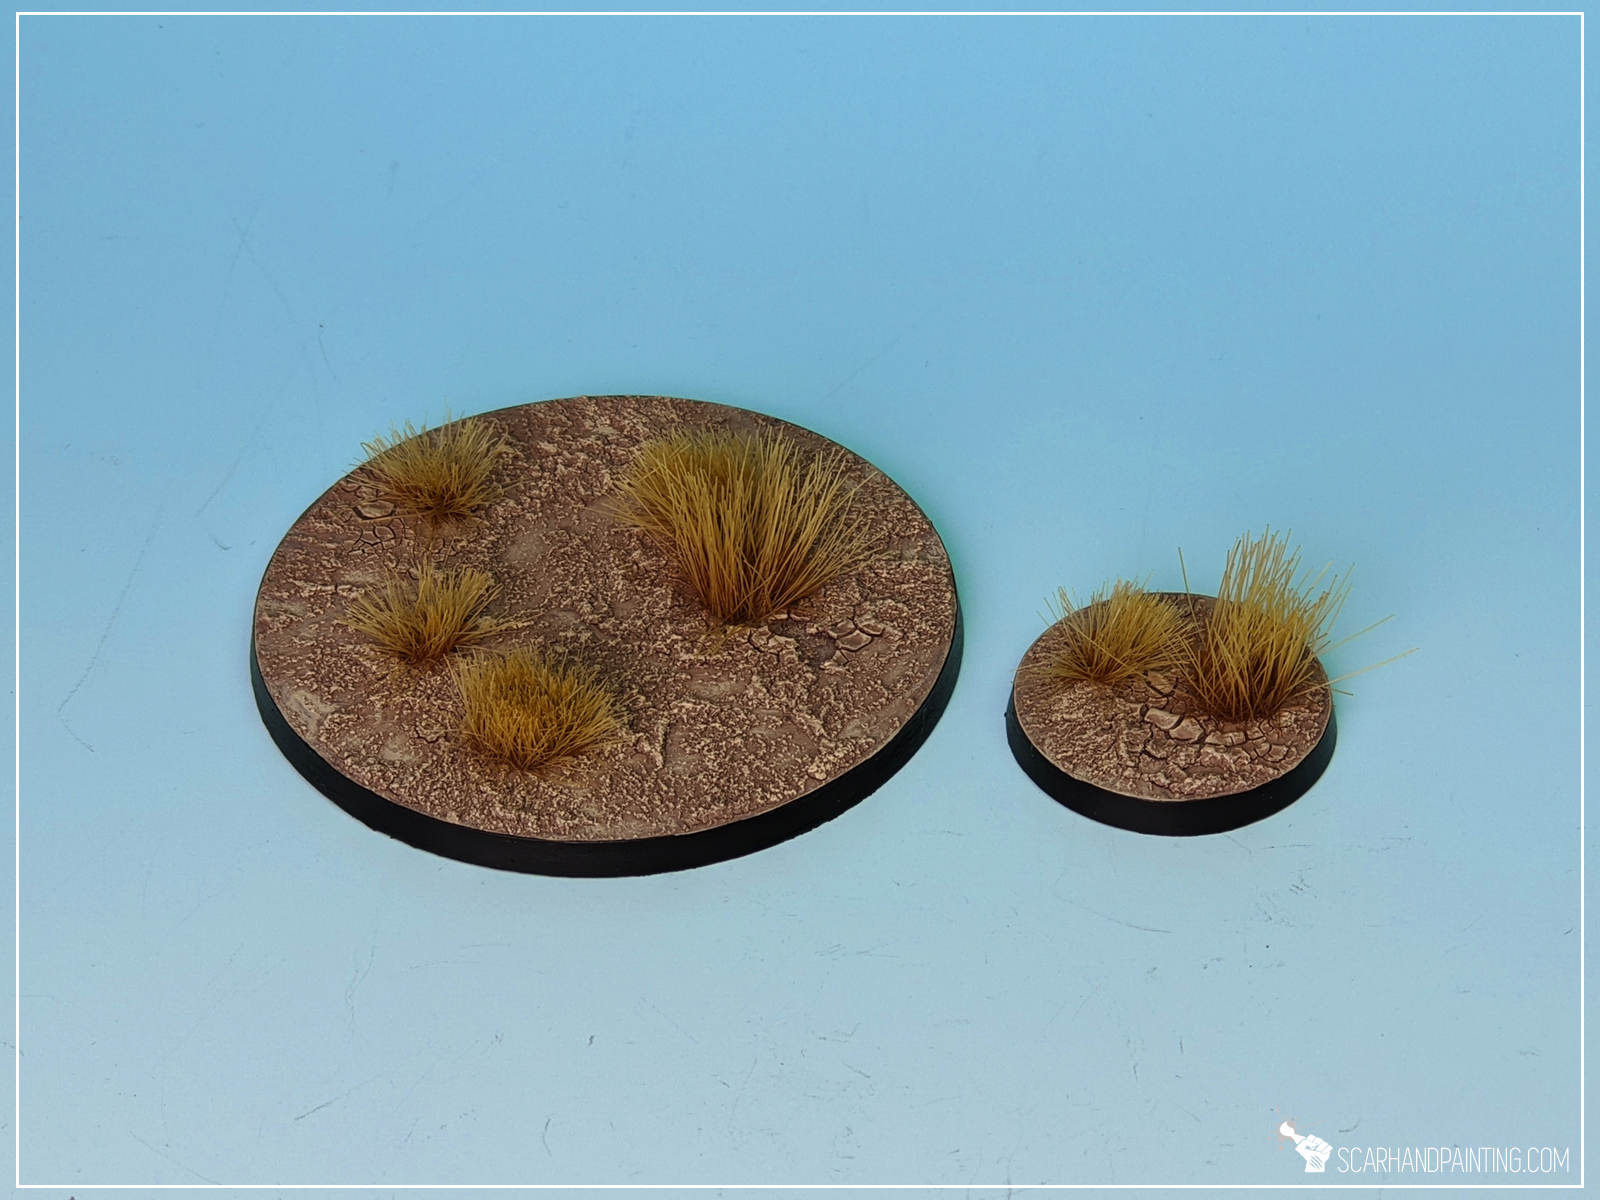
In this step-by-step tutorial I’m going to show you how to create Cityfight bases same way I did for Gallery: Tau Sa’Cea.

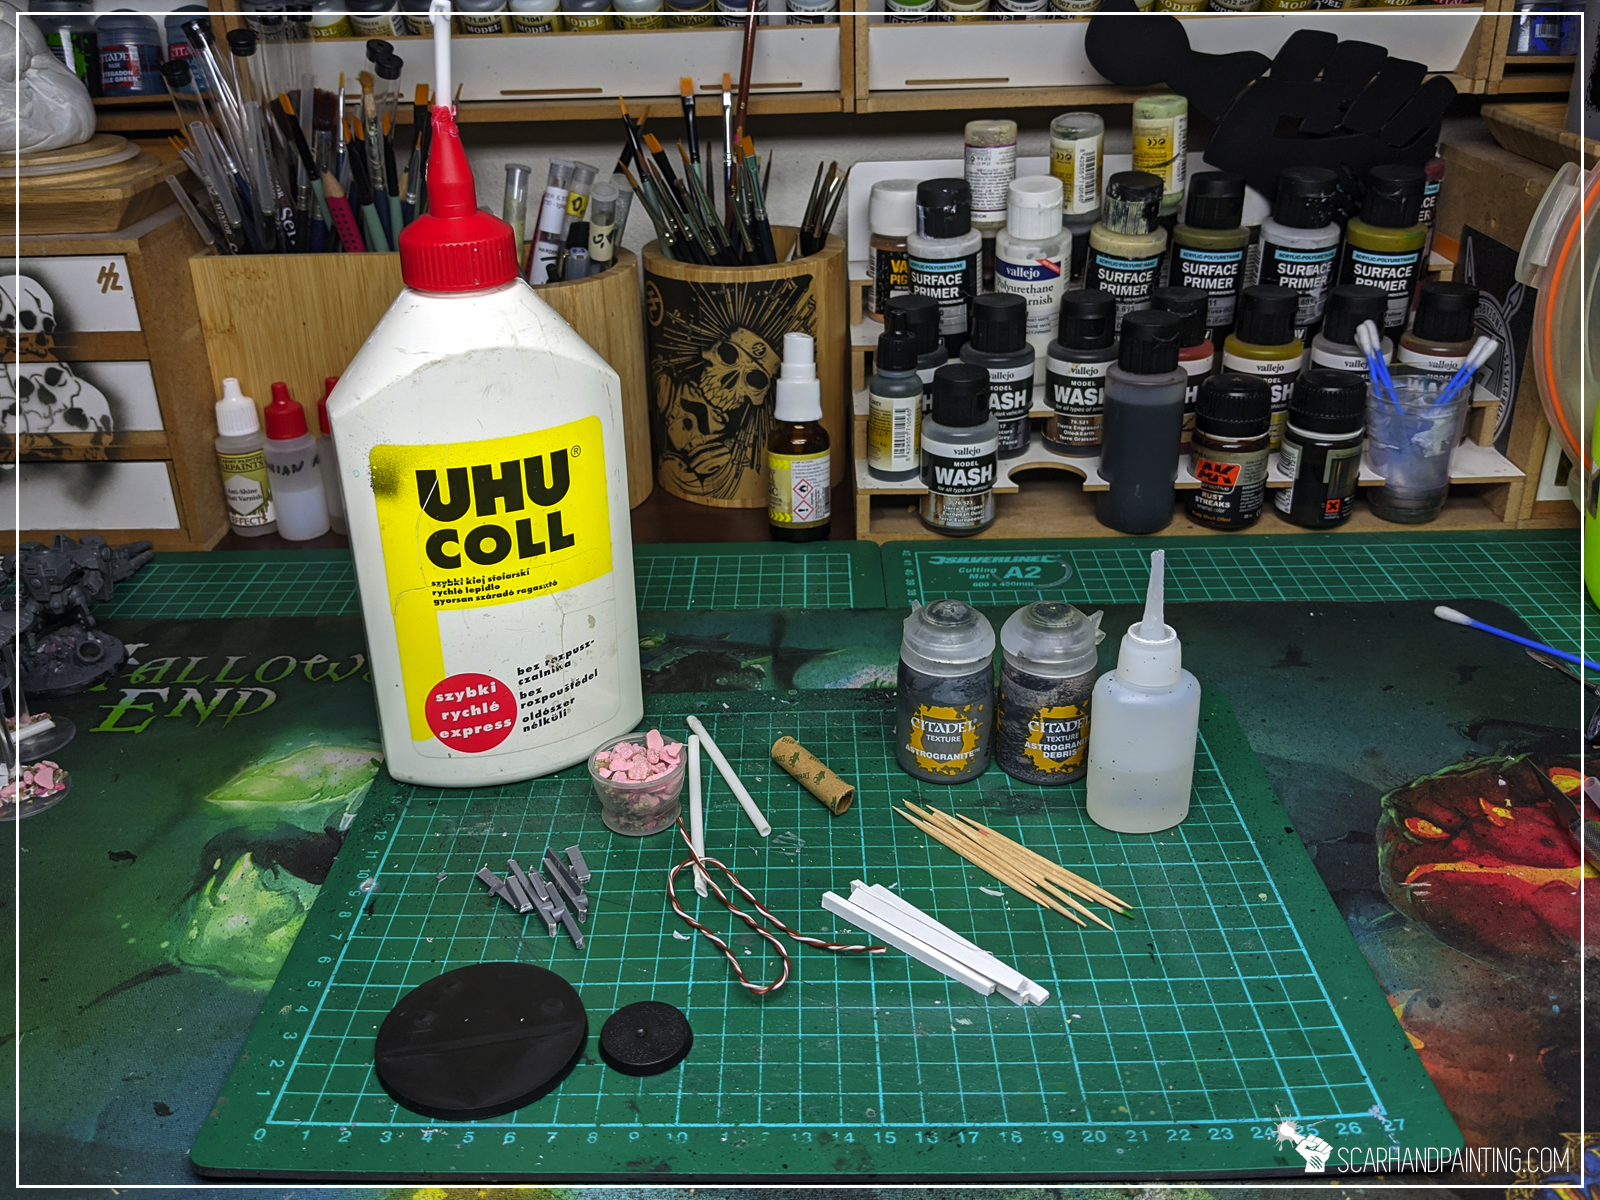
I used:
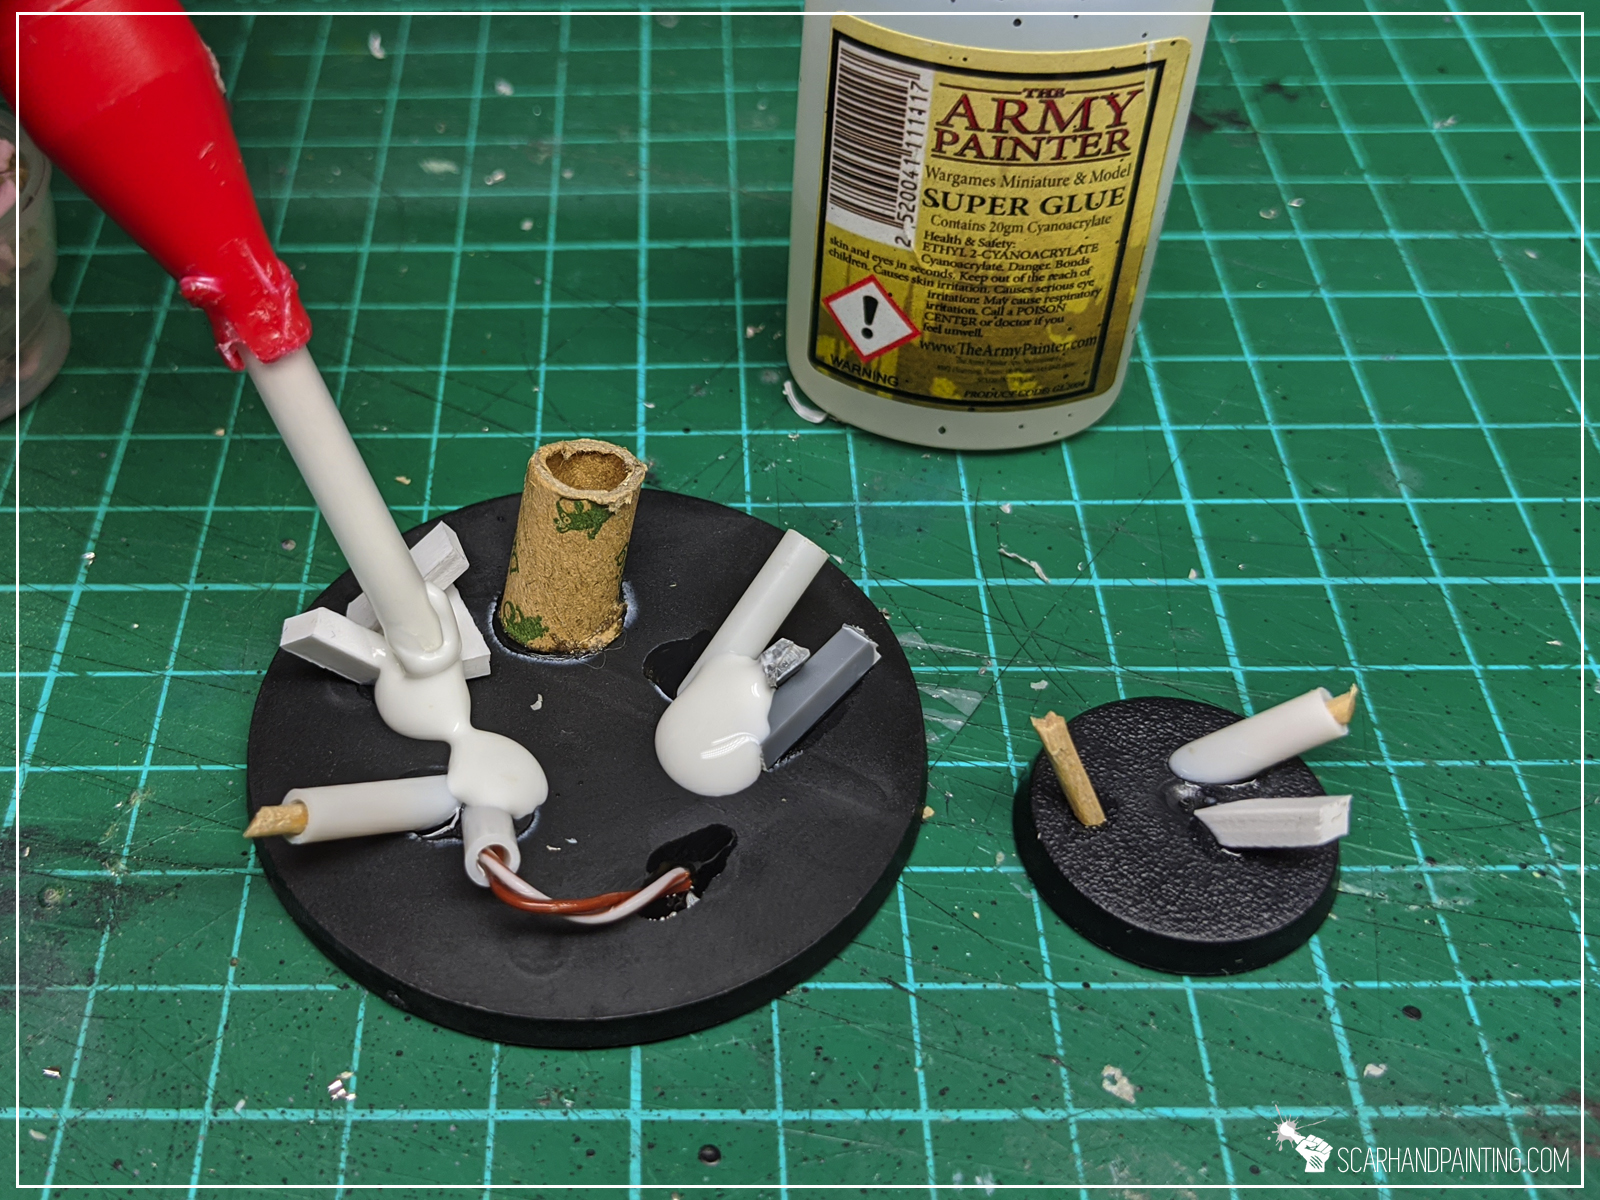
Step one: Special detail
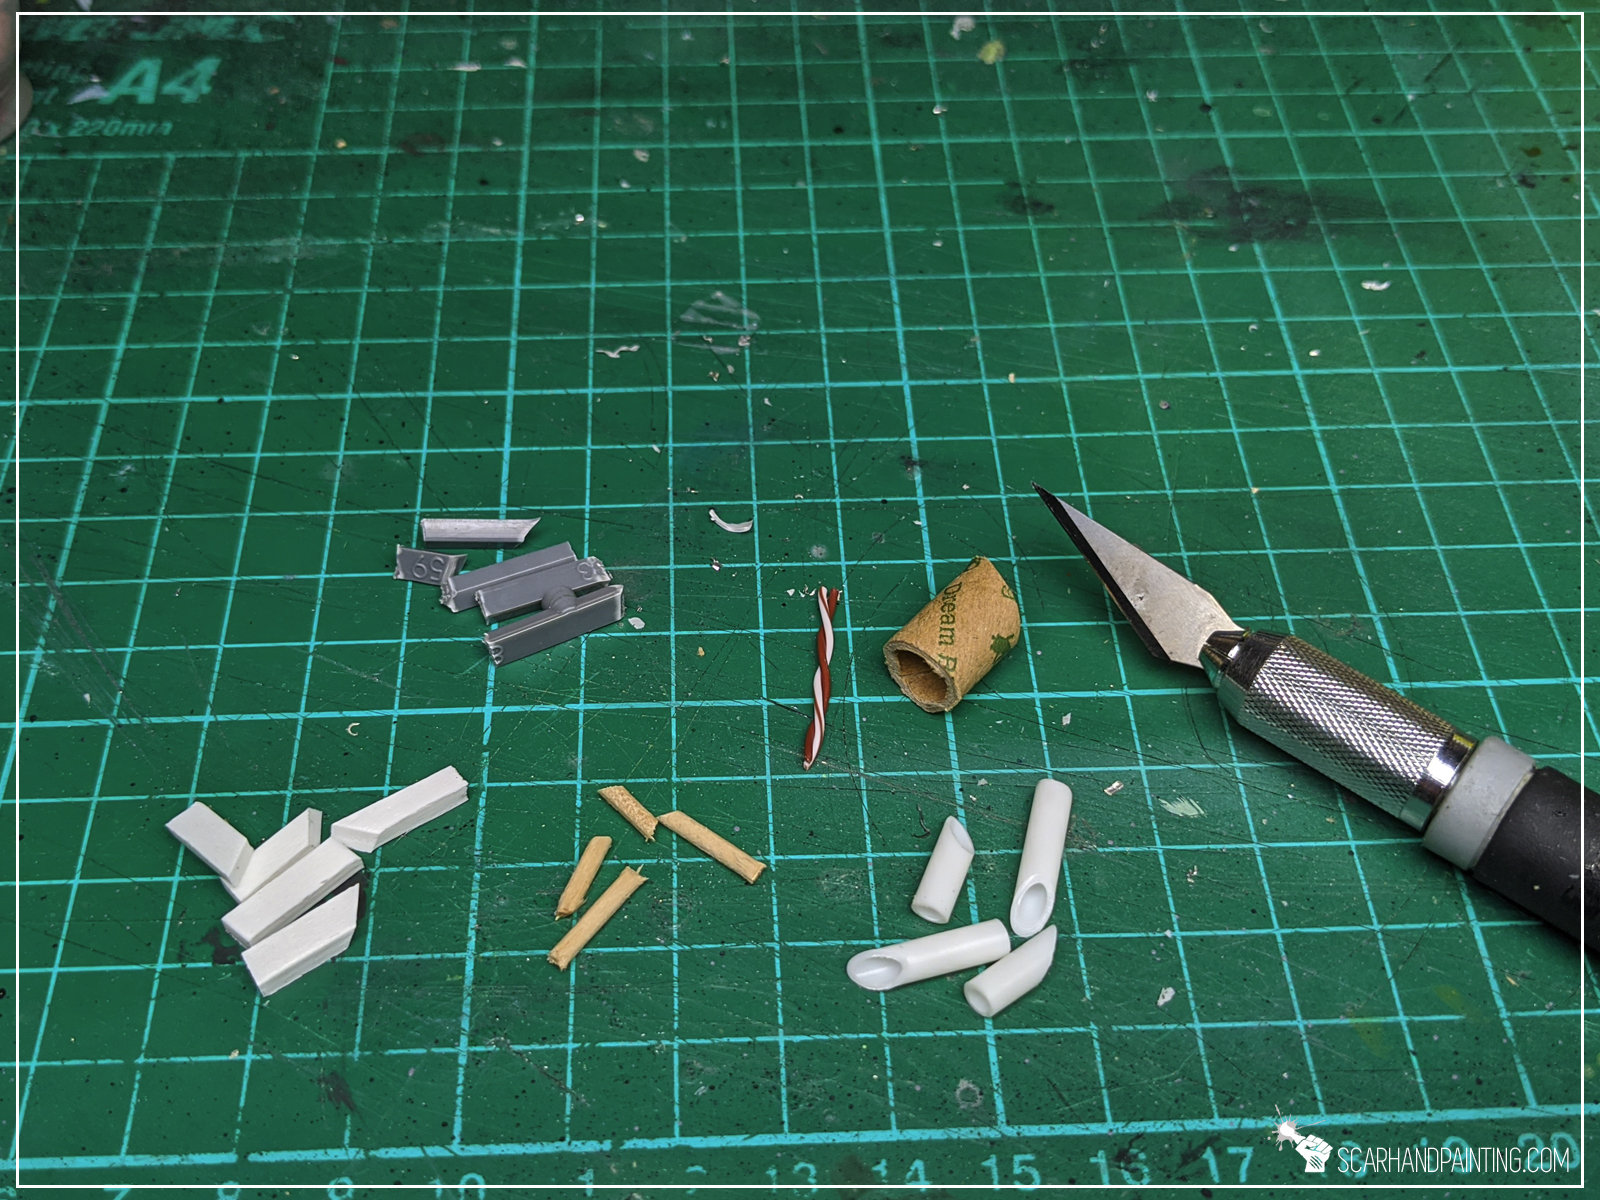

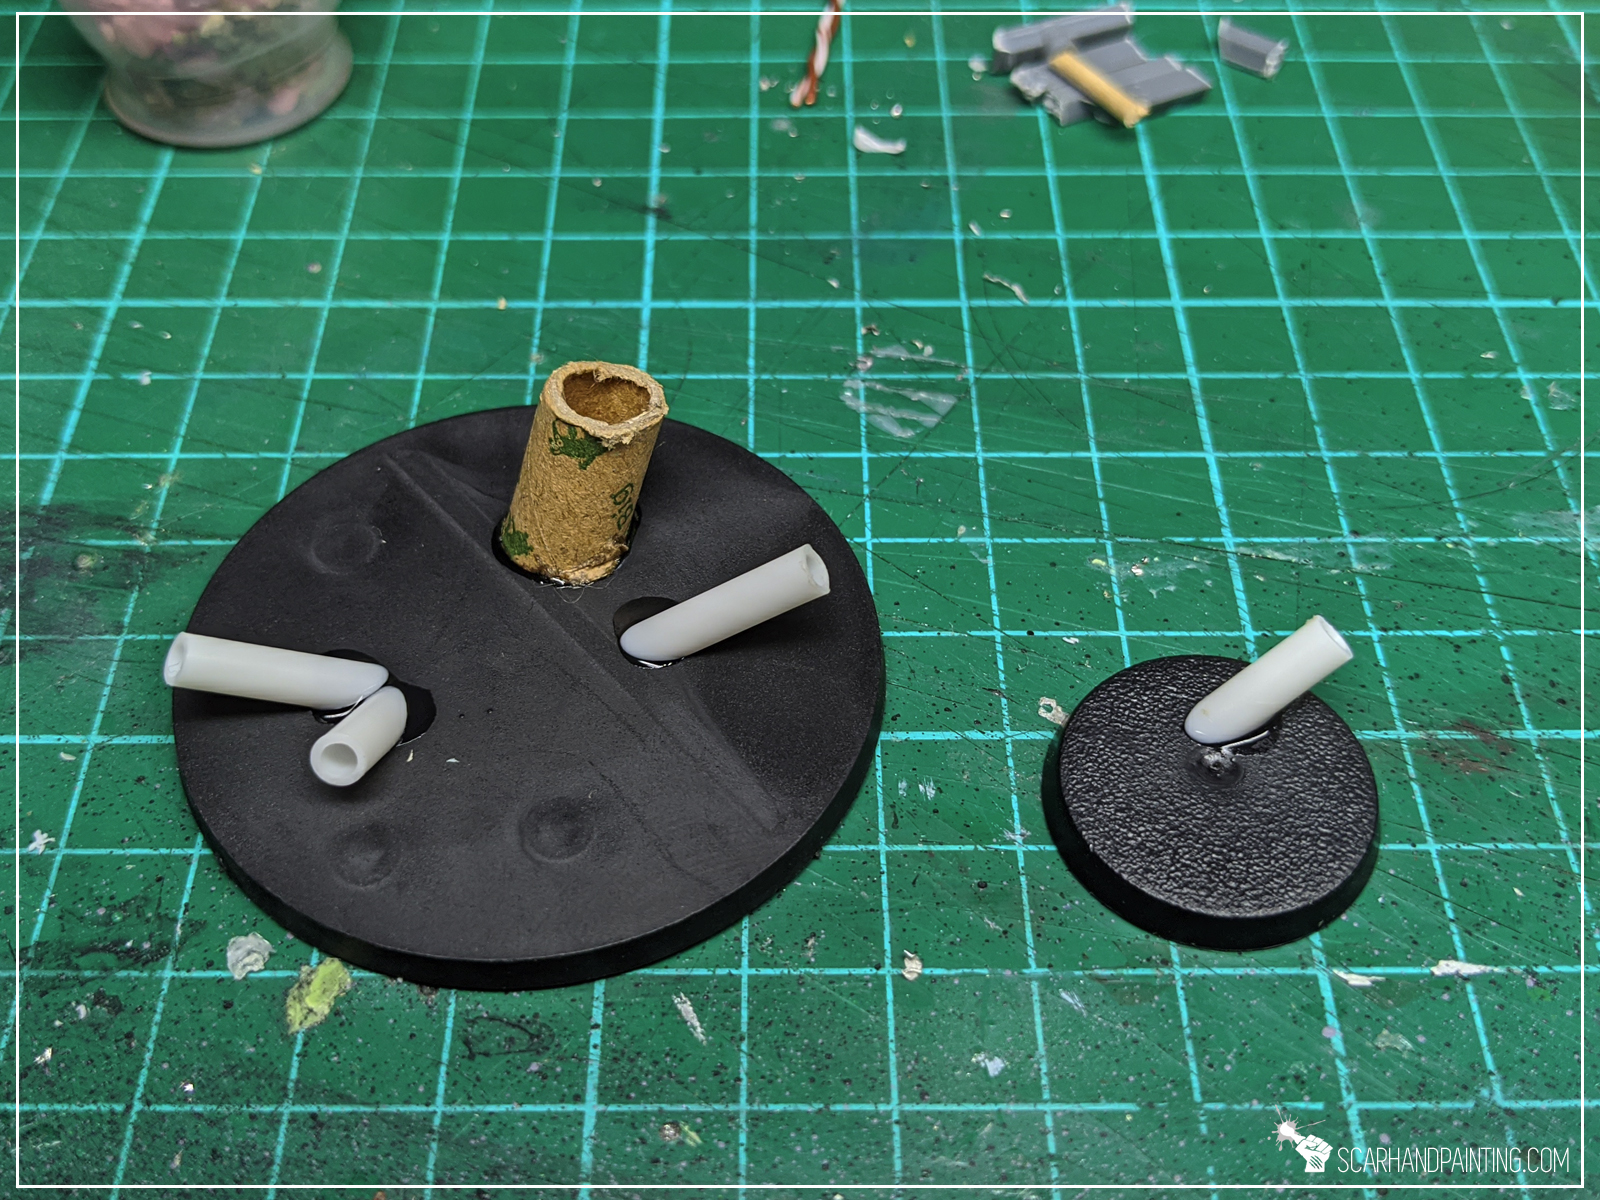

Using a hobby knife I cut all the sticks, sprues, toothpicks, plasticard and tube into small pieces. I made sure to cut one side of each piece at an angle, to better position each piece on the base. I then glued random pieces on top of a base using Super glue.
Step two: Gravel
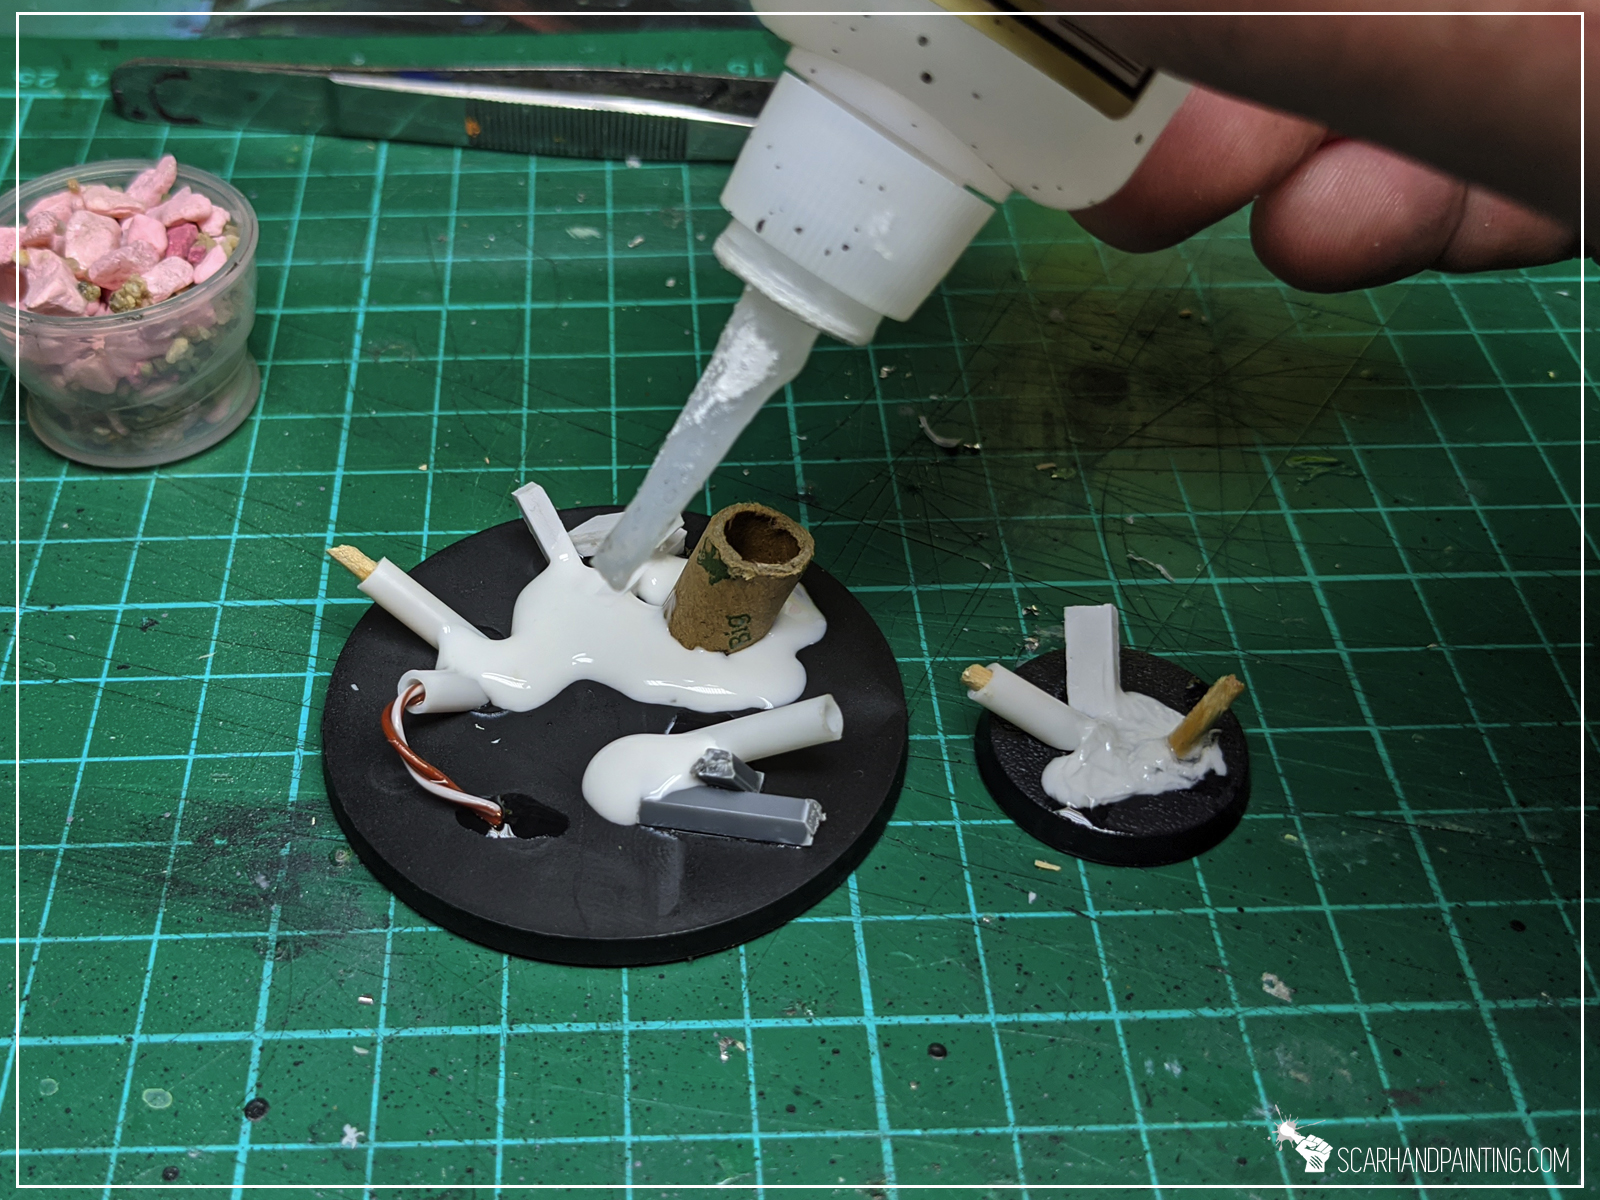


I applied PVA glue around previously glued pieces. I then applied Super glue on top of it and, before super glue hardened, covered entire thing with thick sand mixed with hobby gravel.
Step three: Texture
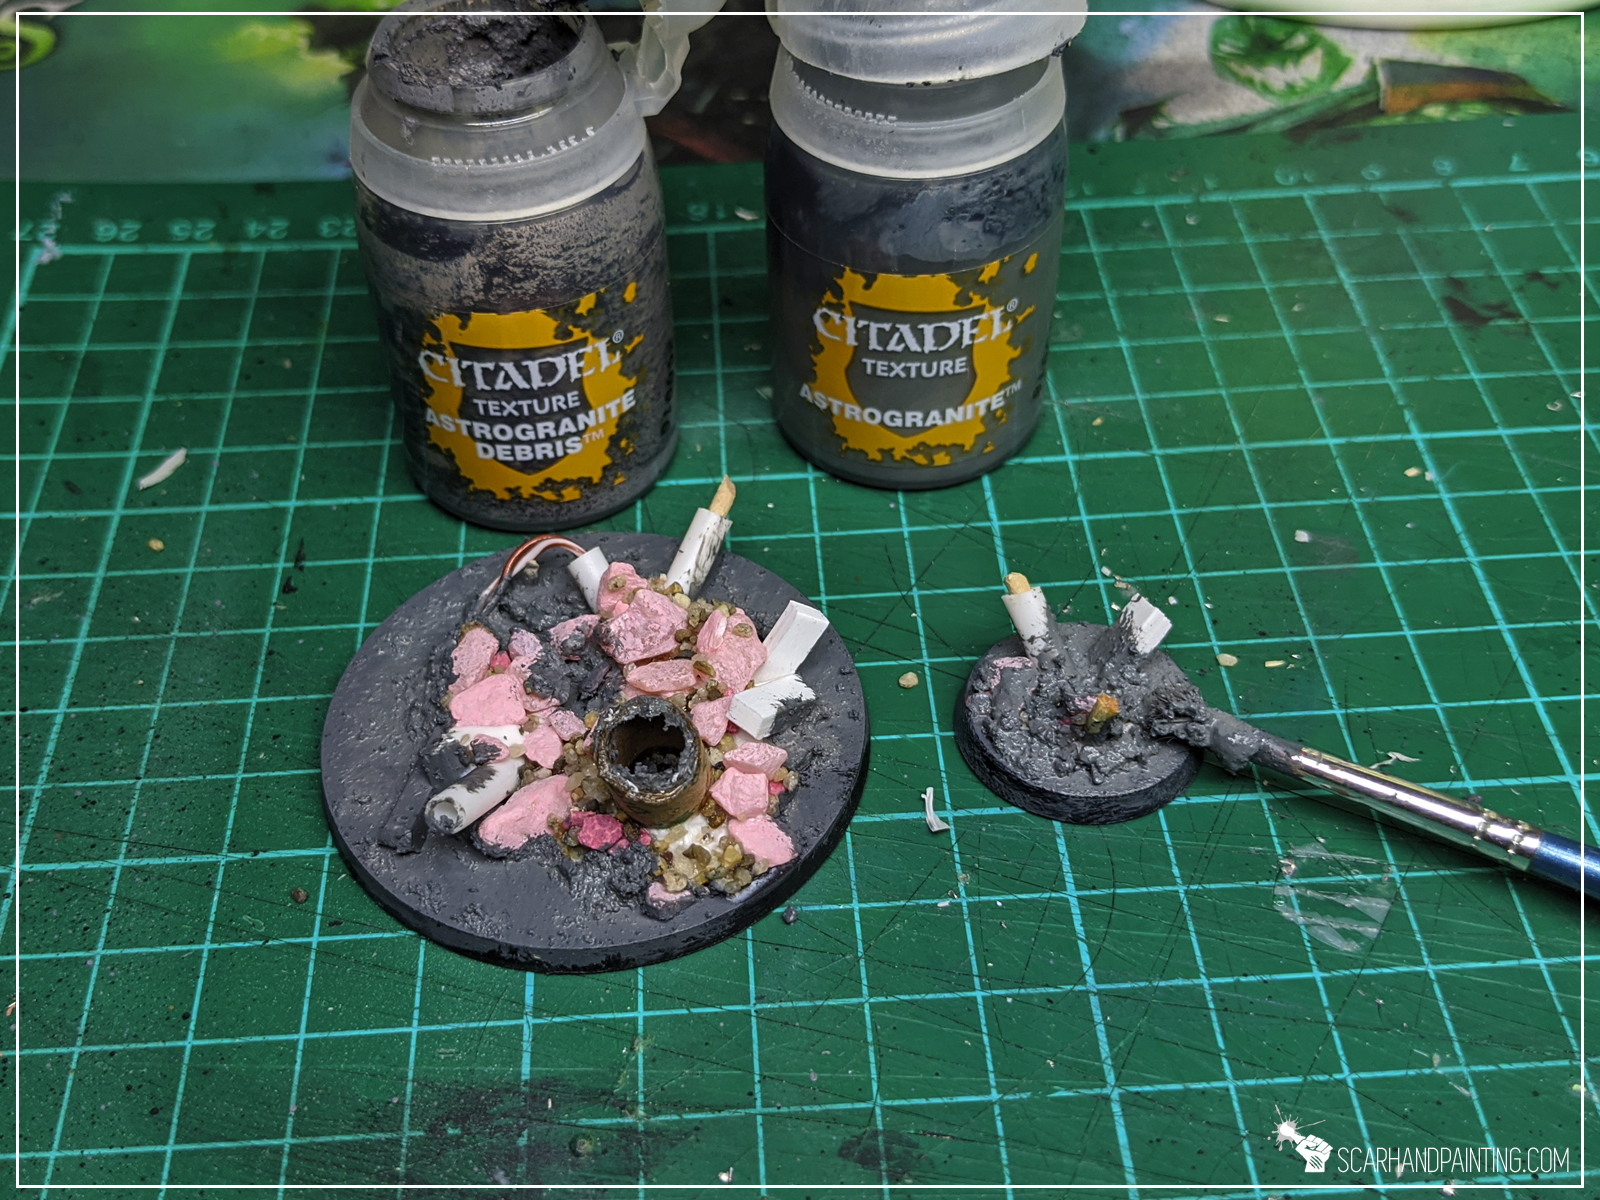
I then textured rest of the base using Games Workshop Astrogranite and Astrogranite Debris paints.
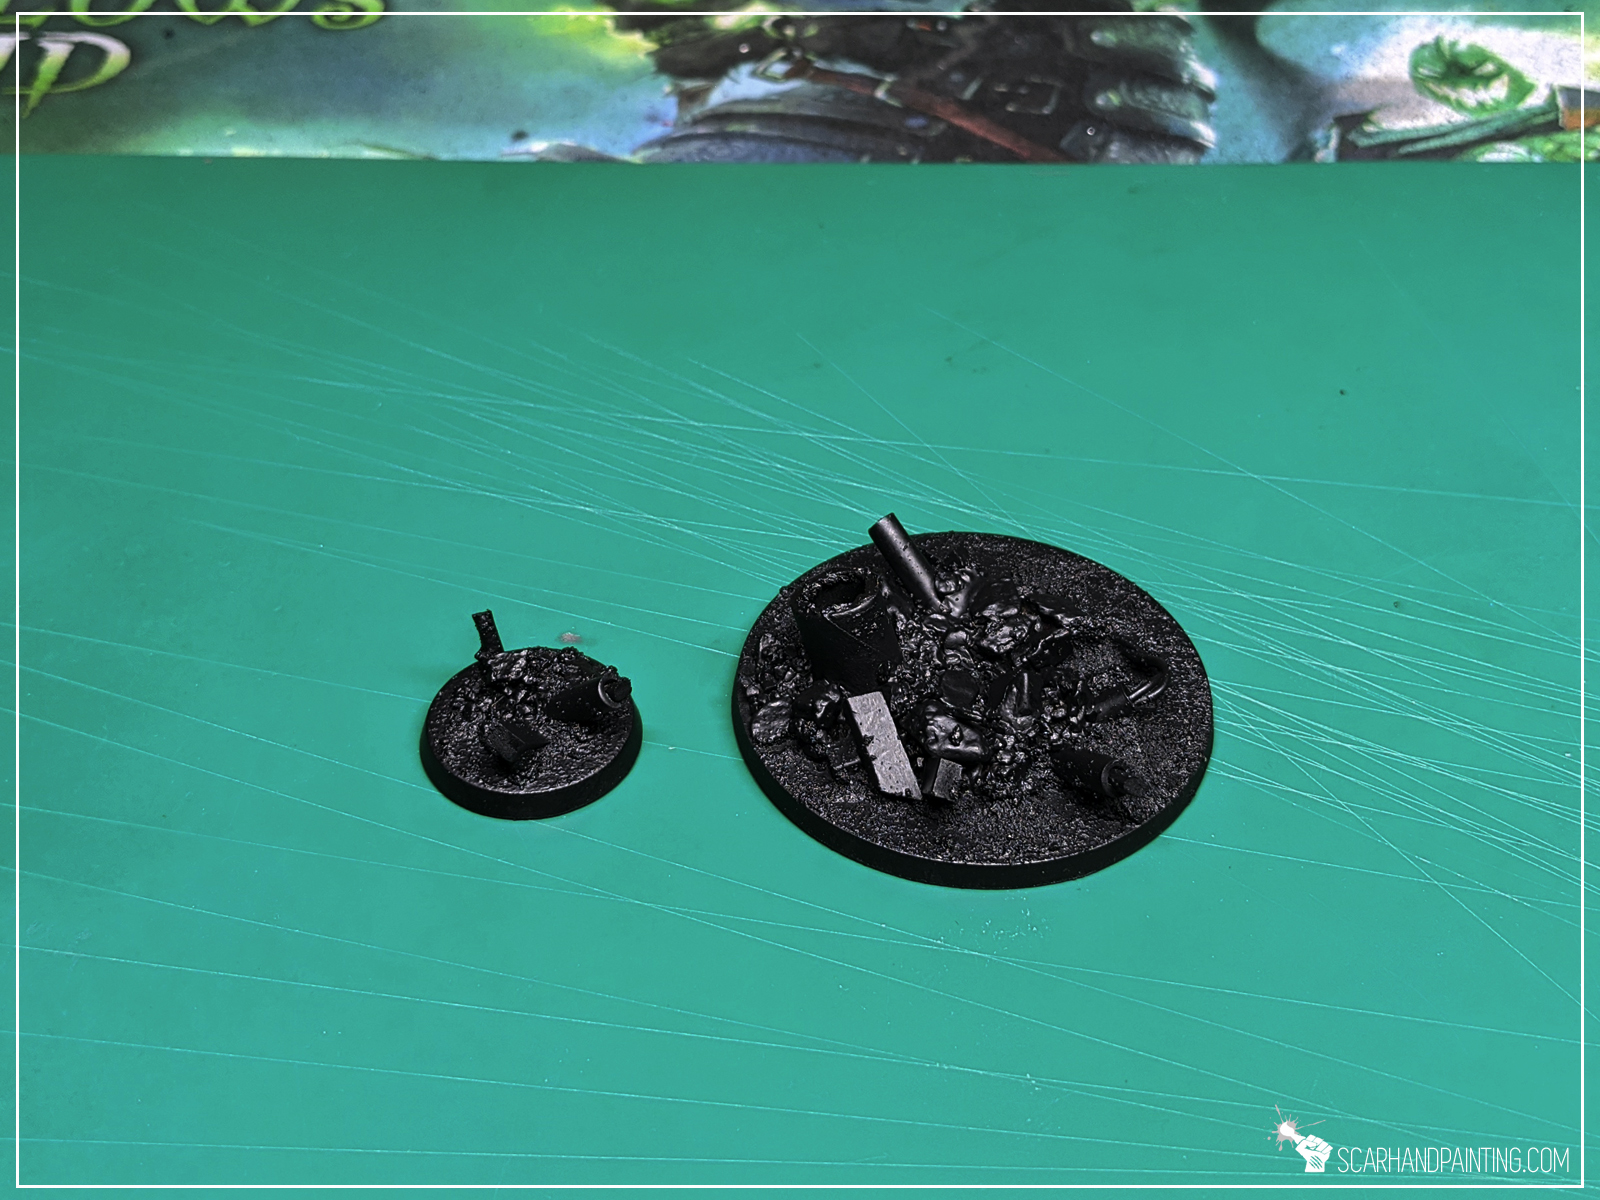


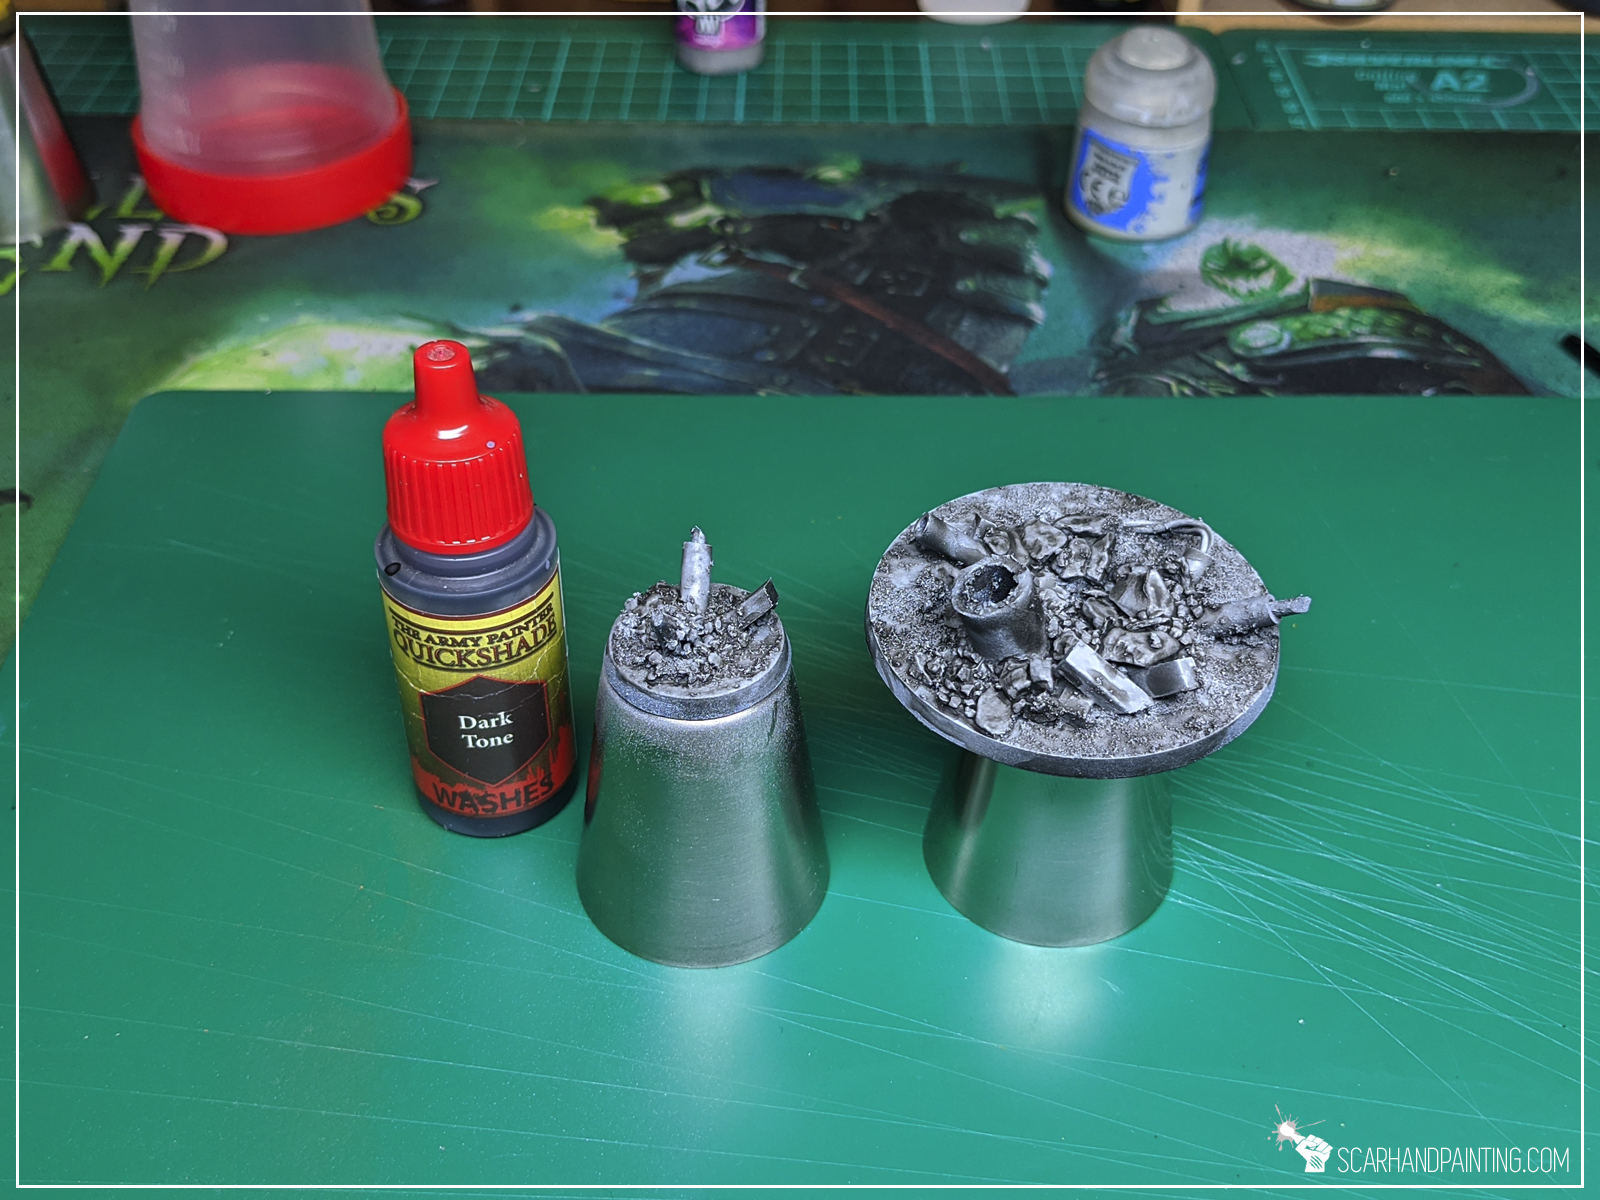
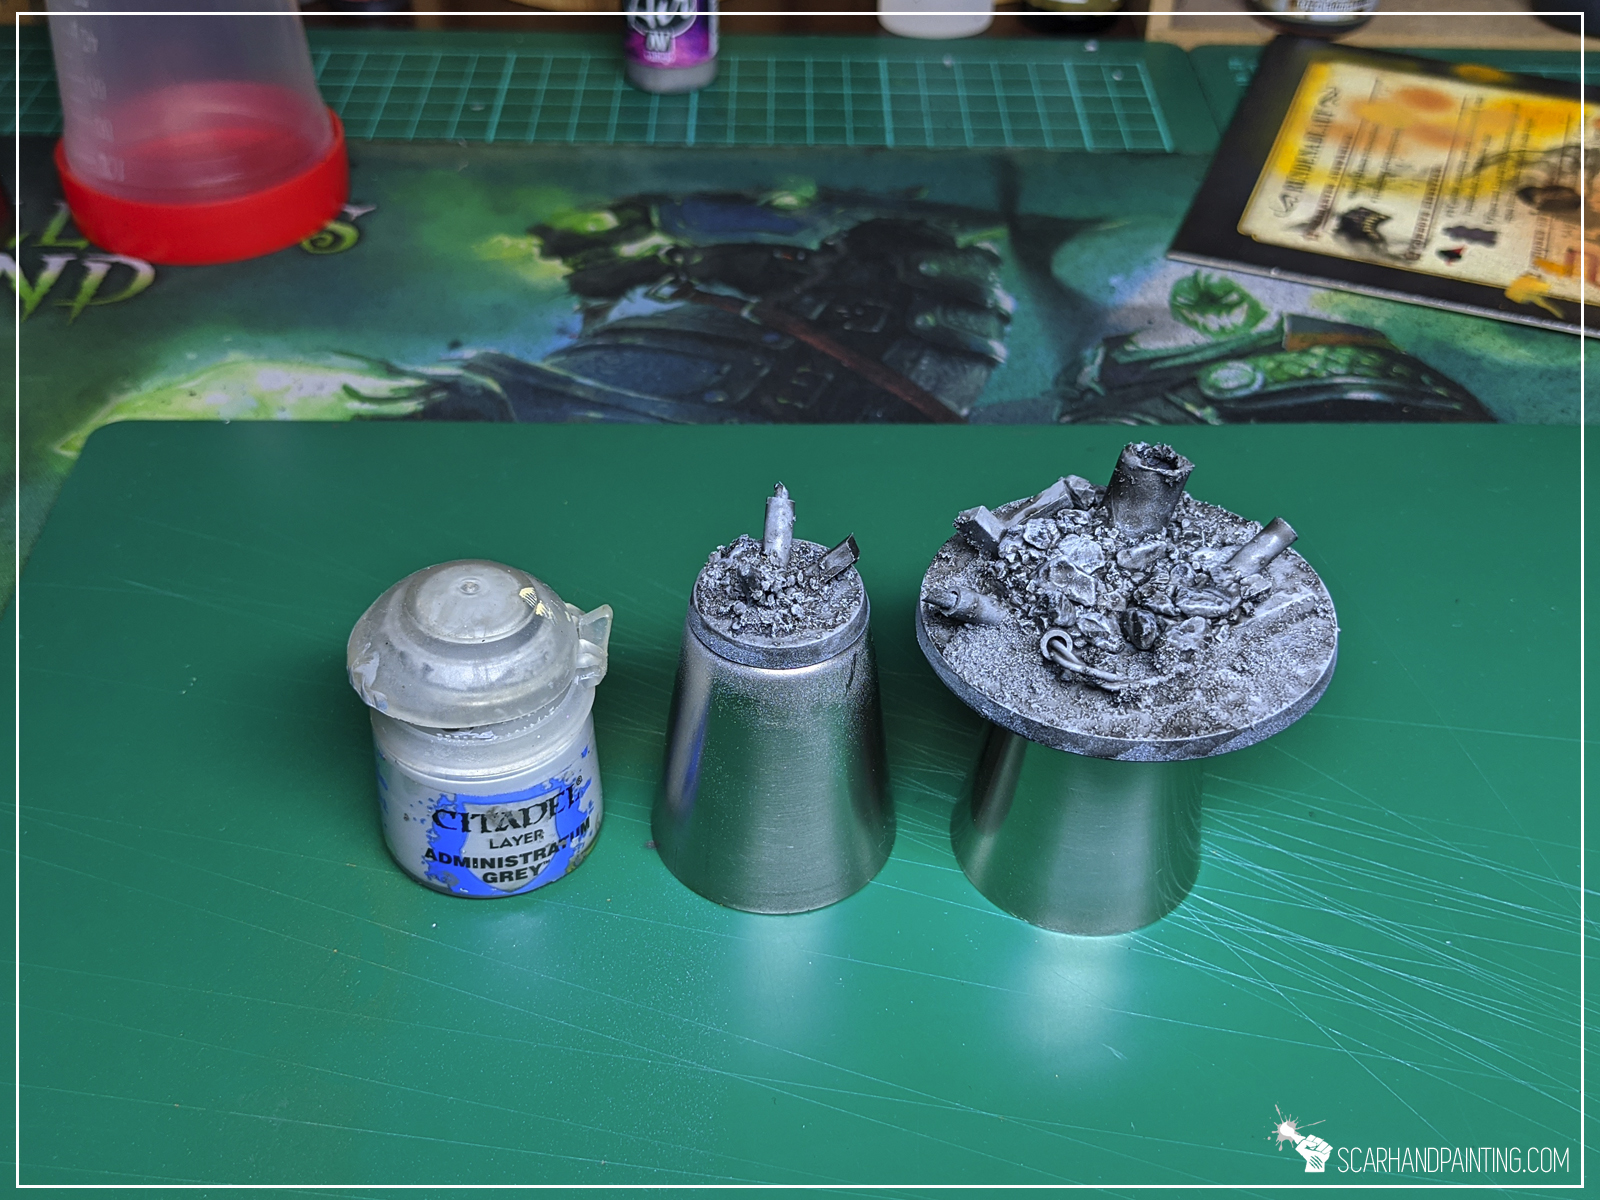
I started with Black Undercoat, then airbrushed a layer of Vallejo Cold Grey, followed short by Vallejo Stonewall Grey. I then washed everything black using Army Painter Dark Tone Ink and once it dried I drybrushed entire base with Games Workshop Administratum Grey.


For metal debris elements I used a mix of Games Workshop Warplock Bronze and Army Painter Gun Metal, followed by a highlight of Army Painter Shining Silver. I then washed all the pieces brown with Army Painter Strong Tone Ink.
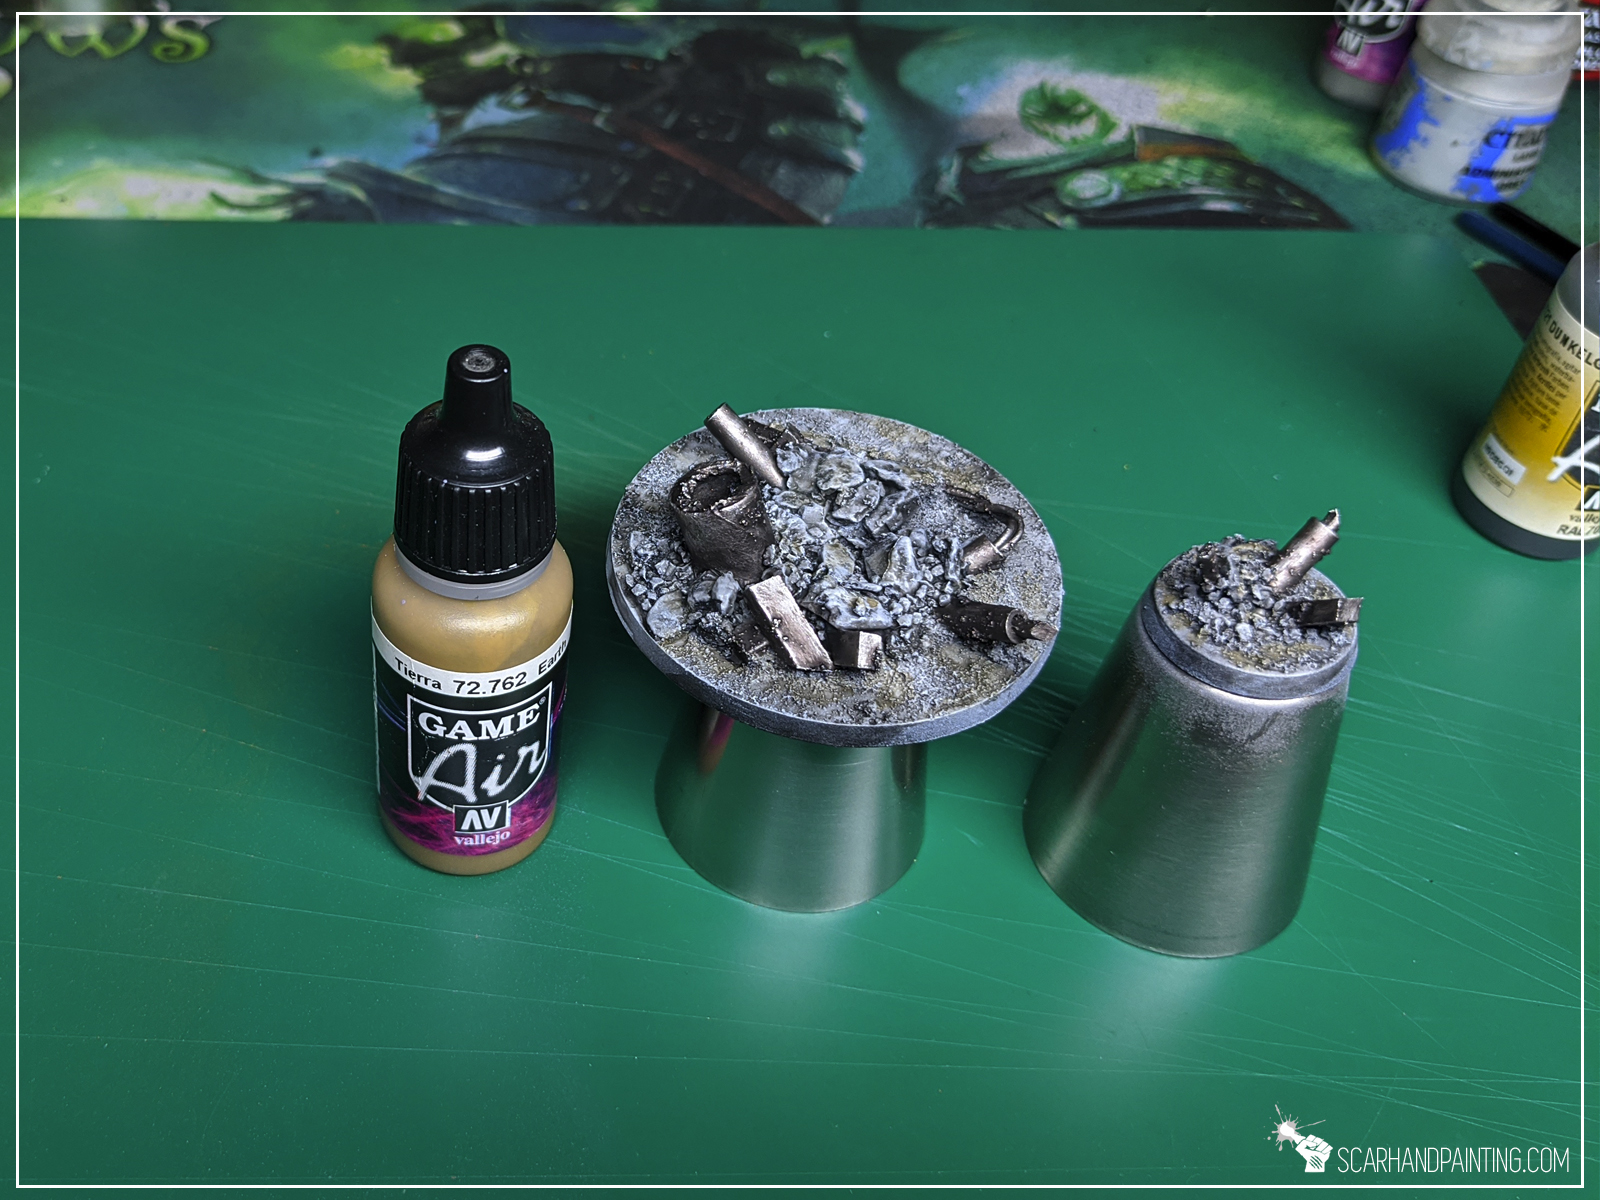
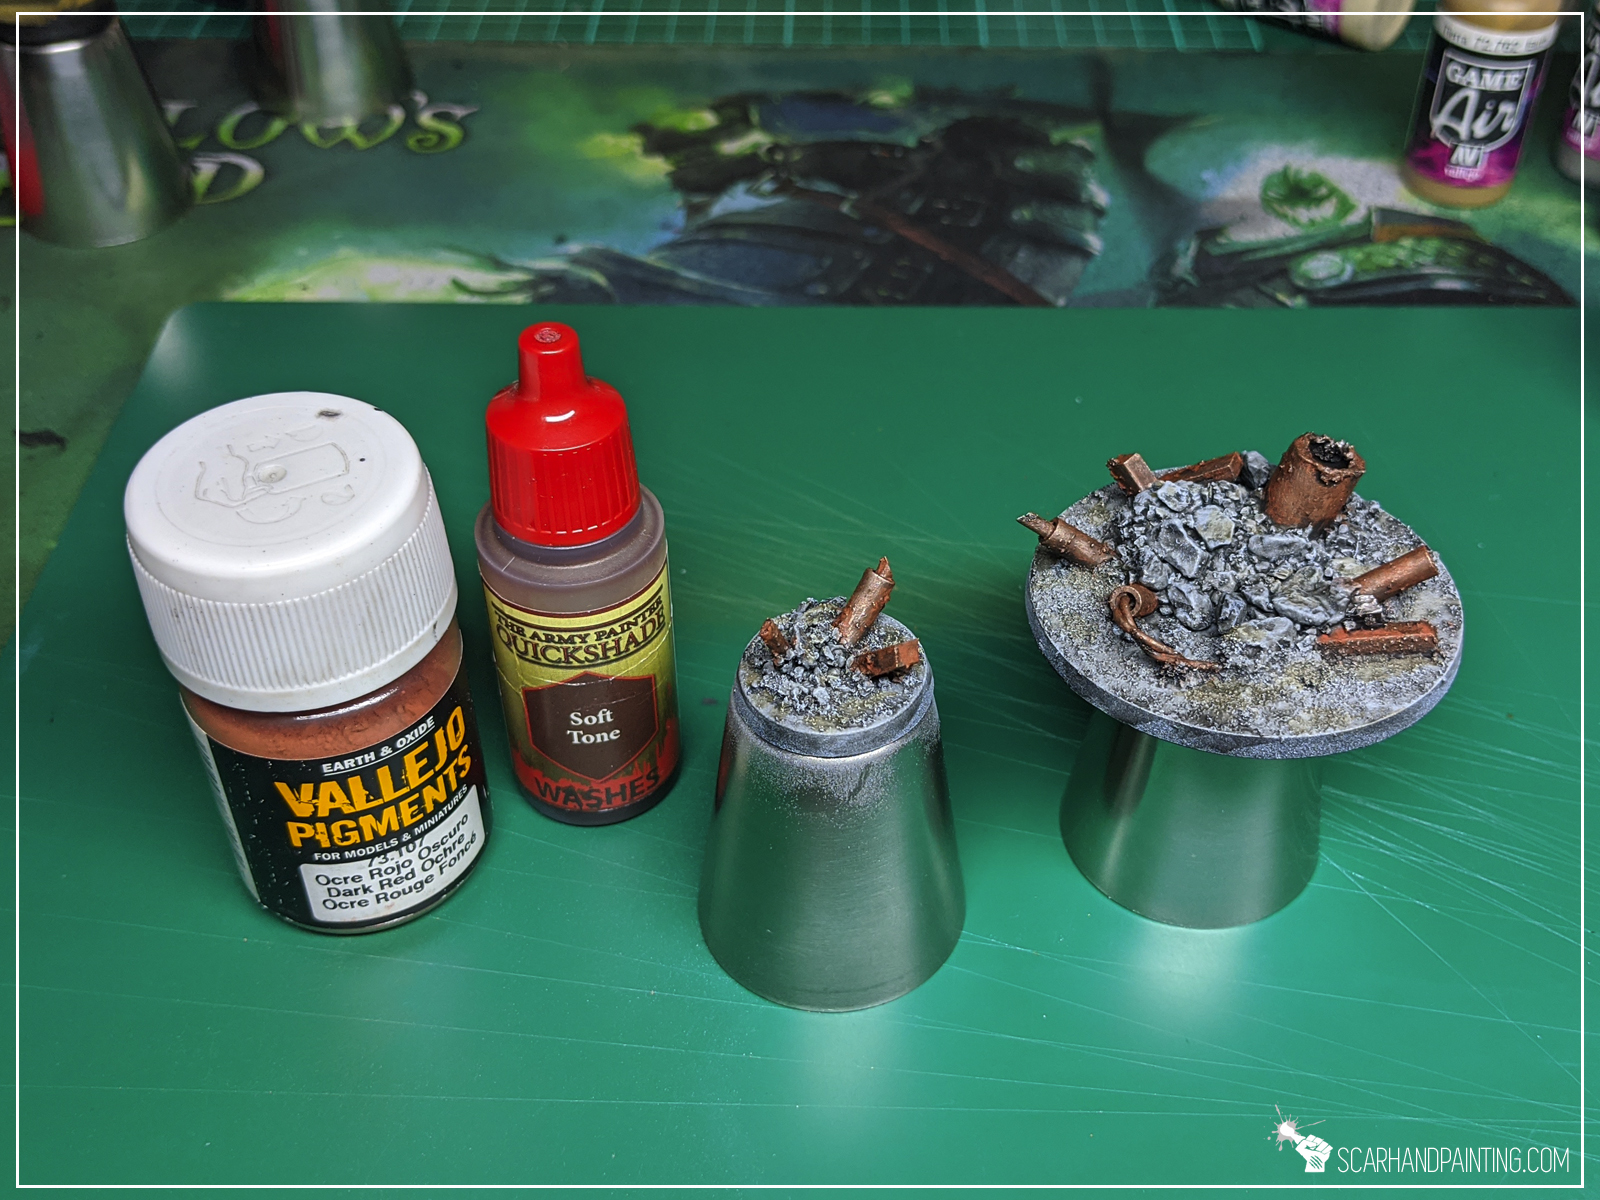

For additional depth and effects I blended in some watered Vallejo Earth. Next I washed all metal debris with a mix of Vallejo Dark Red Ochre Pigment and Army Painter Soft Tone Ink. Lastly I drybrushed grey areas with Vallejo Ghost Grey.
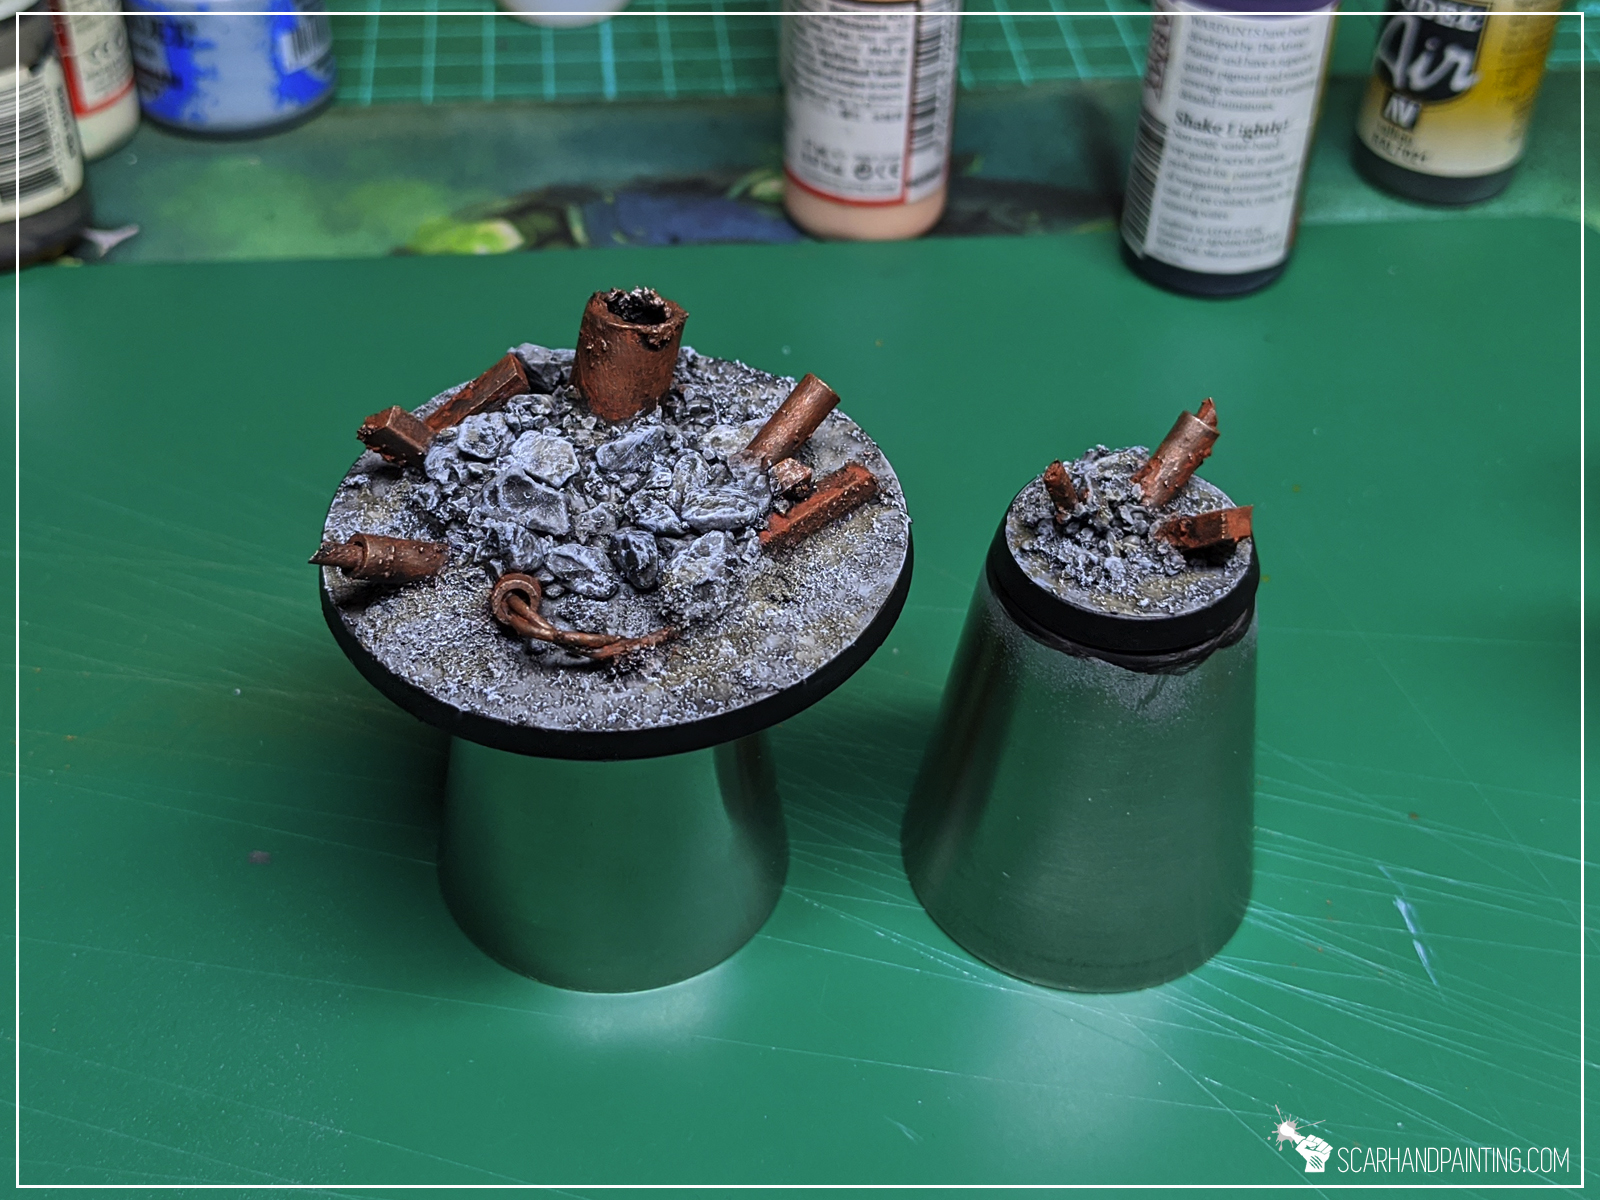
Edges repainted black and job done!
You like this article? Don’t be a stranger! Let me know what you think in the comments below or at my Facebook profile! Cheers!
Welcome to Painting Jade Bases tutorial. Here I will take you on a Step-by-step trip through the process of painting jade Sci-Fi bases the same way as seen at: Gallery: Aleph S.S.S.

Before we start, some notes:
* This one requires an Airbrush.
* What works for me might not necessarily work for you.
* I used Zen Terrain “Futura” base toppers.
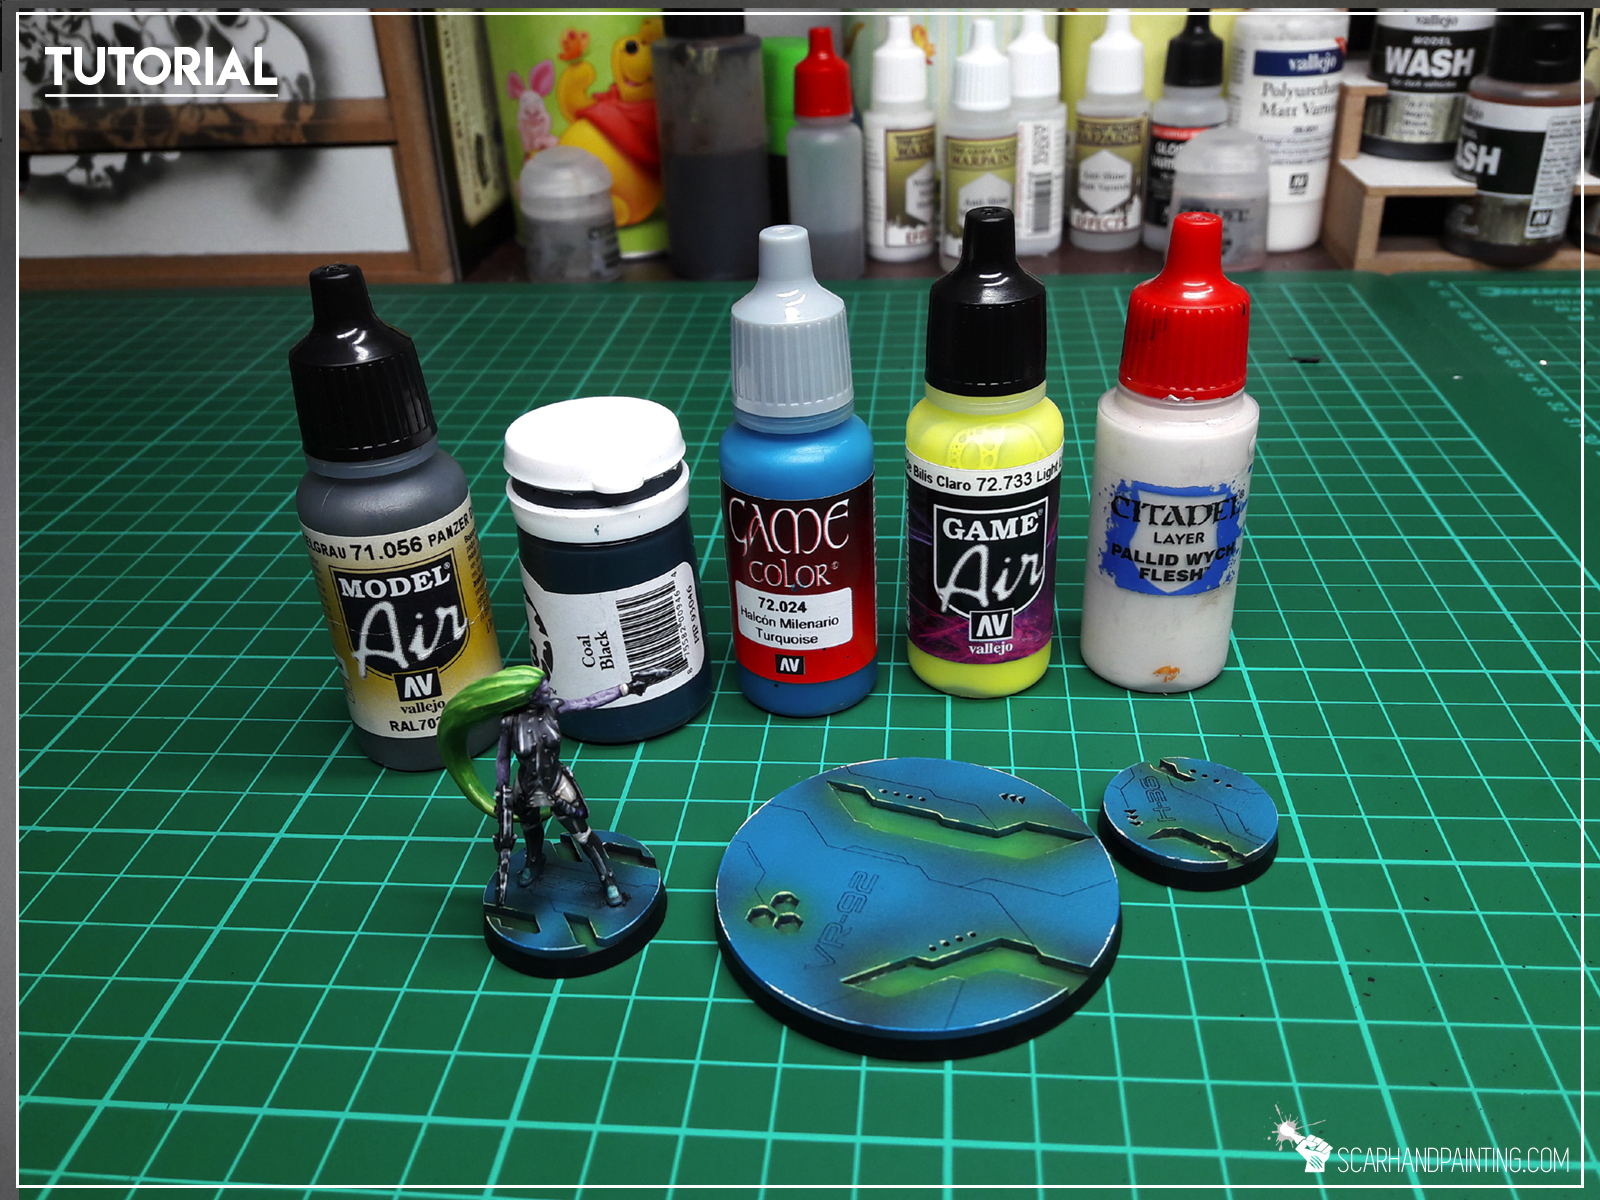
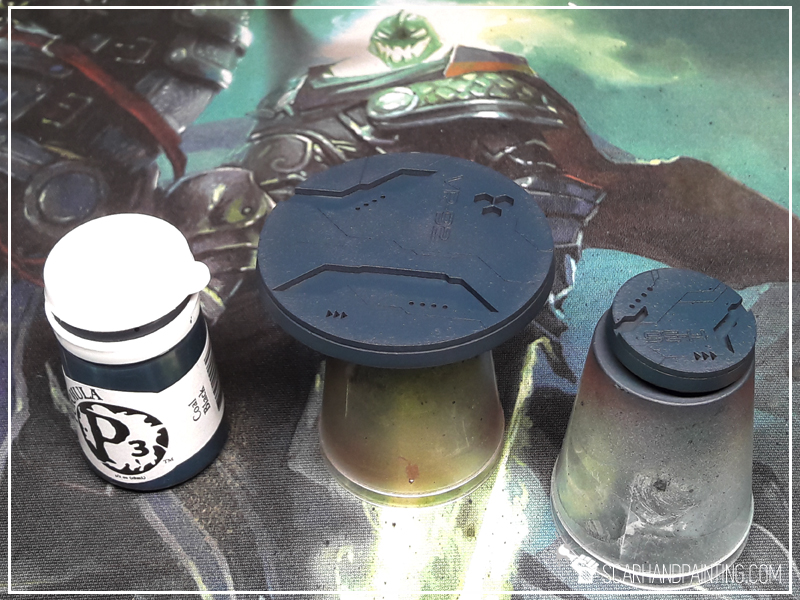
* I started by airbrushing a thick layer of Vallejo Panzer Dark Grey.

* I followed with a layer of P3 Coal Black, mixed with Flow Improover.
* Next I applied a layers of Vallejo Turquoise, mixed with Flow Improover, but this time made sure to leave some spots of previous layer visible.
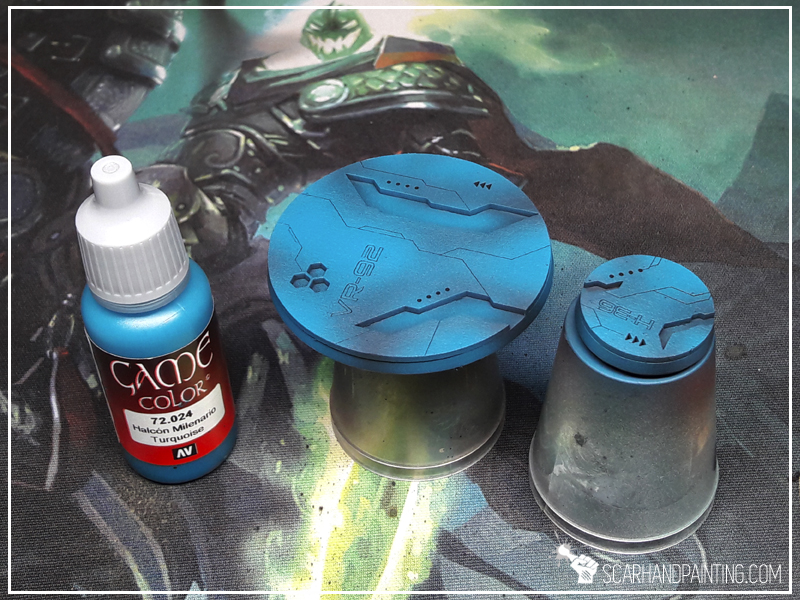
* Using a regular brush I then highlighted all the edges with Vallejo Turquoise.

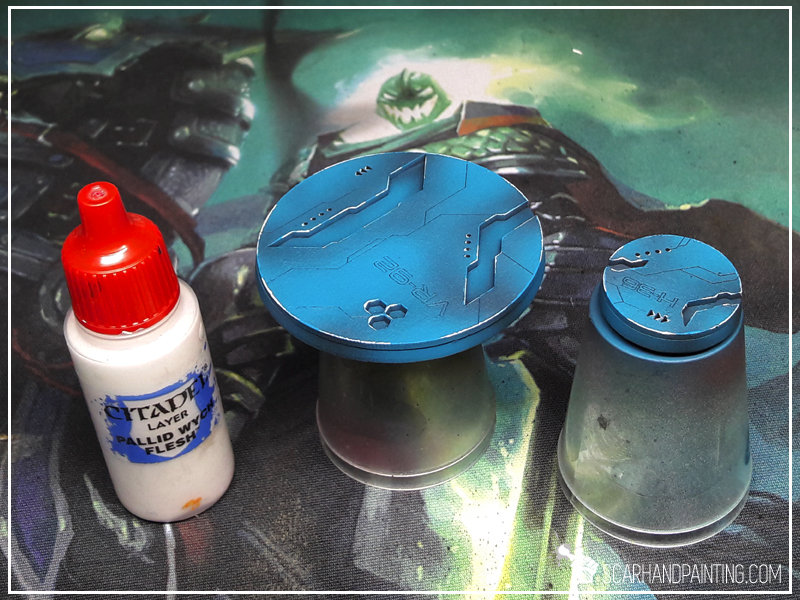
* Next I partially higlighted the edges with Games Workshop Pale Wych Flesh.
* Back to airbruush, I applied a layer of Vallejo Light Livery Green on top of all lower parts of the base.
* I then washed all recess spots with Games Workshop Waywatcher Green, being careful not to leave stain outside the lower parts of the base.

* Finally I painted side edges black. Job done.

That’s all! If you followd this tutorial and painted your own bases this way, be sure to leave a comment and drop me some pics via Facebook 😉
Cheers!
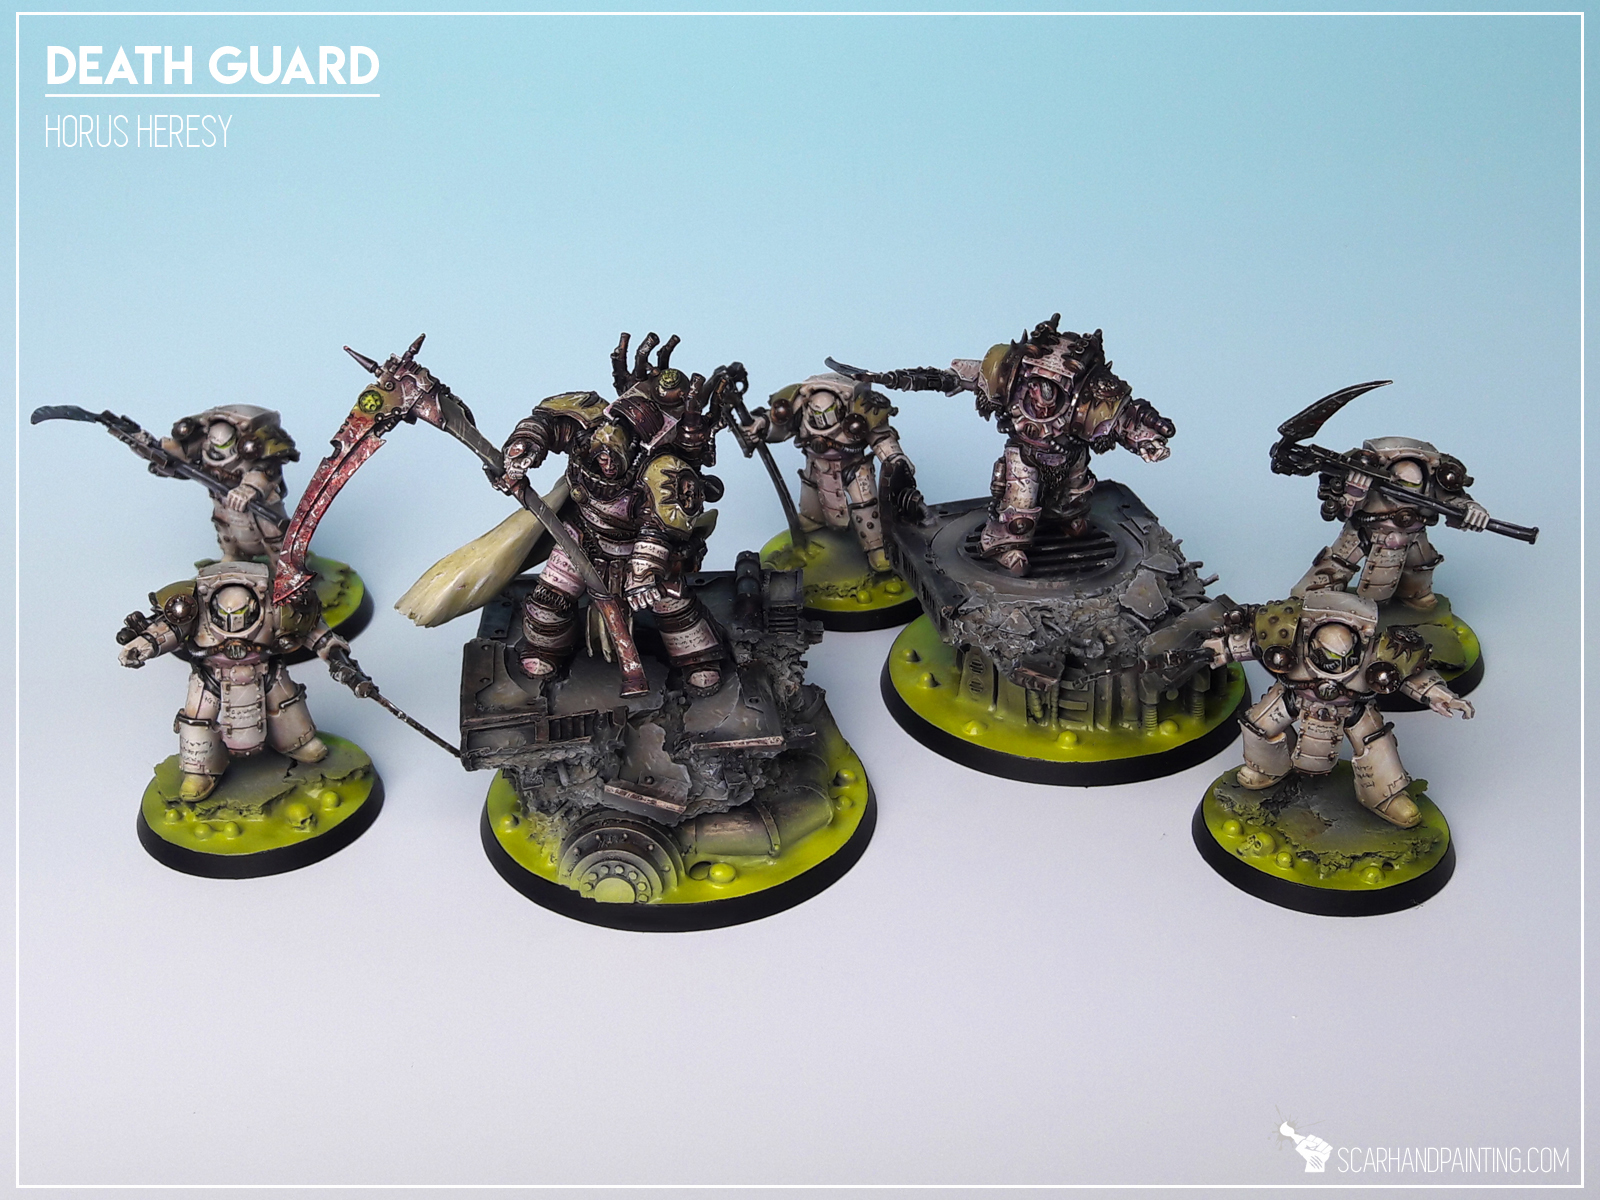
In this easy, step-by-step tutorial I’m going to show you how to create a Toxic Sludge Base. I designed these bases for Warhammer 40,000 Death Guuard Plague Marines.

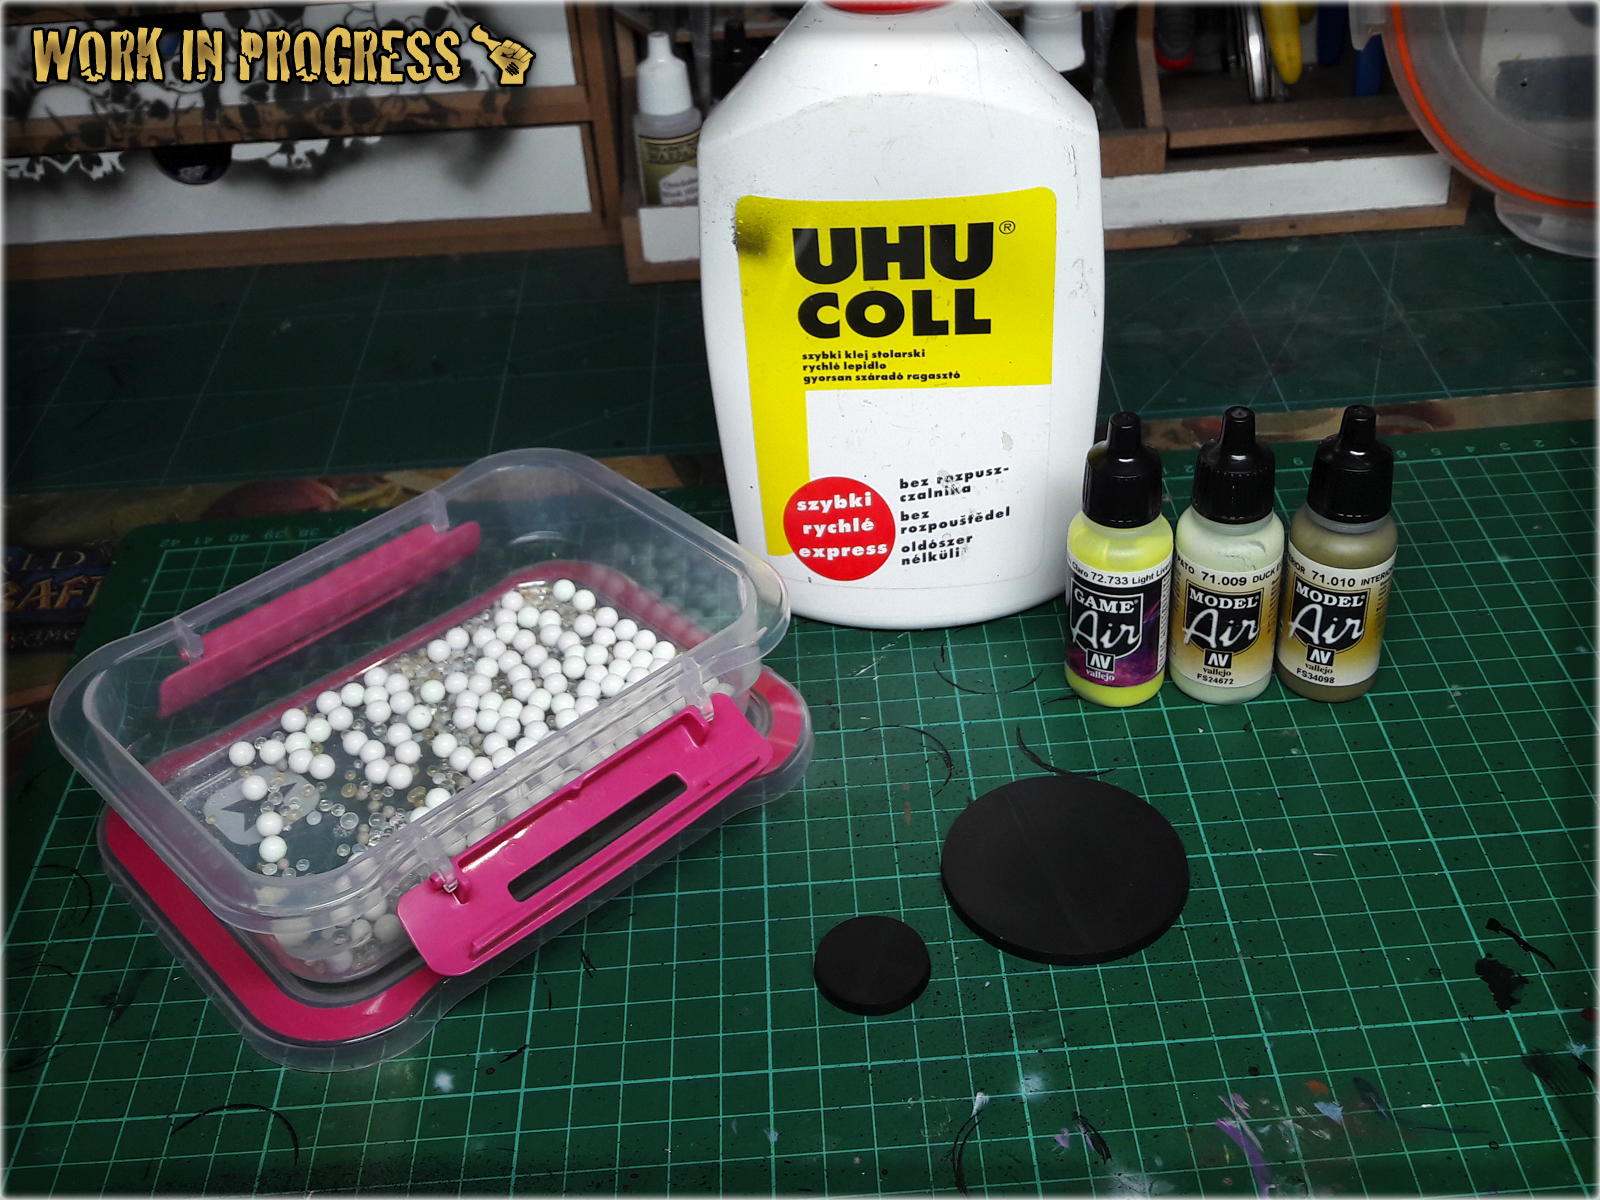
**Where I’m from there’s a small paper bag filled with moist absorbsion balls in every shoe box. If you can’t get that, just use some grains or make small balls out of green stuff or modeling clay.
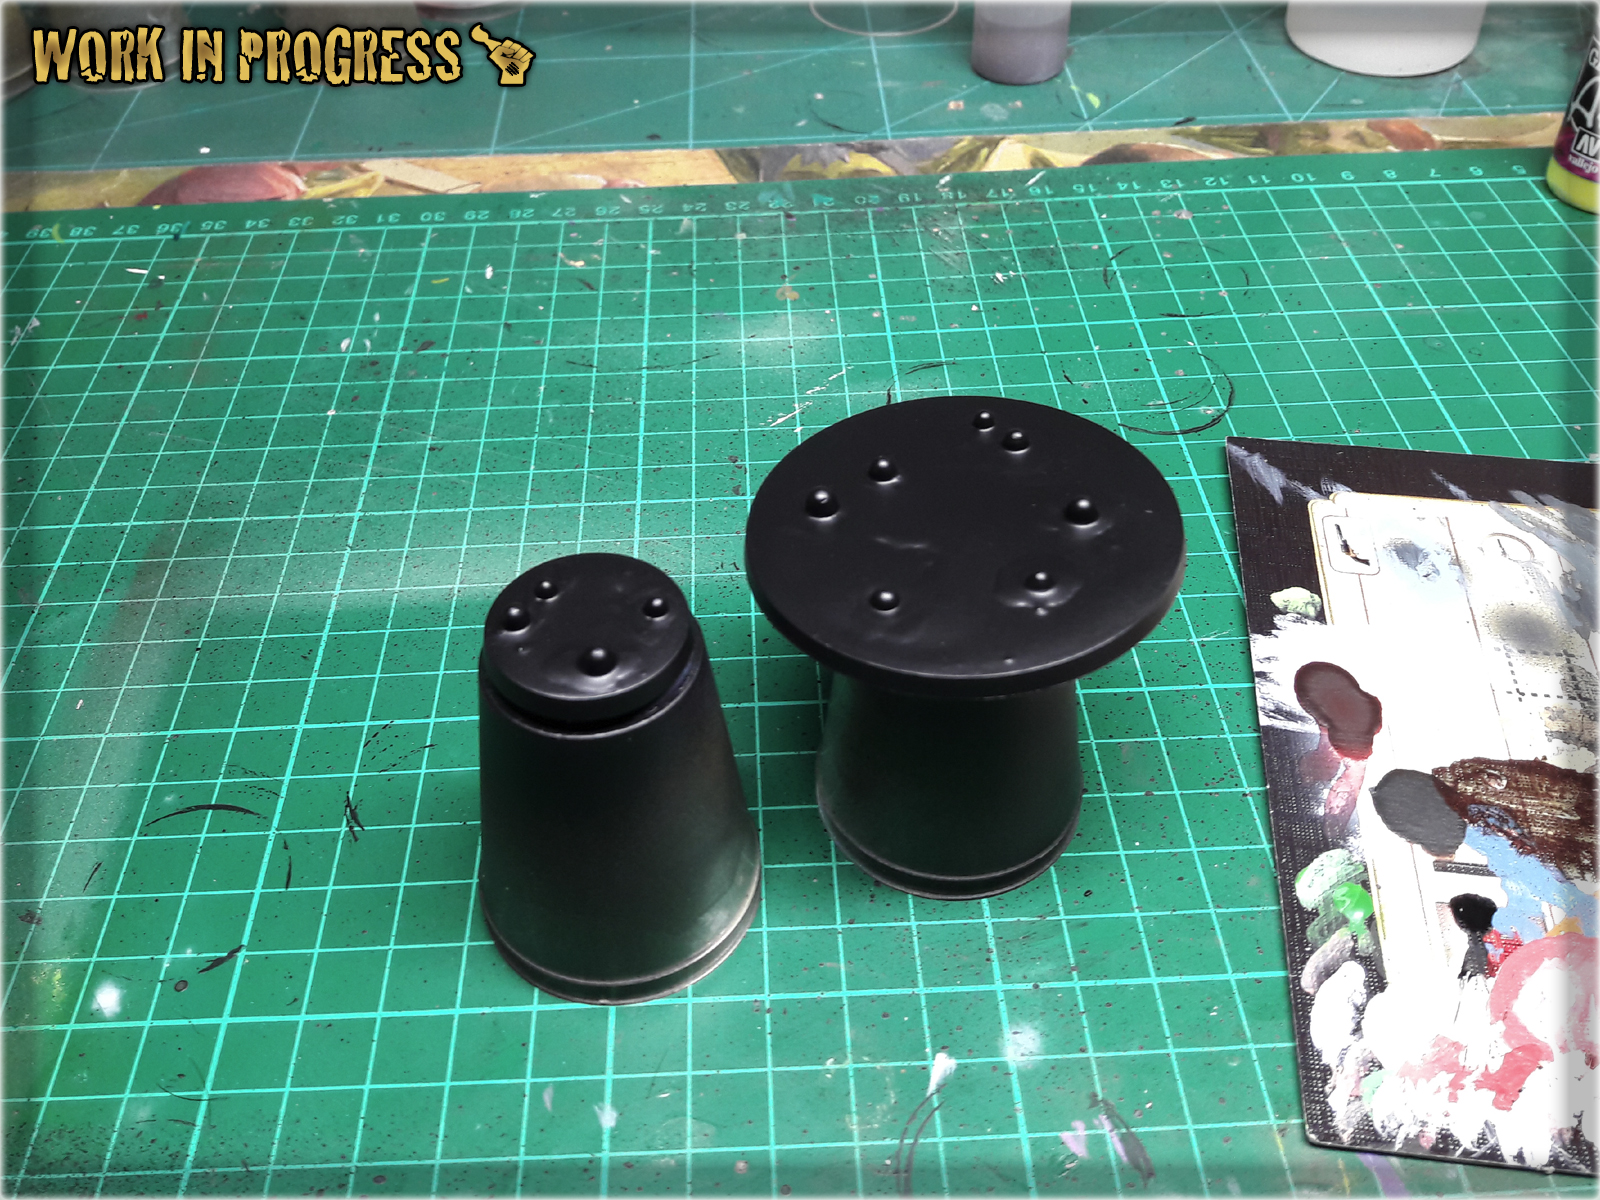
* I started by covering entire base with a layer of basing glue.

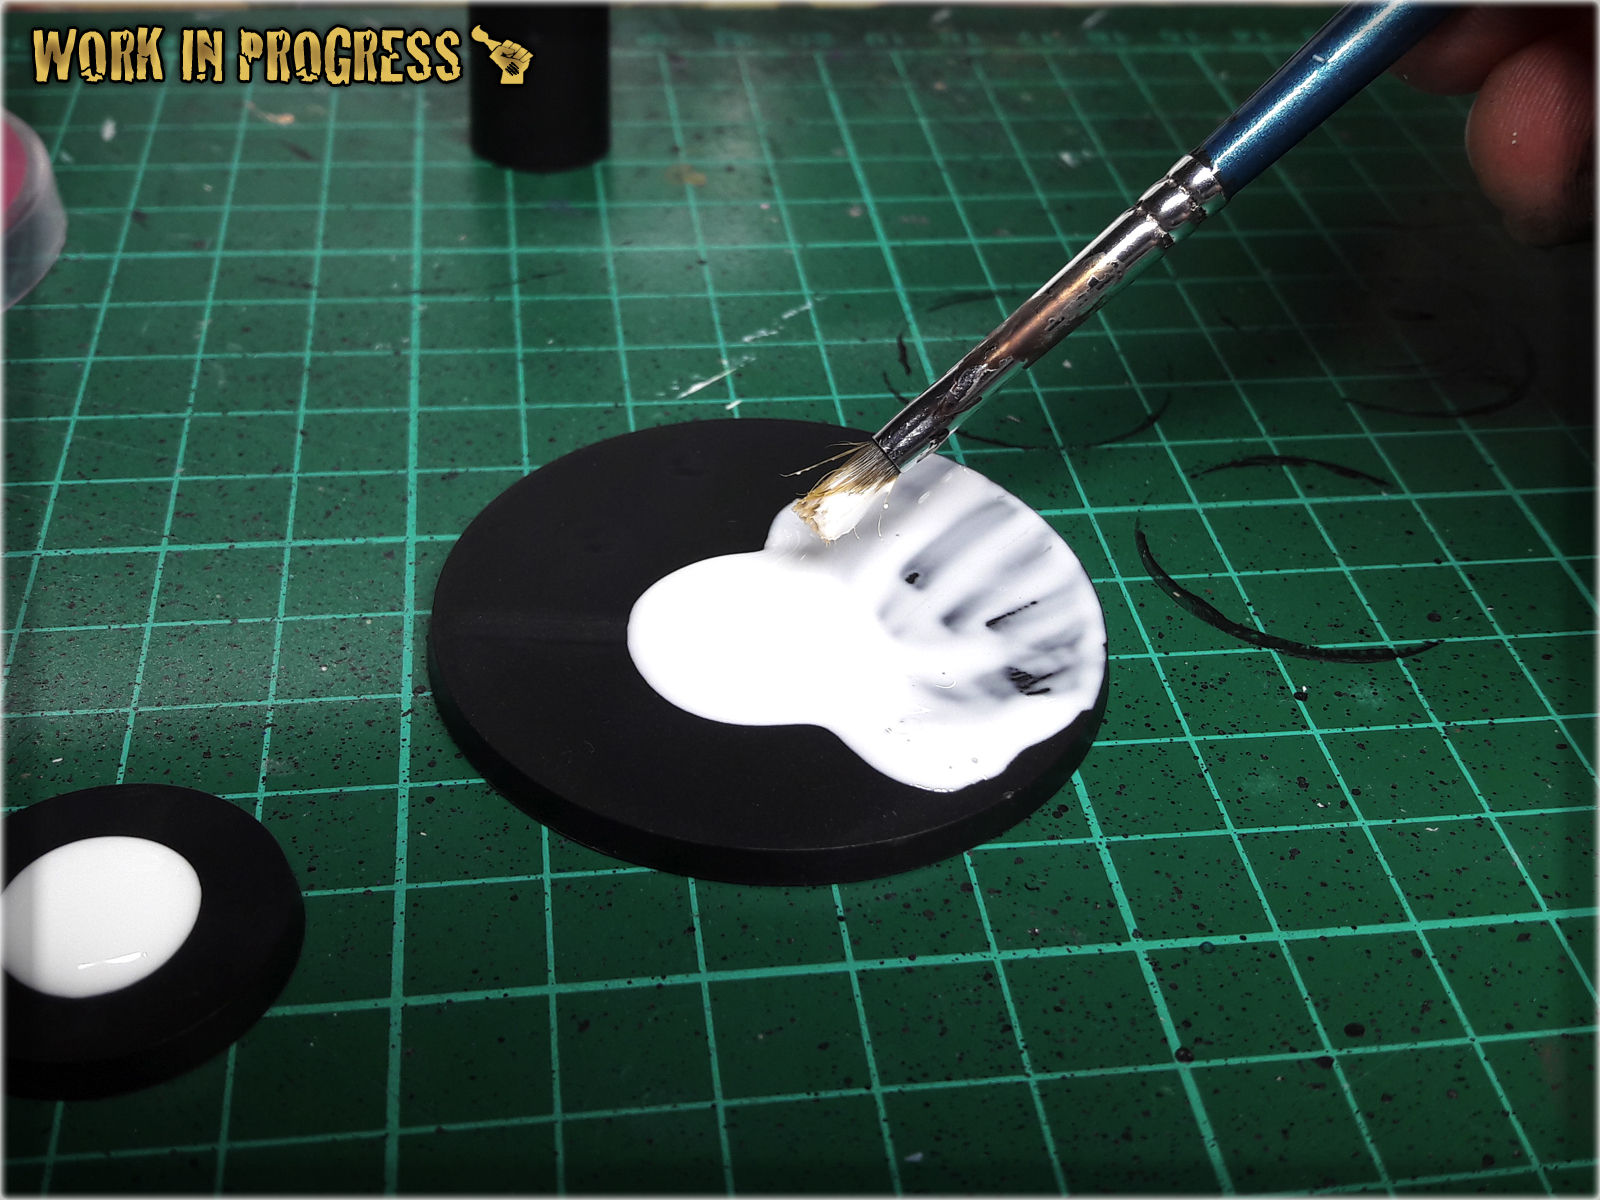
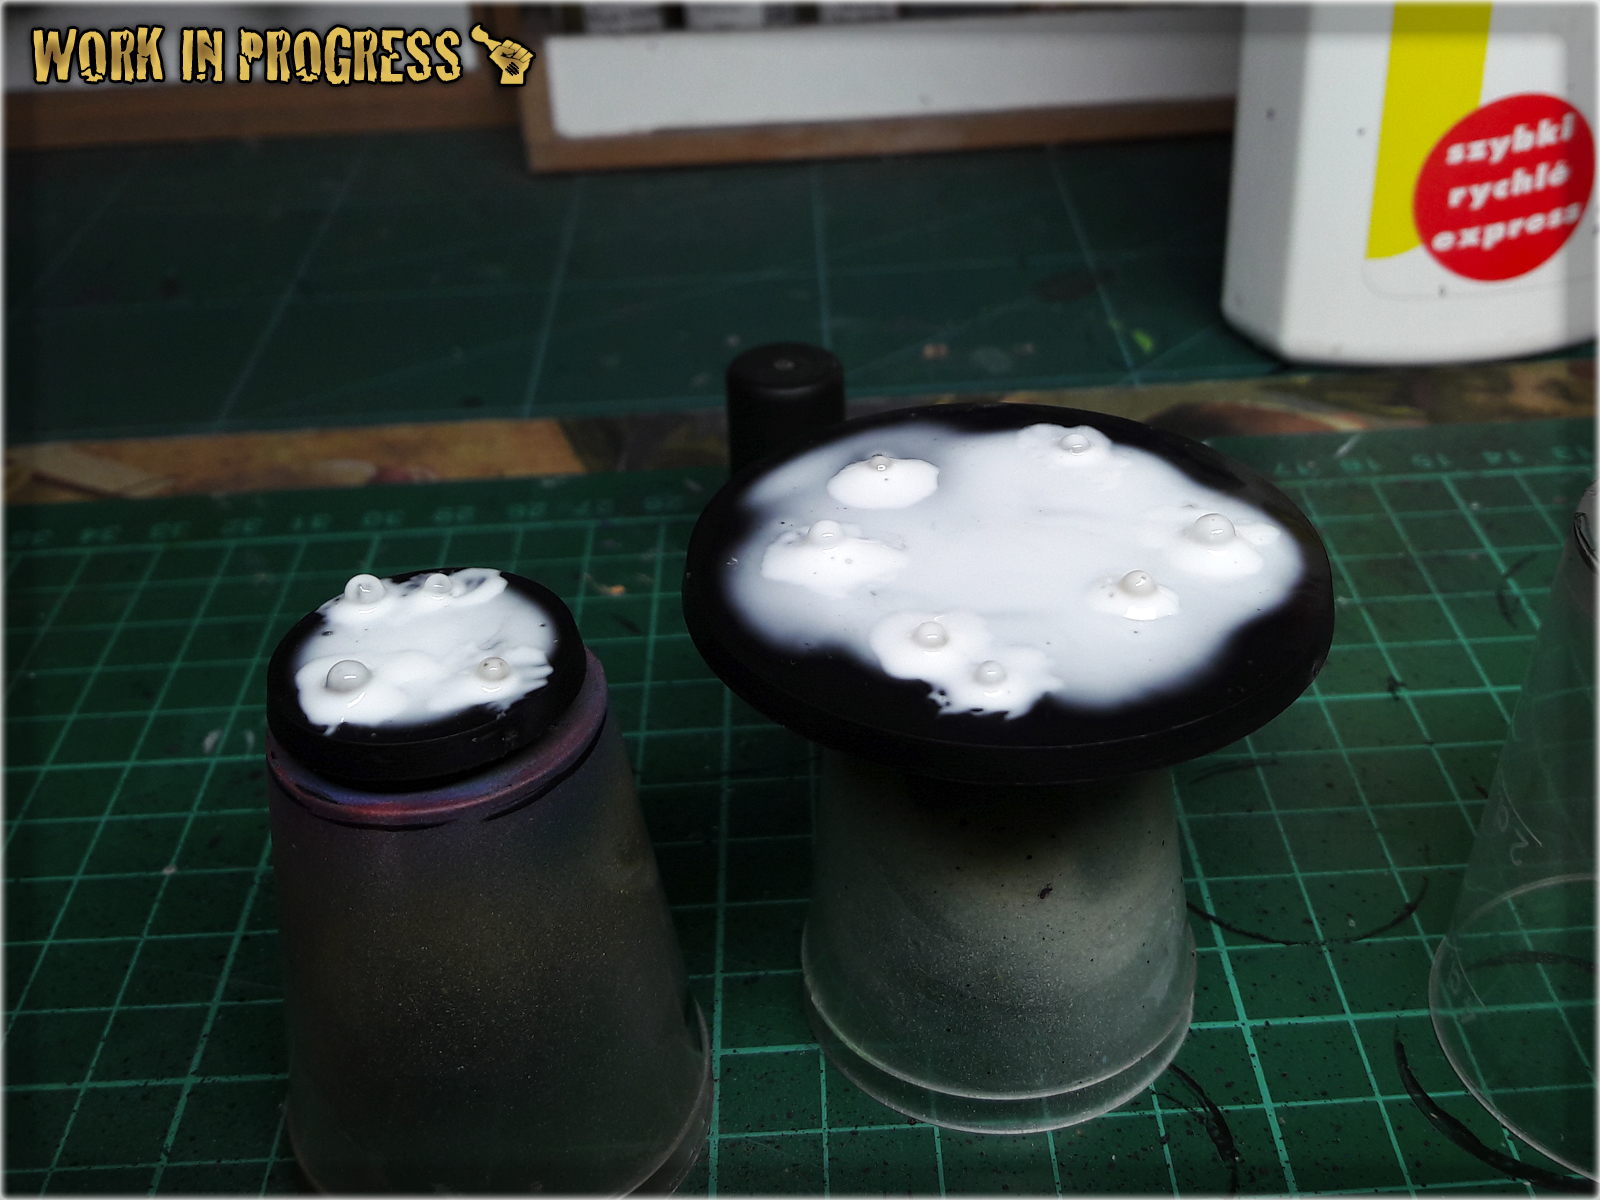
* I then put couple of tiny balls onto the base, creating 'buubbles' and let it all dry.

* Once dry, I covered are around the bubbles with another layer of basing glue.

* I let it all dry for about an hour, then undercoated entire base black.
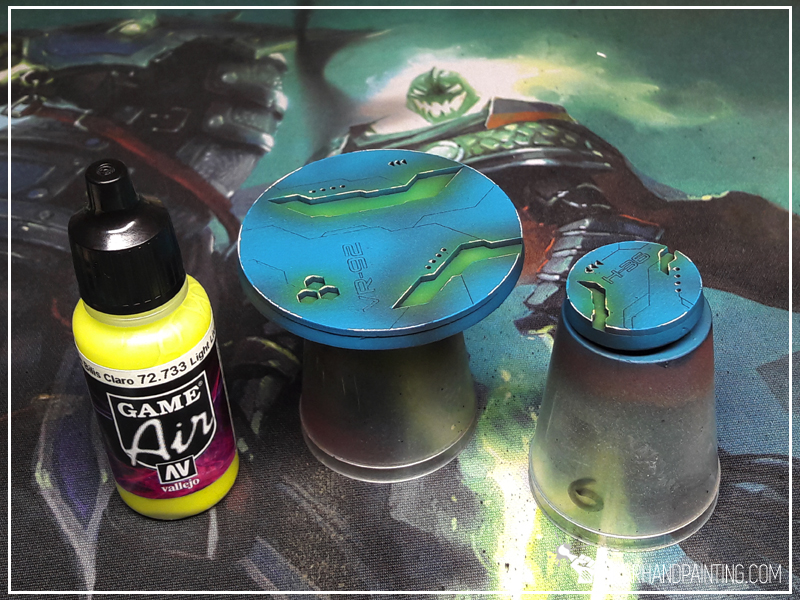
* I then airbrushed a layer of Vallejo Interior Green over entire base.
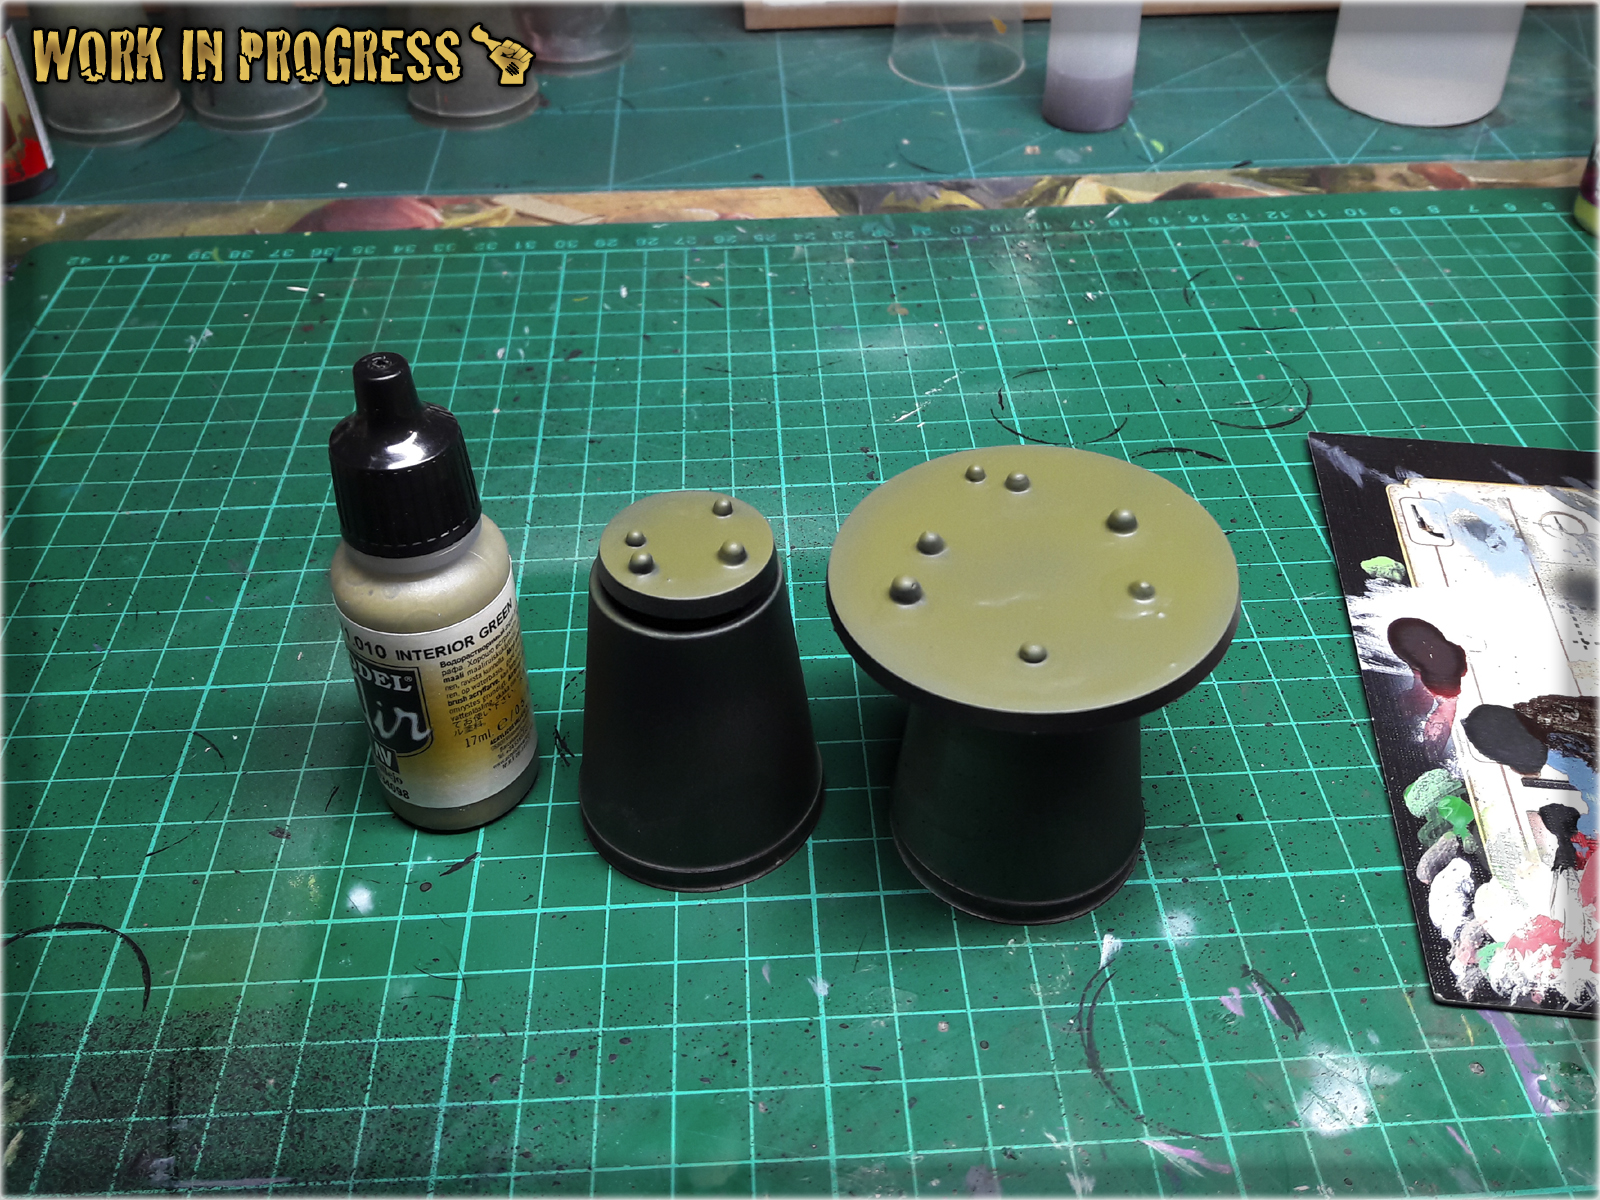
* Next I airbrushed a layer of Duck Egg Green concentrating on bubbles and surrounding areas.

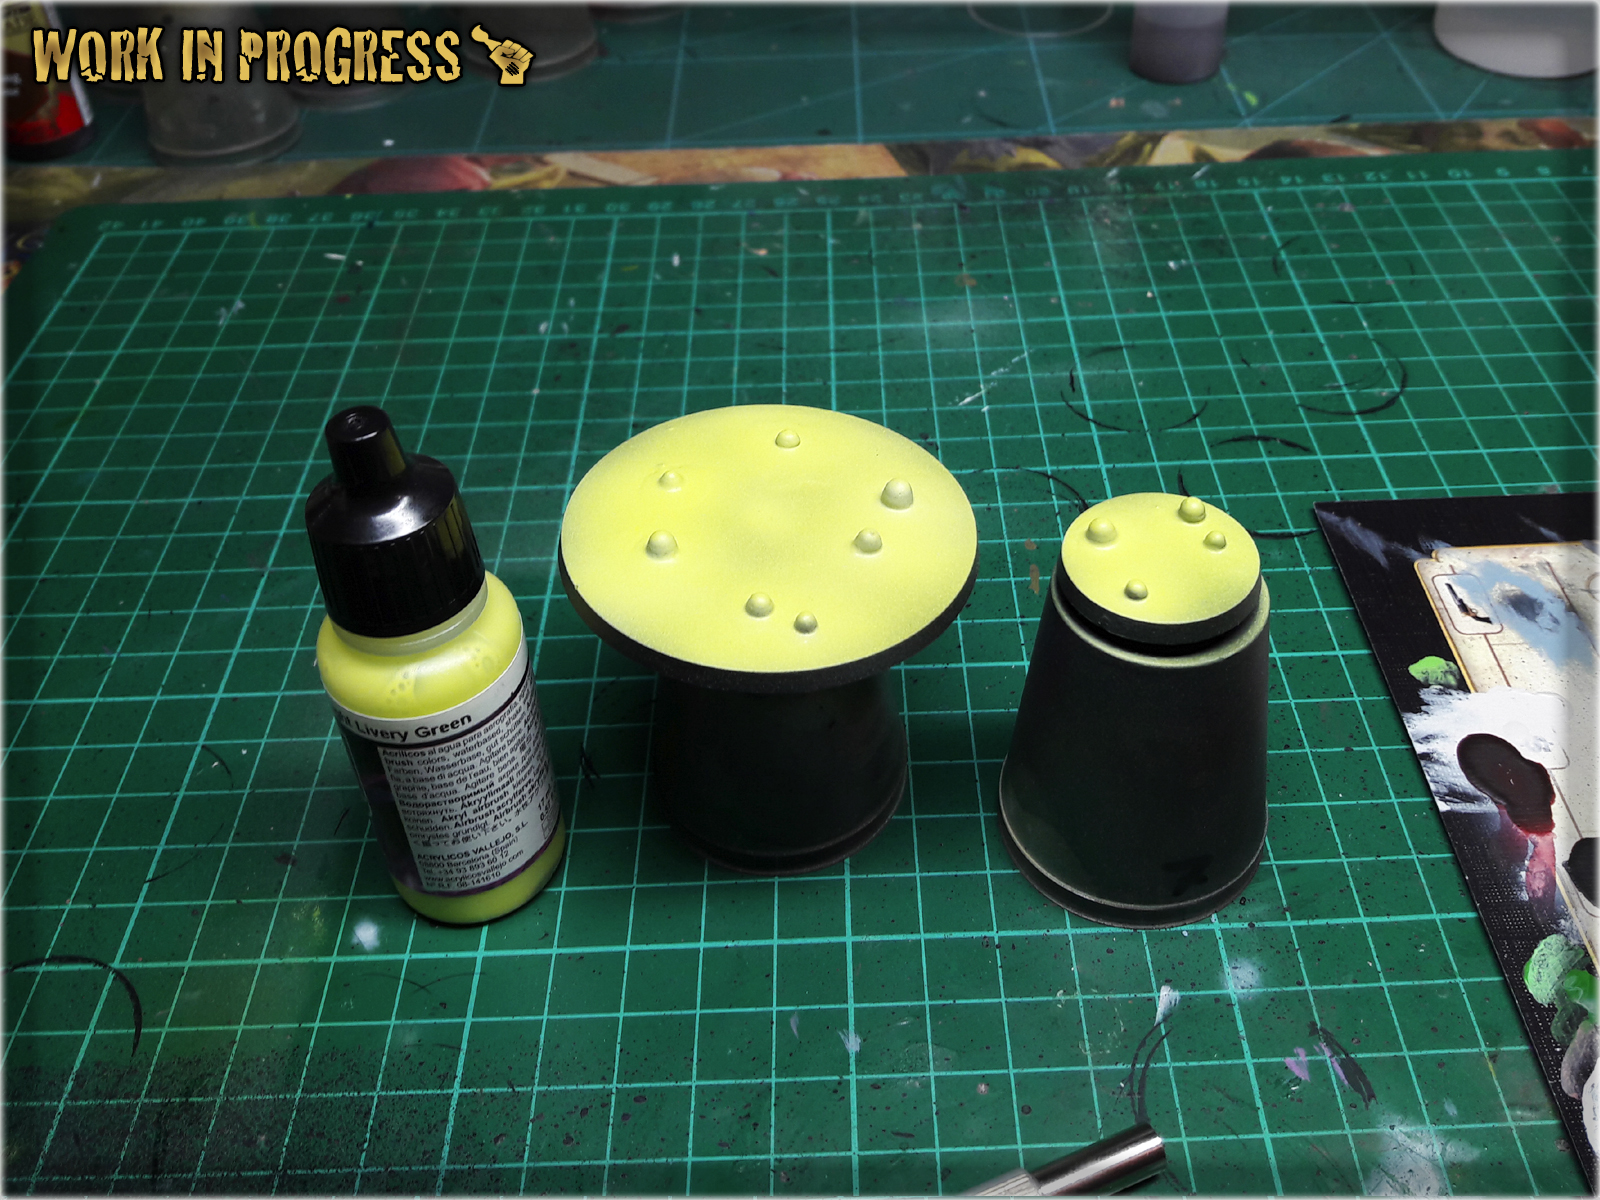
* Last thing to do was to airbrush two layers of Light Livery Green over entire bases and paint the sides black.

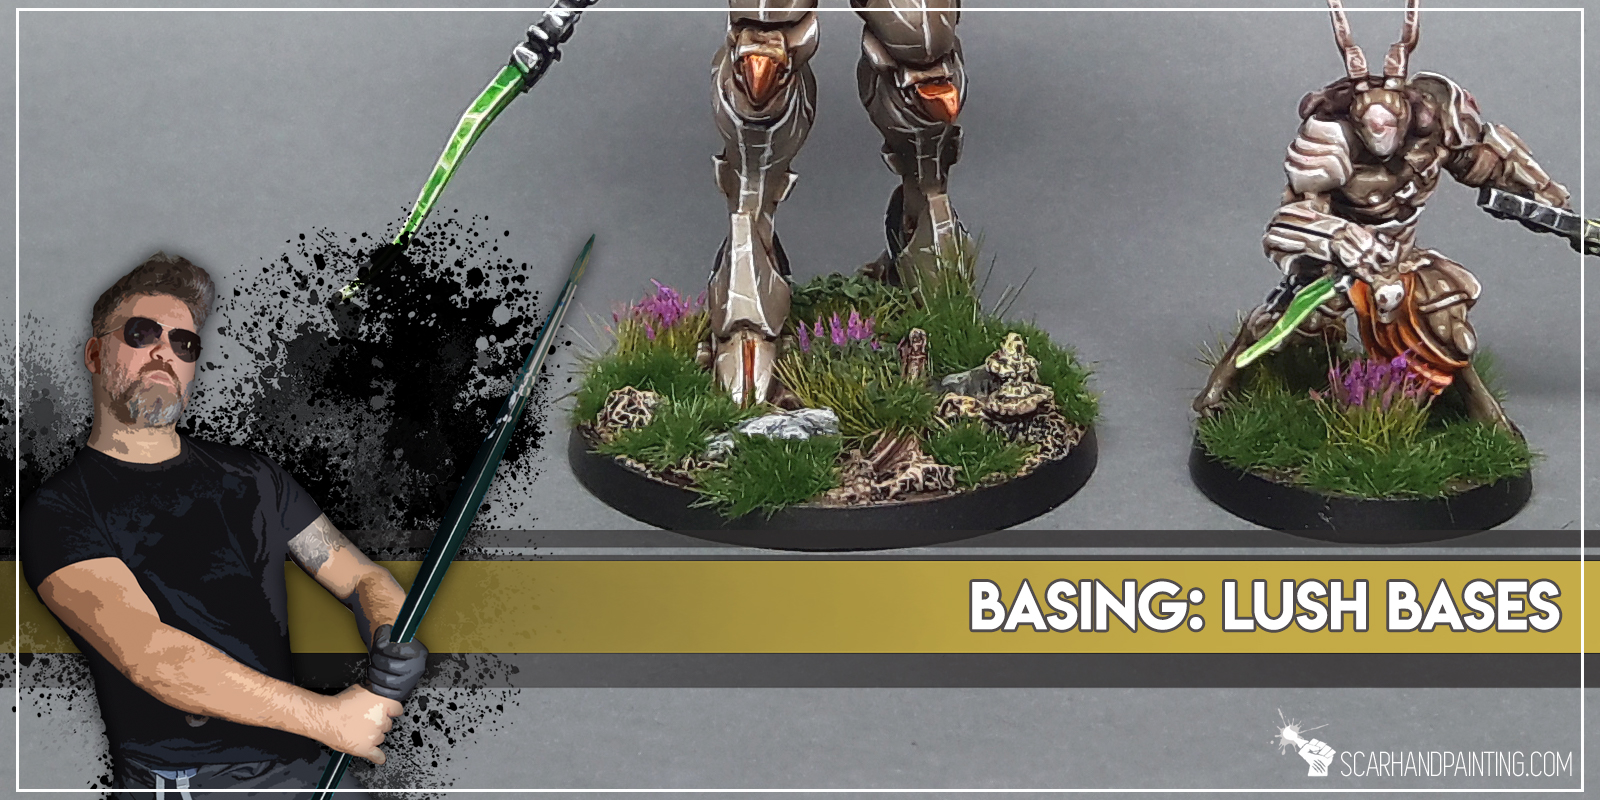
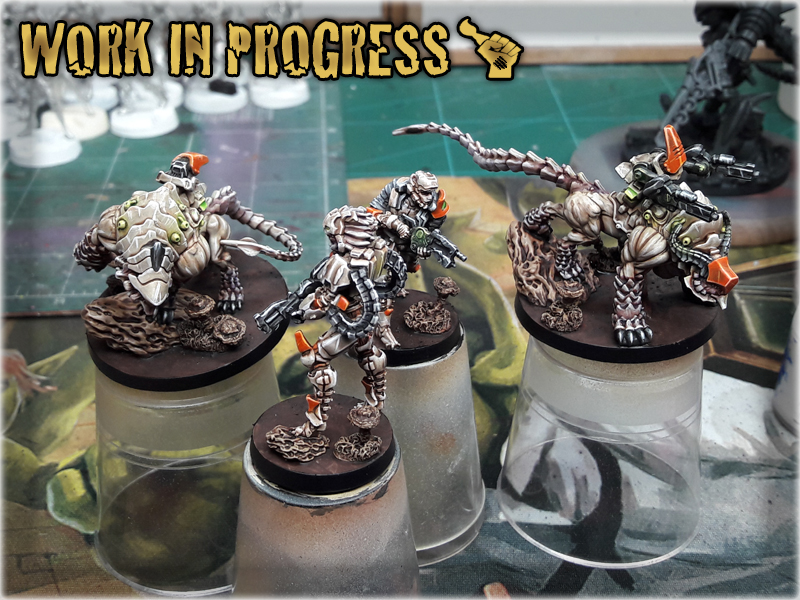
In this easy, step-by-step tutorial I’m going to show you how to create a Lush Base. I designed these bases to fit Infinity the Game Tohaa ‘tactical rocks’ – you can see how it turned out at Infinity TOHAA ‘Witness Me!’ gallery.

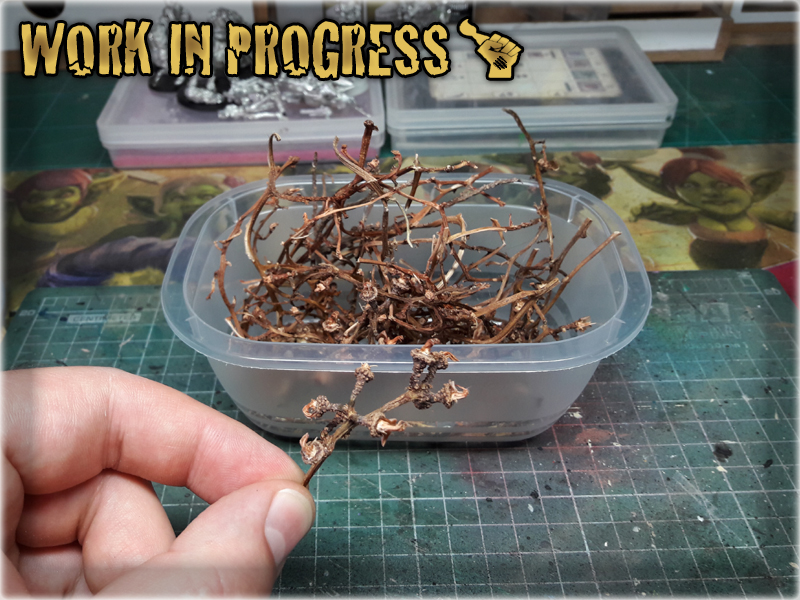
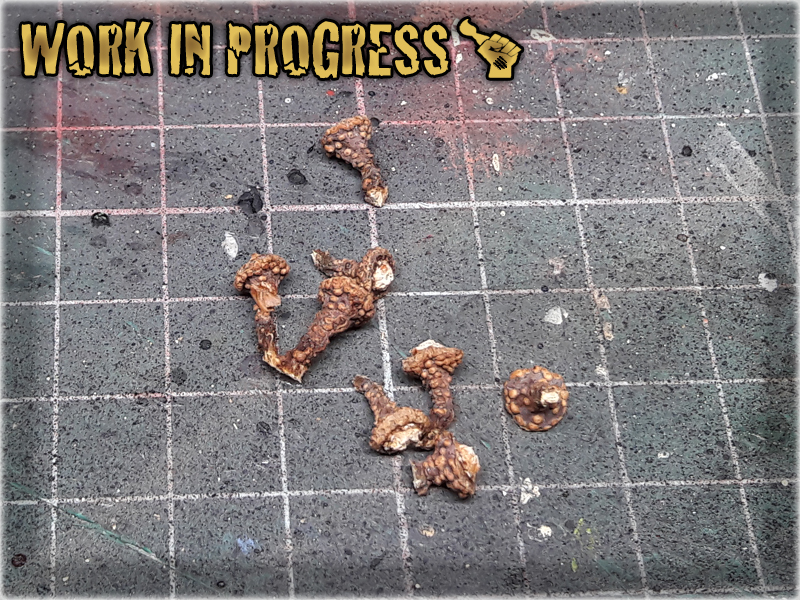
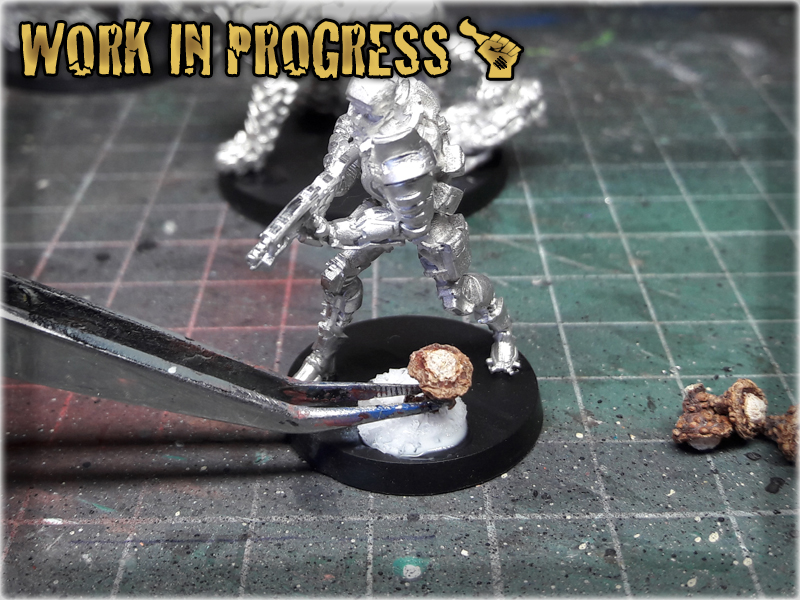
* I started by separating Grape mounts from the dried out Grape branch. Being rather soft, their topf have been removed to improove durability and shape.
* I then applied a drop of basing glue onto the base, followed up shortly by another drop - this time super glue.
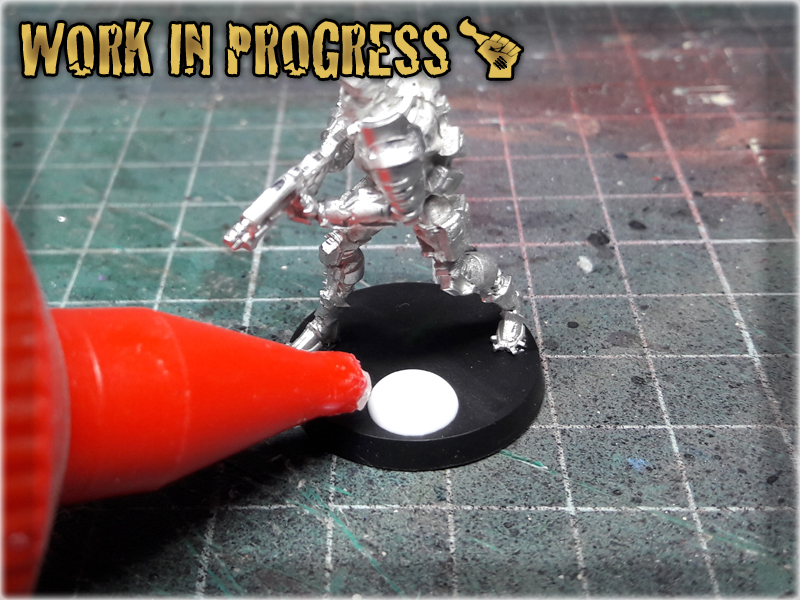
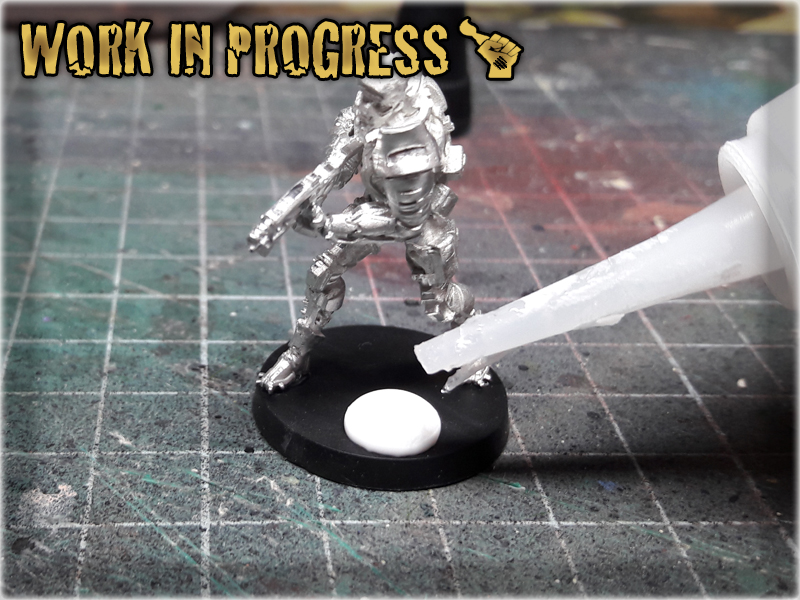
* Before mixed glue drop was able to dry out I've planted Grape mount on top of it, creating strange looking plant.
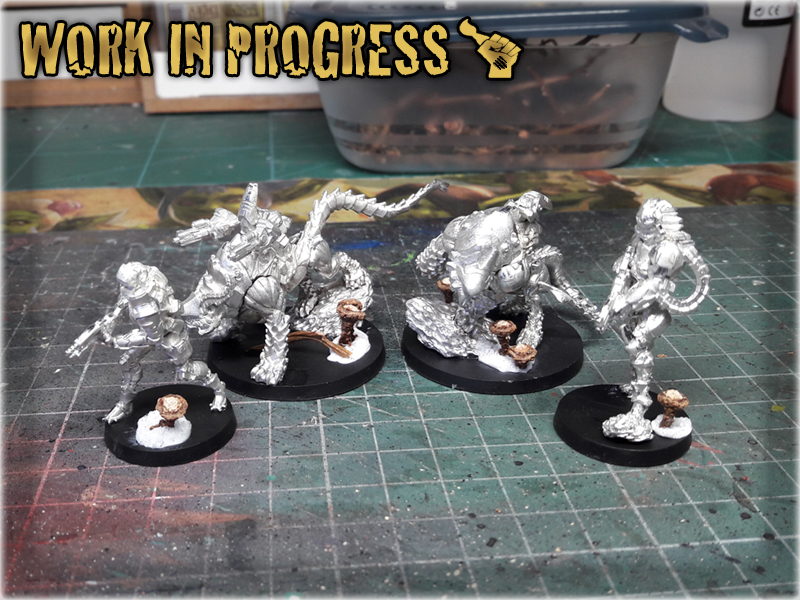
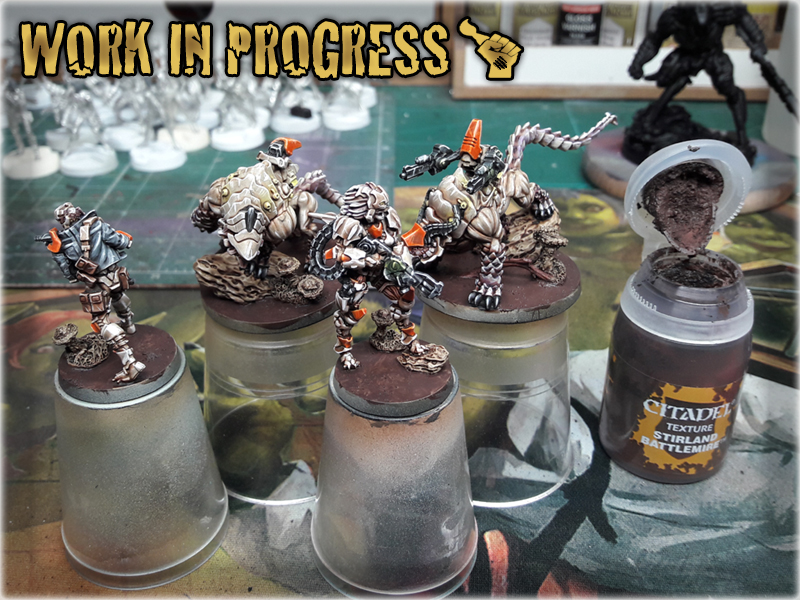
* Once glue dried up I've painted the bases following choosen colour scheme (see below). I then added some texture on top of them with Stirland Battlemire texture paint.
* orem ipsum dolor sit amet, Integer commodo tristiqu odio, aliquet ut. Maecenas sed justo imperdiet bibendum. Vivamus nec sapien imperdiet diam. Aliquam erat volutpat. Sed onsectetur suscipit nunc et rutrum. Lorem ipsum dolor sit amet,volutpat. Sed onsectetur suscipit nunc et rutrum. Lorem ipsum dolor sit amet, volutpat.

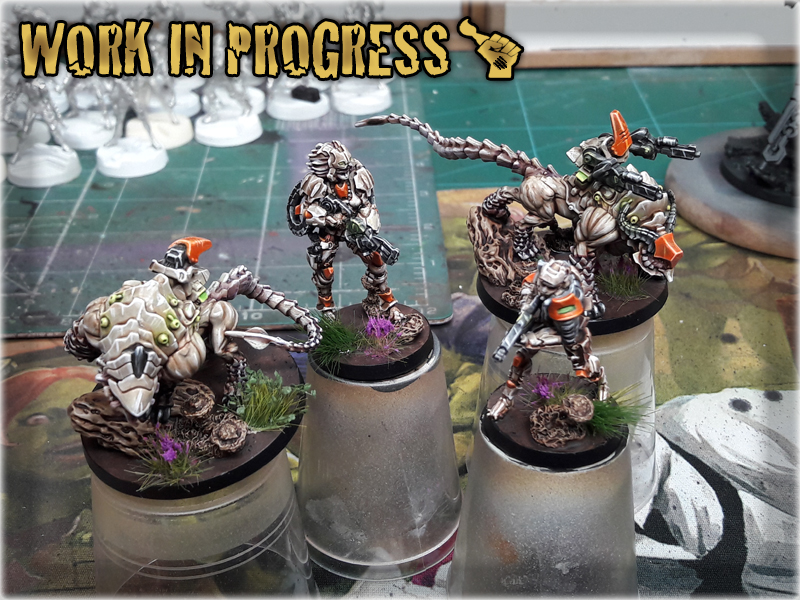
* Last step was to apply regular tufts. I used some noname tufts in large numbers filling most of the flat areas. Job done.


Black Undercoat,
Stirland Battlemire (GW), texture
Karak Stone (GW), stones & plants
Flayed One Flesh (GW), flatbrush stones & plants
Mix Strong Tone Ink (AP) 1:1 Soft Tone Ink (AP), wash