- contact@scarhandpainting.com


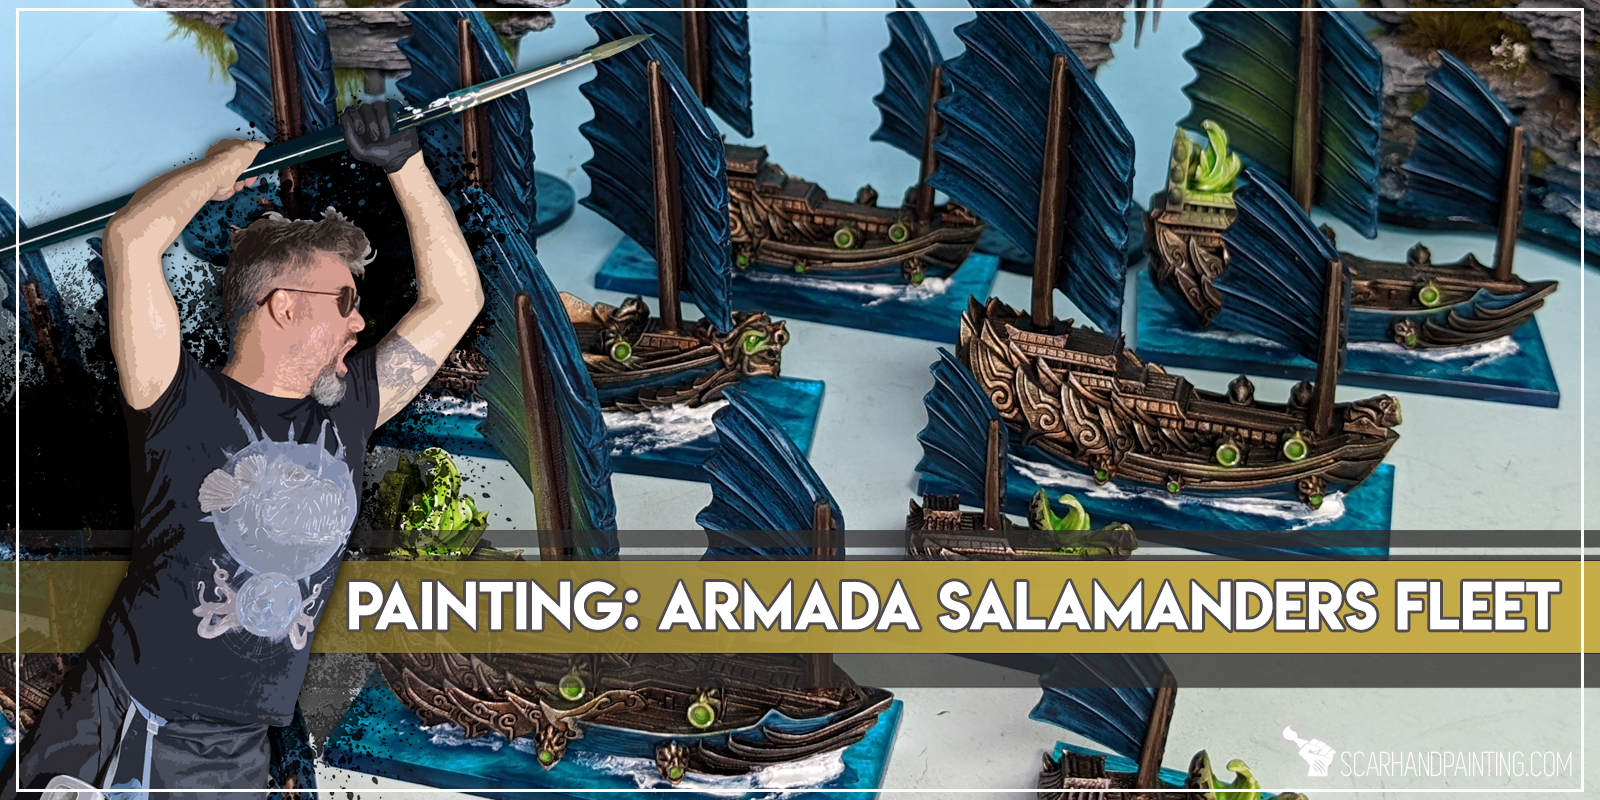
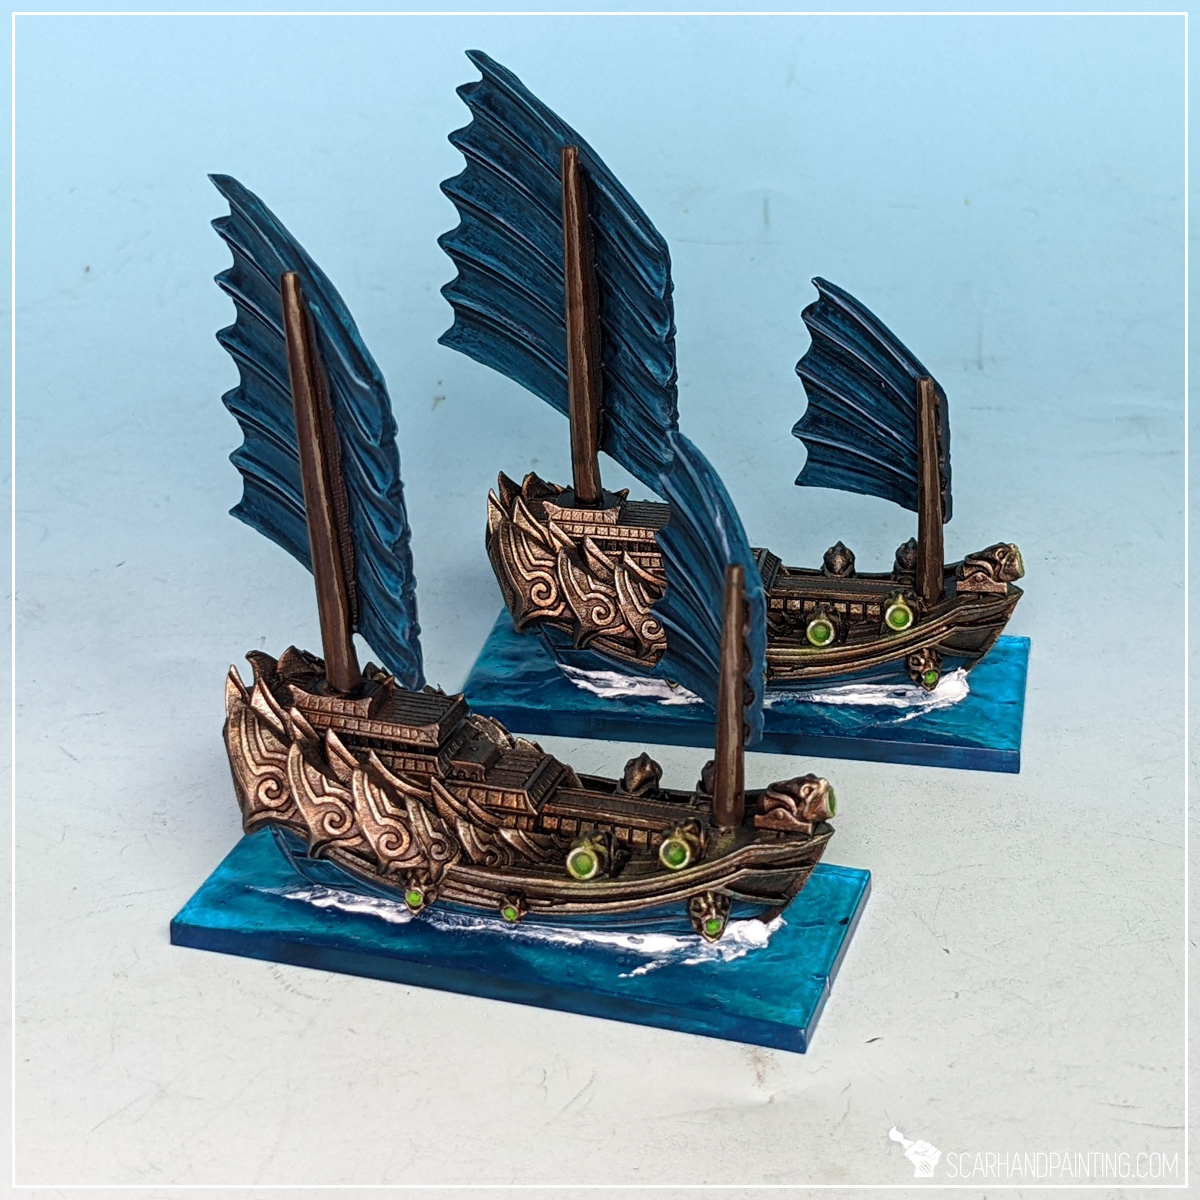
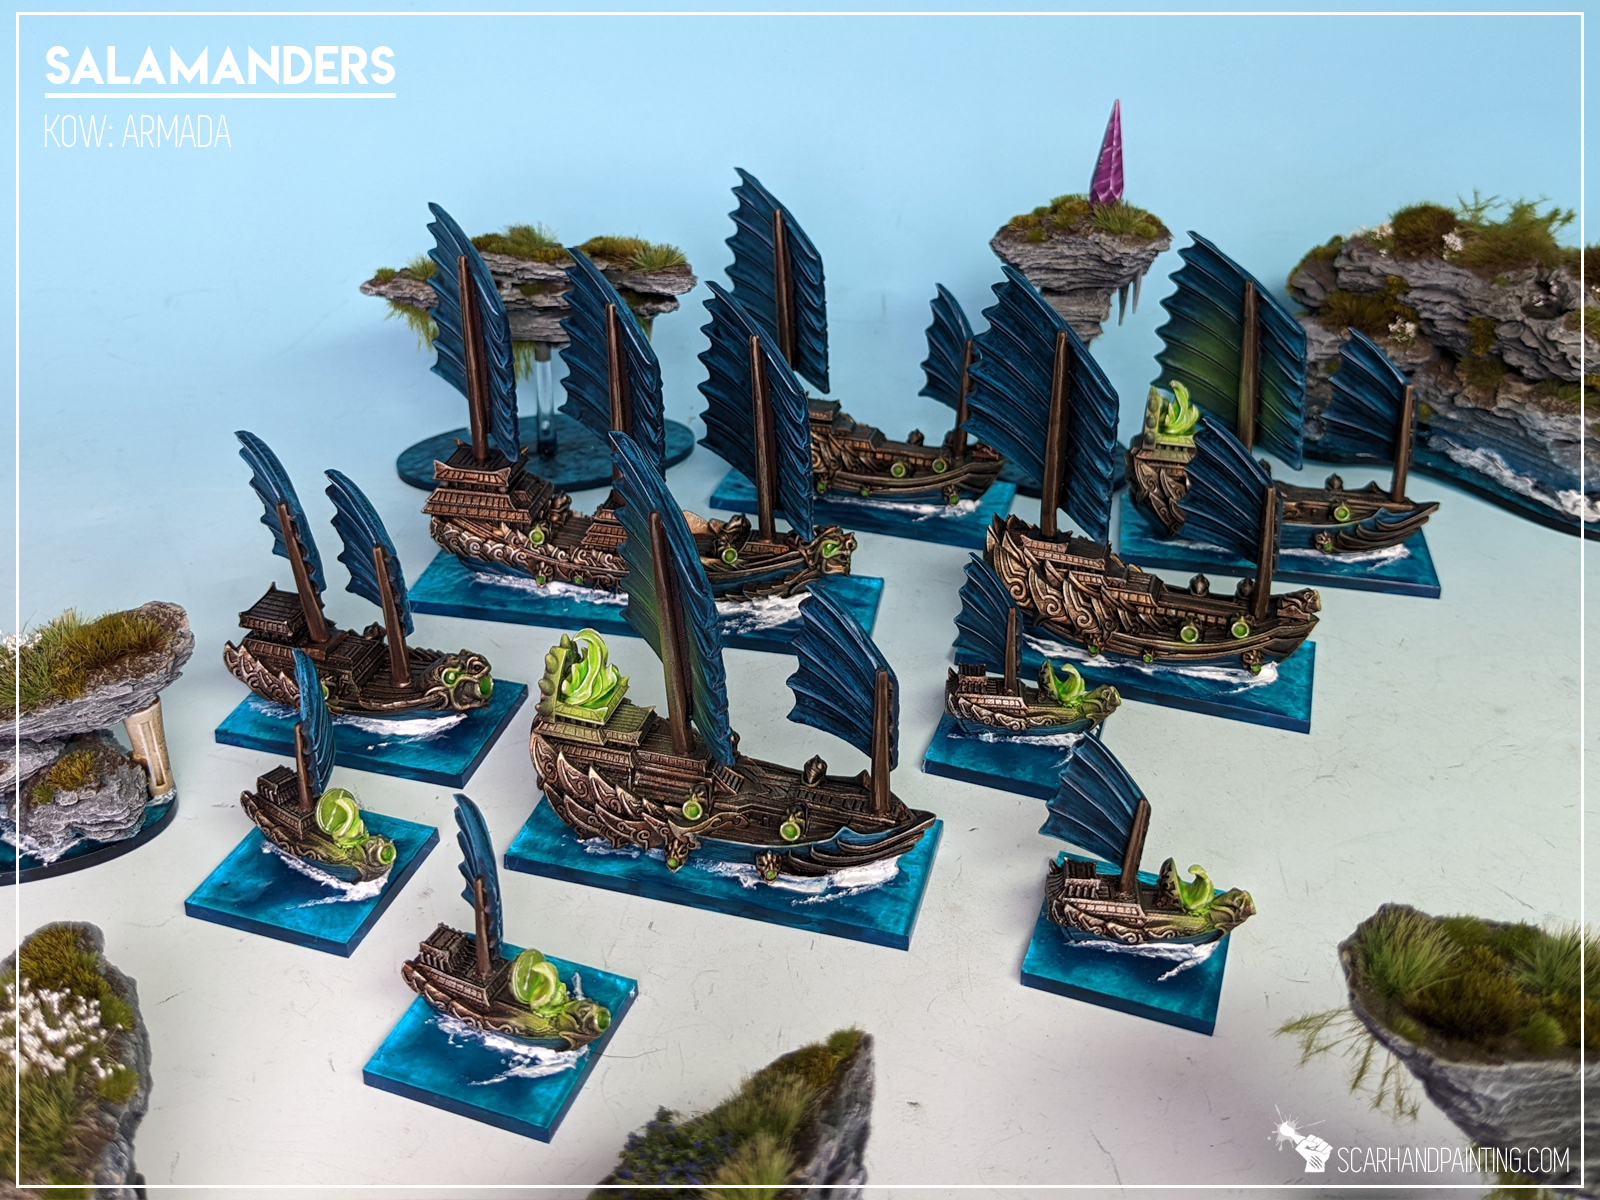
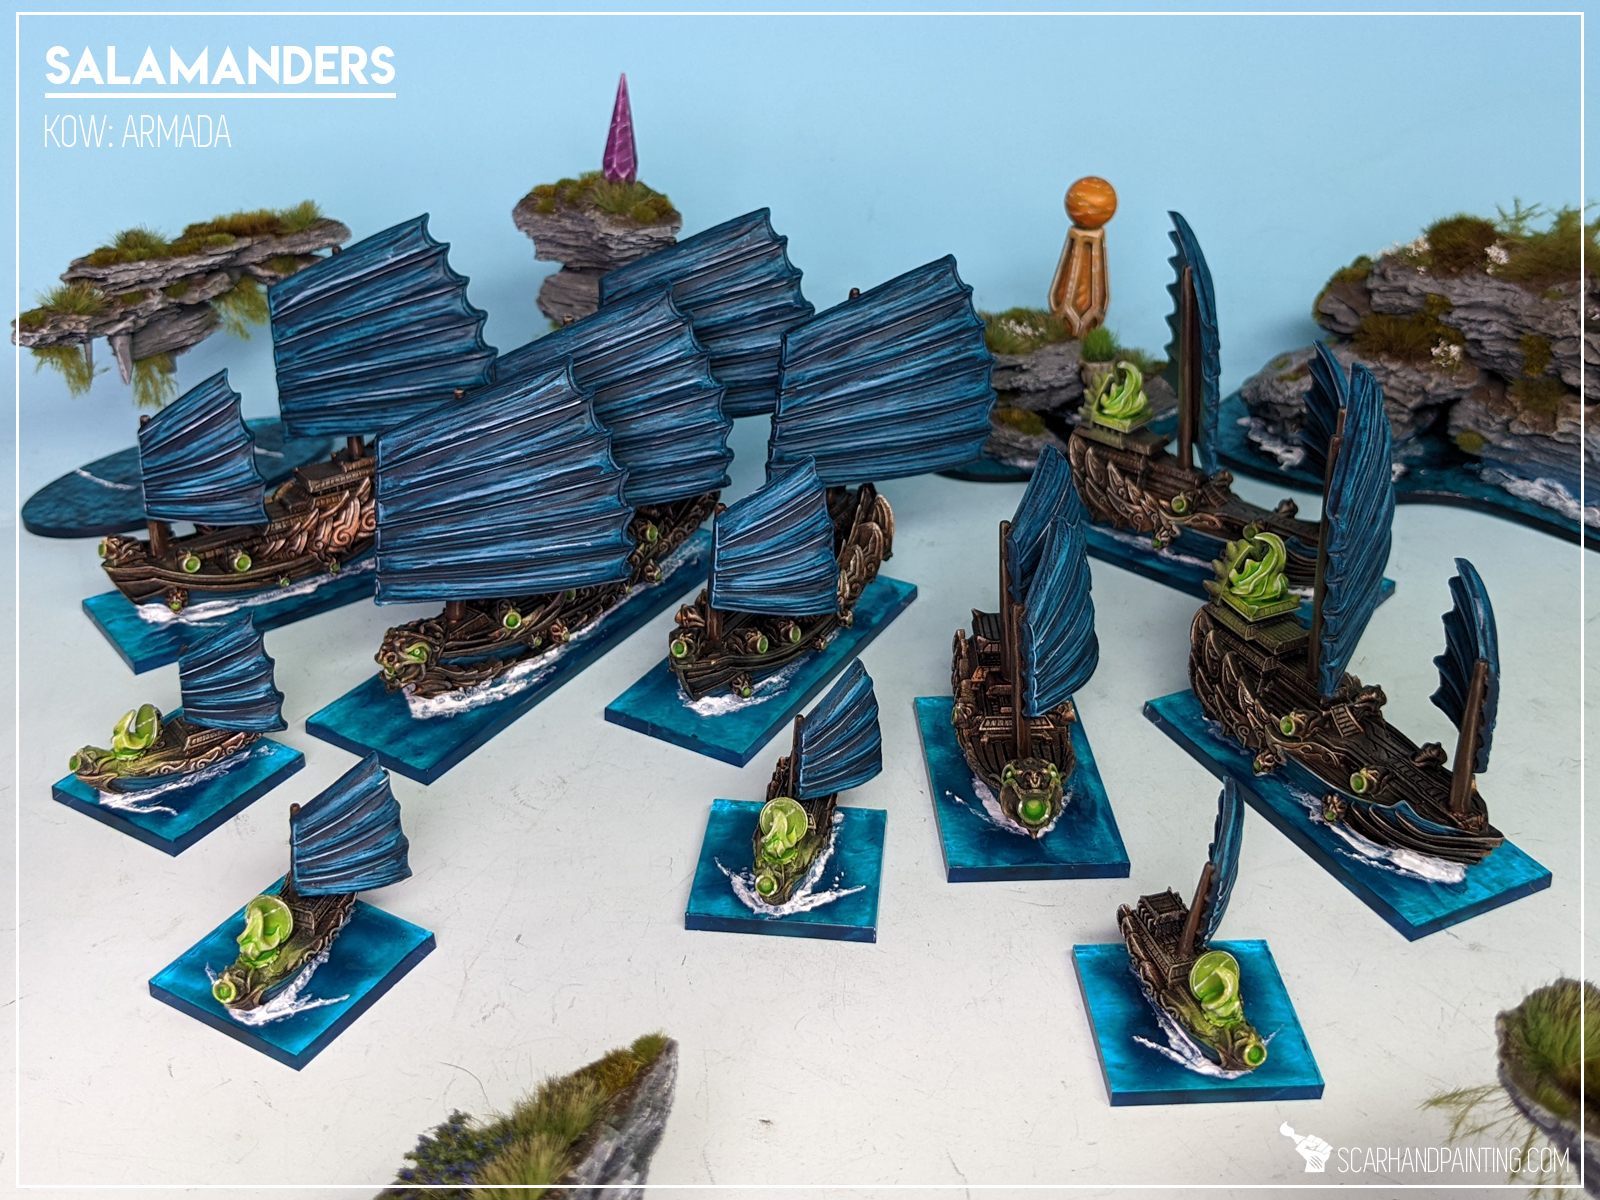
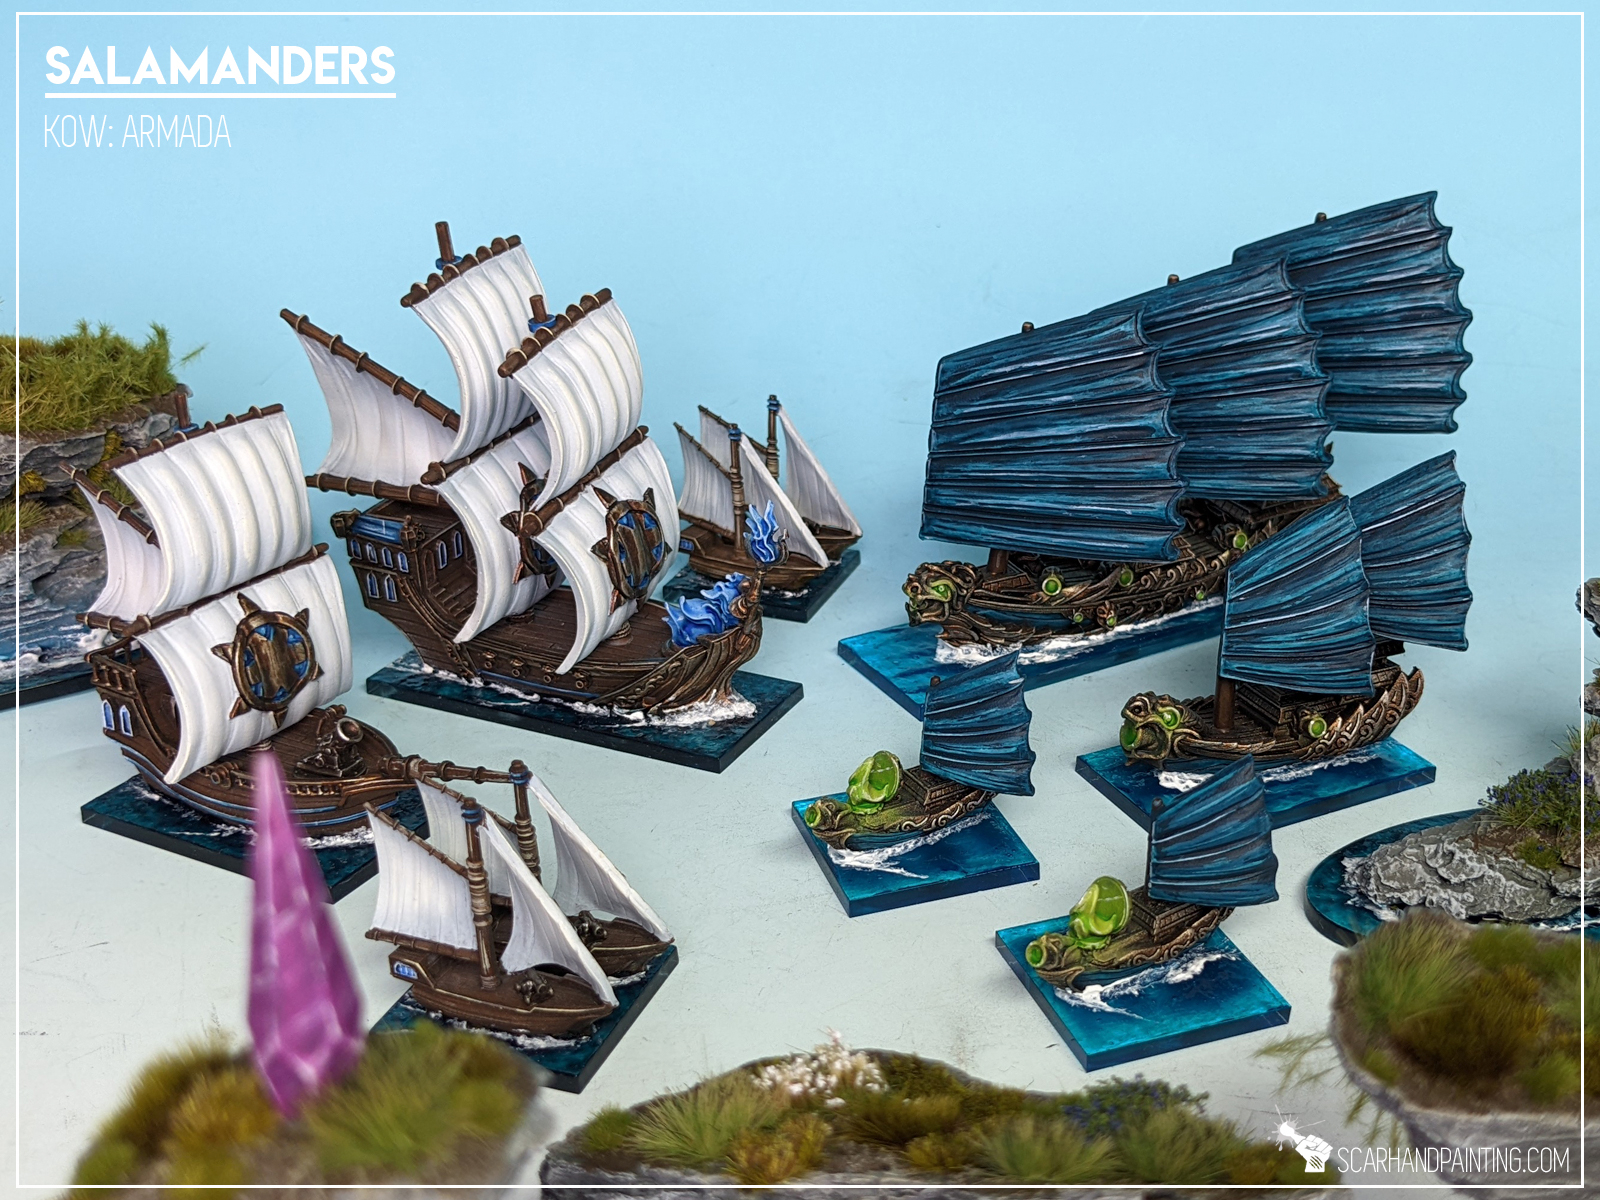
Kings of War: Armada is a fantastic game, full of beautifully crafted miniatures. Still some wargaming veterans might feel intimidated by the unusual scale and plentiful detail of Armada ships. Today I will present to you how easy it is to paint Armada Salamanders ships as can be seen in Gallery: Armada Salamanders. All techniques presented in step-by-step tutorial can be applied to different colors to produce a variety of awesome color schemes for your fleet.
Before we start, some notes:


Step one: Undercoat
I started with a thorough layer of Games Workshop Chaos Black spray. Chaos Black spray is my go to choice when it comes to undercoat, leaving a solid, durable layer with detail intact. Some might consider adding a zenithal preshade on top, but the techniques used in this tutorial would render such practice irrelevant.

Step two: Hull base
Hull, being the largest and most detailed part of the ship, was my choice of where to start the actual paintjob. I applied a solid layer of thinned Games Workshop Warplock Bronze all over the miniature, except for sails. I used an airbrush, but this can easily be done manually.
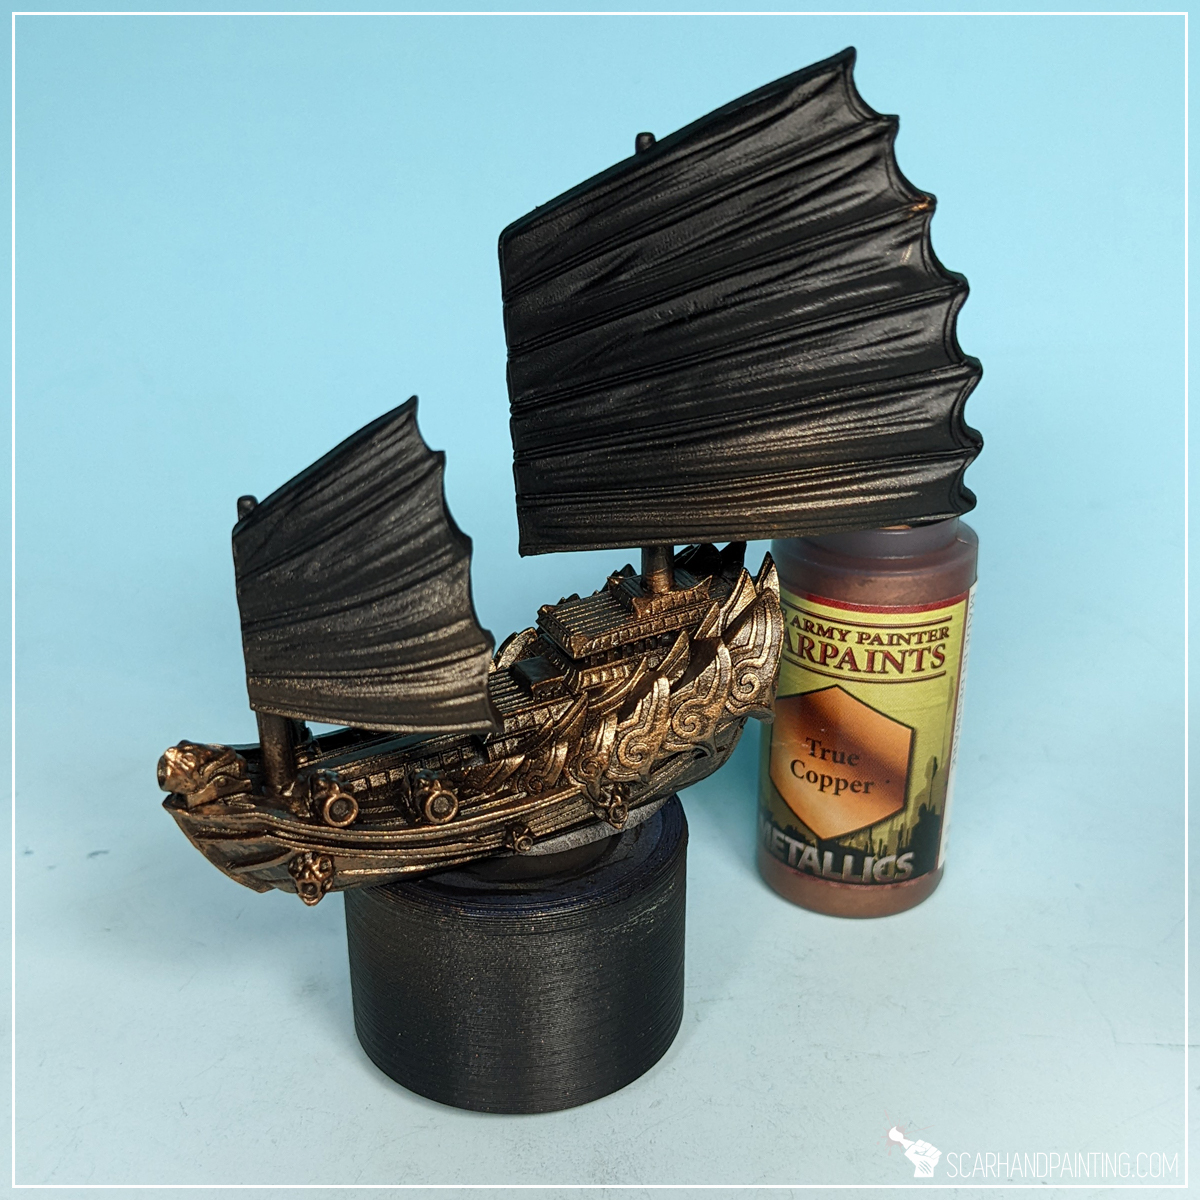
Step three: Hull highlight
Next, using a medium size, soft brush I applied a highlight of Army Painter True Copper. Flatbrush was my technique of choice for this one, as it applied a solid layer of paint sparing most recesses, thus leaving some of the previous layer still visible.
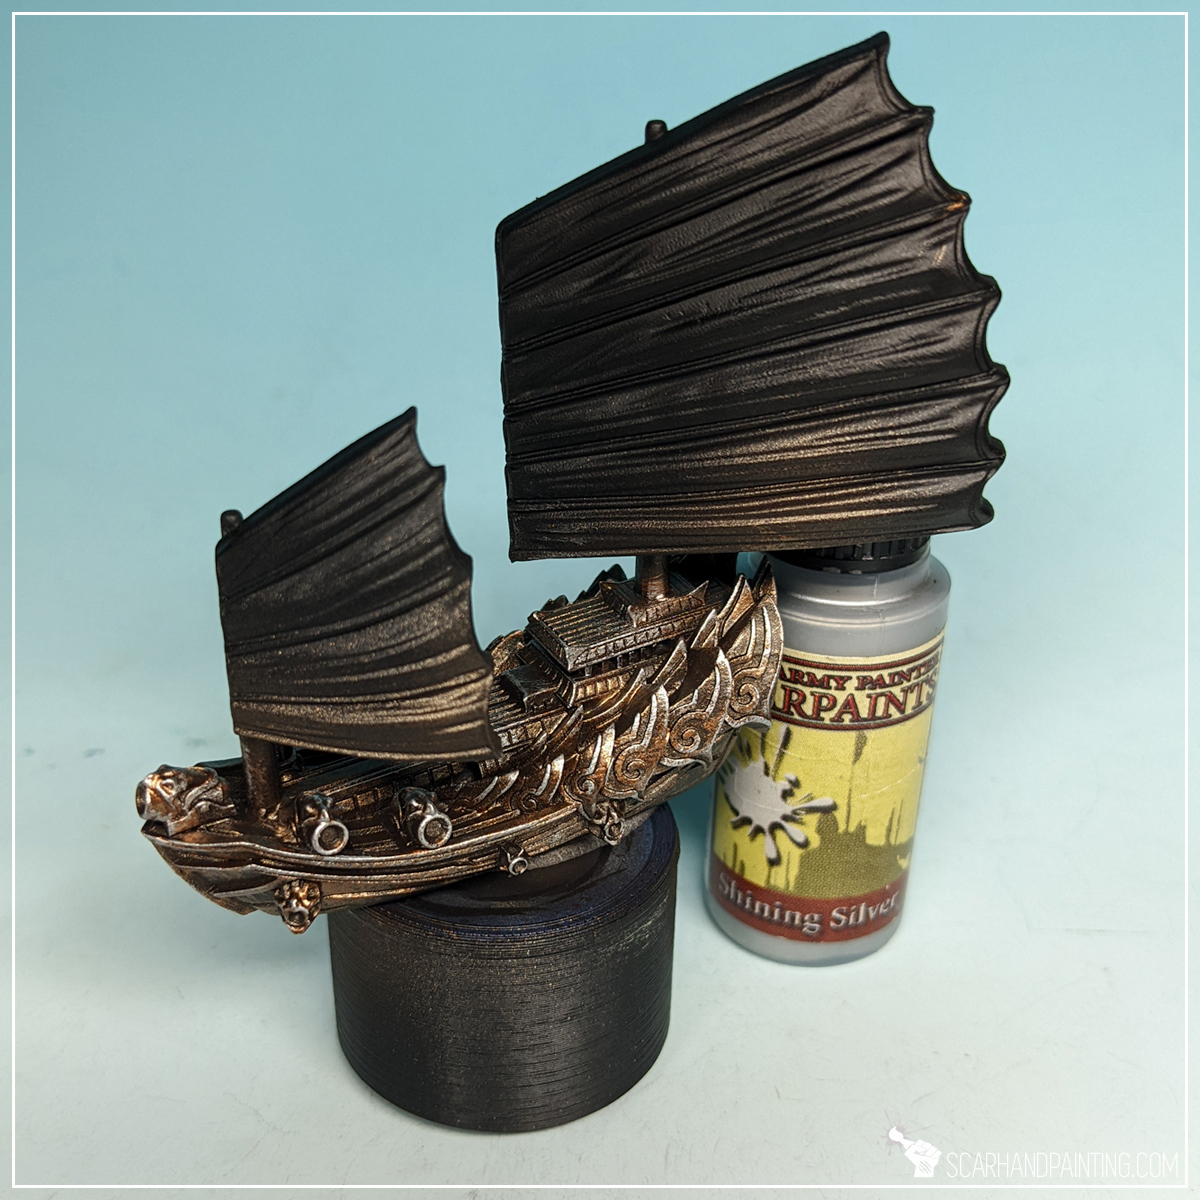
Step four: Hull final highlight
I then applied an edge highlight of Army Painter Shining Silver to make all the detail pop and provide a bit more contrast between recesses and exposed edges.
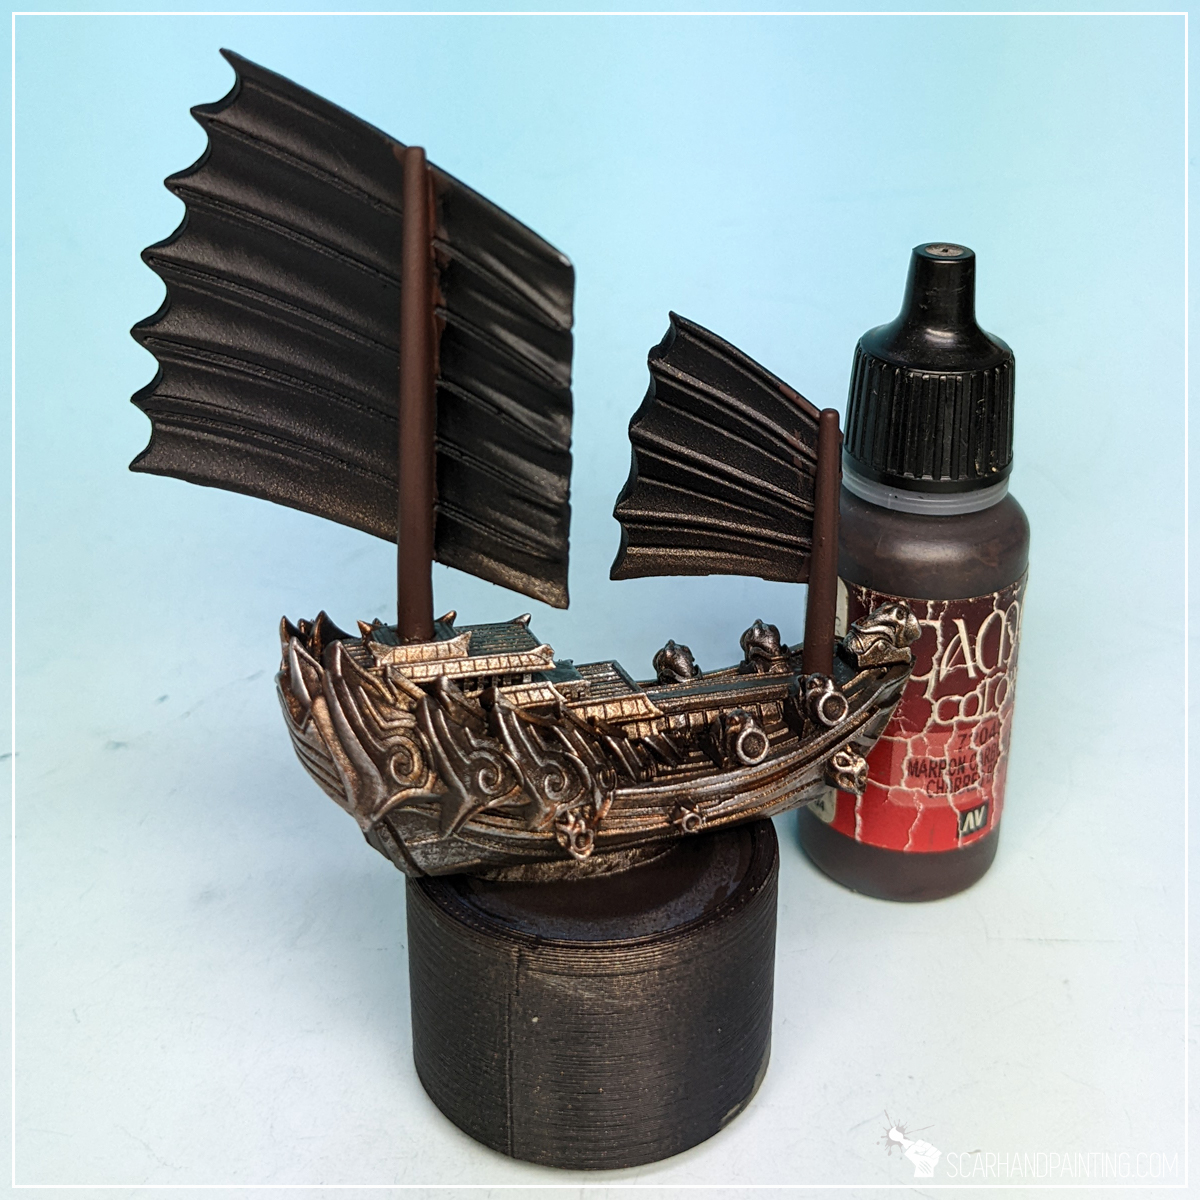
Step five: Masts base
I left the Hull for a bit and moved on to masts, applying a thick layer of Vallejo 72.045 Charred Brown. Once again I would like to point out that the colors I used are my personal preference and you can use any brand, or even any similar color, to achieve similar results.
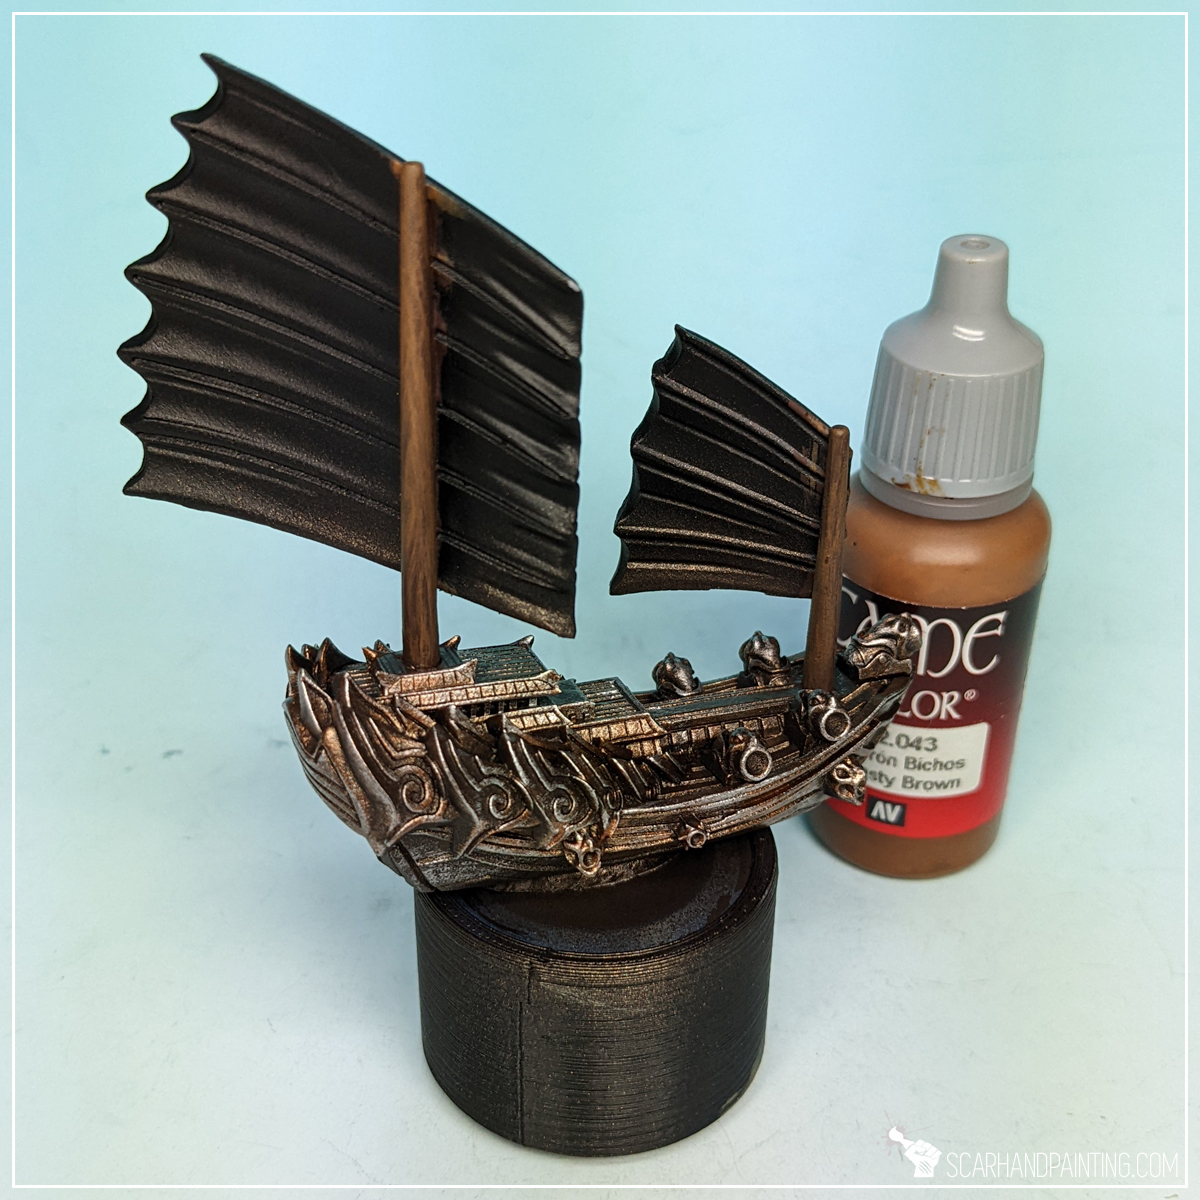
Step six: Masts highlight
Another step was to apply a slightly blurry highlight of Vallejo 42.043 Beasty Brown. By blurry I mean a thinned down paint applied with a relatively large, soft brush. You can see in the picture how this layer seem a bit misty, partially translucent and not as strong as usual base application. This can be achieved by keeping a brush barely loaded with thinned down paint and sliding its edge up and down the surface. If I ever decide to have a Patreon this technique will probably be the first thing I would like to do a deep dive into, but for now my chaotic description must do.
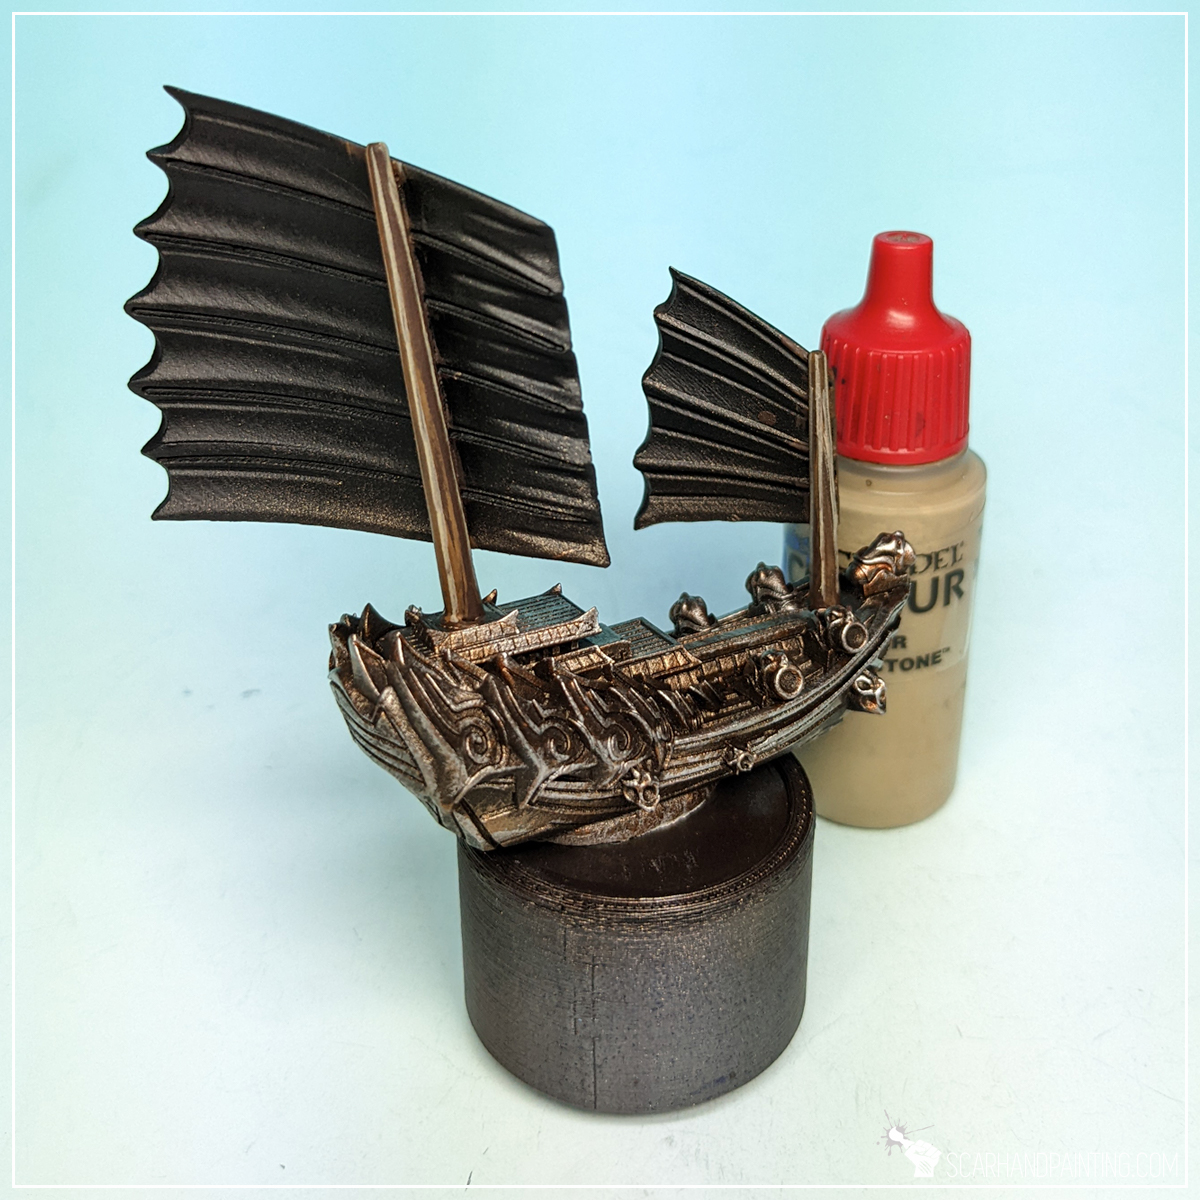
Step seven: Masts edge highlight
Due to masts shape they do not have edges on their sides, but they still can be imitated with standard edge highlight of Games Workshop Karak Stone. If you struggle with edge highlights check out this in-depth article from 2018, where I describe the process and share some related life hacks.

Step eight: Wash
Here’s where real magic happens. I applied a strong layer of Army Painter Strong Tone wash over the miniature. This is probably the most important moment of the entire paint job. Wash applied en-masse blends all the colors beneath, toning them down a bit, adding coherency and that extra juicy look. One thing to look out for is large drops of wash forming on flat areas and lower parts of the miniature, then leaving stains of very dark paint while drying. This can be avoided by removing the excess of paint with a soft wet brush few minutes after application.

Step nine: Sails base
Once wash dried out nicely I moved to Sails and lower hulls. I applied a thick layer of P3 Coal Black, which is something between dark turquoise mixed with dark grey.

Step ten: Sails highlight
Next I applied a flatbrush highlight of slightly thinned Vallejo 309 Periscopes. This exposed most texture of the sails why also providing a more juicy color overall.
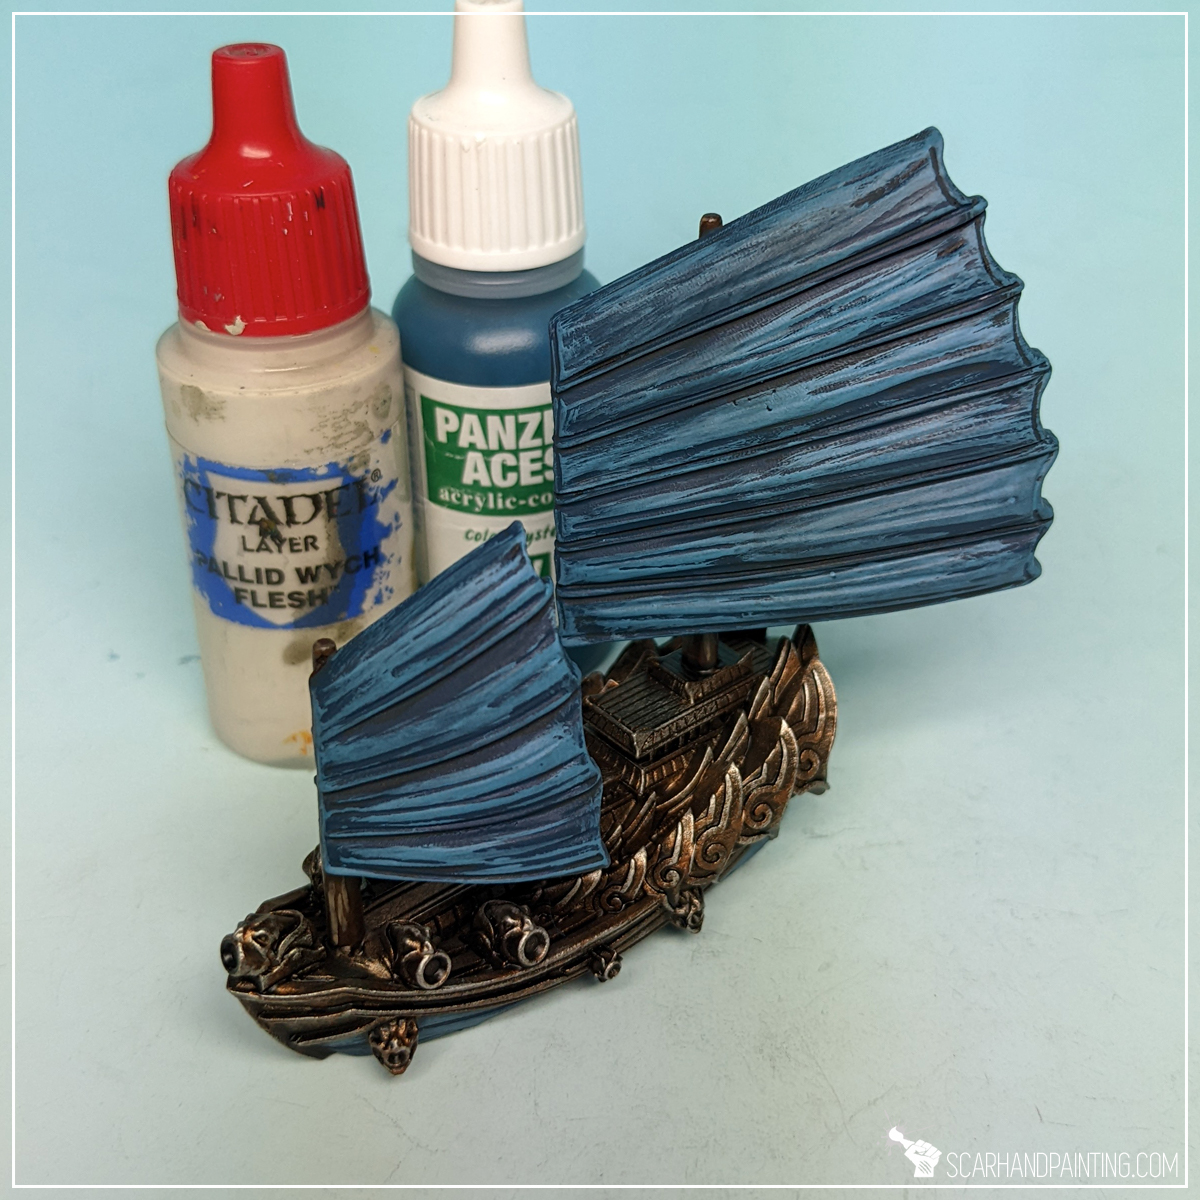
Step eleven: Sails highlight
Another highlight was applied with a 1:1 mix of Games Workshop Pallid Wych Flesh and Vallejo 309 Periscopes. A much more visible highlight to build volume.
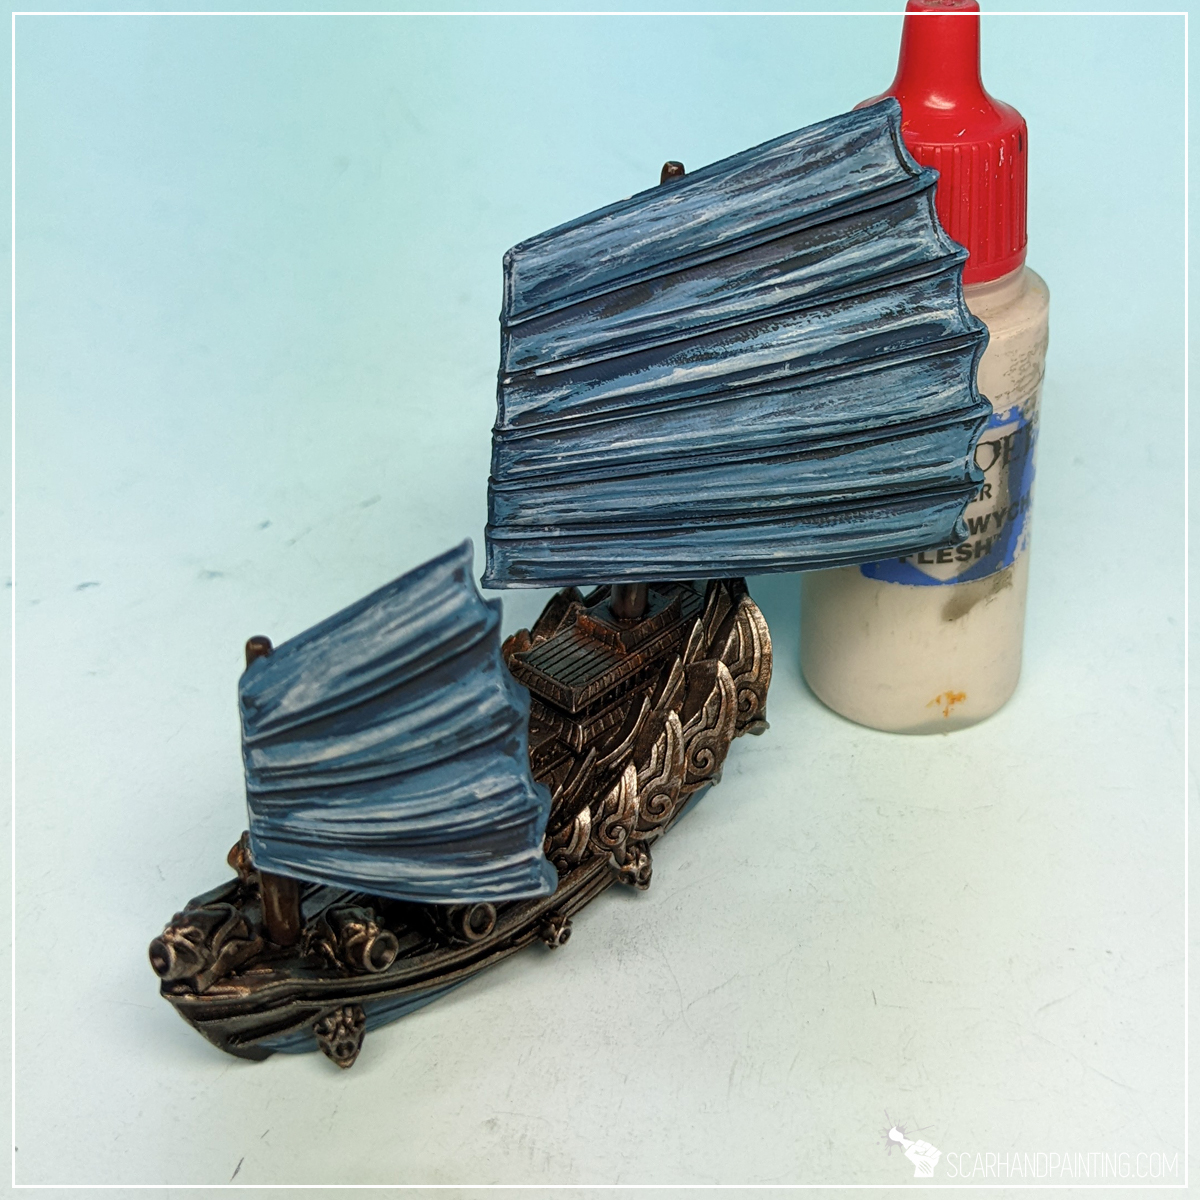
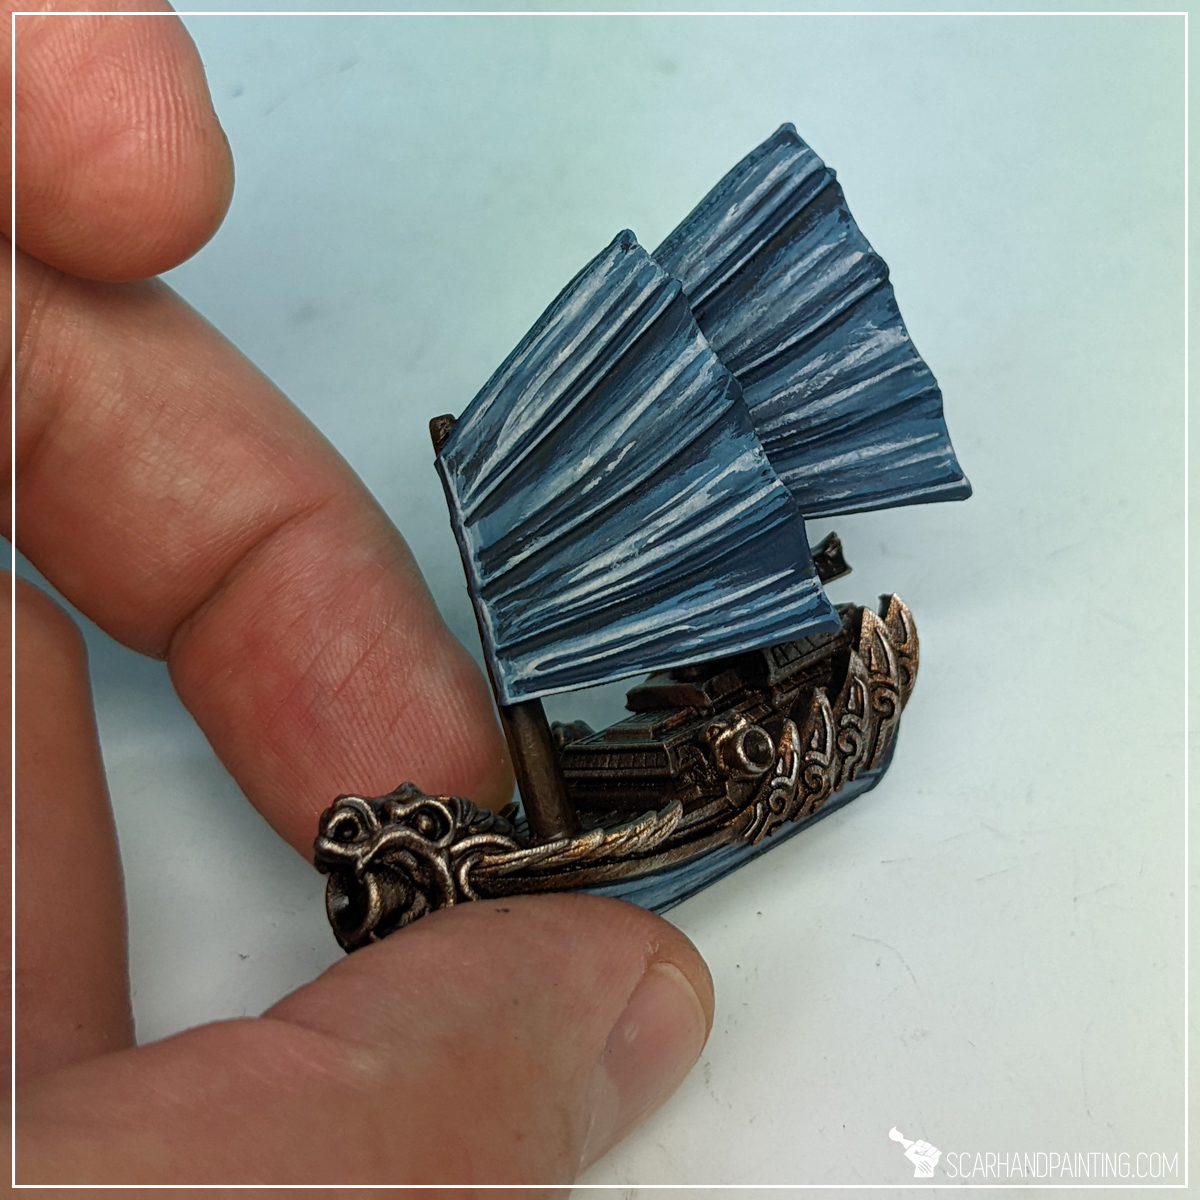
Step twelve: Sails final highlight
Final highlight was applied with pure Games Workshop Pallid Wych Flesh. Similar to edge highlight this one was applied to most exposed detail and edges on the sails. Looks messy and ugly, but everything goes according to a plan…
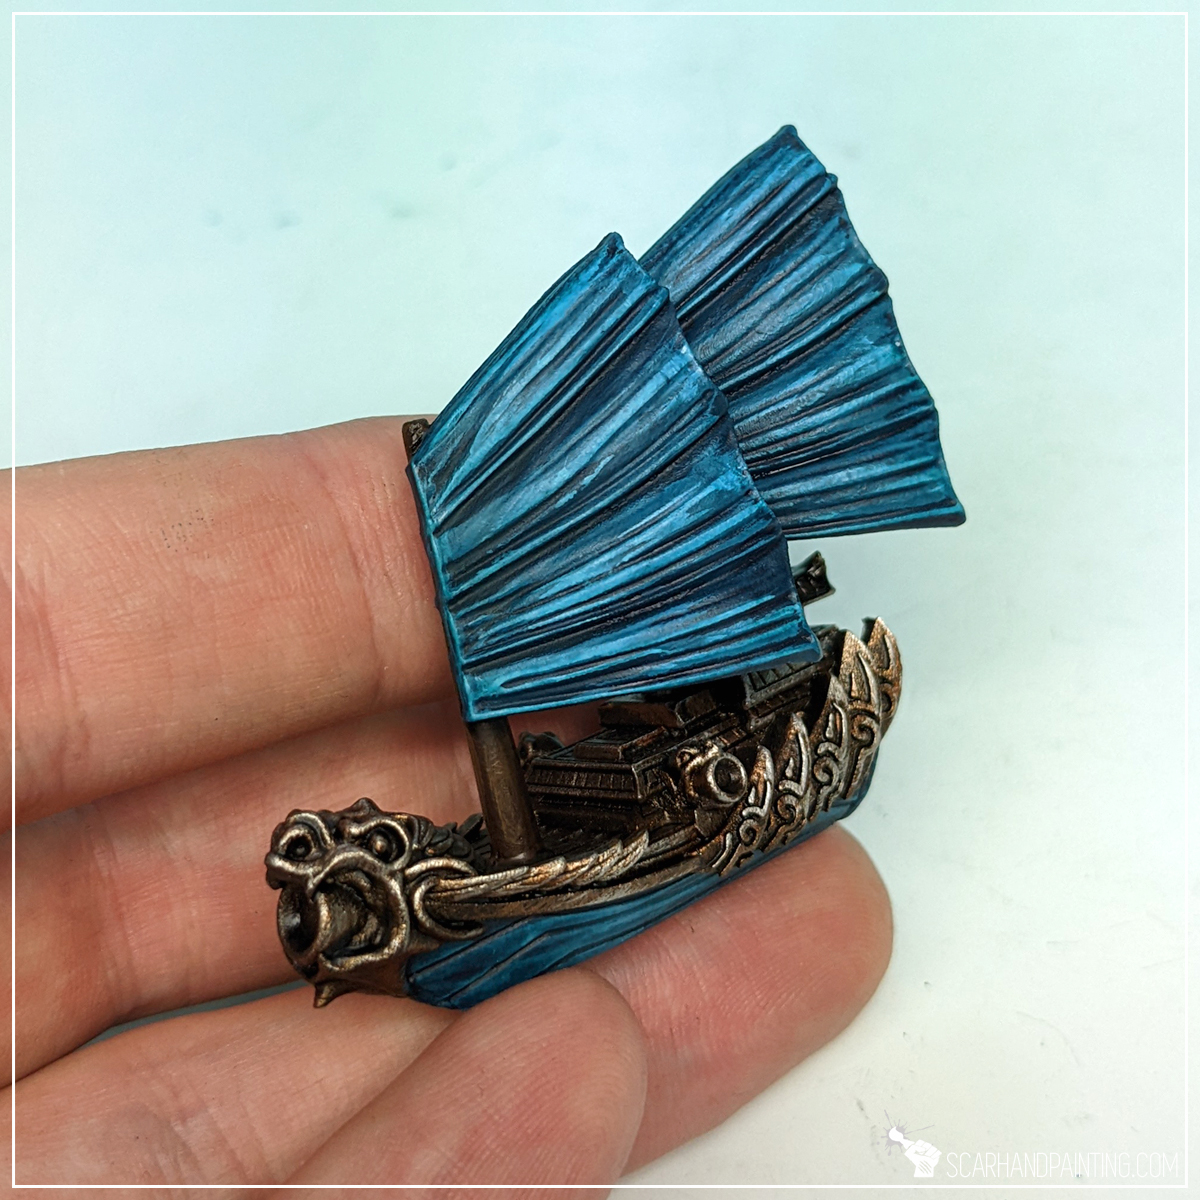
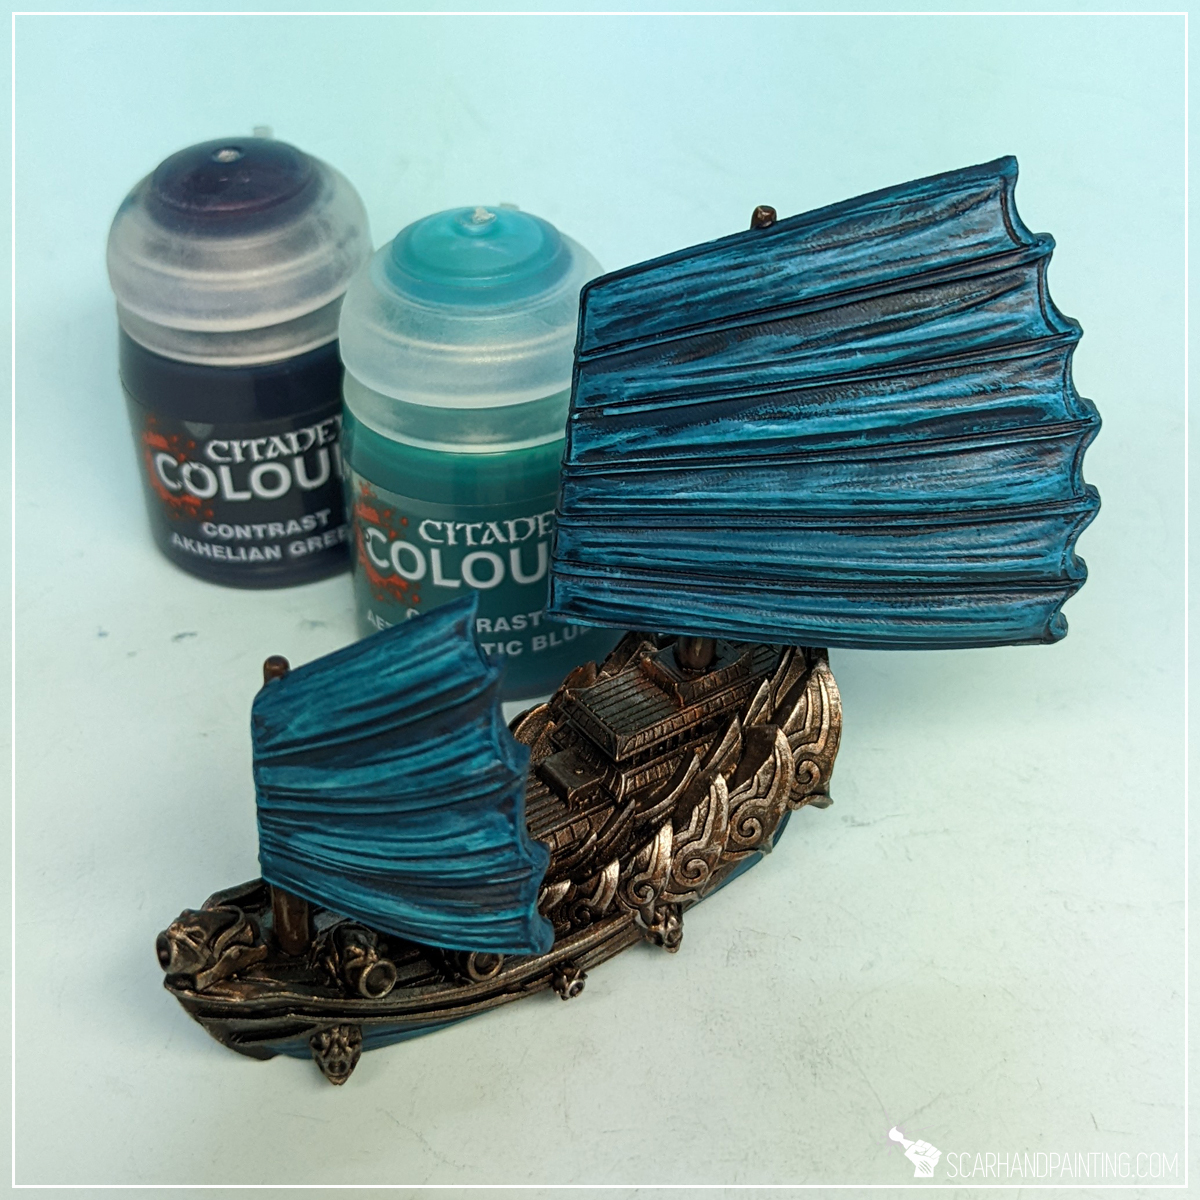
Step thirteen: Glaze
Glazing is a topic on its own that usually refers to rather time consuming and precise application of strongly thinned down paints. The way I apply glazes is more simplified. I apply them with a large, soft brush just like washes, except I avoid applying too much paint. This way I both smooth up and juice up the colors underneath. In case of Salamanders I used a 1:1 mix of Games Workshop Akhelian Green nd Aethermatic Blue contrast paints.


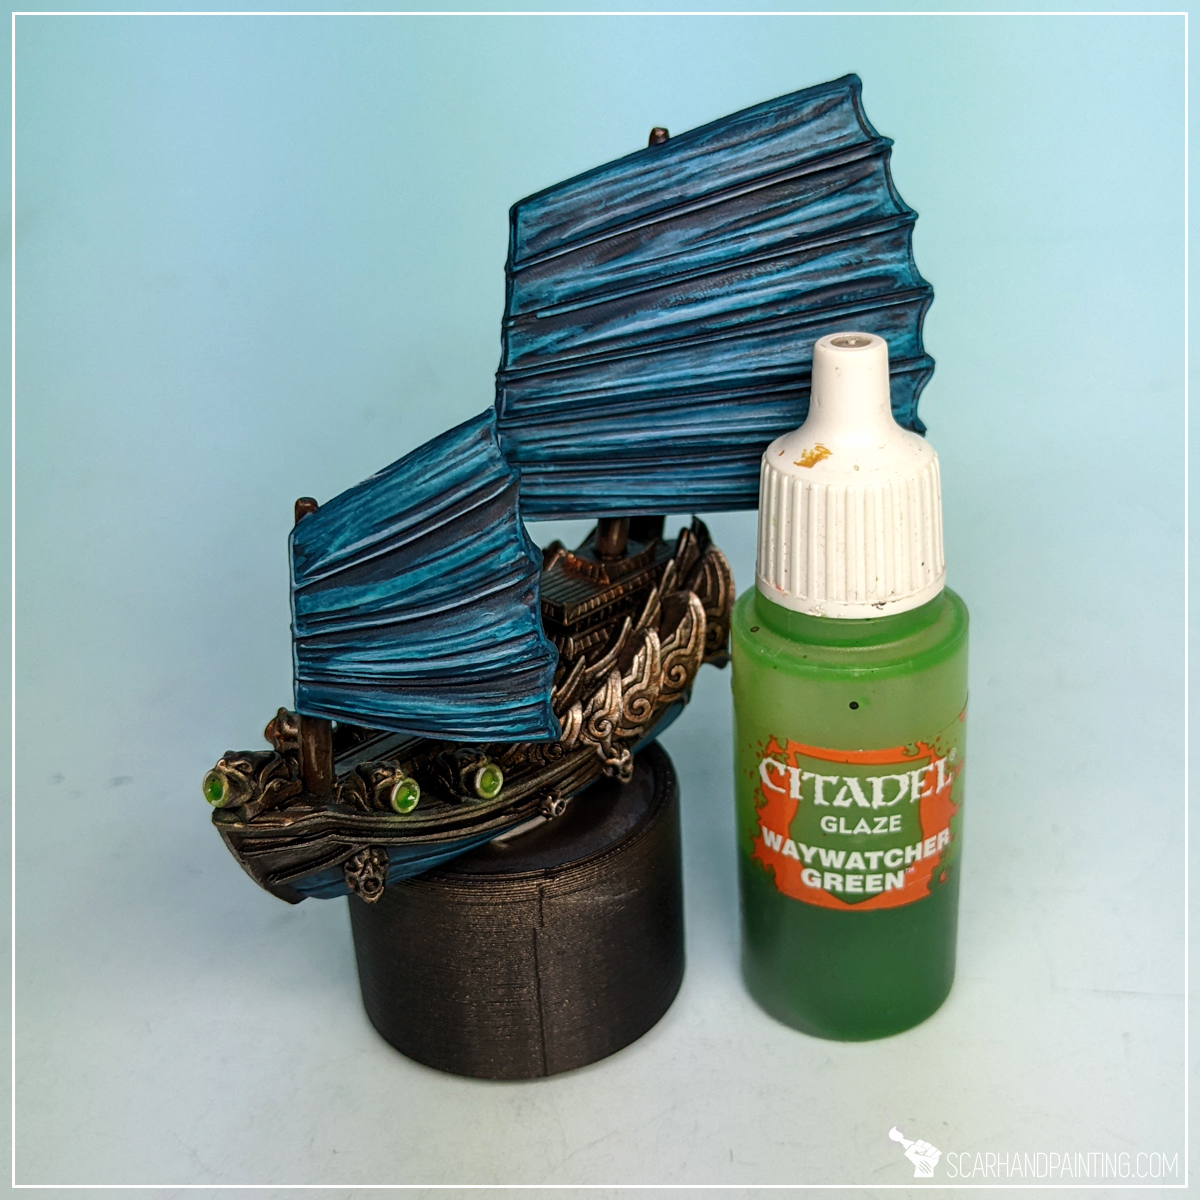
Step fourteen: Green osl
Final color range to add onto the miniature was Greens. I applied four paints one after another to build volume and then add depth to weapons and any fire elements across the fleet. In this tutorial I deliberately linked all the steps into one, as this particular topic was just recently covered in Tutorial: Painting Green Glow that you can read in order to get a better grasp of the entire process.
Step fifteen: Bases
The paint job done and sealed with a matt varnish the last thing left to do was a base. Again, this is something I covered before in KoW Armada Water Bases tutorial that I invite you to read in order to get to know the process. In case of Salamanders I simplified basing by applying one thick, smooth layer of AK Interactive Atlantic blue, then another rough layer of the same texture to finally add waves with AK Interactive Water Foam effect. Very simple while also quite effective.
This marks the end of the tutorial. Feel free to ask any questions in the comments below or via social media.

I hope you find this tutorial interesting. Be sure to let me know your thoughts in the comments below or via Facebook or Instagram. I would also appreciate if you considered sharing this content with your friends, who might find it useful. Finally if you are looking for a professional miniatures painting service, be sure to contact me with this contact form. I always reply within 24 hours, after which please check out your spam folder.
