- contact@scarhandpainting.com


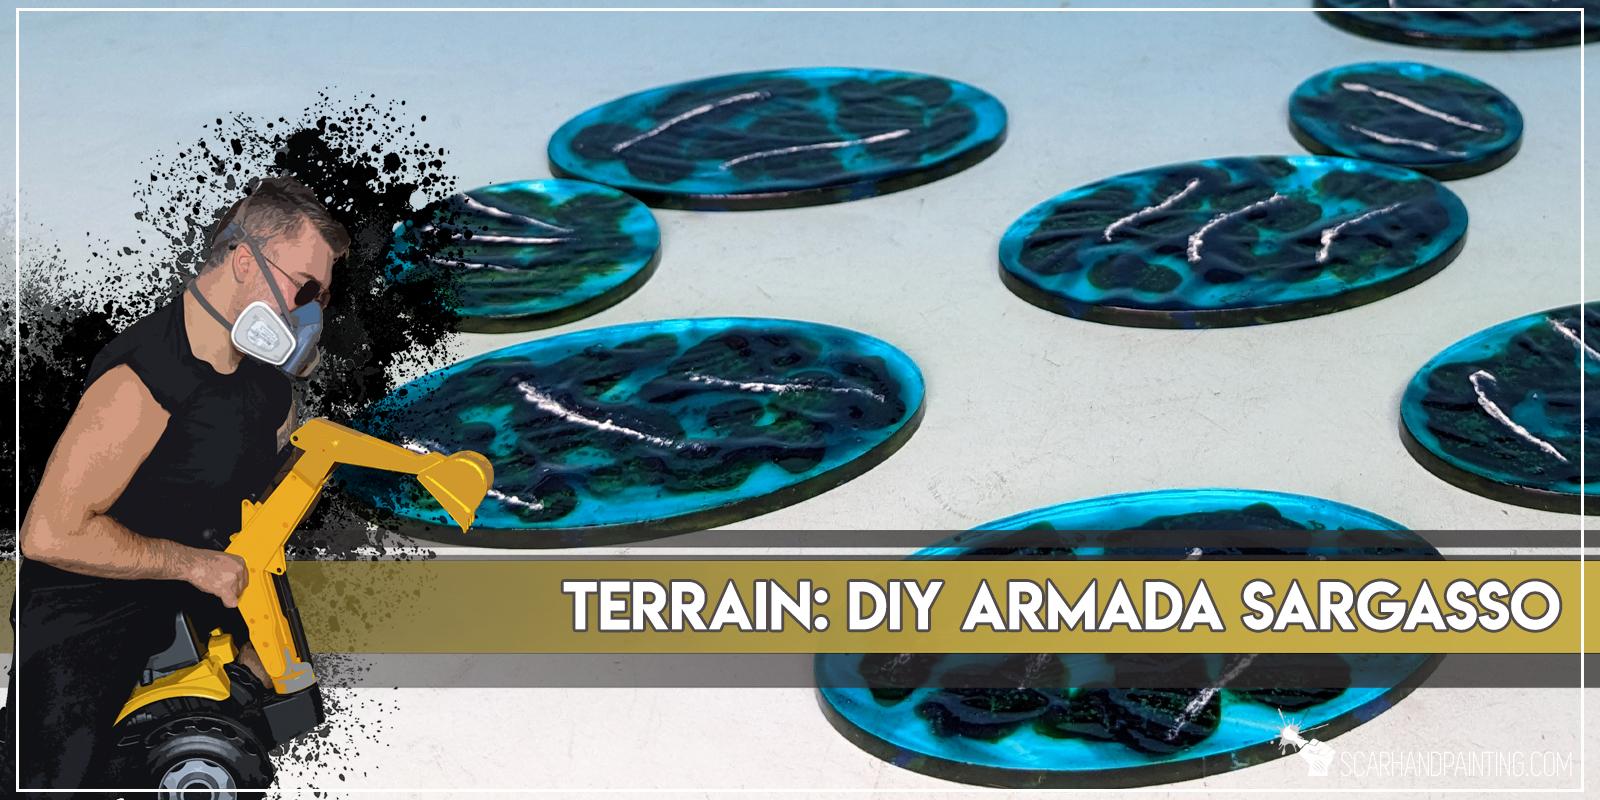
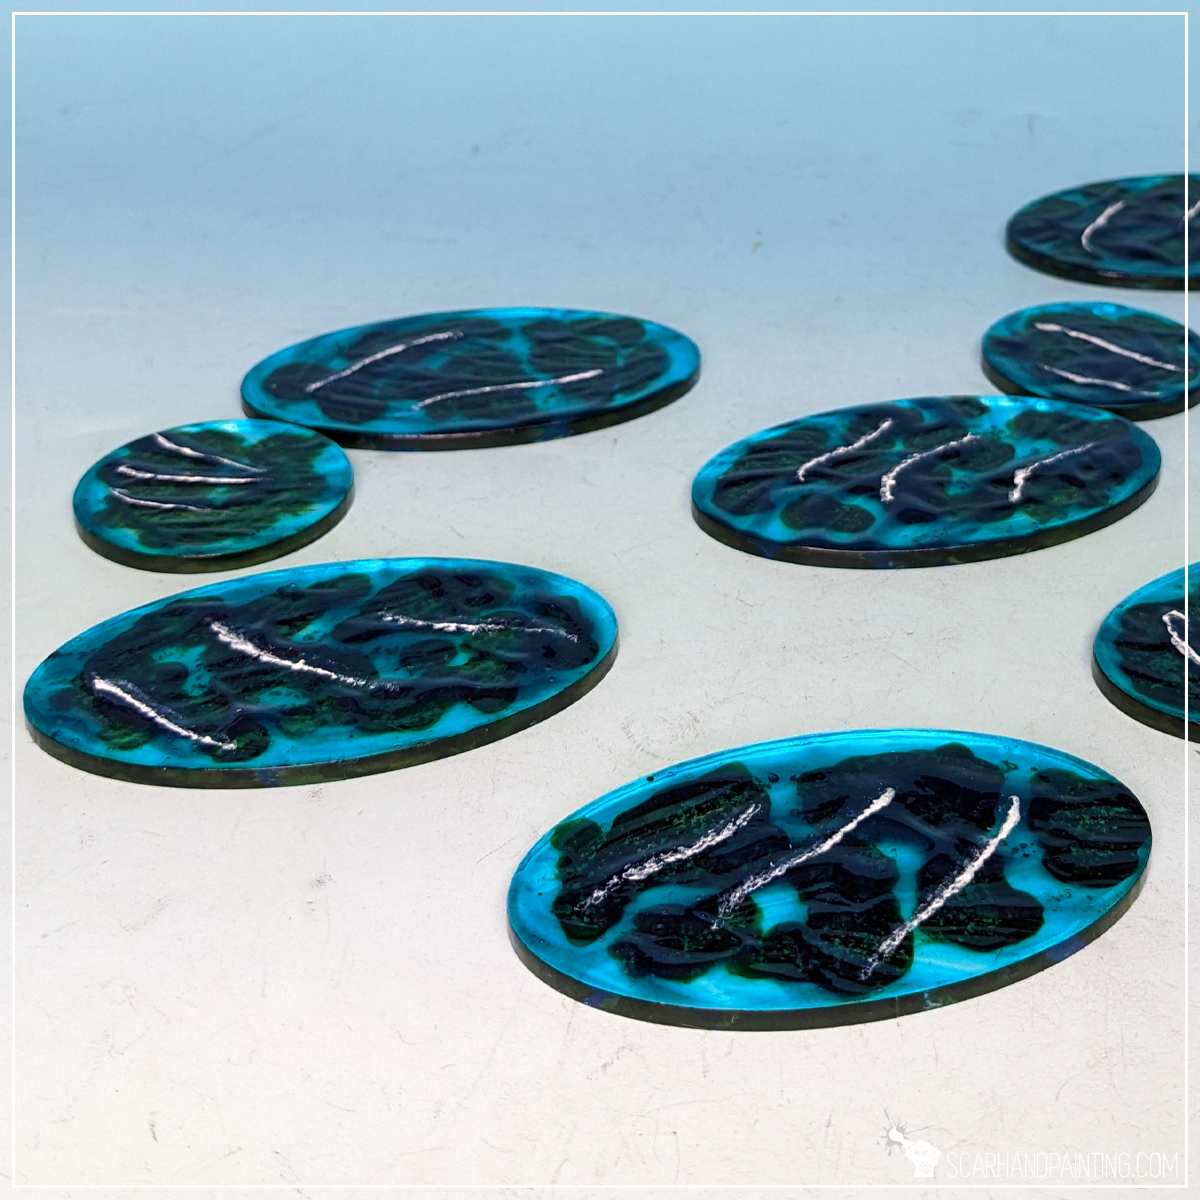
When it comes to spicing up your miniatures naval games, there’s nothing better than nice looking scenery. This is especially true for games full of finely detailed miniatures, such as Kings of War: Armada. Today I would like to take you on a Step-by-step trip through the process of creating and painting an alternative scenery for Armada – the Sargasso. These can be used as either Sandbanks proxy, or as something completely new, as you see fit.
Some notes:

High end materials right from the get go. I do prefer my scenery to be durable and high quality, thus I went with laser cut translucent acrylics. That being said, there’s nothing preventing you from using a cheaper and more accessible material, such as clear plastic – maybe food packaging leftovers, or miniatures blister package? As long as it’s clear and sturdy enough you should be fine with any substitutes.
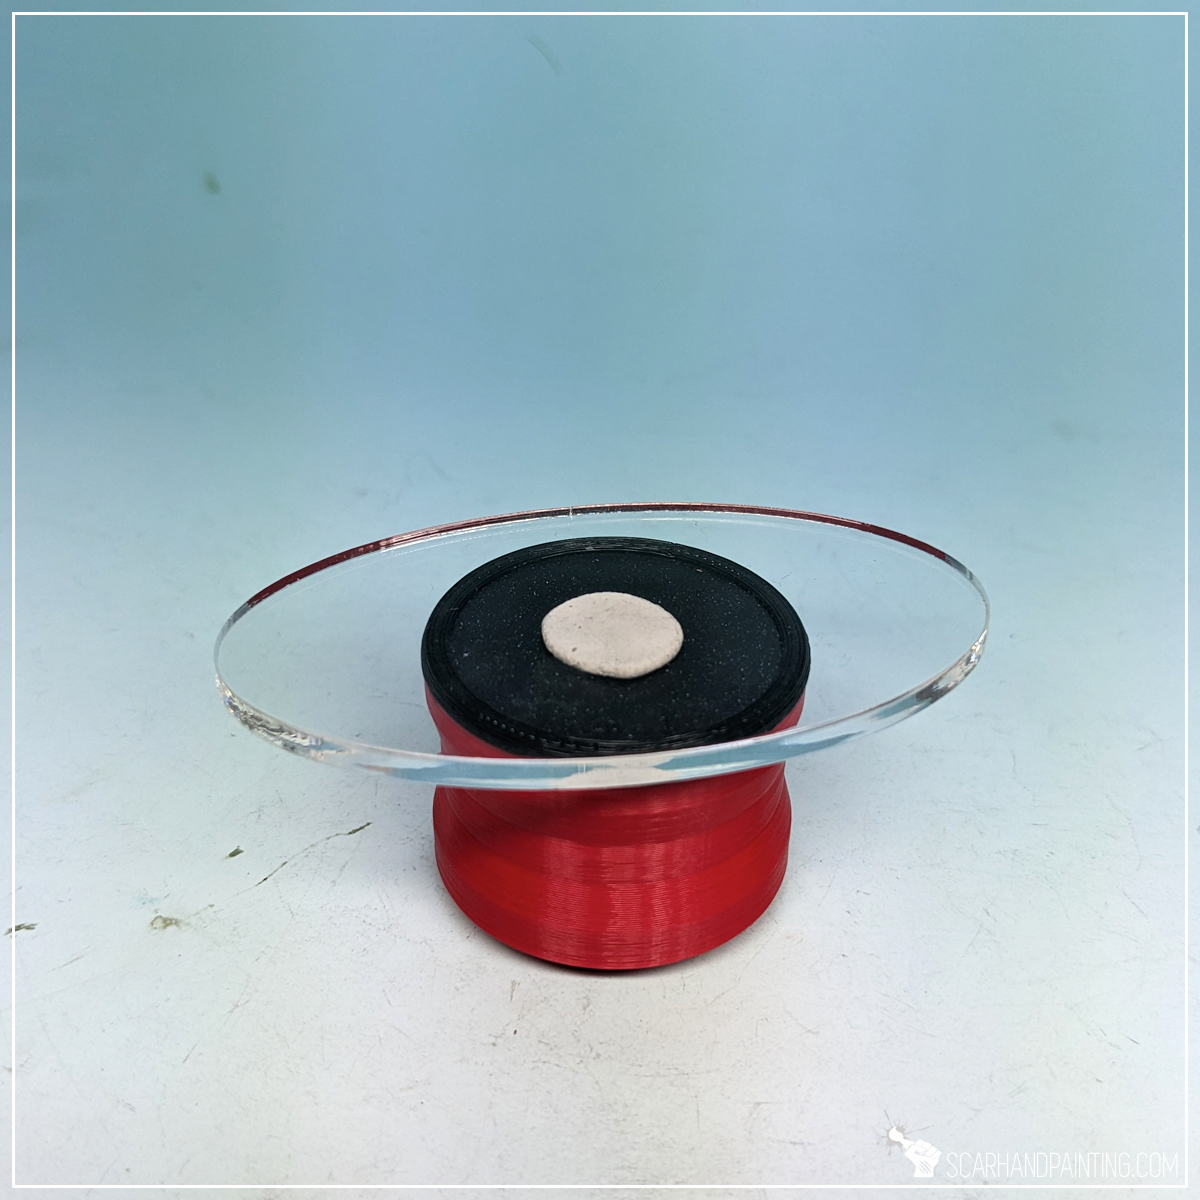
I started by applying some Citadel Militarum Green Contrast in a random pattern all over the base. I used a large, soft brush and applied few large drops of the paint, then added some more to link them.
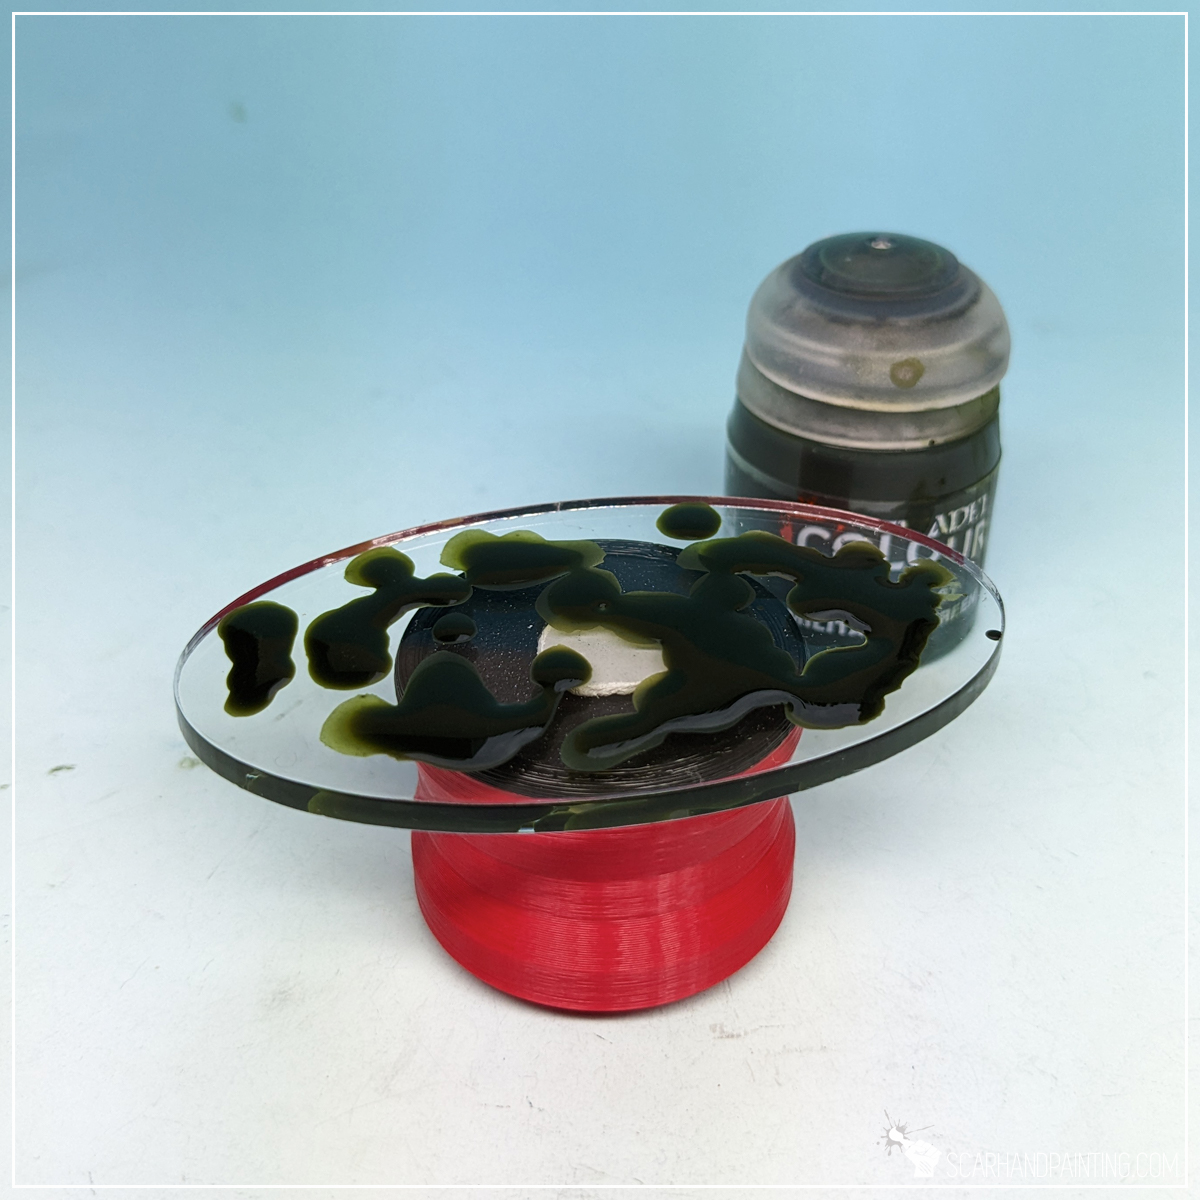
Next I used a large, round brush to stipple Citadel Nurgle’s Rot paint on top of still wet Militarum Green. This was a bit tricky and I used a paper towel to clean the brush very often. The idea is to apply Nurgle’s Rot from the top by touching the previous layer, bot not smear nor mix the two paints too much.
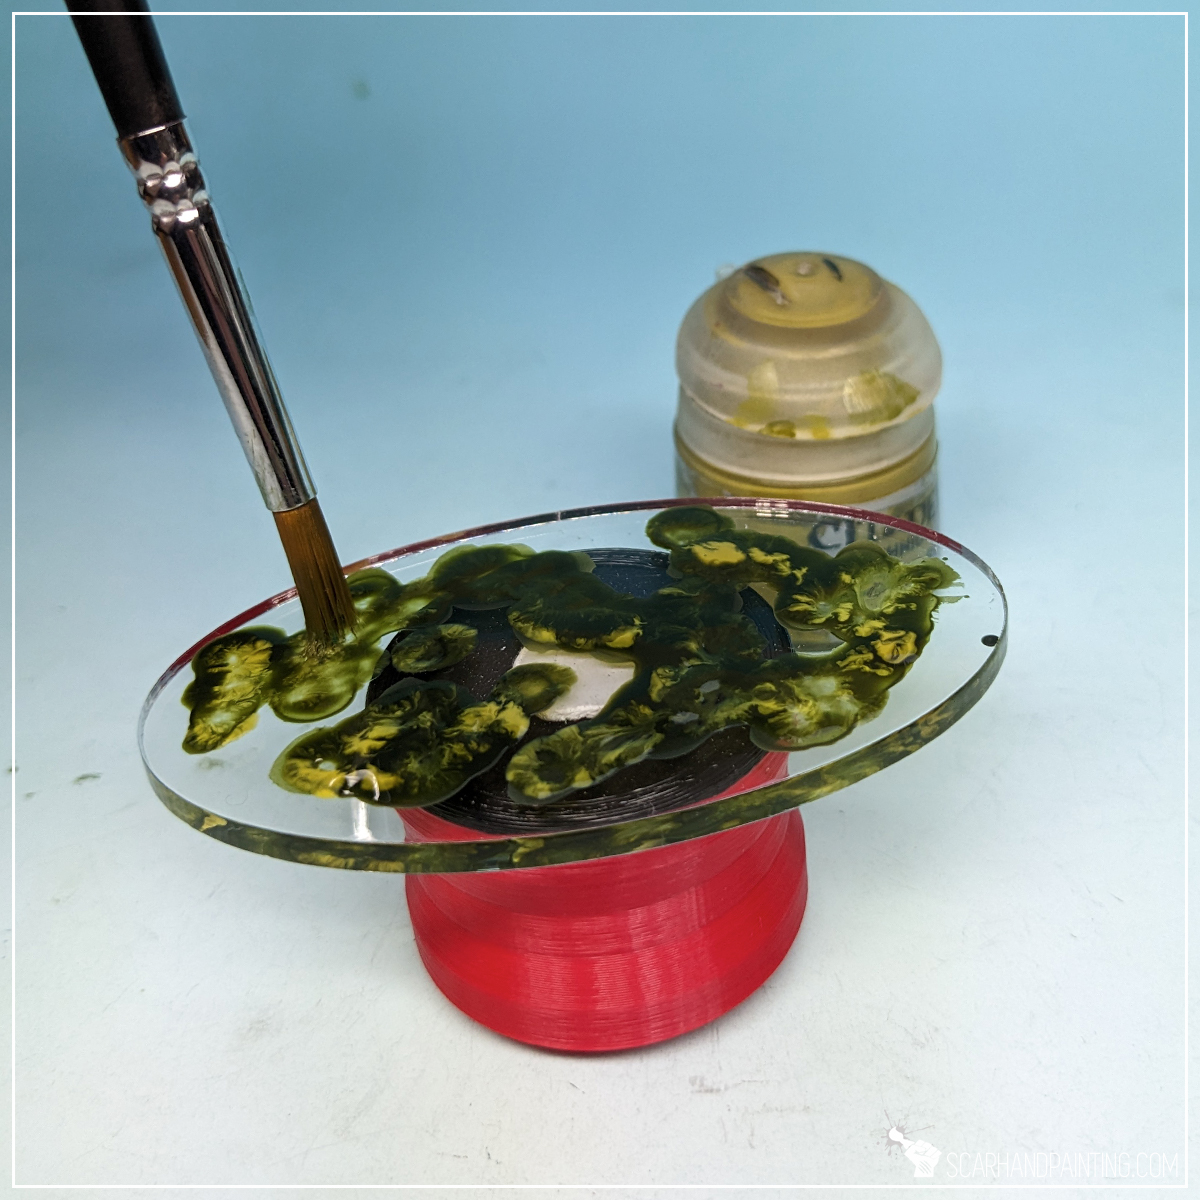
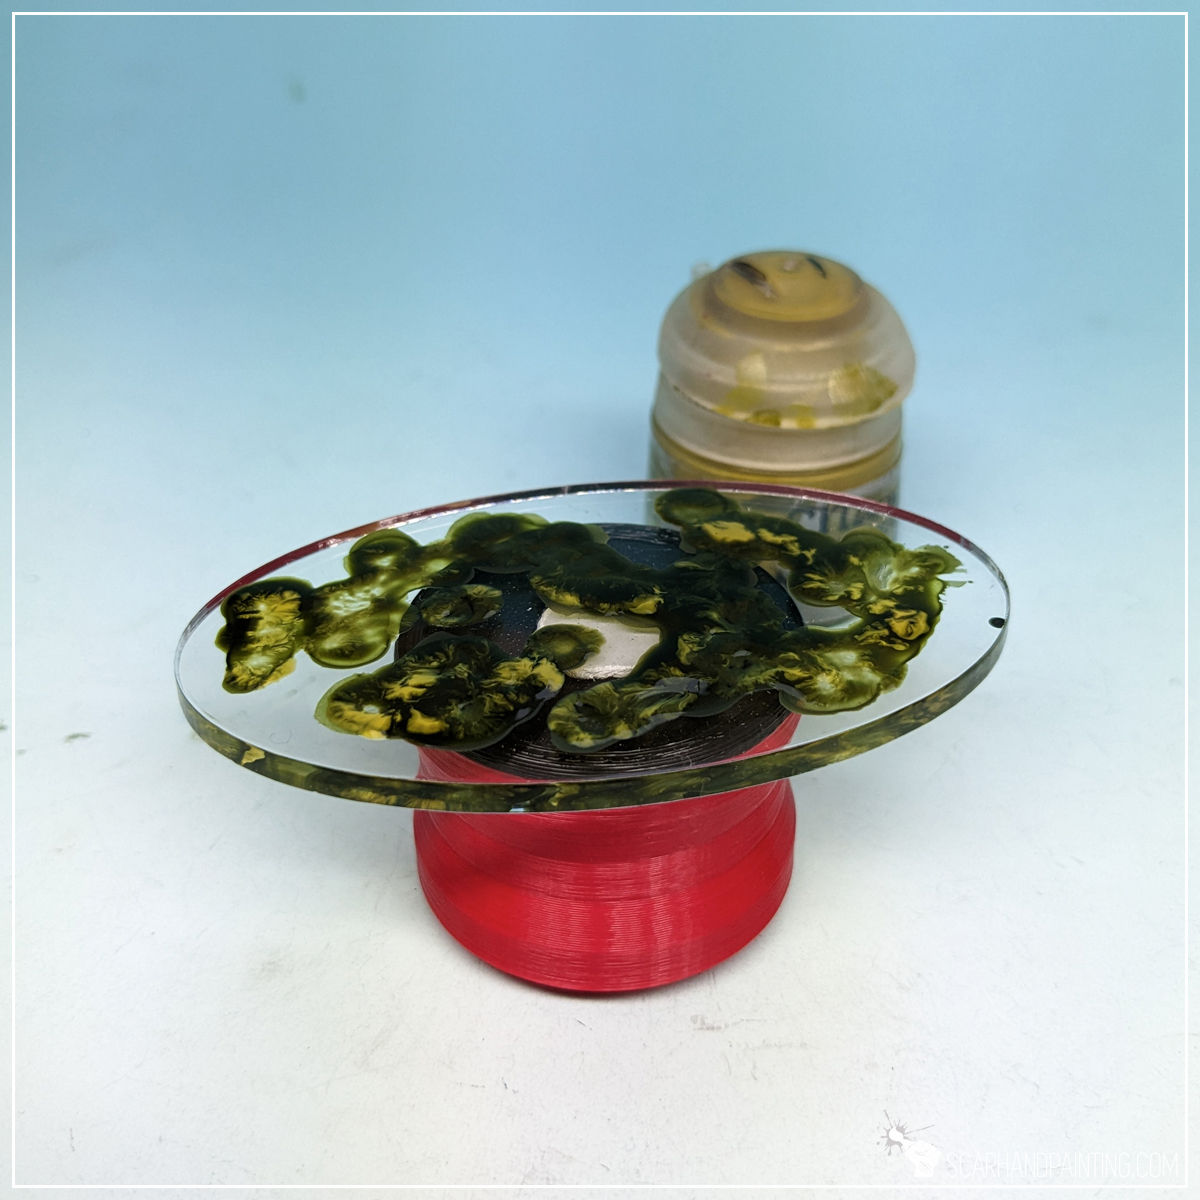

Once the paint dried I decided to add more live to the mix. Using a large, round synthetic brush with a flat tip I stippled wet Vallejo Heavy Khaki paint all over the previous layer.
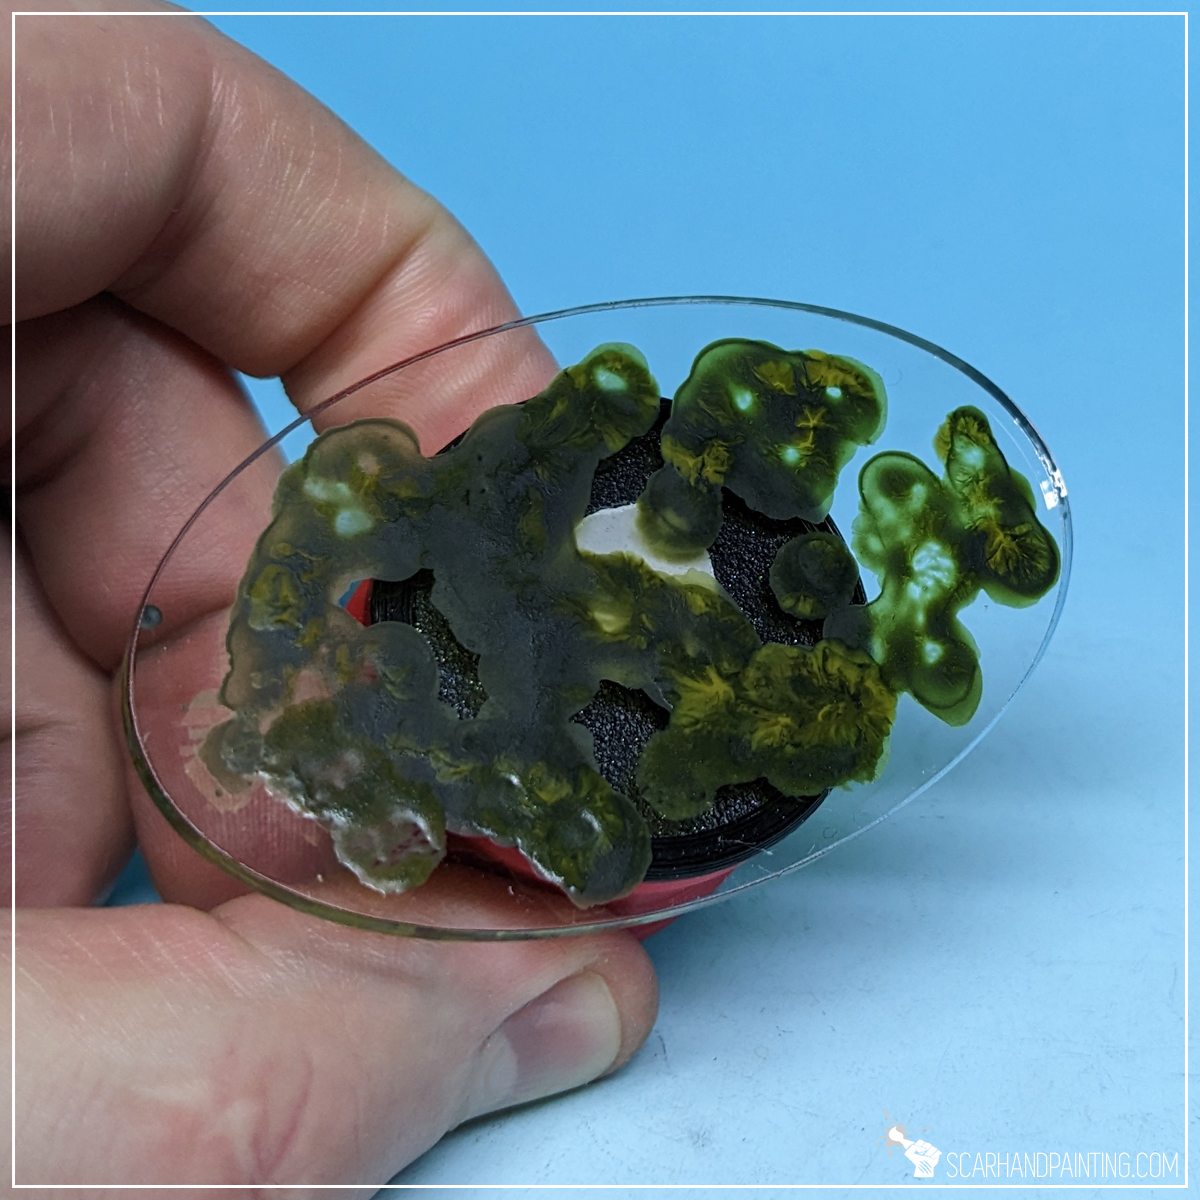

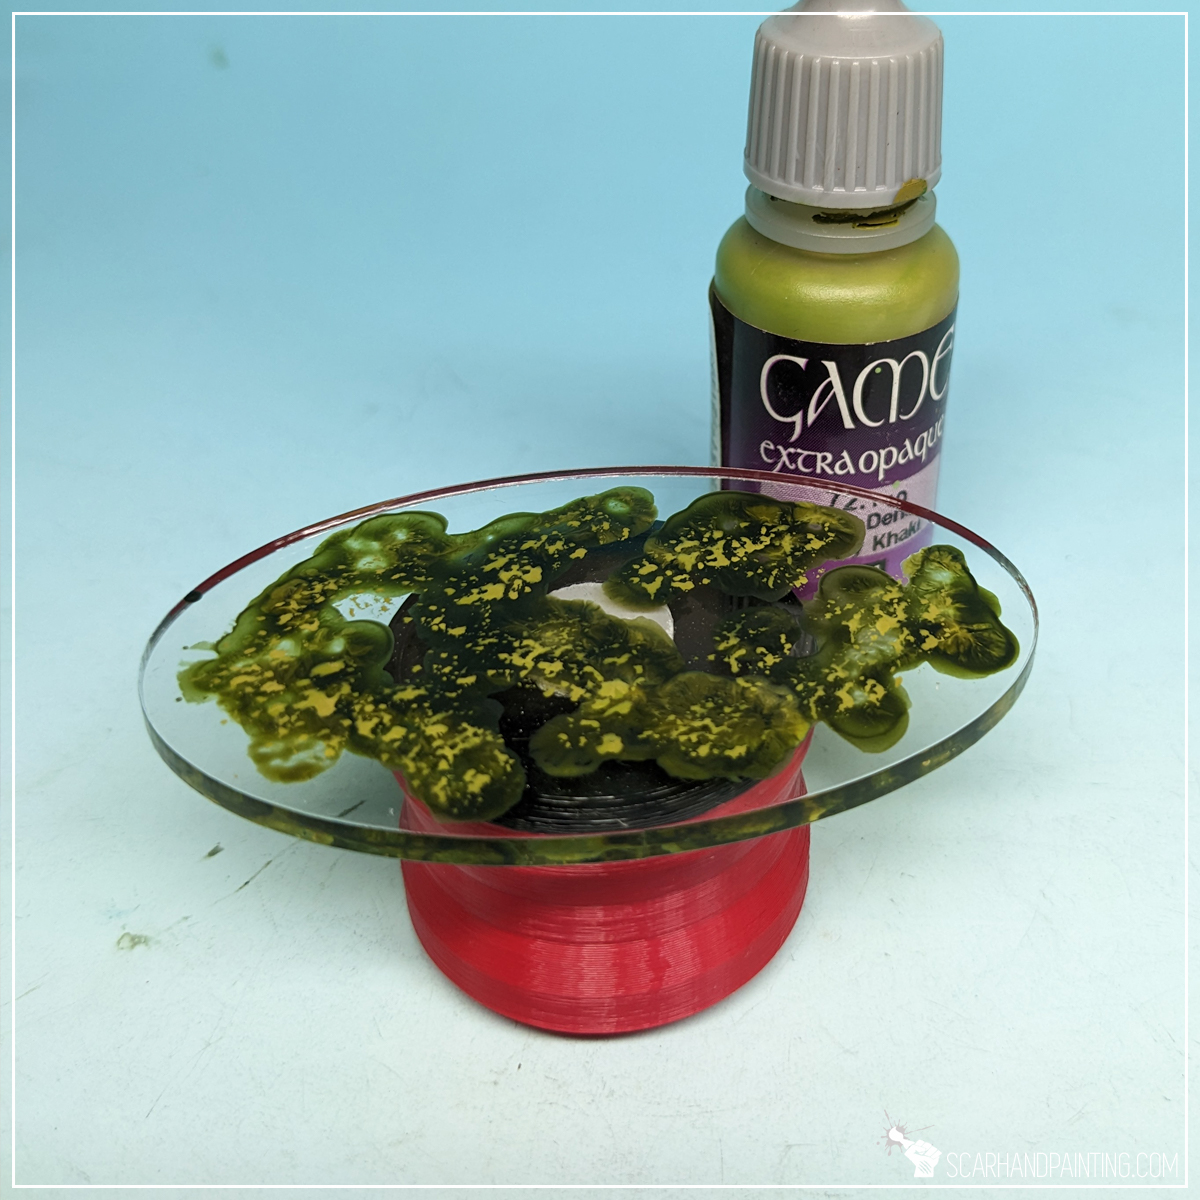
Next I applied a thick layer of AK Interactive Pacific Blue. I usually go with Atlantic Blue instead, but this time I aimed at a brighter, more translucent effect.

Finally I applied few lines of AK Interactive Water Foam texture. I then used a clean synthetic, flat tip brush to reduce volume and shape thin waves.
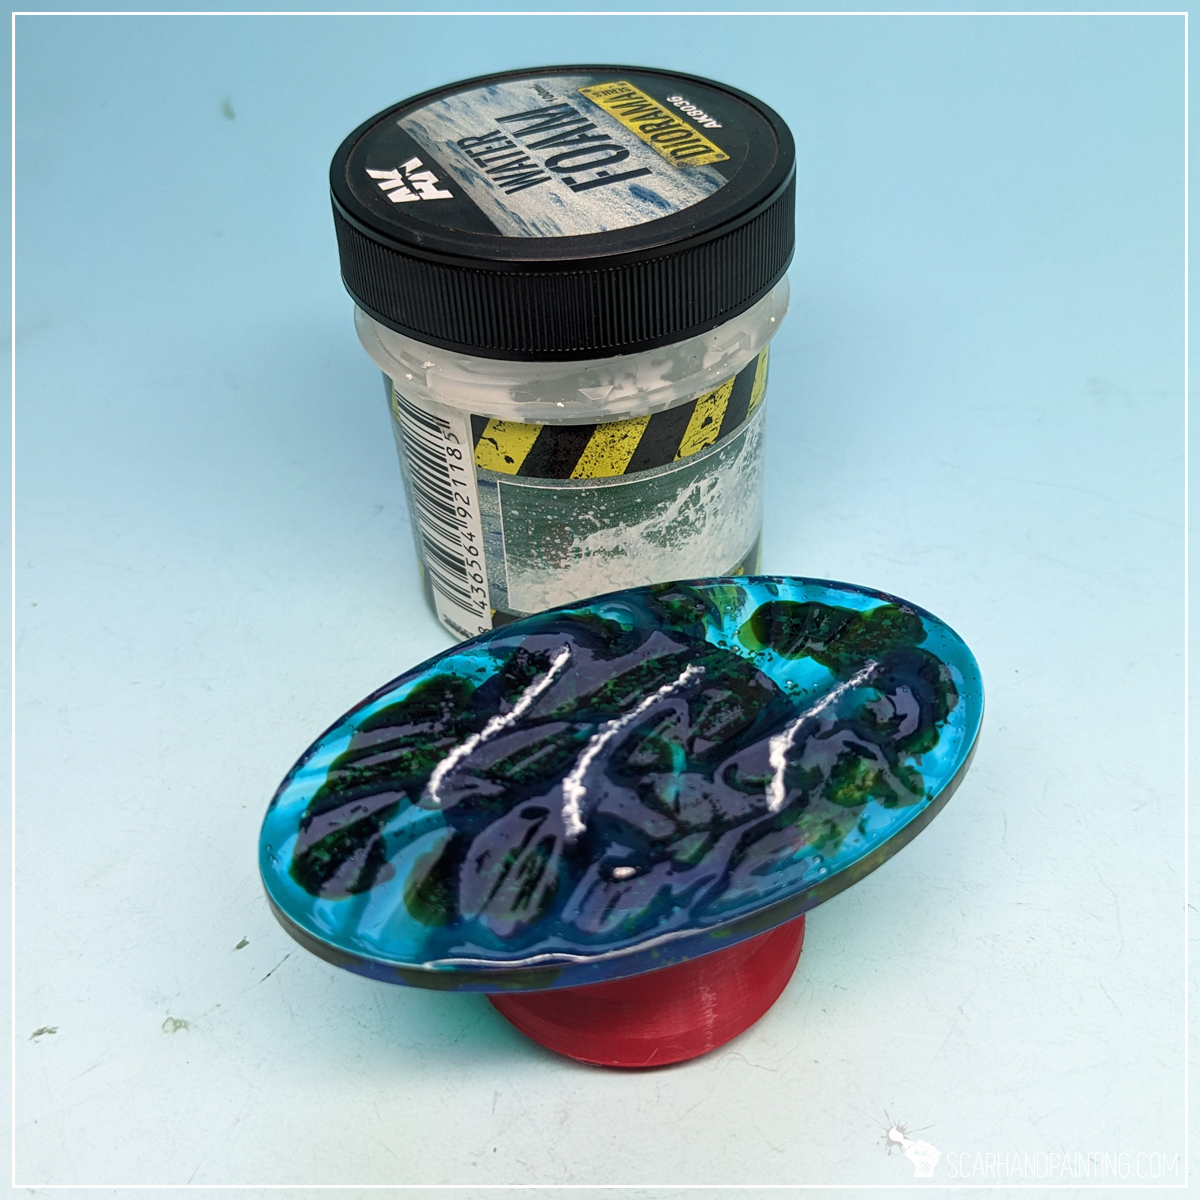

And that is basically all. Sargasso, Seaweed, alternative Sandbanks or some sort of awesome new Armada scenery is now complete.

I hope you find this tutorial interesting. Be sure to let me know your thoughts in the comments below or via Facebook or Instagram. I would also appreciate if you considered sharing this content with your friends, who might find it useful. Finally if you are looking for a professional miniatures painting service, be sure to contact me with this contact form. I always reply within 24 hours, after which please check out your spam folder.

One of the most exciting parts of Warhammer hobby is playing games on awesome looking scenery sets. Still not all of us can afford high end scenery outright, as usually the miniatures comes first. Fortunately a top tier looking scenery is not that difficult and time consuming to make from scratch as it might seem. On top of that it’s much cheaper than most hobbyists can even imagine!
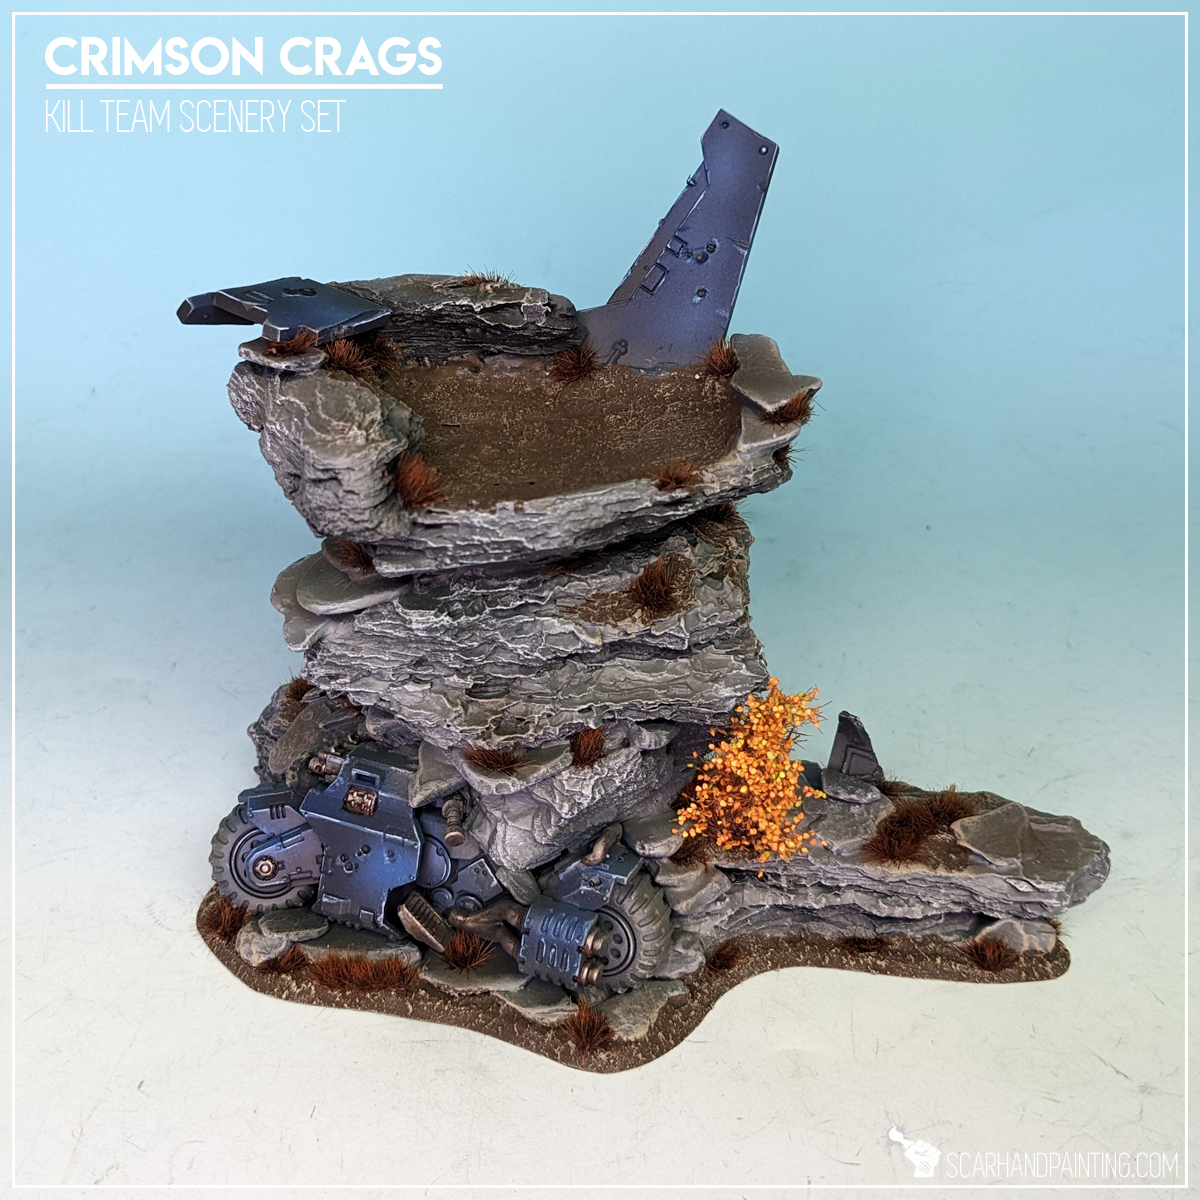
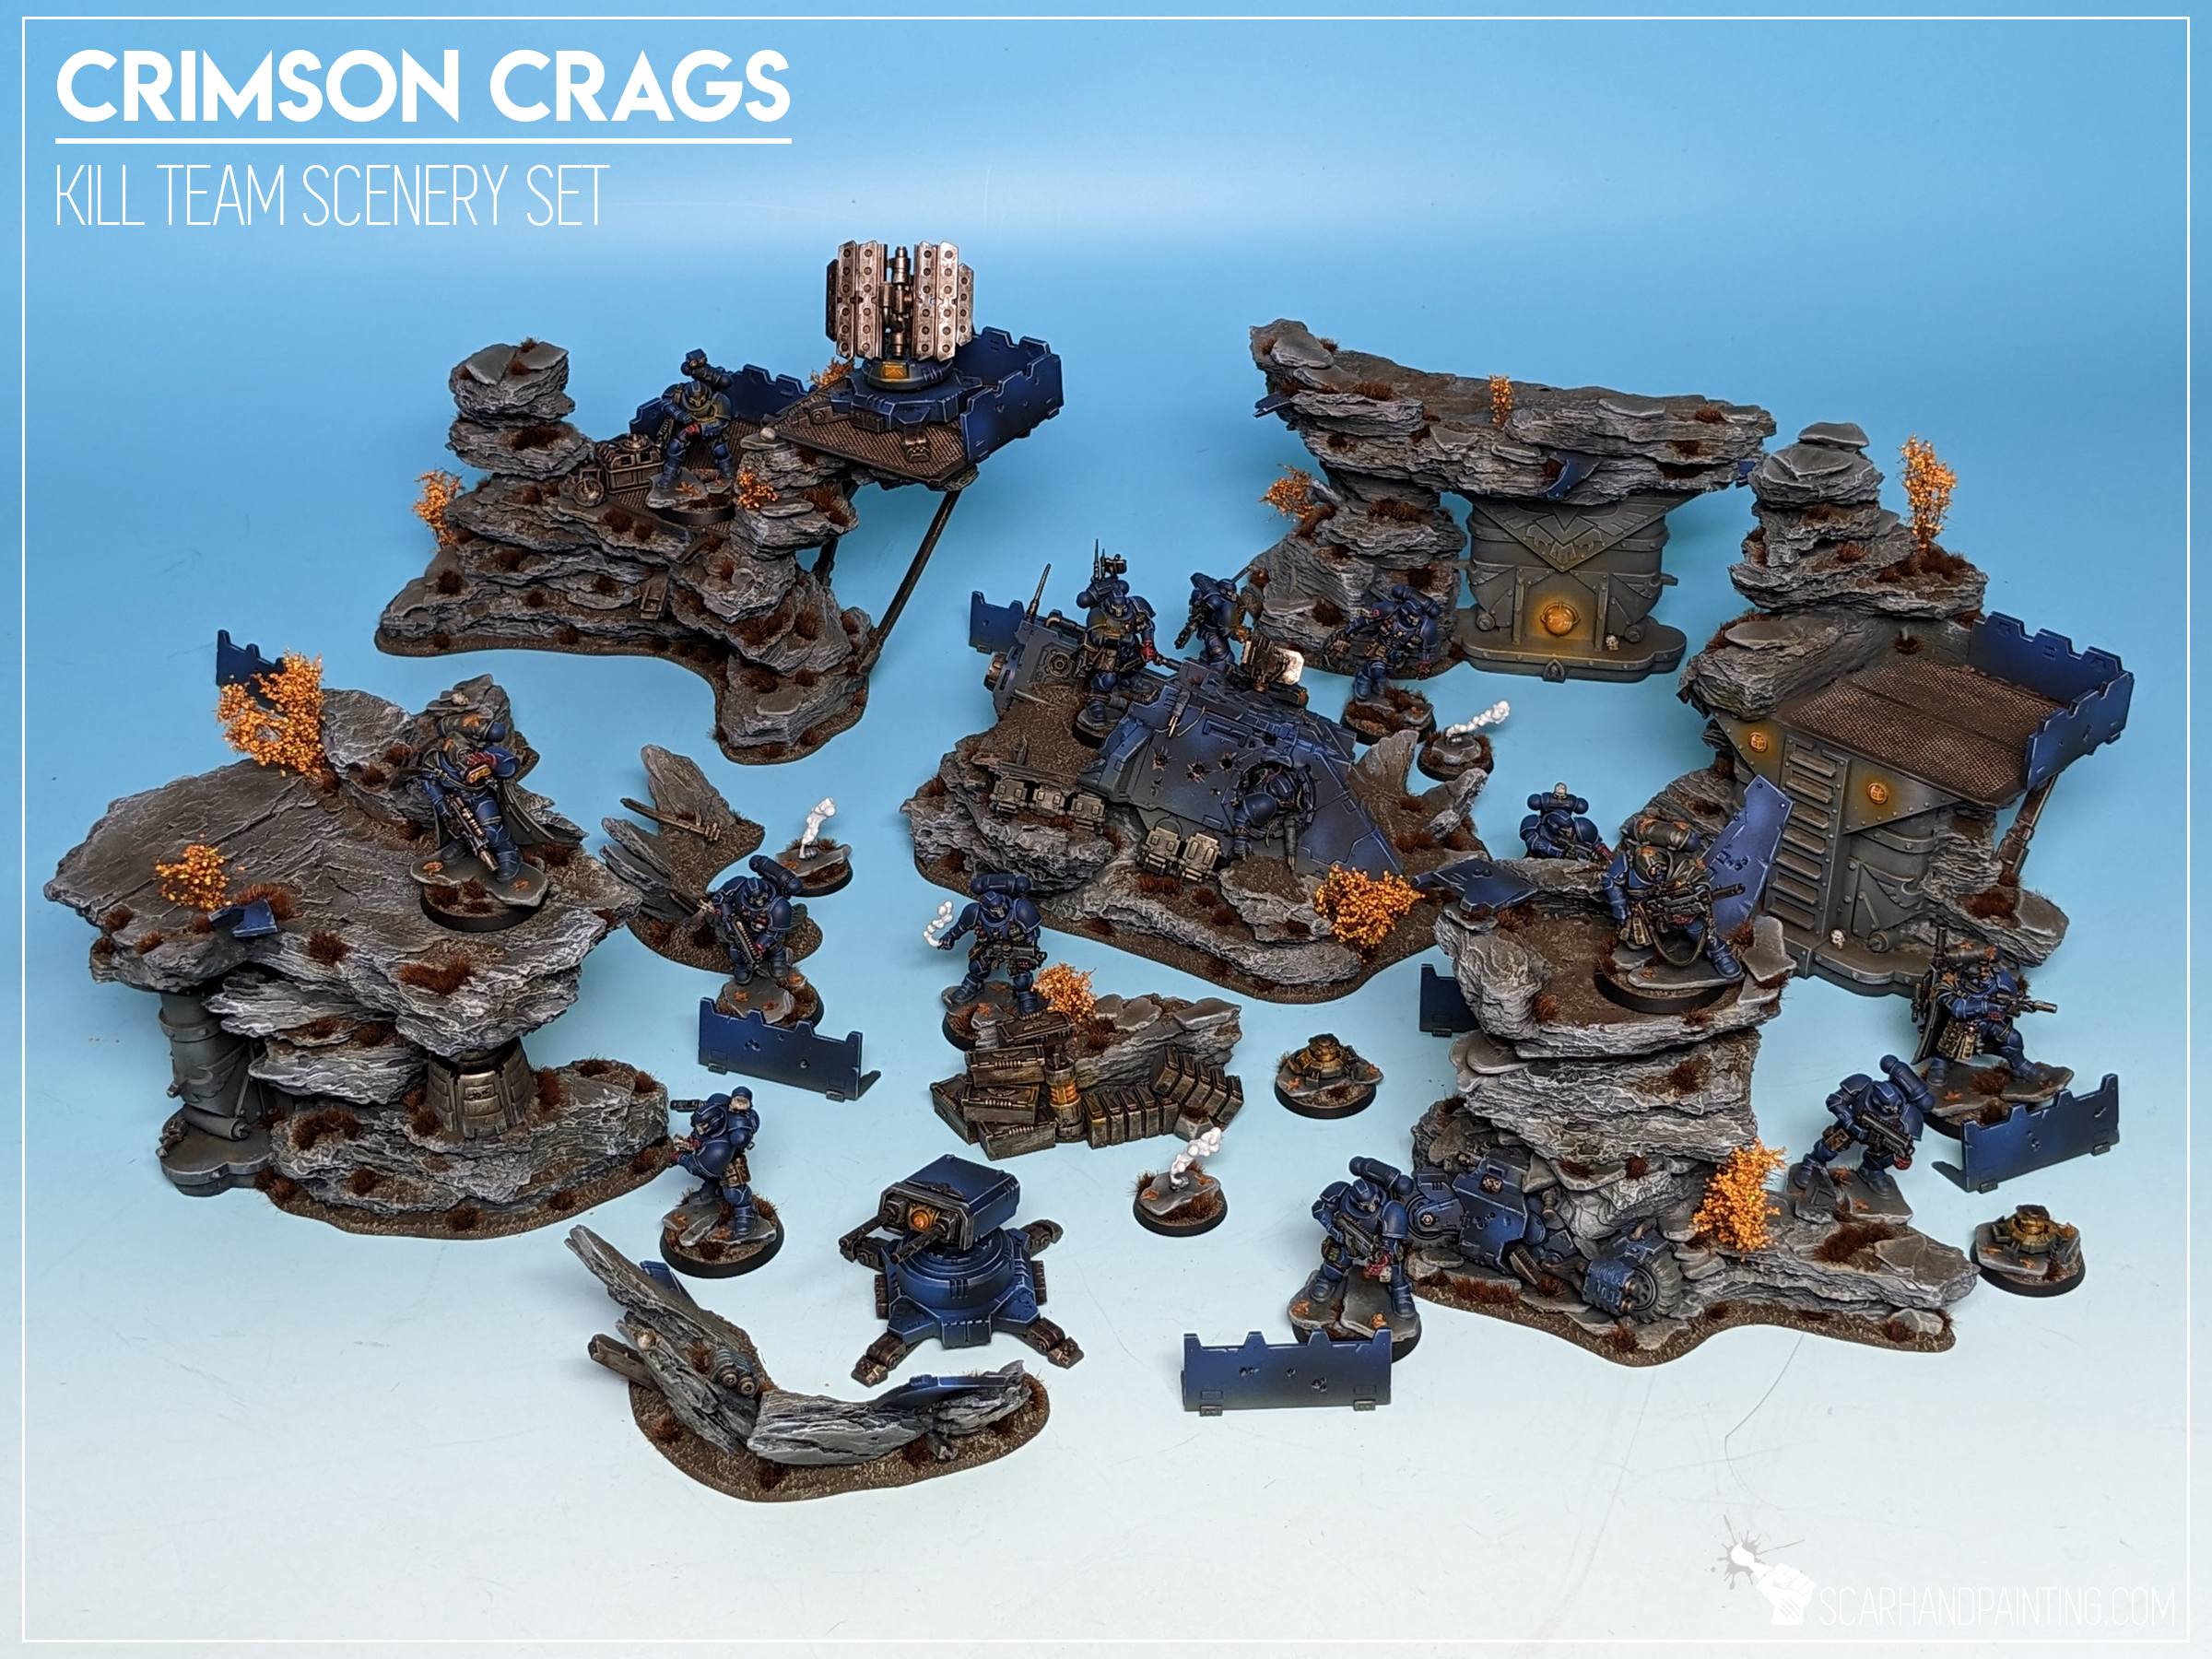
In this article I will present to you an easy way to make highly detailed rock formation perfect for anything Warhammer and many other miniatures wargames as can be seen in Crimson Crags Gallery.
Some notes:

The Basics:
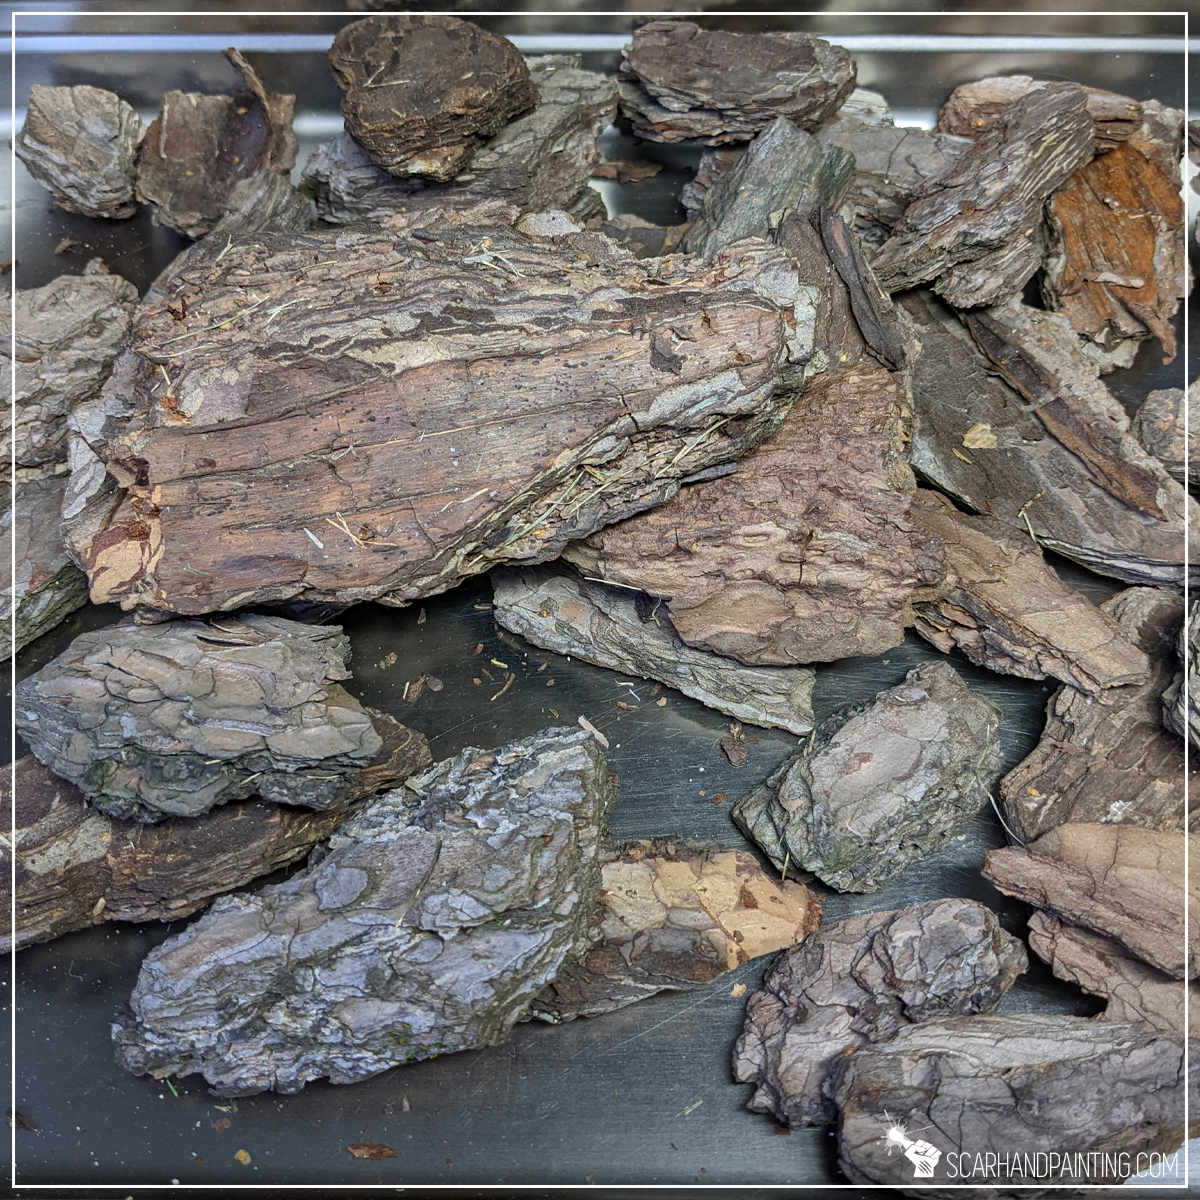
When making miniatures scenery with looks in mind a detailed texture and interesting shapes are usually my go to. These can be difficult to come by and might require a purchase of existing sets, but not in case of rocky formations. Fortunately for our wallets nature have come up with the best source of awesome looking, house budget friendly miniature rocks – Tree Bark. Unless you’re living on the North Pole there should be some sort of trees around. Bark, being the main source of shapes and textures, can be used as the main bulk of miniature rocky scenery, providing an abundance of layers to surround focus points with. This is why for the purpose of this tutorial bark and related know-how will be my main focus.
Bark preparation:
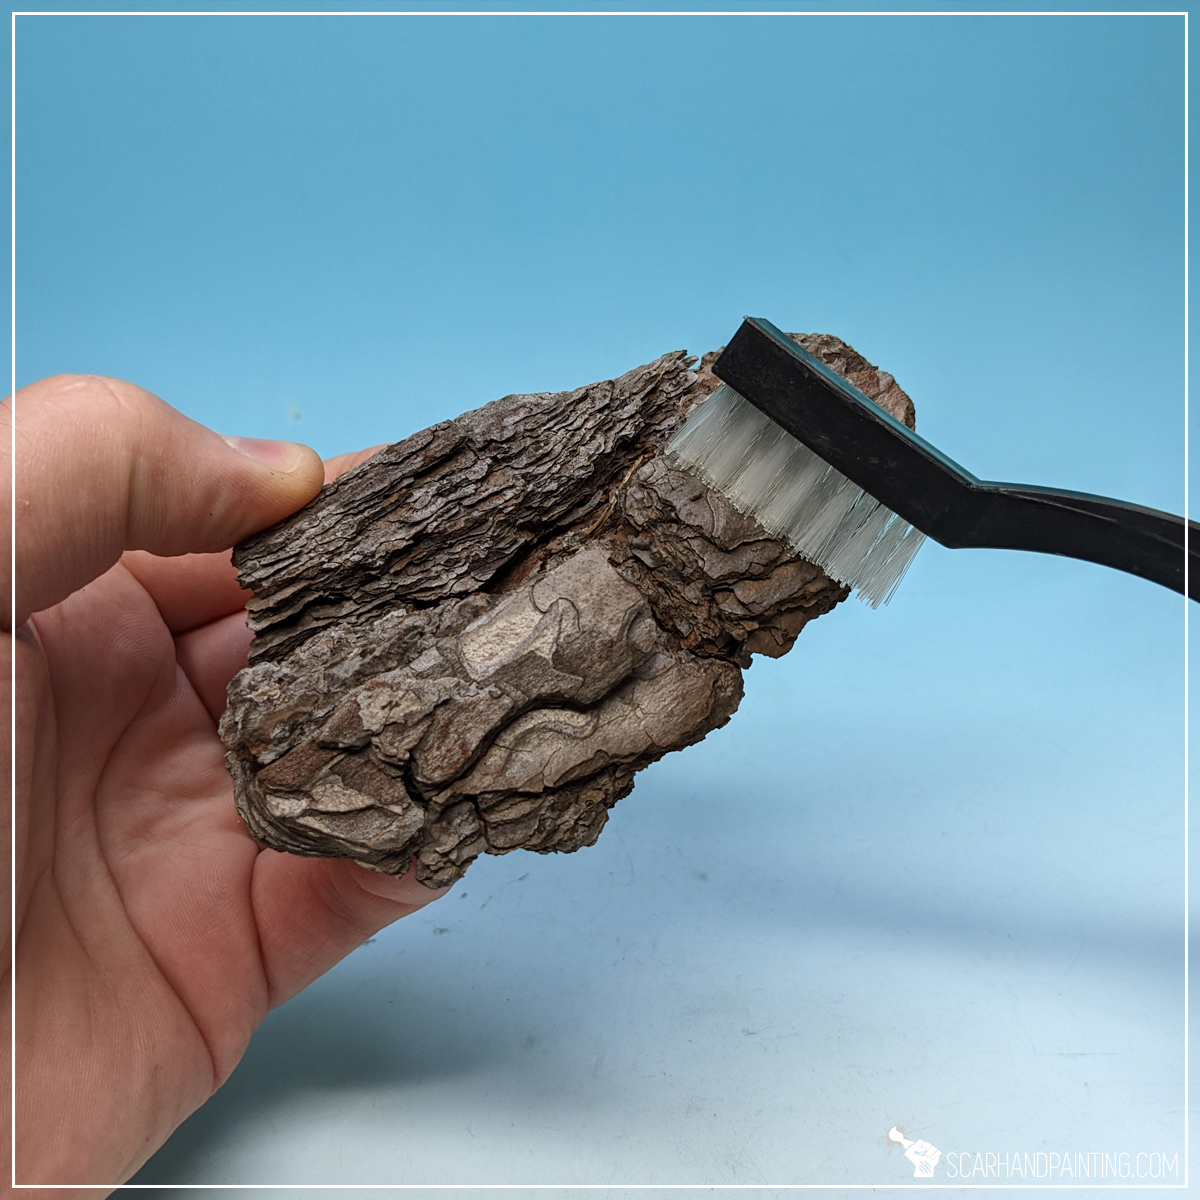
Depending on where you live and weather bark might come wet and dirty. In my case it’s early Autumn, everything is moist and hand picked bark does not cut it without some preparation. Because of that I started by drying bark pieces for about twenty minutes in a stove set to 100* degrees Celsius. Once dry I then brushed any dirt and residue with a hard synthetic brush. This left bark dry, clean and ready to use.
Composition:
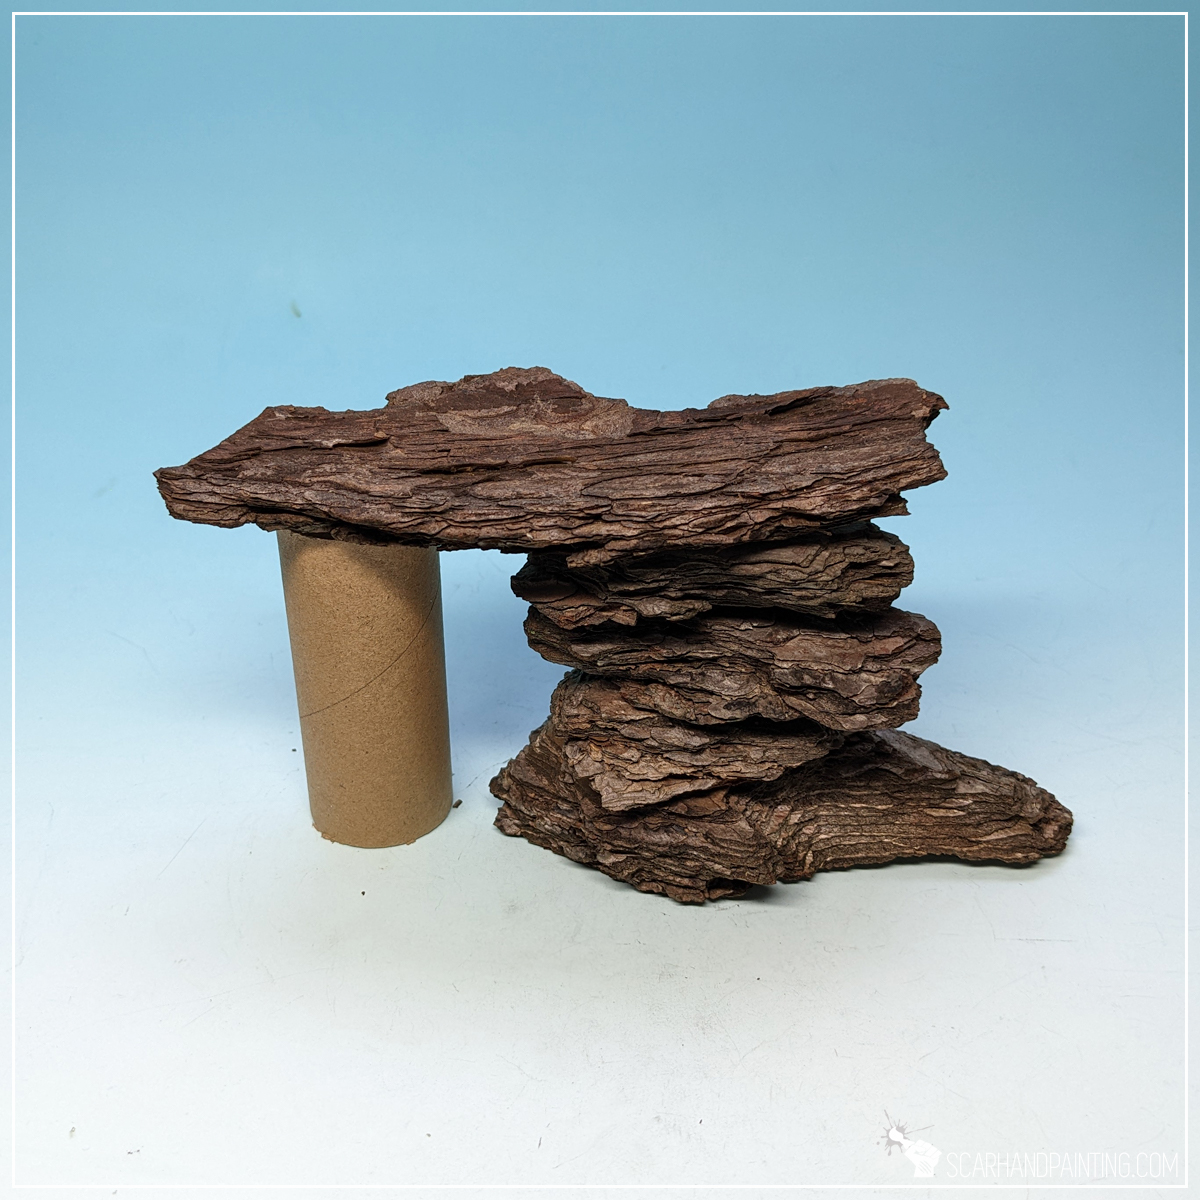
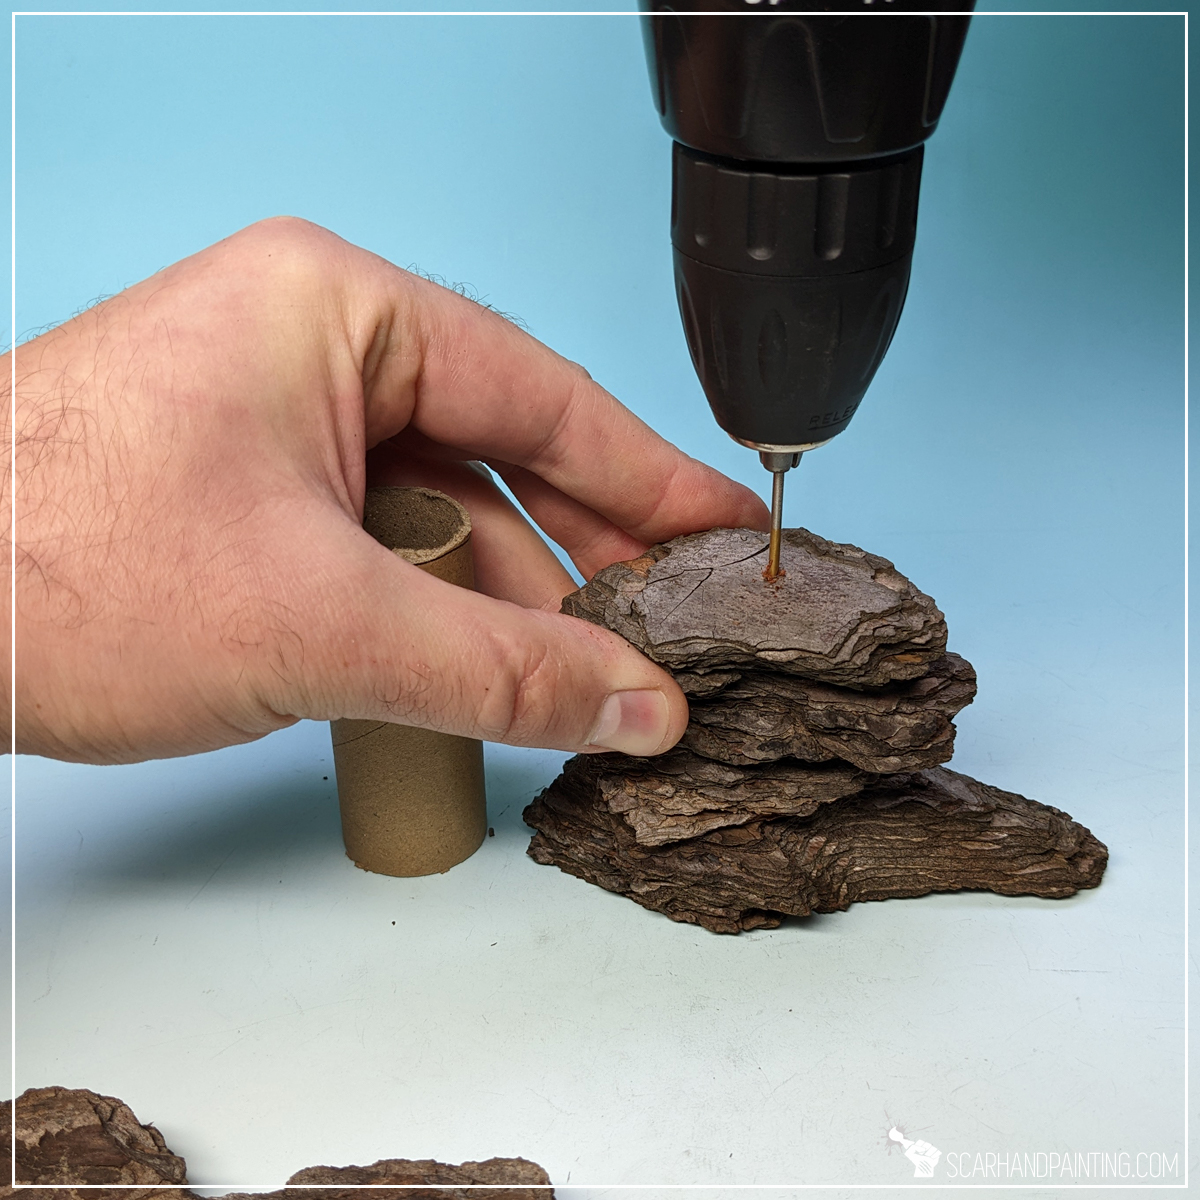
I then created few basic compositions, using a pre-cut piece of hard paper pipe to measure overhangs height. This allowed me to fit any additional elements I had in mind, but also kept all the scenery at a relatively similar height. Once composed I drilled horizontal holes through entire scenery piece and put toothpicks through to ‘save’ the composition shape.
Gluing:
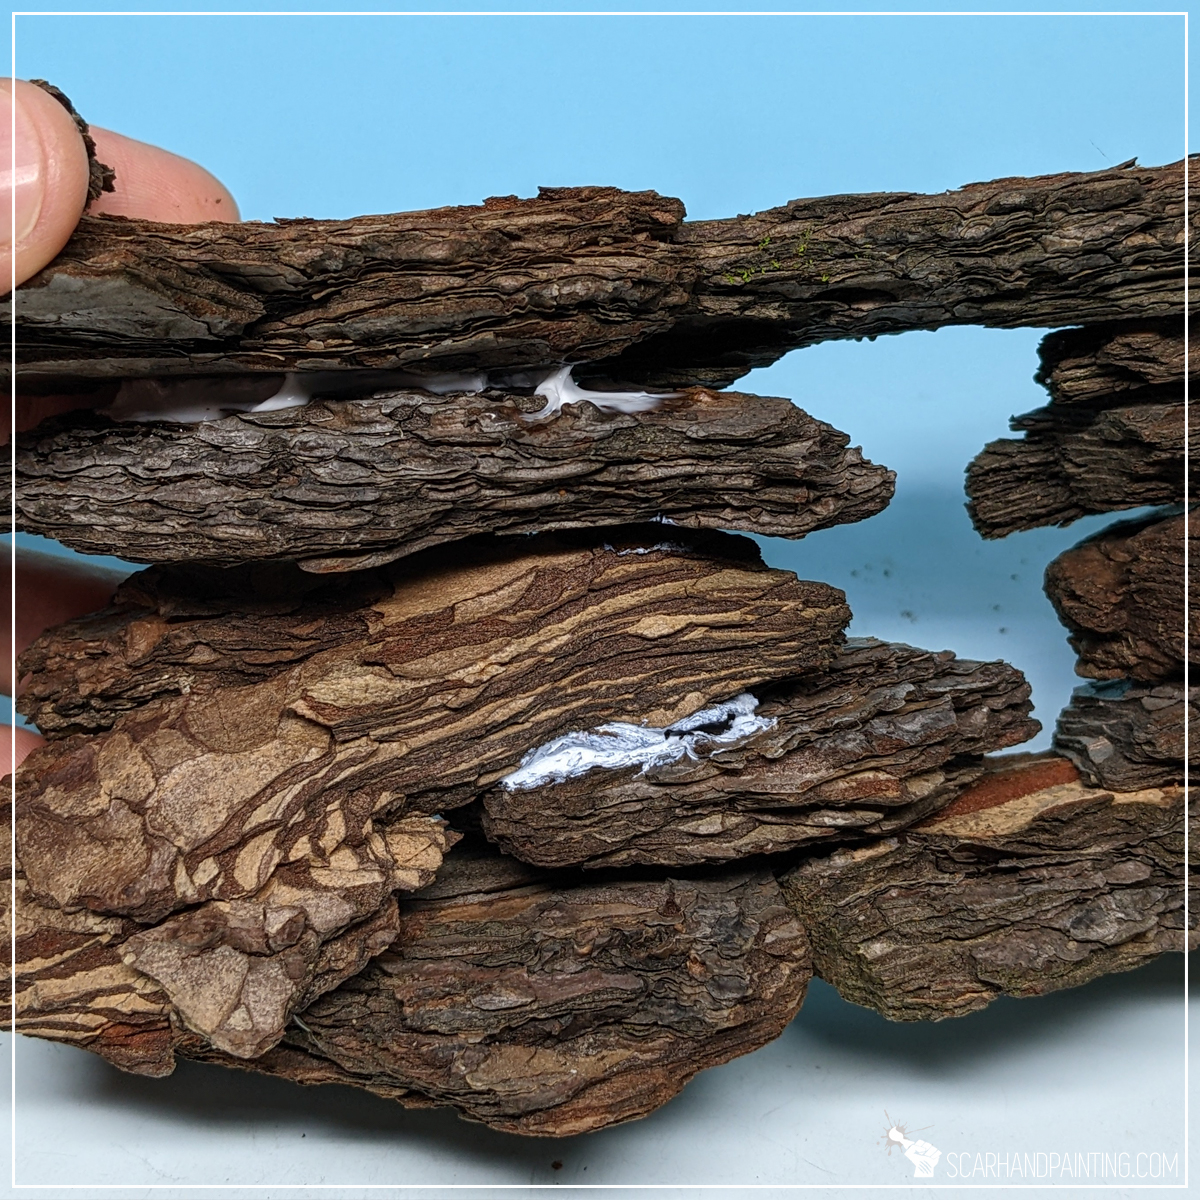
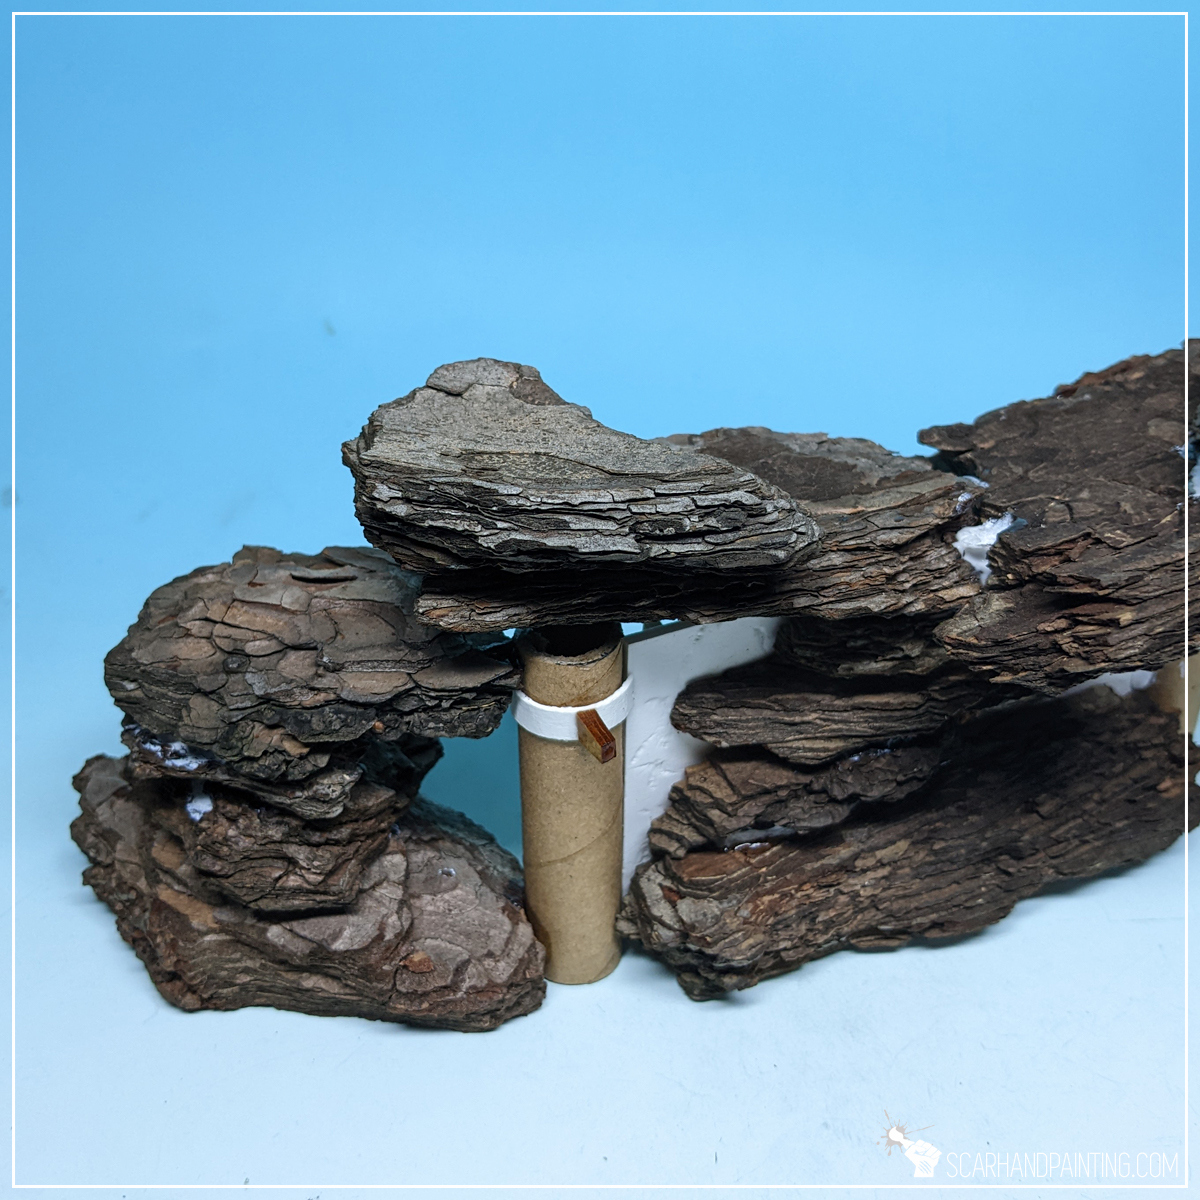
Using PVA glue on bark can be lengthy whereas Cyanoacrylate requires multiple layers to build volume sufficient to hold dry bark pieces. Because of that I took the best of both worlds and glued the compositions firm with a mix of PVA and Cyanoacrylate glue. The mix not only dries much faster than solo PVA, but also leaves rough, textured layer outside. It’s perfect for this kind of scenery.
Sealing:
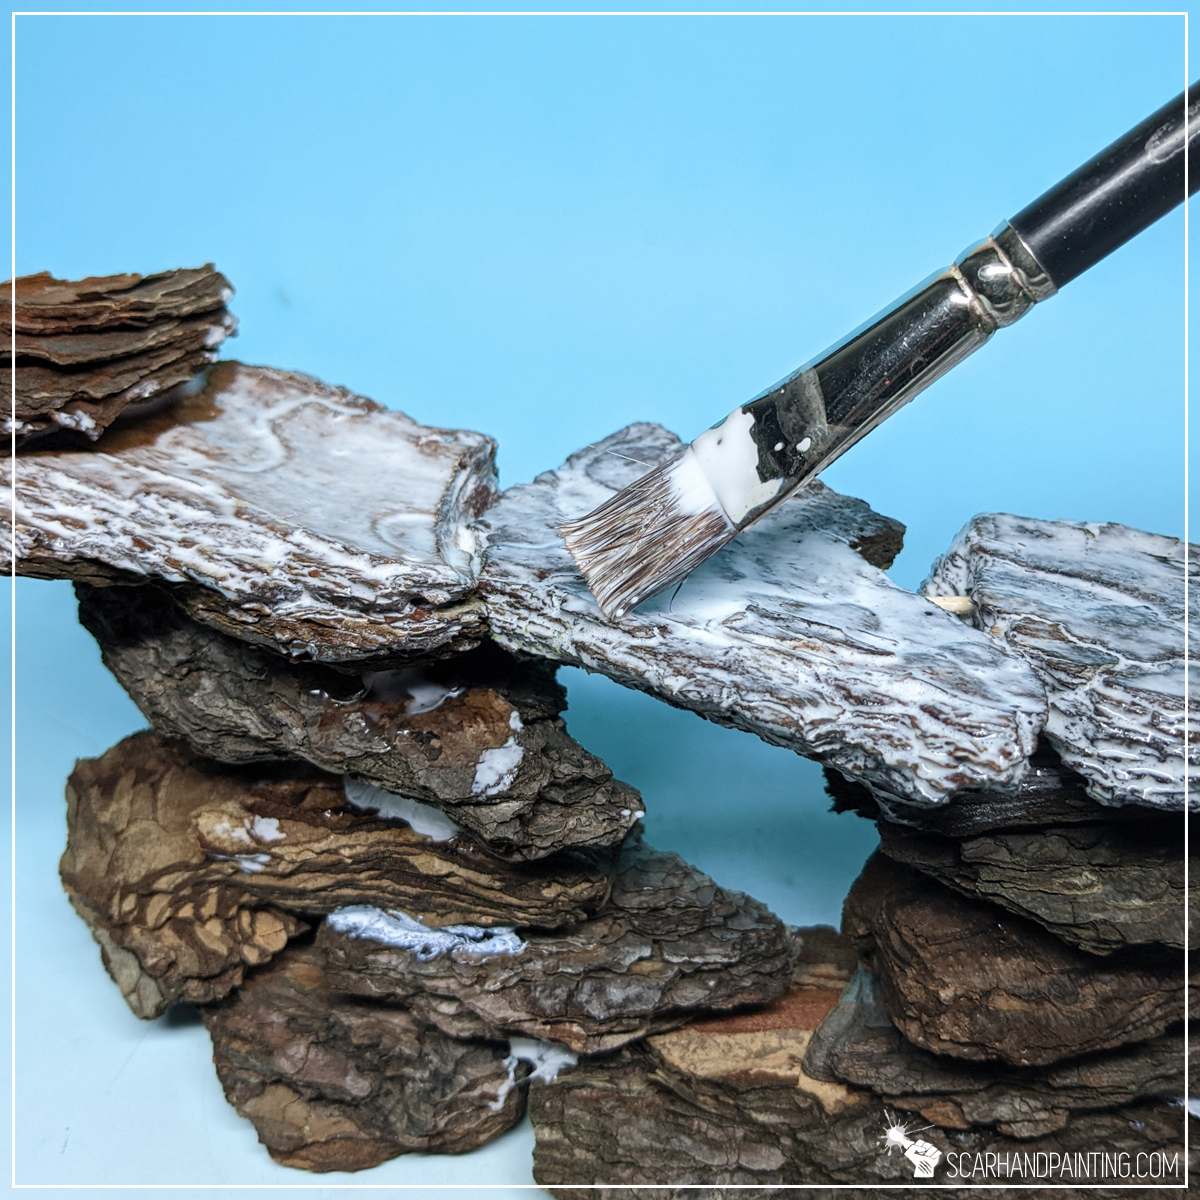
Dry bark tends to cheap and crumble a lot, not to mention it doesn’t take paint that well. To ensure durability and sturdiness of my gaming scenery I sealed the surface by applying a mix of PVA glue with a bit of water. This left the surface a bit smoother, glossy and much more durable.
Extra detail:
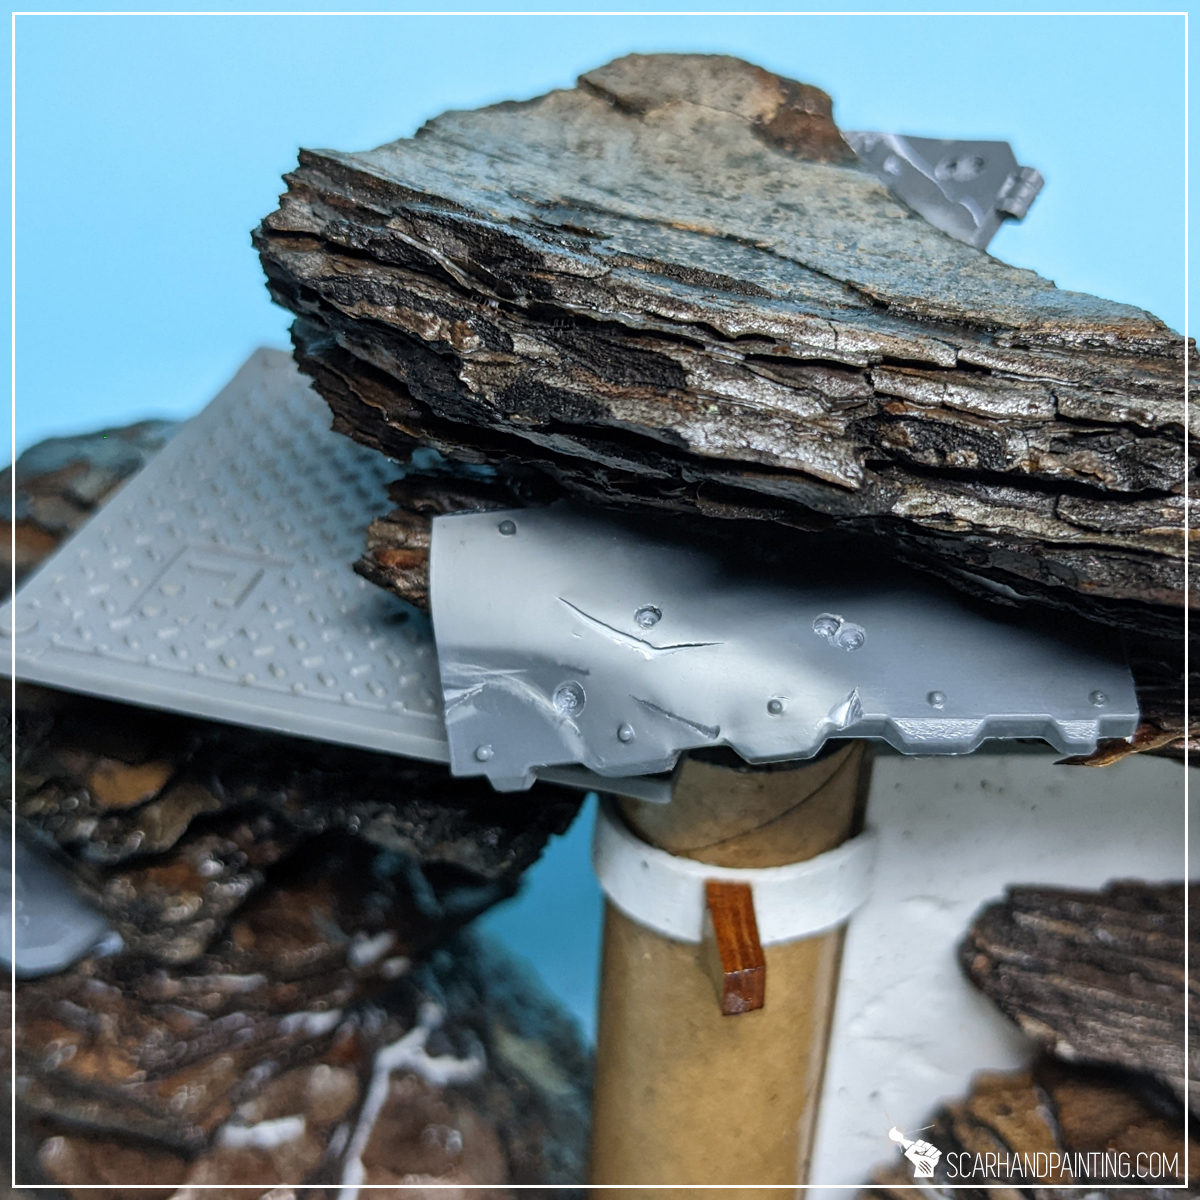
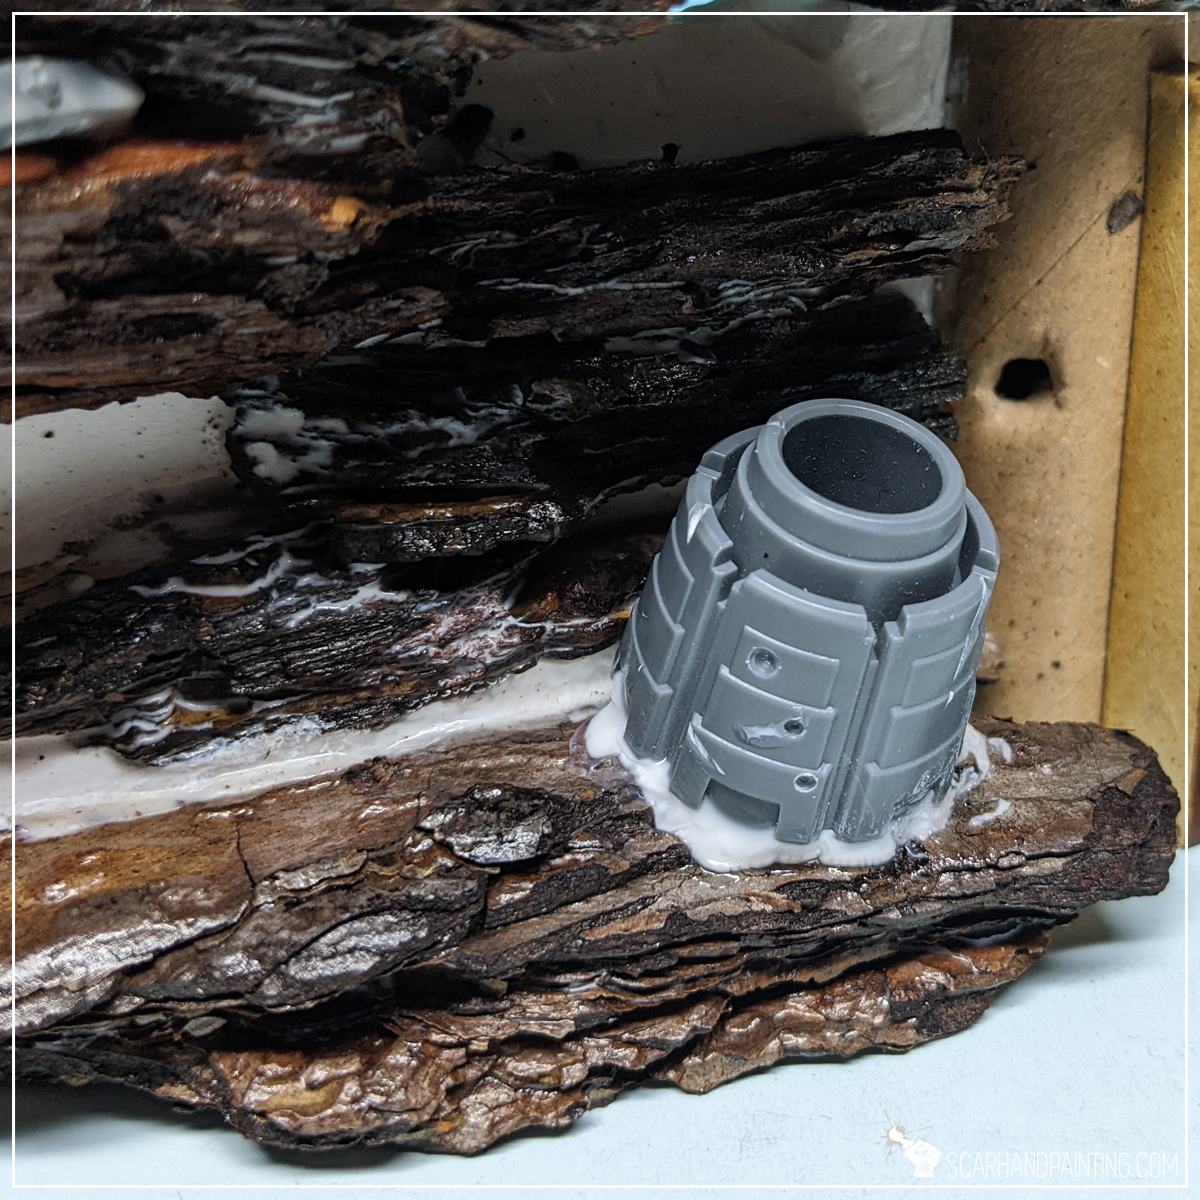
Focus points are an important part of gaming boards, adding life but also variety to otherwise simple scenery. With sealing done I moved to adding detail. Because this particular set was meant for Kill Team and Warhammer 40k I added some damaged Space Marines vehicle elements, but depending on the game and setting – anything will do the job just as well. Simply pick a theme and follow up with proper details as you see fit.
Basing:
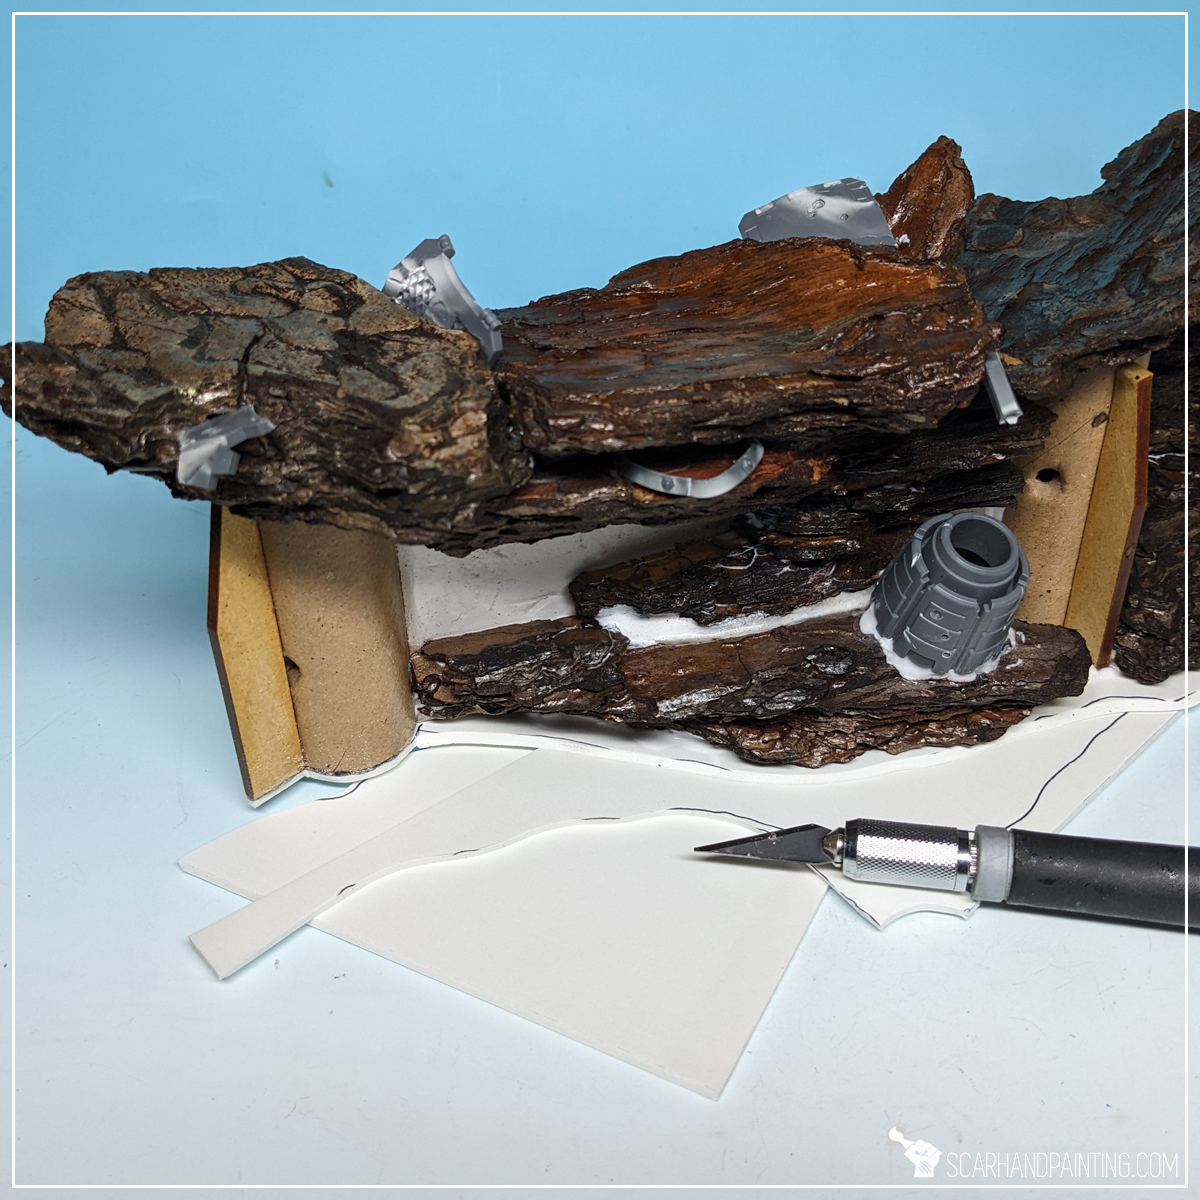
In my opinion nothing ruins gaming scenery more than being wobbly. No matter how good it looks, it gotta be playable and lay flat on the board. I cut simple bases for the scenery out of a 2mm plasticard and glued them firmly under scenery pieces. Any flat, relatively sturdy material will do. I chose plasticard because it is very easy to work with and lightweight.

Filling gaps:
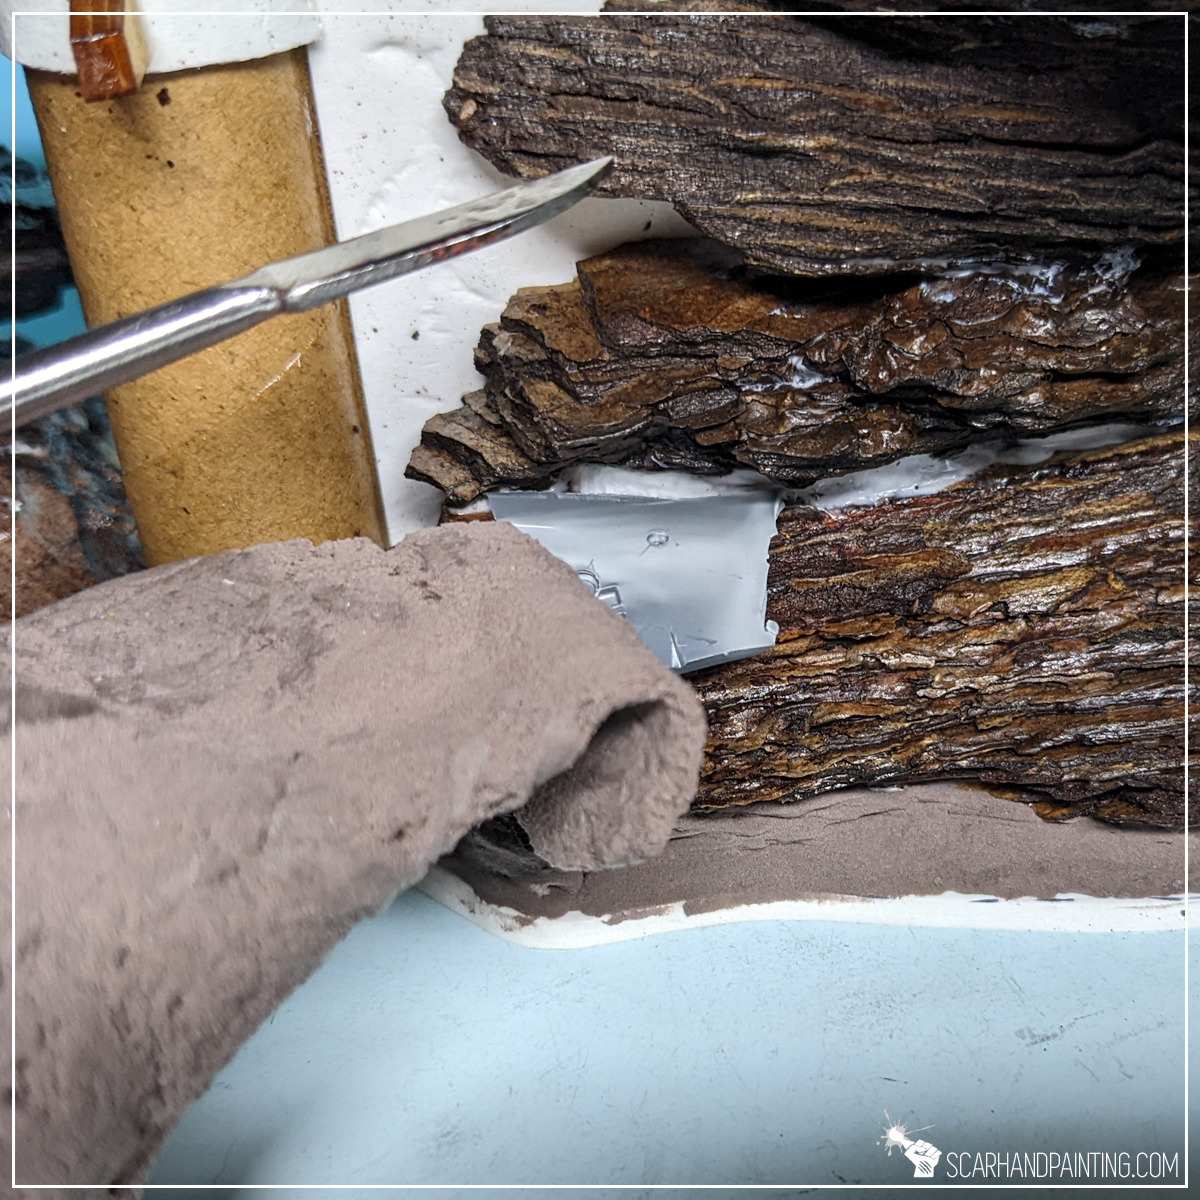
Once based I filled gaps with Hey Clay. This one might come as a surprise to some of you, Hey Clay being a toy for kids. It is similar to plasticine but very lightweight and dries up to a semi-hard state in a matter of few hours. I found it very easy to work with and perfect for this kind of job.
Initial textures:
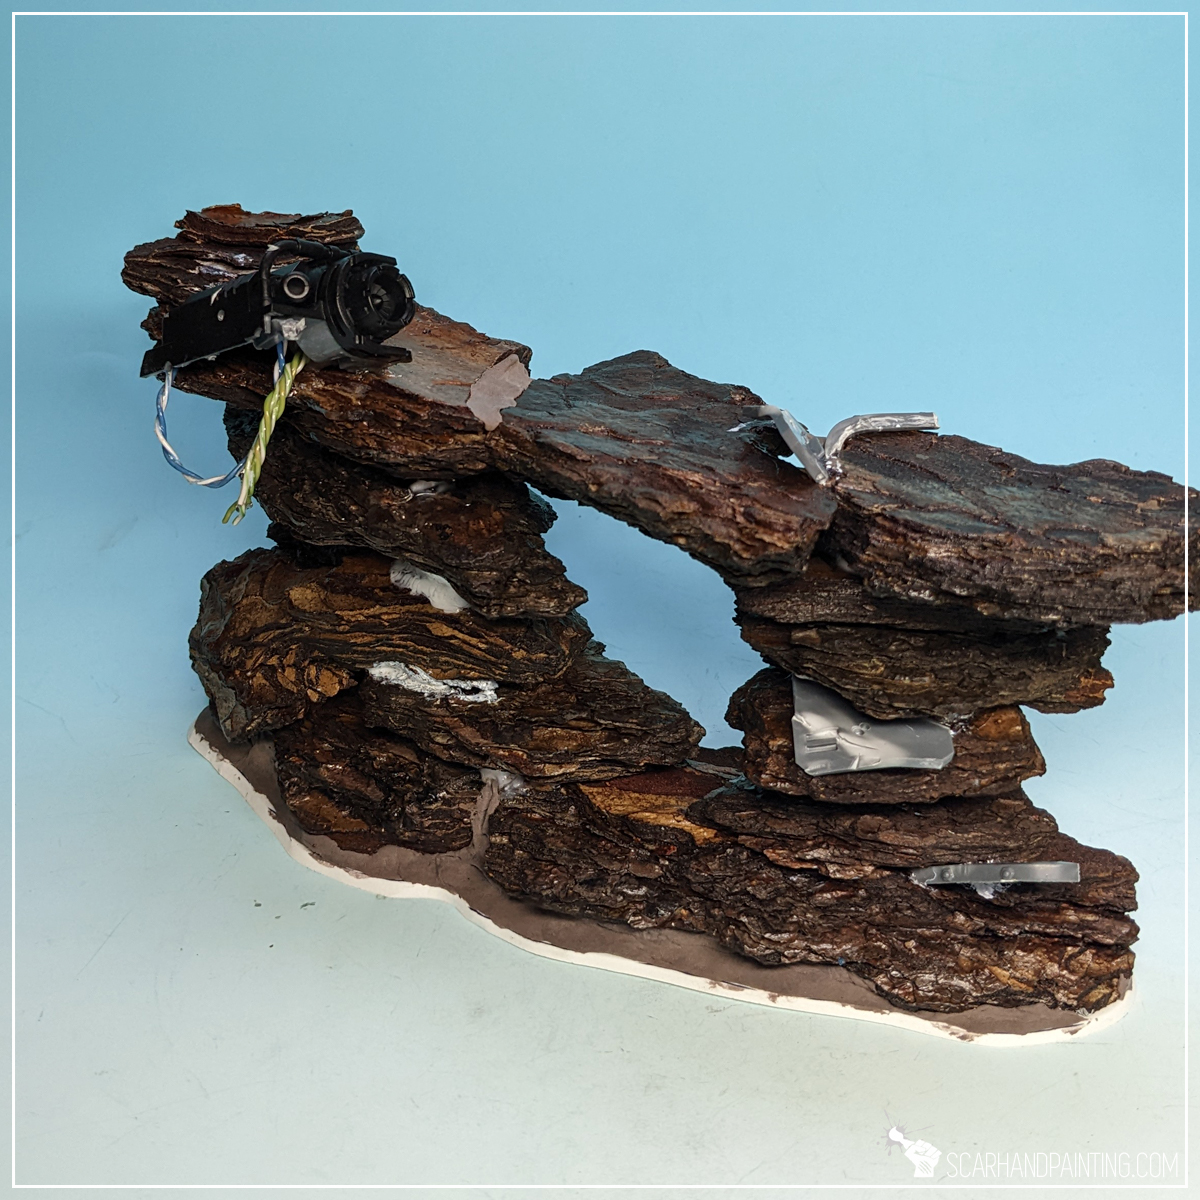
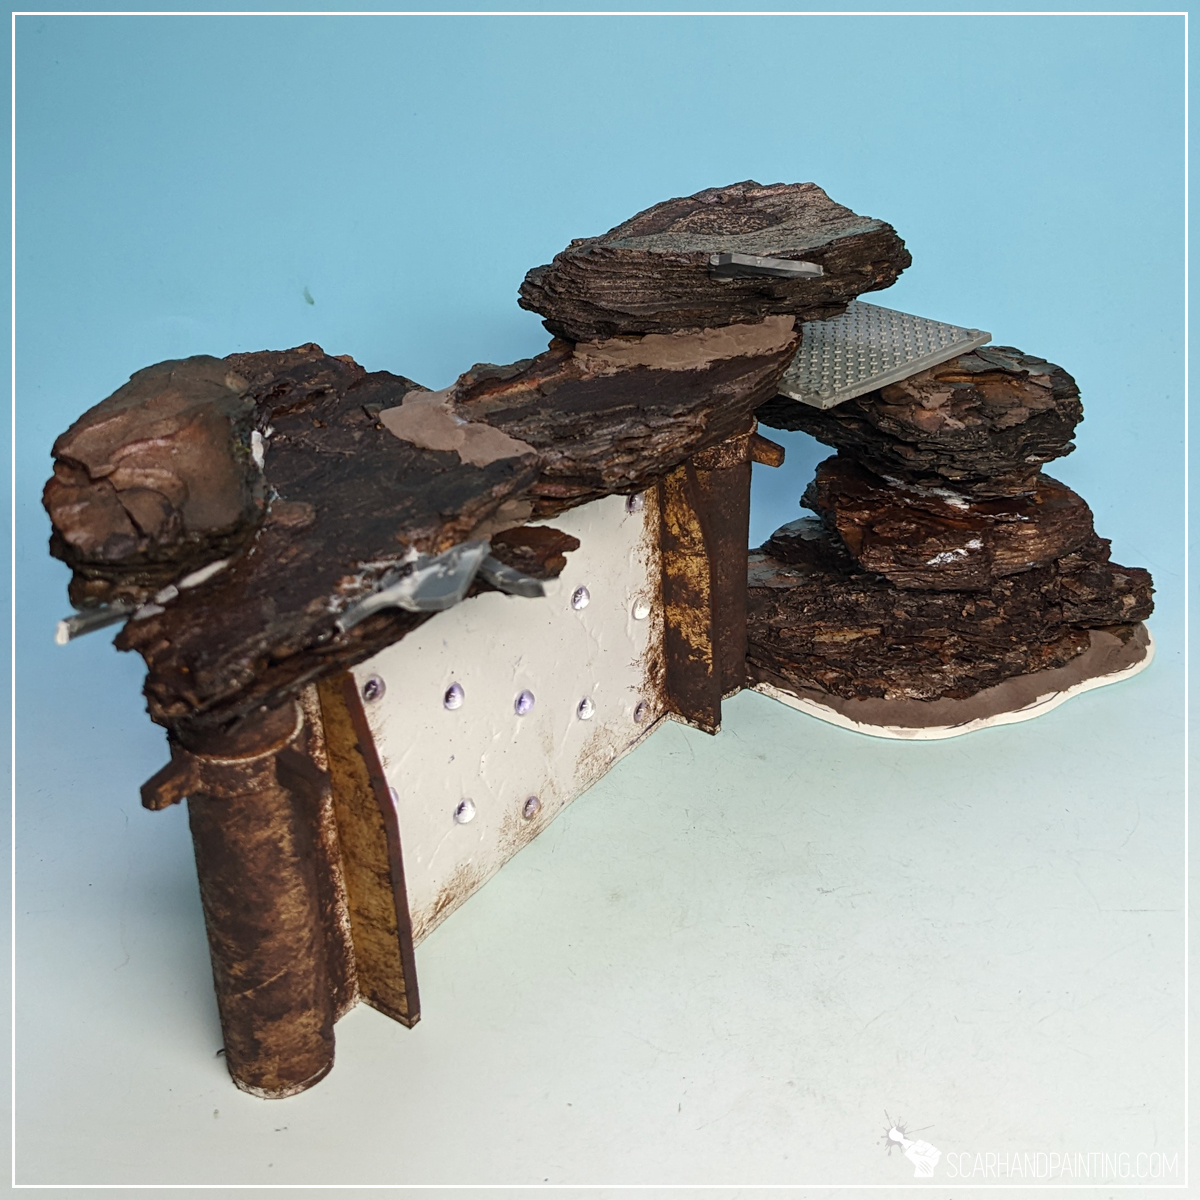
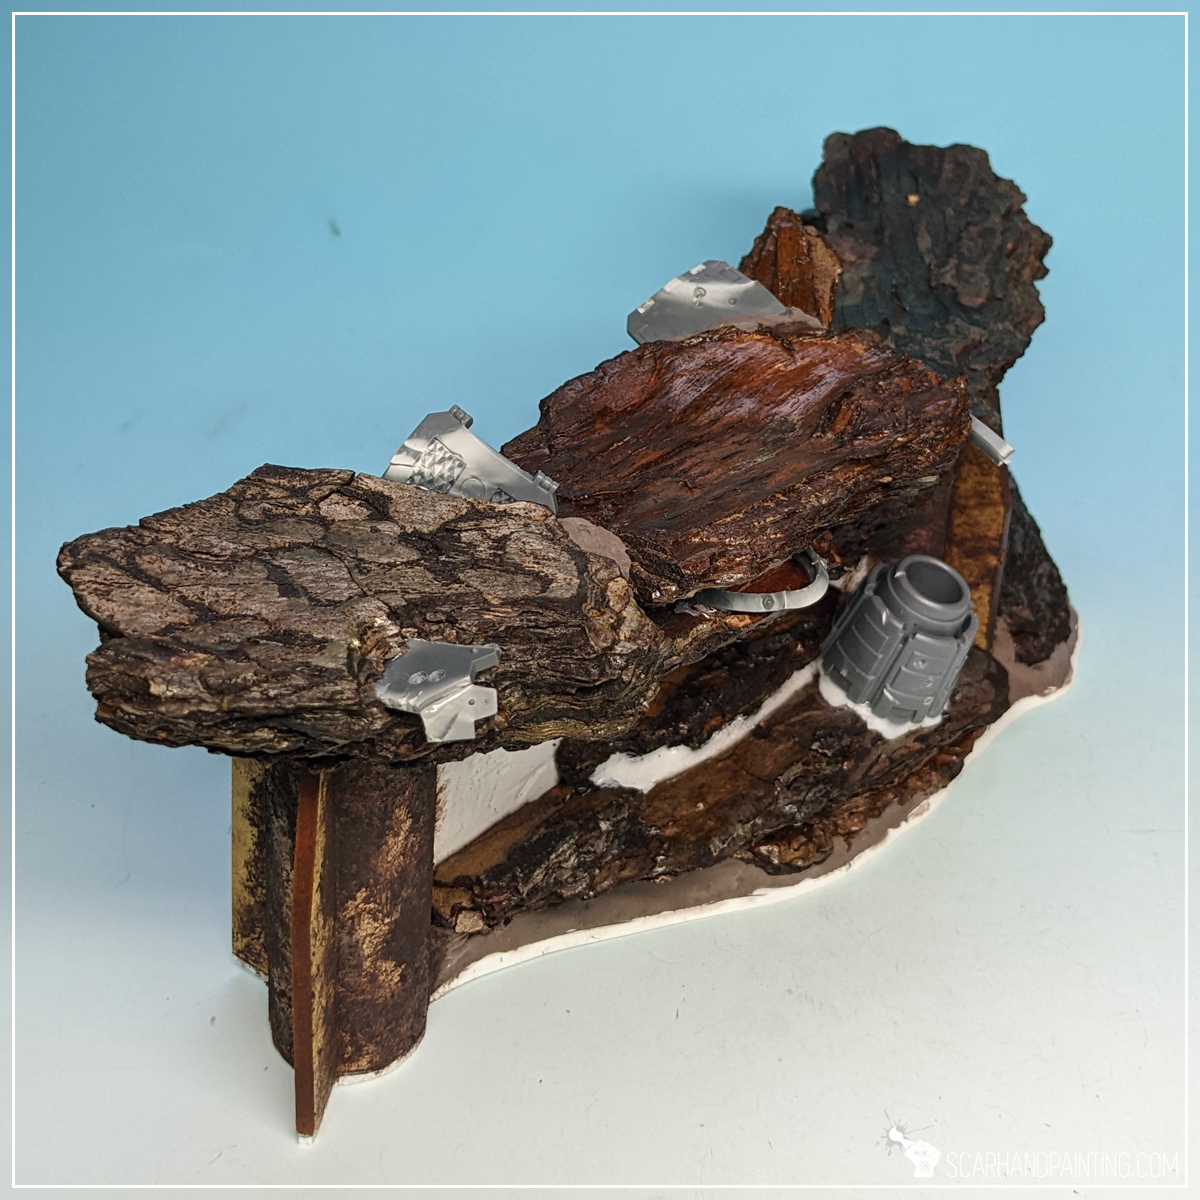
Everything looked fine already but I wanted to add some variety on paper and HDF elements. For this purpose I stippled Citadel Typhus Corrosion on some of the flat areas. Any texture will do and this step can even be skipped completely depending on what kind of detail is being added.
Undercoat:
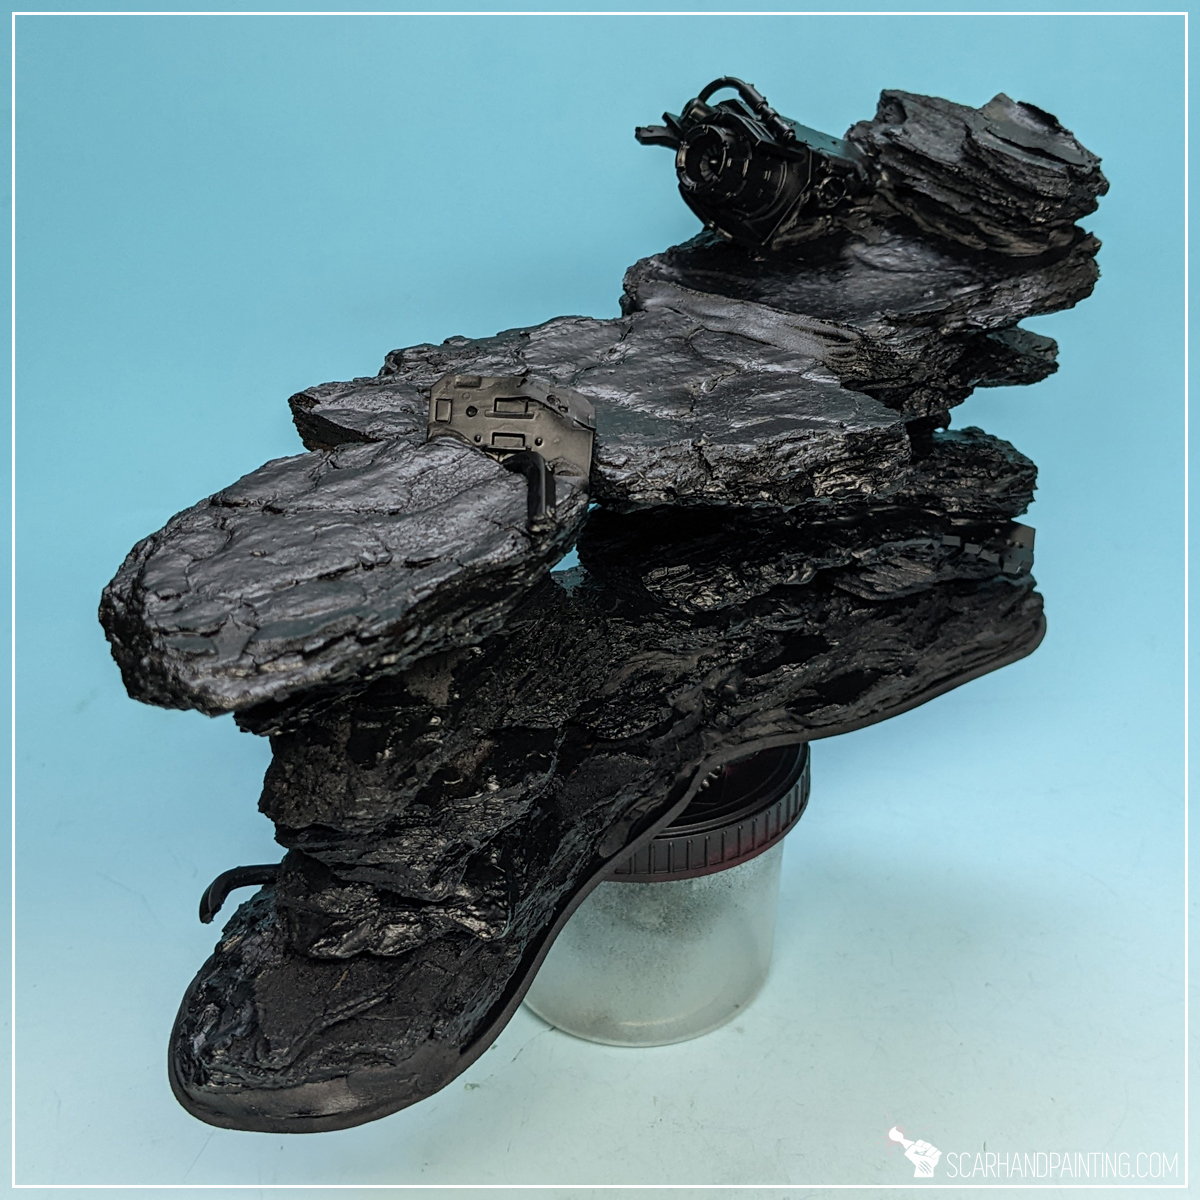
There are few ways to go about it. Usually when it comes do Styrofoam and wood I tend to undercoat manually with thick acrylic paints. In this case I had entire thing sealed with a mix of PVA glue and water, which allowed me to go with a spray can. I sprayed everything with a cheap matt black spray. I always undercoat miniatures with Citadel Chaos Black. With DiY scenery I found crude cheap sprays work very well, providing a thick, hard layer and adding a bit of additional protection from scratches.
Painting and Textures:
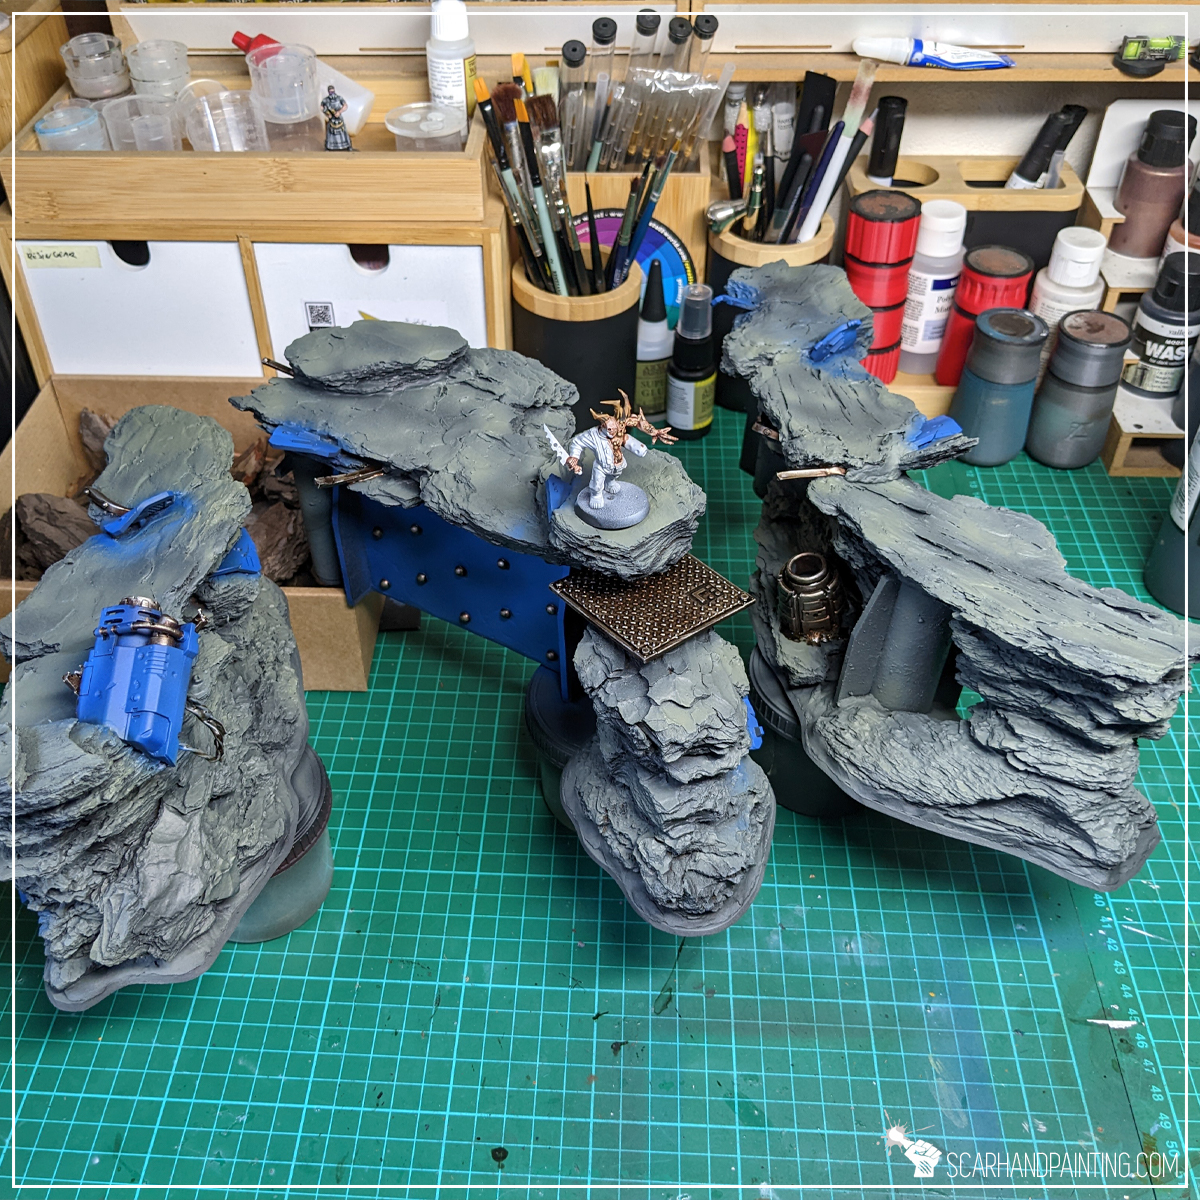
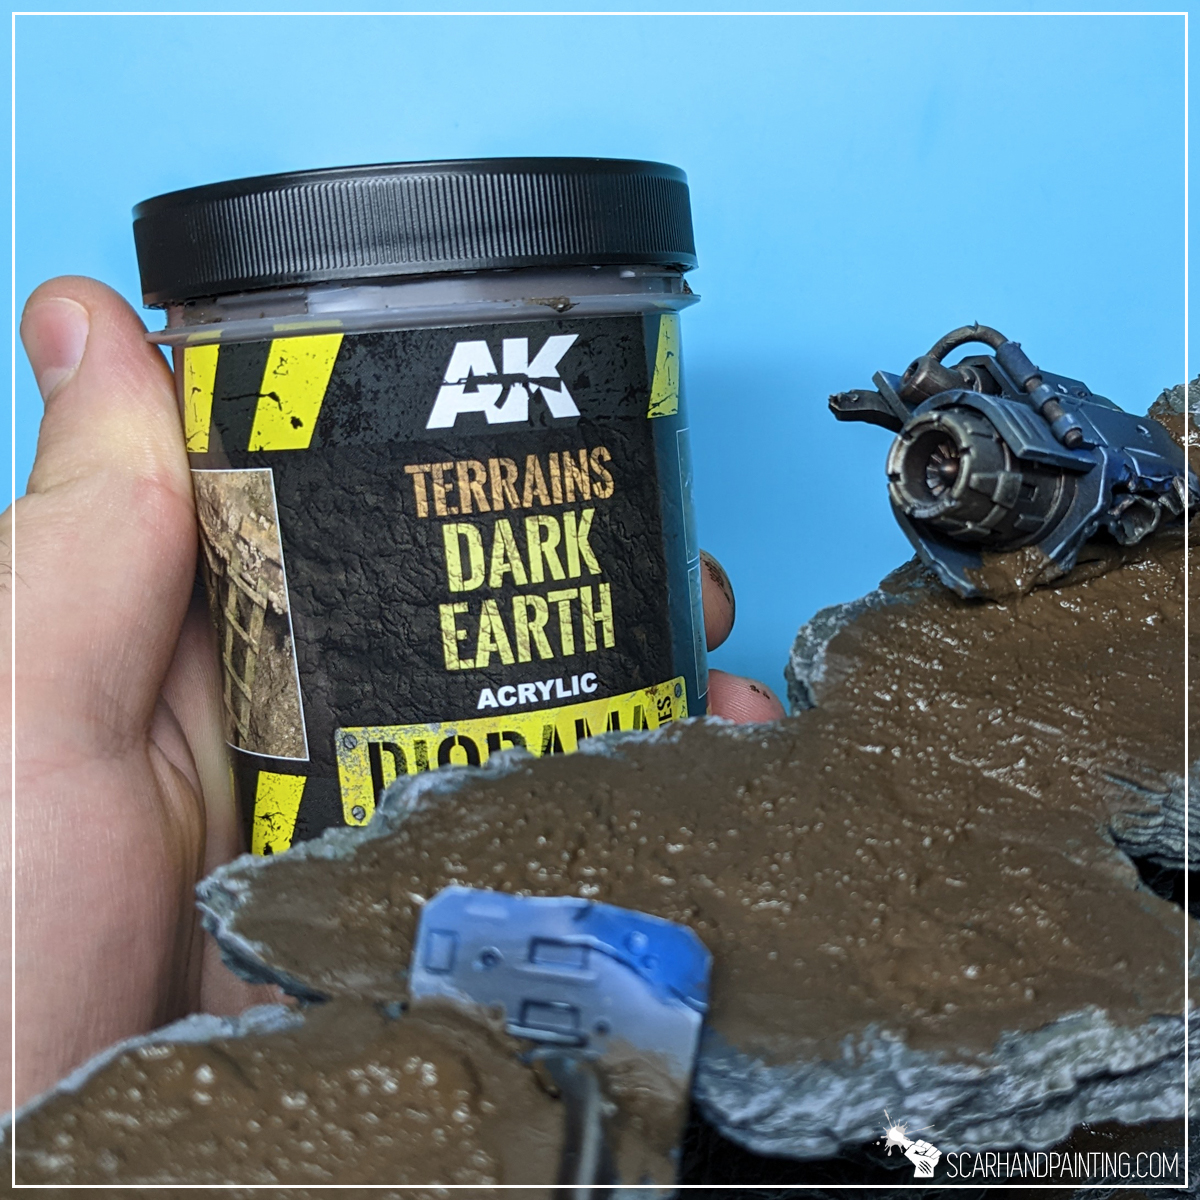
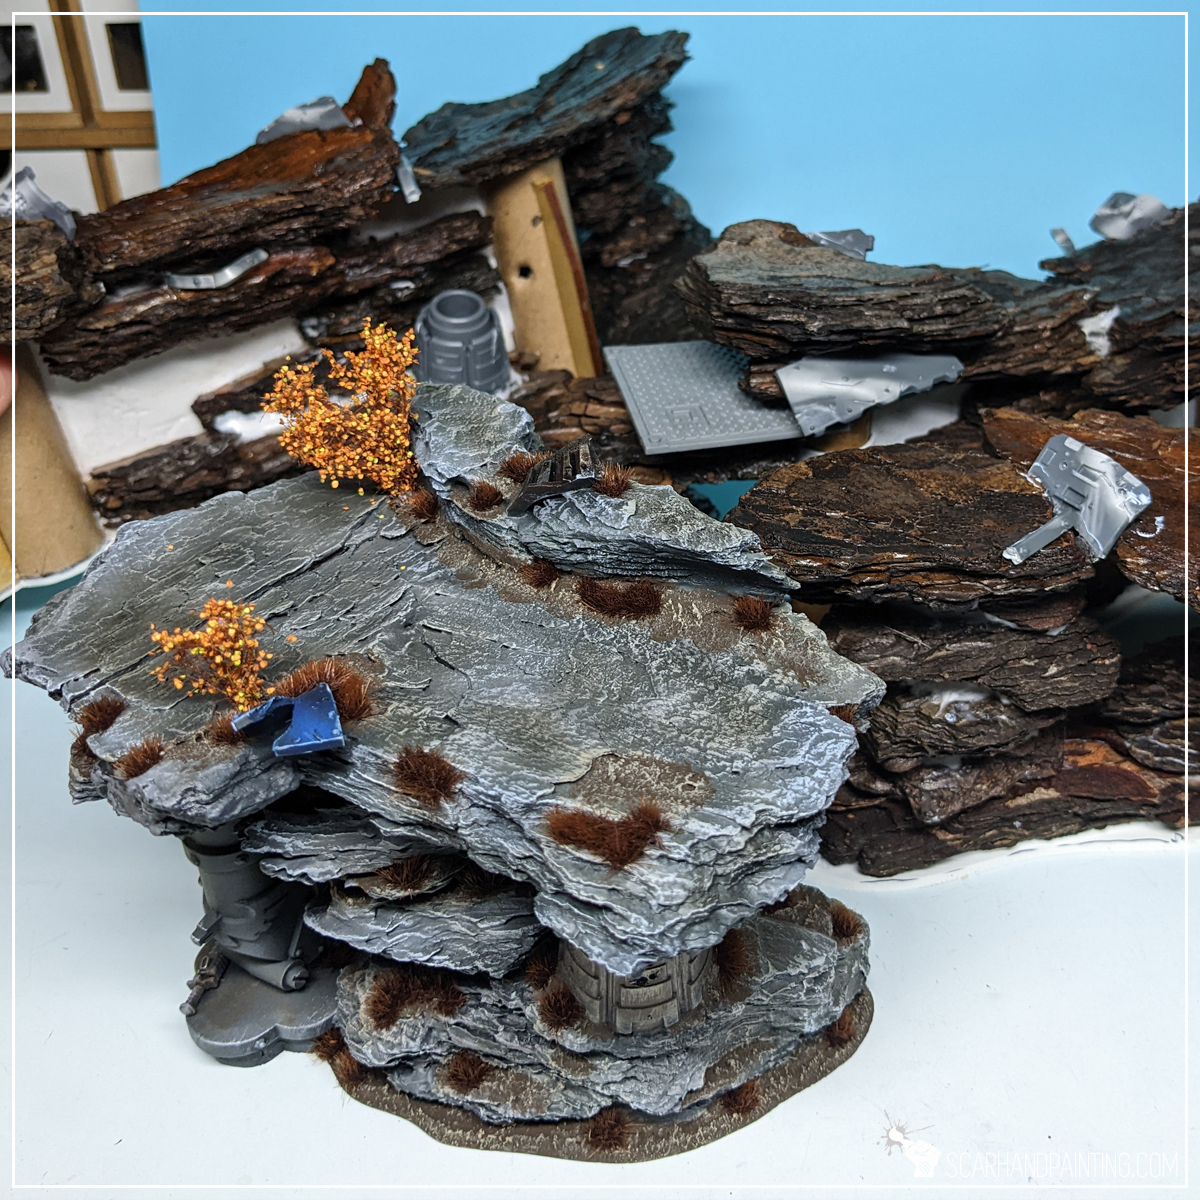
This one I will allow myself to skip, as there is plenty of tutorials and color recipes available on my blog already. Painting is more about personal tastes and available tools. One thing of note is AK Interactive Dark Earth texture. I used it on this particular scenery set and I really recommend this product to everyone. You can learn more about this godlike texture in this article here.
Anyhow – that’s it! Pretty neat looking rocky formations, in this case fit for both Kill Team and Warhammer 40,000, are done! I wasn’t saving on extra detail, but if I did, the entire set would cost me pocket change.

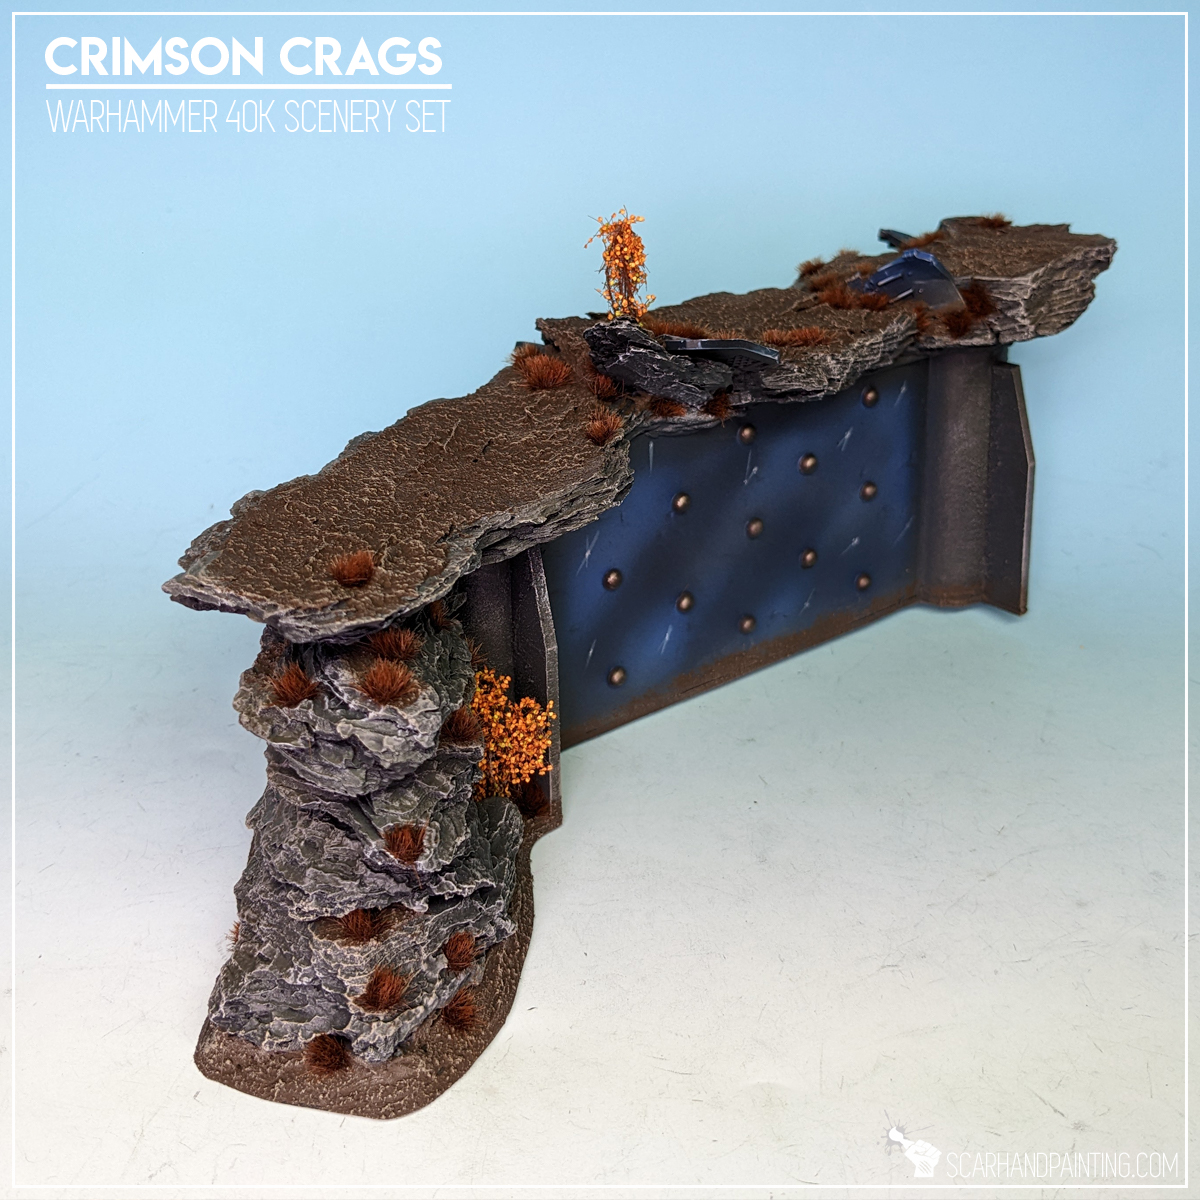
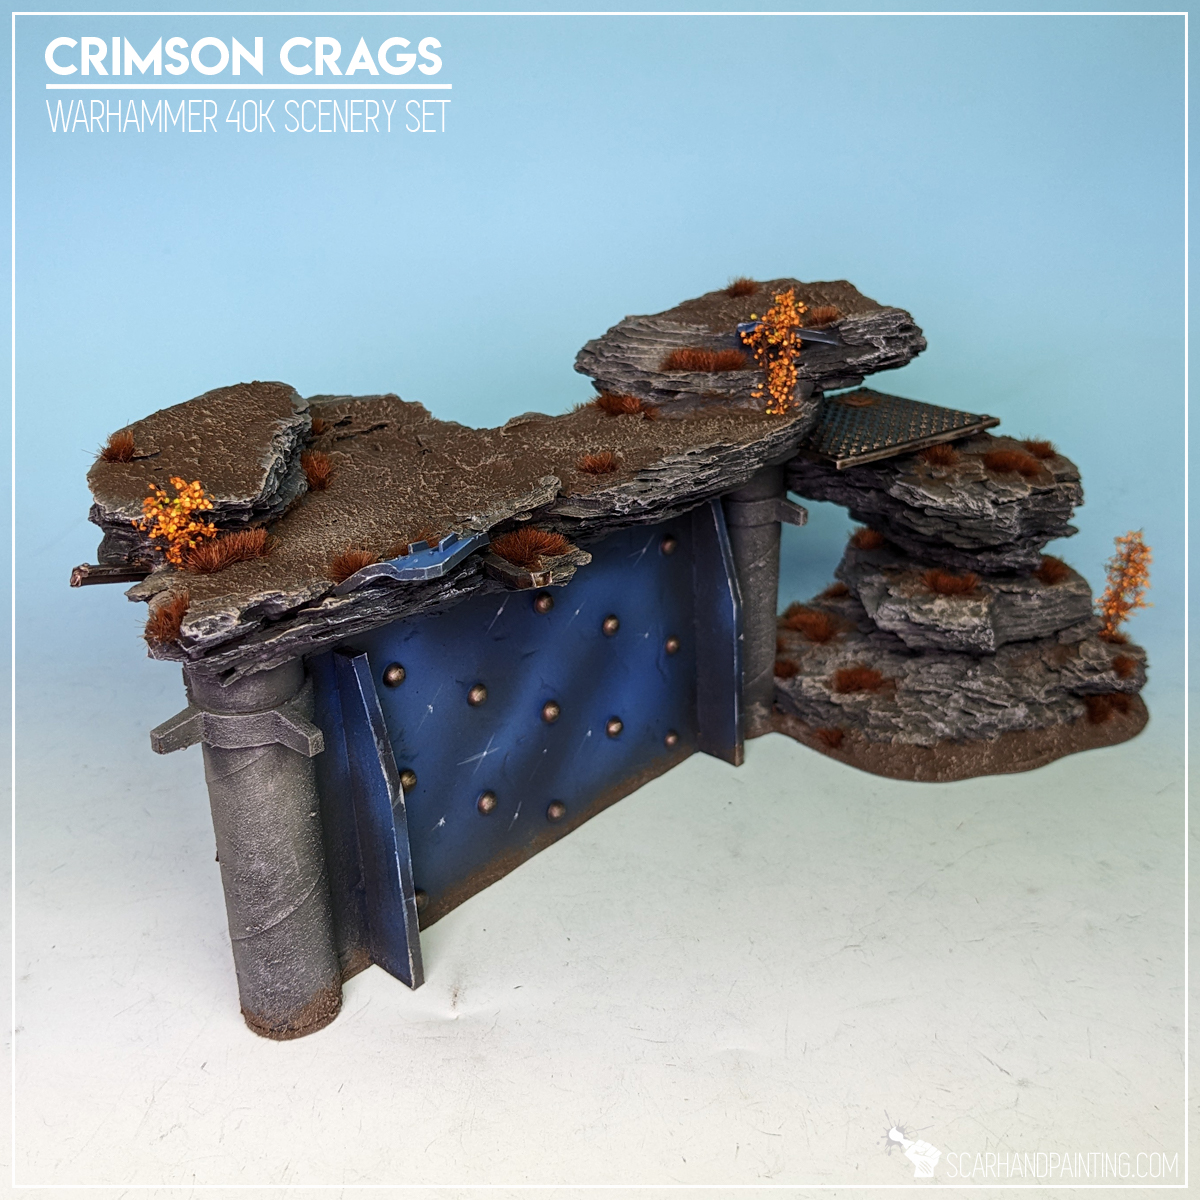
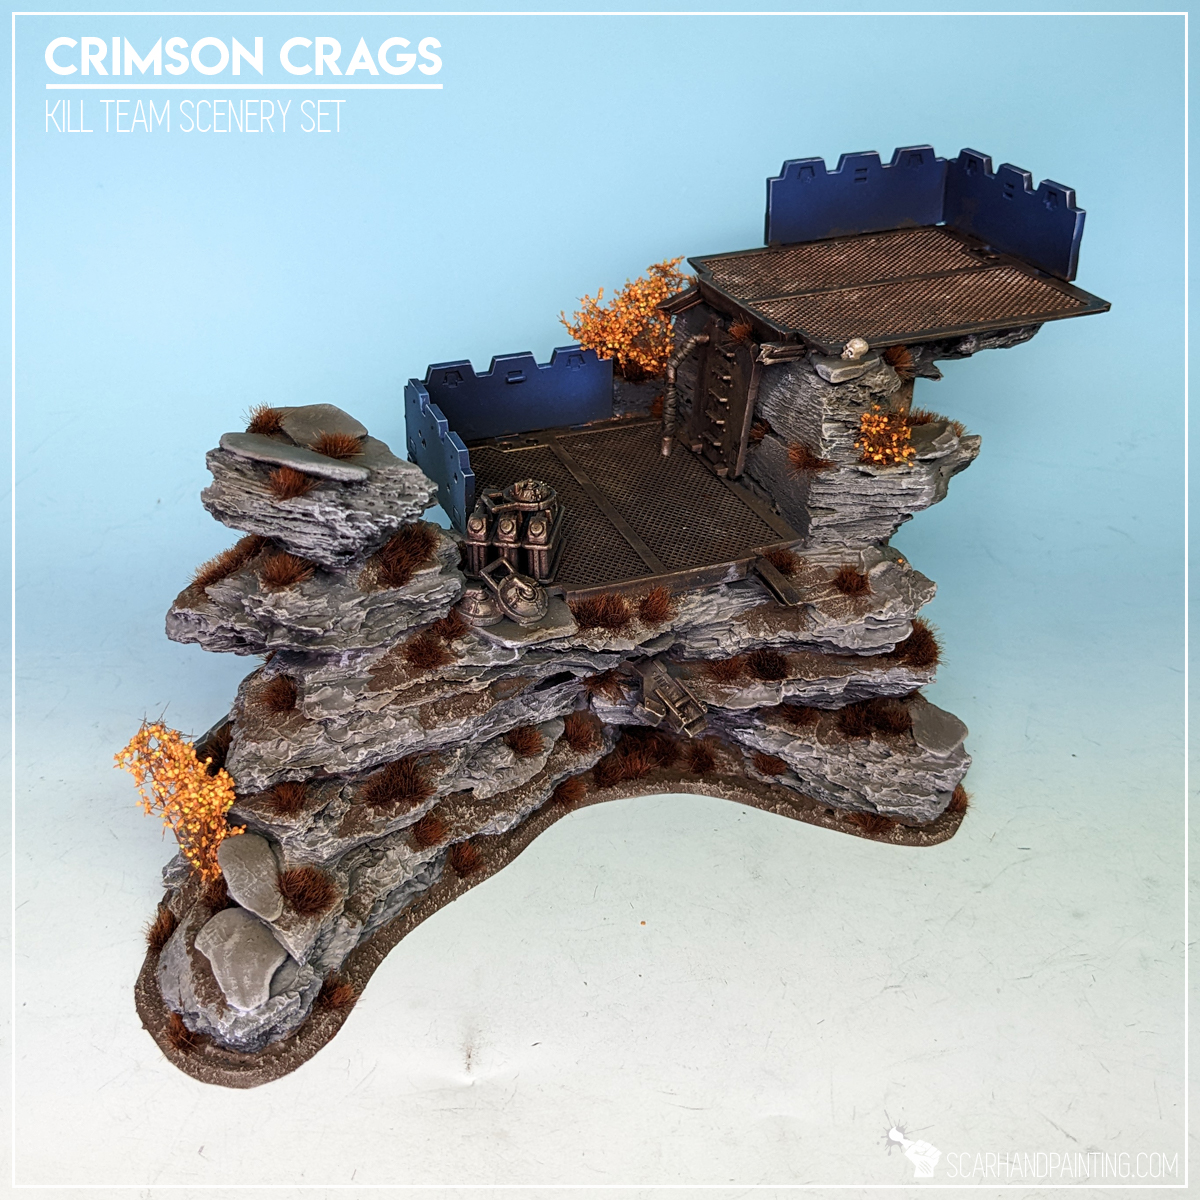
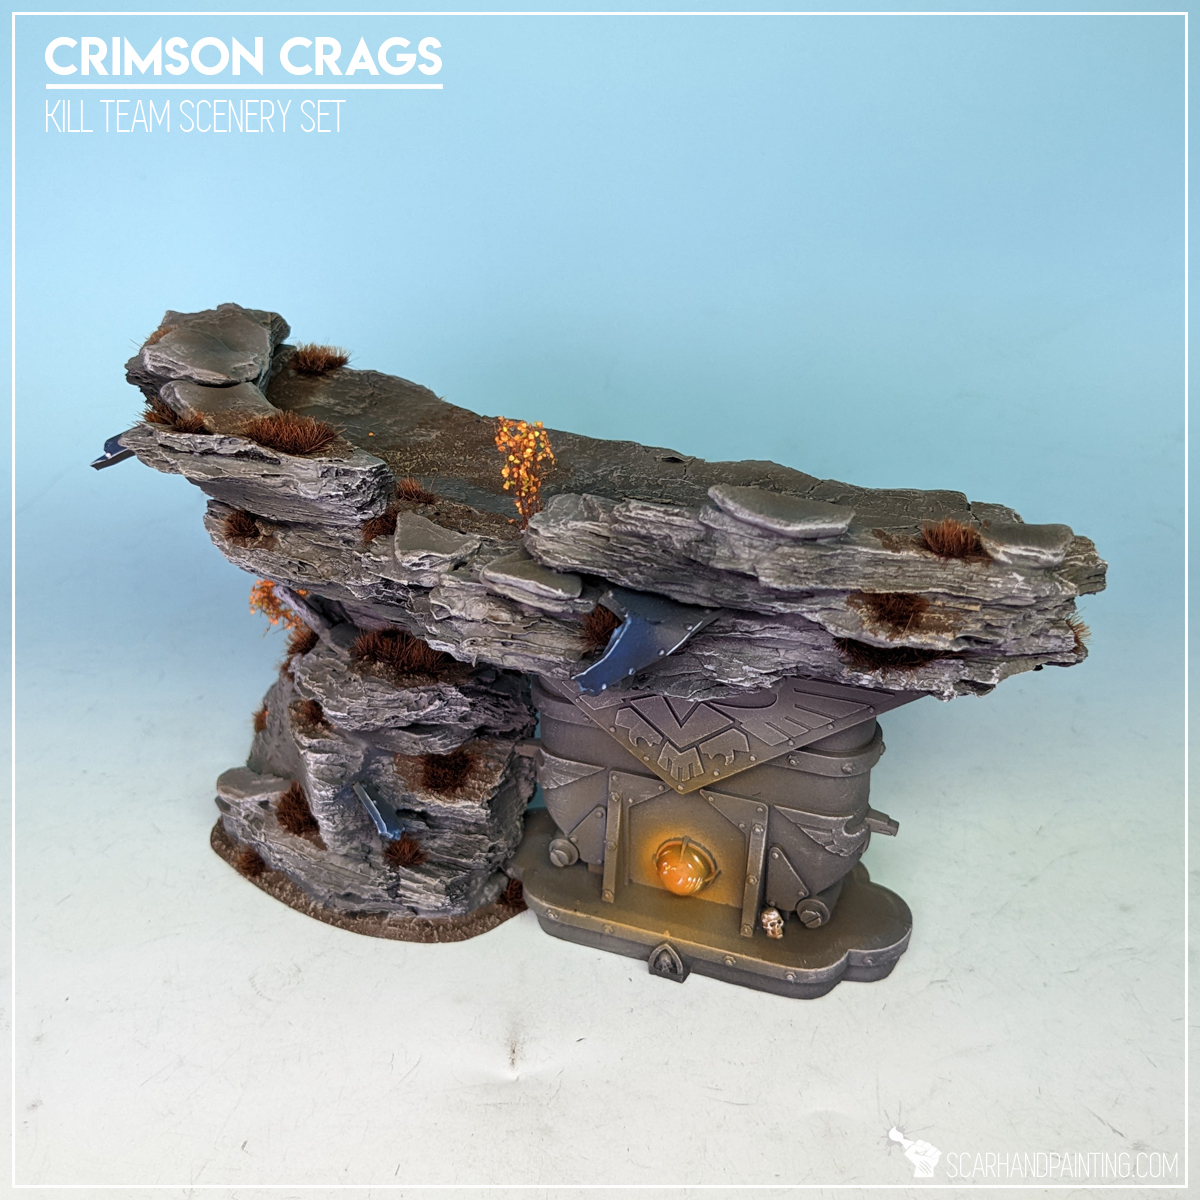

I hope you find this tutorial interesting. Be sure to let me know your thoughts in the comments below or via Facebook or Instagram. I would also appreciate if you considered sharing this content with your friends, who might find it useful. Finally if you are looking for a professional warhammer 40k miniatures painting service, be sure to contact me with this contact form. I always reply within 24 hours, after which please check out your spam folder.

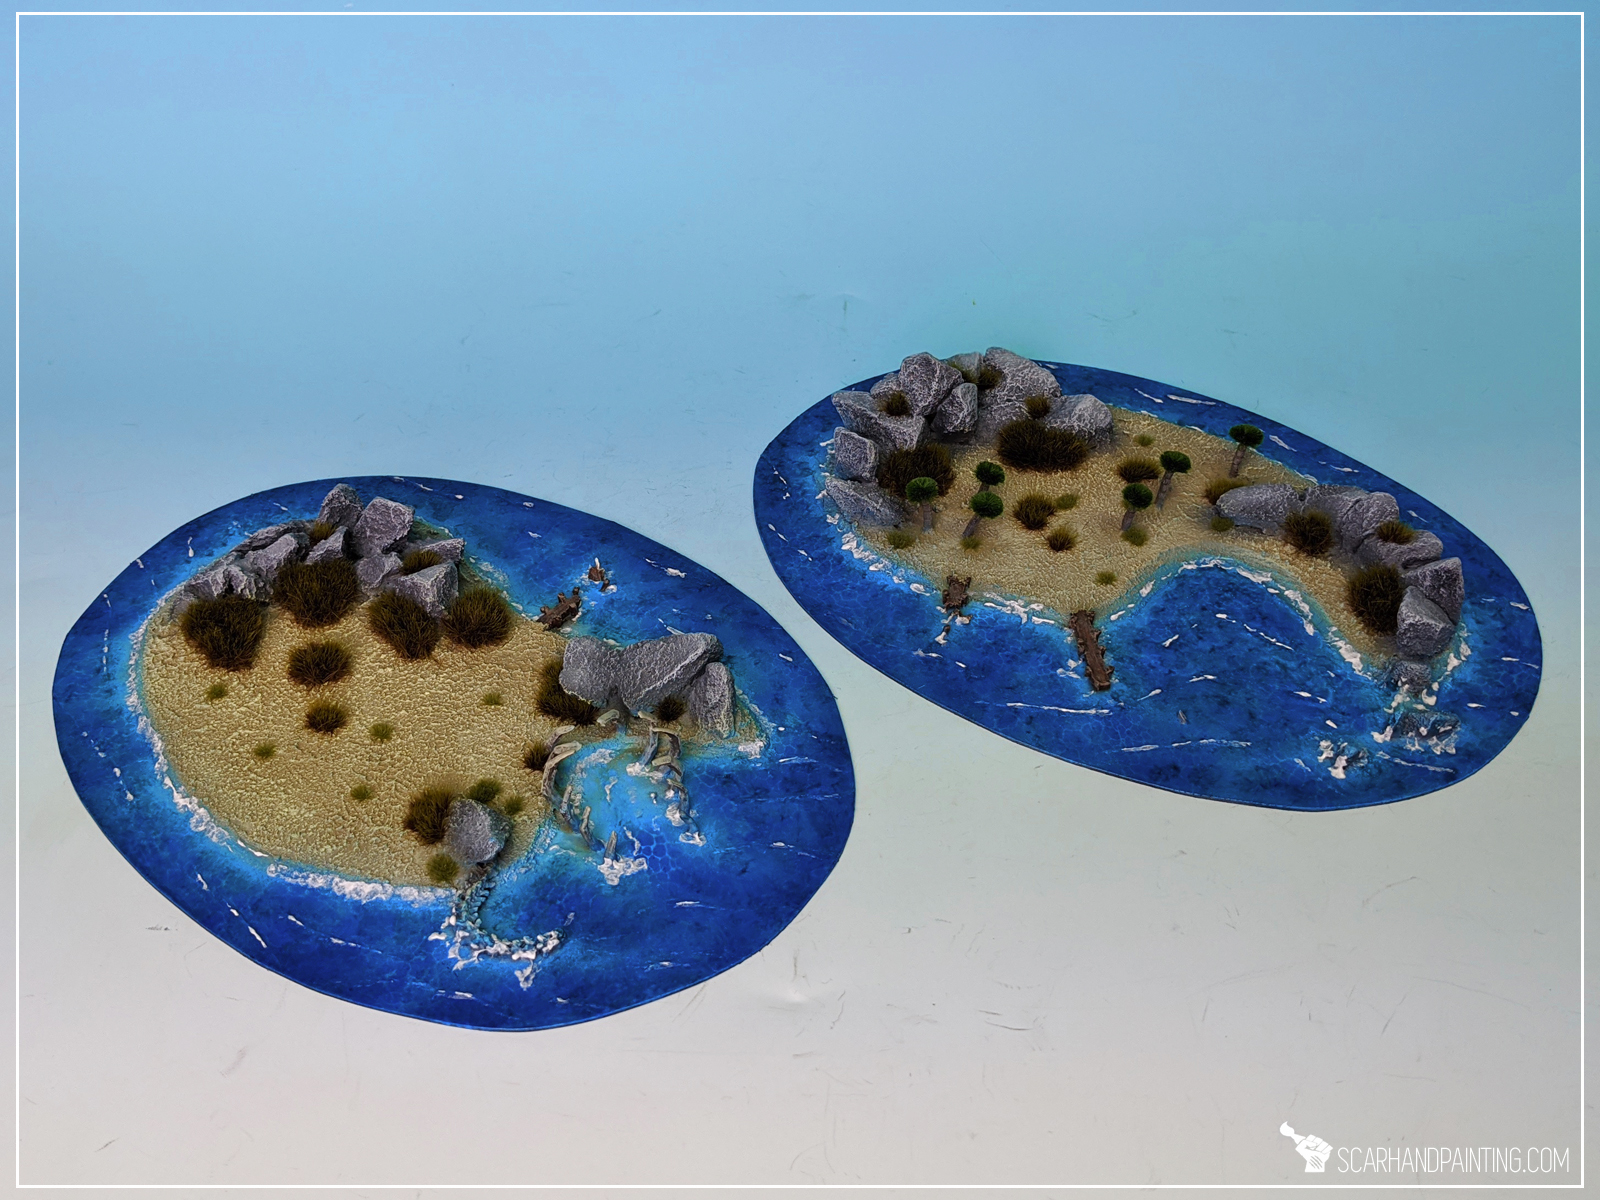
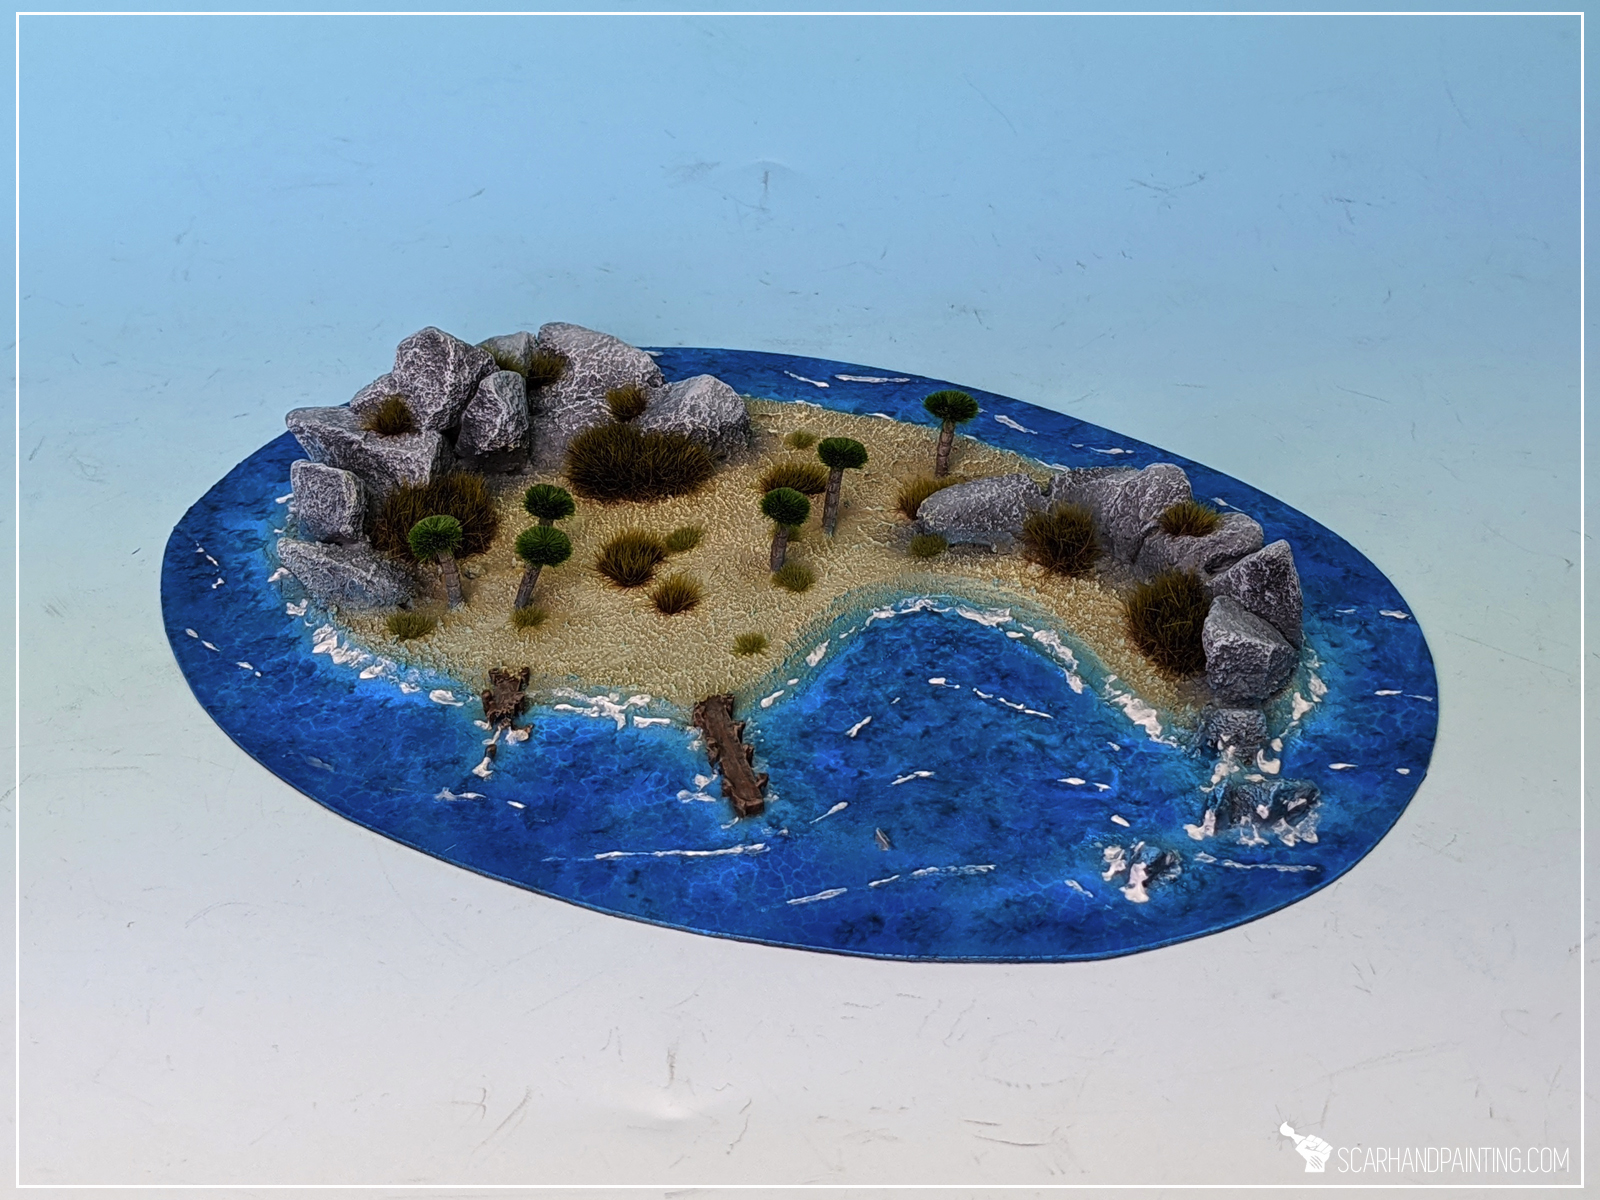
Welcome to Kings of War Armada Islands tutorial. Here I will take you on a Step-by-step trip through the process of creating and painting DiY islands scenery for Mantic Games Kings of War Armada as presented in the picture below.

Before we start, some notes:

Playing a friendly game on a set of fully painted and modeled scenery is always a great experience. In my opinion there’s nothing better than to let yourself go “full immersion mode” during a game of plastic dudesmen, or in this case – resin boats. That’s why I decided to create a set of appropriate scenery and use this opportunity to let you in on some of my hobby secrets.
When planning the set and how to make it my priorities were ease of build (and copy), durability, stability and obviously cool looks! Thus choice of material being mostly PCV and stones. PCV sheets are easy to work with, stay flat and are very glue friendly, whereas stones provide cheap and easy to use terrain features that will add weight and improve stability of the scenery pieces. With that in mind – let’s begin!
Step one: Basic shapes
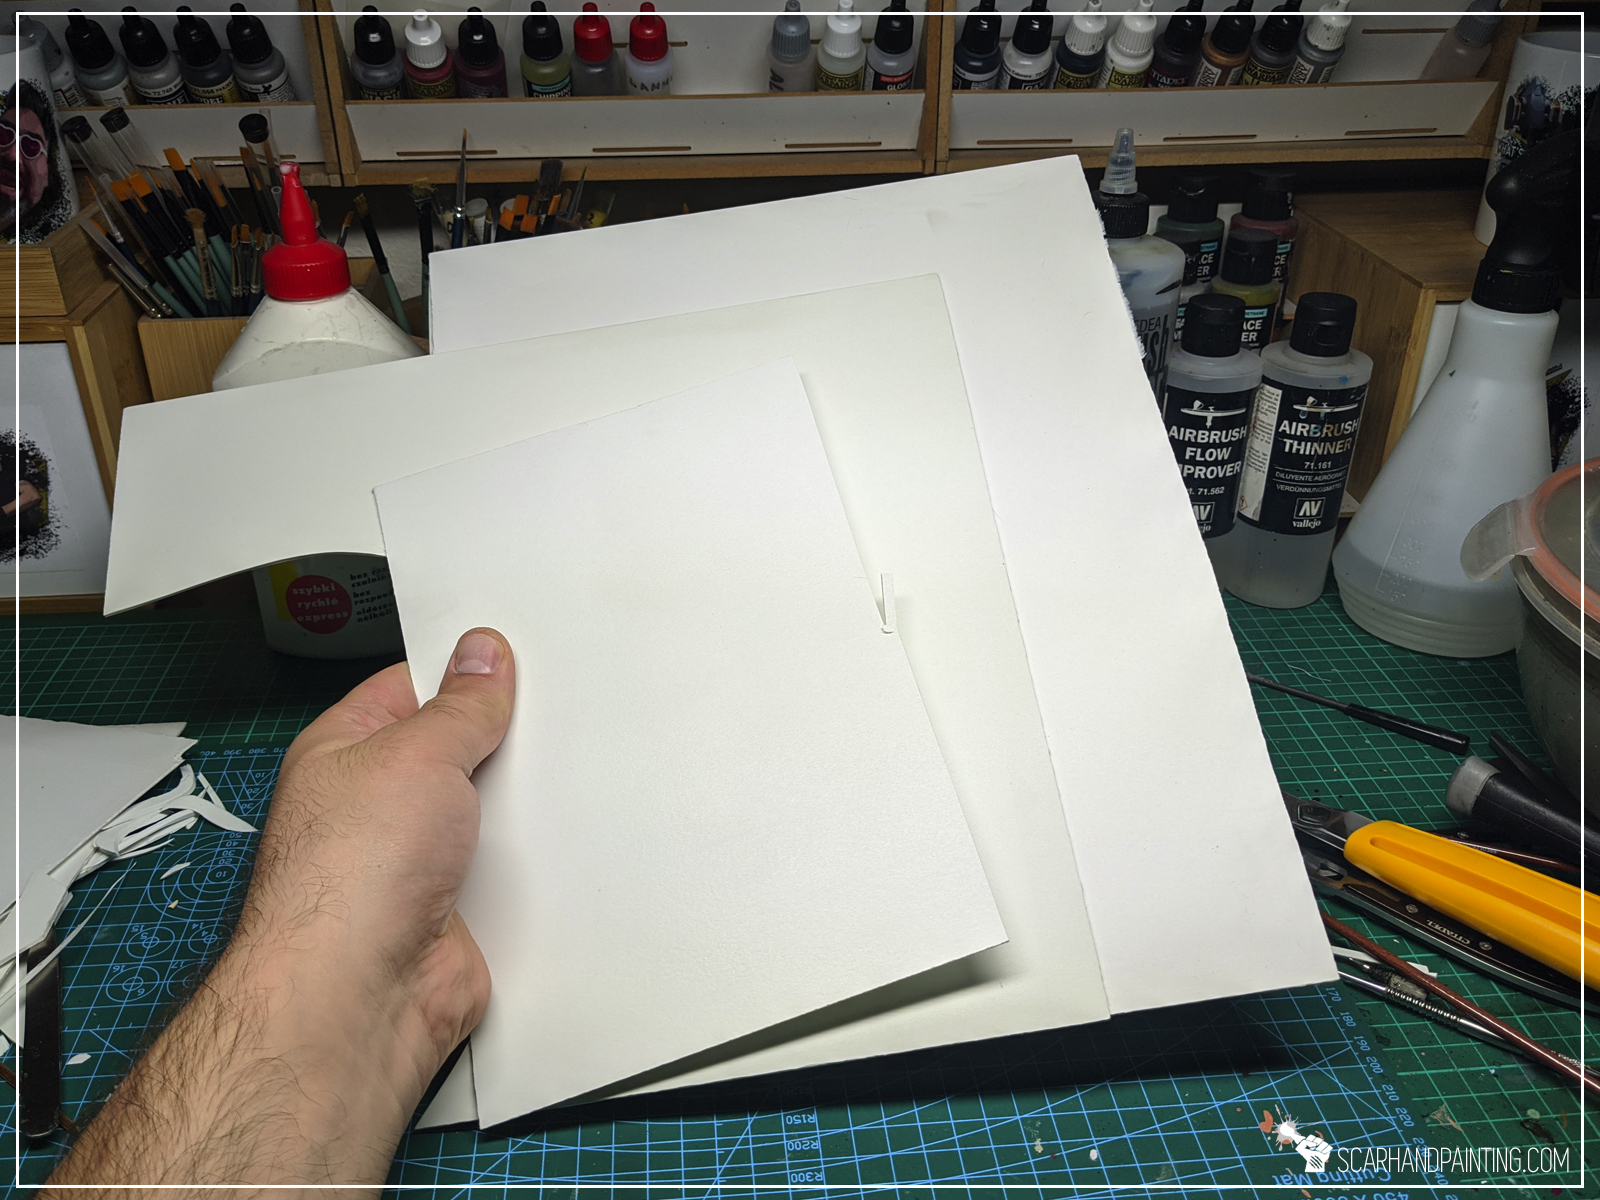
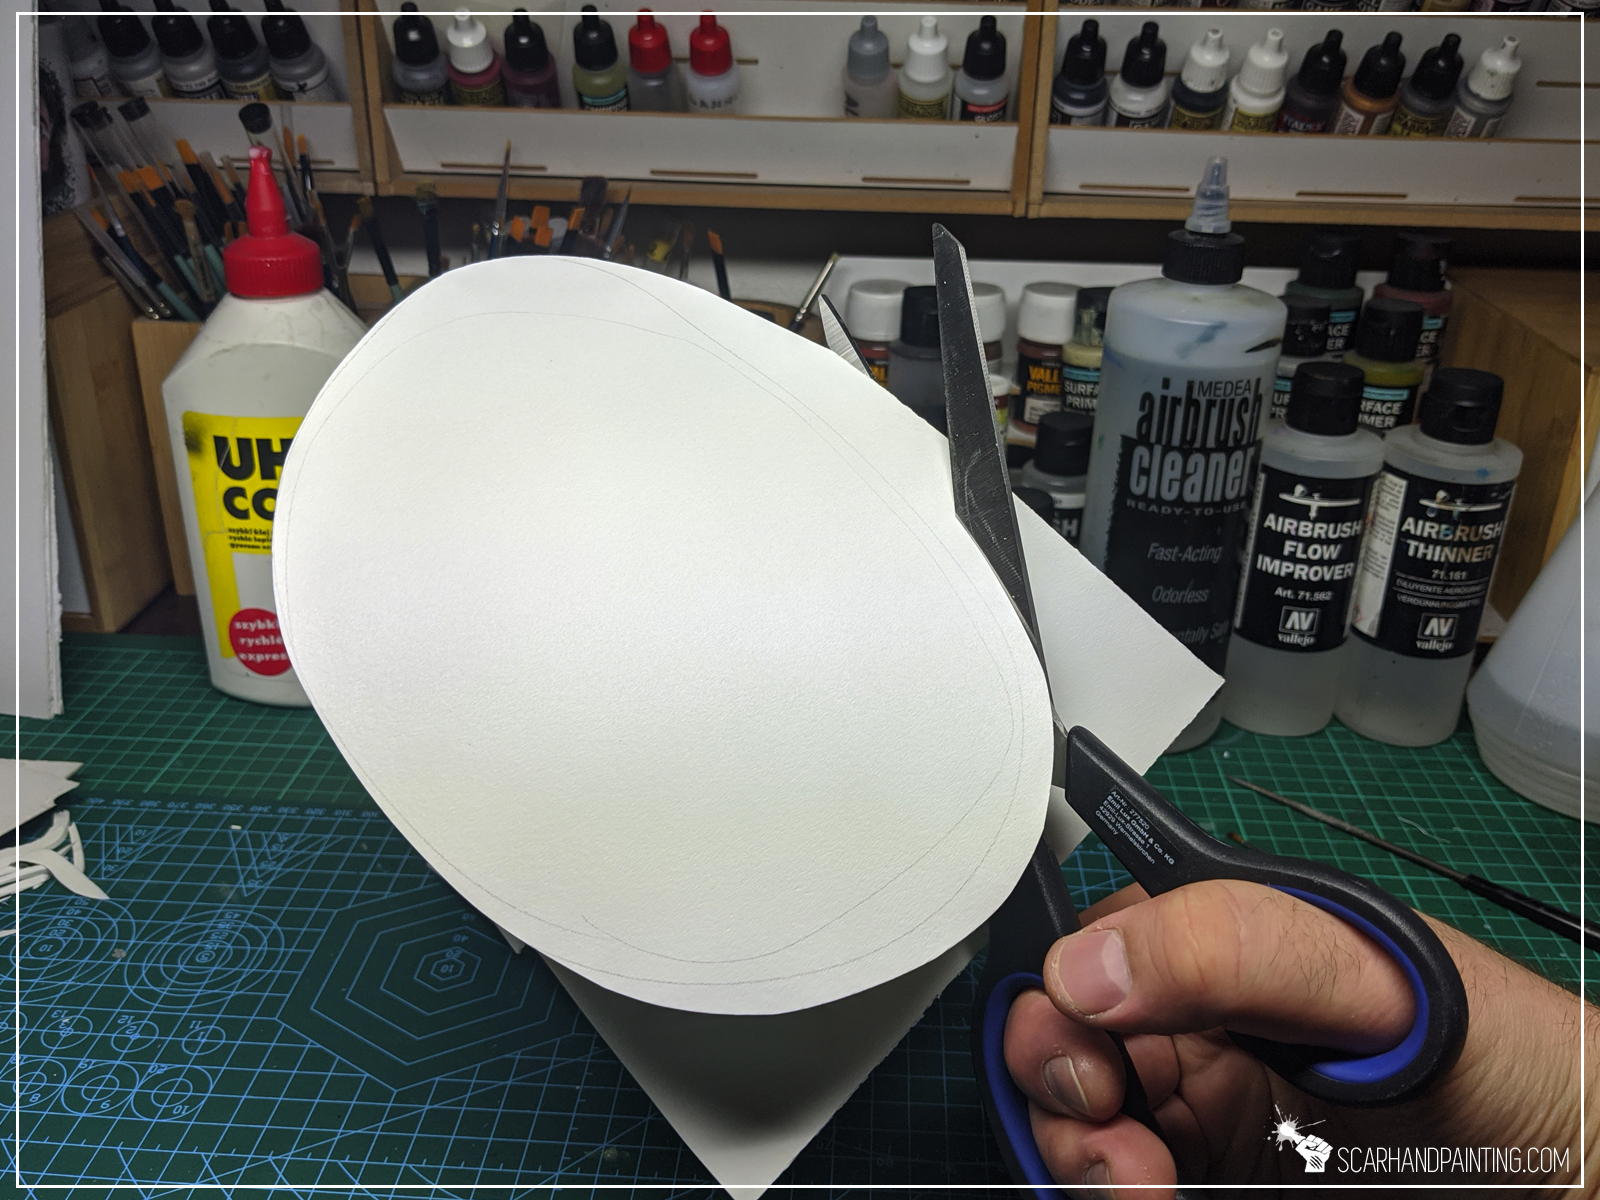
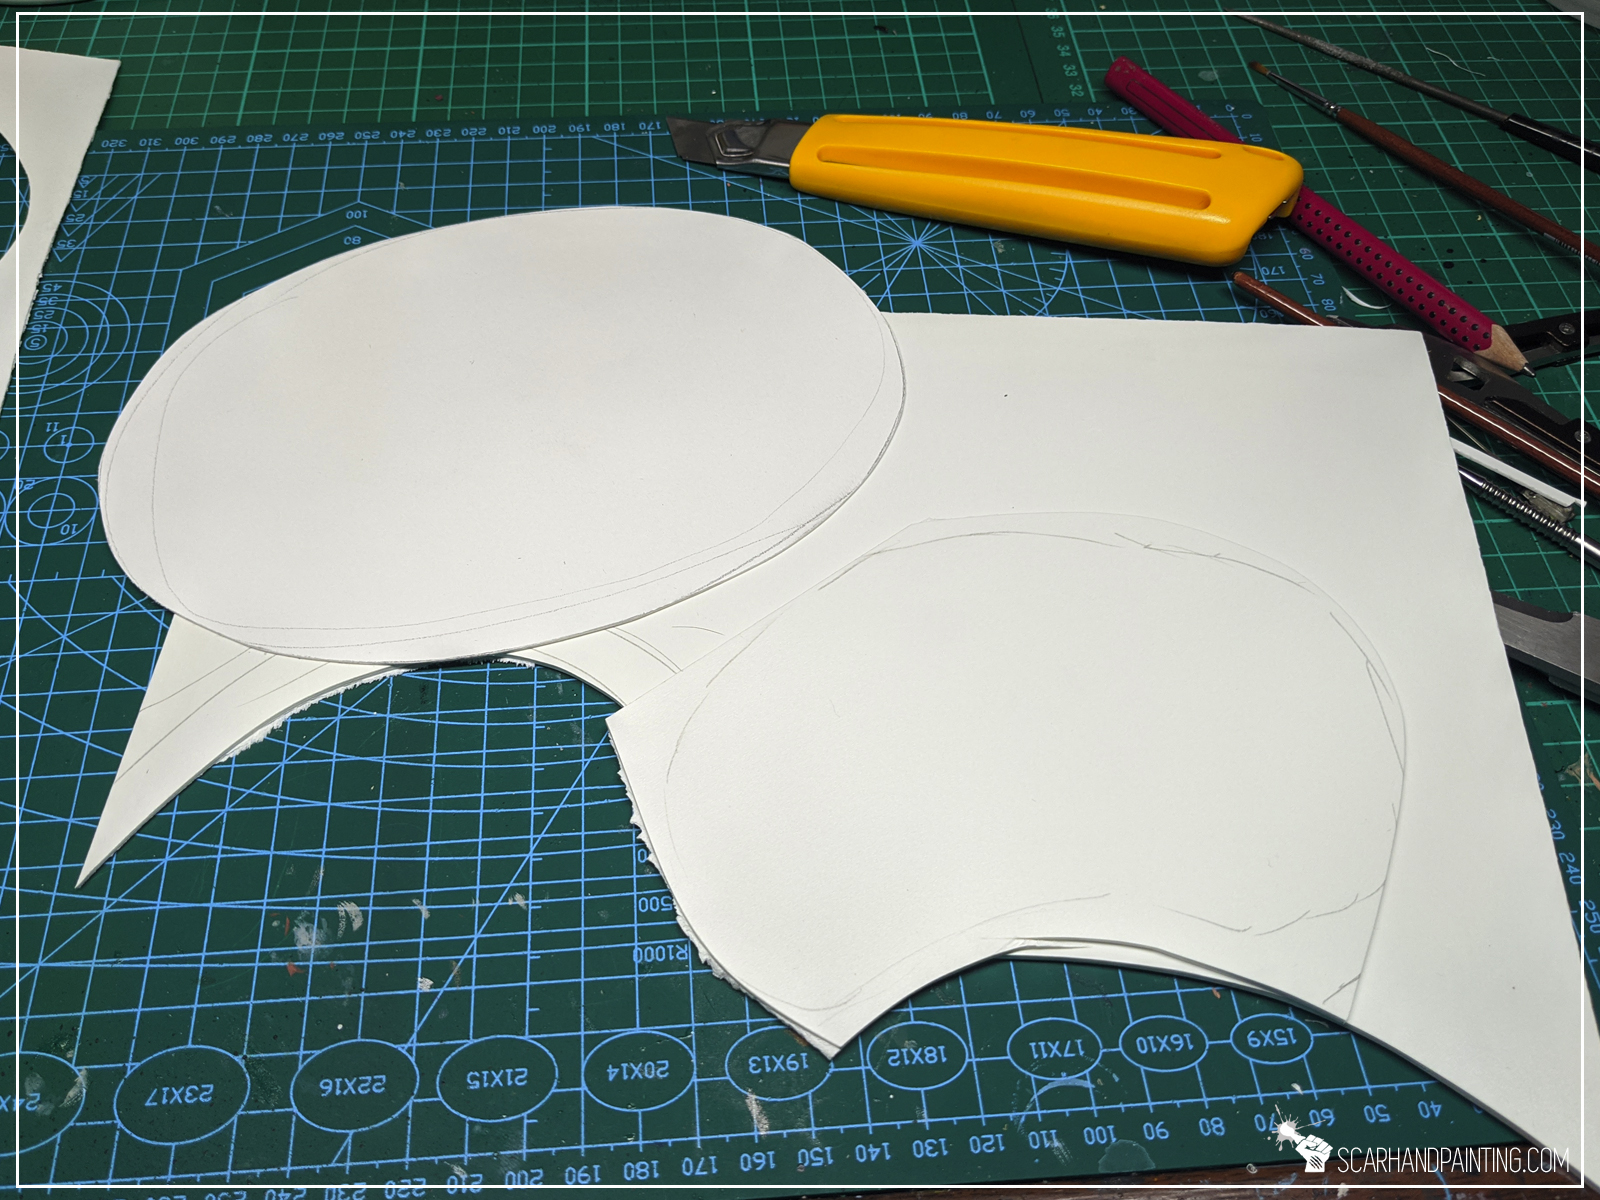
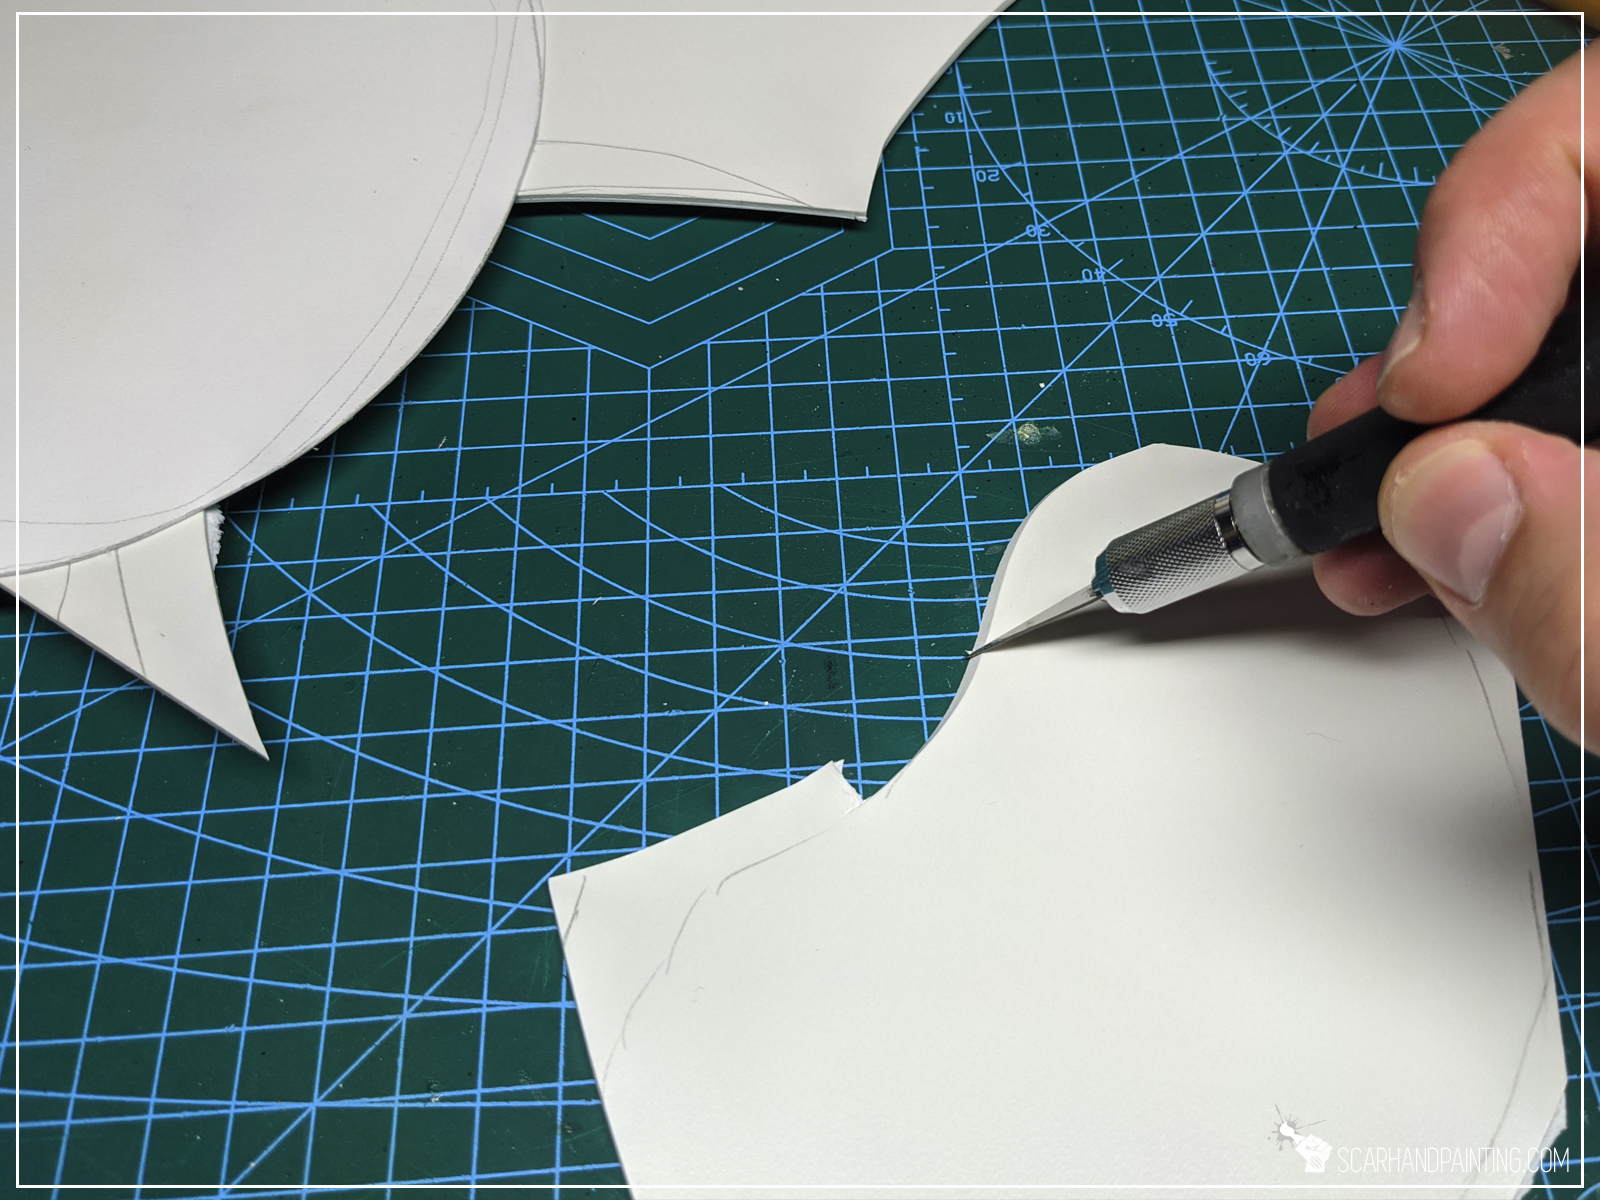
I started by cutting a island’s base out of 1mm thick PCV sheet with a pair of scissors. I then smoothed the edges with a piece of sandpaper.
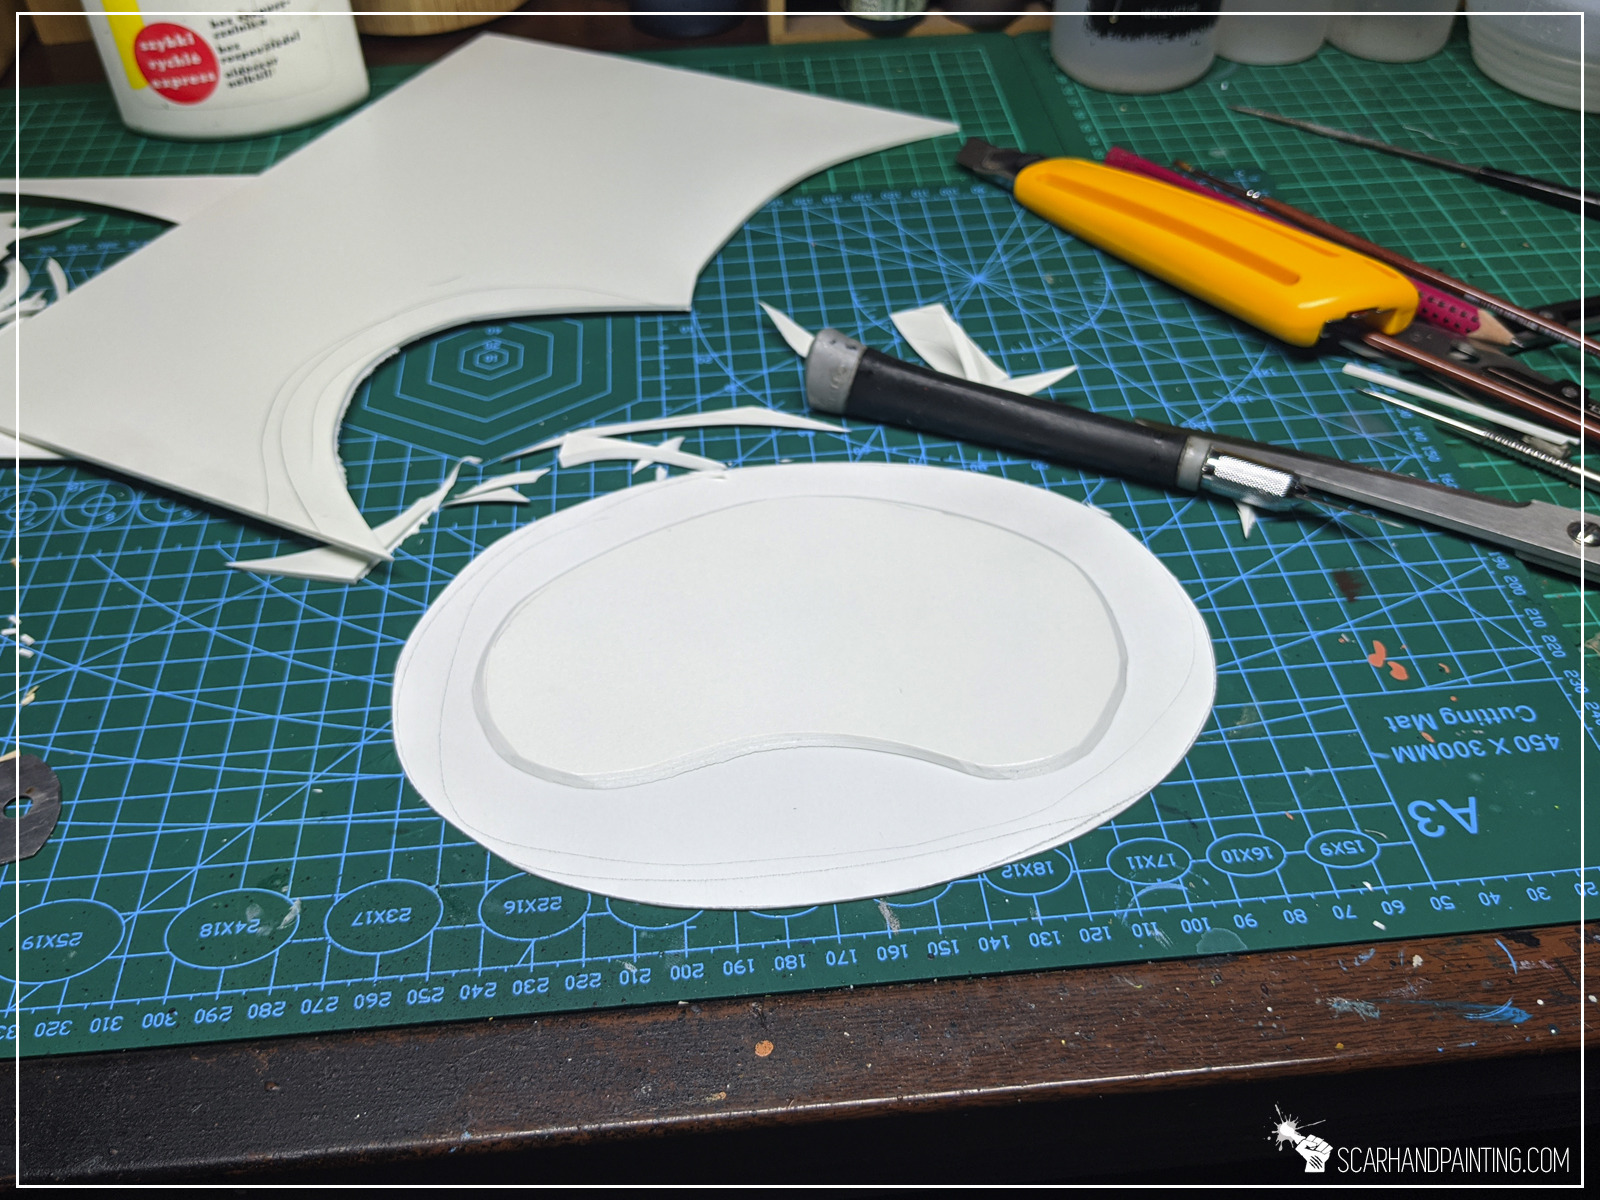
Next, using a hobby knife, I cut the island itself. This time I used 3mm thick PCV and cut the edges at a 30-45* angle, leaving approximately 1,5cm of the base all around the island. Once done I glued both pieces together, using Army Painter’s Super Glue.
Step two: Rocky features
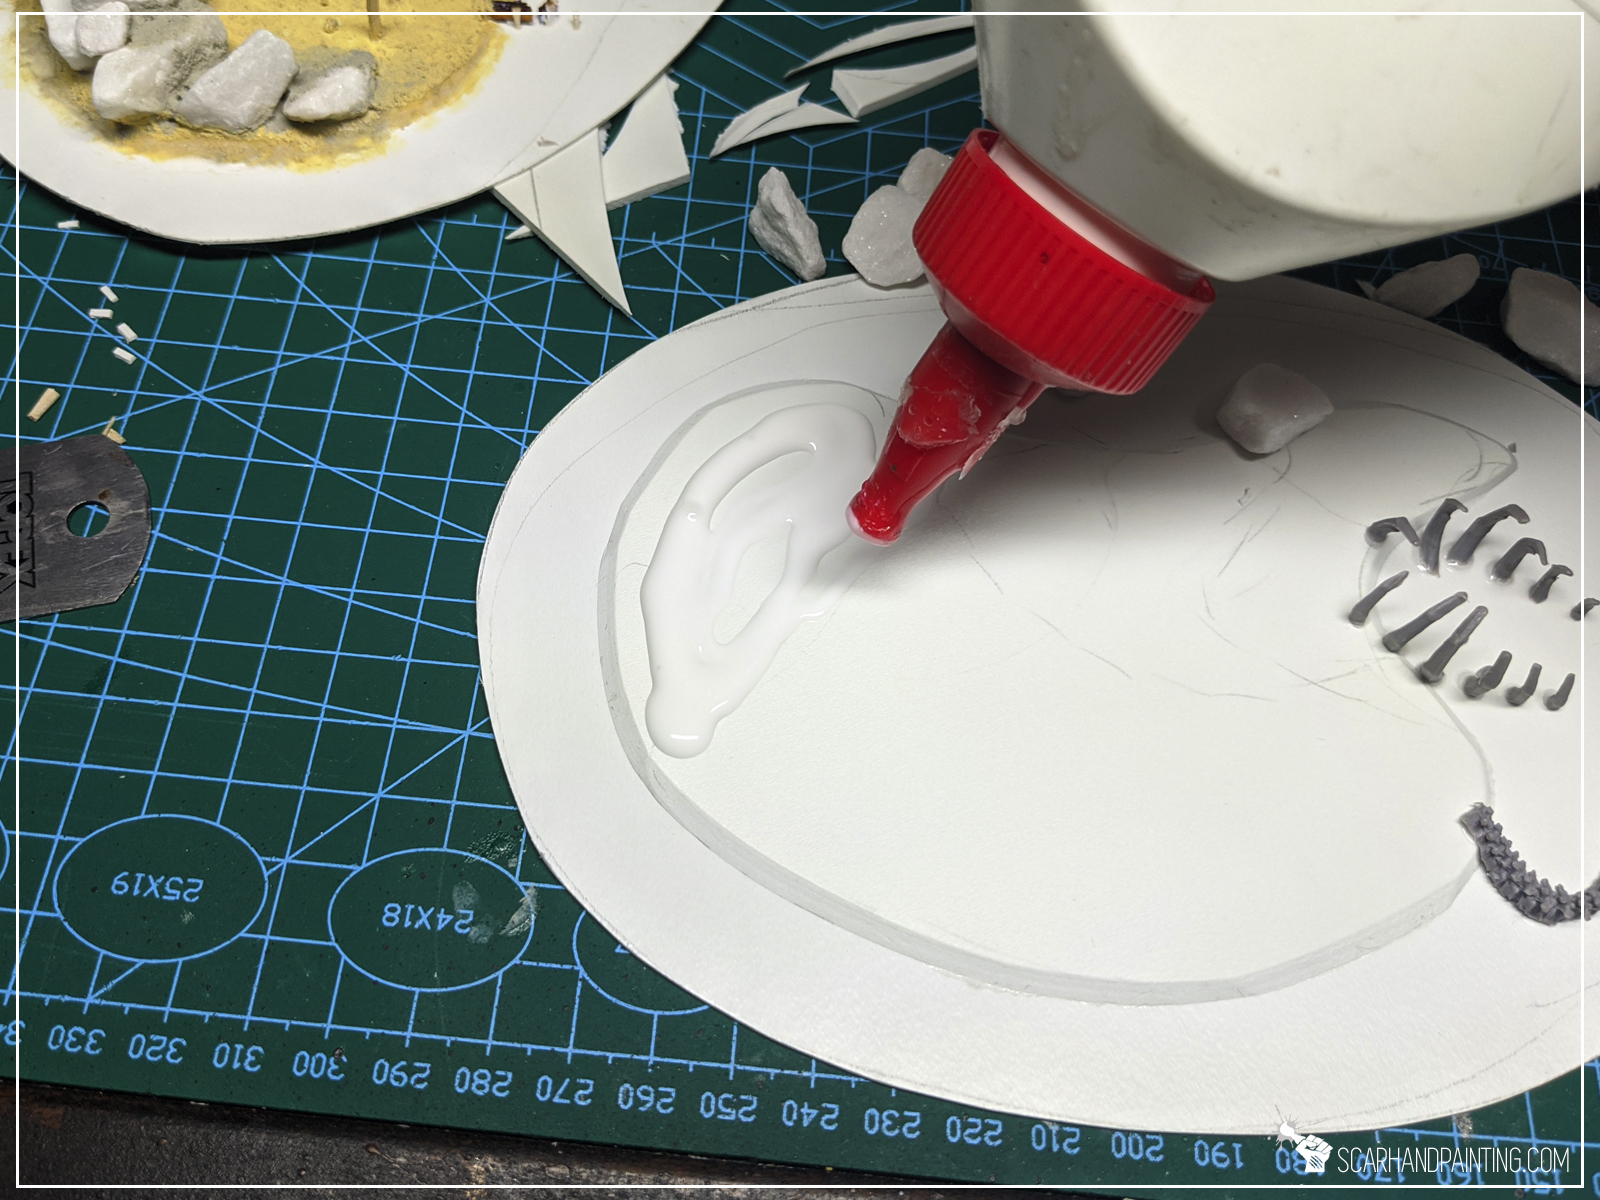
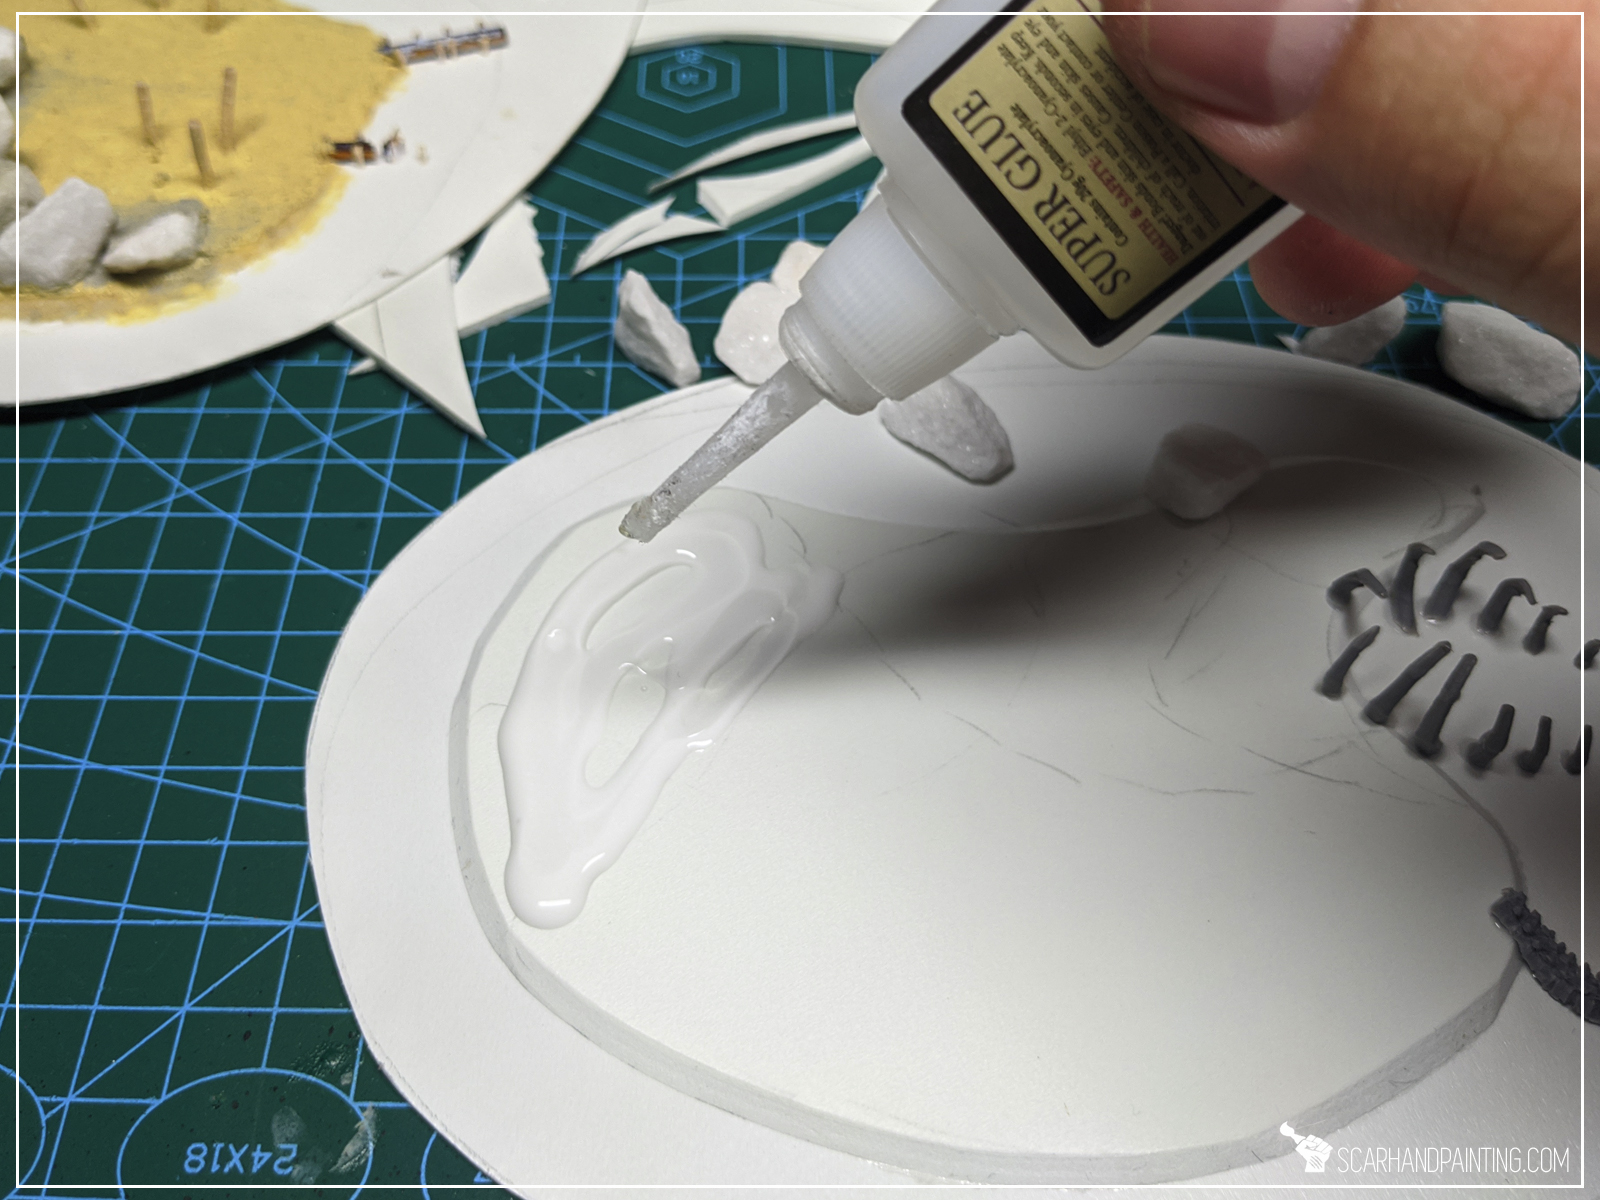
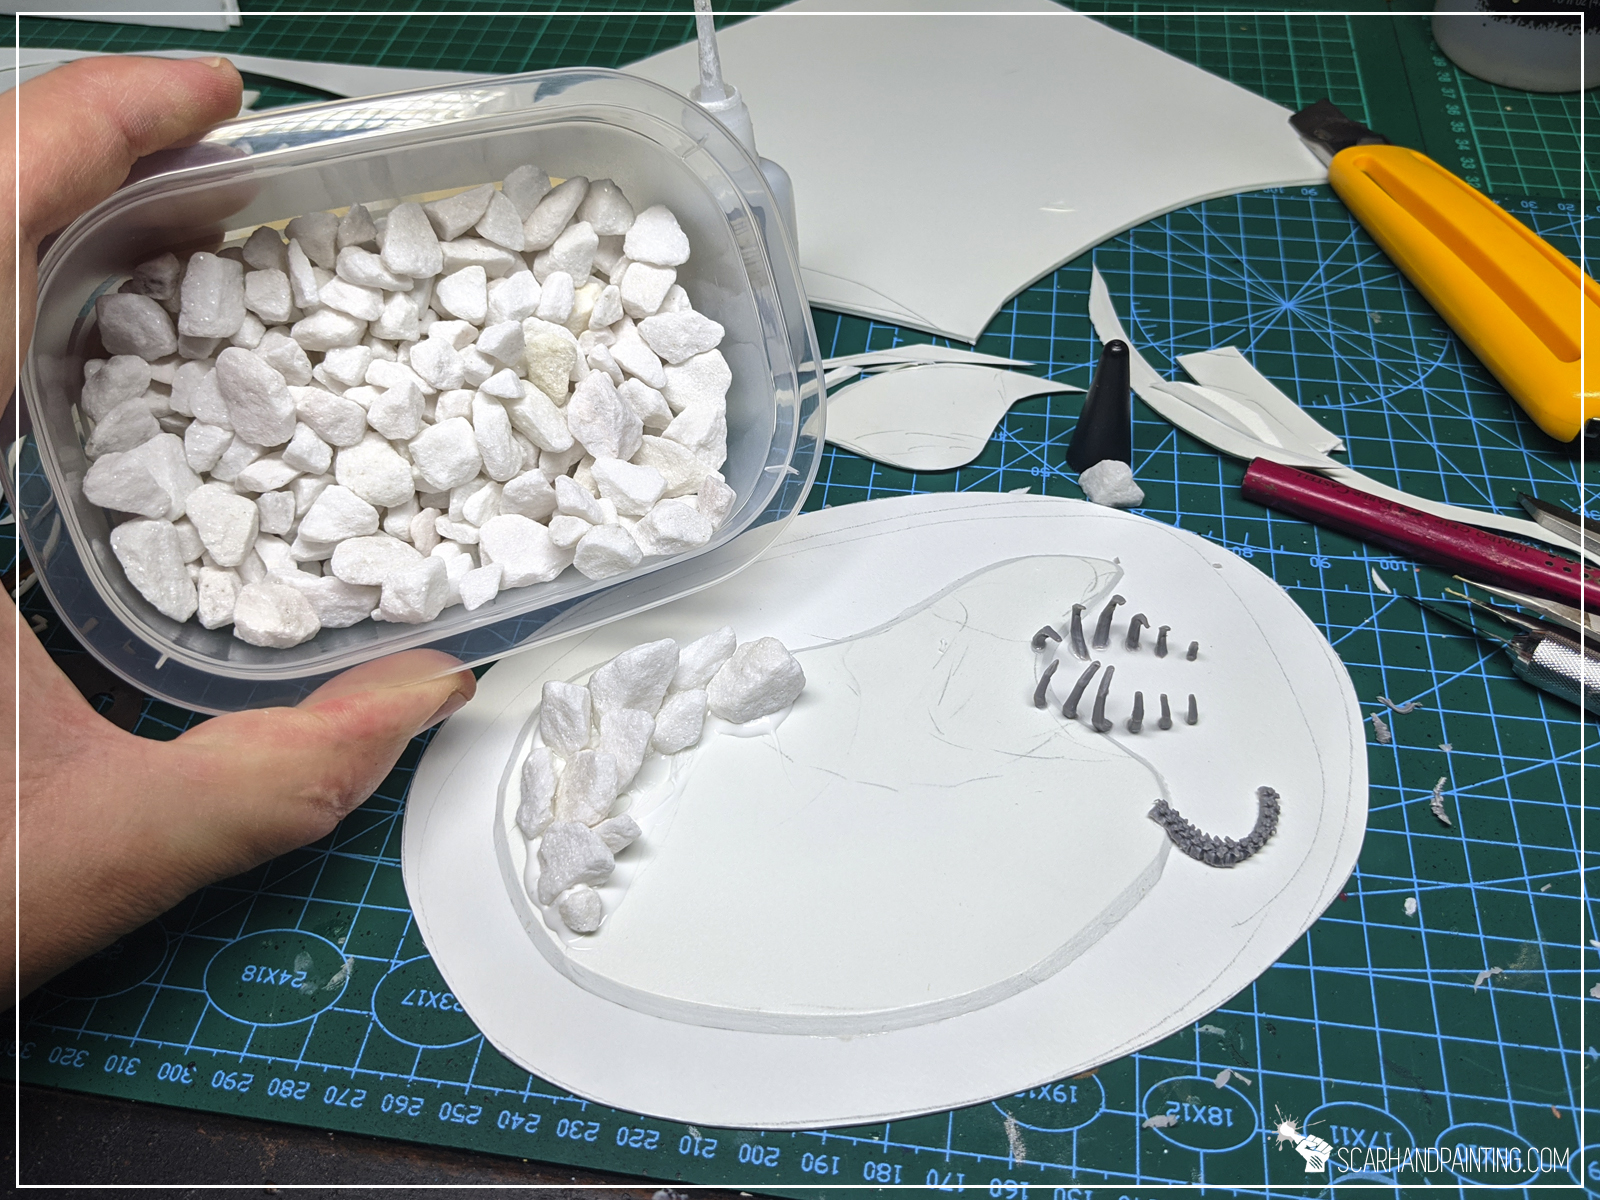
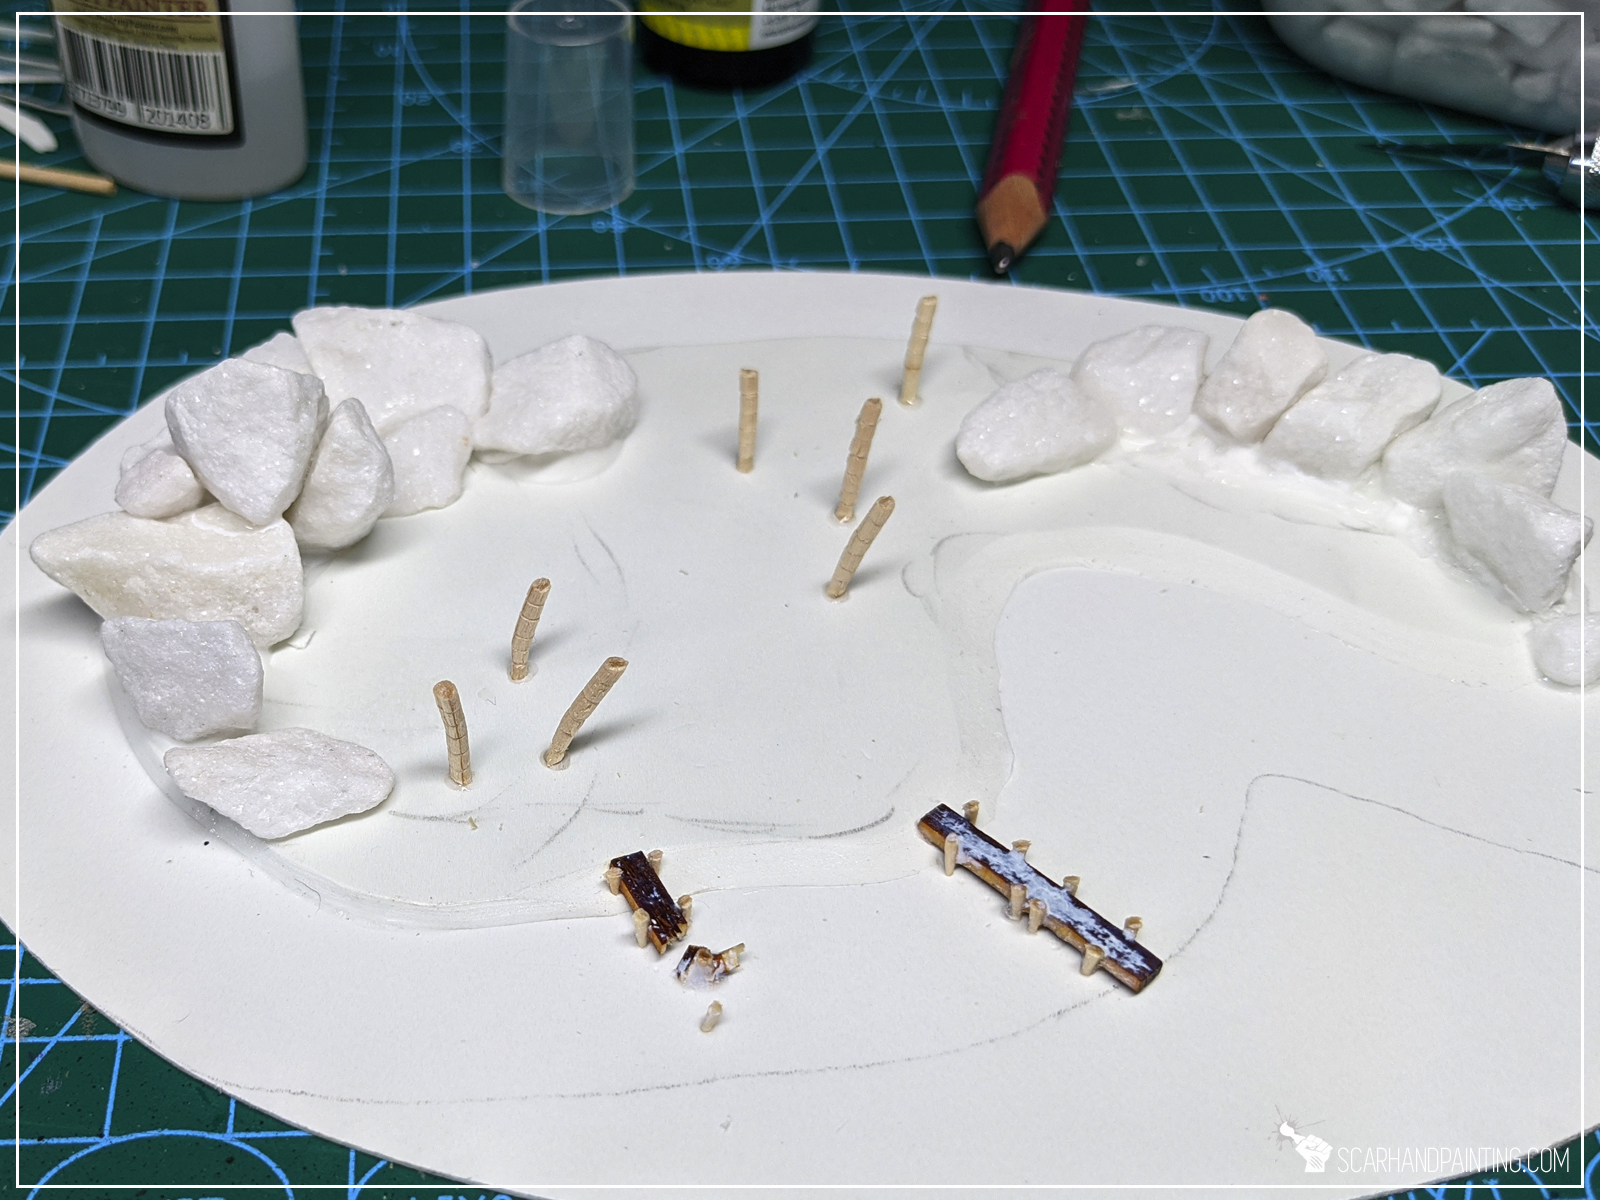
I then applied PVA glue to some areas on the island, followed by AP’s Super Glue and finally Rocks – repositioned to look interesting. I also added some bitz, but I leave it up to you to decide if you want to do the same.
Step three: Wooden piers
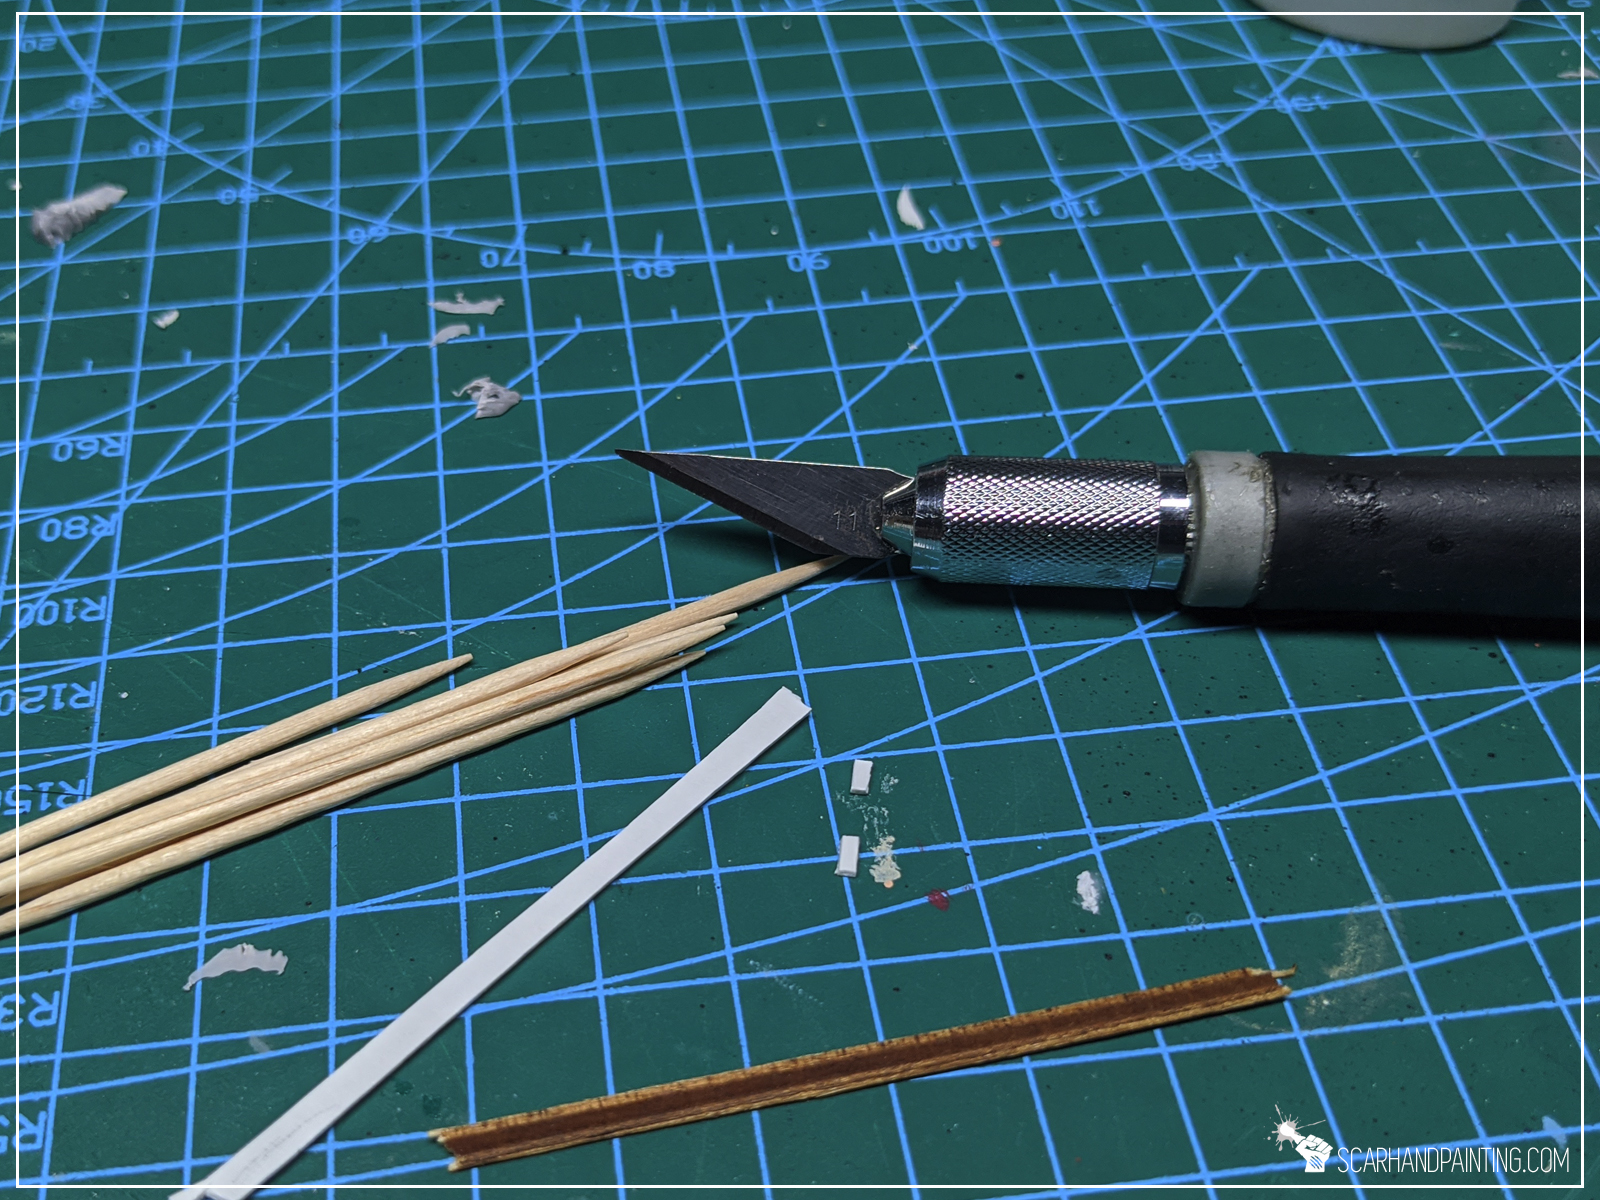
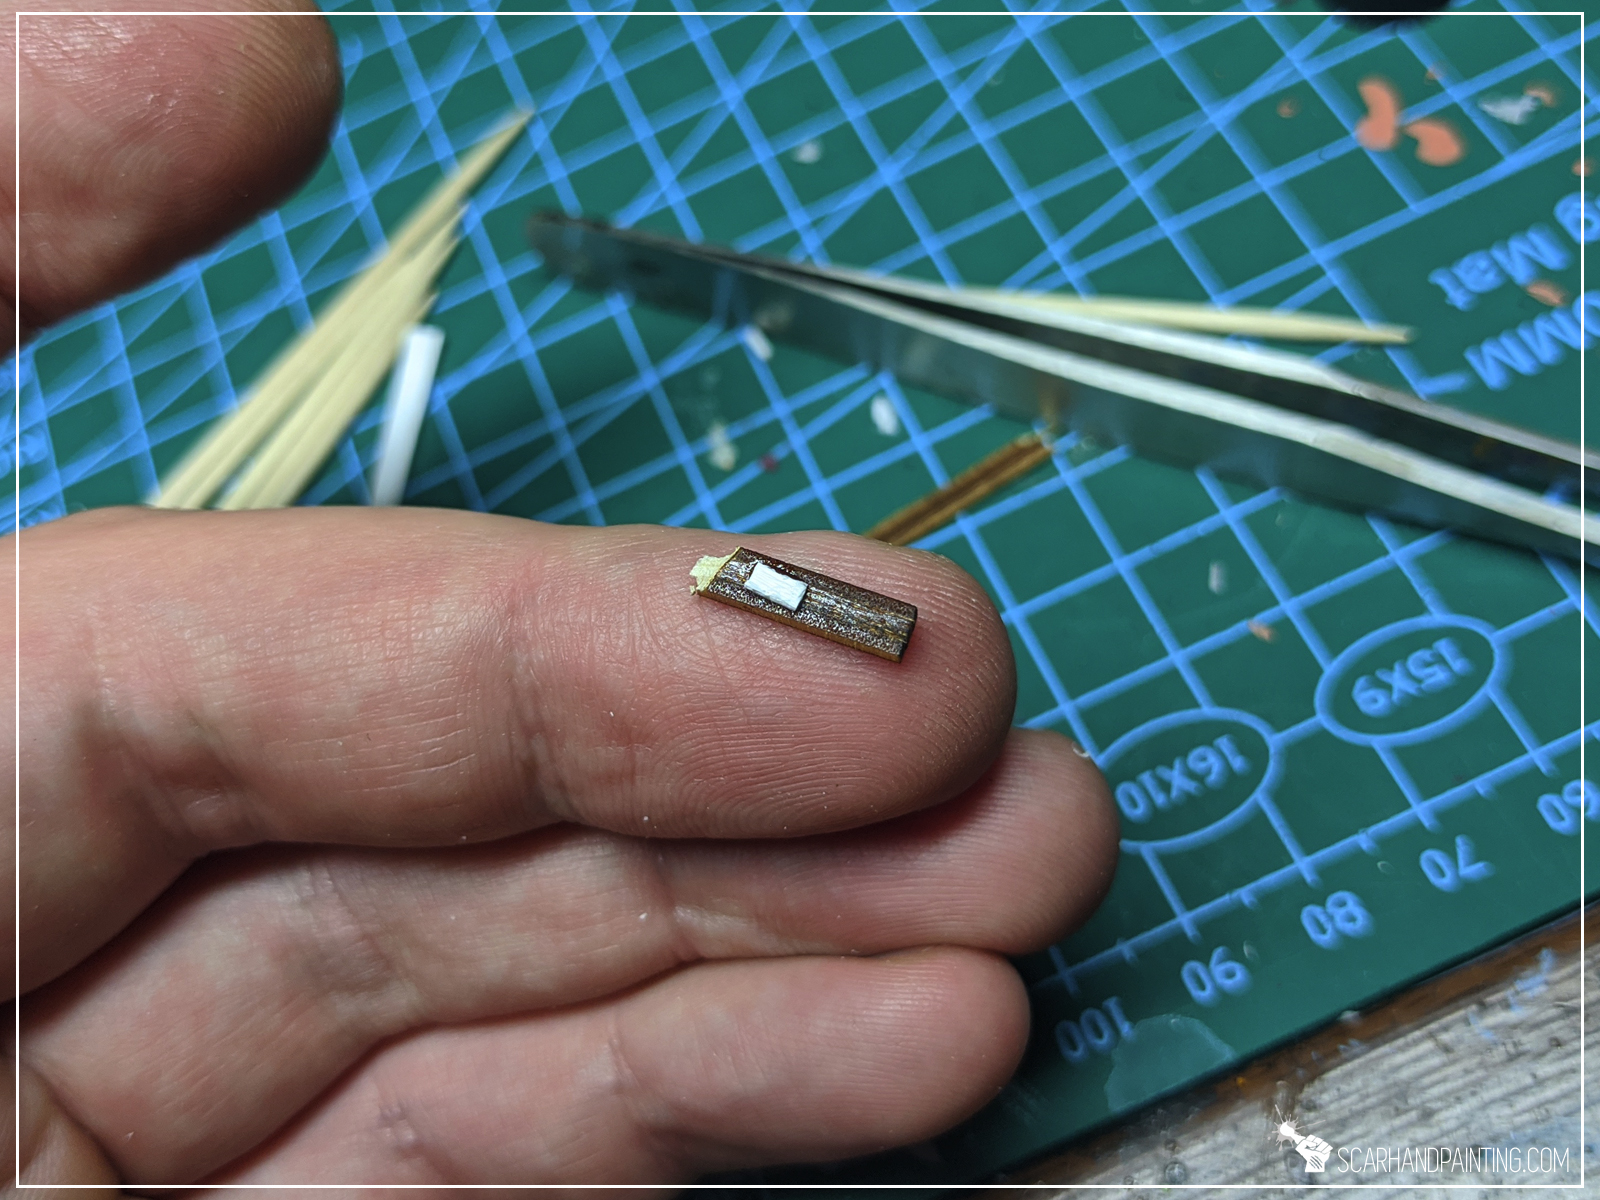
Next I decided to add a bit of character with an old, damaged wooden pier jutting into the sea. I used a piece of MDF cut into a thin strip as a base for the pier, but you can really use anything – including 1mm thick PCV. Just cut a strip, glued tiny bit underneath, then glued it on top of the island and it’s base. Finally marked tiny holes along the sides of the pier and ‘superglued’ toothpicks in place, just to cut them off close to the pier’s level. Done.

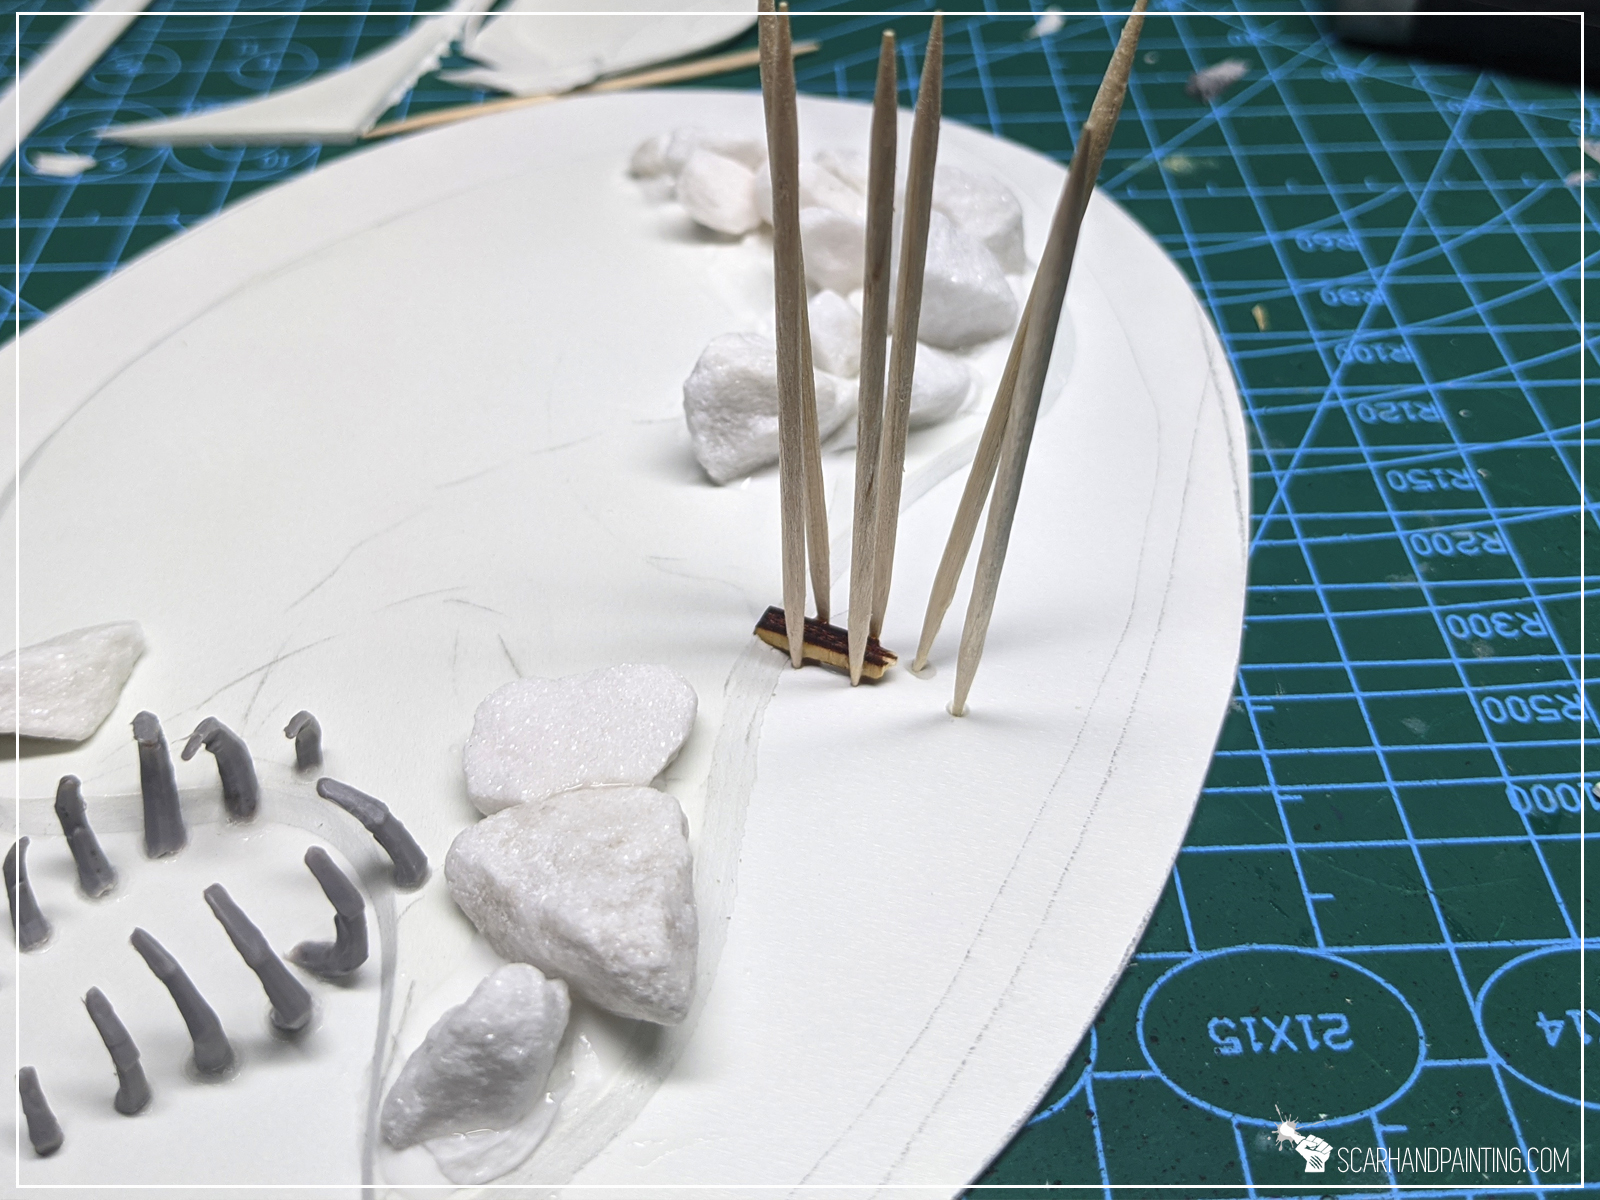
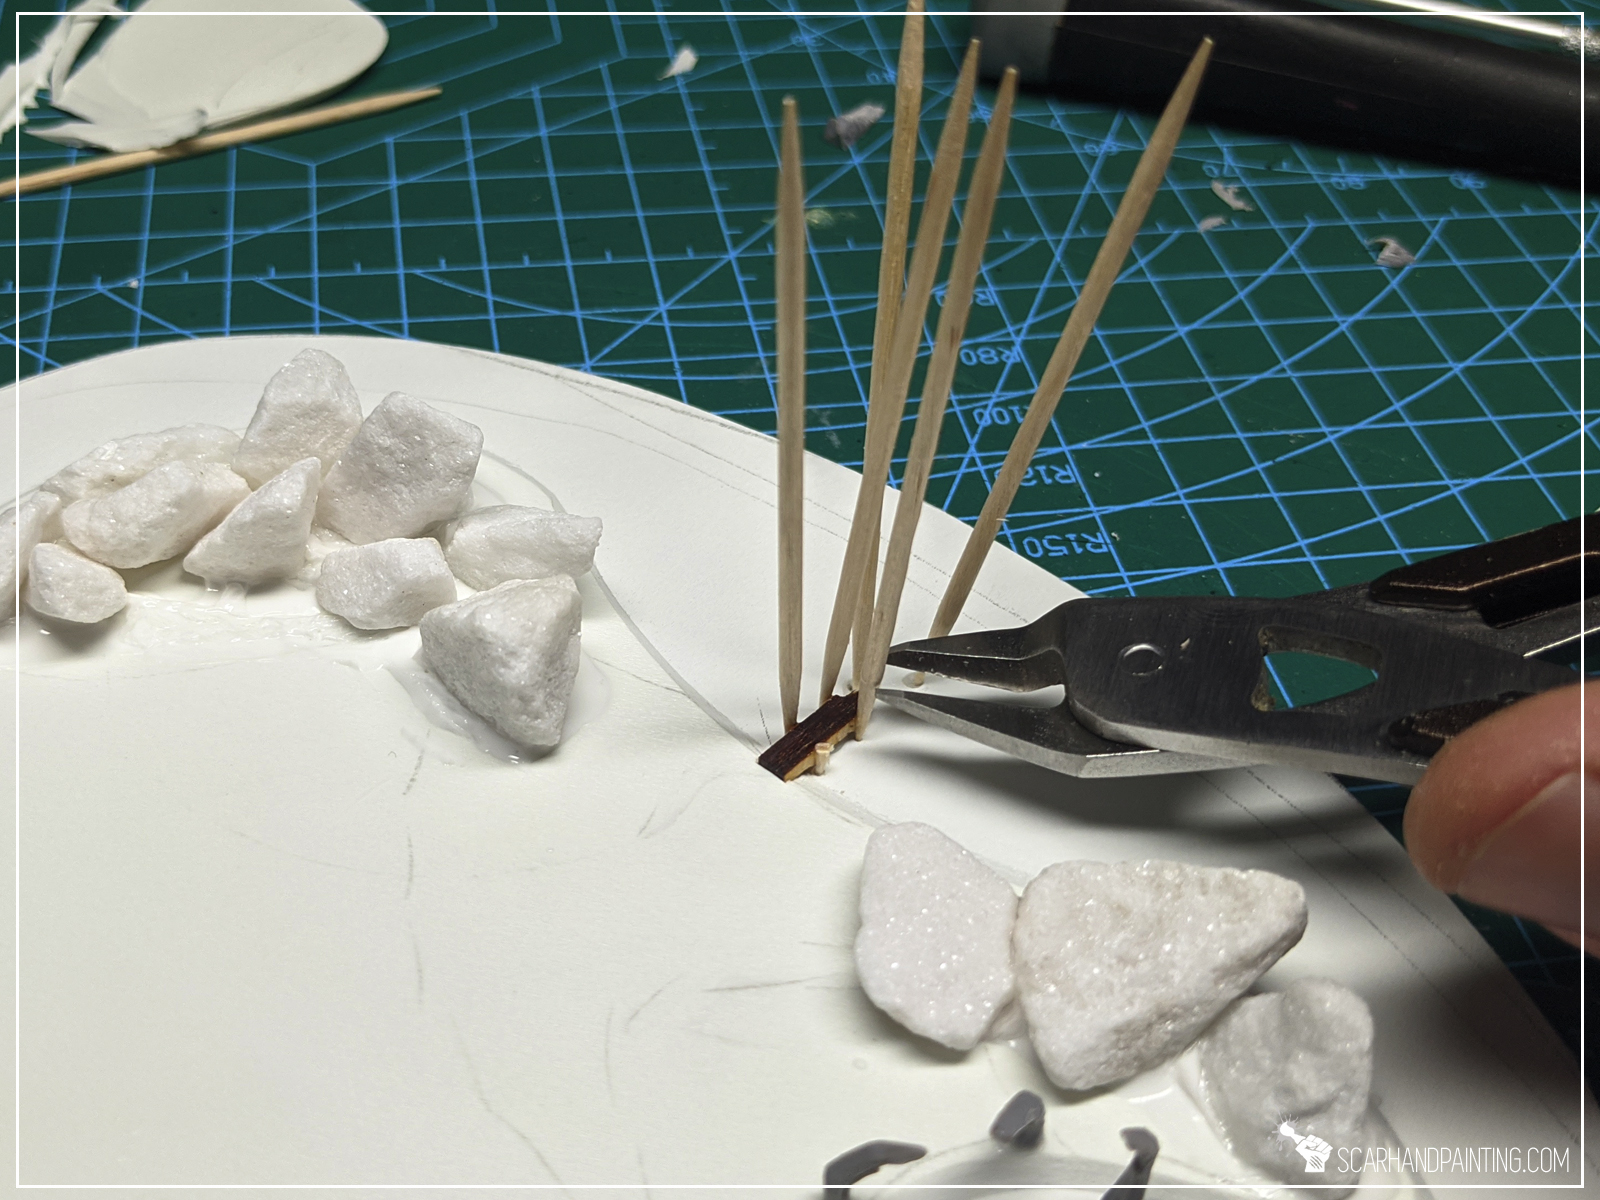
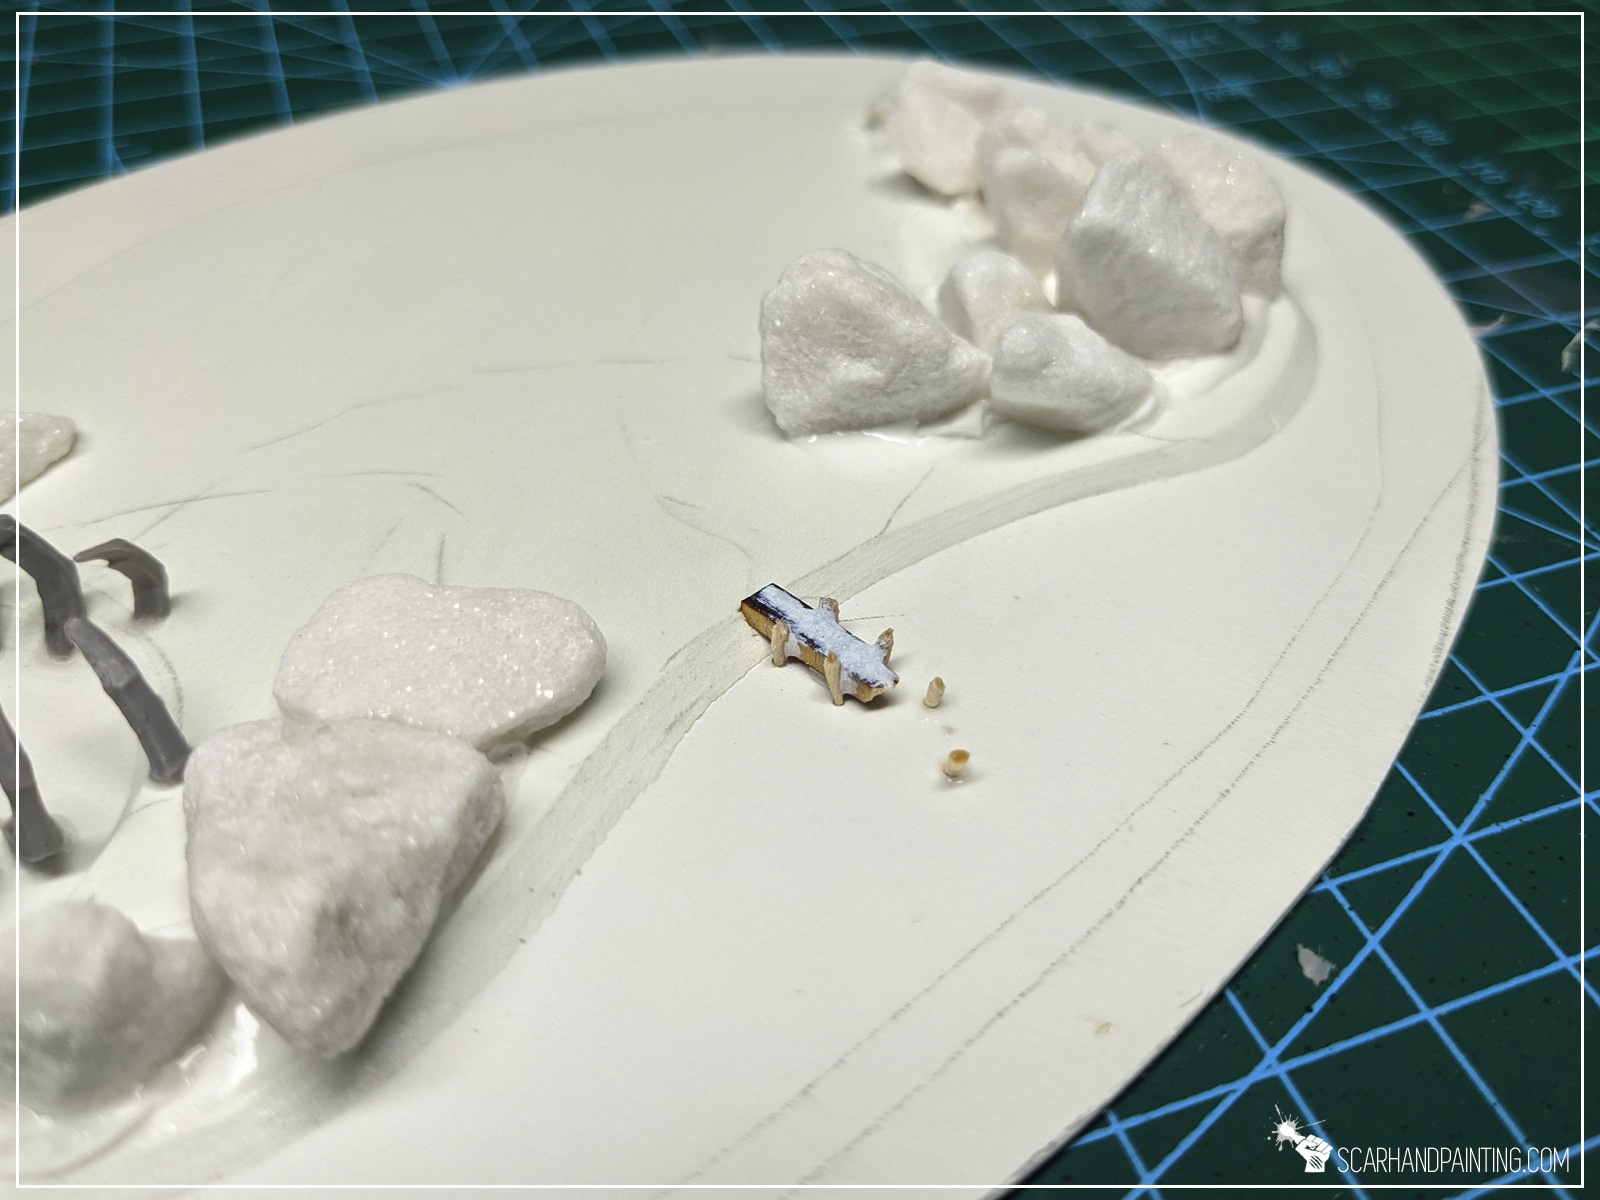
Step four: Palm trees
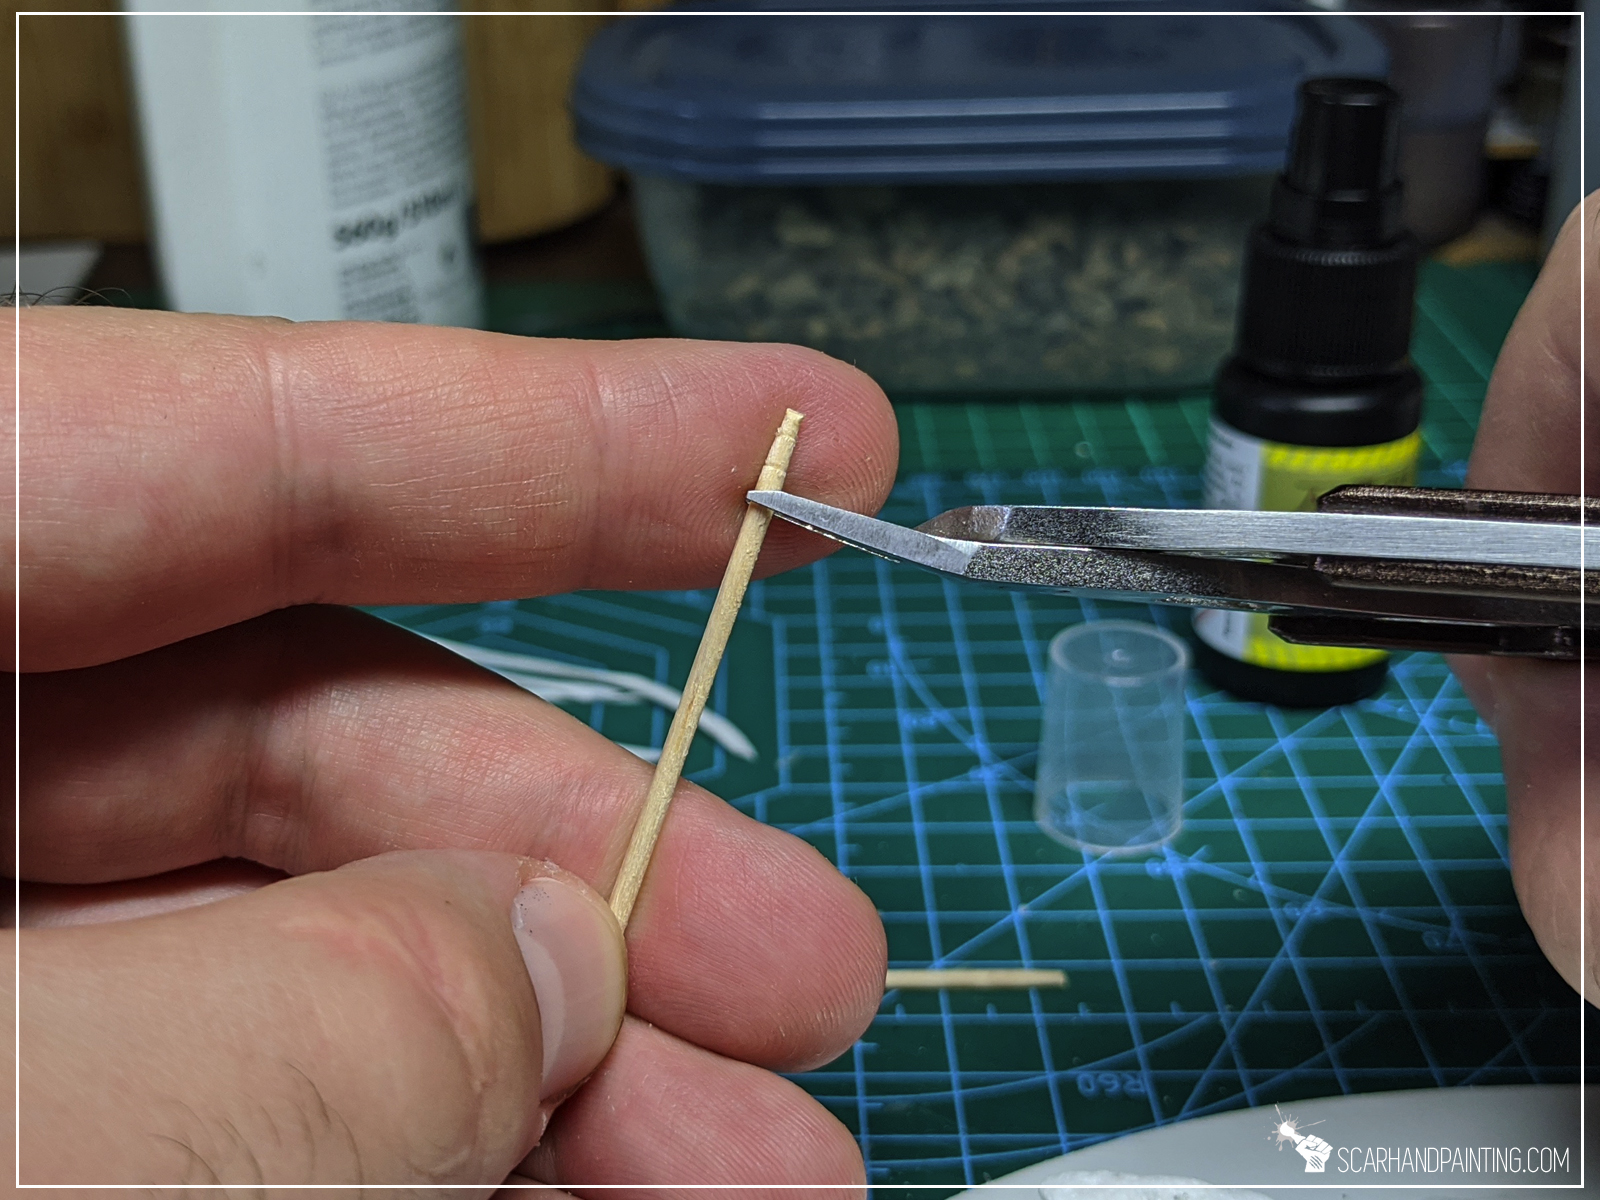
At that point I didn’t wanted to waste good toothpicks and here’s where palm trees idea originates from. I gently squeezed the blunt tip of a toothpick with cutters and moved it around. I made this every two or so mm on the length of the toothpick. I then cut a piece off and gently bent it. With palm trees trunks ready to be added on top to the island, I just pushed a sharp tool into the PCV to create tiny holes and glued the trunks into it.
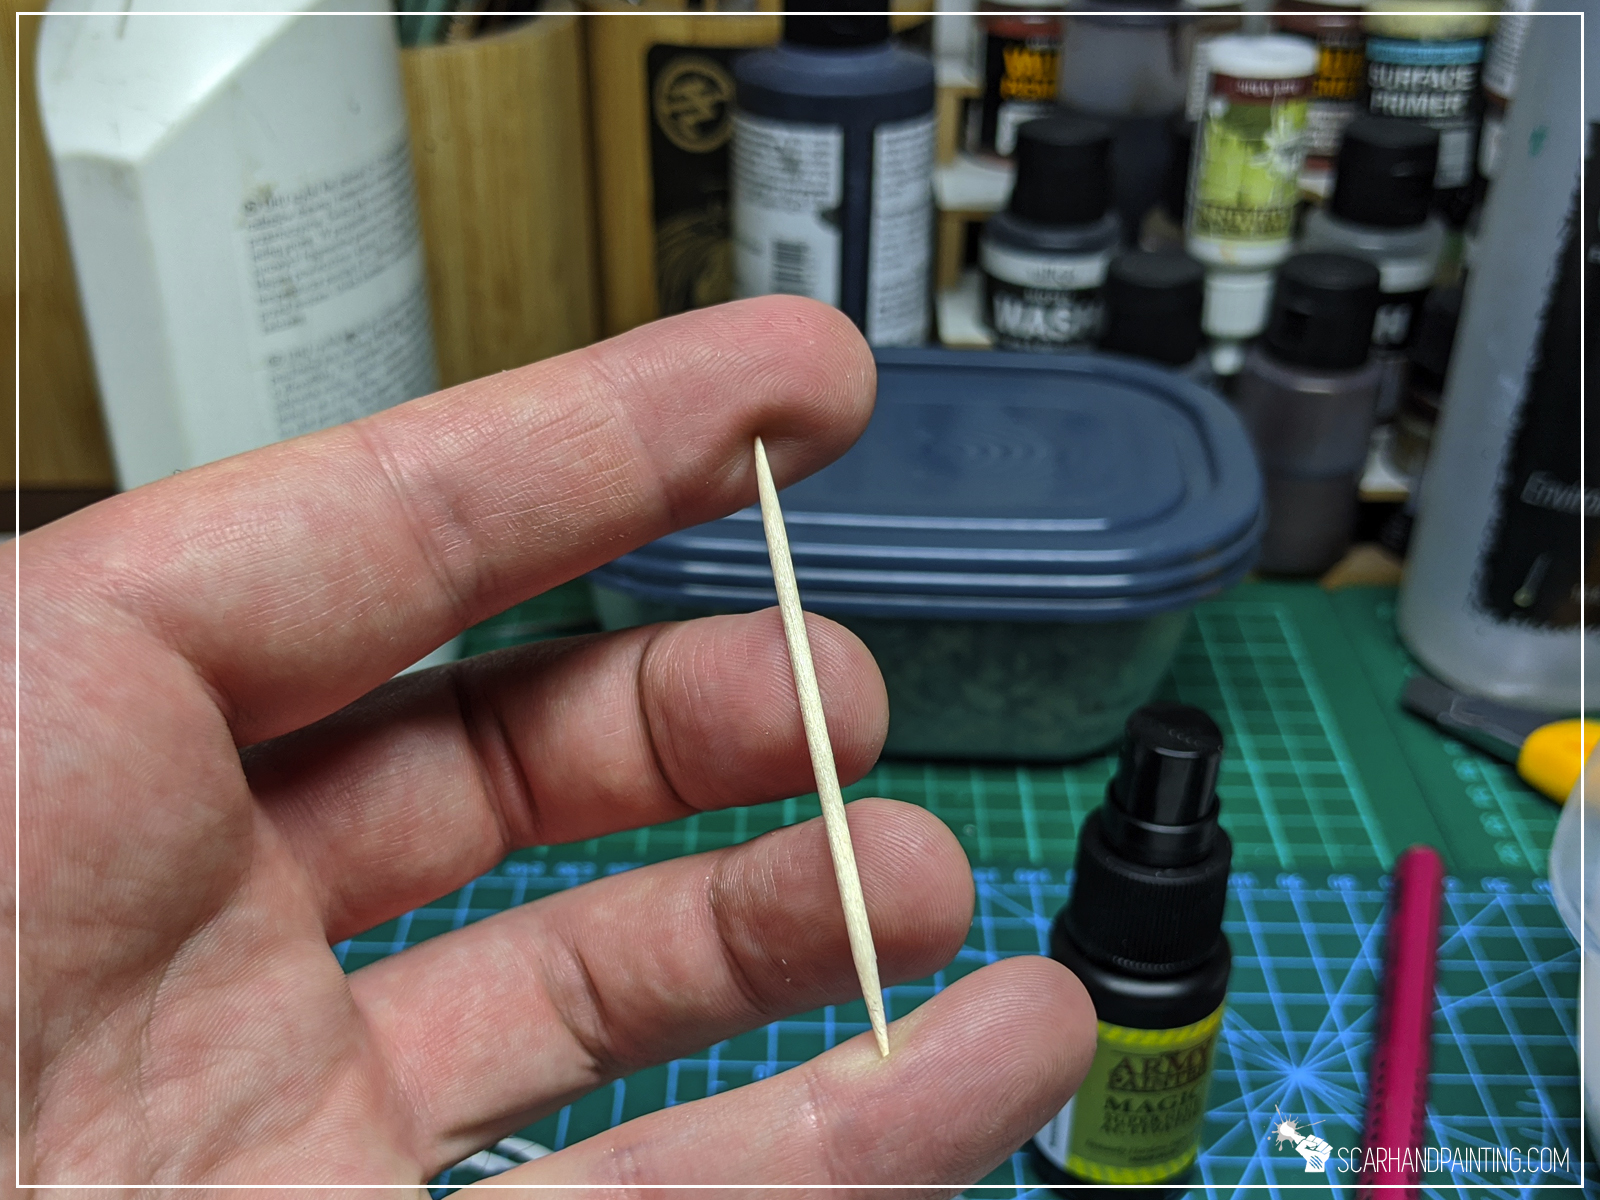



Step five: Textures
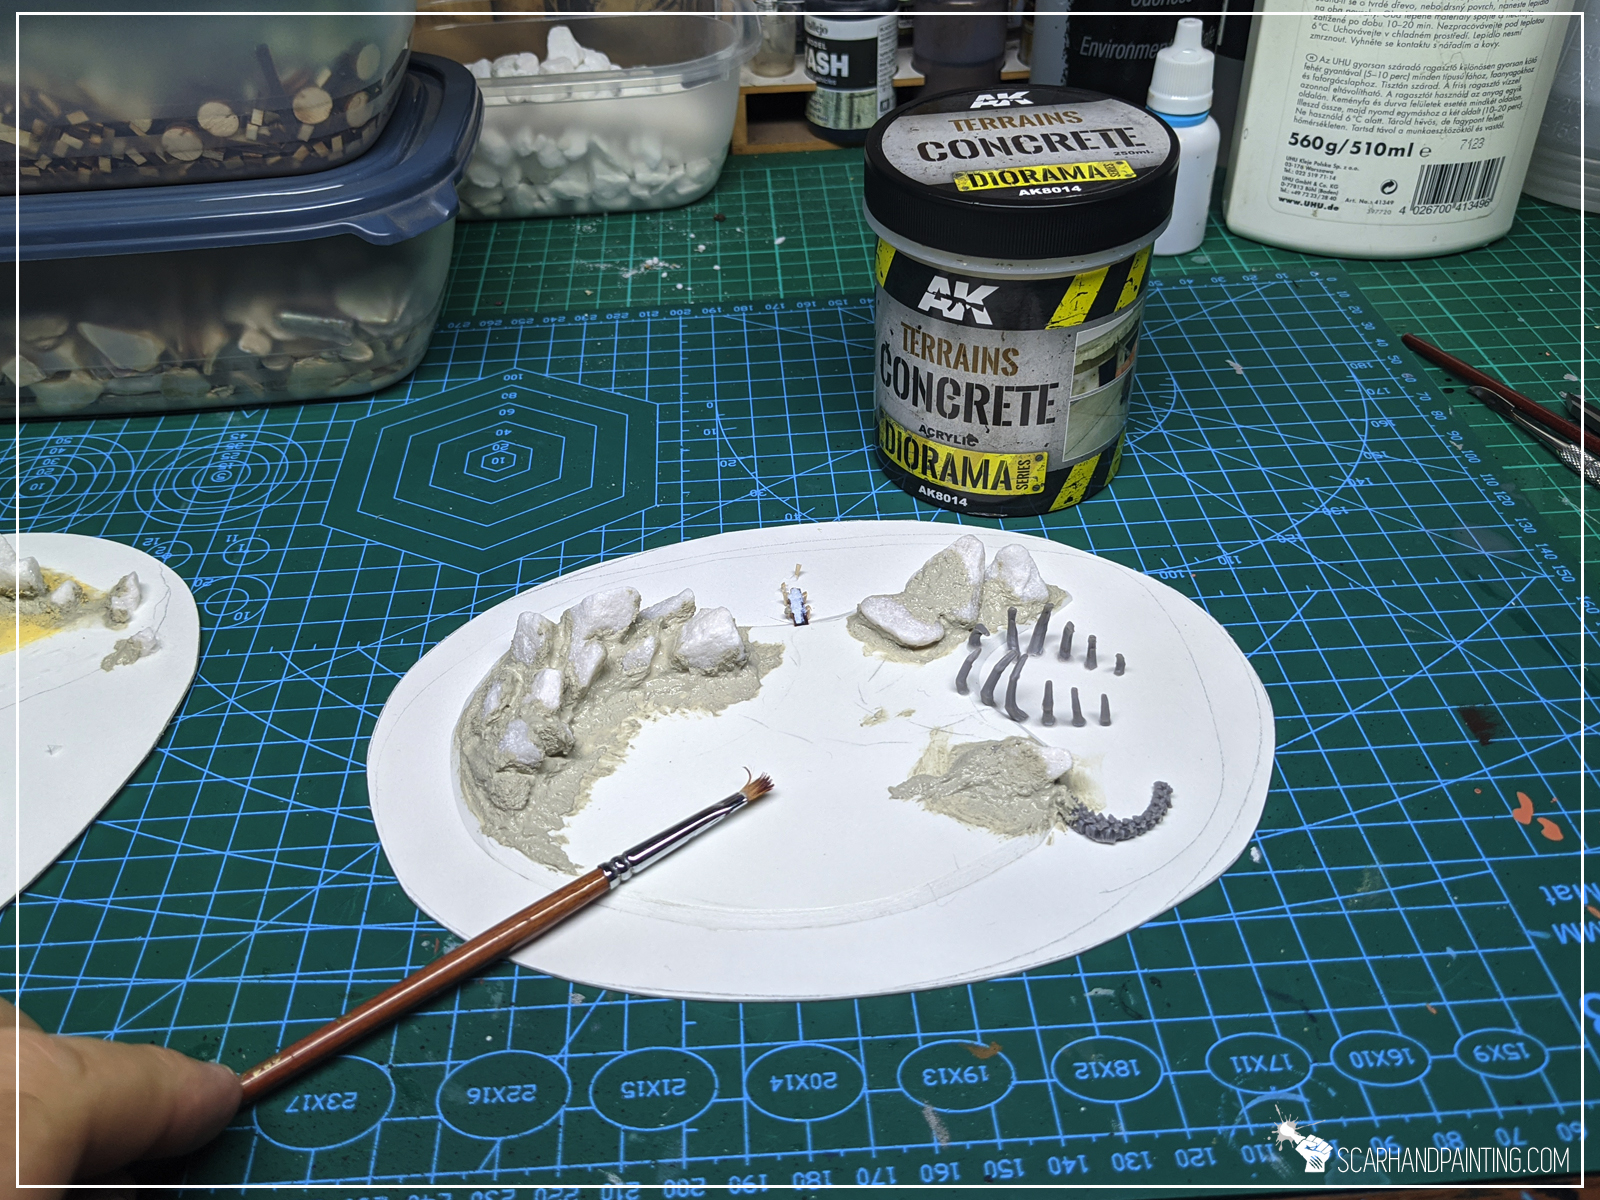
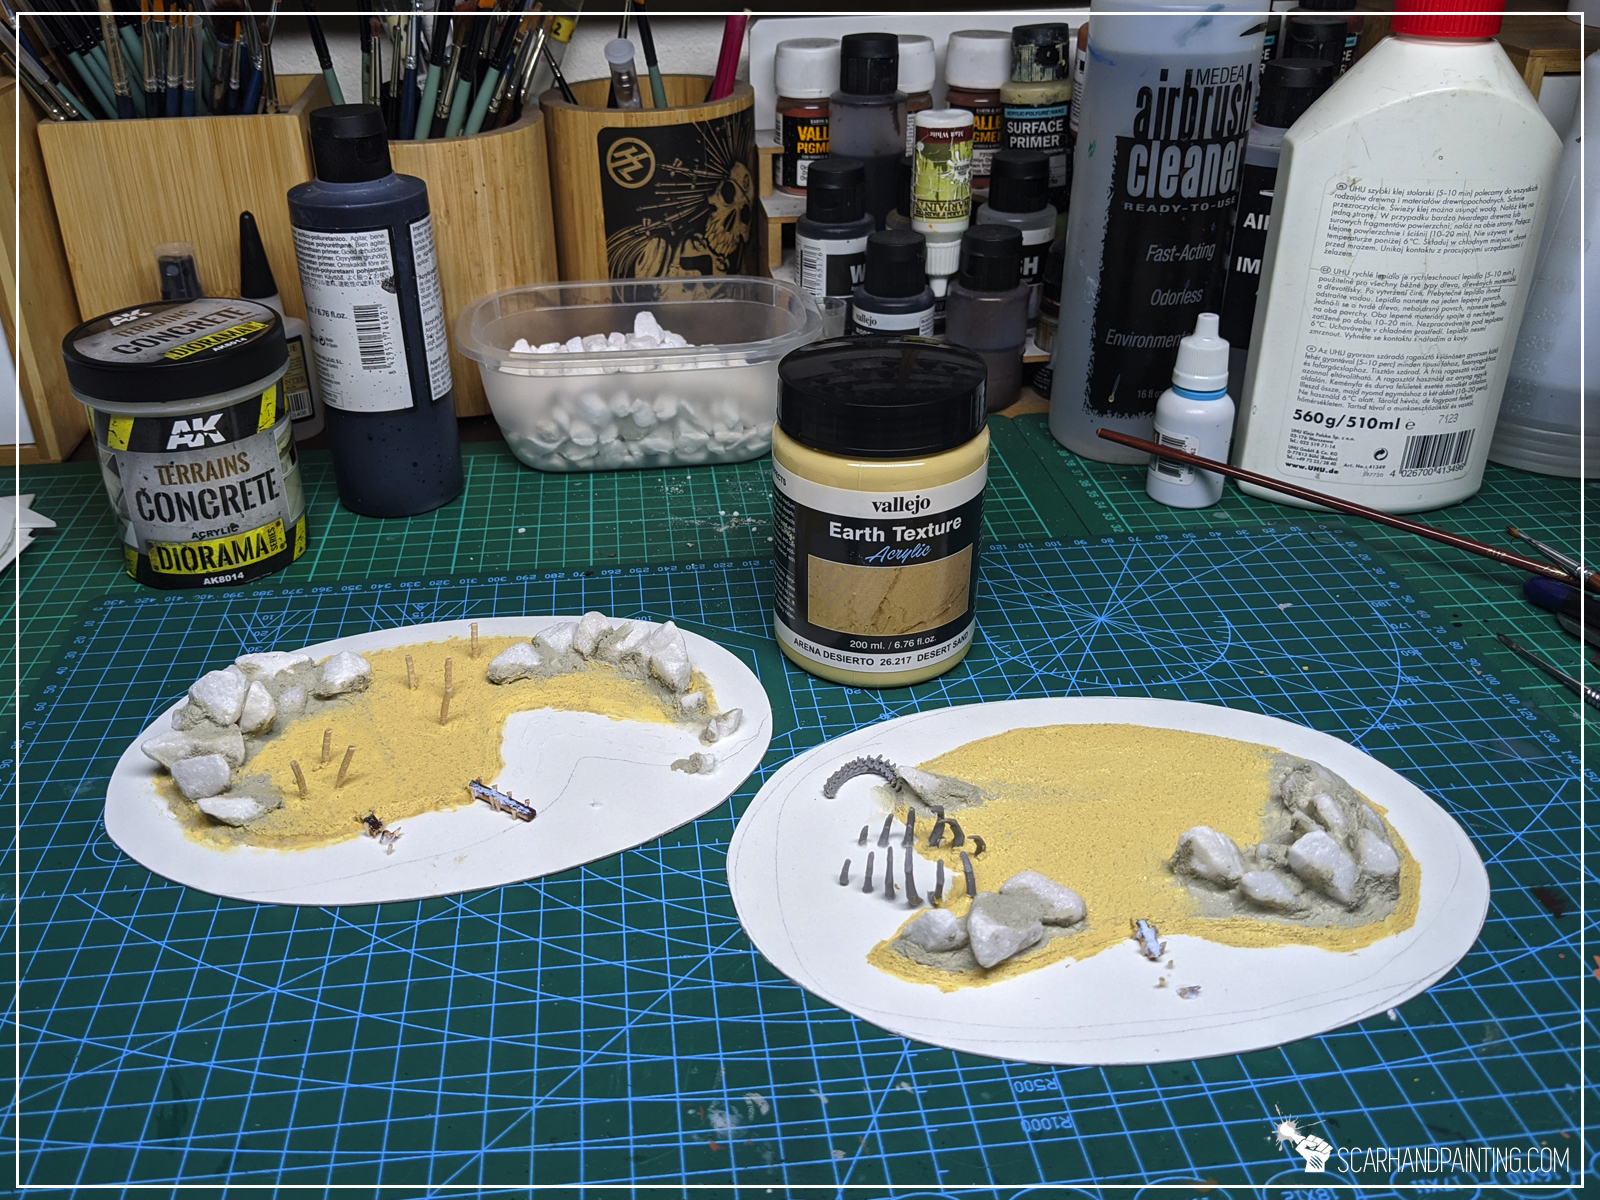
Final modelling step was to apply textures. First I filled gaps and surrounding areas between stones with AK Interactive Concrete from diorama series. I then covered rest of the island with Vallejo Desert Sand texture.
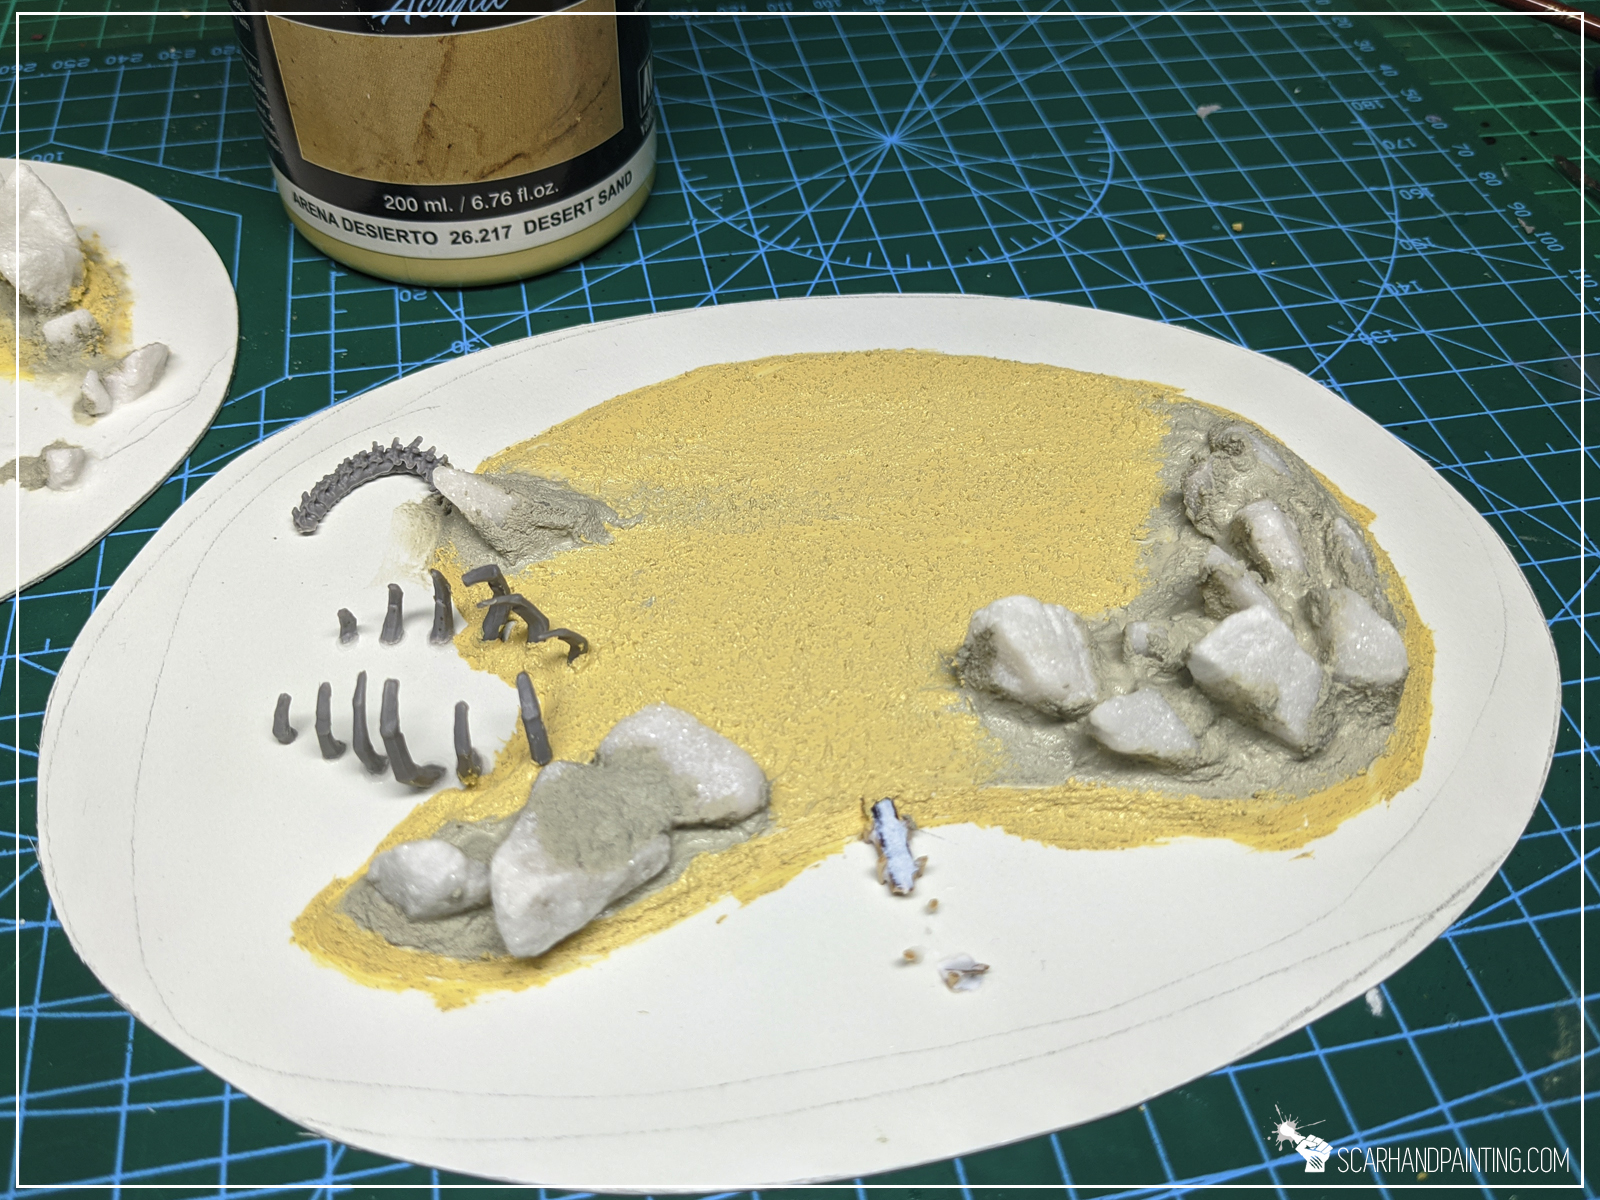
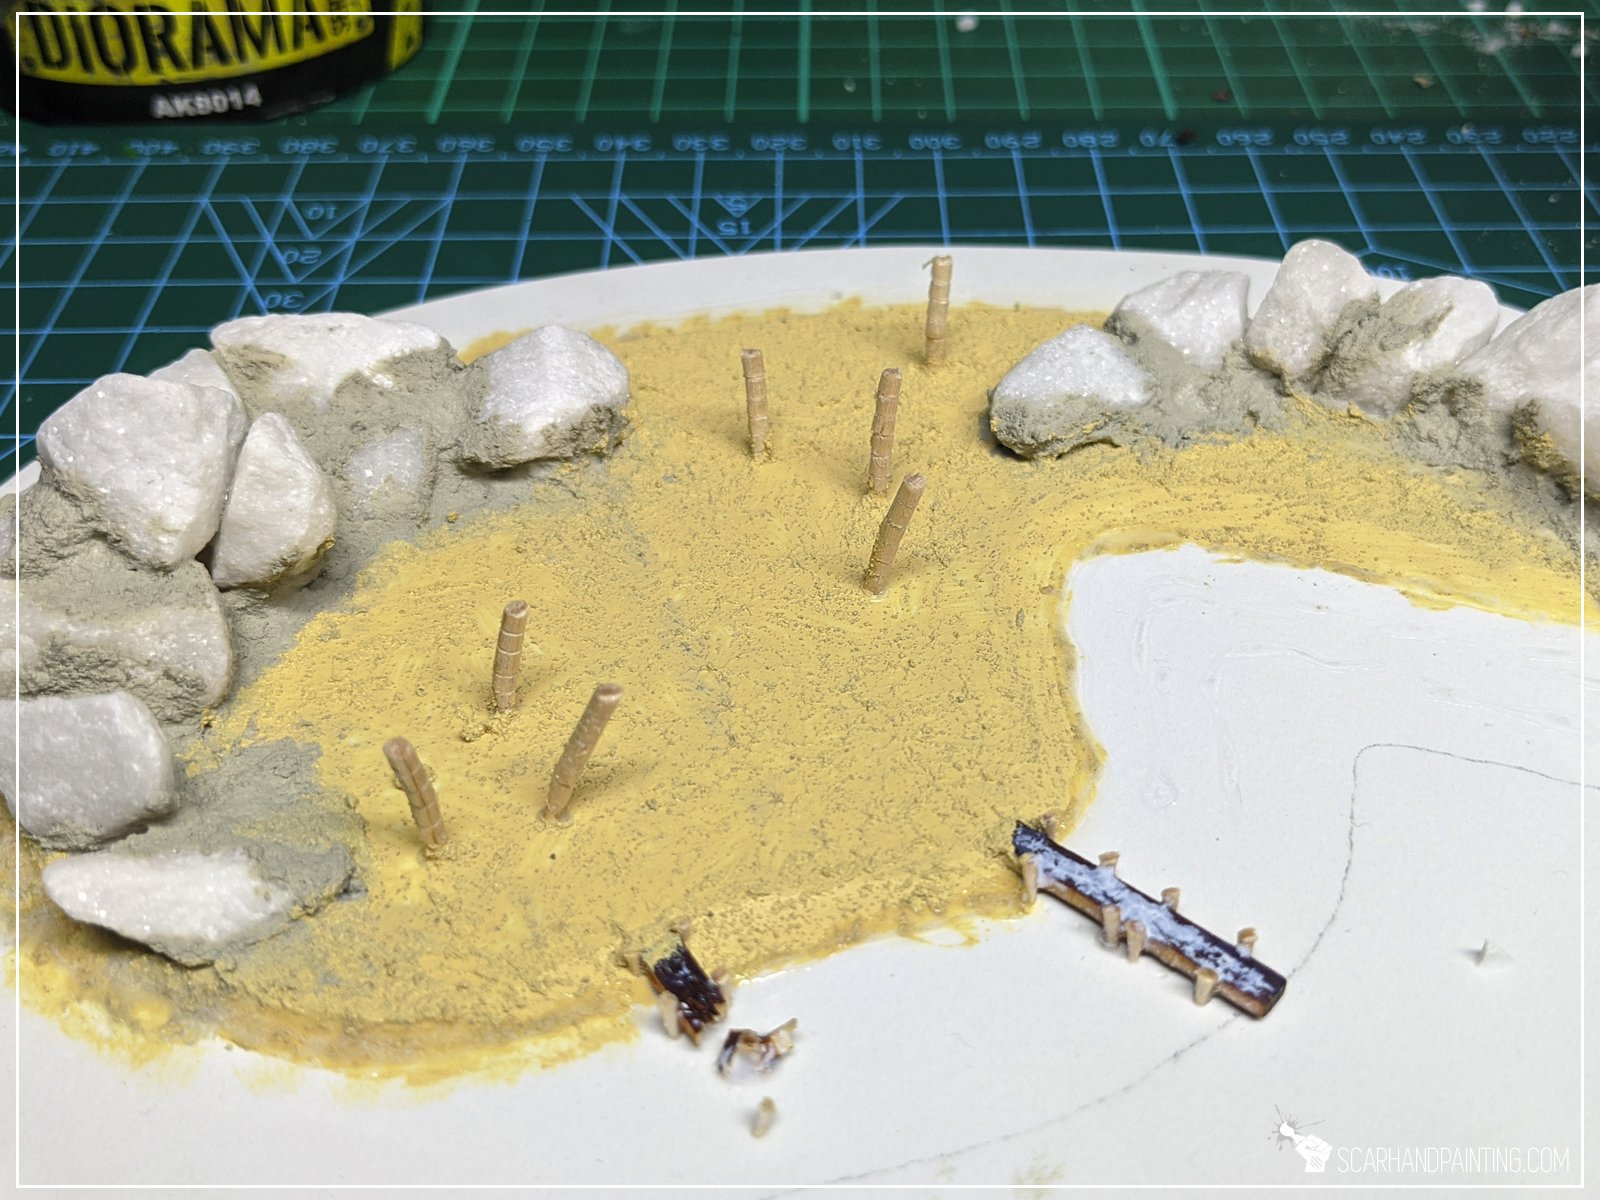
Sandy beaches, rocky coast and vibrant blue water around. With such theme in mind I started the paint job.
Basics:
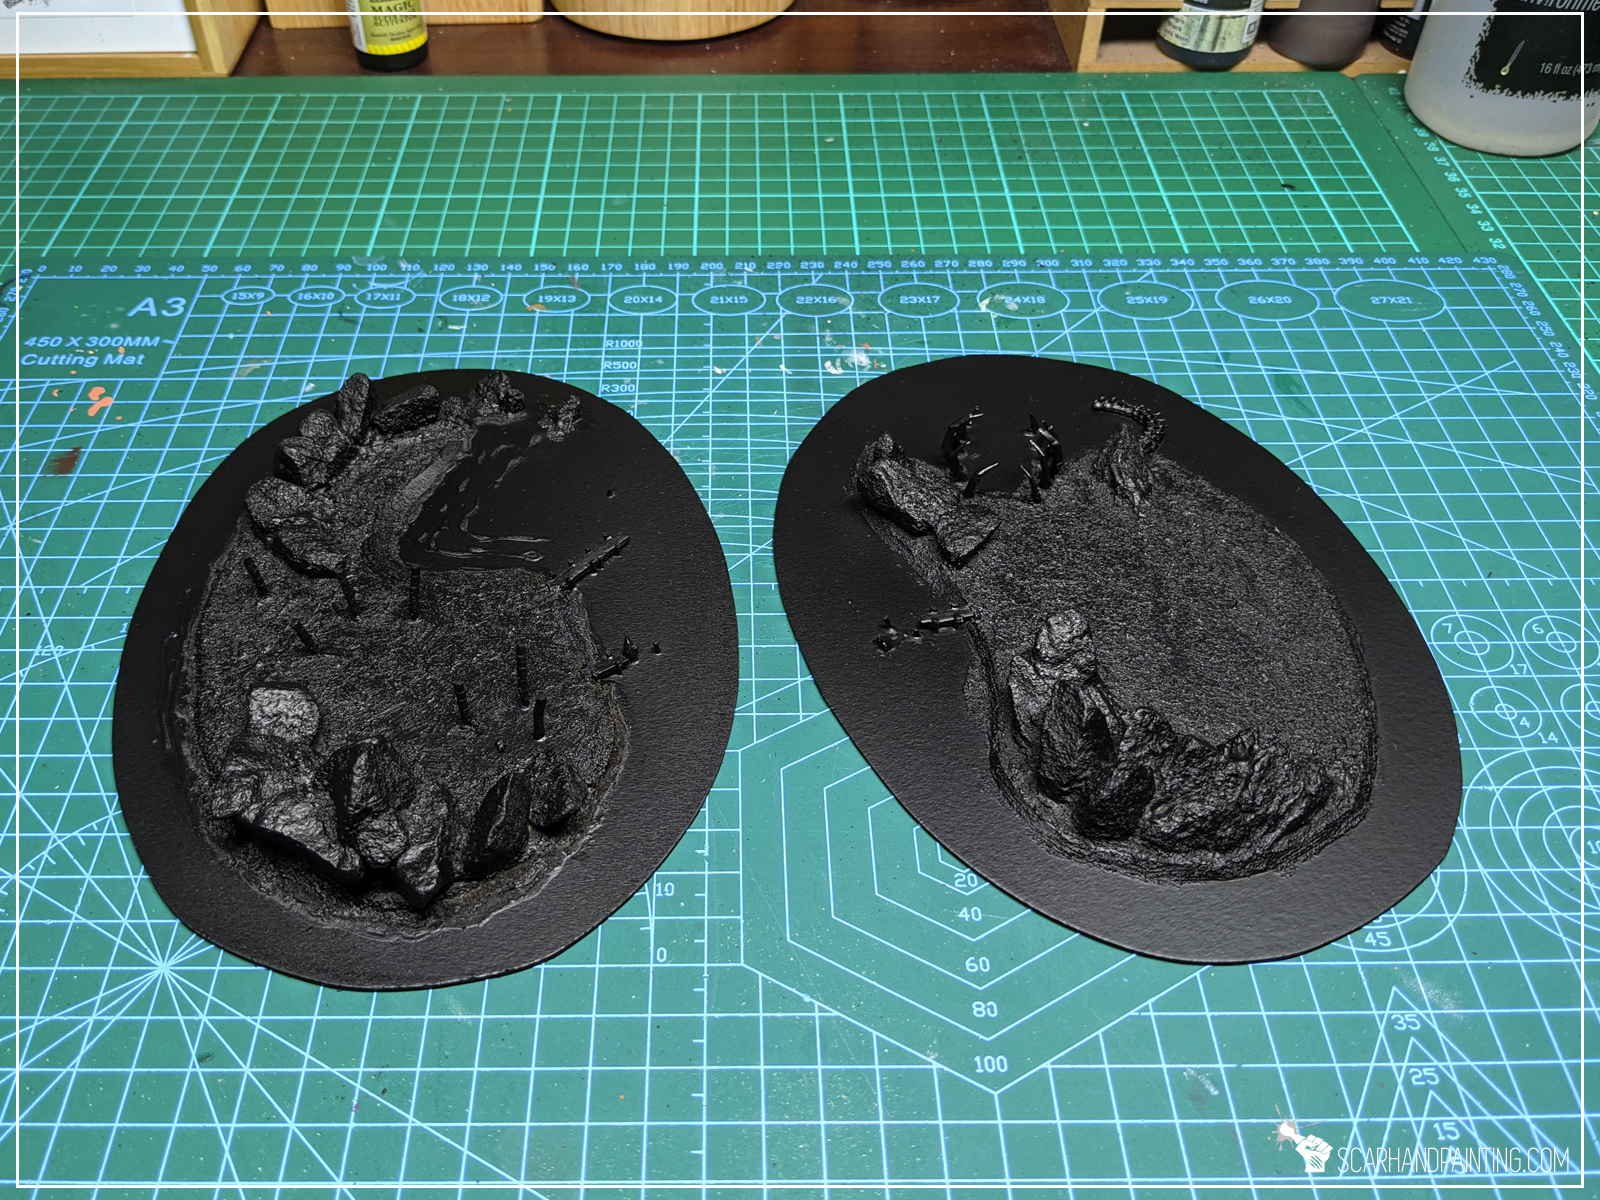
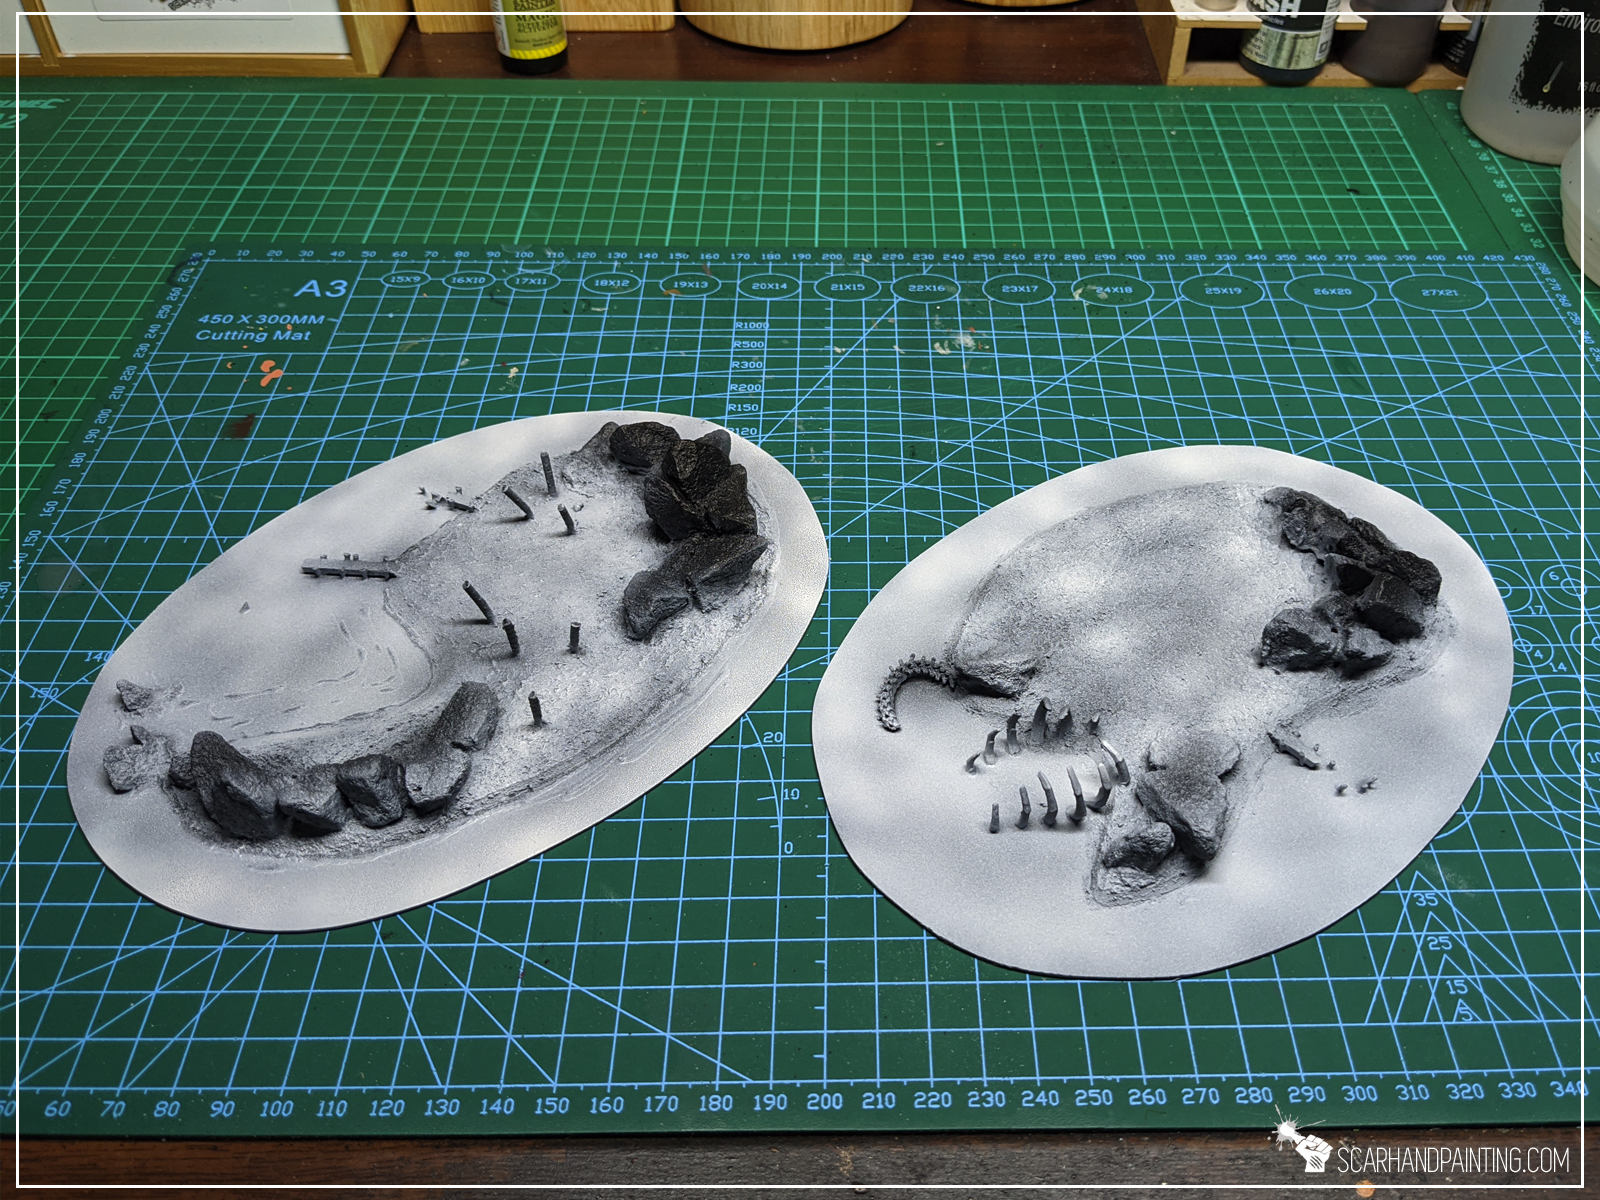
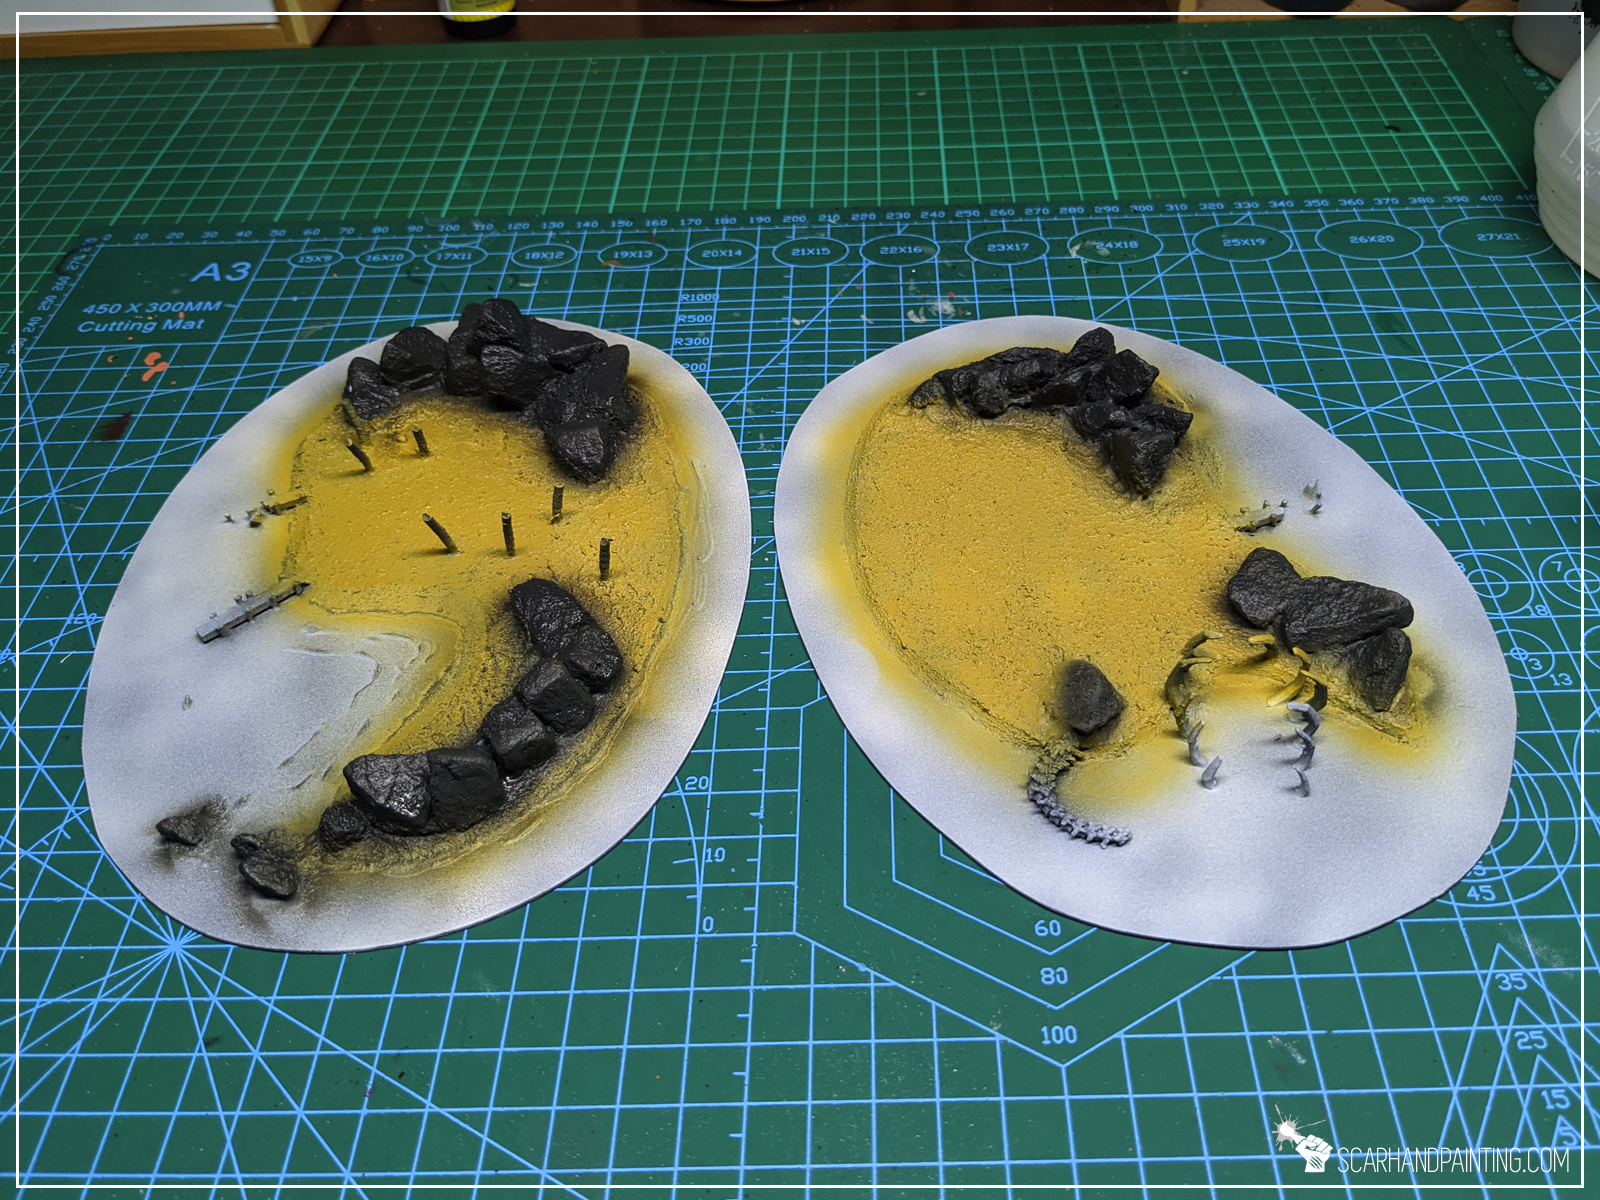
First step was to undercoat the islands black and then airbrush white all over it to create a nice base for both water and sand colors.
Sand:
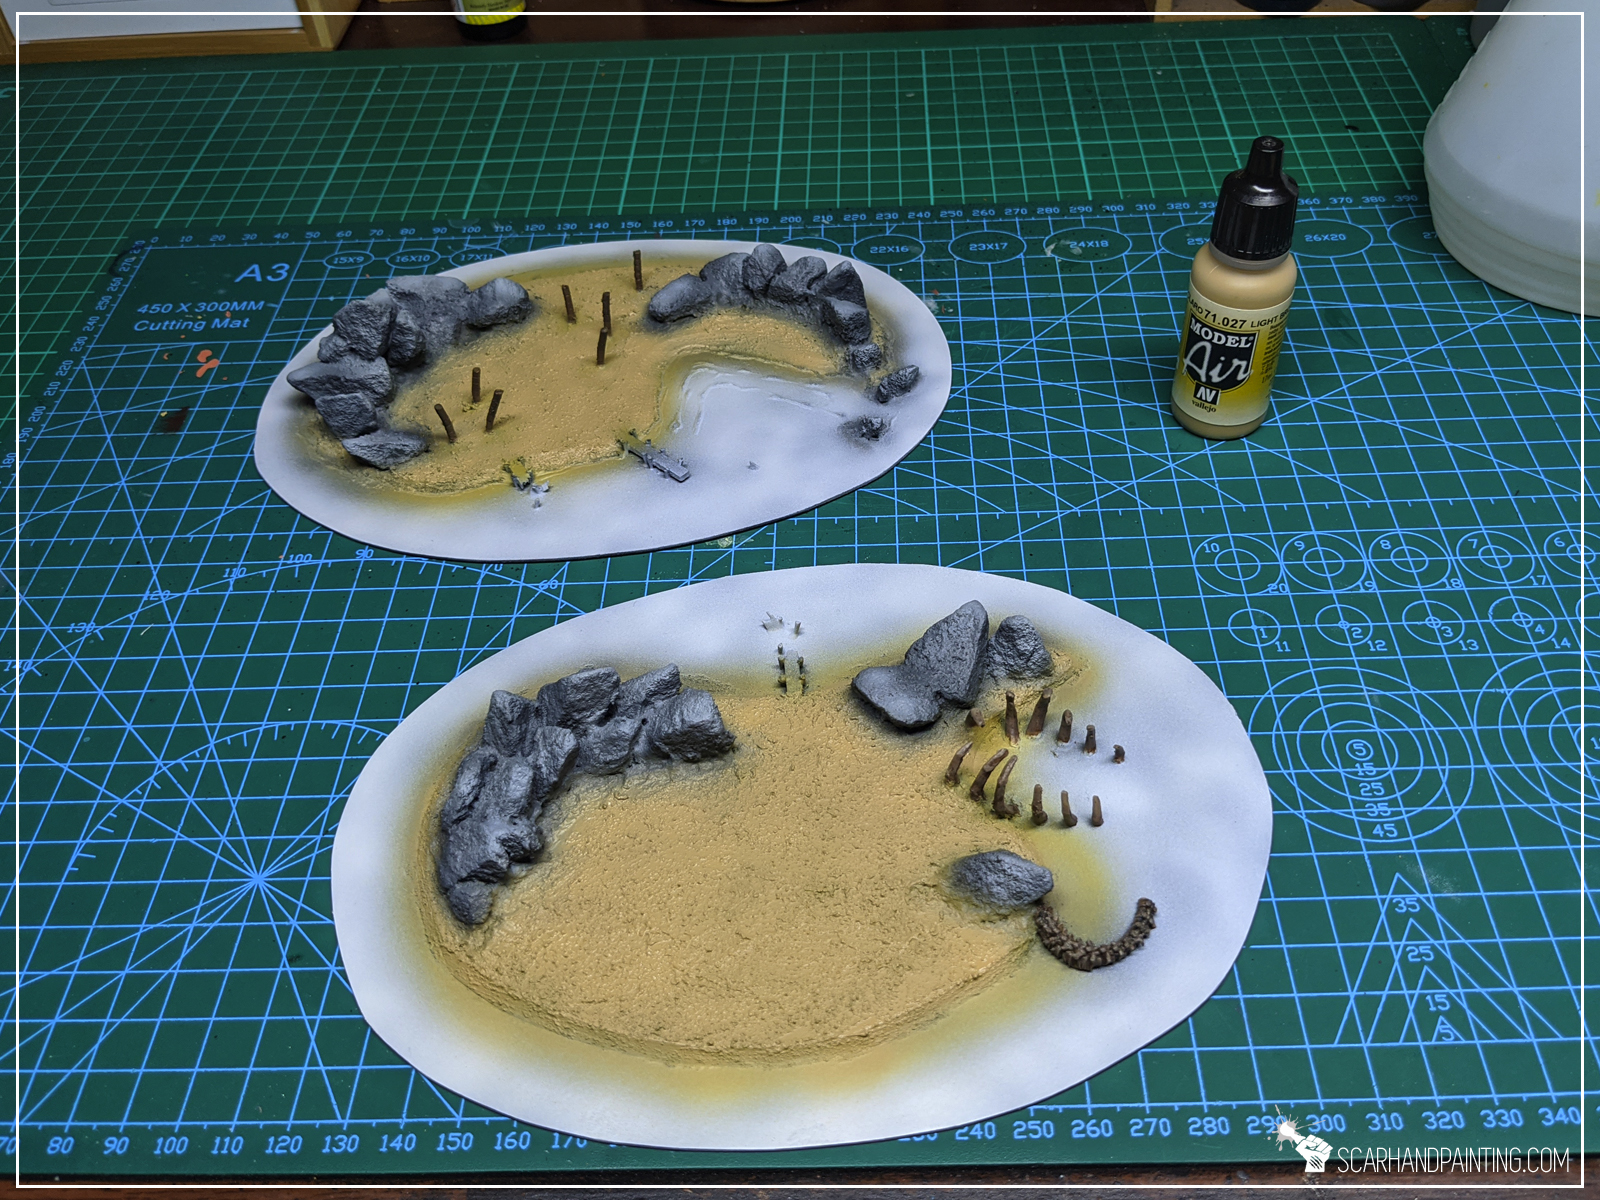
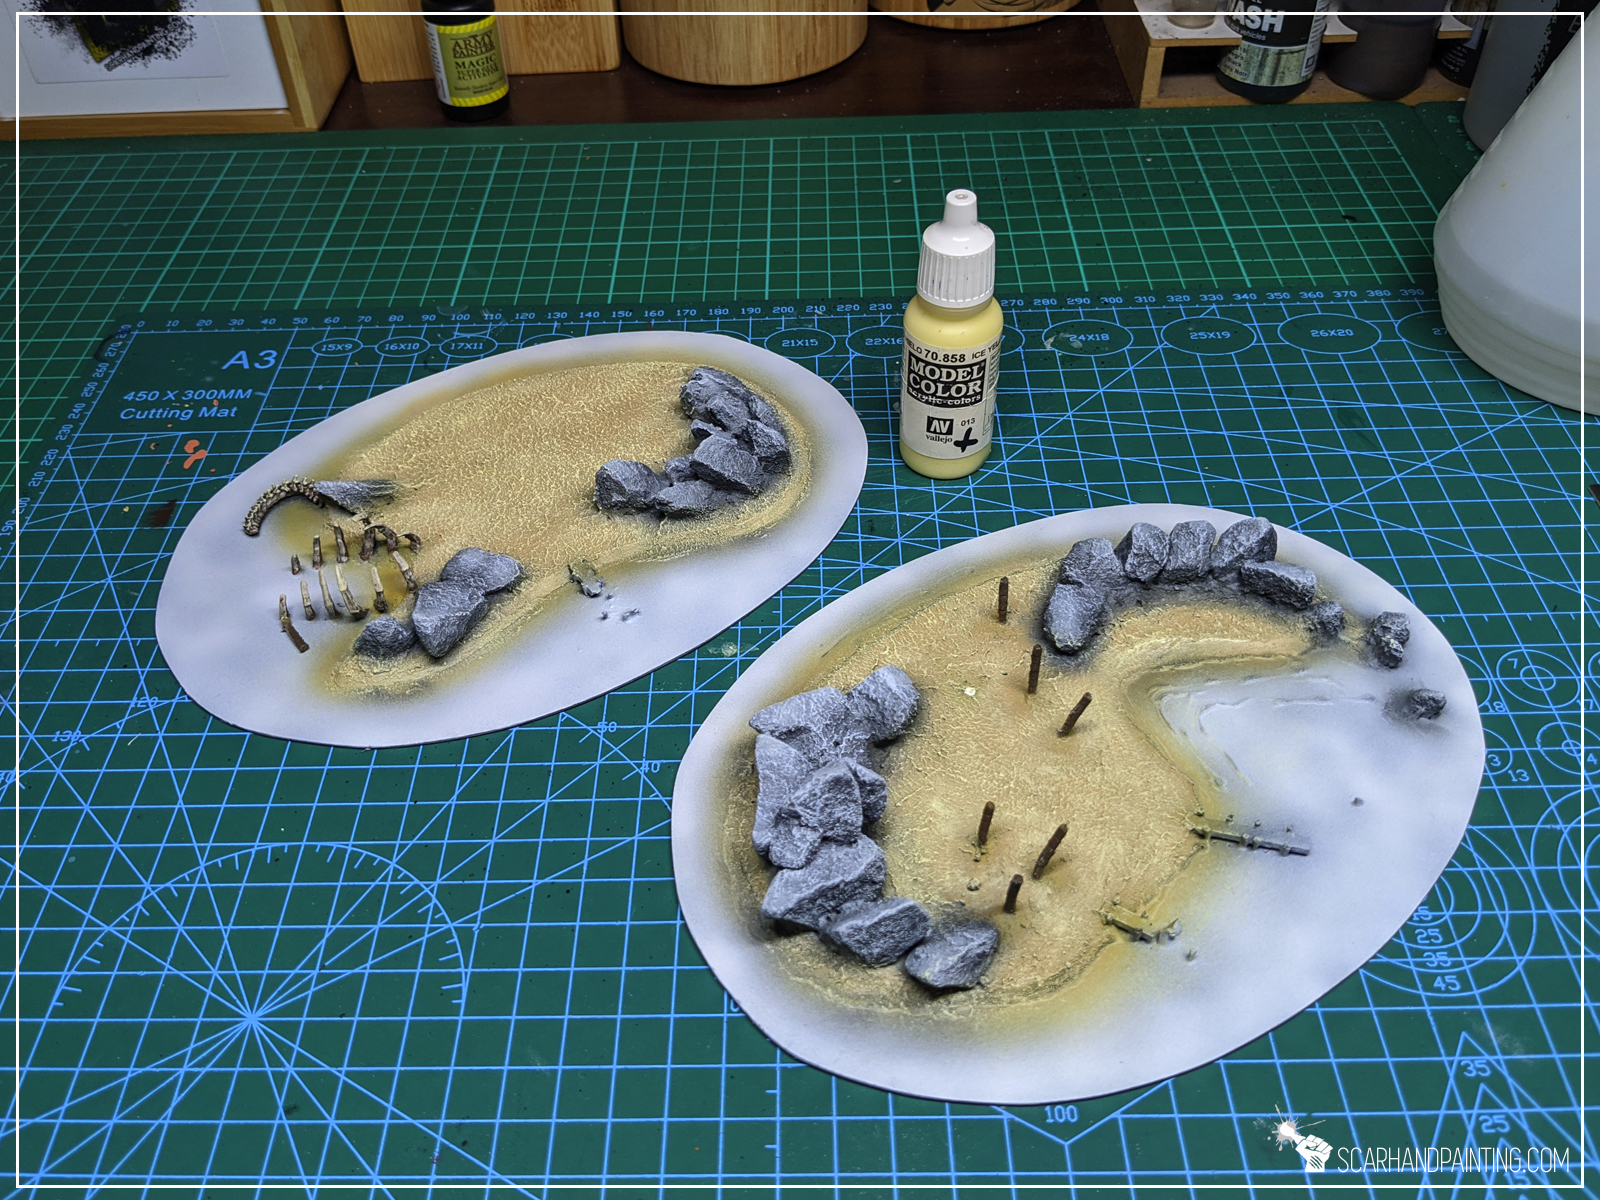
Sand was painted using airbrushed Vallejo Desert Sand, followed by Light Brown and finally drybrushed with Ice Yellow.
Rocks:
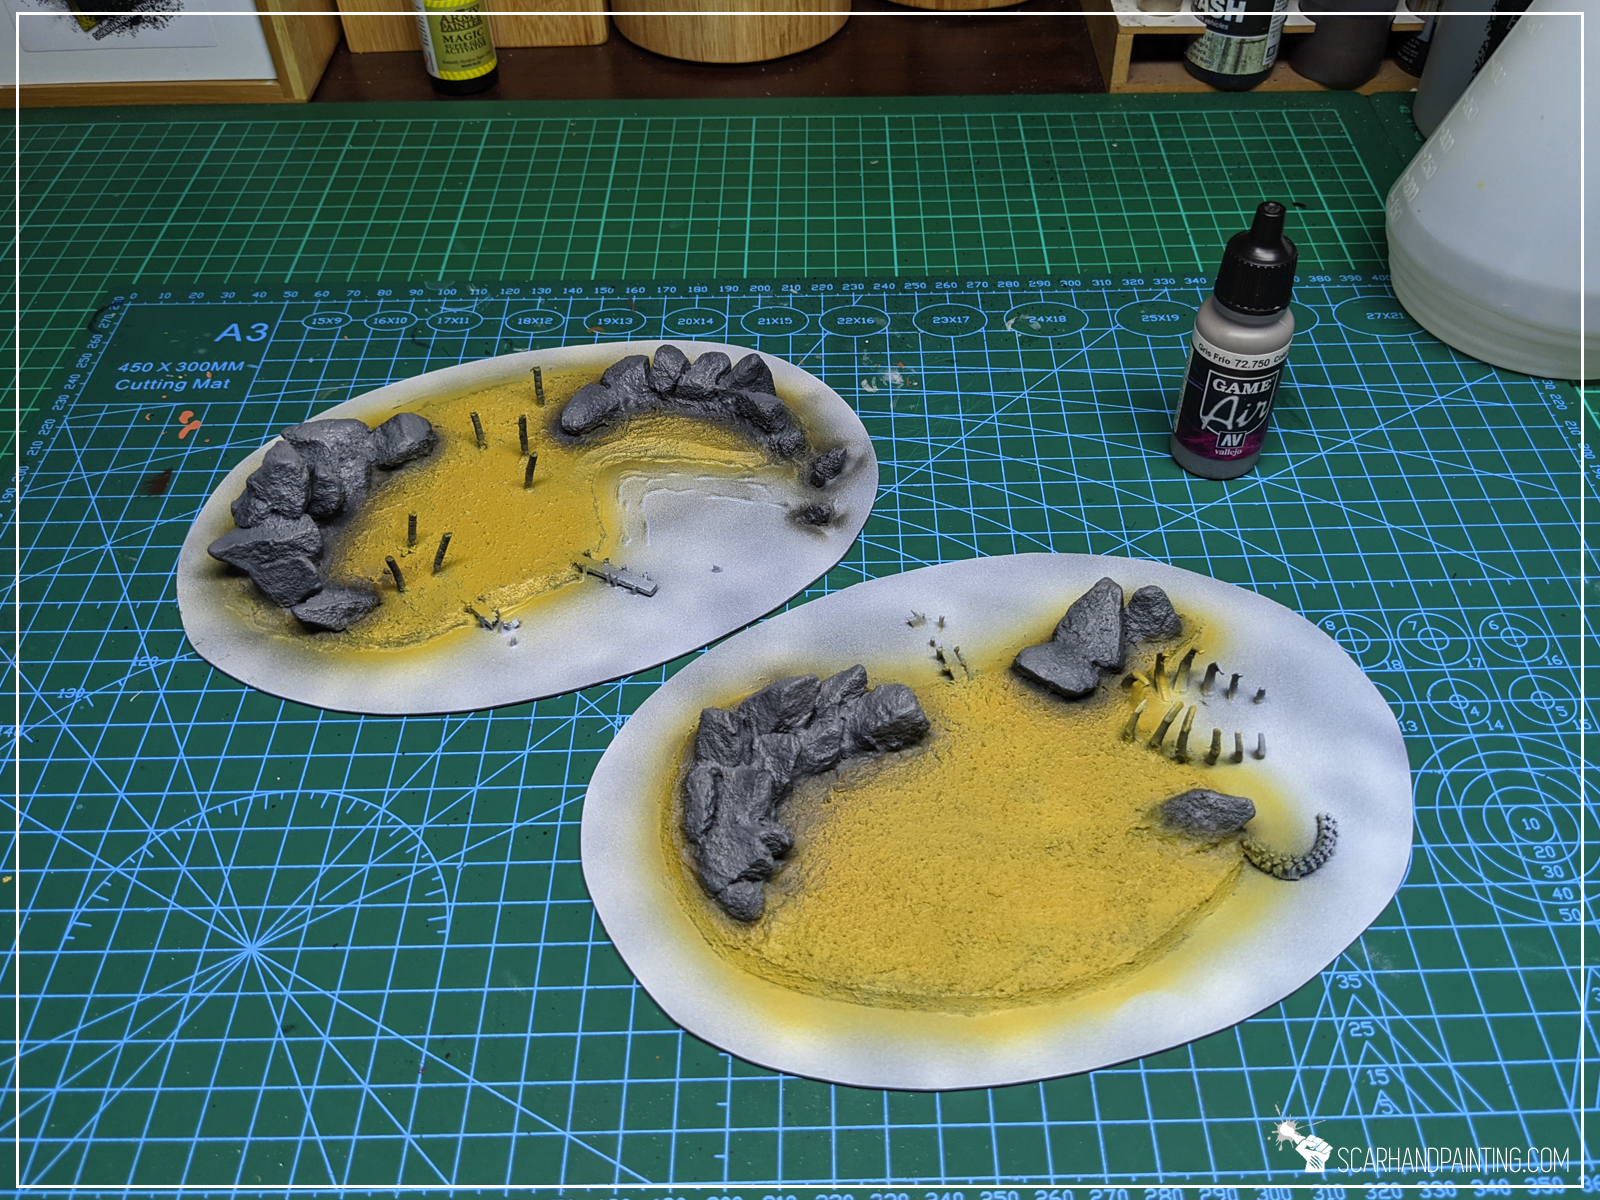
Rocks followed with a similarly easy recipe being airbrushed Vallejo Dark Panzer Grey, Cold Grey, Pale Grey Blue and drybrushed Ghost Grey.

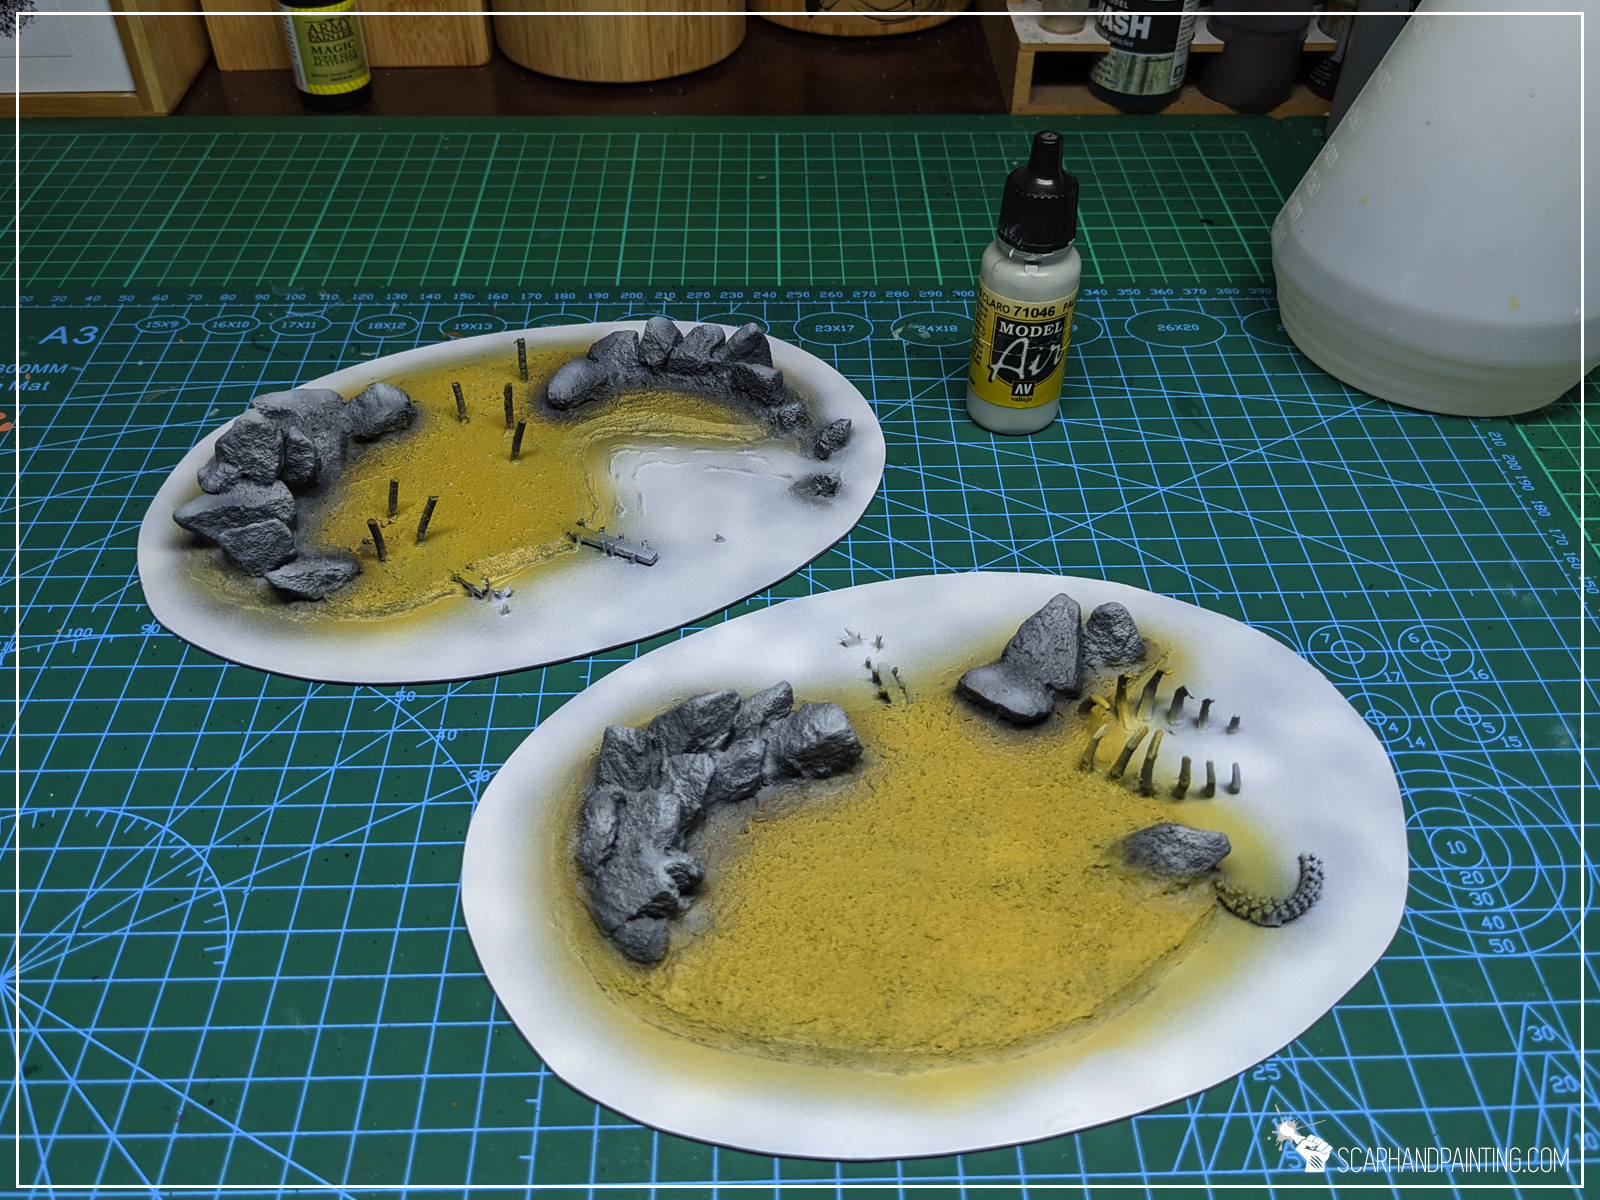
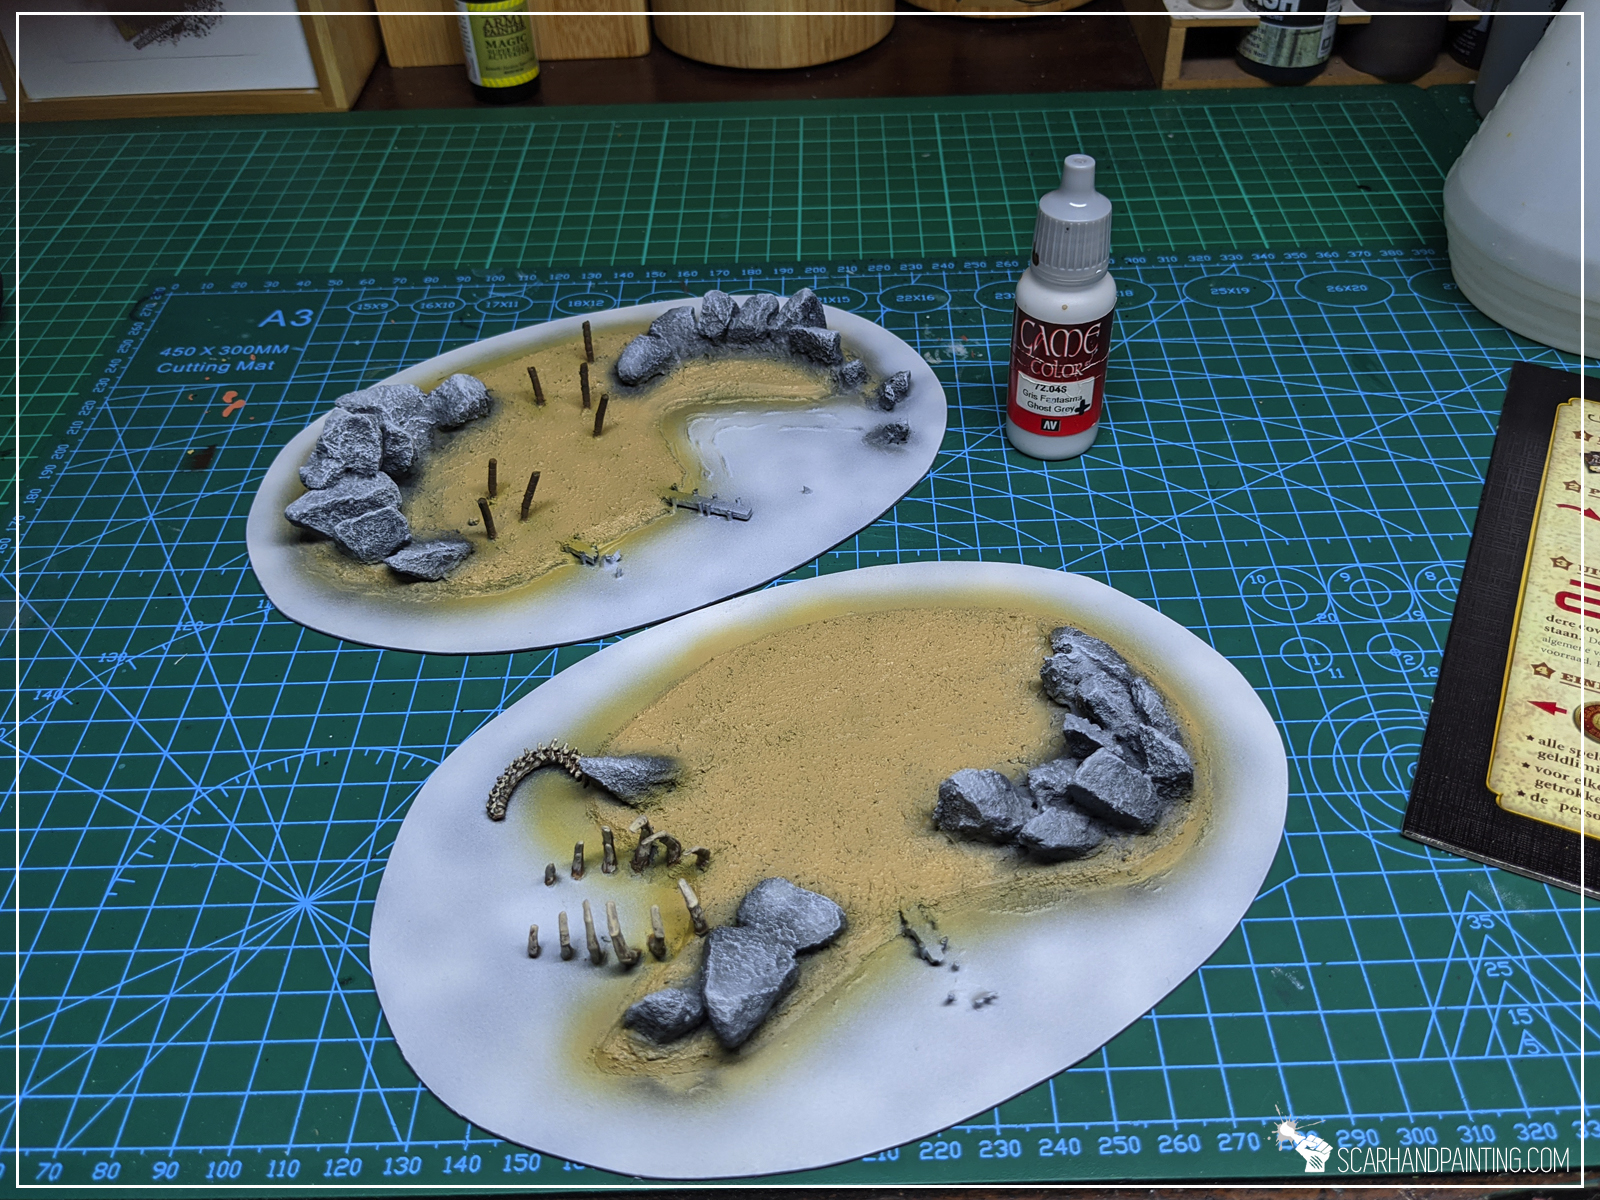
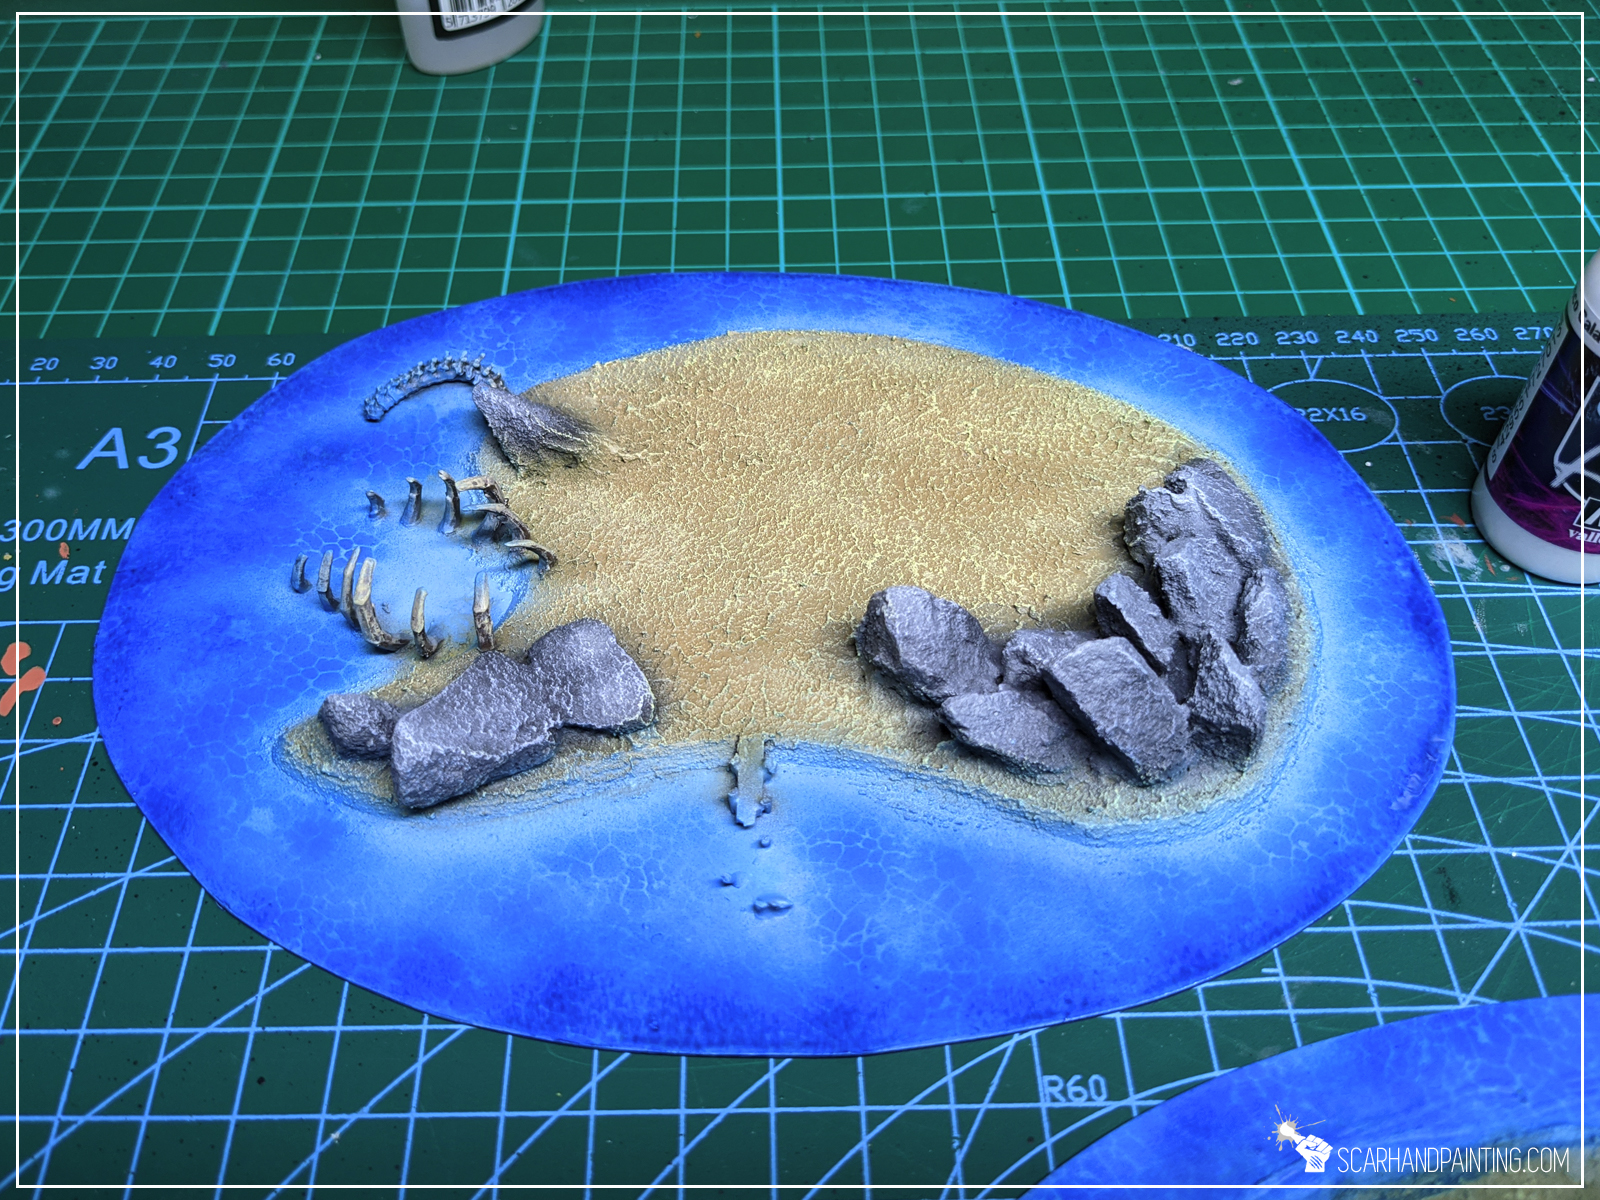
Water:
Here’s the tricky one. I decided to go hard with stencil airbrushed Vallejo Light Sea Blue, Magic Blue and spots of airbrushed Army Painted Blue Ink. I then sealed it with airbrushed Gloss Varnish.


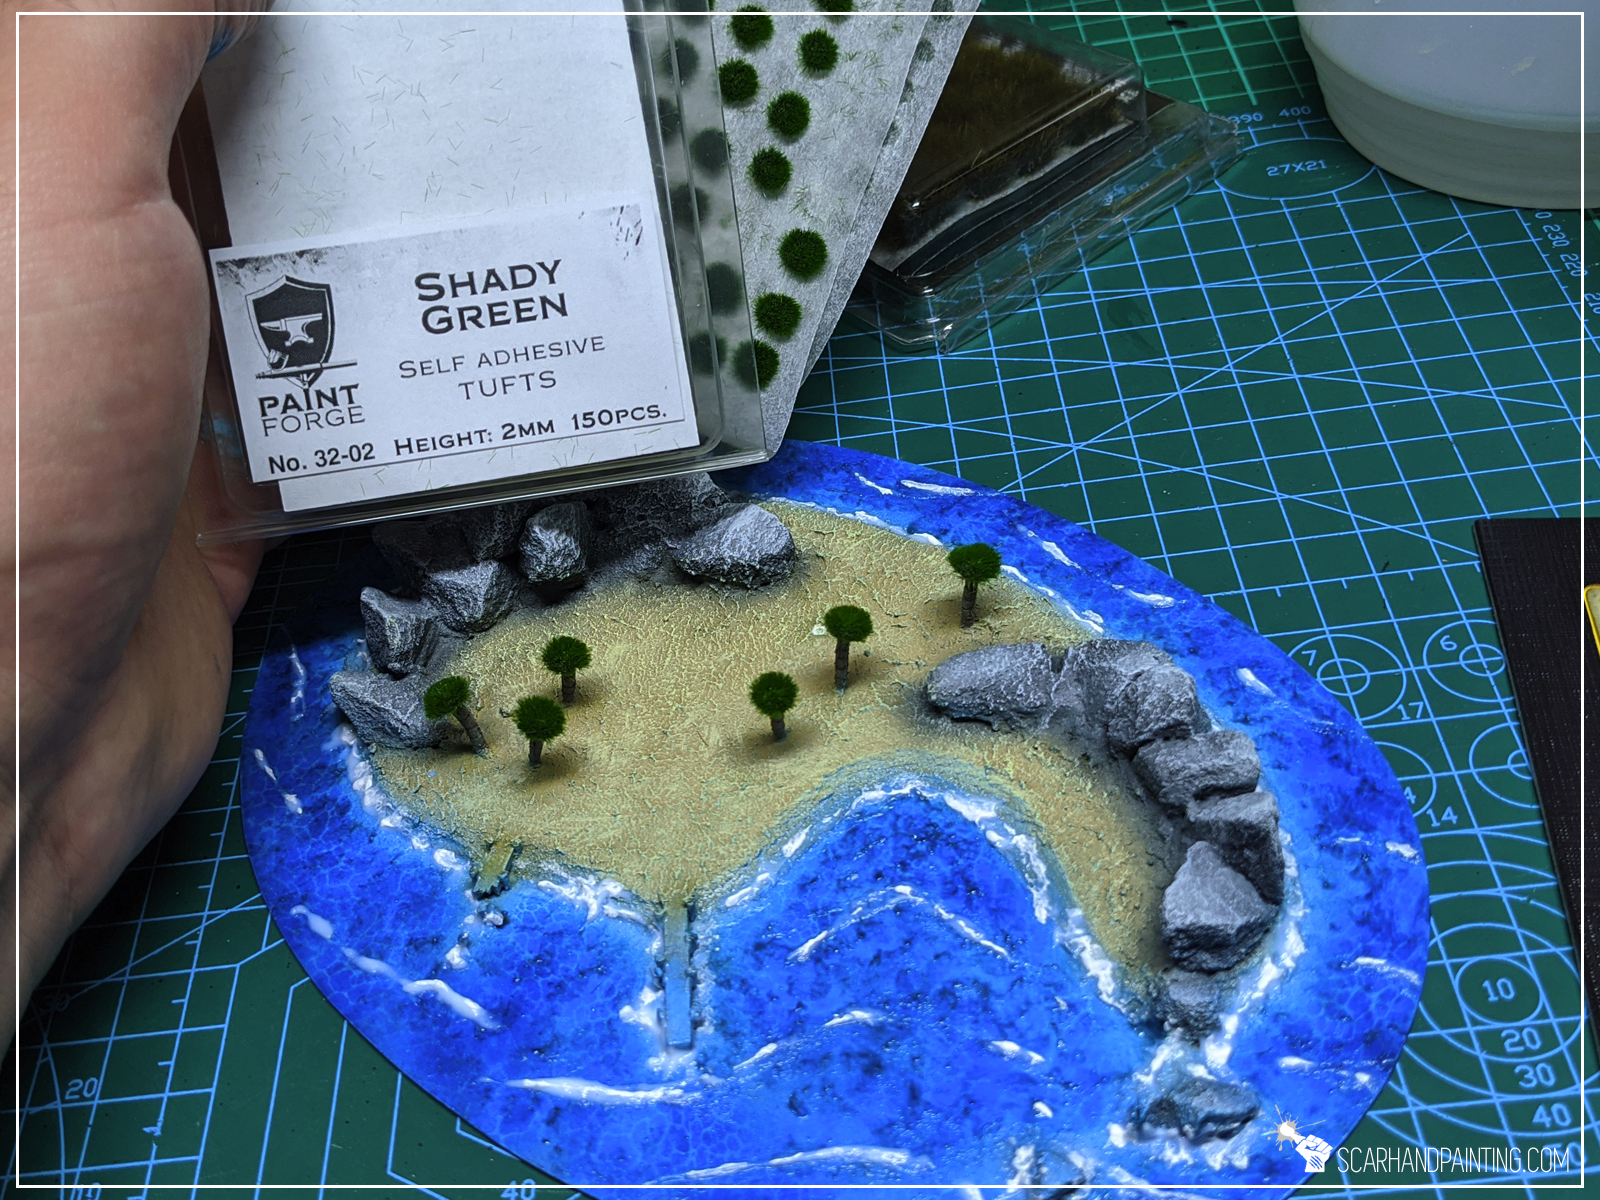
I added some final touches by manually applied AK Interactive effects creating waves and water foam. To add a nice color diversity on top of the island I also applied Gamers Grass Dry Green and Swamp tufts. Pal trees got finished with Shady Green tufts from Paint Forge.
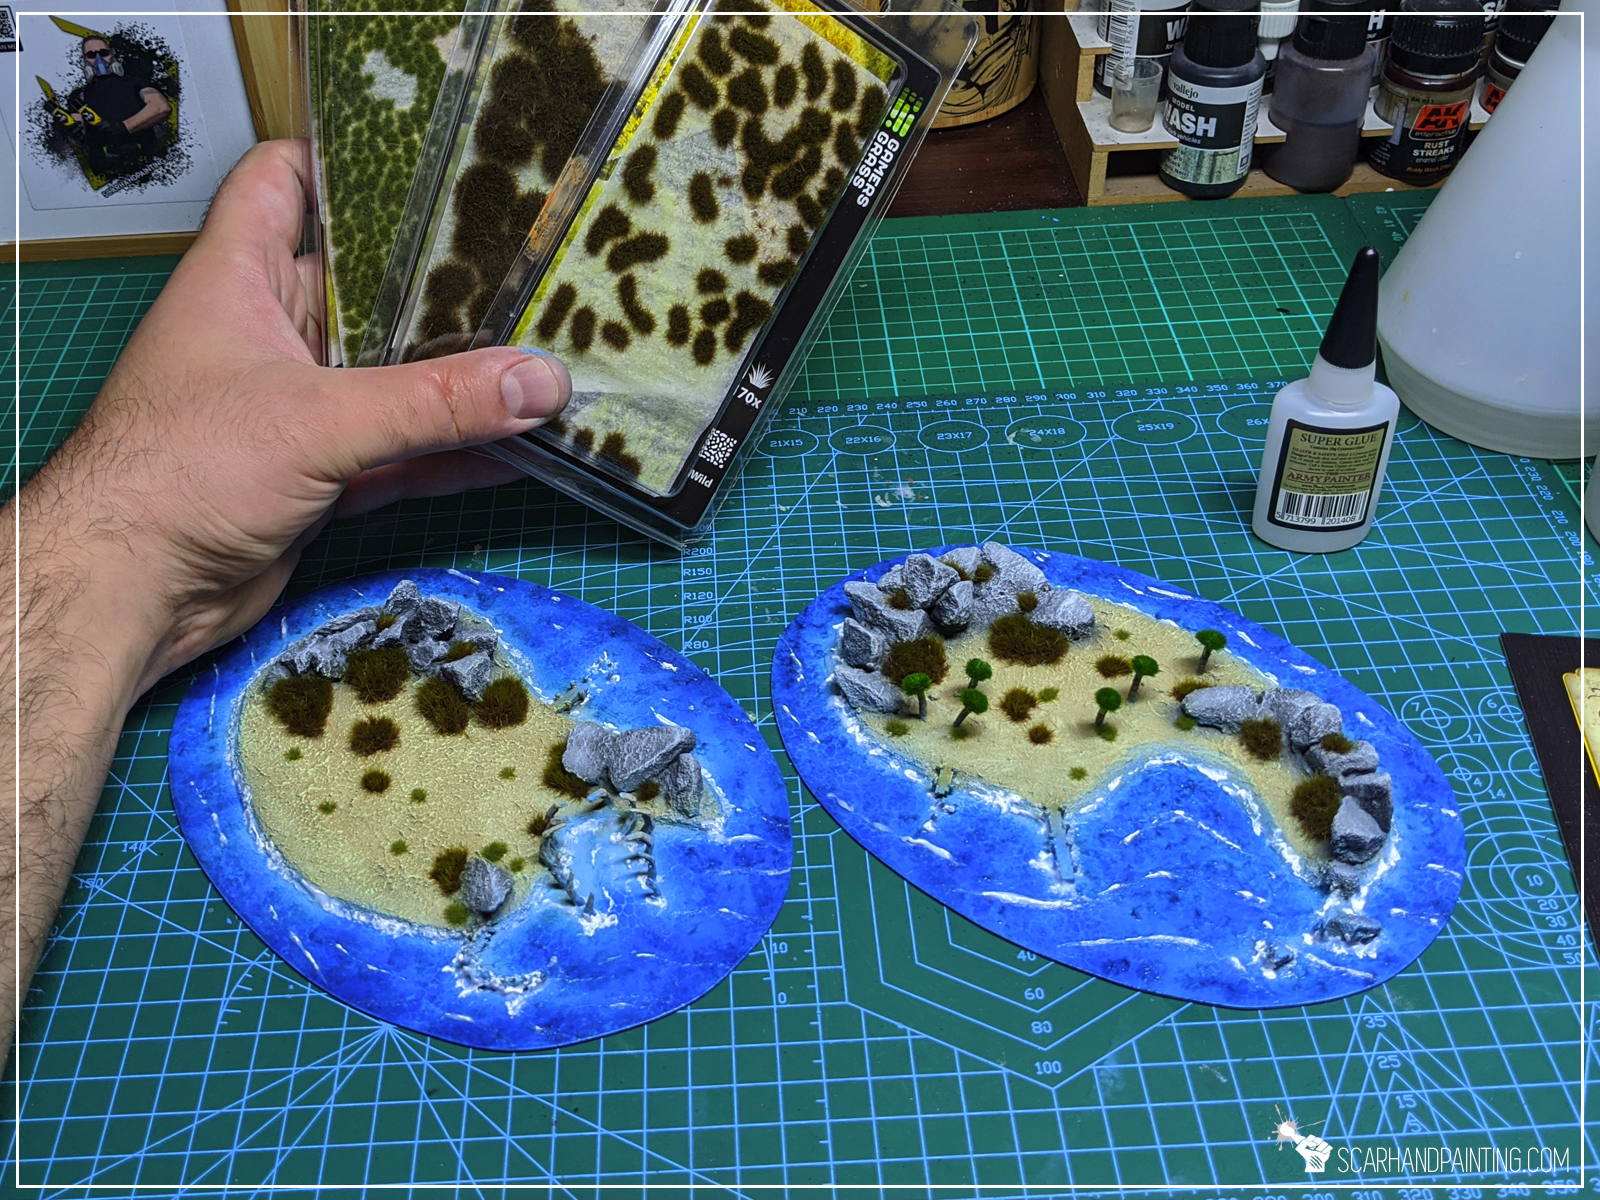
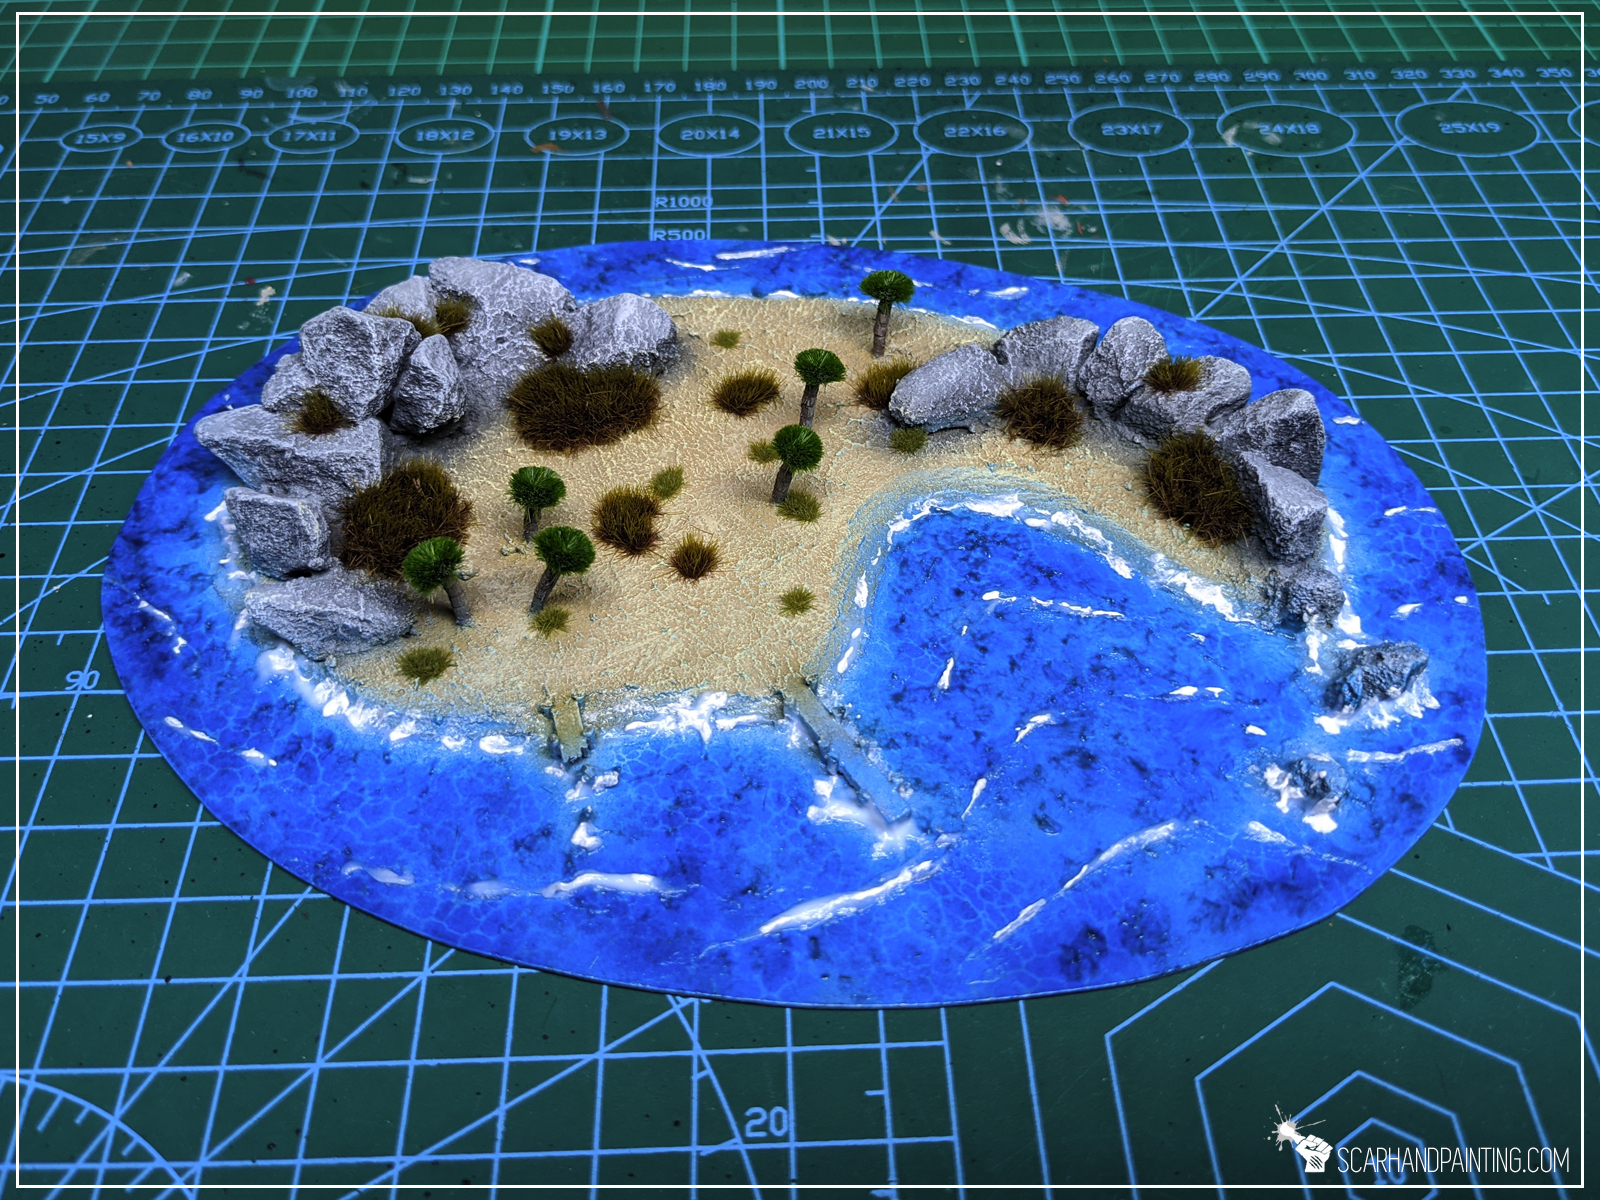
First two islands discovered, I’m ready to head up for the unknown waters. More scenery to come, following the same template. If you stick a while at my blog you’re bound to see more islands and other scenery types, including deadly rocks and shipwrecks. Be sure to visit Scarhandpainting next time you hit a port! Ahoy!


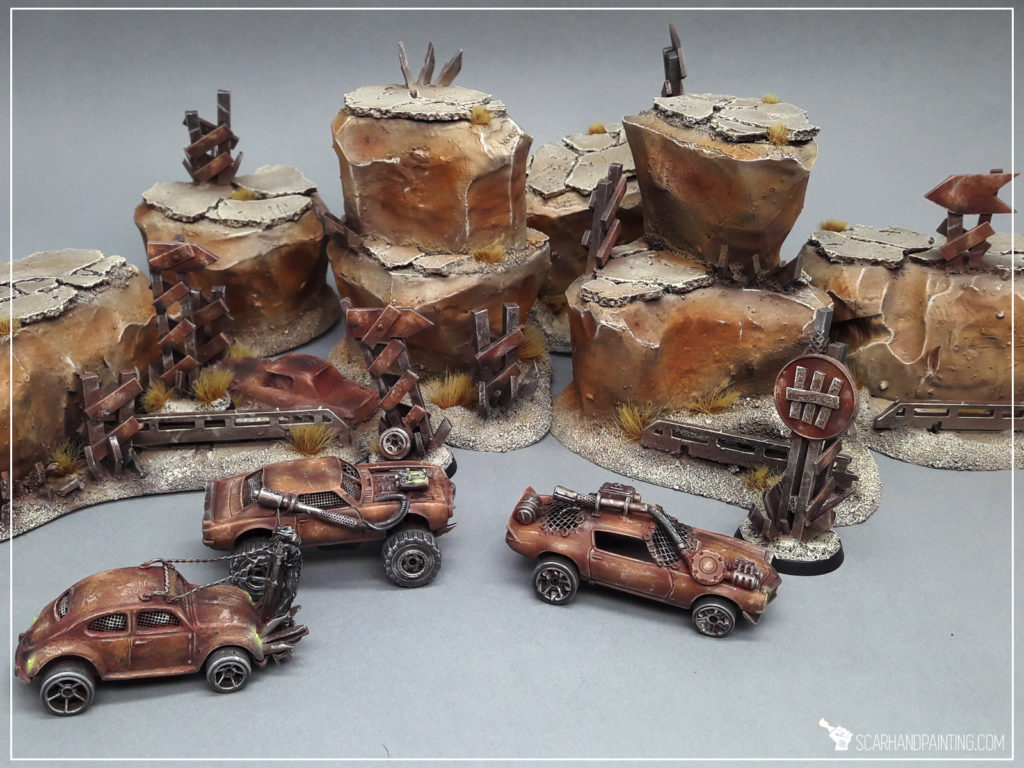
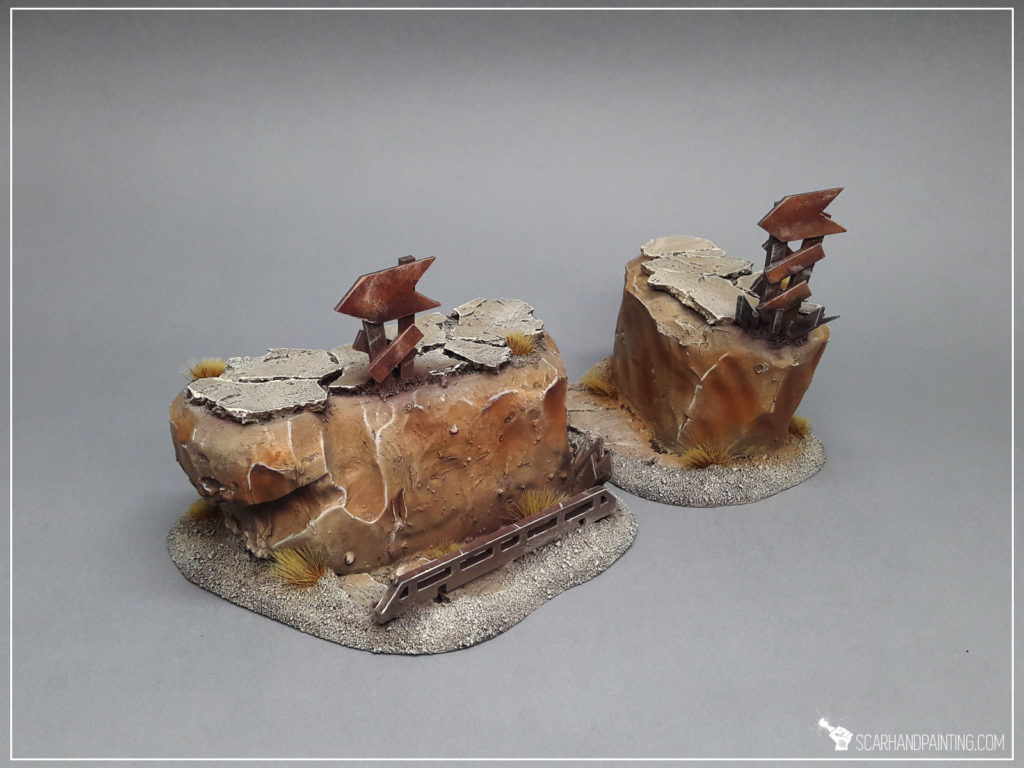
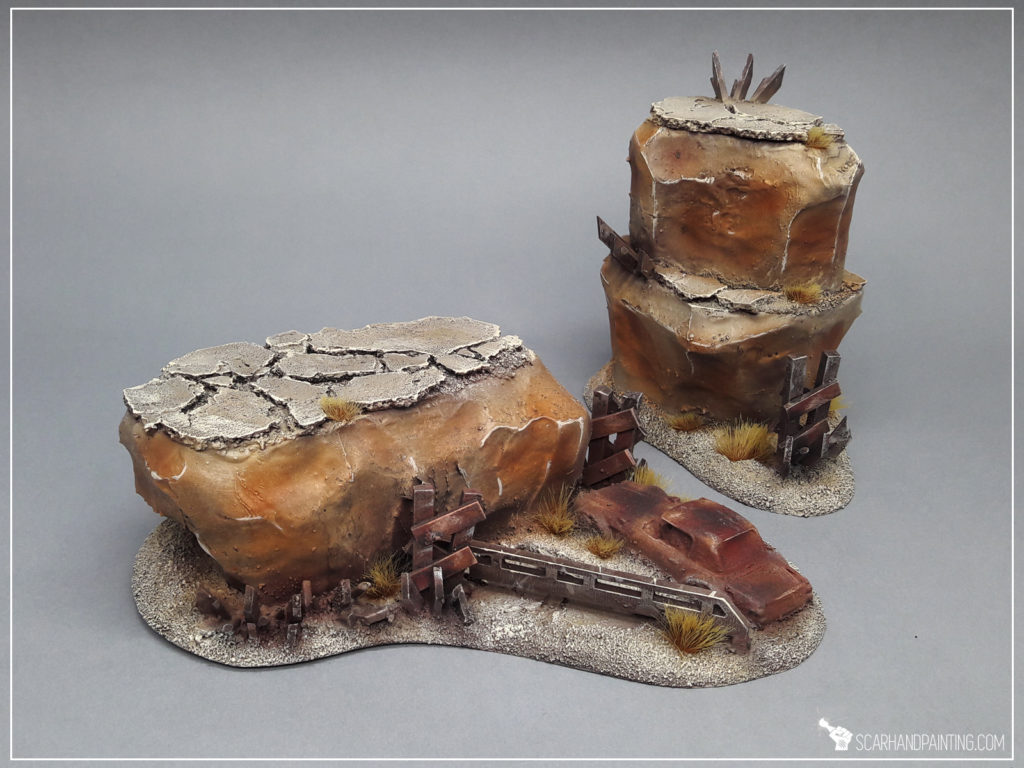
In this easy, step-by-step tutorial I’m going to show you how to create a Desert Scenery as could be found in “Gallery: Gaslands”.

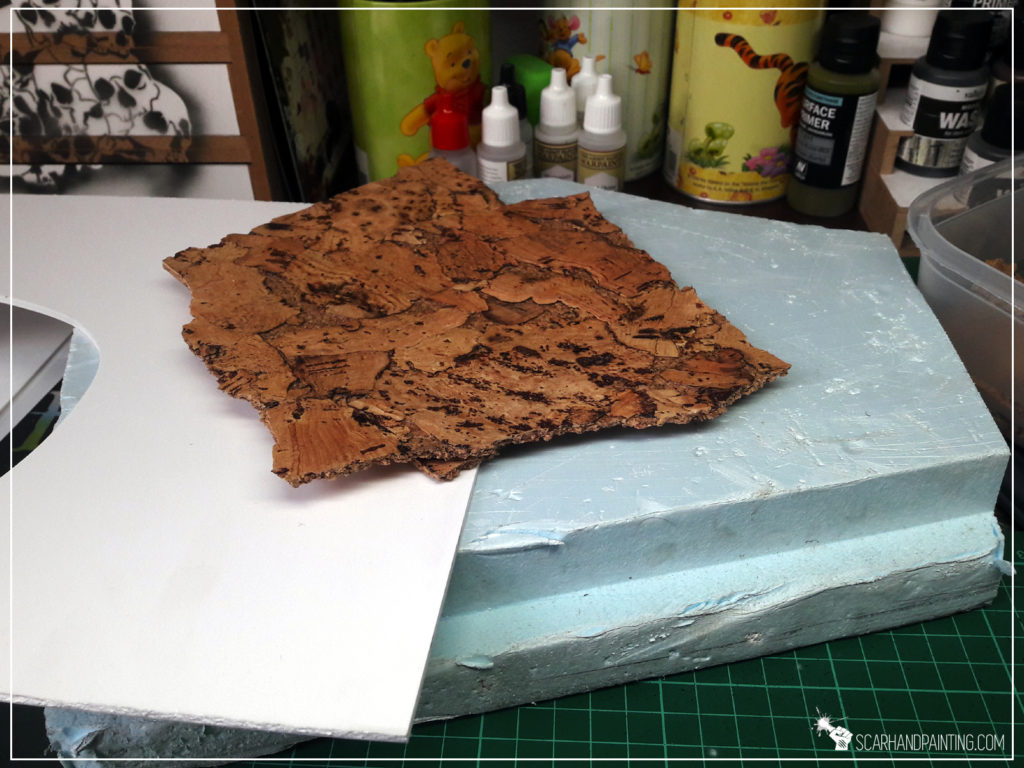
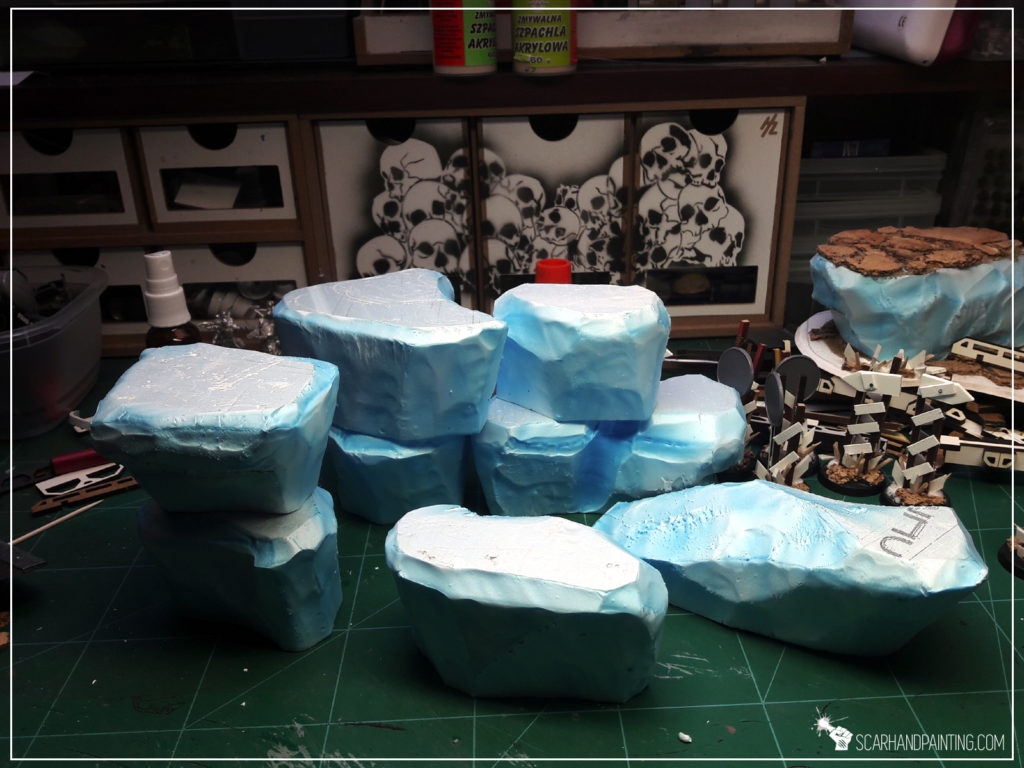
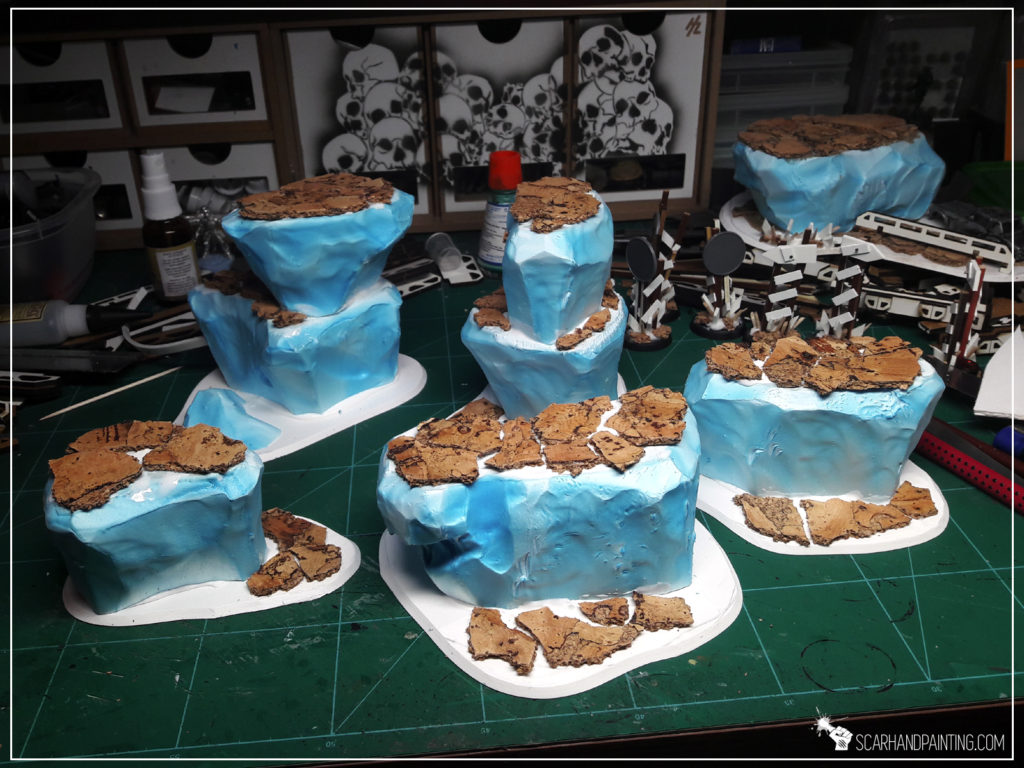
* I started by cutting foamed PCV (or styrofoam) into basic rocky blocks.
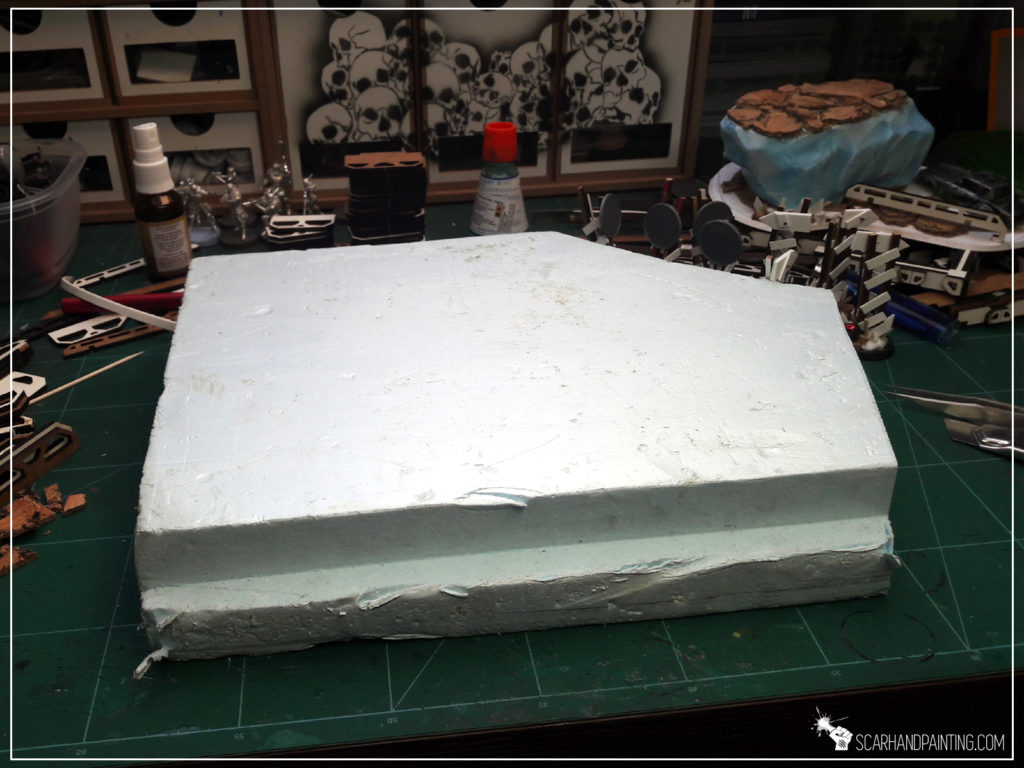
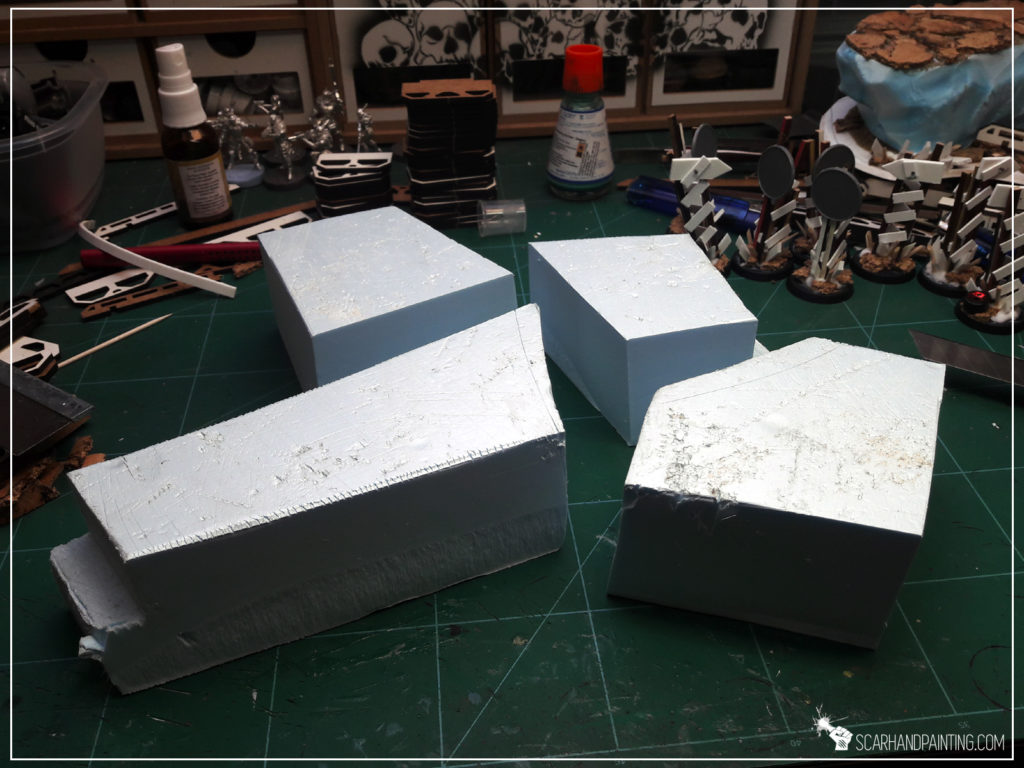
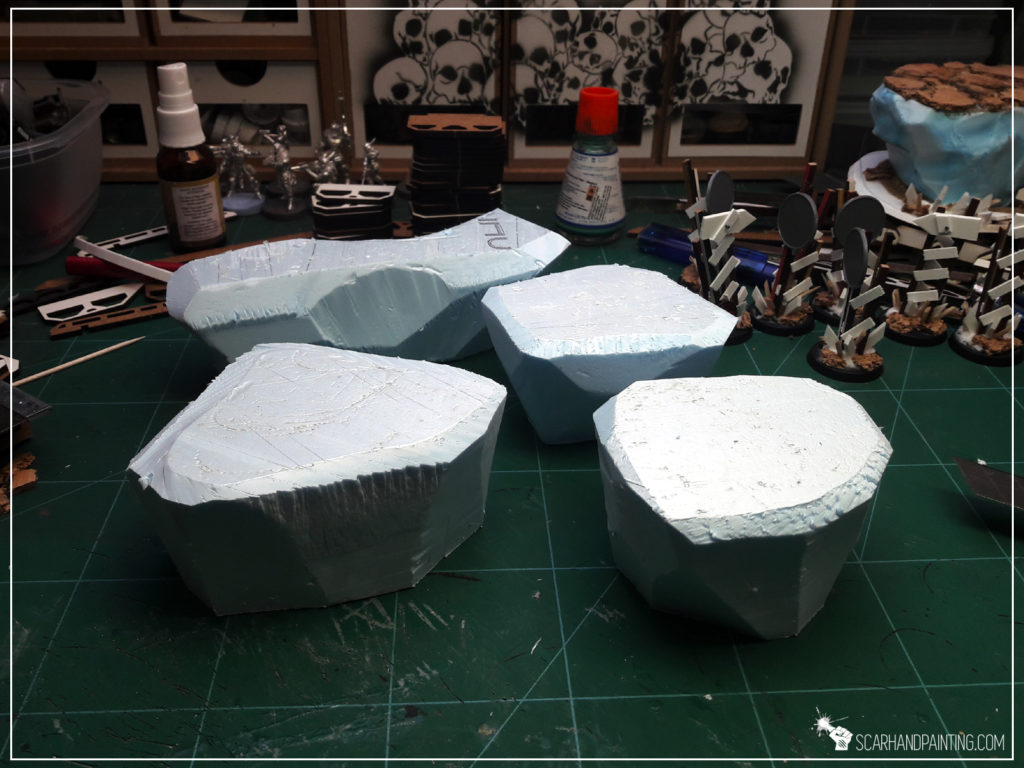
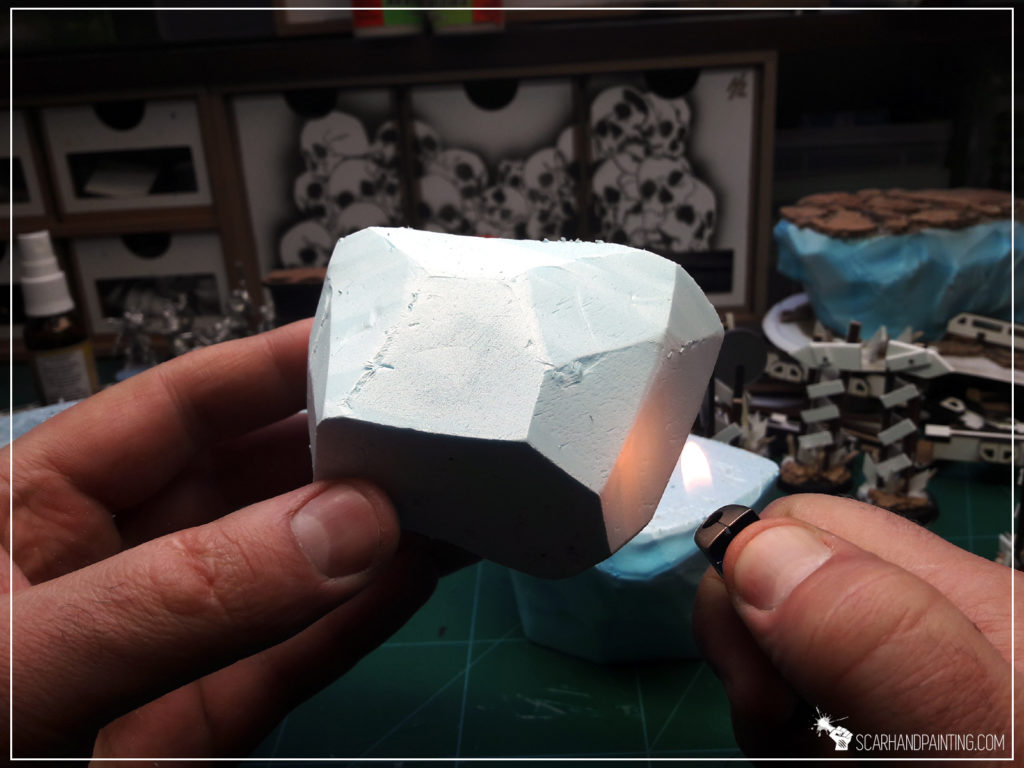
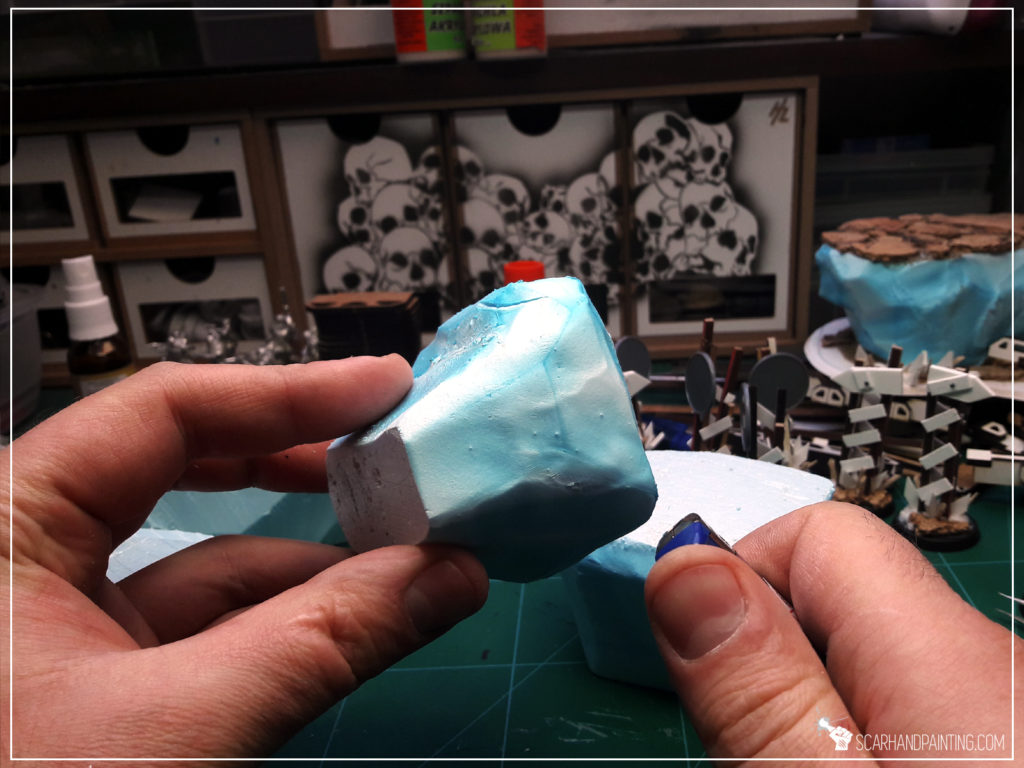
* I then used lighter to gently heat blocks on the sides, avoiding heating up top and bottom surfaces.
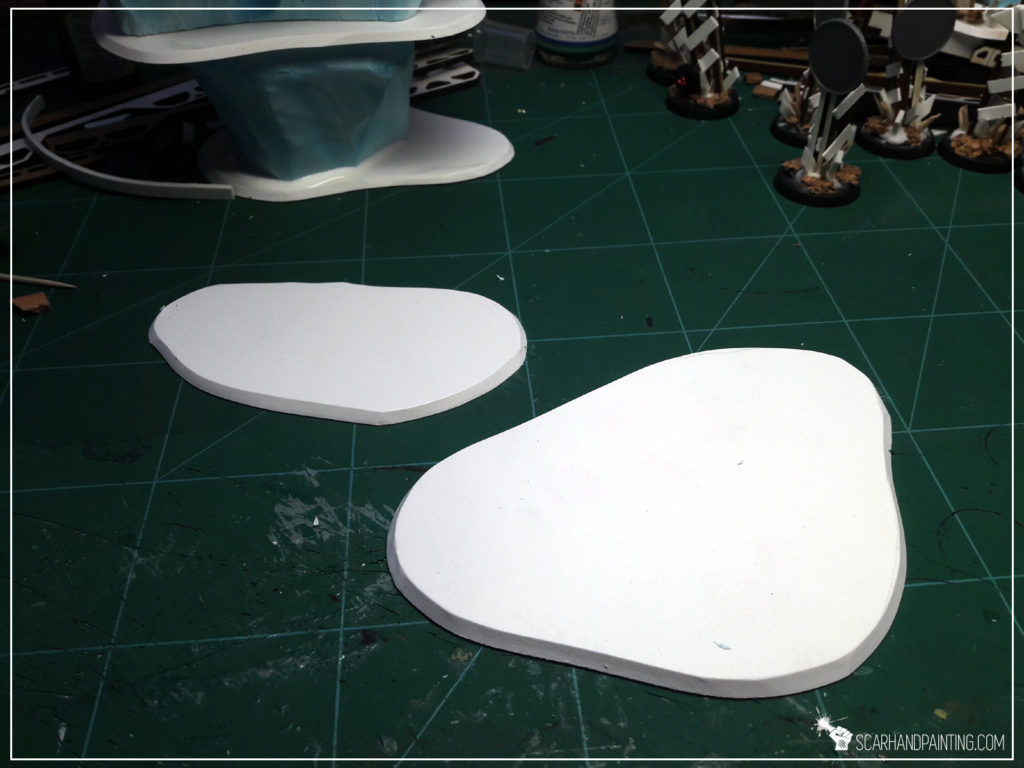
* Next, using a hobby knife, I cut bases from 3mm thick plasticard.
* I then glued rocky blocks on top of the bases with basing (PVA) glue. I also glued some blocks on top of one another for the scenery to look more diverse and interresting.
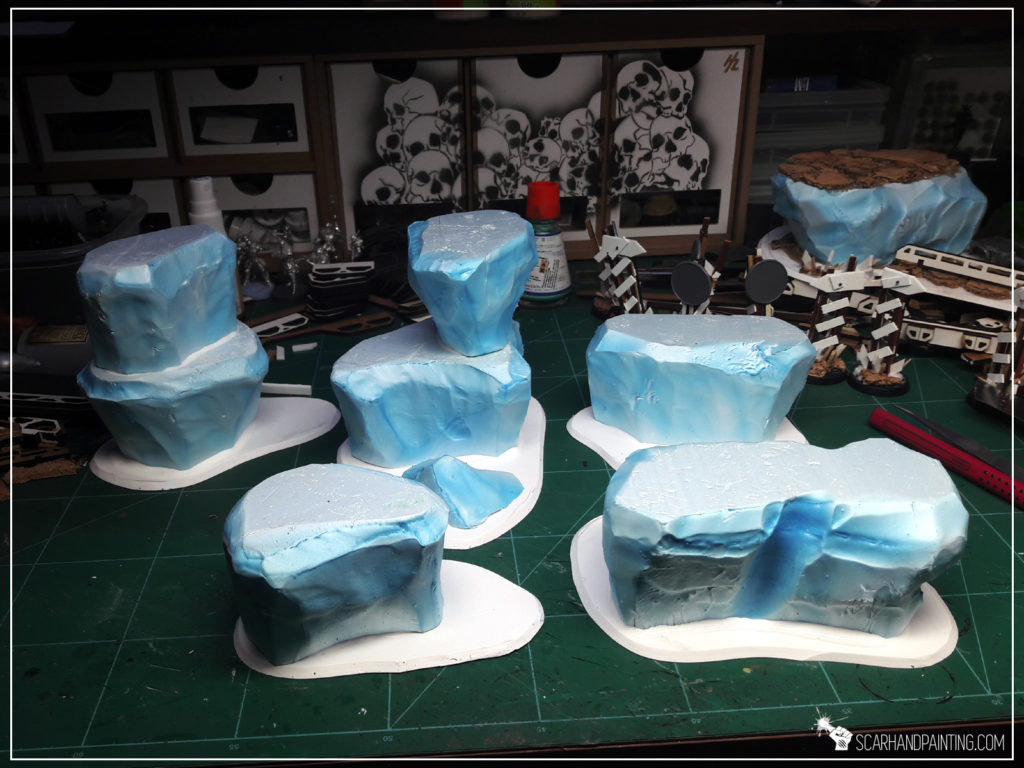
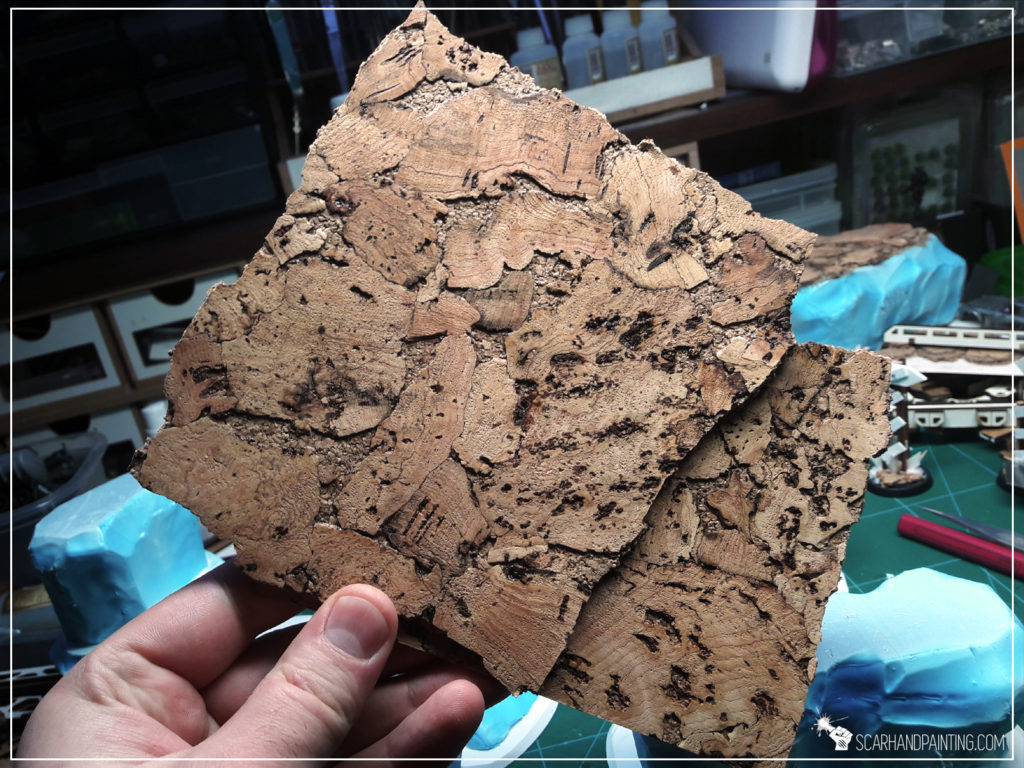
* Next I crumbled a sheet of cork into small pieces and glued them on top of the blocks with basing glue, sanding them before glue dried out to fill the gaps inbetween separate cork pieces.
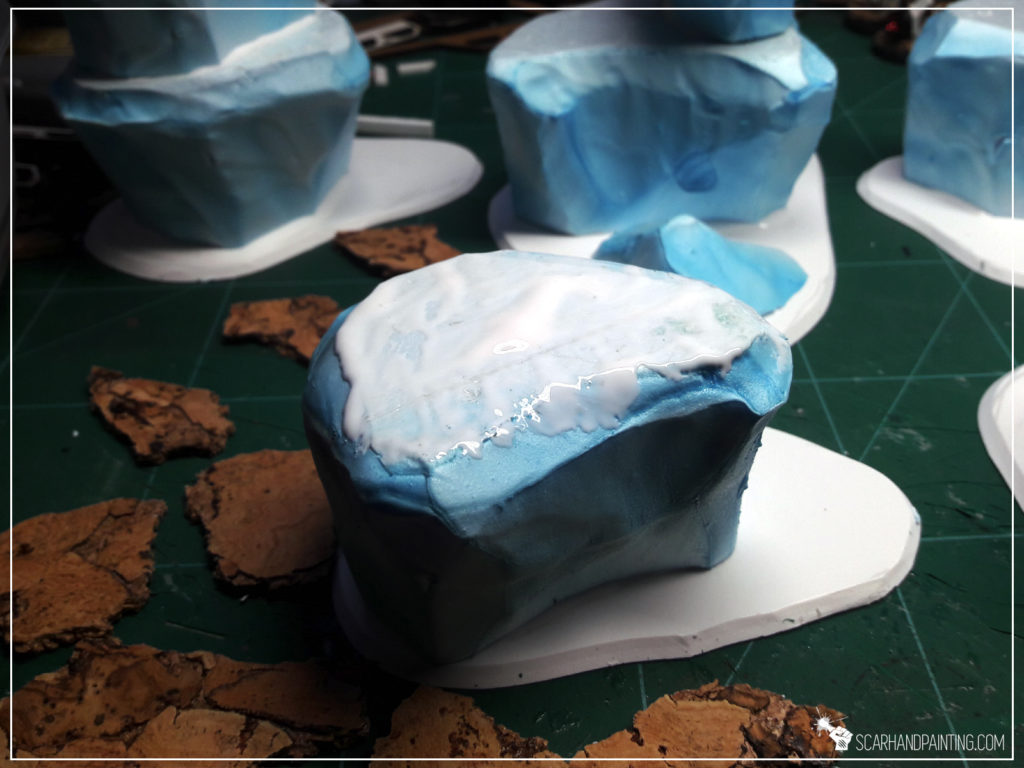
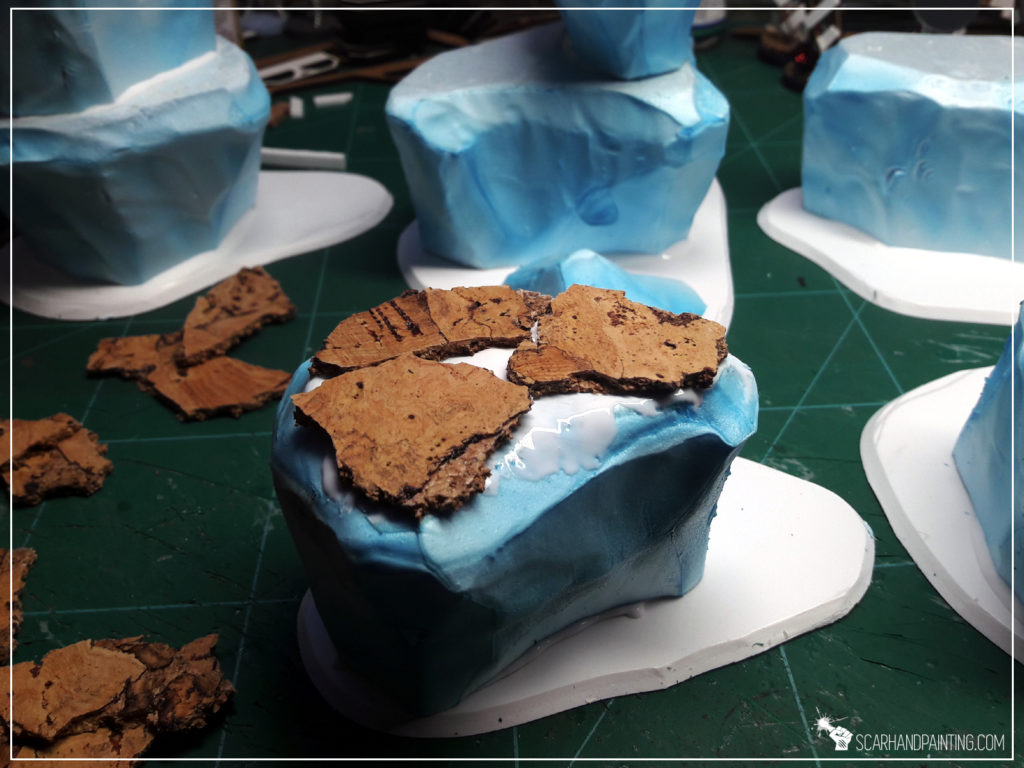
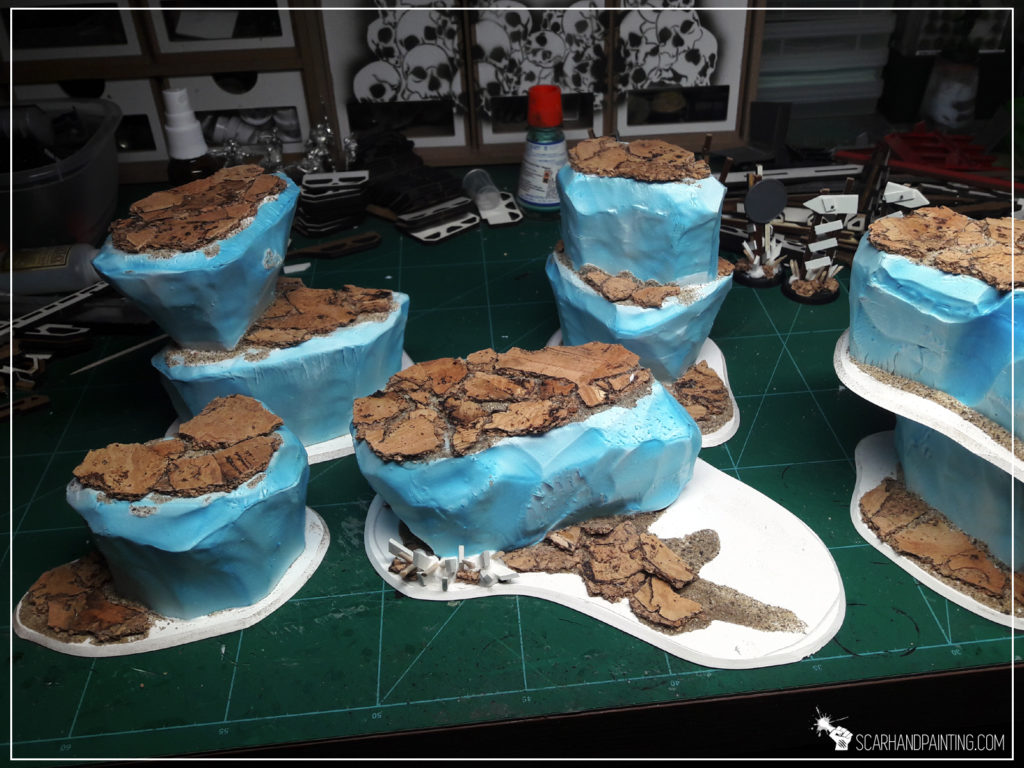
* I then used plaster (gypsum) to build a gentle transition between bases and blocks.
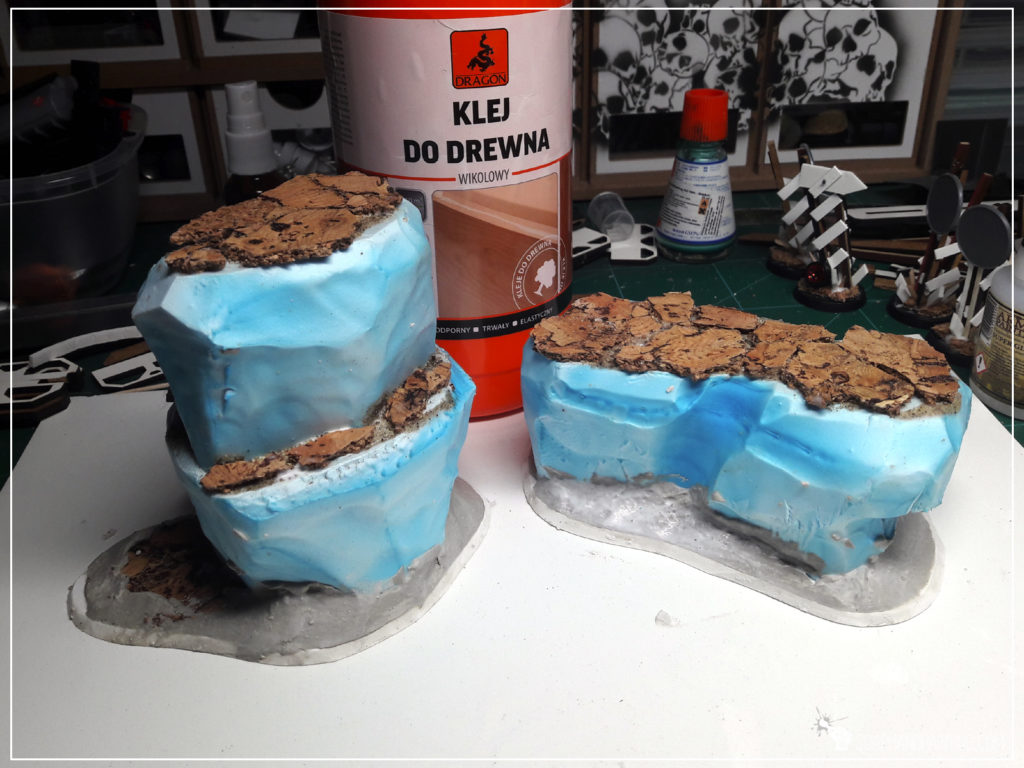
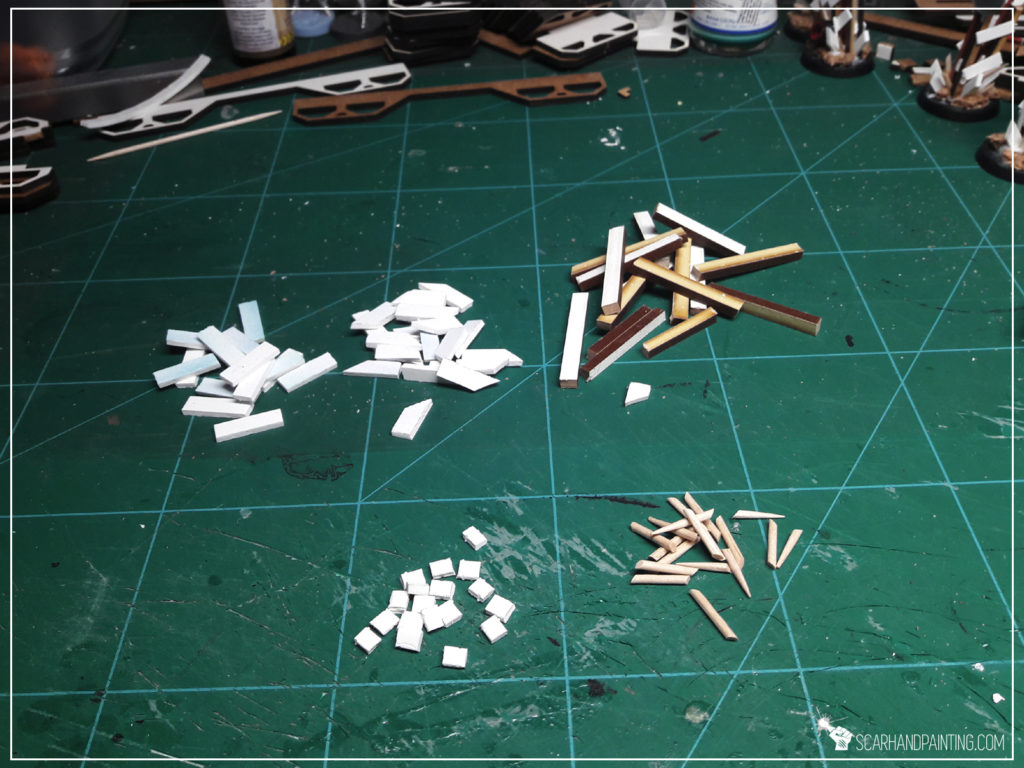
* A time has come for me to add some detail. Not much, just some texture to bring more life to the wasteland. I cut pieces of plasticard and used toothpicks, MDF leftovers and a toy car to create ragtag barricades and post-apo racing signs.
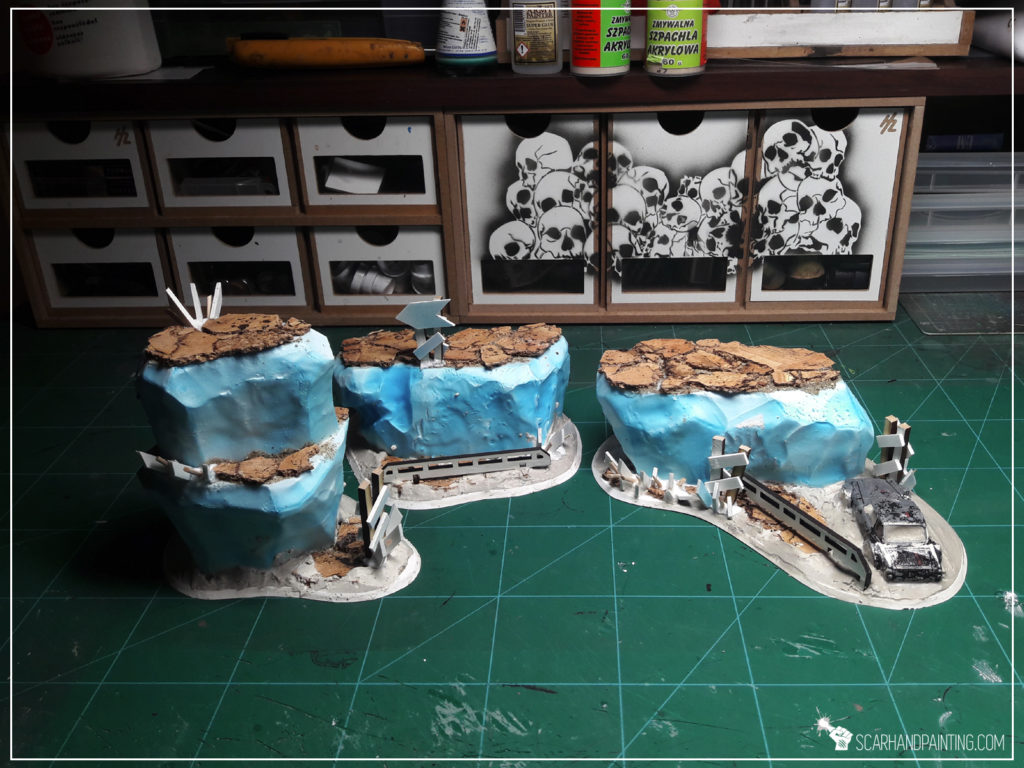
* Lastly, with a regular brush, I applied basing glue then sanded all the plaster, sides of the bases and some areas around cork pieces on top of the blocks.
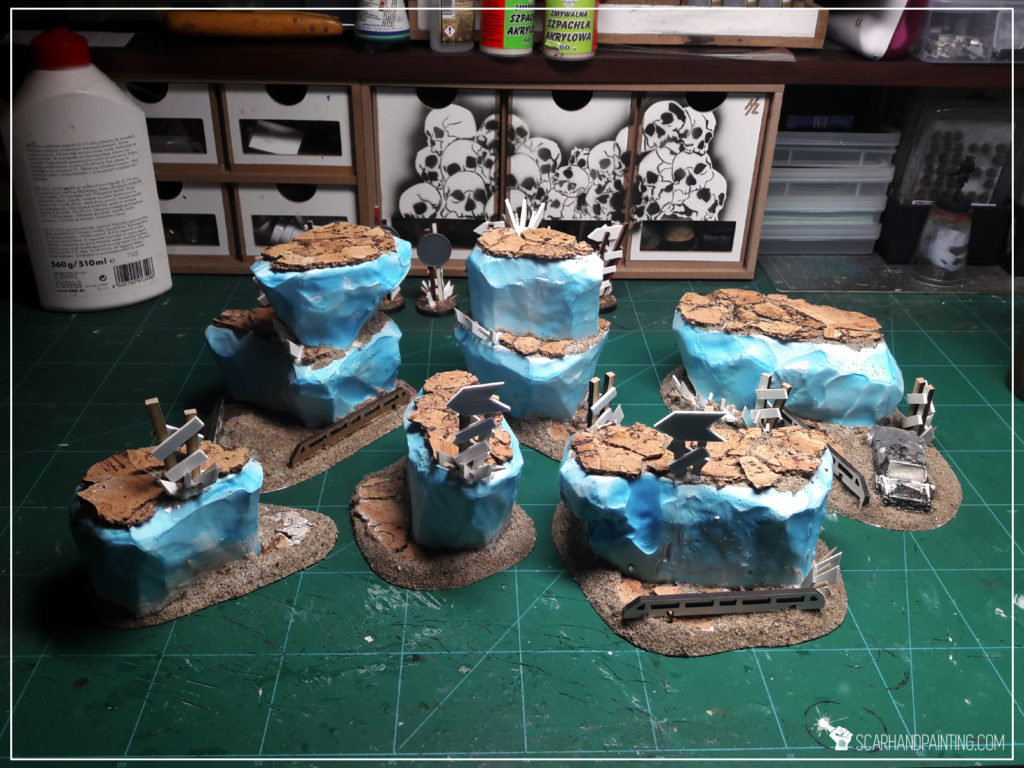
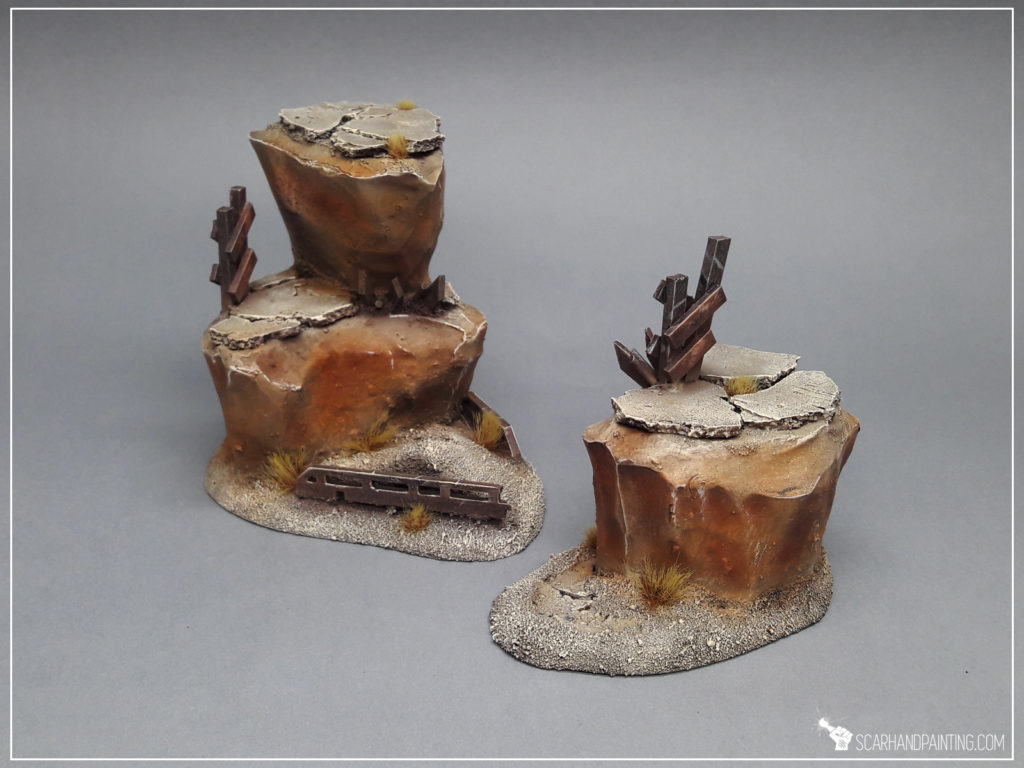
Couple of hours later I have painted this stuff and added some tuftsthe end result looks like this:

In this tutorial I will show you a shortcut to some awesome Terrain Making. Together we will plunge head on into the distant future of ‘Infinity the Game’. We end up knee deep in terrain pieces, surrounded by half cheved bitz of plasticard, with our fingertips bleeding, clothes devastated by super glue and wallets full of unspent cash! A truly manly adventure awaits us and that’s why I’ve prepared some Terrain Making theory to prepare you for what is to come and remodel the way you think about it.
Terrain Making is a topic to write a book about. There is just so many different aproaches a modeller can take on a road to create some awesome gaming terrain. I would be lying if I told you that I am able to cover all of that here, in this tutorial. Instead I will concentrate on some key points of Terrain Making that I keep in mind whenever I happen to make some scenery.
The first thing to do is planning. I’m not a big fan of this part and usually skip it, still some key points of planning take place almost unconsciously. Just sort the ideas, prepare funds for eventual purchases, set a theme and go for it!
– Price of beauty. Long years of gaming and terrain making showed me that a nice looking table may look even better if pumped with some pre-made stuff. Just throw some money into this project and see how much it changed when it comes to how it looks. Think of a sum that you would like to invest in your gaming table – have in mind that except for some necessary stuff like paints, glue, spray, your gaming table can still be built with 0 cash involved.
– Avoid Expensive stuff. I just told you to spend some cash but be thoughtful with that. Try to pinpoint the most expensive elements of your future gaming table and substitute them with some cheap alternatives. This way you not only save some cash but also will not brind huge visual diversity to your terrain set. [A good example of an expensive terrain piece that could be easily replaced.]
– Be a pragmatist. Keep it fast and simple to build. I too had a boner when seeing this gaming table but hey – it’s like a billion € and countless hours spent on putting these things together. Remember that cash equals time and vice versa. If earning cash to purchase a terrain piece and putting that piece together will take you less time than making one yourself – just go for it. Otherwise it’s worth to keep it at speed. A nice looking gaming table can be built and painted in less than 16 hours!
– Select a theme. A ravaged battlefield, futuristic city, space hulk hallways, huge magazines, train station, rich district – what you will choose will affect the materials you will need and a level of complexity ergo ‘time’ you will need to build your gaming table. A good theme is an average between price, time of build and LOOKS. Low on cash and time? Try out Magazine space full of barrels and containers. Plenty of cash and time? Go for a pristine Rich Quarters with fountains, streets, bridges and detailed buildings.
In order to create a gaming table you will need a lot of different materials. Plasticard, cardboard, thin wood are considered to be ‘common’ while bitz and parts of particular shapes are more difficult to obtain.
– Have an open mind. There’s plenty awesome items surrounding you all of the time. Most of them end up as trash while they might be used as modelling material of exceptional value. Just go to the kitchen and look around. Plastic bottle caps of different shapes and sizes, coffee jar lids – these are the tip of an iceberg!
– Ride the outside world. Home ‘trash’ is your brick and mortar when it comes to Terrain Making but true pearls belong to the world outside. Just outside your doors you can find some nice looking stones and sticks but further you venture the better your loot will get. Go ahead and visit a supermarket. Toys, hair utensils, cheap (crappy) plastic jewelry, tools section, decorations – these places are marked with ‘X’ for ‘treasure’!
– Be like modern China, steal blueprints. Many different companies created a variety of splendid gaming terrain. Once you type “Infinity Gaming Terrain” in google you will find a lot of great inspiration to draw your ideas from. You can even purchase some and use leftovers to pimp the visual effect of your home made terrains or go even further and rearrange purchased terrain to have some additional spare bitz left!
Finally a part of raw hard work! If you picked a theme that goes along with your funds and time that you are willing to invest – this part will be a lot of fun for you.
– Durability. Gaming terrain should be tough as otherwise you risk games ended up being forced to do some repairs. Try to create terrain that is well ballanced and easy to game with. I recommend that you base all of the smaller terrain pieces as this will improve their balance along with visuals. Just remember to never use cardboard for basing as it usually bends over time. The recommended materials are: plasticard, plywood (both can be seen in the picture above).
– Utility. Gaming terrain is supposed to be gamed upon. I know – some small, sweet looking, extremely detailed pieces makes me wanna cry with joy, but are they as playable as simple, angular blocks of terrain? The answer is NO and have that in mind. Additionally it is worth to measure some heights to better fit the miniatures. For example: A barrel of the same height as a miniature will usually force you to wonder if a miniature standing behind it has LOF to other miniatures? Well usually it does due to use of silhouettes so it’s better to build barrels that are half the miniature’s height. Etc.
[Once again a good example of an expensive and not very playable terrain piece.]This building is looking great but it is expensive, the cover it provides on the ground level is limited, it is too high for some miniatures to go to the roof in a single action forcing you to remember where the miniature is left hanging.
– Clusters. When it comes to small terrain pieces it is the best to keep them clustered on a single base. They will stay in place and provide a wide cover instead of falling apart and moving around the table each time someone ccidentally pushes it.
– Clones. I’m an enemy of a ruler. I just hate to spend lots of time measuring plasticard/cardboard pieces of same dimensions. I preffer to measure up one piece, then cut the rest using the ‘primary’ piece as a template. Even if some pieces get a bit different from one another this will only add some extra touch to the overall looks of my gaming terrain. [Use this technique at your own discretion.]
– Production line. Plan your work accordingly. Start by preparing all the necessary pieces, put them together and base all the terrain pieces. Do not start to paint before all the terrain is ready for it. This way your work will be a bit less rewarding but you will save a lot of time. Same goes for painting: Do not paint a single terrain piece but paint them in droves instead. Just as you end up applying a layer to the last piece, the first one will get dry and ready for the next layer.
So here’s a shortcut recipee for you:
– Prepare funds then cut the expensives off,
– Plan what to buy/build and how long it’ll take, (be a pragmatist),
– Choose a theme according to your capabilities,
– Pillage your house for free trash material,
– Pillage nearby supermarket for some key material pieces, [keep it cheap.]
– Use some purchased terrain and leftovers to create your own variations,
– Make your terrains durable, balanced and playable,
– Keep small terrain pieces based together,
– Save time while preparing particular bitz by using one as a template to cut the rest out,
– End one stage before moving to the next one,
I feel your pain. That wall of text above is probably as hard to read for you as it was for me and I read it more than thrice. Let’s go to the Practical part of this Tutorial with some examples and more pictures. I will use my own gaming table prepared last year as an example of how to do it in accordance to above tips.
Back then I was short of time and wanted to create a gaming table designed for Infinity ASAP. I love Micro Art Studio’s terrain and wanted to purchase a whole set of it along with some Spartan Scenics. Cash was not an issue but once a test purchase was delivered I almost dropped the project due to time consuming process of putting these terrains together. It was a hell of a boredome so I decided to go ahead and prepare my own gaming table. I choose something between Mass Effect ‘Citadel’ and Death Star outer surface style Theme and already owning a Micro Art Studio’s catwalk set I decided tu cut off the most expensive thing: Buildings. Small part of the surplus cash was to be used on static grass and a Battle Mat that would eventually pump the visual effect of the gaming table.
Being a pragmatist I decided to use a hard cardboard boxes as the main bodies on the gaming board. Easy to obtain in friendly local hobby store, easy to prepare, light (transportaion), stable, very playable – the cardboard boxes prove to be an extrmely good pick. Some spare parts from catwalk set let me upgrade my ‘buildings’ with a nice set of futuristic ladders. The plan was to improve the visual effect by adding some facture with paintjob.
Once I was done with the buildings I moved to all the other stuff. Less futuristic but very playable and bringing some colour to my gaming table came Barrels, Trash Containers, Holograms, inner walls and some key terrain pieces. Here’s an example:
Barrels: Plastic bottle caps of coca cola, milk and water. I find the ones with less facture being the best as the paint looks much better on irregular flat areas. I drink a lot of Coca Cola Zero in addition to milk and water so I used most of the caps being kept in home 🙂
Trash Containers: Tic-tac pack upper parts. Some were additionally converted but looking past I think that I should leave them be as they have a perfect shape on their own.
Holograms: Old Warhammer 40,000 tokens, easy to obtain at second hand market and as these are rarely used – they come in cheap. I had some left from my own Warhammer 40,000 collection and purchased another set from a friend.
Inner Walls: Rectangle Chessex Dice packs being emptied and thrown away by a local hobby store. Some walls were also made of wooden blocks. Some have been updated with facture made of wooden spare parts left from Micro Art’s catwalk set.
All the leftovers were used to build this Relay Beacon, leaving not a single bitz unused.
This particular gaming board was made with rush thus I had to update it from time to time adding extra touch with new sets of scenery. Just recently I wandered into the Supermarket in search of some final pieces to strengthen the theme of Sci-fi quarters. I found these cool items:
Plastic hair holder / 1,5€is a masterpiese of both architecture and art. A fine centerpiece for my gaming table. I bought two of these and made them into this:
Decorative beads / 2€ will one day be used to make a set of awesome light globes all around my flat white buildings. For now they served as additional facture for new set of Trash Containers.
So here we are. My gaming table took less than 24hrs in total to complete and that if all the add-ons are being counted. The overall cost of this project is Micro Art catwalk set, Micro Art hologram banner set, Micro Art gaming mat, warhammer 40,000 tokens, two hair holders, a pack of decorative beads, a can of white spray, some paints, glue, brushes. It’s around 150€ + 24hrs worth of my work (which could be much less if I only made all these stuff in one go). All the other items I’ve managed to get for free. Now I have a very playable and rather nice looking gaming table, designed for Infinity and fully packable into a single box XD
! If i haven't purchased Micro Art Studio's awesome stuff the overall cost of this gaming table would be close to 50€
I hope that you will find this tutorial both helpful and inspiring. In case of any questions just leave me a comment in the comment section below.
PS: The pictures below were made couple of days ago in a local mall, which was modernized recently. Now it looks just as my vision of what this gaming table is supposed to represent 🙂 Welcome to the future – few years from now and we will see some Heavy Infantry in live action 🙂