- contact@scarhandpainting.com


Micro Art Studio does some fantastic paint job on their stuff. At some level it might even be considered a bit intimidating. Thoughts like ‘This stuff is amazing, but I will never be able to paint it anything like they did’ had kept me from purchasing some awesome terrain pieces in the past. I bet that some of you feel the same right now. Well – that is clearly a bad way of thinking. That’s why I prepared this small Step-by-step painting tutorial with which I hope to bring you closer to your ideal of a Gaming Table.
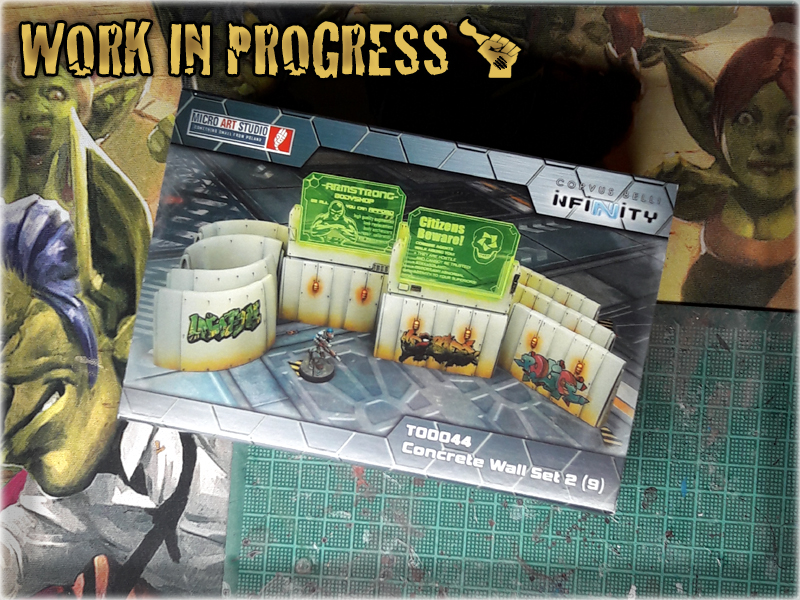
For this purpose I picked a Concrete Wall Set 2 by Micro Art Studio and tried to copy their style with a small variation of the colour scheme.
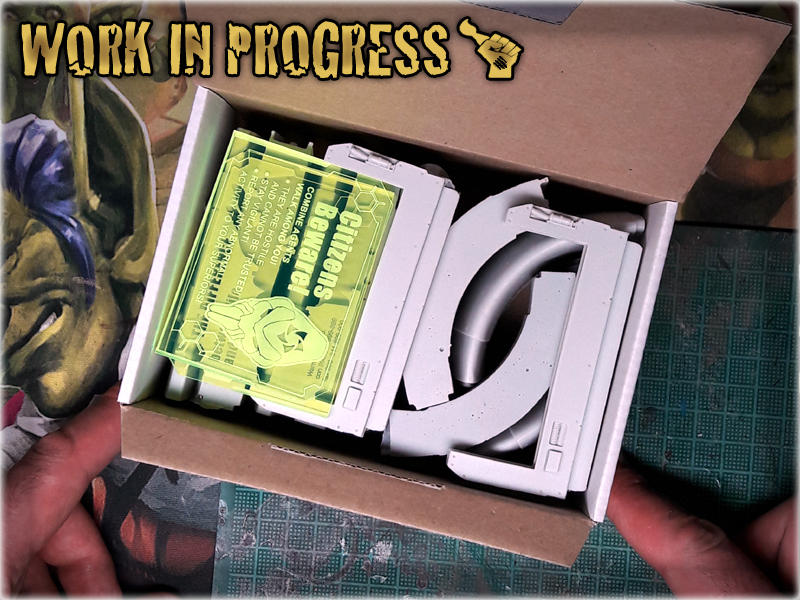
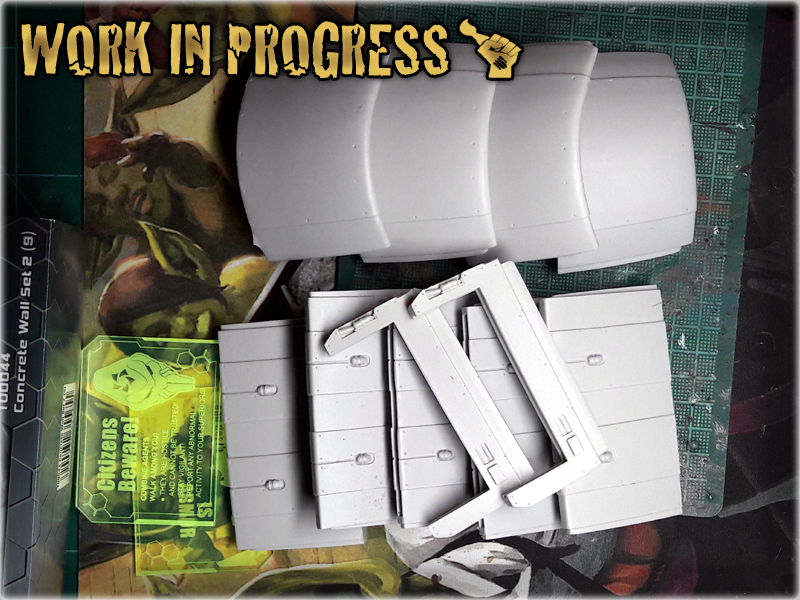
1 After unpacking the set I have cleared any extent of resin and prepared each piece for the undercoat.
I used THIS METHOD
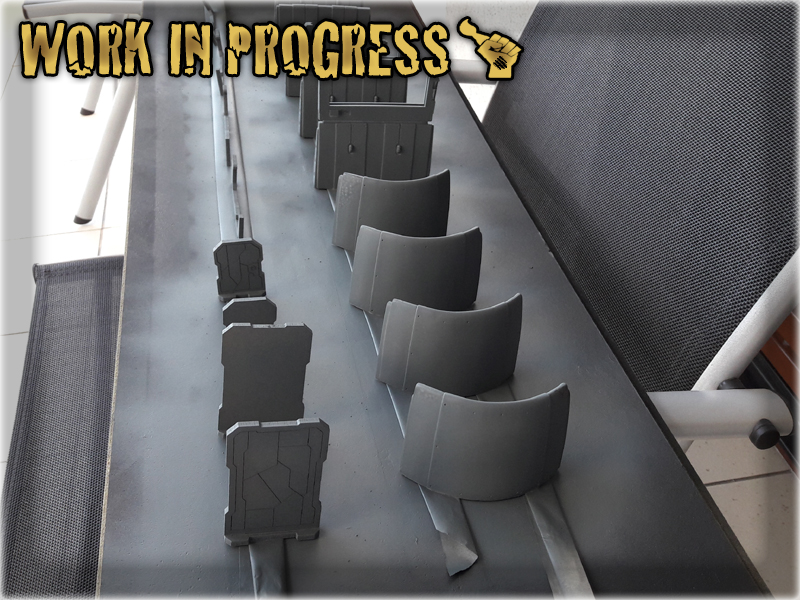
2 I have covered entire set with Games Workshop's Mechanicus Standard Grey primer. Usually I use Black Undercoat first, but in this case the surface was smooth and I knew it will work well with a Grey undercoat. Do not feel obliged to use the exact same primer - you can easily use Vallejo Grey Surface Primer instead and Airbrush it over the surface. I used spray just to save some time.
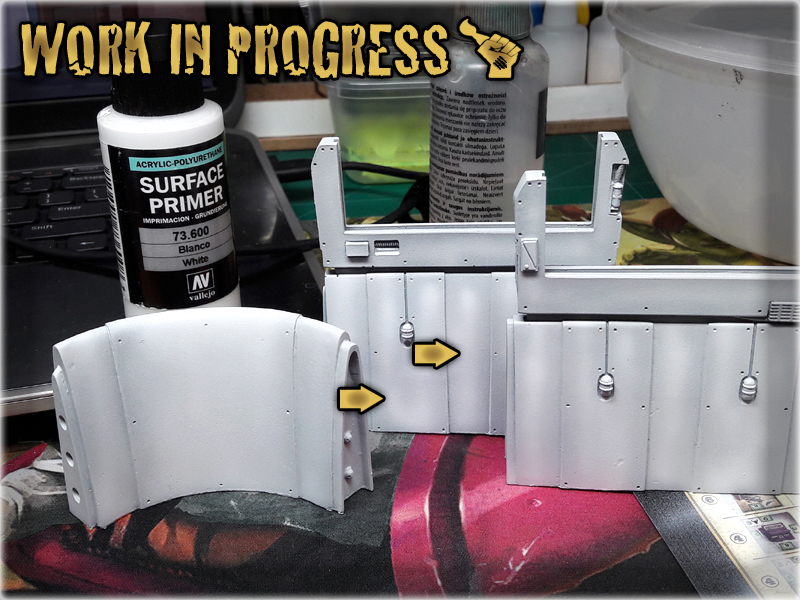
3 I gently arbrushed Vallejo White Surface Primer over the set. First I tried to cover entire surface from afar (15cm distance, constant flow, see pic - dark spots), then I outlined center of each flat surface with additional layers (5cm distance, soft puffs of paint, see pic - light spots). This resulted in the surfaces gaining some extra shadows.

4 I used airbrush to apply Vallejo Light Brown onto the lower parts of each Wall piece. I mixed a bit of Airbrush Flow Improver to build up a nice transition from brown to white. The key is to paint in smooth lines, then go backwards building up colour. Too much paint in the same spot will result in paint spilling all around and ruining the paint job.
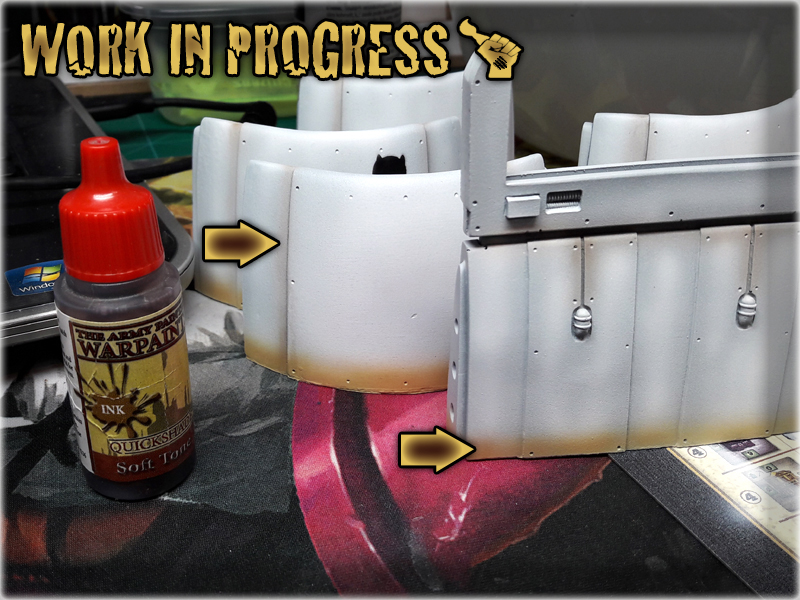
5 Then I moved to Army Painter's Soft Tone Ink and airbrushed it over Light Brown, with an addition of single strokes over the recesses of four oval Wall pieces. I was careful not to apply too much paint as in this particular case I wanted to build up a nice hume of colour, instead of 'washing' the surface with it.
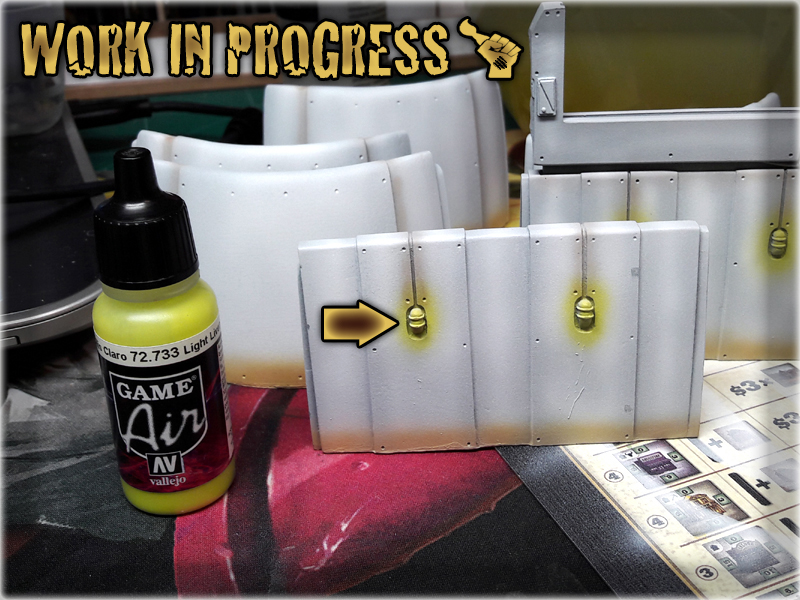
6 Then I applied a thin layer of Vallejo Light Livery Green over and around each lamp. A lot of small puffs of paint helped me to keep the base shape of light around the lamps. Even if one or two puffs went too far, they were so delicate as to remain unseen once the majority of colour was applied.
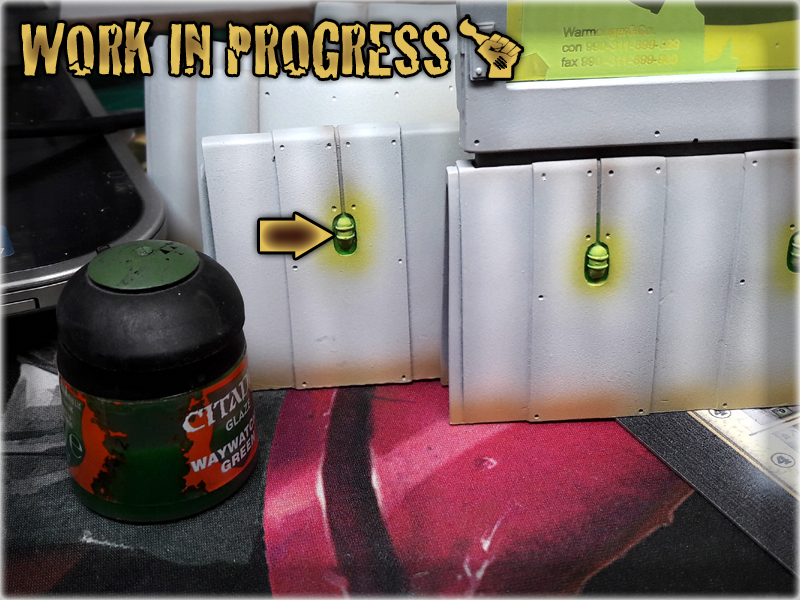
7 To strenghten the colour I used a small brush and applied Games Workshop's Waywacher Green onto the lamps. I tried not to exeed the boundries of their slots and in case I did - I used a small piece of paper towel to clear the paint out.
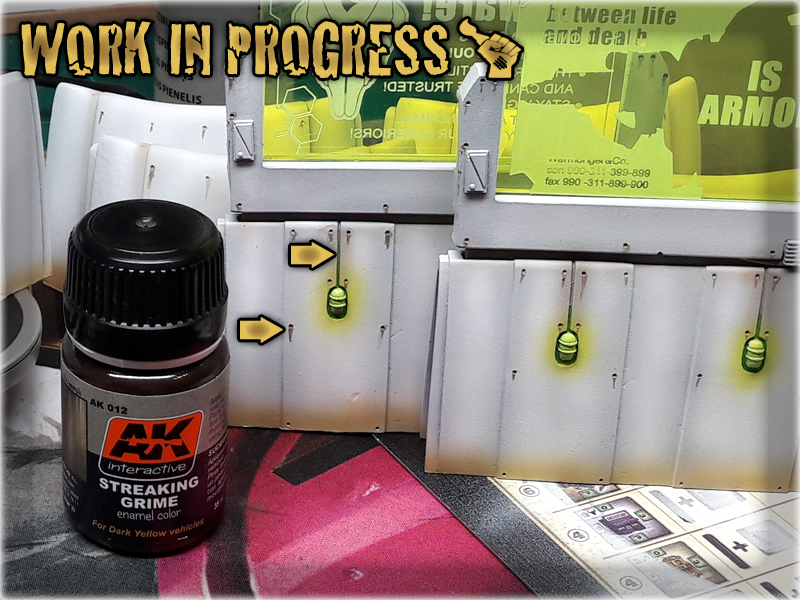
8 Finally I applied AK Interactive Streaking Grime. Using a small brush I poured this weathering effect paint into holes, then smeared it dow with a tip of the brush. The more irregular it went, the better to the overall visual effect.
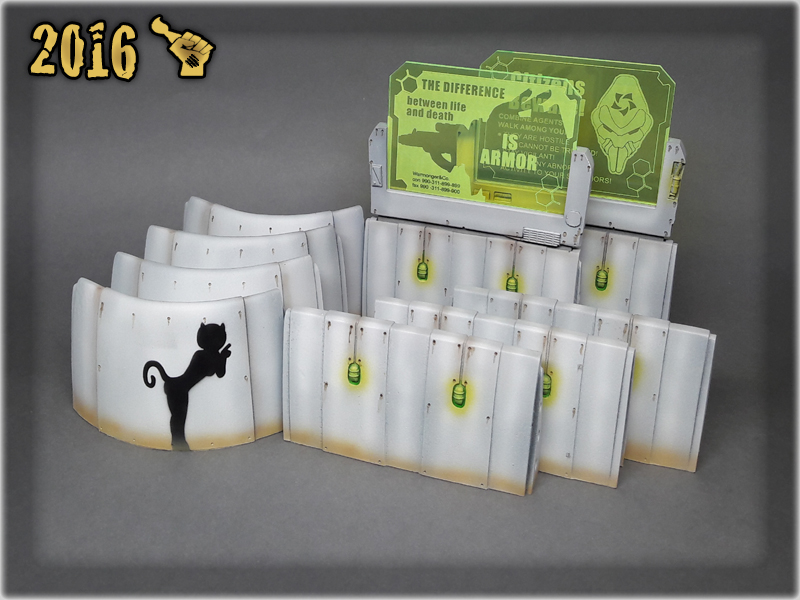
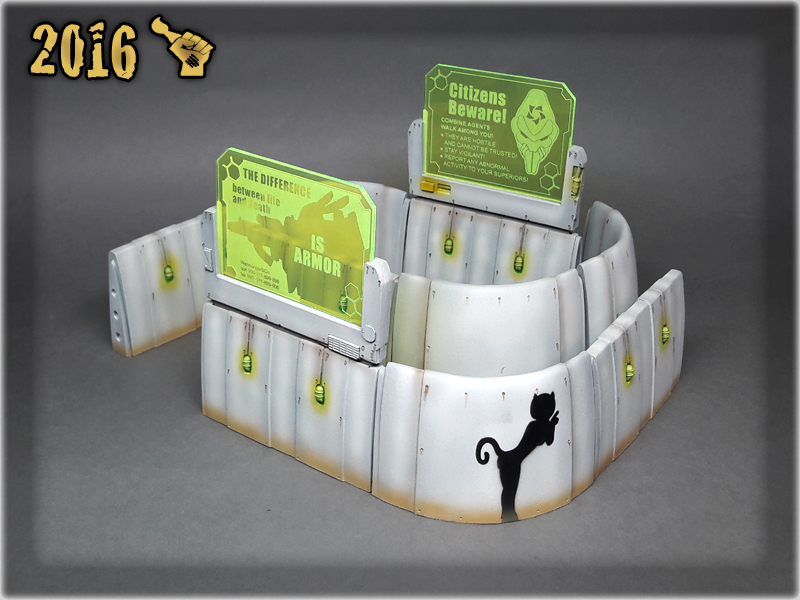
In the end I used a template provided by Reycast to airbrush a small Nomad prank onto the wall, with a Vallejo Black Paint. What’s left now is to purchase Micro Art Studio’s S-F Graffiti Transfers and job will be done.
Here is a result of my paint job:


Foreboding my previous lifestyle in favor of painting for hire was the best decission in my entire life. Not only that I have a lot of fun in my ‘job’ but also plenty of time for my own projects. For those who knew me before scarhandpainting.com the number of Special Projects appearing lately might be quite a surprise. I myself am taken aback by the sheer numbers of personal projects I can work on. Below is a visual step-by-step of just such a project.
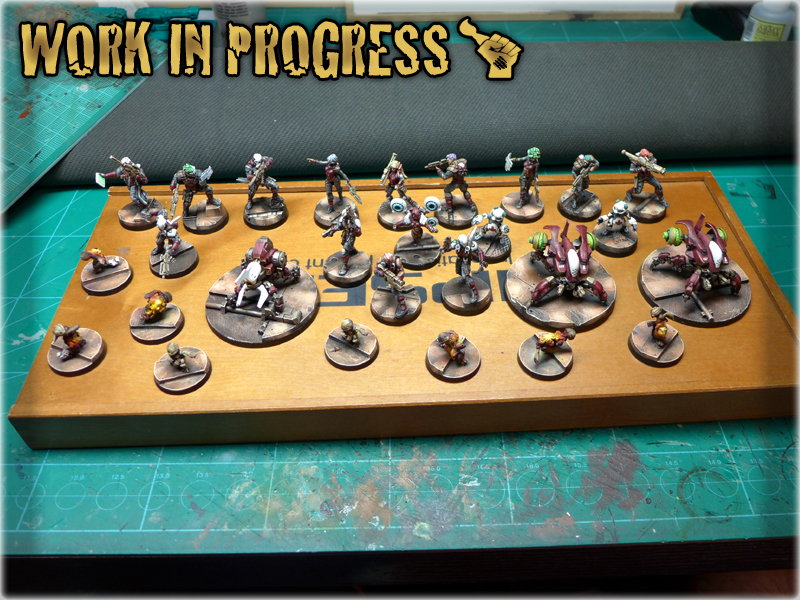
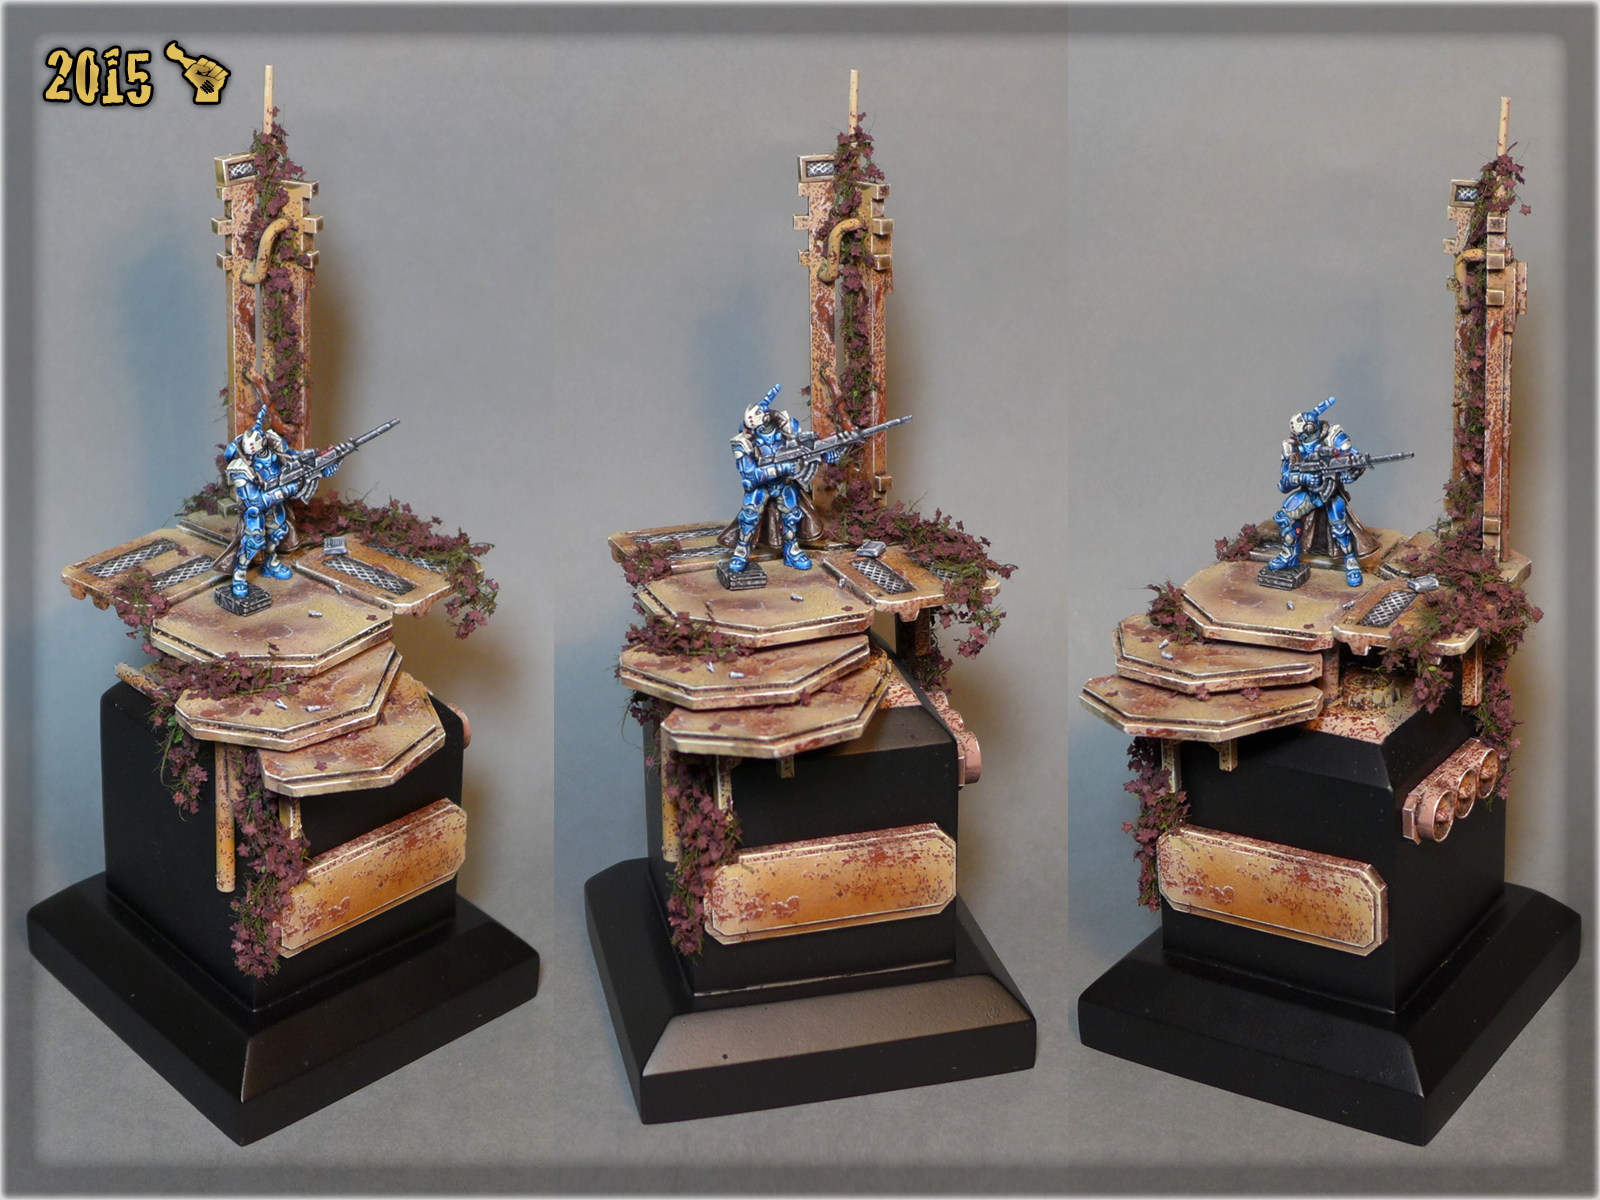
A big Infinity Event is closing in. ‘Polish Championships’ will take place tomorrow and I’ve trained my Corregiror army and dice rolling hard in preparation. Along with the usual mano-a-mano combat, a Painting Contest will also take place at the event. Each player is eligible to select one of his army rosters and present the miniatures for everyone to see and vote. I thought long and hard to think of anything that could deliver my miniatures to the podium. I know very well that there’s plenty of awesome painters among the Infinity community in Poland and that competition will be very strong. My miniatures look nice but not awesome enought to compete with paint jobs that literally blow my mind. I’ve figured something special – a Nomad-like trick to fight for the attention of voters. A special display diorama to compliment my army’s visuals as a nice background, built and painted in the same theme as the bases of my Corregidor army.
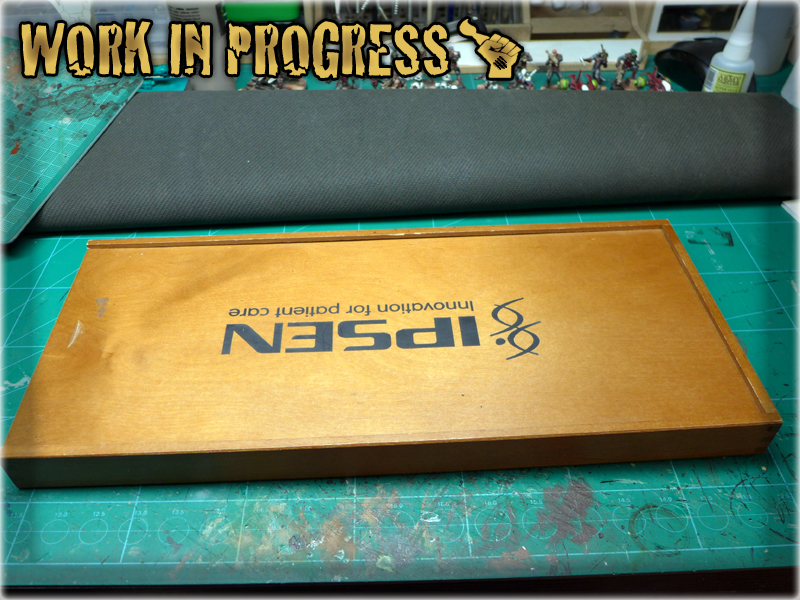
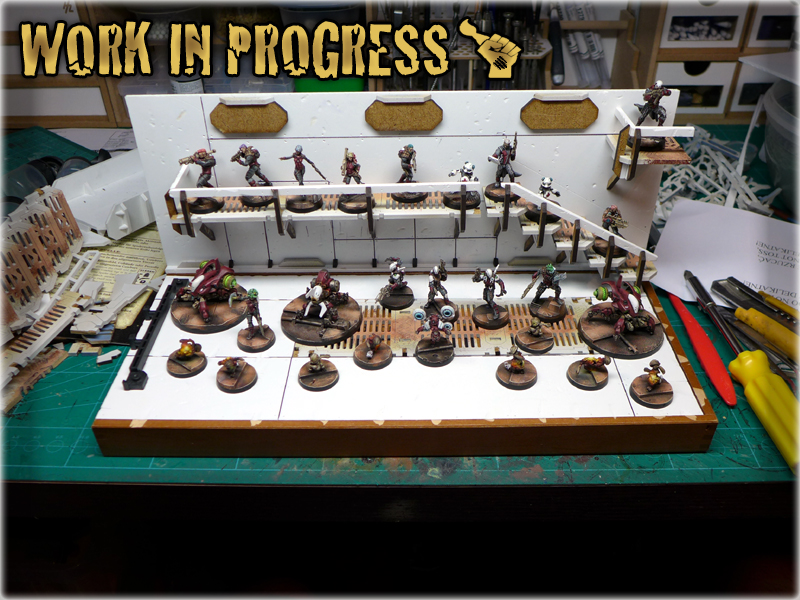
For this purpose I found a suitable wooden crate to be used as the base for entire diorama. I’ve also set up a makeshift display of miniatures to see if the base is large enought to accomodate them.
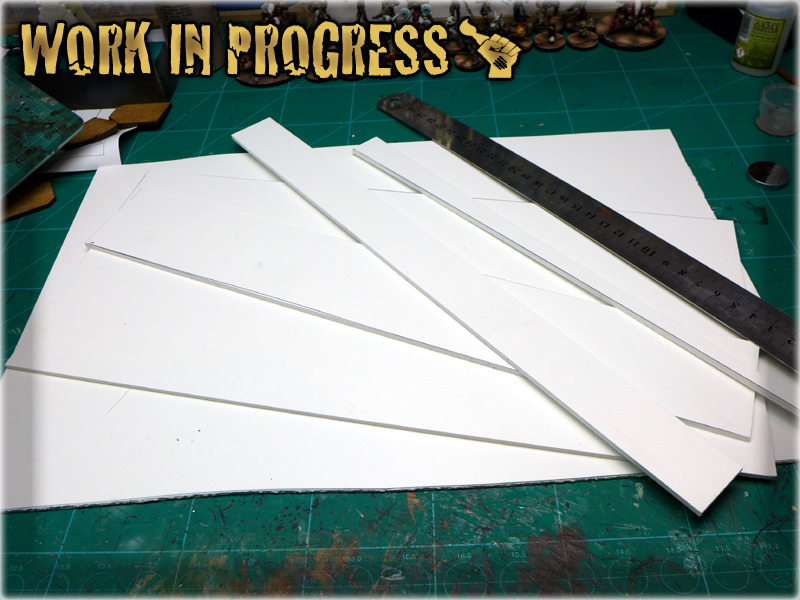
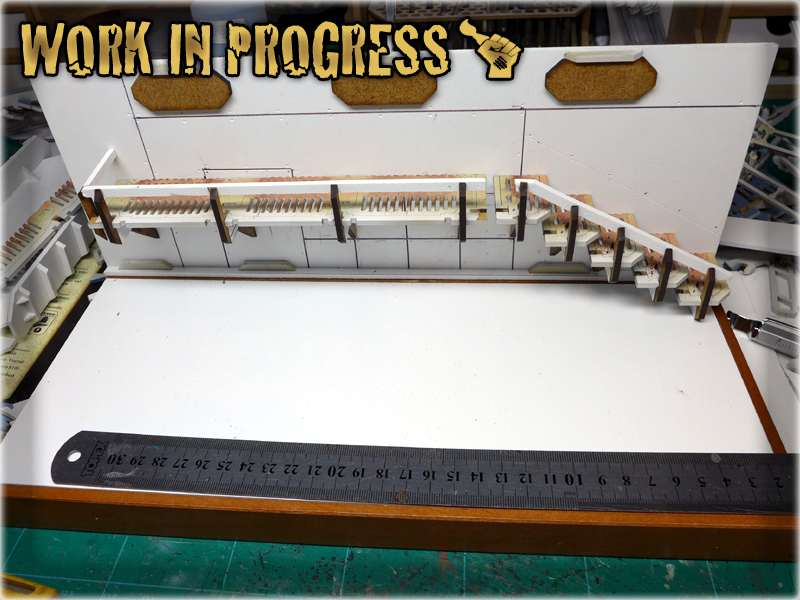
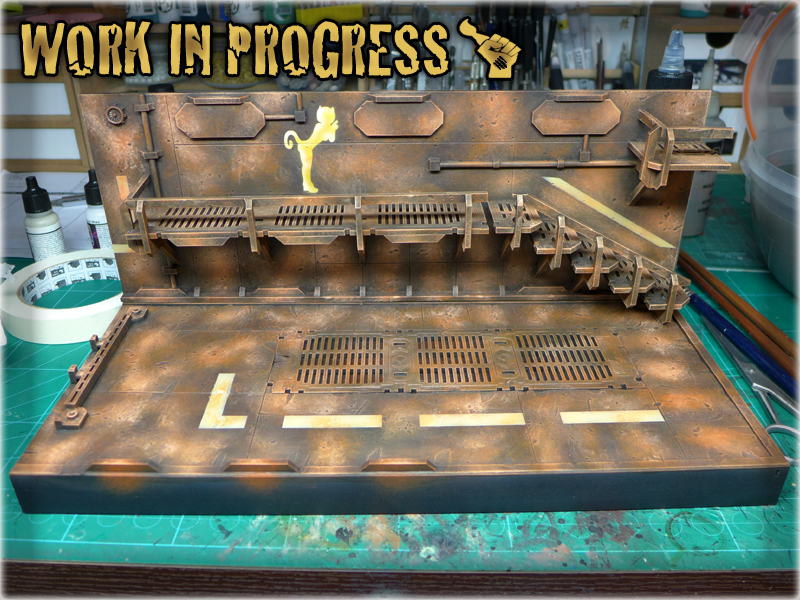
The wooden crate passed this test so I’ve gathered 3mm PCV and some HDF leftovers. The entire layout of the diorama was taking life in my mind’s eye as I started to work on it. I’ve used the wooden crate as a template to cut a floor and a wall for the diorama. After that an idea to build a small balcony with stairs and a sniper point came to my mind. I quickly dig through any materials and pieces that might be used for that and found my good old Micro Art Studio’s walkways set. The set had some sweet looking pieces that I implemented into this project.
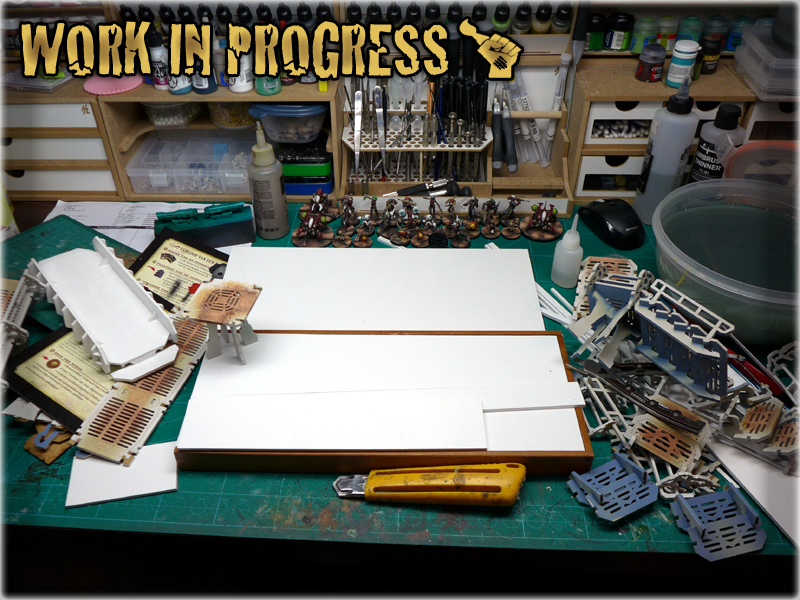
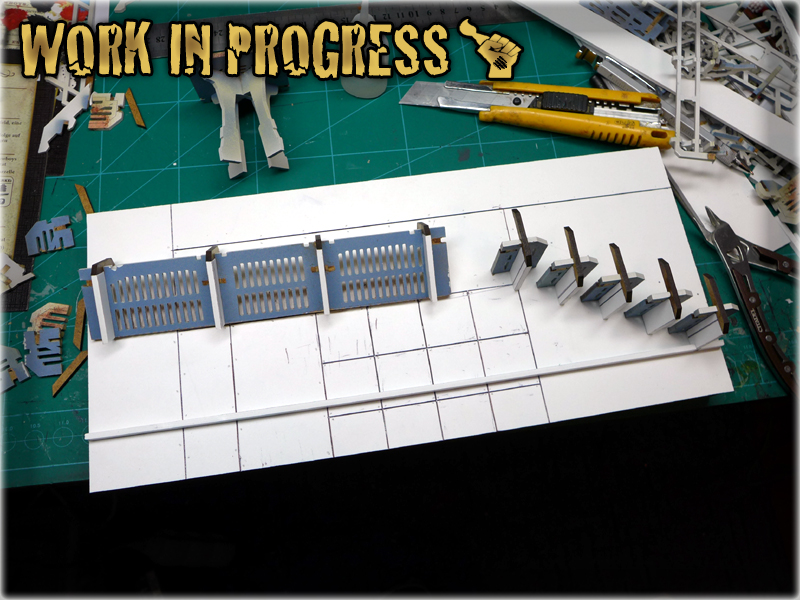
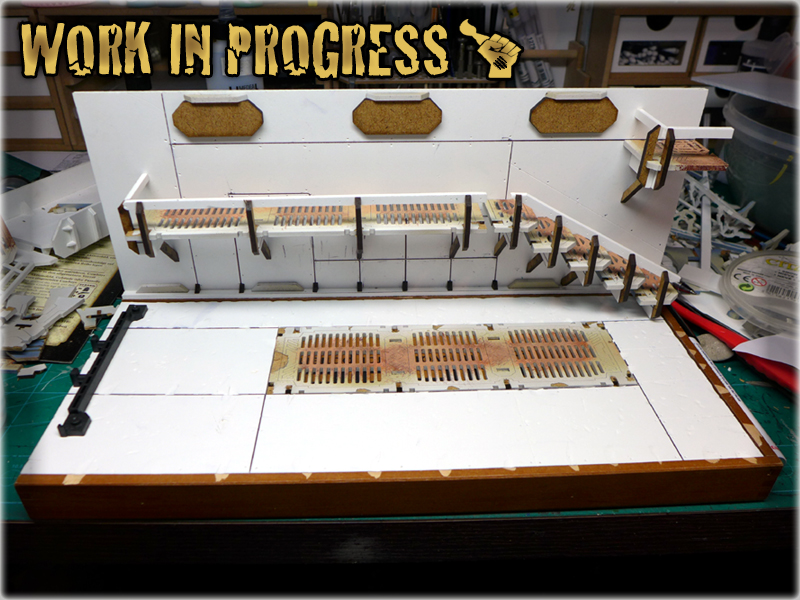
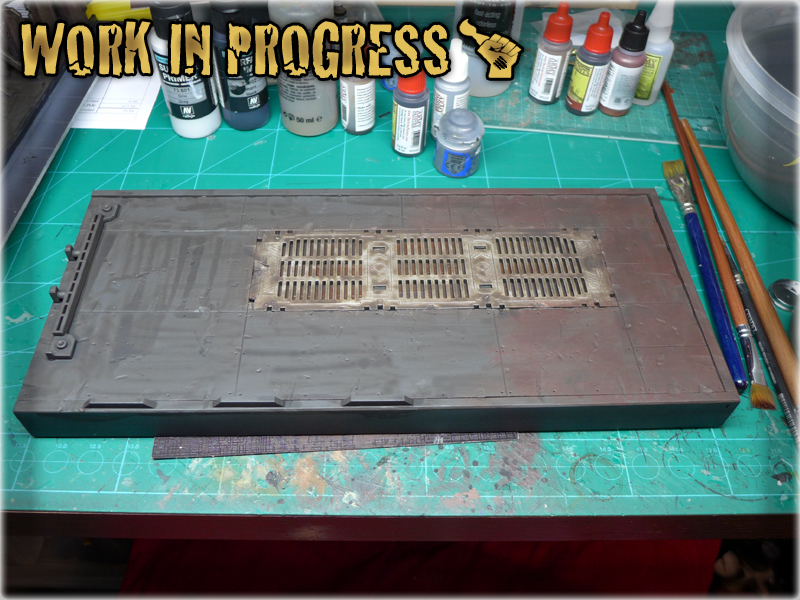
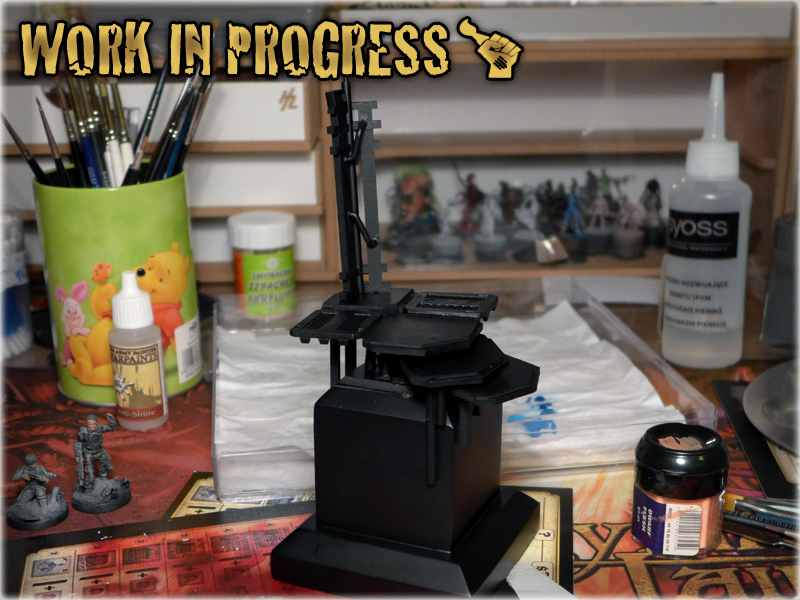
Using a ruler and a pen I drawn some makeshift panels and bolt holes on the ‘wall’ and prepared space for MDF pieces to be put into. I also shortened the MAS’s stairs and added elements of my own to make them look more industrial. Floor followed in a quick succession with the center being switched for a big MAS’s MDF panel. I also moundet the ‘wall’ using three screws. Initially I wanted to use magnets to keep the thing removable, but in the end I wanted for my miniatures to be safe. After that I’ve mounted three wall panels to be used as a base for glow globes. I also made some dents, marks and holes in the concrete panels of both wall and floor. Once I was done I’ve made a last check of display. Just before undercoating I had an idea to add some pipes and a vent along the walls to build even more industrial theme of the diorama. I used lollipop sticks and some leftovers to do that and proceeded to the undercoat.

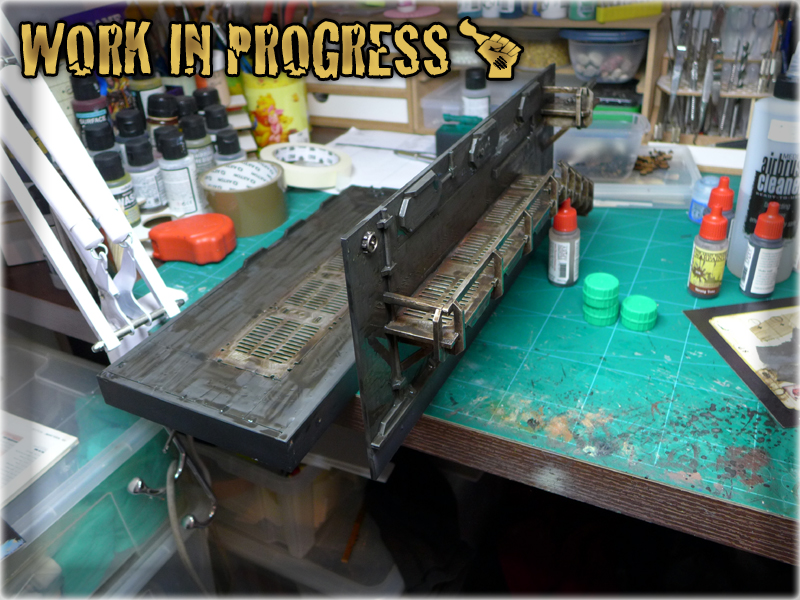
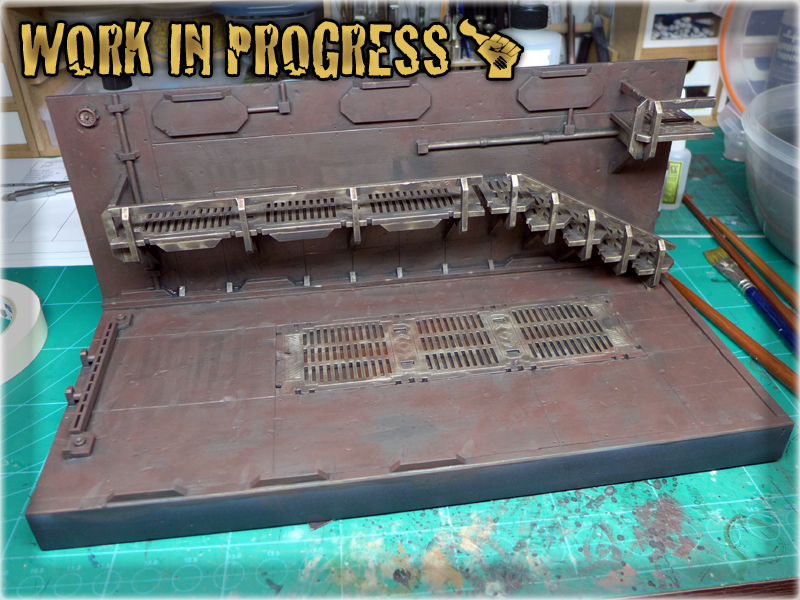
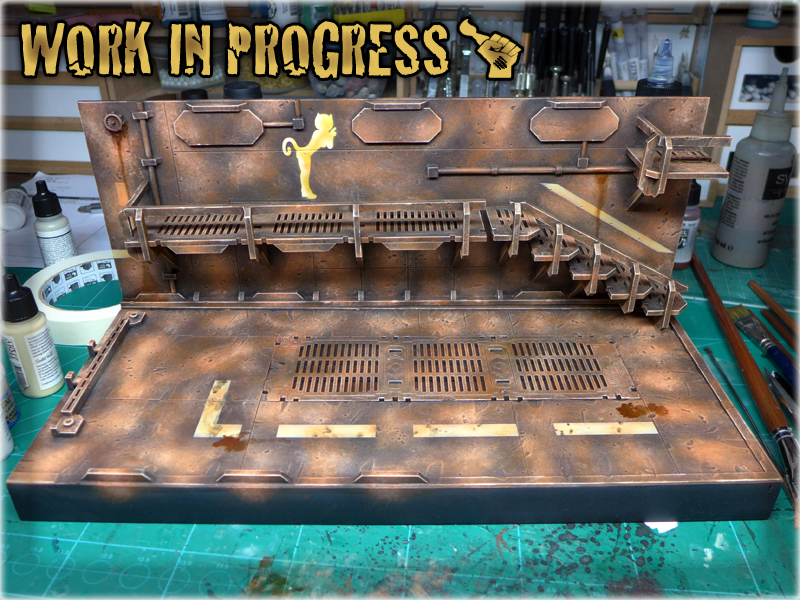
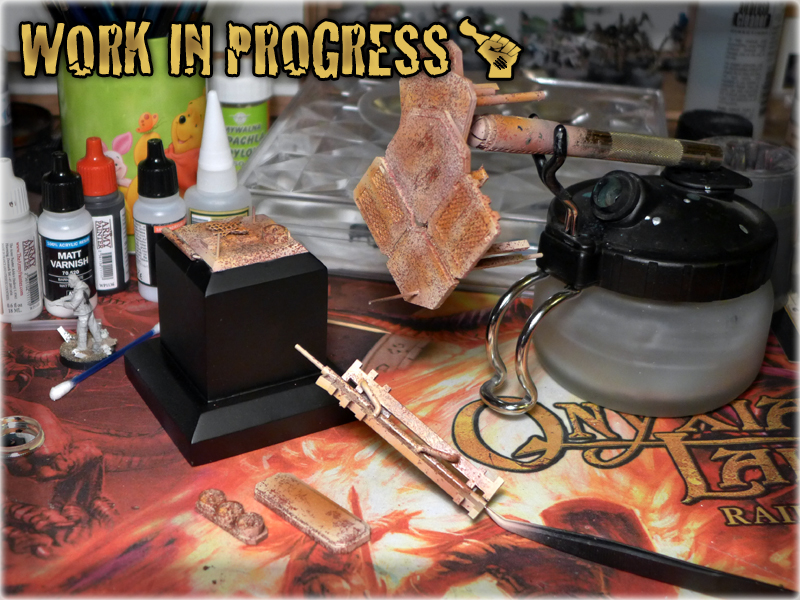
Once it was dry I have covered the entire thing in two strong layers of Eshin Gray, then painted up all metal elements with a Tin Bitz, Boltgun Metal, Mithrill Silver layers and then washed entire thing with Devlan Mud two times. I slowly applied layer after layer starting with Scorched Brown, then following with Calthan Brown, Ryza Rust, Lugganath Orange and lastly Flayed One Flesh. This is the same colour scheme as the one used for my Concrete Bases. Actually both metal and concrete were painted the same way as in these tutorials:
TUTORIAL: CONCRETE BASES part 2: Painting
TUTORIAL: PAINTING ‘FIVE LAYERS’ METAL
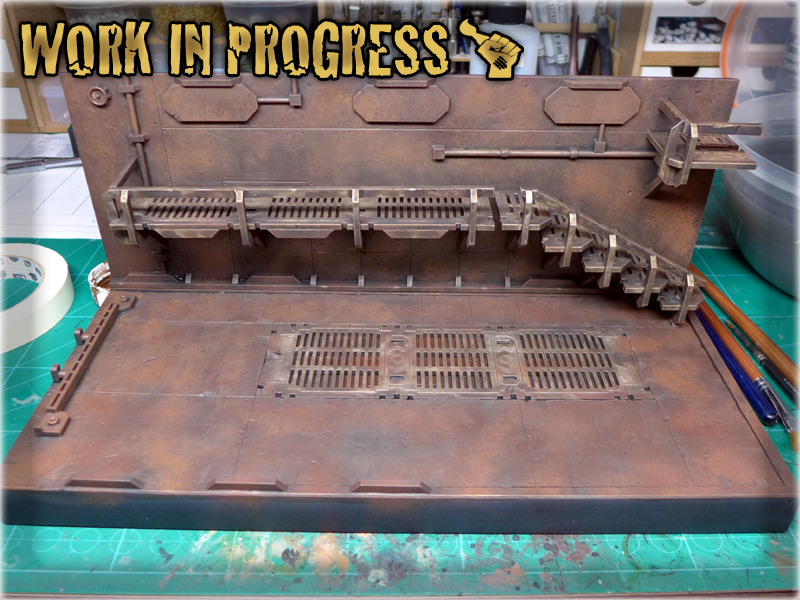
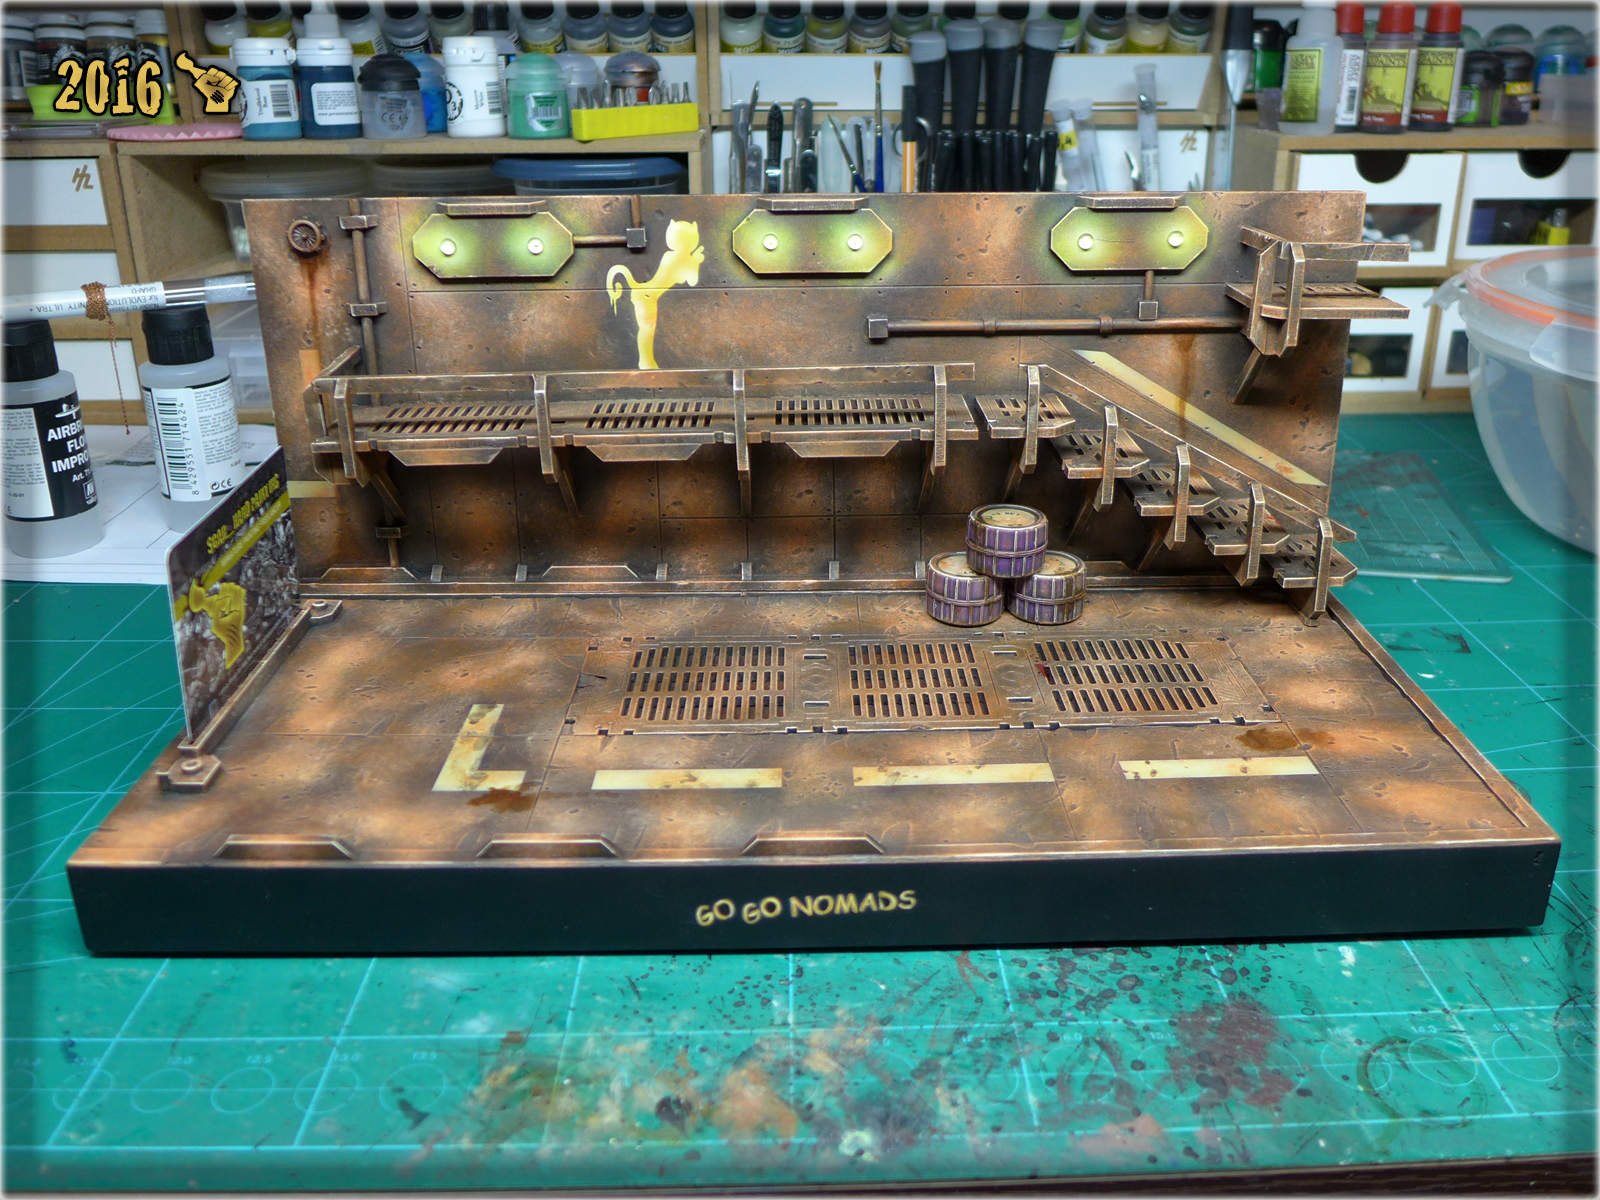
Starting with Calthan Ryza Rust I’ve covered metal elements along with concrete panels, but before that I’ve made a short pause to airbrushed white-creeme lines and a Nomad graffitti. Ryza Rust, Lugganath Orange and Flayed One Flesh went over the lines to create an impression of them being damaged and eroded along with the concrete panels. Once Flayed One Flesh layer was done I lined/edged all the angles using the exact same piant. I also added grease/Rust streaks and oil stains here and there to bring the diorama closer to a life scene.

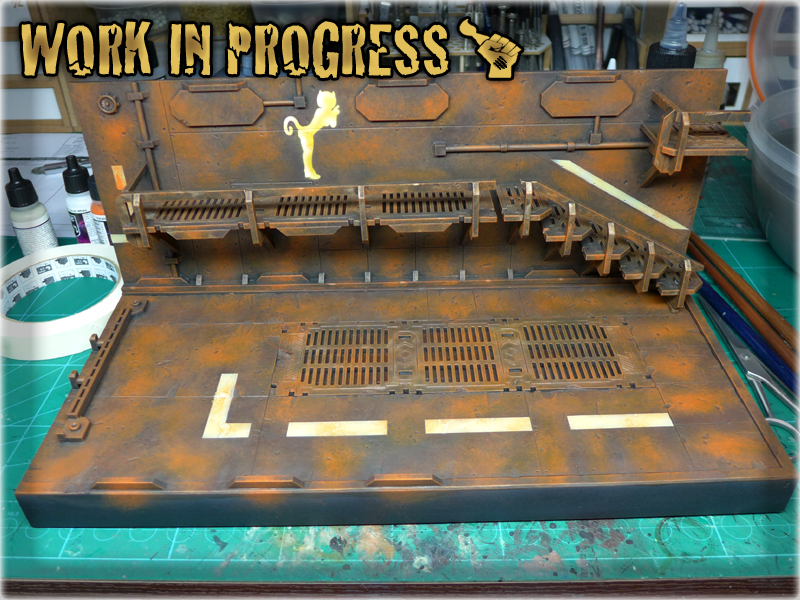
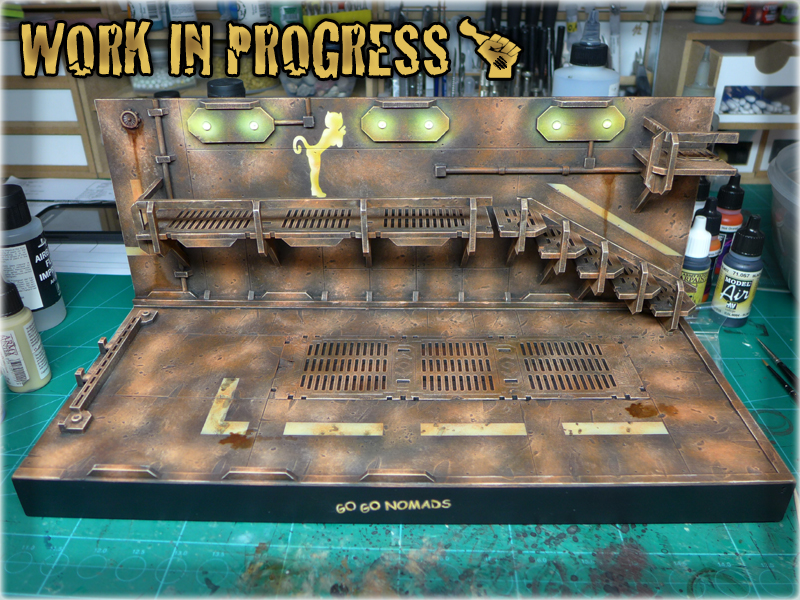
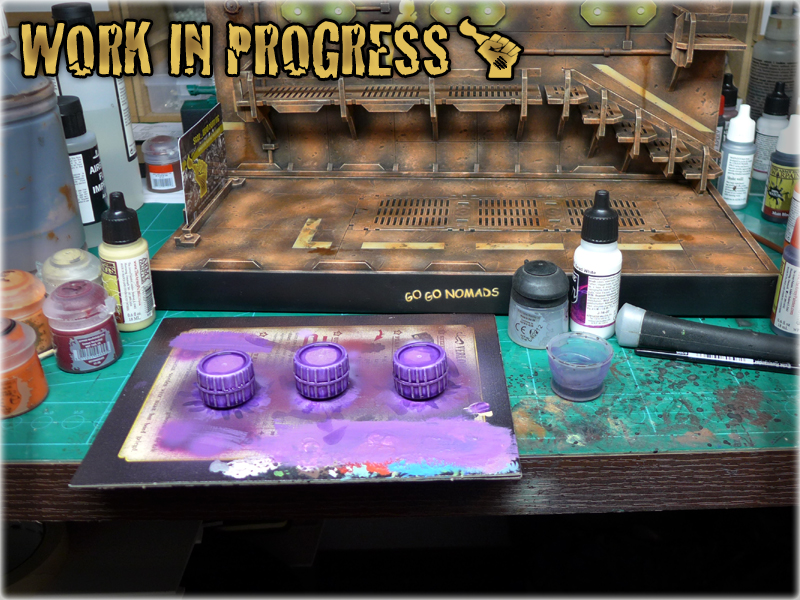
In the end I had to add a name, so I used a template created for me by Reycast Miniatures and airbrushed another graffitti onto the now black edges. Simple OSL was airbrushed and I mounted glow globes in the center points of each light. I also added three purple barrels to compensate glow globe’s green in preparation for red miniatures.
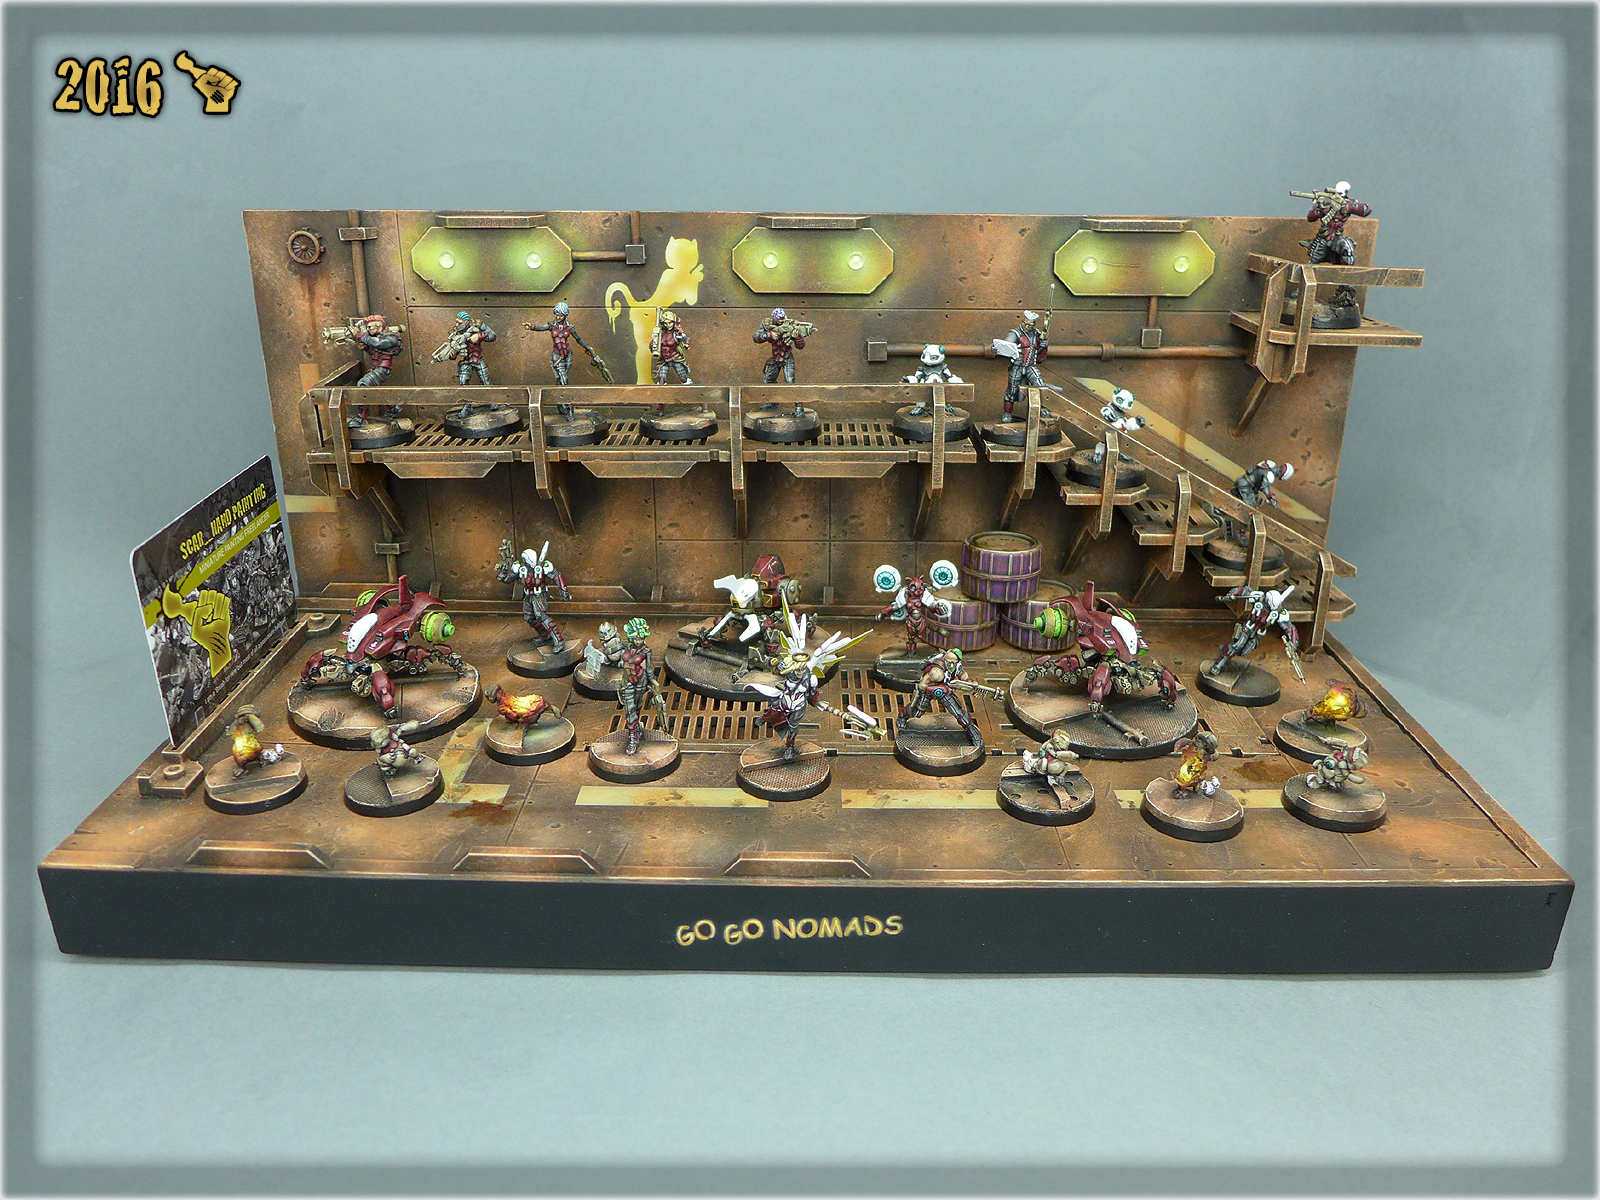
The final piece exceeded my expectations. Even my Girlfriend said it looks cool – and that’s rare! Damn – I count on this one to help me climb the ladder in the contest. If not – well, at least I have a fine piece to set up behind glass along with some less used Nomad Miniatures XD


27.6.2016: I actually won the painting contest XD Ultra happy about the fact! Here’s the entry:
This mini diorama is a ‘special’ kind of a Special Project. The Penthesilea, Amazon Warrioress is a part of ALEPH collection, but I was asked by a friend to make her somehow unique – just to stand out on a display.
It took three failed attempts to base Penthesilea, as I was torn between many different options of a scenic base. I have tried to use a photo frame and model a wild west highway on it. I’ve tried to make a futuristic enviroment on a small wooden plinth. I even tried to use a coffee cap to base Penthesilea, but each time I just torn her off and tossed my creation into garbage (or hid it in the closet for later use). Salvation came to me in the form of a Micro Art Studio’s container, with which these guys filled a package of stuff I’ve ordered from them. “One man’s trash is another man’s treasure” and guys from MAS knew that I will have some use of their’s Kickstarter’s misscasts and leftovers. I cut the container in two and set up a nice background on it. Here’s a WIP pic:
This is how I actually started to work on this particular miniature – with a base instead of a model. After that it went pretty smooth with three days of painting, along with other miniatures. Each time I’ve ended up a key stage of this project, I was able to take a respite with another miniature, and then get back to Penthesilea. This pace kept me going with a lot of vigour, but also enabled me to look at Penthesilea with a bit of critique. I’ve corrected my mistakes at the start of each new stage and then followed adding new colours to the paint job. In the end I am very happy of how this one came out to be.
Here’s the final piece: “PENTHESILEA”
Third ‘Special Project’ and this time it is much different than the previous ones. It’s worth mentioning that I had this one in mind for more than five years. Actually since Dec 2011 when I made these True Scale Night Lords. The paint job with which I provided them was near to ugly and I sworn to redeem myself one day. That day came and ‘AVE DOMINUS NOX’ project was realised. Eight Legion’s Rhino transporter was born into the late night of Feb 8ght 2016.
It all started with an easy yet most important conversion.
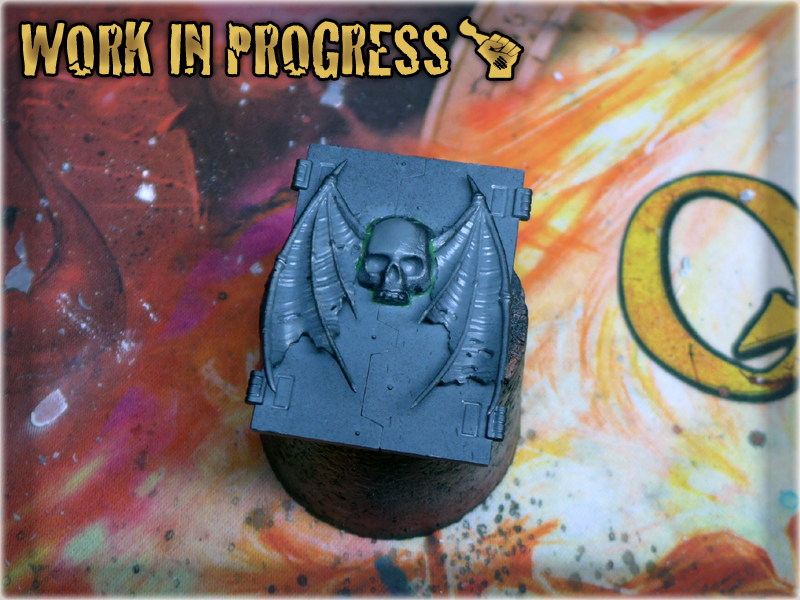
The soul of the project lies within the plastic bounds of this particular piece. Rest of the preparation went pretty easy. It was so fast that I forgot to take pictures throughout the process.
Inner Paintjob.
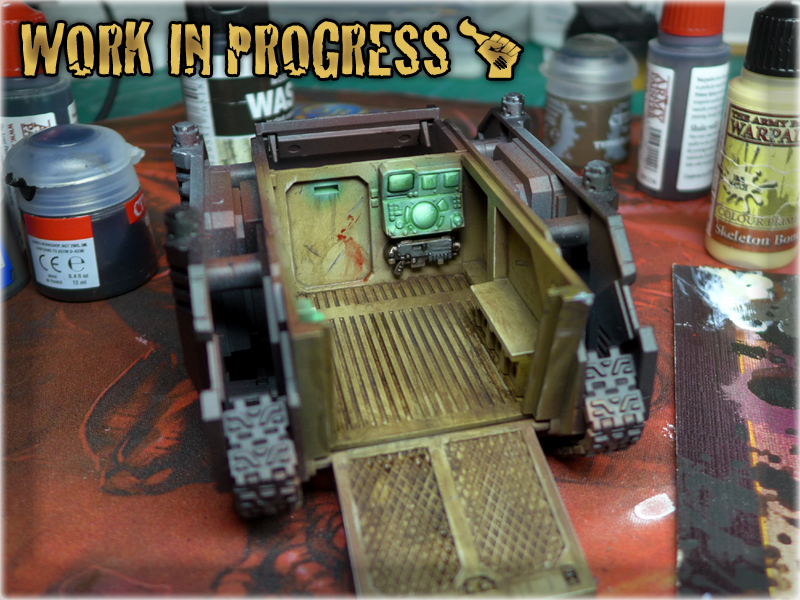
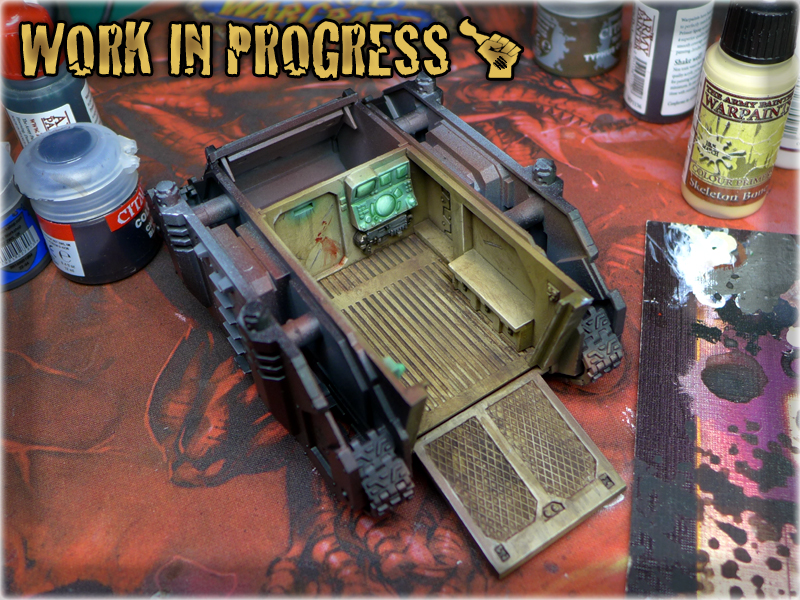
One of the reasons that makes this project ‘Special’ is that I actually painted the innards of a vehicle! I paint for more than 15 years now and I haven’t done this even once ever before. I used to pillage the innards of my vehicles, then fix a D6 dice with a ‘six’ on top into them to boost their survivability and glue all the doors shut forever.
Lightning Strike!
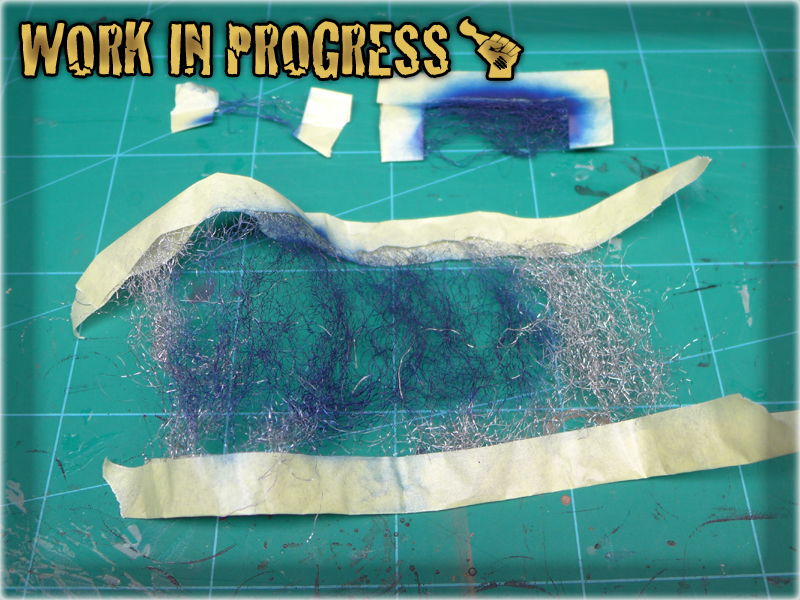
Lightning is the worst nightmare of paintjob. This is the true Terror that One must overcome so that One may stand In Midnight Clad. Fortunately I found a great tutorial of how to paint Lightning using Steel Whool. Must say that it did the job.
First night’s end result.
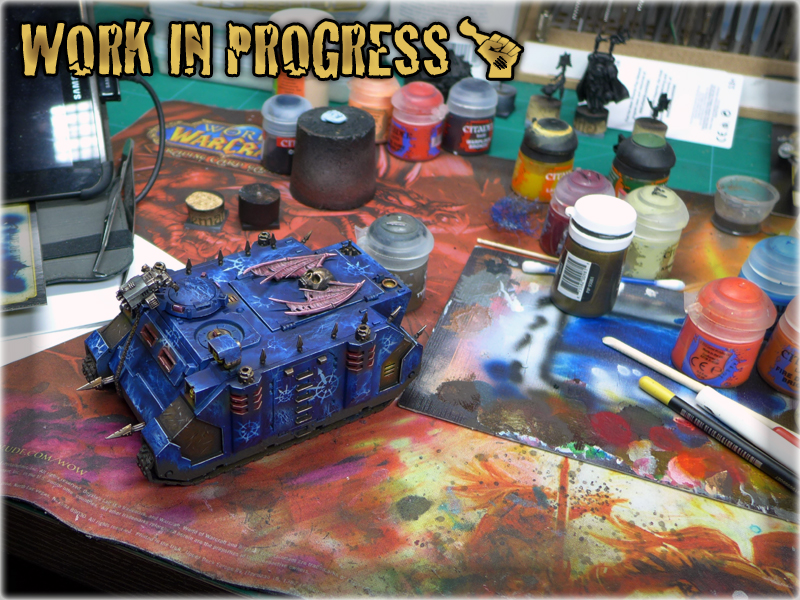
This is how it looked like when I decided to finally forfeit my task for the day and fell into slumber. Next day I was a bit dissapointed with my work. The colours seem to not go well with each other. Something was wrong. I decided to continue paintjob and blend all the Lightning and Chaos markings with blue. I also redone the upper Night Lords simbol, making it a bit more juicy with sharpened edges and key points. Small points of white/yellow were added to the main lights and white lining adorned the red ones. The Rhino finally looked like a whole.
Here’s the final piece: “AVE DOMINUS NOX”


Second ‘Special Project’ in 2015! It was emerging between my thoughts once in a while for some time before I was finally motivated to work on it. The crucial point for me was to accidentally bump into an online Painting Contest at Data-Sphere forum. I already had the concept and materials to make this piece so an opportunity for a nice competition was the final push I needed.
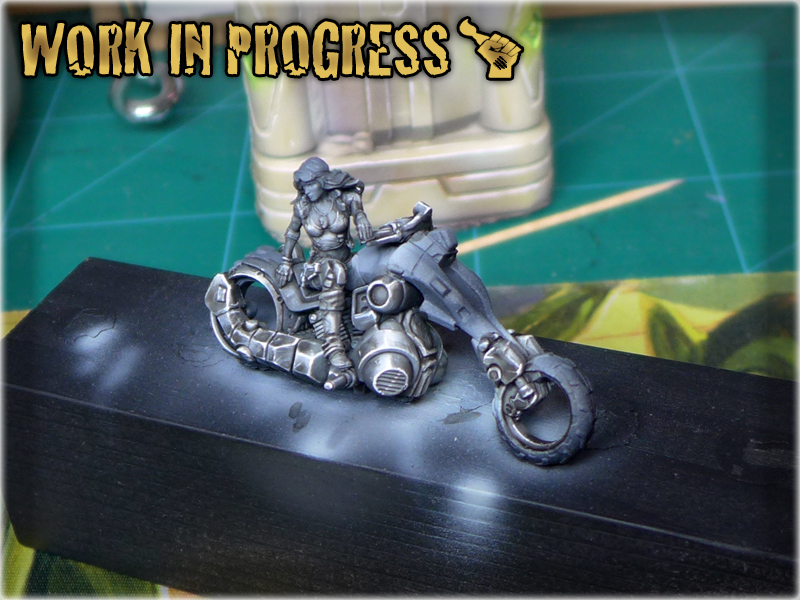
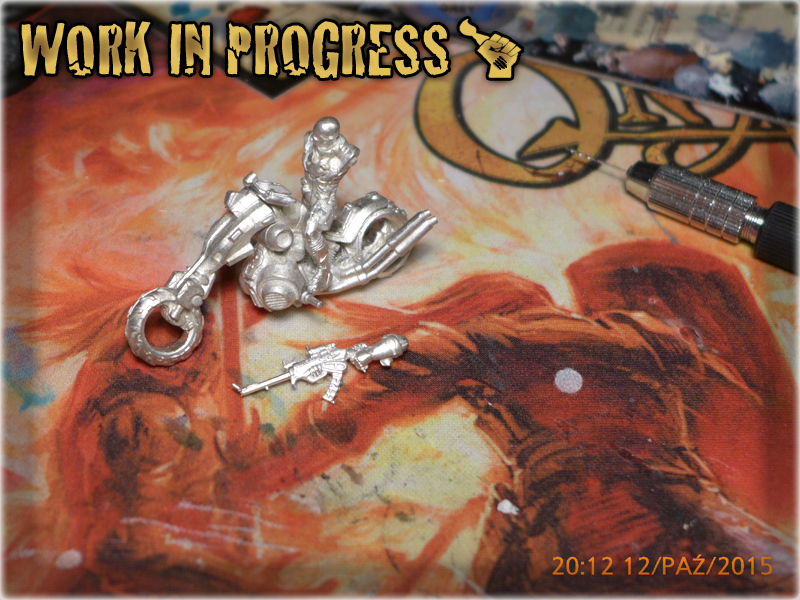
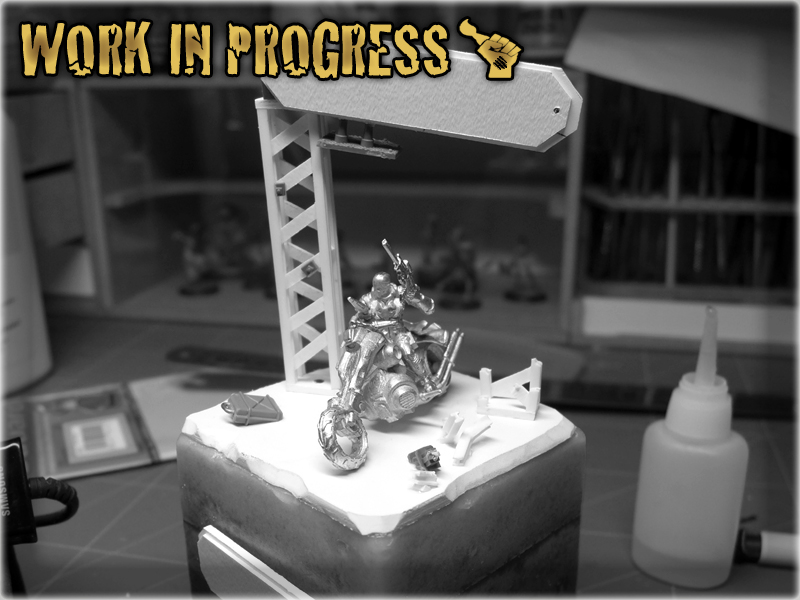
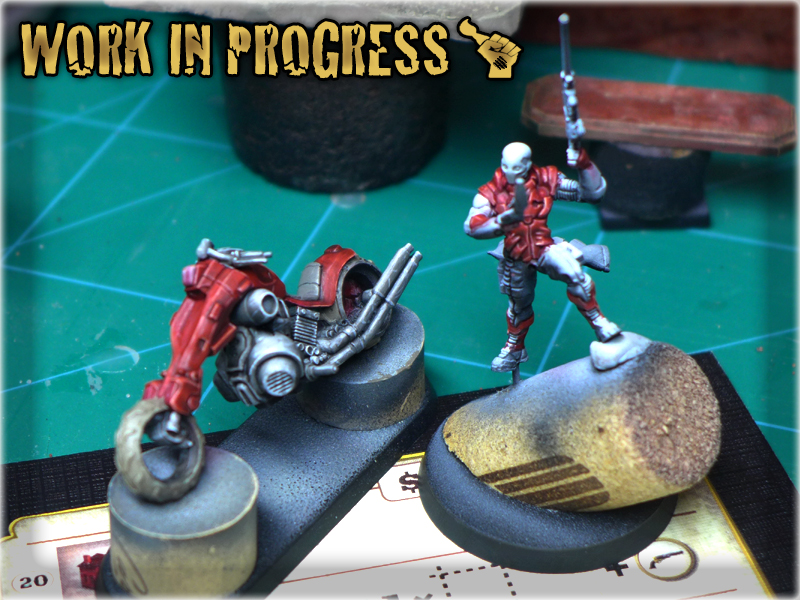
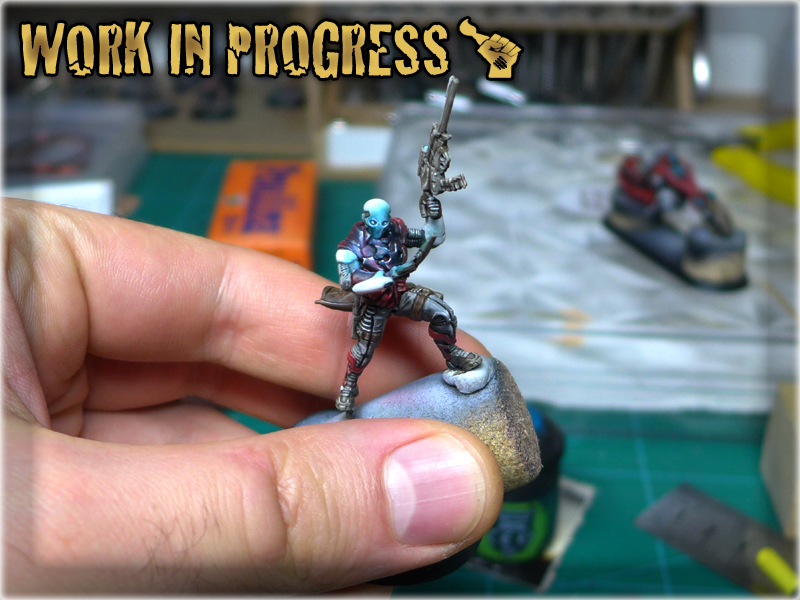
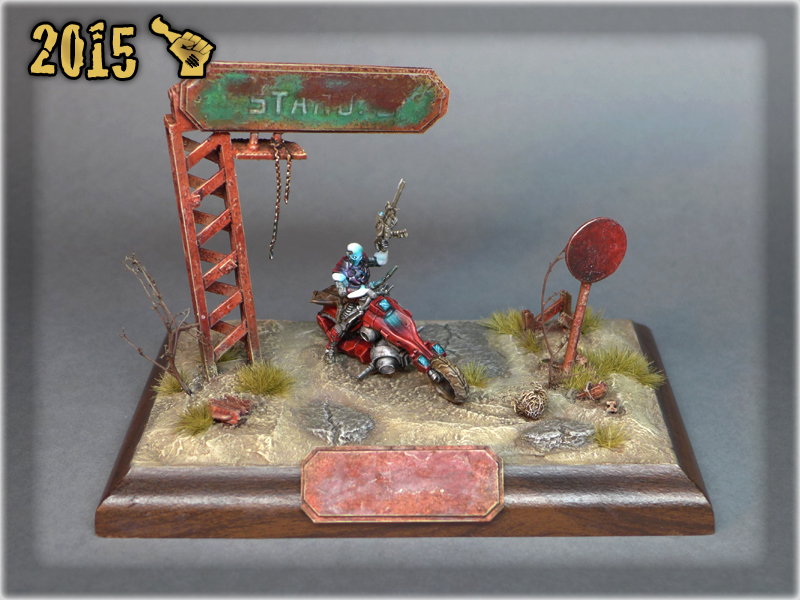
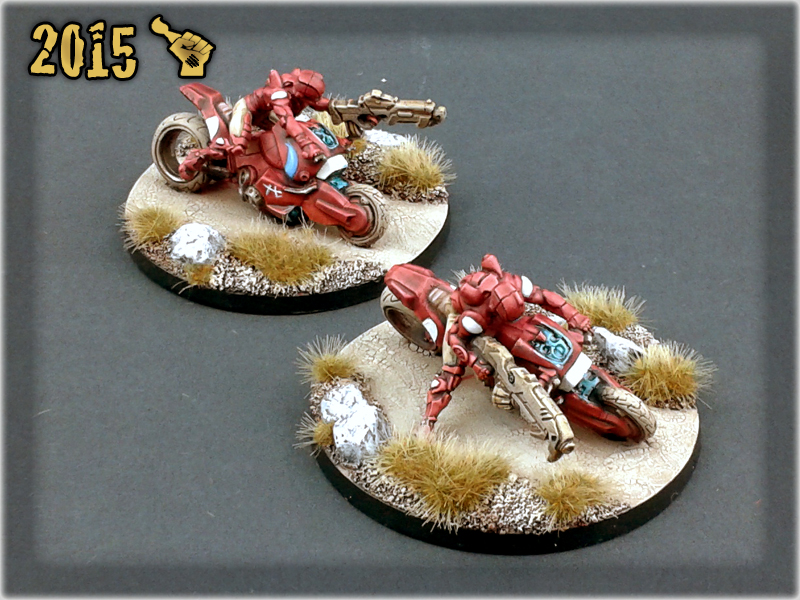
This time I choose a Nomad miniature as a centerpiece of the Diorama. It is my favorite faction in Infinity the Game, and the Grenzer model I’ve picked just ‘screamed’ to let him ride that awesome haqqislamic bike. The pose was almost right if only I done something with the coat and the only thing holding me at bay was a pair of hands. In the end I used original Sniper Rifle left hand of a Grenzer, Shotgun right hand of a Jagguar and stripped a Spektr of both arms.PanOceanic antennae was added and after rearrangement of the pose some Green Stuff Sculpting had done the rest.
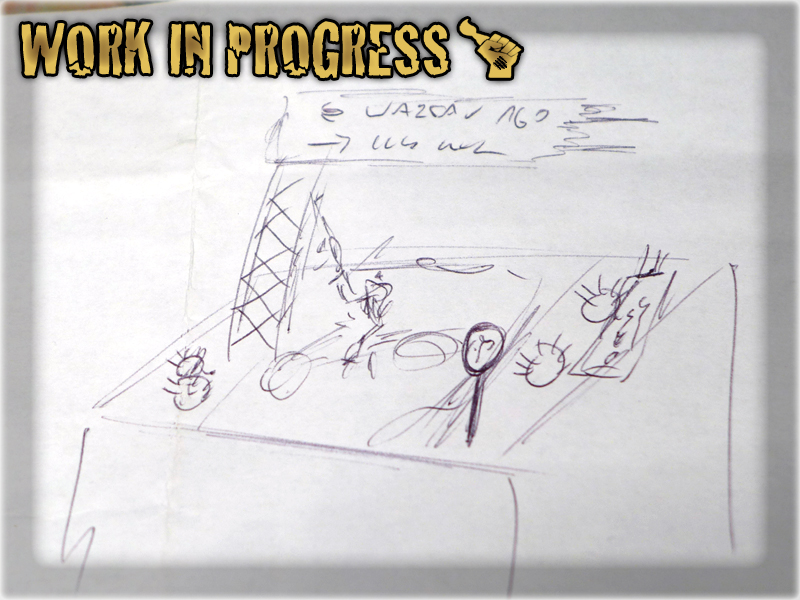
A ‘concept art’ which shows my overpowering drawing skills.
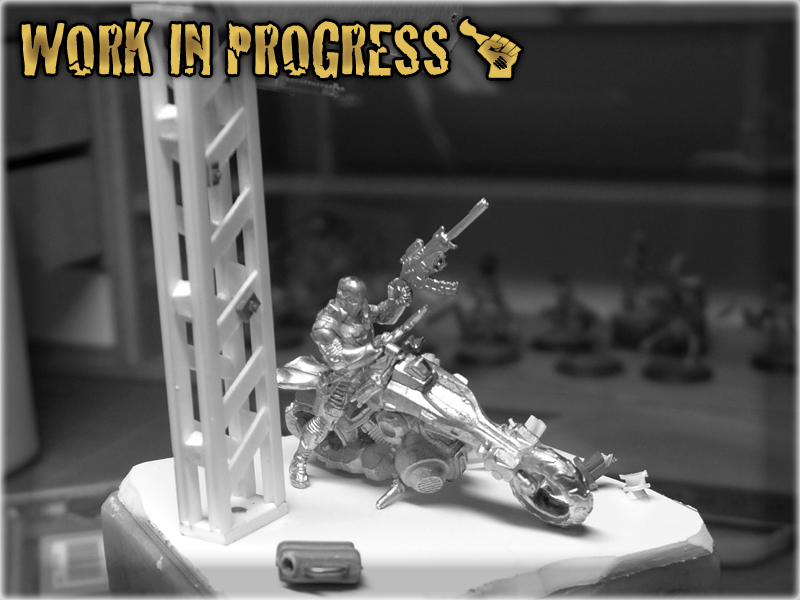
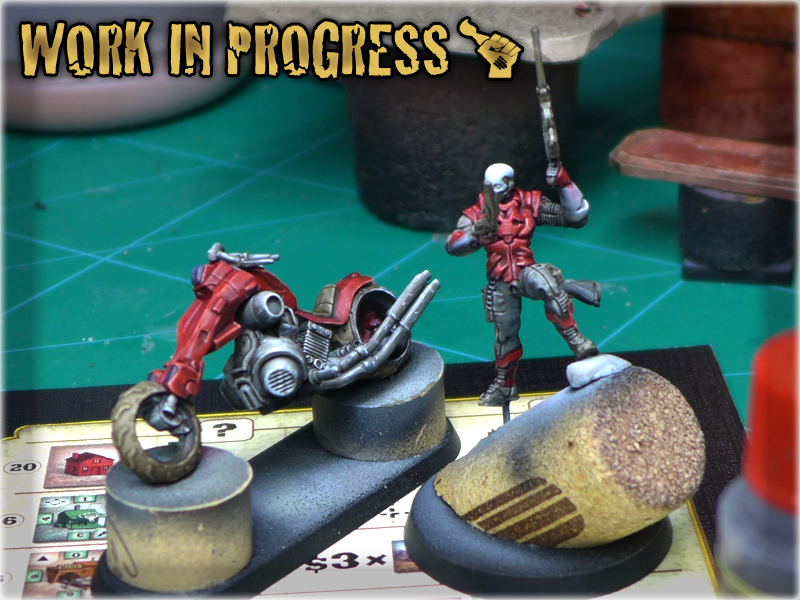
First step was to arrange the miniature on a bike.
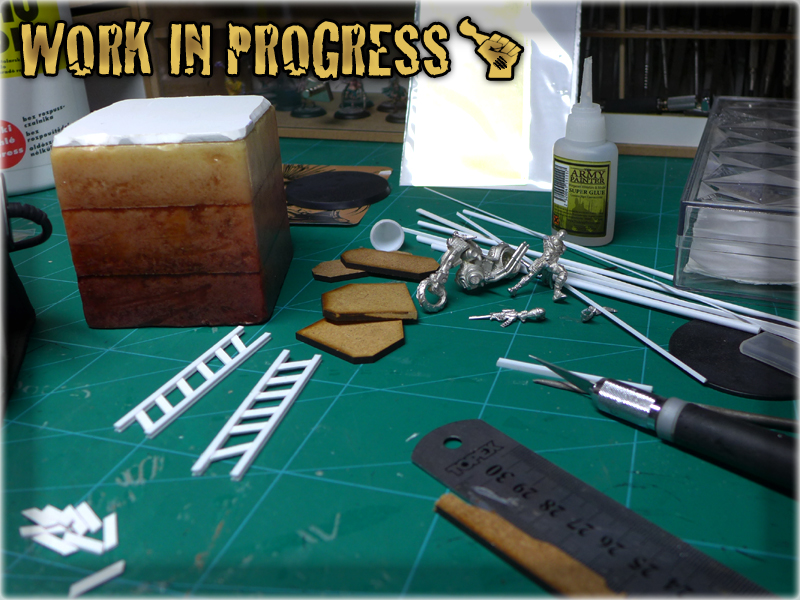
Some conversion and Greenstuff sculpting.


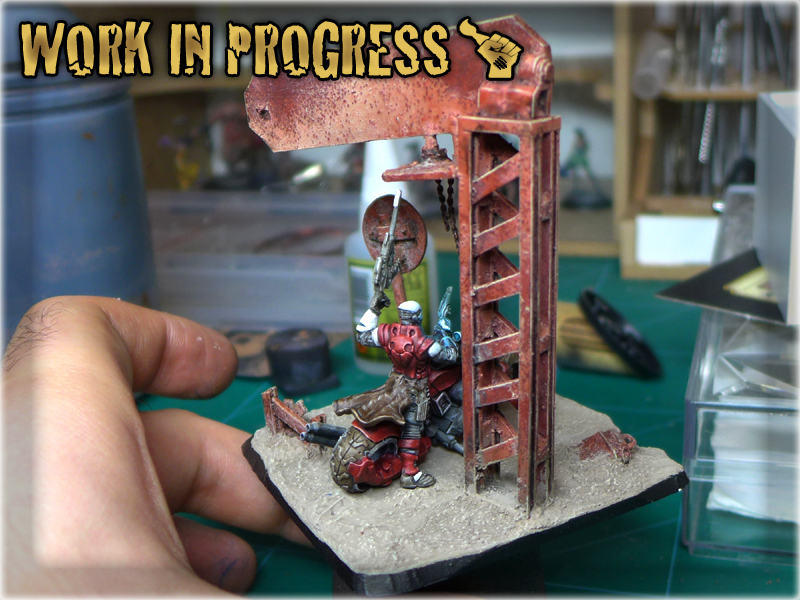
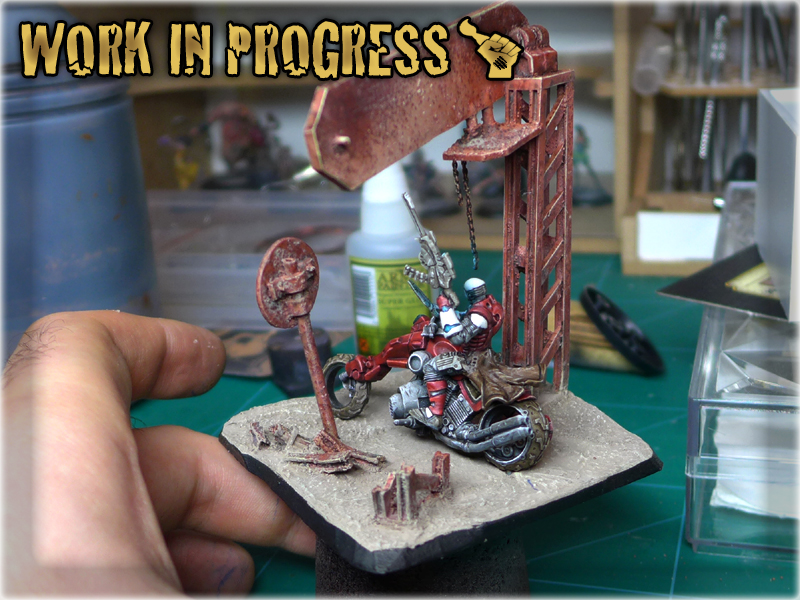
Next step was to create a diorama thus fulfilling my mind’s eye concept. I’ve picked a nice candle for a diorama’s base and starterd to work with main arrangement of things…
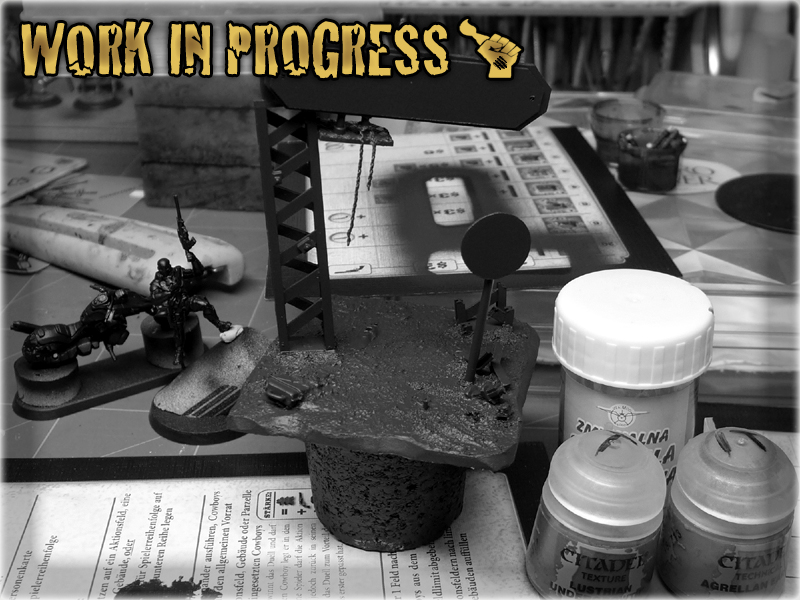
Preparation of diorama.
Basics of diorama and miniature composiotion.
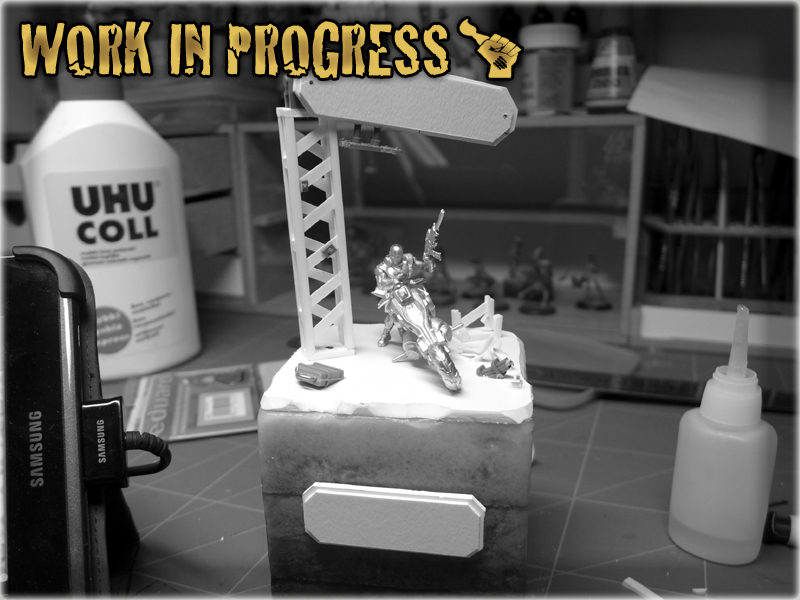
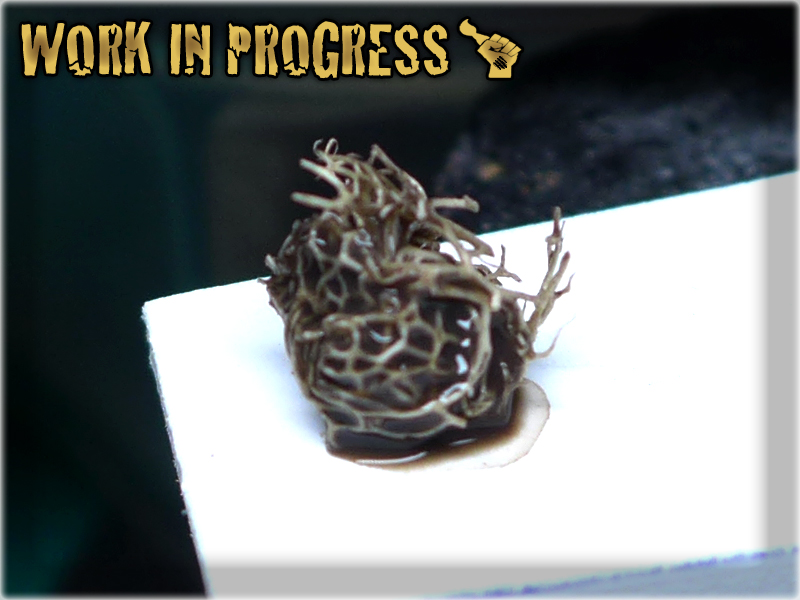
Facture added.
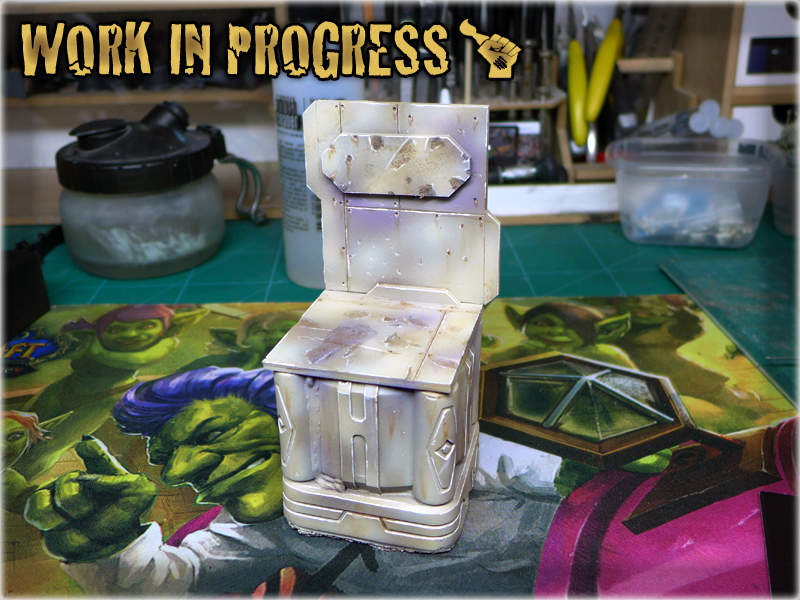
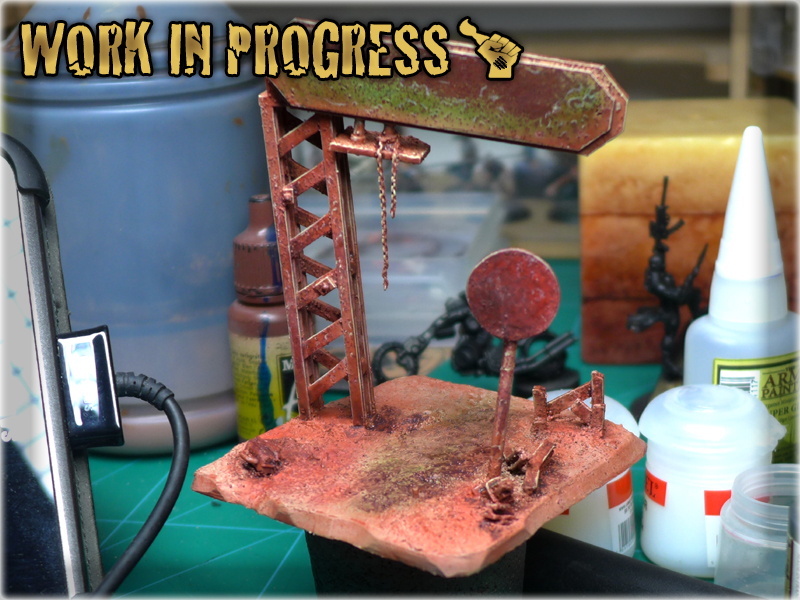
Then came the ‘Painting Time’. Usually I start by painting the miniature but this particular project was an exception. I’ve started with diorama instead to be certain that in the end I will be able to paint it correctly. Painting rust and dust is still new to me.
Diorama paintjob in progress.
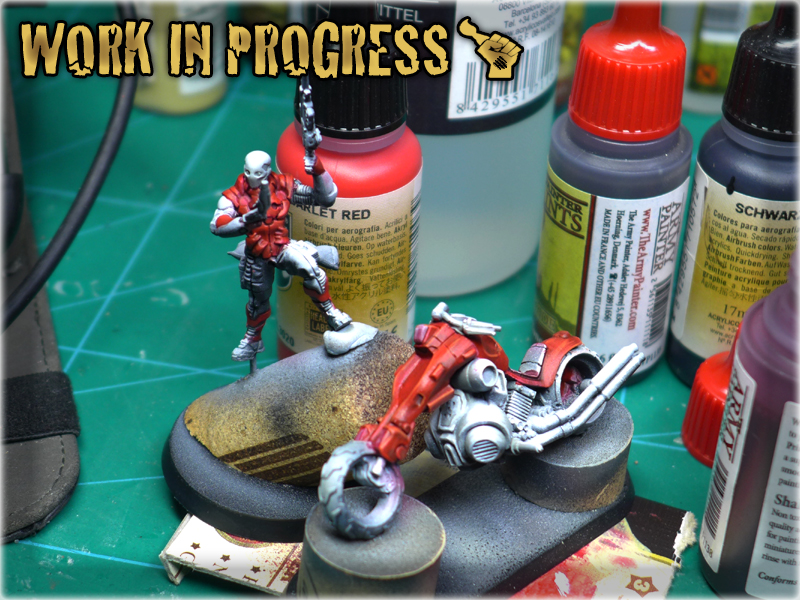
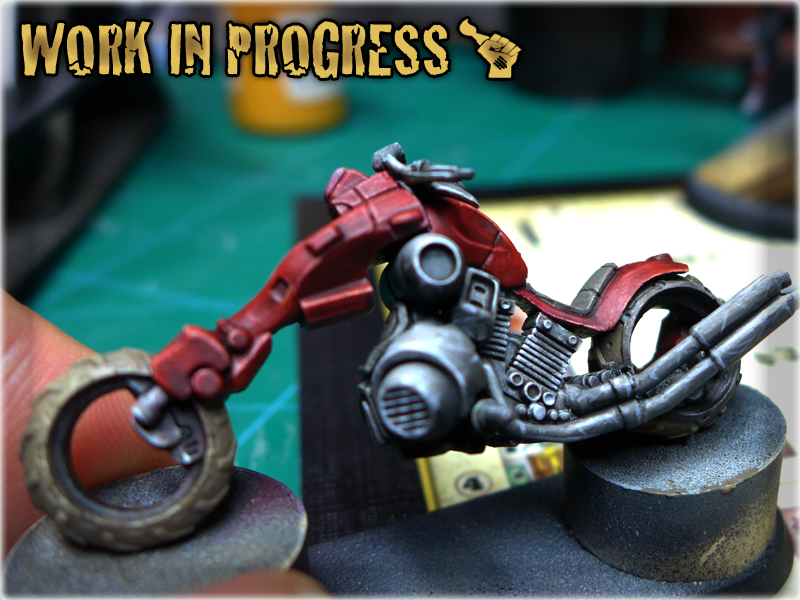
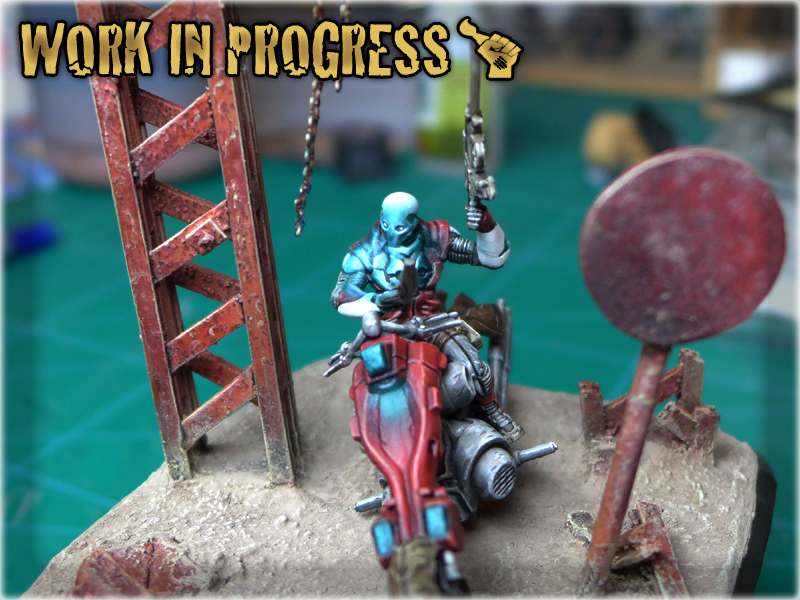
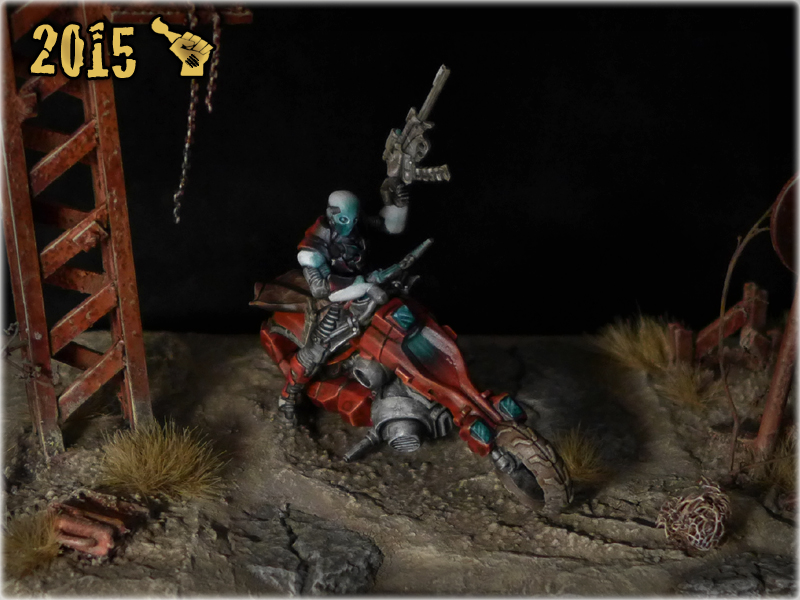
Once I was sattisfied with diorama’s result I’ve focused all of my attention on the miniature. I tried to begin in accordance with Angel Giraldez’s online Kum Bike tutorial and it wen’t rather off at some point. Still I was able to create something unexpected and extraoridinary if compared to my other miniatures.
The actual miniature preshaded and with red armour in midpainting.
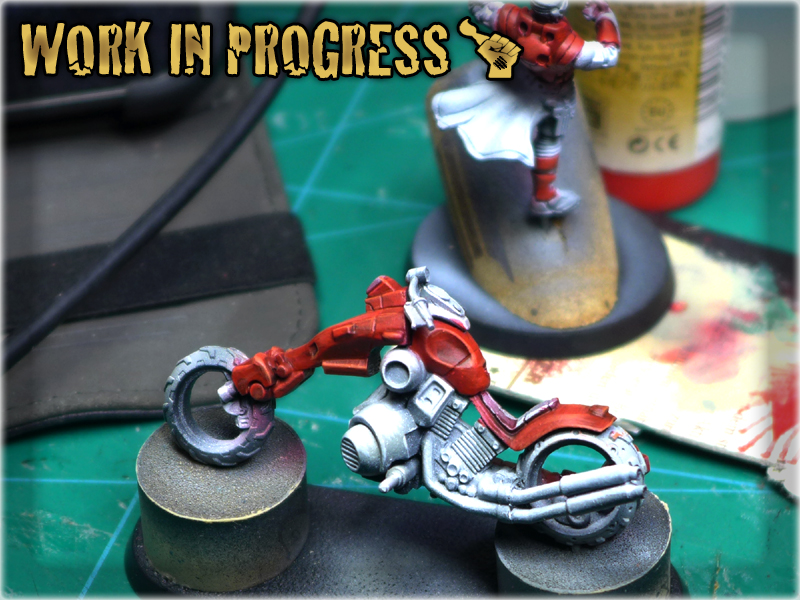
Something to look like NMM appeared on the bike. Armour lined and shades appplied.
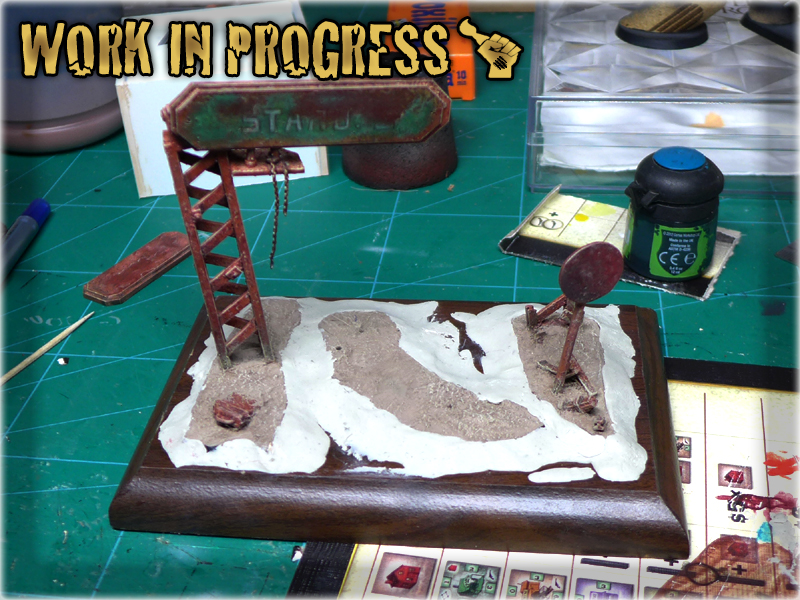
Closing to finish line I’ve figured that something went really wrong. I couldn’t pinpoint the cause – just felt taken aback while observing the pice. It took me half a day of painting different miniatures to finally understand: The diorama sucked! It was a total disaster! There was not enough space for the biker which was posed so that only a small part was visible. Black rant of the base made too much bad contrast while the candle… oh the candle justed didn’t fit…
It went wrong in the forums too as I was told that my ‘OSL looks more like a nuclear blast’ to which I actually agreed…
Bad – bad diorama… bad nuclear blast…
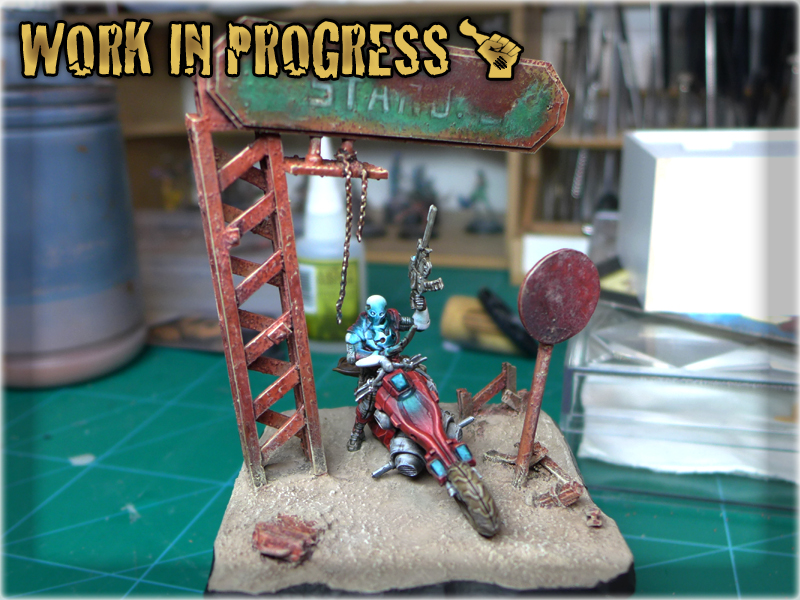
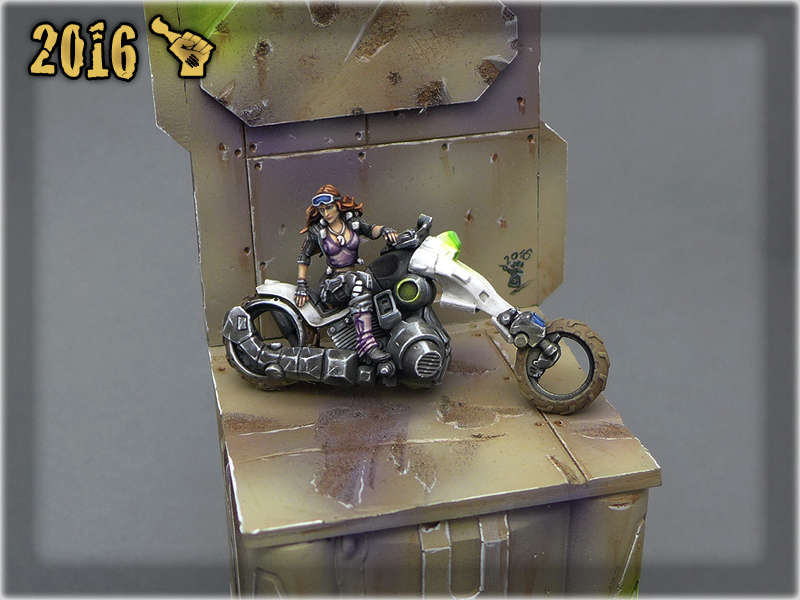
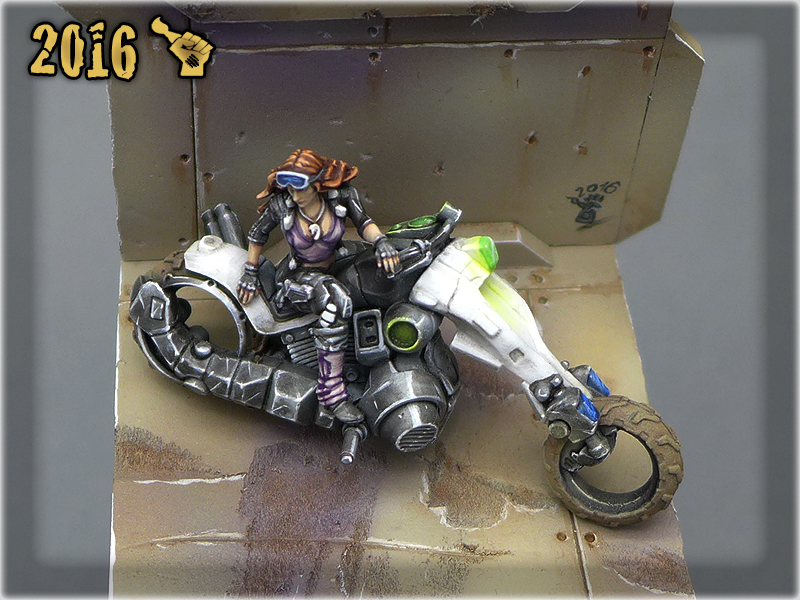
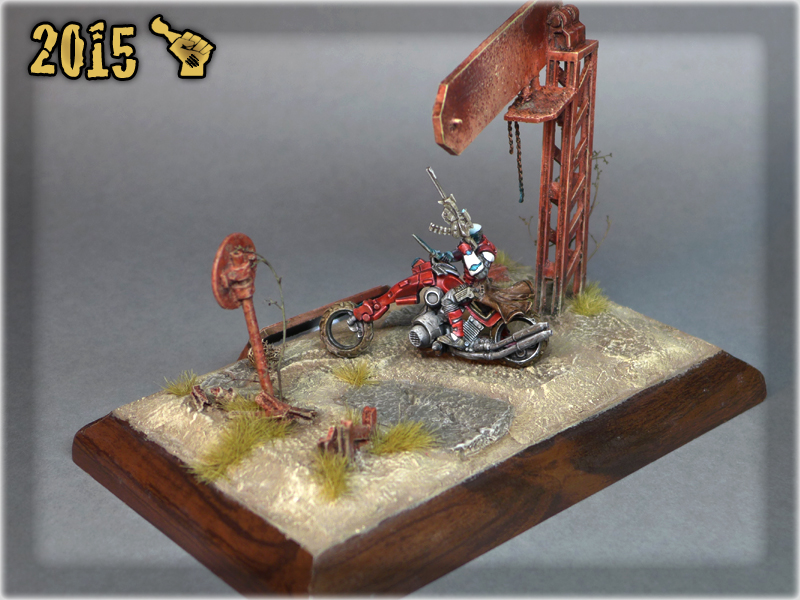
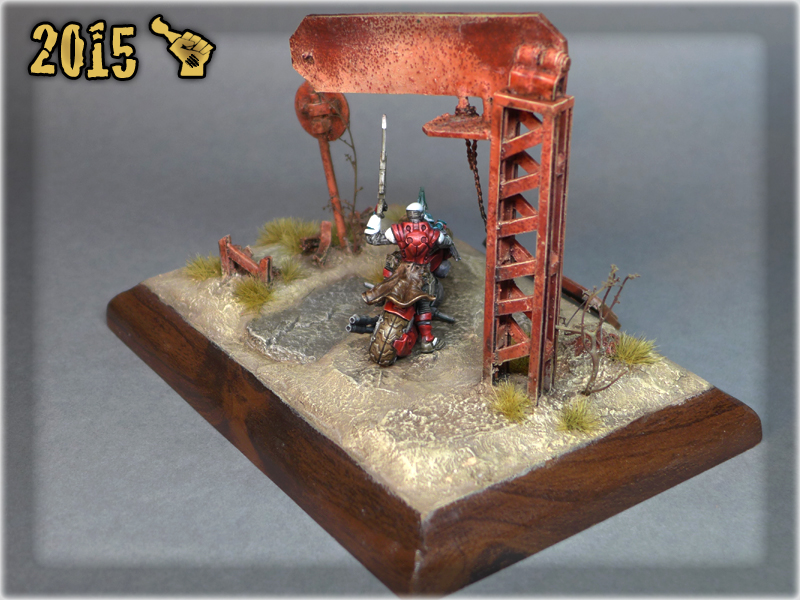
I’ve made my mind then and remade the diorama totally. I cut the stuff into pieces which I used to create foundation for another ‘faster, harder, better, stronger’ diorama. This time I picked a much more suitable base for it too. I also fallowed an advice of Claudius Sol and dimmed the OSL.
Diorama cut and rebased.
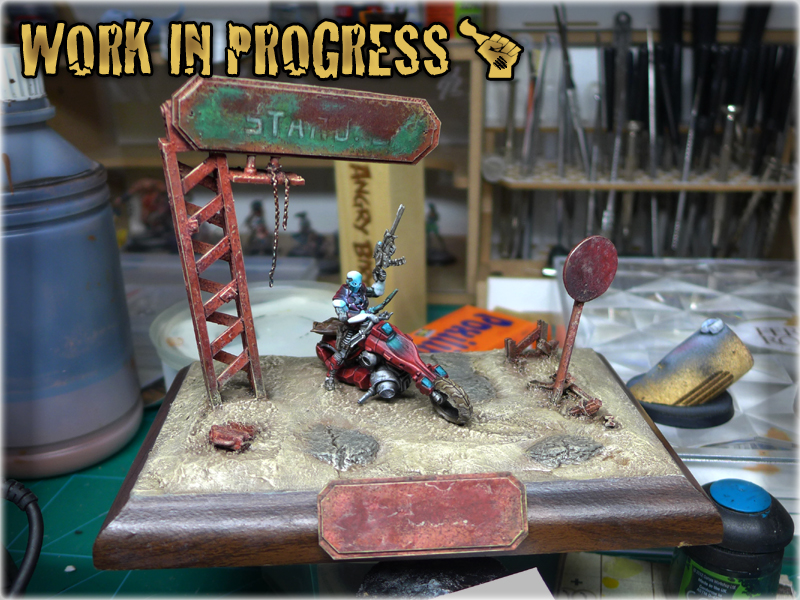
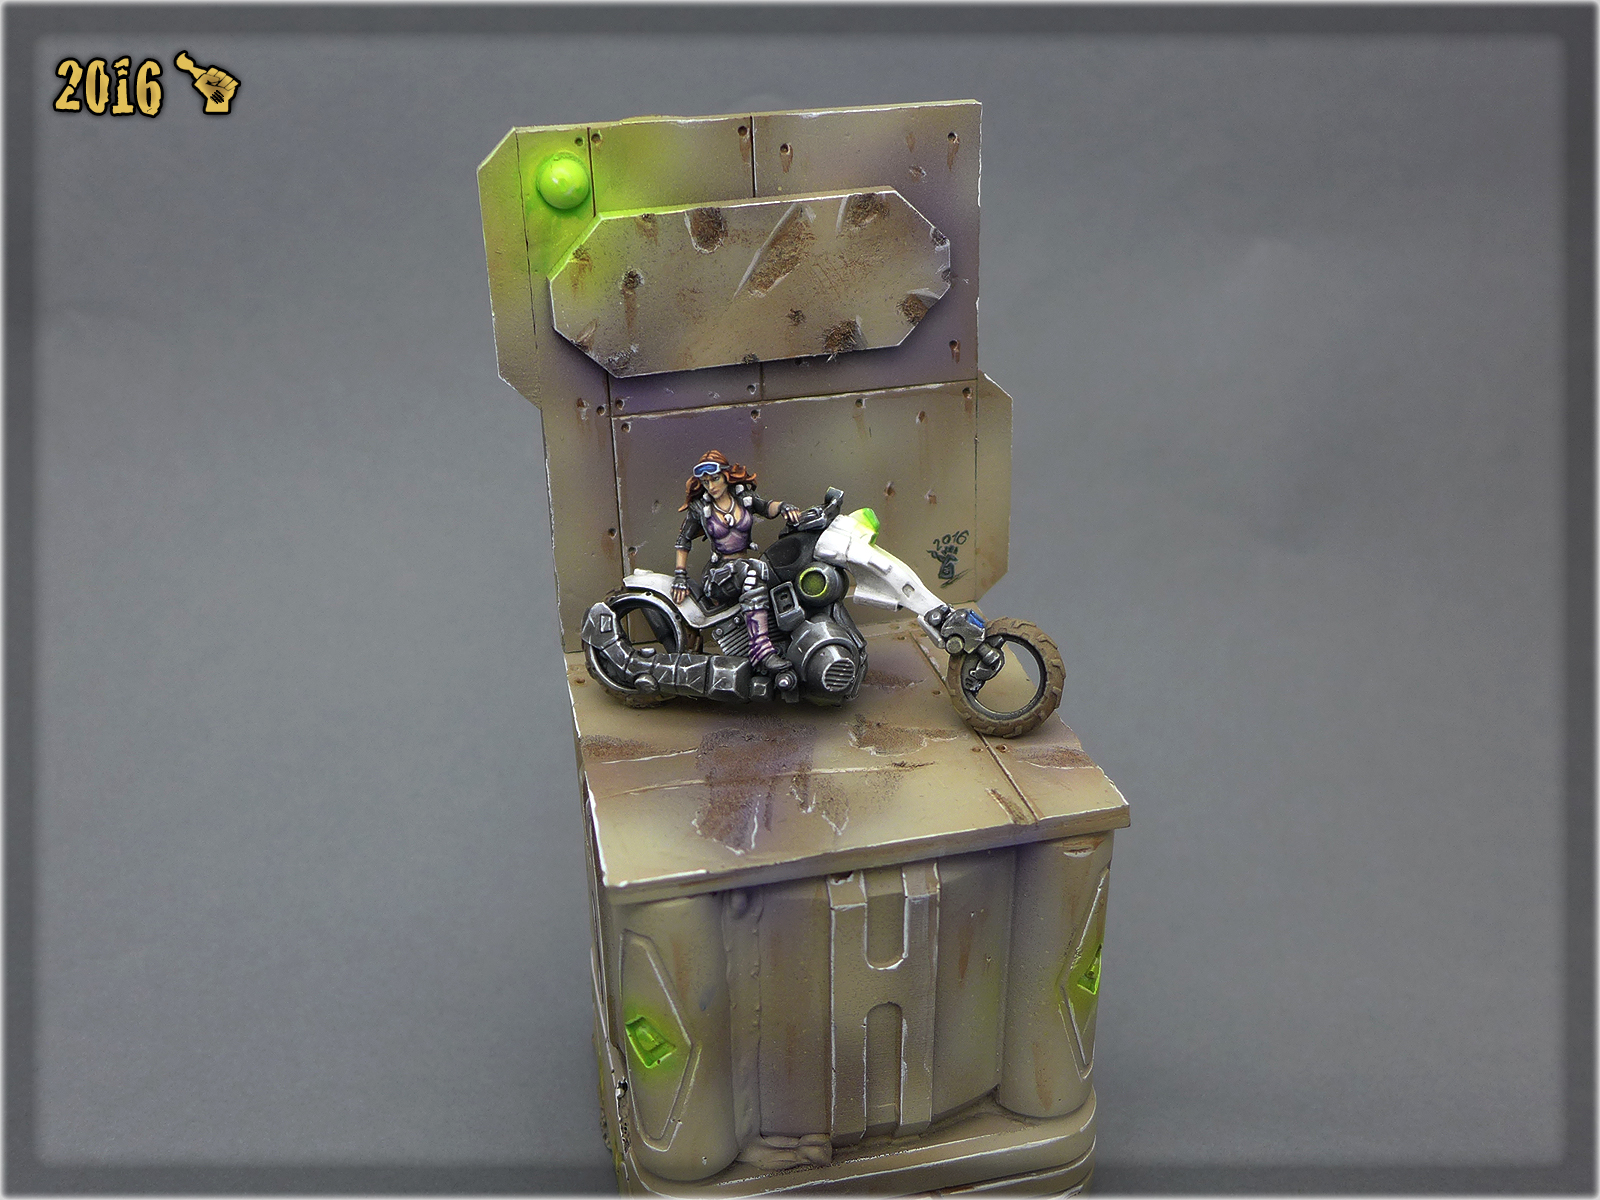
At some point the diorama needed just the final touches.
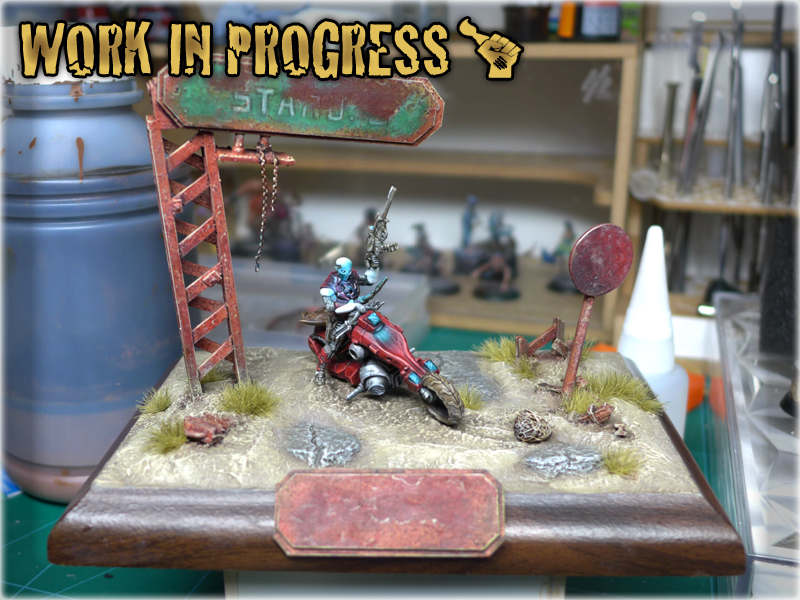
Here’s the final piece: “NOMAD SOUL”
Here is a technique that I have developed through years of painting and find it most usefull up to this day.
Five Layers Technique is a basic technique of choosing and applying colours. I especially reccomend it for begginers as it is simple, easy to learn, fast and rewarding. You can apply almost every colour using this technique and achieve good results as long as you choose proper paints to do so. It is especially good for either painting entire army ‘tabbletop level’ or preparing a miniature for much more complex paintjob.
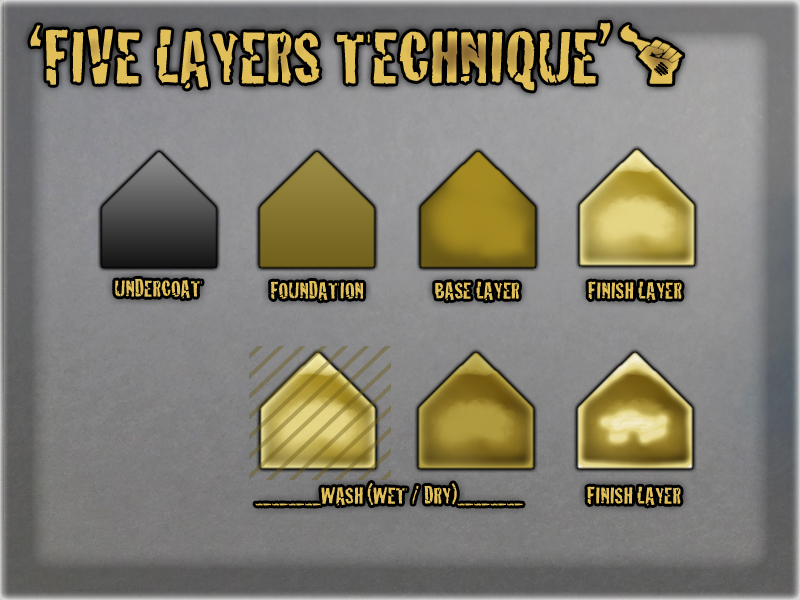
The main concept of Five Layers Technique is to paint different colours using five layers of paint. Starting with a foundation layer, covered with base layer, finished with highlights, all being washed and edged. Here’s an example of how does it look like when finished:
It does not matter if you have a steady hand and a lot of patience – if you pick your paints badly this method will not work. Choosing proper colours is the key to succeed. The colours should pe picked in this order:
* Base layer: pick up a medium tone colour,
* Foundation layer: choose darked version of the base colour,
– The exception to this rule is if you would like to keep the colour bright such as bone, vibrant purple, creme, yellow, etc. In this case a little bit brighter, preferrably pastelle foundation colour will do.
* Finish layer: choose a brighter version of the base colour.
– Try to keep it the same distance as it is between Base and Foundation layer.
* Wash layer: use either same colour wash or brown.
– Brown wash fits in most cases. Be aware tho – it will do much damage if you pair it with pink, purple, violet or white.
Here’s and example of a proper layer set:
Let’s talk about how to apply choosen colours. There are some rules that must be followed. Below is the order and all the important leads:
– Foundation layer: Must be painted thoroghly. Paint should be delivered into recesses and cover all the flat areas, in the same time it must be kept from obscuring details too much. Some water may be added to the paint to ease the process.
– Base layer: May be painted scruffy and without dedication. Paint should be applied to all the flat areas and bulges leaving some of the Founation layer visible around it. Protruding areas should be ‘base’ covered wholly. I susually use flat brush for this layer to quicken the process and leave some Foundation layer visible without effort.
– Finish layer: Is the hardest part. Only protruding elements, central parts of flat and bulged areas should be covered. Some ‘edging’ may be done but next layer will render it almost invisible.
– Wash layer: Is the easy part. A lot of wash should be applied onto efery surface with no regard for details. Medium brush is good for the job as brushes too small won’t keep a lot of wash in them.
– Finish layer: Goes once again. Only protruding elements, central parts of flat and bulged areas should be covered but some parts of previous Finish layer should stay visible. At this point ‘edging’ is desirable.
Here’s a step-by-step example of this method:
That’s it 🙂 Below are some colours recepee examples for this tutorial:
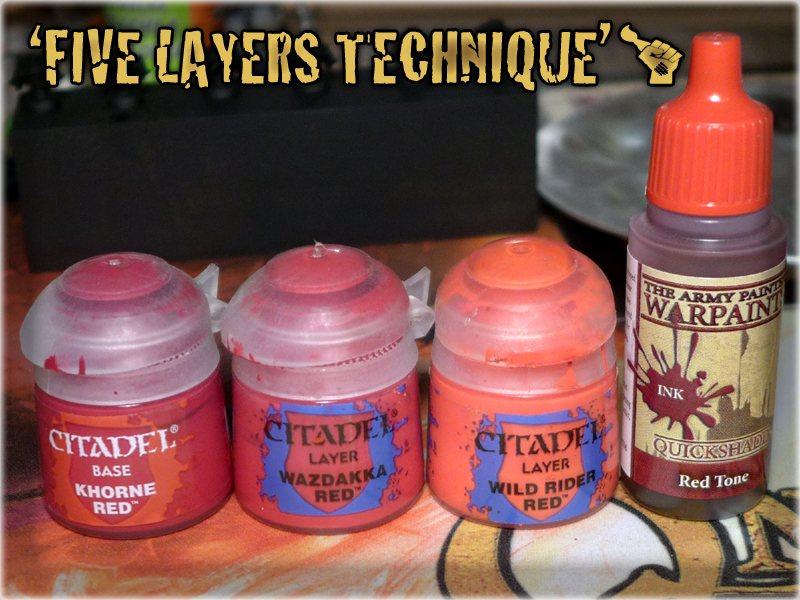
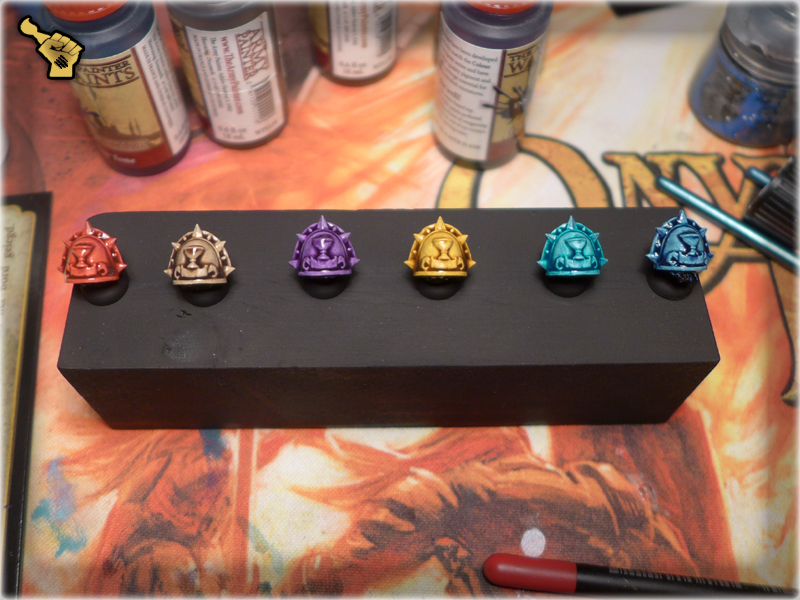
Foundation: Khorne Red (GW), Karak Stone (GW), Xereus Purple (GW), Tausept Ochre (GW), Stegadon Scale Green (GW), Regal Blue (GW),
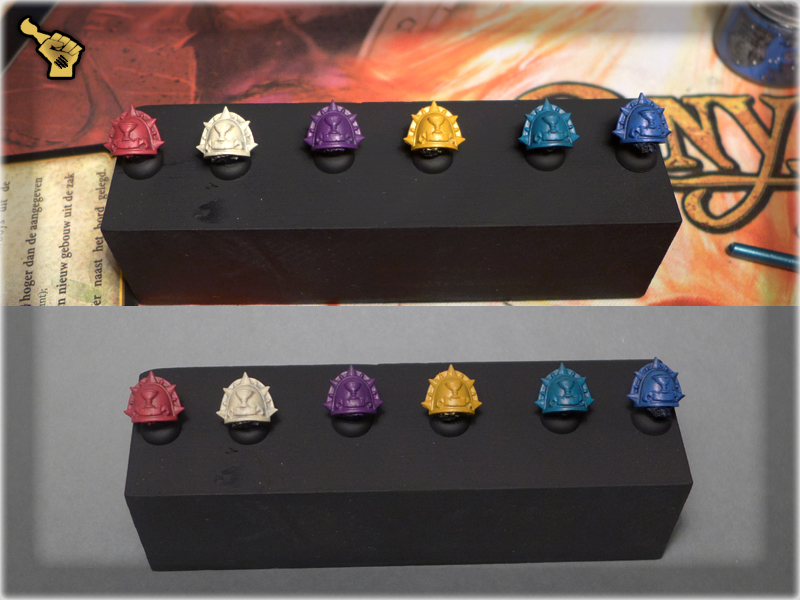
Base: Wazdakka Red (GW), Skeleton Bone (AP), Liche Purple (GW), Golden Yellow (GW), Hawk Turquise (GW), Ultramarine Blue (GW),
Finish: Wild Rider Red (GW), Skeleton Bone (AP) + White, Genestealer Purple (GW), Golden Yellow (GW) + White, Hawk Turquise (GW) + White, Lothern Blue (GW),
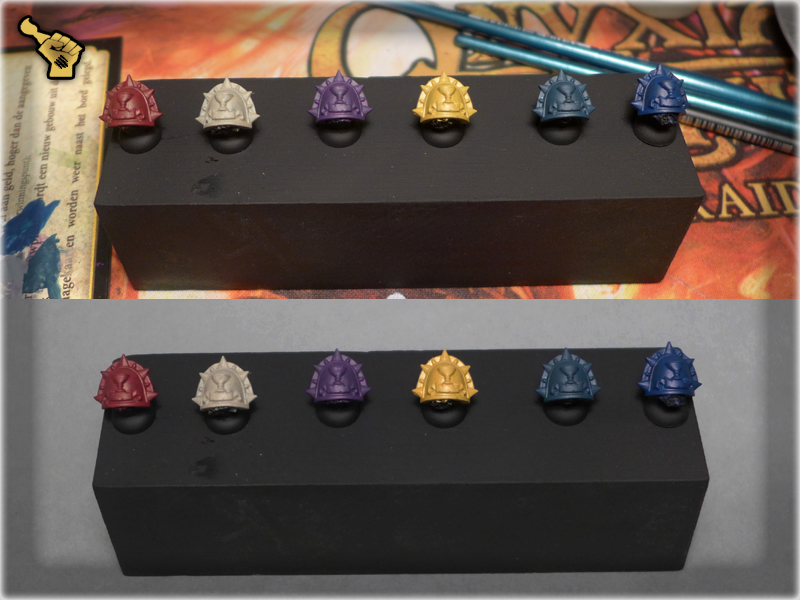
Wash: Red Tone Ink (AP), Strong Tone Ink (AP, Purple Ink (AP), Seraphim Sepia (GW), Turquise Ink (P3), Blue Tone Ink (AP),
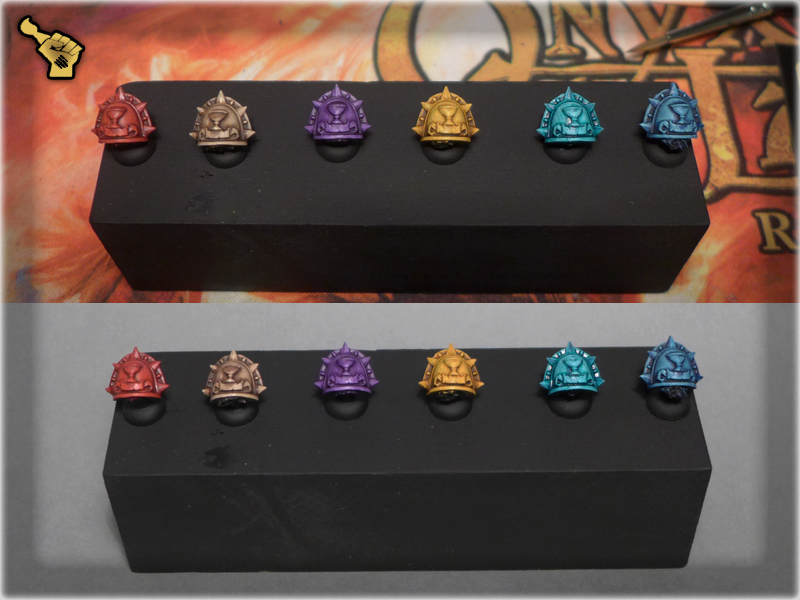
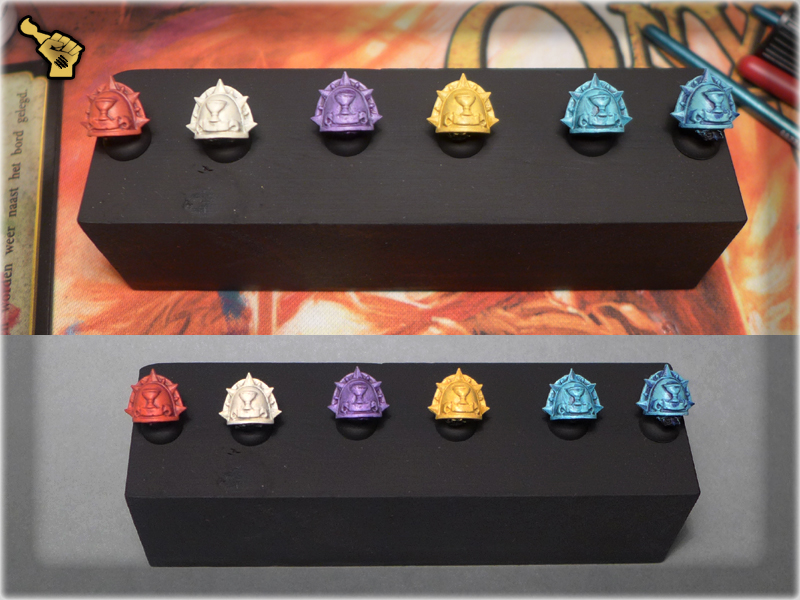
This how it looks like when Wash dries up,
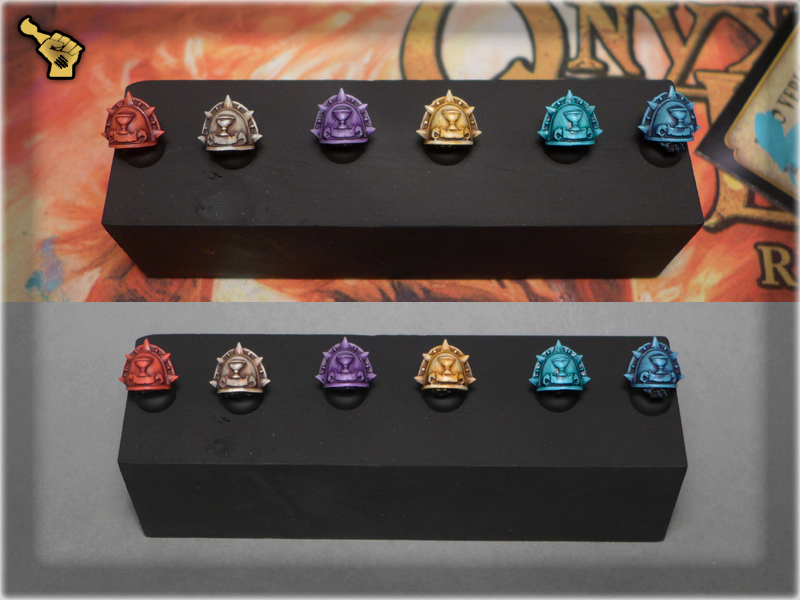
Final Finish: Wild Rider Red (GW), Skeleton Bone (AP) + White, Genestealer Purple (GW), Golden Yellow (GW) + White, Hawk Turquise (GW) + White, Lothern Blue (GW),
I hope you’ve enjoyed this tutorial and found it helpful.
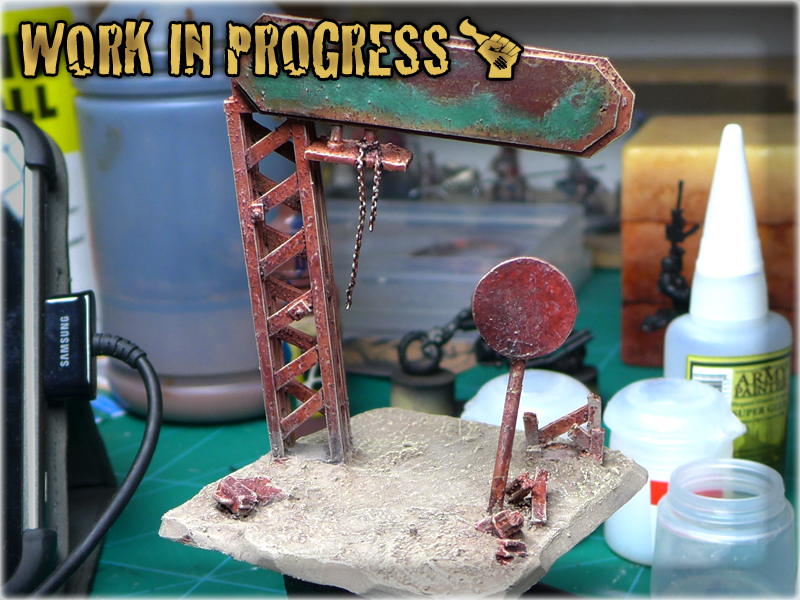
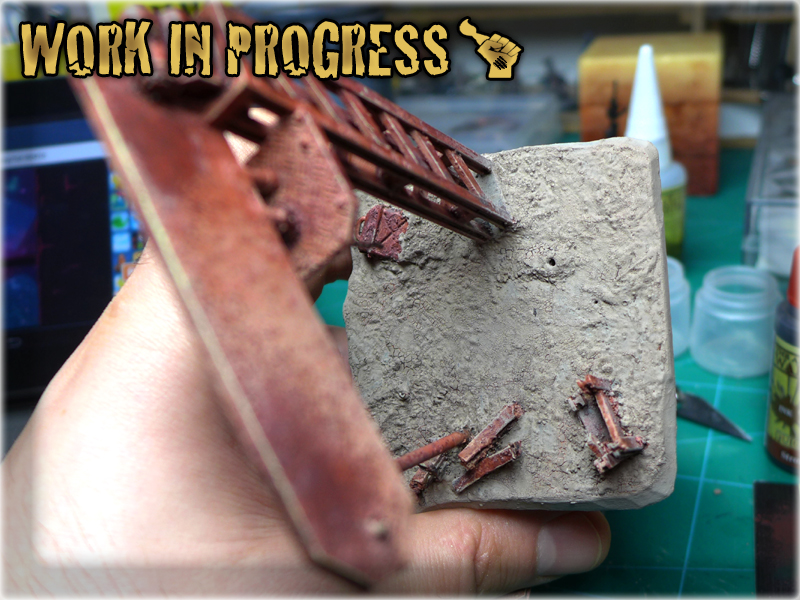
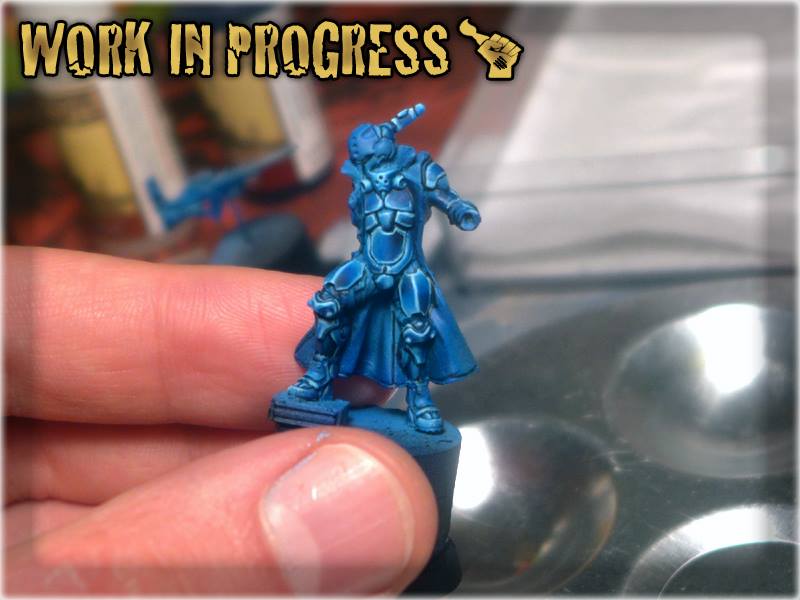
Recently I spent a lot of time working on a ‘Special Project’. I have read/watched tutorials and acquired Know How in a hope of expanding my painting skill. I even visited a friend from Fantasygames Painting Studio to watch and learn. In the end I feel like if I ‘gained a level’. Here is a shortcut of a tremendous amount of hours spent on learning and a week of hard day and night labour:
“LONE SENTRY”


FINAL RESULT:

Shizune (Made by Shizune) – for Painting Panoceania Blue Armour Tutorial
C’tan (Fantasygames Painting Studio) – for all the help, know how and this awesome Salt & Hairspray Tutorial
Here is a Step-by-step guide of how to paint Infinity Nomad Red Armour – Scar_hand Painting’s style 🙂
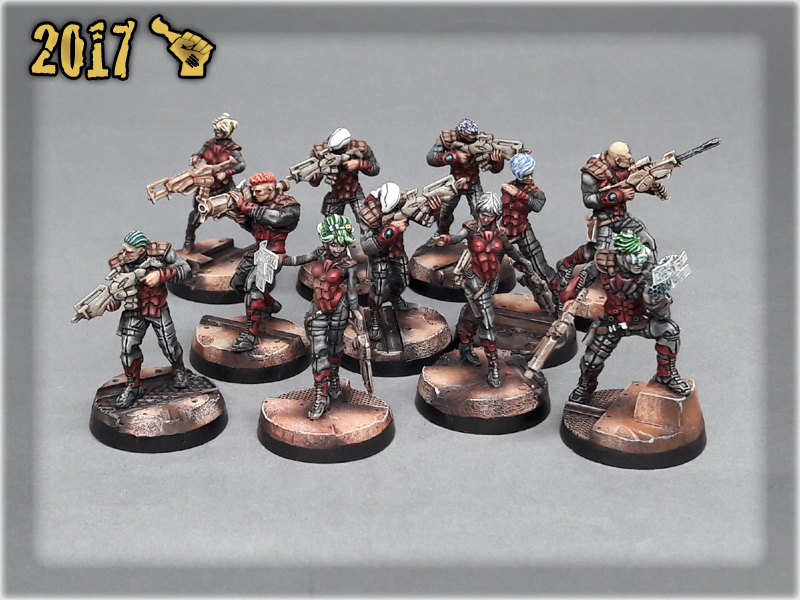
A complete Recipee used to paint my Infinity Nomads may be found in COLOUR RECIPEES: INFINITY NOMADS. You can also find some additional pictures in the NOMADS: CORREGIDOR lvl 4,5 Gallery.
* GW Standard Brush,
* Tamiya Modeling Brush HG,
* AP Wargamer: The Psycho,
* GW Chaos Black Undercoat,
* GW Mechrite Red, (When this one runs out i’ll switch to P3 Formula ‘Sanguine Base’ instead),
* GW Wazdakka Red,
* AP Skeleton Bone,
* White,
* AP Strong Tone Ink,
* AP Red Tone Ink,
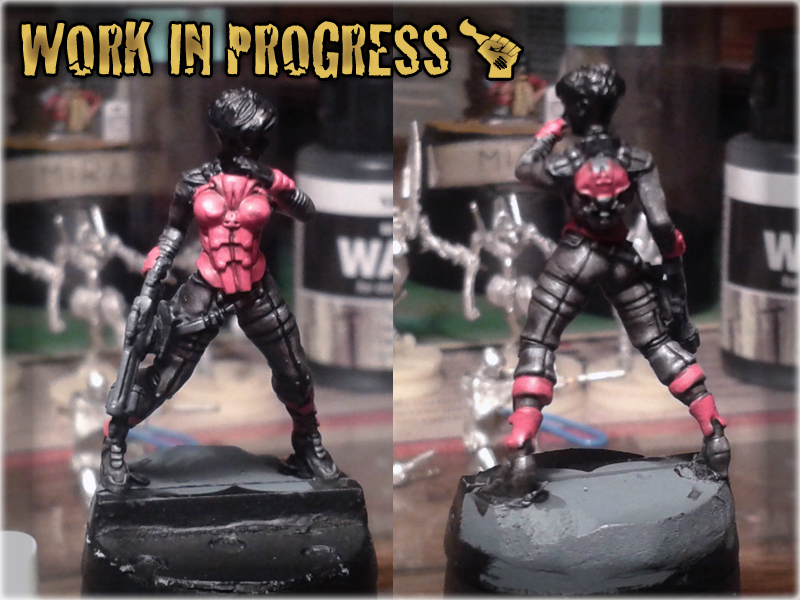
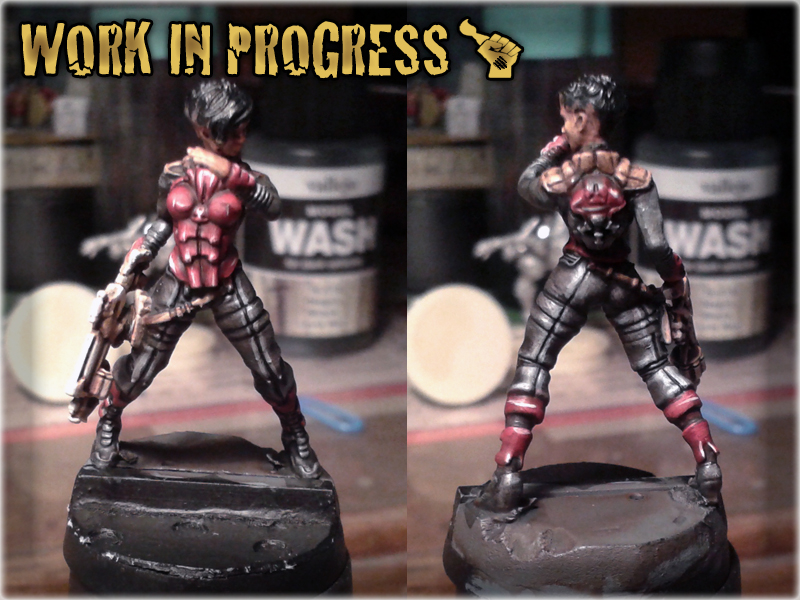
1 I used Chaos Black spray to undercoat the model. I usually do this by applying eight layers of undercoat from eight different angles (four at the front and four at the back of the model, each at the same 45* angle with one directed up, one down, one left and one right side of the model).
2 The first layer of Red was made with Standard Brush and Mechrite Red. I tried not to fill the recesses too much and to cover all buldes smoothly.
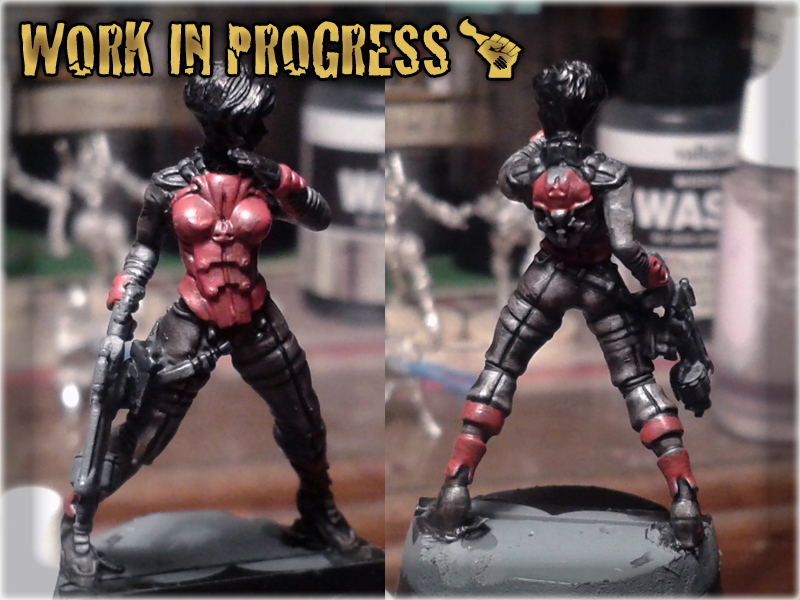
3 I switched to Tamiya Modeling Brush and applied Wazdakka Red to all bulges and flat surfaces of the armour, leaving cavities Mechrite Red'ed. This madethe armour look more smooth and ready to be highlighted.
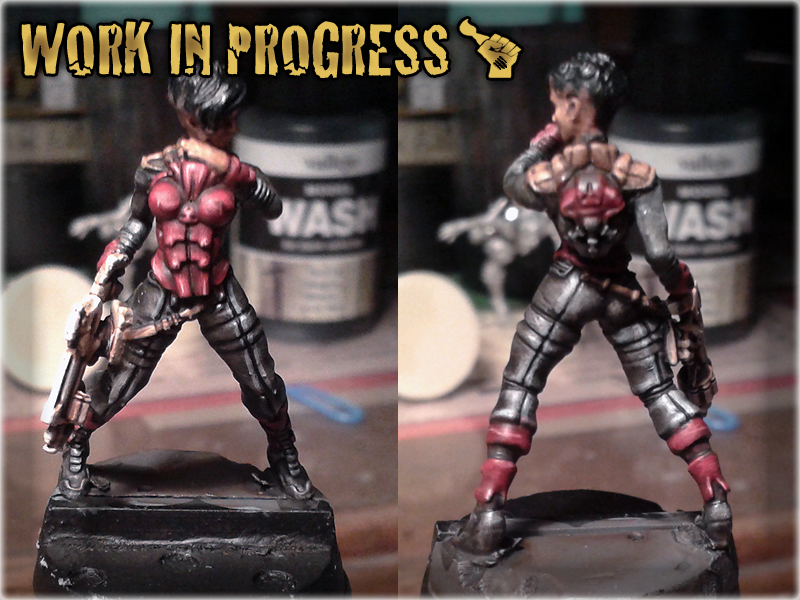
4 I applied a 50%/50% mix of Wazdakka Red and Skeleton Bone in the middle and on the edges of particular surfaces.
5 I added White to the Wazdakka/Skeleton mix and further lined the model.
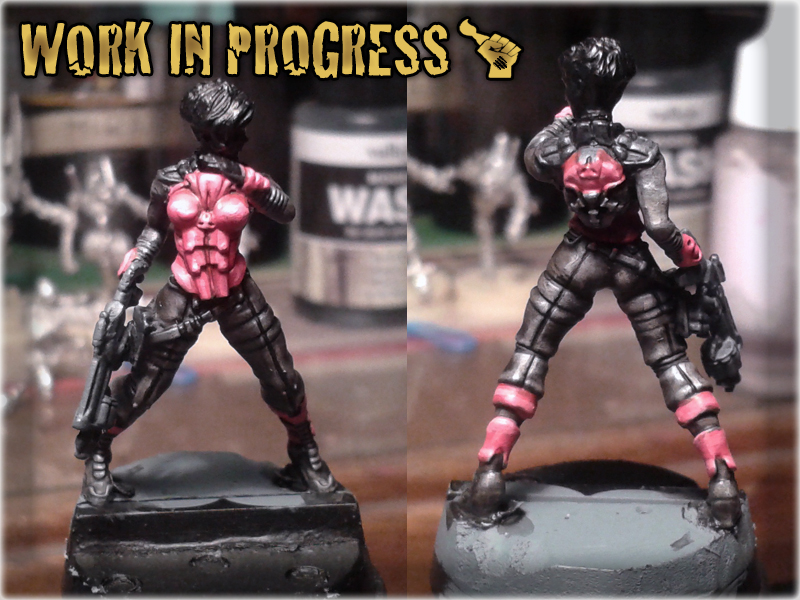
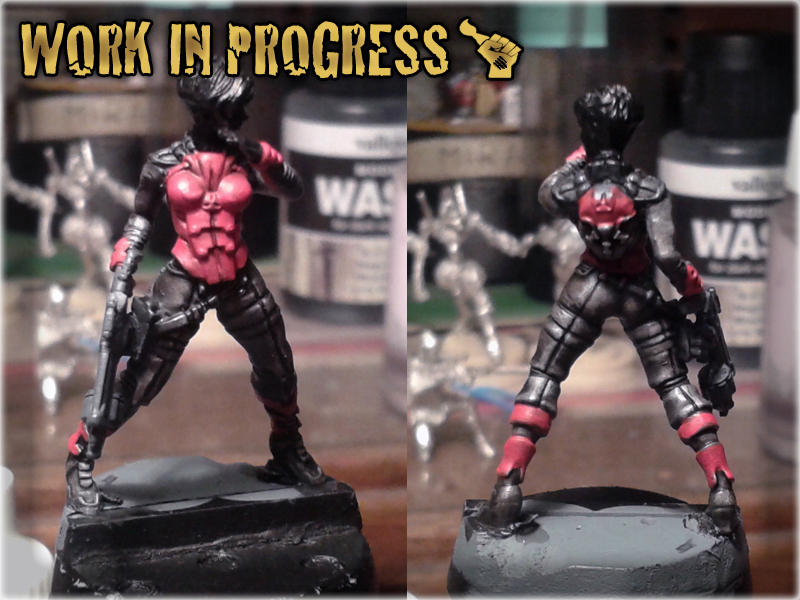
6 More White was added to the mix and another layer of lines and points was made.
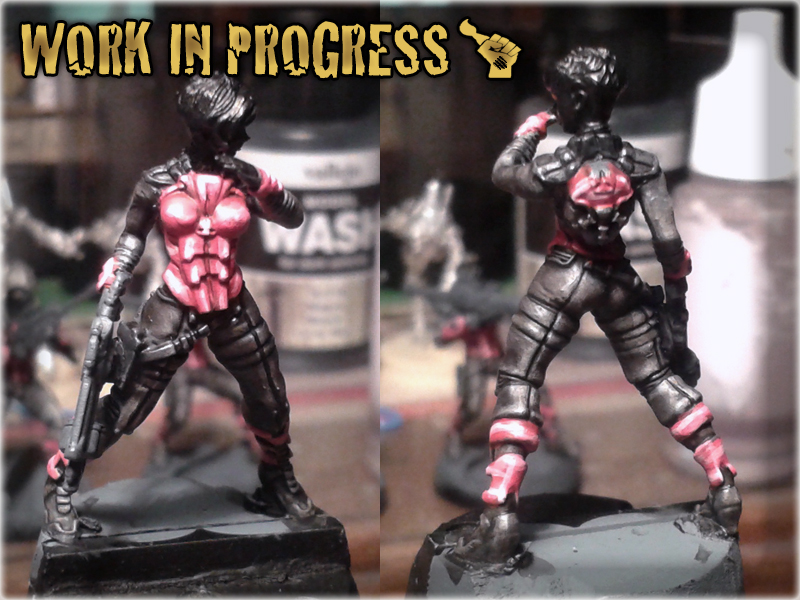
7 I switched back to Standard Brush and washed the armour with Strong Tone Ink.
8 I switched to The Psycho to add some Skeleton Bone/White lining in the key points of the armour.
9 I switched to Tamiya Modeling Brush and washed the armour with Red Tone Ink.
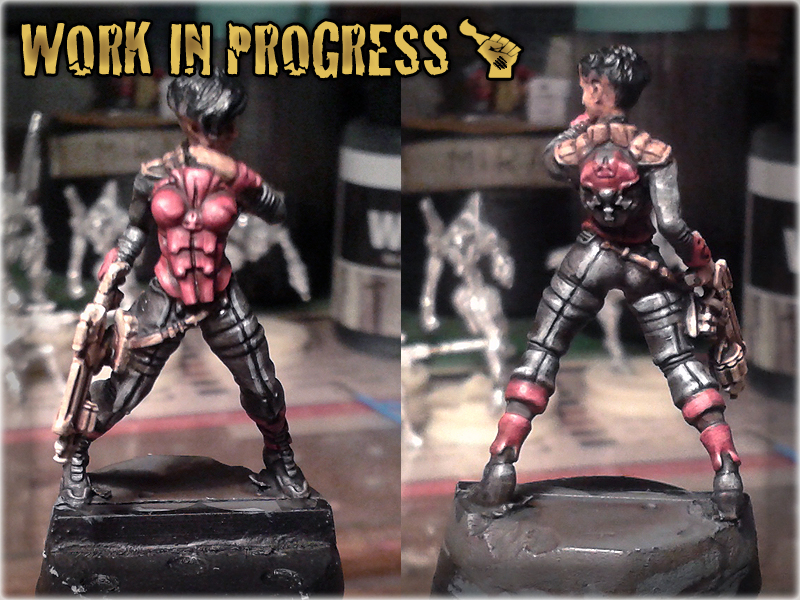
9 Oops! I did it again washing all the armour with Red Tone Ink to finally finish it.
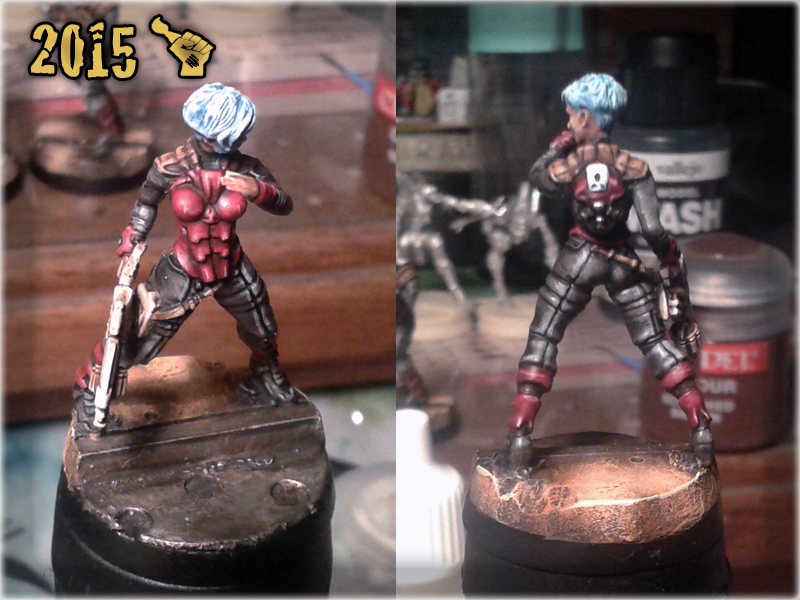
Hope that you find this little tut useful and that you will post some pictures of miniatures painted this way 😉