- contact@scarhandpainting.com


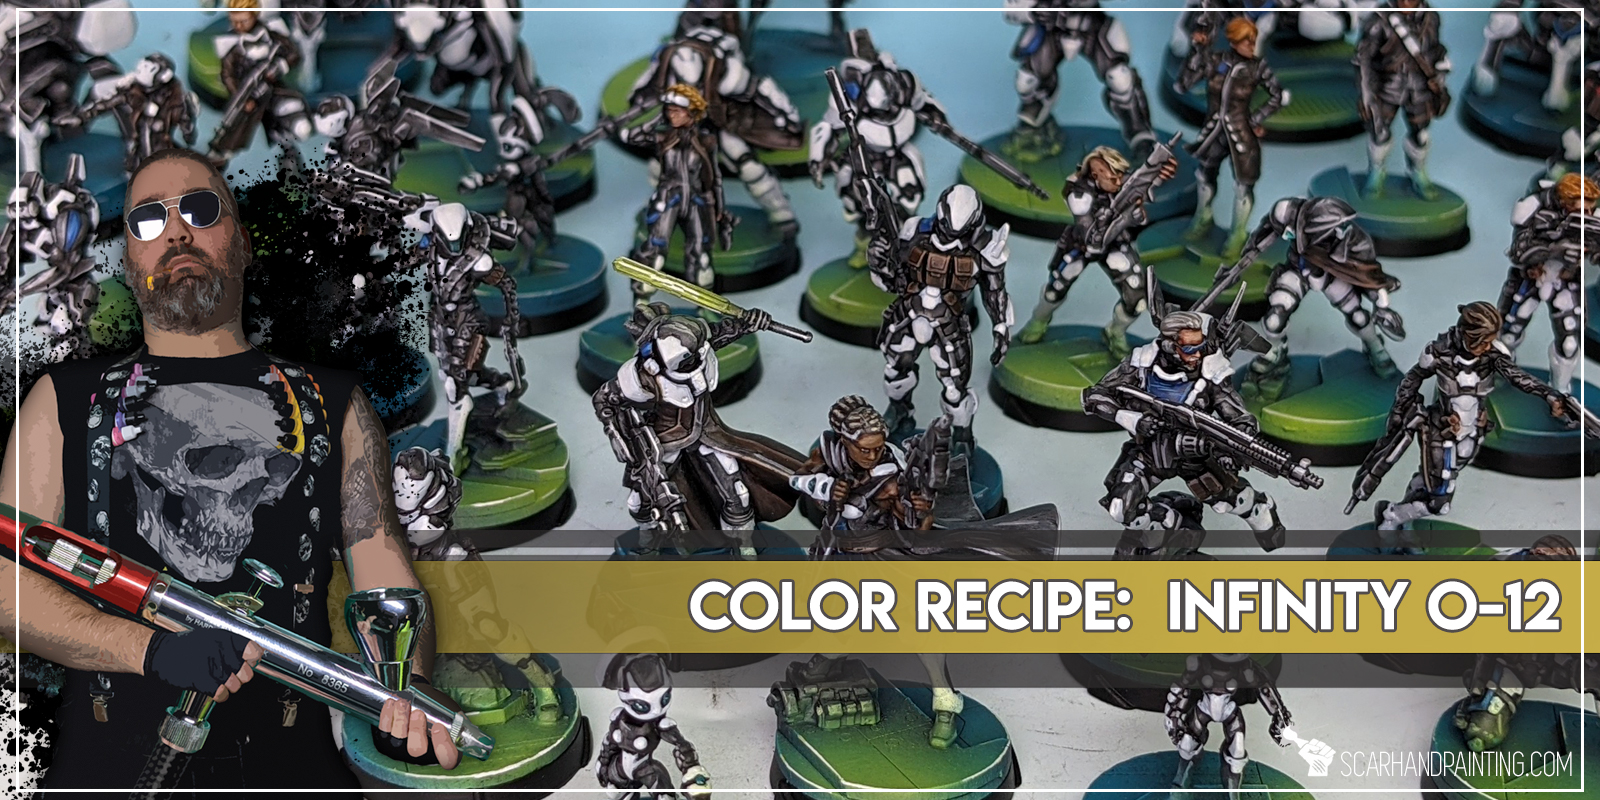
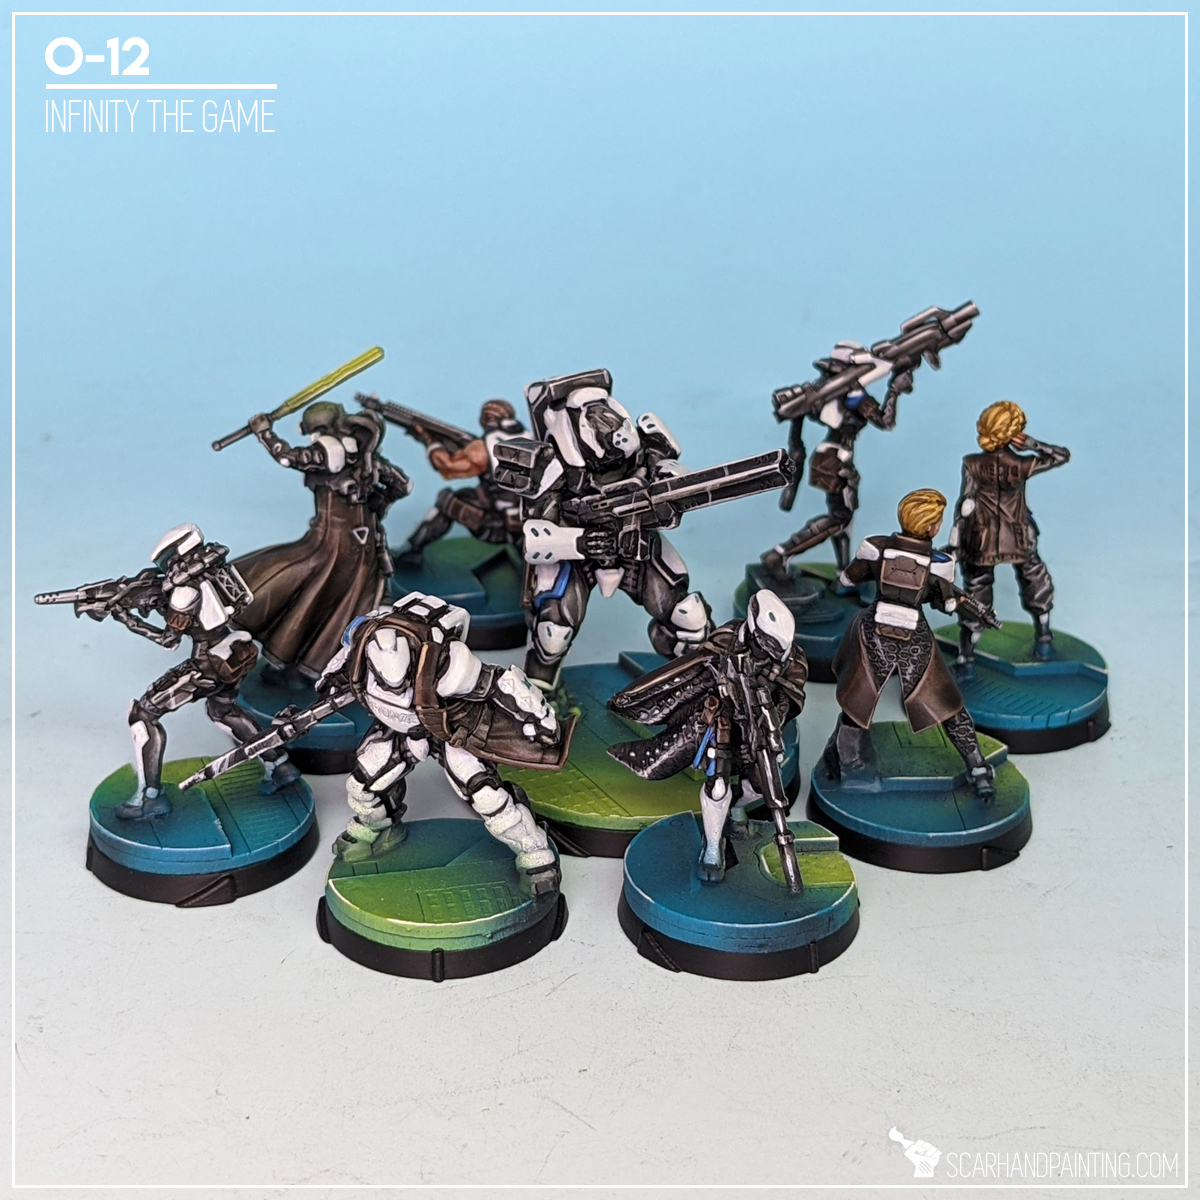
Here are some Colour Recipes for Infinity O-12 from Gallery: Infinity O-12. Please take note that this is a simple colour scheme, not covering multiple overlapping layers and blends in between, that lead to the final product. It is supposed to be used as guideline not a step-by-step.
BLACK armor:
Chaos Black, undercoat
Pancer Dark Grey (Val a), *
Fenrisian Grey (GW), flbr
Pale Wych Flesh (GW), flbr, l&p
Dark Tone Ink (AP), wash
Pale Wych Flesh (GW), l&p
WHITE armor:
Mix Ghost Grey (Val) 1:1 Wolf Grey (Val a),
Mix Ghost Grey (Val) 1:1 Wolf Grey (Val a),
White (Val a), bl
Off White (Val), bl, l&p

BROWN clothes:
Black Armor base,
Dark Brown (Val A), bl
Mix Strong Tone Ink (AP) 1:1 Soft Tone Ink (AP), wash
Karak Stone (GW), l&p
BLUE elements:
French Blue (val a),
Ultramarine Blue (val a), l
Heth Blue (gw), l&p
Glacier Blue (val), l&p
VISIERS:
Emerald (Val),
Mix Emerald (Val) x:x Off White (Val), l&p
TURQUOISE helmet dots,
Coelia Greenshade (GW),

BASES:
Coal Black (P3), *
Turquoise (Val), *
Turquoise (Val), l
Pale Wych Flesh (GW), l
Duck Egg Green (Val a), OSL
Light Livery Green (Val a), OSL
Off White (Val), l

l&p – lines and points,
p – points,
dl – deep lining,
bl – blend,
gl – glaze,
drbr – drybrush,
fltbr – flatbrush,
lobr – loaded brush,
stpl – stippling,
*Airbrushed (with multiple layers and mixes)
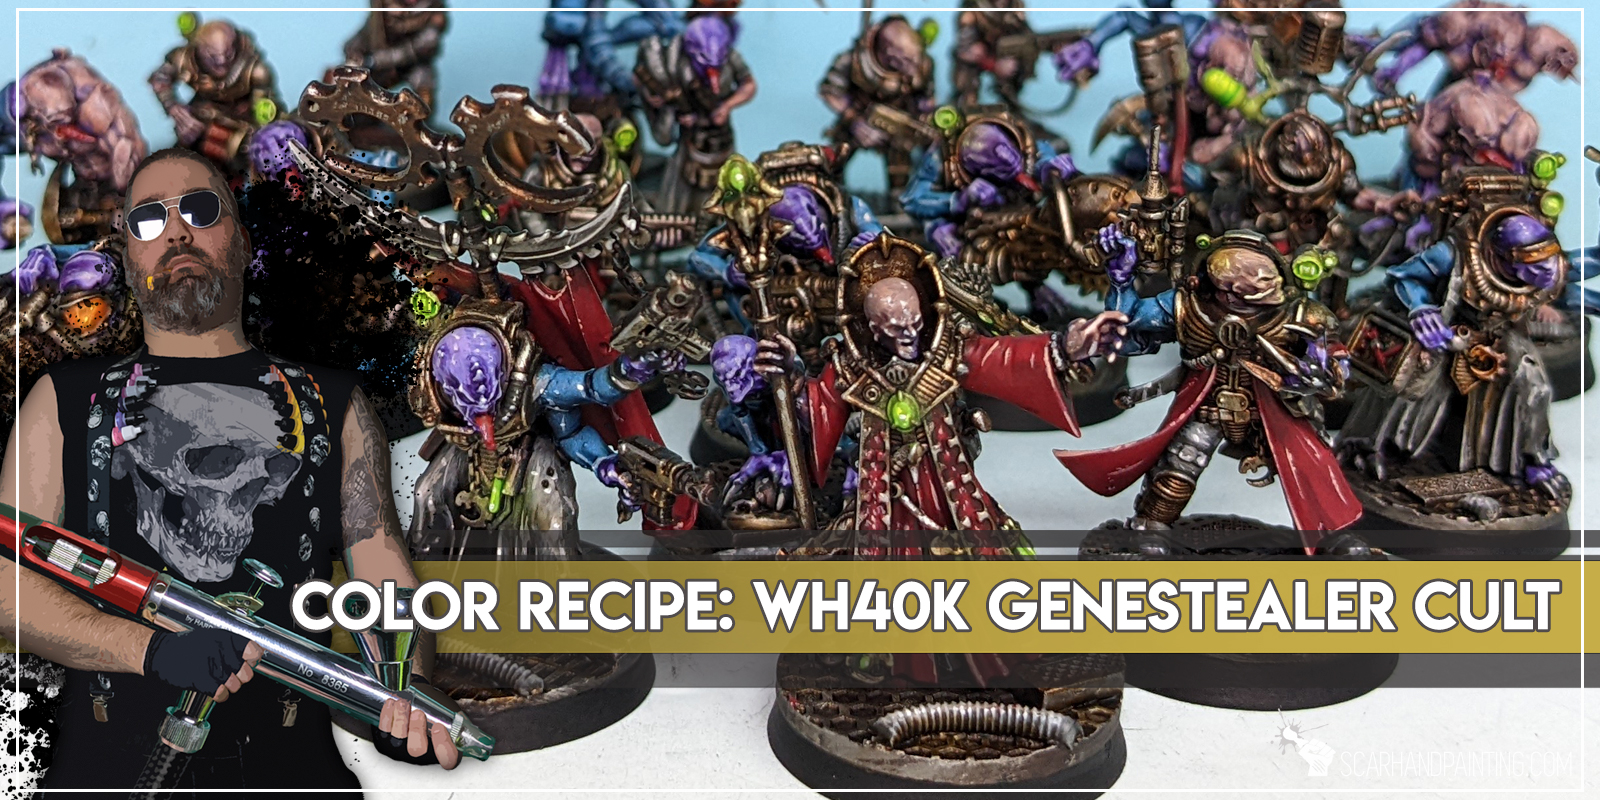
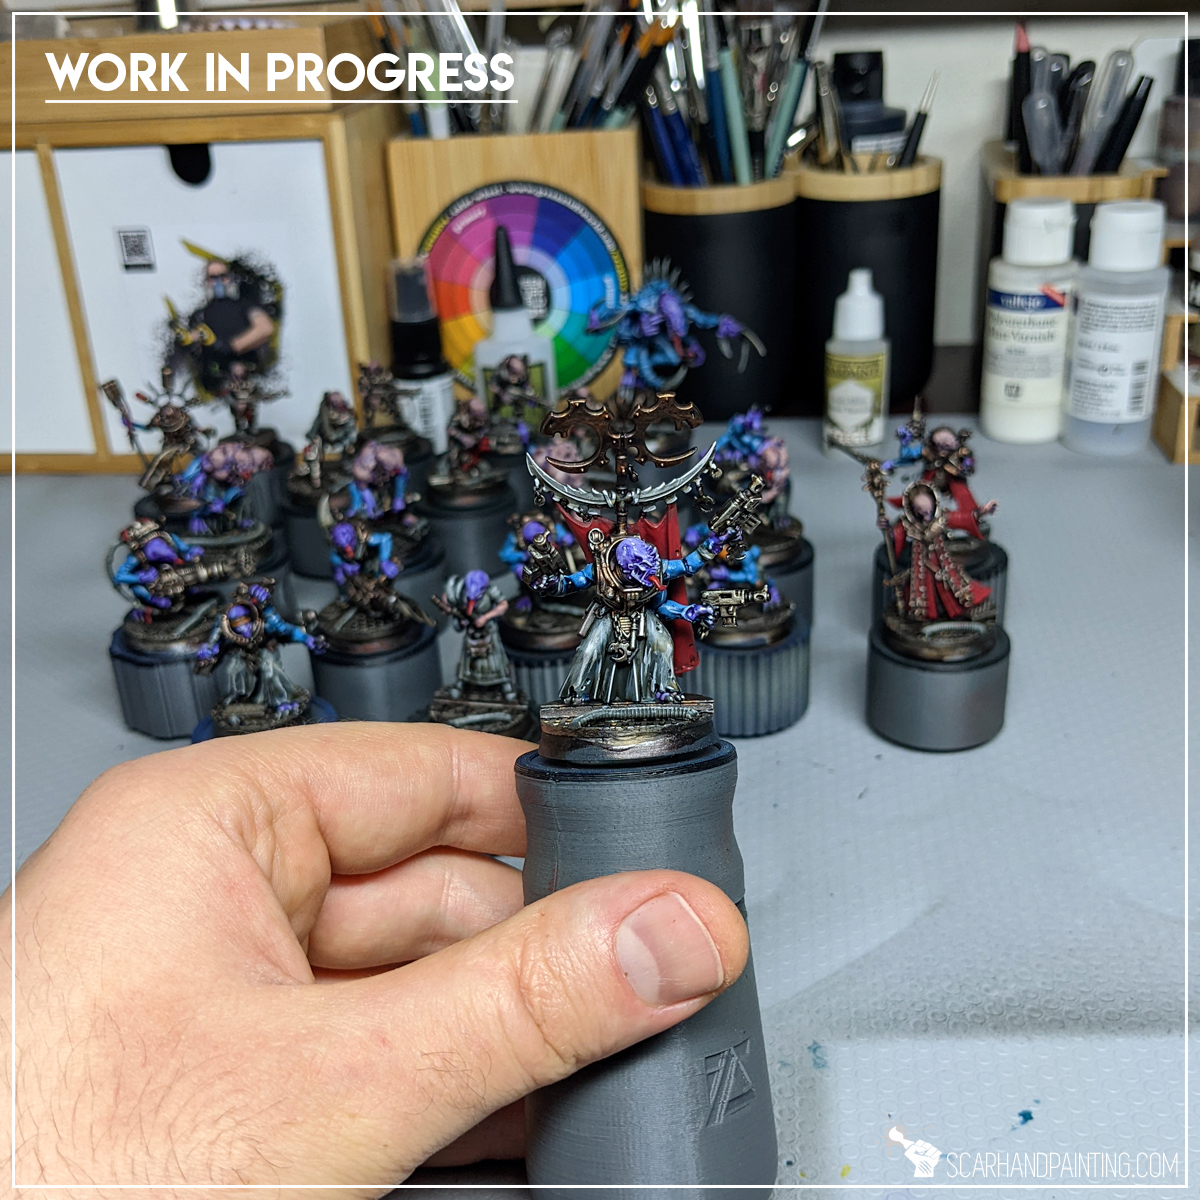
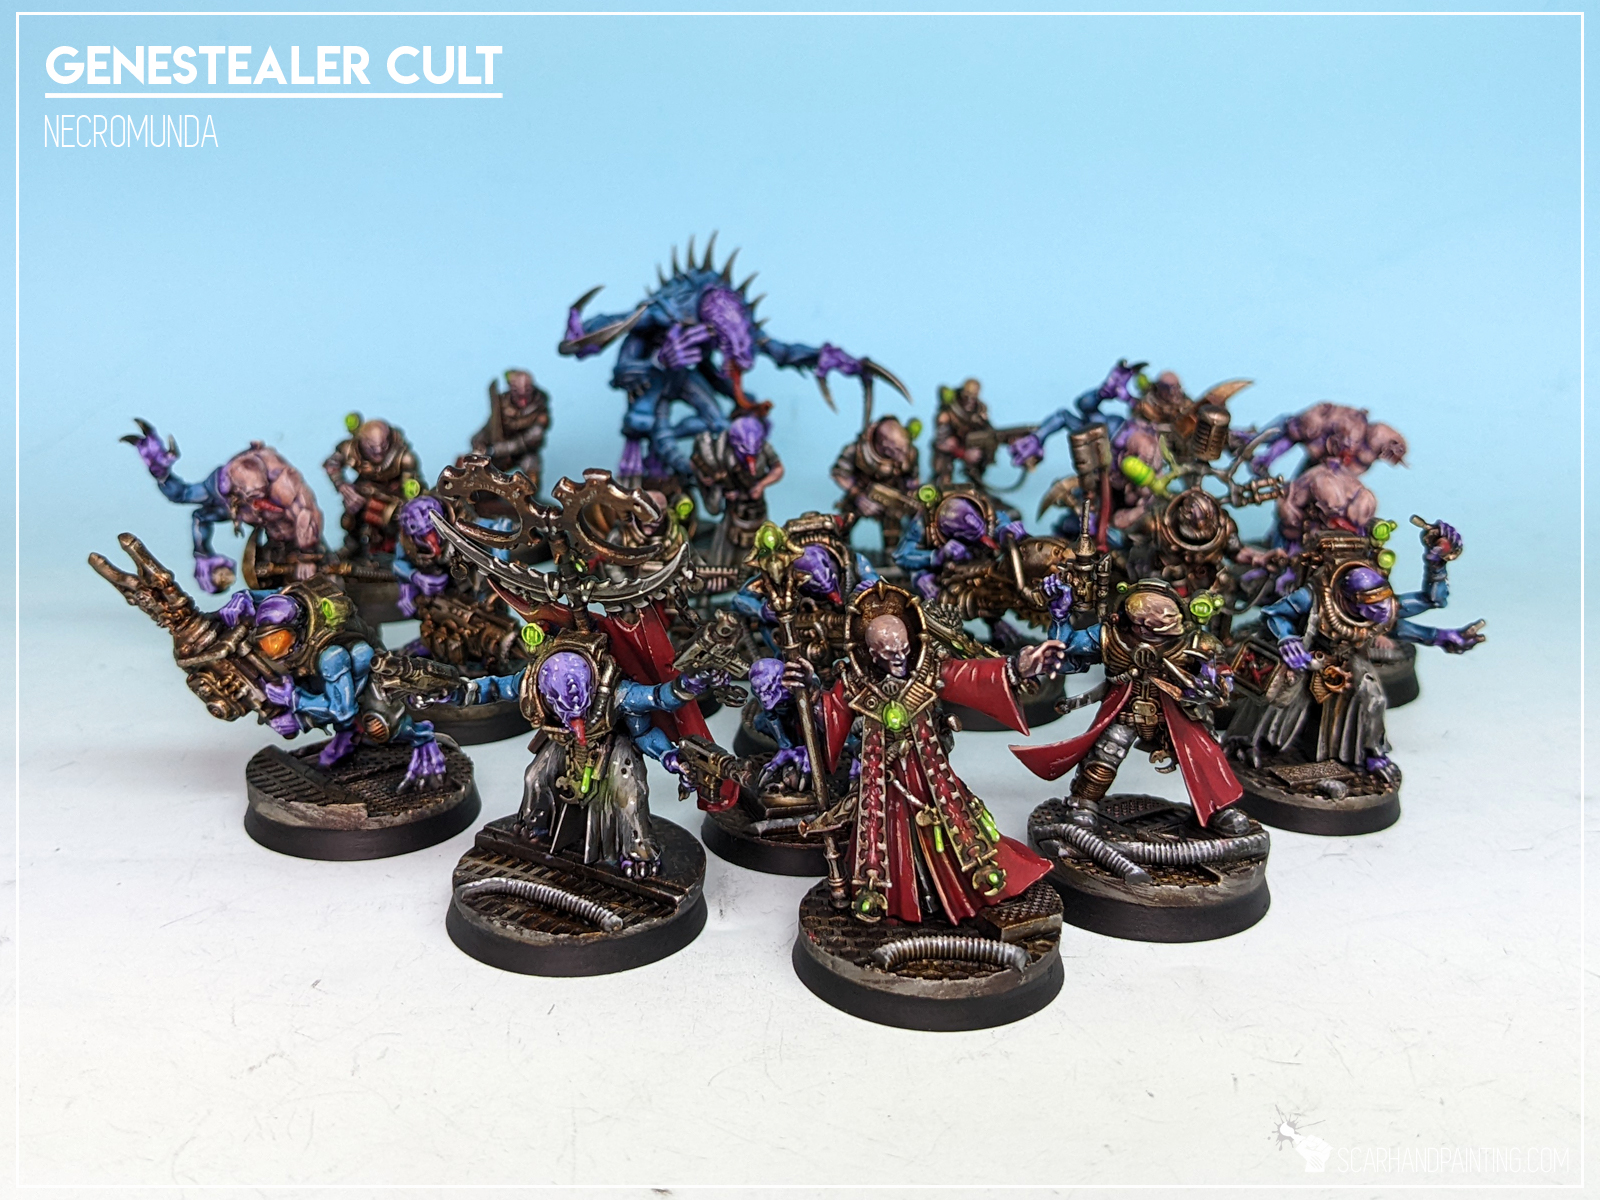
Here are some Colour Recipes for Infinity Haqqislam from GALLERY: GENESTEALER CULTS. Please take note that this is a simple colour scheme, not covering multiple overlapping layers and blends in between, that lead to the final product. It is supposed to be used as guideline not a step-by-step.
BLUE armor:
Black Undercoat,
Imperial Blue (val),*
Mix: Imperial Blue (val) 4:1 Electric Blue (val),*
Electric Blue (val),*
Mix: Electric Blue (val) 1:3 White,*
Blue Tone Ink (ap),
Pallid Wych Flesh (gw), l&p
Off White (val), l&p
METAL:
Warplock Bronze (gw),
Gun Metal (ap), / True Copper (ap), flbr
Shining Silver (ap), l&p
Mix: Strong Tone Ink (ap) 1:1 Soft Tone Ink (ap),
Streaking Grime (ak int),

PURPLE skin:
Black Undercoat,
Alien Purple (val),
Mix: Alien Purple (val) 2:1 Squid Pink (val), flbr
Mix: Alien Purple (val) 1:1:1 Squid Pink (val), Pale Flesh (val), flbr
Purple Tone Ink (ap),
Pallid Wych Flesh (gw), l&p
Off White (val), l&p
SKIN:
Alien Purple (val a),
Dwarf Skin (val a), flbr
Flesh (val a), flbr
Mix: Purple Tone Ink (ap) 1:1:1:1, Strong Tone Ink (ap), Soft Tone Ink (ap), Medium,
BLACK/GREY outfits:
Black Undercoat,
Panzer Dark Grey (val),
Cold Grey (val), flbr
Fenrisian Grey (gw), flbr
Pallid Wych Flesh (gw), l&p
Mix Strong Tone Ink (ap) 1:1 Soft Tone Ink (ap),
Pallid Wych Flesh (GW), l&p
Off White (Val), l&p
BROWN clothes:
Grey Outfits base,
Dark Brown RLM61 (val), bl
Mix Strong Tone Ink (ap) 1:1 Soft Tone Ink (ap),
Karak Stone (gw), l&p
Flayed One Flesh (gw), l&p
GREEN light:
Duck Egg Green (val a),
Off White (val), l&p
Light Livery Green (val a),*
Waywatcher Green (gw), wash
Off White (val), l&p
l&p – lines and points,
p – points,
dl – deep lining,
bl – blend,
gl – glaze,
drbr – drybrush,
fltbr – flatbrush,
lobr – loaded brush,
stpl – stippling,
*Airbrushed (with multiple layers and mixes)

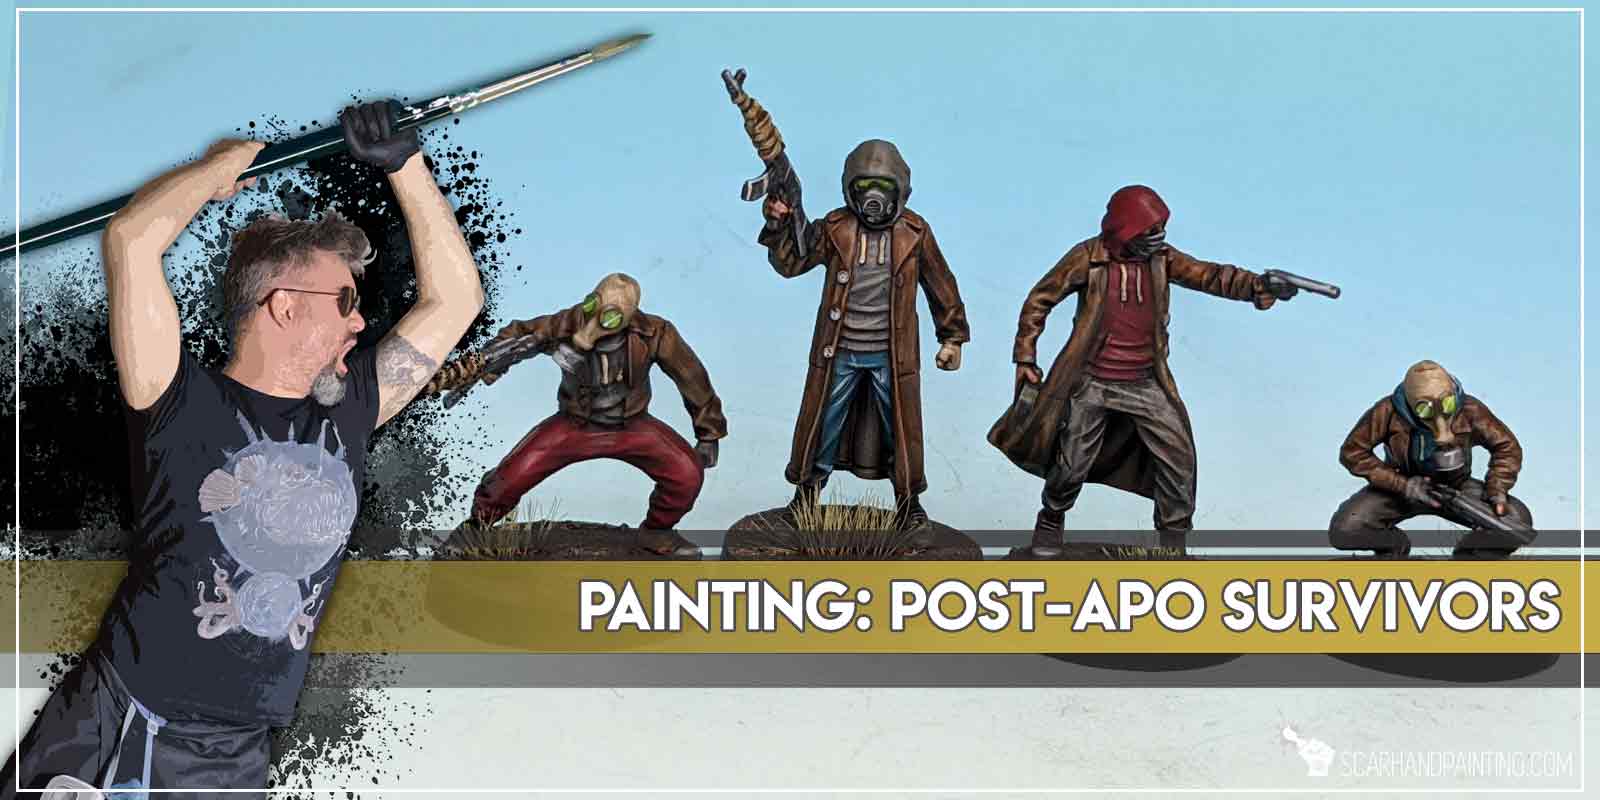
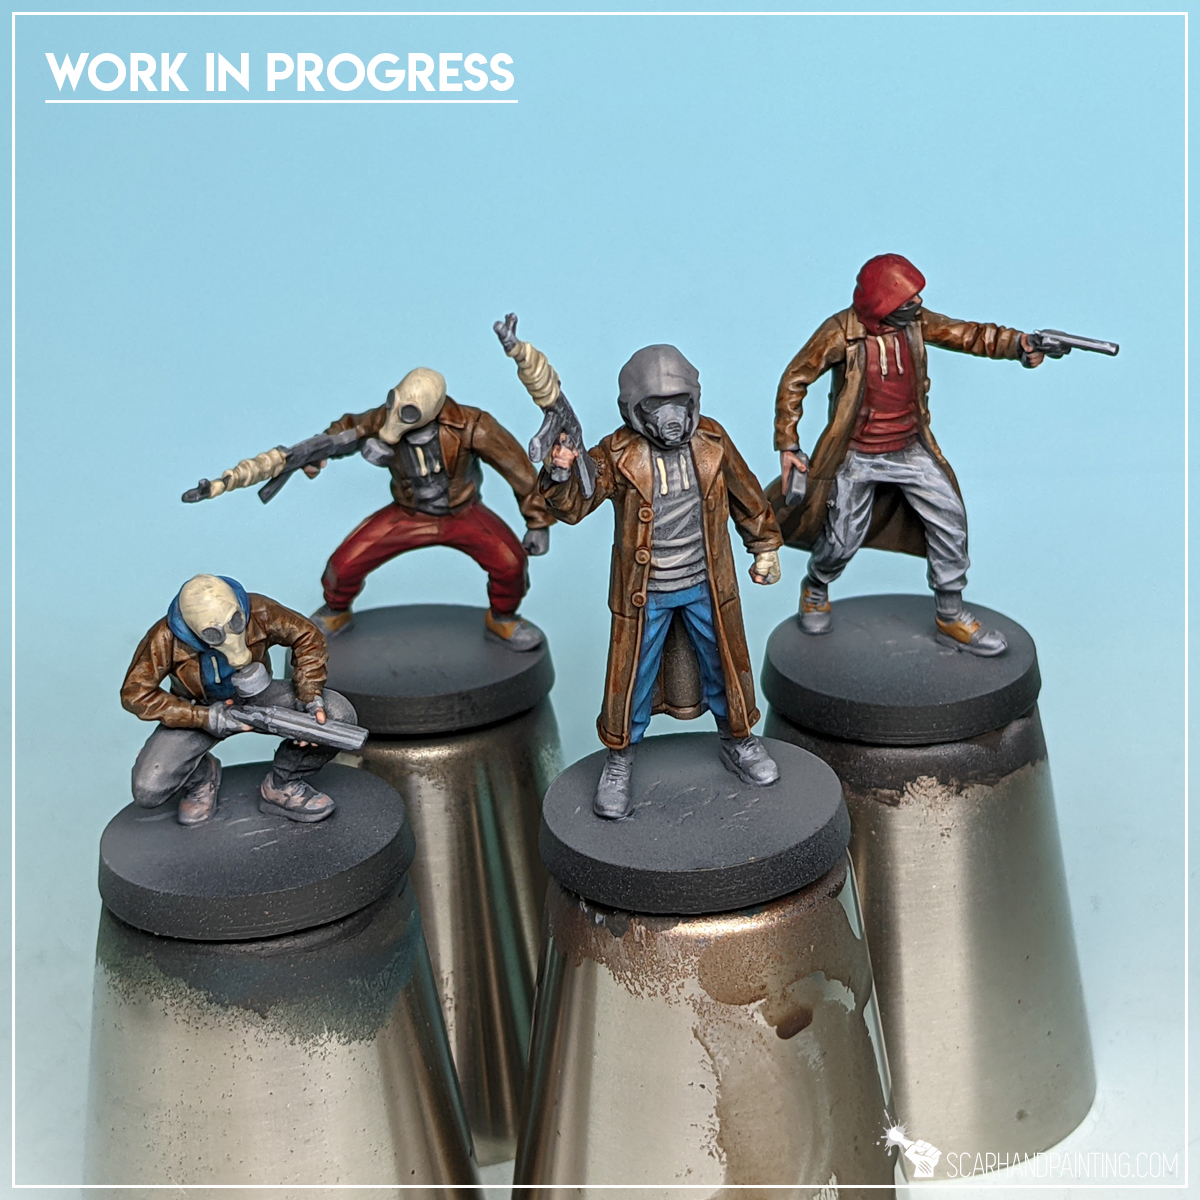
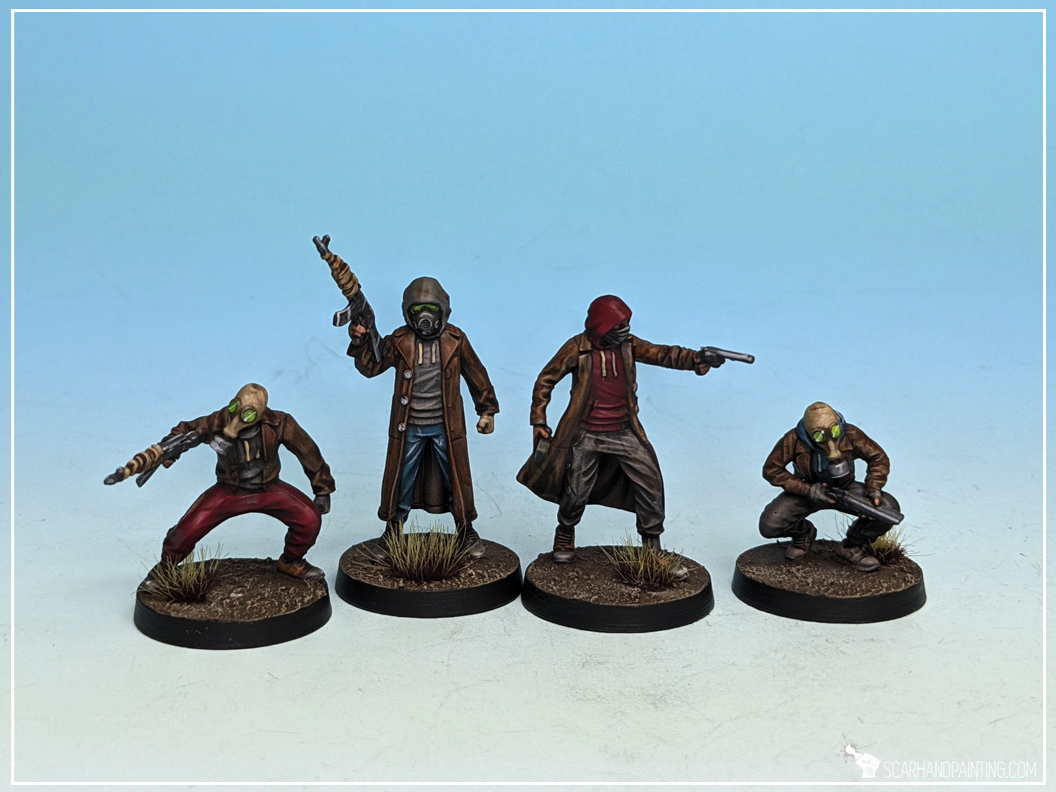
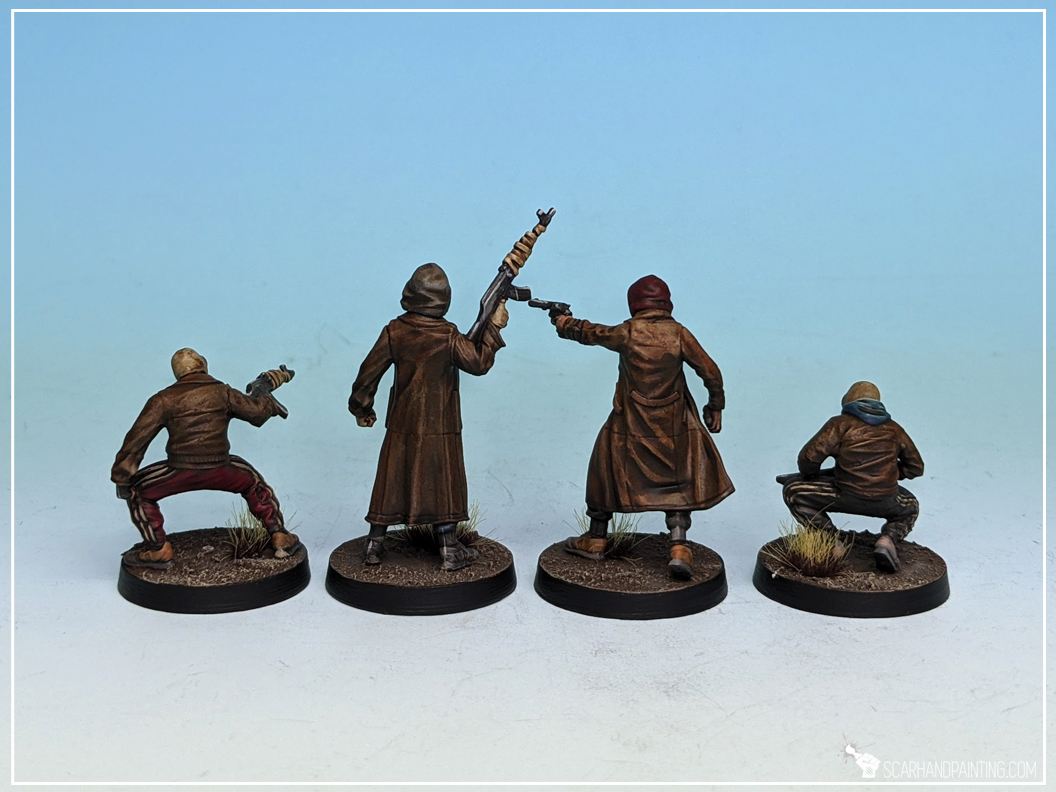
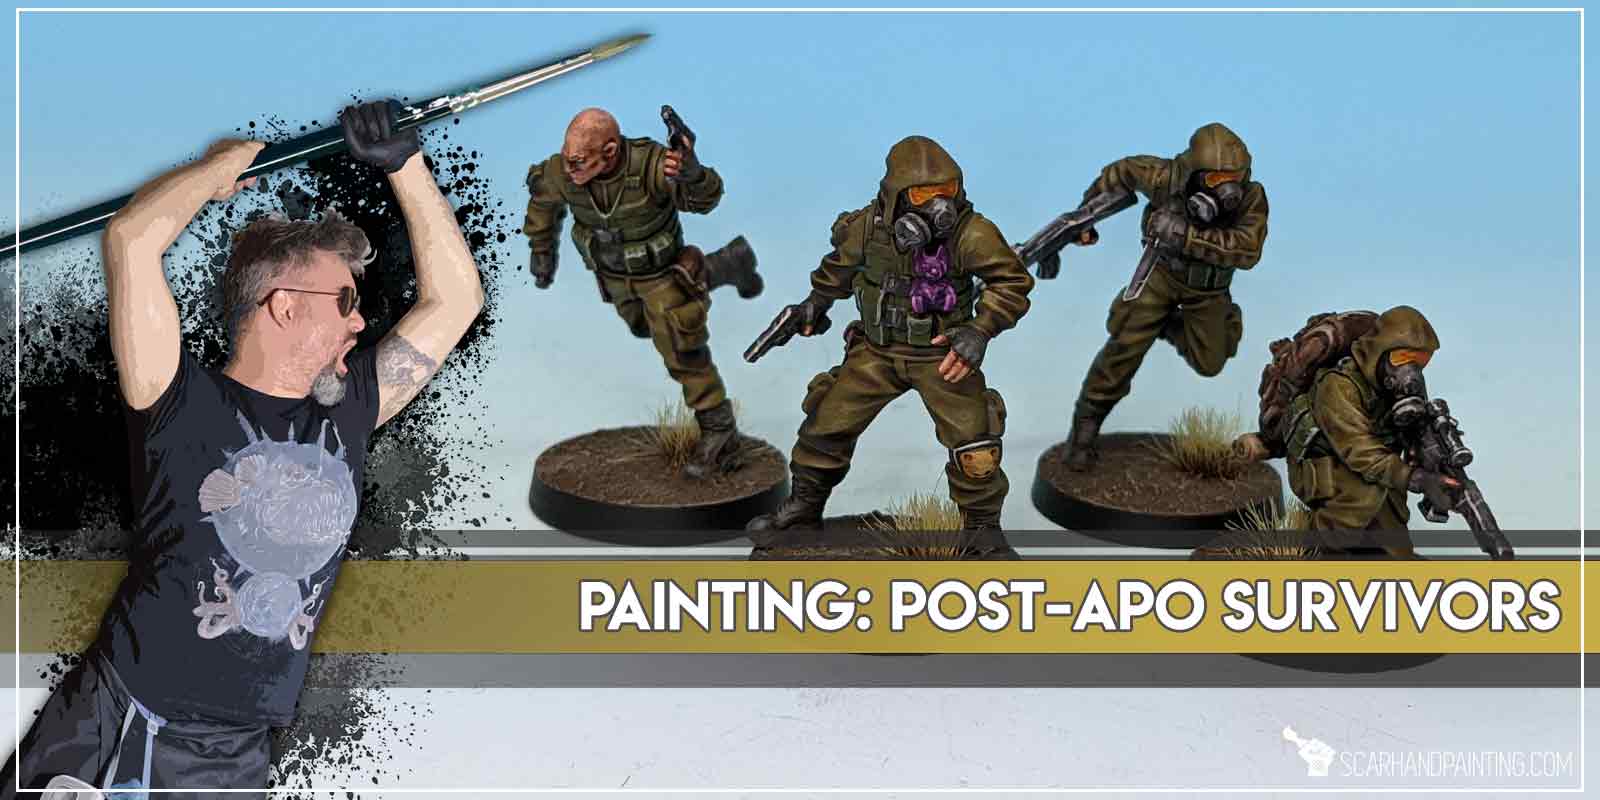
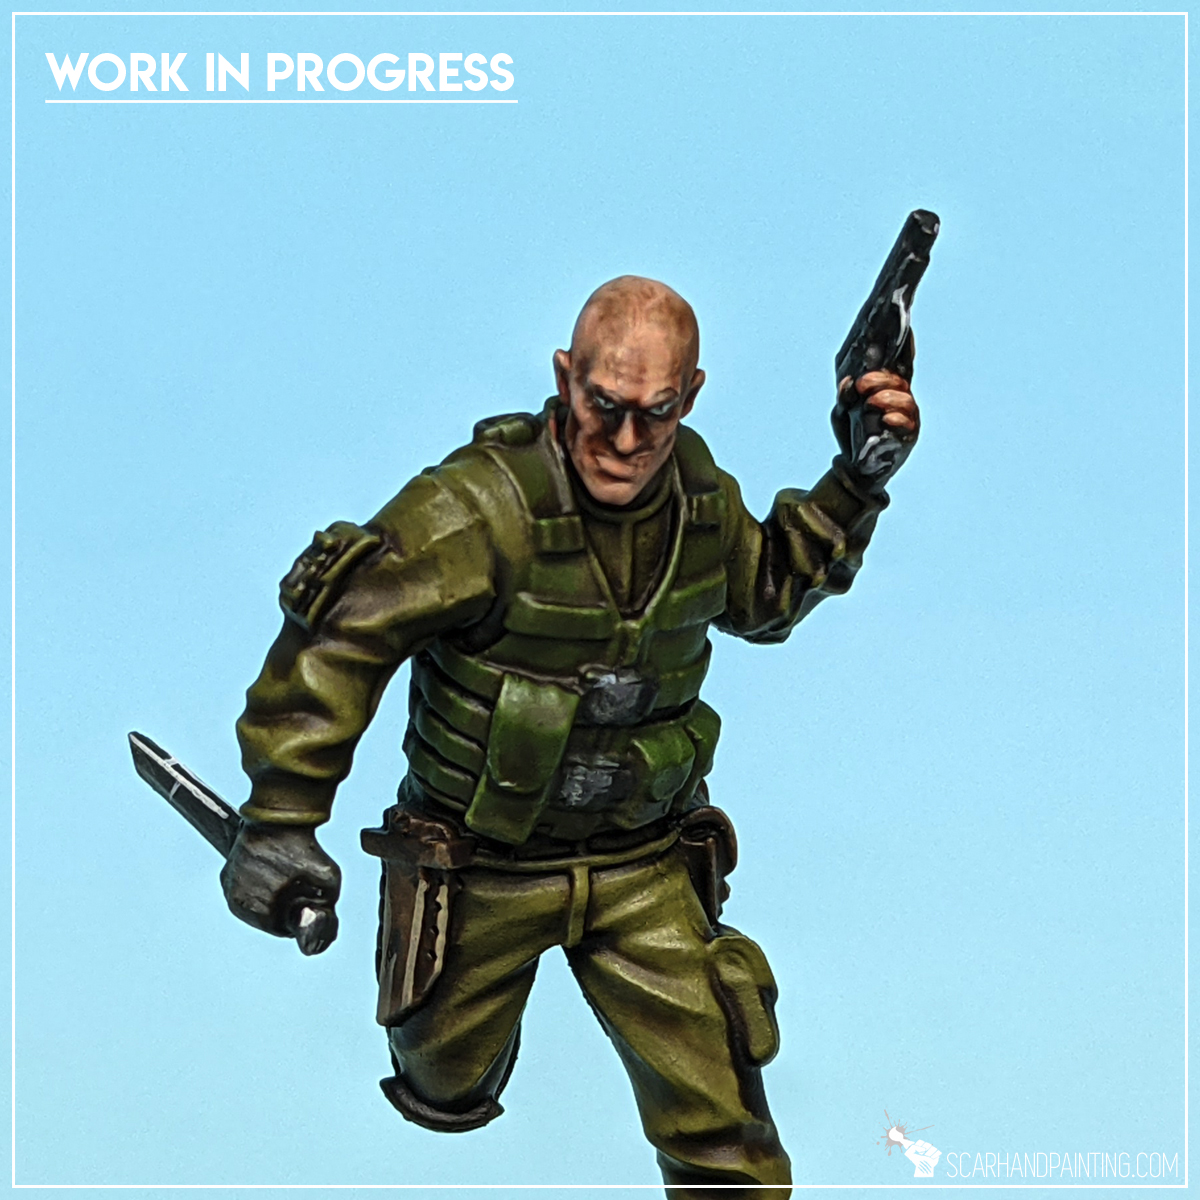
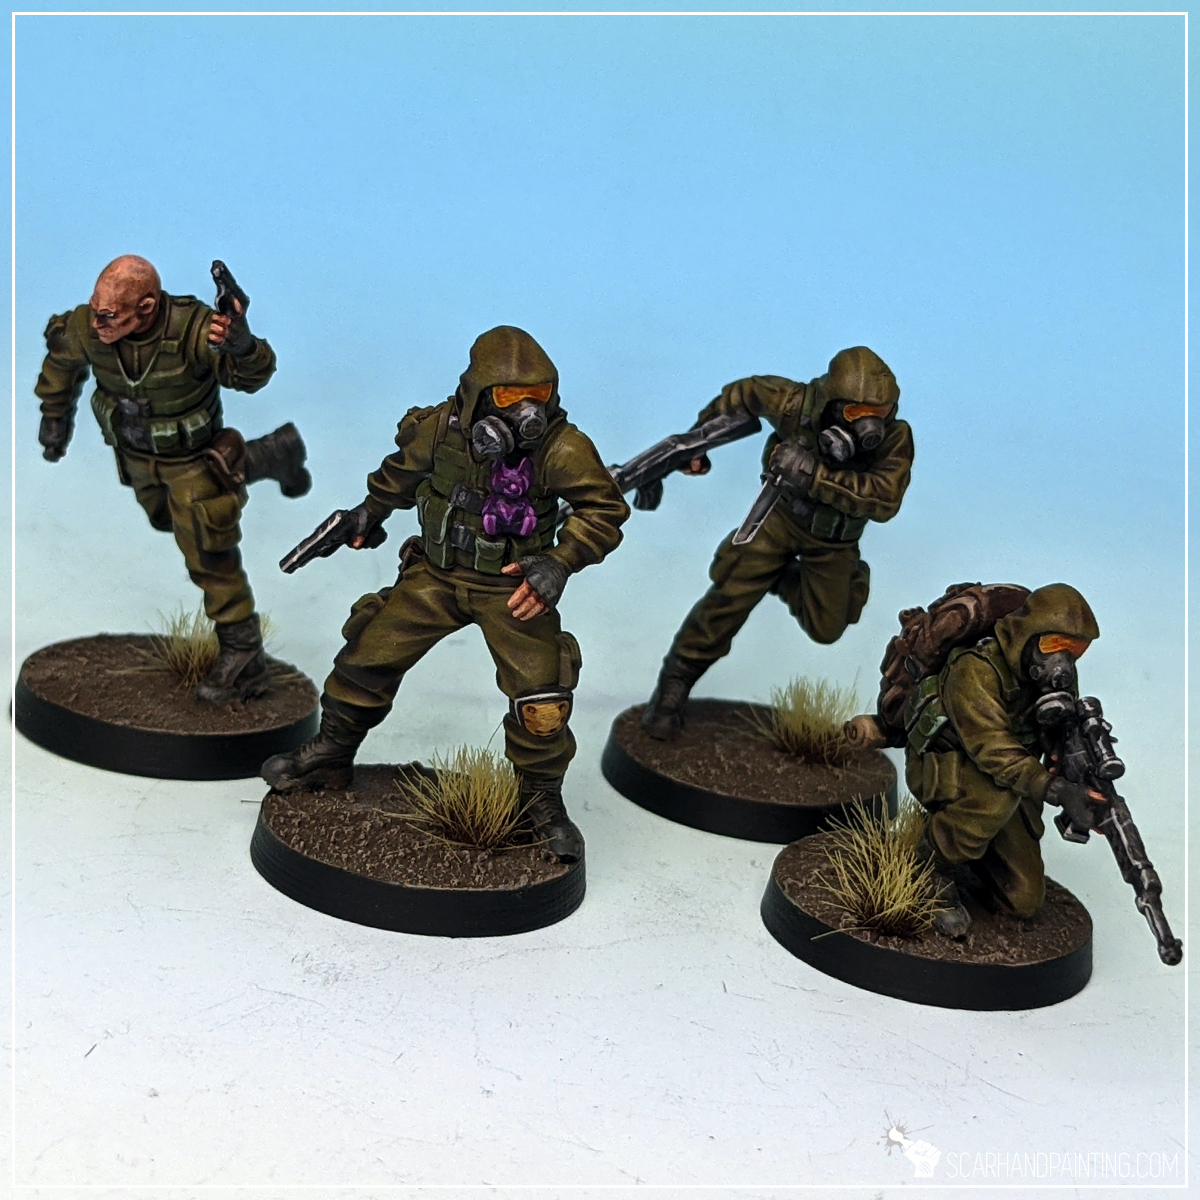
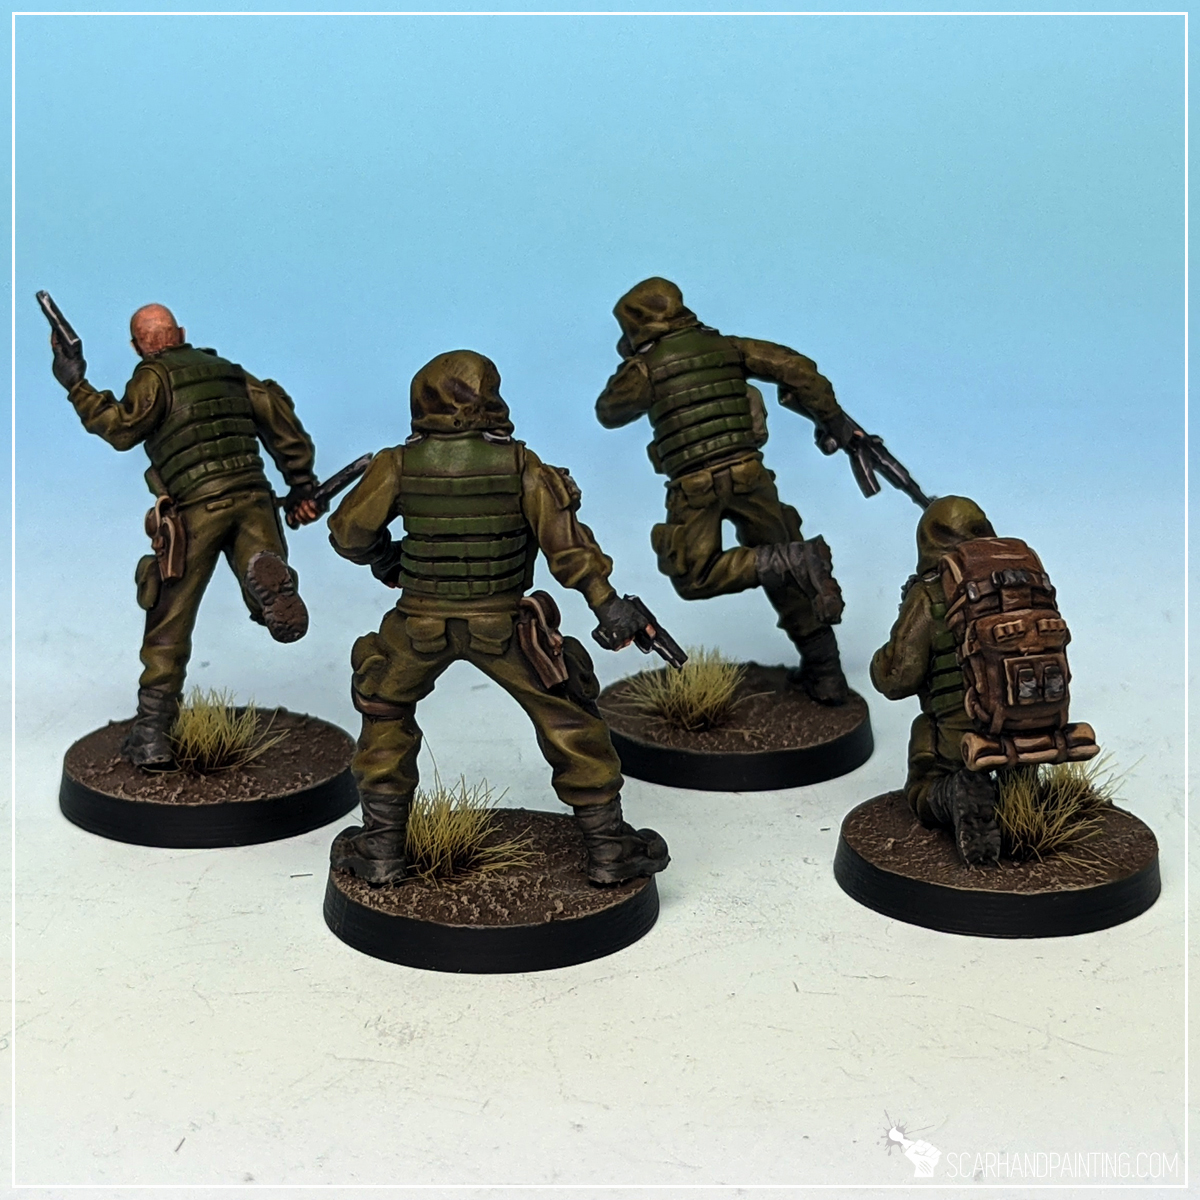
Welcome to Painting Road to Survival Bandits tutorial. Here I will present to you a Step-by-step of an easy and fast painting process for Orzol Studio’s Bandits team from the Post-apo Survivors Kickstarter.
Before we start, some notes:

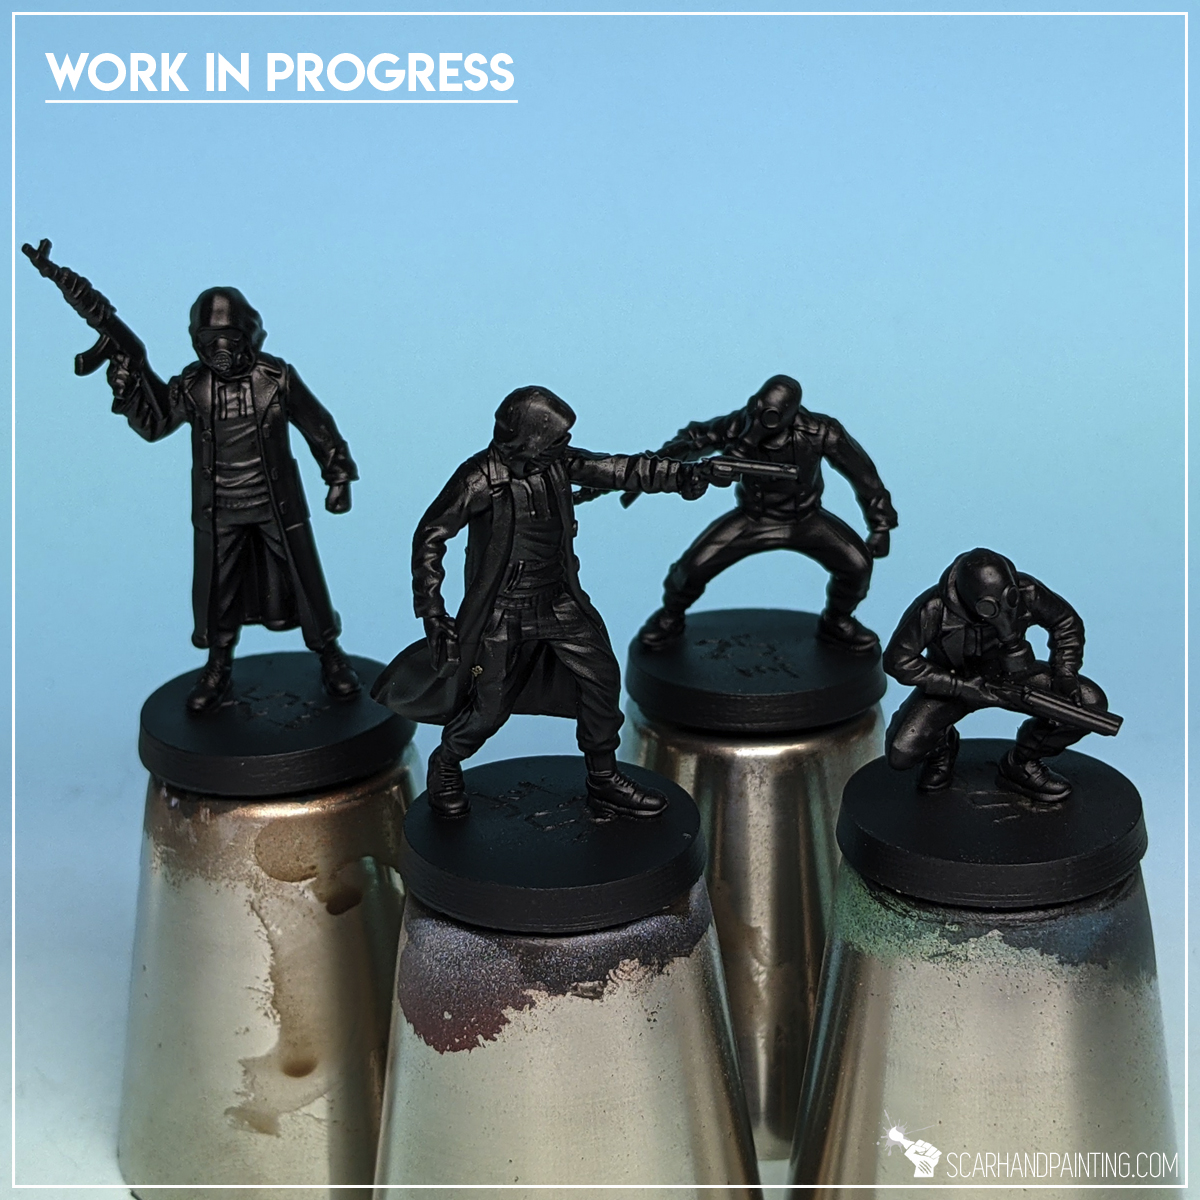
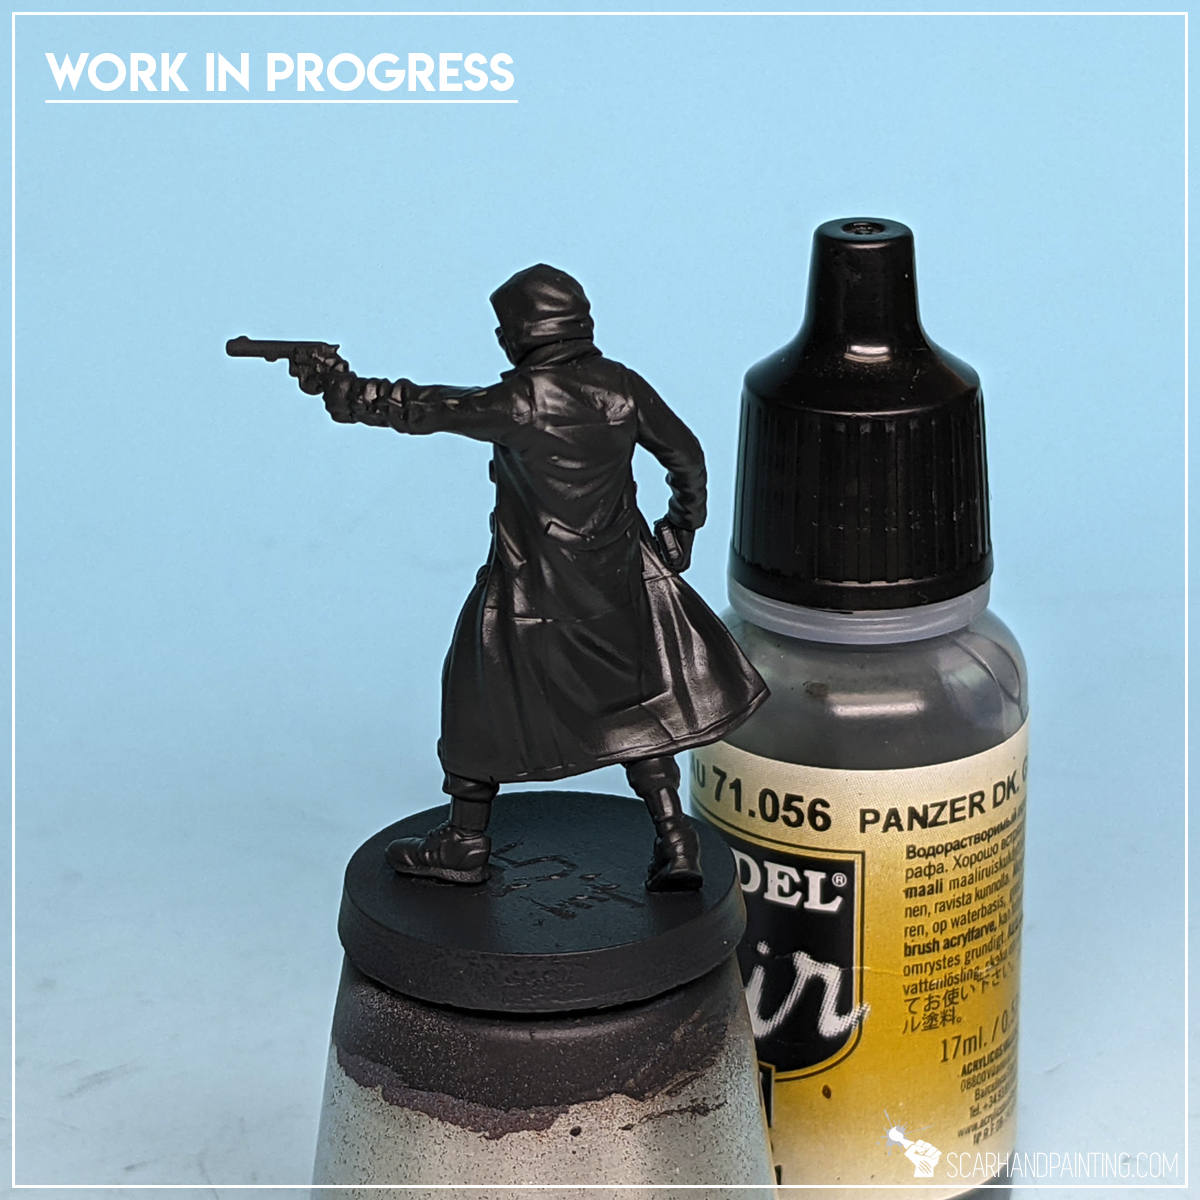
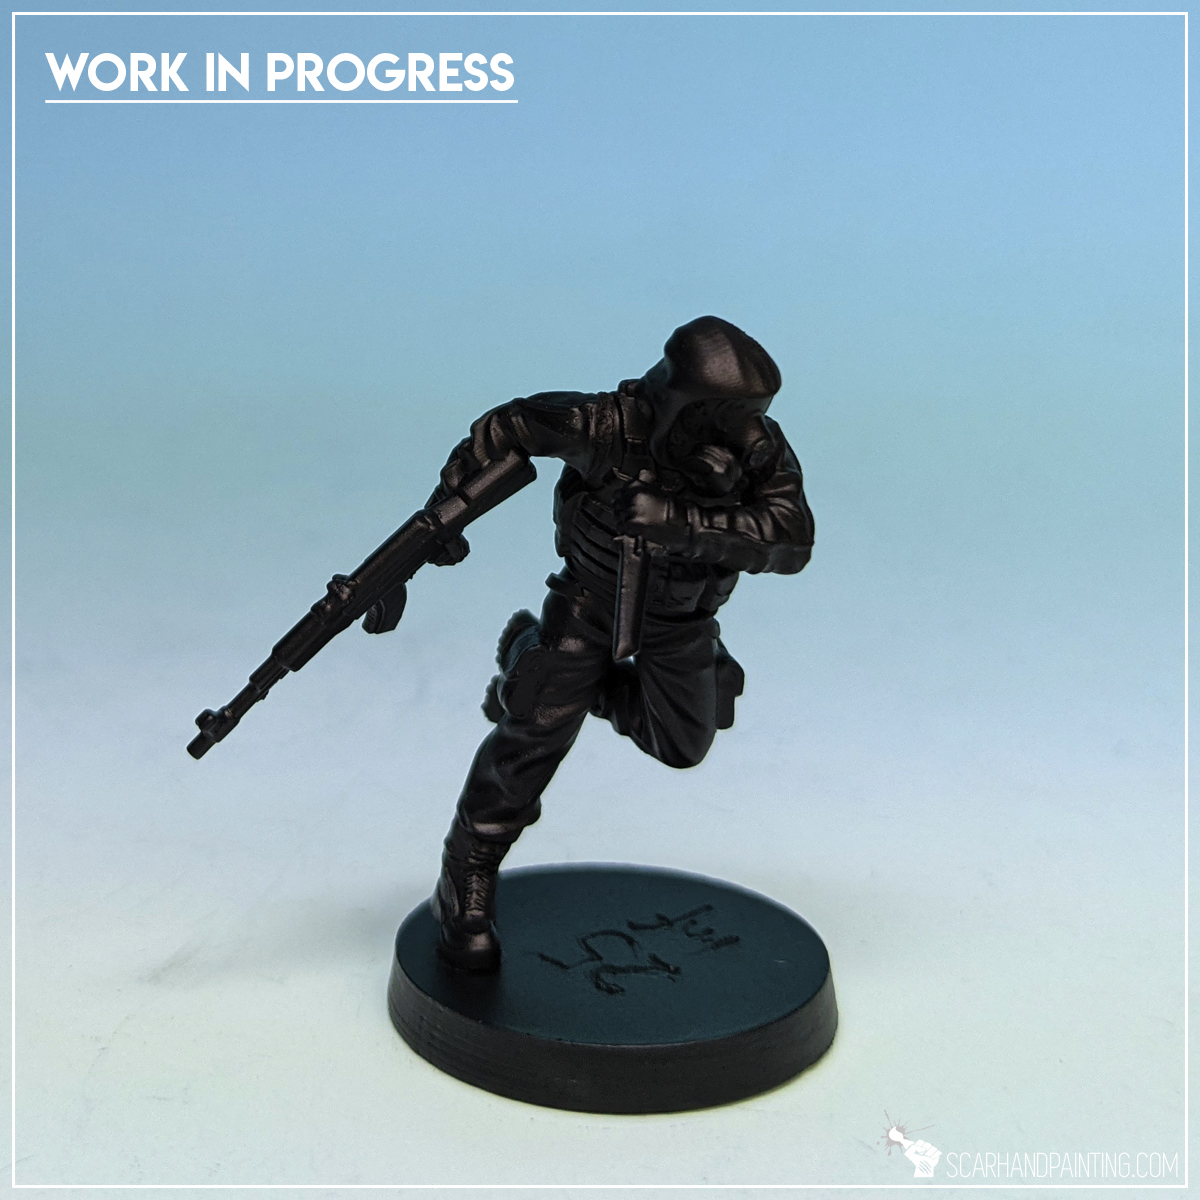
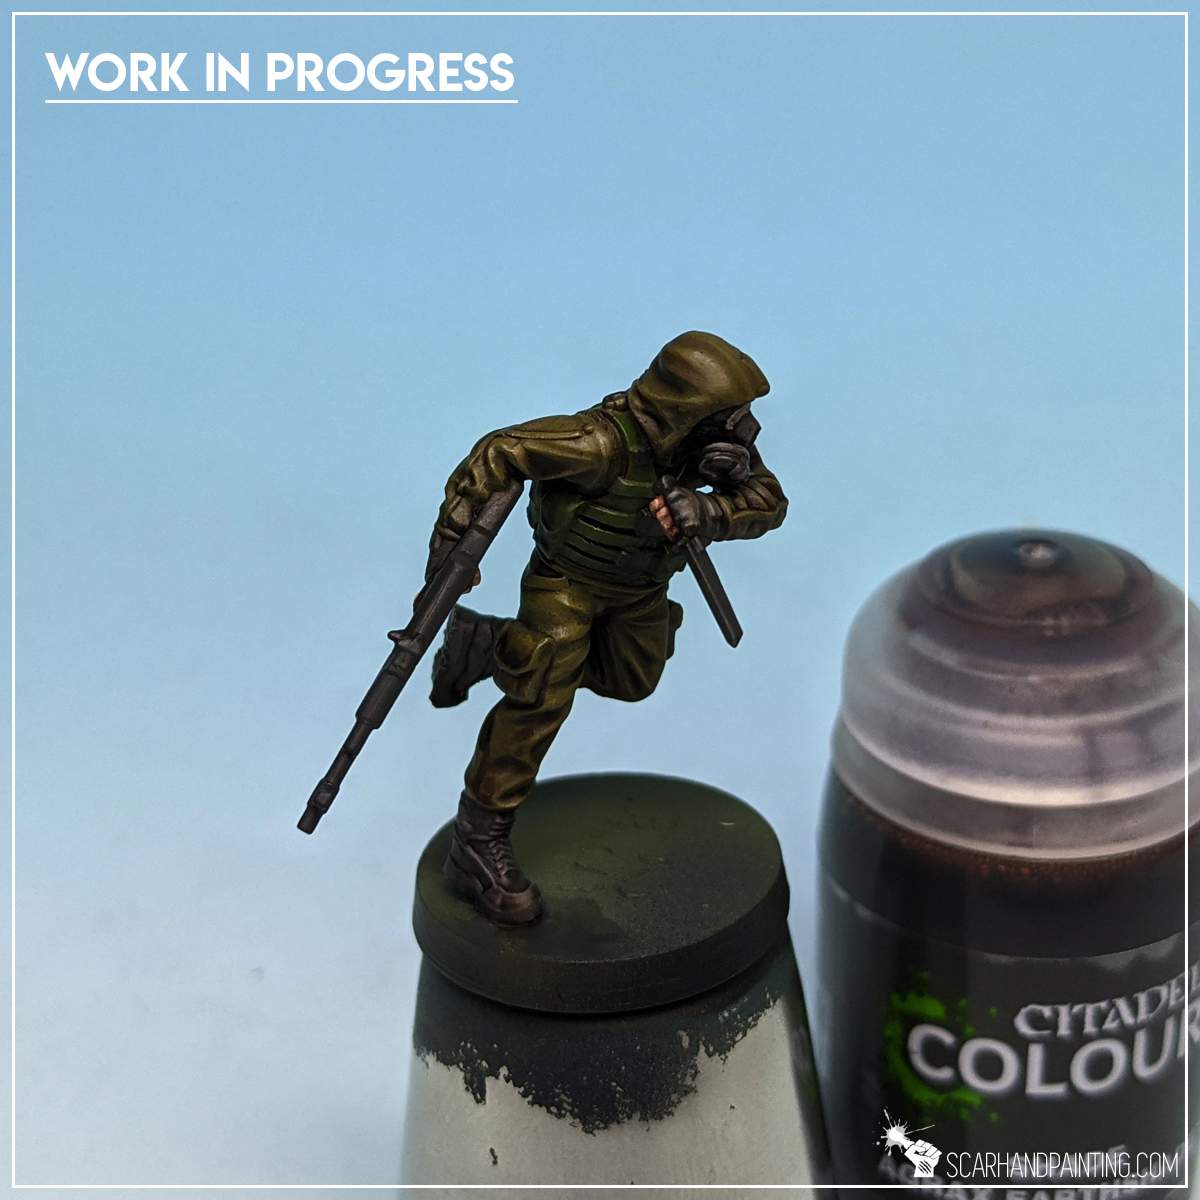
Step one: Undercoat
I applied a strong layer of Citadel Chaos Black spray. I prefer spray over manual application, but this is just a personal preference. Any matt black undercoat will do, as long as it’s thorough.
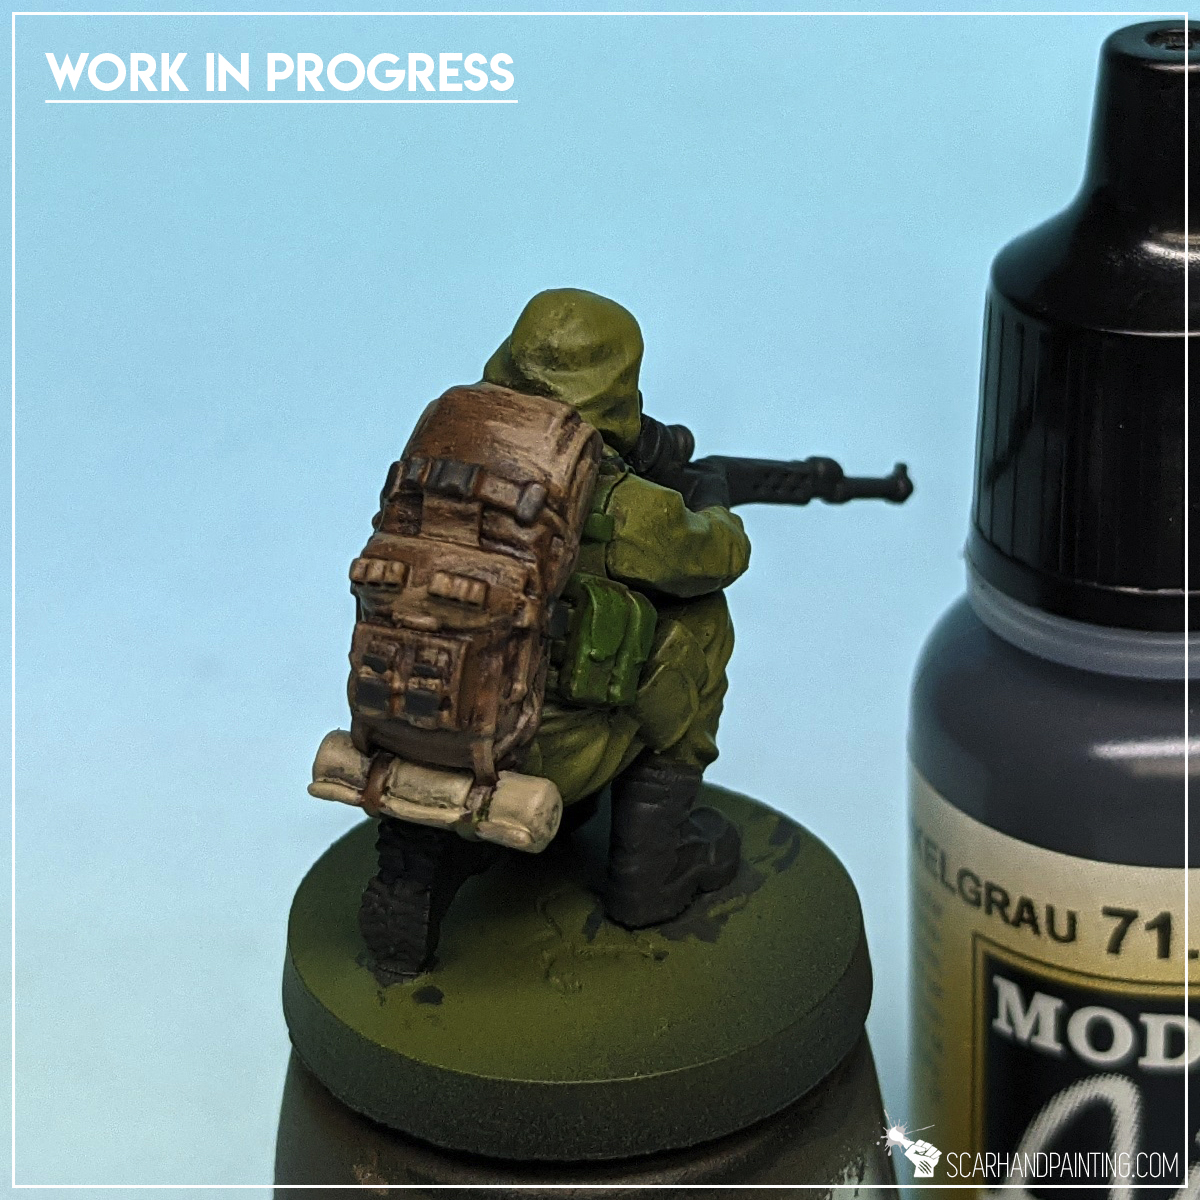
Step two: Grey clothes base
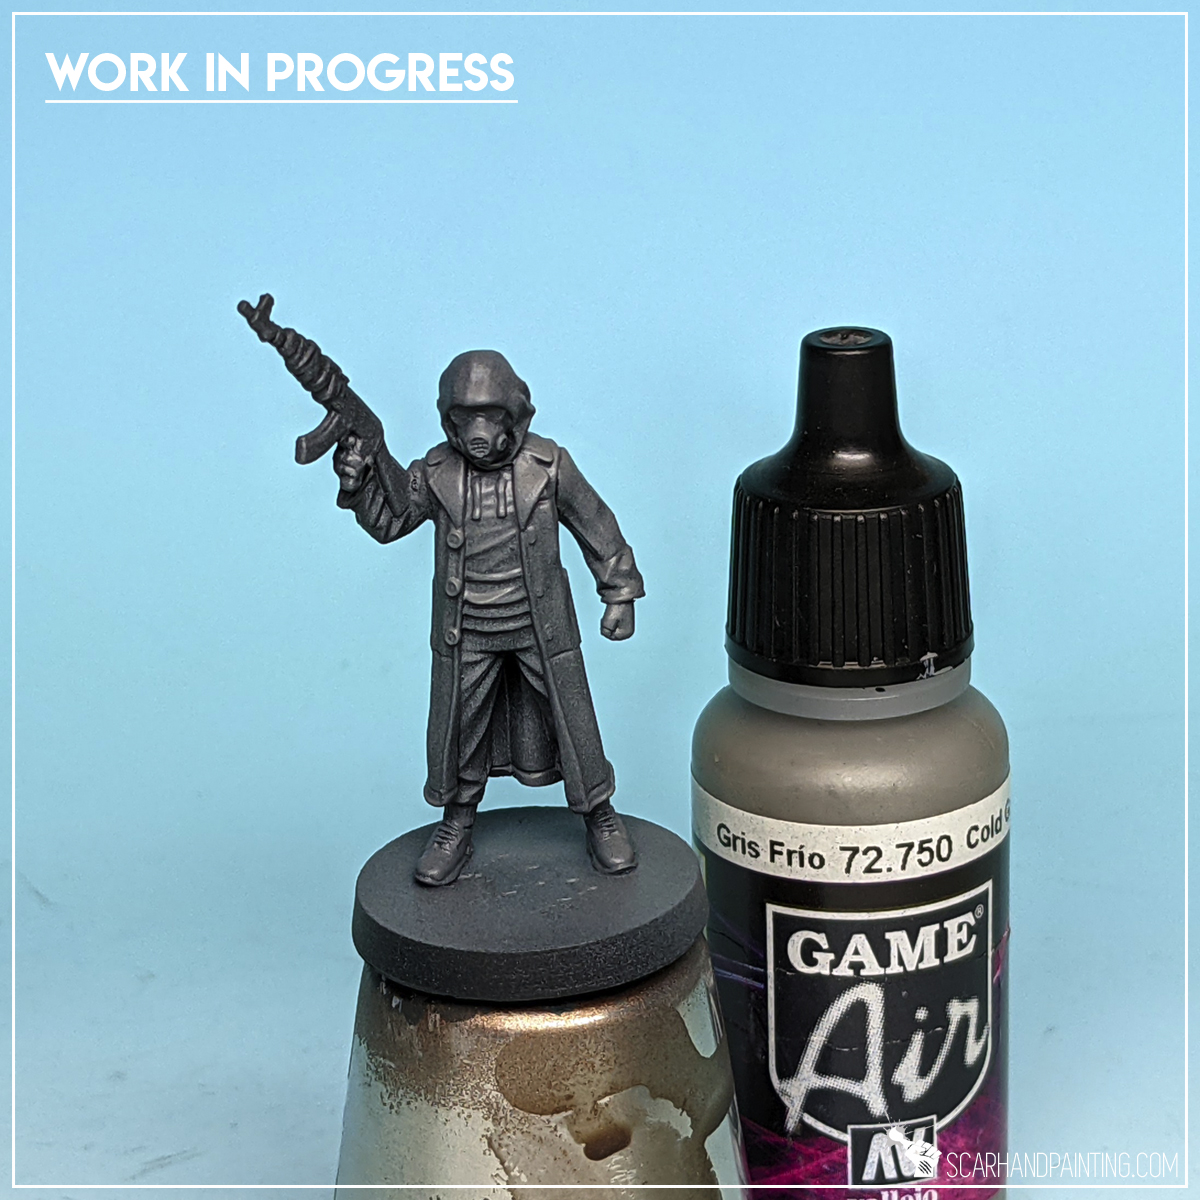
I started by airbrushing a strong layer of Vallejo Panzer Dark Grey all over the miniature. I used an airbrush mainly to have a thin but also strong and smooth layer.
Next I airbrushed a layer of Vallejo Cold Grey on top, zenithally and partially on the sides of the miniature.

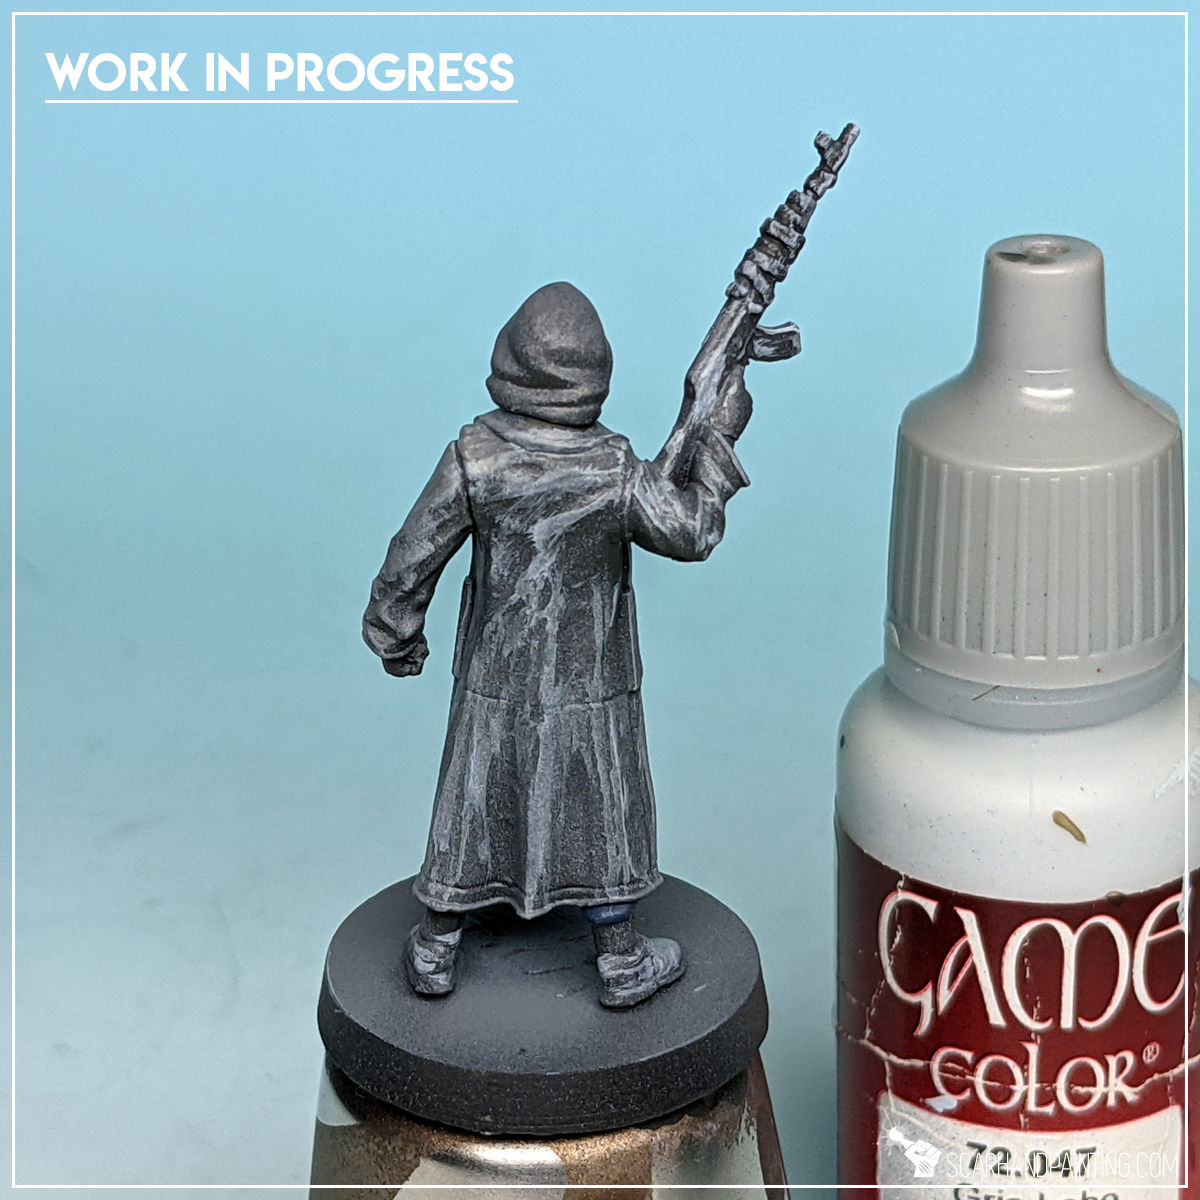
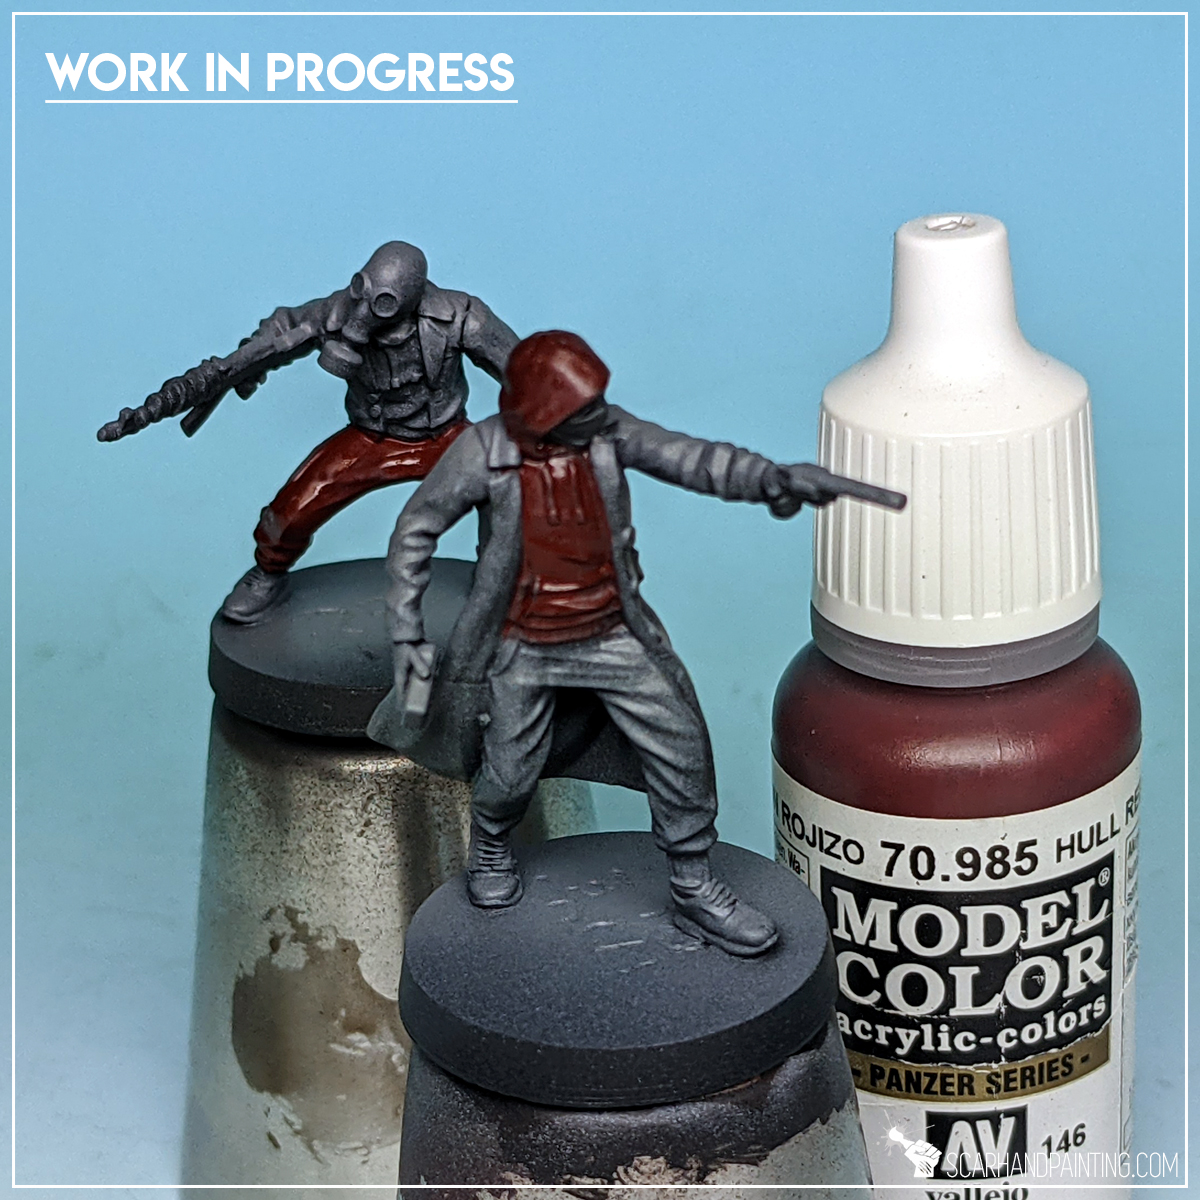
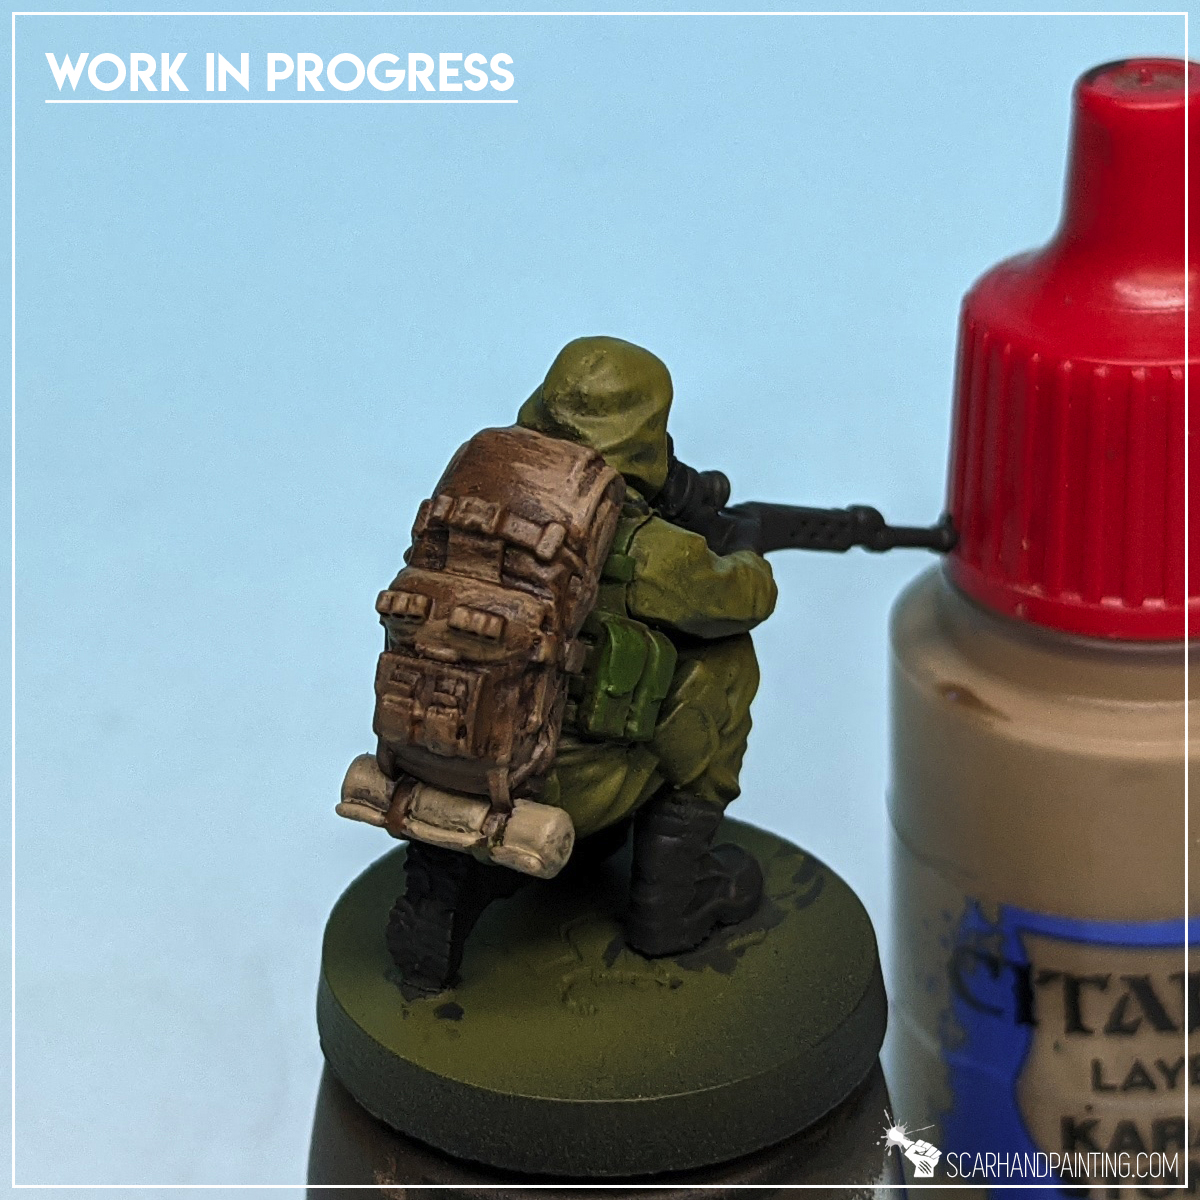
Step three: Brown clothes
With a solid grey foundation I moved to painting browns. I started by applying a thinned down Vallejo Ghost Grey in a gritty, haphazard fashion on top of everything soon to be brown. I also used this opportunity to apply highlights on weapons and pieces of clothes meant to be black.
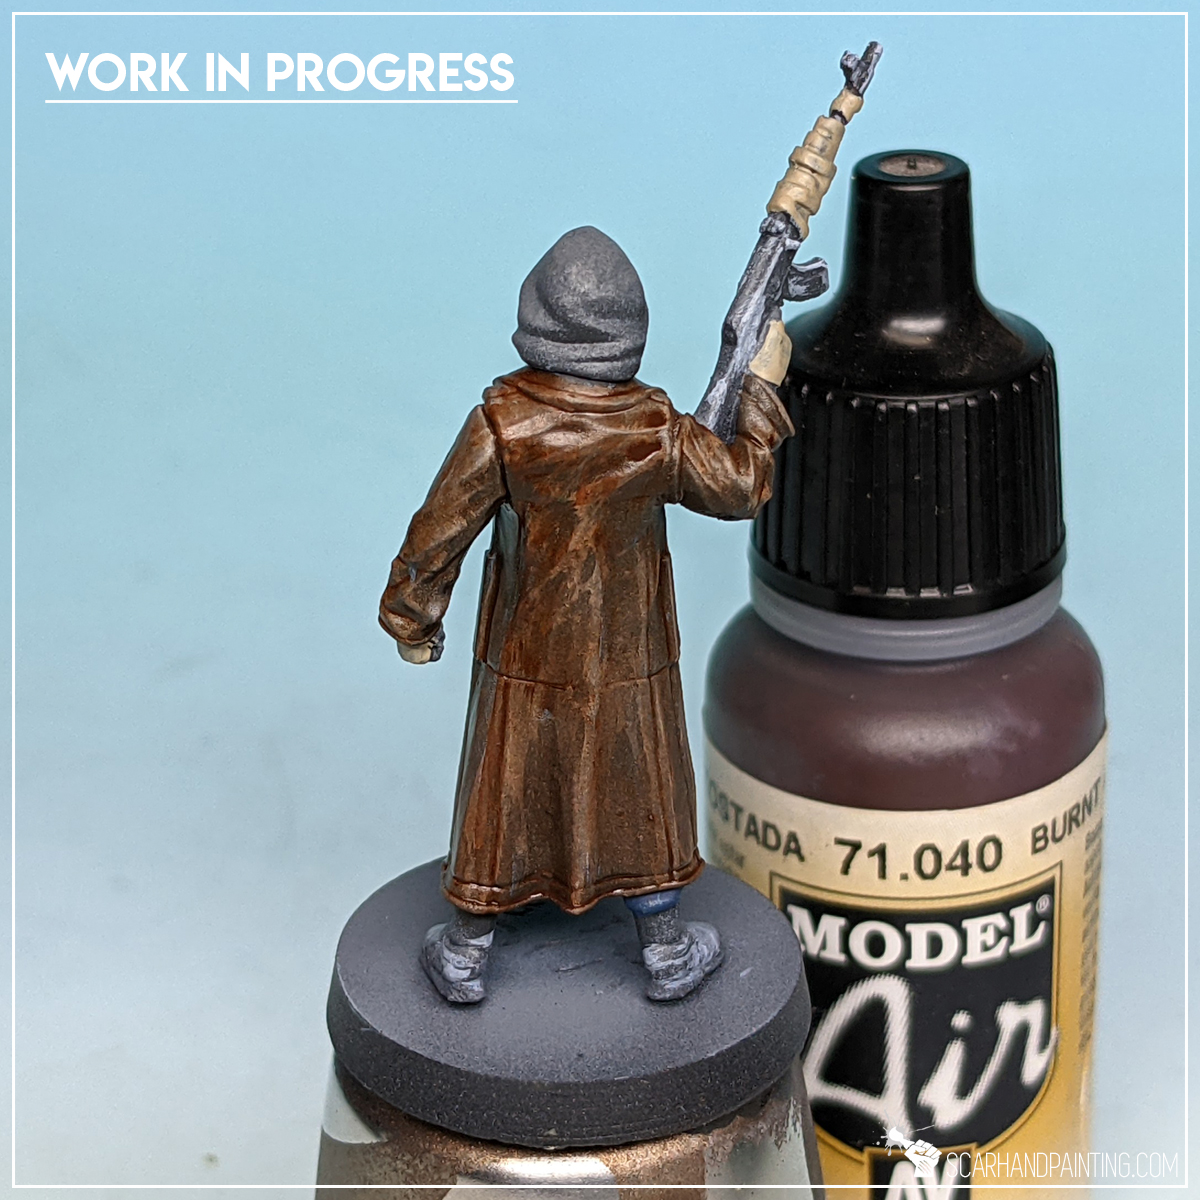
Then I applied a strongly thinned layer of Vallejo Burnt Umber instantly changing grey to nice vibrant brown, but keeping all the detail of the previous layer still visible. You might say I glazed with Burnt Umber.
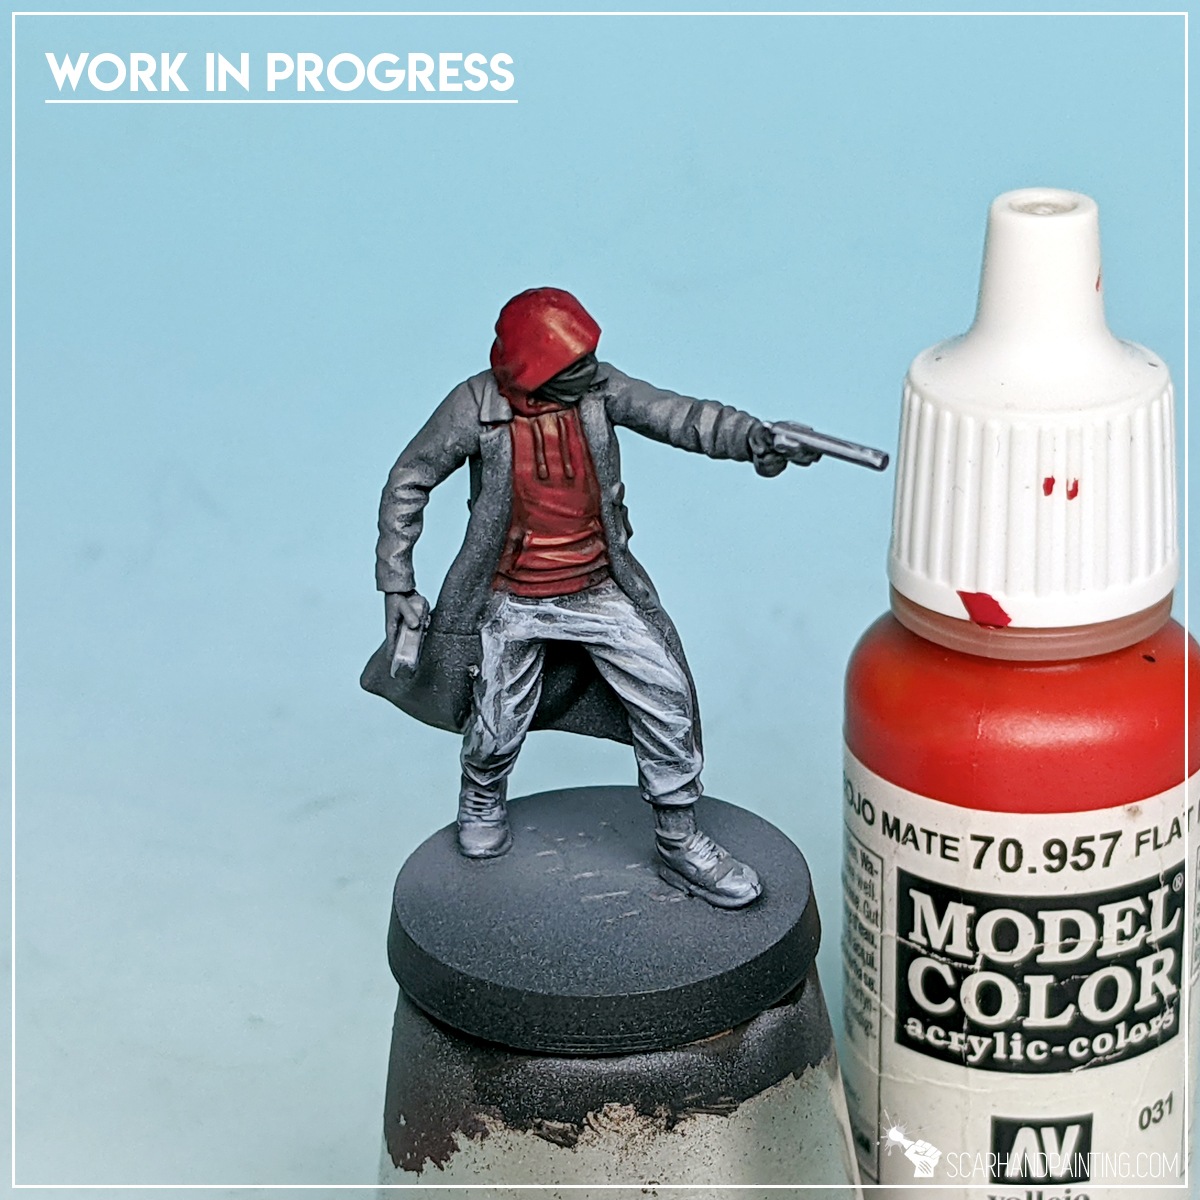
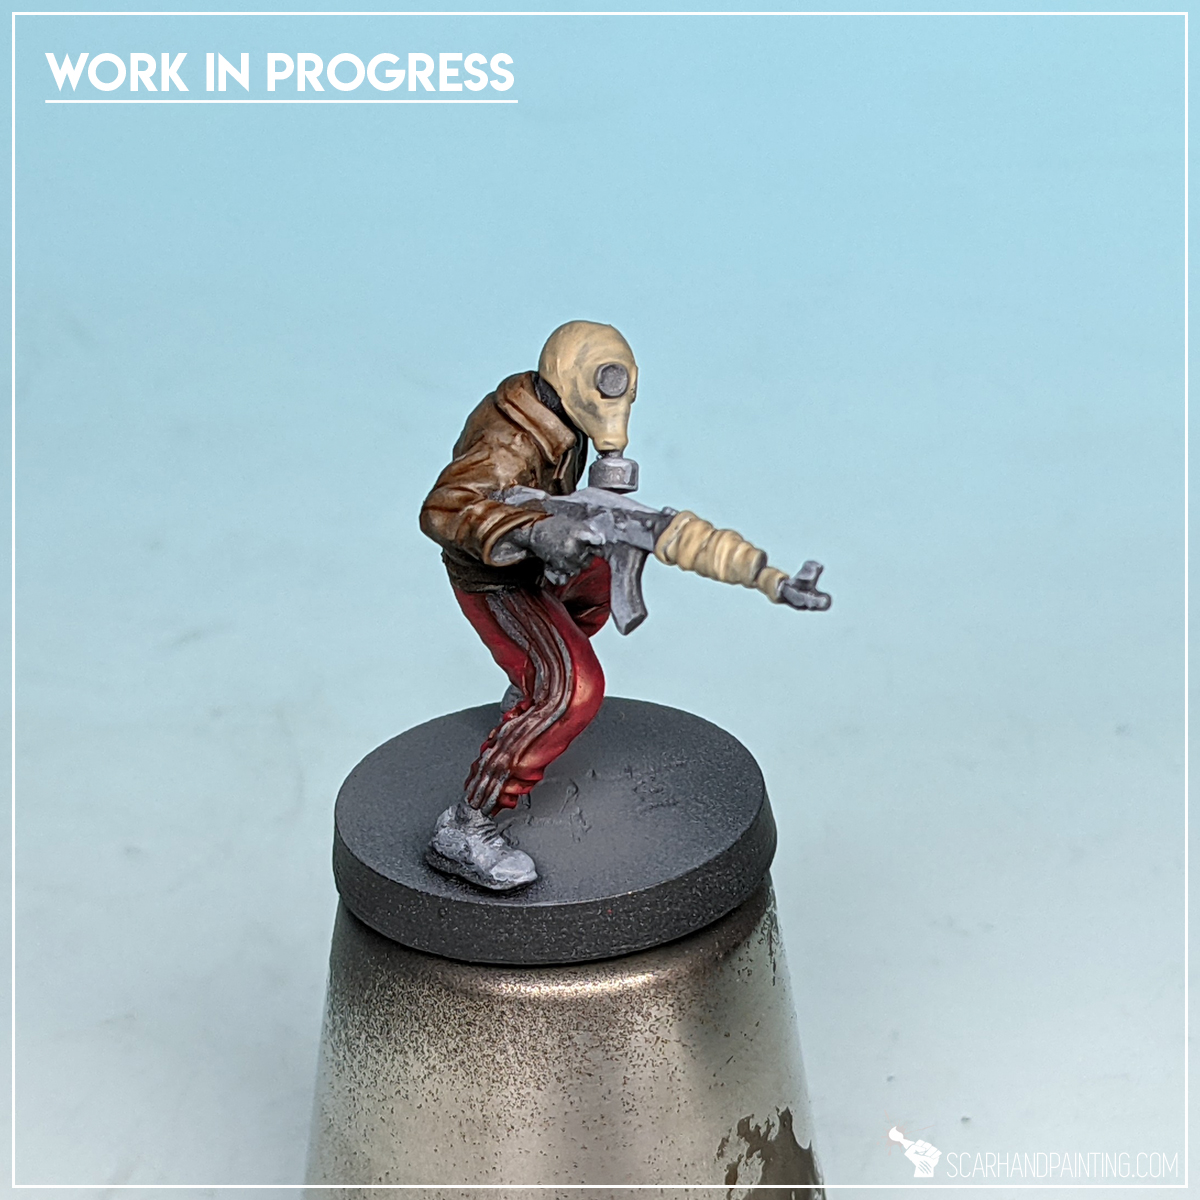
Step four: Red clothes
I moved to Reds, staring with a strong layer of Vallejo Hull Red, followed by a wide highlight of Vallejo Flat Red.
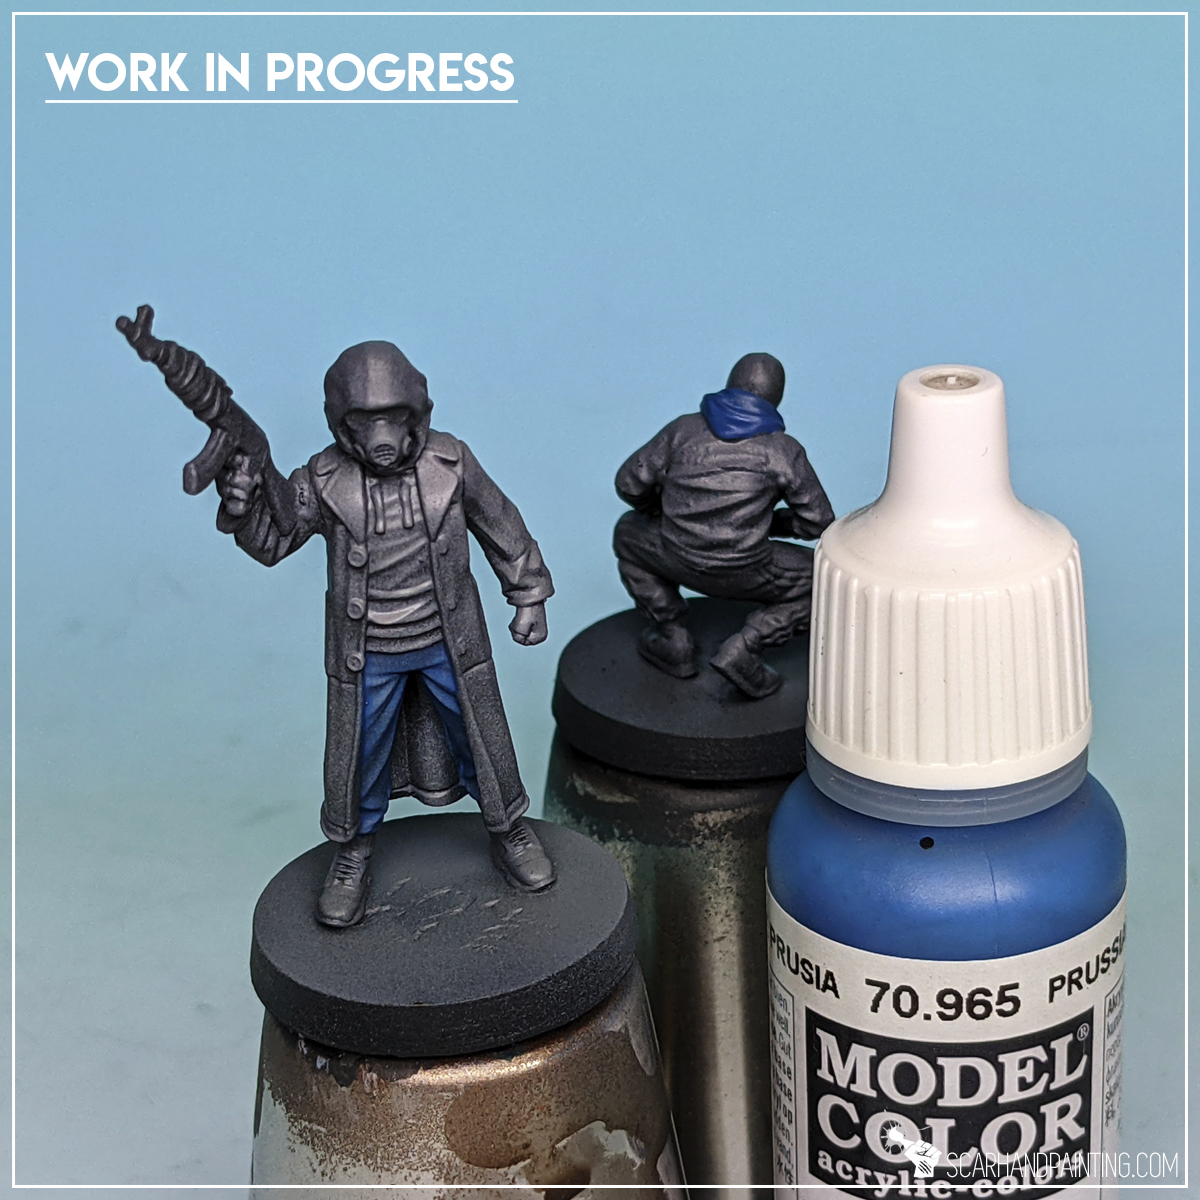
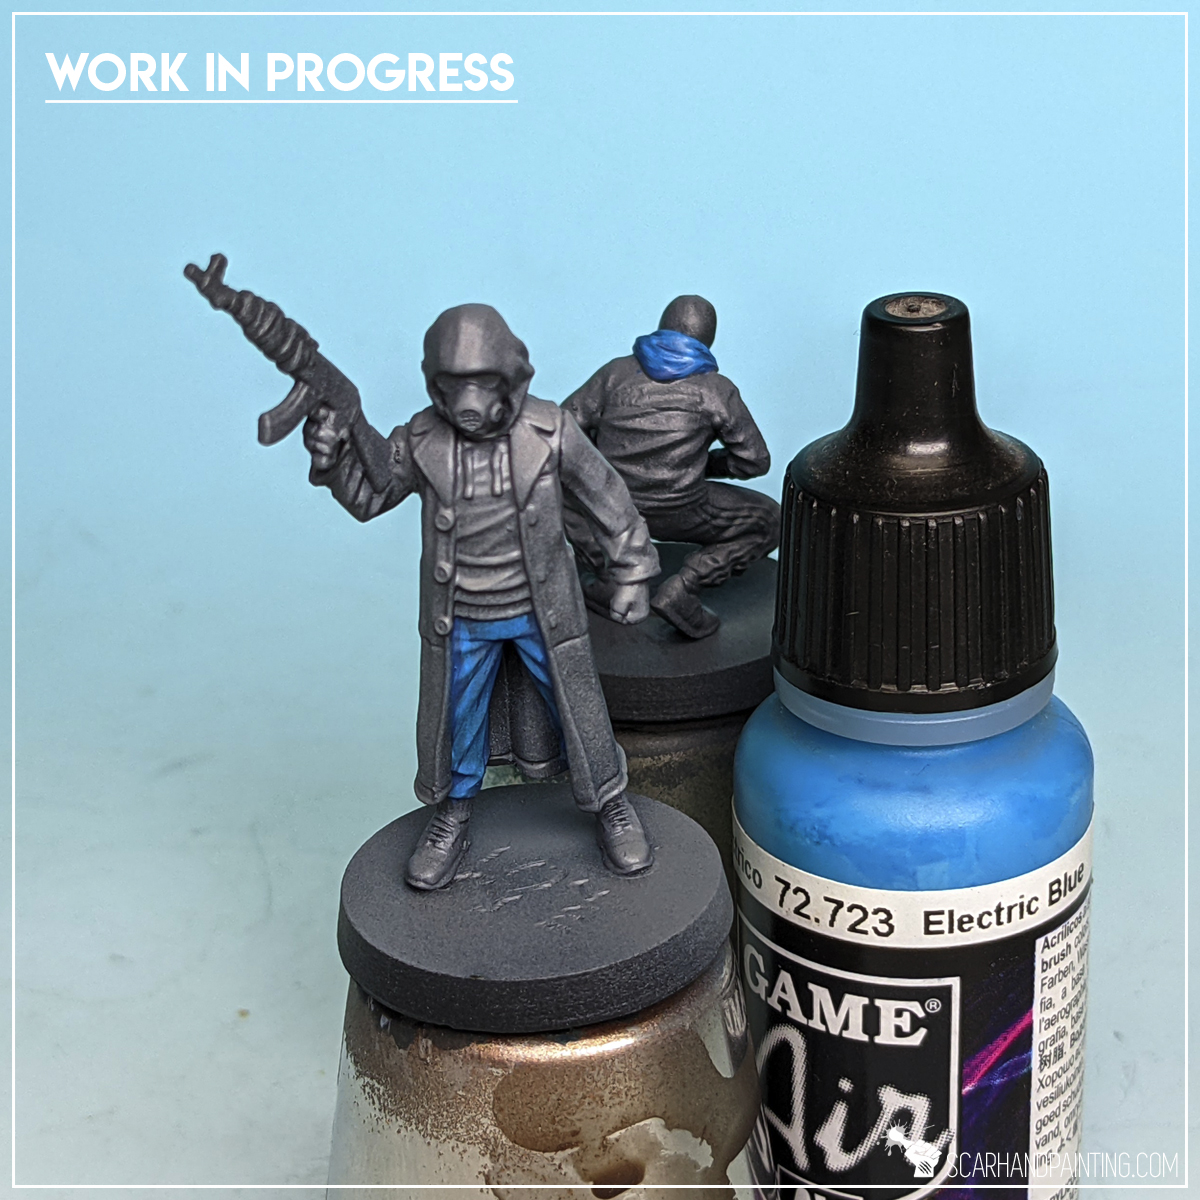
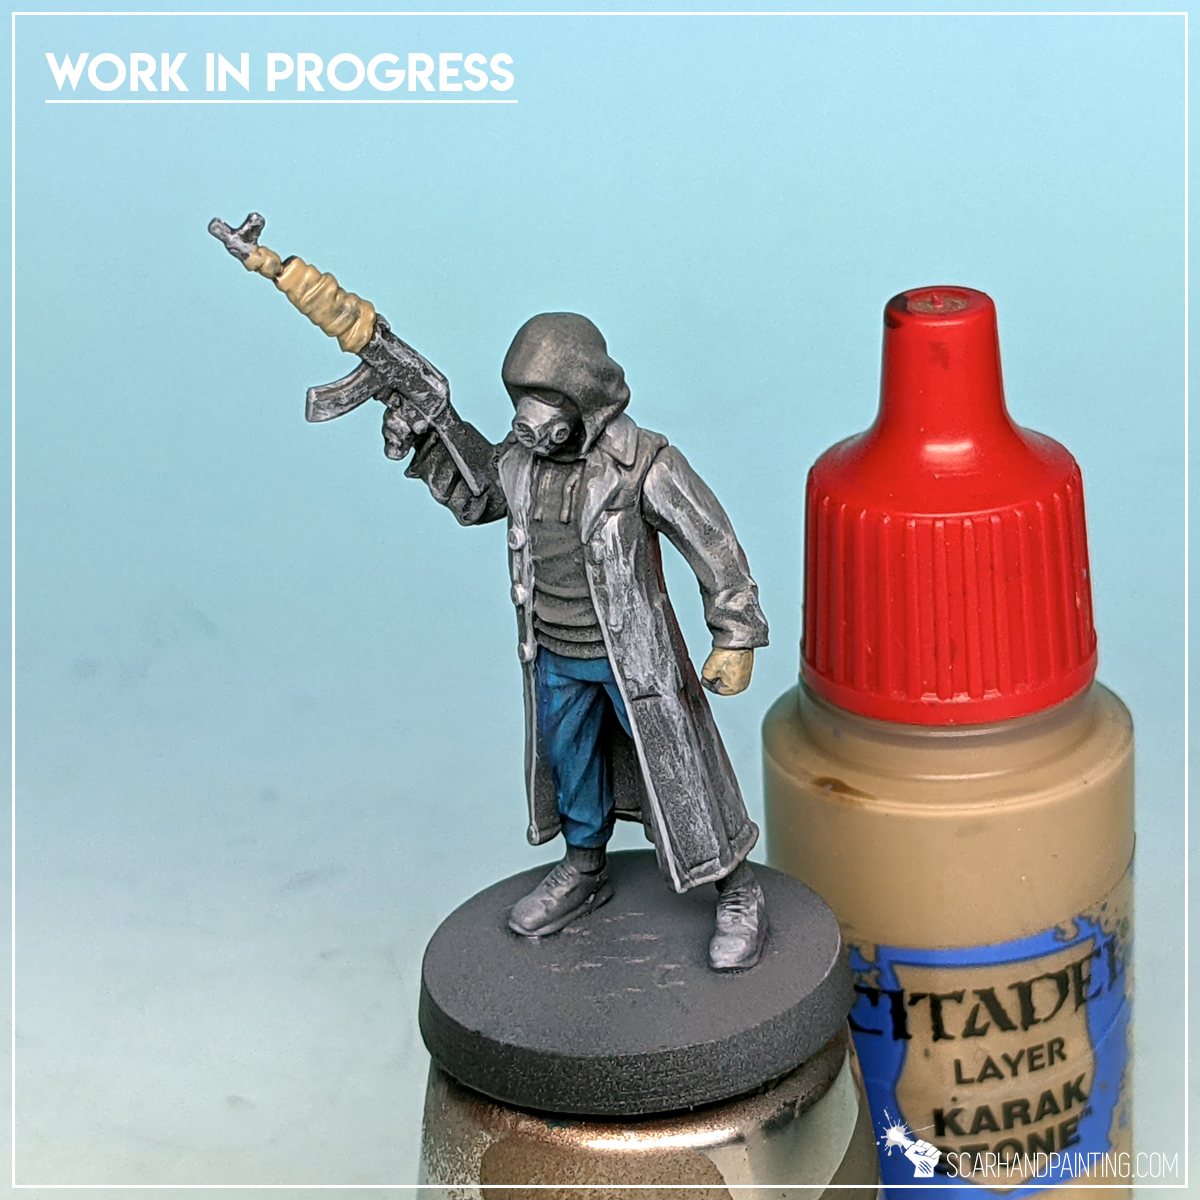
Step six: Blue clothes
Another color I took on was blue. I applied Vallejo Prussian Blue then highlighted with Vallejo Electric Blue.
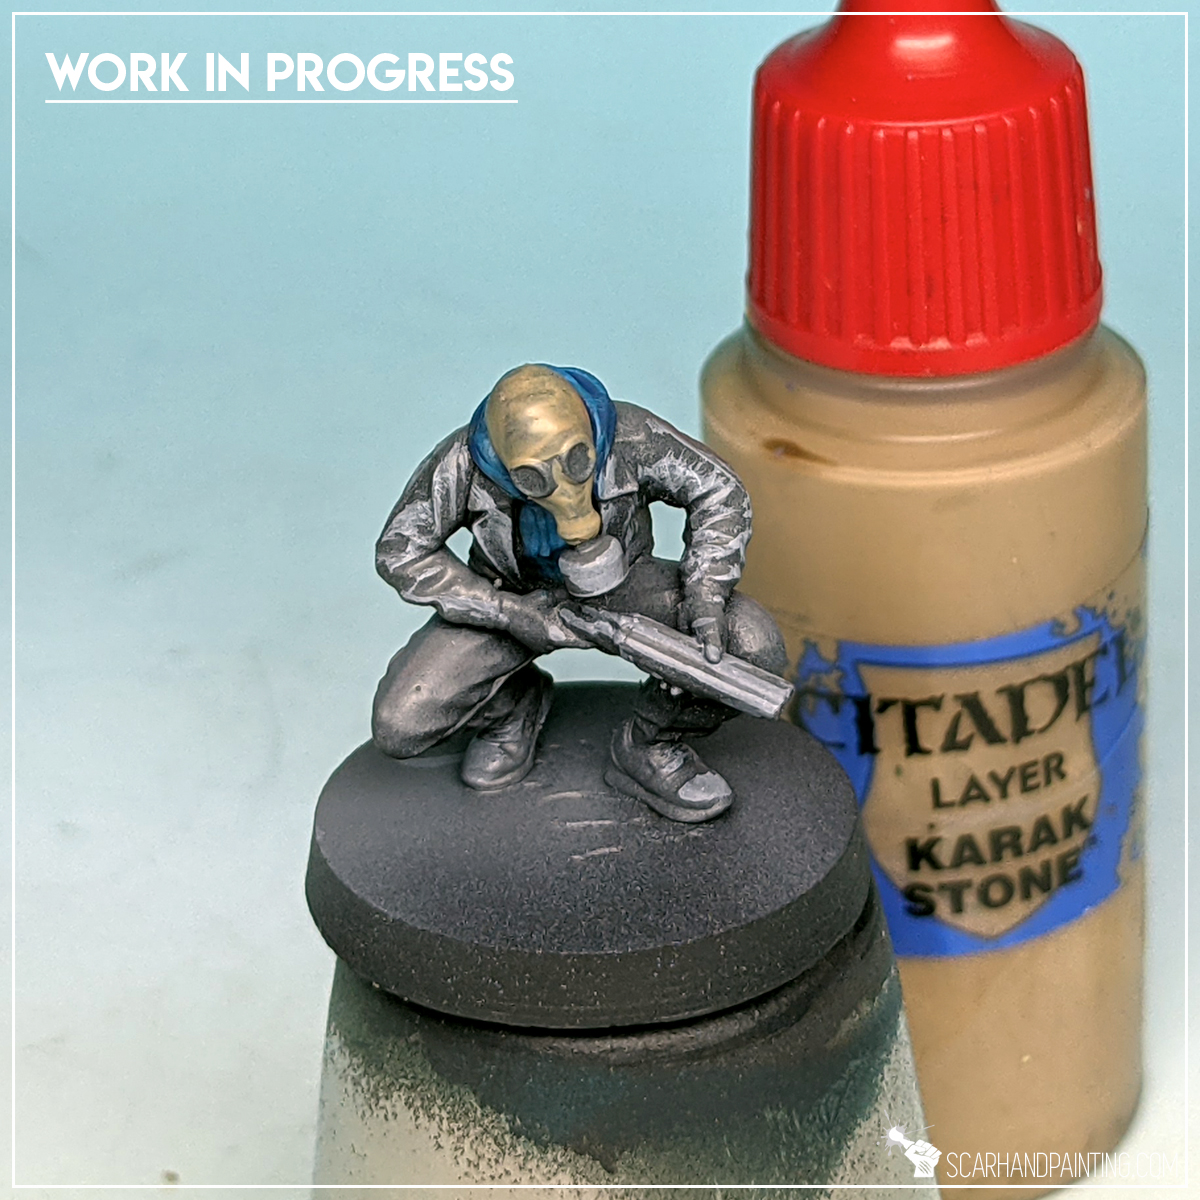
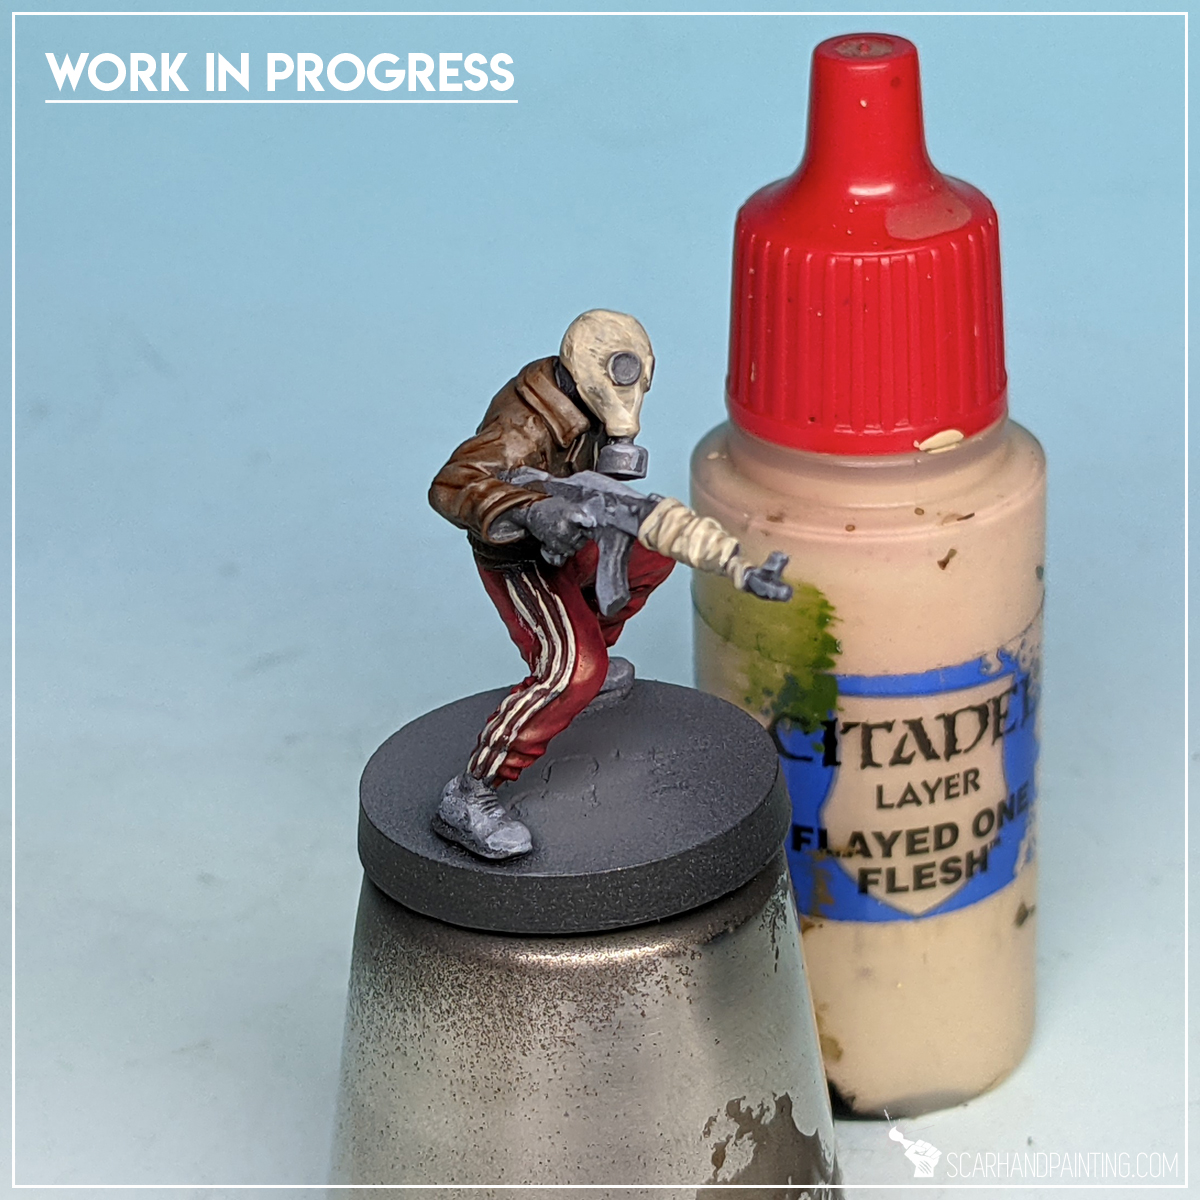
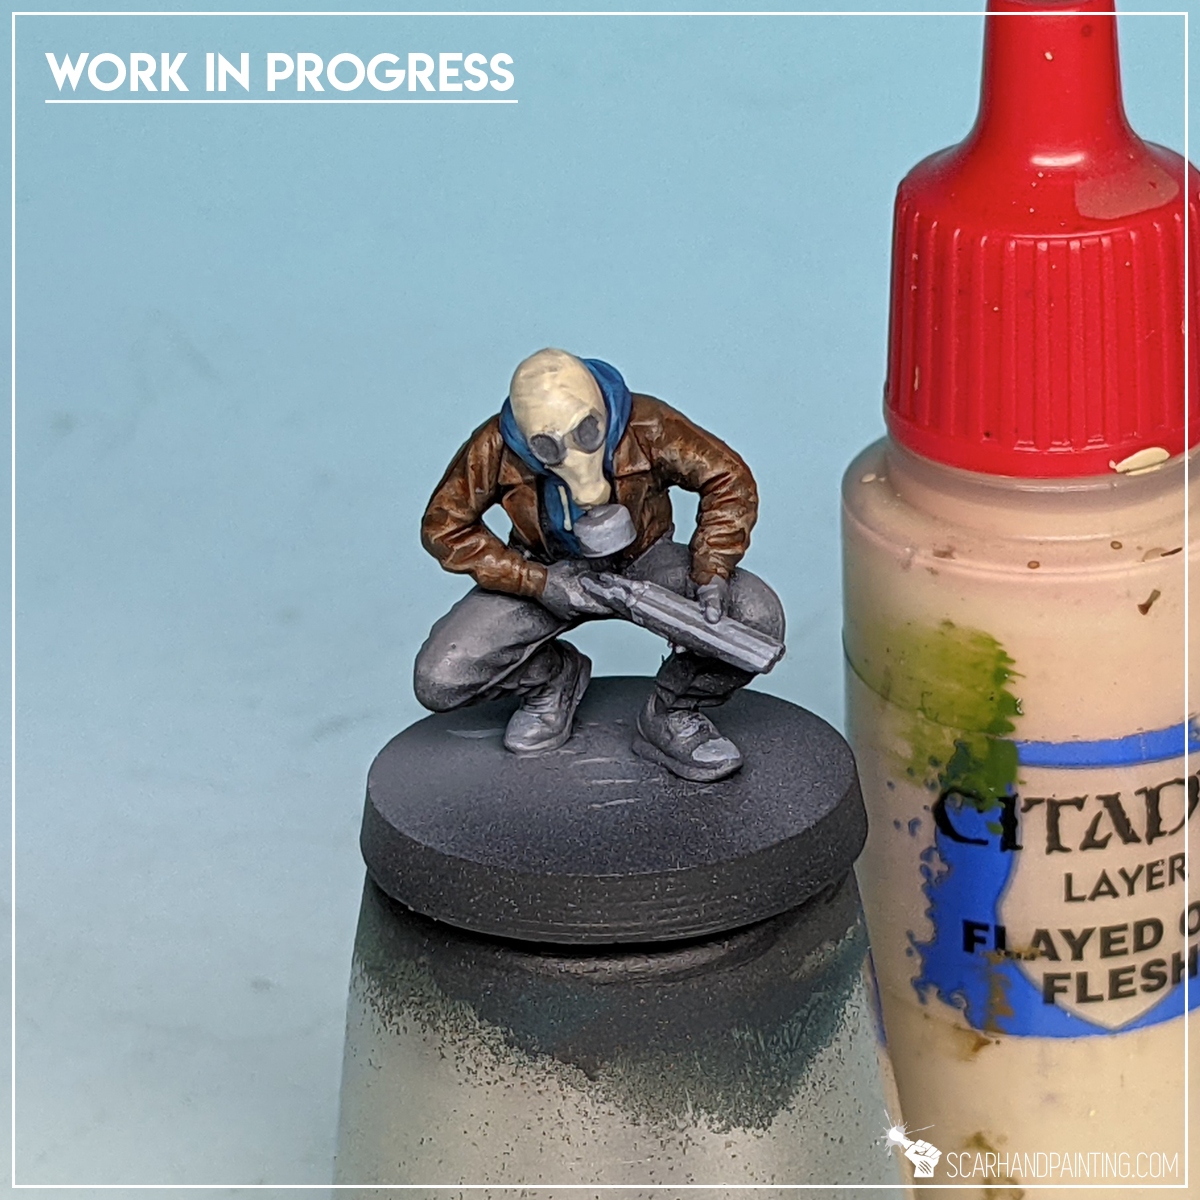
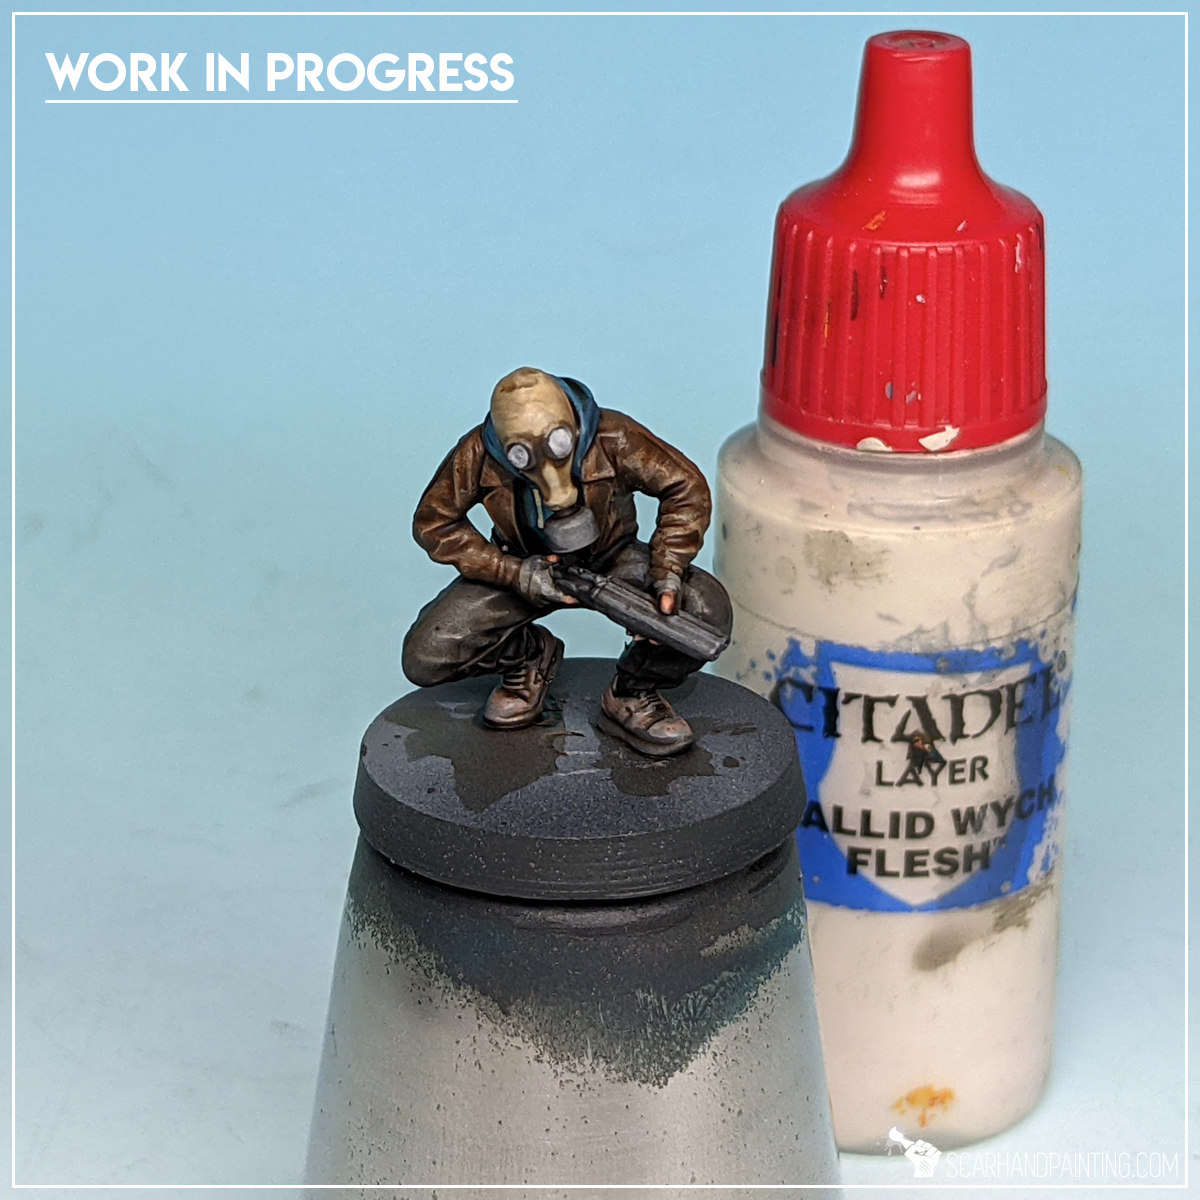
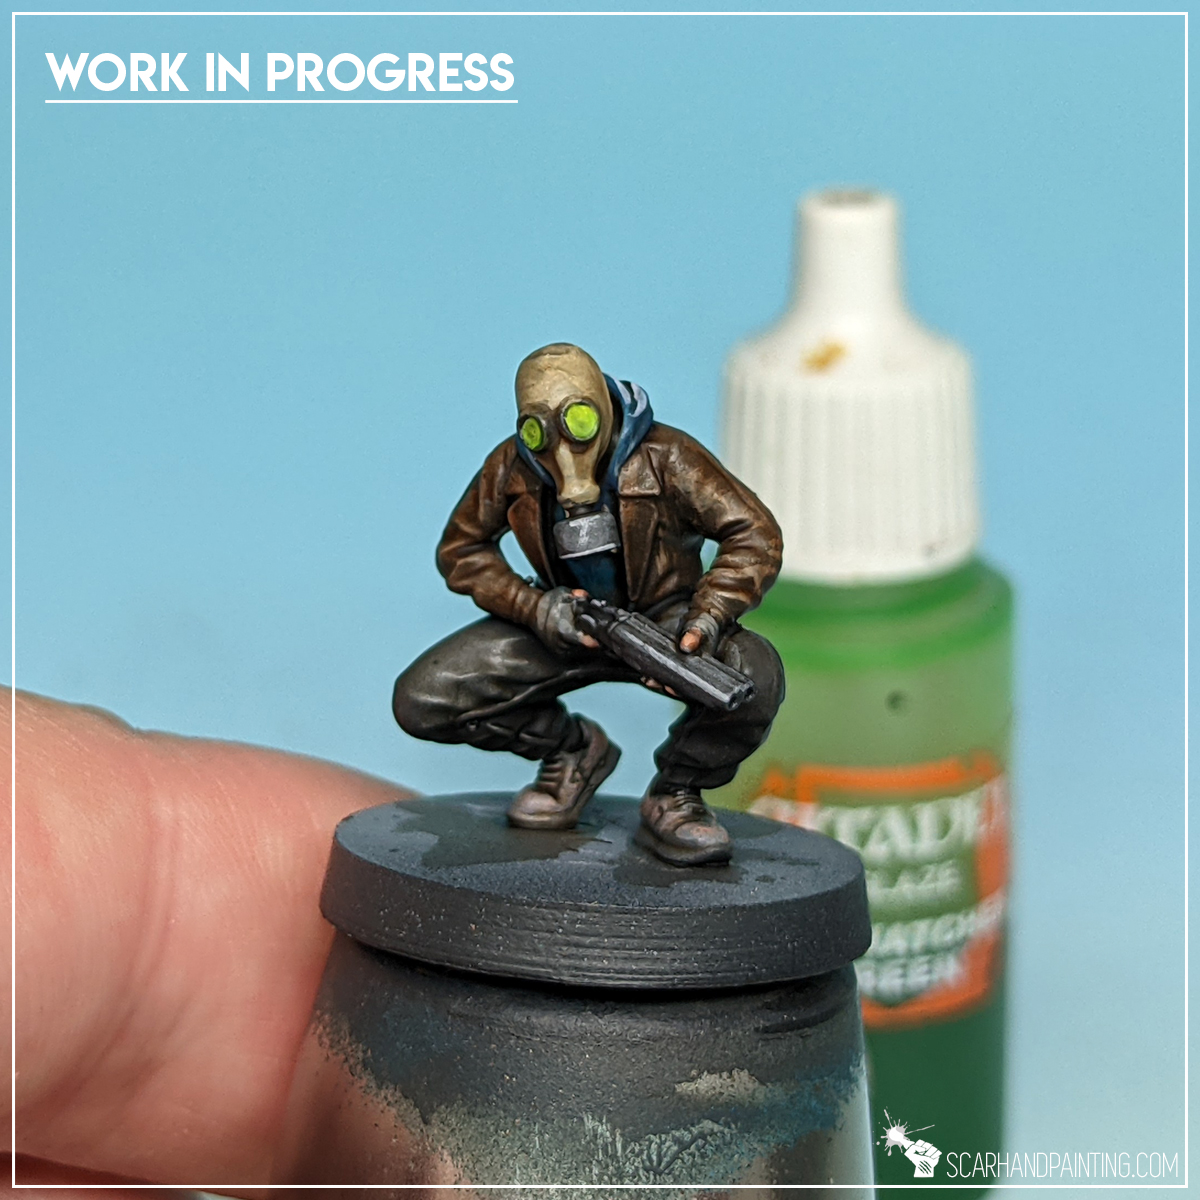
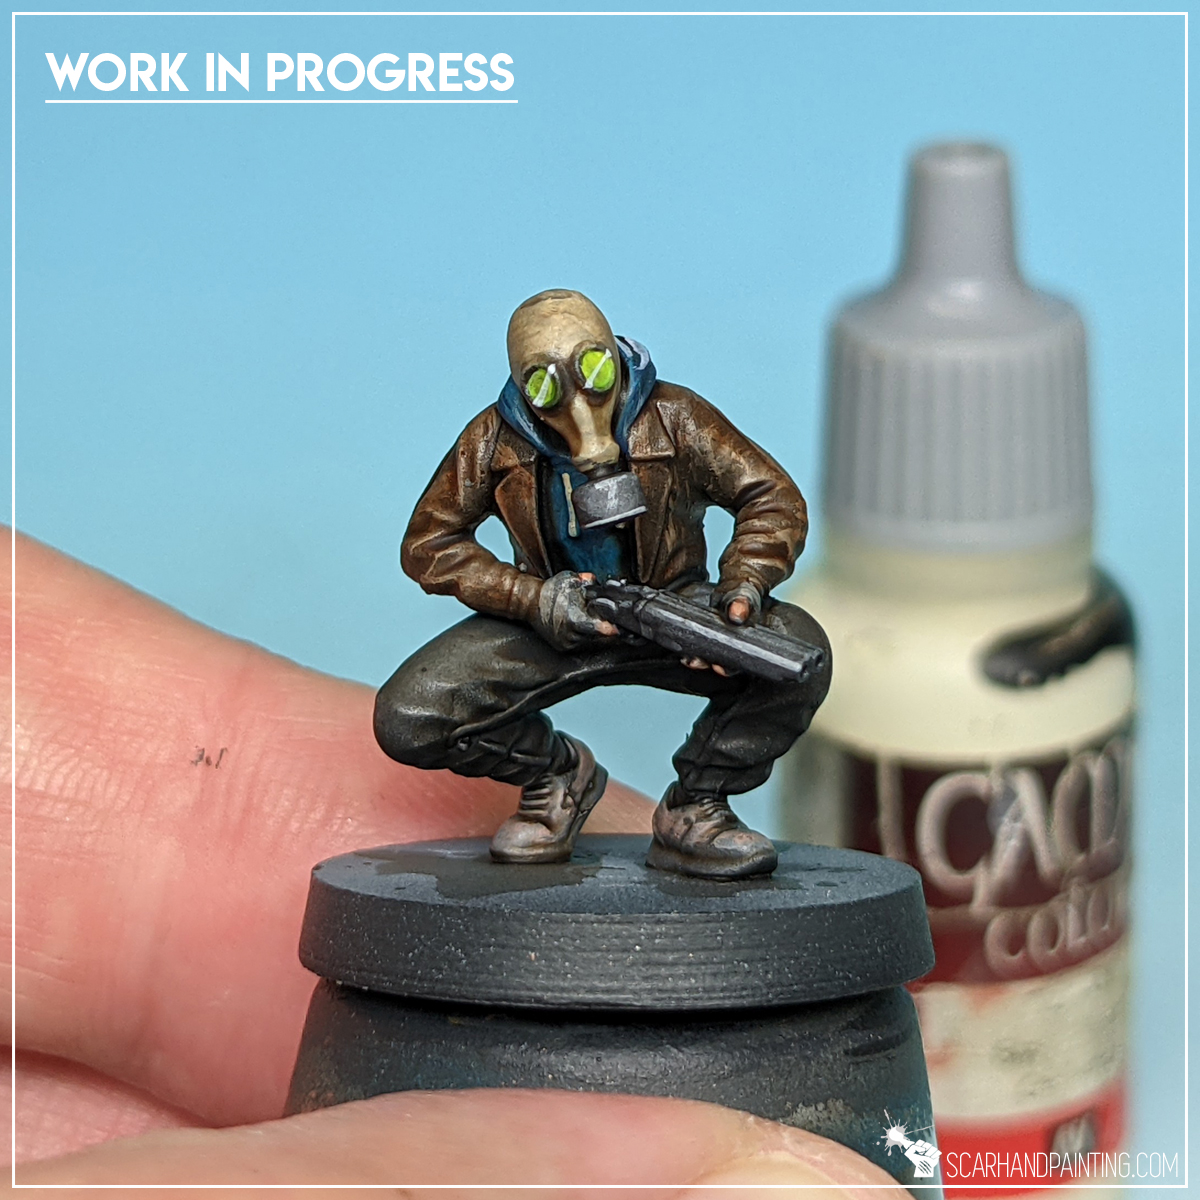
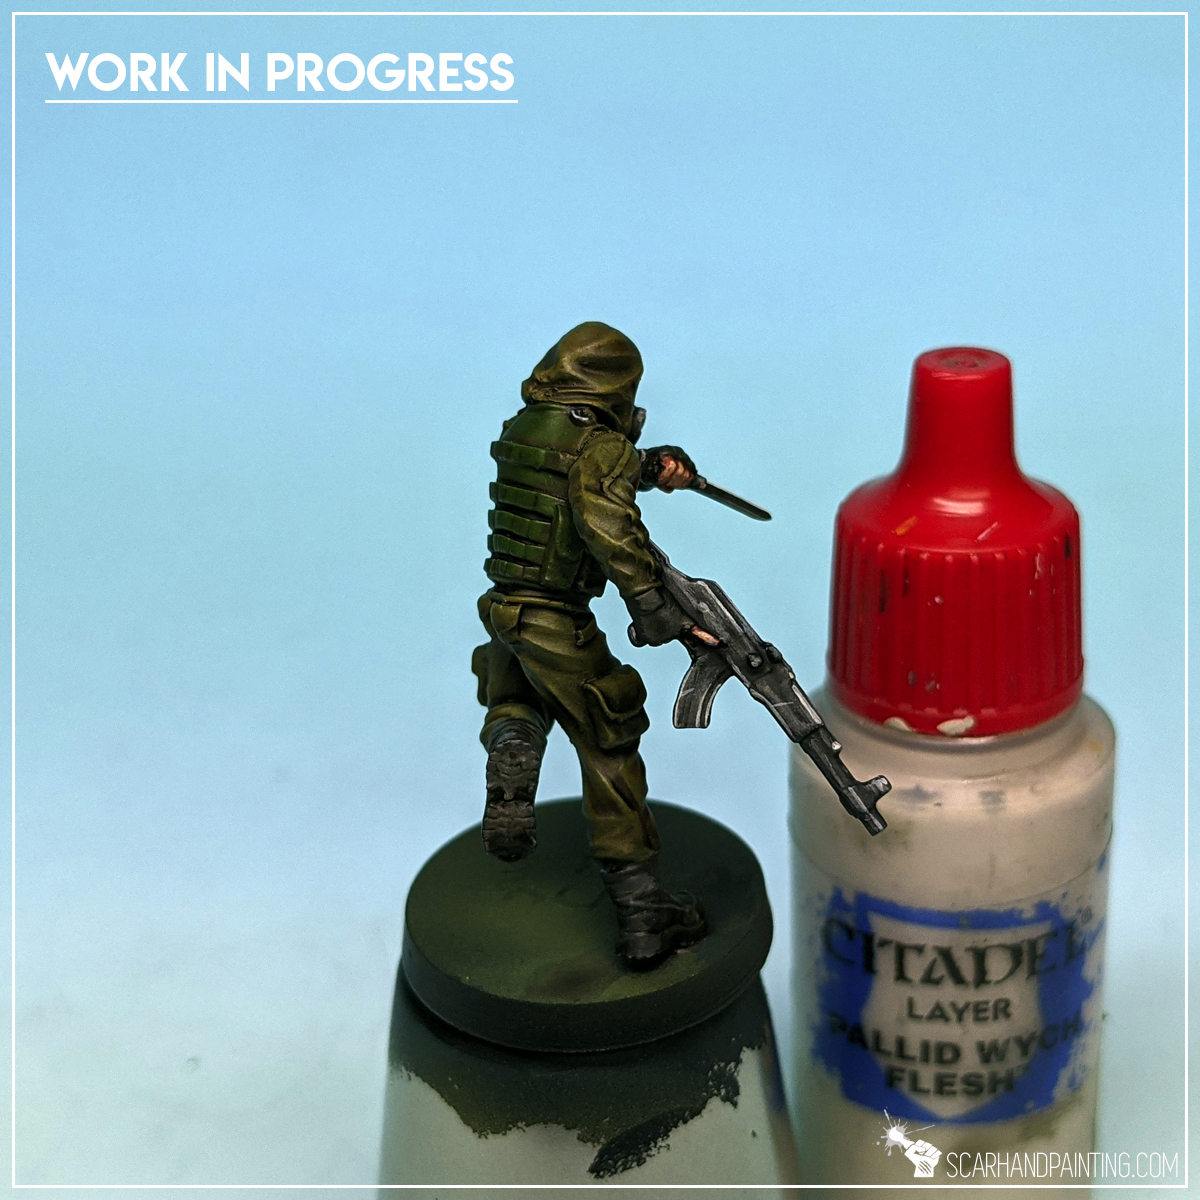
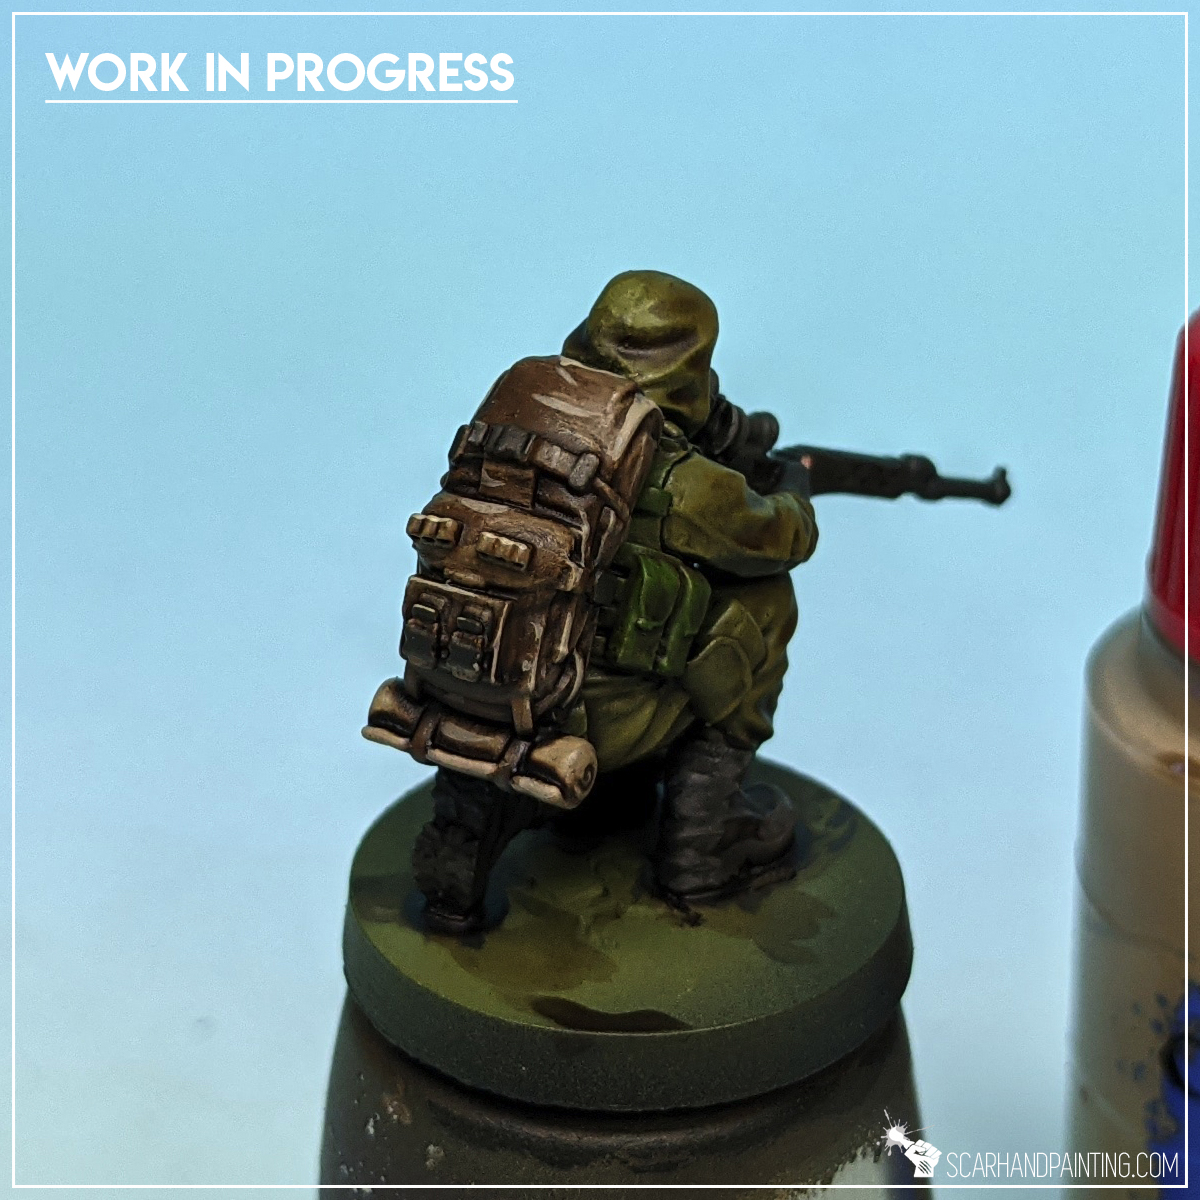
Step seven: Gas masks
For the masks and some additional detail I applied a layer of Games Workshop Karak Stone. I then strengthened the layer using Games Workshop Flayed One Flesh.
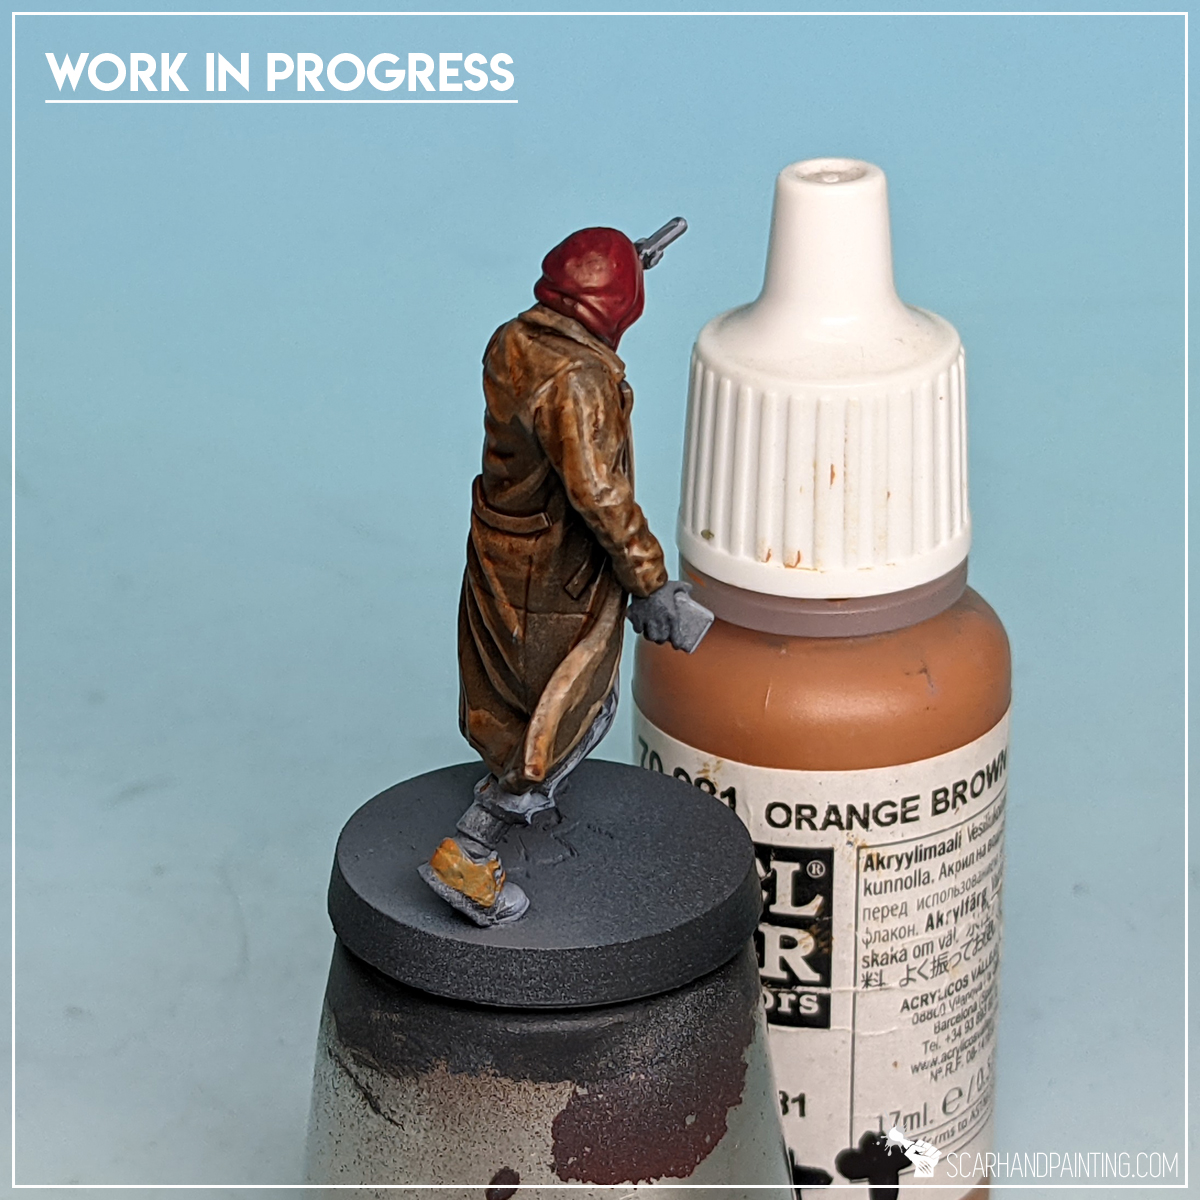
Step eight: Orange boots
For some shoes I applied a single layer of Vallejo Orange Brown. I knew boots will inevitably get messy during basing, so I decided to keep them super-simple.
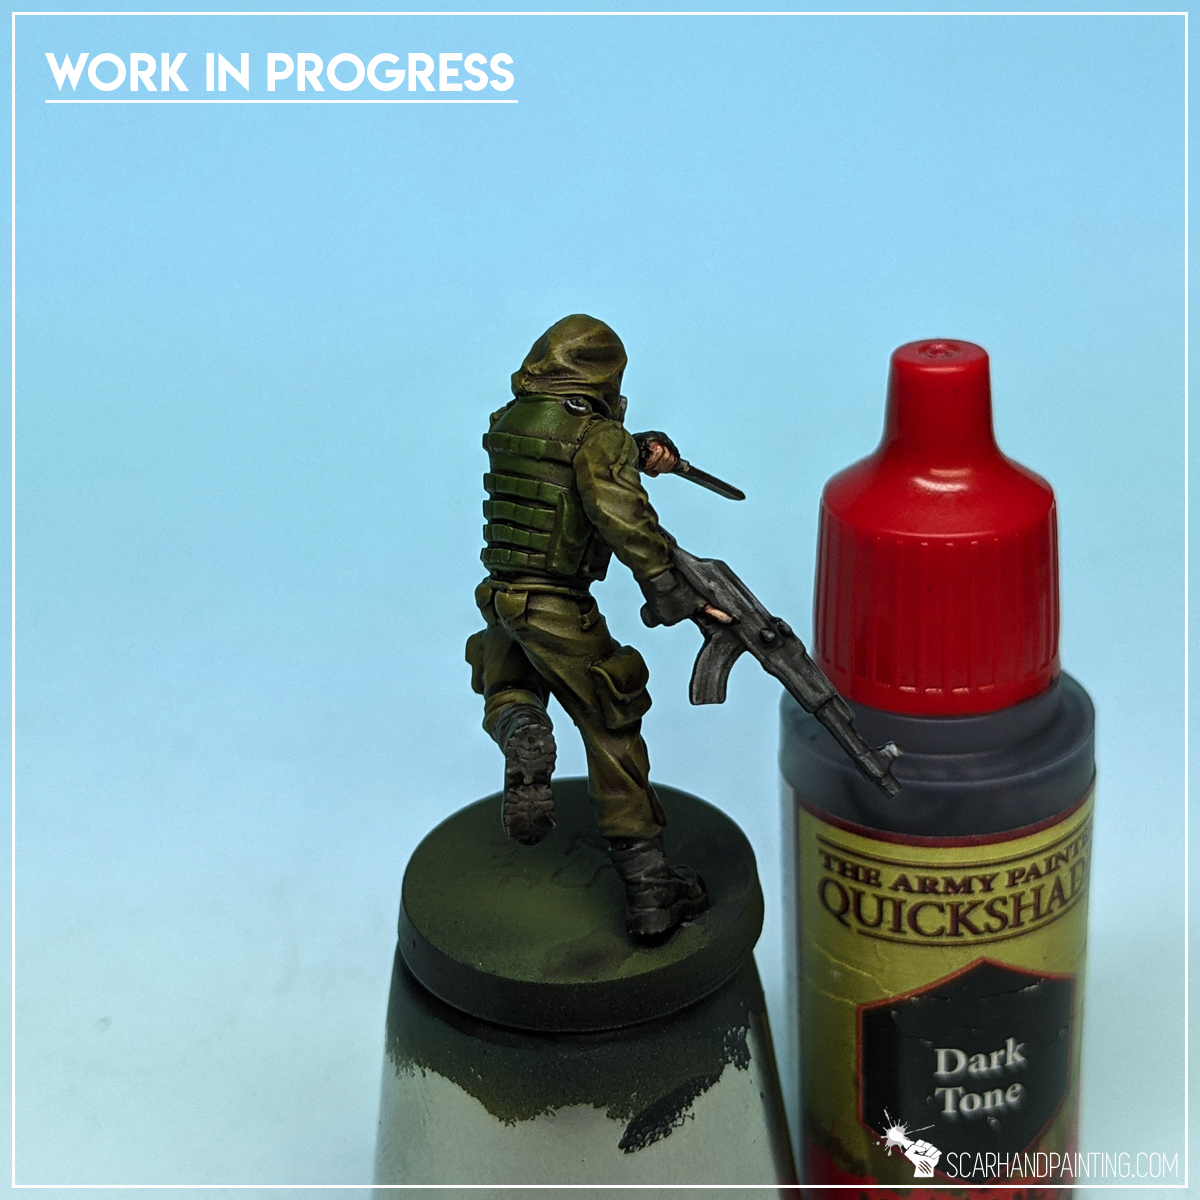
Step nine: Brown wash
Here’s where all the magic happens. I applied a strong layer of Army Painter Strong Tone Ink mixed with just a drop of Matt Varnish. I washed everything, skin* included, except for weapons*. I kept coming back to the miniatures to remove the ostentatious excess of wash throughout the drying process.
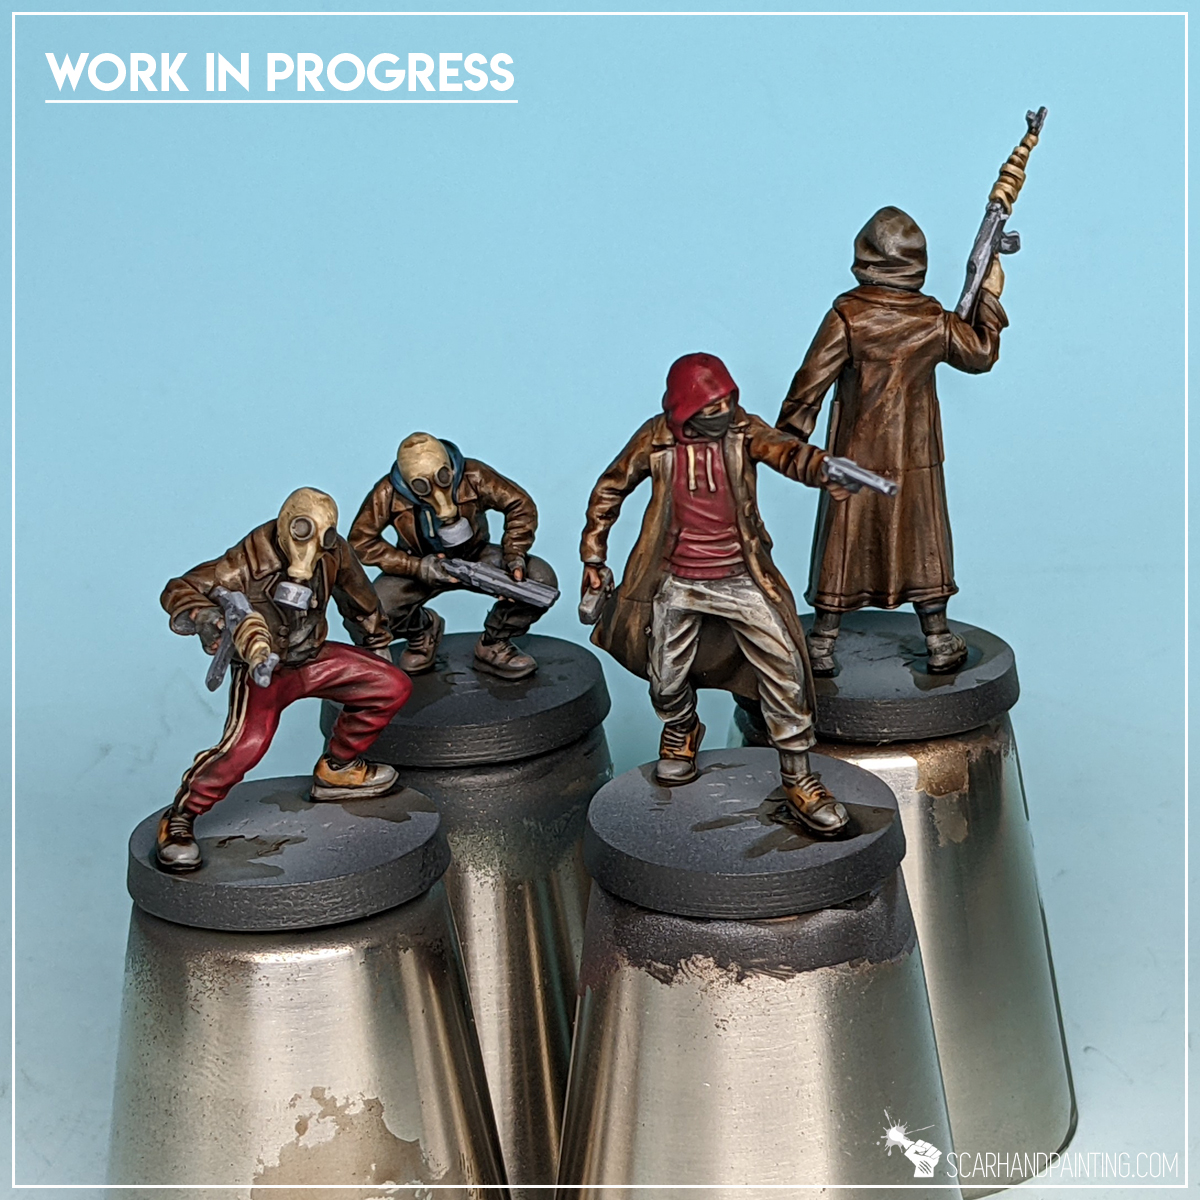
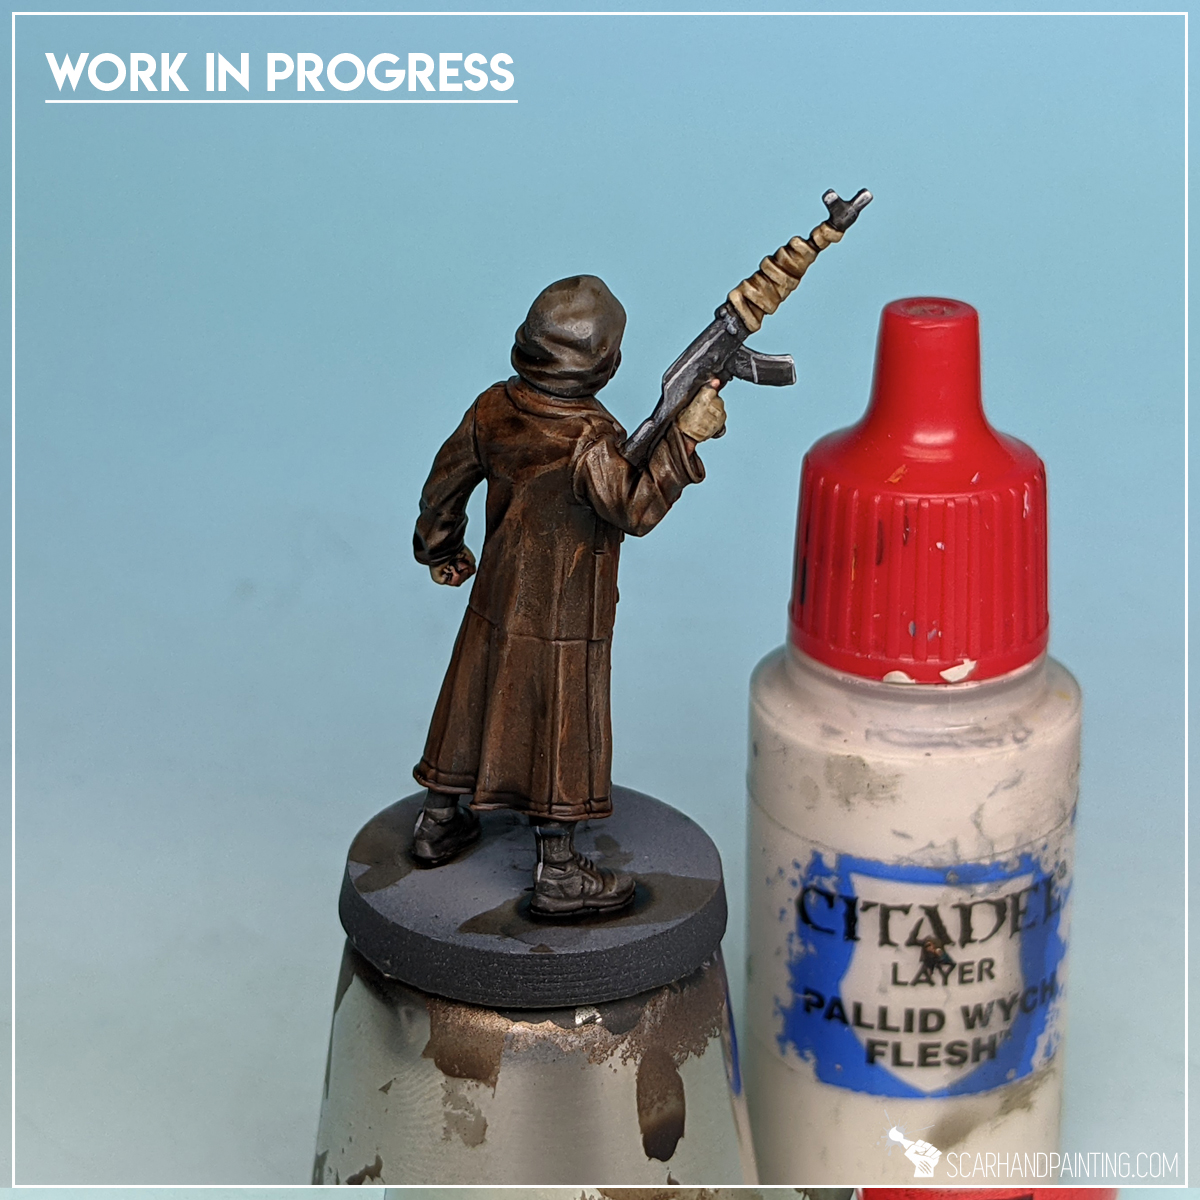
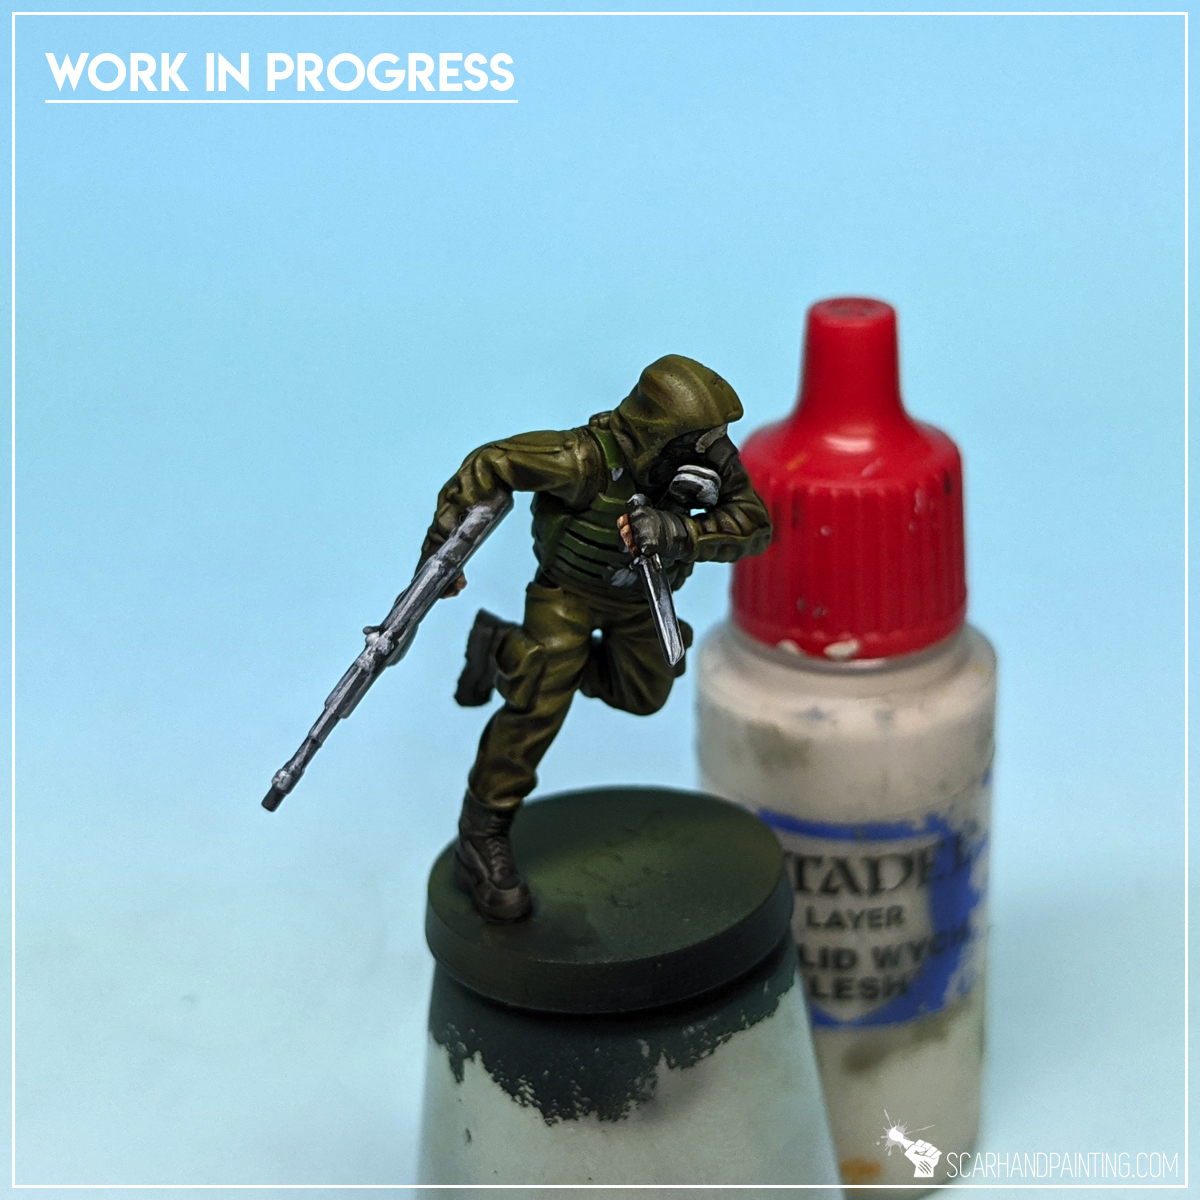
Step ten: Highlights
I used Vallejo Glacier Blue and Games Workshop Pallid Wych Flesh to highlight blue, black and paint some extra detail on the shoes and buttons.
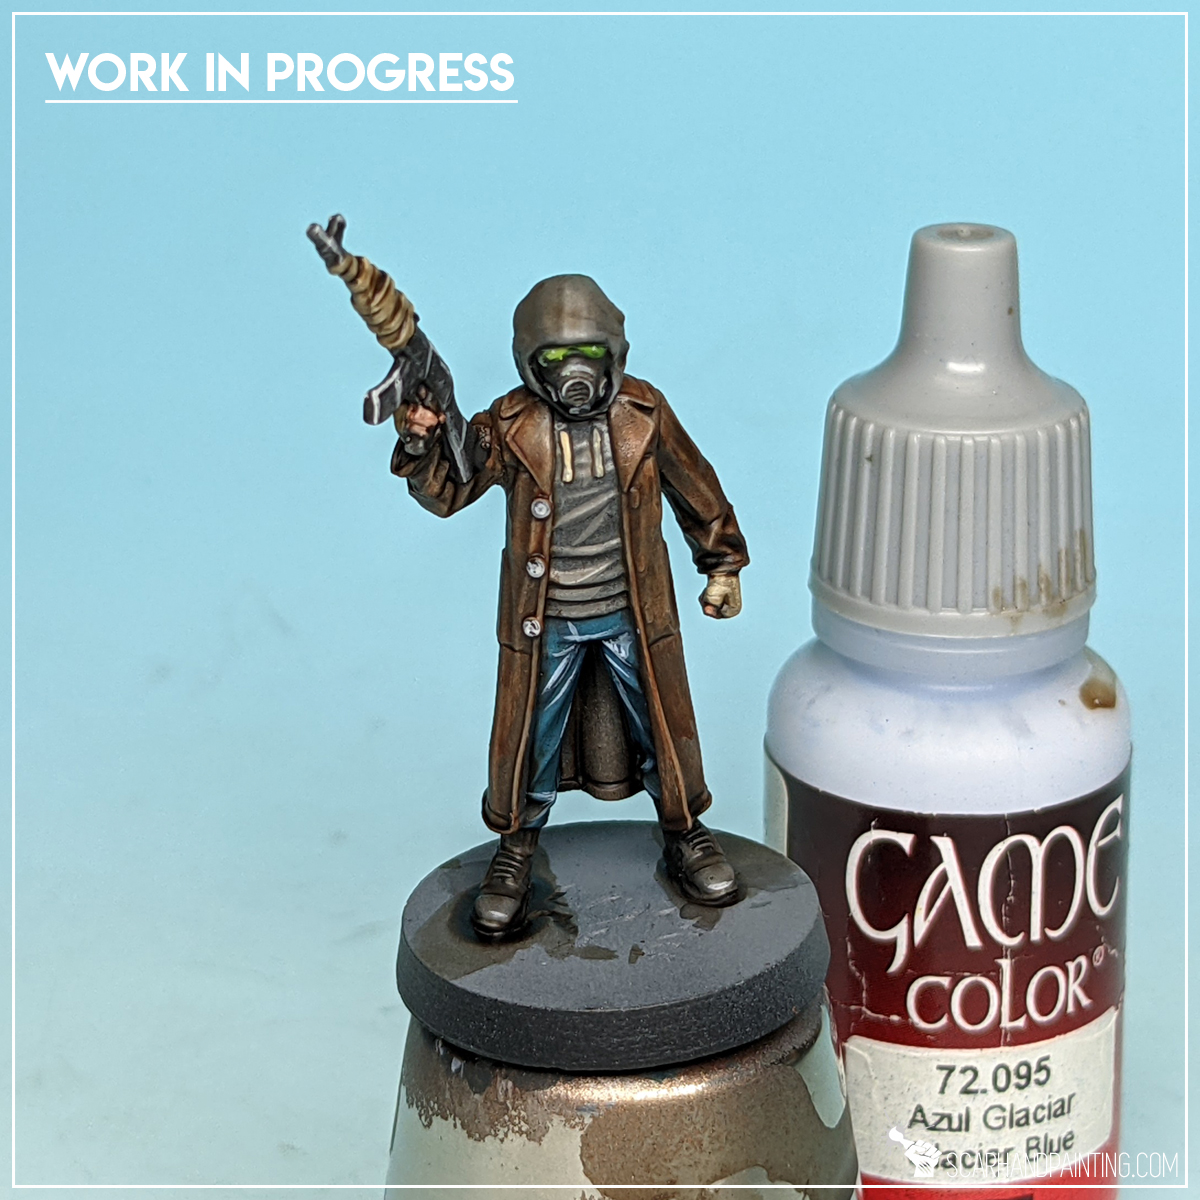
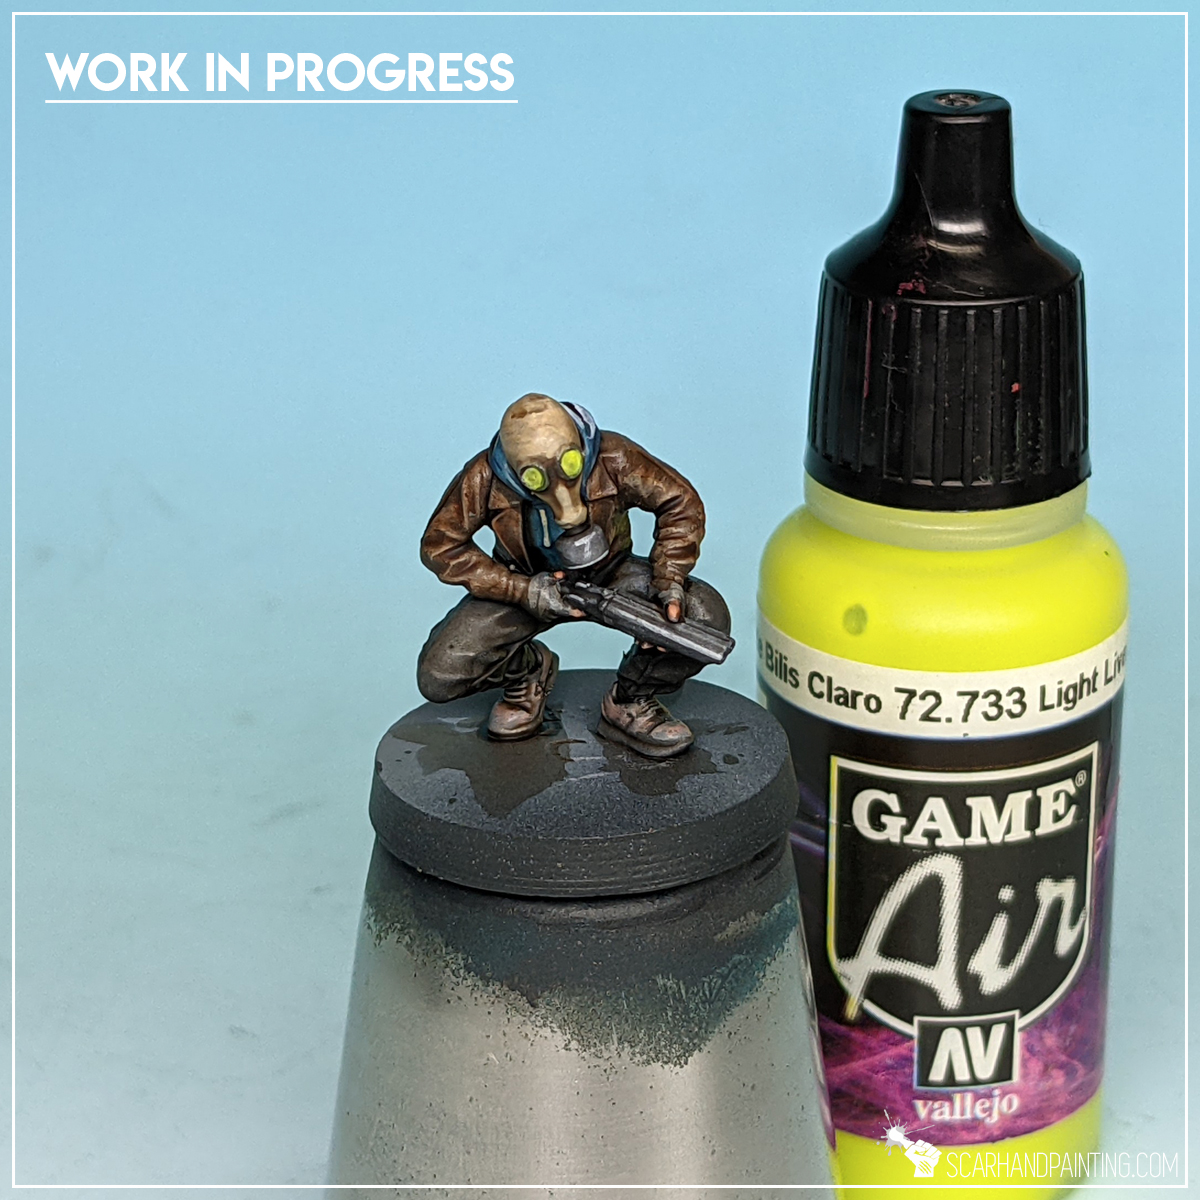
Step eleven: Gasmask visors
Finally I painted gasmask visors with Games Workshop Pallid Wych Flesh, followed by Vallejo Light Livery Green. I then applied a glaze of Games Workshop Waywatcher Green. Last step was to paint diagonal lines of Vallejo Off White through the visors – adding that extra flash effect to them.
Other steps: *You can learn how to paint weapons, skin and bases in previous tutorial: Painting Post-apo Survivors part 1 Stalkers

I hope you find this tutorial interesting. Be sure to let me know your thoughts in the comments below or via Facebook.or Instagram. I would also appreciate if you considered sharing this content with your friends, who might find it useful. Finally if you are looking for a professional miniatures painting service be sure to contact me with this contact form. I always reply within 24 hours, after which please check out your spam folder.
Welcome to Painting Five Layers Technique – Metal tutorial. Here I will present to you a Step-by-step of an easy and fast painting process for metal, that I myself use in most of my projects.

Before we start, some notes:
Prep: Undercoat
I started with a thorough layer of Games Workshop Chaos Black spray.
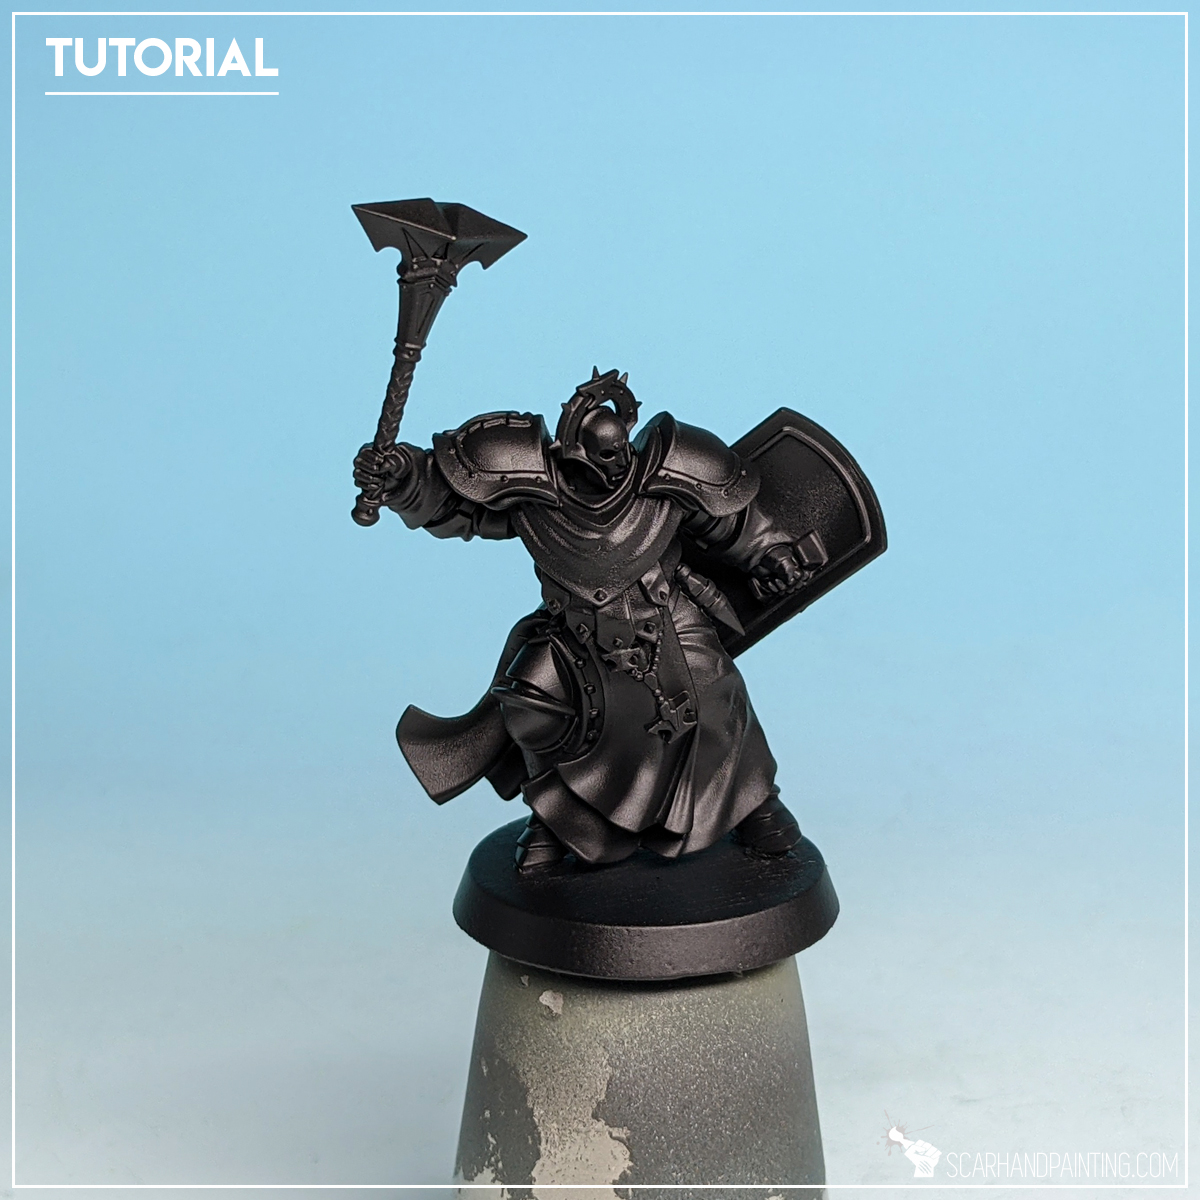
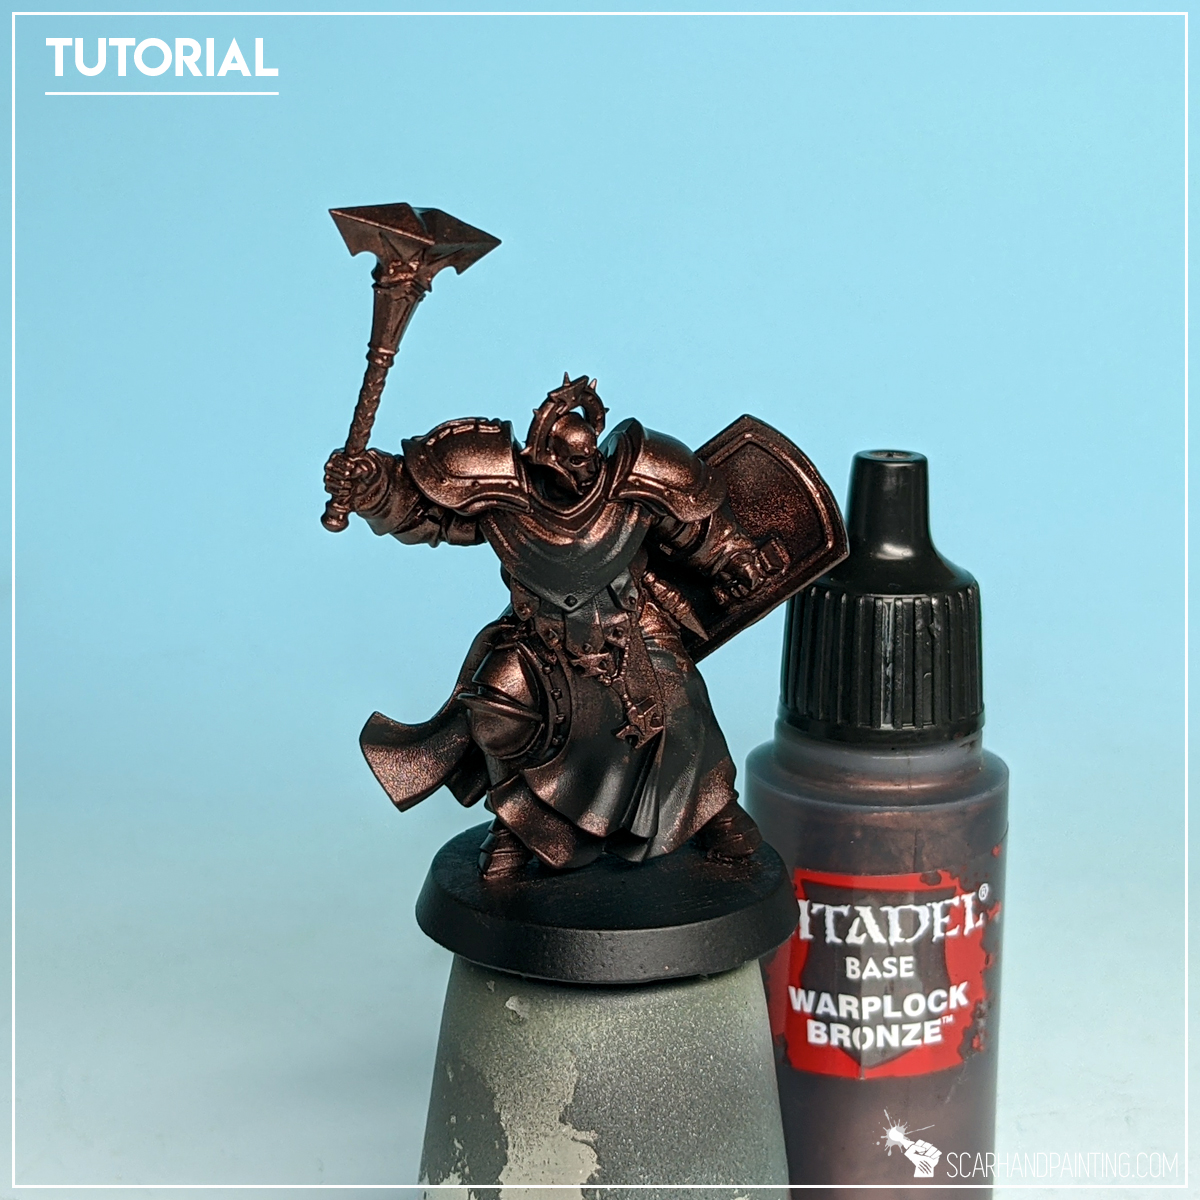
Step one: Base layer
I then applied first layer (base) with GW Warplock Bronze. Thinning the paint down a notch might help leading the paint to recesses and speed up the process.
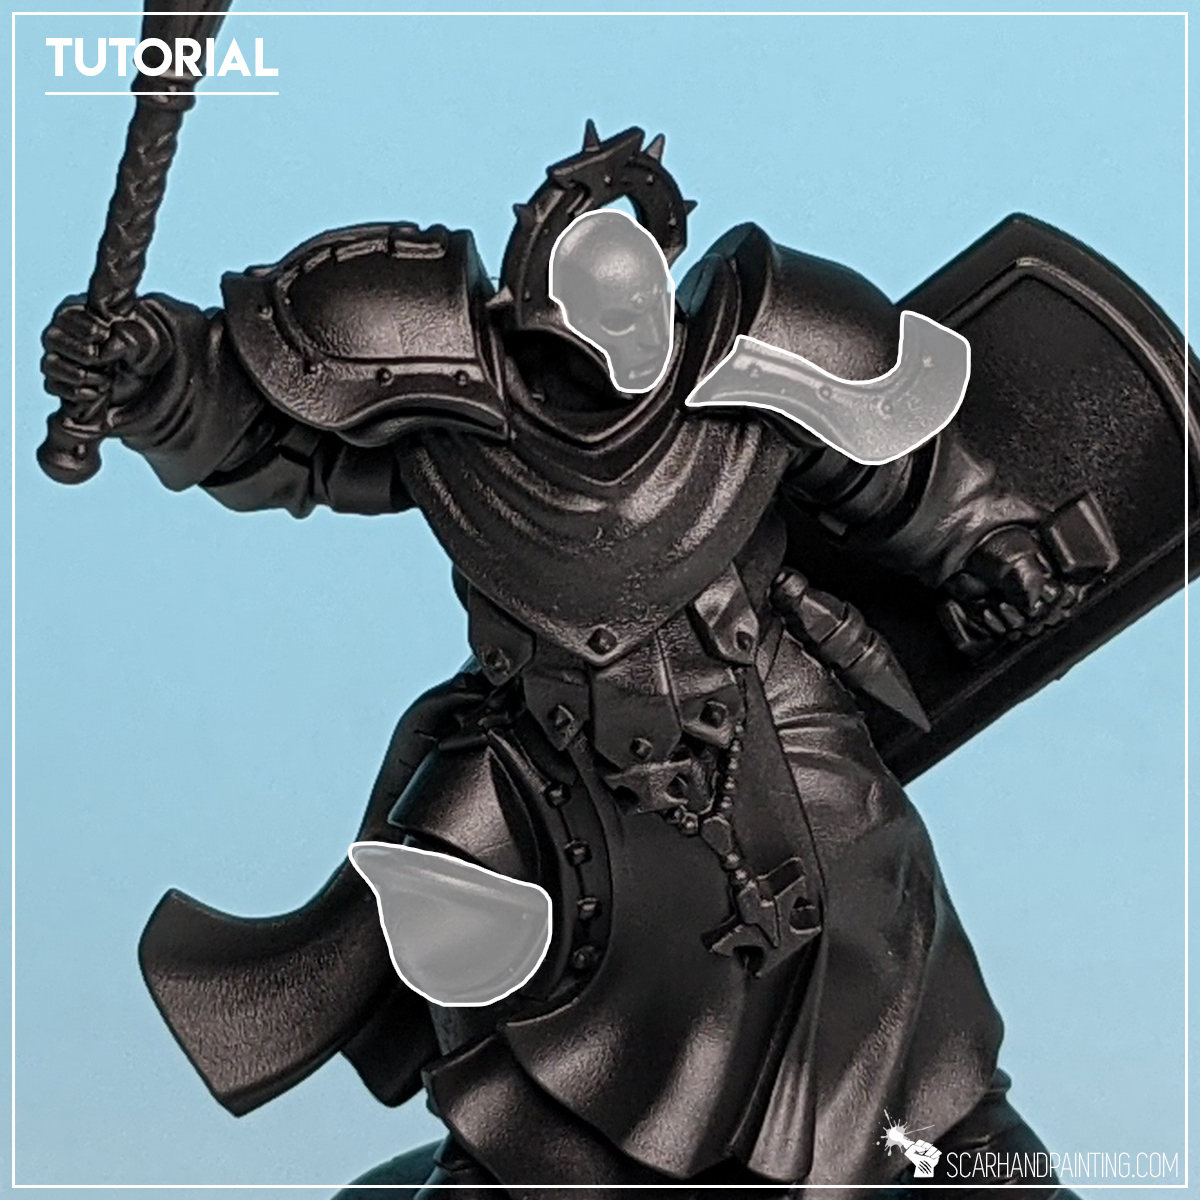
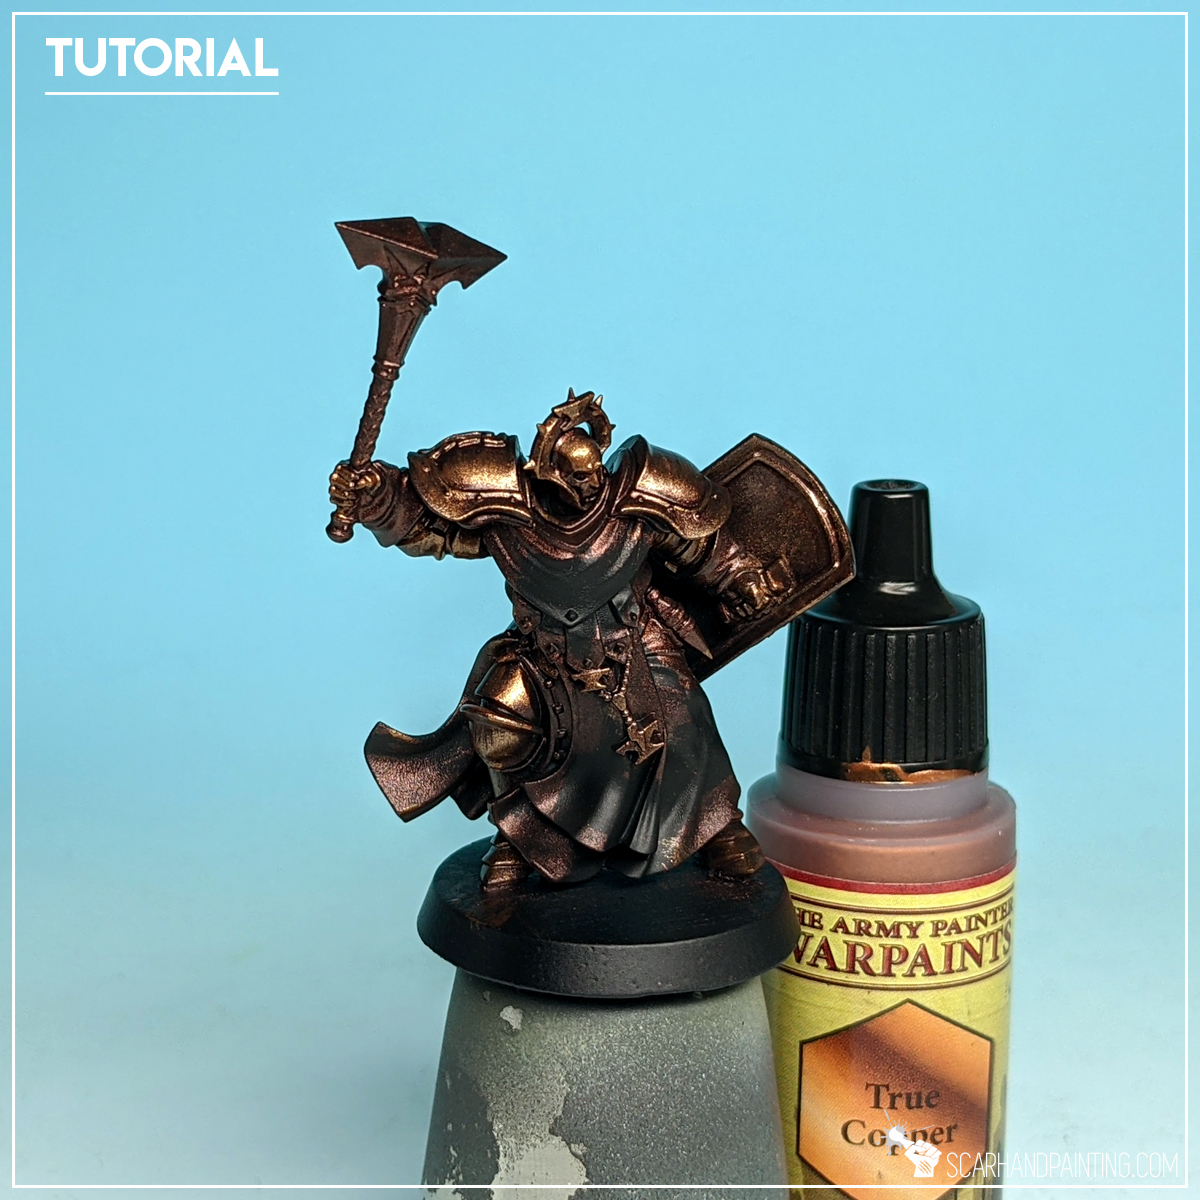
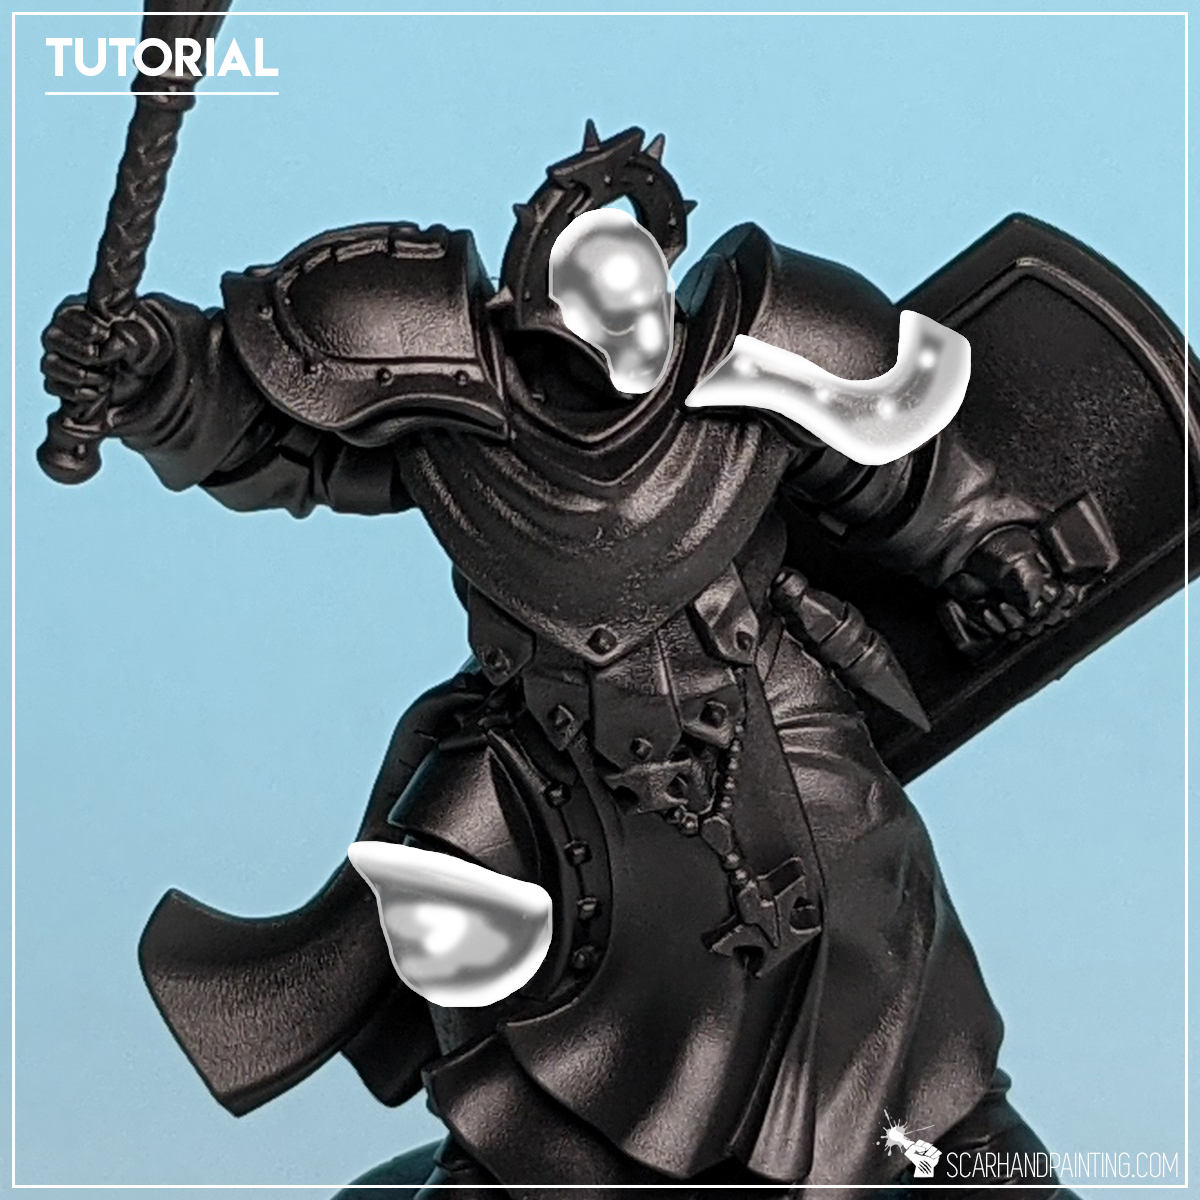
Step two: Bronze Highlight
Next, with a side of a large brush tip, I applied a layer of Army Painter True Copper. The movement and technique behind this layer was similar to flatbrushing. The key was to leave some of the previous layer visible in recesses, all the while applying new color to everything beyond.

Step two alt: Metal Highlight
I did the same for weapon, except I switched to Army Painter Gun Metal, instead of True Copper.
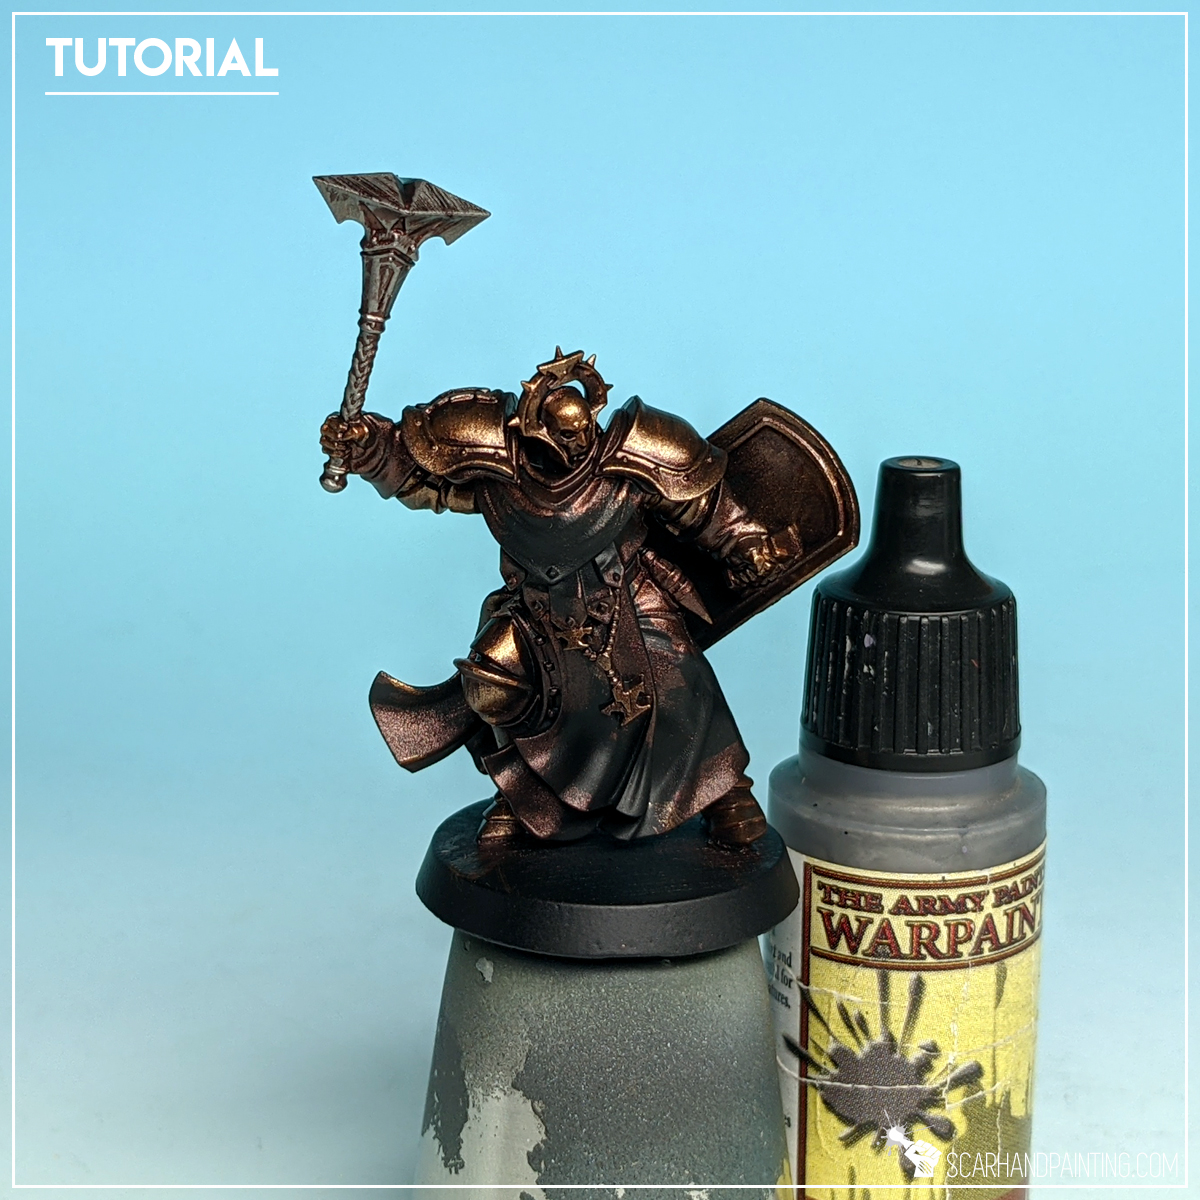
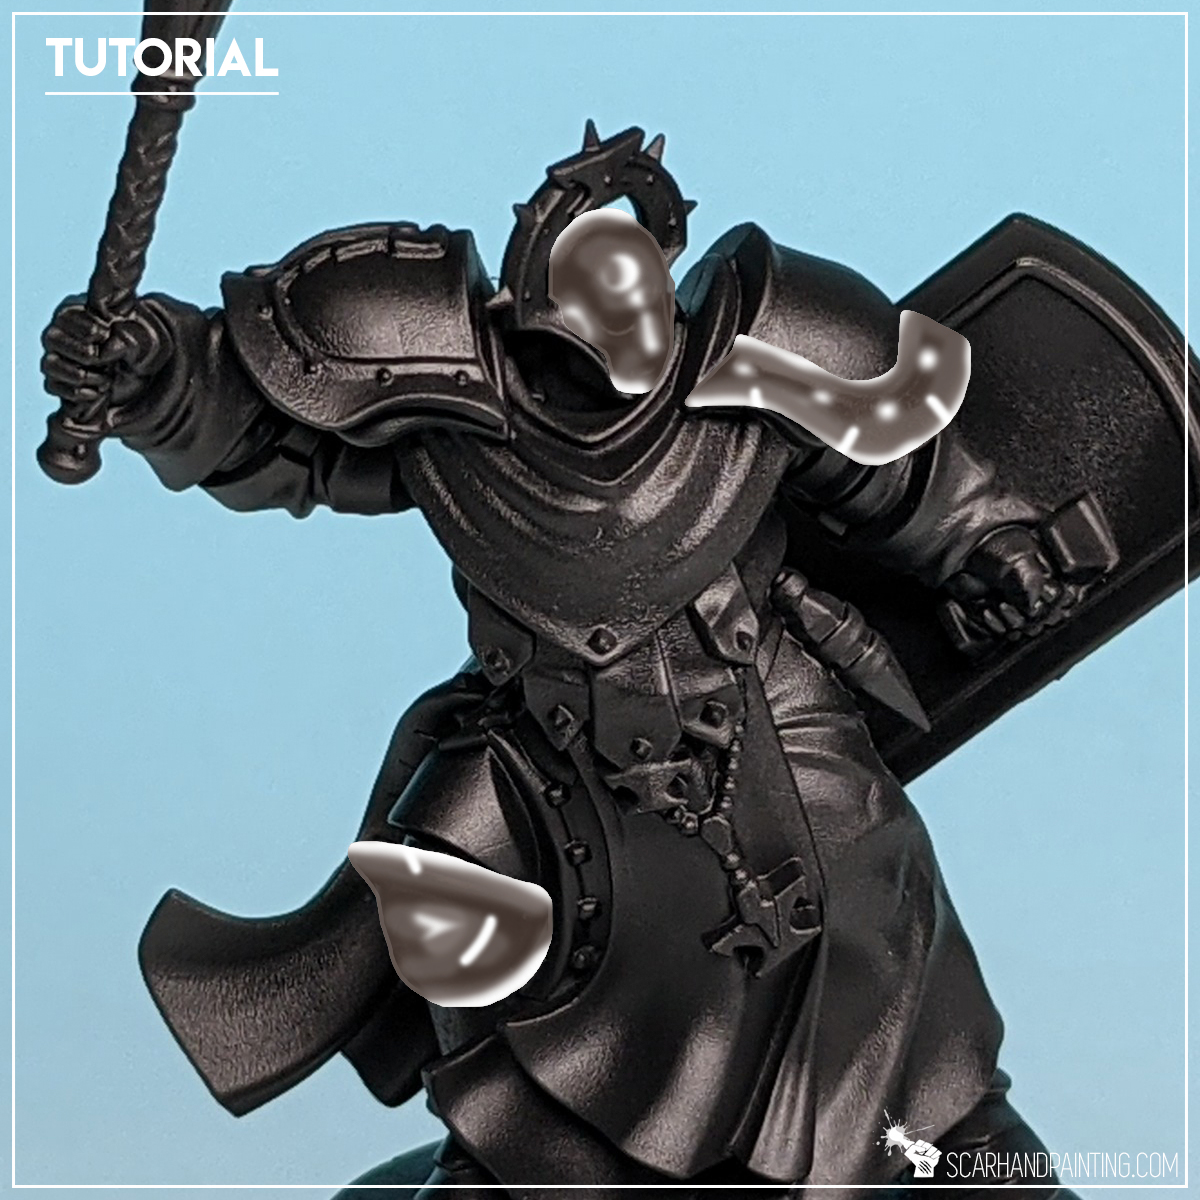
Step three: Edge highlight
Next I edge highlighted all areas with Army Painter Shining Silver. This one does not have to be precise and might get a bit messy. Any additional scratches or lines painted on the armor will benefit the final result.
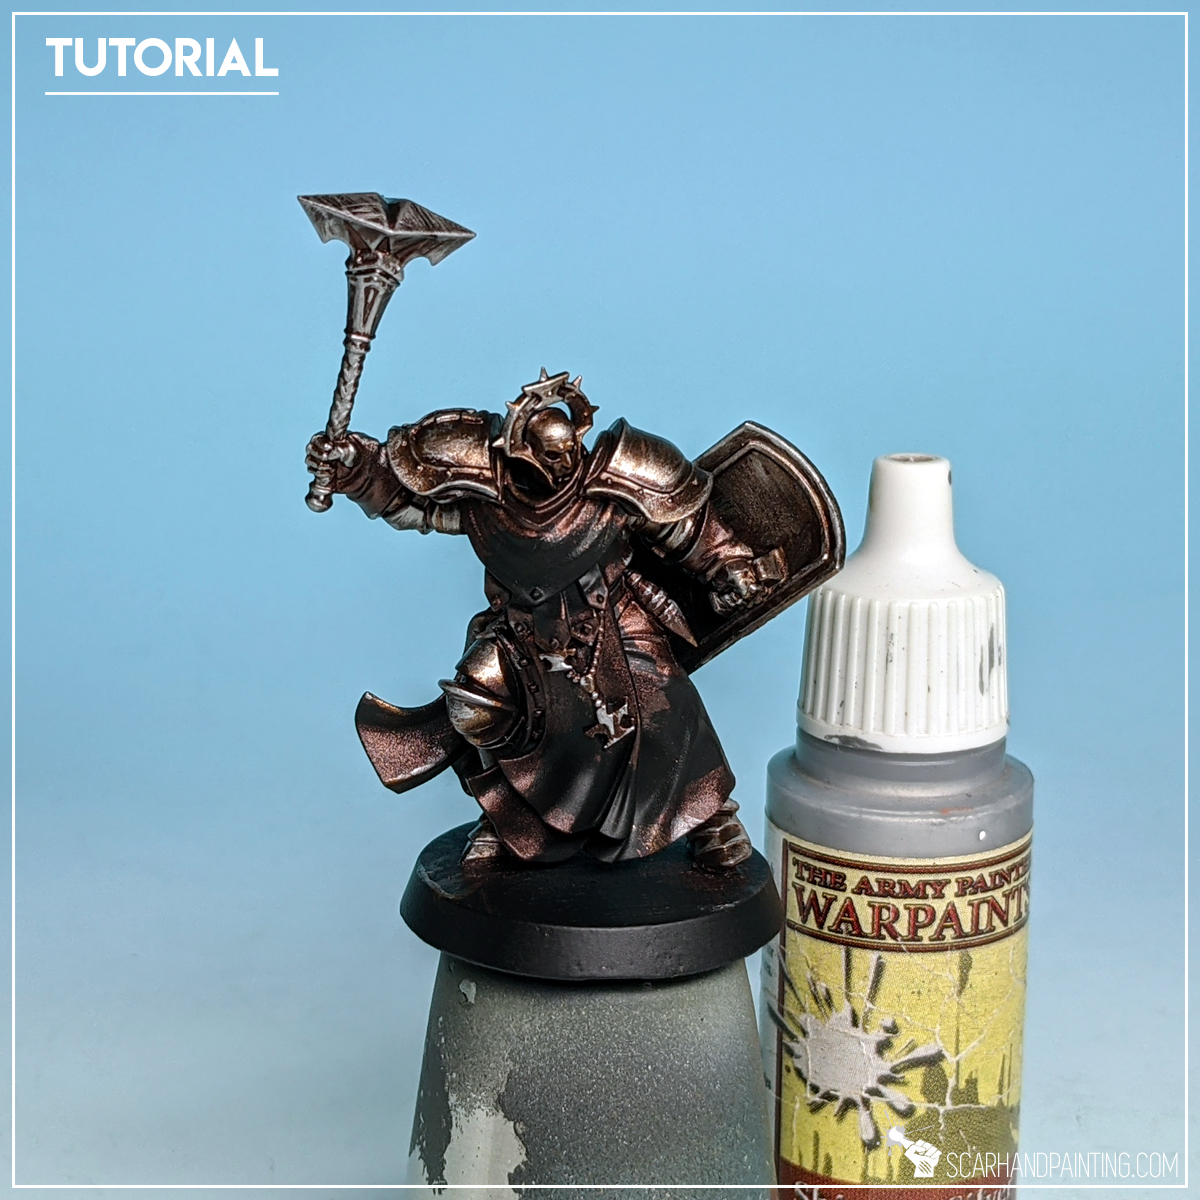
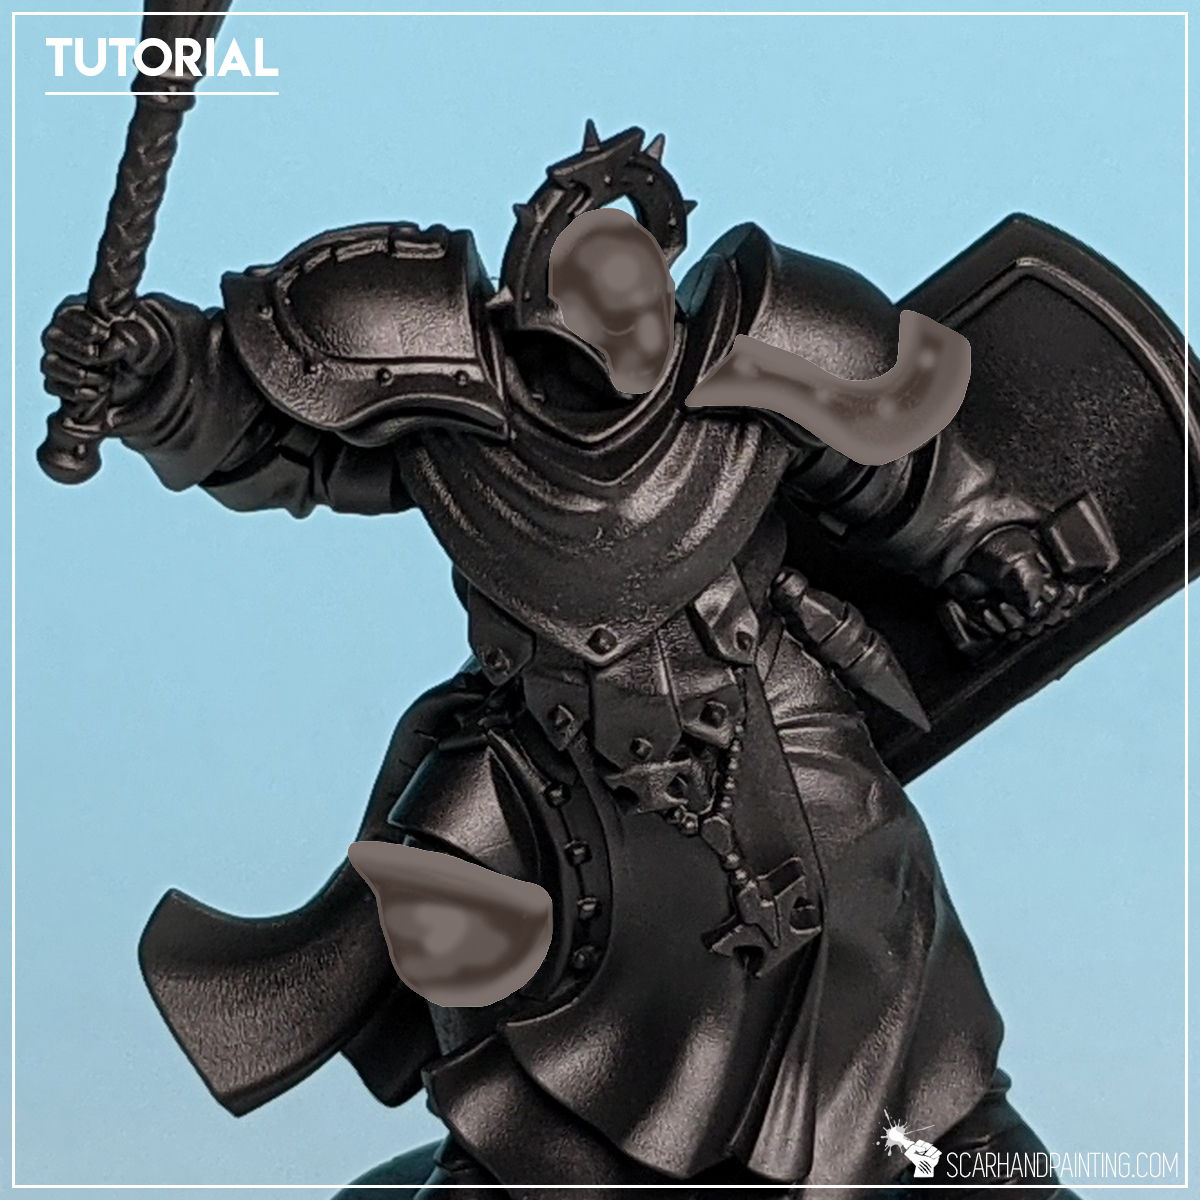
Step four: Wash
The Army Painter Strong Tone was next. I applied a rich layer of wash all over the miniature.
NOTE: I recommend applying and highlighting any colors compatible with Strong Tone before commencing this step. Proper layer planning is key to achieving fast painting time. For this tutorial I left the rest of the miniature as is.
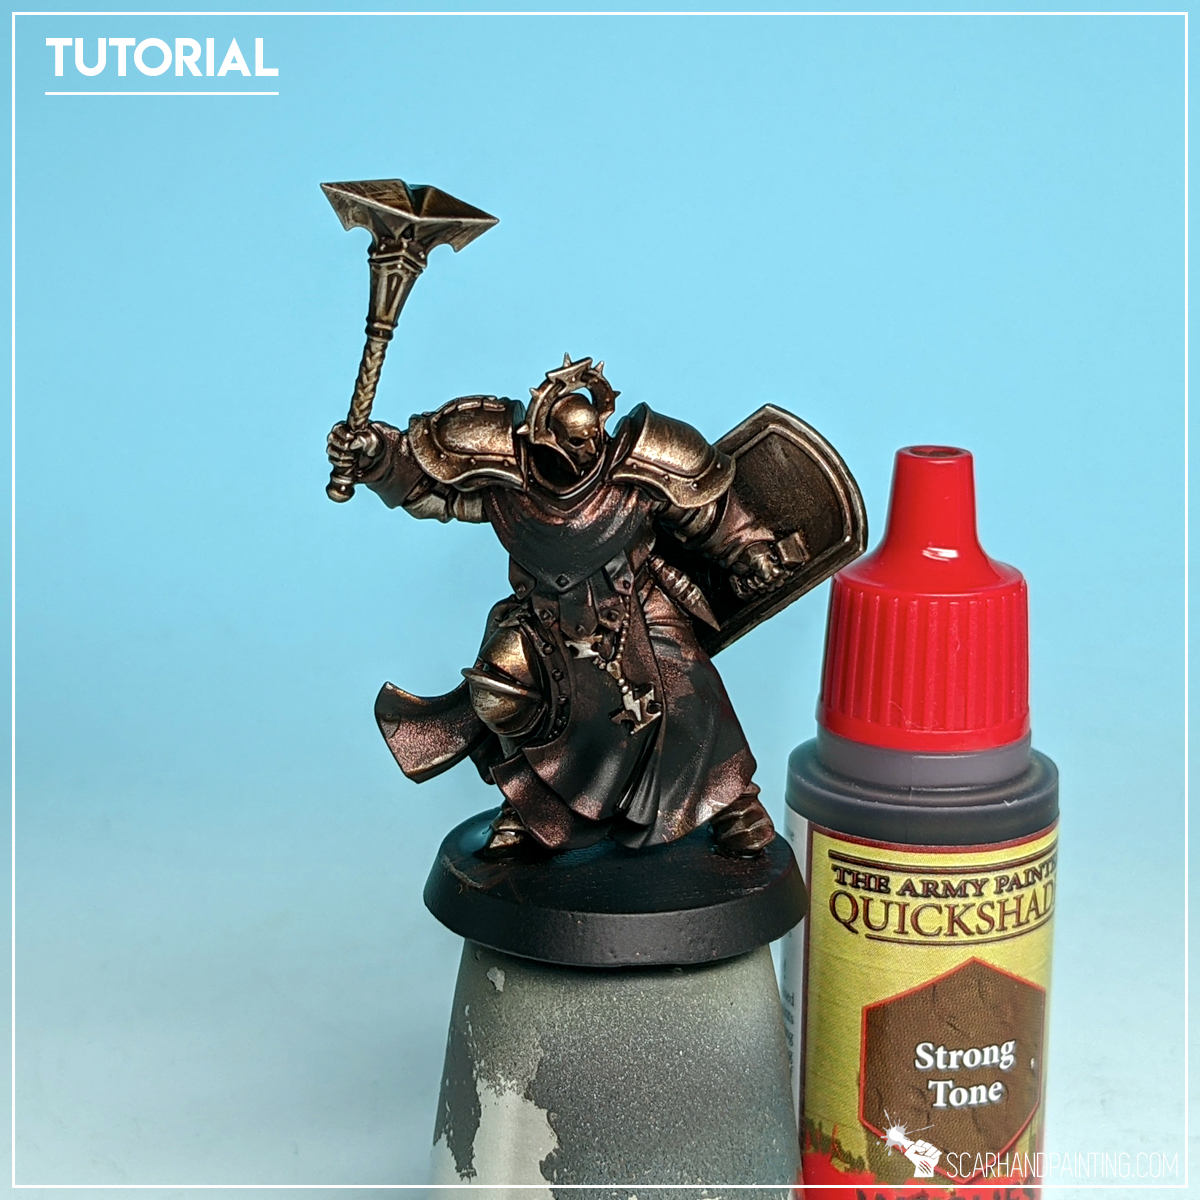
Step five: Highlight
Finally I edge highlighted with Army Painter Shining Silver. I also painted few additional scratches and lines to add diversity to some areas.

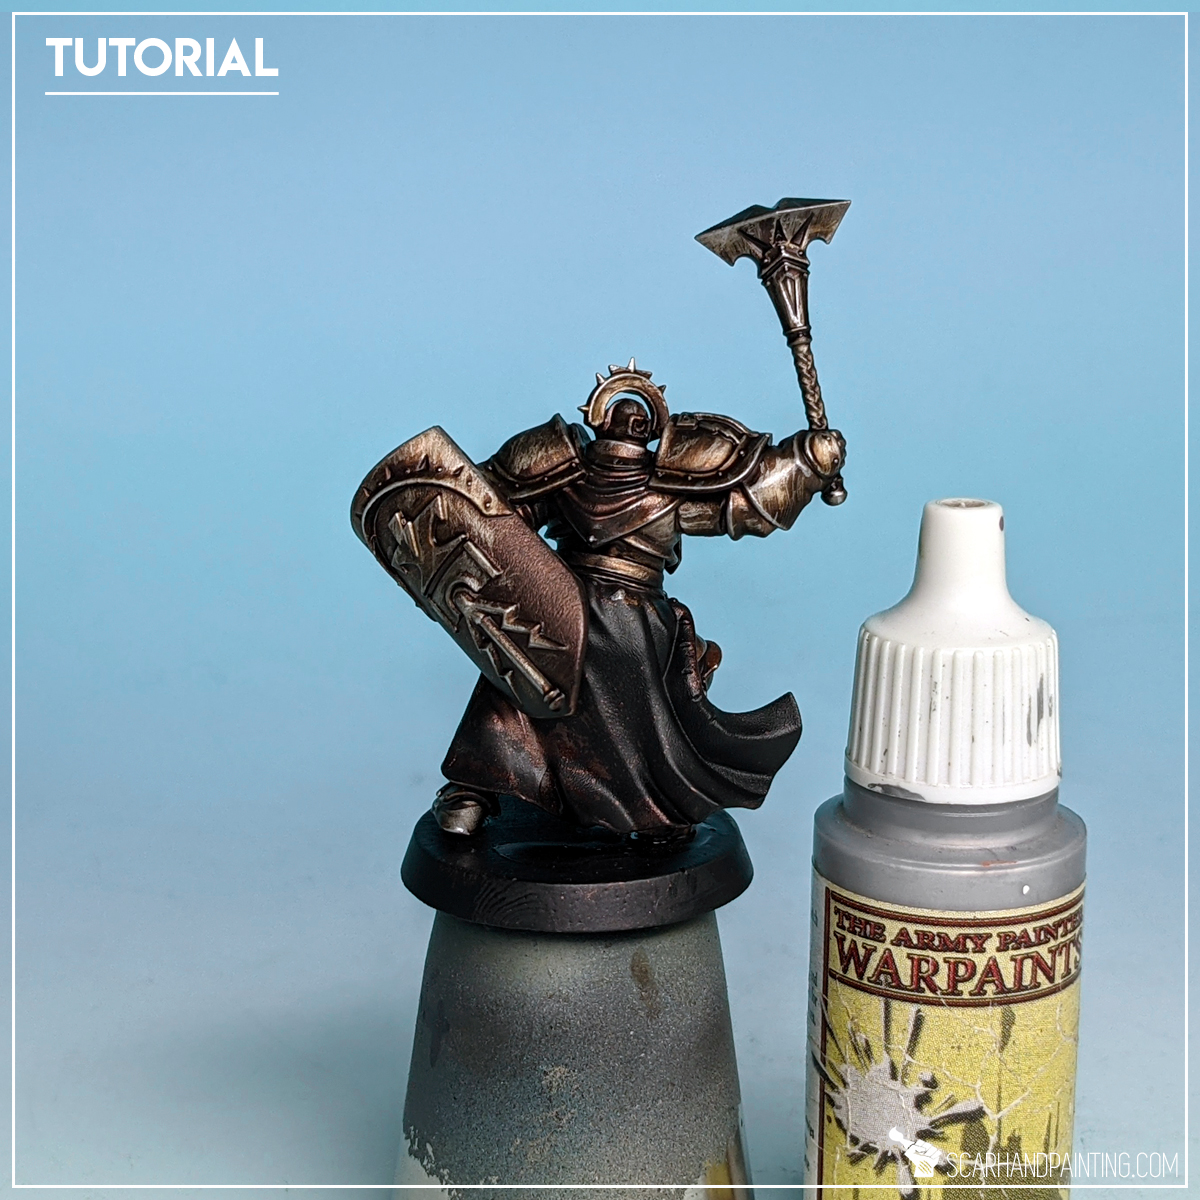
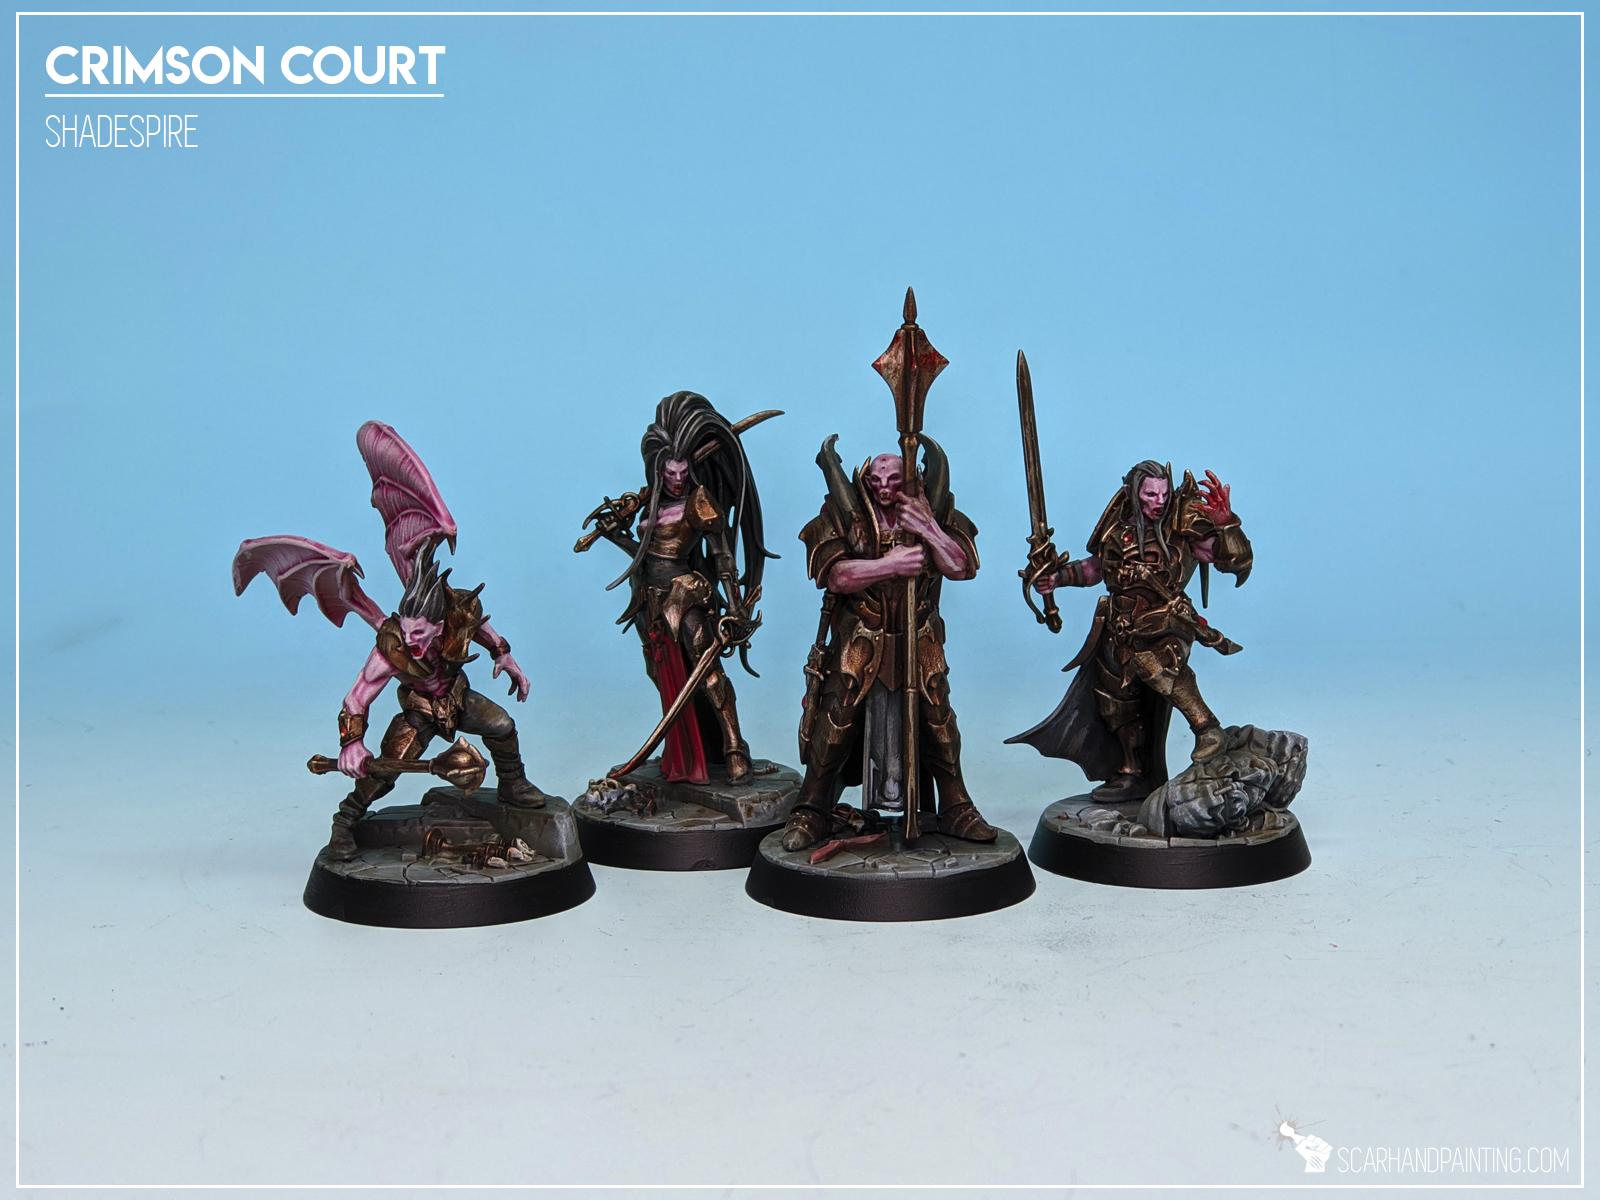
Job complete. It is just that simple. Now you have a nice base to add depth and additional detail with color washes/glazes, or you can just leave it as is, if you prefer. Below are some examples of Metal painted with Five Layers Technique.

I hope you find this tutorial interesting. Be sure to let me know your thoughts in the comments below or via Facebook or Instagram. I would also appreciate if you considered sharing this content with your friends, who might find it useful. Finally if you are looking for a professional miniatures painting service be sure to contact me with this contact form. I always reply within 24 hours, after which please check out your spam folder.

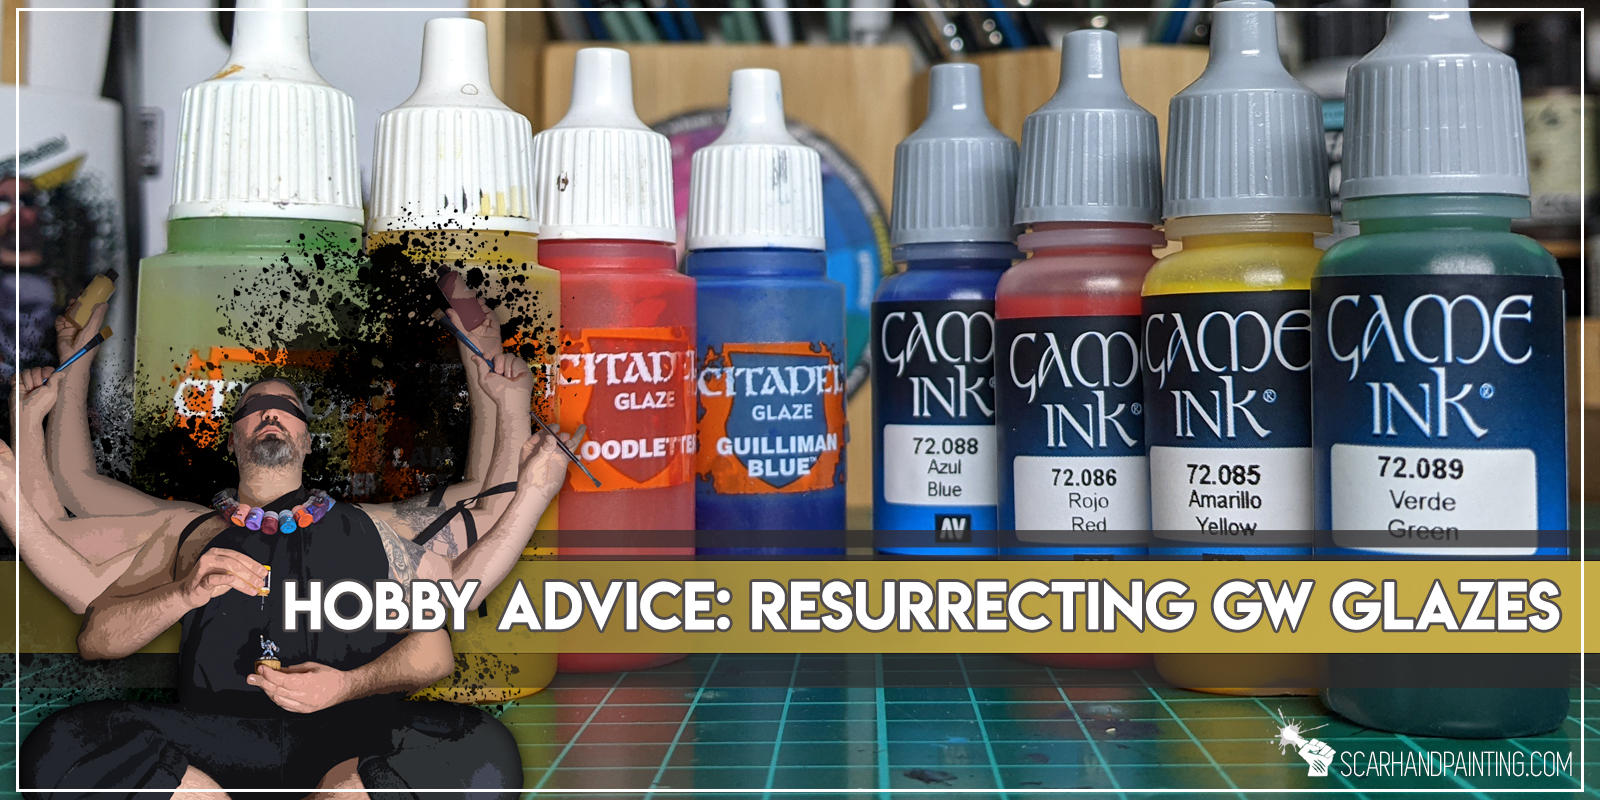
Being a commission painter, or even just a casual hobbyist, might see you grow attached to a certain line of paints. What if suddenly these paints become out of production? Having to change one’s painting habits is rough. Being left in a middle of a project, without means to continue seems even worse!
I’ve been hobbying for over twenty years now. Easy to say I have seen my share of paints going OOP. Been on a receiving end of such blows far too many times. The most recent and by far most painful was Games Workshop’s removal of the amazing Glaze series. Using these as Washes, Glazes and even Mix ingredients I grew to love them. No amount of Contrast paints will fill the void, as these are a thing of their own with different qualities and behavior.
And thus after burning (or rather flowing) though my stash of GW Glazes I started searching for a stable source of substitute. I experimented with Army Painter, Privateer Press, Games Workshop and more. In the end salvation came from Vallejo. It turned out their Game Inks are already pretty close to old GW Glazes. Few tweaks saw these pretty much spot on. See for yourself.
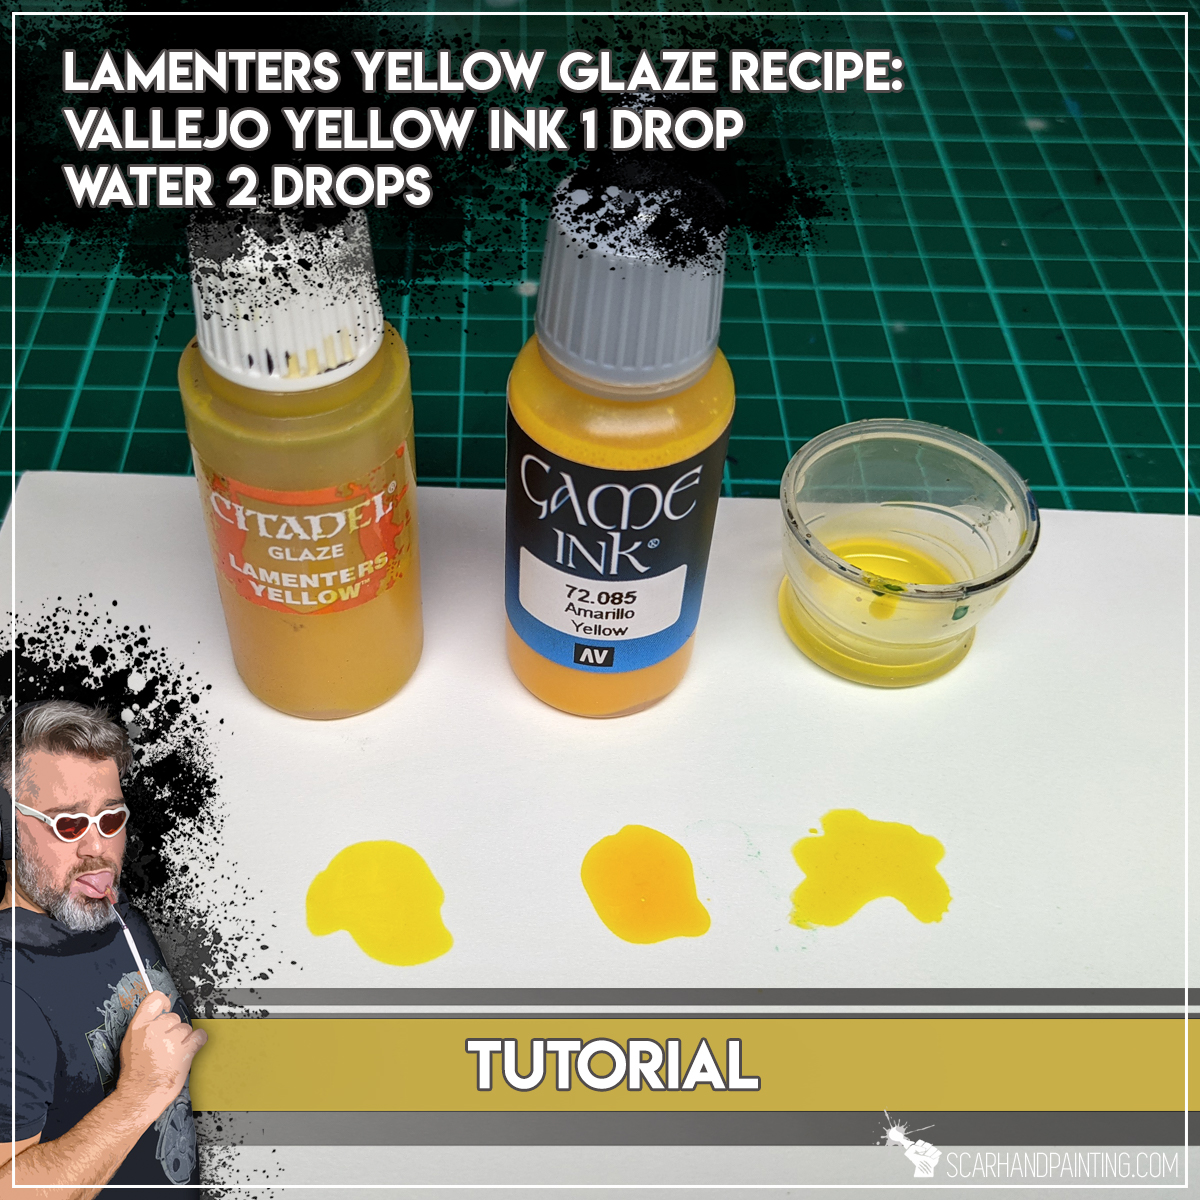
Recipe:
Vallejo Game Ing 72.085 Yellow 1 drop
Water 2 drops

Recipe:
Vallejo Game Ink 72.086 Red 4 drops
Vallejo Game Ing 72.085 Yellow 1 drop
Water 10 drops
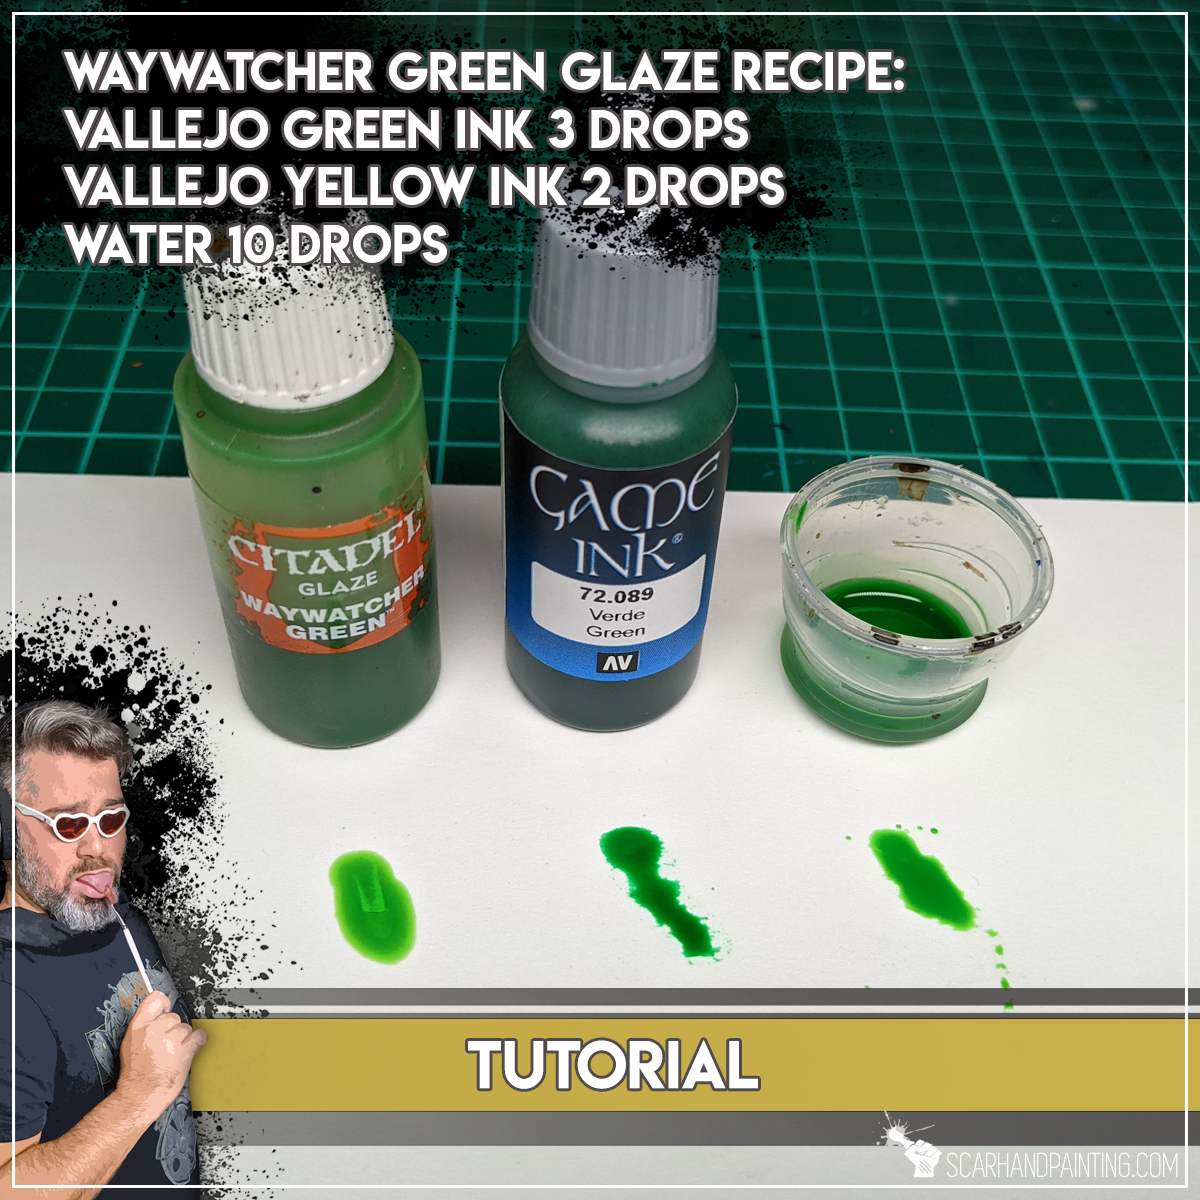
Recipe:
Vallejo Game Ink 72.089 Green 3 drops
Vallejo Game Ing 72.085 Yellow 2 drops
Water 10 drops
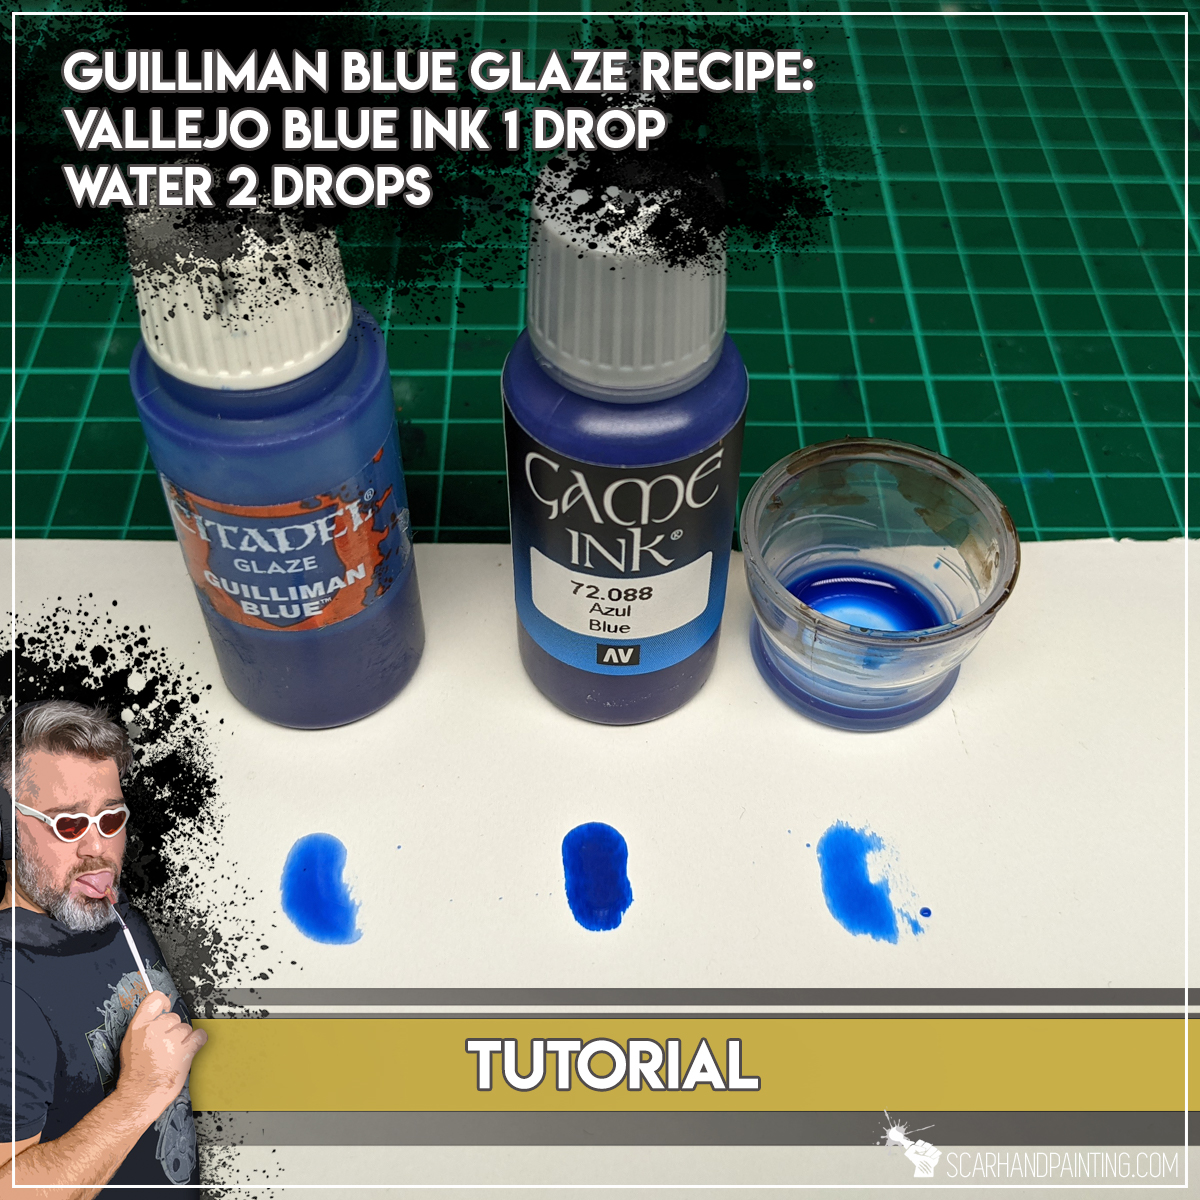
Recipe:
Vallejo Game Ink 72.088 Blue 1 drop
Water 2 drops
There you have it. I hope this will help you refill your own bottles of old GW Glazes.
If you like the article, consider sharing it with someone who likes hobbying around with miniatures. Find me on Facebook and Instagram. Most importantly have a great hobby time!
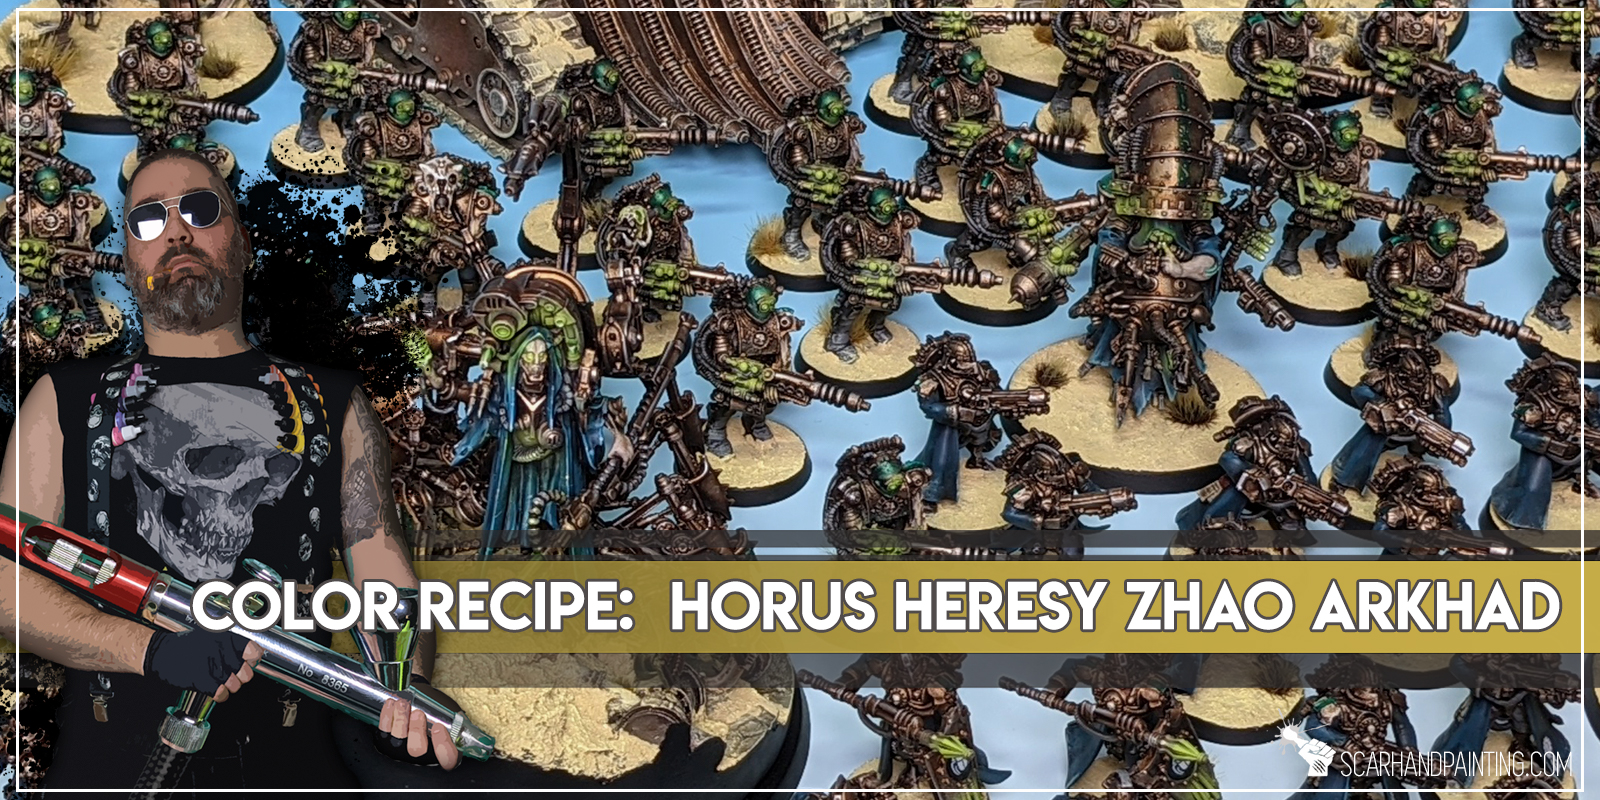
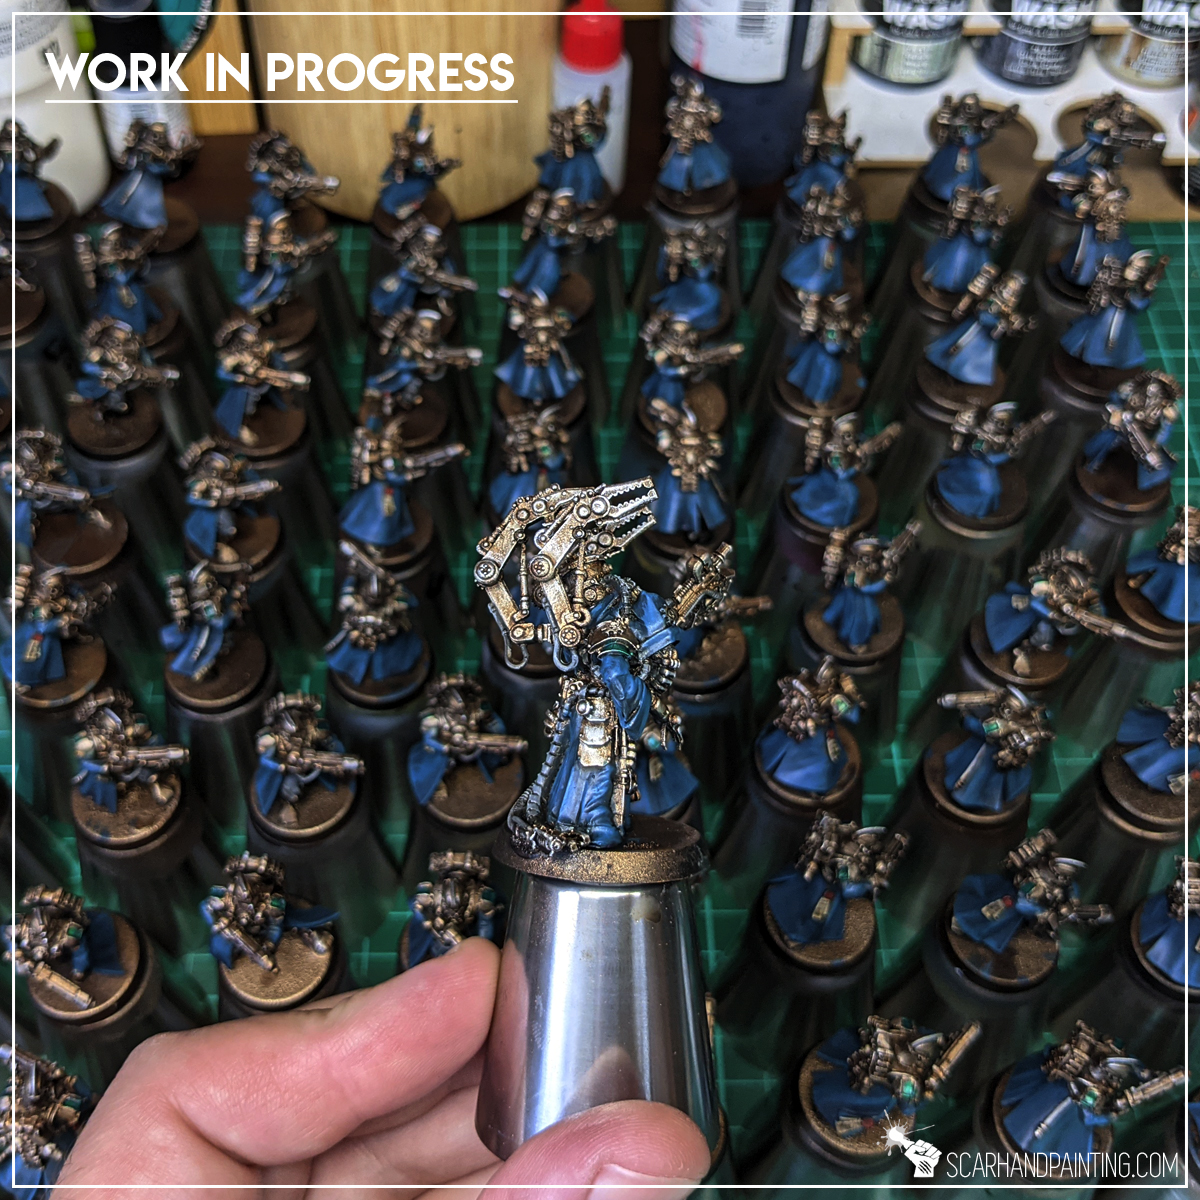
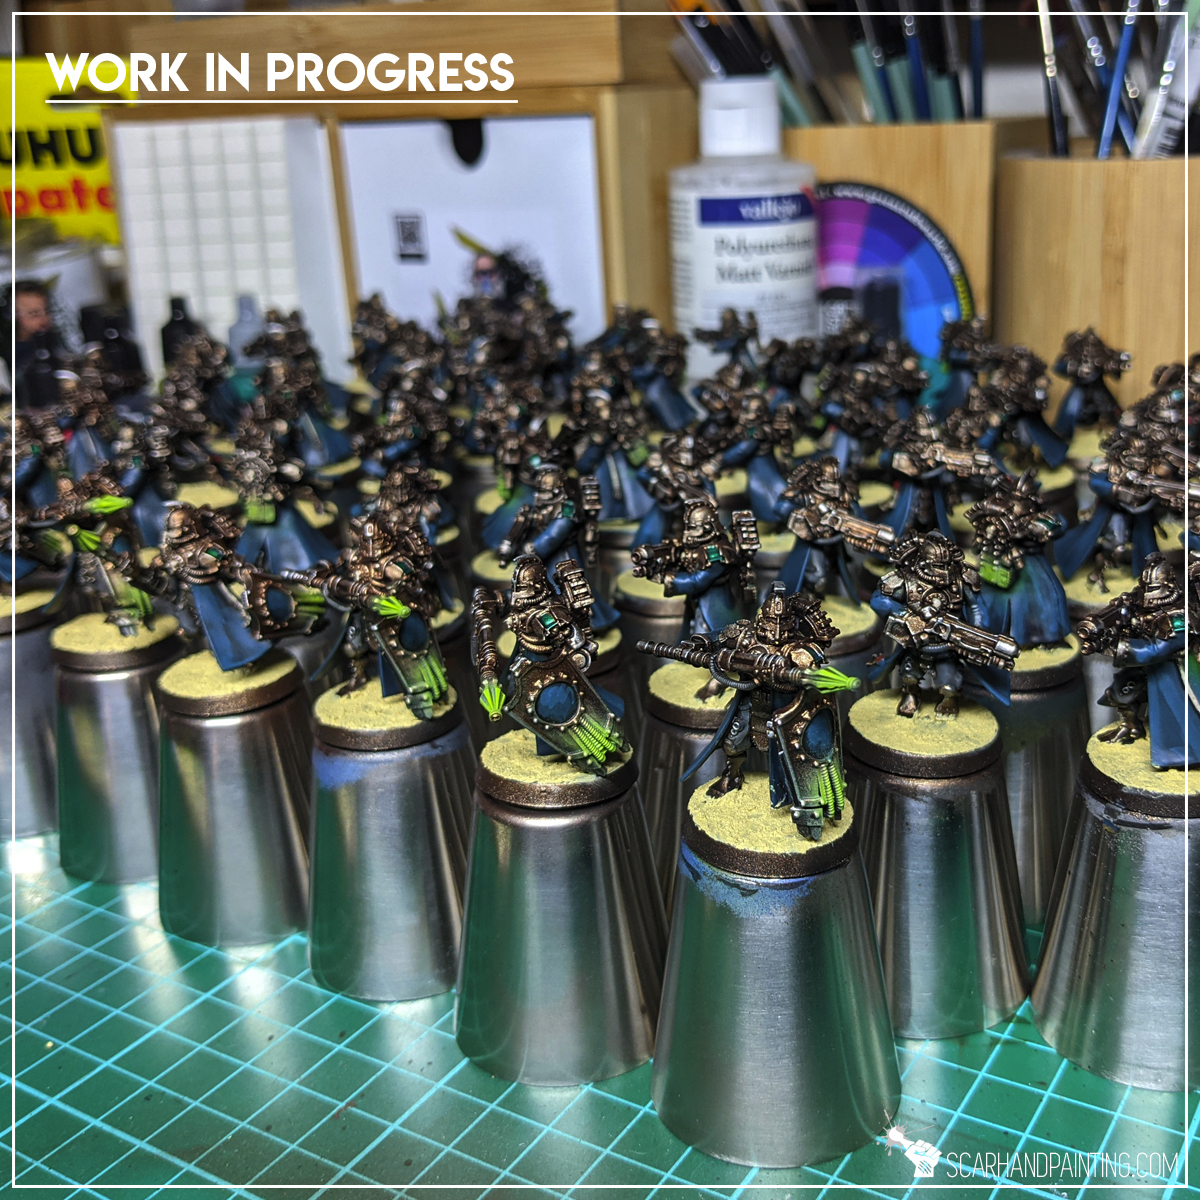
Here are some Colour Recipes for Horus Heresy Mechanicum from Gallery: Forge World Zhao Arkhad. Please take note that this is a simple colour scheme, not covering multiple overlapping layers and blends in between, that lead to the final product. It is supposed to be used as guideline not a step-by-step.
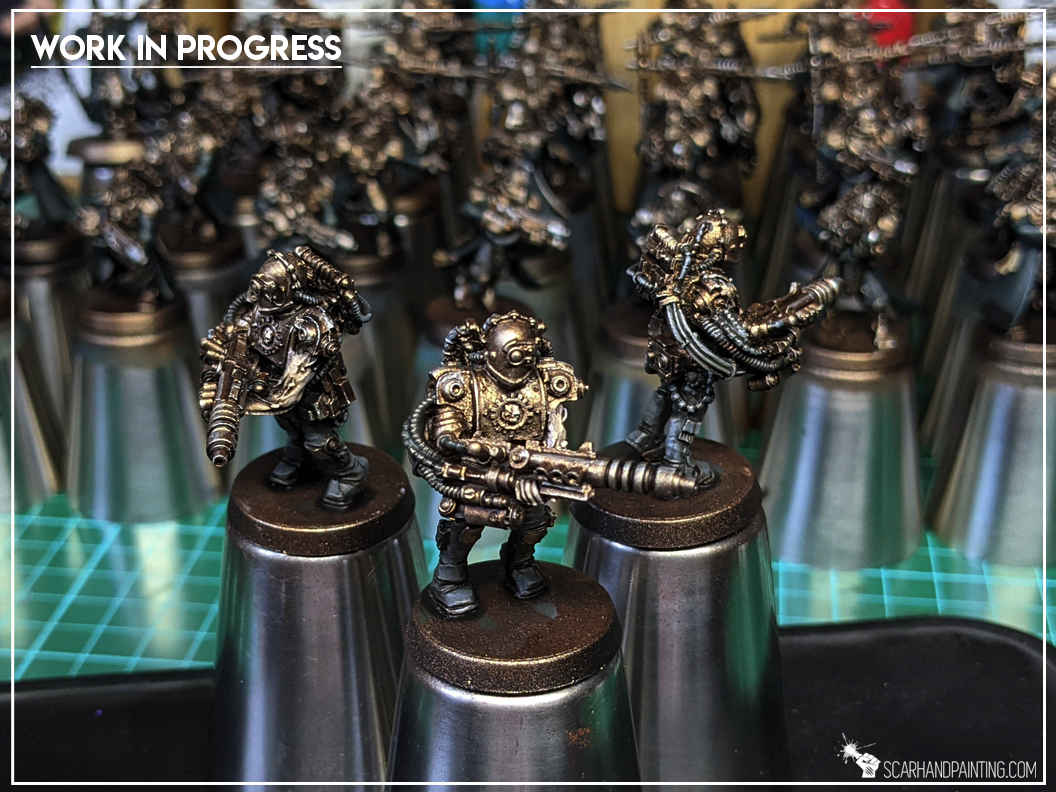
BRONZE armor:
Black Undercoat,
Mix Rust (val a) 1:1 Metallic Black (val a), *
Bright Bronze (val a), * zenithal
Shining Silver (ap), flbr
Strong Tone Ink (ap), wash / *
Shining Silver (ap), l&p
Soft Tone Ink (ap), wash dedicated
… GREEN metallic:
Jade Green (val), bl
TURQUOISE clothes:
Coal Black (p3),
Strong Tone Ink (ap), wash
Coal Black (p3),
Mix Coal Black (p3) 1:1 Turquoise (val), flbr
Mix Coal Black (p3) 1:2 Turquoise (val), bl
Turquoise (val), l&p
Ice Yellow (val), bottom drbr
SKIN:
Slaanesh Grey (gw),
Flesh (val a), flbr
Pale Flesh (val), l&p
Strong Tone Ink (ap), wash
Pale Flesh (val), l&p
BONES:
Flayed One Flesh (gw),
Ivory (val), flbr
Strong Tone Ink (ap), wash
Skeleton Bone (ap), l&p
Off White (val), l&p
GREEN osl:
Duck Egg Green (val a), *
Light Livery Green (val a), *
Off White (val), l*p
Waywatcher Green (gw), bl
DESERT bases:
Desert Sand (val texture), texture
Khaki (val a), * stones
Ice Yellow (val), drbr
Tufts:
Wasteland Tuft (ap),
Steppe Tuft 12mm (Paint Forge),
Steppe Tuft 6mm (Paint Forge),
l&p – lines and points,
p – points,
dl – deep lining,
bl – blend,
gl – glaze,
drbr – drybrush,
fltbr – flatbrush,
lobr – loaded brush,
stpl – stippling,
*Airbrushed (with multiple layers and mixes)

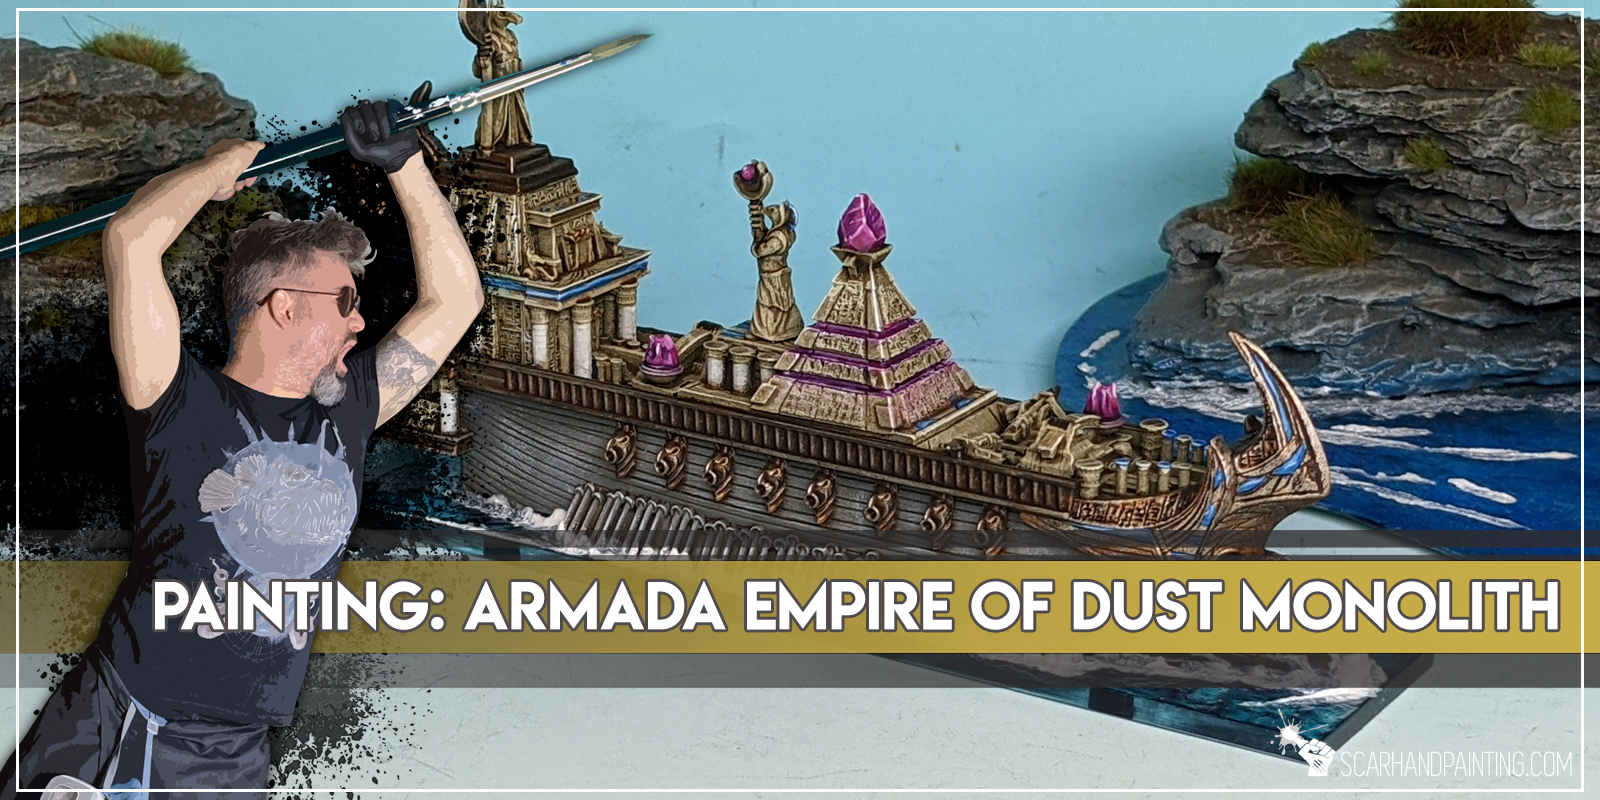
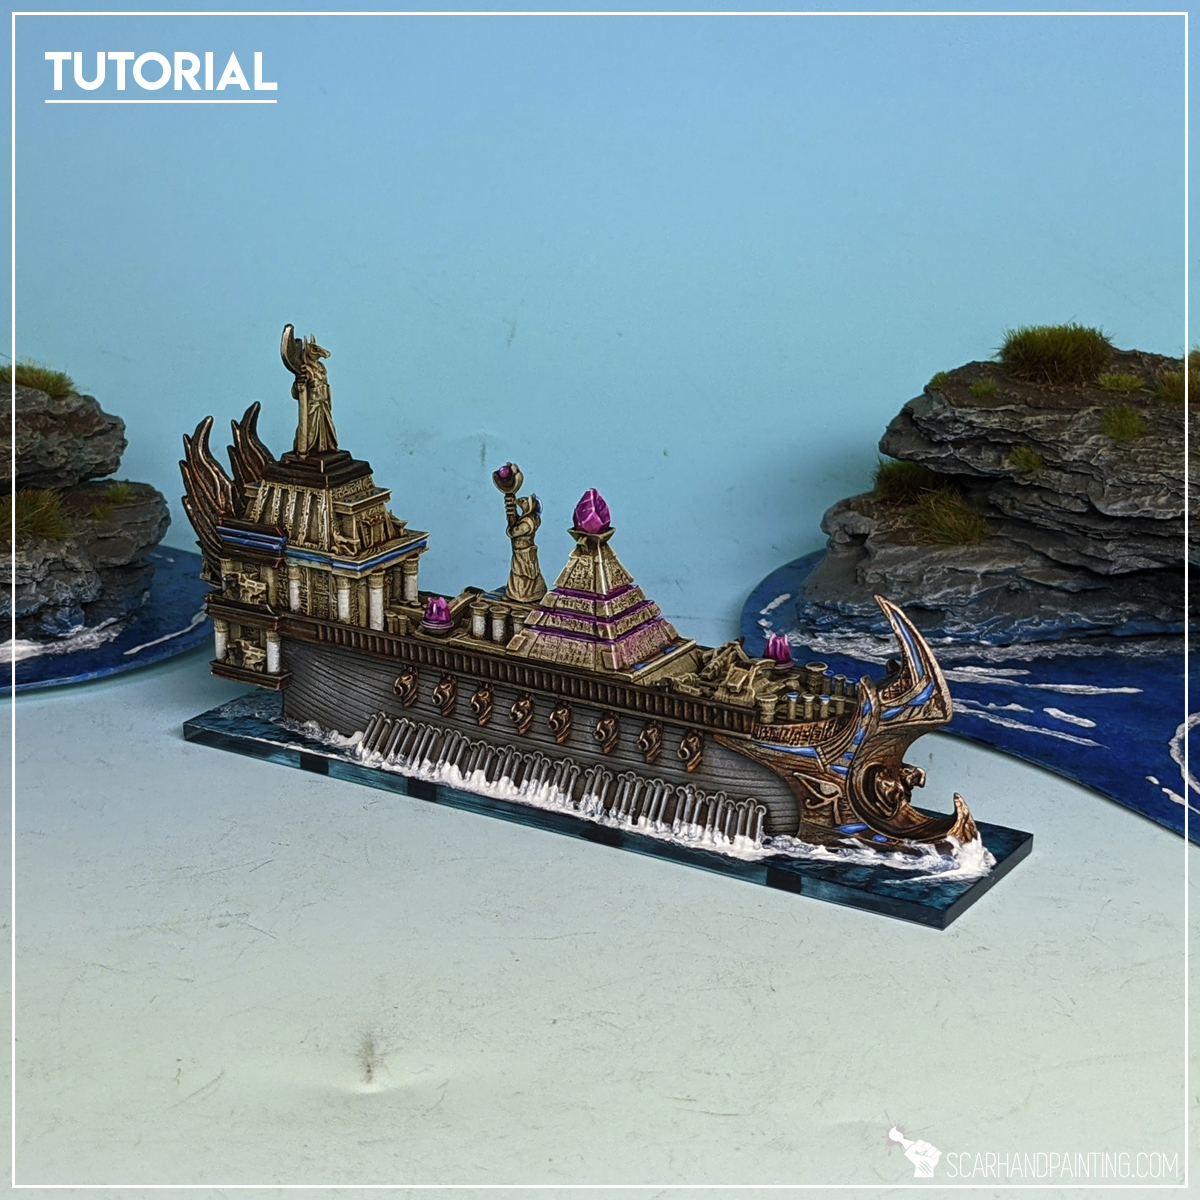
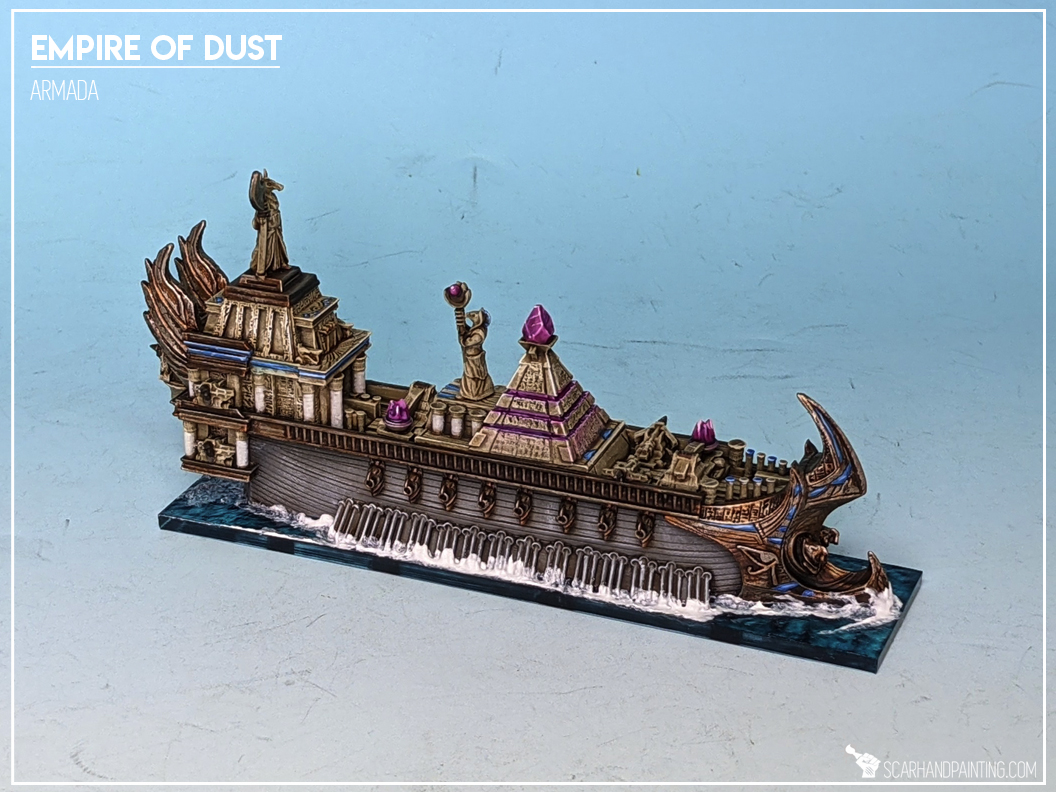
Welcome to Painting Empire of Dust Monolith tutorial. Here I will present to you a Step-by-step of an easy and fast painting process for Mantic Games Empire of Dust Monolith as can be seen in Gallery: Armada Empire of Dust.
Before we start, some notes:
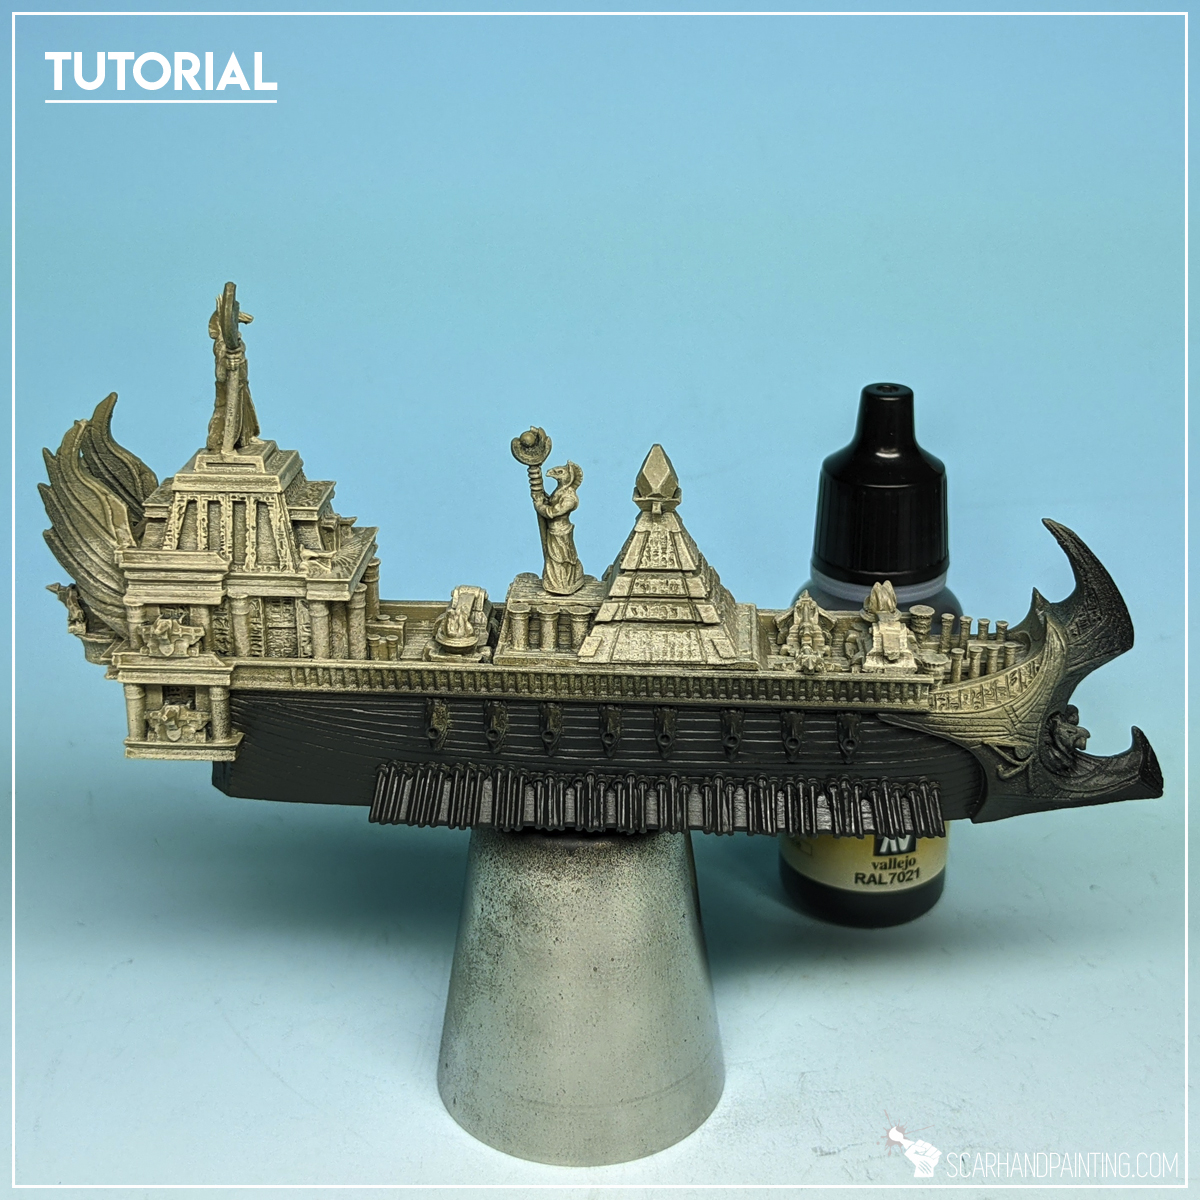
Step one: Undercoat
I started with a thorough layer of Games Workshop Chaos Black spray.
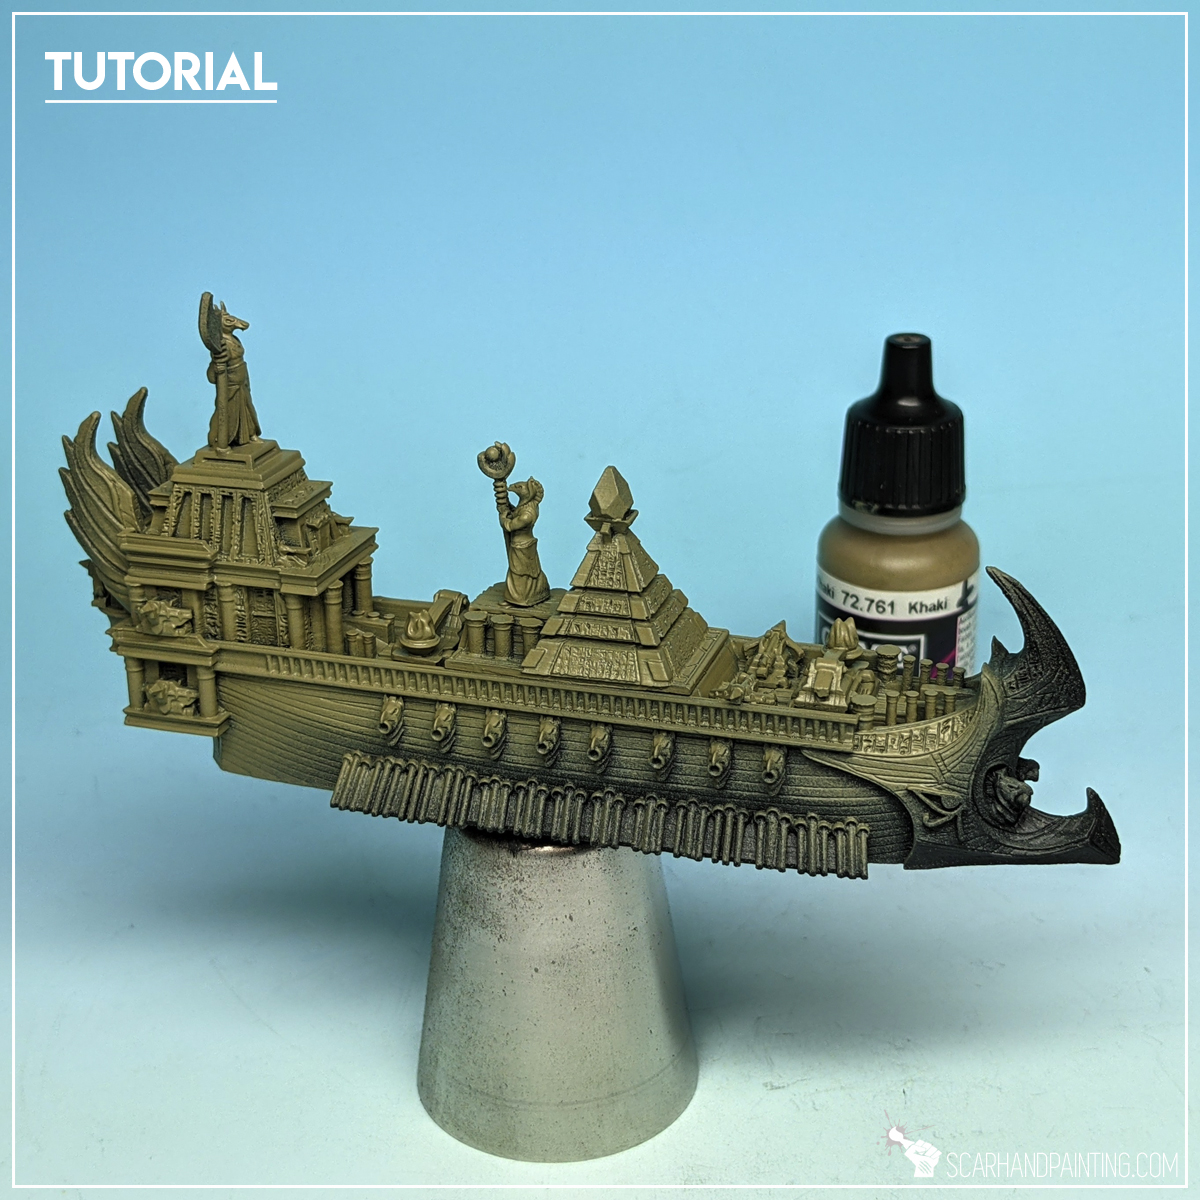
Step two: Deck
I airbrushed Vallejo Khaki (air) over main deck and all top structures. I then flatbrushed GW Flayed One Flesh on top of Khaki layer.

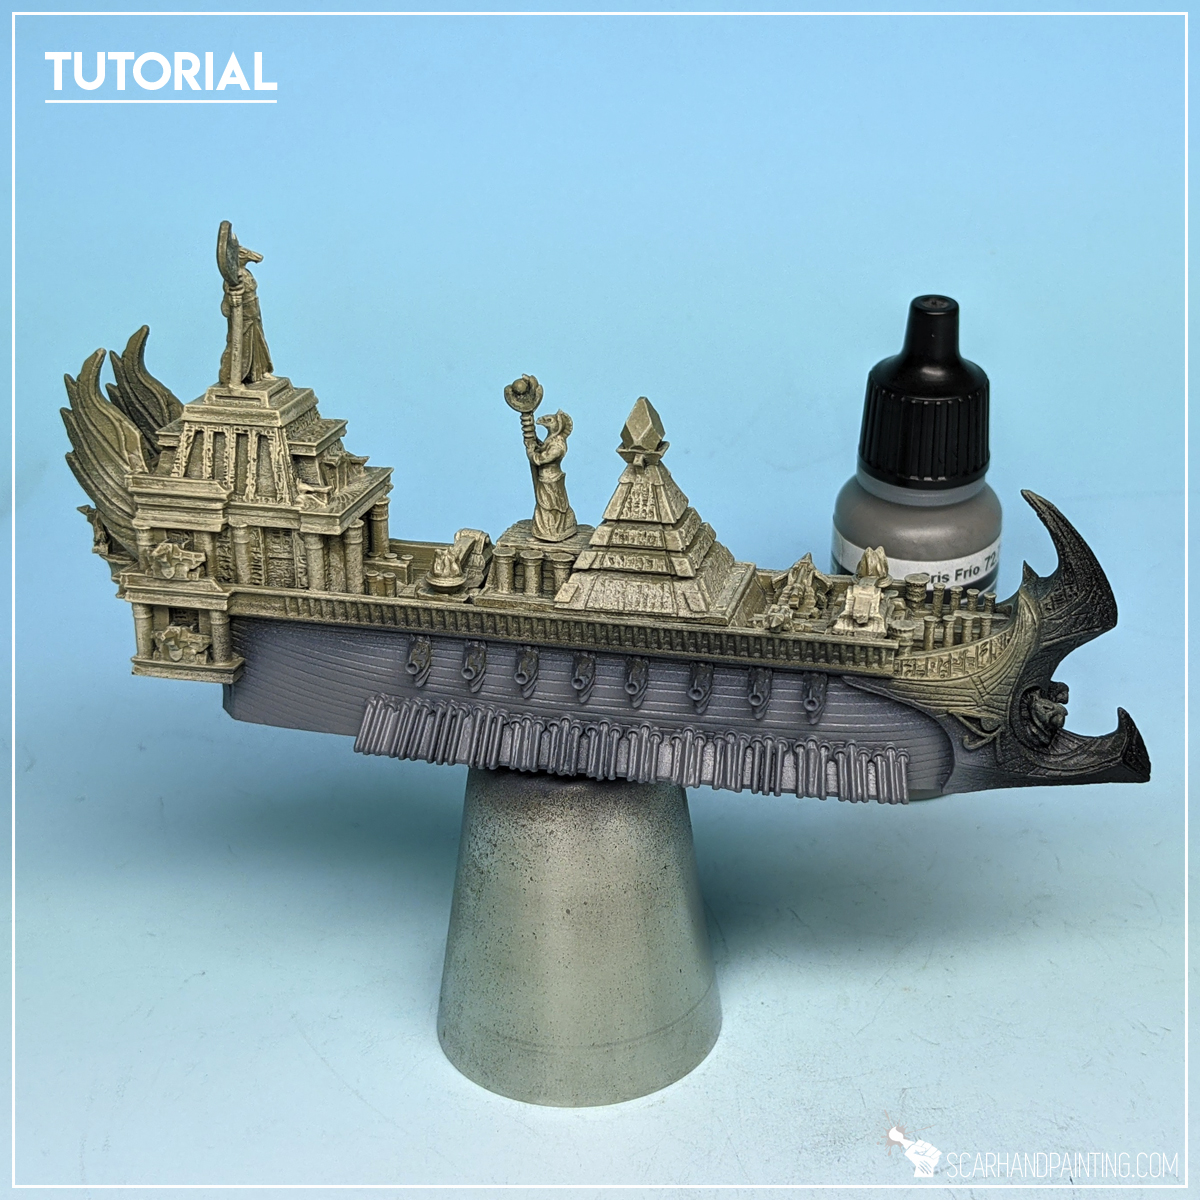
Step three: Broadside
I airbrushed Vallejo Panzer Dark Grey (air), followed by a layer of Vallejo Cold Grey (air).
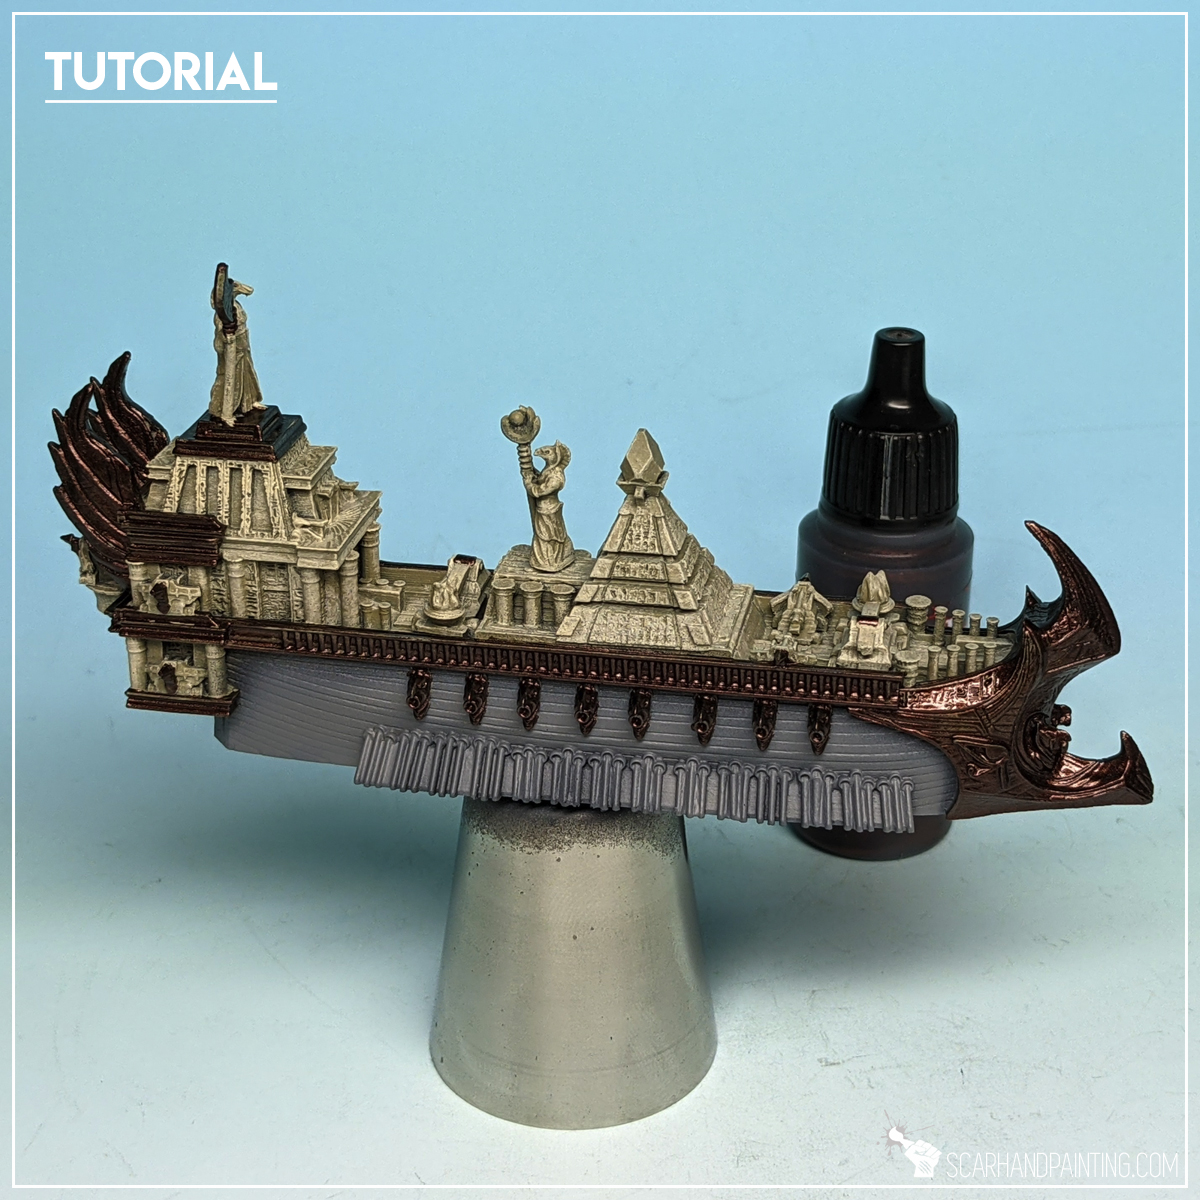
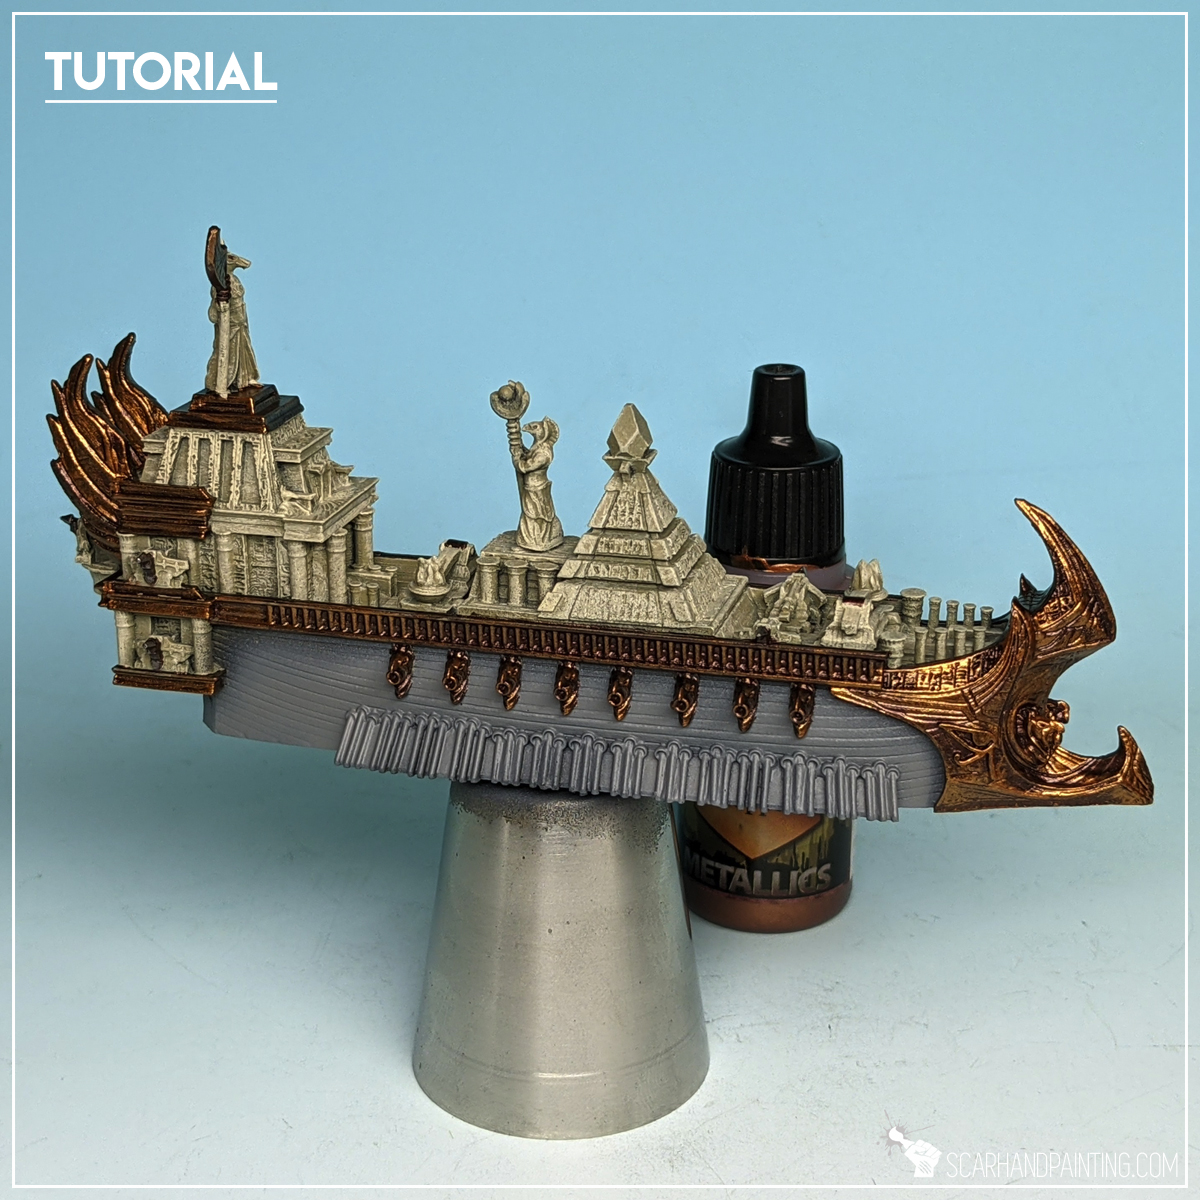
Step four: Gold
I then painted front and side ornaments, plus some additional detail with GW Warplock Bronze, followed by a solid flatbrush of P3 Molten Bronze and a highlight of Army Painter Shining Metal.
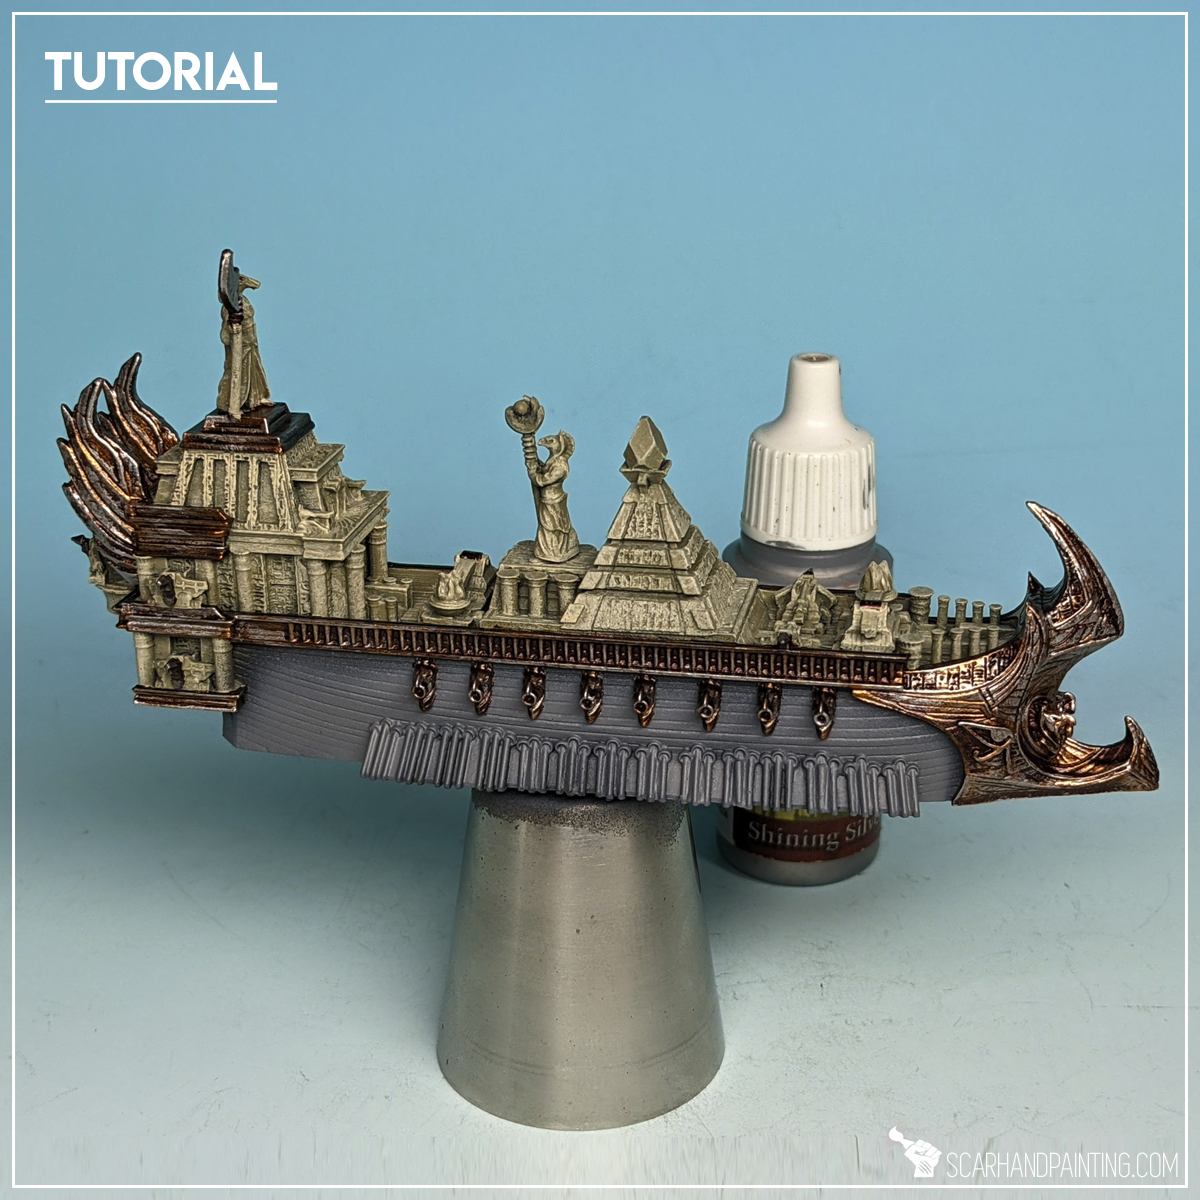
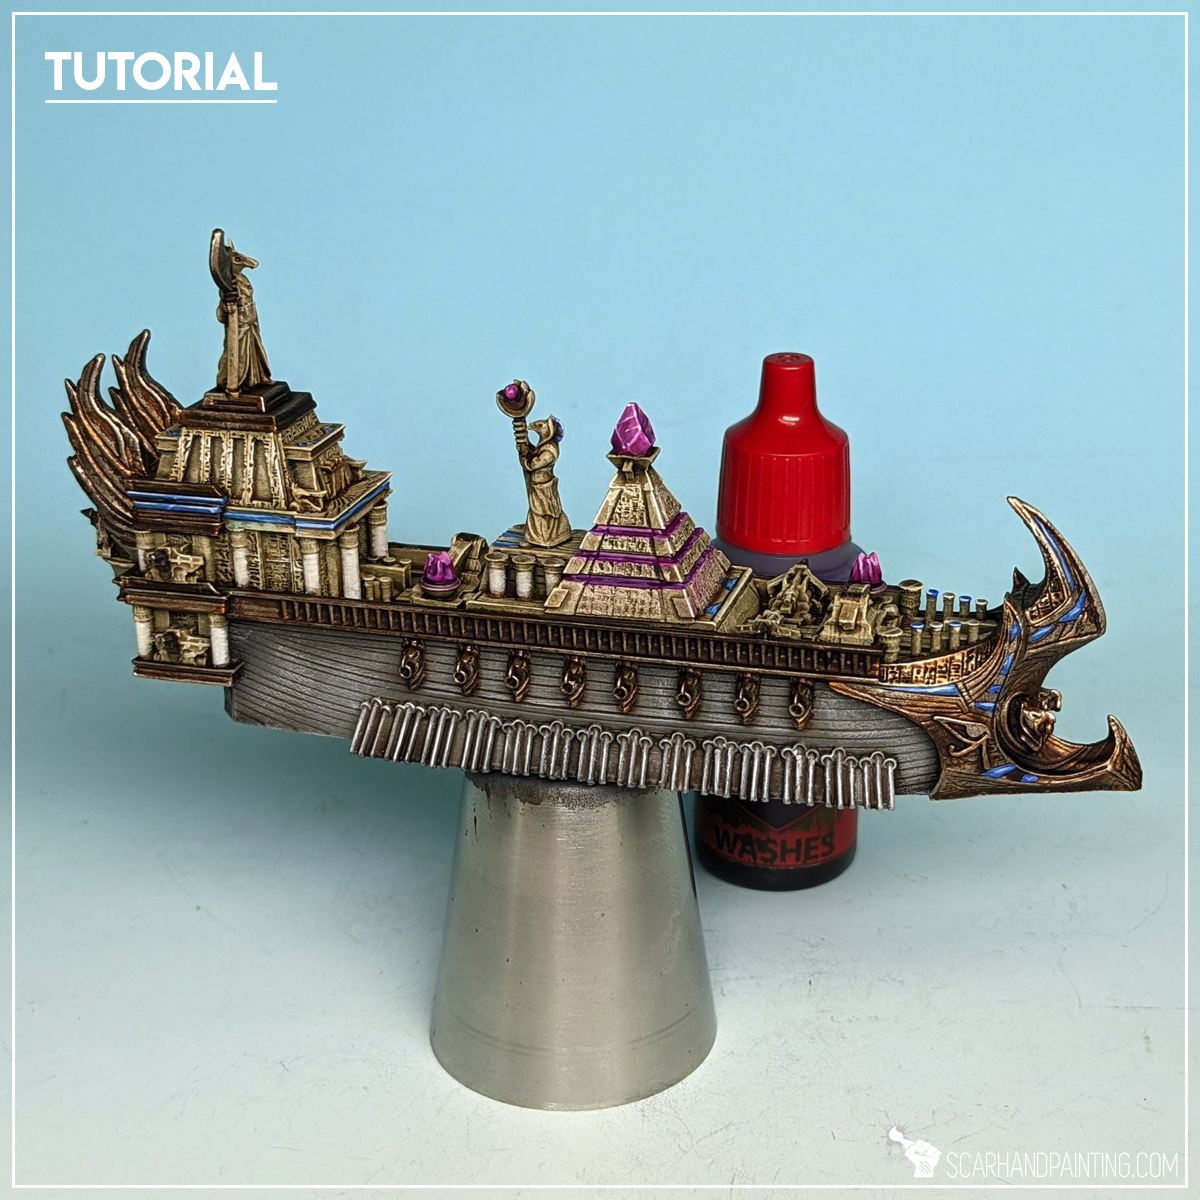
Step five: Wash
I then applied a lot of wash mix of Army Painter Strong Tone Ink 1:1 Army Painter Soft Tone Ink.
(If you followed my other tutorials you know at this point that the mixture is one of my very best friends in all painting.)

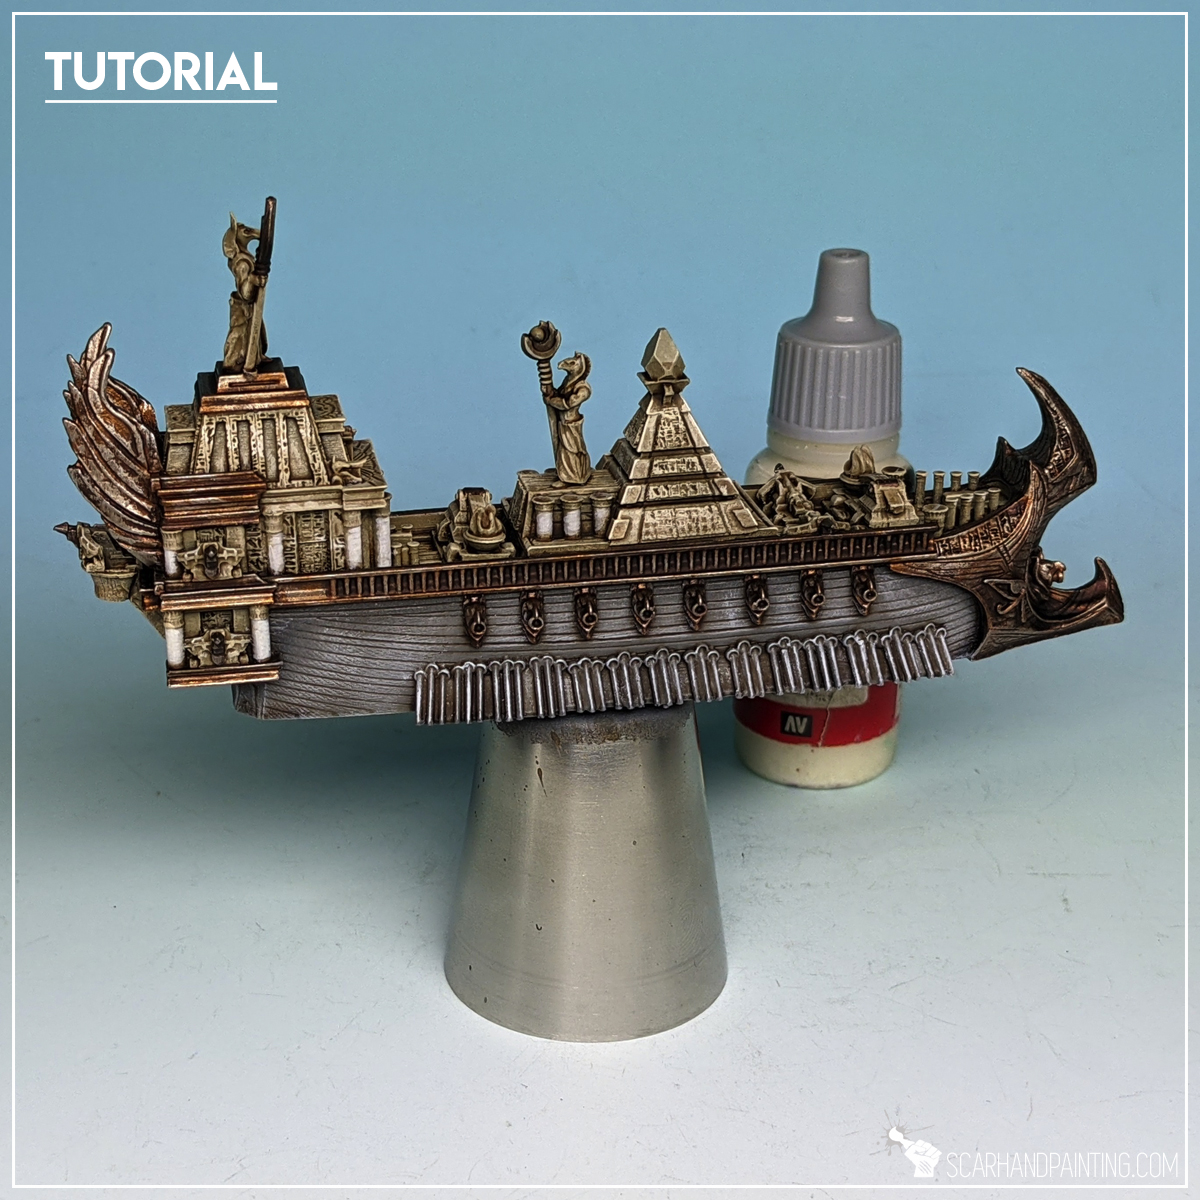
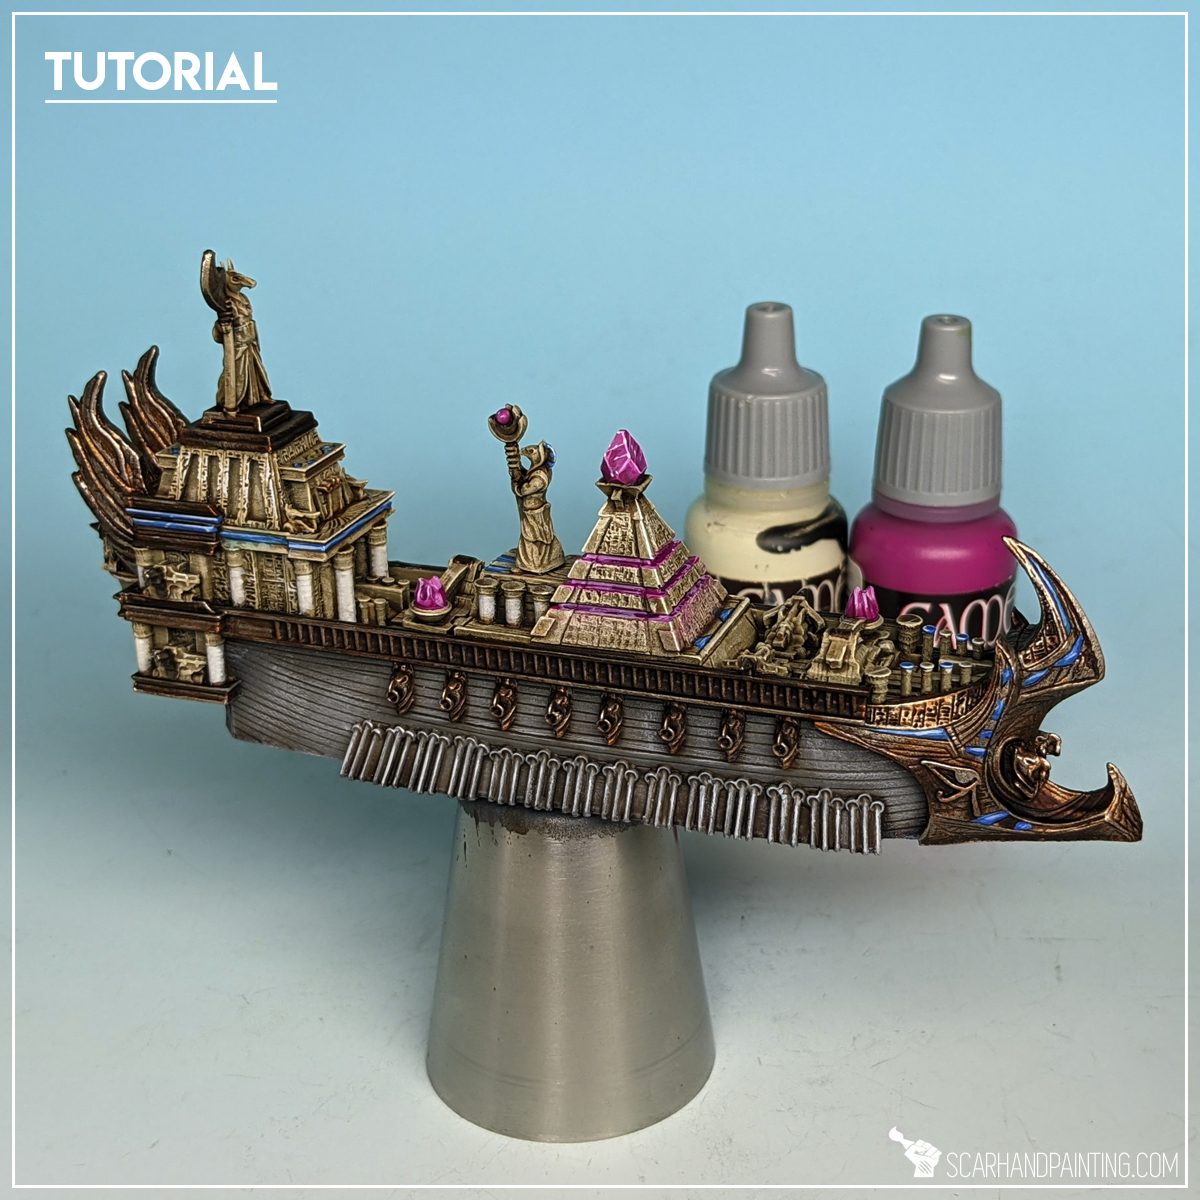
Step six: Main highlights
Once wash was dry I drybrushed broadsides with Vallejo Medium Sea Grey and then with Vallejo Ghost Grey. (I forgot to take pics). I then flatbrushed deck and top structure elements with GW Flayed One Flesh and edge highlighted with Vallejo Off White.

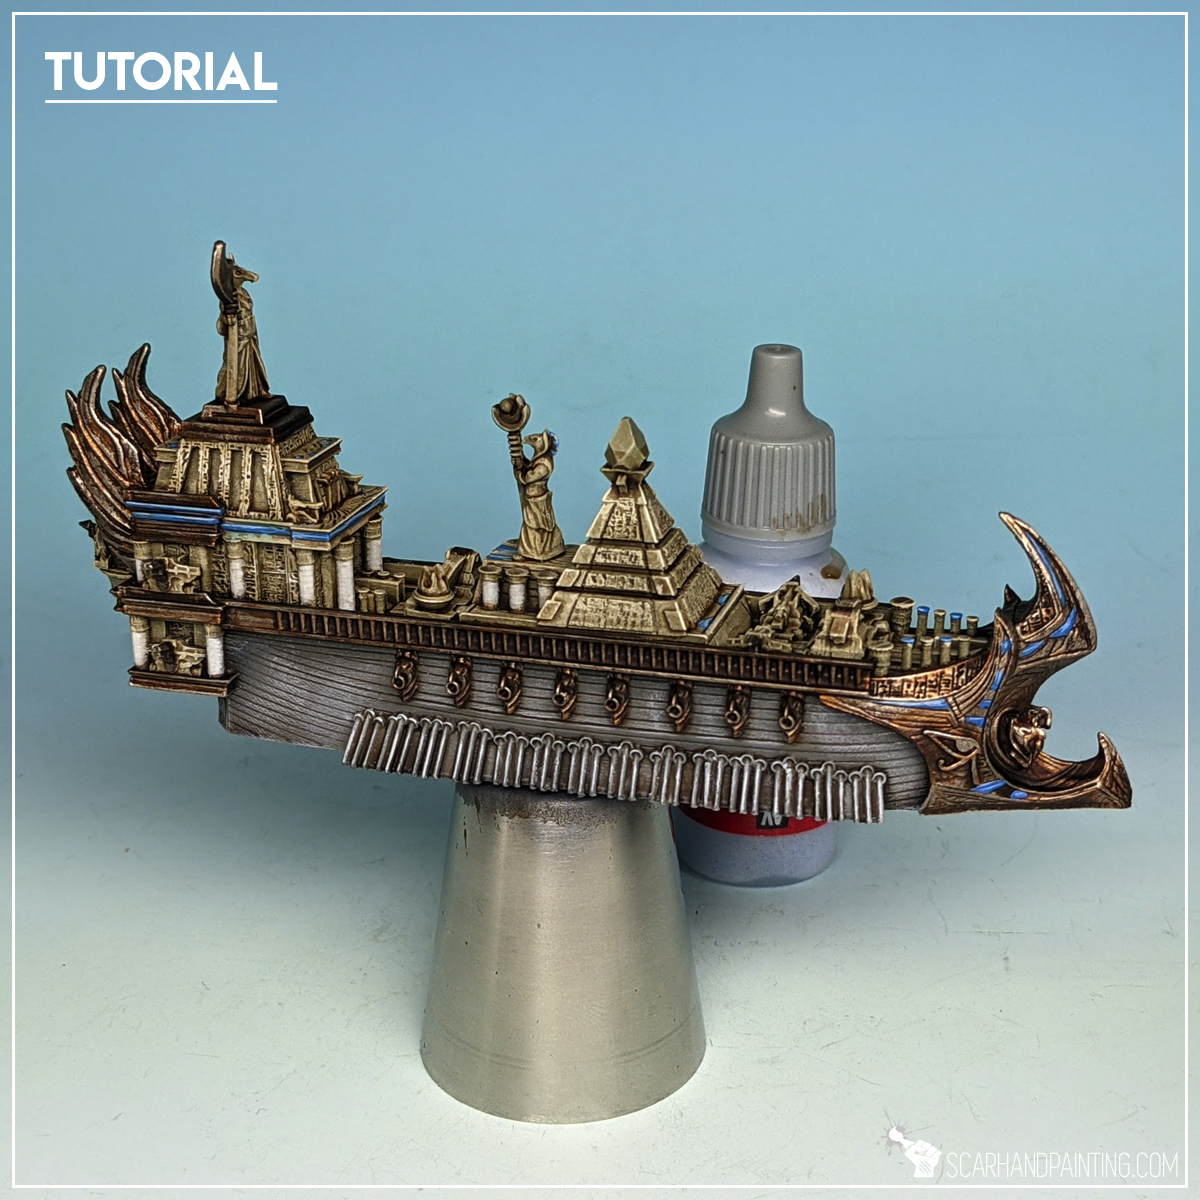
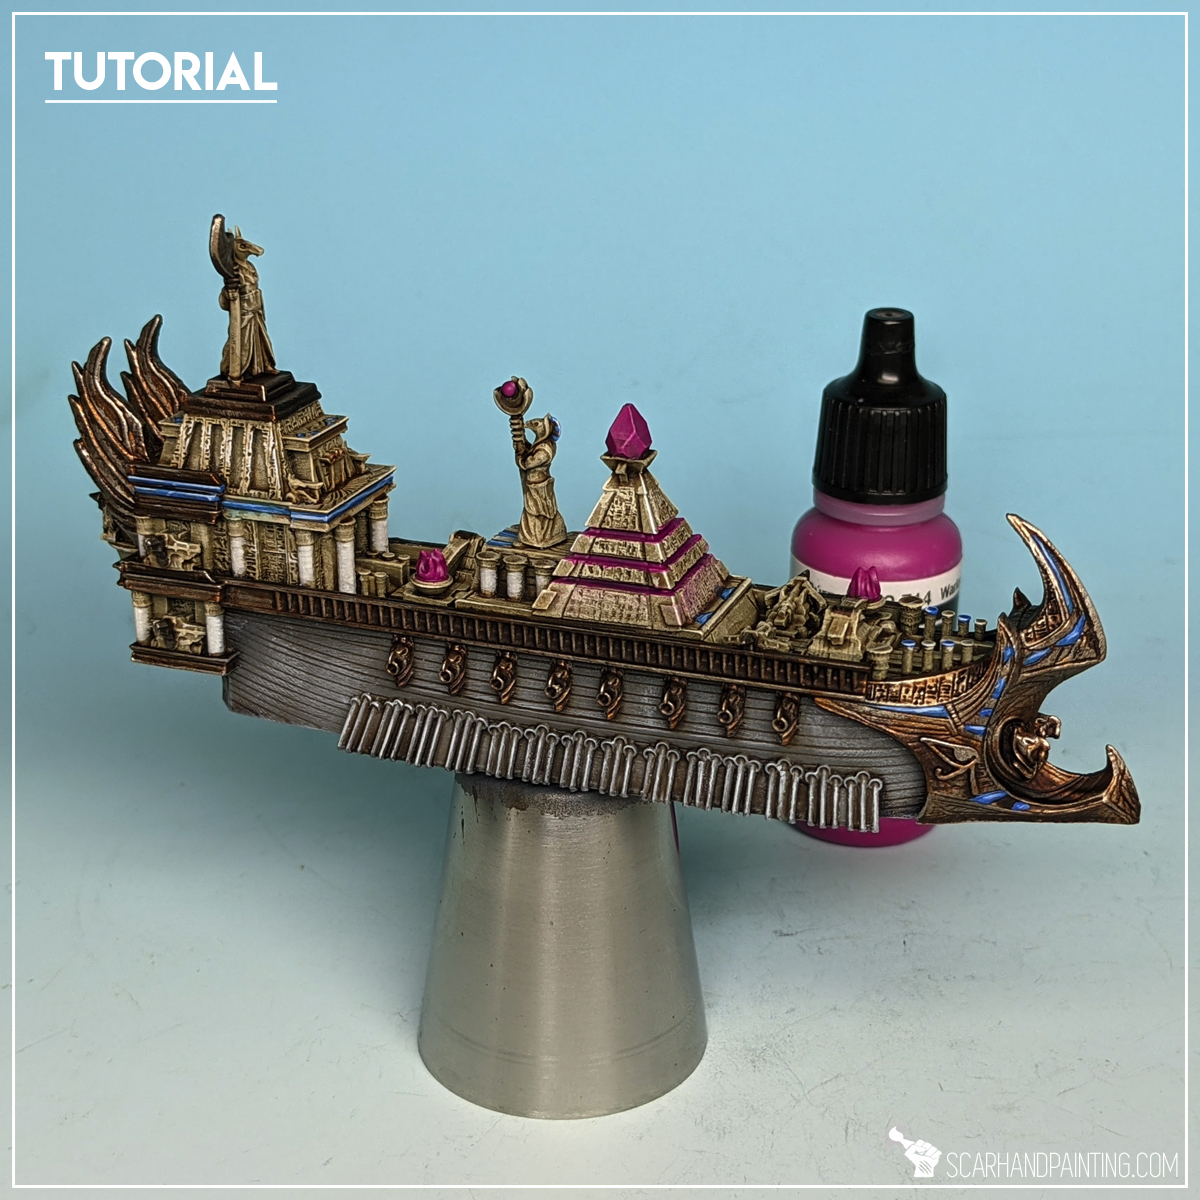
Step seven: Blue
I added accents of blue by manually painting chosen elements with Vallejo Magic Blue (air). I then highlighted with Vallejo Electric Blue, followed with Vallejo Glacier Blue. Furthermore I applied a wash layer of GW Guilliman Blue (glaze). Finally I added points of focus and thin highlights with Vallejo Glacier Blue.

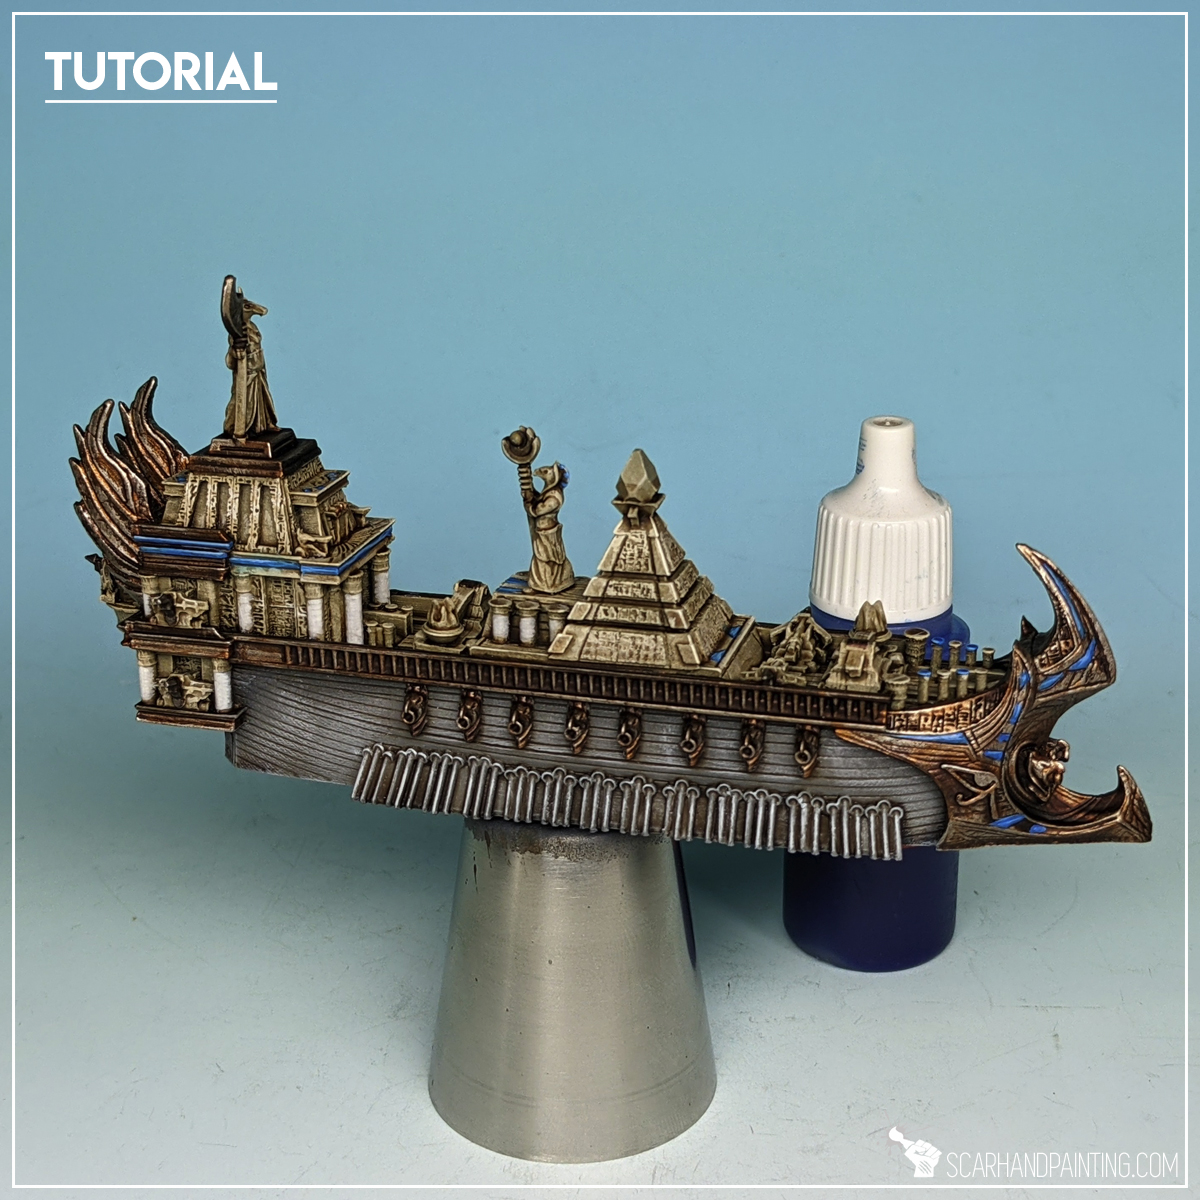

Step Eight: Purple/Pink
I applied Vallejo Warlock Purple onto chosen areas, including top gem, piramid inner lines and catapult flames. I then applied couple successive highlights with different mixes of Vallejo Warlock Purple and Vallejo Off White. With few highlights made with pure Vallejo Off White I moved to glaze Army Painter Purple Tone Ink into few areas of choice. This was contained mostly to top gem and recesses in catapult flames (and around).
Such prepared miniature I airbrushed with two coats of Vallejo Polyurethane Matt Varnish and mounted on a base, following Tutorial: KoW Armada Water Bases.
I hope you find this tutorial interesting. Be sure to let me know your thoughts in the comments below or via Facebook or Instagram. I would also appreciate if you considered sharing this content with your friends, who might find it useful. Finally if you are looking for a professional miniatures painting service be sure to contact me with this contact form. I always reply within 24 hours, after which please check out your spam folder.
Welcome to Painting Road to Survival Stalkers tutorial. Here I will present to you a Step-by-step of an easy and fast painting process for Orzol Studio’s Stalkers team from the Post-apo Survivors Kickstarter.
Before we start, some notes:
Step one: Undercoat
I applied a strong layer of Citadel Chaos Black spray. I prefer spray over manual application, but this is just a personal preference. Any matt black undercoat will do, as long as it’s thorough.
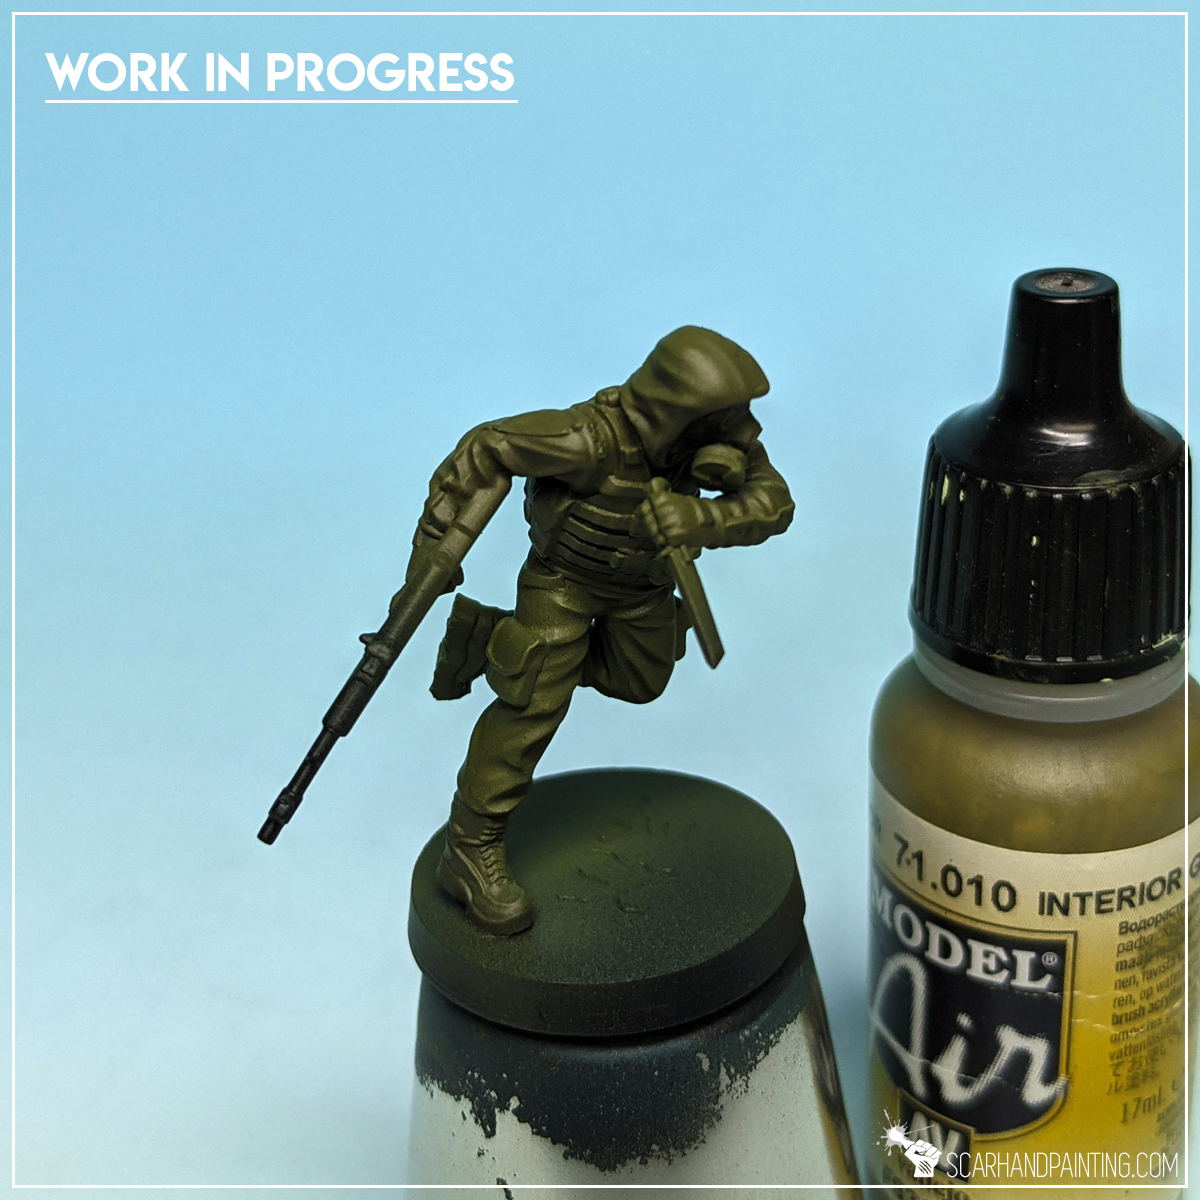
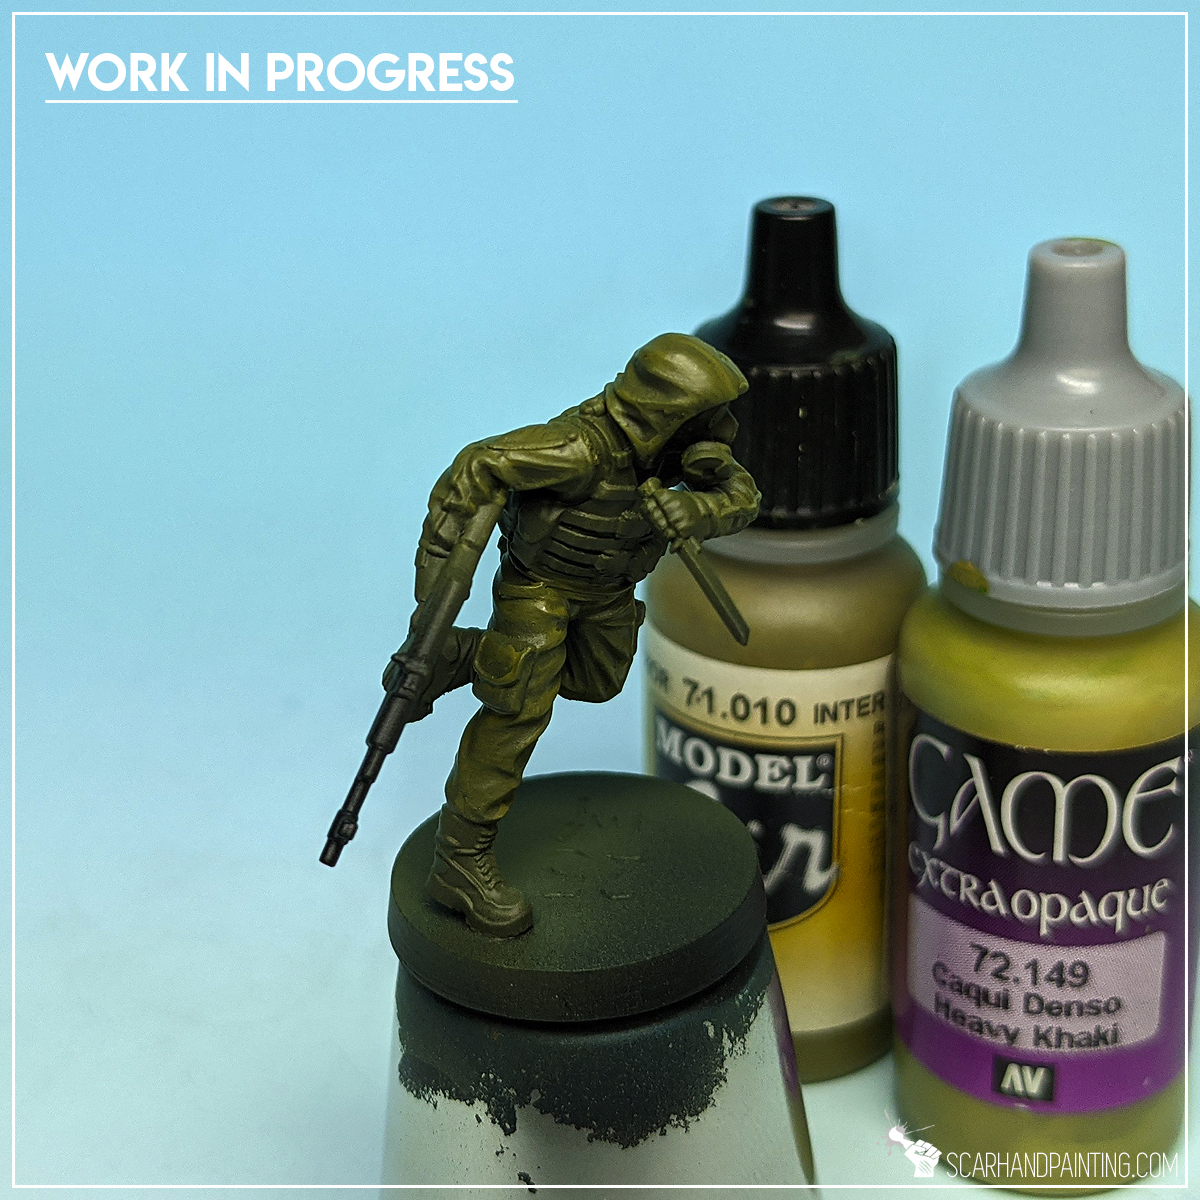
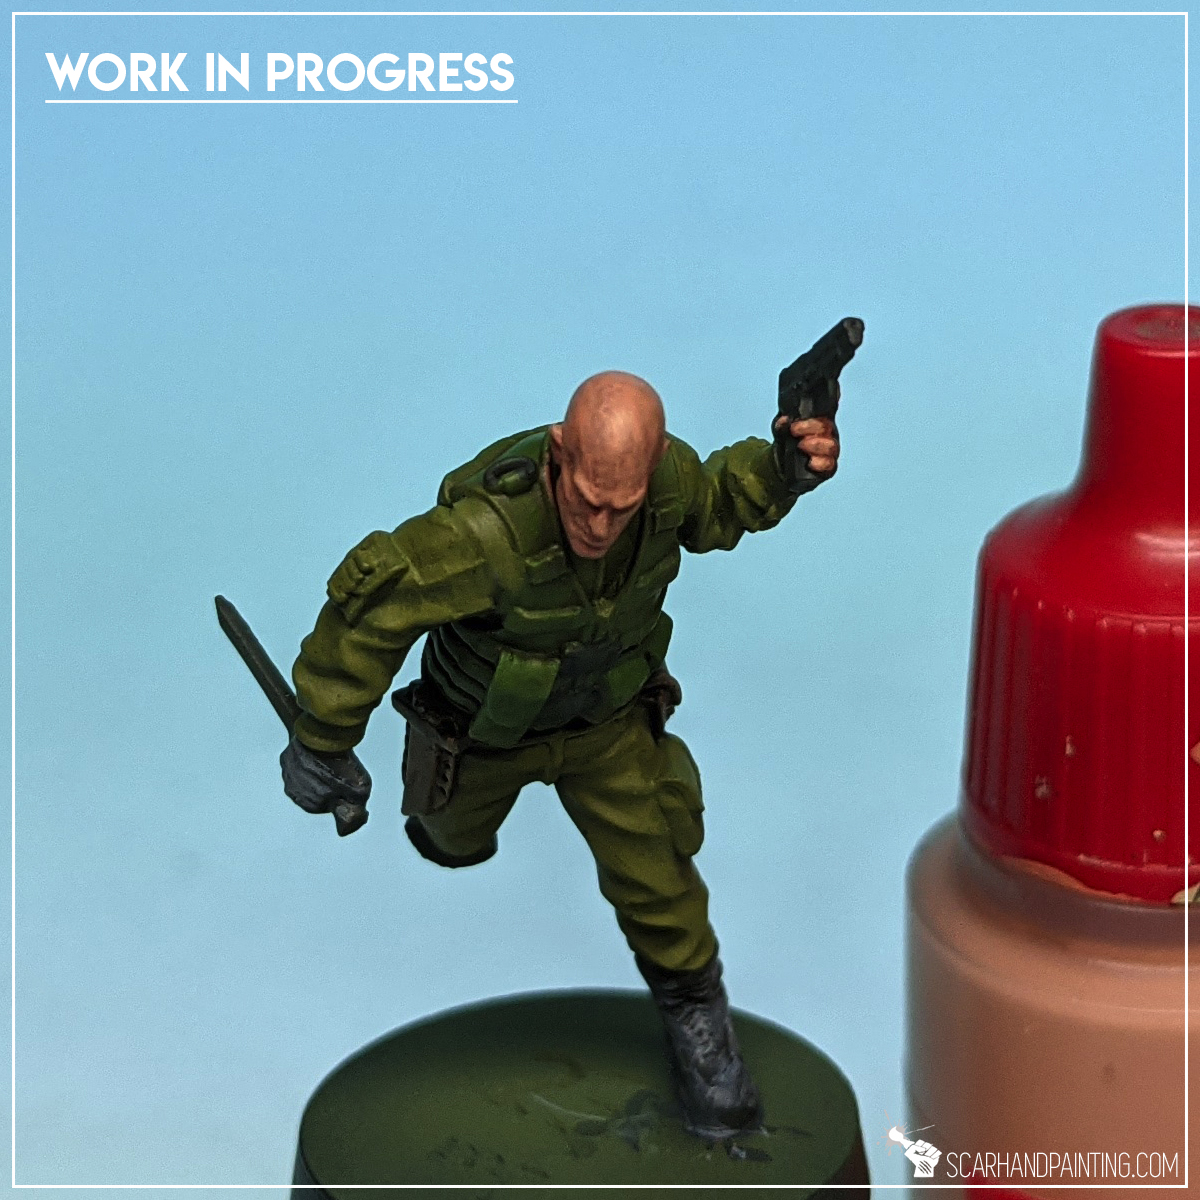
Step two: Uniform
I started by applying a strong layer of Vallejo Dark Green RLM71 (air) onto entire uniform. I used an airbrush for this, but it is not necessary. This layer might as well be applied manually, but might take few runs to look smooth and solid. Although boots, weapons and other detail got painted alongside the uniform, it’s not a problem. If you switch to manual painting you don’t have to worry about messing these up at this stage of paint job.
Next I airbrushed Vallejo Interior Green (air) over previous layer. Similarly to Dark Green this one can be done manually and follows same philosophy.
I switched to manual painting and with a basecoat size brush, flatbrushed a mix of Vallejo Interior Green (air) 1:1 Vallejo Heavy Khaki over the miniature. I then used a more precise brush and highlighted some edges with the same color mix.

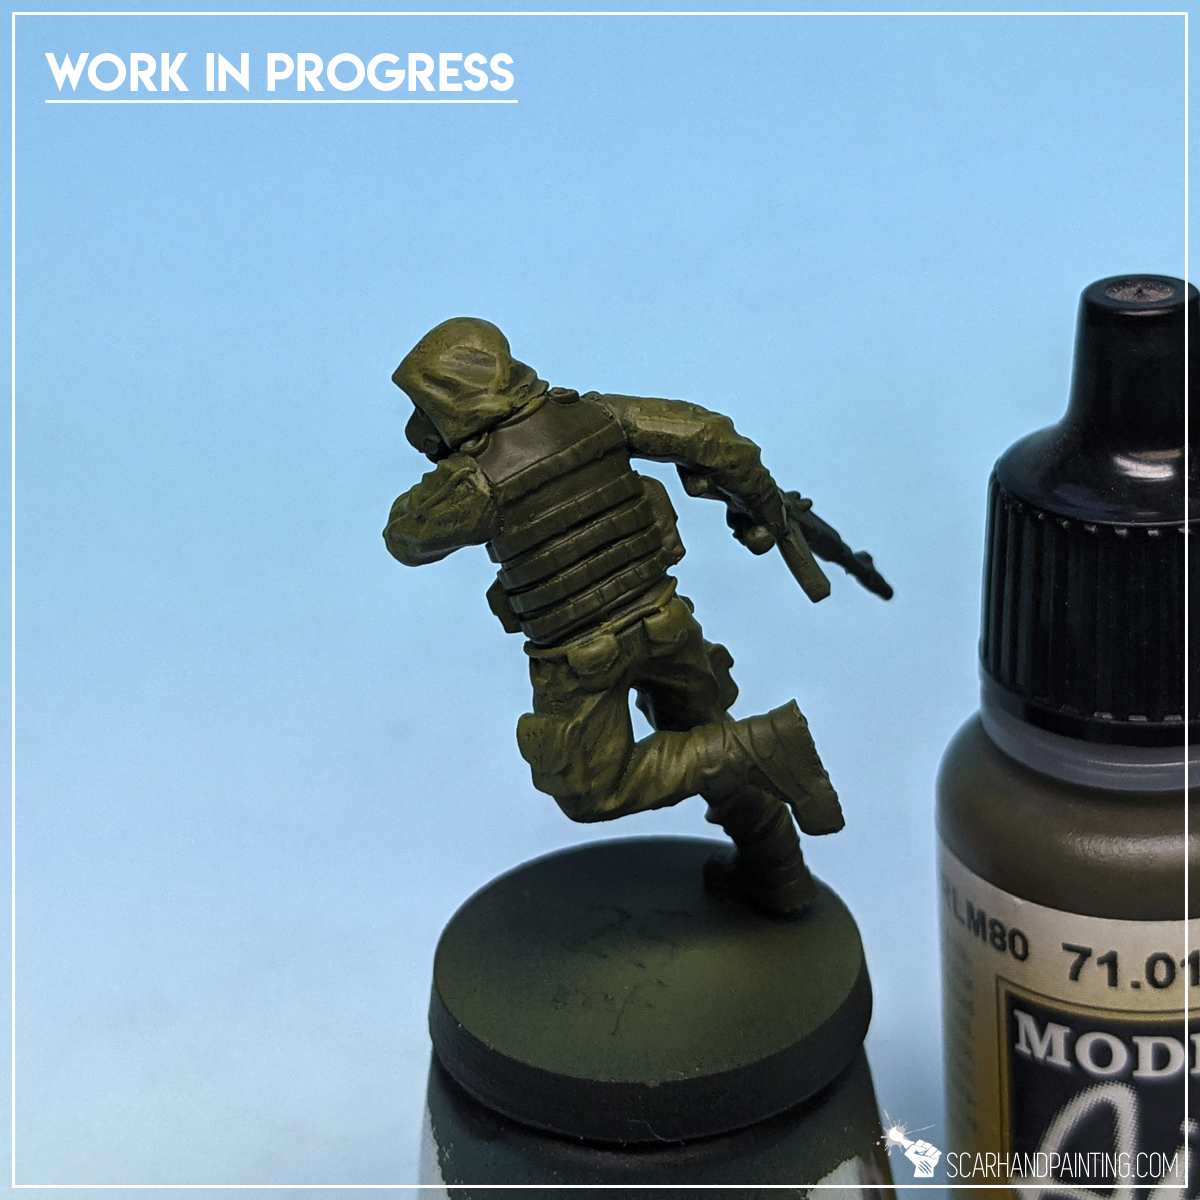
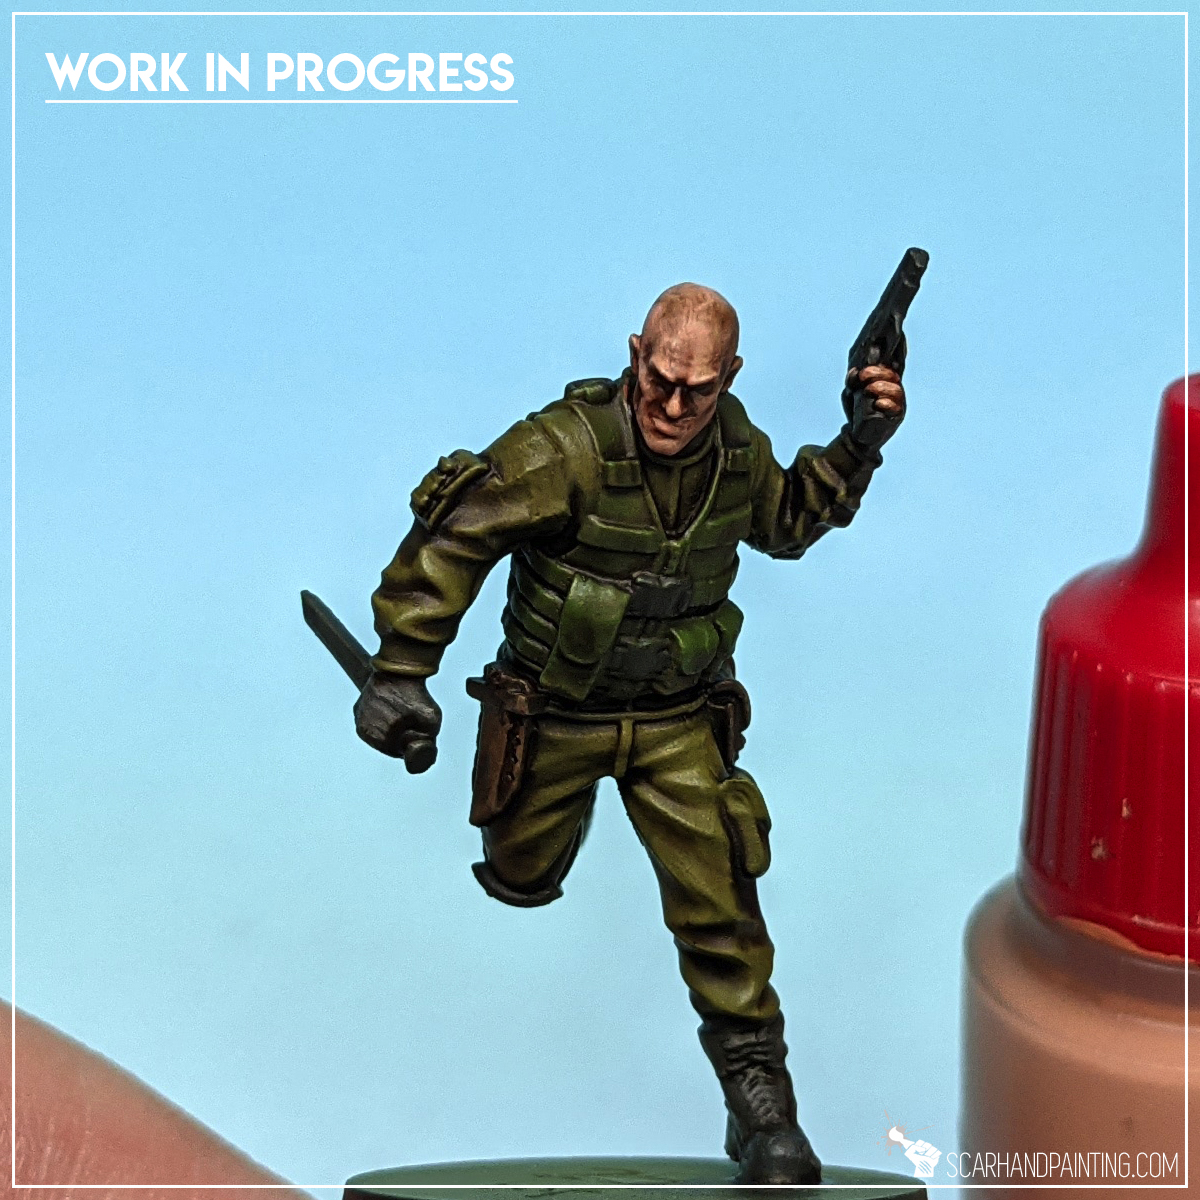
Step three: Vest
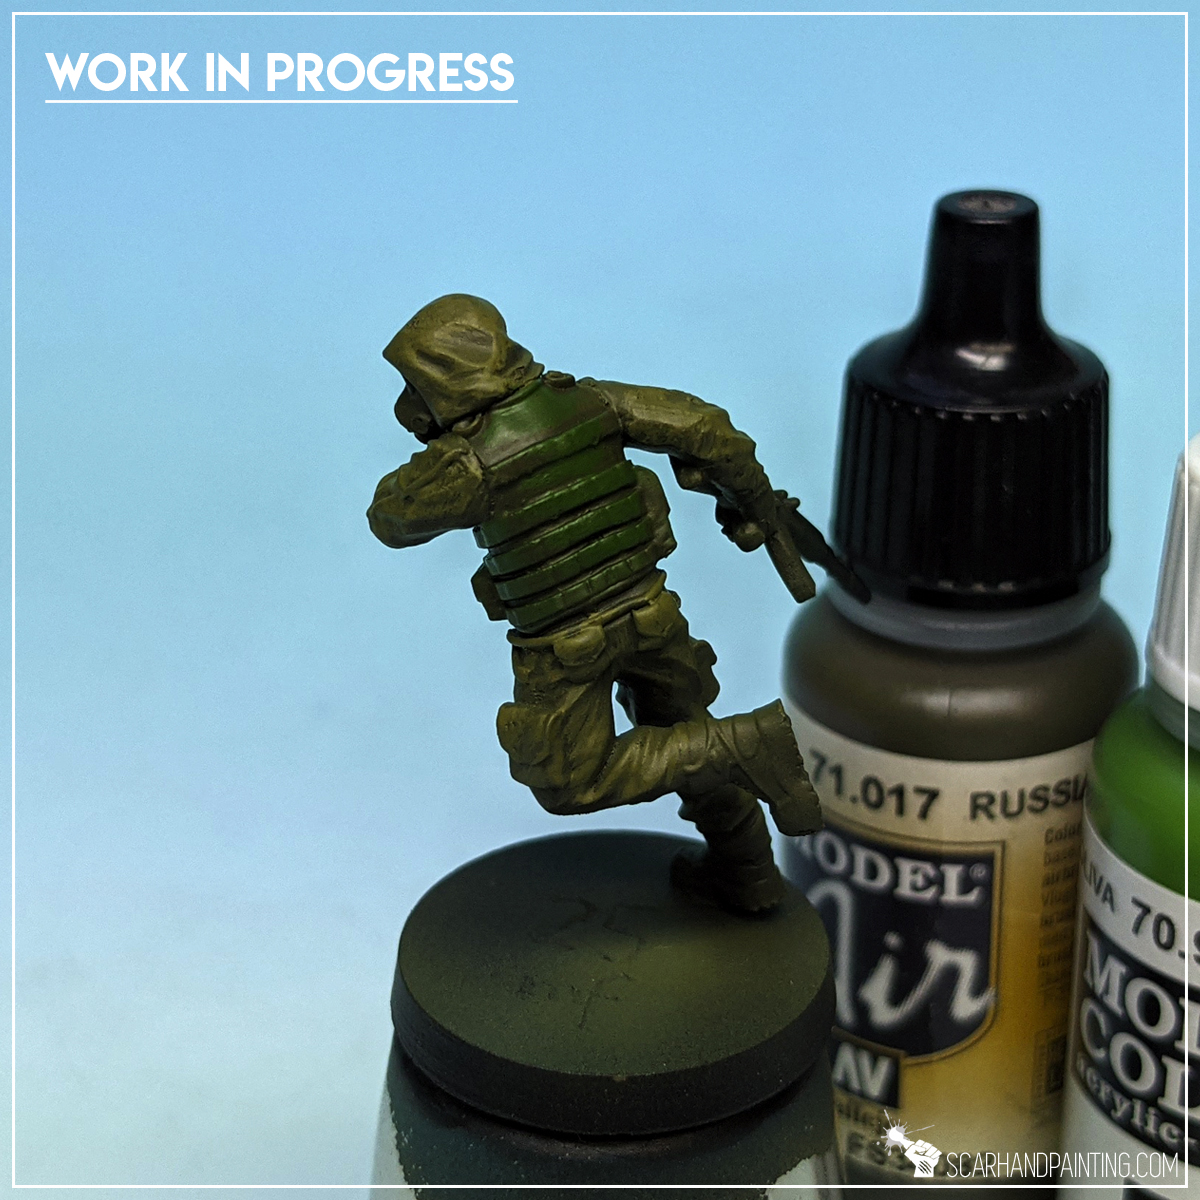
With a solid color underneath a single layer of Vallejo Russian Green (air) was enough to provide a smooth base for the vest. The key was to avoid messing up all the bright uniform around. Because of that I outlined the vest with a precise brush and only then switched for a larger brush to gain speed.
Next I flatbrushed a mix of Vallejo Russian Green 1:1 Vallejo Olive Green over previous layer. This provided nice thickness, something the upcoming Wash will work good on.
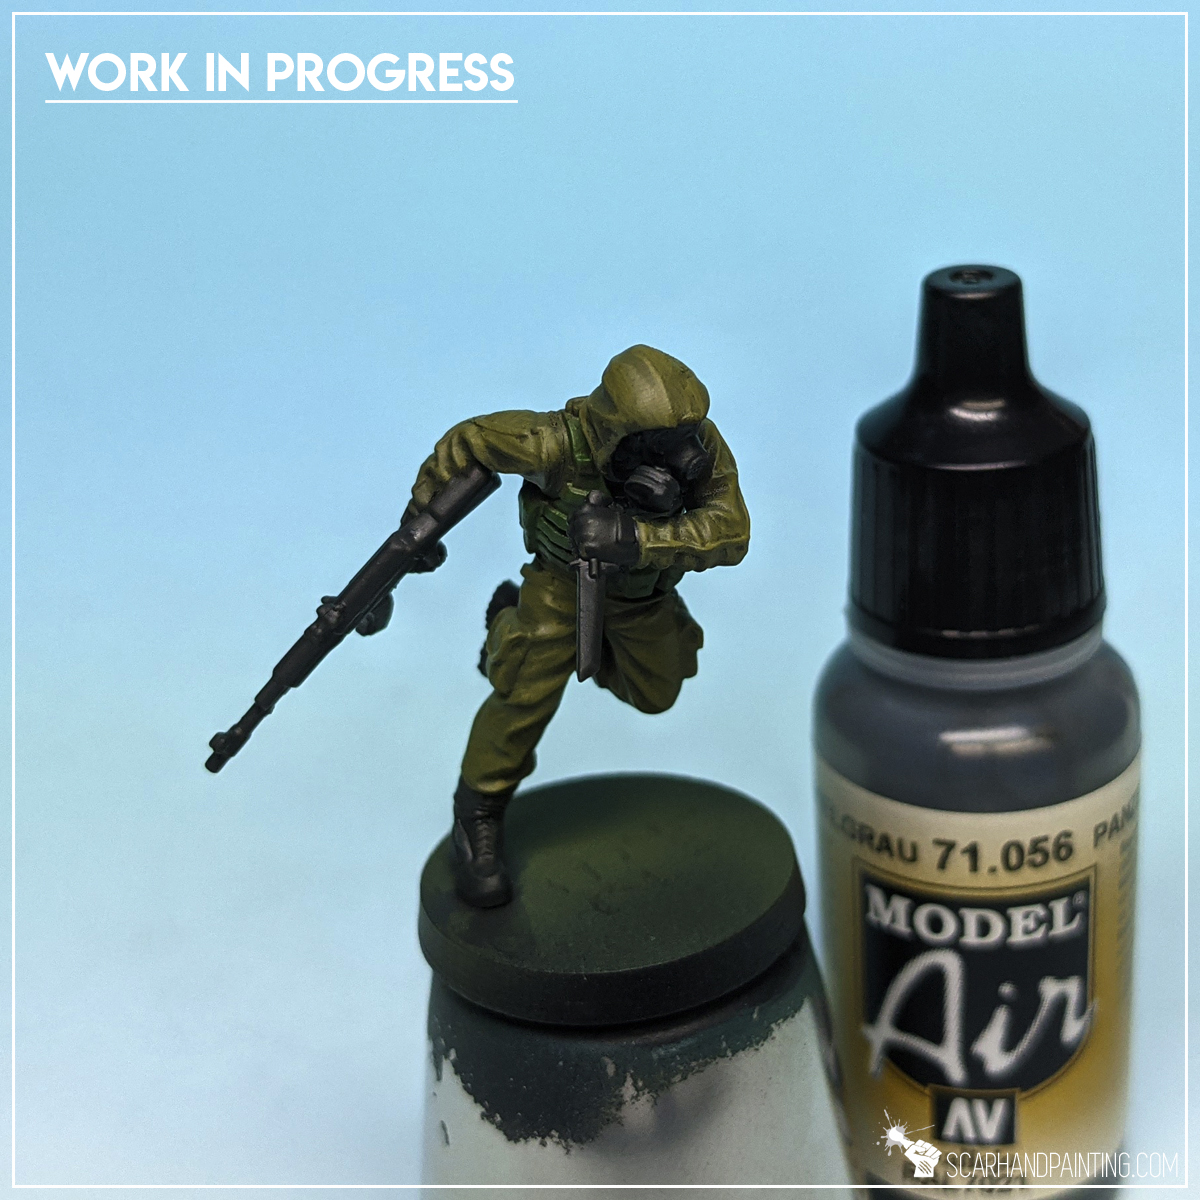
Step four: Boots, Gloves, Mask
Using a small brush I applied a strong, precise layer of Vallejo Panzer Dark Grey (air) onto boots, mask, gloves, weapons and buckles.
I then switched to Vallejo Medium Sea Grey, thinned it down with medium and applied a somehow misty, irregular layer over Panzer Dark Grey, leaving spots of previous color visible. I deliberately left weapons and buckles be for the time being.

Step five: Brown wash
Using a large, soft brush I applied a lot of Games Workshop Agrax Earthshade onto entire miniature. After a while I used a clean precise brush to strip some of the paint from areas where too much pigmentation covered all the detail. I left the miniature to dry after that.
Step six: Weapons
I applied a partially translucent layer of thinned down Vallejo Wolf Grey (air) onto weapons and buckles. I moved a brush alongside blade and barrel, trying to leave pigmentation on the edges.
I then highlighted weapons with Games Workshop Pallid Wych Flesh. Mostly on the edges and with no dillution.
I then followed up by applying Army Painter Dark Tone Ink. Similar to Agrax, I let the paint flow then removed the excess and let the thing dry.
Finally I edge highlighted with Games Workshop Pallid Wych Flesh. This time around I included gas mask filter plus added few scratches here and there.

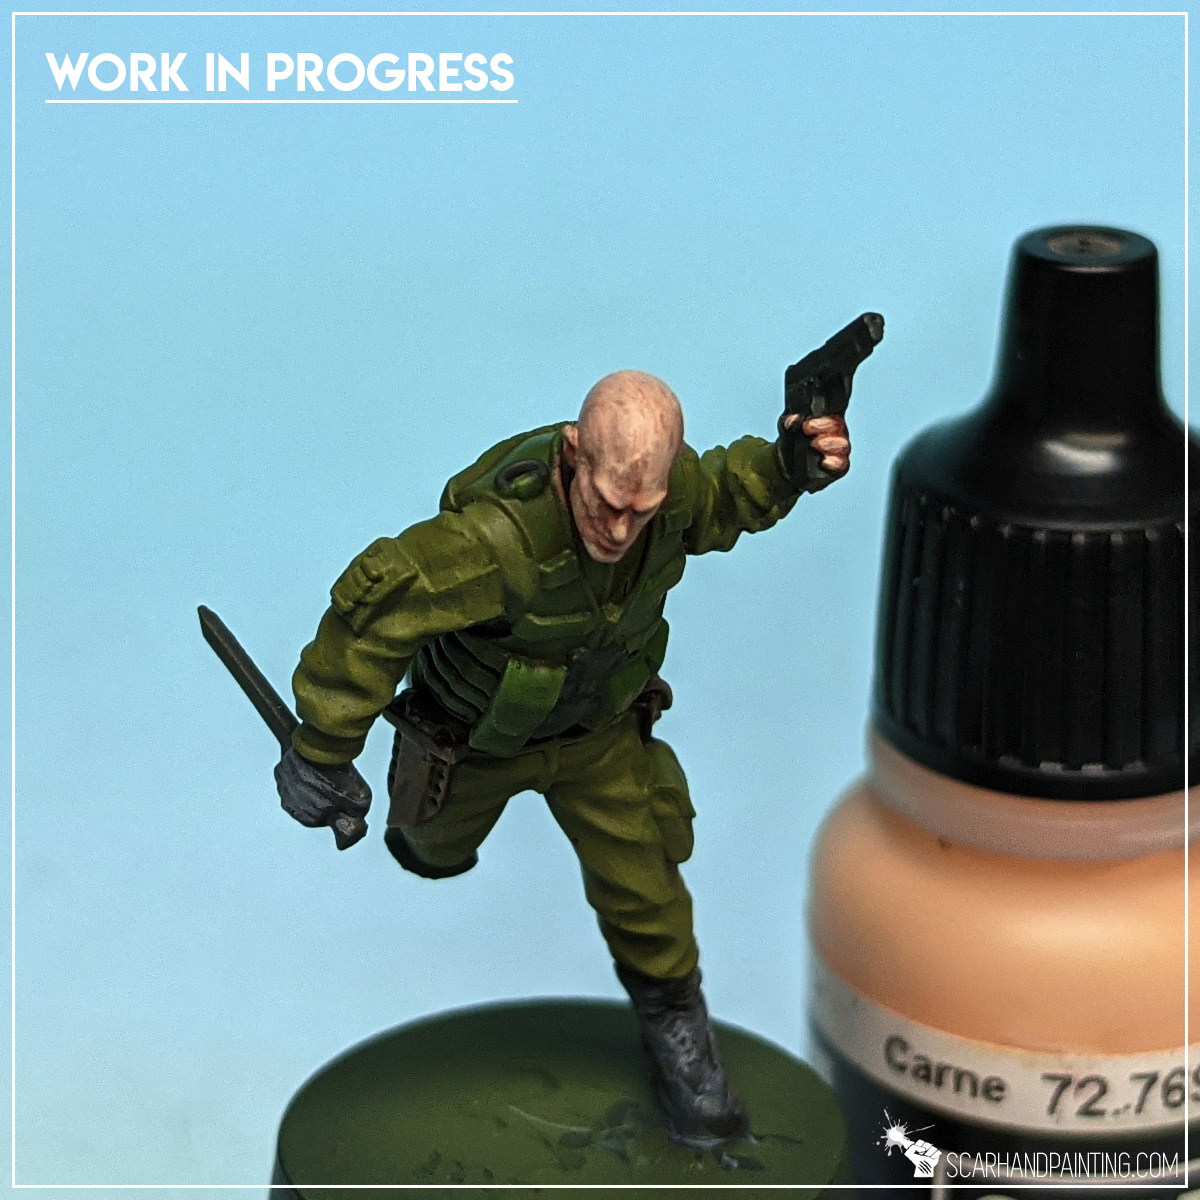
Step seven: Skin & Eyes
I started painting skin by applying a solid layer of slightly thinned down Vallejo Tan. This layer had to be precise and I avoided going out of line and messing up paintjob around it. I deliberately started painting skin before applying Agrax Earthshade Wash from previous tutorial so that any corrections could be done much easier, if required.
I then applied Games Workshop Dwarf Flesh onto previous layer. Same premise, except I left just a bit of Tan visible in the recesses.
Next I highlighted skin with Vallejo Flesh (air), which due to it’s consistency produces a partially translucent effect. I then re-applied Flesh on top of the head, cheeks and nose.
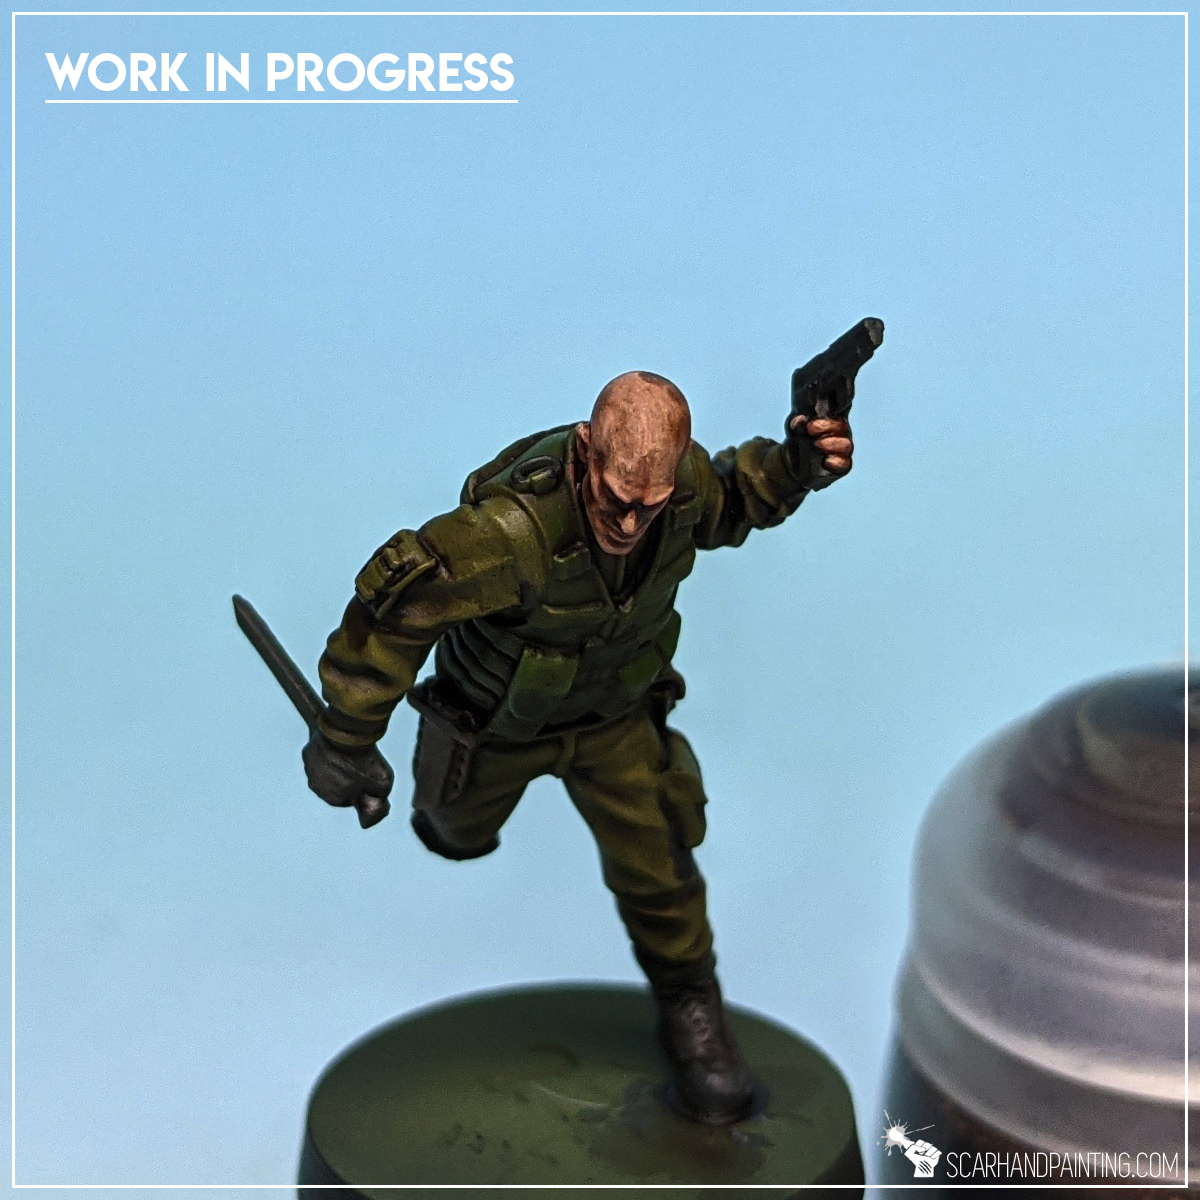
I followed up with Agrax Earthshade wash (done at Step five: Brown wash).
Finally I highlighted with Games Workshop Dwarf Flesh. I also blended some of the Dwarf Flesh over wash made stains on top of the head.
Painting eyes is a topic on it’s own and I’m not trying to write a book here, so I used a simple method of a single white line followed by a black dot in the middle. Any necessary corrections can be done to your heart’s content by painting over and over till good results are produced.

Step eight: Backpack & Holsters
I started with a strong layer of Vallejo Charred Brown (air), ensuring not to leave a mess on top of any previous layer around the backpack.
I then flatbrushed Vallejo Beasty Brown over Charred Brown. No thinning, just paint straight from a bottle and onto a palette before application.
I used Games Workshop Karak Stone for gritty highlights plus painted a blanket strapped at the bottom of the backpack.
I then switched to Vallejo Panzer Dark Grey (air) and re-painted all the buckles grey.
Agrax Earthshade wash followed (done at Step five: Brown wash).
Finally I applied a highlight of Games Workshop Karak Stone onto the edges and middle areas.


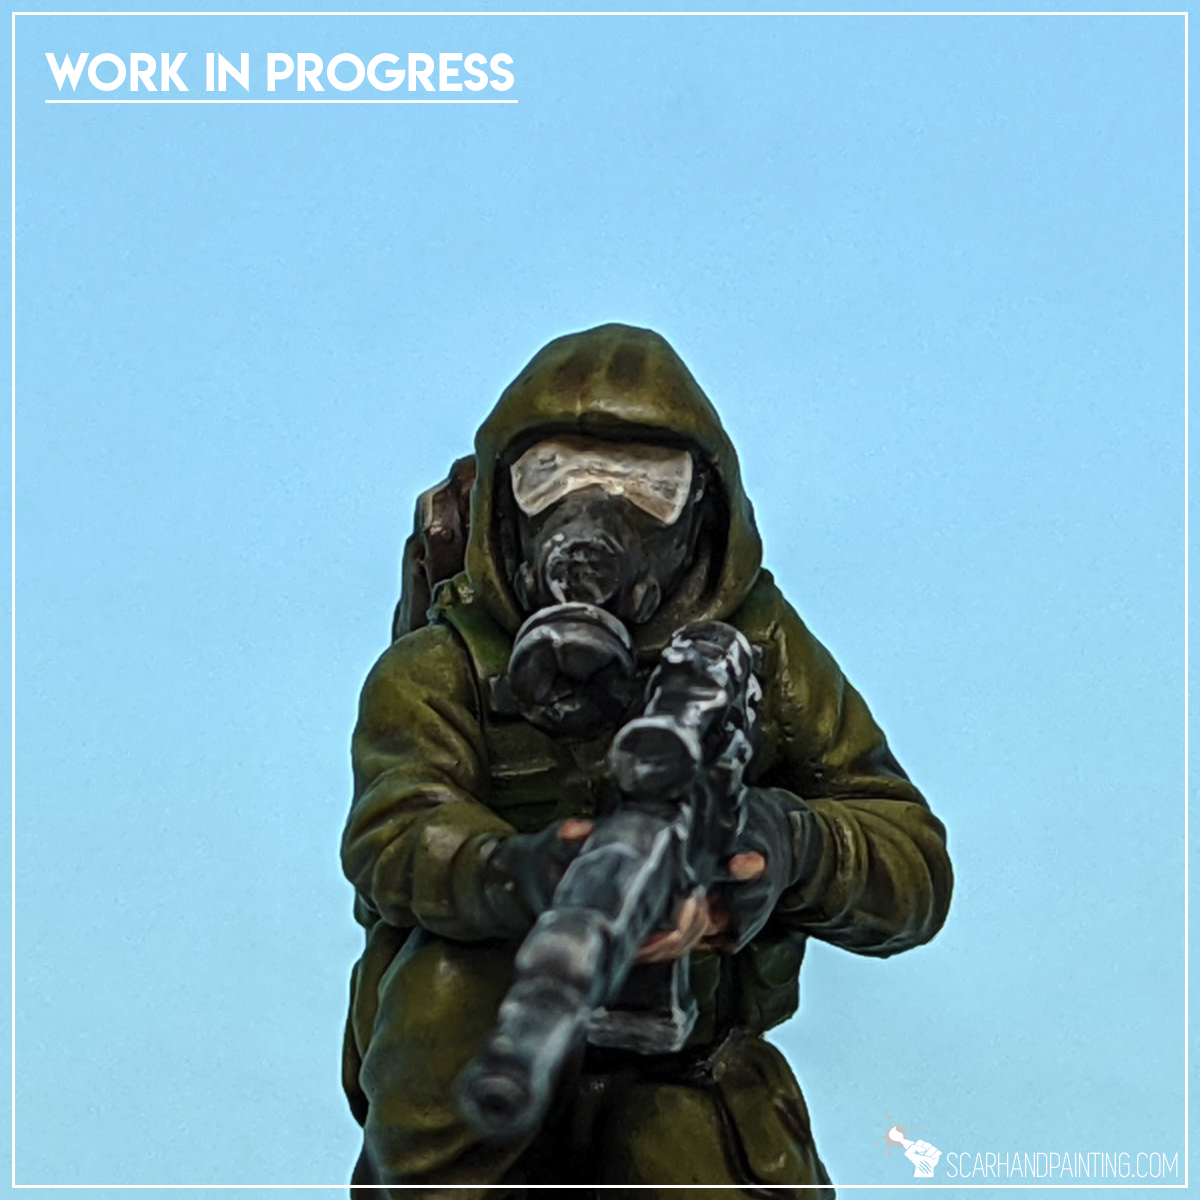
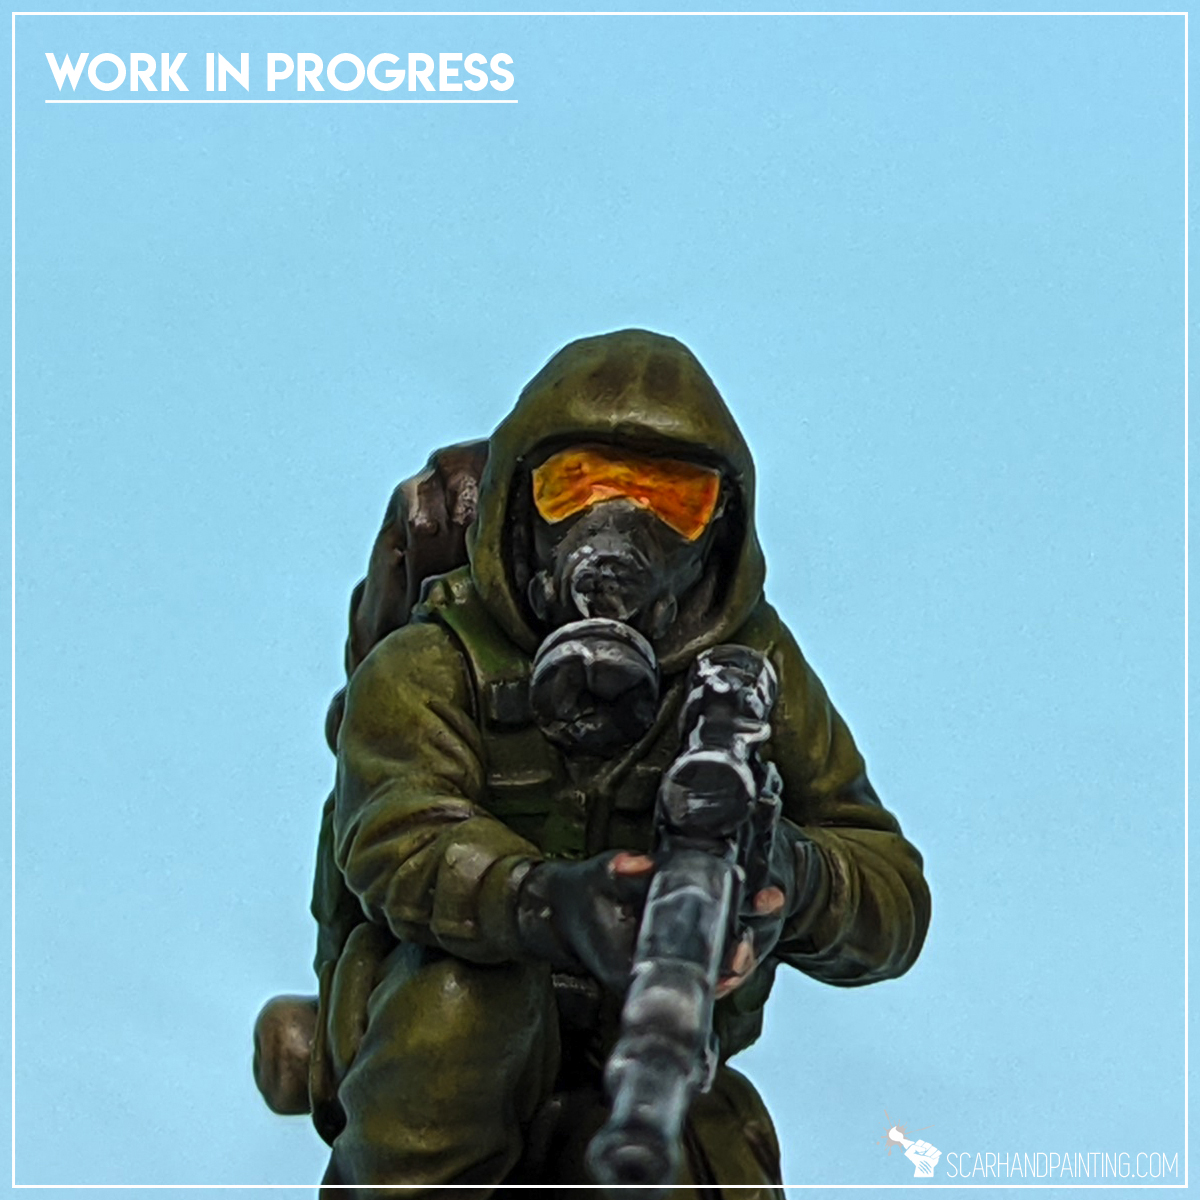
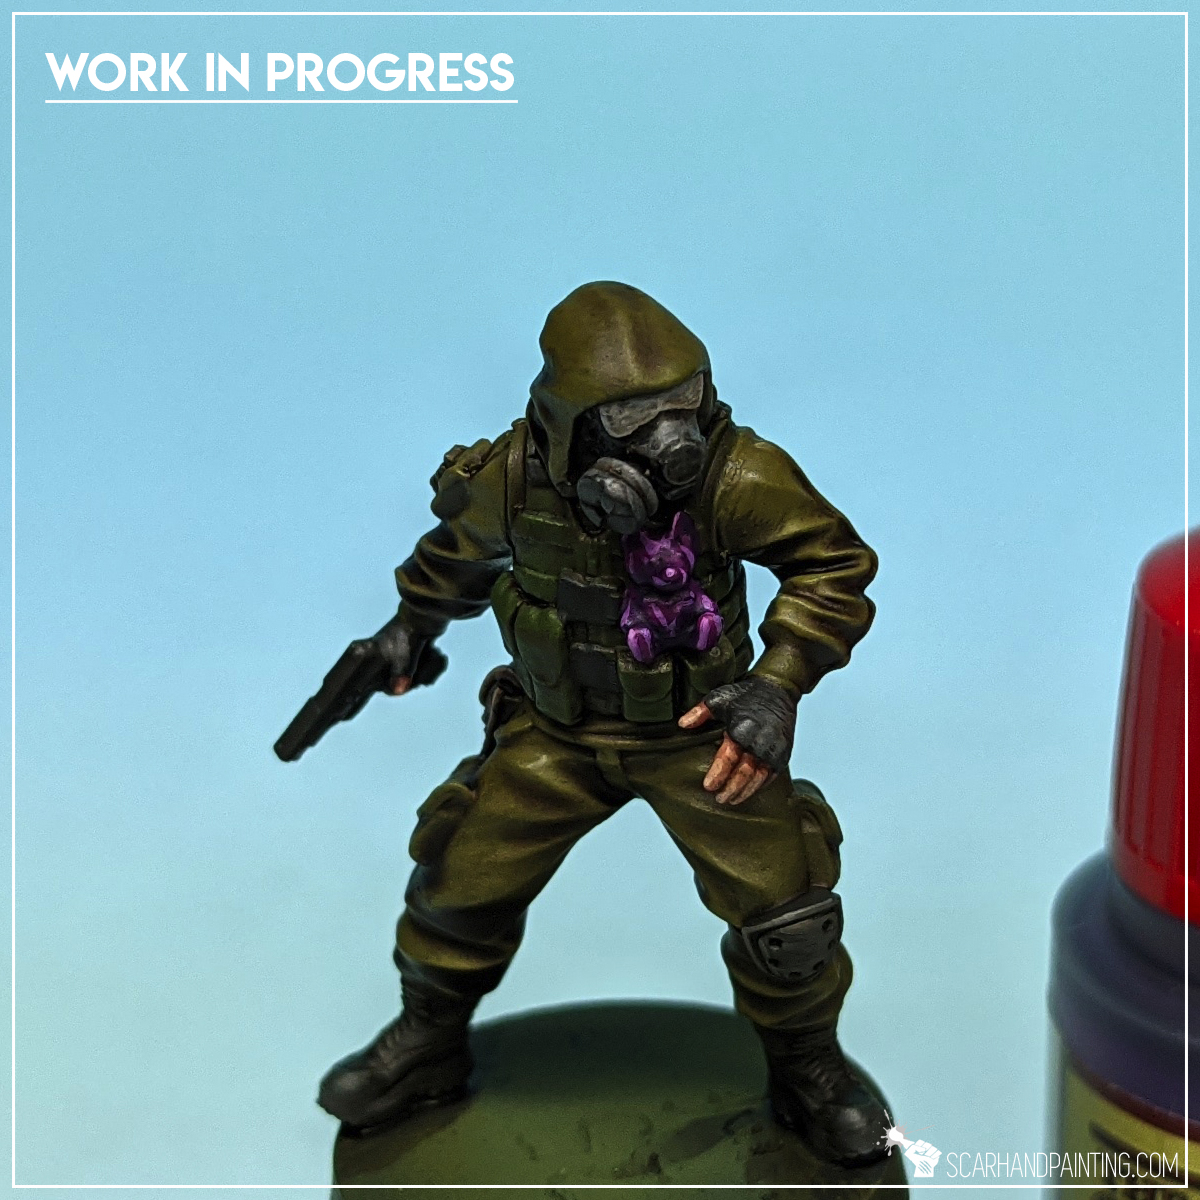
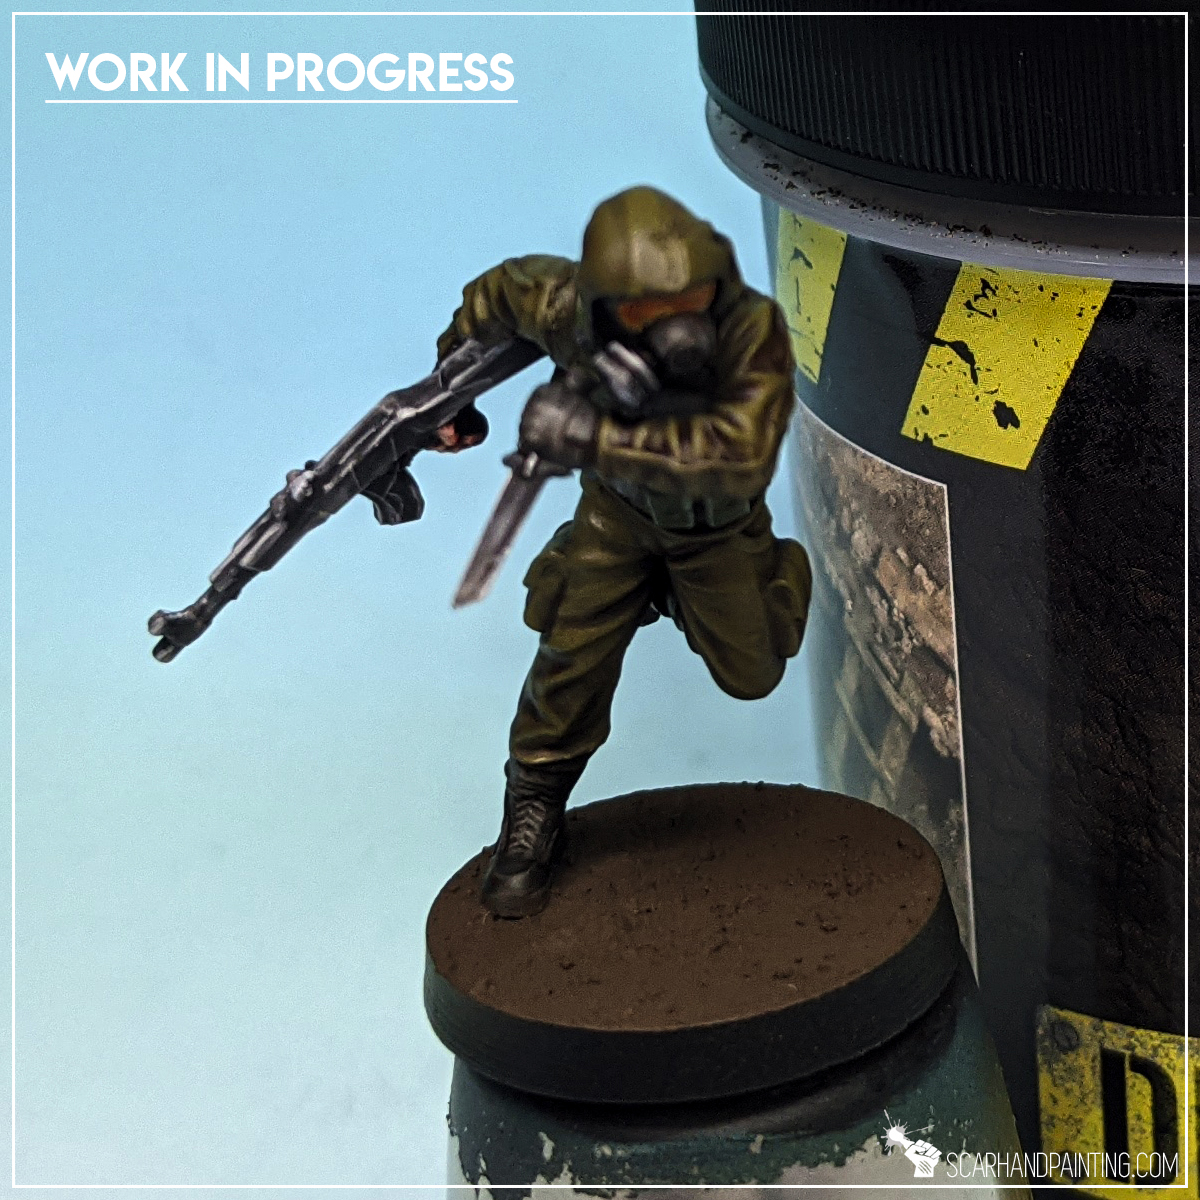
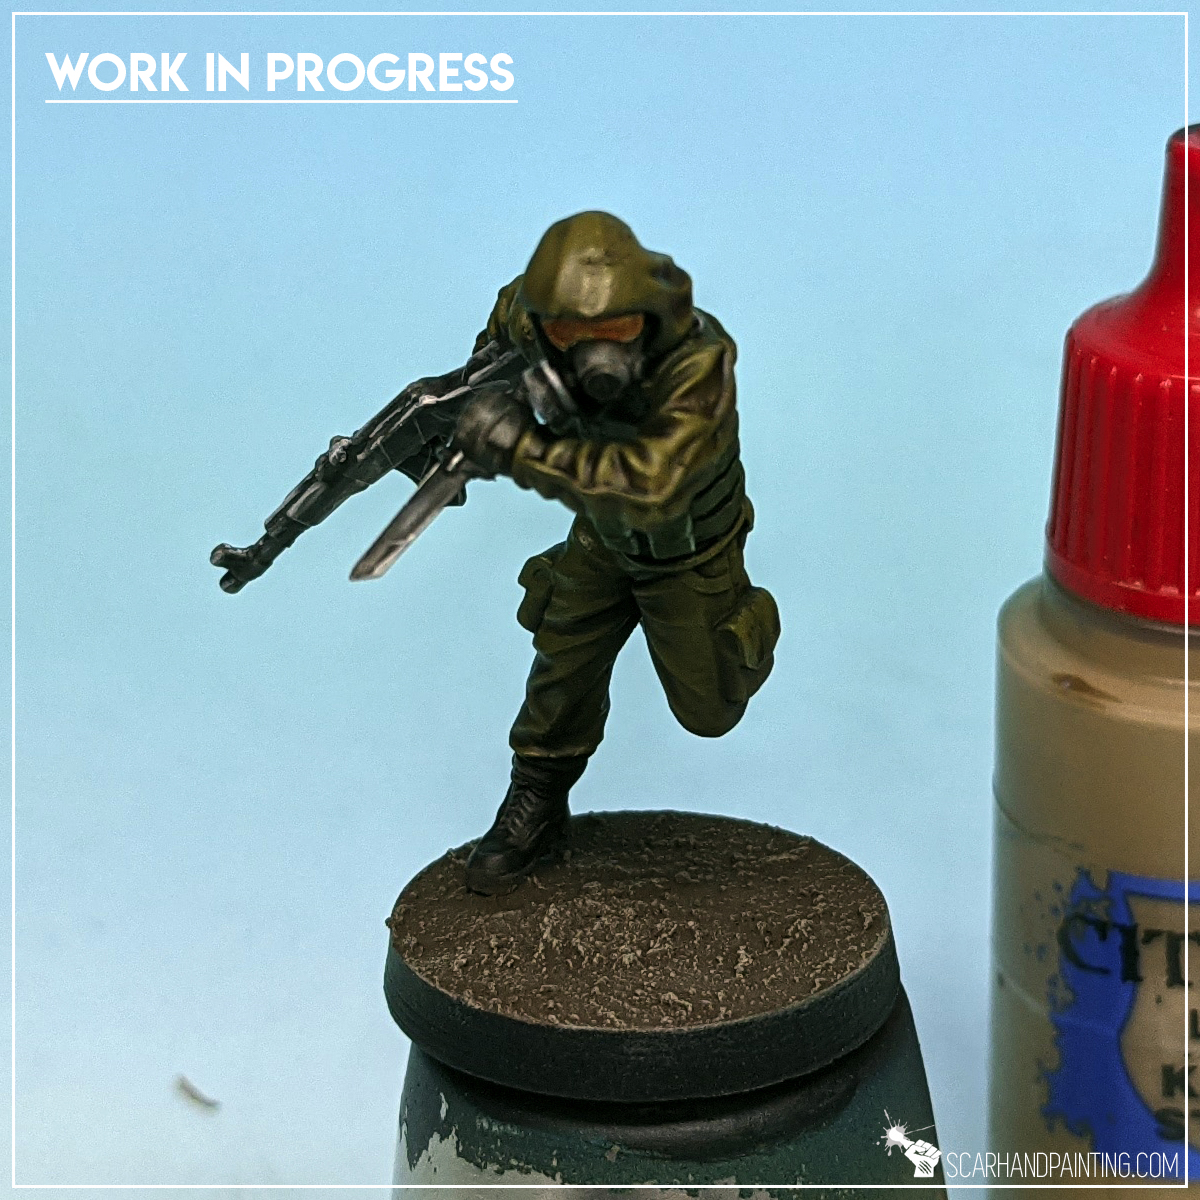
Step nine: Mask Visor
I tried to keep this one extra simple. Started with a gritty, messy layer of Games Workshop Pallid Wych Flesh. No need to be overly precise, nor smooth. The more irregular, diverse the visor looks now, the better the end result.
I then applied slightly thinned down Vallejo Hot Orange (air). Once dry I applied another layer of the same stuff. Done.
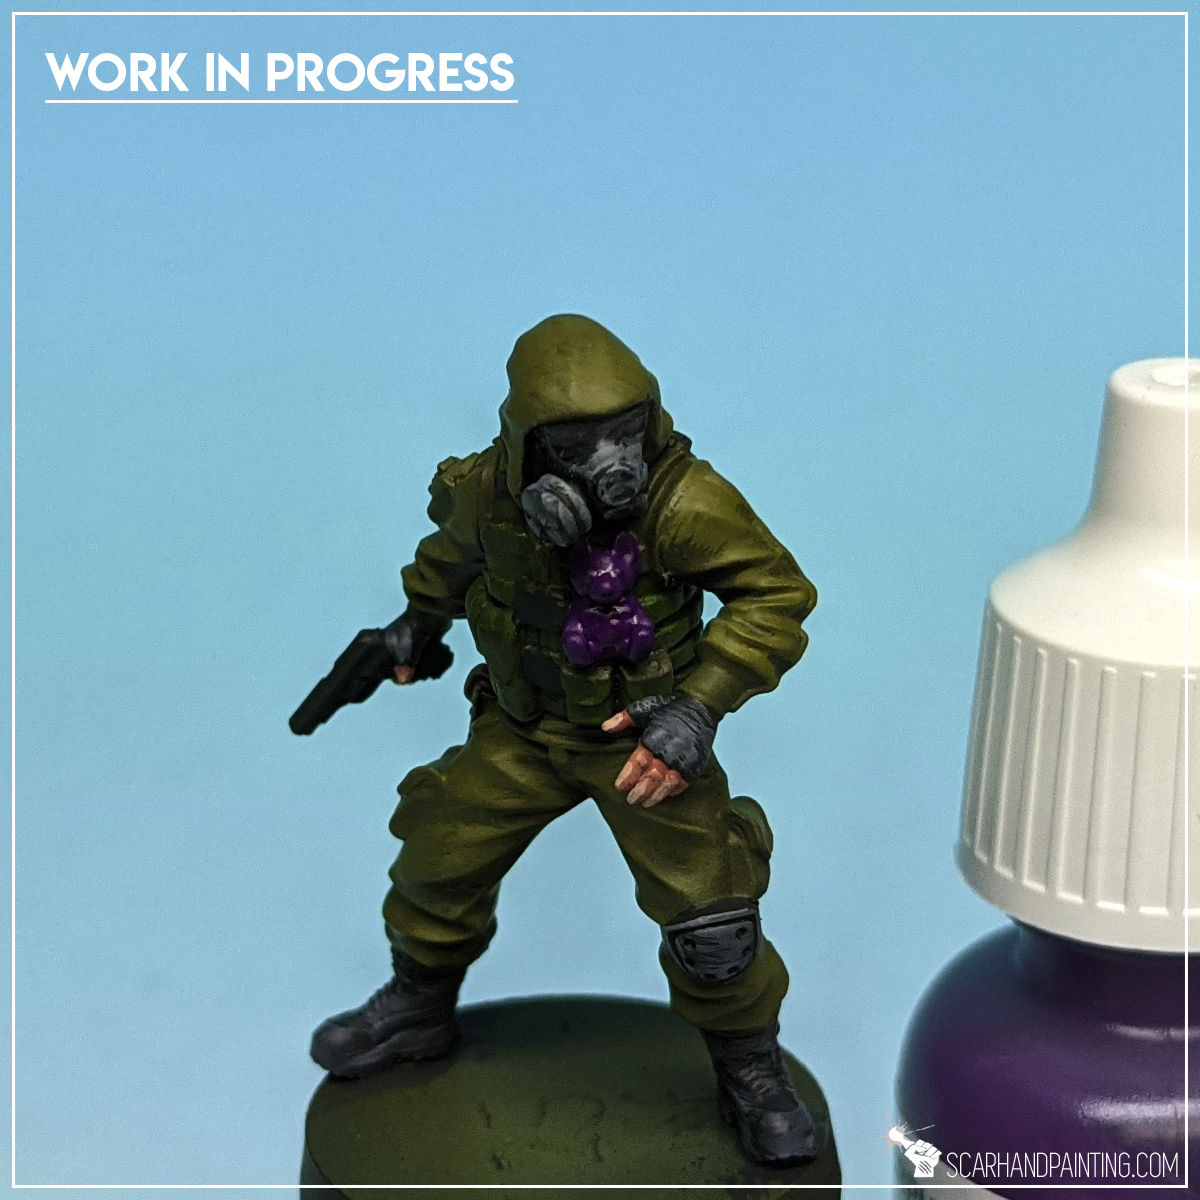
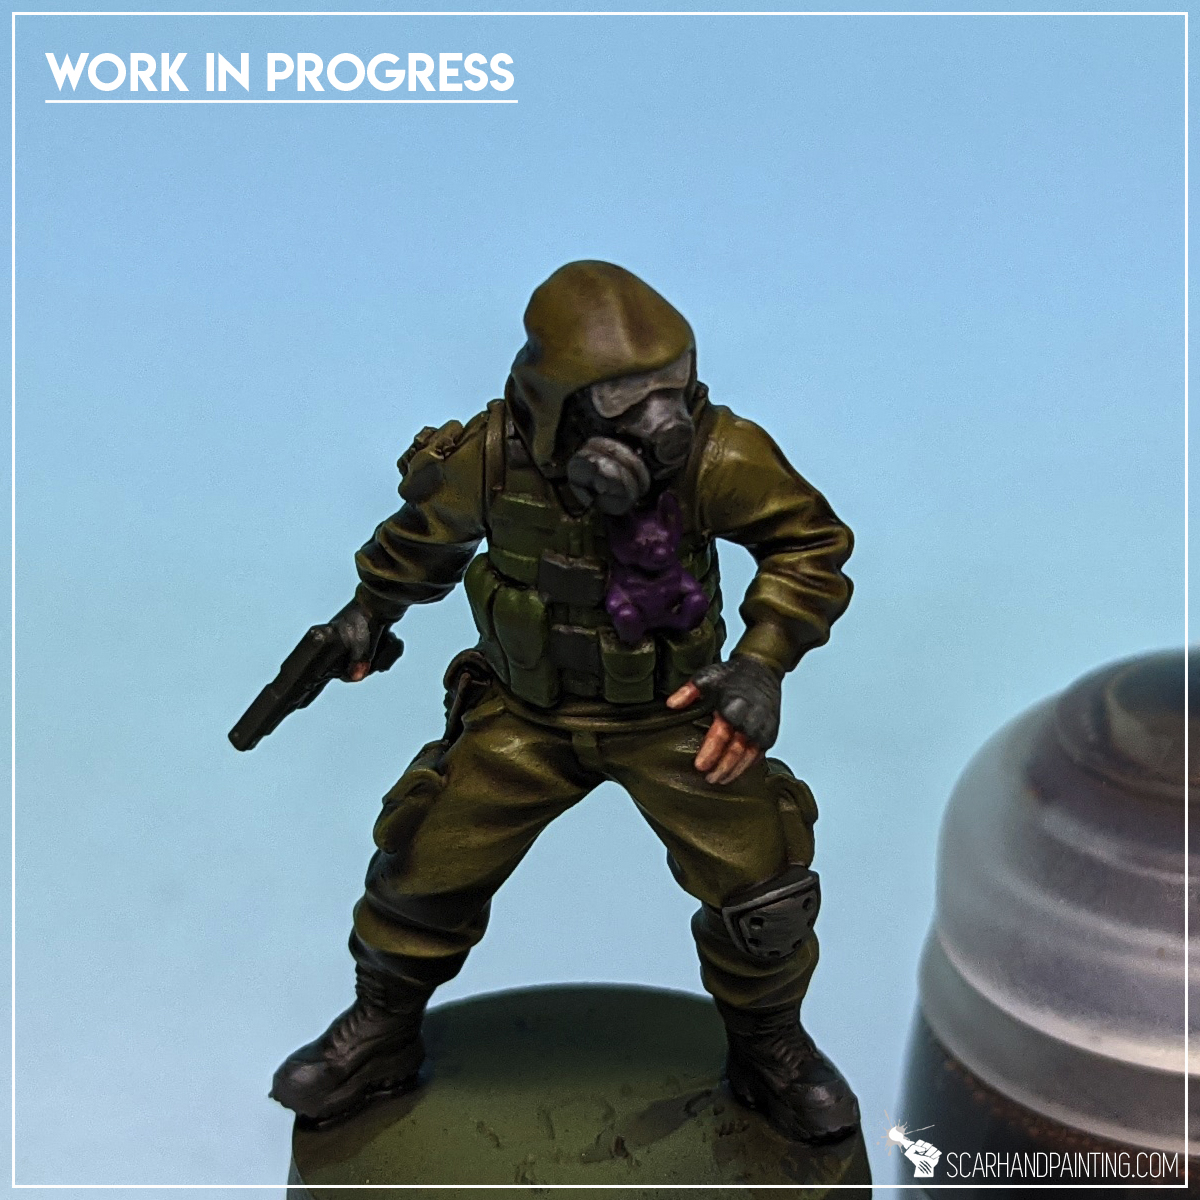
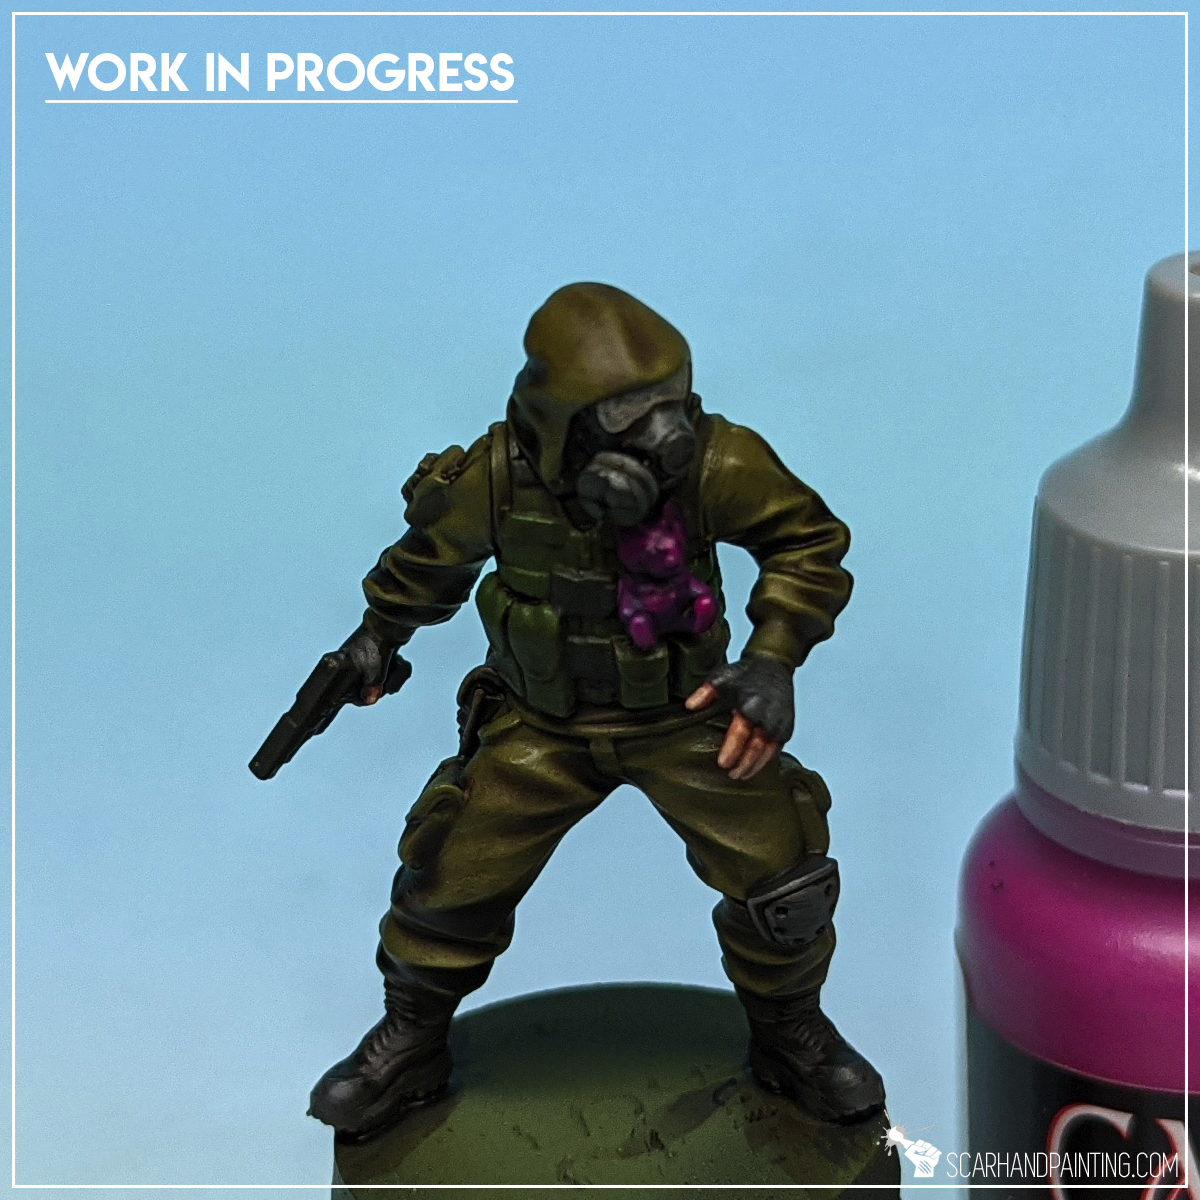
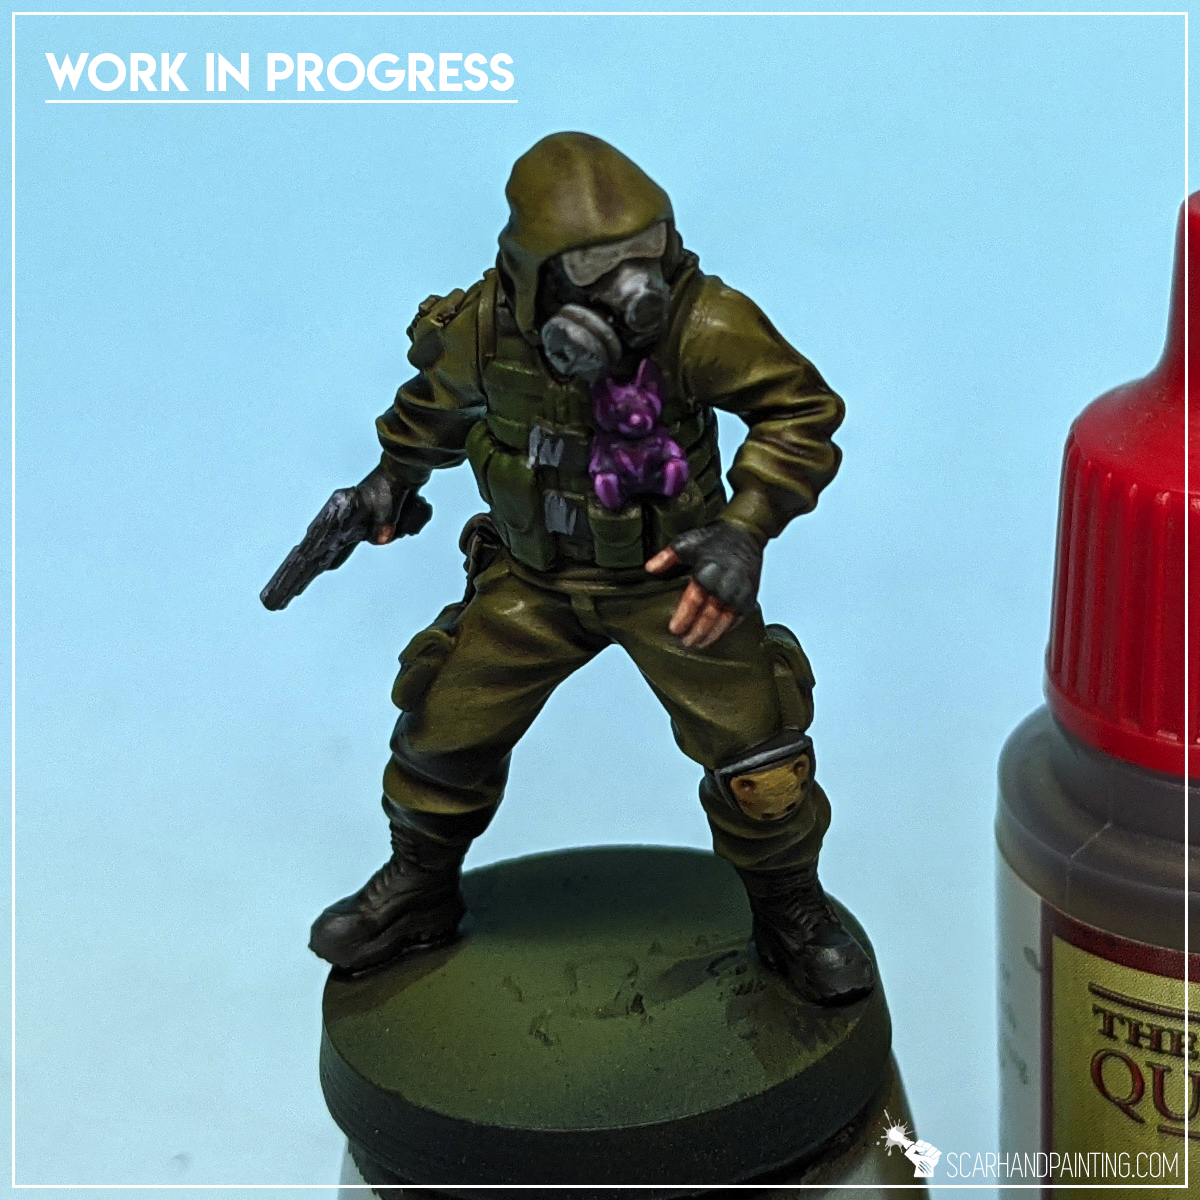
Step ten: Teddy Bear
This one is such a cool detail. I decided to go purple/pink to make it stand out. I started with a solid layer of Vallejo Royal Purple.
I then applied Games Workshop Agrax Earthshade wash (done at Step five: Brown wash).
Once wash dried, I highlighted most exposed areas of the bear with Vallejo Warlord Purple.
I then used Vallejo Squid Pink for final highlight, applying dots and lines on top of most exposed areas.
To bring all layers together I applied a strong layer of Army Painter Purple Tone Ink.

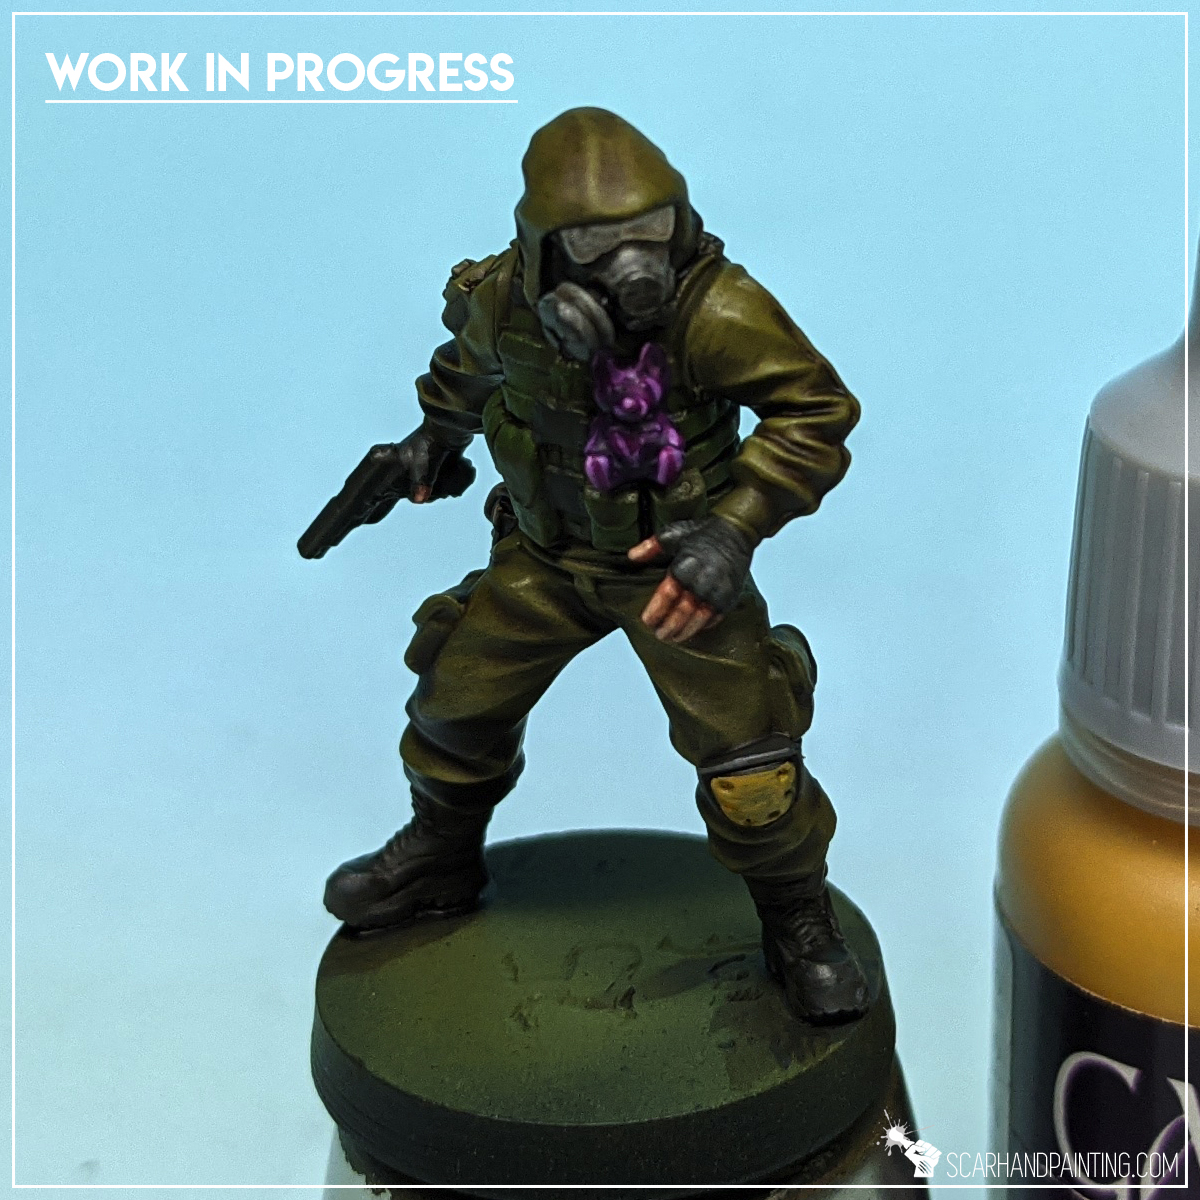
Step eleven: Yellow Kneepad
Once again I decided for a feature to stand out. I started with a strong, precise layer of Vallejo Heavy Goldbrown.
I then applied an irregular highlight of Vallejo Pale Yellow.
Finally I washed it with Army Painter Soft Tone Ink, which brought both layers together and made the knee pad look darker and used thoroughly.
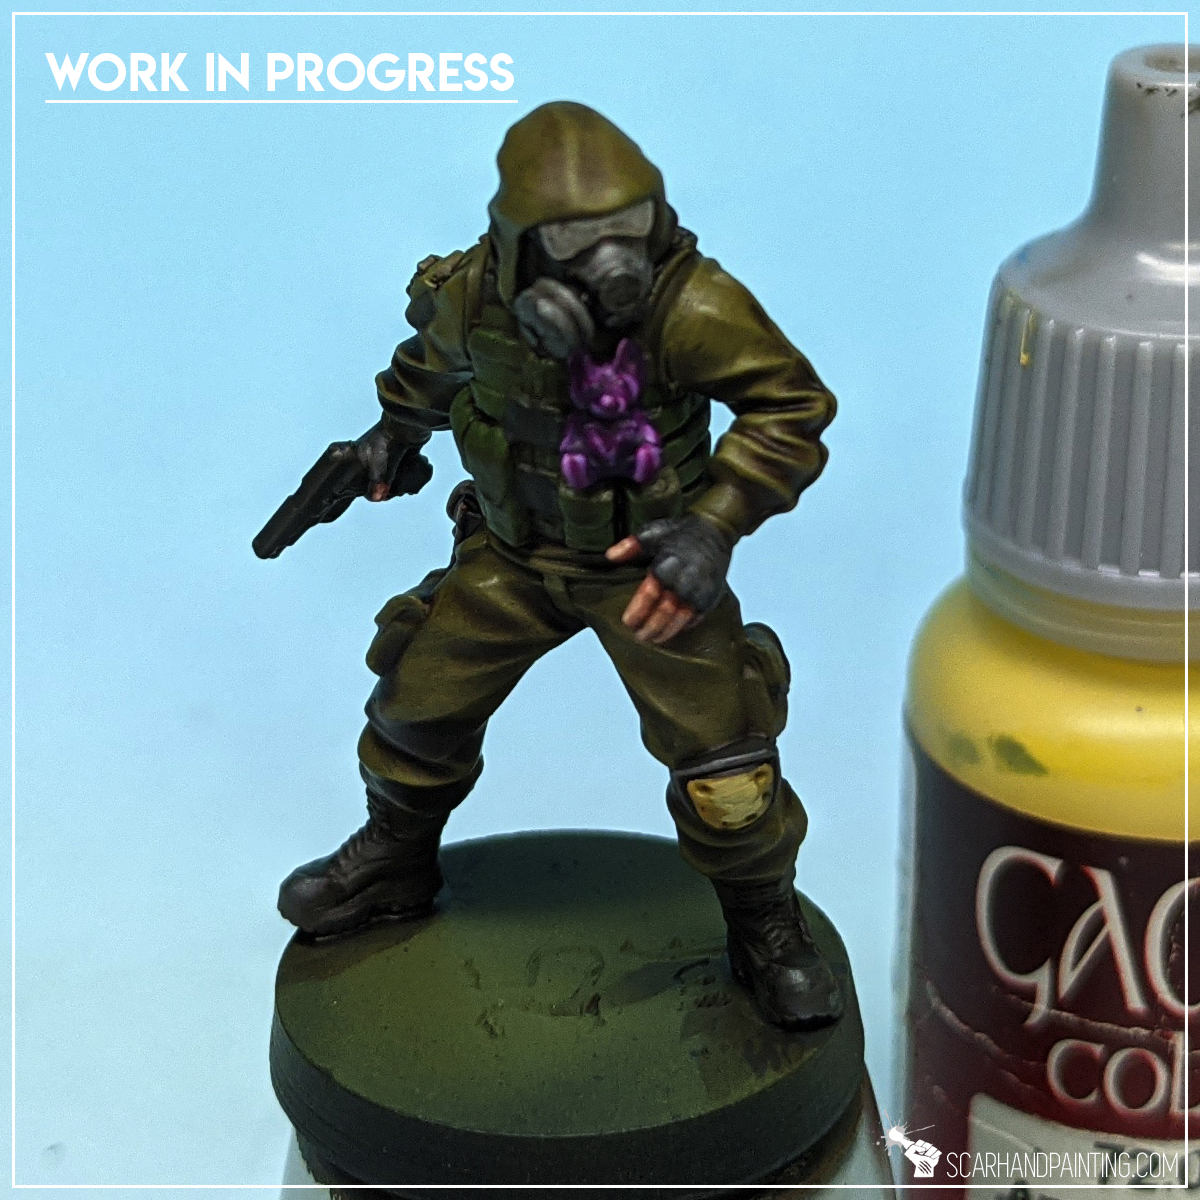
Step twelve: Basing
Time to finish the paint job with a proper looking base. For this purpose I decided to go with something easy to follow. One texture, one highlight and one tuft type for extra detail. I started with a large flat brush, applying a thick layer of AK Interactive Dark Earth texture. You can switch to any dark texture like for example Games Workshop Stirland Mud. I just prefer AK’s one because I find it easier to apply.
Once dry I drybrushed Dark Earth with Games Workshop Karak Stone.
Finally I glued an Army Painter Wasteland Tuft and re-painted base’s edge black afterwards.

I hope you find this tutorial interesting. Be sure to let me know your thoughts in the comments below or via Facebook.or Instagram. I would also appreciate if you considered sharing this content with your friends, who might find it useful. Finally if you are looking for a professional miniatures painting service be sure to contact me with this contact form. I always reply within 24 hours, after which please check out your spam folder.
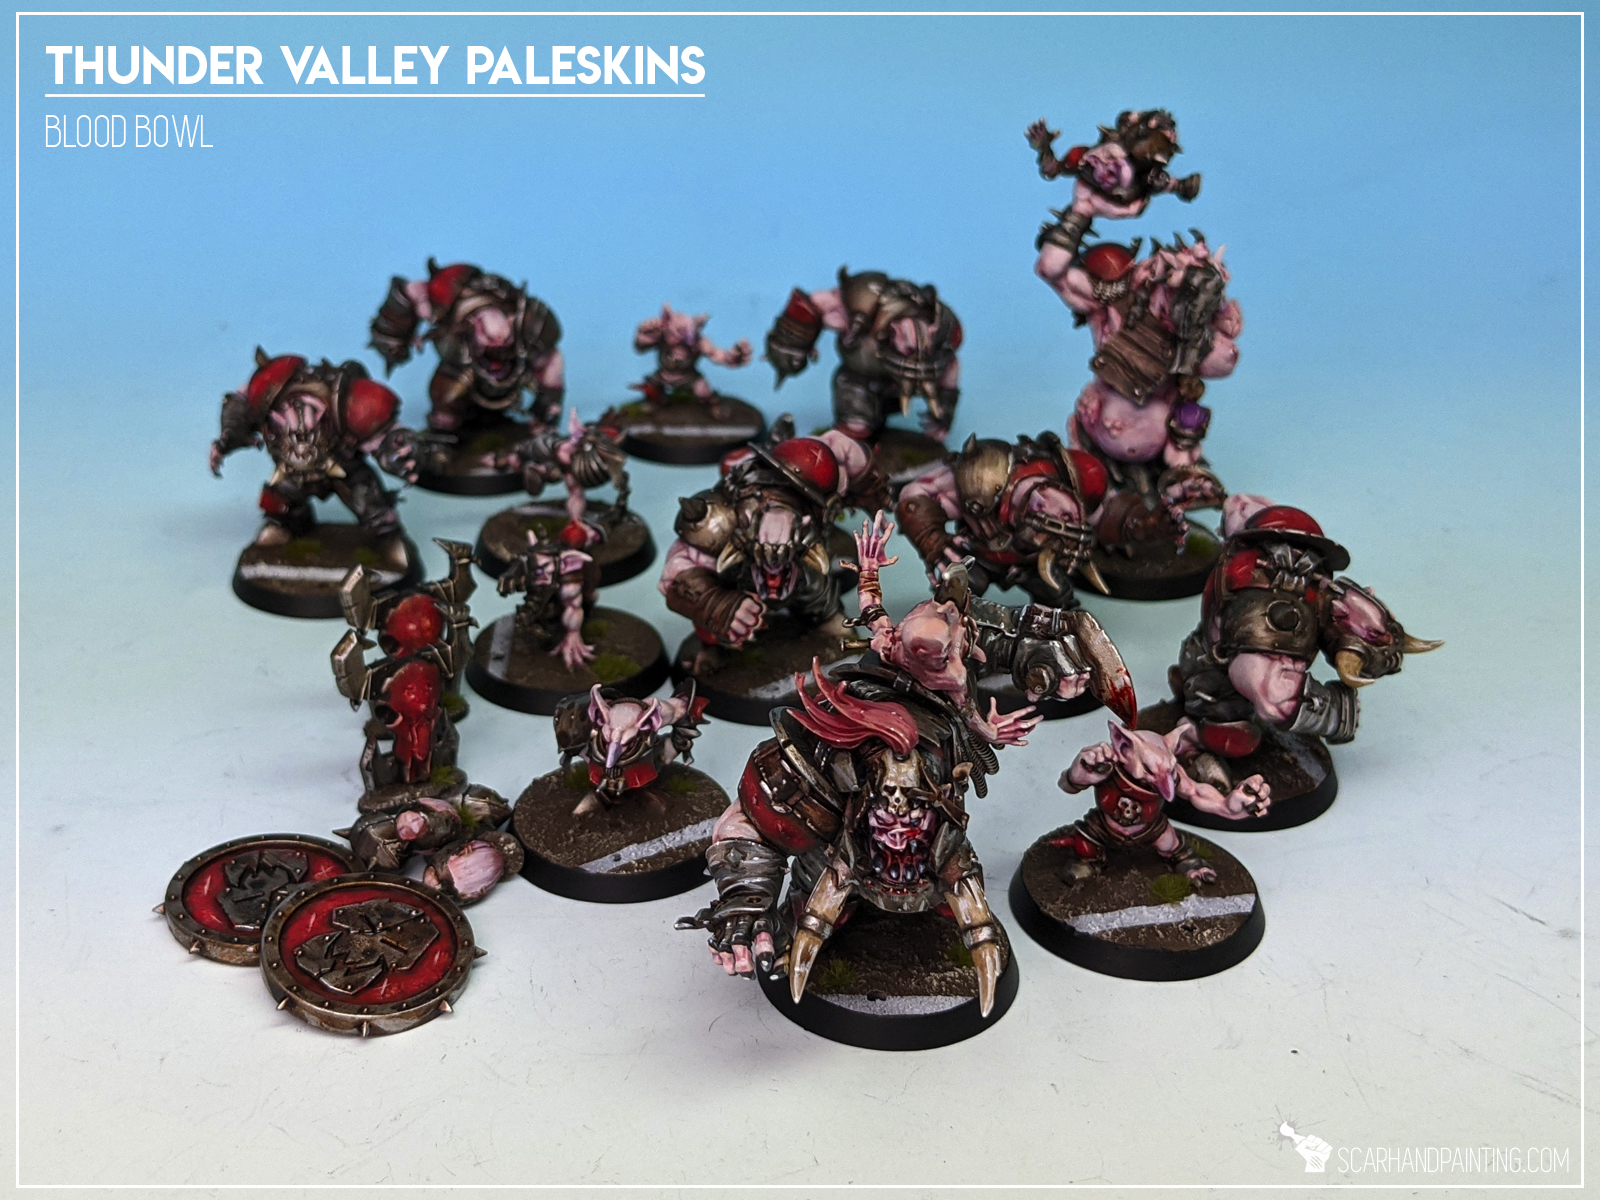
Here are some Colour Recipes for Blood Bowl Black Orcs team from Gallery: Thunder Valley Paleskins. Please take note that this is a simple colour scheme, not covering multiple overlapping layers and blends in between, that lead to the final product. It is supposed to be used as guideline not a step-by-step.
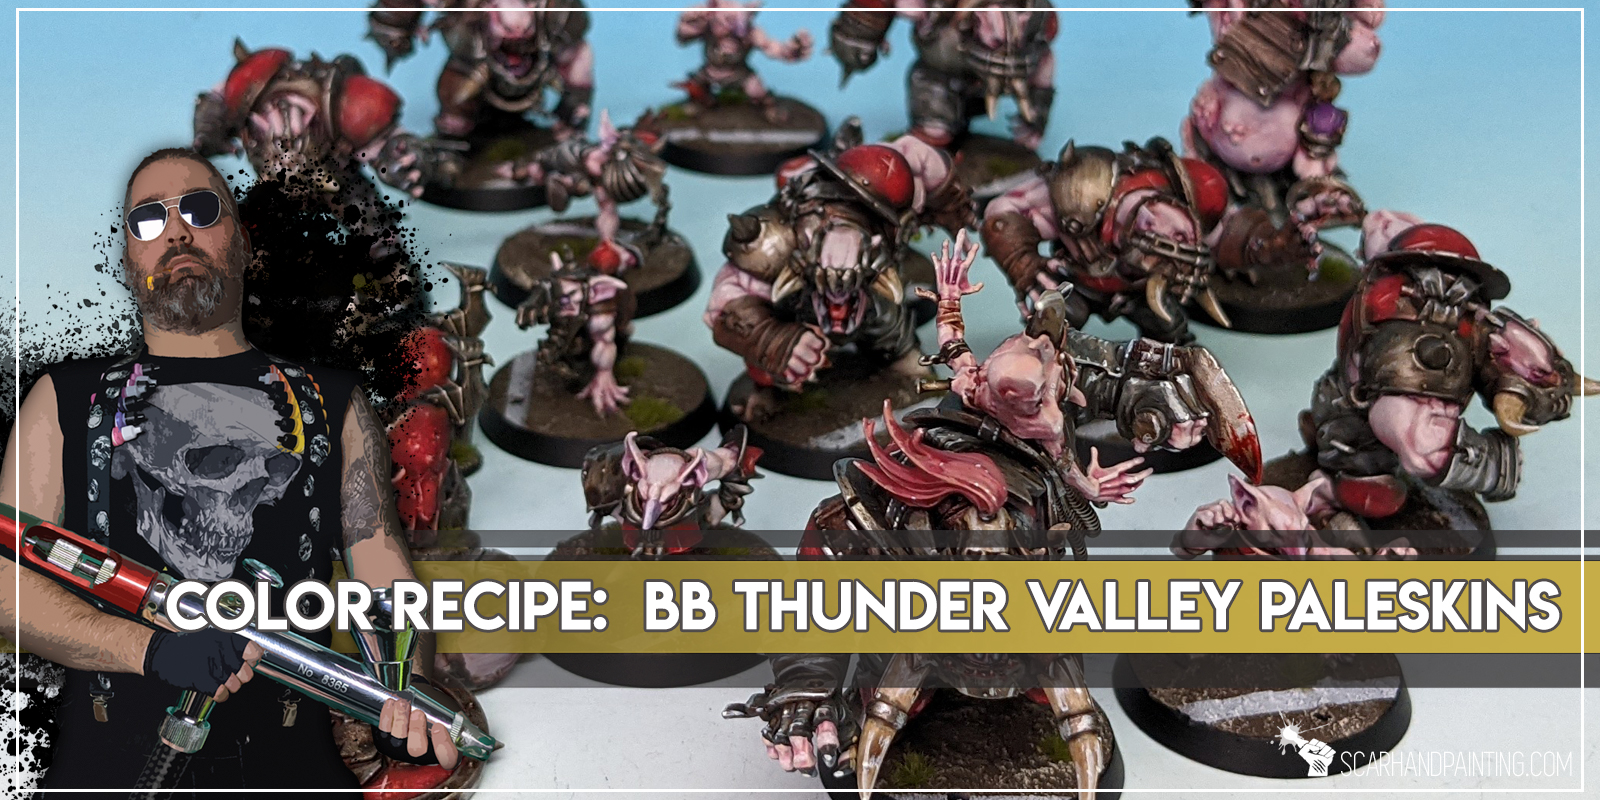
PALE skin:
Mix: Tan (val) 1:3:3 Flesh (val a), Squid Pink (val a), *
Flesh (val a), *
Pale Flesh (val a), *
Mix: Volupus Pink (gw) 1:5 Glaze Medium (gw),
Mix: Volupus Pink (gw) 1:5:1 Glaze Medium (gw), Purple Tone Ink (ap), deep lines
Mix: Volupus Pink (gw) 1:5:1 Glaze Medium (gw), Red Tone Ink (ap), deep lines
Pale Flesh (val), l&p
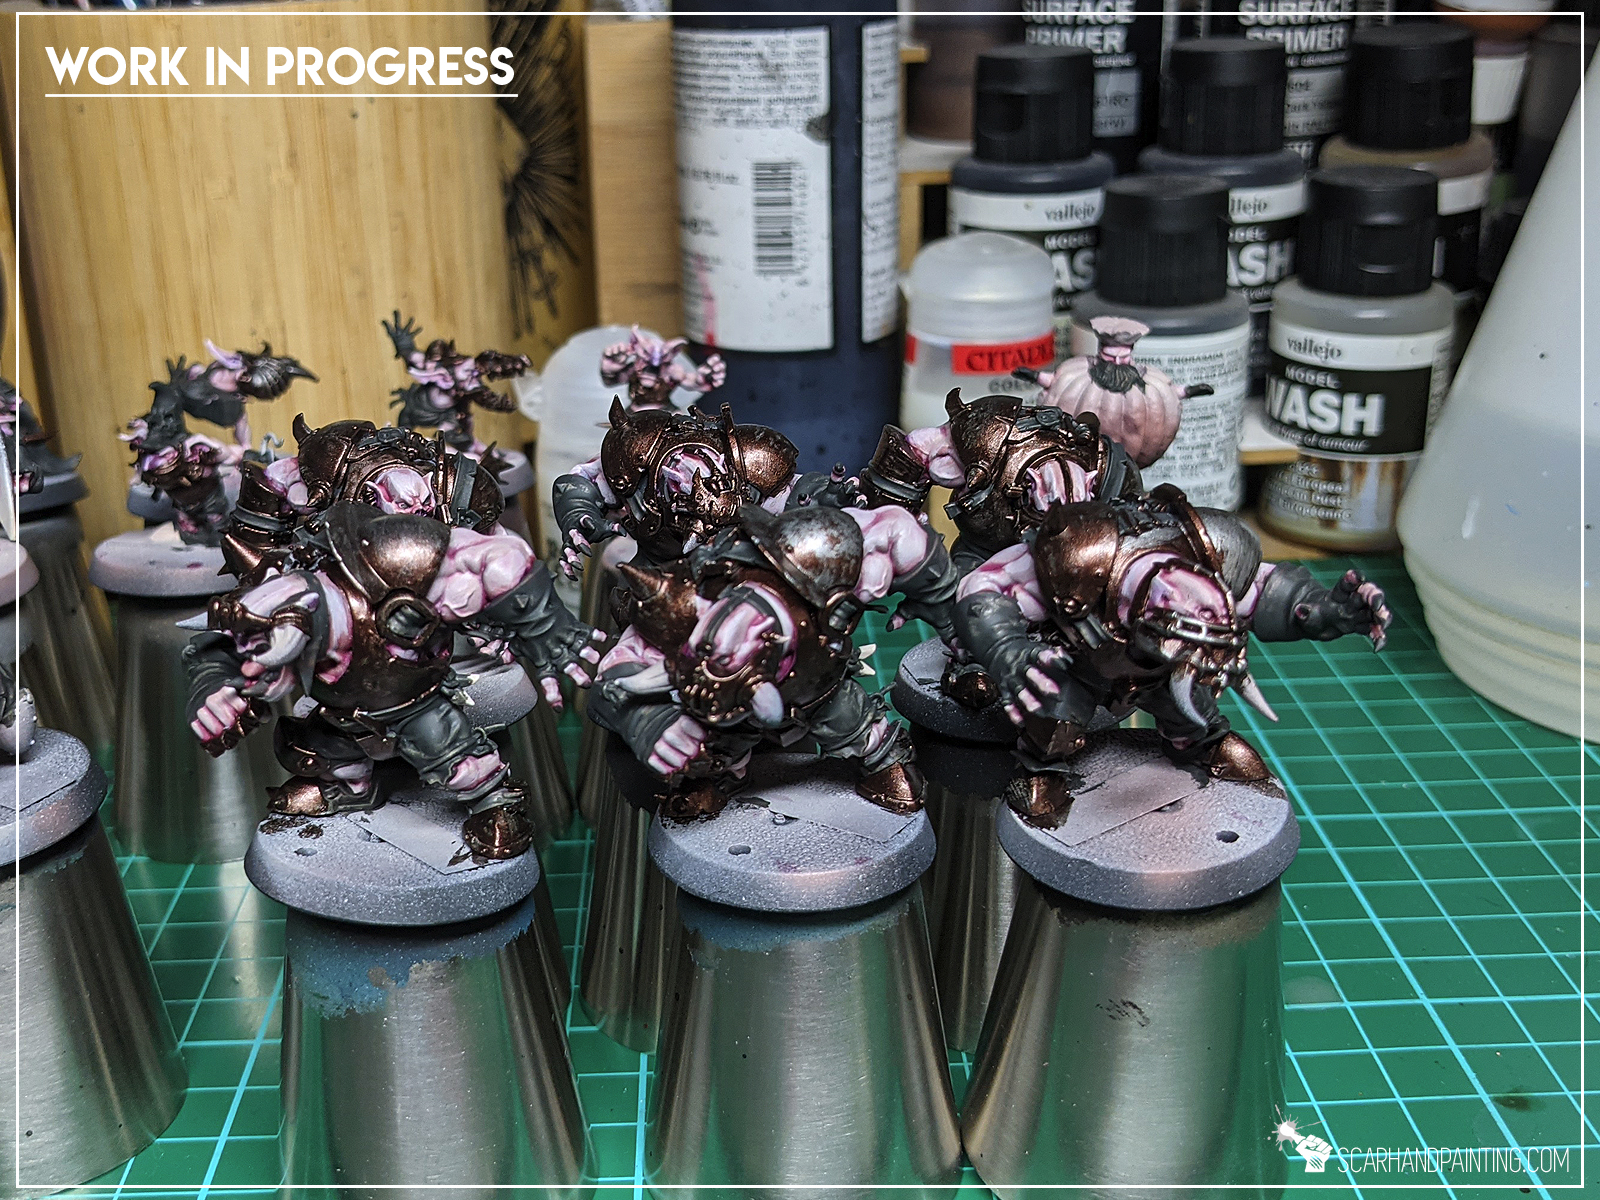
METAL armour:
Warplock Bronze (gw),
Gun Metal (ap),
Shining Silver (ap), l&p
Mix Strong Tone Ink (ap) 1:1 Soft Tone Ink (ap),
Shining Silver (ap), l&p
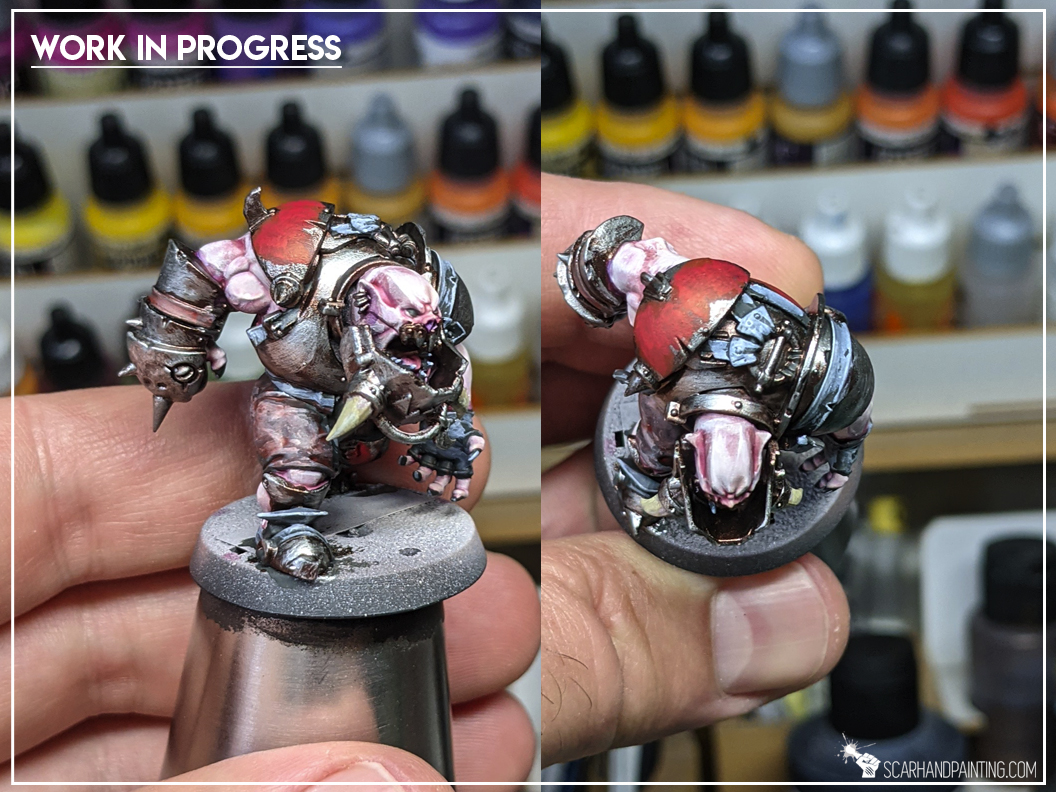
RED armour:
Red Terracotta (val), stpl
Flat Red (val), stpl
Strong Tone Ink (ap),
Orange Fire (val), stpl
Flat Red (val), bl
BROWN belts & strips:
Red Terracotta (val),
Pallid Wych Flesh (gw), flbr
Off White (val), l&p
Mix: Scorched Brown (val) 1:1:1 Dark Fleshtone (val), Medium,
Mix: Strong Tone Ink (ap) 1:1 Soft Tone Ink (ap),
GREY clothes:
Panzer DK. Grey (val),
Fenrisian Grey (gw), flbr
Pallid Wych Flesh (gw), l&p
Strong Tone Ink (ap),
Off White (val), l&p
BASES:
Dark Earth (ak texture),
Karak Stone (gw), drbr
Flayed One Flesh (gw), flbr
l&p – lines and points,
p – points,
dl – deep lining,
bl – blend,
gl – glaze,
drbr – drybrush,
fltbr – flatbrush,
lobr – loaded brush,
stpl – stippling,
*Airbrushed (with multiple layers and mixes)
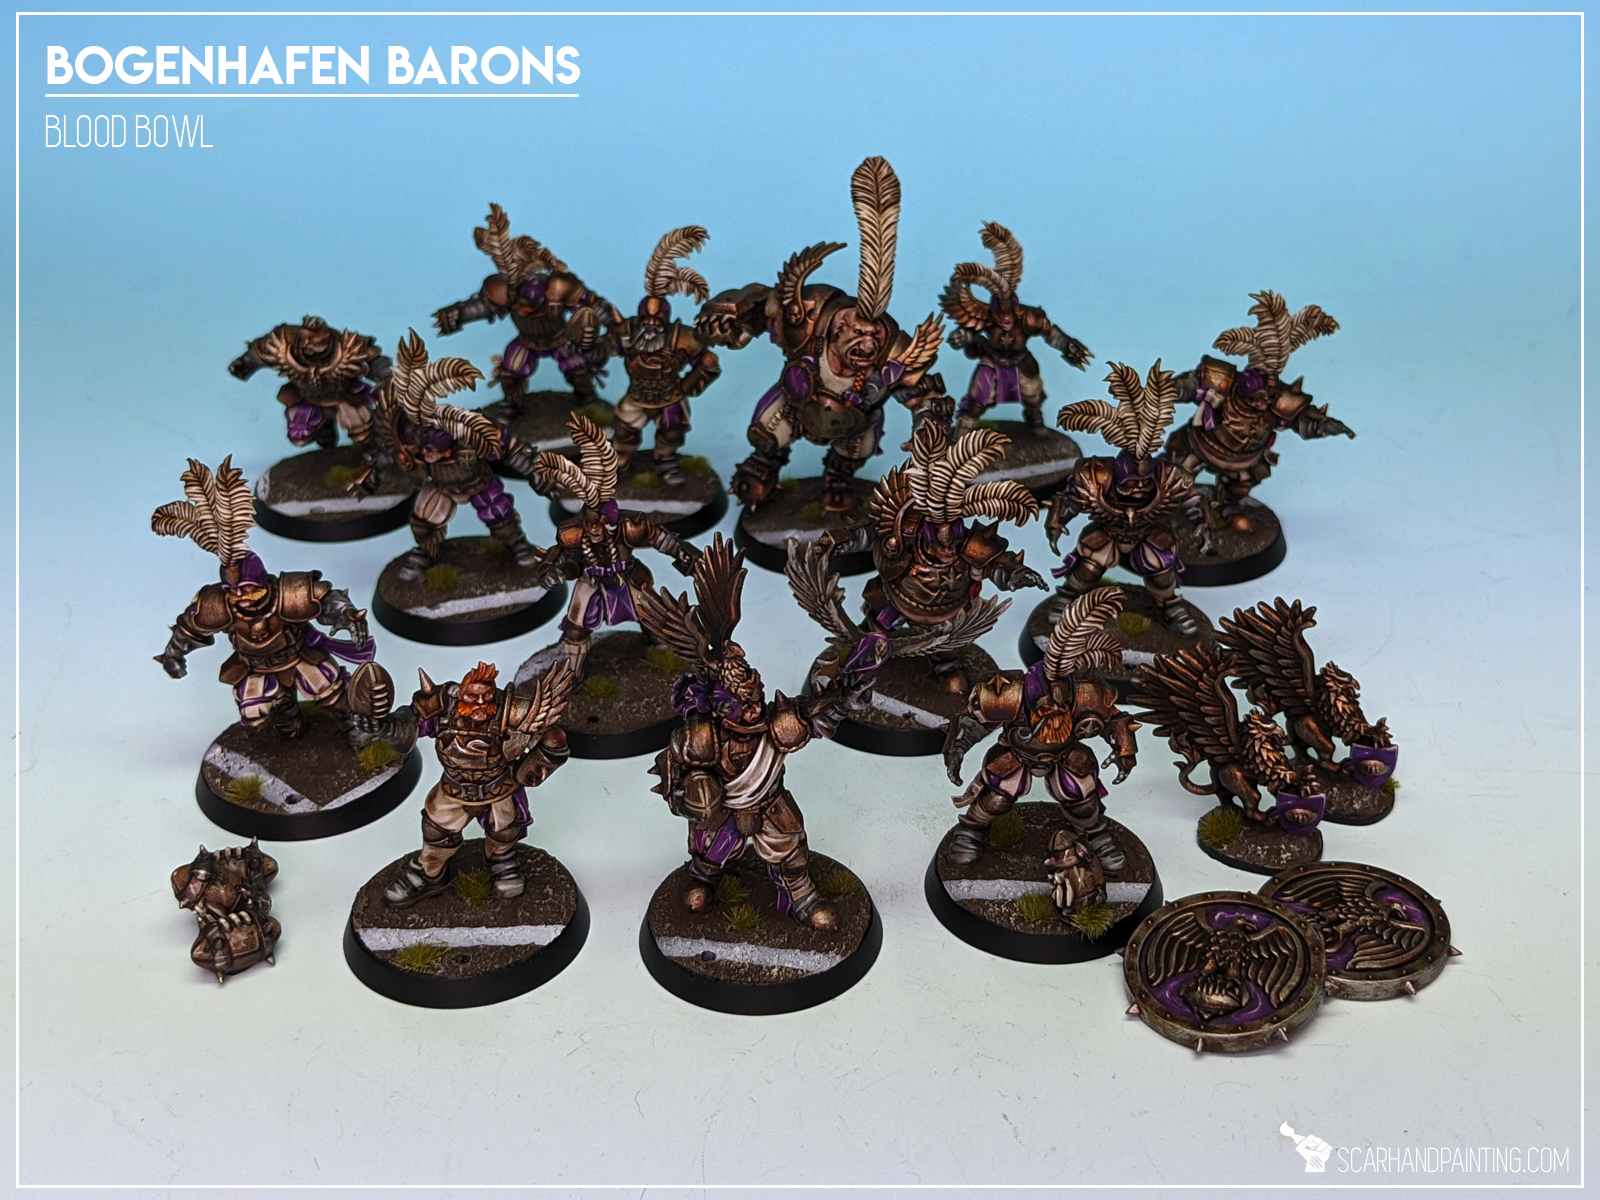
Welcome to Painting Blood Bowl Bogenhafen Barons tutorial. Here I will present to you a Step-by-step of an easy and fast painting process for Games Workshop Bogenhafen Barons as can be seen in Gallery: Bogenhafen Barons.
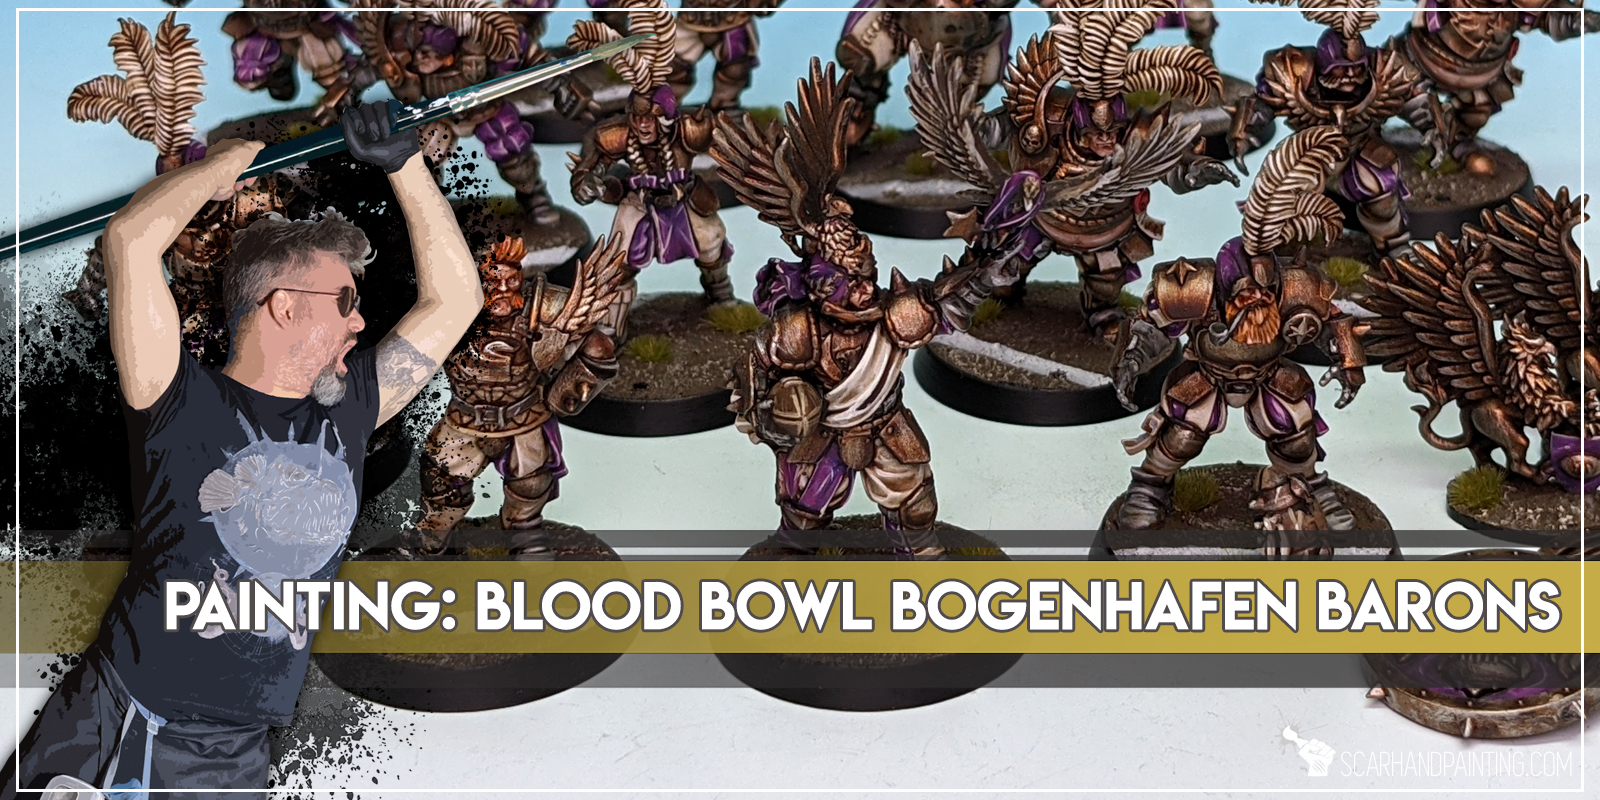
Before we start, some notes:
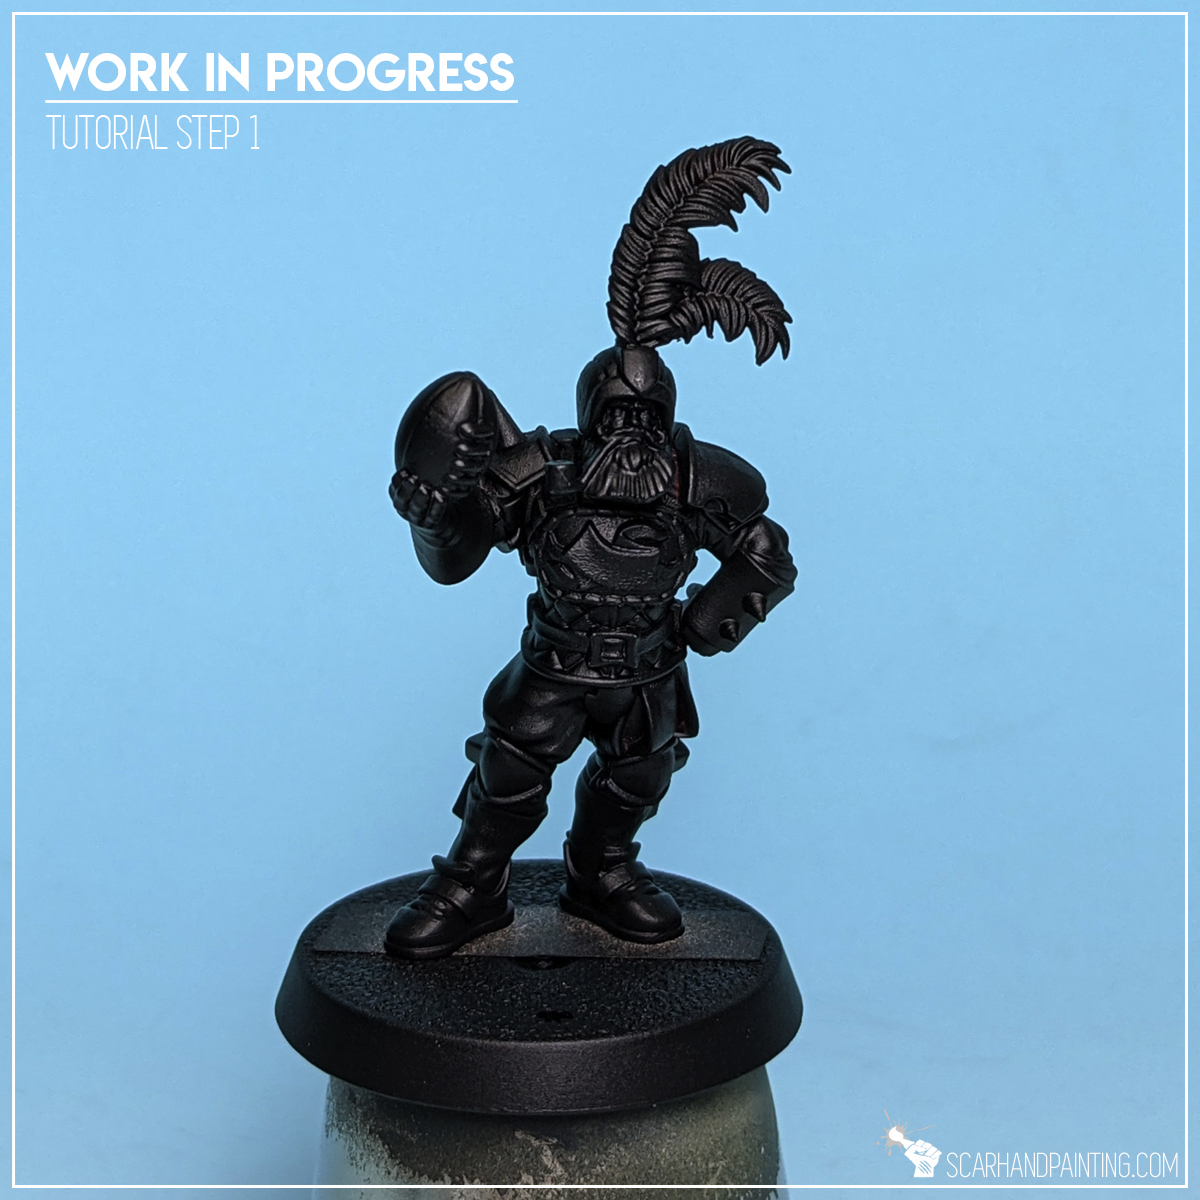
Step one: Undercoat
I started with a thorough layer of Games Workshop Chaos Black spray. This is a standard procedure for me. Chaos Black spray is my go to choice when it comes to undercoat.
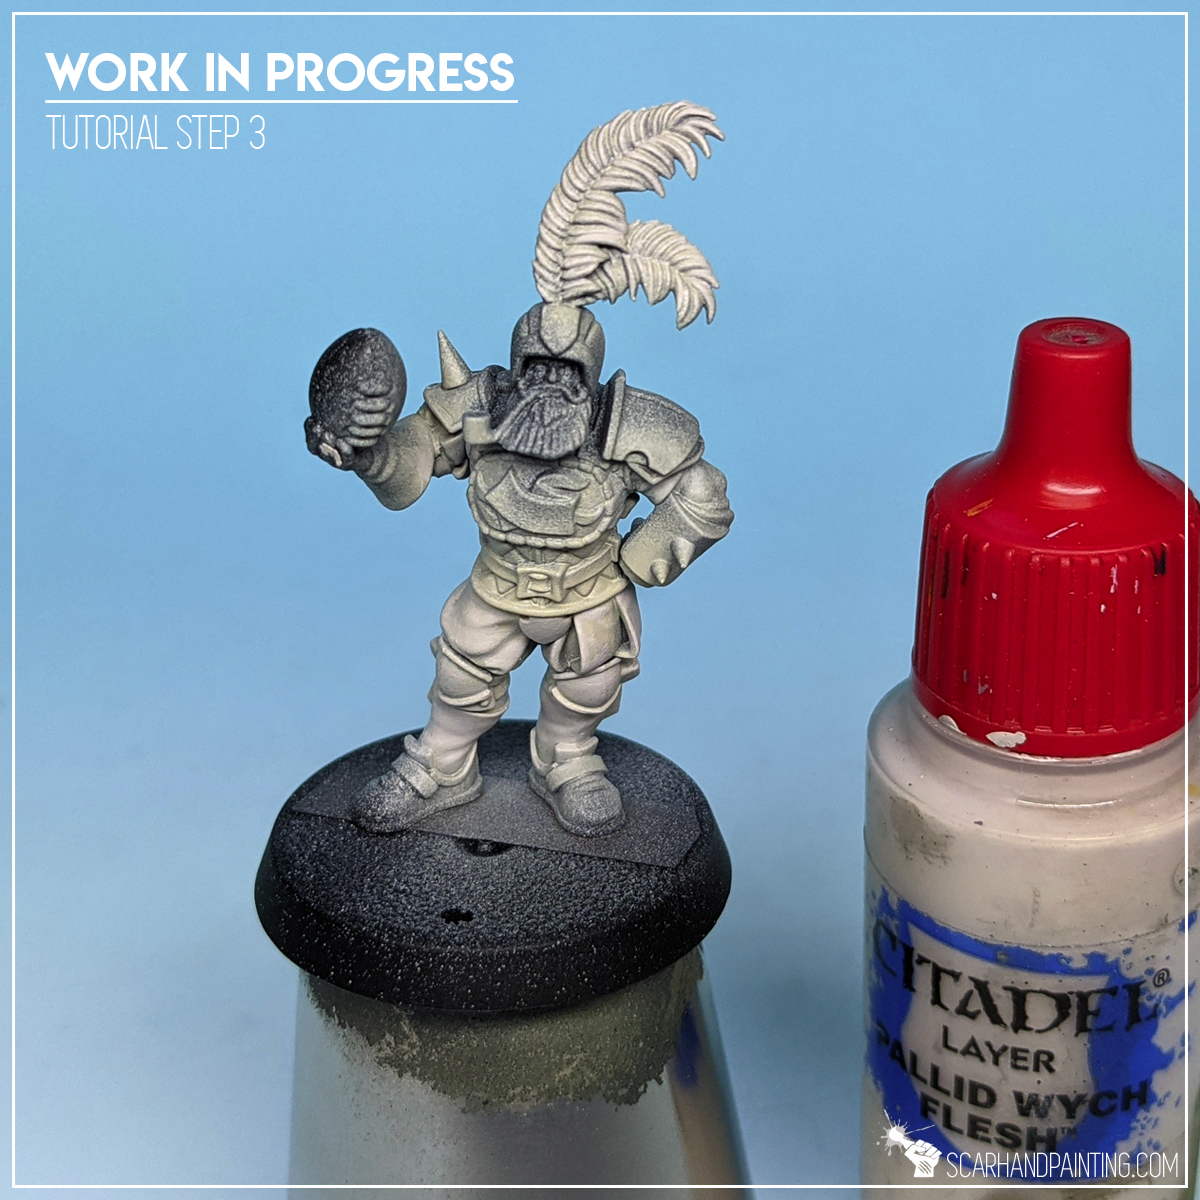
Step two: Cream
I started by airbrushing Vallejo Bonewhite (air) all over feathers and clothes of the miniature, not caring if I mess up everything around. Paint was applied straight out of bottle, no dilution. I then moved to GW Pale Wych Flesh and
Flatbrushed it over previous layer. This layer was meant to build volume of paint and just a bit of highlight for the color, so that further ahead Wash could do a better job.

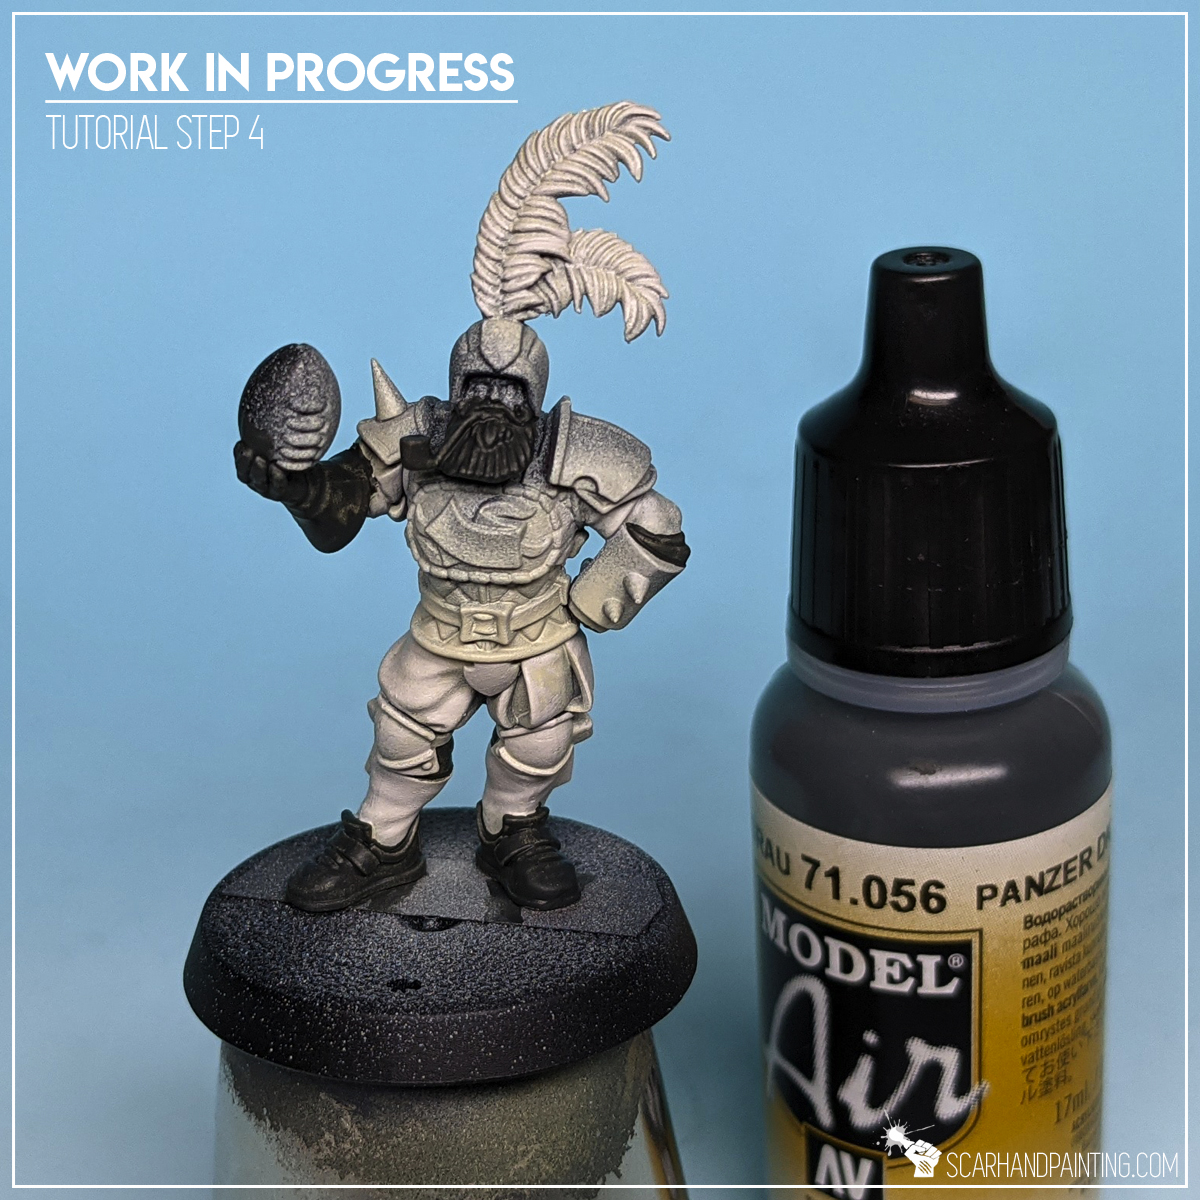
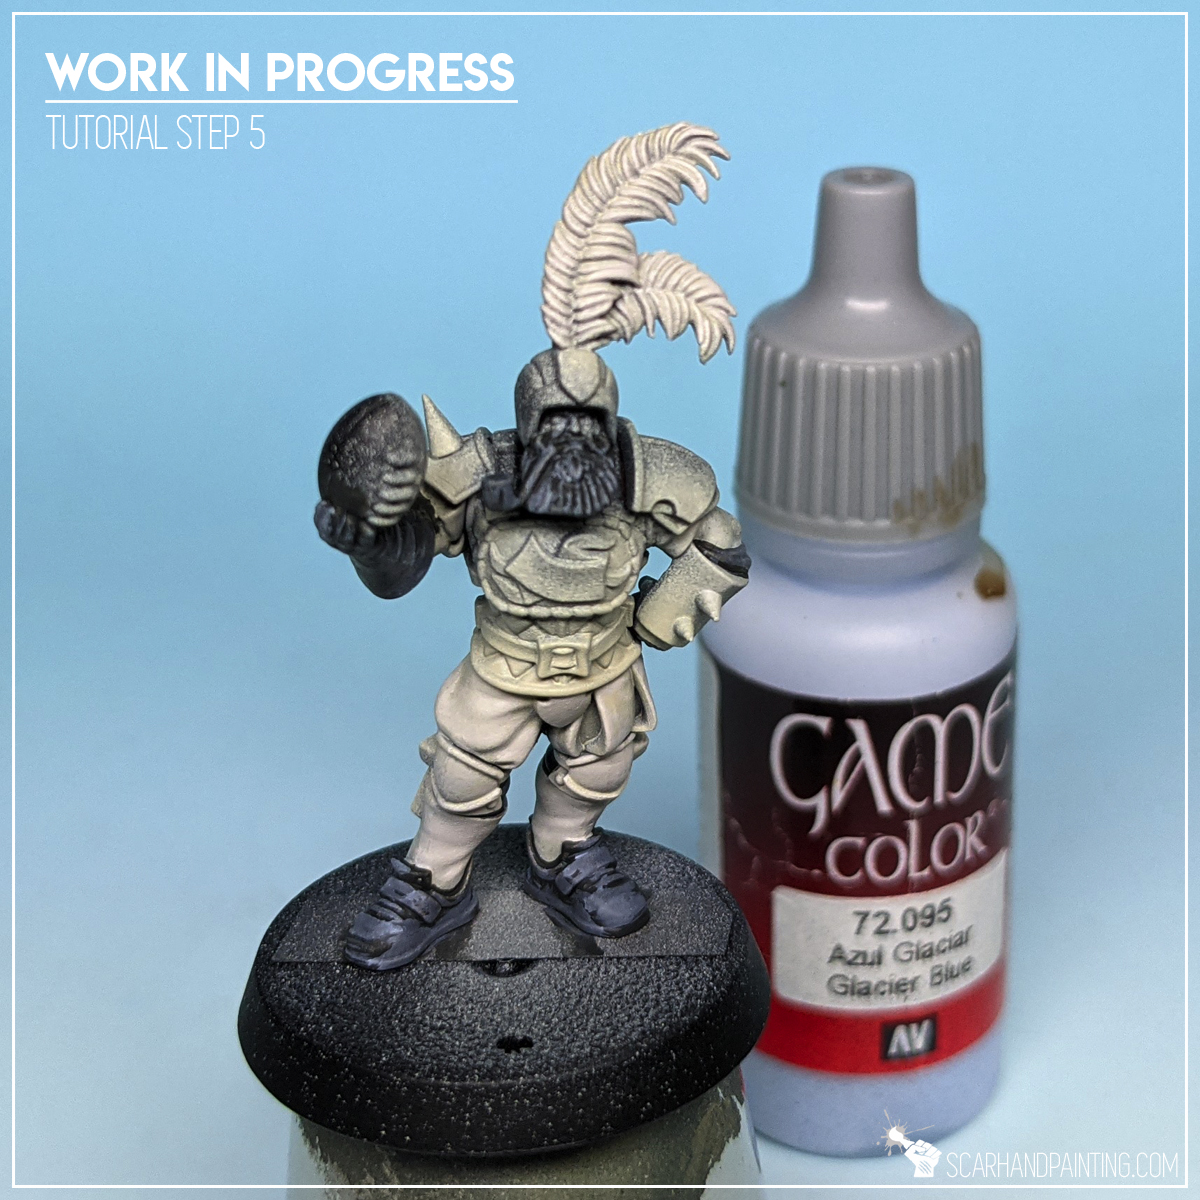
Step three: Grey
I applied Vallejo Air Panzer Dark Grey (air) manually, with natural dilution (air series). This paint is easy to control which helped me keep the layer precise. The color wasn’t strong but this layer didn’t had to. It was meant to prepare a background for future highlights of dark black-to-brown elements. Next I used slightly diluted Vallejo Glacier Blue and flatbrushed it over previous layer. Finally I applied few highlights with GW Pale Wych Flesh.

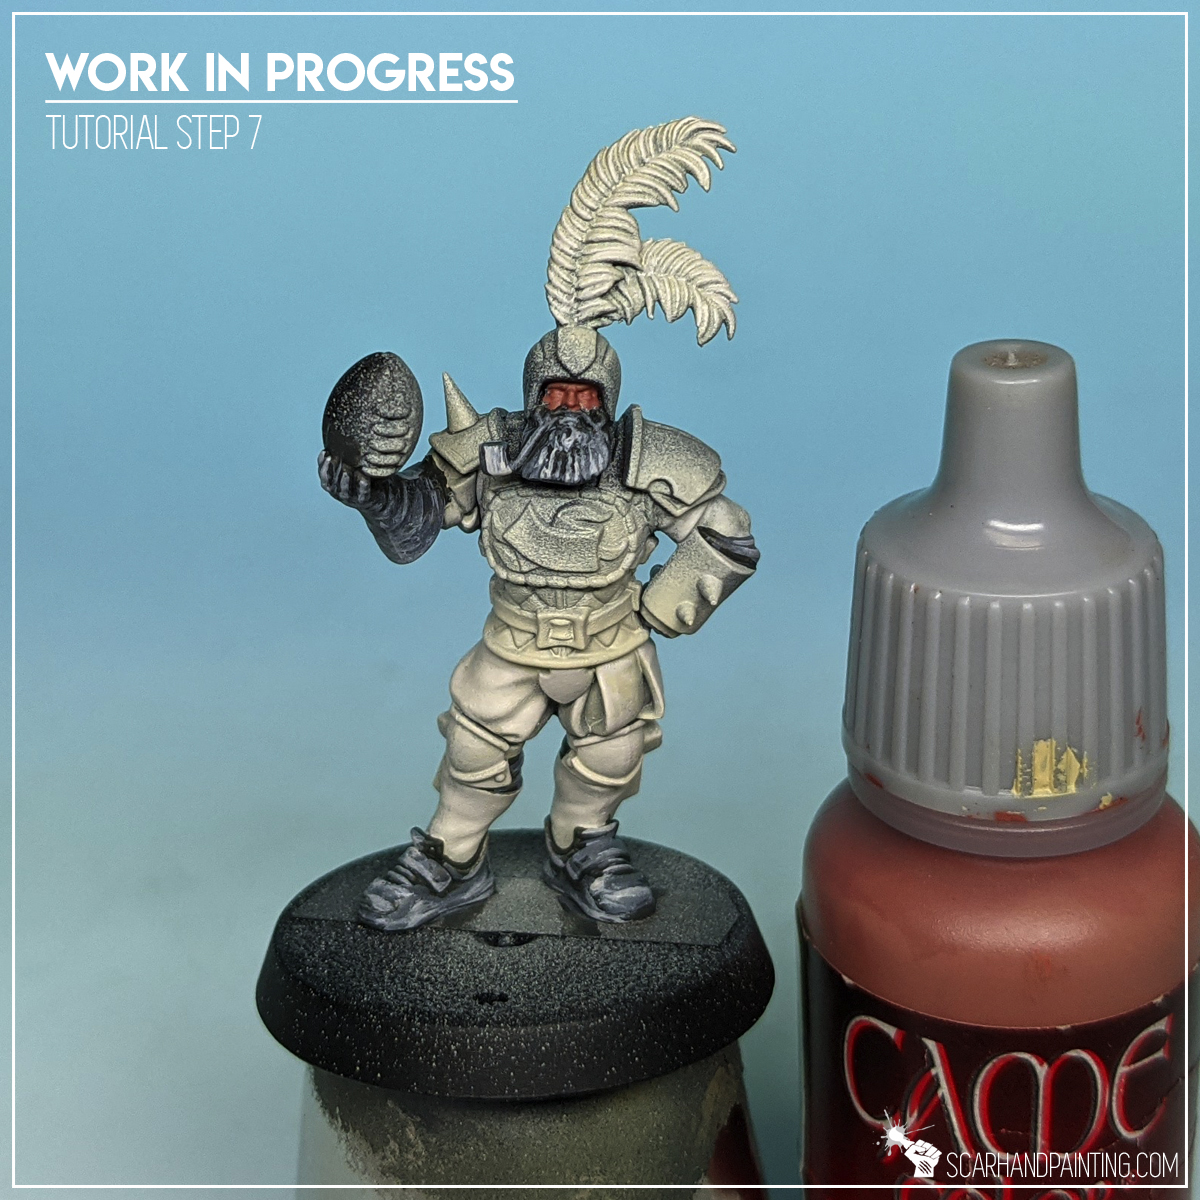
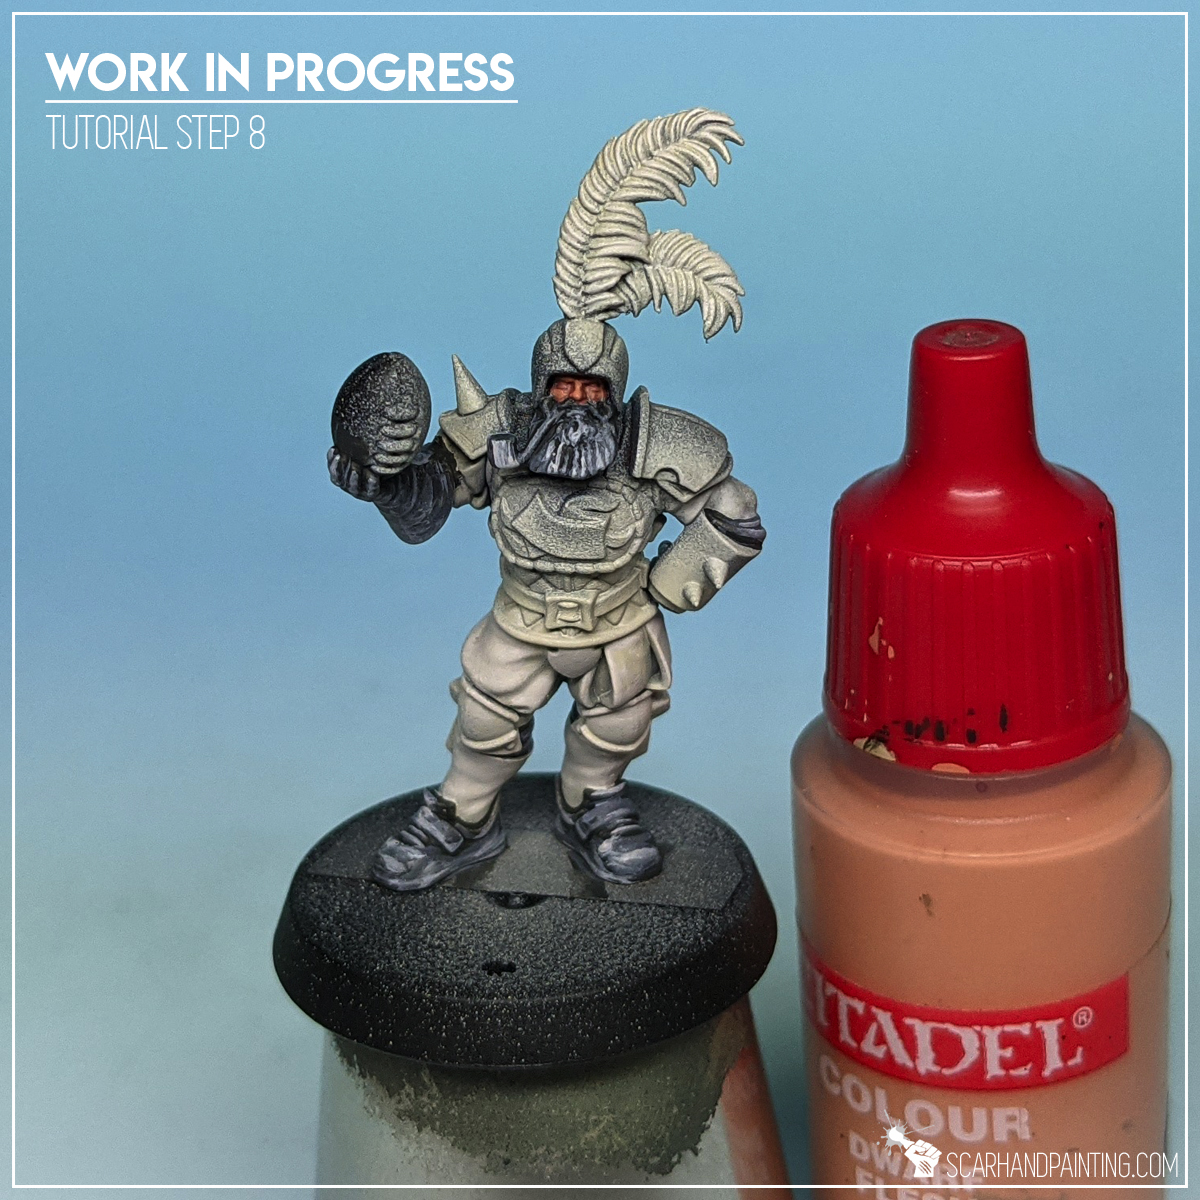
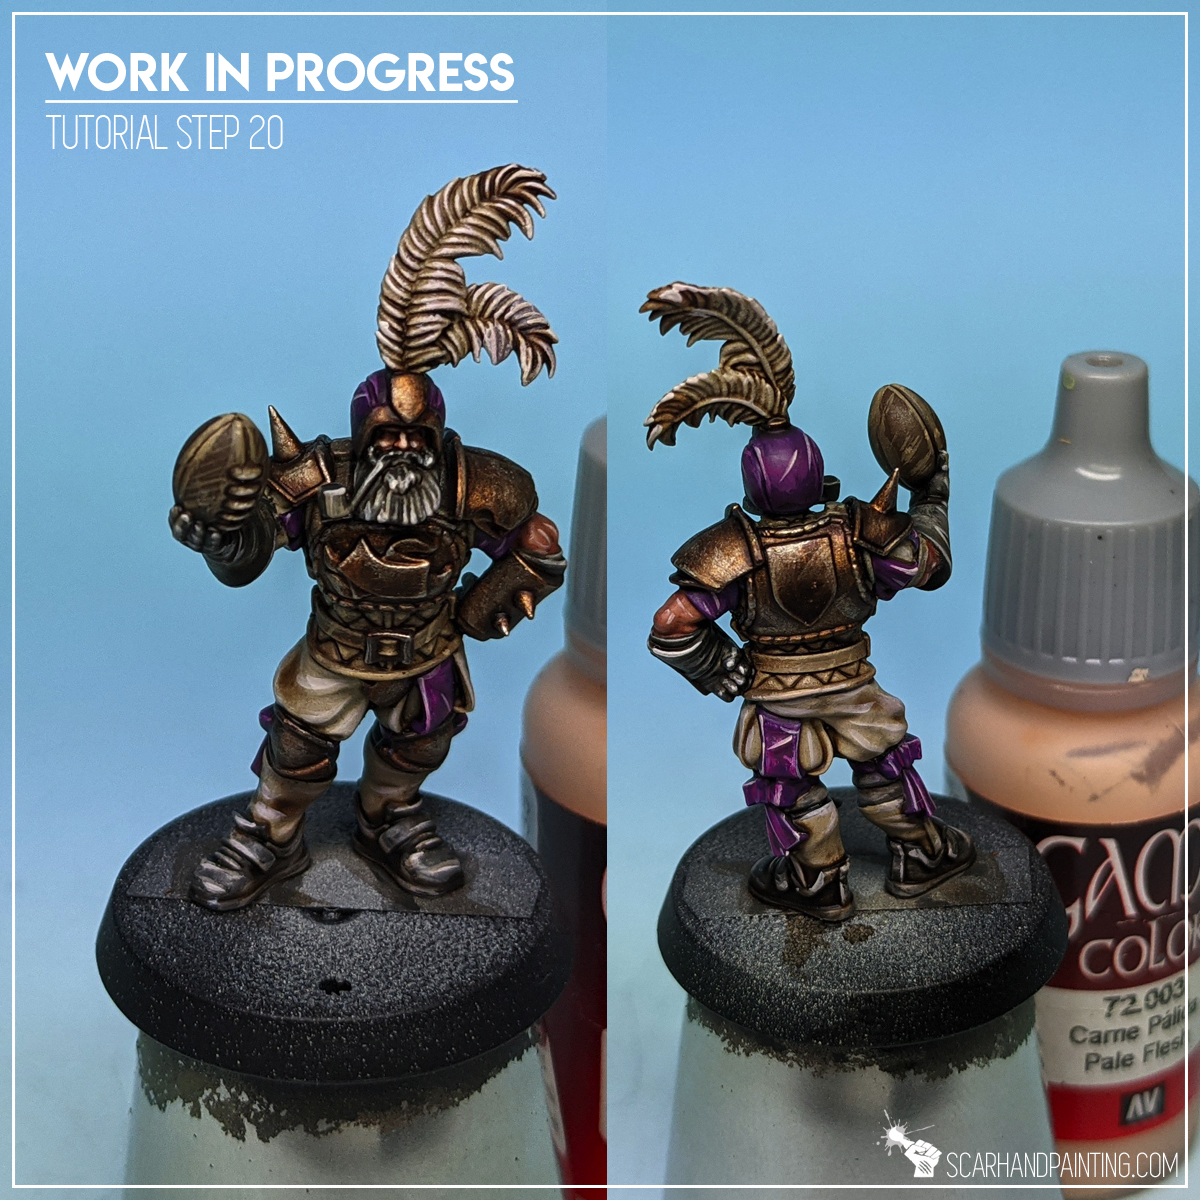
Step four: Skin
I begun painting skin with Vallejo Tan by applying a thin layer and concentrating on filling recesses. I added another thin layer on large flat areas to provide a solid color. Next I switched to GW Dwarf Flesh covered previous layer using flatbrush technique. Final highlights were made with Vallejo Flesh (air). I used the paint straight out of the bottle and applied it on the edges and on top of flat areas.

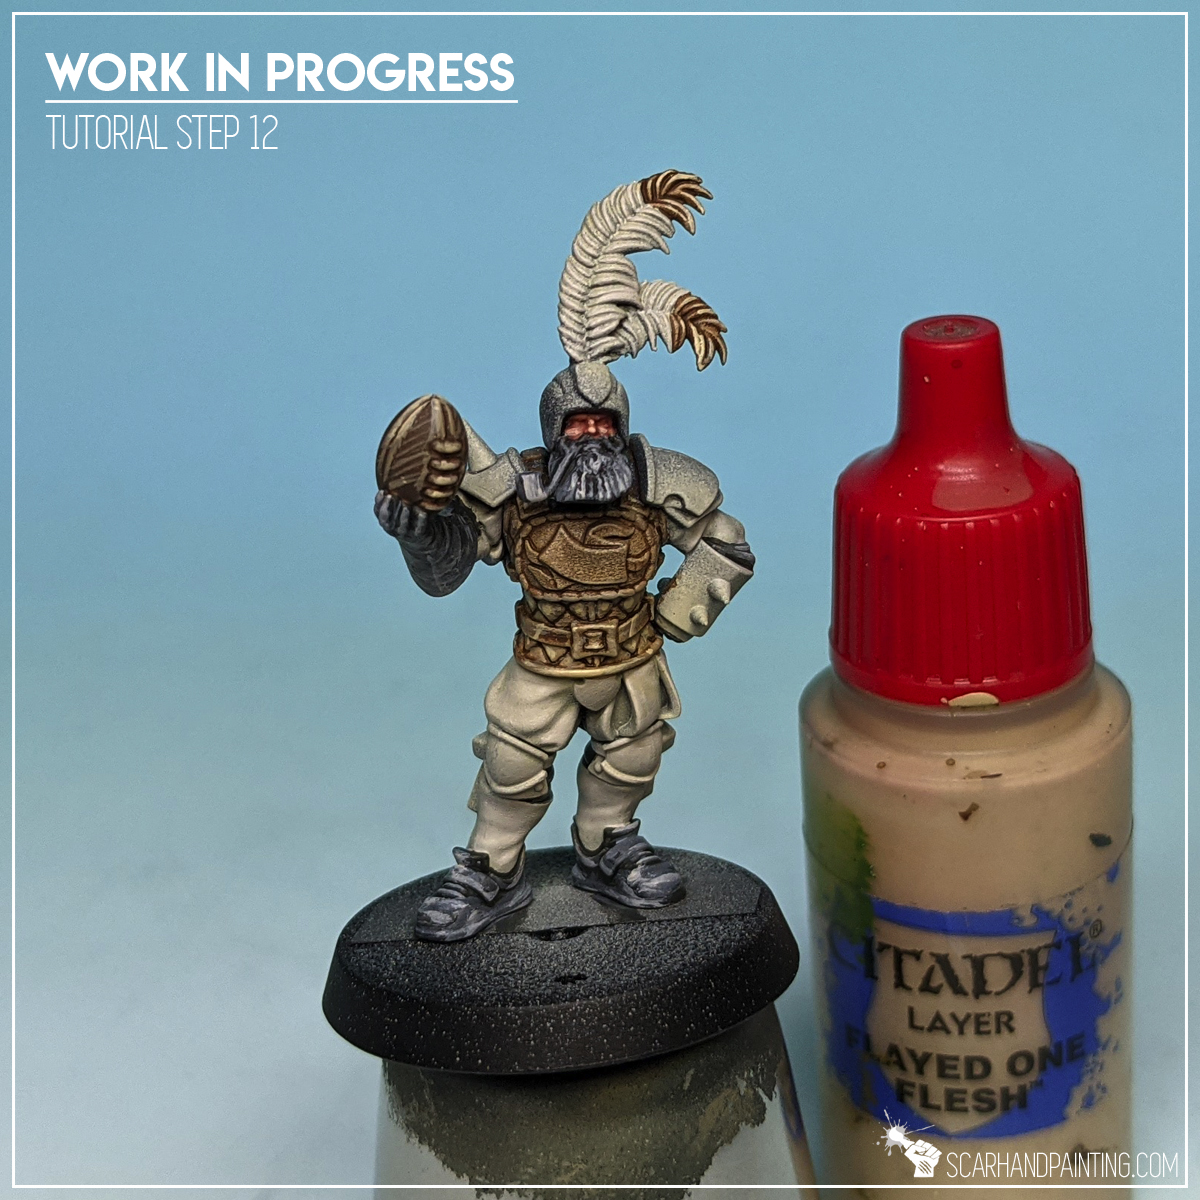
Step five: Browns
I took on Browns by manually applying Vallejo Dark Fleshtone (air) onto everything to-be-brown. Natural air series dilution allowed me to control the paint and avoid messing up other layers. I then switched to GW Karak Stone and Flayed One Flesh for classic highlights. Just few lines and dots on the edges and in center areas.


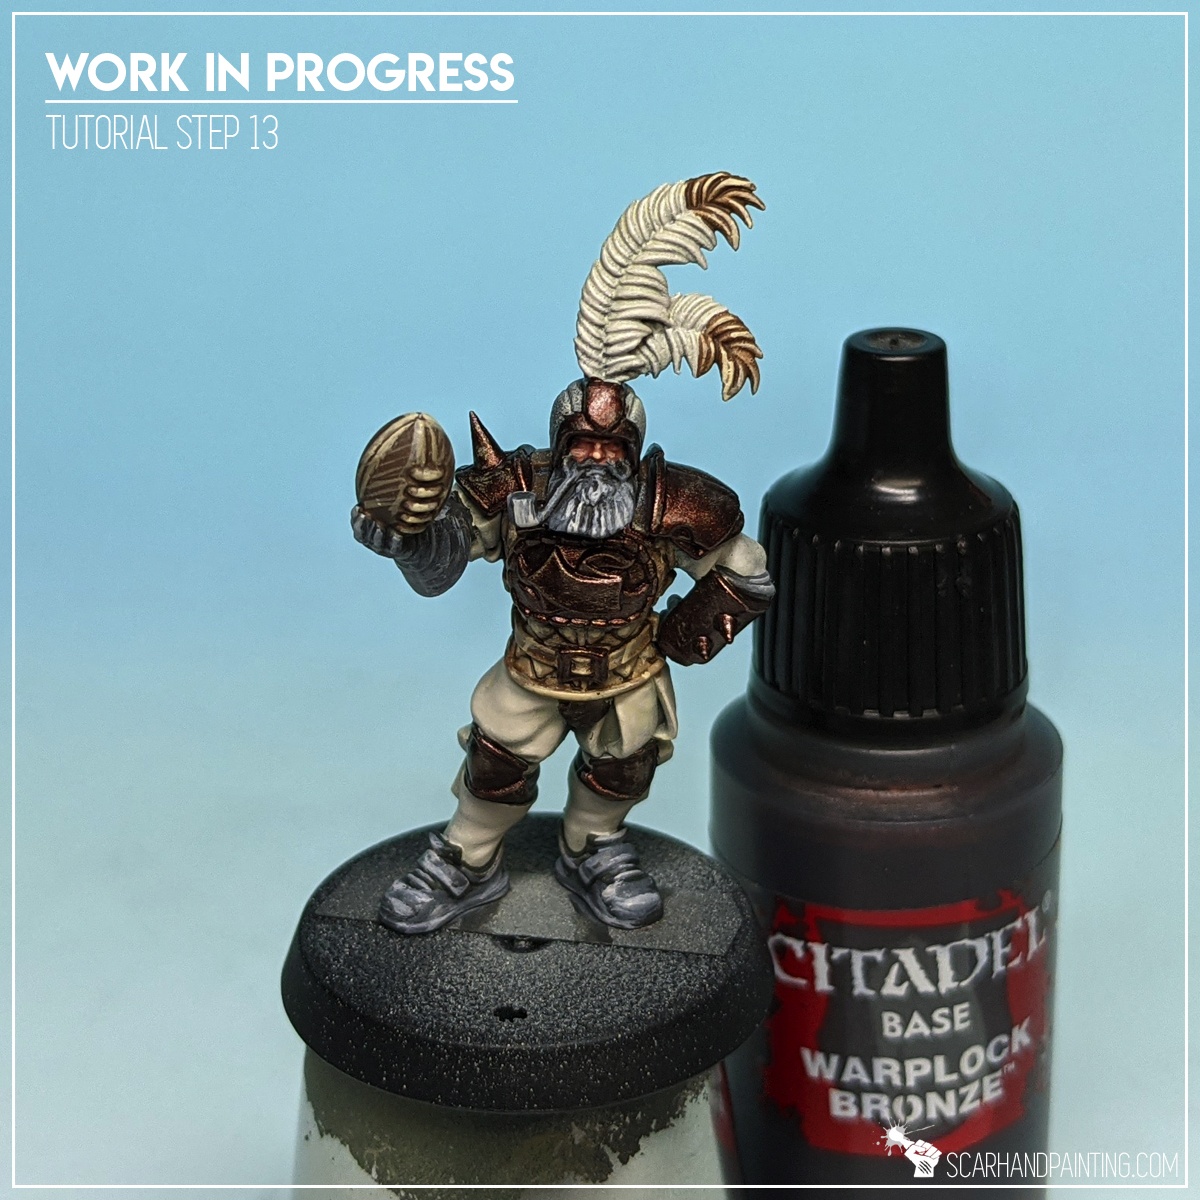
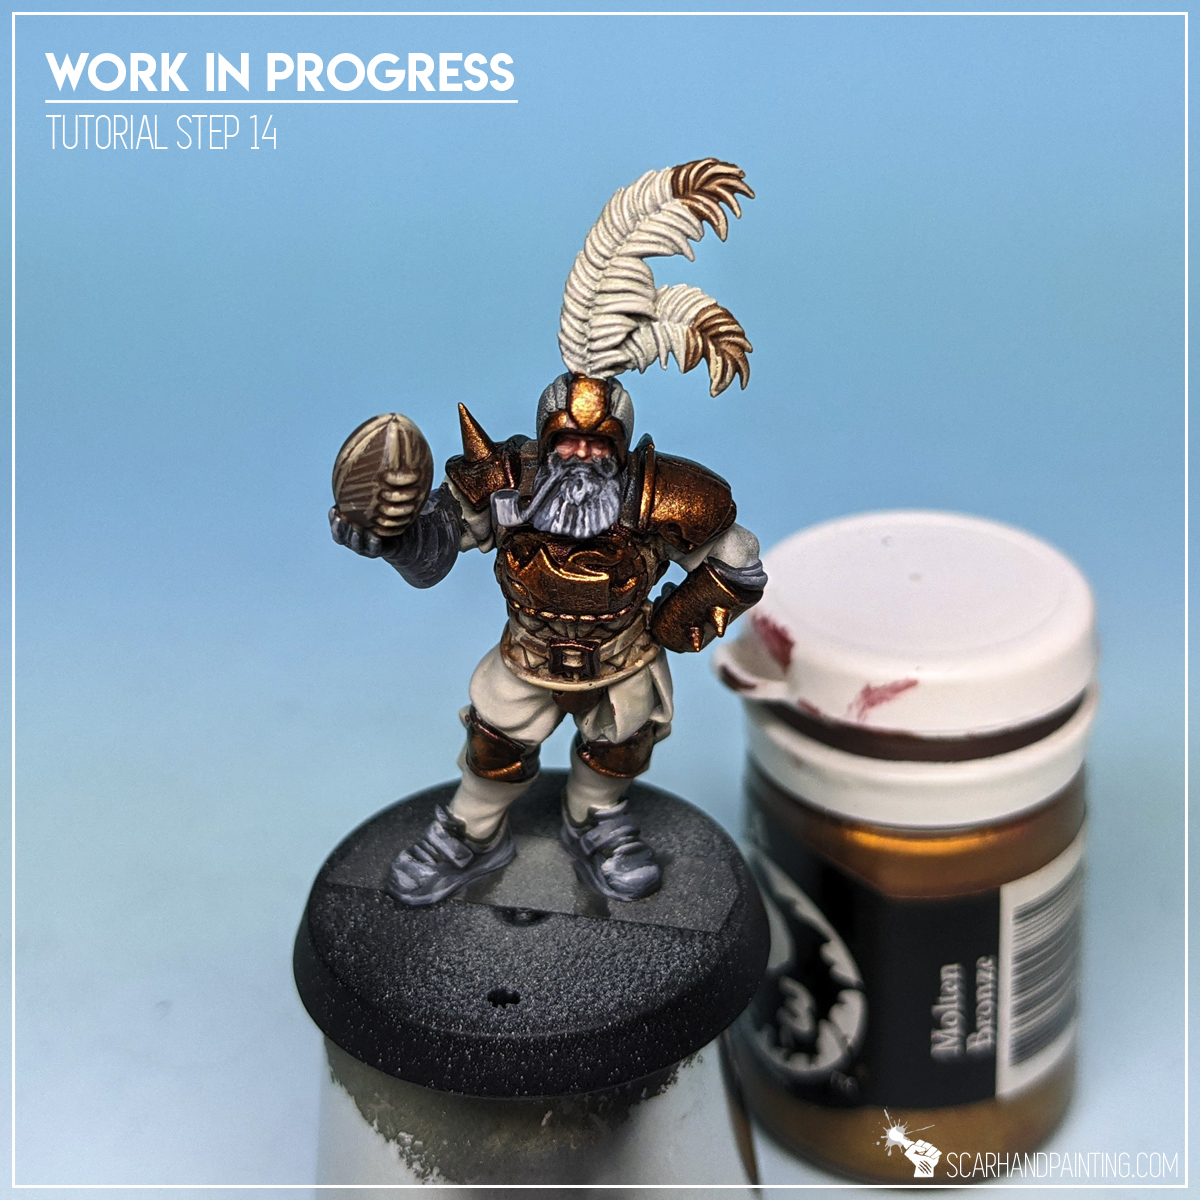
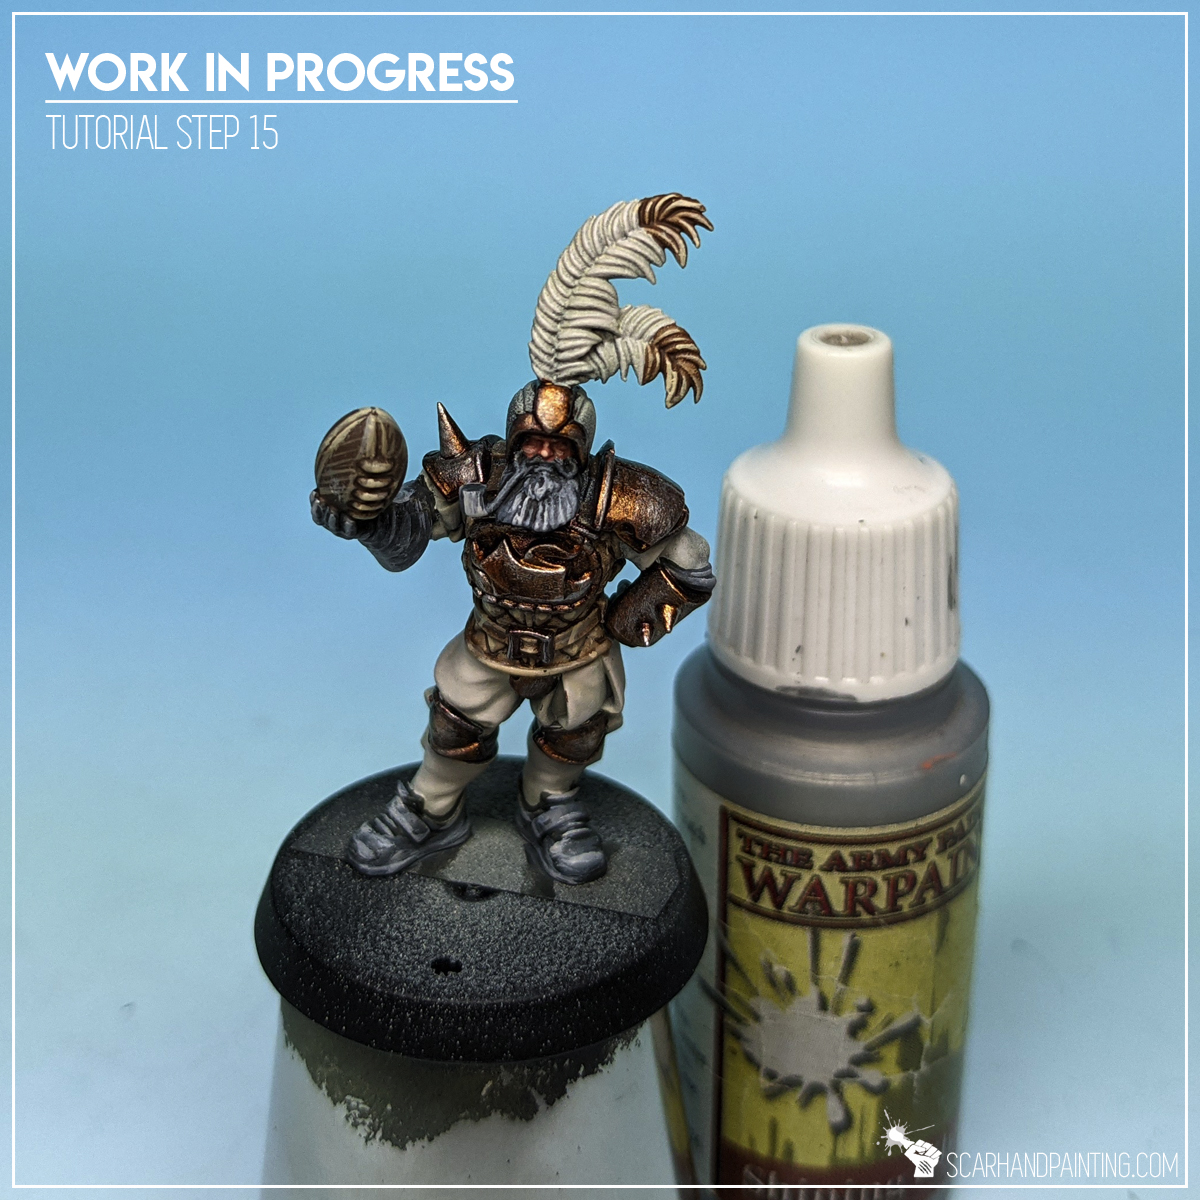
Step six: Metal
I started metal with GW Warplock Bronze, applying a thinned down layer on top of armor pieces. I then moved to P3 Molten Bronze for flatbrushed highlights. Finally I applied few highlights with AP Shining Silver.
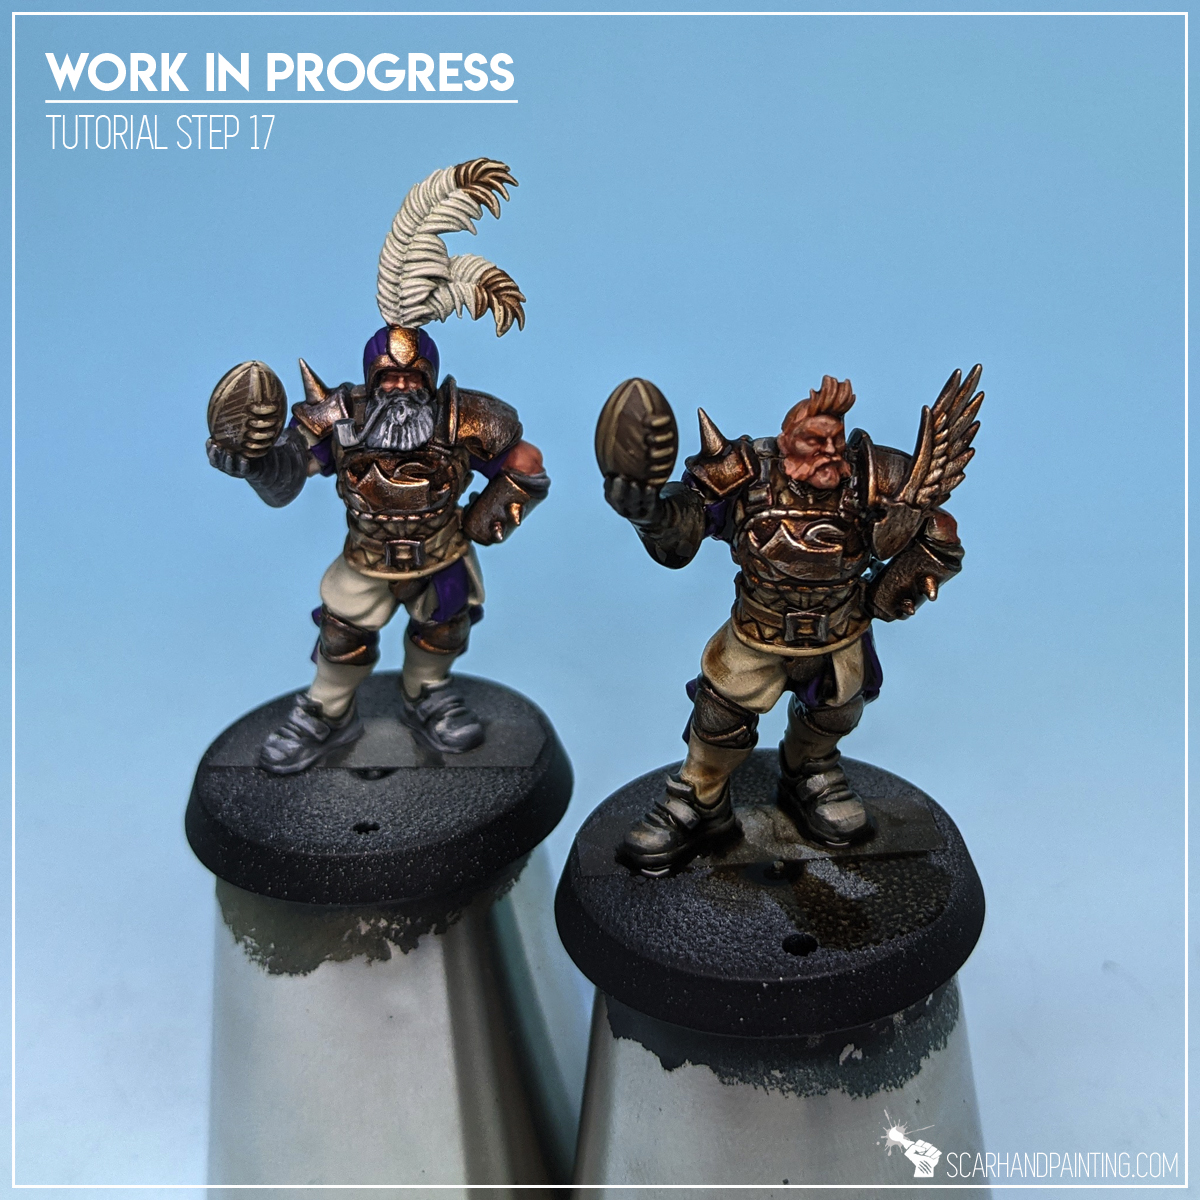
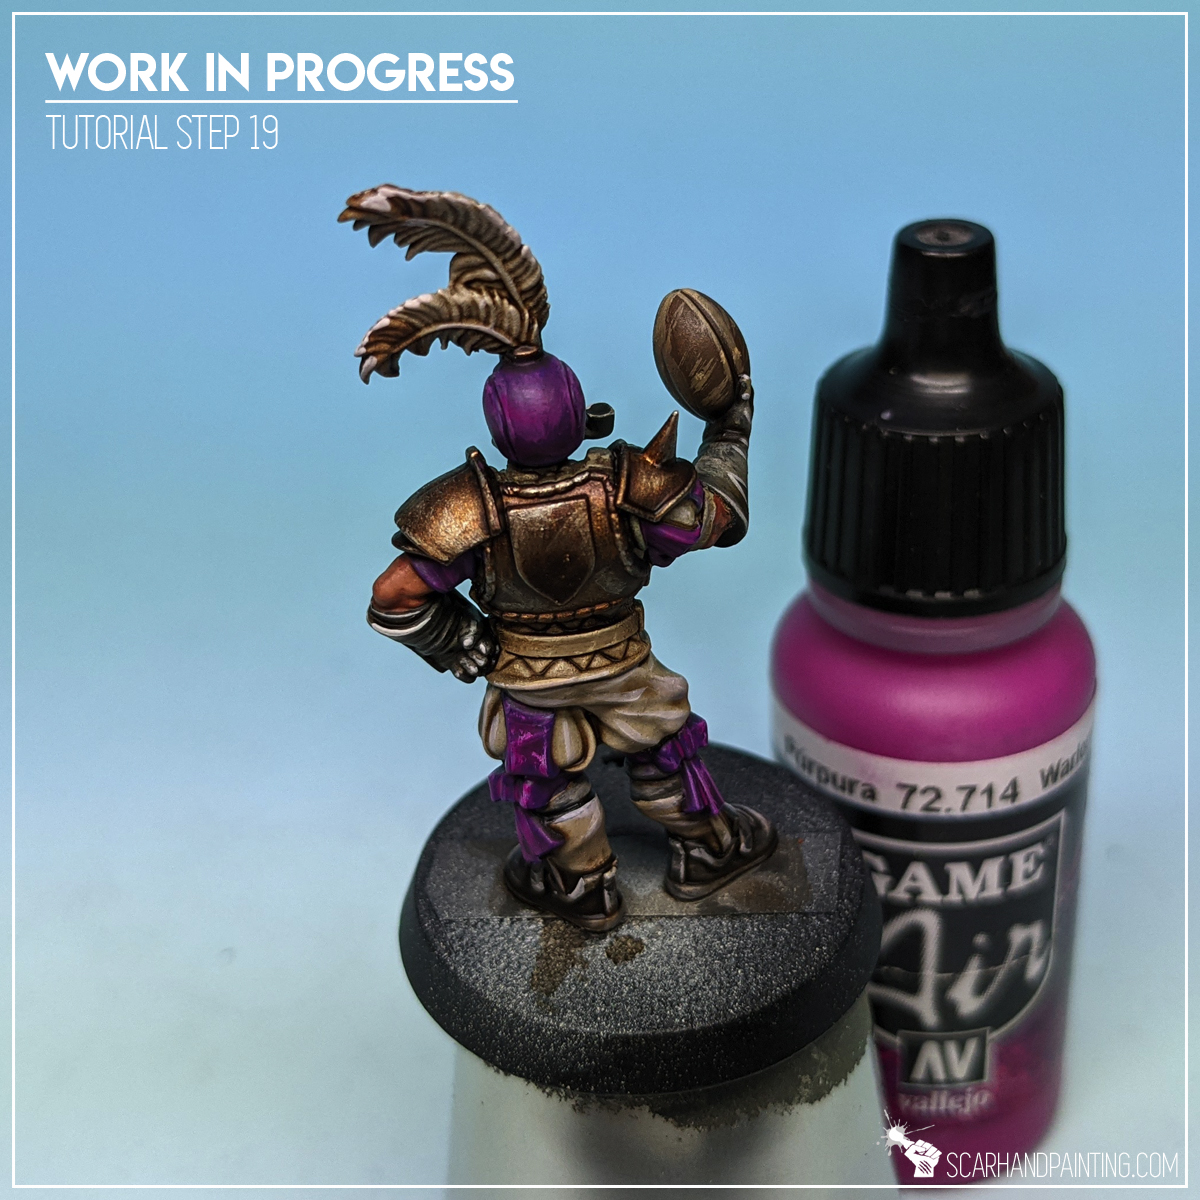
Step seven: Violet
I applied a layer of Vallejo Violet on chosen parts of clothes and decorations. This was the last layer before wash so I ensured it didn’t leave a mess on top of previous elements. At this point of the paint job, anything could still be corrected with minimum effort, and I done so accordingly.

Step eight: Wash
This is where magic always happens. I applied a wet layer of AP Strong Tone Ink mixed with a tiny bit of Matt Varnish, onto entire miniature. I then ensured to remove any excess paint, from where detail got completely covered by pigmentation, with a clean brush.
Step nine: Highlights
Once wash dried up, I applied highlights of GW Pale Wych Flesh. Edge highlights, points of focus and lines in the middle areas for everything not metal or skin. I also applied a strongly thinned down layer of Pale Wych Flesh on top of Purple clothes creating a somehow mist-like effect.

Step ten: Purple
I then got back to violet (now more of a purple) and blended a layer of Vallejo Warlord Purple (air) on top of it. Air series does not require any thinning, but I added a bit of medium to leave texture difference visible underneath. With a strong and vibrant color I moved to Vallejo Pale Flesh for both an edge highlight and some random lines. I used this opportunity to add few dots and lines on top of skin, thus providing a final highlight.
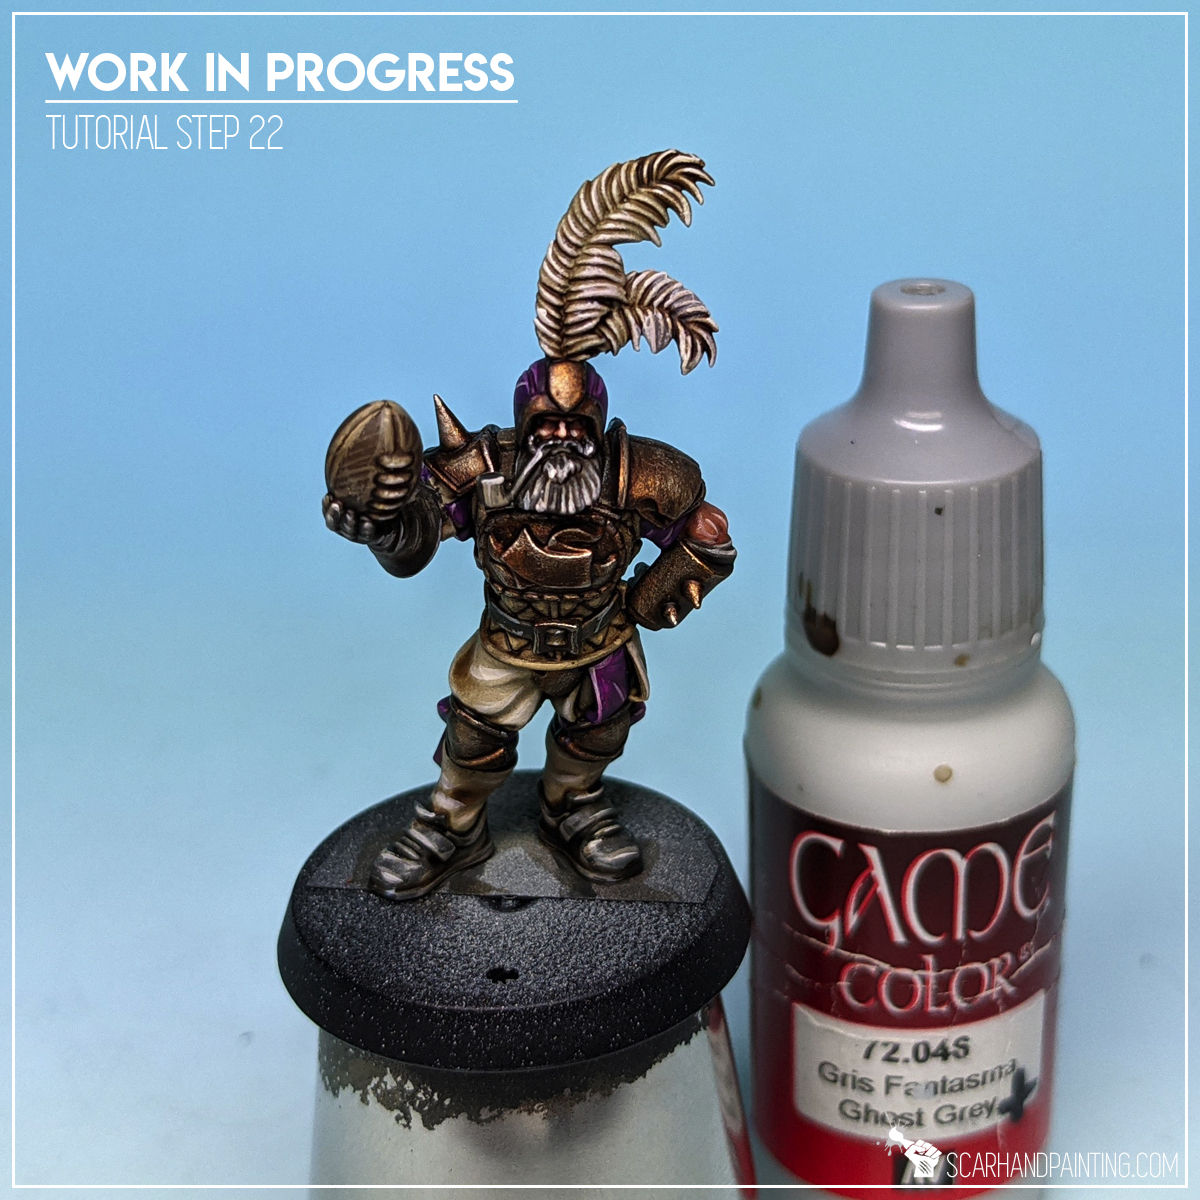
Step eleven: Grey
Finally I painted belts and straps with thinned Vallejo Panzer Dark Grey (air) with previous layers being barely visible from underneath. It was then highlighted with Vallejo Ghost Grey to add contrast and keep it in line with rest of greys on the miniature.

Step twelve: Basing
Basing was made using AK Interactive Dark Earth texture, followed with a single layer drybrush of Games Workshop Karak Stone. I then airbrushed a line of pure white using a masking tape to protect the rest of the base (and miniature). Few Gamers Grass tufts and pure black edge later the job was done.


I hope you find this tutorial interesting. Be sure to let me know your thoughts in the comments below or via Facebook.or Instagram. I would also appreciate if you considered sharing this content with your friends, who might find it useful. Finally if you are looking for a professional miniatures painting service be sure to contact me with this contact form. I always reply within 24 hours, after which please check out your spam folder.