- contact@scarhandpainting.com


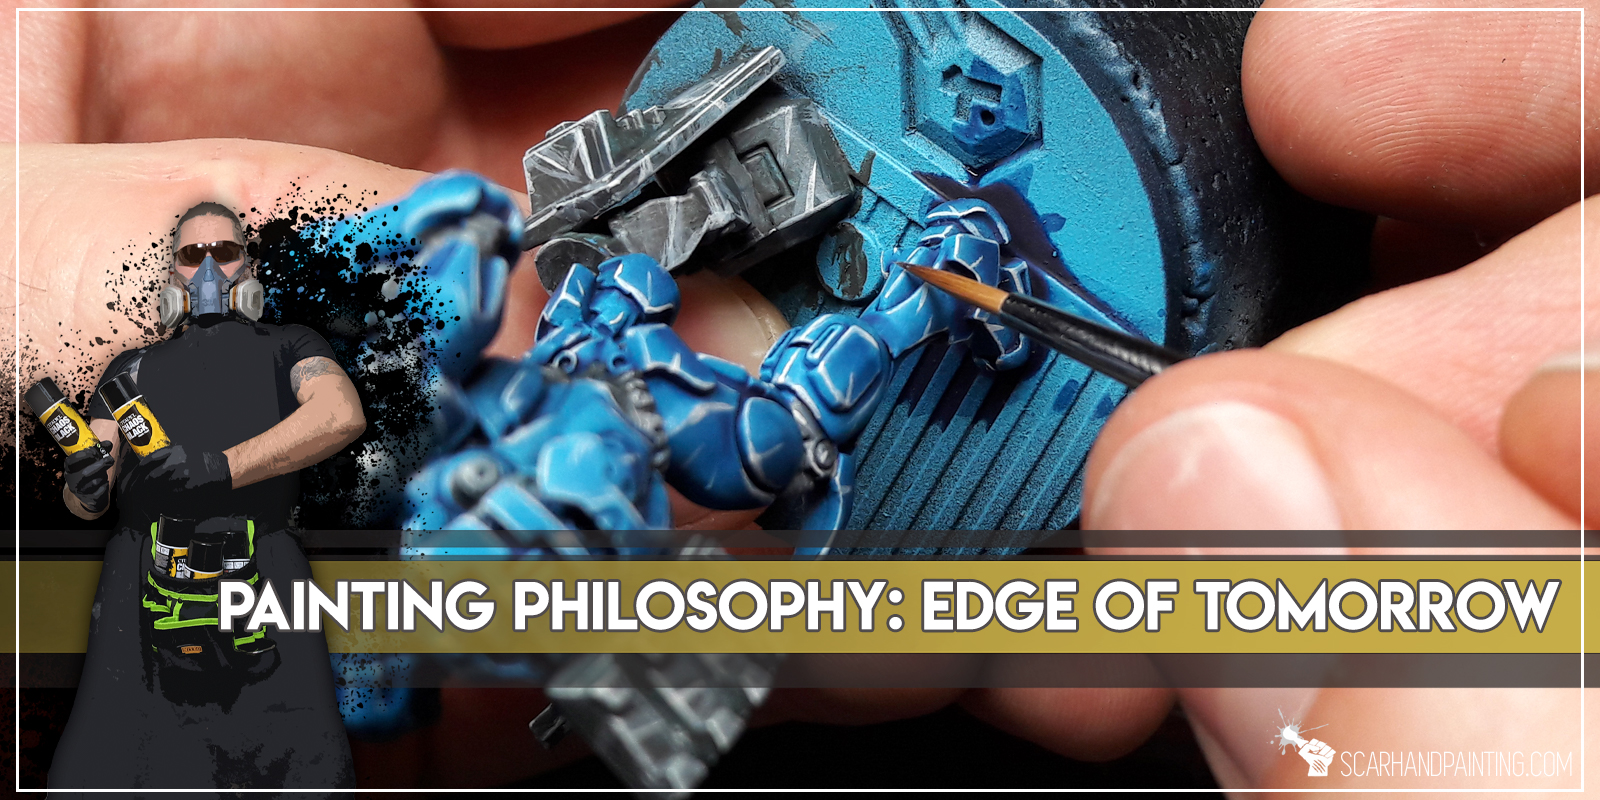
Third time’s a charm thus welcome to the third ‘Painting Philosophy’ article, where I let you in on ‘how’ and especially ‘why’ I do some things in a certain way. In my opinion a proper approach to painting is crucial to maintain healthy and rewarding experience. Final result depends on it in the same way as on techniques, know-how and tools being used. Nowadays internet is full of painting tutorials yet it takes some inner understanding of our own capabilities to find what suits us best and fully benefit from all acquired knowledge. That being said – In this series I will reveal what works best for me as a painter. I hope you will find some wisdom in it…
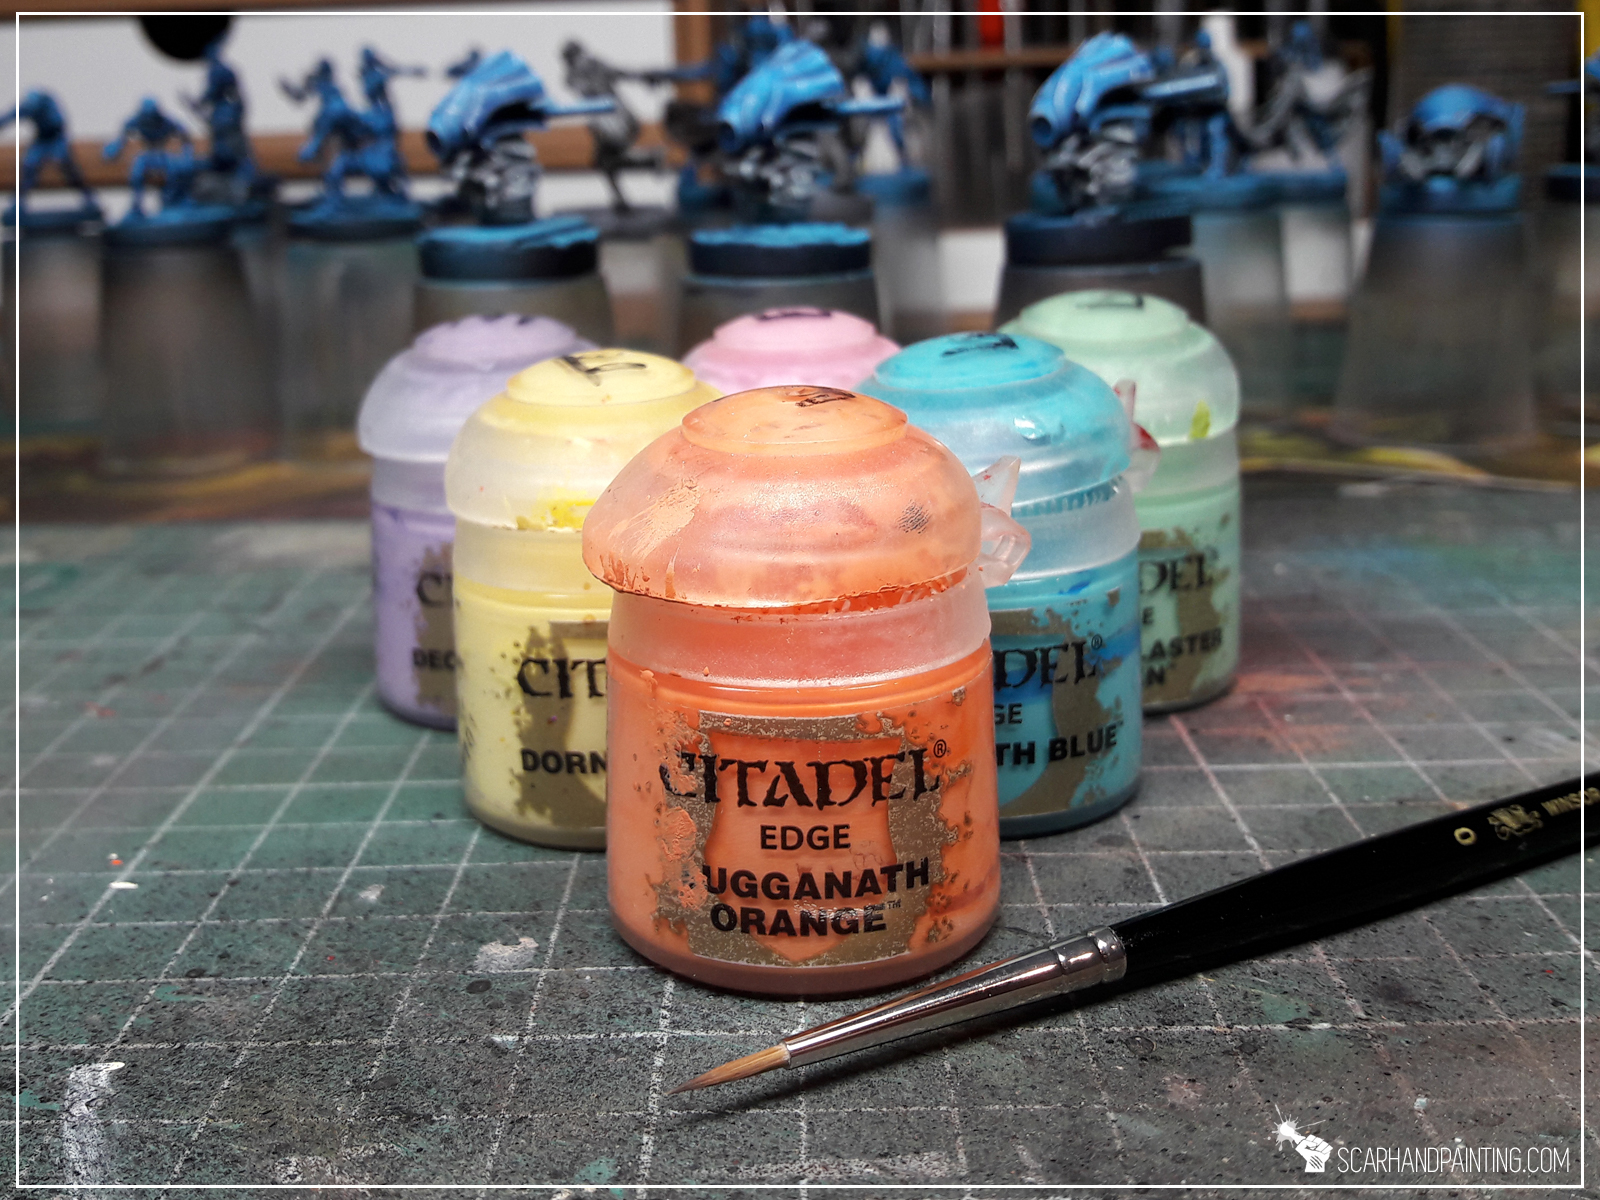
In last article I wrote a lot about the edge of a base and what it represents. Do not let yourself be fooled by a similar title, as today we’re talking a completely different topic. I introduce to you the ‘Edge highlight technique’. Something that I used to avoid, but at some point got lured by Games Workshop to try out. Before that I struggled to keep colors juicy and interesting, preferred dark, murky color schemes and avoided any type of lining, including edges. I was a bit disappointed with my own work as a result – so a not very healthy relationship with paints and miniatures. It all changed once I got my hands on GW’s Edge paints, which was the first step to realize how important strong edges, combined with proper lining, are.
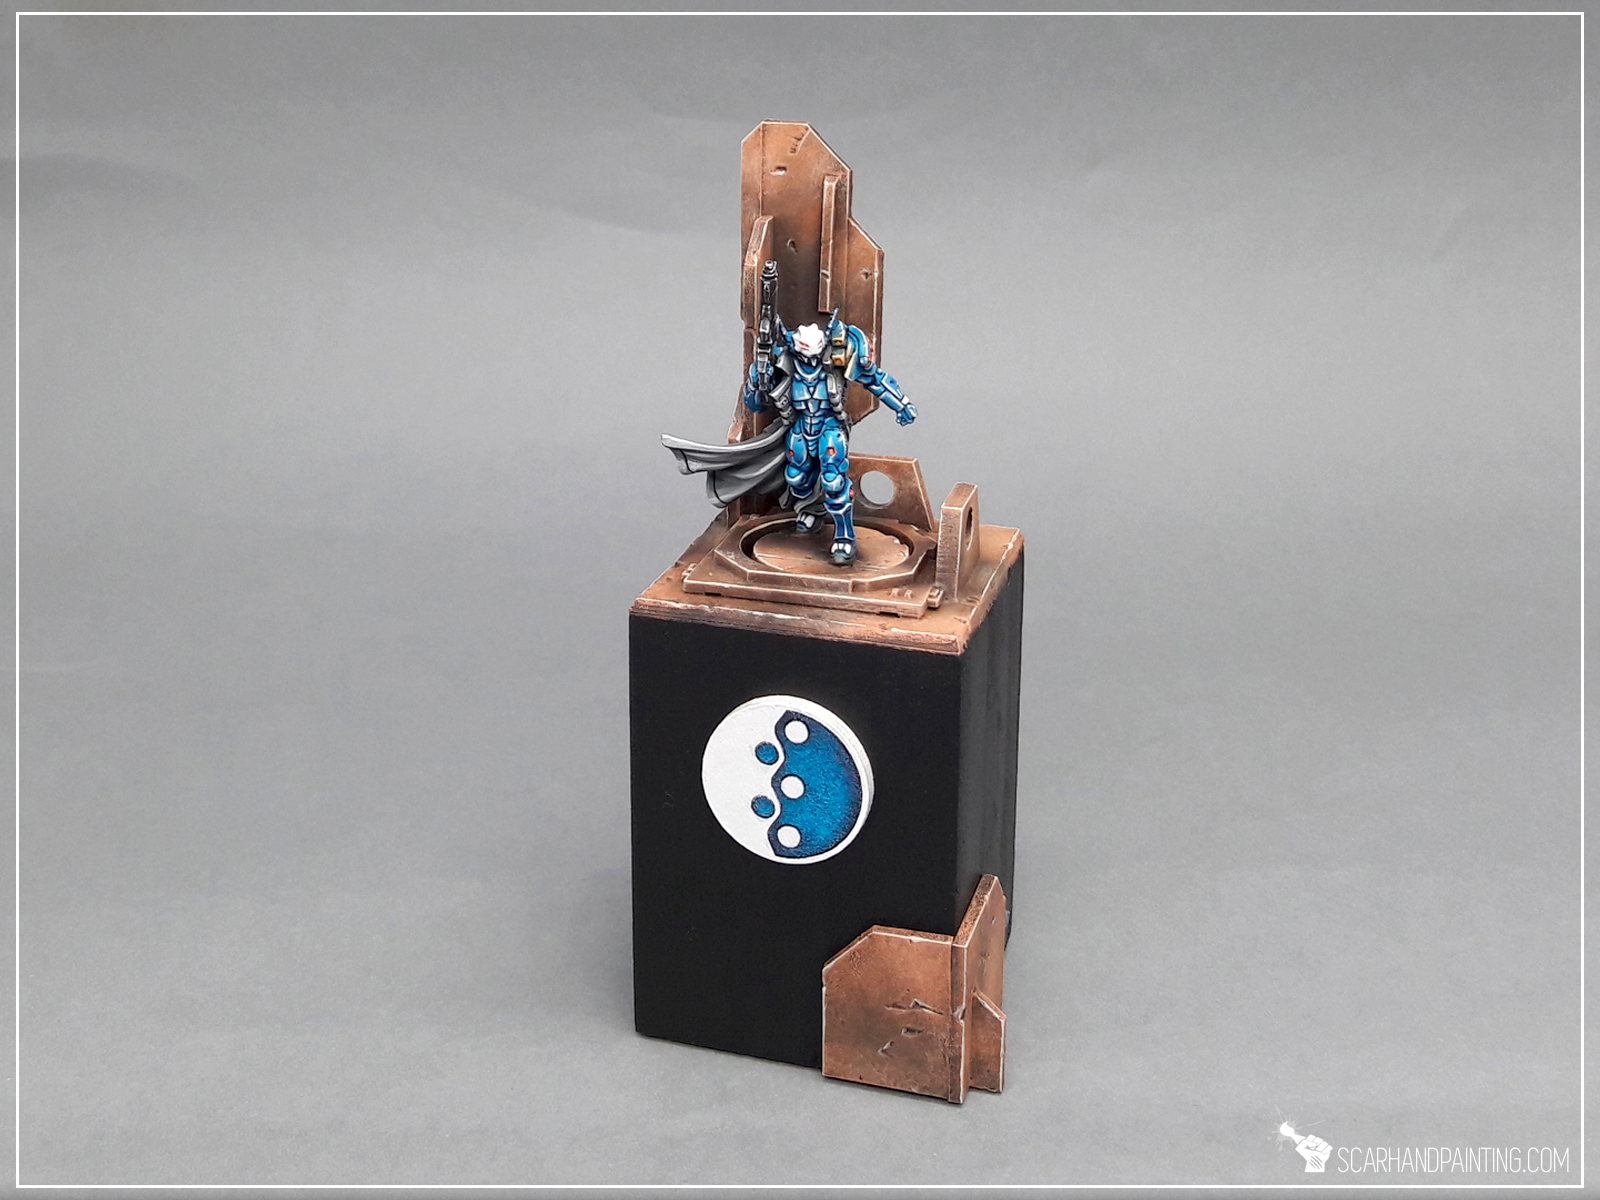
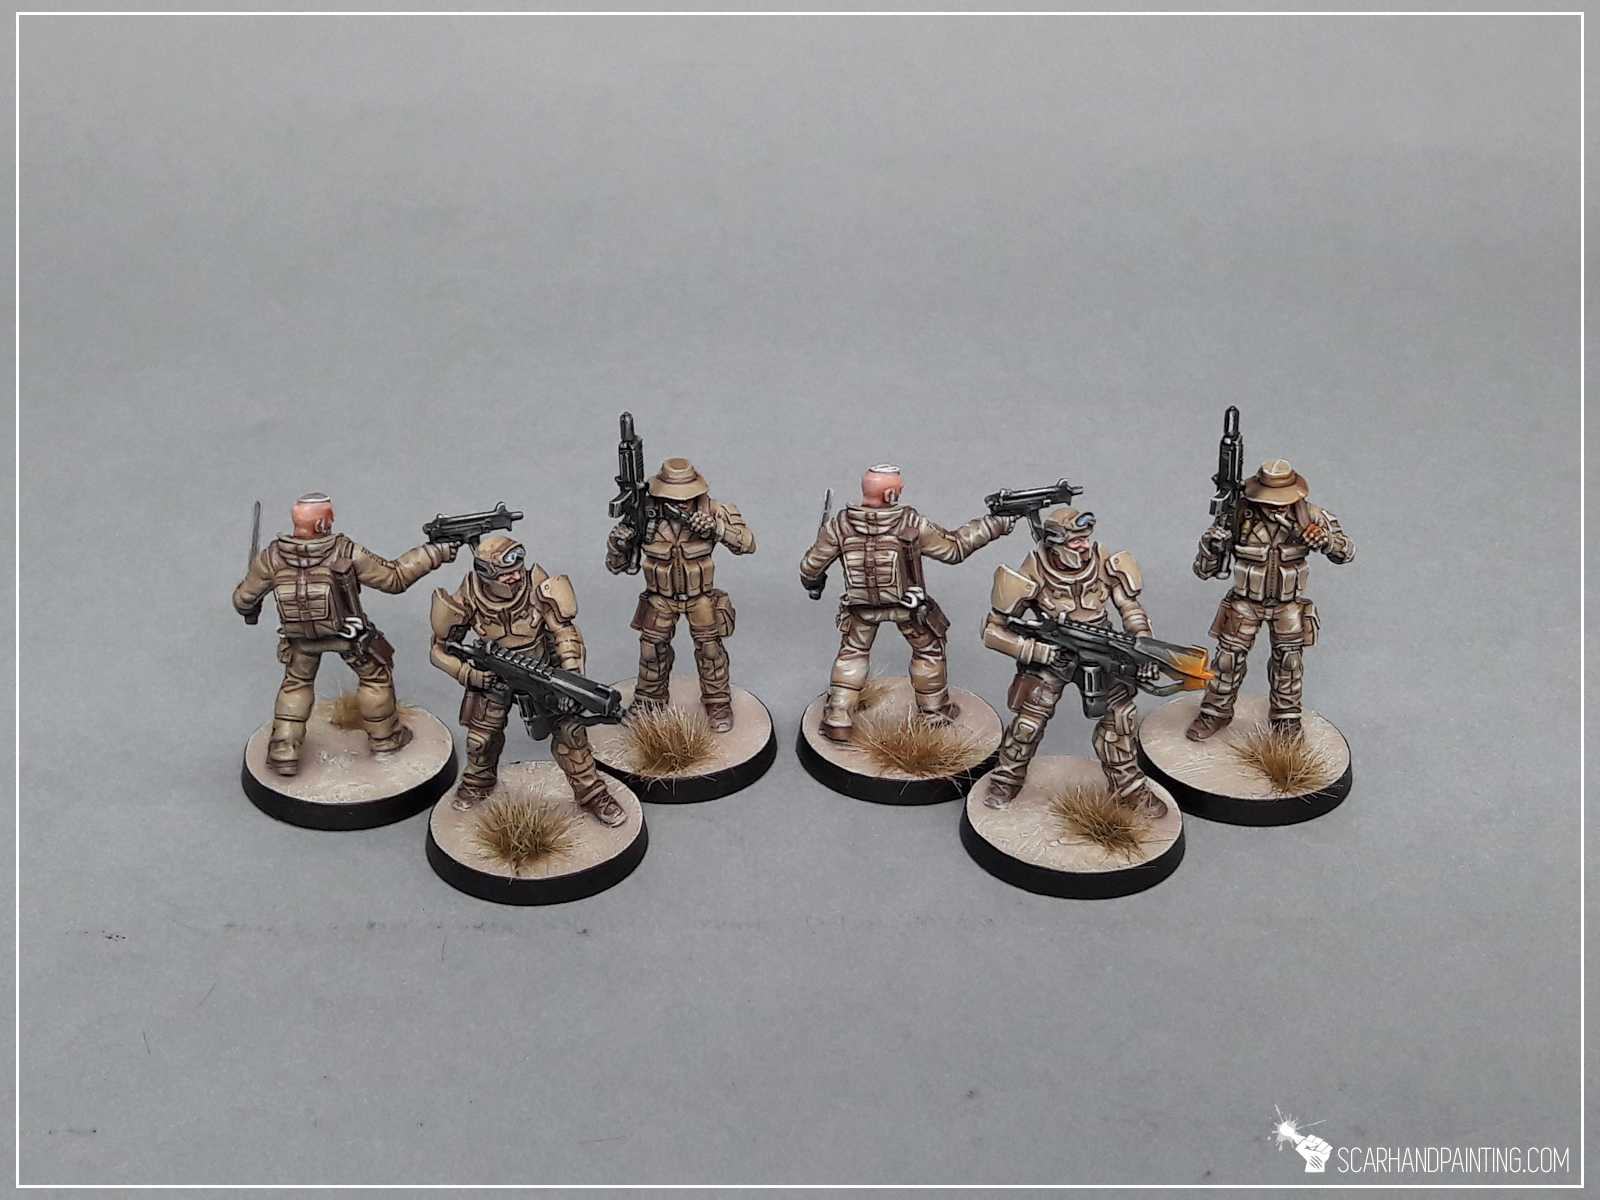
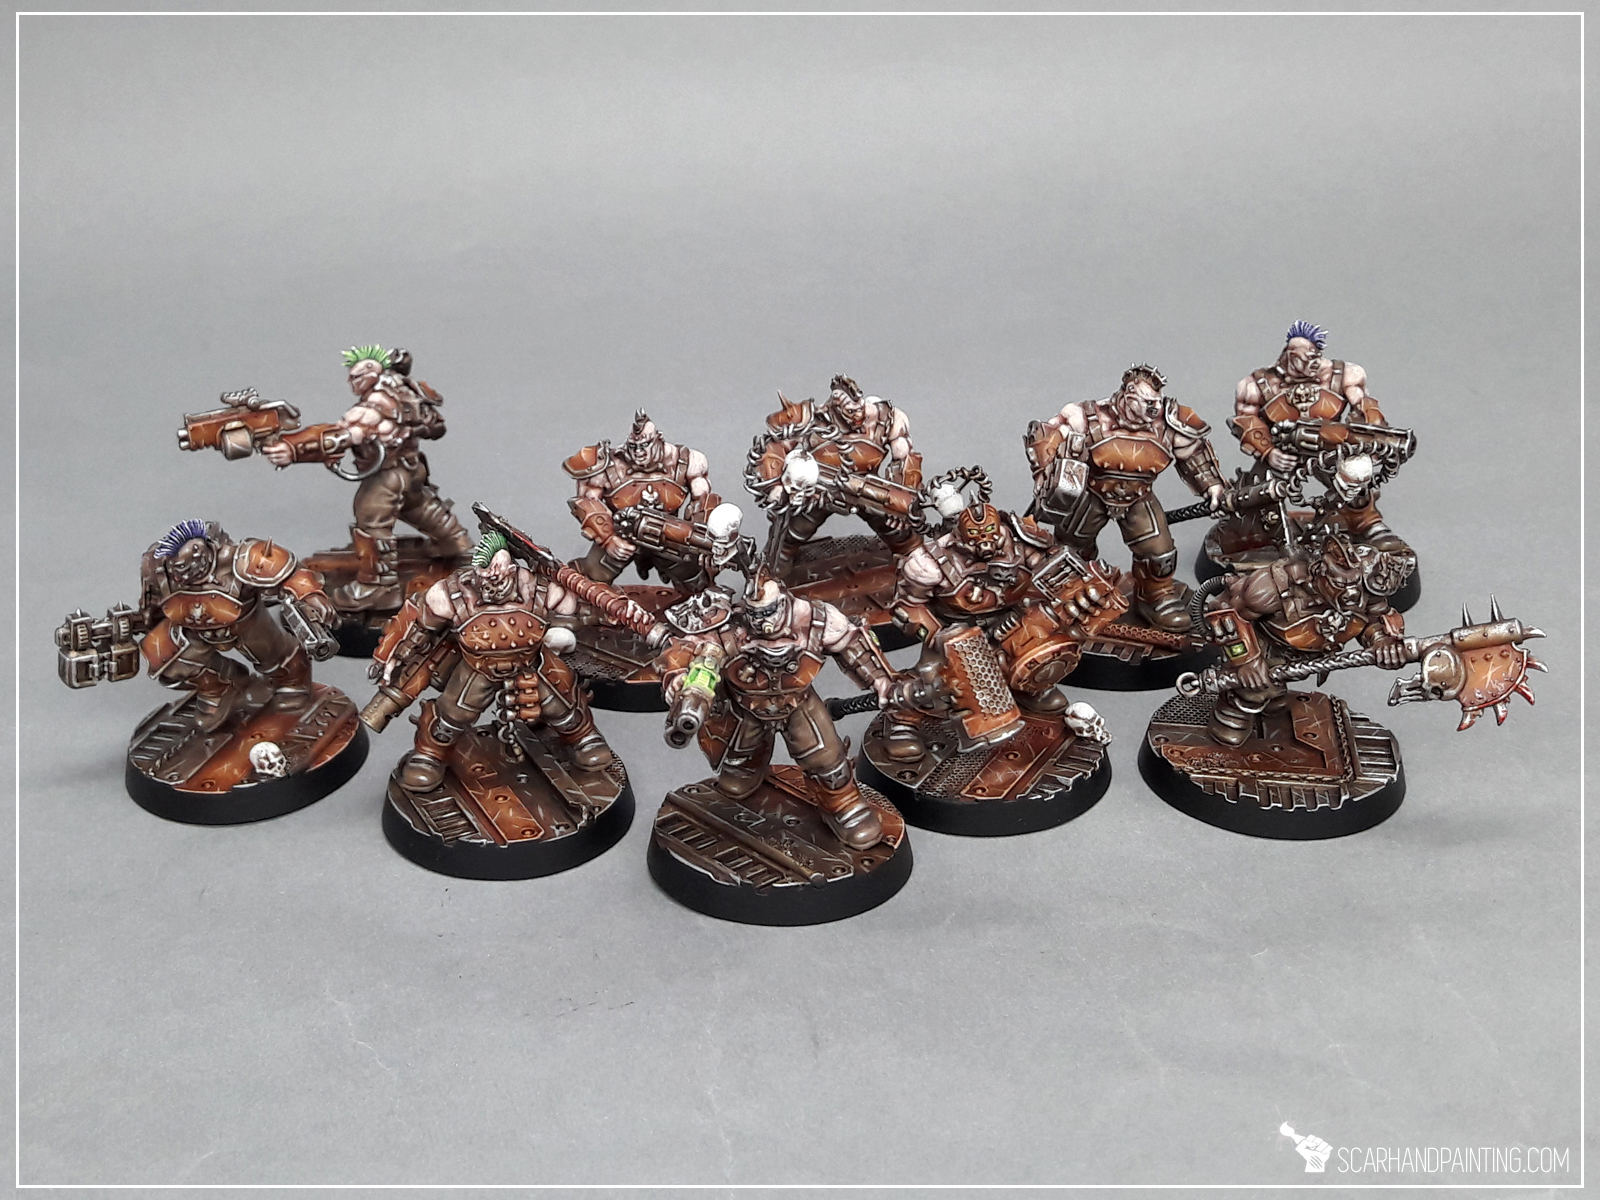
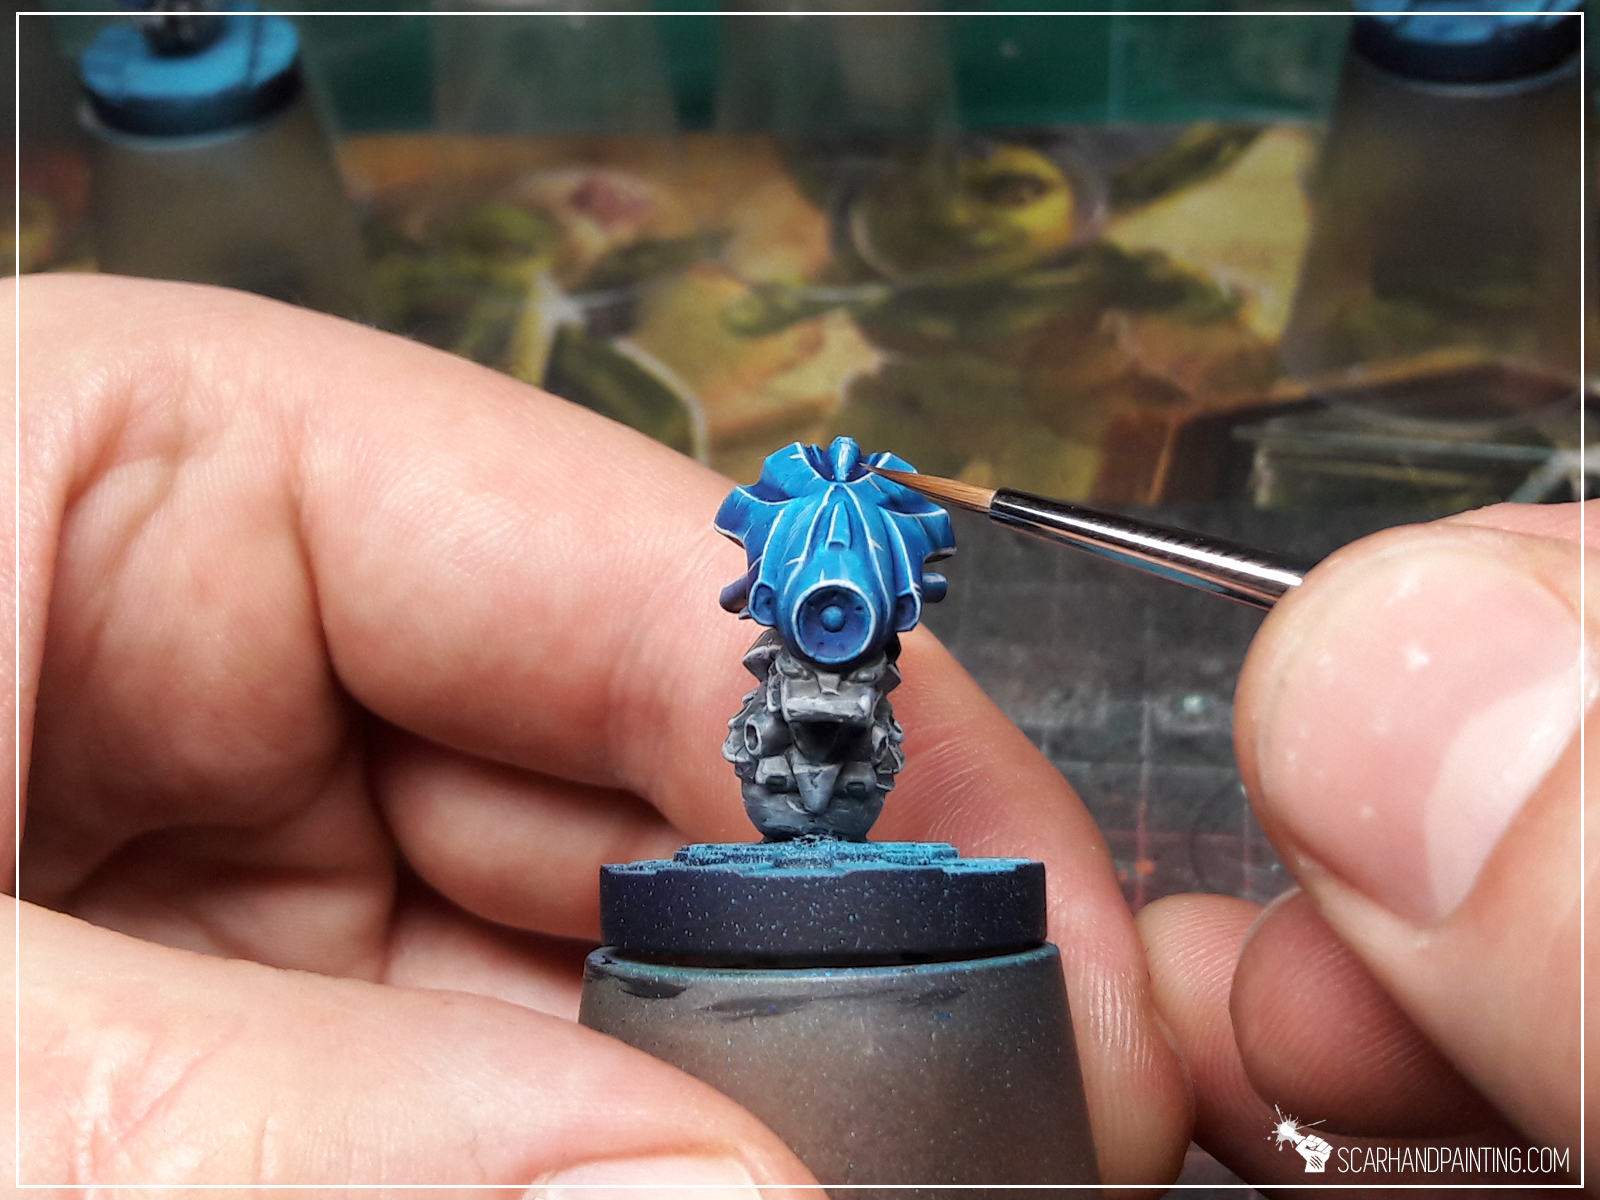
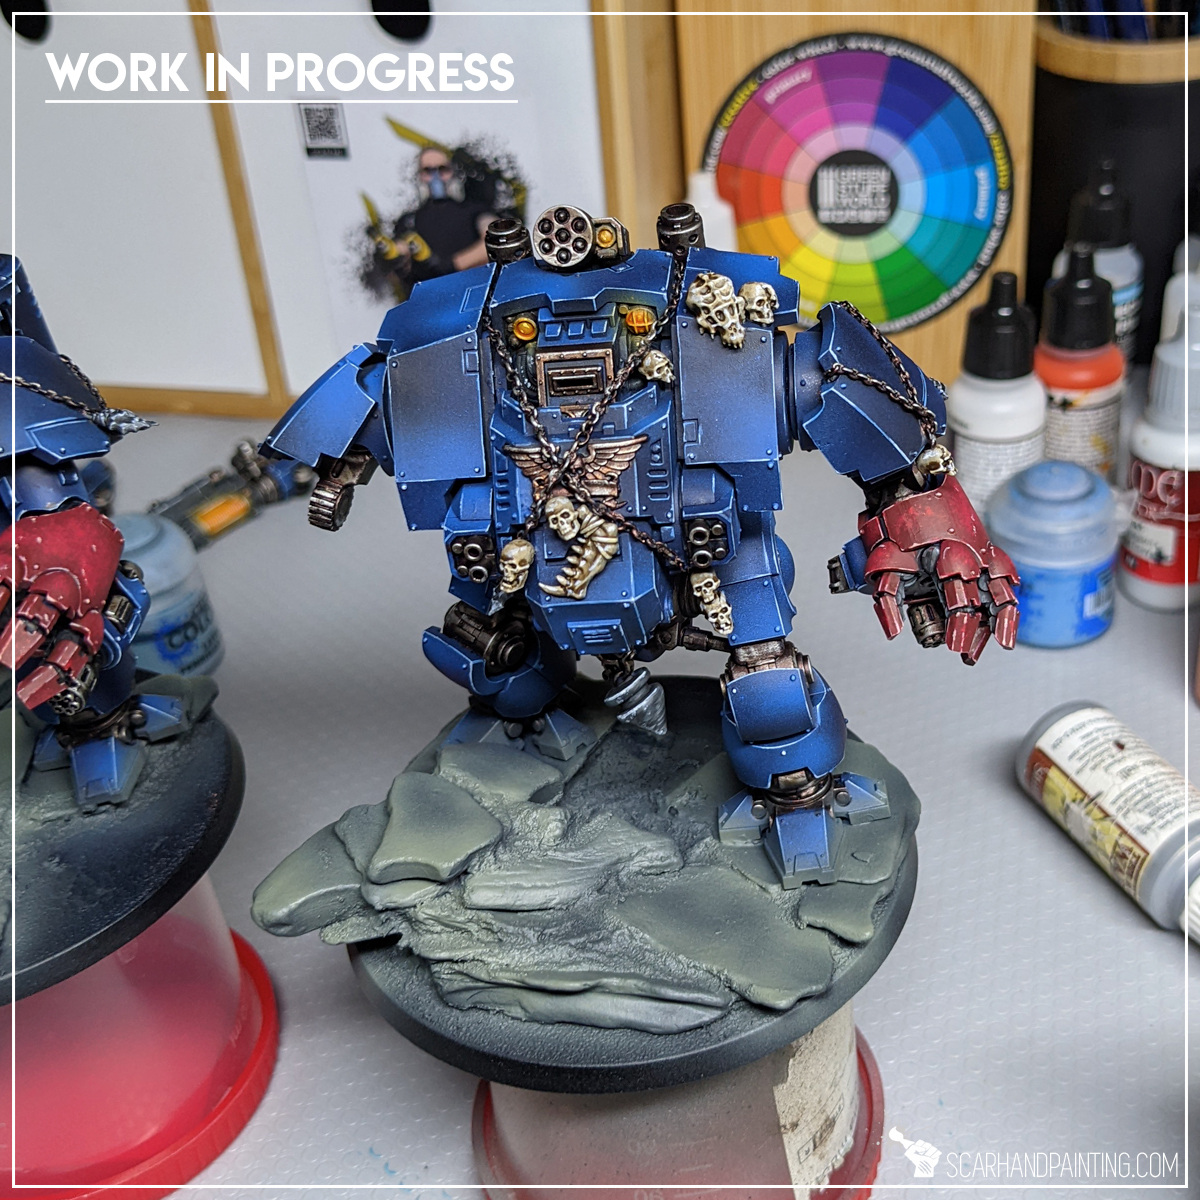
Edge highlights is a technique of applying paint to the natural edges of a surface, resulting in strong contrast and nice surface outlining. I find edge highlighting, combined with lining, to be a great way to make a color pop and literally change how an eye can perceive it. It works especially well with multi-layered surfaces of detailed miniatures but should work for you regardless of what miniatures you paint. Here’s an example of edge highlights in action – two sets of miniatures painted the same, except one set was then edge highlighted (with barely few extras):
I’m not a guy that looks at miniatures through magnifying glass. Being a commission painter I paint projects related to gaming and this kind of miniatures should be able to catch an eye while being used on the gaming board. I like my miniatures to pop, to be sharp and ‘edgy’, to have personality and coherent color scheme. For me edge highlights provide all that and more.
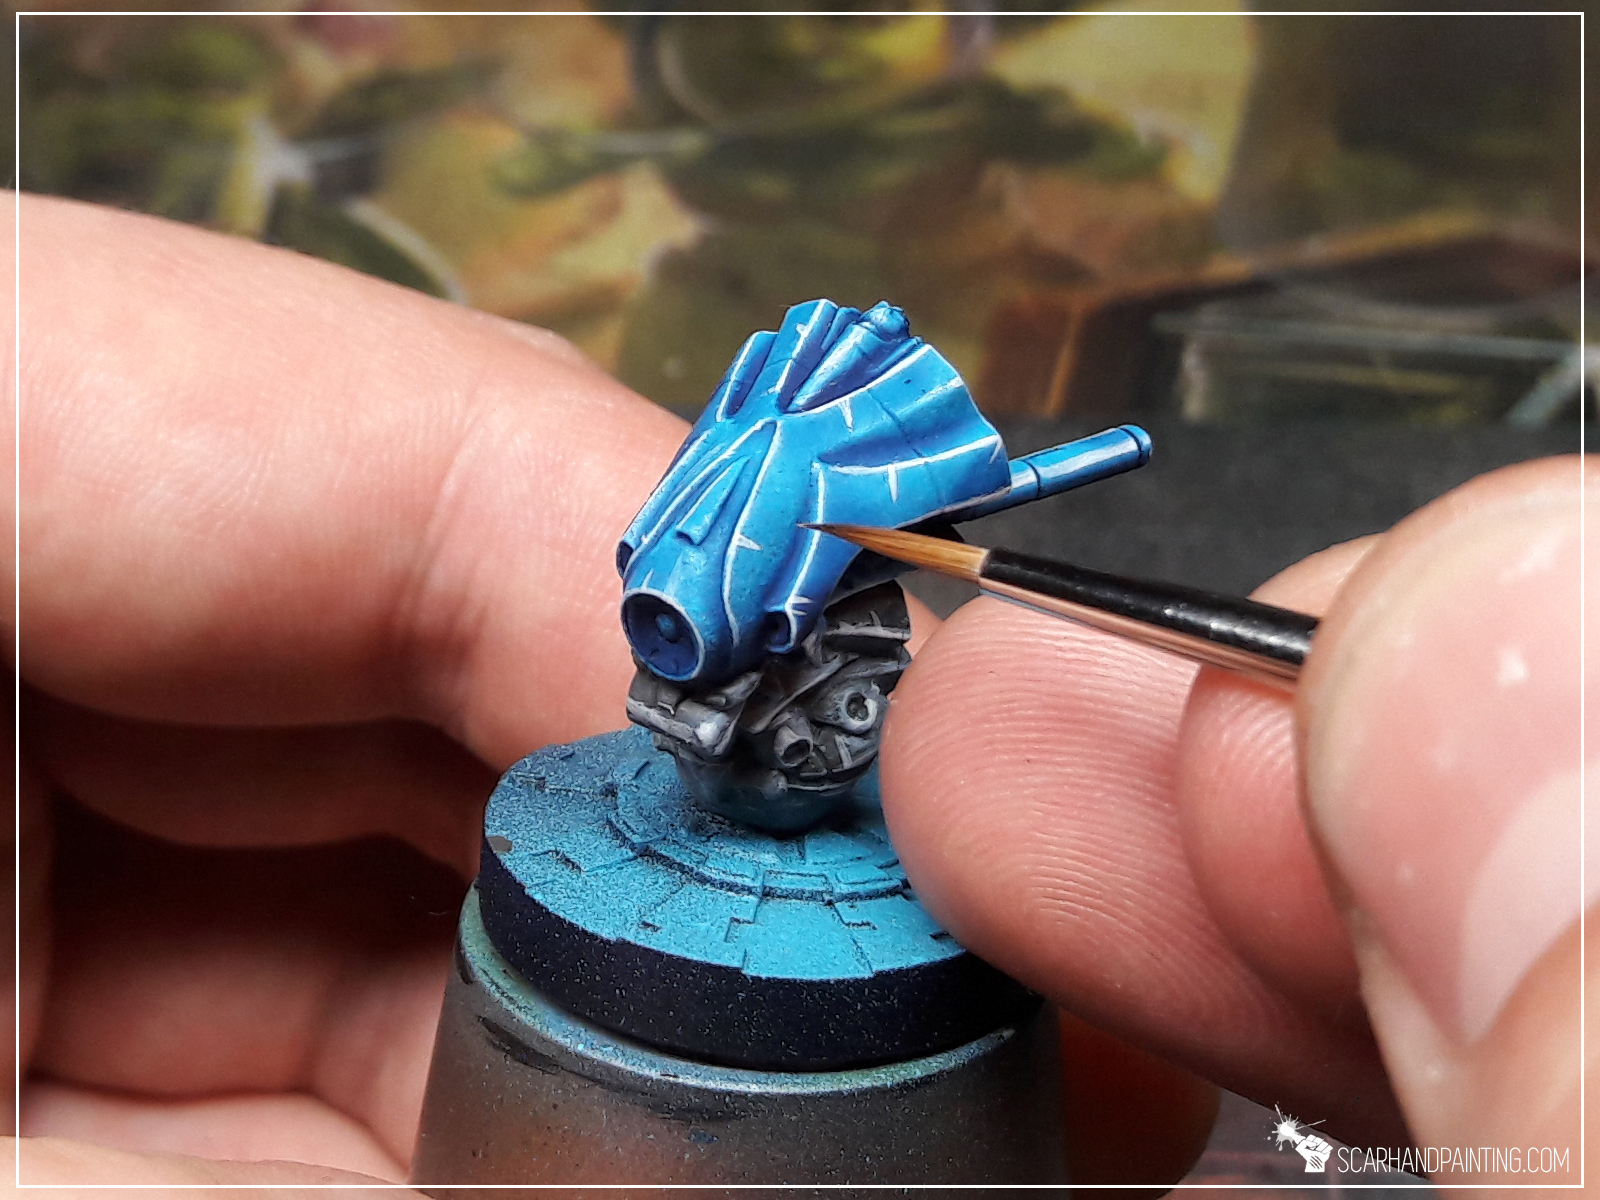
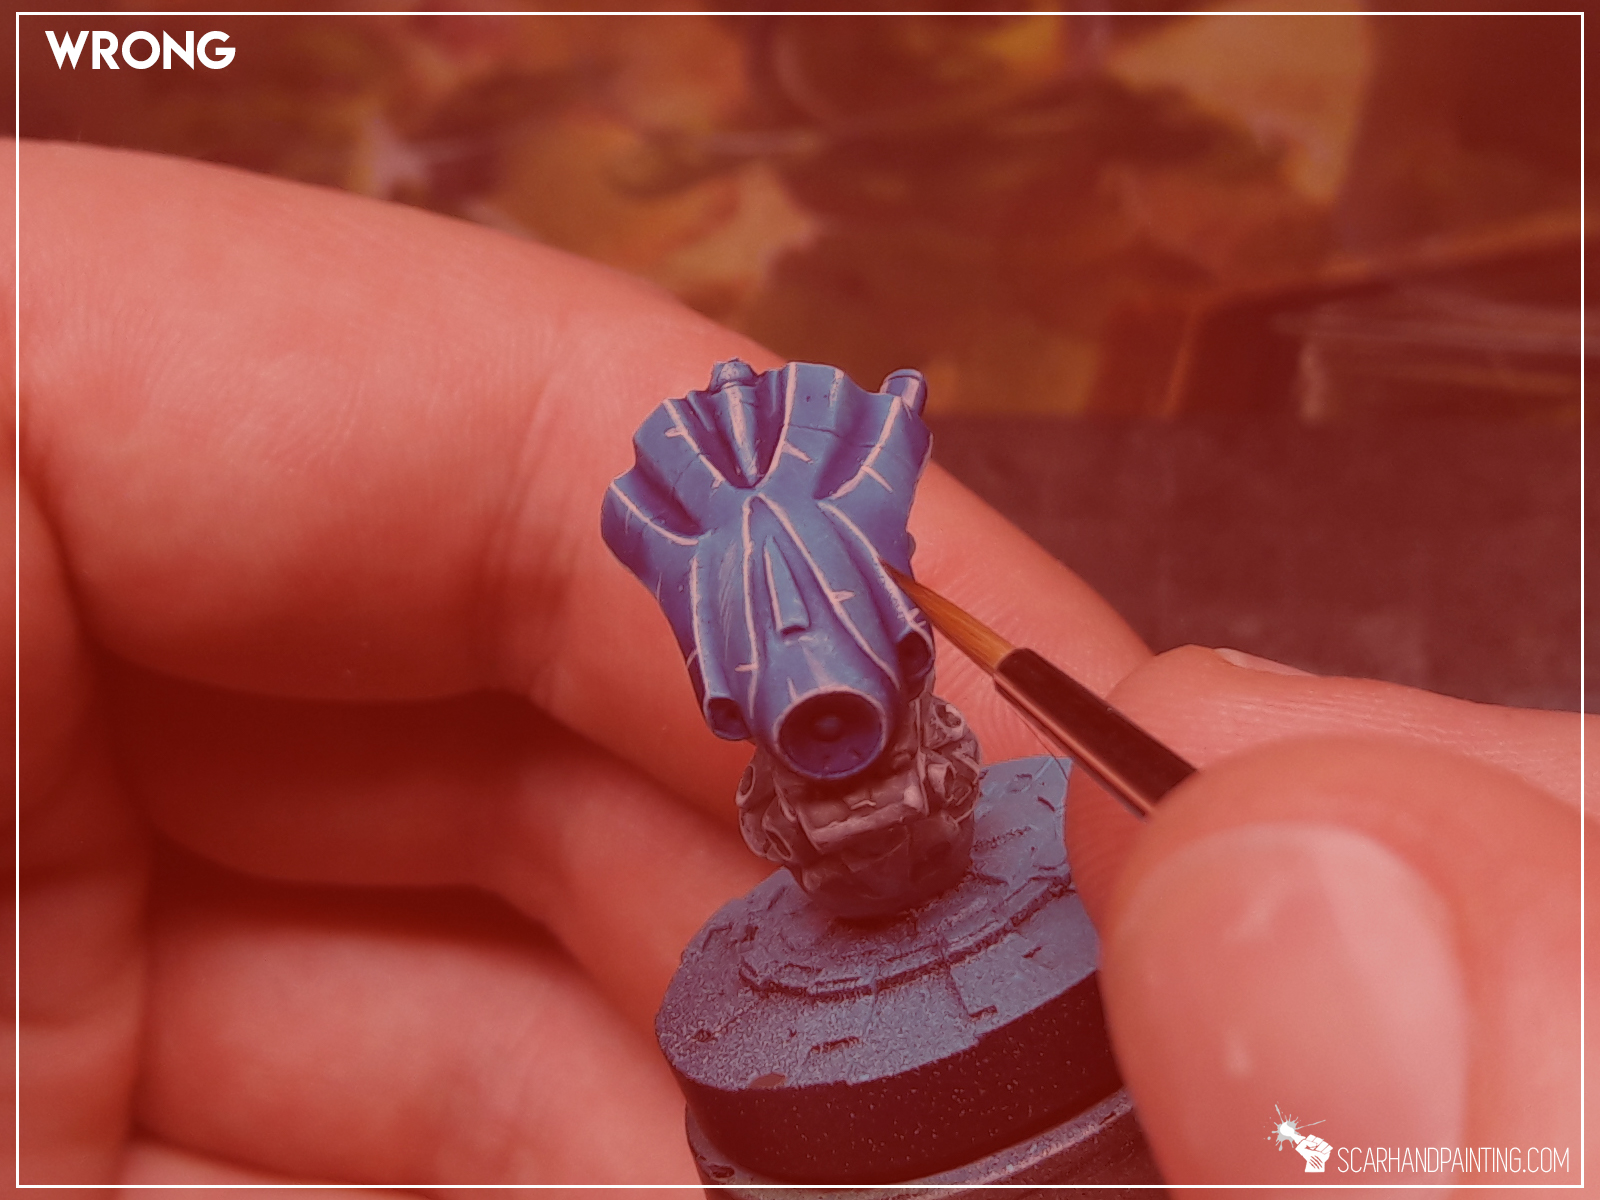
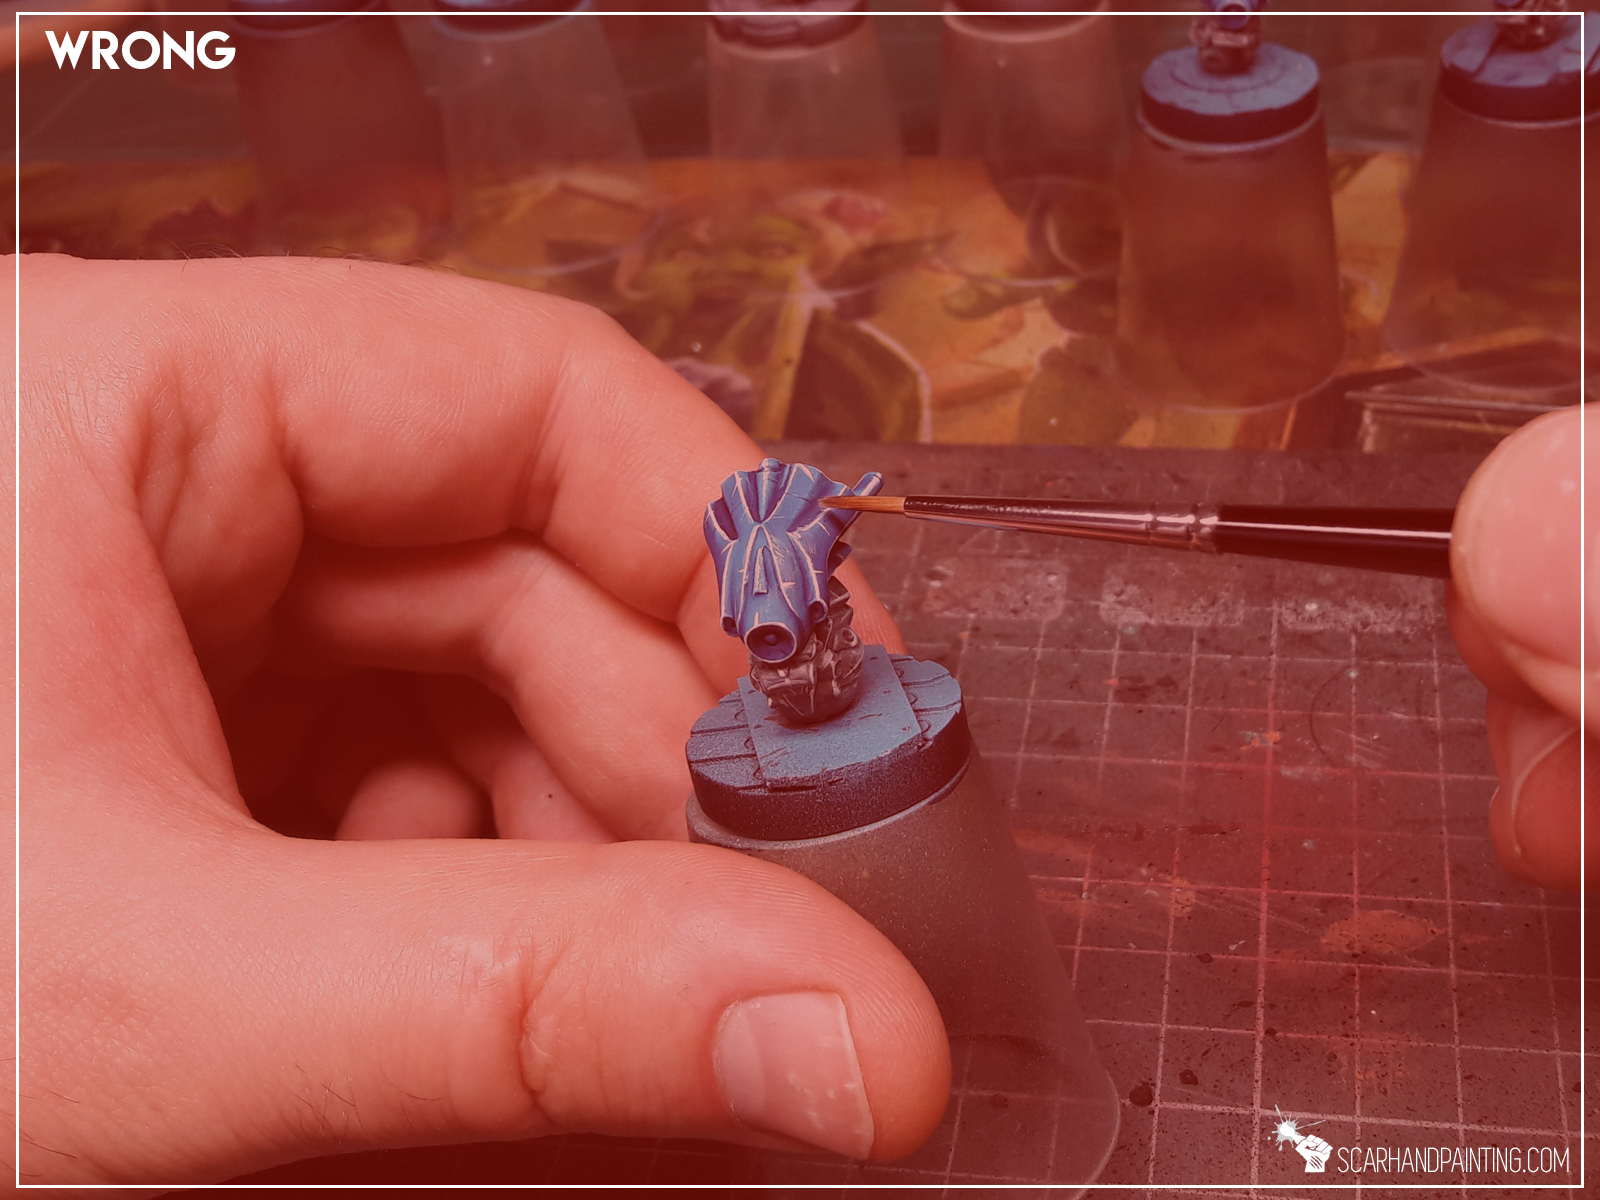
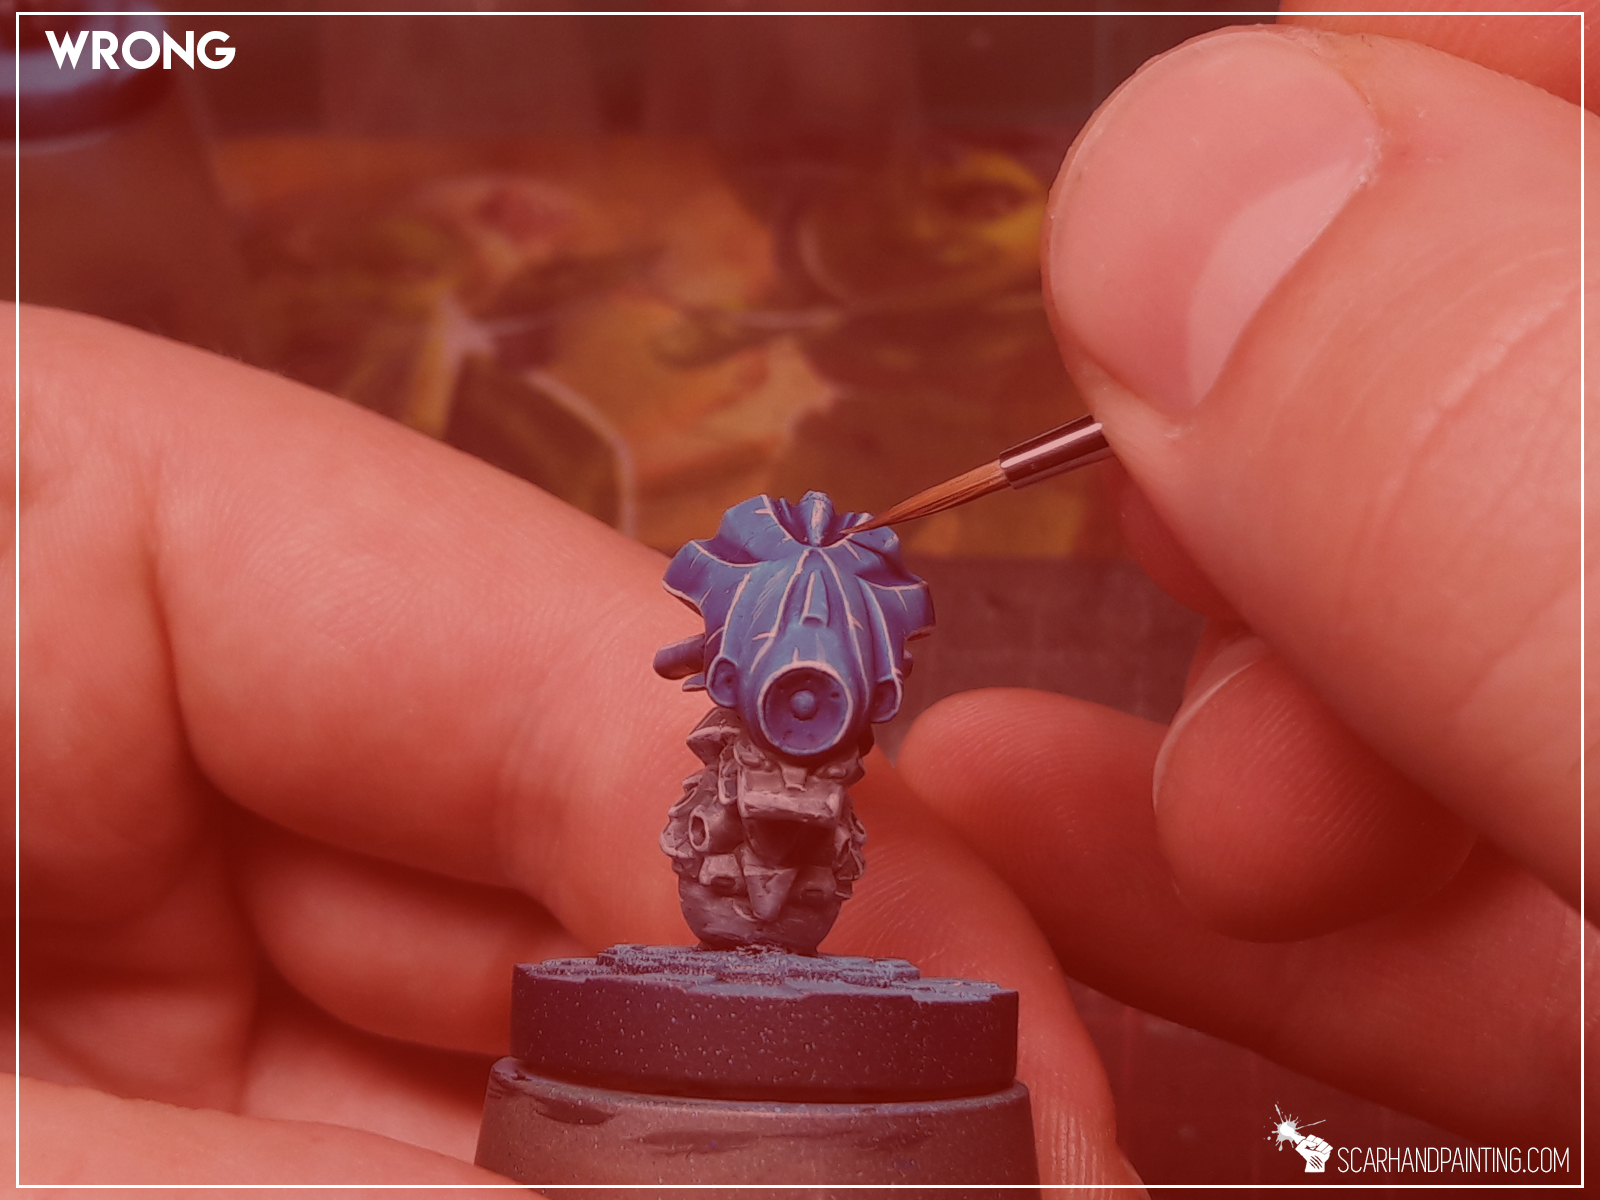
First of all, like with most painting methods, I avoid overloading my brush with too much paint. This is very important as too much paint would run down and ruin a crisp, sharp edge. Other than that I try to:


Now you know how I approach edge highlighting and with that I would like to close third the Painting Philosophy article. Please take note that what works for me, might not necessarily work for you – still there are many ways to accomplish certain things – mine is just one of them. I encourage you to try and experiment with this technique. As usual I put a lot of effort into preparing this article, but if it helps at least one painter out there – I consider it a time well spent.

I hope you found this tutorial interesting. Be sure to let me know your thoughts in the comments below or via Facebook or Instagram. I would also appreciate if you’d consider sharing my content with your friends, who might find it useful. Finally, if you are looking for a professional Warhammer miniatures painting service, be sure to contact me via this contact form. I always reply within 24 hours. If you don’t see anything from me by then, please check your spam folder.

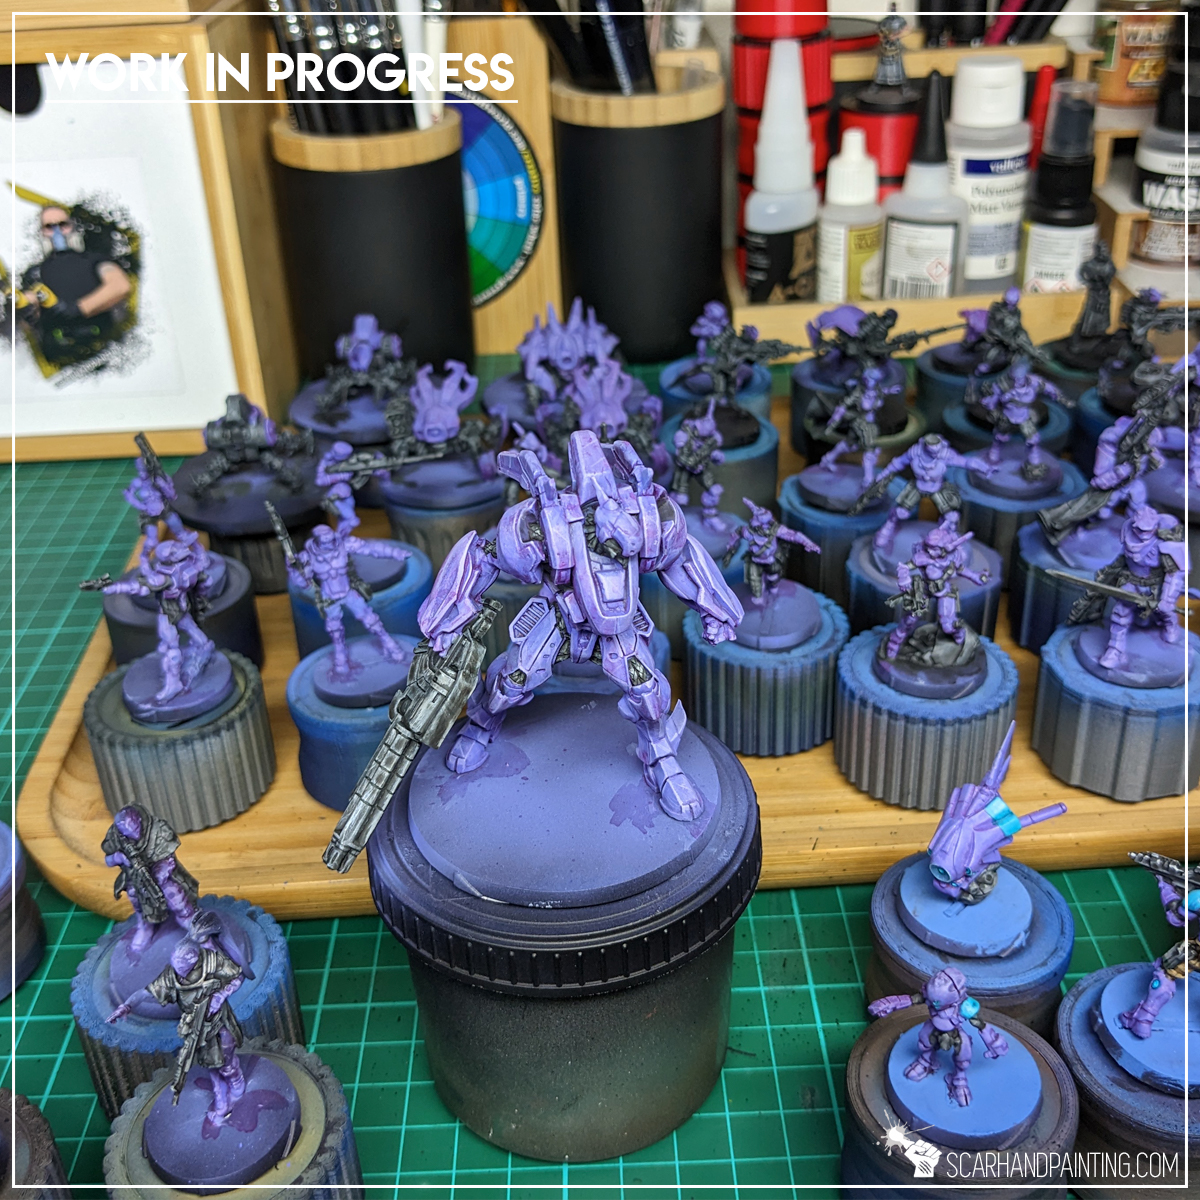
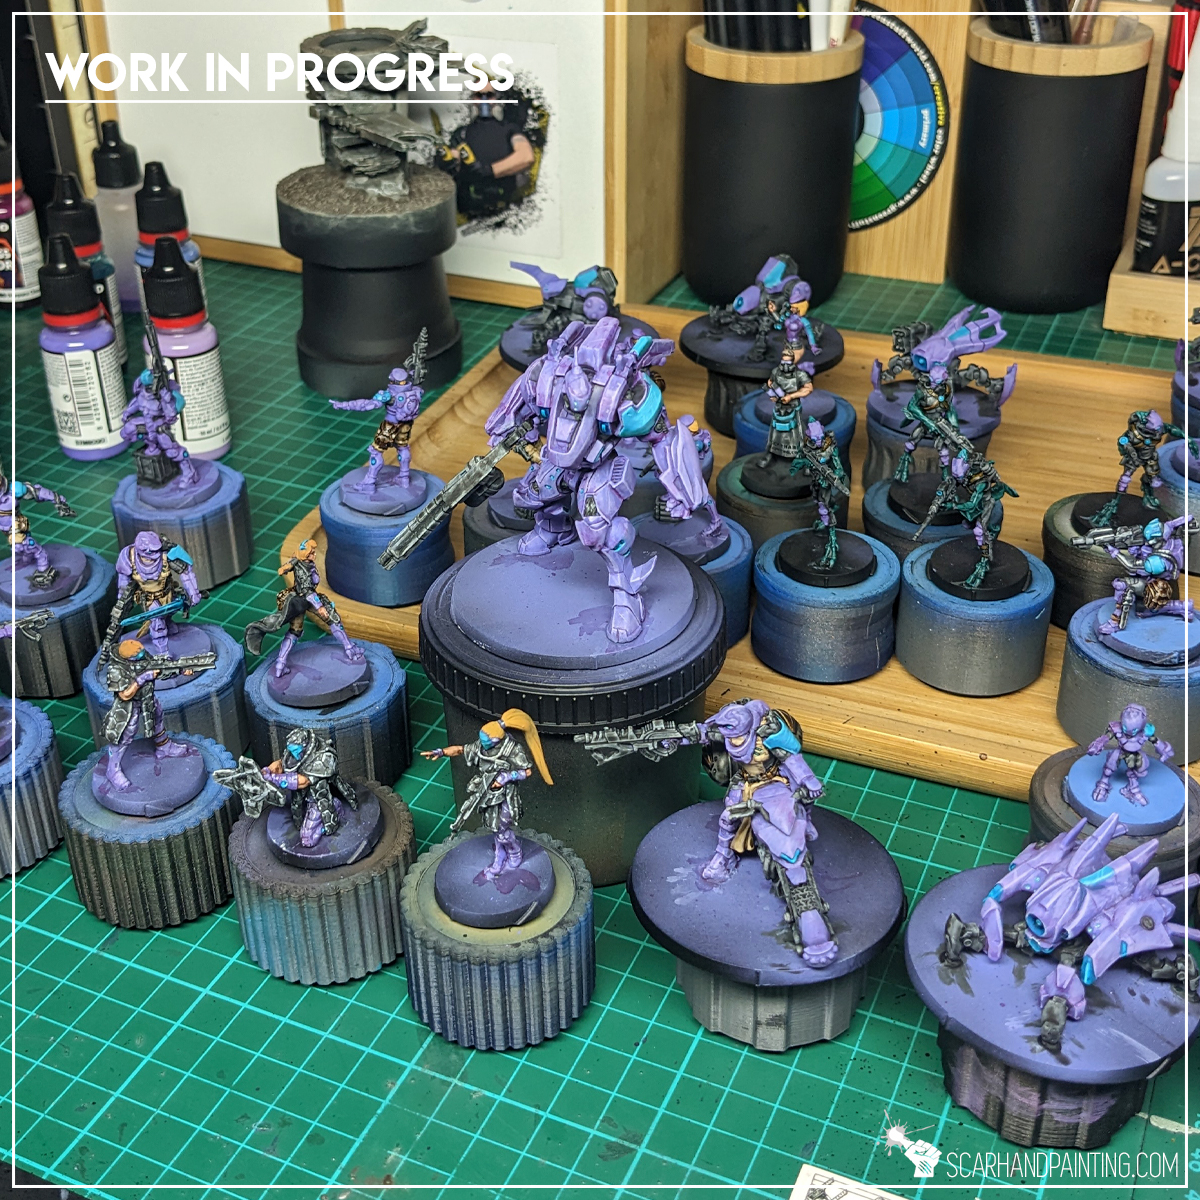
Here are some Color Recipes for Warhammer 40,000 Tau Empire from Gallery: Infinity Varuna. Please take note that this is a simple color scheme, not covering multiple overlapping layers and blends in between, that lead to the final product. It is supposed to be used as guideline not a step-by-step.

Purple Armor:
Mix Alien Purple (val) 1:1 Water, *
Lustful Purple (val), flbr
Mix Deep Purple (val xp) 3:1-1:1 Water, wash
Lustful Purple (val), l&p
Mix Lustful Purple (val) 1:1 Warm Grey (val), l&p
Turquoise Armor:
Hydra Turquoise (ap),
Aquamarine (val), flbr
Mix Snake Green (val xp) 1:3 Water, wash
Verdigris (val), l
Verdigris (val), p
Black Armor:
Panzer Dark Grey (val a),
Fenrisian Grey (gw), flbr
Pallid Wych Flesh (gw), flbr
Dark Tone Ink (ap), wash
Pallid Wych Flesh (gw), l&p
Off White (val), l&p
Skin:
Tan (val),
Mix 1:1 Tan (val), Dwarf Flesh (val a), flbr
Strong Tone Ink (ap), wash
Dwarf Flesh (val a), l&p
Brown:
Gorgon Brown (val),
Khaki (val), flbr
Copper Brown (val xp), wash
Strong Tone Ink (ap), wash
Strong Tone Ink (ap), wash
Lights:
Aquamarine (val),
Verdigris (val), p
Dark Turquoise (val ink), wash
Verdigris (val), p

l&p – lines and points,
l – lines, edge highlights,
p – points,
dl – deep lining,
bl – blend,
gl – glaze,
drbr – drybrush,
flbr – flatbrush,
lobr – loaded brush,
stpl – stippling,
*Airbrushed (with multiple layers and mixes)

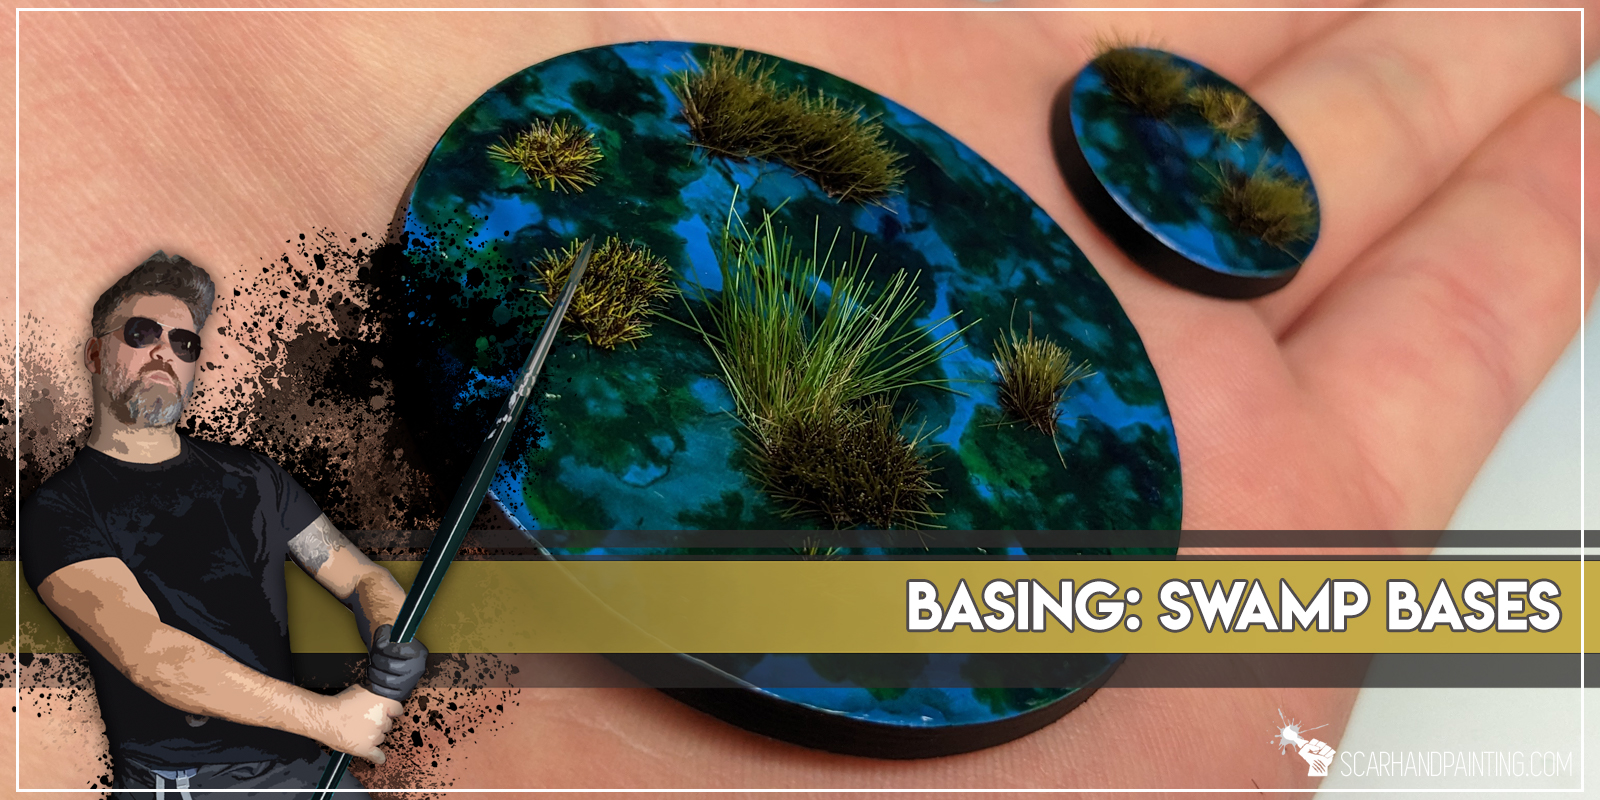
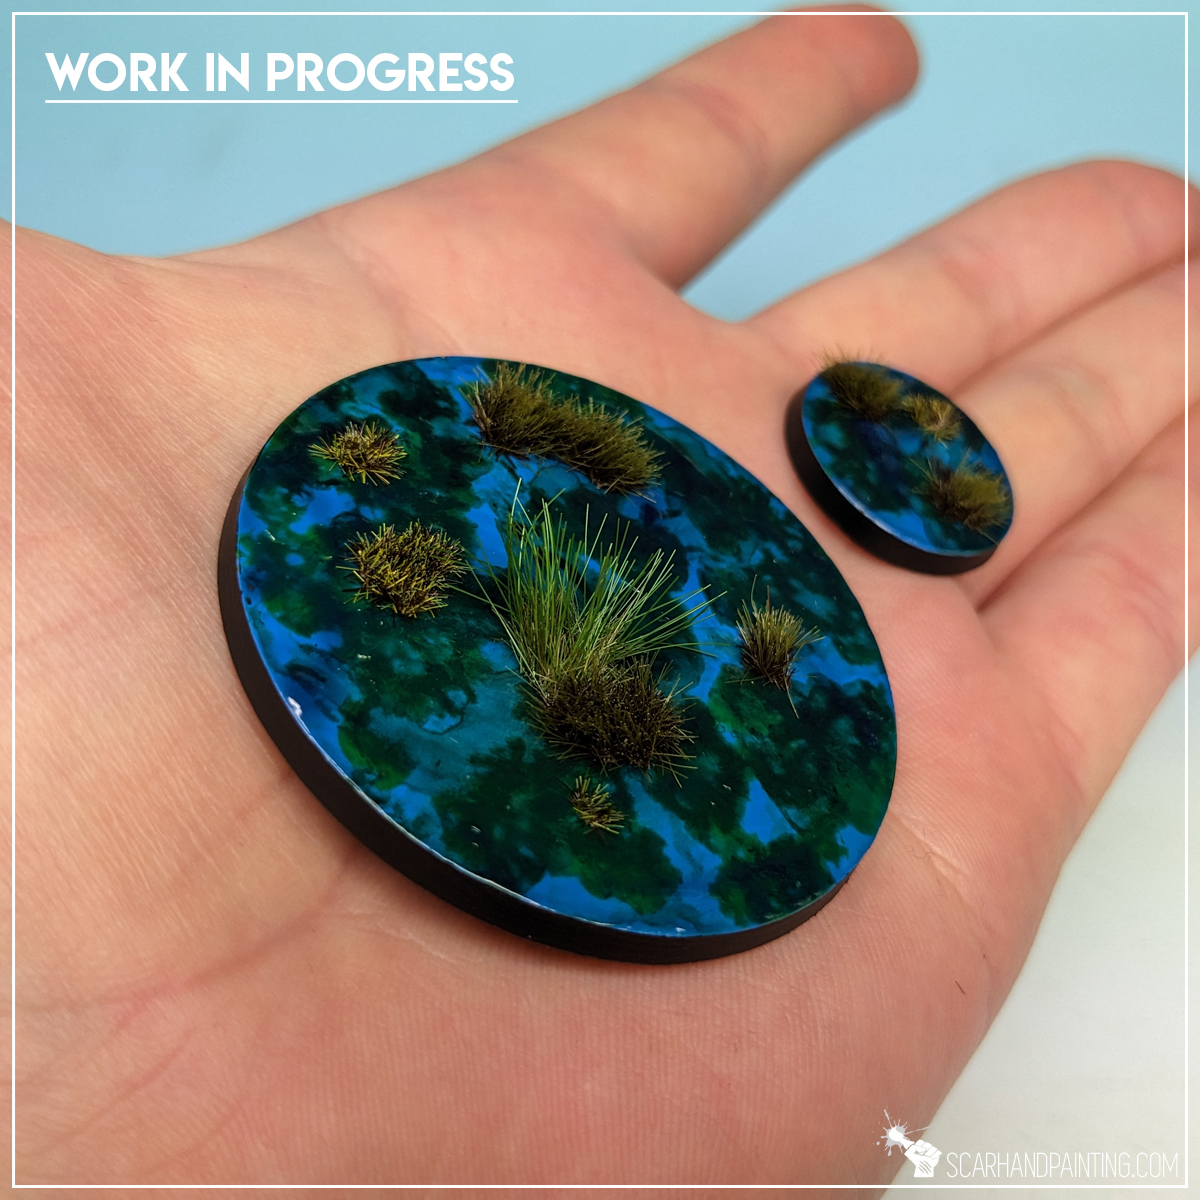
Welcome to Painting Swamp Bases tutorial. Here I will take you on a Step-by-step trip through the process of creating Swamp Bases the same way as seen at: Gallery: Infinity Varuna.
Before we start, some notes:

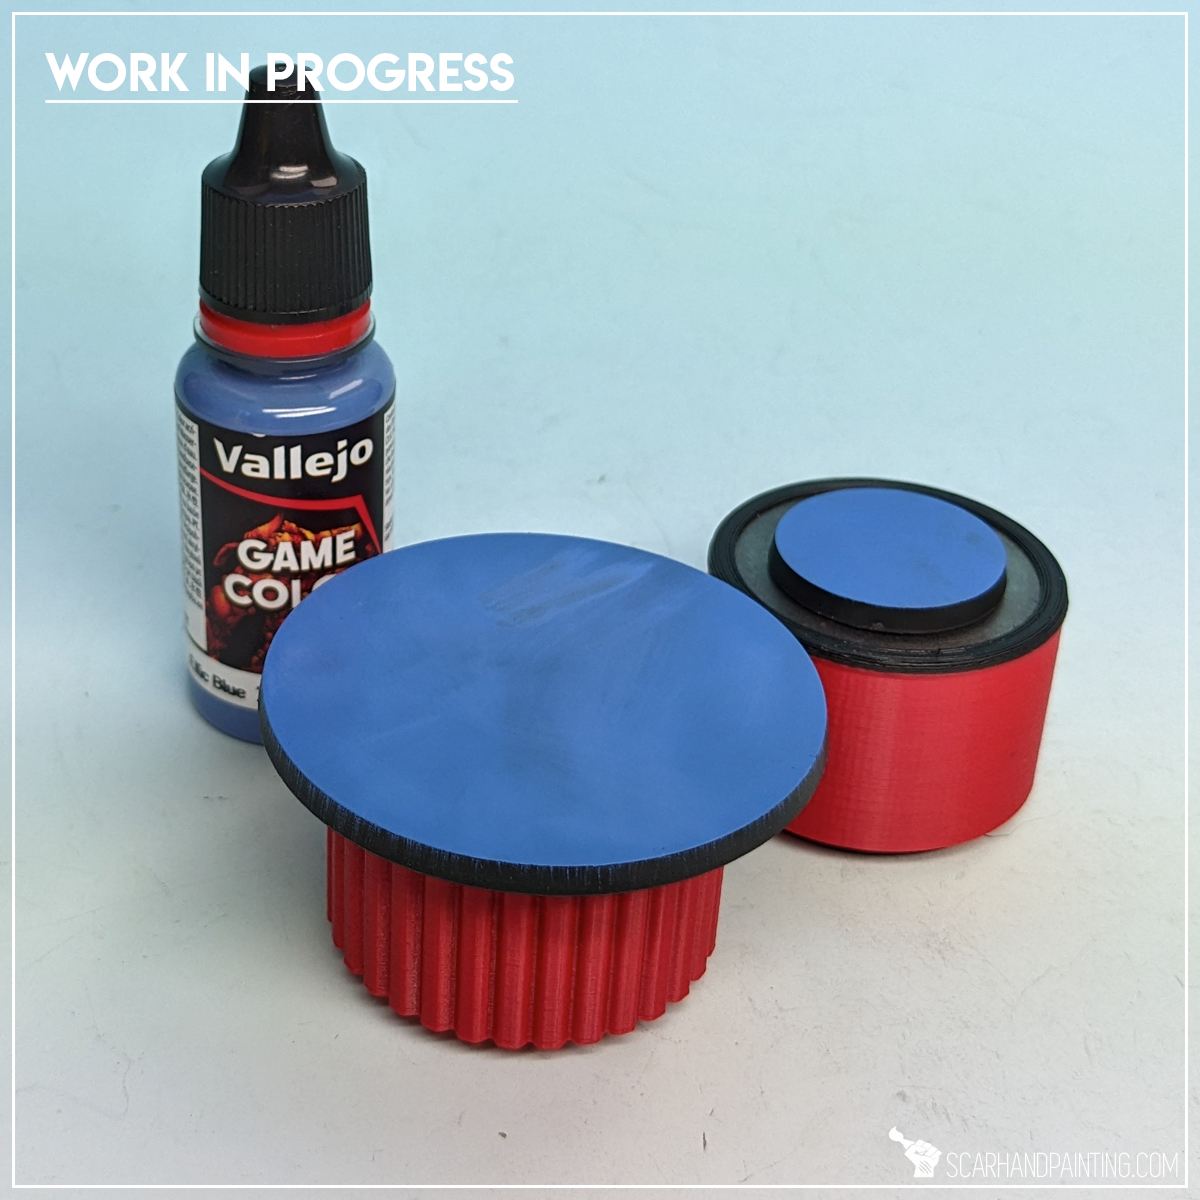
Step one: Undercoat
I started with a relatively smooth layer of Vallejo Elfic Blue. Any similar color would fit and I encourage you to experiment.
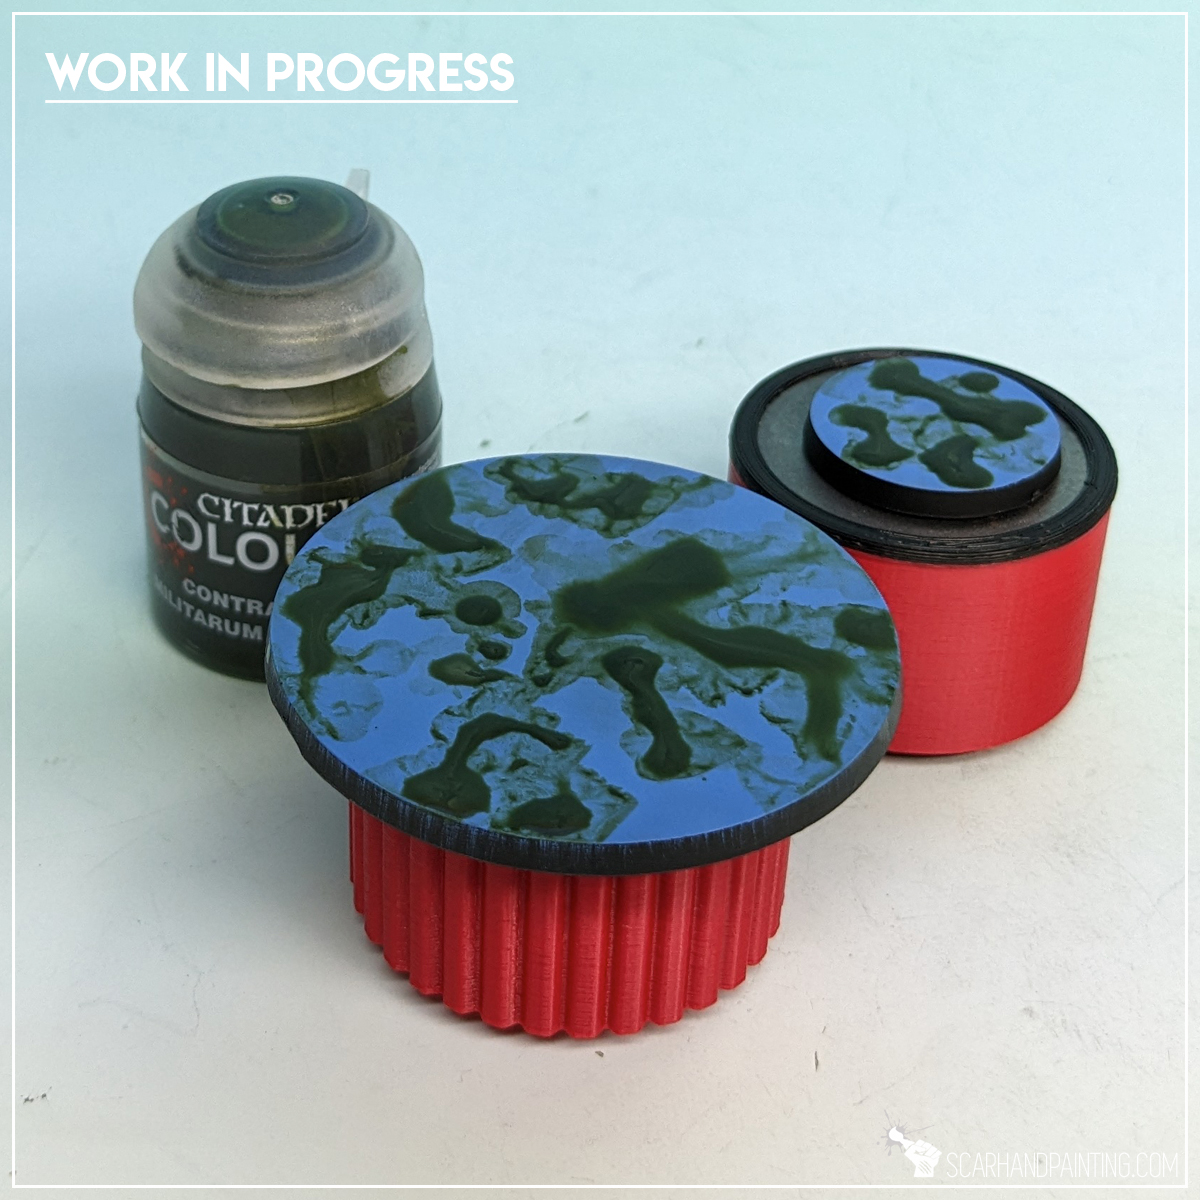
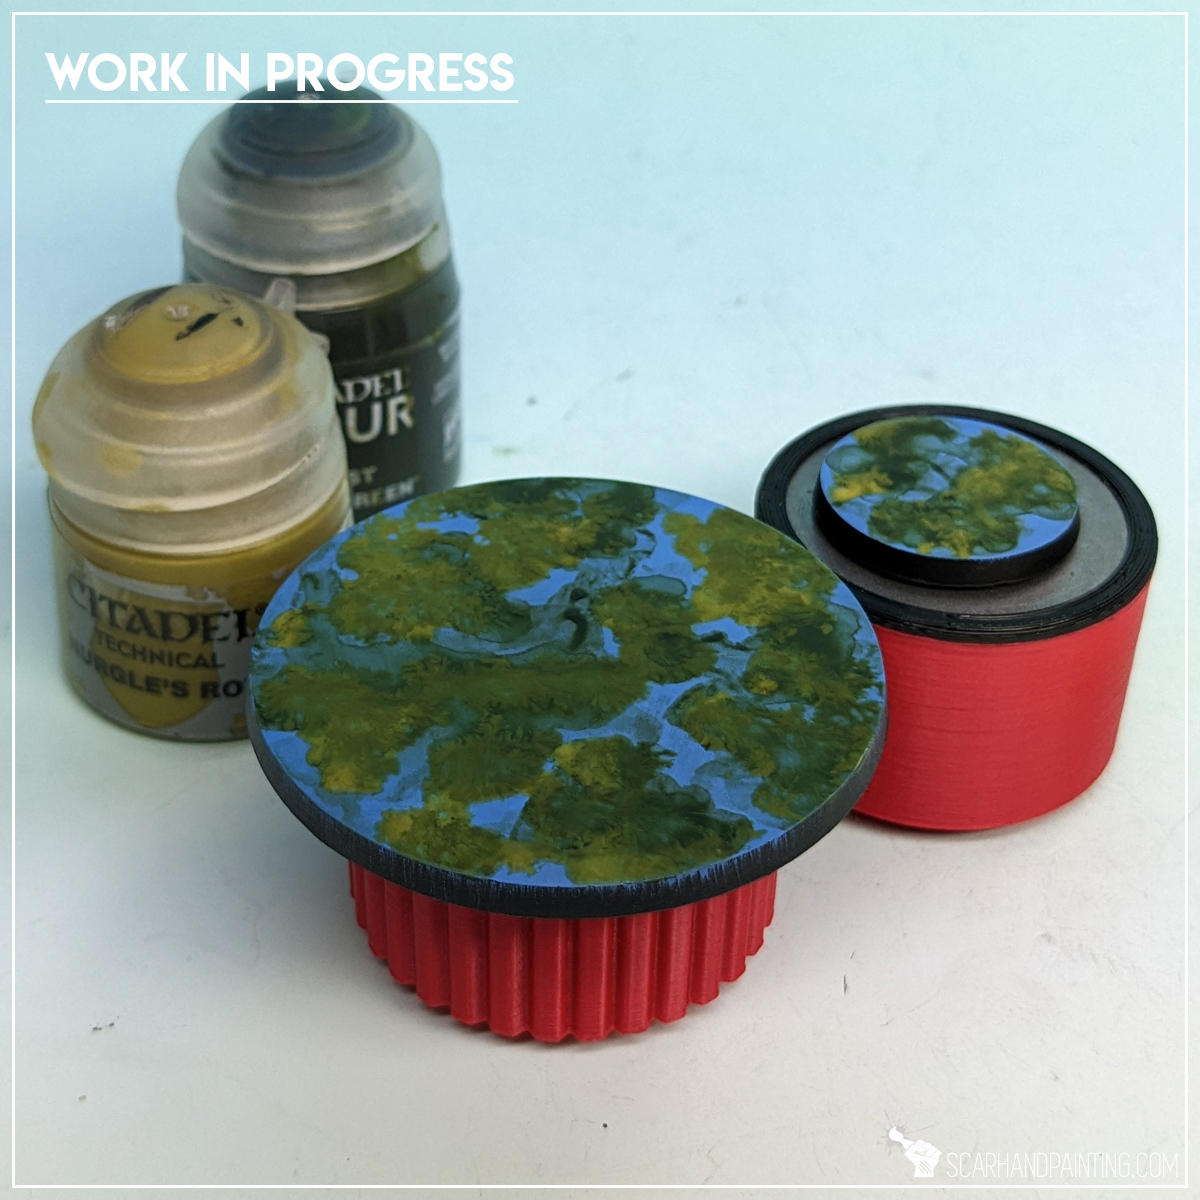
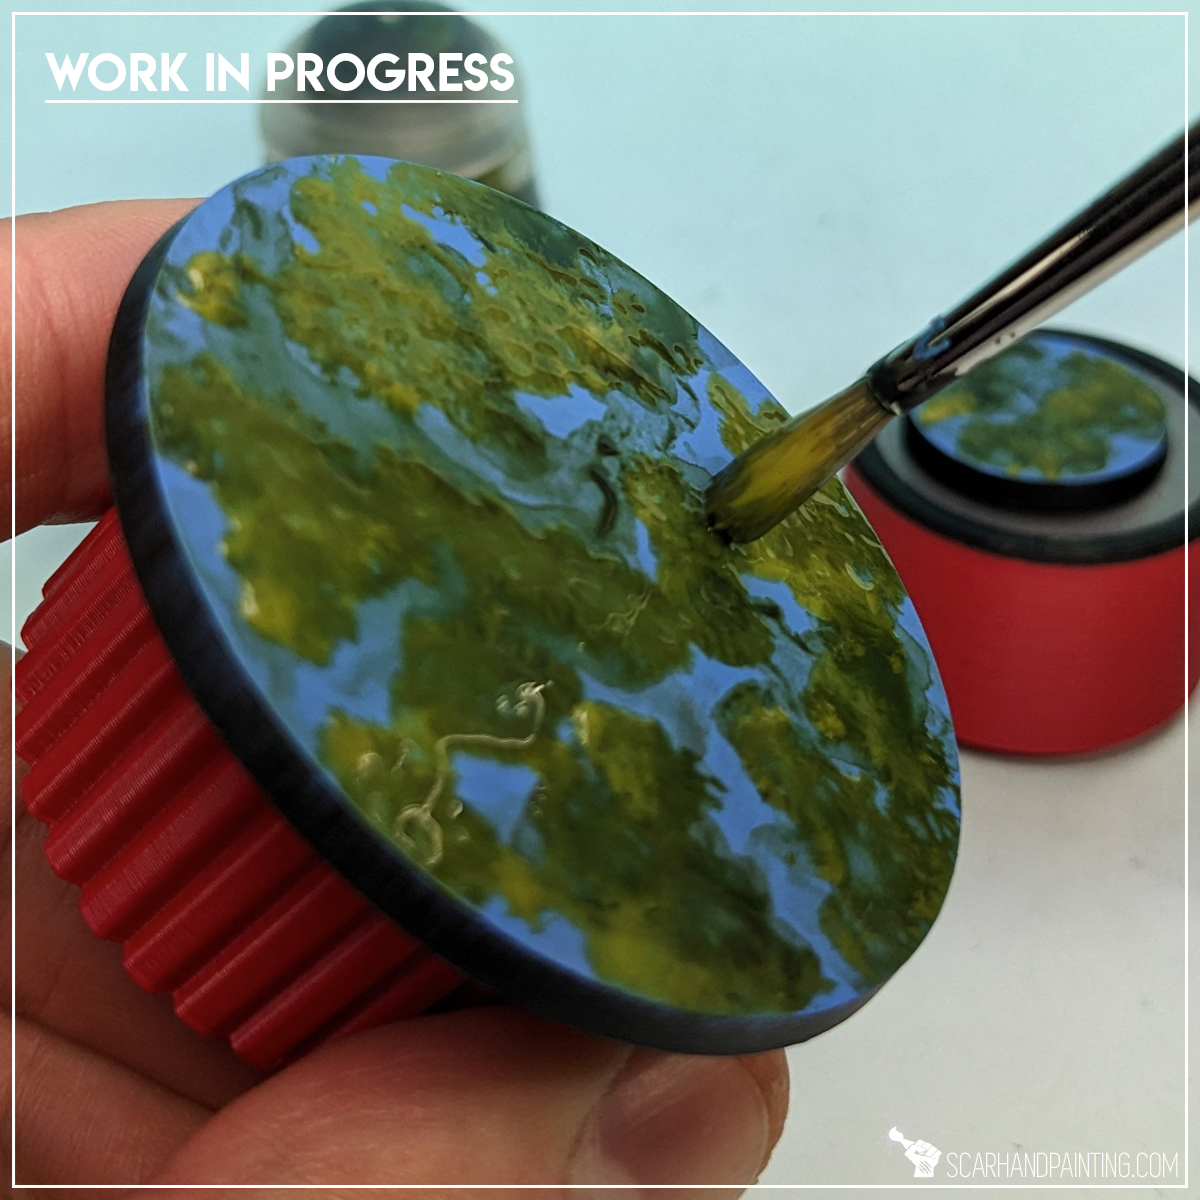
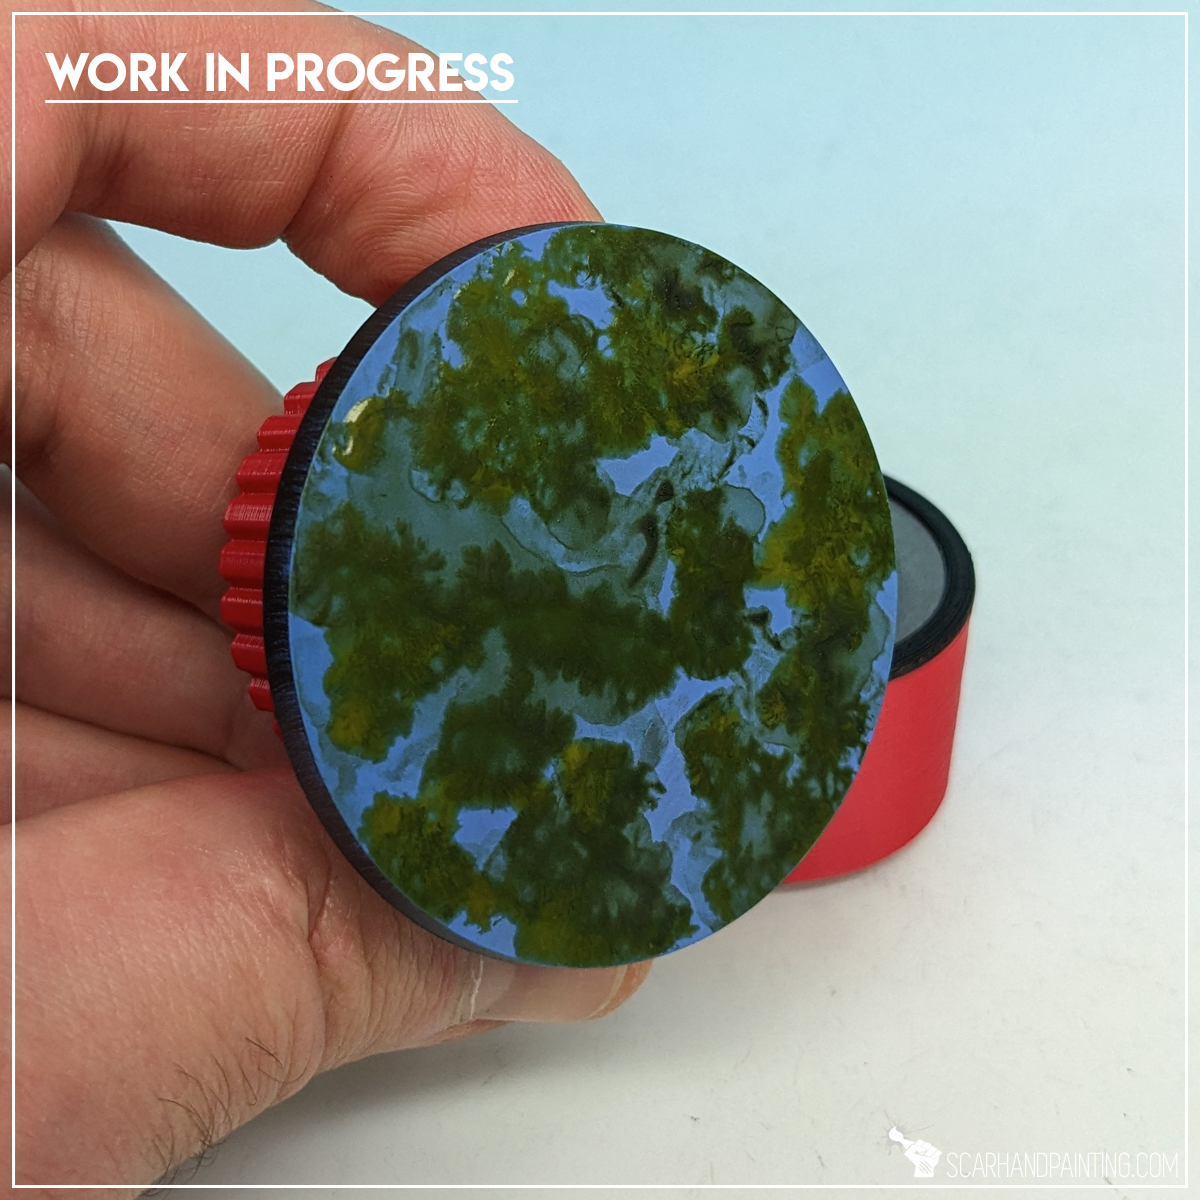
Step two: Underwater Plants
Next I applied spots of Games Workshop Militarum Green Contrast mixed with a bit of water, followed short by Games Workshop Nurgle’s Rot on top. I used relatively large, soft brush to ‘stipple’ Nurgle’s Rot on top of still wet Militarum Green. These paints do not mix well, precipitating and creating interesting patterns in result.
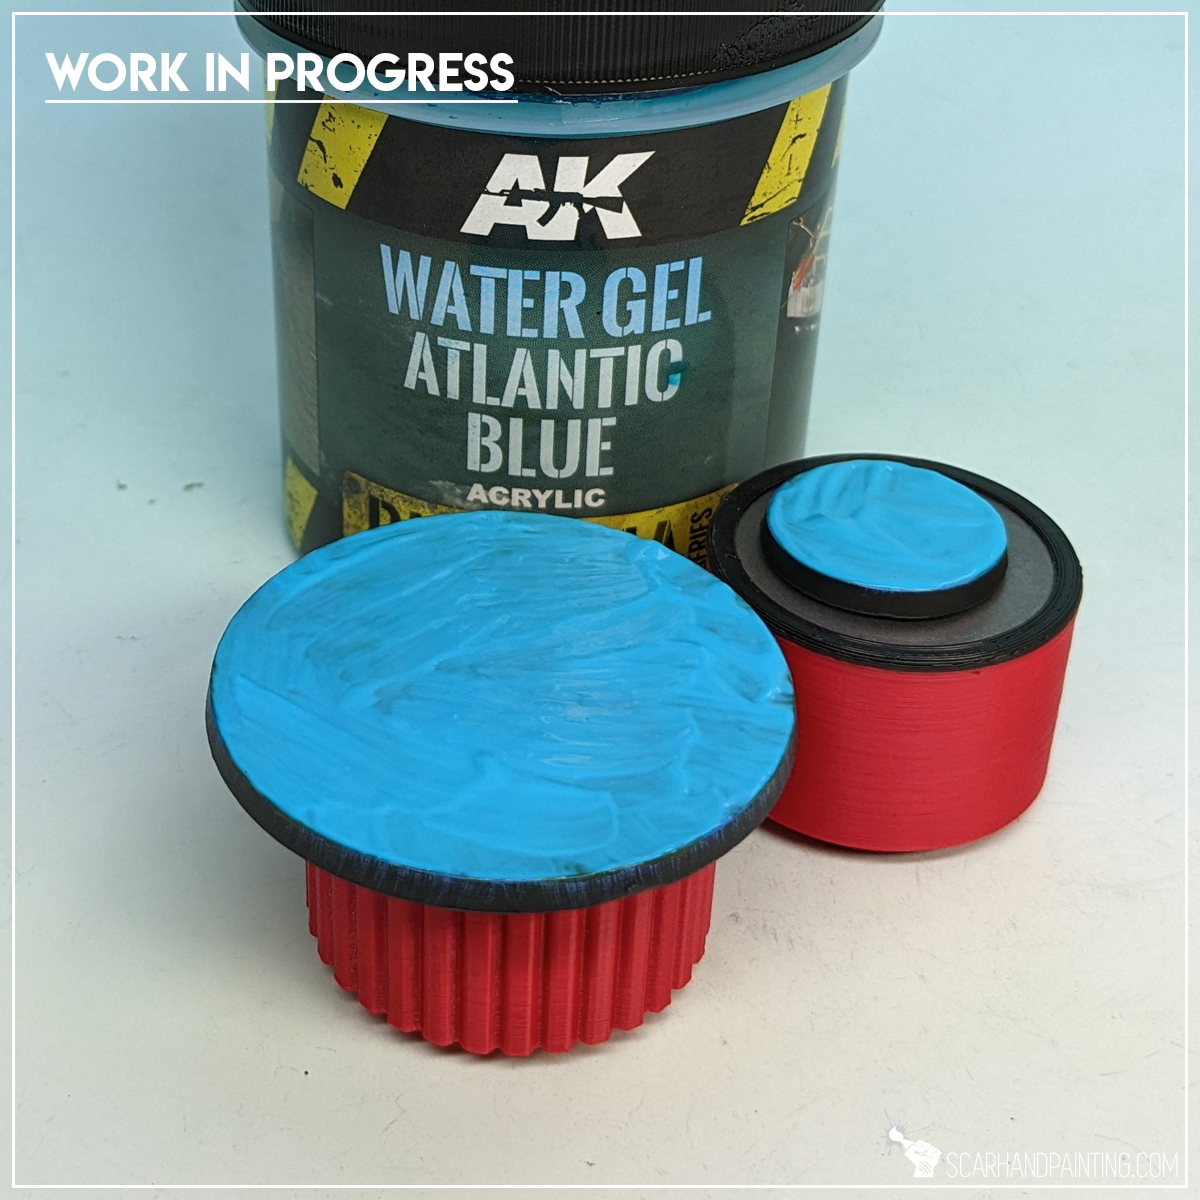
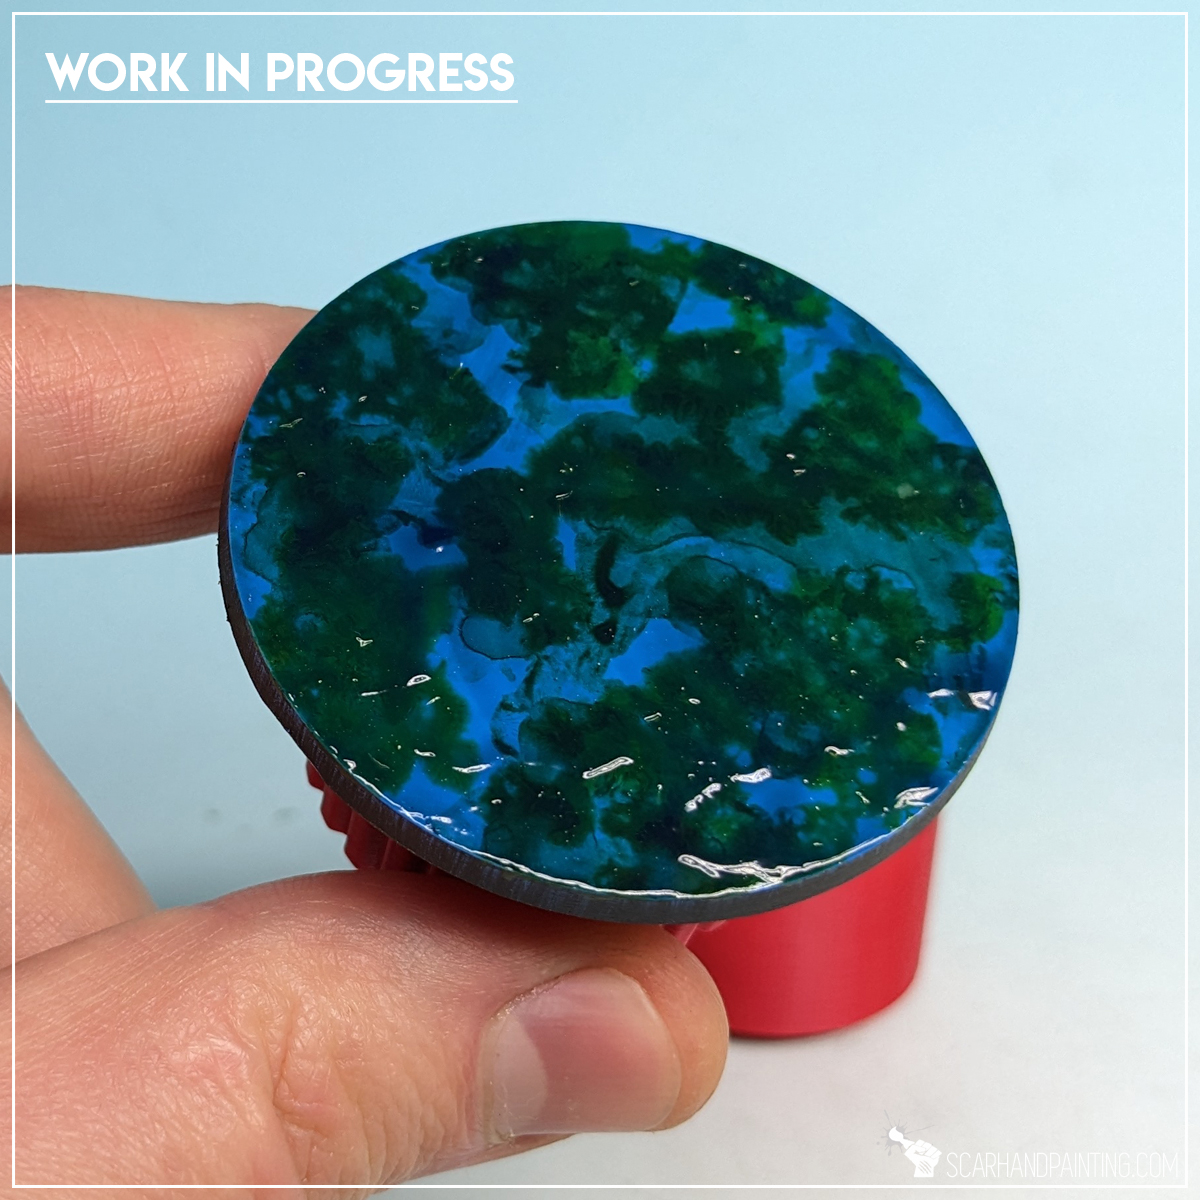
Step three: Water Effect
Once the previous layer dried, I covered entire base with a thick layer of AK Interactive Atlantic Blue texture and left it for half an hour to dry well.
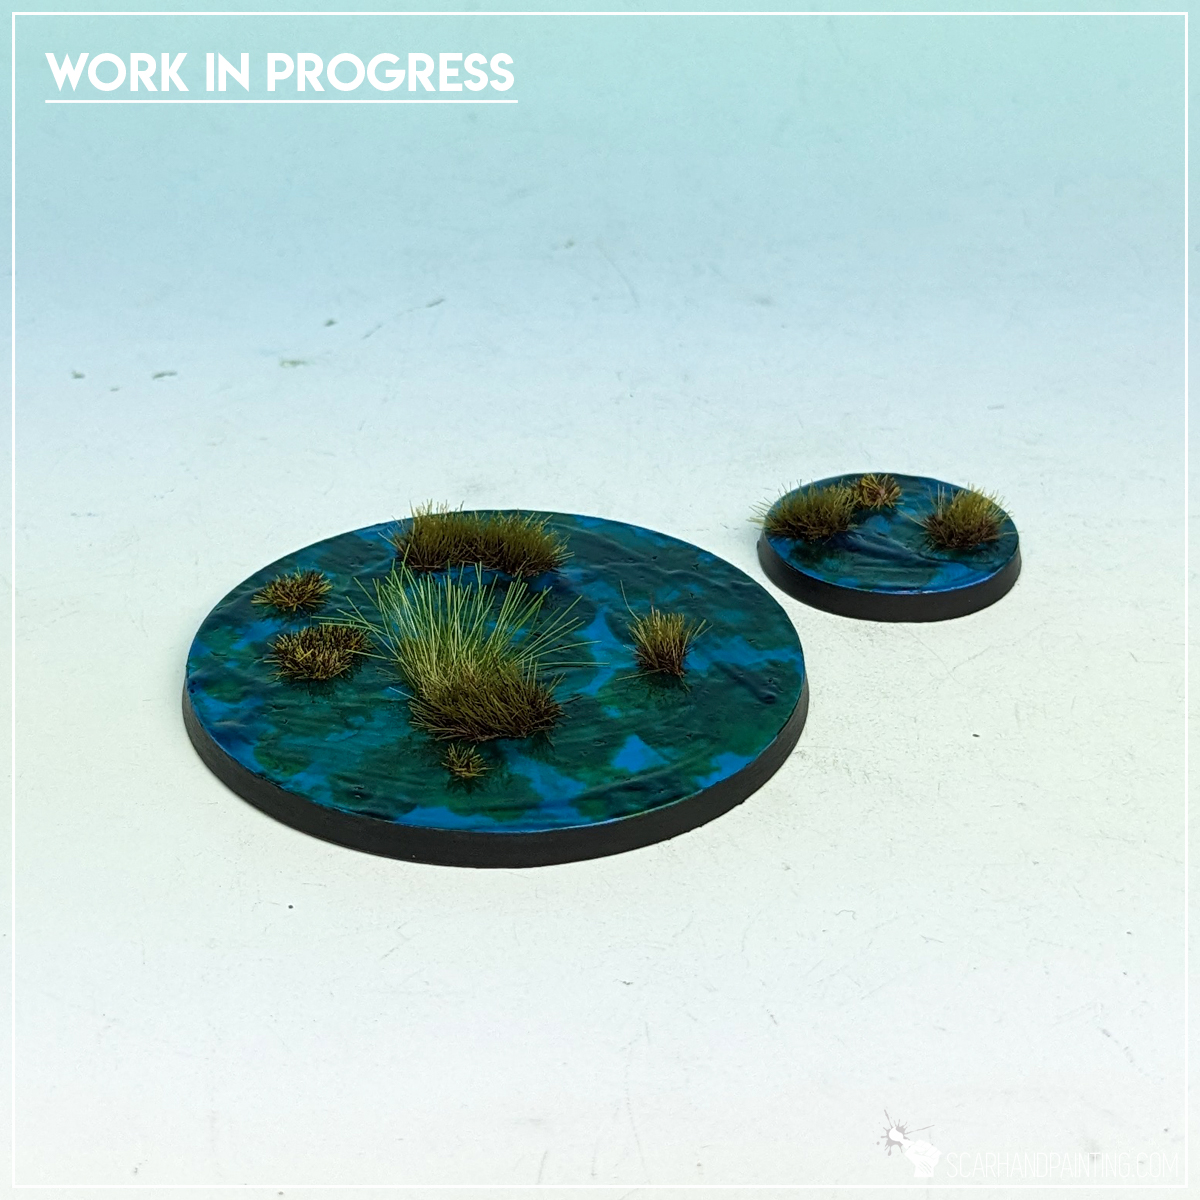
Step four: Tufts
Finally, (after some black edge ninja painting) I applied some tufts. I used a mix of Gamers Grass Swamp and Dark Moss tufts to add volume to the base.

As you can see the process is super easy but provides an interesting, eye catching final result. I strongly suggest you take the process further and experiment with different colors and overall volume. I believe there is a lot of potential in this method.
I hope you find this tutorial interesting. Be sure to let me know your thoughts in the comments below or via Facebook or Instagram. I would also appreciate if you considered sharing this content with your friends, who might find it useful. Finally if you are looking for a professional warhammer 40k miniatures painting service, be sure to contact me with this contact form. I always reply within 24 hours, after which please check out your spam folder.
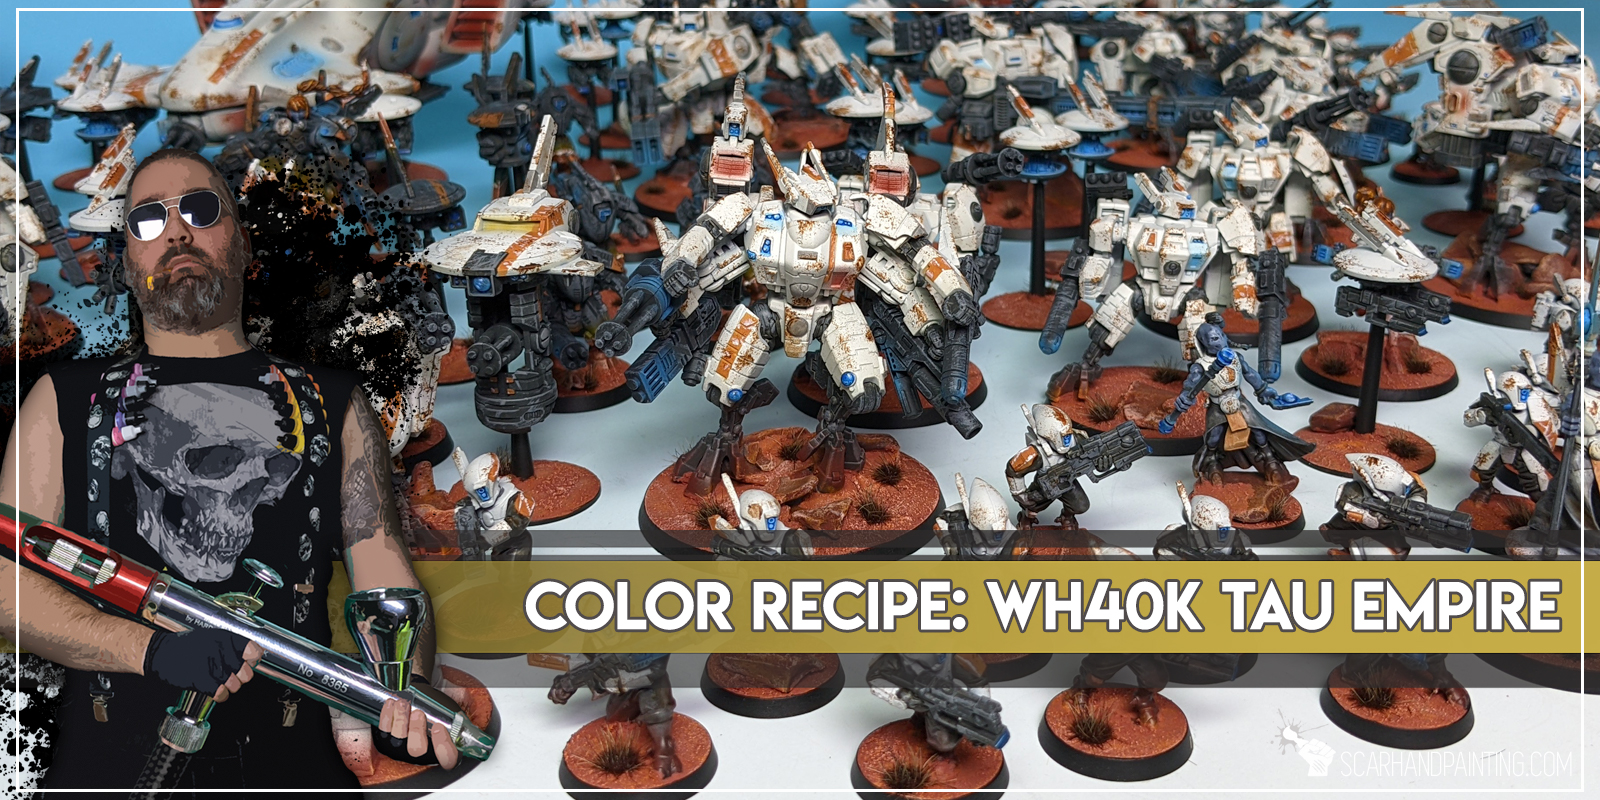
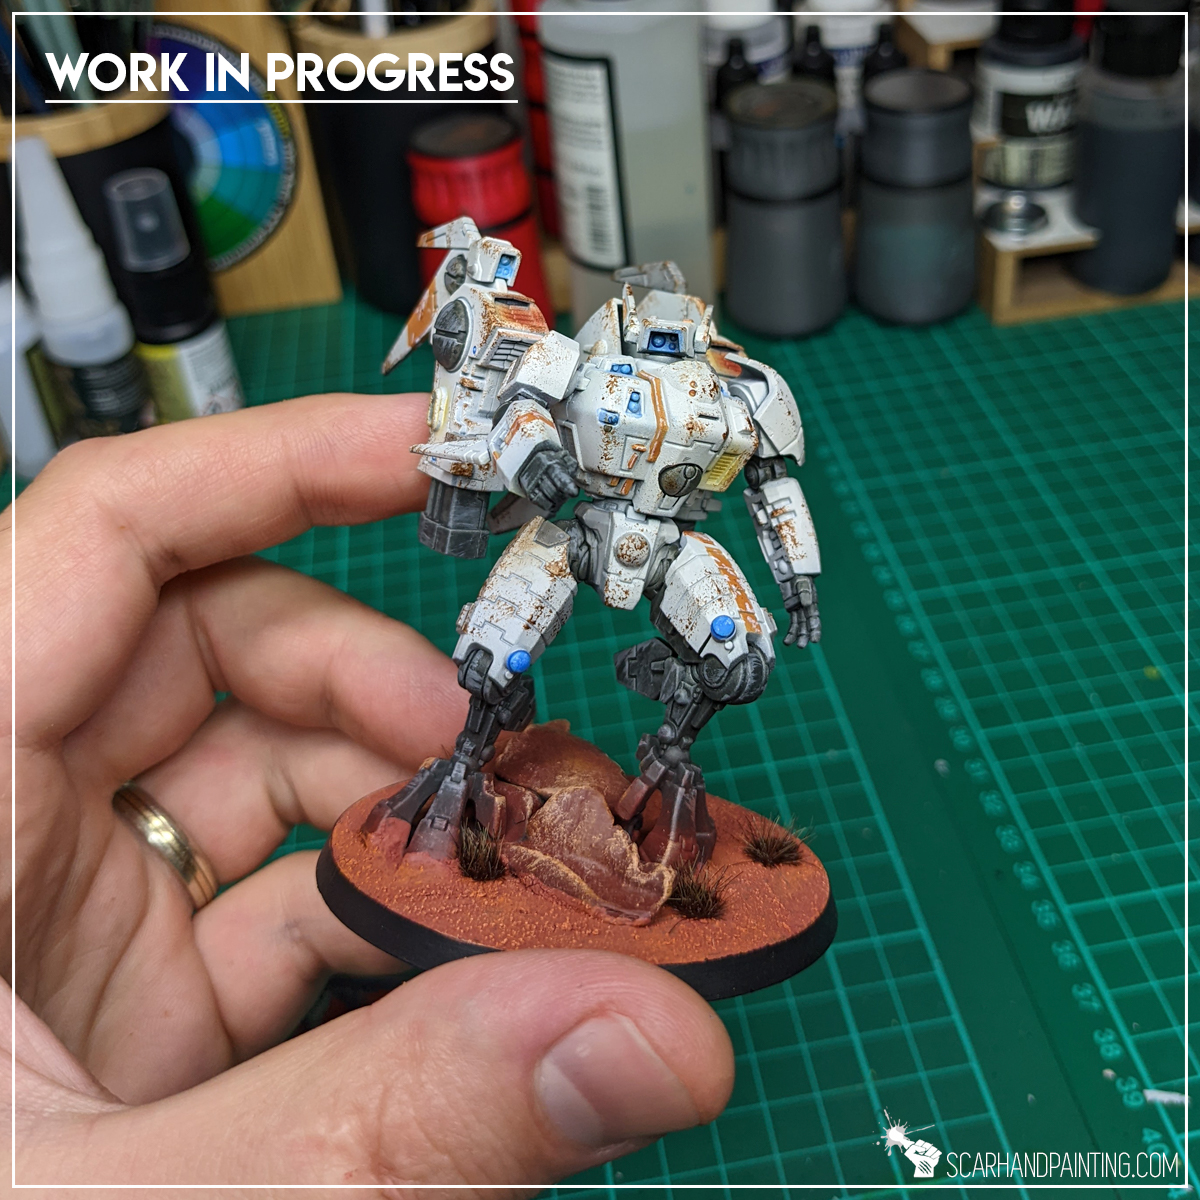
Here are some Color Recipes for Warhammer 40,000 Tau Empire from Gallery: Tau Empire. Please take note that this is a simple color scheme, not covering multiple overlapping layers and blends in between, that lead to the final product. It is supposed to be used as guideline not a step-by-step.
White Armor:
Desert Tan (val primer),
White (val primer),
Scrofulous Brown (val),* stencil stripes
White (val), scratches
Clothes / Mesh:
Panzer Dark Grey (val a) *
– White Armor –
Panzer Dark Grey (val a), wash
Cold Grey (val a), flbr
CLOTHES: Strong Tone Ink (ap), wash

Weapons:
Panzer Dark Grey (val a),
Cold Grey (val), weathering, edge highlight
Weathering:
Smokey Ink (val), stpl
Desert Yellow (val a),*
German Red Brown (val primer), *
Blue OSL:
Light Sea Blue (val a), bl / *
White (val), l&p
Guilliman Blue (gw), glaze
Bases:
German Red Brown (val primer),
Mix Martian Ironcrust (gw texture) 1:1 Martian Ironearth (gw texture), texture
Orange Fire (val), flbr
Lugganath Orange (gw), drbr
TUFT: Army Painter Wasteland Tuft
TUFT: Gamers Grass Burned Tuft

l&p – lines and points,
p – points,
dl – deep lining,
bl – blend,
gl – glaze,
drbr – drybrush,
flbr – flatbrush,
lobr – loaded brush,
stpl – stippling,
*Airbrushed (with multiple layers and mixes)
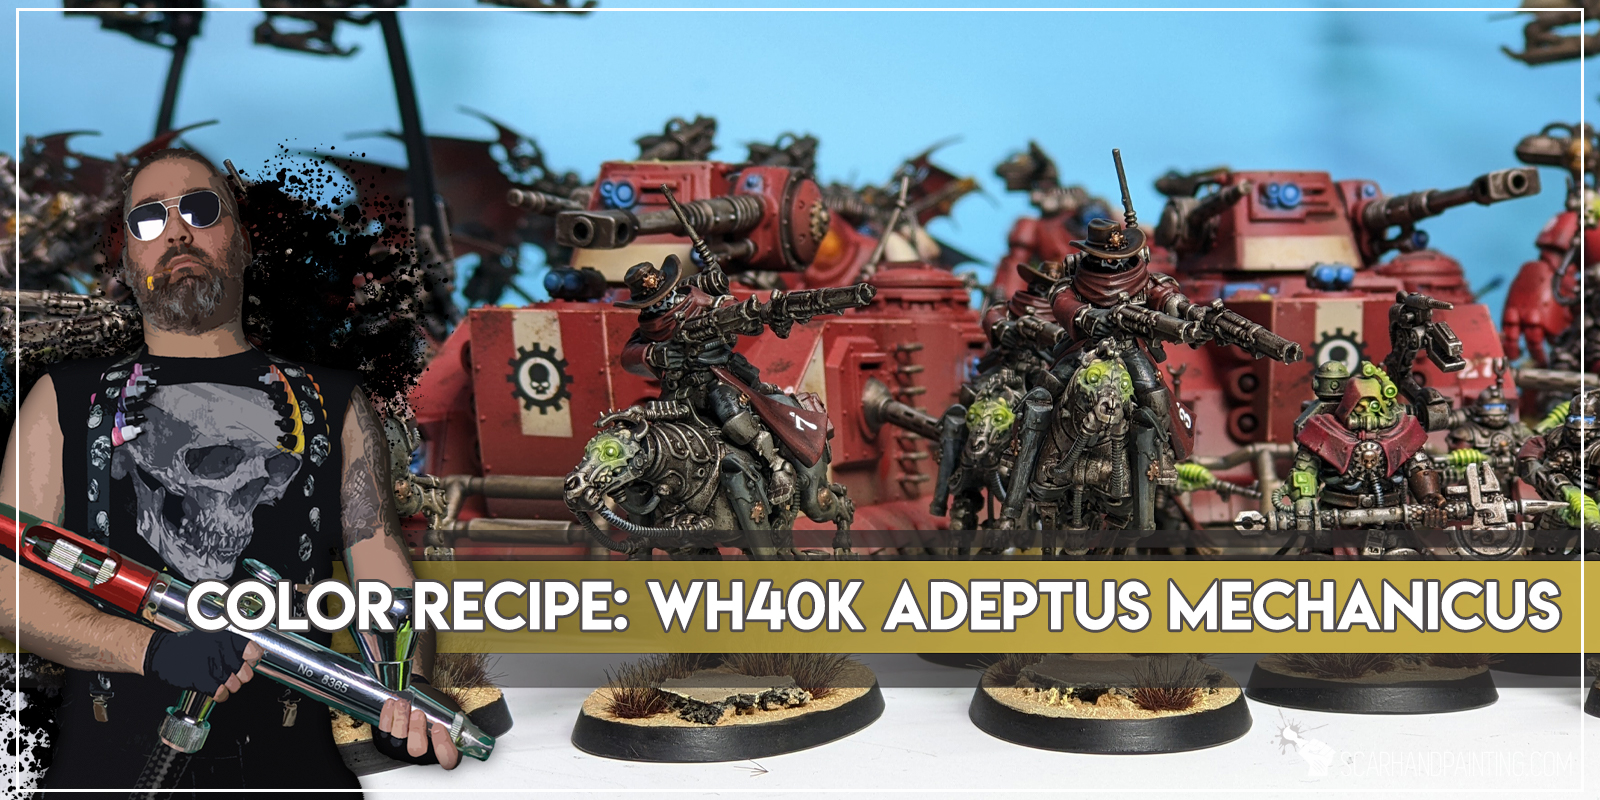
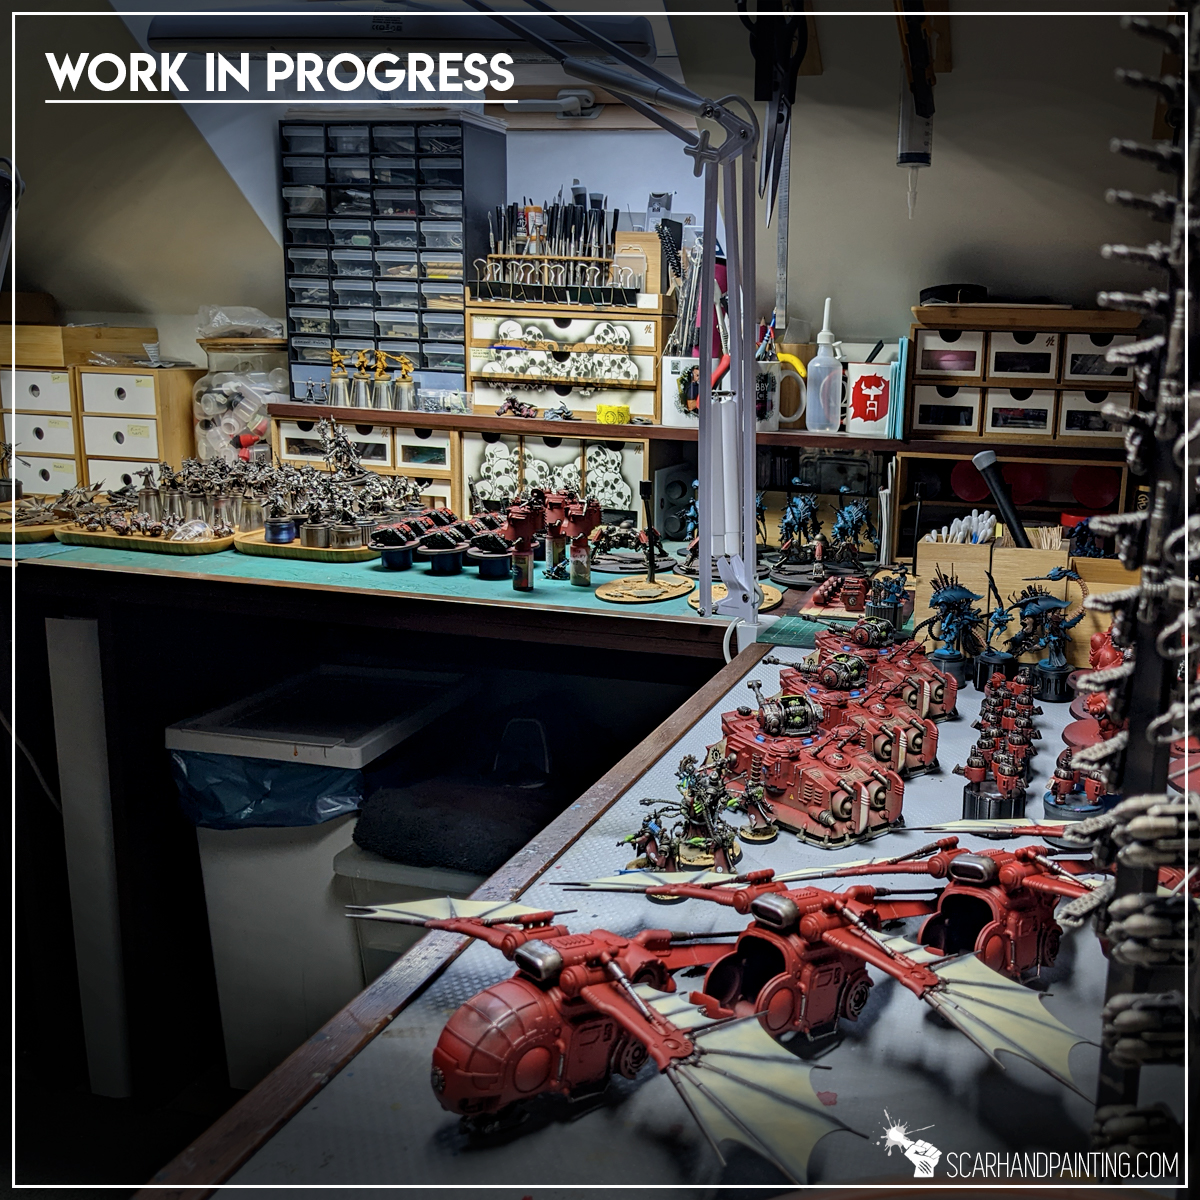
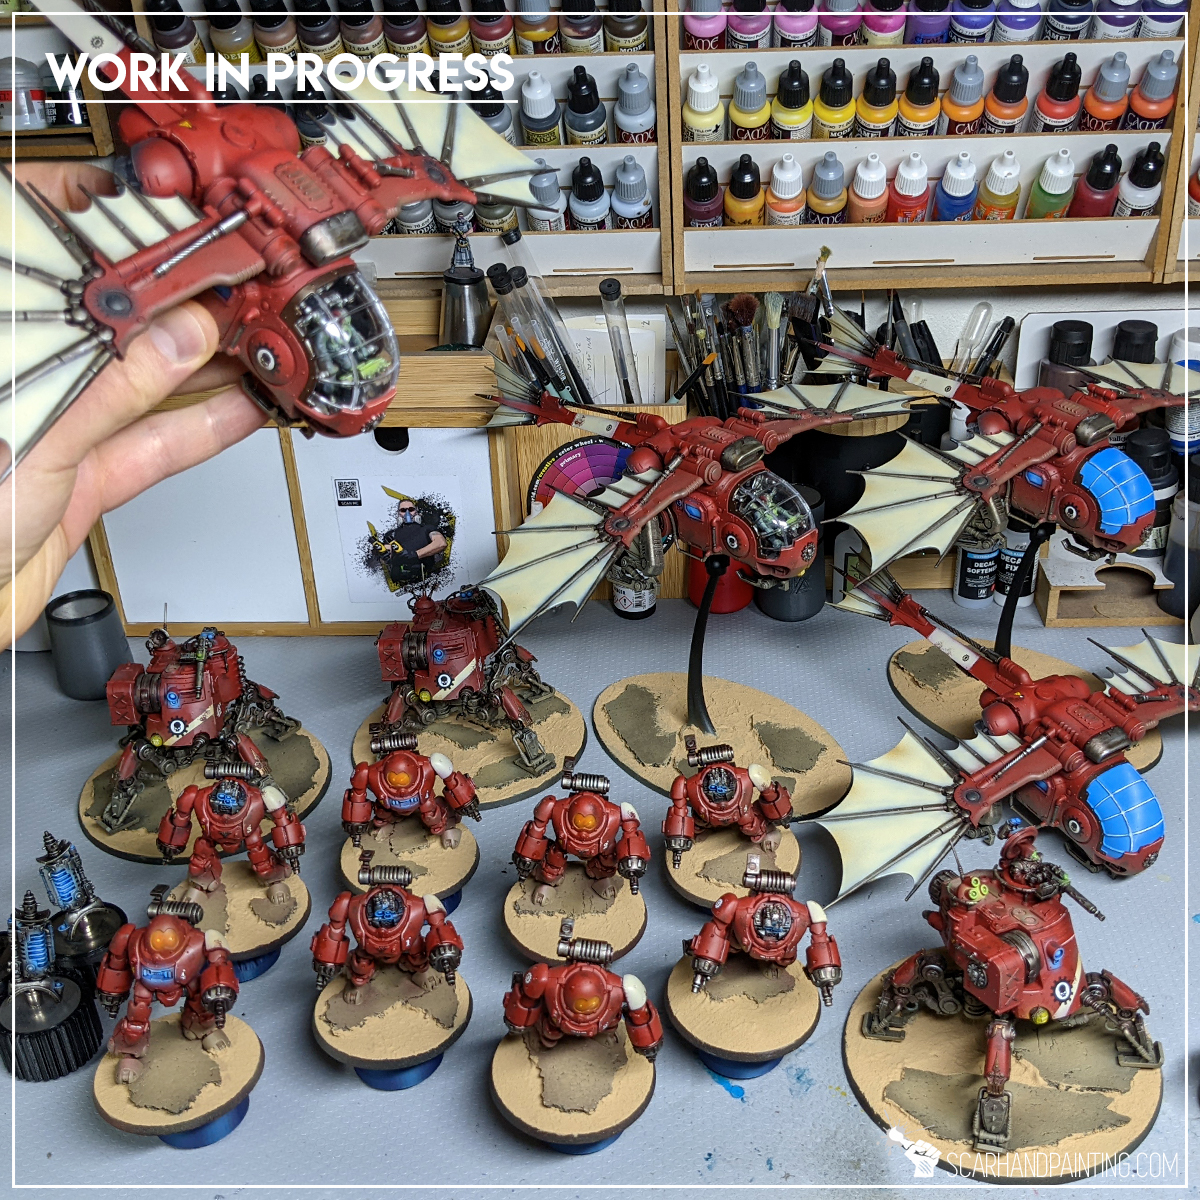
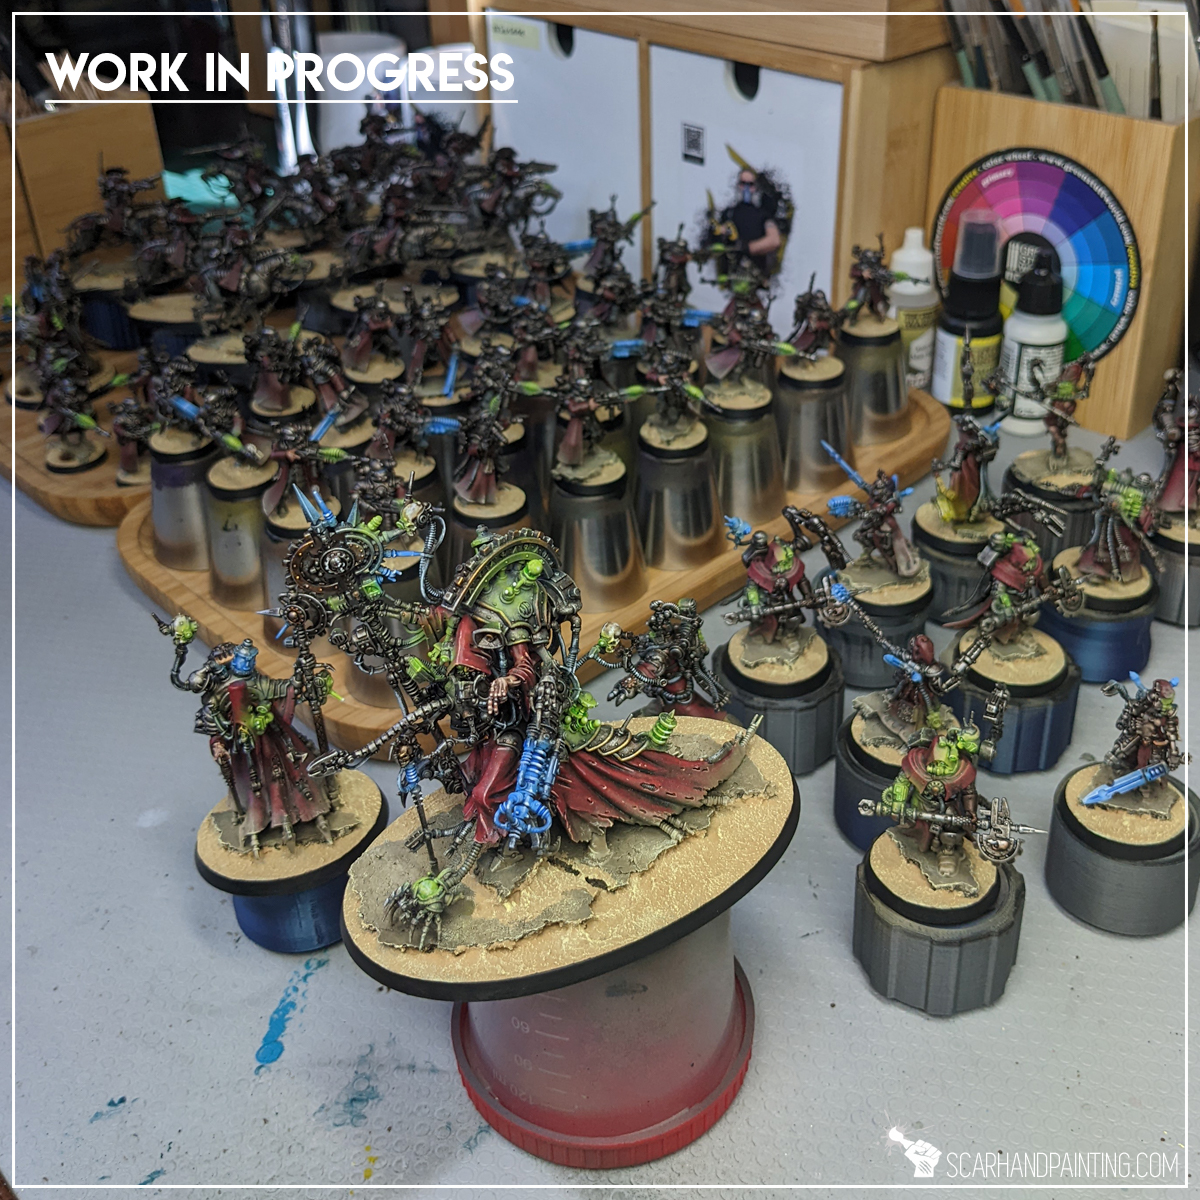
Here are some Color Recipes for Warhammer 40,000 Adeptus Mechanicus from Gallery: Adeptus Mechanicus. Please take note that this is a simple color scheme, not covering multiple overlapping layers and blends in between, that lead to the final product. It is supposed to be used as guideline not a step-by-step.
Metal:
Rust (val a),*
Gun Metal (ap), flbr
Shining Silver (ap), flbr
True Copper (ap), alternative spots
Strong Tone (ap), wash / wash*
Shining Silver (ap), l&p
RED Vehicles:
German Red Brown (val primer), *
Desert Tan (val primer), *preshade
Mix: German Red Brown 1:1 Red RLM 23 (val a),*
Bonewhite (val a), stencil stripes
Smokey Ink (val), weathering
Red Clothes:
Hull Red (val),
Strong Tone (ap), wash / wash*
German Red Brown (val primer), flbr, bl
German Red Brown (val primer), bl, edges
Scarlet Blood (val), edges
Black Clothes:
Panzer Dark Grey (val a),
Fenrisian Grey (gw), flbr
Hero: Ghost Grey (val), l&p
Strong Tone (ap), wash
Hero: Ghost Grey (val), l&p
Hero: Off White (val), l&p
Blue Light:
Light Sea Blue (val a), *
White (val a), *
Guilliman Blue (gw), wash
Off White (val), l&p
Purity Seals:
Hull Red (val),
Strong Tone (ap), wash
Rosy Flesh (val), p
/
Flayed One Flesh (gw),
Pallid Wych Flesh (gw), flbr
Strong Tone (ap), wash
Black markings,
Skulls:
Ghost Grey (val),
Strong Tone (ap), wash
Ghost Grey (val), p
Skin:
Tan (val),
Dwarf Flesh (gw), flbr
Flesh (val a),
Strong Tone (ap), wash
Hero: Flesh (val), l&p
Hero: Pale Flesh (val), l&p
Bases:
Earth (val a), *
Light Brown (val a), *
European Dust (val), *
Sandy Desert (AK texture),
Ice Yellow (val), drbr, flbr,
TUFT: Wasteland Tuft (ap),
TUFT: Burned 6mm wild (gg),

l&p – lines and points,
p – points,
dl – deep lining,
bl – blend,
gl – glaze,
drbr – drybrush,
flbr – flatbrush,
lobr – loaded brush,
stpl – stippling,
*Airbrushed (with multiple layers and mixes)

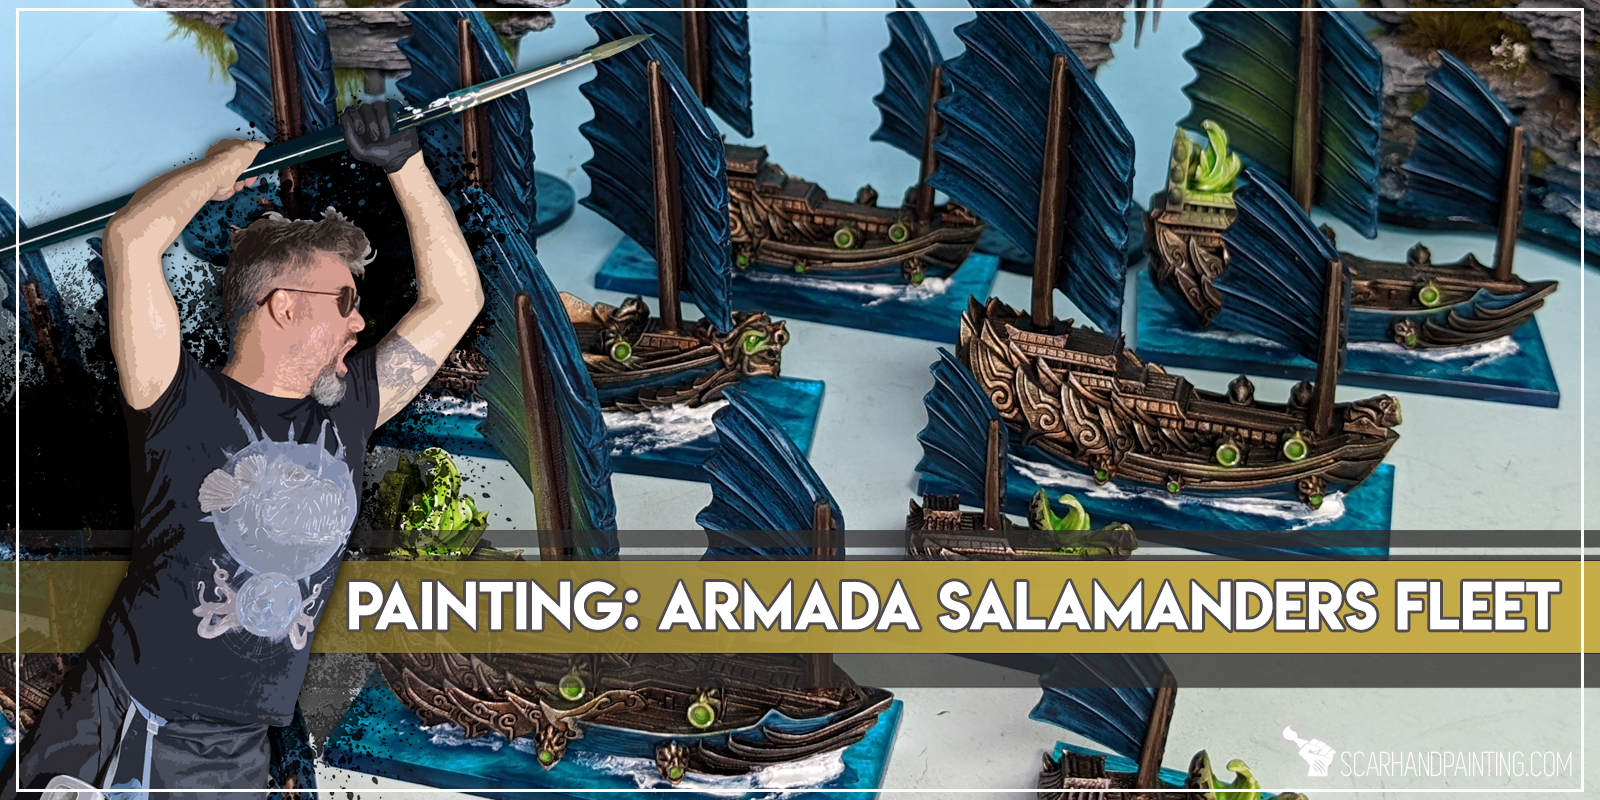
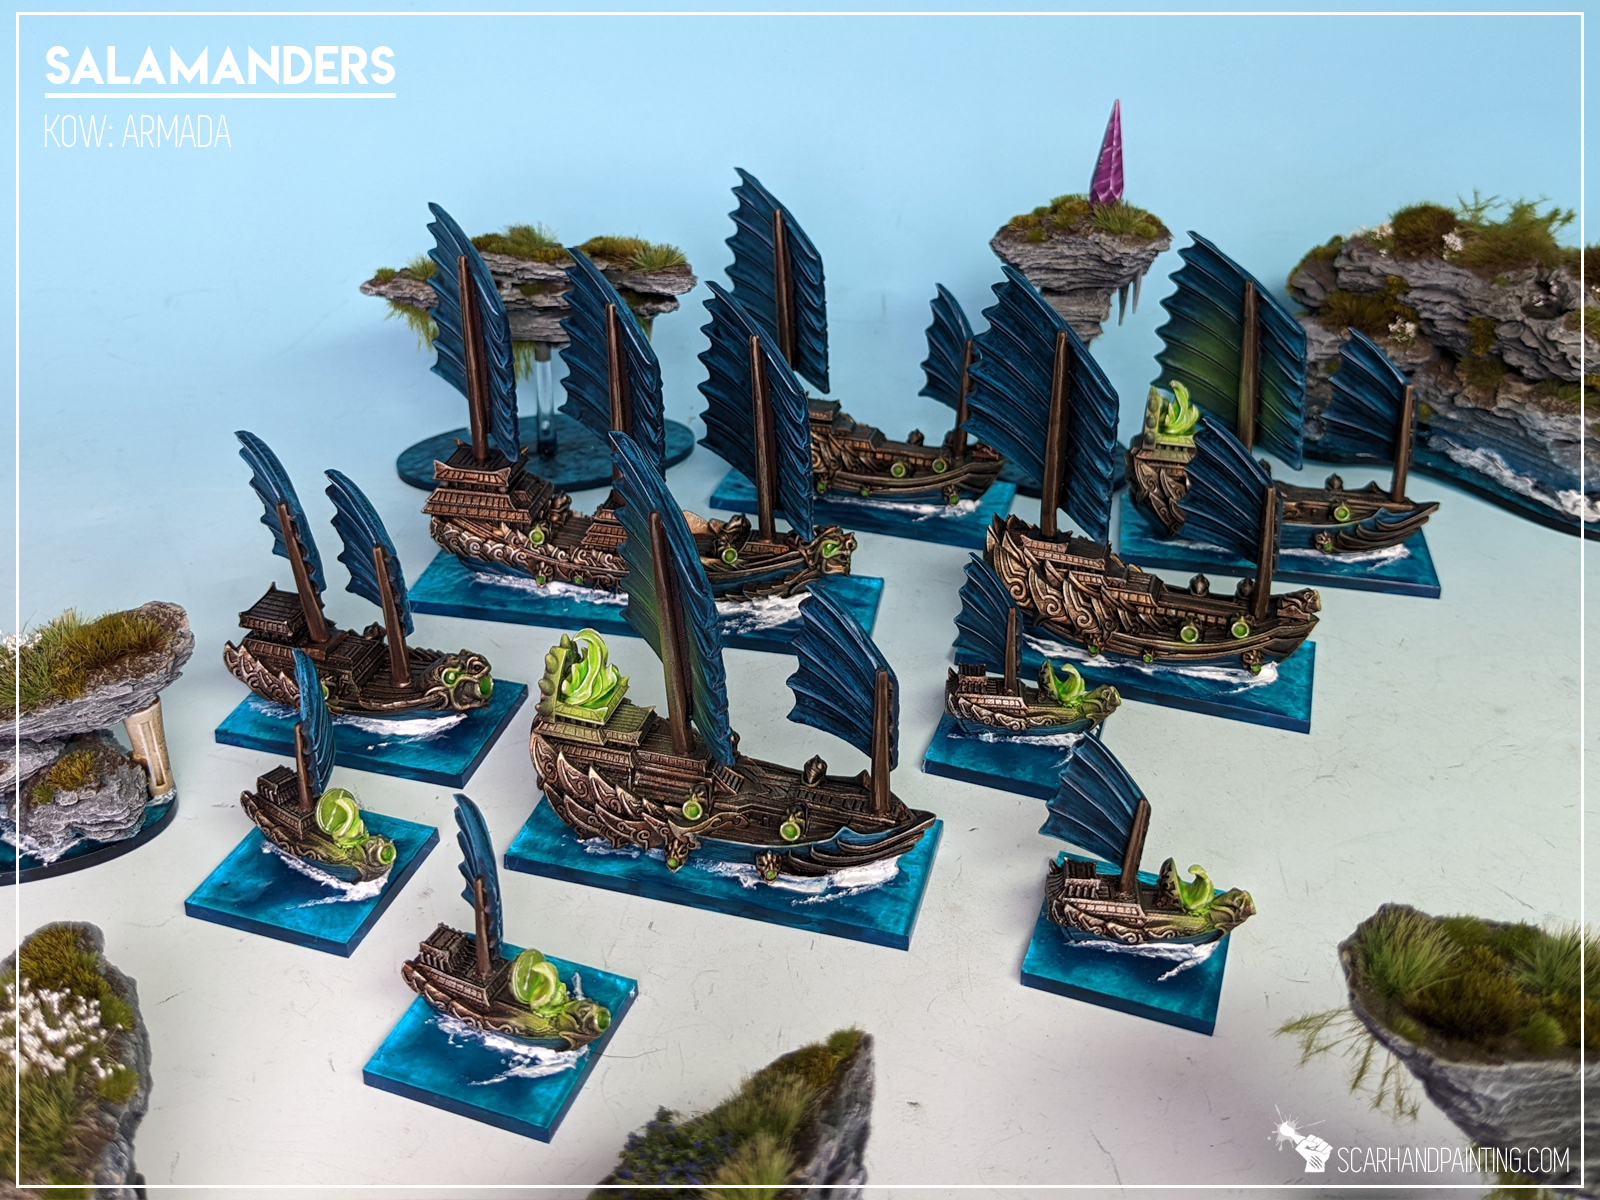
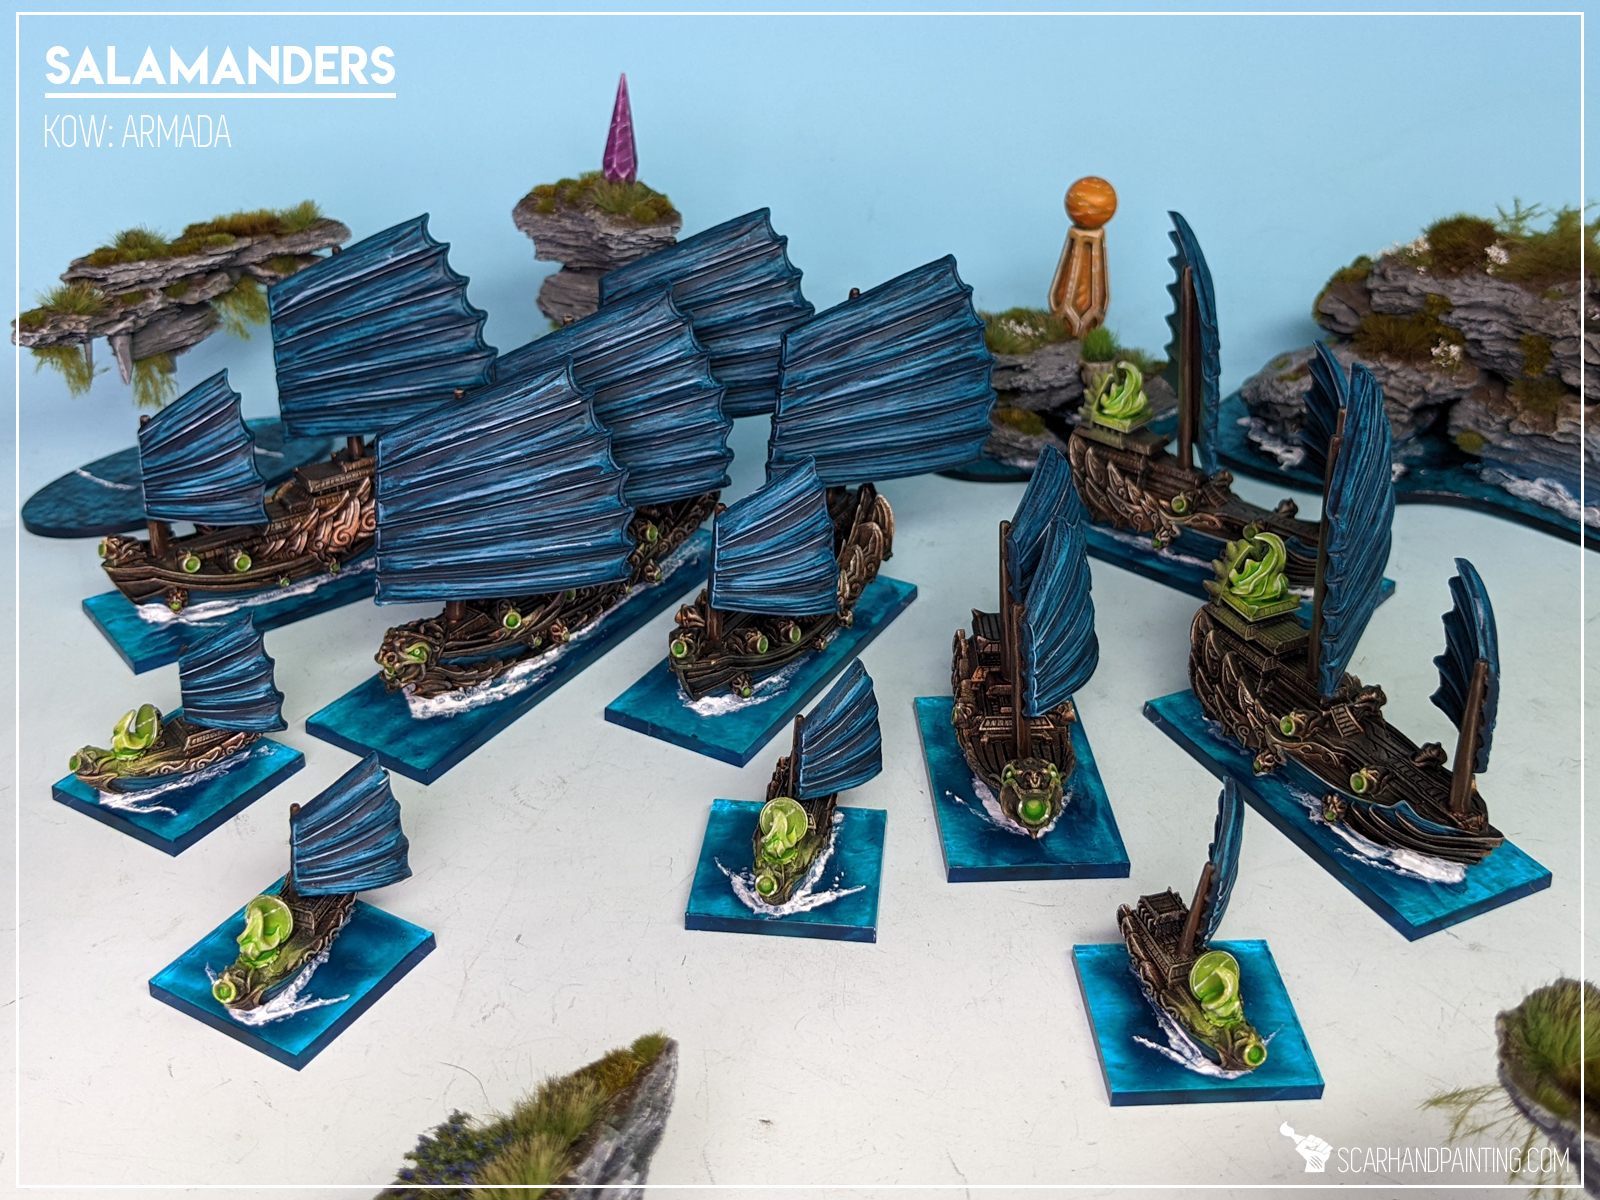
Kings of War: Armada is a fantastic game, full of beautifully crafted miniatures. Still some wargaming veterans might feel intimidated by the unusual scale and plentiful detail of Armada ships. Today I will present to you how easy it is to paint Armada Salamanders ships as can be seen in Gallery: Armada Salamanders. All techniques presented in step-by-step tutorial can be applied to different colors to produce a variety of awesome color schemes for your fleet.
Before we start, some notes:


Step one: Undercoat
I started with a thorough layer of Games Workshop Chaos Black spray. Chaos Black spray is my go to choice when it comes to undercoat, leaving a solid, durable layer with detail intact. Some might consider adding a zenithal preshade on top, but the techniques used in this tutorial would render such practice irrelevant.

Step two: Hull base
Hull, being the largest and most detailed part of the ship, was my choice of where to start the actual paintjob. I applied a solid layer of thinned Games Workshop Warplock Bronze all over the miniature, except for sails. I used an airbrush, but this can easily be done manually.
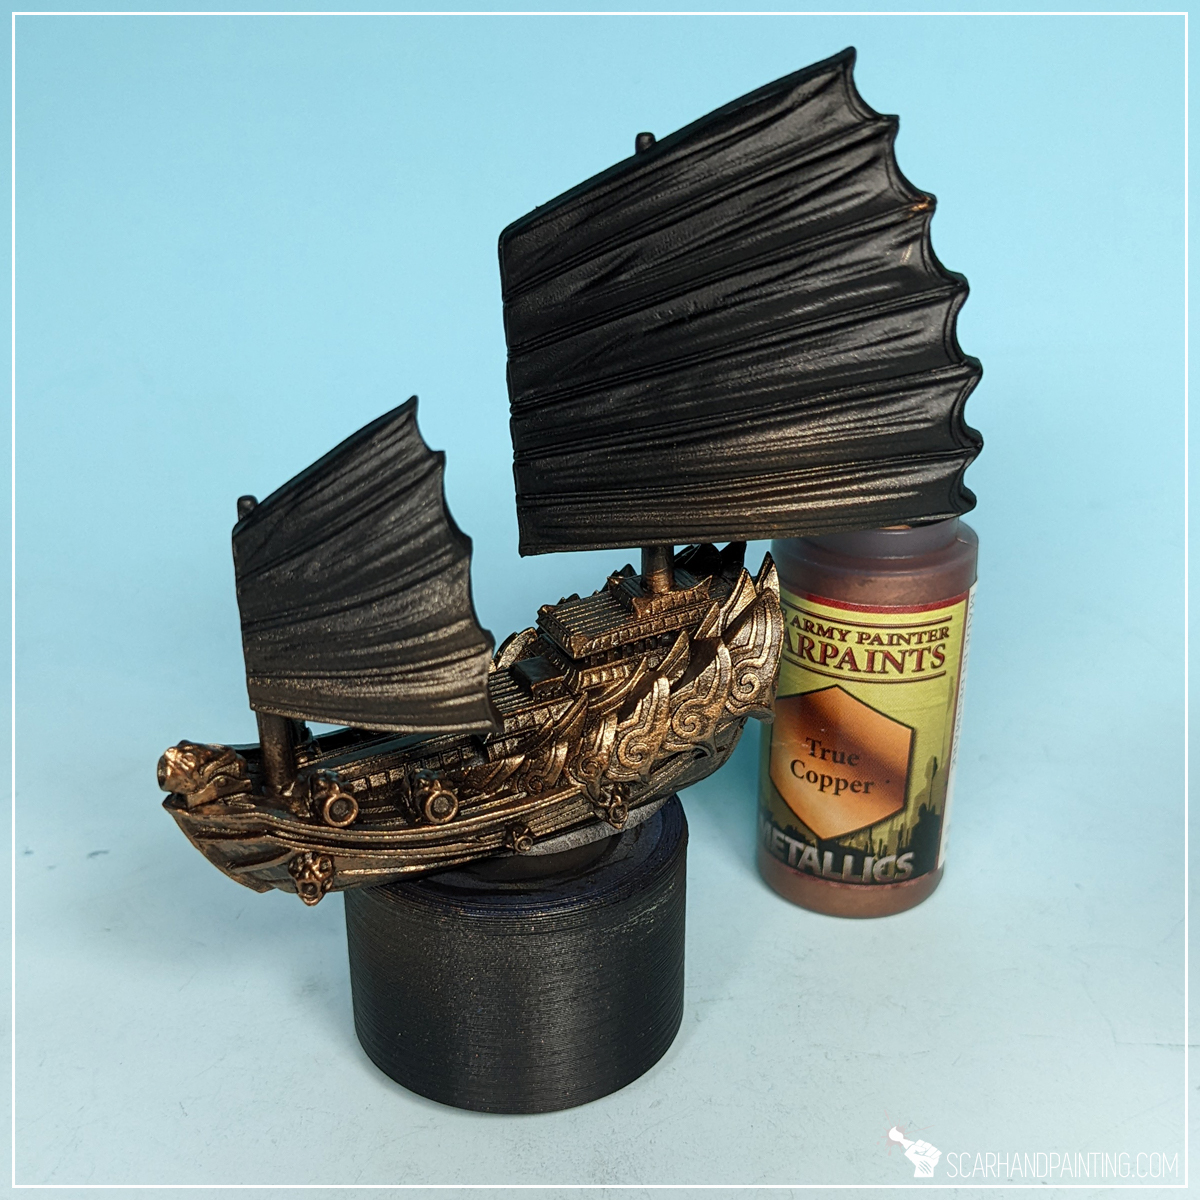
Step three: Hull highlight
Next, using a medium size, soft brush I applied a highlight of Army Painter True Copper. Flatbrush was my technique of choice for this one, as it applied a solid layer of paint sparing most recesses, thus leaving some of the previous layer still visible.
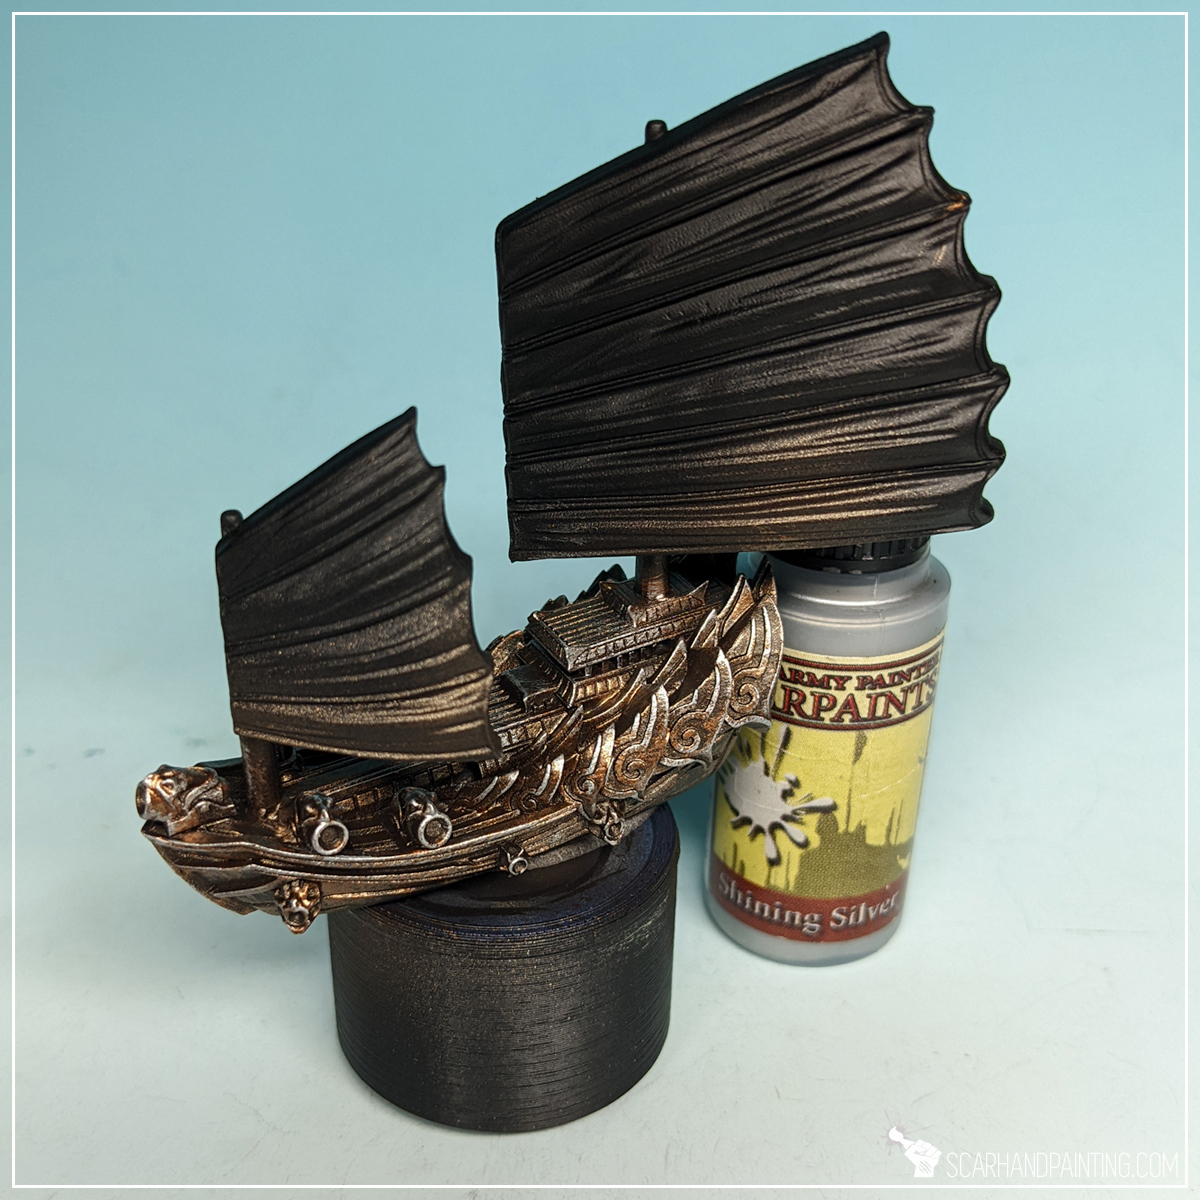
Step four: Hull final highlight
I then applied an edge highlight of Army Painter Shining Silver to make all the detail pop and provide a bit more contrast between recesses and exposed edges.
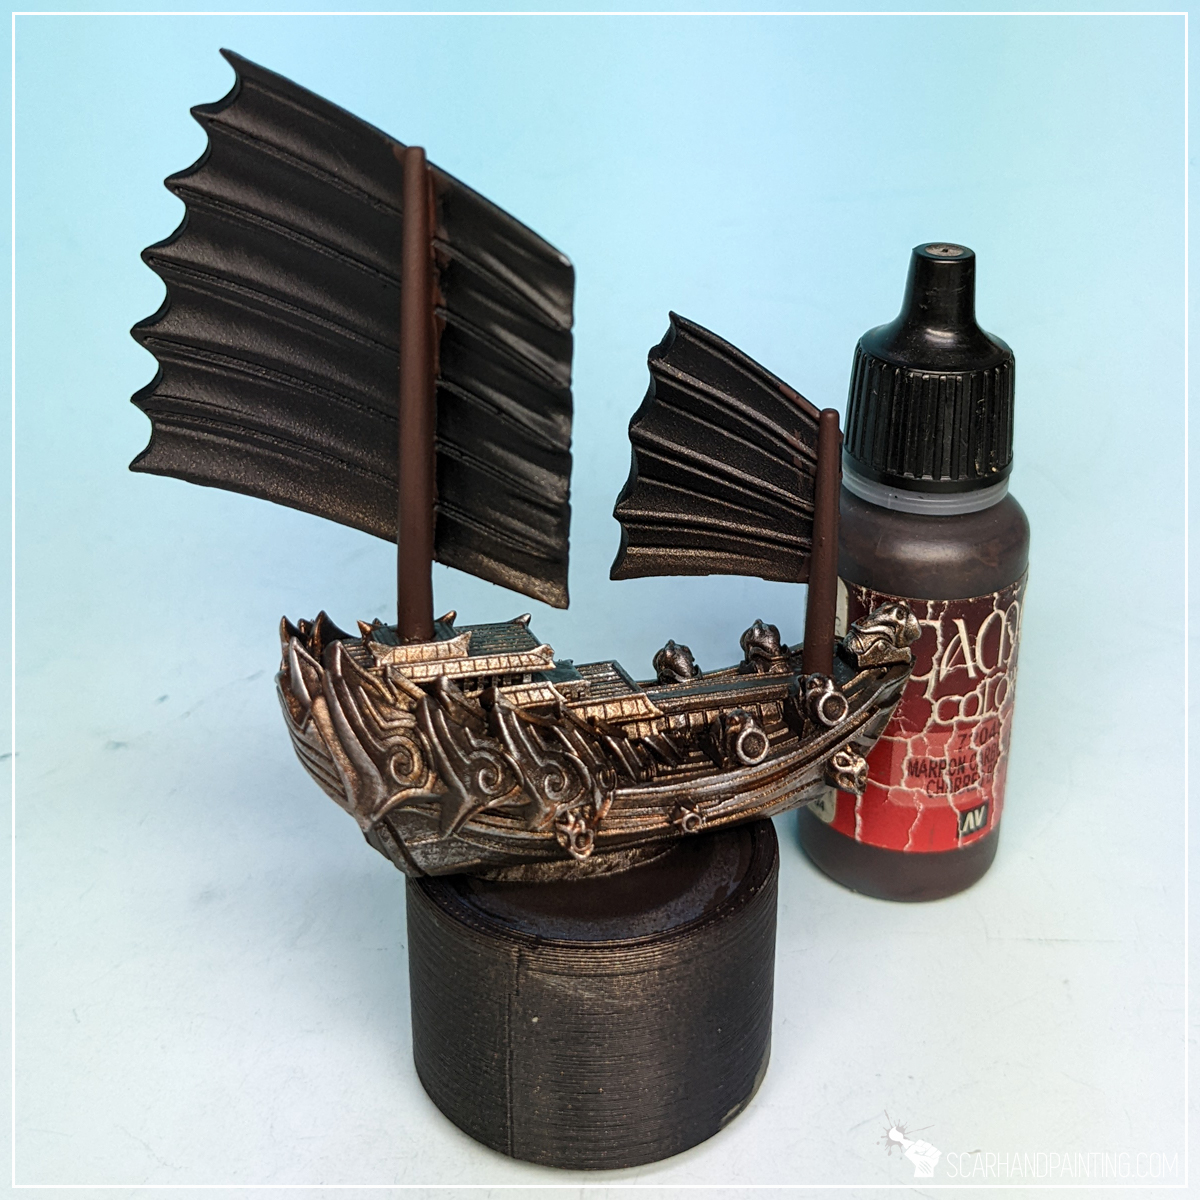
Step five: Masts base
I left the Hull for a bit and moved on to masts, applying a thick layer of Vallejo 72.045 Charred Brown. Once again I would like to point out that the colors I used are my personal preference and you can use any brand, or even any similar color, to achieve similar results.
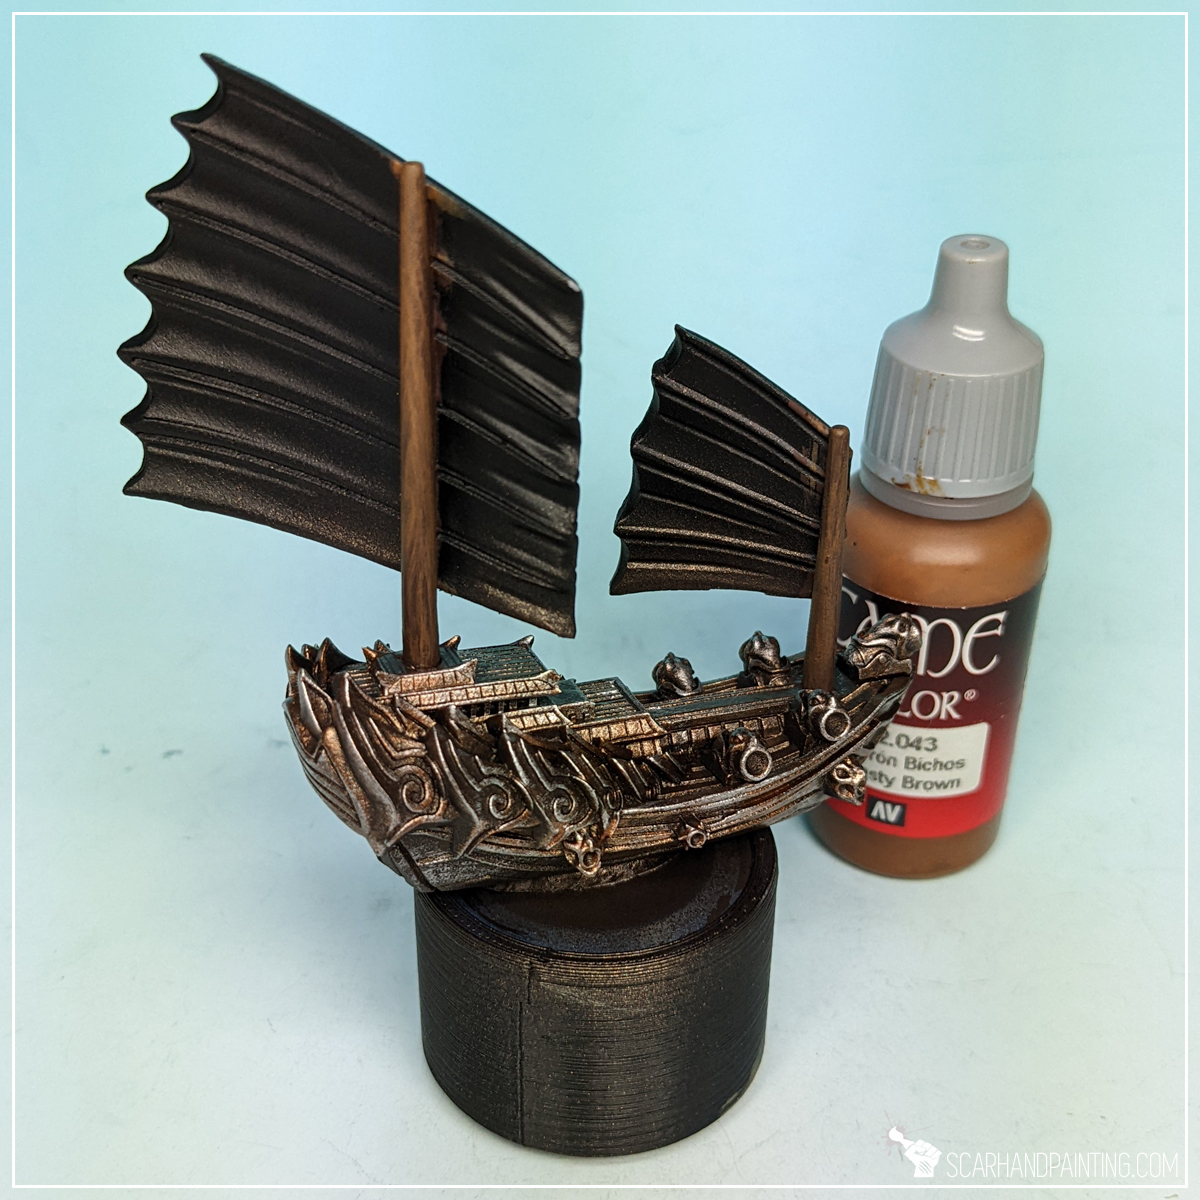
Step six: Masts highlight
Another step was to apply a slightly blurry highlight of Vallejo 42.043 Beasty Brown. By blurry I mean a thinned down paint applied with a relatively large, soft brush. You can see in the picture how this layer seem a bit misty, partially translucent and not as strong as usual base application. This can be achieved by keeping a brush barely loaded with thinned down paint and sliding its edge up and down the surface. If I ever decide to have a Patreon this technique will probably be the first thing I would like to do a deep dive into, but for now my chaotic description must do.
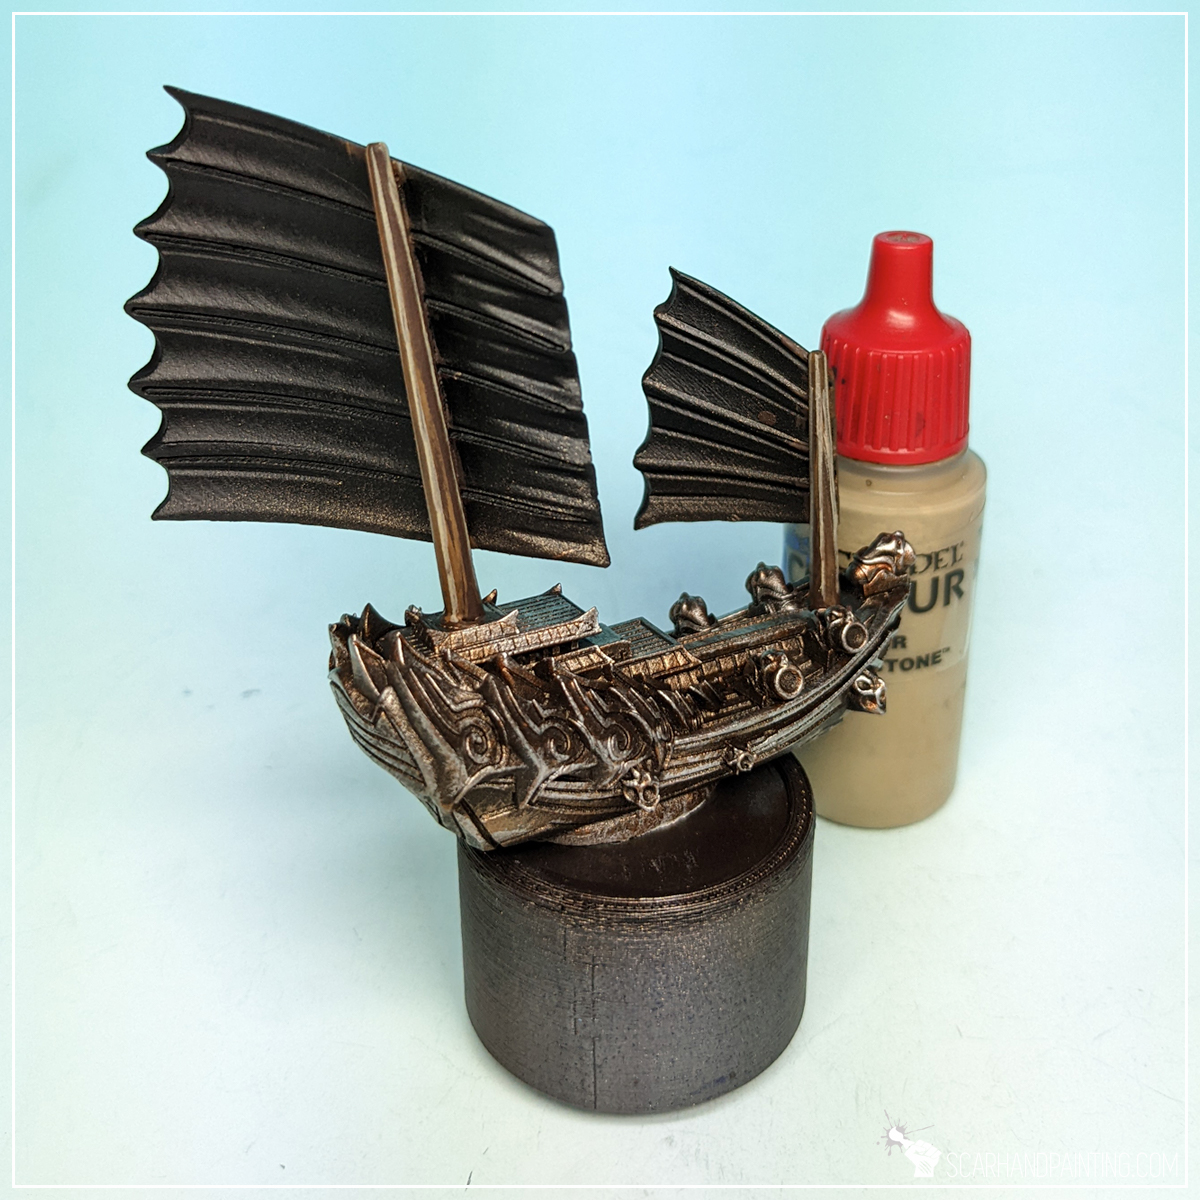
Step seven: Masts edge highlight
Due to masts shape they do not have edges on their sides, but they still can be imitated with standard edge highlight of Games Workshop Karak Stone. If you struggle with edge highlights check out this in-depth article from 2018, where I describe the process and share some related life hacks.

Step eight: Wash
Here’s where real magic happens. I applied a strong layer of Army Painter Strong Tone wash over the miniature. This is probably the most important moment of the entire paint job. Wash applied en-masse blends all the colors beneath, toning them down a bit, adding coherency and that extra juicy look. One thing to look out for is large drops of wash forming on flat areas and lower parts of the miniature, then leaving stains of very dark paint while drying. This can be avoided by removing the excess of paint with a soft wet brush few minutes after application.

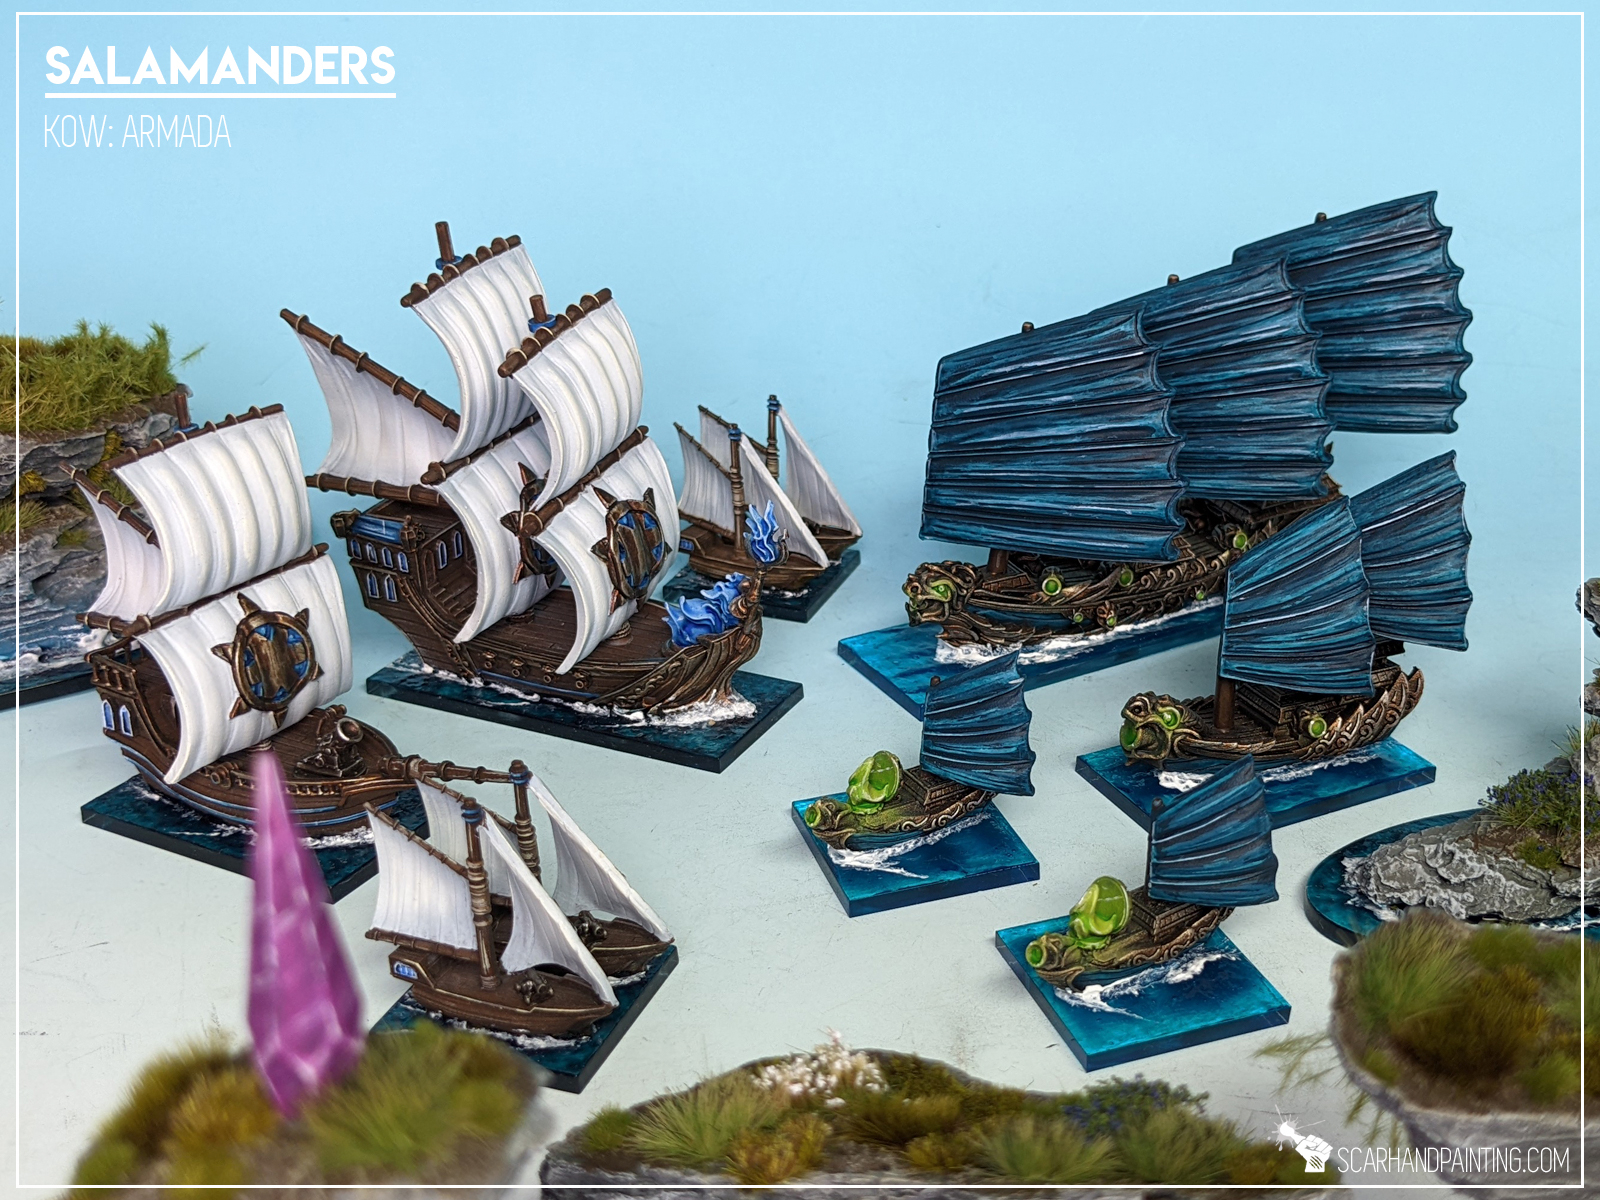
Step nine: Sails base
Once wash dried out nicely I moved to Sails and lower hulls. I applied a thick layer of P3 Coal Black, which is something between dark turquoise mixed with dark grey.

Step ten: Sails highlight
Next I applied a flatbrush highlight of slightly thinned Vallejo 309 Periscopes. This exposed most texture of the sails why also providing a more juicy color overall.
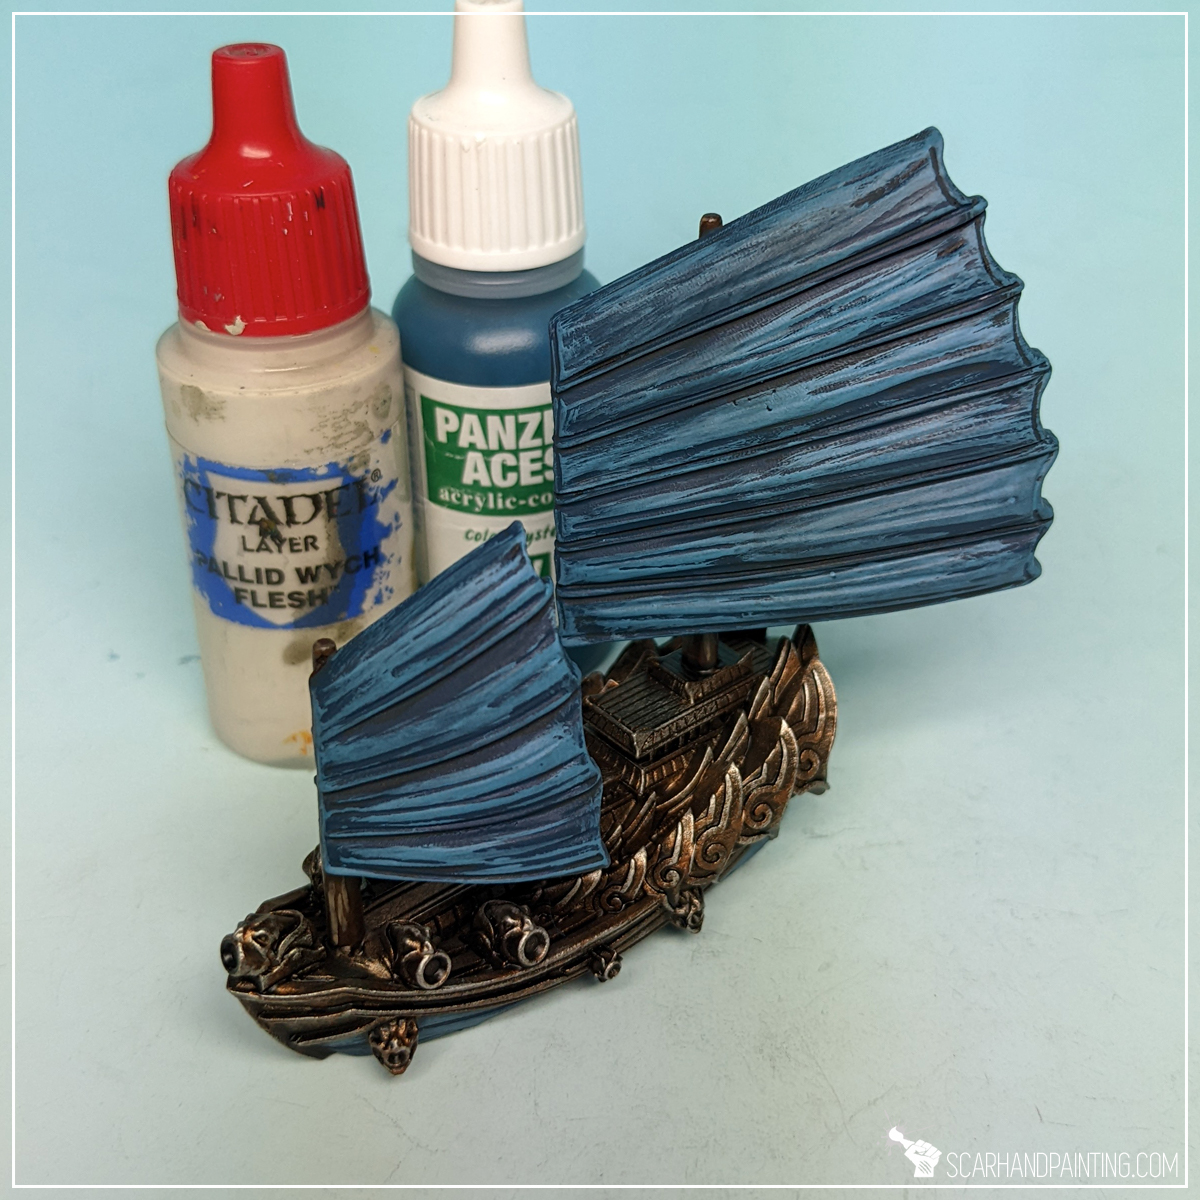
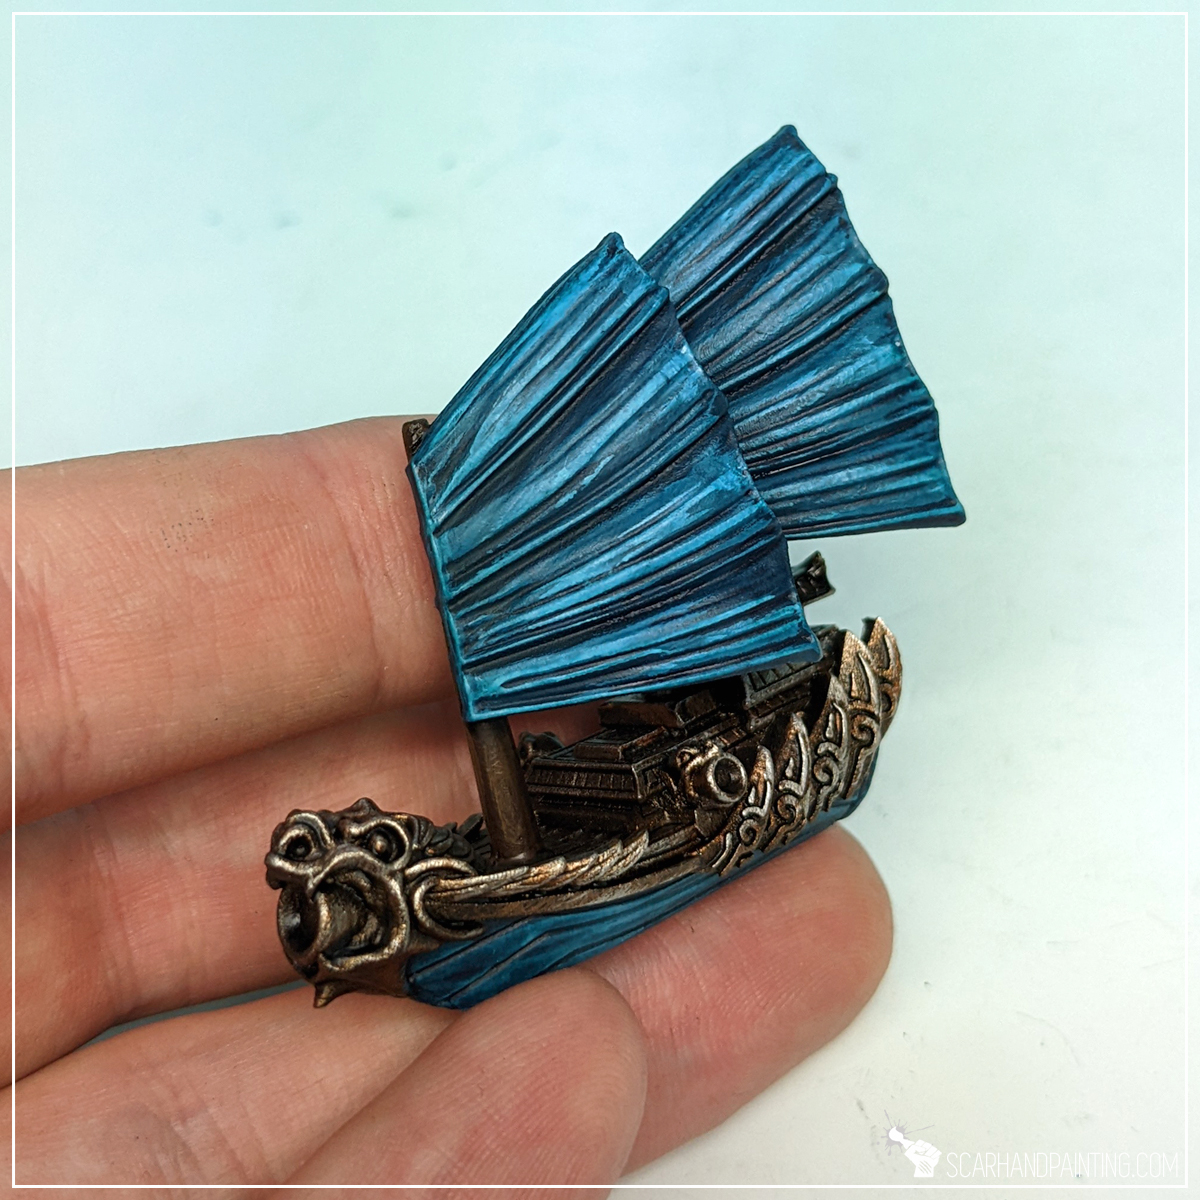
Step eleven: Sails highlight
Another highlight was applied with a 1:1 mix of Games Workshop Pallid Wych Flesh and Vallejo 309 Periscopes. A much more visible highlight to build volume.
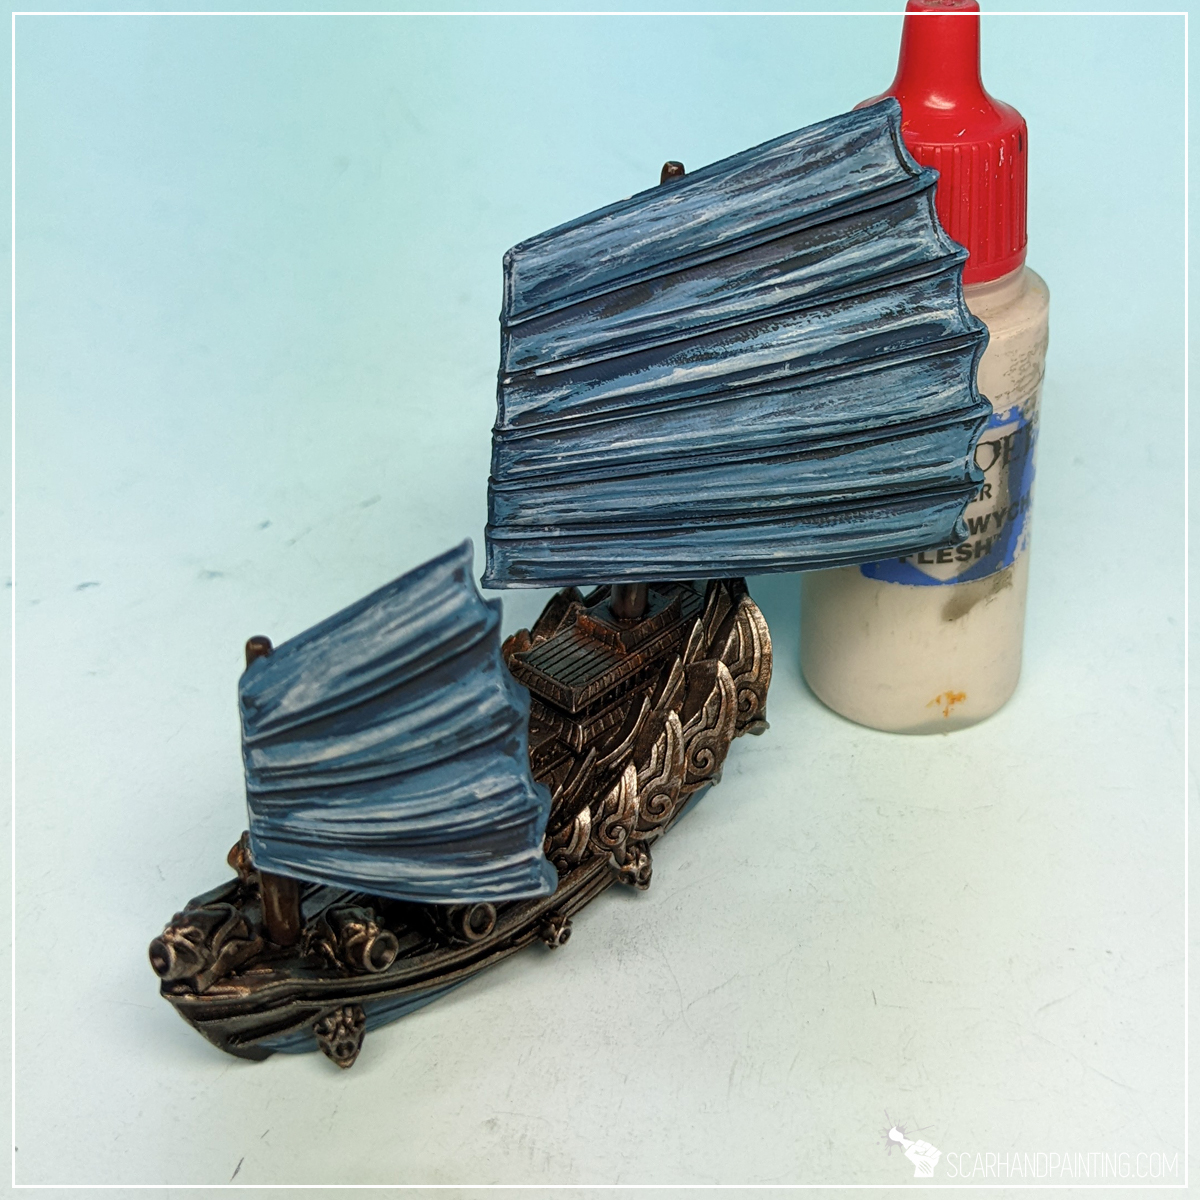
Step twelve: Sails final highlight
Final highlight was applied with pure Games Workshop Pallid Wych Flesh. Similar to edge highlight this one was applied to most exposed detail and edges on the sails. Looks messy and ugly, but everything goes according to a plan…
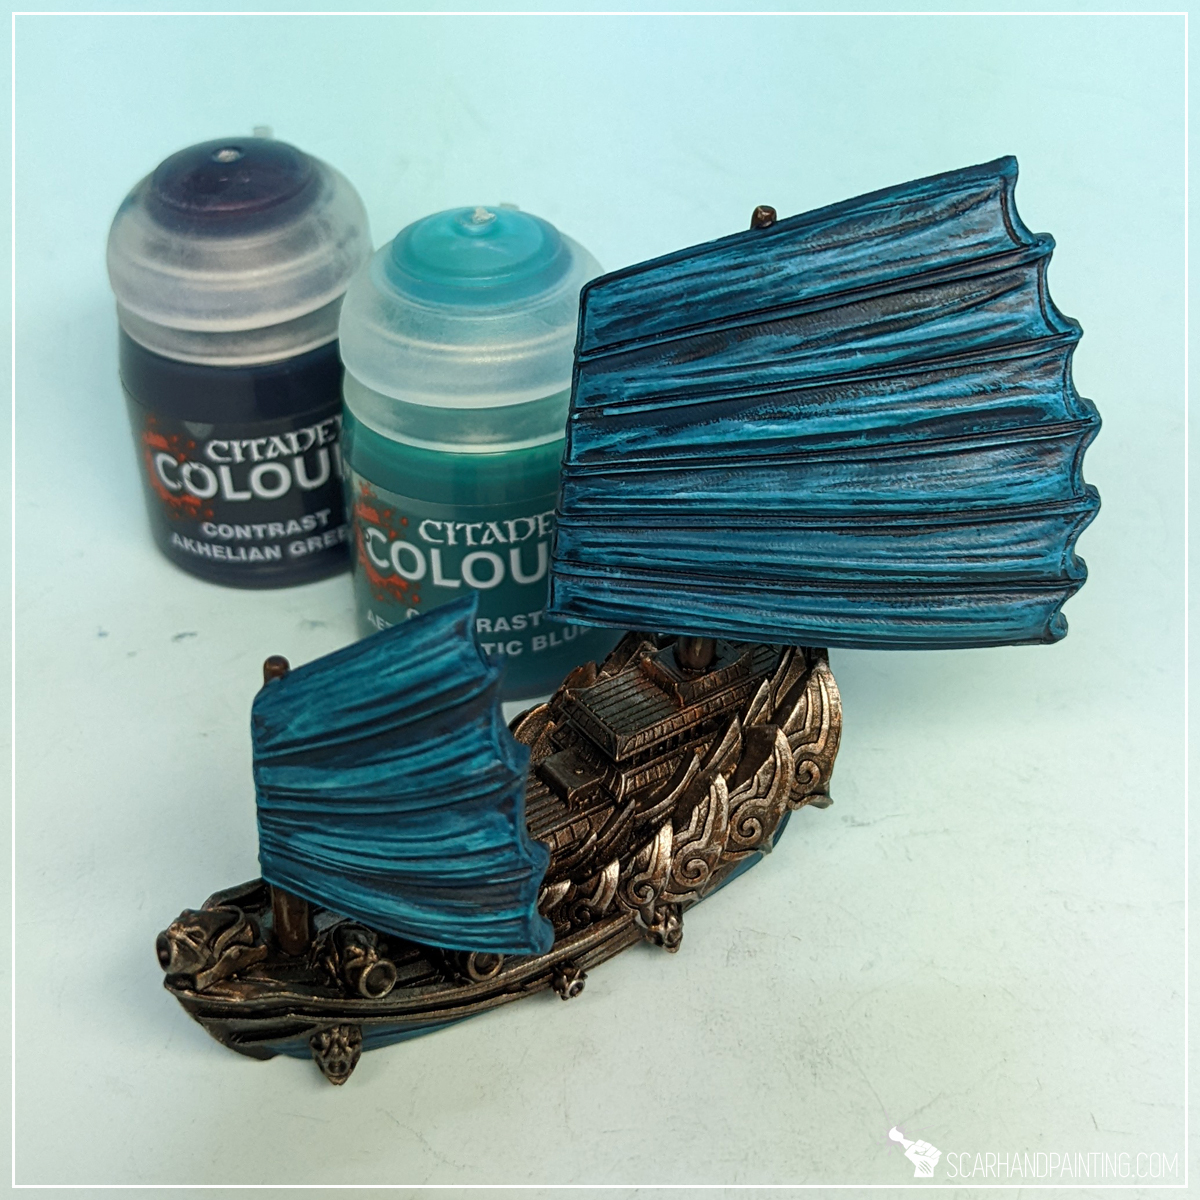
Step thirteen: Glaze
Glazing is a topic on its own that usually refers to rather time consuming and precise application of strongly thinned down paints. The way I apply glazes is more simplified. I apply them with a large, soft brush just like washes, except I avoid applying too much paint. This way I both smooth up and juice up the colors underneath. In case of Salamanders I used a 1:1 mix of Games Workshop Akhelian Green nd Aethermatic Blue contrast paints.


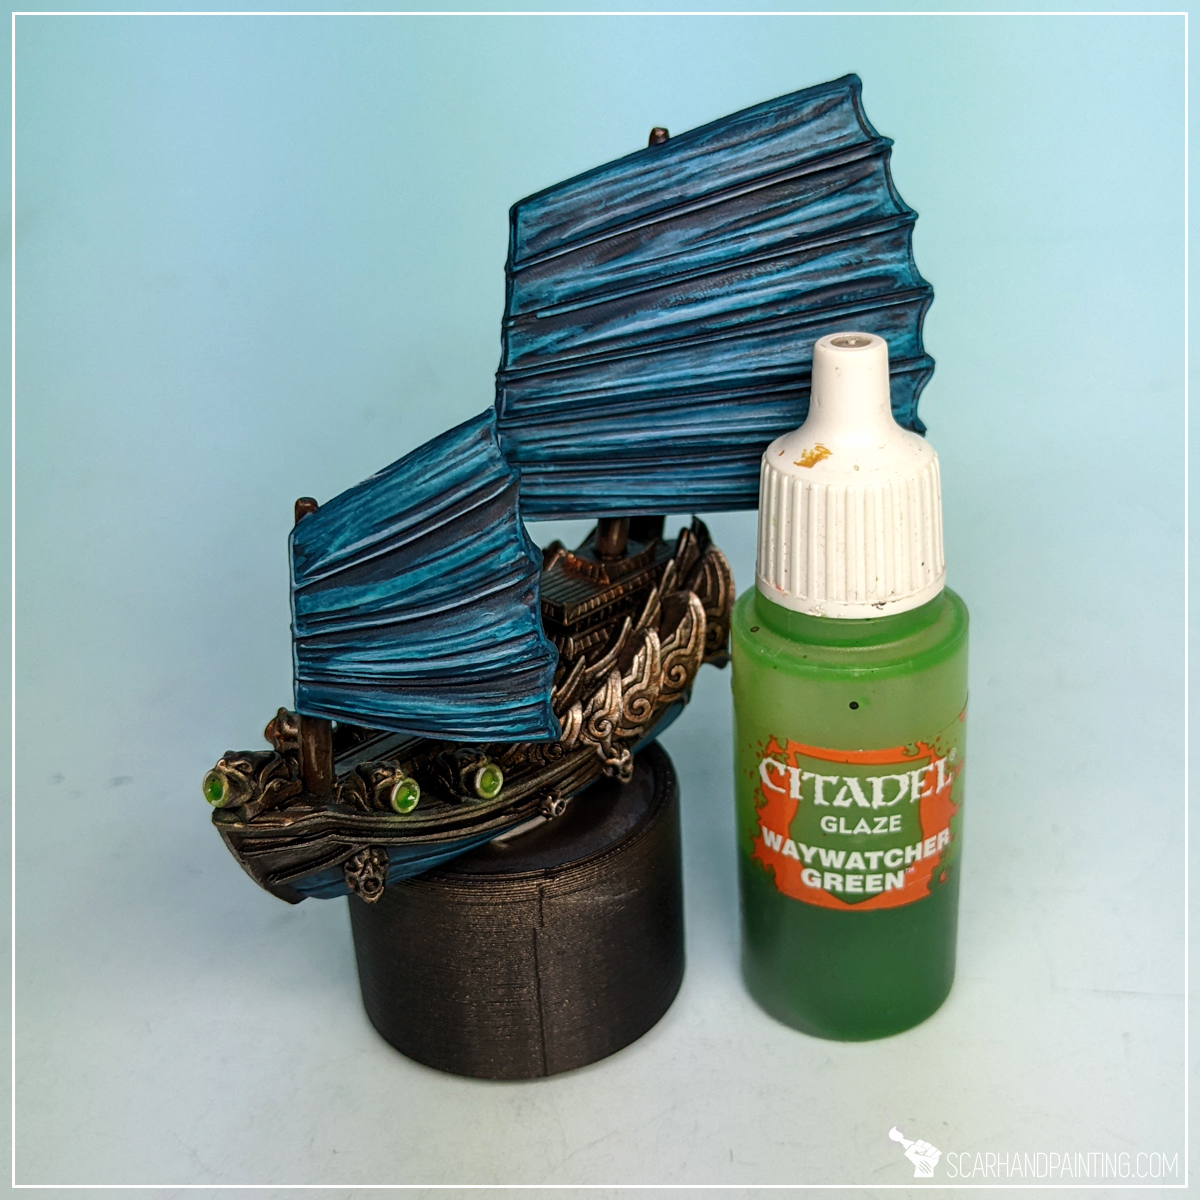
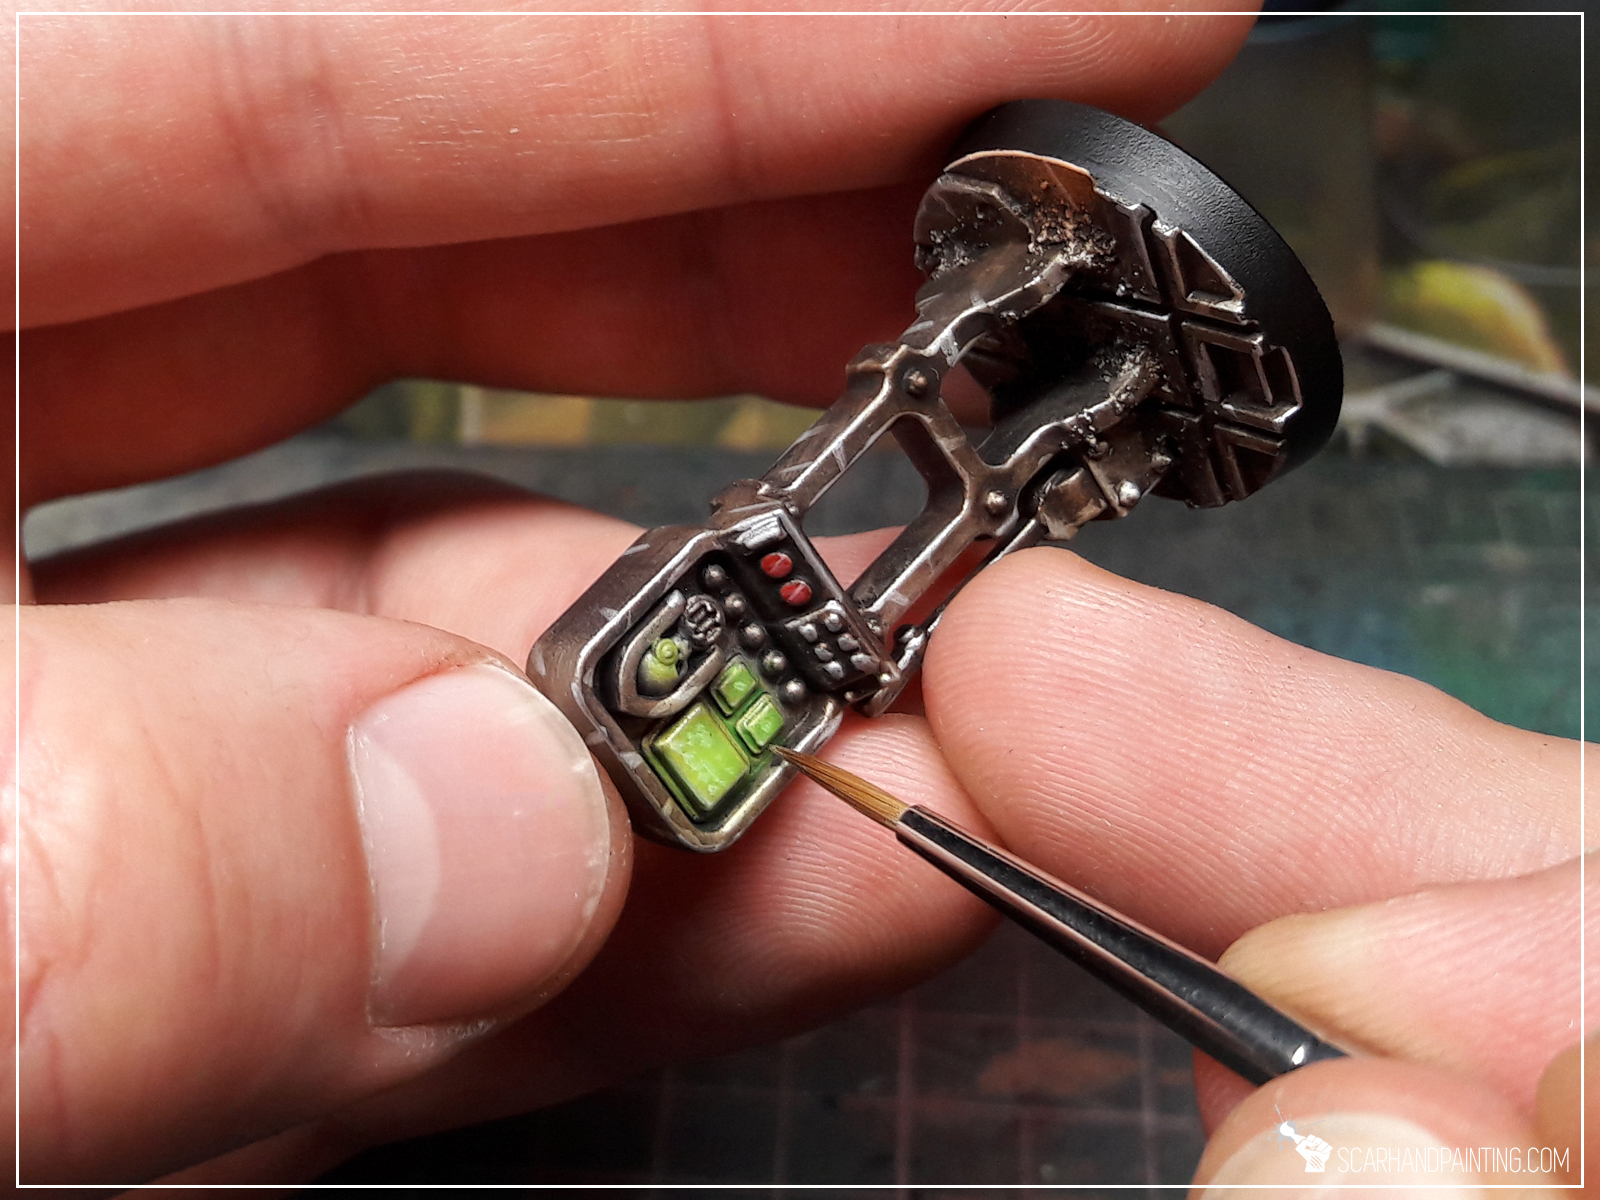
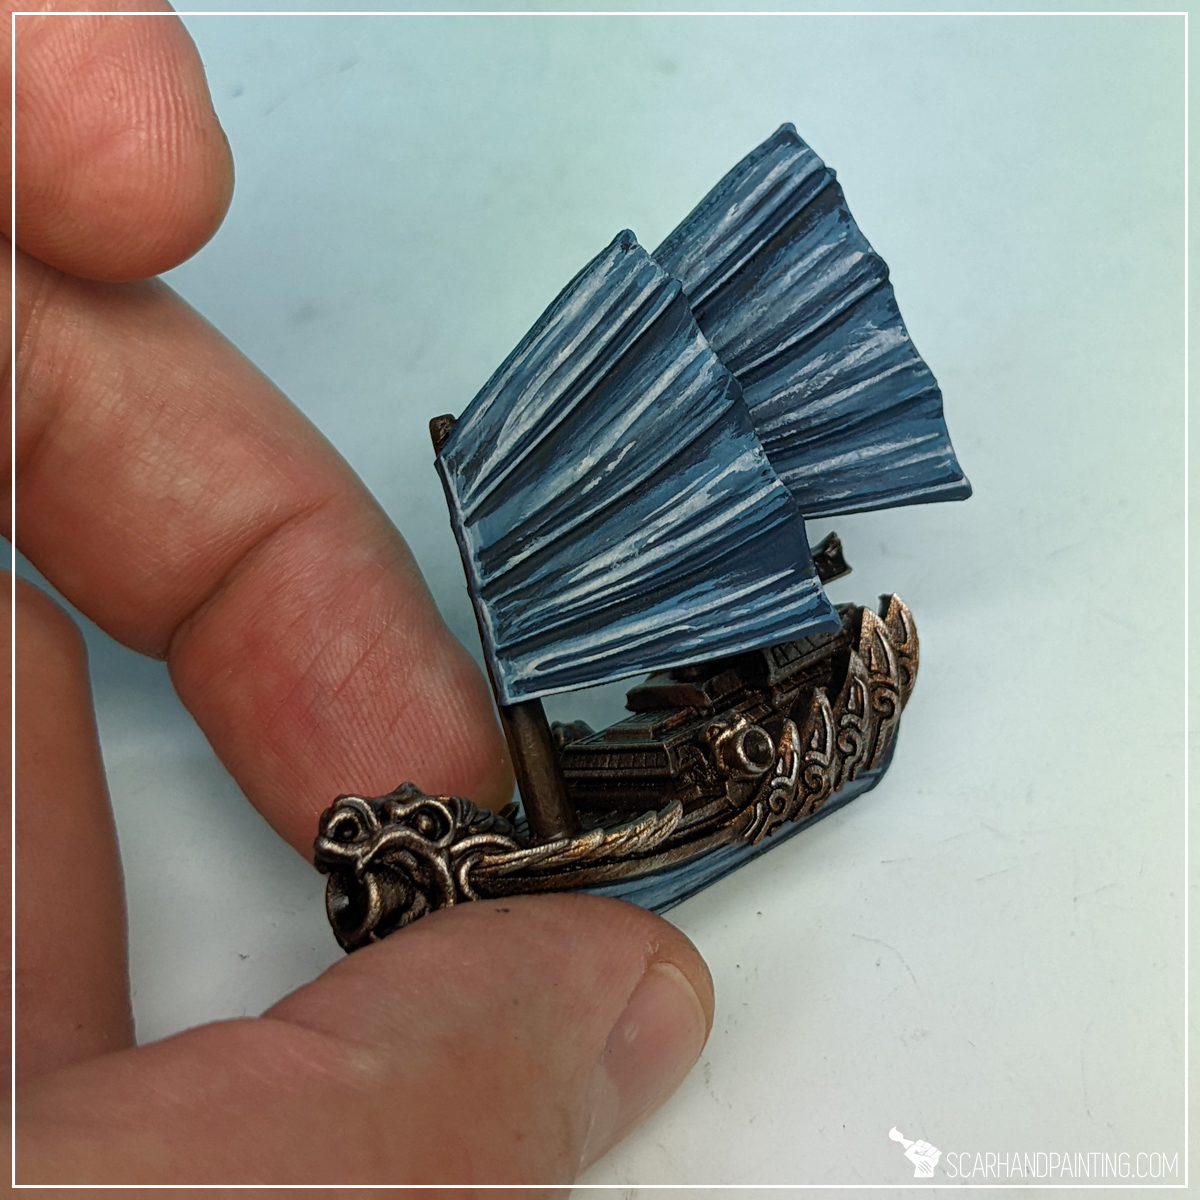
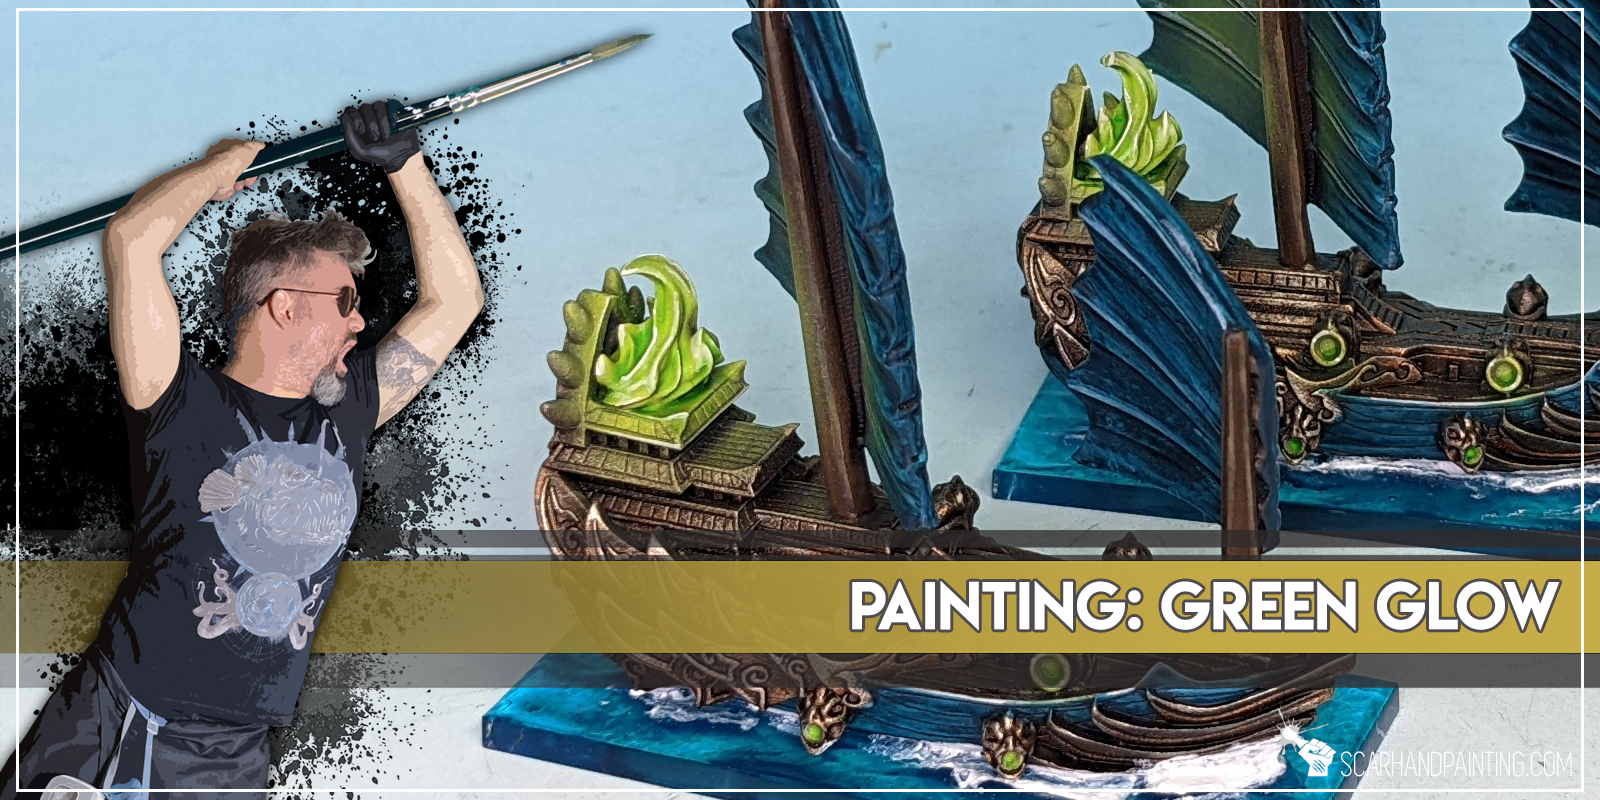
Step fourteen: Green osl
Final color range to add onto the miniature was Greens. I applied four paints one after another to build volume and then add depth to weapons and any fire elements across the fleet. In this tutorial I deliberately linked all the steps into one, as this particular topic was just recently covered in Tutorial: Painting Green Glow that you can read in order to get a better grasp of the entire process.
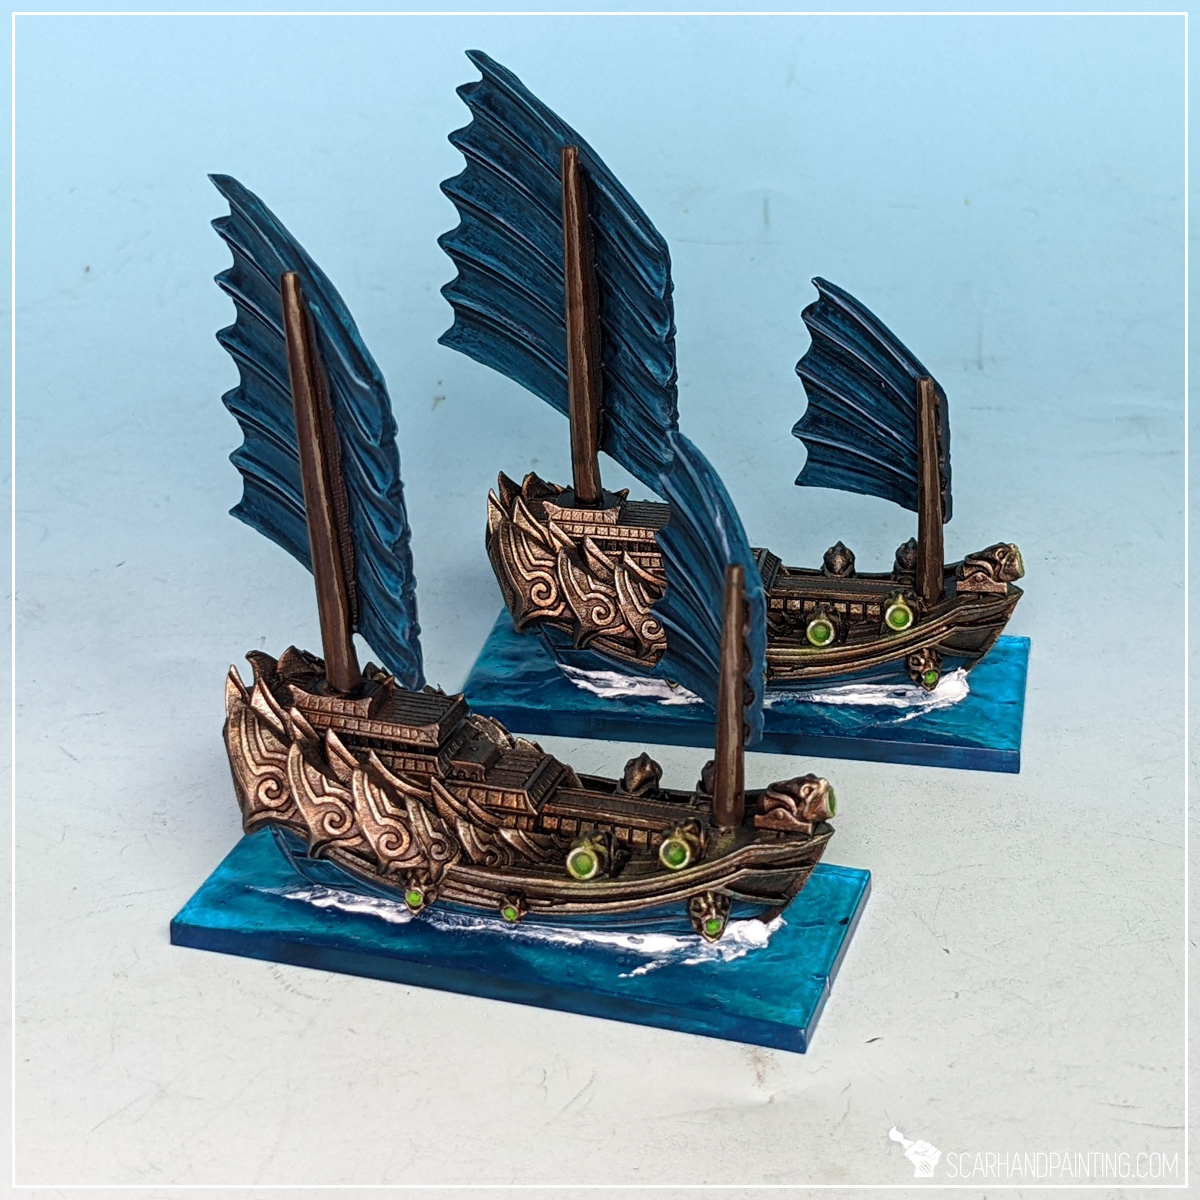
Step fifteen: Bases
The paint job done and sealed with a matt varnish the last thing left to do was a base. Again, this is something I covered before in KoW Armada Water Bases tutorial that I invite you to read in order to get to know the process. In case of Salamanders I simplified basing by applying one thick, smooth layer of AK Interactive Atlantic blue, then another rough layer of the same texture to finally add waves with AK Interactive Water Foam effect. Very simple while also quite effective.
This marks the end of the tutorial. Feel free to ask any questions in the comments below or via social media.

I hope you find this tutorial interesting. Be sure to let me know your thoughts in the comments below or via Facebook or Instagram. I would also appreciate if you considered sharing this content with your friends, who might find it useful. Finally if you are looking for a professional miniatures painting service, be sure to contact me with this contact form. I always reply within 24 hours, after which please check out your spam folder.

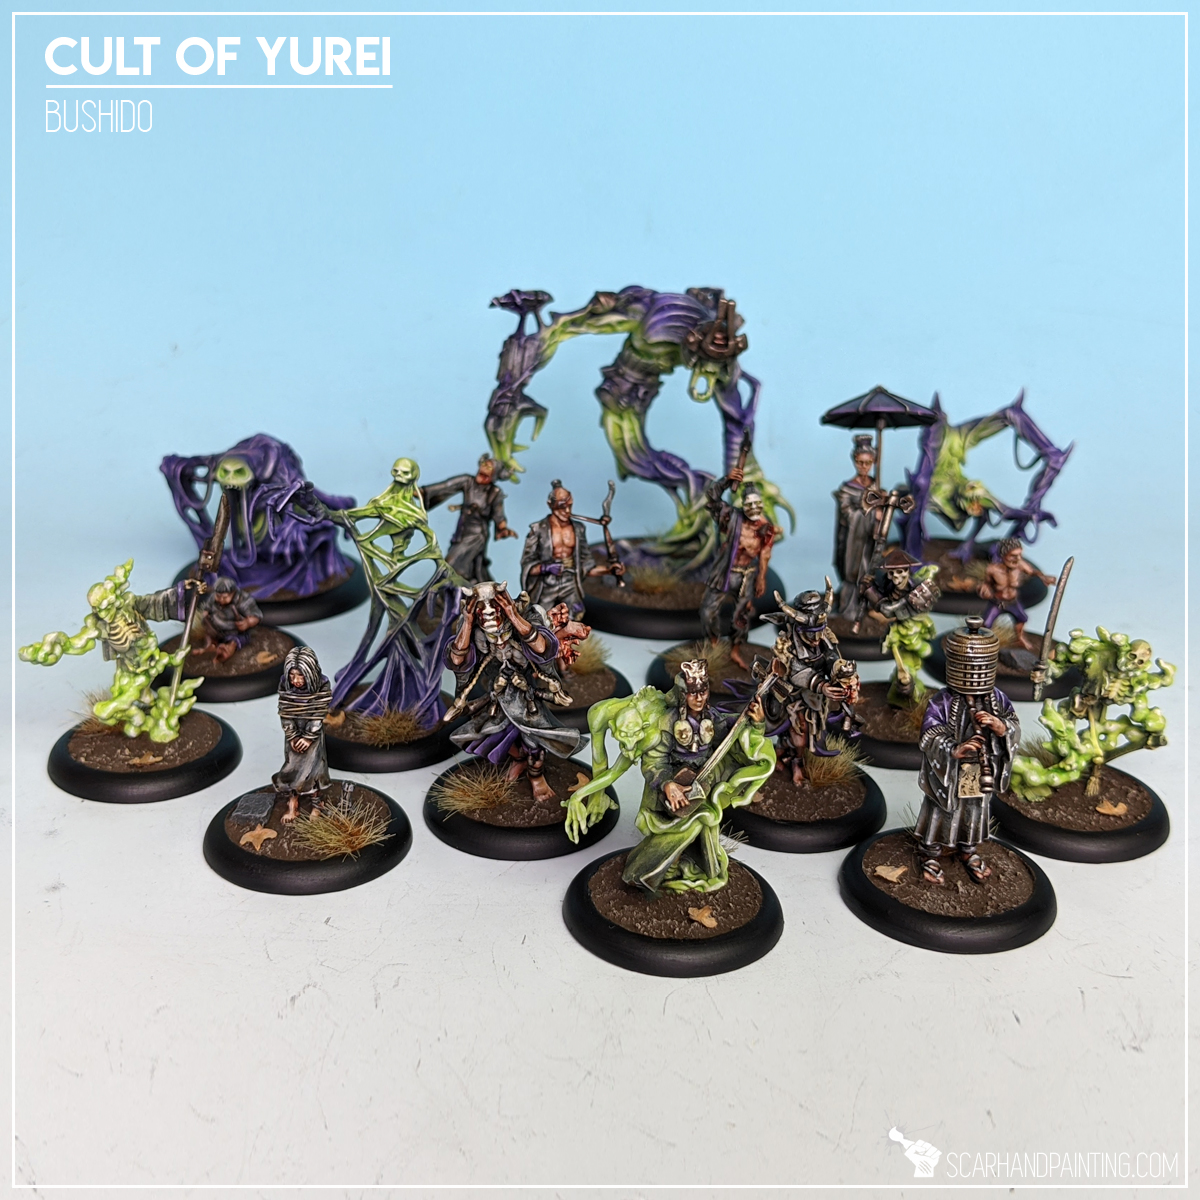
As a full time professional miniatures painter I strive to specialize in techniques that provide the maximum effect on the gaming board, while being relatively simple and easy to mass duplicate. Here I will present to you a Step-by-step guide to painting green glow effect similar to that used in most of the projects, for example Gallery: Cult of Yurei and Gallery: Legio Vulpa.
Before we start, some notes:
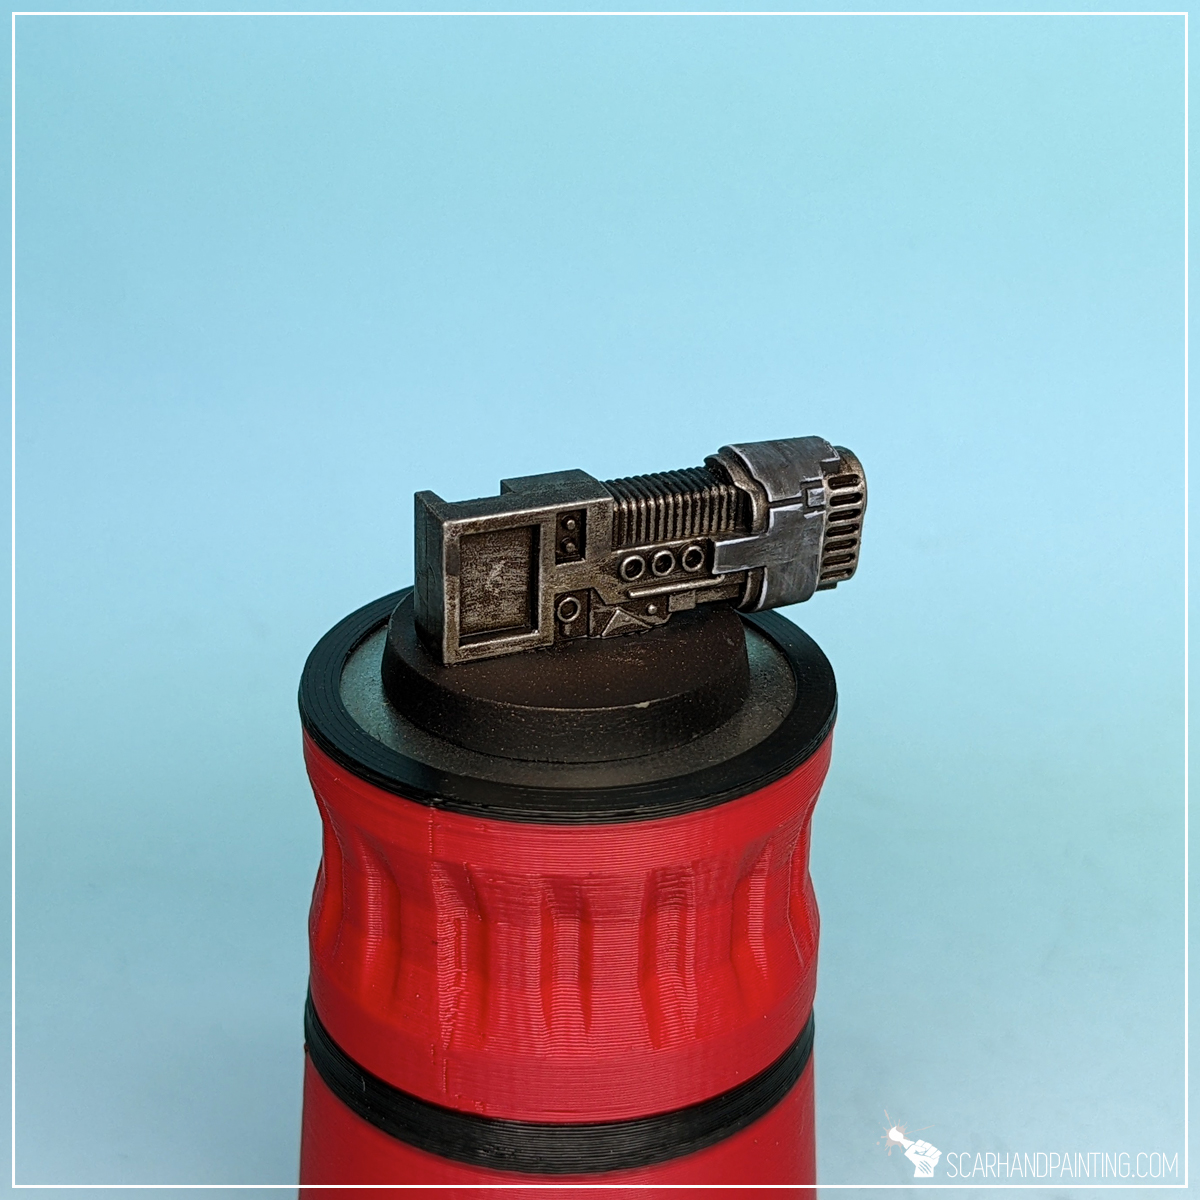
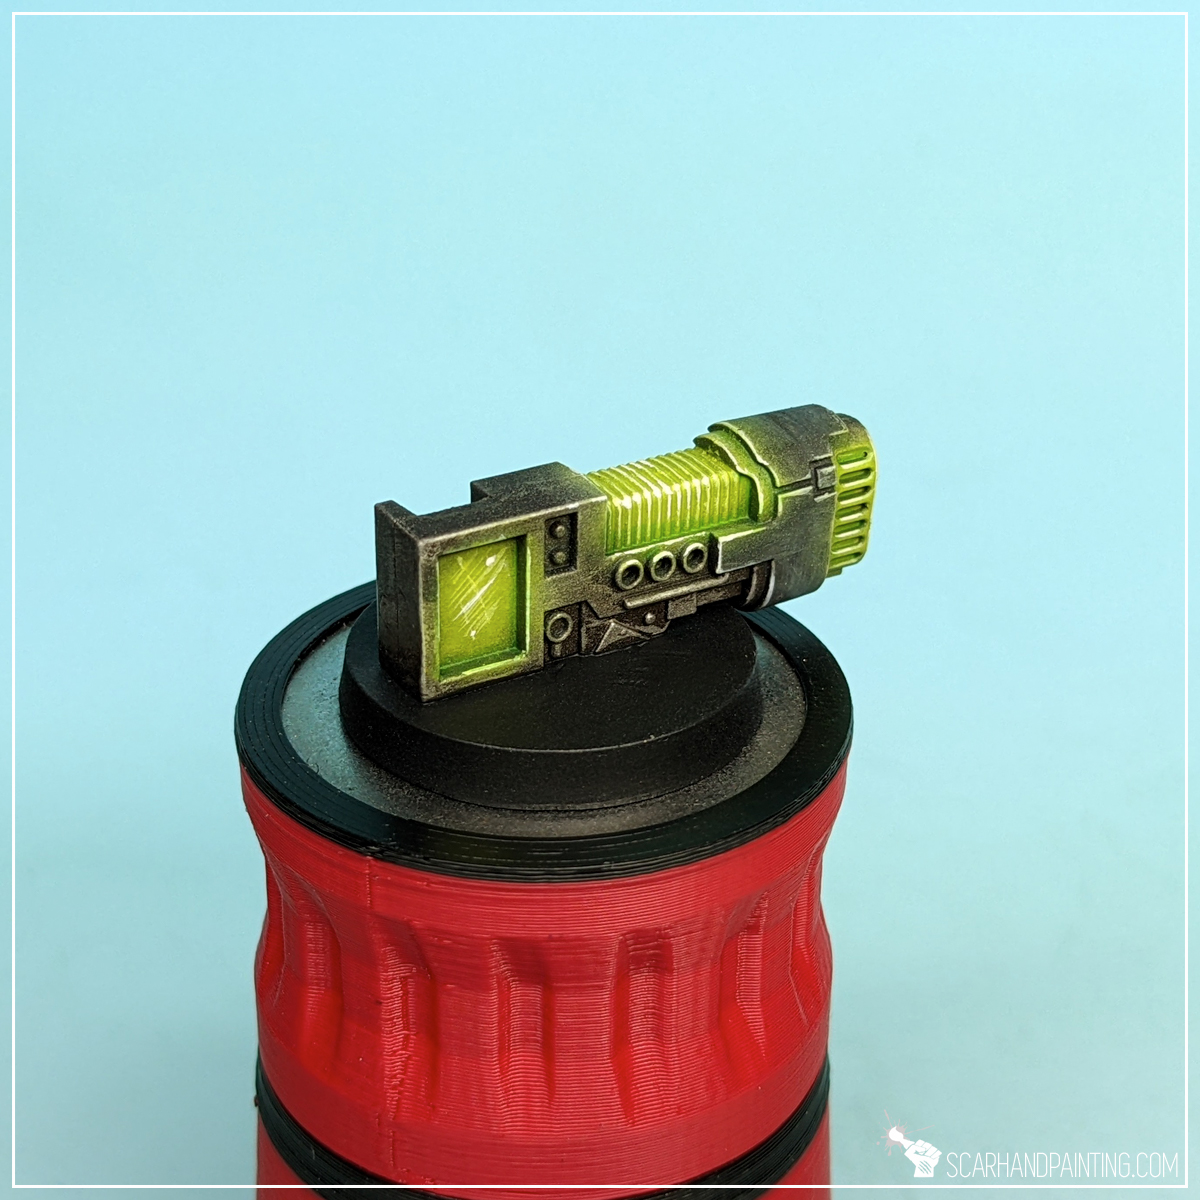
Step one: Duck Egg preshade
I started with a soft layer of slightly thinned airbrushed Vallejo 71.009 Duck Egg Green (air). While airbrushing I made sure to cover potential light source areas plus the immediate surroundings.

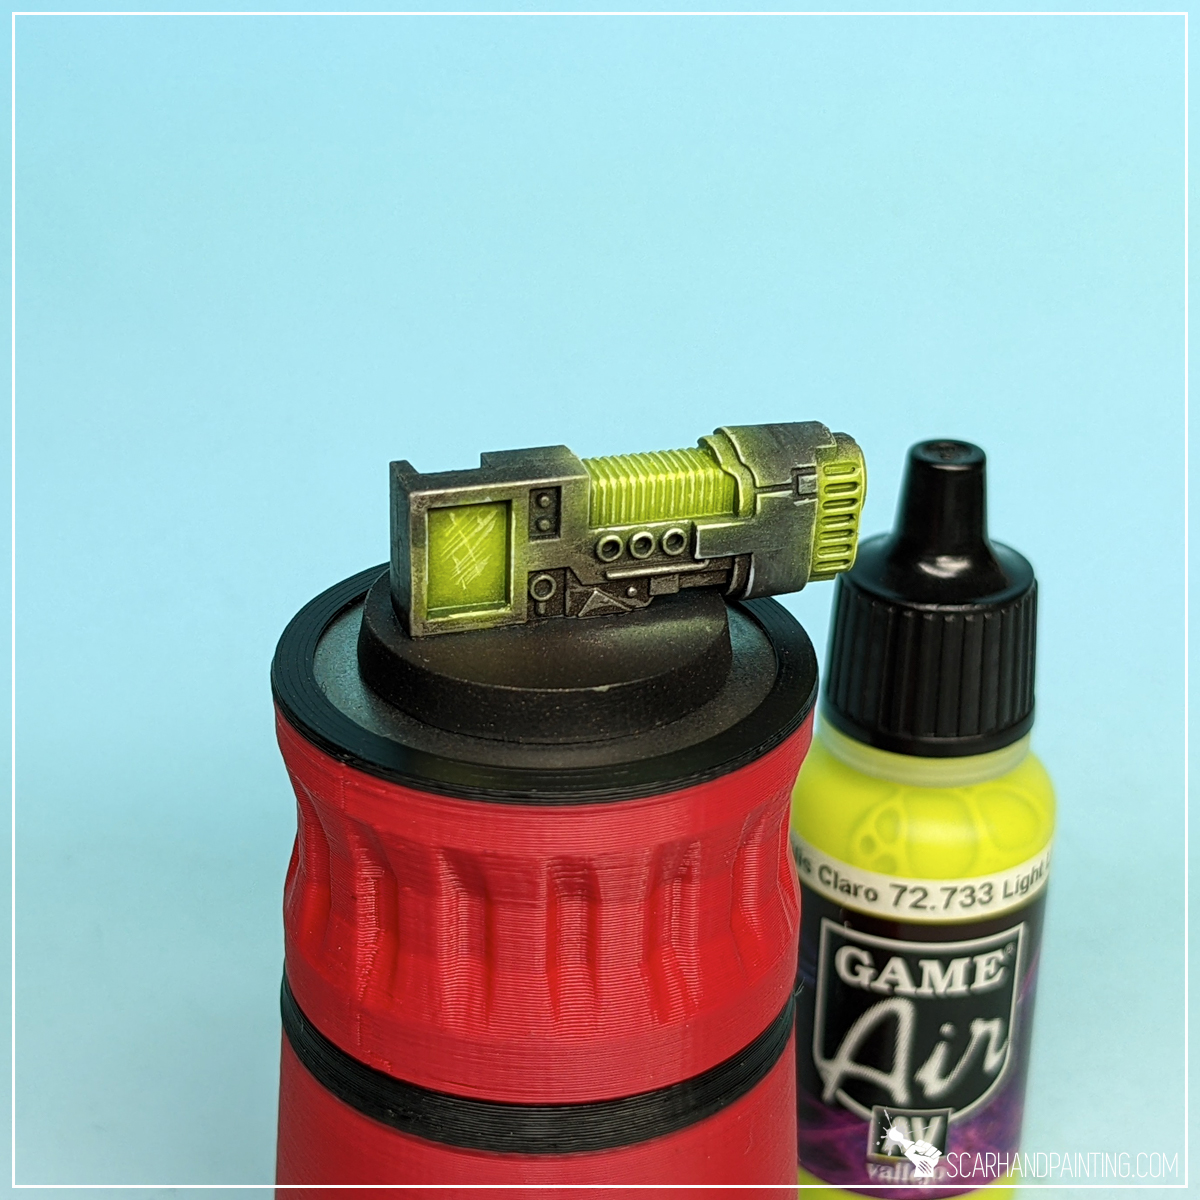
Step two: Green base
Next I airbrushed a layer of Vallejo 72.733 Light Livery Green (air) without thinning. This layer was applied on top of previously airbrushed Duck Egg Green.

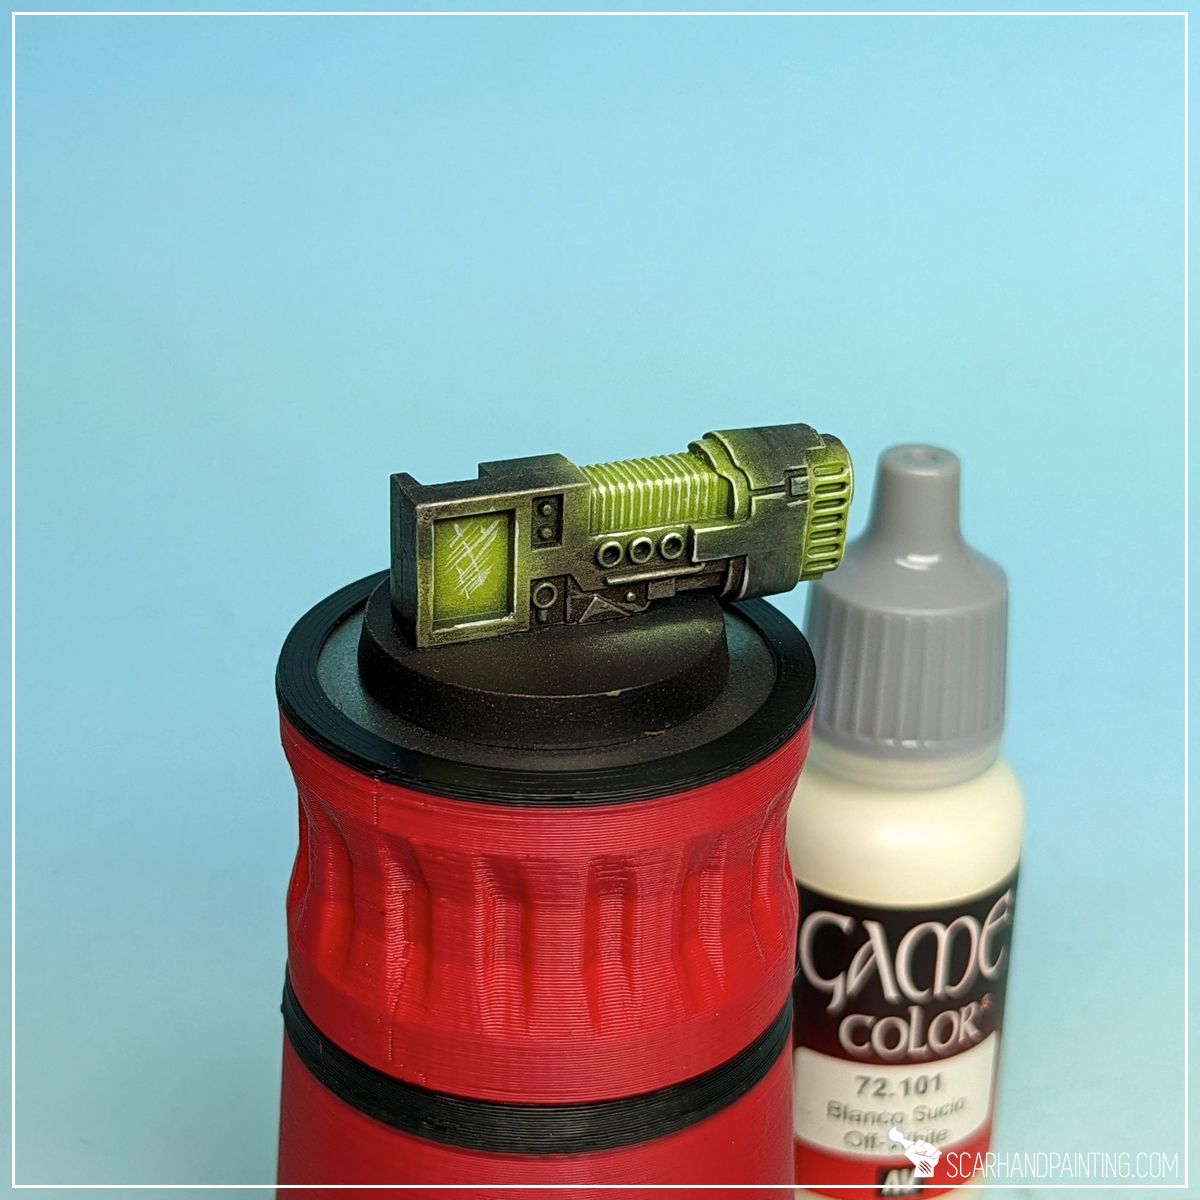
Step three: highlight
I then highlighted green with Vallejo 72.101 Off-White, pulling the edges out to create a solid base for future juicing up back to strong toxic green.
Step four: glaze
Next I manually applied a glaze of slightly thinned down Vallejo 72.733 Light Livery Green over the most intense green parts of the miniature. This includes plasma coils, glow on the side of the barrel and large rectangle area at the back.
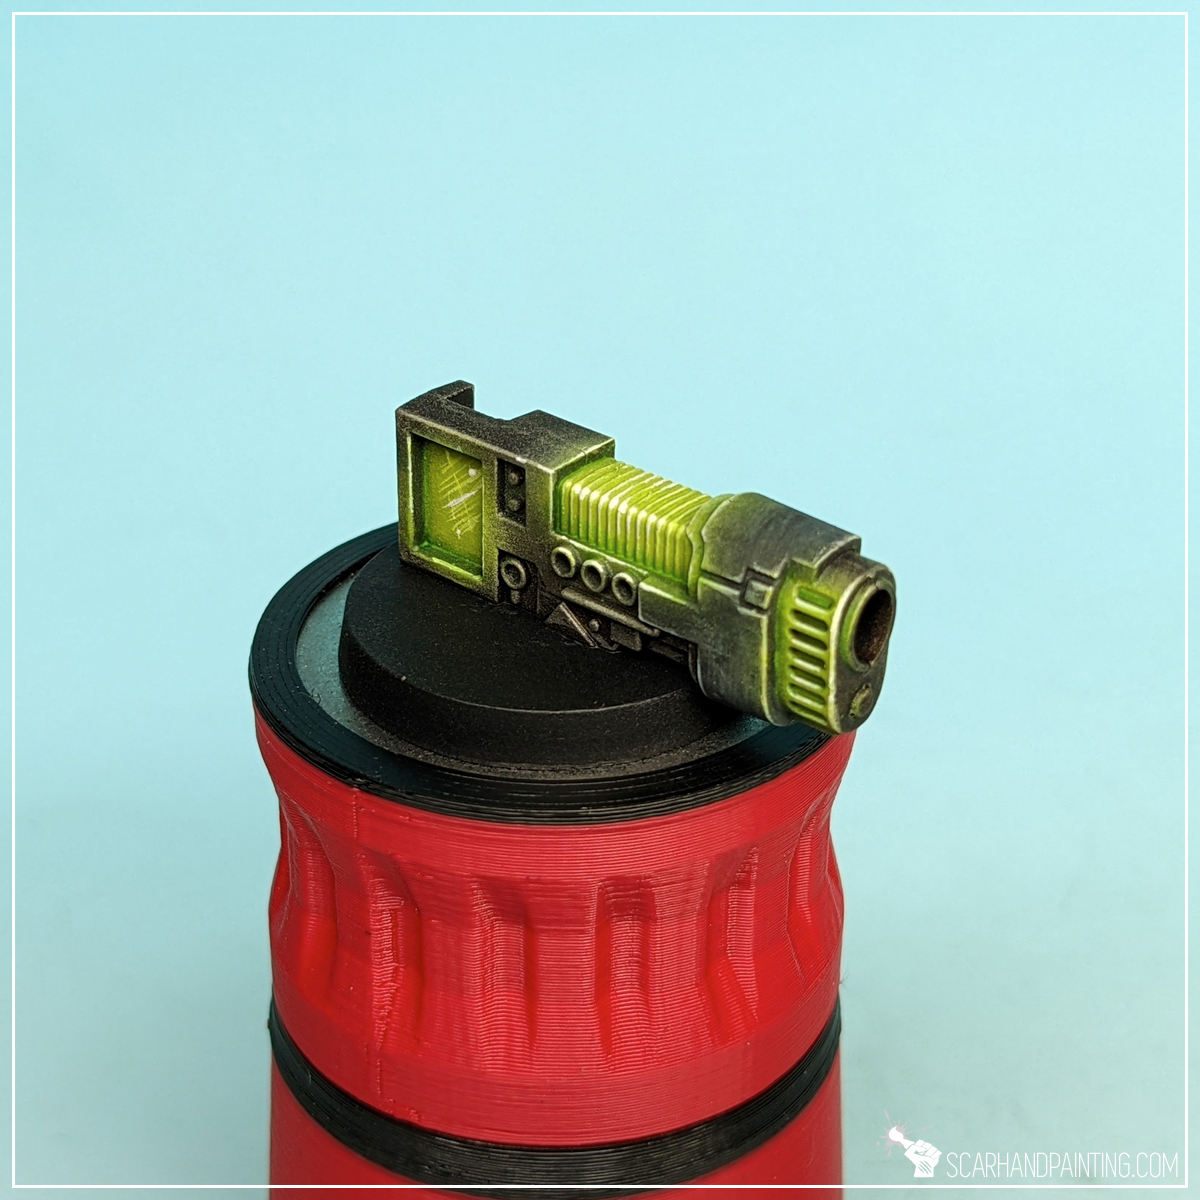
Step five: highlight
Then, I once again applied a highlight of Vallejo 72.101 Off-White. This time I kept it contained to most exposed areas, barely few lines and dots to add focus points and add more overall contrast on the piece.

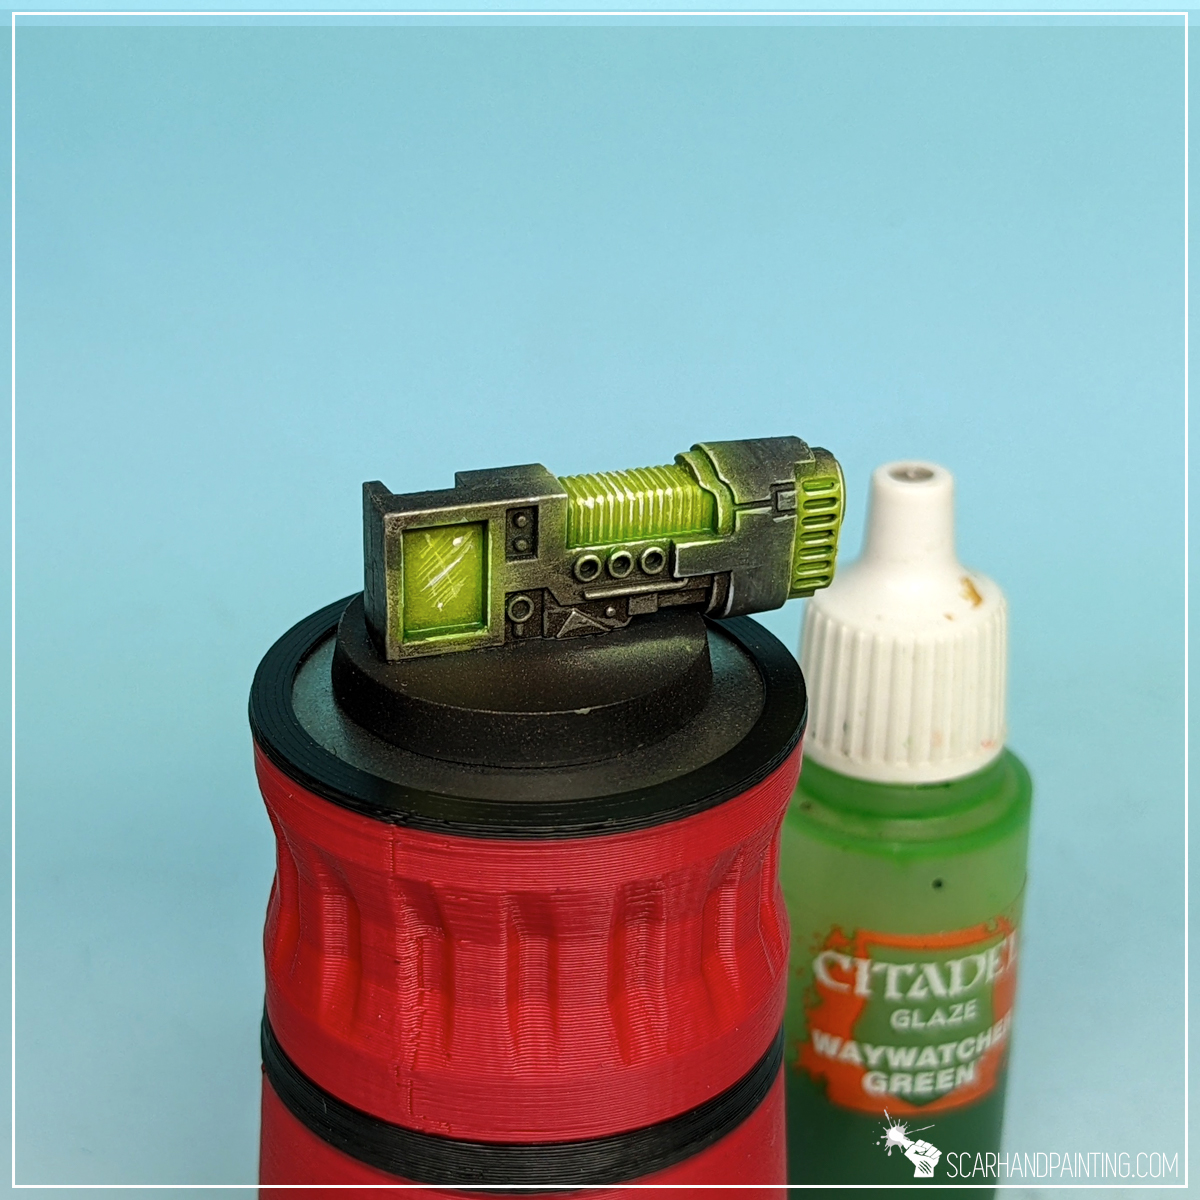
Step six: wash
Finally I applied a mix* of Vallejo 72.089 Green Ink ( 3 drops), Vallejo 72.085 Yellow Ink (2 drops) and water (10 drops). I made sure to apply the paint to deepest recesses only, avoiding exposed plasma coils and edges.
* You might notice a GW Waywatcher Green bottle in the picture below. The Vallejo mix is a recipe for GW Waywatcher Green, that is out of production. You can find more GW Glaze – Vallejo mix recipes in this article.
Work complete. Four colors, six layers an an interesting effect of toxic green plasma coils / ghosts / goo is done!


I hope you find this tutorial interesting. Be sure to let me know your thoughts in the comments below or via Facebook or Instagram. I would also appreciate if you considered sharing this content with your friends, who might find it useful. Finally if you are looking for a professional warhammer 40k miniatures painting service, be sure to contact me with this contact form. I always reply within 24 hours, after which please check out your spam folder.
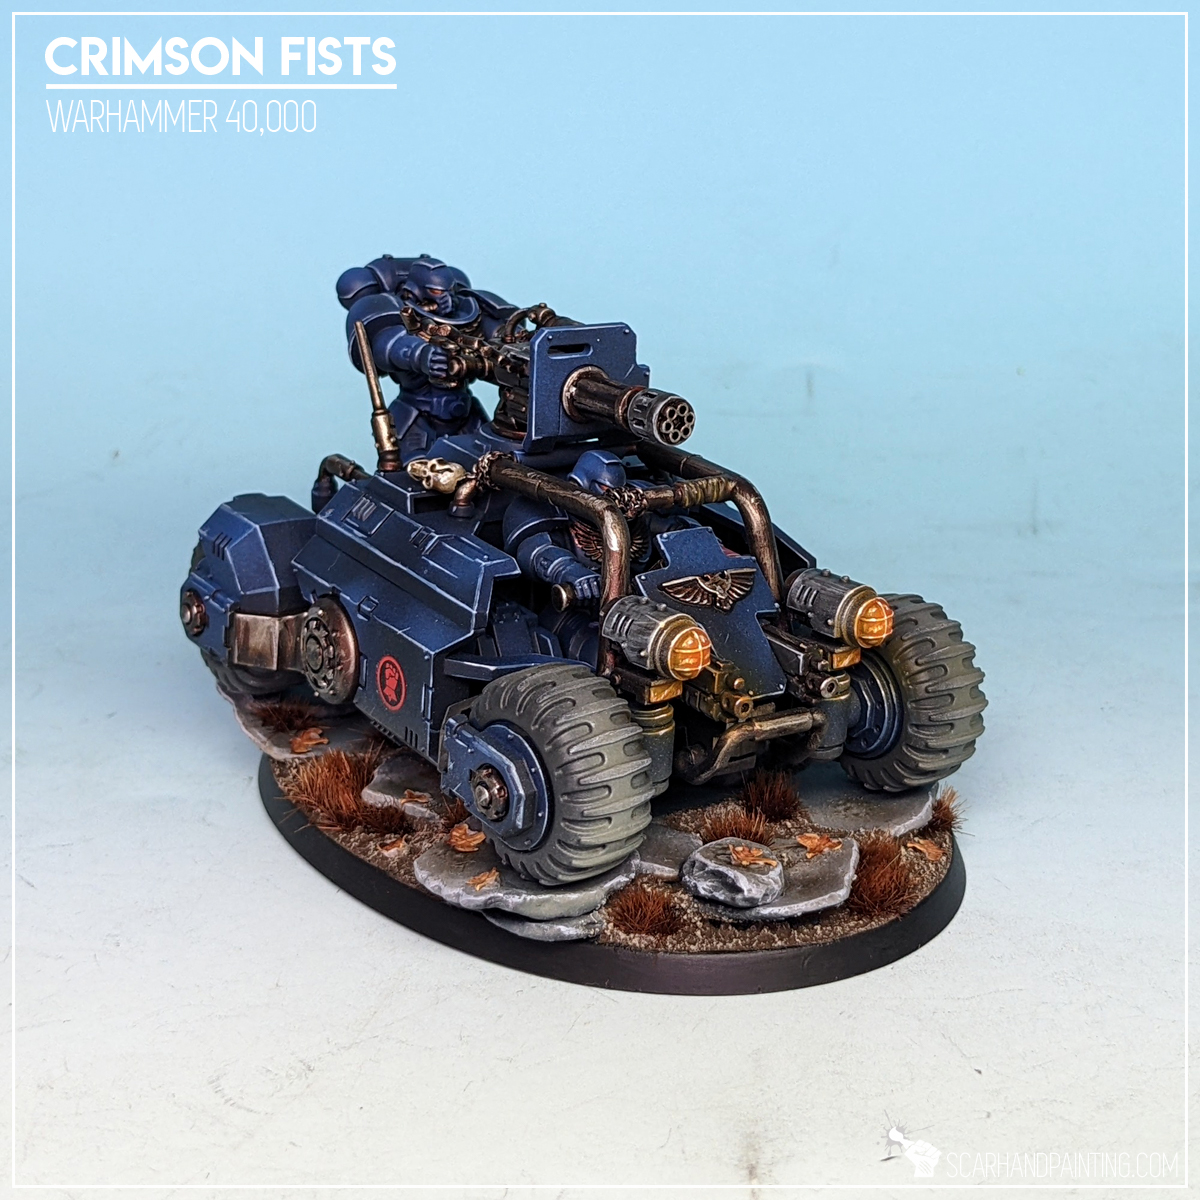
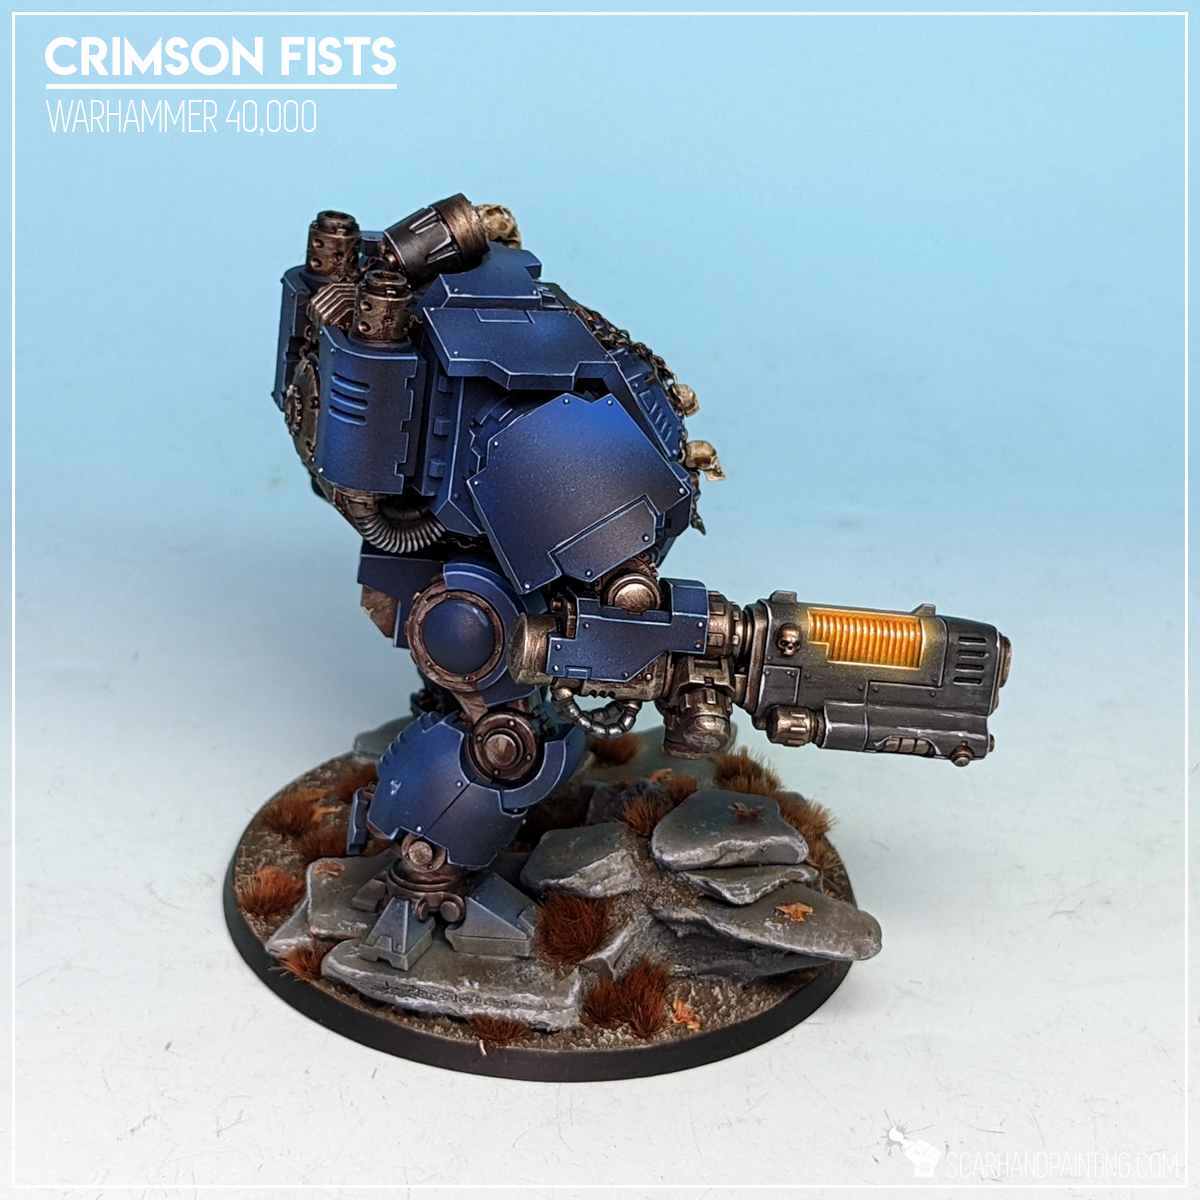
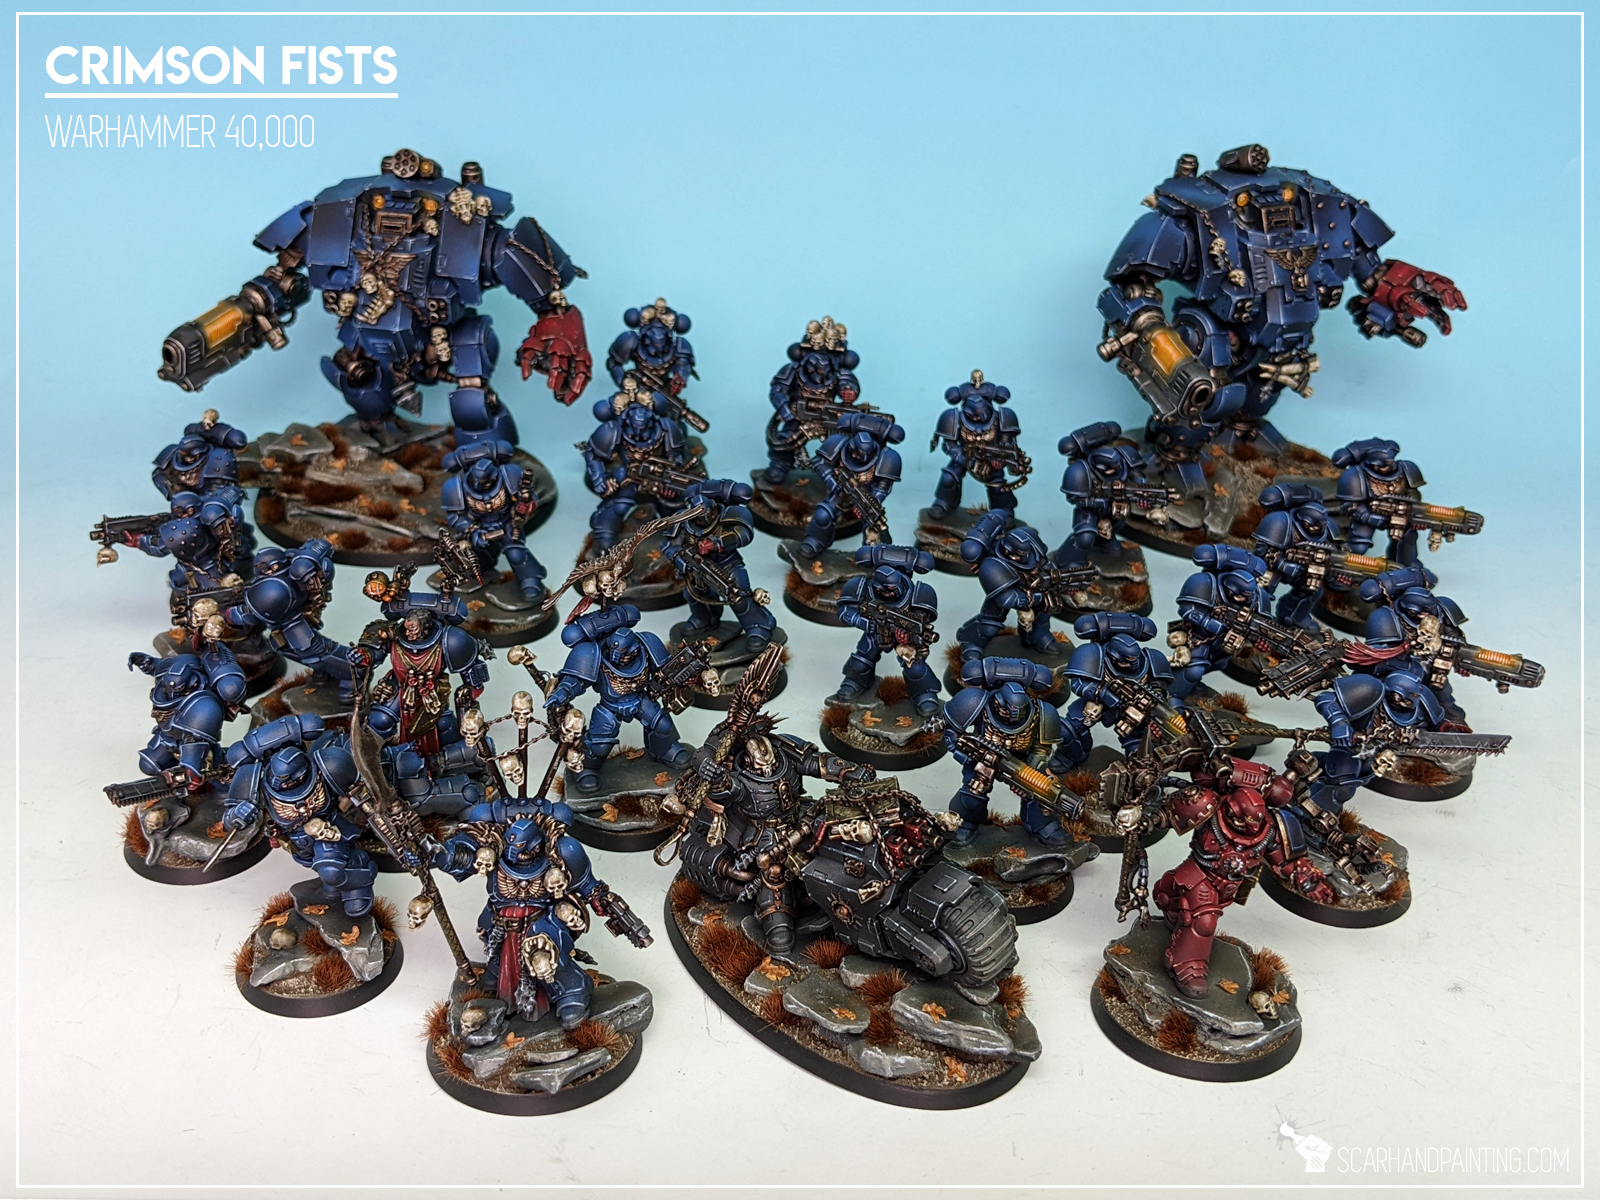
As a full time professional miniatures painter I strive to specialize in techniques that provide the maximum effect on the gaming board, while being relatively simple and easy to mass duplicate. Here I will present to you a Step-by-step guide to painting orange glow effect similar to that used on my Games Workshop Crimson Fists army as can be seen in Gallery: Crimson Fists.
Before we start, some notes:
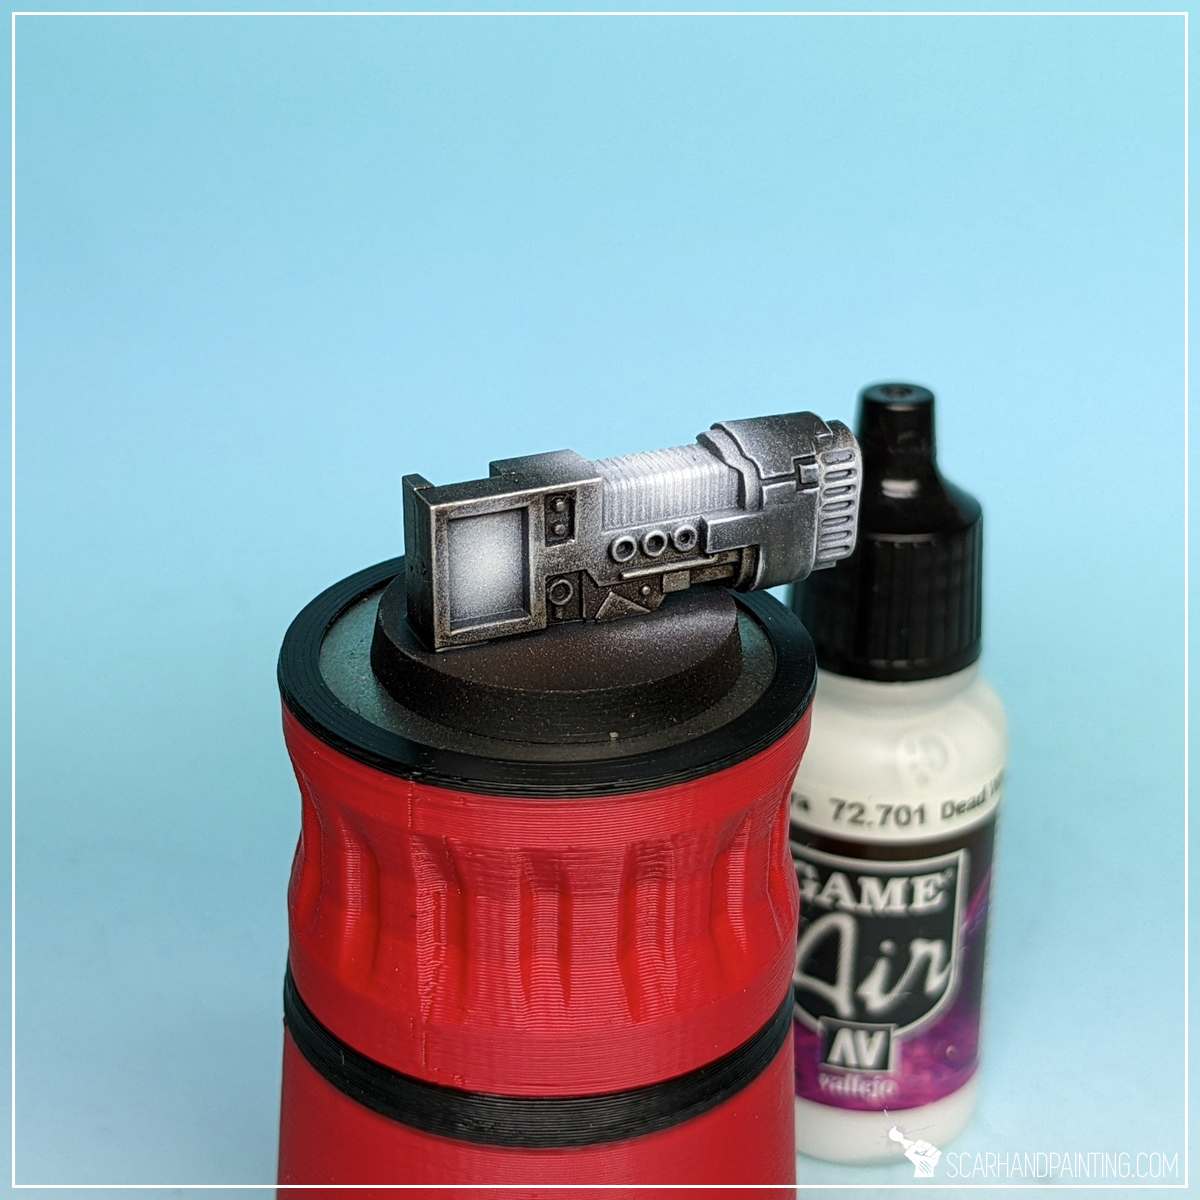
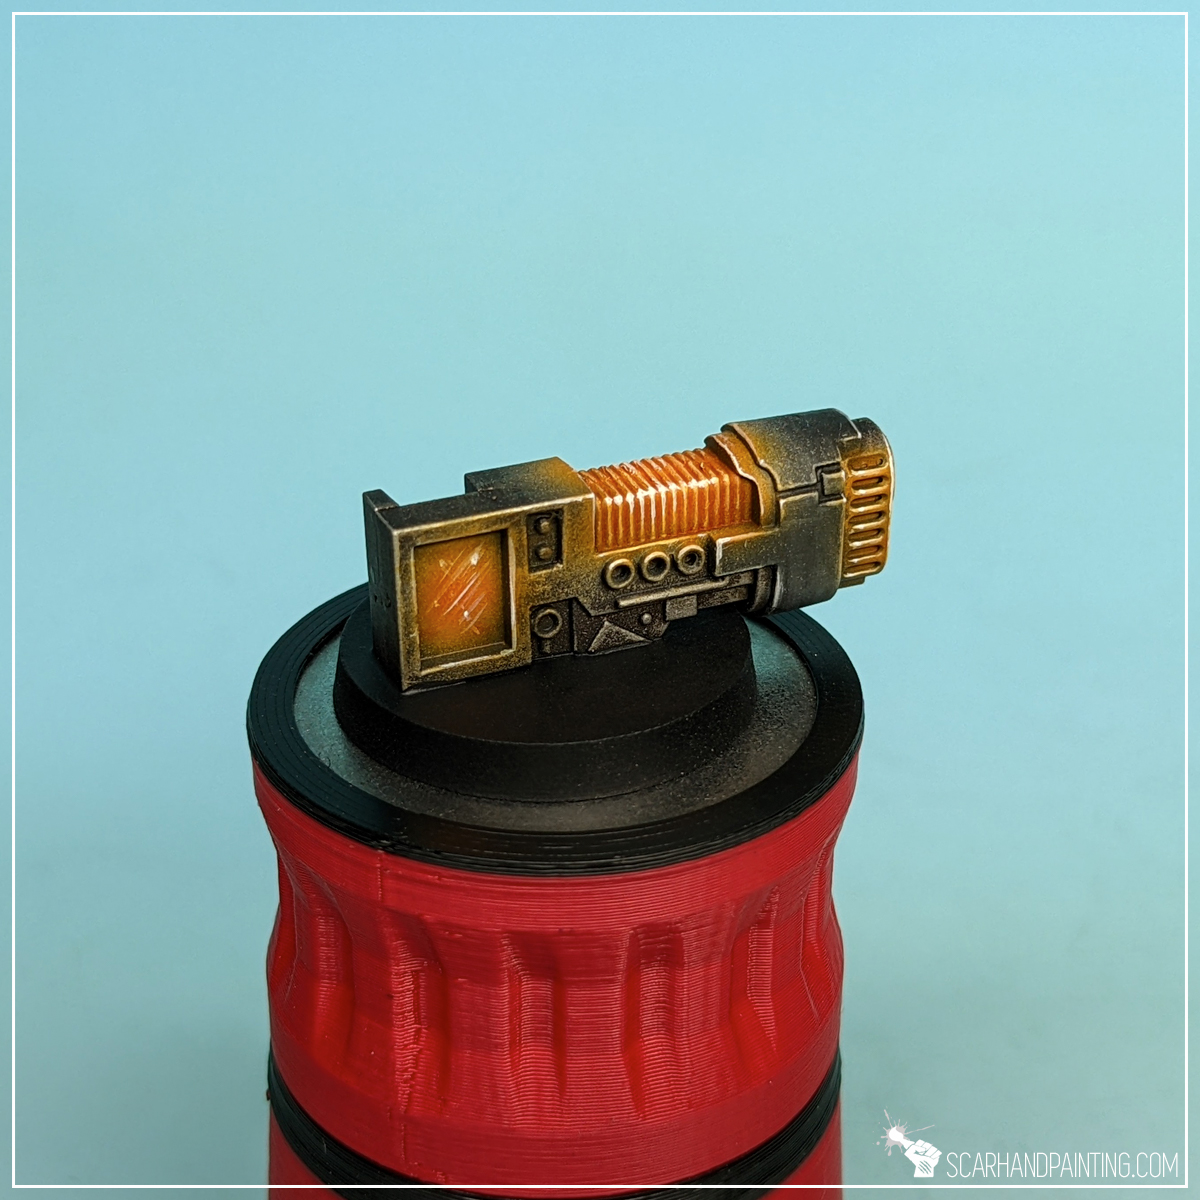
Step one: White preshade
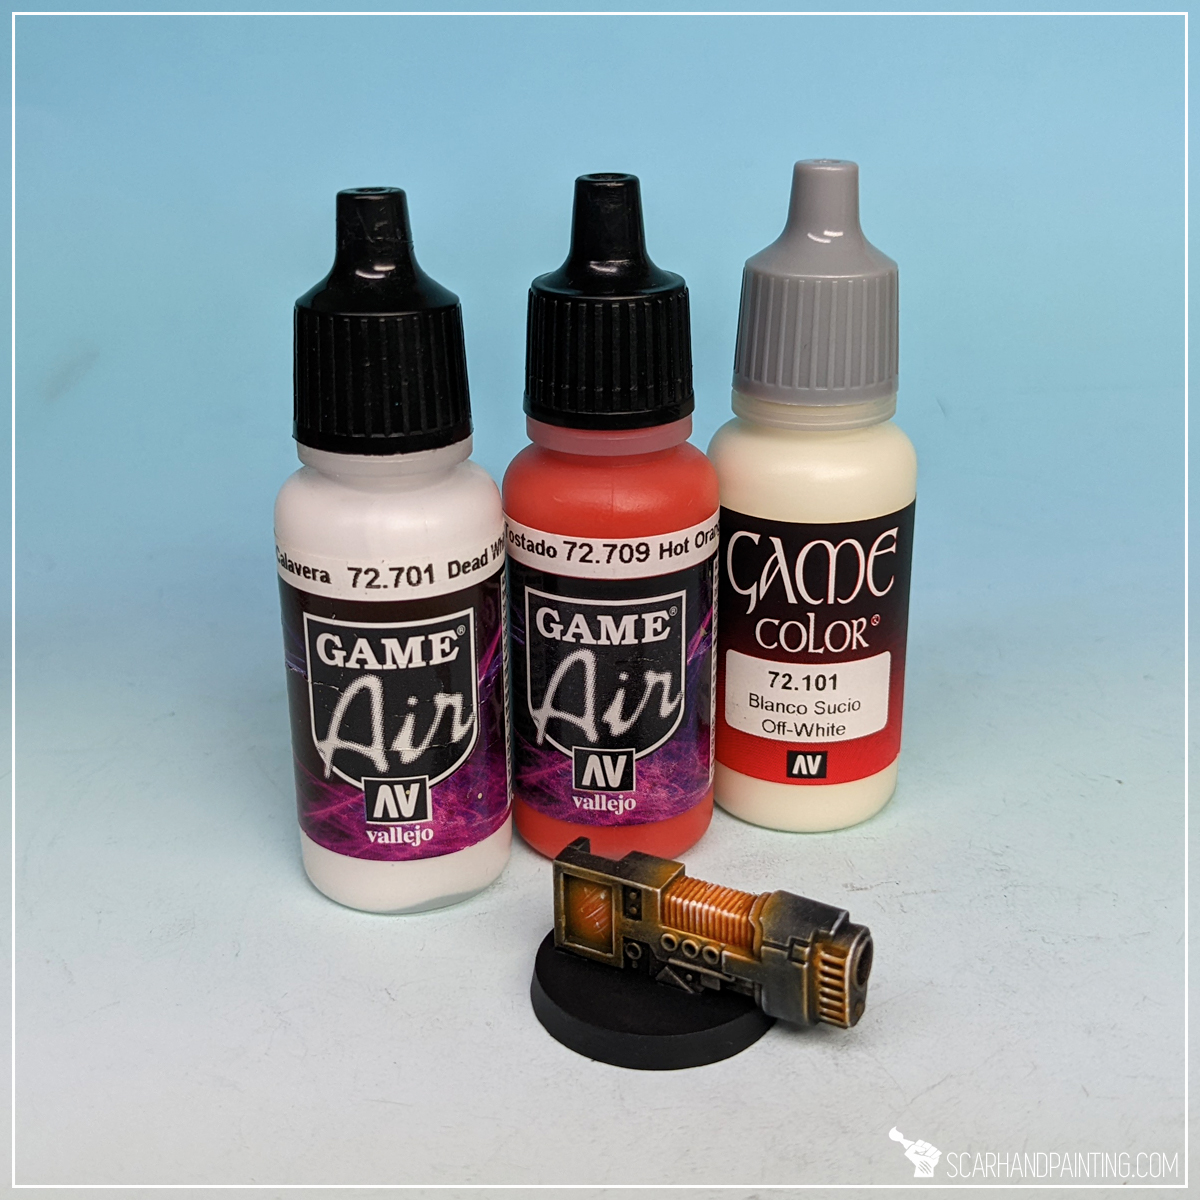
I started with a soft layer of airbrushed Vallejo 72.701 Dead White (air). For the purpose of this tutorial I went straight from the bottle, although usually I thin the paint down just a bit with a drop of Flow Improver and a drop of Airbrush Thinner, resulting in less speckling. While airbrushing I made sure to cover potential light source areas plus the surroundings.
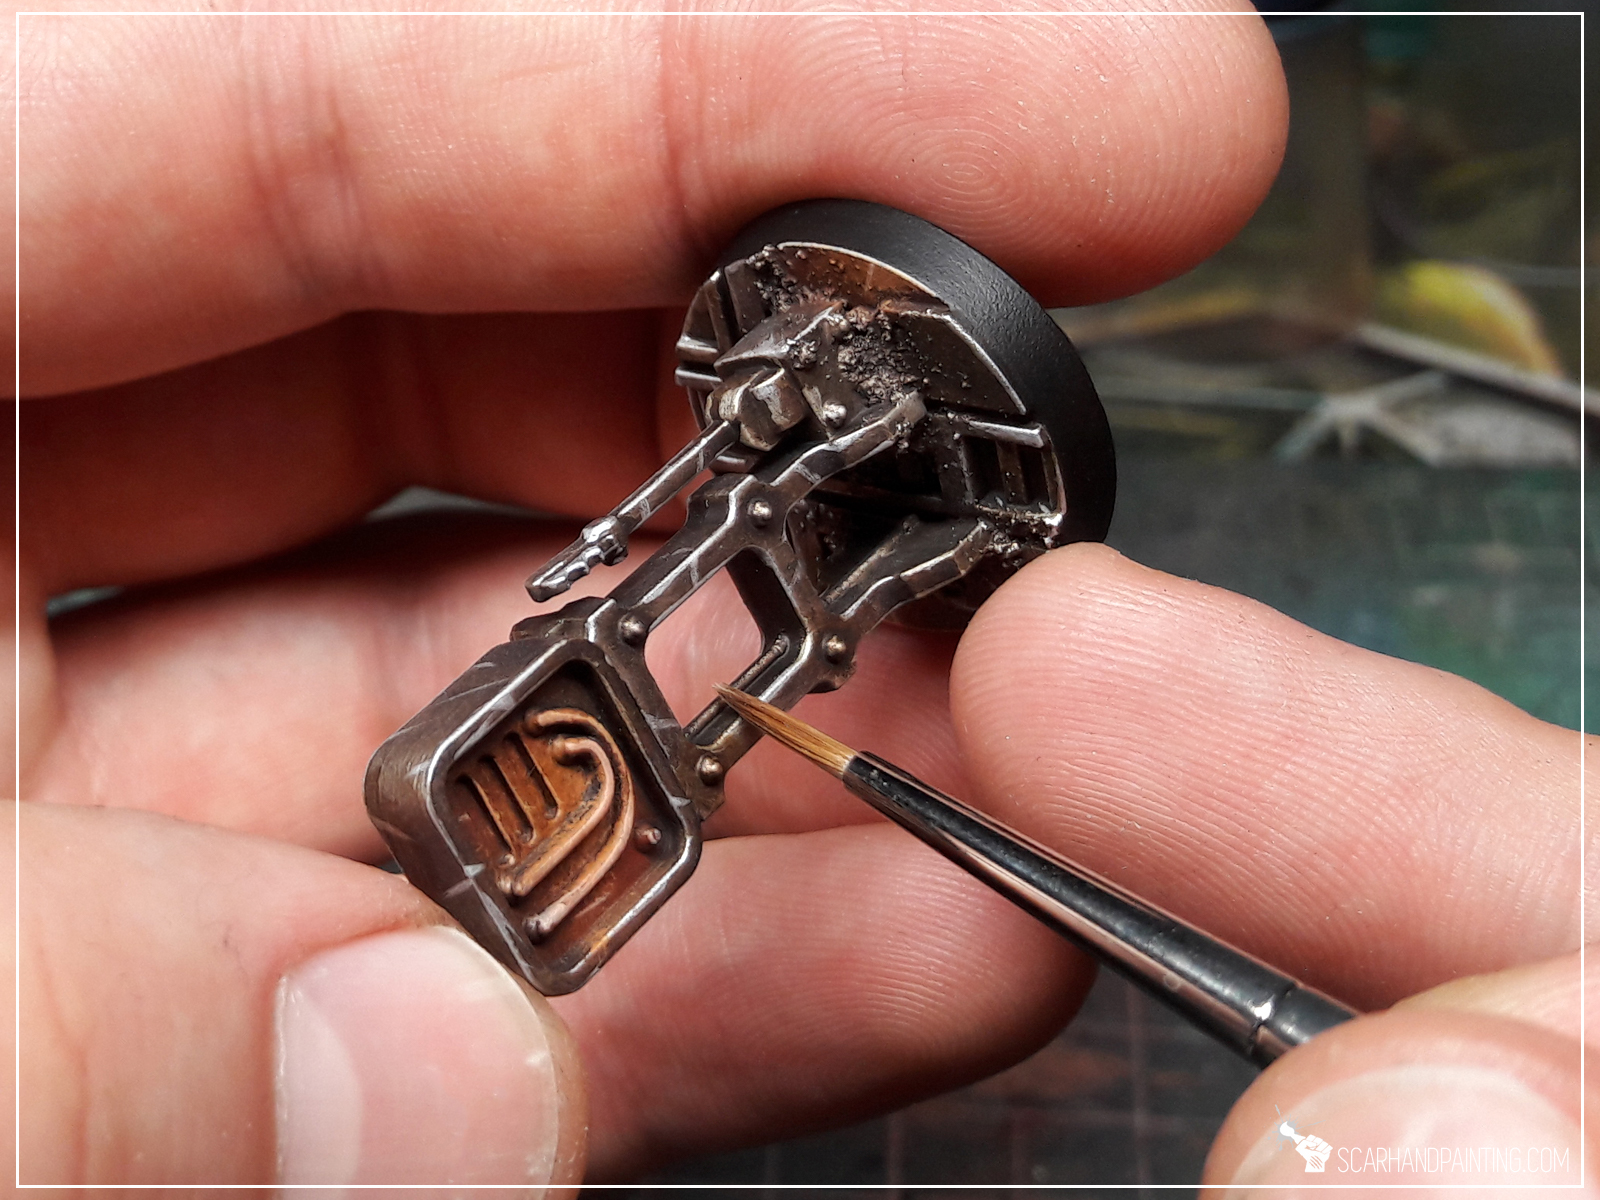
Step two: Orange base
Next I airbrushed a layer of Vallejo 72.709 Hot Orange (air) without thinning. This layer was applied on top of previously airbrushed Dead White.
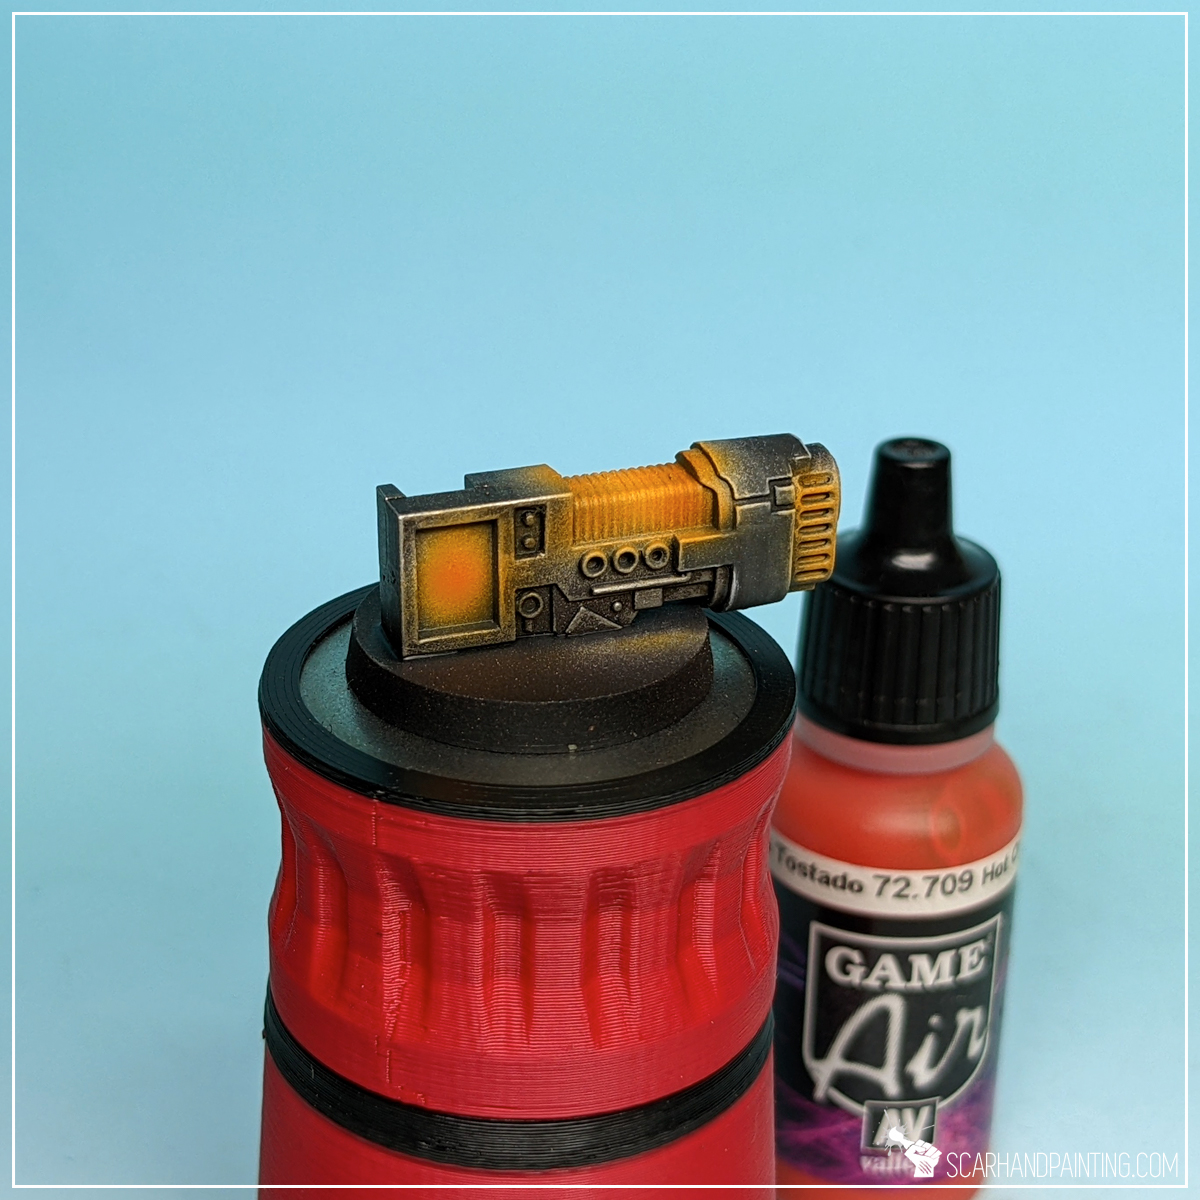
Step three: highlight
I then highlighted orange with Vallejo 72.101 Off-White. Such a bright color might seem like an overkill, but this one is a bit cream’ish and can get juiced up to bright orange easily later on.

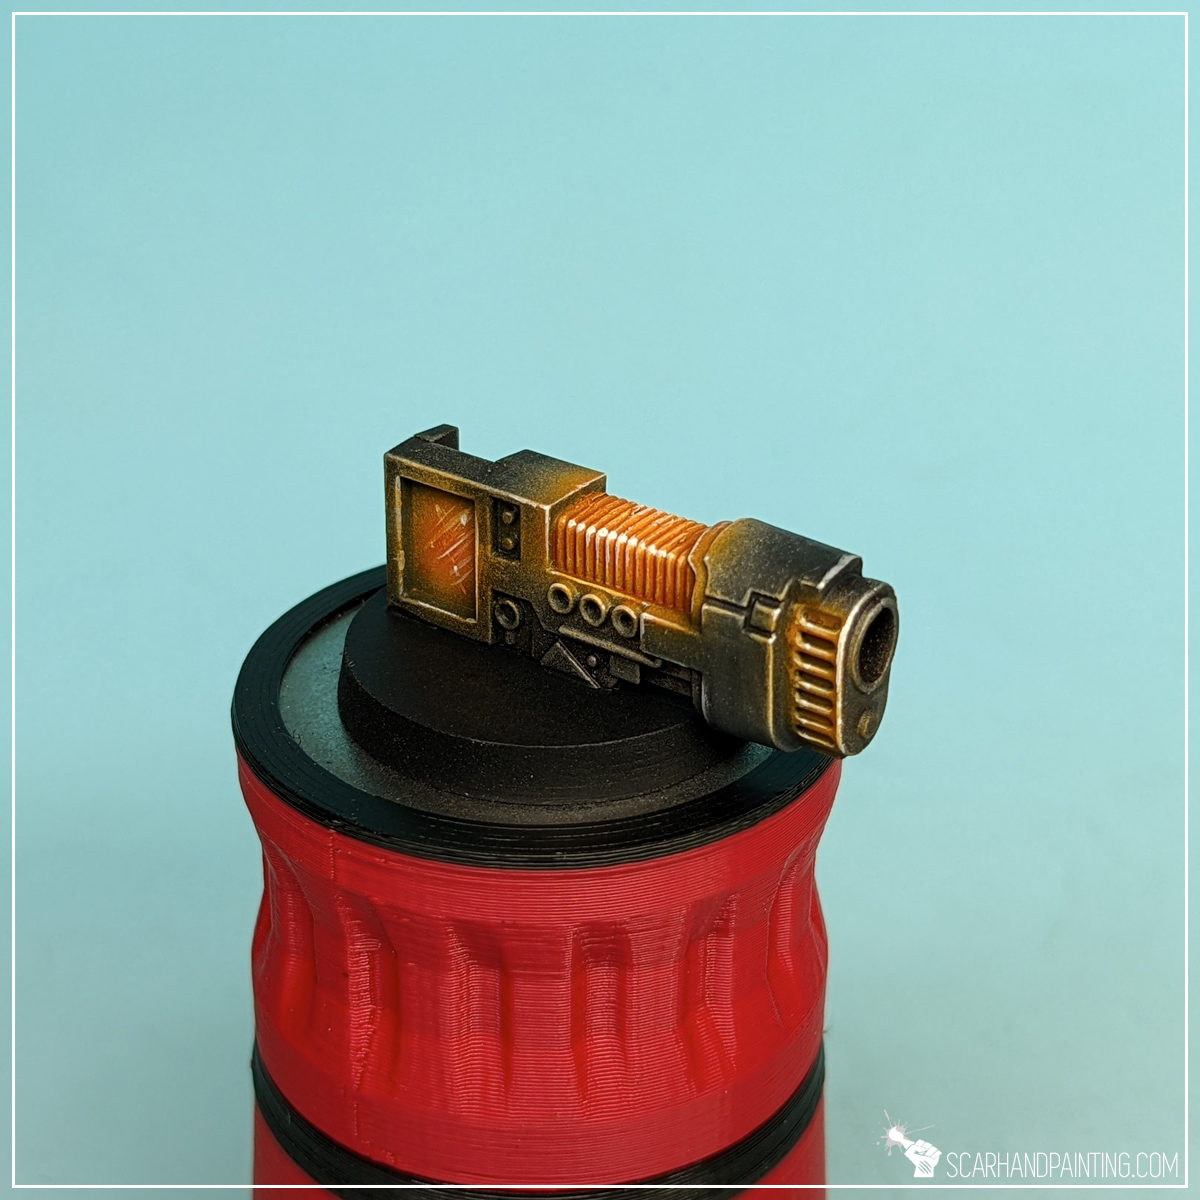
Step four: glaze
Here’s where real magic started. I thinned down Vallejo 72.709 Hot Orange (air) with a bit of water and manually glazed over the most intense orange parts of the miniature. This includes plasma coils, glow on the side of the barrel and large rectangle area at the back. Vallejo air series are perfect for hard glazing, retaining a lot of ‘juice’ even after thinning.

Step five: highlight
Finally I once again applied a highlight of Vallejo 72.101 Off-White, but this time limited to barely few dots and lines in the most exposed areas. This created focus points for the eye, while also providing better overall contrast on the piece.
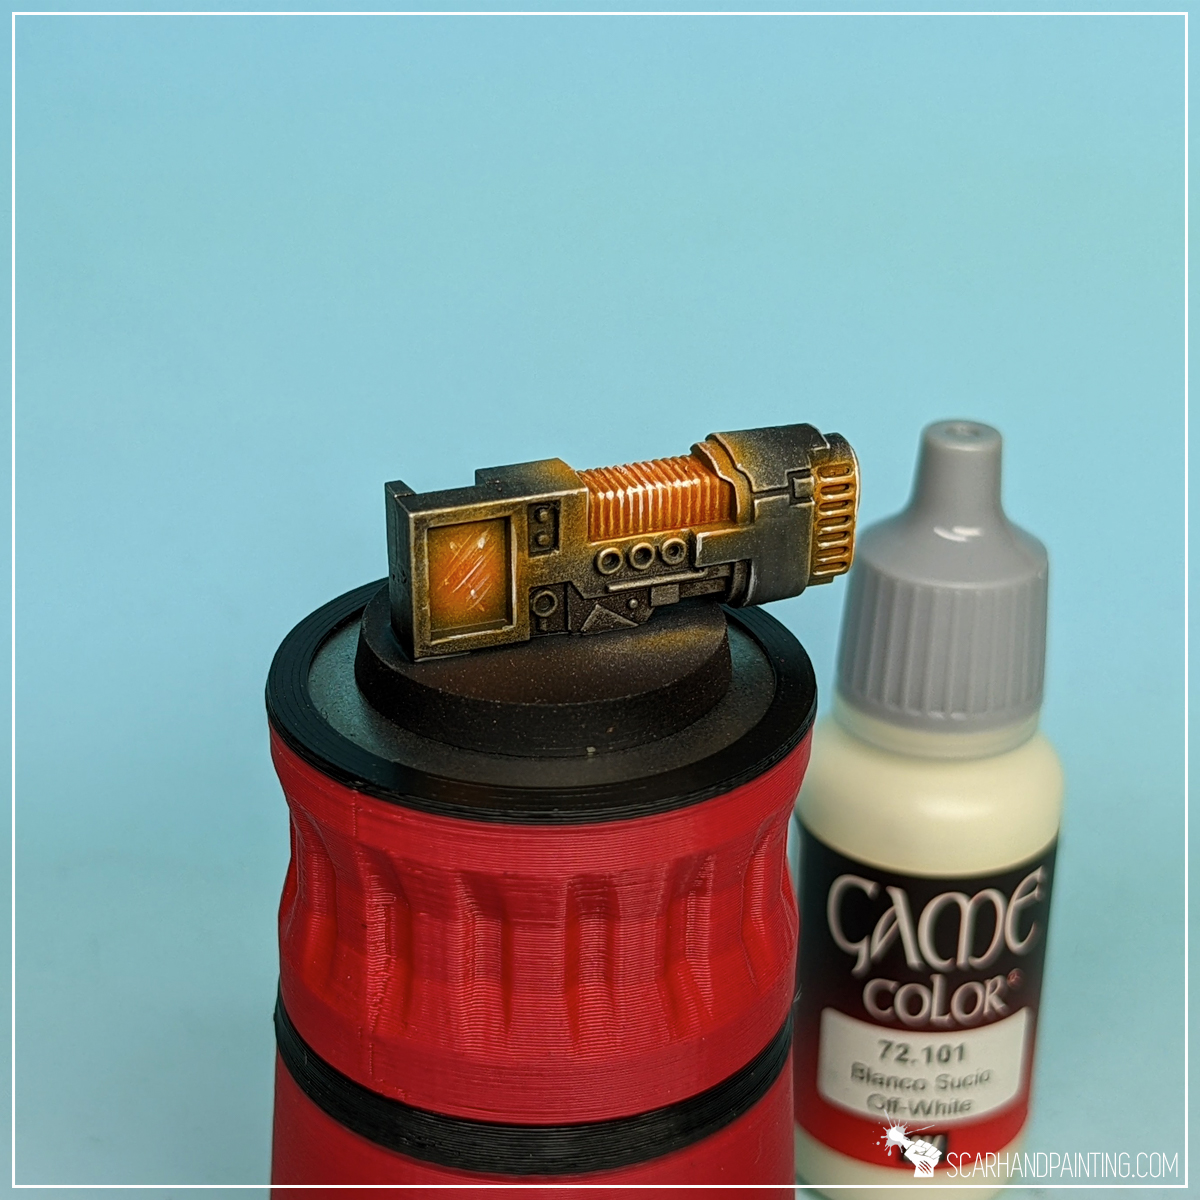
Job done. Three colors, five layers is all it takes to achieve an interesting effect that will steal a glance or two on the gaming board.

I hope you find this tutorial interesting. Be sure to let me know your thoughts in the comments below or via Facebook or Instagram. I would also appreciate if you considered sharing this content with your friends, who might find it useful. Finally if you are looking for a professional warhammer 40k miniatures painting service, be sure to contact me with this contact form. I always reply within 24 hours, after which please check out your spam folder.
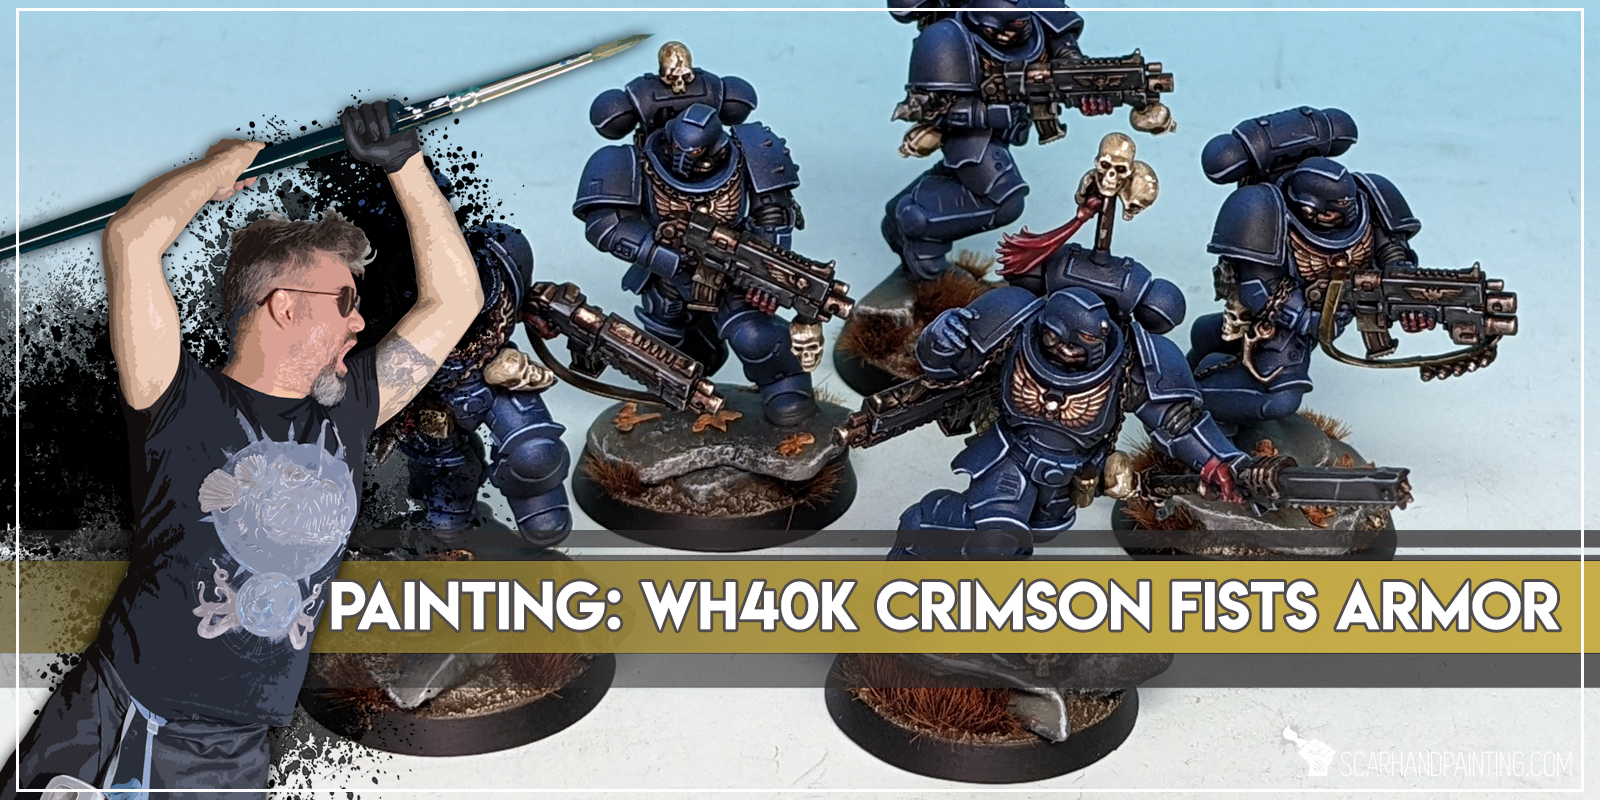
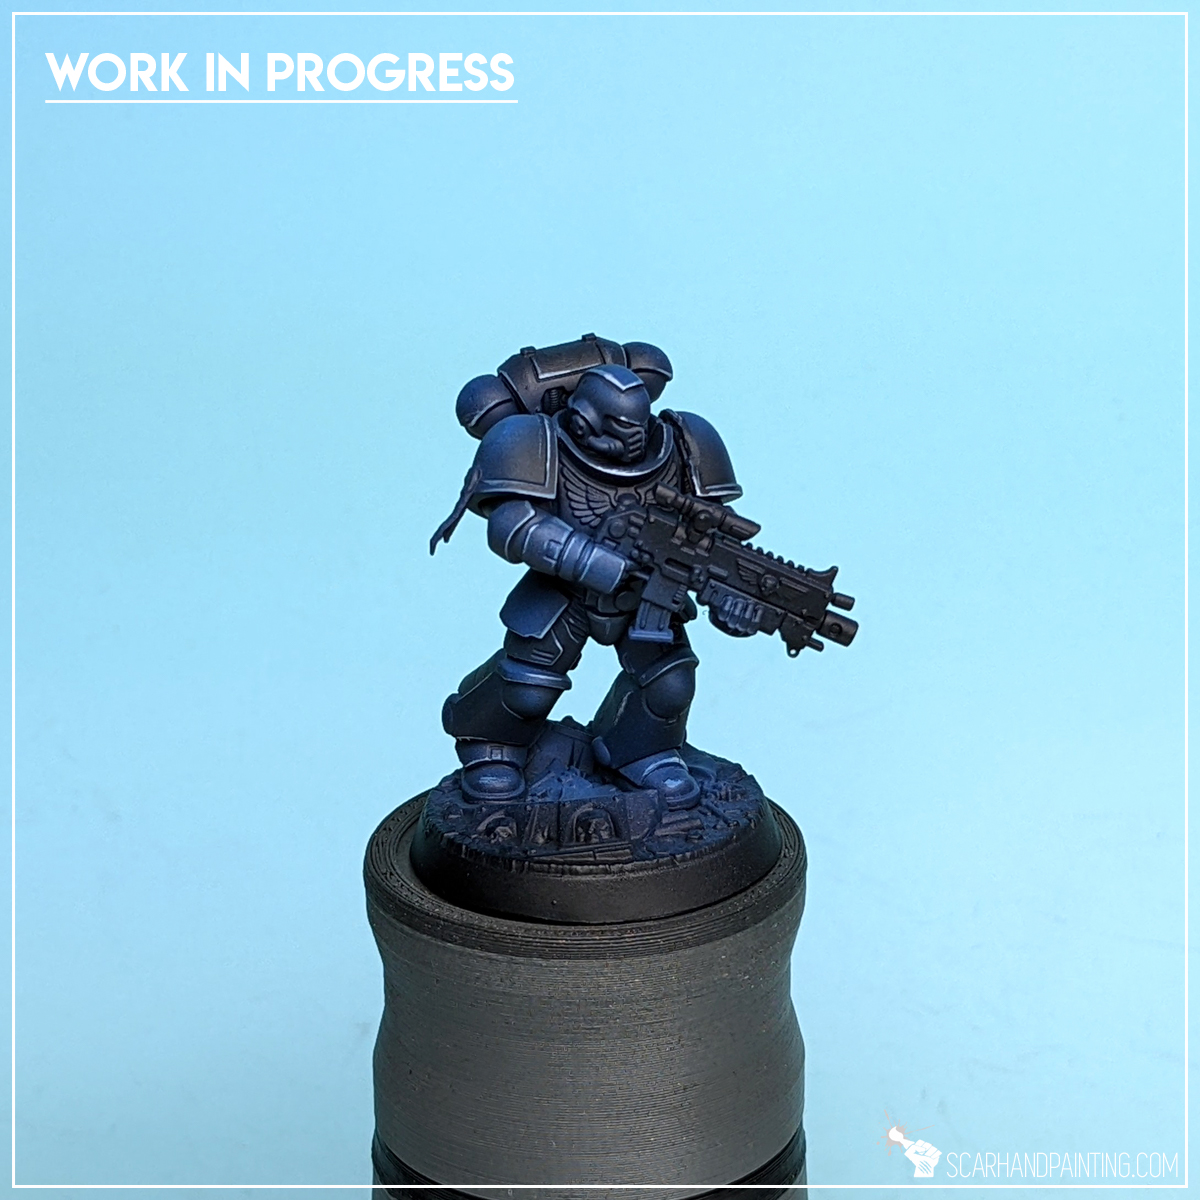
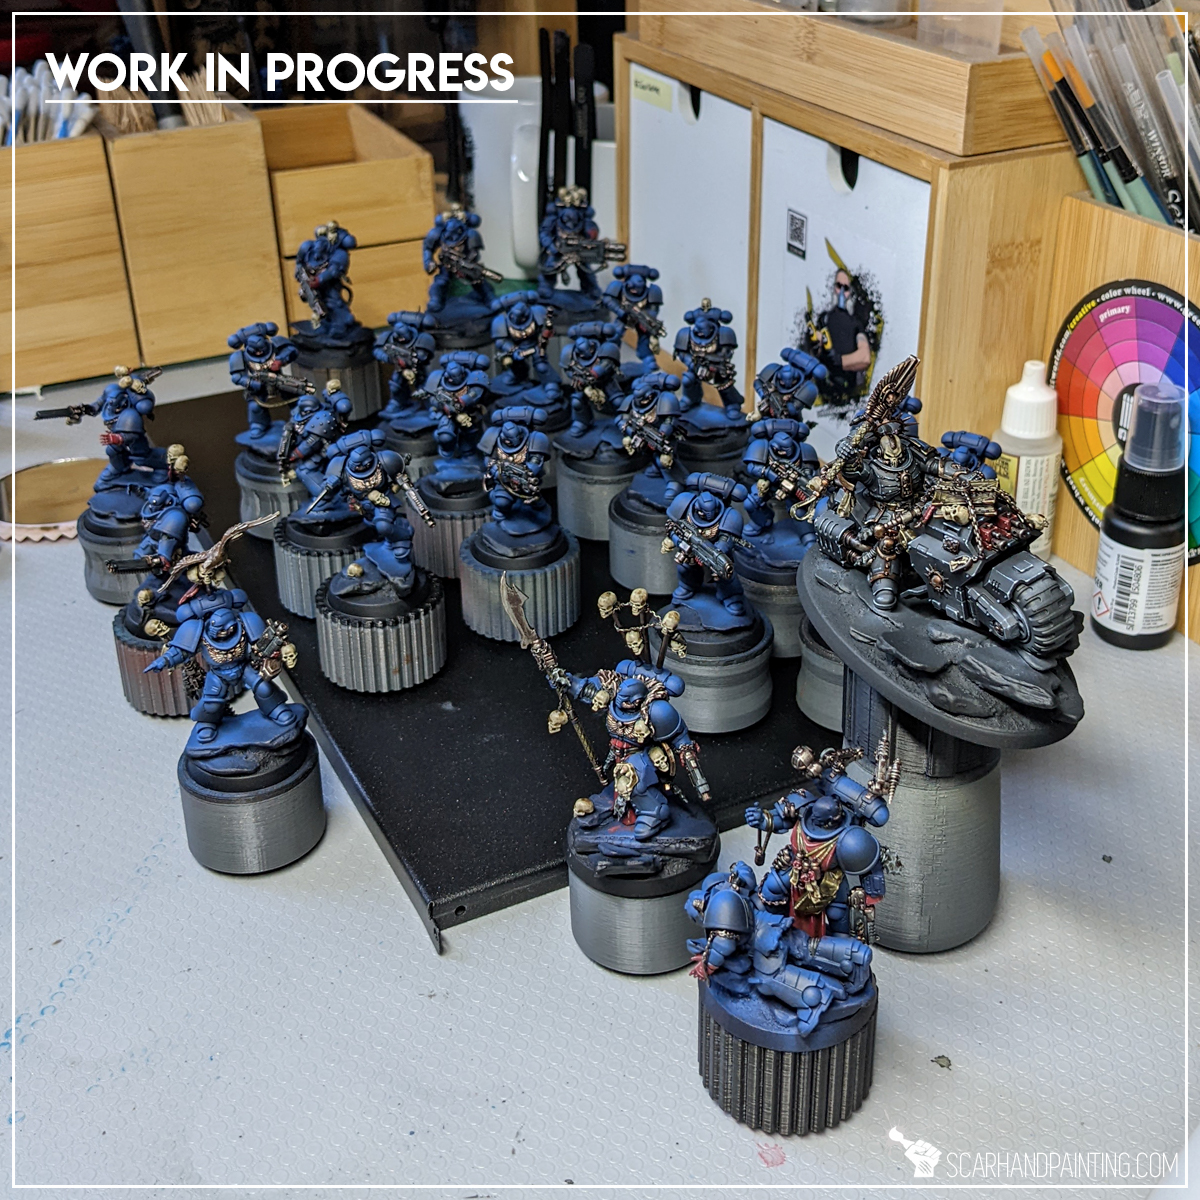
Welcome to Painting Warhammer 40,000 Crimson Fists tutorial. Here I will present to you a Step-by-step of an easy and fast painting process for Games Workshop Crimson Fists Primaris Marines armor as can be seen in Gallery: Crimson Fists.
Before we start, some notes:
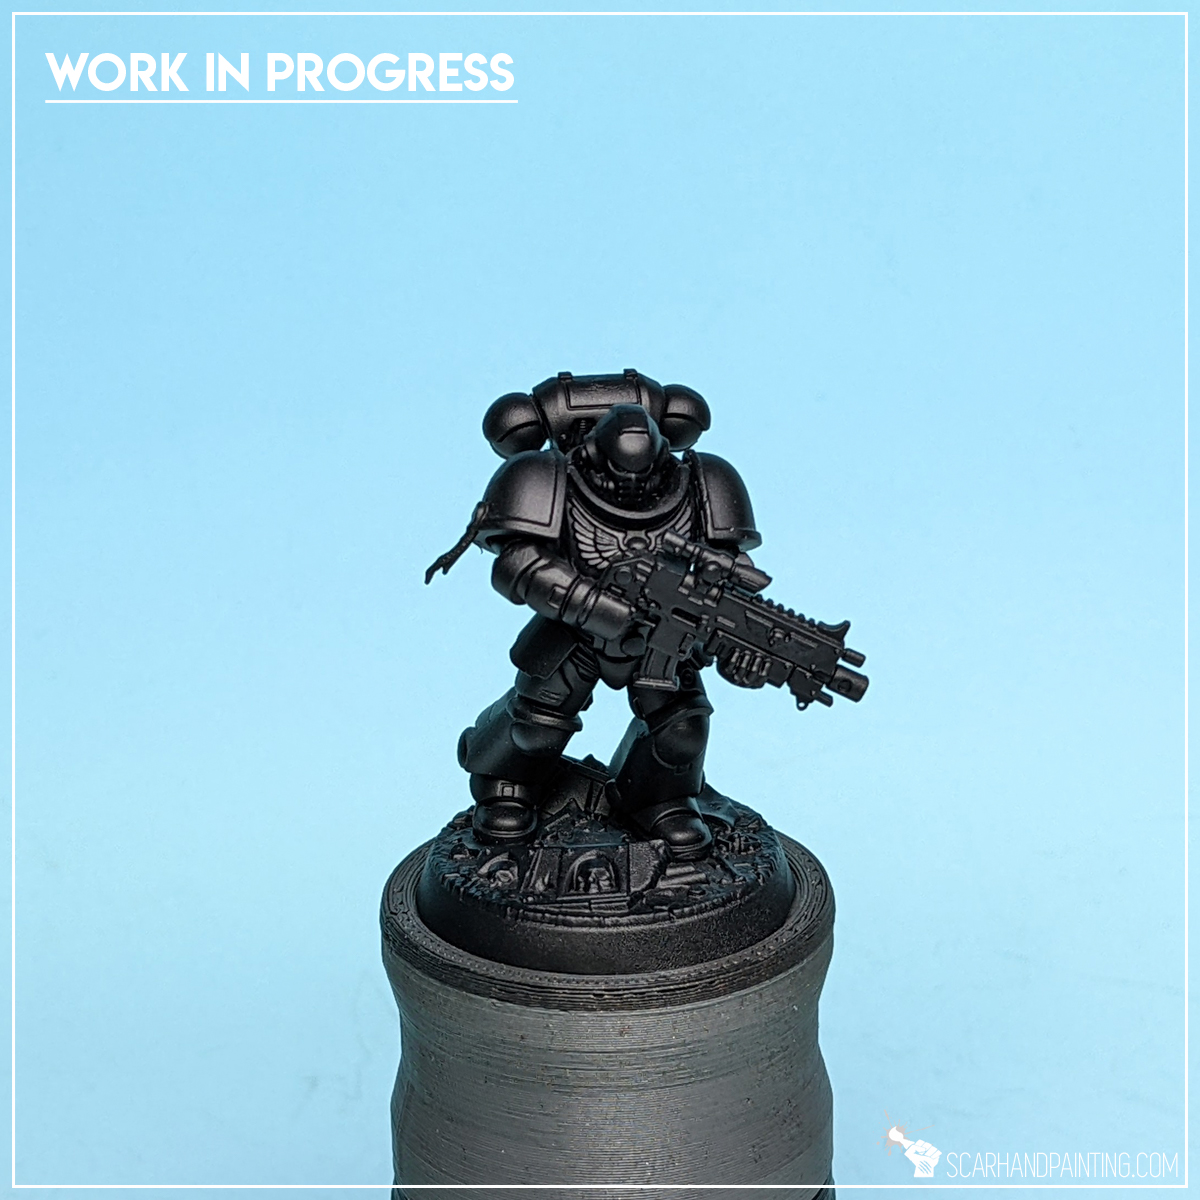
Step one: Undercoat
I started with a thorough layer of Games Workshop Chaos Black spray. This is a standard procedure for me. Chaos Black spray is my go to choice when it comes to undercoat.
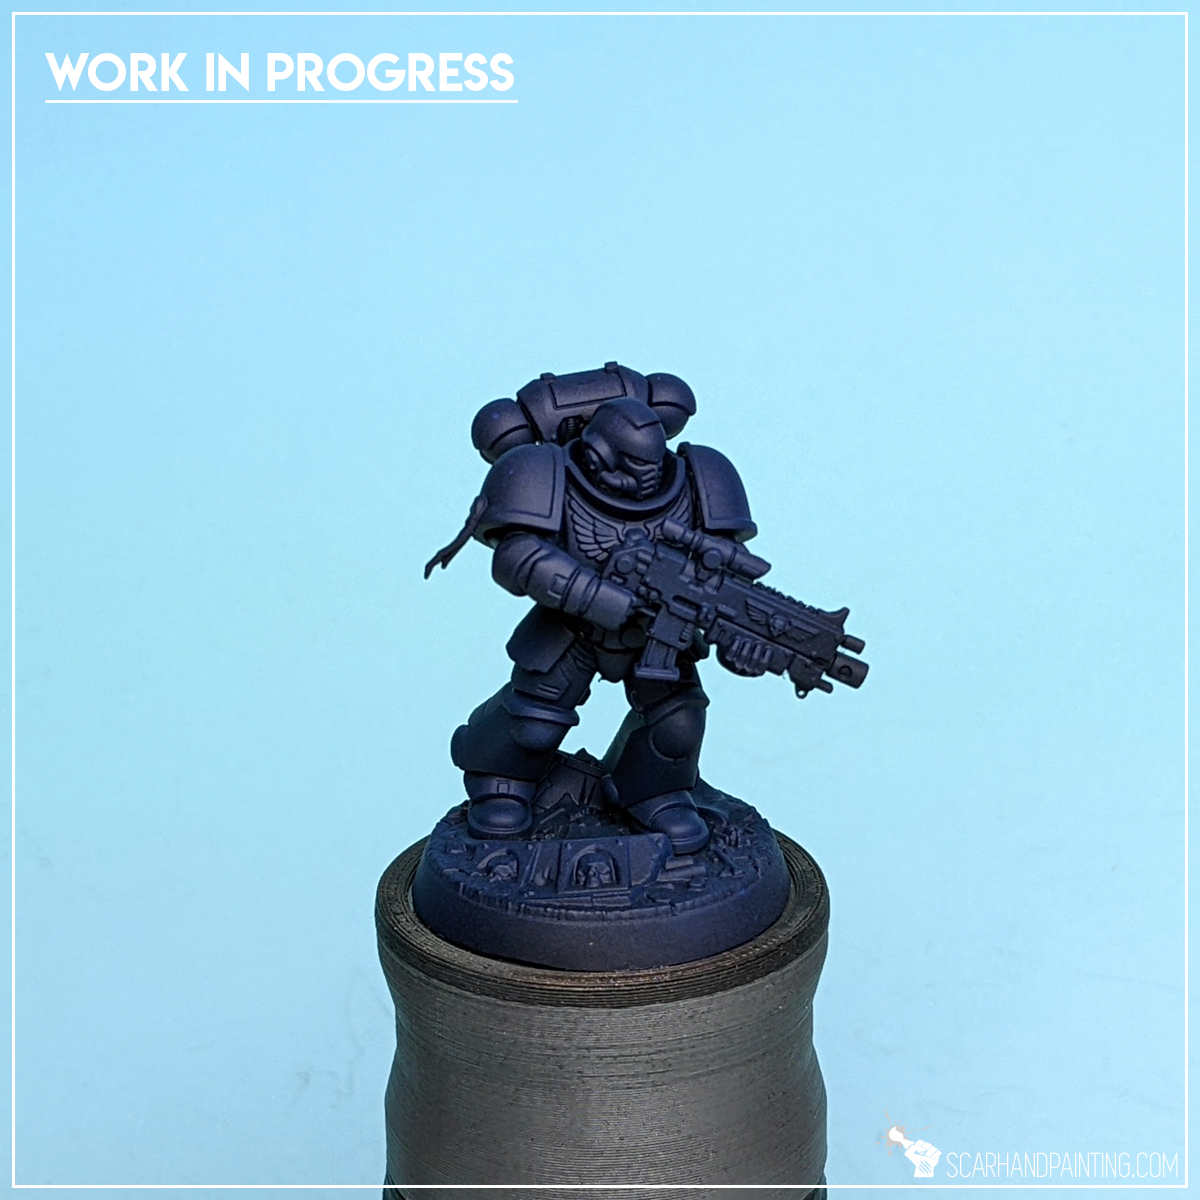
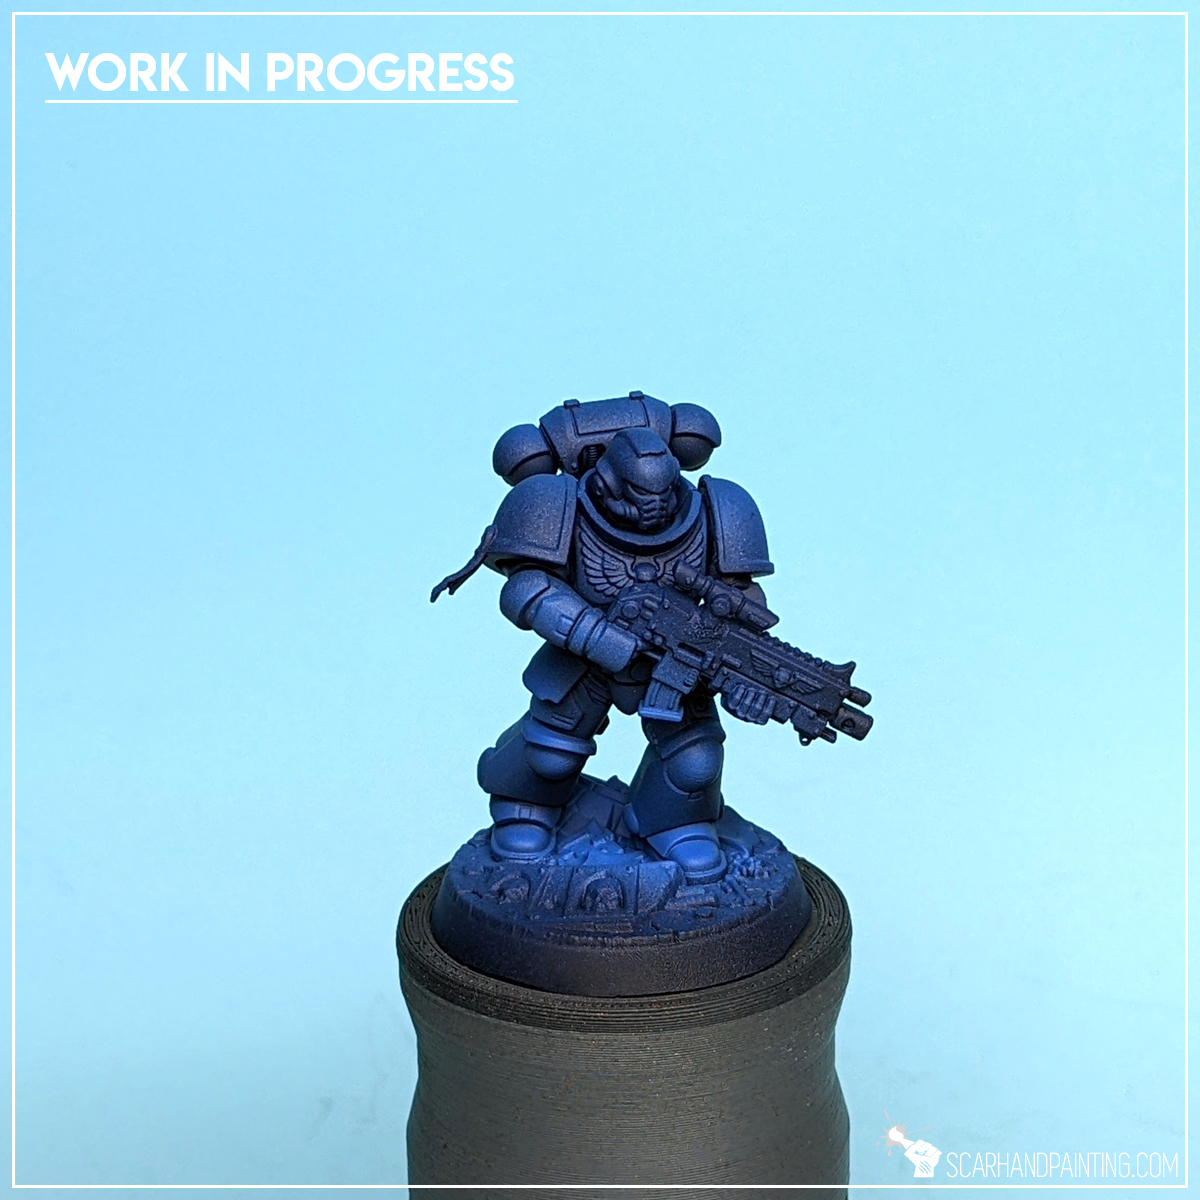
Step two: Base Color
For the initial layer I chose Vallejo Model Air – French Blue (71.088). The color is a somewhere medium tone blue, with much vibrancy that got a bit toned down by black undercoat beneath. I applied a thin, dry layer of French Blue by airbrushing it on top and around the miniature. I took extra care not to make the layer too strong.
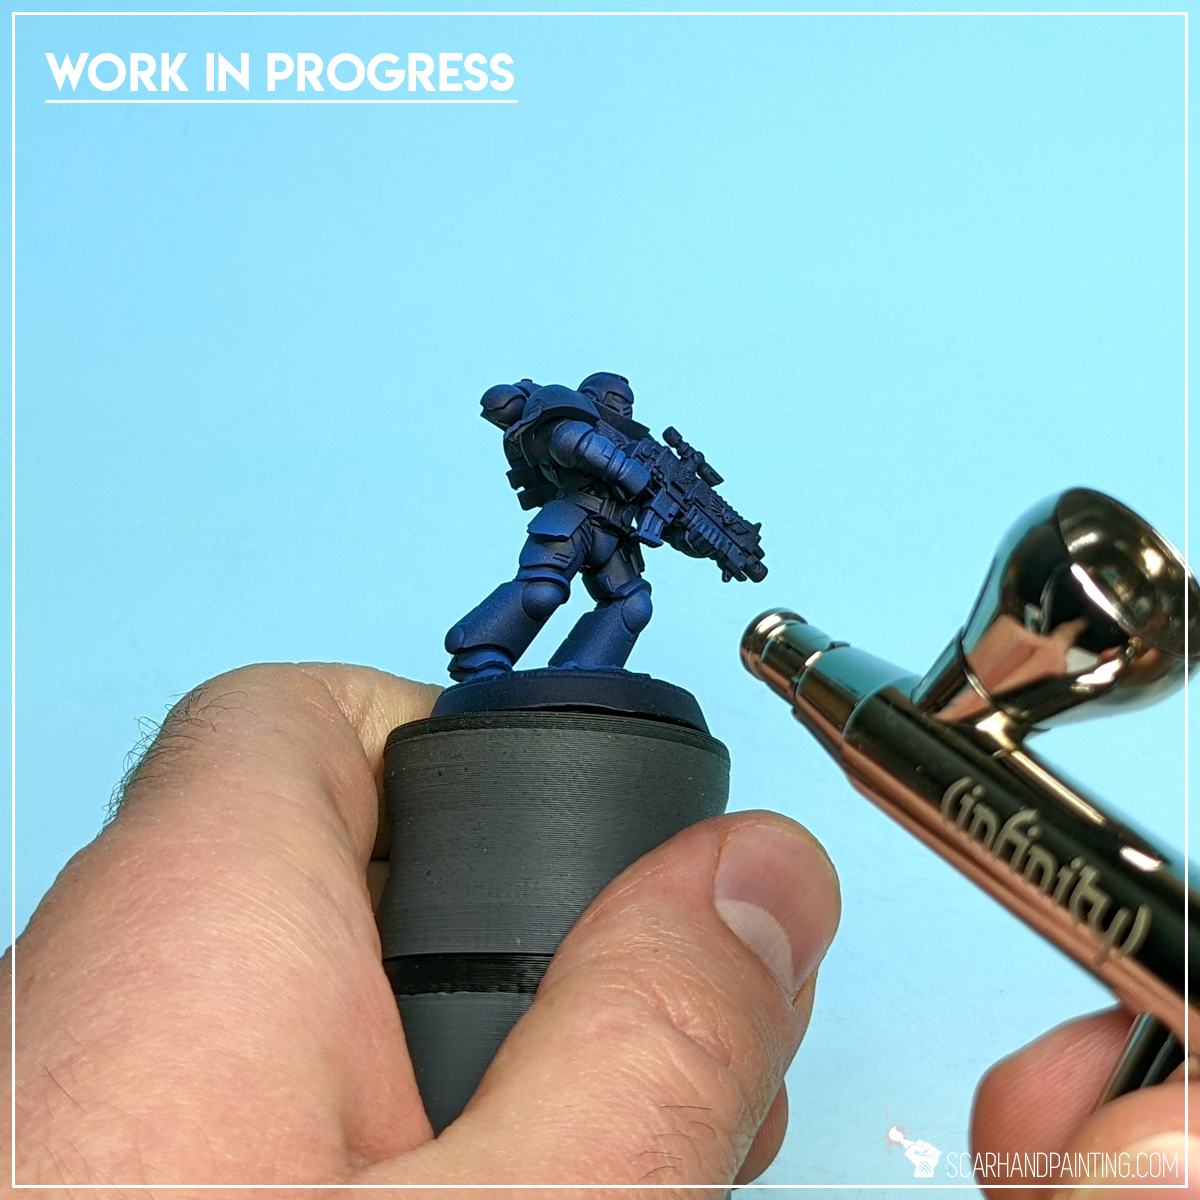
Step three: Highlight
Next I applied a mix of Vallejo Game Air – Ultramarine Blue (72.722) proportioned 5:2 with Vallejo Model Air – Light Sea Blue (71.089). This layer was also airbrushed, but this time I applied it zenithally and on the most exposed areas of the armor. Once again I took extra care to keep the layer dry and soft.
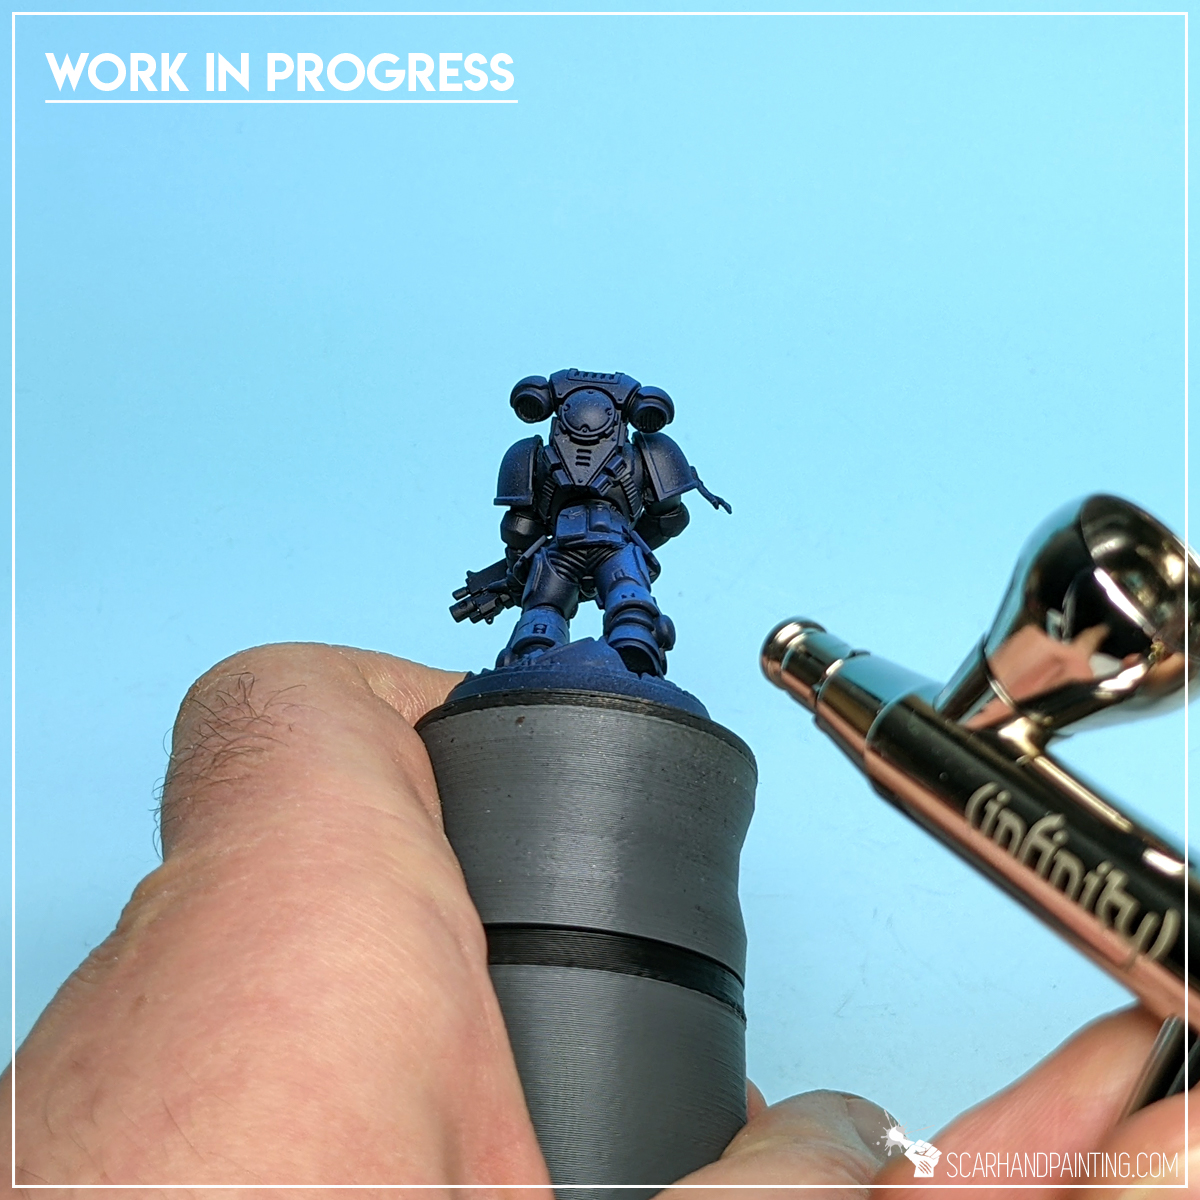
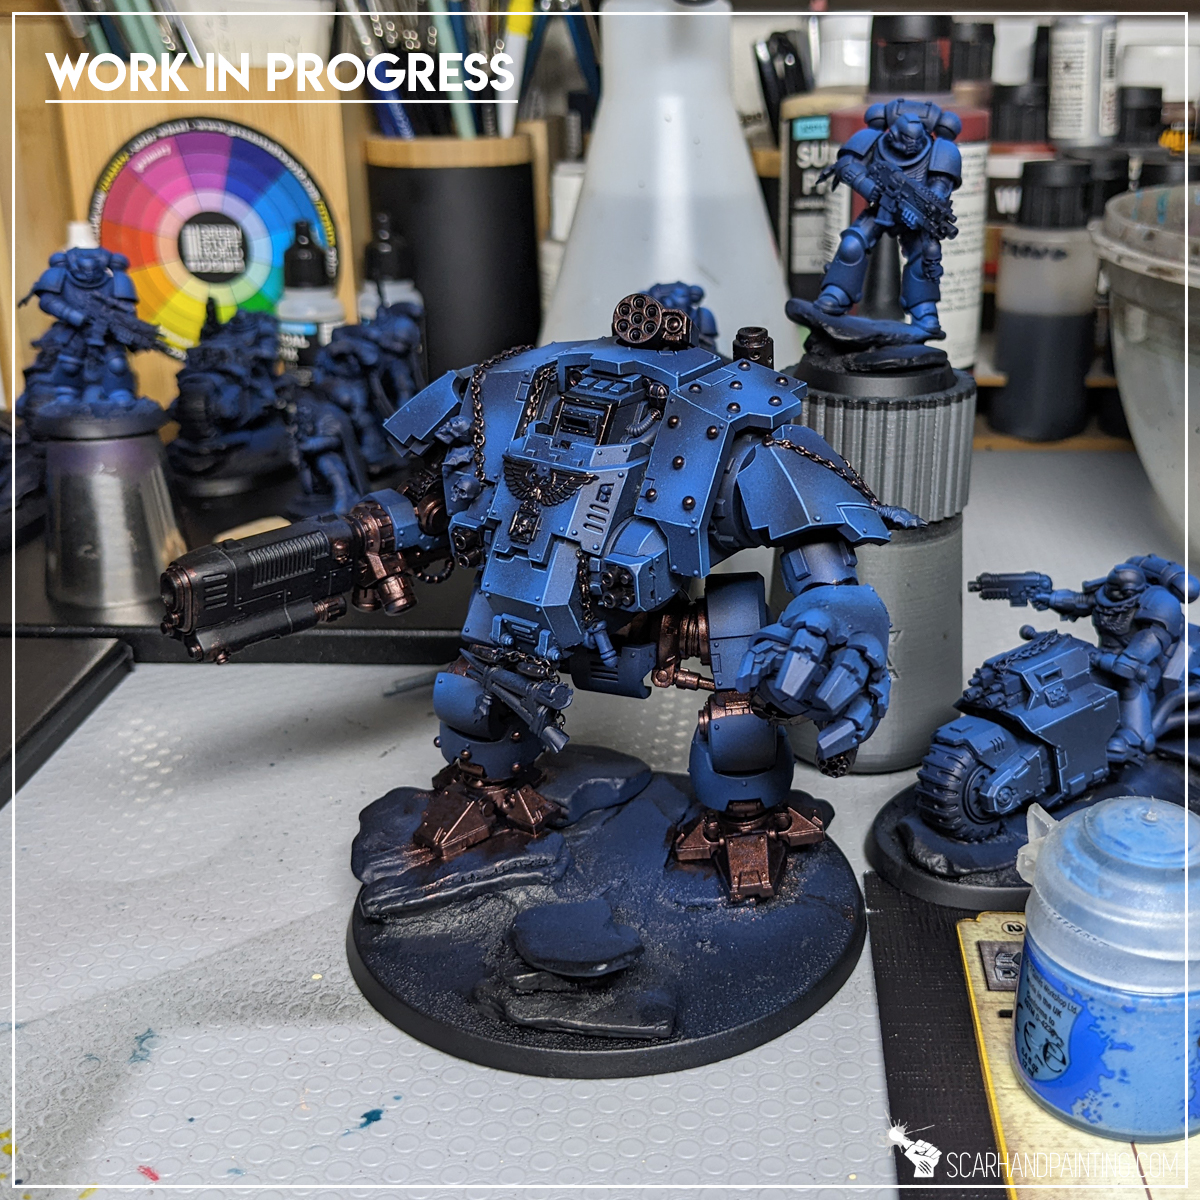
Step four: Shading
I then applied Vallejo Wash for Dark Vehicles (76.518) by airbrushing it from the bottom of the miniature (reverse zenithal) and onto low parts of large areas, including lower shoulder guards, sides of leg armor and lower part of the backpack. This particular paint is very thin, forcing me to apply it by multiple tiny, mist-like “puffs”, that dried out almost instantly. It significantly toned down all the armor and blended any dry specks leftovers from previous layers.
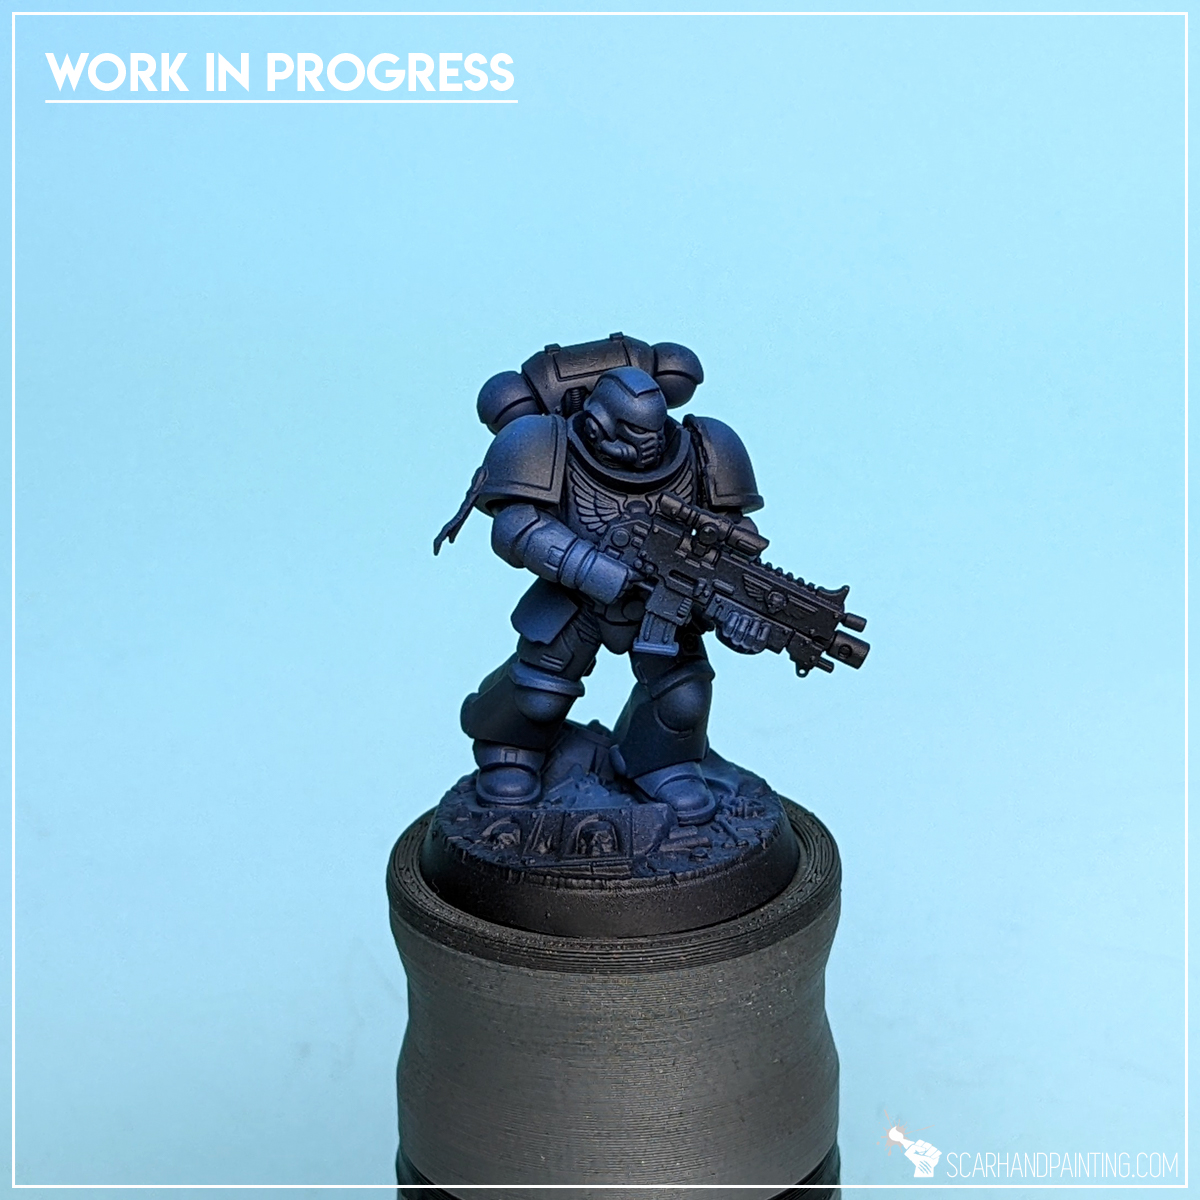
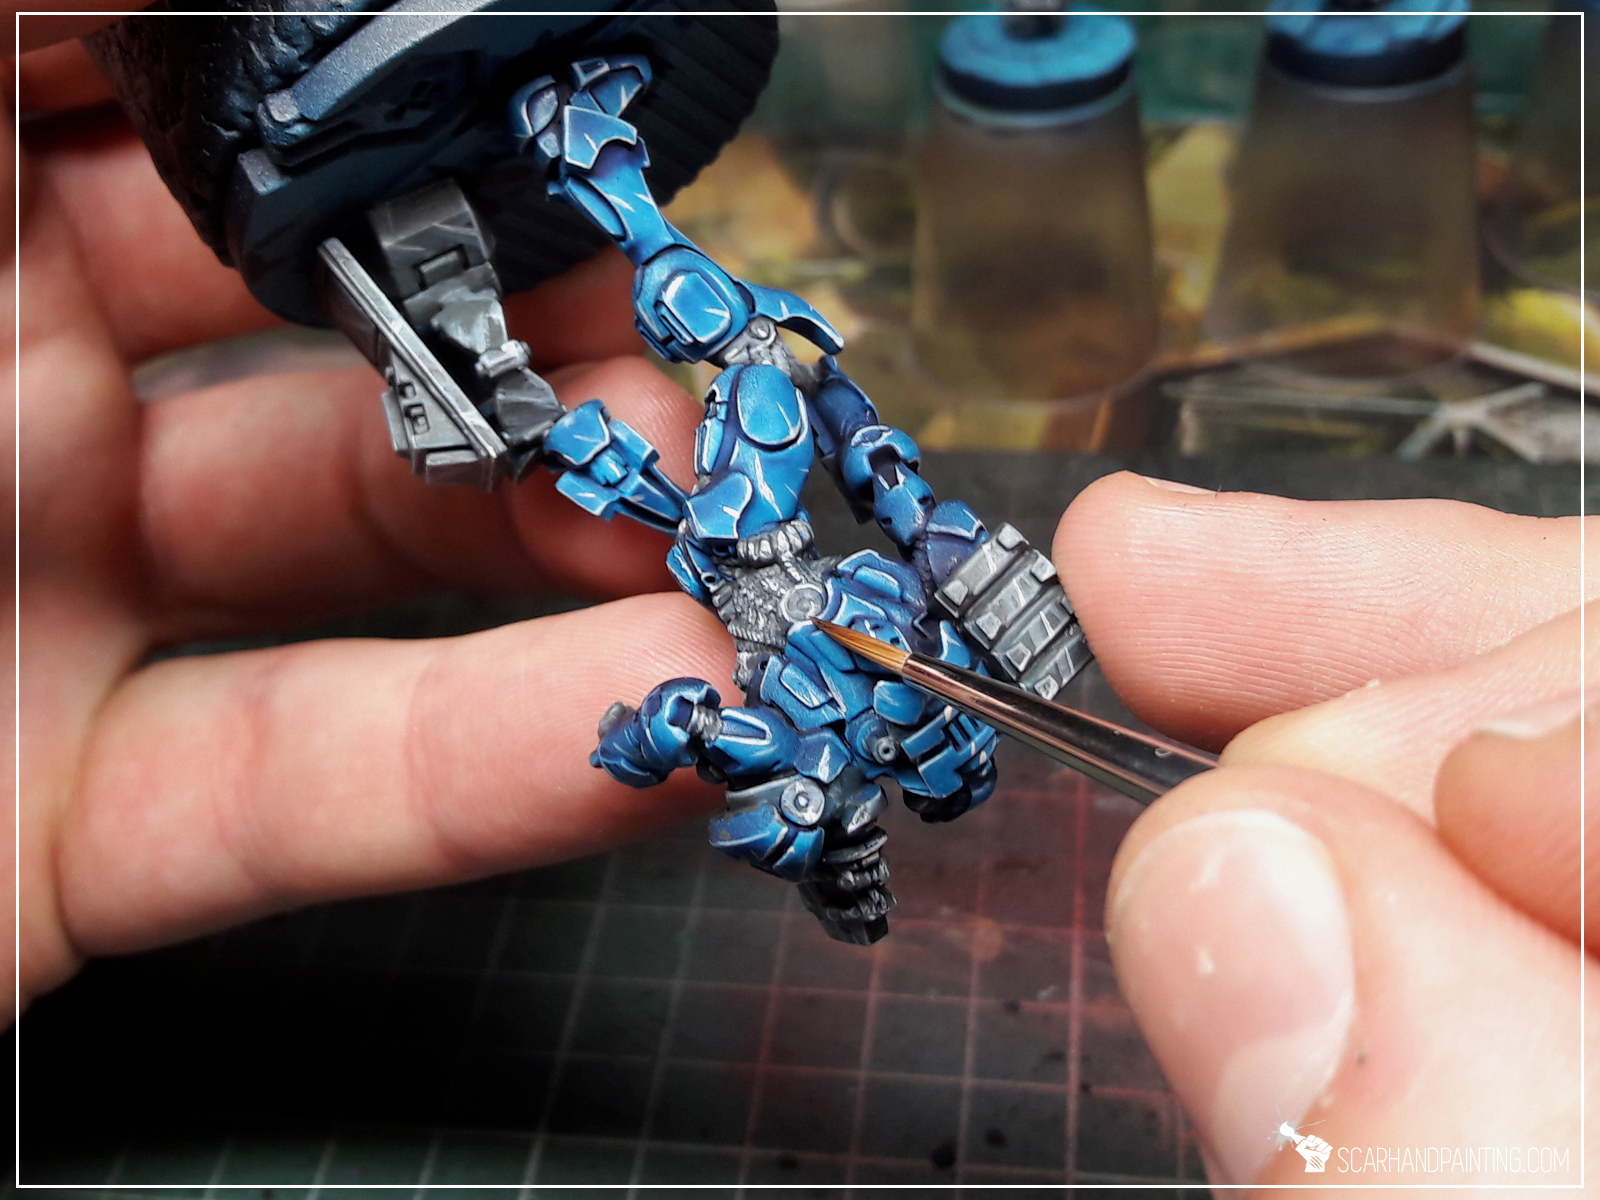
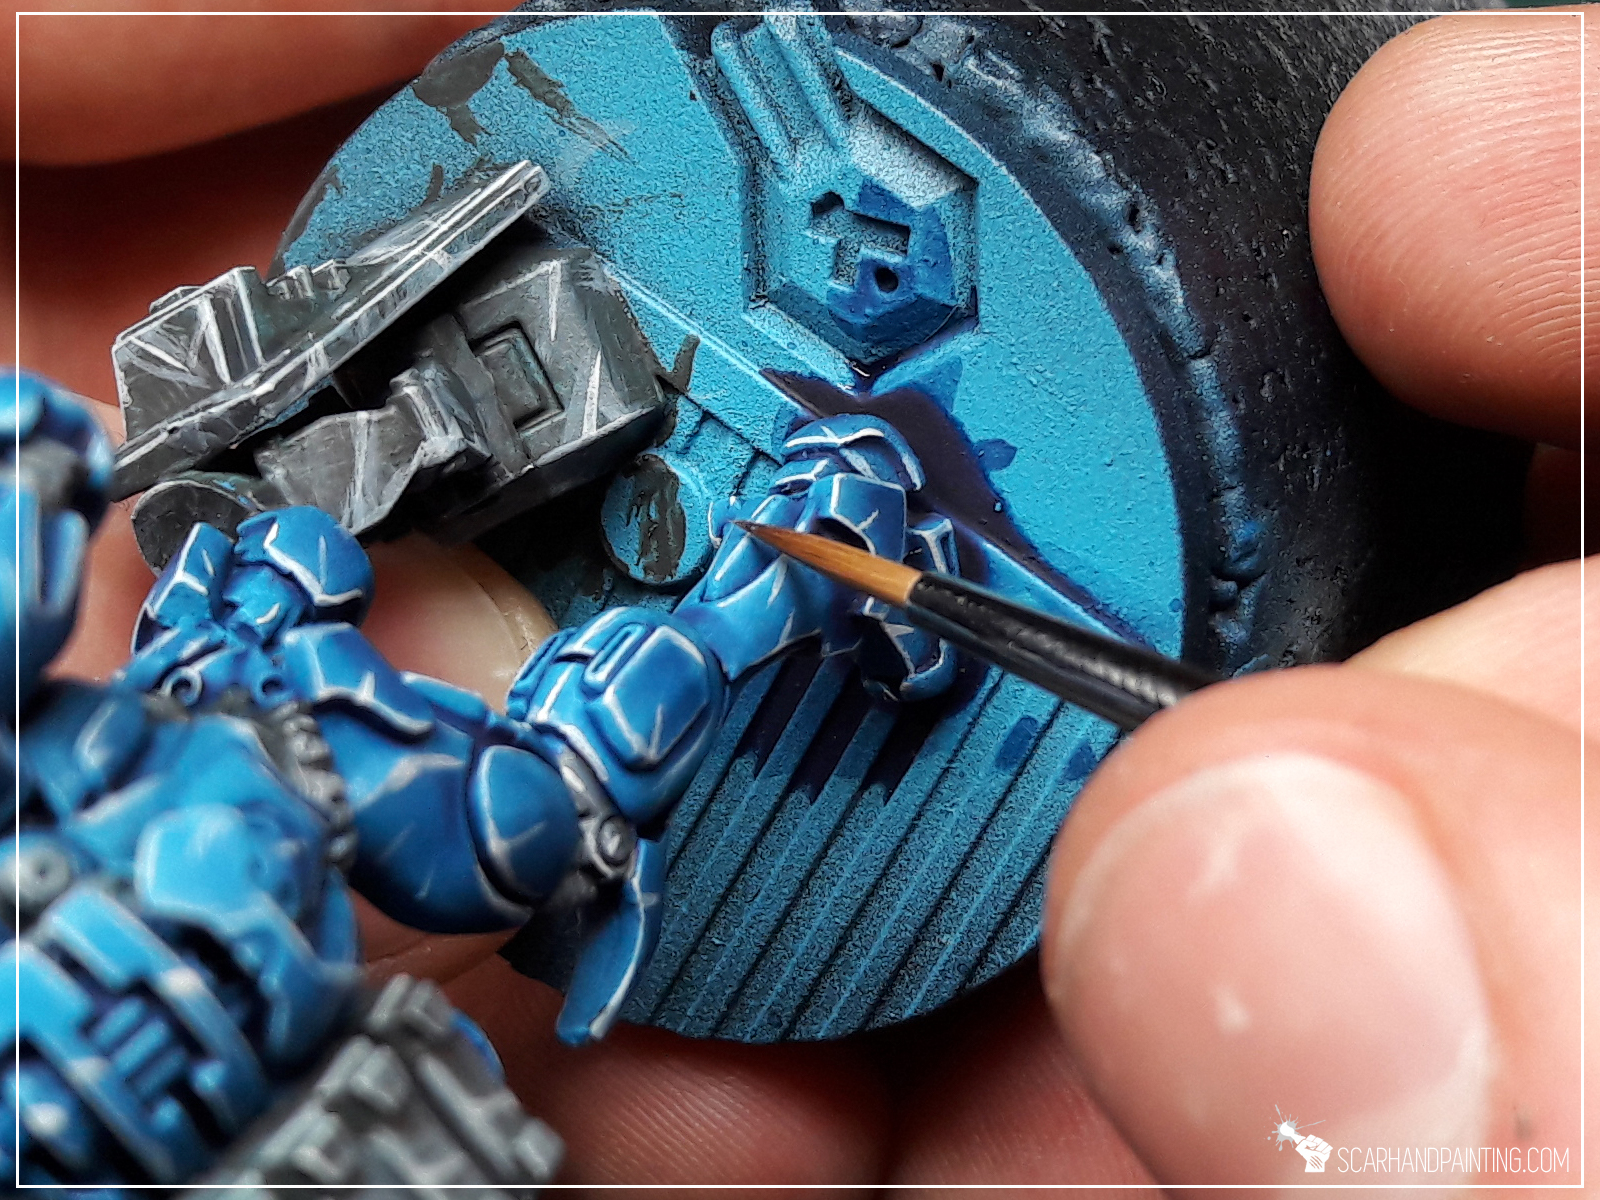
Step five: First Highlight
Next I switched to manual brush and applied an edge highlight of Citadel Layer – Hoeth Blue. I picked only the most exposed edges, skipping all places that were too difficult to reach or hidden from sight.

Step Six: Second Highlight
Finally I applied an edge highlight with Vallejo Game Color – Glacier Blue (72.095). Contrary to previous layer, I kept this one concentrated on top areas and corners, adding extra focus and depth to the exposed armor detail.
That wraps up the armor. Only five layers of paint for an eye catching effect of dark blue armor, that stands out on the gaming board. Now with this solid base out of the way, we can start building character of the miniatures, by adding more colors and enriching the overall feel of the miniatures – but that is a topic for another day. Stay tuned for part two of the tutorial.
I hope you’ve enjoyed this article. Be sure to let me know your thoughts in the comments below or via Facebook or Instagram. I would also appreciate it if you considered sharing this content with your friends, who might find it interesting. Finally if you are looking for a professional miniatures painting service, be sure to contact me with this contact form. I always reply within 24 hours, after which please check out your spam folder.
Here are some Colour Recipes for Warhammer 40,000 Crimson Fists from Gallery: Crimson Fists. Please take note that this is a simple colour scheme, not covering multiple overlapping layers and blends in between, that lead to the final product. It is supposed to be used as guideline not a step-by-step.

BLUE armor:
Black undercoat,
French Blue (val a), * around
Mix Ultramarine Blue (val a) 5:2 Light Sea Blue (Val a), * from top, points focused
Black Wash for Vehicles (val), * from bottom, points focused
Hoeth Blue (gw), l&p
Glacier Blue (val), p
RED armor:
Hull Red (val),
Burnt Red (val)
Flat Red (val), l&p, highlight flbr (x3)
Lugganath Orange (gw), l&p
Vehicles: Flat Red (val), stpl (large areas)
DARK mesh:
Panzer Dark Grey (val a),
Fenrisian Grey (gw), l&p
Dark Tone Ink (ap),
Glacier Blue (val), l&p / Ghost Grey for vehicles)
METAL:
Warplock Bronze (gw),
True Copper (ap) / Gun Metal (ap), flbr
Shining Metal (ap), l&p
Strong Tone Ink (ap),
Shining Metal (ap), l&p
BROWN detail:
Burnt Umber (val a),
Karak Stone (gw) l, detail filling,
Off White (val), l&p
Dark Olive Drab (val a), bl
Flayed One Flesh (gw), l&p
Mix: Strong Tone Ink (ap) 1:1:1 Soft Tone Ink (ap), Flesh Tone Ink (ap),
Flayed One Flesh (gw), l&p
SKULLS & PAPER:
Karak Stone (gw),
Flayed One Flesh (gw), flbr
Mix: Off White (val) 1:2 Skeleton Bone (ap), flbr
Strong Tone Ink
Off White (val), l&p
ORANGE OSL:
White (val a), *
Hot Orange (val a), *
Off White (val), l&p
Hot Orange (val a), bl
EYES:
Flat Red (val),
Lugganath Orange (gw), dots
Hot Orange (val a), glaze

l&p – lines and points,
p – points,
dl – deep lining,
bl – blend,
gl – glaze,
drbr – drybrush,
flbr – flatbrush,
lobr – loaded brush,
stpl – stippling,
*Airbrushed (with multiple layers and mixes)