- contact@scarhandpainting.com


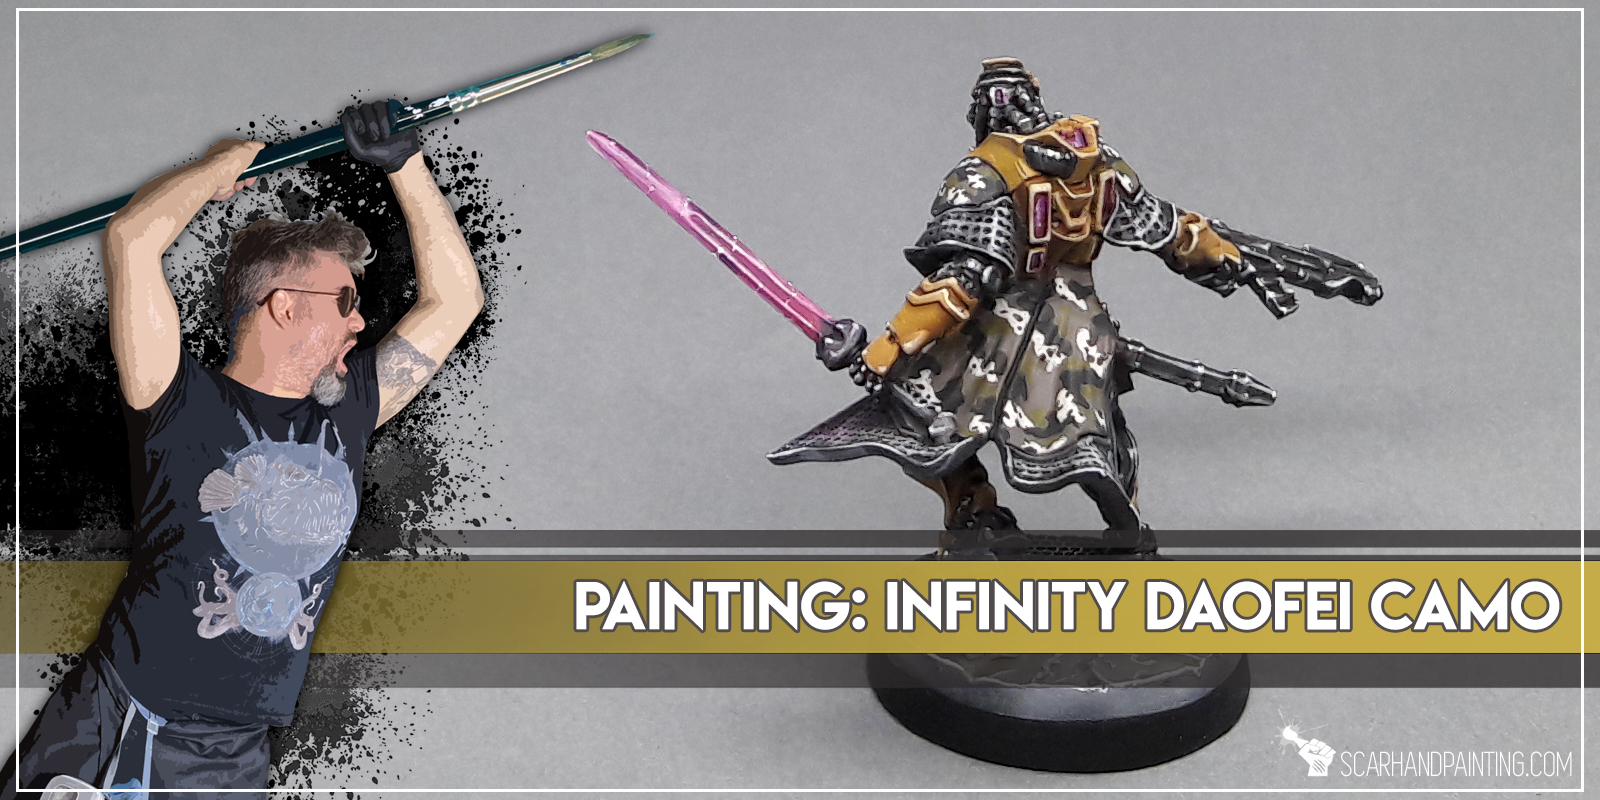
Welcome to Painting Infinity Daofei Camo tutorial. Here I will take you on a Step-by-step trip through the process of painting Daofei Camo the same way as seen at: Gallery: Yu-Jing.
Before we start, some notes:
* This one requires no Airbrush.
* For better visibility there are two different sizes of the pattern.
* What works for me might not necessarily work for you.
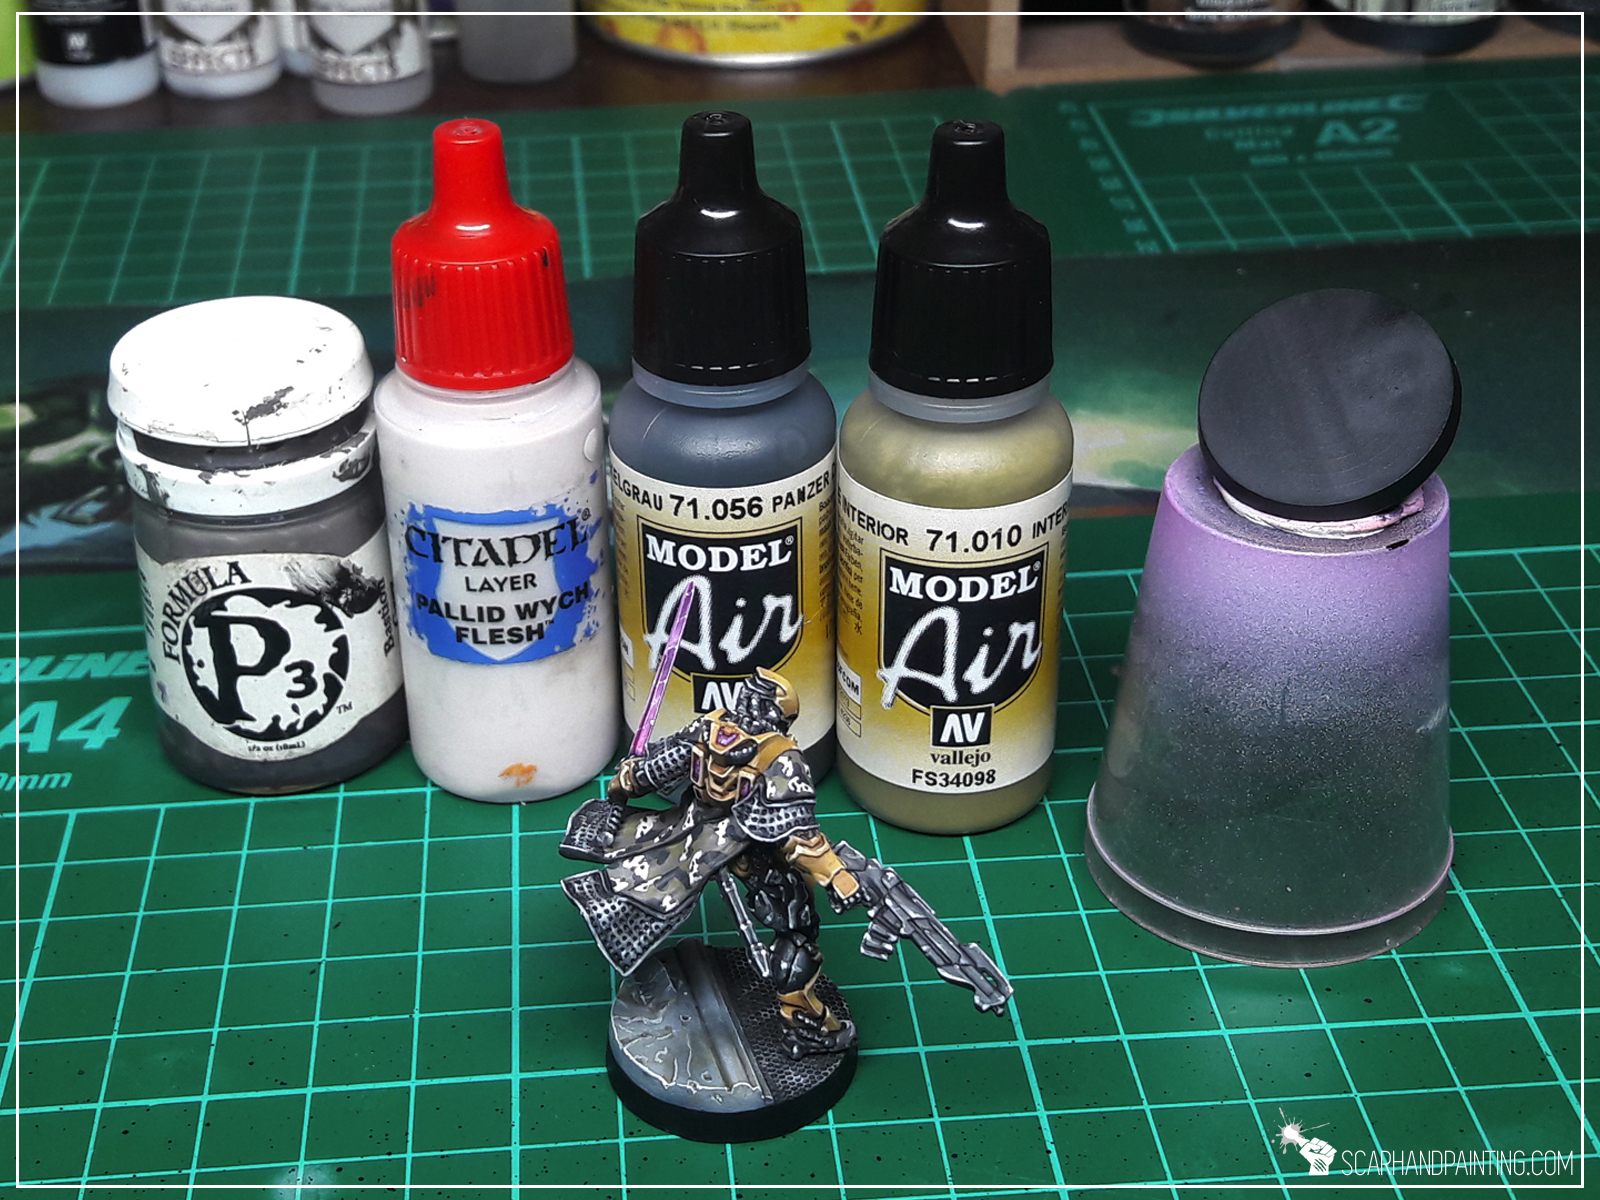
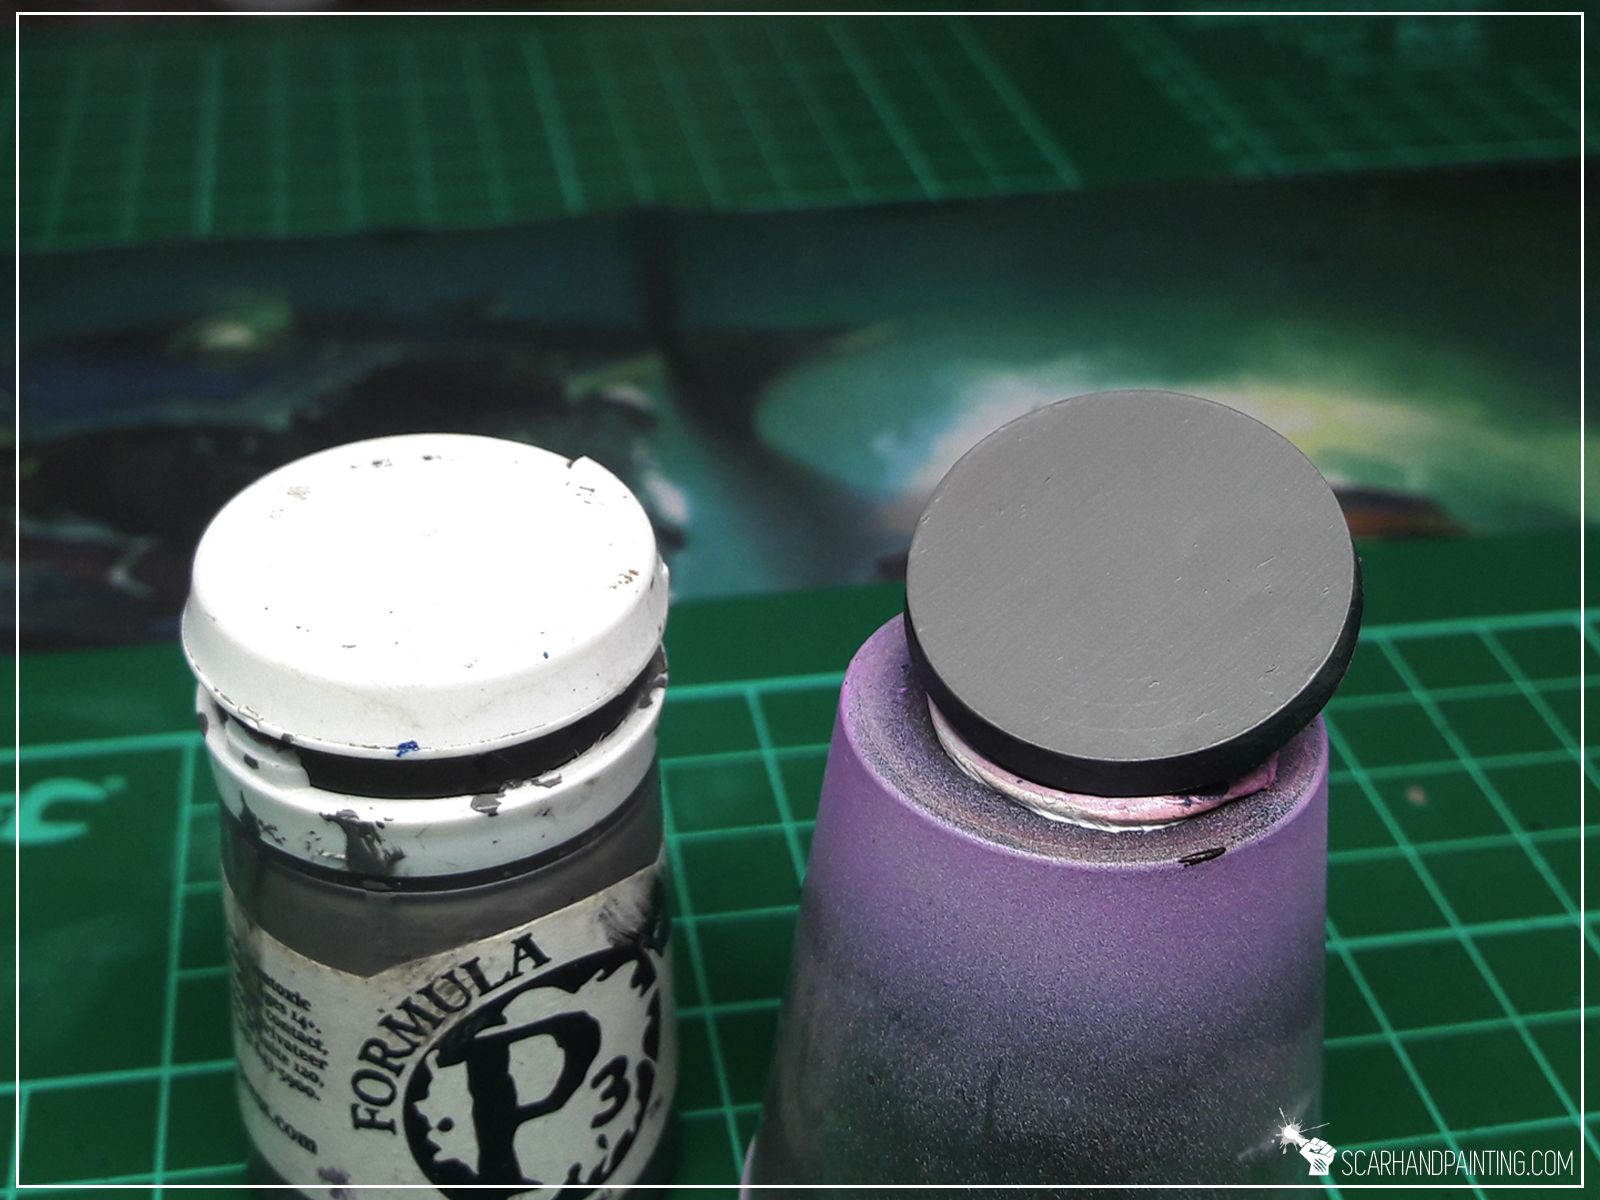
* Start by applying a smooth layer of P3 Bastion Grey.
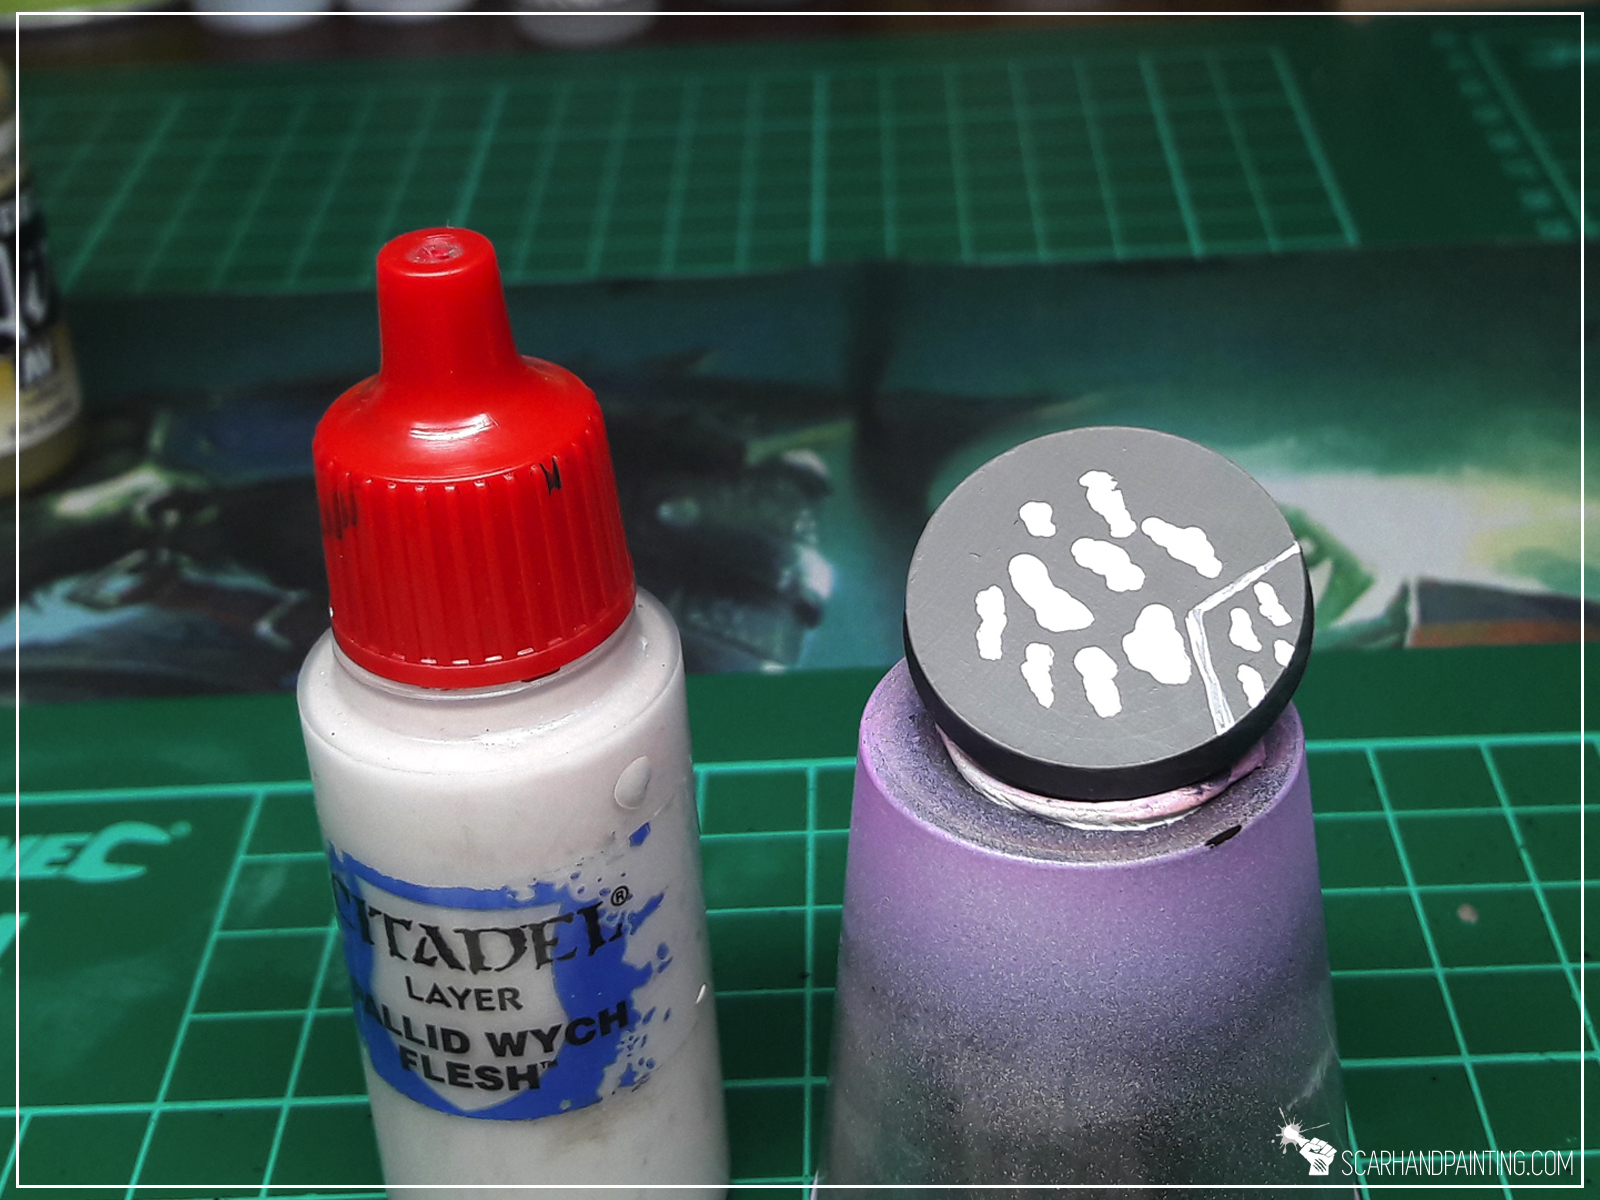
* Create basic pattern, applying Pale Wych Flesh spots leaving similar sized gaps inbetween .
* Next apply Panzer Dark Grey spots between Pale Wych Flesh, so that every new spot touches at least one from the previous layer.
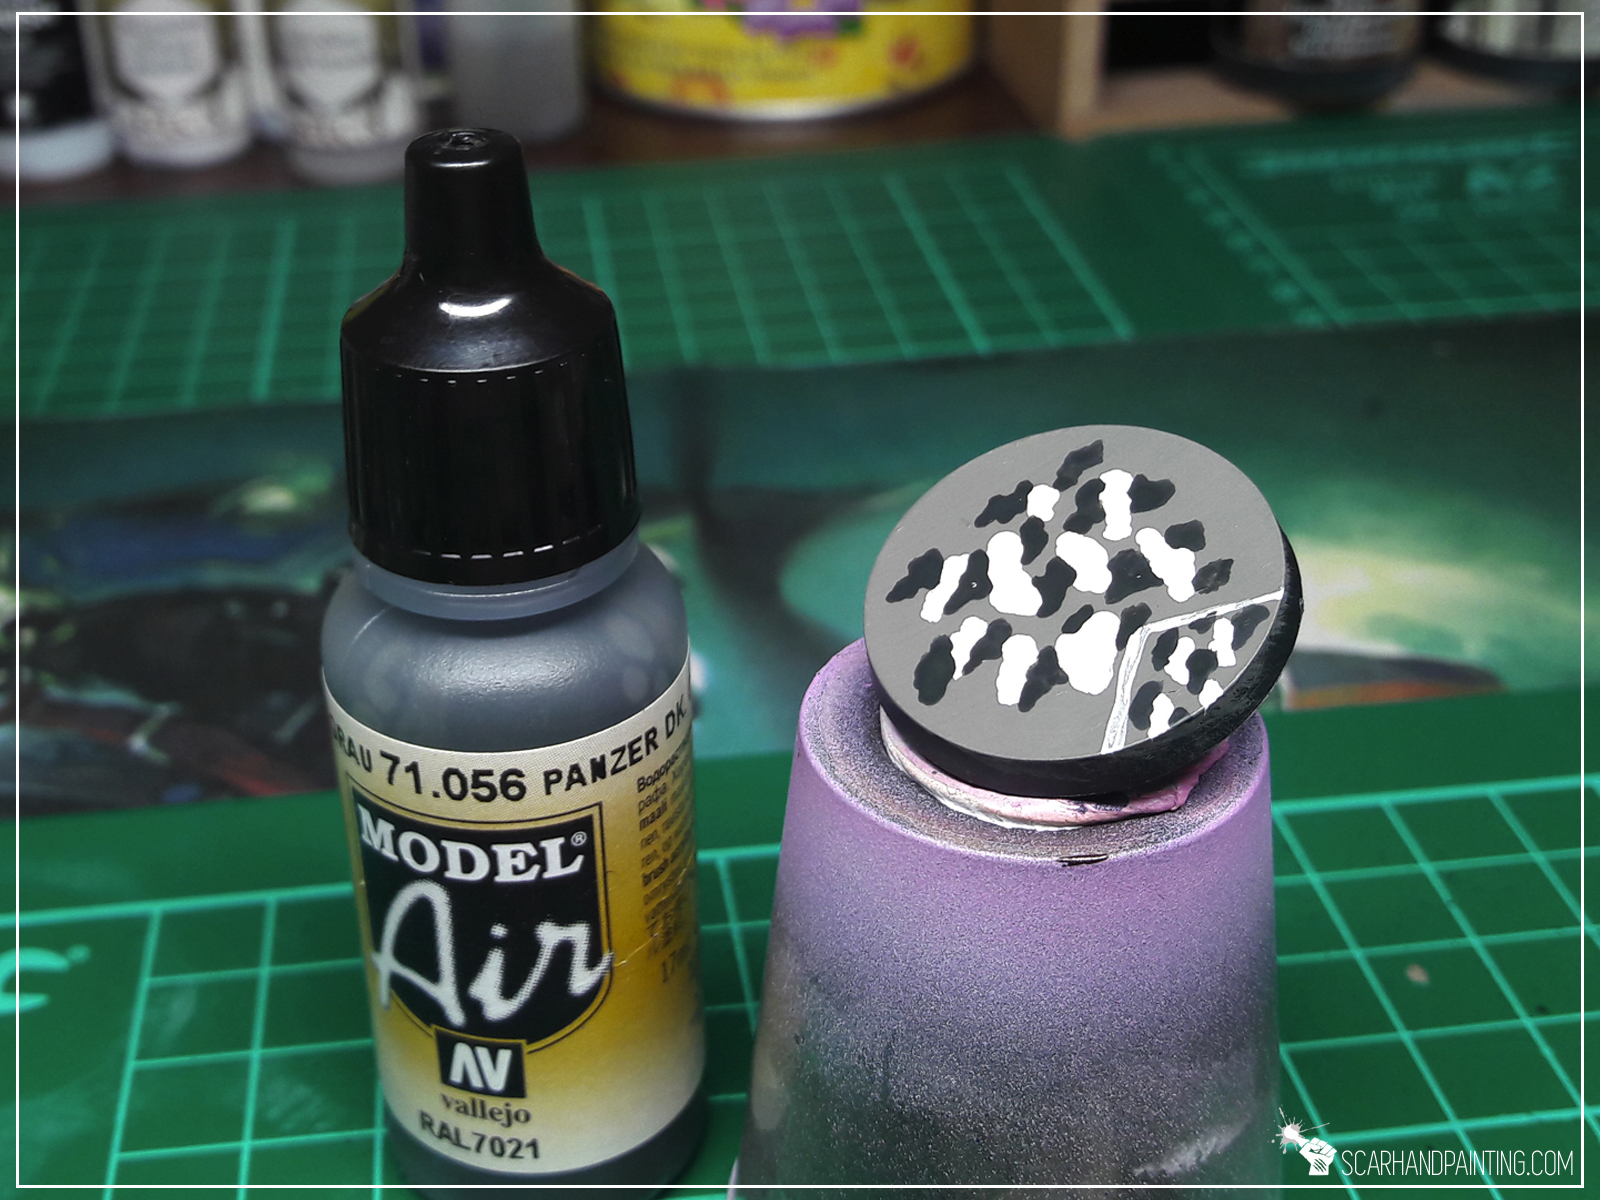
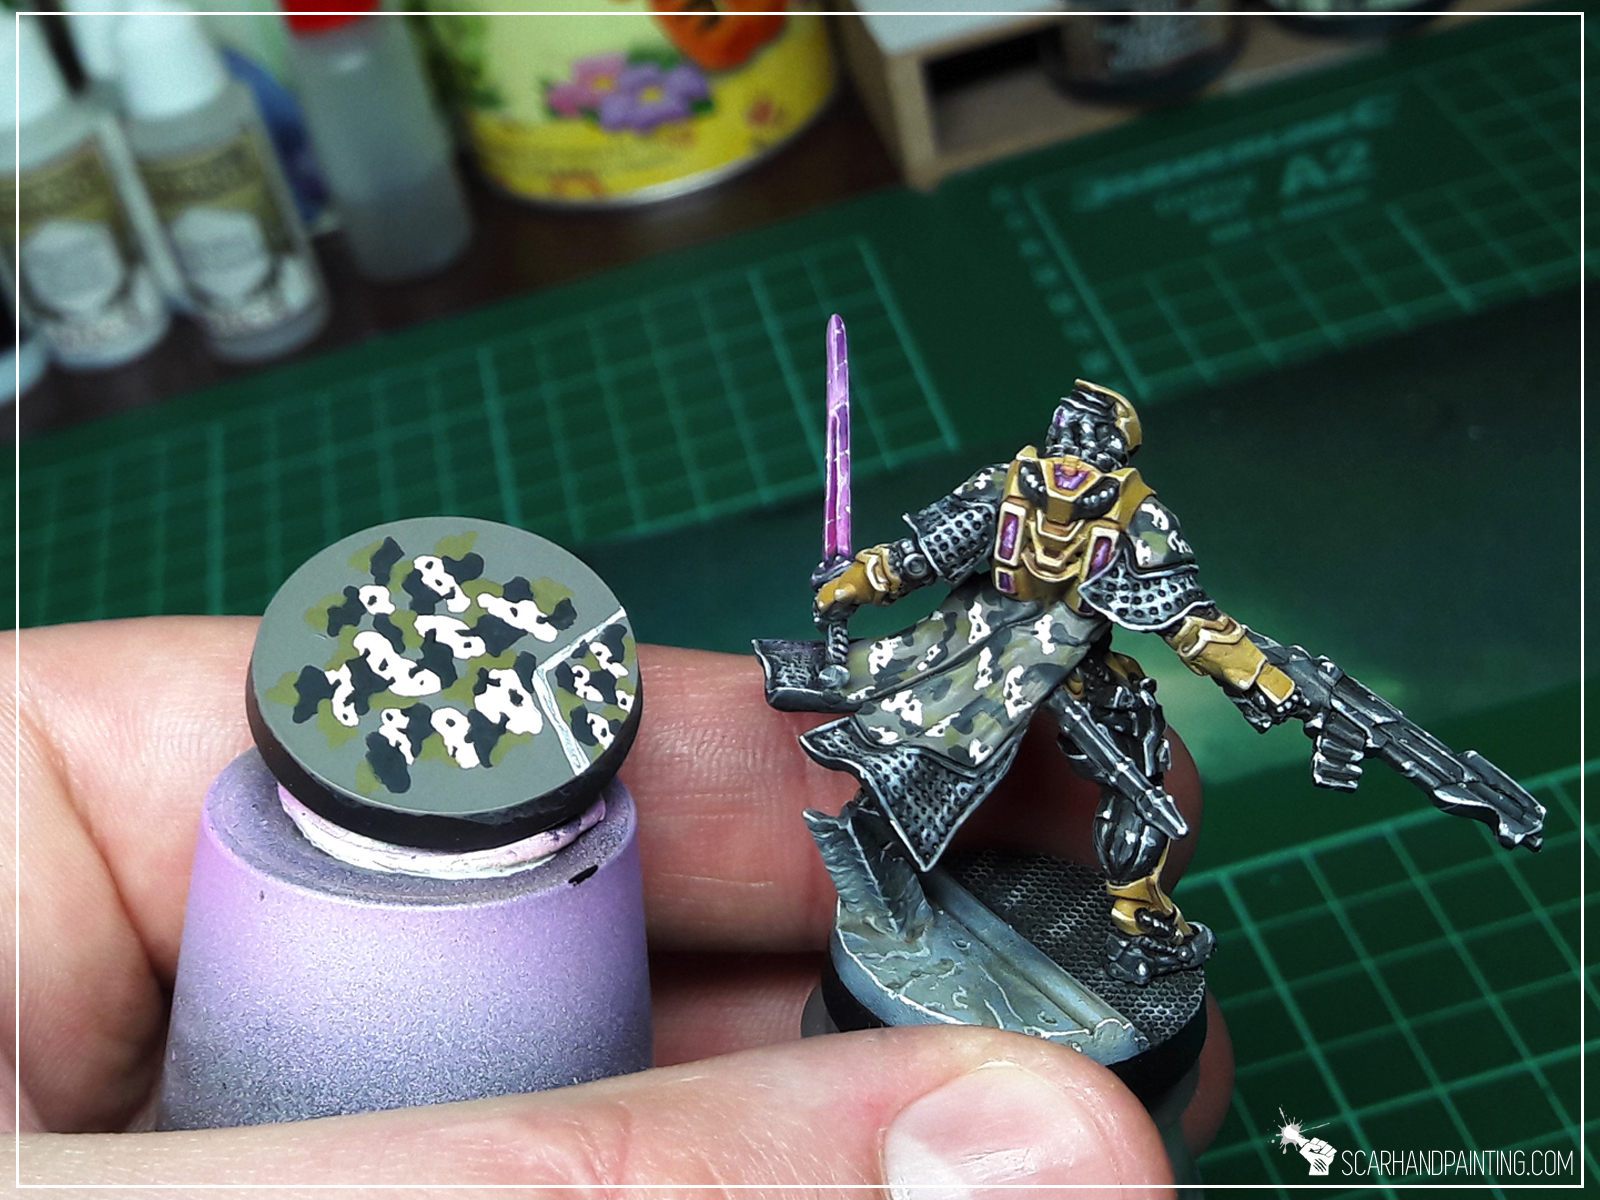
* Follow up with a third layer of pattern, using Interior Green and following the same rules. Be sure to leave some spots of Bastion Grey visible.

* Lastly add tiny spots of Panzer Dark Grey on top of Pale Wych Flesh pattern. Some might touch the edges.

That’s it, you have painted the pattern. Congrats! Be sure to visit Infinity Yu-Jing gallery for further inspiration if need be 😉
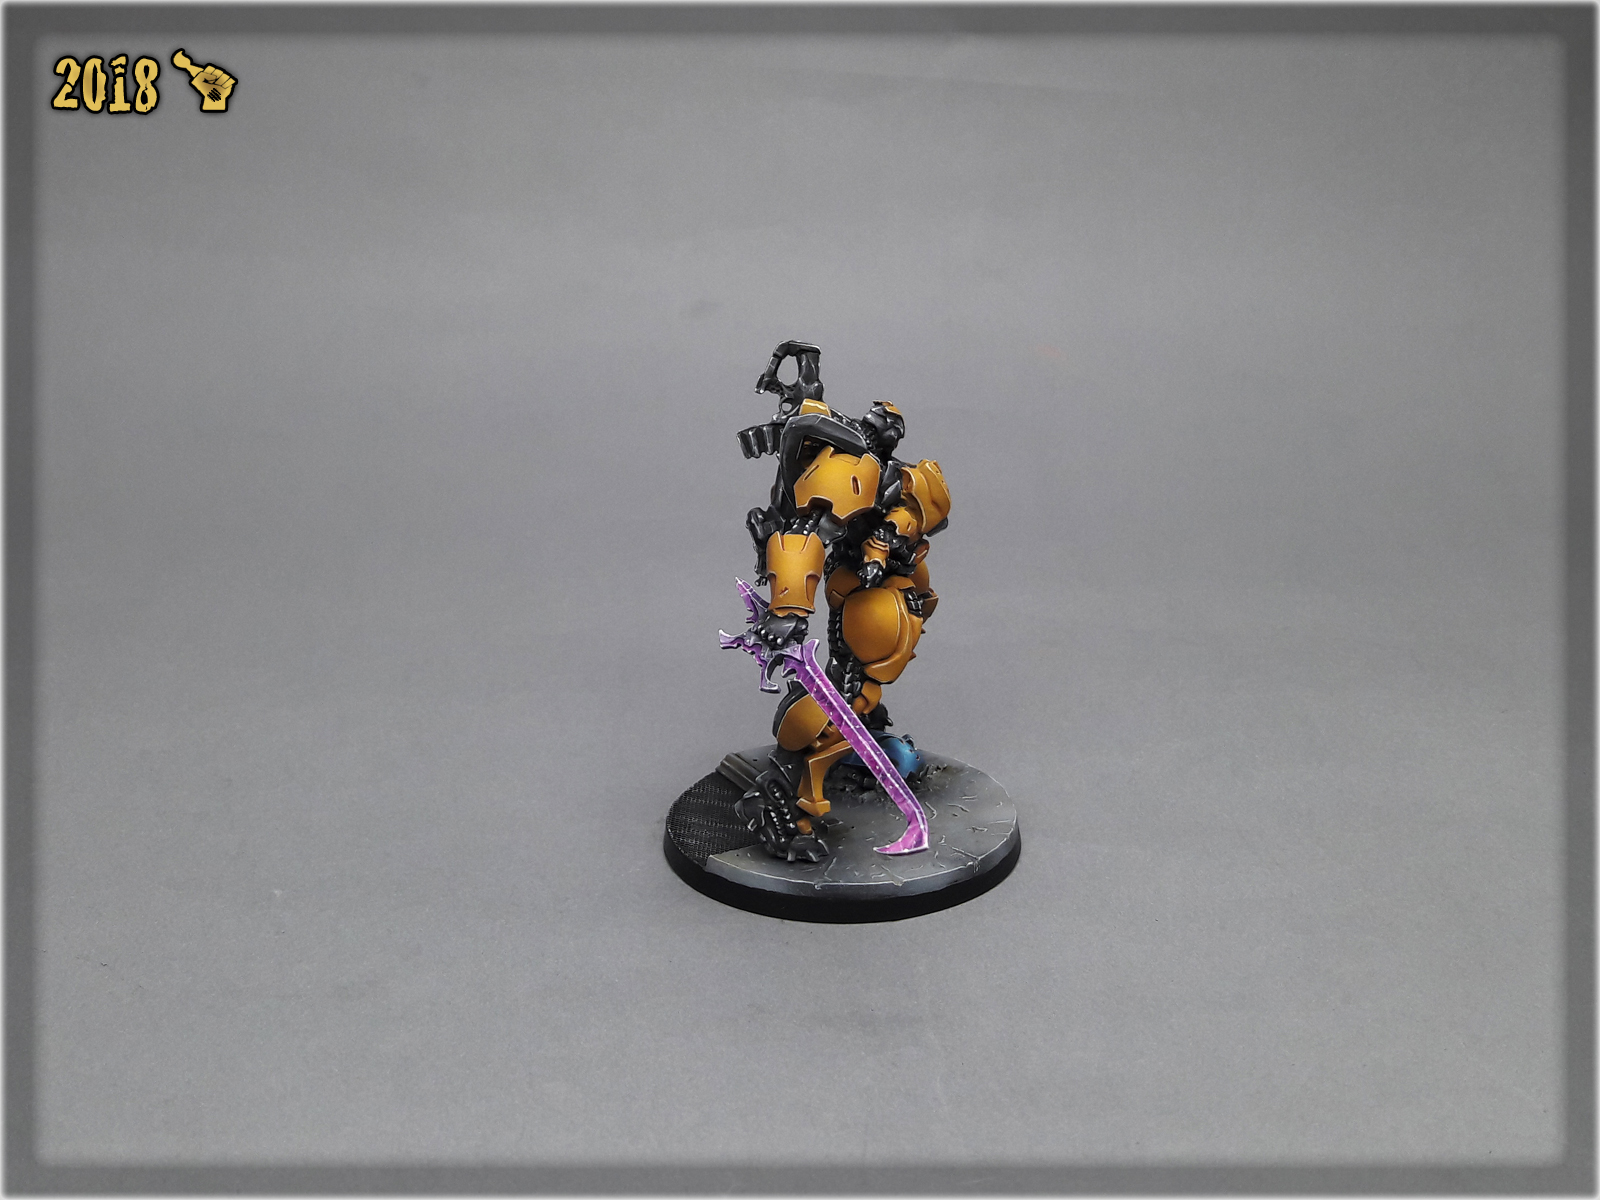
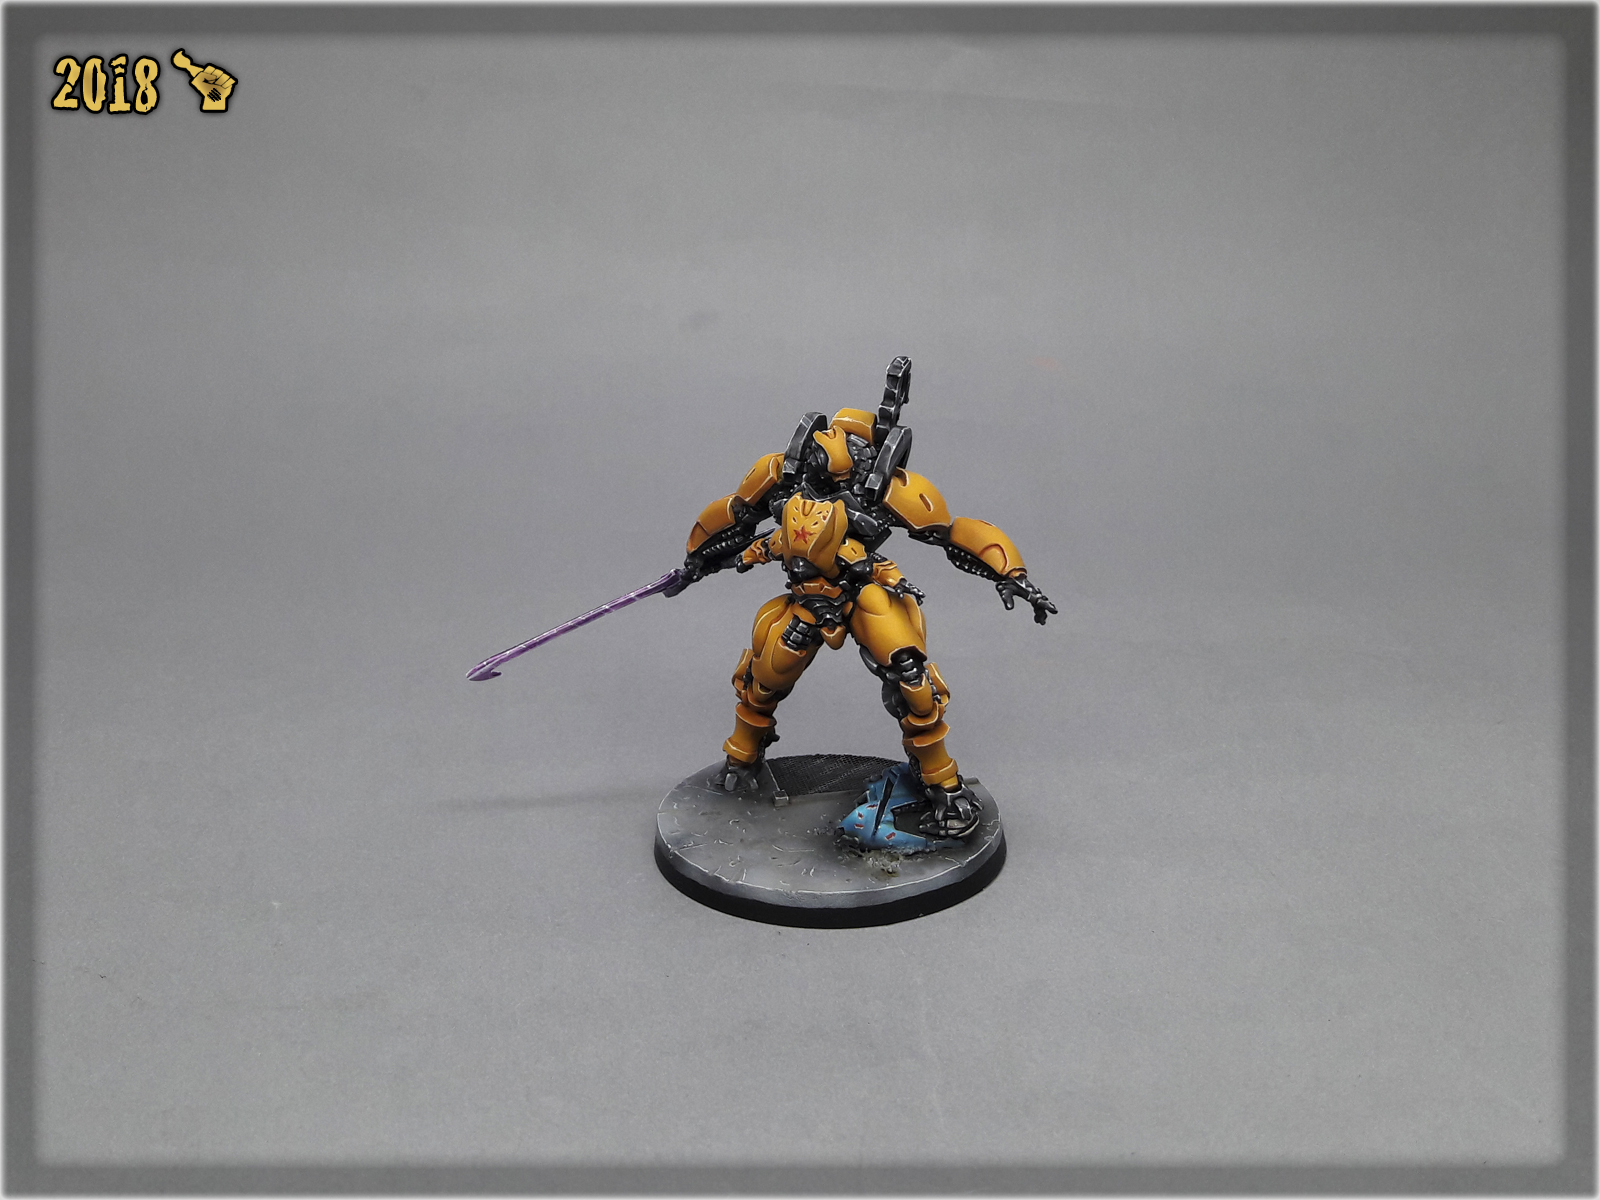
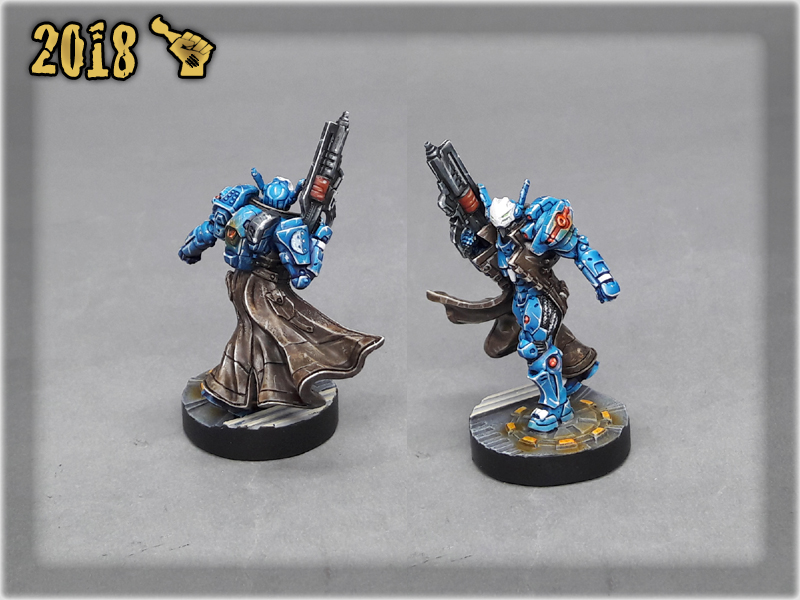
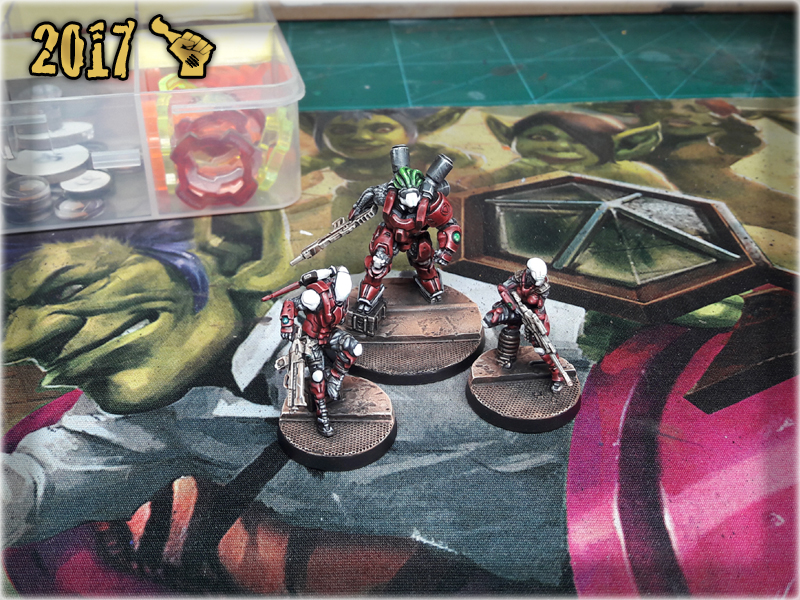
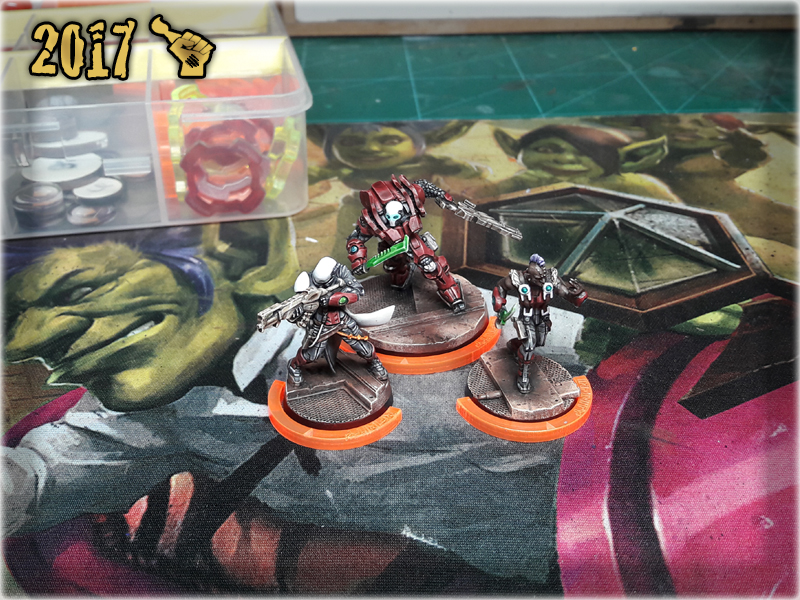
Welcome to Painting “Guijia” tutorial. Here I will take you on a Step-by-step trip through almost entire process of painting Infinity the Game “Guijia” Special Project.
Before we start, some notes:
* This one requires an Airbrush.
* Paints are to be properly thinned before airbrush application.
* As usual, please take note that what works for me might not necessarily work for you.

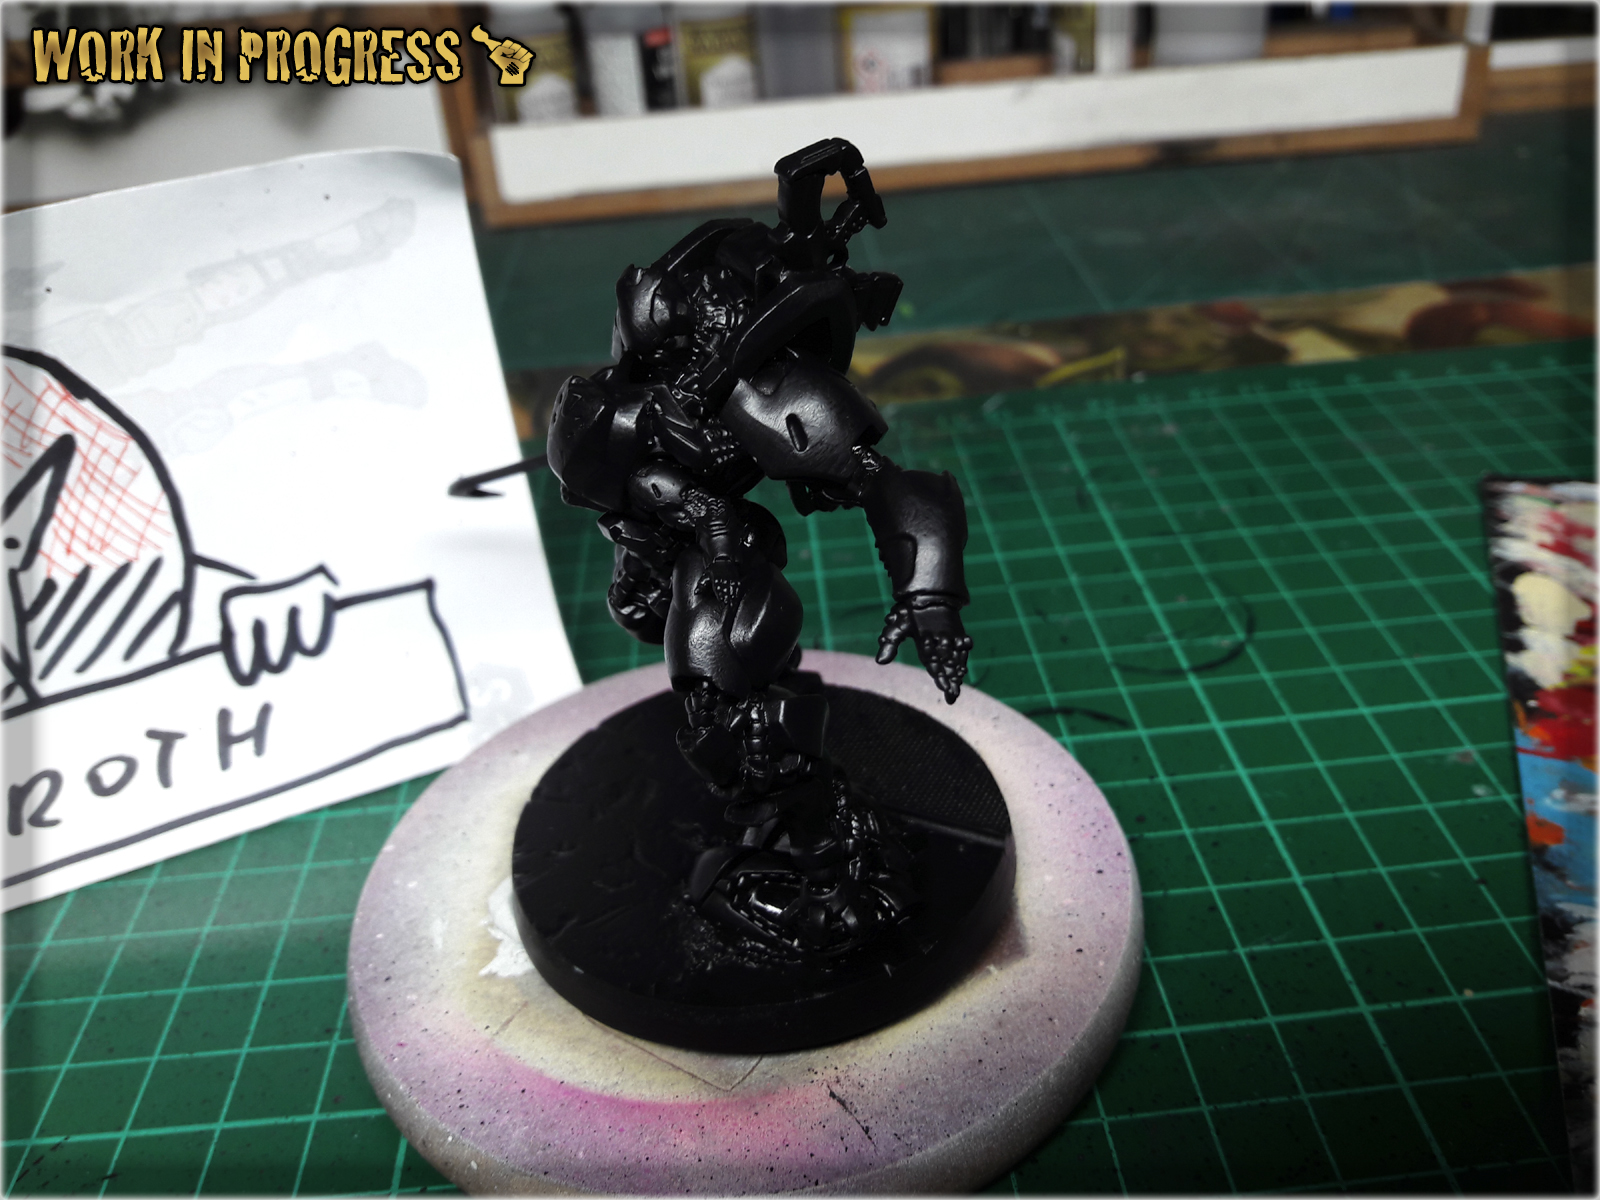
Allright! Undercoat the miniature with black, check your gear and let’s do this!
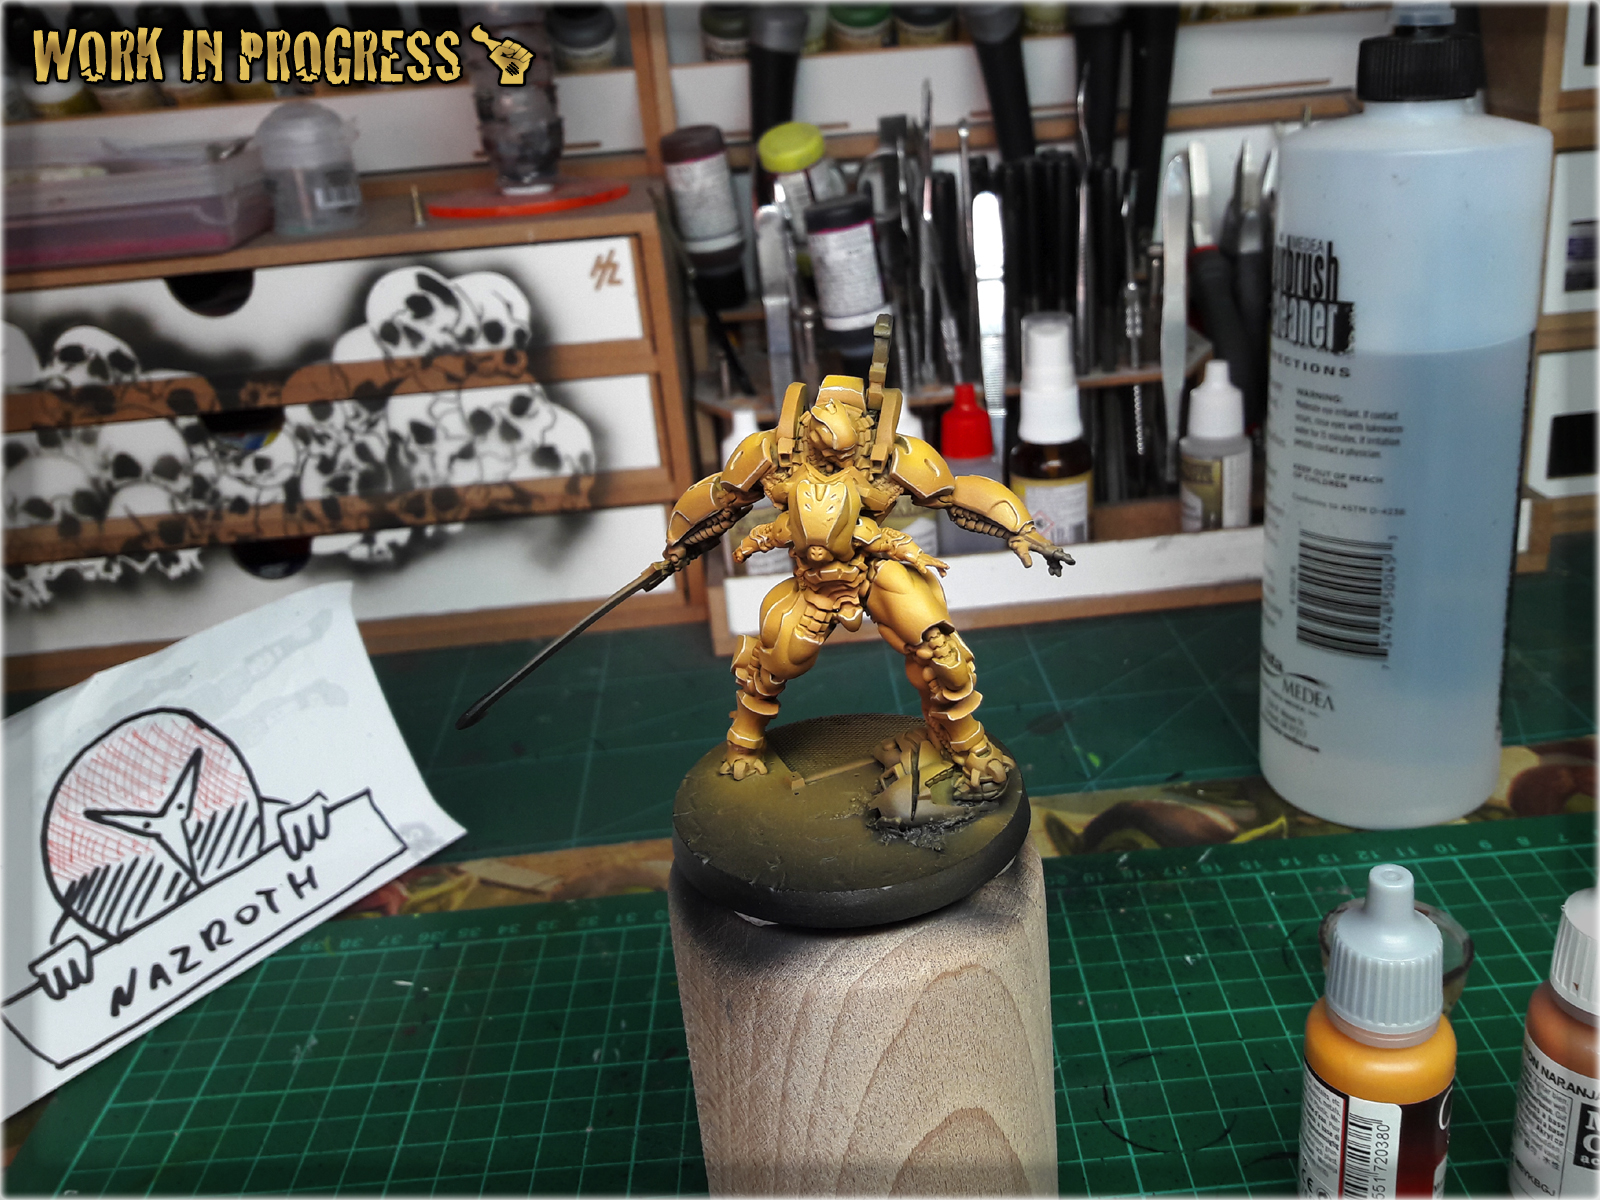
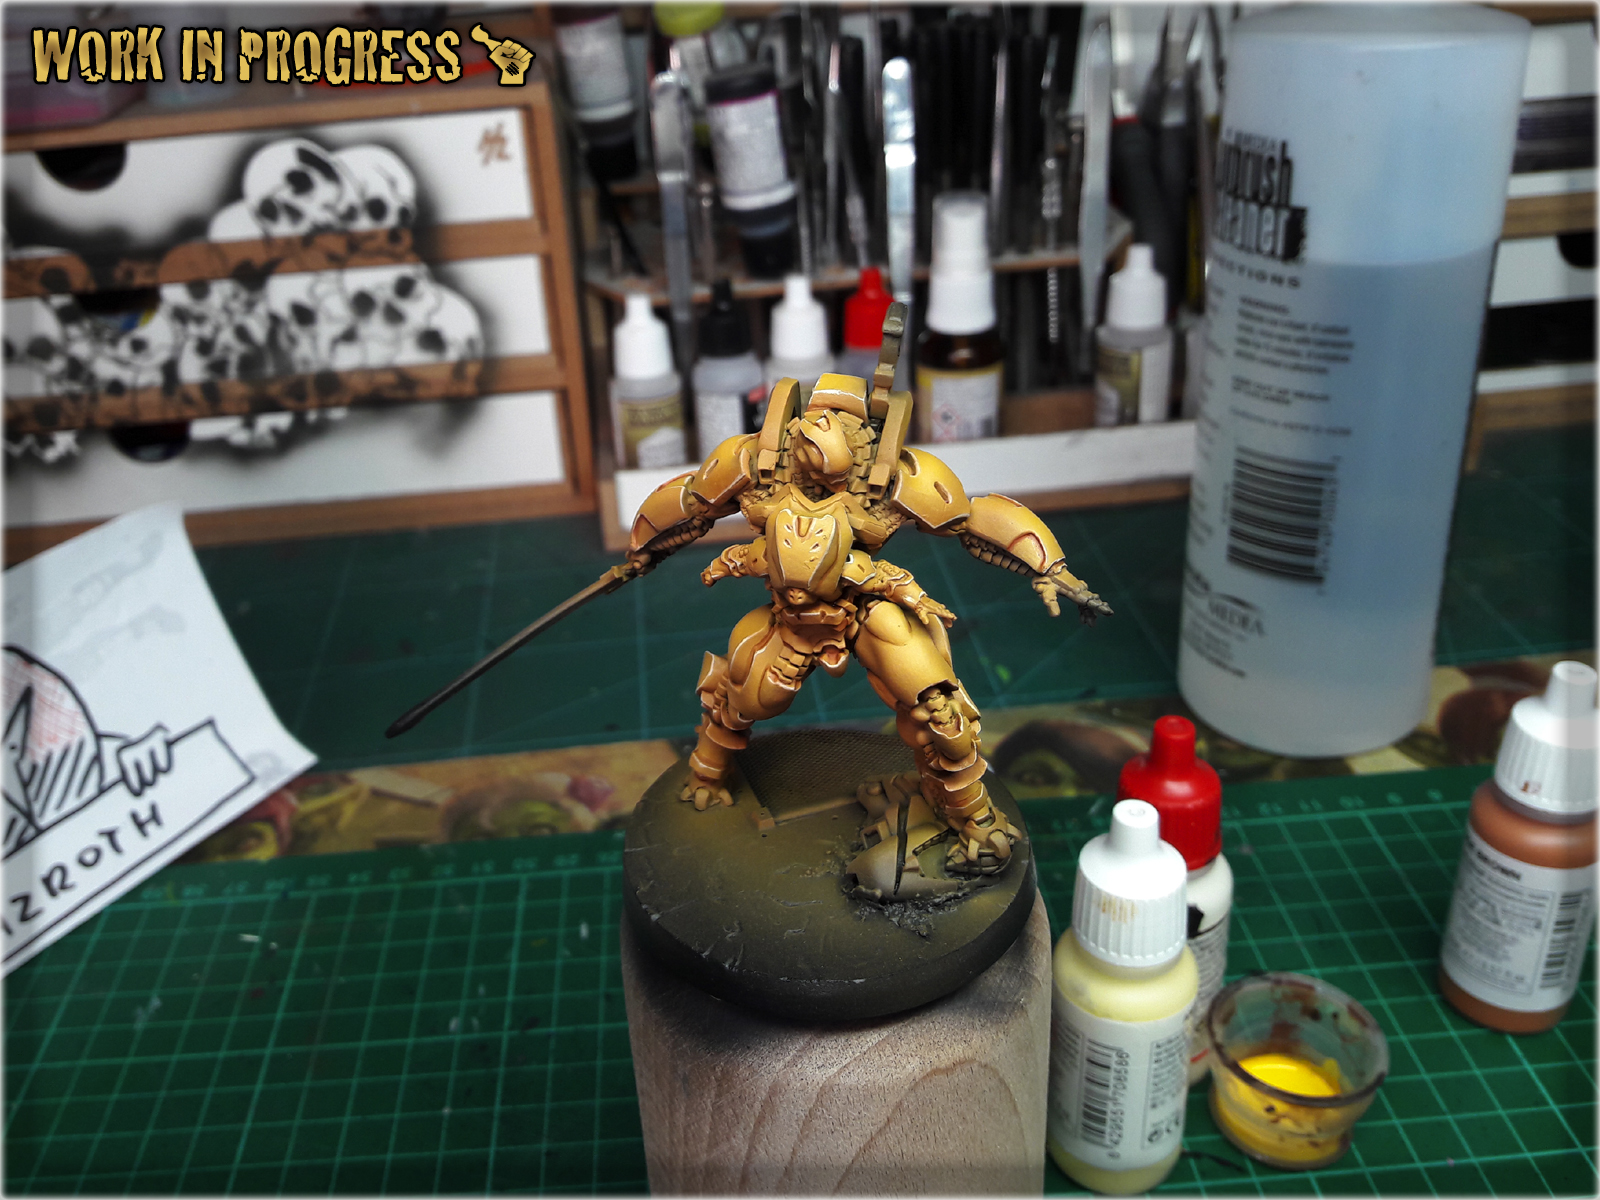
* Start with a solid layer of airbrushed Val. Orange Brown. I applied mine in three delicate, overlaping layers. I went around the miniature, with top and bottom, focusing on Armor Plates areas.

* Next, airbrush Val. Scrofulous Brown. Mostly from the top and up to 45* degree, focusing on the most exposed areas. You can start building transitions to previous layer avoiding shadowed areas.

* I forgot to take a picture of this layer. That's on me. Fortunatelly the result can be seen on the next picture. The layer is a mix of Val. Scrofulous Brown and Val. Off White, applied from top onto the center of all exposed areas.
* Next, outline all the edges with Val. Ice Yellow
* Lastly, underline armor plates with Army Painter Soft Tone Ink. I also used strongly dilluted Soft Tone to apply some more shadow in certain 'over the edge' areas.
* This is the most difficult part of the process. Mix Val. Black (air) 1:5 with Val. Panzer Dark Grey (air) and apply it to everything, that is not external armour plates and blade. The difficult part is to not mess up all these sexy Orange-to-Yellow armour plates. If you do, you can try out Erasing Bloopers following one of my tutorials, still the airbrushed nature of the layer will make it extremely difficult.
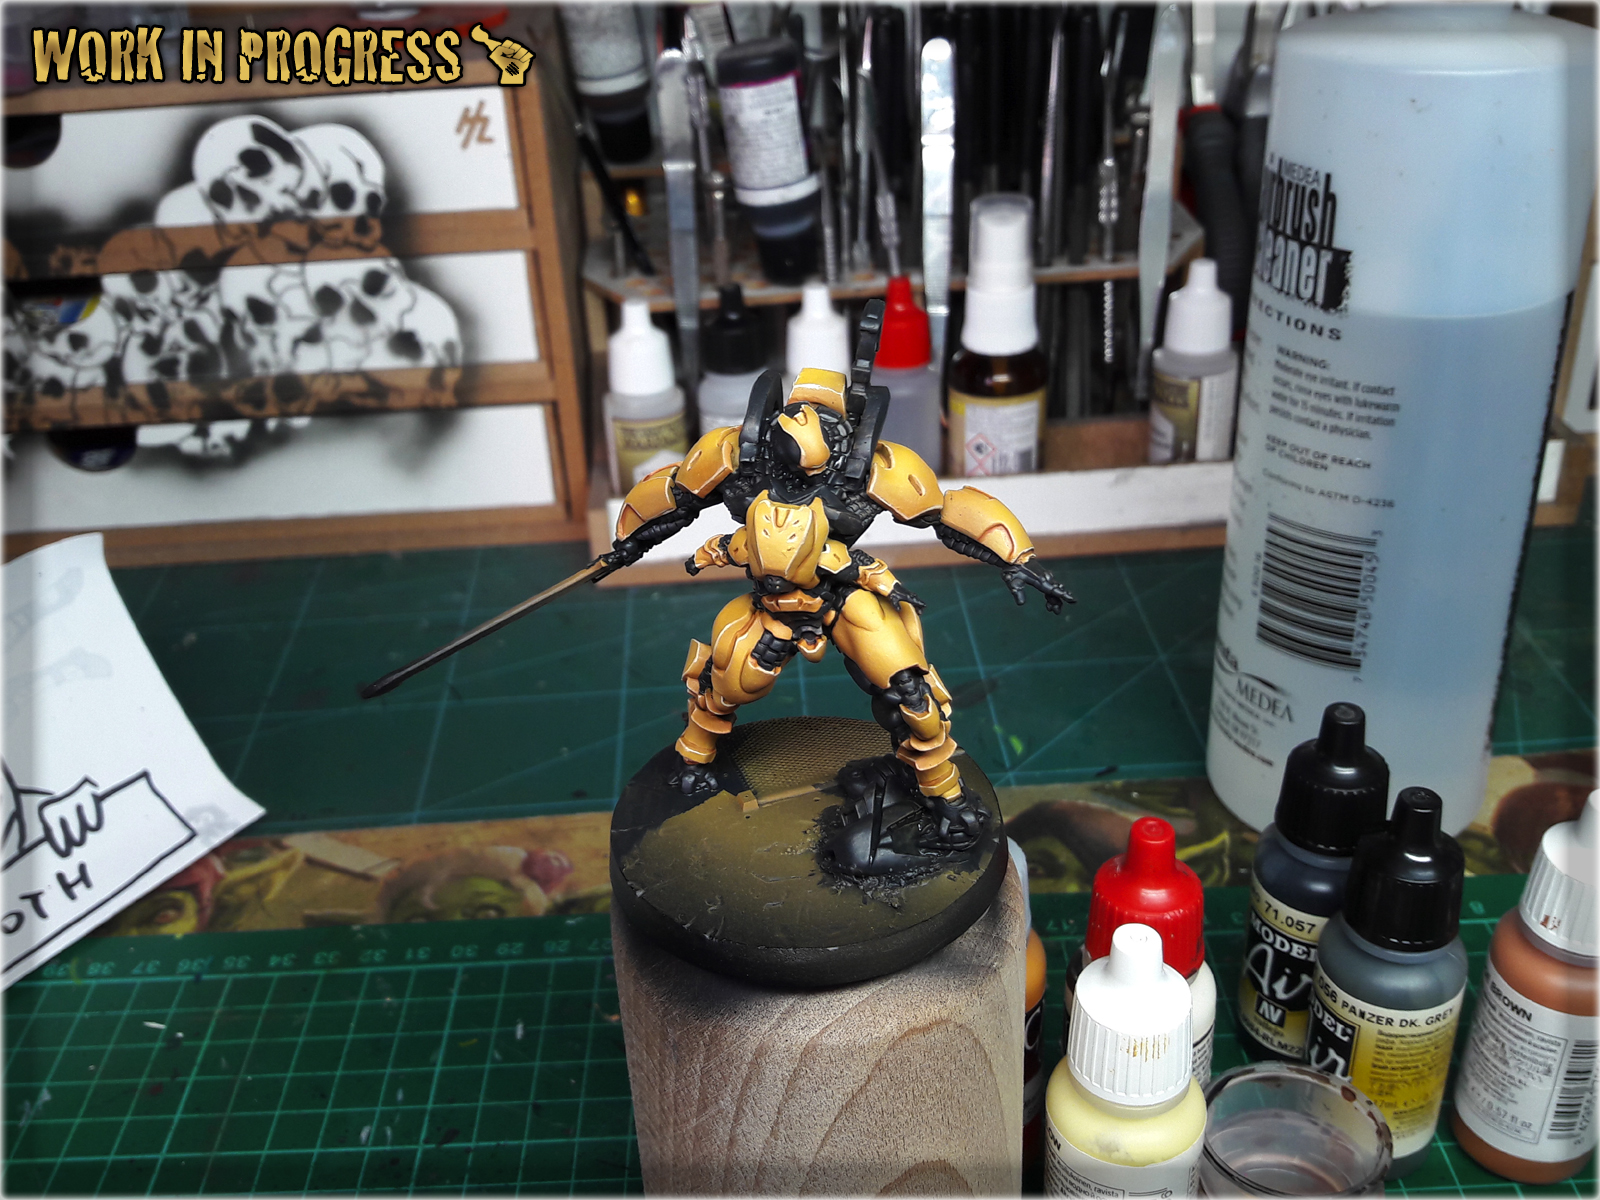
* Next apply a watered down GW Fenrisian Grey over black areas. It is important not to fill any recesses. You can apply more than one thin layer, overlaping each other and even leave some irregularities - this will work to the overall paint job's advantage.

* Next, higlight edges with GW Pale Wych Flesh. This time no thinning down the paint. You can imitate some scratches, reflexions etc.


* Now wash it all with a thinned down Army Painter Dark Tone Ink. Once again be extra carefuul not to paint over finished armour plates.

* Now it's time to make it POP! Using GW Pale Wych Flesh and Val. Off White, highlight the edges and create some points of focus, scratches, reflections etc.

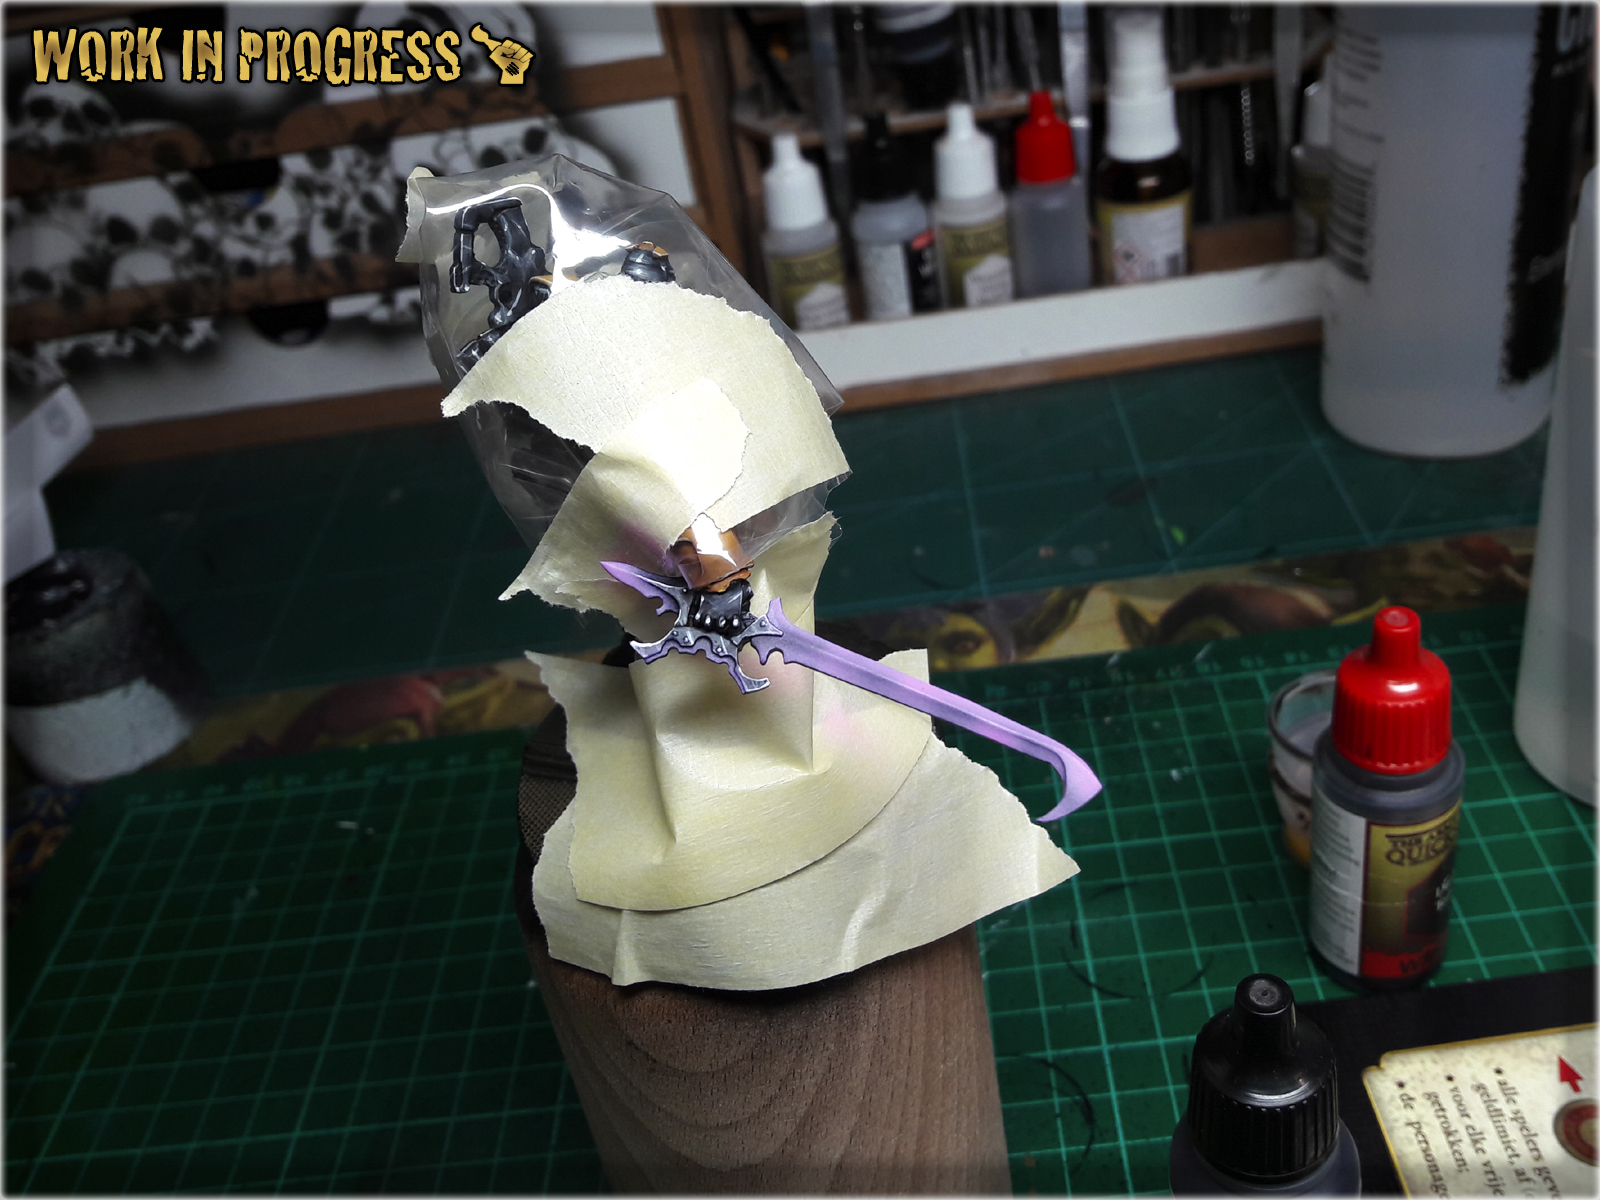
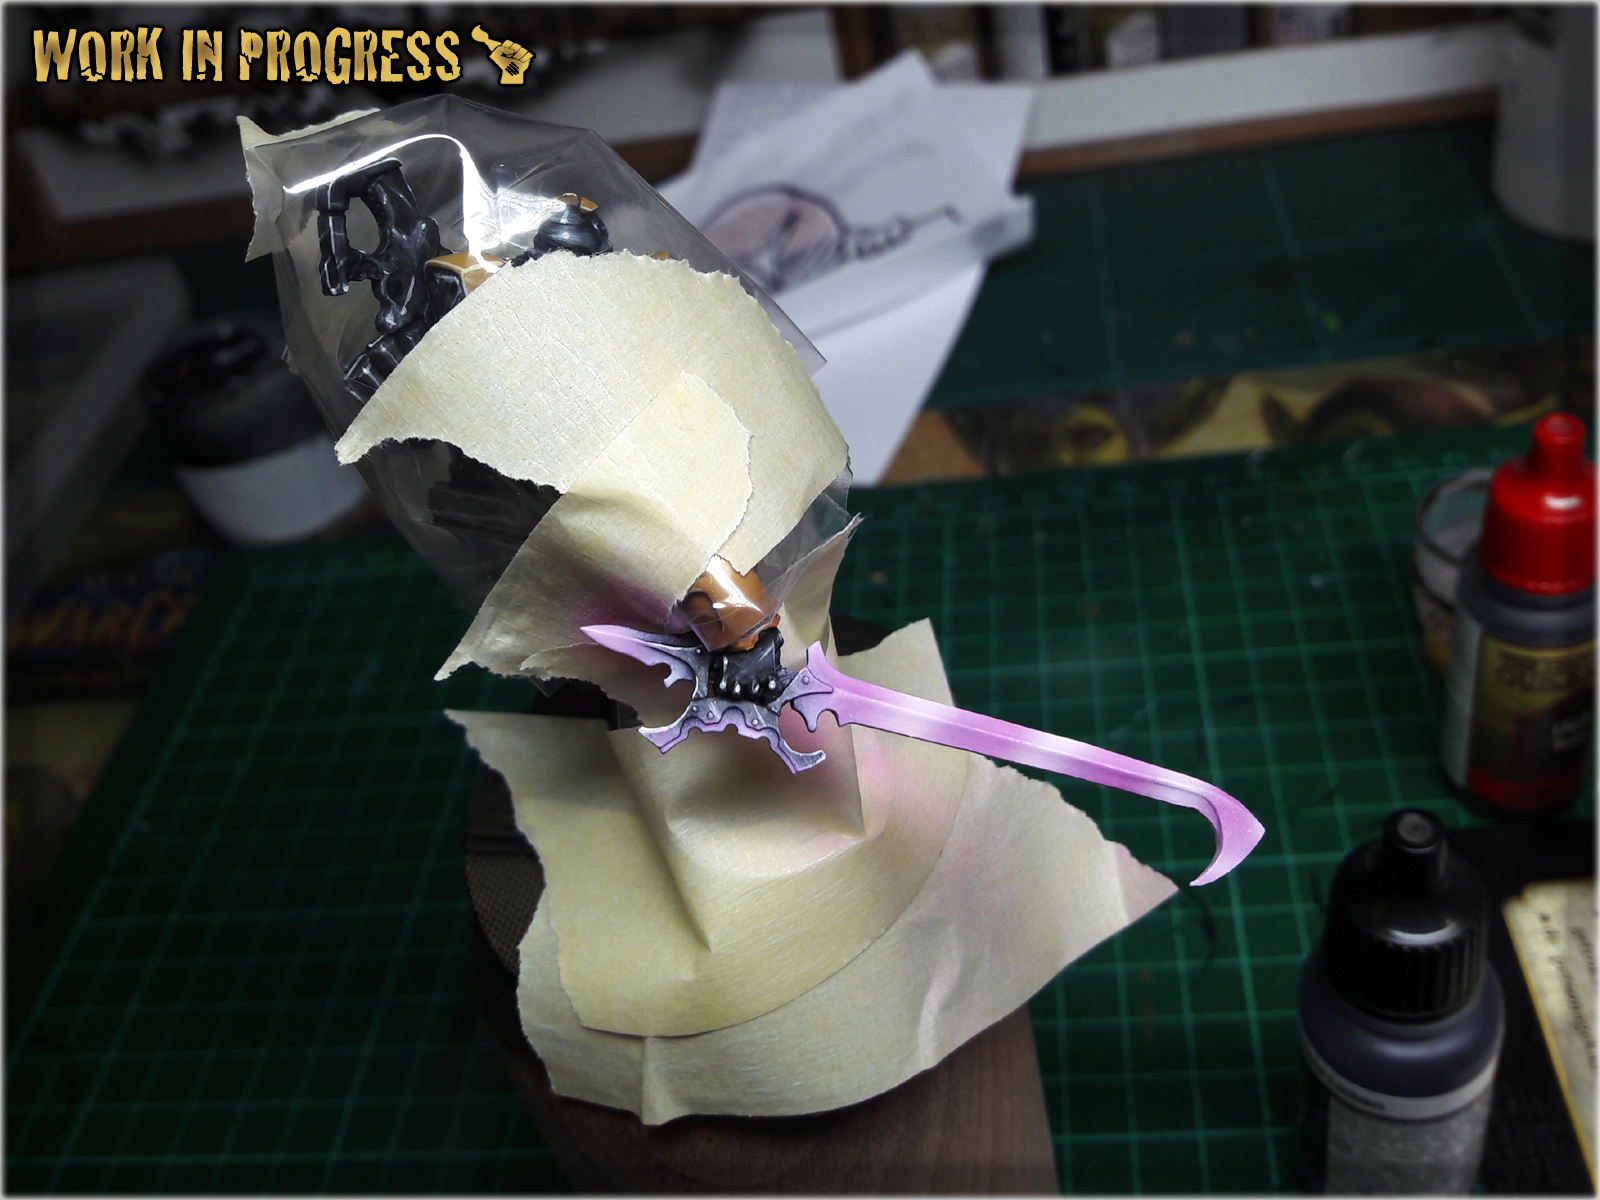
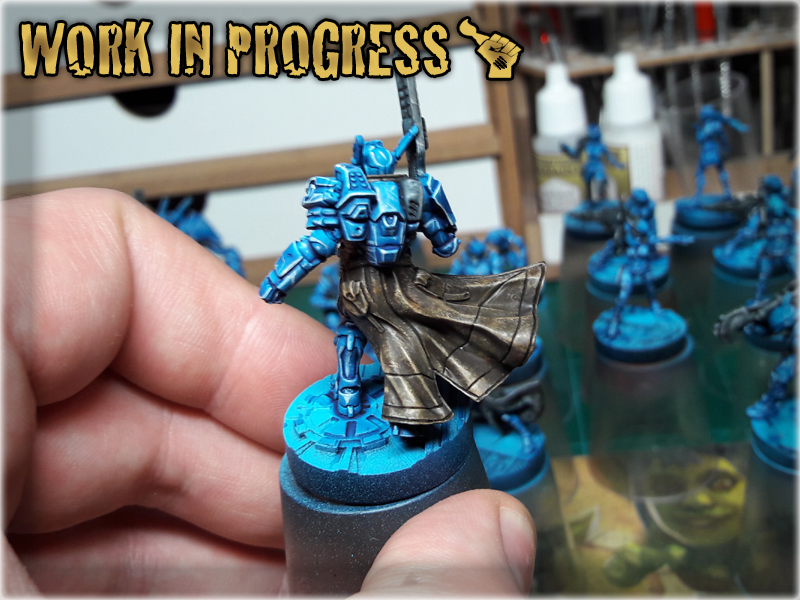
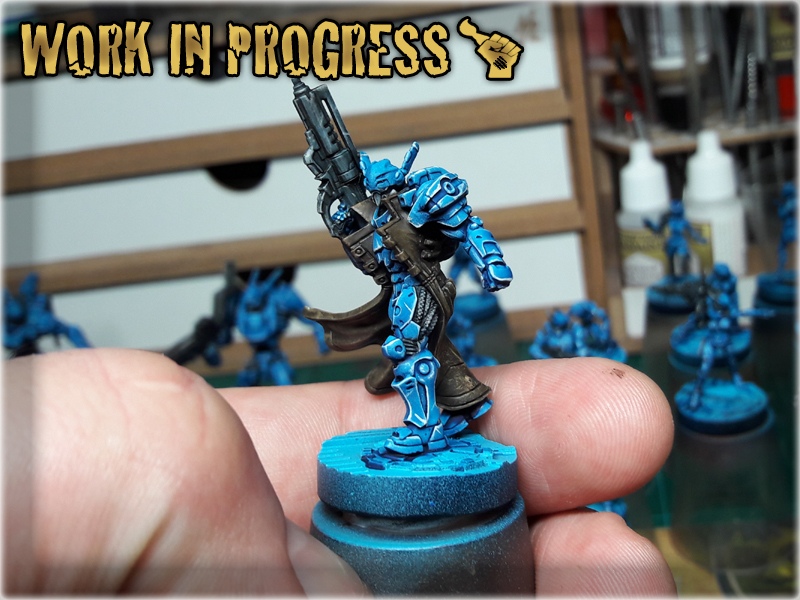
* Start by masking the Guijia's leg. I used a piece of foil and masking tape to cover areas that I didn;t wanted to get dirty. Then manually applu a layer of Val. Prussian Blue, avoiding areas of Black Mesh.

* Next airbrush a layer of Light Sea Blue, focusing on the most exposed areas of armour.
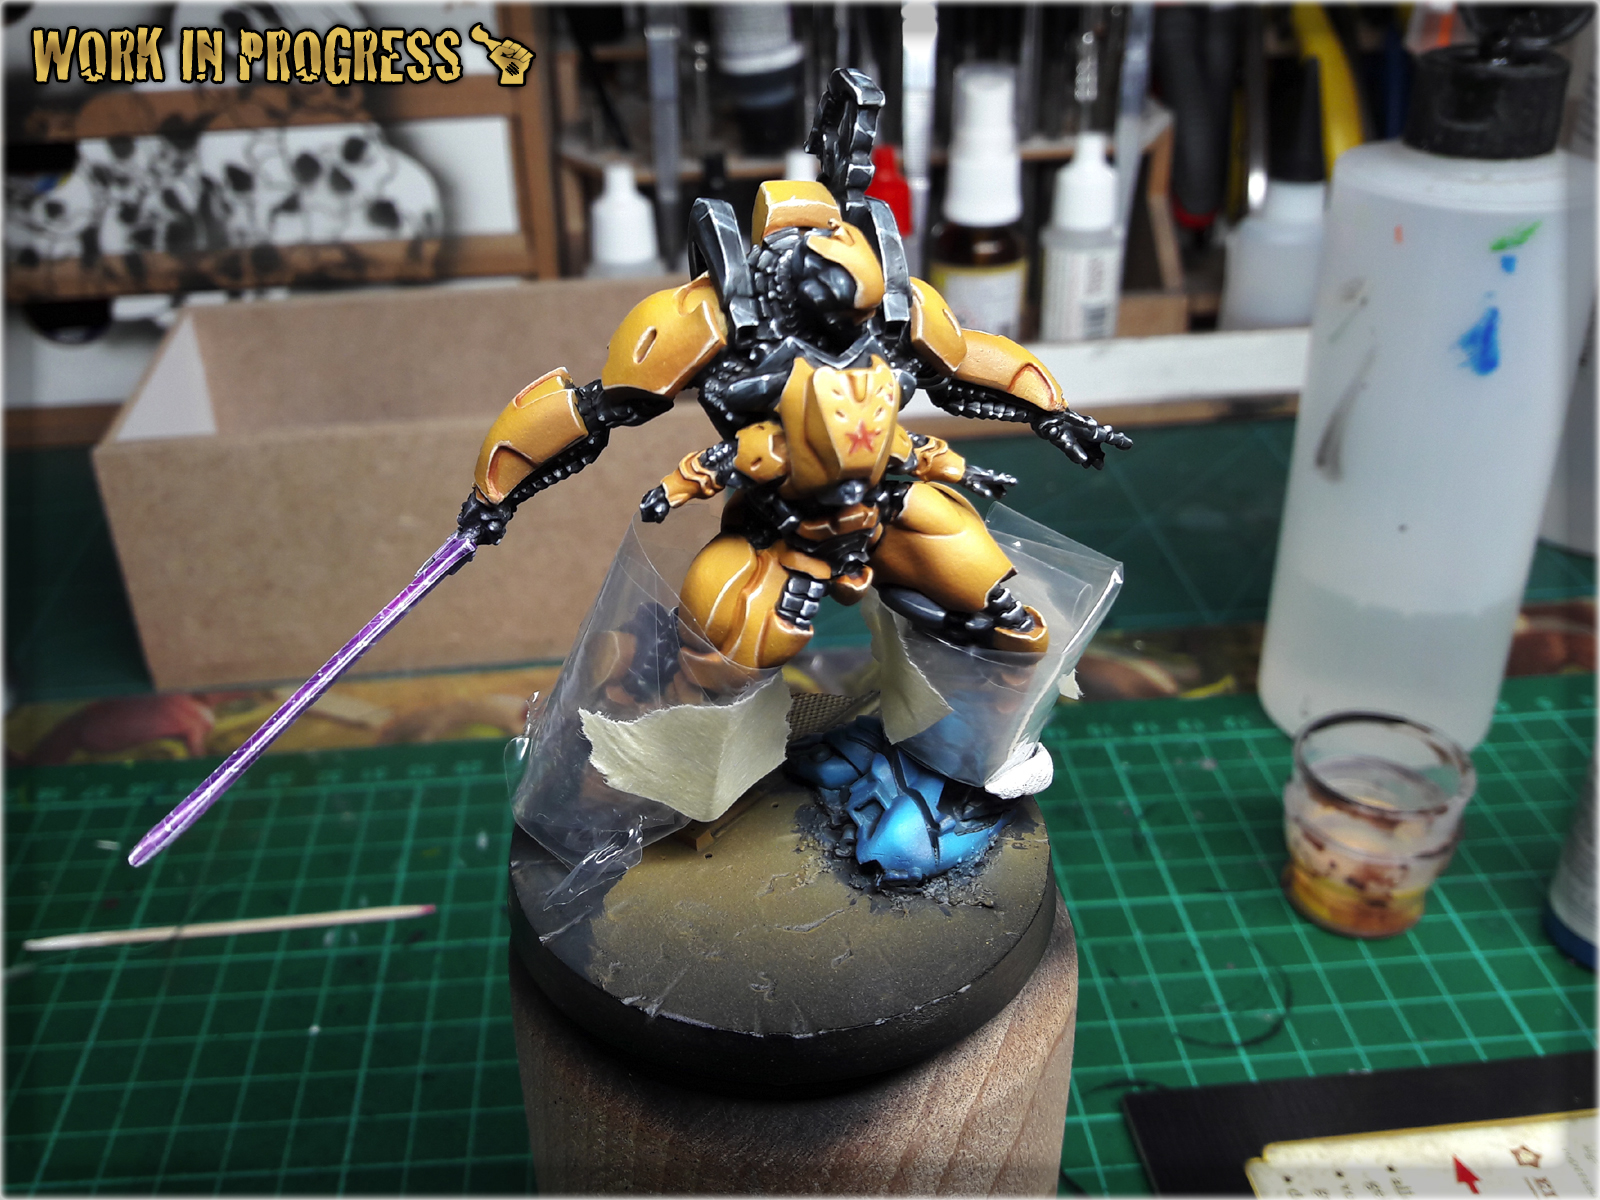
* Next, airbrush a mix of Val. Light Sea Blue with a bit of Val. White focusing on middle areas, creating a transition from previous layer.
* Next highlight the edges with GW Pale Wych Flesh.

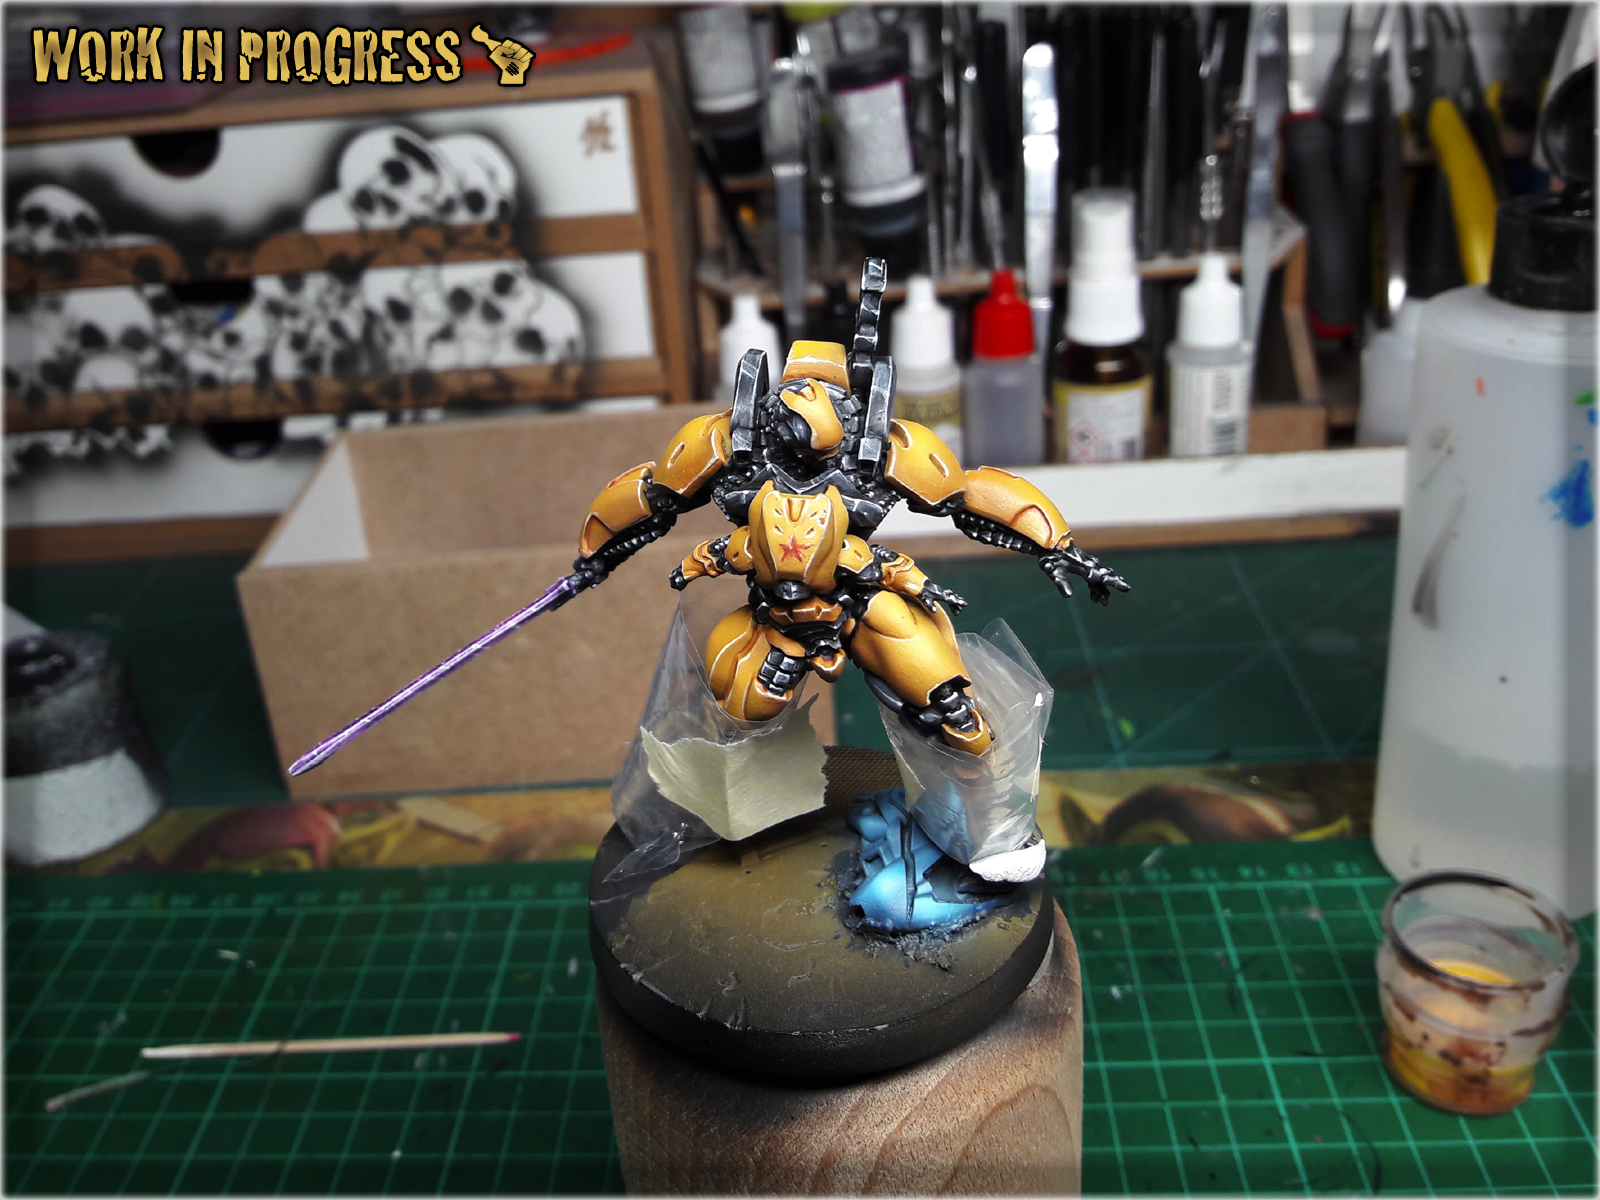
* To seal Blue, wash it with thinned down GW Guilliman Blue Glaze. You can see that I have also painted some battle damage. I did it using Val. Cavalry Brown, underlined with Val. Off White.

I leave adding Black Under Armour and additional details to you. Now to the Sword… To be honest, because of strong light, pictures taken during this one’s painting process did not captured how the sword looked like and I really don’t like how they turned out. That being said – I will still show you the Sword and name the paints used, but instead of a Step-by-step tutorial, let’s just call it a BONUS.
List of paints:
Val. Warlord Purple,
Val. Off white,
GW. Pale Wych Flesh,
AP. Purple Tone Ink,

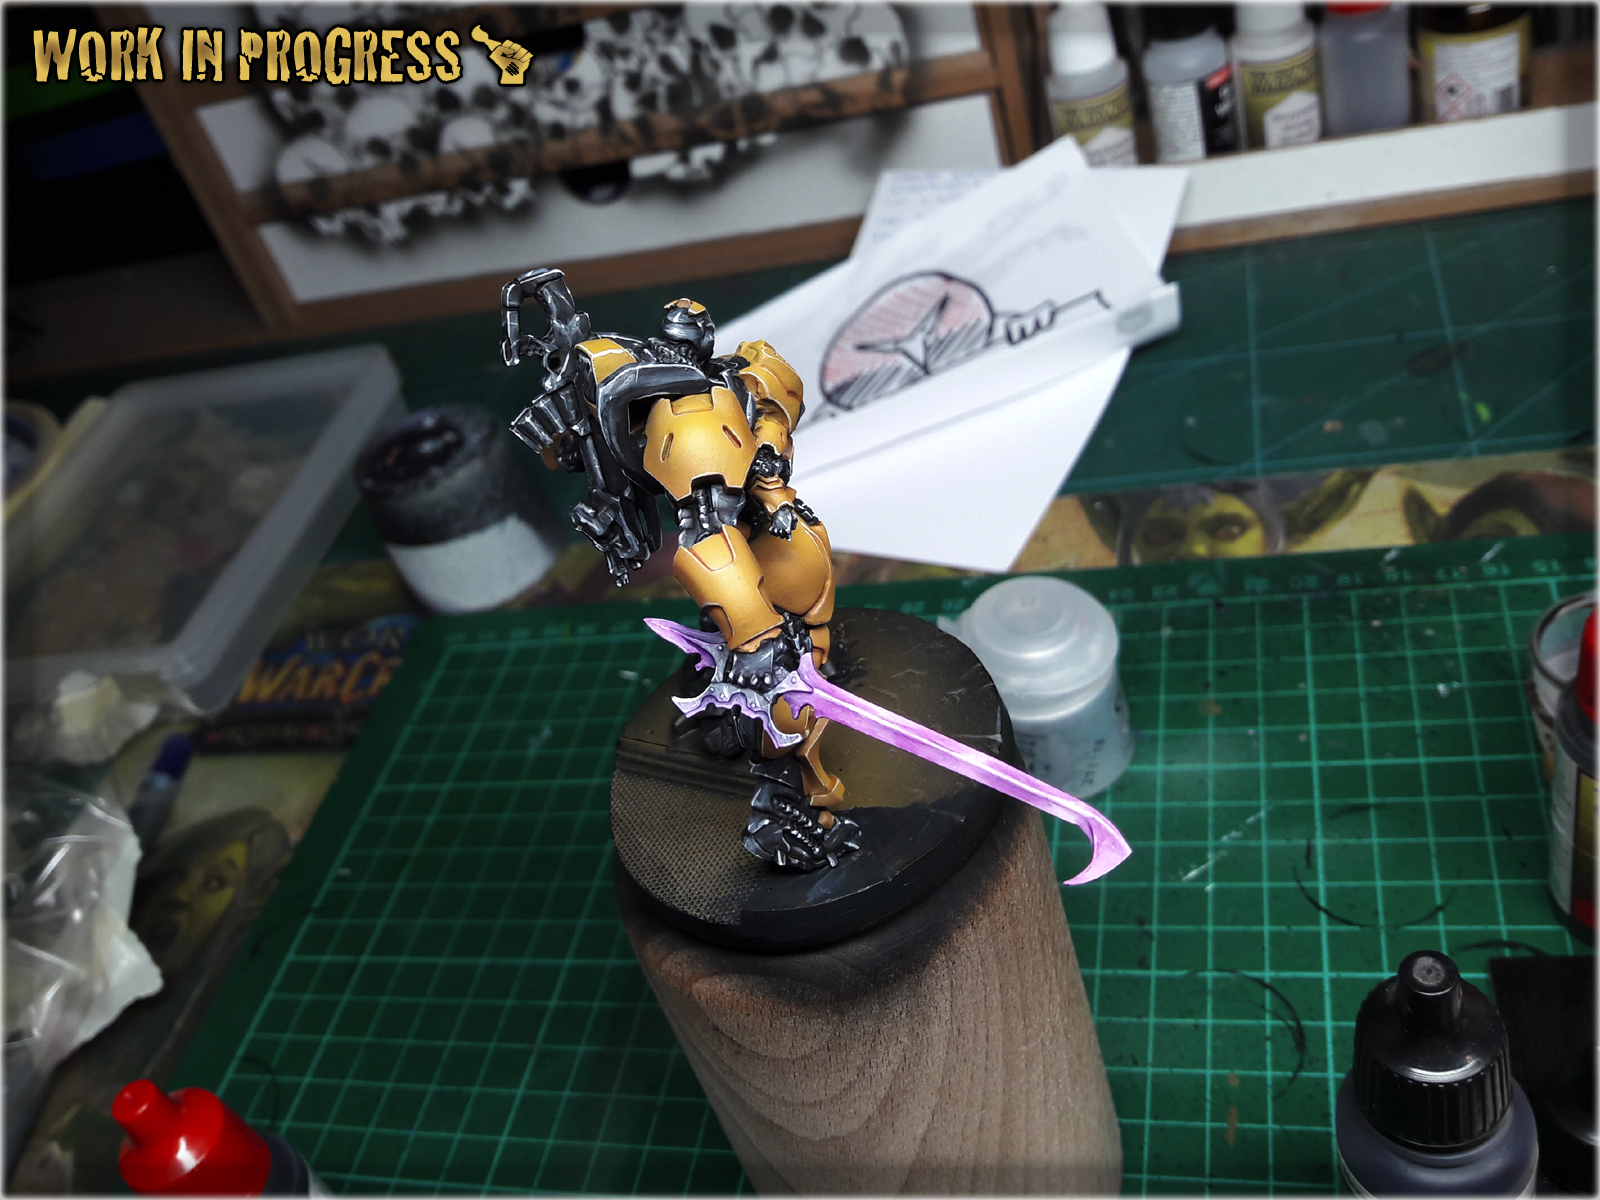

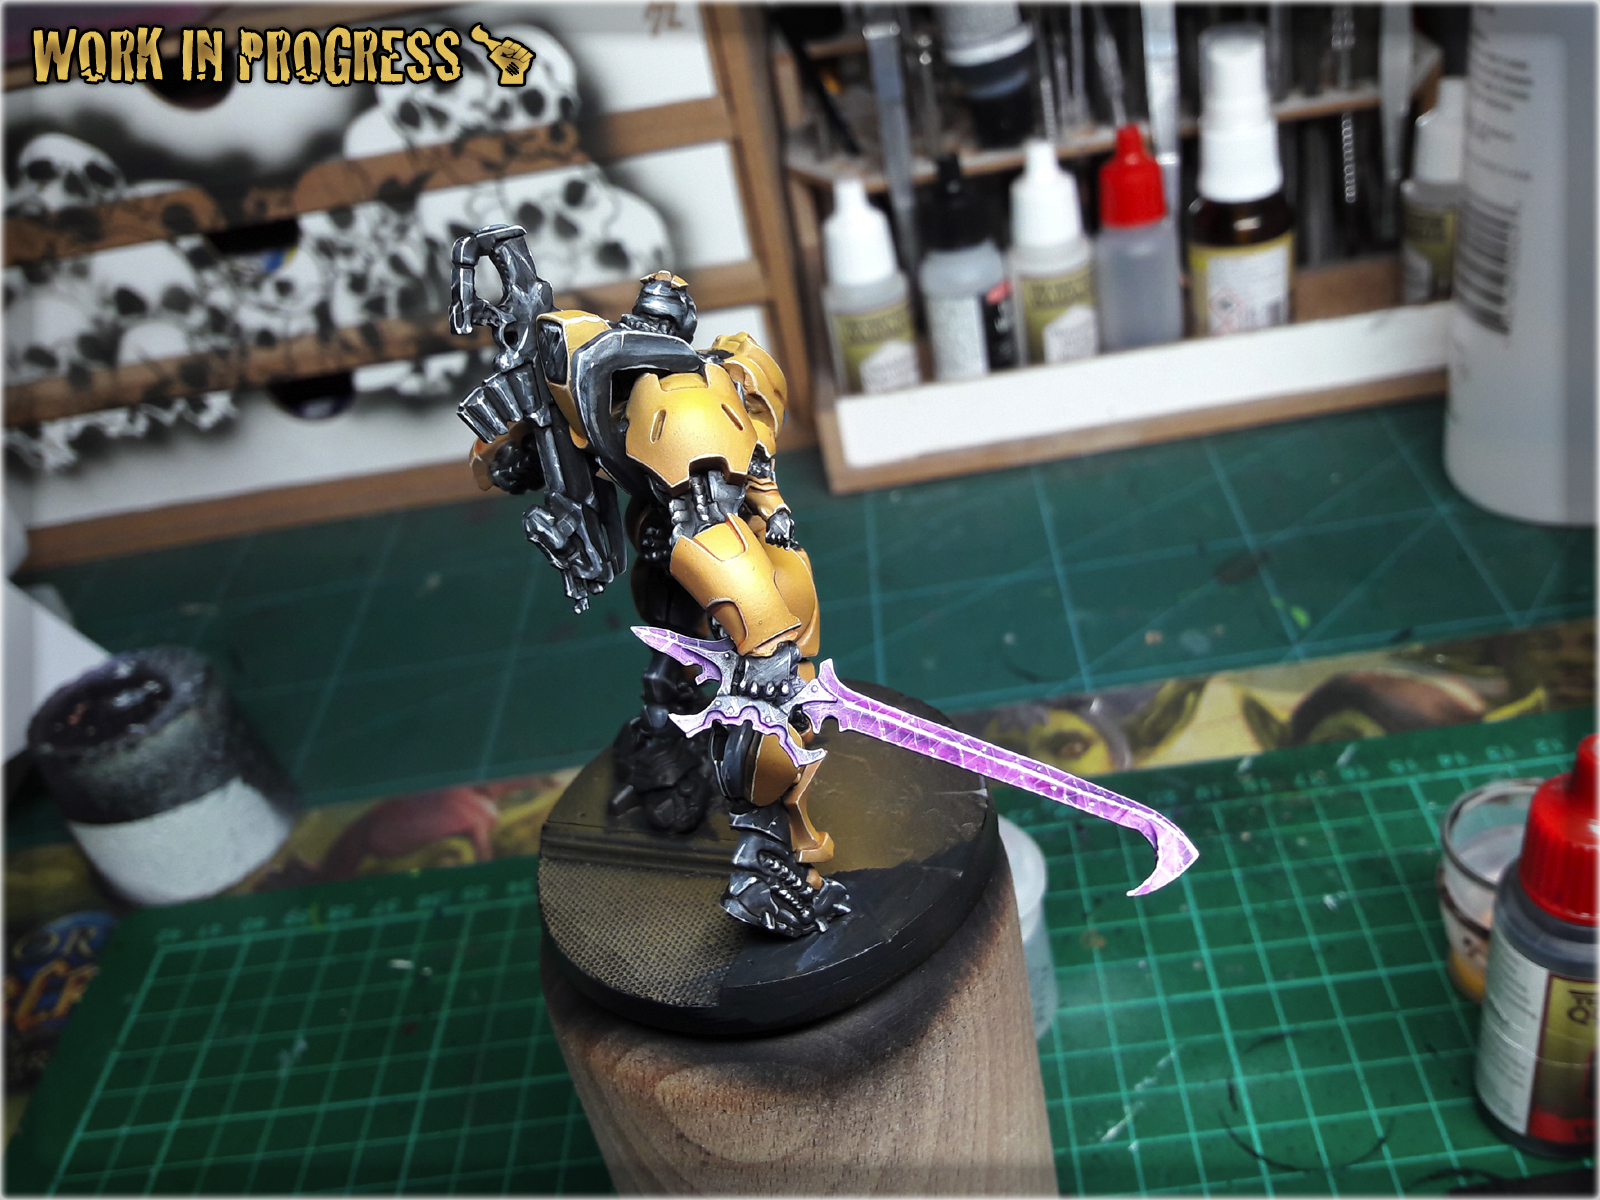
I leave the base and additional detail to you. Congratulations, you have painted a Guijia 🙂
Was this tutorial helpful? Did you enjoyed it? Leave me a comment 😉
I hope you find this tutorial interesting. Be sure to let me know your thoughts in the comments below or via Facebook or Instagram. I would also appreciate if you considered sharing this content with your friends, who might find it useful. Finally if you are looking for a professional miniatures painting service be sure to contact me with this contact form. I always reply within 24 hours, after which please check out your spam folder.

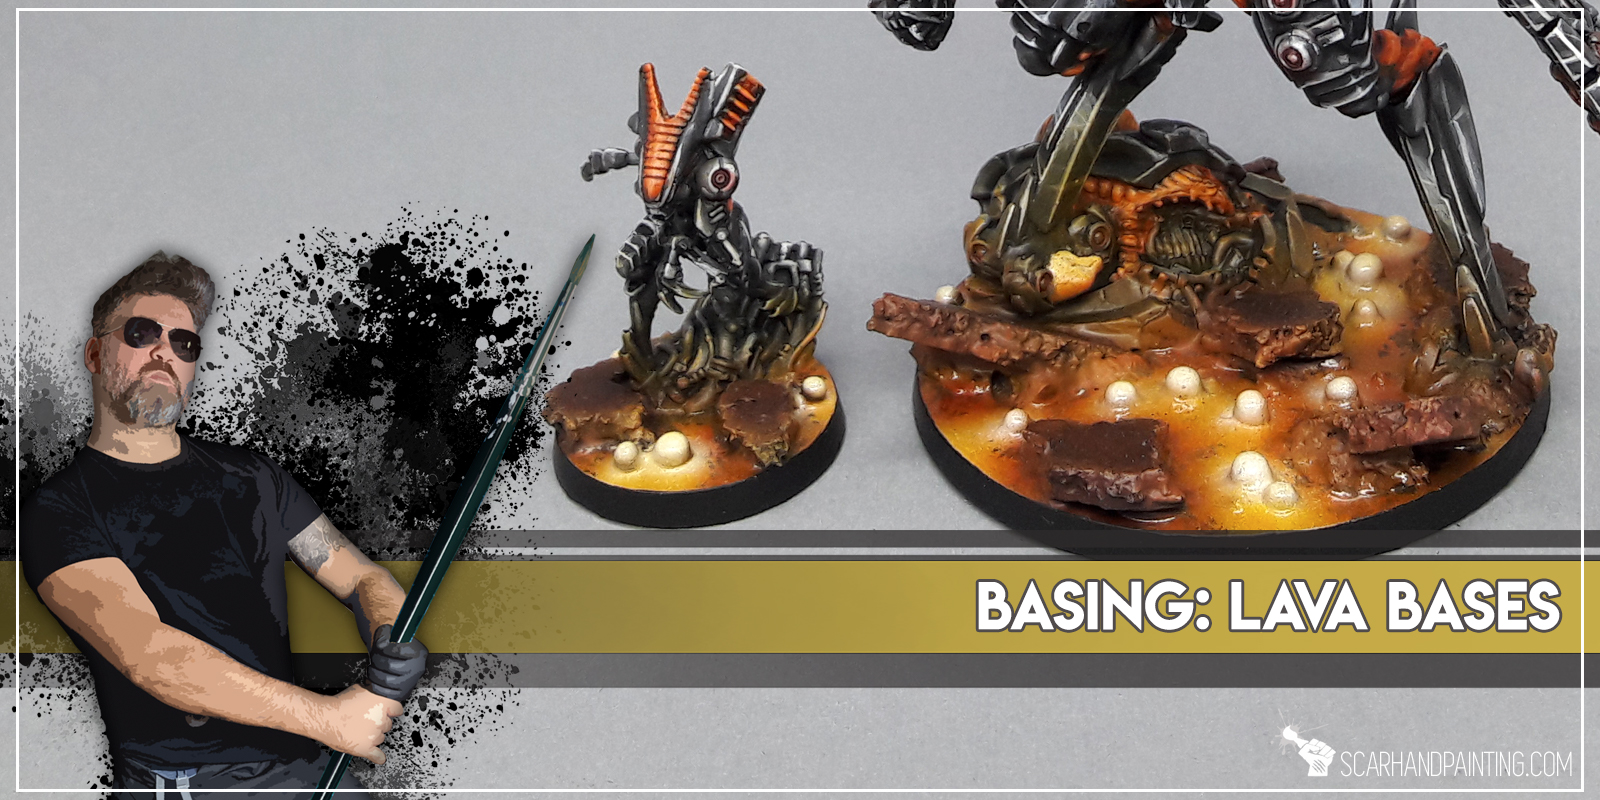
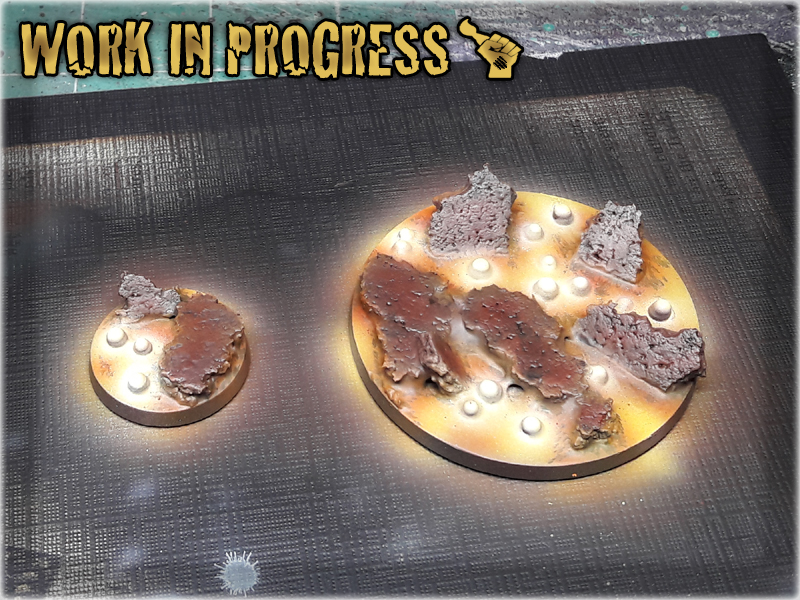
In this easy, step-by-step tutorial I’m going to show you how to create and paint a Lava Bases. I used these bases for Infinity the Game Combined Army – you can see how it turned out at Infinity COMBINED ARMY ‘Witness Me!’ gallery.

**Where I’m from there’s a small paper bag filled with moist absorbsion balls in every shoe box. If you can’t get that, just use some grains or make small balls out of green stuff or even modeling clay.
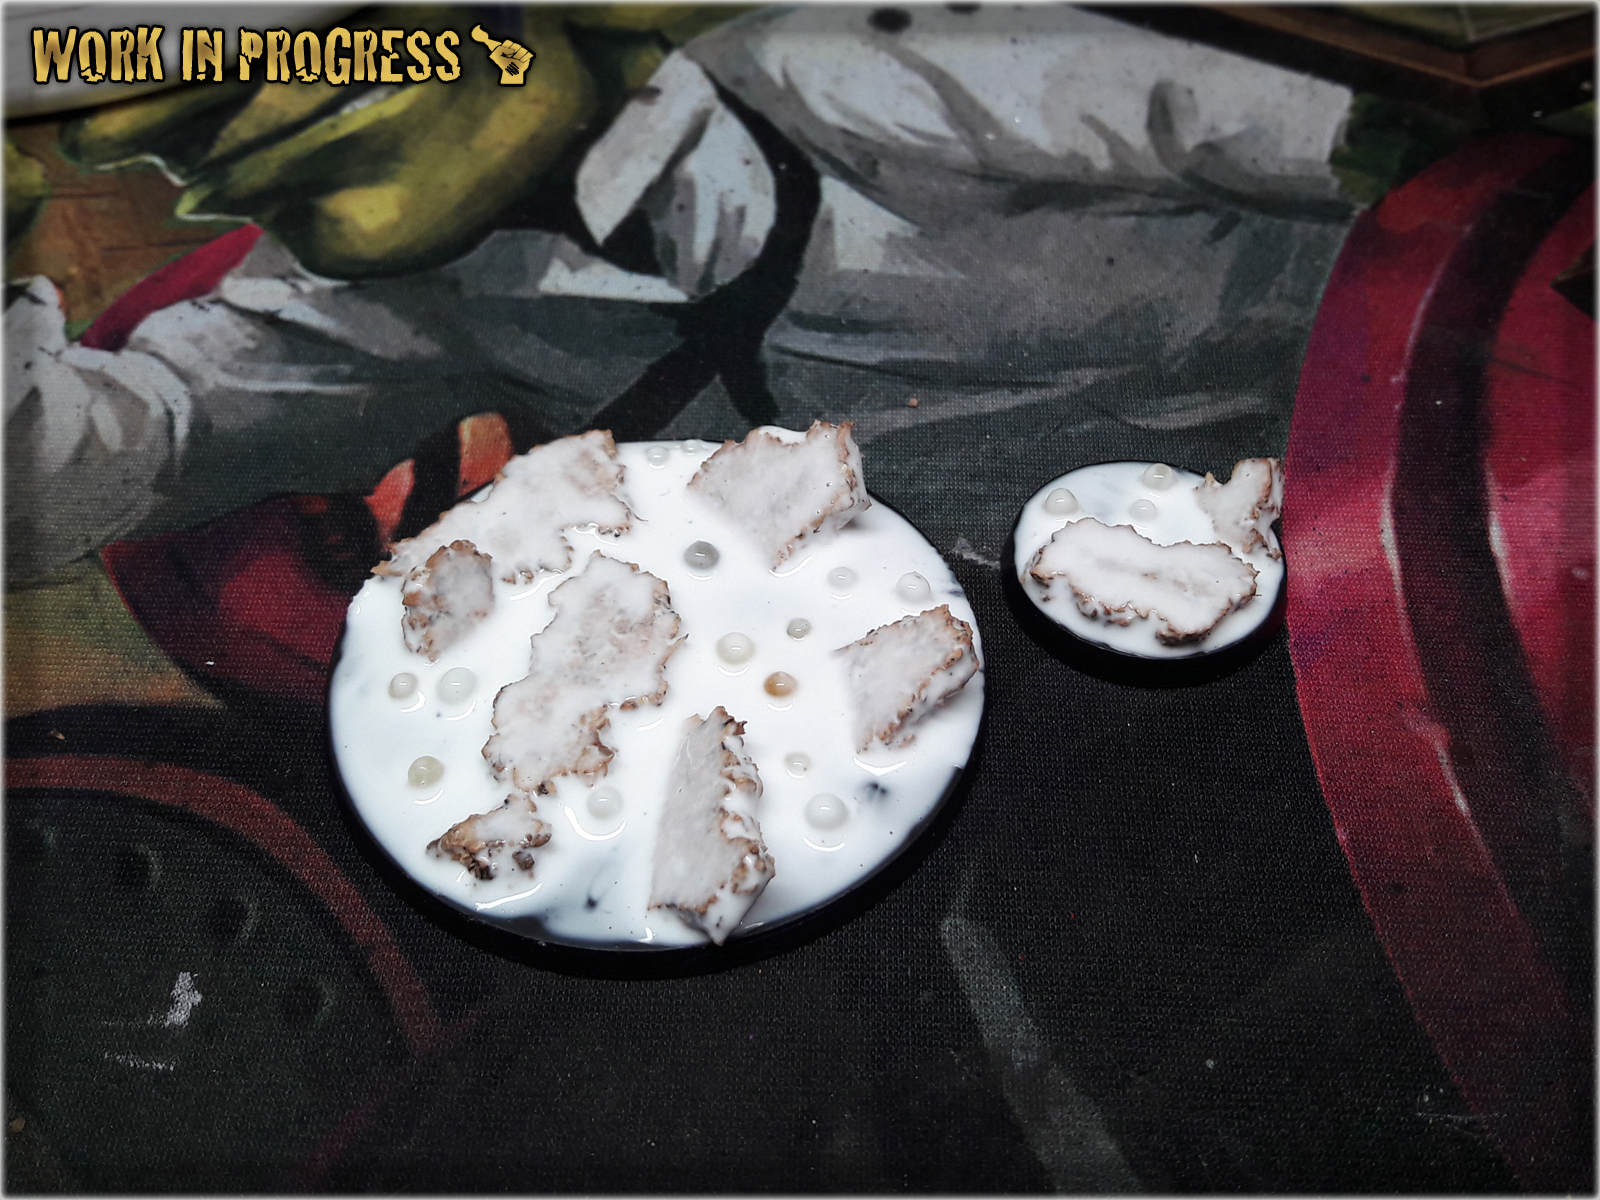
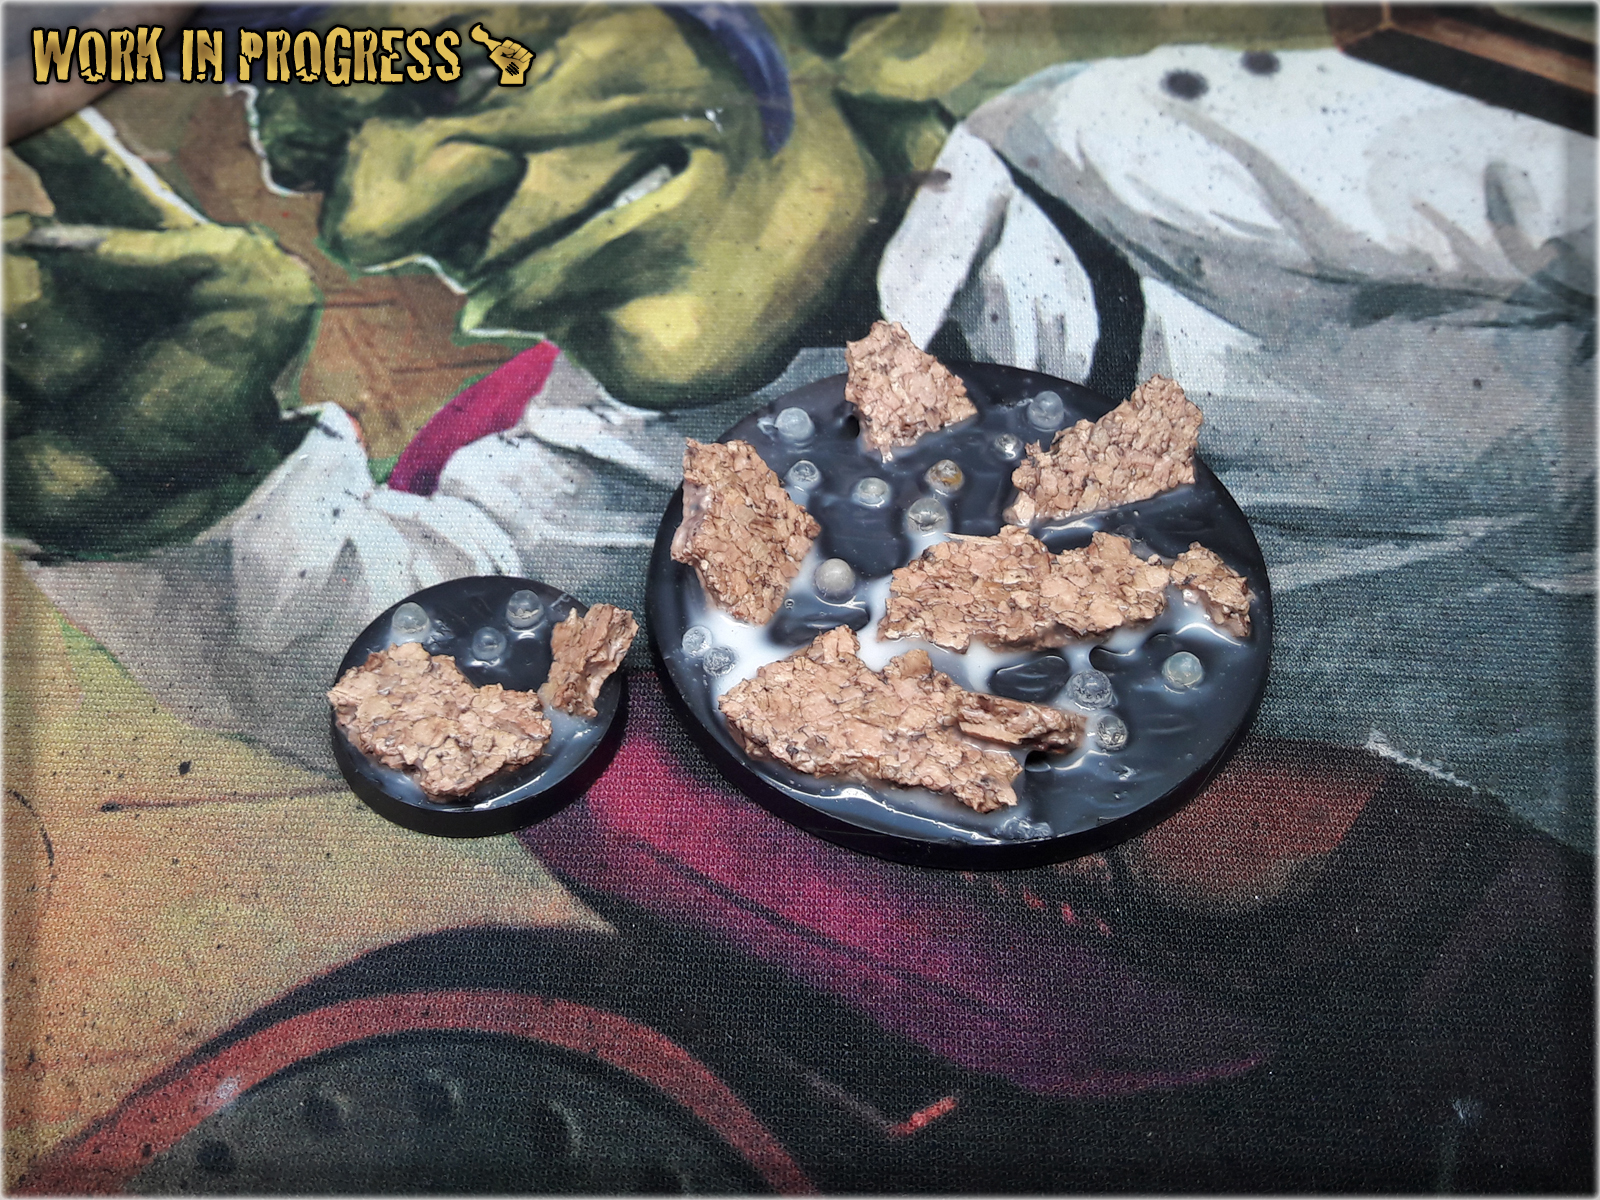
* I started by breaking a piece of Cork into smaller bitz.
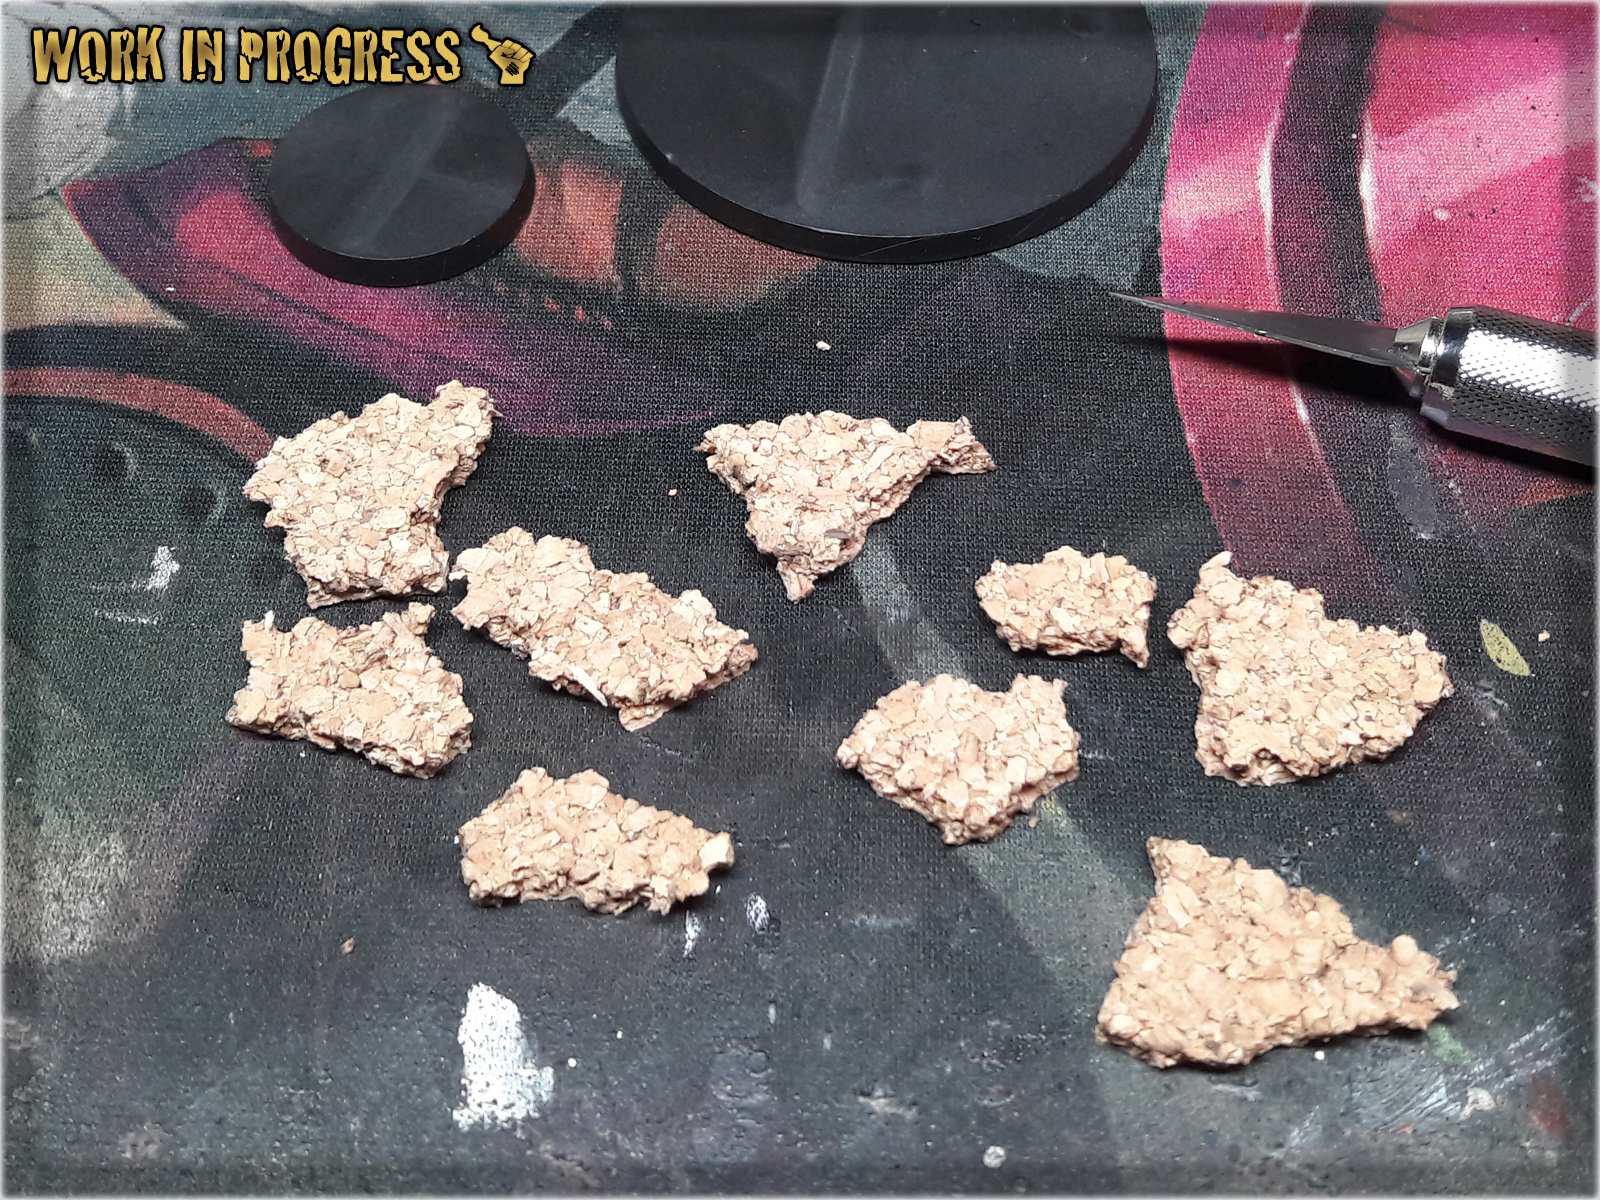
* I then applied Super Glue over the bases in a random pattern. No need to be precise here.
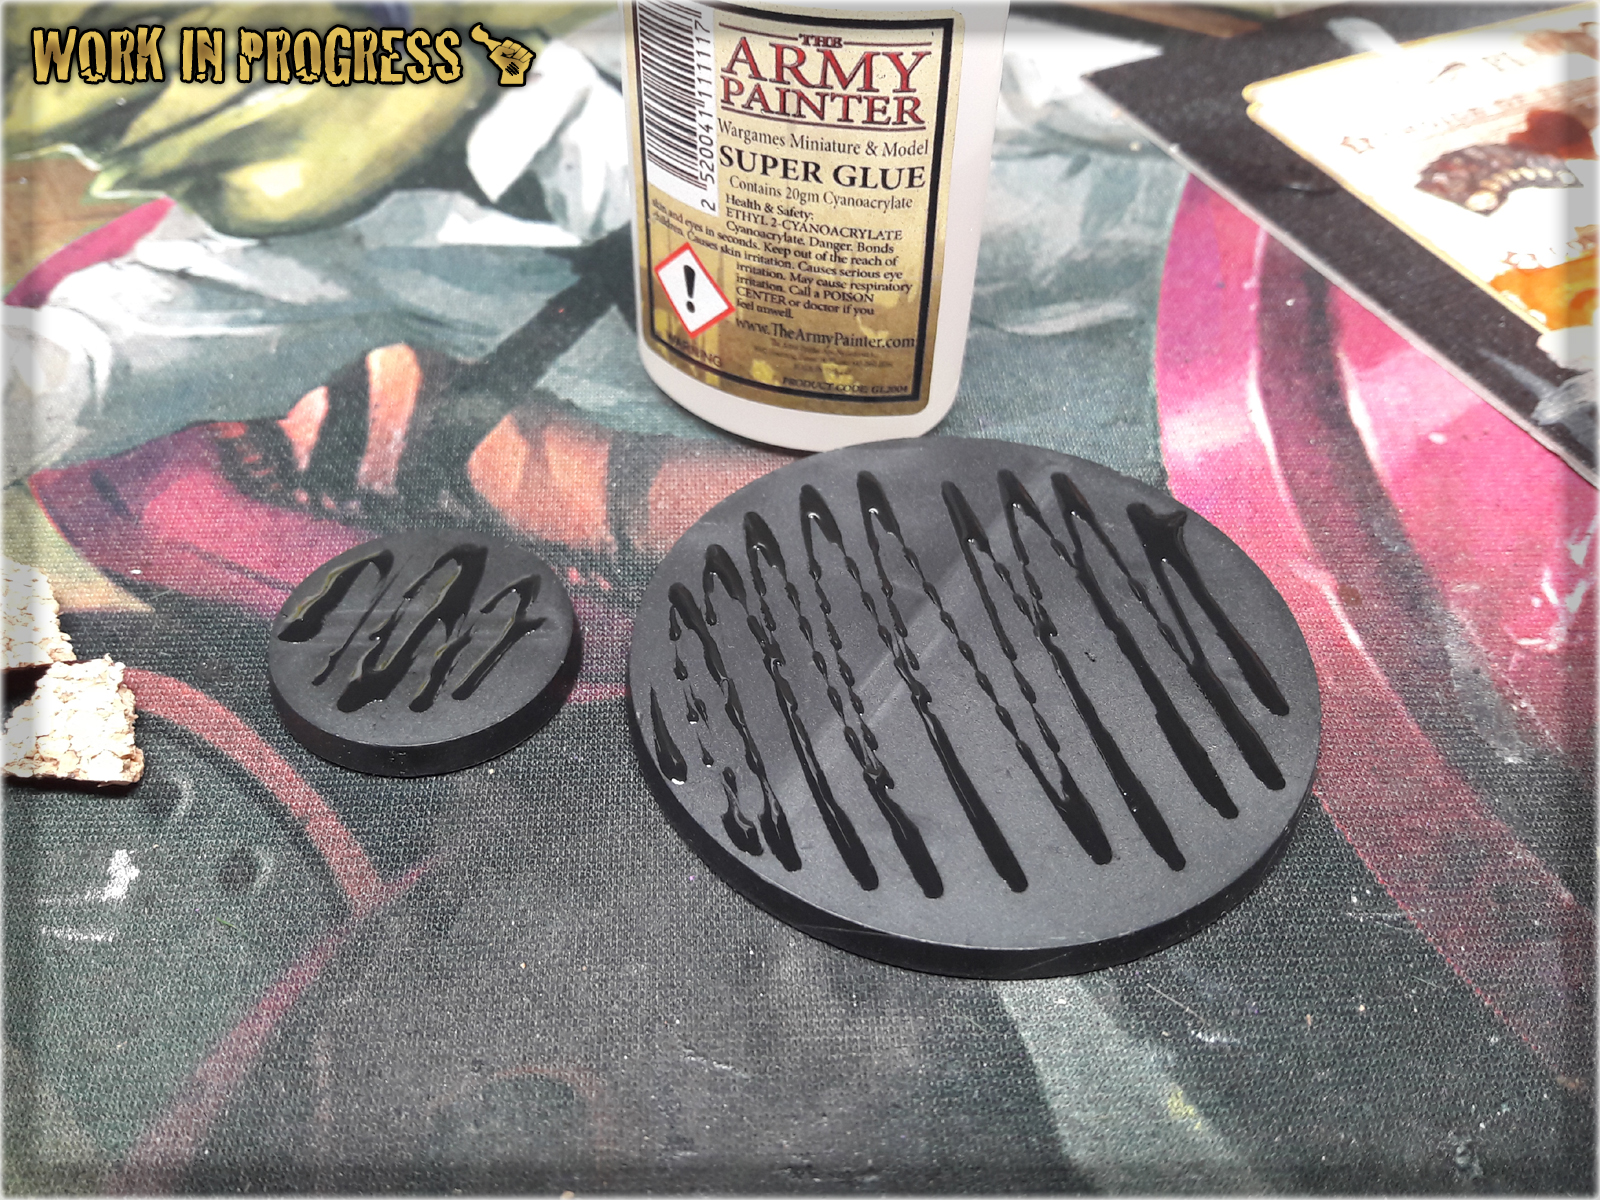
* Pieces of Cork followed to form 'volcanic rocks' and future spots for the miniatures to be mounted on.
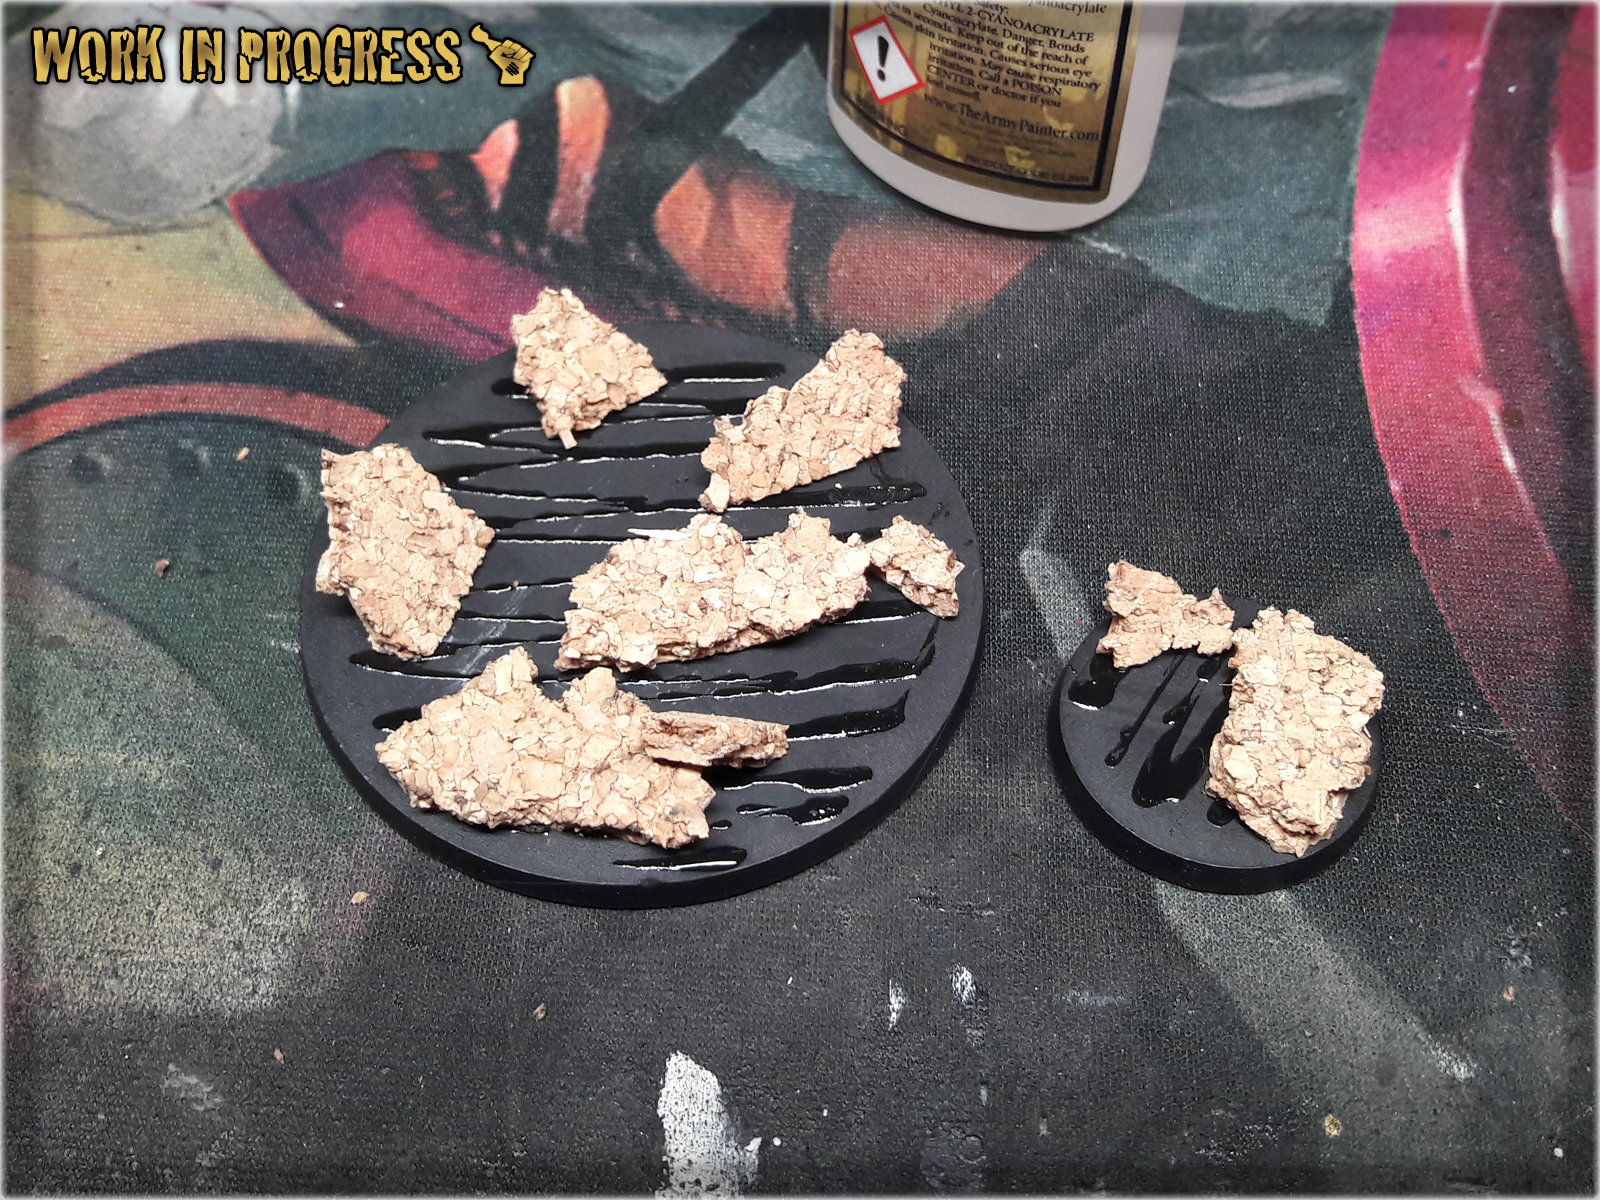
* Once Super Glue dried out I covered entire base with Basing Glue.
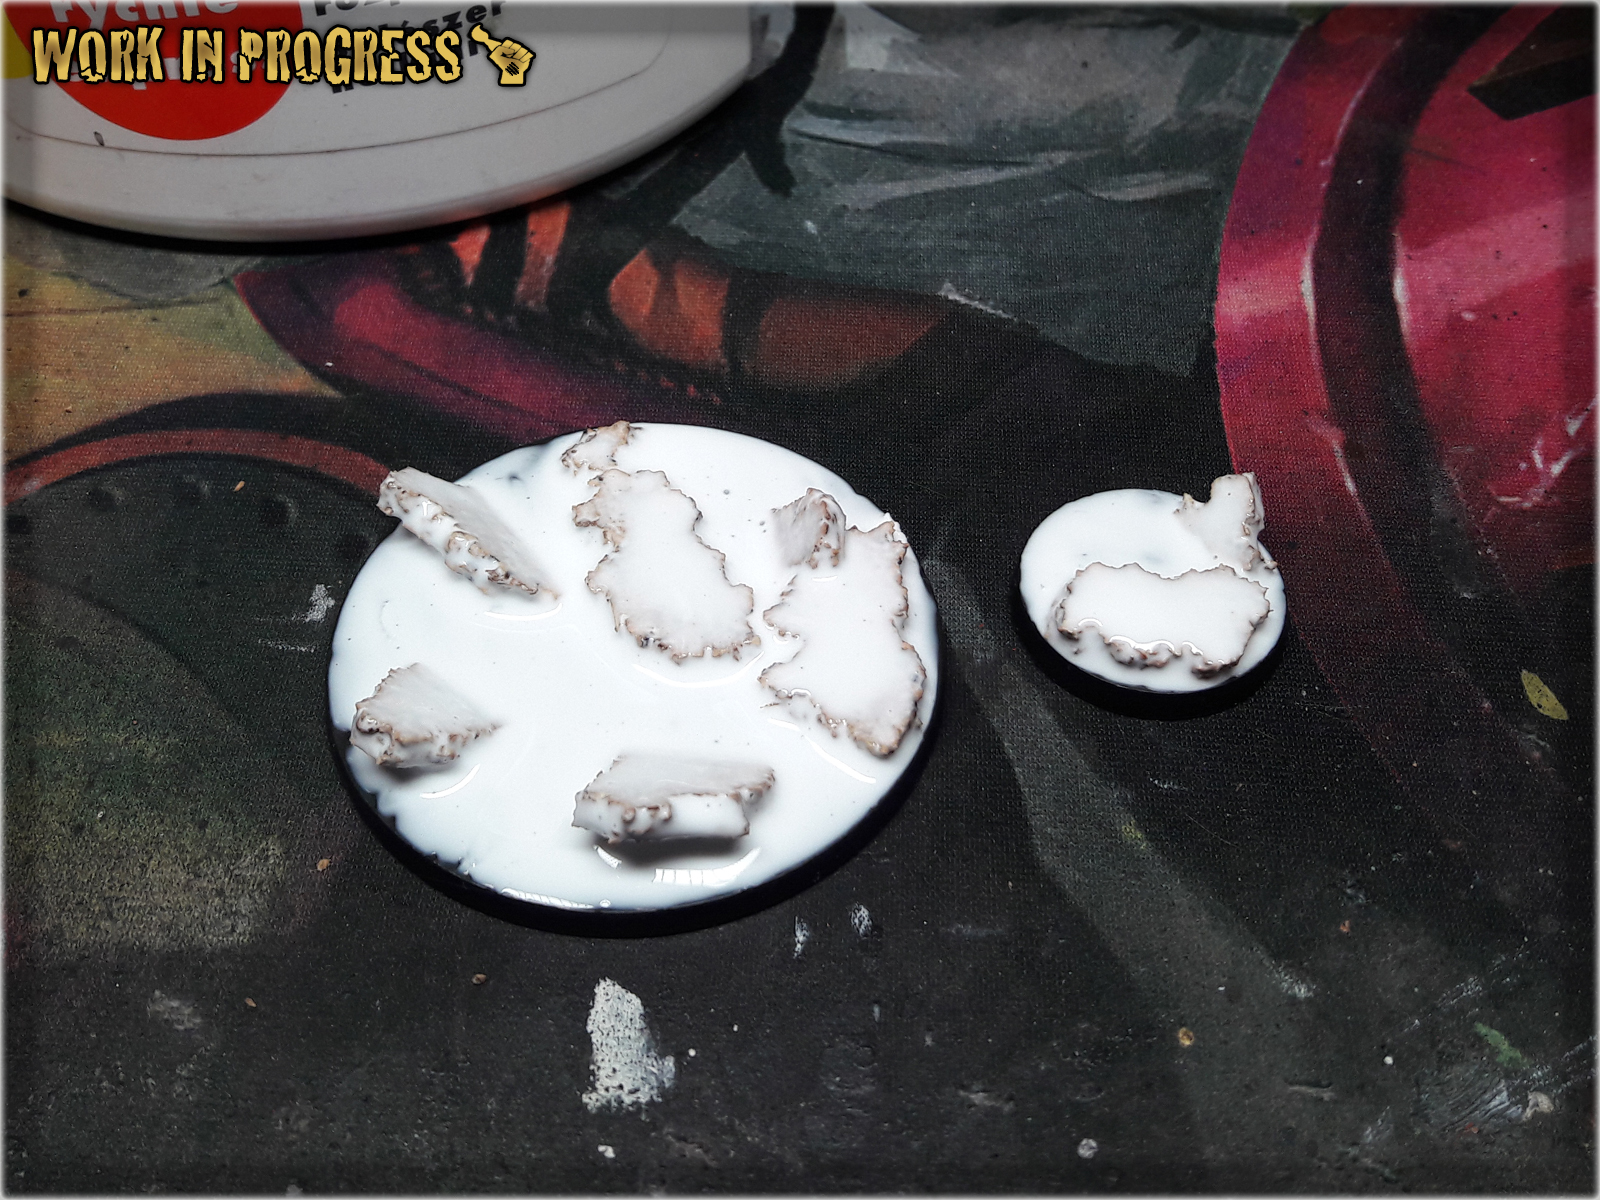
* I then dropped tiny balls (shoe moist absorbers) oon top of the Basing Glue, between 'volcanic rocks' to create an effect boiling lava bubbles.
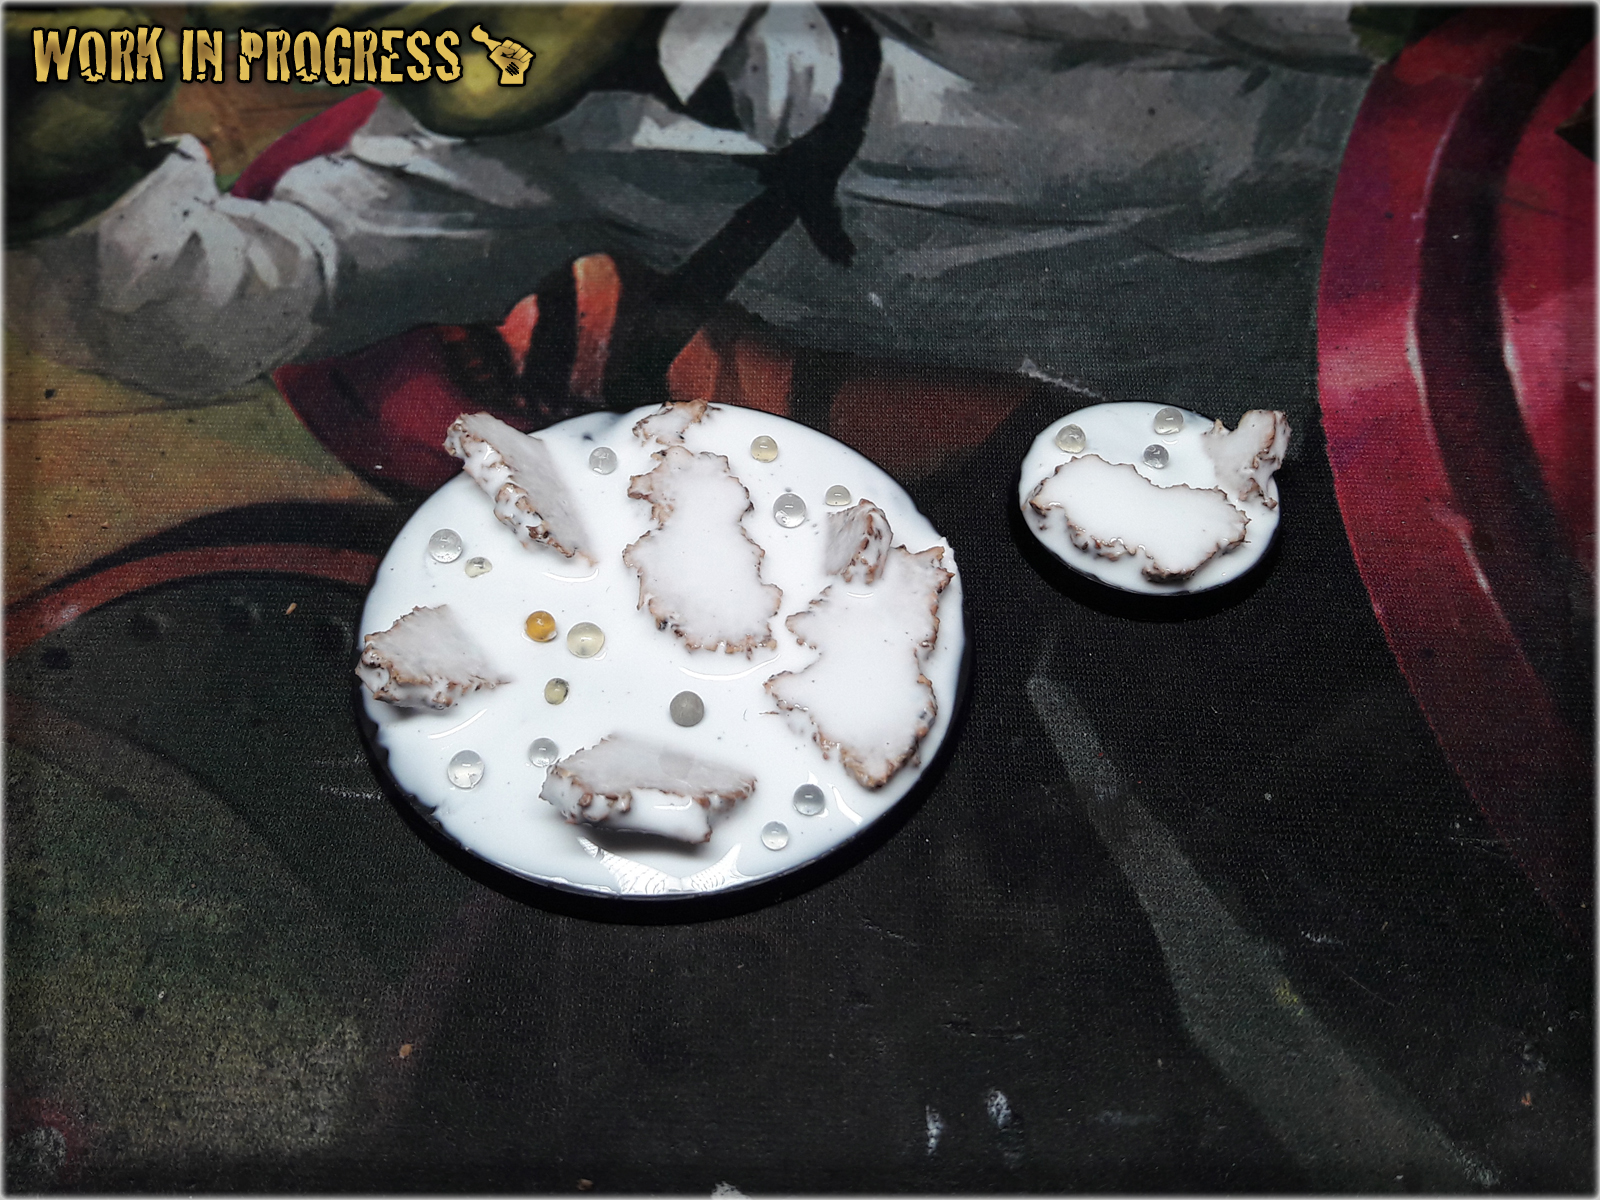
* Next I applied Basing Glue over the bubbles.
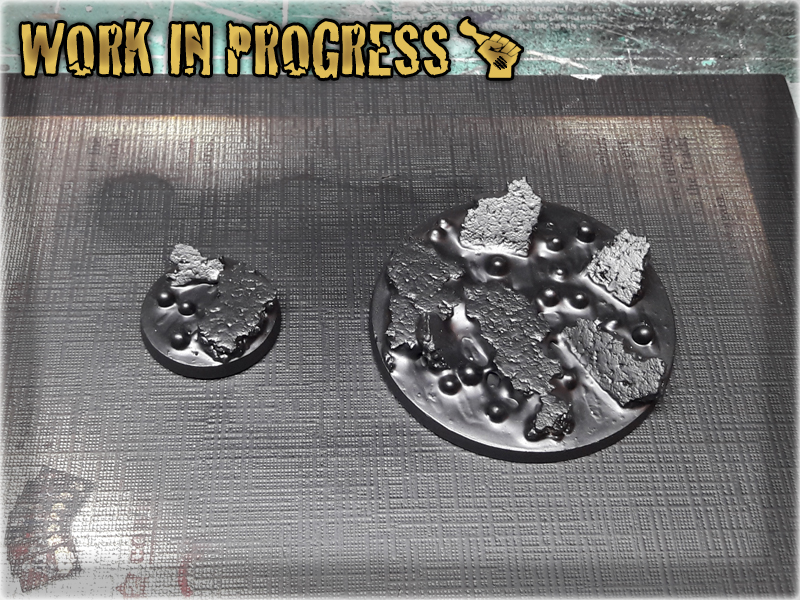
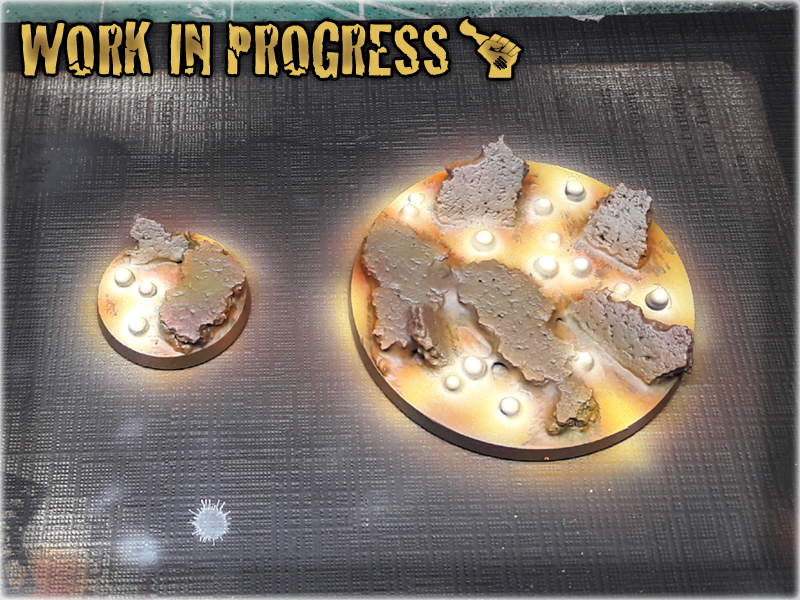
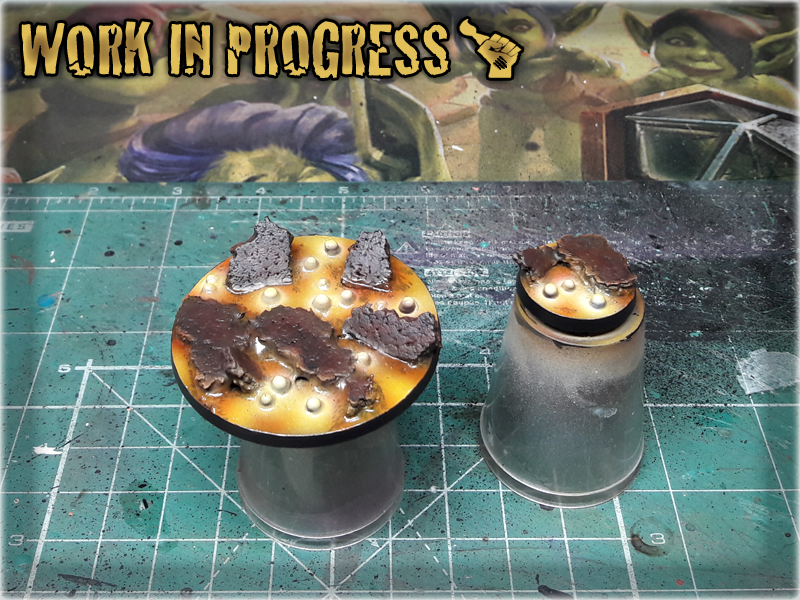
* Black Undercoat.
* Mahogany (Val) airbrushed all over the base.
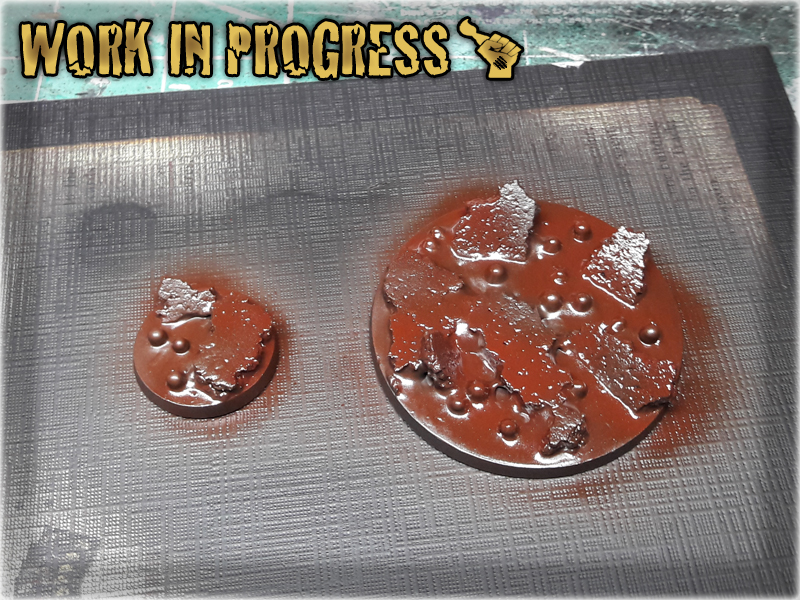
* Gorthror Brown (GW) drybrush over the Rocks.
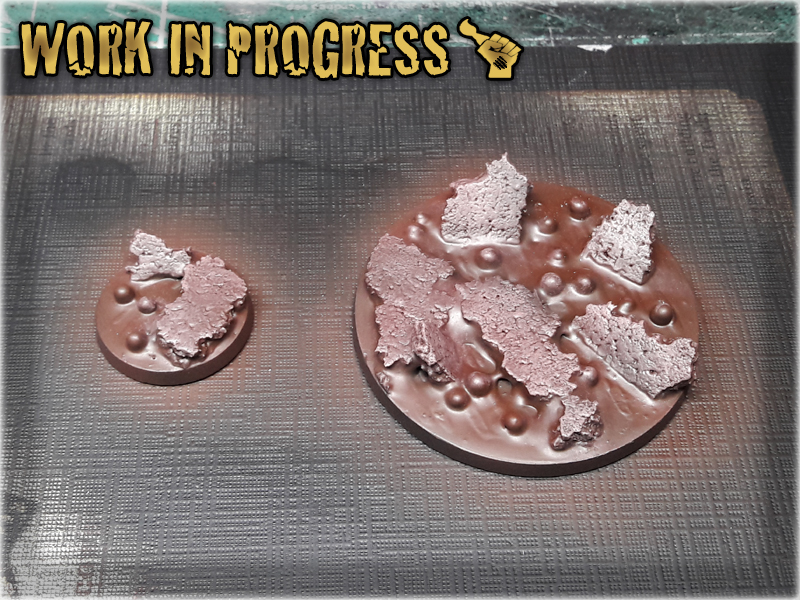
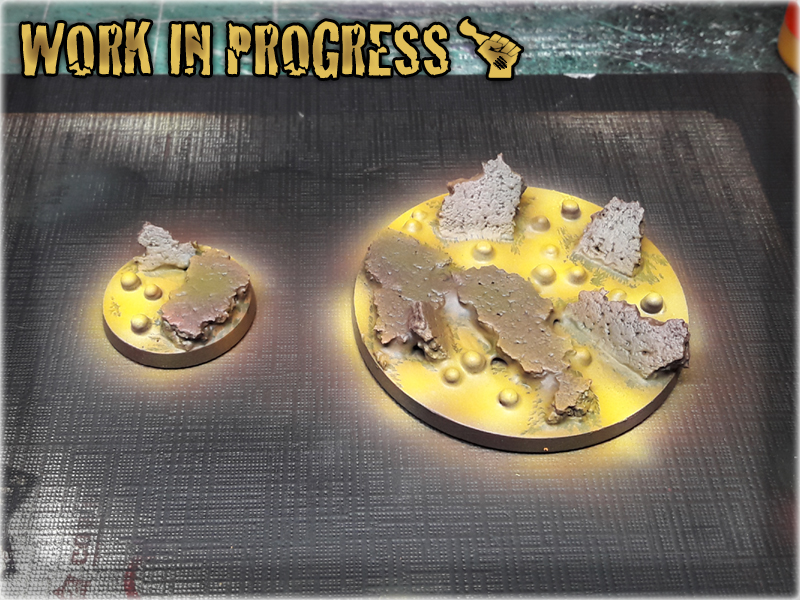
* Gory Red (Val) airbrushed over Lava.
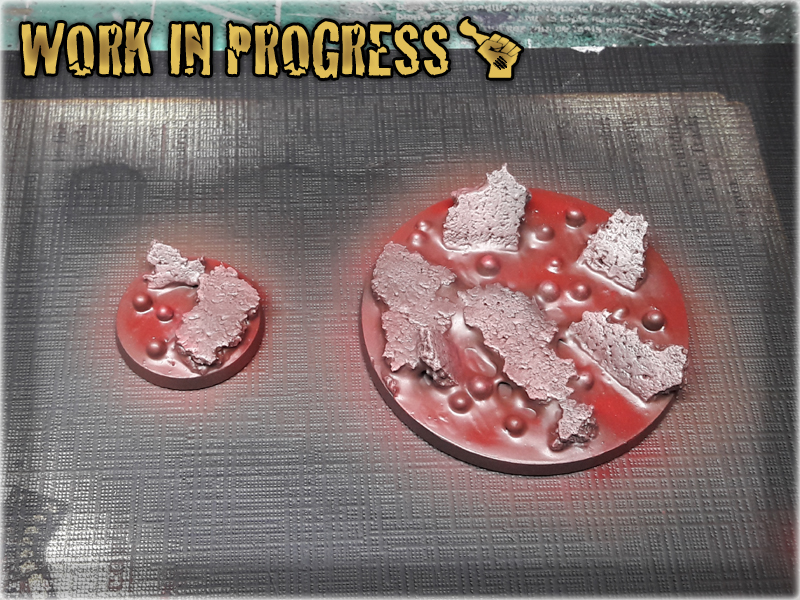
* Scrofulous Brown (Val) airbrushed over Lava.
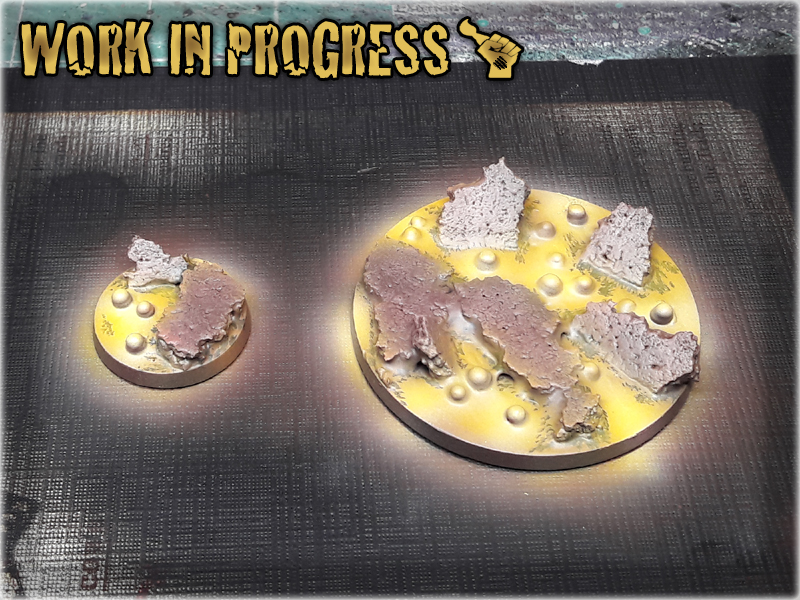
* Scrofulous Brown (Val) + White airbrushed over Lava.
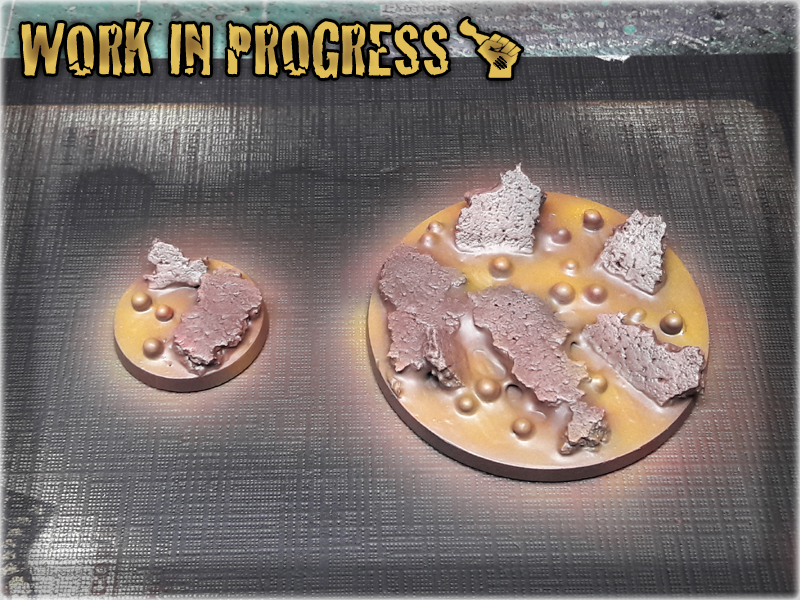
* Black spots added around Rocks
* Scrofulous Brown (Val) airbrushed over Black spots.
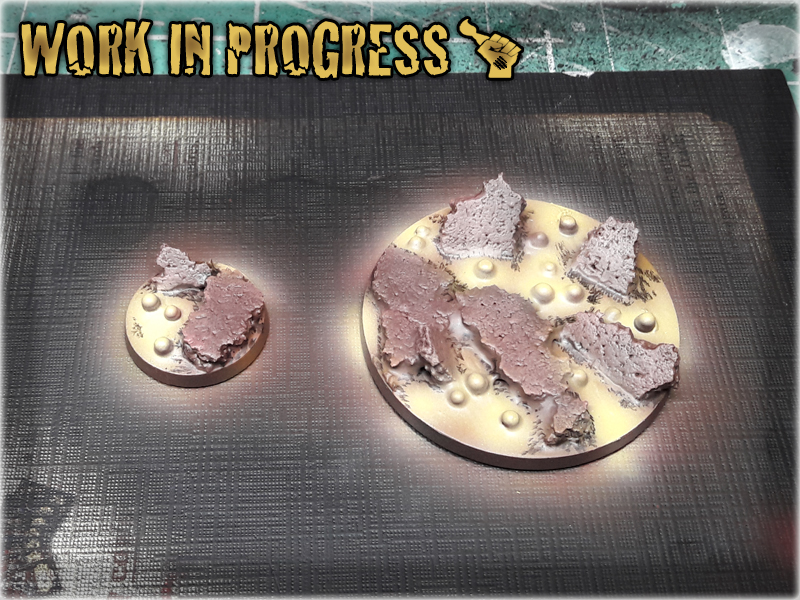
* Lamenters Yellow (GW) airbrushed over Lava.
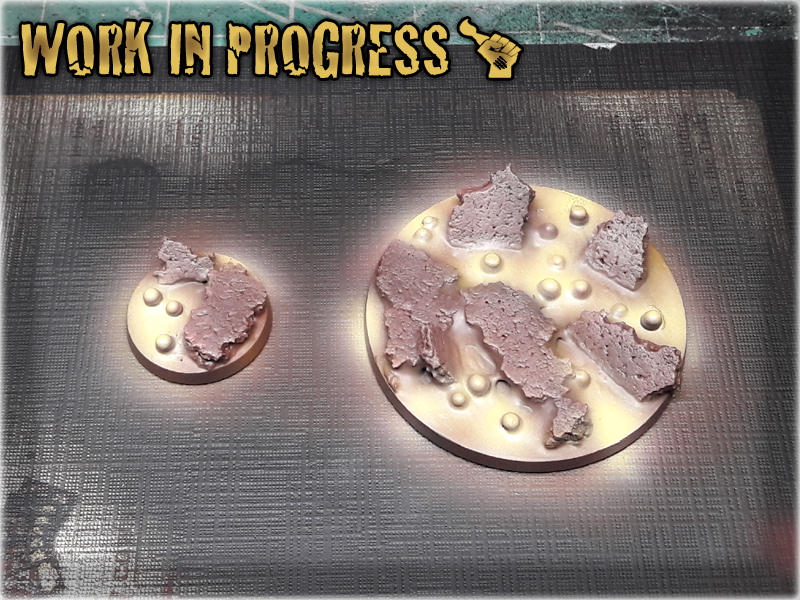
* Hot Orange (Val) spots airbrushed over Black spots, White airbrushed over bubbles.
* Scrofulous Brown (Val) + Black, then pure Black glaze applied oved the Rocks.
* Gloss Varnish applied over Lava.
![]()
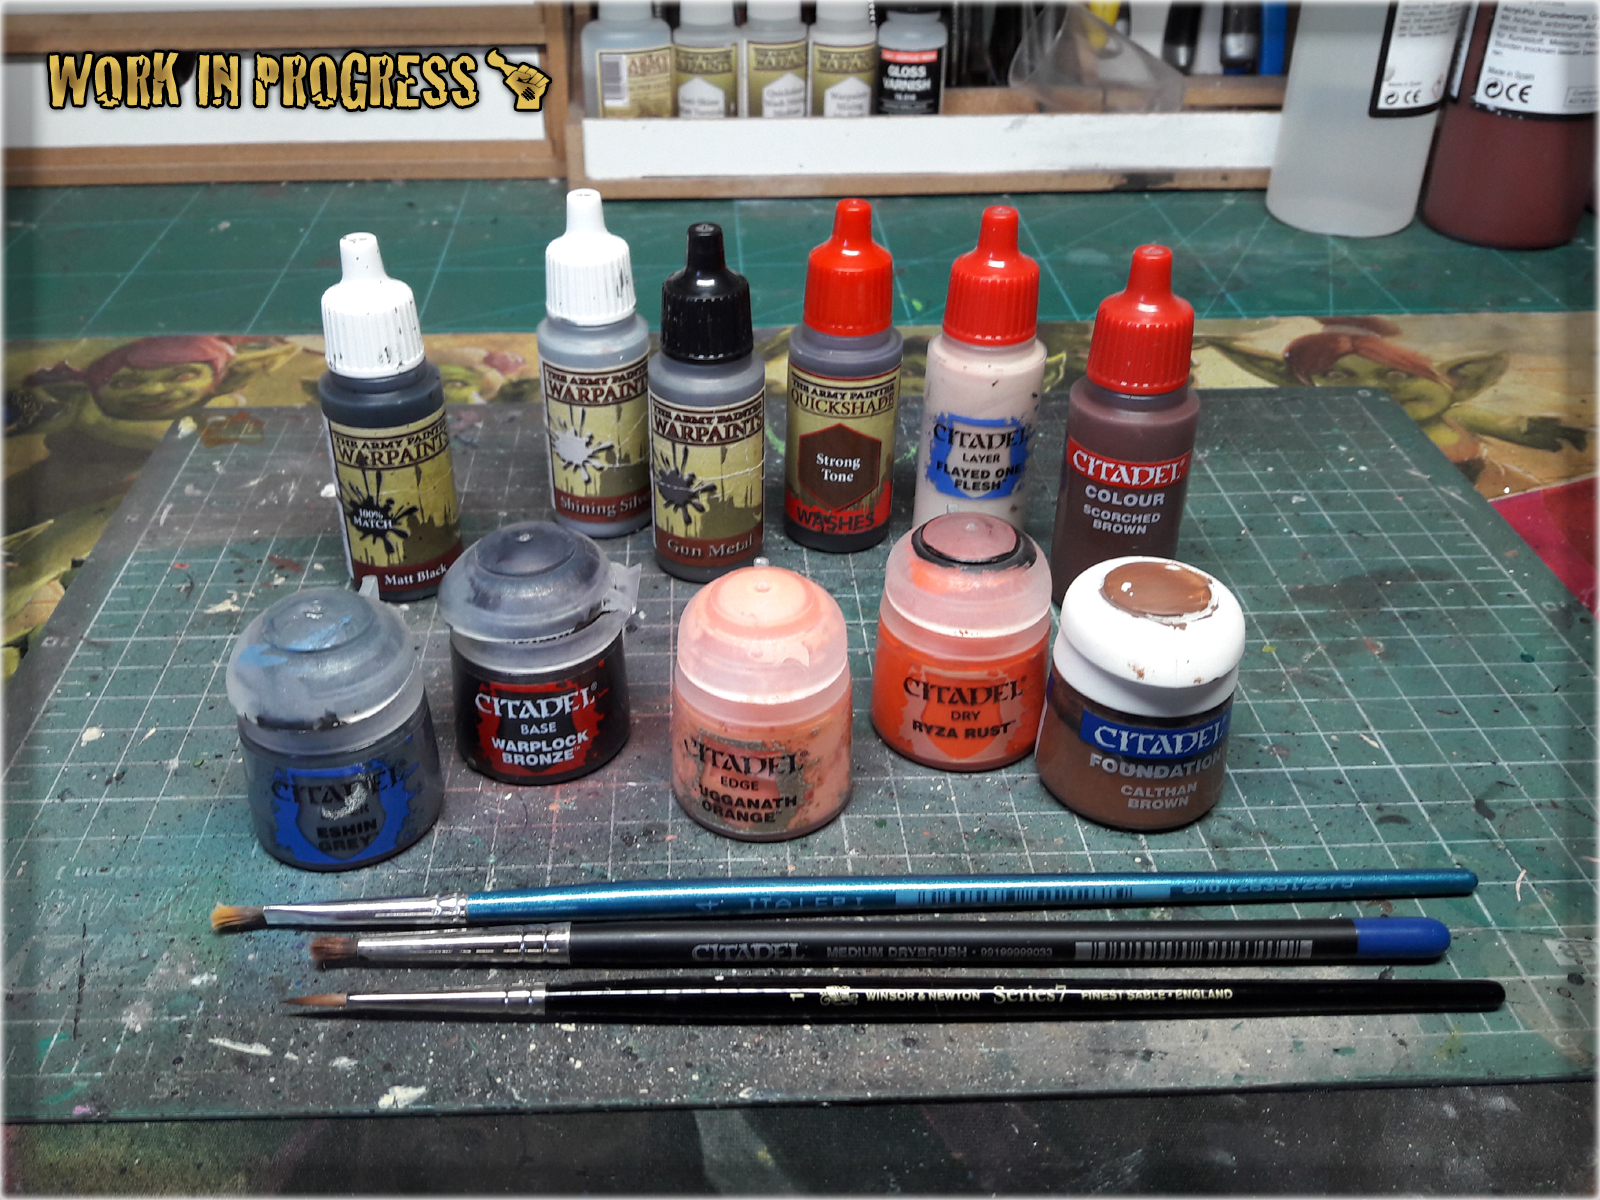
In this Step-by-Step tutorial I would like to take you on a spin with some Micro Art Studio’s Corregidor Bases. Guys from MAS did a fantastic job painting this product, but I have my own way which I would like to share with you. Buckle up and let’s get to it!
* Regular Brush,
* Stippling Brush,
* Black,
* Tin Bitz / Warplock Bronze (GW)
* Eshin Grey (GW),
* Strong Tone Ink (AP),
* Gun Metal (AP),
* Shining Silver (AP),
* Scorched Brown (GW),
* Calthan Brown (GW),
* Ryza Rust (GW),
* Lugganath Orange (GW),
* Flayed One Flesh (GW),
! You can achieve similar results using different paints as long as you followTutorial's basics. For example Eshin Grey (GW) might be switched for Panzer Dark Grey (Val).
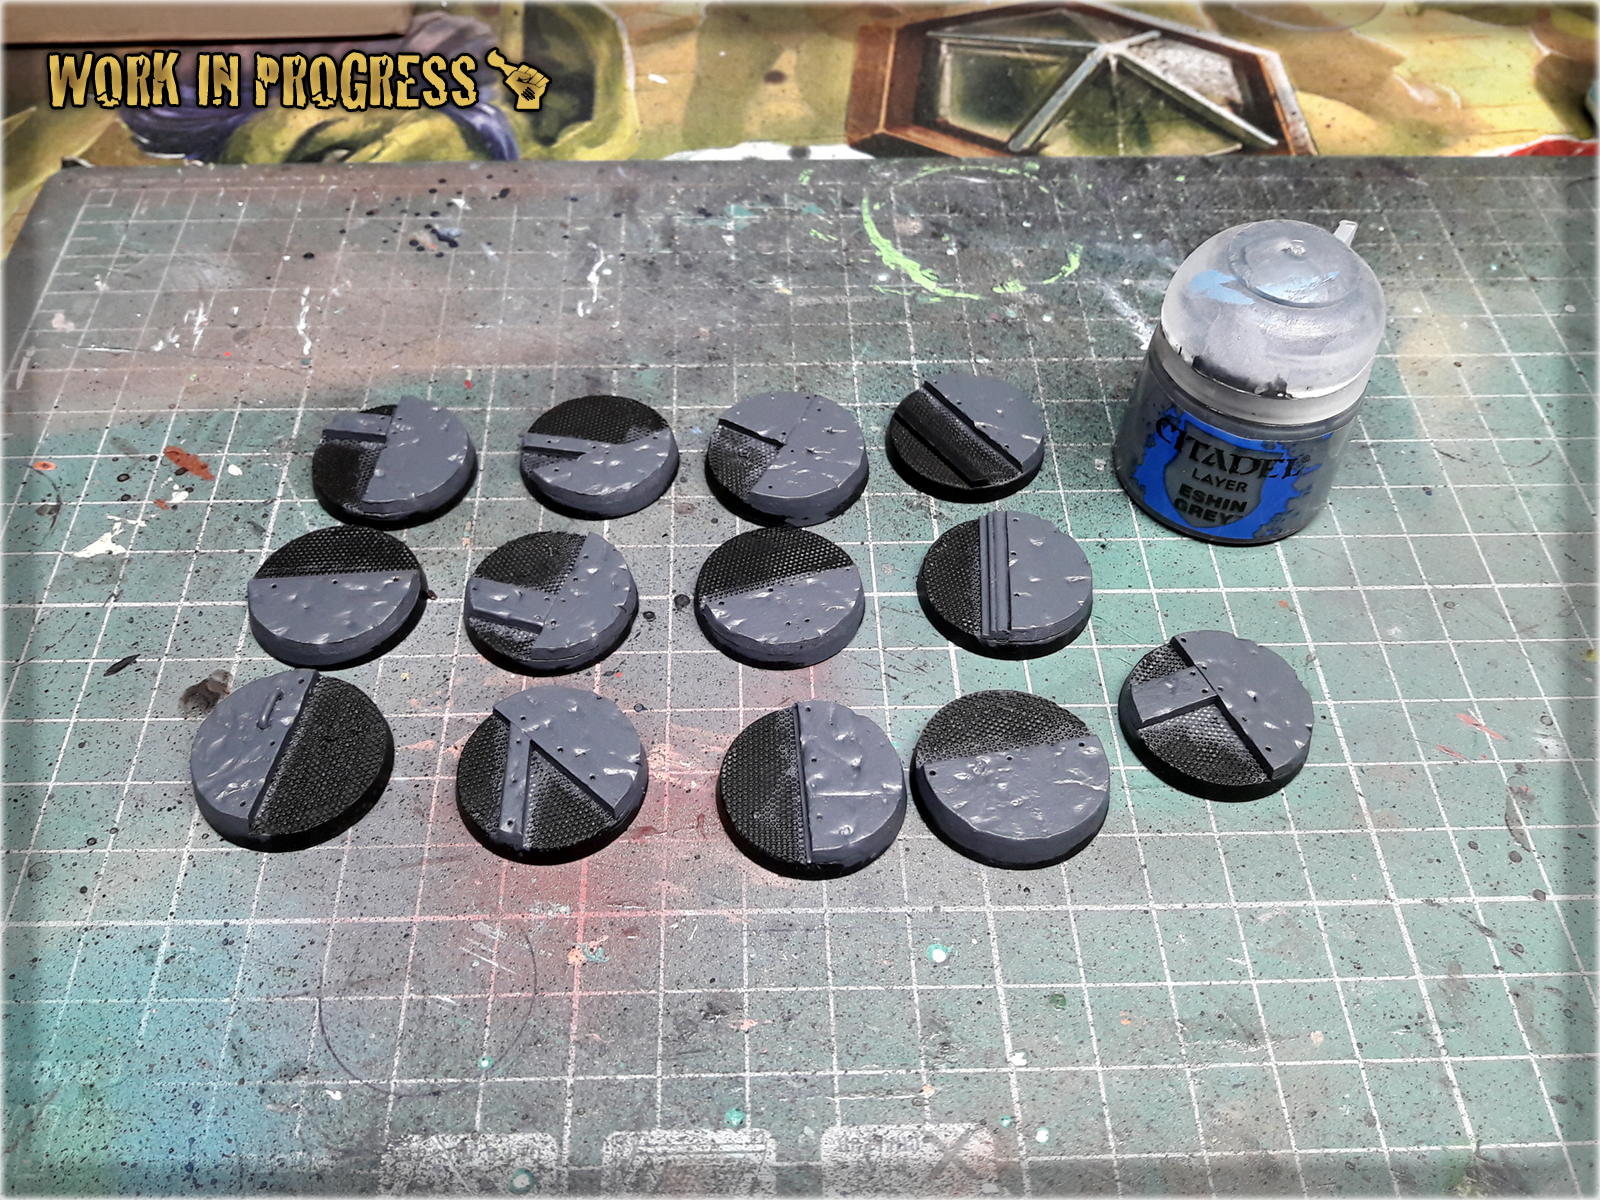
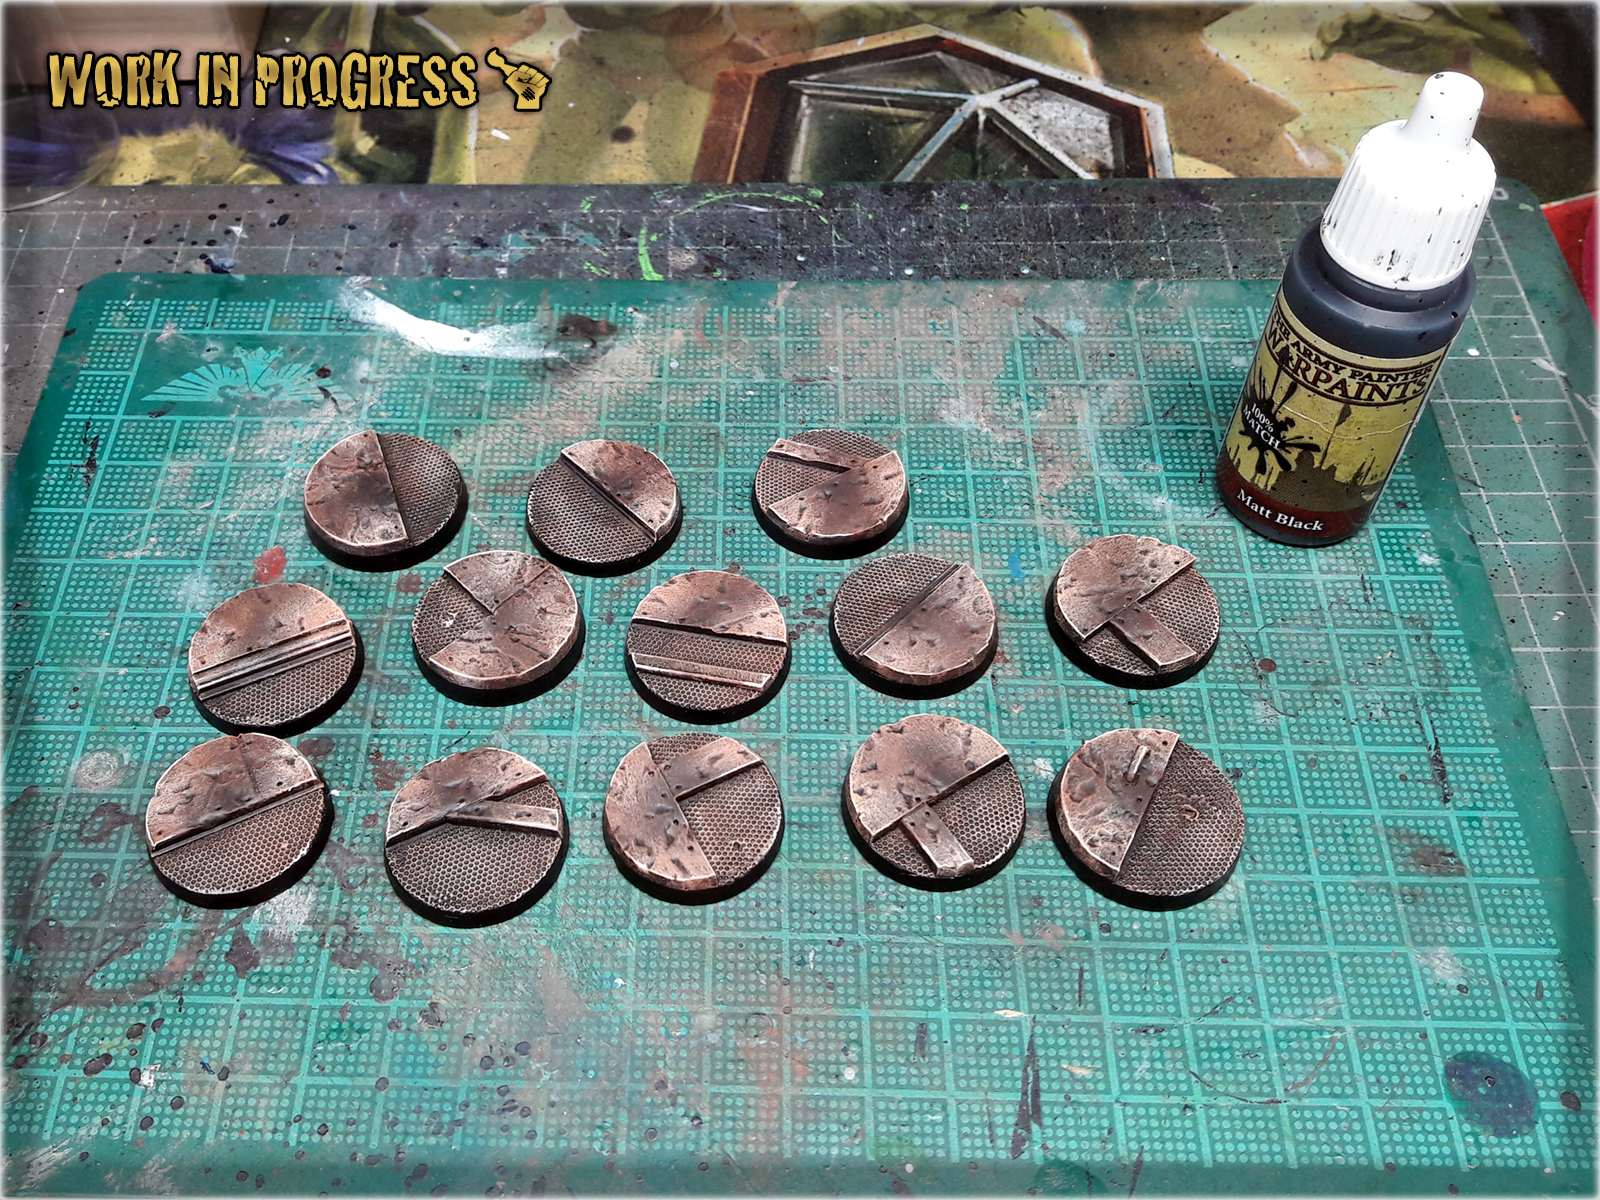
1 I started by applying a layer of Eshin Grey (GW) to all raised areas of the base, over Black undercoat. Just a hint that applying two slightly diluted layers goes much faster and produces a similar result.
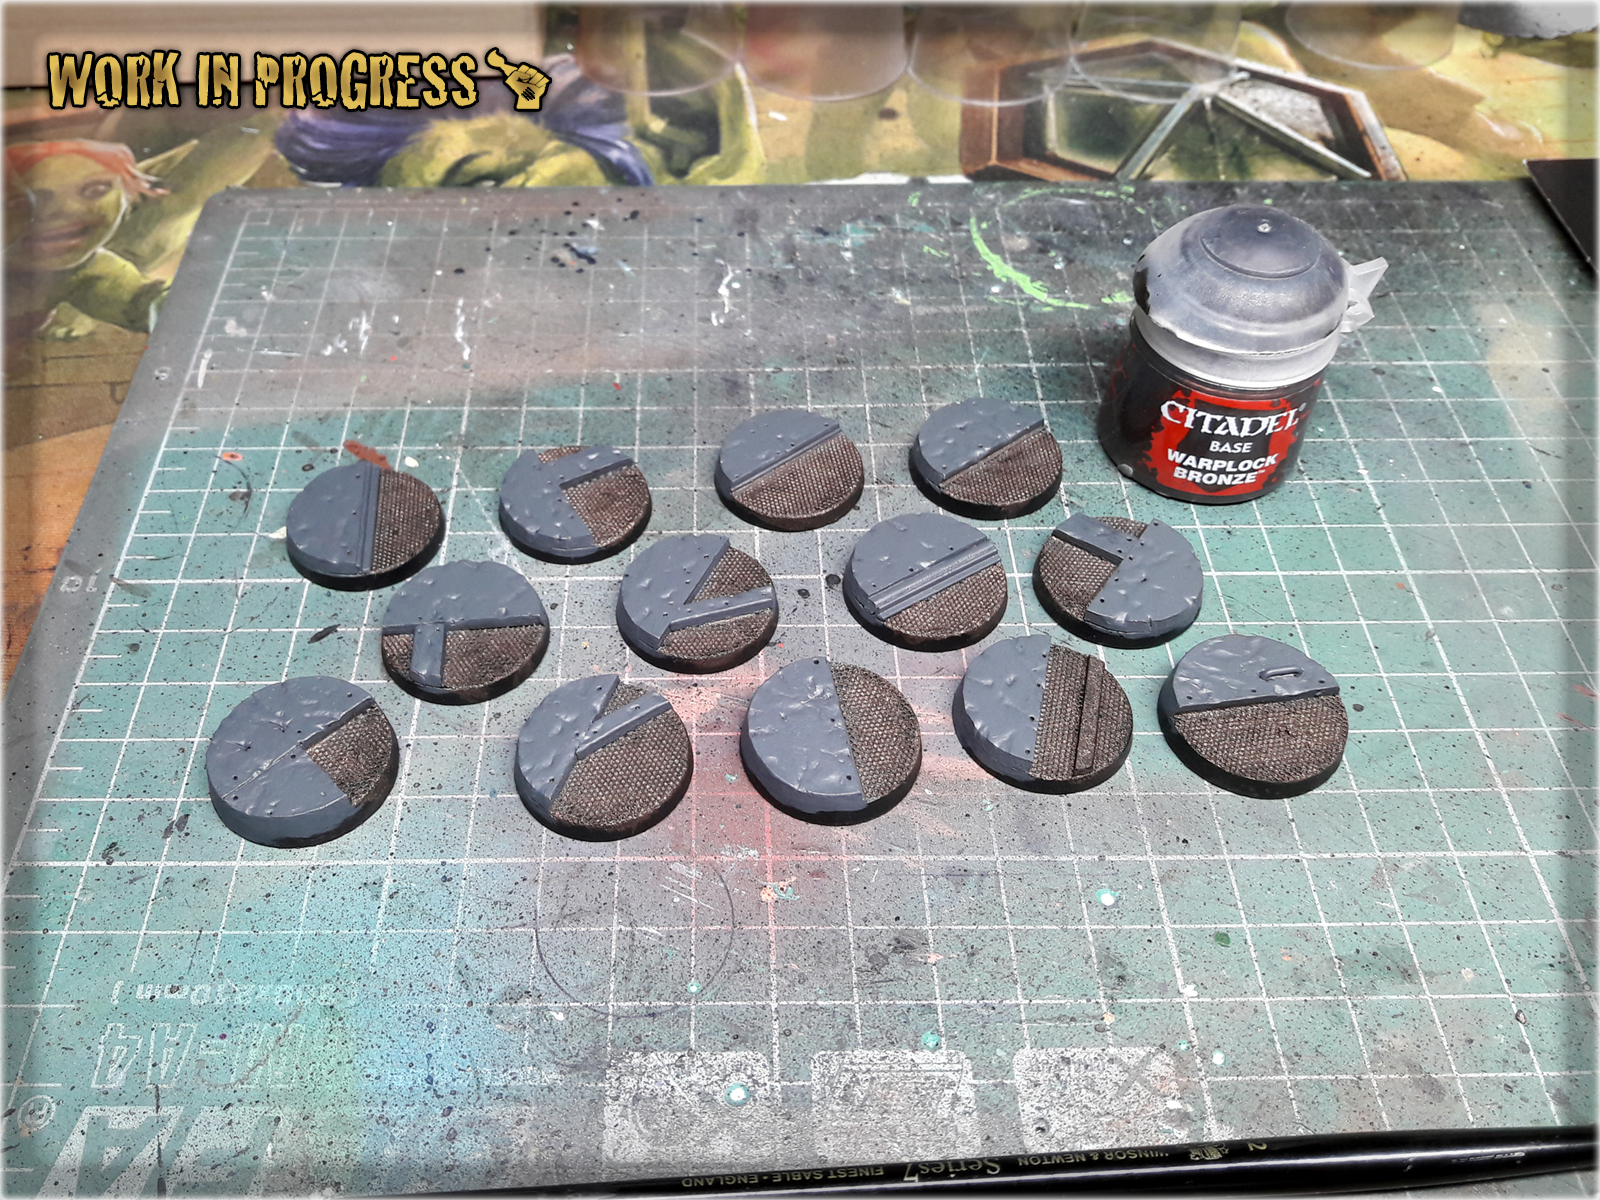
2 I then moved to the mesh areas and painted them with Warplock Bronze (GW). Once again this paint might be diluted but this time no need to apply two layers - one will suffice.
3 Once Warplock Bronze dried out, I applied a layer of Gun Metal (AP). For best results I did this with regular brush and using a Flatbrush technique following:
Five Layers Technique – Metal basis
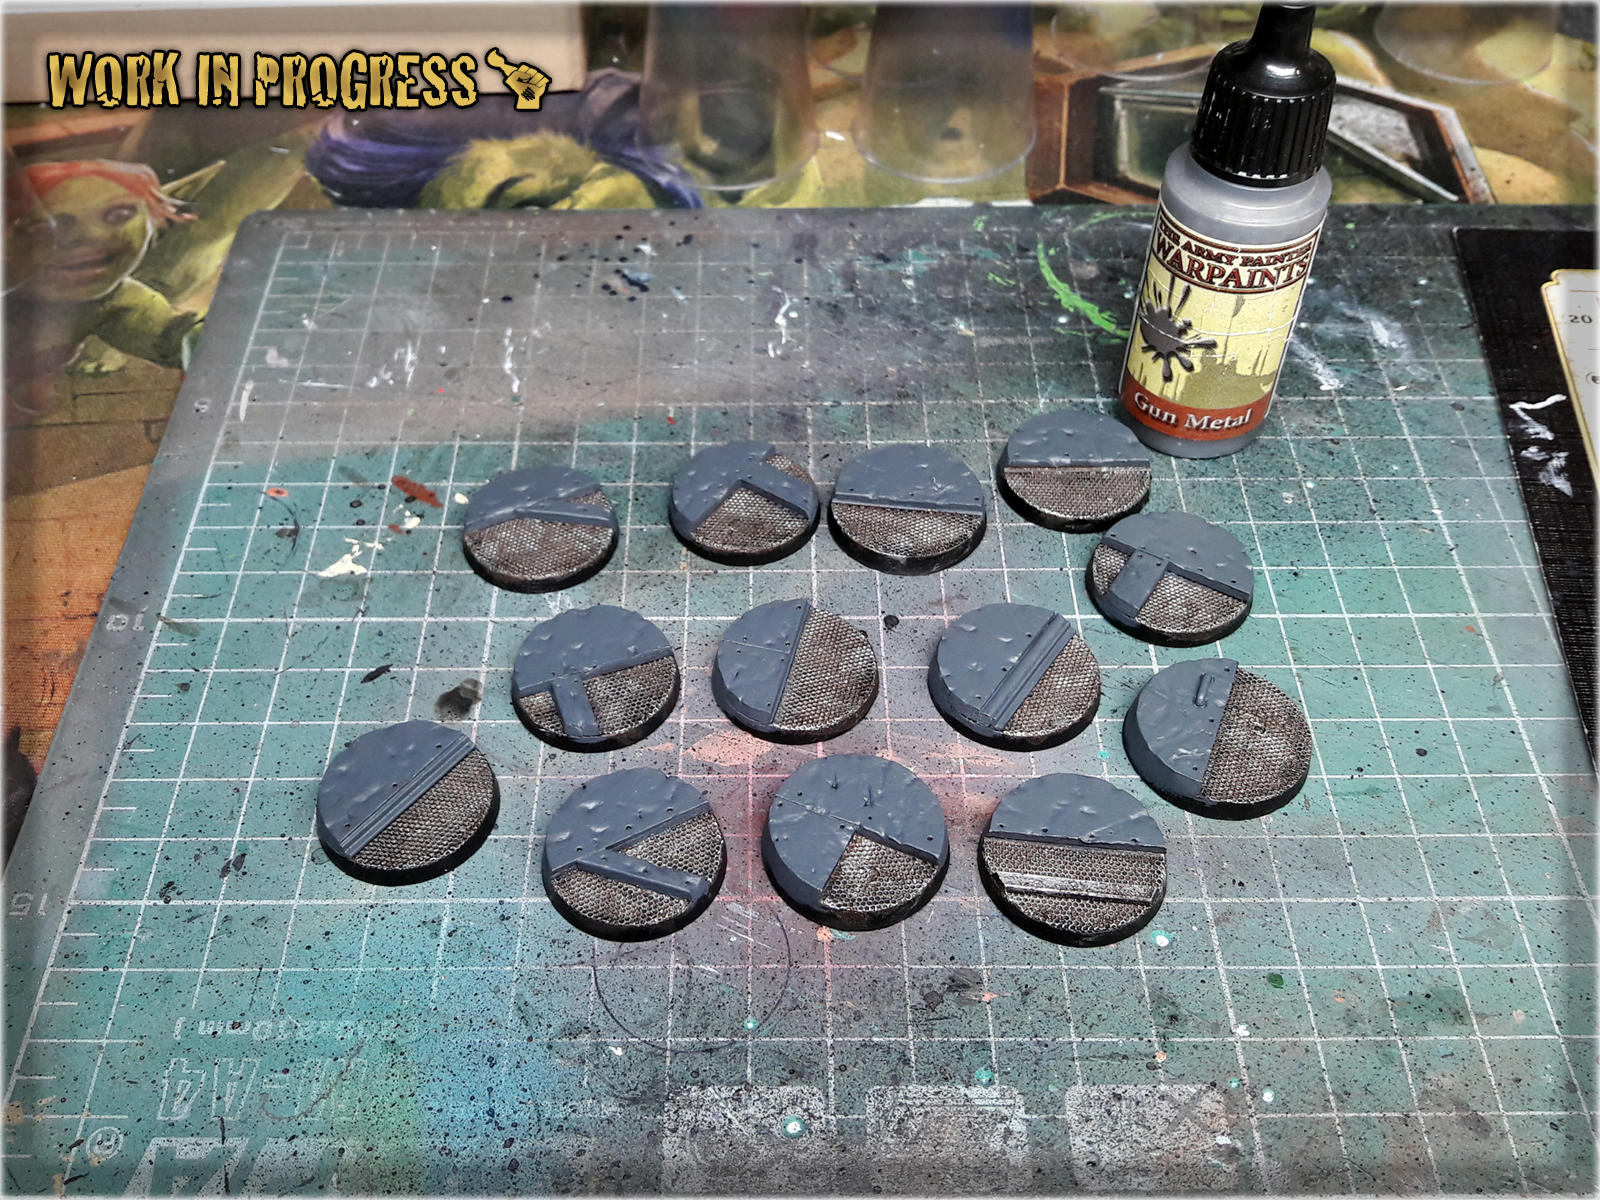
4 Next Shining Silver (AP) came in. I applied one layer over Gun Metal with regular brush, Flatbrushing.

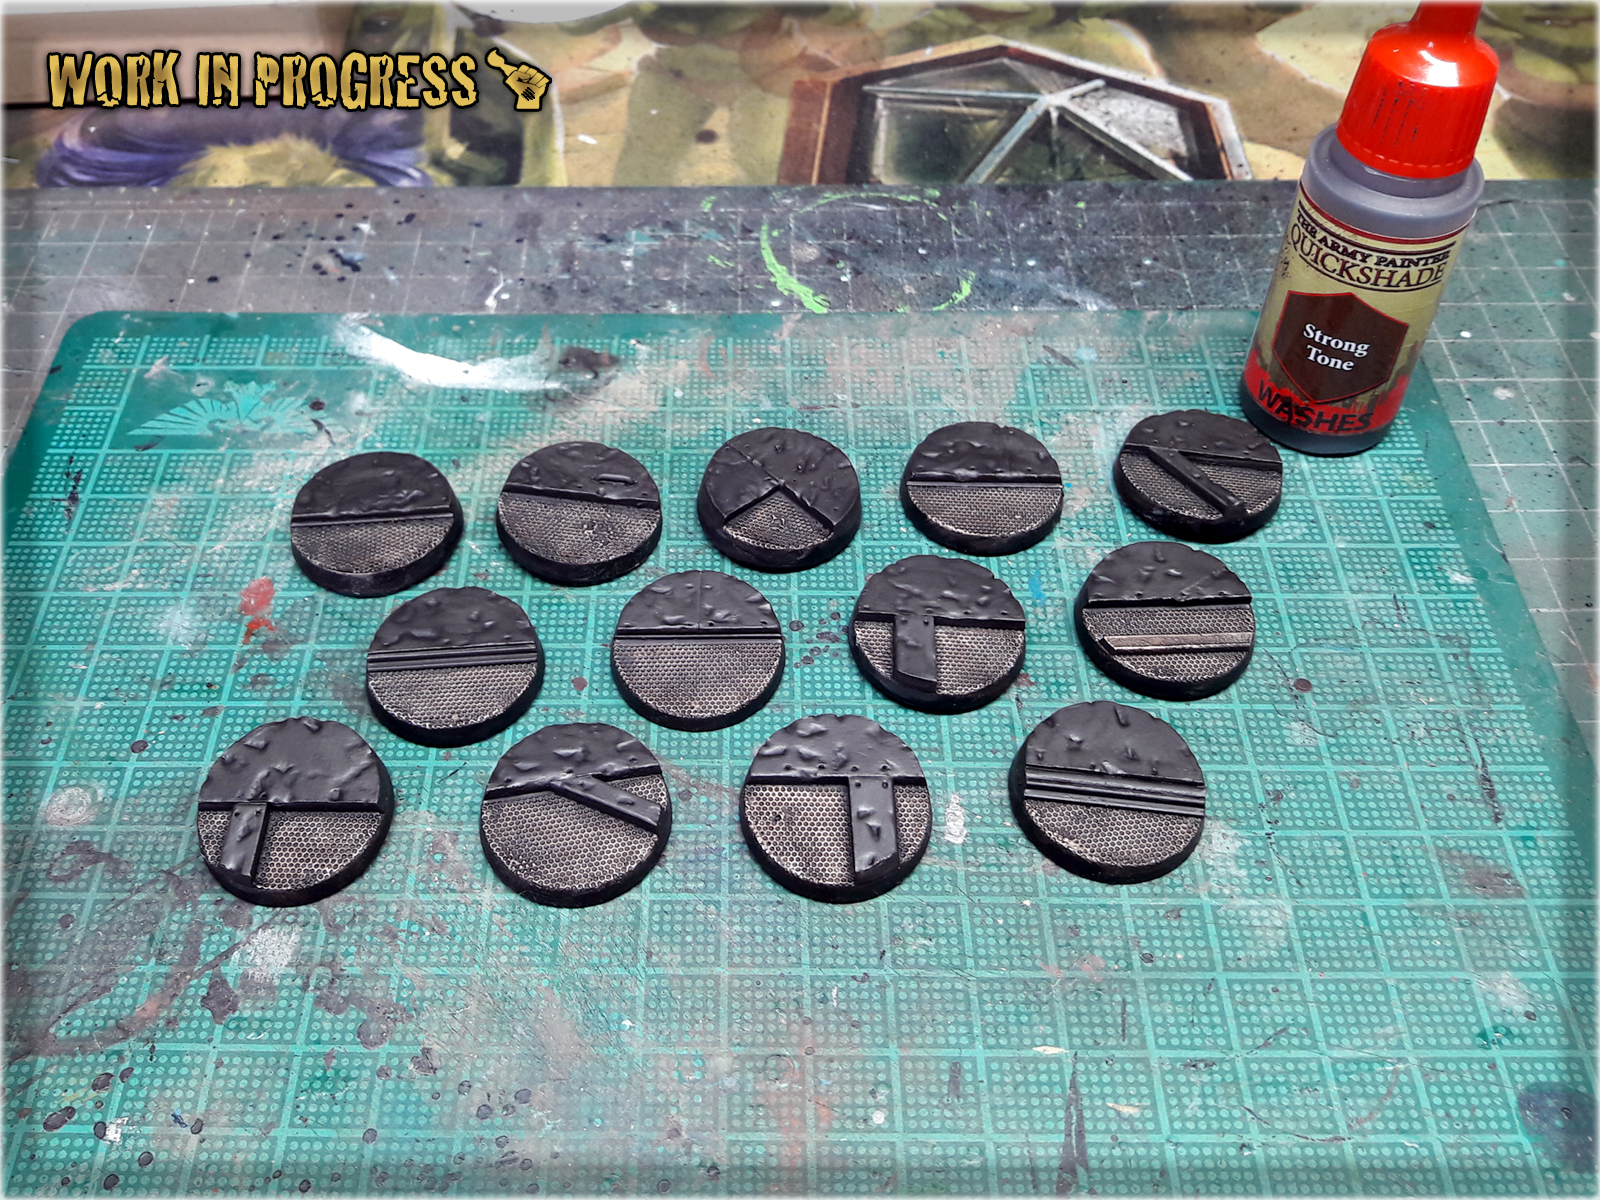
5 I then applied a wet, thick layer of Strong Tone Ink (AP) over entire base. Once it dried out - I applied another, identical layer. (Picture seem grey'ish - in real life this would look more brown and juicy)

! orem ipsum dolor sit amet, Integer commodo tristiqu odio, aliquet ut. Maecenas sed justo imperdiet bibendum. Vivamus nec sapien imperdiet diam. Aliquam erat volutpat. Sed onsectetur suscipit nunc et rutrum. Lorem ipsum dolor sit amet,volutpat. Sed onsectetur suscipit nunc et rutrum. Lorem ipsum dolor sit amet, volutpat.
1 Using either a Stippling brush or a well used up large brush I applied stains of Scorched Brown (GW) over all raised areas. Was carefull not to use too much paint.
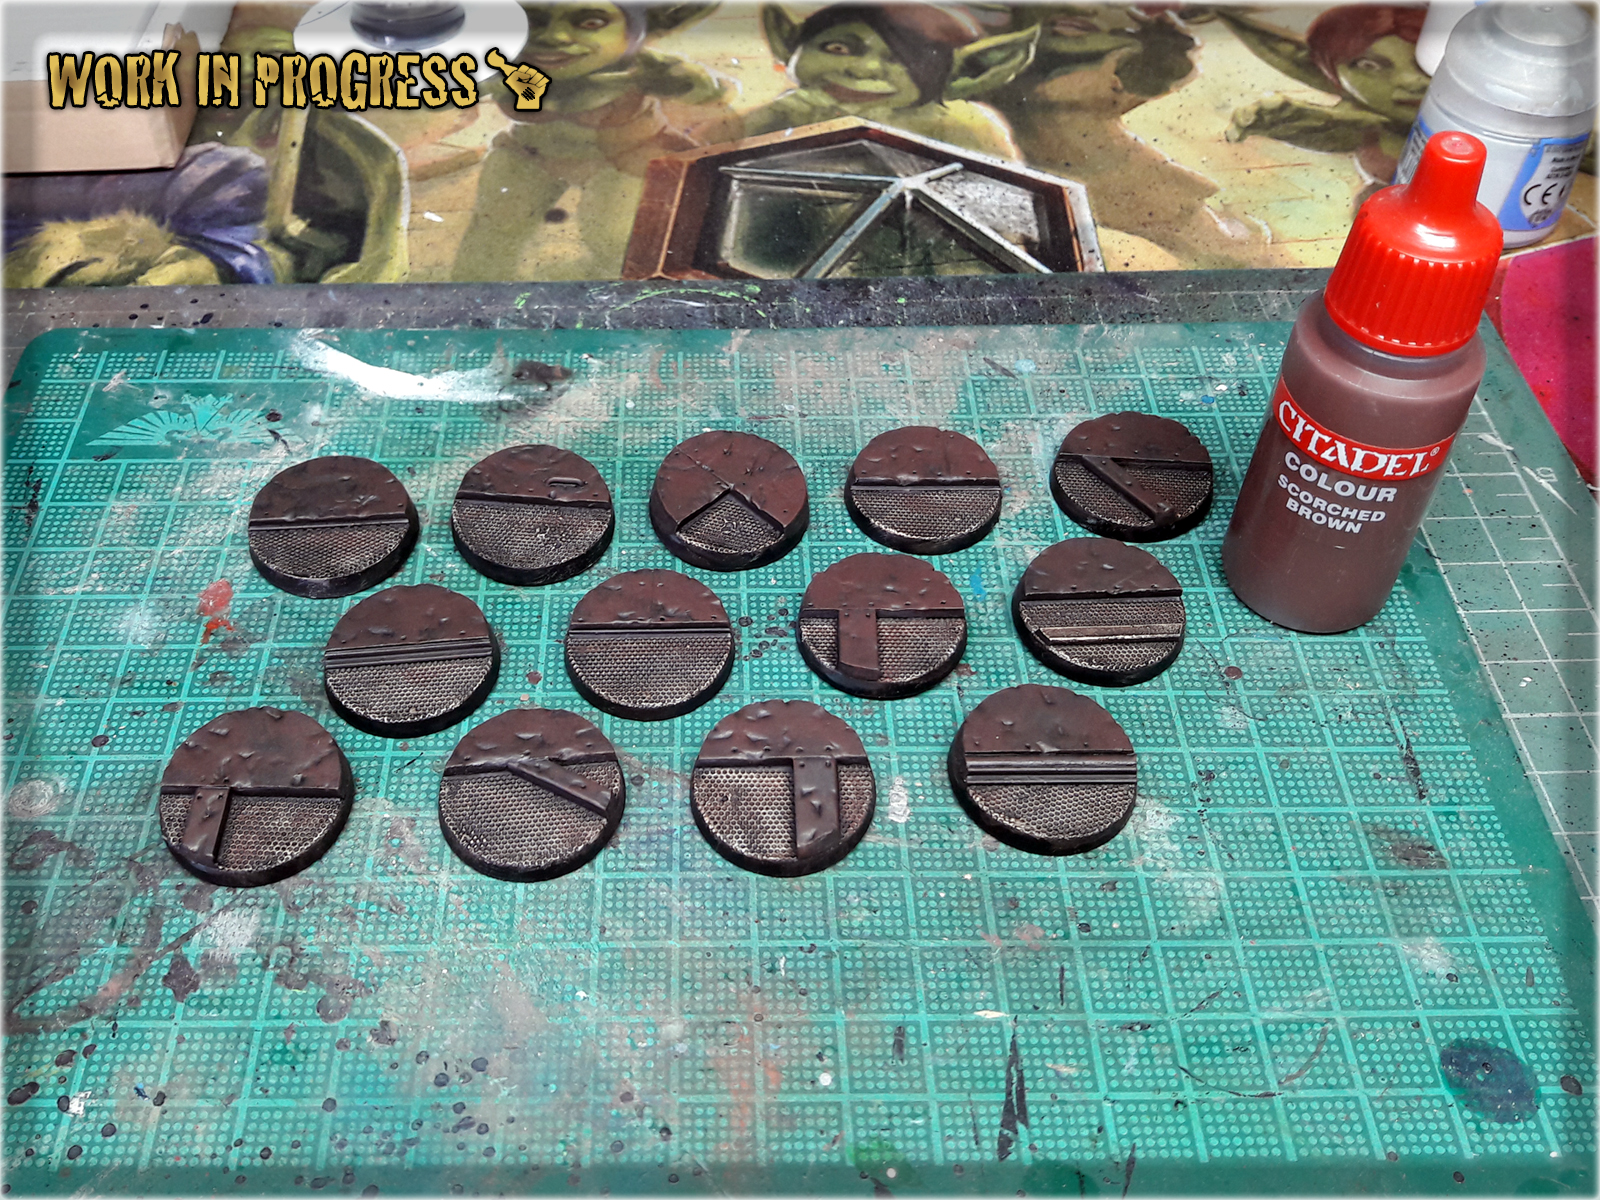
2 I then drybrushed edges and some large parts of raised areas using Calthan Brown (GW).

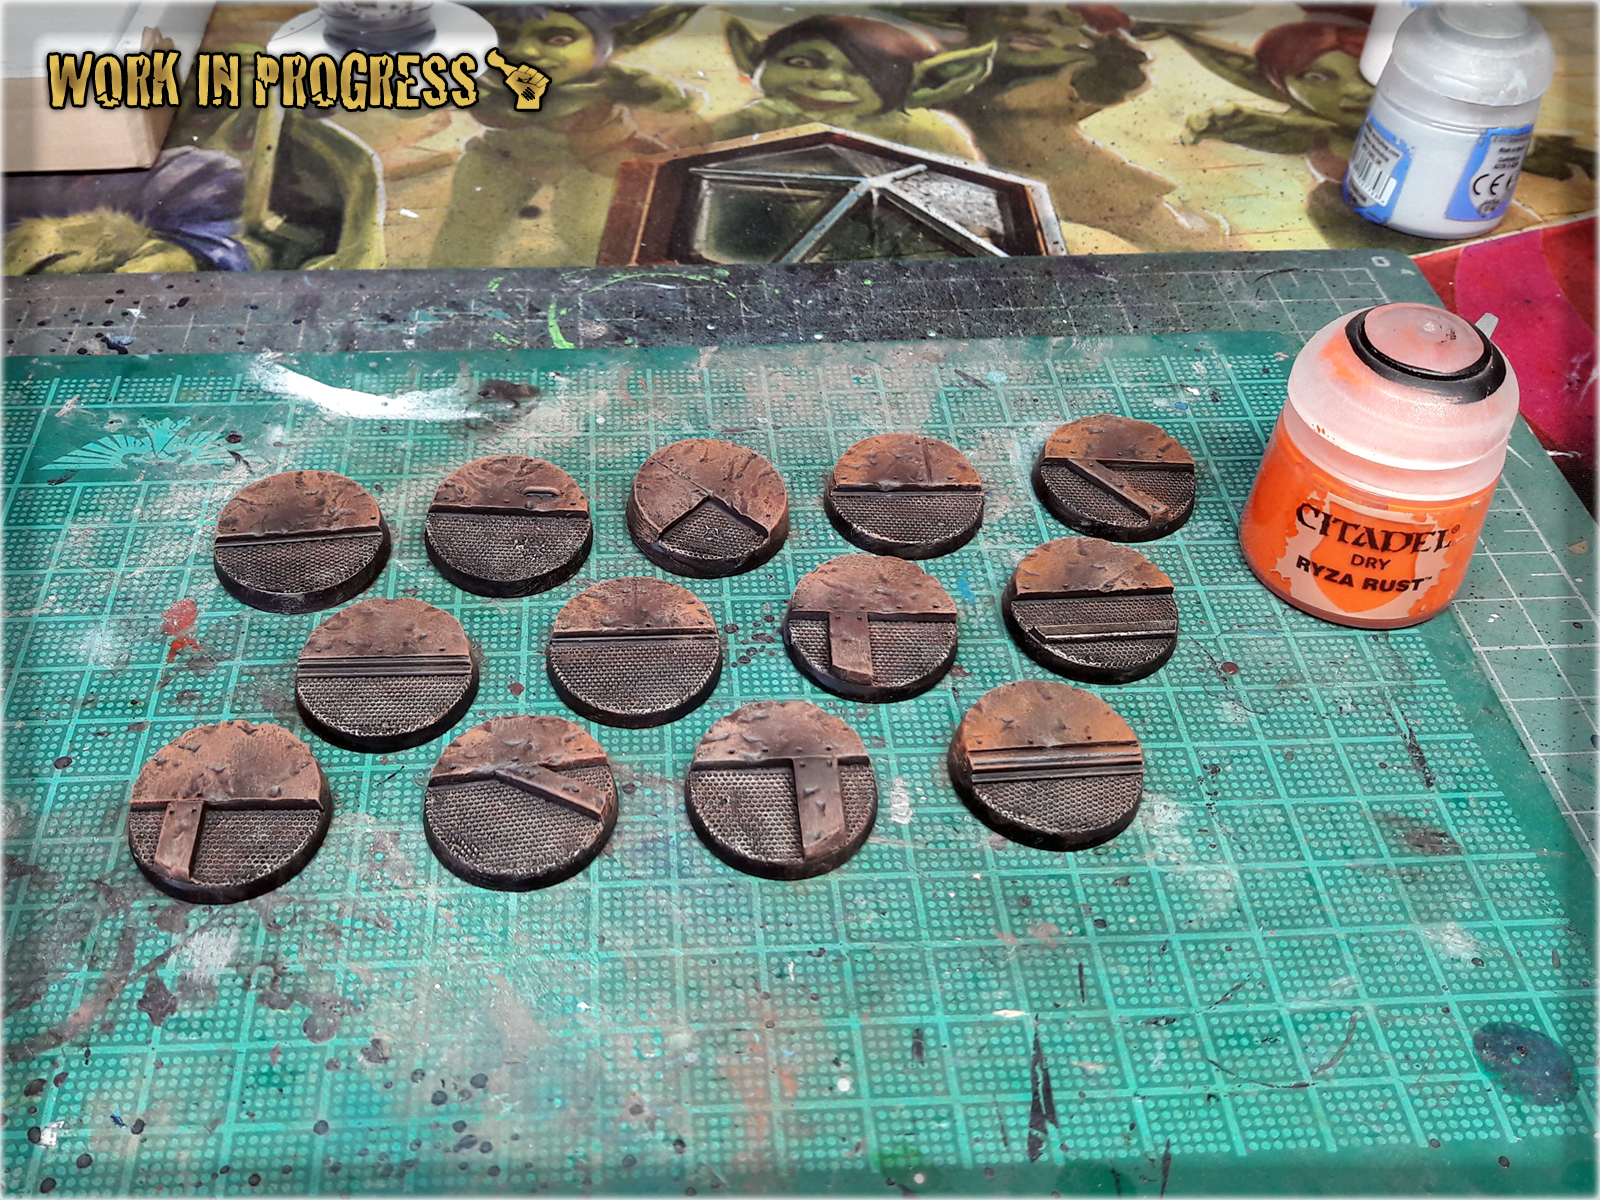
3 Next I Stippled some Ryza Rust (GW) on top of previous layer, ensuring to leave some Calthan Brown visible.
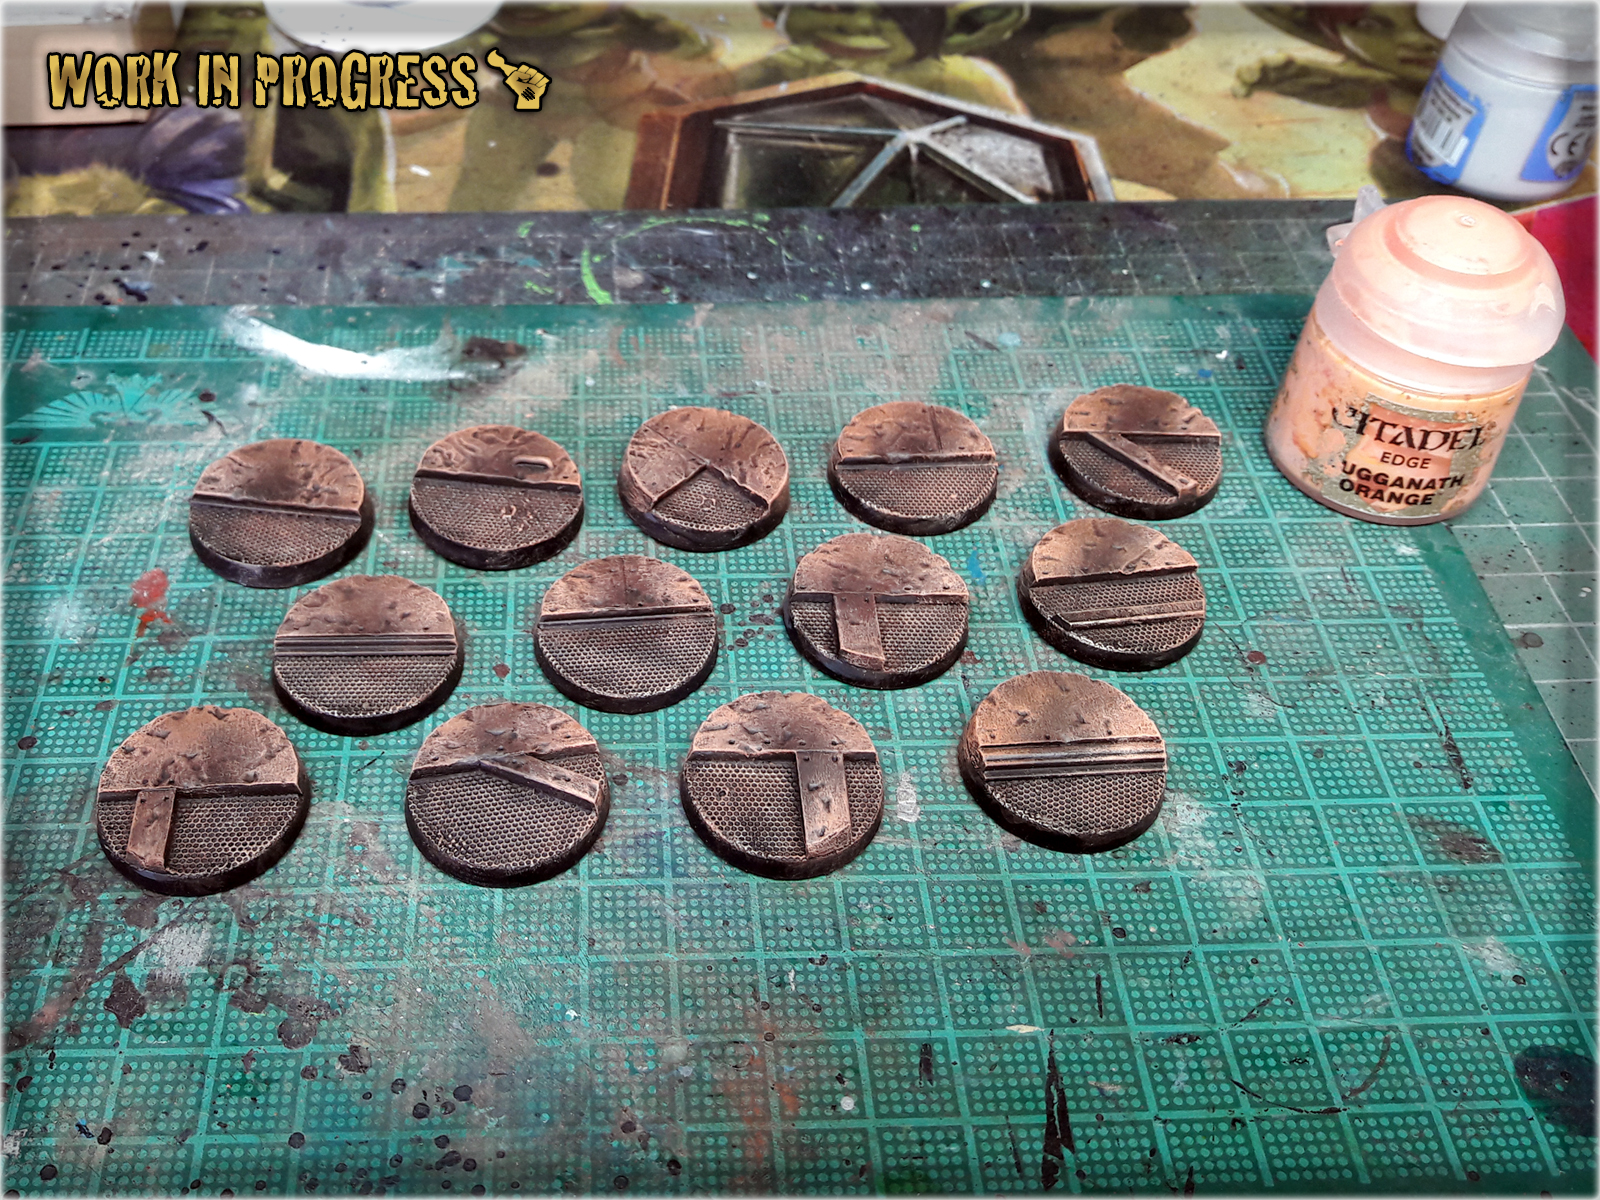
4 Same technique, different paint. I stippled Lugganath Orange (GW) on top of Ryza Rust layer, leaving previous layer visible on the sides of the new one.
! From this layer onward I usually paint over both raised and mesh areas. For the purpose of this Tutorial I left mesh parts clean, but do not be alarmed if you see pictures of my own bases with a less differentiated colour scheme.
5 Flayed one Flesh (GW) followed. This time I Drybrushed over Lugganath Orange layer and then used regular brush to paint thin lines on the edges.
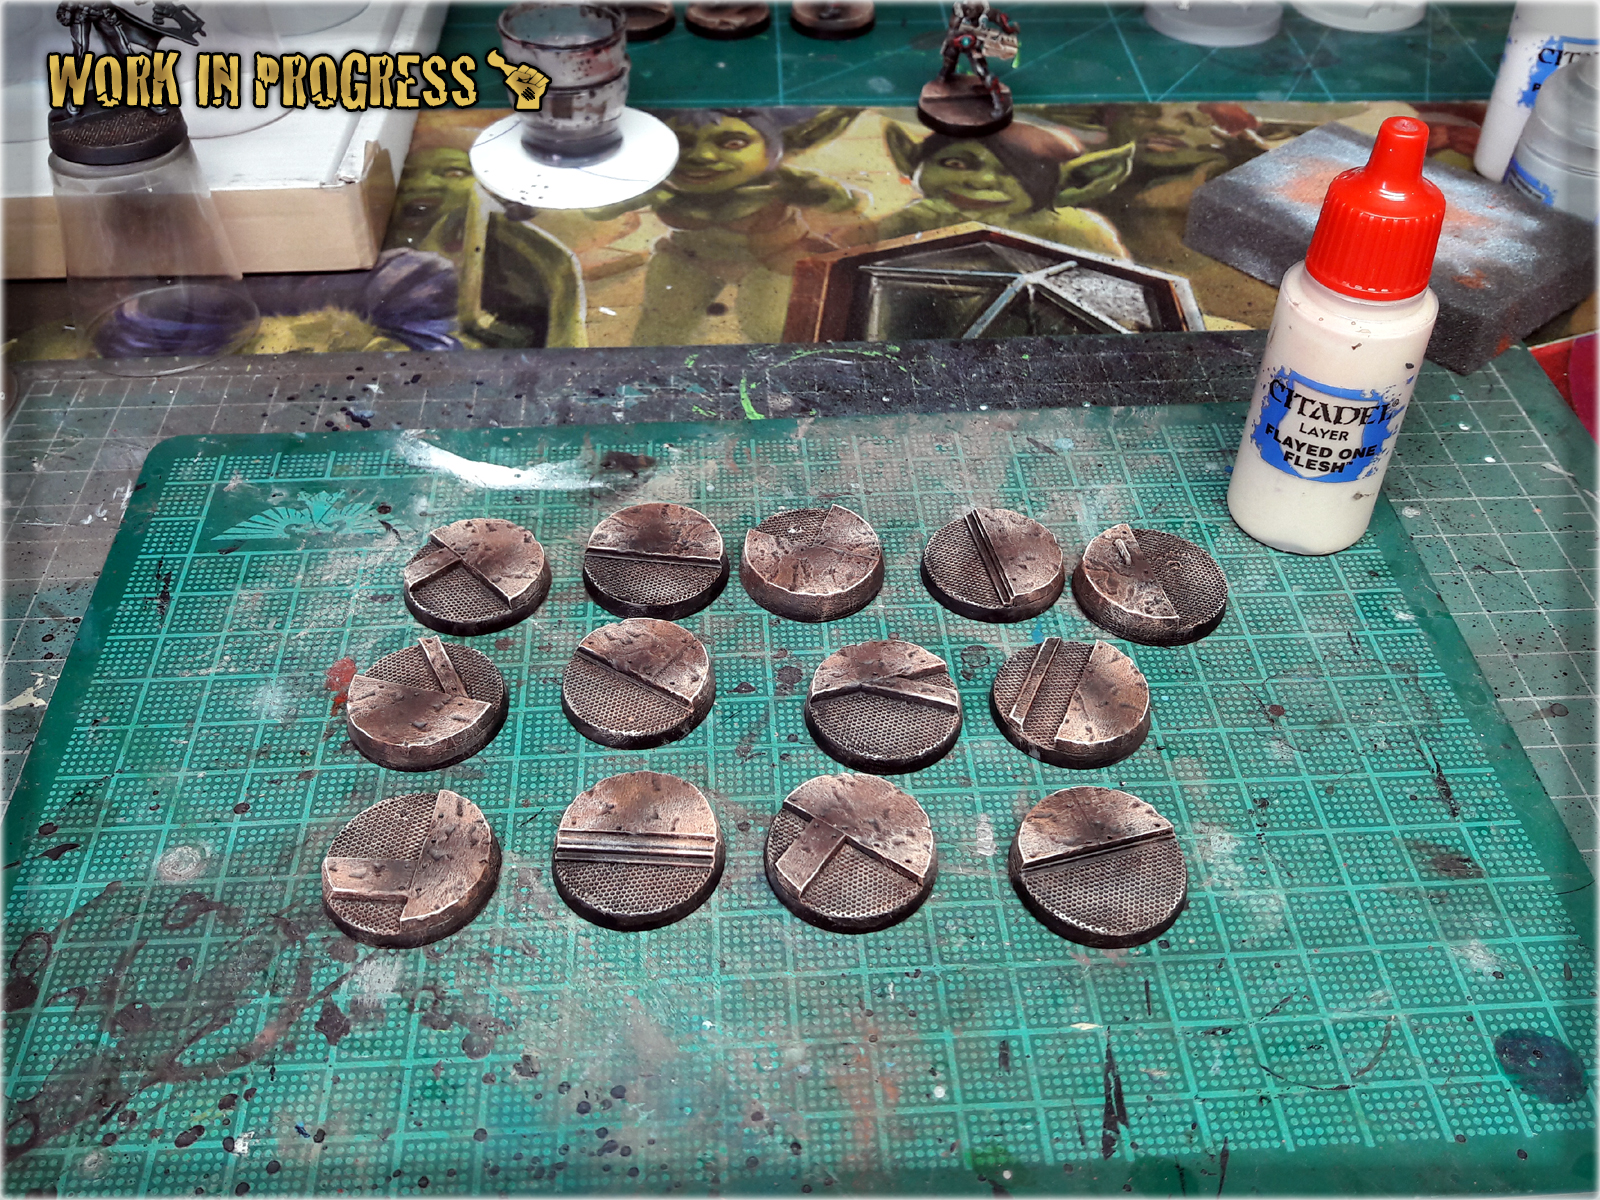
6 Adding a final touch I painted edges smooth Black to add contrast and keep the paint job clean.
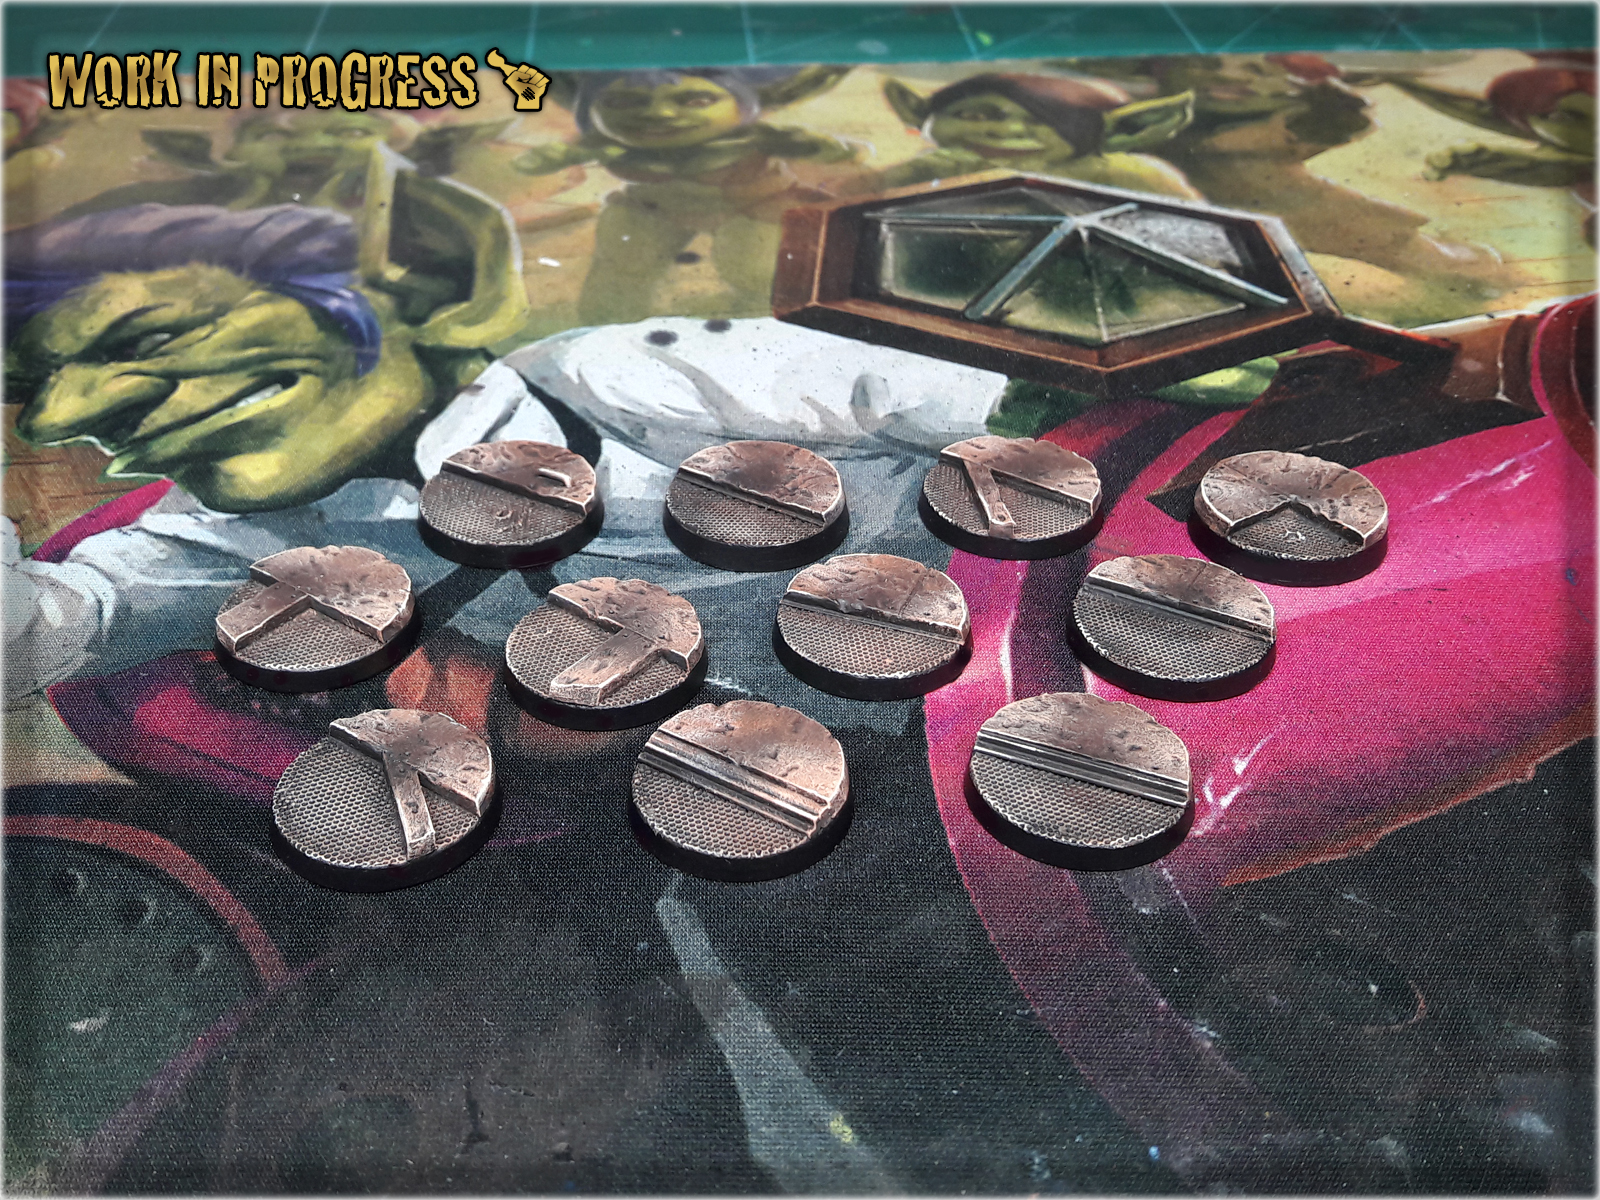
That’s it – you have followed me on my short journey from black undercoat to finished Corregidor Bases. Below you will find some examples of finished Corregidor Bases. Each bunch turns out slightly different from the rest. That’s because a slight difference in surface coverage or layer to layer proportion might result in change of how eye can see these bases. Either way – here they are:

Painting skin – nightmare for some, EZ for others. Back in the days I’ve struggled with a proper skin tone, my miniatures turning out too dark, or skin being overall flat and uninterresting. Practicing ‘Five Layers Technique‘ for many years, led me to some realisations and now I am able to present to you my ultimate way of basic skin painting.


* Regular Brush,
* Bugmans Glow (GW),
* Dwarf Flesh (GW),
* Flesh (Val AIR),
* Strong Tone Ink (AP),
* Soft Tone Ink (AP),
* Pale Flesh (Val),
! You can achieve similar results using different paints and avoiding mixes, as long as you follow Five Layers Technique basics. For example Bugmans Glow (GW) might be switched for Tanned Flesh (AP) or Tan (Vallejo).
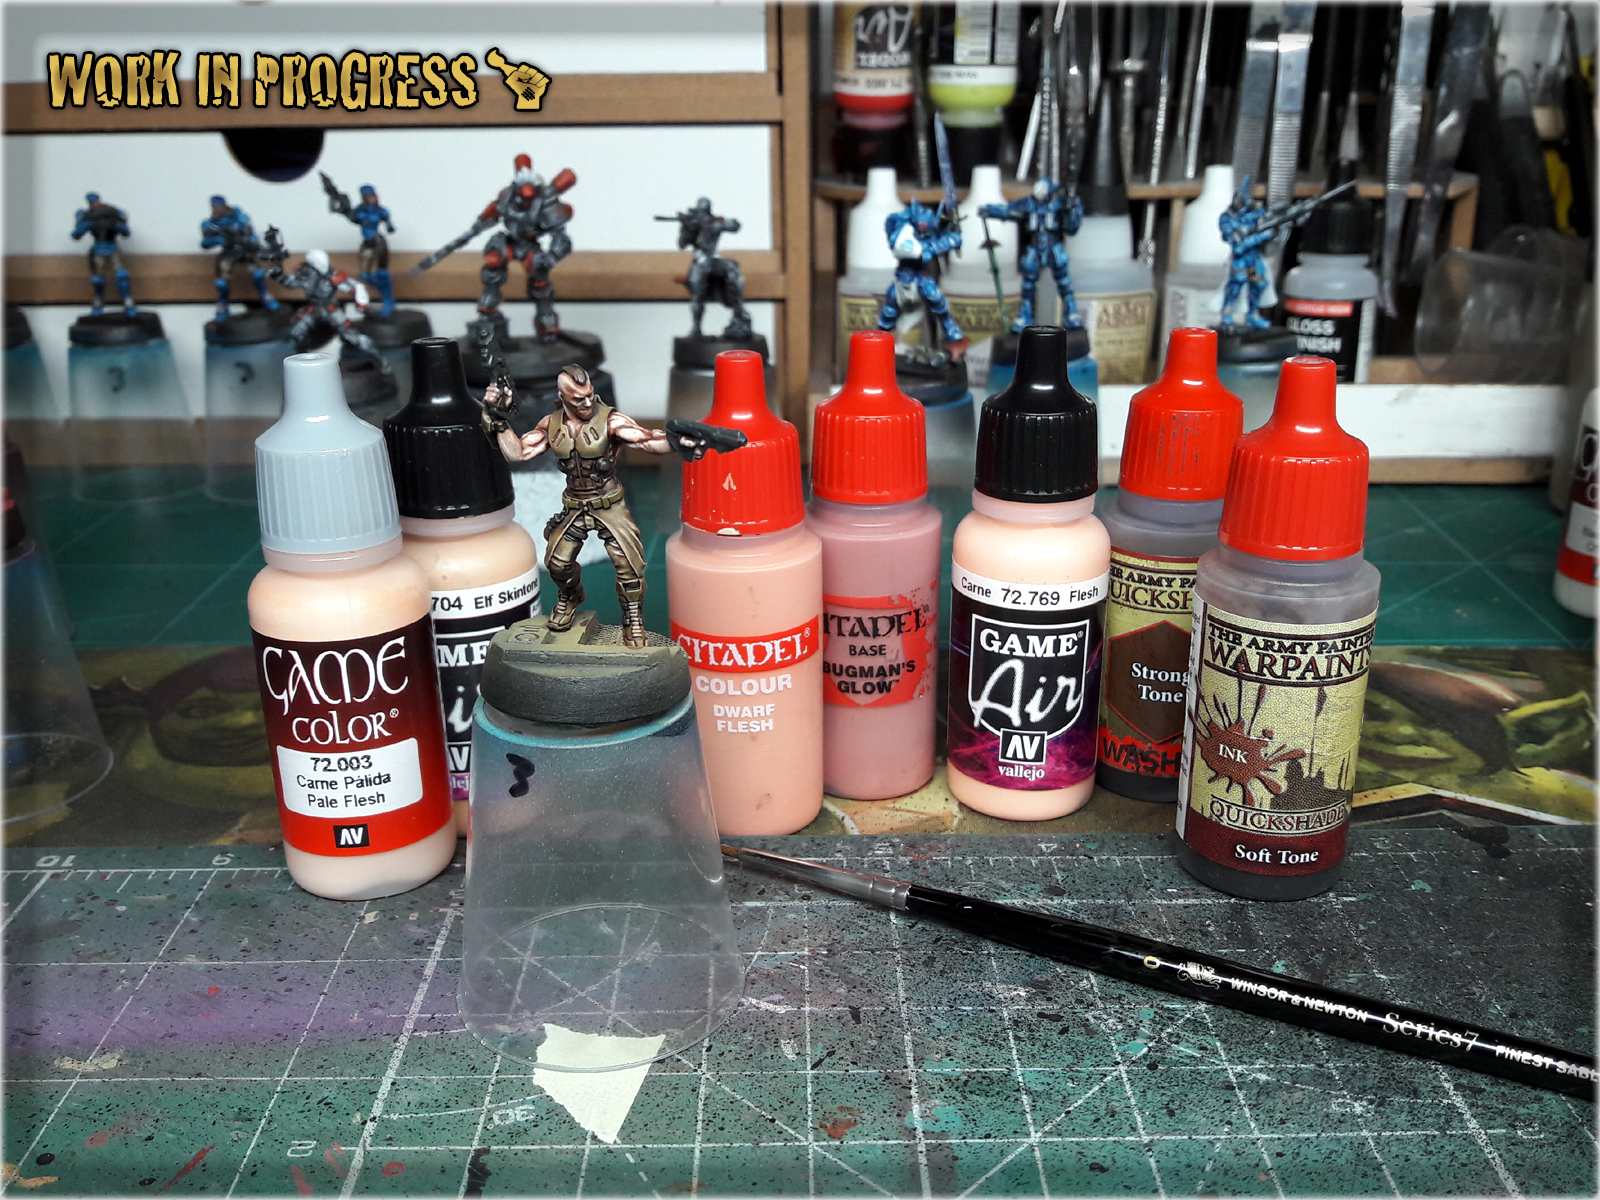
! You can start by applying first layer on any surface. This method does not require any special preparation, like re-painting surface to primer black etc.

1 I started by applying an underlayer of Bugmans Glow paint over any surface destined to become skin. This layer might be a bit messy and is not meant to be smooth, only to cover entire surface. For this particular layer I encourage thinning the paint a bit to help it flow into recesses.
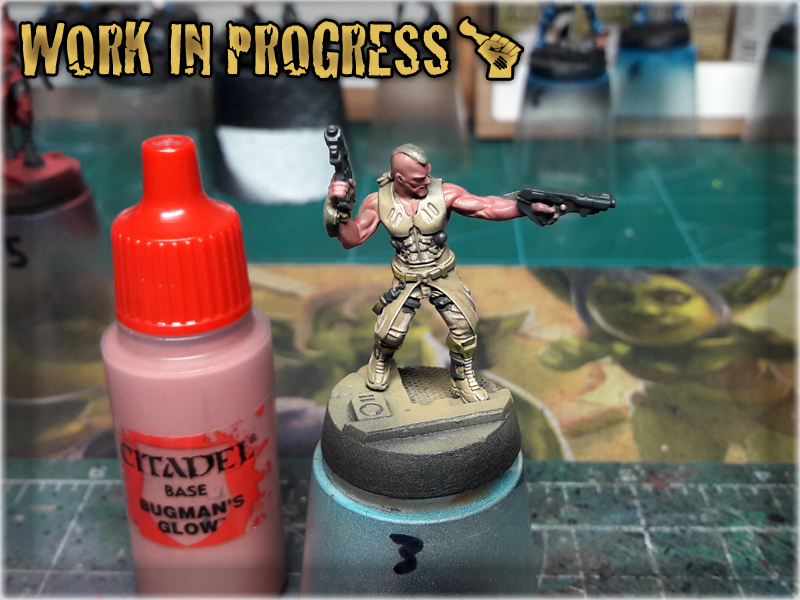
2 Next I applied a main layer of Dwarf Flesh. This time I tried to keep paint from flowing into recesses and made sure that it will cover all big flat areas.

3 I then applied a layer made of a 1:1 mix of Dwarf Flesh and Flesh over all raised areas. This is suposed to be the first highligh and provides a difference in skin tones over the model. Don't worry if some piant flows into recesses, just try to avoid covering everything with it.

4 Here came the flood of wash. I applied a 1:1 mix of Army Painter's Strong Tone Ink with Soft Tone Ink. As usual I didn't bother to be subtle about it.


5 Once dried, I highlighted skin with a 1:1 mix of Elf Skintone and Pale Flesh. This usually is the final highlight and is meant to POP the skin.
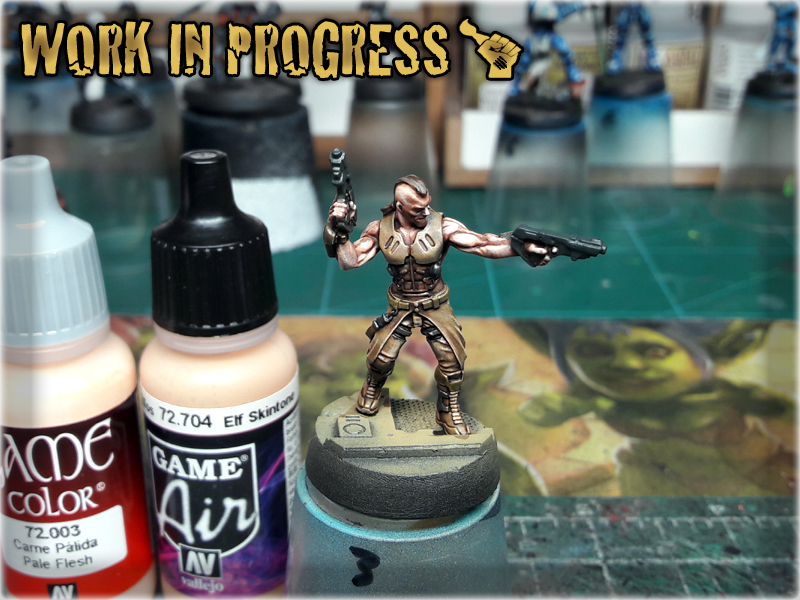
! If I was to enchance skin a bit and move forward from this point, I would add points of focus with lines and dots of Pale Flesh. Some deeper spots can also be in-lined with Flesh Tone or some brown-ish wash to build contrast but that's for another article.

How about I show you a technique to paint brown military coats like a pro in a way so simple that it’ll make you wander why haven’t you painted like that before? Below is a simple Step-by-step tutorial on how to achieve awesome tattered and used up leather brown coat effect in just few simple steps.

First some home brewed theory.
Stippling: A technique of creating texture out of dozens of tiny dots of paint. Easiest way to achieve this is to use a Stippling Brush (round head, tip cut off – flat surface instead, resilient hair).
Blending: A technique of gently intermingling two or more colors to create a gradual transition or to soften lines. Below I will demonstrate a rather crude version of it.
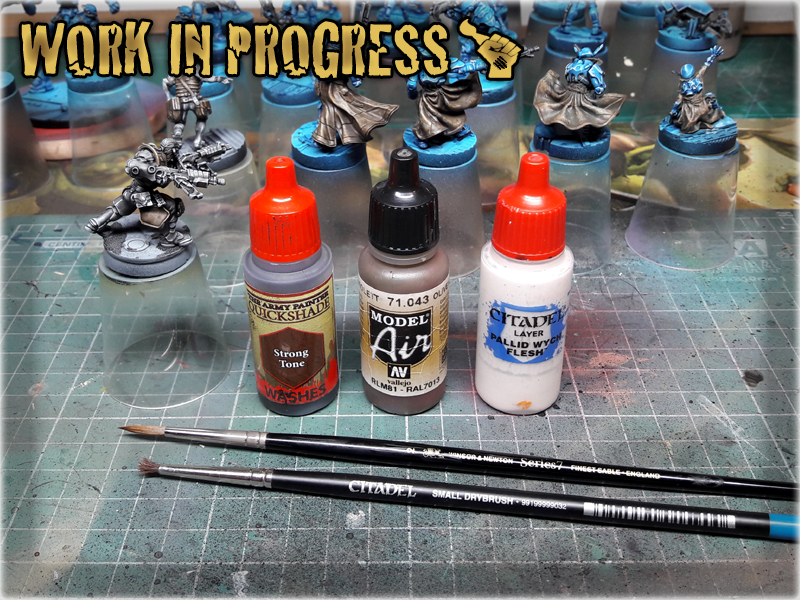
* Stippling Brush (GW),
* Regular Brush,
* Olive Drab (Vallejo AIR),
* Pallid Wych Flesh (GW),
* Strong Tone Ink (AP),
1 You can start painting this on any dark surface, but for good result I recommend to prepare the surface, by following steps 1 to 3 of Painting 'Infinity' Black Tutorial. This will transition into a complex and interresting surface to work on. On a bright side neither these nor following layers require precision and are really fast to paint.
TUTORIAL: PAINTING ‘INFINITY’ BLACK
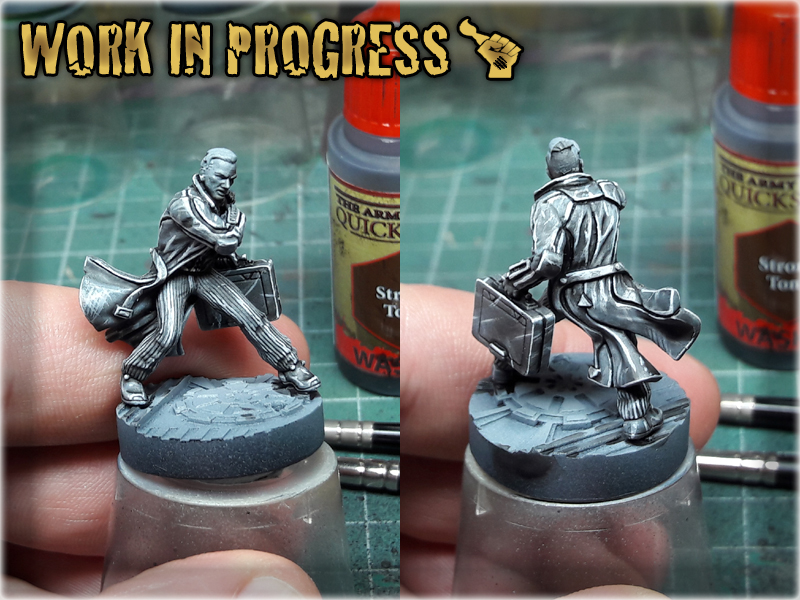
2 Time to stipple. I used a Stippling brush and Pallid Wych Flesh paint. I left the excess paint on the palette and randomly applied some dots onto the coat.


3 Next I mixed Olive Drab 1:1 with Strong Tone Ink and applied it all over the coat. This is the crude version of blending I mentioned earlier. It has not much to do with actual blending technique, except it changes the color and actually 'blends'.
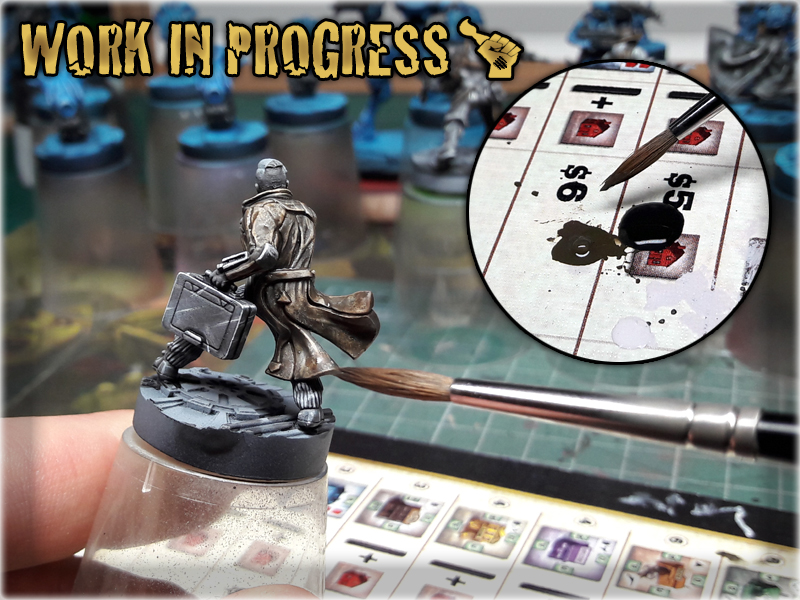
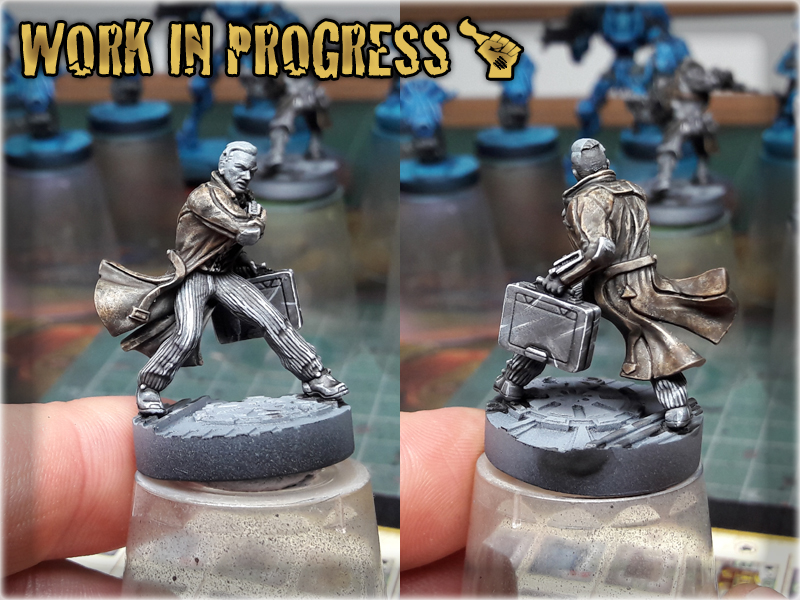
4 Wash comes last. I applied a strong, wet layer of Strong Tone Ink all over the coat. Once dry - paint job is done.

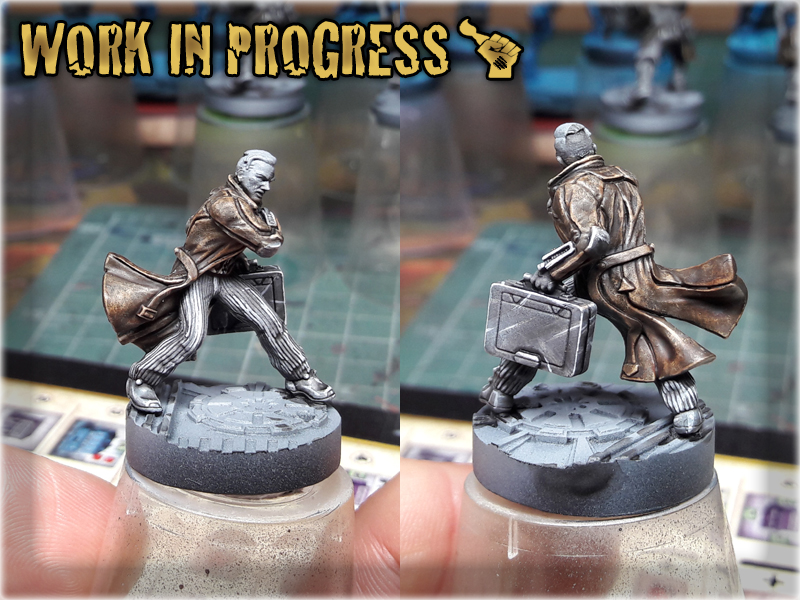
! This might be the end to it, but if you preffer to take your paint job to a higher level you can for example 'edge' the coat with a brighter brown/leathery colour. From now on you have a great looking base to add detail to and it was achieved in no time.


This is a second installment in the ‘Painting Philosophy’ series in which I let you in on ‘how’ and especially ‘why’ I do some things in a certain way. “In my opinion a proper approach to painting is crucial to maintain healthy and rewarding experience. Final result depends on it in the same way as on techniques, know-how and tools used. Nowadays internet is full of painting tutorials yet it takes some inner understanding of our own capabilities to find what suits us best and fully benefit from all acquired knowledge. That being said – In this series I will reveal what works best for me as a painter. I hope you will find some wisdom in it…”
The edge, a plastic frontier between a piece of art and the rest of the world. It divides a miniature from the surrounding chaos. It defines the paint job. It underlines the final result of your work, enhancing the visual effect. In short, a properly painted edge of a base will enclose the miniature just like a frame around a painting. Can you imagine a ‘Mona Lisa’ in a dirty styrofoam frame? Well, that’s what I see each time I look upon a picture of awesomely painted miniature on a base, with dirty, unprepared edge. No matter the quality of paint job, a piece of art turns into a kid with chocolate smeared all over it’s face. I just can’t appreciate ‘that’. But is the difference so evident? Don’t take my word for it – see for yourself…
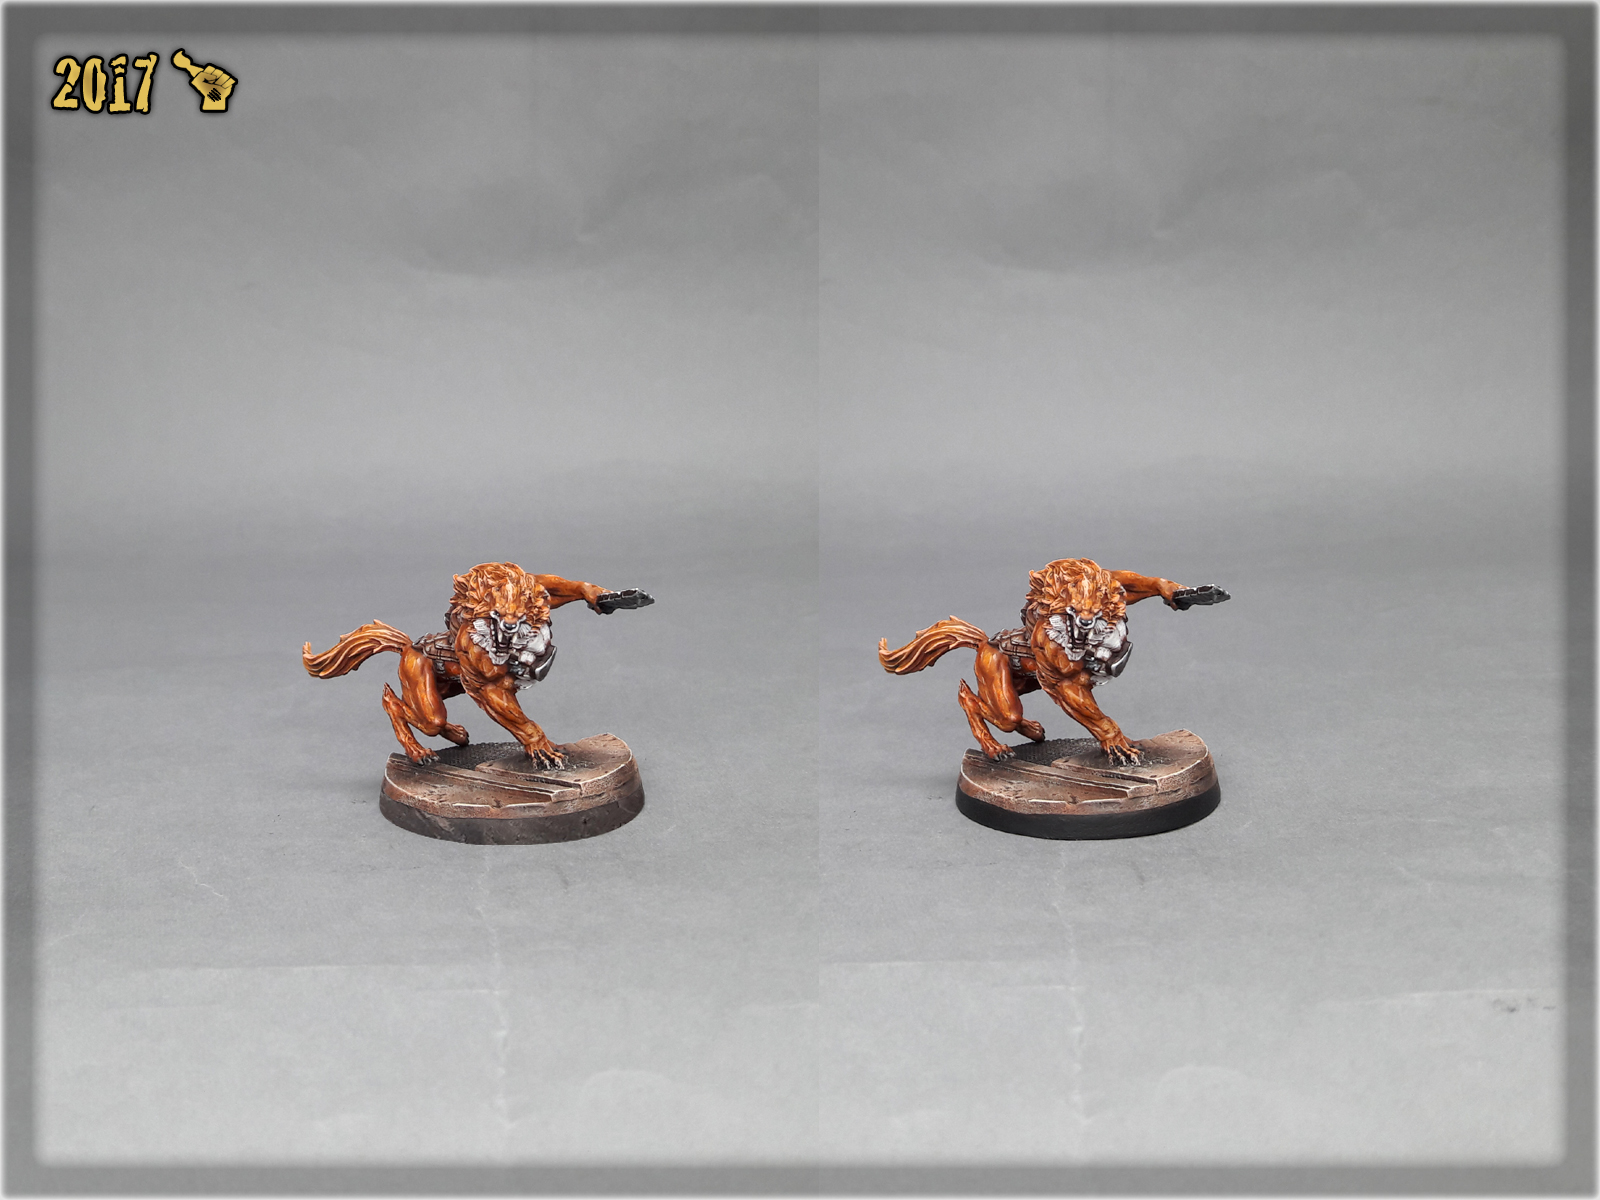
This actually IS the exact same miniature, with the only exception of one base’s edge being covered with a dirty base edge Photoshopped from a work in progress picture. But enough about ‘how I feel’ and let’s skip to ‘how I do’. For me there’s only one paint capable of fully POPing a miniature on the battlefield and it’s BLACK!
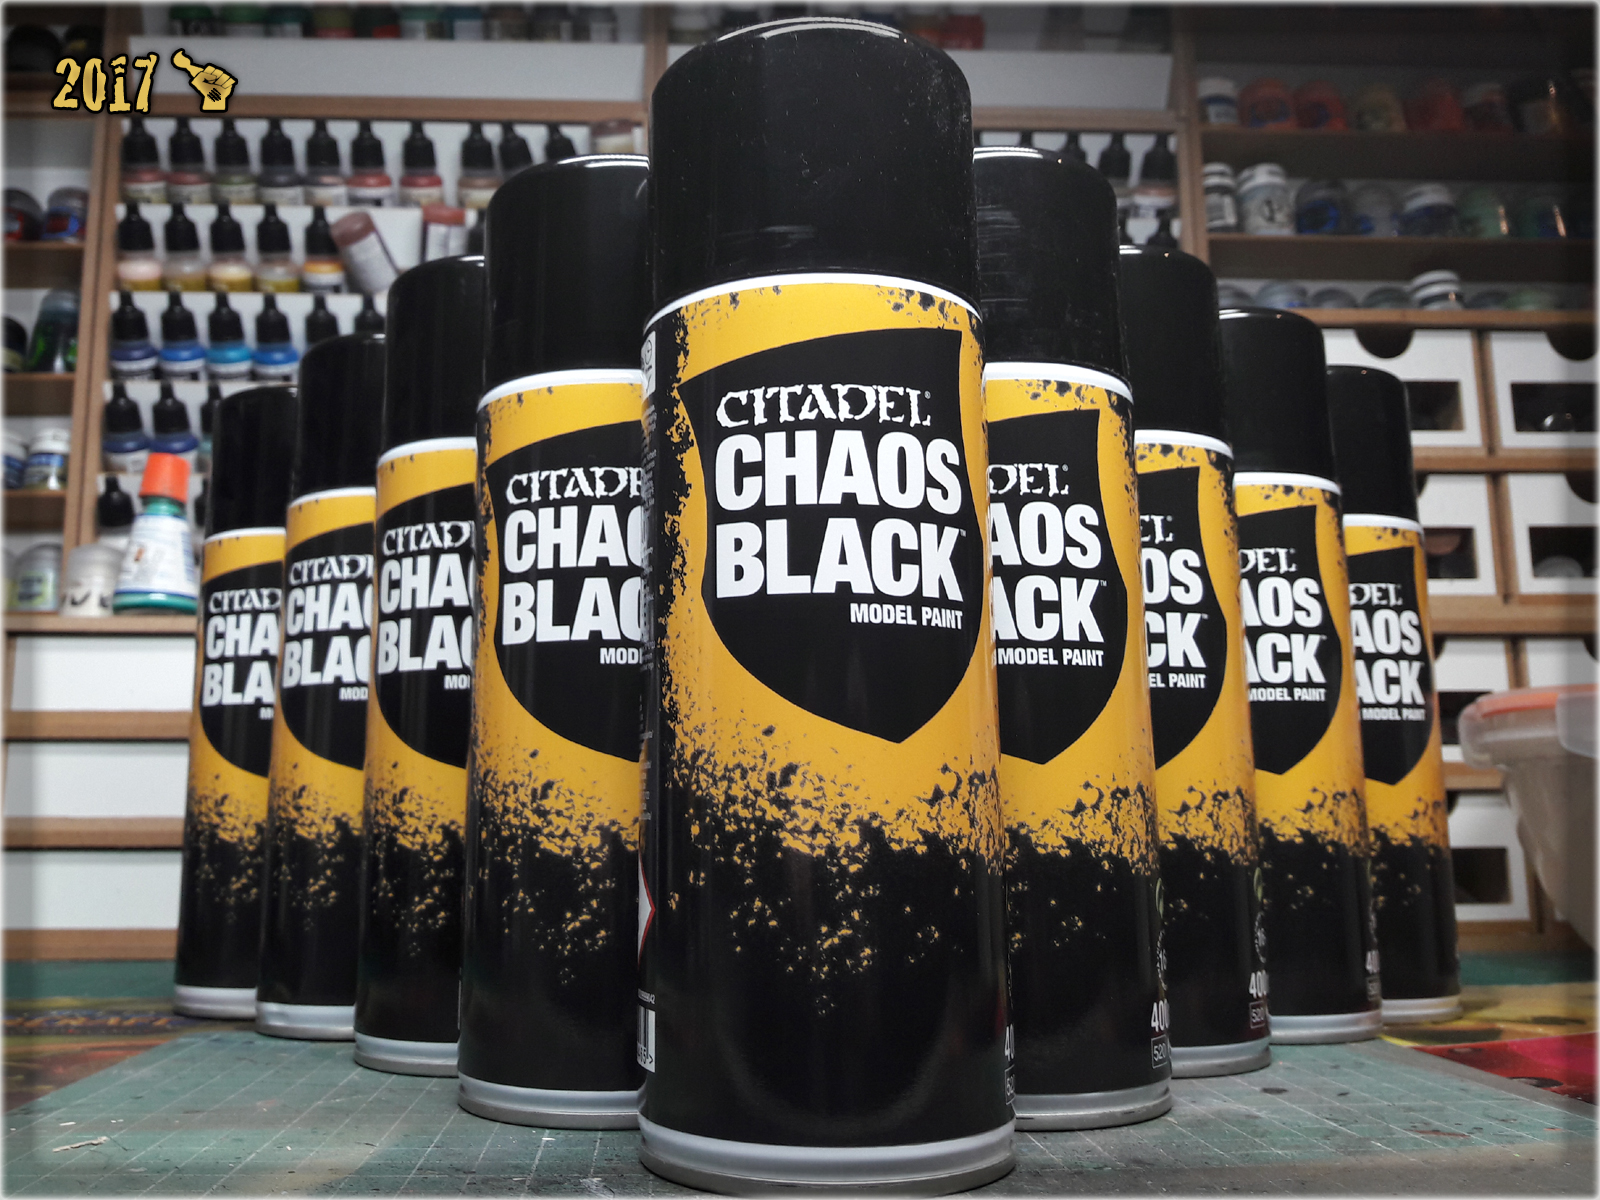
In light spectrum black is not even a color per se, being an ultimate lack of color instead. In the world of hobby paints black is technically a color, due to pigments used to create black paint. This particular colour will work with whatever color scheme you choose for a miniature, enhancing the effect of what’s on the base. It is worth mentioning, that black paint usually surpasses other colors when it comes to opacity, therefore it is much easier to provide a smooth, opaque layer using black than most other paints.
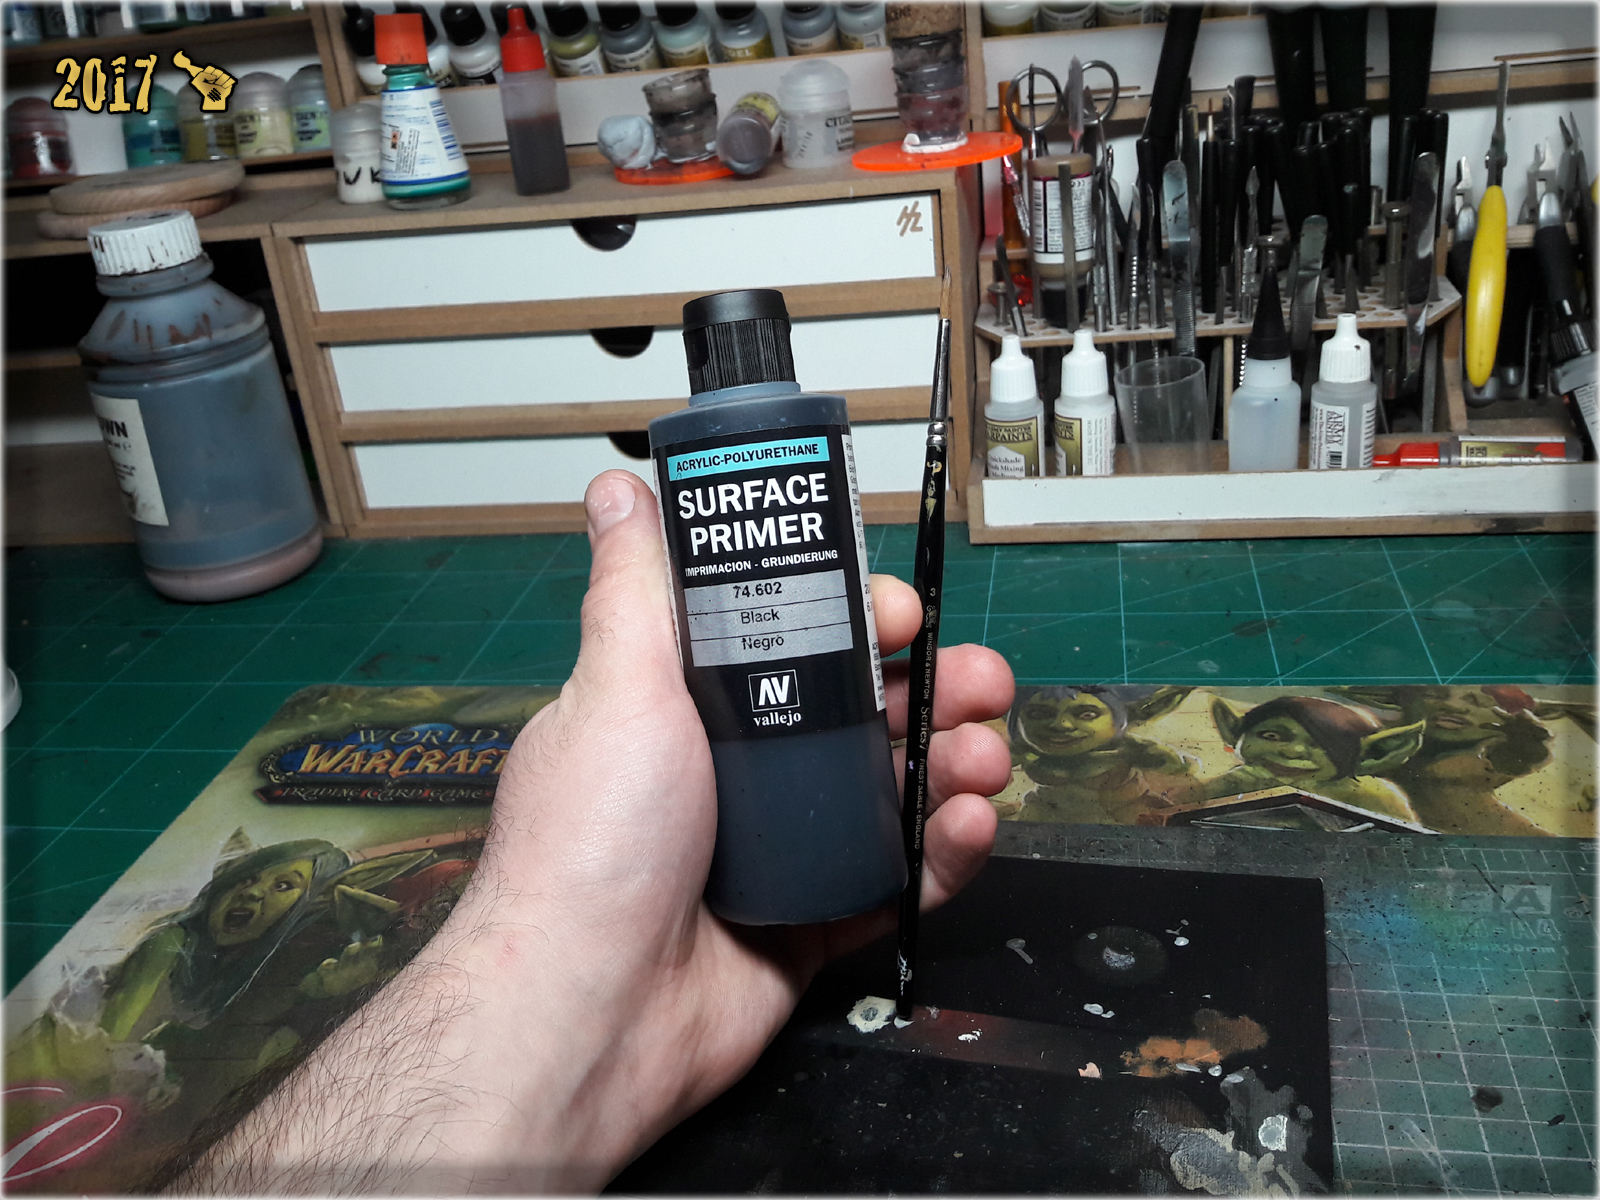
I go about it in a simple, old school manner – with regular medium sized brush and a good, trusted paint. After testing a lot of different black paints I chose Vallejo 74.602 Negro Surface Primer. It works great both with brush and surface. Usually one layer is all that is needed to fully cover the edge, if not – second one is always enough. This paint leaves a nice, smooth, thick layer, hiding some irregularities that might happen to cover the edge of the base. It is worth pointing out, that the base’s edge is always the last thing I paint, before finishing a project. First I thoroughly clean up my painting space of any project leftovers, then I apply varnish and just then move to painting black edges. This way both Varnish and edges are clear of any dust particles and unwanted stuff that might stick to them.
How do I deal with a situation, when a game requires the base to be marked / split or otherwise painted so that the arc of vision or other feature is clearly visible? I prefer to either:
* Use a modelled on-base feature to clearly indicate the direction a miniature is facing,
* Use a marker instead,
When painting a project for someone else I’m sometimes asked to add an ‘arc of sight’ on the base’s edge. If possible I provide small markings to minimize the other colors impact on the otherwise black edge. This seems to work pretty well and keeps the initial feel of a miniature being underlined.
So here we are, at an end of the second installment in the Painting Philosophy – a series that is meant to ‘infect’ you with some of my hobby ideals. Hope you found this one interesting and helpful.
As usual – I have put a lot of effort into preparing for this article, yet I am sure I missed something important. If you happen to have any questions or suggestions related to it – feel free to hit me with them. Also take note that what works for me, might not necessarily work for you – still there are many ways to accomplish certain things – mine is just one of them.
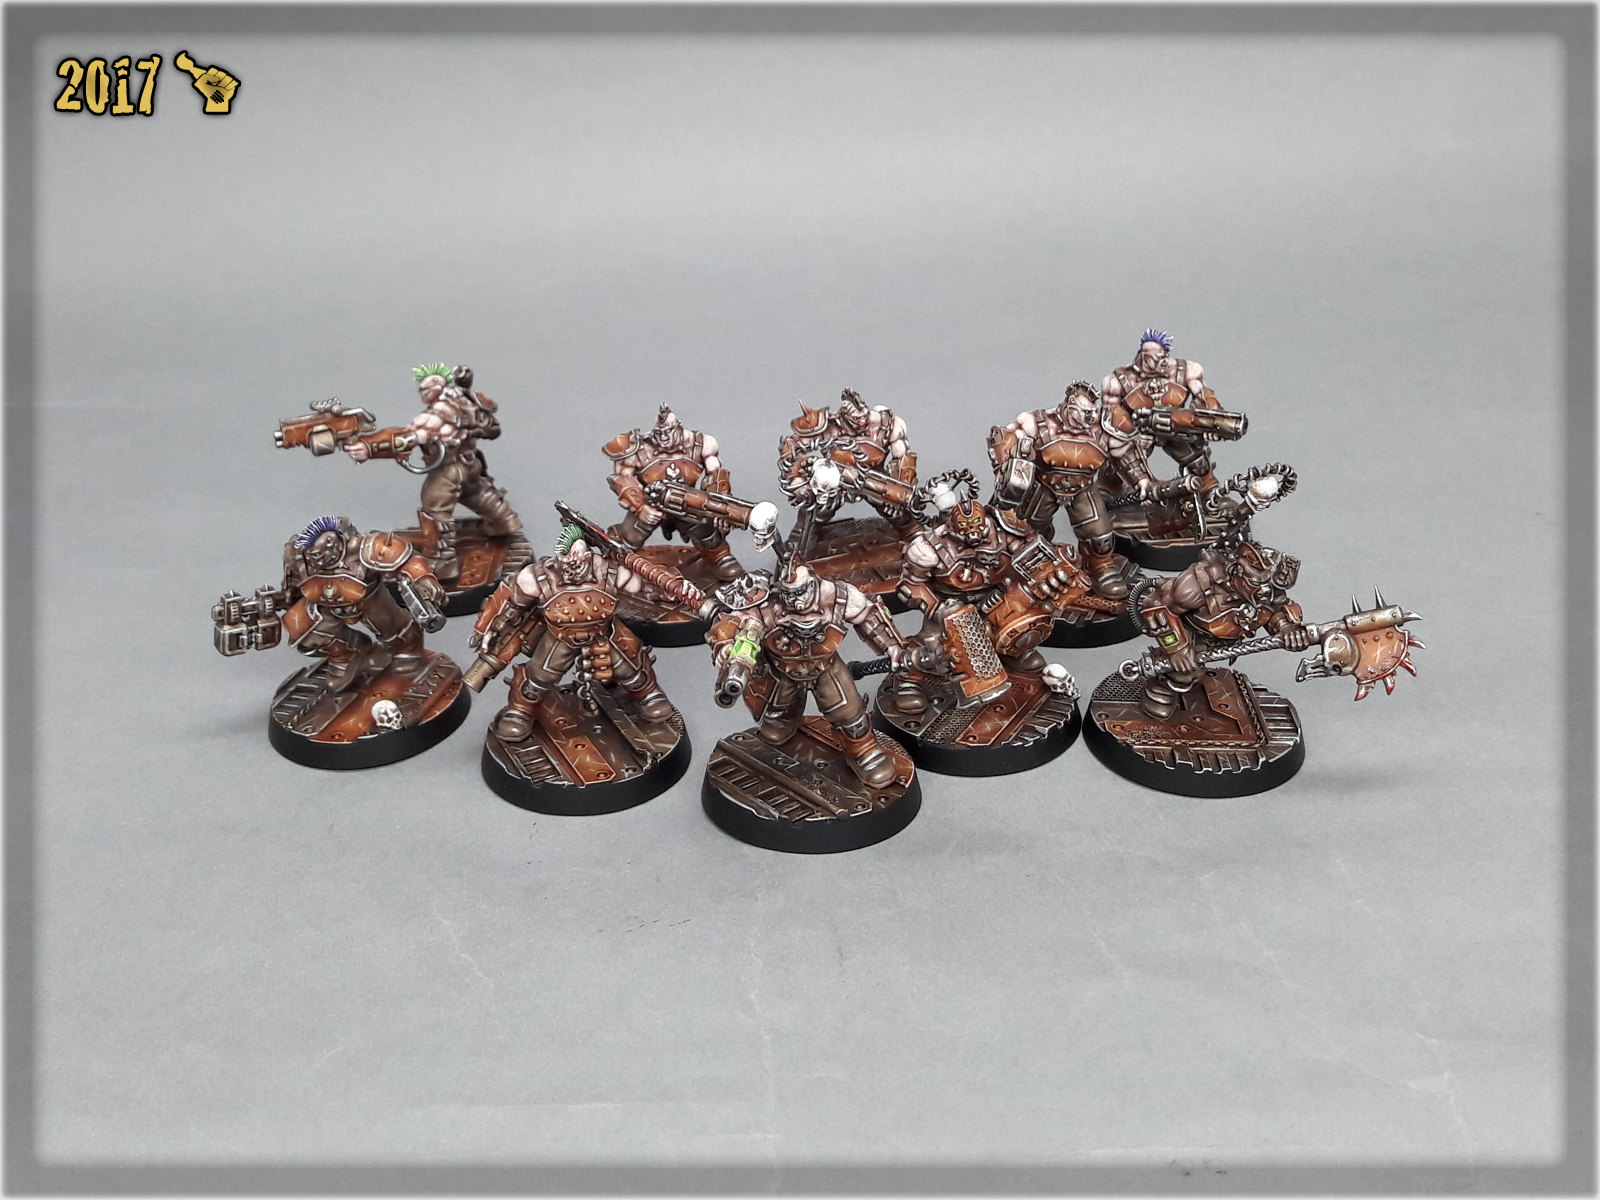
All right, sweethearts, you’re a team and there’s nothin’ to worry about. We come here, and we gonna conquer, and we gonna paint some, is that understood? That’s what we gonna do, sweethearts, we are going to go and paint some. All right, people, on the ready line! Are ya lean?

Here are some Colour Recipes for Necromunda scenery pieces from GALLERY: NECROMUNDA UNDERHIVE. Please take note that this is a simple colour scheme, not covering multiple overlapping layers and blends inbetween, that lead to the final product. It is supposed to be used as guidline not a step-by-step.

METAL:
Black Undercoat,
Warplock Bronze (GW), *
Gun Metal (AP),
Shining Silver (AP),
Strong Tone Ink (AP),
Shining Silver (AP), l&p
Streaking Grime (AK),
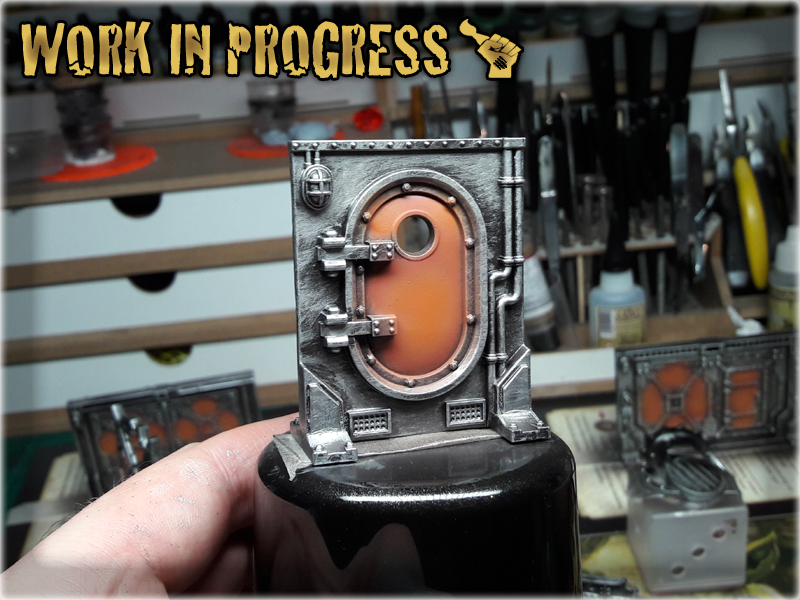
ORANGE’ish elements:
Black Undercoat,
Cavalry Brown (Val), *
Orange Brown (Val), *
Strong Tone Ink (AP),
Orange Brown (Val), stpl
Lugganath Orange (GW), l&p
Streaking Grime (AK), 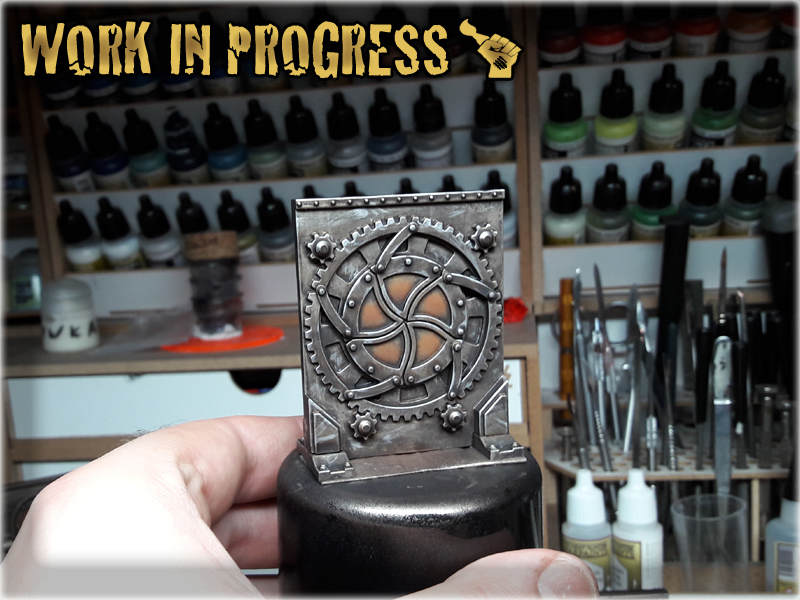 GREEN lights:
Duck Egg Green (Val), *
Light Livery Green (Val), *
Waywatcher Green (GW),
Off White (Val), l&p

l&p – lines and points,
p – points,
b – blend,
drbr – drybrush,
flbr – flatbrush,
stpl – stippling,
*Airbrushed (with multiple layers and mixes)

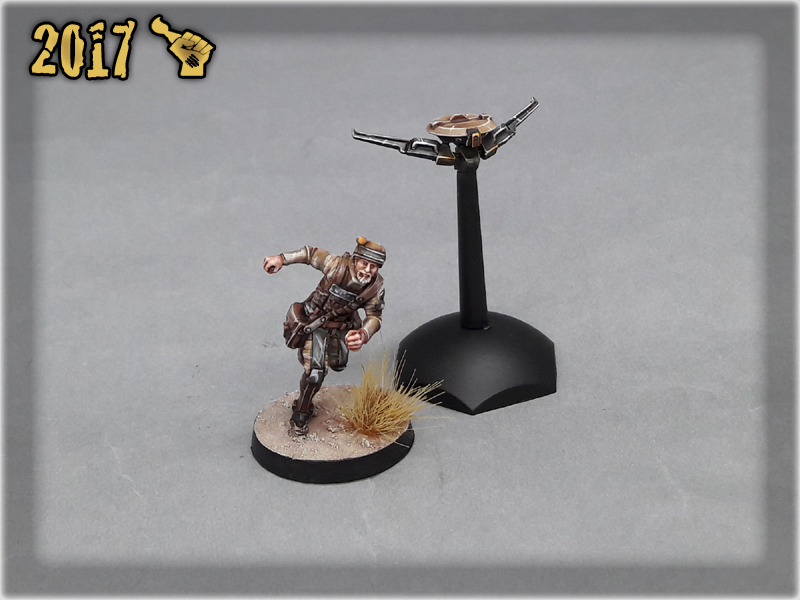
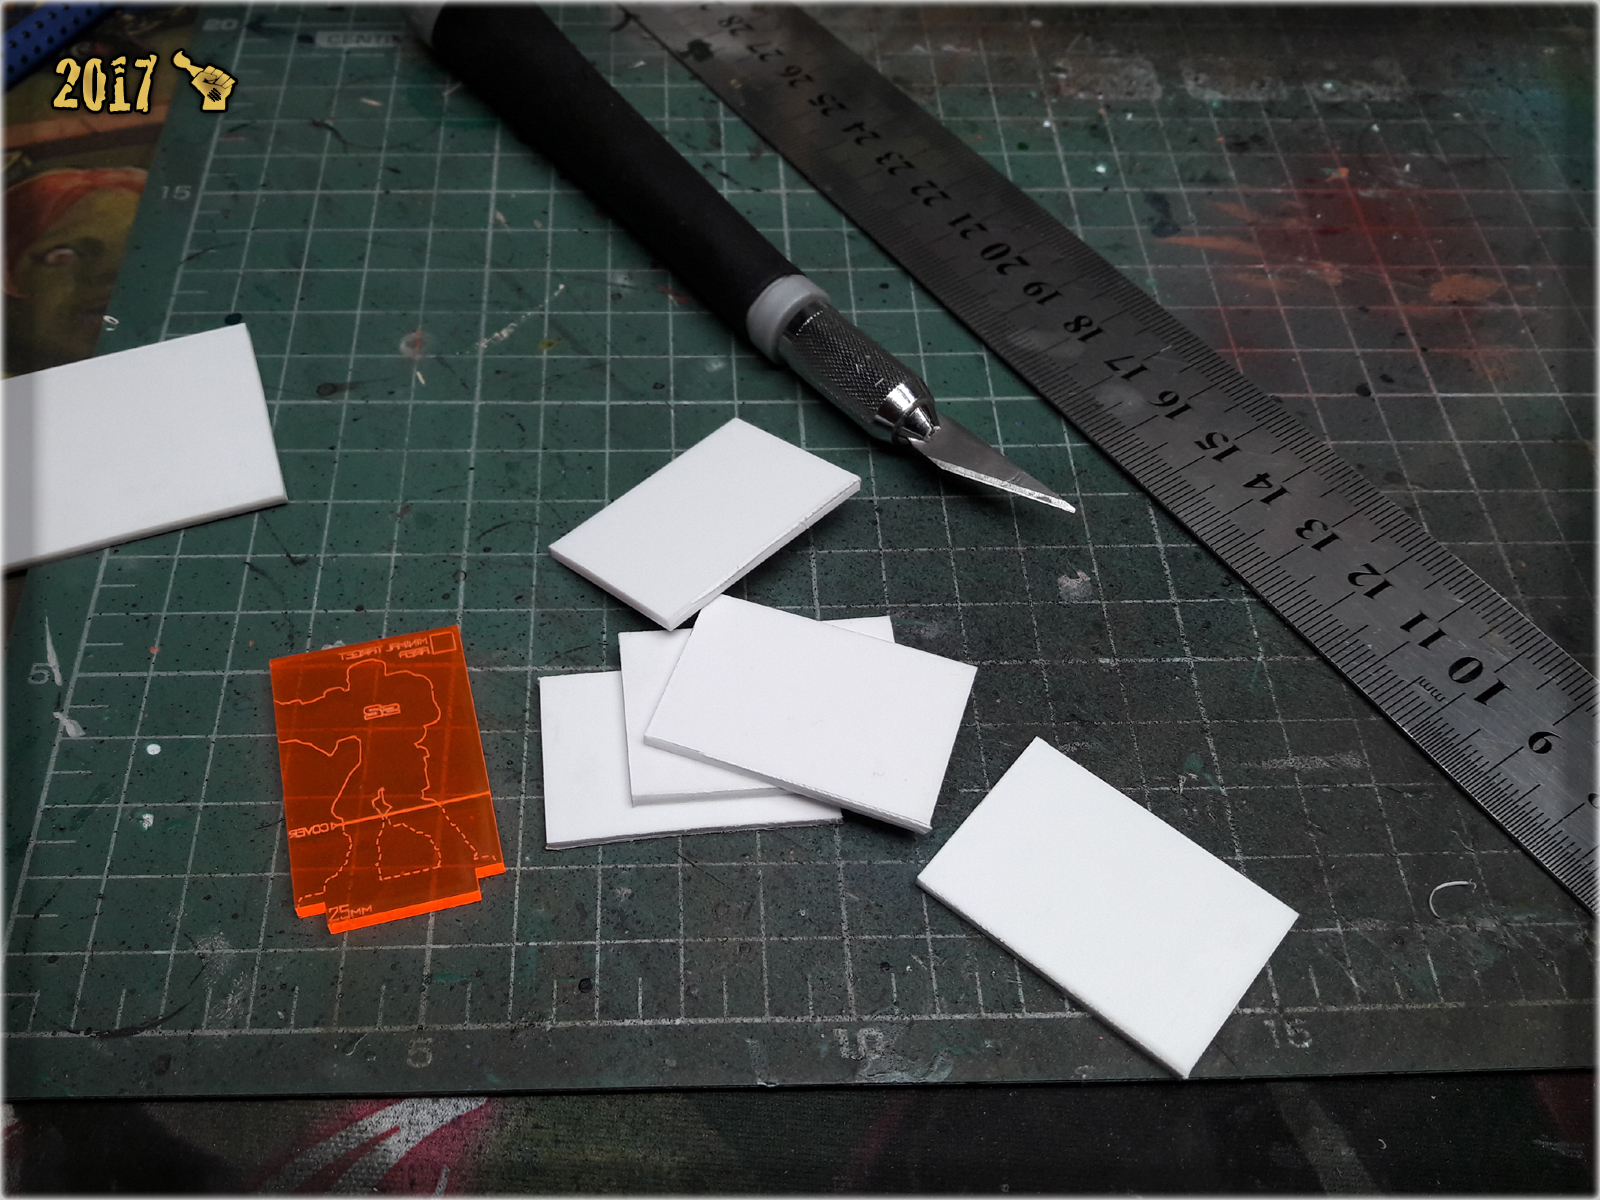
In this article I would like to present to you an easy way to prepare and then paint your own Camo Markers for Infinity the Game.
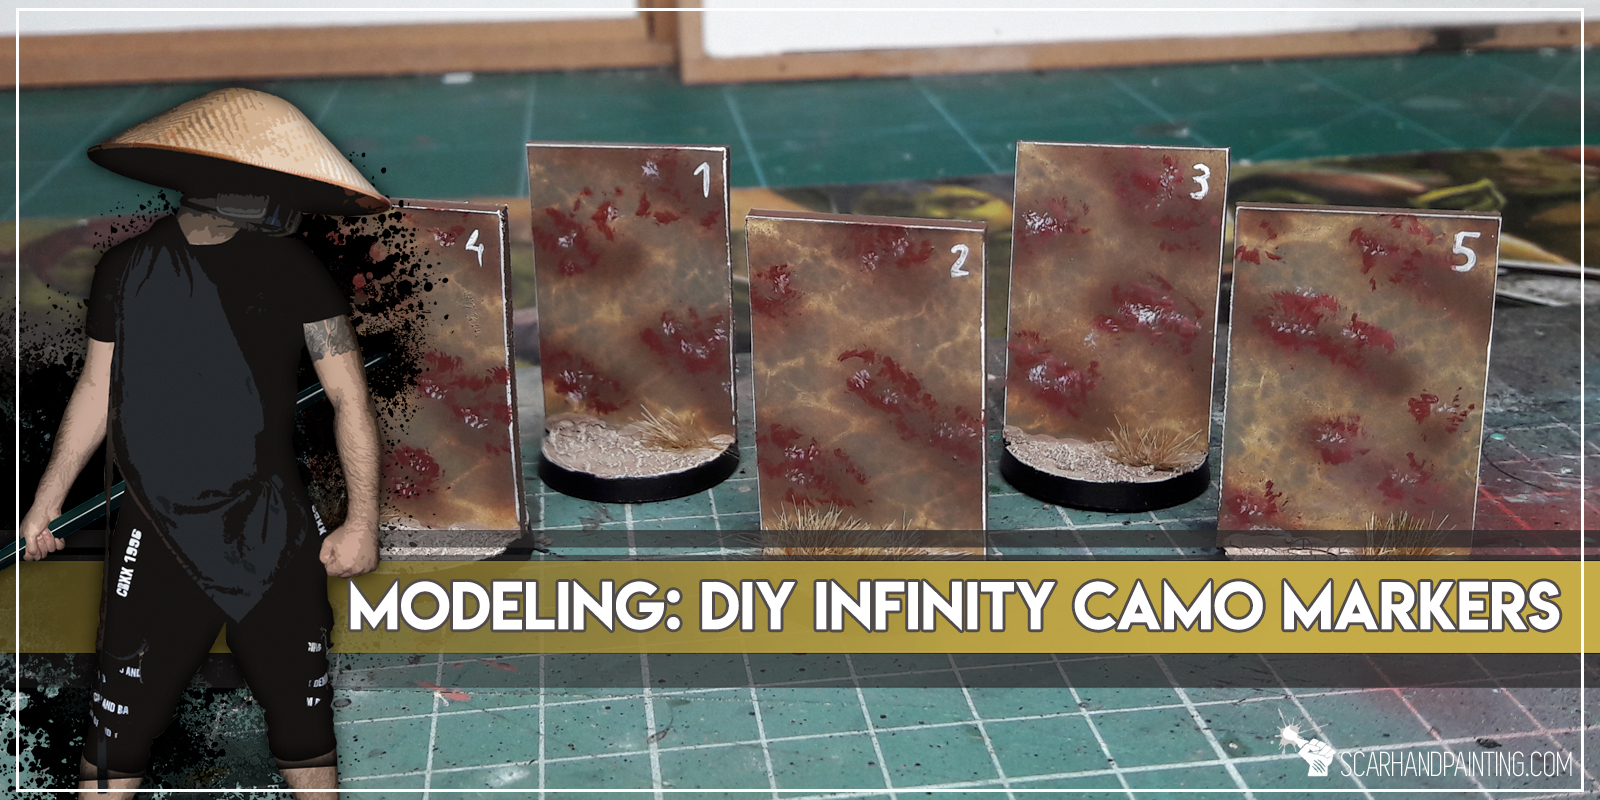
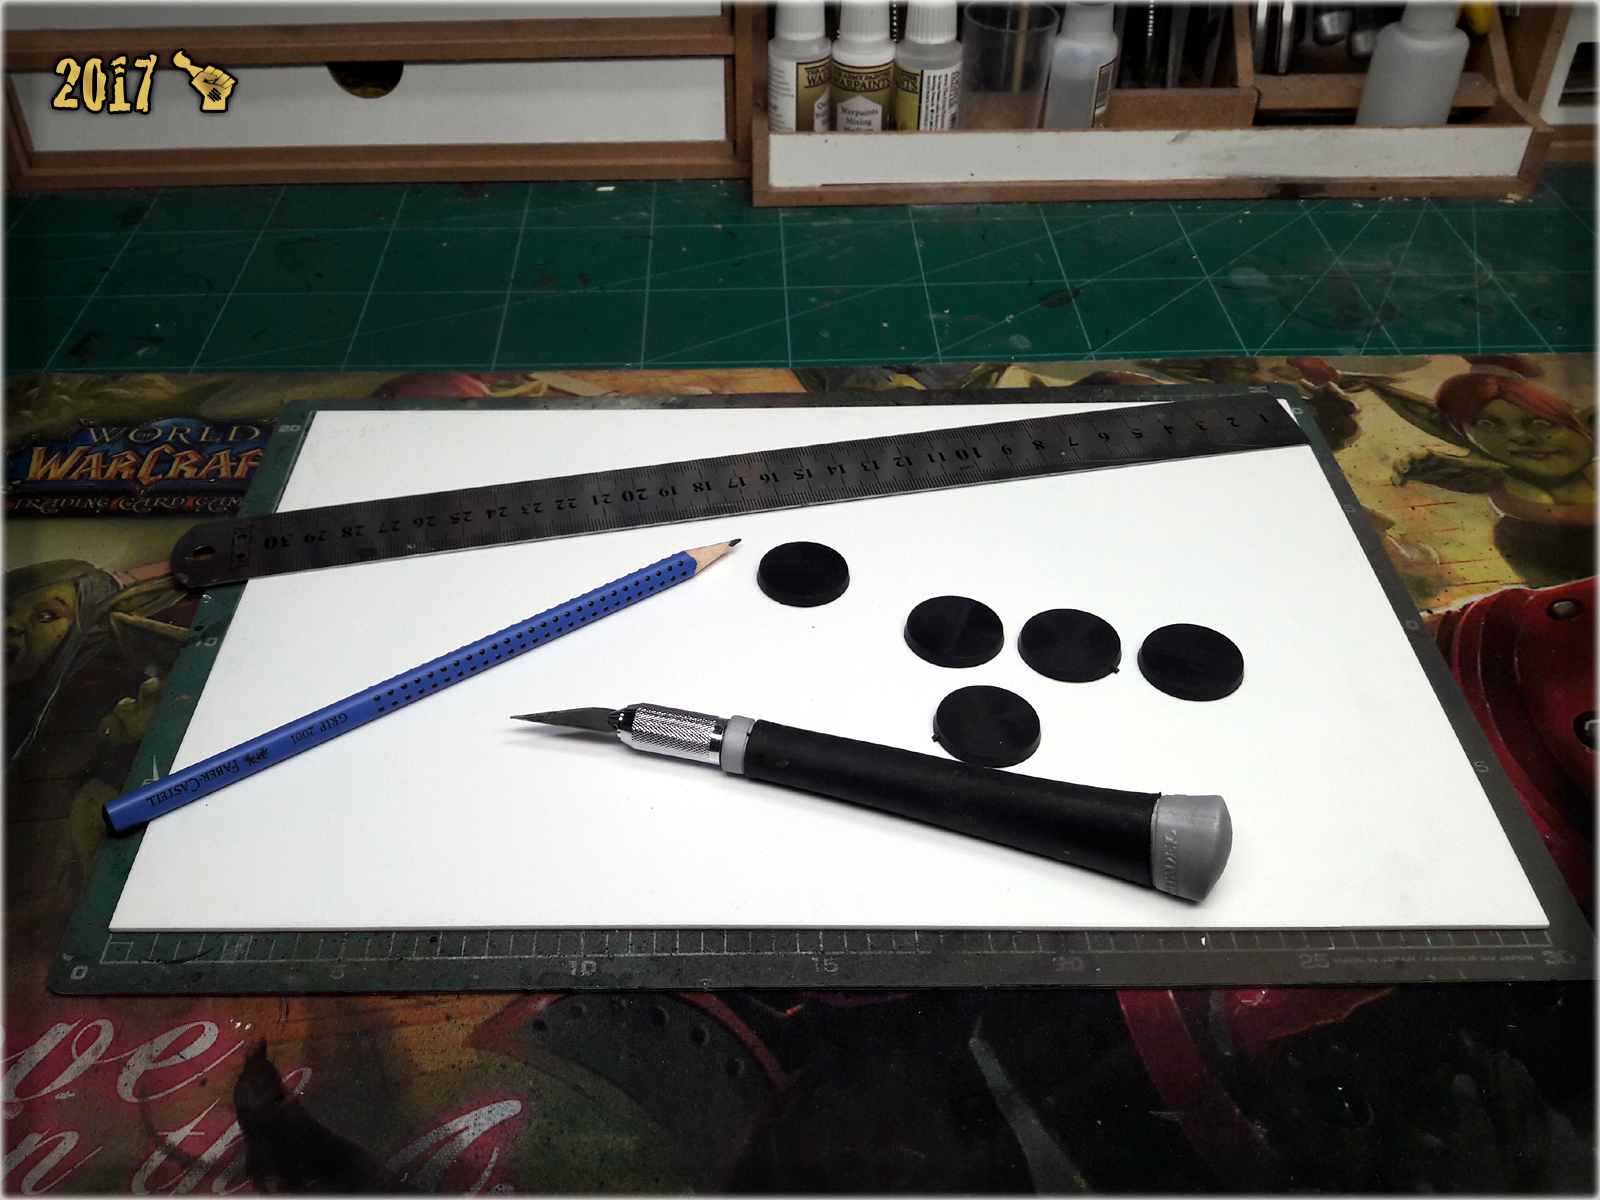
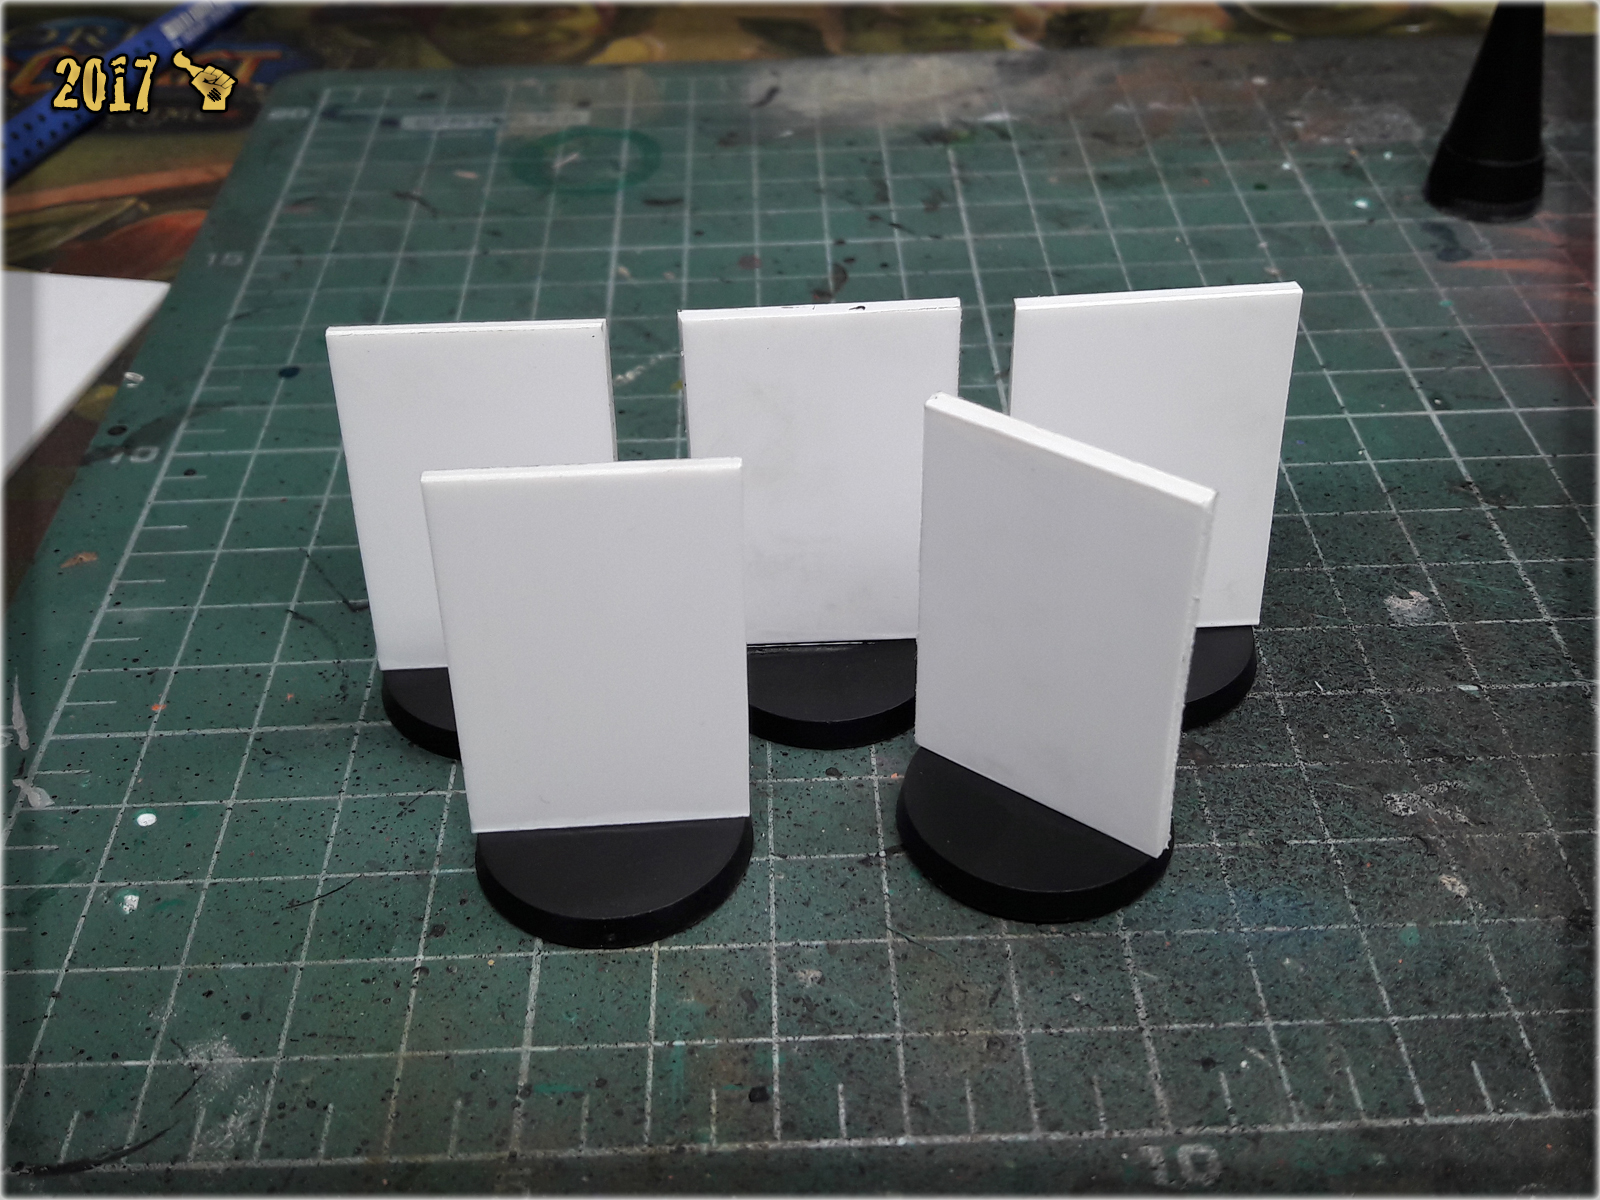
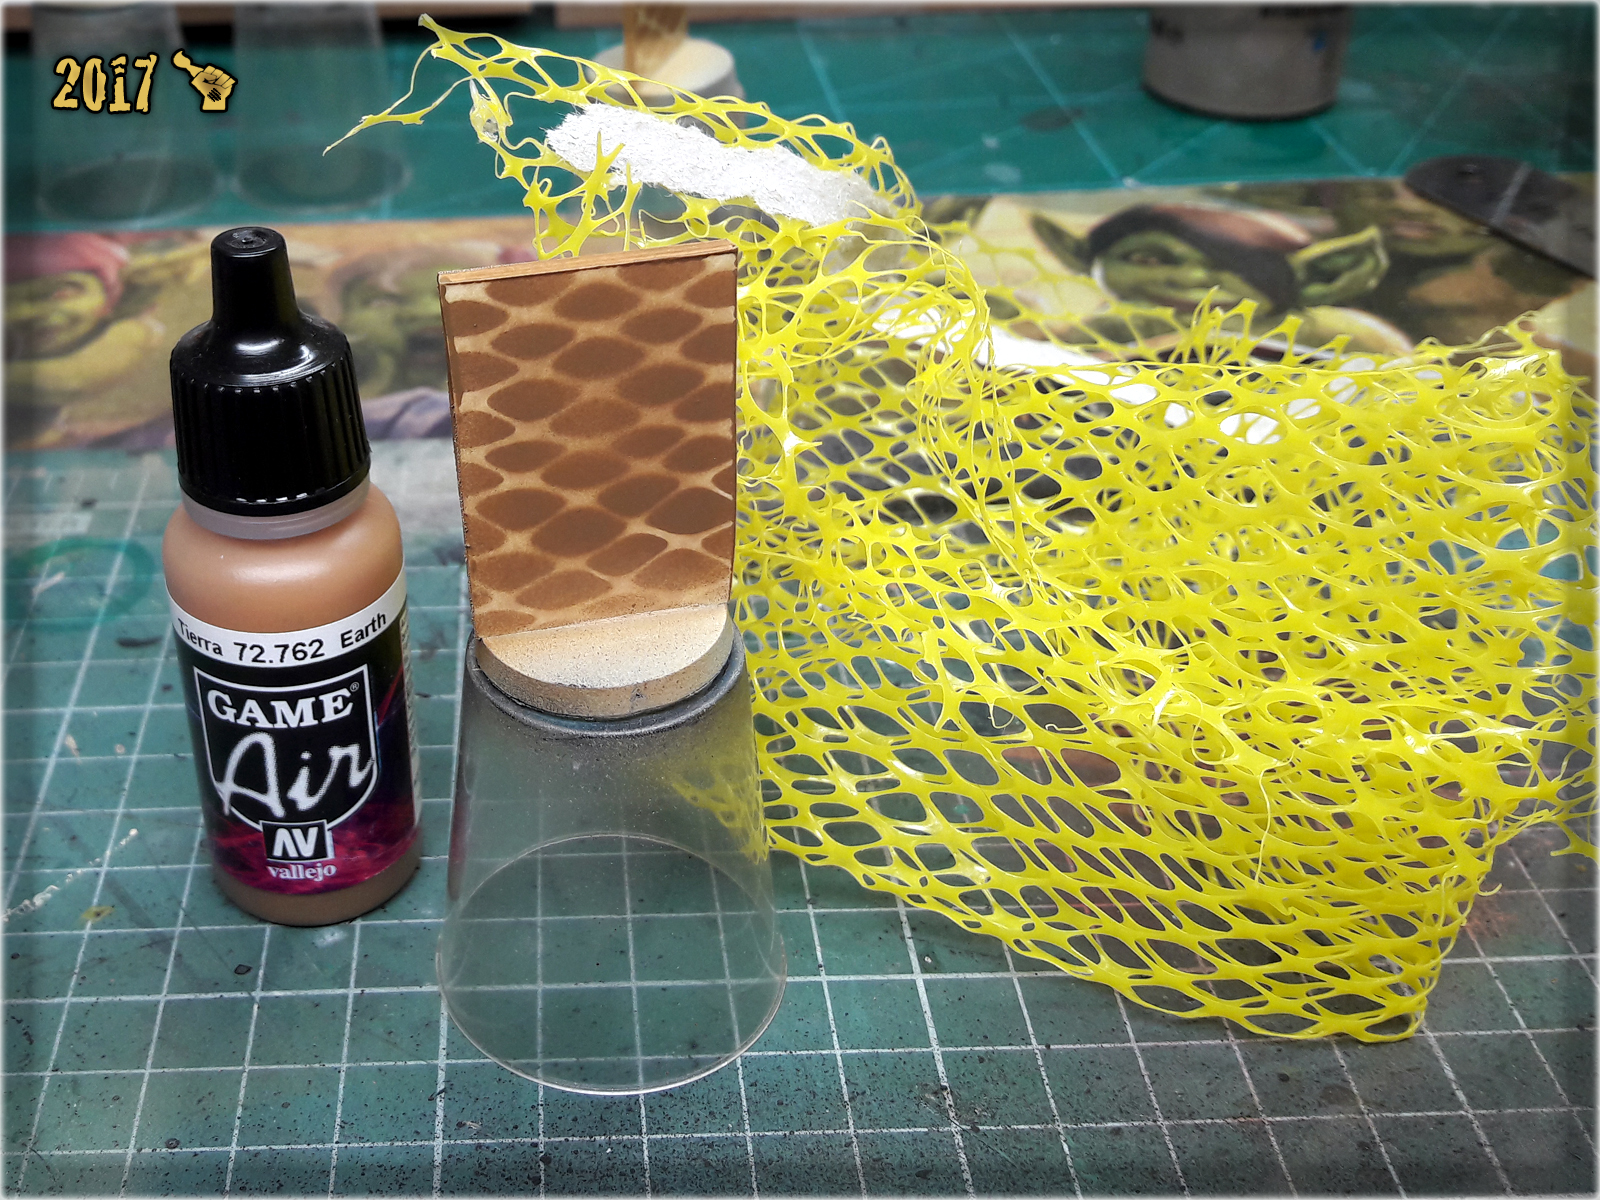
Obviously, the preparation process was pretty simple. Using a ruler, pencil and hobby knife I first drawn and then cut five 25x47mm rectangles made of PCV. I then glued them on top of 25mm round bases. At this point Camo Markers were ready to get painted.

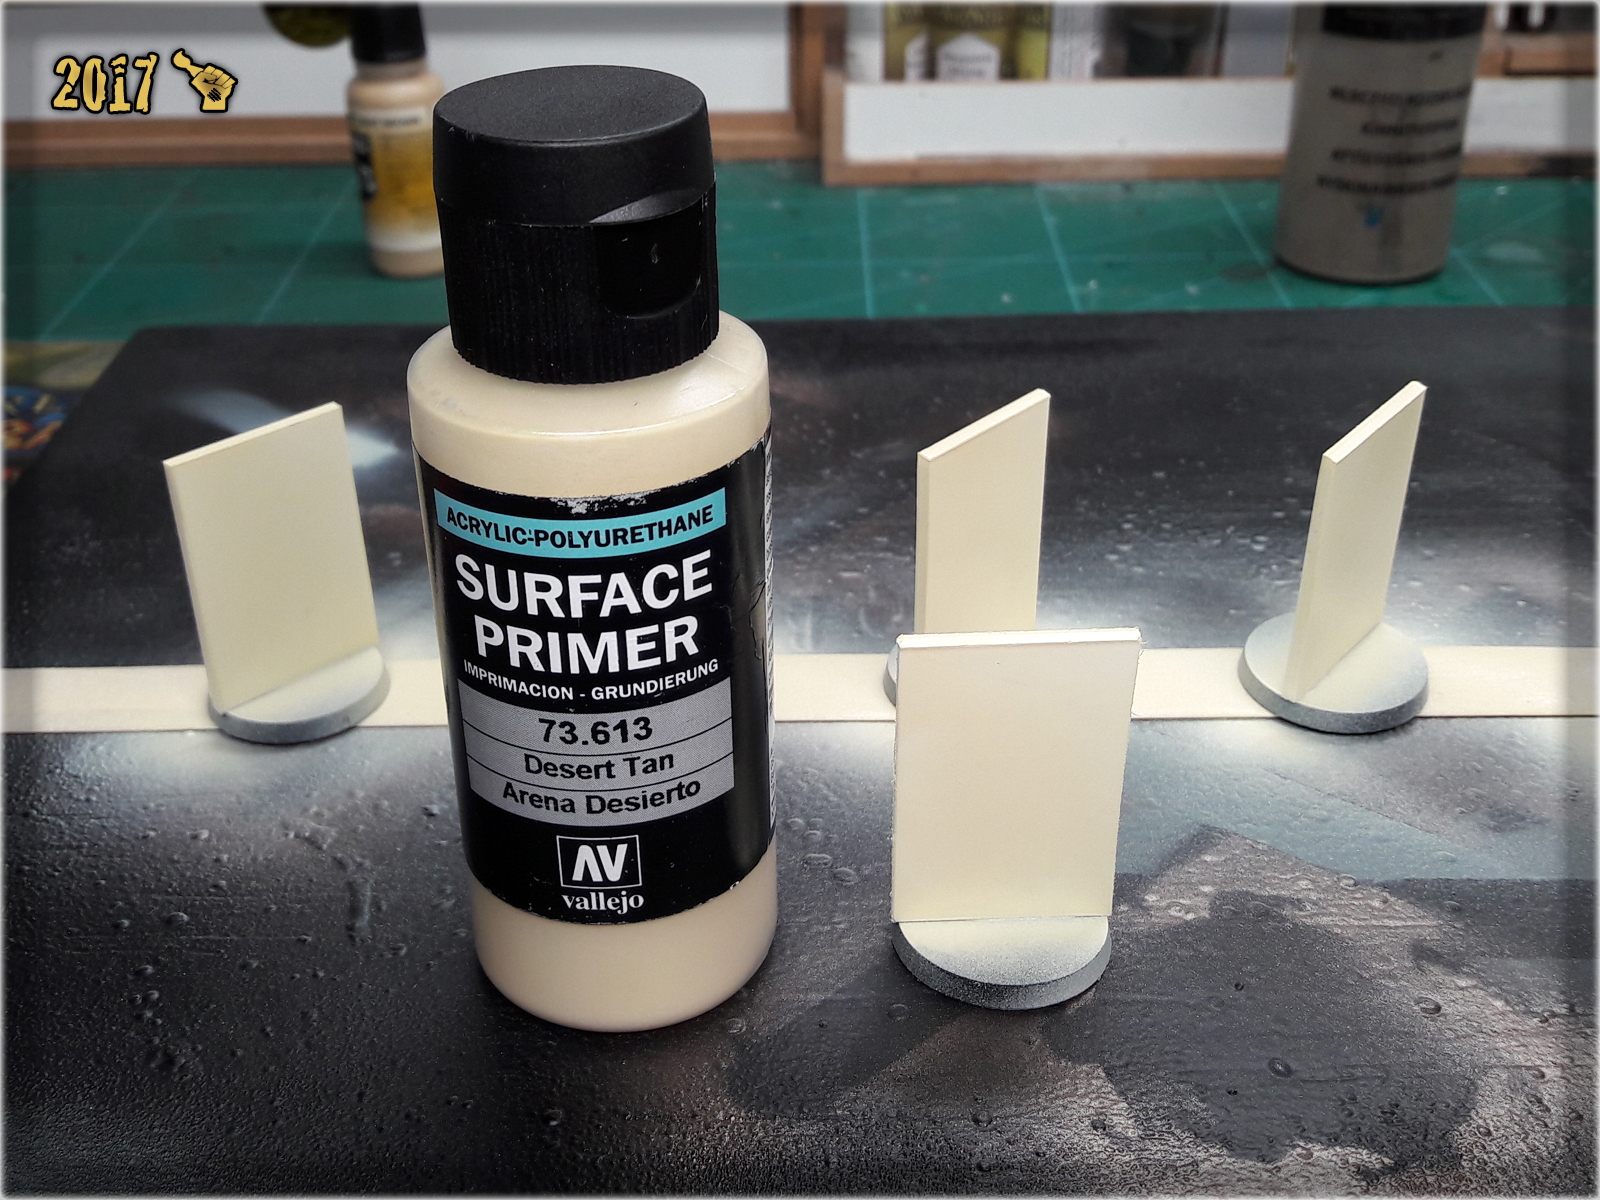
1 First step was to undercoat entire Camo Markers with Vallejo's Desert Tan.
2 Next I used a piece of synthetic hair holder as a stencil and airbrushed Vallejo Light Brown over the Markers.
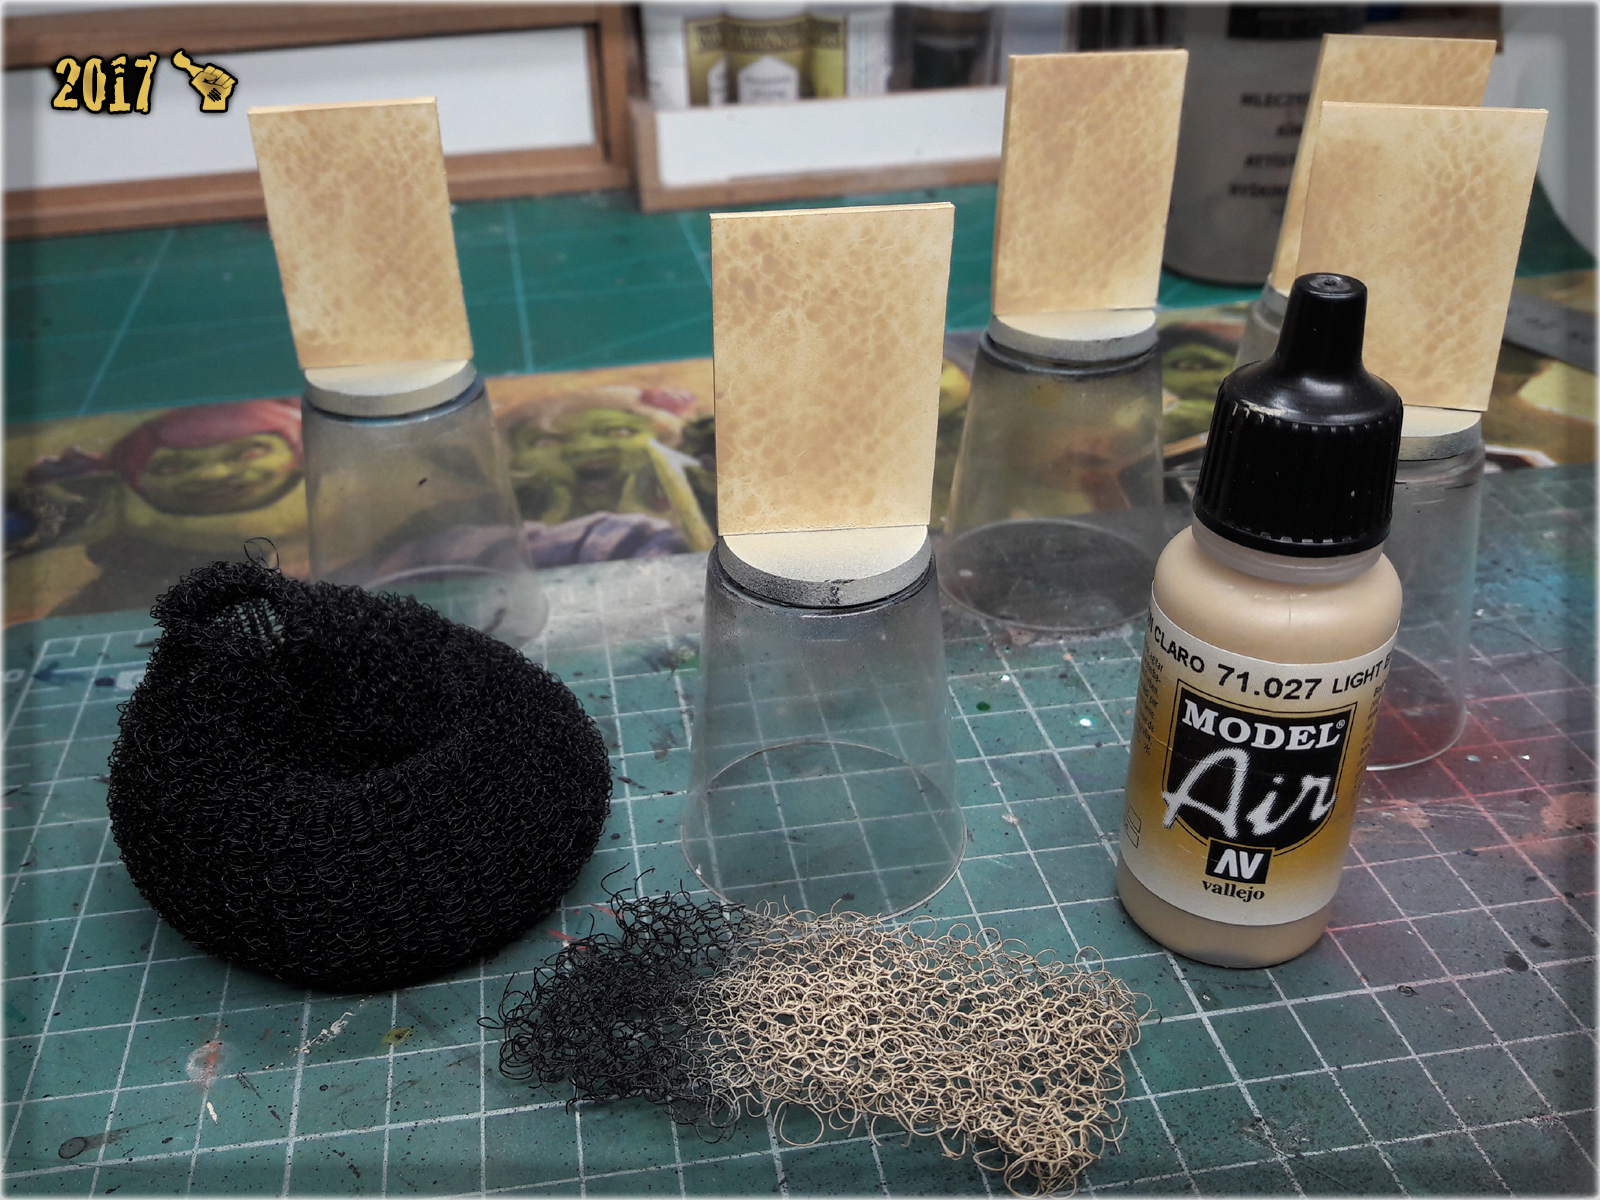
3 Then I switched to Vallejo Earth and airbrushed it over the markers using a piece of net that I got patatoes in. This net should be easily obtainable in every grocery store and makes for a really cool stencil.
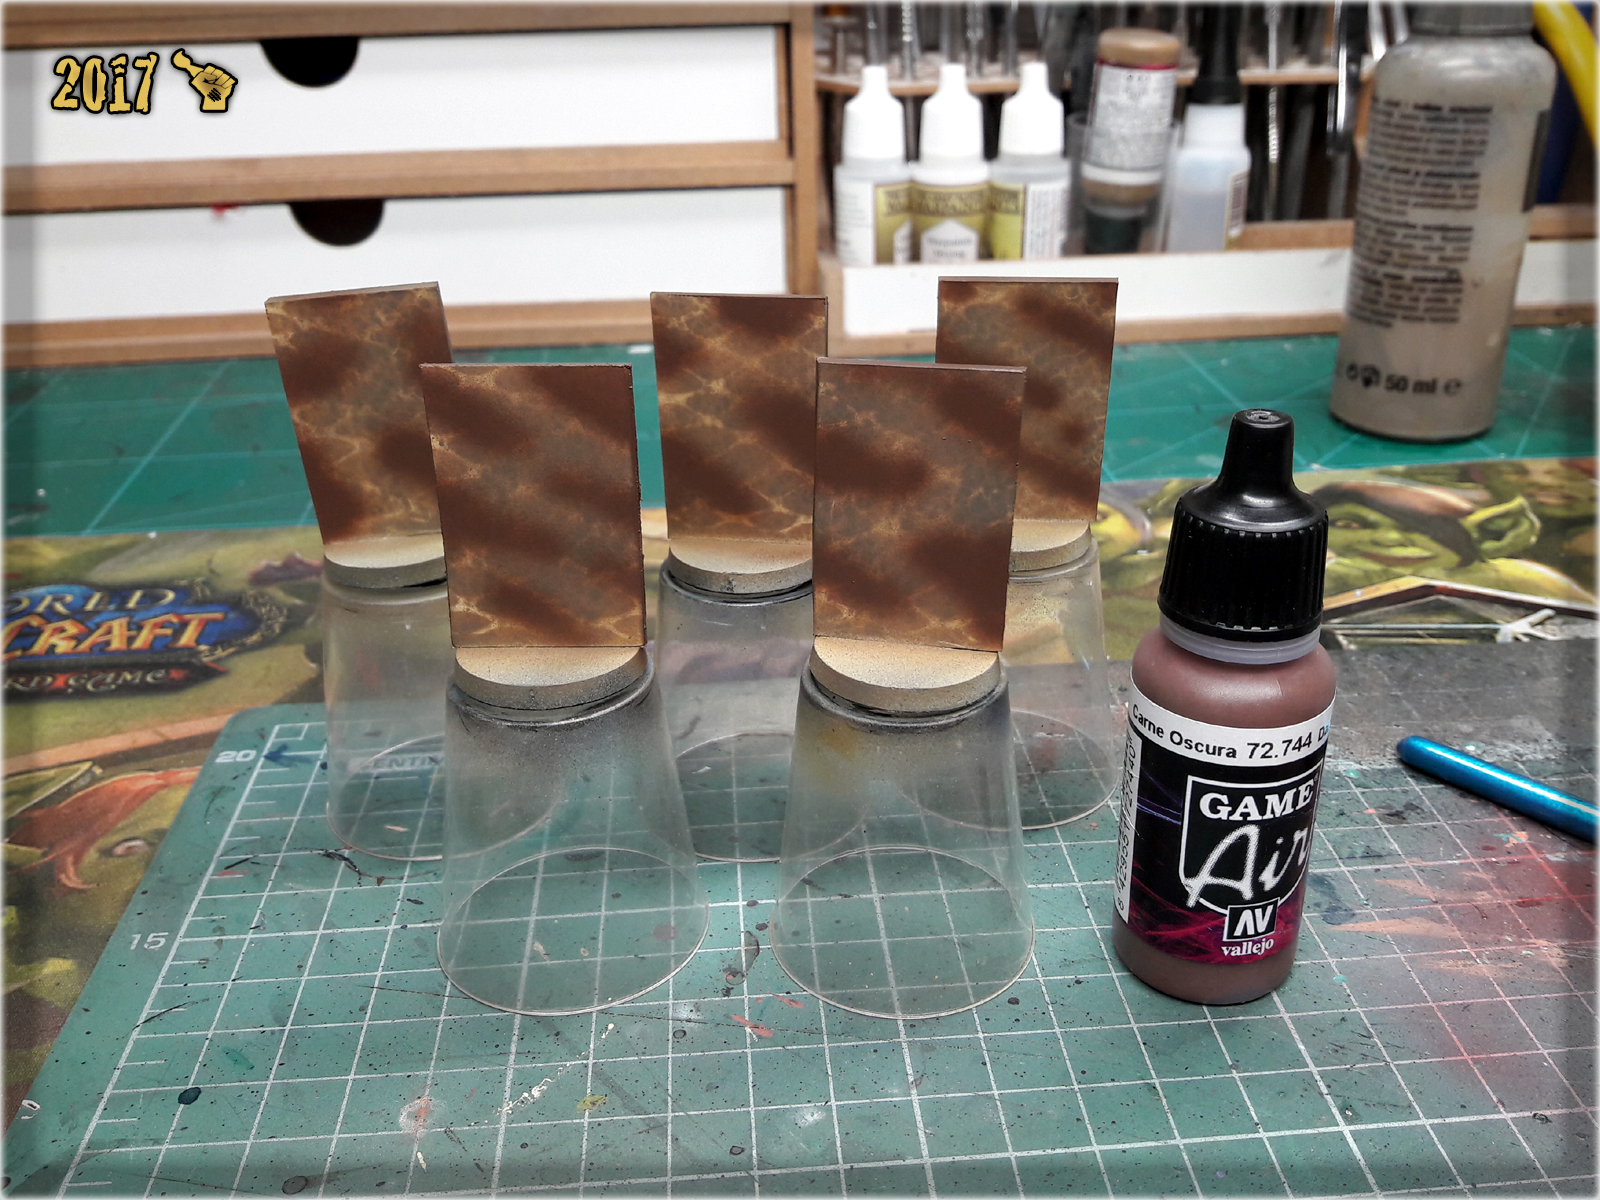
4 I then got back to hair holder stencil and airbrushed a layer of Vallejo Light Grey Green.

5 Next I airbrushed points of Vallejo Dark Flesh.
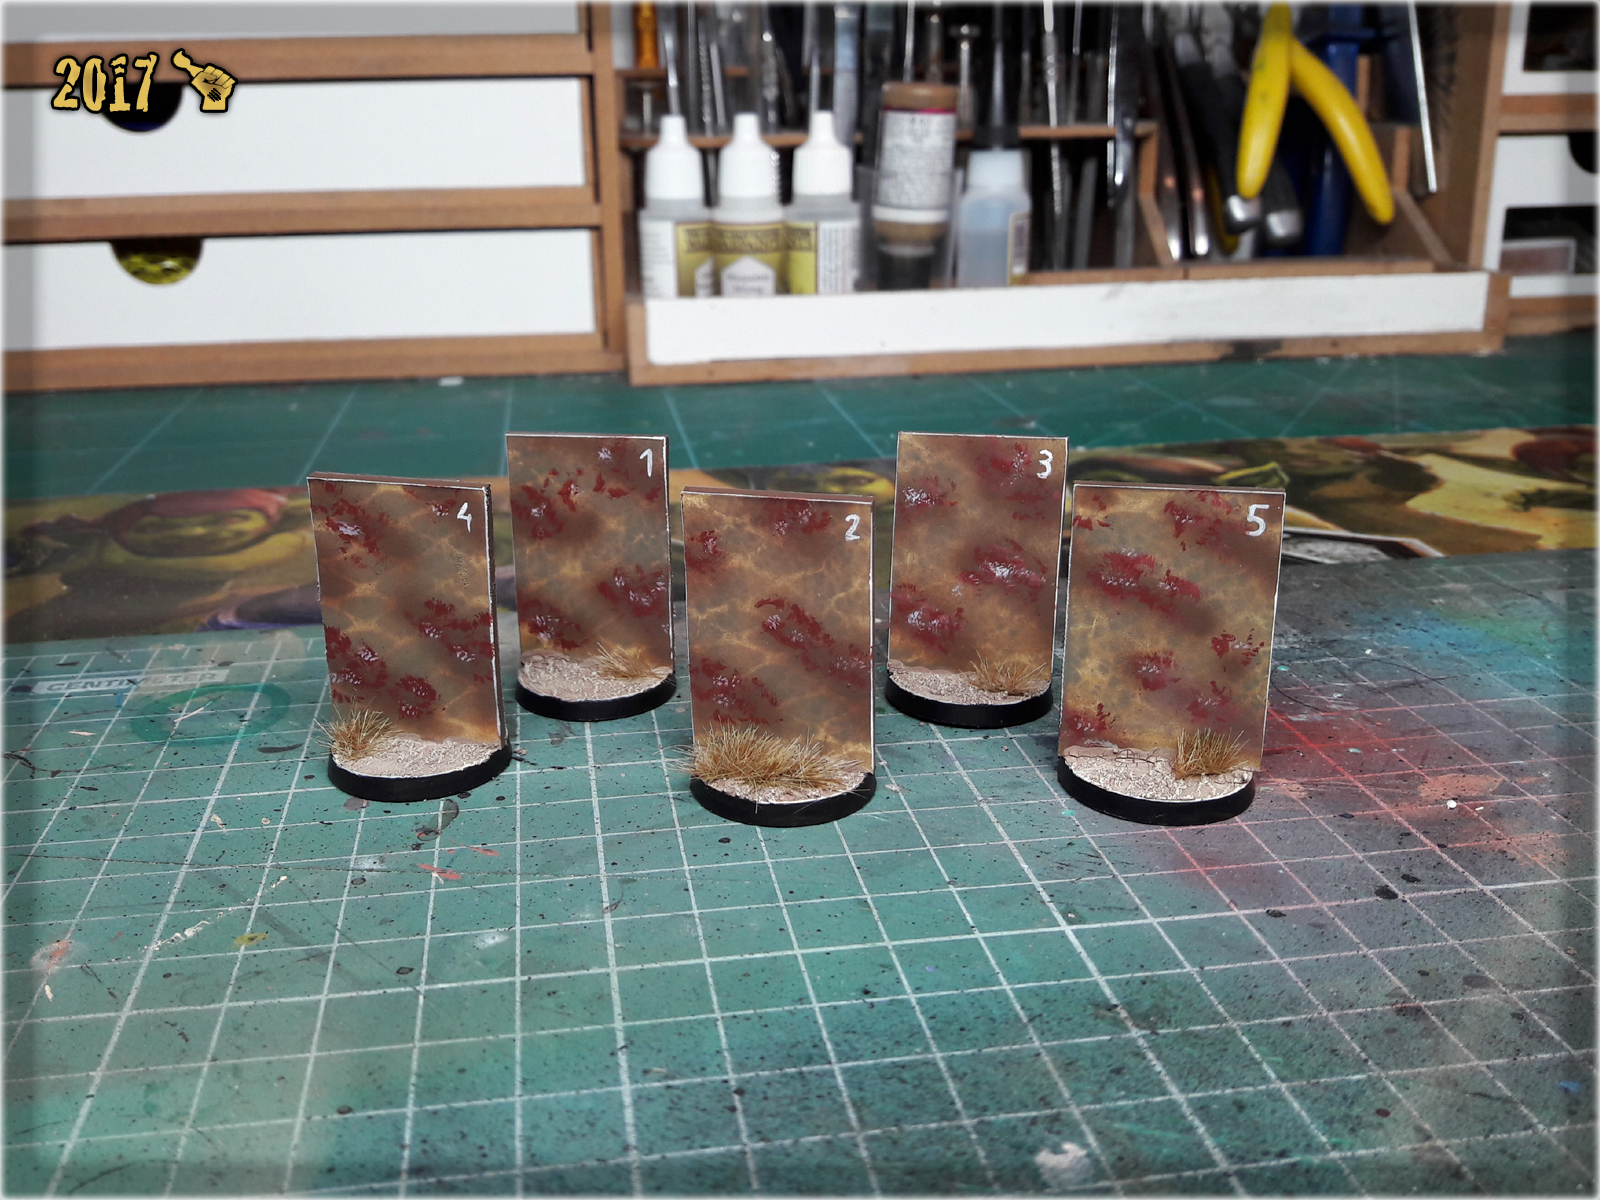
6 Some wet stippling went next. First I applied clumsy dots of Vallejo German Red Brown, then did the same with Games Workshop Pallid Wych Flesh. Afterwards I used Pallid Wych Flesh to mark edges of the markers and provide number to distinguish them from one another on the gaming board.

7 Basing came last. I used Games Workshop Agrellan Earth and Agrellan Badland, then drybrushed them with Karak Stone and Flayed One Flesh. Work done.
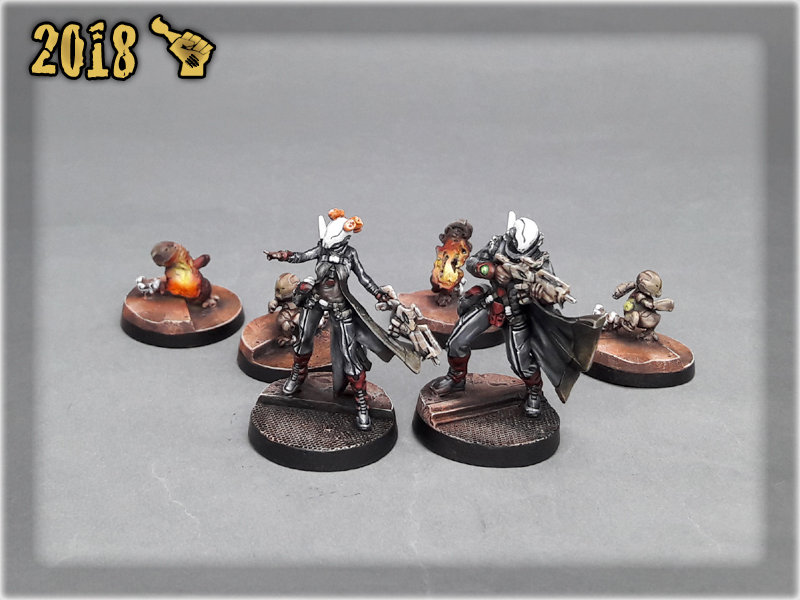
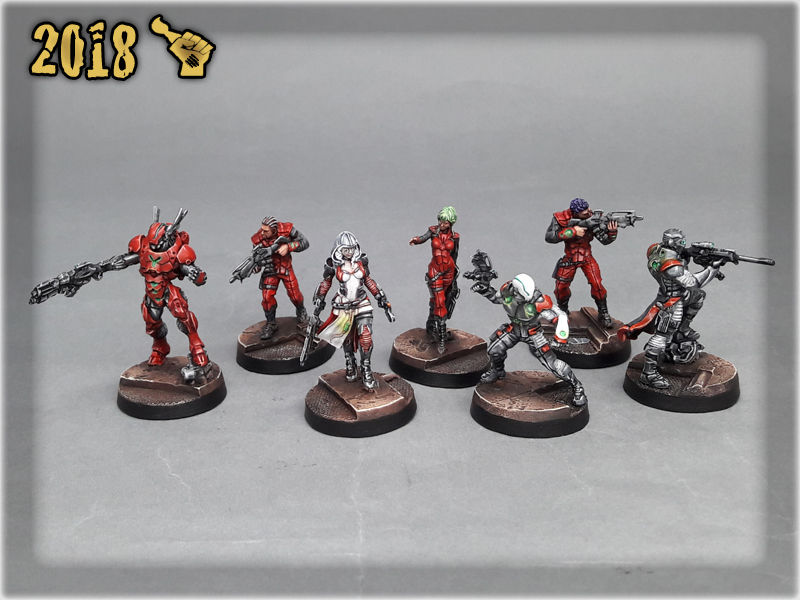
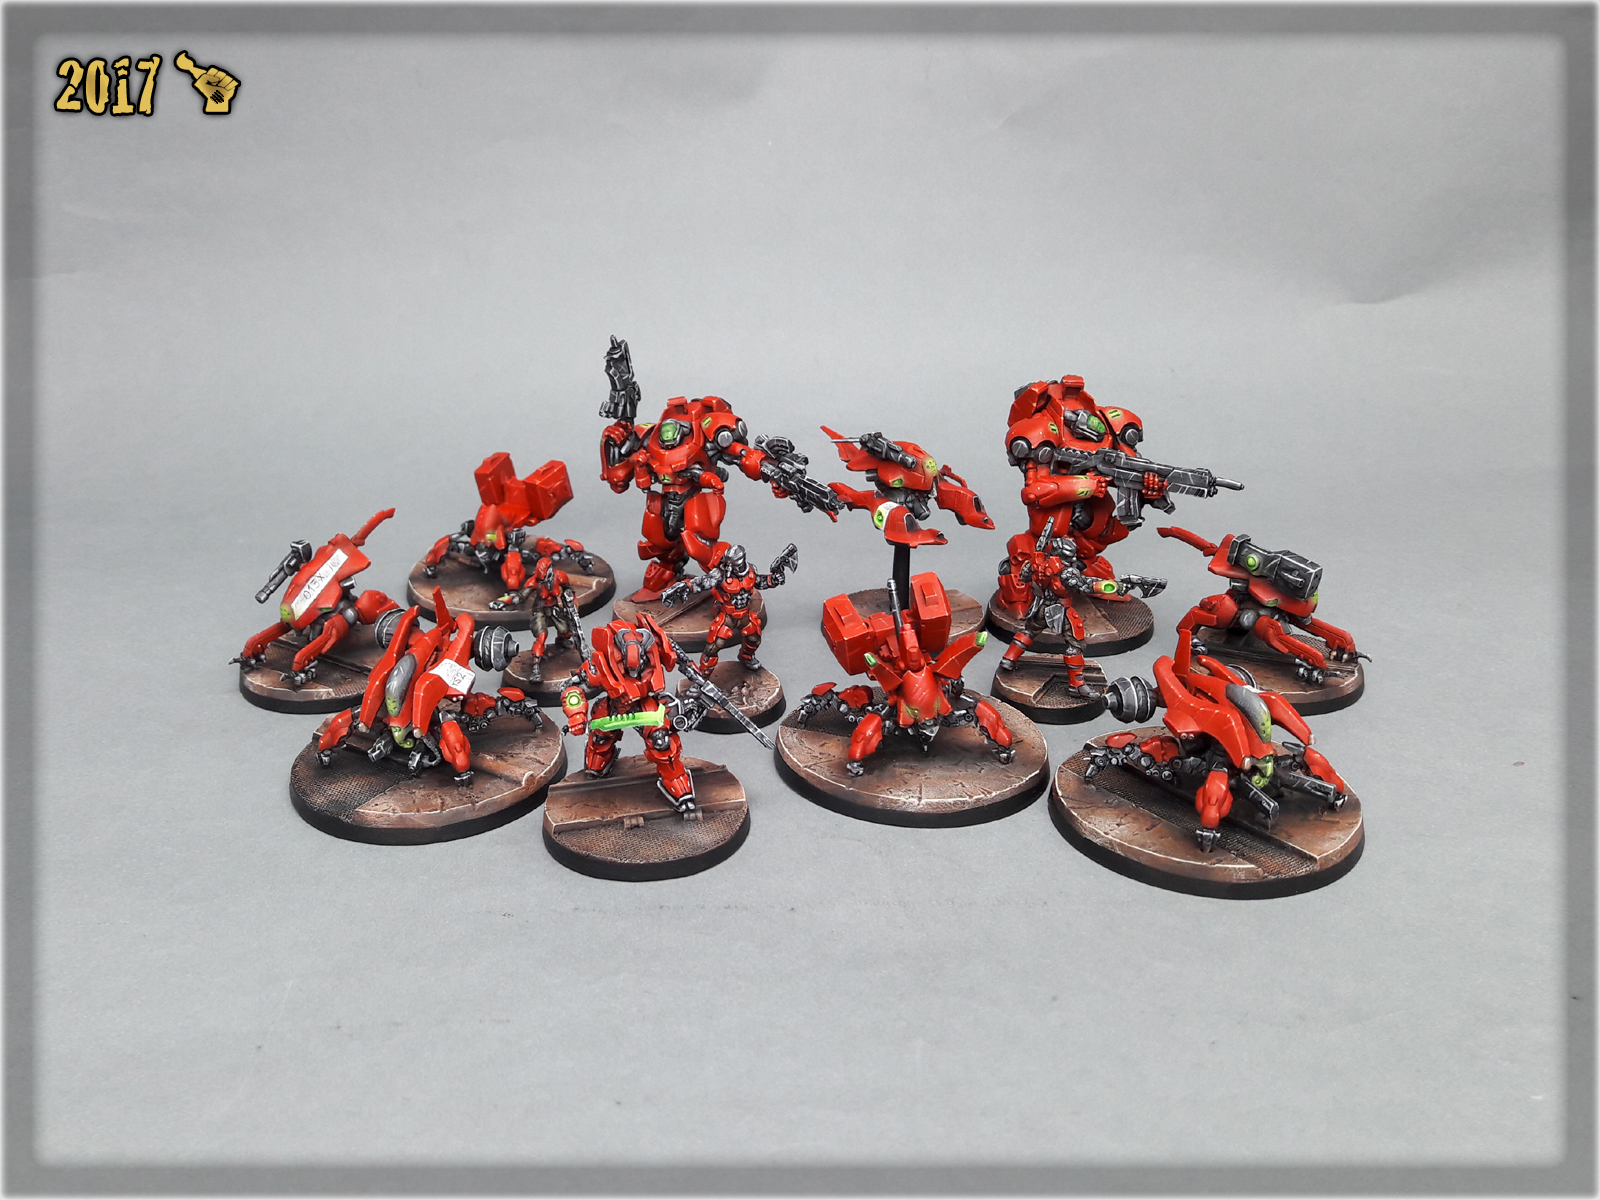
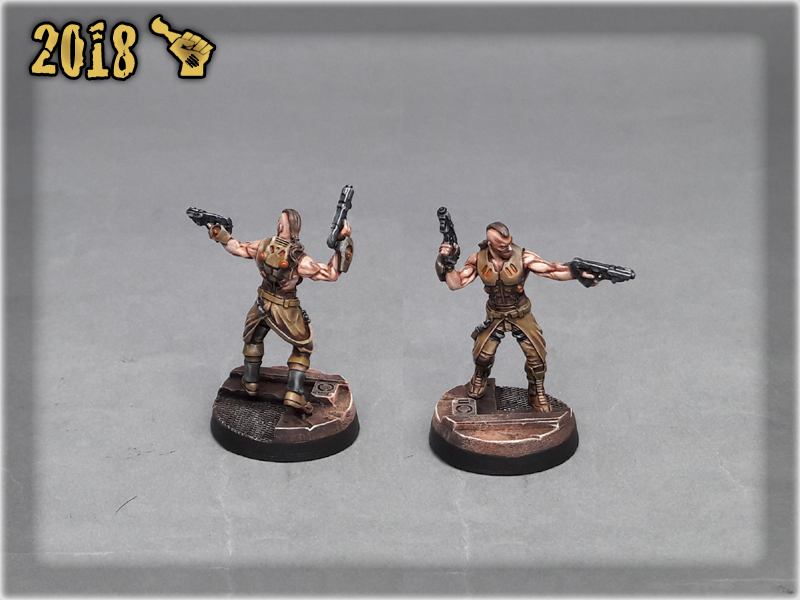
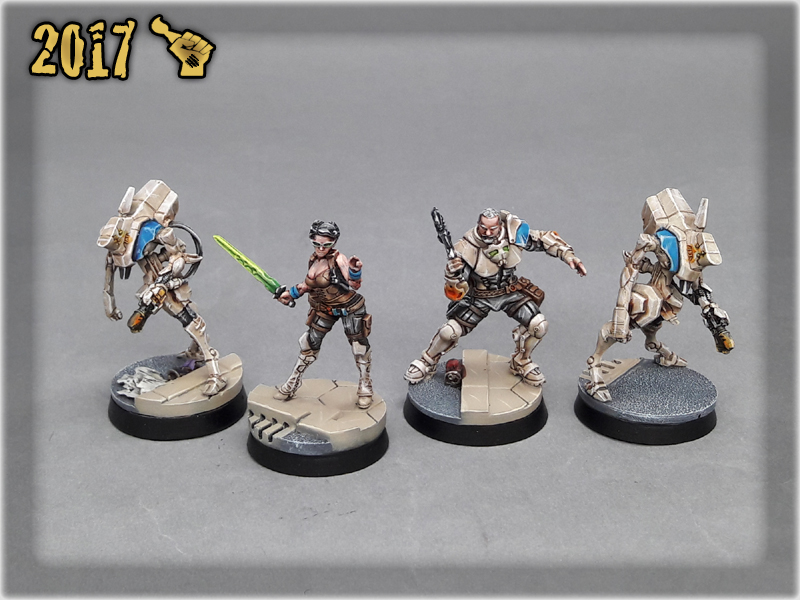
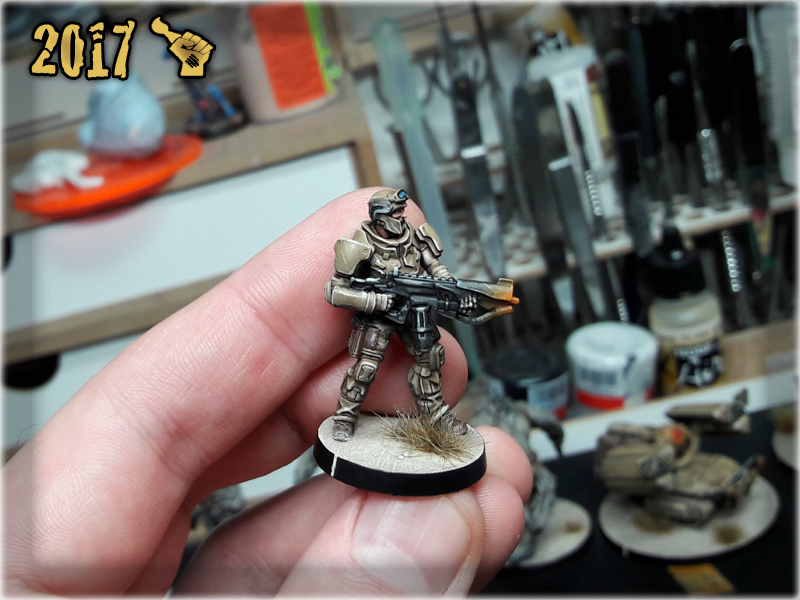
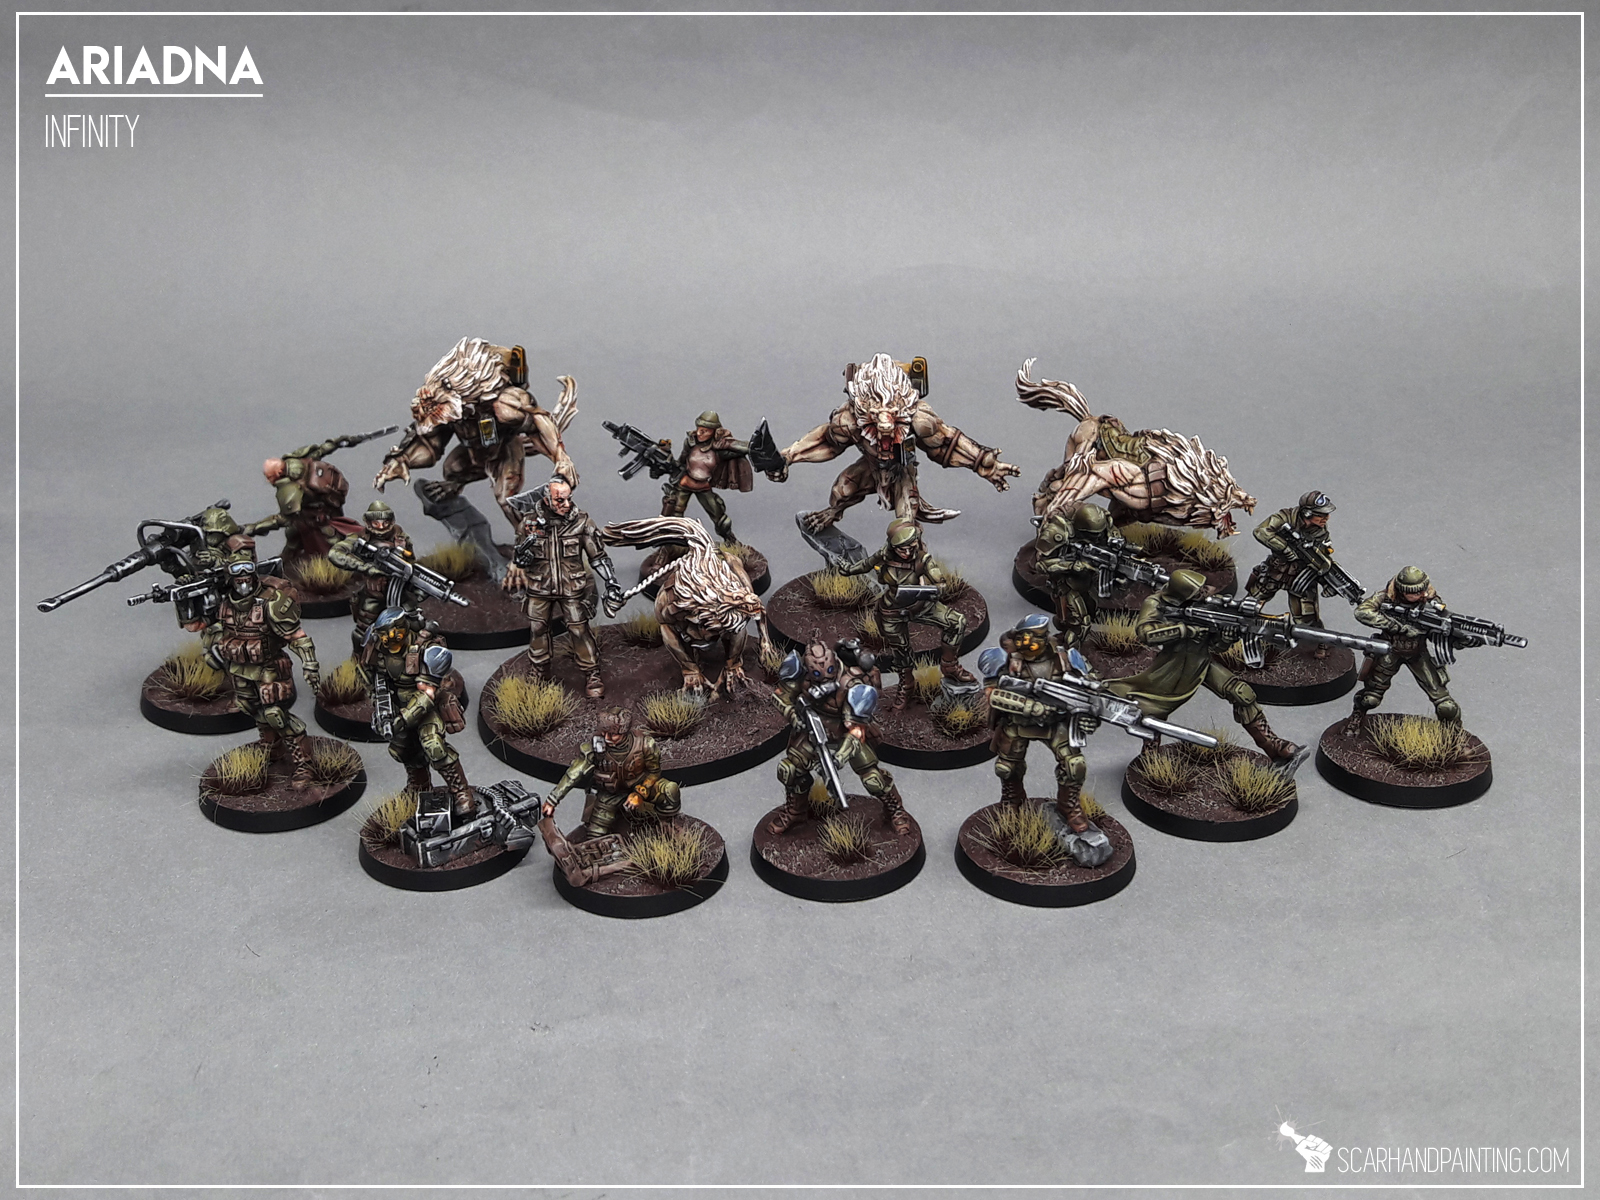
Here are some Colour Recipes for Infinity Haqqislam from GALLERY: INFINITY KAZAKS lvl 4. Please take note that this is a simple colour scheme, not covering multiple overlapping layers and blends inbetween, that lead to the final product. It is supposed to be used as guidline not a step-by-step.
GREEN armour & uniforms:
Black Undercoat,
Dark Green RLM (Val), *
Interior Green (Val), *
Mix Interior Green (Val) 3:2 Dead Flesh (Val), *
Mix Strong Tone Ink (AP) 1:1 Soft Tone Ink (AP),
Mix Interior Green 1:1:1 Flayed One Flesh (GW) Pale Wych Flesh (GW), l&p
BLACK/GREY outfits & weapons:
Black Undercoat,
Skavenblight Dinge (GW),
Fenrisian Grey (GW),
Pallid Wych Flesh (GW), l&p
Dark Tone Ink (AP),
Pallid Wych Flesh (GW), l&p
White, l&p
BROWN elements:
Olive Drab (Val),
Gorthor Brown (GW),
Mix Gorthor Brown (GW) 1:1 Pallid Wych Flesh (GW), l&p
Mix Strong Tone Ink (AP) 1:1 Soft Tone Ink (AP),
Karak Stone (GW), l&p
SKIN:
Bugmans Glow (GW),
Dwarf Flesh (GW),
Dwarf Flesh (GW) + Pale Flesh (Val),
Mix Strong Tone Ink (AP) 1:1 Soft Tone Ink (AP),
Pale Flesh (Val),
Mix Pale Flesh (Val) 1:1 Pallid Wych Flesh (GW), l&p
l&p – lines and points,
p – points,
b – blend,
drbr – drybrush,
flbr – flatbrush,
*Airbrushed (with multiple layers and mixes)