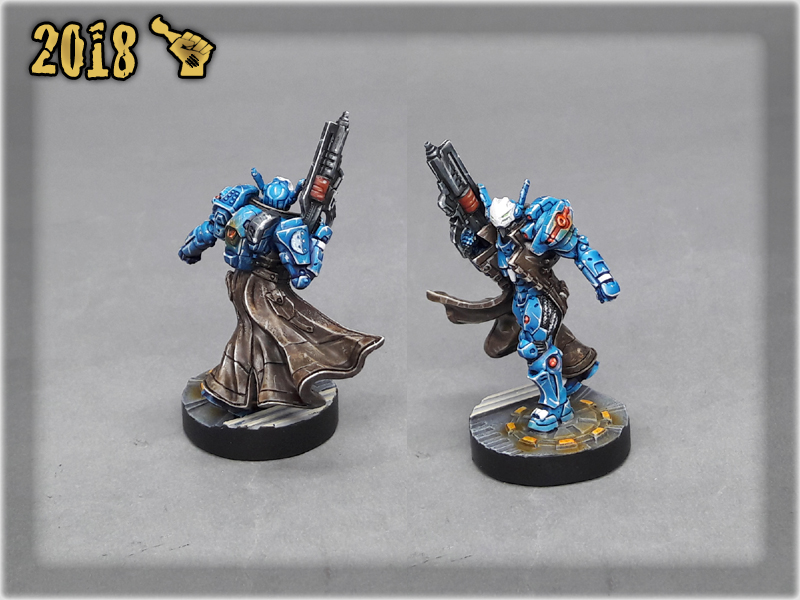
- contact@scarhandpainting.com


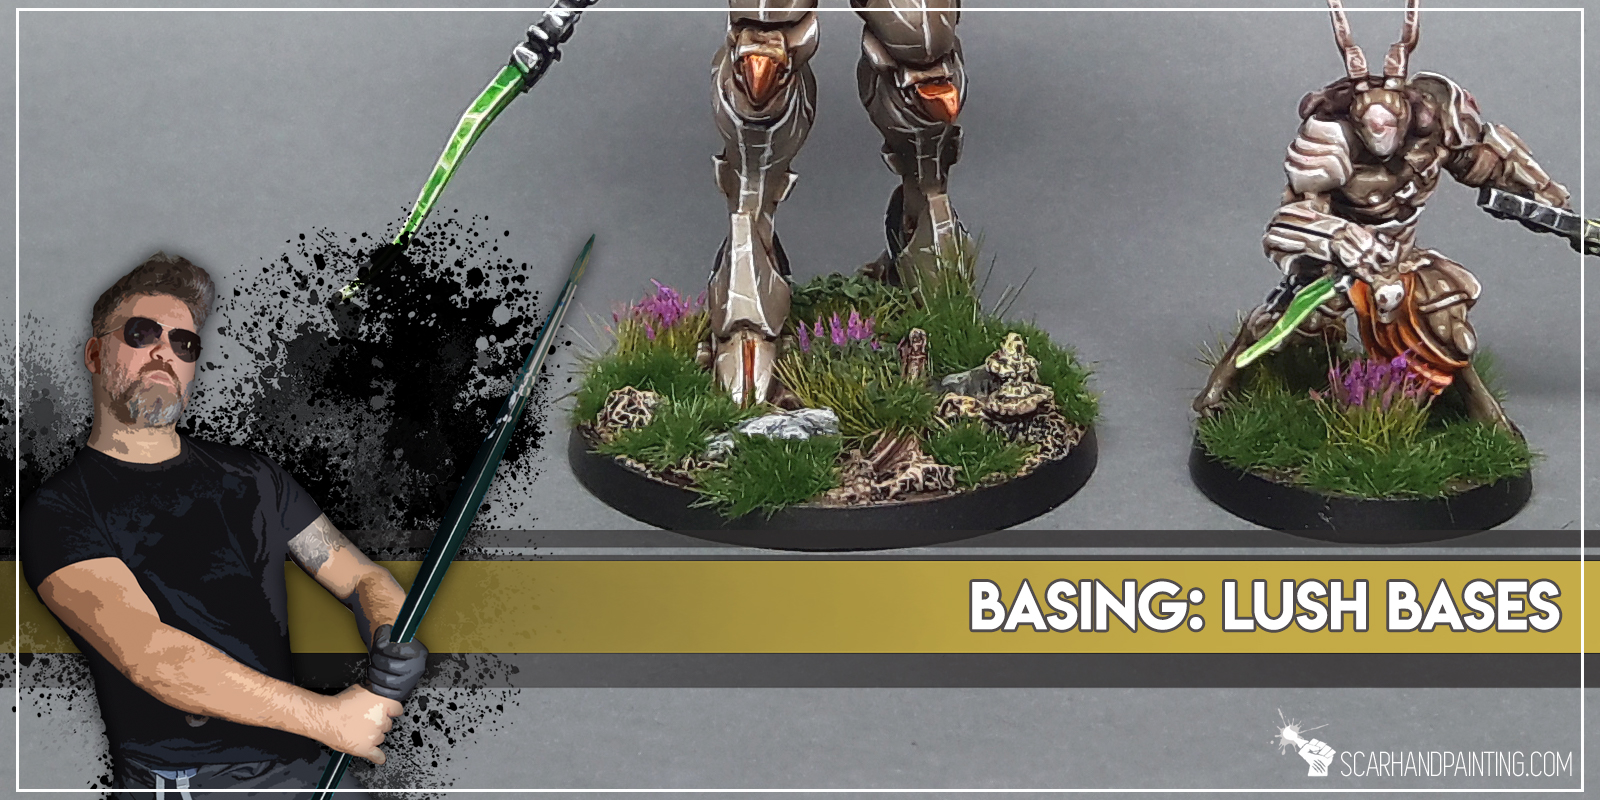
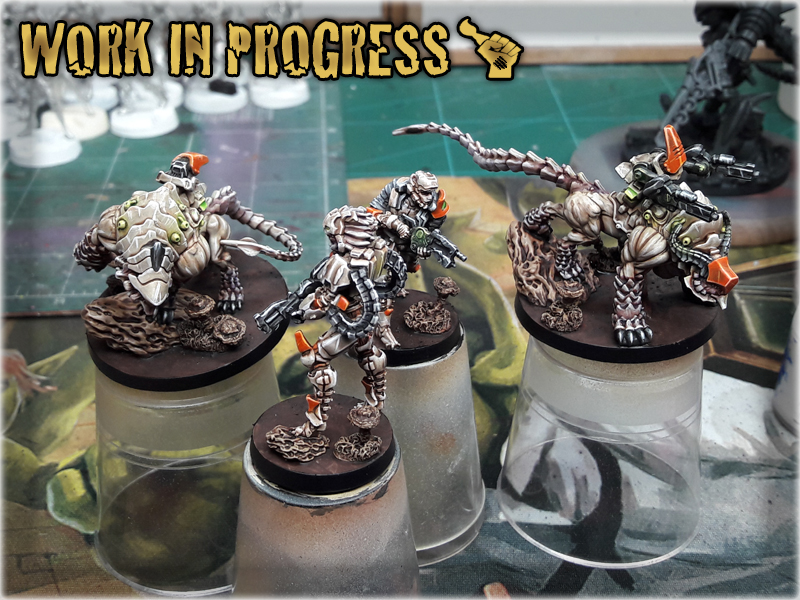
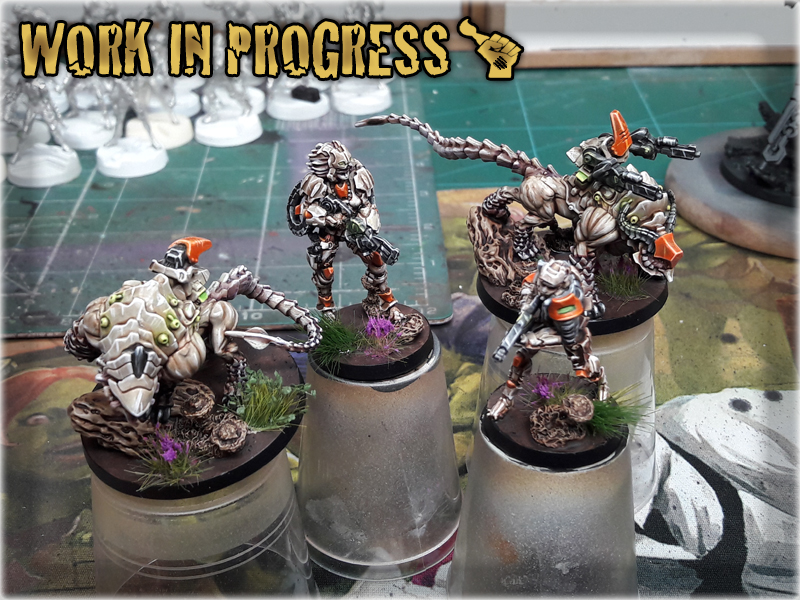
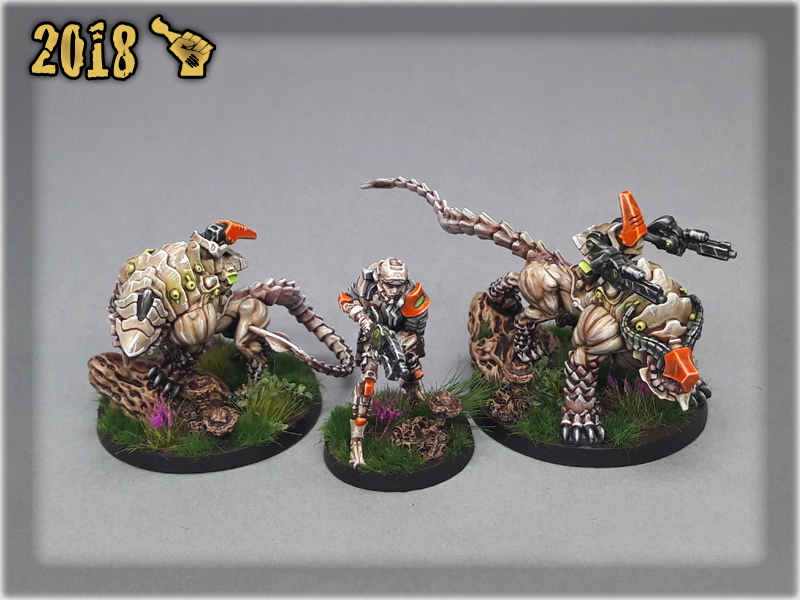
In this easy, step-by-step tutorial I’m going to show you how to create a Lush Base. I designed these bases to fit Infinity the Game Tohaa ‘tactical rocks’ – you can see how it turned out at Infinity TOHAA ‘Witness Me!’ gallery.

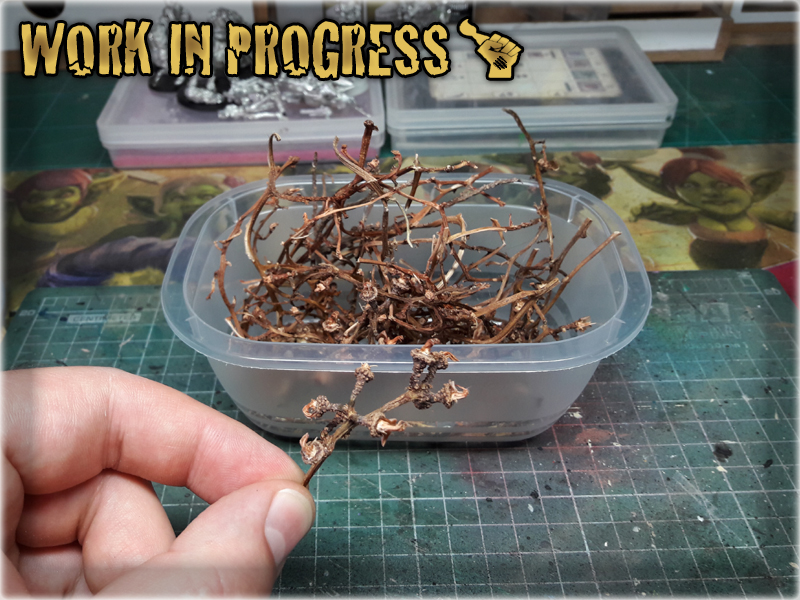
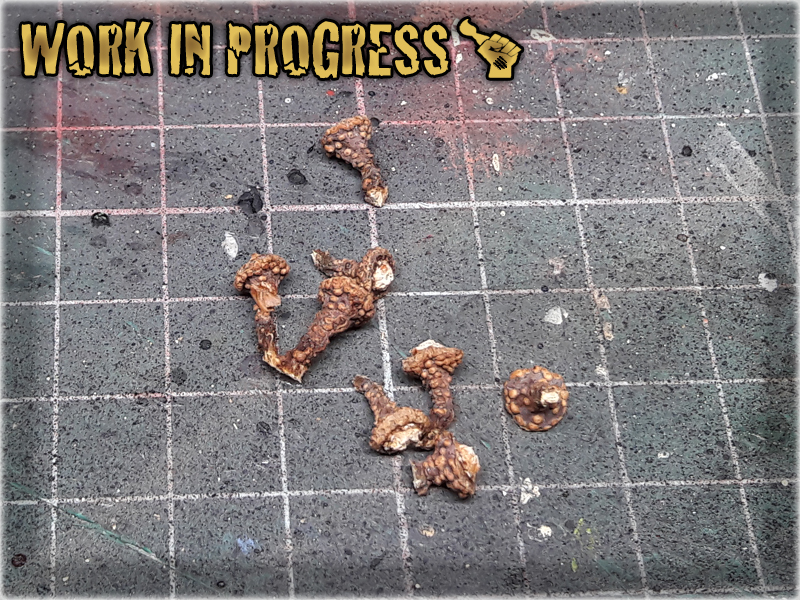
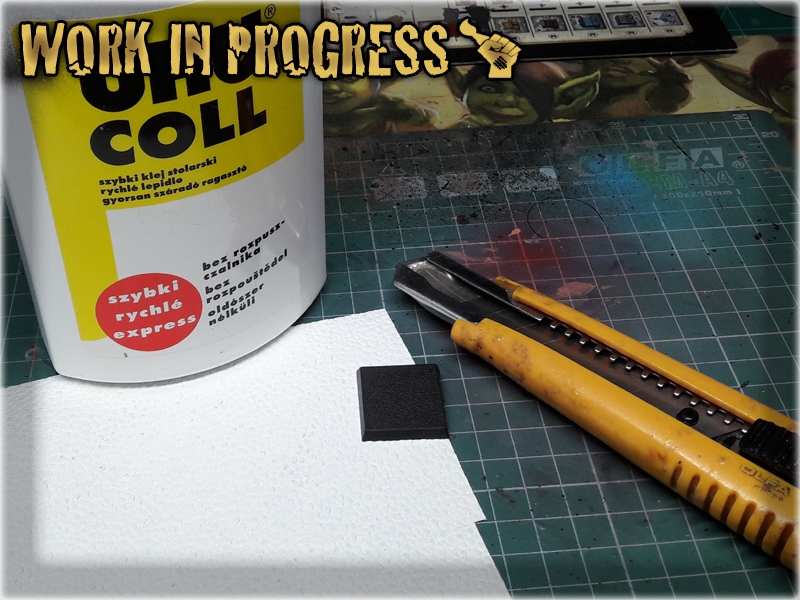
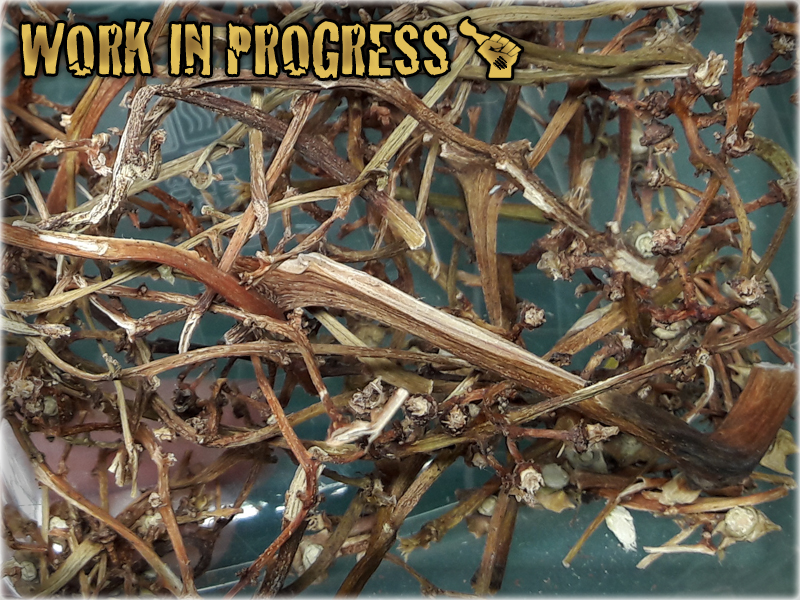
* I started by separating Grape mounts from the dried out Grape branch. Being rather soft, their topf have been removed to improove durability and shape.
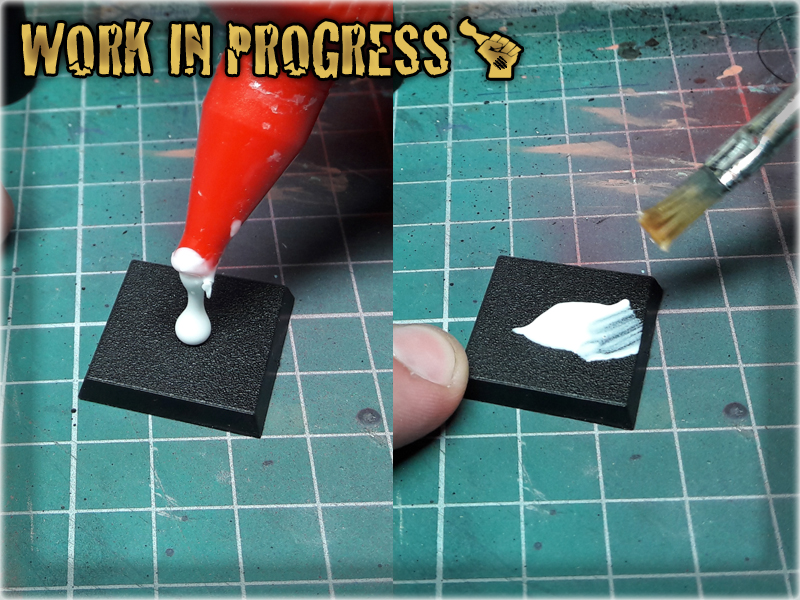
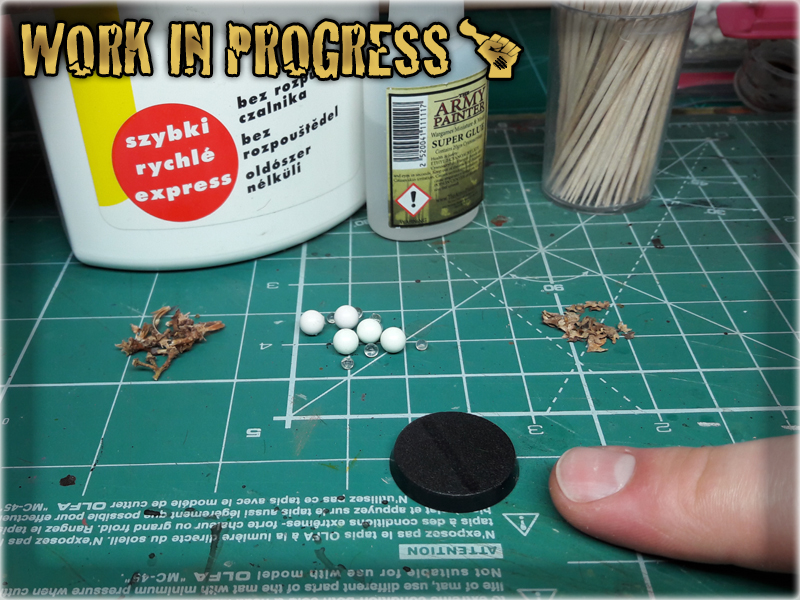
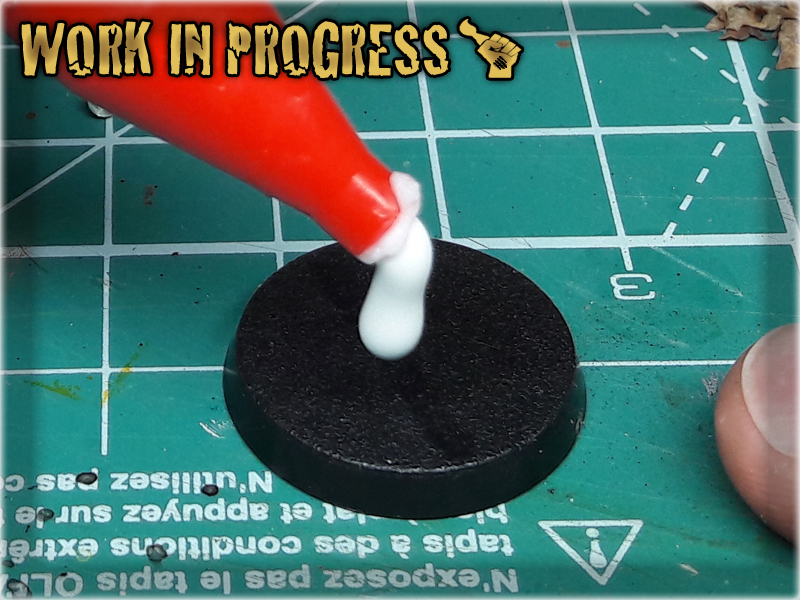
* I then applied a drop of basing glue onto the base, followed up shortly by another drop - this time super glue.
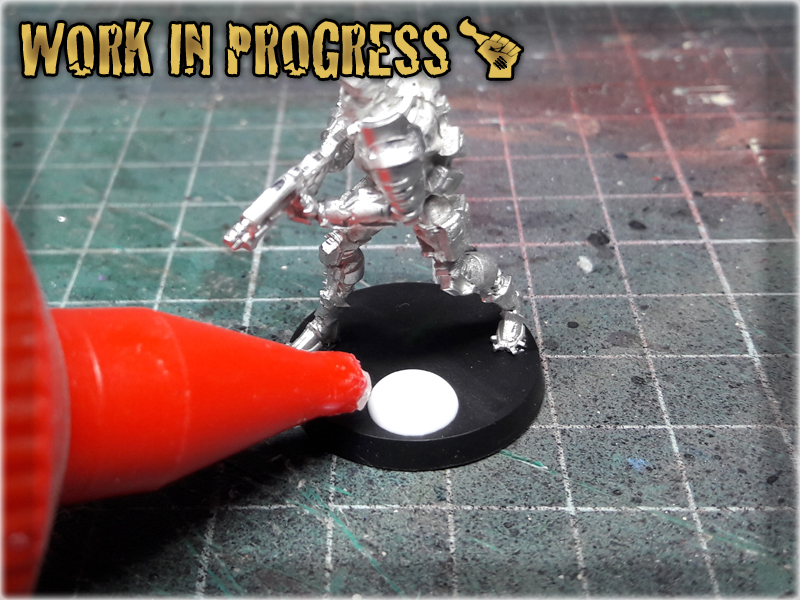
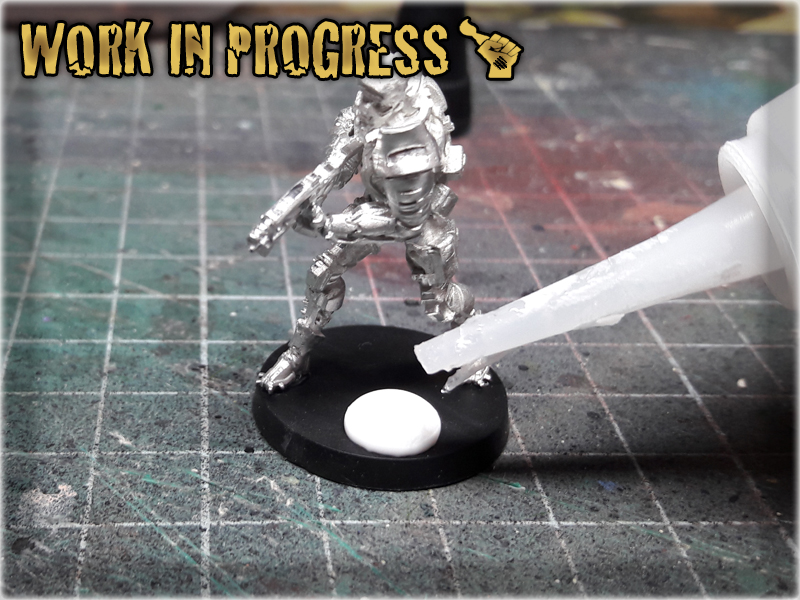
* Before mixed glue drop was able to dry out I've planted Grape mount on top of it, creating strange looking plant.
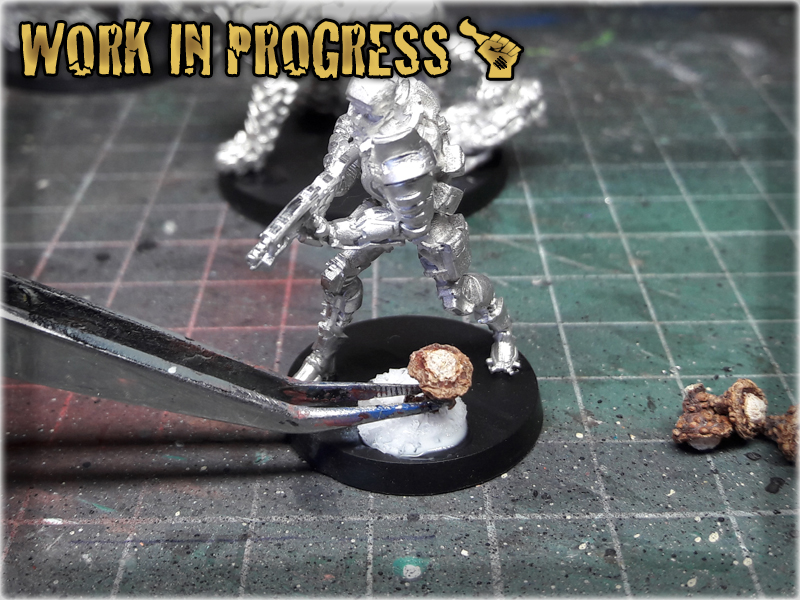
* Once glue dried up I've painted the bases following choosen colour scheme (see below). I then added some texture on top of them with Stirland Battlemire texture paint.
* orem ipsum dolor sit amet, Integer commodo tristiqu odio, aliquet ut. Maecenas sed justo imperdiet bibendum. Vivamus nec sapien imperdiet diam. Aliquam erat volutpat. Sed onsectetur suscipit nunc et rutrum. Lorem ipsum dolor sit amet,volutpat. Sed onsectetur suscipit nunc et rutrum. Lorem ipsum dolor sit amet, volutpat.

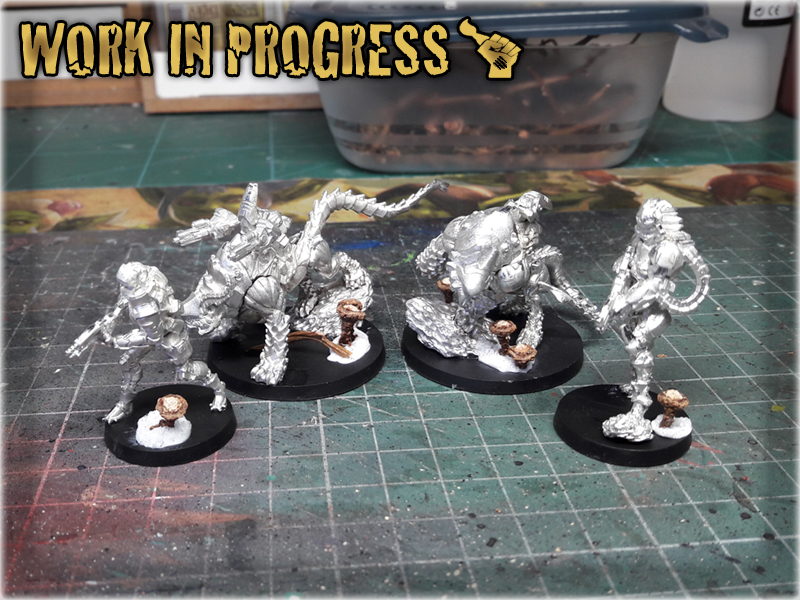
* Last step was to apply regular tufts. I used some noname tufts in large numbers filling most of the flat areas. Job done.


Black Undercoat,
Stirland Battlemire (GW), texture
Karak Stone (GW), stones & plants
Flayed One Flesh (GW), flatbrush stones & plants
Mix Strong Tone Ink (AP) 1:1 Soft Tone Ink (AP), wash
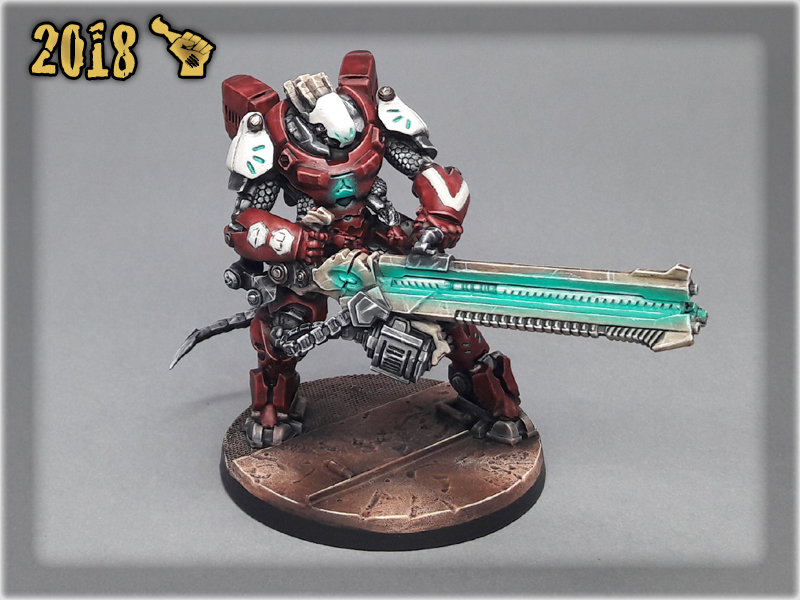
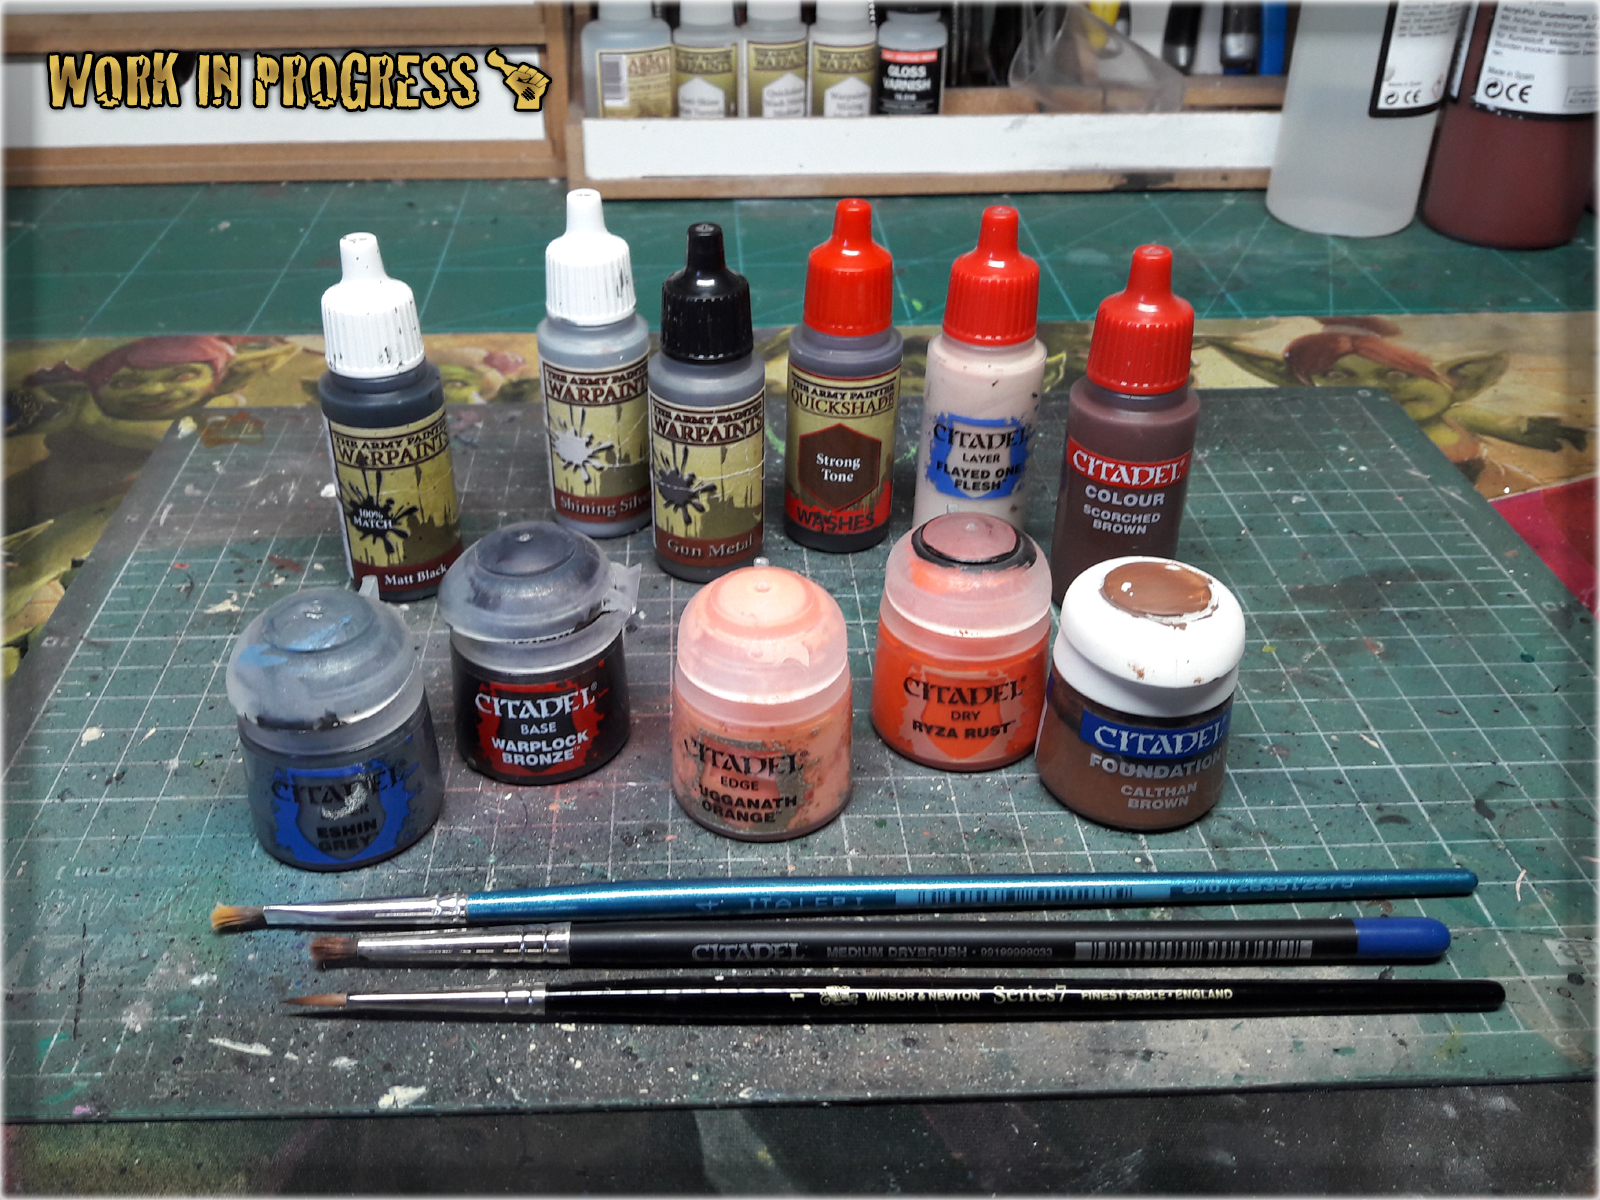
In this Step-by-Step tutorial I would like to take you on a spin with some Micro Art Studio’s Corregidor Bases. Guys from MAS did a fantastic job painting this product, but I have my own way which I would like to share with you. Buckle up and let’s get to it!
* Regular Brush,
* Stippling Brush,
* Black,
* Tin Bitz / Warplock Bronze (GW)
* Eshin Grey (GW),
* Strong Tone Ink (AP),
* Gun Metal (AP),
* Shining Silver (AP),
* Scorched Brown (GW),
* Calthan Brown (GW),
* Ryza Rust (GW),
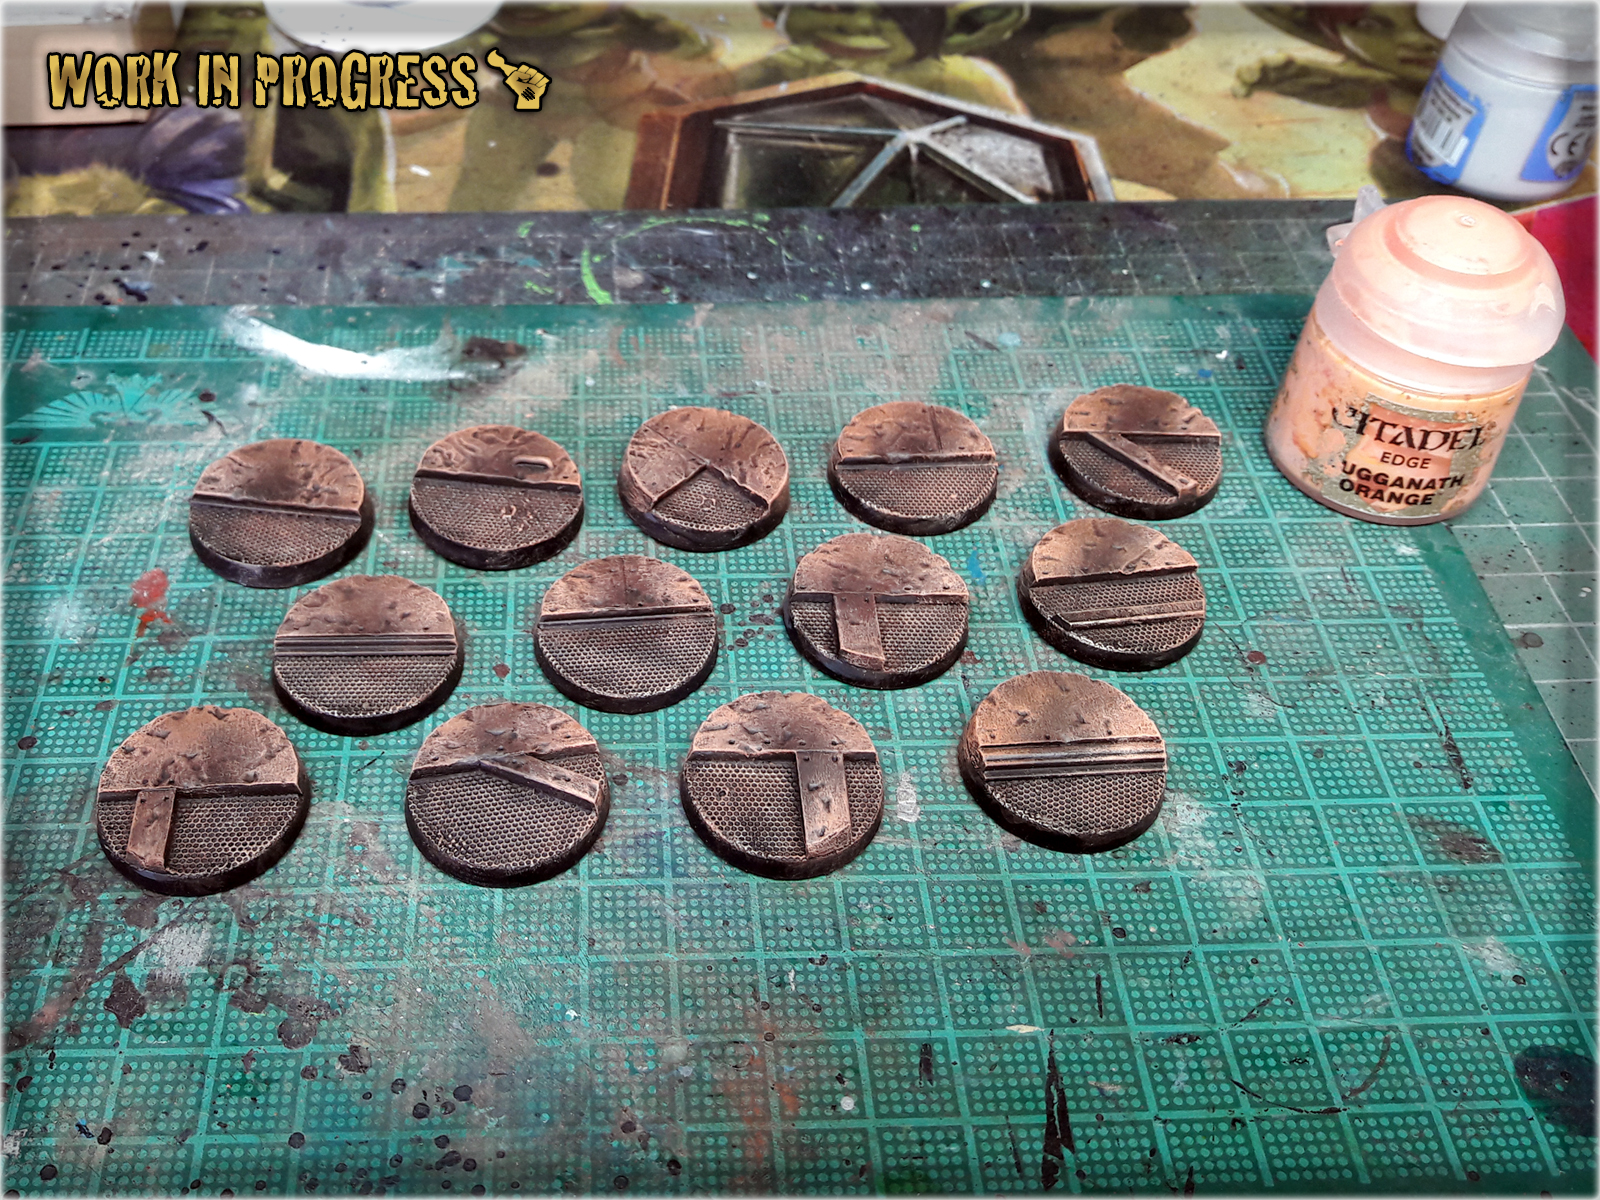
* Lugganath Orange (GW),
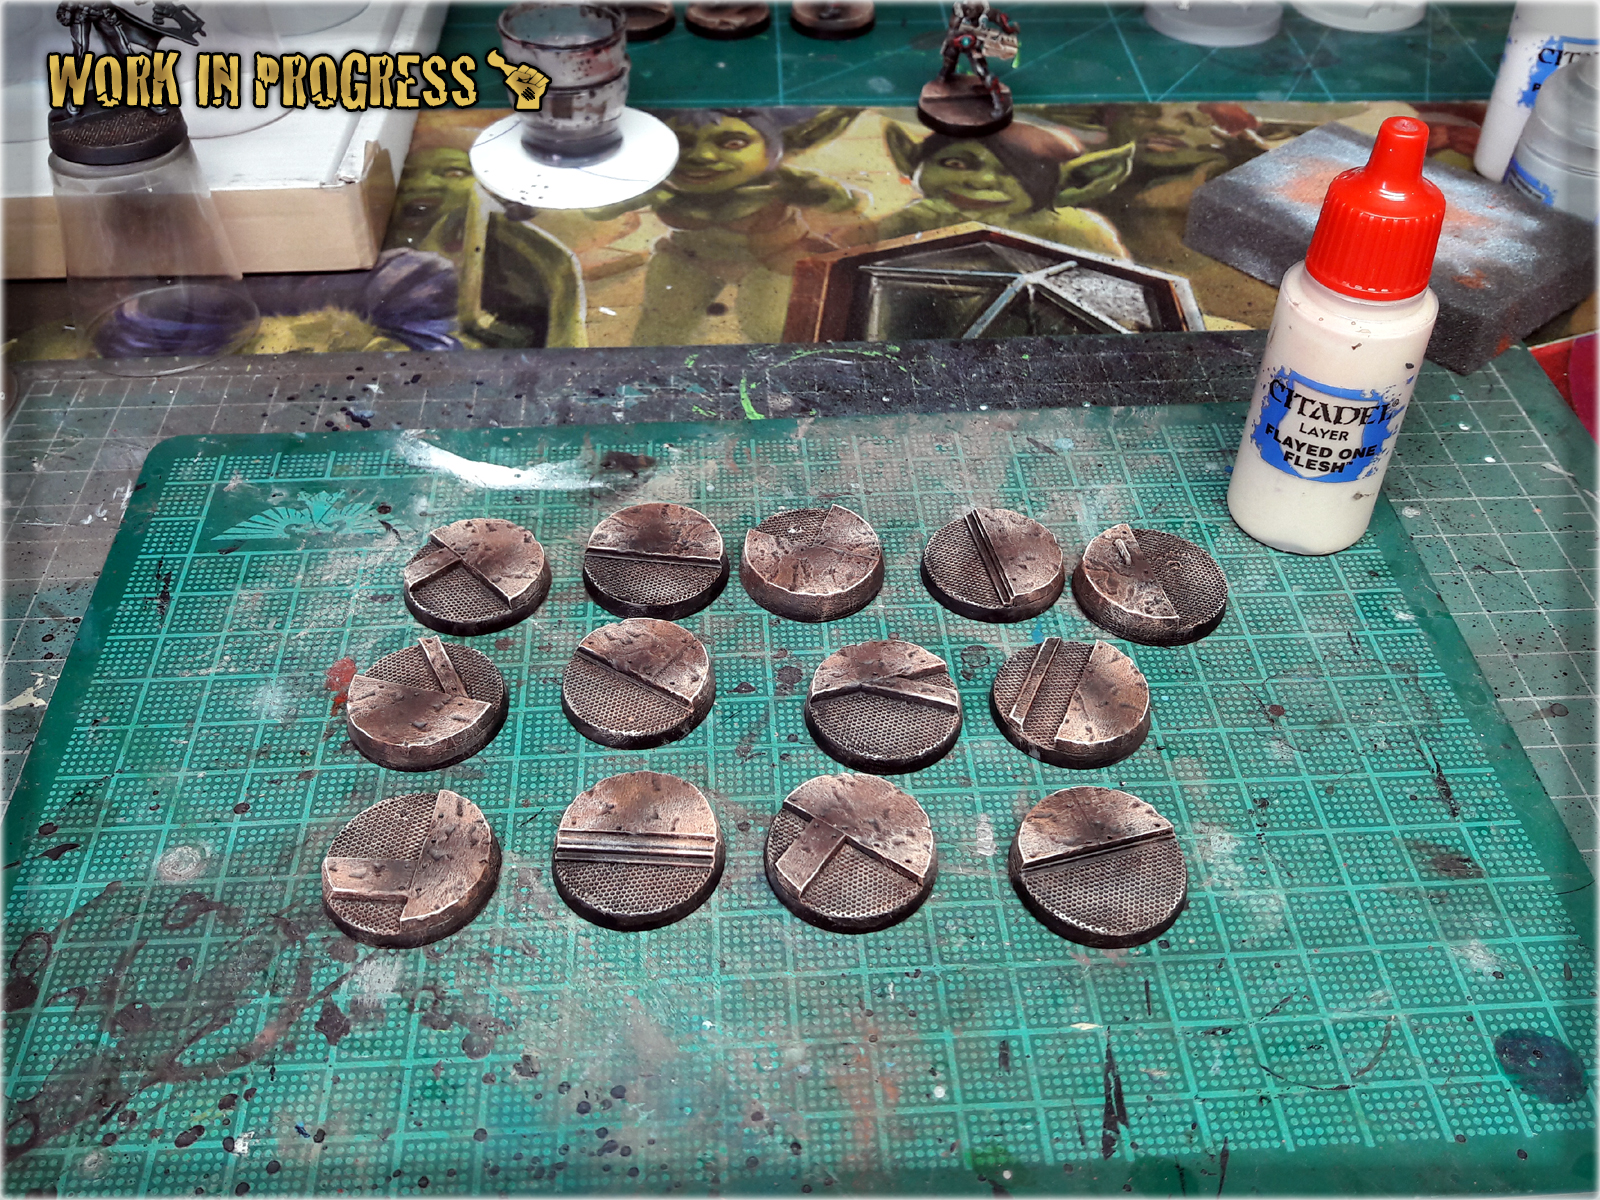
* Flayed One Flesh (GW),
! You can achieve similar results using different paints as long as you followTutorial's basics. For example Eshin Grey (GW) might be switched for Panzer Dark Grey (Val).
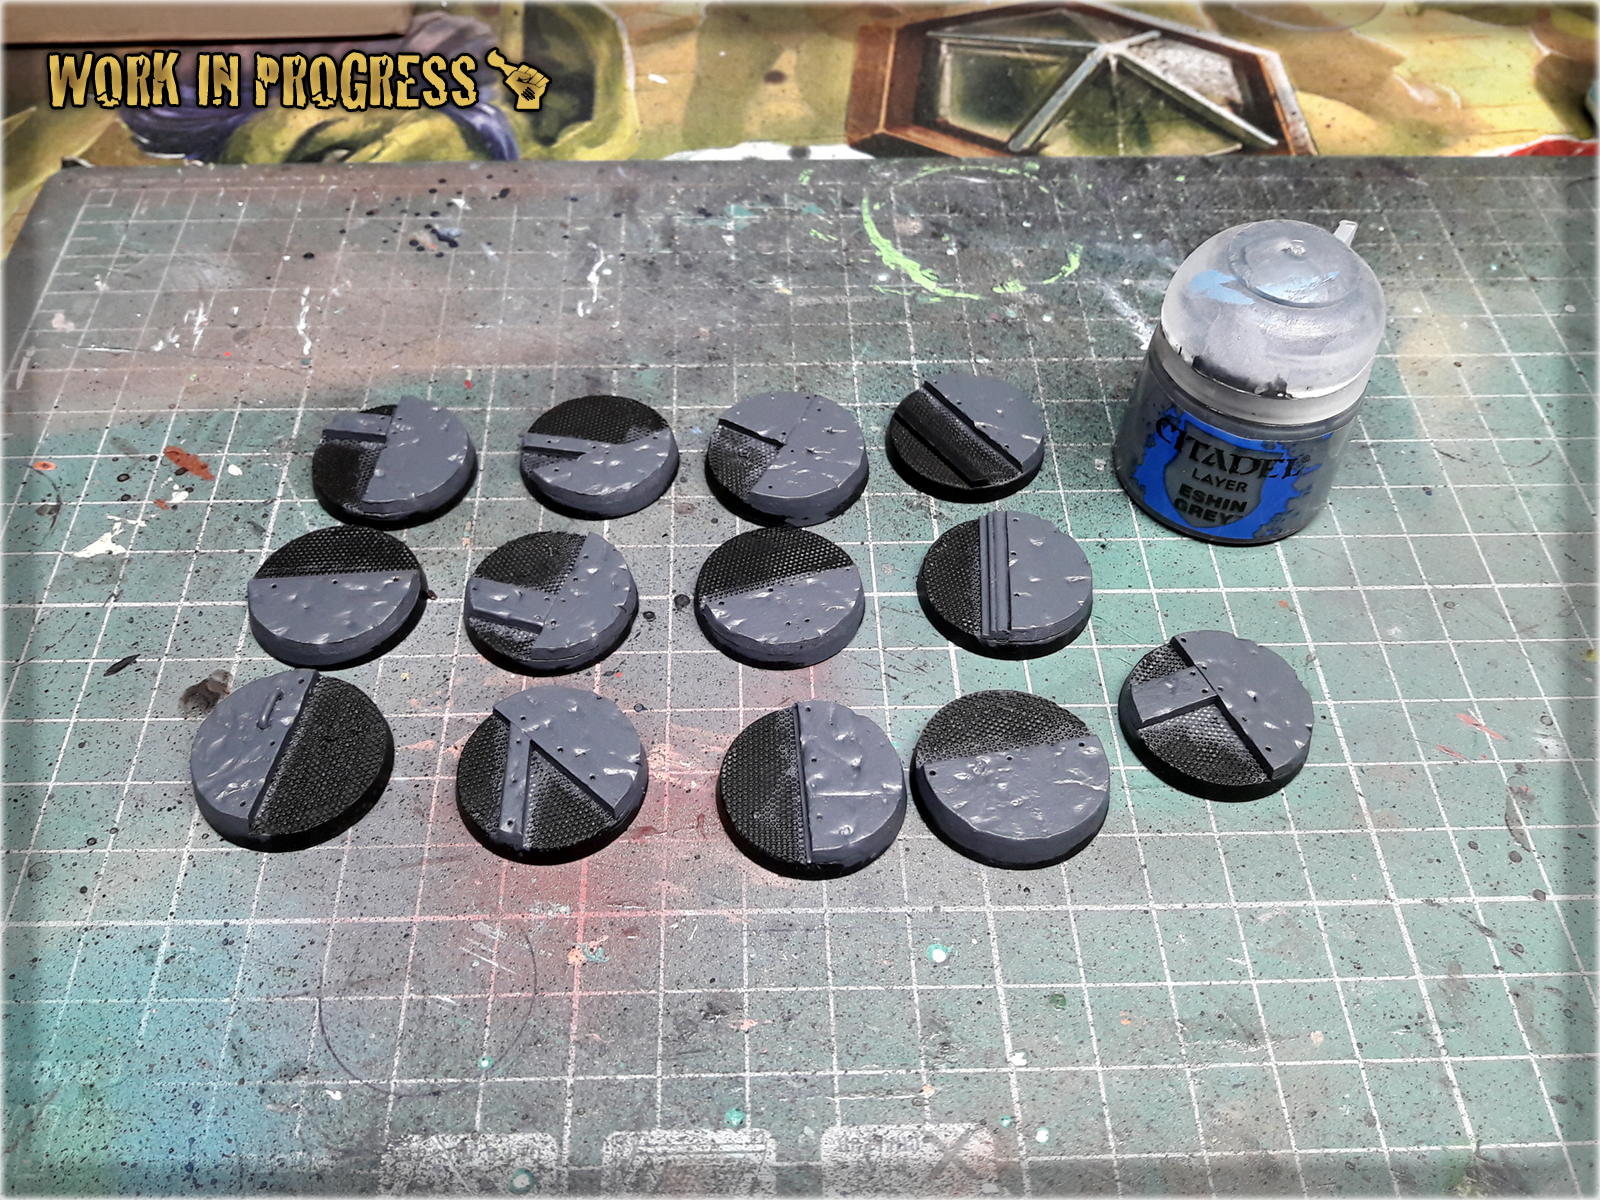
1 I started by applying a layer of Eshin Grey (GW) to all raised areas of the base, over Black undercoat. Just a hint that applying two slightly diluted layers goes much faster and produces a similar result.
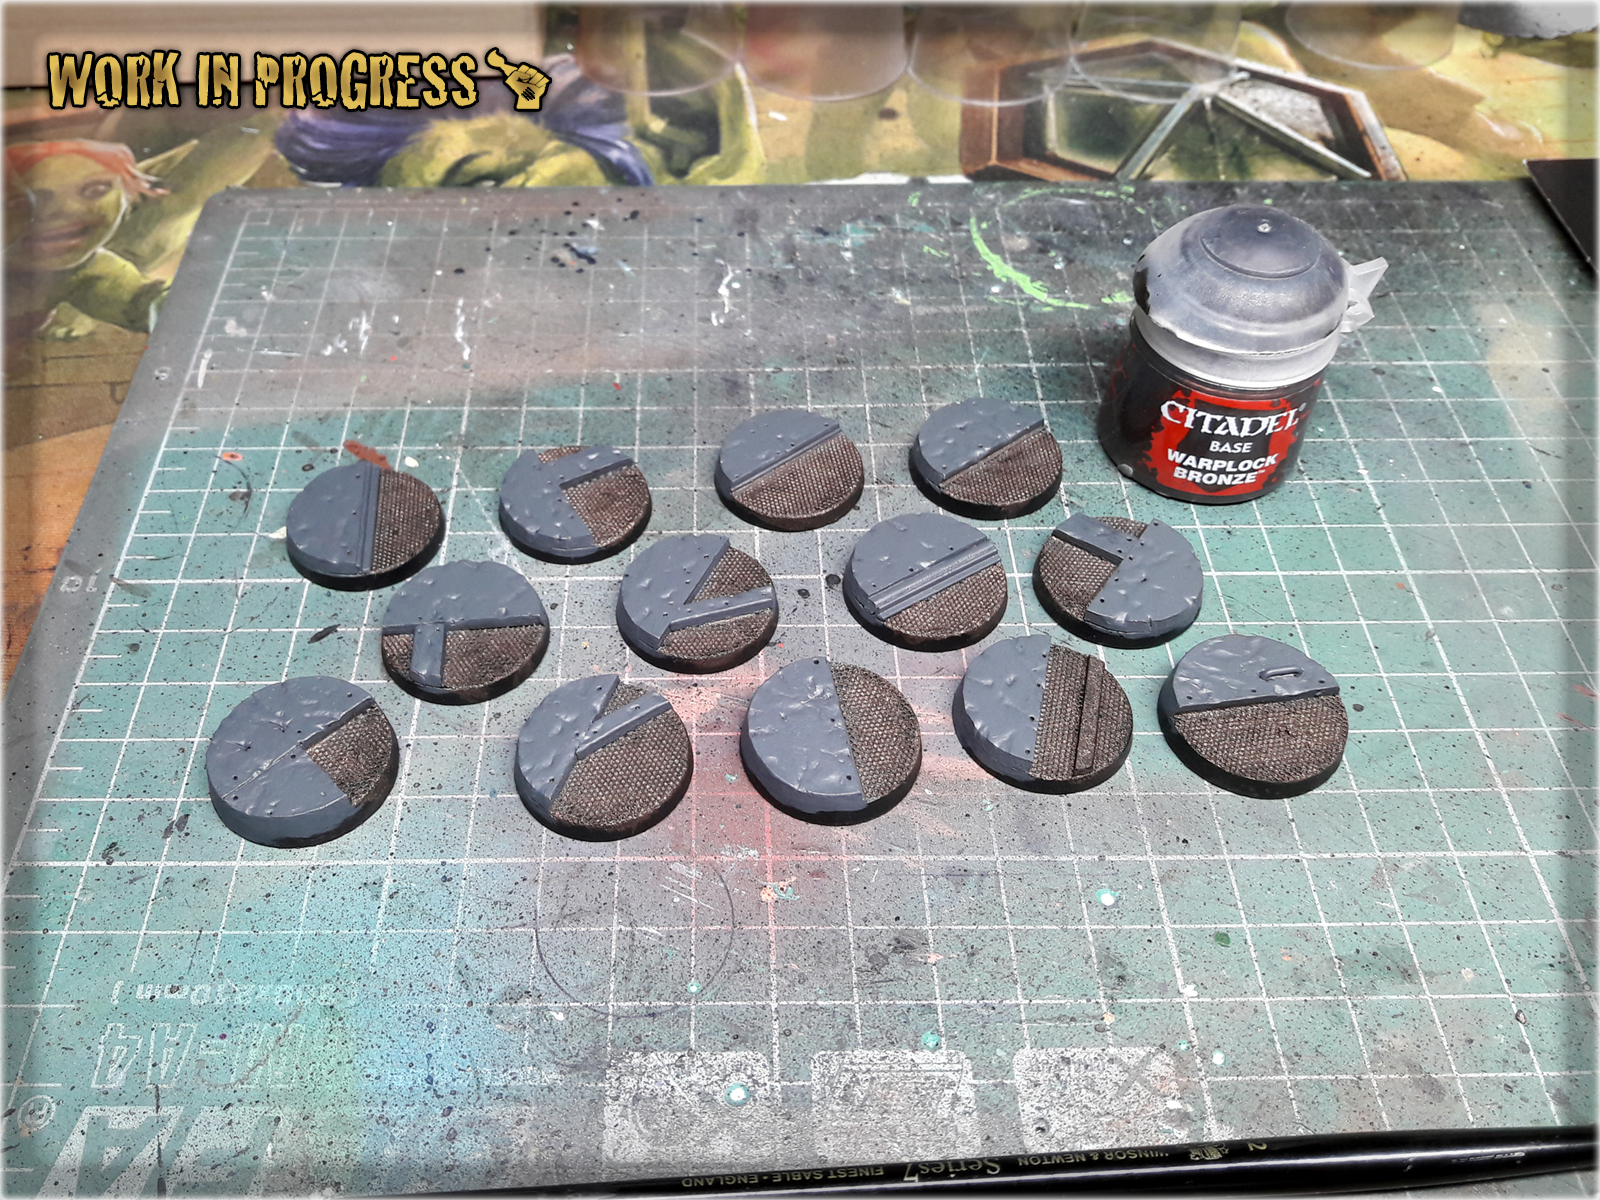
2 I then moved to the mesh areas and painted them with Warplock Bronze (GW). Once again this paint might be diluted but this time no need to apply two layers - one will suffice.
3 Once Warplock Bronze dried out, I applied a layer of Gun Metal (AP). For best results I did this with regular brush and using a Flatbrush technique following:
Five Layers Technique – Metal basis
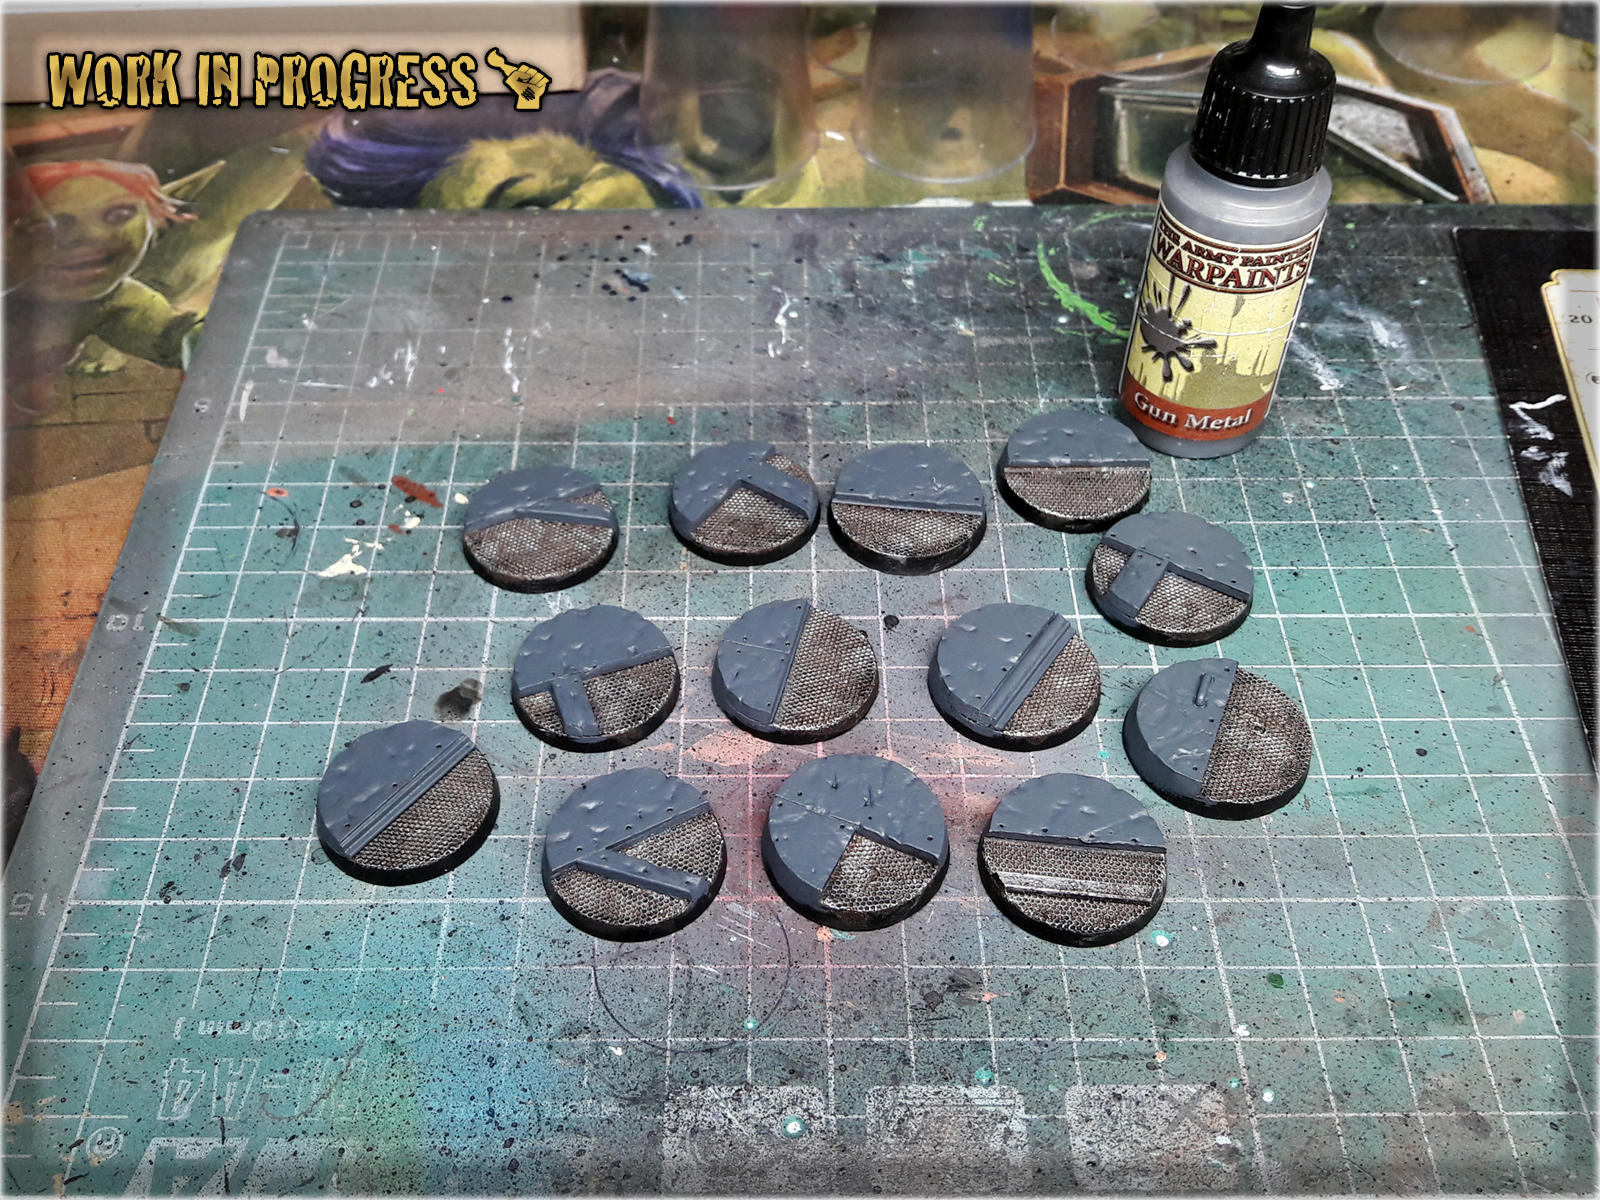
4 Next Shining Silver (AP) came in. I applied one layer over Gun Metal with regular brush, Flatbrushing.

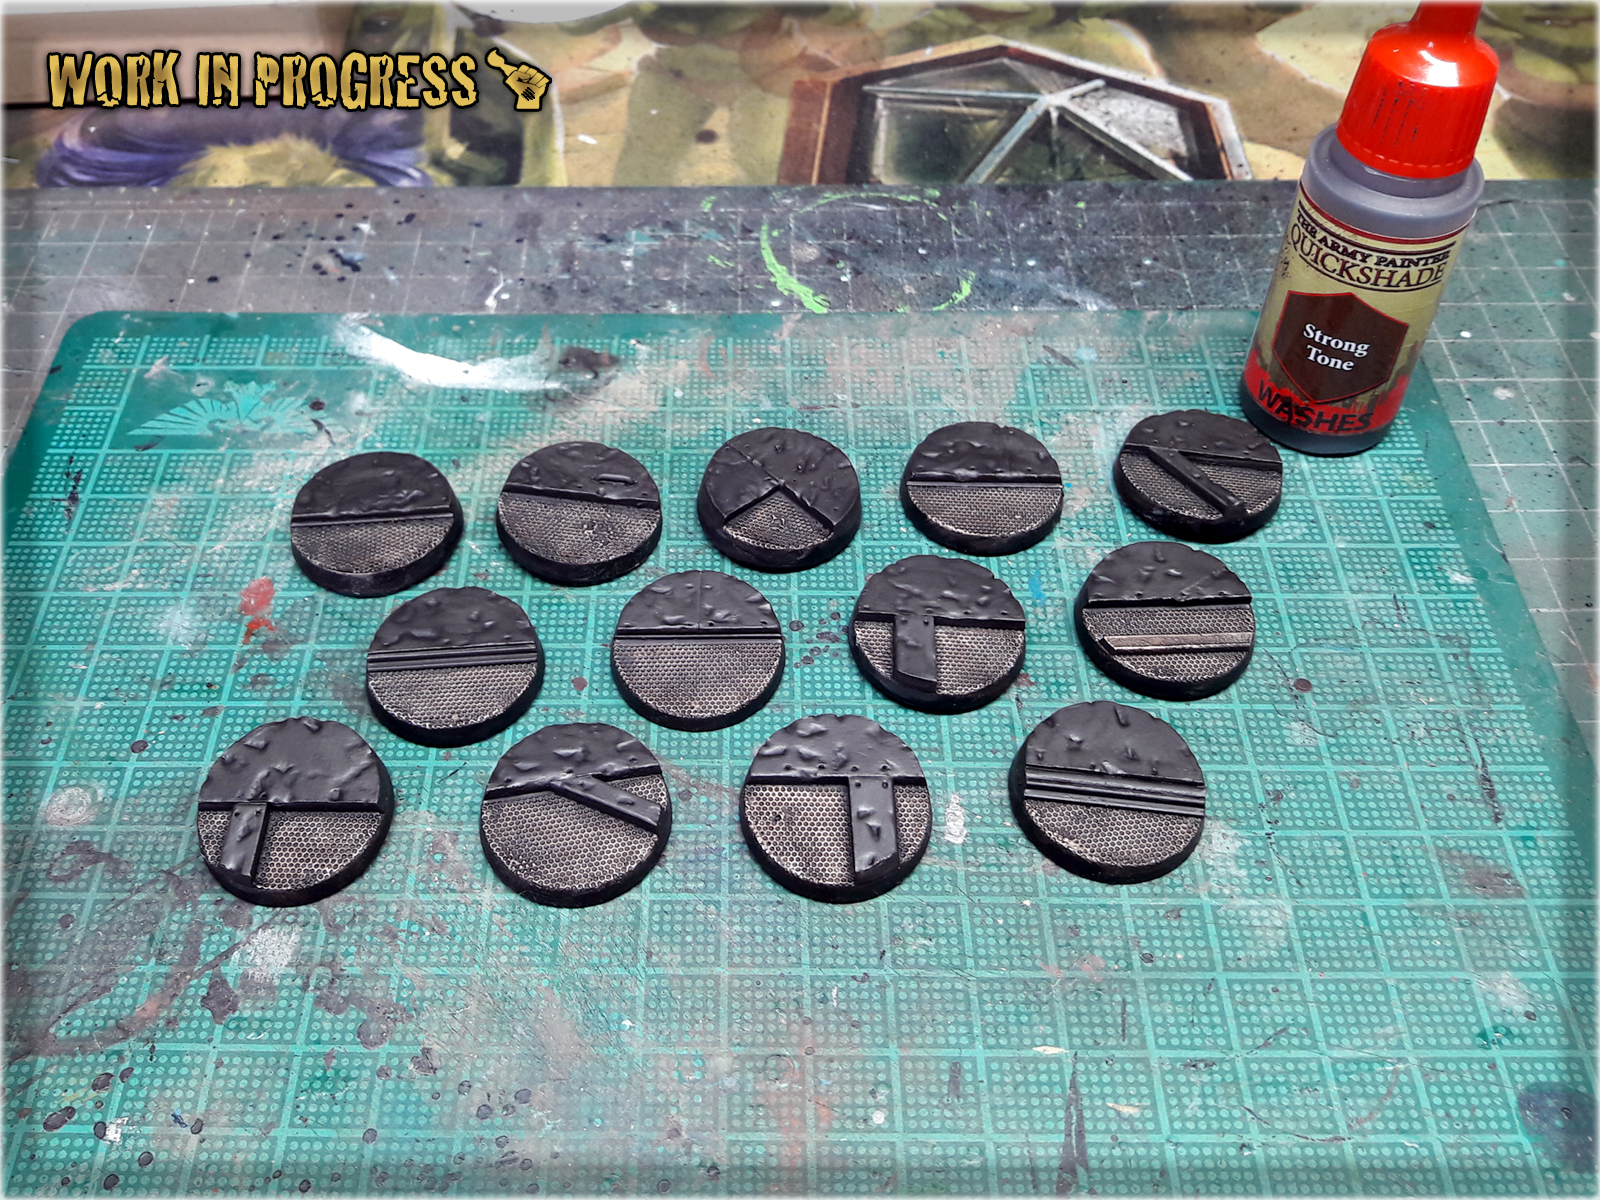
5 I then applied a wet, thick layer of Strong Tone Ink (AP) over entire base. Once it dried out - I applied another, identical layer. (Picture seem grey'ish - in real life this would look more brown and juicy)

! orem ipsum dolor sit amet, Integer commodo tristiqu odio, aliquet ut. Maecenas sed justo imperdiet bibendum. Vivamus nec sapien imperdiet diam. Aliquam erat volutpat. Sed onsectetur suscipit nunc et rutrum. Lorem ipsum dolor sit amet,volutpat. Sed onsectetur suscipit nunc et rutrum. Lorem ipsum dolor sit amet, volutpat.
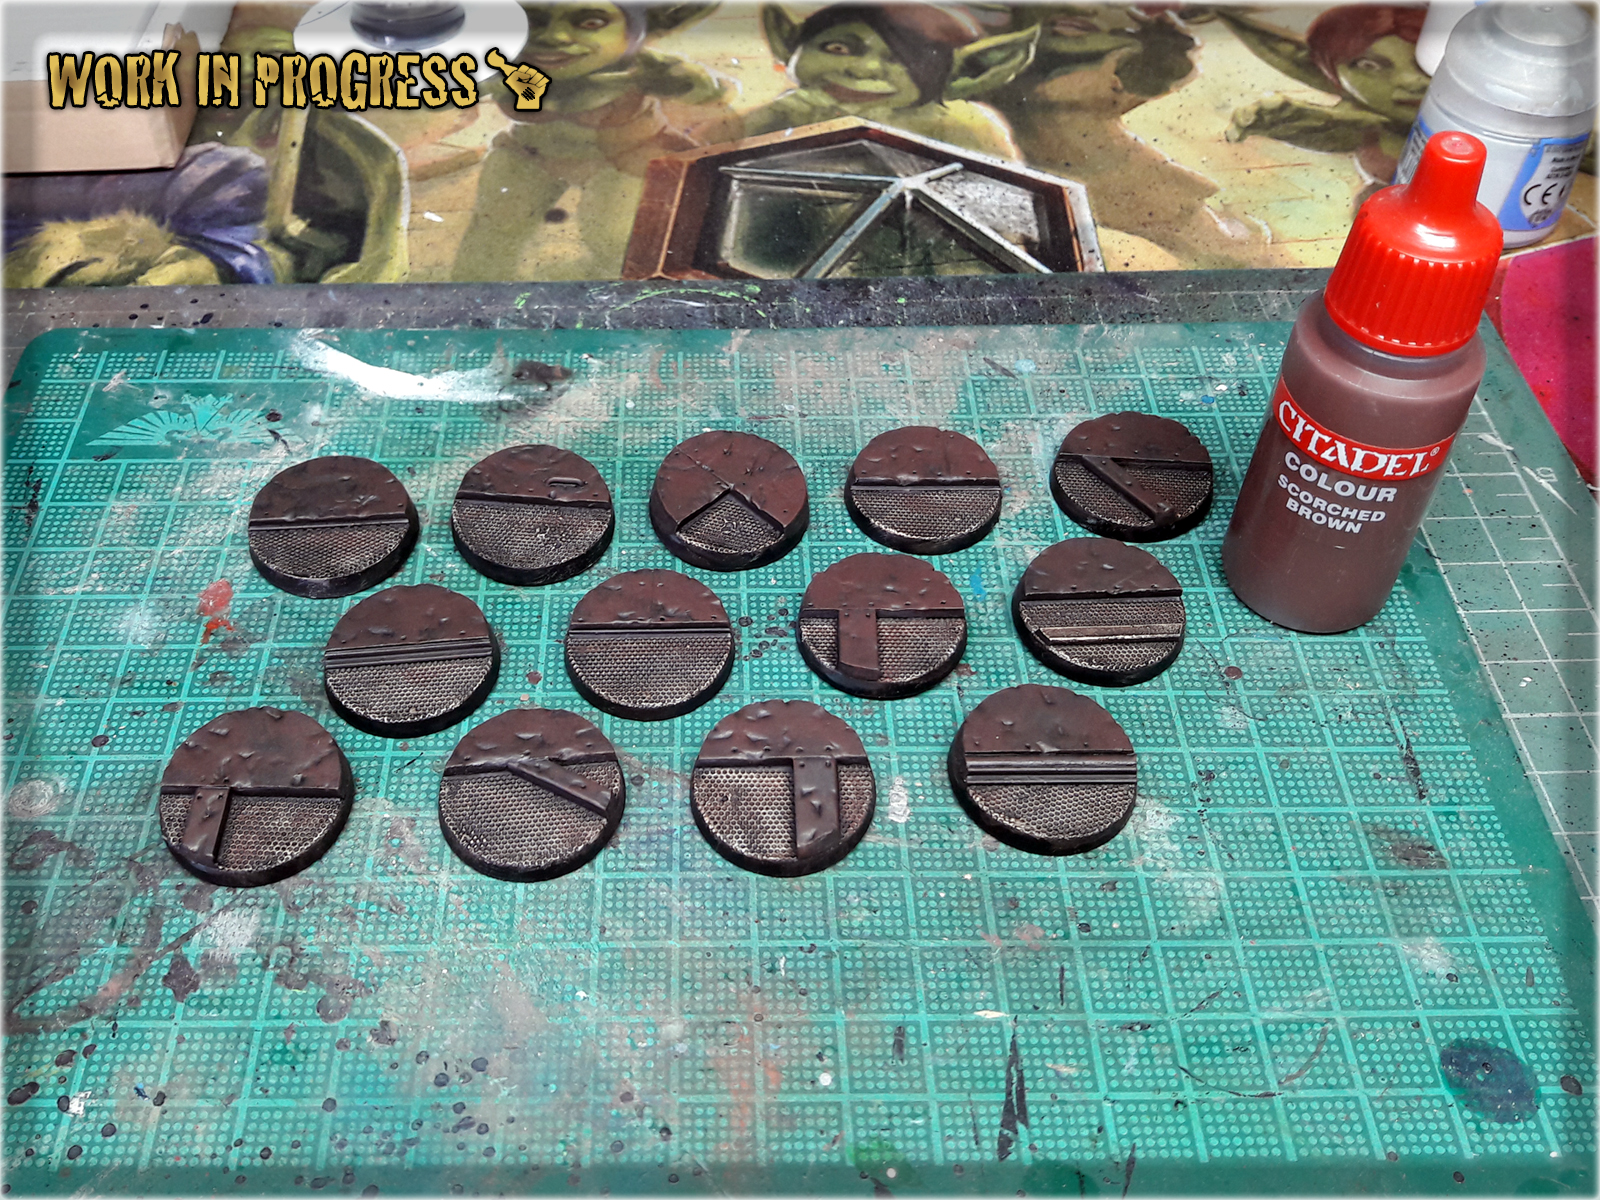
1 Using either a Stippling brush or a well used up large brush I applied stains of Scorched Brown (GW) over all raised areas. Was carefull not to use too much paint.
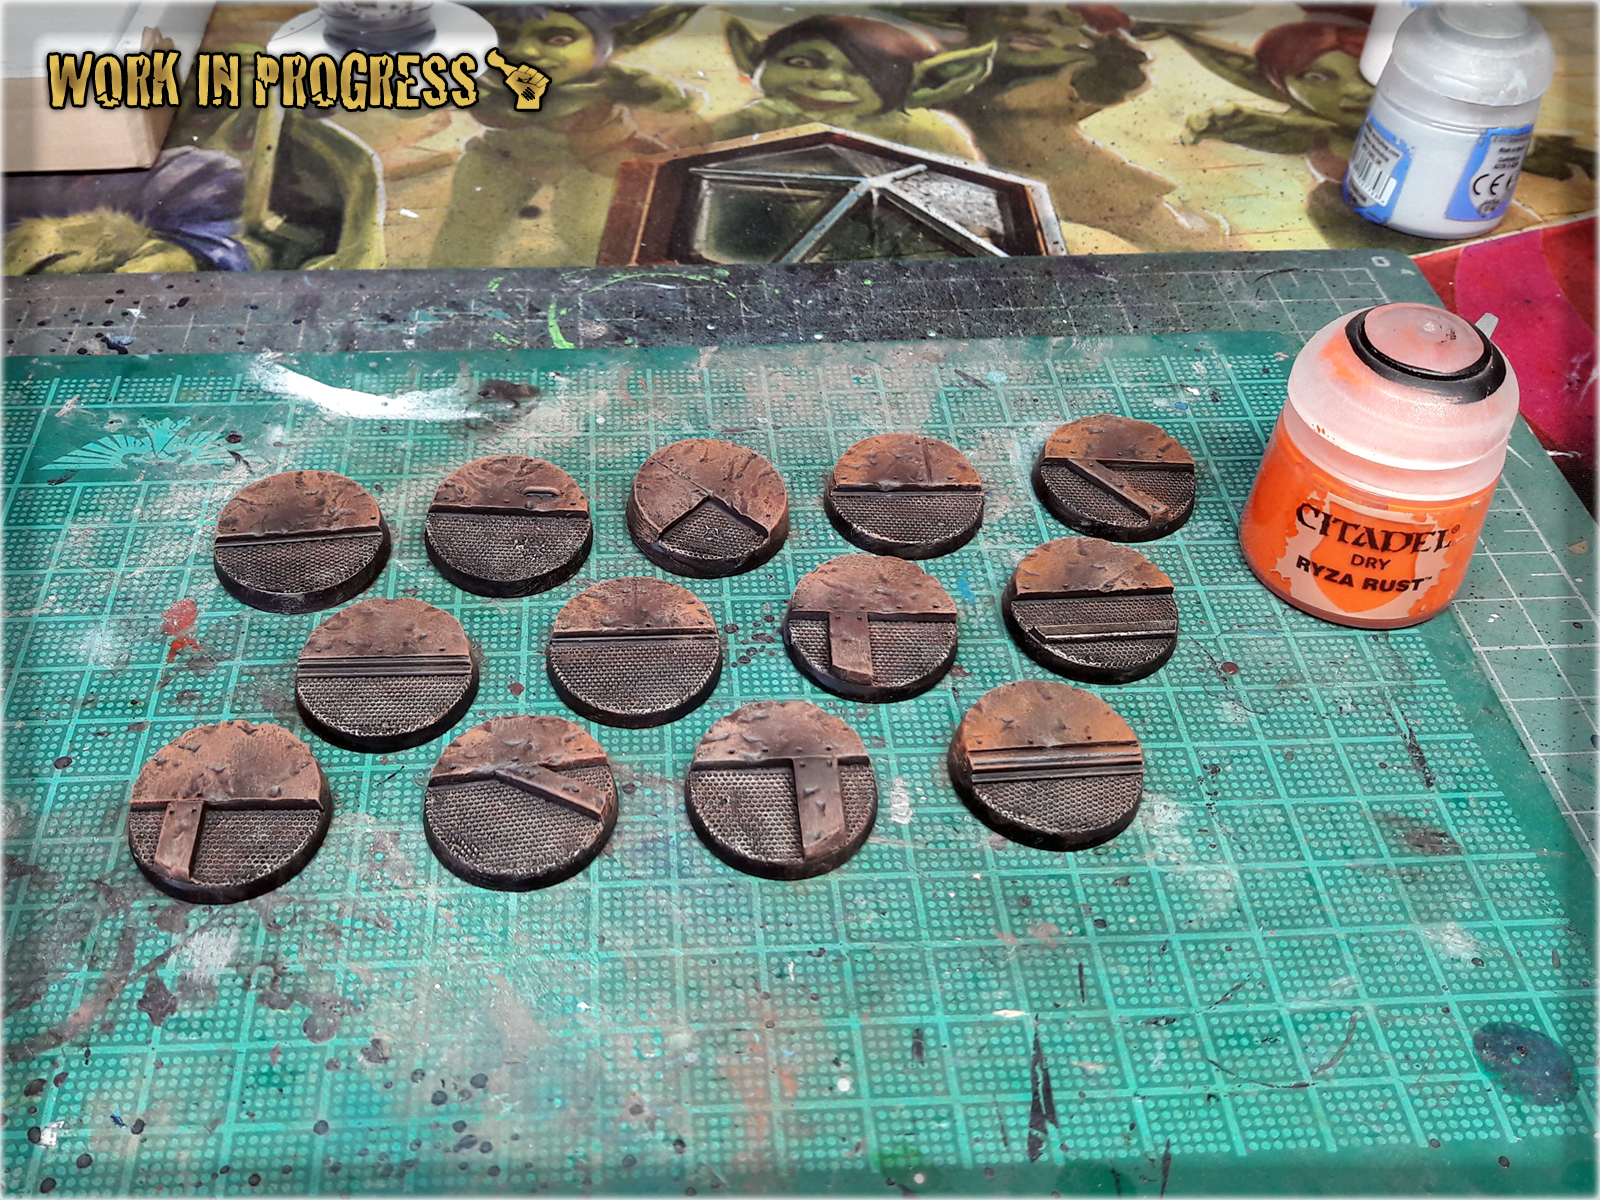
2 I then drybrushed edges and some large parts of raised areas using Calthan Brown (GW).

3 Next I Stippled some Ryza Rust (GW) on top of previous layer, ensuring to leave some Calthan Brown visible.
4 Same technique, different paint. I stippled Lugganath Orange (GW) on top of Ryza Rust layer, leaving previous layer visible on the sides of the new one.
! From this layer onward I usually paint over both raised and mesh areas. For the purpose of this Tutorial I left mesh parts clean, but do not be alarmed if you see pictures of my own bases with a less differentiated colour scheme.
5 Flayed one Flesh (GW) followed. This time I Drybrushed over Lugganath Orange layer and then used regular brush to paint thin lines on the edges.
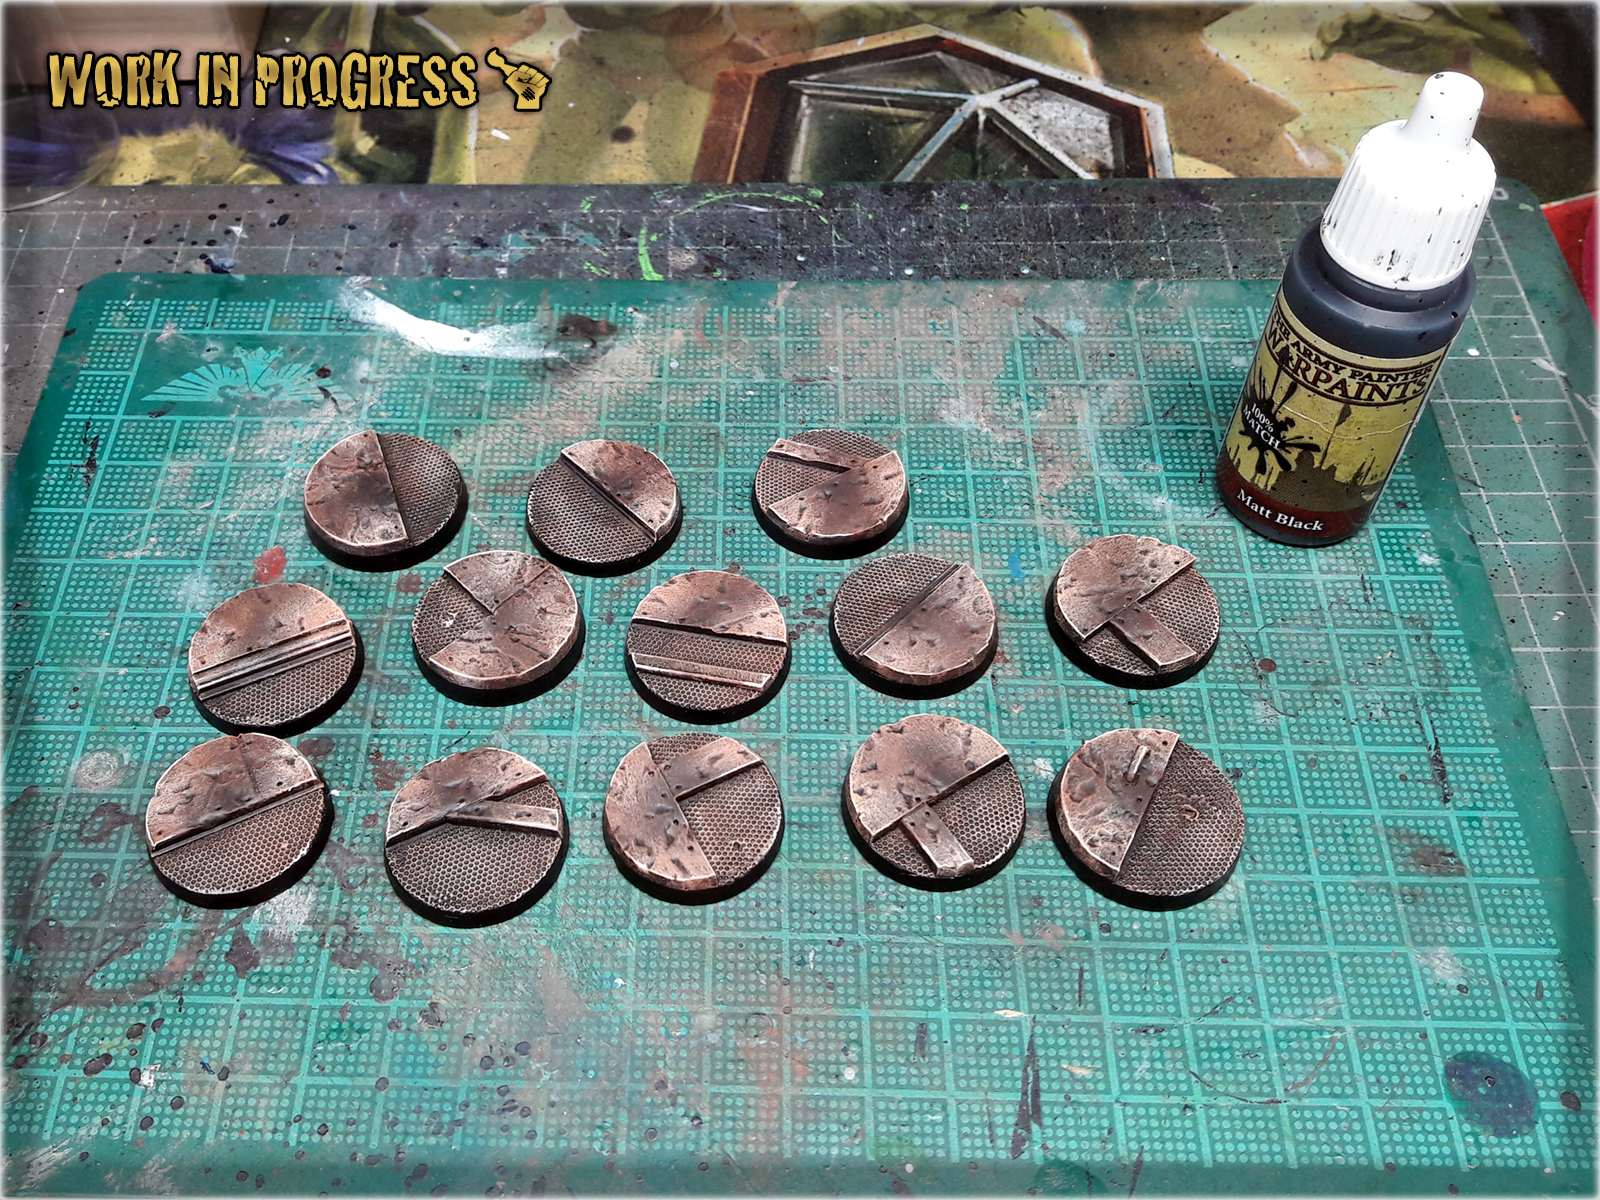
6 Adding a final touch I painted edges smooth Black to add contrast and keep the paint job clean.
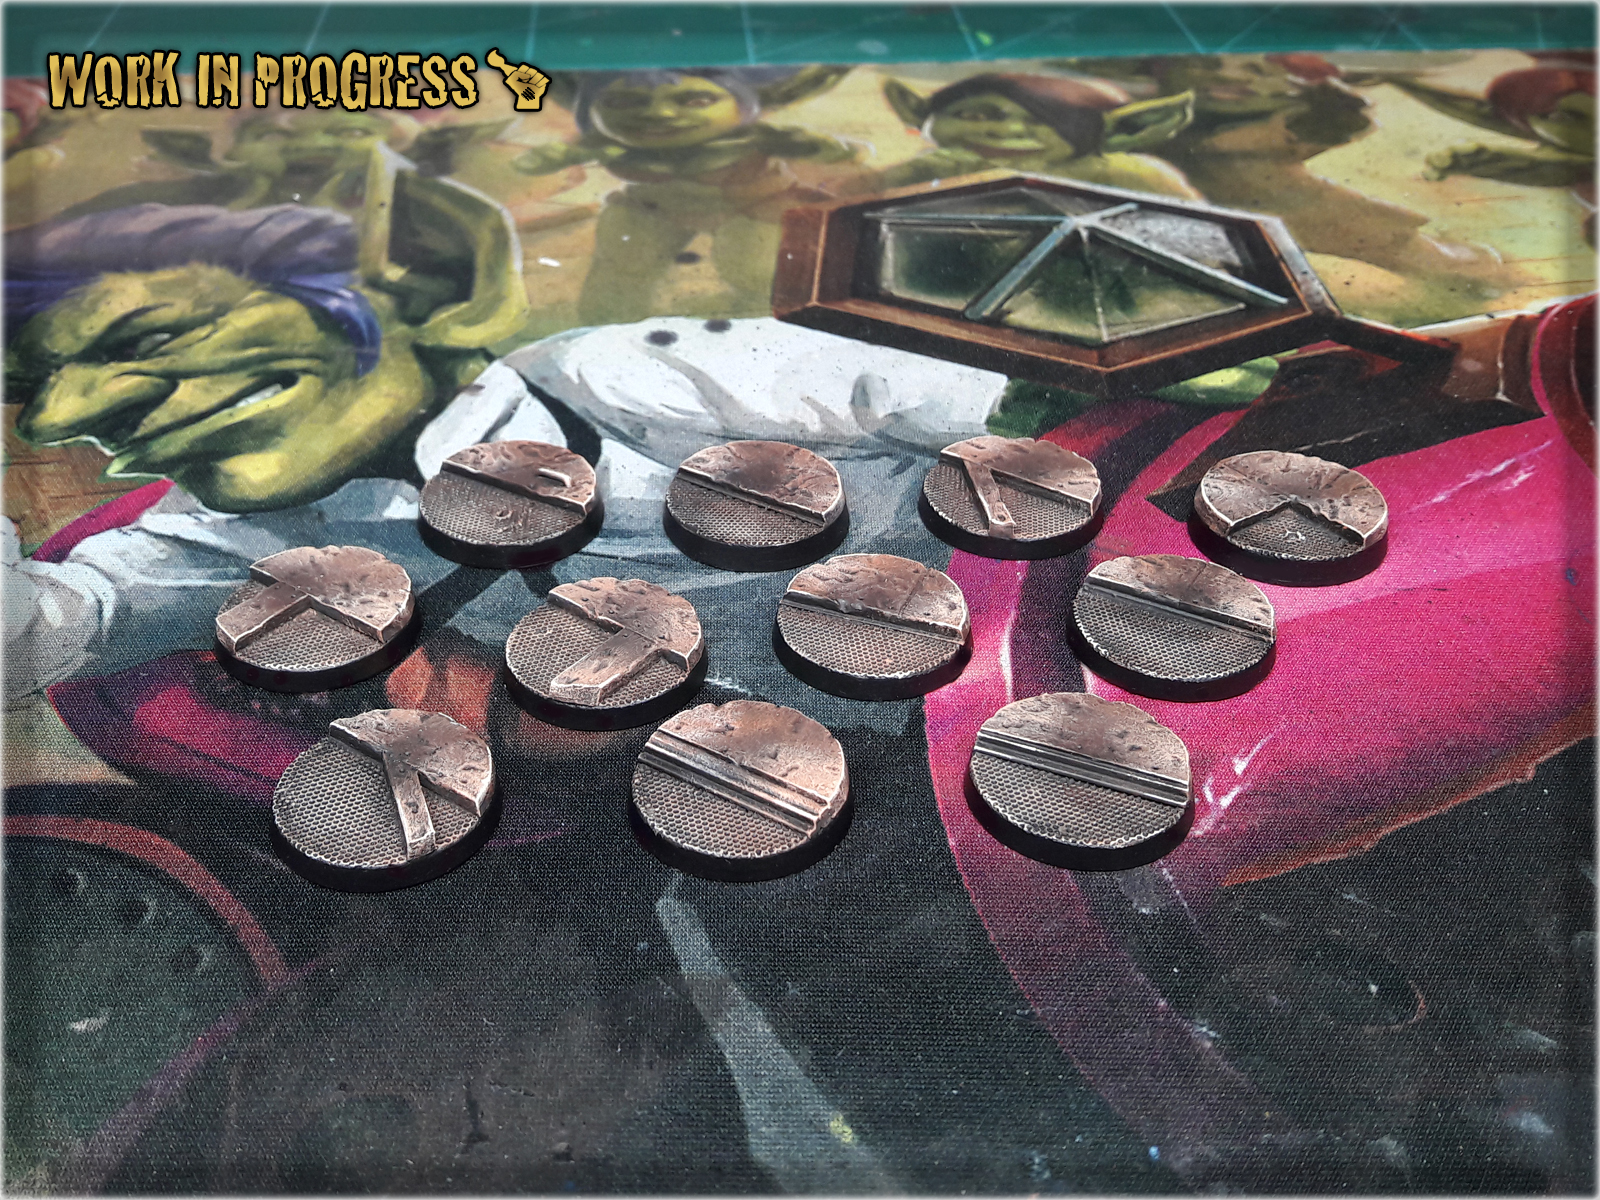
That’s it – you have followed me on my short journey from black undercoat to finished Corregidor Bases. Below you will find some examples of finished Corregidor Bases. Each bunch turns out slightly different from the rest. That’s because a slight difference in surface coverage or layer to layer proportion might result in change of how eye can see these bases. Either way – here they are:


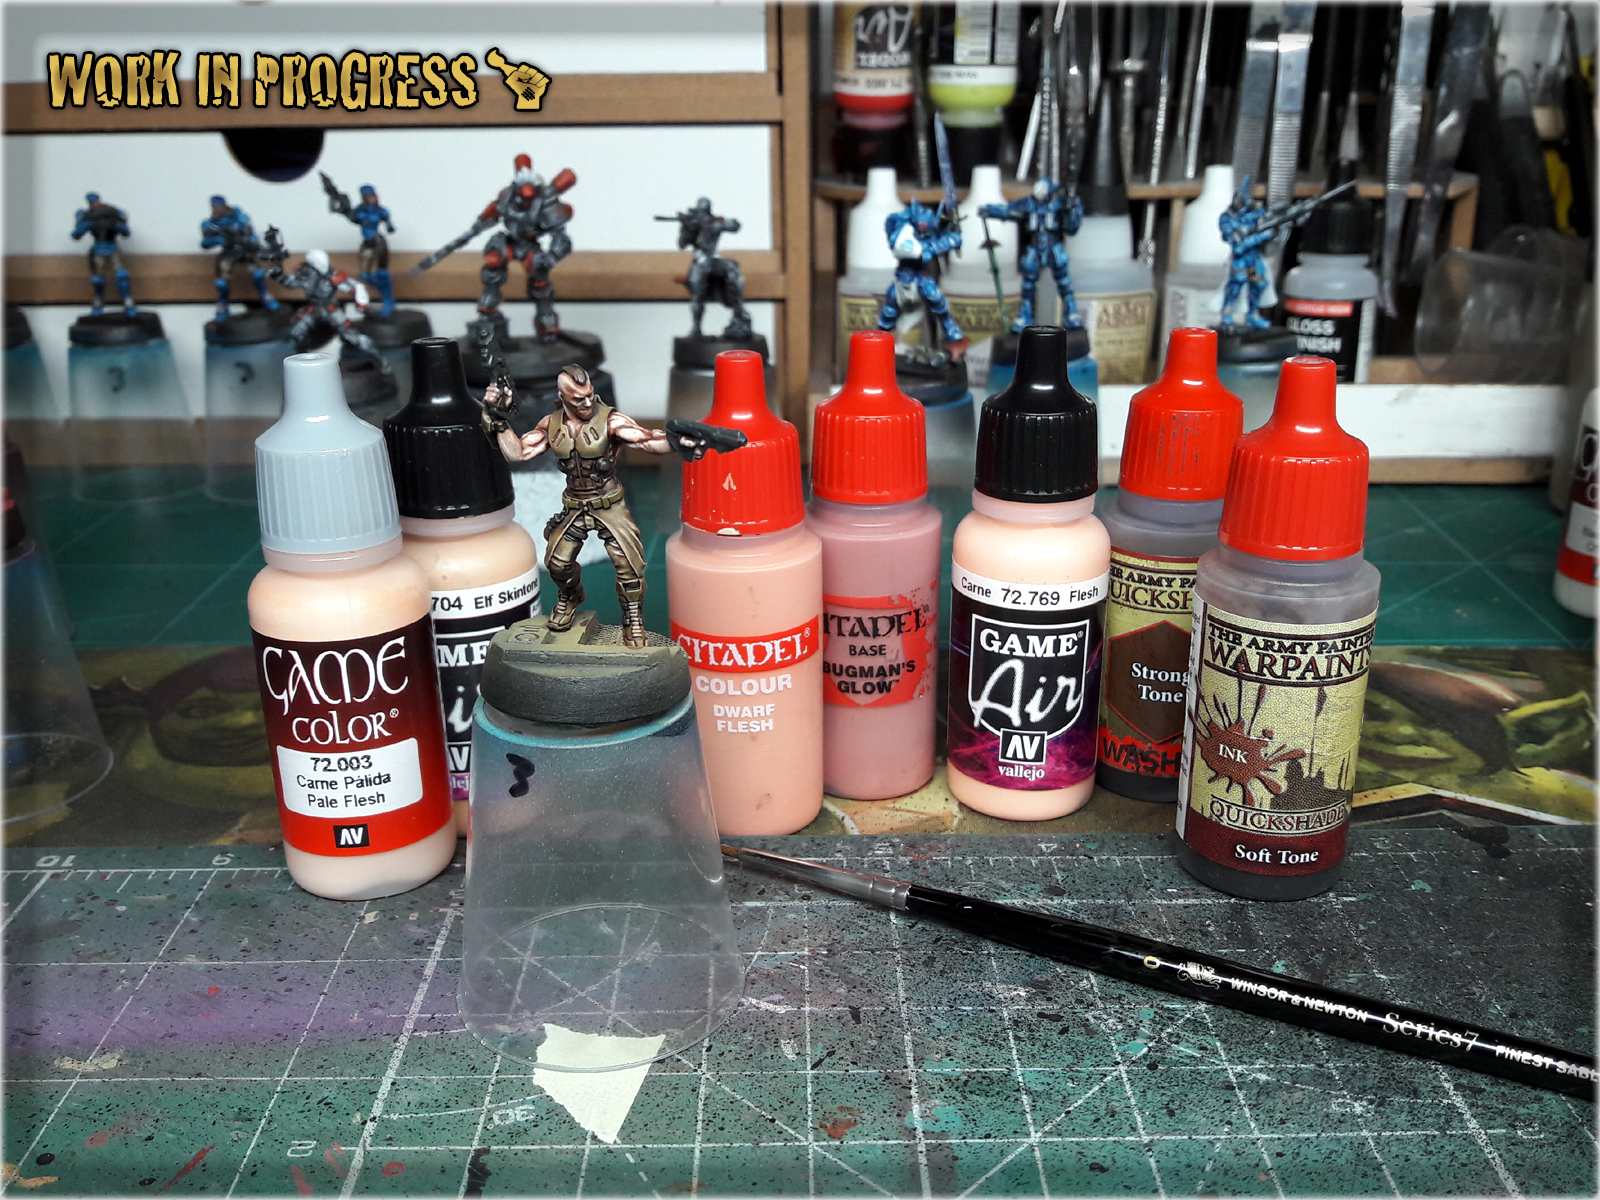
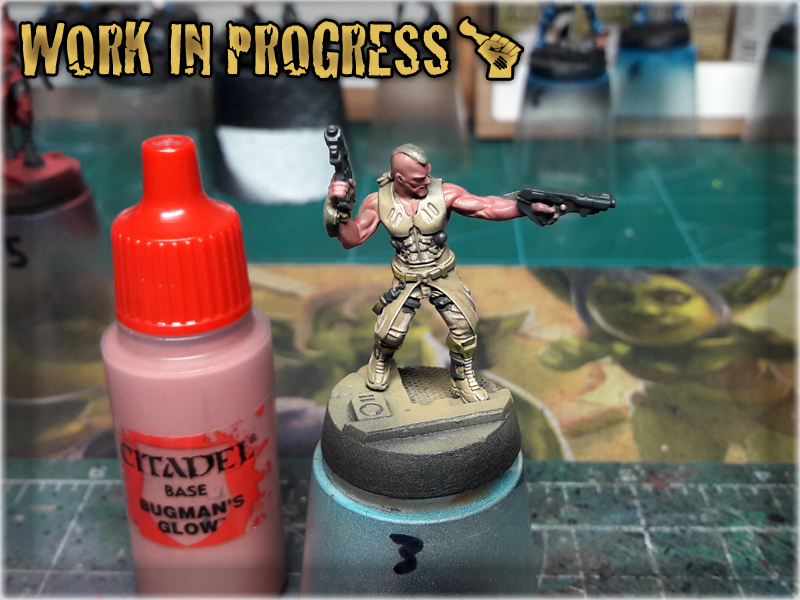
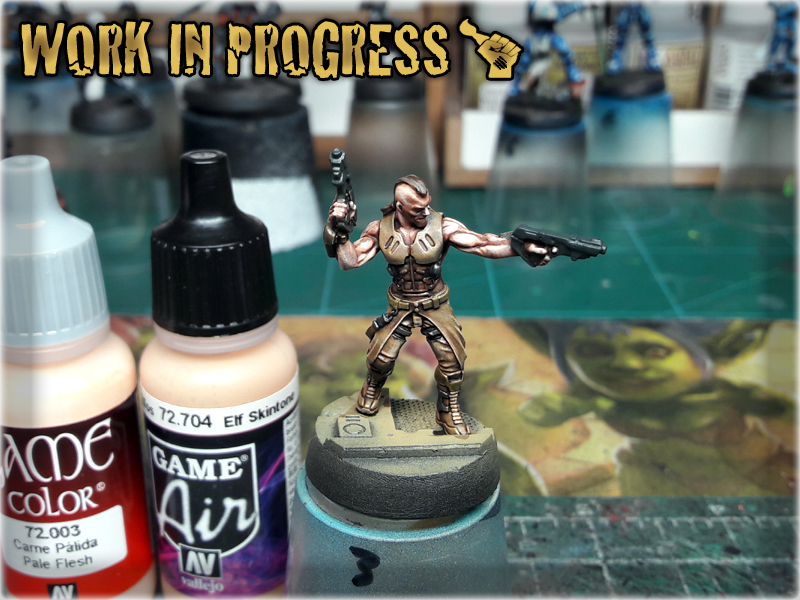
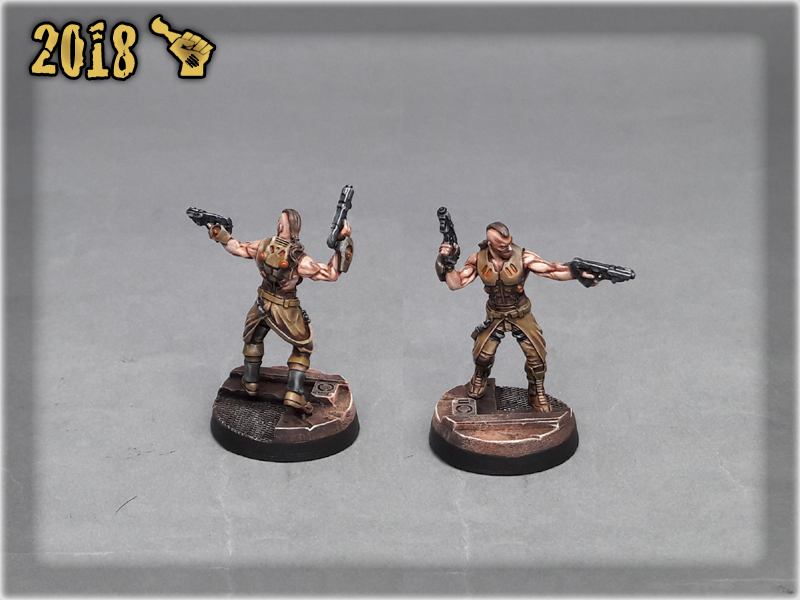
Painting skin – nightmare for some, EZ for others. Back in the days I’ve struggled with a proper skin tone, my miniatures turning out too dark, or skin being overall flat and uninterresting. Practicing ‘Five Layers Technique‘ for many years, led me to some realisations and now I am able to present to you my ultimate way of basic skin painting.


* Regular Brush,
* Bugmans Glow (GW),
* Dwarf Flesh (GW),
* Flesh (Val AIR),
* Strong Tone Ink (AP),
* Soft Tone Ink (AP),
* Pale Flesh (Val),
! You can achieve similar results using different paints and avoiding mixes, as long as you follow Five Layers Technique basics. For example Bugmans Glow (GW) might be switched for Tanned Flesh (AP) or Tan (Vallejo).
! You can start by applying first layer on any surface. This method does not require any special preparation, like re-painting surface to primer black etc.

1 I started by applying an underlayer of Bugmans Glow paint over any surface destined to become skin. This layer might be a bit messy and is not meant to be smooth, only to cover entire surface. For this particular layer I encourage thinning the paint a bit to help it flow into recesses.
2 Next I applied a main layer of Dwarf Flesh. This time I tried to keep paint from flowing into recesses and made sure that it will cover all big flat areas.

3 I then applied a layer made of a 1:1 mix of Dwarf Flesh and Flesh over all raised areas. This is suposed to be the first highligh and provides a difference in skin tones over the model. Don't worry if some piant flows into recesses, just try to avoid covering everything with it.

4 Here came the flood of wash. I applied a 1:1 mix of Army Painter's Strong Tone Ink with Soft Tone Ink. As usual I didn't bother to be subtle about it.


5 Once dried, I highlighted skin with a 1:1 mix of Elf Skintone and Pale Flesh. This usually is the final highlight and is meant to POP the skin.
! If I was to enchance skin a bit and move forward from this point, I would add points of focus with lines and dots of Pale Flesh. Some deeper spots can also be in-lined with Flesh Tone or some brown-ish wash to build contrast but that's for another article.

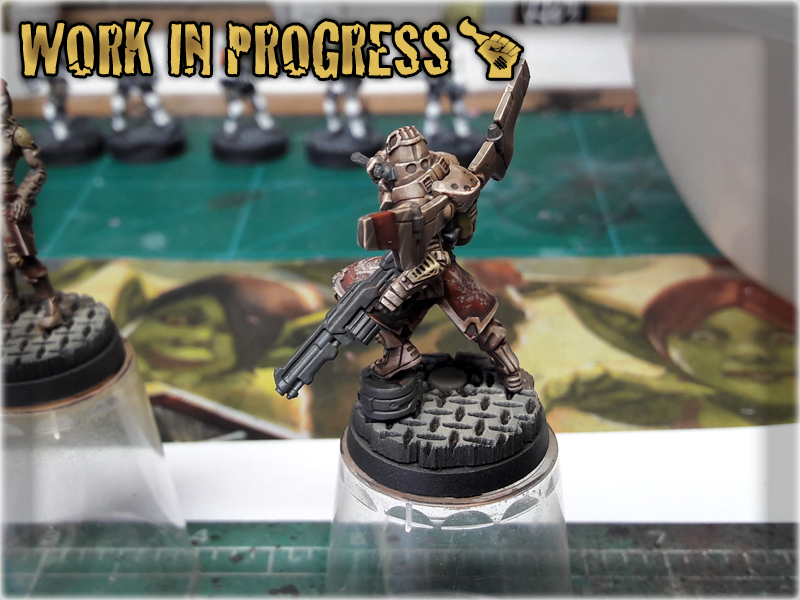
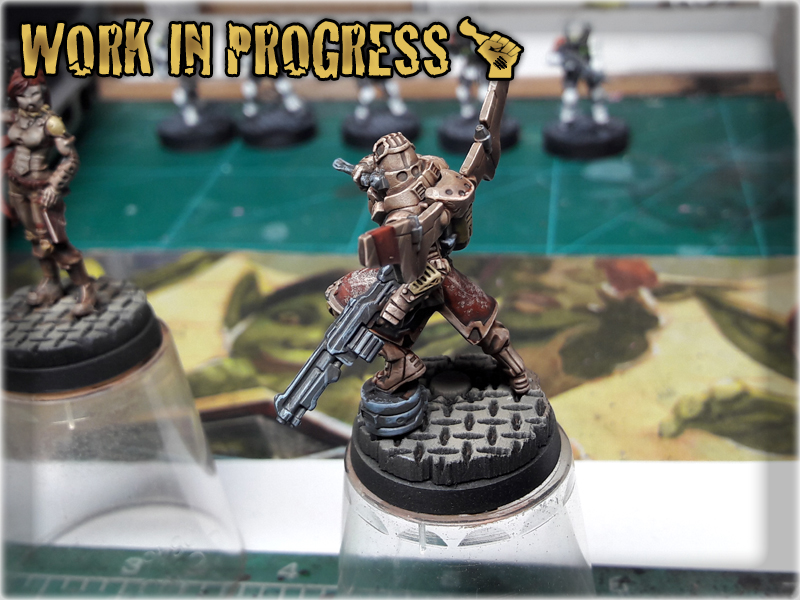
How about I show you a technique to paint brown military coats like a pro in a way so simple that it’ll make you wander why haven’t you painted like that before? Below is a simple Step-by-step tutorial on how to achieve awesome tattered and used up leather brown coat effect in just few simple steps.

First some home brewed theory.
Stippling: A technique of creating texture out of dozens of tiny dots of paint. Easiest way to achieve this is to use a Stippling Brush (round head, tip cut off – flat surface instead, resilient hair).
Blending: A technique of gently intermingling two or more colors to create a gradual transition or to soften lines. Below I will demonstrate a rather crude version of it.
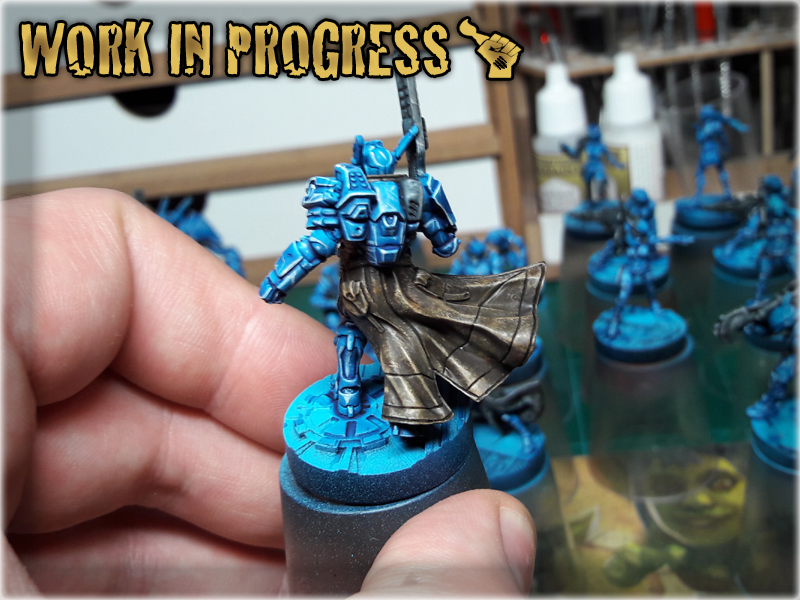
* Stippling Brush (GW),
* Regular Brush,
* Olive Drab (Vallejo AIR),
* Pallid Wych Flesh (GW),
* Strong Tone Ink (AP),
1 You can start painting this on any dark surface, but for good result I recommend to prepare the surface, by following steps 1 to 3 of Painting 'Infinity' Black Tutorial. This will transition into a complex and interresting surface to work on. On a bright side neither these nor following layers require precision and are really fast to paint.
TUTORIAL: PAINTING ‘INFINITY’ BLACK
2 Time to stipple. I used a Stippling brush and Pallid Wych Flesh paint. I left the excess paint on the palette and randomly applied some dots onto the coat.


3 Next I mixed Olive Drab 1:1 with Strong Tone Ink and applied it all over the coat. This is the crude version of blending I mentioned earlier. It has not much to do with actual blending technique, except it changes the color and actually 'blends'.
4 Wash comes last. I applied a strong, wet layer of Strong Tone Ink all over the coat. Once dry - paint job is done.

! This might be the end to it, but if you preffer to take your paint job to a higher level you can for example 'edge' the coat with a brighter brown/leathery colour. From now on you have a great looking base to add detail to and it was achieved in no time.


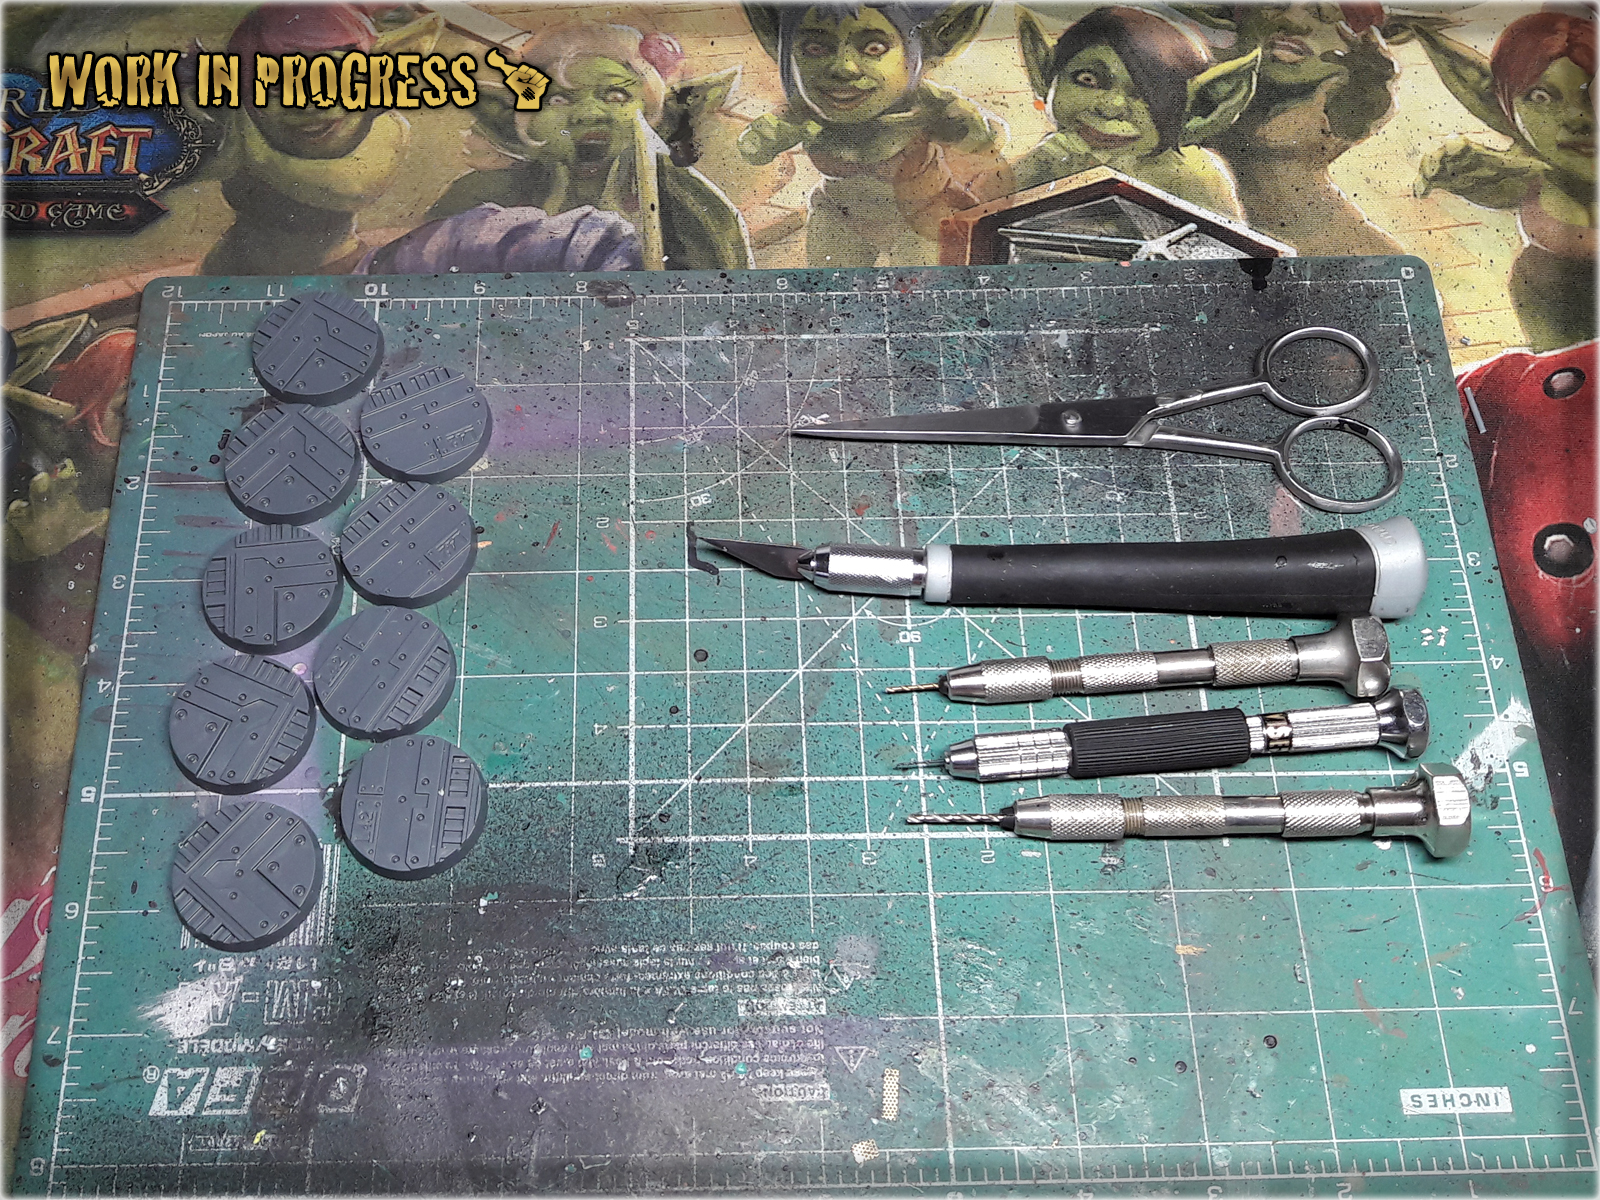
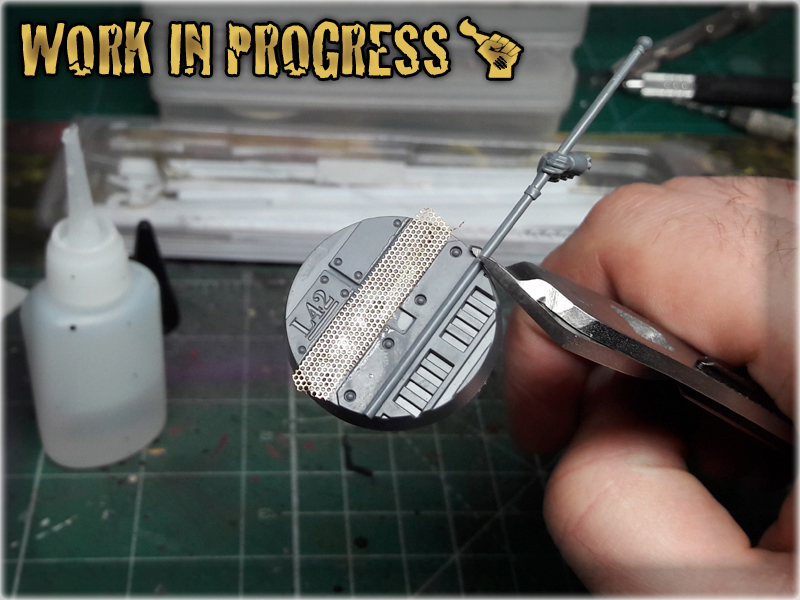
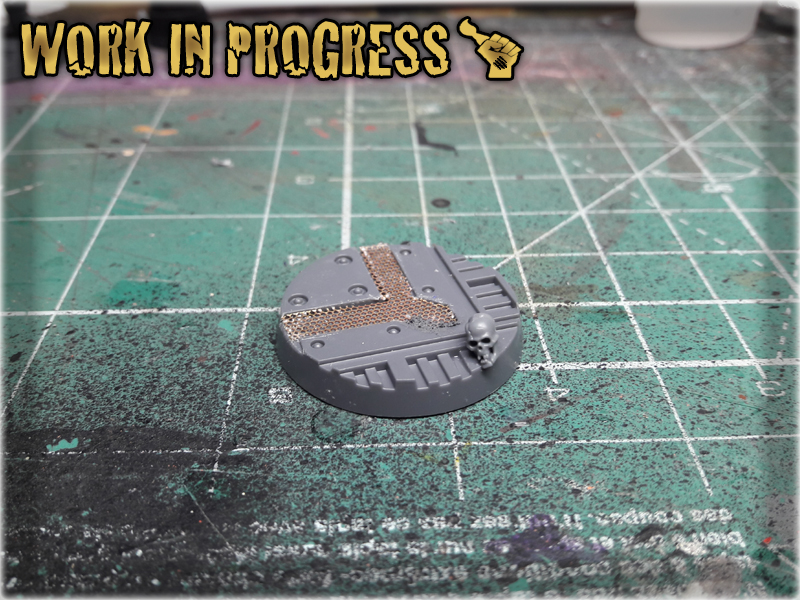
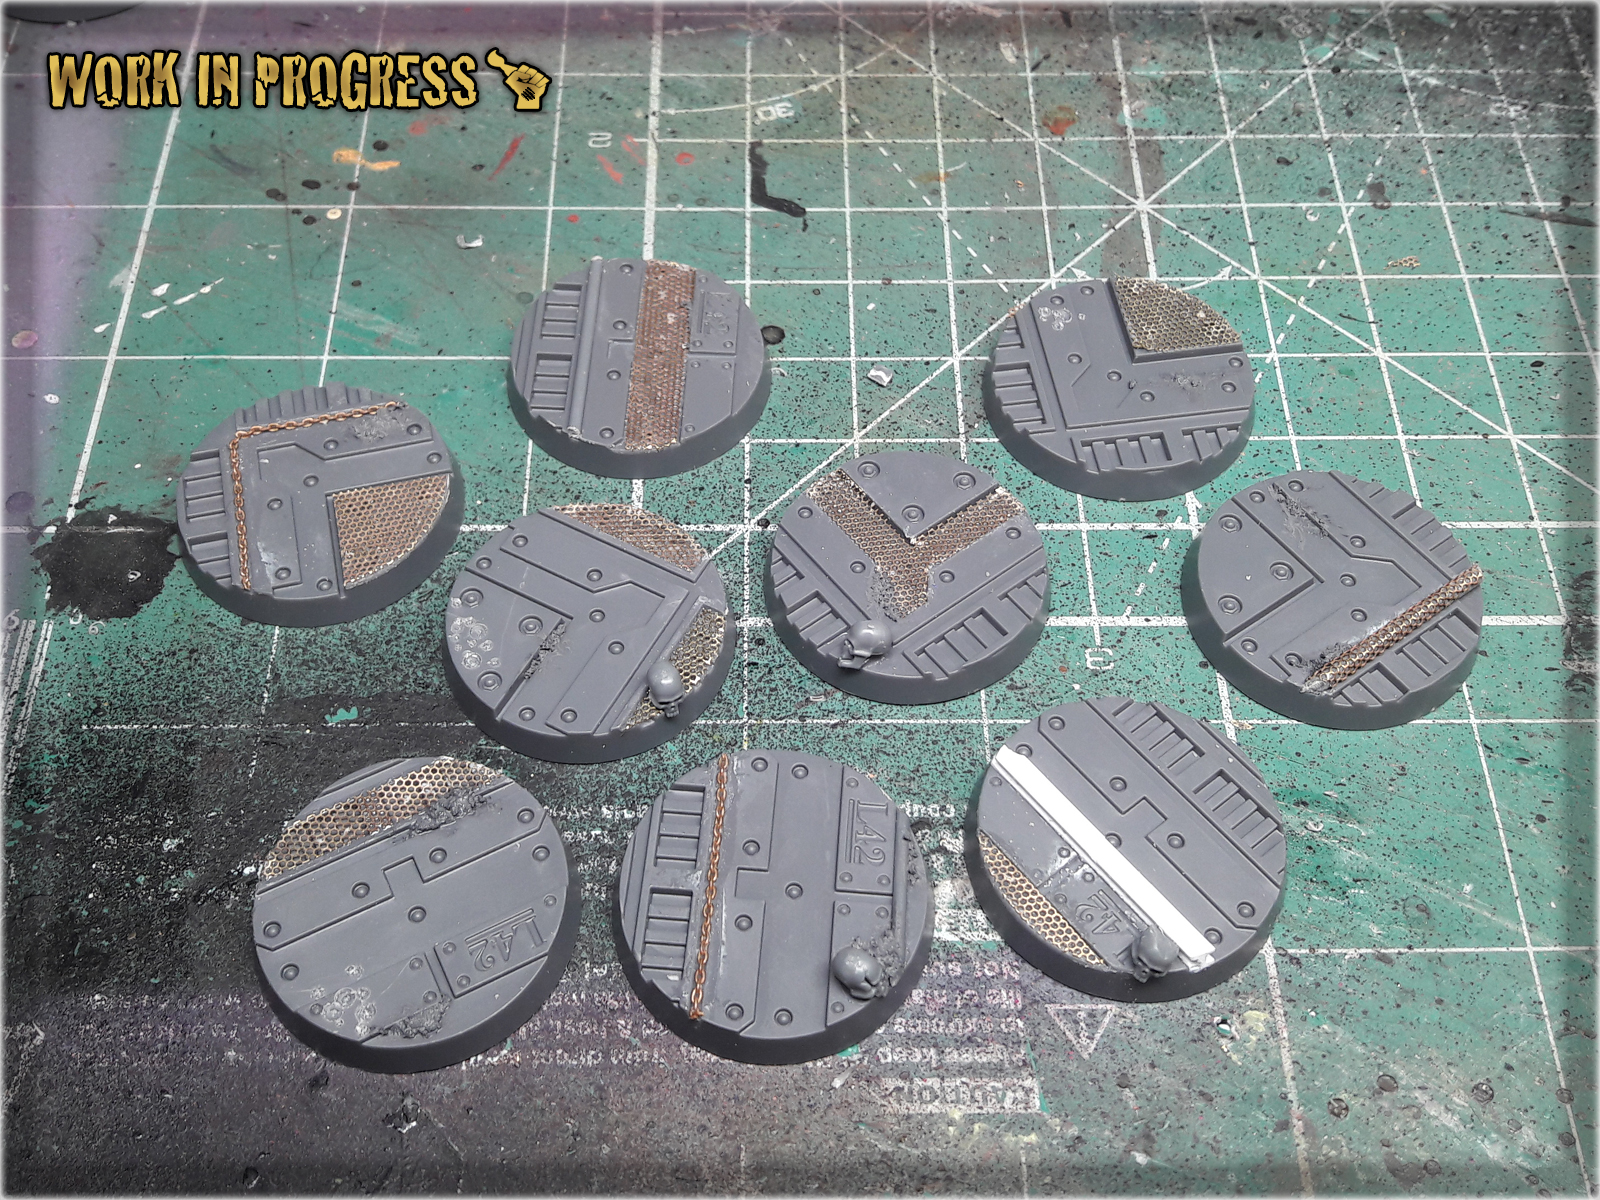
Necromunda: Underhive is a game full of nicely detailed plastic miniatures. As much as I hate endorsing Games Workshop – It should be mentioned that in terms of miniatures – they did a really nice job, extending the set so that it includes 25 industrial themed plastic bases. I appreciate this move from GW, even tho the variety of Necromunda bases designs is scarce. For example my own set came with just two versions among a total of ten bases. This is where I come in with a Tutorial on how to Enchance Necromunda bases in a fast, simple way. Below you will find few ideas on how to do it – but let me say this in advance: keep an open mind cause there’s plenty of awesome stuff that can be used to differentiate your Necromunda bases set (and actually any Industrial bases).
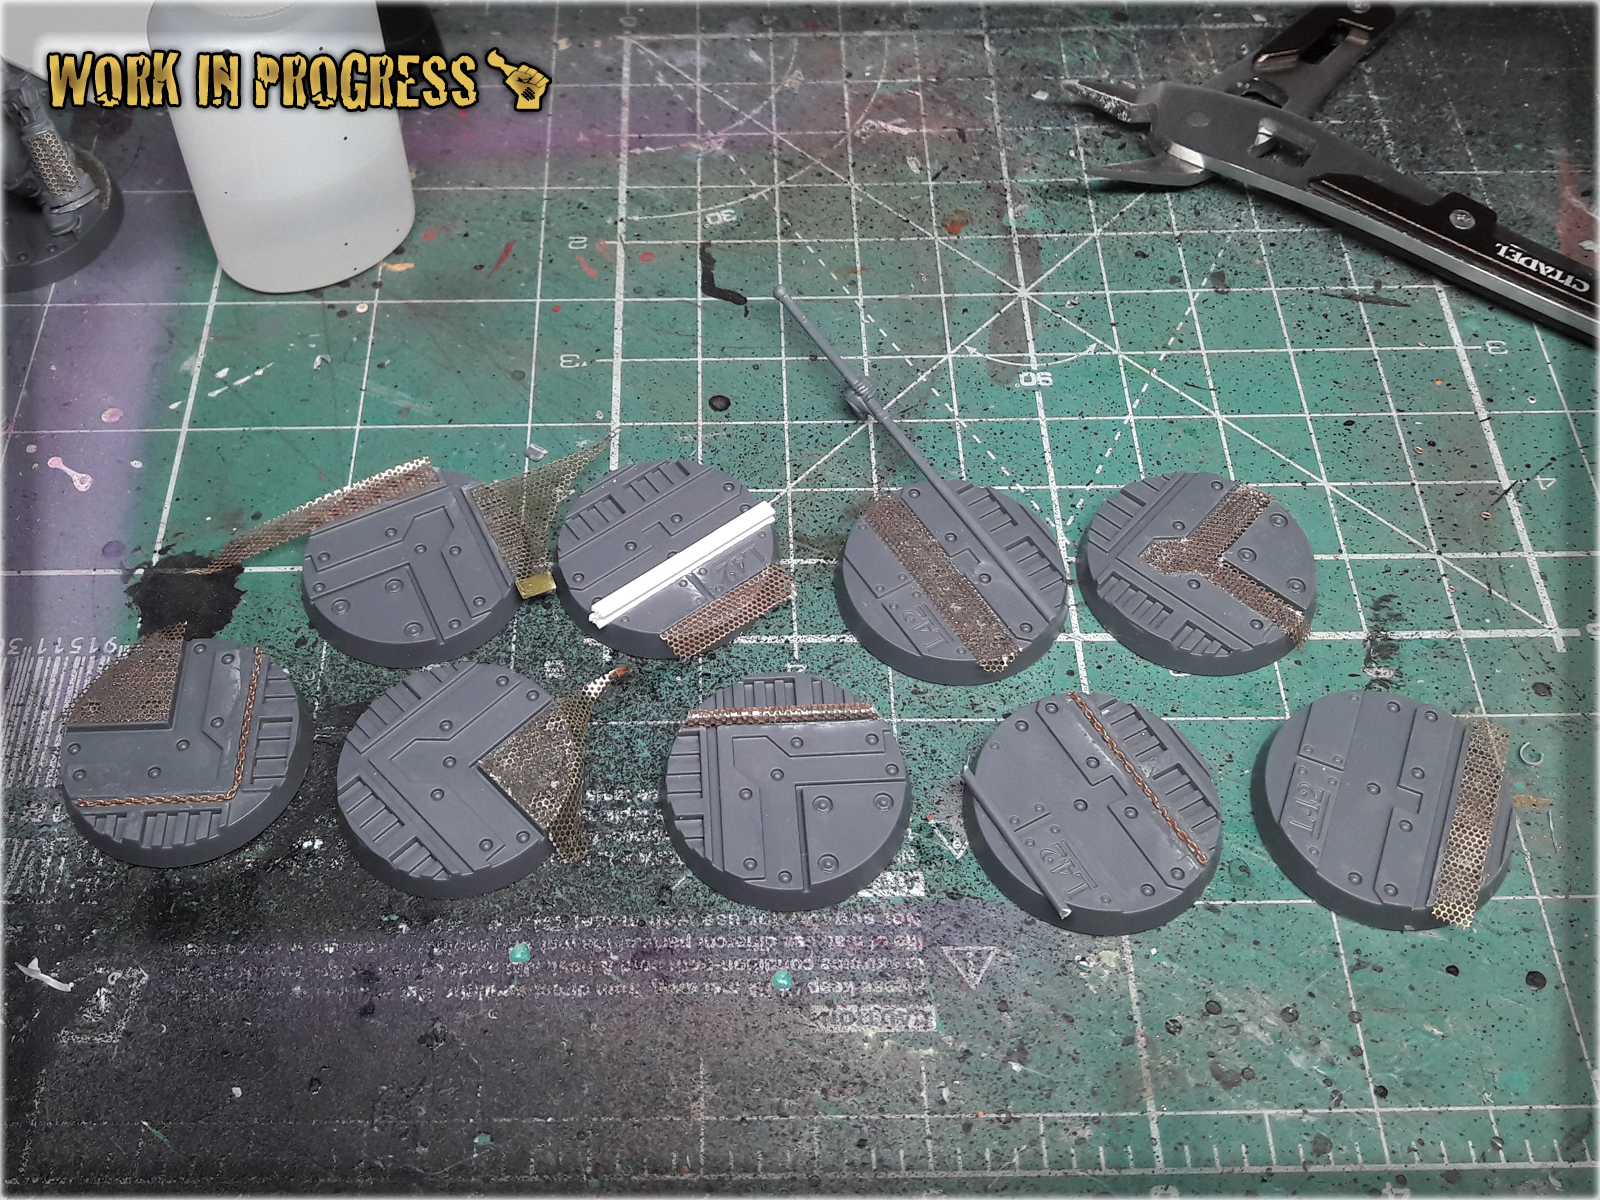
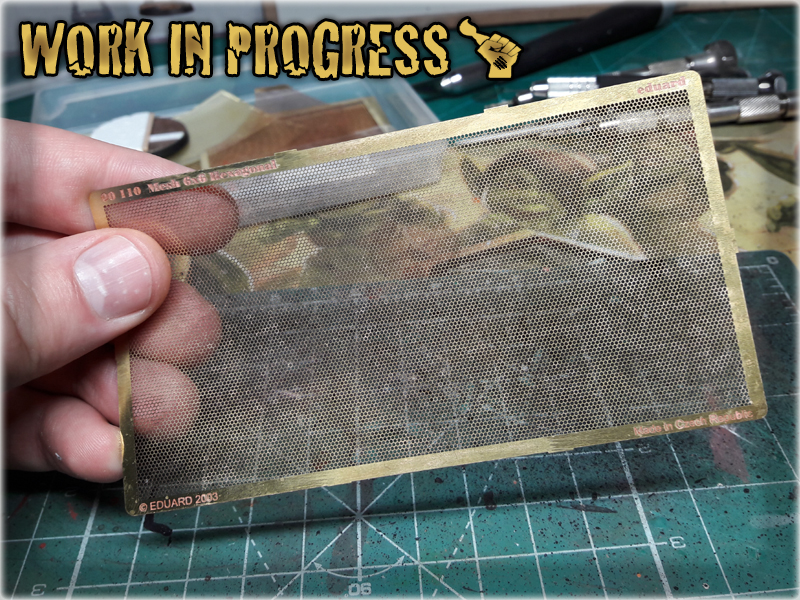
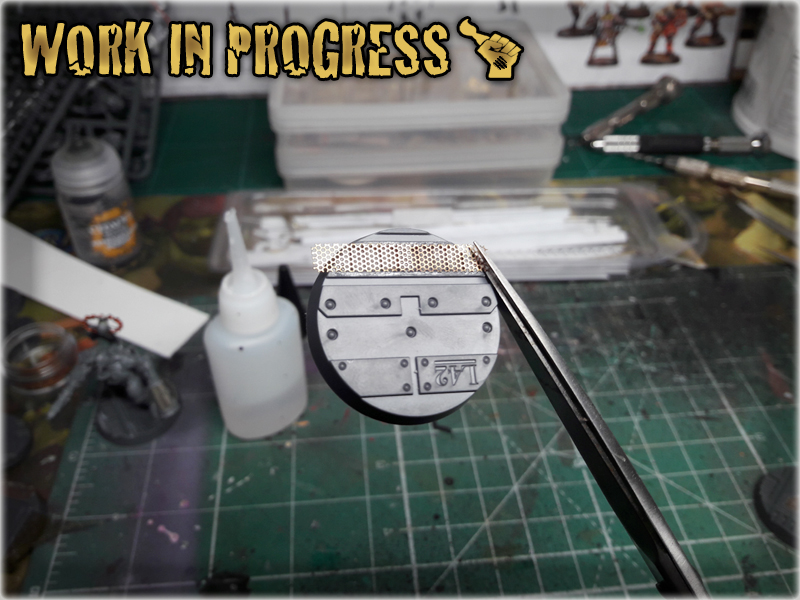
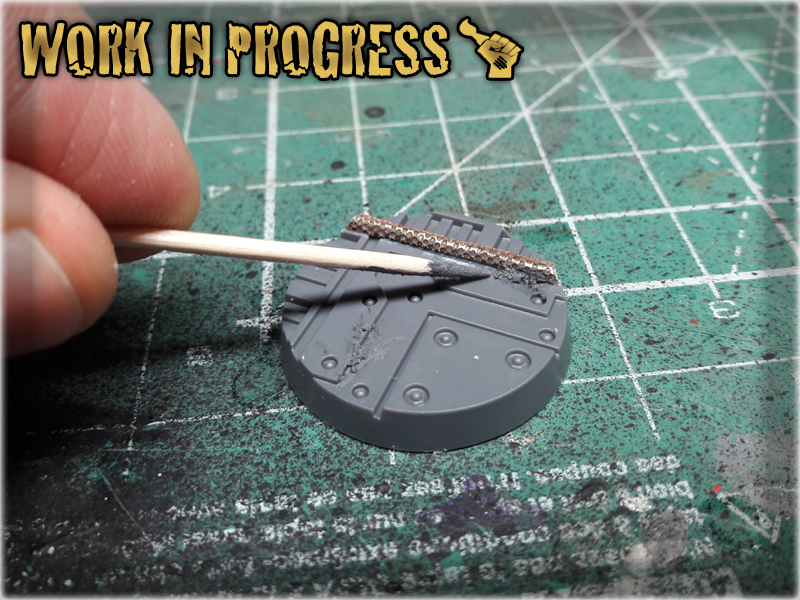
This stuff can be found in most modellers hobby stores. Personally I love it, cause it let’s me add awesome texture to the bases. It is very easy to use. I tend to cut a piece of mesh with scissors and glue it onto a designated surface, leaving an excess to hang outside the base. Once Super Glue dries out I just cut the excess mesh with scissors and file it on the edge – driving a file from top to bottom of the bases edge. This keeps the mesh glued onto the base, but smoothers the edge nicely.
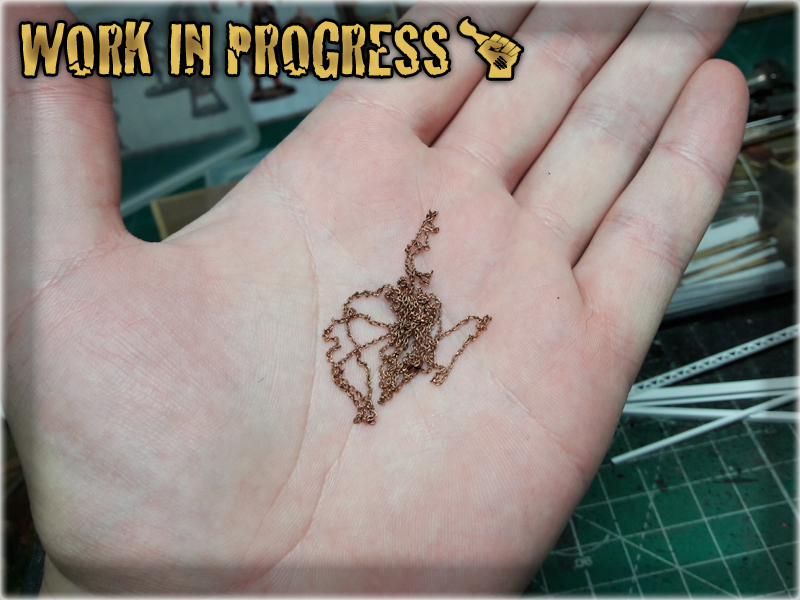
Another item from a hobby store. I just glue it onto the base and cut the excess with plastic cutters. Brass Chain is thin and rather frail so it does not damage the cutters.
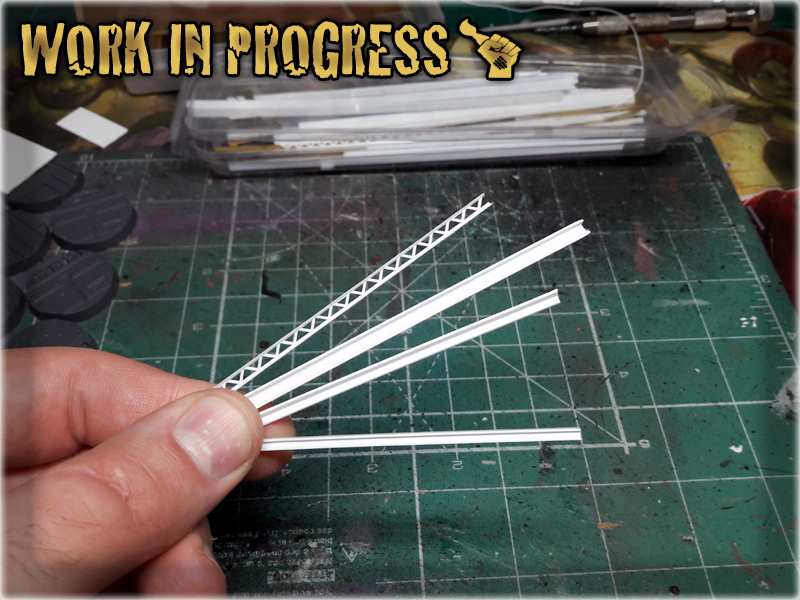
Awesome, hobby friendly and easy to use material. It comes in either flat sheets of different thickness, or in prefabricated shapes. For bases I usually use flat sheets, gluing them onto the base, then cutting to fit the edge. In case of Necromunda bases – there’s plenty of industrial texture already, so I uused a prefabricated piece of PCV to add here and there. Same technique – glue onto the base, then cut to match the edge.
Everybody has some. For Necromunda bases I preffered thin, long spears and banner poles. I just glued them over certain areas and cut with a plastic cutters to match the edge of the base and add variety to the base’s surface.
Games Workshop’s Skulls set is something that everyone should get. If you haven’t got yours – damn – just go and order one. For what you get the price is just insane. Either way – some Skulls on the base would certainly make it stand out.
Actually any grain-texture paint would do just fine. I used Astrogranit Debris cause I don’t have many uses for this particular colour and here it is meant to go under a black undercoat anyway. I applied small amount to certain places, just to add texture.
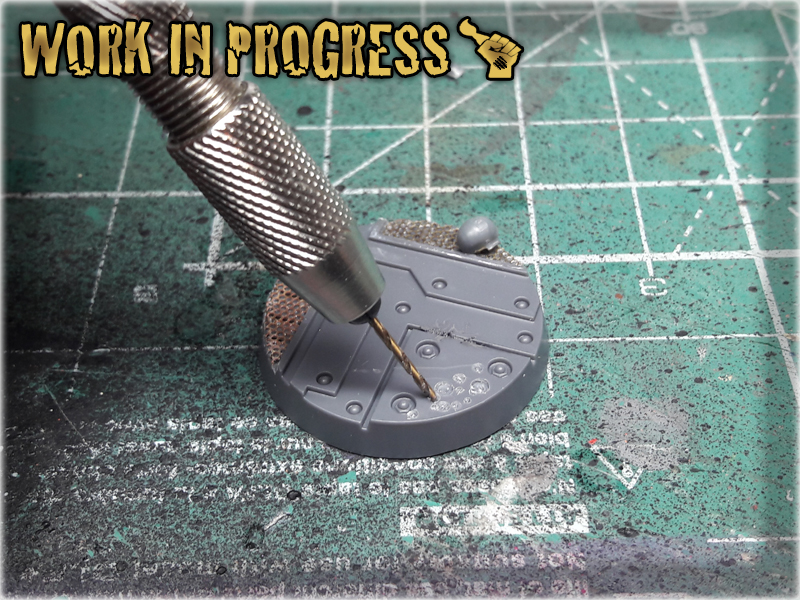
I drilled some holes in different sizes here and there to look like corrosion or some form of acid damage. Easy to do – looks cool once painted.
So, there’s that. These are just few ways to enchance Necromunda bases. I bet you can find a lot more ways to differentiate the set. Here’s how mine looks like after the above additions:

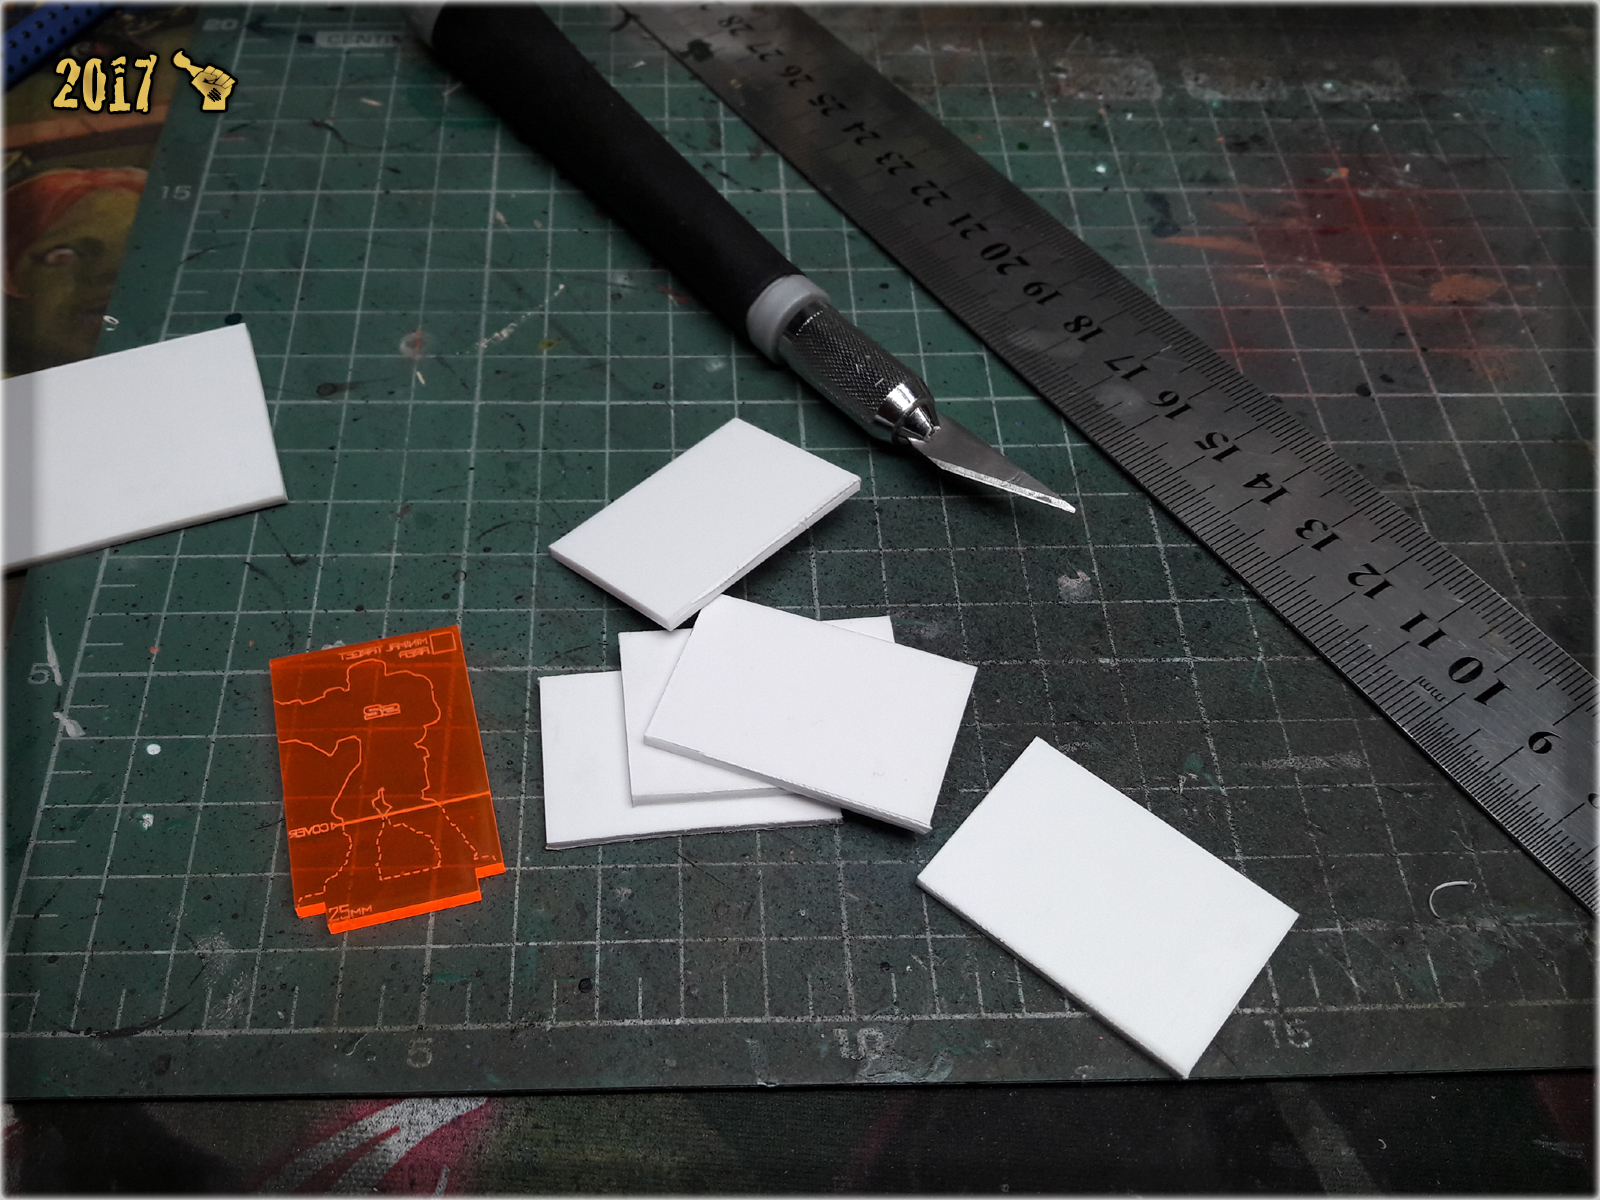
In this article I would like to present to you an easy way to prepare and then paint your own Camo Markers for Infinity the Game.
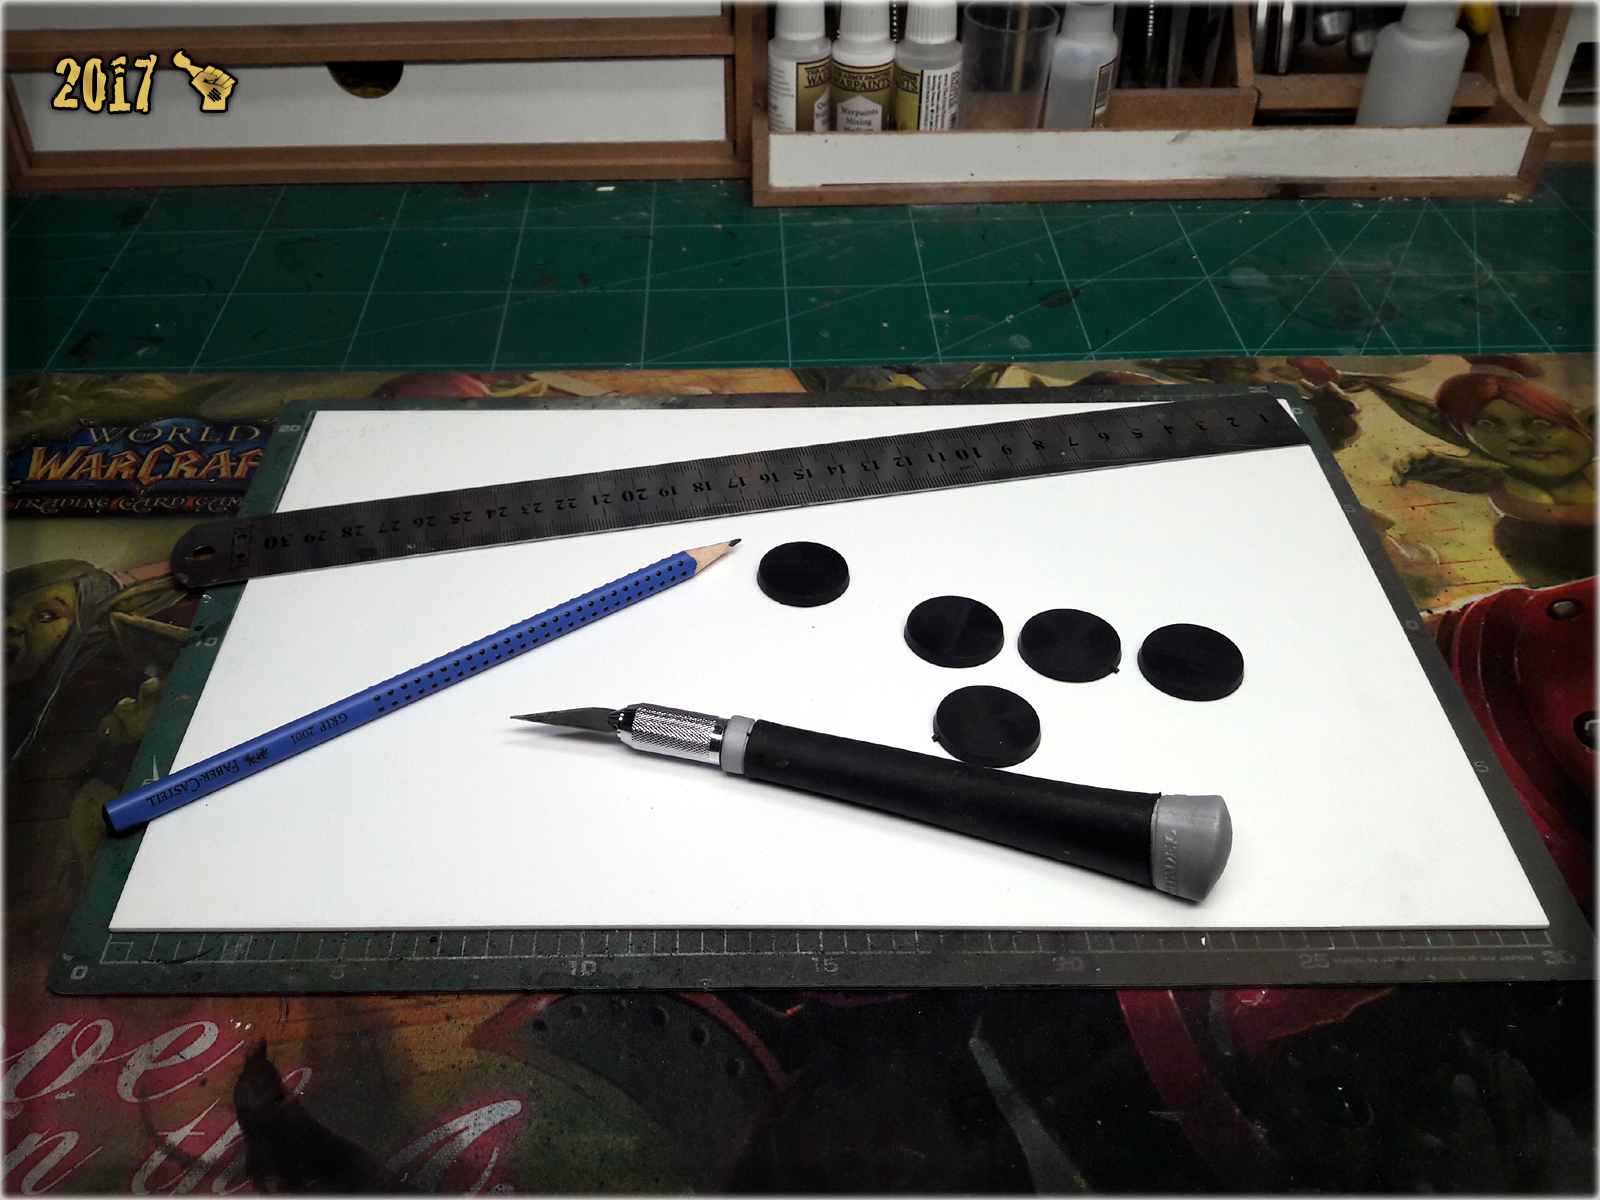
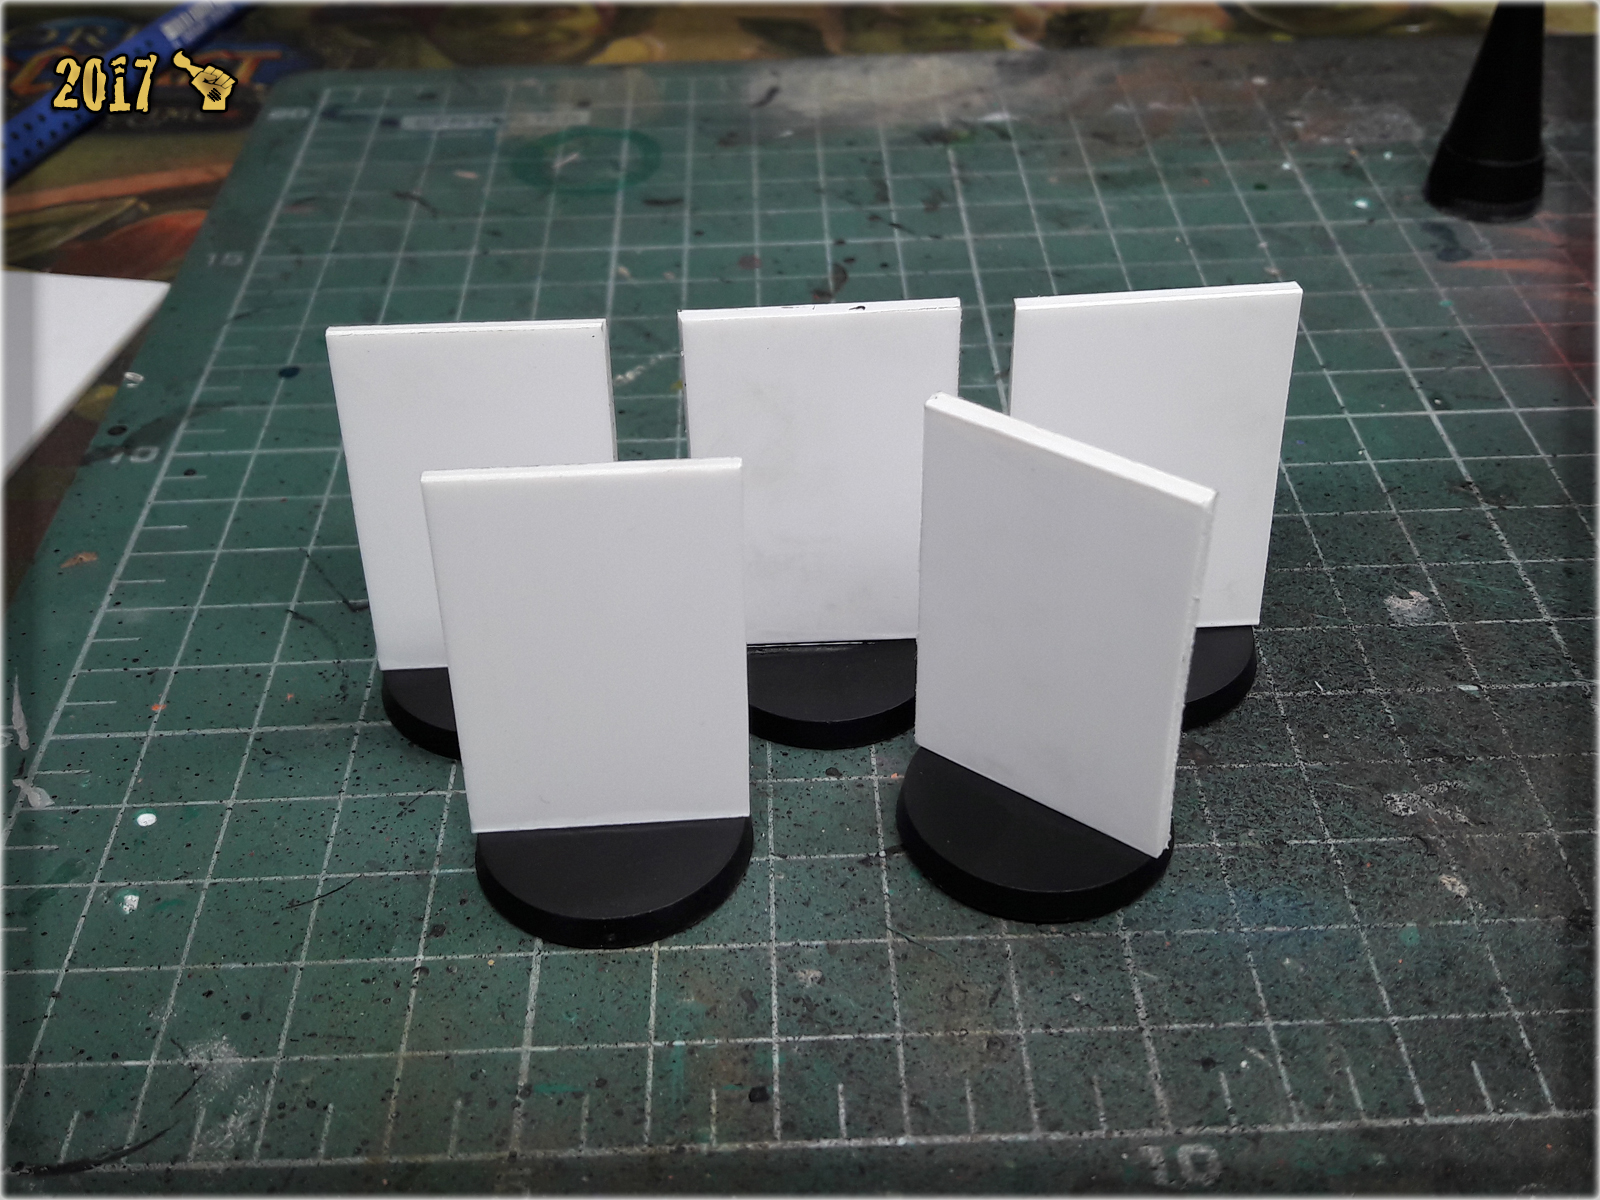
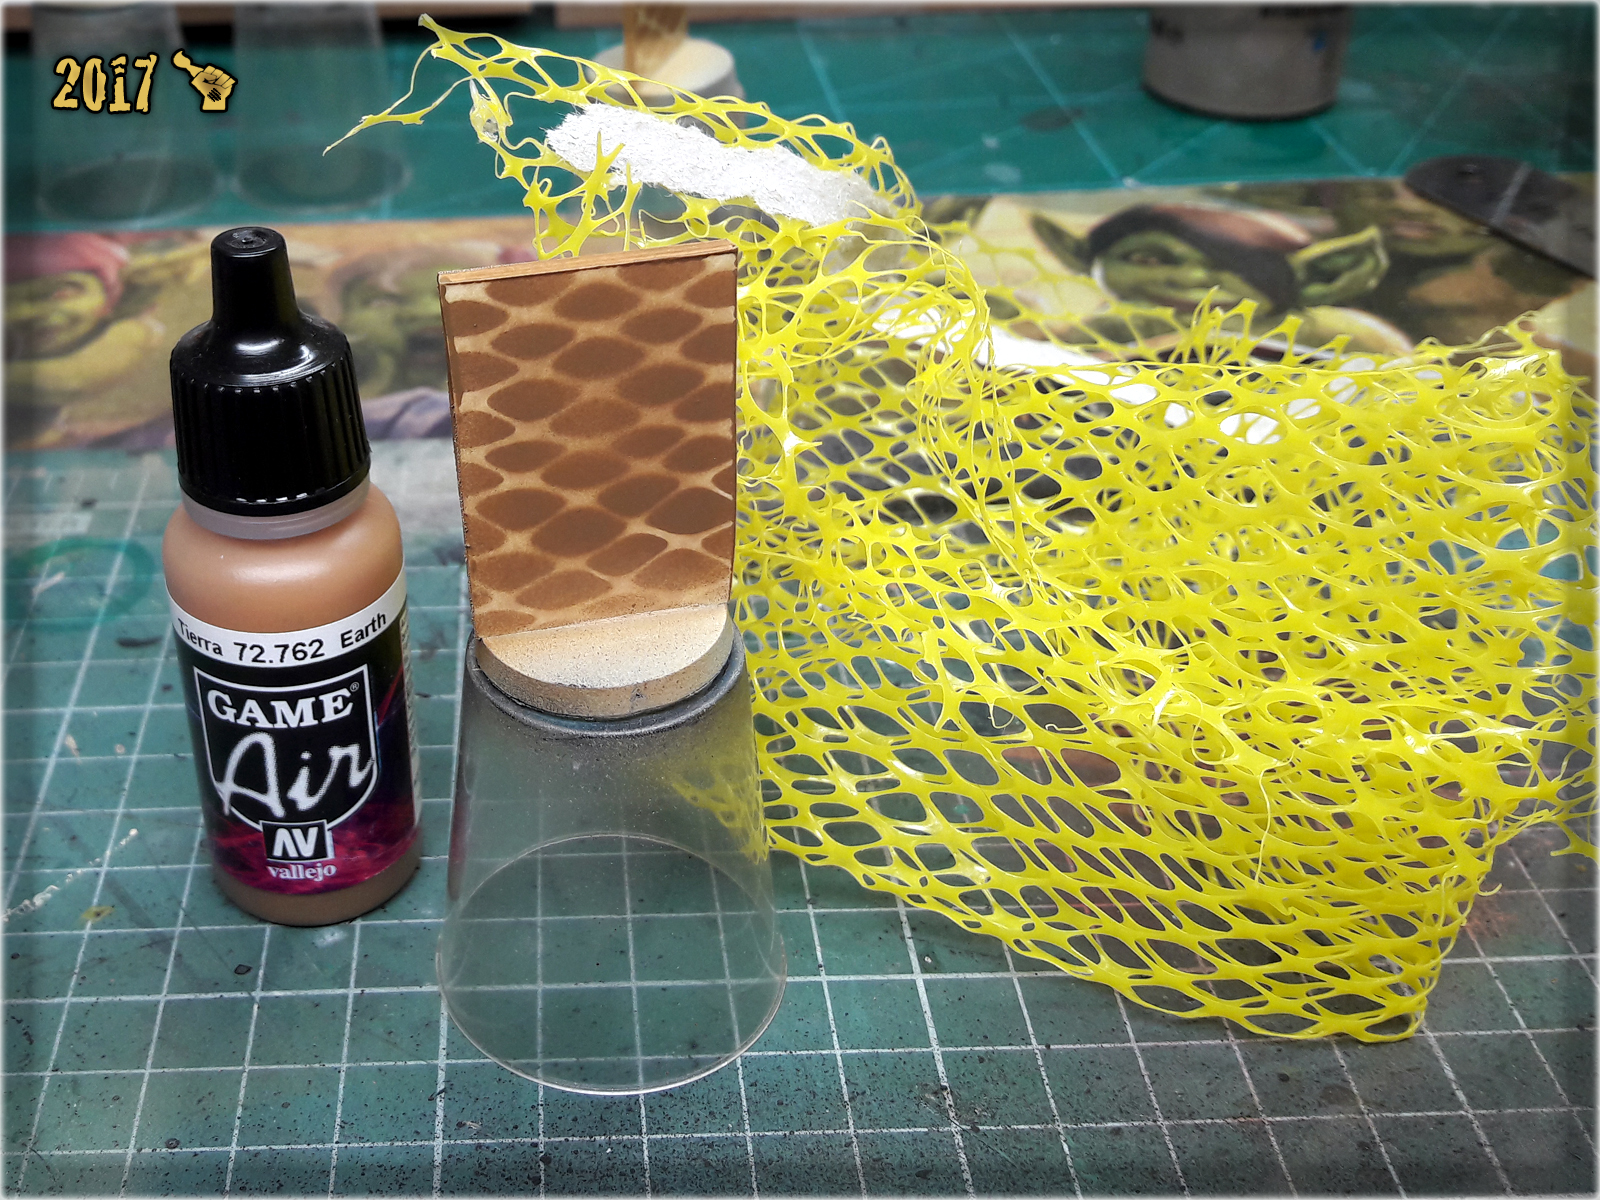
Obviously, the preparation process was pretty simple. Using a ruler, pencil and hobby knife I first drawn and then cut five 25x47mm rectangles made of PCV. I then glued them on top of 25mm round bases. At this point Camo Markers were ready to get painted.

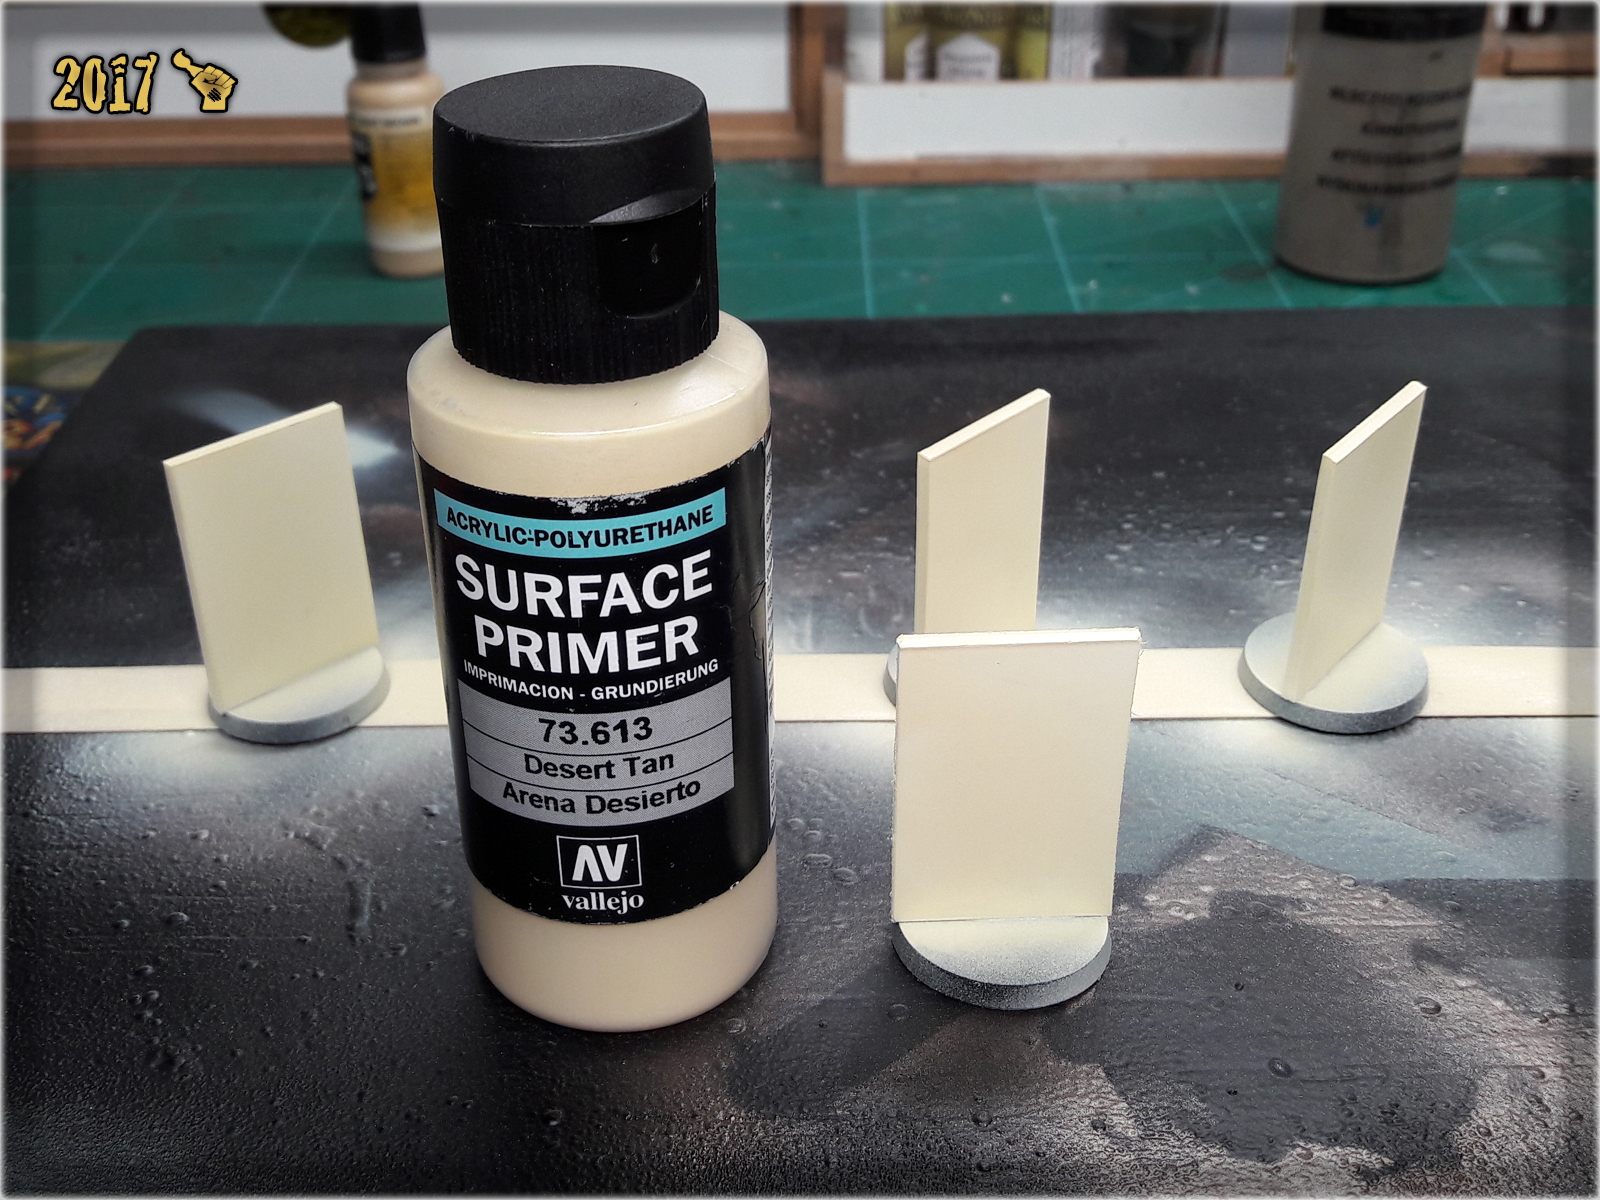
1 First step was to undercoat entire Camo Markers with Vallejo's Desert Tan.
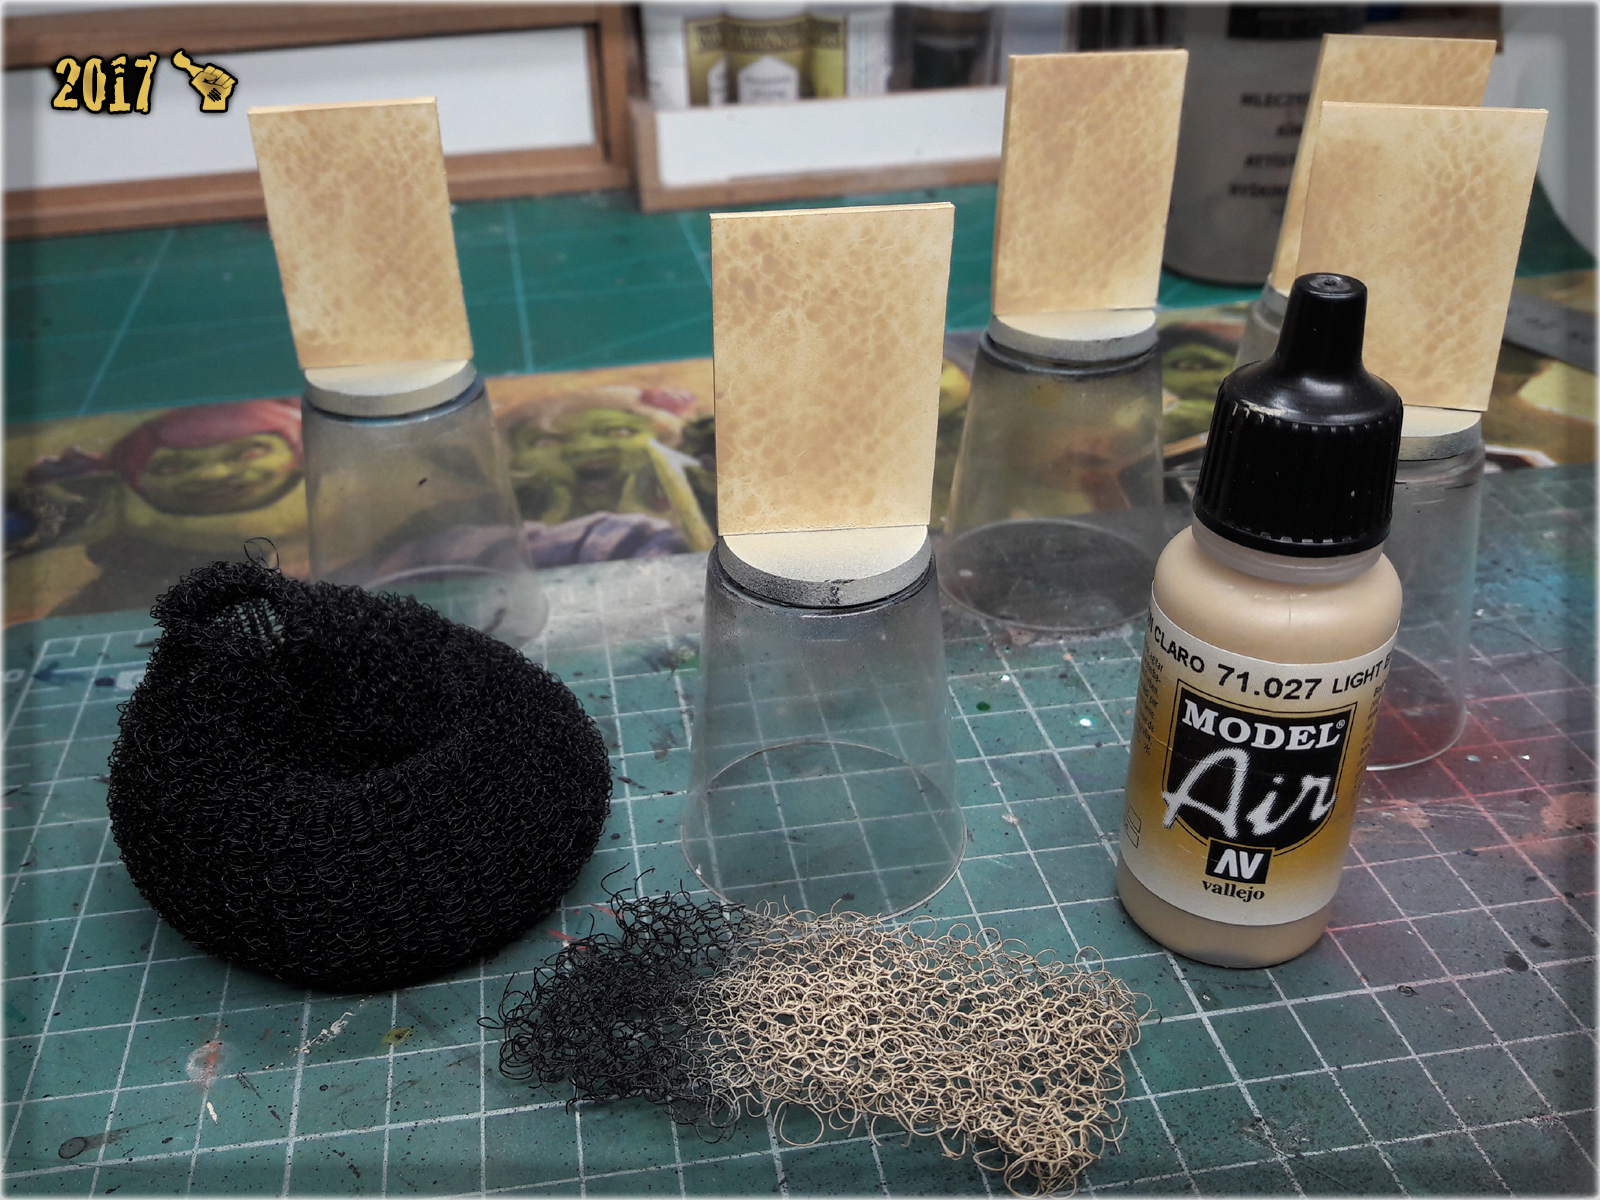
2 Next I used a piece of synthetic hair holder as a stencil and airbrushed Vallejo Light Brown over the Markers.
3 Then I switched to Vallejo Earth and airbrushed it over the markers using a piece of net that I got patatoes in. This net should be easily obtainable in every grocery store and makes for a really cool stencil.
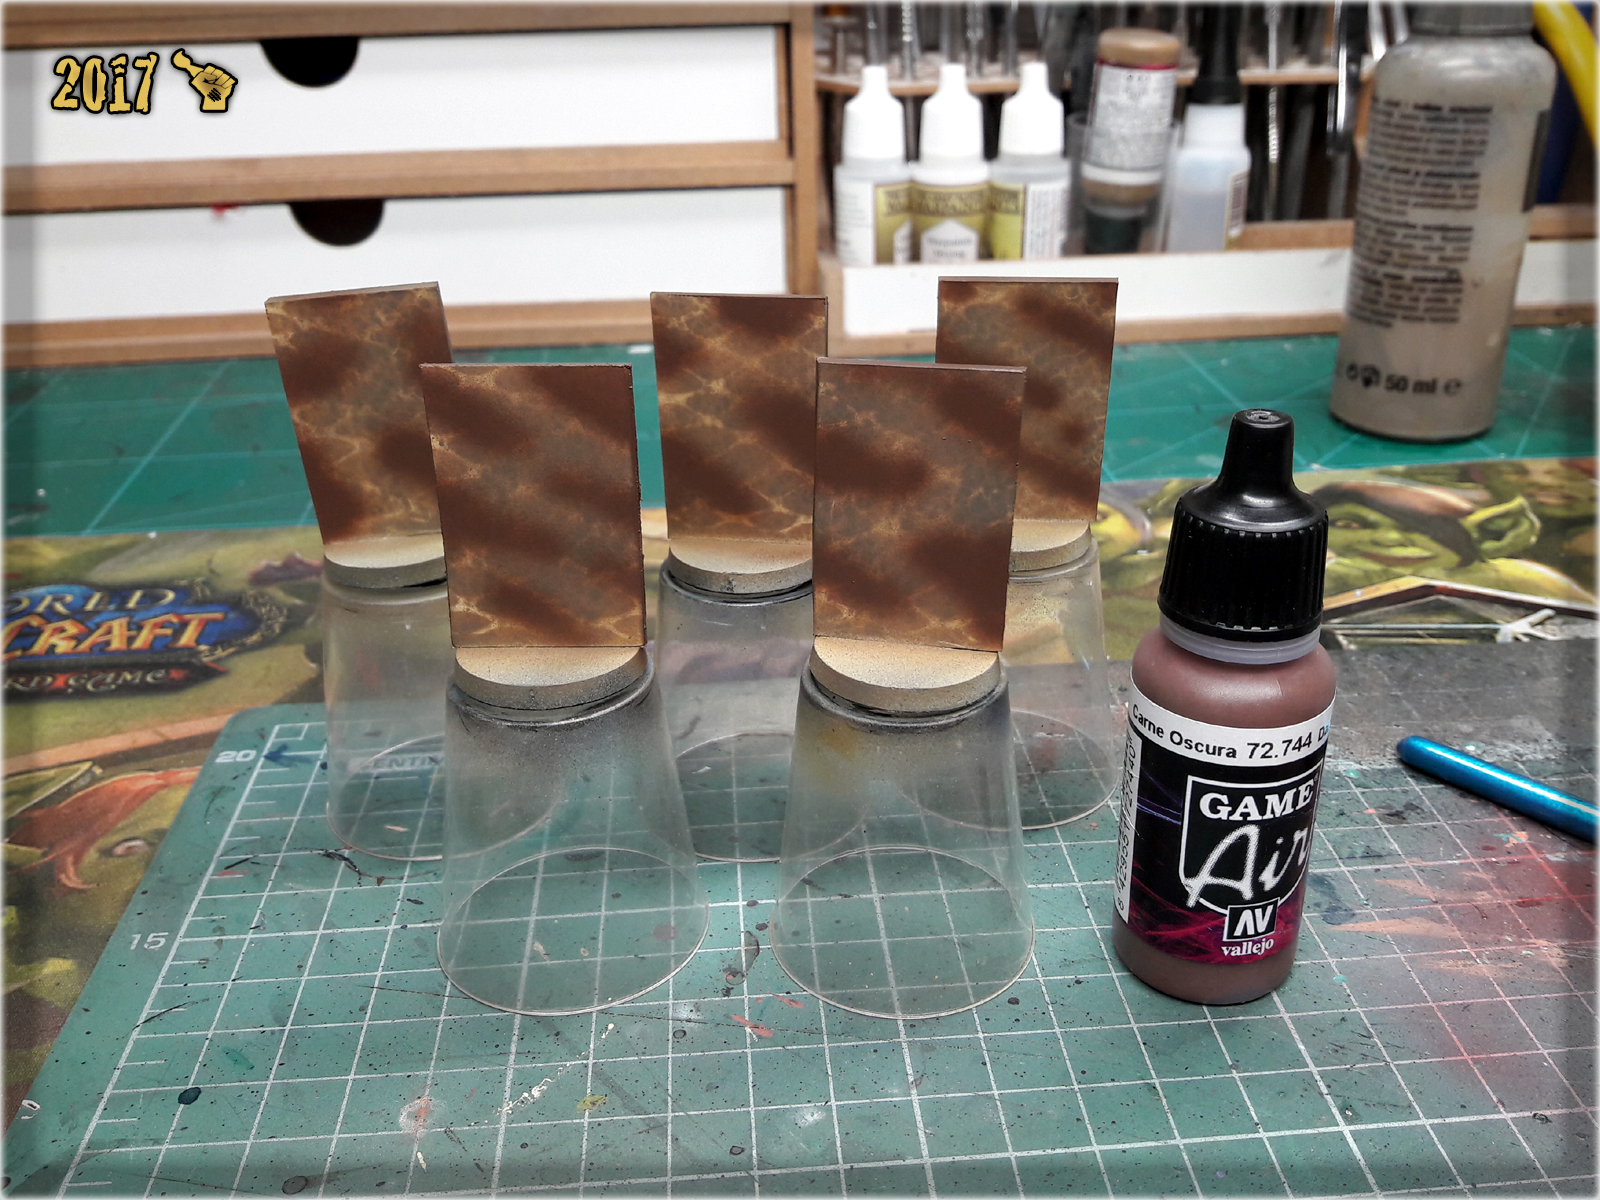
4 I then got back to hair holder stencil and airbrushed a layer of Vallejo Light Grey Green.

5 Next I airbrushed points of Vallejo Dark Flesh.
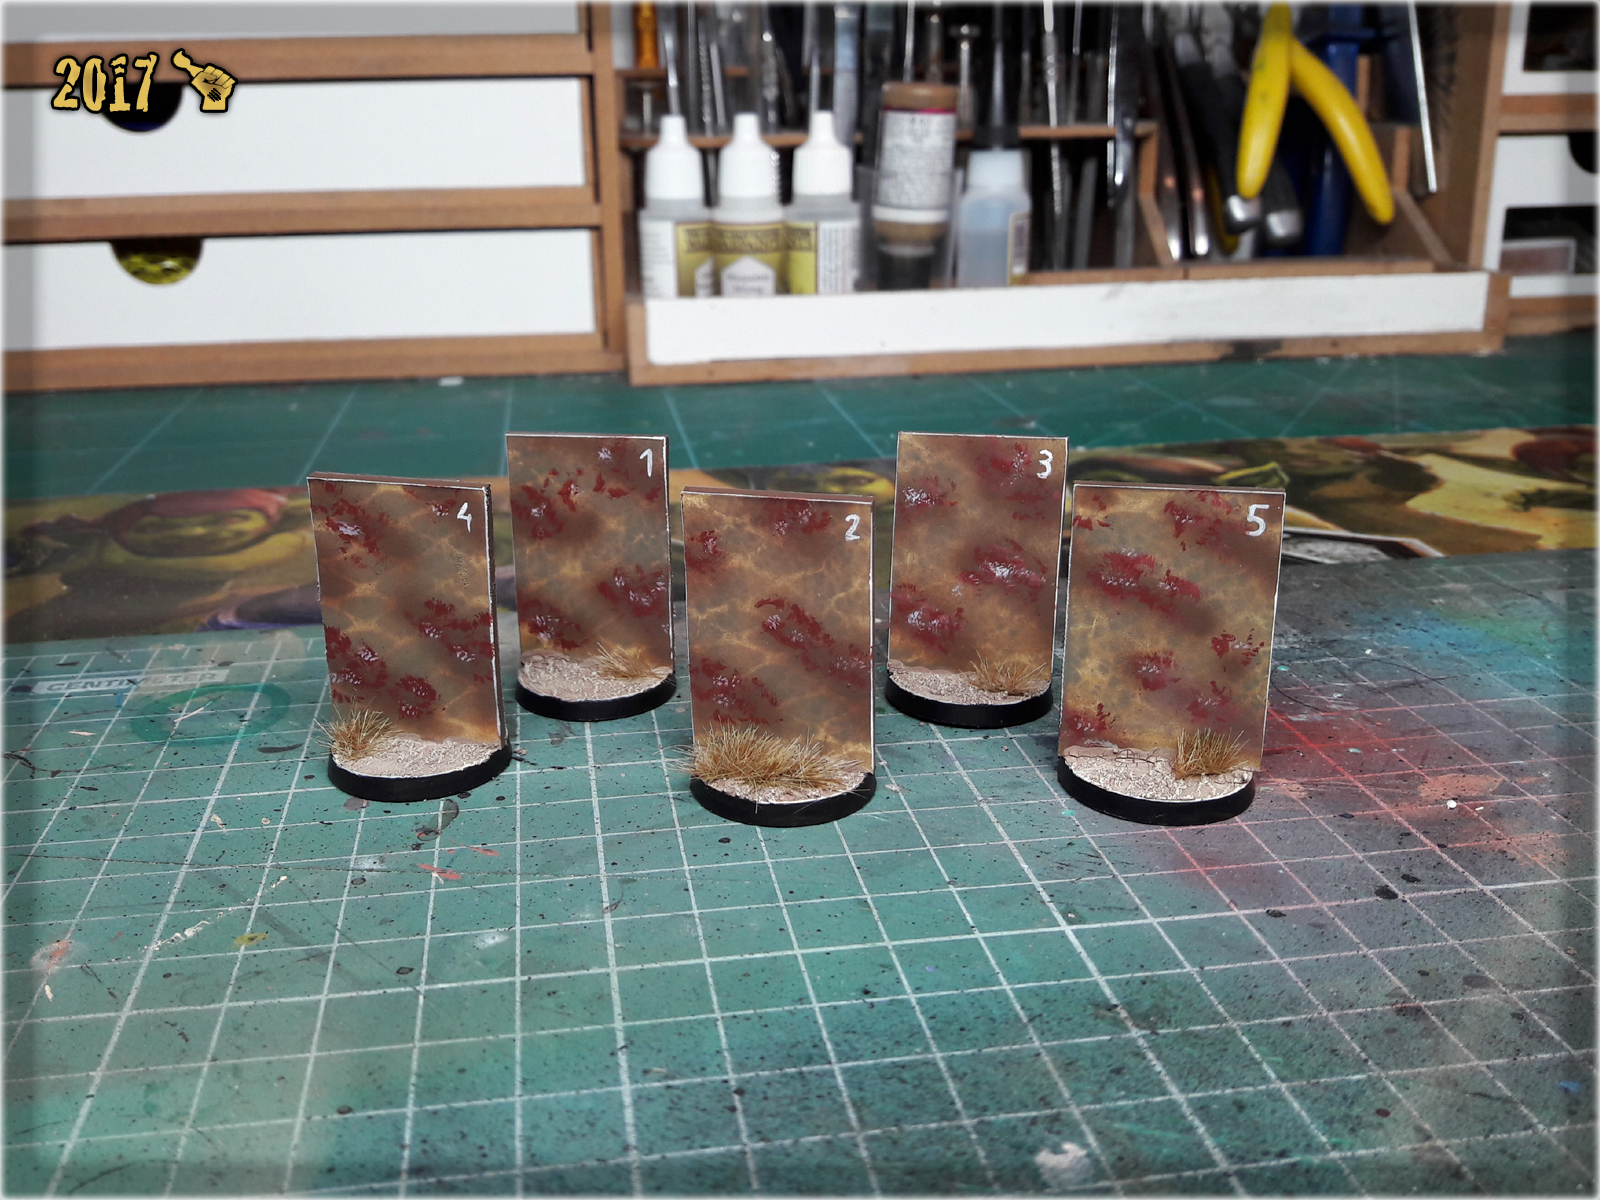
6 Some wet stippling went next. First I applied clumsy dots of Vallejo German Red Brown, then did the same with Games Workshop Pallid Wych Flesh. Afterwards I used Pallid Wych Flesh to mark edges of the markers and provide number to distinguish them from one another on the gaming board.

7 Basing came last. I used Games Workshop Agrellan Earth and Agrellan Badland, then drybrushed them with Karak Stone and Flayed One Flesh. Work done.

Ever wandered how a brush graveyard looks like? Some of us seen this wast field of broken, damaged brushes – left aside without purpose. A truly sad sight to behold. Now you’re probably looking at the sharp tip of your favorite brush thinking “It won’t happen to you my dear friend. This doesn’t concern you.” Sorry to be a bringer of bad news, but brushes come and go – no way around it. The only thing we can do is to preserve their longevity as much as possible. How to it? The sole purpose of this article is to share some tips that might help you enjoy your brush till it’s late veteranship and avoid this:
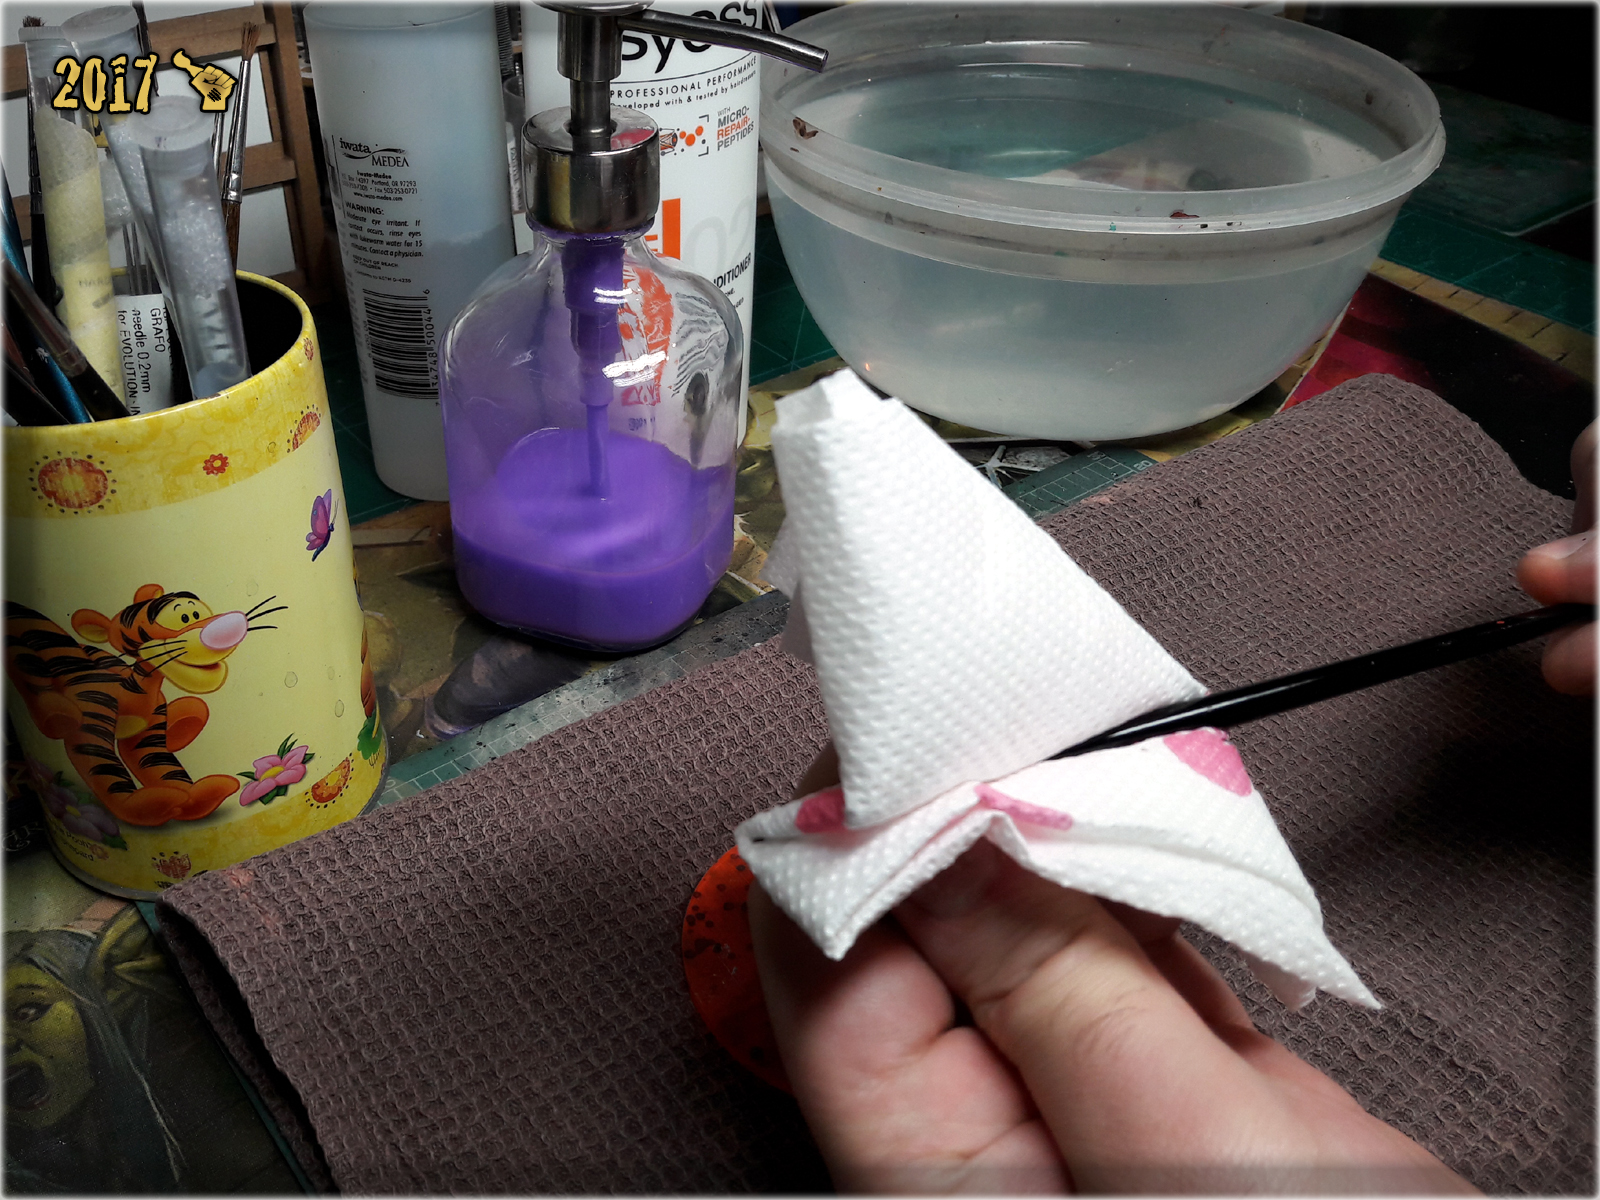
On top of thorough cleaning after each use, the proper care is the key to preserve brush’s shape and thus function. It’s not something to repeat at daily basis, still every now and then a “brush spa”should be performed. Here’s how I do it:
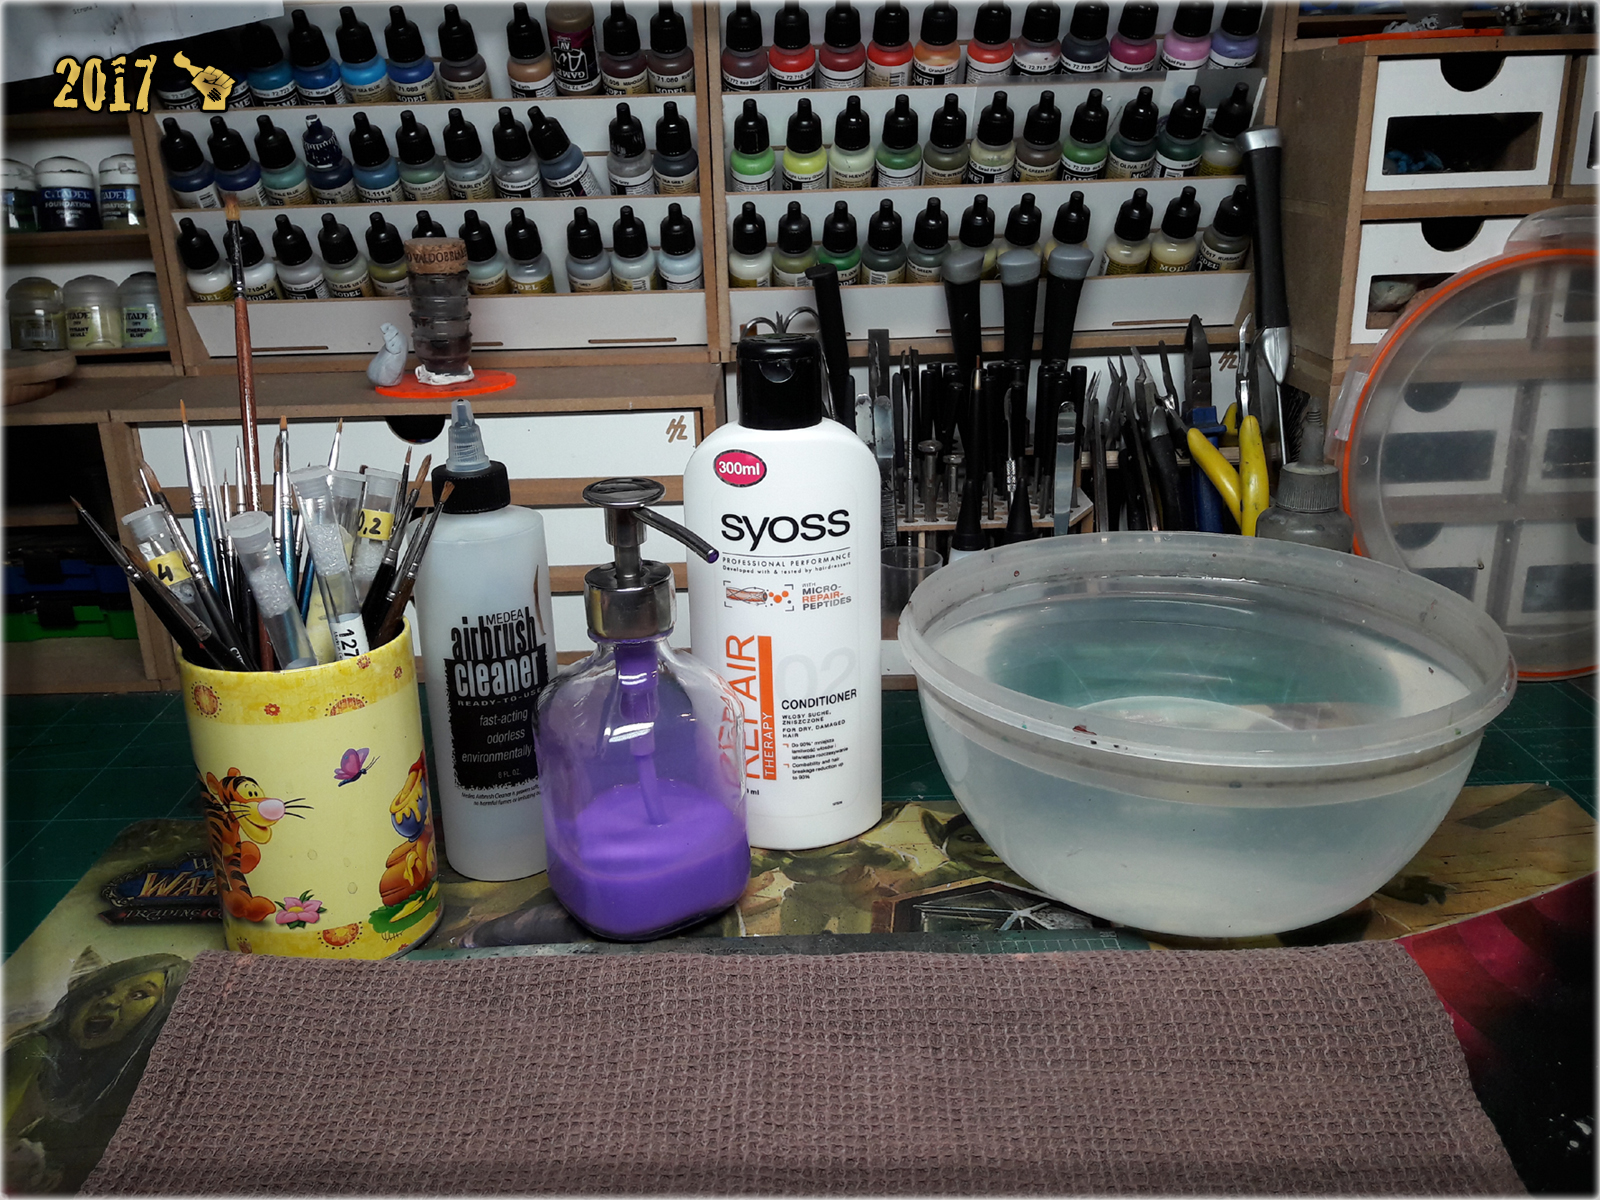
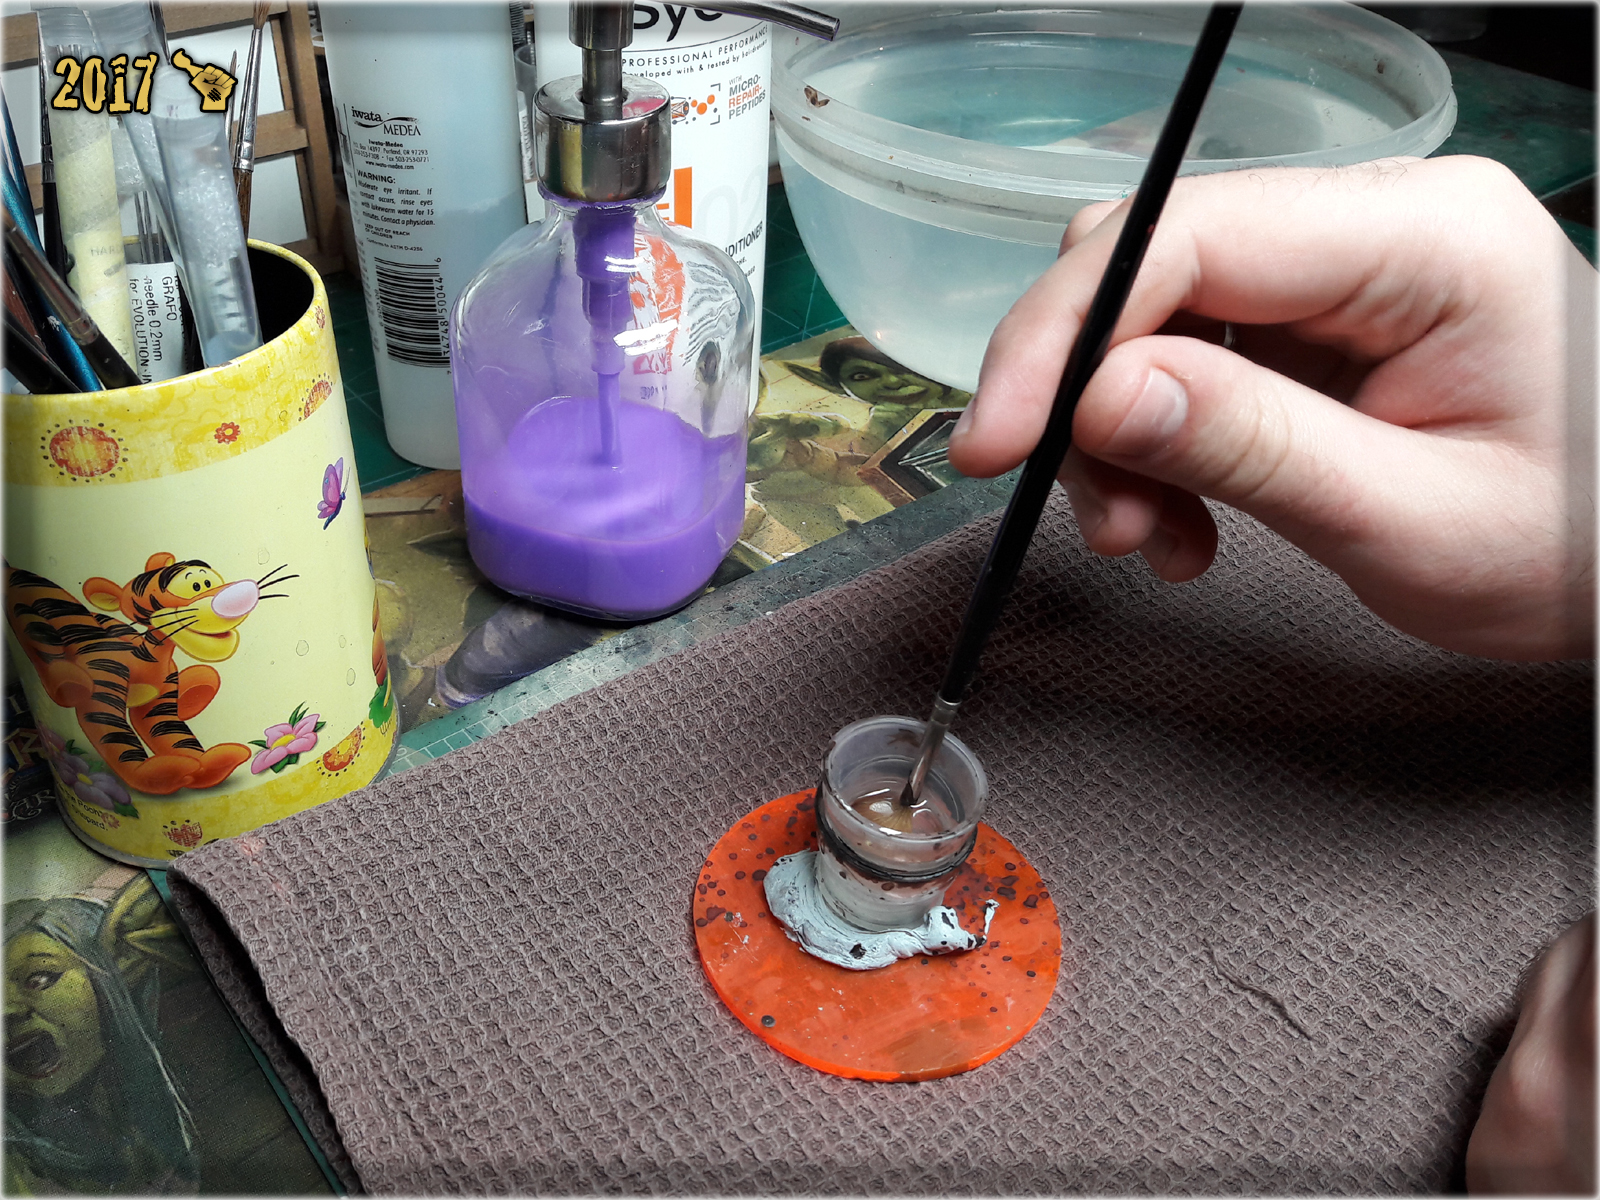
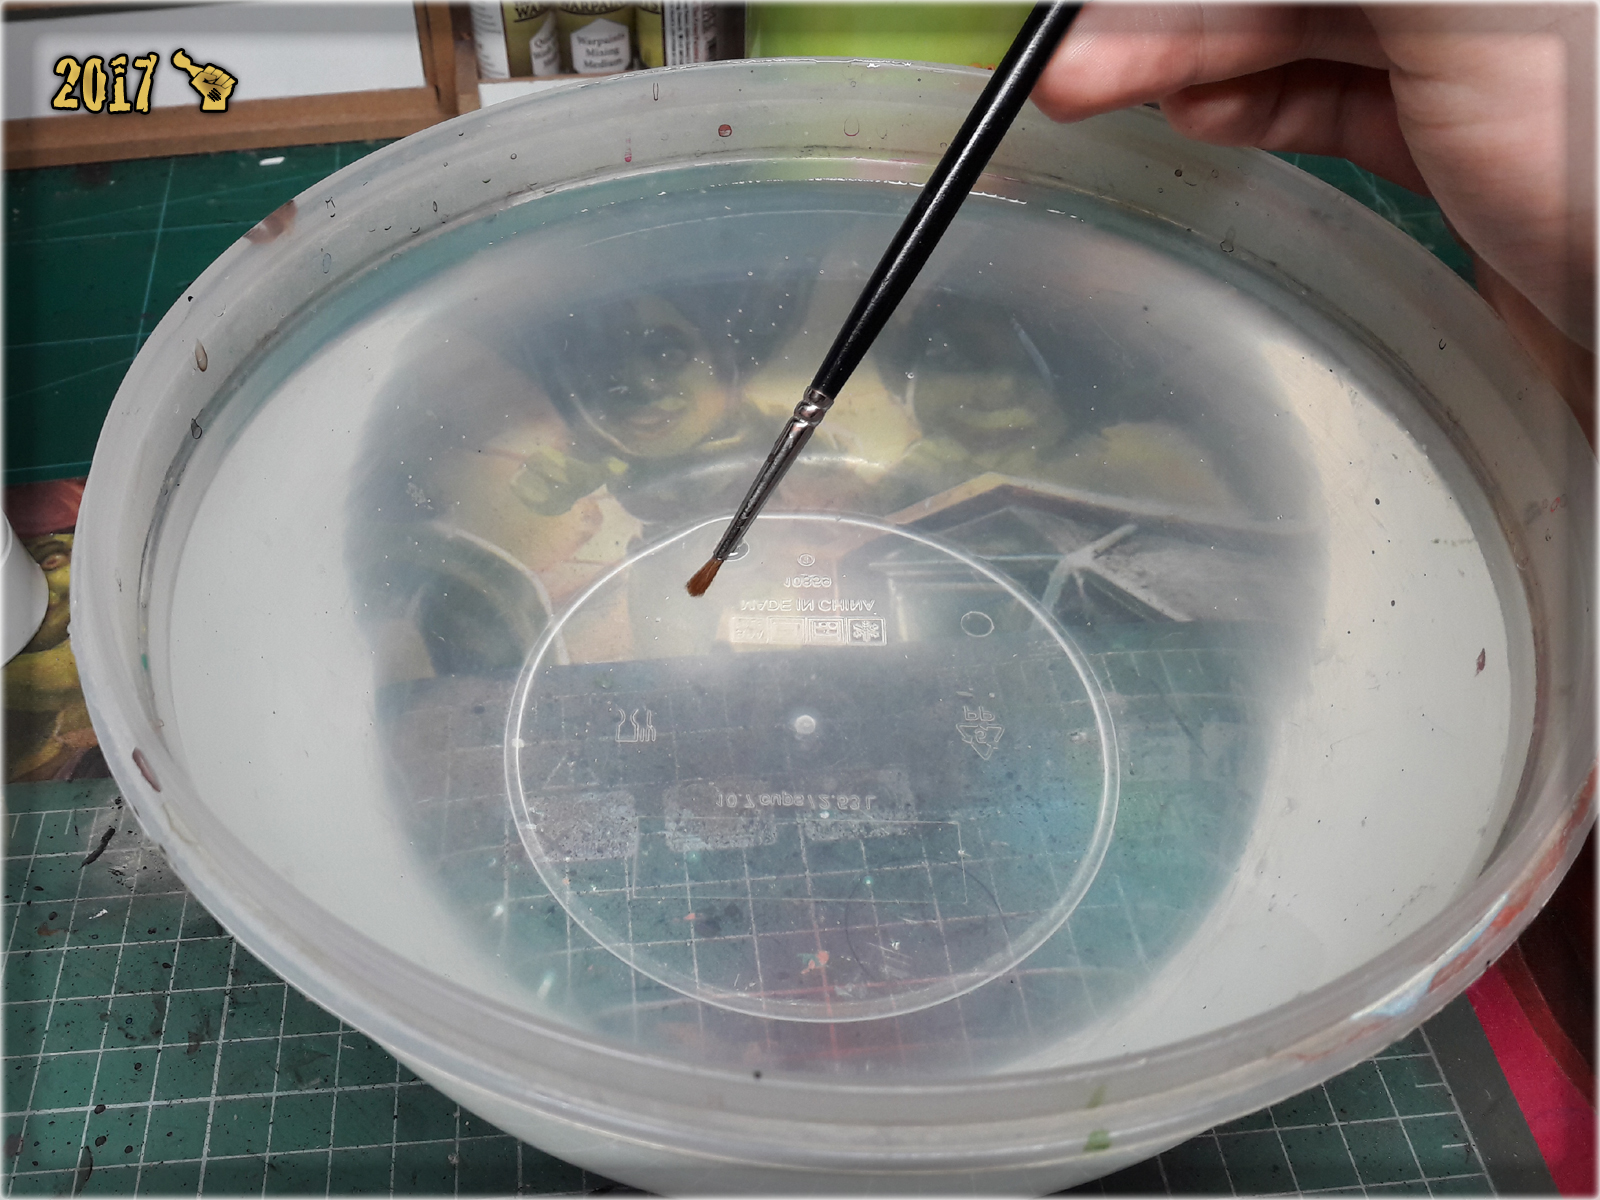
1 First I poured Airbrush Cleaner into a small cup. Next I dipped a tip of the brush, tapping it against a bottom of the cup. The purpose of this step is to ensure that any dried out paint leftovers would get removed from the brush's tip. Once done I cleaned up the tip and metal part of the brush's handle with a paper towel soaked in Airbrush Cleaner. I did this by slowly pulling the brush through the towel, forming it's tip.

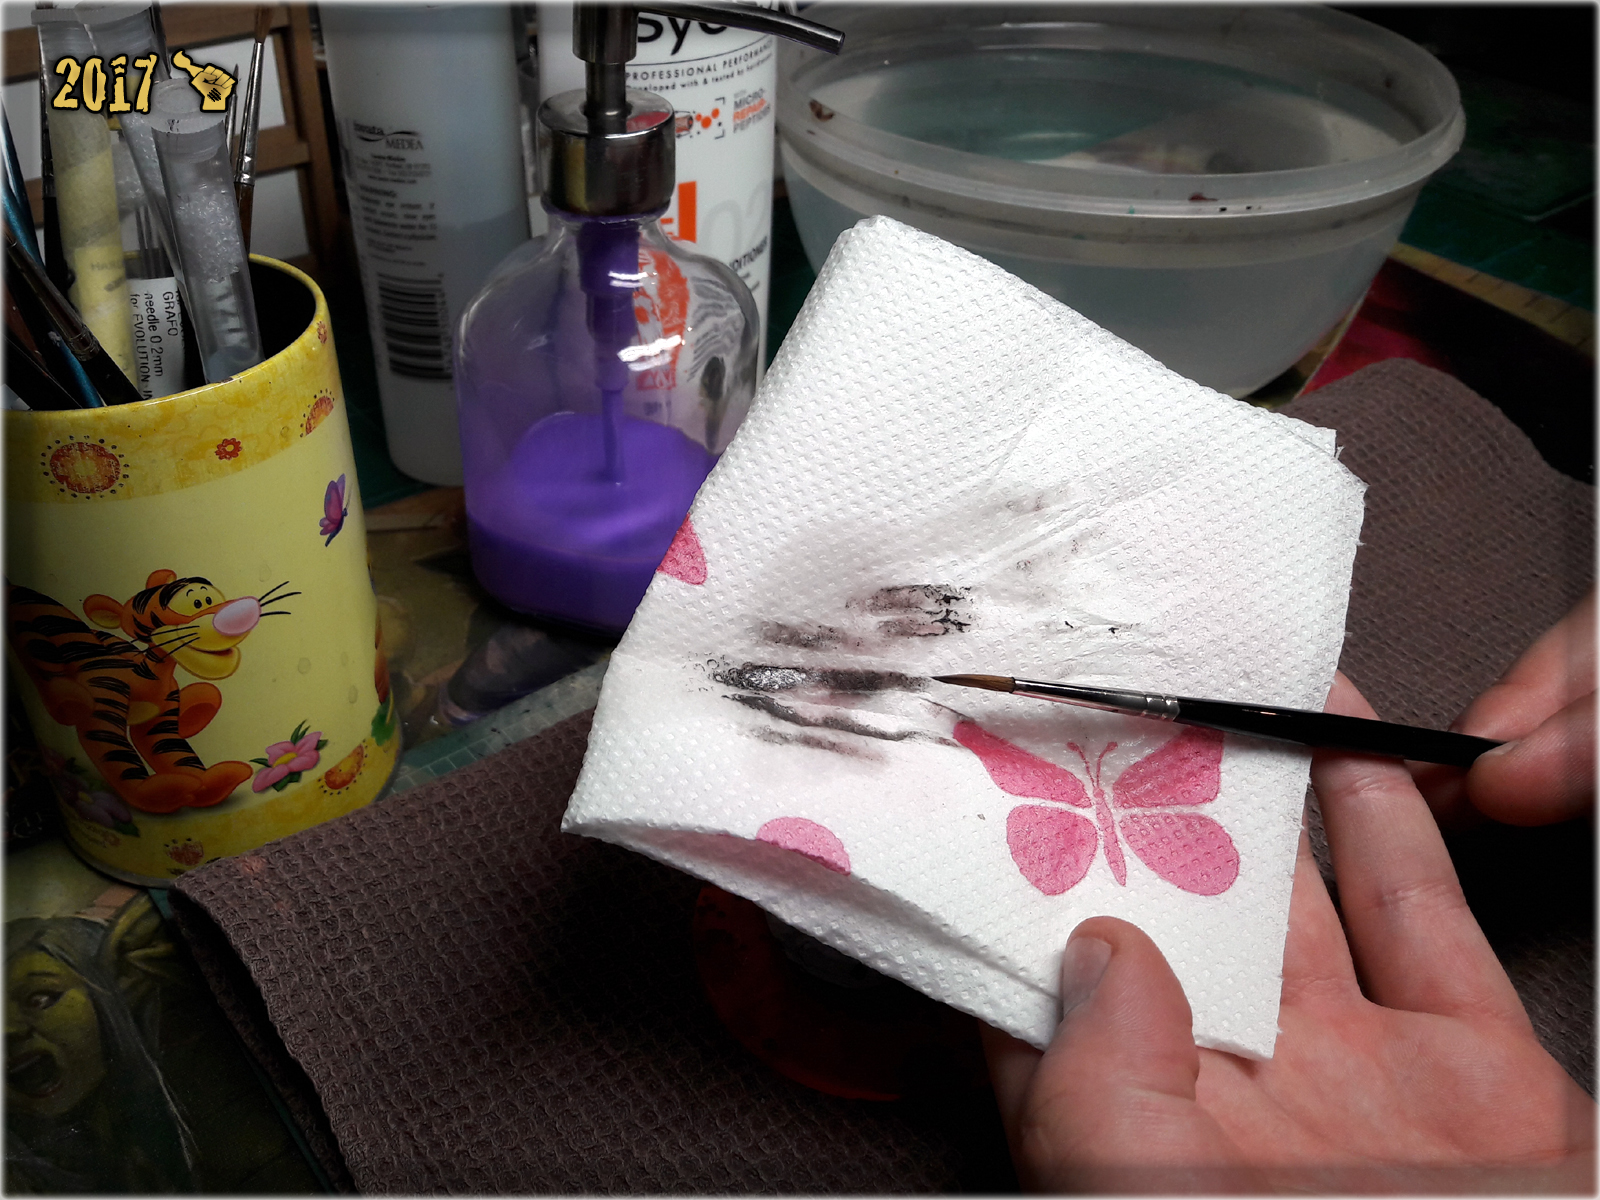

2 Step two was to gently clean the tip with soaped fingers and wash it with water.
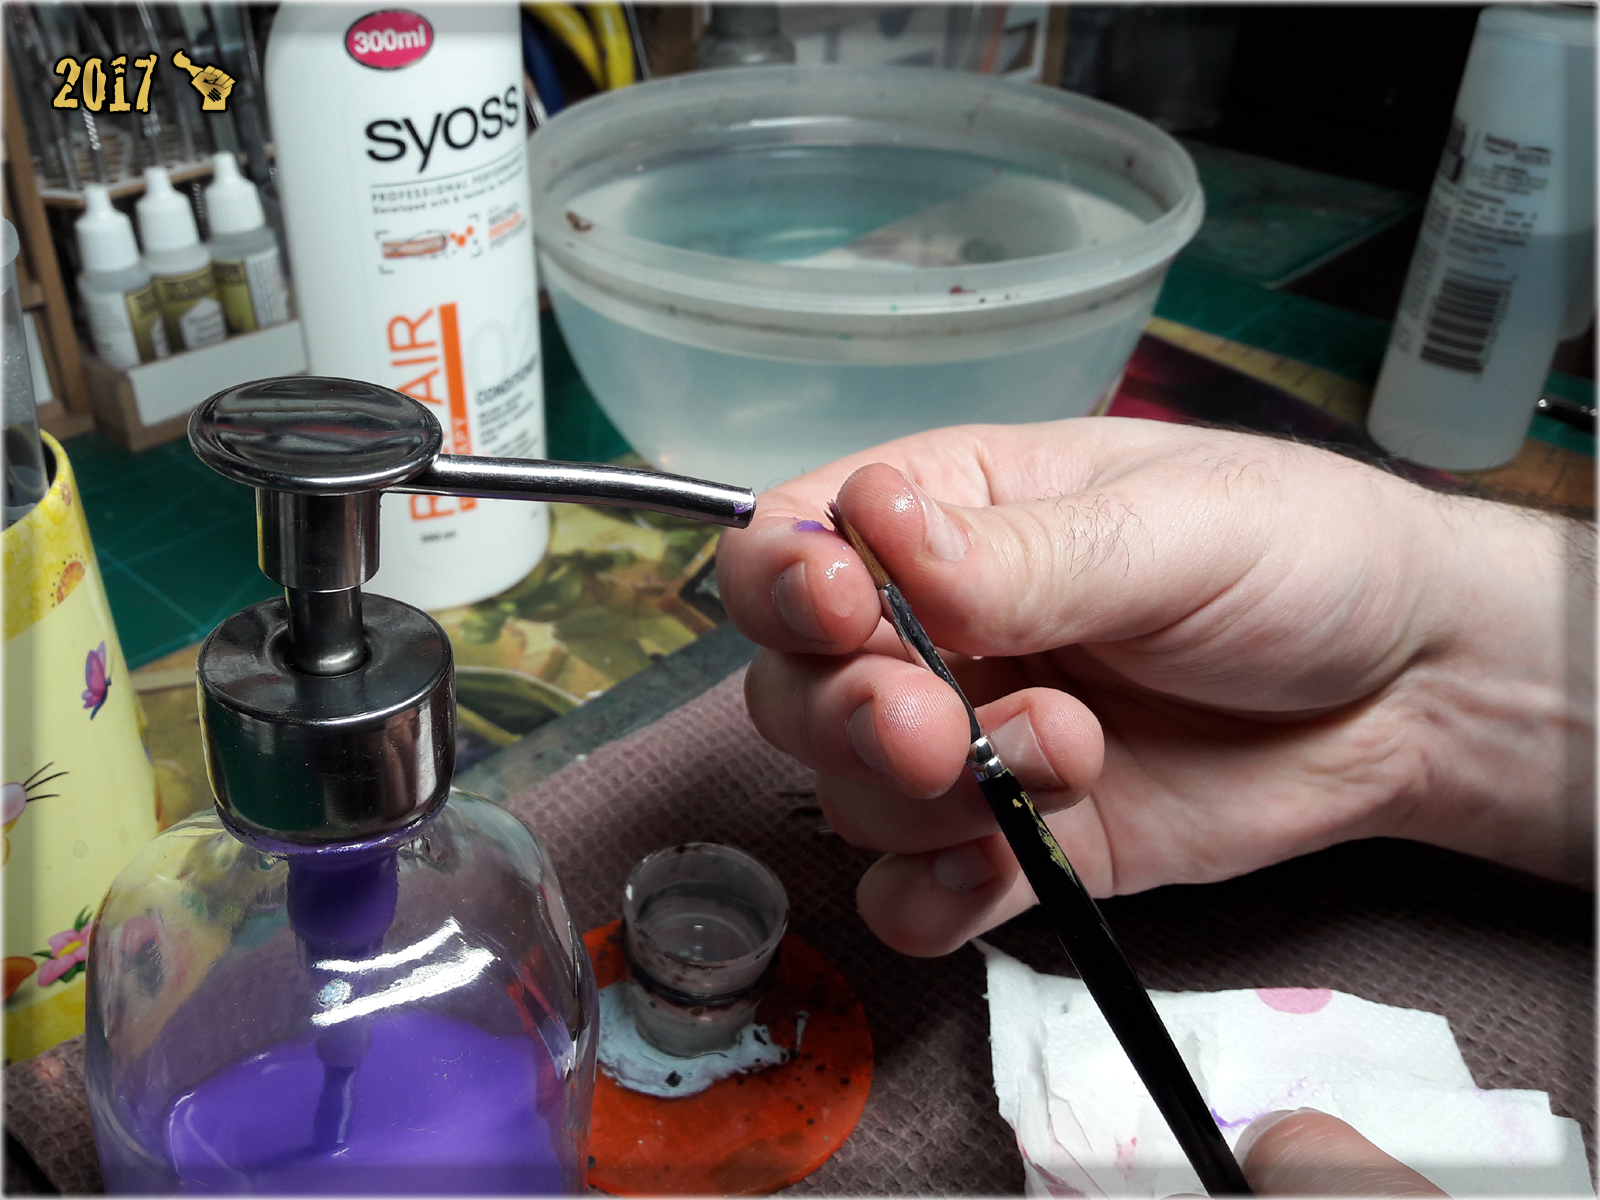

3 Then I moved to step three, covering the tip with a hair repair conditioner. Then I left the brush to soak with conditioner for about 20 minutes.


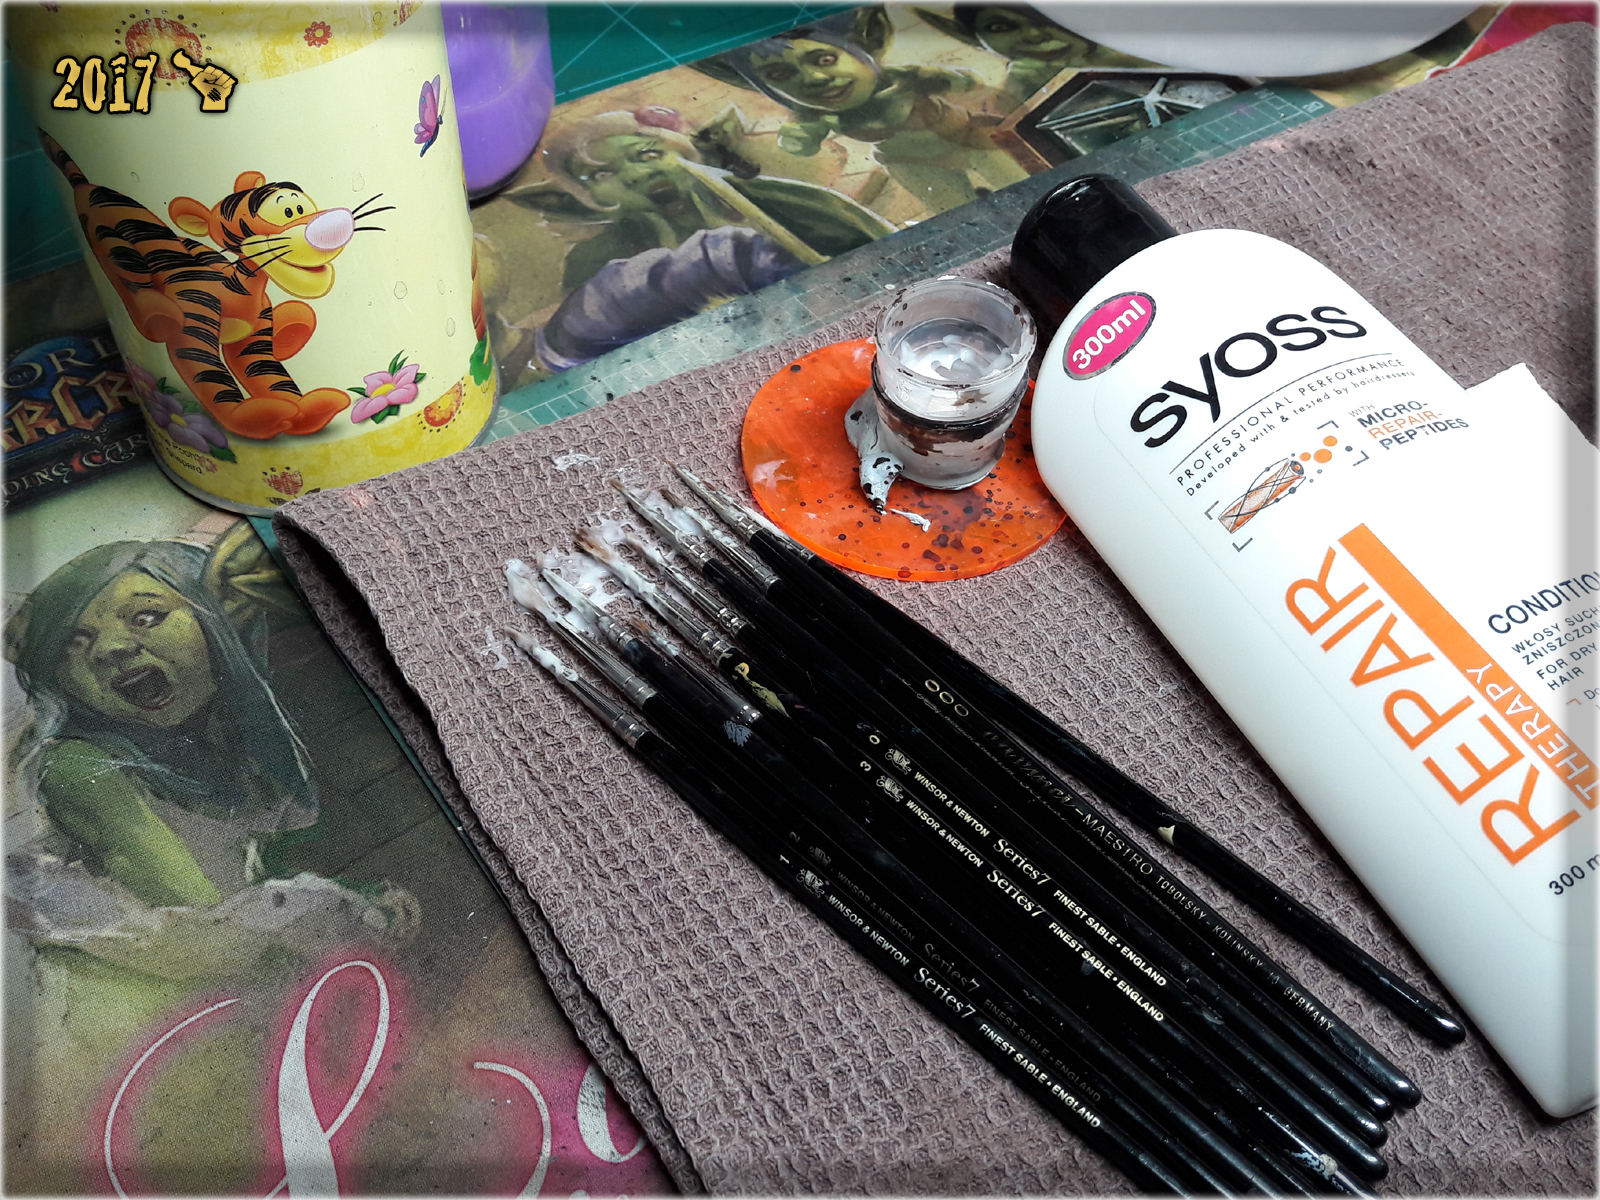
4 The final step was to once again clean the brush with water and form the tip, using a paper towel.


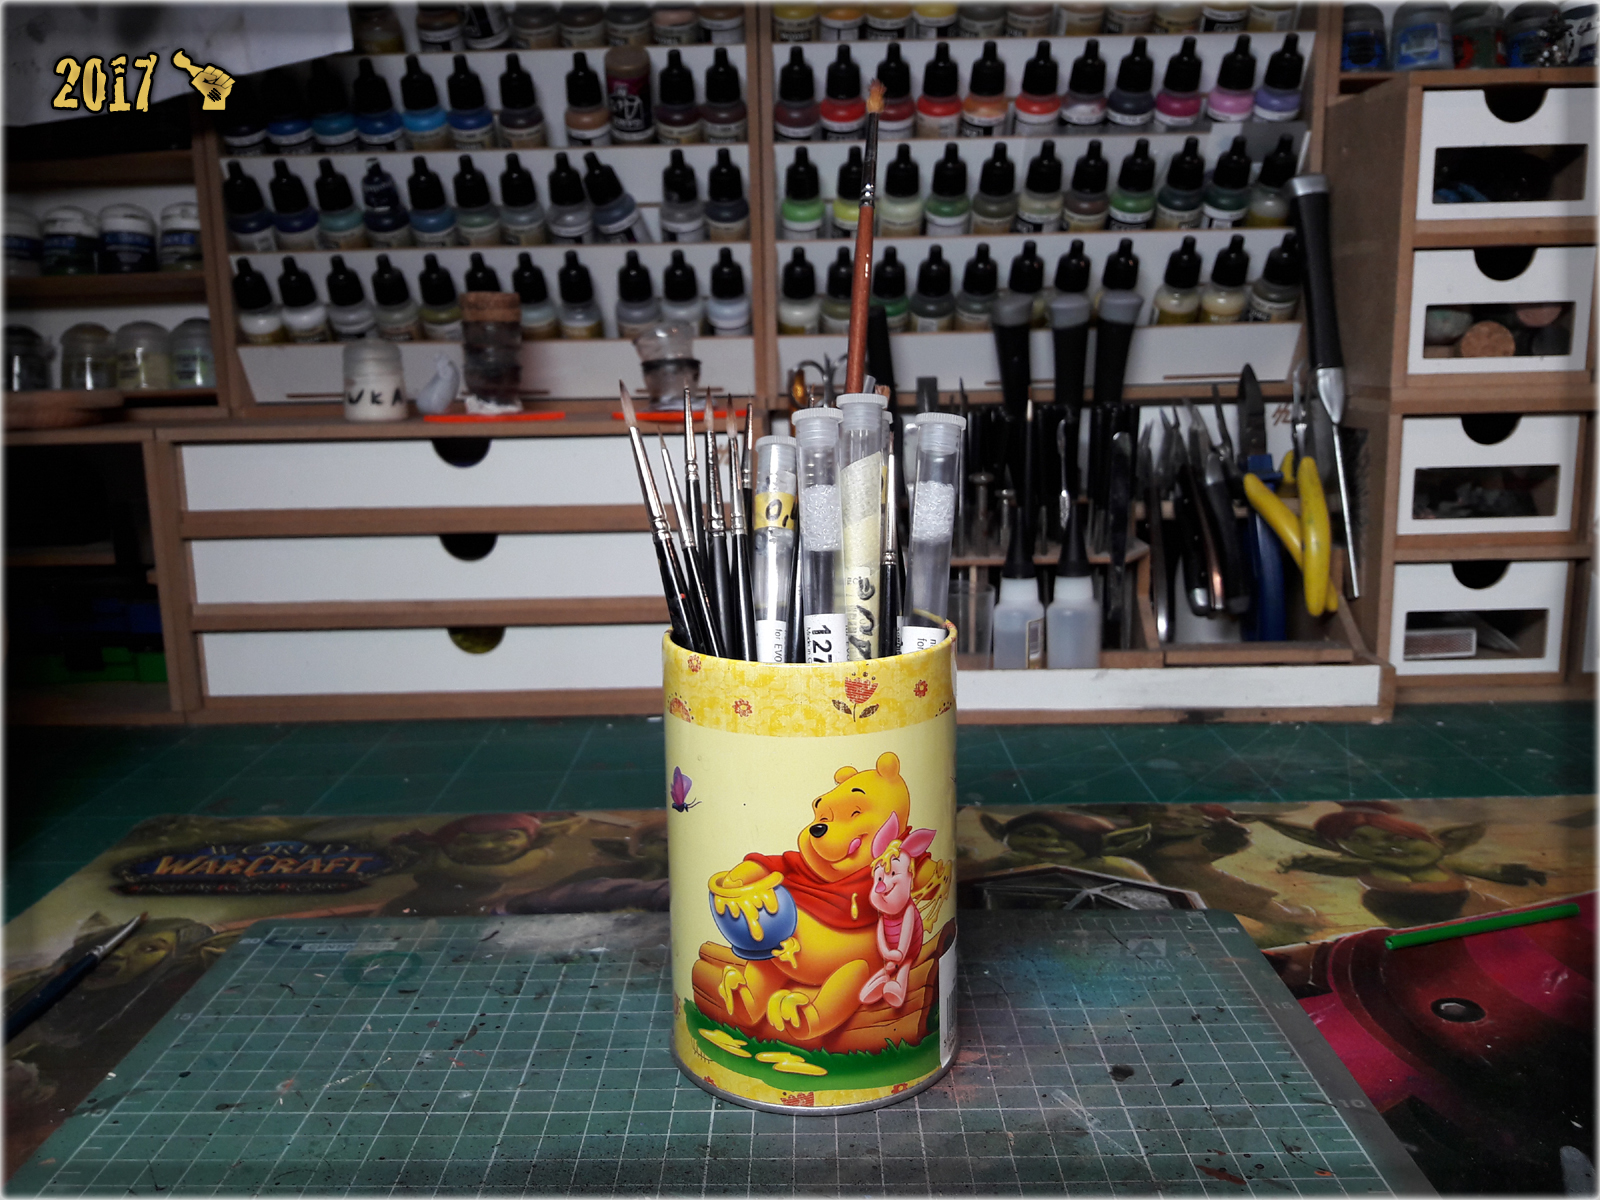
Now my brushes rest happily in a brush cup, smiling to me in wait for next project…
Ok, so you can take care of your brushes to keep them healthy, but what if they’re already ‘on the other side’? Untill recently I was sure that there’s no comming back from the brush’s afterlife, but I was prooven wrong by a friend who linked me a crazy awesome tutorial – and now I will share it with you.

1 I dipped the brush in water...
2 I touched a wet tip of the brush to the hot iron, then started moving it backwards, gently turning it in one direction.


Well – that’s it! Sounds easy? It actually is XD Just take a look at this video…
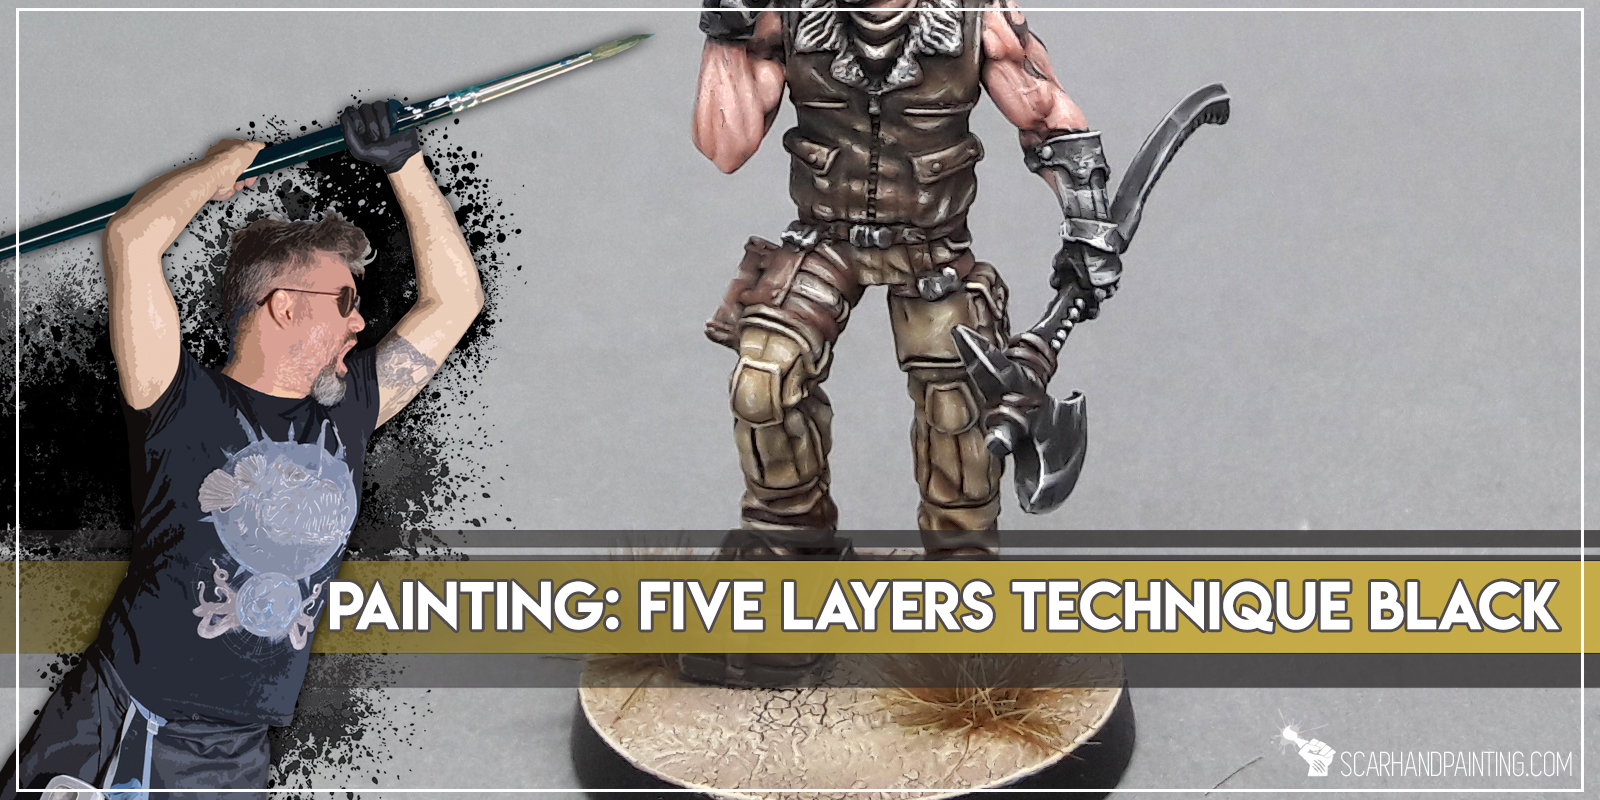
There’s probably as many recipes for painting black as there are painters all over the globe. On top of that there are many different techniques to choose from. Painting a lot of detailed Infinity the Game miniatures, I have found one that works best for me. Today I would like to present to you a ‘Five Layers Technique‘ based color scheme that I myself use.
First of all some home brewed theory. Just like most colors – Black looks great when highlighted. Black surfaces make good impression, when we are able to see different overlapping layers and how color works with natural curves and detail. For this purpose I always use grey to highlight and texturize black. This leads to black effectively turning grey in the end, so I usually wash it with black ink/wash to deepen the ‘blackness’ in recesses and darken flat surfaces. That in turn lessens the highlights and flattens the entire impression. Here’s where I figured to follow wash with an edge of white’ish color to produce strong contrast and ‘pop’ the blackness.
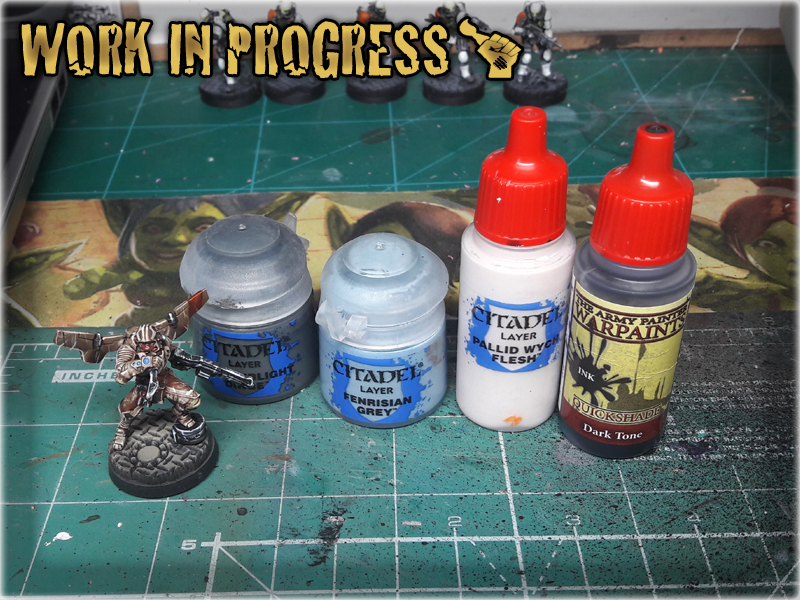
* Chaos Black Undercoat (GW),
* Skavenblight Dinge (GW),
* Fenrisian Grey (GW),
* Pallid Wych Flesh (GW),
* Dark Tone Ink (AP),
! Important note: For this technique you don't need to re-paint entire surface with pure black. I use it on different, mixed colours - usually being previously airbrushed all over the miniature.

1 First I covered the entire target surface with Skavenblight Dinge. To fasten and ease the process I added a bit of watter to the paint. No need to cover everything with a strong layer - just smoother what's undeneath it with a nice dark grey.
2 Then I made some random strokes with Fenrisian Grey. Once again I diluted the paint a bit, to make it more transparent. This layer provides texture and some irregularities to all the flat surfaces.
3 I then edged with Pallid Wych Flesh. I tend to edge only the natural sharp edges and some easy accessible spots. the most important are the ones on top of the surface I paint. Added some random scratches here and there too.

4 I then washed the entire thing black with AP's Dark tone Ink. (no picture)
5 Finally I edged once again with Pallid Wych Flesh. Added some more scratches. Job done.
That is the entire secret behind my Painting ‘Infinity’ Black technique. Fast and easy. Sure, no perfectly smooth transitions, no none metallic metal, but still a very rewarding result. With a bit of imagination and practice – this might be used as a perfect starting point for a much more complicated paint job. Hope it works for you.


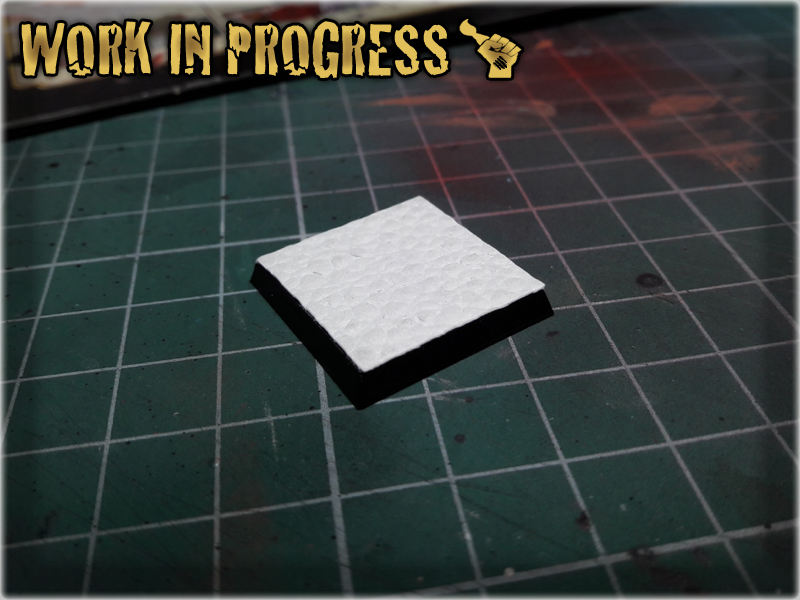
In this easy, step-by-step tutorial I’m going to show you how to create a Cobblestone Base in a what is probably the fastest and simplest way ever.

*Just find a suitable one at a local builder’s store.
1 I started by covering entire base with Basing Glue.
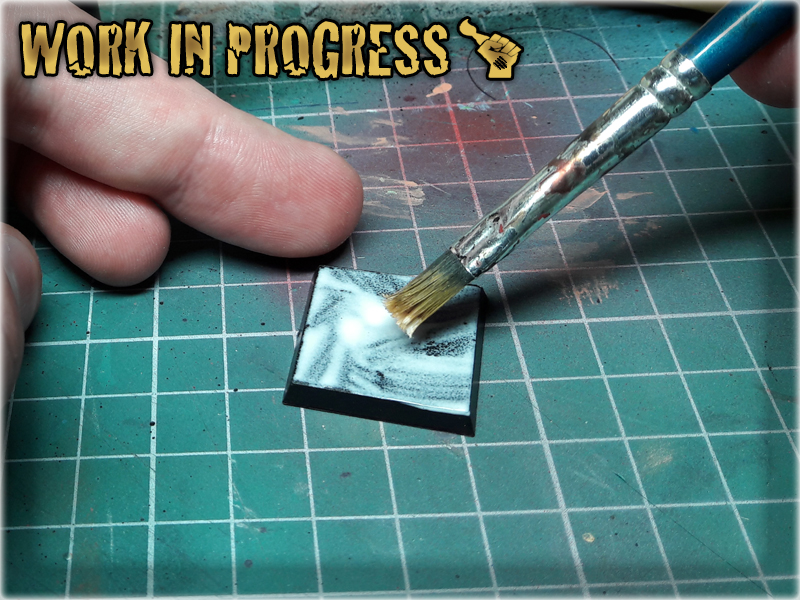
2 I then cut off a piece of the wallpaper to be slightly larger then the base itself.

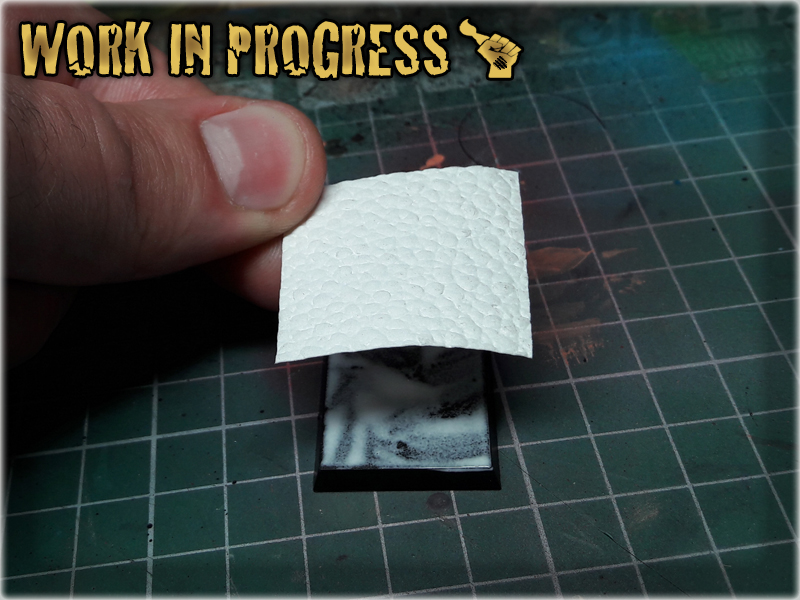
3 Next I glued the piece onto the base, turned the base upside down and cut off the excess of the wallpaper with a Hobby Knife.
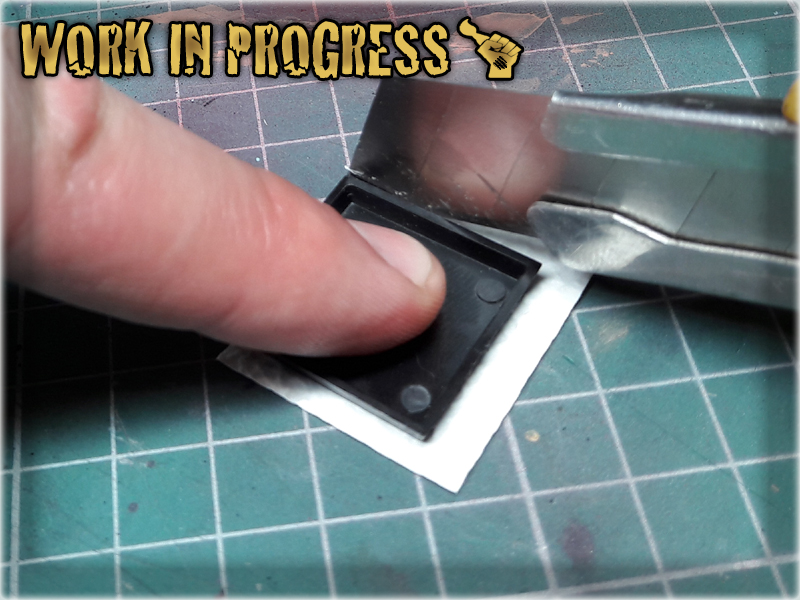
4 Last step was to smoother the edges with a slightly moisted fingertip.

Now you see how insanely fast and easy this was. For the purpose of this tutorial I made just this simple base, but once you get your hands on a proper wallpaper, options are limitless. You can use it to texturize bases and terrain, add more detail or even mix different types of texture.
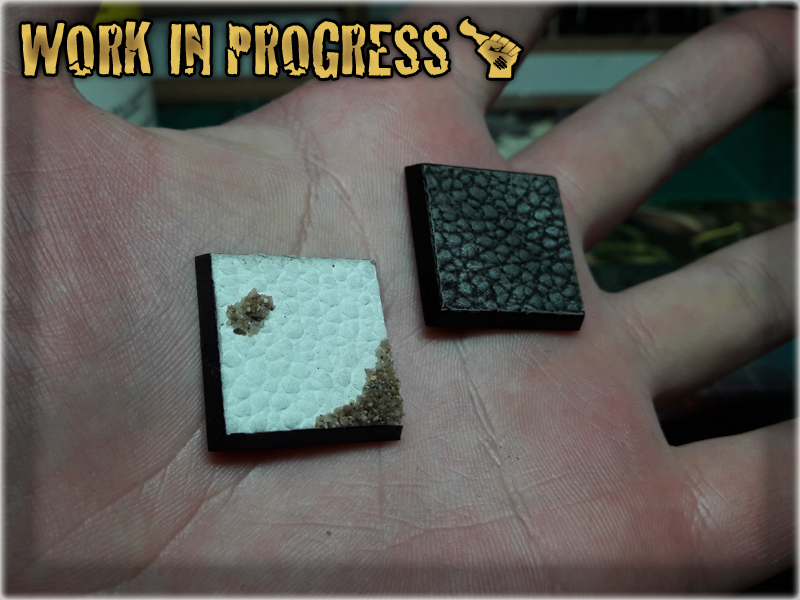
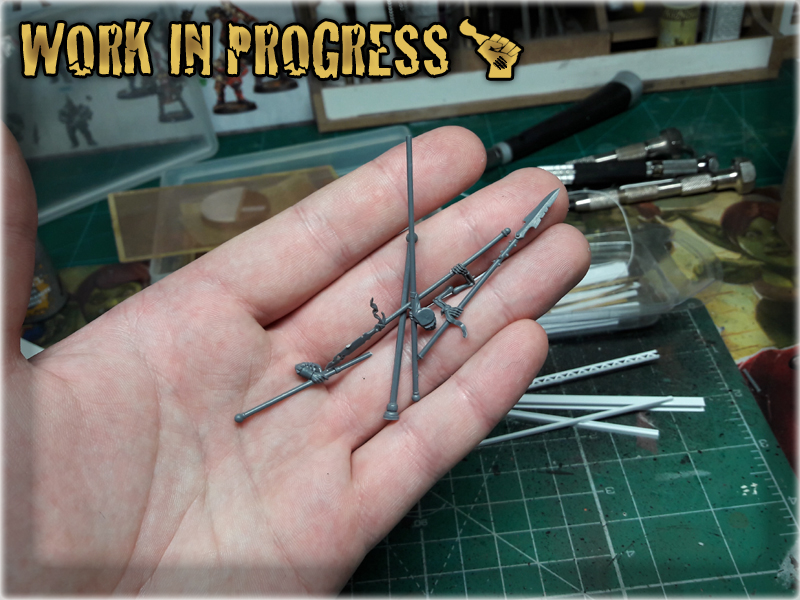
Today I’m going to reveal one of my dearest secrets: how Super Glue and Basing Glue can be used to make some fantastic, crazy, awesome stuff! I have invented it by accident when I was a kid, used it since and love it for both simplicity and awesome texture effect. In this easy, step-by-step tutorial I will show you how to produce your own Overgrown Bases!

*I purchased a huge pack of these for approximately 1€,
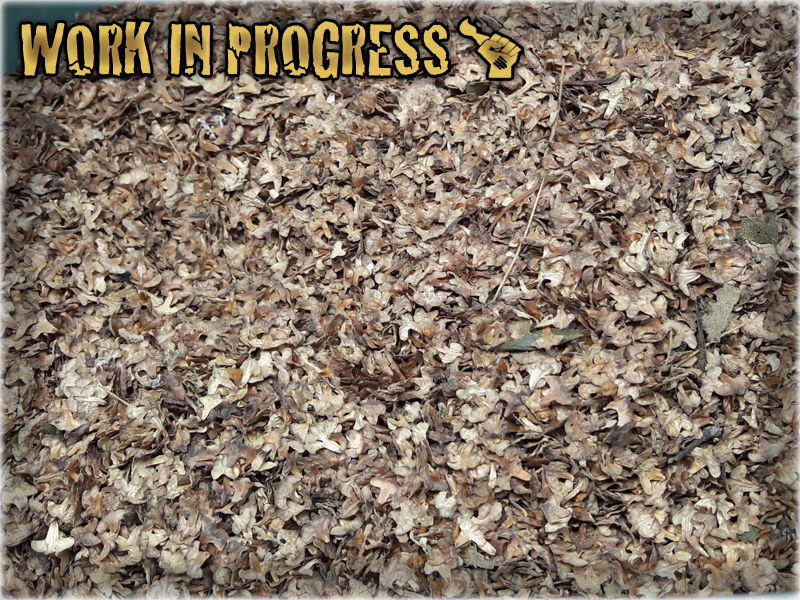
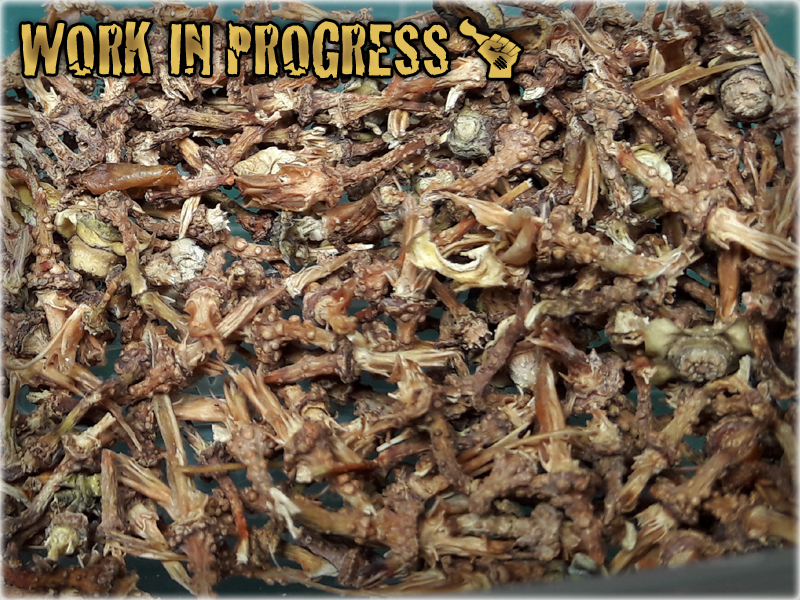
**Once you eat up all the goodie goodie grapes, you have like a bunch of wooden leftovers. Once dried out these are awesome bor basing miniatures.
***I use either Air Soft Gun ammuniton, or for smaller calliber moist absorber balls obtainable with every new pair of shoes. Just ask your gf to dig out one of her shoeboxes, there should be a small paper bag filled with tiny, translucent balls in it.
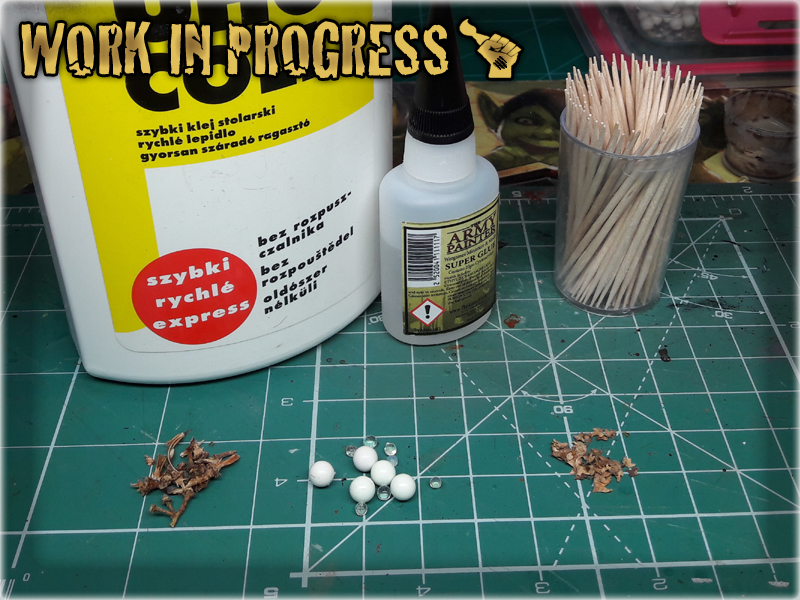
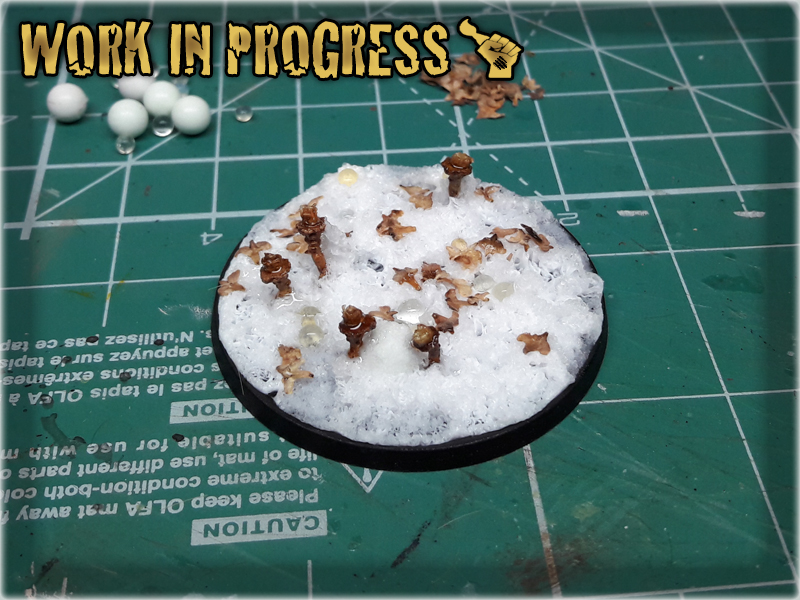
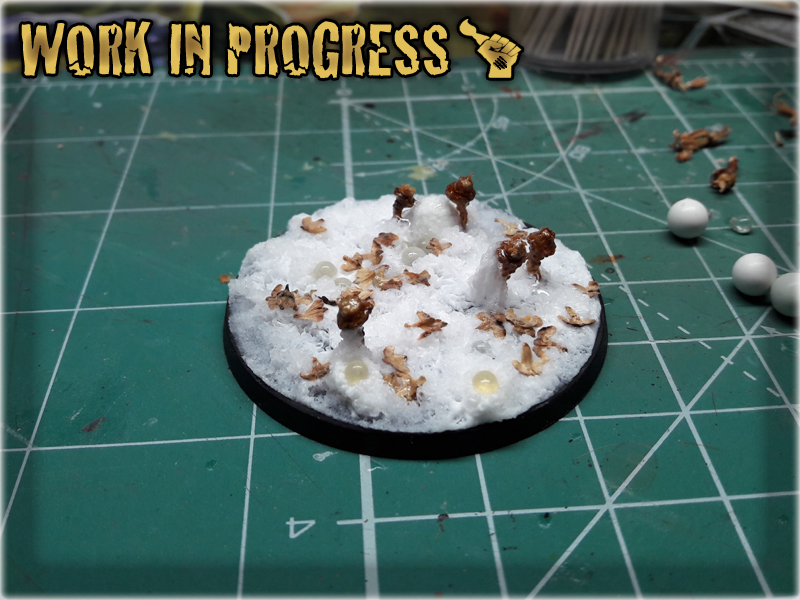
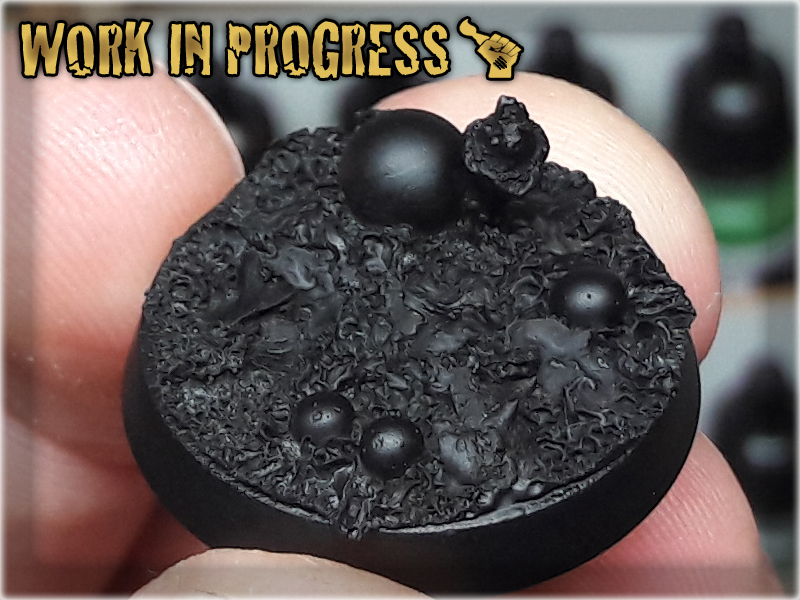
1 I started by applying basing glue all over the base. No need to make it smooth, just enough not to leave any empty spaces.

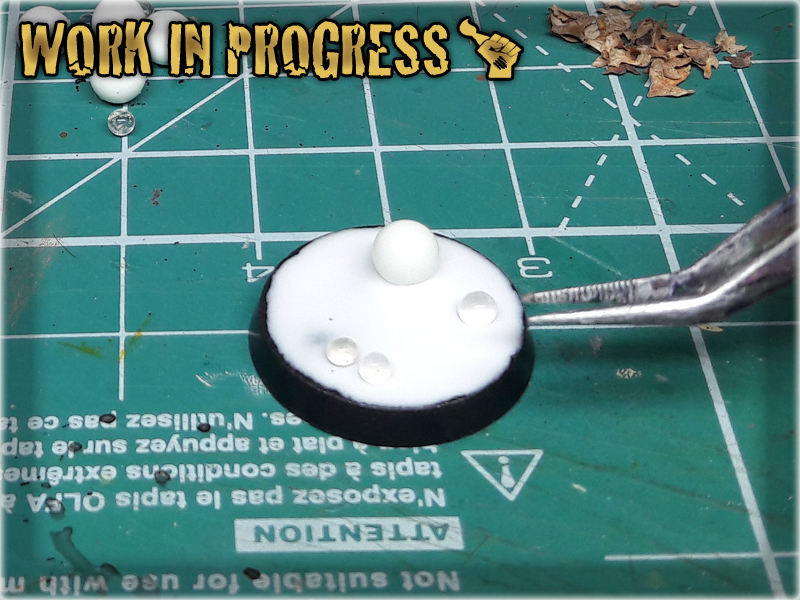
2 I then dropped some of the tiny balls and Birch-tree seeds over the wet glue.
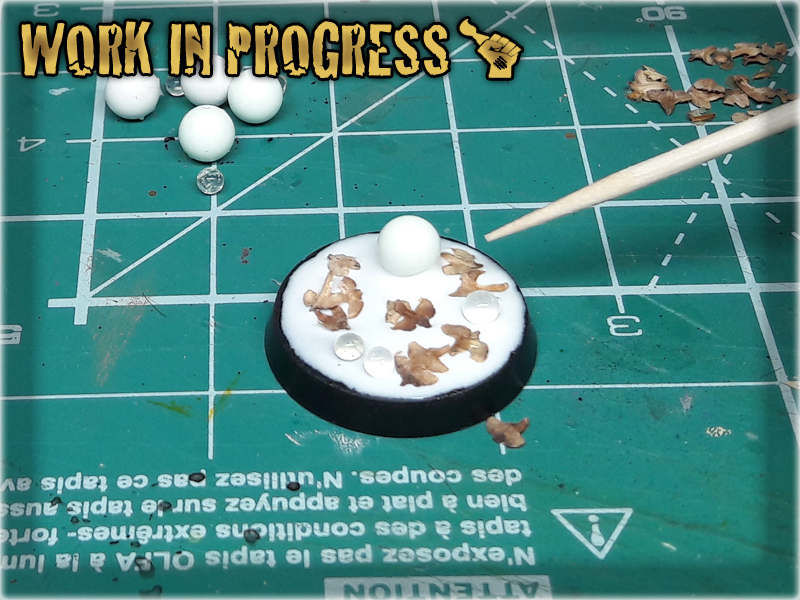
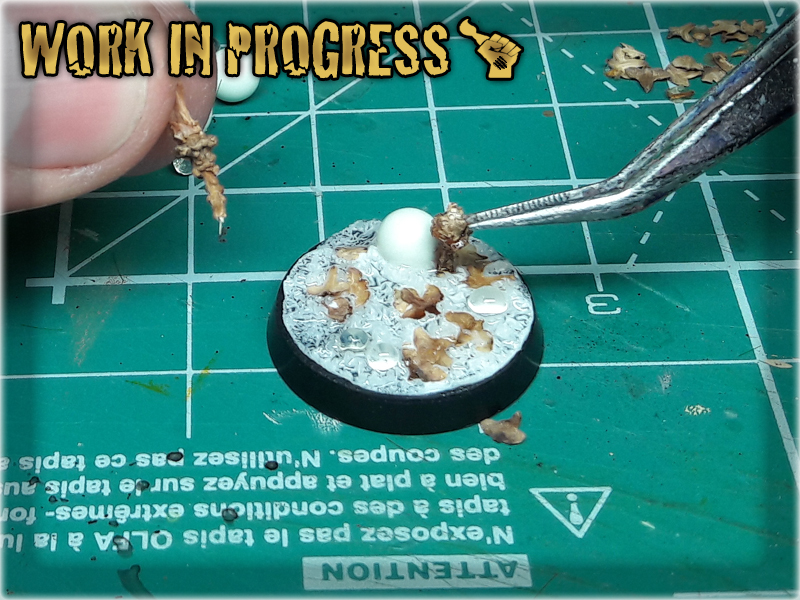
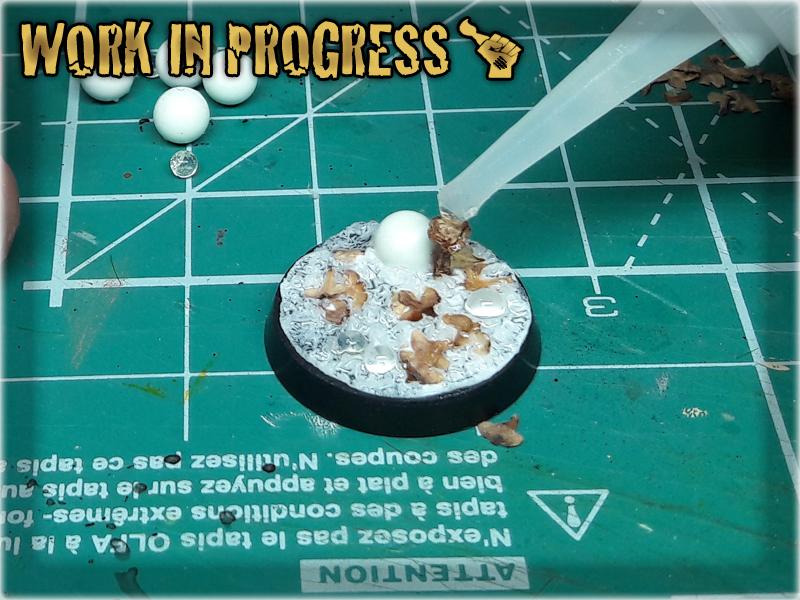
3 Here's where MAGIC begun. I covered entire base with Super Glue and watched as it was warped before my eyes in a matter of merely seconds.


4 Before it dried out I added some pieces of dry grape vines to make it look like some strange, alien mushrooms, or plants. I then covered additional stuff with more Super Glue to harden it.
5 Last step was to leave entire thing to dry out. Usually it takes around five minutes for a base to get dry, but it might take a bit longer, depending on how much basing glue is used.
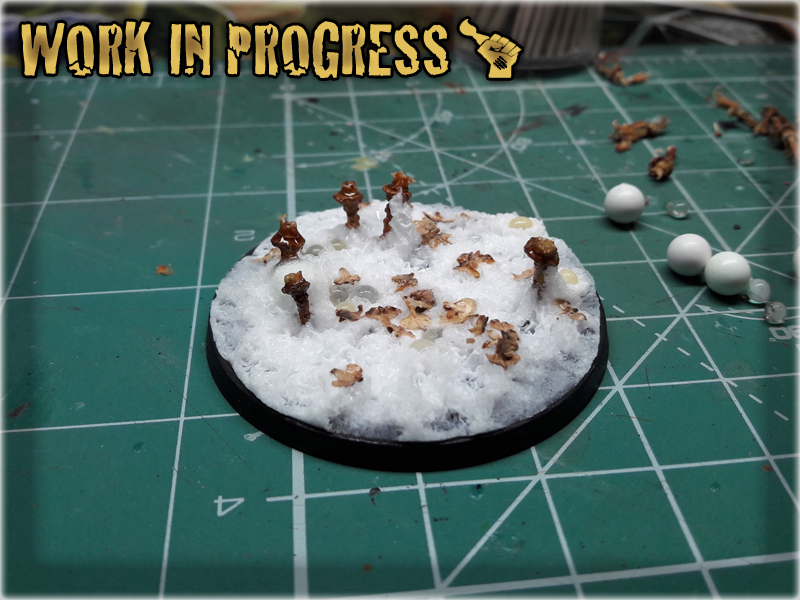

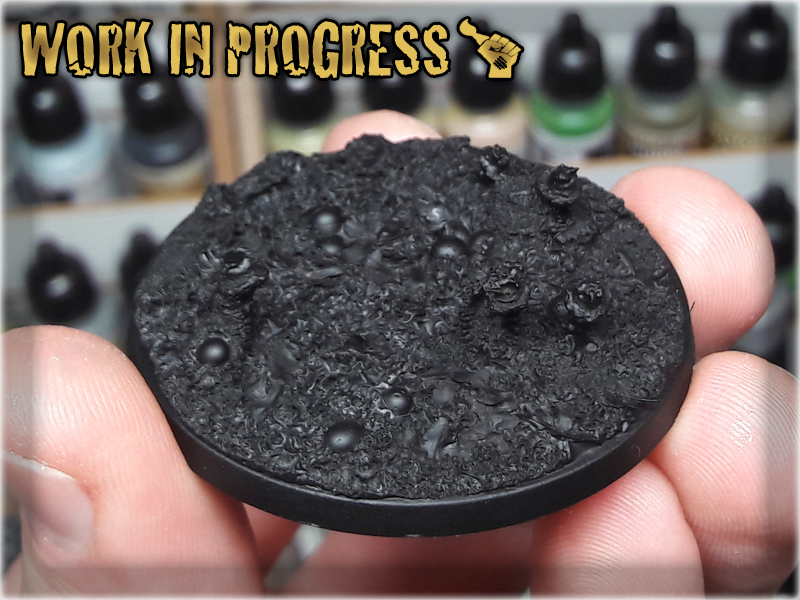
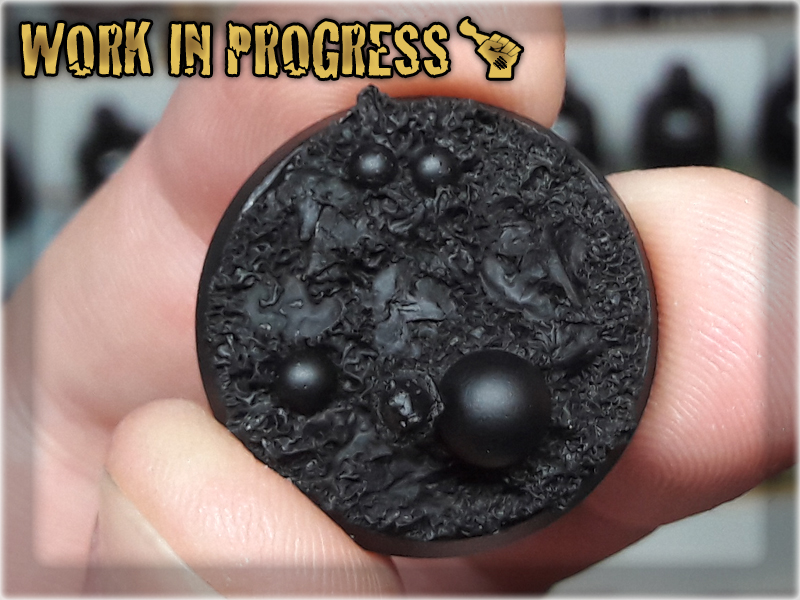
6 The final step was to undercoat dried out base with Chaos Black spray... then do a quick paint job with random colours.
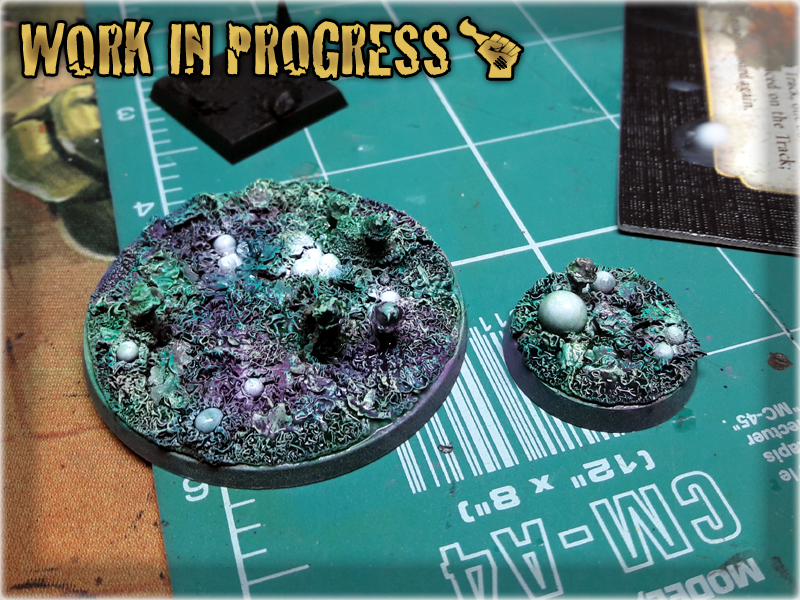
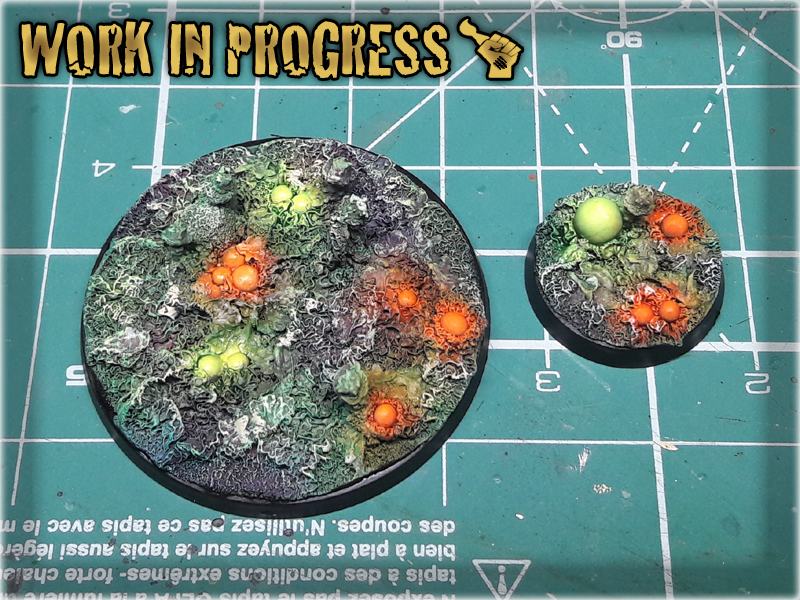
Now seriously – tell my that’s not an awesome texture effect XD This is like ultra-fast, mega-cool way of using two glues to create utter chaos on any surface. Chaos mutations, warped stuff, Zerg creep, alien planet foliage, jungle floor, faerie glade, name it – then glue+glue it 😉

Do not hesitate to let me know and send some pictures via FACEBOOK if you ever use the tutorial. I will be happy to see how it turned out 😉