- contact@scarhandpainting.com


My hype for Guild Ball is pretty strong. The game looks like a lot of fun and miniatures have a great feel to them, that makes me want to leave everything else and just start painting. My Mortician’s team being currently on hold I decided to focus all the Guild Ball related inspiration around another project – Mortician’s Pitch.
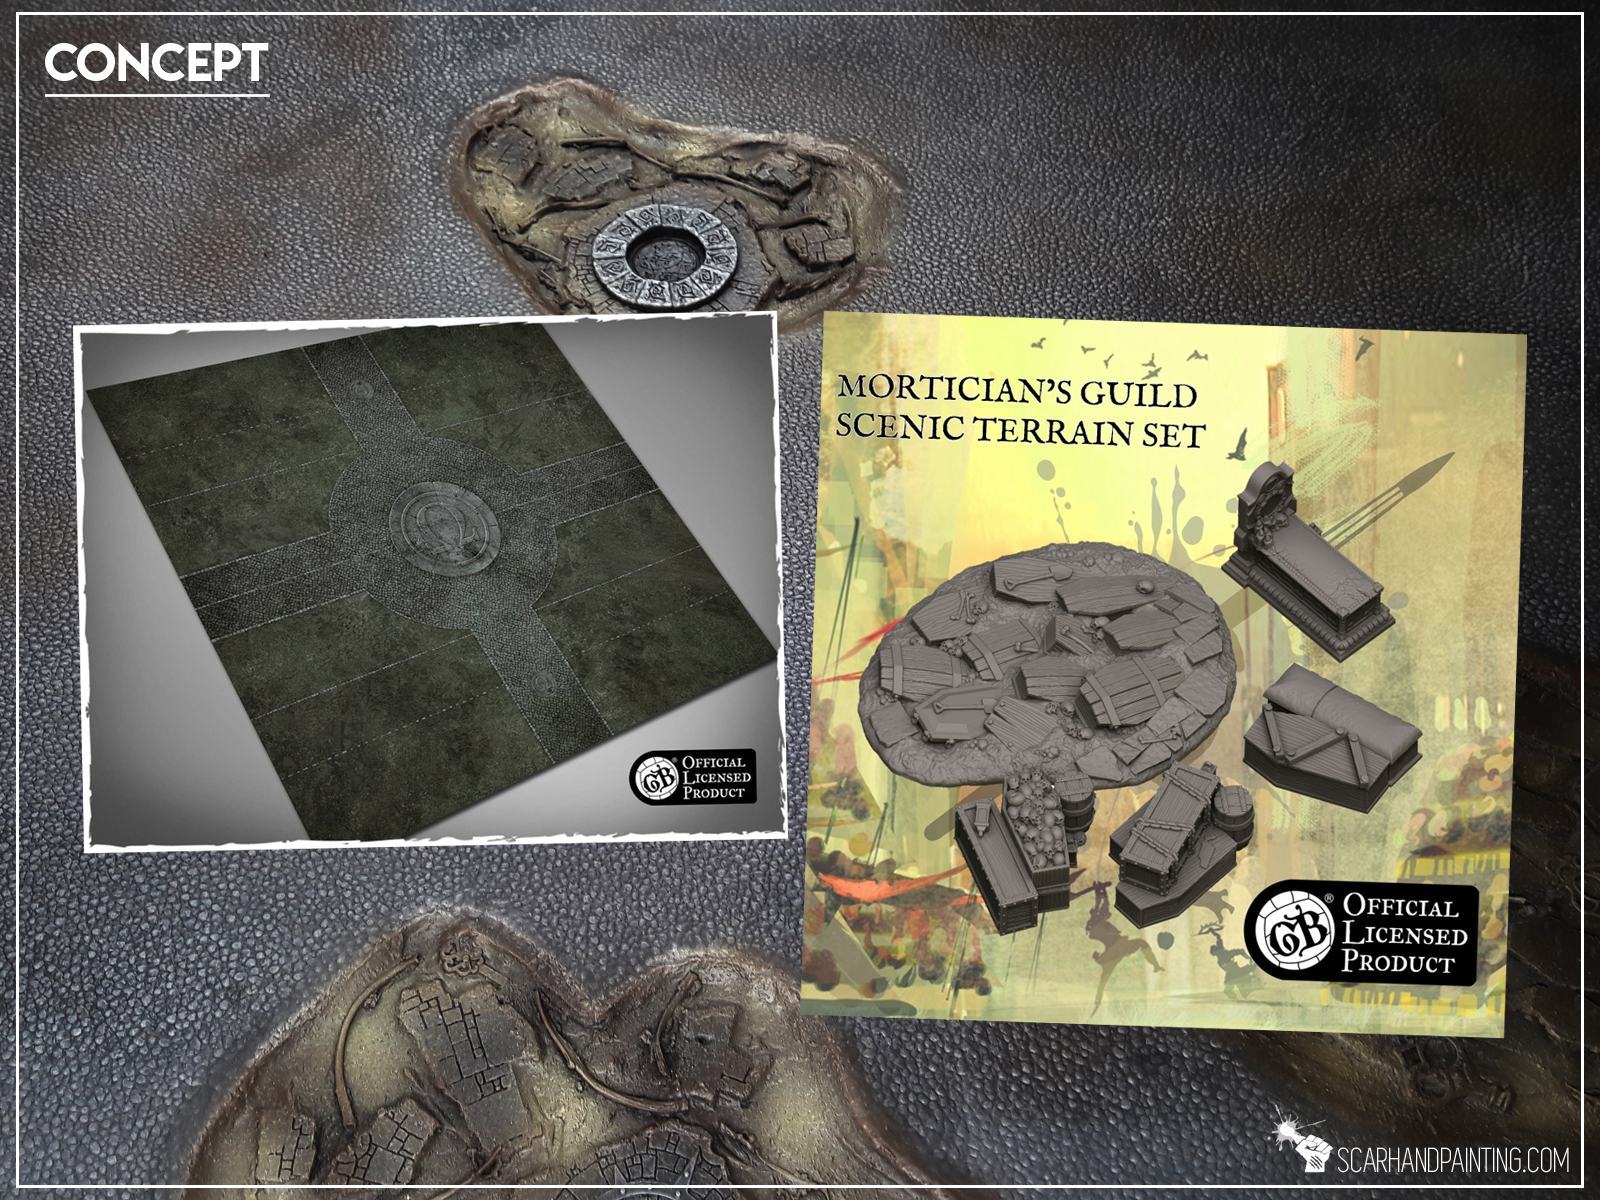
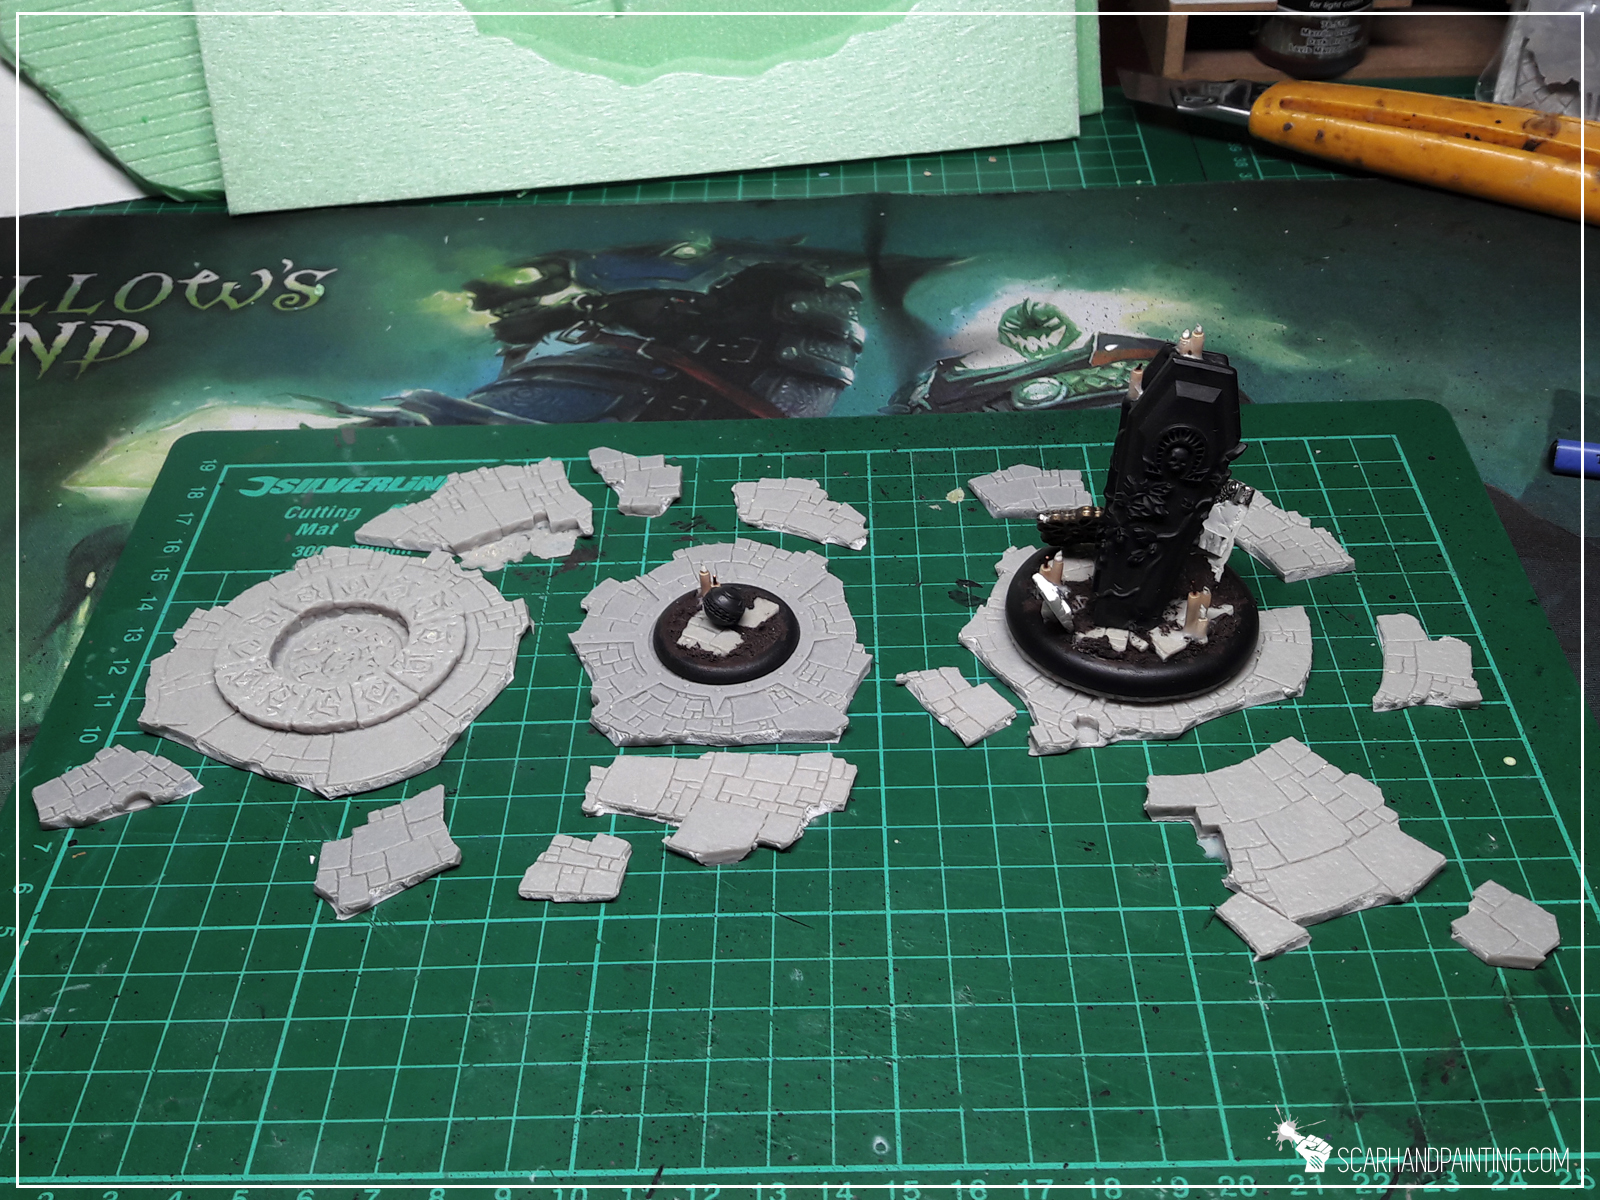
At first I thought about something blunt, like cobblestone texture with pitch features airbrushed on top. Thing would be both playable and looking nice. It all changed once I accidentally bumped into this magnificent piece of scenery by Brokentoad. Those half buried coffins almost catapulted me out of a chair. Such a nice idea. I knew I will order this piece, but first I just had to implement a similar feature to the project. This made “Mortician’s Pitch” evolve from a simple flat cobblestone into a more 3d design. Still, how to insert irregular shapes on top of what is meant to be a playable surface… and then I thought about clear resin…
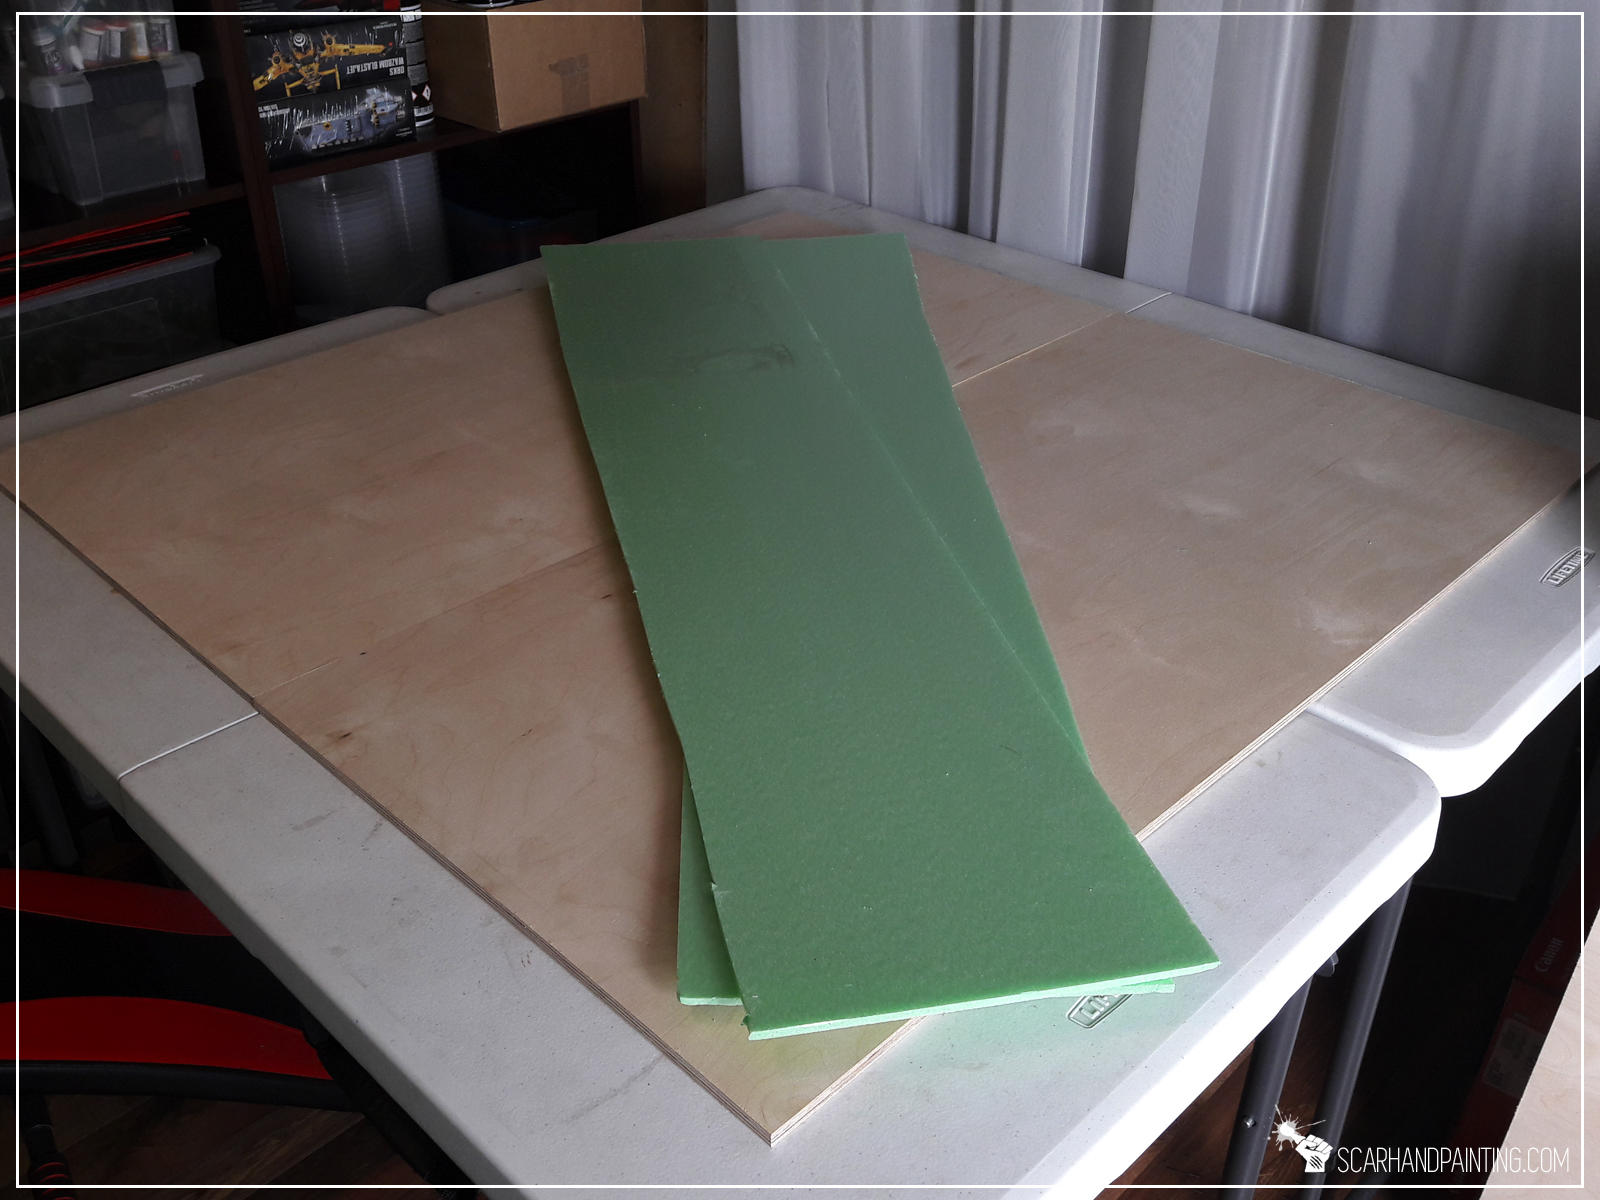
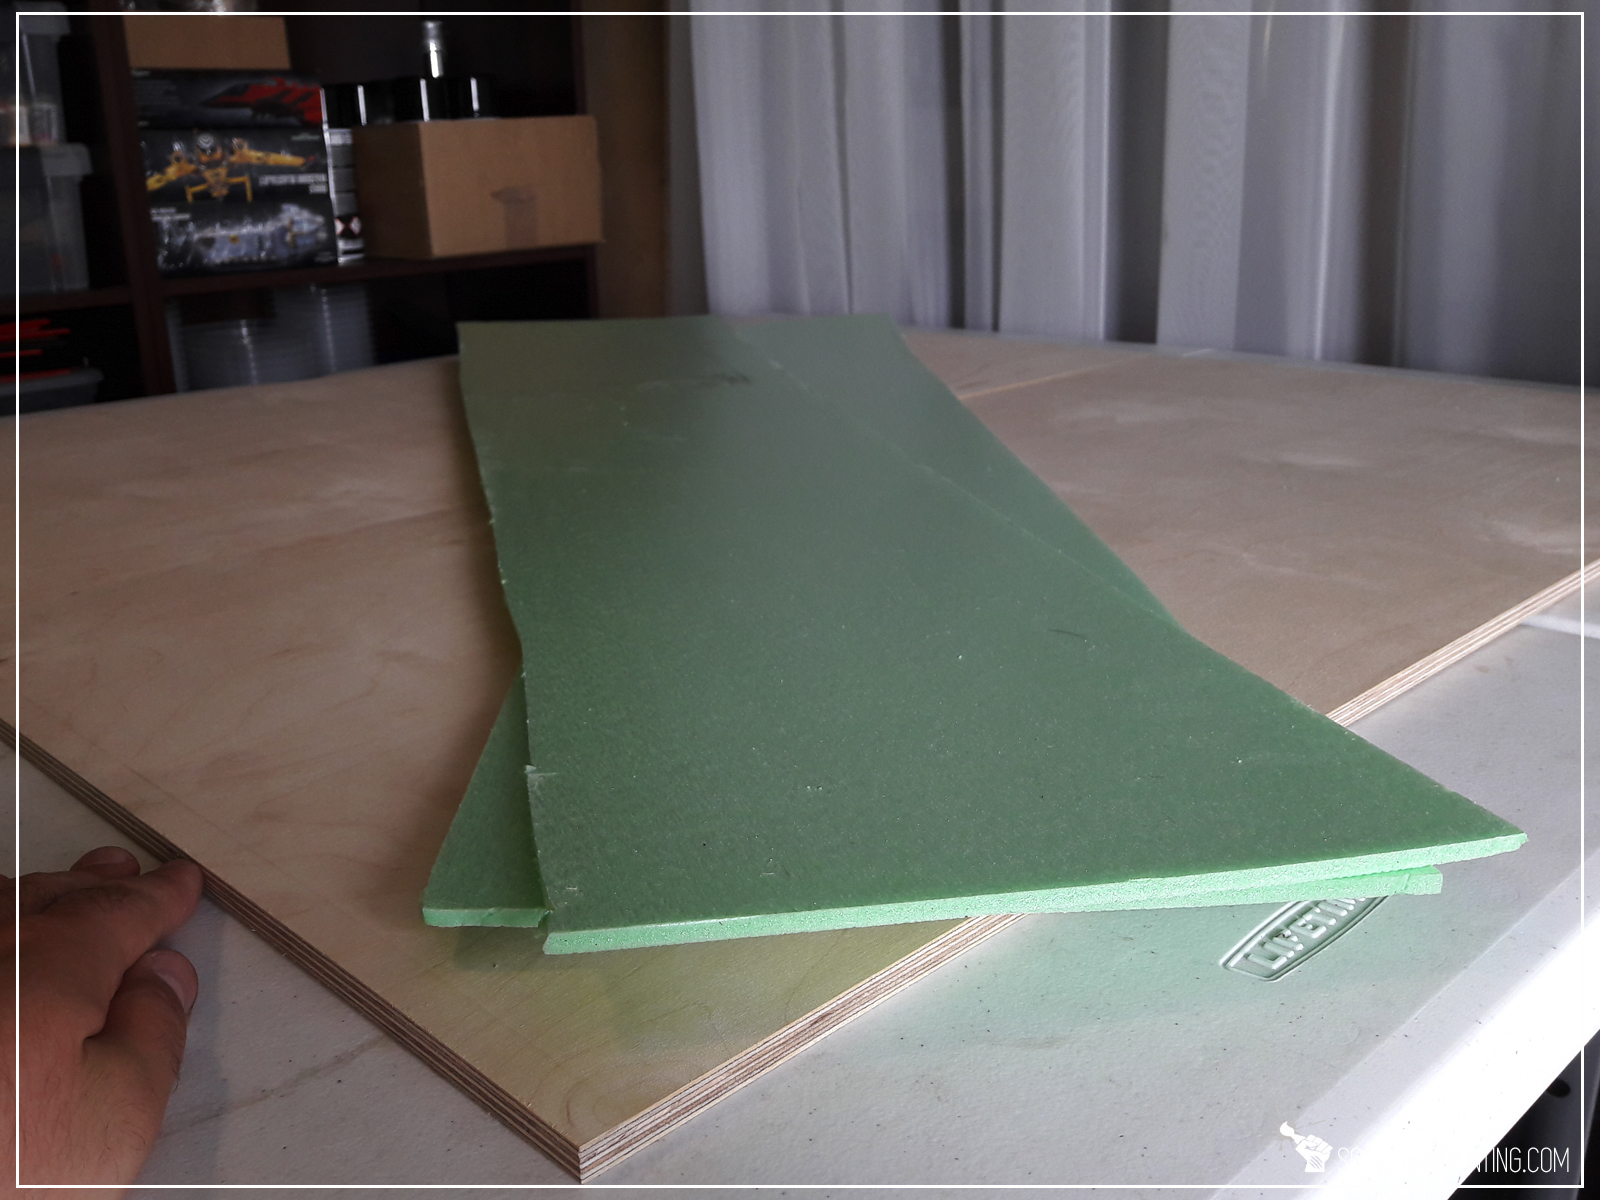
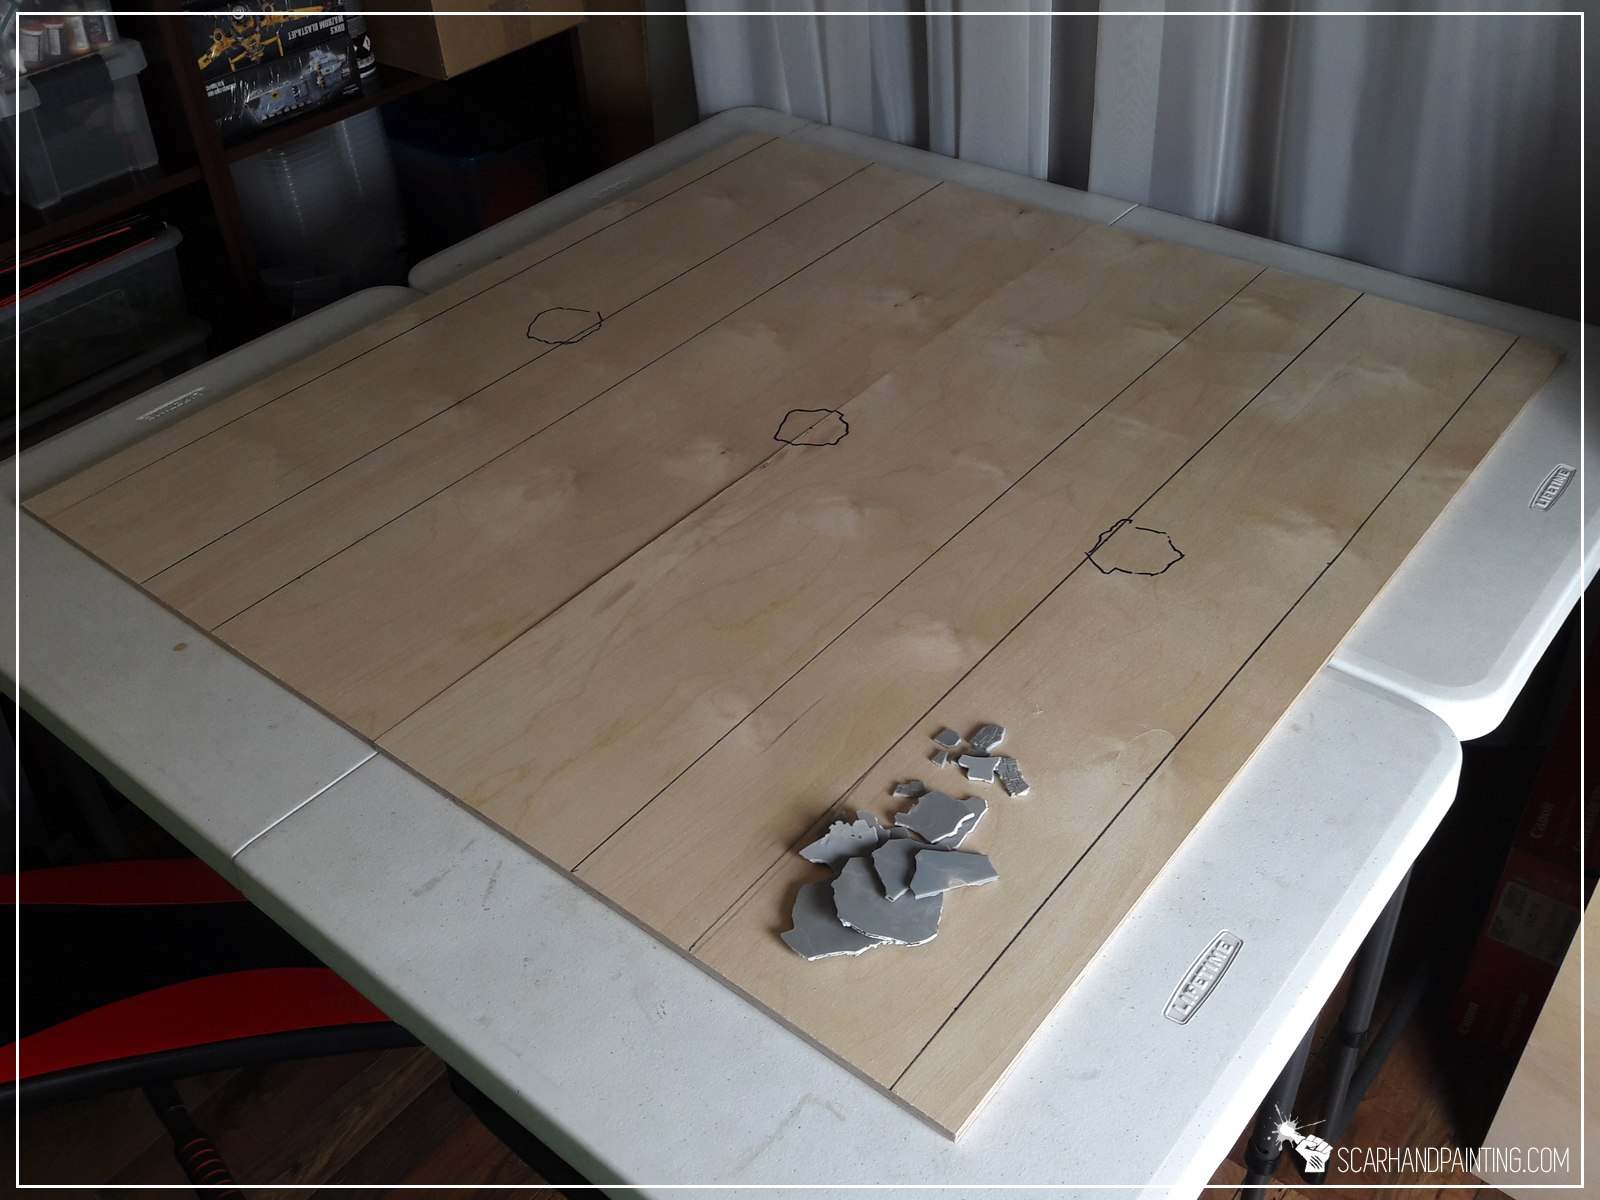
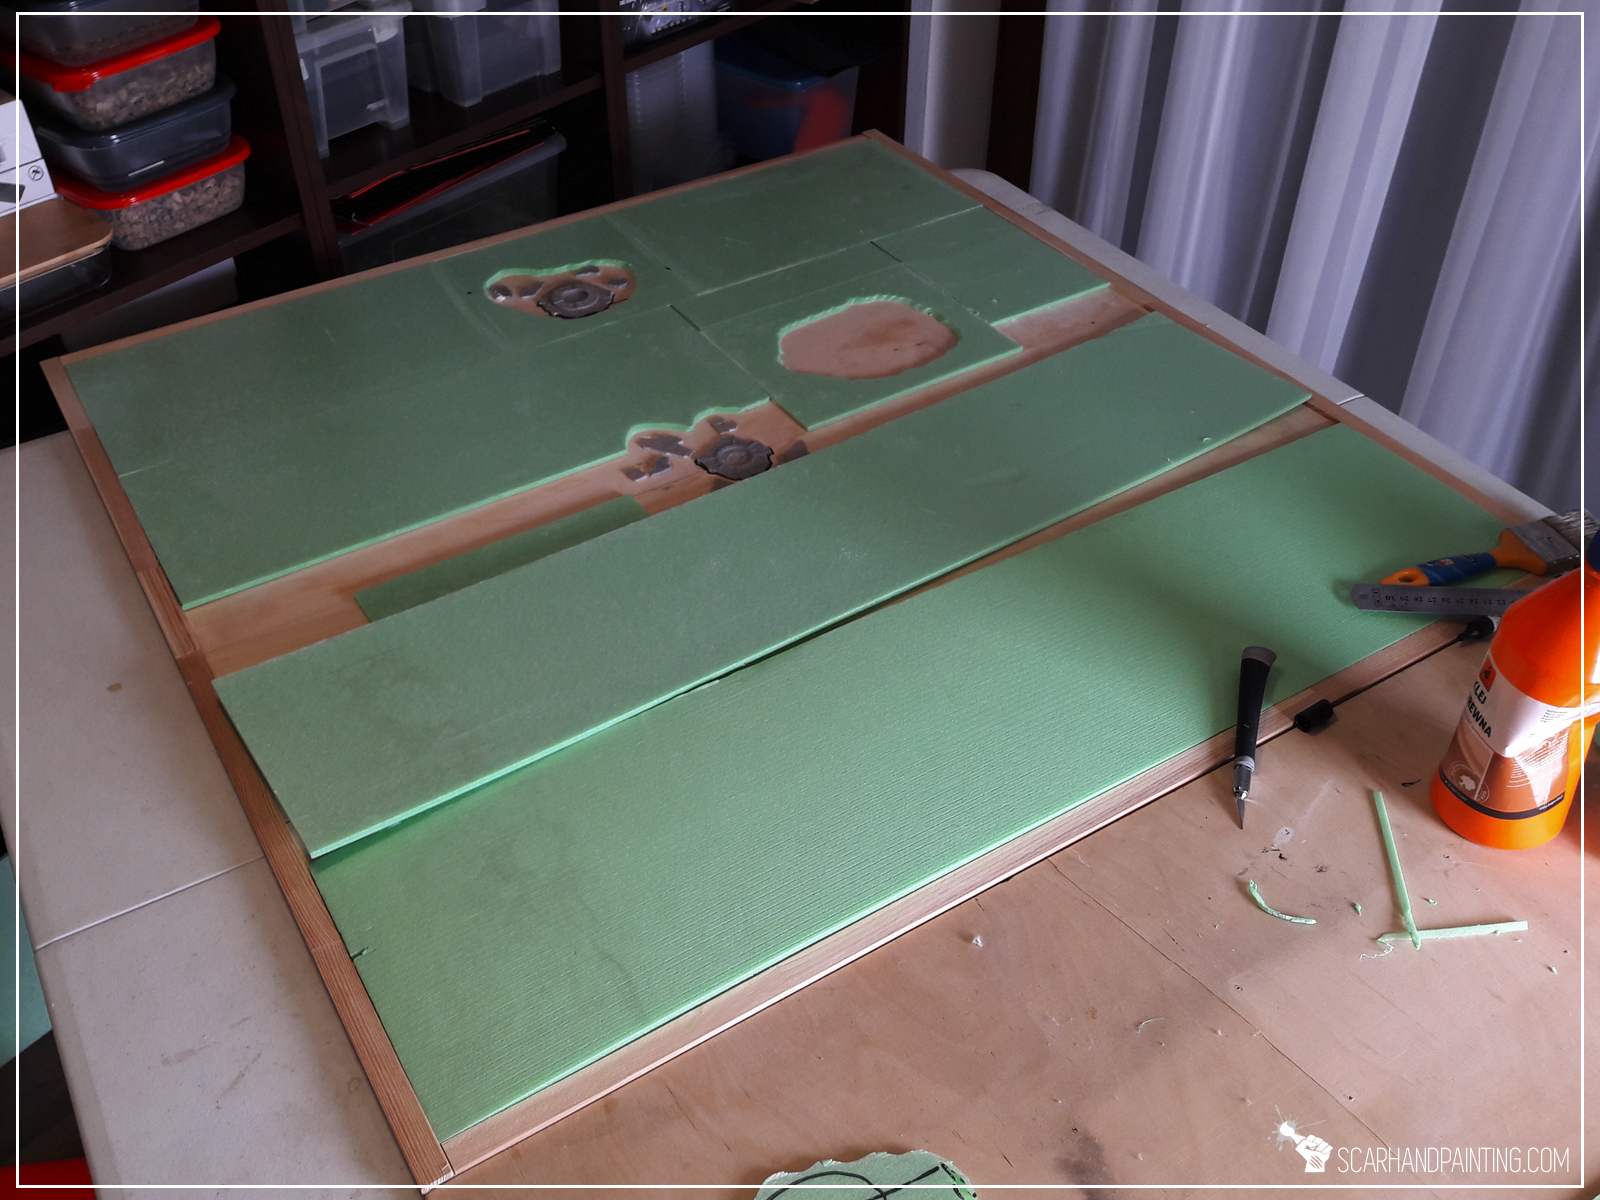
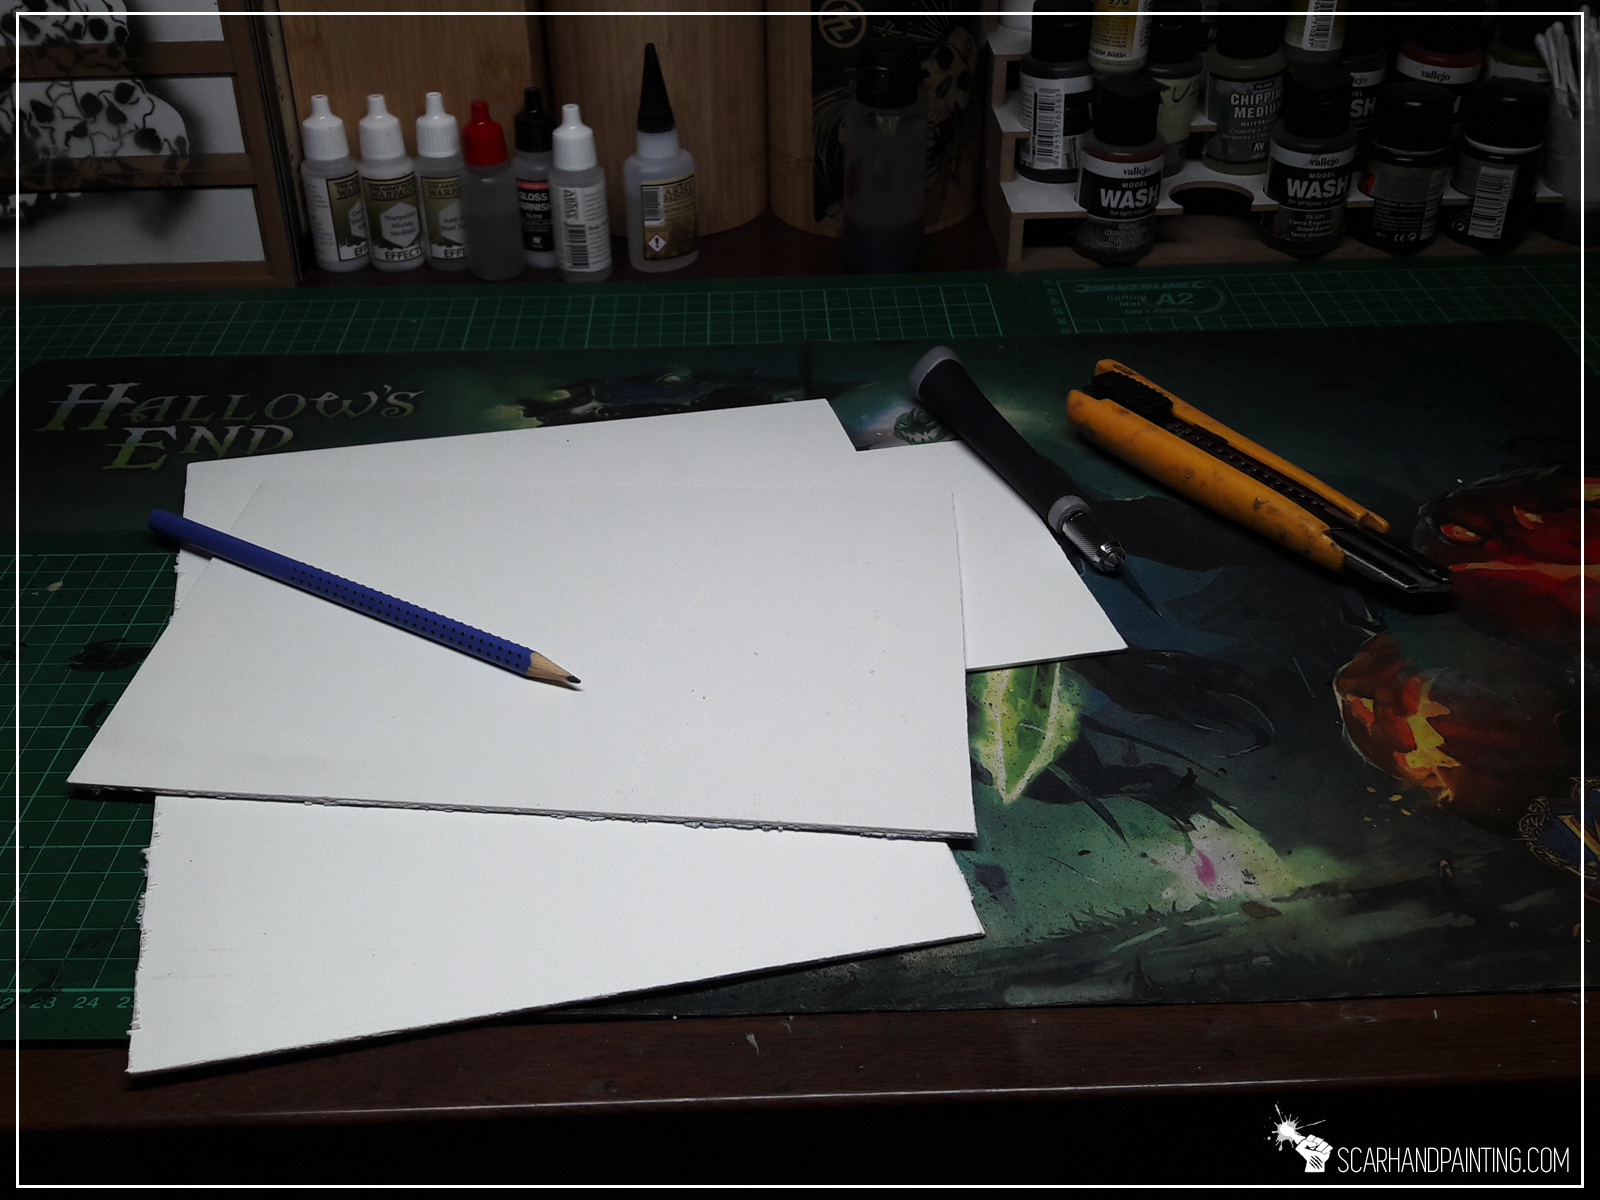
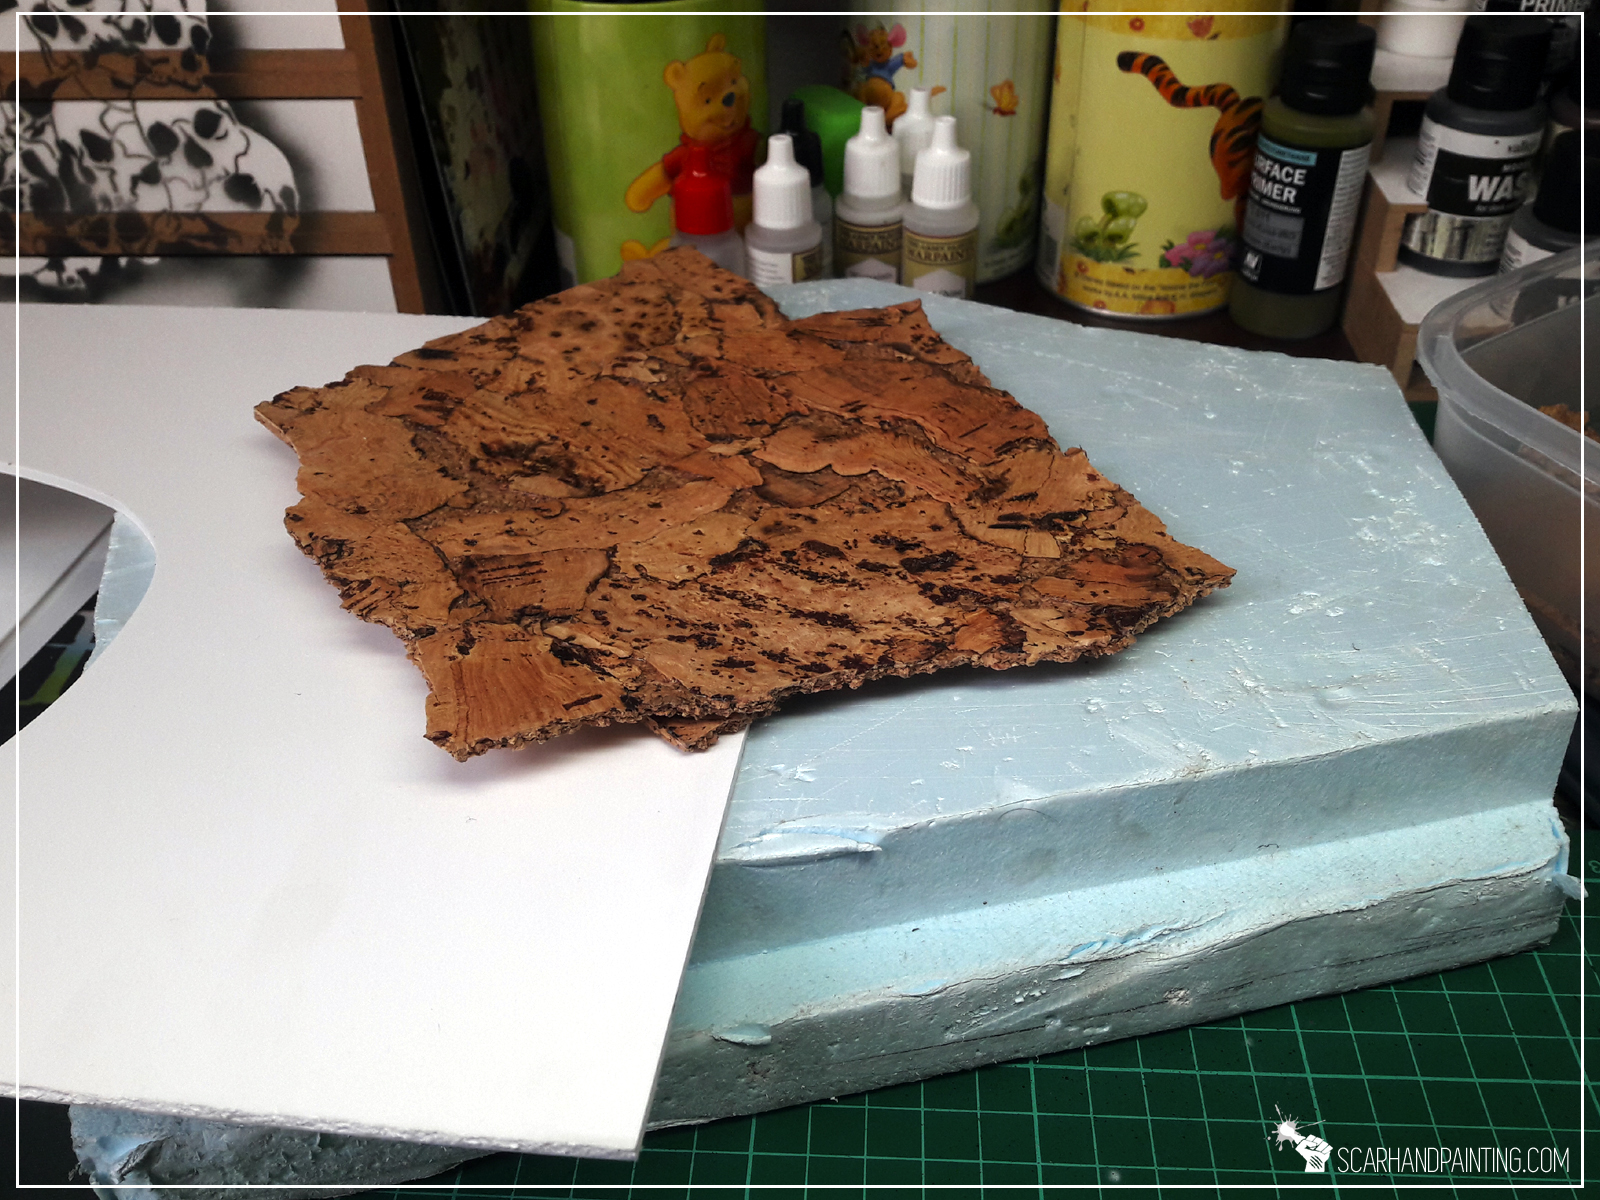
Off course a man gotta pick a right spot to dig a grave, not to mention placing an entire graveyard. I decided to go with two 10mm thick, 100x50cm wide meshed wood planks as a base for the pitch. These are a bit wider than necessary, but playing different games throughout the years taught me to leave some spare space around the proper gaming area. This way if anything gets damaged it wouldn’t impact playability of the board. 10mm thickness means these would stay flat and be durable enough to withstand any random fuckups that might happen some day.
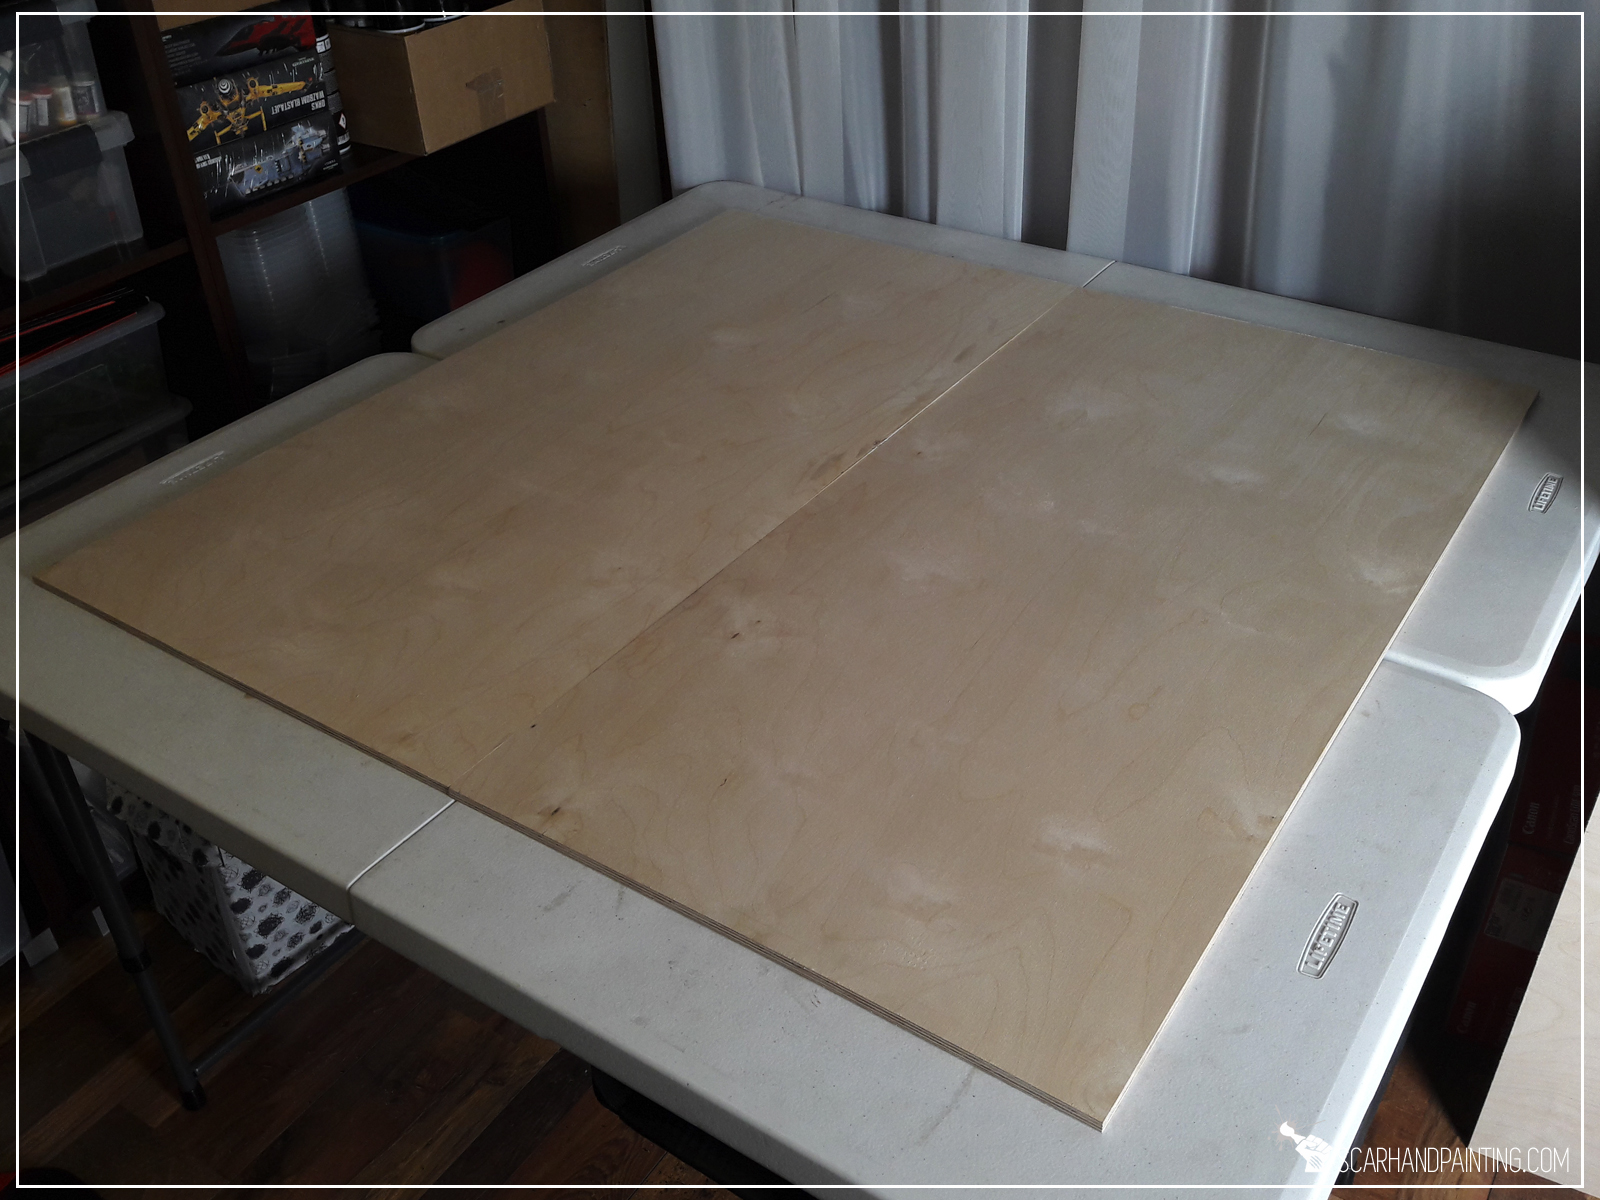
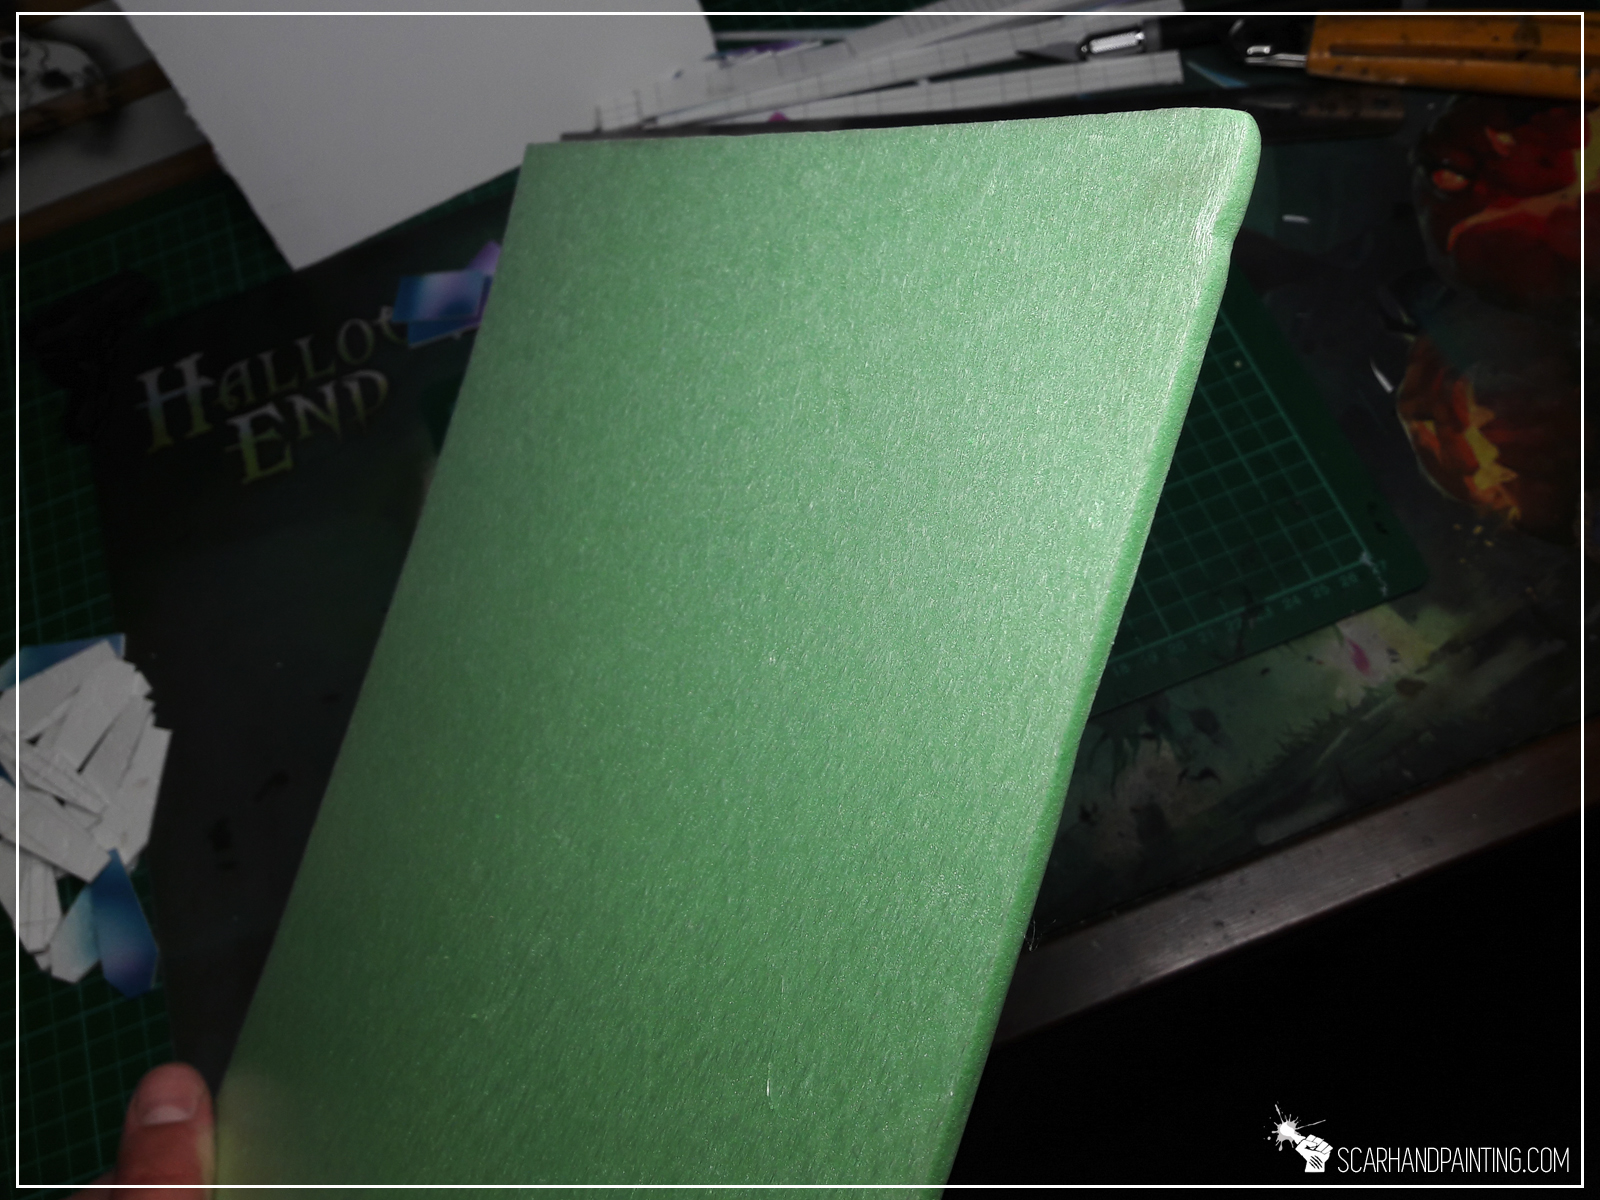
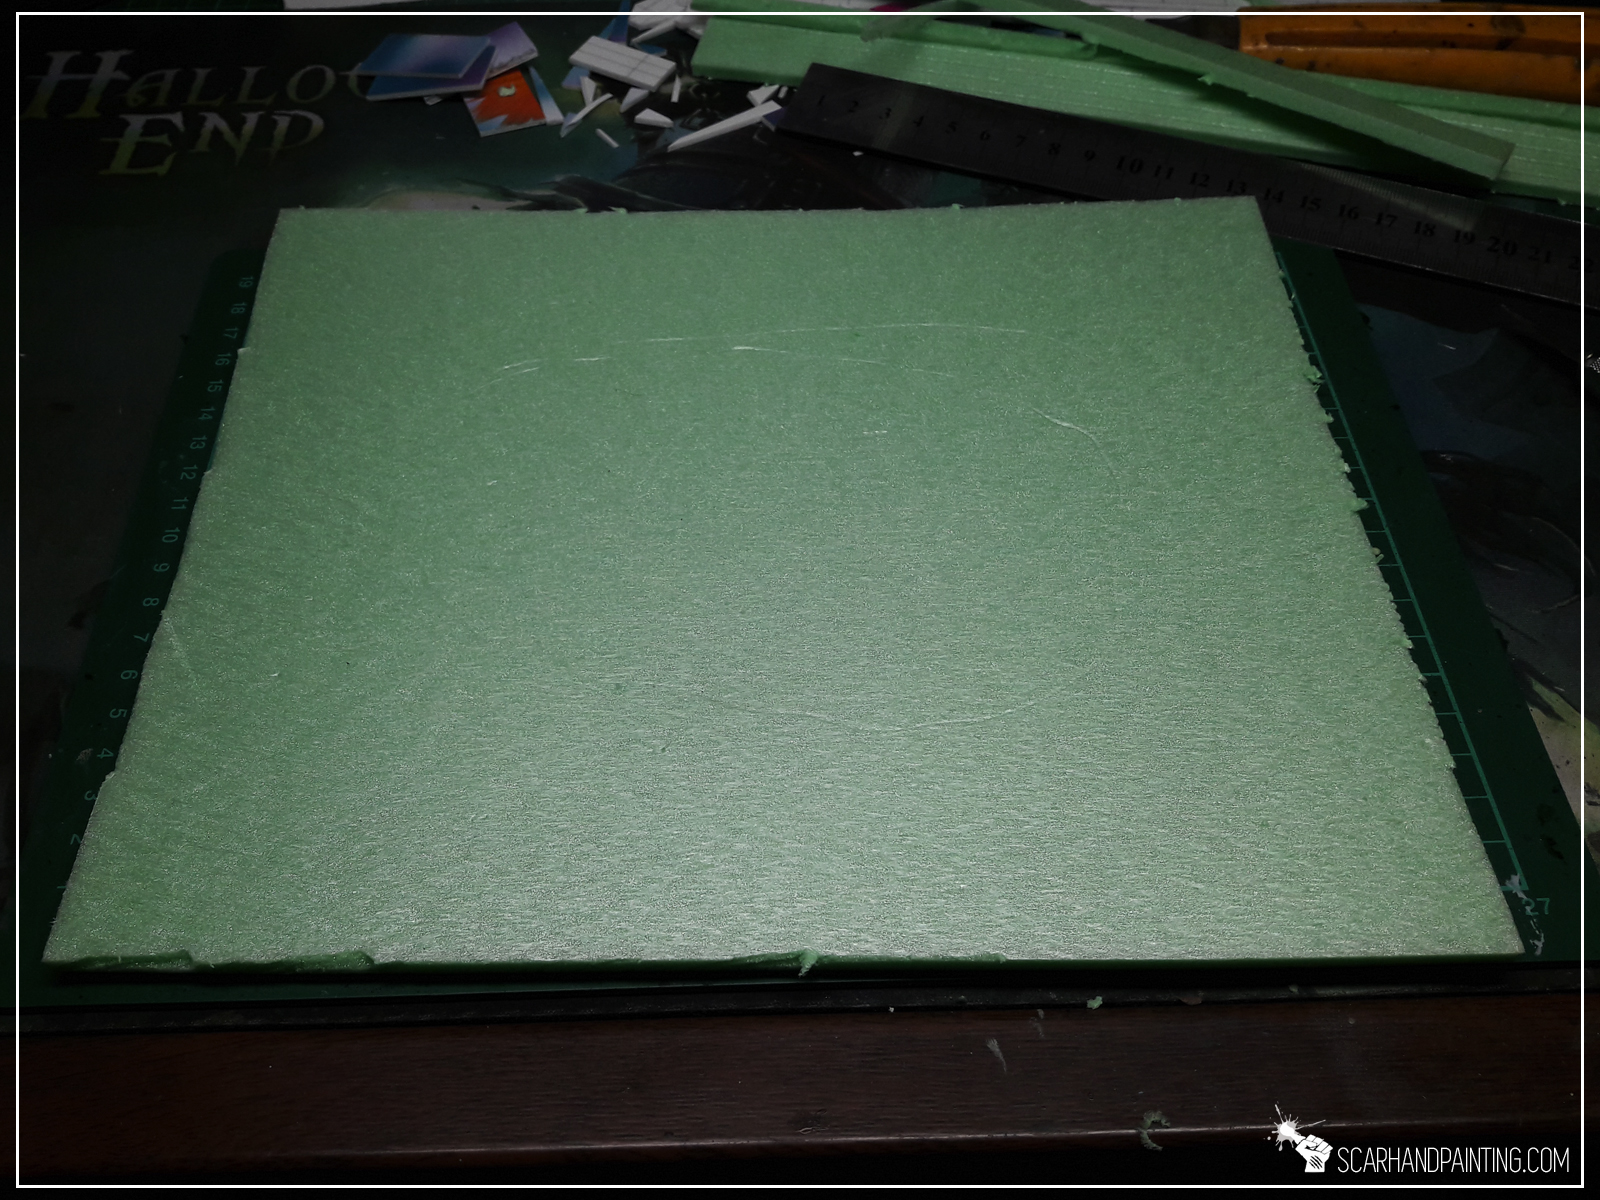
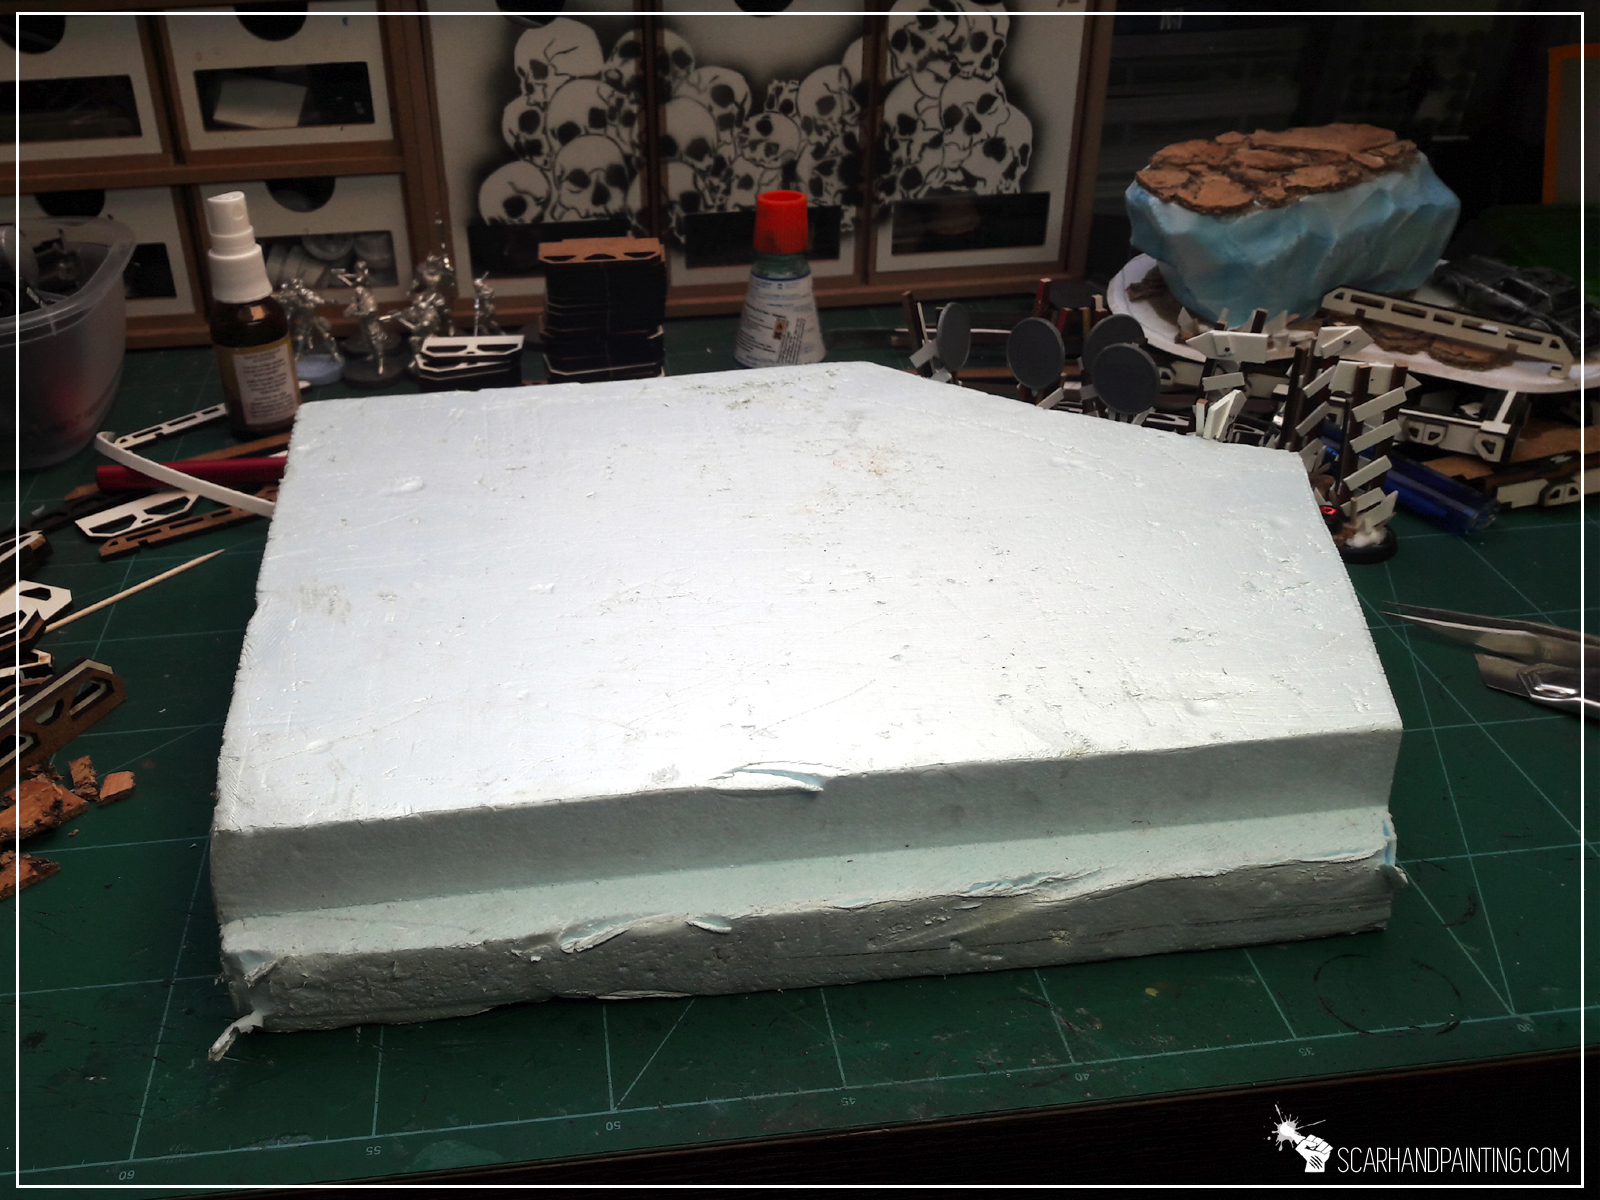
In order to allow me to “work” with the surface and nest any 3d elements I chose to cover the boars with additional layer of 5mm thick styrofoam.

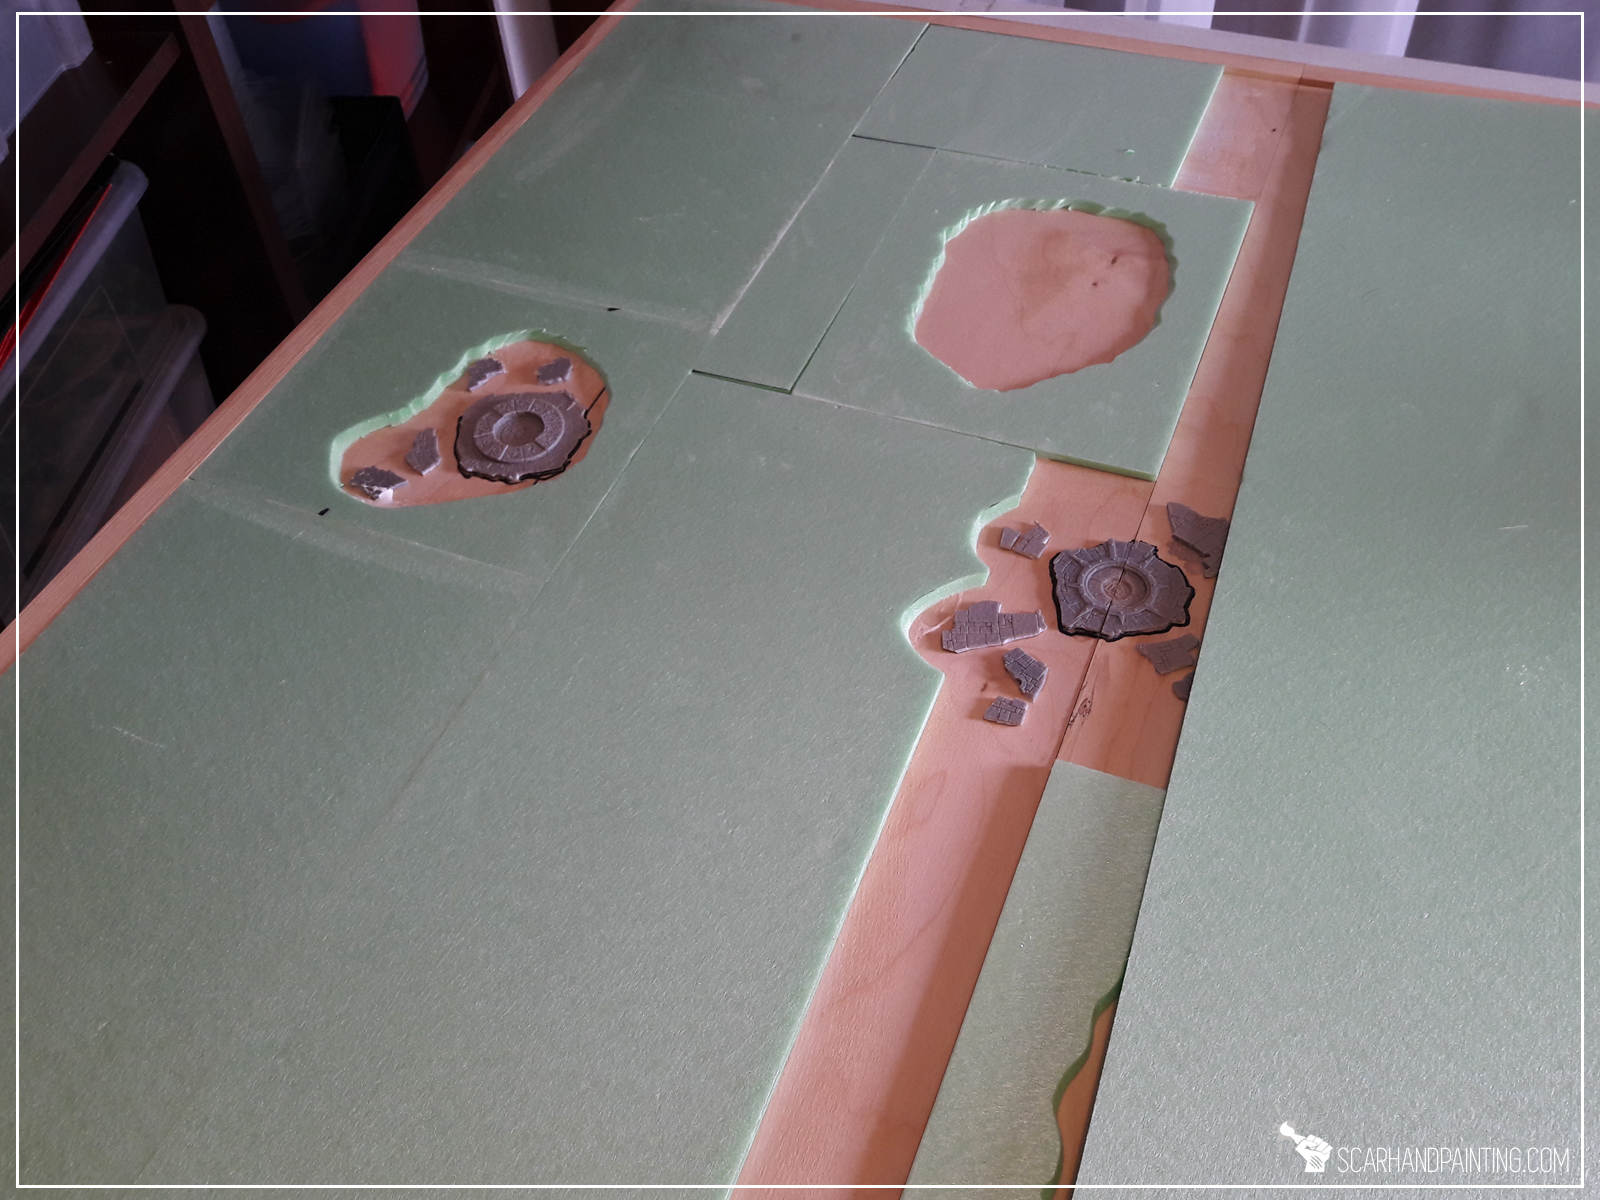
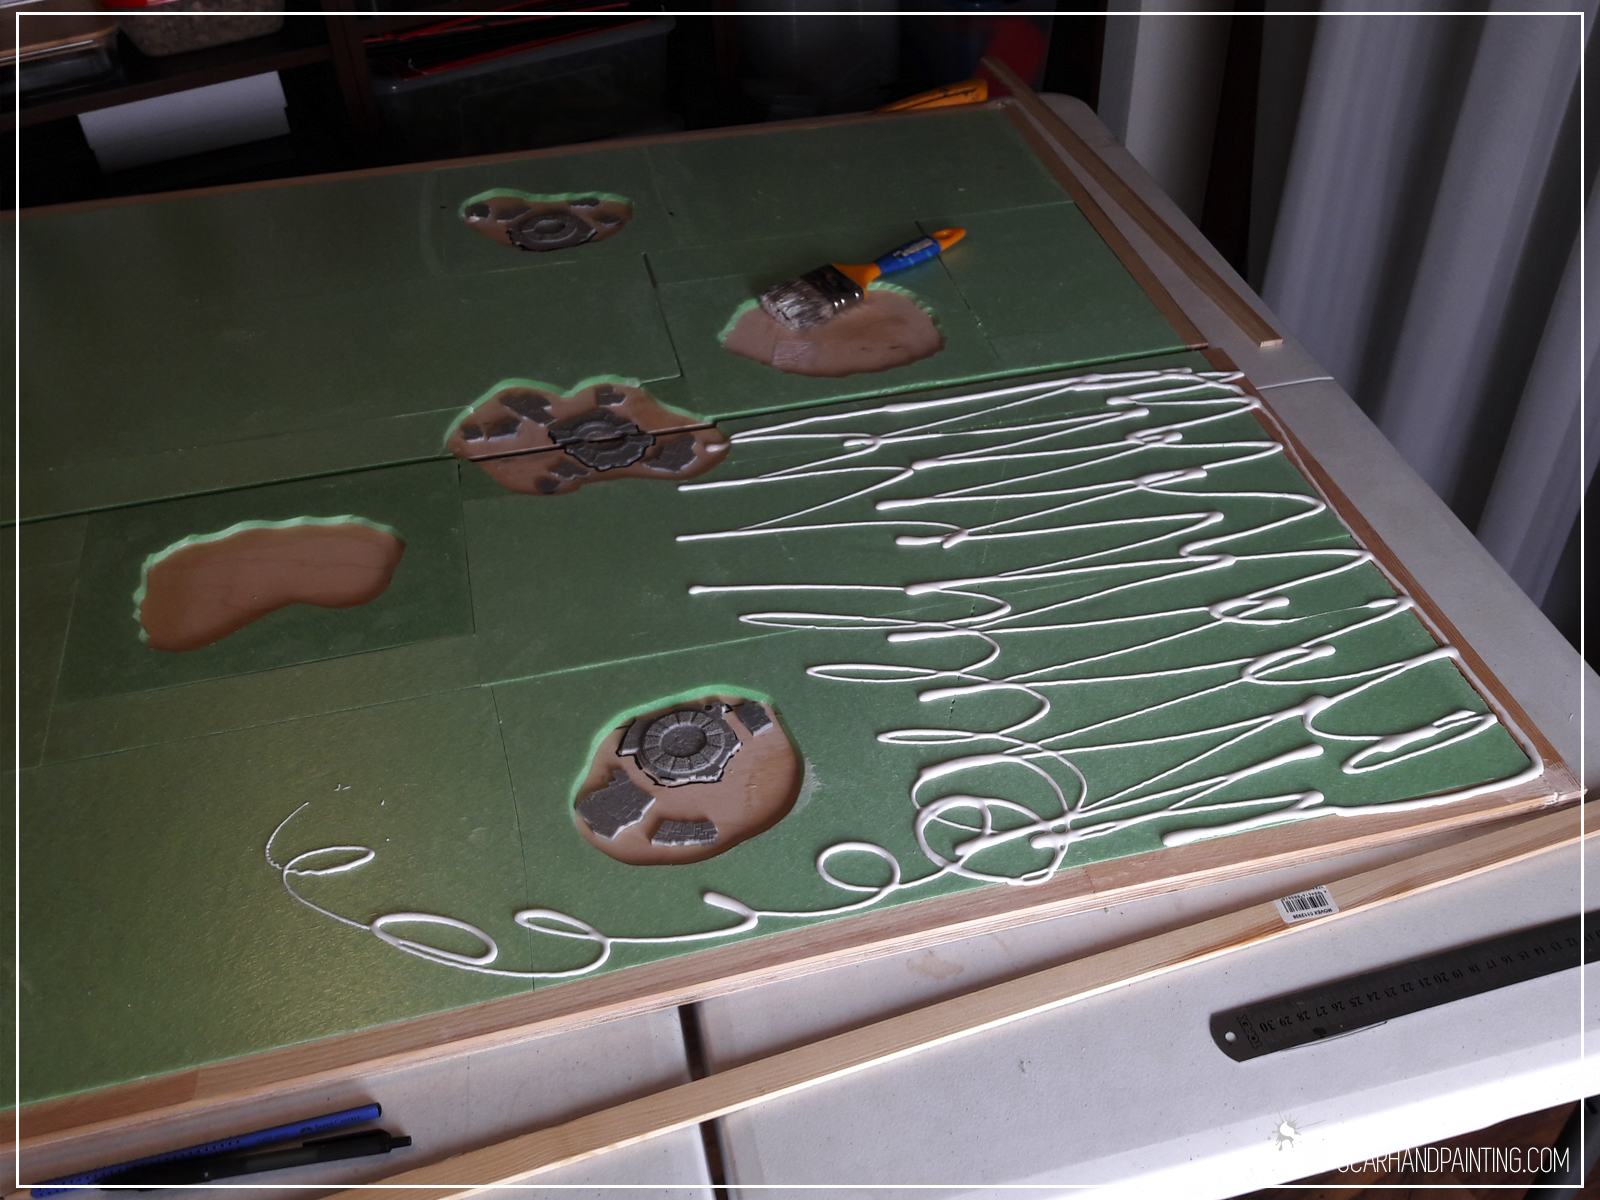
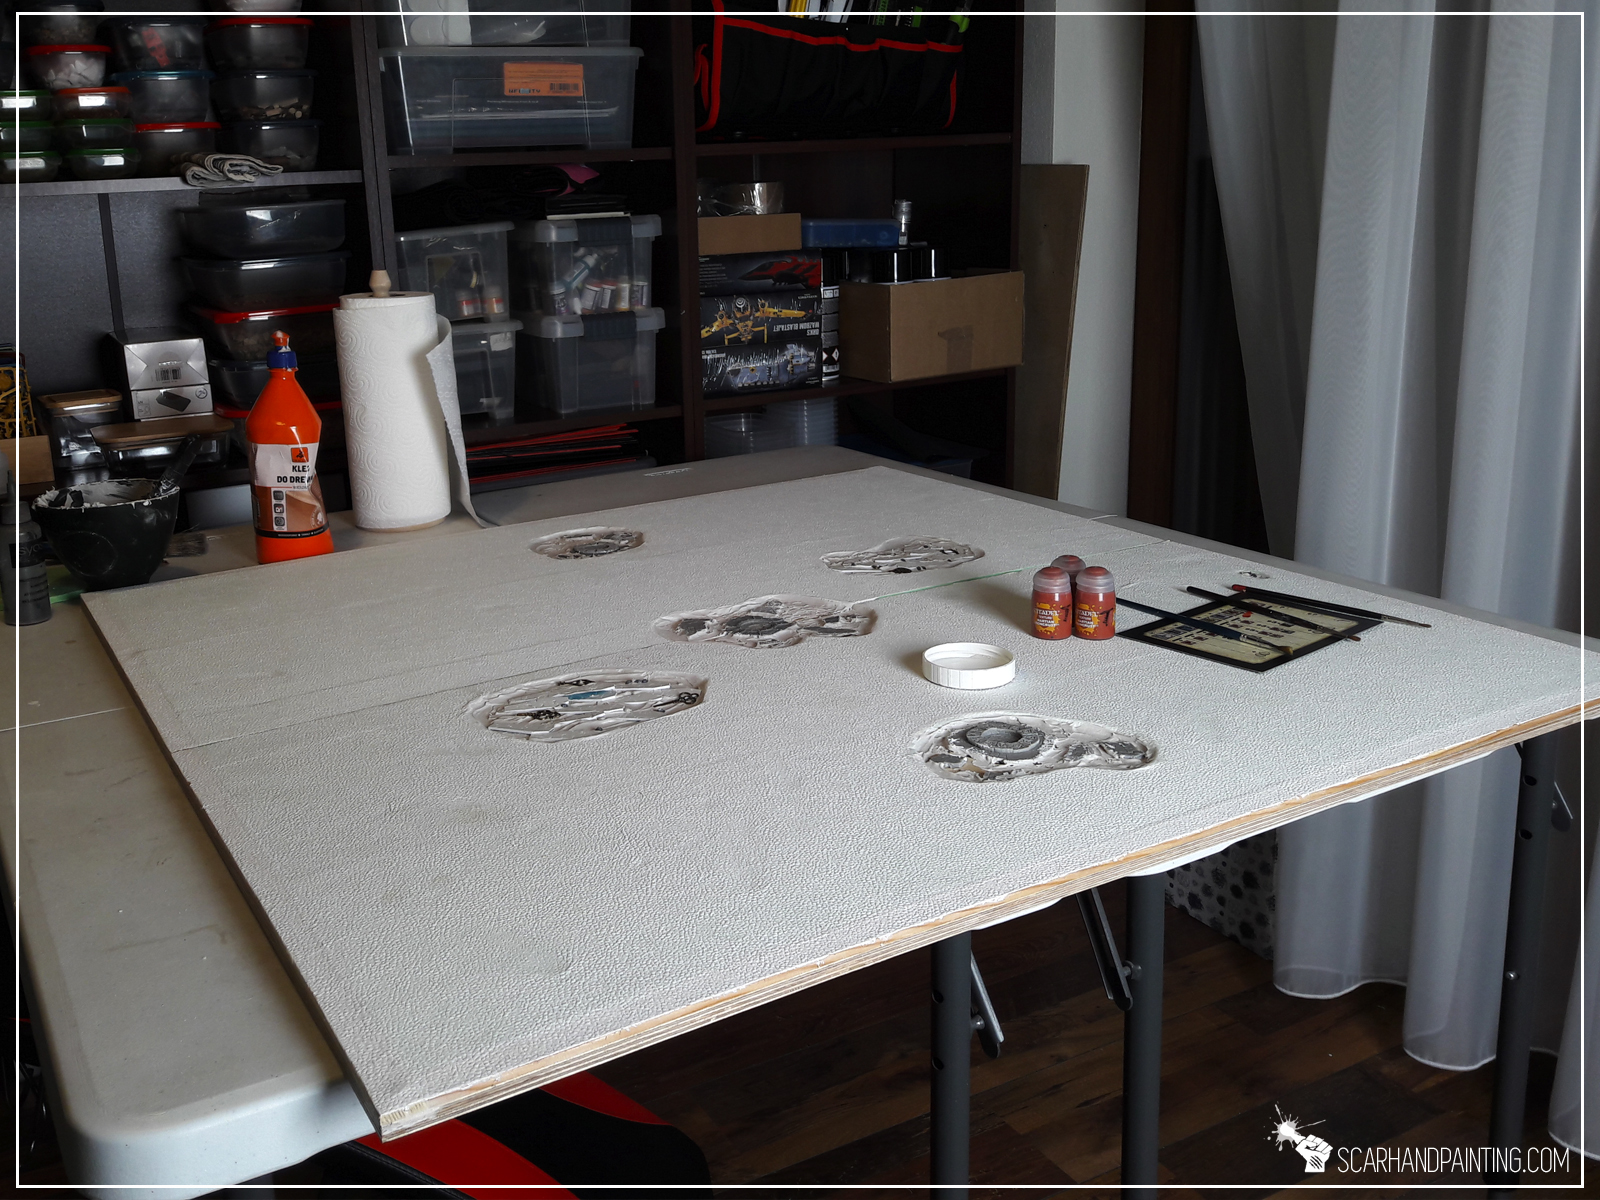
I carefully planned the layout of the board. Figured that it would be cool to have goals and the middle point of the pitch additionally detailed. I have a huge amount of random stuff scattered around my hobby room and as it happened I had a perfect match for these features.
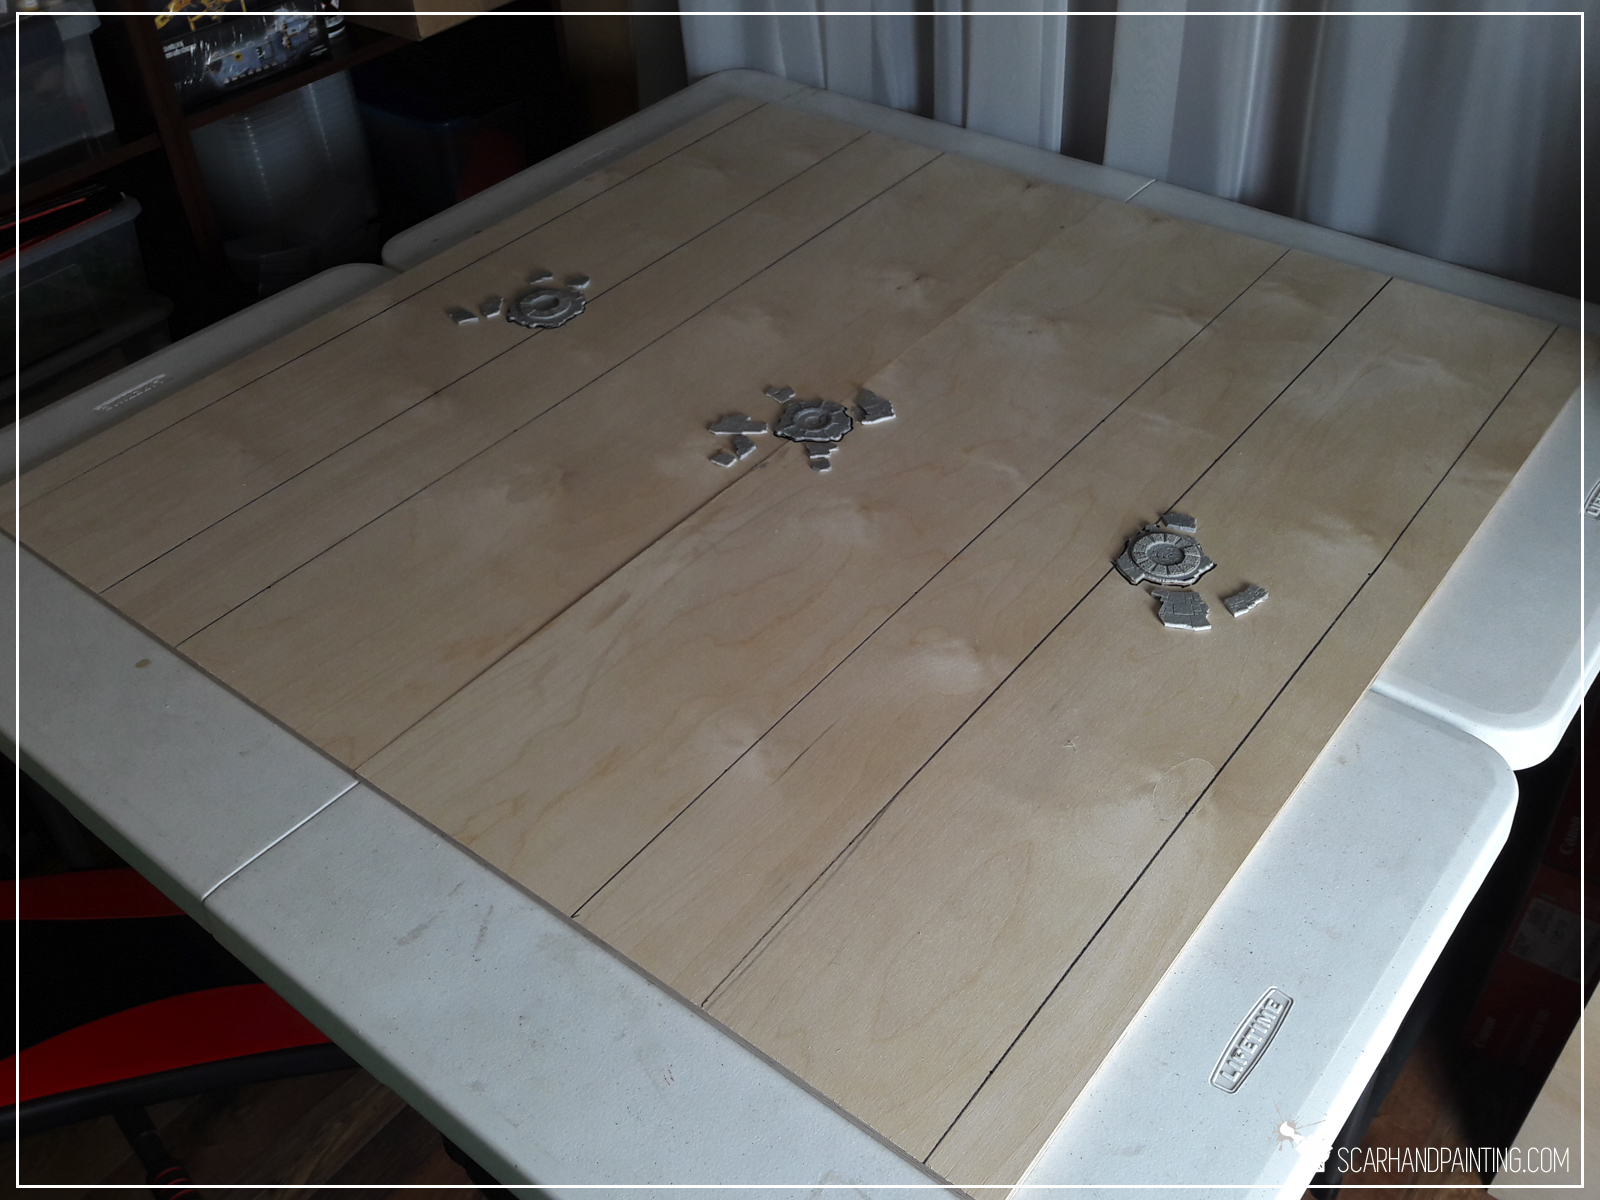
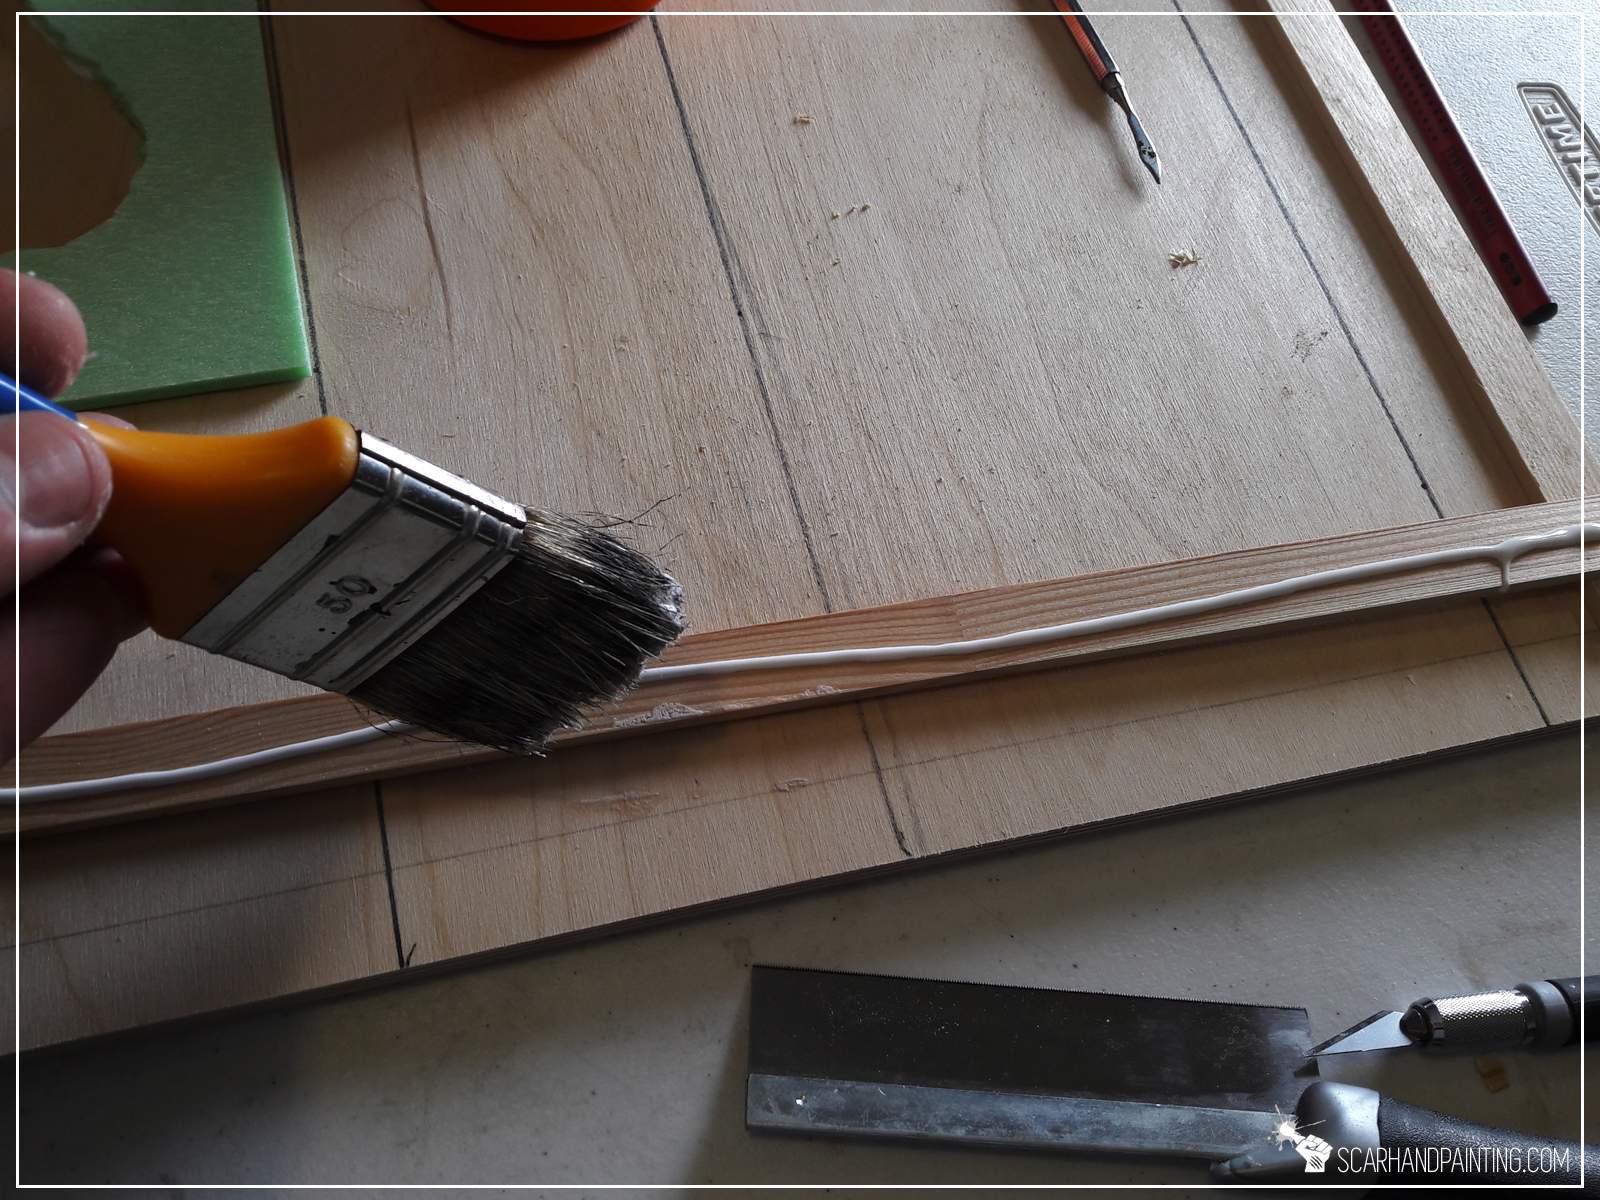
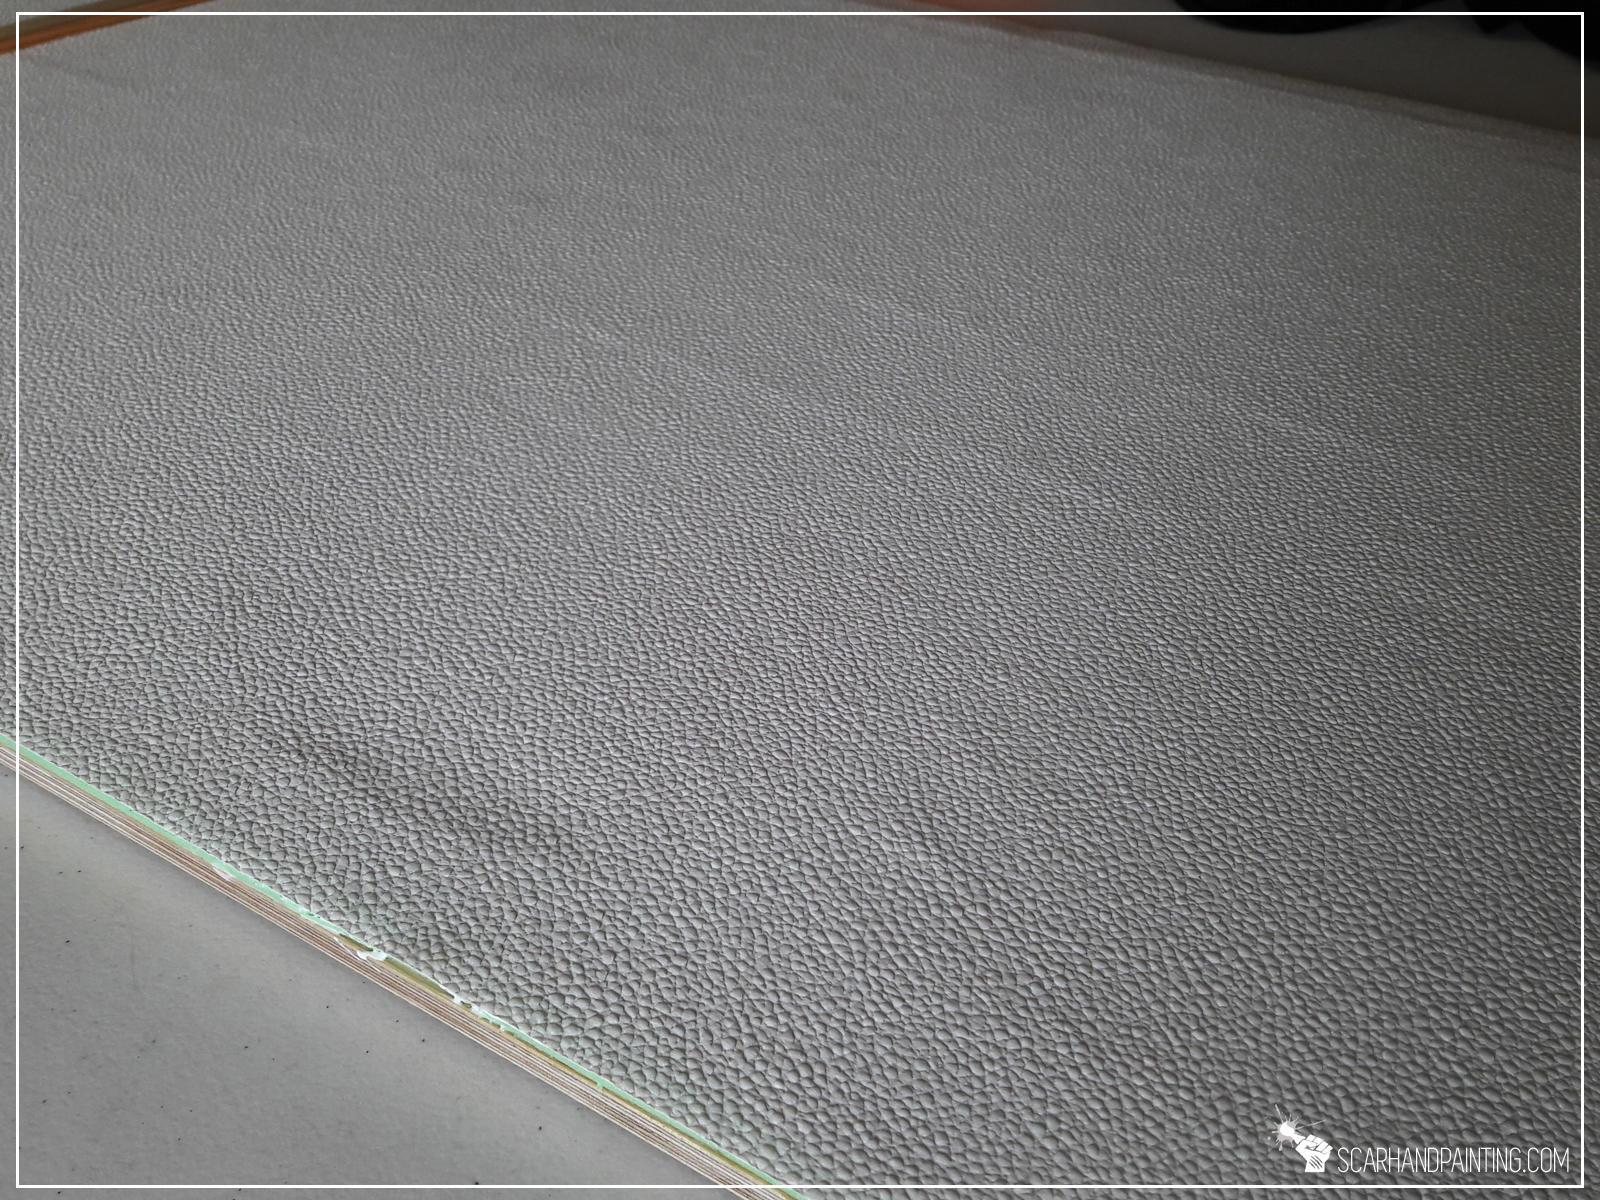
With goals in place I covered entire board with styrofoam, leaving only certain spots to reveal detailed elements from underneath. I also left two holes for the most important feature – coffins. Additionally I reinforced the edges of the board with thin planks of wood – just in case. I just like my scenery durable and sturdy.


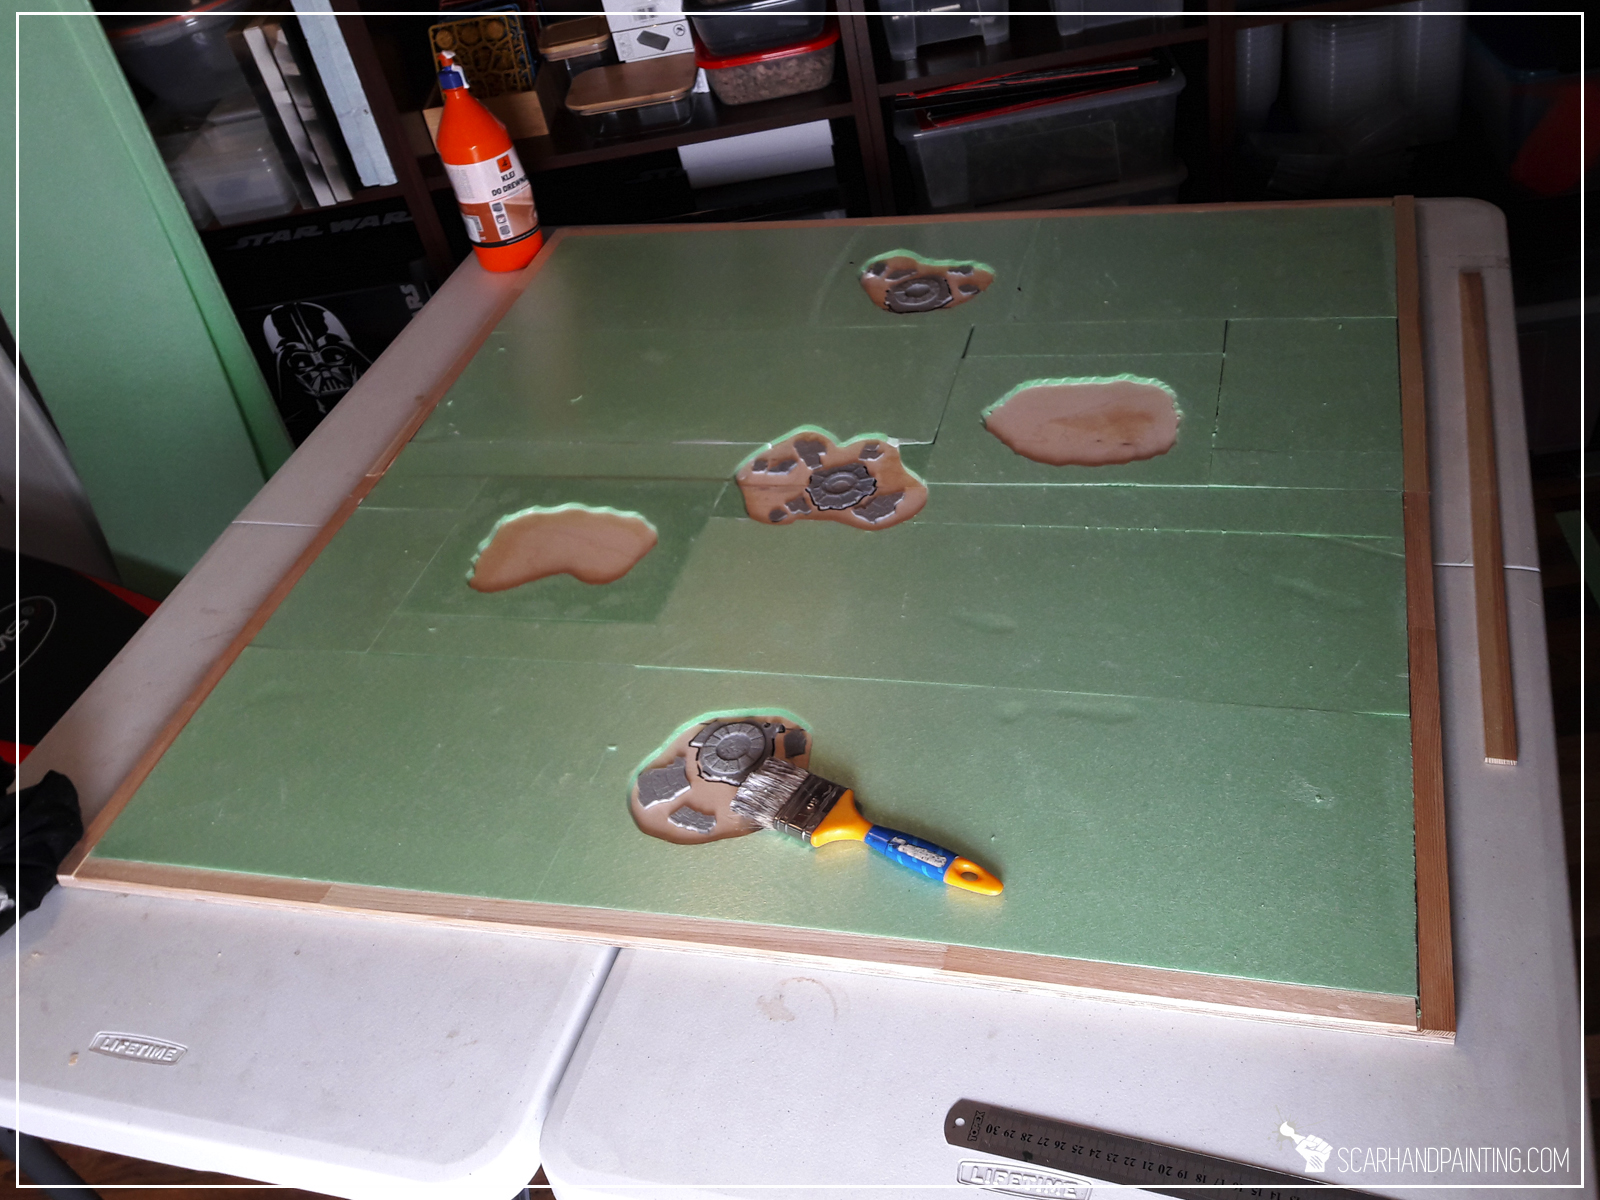

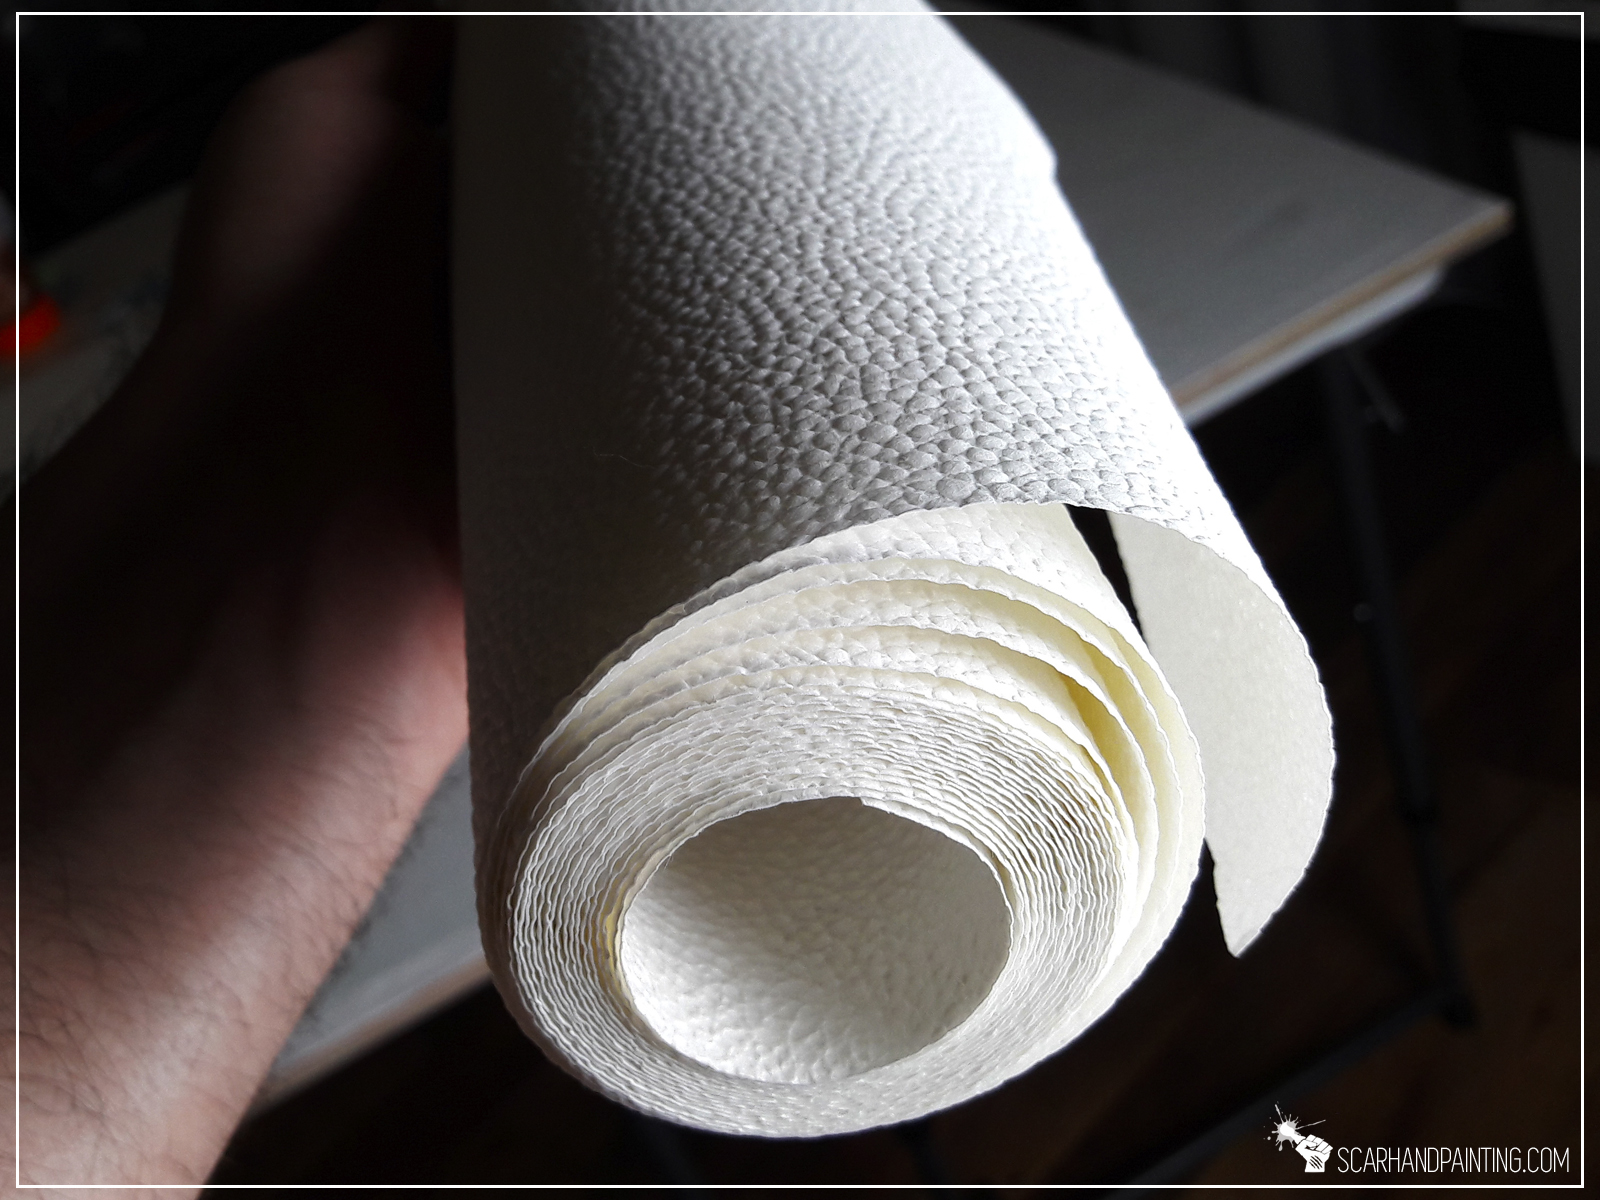
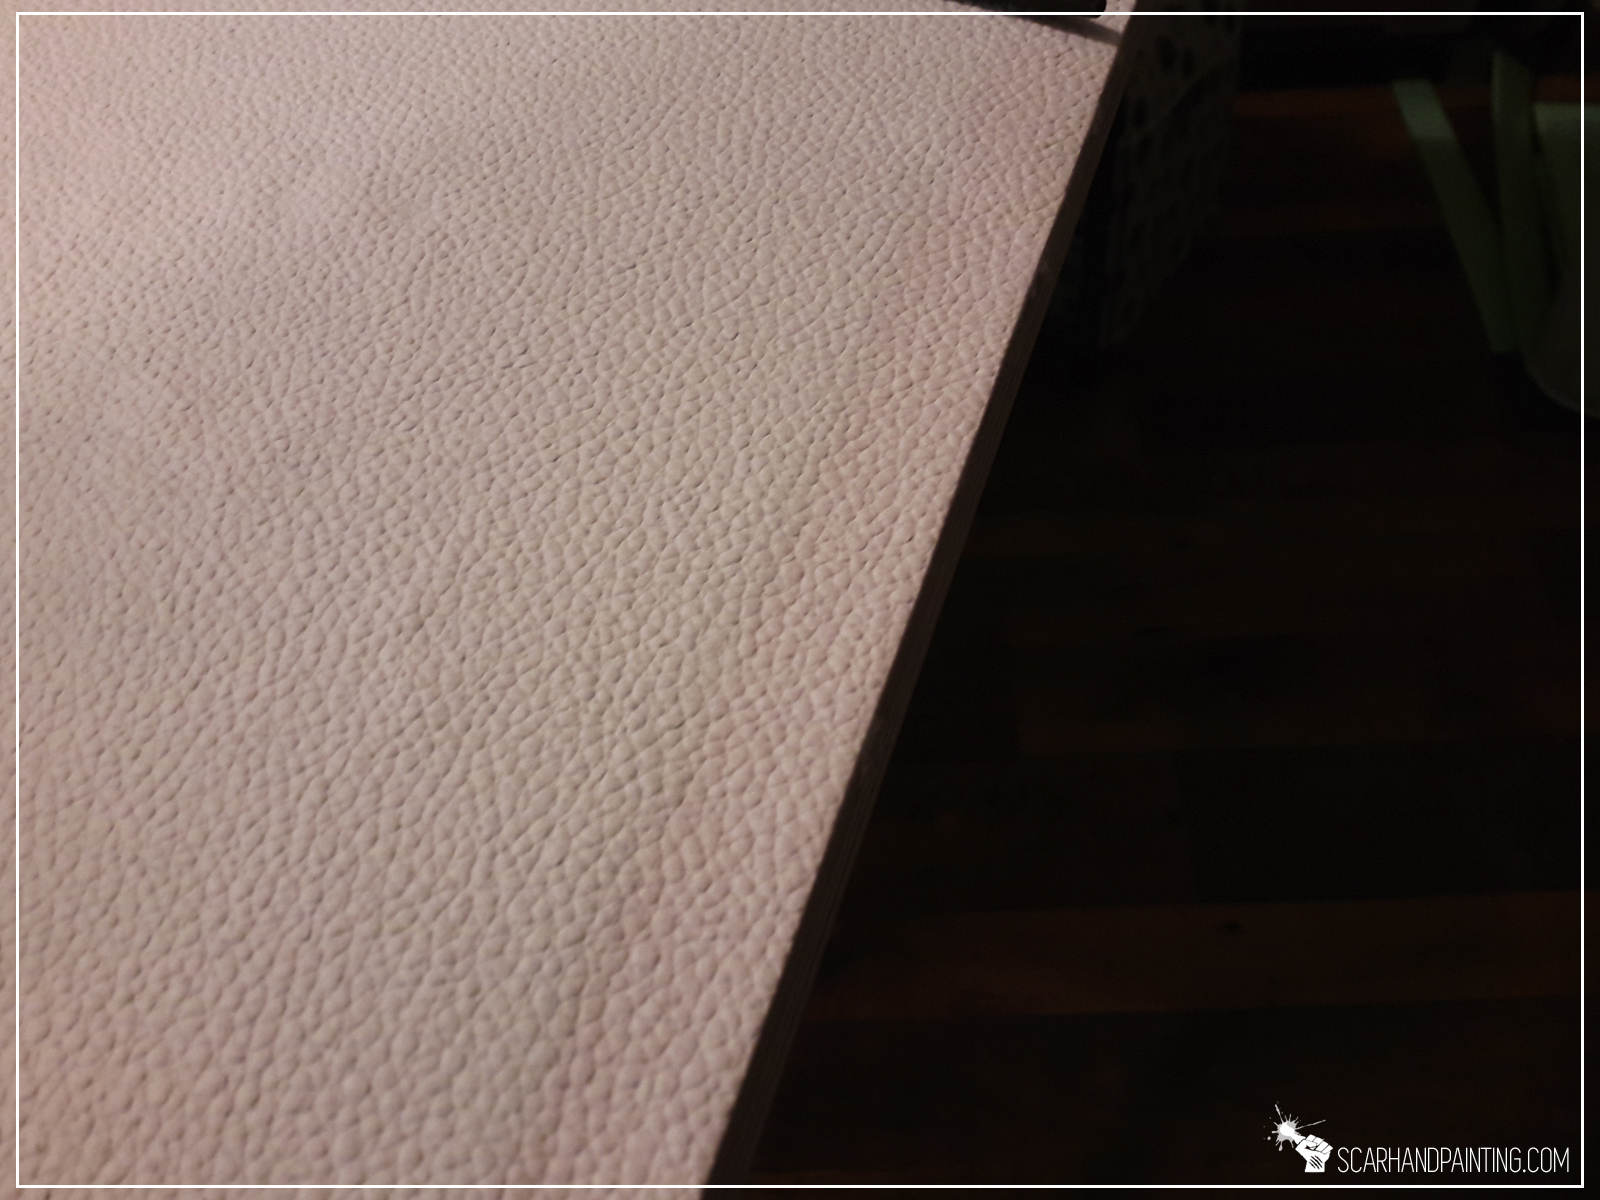
For base texture I picked a trusted wallpaper that helped me with other fantasy projects in the past. Being easy to work with a wallpaper is a great way to texturize large areas, plus it helps keep wobbling models safe in case of a fall.

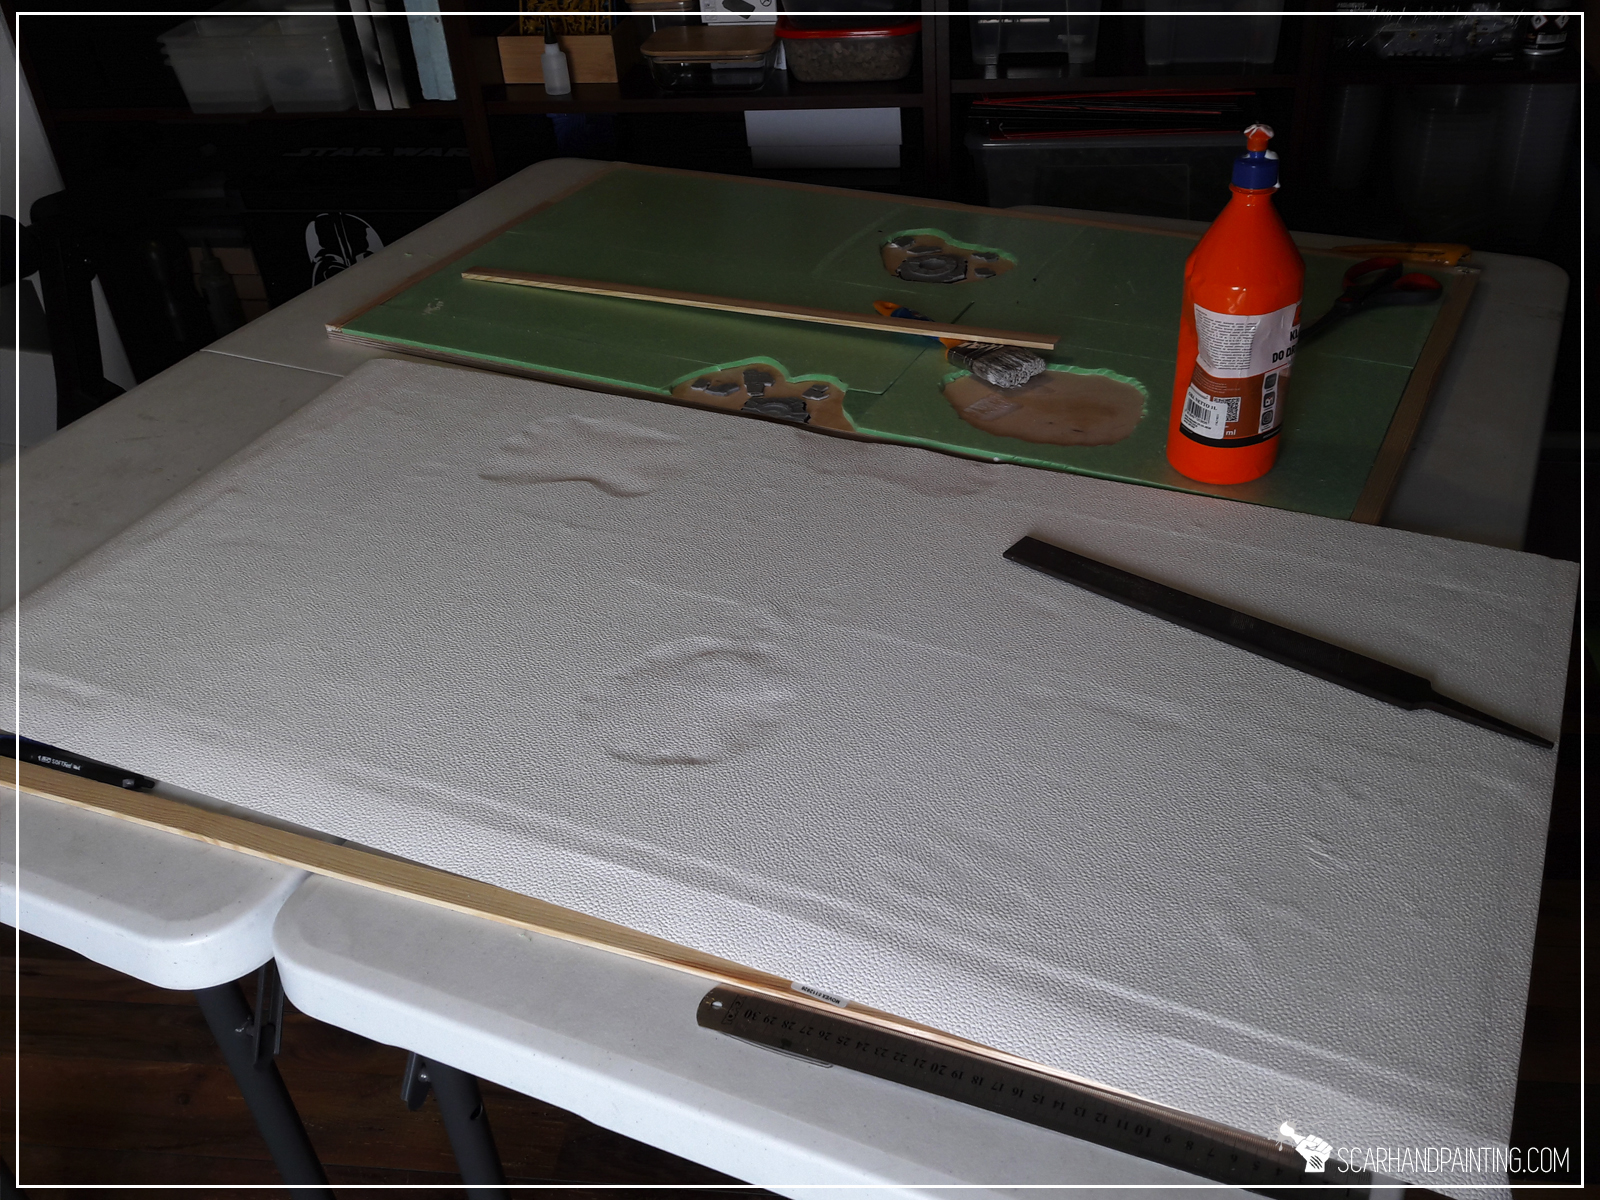
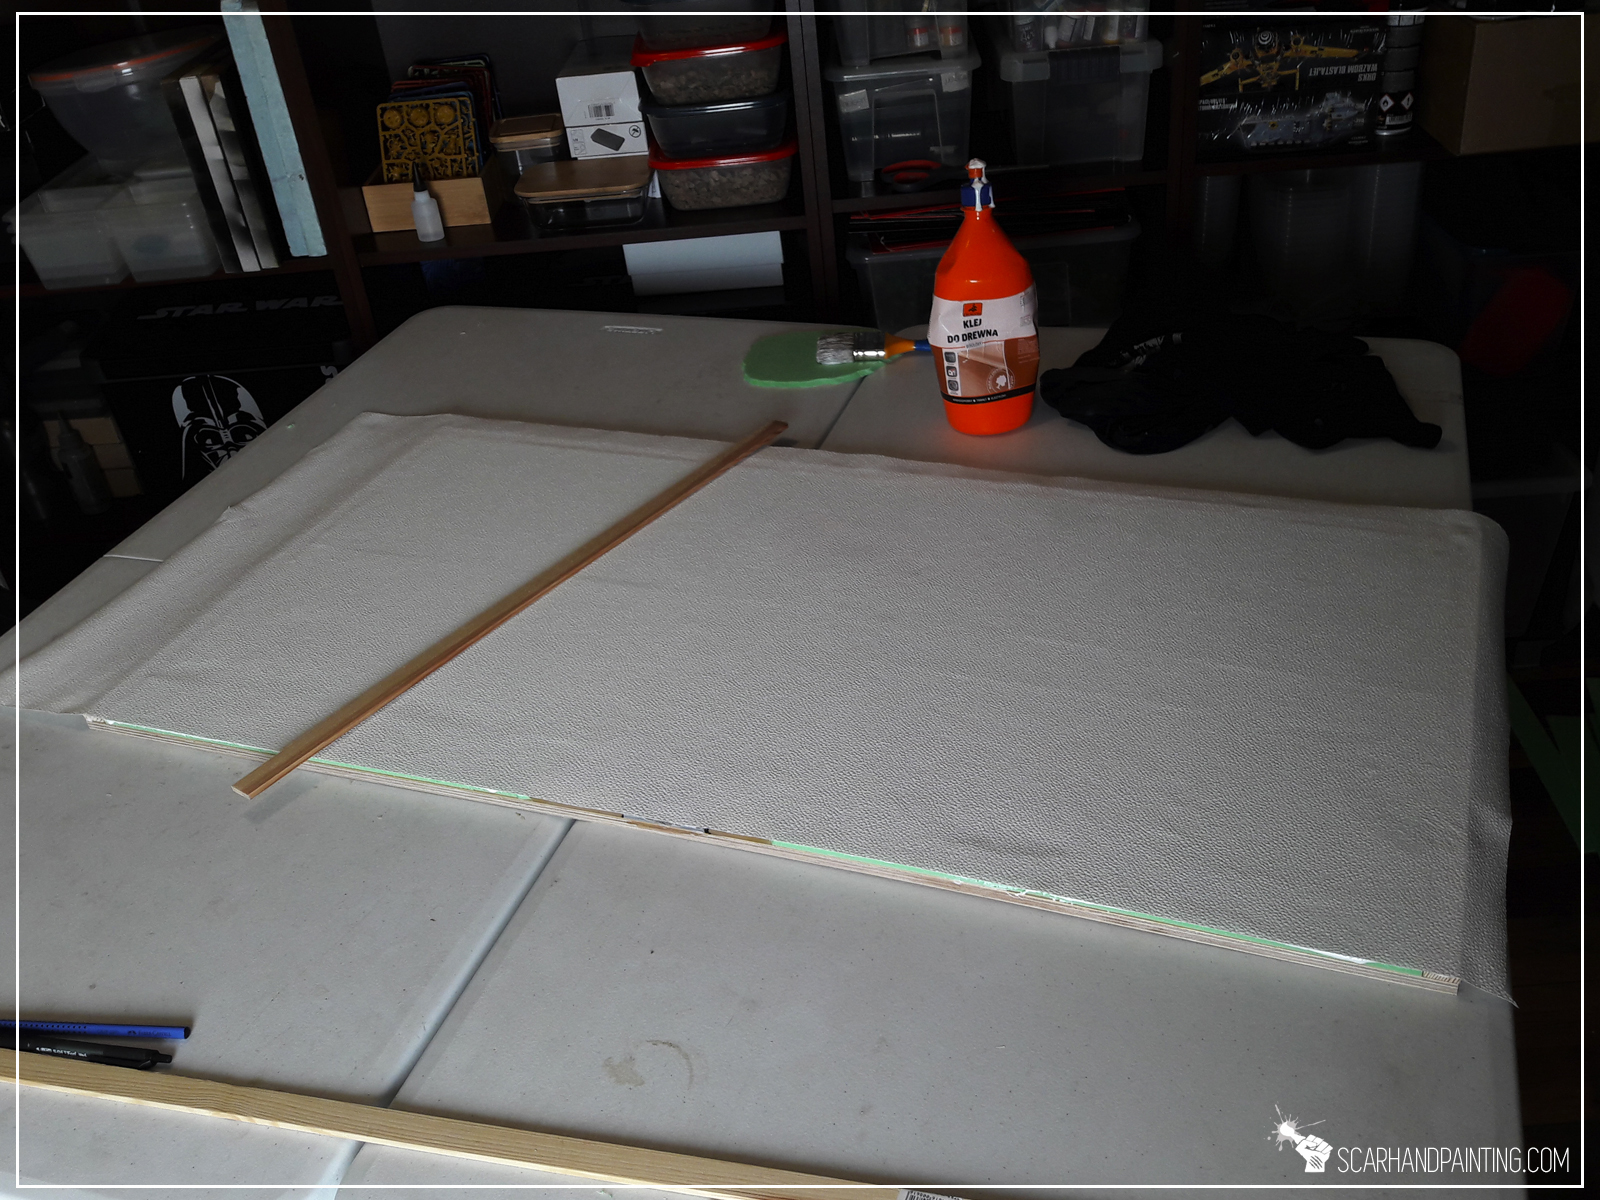
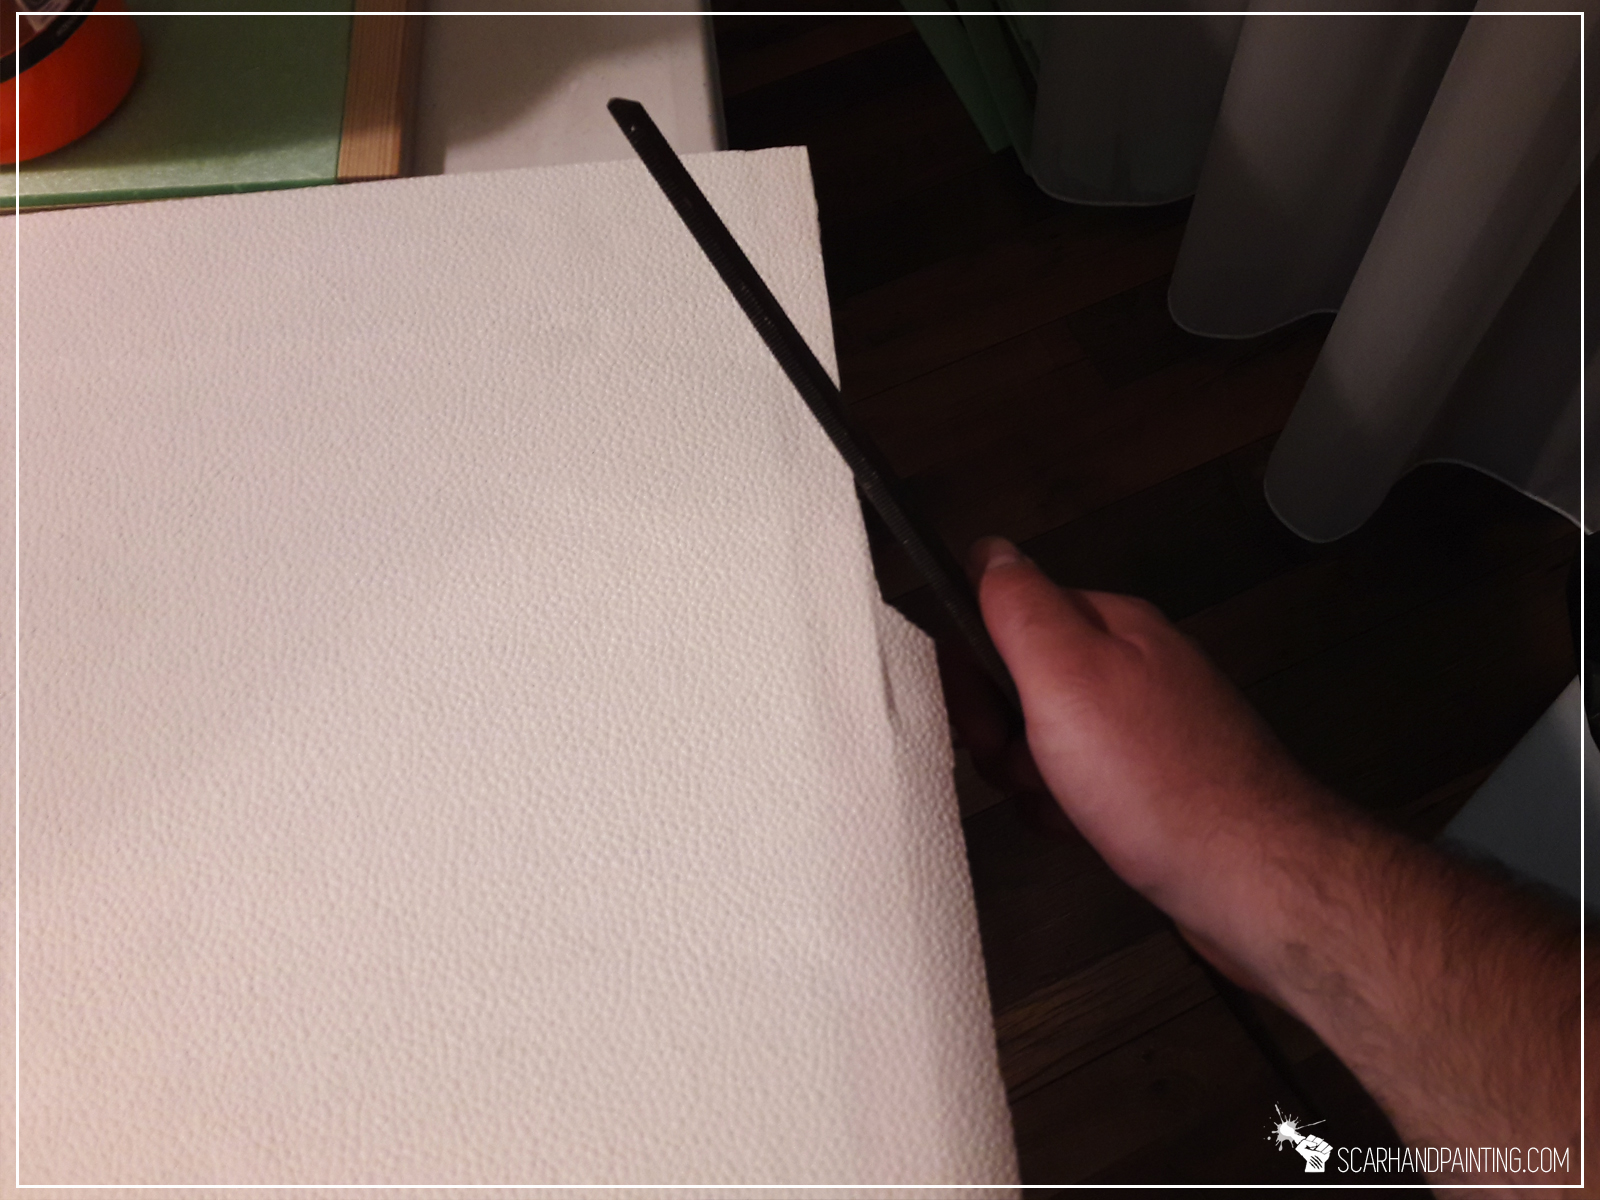
I glued the wallpaper on top of entire board. No measuring required – I removed excess wallpaper with a giant file. Fast & simple.
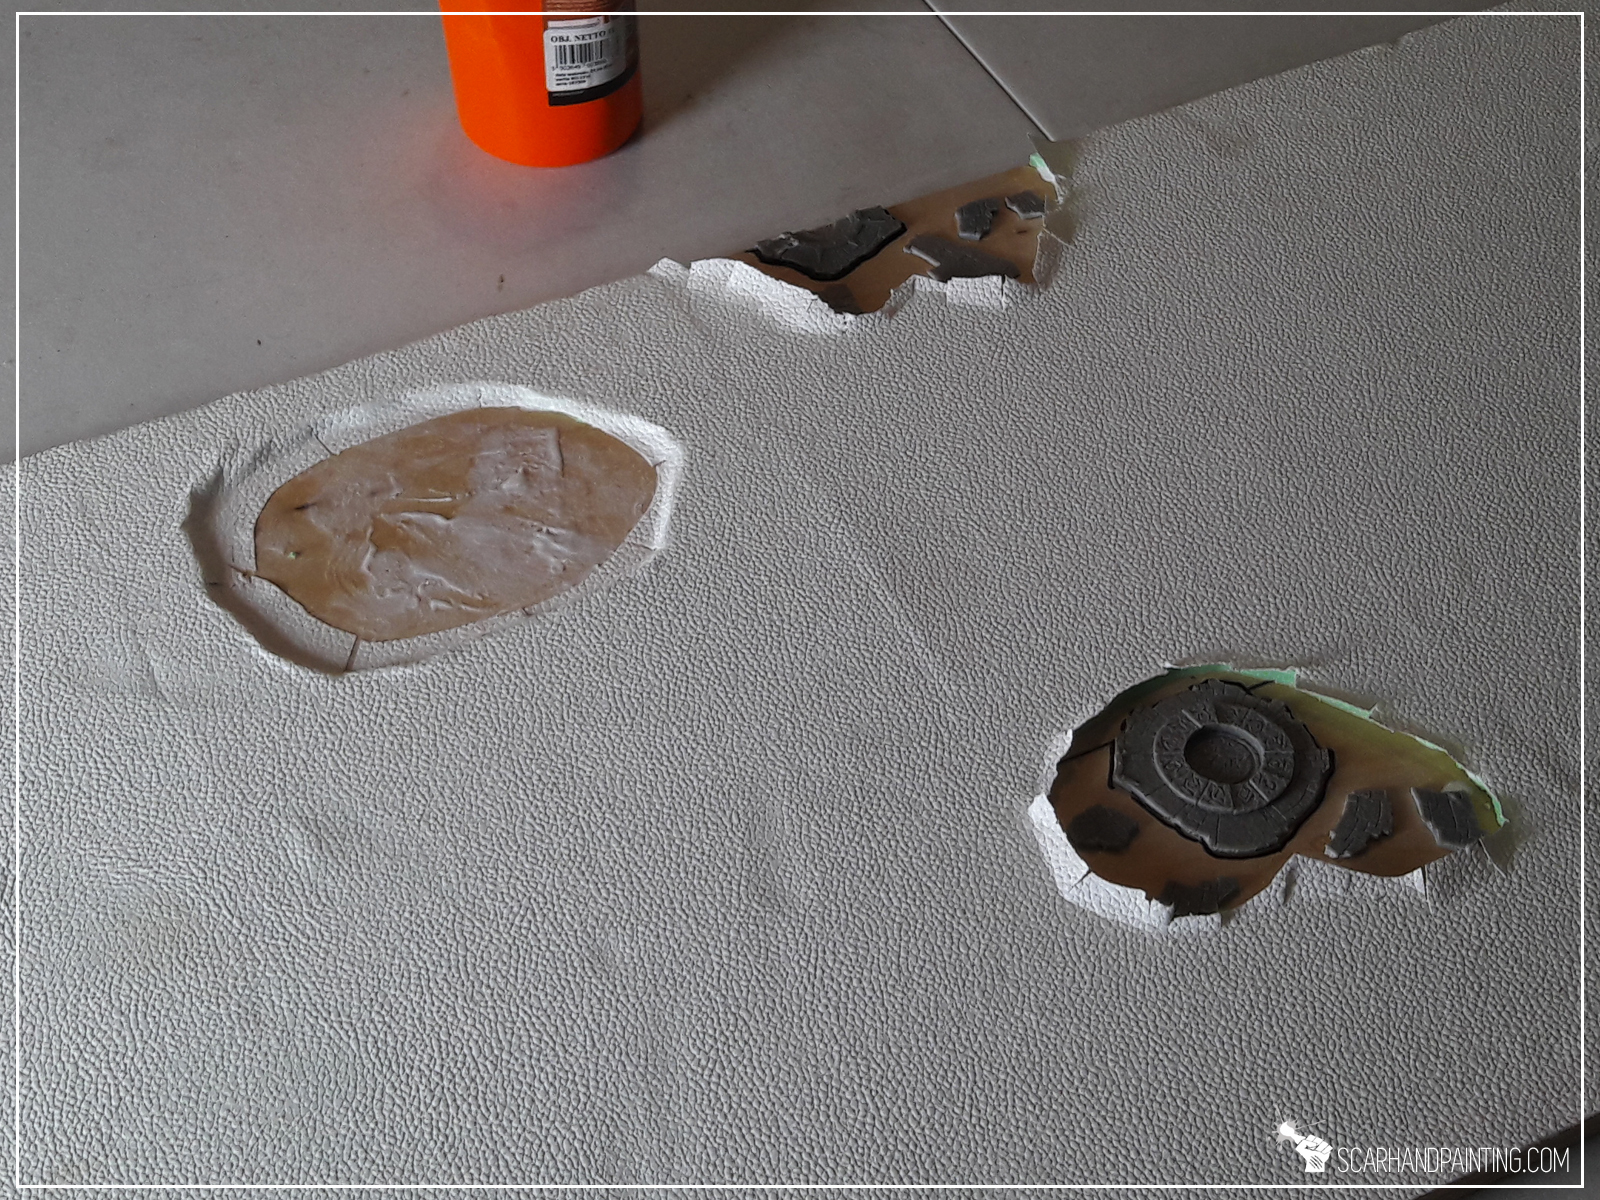
I uncovered all the detailed features by cutting the wallpaper around them, leaving approximately 1-2cm surplus, to then cut it into smaller strips to be glued inside the holes.


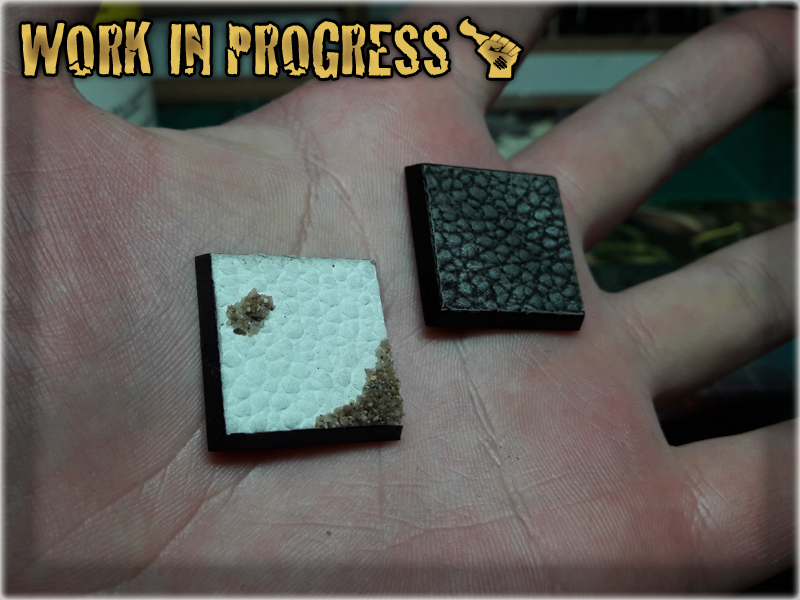
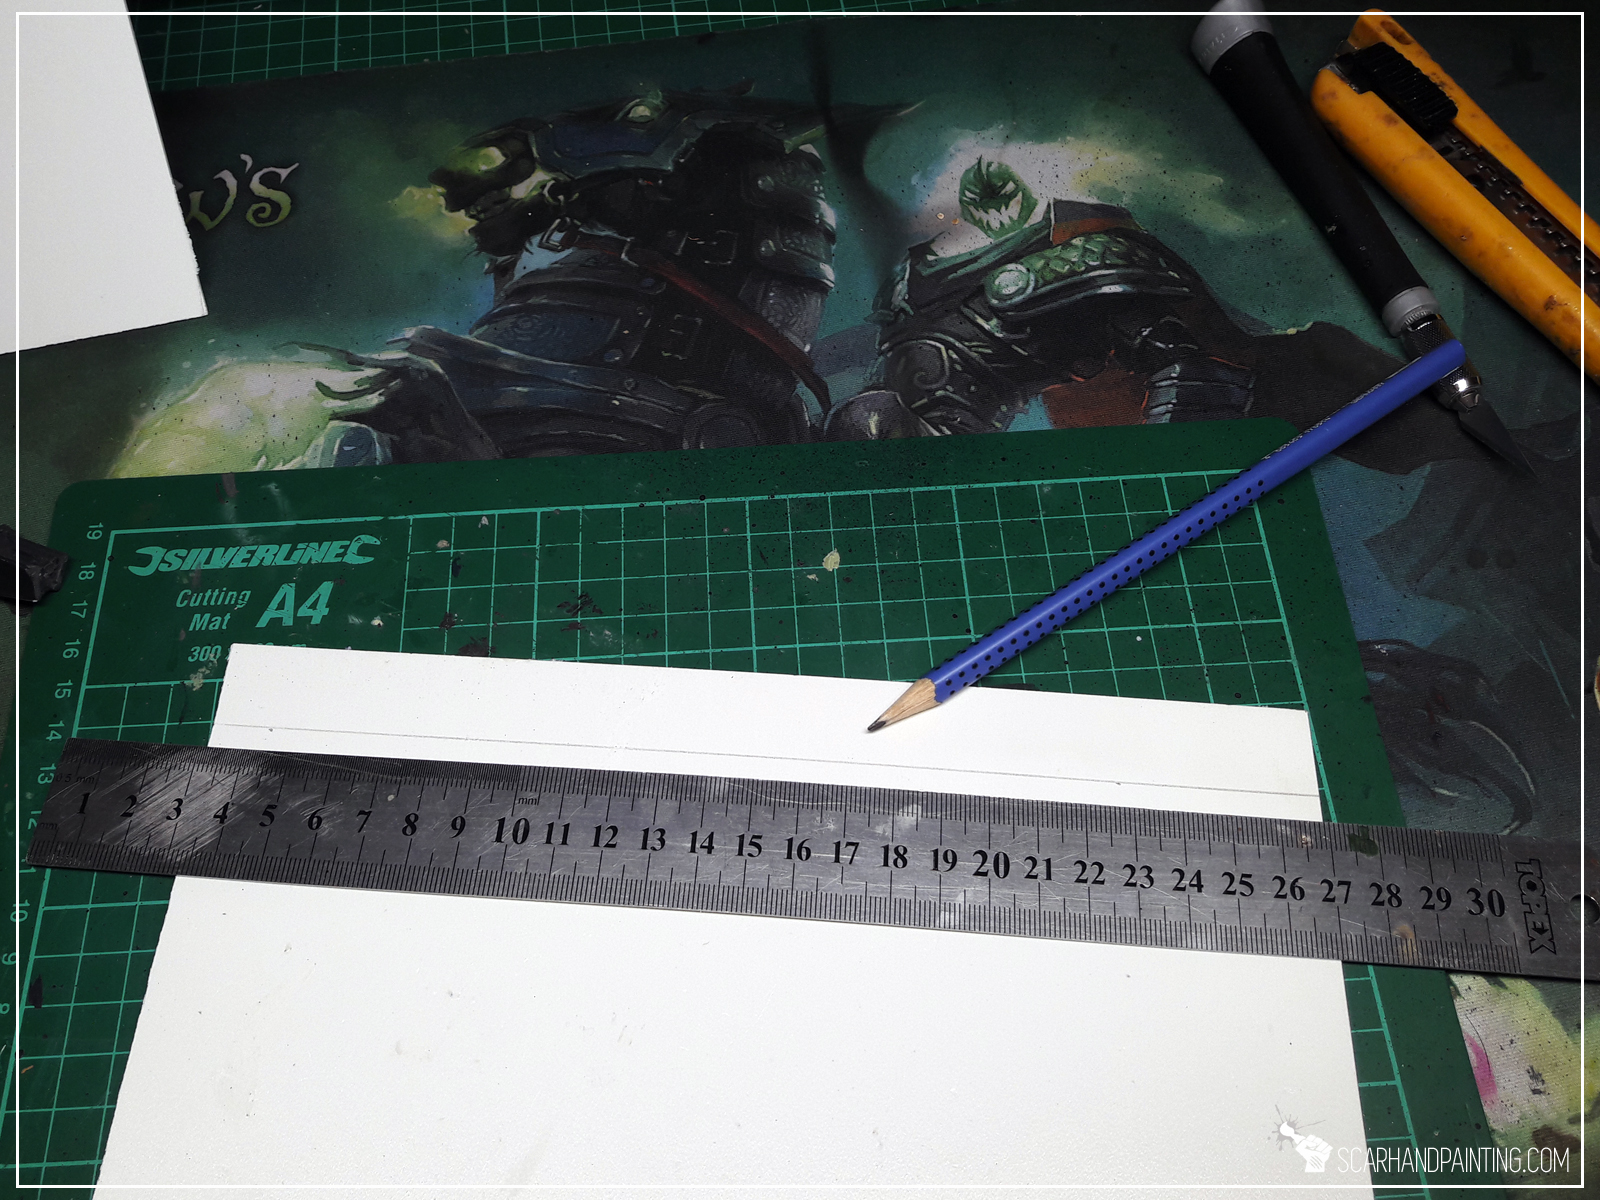
Now was the time to bring in all the coffins. These were made using 3mm thick plasticard. In projects like this I tend to save time and leave perfect measurements out. Once I measured and cut out a single coffin, I then used it as a template to cut all the rest. Fast & simple yet again.
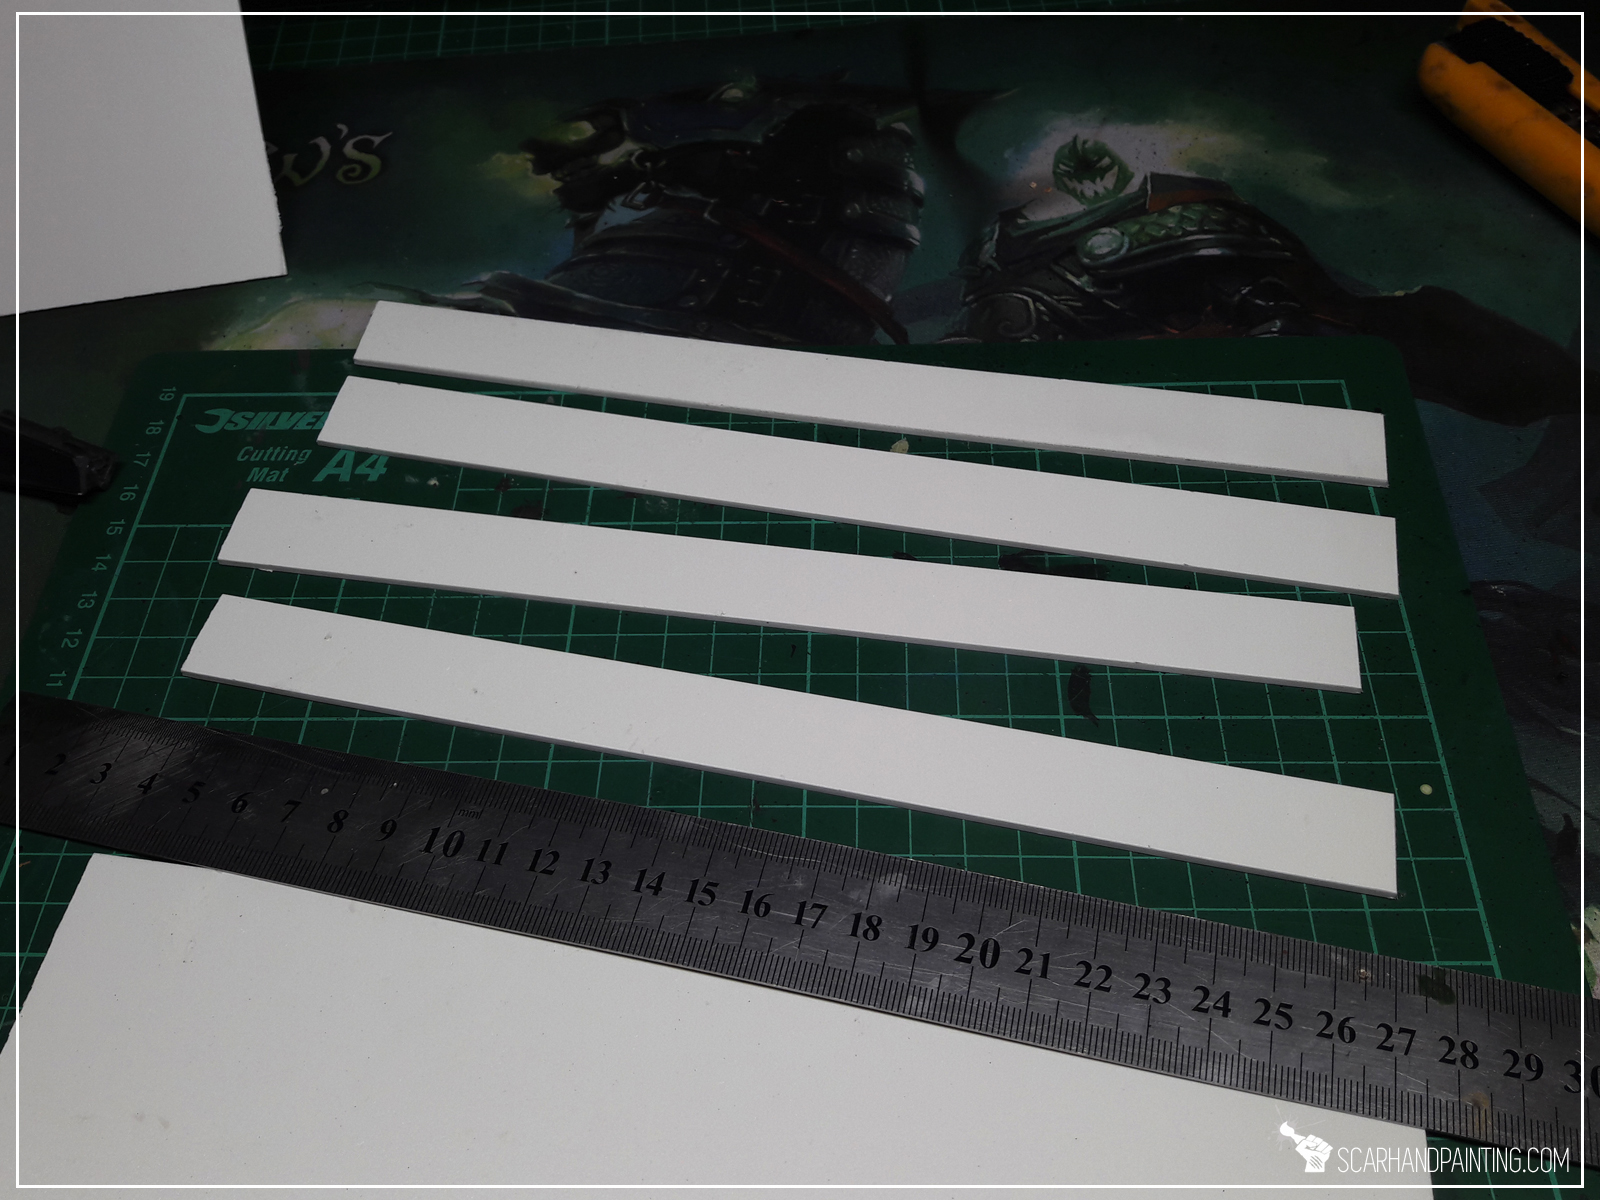


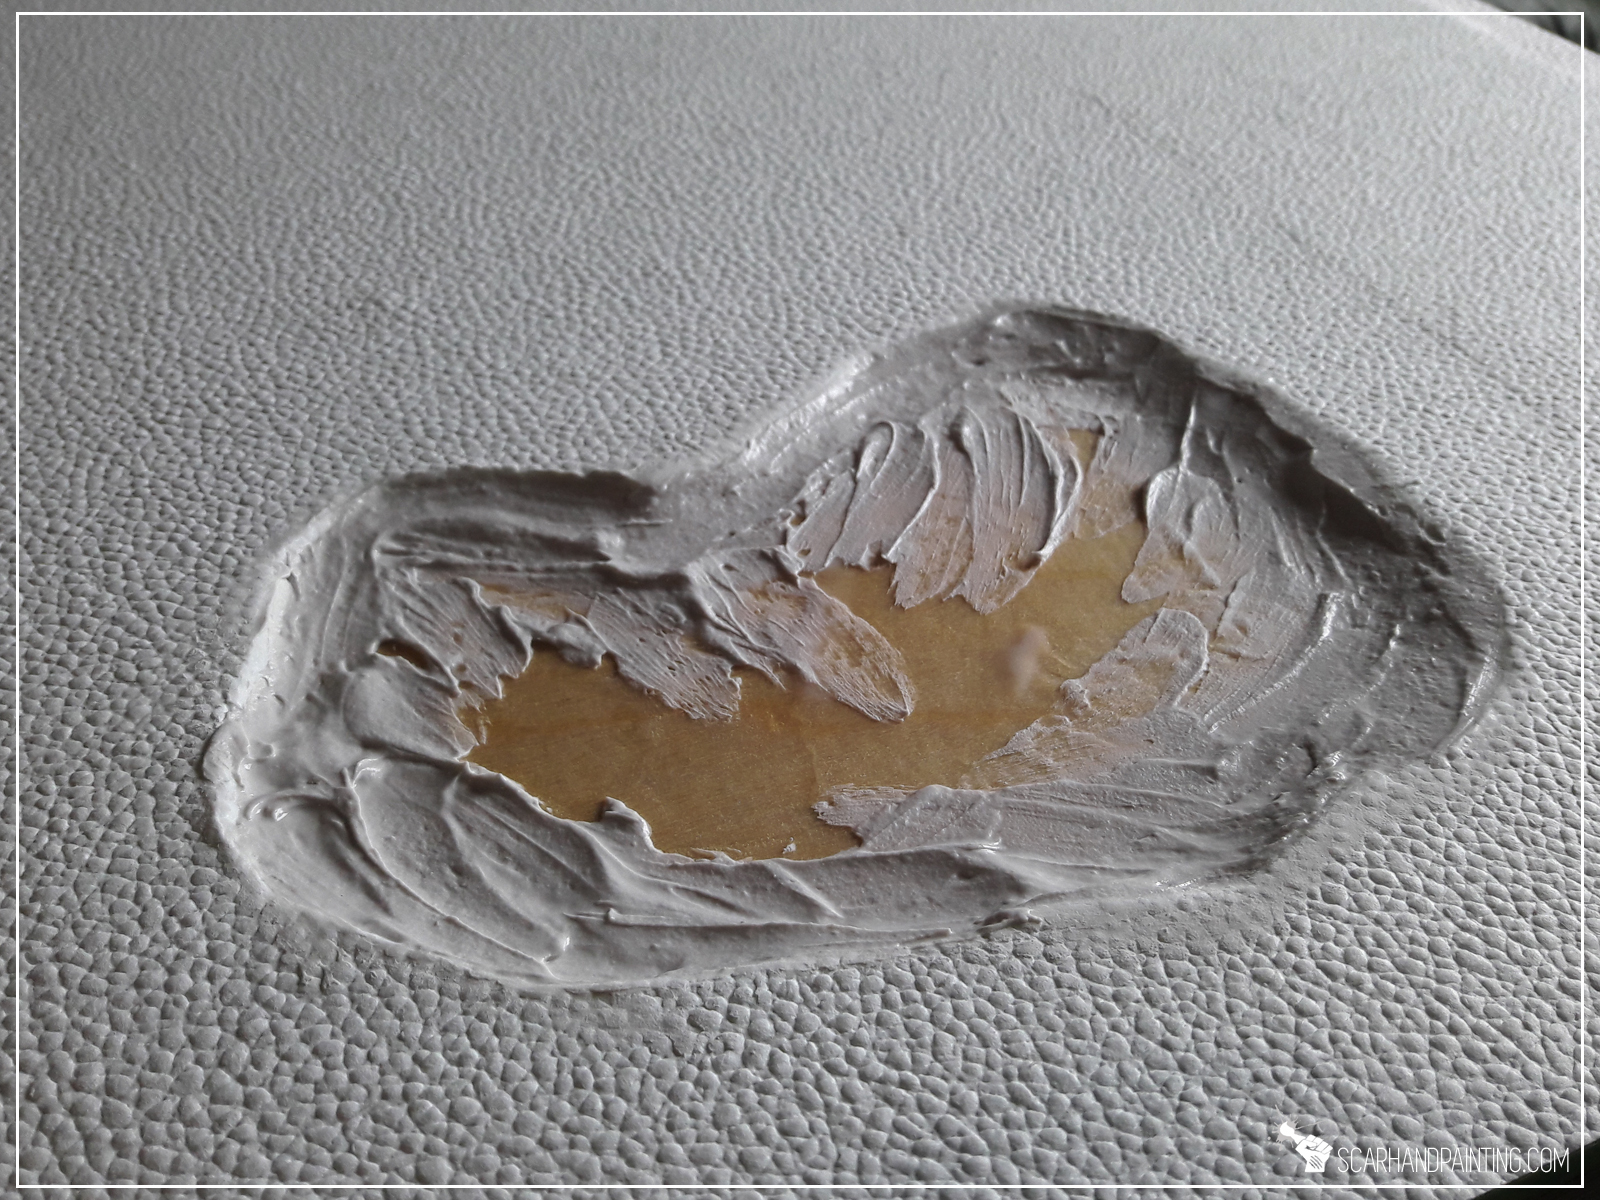
These then got texturized using a medium sized stone. Plasticard is a durable material, but with enough force it gives in and stones are great to provide an uneven texture.


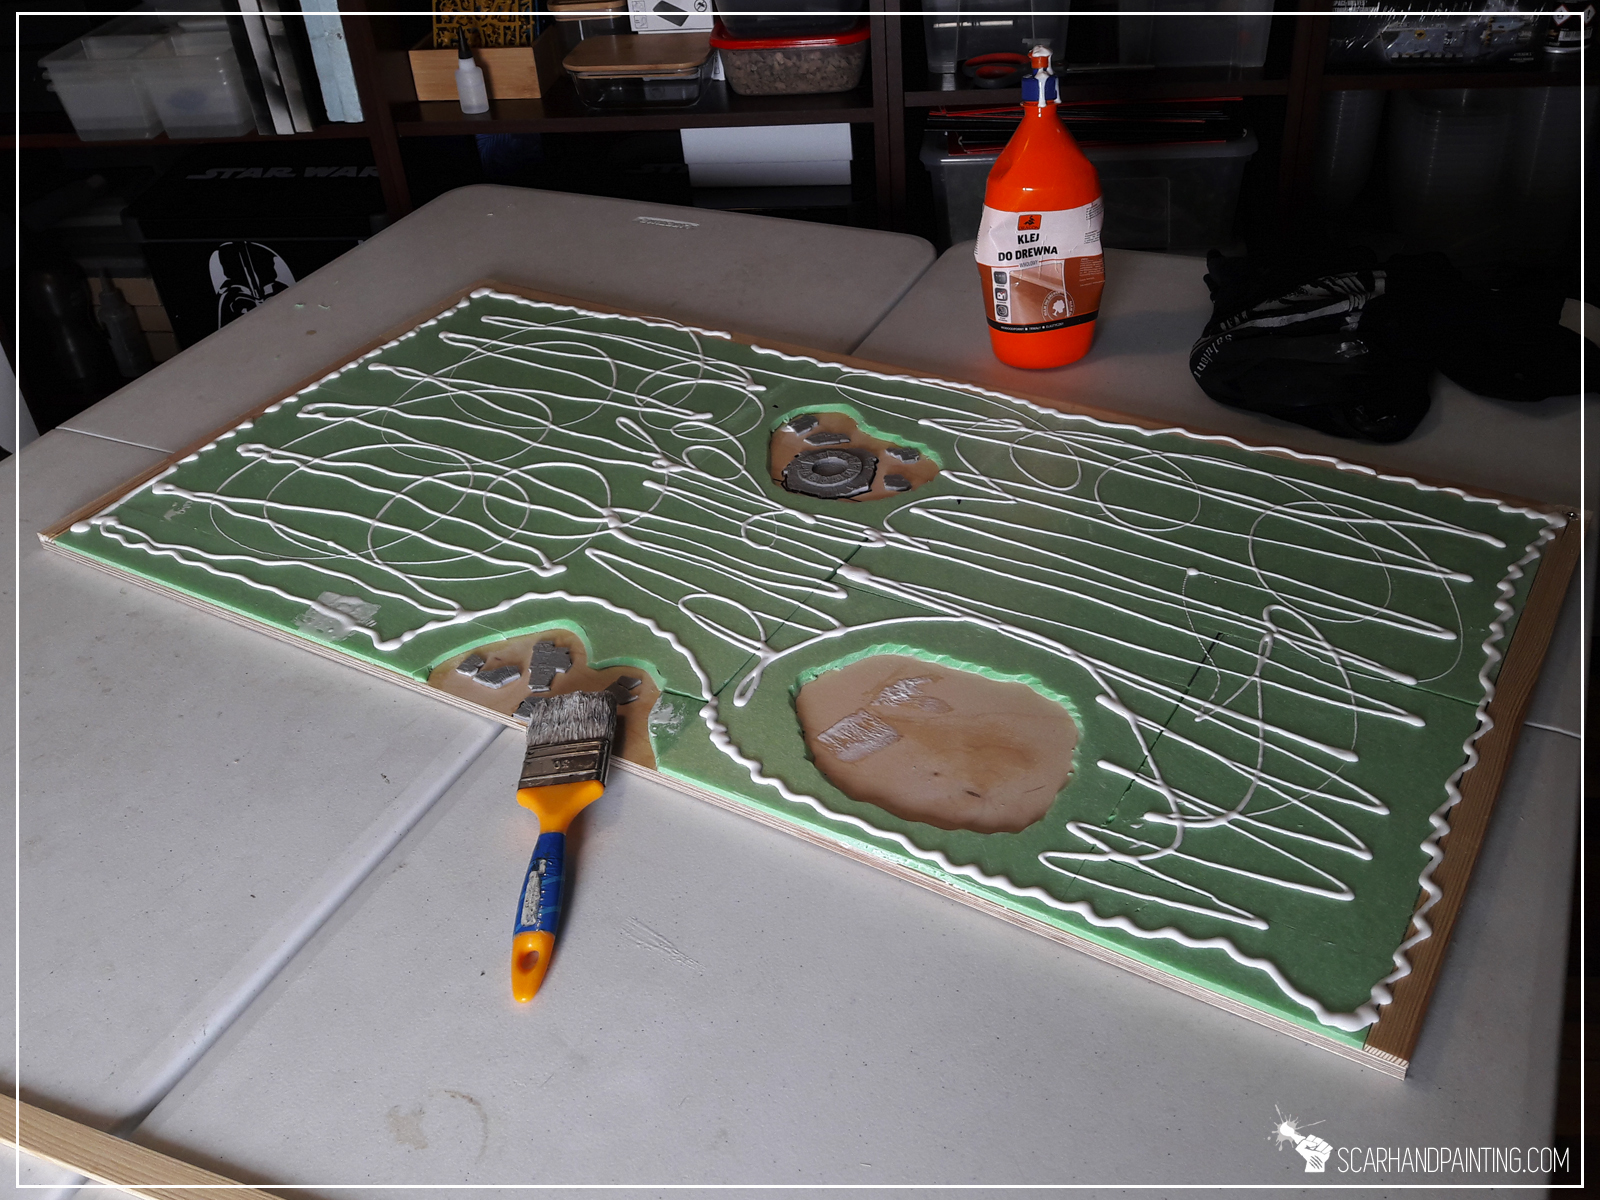
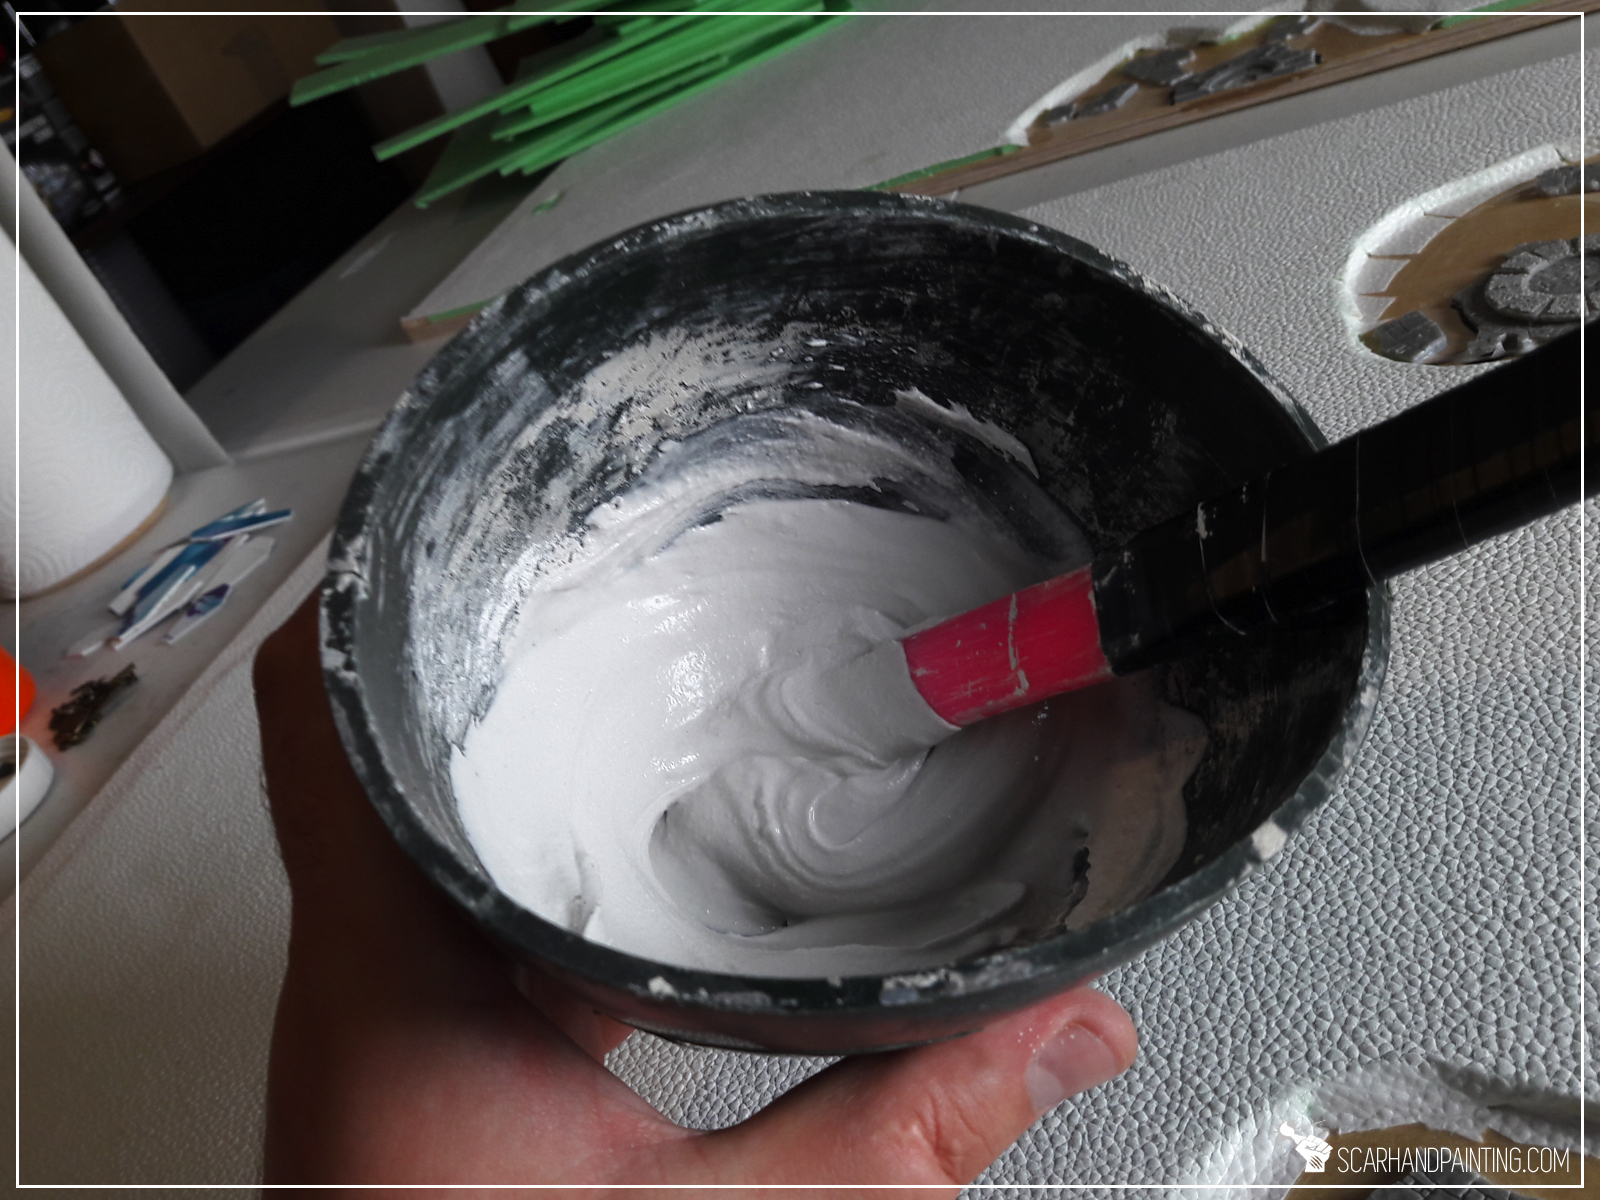
Next step was to insert the coffins and some additional detail elements into the holes. I used white plaster to partially fill the holes, then arranged all the detail inside.
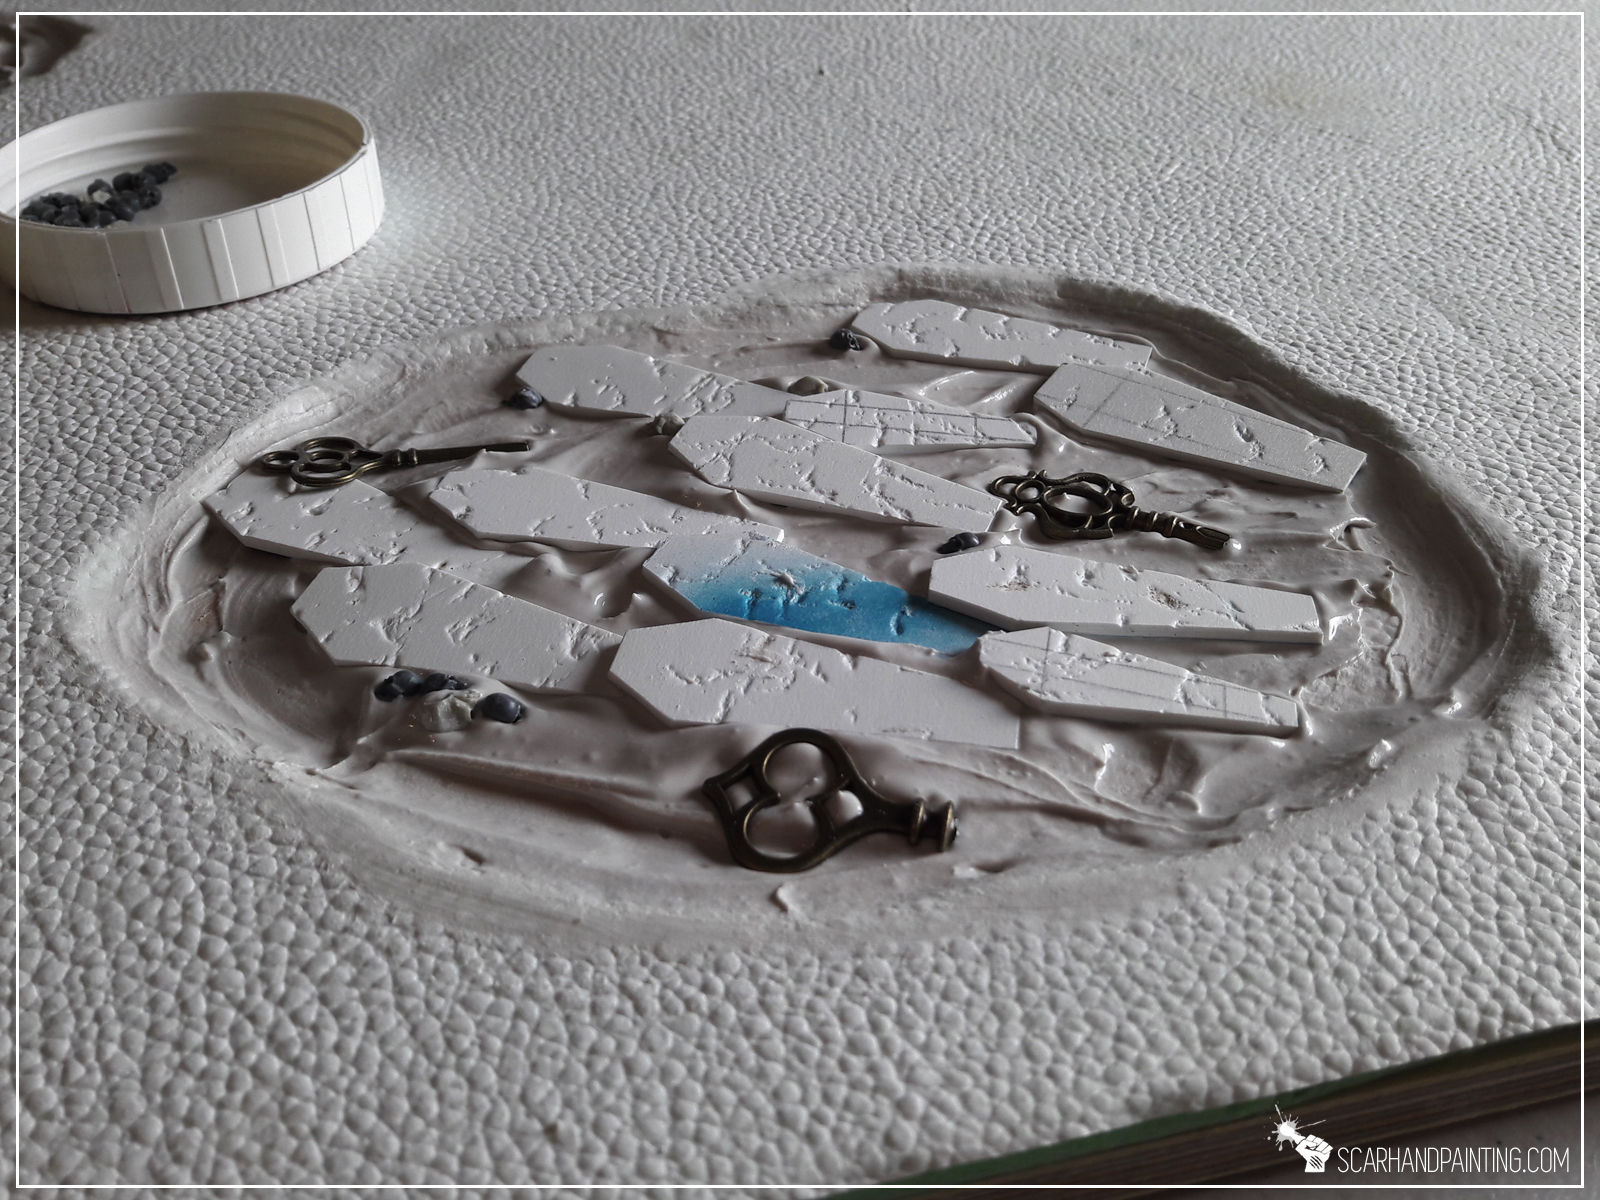
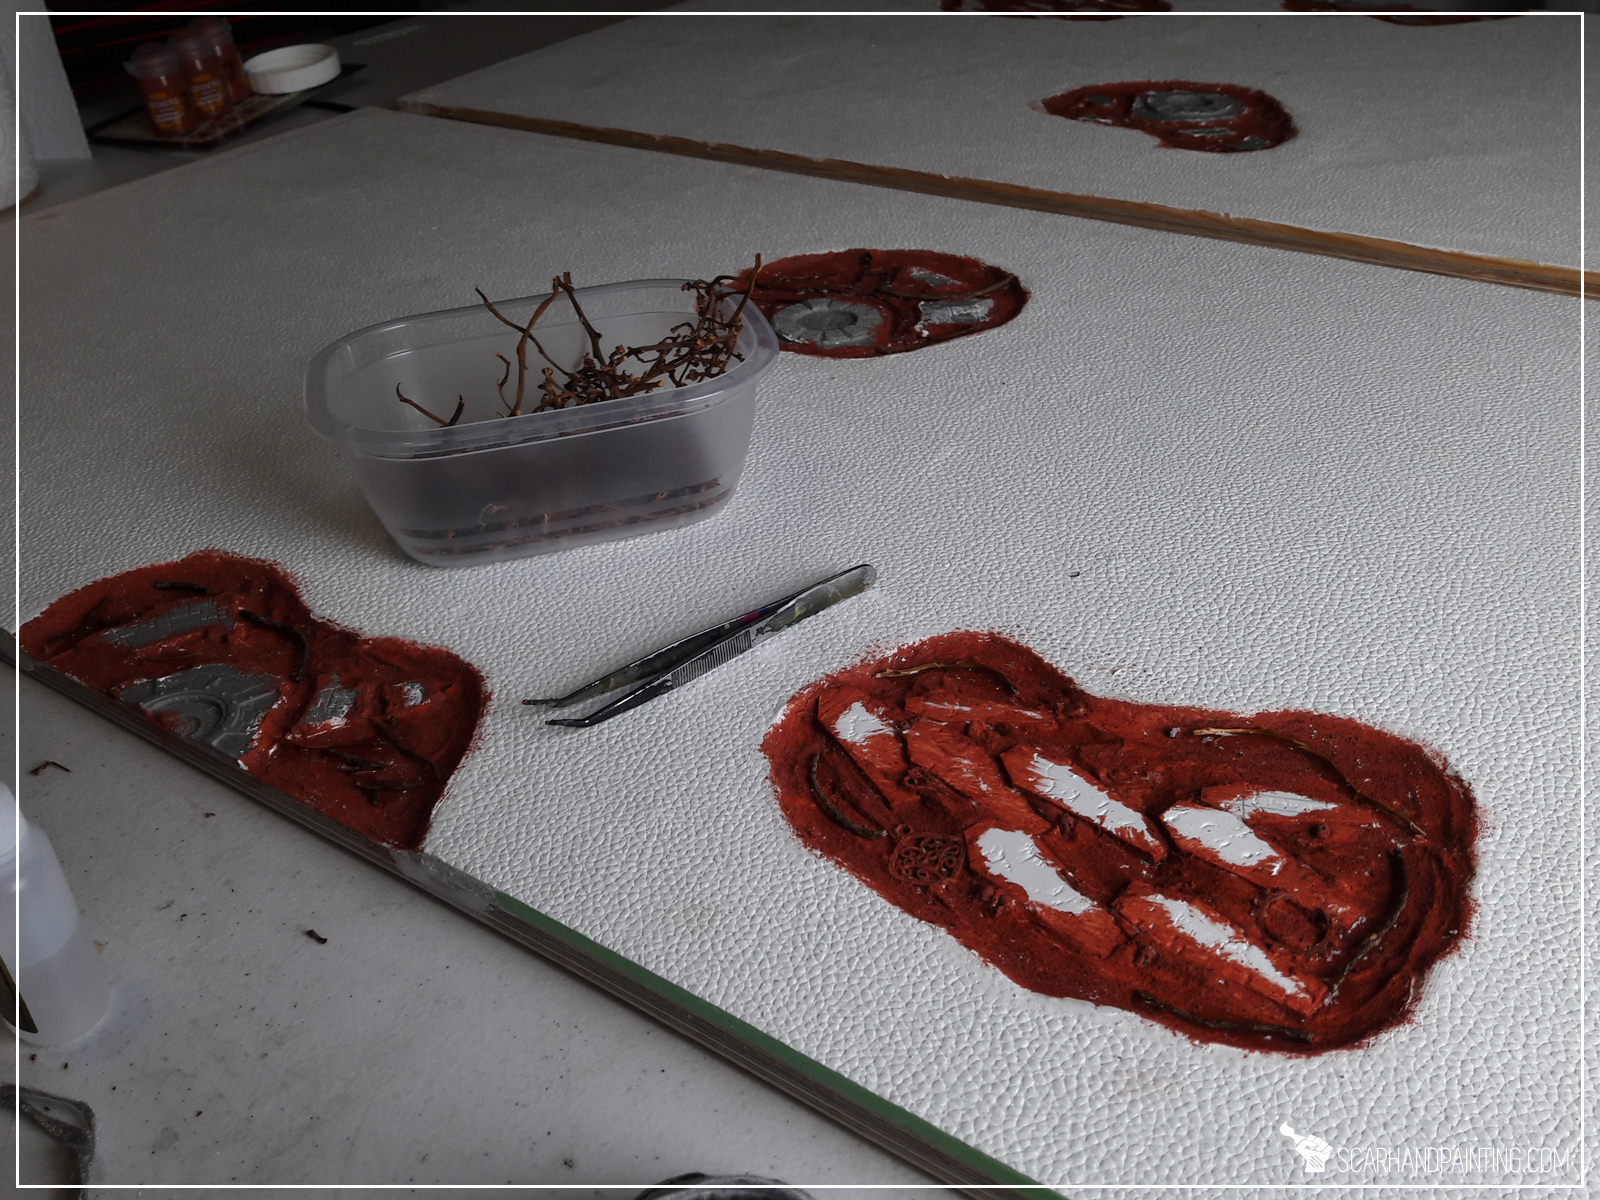
With all the features arranged to my liking I textured the insides of the holes with Games Workshop Martian Ironcrust texture paint. Once dried I placed some dry twigs here and there and sealed everything with PVA glue. This last step was very important to ensure resin stays in once used.

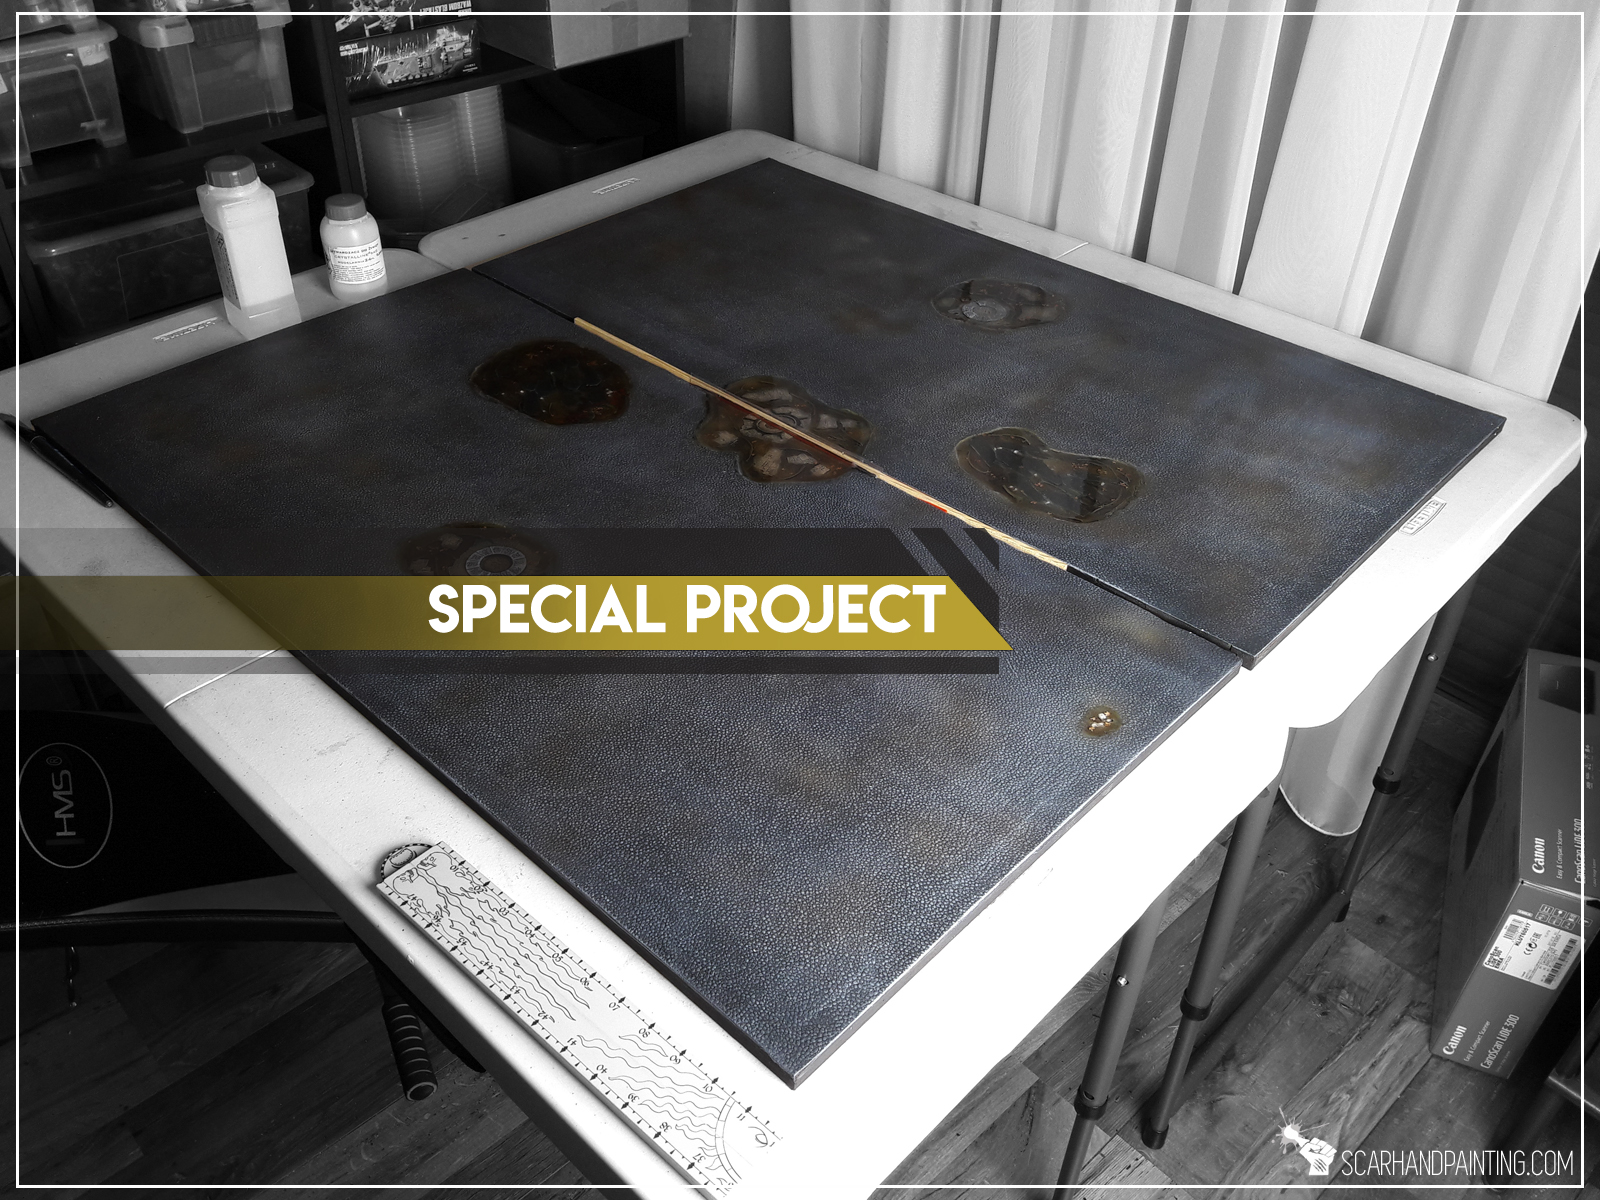
Everything modeled it was time to undercoat entire board with trusted acrylic black paint. Two thin layers of a black wall paint followed by a spray coat of Chaos Black.
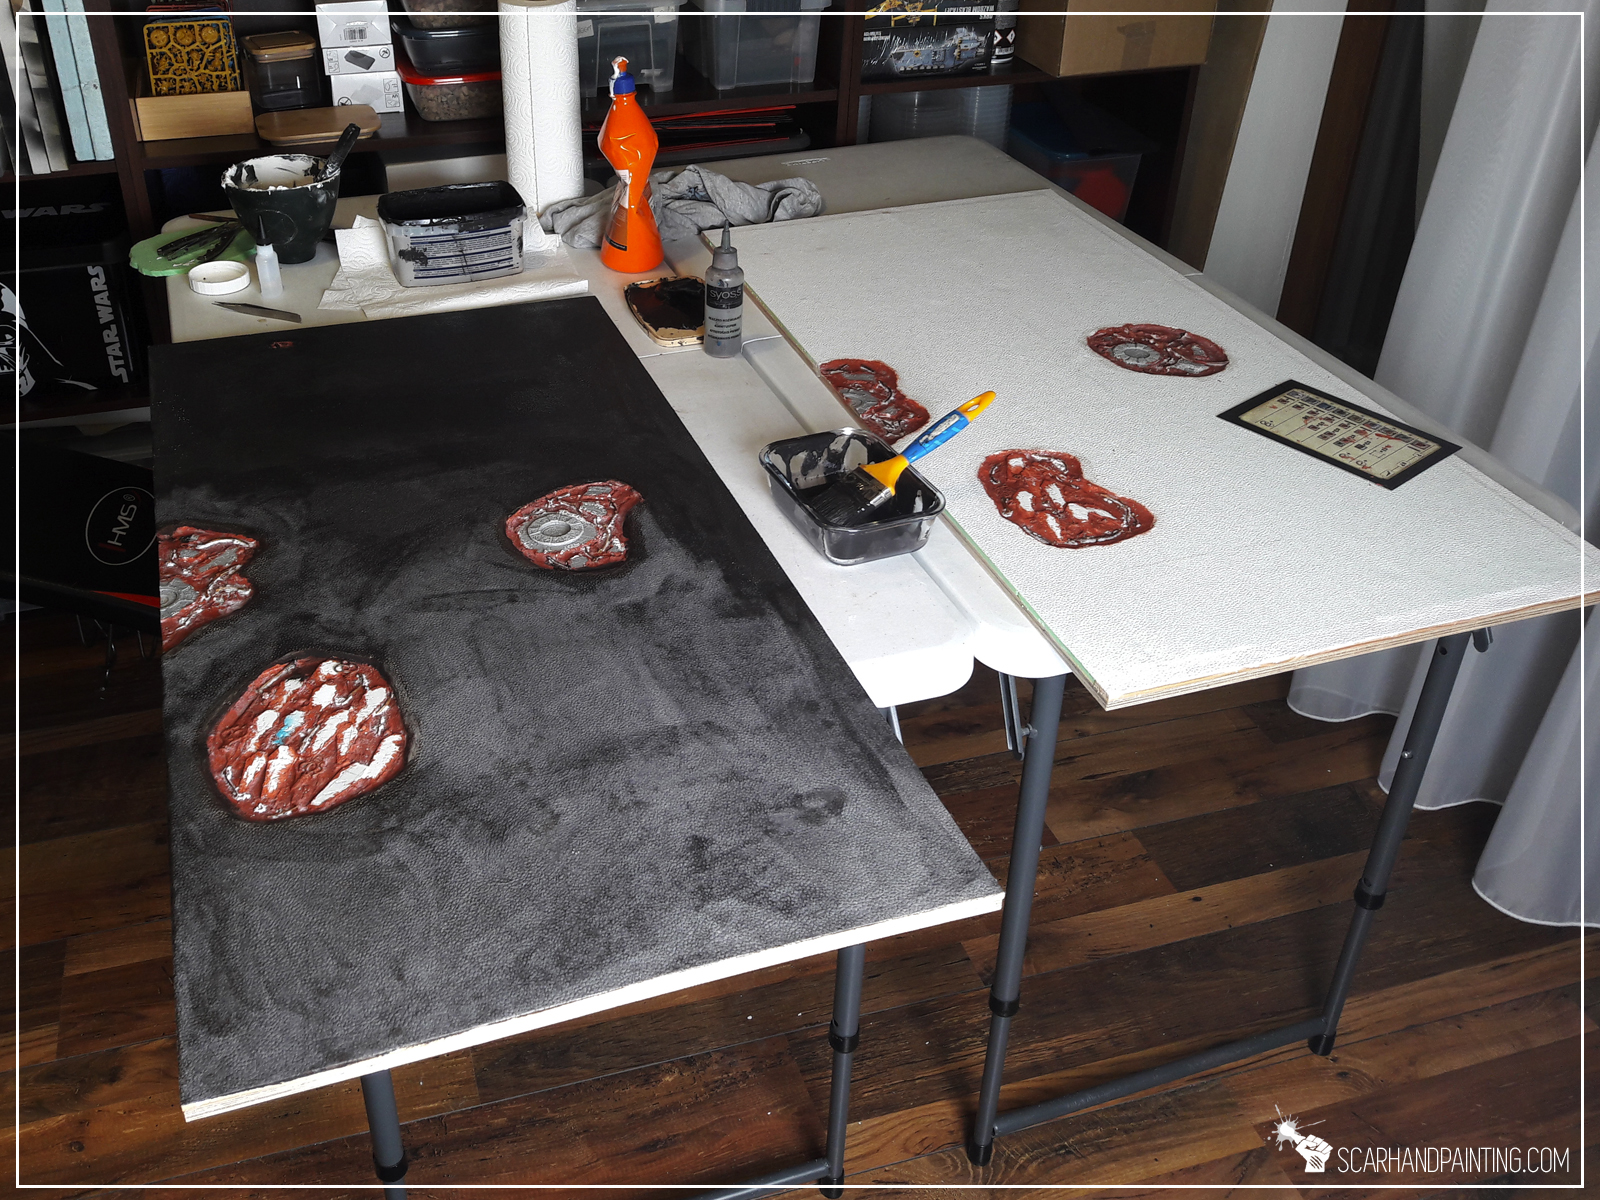
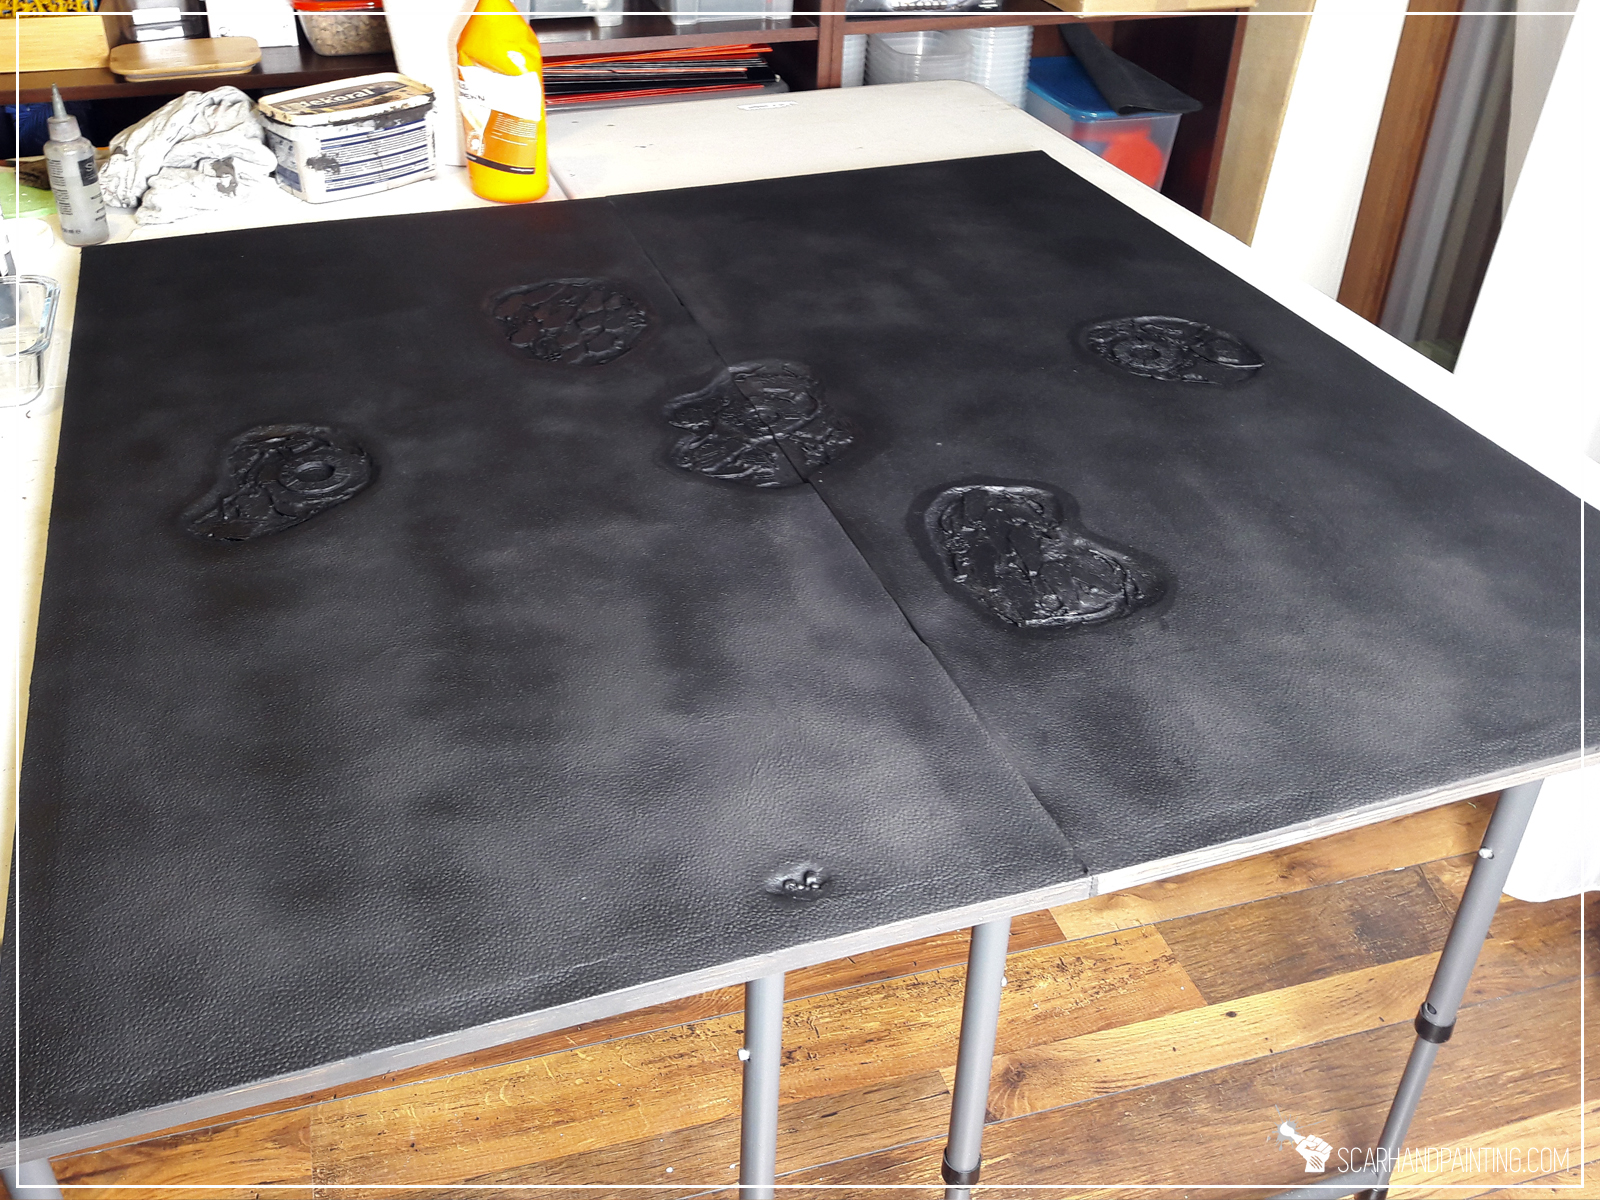
This project was planned to last approximately 48hrs, but working with clear resin can sometimes lead to unexpected (and messy) complications. More than a week into the project and some of the resin didn’t coagulate properly. I decided to scrape it off and apply another layer. This is also why I decided to divide this article into two. Undercoat seems like a great place to finish part one.
If you like the article and find it interesting – be sure to let me know either in the comments or at my Facebook page. See you in the next article, hopefully soon. Here’s a little sneak peek:


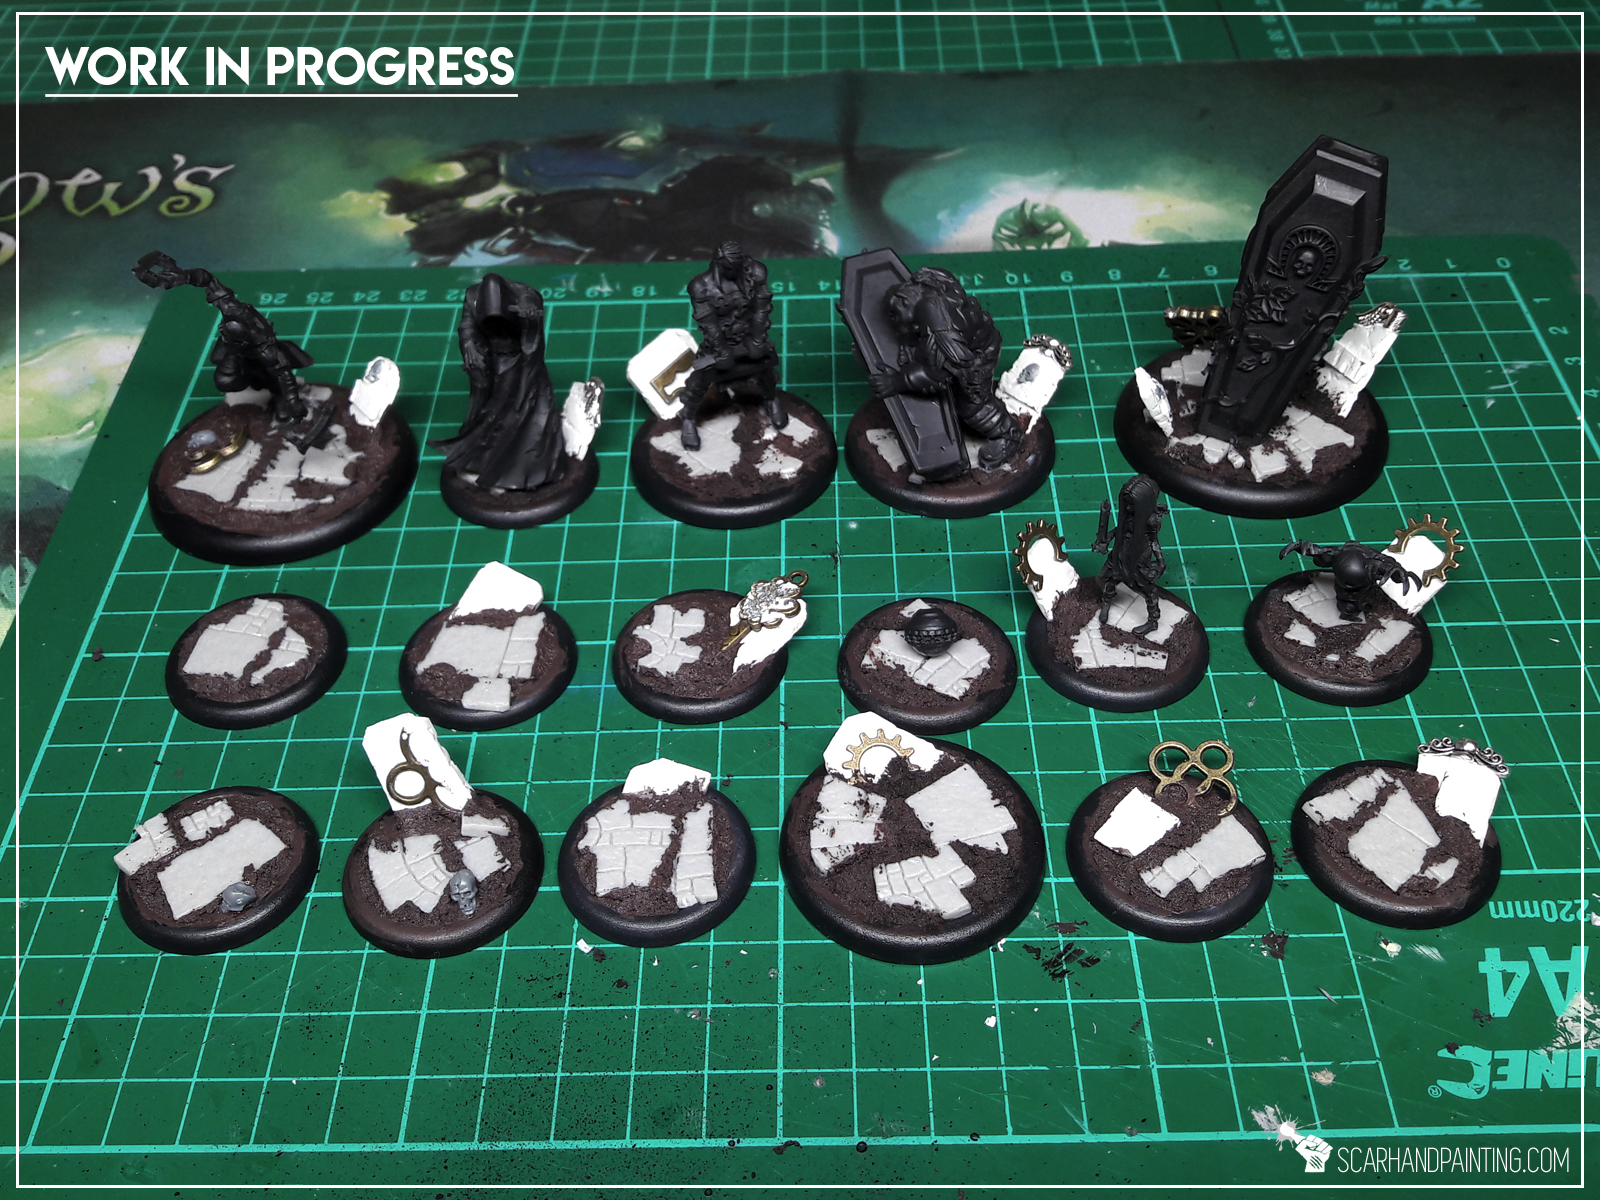
In this step-by-step tutorial I’m going to show you how to create gravestones. Please treat this article more like an inspiration, rather than tutorial.

I recently started collecting Guildball and decided to create graveyard themed bases for my Mortician’s. In the miniatures world gravestones are a rare bitz to come across. Sure there are some graveyard themed miniatures sets but getting them just for the sake of gravestones seem like a ludicrous idea – at least for me. Cuz why not just make your own? It is pretty simple you know…
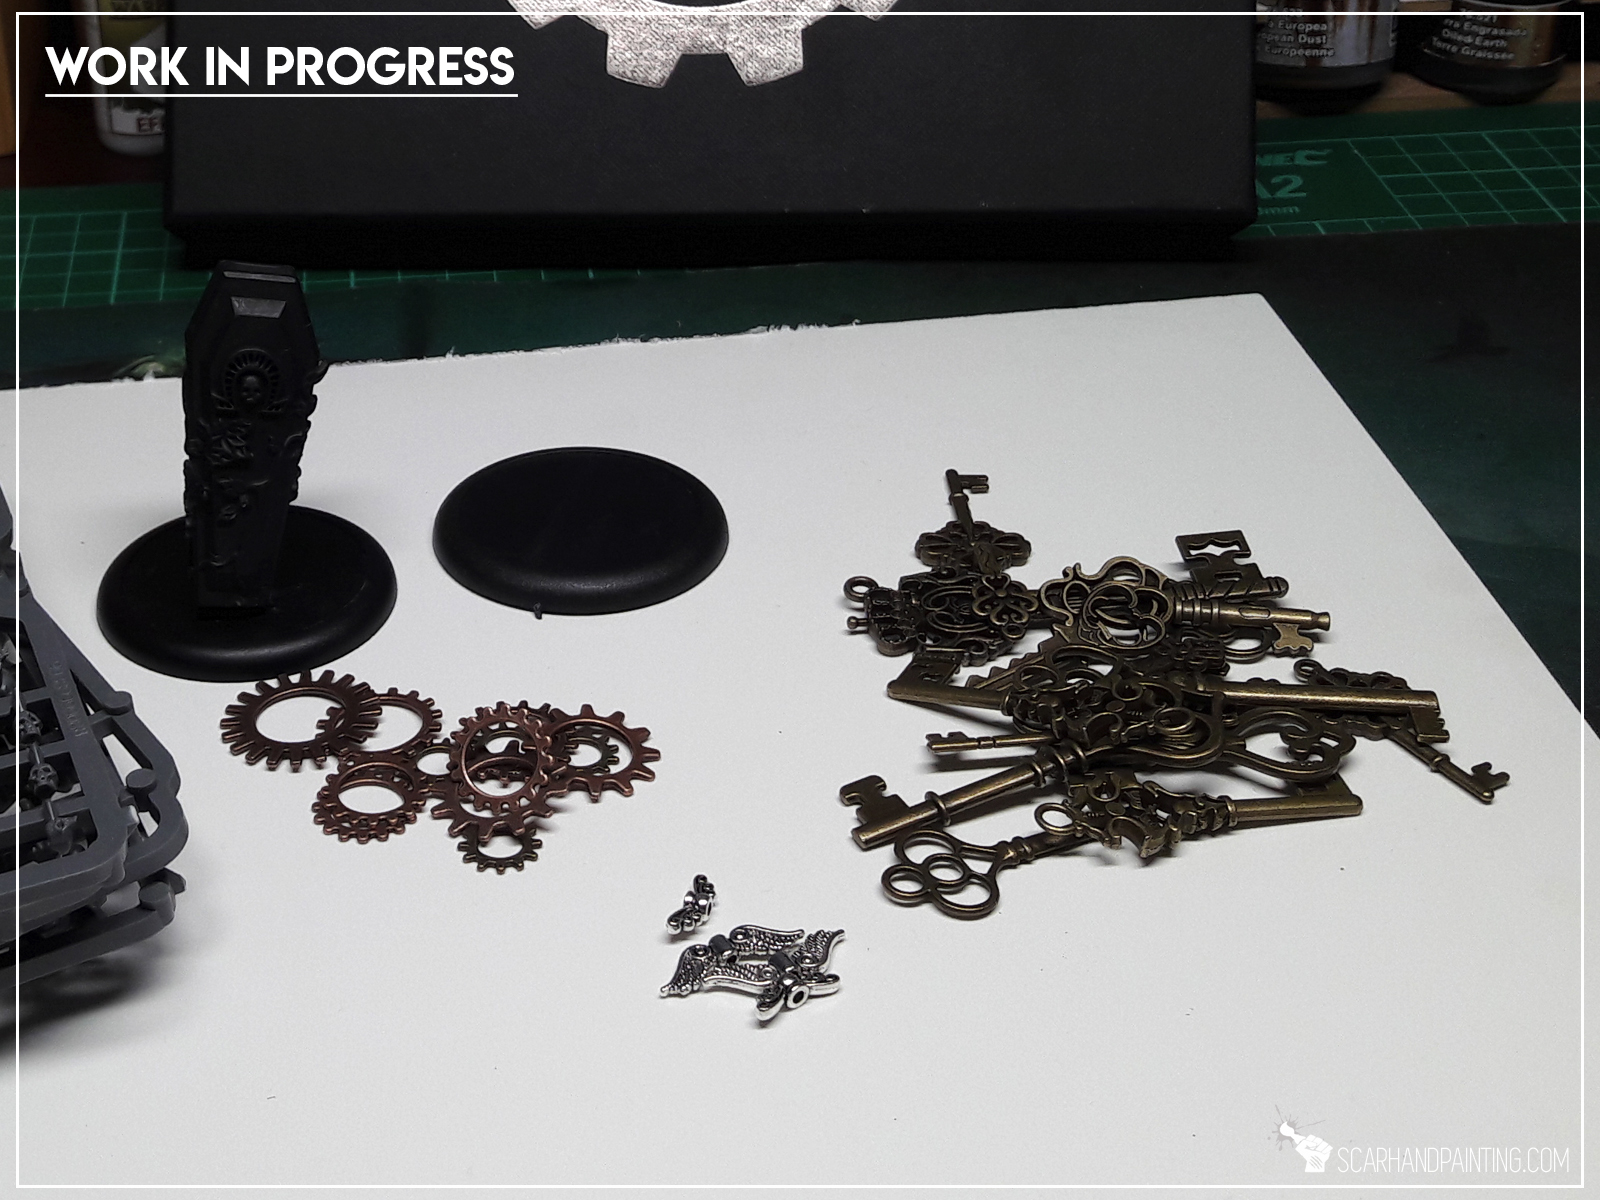
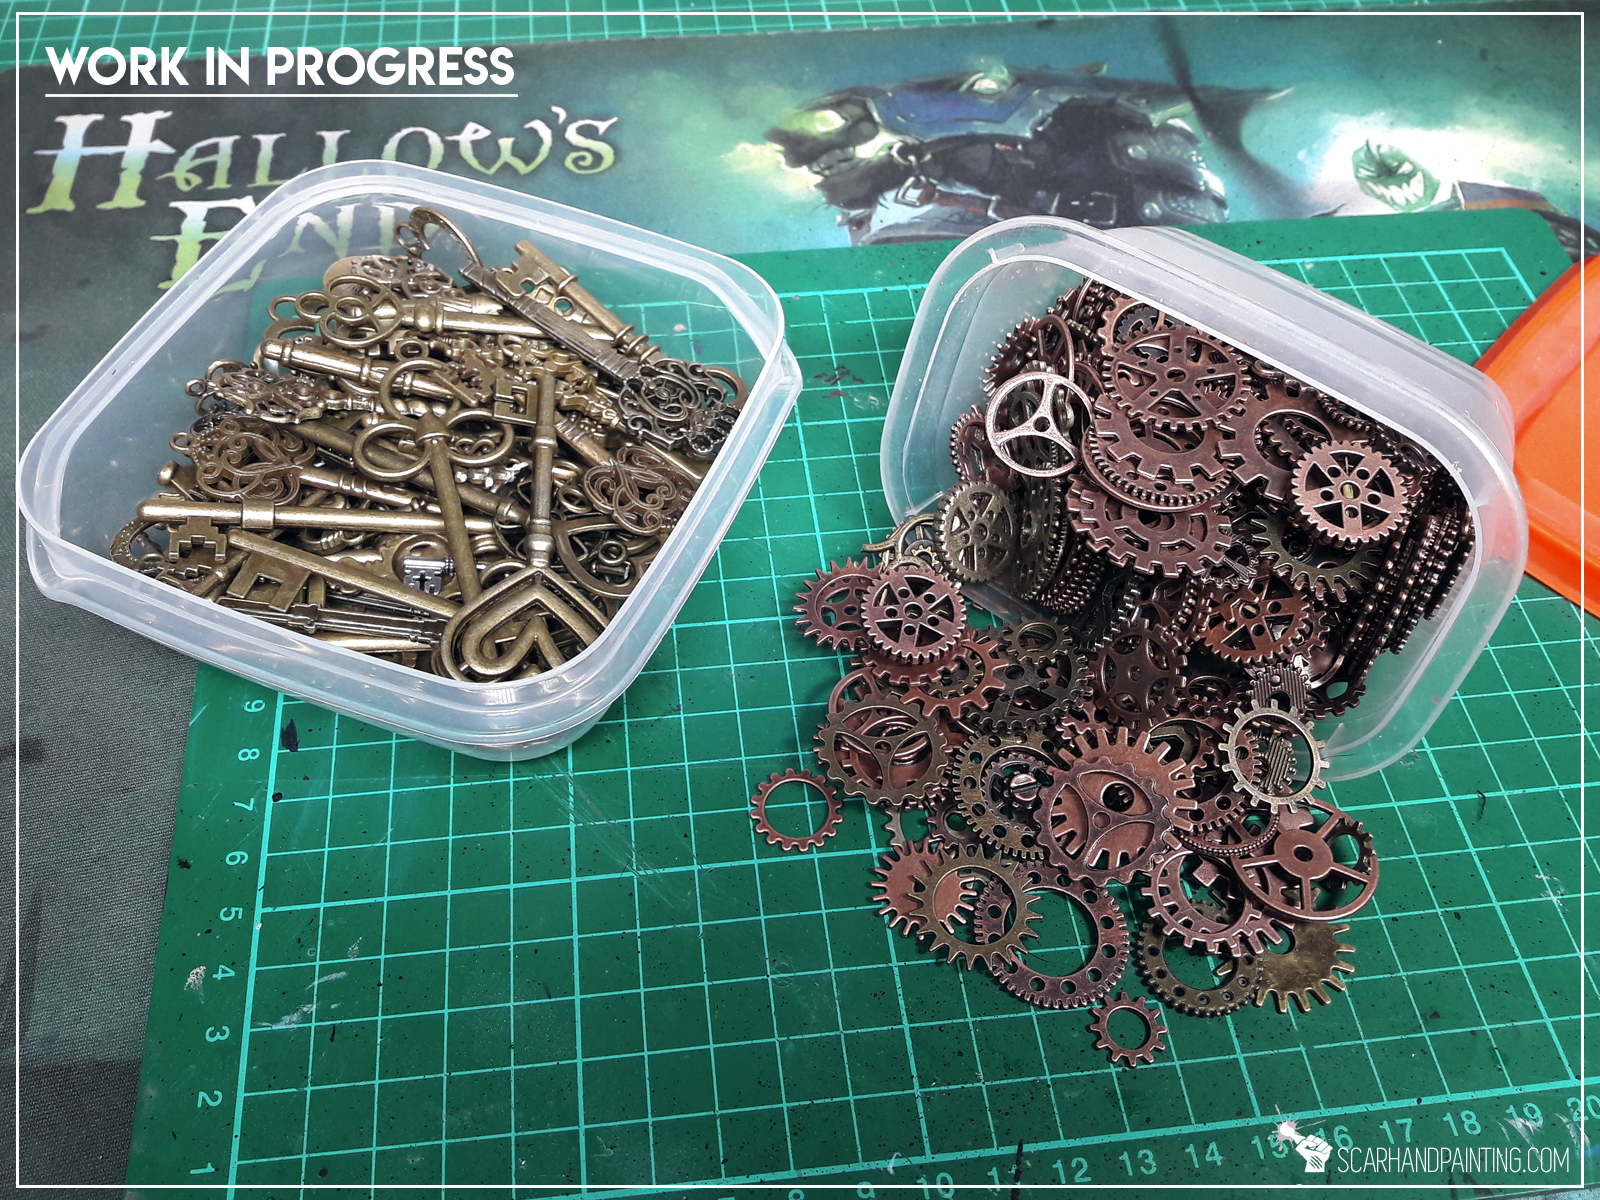
Before we get into it, let’s talk all the charms, decorative beads and bronze gears. Ever heard of Aliexpress? Just search for “decorative charms bronze” and prepare yourself for a mind blowing experience – cause miniatures modelling would never be the same from now on…
Step one: Cutting plasticard
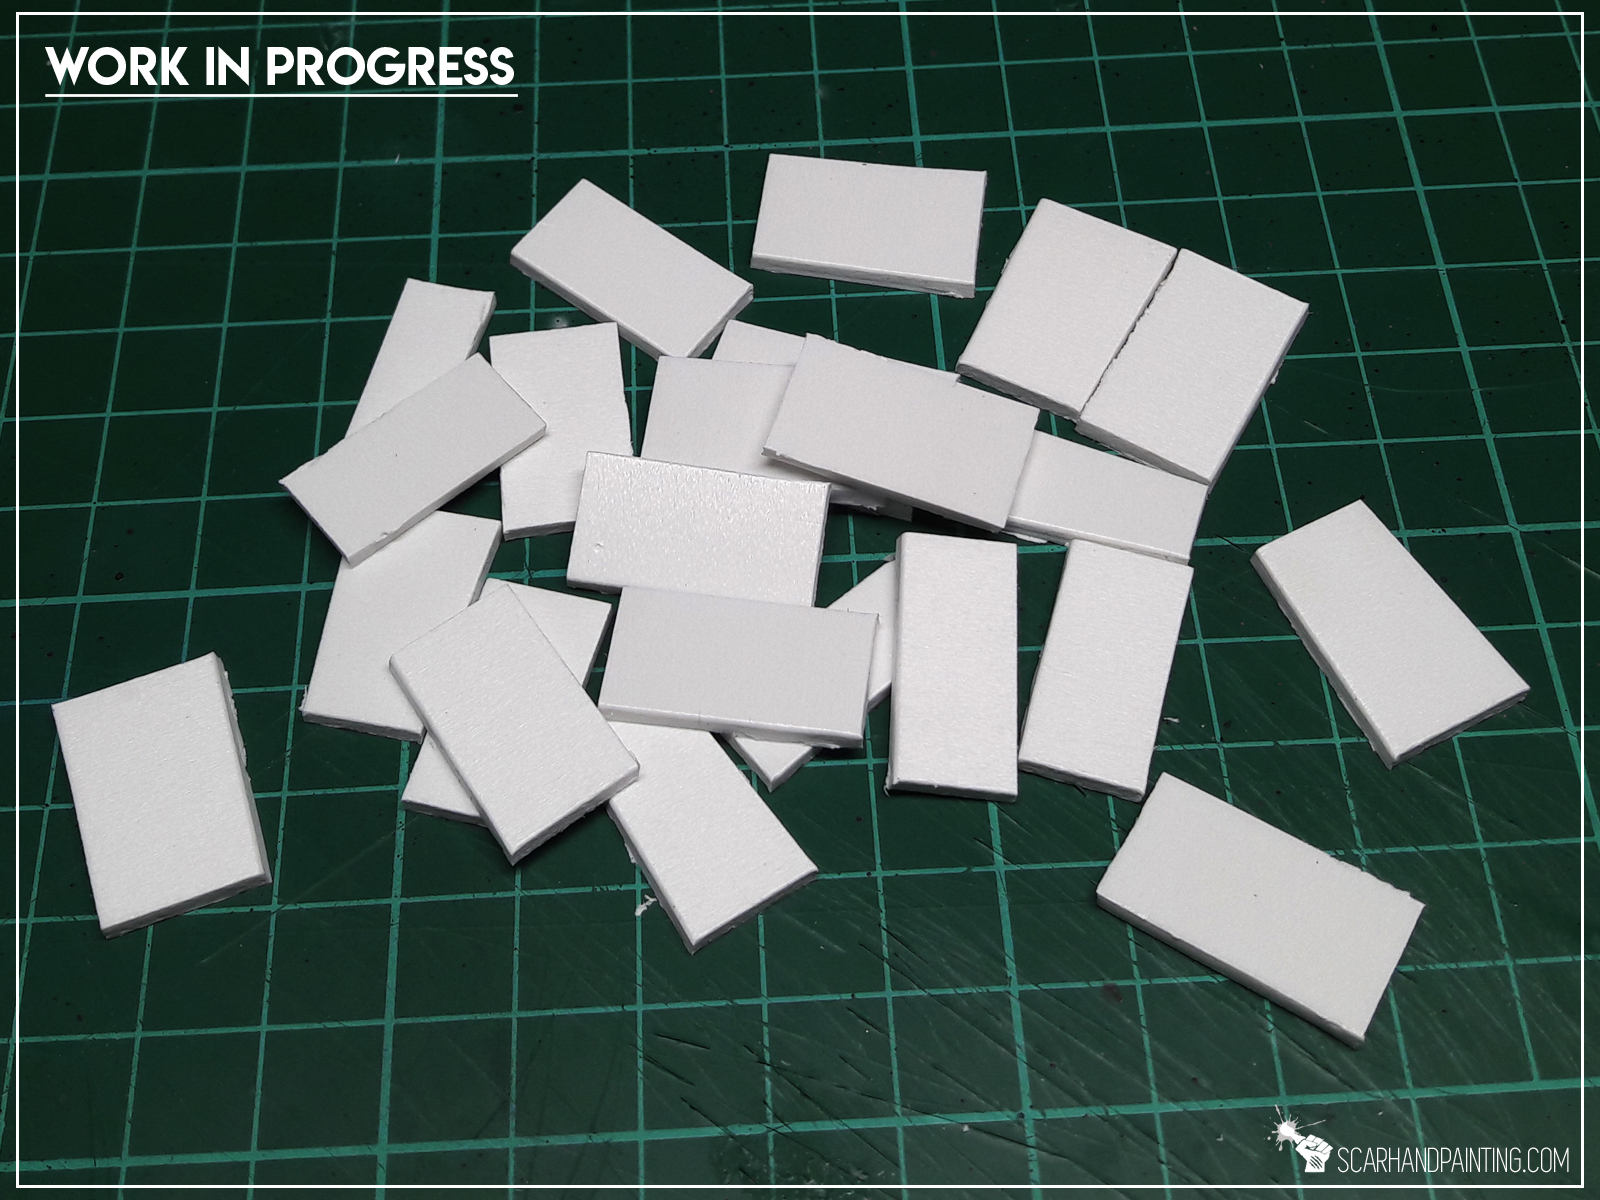
Using a hobby knife I cut 2mm plasticard into pieces of more or less gravestone size and shape.
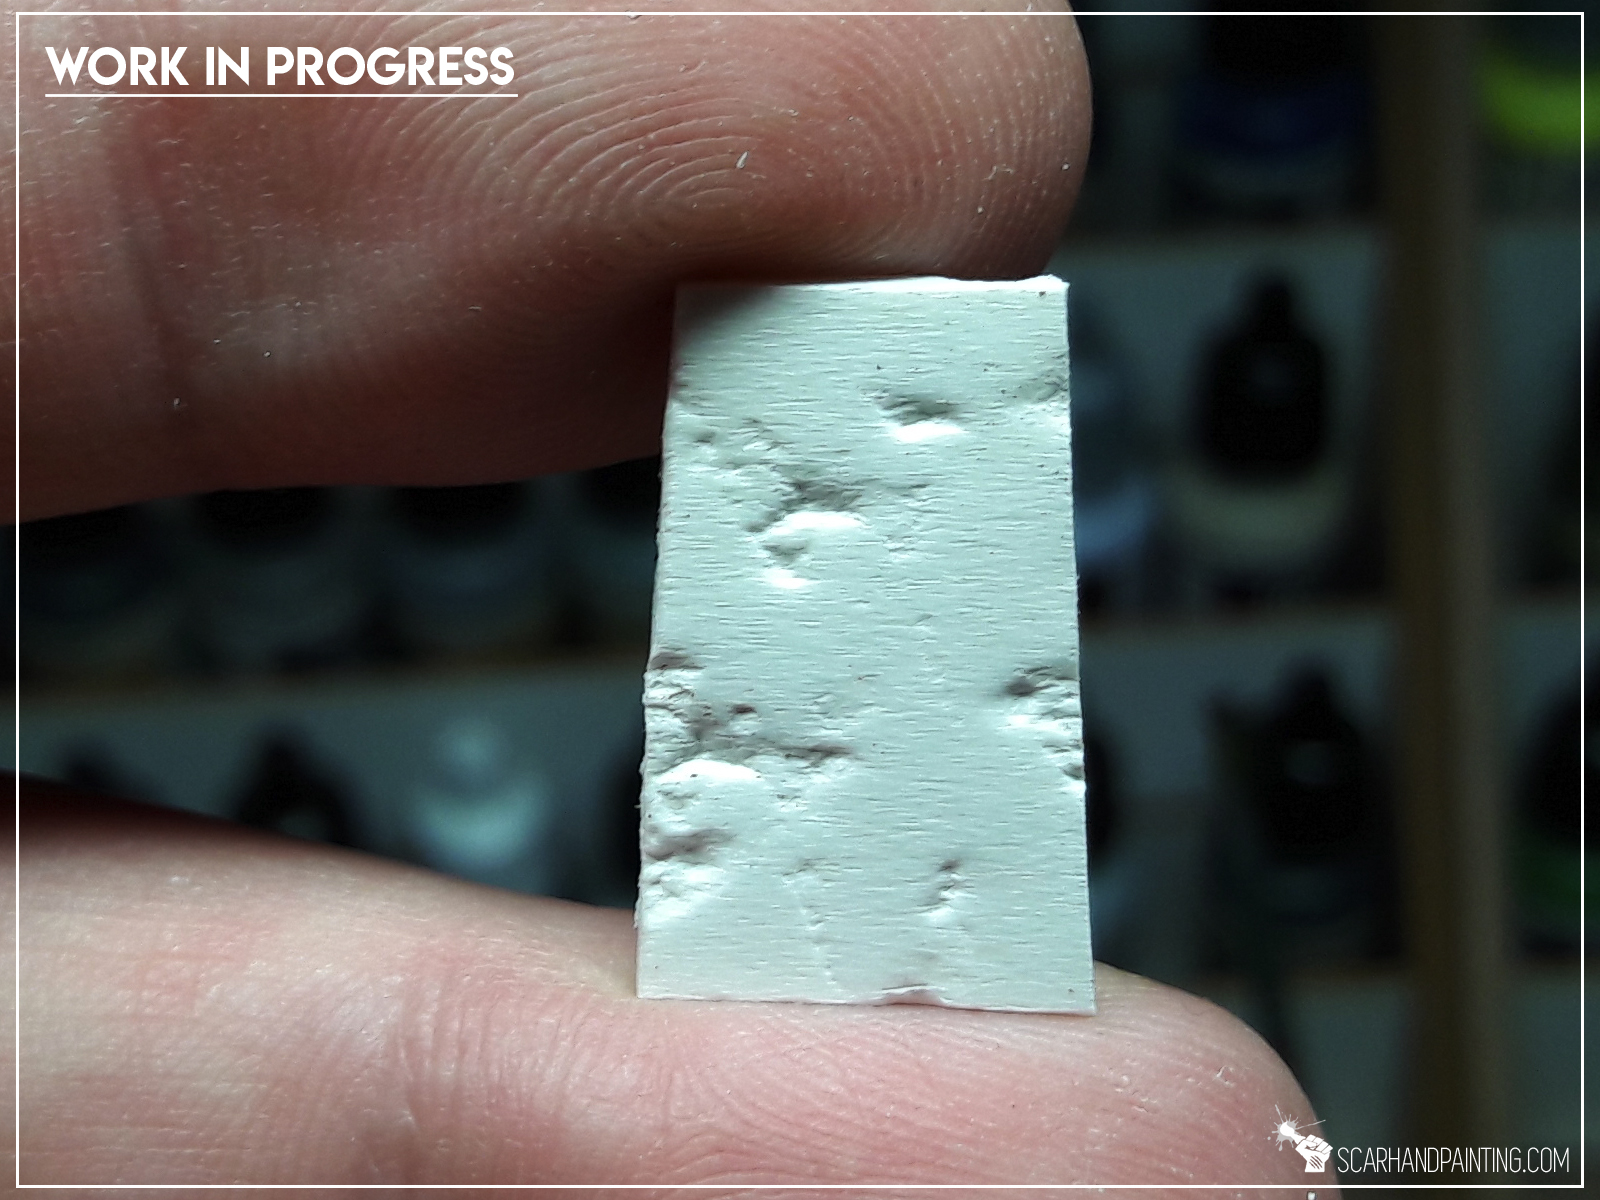
Step two: Applying texture
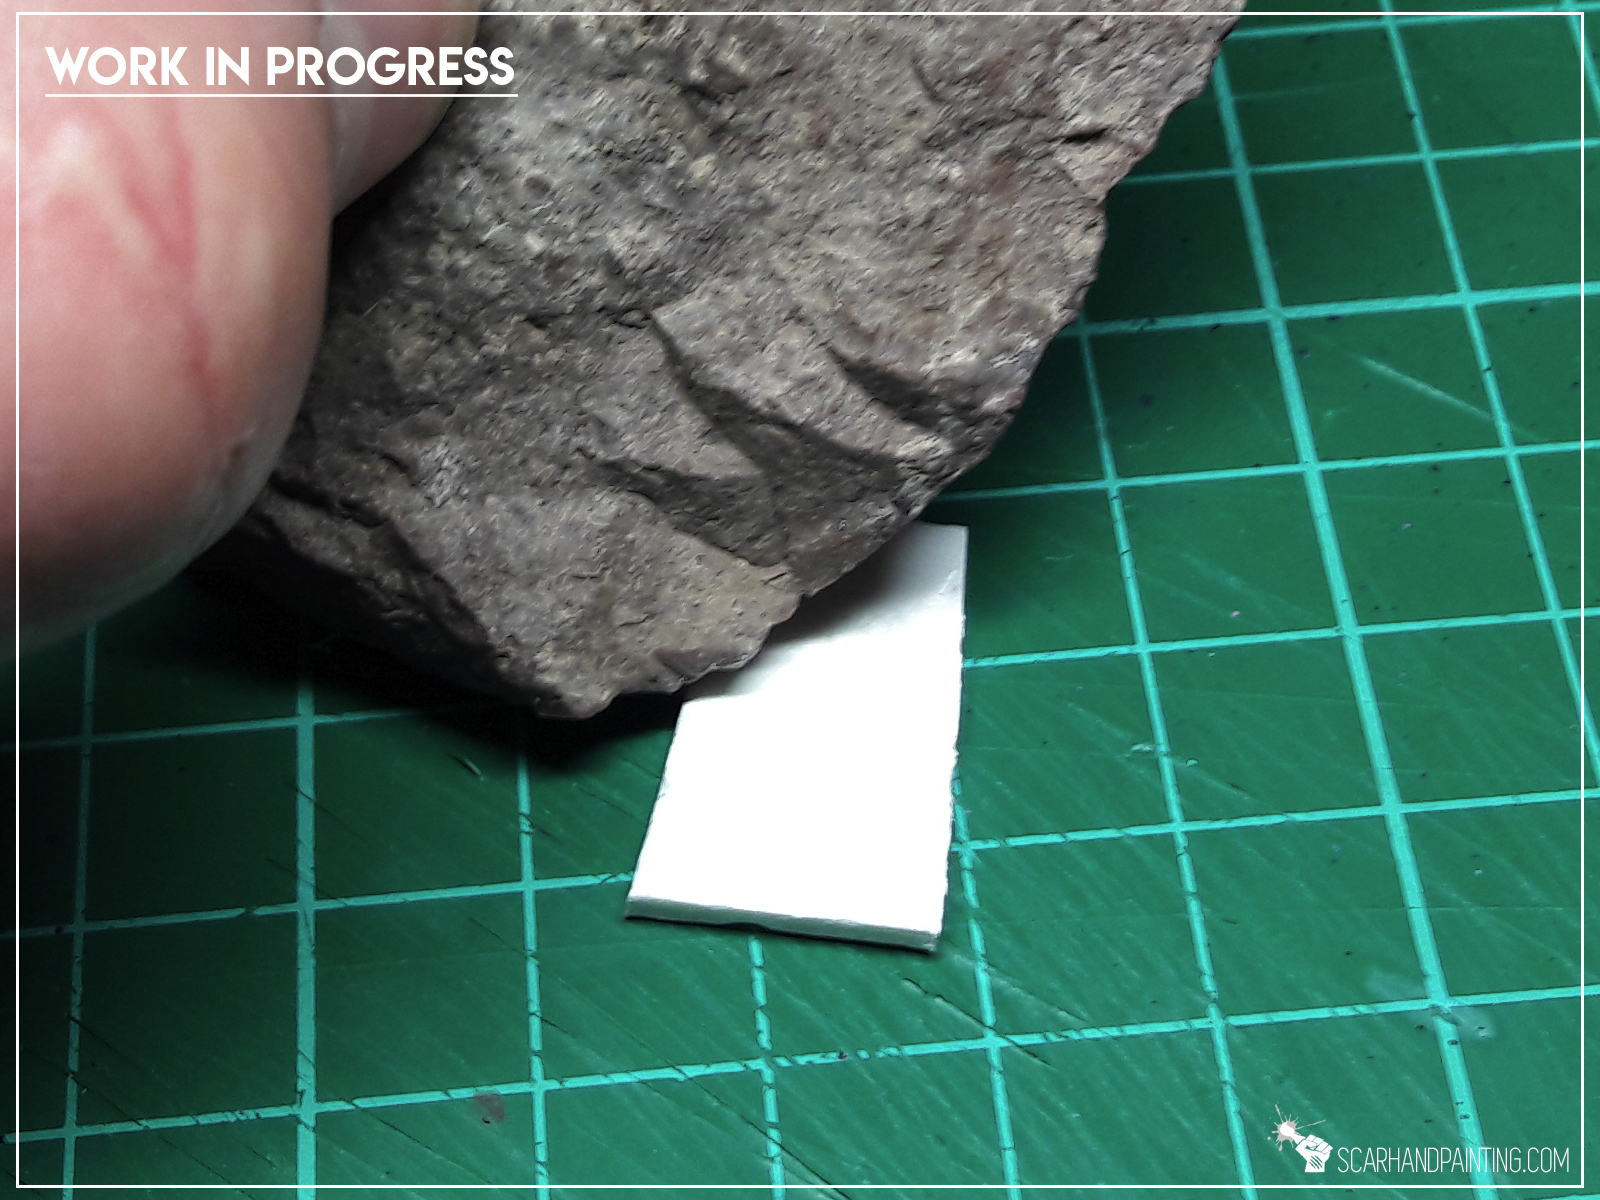
I then “textured” each gravestone with a rock. I know how it sounds, but yeah – I simply rock’n’rolled on top of the plasticard to create an uneven texture.
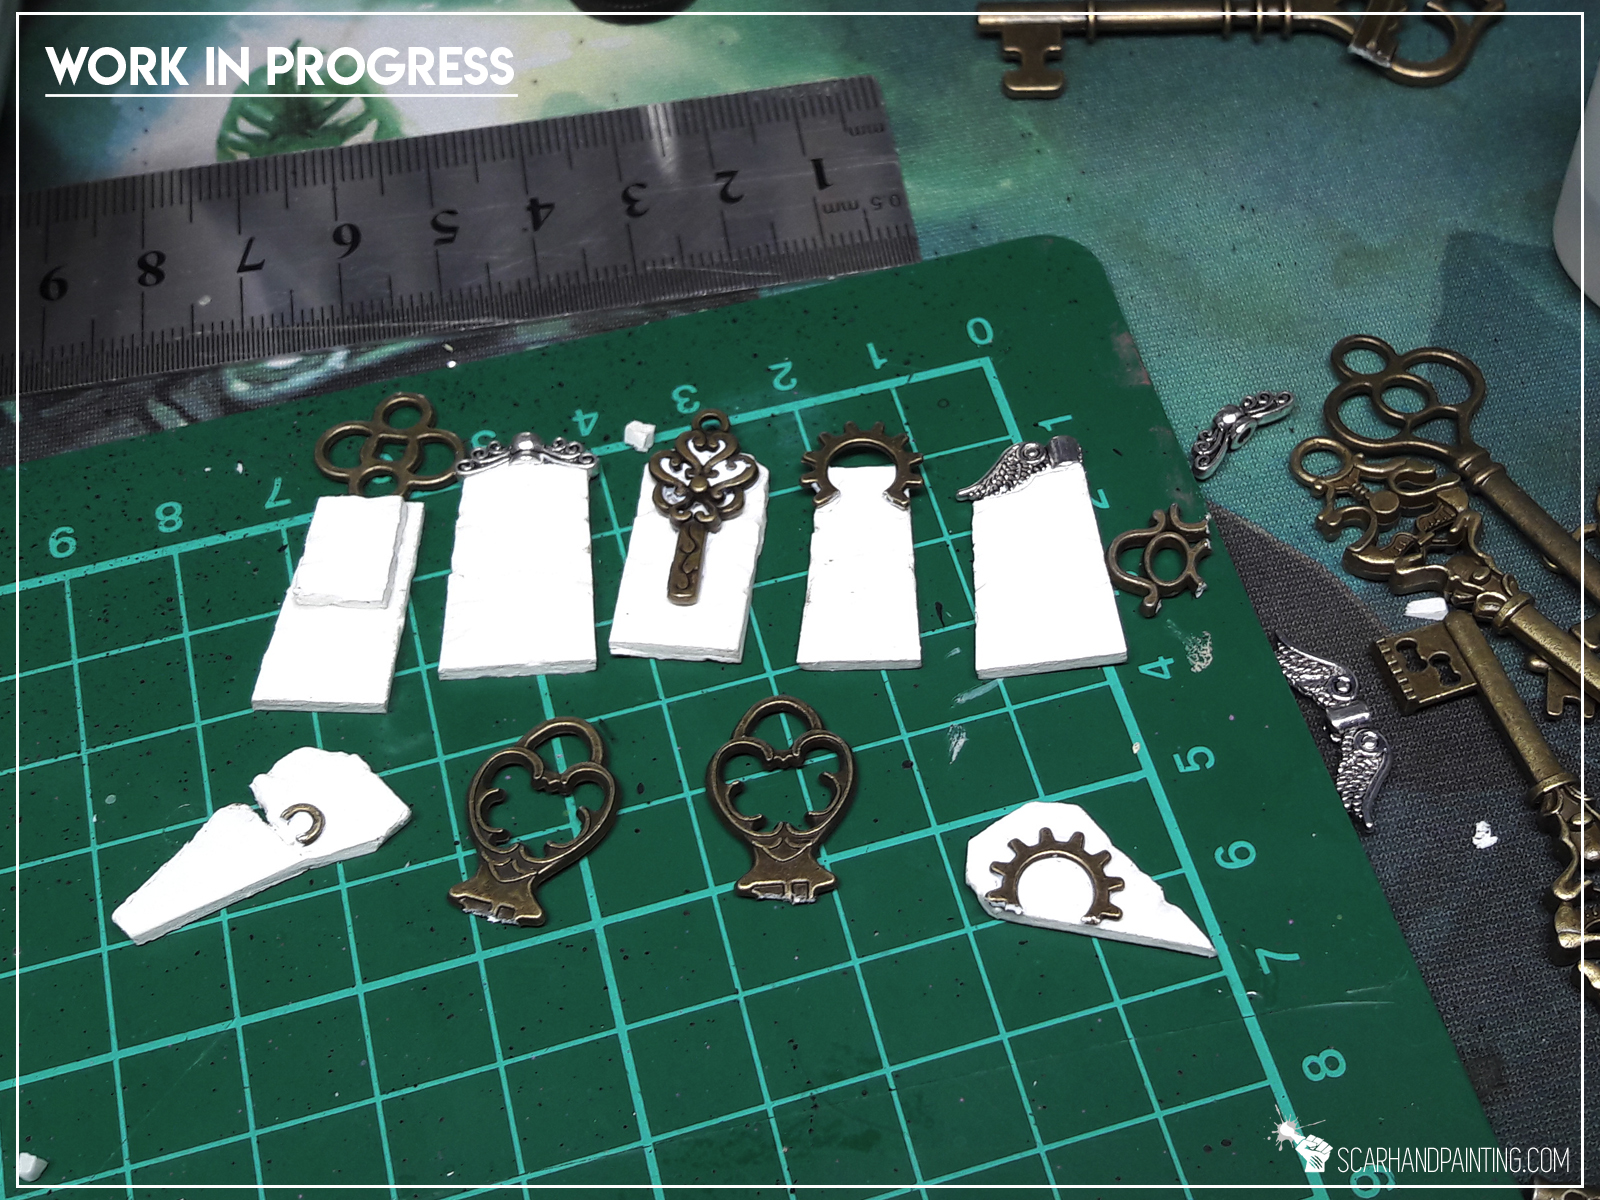
Step three: Detail

With basic gravestones done I added some detail. I glued plasticard and some of the bronze charms on top and on the sides.
Good to know: Bronze charms are easy to work with. They can be broken into smaller pieces with tweezers and just a bit of force.
Well… that’s all. Job done! That was easy, wasn’t it? Plus it costed barely couple bucks for an entire graveyard worth of material! Not that I need as much 😛

Now just waiting for all the Mortician’s to show up. Can’t wait to get these painted!
You find this article helpful? Don’t be a stranger and drop me a comment below!

In this easy, step-by-step tutorial I’m going to show you how to create a Desert Scenery as could be found in “Gallery: Gaslands”.

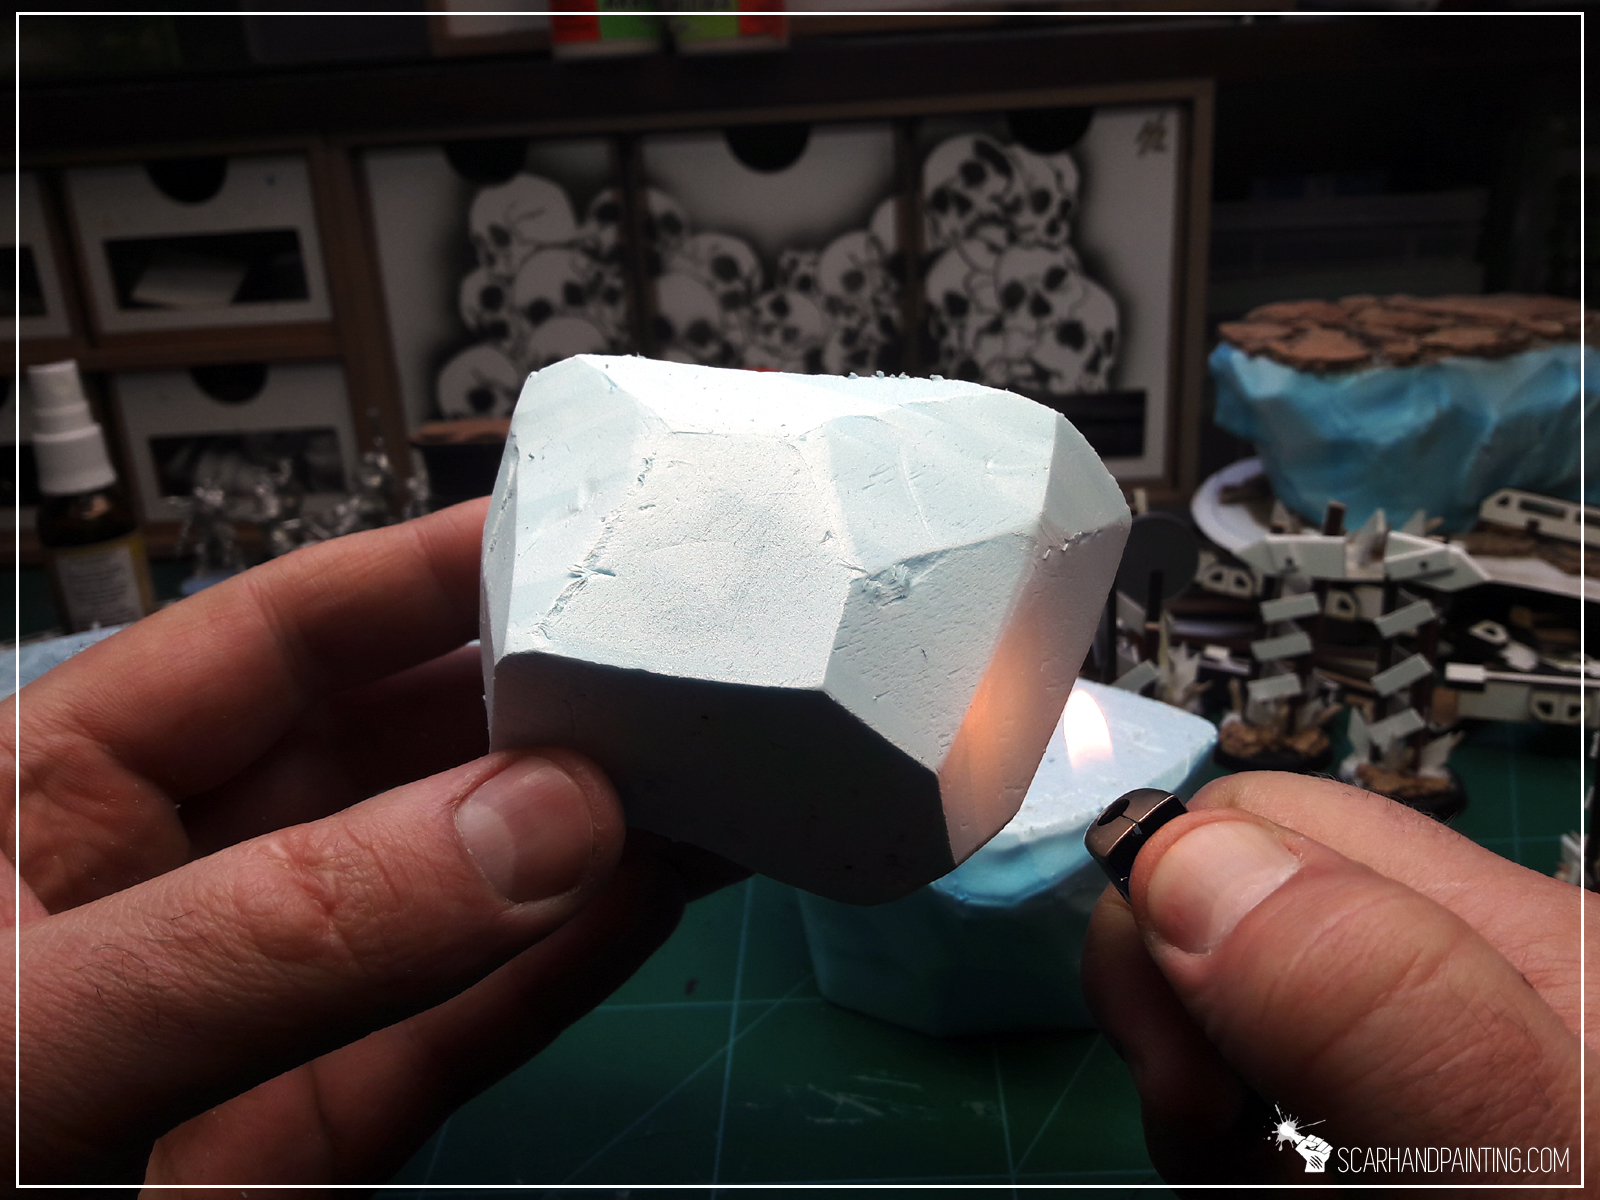
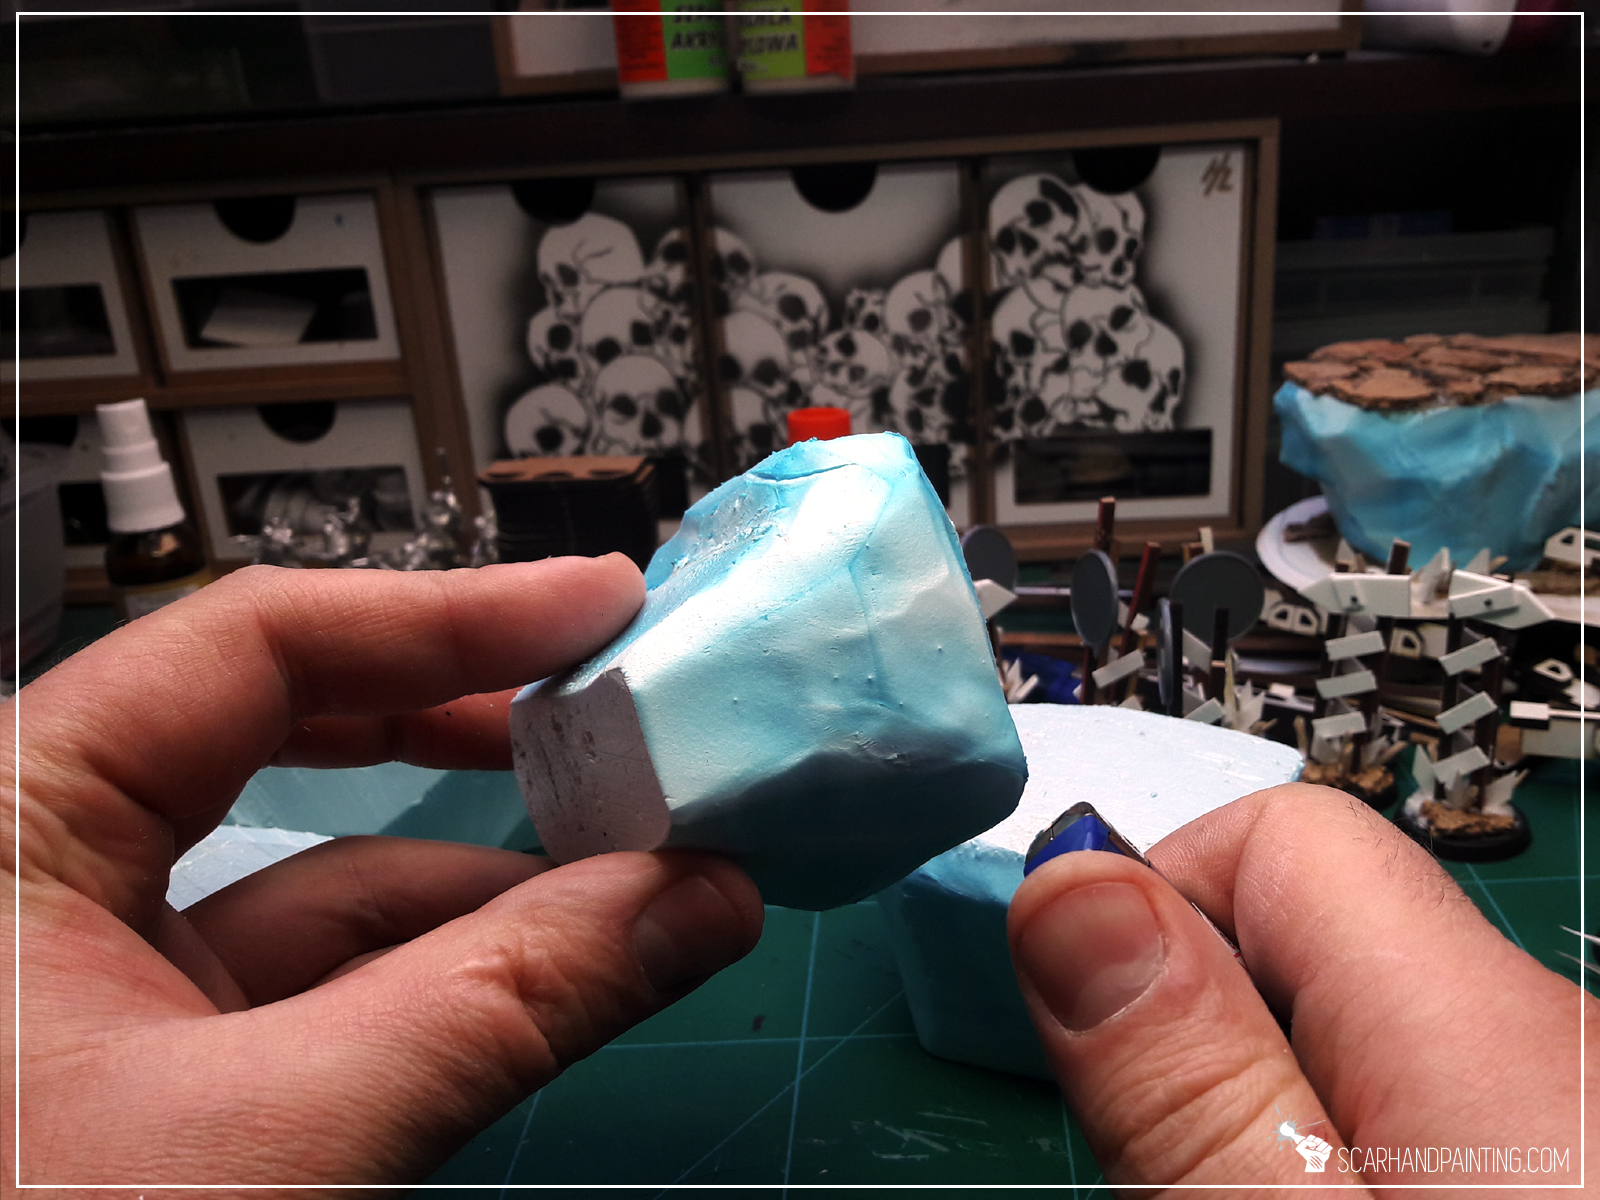
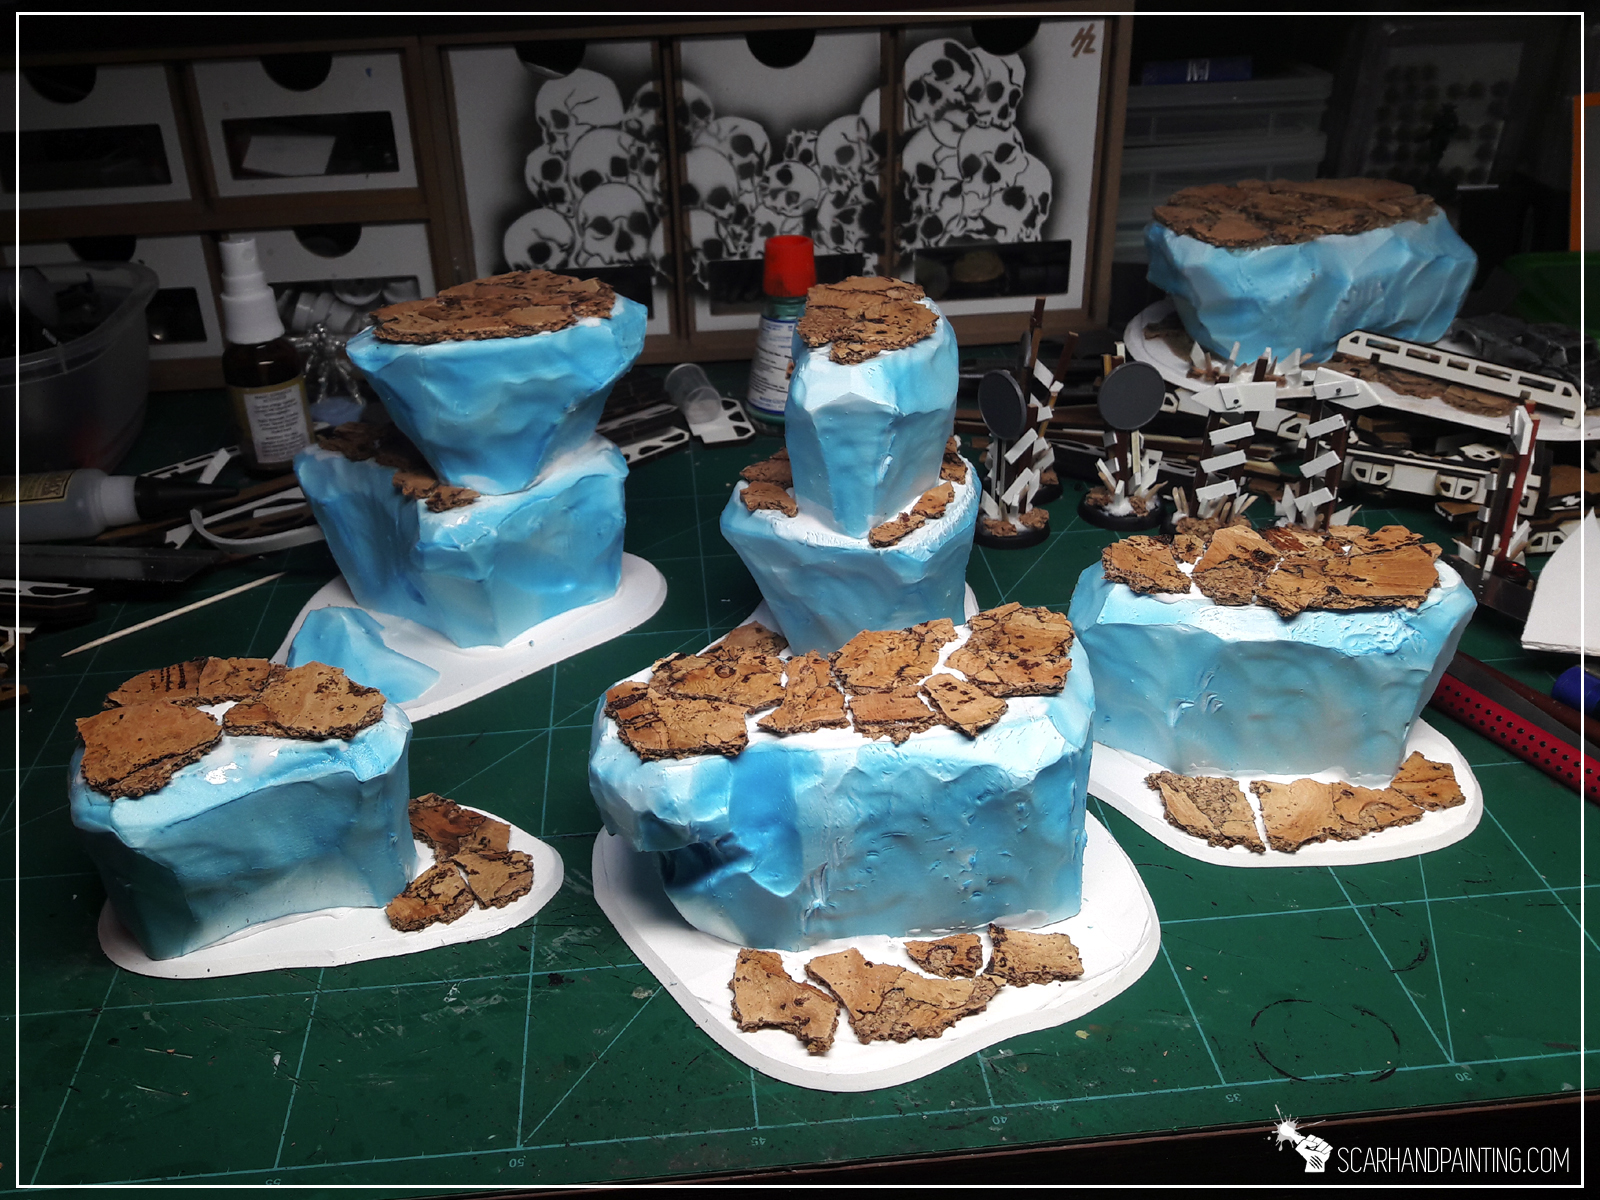
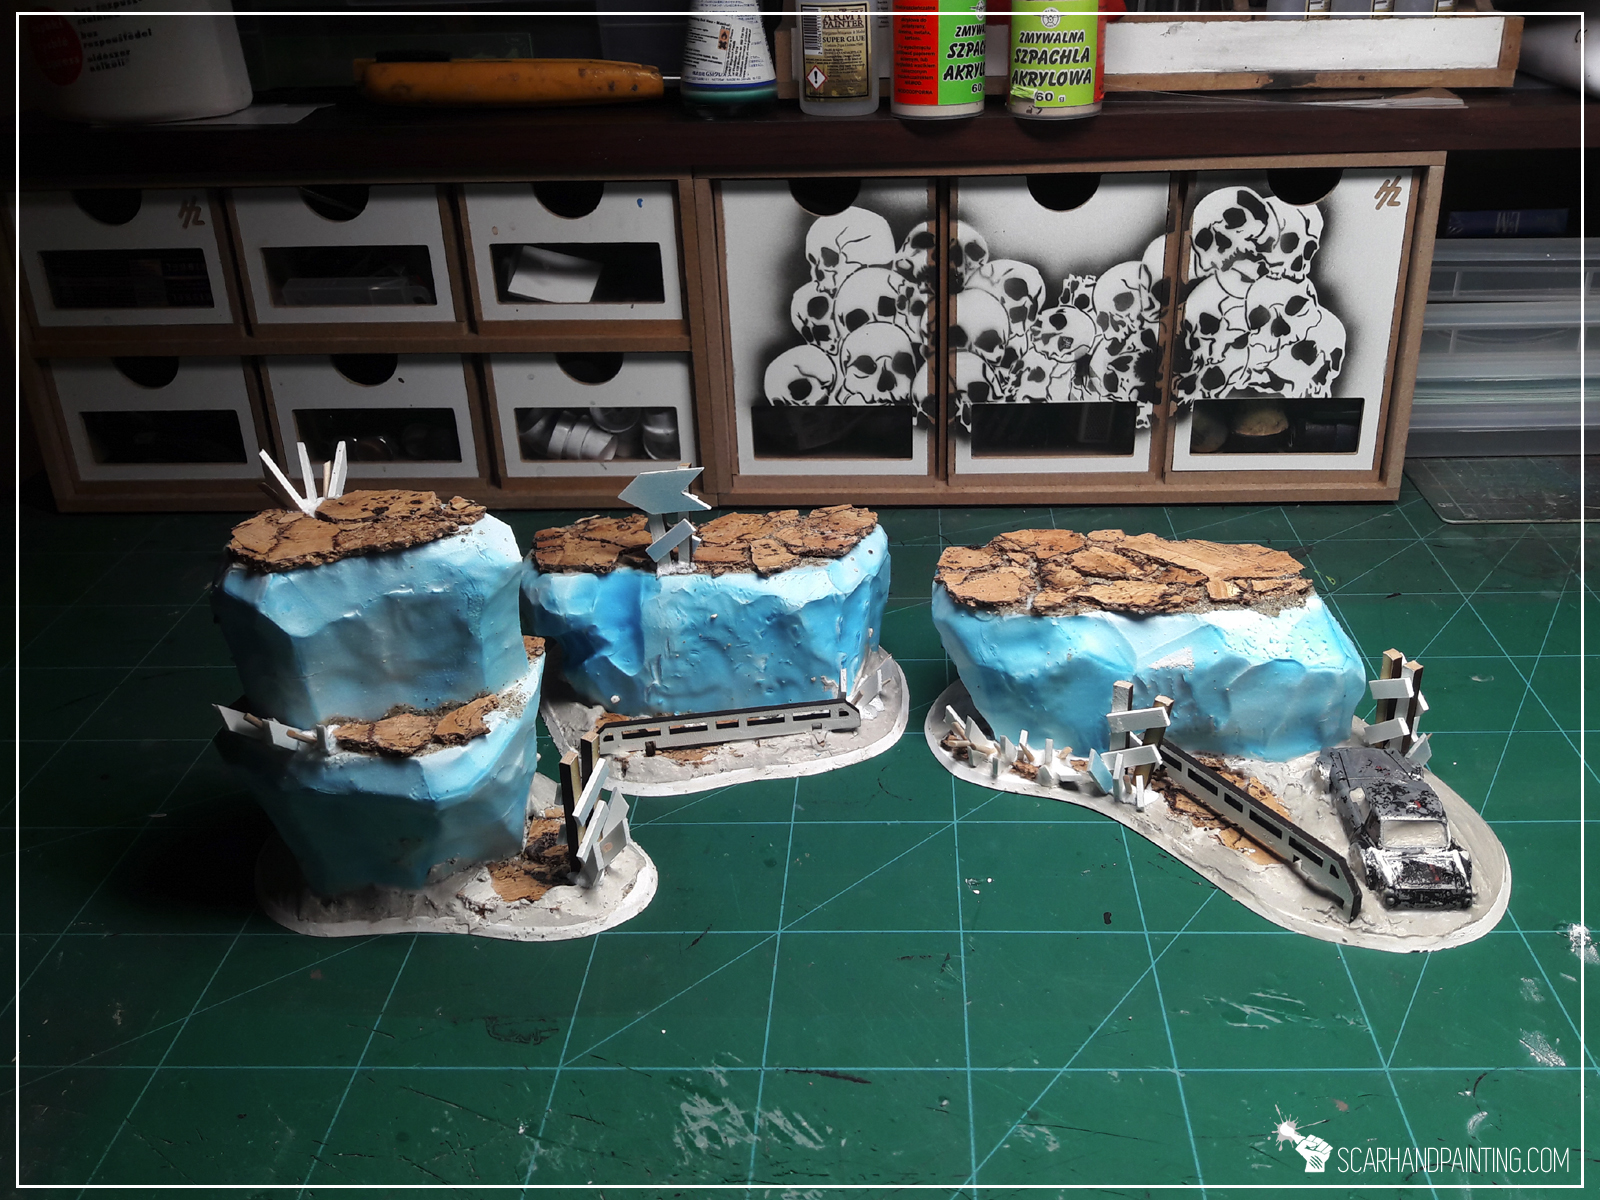
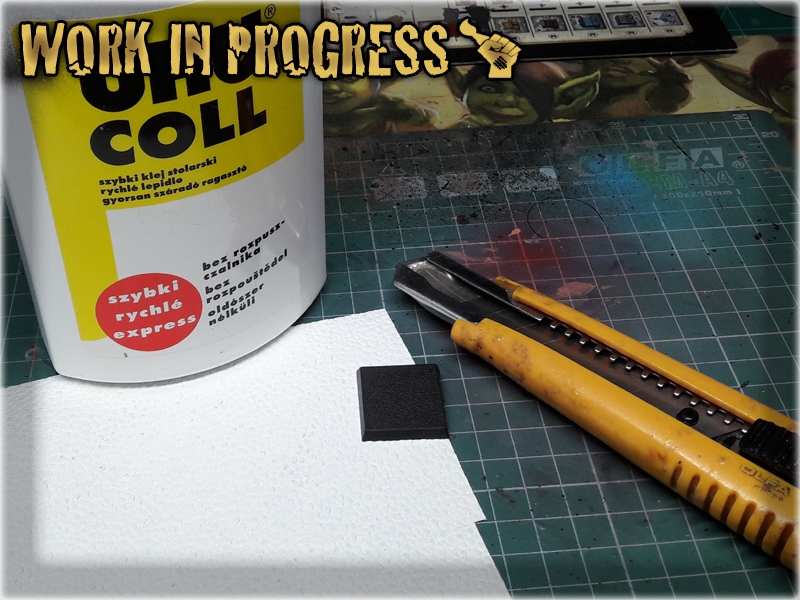
* I started by cutting foamed PCV (or styrofoam) into basic rocky blocks.

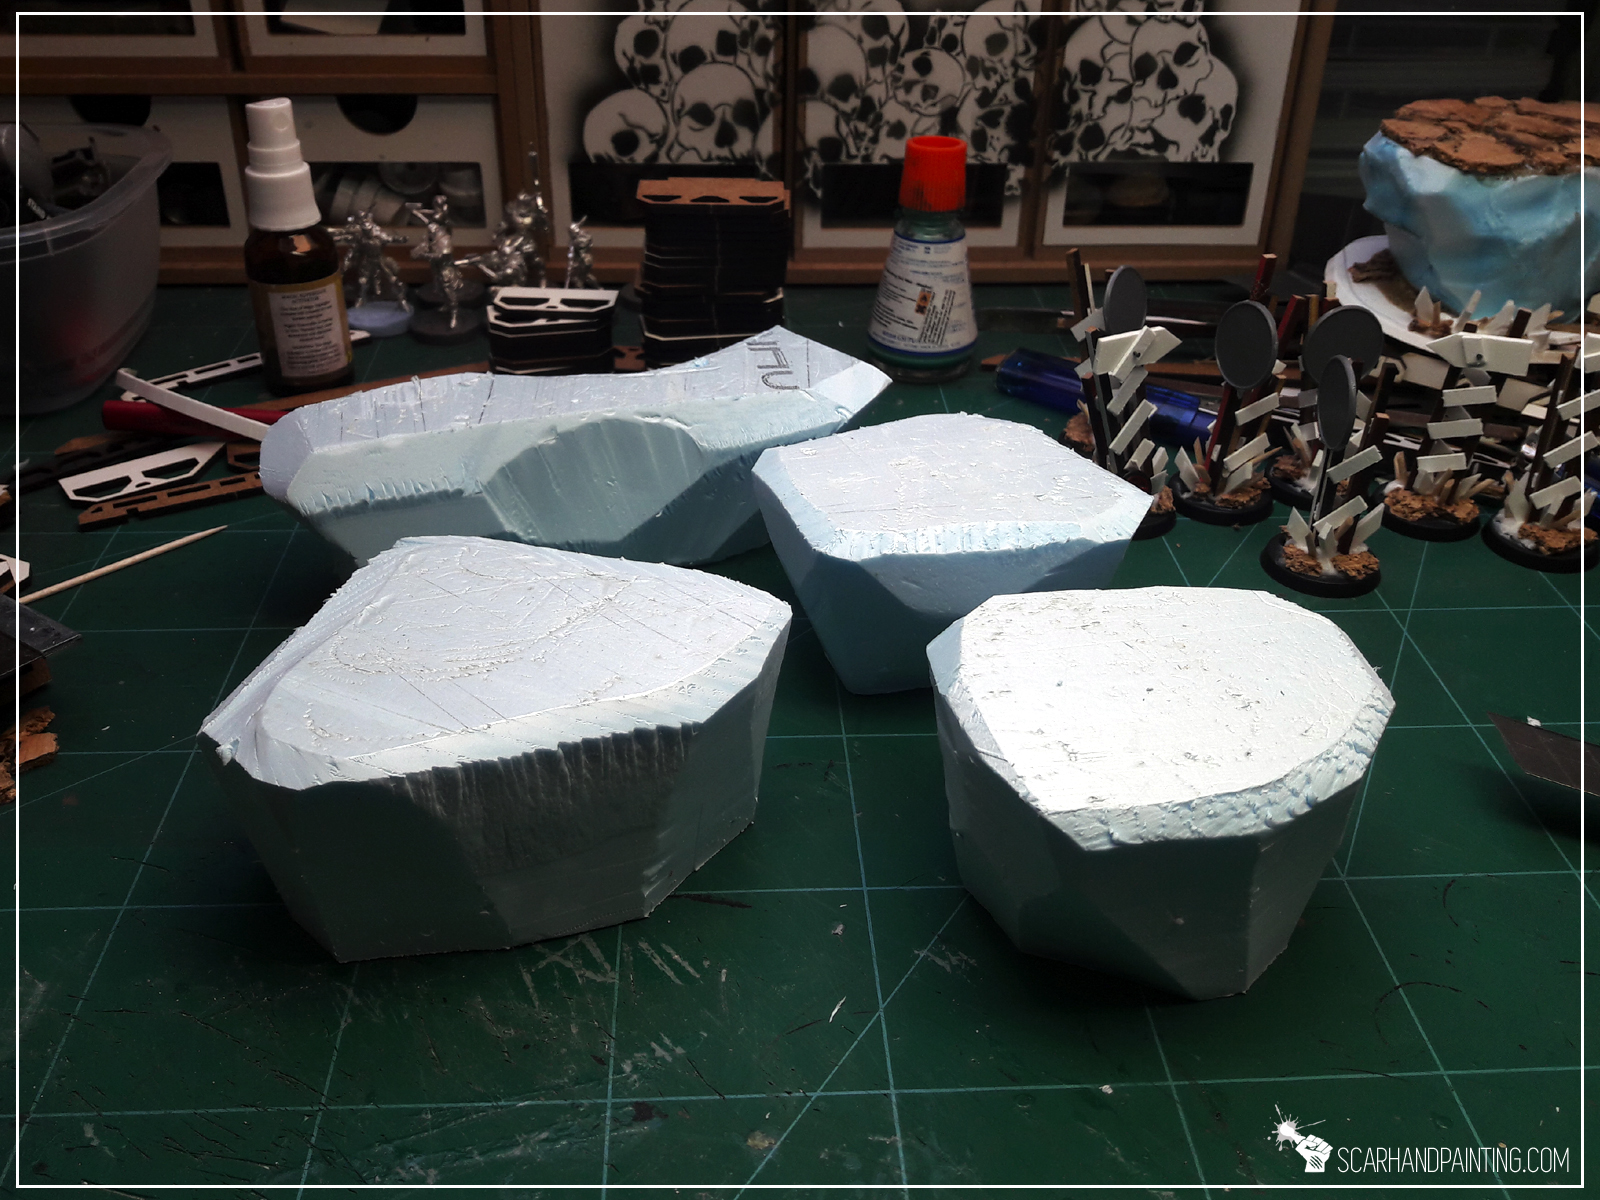
* I then used lighter to gently heat blocks on the sides, avoiding heating up top and bottom surfaces.
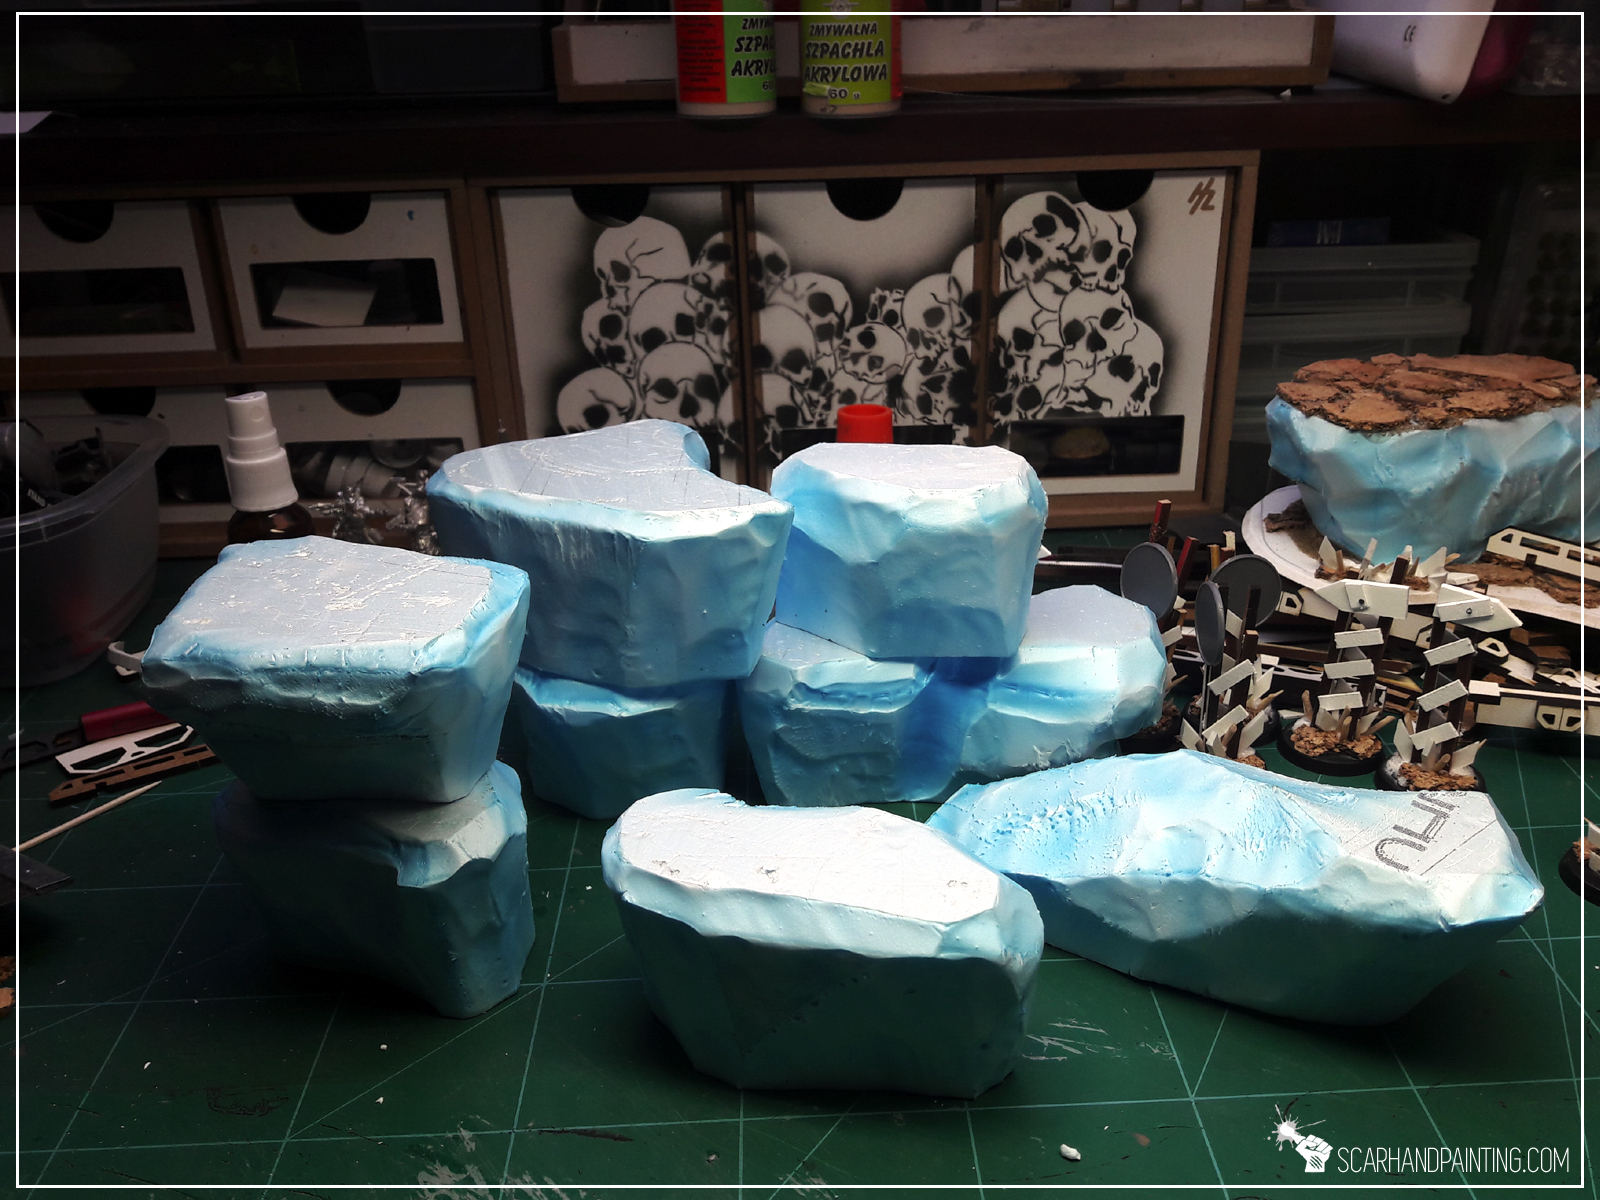
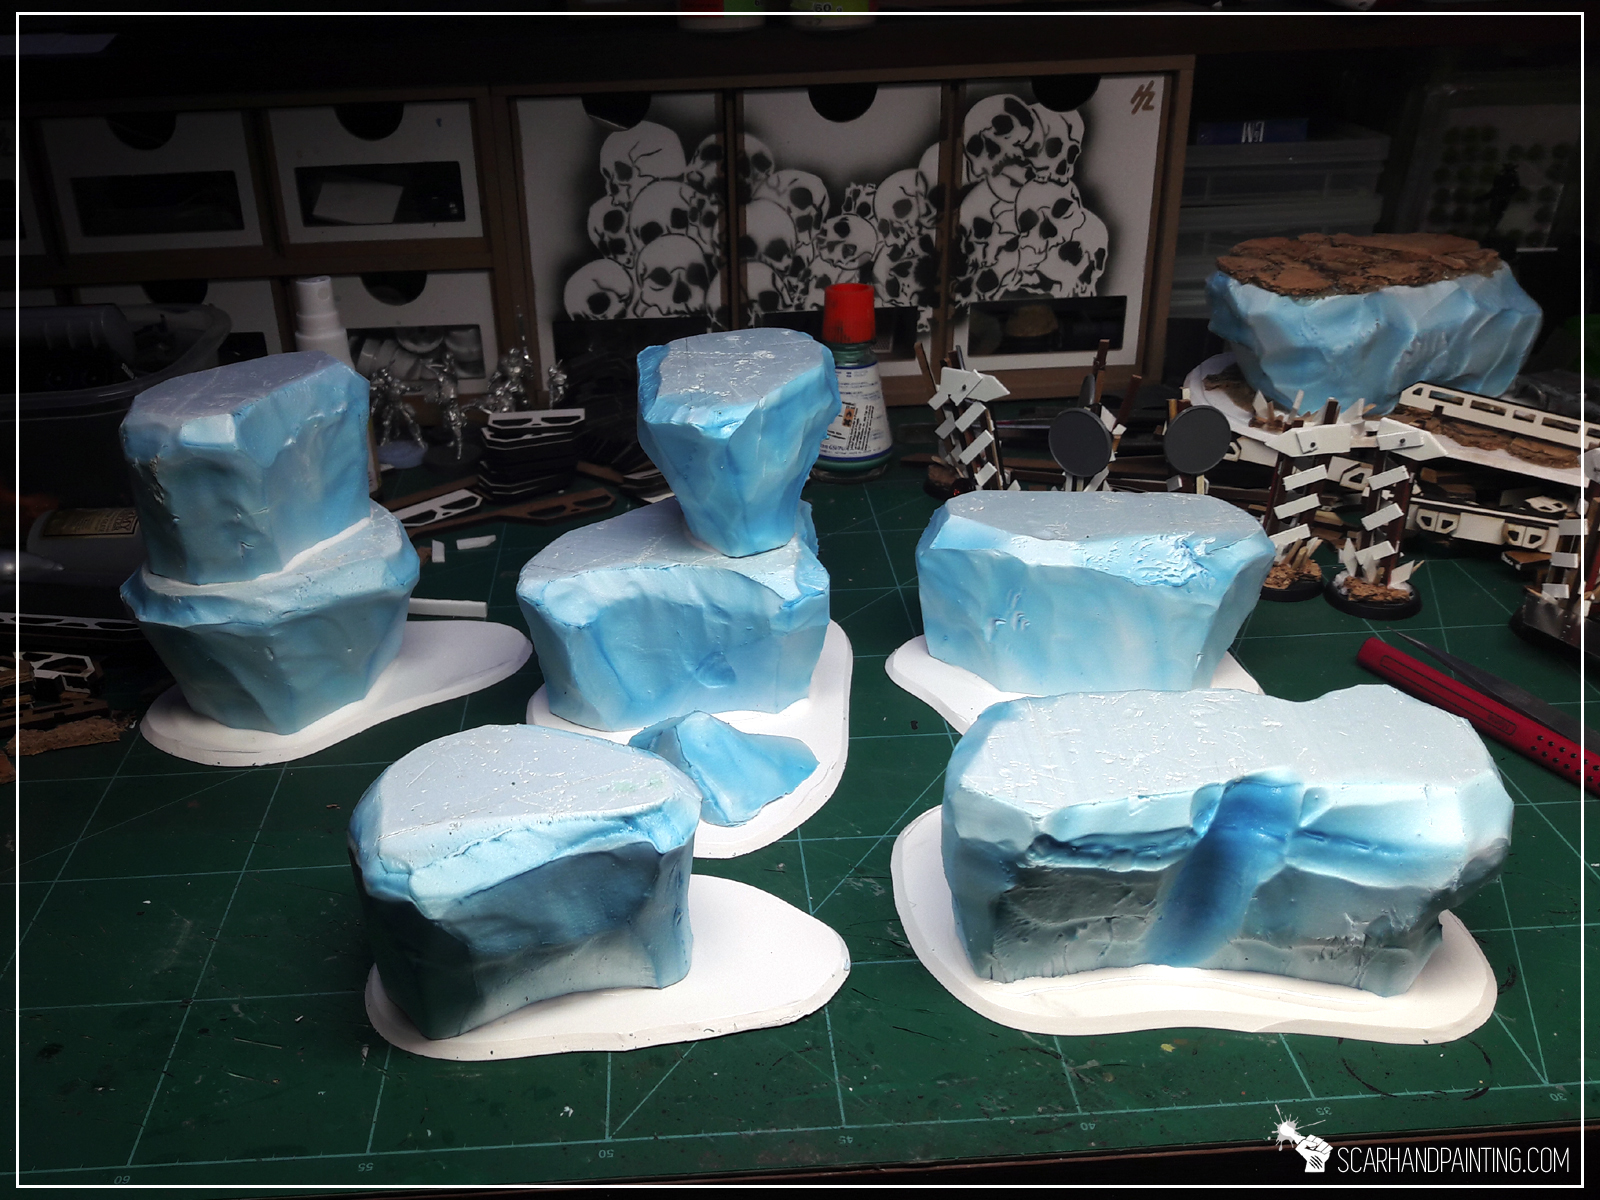
* Next, using a hobby knife, I cut bases from 3mm thick plasticard.

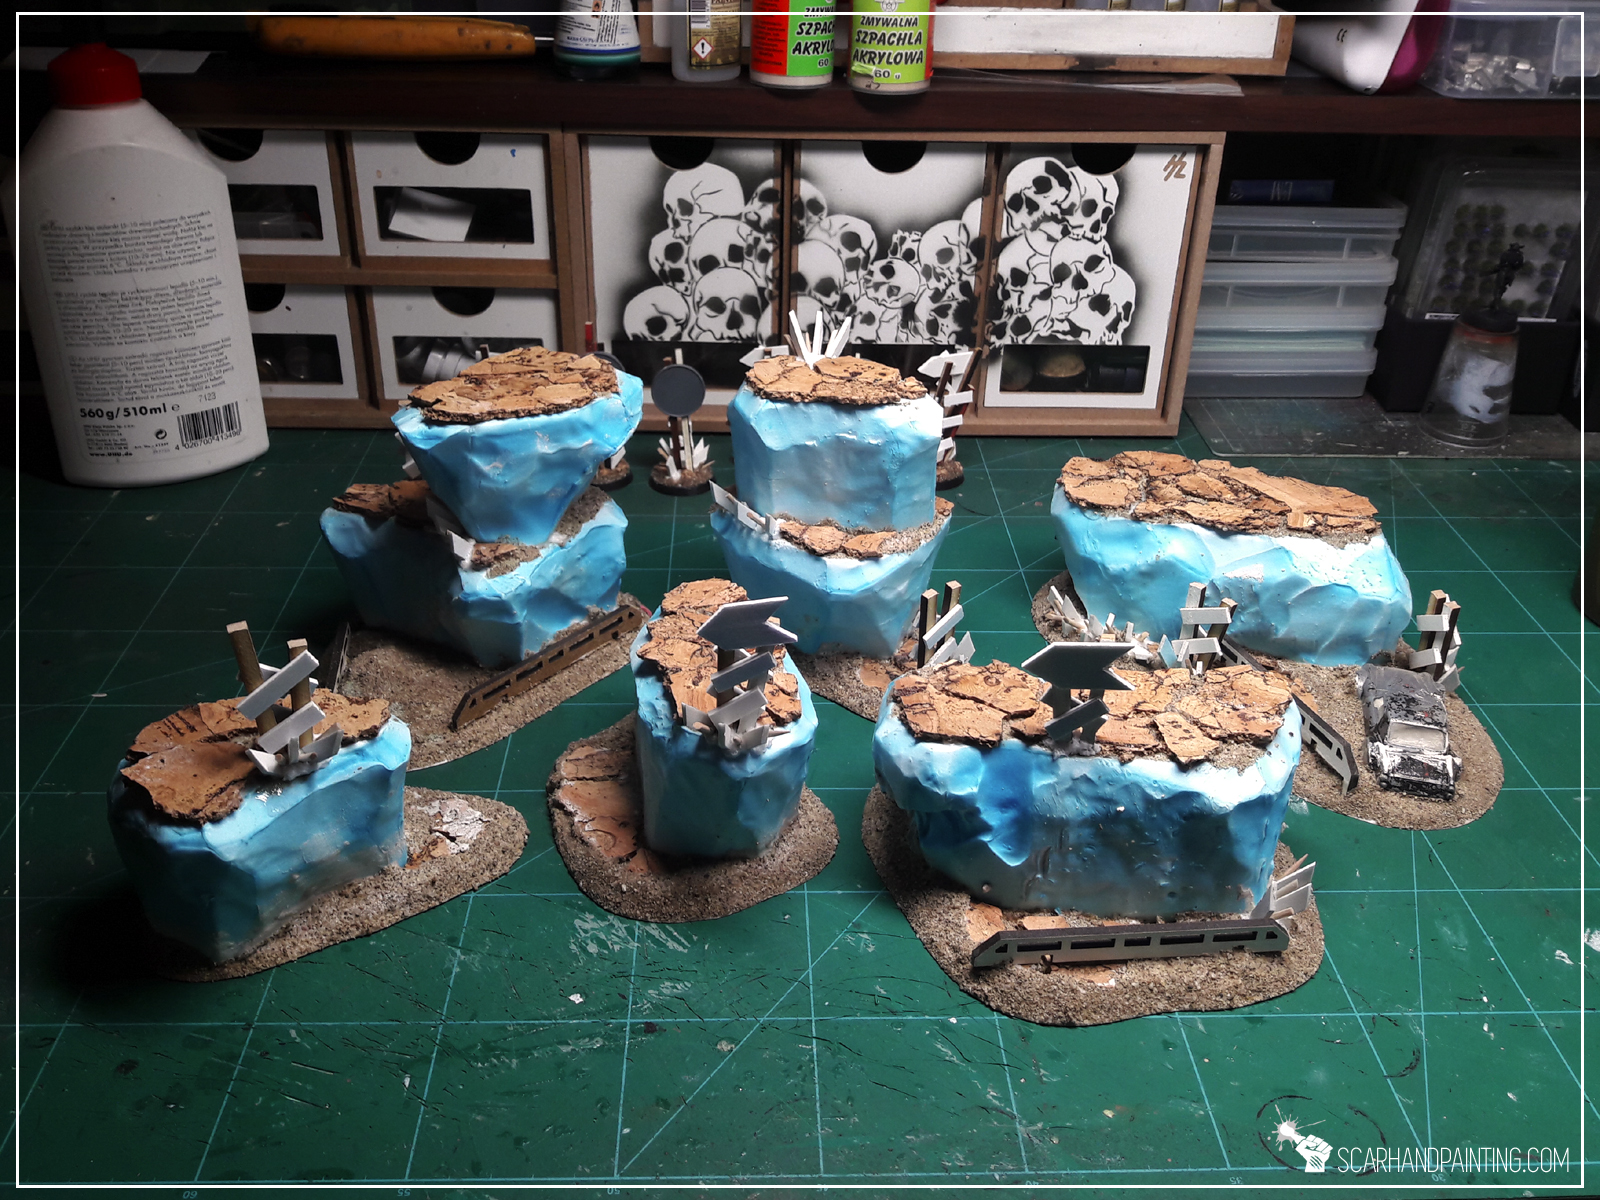
* I then glued rocky blocks on top of the bases with basing (PVA) glue. I also glued some blocks on top of one another for the scenery to look more diverse and interresting.
* Next I crumbled a sheet of cork into small pieces and glued them on top of the blocks with basing glue, sanding them before glue dried out to fill the gaps inbetween separate cork pieces.


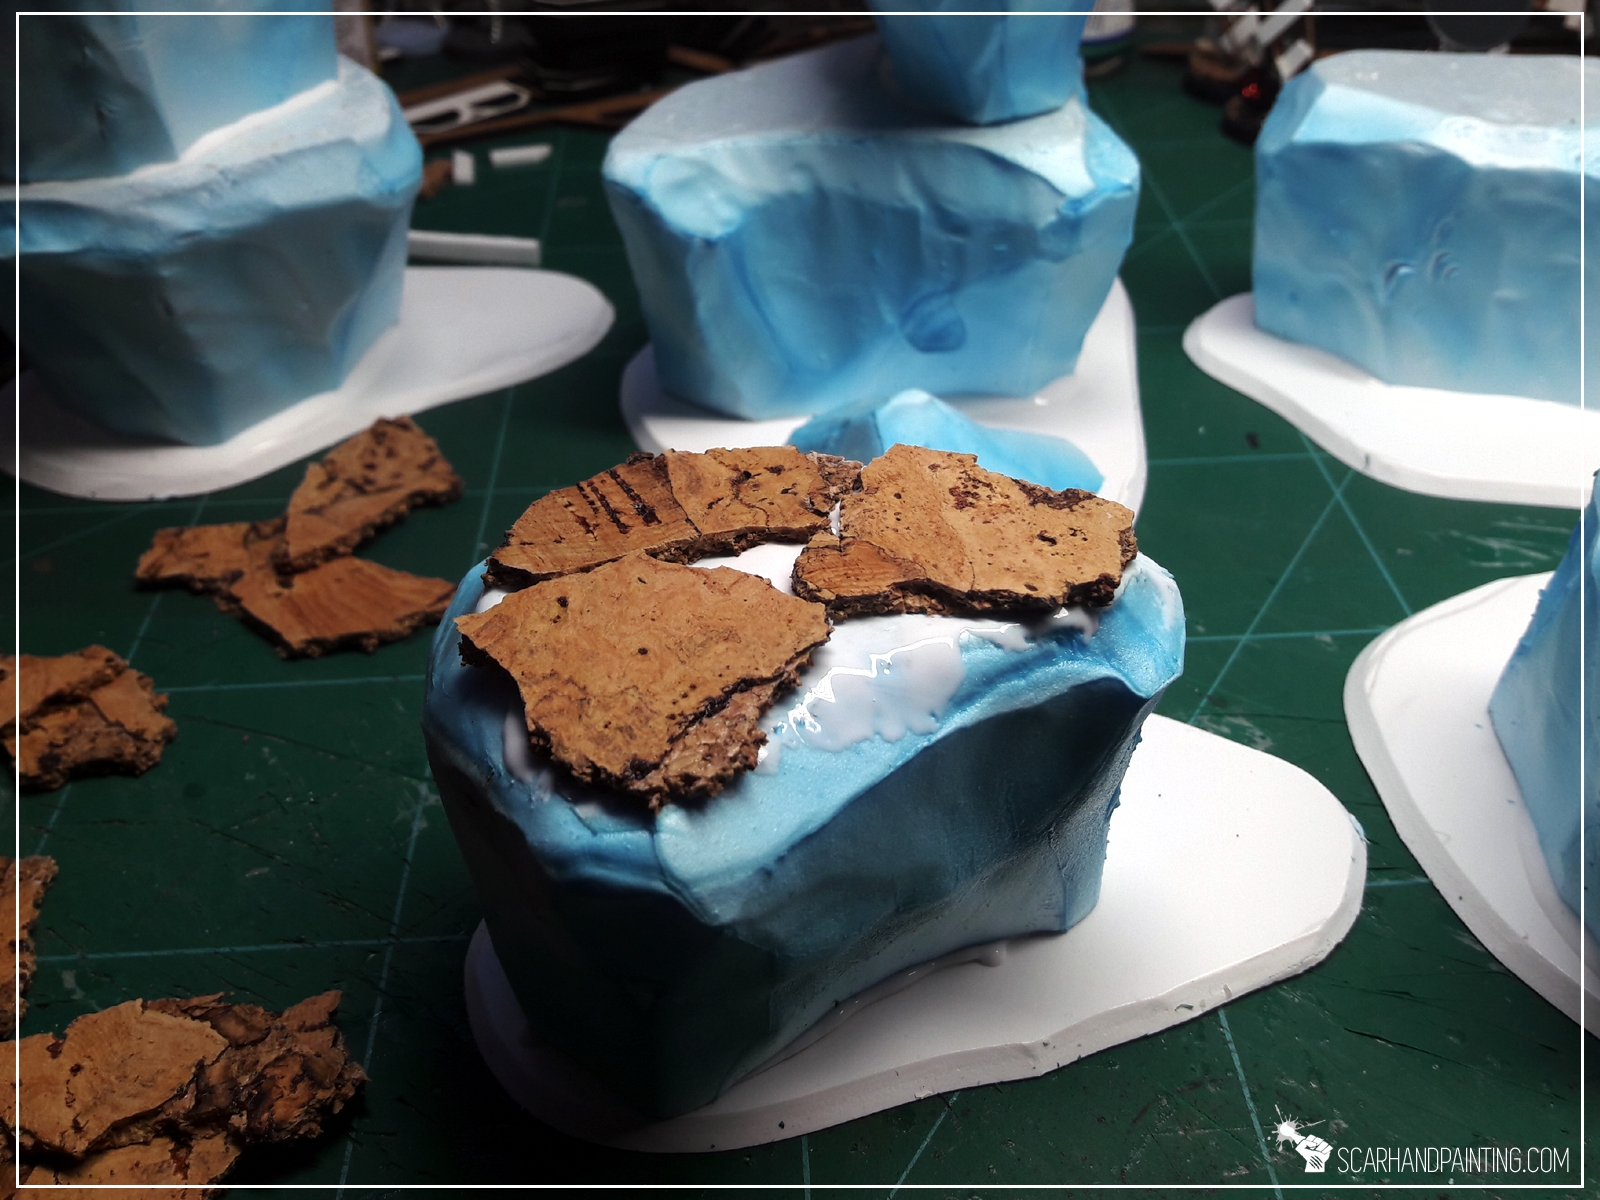

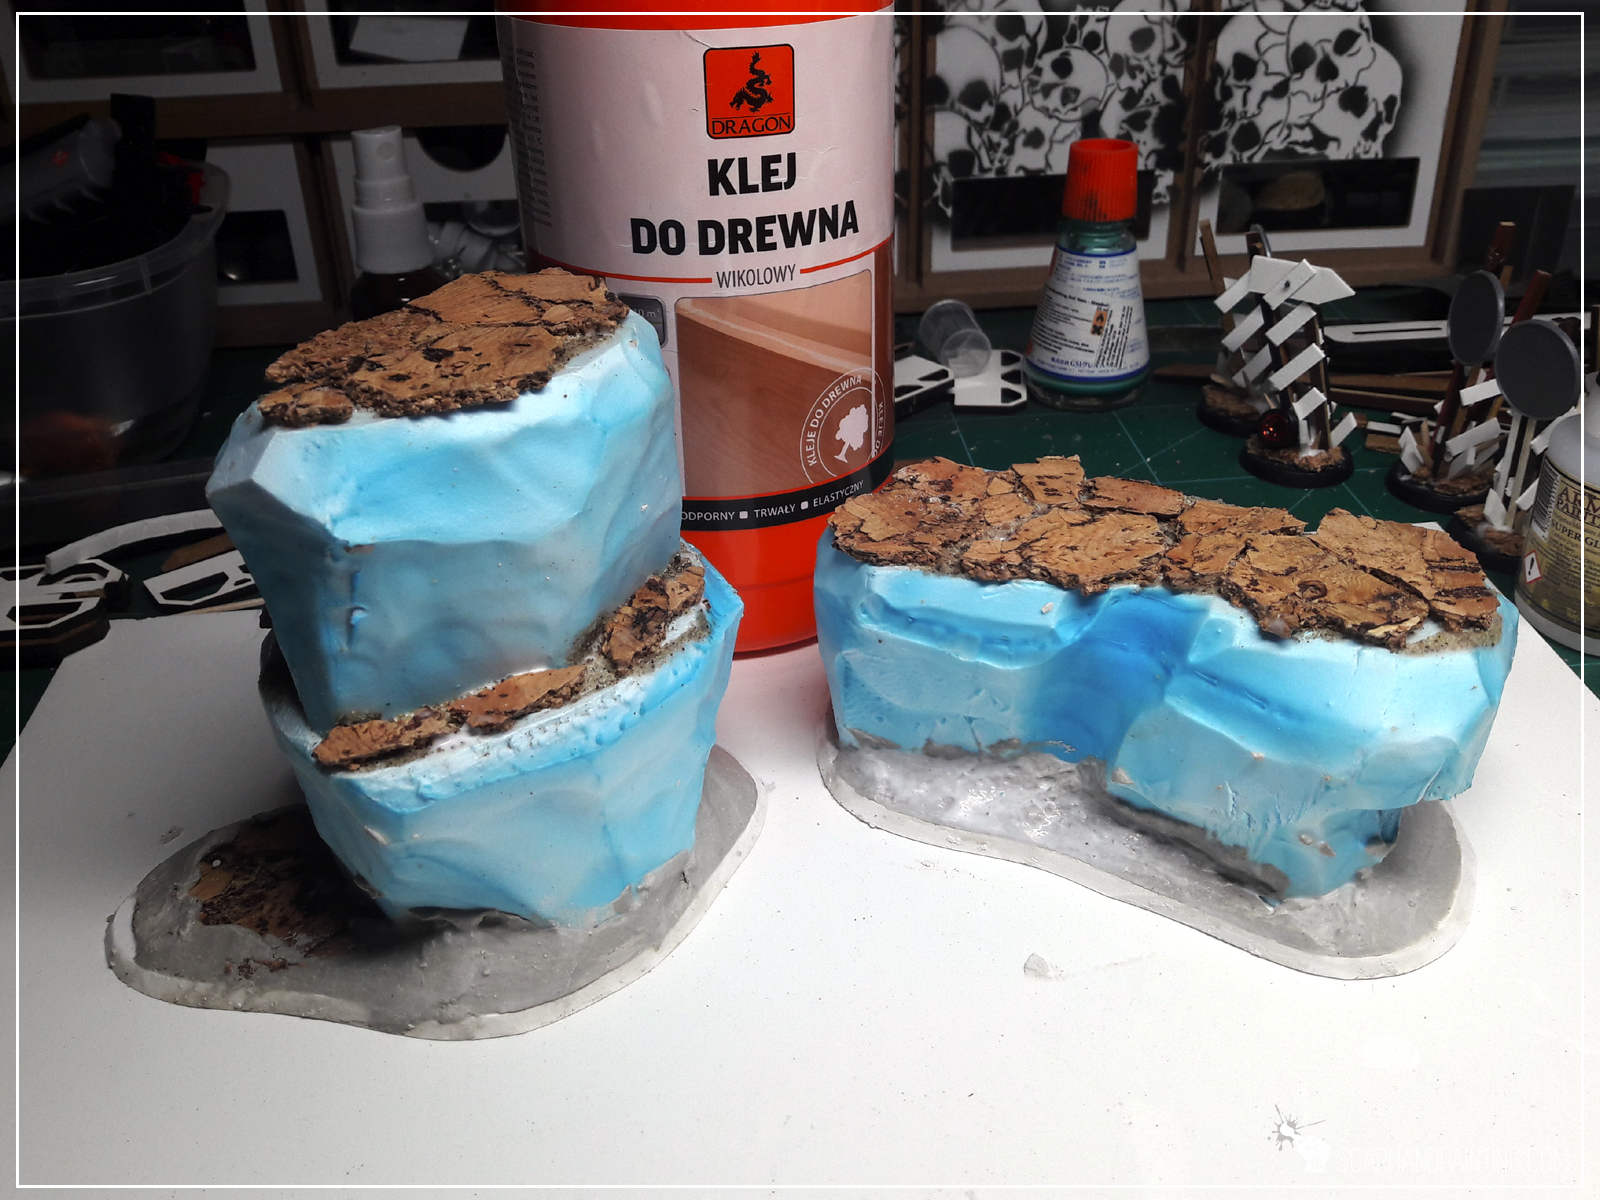
* I then used plaster (gypsum) to build a gentle transition between bases and blocks.
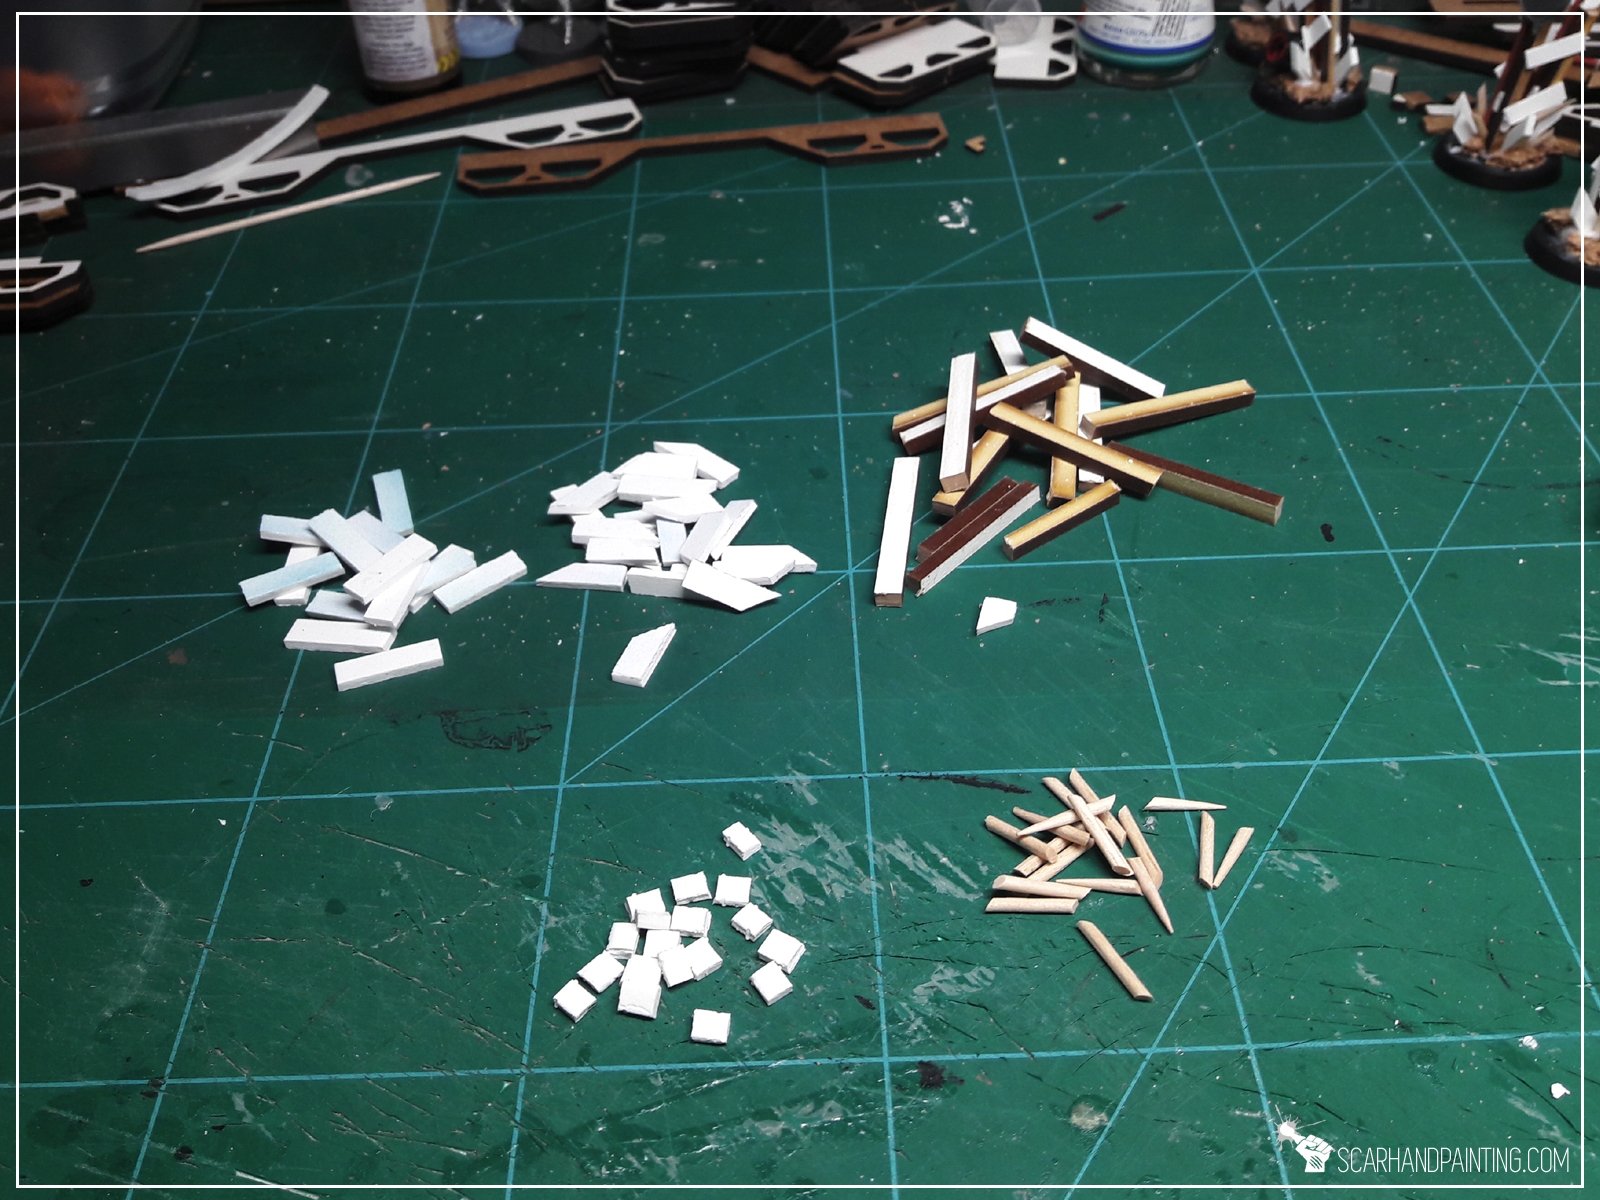
* A time has come for me to add some detail. Not much, just some texture to bring more life to the wasteland. I cut pieces of plasticard and used toothpicks, MDF leftovers and a toy car to create ragtag barricades and post-apo racing signs.
* Lastly, with a regular brush, I applied basing glue then sanded all the plaster, sides of the bases and some areas around cork pieces on top of the blocks.
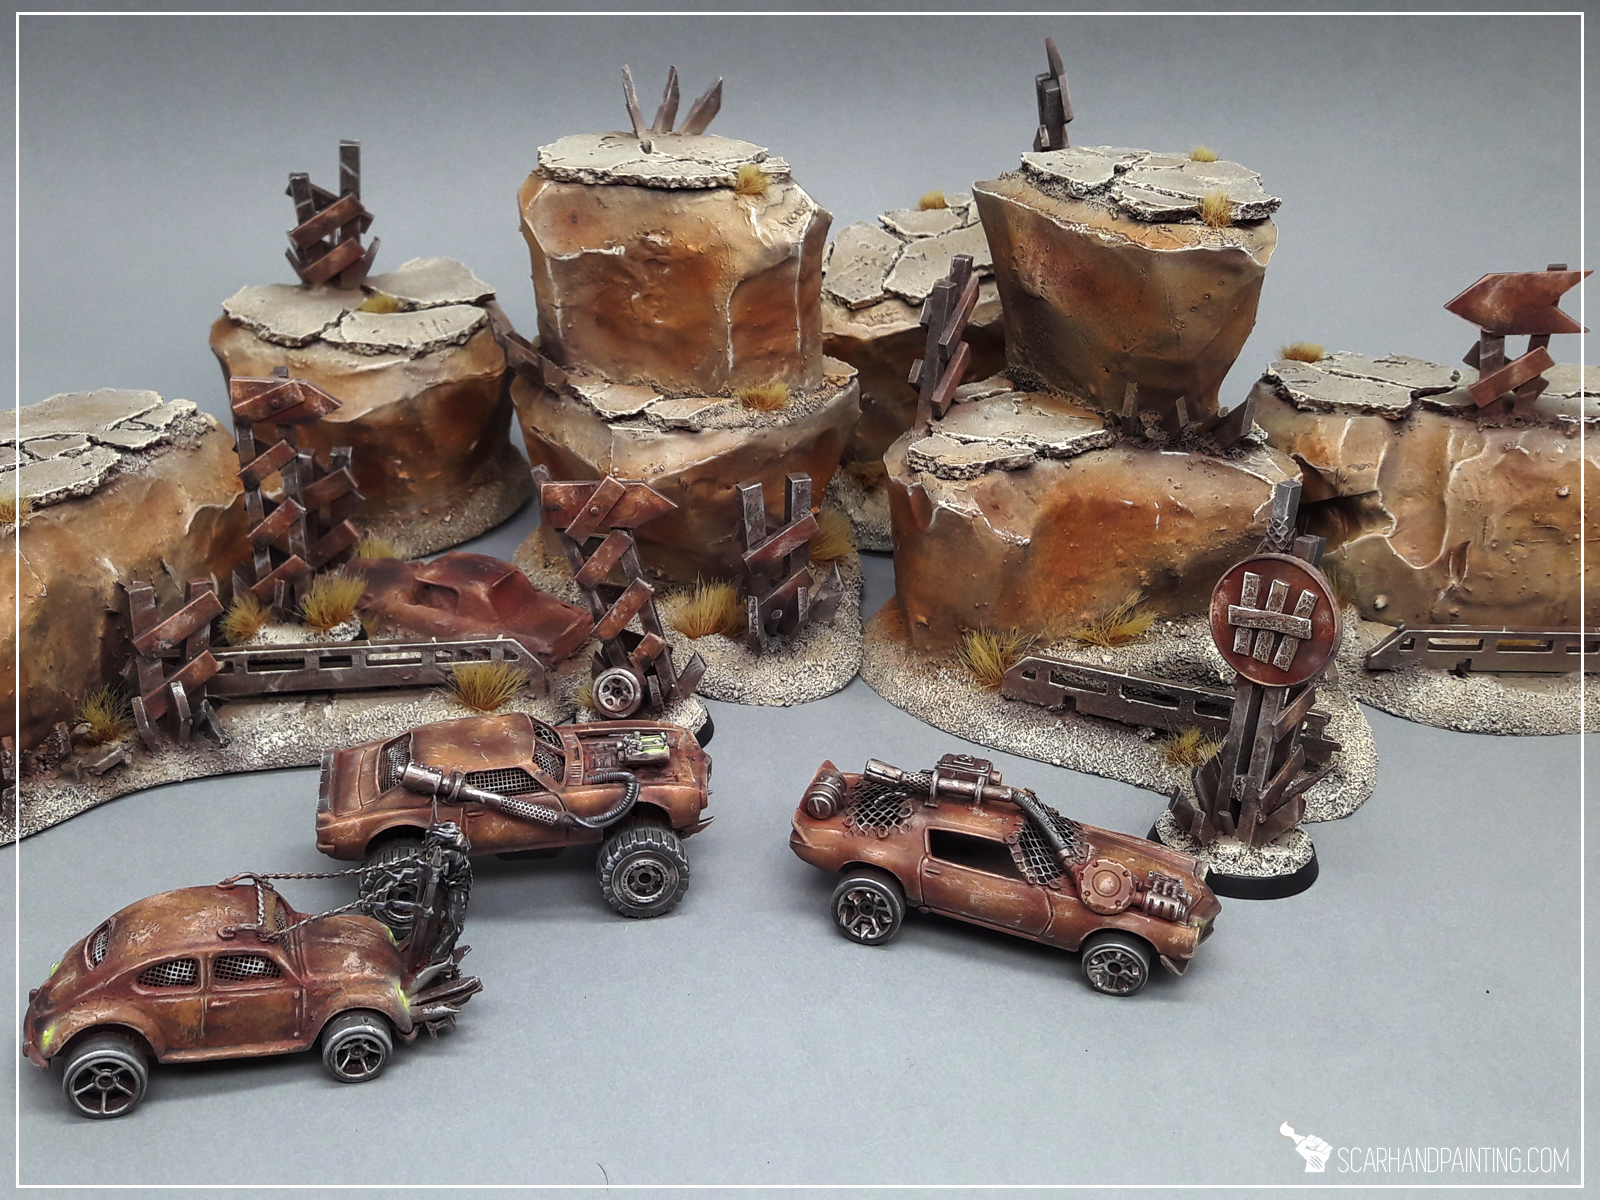
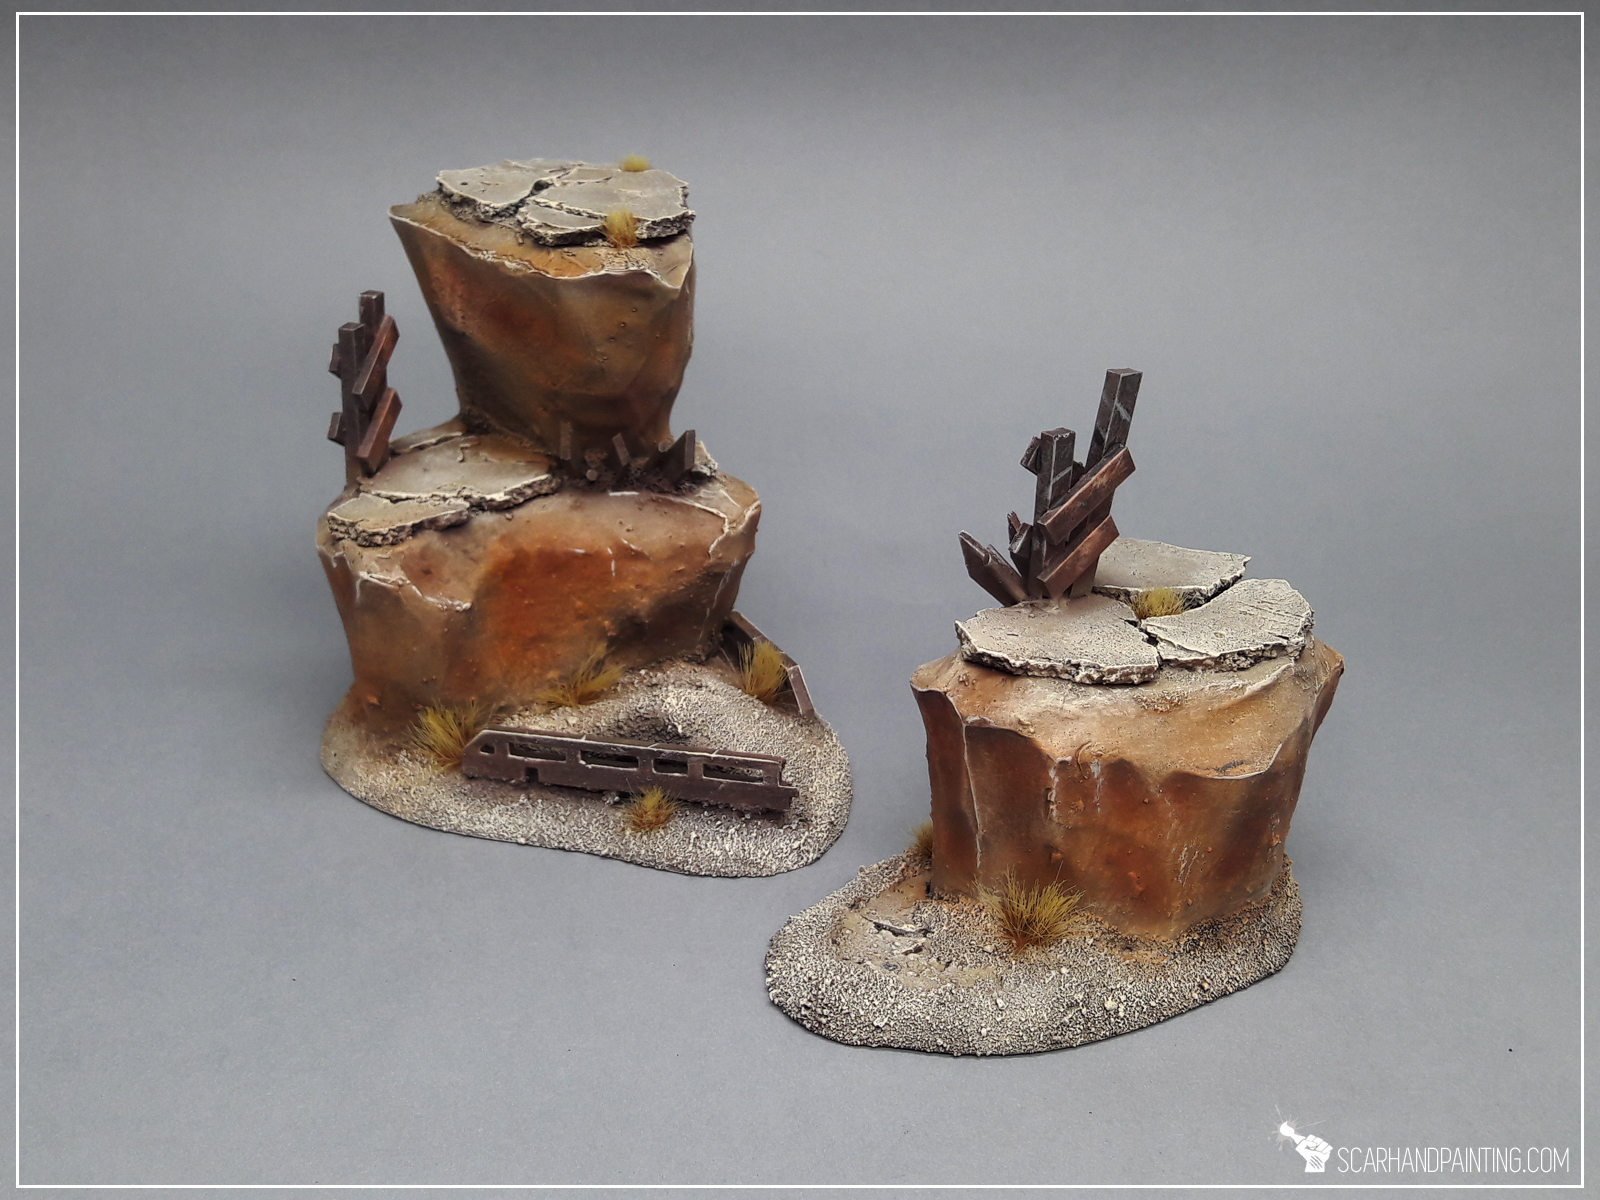
Couple of hours later I have painted this stuff and added some tuftsthe end result looks like this:

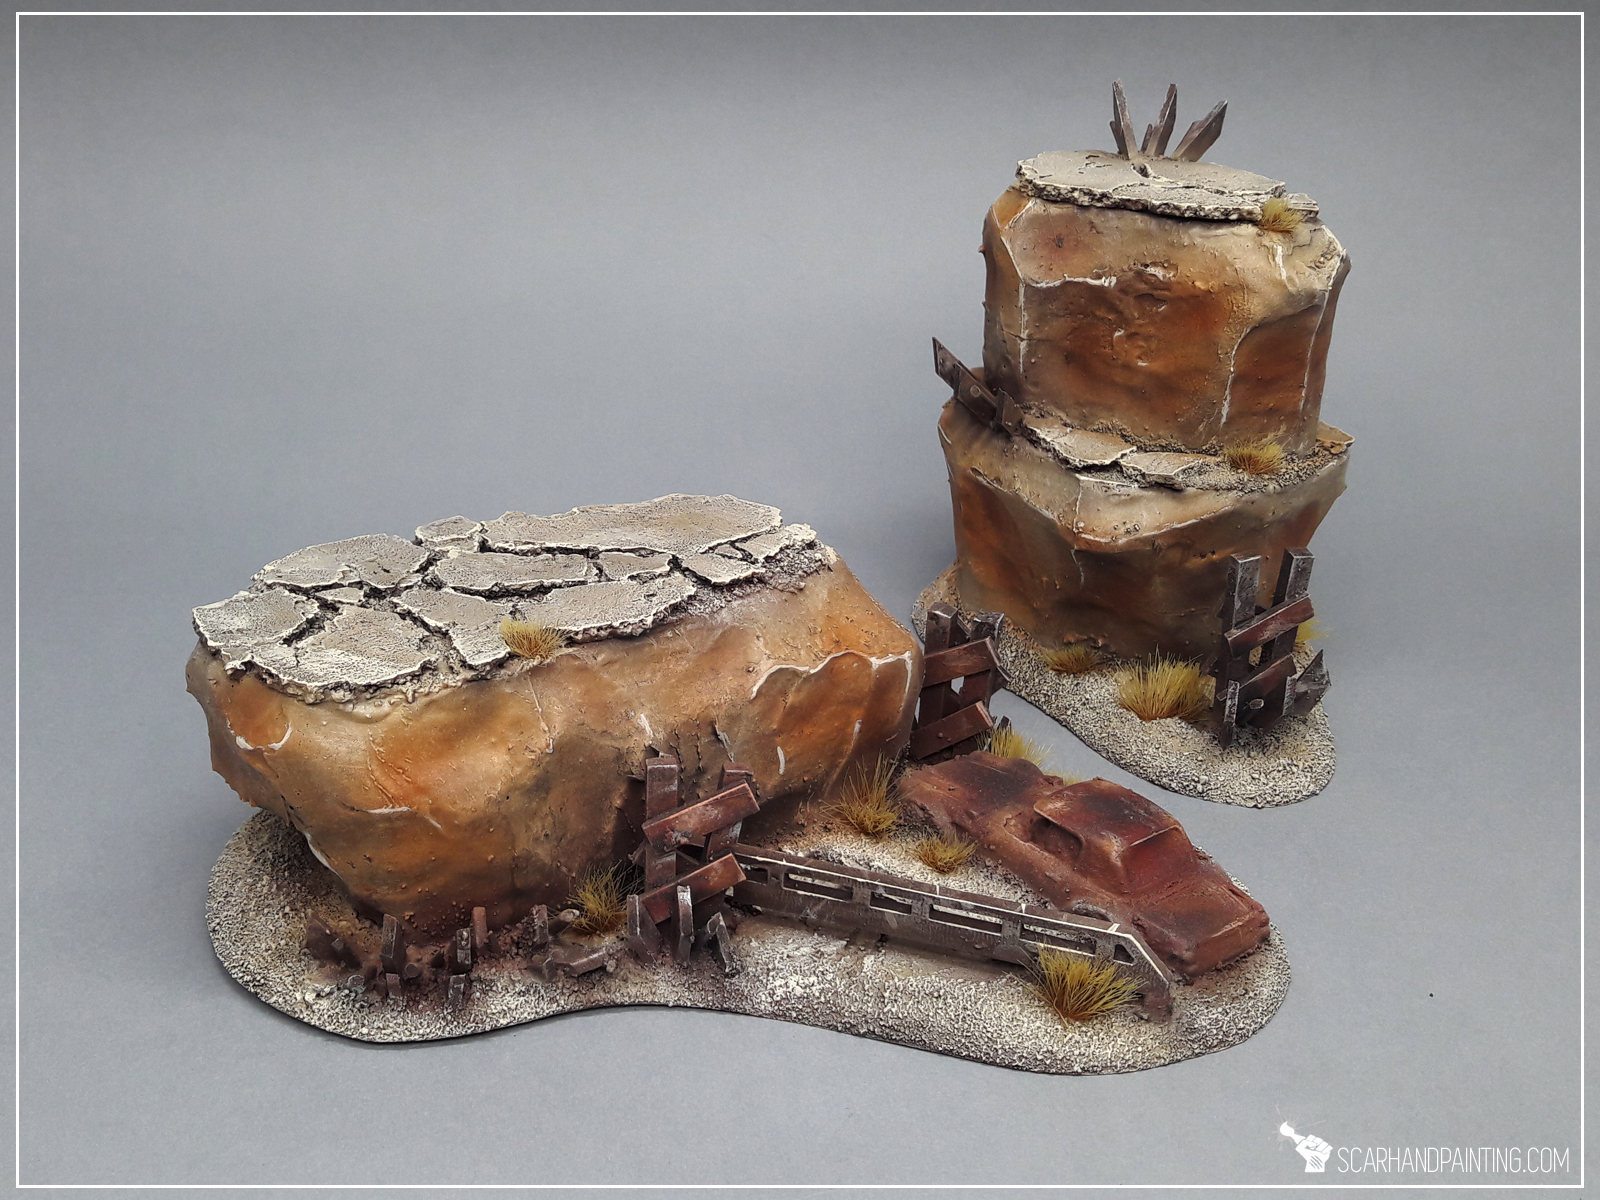

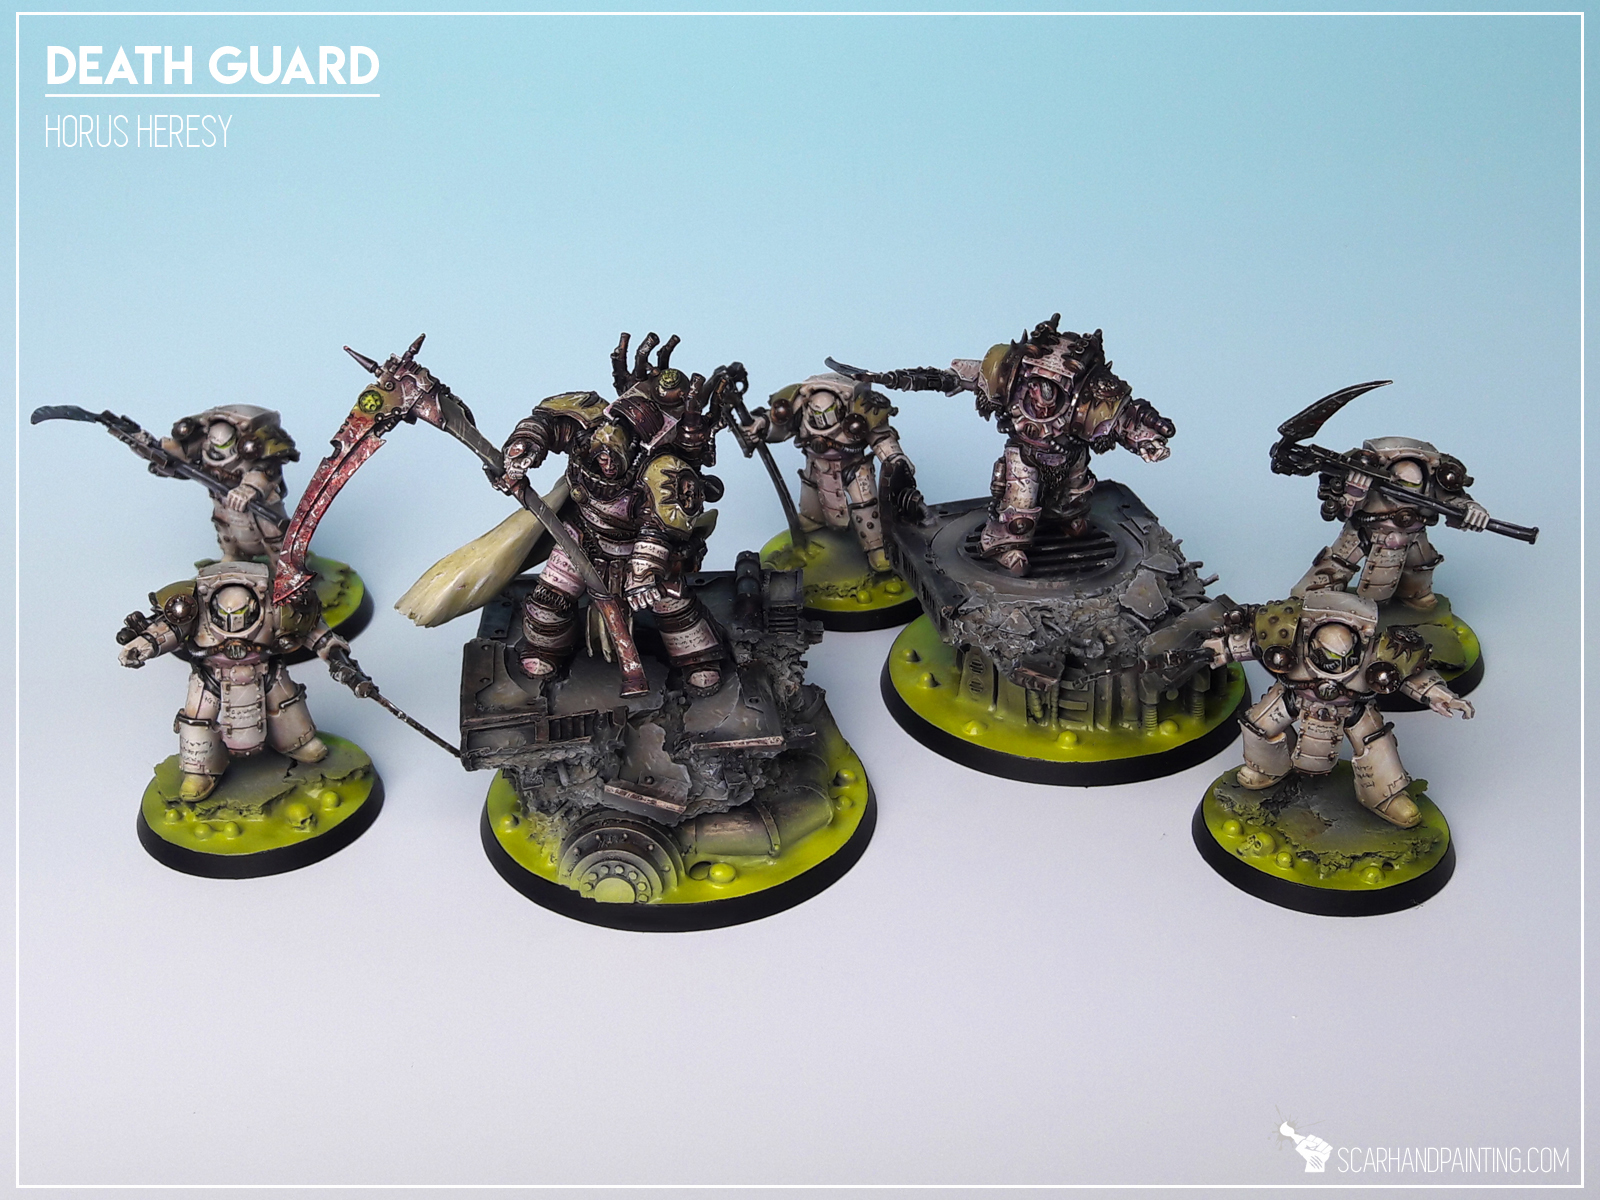
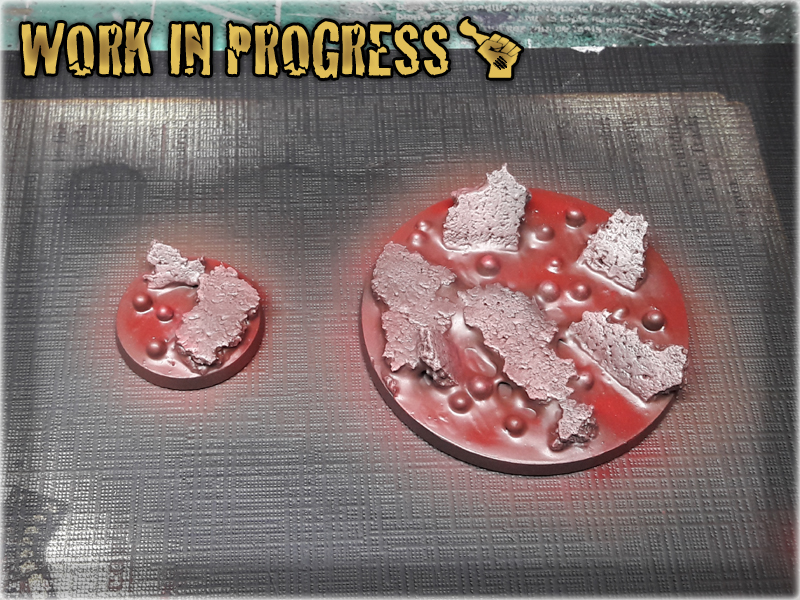
In this easy, step-by-step tutorial I’m going to show you how to create a Toxic Sludge Base. I designed these bases for Warhammer 40,000 Death Guuard Plague Marines.

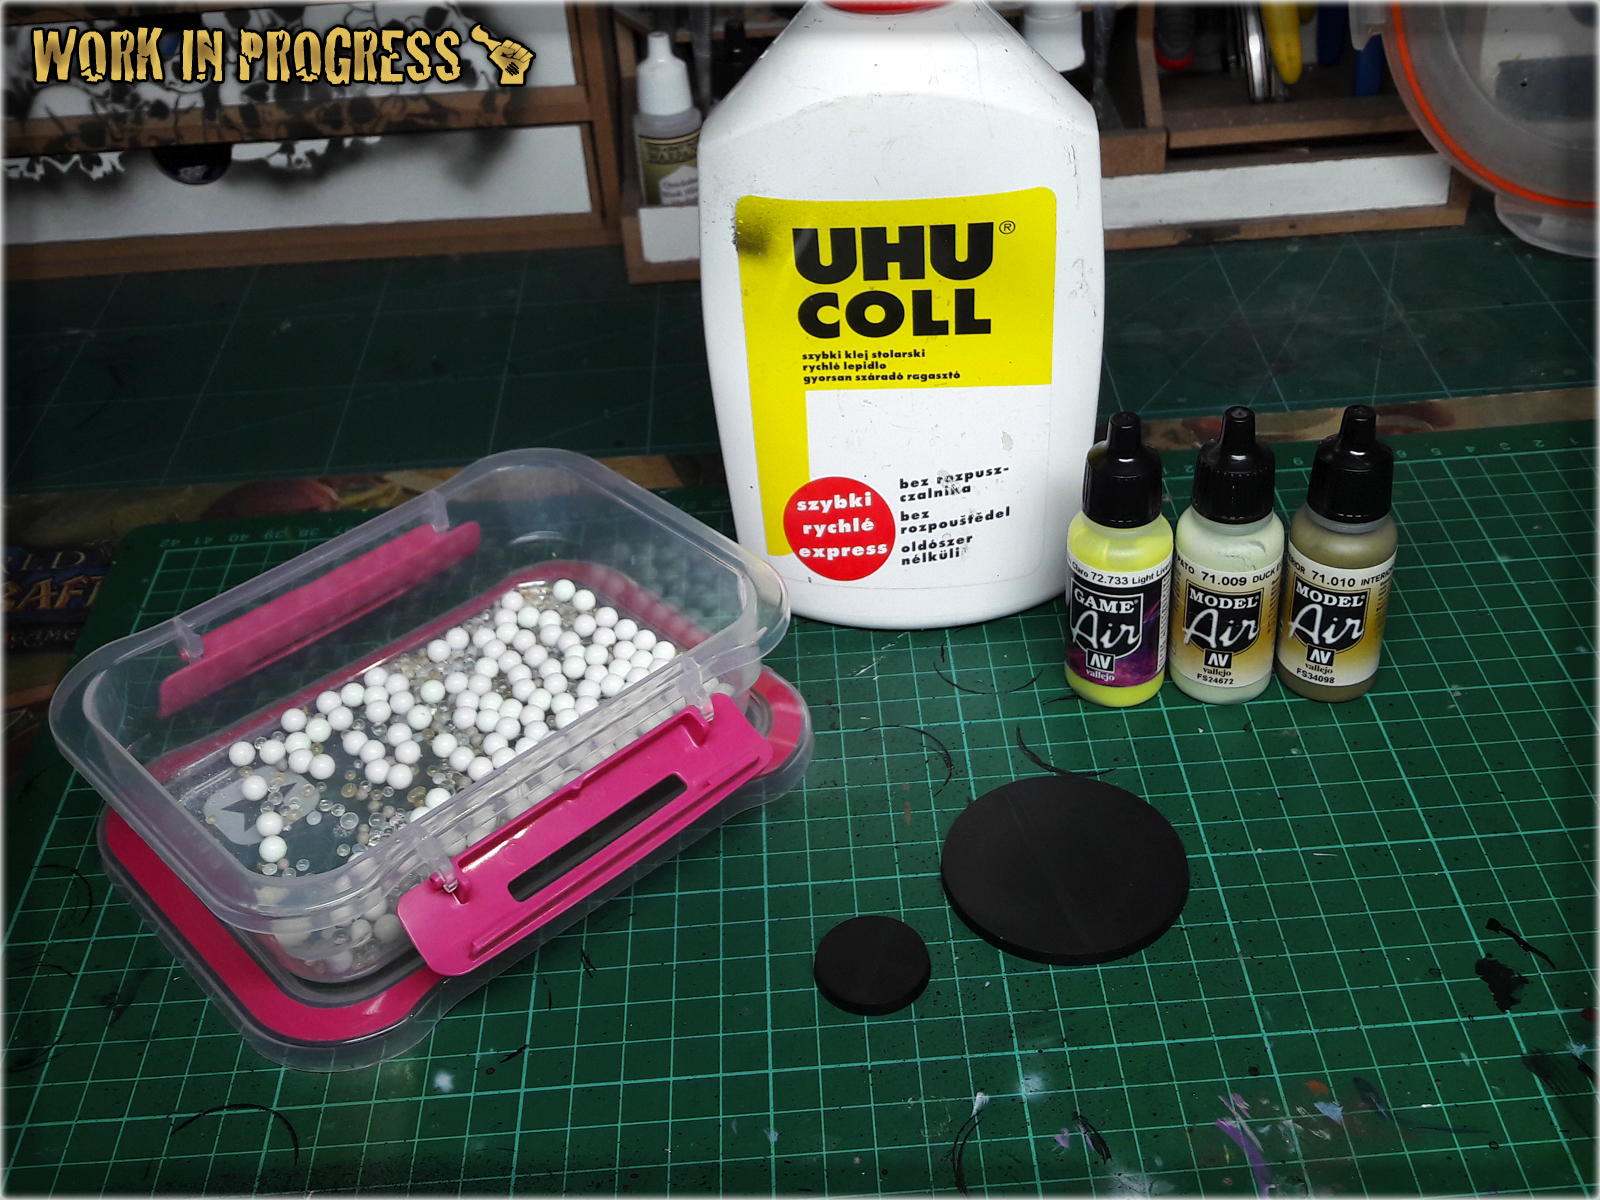
**Where I’m from there’s a small paper bag filled with moist absorbsion balls in every shoe box. If you can’t get that, just use some grains or make small balls out of green stuff or modeling clay.
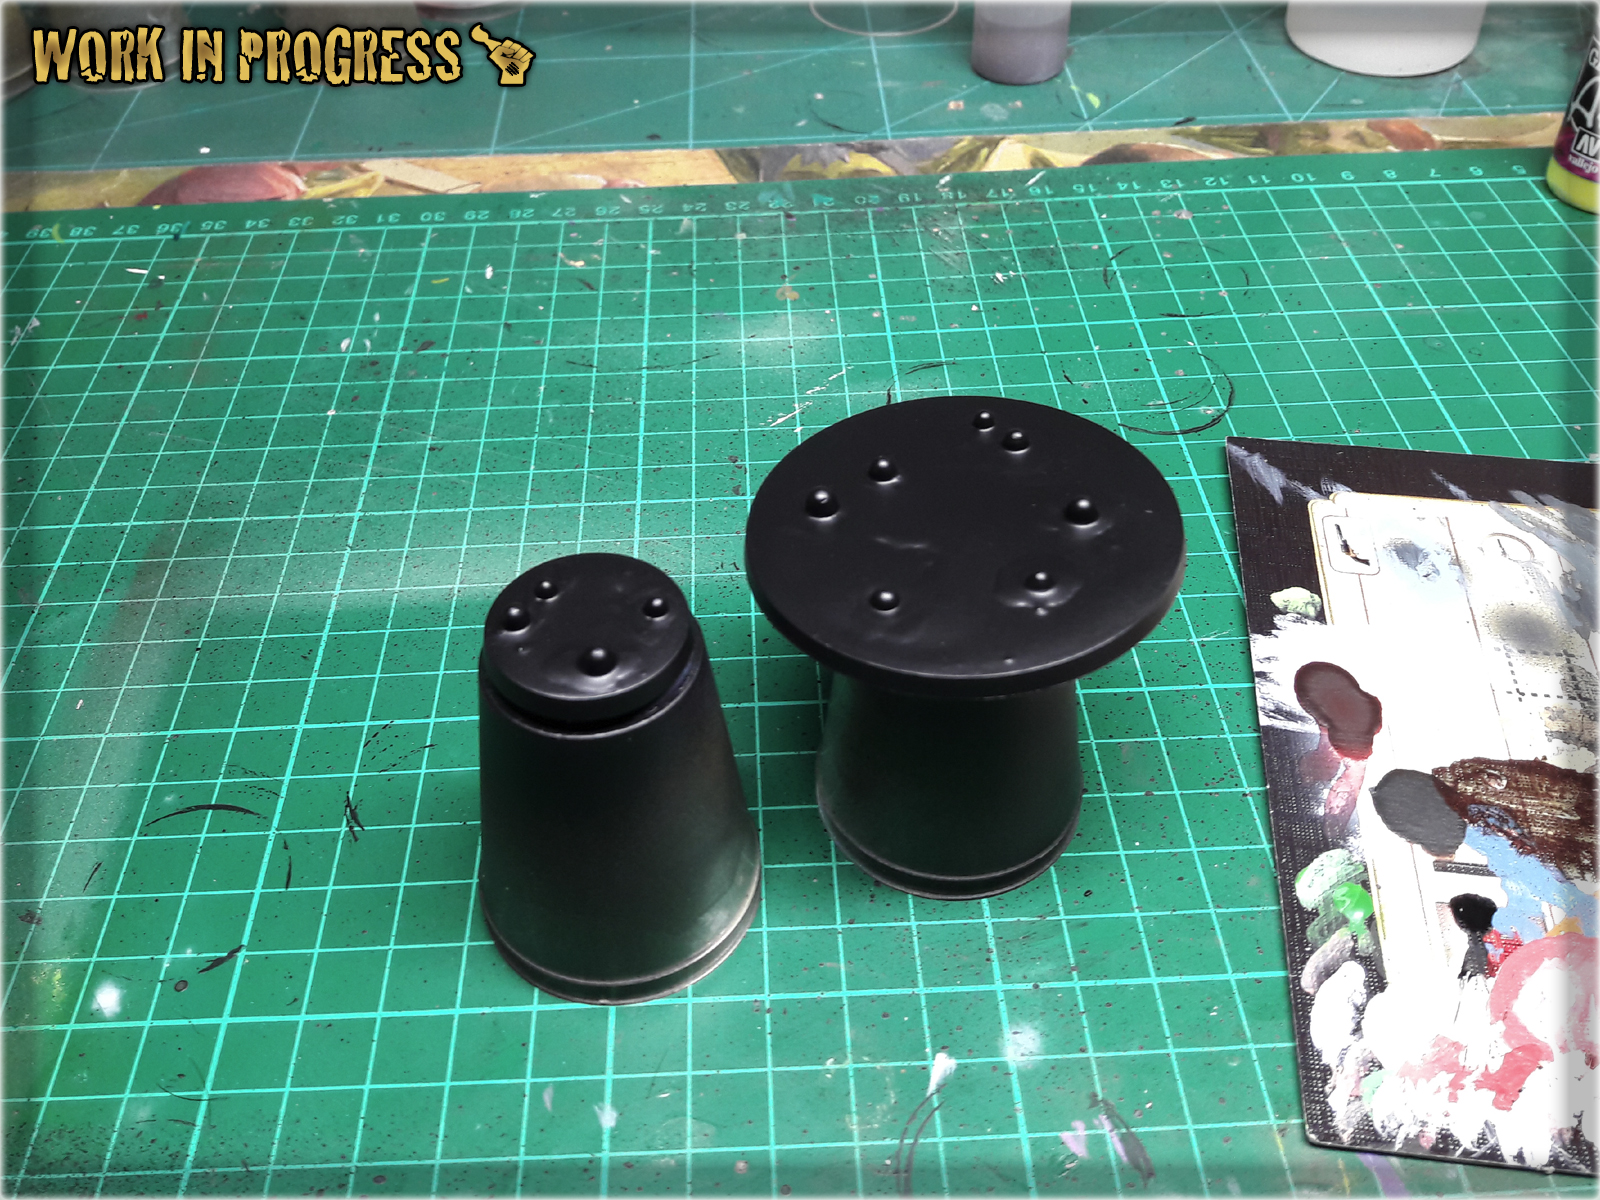
* I started by covering entire base with a layer of basing glue.

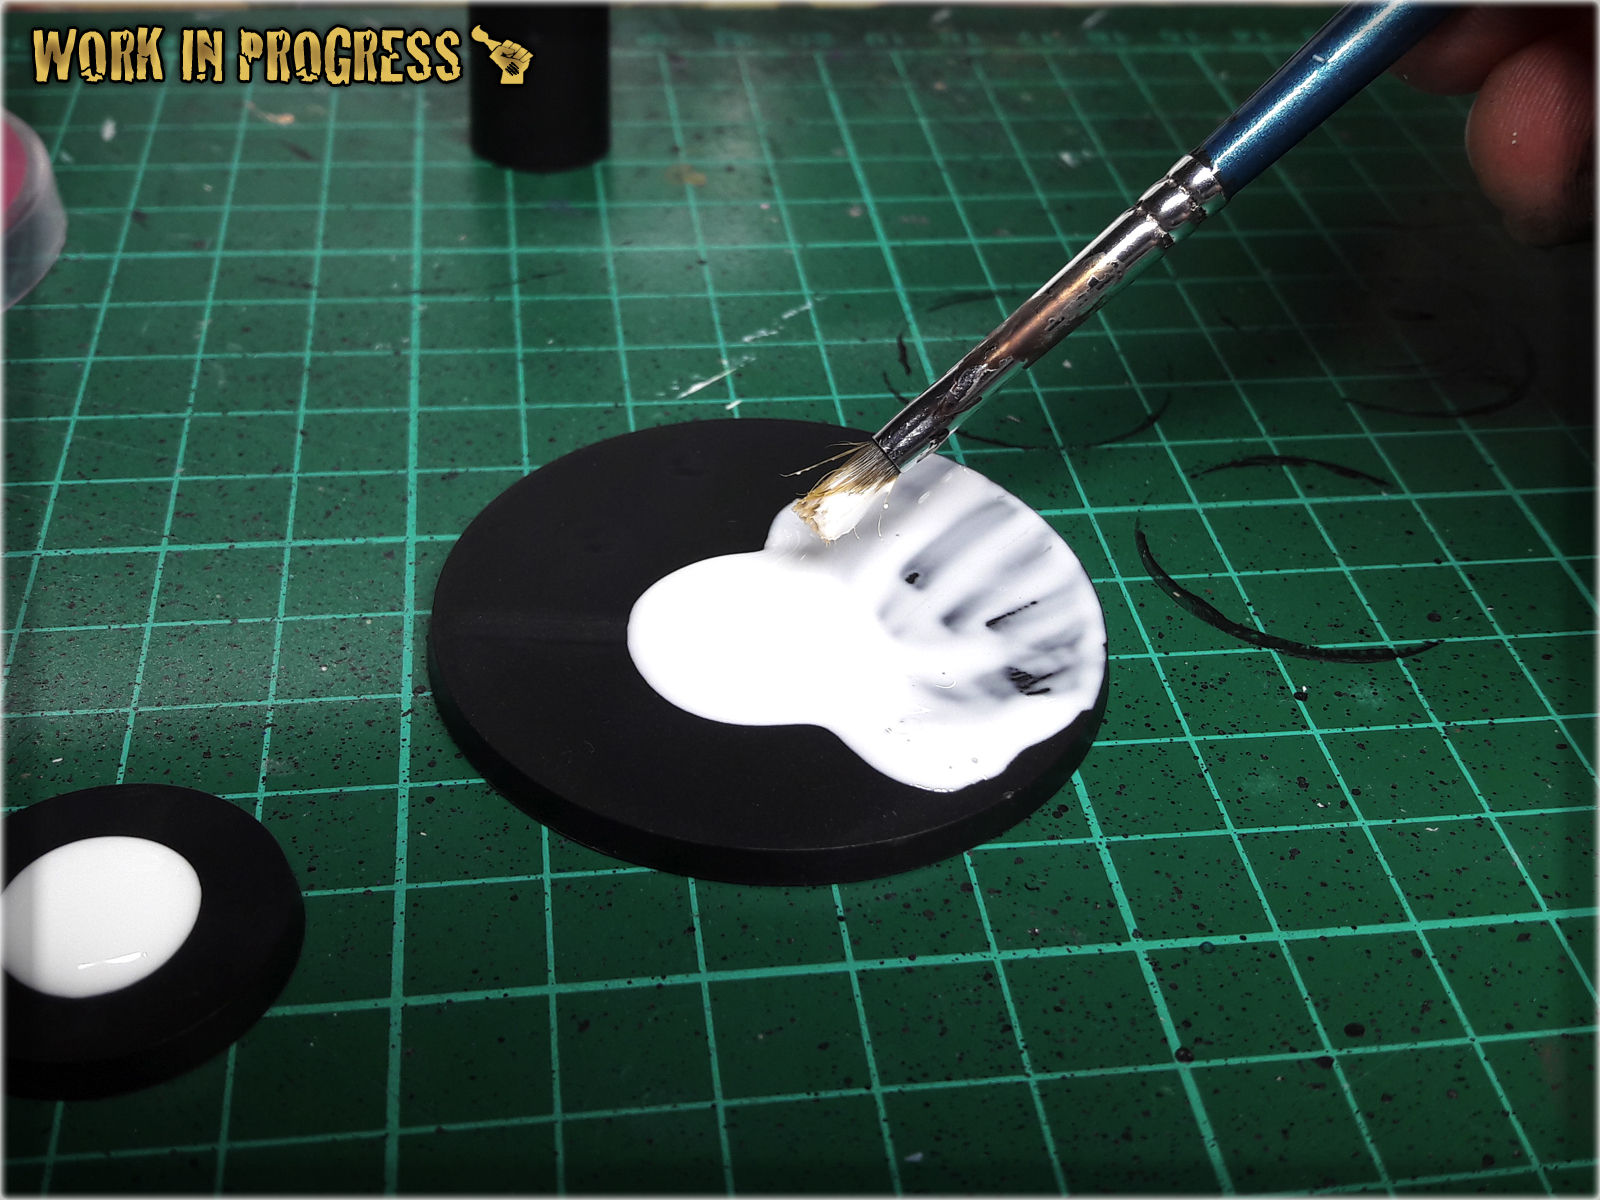
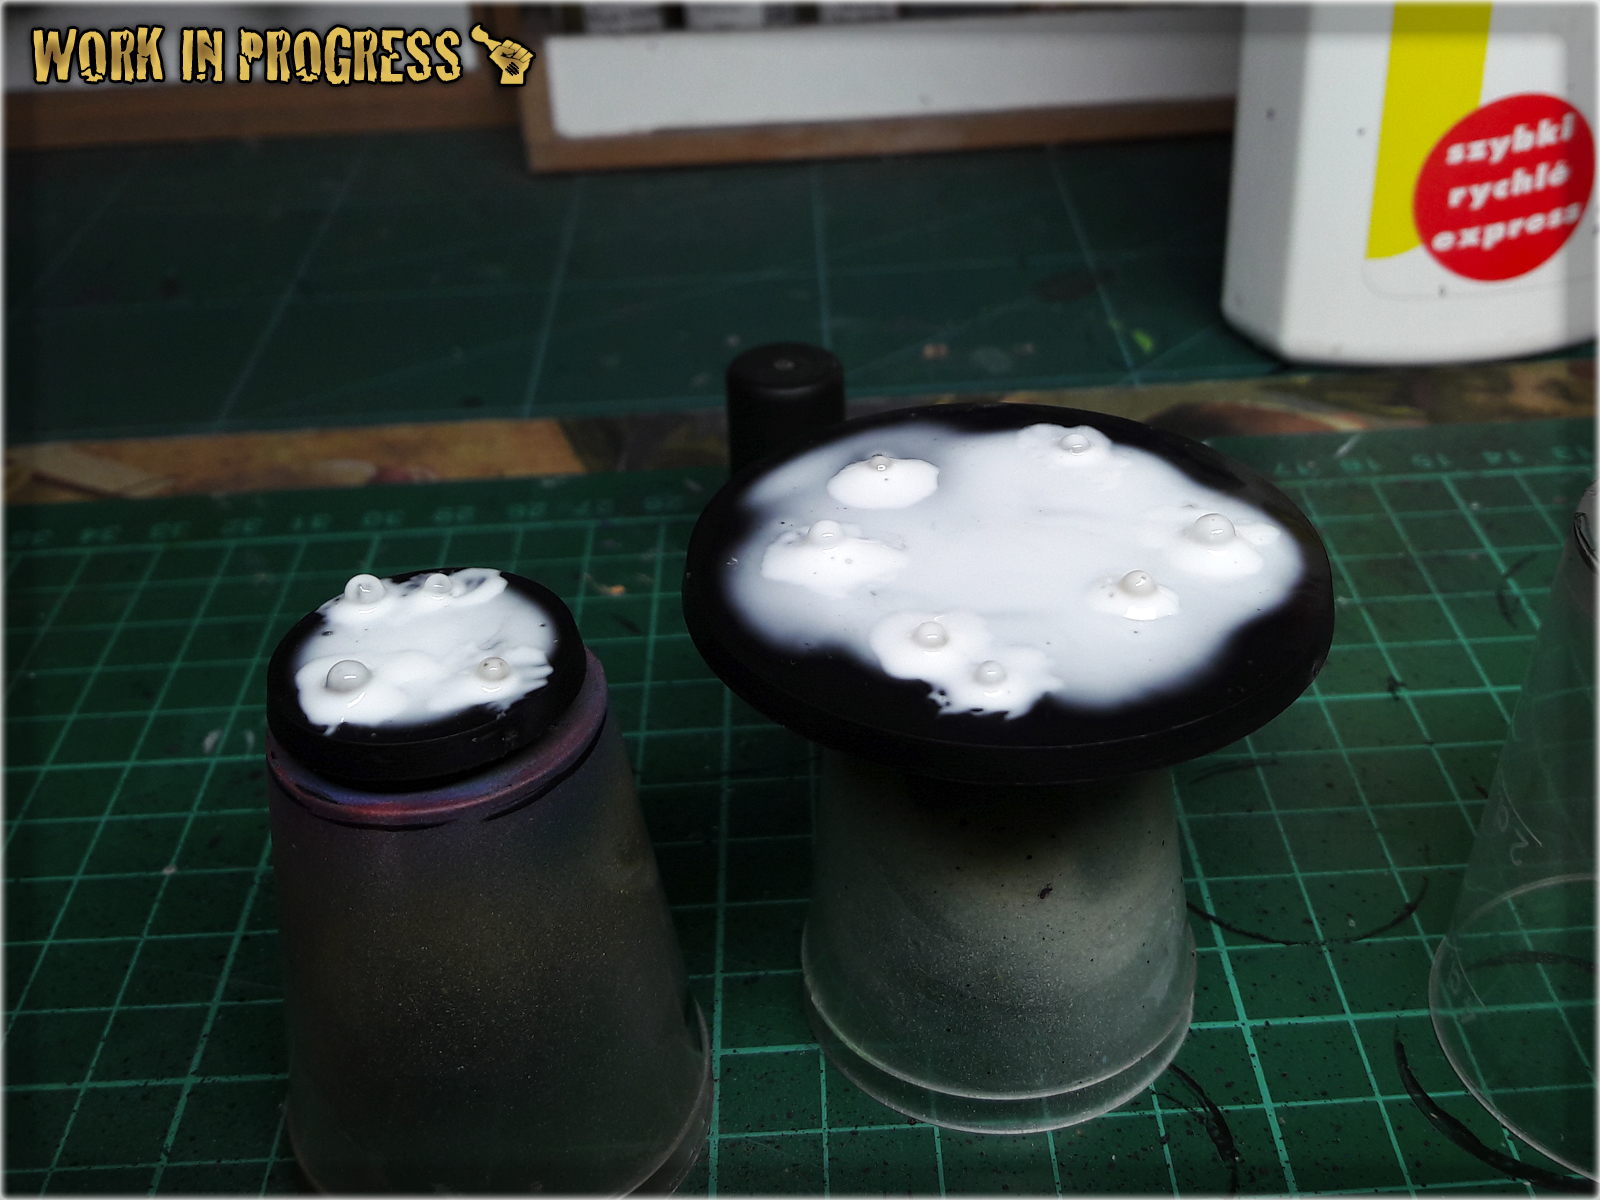
* I then put couple of tiny balls onto the base, creating 'buubbles' and let it all dry.

* Once dry, I covered are around the bubbles with another layer of basing glue.

* I let it all dry for about an hour, then undercoated entire base black.
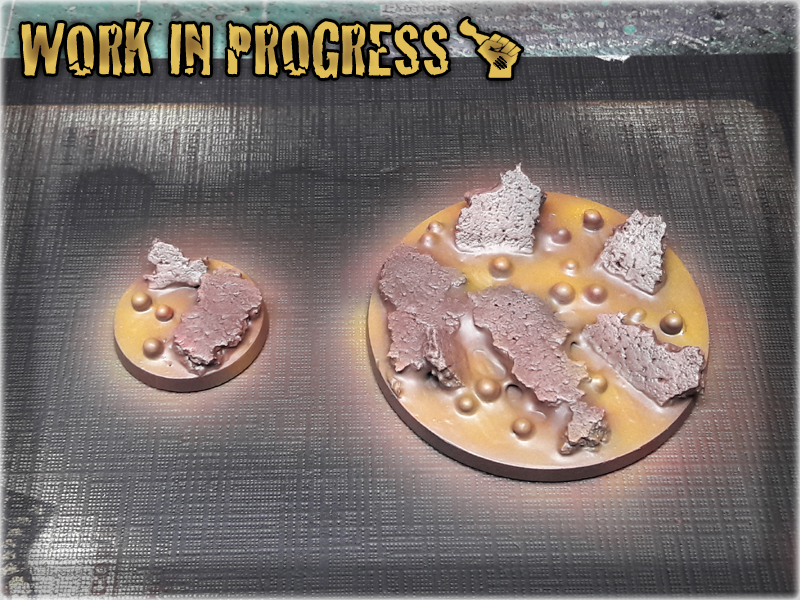
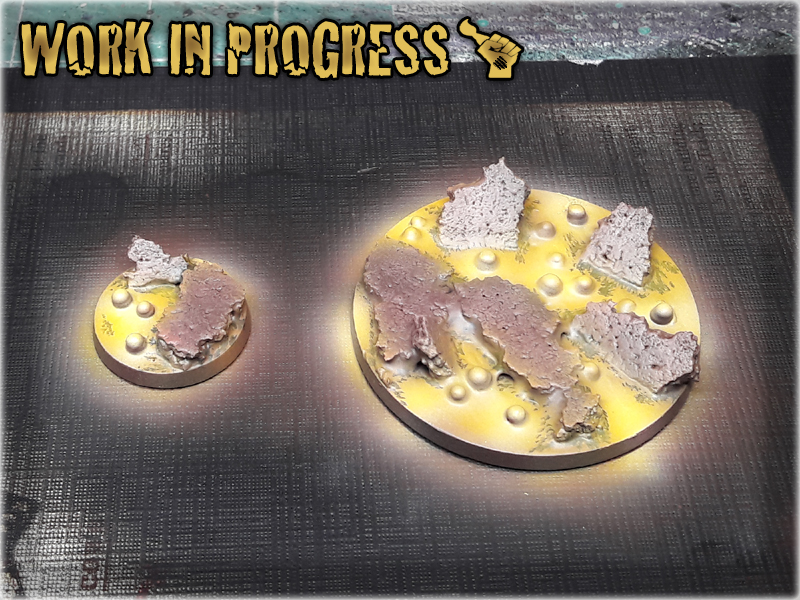
* I then airbrushed a layer of Vallejo Interior Green over entire base.
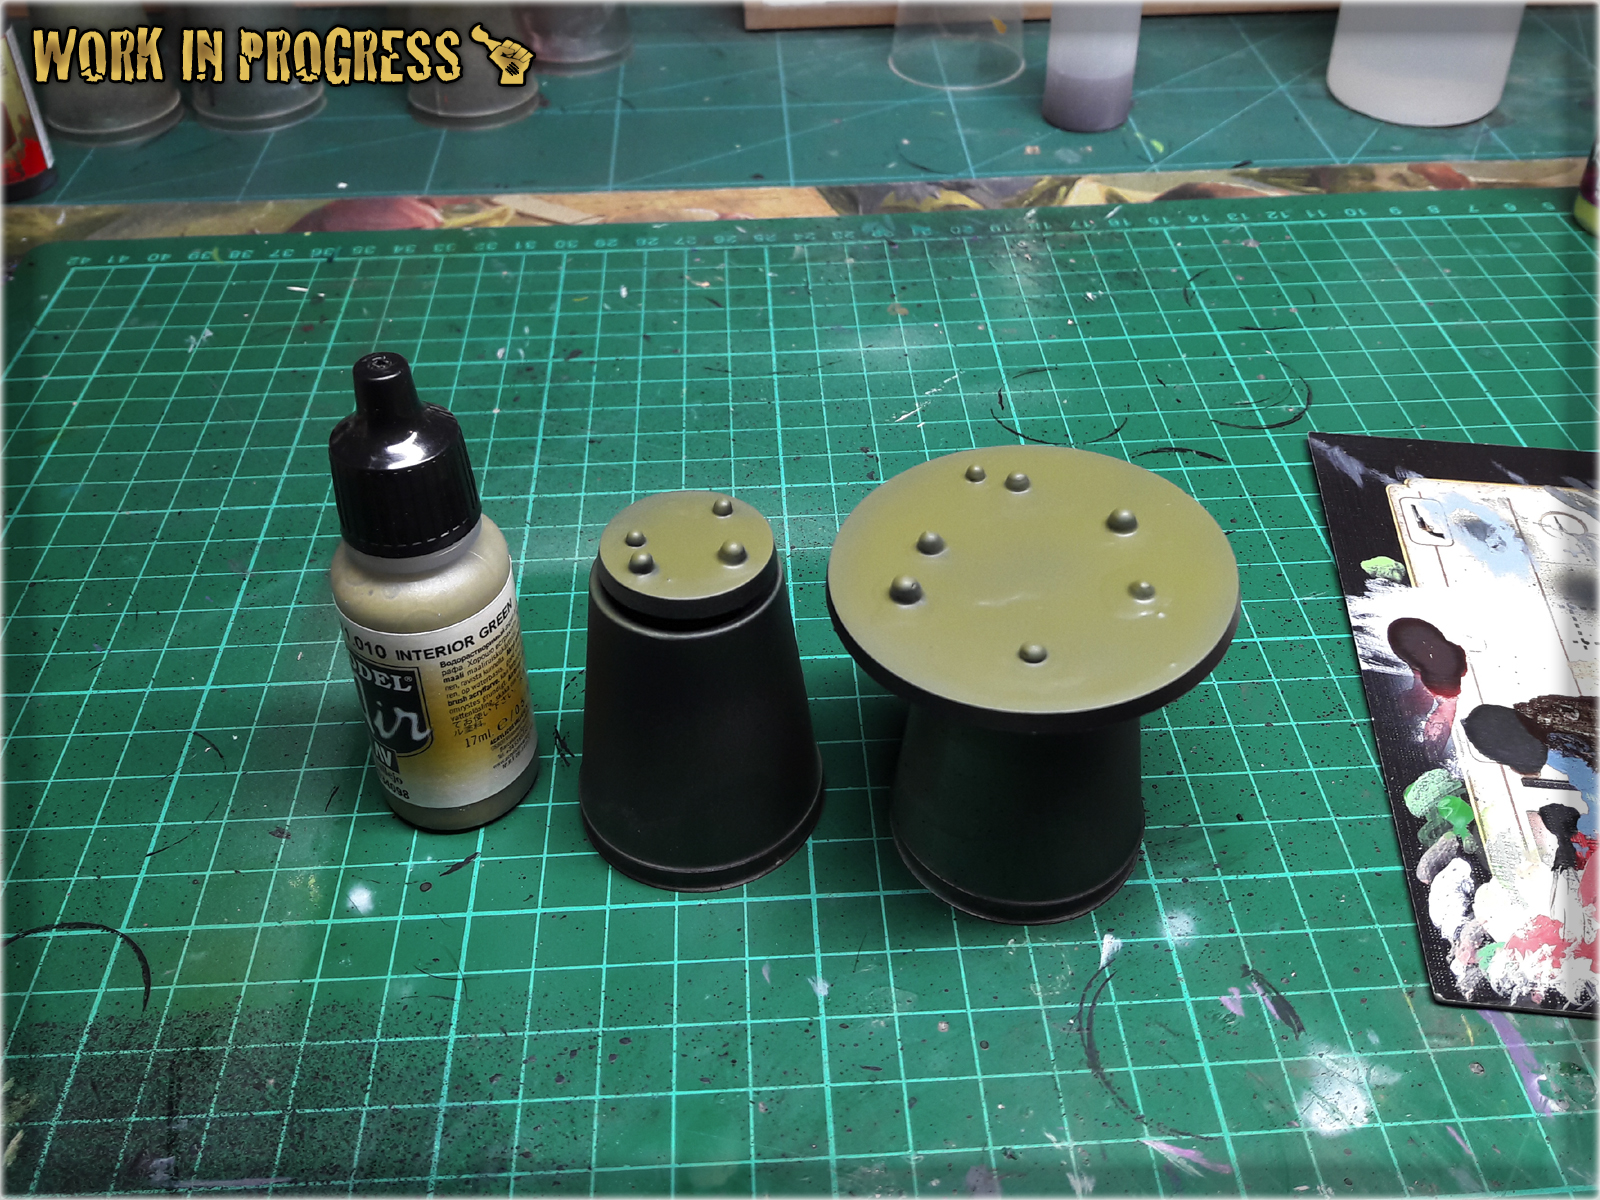
* Next I airbrushed a layer of Duck Egg Green concentrating on bubbles and surrounding areas.

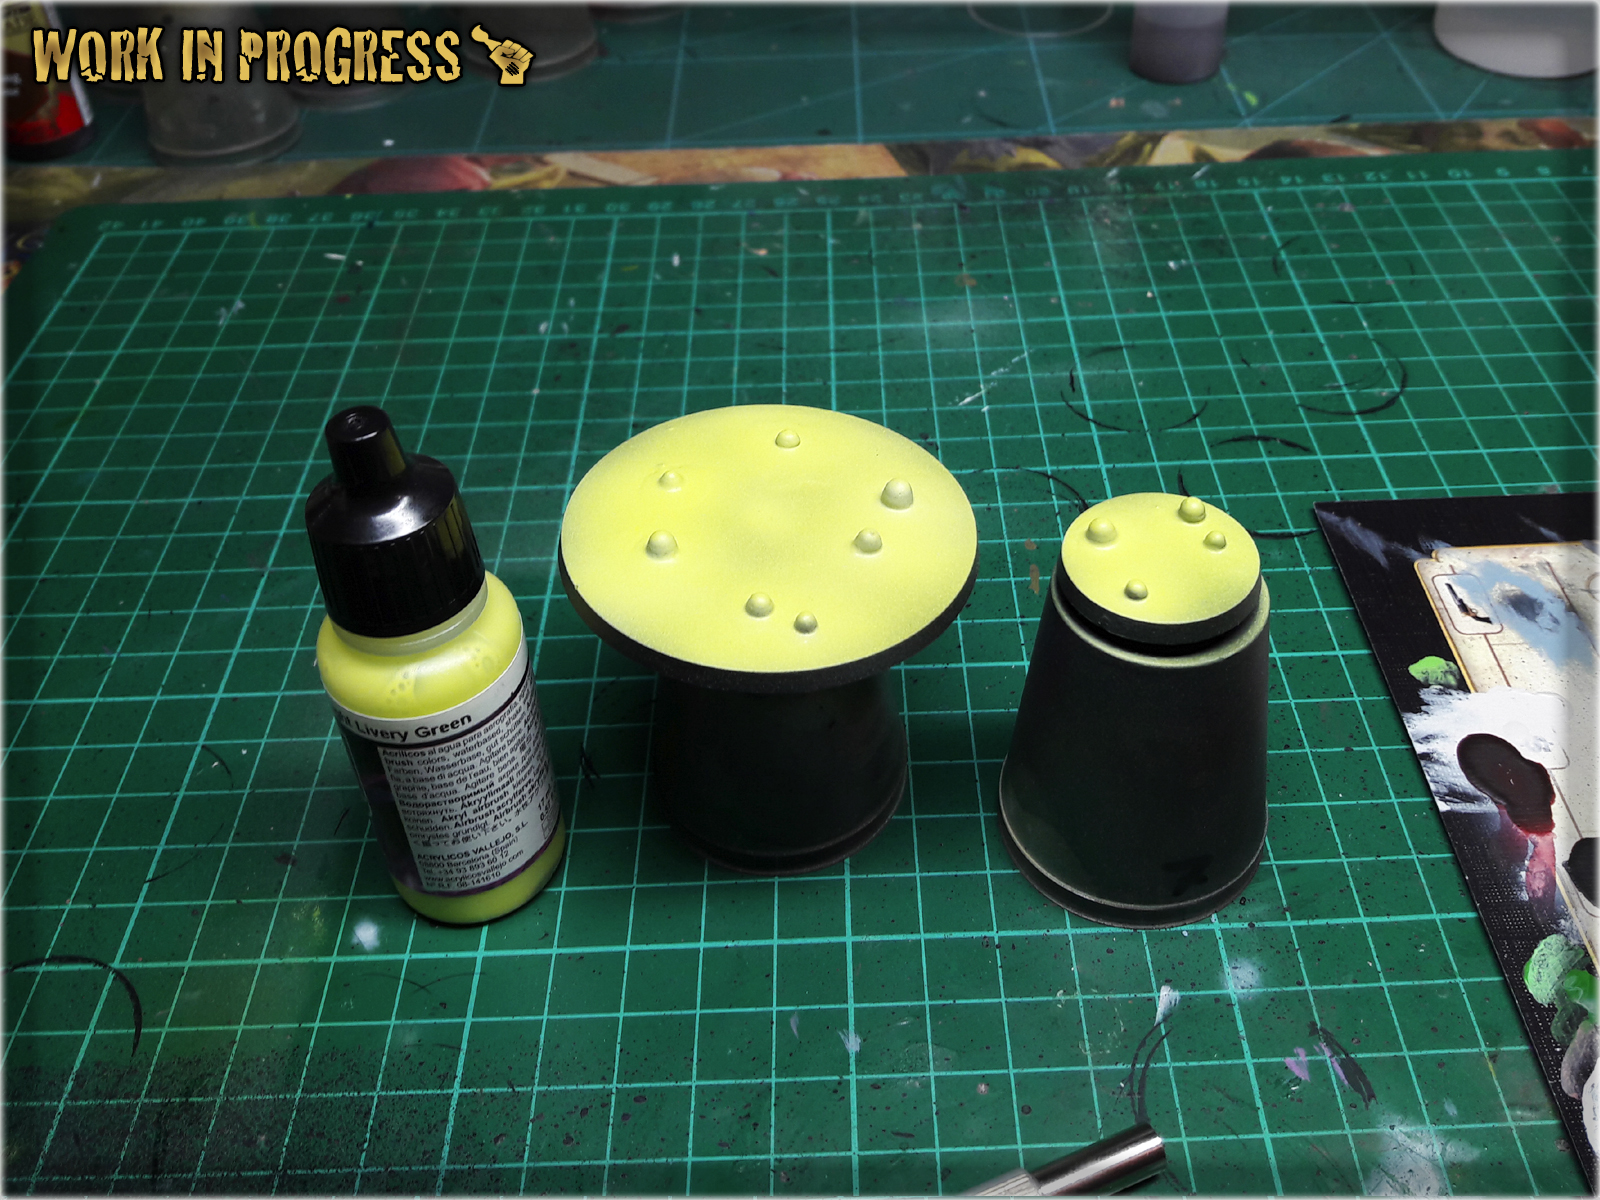
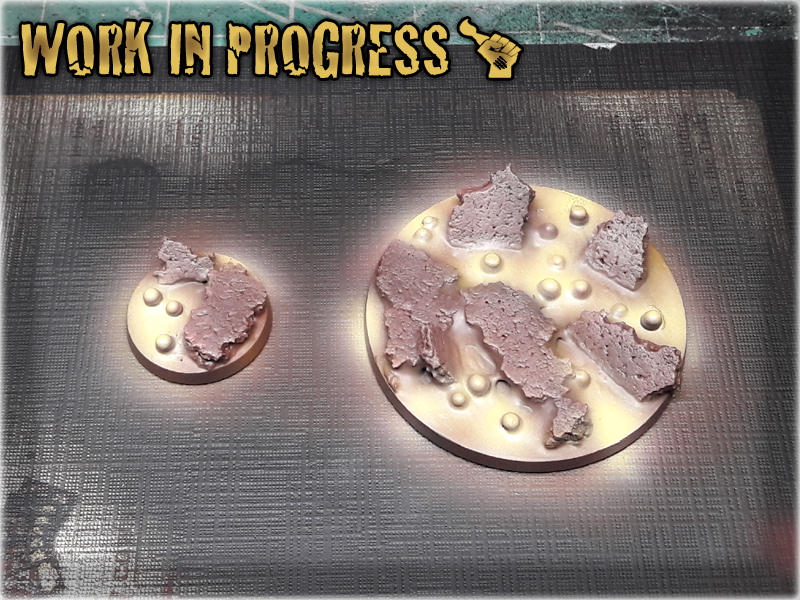
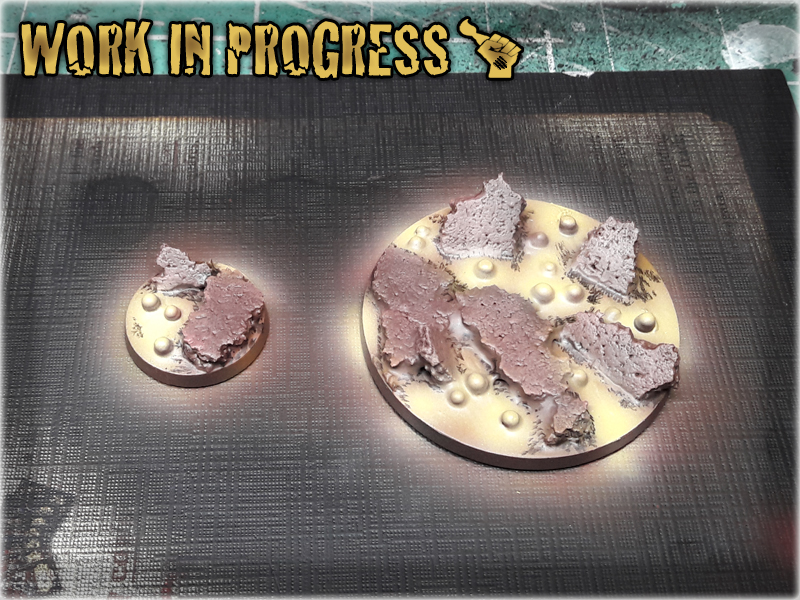
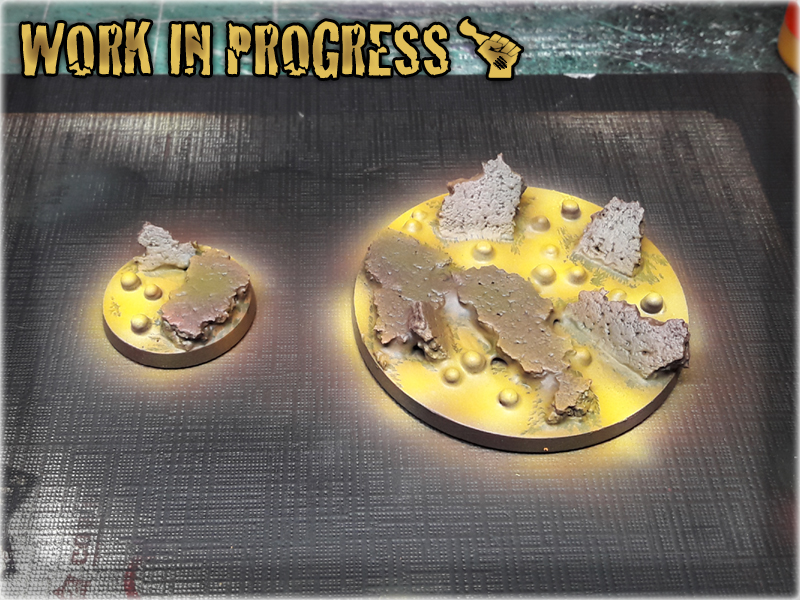
* Last thing to do was to airbrush two layers of Light Livery Green over entire bases and paint the sides black.

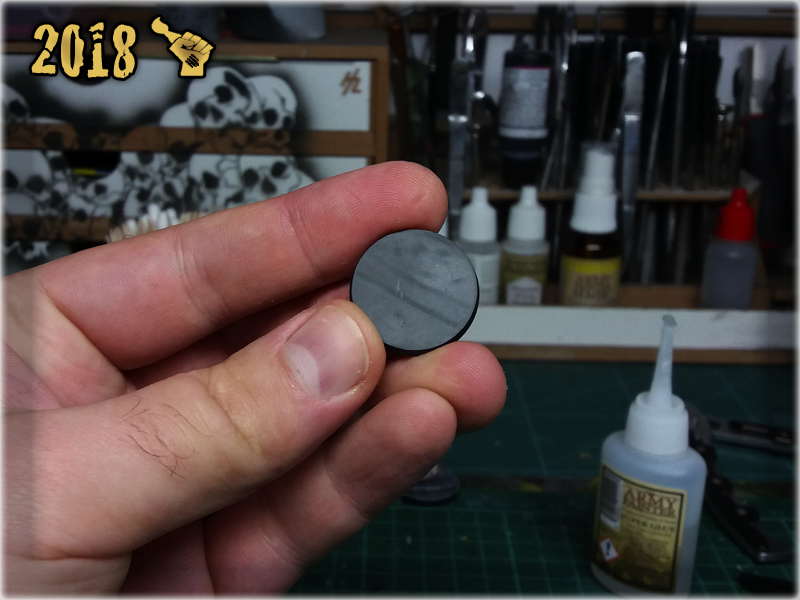
In this easy, step-by-step tutorial I’m going to show you how to create a Seed-Embryo marker, same as from Infinity SHASVASTII lvl 5 ‘Witness Me!’ gallery.
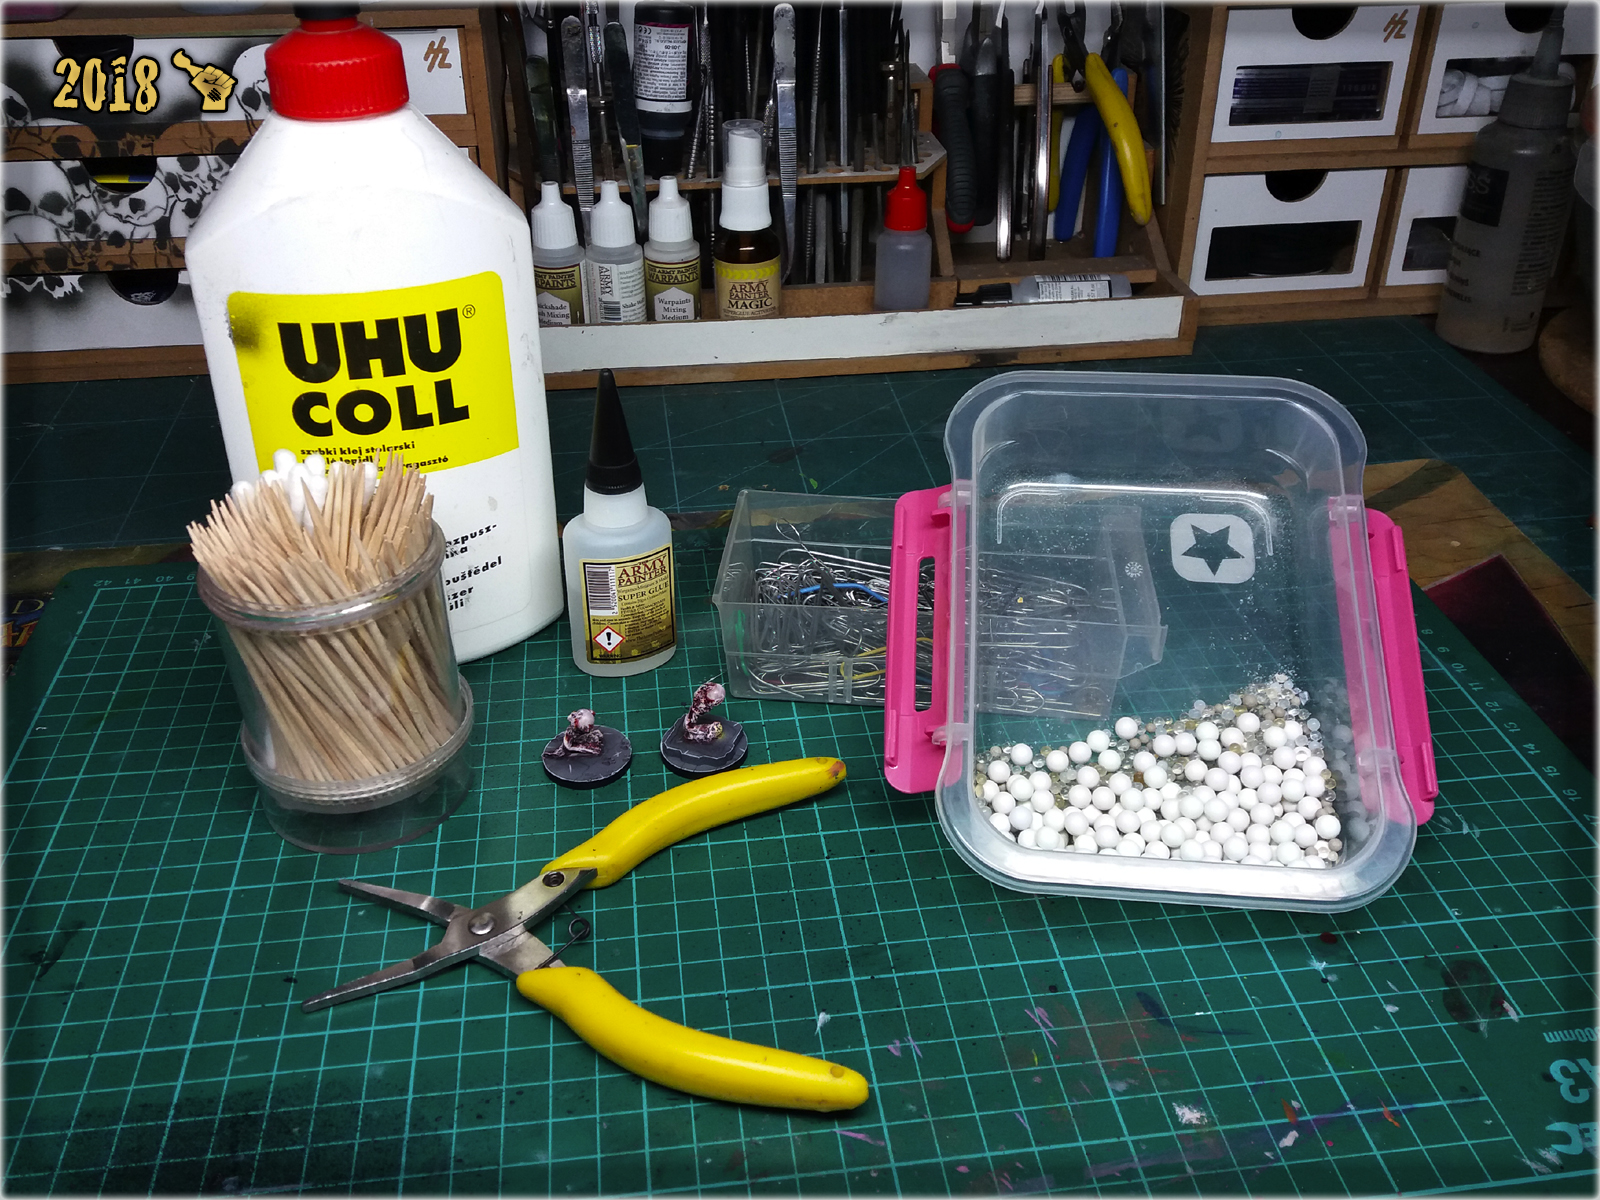
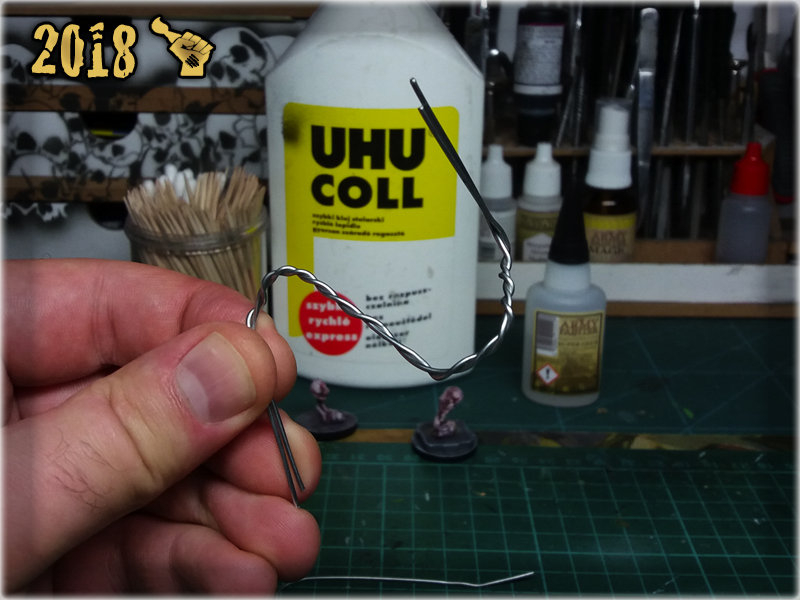
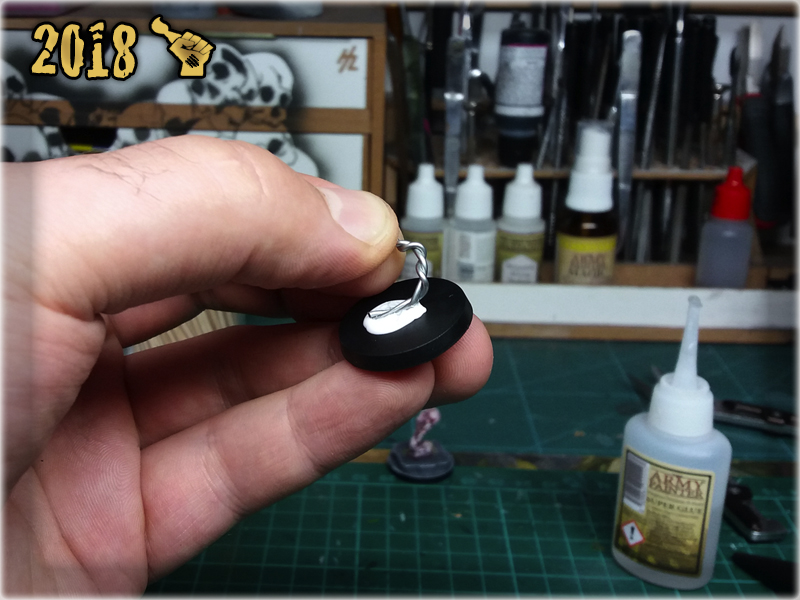
* I started by straightening two office clips, leaving both ends curved.

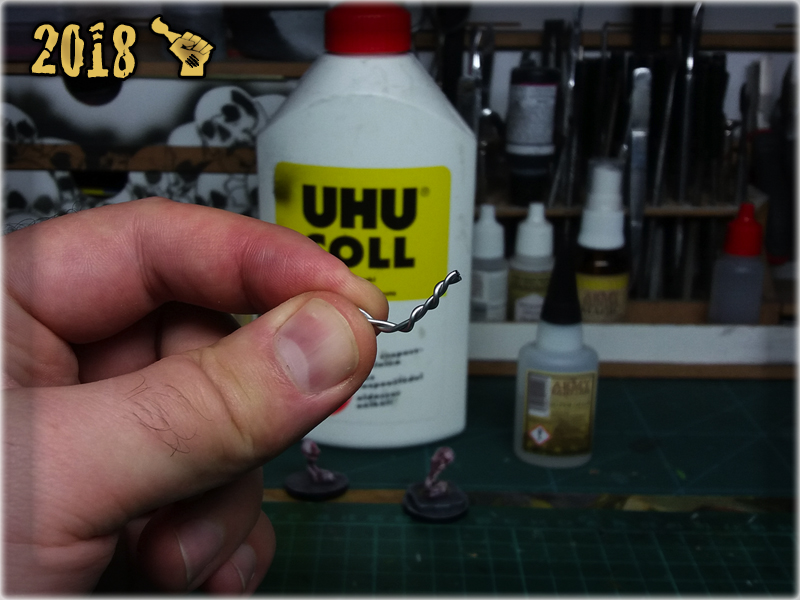
* I then wraped them around one another and once done, cut a piece with hobby cutters.
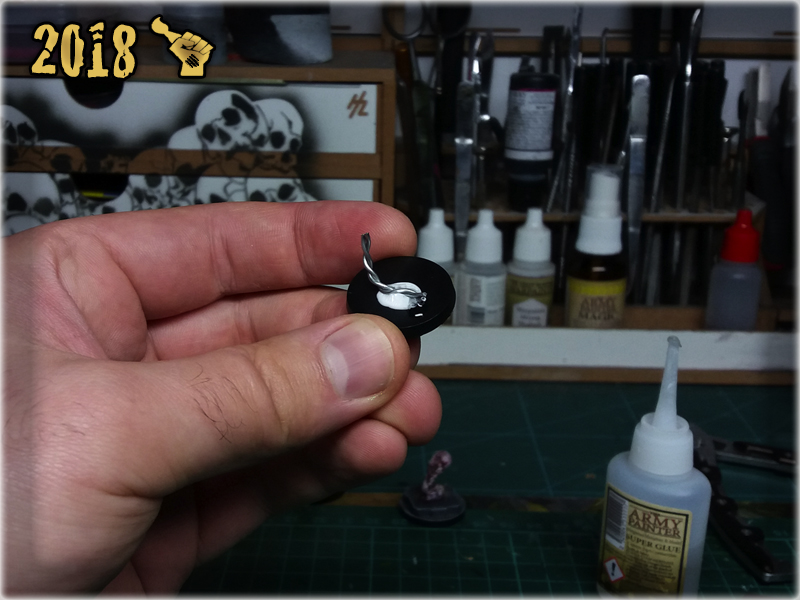
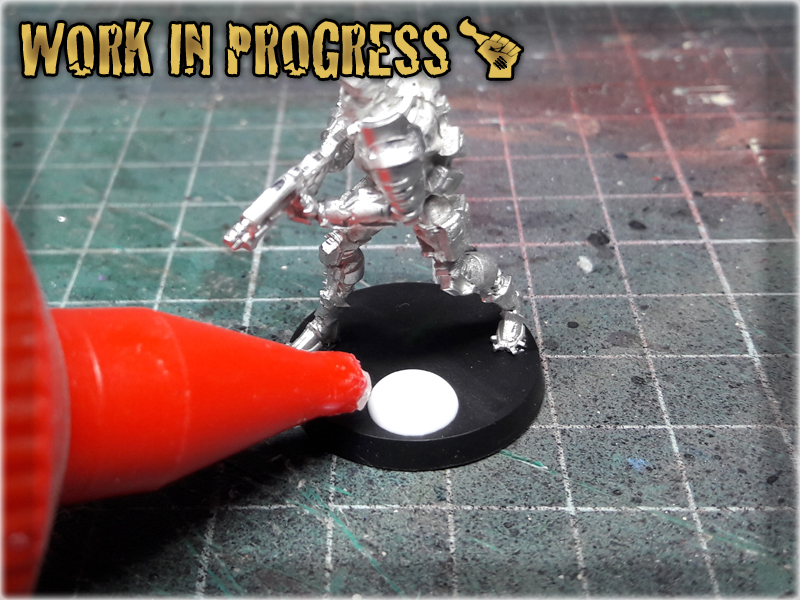
* Next I applied a drop of basing glue, followed by a drop of super glue onto a base.


* Then I glued wraped up office clip piece on top of the super glue spot.
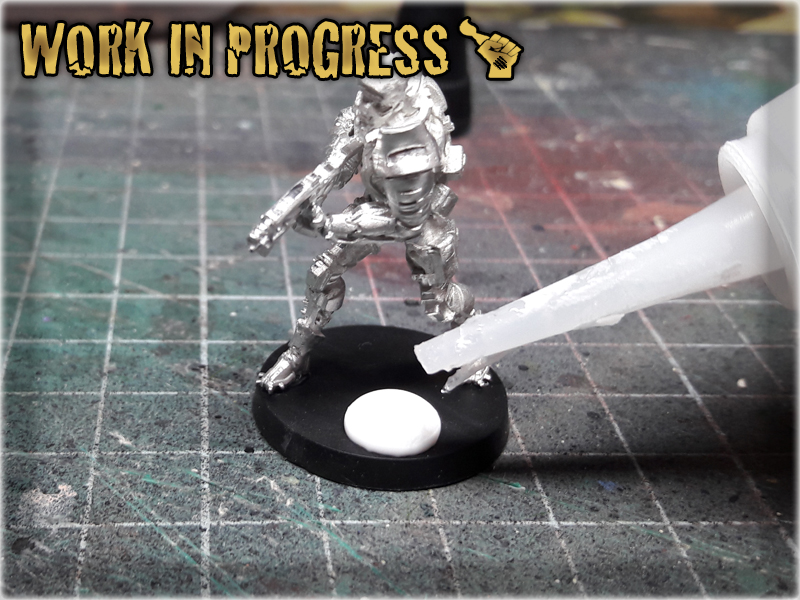
* Airsoft gun ammo ball followed, on top of the office clip piece. First a drop of super glue, then basing glue, then I slightly dipped the ball in super glue and glued it on.
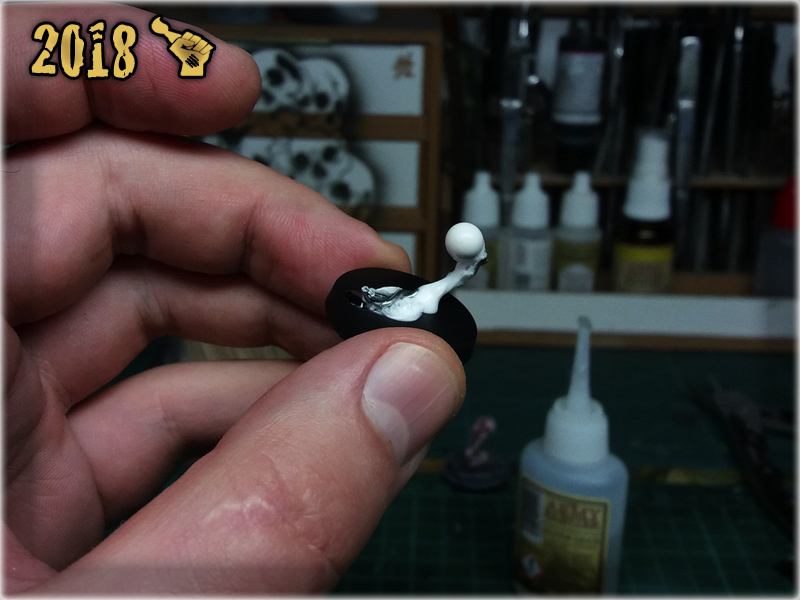
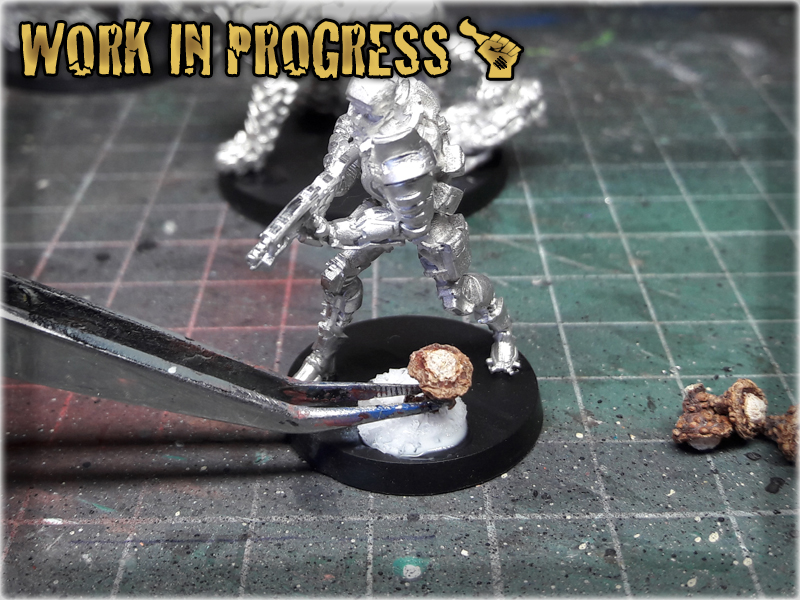
* Lastly I modelled three growth pieces on top of the ball, applying a small dose of basing glue with a tootpick, then covering it with super glue.

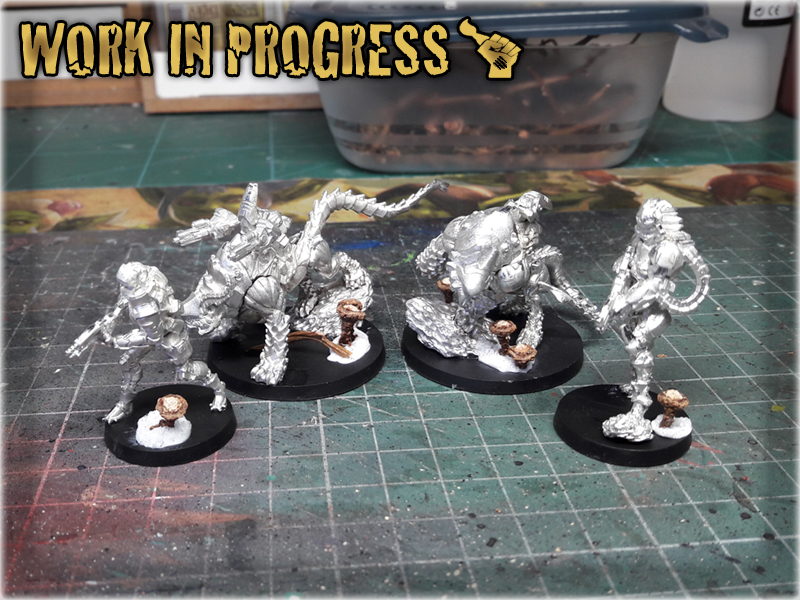
And that’s it! The Seed-Embryo markers ready in few minutes. Just make sure you let them dry before painting – I recommend about 4 hours for super glue – basing glue mix to fully dry out and produce awesome texture.

Do you like this tutorial? Have you made your own Seed-Embryo markers? Be sure to let me know in the commets below!
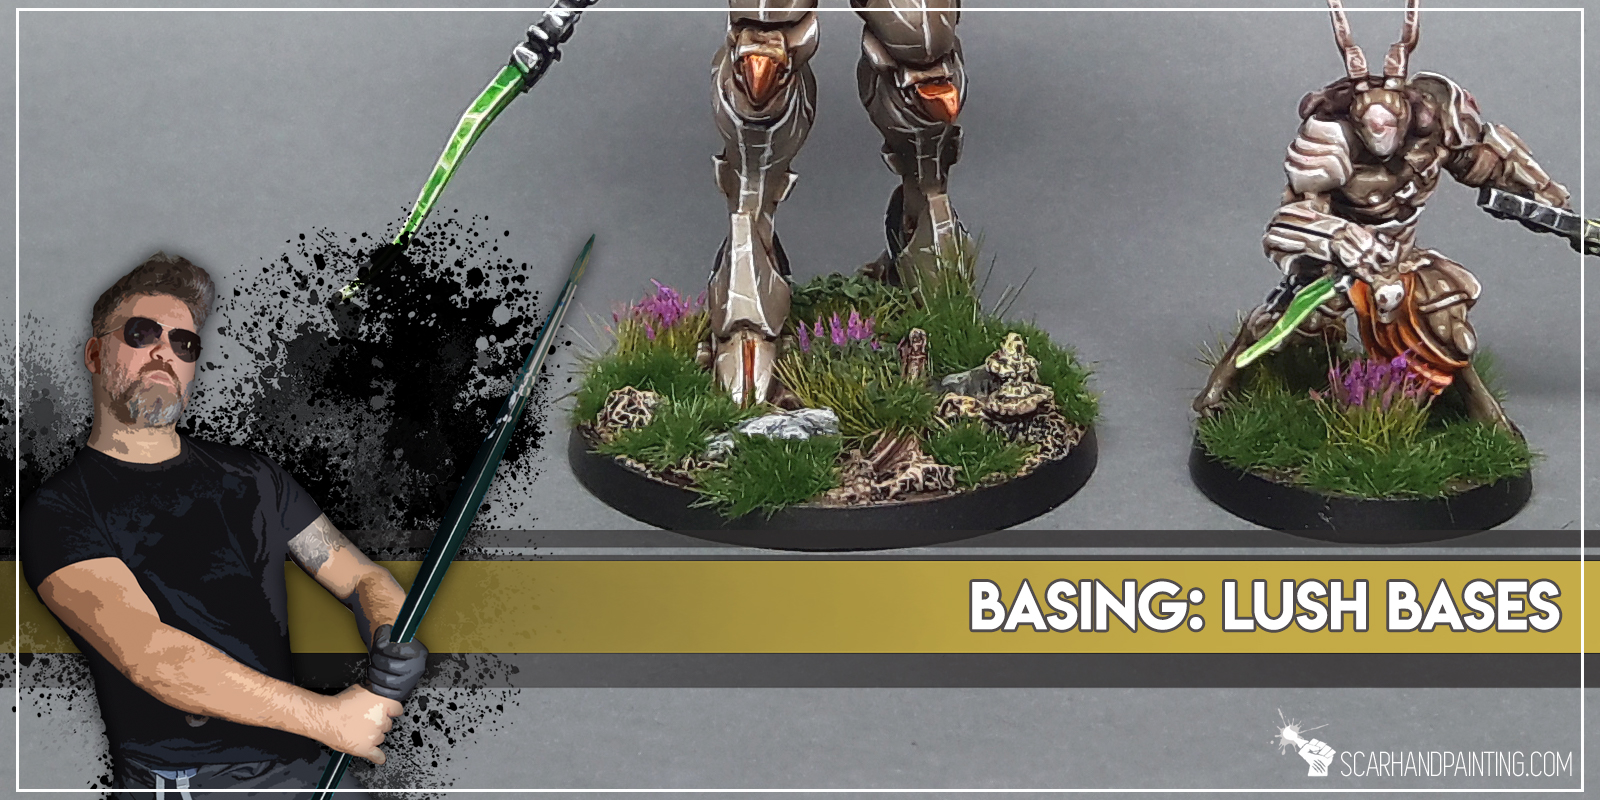
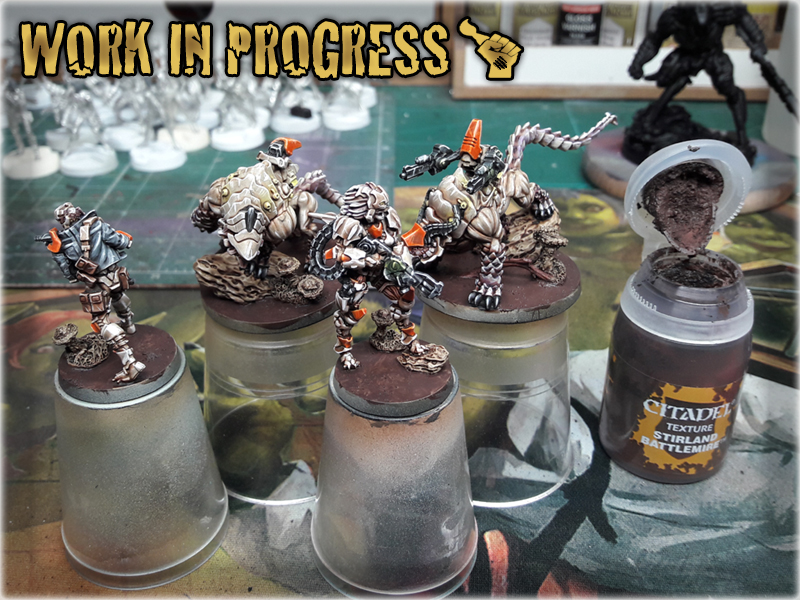
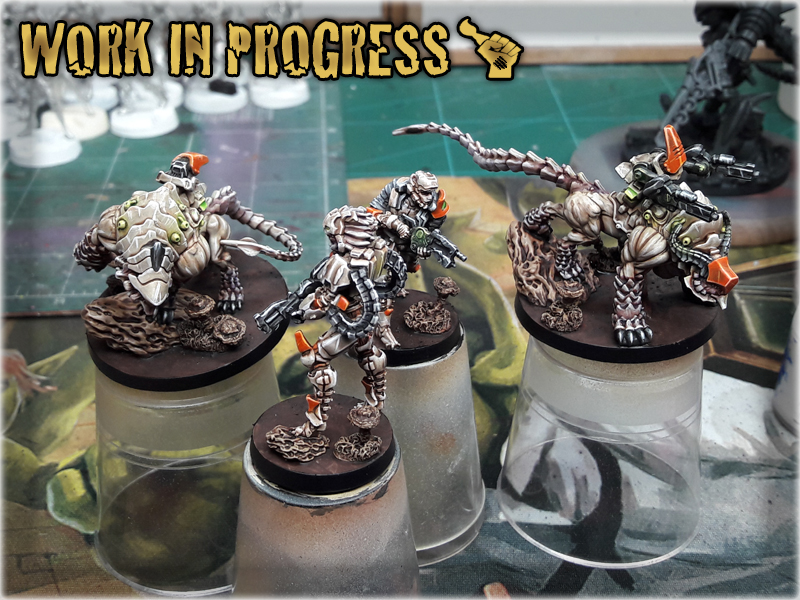
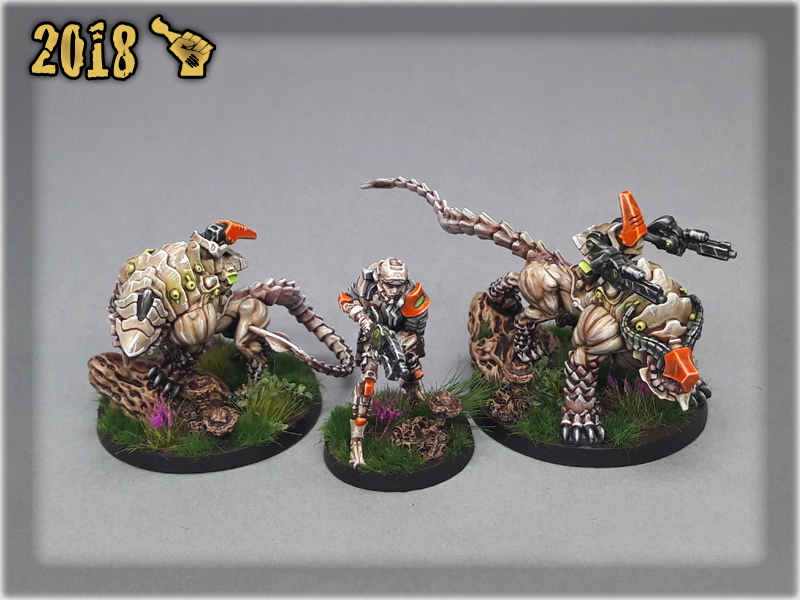
In this easy, step-by-step tutorial I’m going to show you how to create a Lush Base. I designed these bases to fit Infinity the Game Tohaa ‘tactical rocks’ – you can see how it turned out at Infinity TOHAA ‘Witness Me!’ gallery.

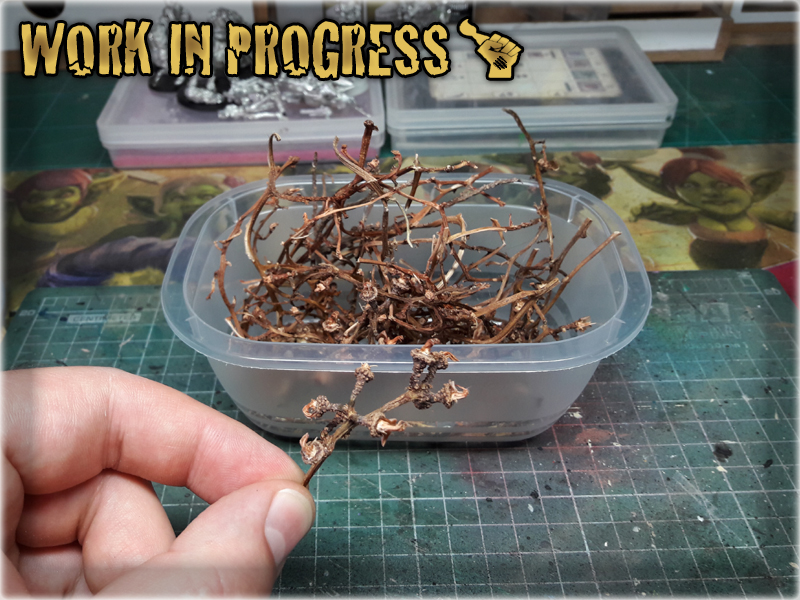
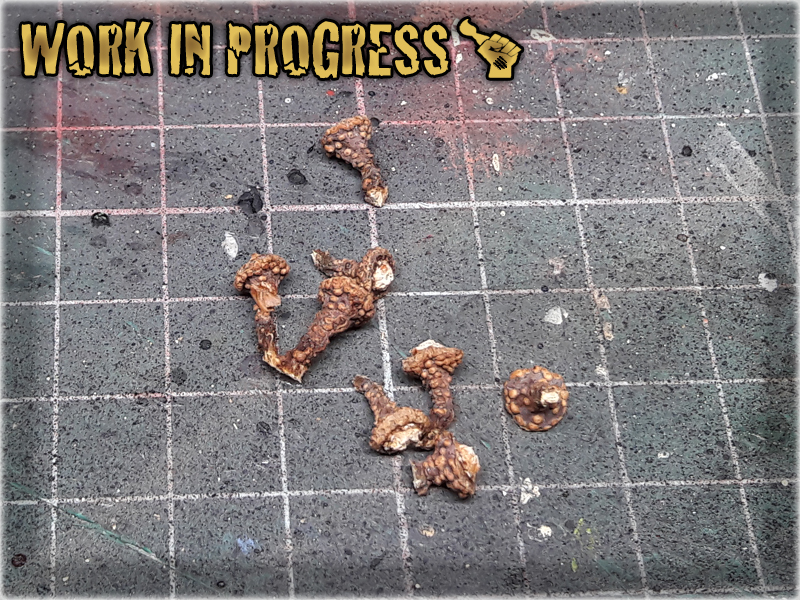
* I started by separating Grape mounts from the dried out Grape branch. Being rather soft, their topf have been removed to improove durability and shape.
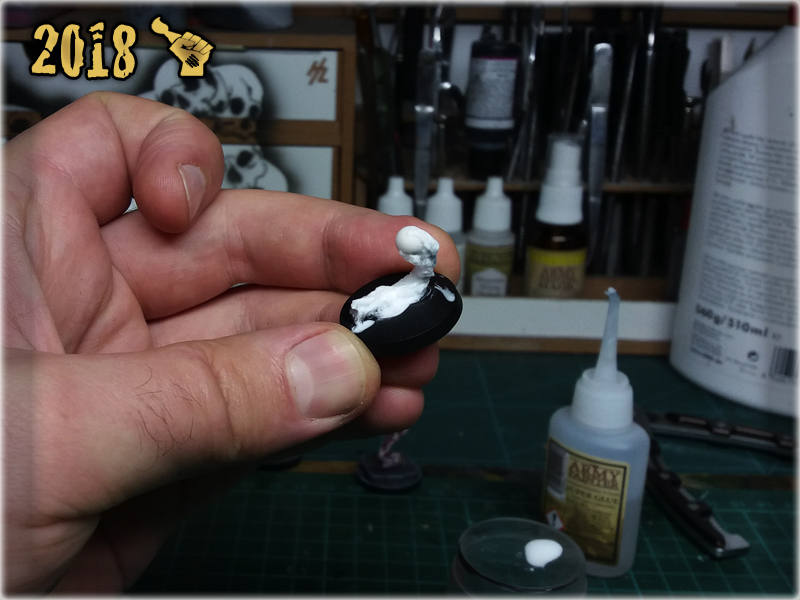
* I then applied a drop of basing glue onto the base, followed up shortly by another drop - this time super glue.
* Before mixed glue drop was able to dry out I've planted Grape mount on top of it, creating strange looking plant.
* Once glue dried up I've painted the bases following choosen colour scheme (see below). I then added some texture on top of them with Stirland Battlemire texture paint.
* orem ipsum dolor sit amet, Integer commodo tristiqu odio, aliquet ut. Maecenas sed justo imperdiet bibendum. Vivamus nec sapien imperdiet diam. Aliquam erat volutpat. Sed onsectetur suscipit nunc et rutrum. Lorem ipsum dolor sit amet,volutpat. Sed onsectetur suscipit nunc et rutrum. Lorem ipsum dolor sit amet, volutpat.

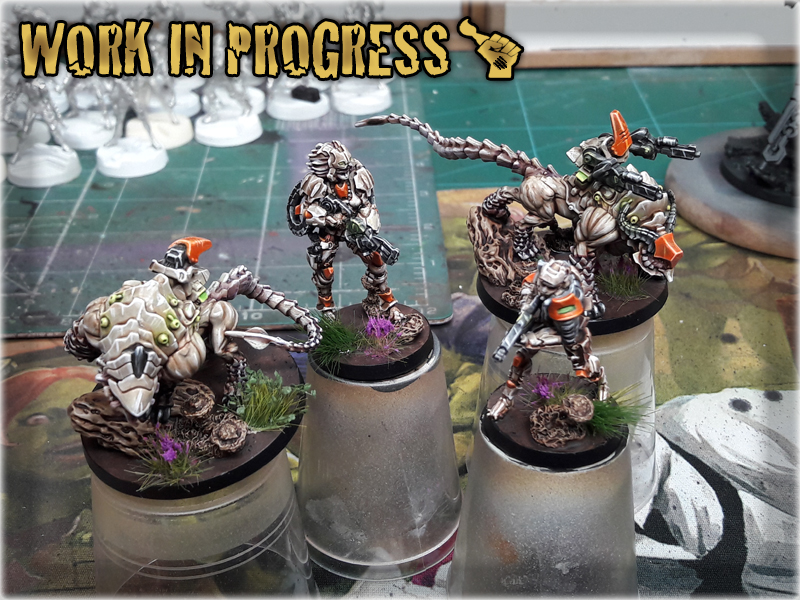
* Last step was to apply regular tufts. I used some noname tufts in large numbers filling most of the flat areas. Job done.


Black Undercoat,
Stirland Battlemire (GW), texture
Karak Stone (GW), stones & plants
Flayed One Flesh (GW), flatbrush stones & plants
Mix Strong Tone Ink (AP) 1:1 Soft Tone Ink (AP), wash
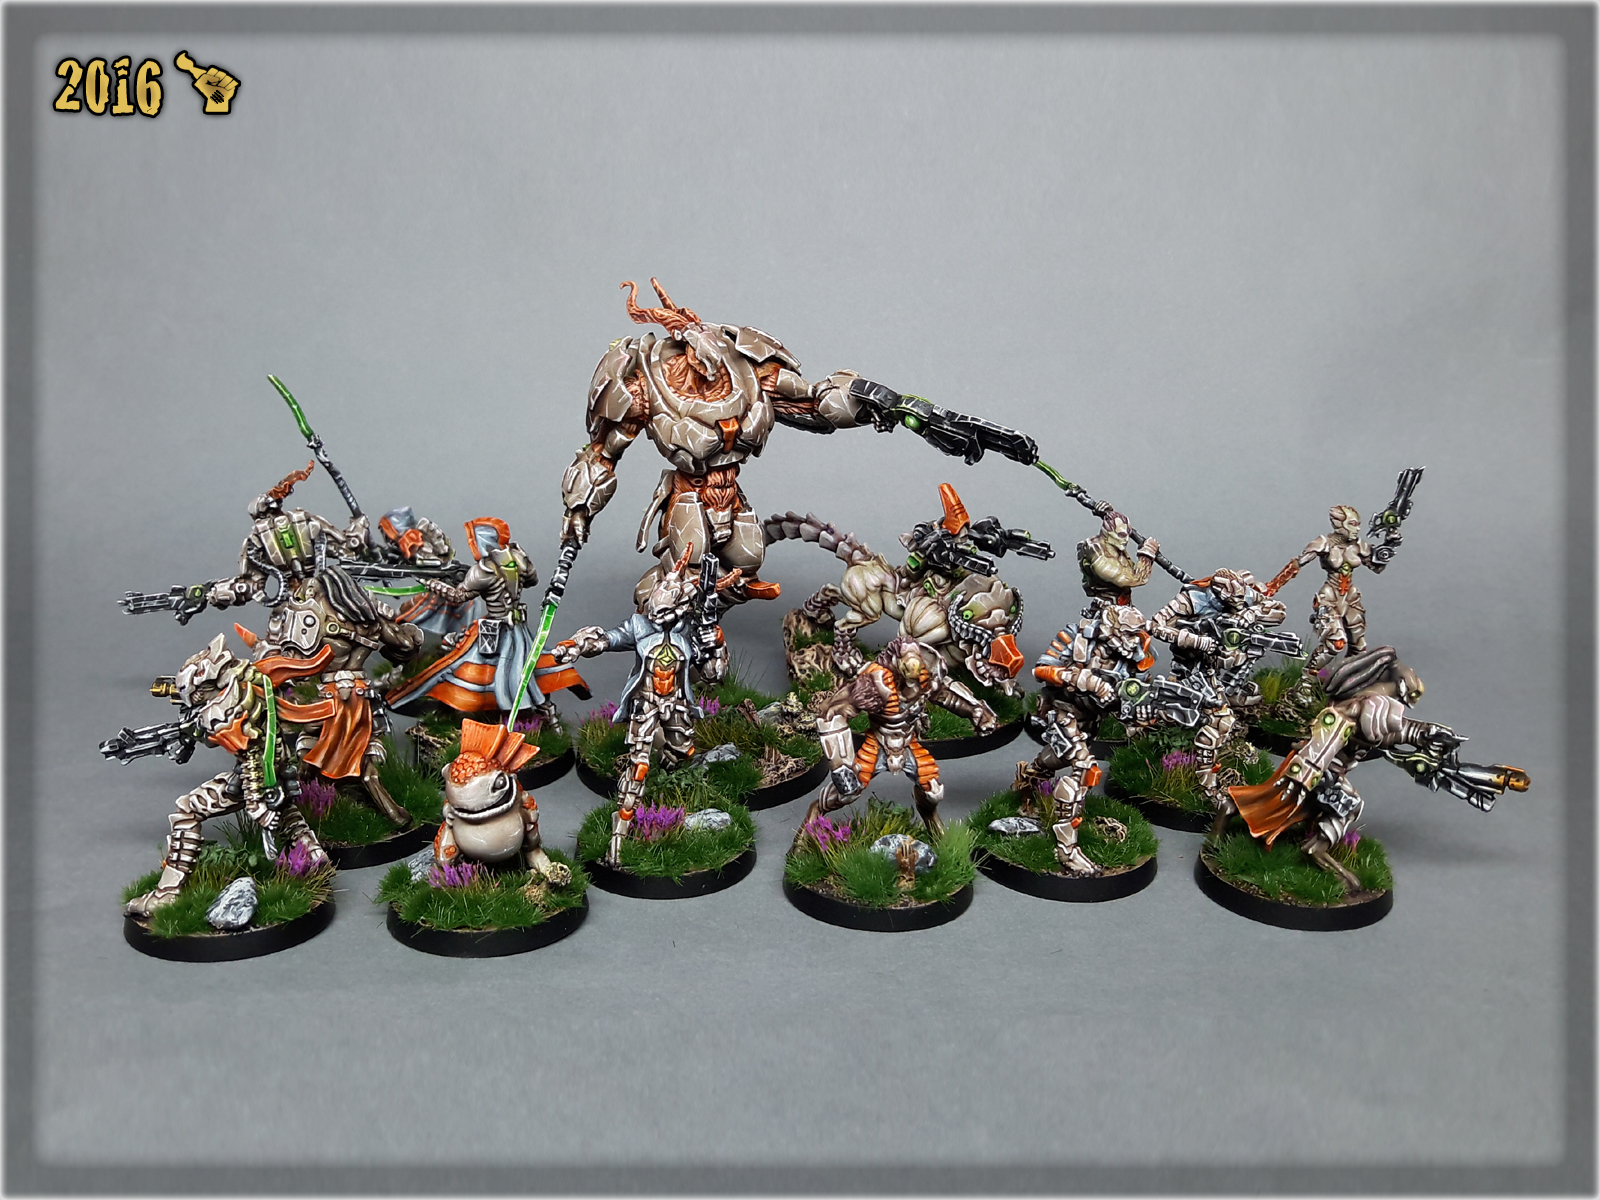
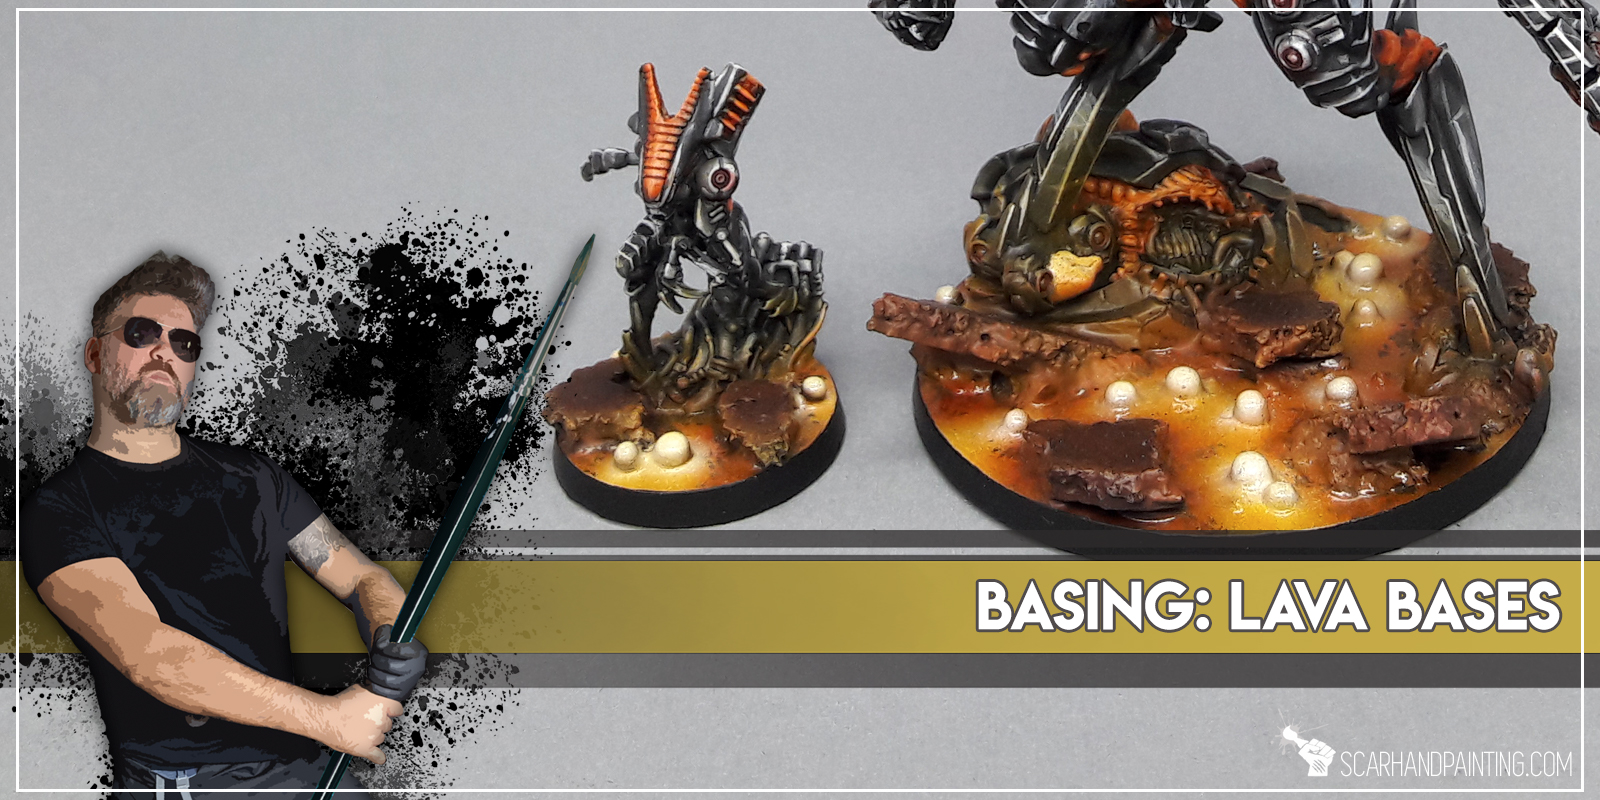
In this easy, step-by-step tutorial I’m going to show you how to create and paint a Lava Bases. I used these bases for Infinity the Game Combined Army – you can see how it turned out at Infinity COMBINED ARMY ‘Witness Me!’ gallery.

**Where I’m from there’s a small paper bag filled with moist absorbsion balls in every shoe box. If you can’t get that, just use some grains or make small balls out of green stuff or even modeling clay.
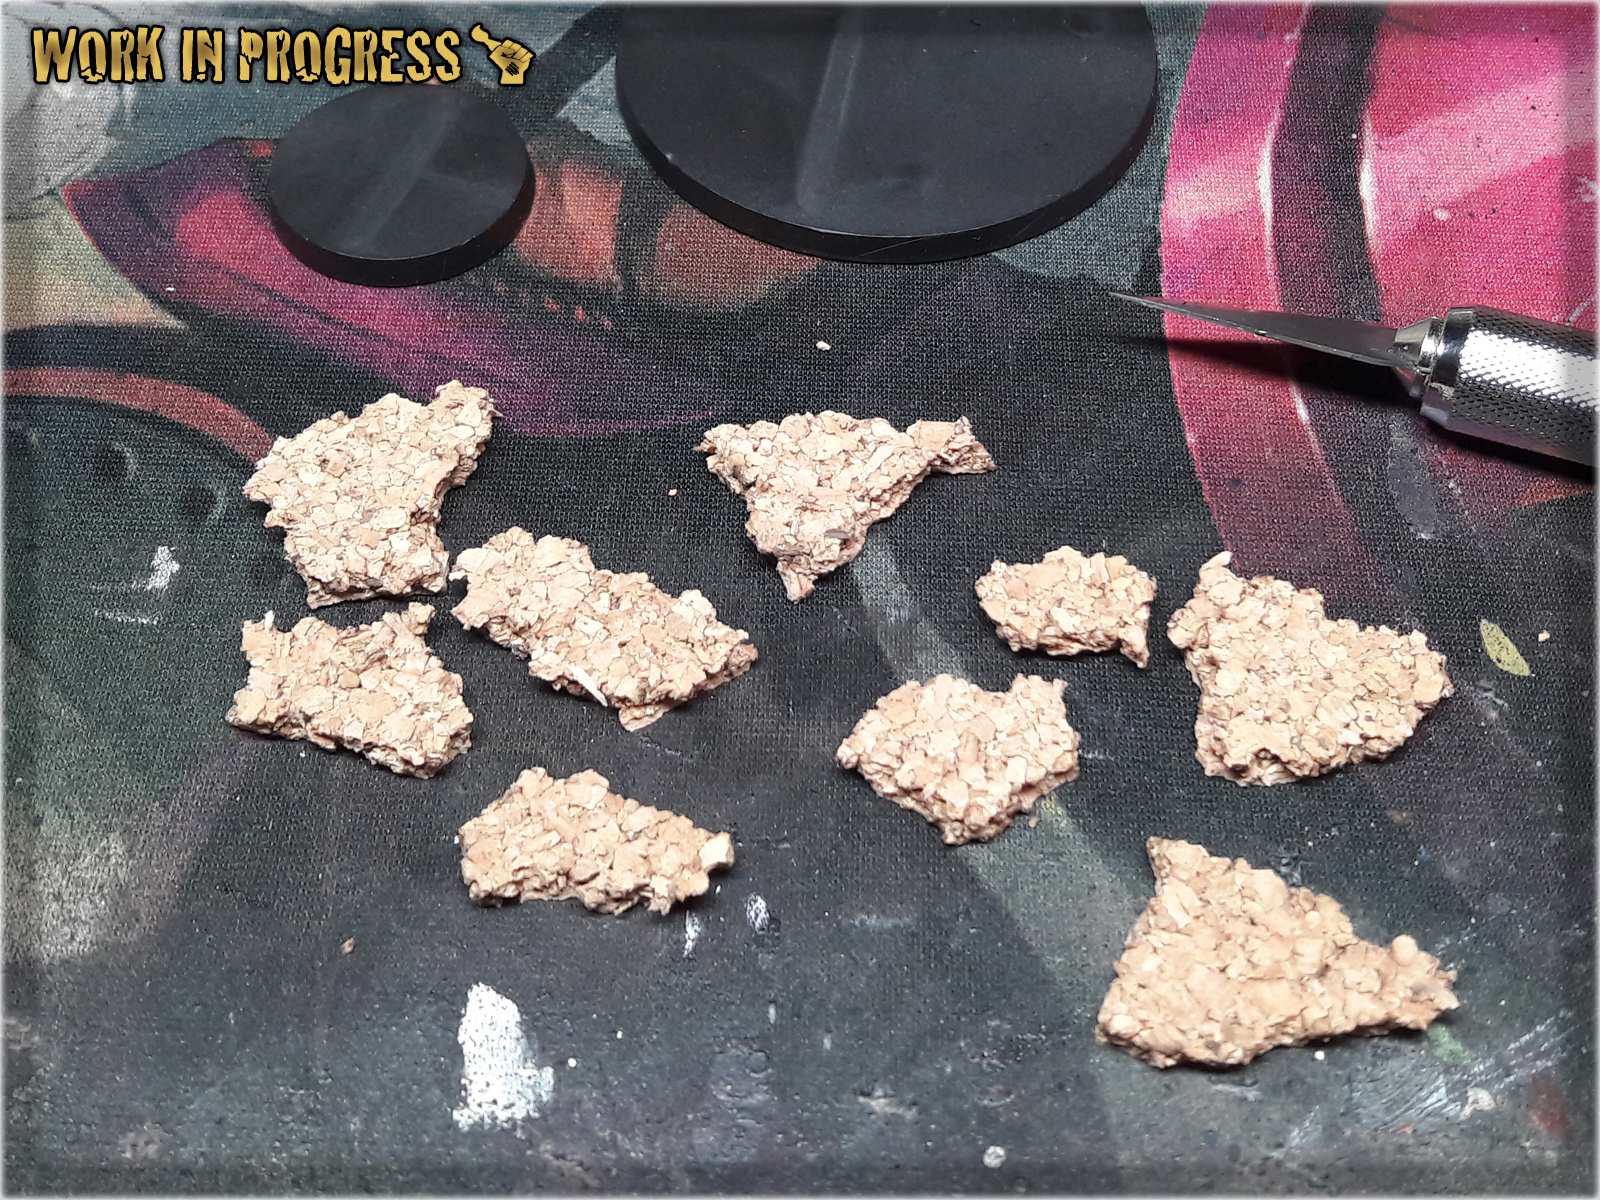
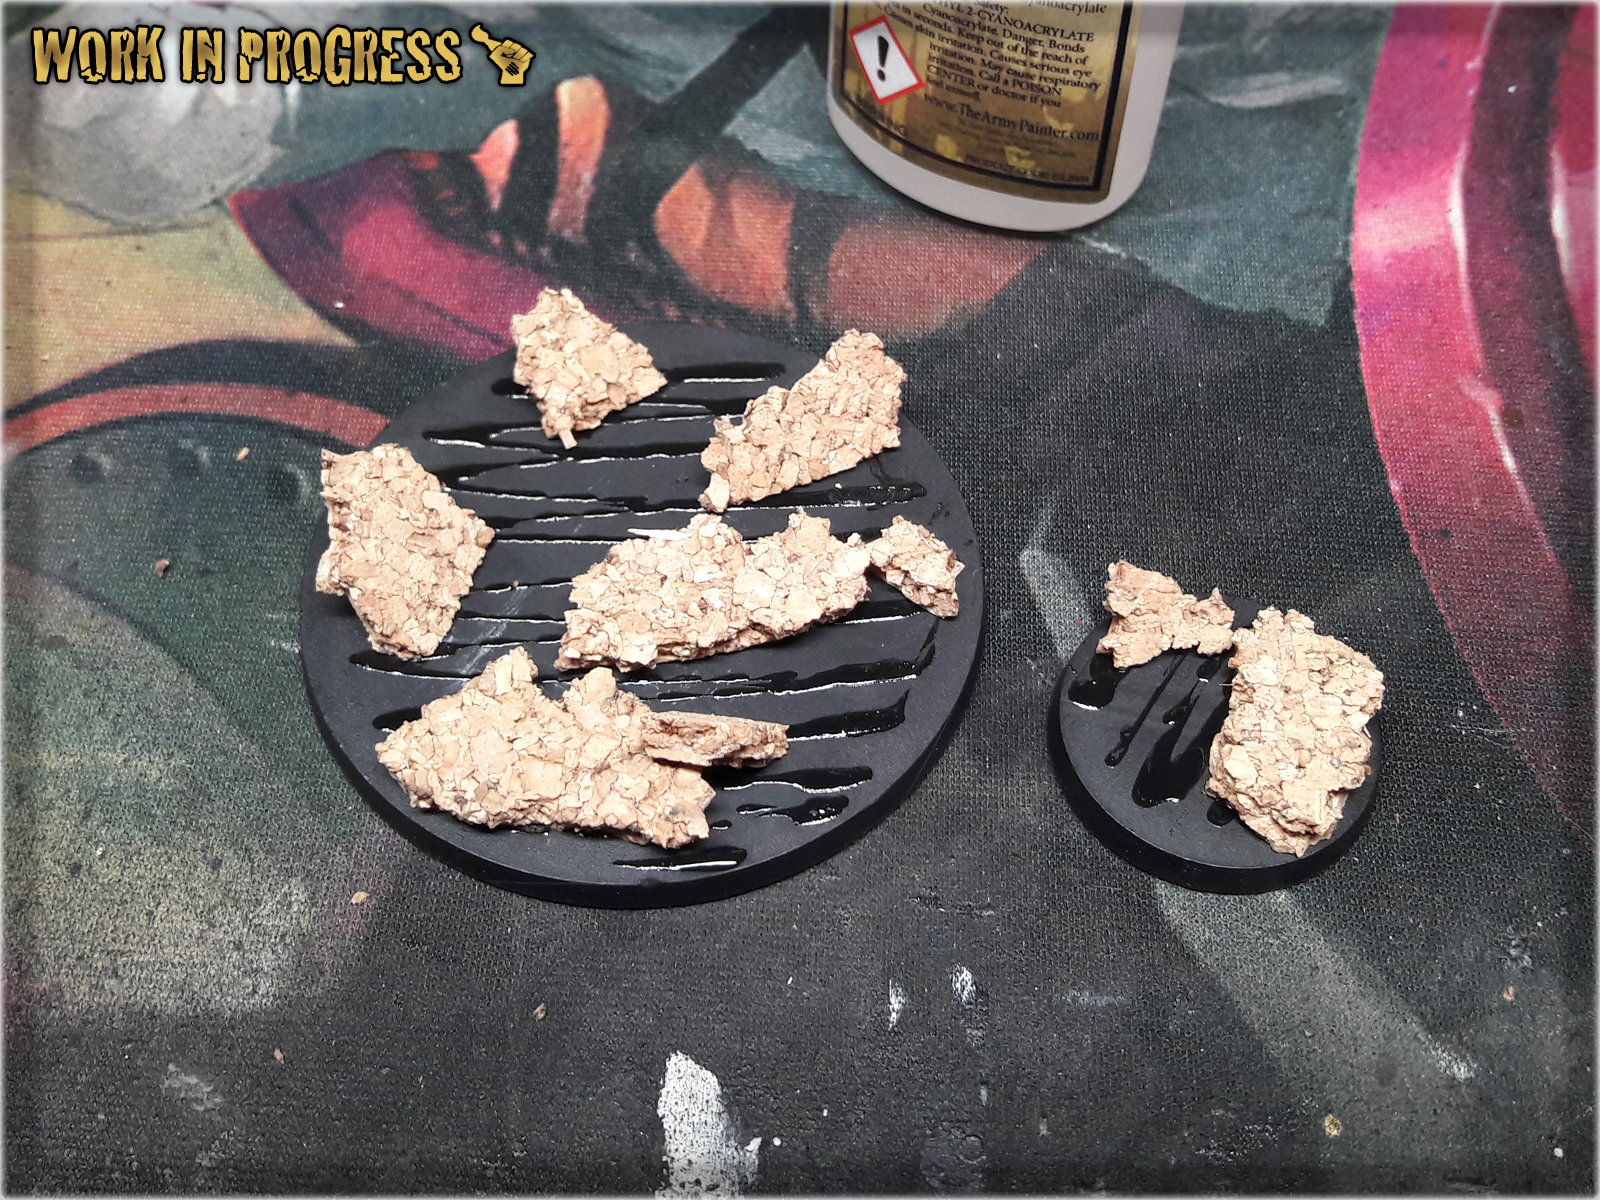
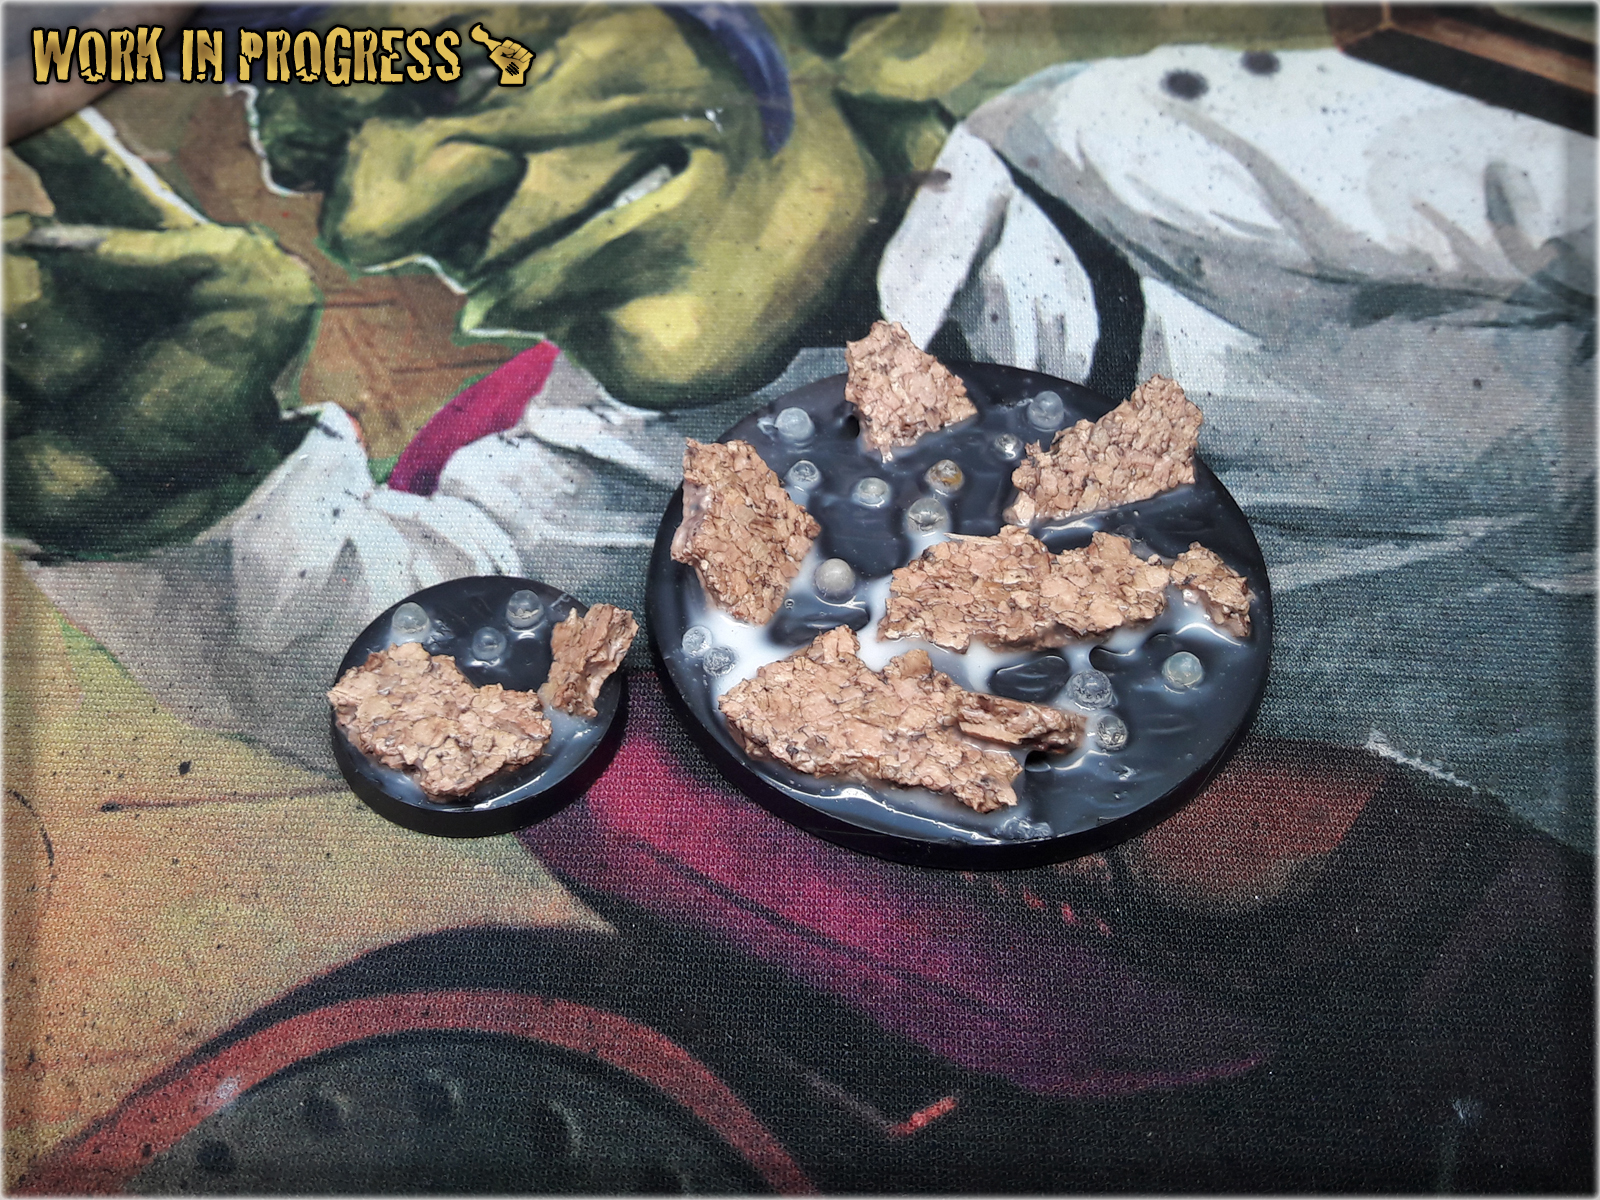
* I started by breaking a piece of Cork into smaller bitz.
* I then applied Super Glue over the bases in a random pattern. No need to be precise here.
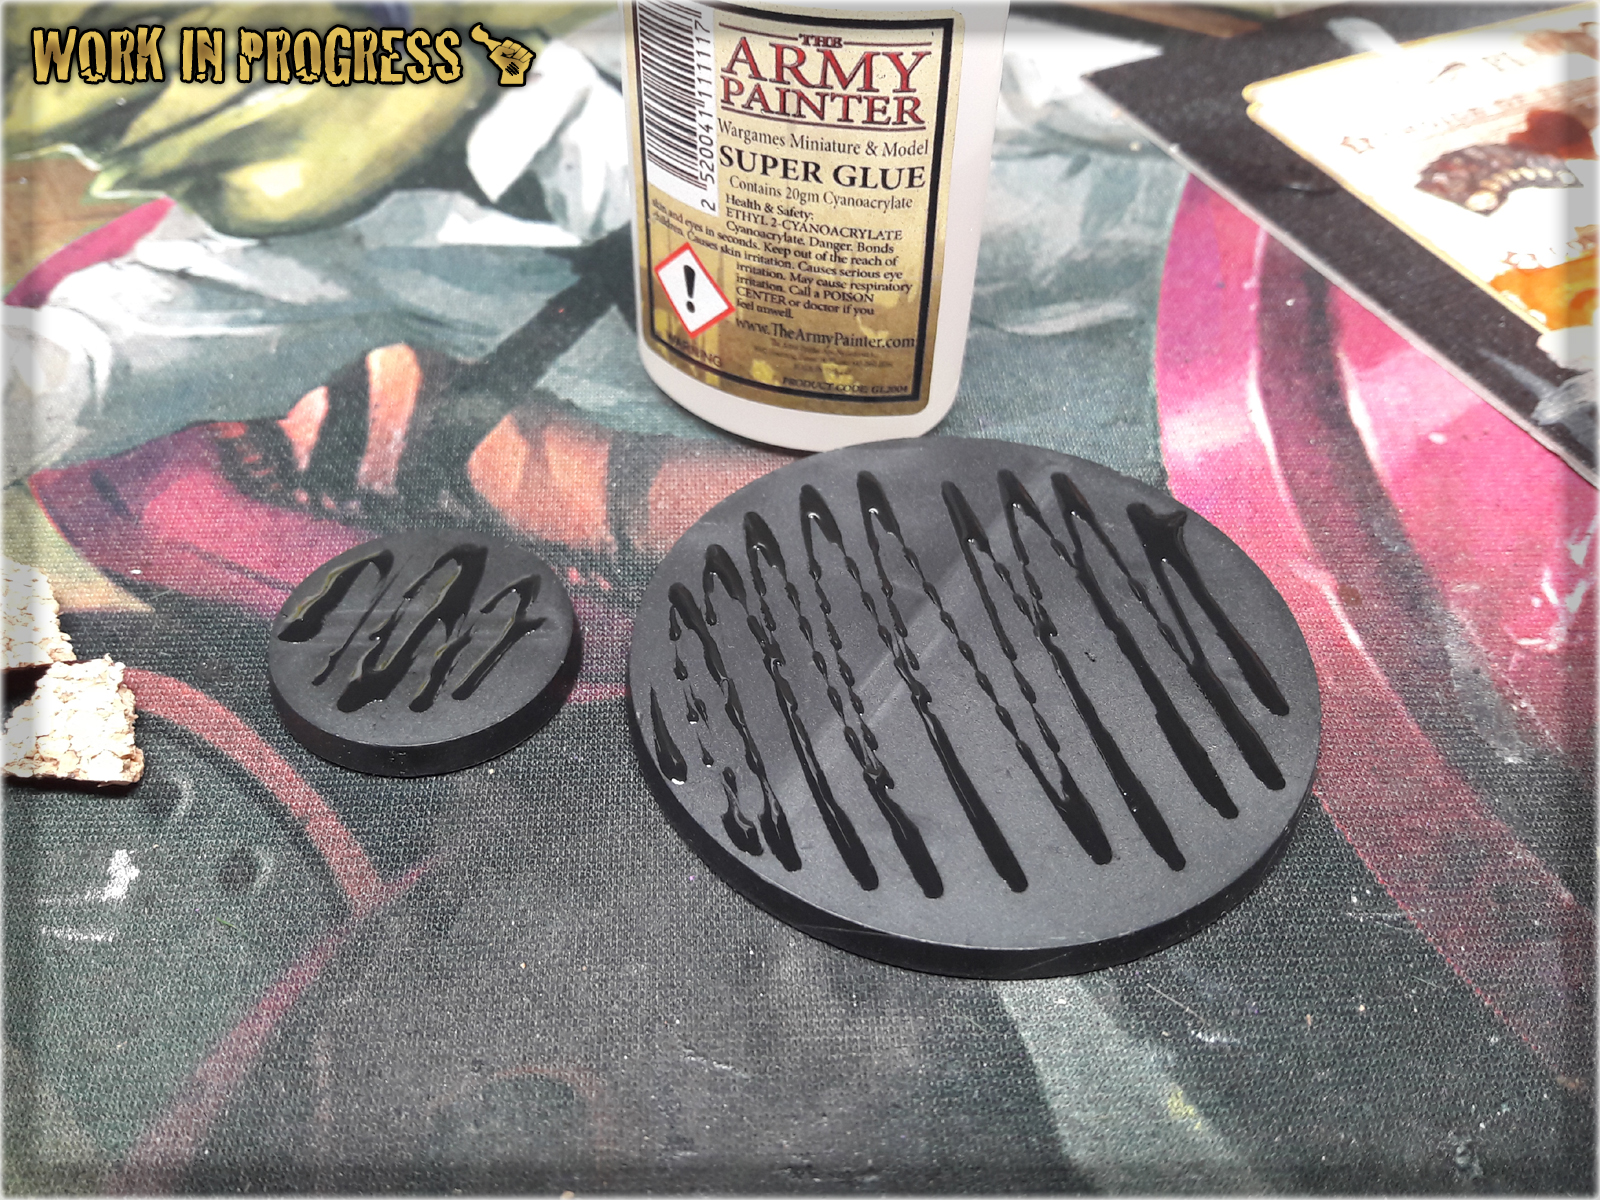
* Pieces of Cork followed to form 'volcanic rocks' and future spots for the miniatures to be mounted on.
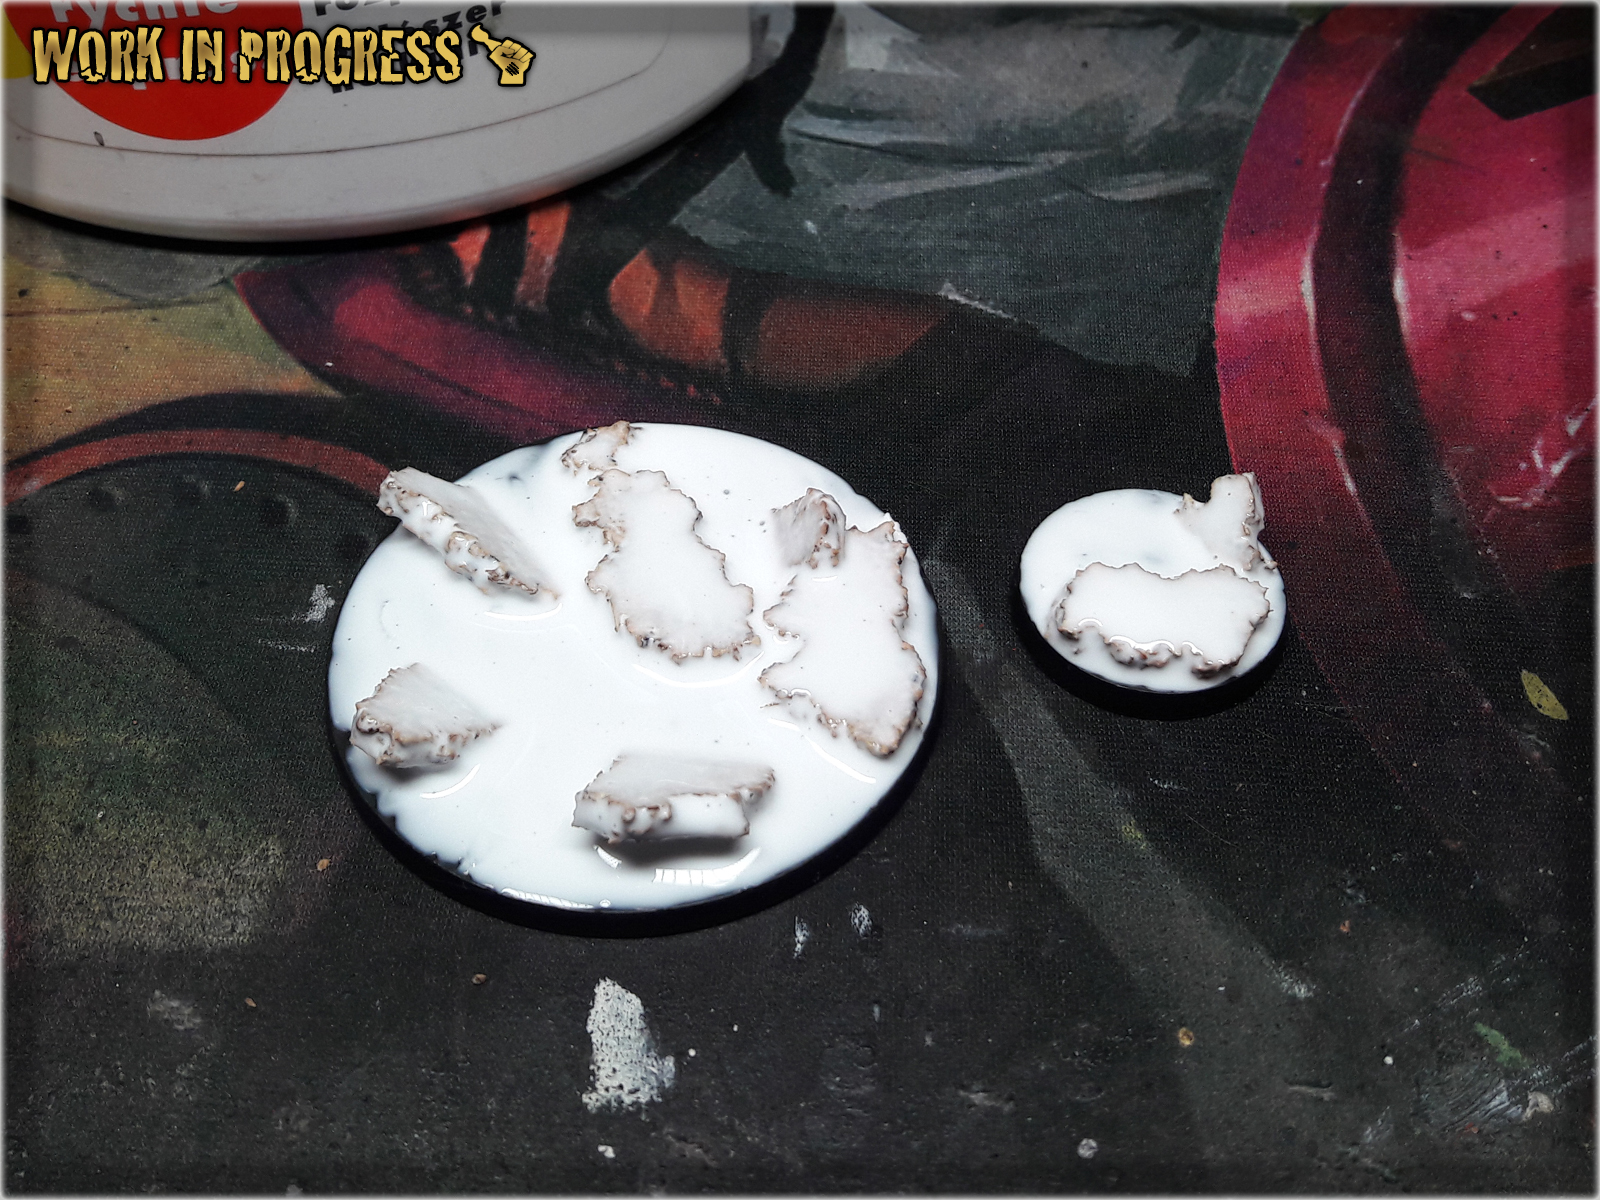
* Once Super Glue dried out I covered entire base with Basing Glue.
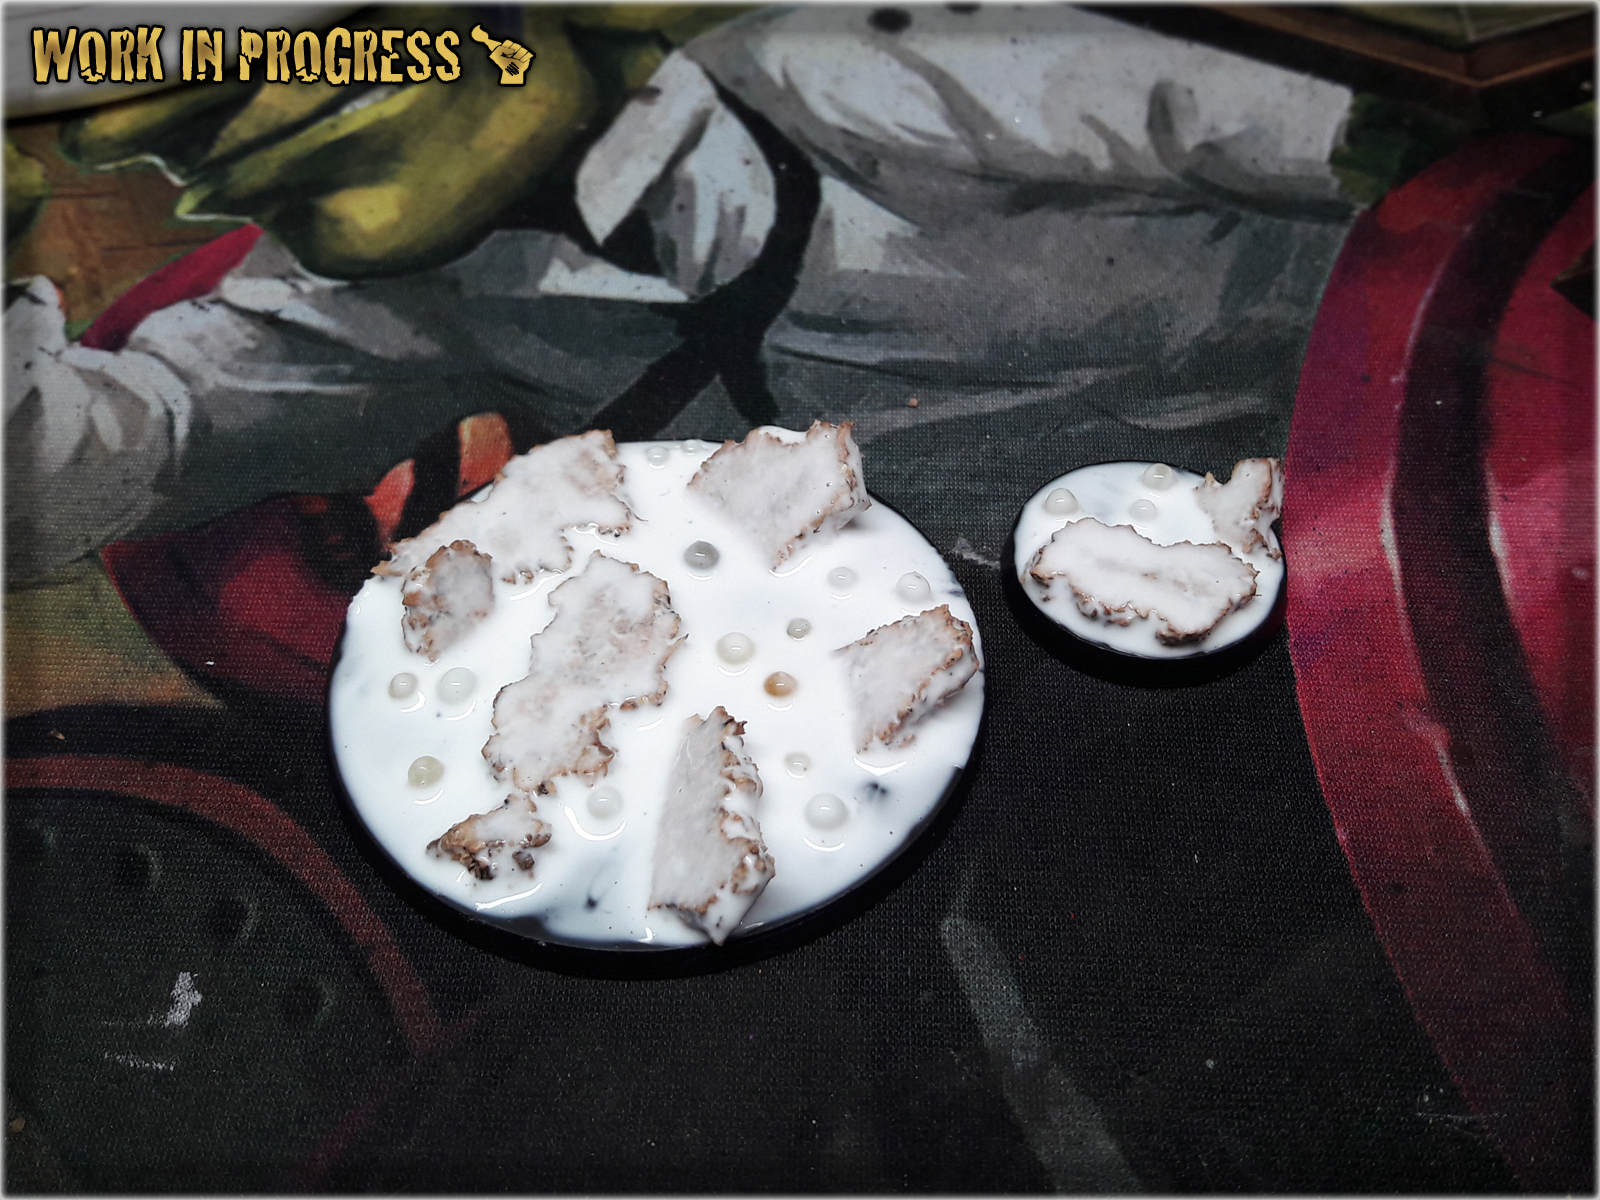
* I then dropped tiny balls (shoe moist absorbers) oon top of the Basing Glue, between 'volcanic rocks' to create an effect boiling lava bubbles.
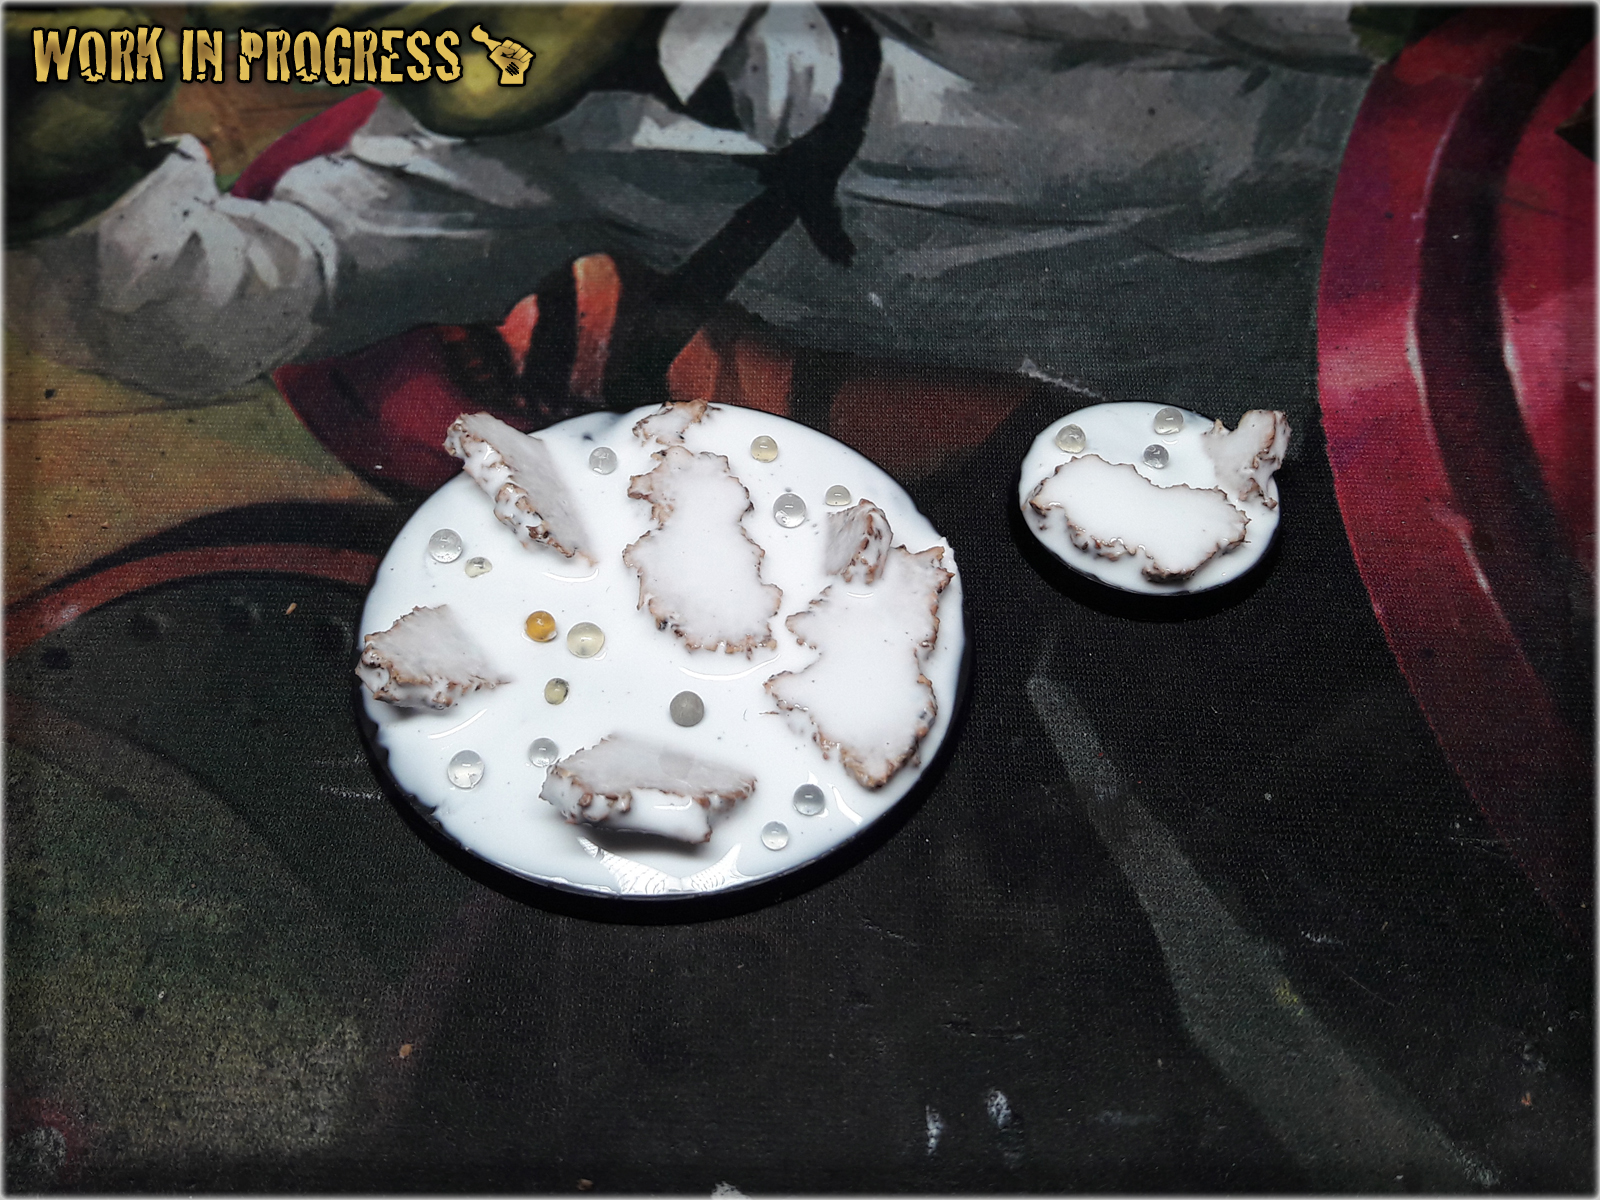
* Next I applied Basing Glue over the bubbles.
* Black Undercoat.
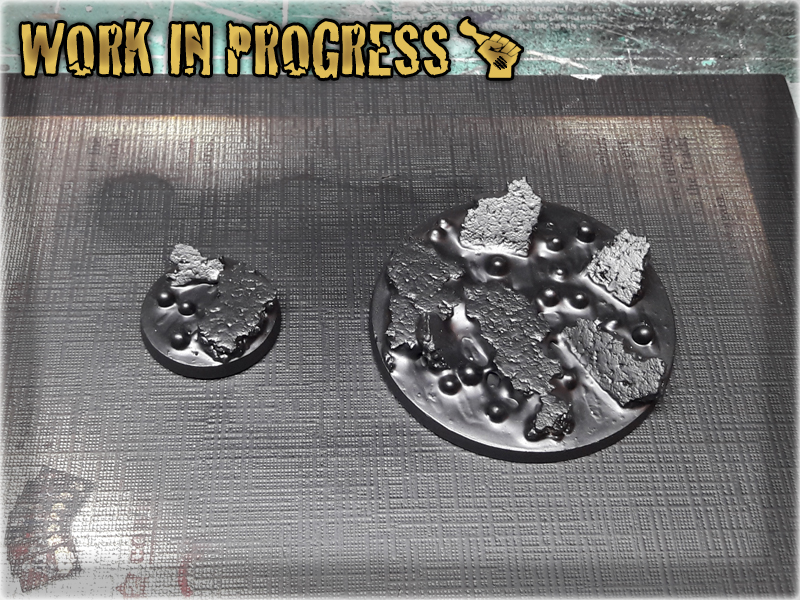
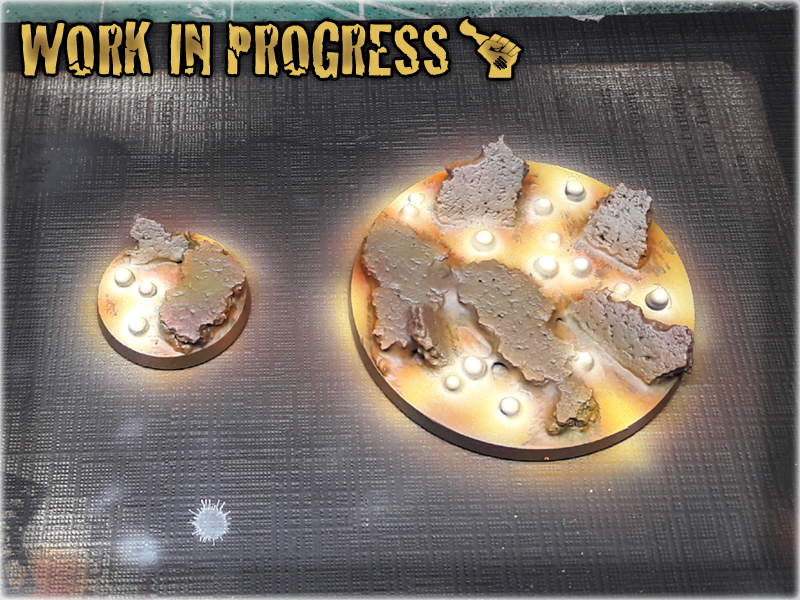
* Mahogany (Val) airbrushed all over the base.
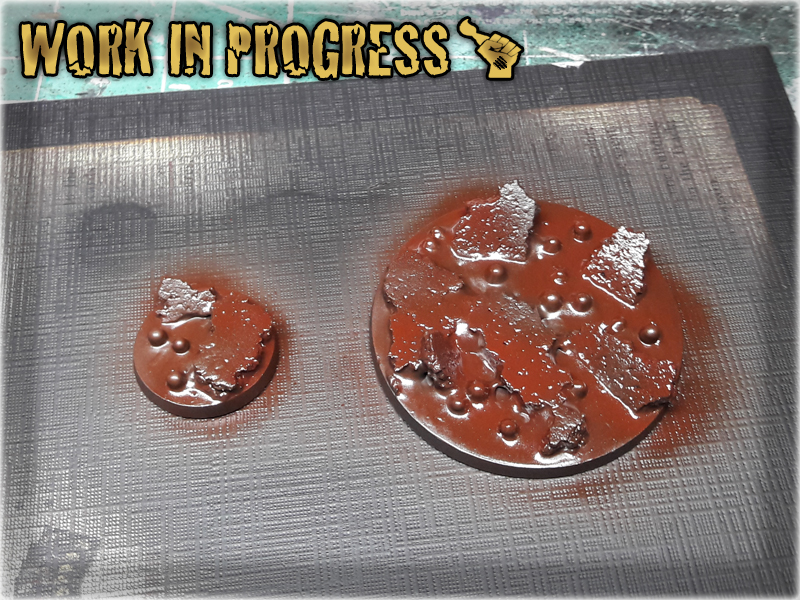
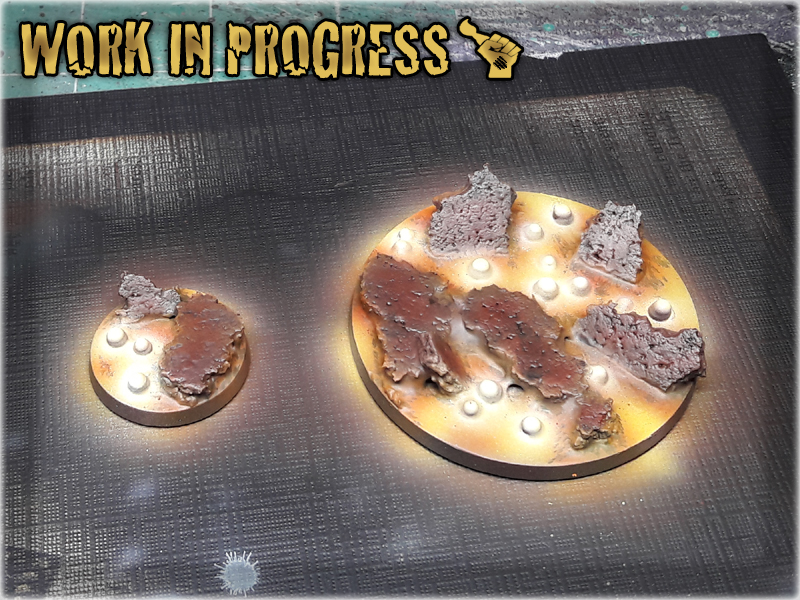
* Gorthror Brown (GW) drybrush over the Rocks.
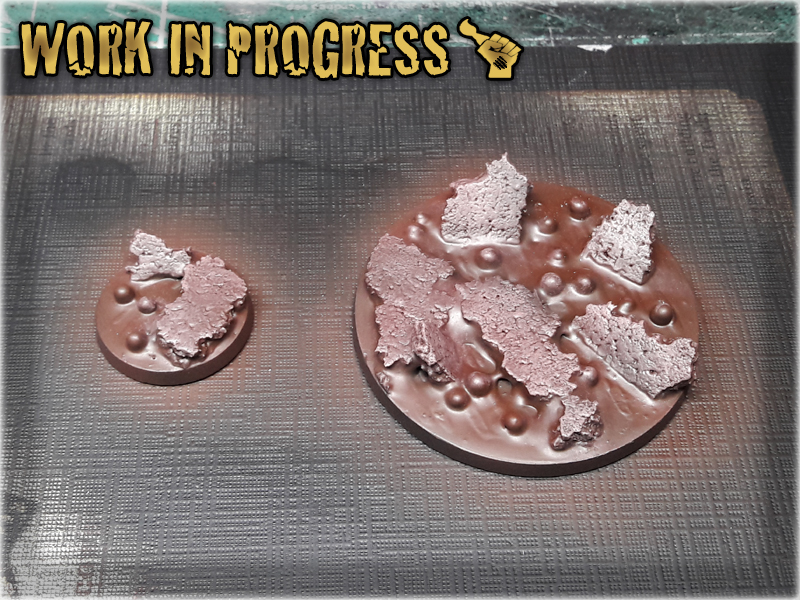
* Gory Red (Val) airbrushed over Lava.
* Scrofulous Brown (Val) airbrushed over Lava.
* Scrofulous Brown (Val) + White airbrushed over Lava.
* Black spots added around Rocks
* Scrofulous Brown (Val) airbrushed over Black spots.
* Lamenters Yellow (GW) airbrushed over Lava.
* Hot Orange (Val) spots airbrushed over Black spots, White airbrushed over bubbles.
* Scrofulous Brown (Val) + Black, then pure Black glaze applied oved the Rocks.
* Gloss Varnish applied over Lava.
![]()
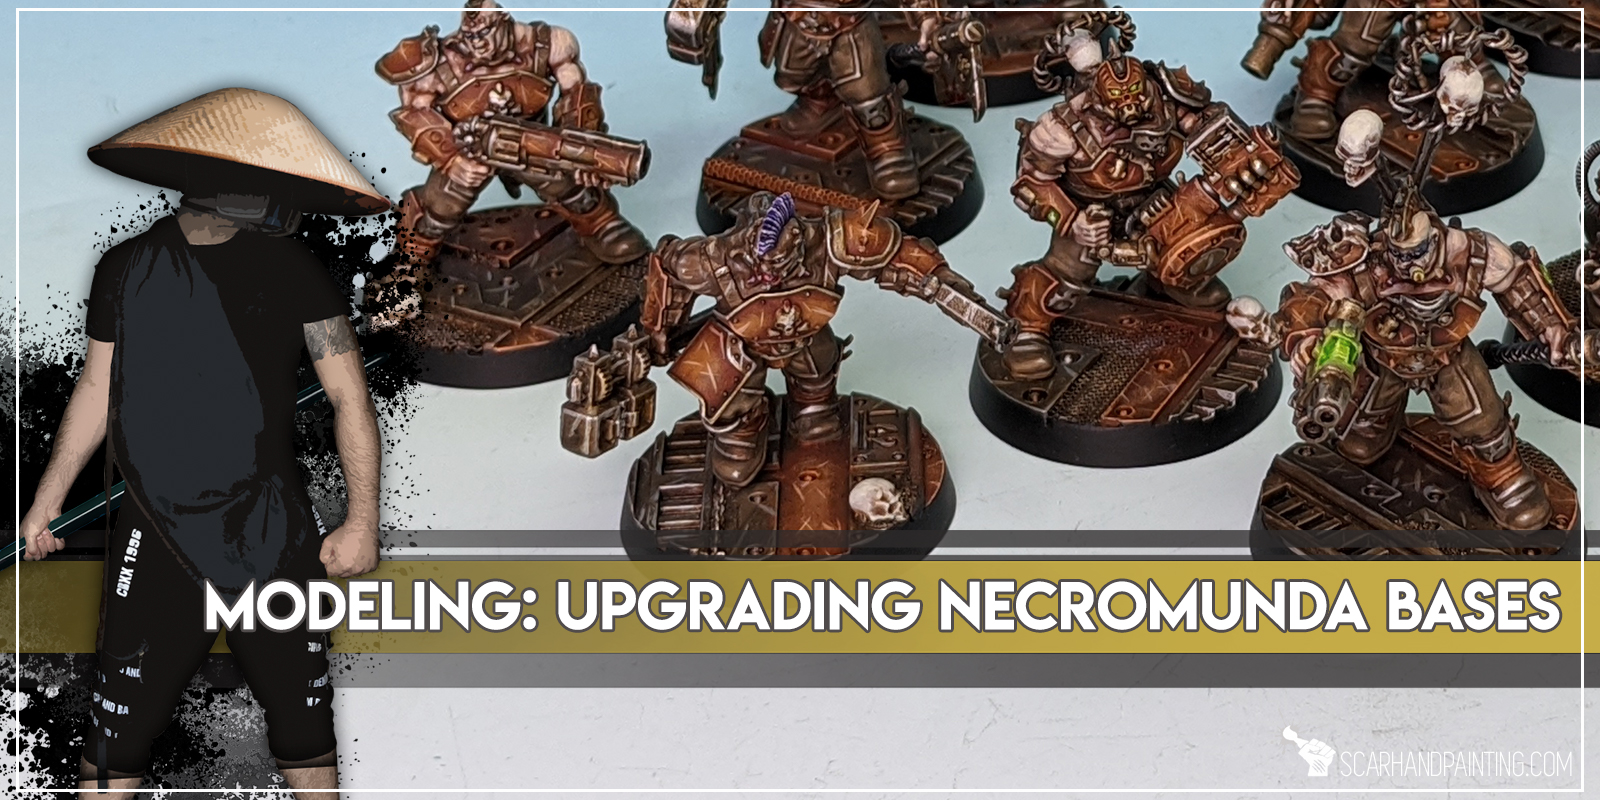
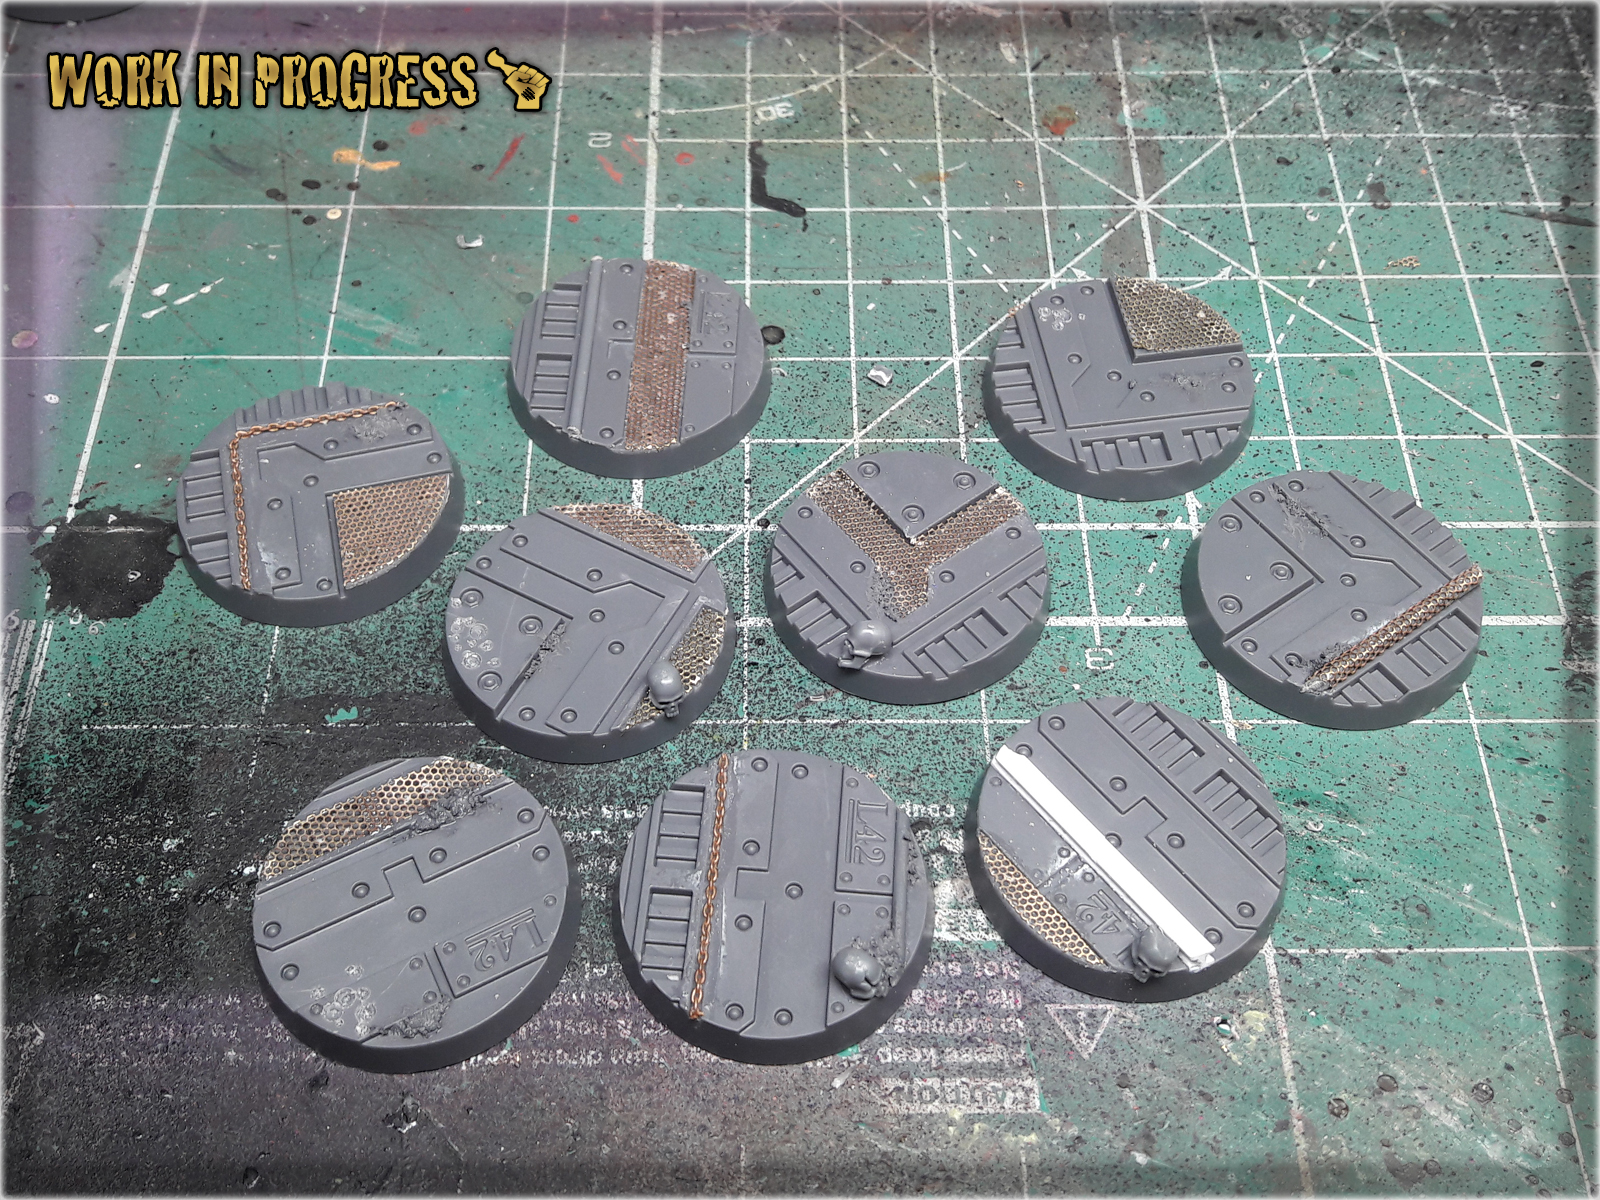
Necromunda: Underhive is a game full of nicely detailed plastic miniatures. As much as I hate endorsing Games Workshop – It should be mentioned that in terms of miniatures – they did a really nice job, extending the set so that it includes 25 industrial themed plastic bases. I appreciate this move from GW, even tho the variety of Necromunda bases designs is scarce. For example my own set came with just two versions among a total of ten bases. This is where I come in with a Tutorial on how to Enchance Necromunda bases in a fast, simple way. Below you will find few ideas on how to do it – but let me say this in advance: keep an open mind cause there’s plenty of awesome stuff that can be used to differentiate your Necromunda bases set (and actually any Industrial bases).
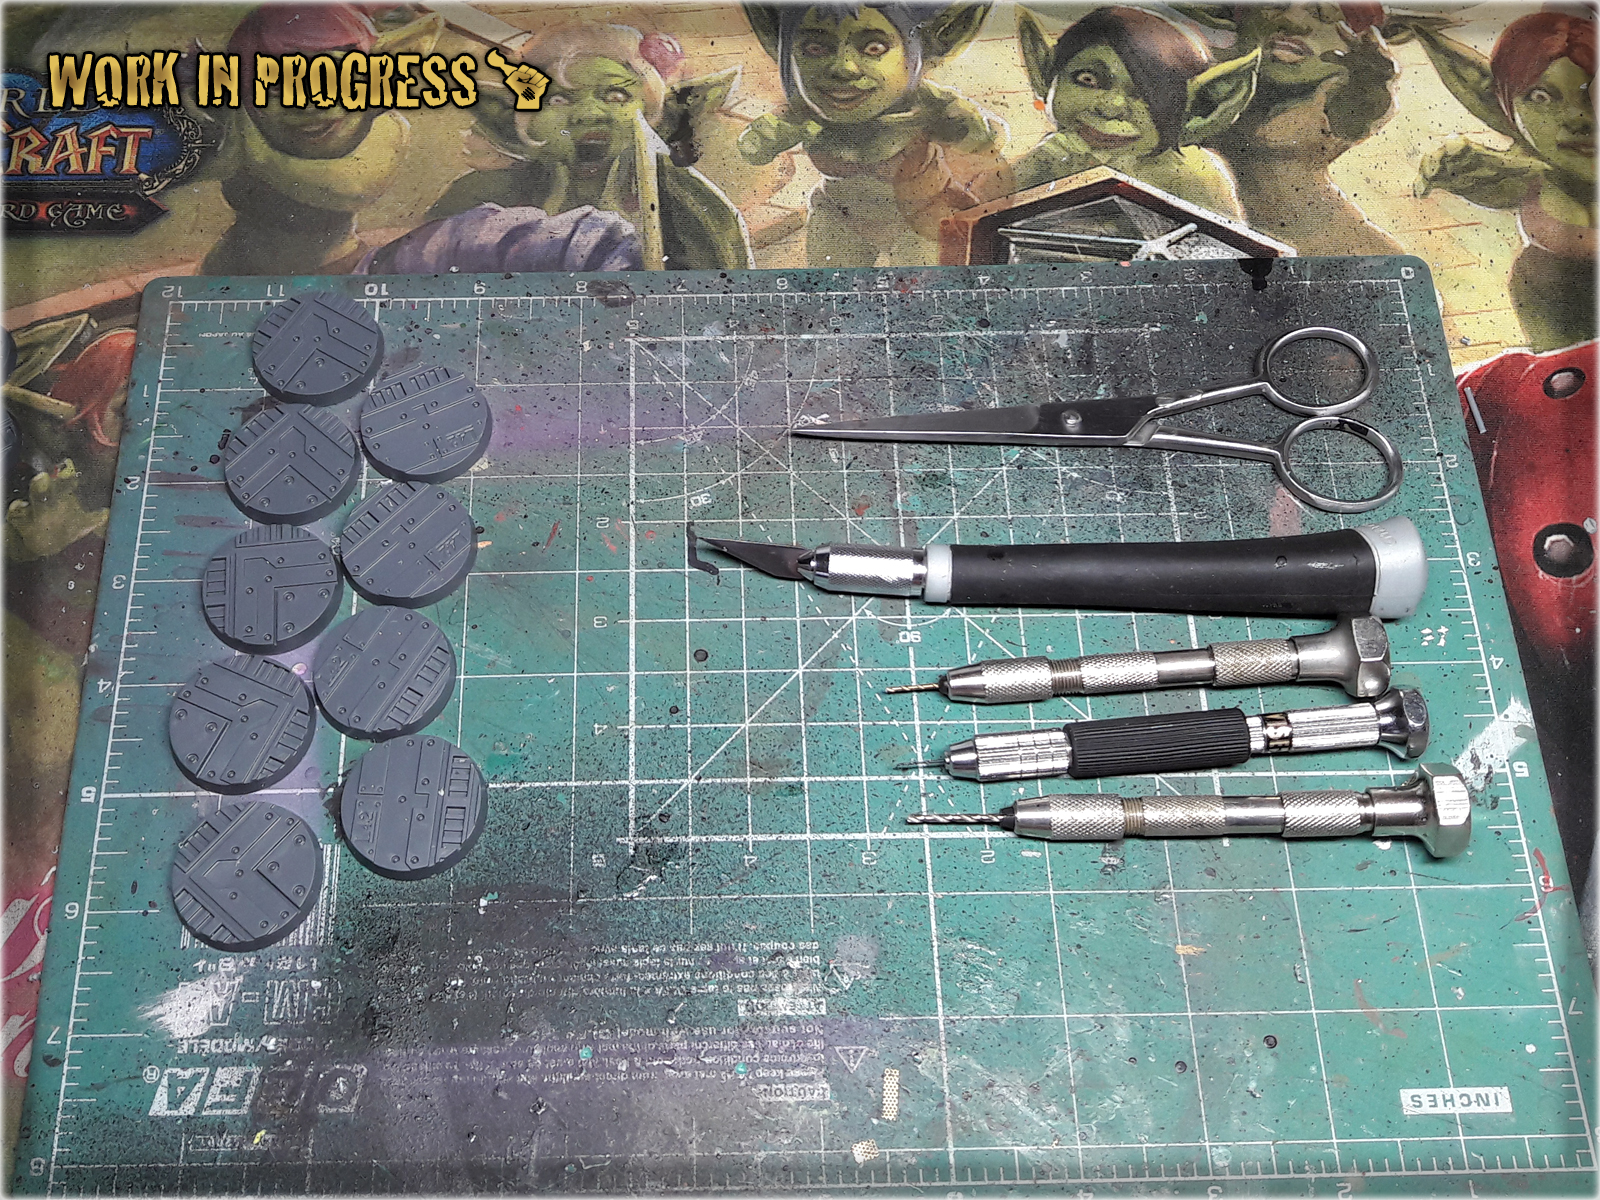
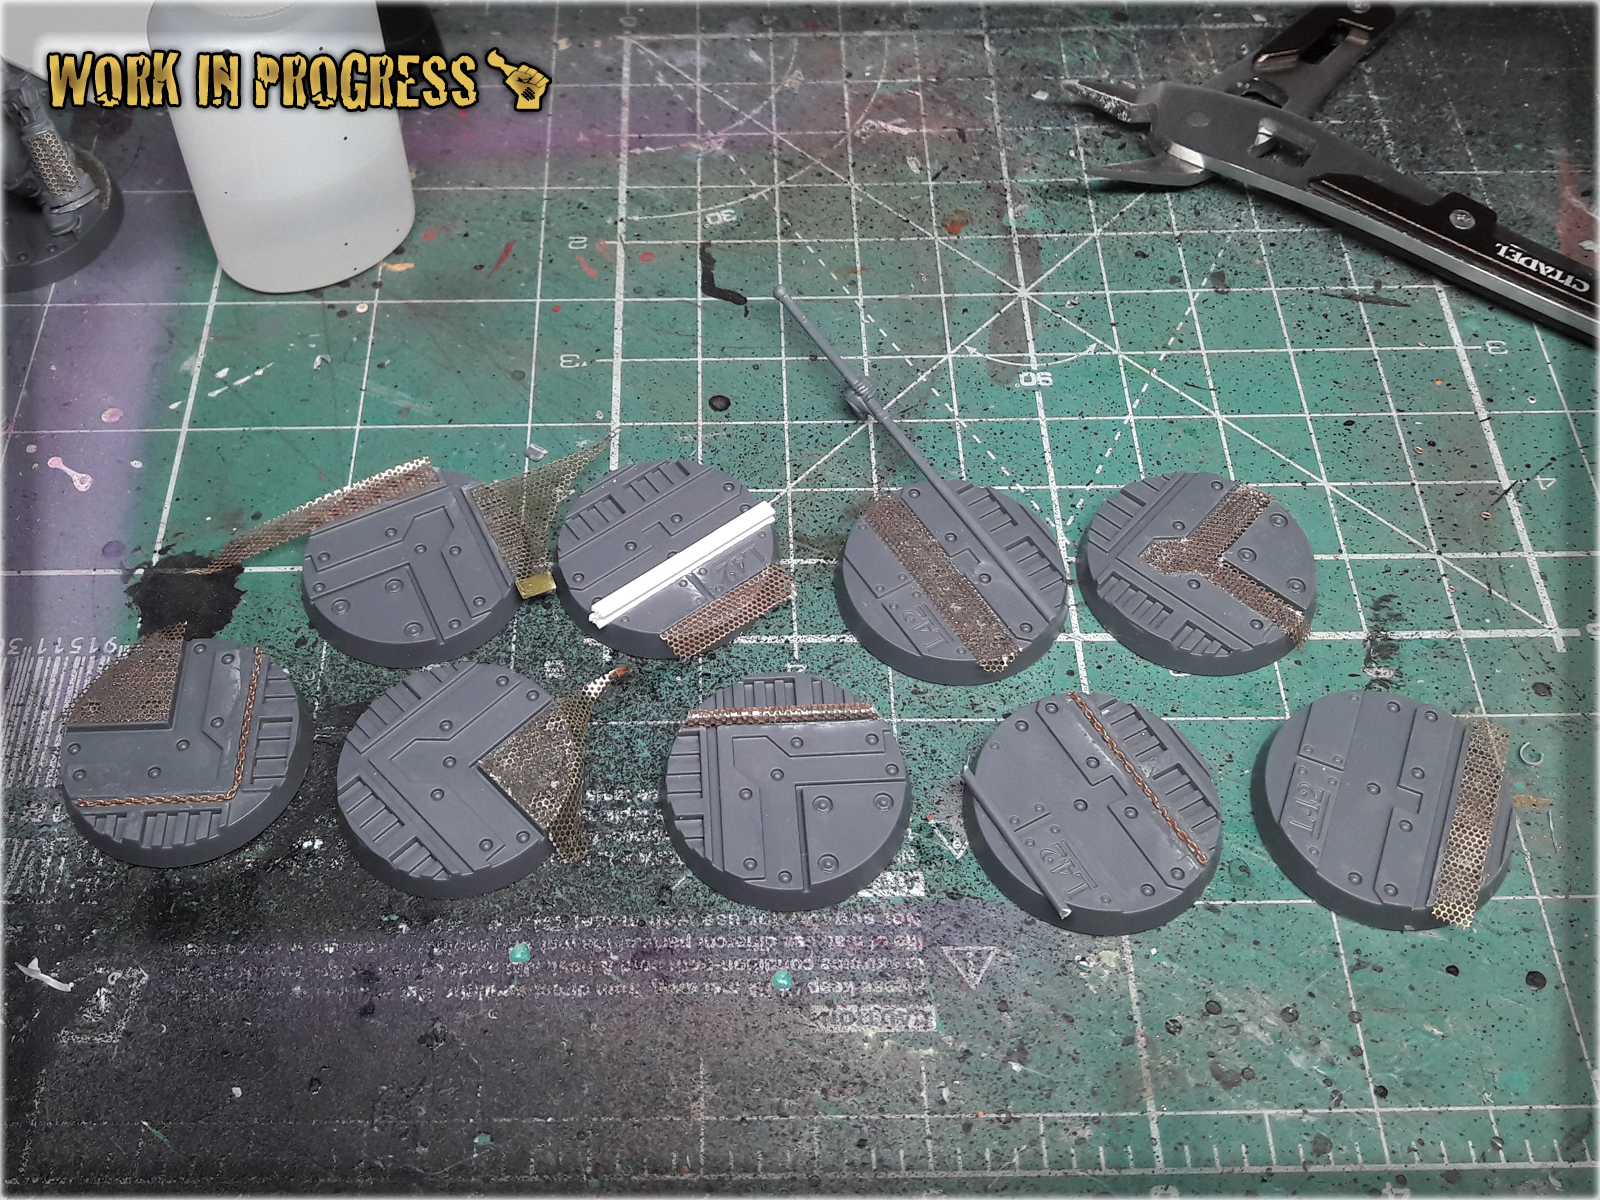
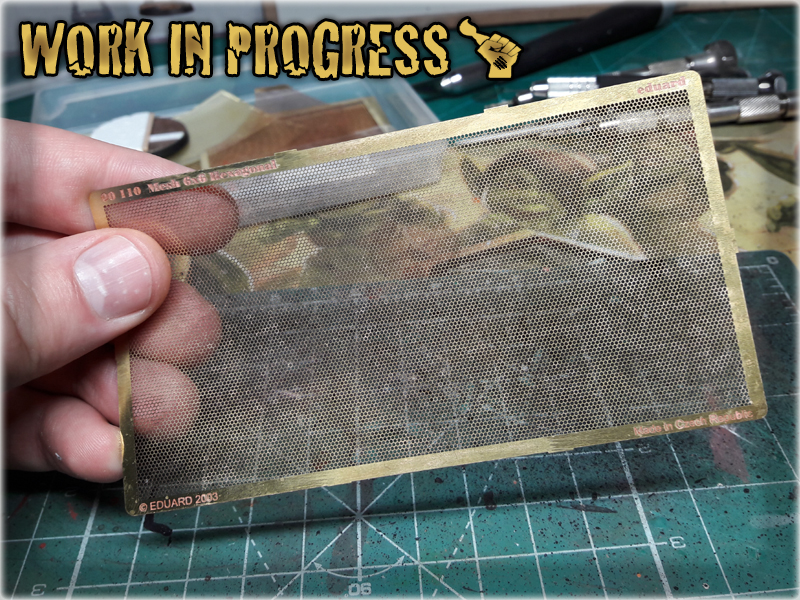
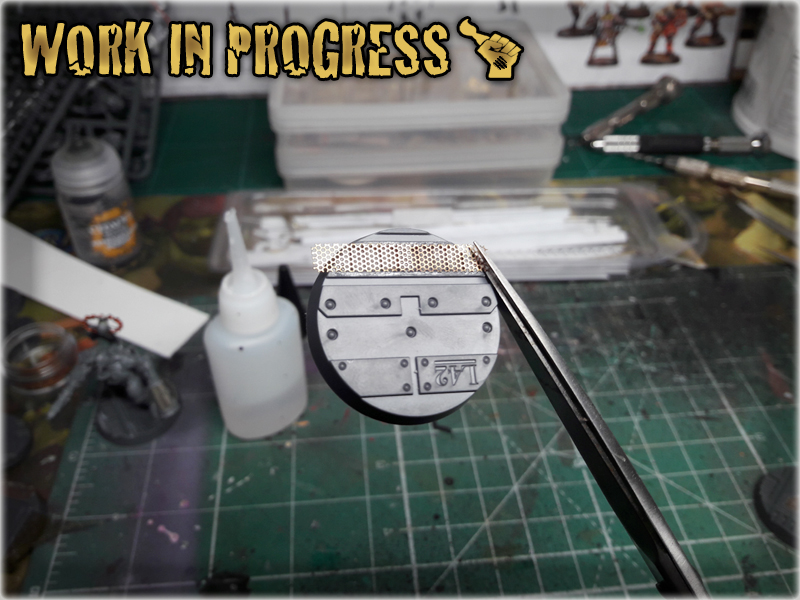
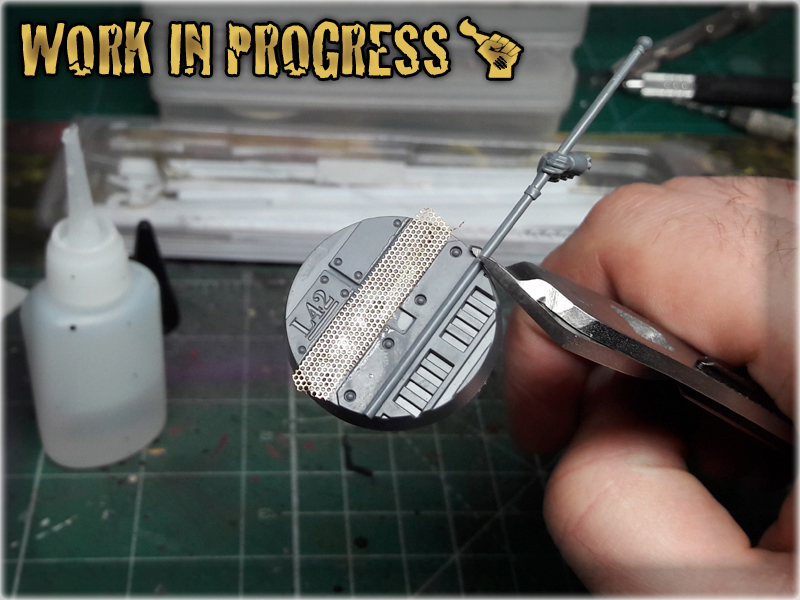
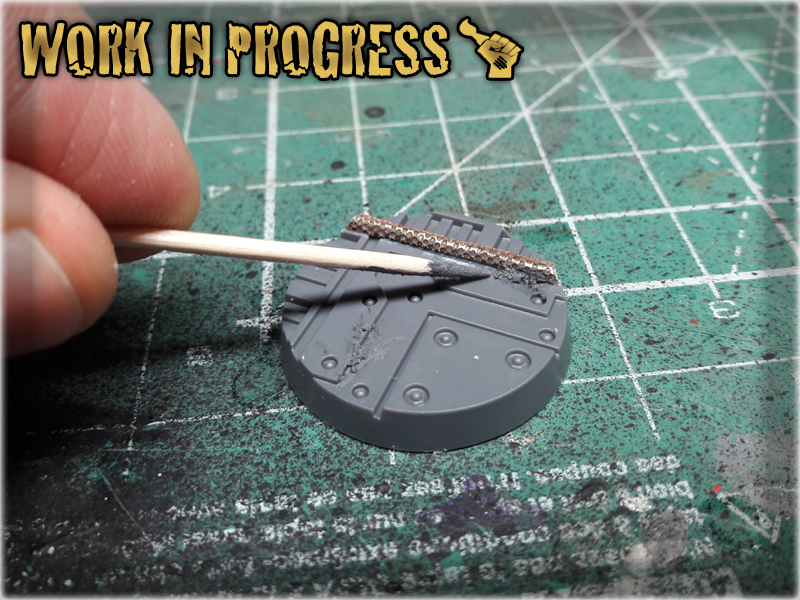
This stuff can be found in most modellers hobby stores. Personally I love it, cause it let’s me add awesome texture to the bases. It is very easy to use. I tend to cut a piece of mesh with scissors and glue it onto a designated surface, leaving an excess to hang outside the base. Once Super Glue dries out I just cut the excess mesh with scissors and file it on the edge – driving a file from top to bottom of the bases edge. This keeps the mesh glued onto the base, but smoothers the edge nicely.
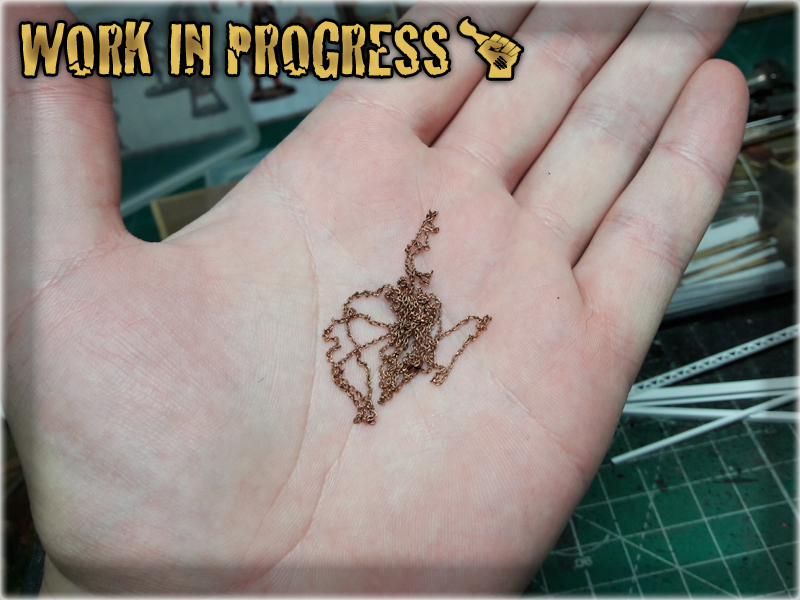
Another item from a hobby store. I just glue it onto the base and cut the excess with plastic cutters. Brass Chain is thin and rather frail so it does not damage the cutters.
Awesome, hobby friendly and easy to use material. It comes in either flat sheets of different thickness, or in prefabricated shapes. For bases I usually use flat sheets, gluing them onto the base, then cutting to fit the edge. In case of Necromunda bases – there’s plenty of industrial texture already, so I uused a prefabricated piece of PCV to add here and there. Same technique – glue onto the base, then cut to match the edge.
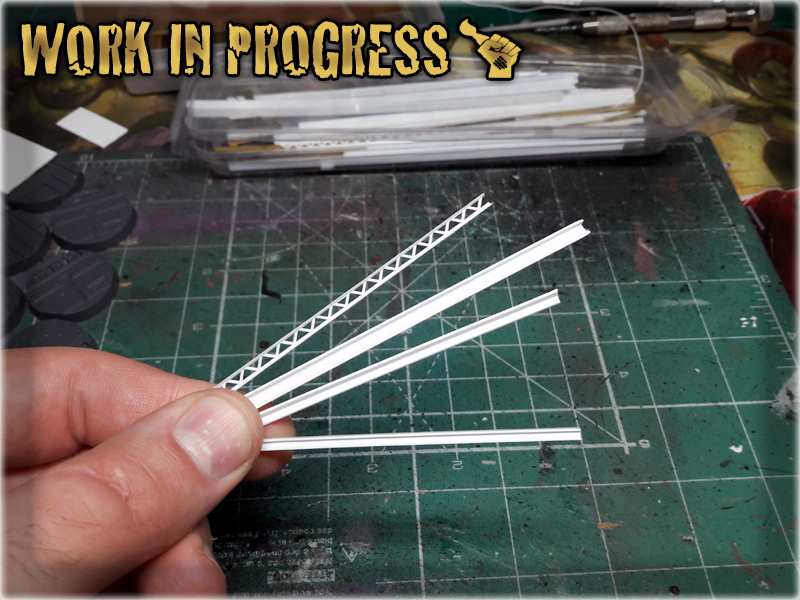
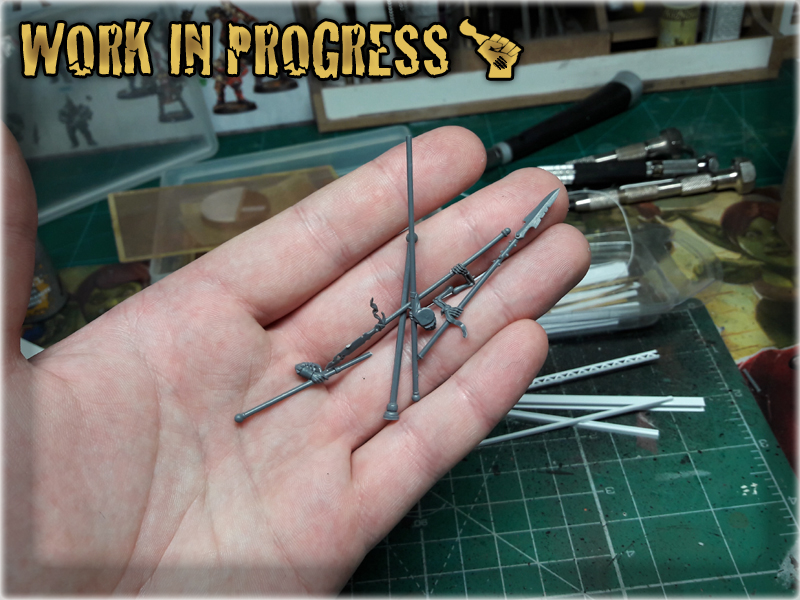
Everybody has some. For Necromunda bases I preffered thin, long spears and banner poles. I just glued them over certain areas and cut with a plastic cutters to match the edge of the base and add variety to the base’s surface.
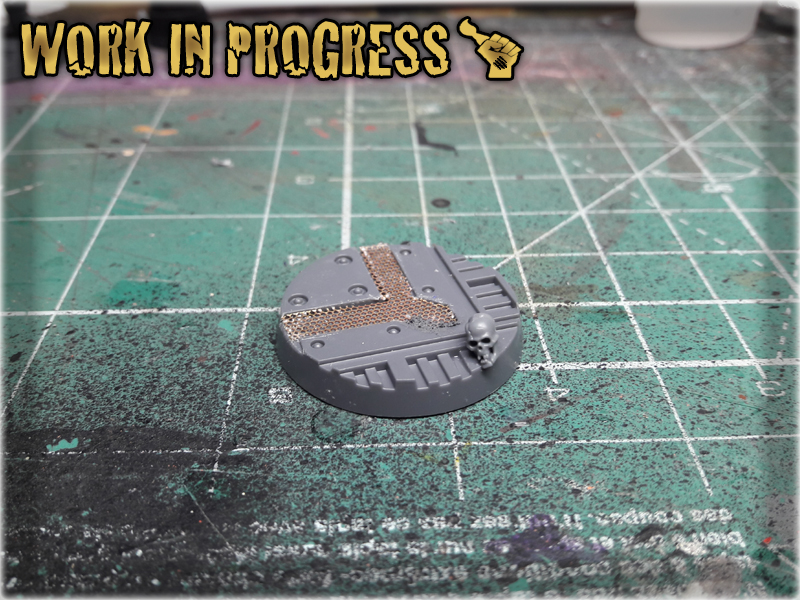
Games Workshop’s Skulls set is something that everyone should get. If you haven’t got yours – damn – just go and order one. For what you get the price is just insane. Either way – some Skulls on the base would certainly make it stand out.
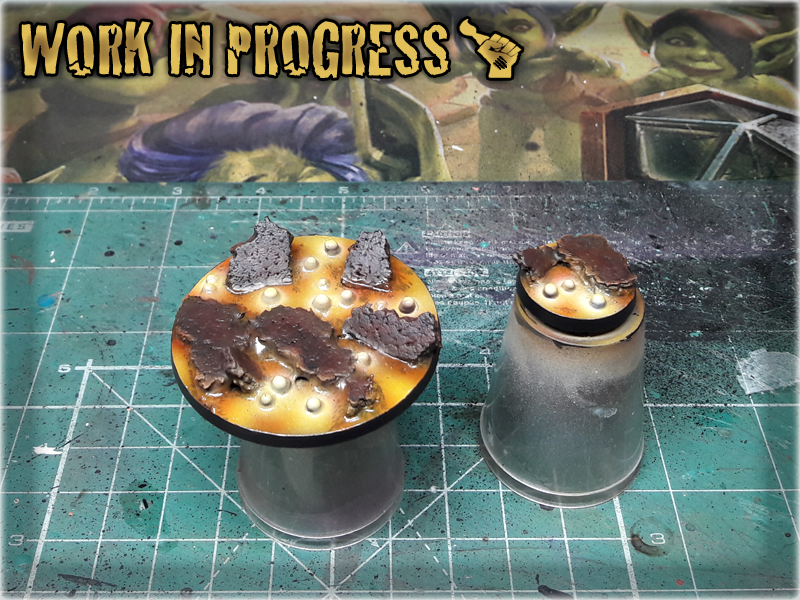
Actually any grain-texture paint would do just fine. I used Astrogranit Debris cause I don’t have many uses for this particular colour and here it is meant to go under a black undercoat anyway. I applied small amount to certain places, just to add texture.
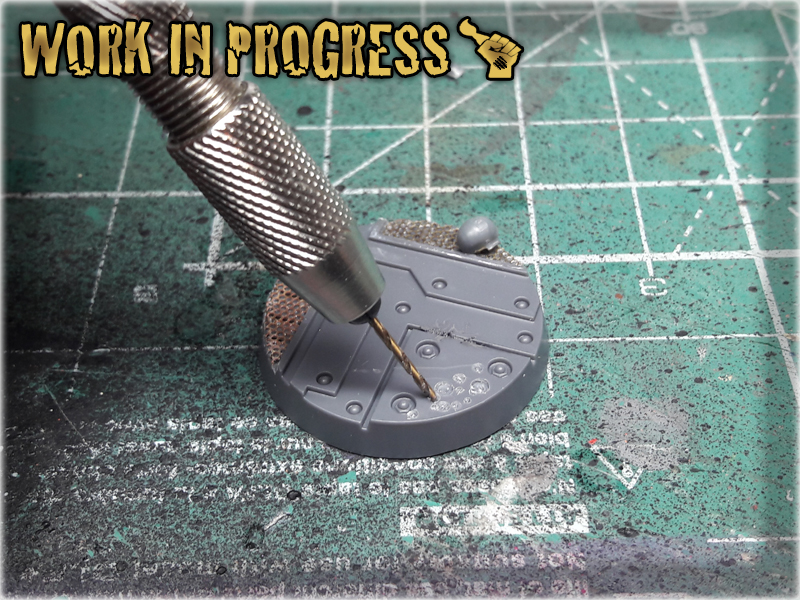
I drilled some holes in different sizes here and there to look like corrosion or some form of acid damage. Easy to do – looks cool once painted.
So, there’s that. These are just few ways to enchance Necromunda bases. I bet you can find a lot more ways to differentiate the set. Here’s how mine looks like after the above additions:

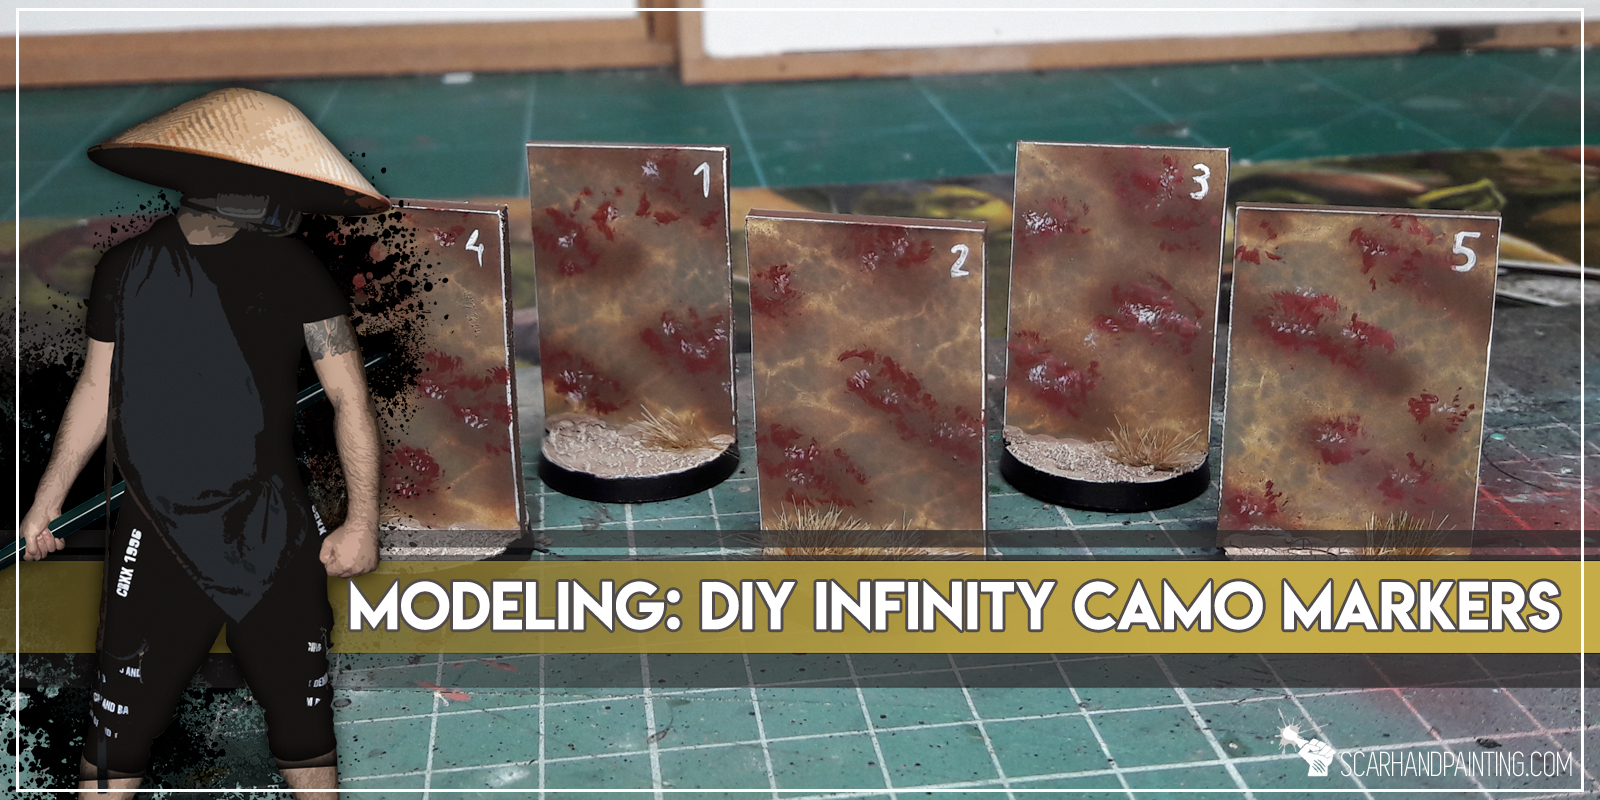
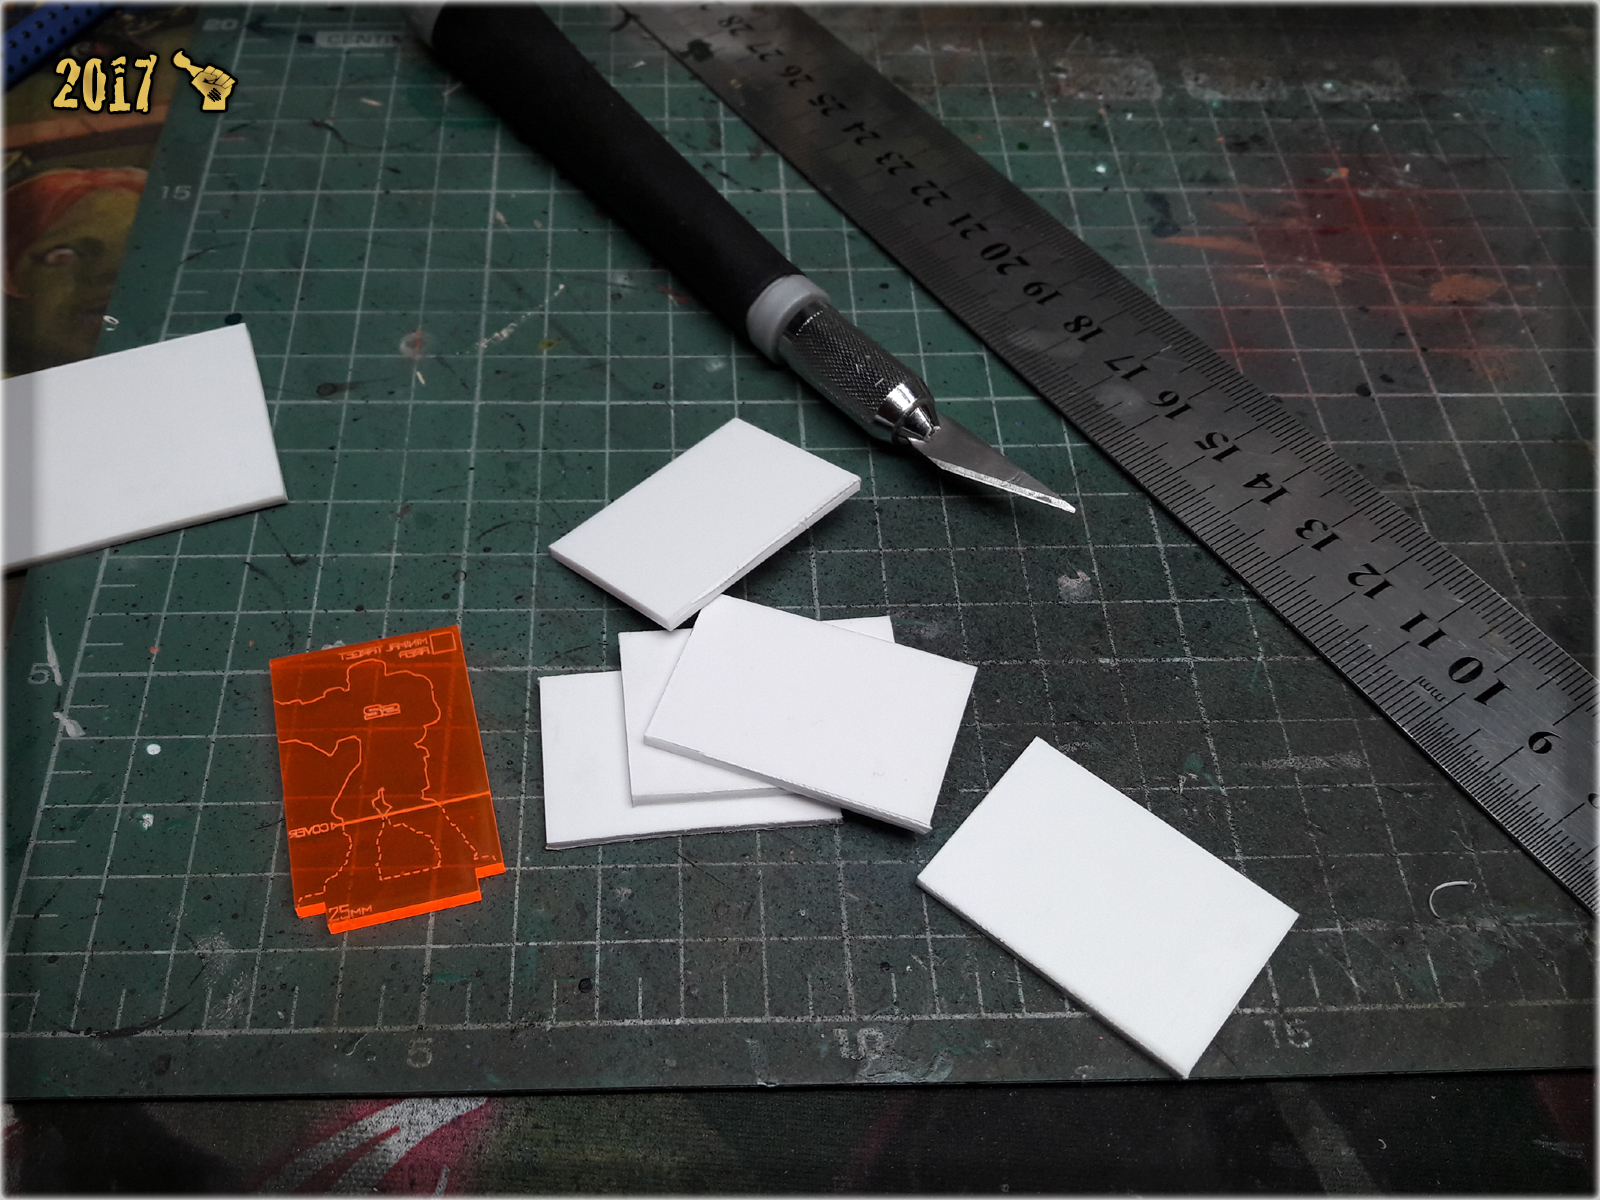
In this article I would like to present to you an easy way to prepare and then paint your own Camo Markers for Infinity the Game.
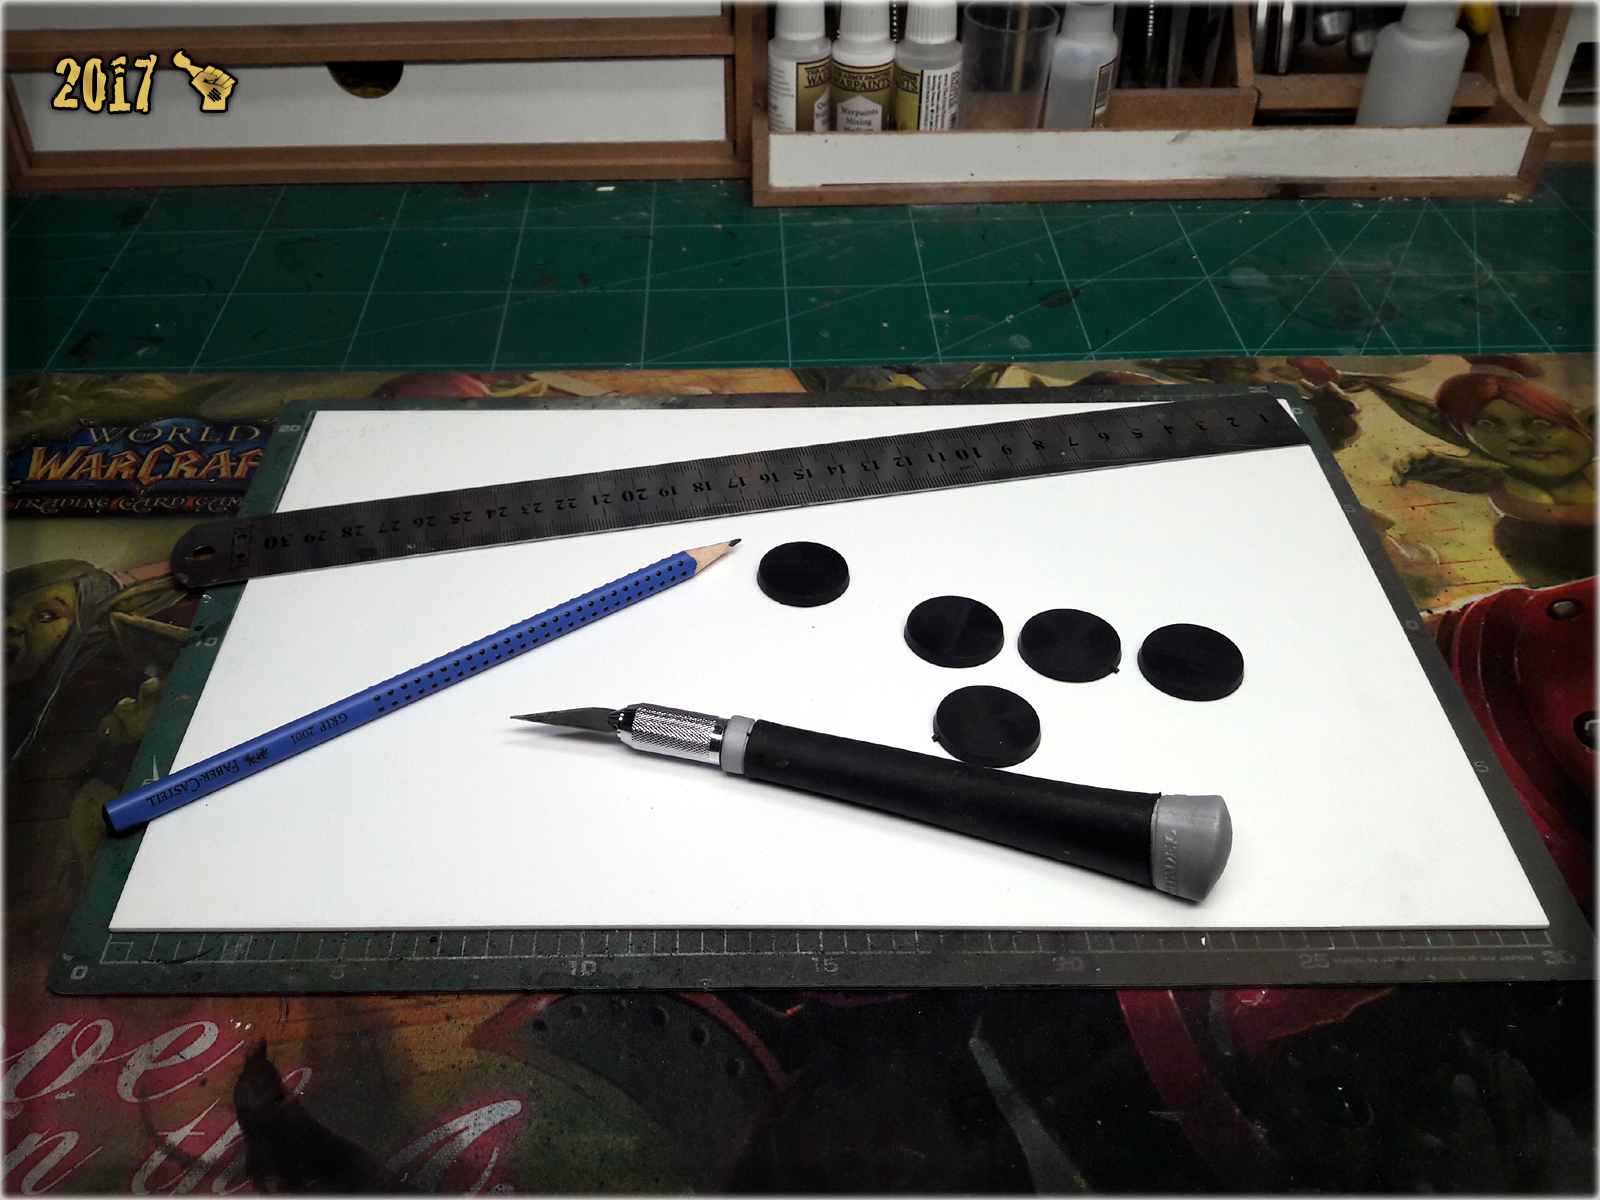
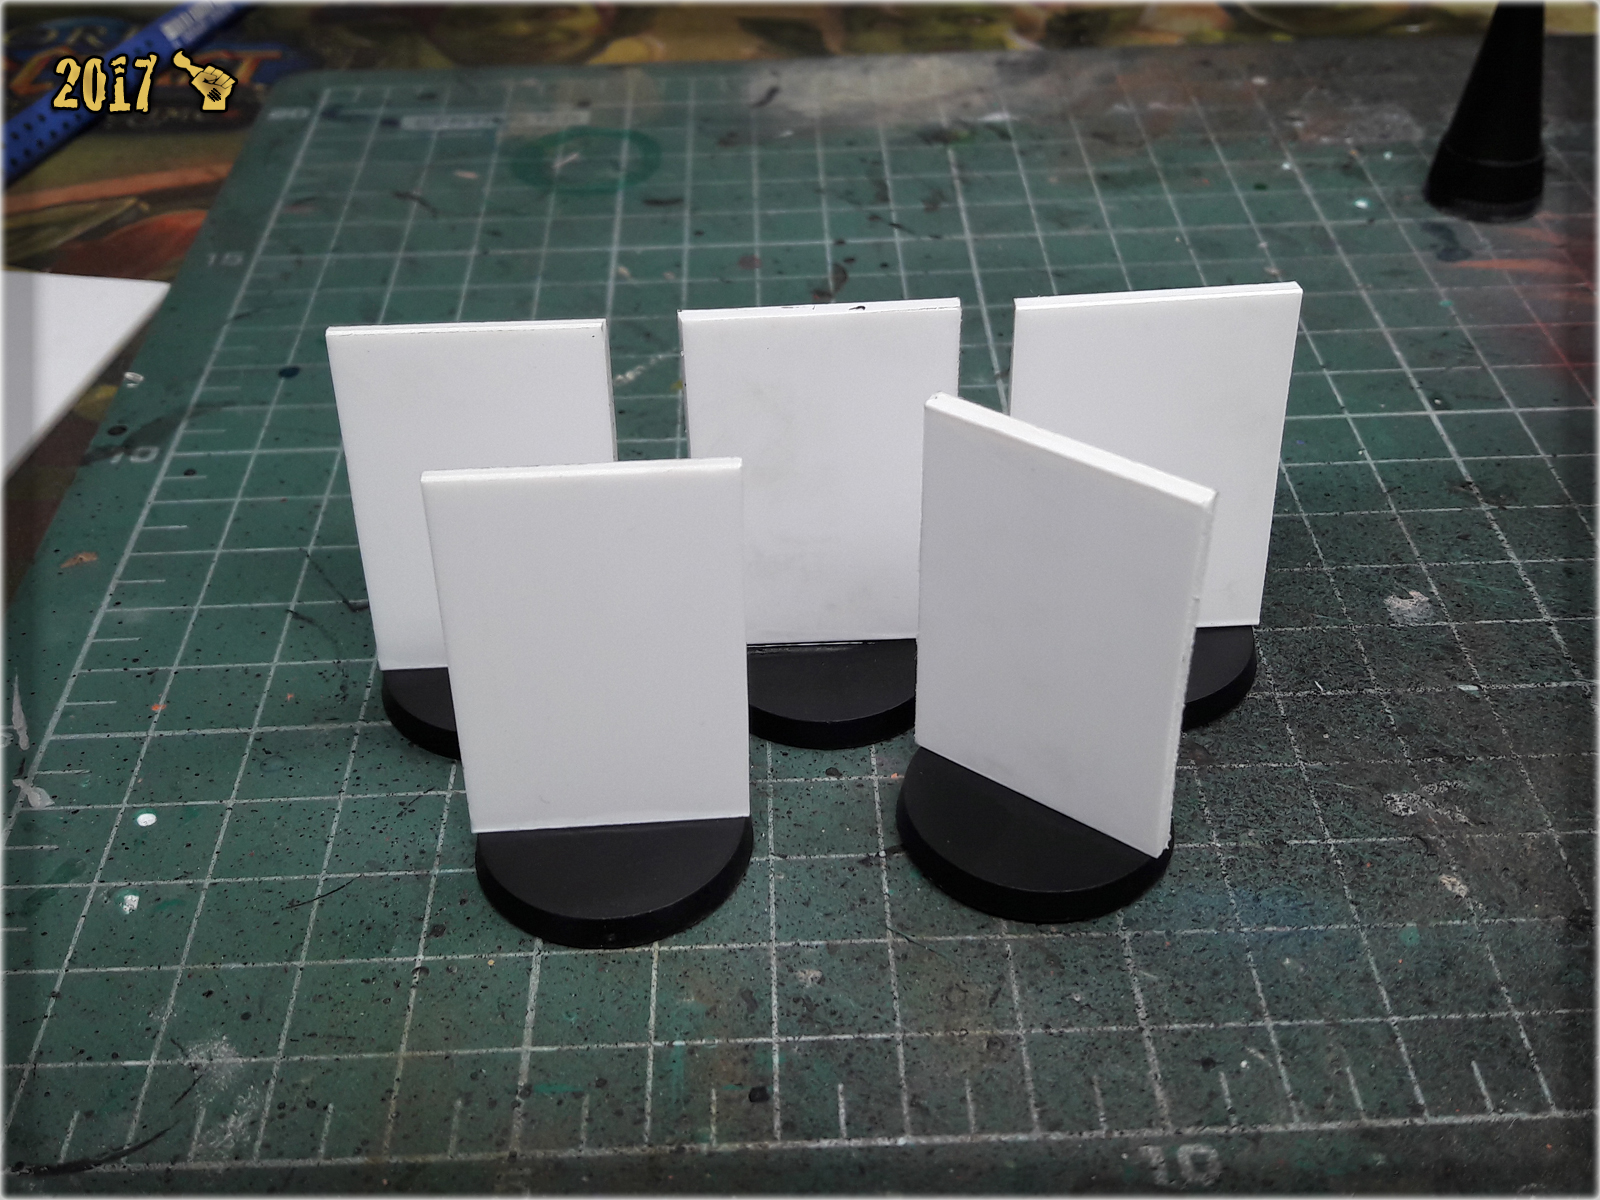
Obviously, the preparation process was pretty simple. Using a ruler, pencil and hobby knife I first drawn and then cut five 25x47mm rectangles made of PCV. I then glued them on top of 25mm round bases. At this point Camo Markers were ready to get painted.

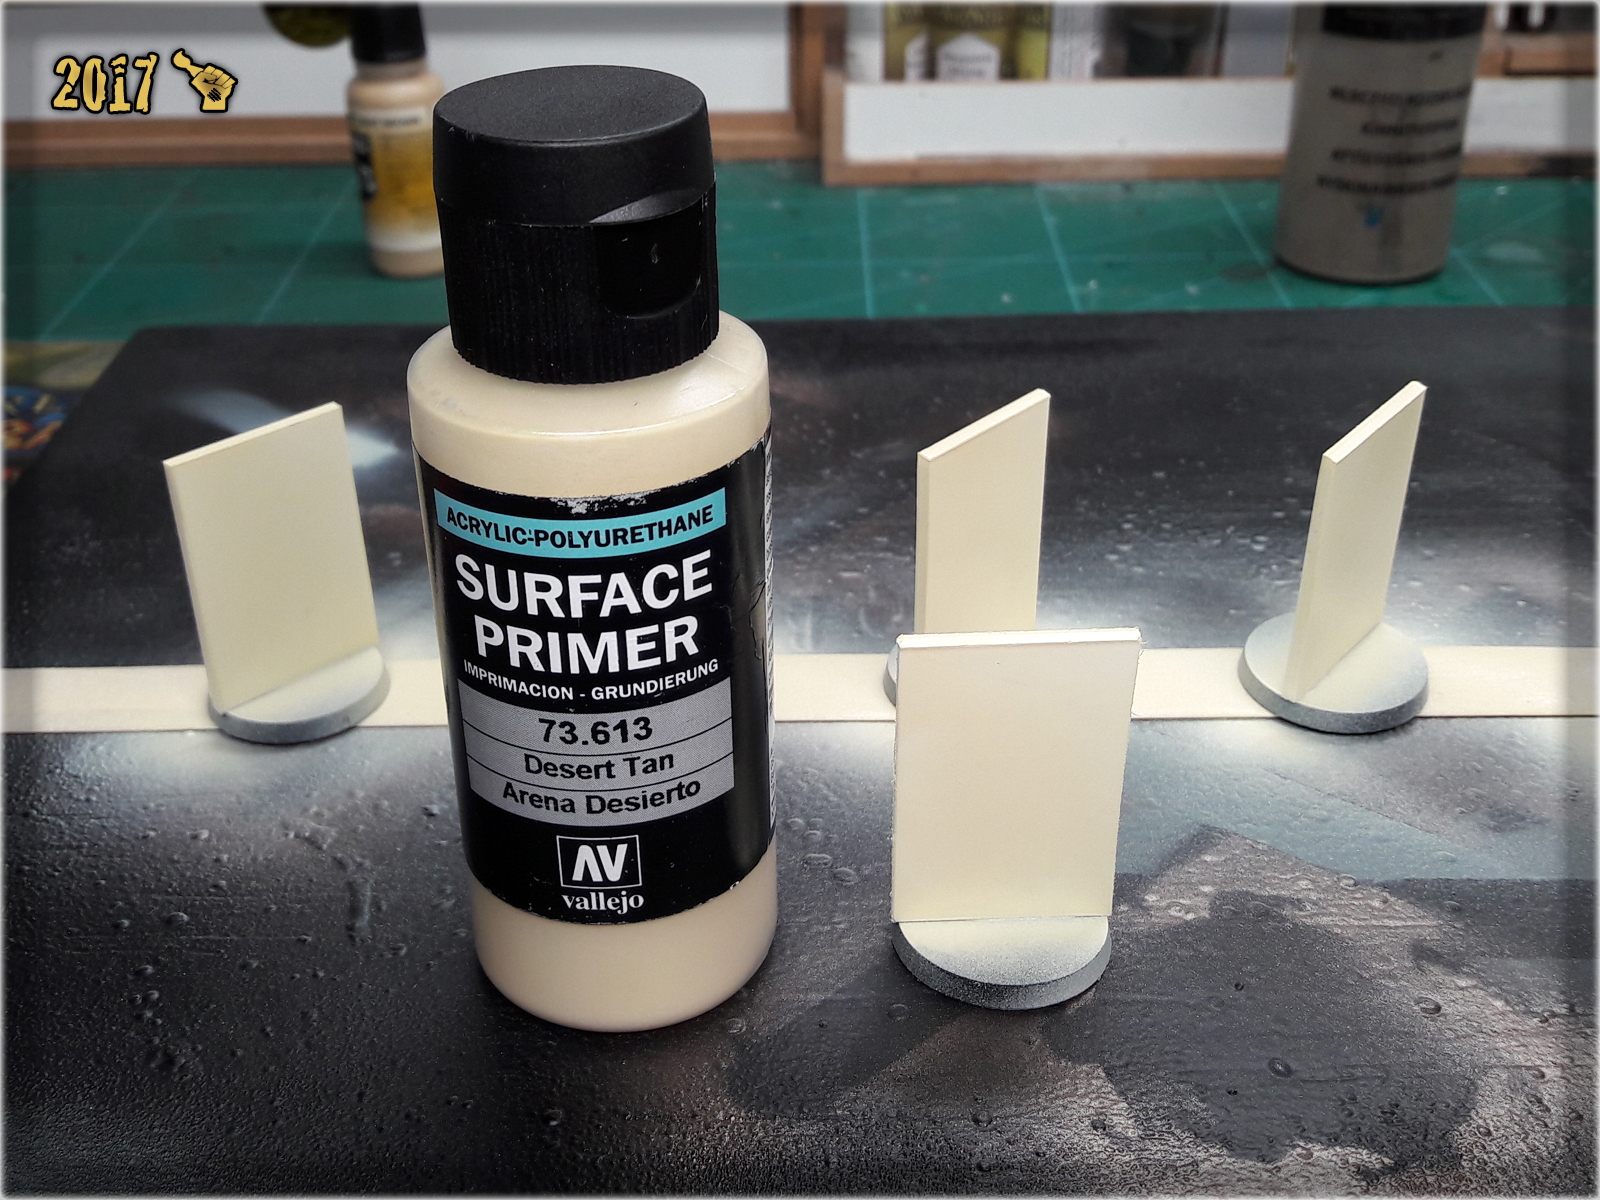
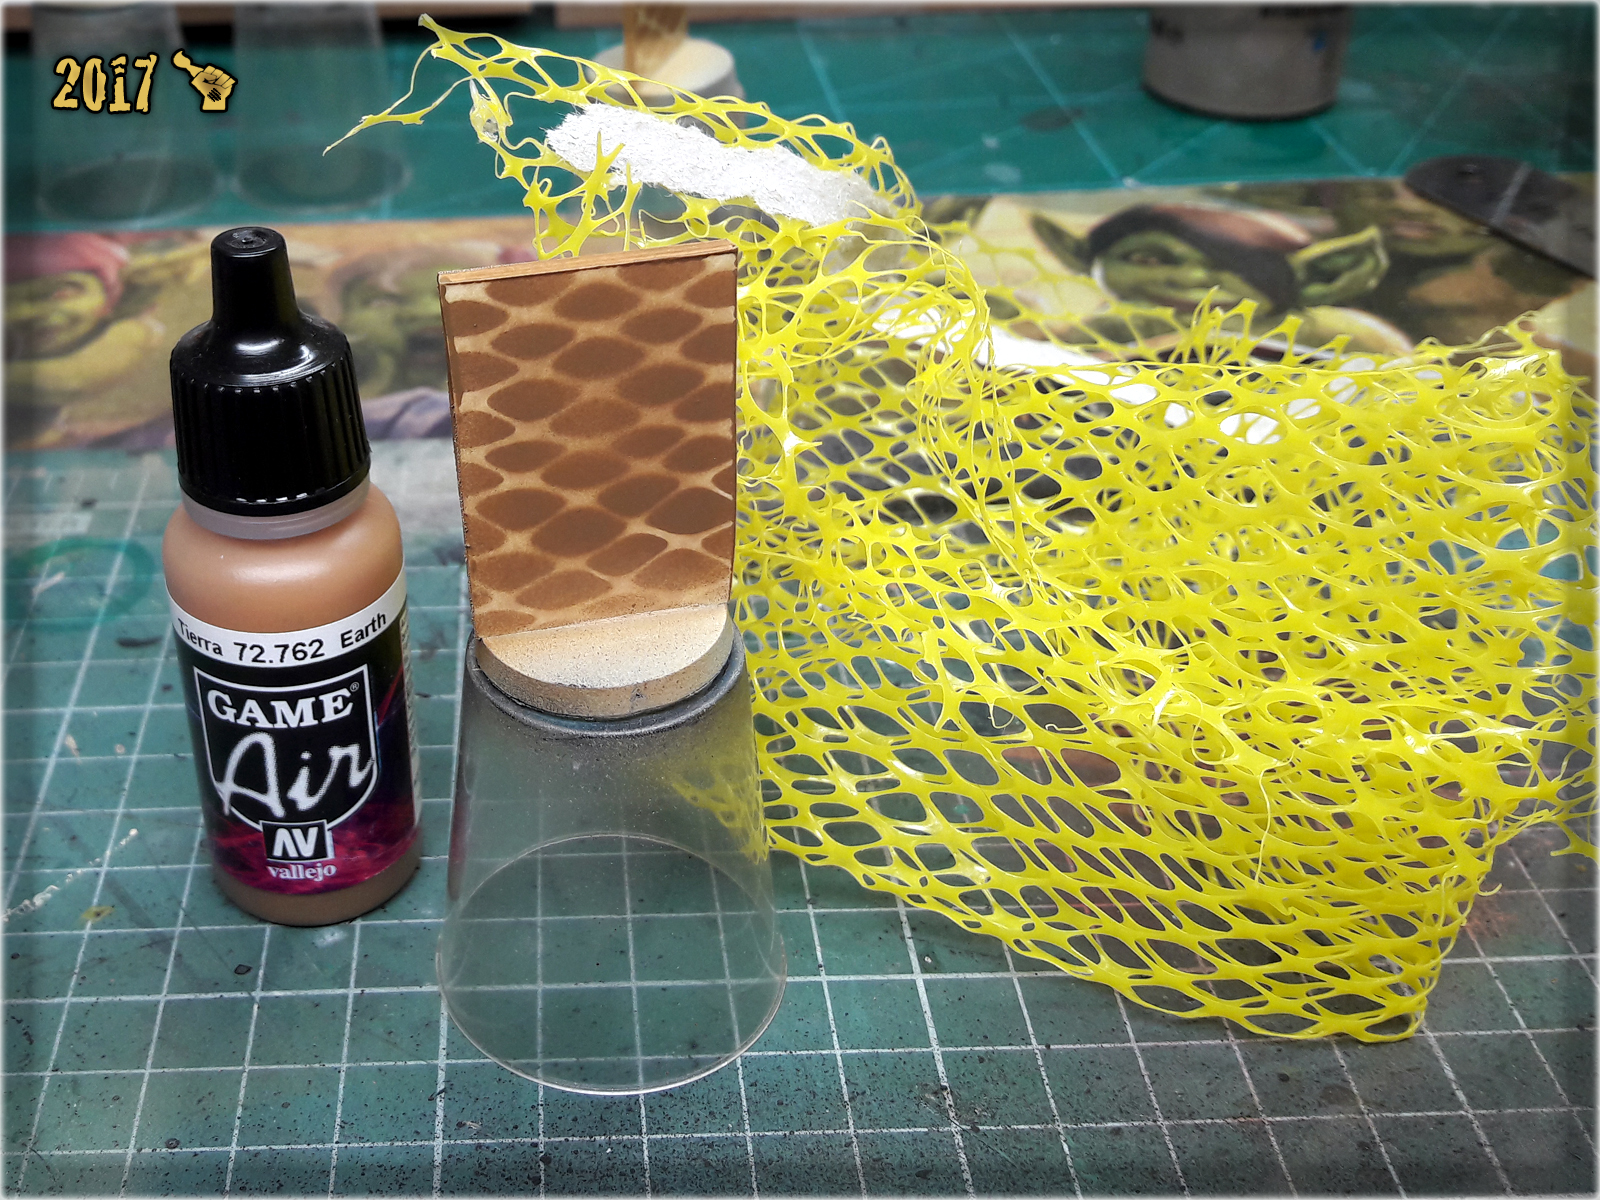
1 First step was to undercoat entire Camo Markers with Vallejo's Desert Tan.
2 Next I used a piece of synthetic hair holder as a stencil and airbrushed Vallejo Light Brown over the Markers.
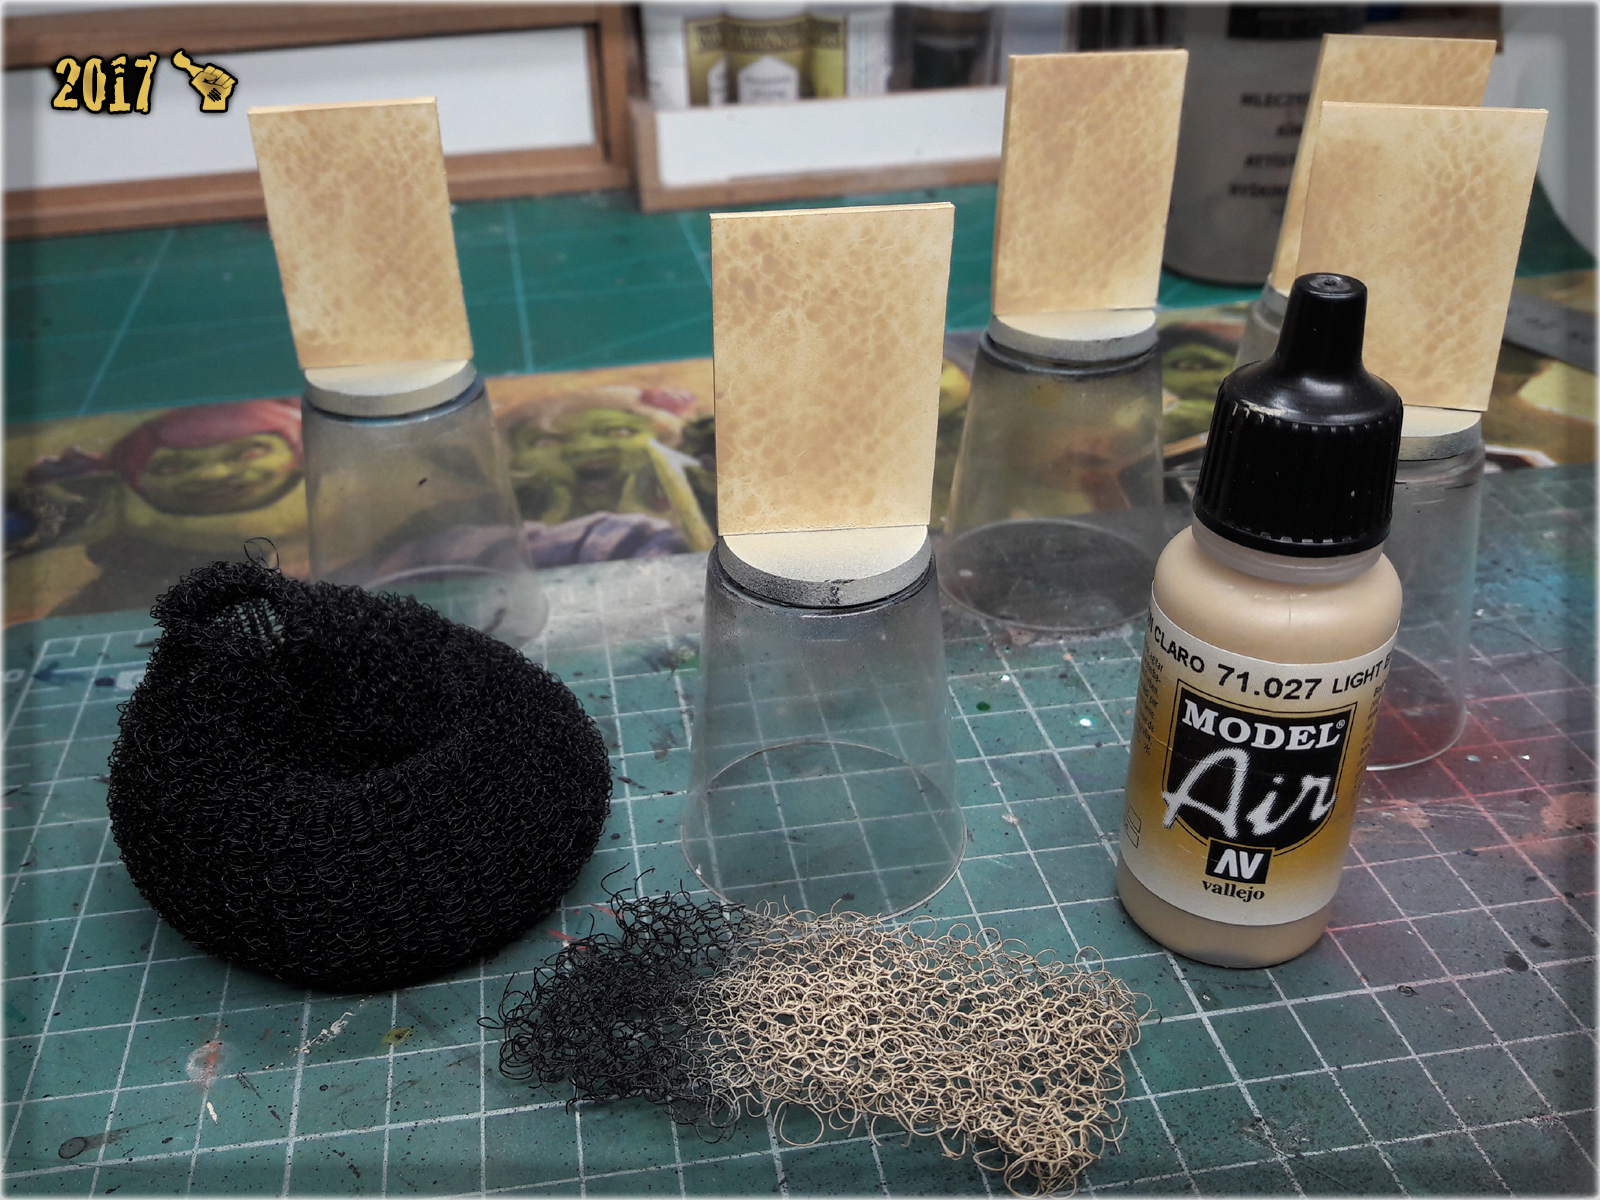
3 Then I switched to Vallejo Earth and airbrushed it over the markers using a piece of net that I got patatoes in. This net should be easily obtainable in every grocery store and makes for a really cool stencil.
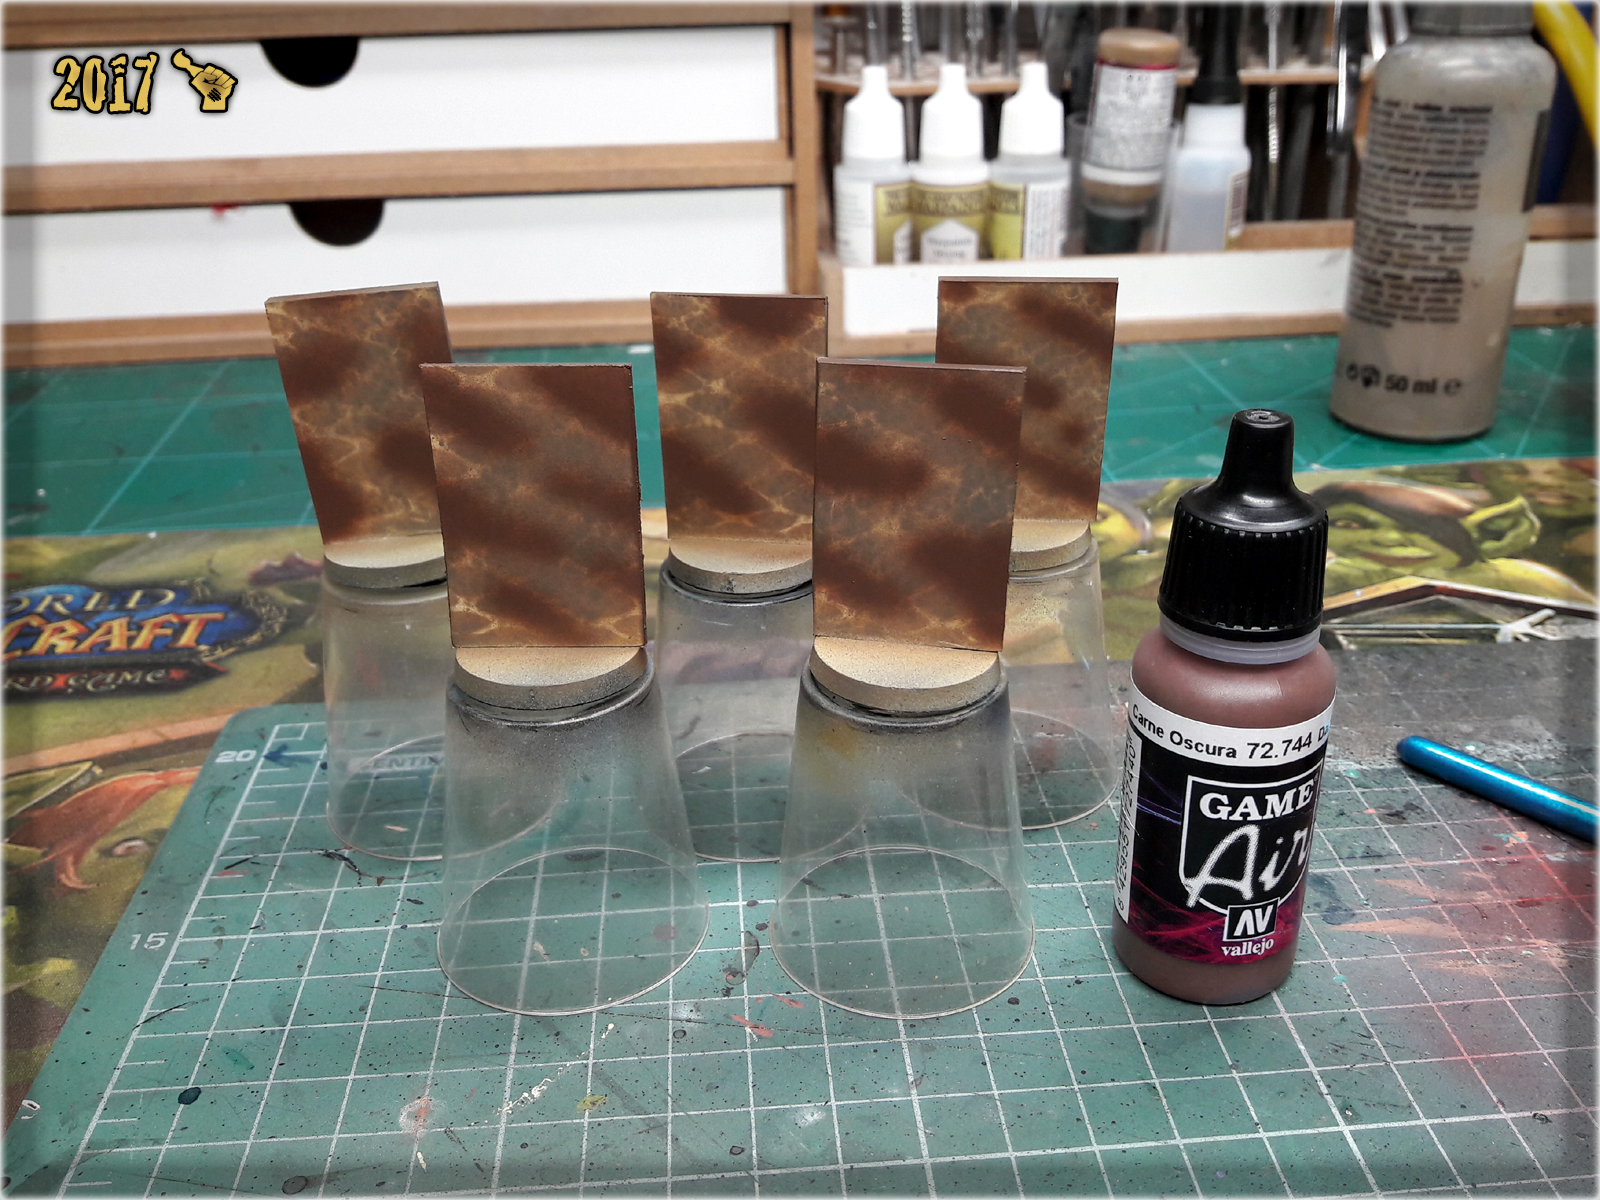
4 I then got back to hair holder stencil and airbrushed a layer of Vallejo Light Grey Green.

5 Next I airbrushed points of Vallejo Dark Flesh.
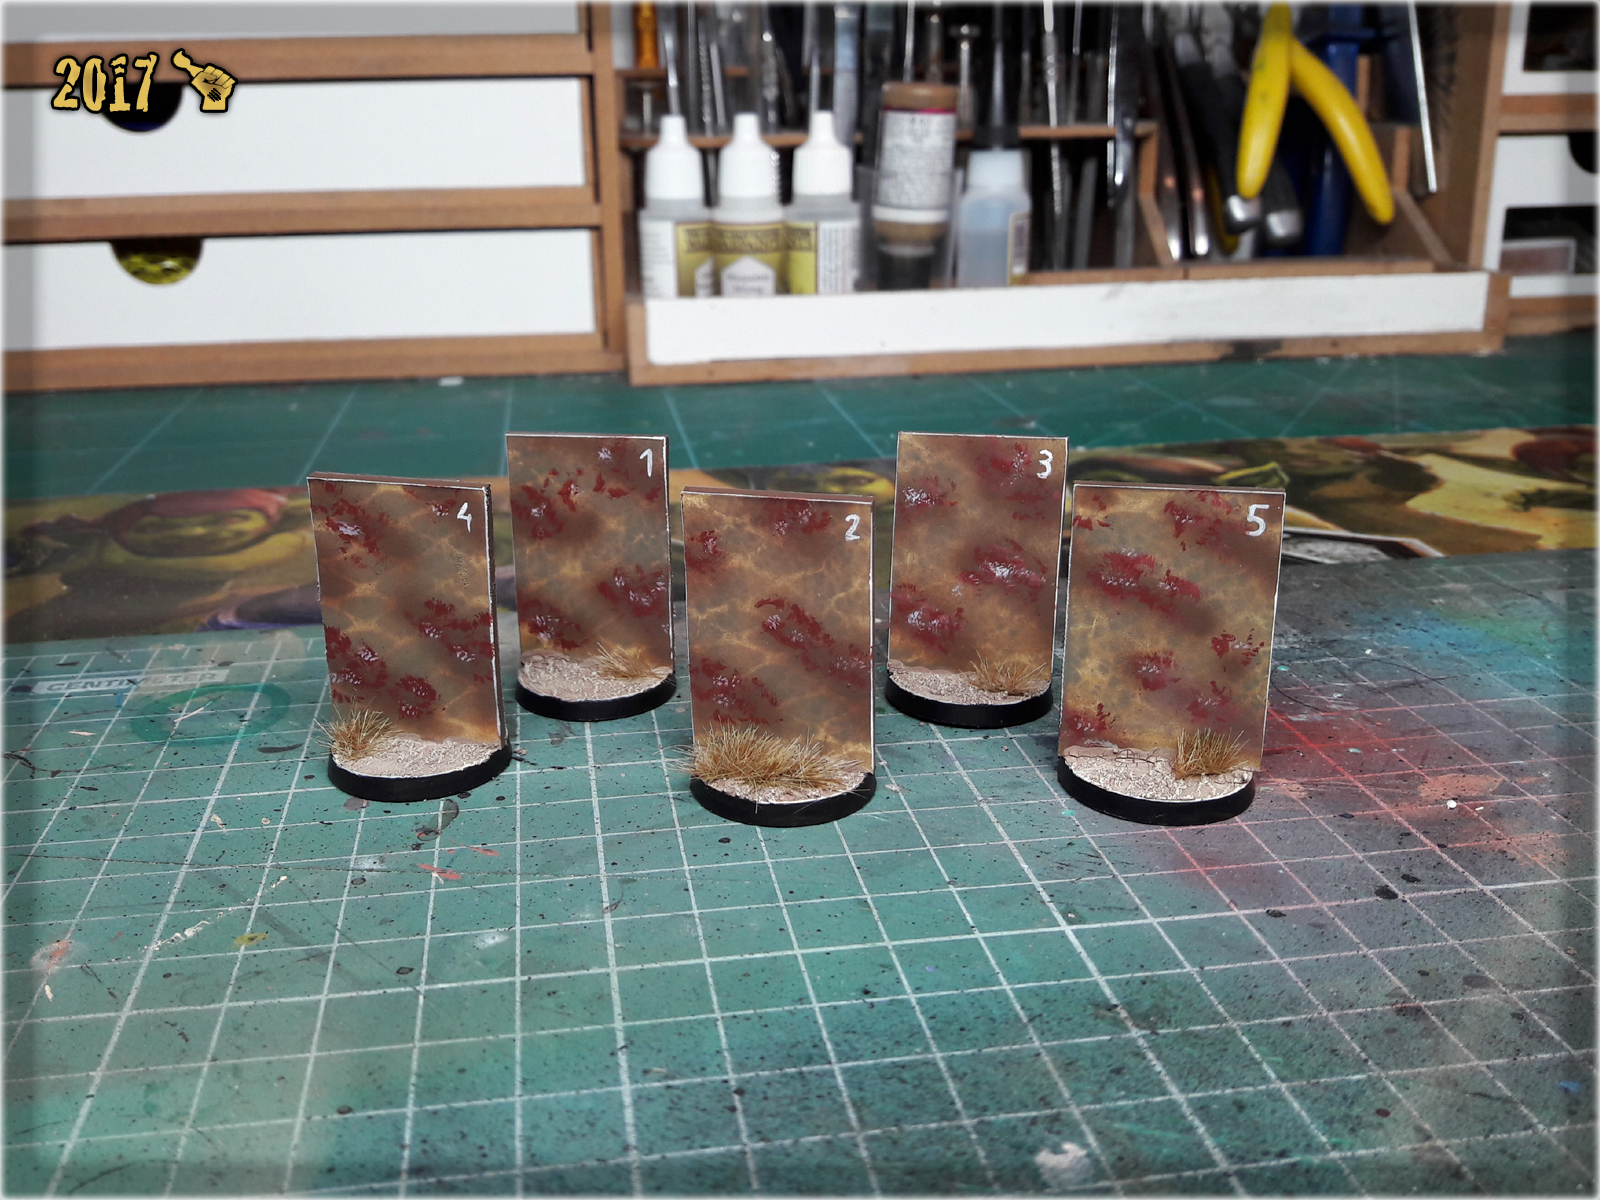
6 Some wet stippling went next. First I applied clumsy dots of Vallejo German Red Brown, then did the same with Games Workshop Pallid Wych Flesh. Afterwards I used Pallid Wych Flesh to mark edges of the markers and provide number to distinguish them from one another on the gaming board.

7 Basing came last. I used Games Workshop Agrellan Earth and Agrellan Badland, then drybrushed them with Karak Stone and Flayed One Flesh. Work done.
In this easy, step-by-step tutorial I’m going to show you how to create a Cobblestone Base in a what is probably the fastest and simplest way ever.

*Just find a suitable one at a local builder’s store.
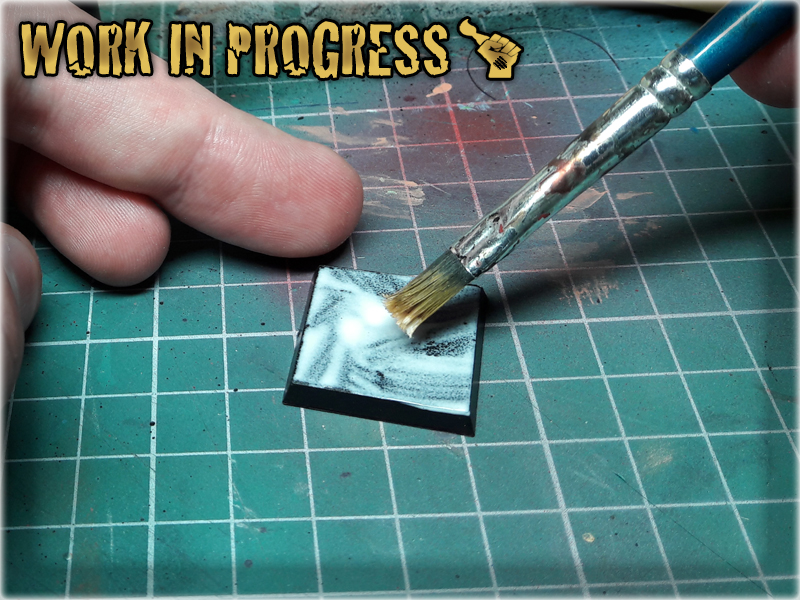
1 I started by covering entire base with Basing Glue.
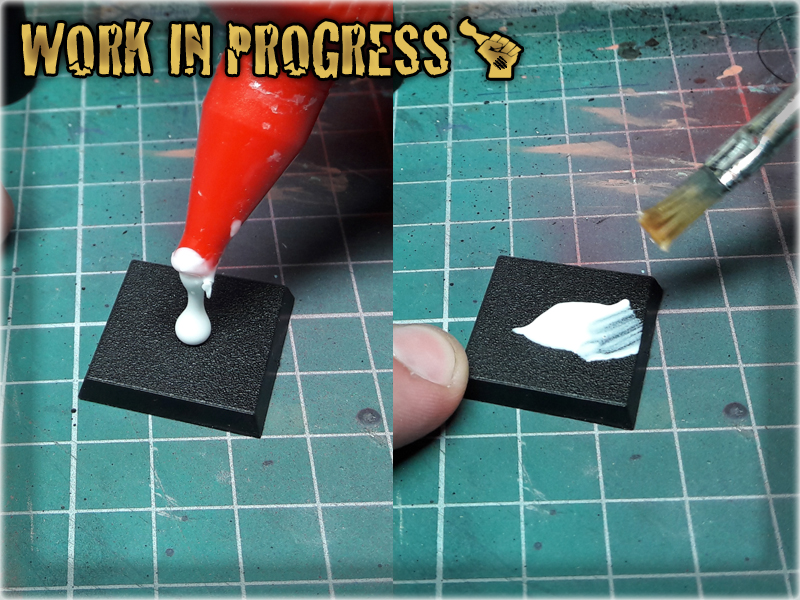
2 I then cut off a piece of the wallpaper to be slightly larger then the base itself.

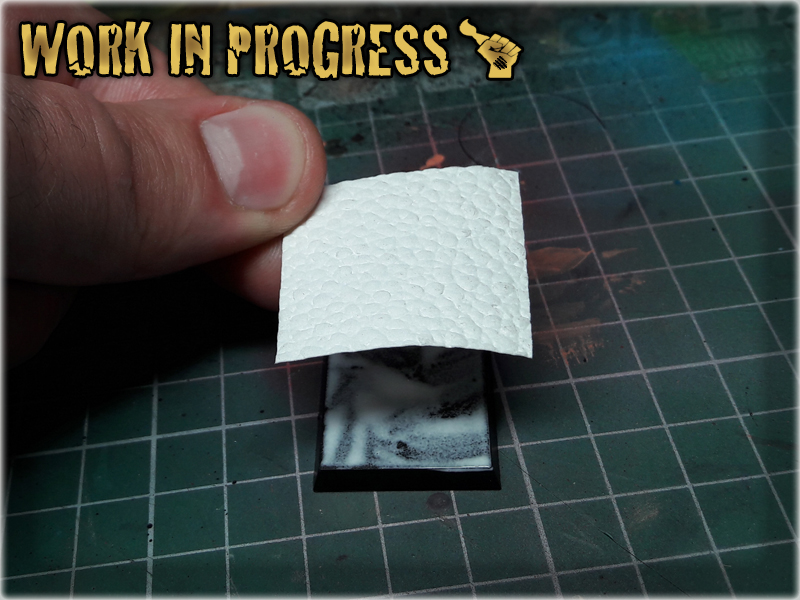
3 Next I glued the piece onto the base, turned the base upside down and cut off the excess of the wallpaper with a Hobby Knife.
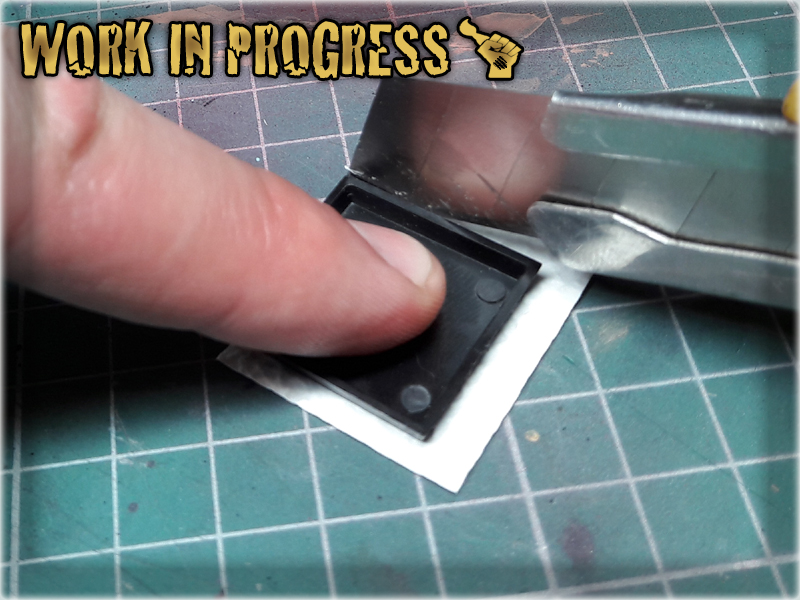
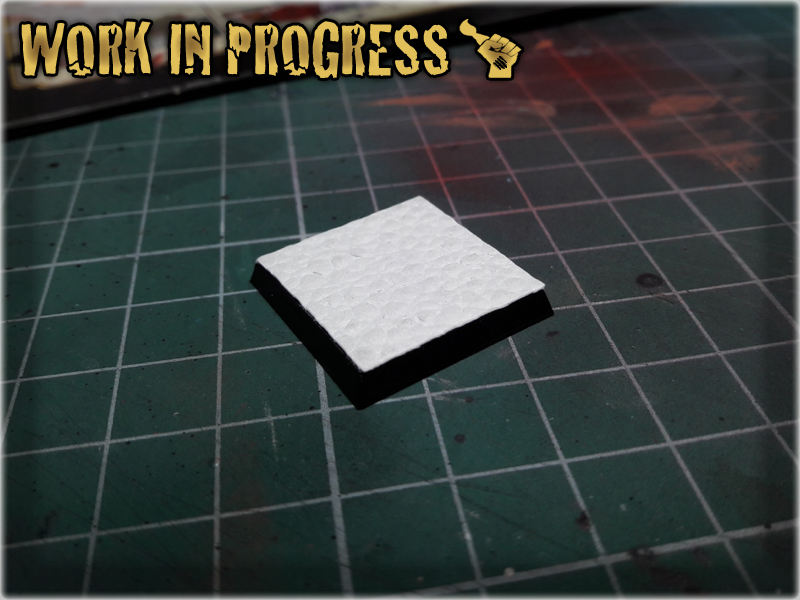
4 Last step was to smoother the edges with a slightly moisted fingertip.

Now you see how insanely fast and easy this was. For the purpose of this tutorial I made just this simple base, but once you get your hands on a proper wallpaper, options are limitless. You can use it to texturize bases and terrain, add more detail or even mix different types of texture.