- contact@scarhandpainting.com


The Army Painter – a worldwide supplier of hobby products, such as paints, colour primers, glues, brushes, tufts and well… fck’n barbaric ‘Quickshades’. The company entered the market in 2007th introducing a medium sized offer of hobby products meant, as the name suggests, to paint entire armies. My personal adventure with Army Painter started pretty early, as I was a hobby store manager back in the days they’ve appeared. Easy to say that throughout ten years I had a pleasure of getting to know their entire range to a point, where Army Painter’s products had no secrets from me. Since 2007 the Army Painter’s offer had grewn potentially expandindg their paints range more than thrice and introducing some revamped products as well. This brings even more opportunities to get to know some new cool stuff.
When it comes to my opinion about entire AP’s range – I have mixed feelings. AP do have some fantastic products like:
Still, they also produce stuff like:
Atop of all the above they also produce Hobby Tools, different glues, paints, Licensed Warpaints and Battlefields XP Tufts – and today I would like to take a closer look at the latter.
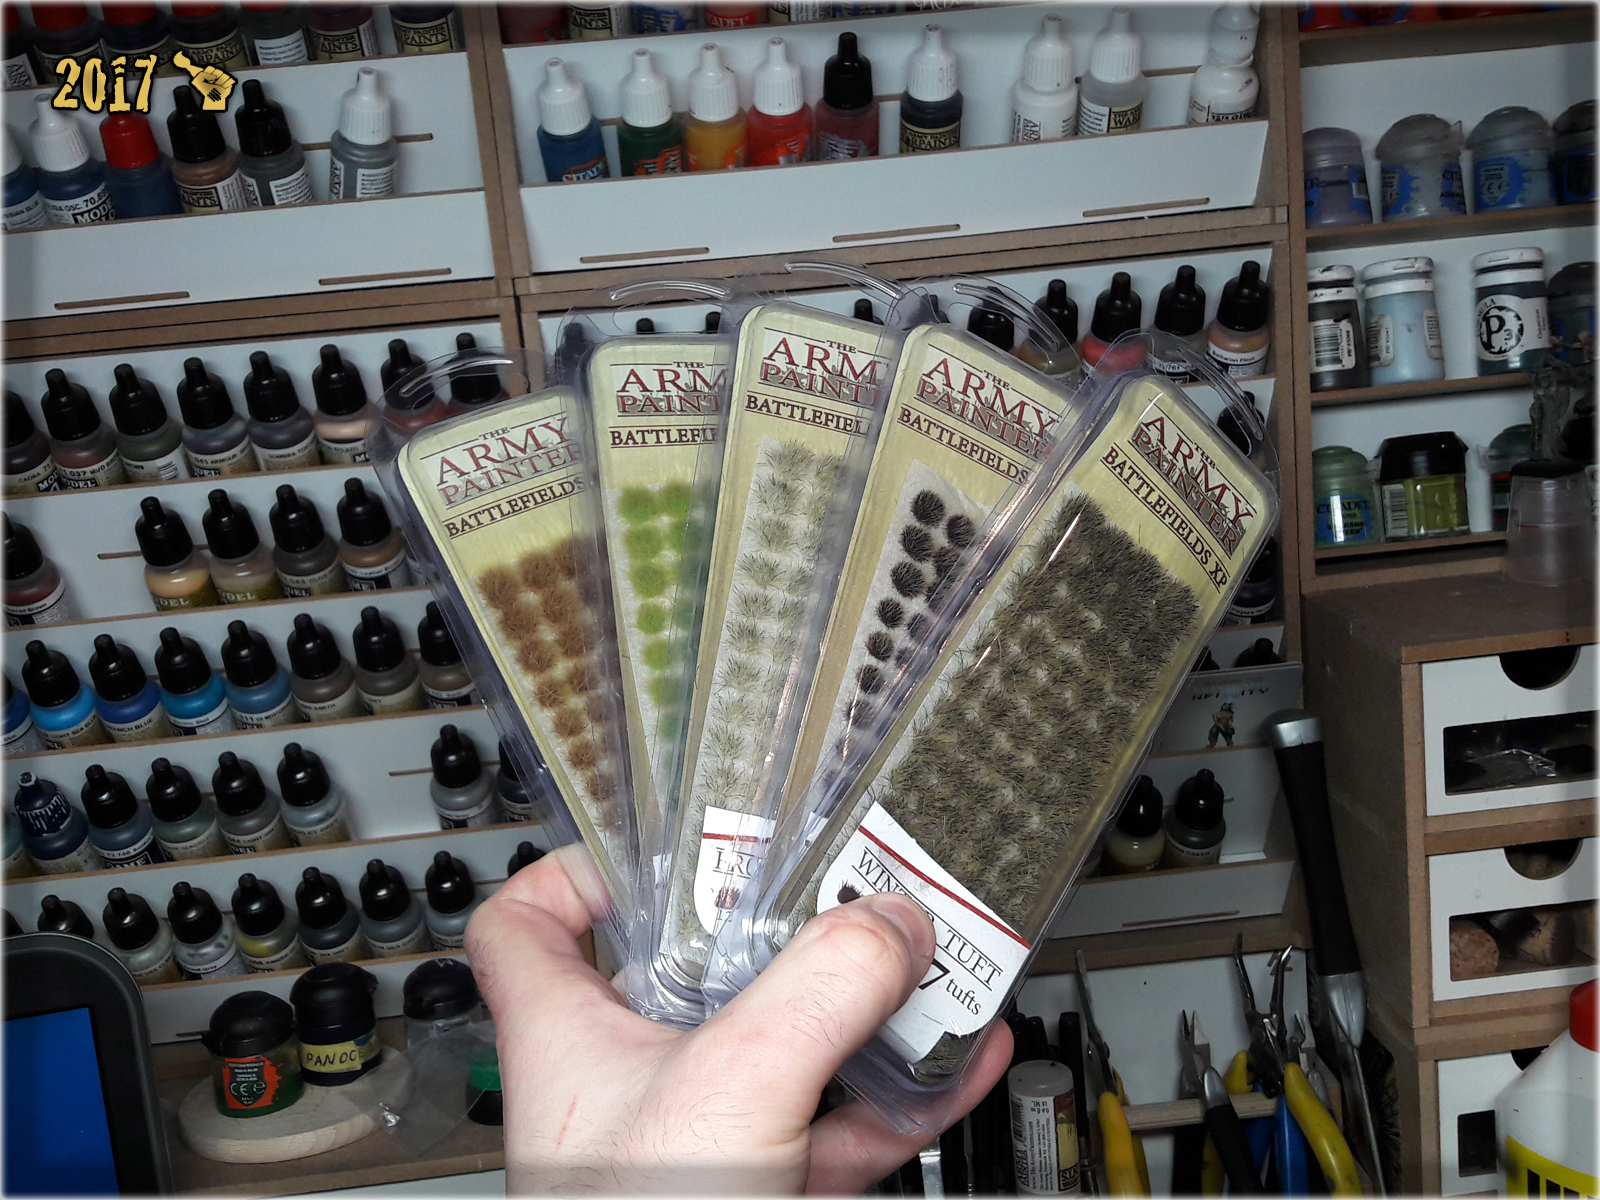
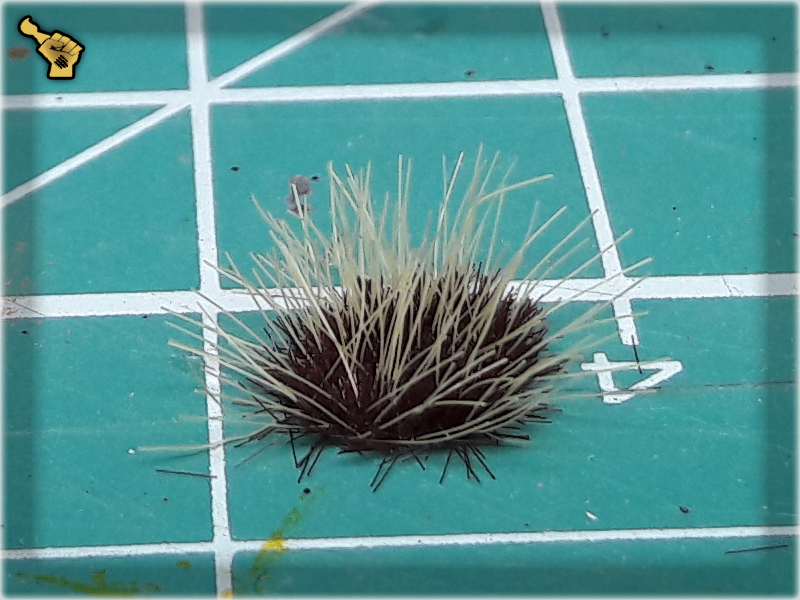
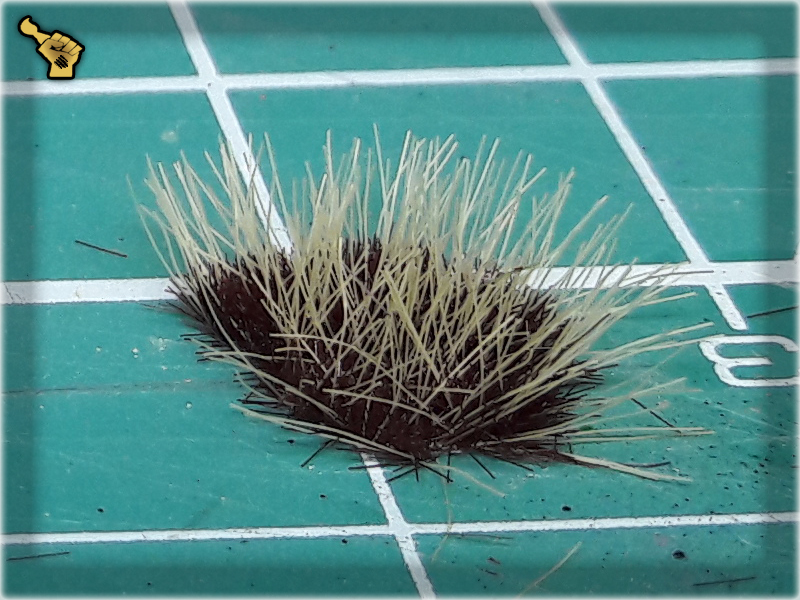
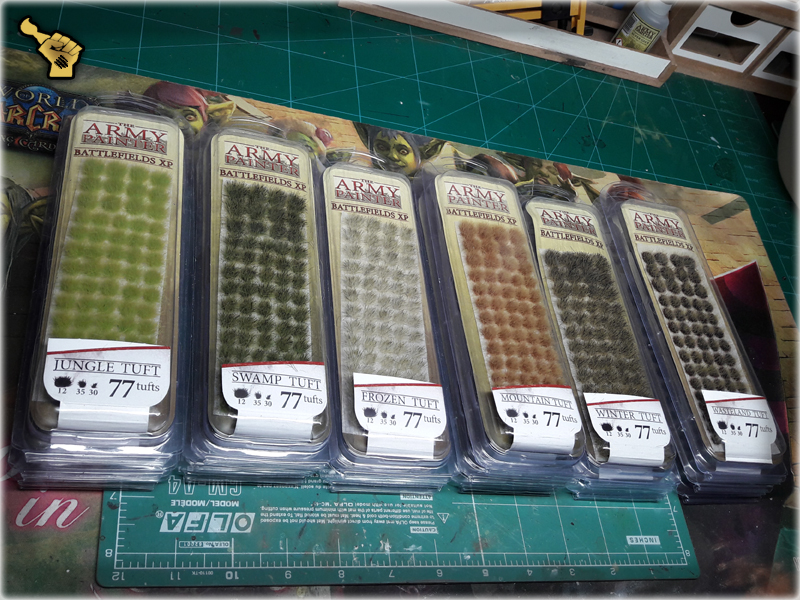
For me the most important trait of a product is the quality. There’s plenty of products priced closely in the market, but among them there are some which exceed in quality. That’s where I aim, when deciding if I should purchase a range of particular products or not. In case of Army Painter’s Battlefield XP Tufts I used them for a very long time due to easy access and limited competition. Back in the days I wasn’t entirely happy with the AP’s tufts, as their quality varried between good and very bad. Old tufts were applied randomly, rendering a significant part of the product useless, be it due to not enought material being used or some tufts being applied to the fold in the foil, they came attached to. New tufts in the contruary, are applied selectively, numbering the exact 77 ideal pieces in a straight raws and varrying in shapes and sizes. This makes the new tufts superior to their previous incarnation and most of the current competition in the market. One might say that they are as close to being perfect as possible.

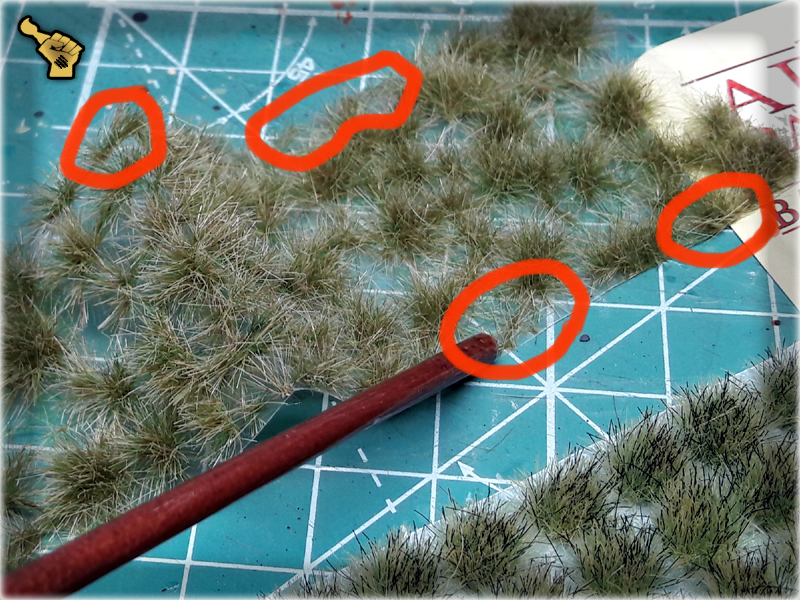
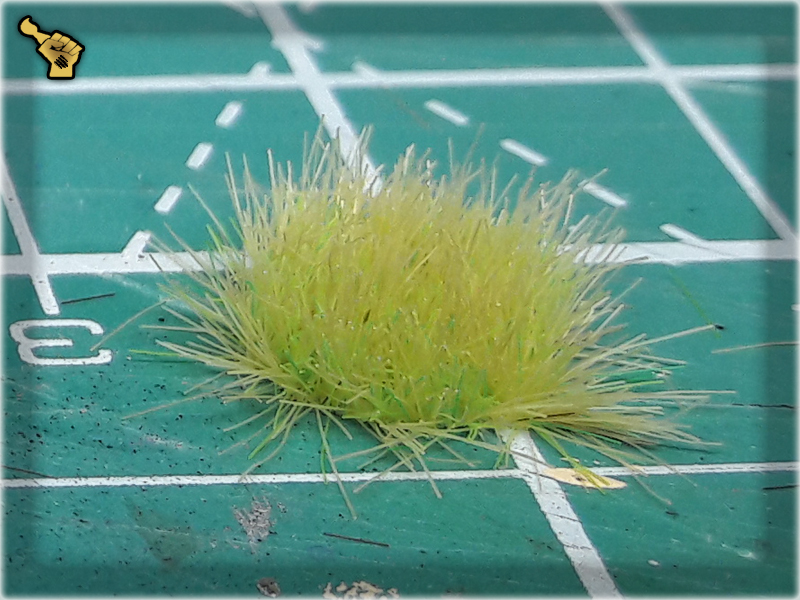
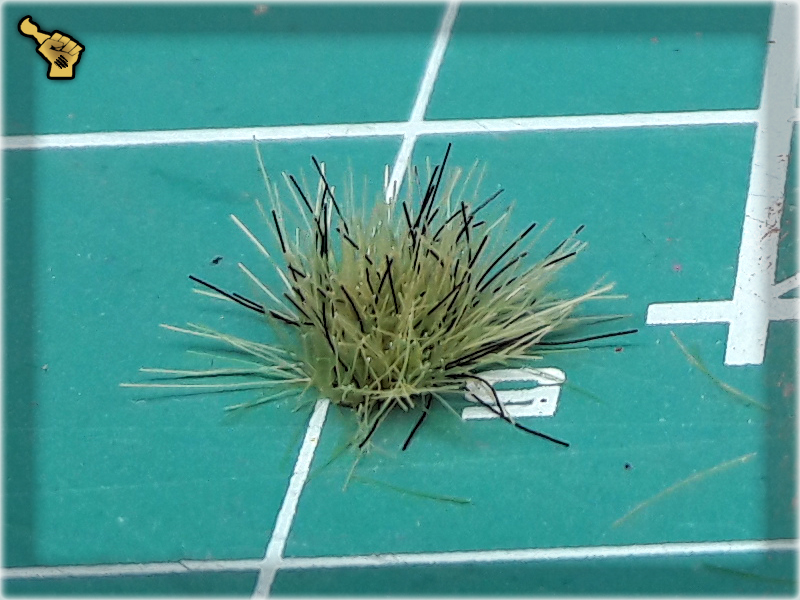
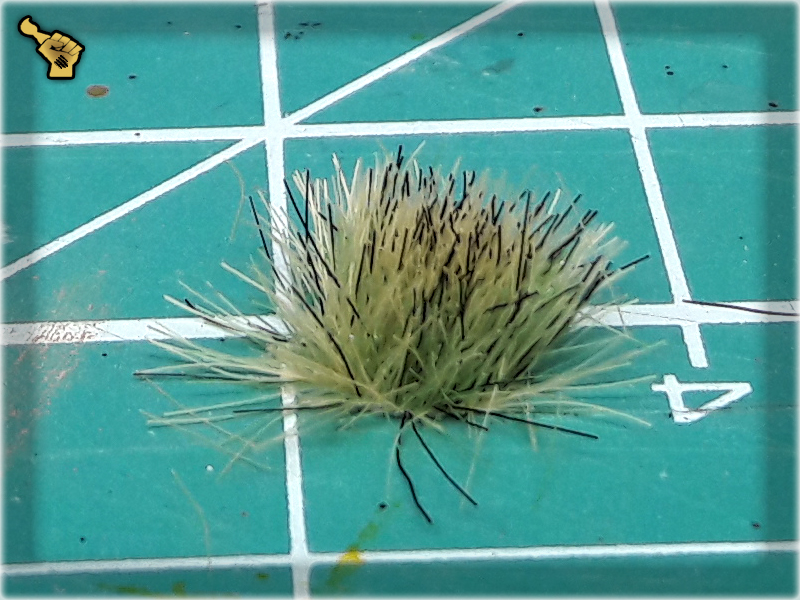
They come in a variety of colours and designs. I really dig the entire range. One thing that set’s me on edge and lowers my rating from ‘awesome’ to ‘very good’ is the number of differently coloured blades mixed with the main colour. Oh’ Army Painter – why, for the love of God, you do things like this? These black hair are more horrific than your graphic layout and it is ‘a thing’…
Jokes (or not) aside, I miss the old Swamp Tuft’s strong green colour, not to mention old Winter Tuft. I do hope that with all the new designs and revamps you will bring more tufts to the fold and fill the void in my heart. Either way – be it mixed or solo, all the new Tufts look very good.


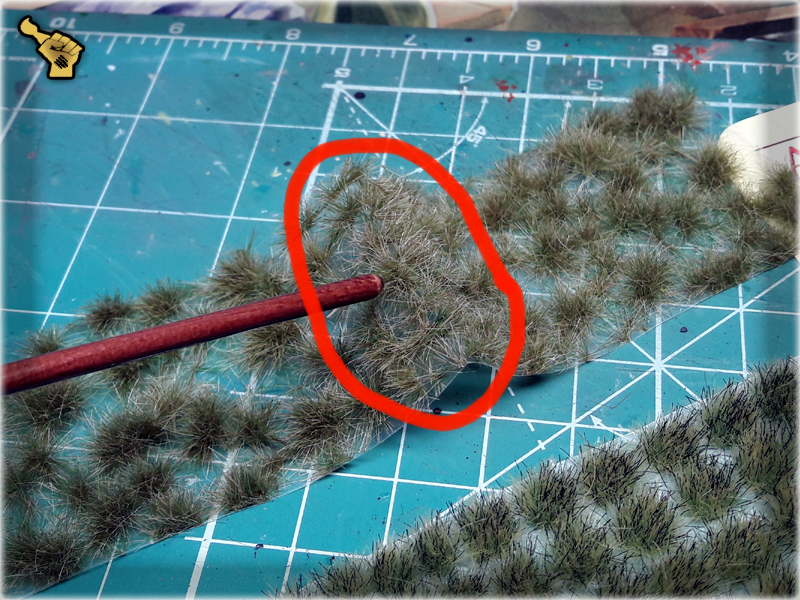
I have the exact zero issues with new Army Painter Battlefield XP Tufts. They come in perfect shapes, hair held firmly in the adhesive base. All hair are pointed upwards and on the sides. Colours are mixed well and in some cases different colours are also of a different length. Being arranged in straight raws makes these tufts easy to grab, while adhesive base has enough glue to keep them in place once used.
I have a little fetish of mine, tending to apply tufts over Super Glue and AP’s tufts behave very good when done so.


Army Painter’s Battlefield XP Tufts are very well priced. They are priced close to previously reviewed Paint Forge products, offering 77 pieces in a variety of sizes, including big ones. Would be awesome if they were cheaper, but that would be just too good, to say the least.
Army Painter’s Battlefields XP Tufts look cool, are very user friendly, easy to apply, of solid quality and come in a variety of colors – and the price is exactly what I would expect of these. Solid stuff.
All in all I’m happy to finally be reviewing the Army Painter, with which I spent like ten years of solid painting by now. In my opinion some of their products are totally undervalued by hobbyists around the globe. I plan to bring more AP’s products on to the review table in the future. Mostly, the ones I like to use and have plenty of, like Washes or the best of the best Miniature & Model Super Glue.
Where to purchase? If you are lucky, then your local hobby store has some, but if not – go straight to the source at Army Painters Online store. If you happen to be managing a hobby store in Poland, then I strongly recommend you to contact THESE GUYS, they are very friendly distributors based here in Rzeczpospolita Polska.

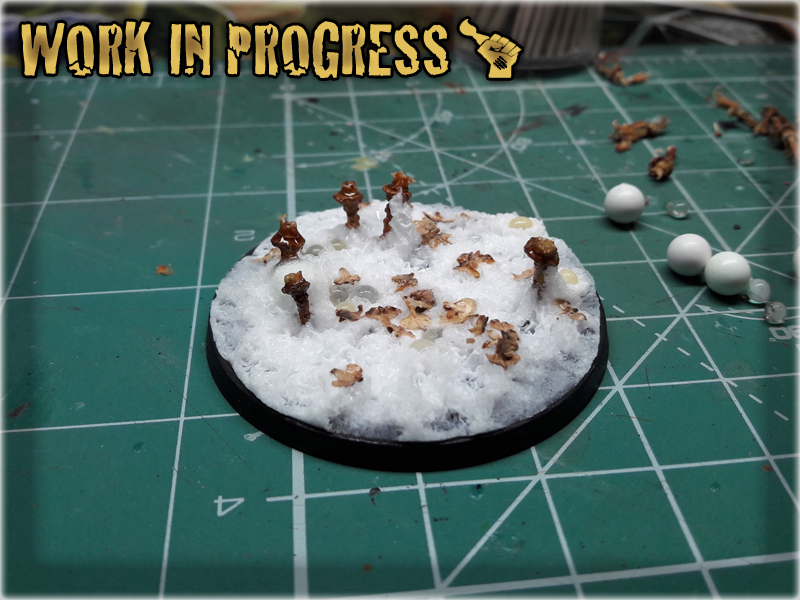
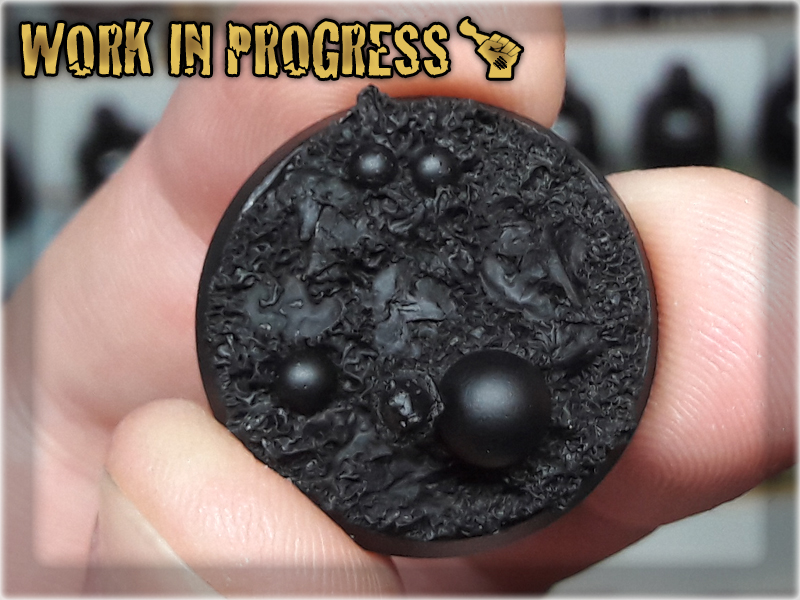
Today I’m going to reveal one of my dearest secrets: how Super Glue and Basing Glue can be used to make some fantastic, crazy, awesome stuff! I have invented it by accident when I was a kid, used it since and love it for both simplicity and awesome texture effect. In this easy, step-by-step tutorial I will show you how to produce your own Overgrown Bases!

*I purchased a huge pack of these for approximately 1€,
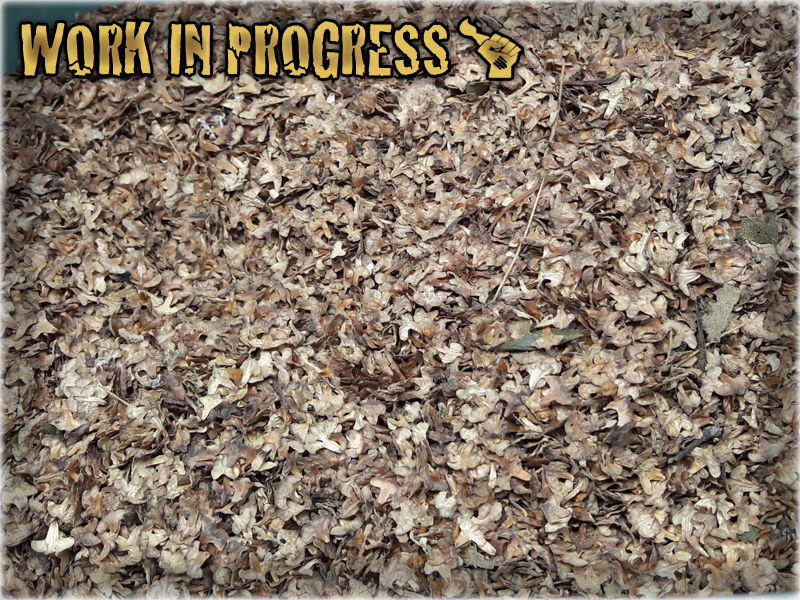
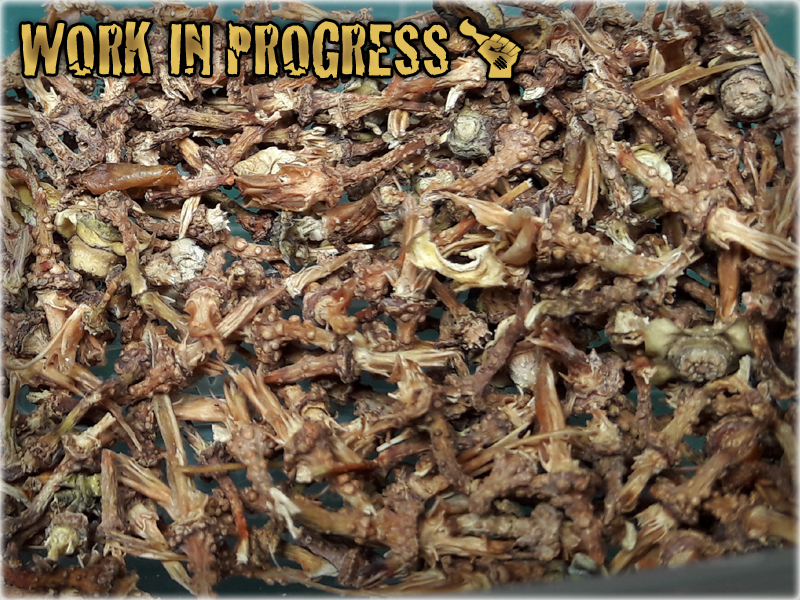
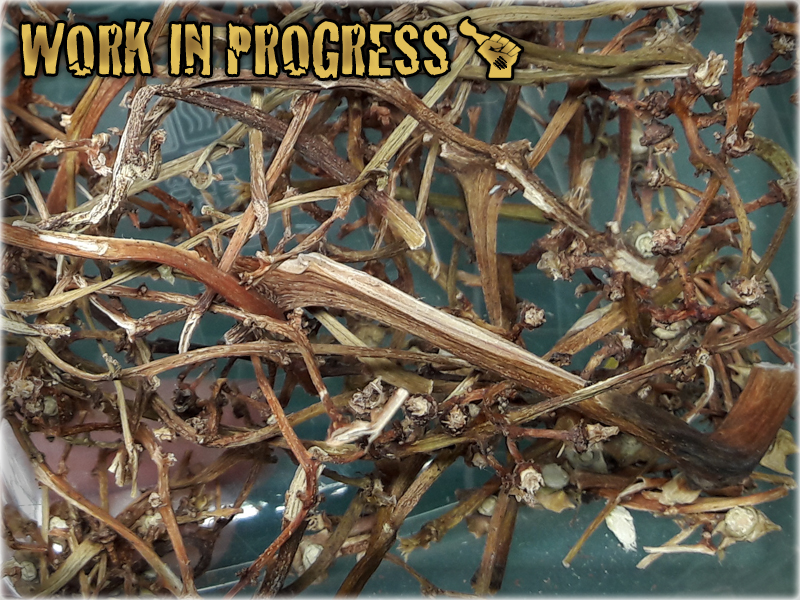
**Once you eat up all the goodie goodie grapes, you have like a bunch of wooden leftovers. Once dried out these are awesome bor basing miniatures.
***I use either Air Soft Gun ammuniton, or for smaller calliber moist absorber balls obtainable with every new pair of shoes. Just ask your gf to dig out one of her shoeboxes, there should be a small paper bag filled with tiny, translucent balls in it.
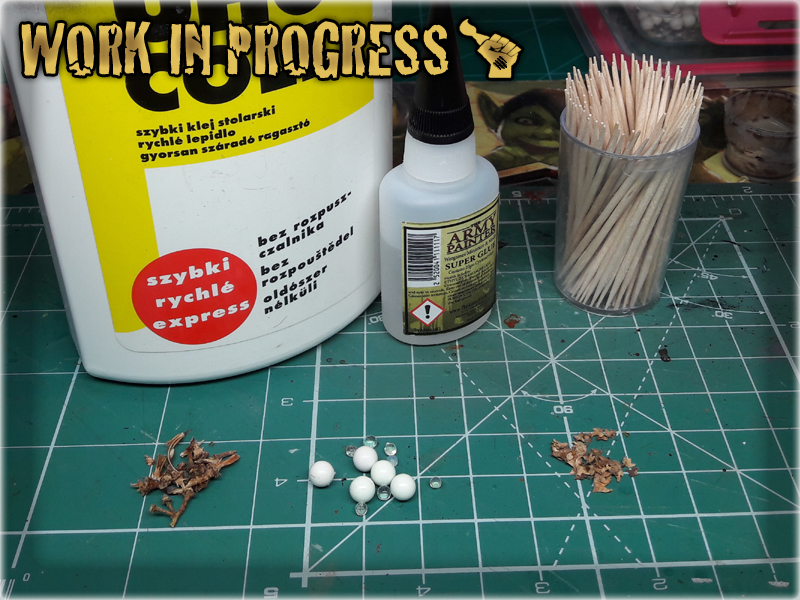
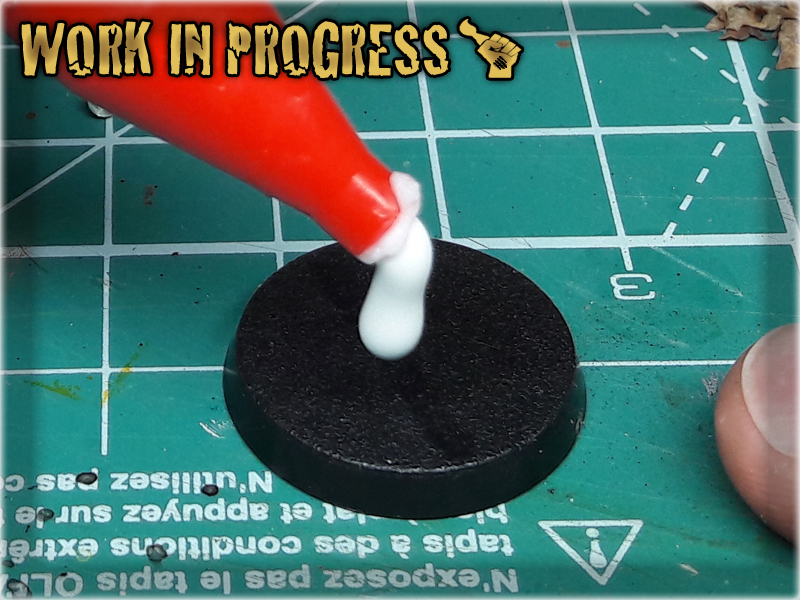
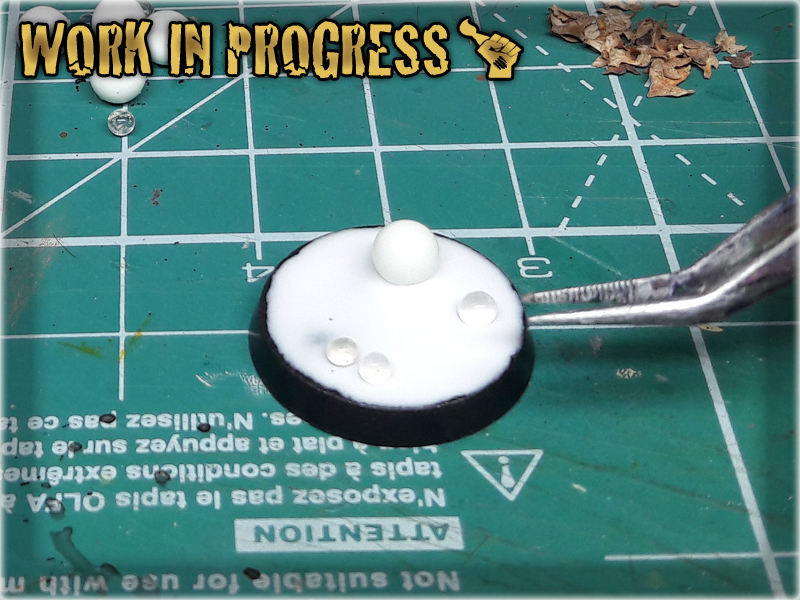
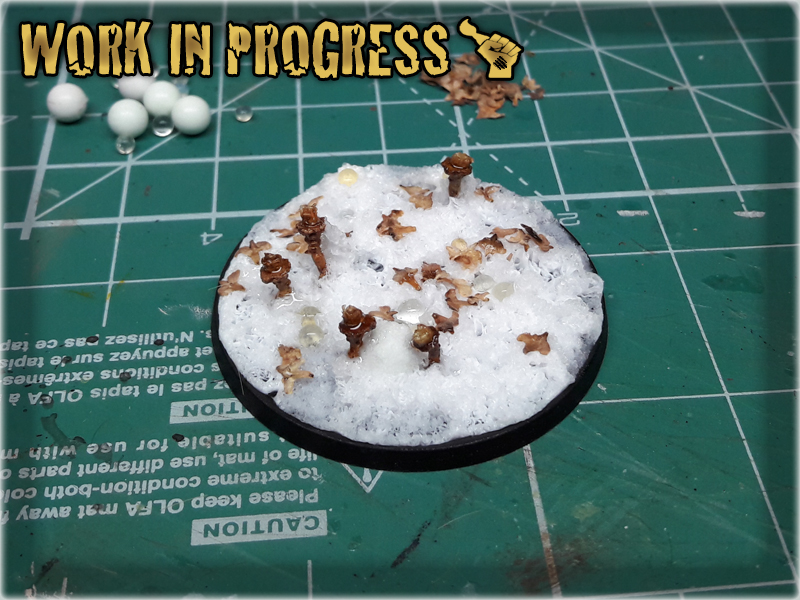
1 I started by applying basing glue all over the base. No need to make it smooth, just enough not to leave any empty spaces.
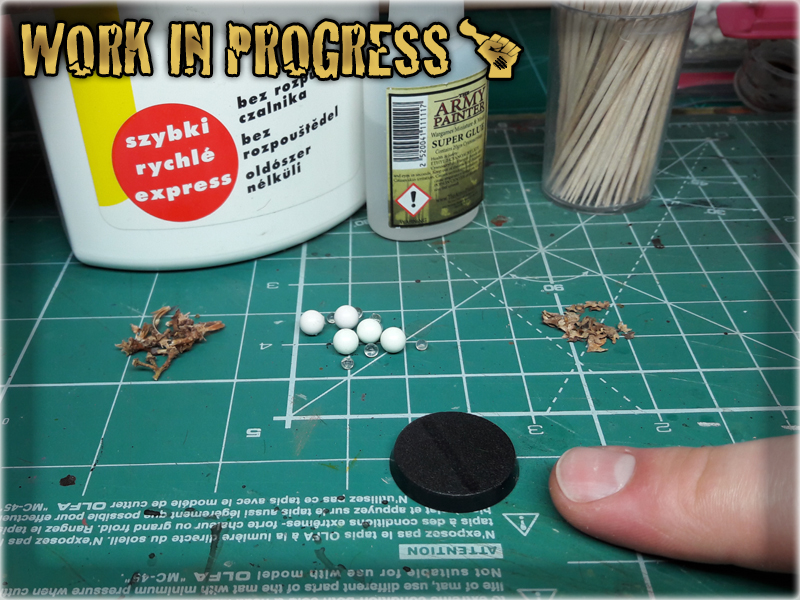

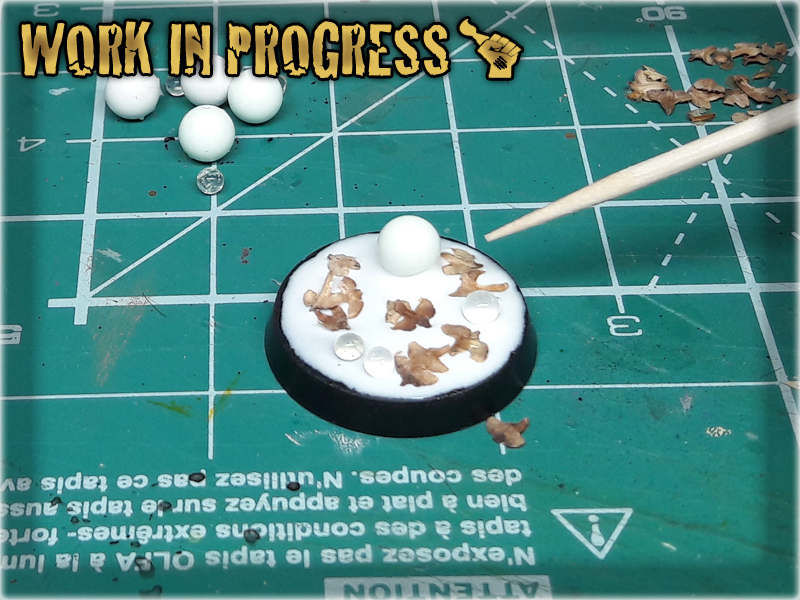
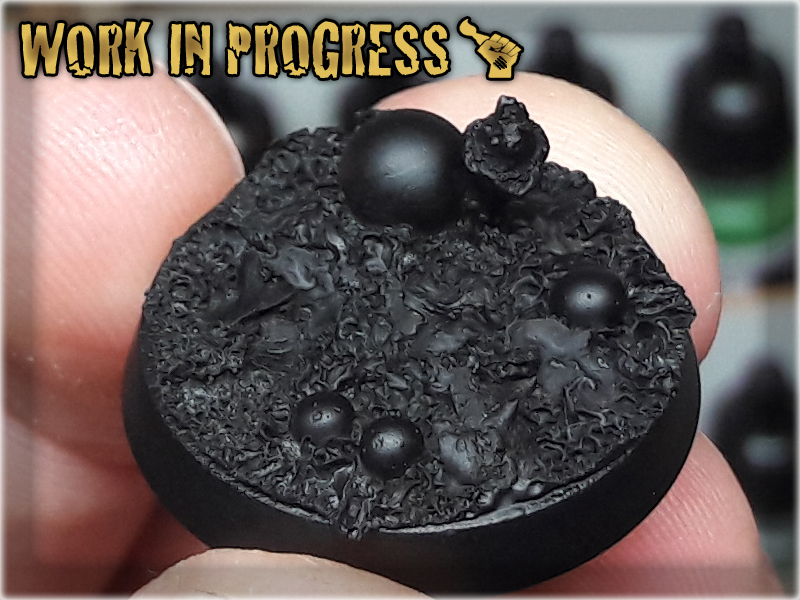
2 I then dropped some of the tiny balls and Birch-tree seeds over the wet glue.
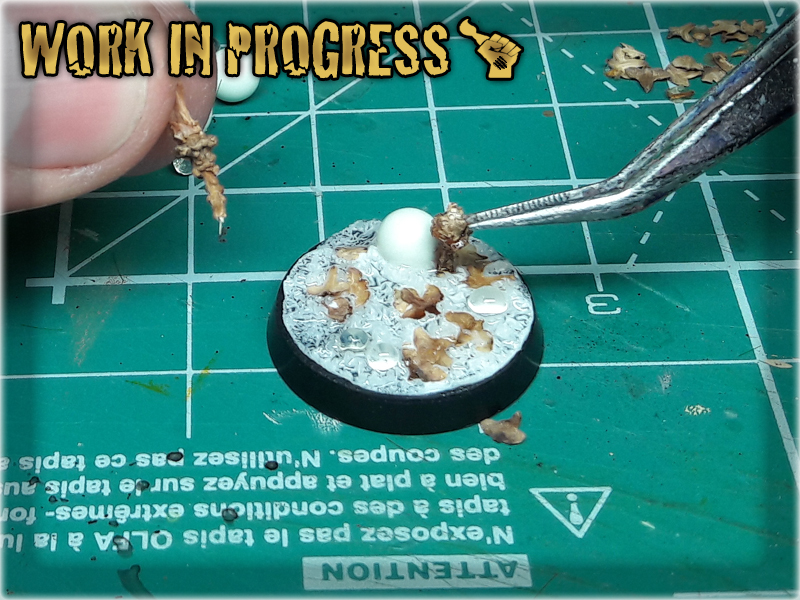
3 Here's where MAGIC begun. I covered entire base with Super Glue and watched as it was warped before my eyes in a matter of merely seconds.


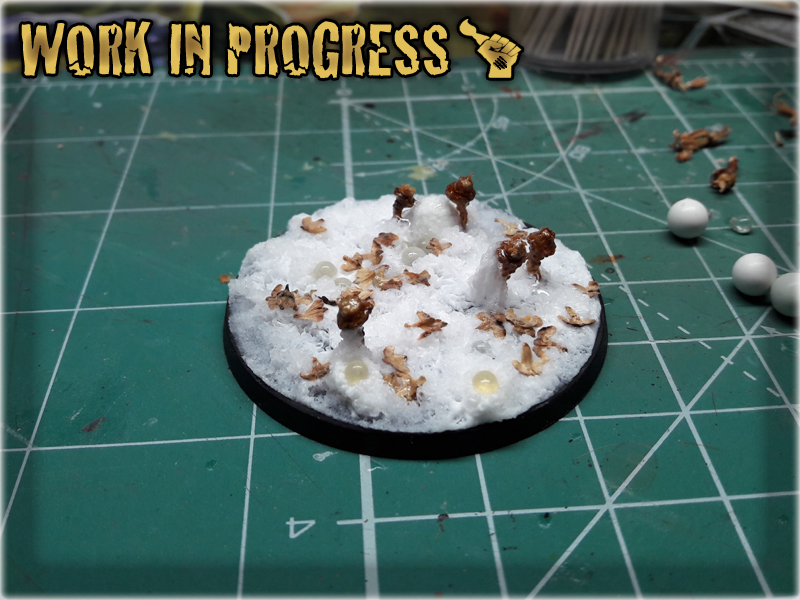
4 Before it dried out I added some pieces of dry grape vines to make it look like some strange, alien mushrooms, or plants. I then covered additional stuff with more Super Glue to harden it.
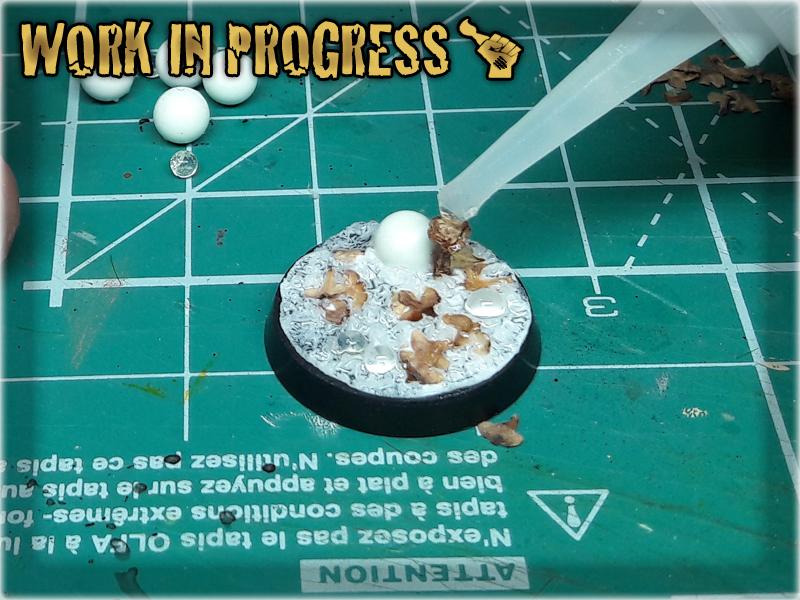
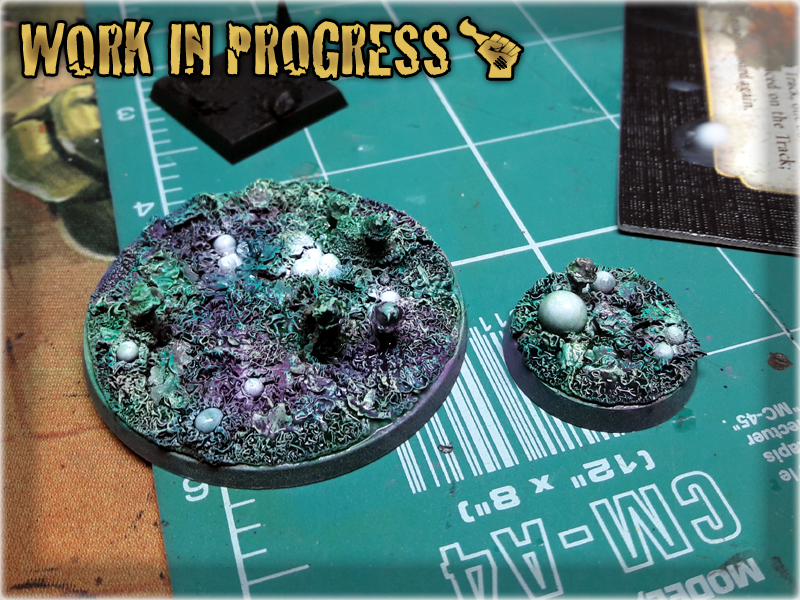
5 Last step was to leave entire thing to dry out. Usually it takes around five minutes for a base to get dry, but it might take a bit longer, depending on how much basing glue is used.

6 The final step was to undercoat dried out base with Chaos Black spray... then do a quick paint job with random colours.
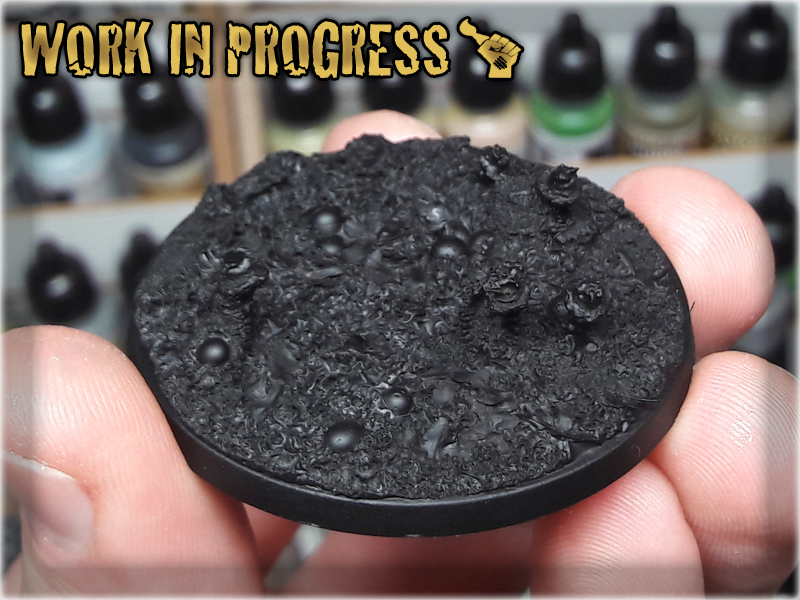
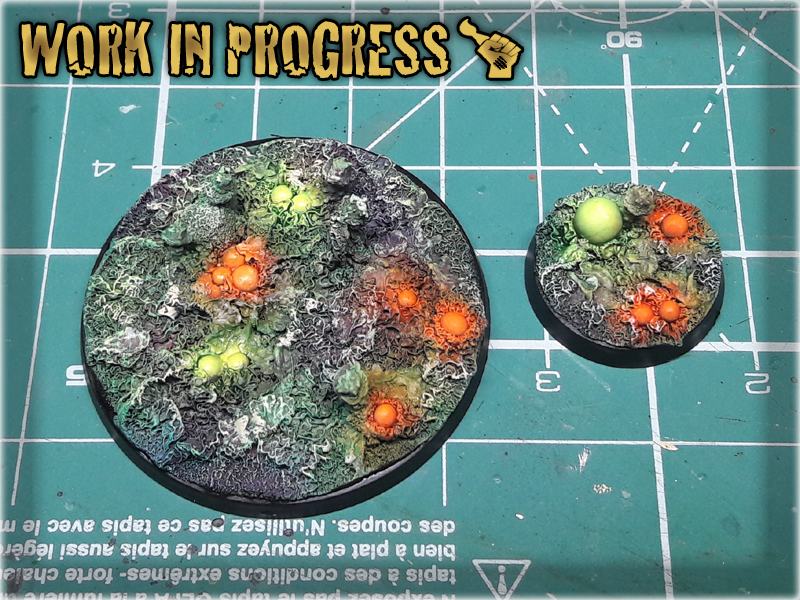
Now seriously – tell my that’s not an awesome texture effect XD This is like ultra-fast, mega-cool way of using two glues to create utter chaos on any surface. Chaos mutations, warped stuff, Zerg creep, alien planet foliage, jungle floor, faerie glade, name it – then glue+glue it 😉
Do not hesitate to let me know and send some pictures via FACEBOOK if you ever use the tutorial. I will be happy to see how it turned out 😉
In this easy, step-by-step tutorial I’m going to show you how to create a Cave Base.

*Ask your GF if you don’t know where to obtain the latter.
**Search in IKEA or any home/garden store. A lifetime stockpile of these is less than 5€.
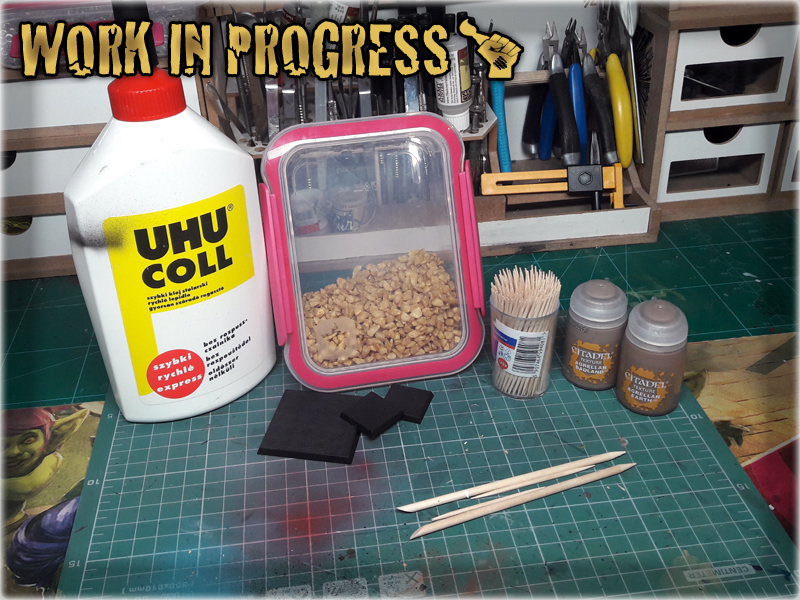
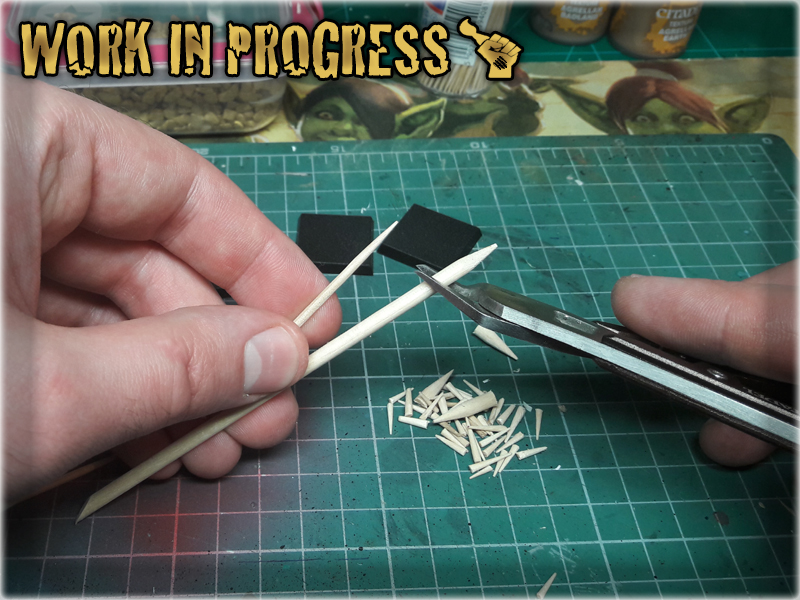
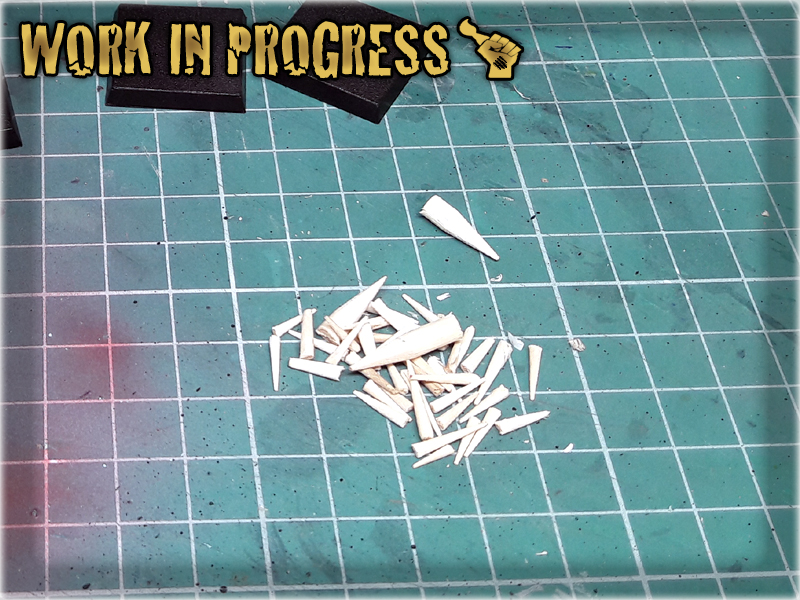
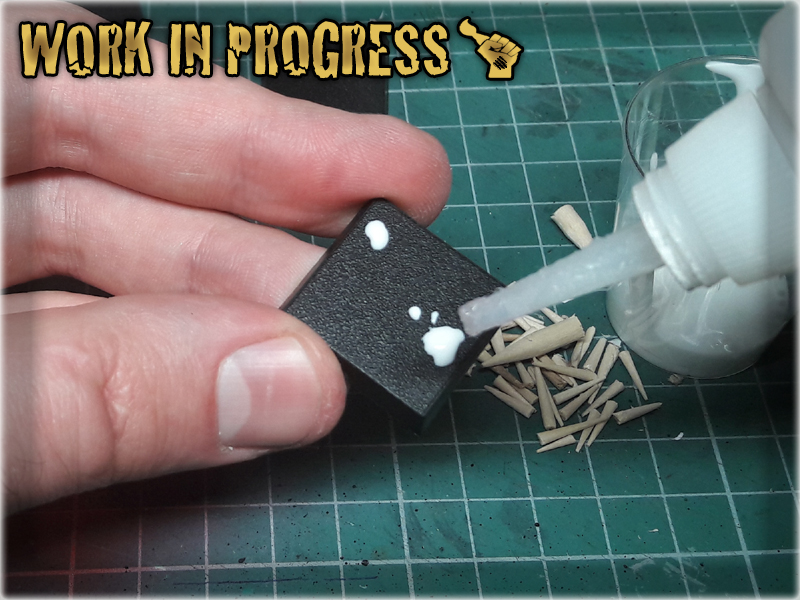
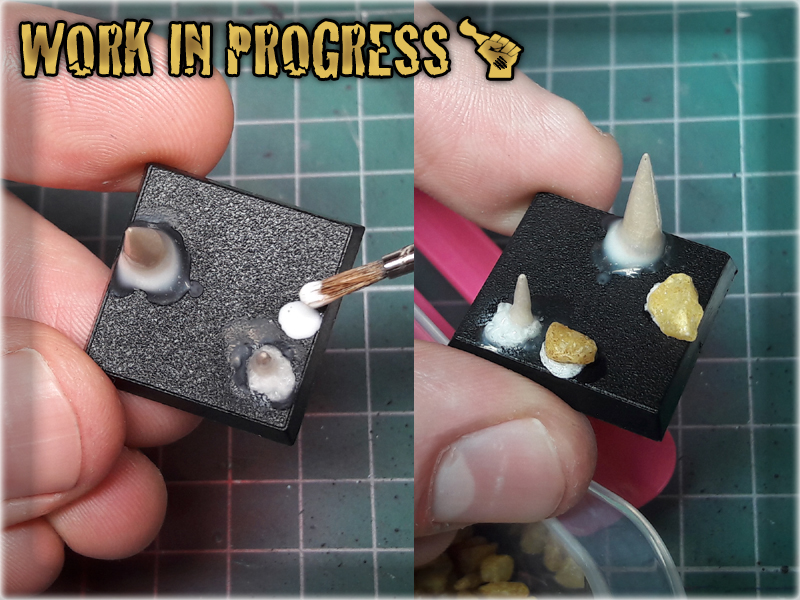
1 I started by cutting off the tips of both toothpicks and nail sticks. These would do for fine stalagmites later on.
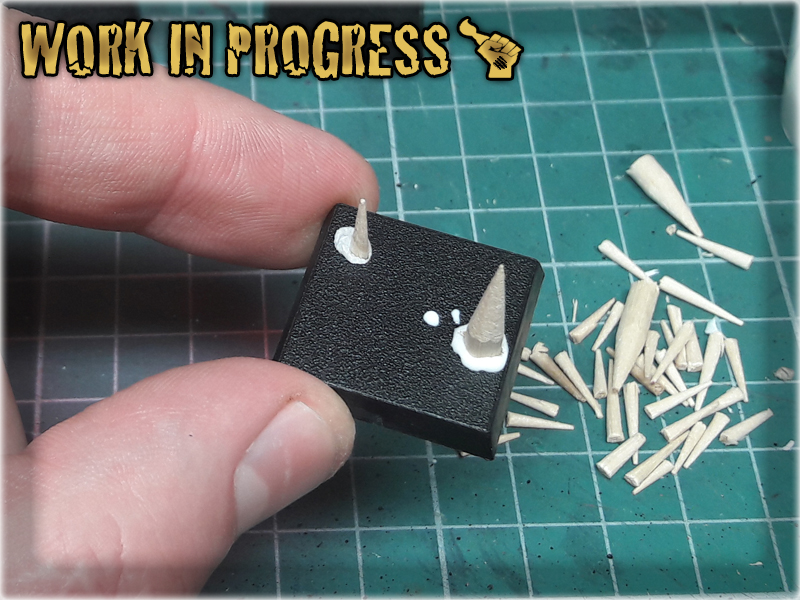
2 I then applied couple of drops of basing glue onto the base. Before it dried out I applied Super Glue on it and mounted stalagmites, tip upwards, on the mix.

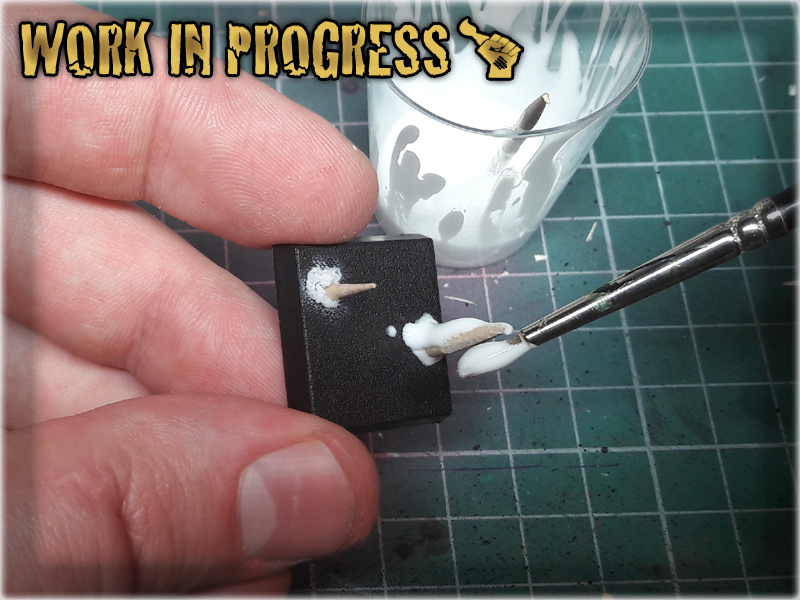
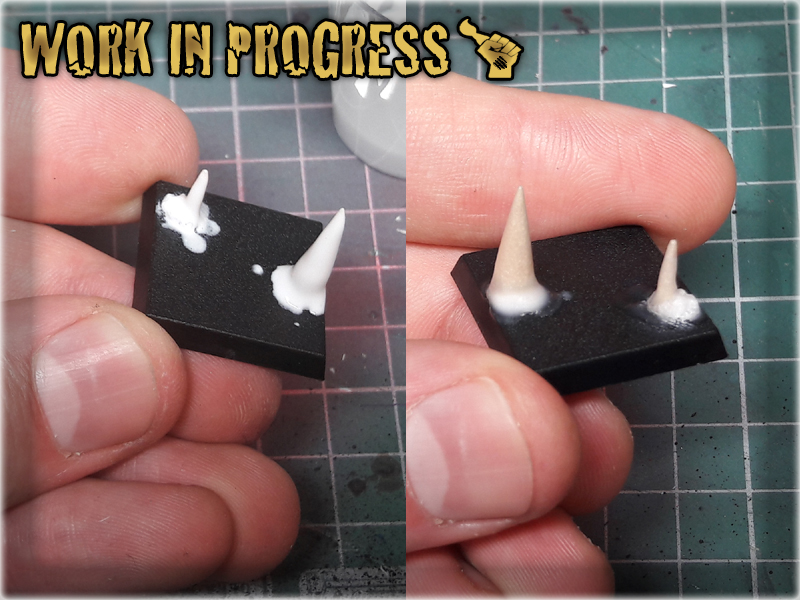
3 Next I covered entire stalagmites with basing glue and left it to dry. The excess glue, moved by the power of gravity, was drawn downwards, where it rested around the base of the stalagmites, making them look smooth and natural.
4 Using the previous technique I applied some basing glue in few spots and then Super Glue'ed some gravel over it. You can actually glue any type of stuff with this - like skulls, some pieces of armour etc.
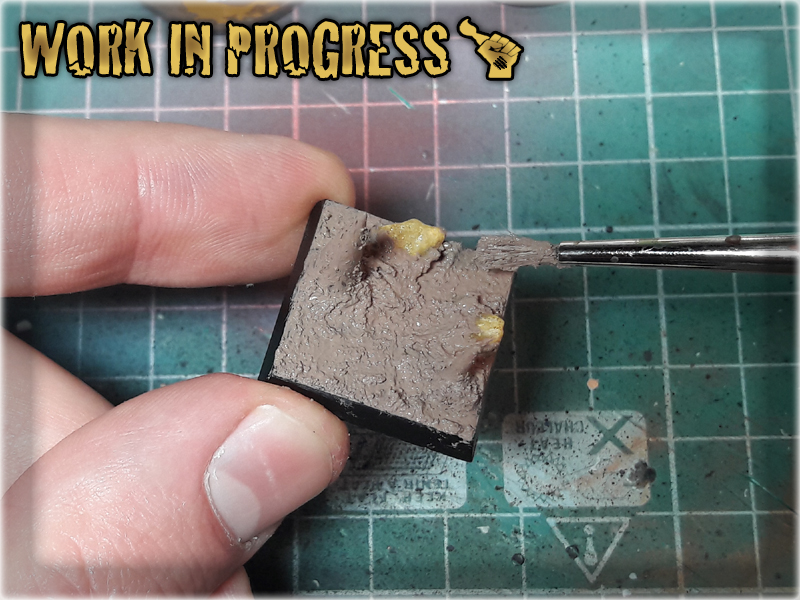
5 I then covered antire surface, except for any fillers, with Games Workshop's texture paints. I used a mix of Agrellan Earth and Agrellan Badland for this tutorial, but actually any of the range will do - as long as you would like to undercoat the base afterwards.


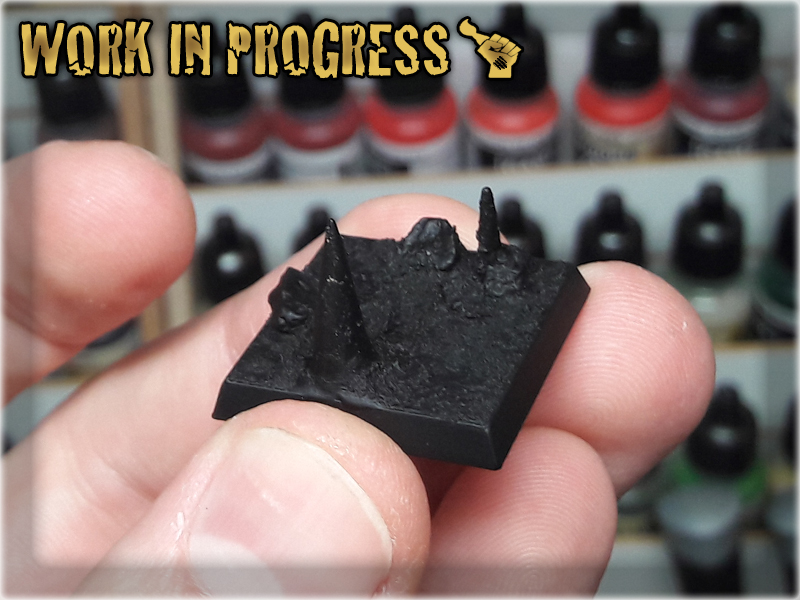
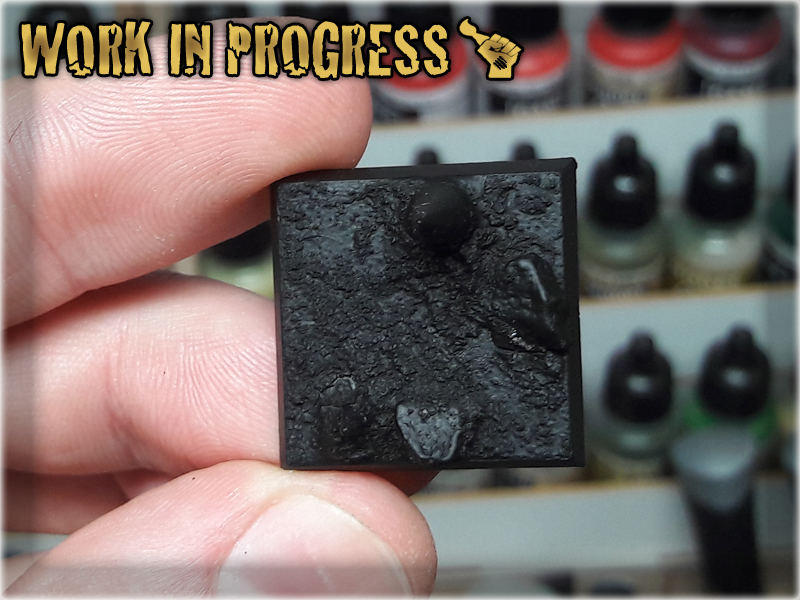
6 The final step was to undercoat dried out base with Chaos Black spray...


Now, what’s left is just to paint the bases with your preferable colour scheme. I chose to go red/copper style similar to ‘the Wave’ and watered some spots with clear resin, but the number of potential colour schemes is unlimited.
If you ever use the tutorial – be sure to let me know and send some pictures via FACEBOOK. I will be happy to see how it turned out 😉

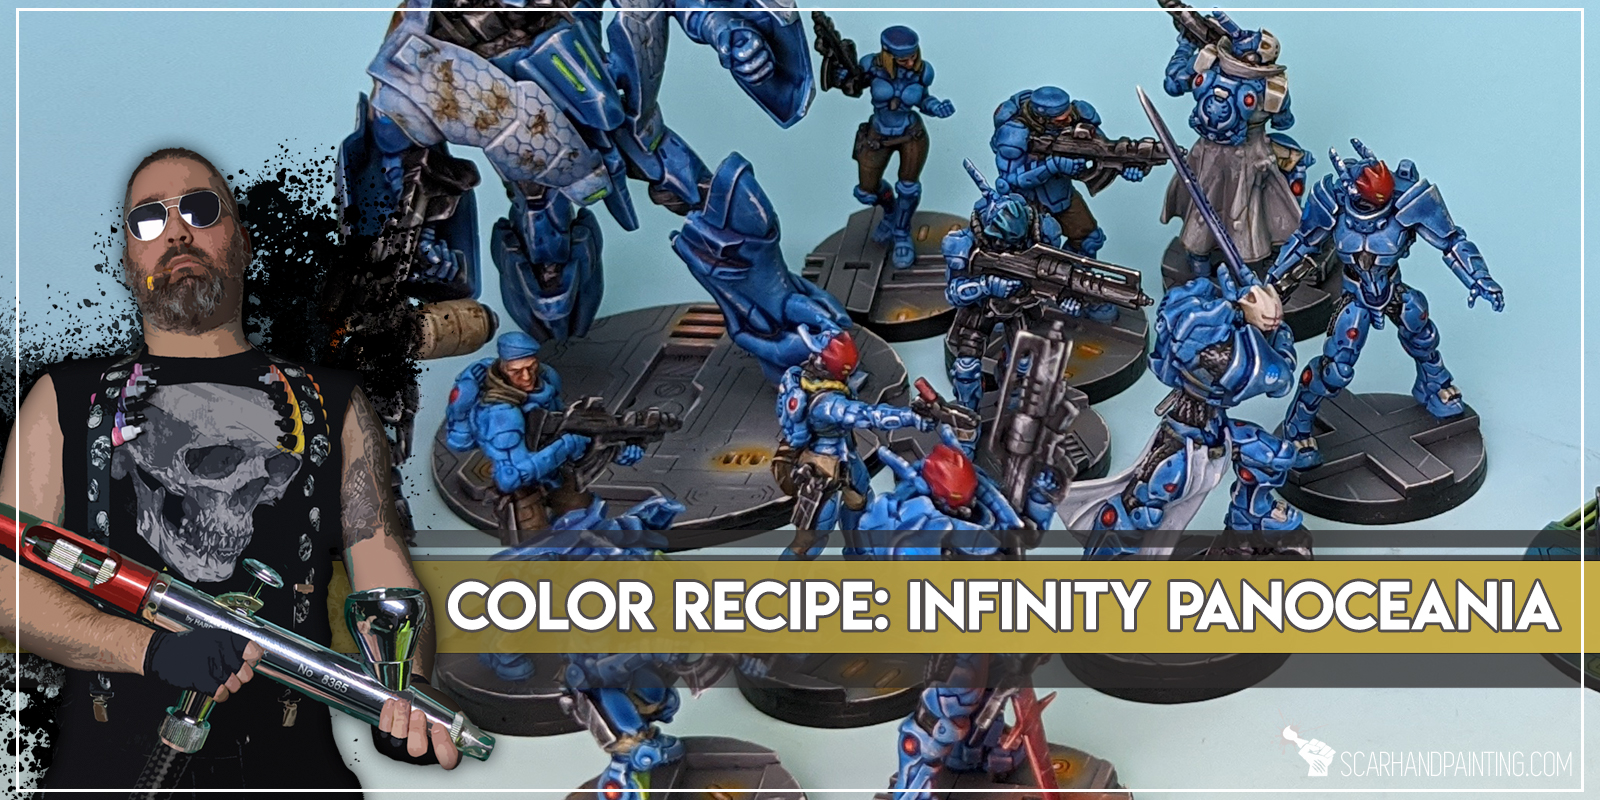
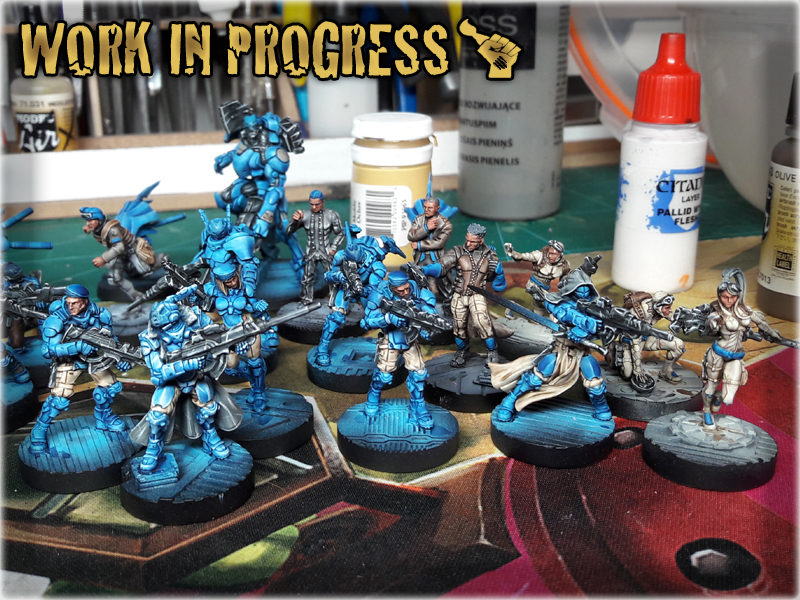
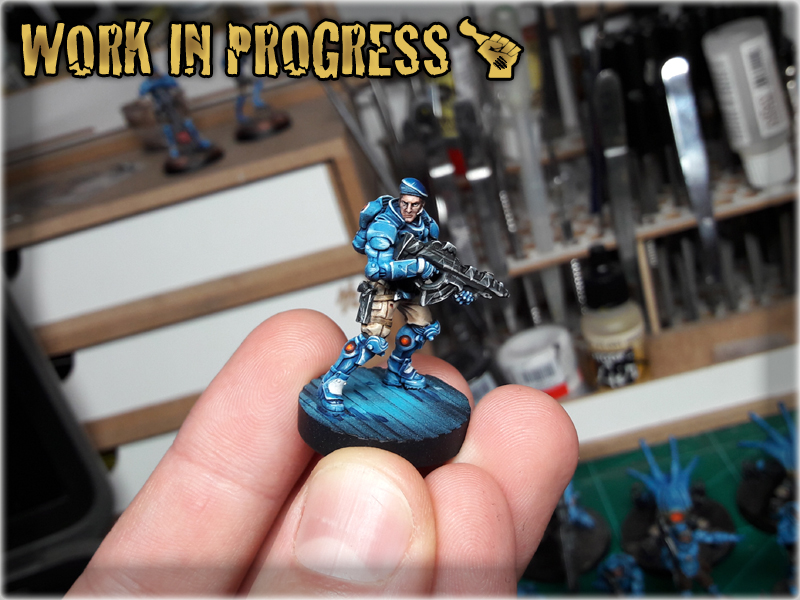
Here are some Colour Recipes for Infinity Panoceania from GALLERY: INFINITY NEOTERRA lvl 5. Please take note that this is a simple colour scheme, not covering multiple overlapping layers and blends inbetween, that lead to the final product. It is supposed to be used as guidline not a step-by-step.
BLUE armour:
Black Undercoat,
French Blue (VAL),*
Light Sea Blue (Val),*
Mix Light Sea Blue (Val) 8:3 White,*
Mix Guilliman blue (GW) 1:1:1 Blue Tone Ink (AP), Lahmian Medium (GW),
Pale Wych Flesh (GW) l&p,
Light Sea Blue (Val) glaze,
White glaze & l&p,
Black Wash (Val) deep lining,
CREME/BROWN clothes:
Karak Stone (GW),
Flayed One Flesh (GW),
Flayed One Flesh (GW),
Mix Strong Tone Ink (AP) 1:1:1 Soft Tone Ink (AP), Lahmian Medium (GW),
Flayed One Flesh (GW) l&p
Mix Flayed One Flesh (GW) 1:1 Pale Wych Flesh (GW) l&p,
Dark Brown Wash (Val) deep lining,
SKIN:
Bugmans Glow (GW),
Dwarf Flesh (GW),
Mix Dwarf Flesh (GW) 1:1 Elf Skintone (Val),
Elf Skintone (Val) l&p,
Mix Strong Tone Ink (AP) 1:1 Soft Tone Ink (AP),
Flesh (Val) l&p,
RED helmets:
Sanguine Base (P3),
Mephiston Red (GW),
Evil Sunz Scarlet (GW),
Red Tone Ink (AP),
Bloodletter (GW) glaze points,
Troll Slayer Orange (GW) l&p,
Lugganath Orange (GW) l&p,
RED lights:
Evil Sunz Scarlet (GW),
Troll Slayer Orange (GW),
Lugganath Orange (GW) p,
Pale Wych Flesh (GW) p,
Bloodletter (GW),
Lugganath Orange (GW) p,

BASES:
Administratum Grey (GW),
/ Skeleton Bone (AP),
Mix Skeleton Bone (AP) 1:1 Pale Wych Flesh (GW),
/Frostbite (P3) drbr,
l&p – lines and points,
p – points,
drbr – drybrush,
*Airbrushed (with multiple layers and mixes)

I drilled. Slowly, gentle at first, then harder, with more and more pressure. My movements became more firm when I grabbed the lower parts and drilled deep and hard. Upon a finale my hands were covered with a thin layer of sweat. I fealt the fastened beat of my heart, when I plucked the drill out of the hole. It was there – vast, shiny. I never had time to fully appreciate it. I grabed a hard metal pin and sticked it deep into the hole. Metal squealed under pressure but that only made me push even harder up to a rapid stop. I sat then, in silence, breathing erratically. The miniature stood before me, pinned to a scenic base. So delicate and yet unbroken. I wanted more. More of the purifying labour. My airbrush responded in appreciation – It twitched once in agreement…
It started a bit awkward, but what the hell. I’m currently drunk with excitement and happiness so I hope you’ll excuse me. Today it’s Party Time – Scarhandpainting.com’s first birthday!
Who would have thought that Scarhandpainting.com is already one year old!? For me it’s like if it came online just a month ago. One moment it was 17th of February 2016 with me copying old articles and estabilishing a new website, and now BAM! It’s a full year later with a tone of new content added to the site’s Blog and Gallery. If not for the stathistics I wouldn’t believe it, but here I am, appreciating thousands of visitors and views. This seems unreal, especially in comparisson to my old blog at blogspot.com, which generated less than one fifth of the activity. I’m thrilled to see the popularity of Scarhandpainting.com. It means a lot to me. I see that all the work I put into writing articles is totally worth the effort.
The concept of Scarhandpainting.com appeared in the late 2015th. I always wanted to start freelancing full time, but untill then I had an estabilished source of income and a trustworthy employer. Needless to say that I had this ‘sphere of comfort’ built around me and it grew as vast as to provide me with confidence to start my own project. I knew that success is not something laying around for everyone to pick at leaisure and without a good fight. Calculating risks and eventual gains, making plans, switching towns – it all took around two months, after which I decided to go all-in. I rent a huge server, registered the domain and purchased a professional theme. First steps almost made me regret the decission, cause I was an utter noob about such stuff. Still the site came to life one piece at a time while I uploaded previously prepared content and learned a thing or two about how things work in the site’s Dashboard…

The idea behing Scarhandpainting.com was and still is to express myself. I love to paint miniatures and feel extatic each time a project is nearing the finish line. I know that there’s plenty of bussiness-like sites around the web, but I had something more friendly in mind. I wanted to let you into my thoughts and lifestyle a bit. Scarhandpainting.com is my home where I share not only the miniatures I’ve painted, but also some of the techniques and colour recipes that I use. Like many artists, I want to share my passion with all of you. This domain is a medium I chose for the purpose. For me Scarhandpainting.com is not a strict advertisement, but a way of life. Painting miniatures keeps me hyped, while writing articles helps me reset, calm down after each major project. Every comment I receive is precious while each awesome friendstomer that I meet thanks to the site is just a hidden bonus.
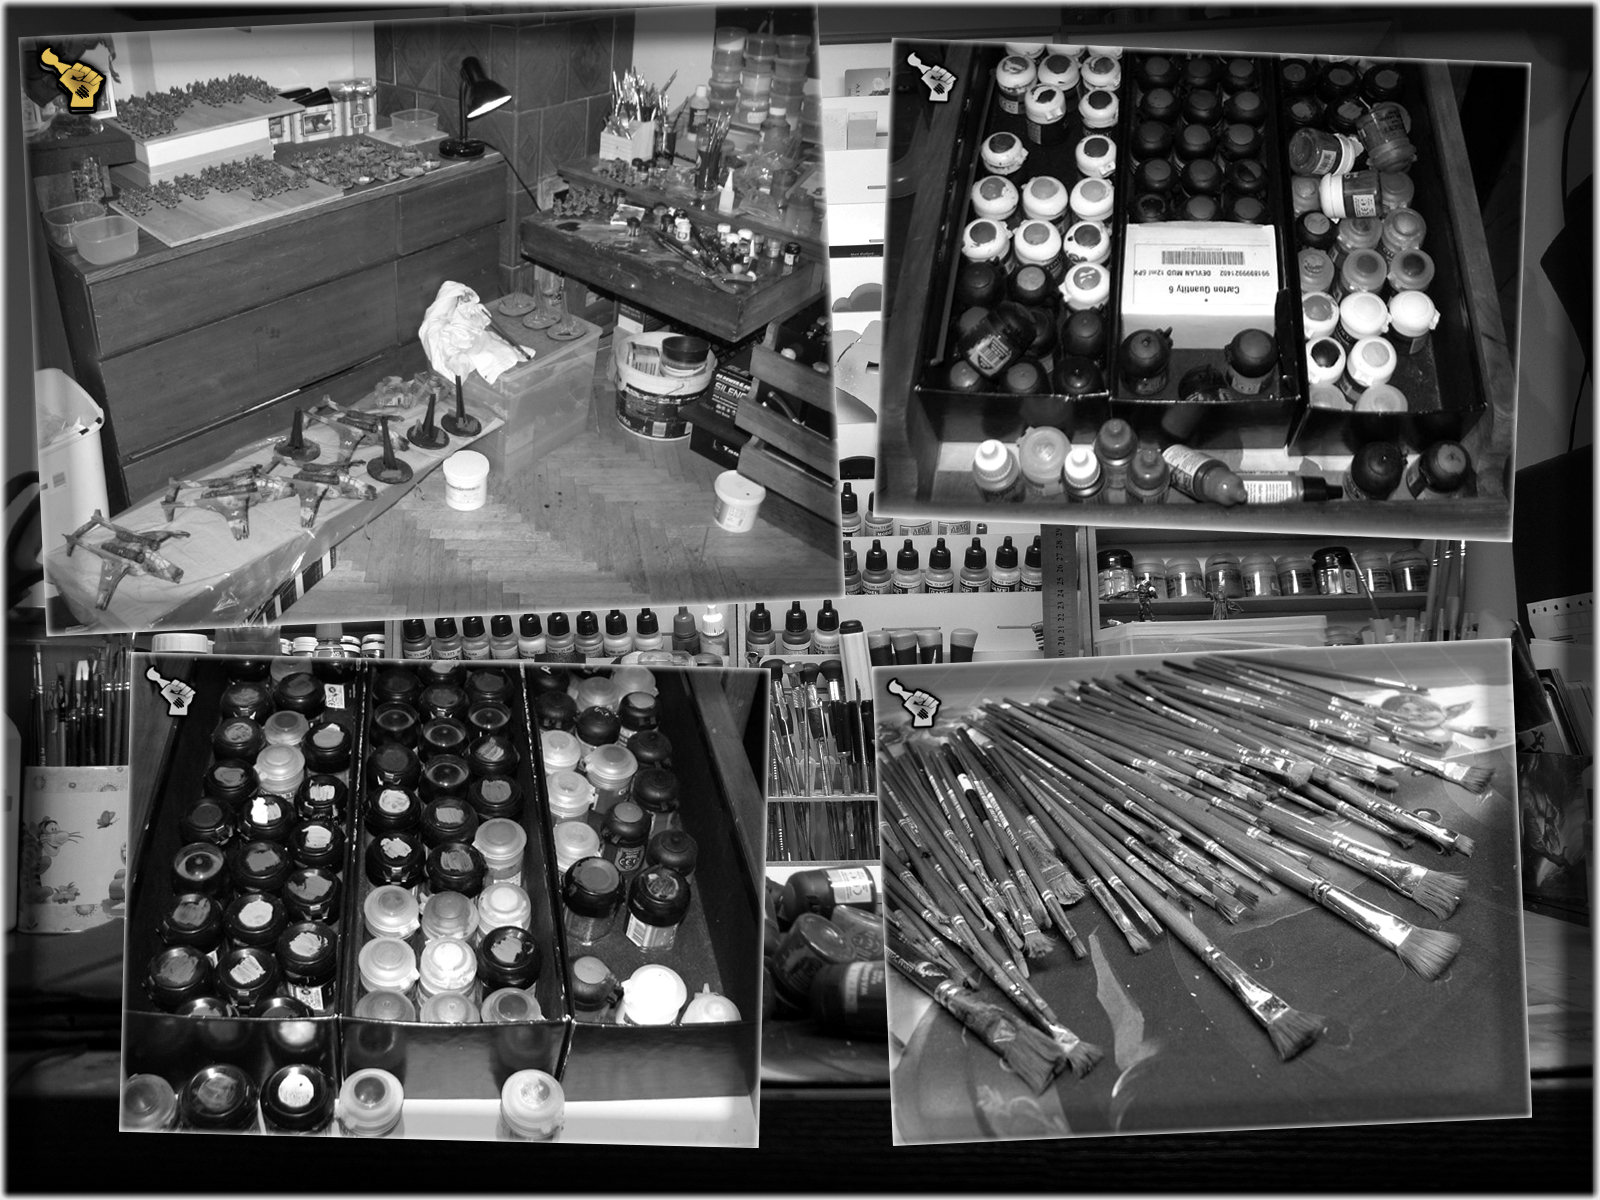
For you to understand how my life changed upon dedicating myself to Scarhandpainting it is important to get to know how things were before. So, here’s a quick look back. Just before Scarhandpainting.com hit the internet, I used to paint in a corner of a living room, surrounded by utter chaos, not having an Airbrush and working with a limited choice of colours and materials. Might be difficult to believe it, but that’s my old working space. Here’s where all of the early projects of 2016th came to being…
For most, a year is not much in terms of a lifetime. For me ‘today’ is a lightyear jump distant from how I used to work, how my workbench looked like, what equipment and materials I owned and how everything was organized by the time in 2016th. I still spend most of my time near a desk in the corner of a room, with a brush and a miniature in my hand, the fact did not changed a lot – but all the rest is just forced evolution step ahead of what it used to be… And upon that I recently got married, so you see… a lightyear jump.
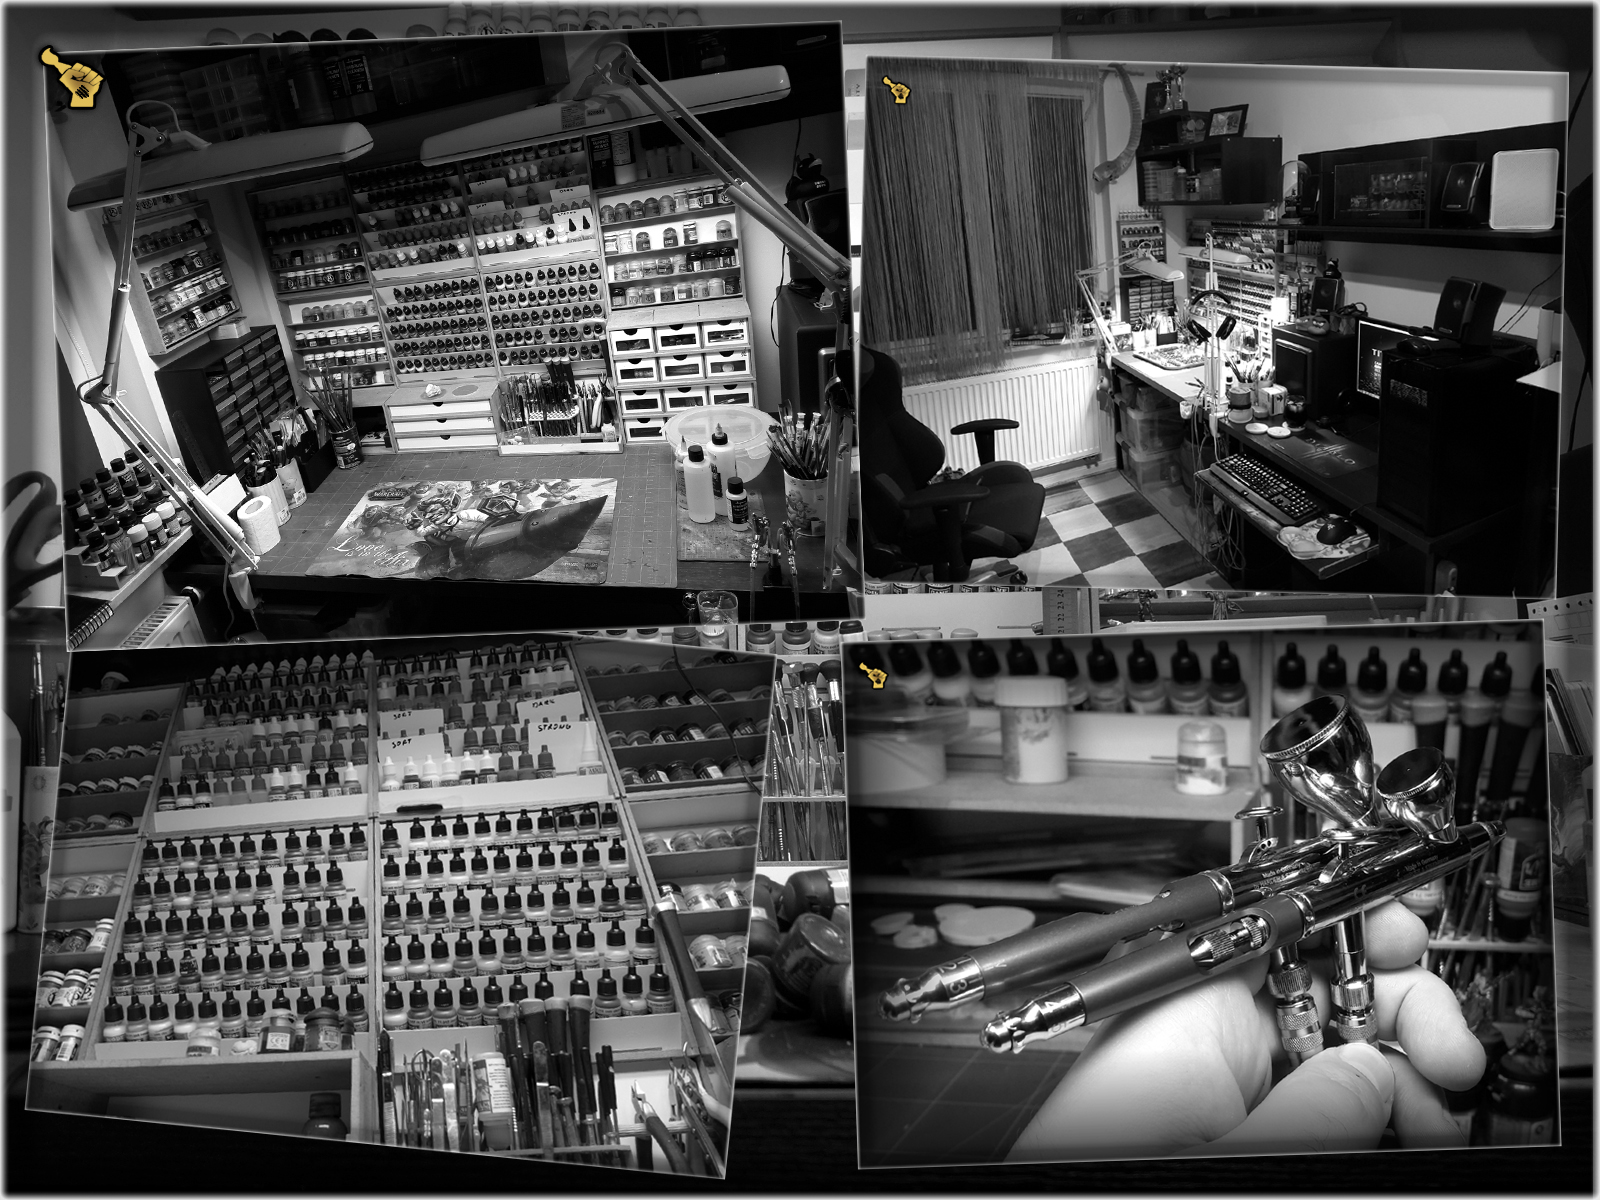
The road throughout the year was very interresting. I was able to lay my hands on many sweet new releases, rare pieces, awesome scenery and miniatures I never ever knew existed. At many occassions I had an opportunity to paint on a much higher level than in the years before. During all that painting I met a bunch of great people, many of which are at least as passionate about hobby as I am. This led me to redevelopment of my preferable painting style and learning a lot, both in terms of painting and taking pictures. I also evolved many of my habits, got better acquainted with airbrushing and made peace with the fact that some projects are meant to be painted on a lower level than the others. The amount of experience I have earned is vast and the best proof of that is the series of Monthly Galleries. In the comming years I aim to further expand the variety of techniques at my disposal and become a better painter. I only hope you will stay with me to witness it…
Using this opportunity I would like to thank all of my friendstomers who accompanied me in this crazy, heroic journey. You all are very important to me and without you I wouldn’t be where I am today. For your support, for all the hours spent talking, for your friendship and trust with which you honor me – I thank YOU. This was a fantastic year and I hope we would still be a great team at the same time next year and the year after and the next, just until the end of the world!
Special thanks to Andreas and Markus. You guys were the reasons I decided to choose this glorious path of life.
Among almost eighty articles on Scarhandpainting.com there are those which viewers found the most interresting. As this is a 1st year anniversary, I have selected twelve articles that were viewed the most. If you don’t know some/any of these then here’s what makes Scarhandpainting.com worth reading today’s entire article.
COLOUR RECIPES: INFINITY USARF
TUTORIAL: PAINTING MICRO ART STUDIO CONCRETE WALLS
REVIEW: HOBBYZONE ‘MODULAR WORKSHOP SYSTEM’
REVIEW: BRUSH CLASH TAMIYA vs CITADEL
TUTORIAL: INFINITY DIY CONSOLE
“THE COLONY” SPECIAL PROJECT part one
TUTORIAL: INFINITY ‘DO IT YOURSELF’ GAMING TERRAIN
TUTORIAL: PAINTING NOMAD RED ARMOUR
Today a brand new chapter begins for Scarhandpainting.com. The website is still young but there is a strong community of viewers. I look forward to bringing yet more miniatures to life under the Scar_hand Painting logo and further evolving myself. I hope to produce more articles to keep all of you here. There should be many opportunities to do that, cause things that are currently awaiting paint job are just crazy awesome. Stay tuned…

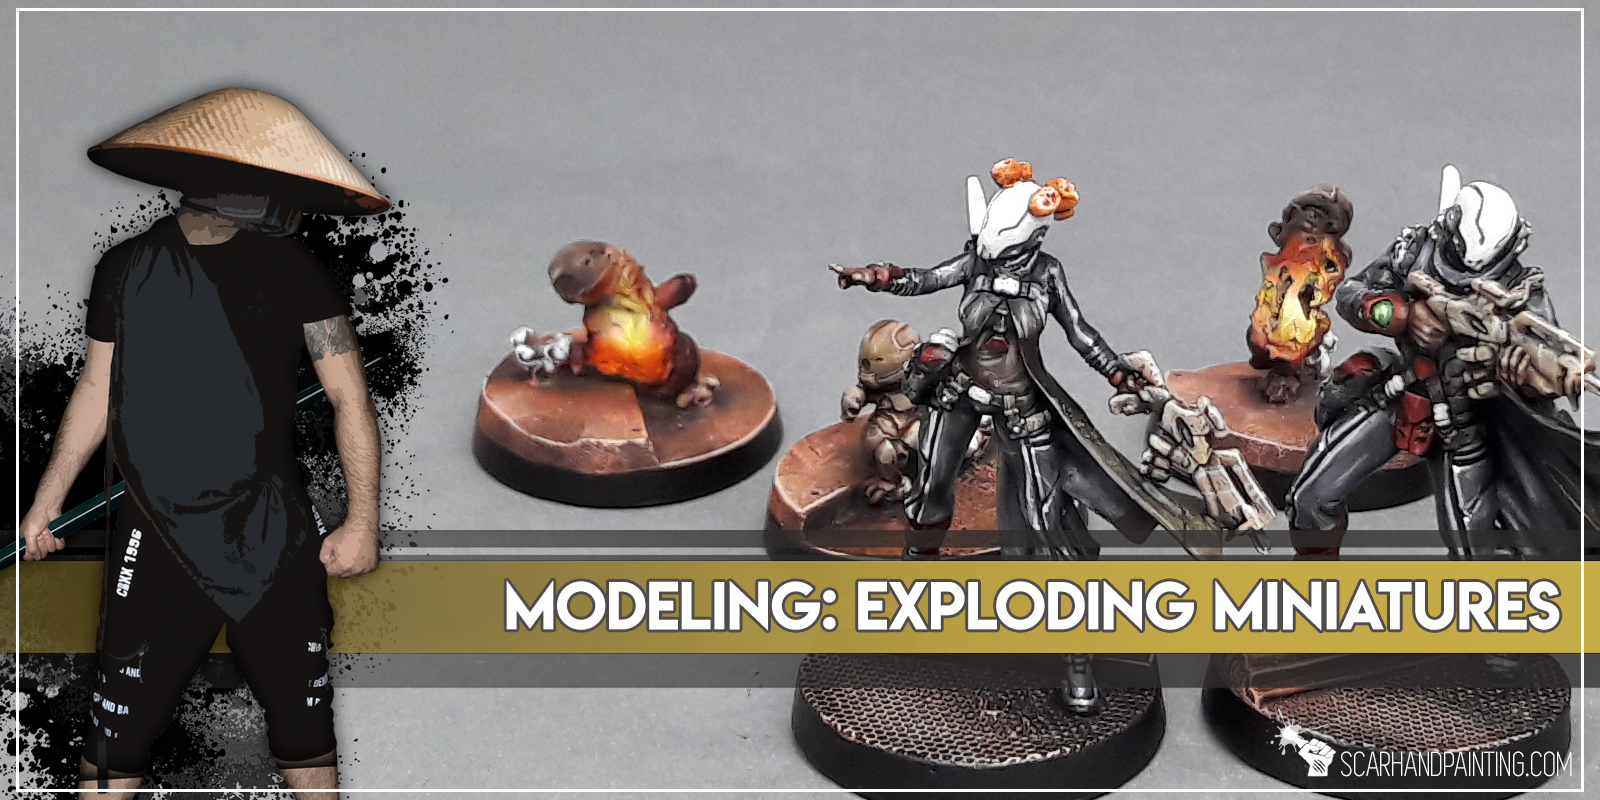
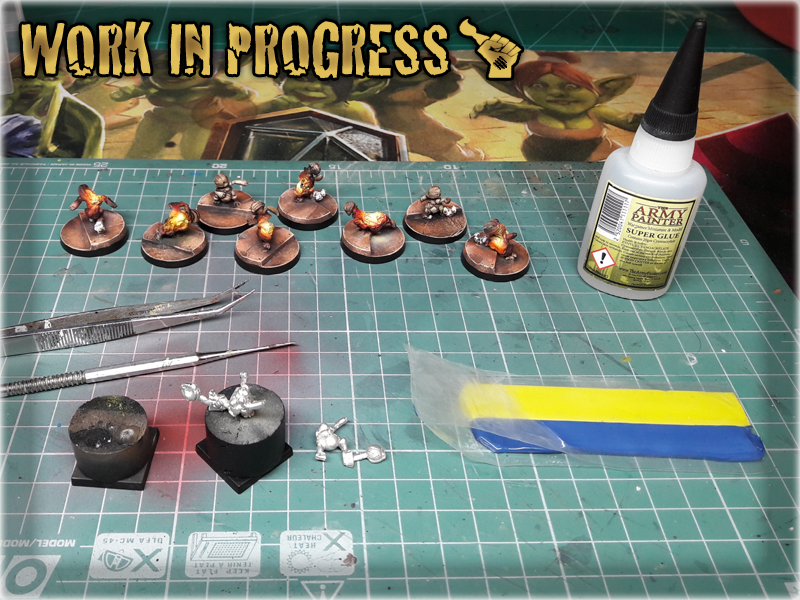
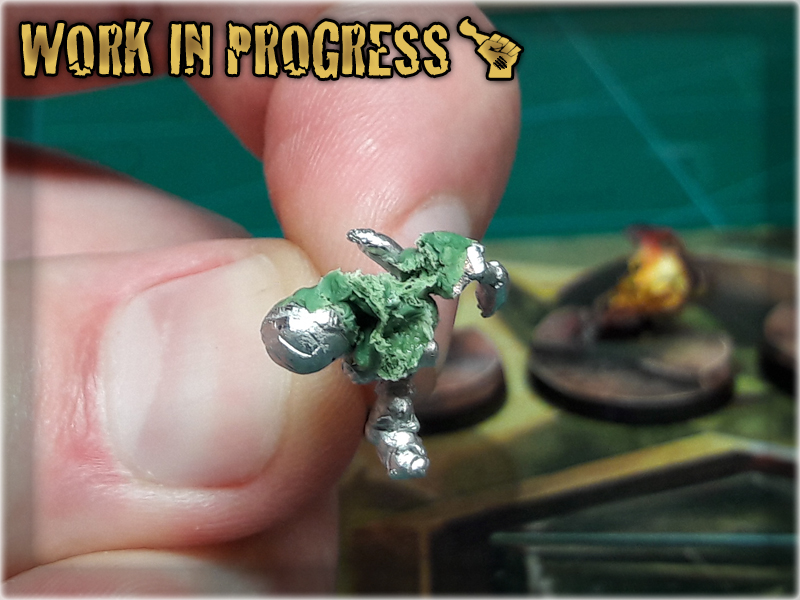
In this easy, step-by-step tutorial I’m going to show you how to create an ‘explosion from inside’ effect on the miniatures. Personally I use this method to create exploding mines or in this case Crazy Koalas from Infinity the game, but the number of potential uses is limited only by your imagination. That being said, buckle up and have a nice ride.
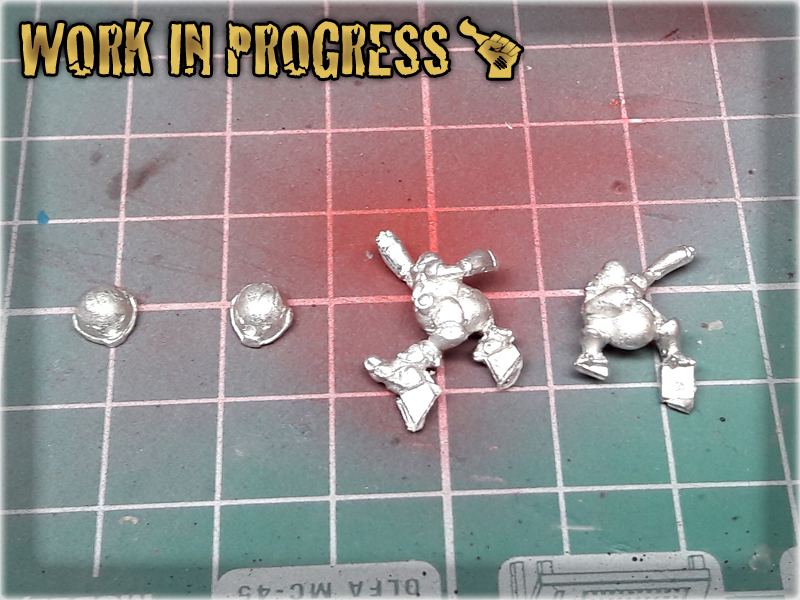
1 I started with cutting the miniature diagonally in two. I didn't thought too much about where to cut, just about the waist, leaving one hand attached to the lower part of the body.
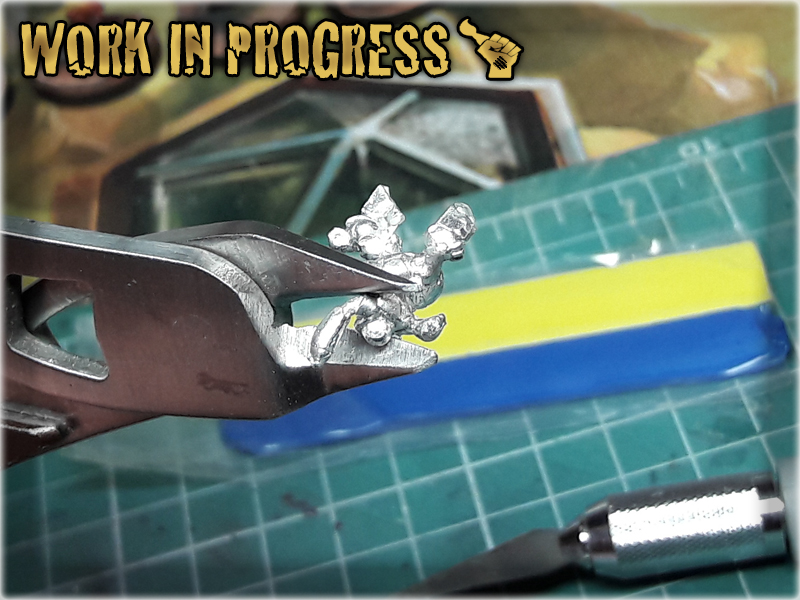

2 I then rolled some Green Stuff and glued it onto the lower body part.
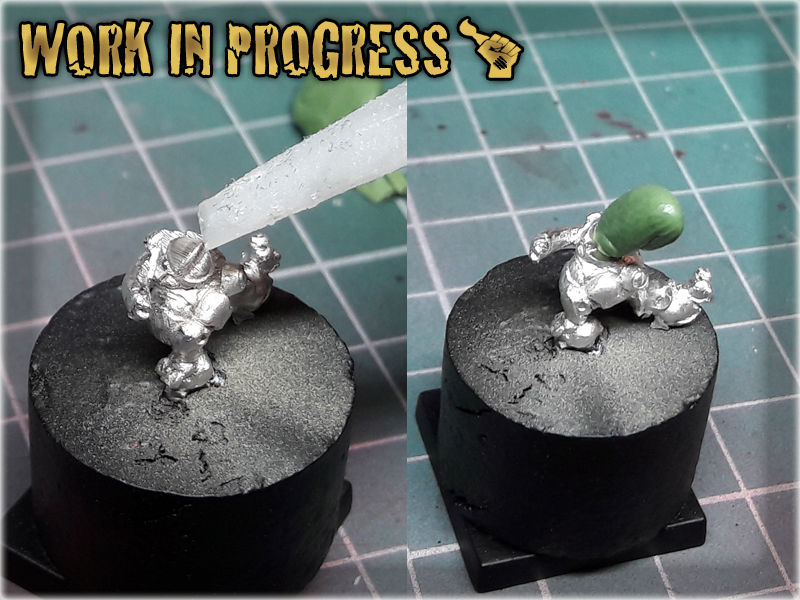
3 Next I applied a small drop of Super Glue onto the Green Stuff and attached the upper body part to it.

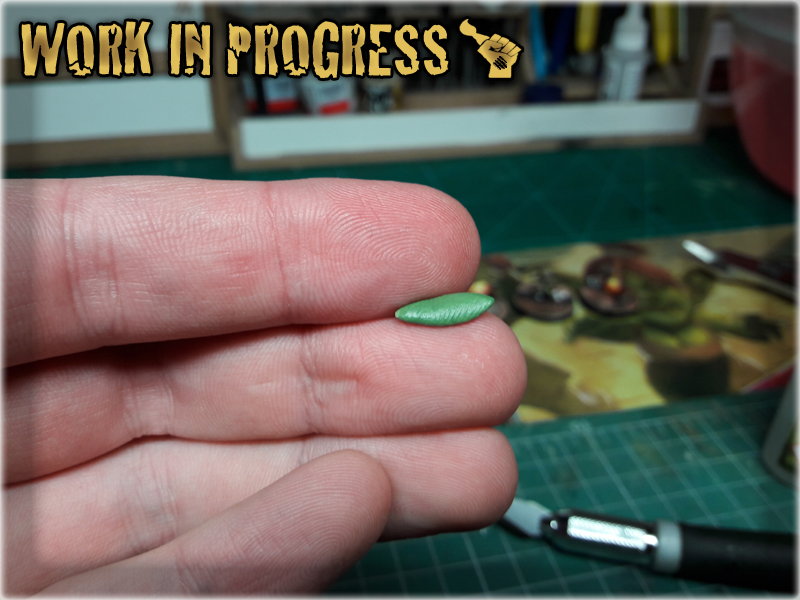
4 Then I squeezed both part, forcing the Green Stuff out.
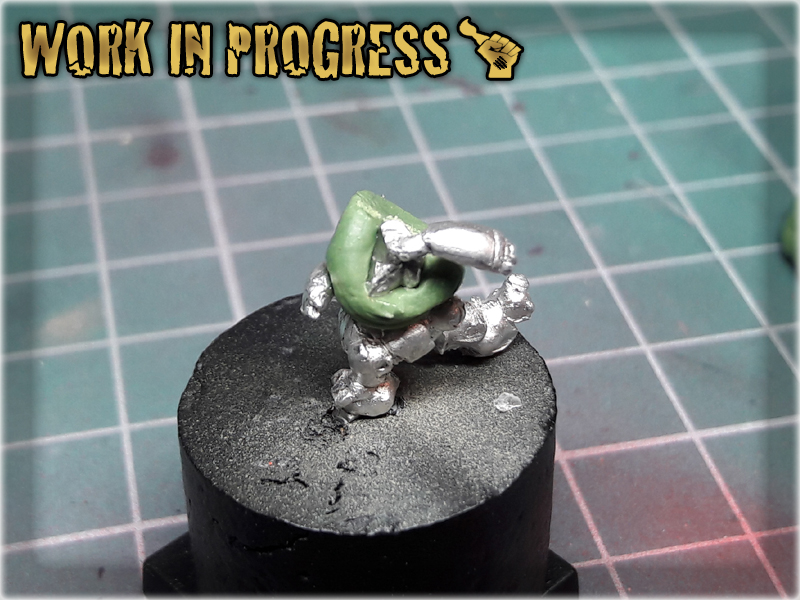
5 Next I gently pulled both body parts away, creating a gap with rended Green Stuff inbetween the parts.
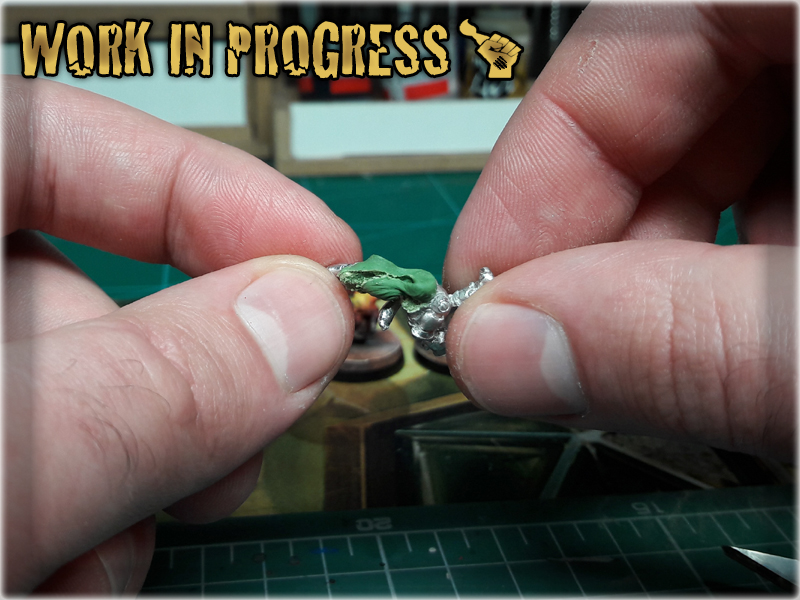
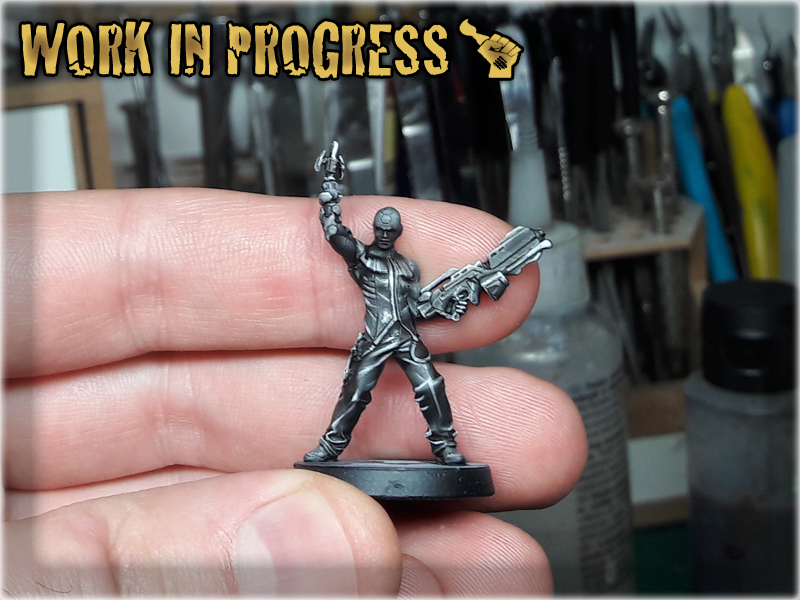
6 Next I rolled another piece of Green Stuff and repeated the technique, adding head to the miniature.

7 After pulling the head away I used a modelling tool to stretch the excess Green Stuff to the sides.
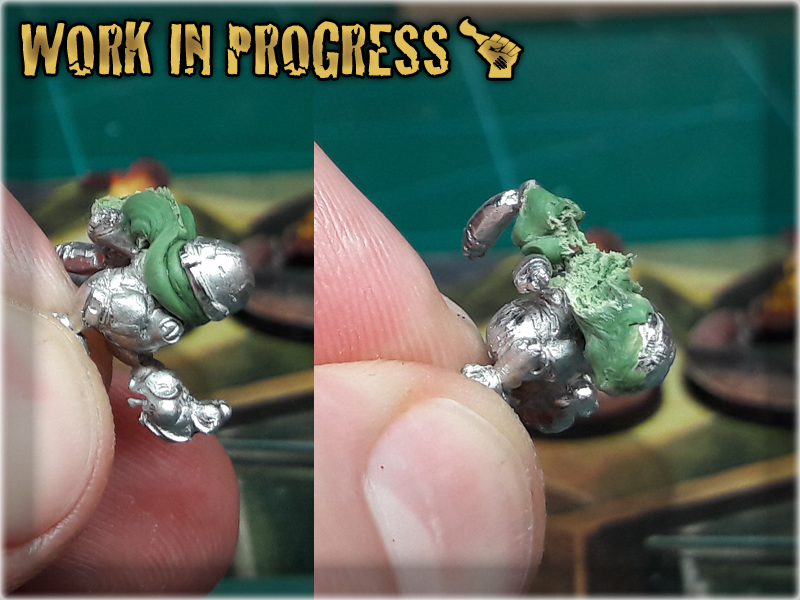
8 I also applied Super Glue onto the Green Stuff to fasten it's hardening.
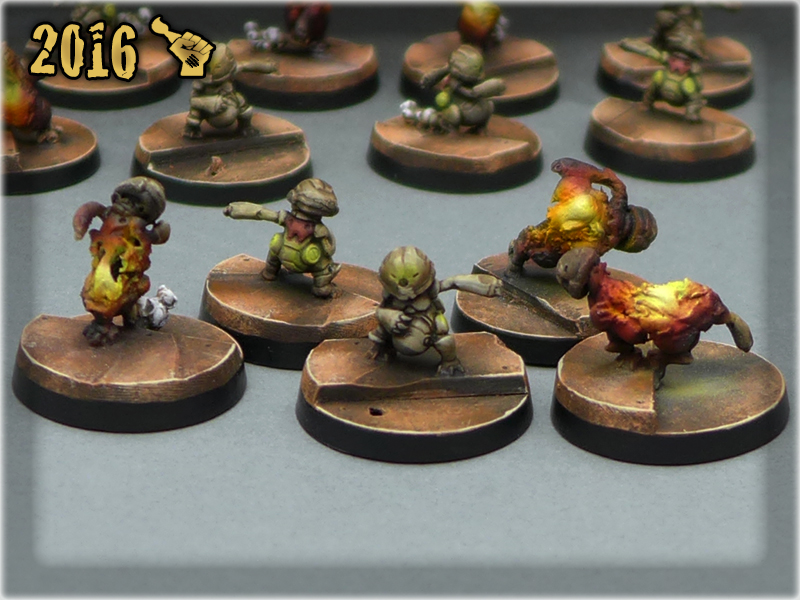
The end result is below:

Here are some Colour Recipes for Infinity ALEPH from GALLERY: INFINITY ALEPH lvl 4,5. Please take note that this is a simple colour scheme, not covering multiple overlapping layers and blends inbetween, that lead to the final product. It is supposed to be used as guidline not a step-by-step.

TURQUISE armour:
Black Undercoat,
Coal Black (P3),
Hydra Turquise (AP),
Mix Hydra Turquise (AP) 5:1 Pale Wych Flesh (GW) l&p,
Mix Hydra Turquise (AP) 1:5 Pale Wych Flesh (GW) l&p,
Coelia Greenshade (GW),
Pale Wych Flesh (GW) l&p,
DARK clothes:
Black Undercoat,
Dark Sea Grey (Val)*,
Barley Grey (Val)*,
Dark Sea Grey (Val)*,
Wolf Grey (Val)*,
Pale Wych Flesh (GW) l&p,
Dark Tone Ink (AP),
…DEEP dark effect:
Pale Wych Flesh (GW) l&p,
Dark Tone Ink (AP),
…BROWN clothes:
Dirt (Val),
Mix Strong Tone Ink (AP) 1:1 Soft Tone Ink (AP),
Off White (Val) l&p,

SKIN:
Bugmans Glow (GW),
Dwarf Flesh (GW),
Elf Skintone (Val),
Mix Strong Tone Ink (AP) 1:1 Soft Tone Ink (AP),
Flesh (Val) l&p,
GREEN OLS:
Sick Green (Val),
Mix Sick Green (Val) 1:1 Off White (Val),
Mix Sick Green (Val) 1:2 Off White (Val) l&p,
Light Livery Green (Val)*,
Waywatcher Green (GW),
Off White (Val) l&p,

l&p – lines and points,
*Airbrushed (with multiple layers and mixes)
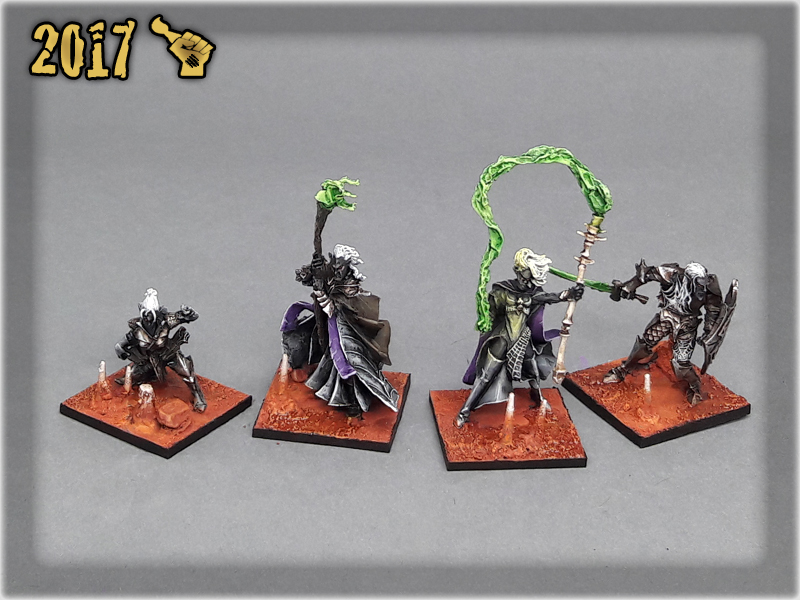
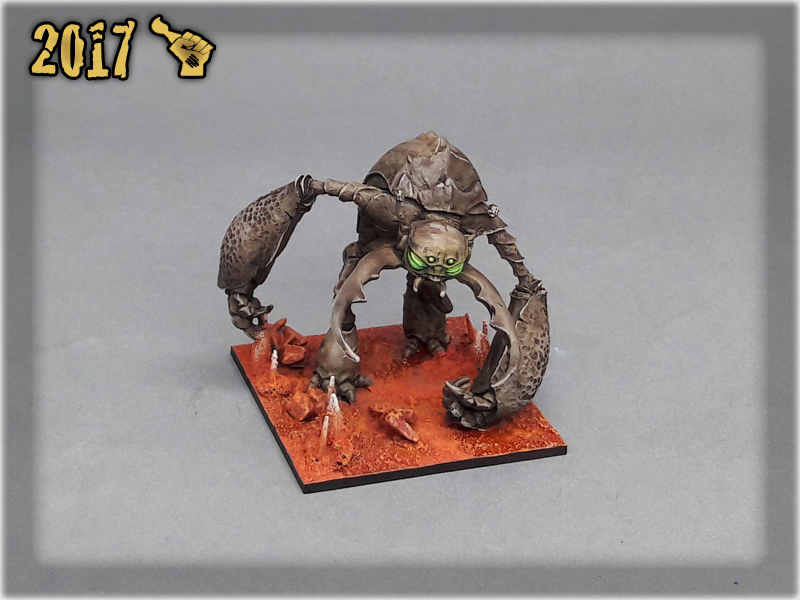
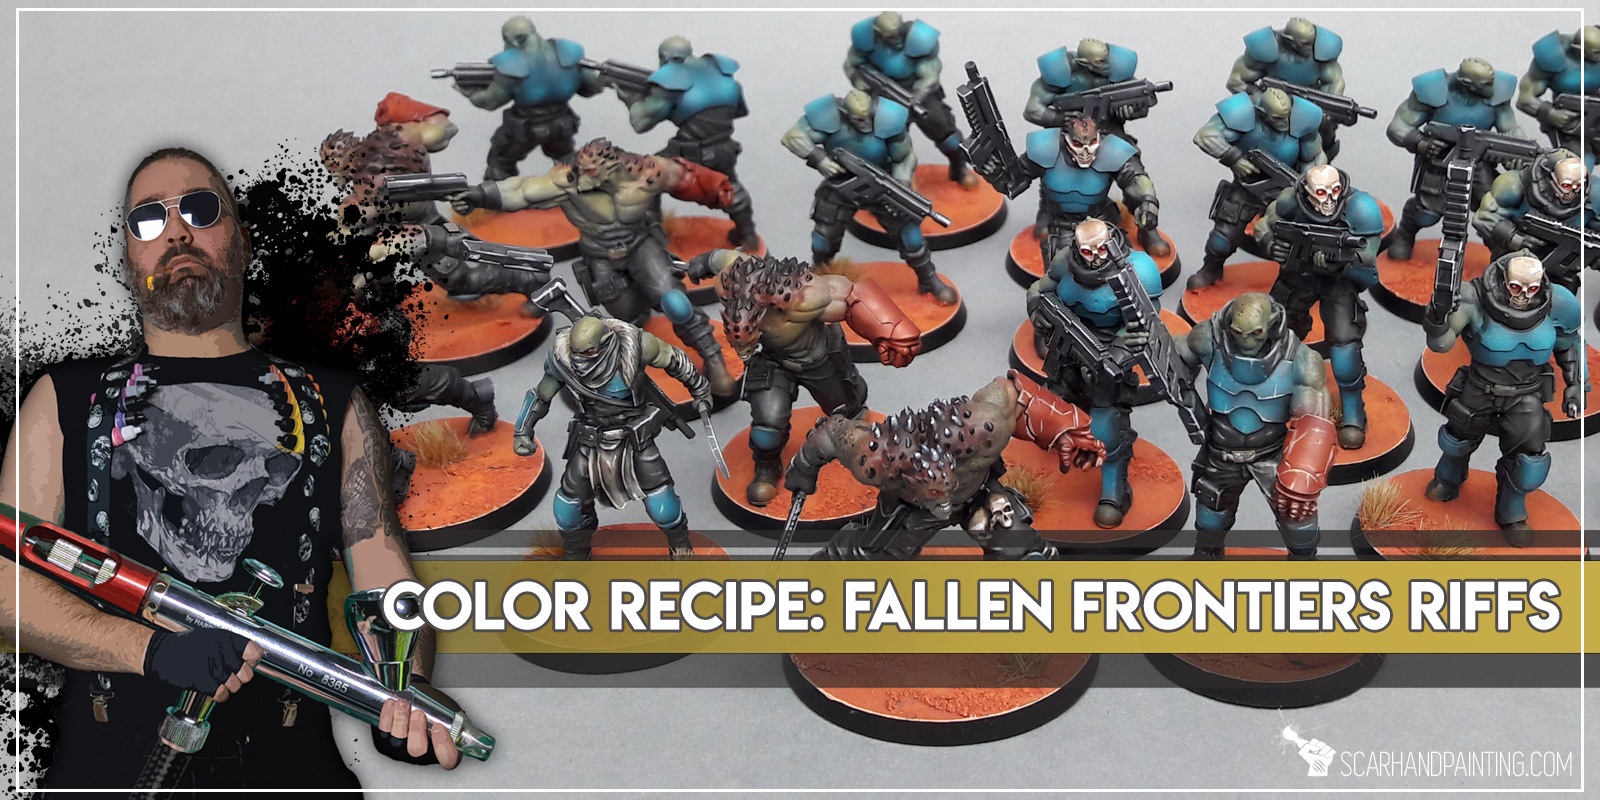
Here are some Colour Recipes for Fallen Frontiers Riffs from GALLERY: FALLEN FRONTIERS RIFFS lvl 3-4. Please take note that this is a simple colour scheme, not covering multiple overlapping layers and blends inbetween, that lead to the final product. It is supposed to be used as guidline not a step-by-step.
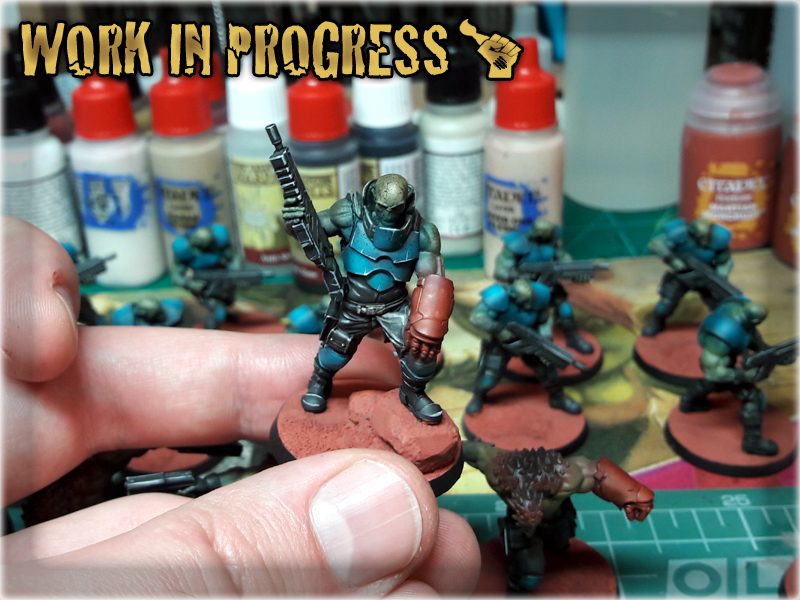
TURQUISE armour:
Black Undercoat,
German Grey (Val)*,
Mix German Grey (Val) 1:1 Cold Grey (Val)*,
Coal Black (P3)*,
Hydra Turquise (AP)*,
Mix Hydra Turquise (AP) 1:1 White*,
Heroes: Pallid Wych Flesh (GW) l&p,
DARK clothes:
Black Undercoat,
German Grey (Val)*,
Mix German Grey (Val) 1:1 Cold Grey (Val)*,
Skavenblight Dinge (GW),
Mix Skavenblight Dinge (GW) 1:1 Light Grey (Val),
Dark Tone Ink (AP),
Heroes: Karak Stone (GW) l&p,
Heroes: Pale Wych Flesh (GW) l&p,

GREEN skin:
Dark Yellow (Val)*,
Red Terracota (Val)*,
Cam. Black Brown (Val)*,
Mix Cam. Black Brown (Val) 1:1 Black*,
BLACK weapons:
Black Undercoat,
German Grey (Val)*,
Mix German Grey (Val) 1:1 Cold Grey (Val)*,
Dark Tone Ink (AP),
Pallid Wych Flesh (GW) l&p,

RED gloves:
Red Terracota (Val)*,
Mix Hot Orange (Val) 5:1:1 Red Terracota (Val), Bonewhite (Val)*,
Red Tone Ink (AP)*,
Heroes: Lugannath Orange (GW) l&p,
MARS Bases:
Martian Ironearth (GW),
Martian Ironcrust (GW),
Fire Dragon Bright (GW) dbr,
Luganath Orange (GW) l,
Dark Steppe Tufts (Paint Forge) tufts,
dbr – drybrush,
l&p – lines and points,
*Airbrushed (with multiple layers and mixes)

“It is a Dark Time.
The might of the Empire is dust, their crown is lost to them and their glory forgotten.
The promise of an age of peace and prosperity is drowned in blood.
This is your time. For the ruins of Mordheim hold prize beyond imagination: stones of power which can grant all your wishes.
But beware of your enemies.
Fear the Possessed, the Beasts of the Pit which roam the night.
Watch for the thieves of the Rat men, the Skaven of the Underworld.
Dread the corpses who walk like the living: the foul Vampires and their rotting minions.
This is Mordheim, the city of the Damned. This is the home of all your hopes. Be wary or it will be your grave as well.”
Mordheim rb.s.124
It all started with a single idea that came to me one day. I installed “Mordheim: City of the Damned” on a PC and played for the first time. It took me back on a memory trip through all the campaigns played throughout the years and further – as for the first time I saw Mordheim in it’s dark glory! It looked so effective. I figured to make myself a gaming board based on this…
You see – terrain making is similar to PC map building. You take base shapes, you texturize them and then color them. If you happen to plan it beforehand, you will have just that: base shapes, texture pieces and paints – to work with. So , the idea was totally within my reach. Not a priority – just ‘an idea’. One to haunt me throughout my everyday life from then on. Sometimes it stayed dormant for couple of weeks just to emerge from the depth of imagination without any warning. Many times I was on the verge of realizing it into existence, then just hid it deeper within me like “meh, takes up too much time, I don’t need it right now”. But the right moment finally came. I was gaming in a local hobby store, where I saw an inspiring collection of Mordheim scenery. This was too much – I couldn’t resist. There was just too much inspiration to walk by. I broke that invisible mental barrier – took this like a man – a day later I went to construction store, purchased all necessary materials and started working on this project…

I already had a Mordheim Gaming Board along with all the terrain that might come in handy throughout a vast campaign. The old scenery set was rather solid but lacked some key features in terms of theme and most importantly – texture. Back in the days I praised short construction time and playability over looks and strong theme. I produced terrain pieces really fast, but at a cost of visuals. This time around I set off for looks and theme as the highest priority with playability a bit lower, followed by durability and other usual stuff. Due to current Nomad’ish way of life I also wanted for this gaming board to be transportation friendly and rather light. To achieve that I had to fulfill these assumptions:
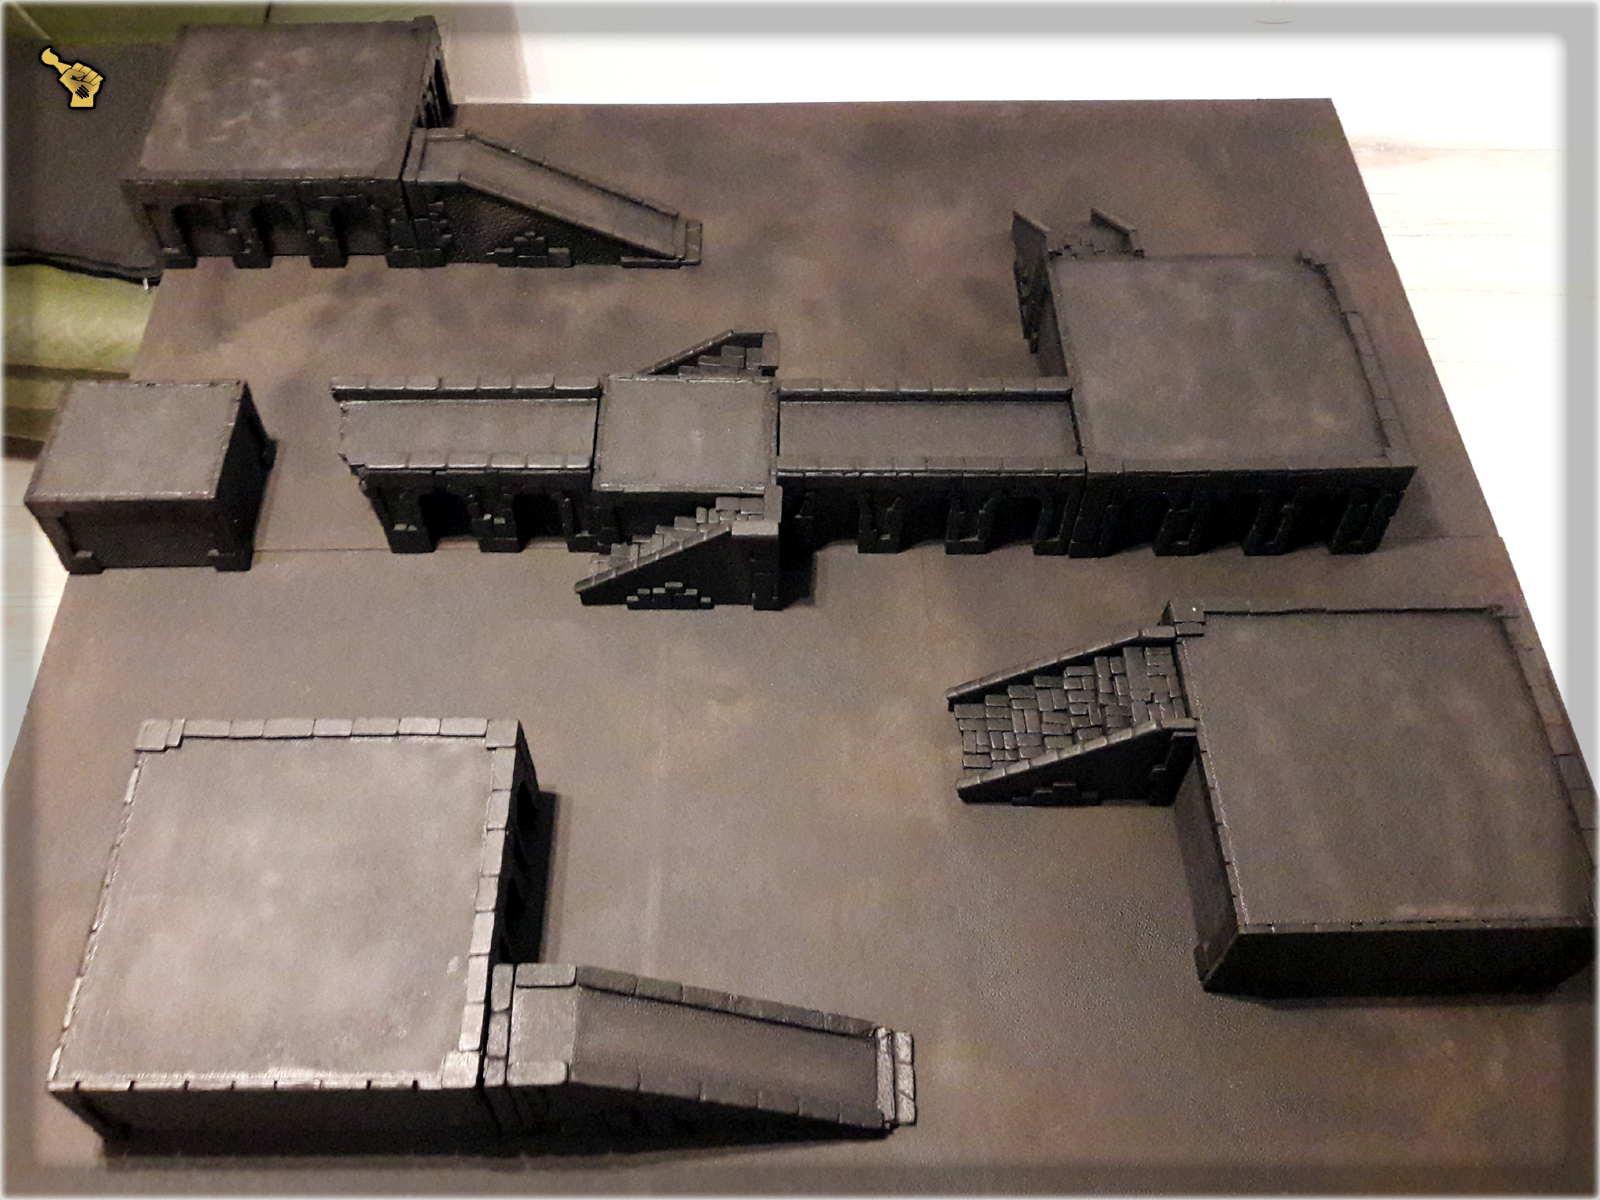
As with most terrain projects, I started by preparing a simple visualisation of how much space the foundations will take up on the gaming board. By ‘the foundations’ I mean simple terrain pieces that will take up most space, creating different levels on the gaming board. In case of “The Colony” gaming board these would be buildings, but this time I’ve decided to use urban hills for the job. This was just a formality, but as usual I wanted to be prepared for what’s to come…
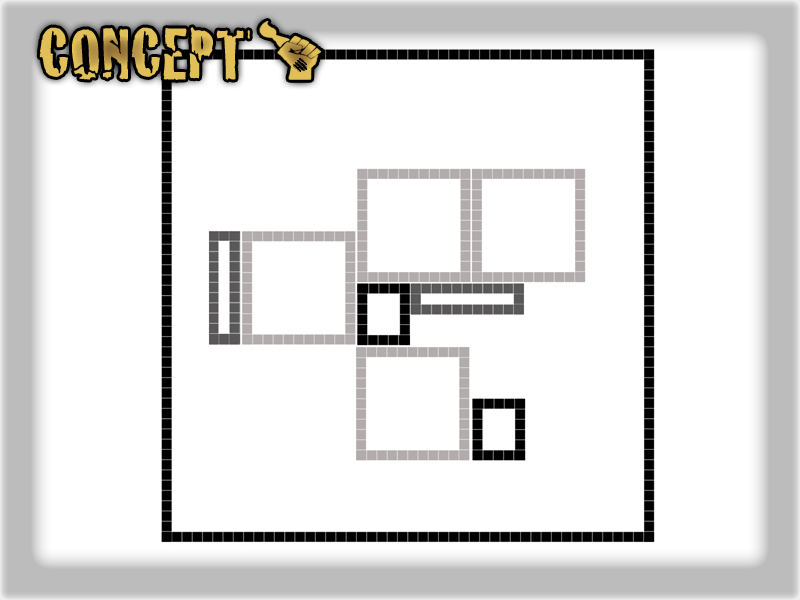
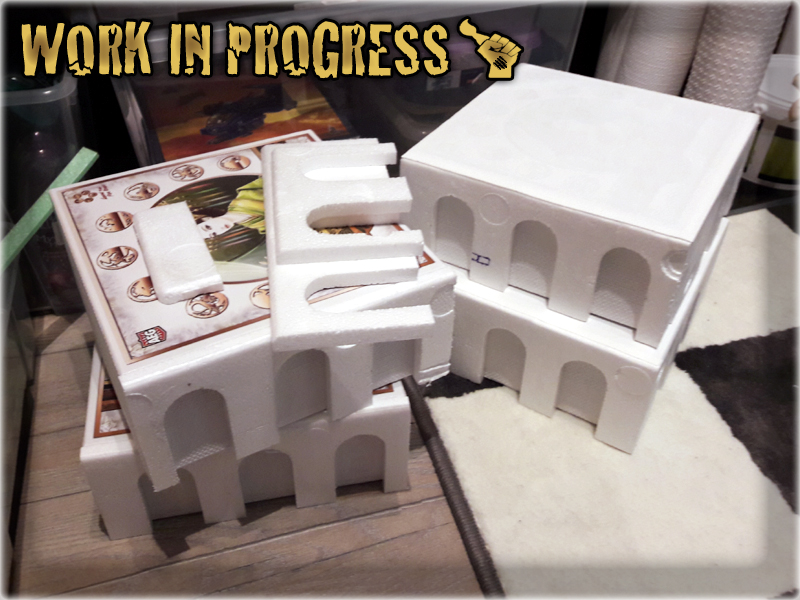
The base concept was to create four urban hills, that might be combined in many different ways to create a large elevated space, or set up individually. Along with these, two small urban hills and two platforms were to be made. While small hills might be used for shape diversity and to link the bigger ones, platforms were to provide easy access to elevated positions on the map…
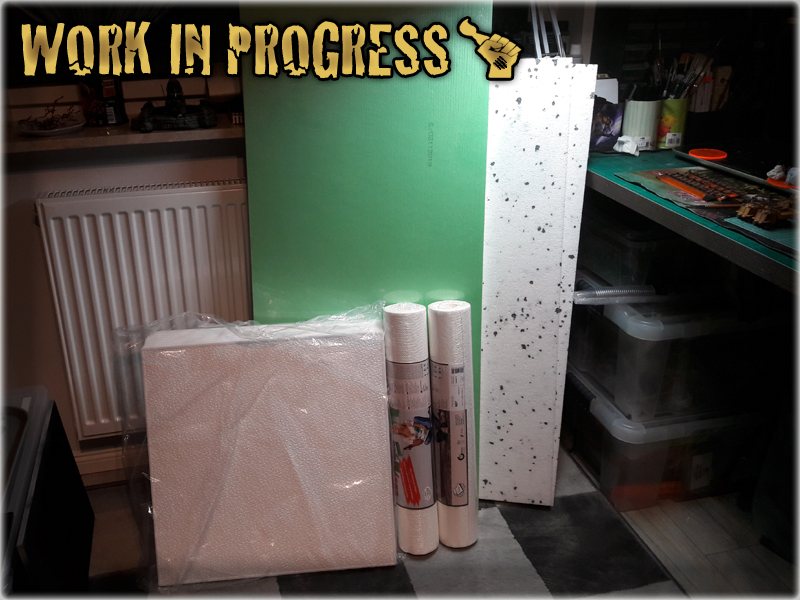
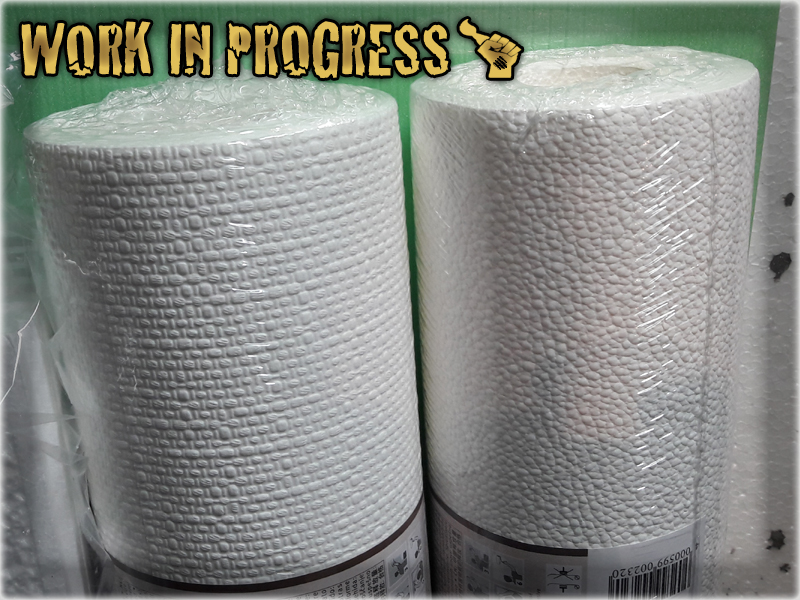
One of the most important things in terrain building is choosing the right materials. Let’s say that I wanted to provide a lot of texture and detail, keeping gaming board/scenery durable, easy to setup and easy to transport (Not to mention – wallet friendly), at the same time. Plaster was obviously a bad choice as it’s heavy and tends to get damaged all the time. Personally I try to avoid it. Any type of Resin or Hardfoam might do but these are extremely expensive and in case of a project on such a scale, they would require professional equipment to be fully implemented. So I decided to go for styrofoam for base shapes and wallpaper for texture. I personally hate light terrain pieces, that tend to fly all over the table, but in this case – solid buildings could keep the rest pinned to the table, thus following all the assumptions of my initial idea at the same time.
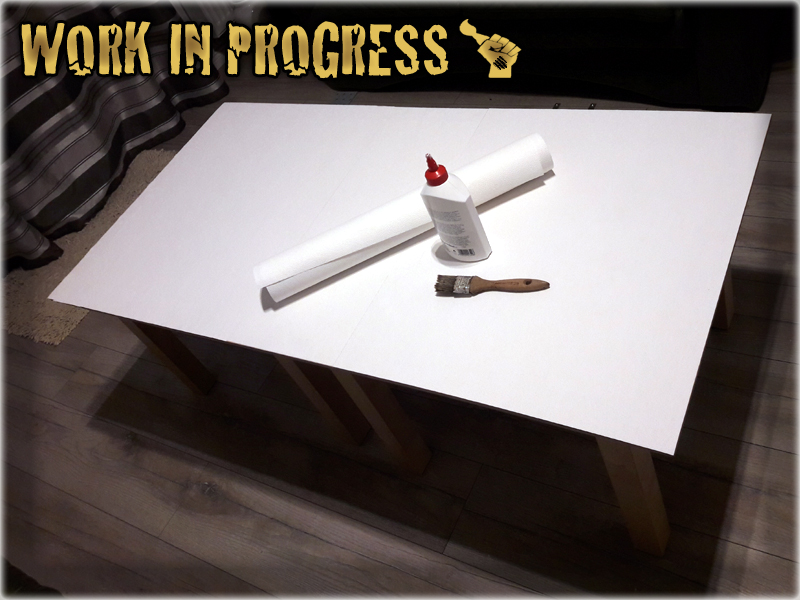
I had all the materials needed along with the concept. The only thing left was to start working on the project. I started with the most simple task – preparing a ‘cobblestone’ gameboard. It took like half an hour with me just applying a lot of basing glue onto the board and then cutting large pieces of wallpaper to be gluedon top of the board. The picture looks nothing special, but once painted – small cobblestone could be seen all over the game board…
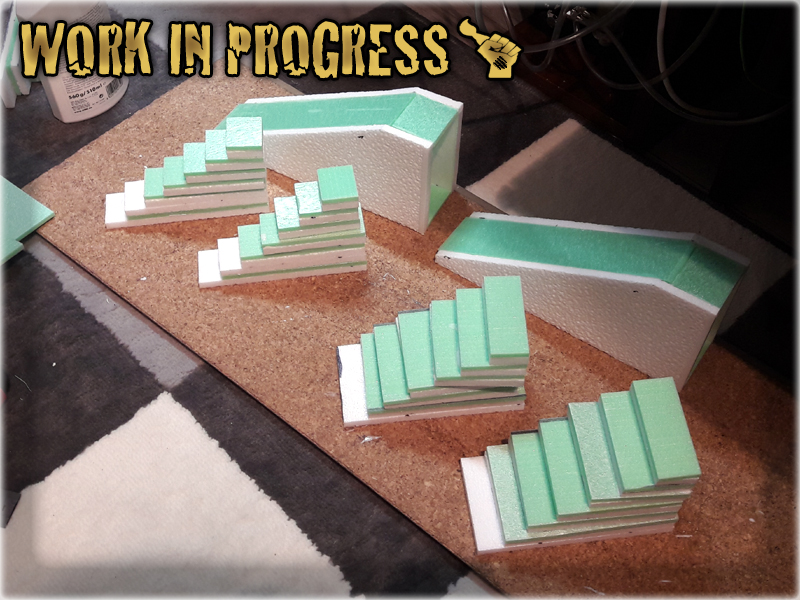
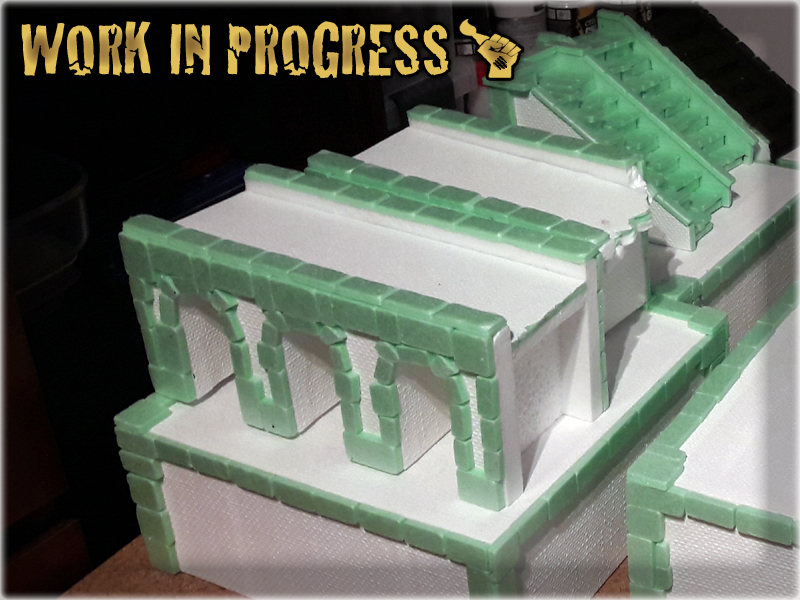
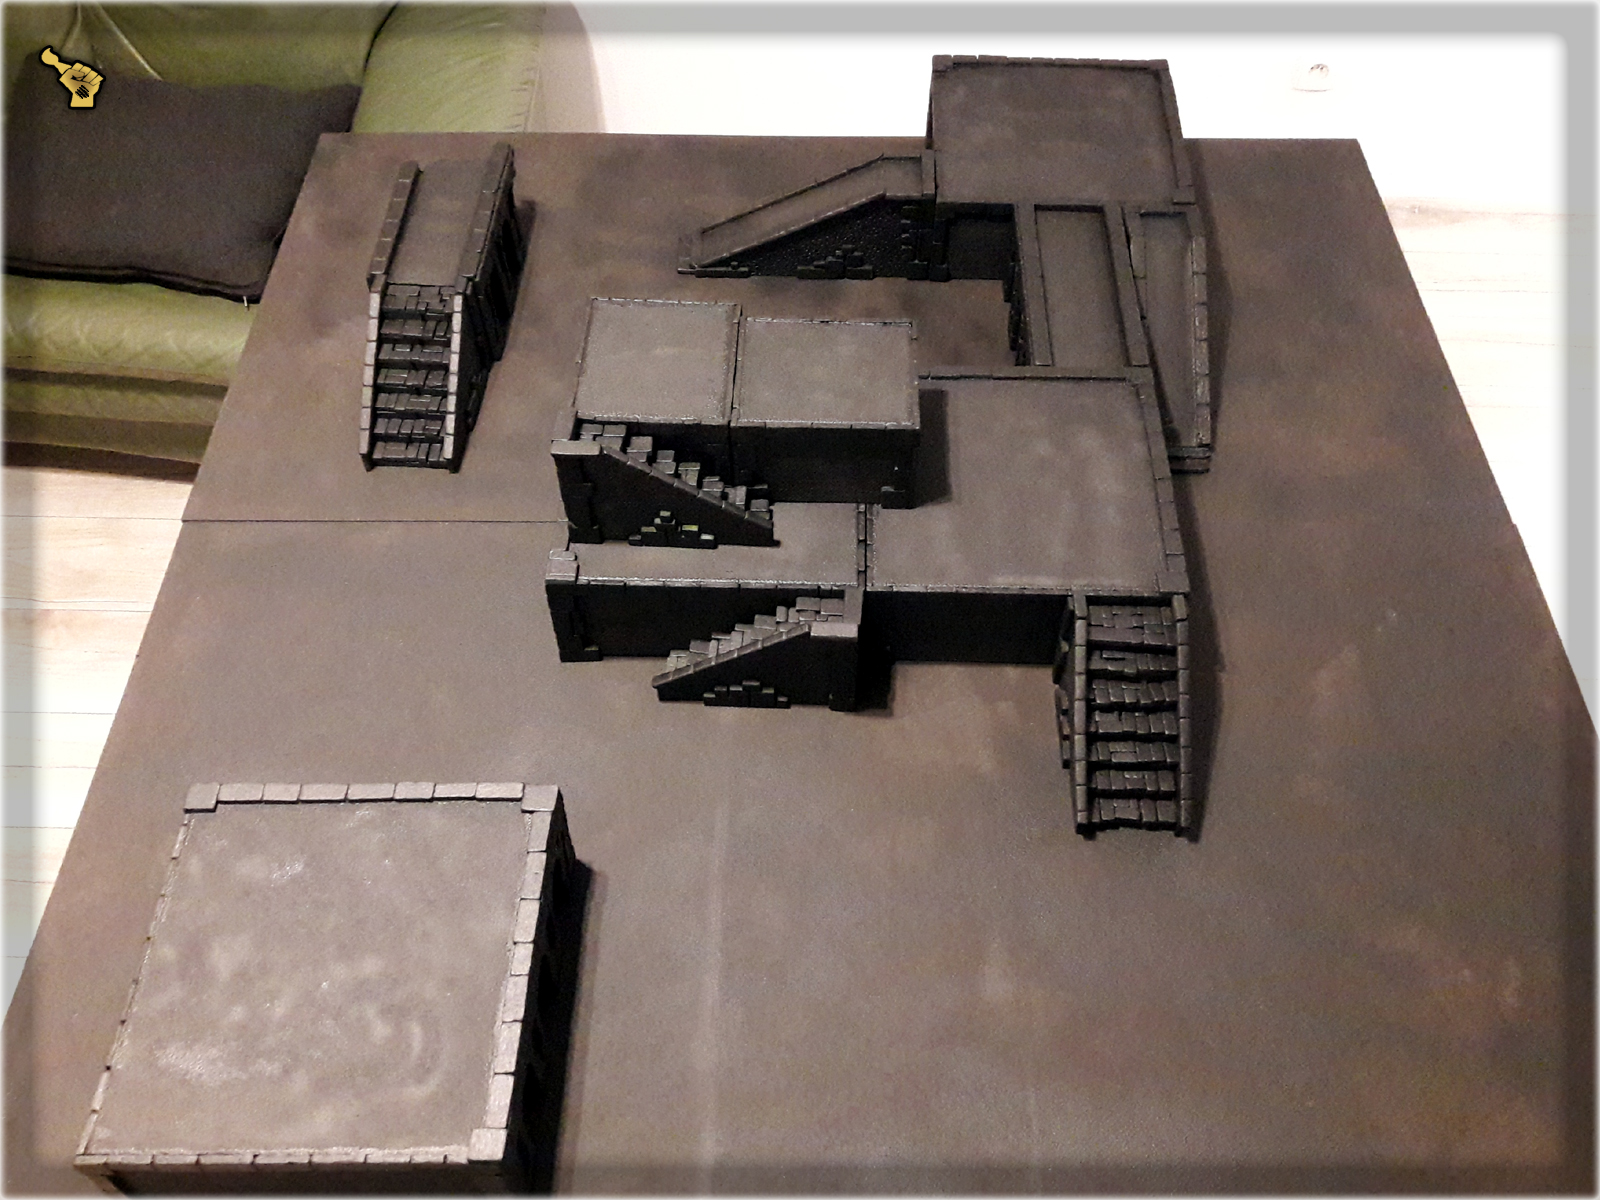
As soon as I took on the platforms, an idea of additional items appeared. Having in mind that the upper level should be rather accessible for all the miniatures I added four sets of stairs to the fold. Started with base shape cut out of rough pieces of styrofoam, then added texture on the sides to finally cover certain places with handmade stones. The stones (or just ‘huge bricks’) were made by cutting the base rectangular shape out of styrofoam and then rolling droves of these in my hands so that all the hard angles became nicely rounded.
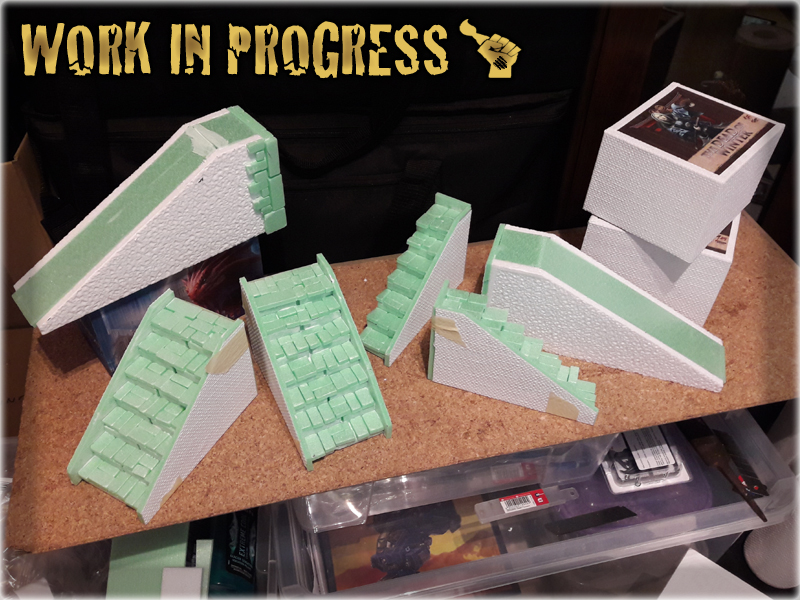
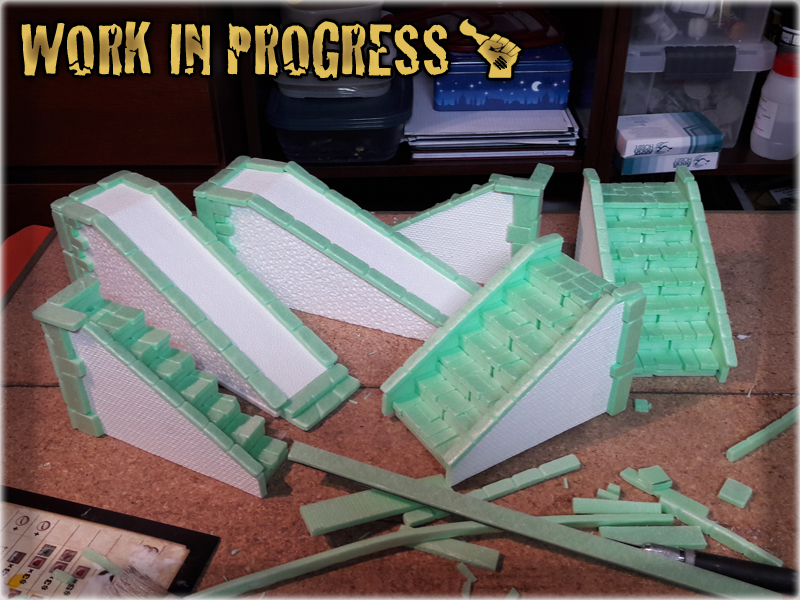

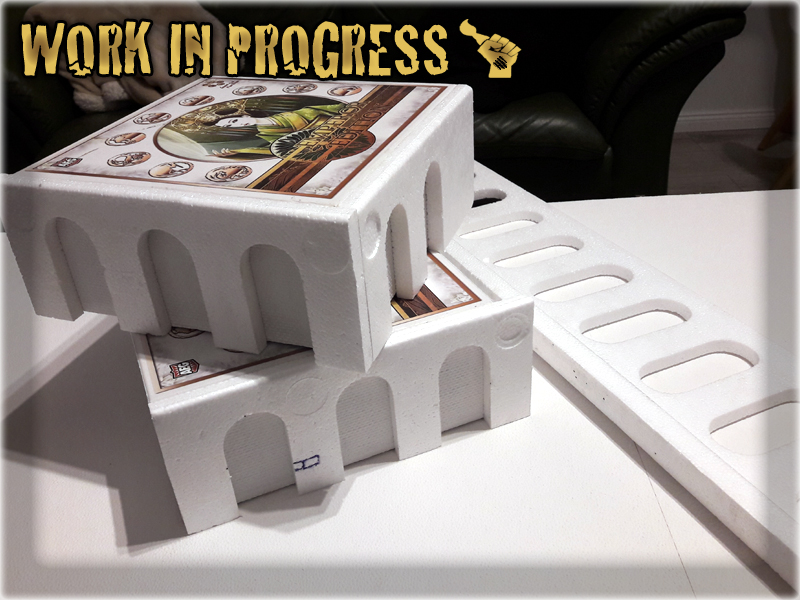
Along with all the platforms and stairways I also prepared a set of urban hills. I used ‘Legend of the five rings ccg’ boxes to gain access to base shapes of a similar height. The best method to texturise them was to cover entirety of them with glue and then use wallpaper all over it. Once glue dried out I added styrofoam pieces cut out of the fridge protecting casing ( I like to keep such stuff in case it’ll come in handy – and guess what – it did…). Just like with stairs and platforms, I texturized urban hills with styrofoam bricks/blocks of stone.
Usually at this point I would have spent a lot of time correcting small imperfections, but I’ve figured out to cover them with a finishing touch of fake autumn leaves, once the paint job is done. This way I wanted to strengthen the mood of the entire table while having all the small holes and defects covered.


One of the things I usually mess up aree bridges. Up to now I can’t recall any of these that would actually turn out to look good. Having excess materials I decided to give it a try, this time though I used the same concept as in case of urban hills. I tweaked the design a little to better suit the gaming board and added two short bridges to the set.
Once undercoated I set up couple of different battlefields to take proper pictures. I was able to confront the idea of a modular table with what I’ve created. Checked out different layouts but also made mental notes of what and how many buildings I would require in the future…
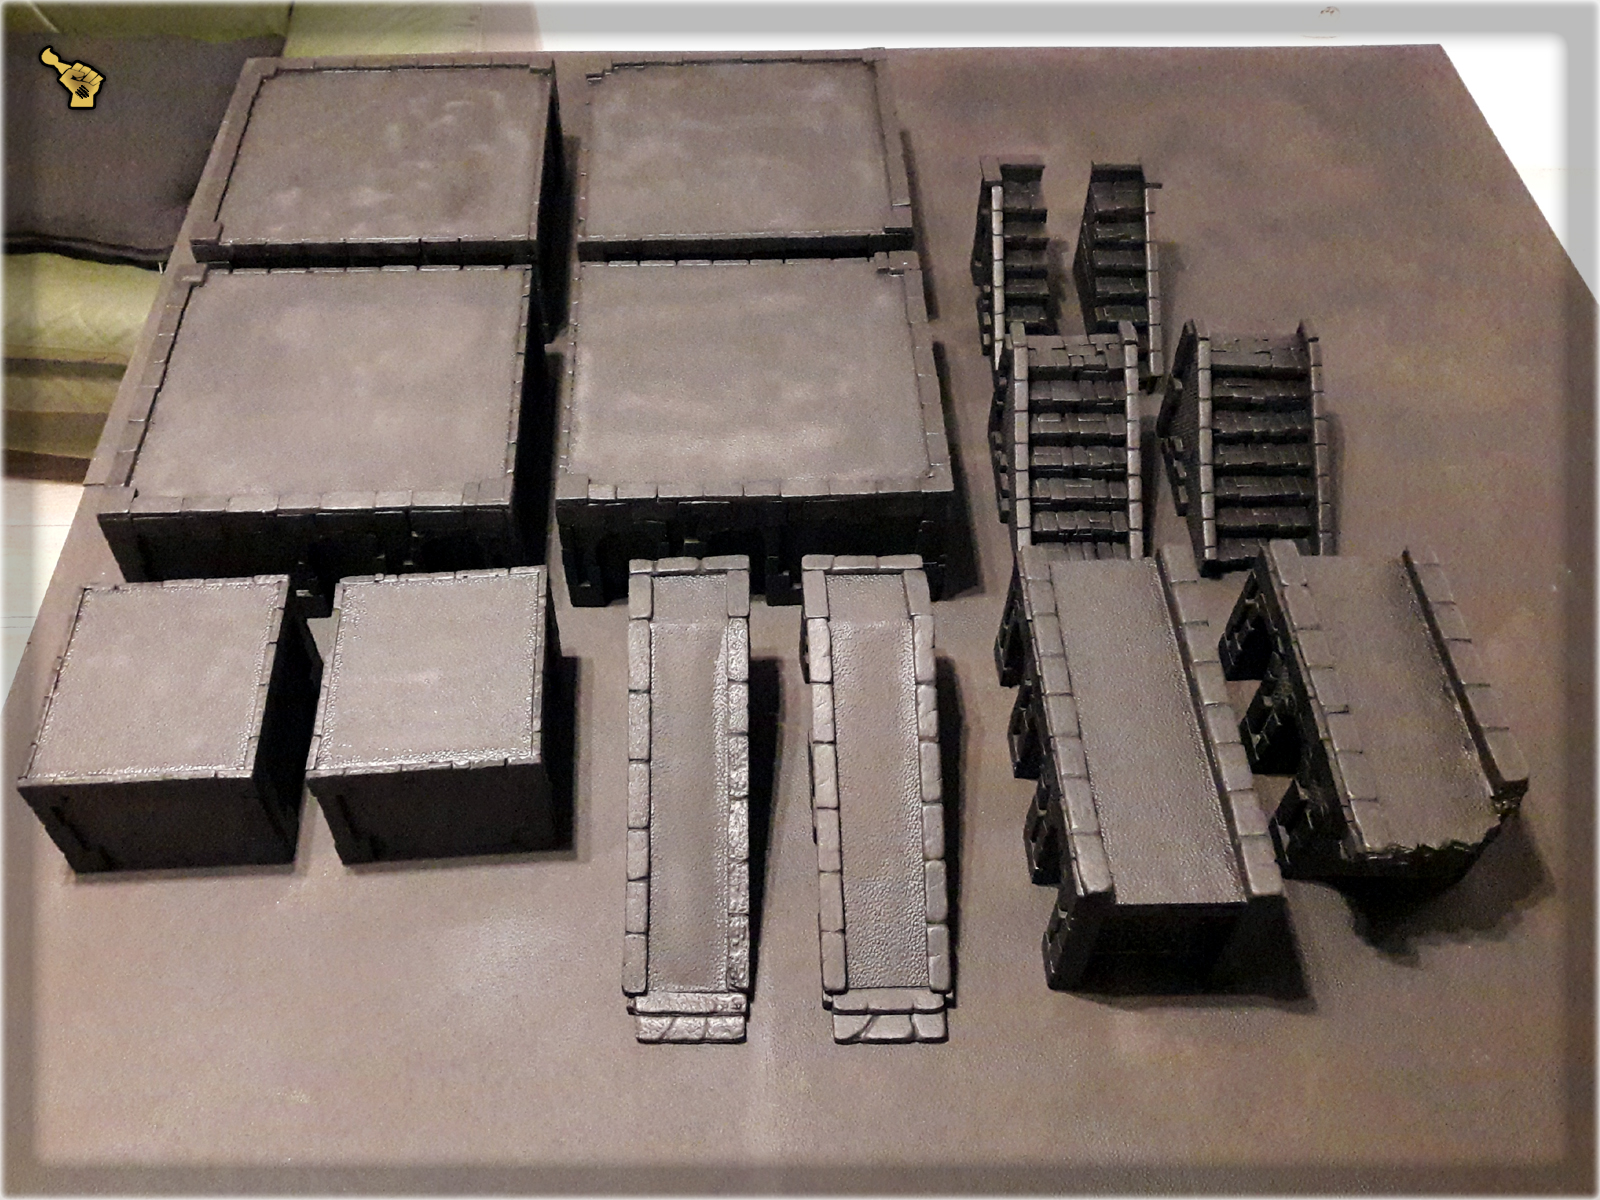
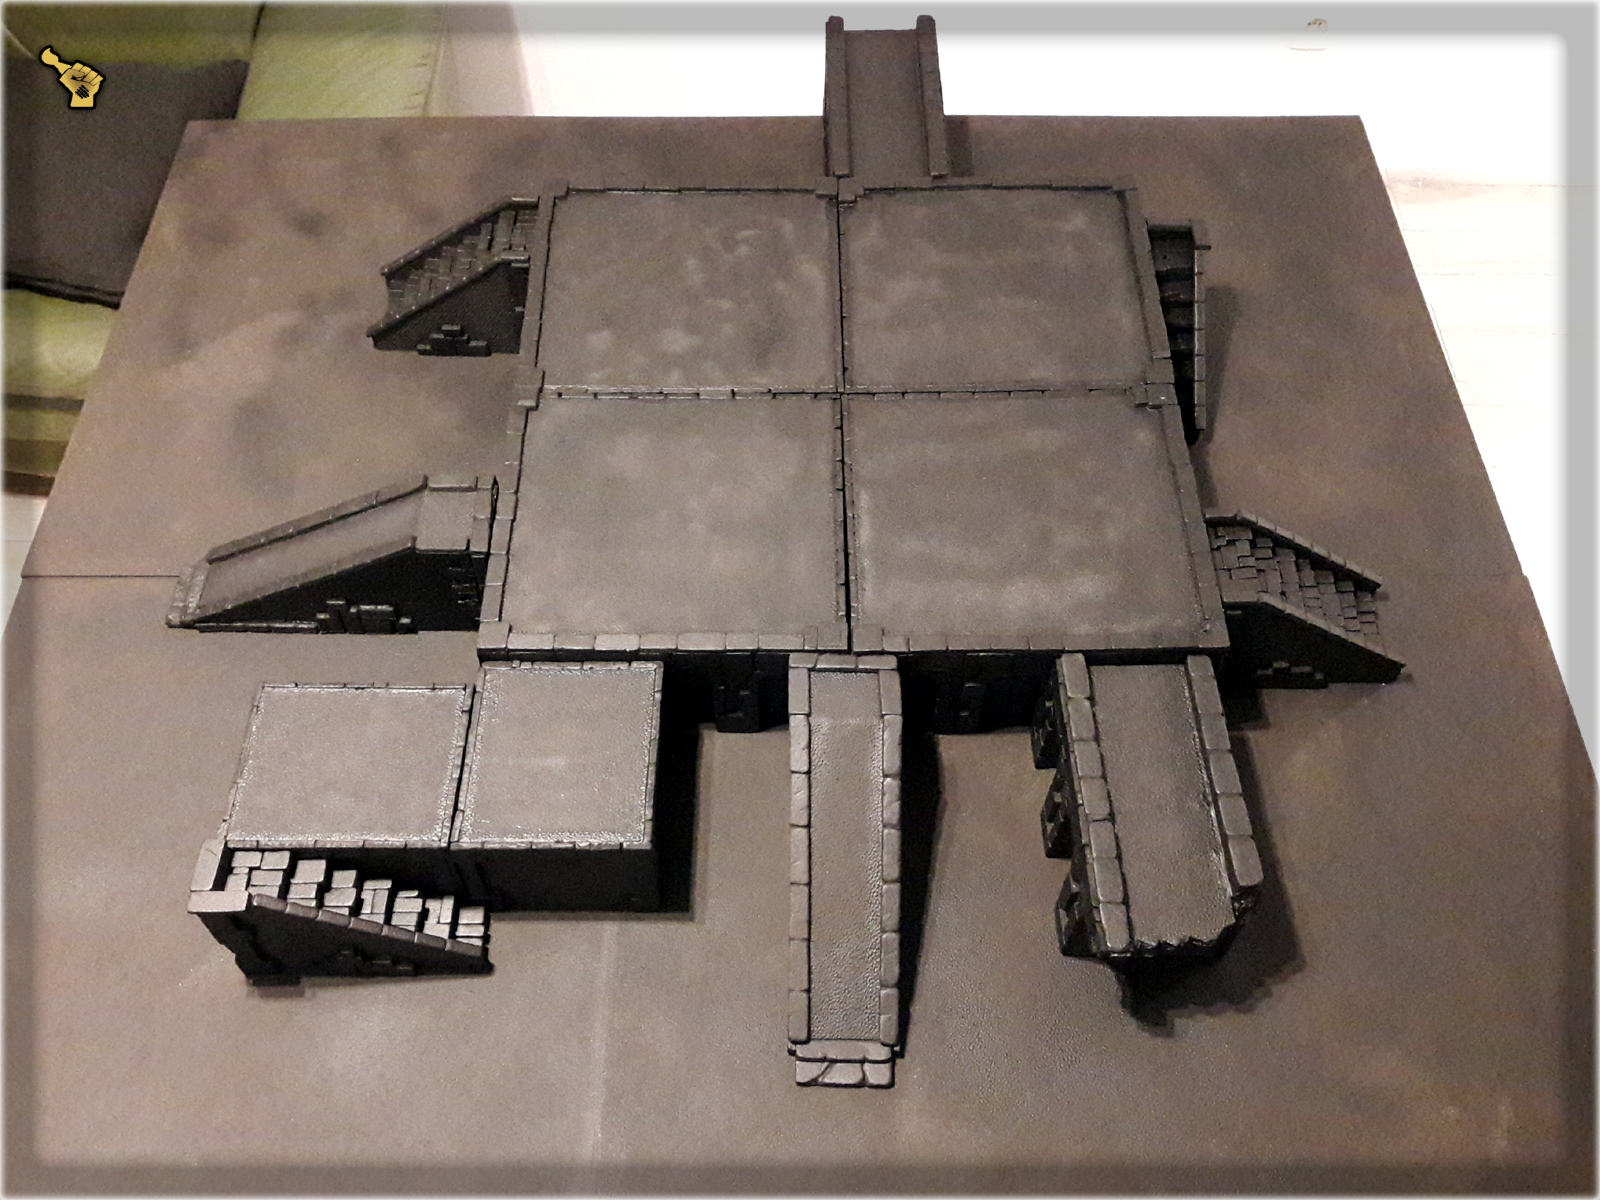
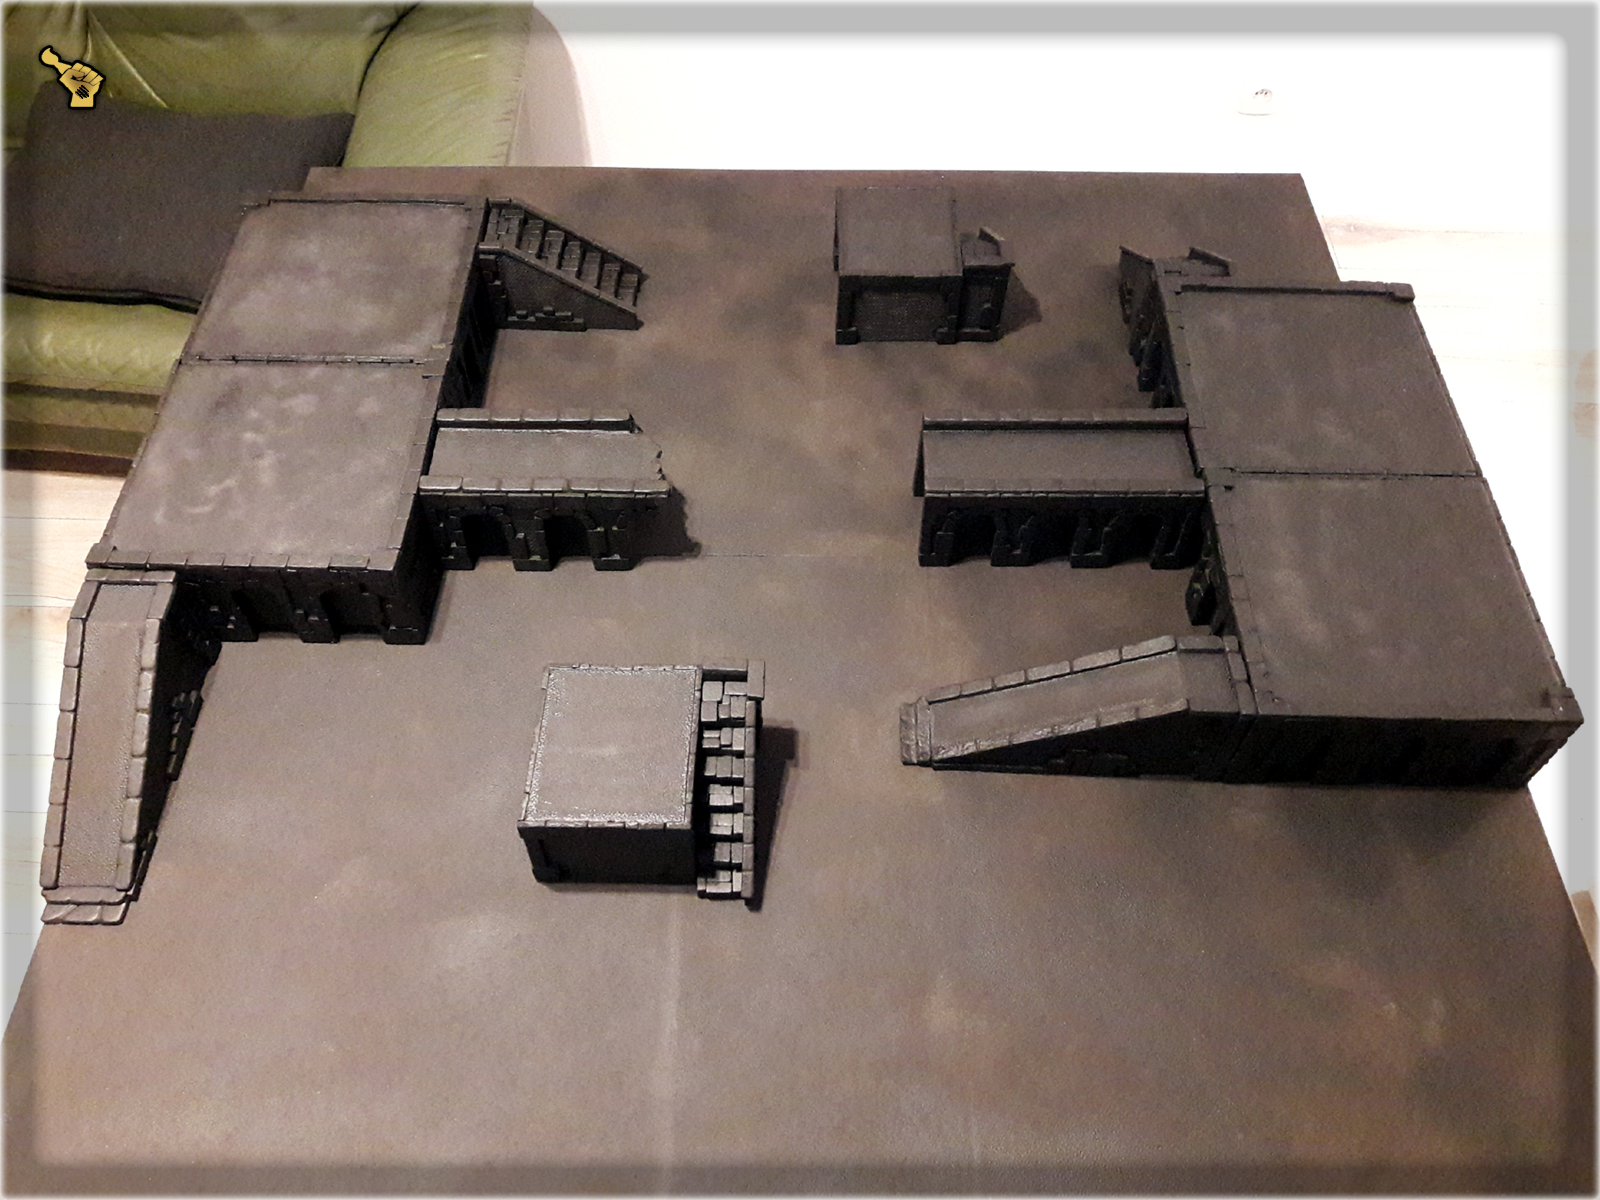
Paint job followed soon after. I used entire 200ml of Vallejo Black Surface Primer mixedwith gray and white to provide different layers of both wet paint job and drybrush. After that I also edged all corner stones with GW’s Pale Wych Flesh and added some extras in form of broken skulls, torches and Wyrdstone Shards. I also covered some spots with Autumn Leaves made out of Birch-tree seeds. This set a strong, dark mood to the scenery and comboed nicely with already painted ‘Toad Fountain’ and ‘Dead Tree’ pieces…
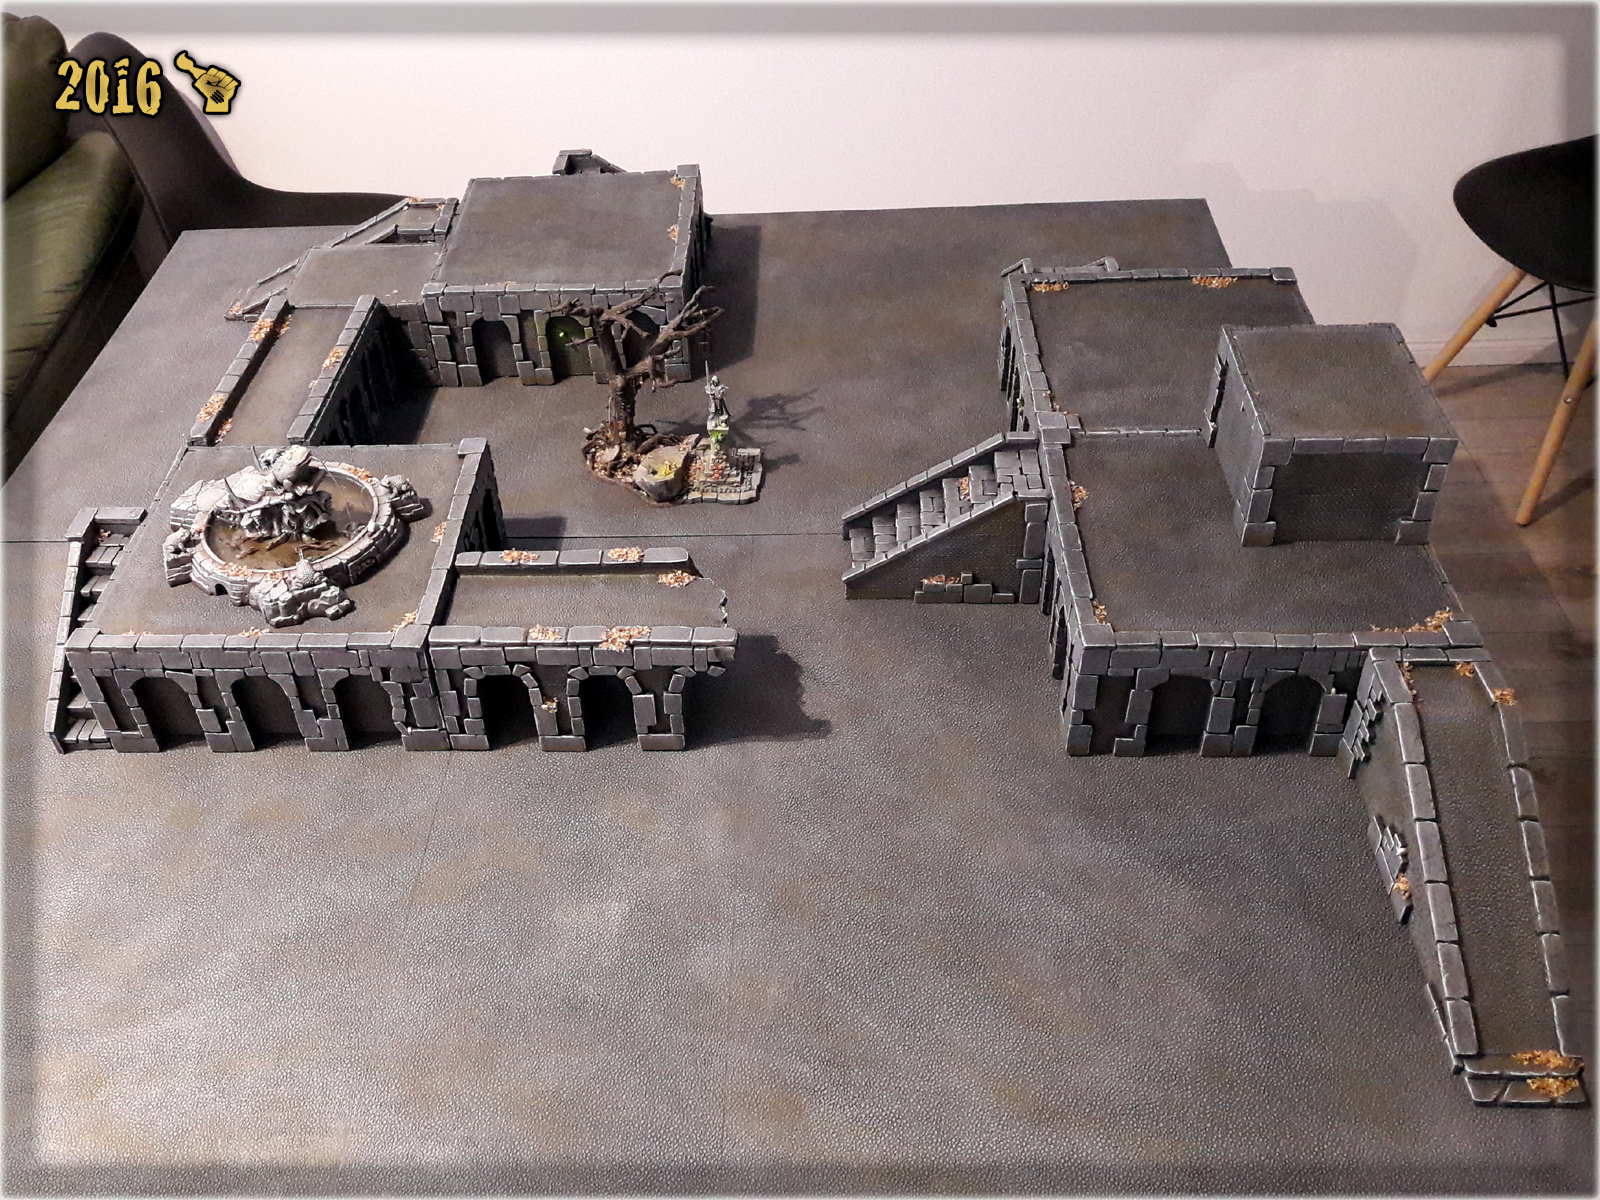
More than happy with the visual results I put the project on hold until end of the year in hope to get back to it with some cool looking buildings later on. We’ll see how it goes once 2017th hits the callendar…
Last weeks I’ve been diverting more and more attention to Mordheim. Maybe that’s because I’ve been playing PC version lately. Either way, every couple of years I get that ‘Mordheim fever’ and delve deep into my imagination, staying up whole nights, making something cool for my own Mordheim collection. Right now I work on a brand new Mordheim gaming board thus I figured out to revive an old Tutorial from Mordheim Treasure Hunters blog and add it to the collection here at Scarhandpainting. More articles are already prepared, but I somehow felt like this one will be a nice way to close the 2016th.
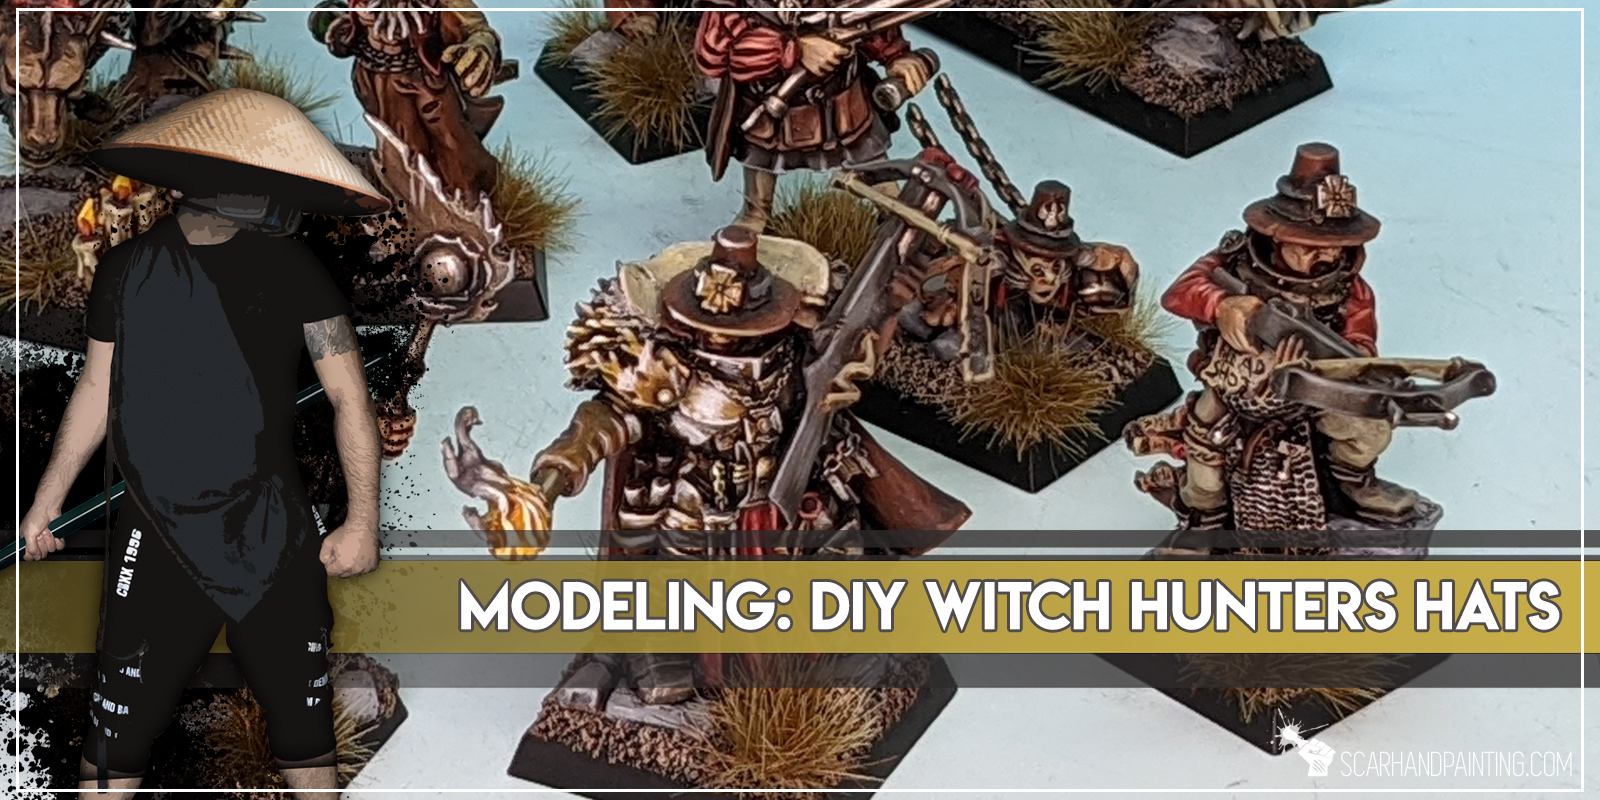
Below I will show you a quick way of making a Witch Hunter’s Hat with basic tools, some green stuff and some plastic leftovers. The thing about Witch Hunter’s Hats is that they are extremely rare and yet they look just awesome. A lot of miniatures can be reborn as proper Witch Hunters just by adding this small detail. So, here’s how I do it:
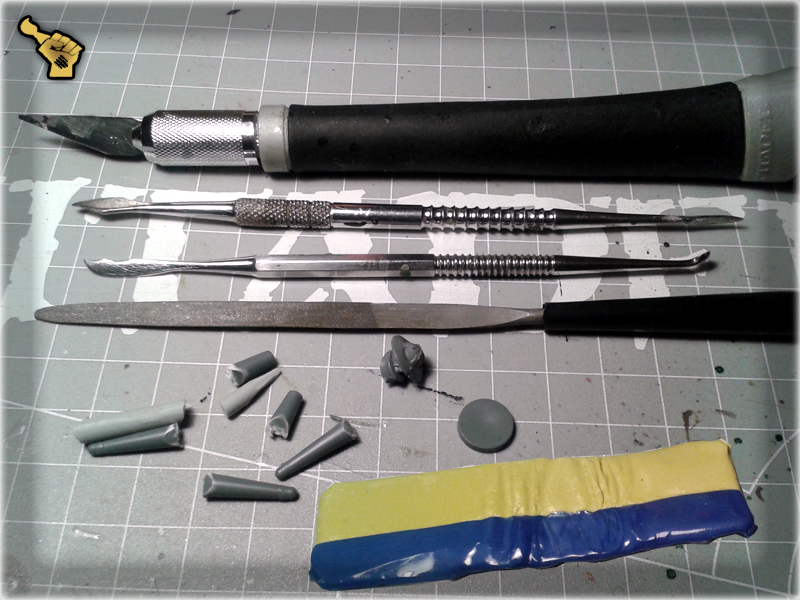
* Modelling Knife,
* Sculpting Tools,
* Modellin File,
* Green Stuff,
* Super Glue,
* Some round and flat plastic bitz (heads in helmets will do too),
* Some tubular sprue plastic bitz (easy to get as they’re in almost every sprue),
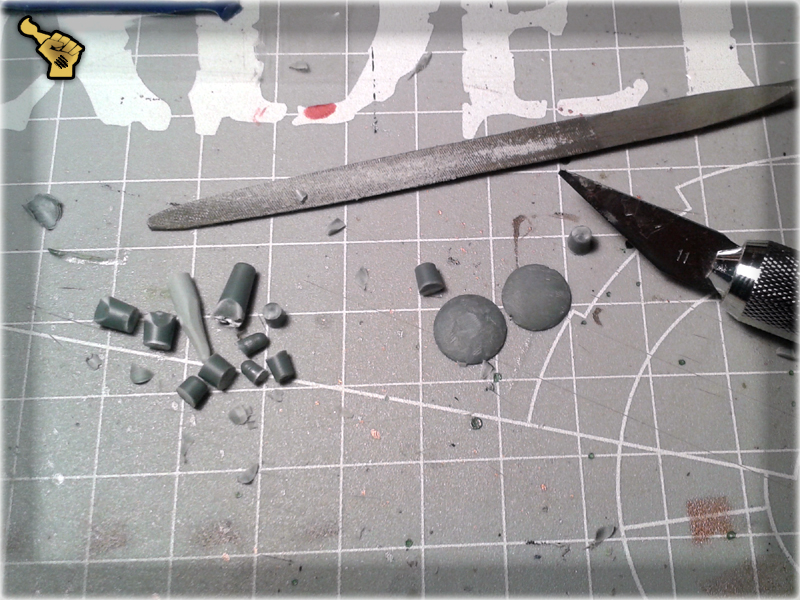
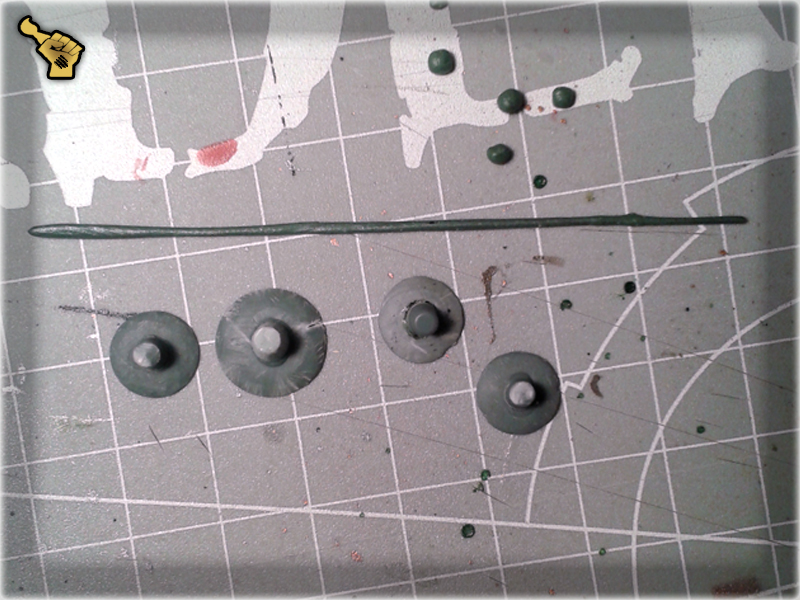
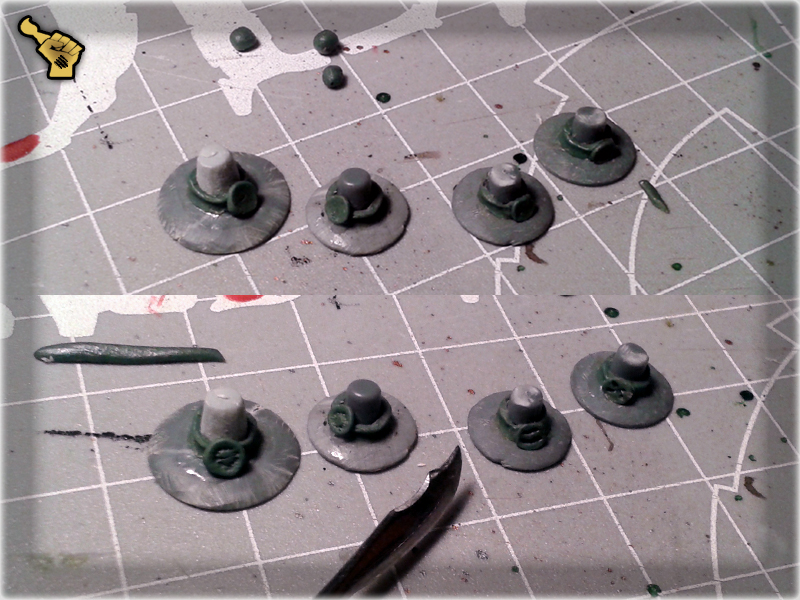
1 I started with preparation of hat parts. For this purpose I used round shaped plastic bitz, cutting off the excess of plastic with Modelling Knife first, then flattening the top area with a Modelling File. Next I used a Modelling Knife to cut tubular sprue bitz into nice hat top pieces. This is how it should look like when done:
2 I then glued the pieces together, prepared a piece of Green Stuff and rolled it into a thin line. I also cut small pieces of Green Stuff loose and rolled them into small balls.
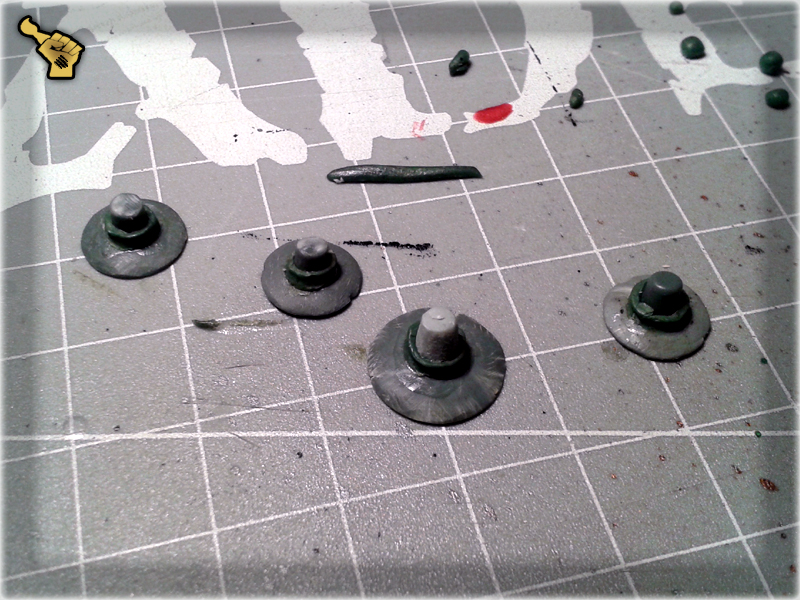
3 I applied some Super Glue around the connection between hat's top and brim. I then applied a Green Stuff rolled piece onto the glue and flattened it with a Sculpting Tool modelling it into a strap. For this purpose I used a rounded part just behind the tip of a Sculpting Tool.
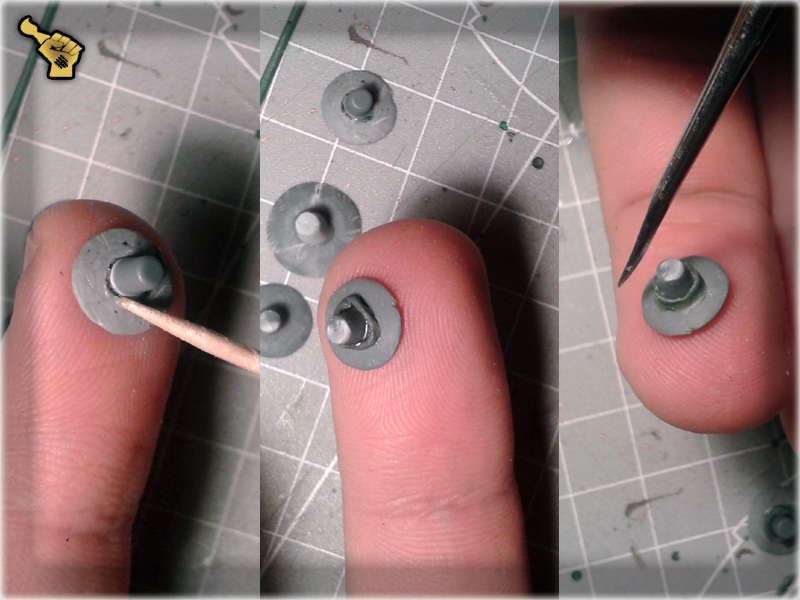
4 I smoothed the texture of starps using a Sculpting Tool dipped in water. I then left the hats to dry.
5 Once the Green Stuff dried out I applied Super Glue onto a piece of plastic, sticked a Green Stuff ball onto the tip of a Sculpting Tool, gently dipped it in the glue and applied it to a hat's strip. I also flattened the ball with the other (rounded) end of a Sculpting Tool thus creating a clasp.
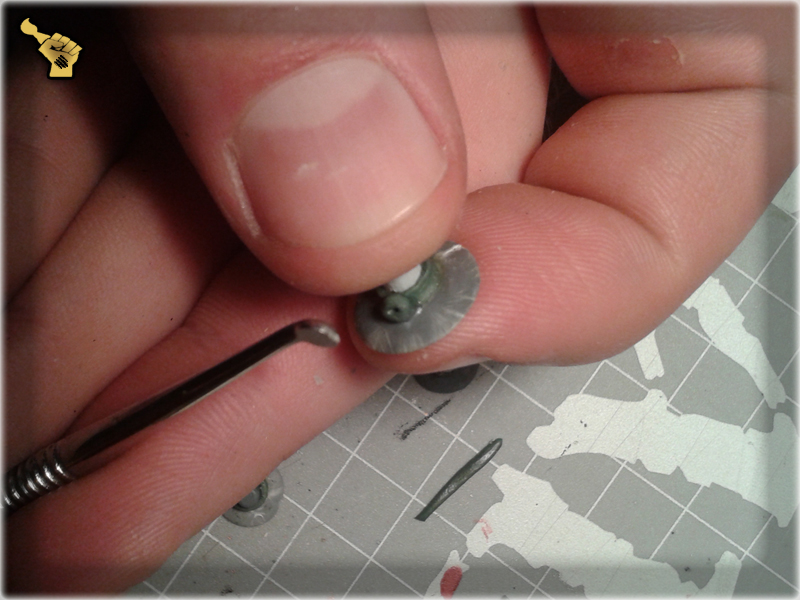
6 In the end I modelled a pattern on each clasp with the sharp tip of a Sculpting Tool. Once it was done I let the Green Stuff to dry out. Instead of modelling a clasp yourself, you can use any well sized bitz or even a piece of plastic. Actually anything fitting the hat's strap will do.
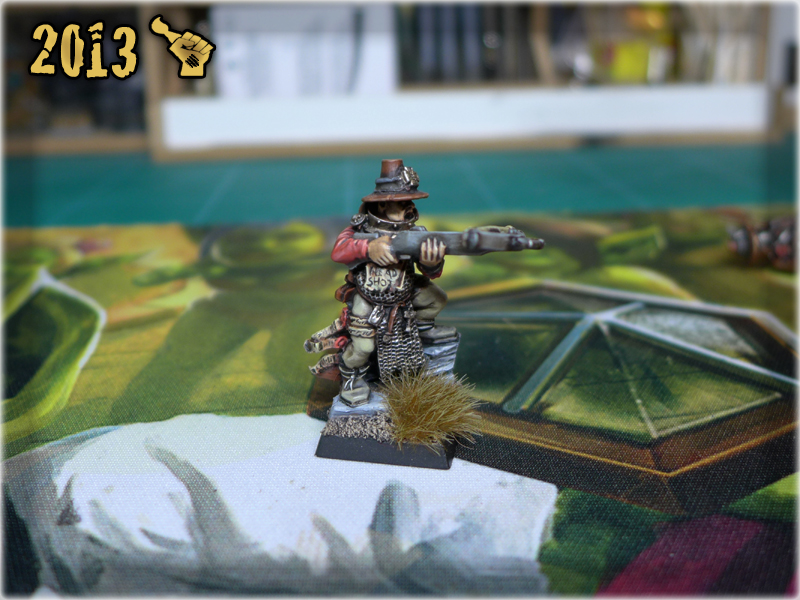
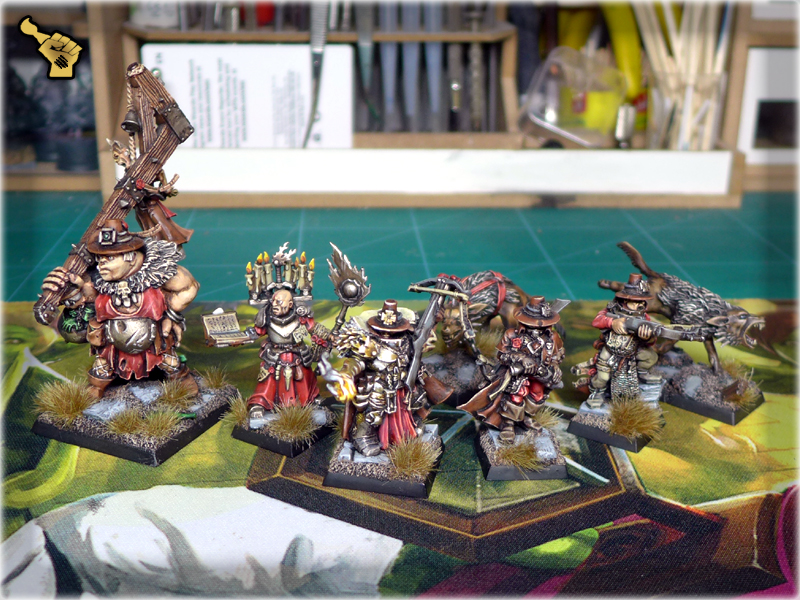
The final effect may not be outstanding but it will do the job of transforming your Imperial Mercenary, or any other miniature into a badass Witch Hunter. See for yourself in the Warband: ‘Scourge of the Witches’ gallery. Here’s a preview pic:
I hope you like the tutorial. It is an old piece but I really wanted to have it here at Scarhandpainting.