- contact@scarhandpainting.com


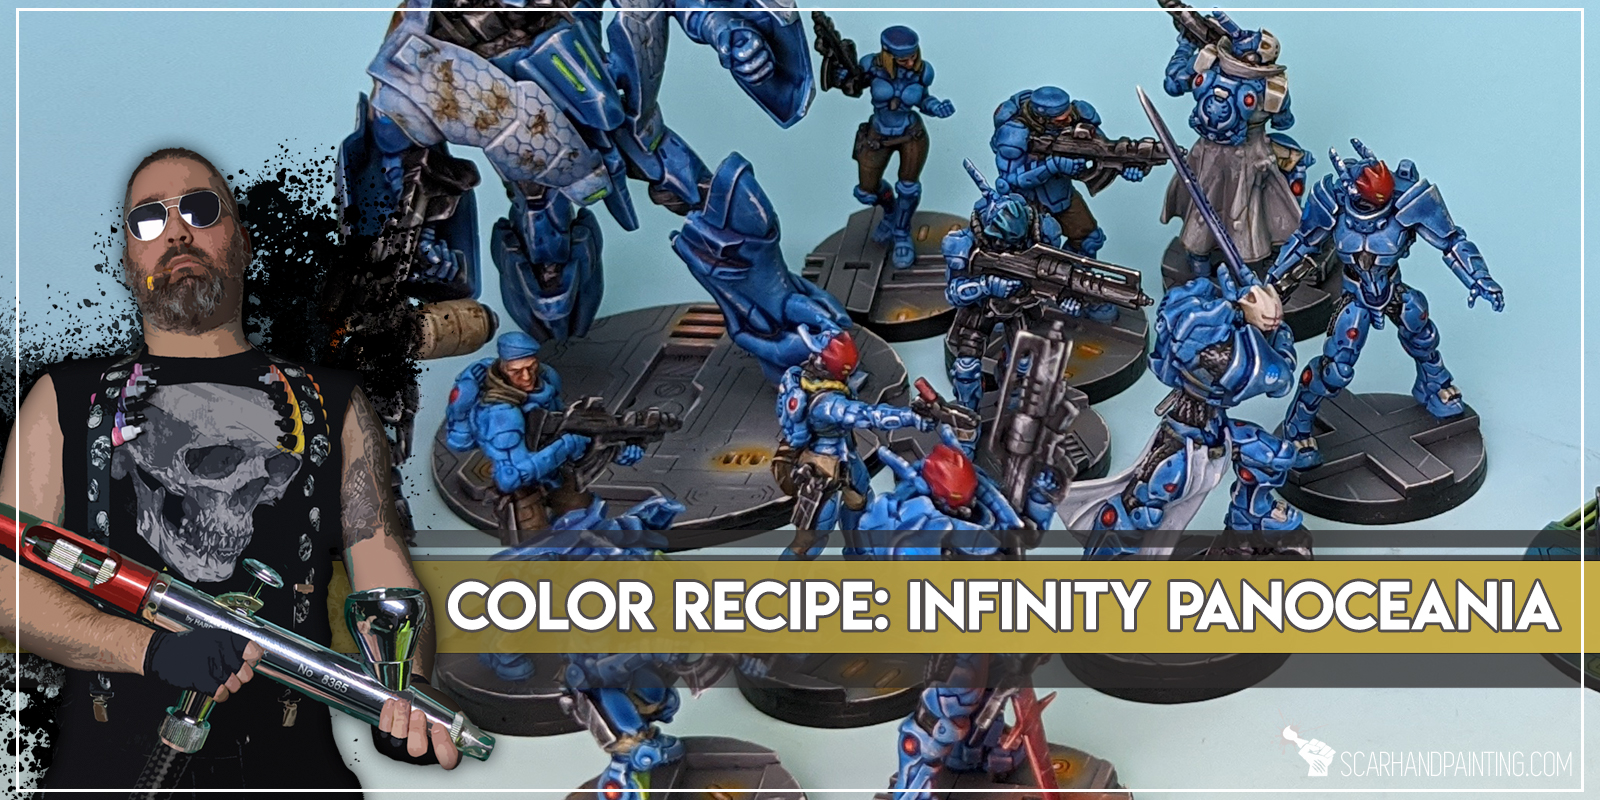
Here are some Colour Recipes for Infinity Panoceania from GALLERY: INFINITY NEOTERRA lvl 5. Please take note that this is a simple colour scheme, not covering multiple overlapping layers and blends inbetween, that lead to the final product. It is supposed to be used as guidline not a step-by-step.
BLUE armour:
Black Undercoat,
French Blue (VAL),*
Light Sea Blue (Val),*
Mix Light Sea Blue (Val) 8:3 White,*
Mix Guilliman blue (GW) 1:1:1 Blue Tone Ink (AP), Lahmian Medium (GW),
Pale Wych Flesh (GW) l&p,
Light Sea Blue (Val) glaze,
White glaze & l&p,
Black Wash (Val) deep lining,
CREME/BROWN clothes:
Karak Stone (GW),
Flayed One Flesh (GW),
Flayed One Flesh (GW),
Mix Strong Tone Ink (AP) 1:1:1 Soft Tone Ink (AP), Lahmian Medium (GW),
Flayed One Flesh (GW) l&p
Mix Flayed One Flesh (GW) 1:1 Pale Wych Flesh (GW) l&p,
Dark Brown Wash (Val) deep lining,
SKIN:
Bugmans Glow (GW),
Dwarf Flesh (GW),
Mix Dwarf Flesh (GW) 1:1 Elf Skintone (Val),
Elf Skintone (Val) l&p,
Mix Strong Tone Ink (AP) 1:1 Soft Tone Ink (AP),
Flesh (Val) l&p,
RED helmets:
Sanguine Base (P3),
Mephiston Red (GW),
Evil Sunz Scarlet (GW),
Red Tone Ink (AP),
Bloodletter (GW) glaze points,
Troll Slayer Orange (GW) l&p,
Lugganath Orange (GW) l&p,
RED lights:
Evil Sunz Scarlet (GW),
Troll Slayer Orange (GW),
Lugganath Orange (GW) p,
Pale Wych Flesh (GW) p,
Bloodletter (GW),
Lugganath Orange (GW) p,

BASES:
Administratum Grey (GW),
/ Skeleton Bone (AP),
Mix Skeleton Bone (AP) 1:1 Pale Wych Flesh (GW),
/Frostbite (P3) drbr,
l&p – lines and points,
p – points,
drbr – drybrush,
*Airbrushed (with multiple layers and mixes)
Here are some Colour Recipes for Infinity ALEPH from GALLERY: INFINITY ALEPH lvl 4,5. Please take note that this is a simple colour scheme, not covering multiple overlapping layers and blends inbetween, that lead to the final product. It is supposed to be used as guidline not a step-by-step.

TURQUISE armour:
Black Undercoat,
Coal Black (P3),
Hydra Turquise (AP),
Mix Hydra Turquise (AP) 5:1 Pale Wych Flesh (GW) l&p,
Mix Hydra Turquise (AP) 1:5 Pale Wych Flesh (GW) l&p,
Coelia Greenshade (GW),
Pale Wych Flesh (GW) l&p,
DARK clothes:
Black Undercoat,
Dark Sea Grey (Val)*,
Barley Grey (Val)*,
Dark Sea Grey (Val)*,
Wolf Grey (Val)*,
Pale Wych Flesh (GW) l&p,
Dark Tone Ink (AP),
…DEEP dark effect:
Pale Wych Flesh (GW) l&p,
Dark Tone Ink (AP),
…BROWN clothes:
Dirt (Val),
Mix Strong Tone Ink (AP) 1:1 Soft Tone Ink (AP),
Off White (Val) l&p,

SKIN:
Bugmans Glow (GW),
Dwarf Flesh (GW),
Elf Skintone (Val),
Mix Strong Tone Ink (AP) 1:1 Soft Tone Ink (AP),
Flesh (Val) l&p,
GREEN OLS:
Sick Green (Val),
Mix Sick Green (Val) 1:1 Off White (Val),
Mix Sick Green (Val) 1:2 Off White (Val) l&p,
Light Livery Green (Val)*,
Waywatcher Green (GW),
Off White (Val) l&p,

l&p – lines and points,
*Airbrushed (with multiple layers and mixes)
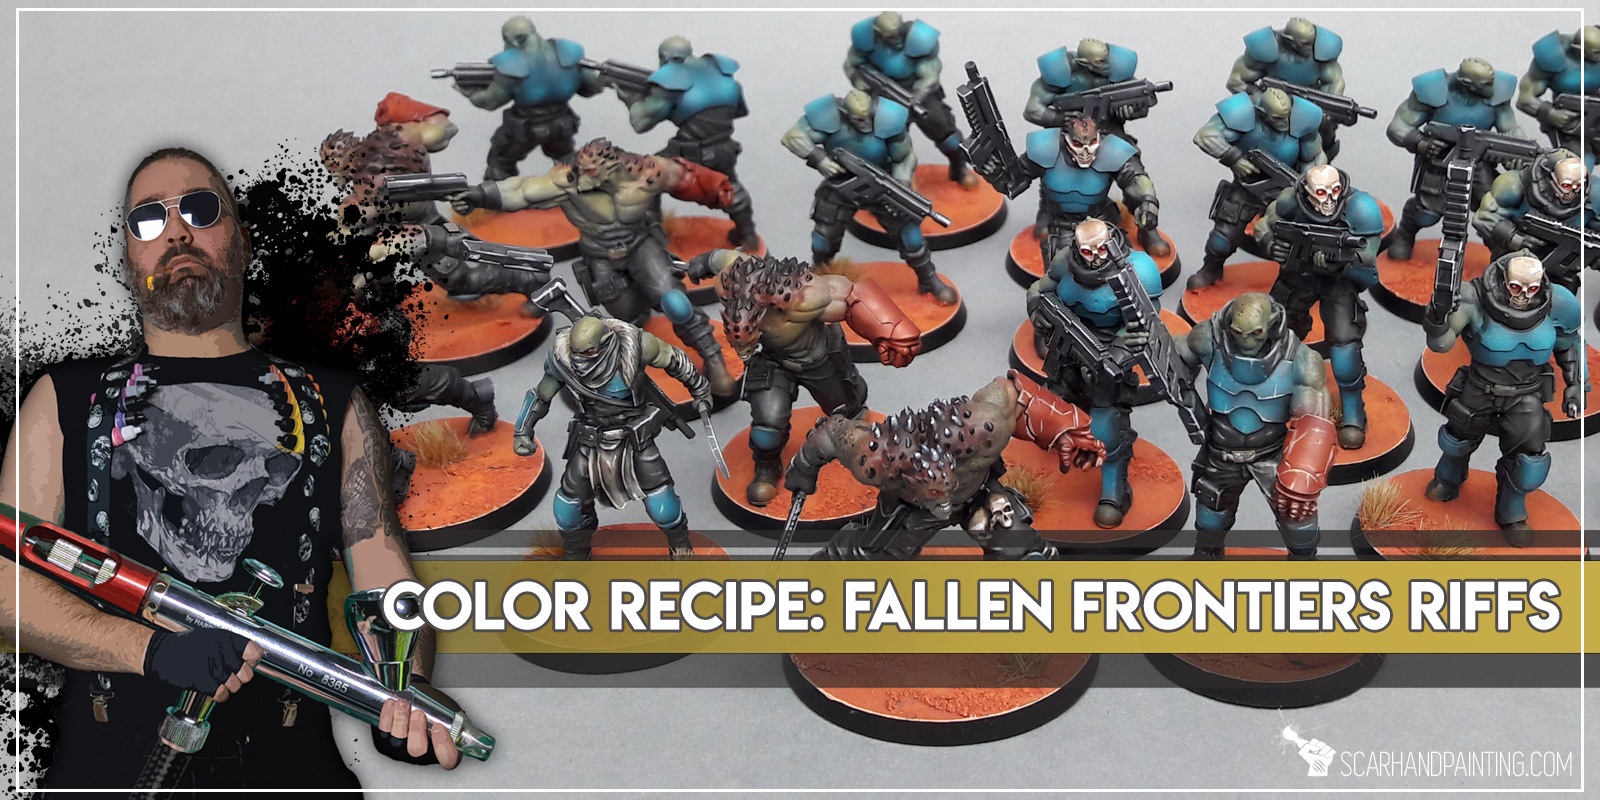
Here are some Colour Recipes for Fallen Frontiers Riffs from GALLERY: FALLEN FRONTIERS RIFFS lvl 3-4. Please take note that this is a simple colour scheme, not covering multiple overlapping layers and blends inbetween, that lead to the final product. It is supposed to be used as guidline not a step-by-step.
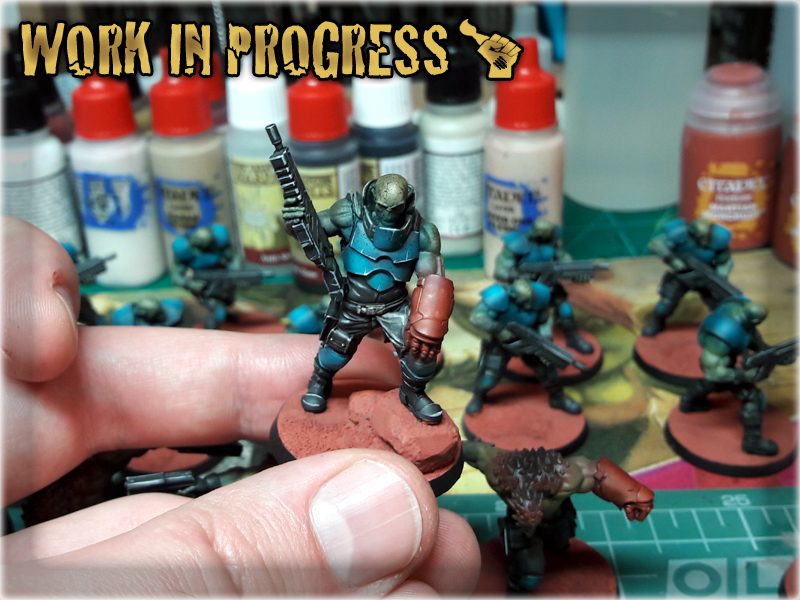
TURQUISE armour:
Black Undercoat,
German Grey (Val)*,
Mix German Grey (Val) 1:1 Cold Grey (Val)*,
Coal Black (P3)*,
Hydra Turquise (AP)*,
Mix Hydra Turquise (AP) 1:1 White*,
Heroes: Pallid Wych Flesh (GW) l&p,
DARK clothes:
Black Undercoat,
German Grey (Val)*,
Mix German Grey (Val) 1:1 Cold Grey (Val)*,
Skavenblight Dinge (GW),
Mix Skavenblight Dinge (GW) 1:1 Light Grey (Val),
Dark Tone Ink (AP),
Heroes: Karak Stone (GW) l&p,
Heroes: Pale Wych Flesh (GW) l&p,

GREEN skin:
Dark Yellow (Val)*,
Red Terracota (Val)*,
Cam. Black Brown (Val)*,
Mix Cam. Black Brown (Val) 1:1 Black*,
BLACK weapons:
Black Undercoat,
German Grey (Val)*,
Mix German Grey (Val) 1:1 Cold Grey (Val)*,
Dark Tone Ink (AP),
Pallid Wych Flesh (GW) l&p,

RED gloves:
Red Terracota (Val)*,
Mix Hot Orange (Val) 5:1:1 Red Terracota (Val), Bonewhite (Val)*,
Red Tone Ink (AP)*,
Heroes: Lugannath Orange (GW) l&p,
MARS Bases:
Martian Ironearth (GW),
Martian Ironcrust (GW),
Fire Dragon Bright (GW) dbr,
Luganath Orange (GW) l,
Dark Steppe Tufts (Paint Forge) tufts,
dbr – drybrush,
l&p – lines and points,
*Airbrushed (with multiple layers and mixes)
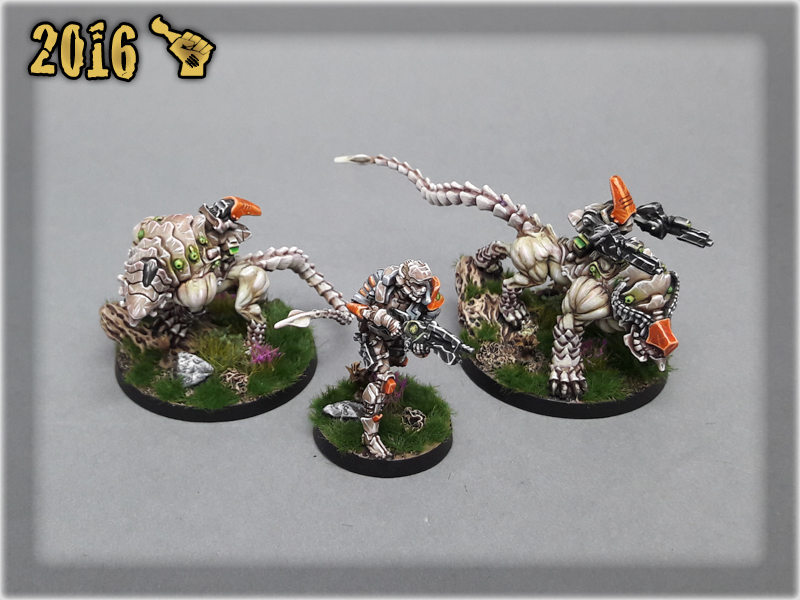
Here are some Colour Recipes for Infinity Yu-Jing lvl 5 from GALLERY: INFINITY TOHAA lvl 5. Please take note that this is a simple colour scheme, not covering multiple overlapping layers and blends inbetween, that lead to the final product. It is supposed to be used as guidline not a step-by-step.

BONE armour:
Black Undercoat,
Earth (Vallejo)*,
Khaki (Vallejo)*,
Bonewhite (Vallejo)*,
Pallid Wych Flesh (GW) l&p,
Mix Strong Tone Ink (AP) 1:1 Soft Tone Ink (AP),
Pallid Wych Flesh (GW) l&p,
White l&p,
SYMBIONT armour:
Hot Orange (Vallejo),
Hot Orange (Vallejo) + Pallid Wych Flesh (GW),
Mix Strong Tone Ink (AP) 1:1 Soft Tone Ink (AP),
Lugganath Orange (GW),
Lugganath Orange (GW) + Pallid Wych Flesh (GW),
Pallid Wych Flesh (GW) l&p,
BLACK weapons:
Black Undercoat,
Skavenblight Dinge (GW),
Fenrisian Grey (GW),
Pallid Wych Flesh (GW) l&p,
Dark Tone Ink (AP),
Pallid Wych Flesh (GW) l&p,
White l&p,
NECROTIC skin:
Dead Flesh (Vallejo),
Mix Strong Tone Ink (AP) 1:1 Soft Tone Ink (AP),
Necrotic Flesh (AP) + Pallid Wych Flesh (GW) l&p,
White l&p,
ORANGE clothes:
Hot Orange (Vallejo),
Hot Orange (Vallejo) + Fire Dragon Bright (GW),
Hot Orange (Vallejo) + Fire Dragon Bright (GW) + Pallid Wych Flesh (GW) l&p,
Pallid Wych Flesh (GW) l&p,
Mix Hot Orange (Vallejo) 3: 1 Bloodletter (GW),
Lugganath Orange (GW) l&p,
GRAY/BLUE clothes:
Eshin Grey (GW),
Mix Strong Tone Ink (AP) 1:1 Soft Tone Ink (AP),
Eshin Grey (GW),
Eshin Grey (GW) + Fenrisian Grey (GW),
Eshin Grey (GW) + Fenrisian Grey (GW) + Pallid Wych Flesh (GW) l&p,
Dark Tone Ink (AP) shadows,
Pallid Wych Flesh (GW) l&p,
White l&p,
l&p – lines and points,
*Airbrushed (with multiple layers and mixes)
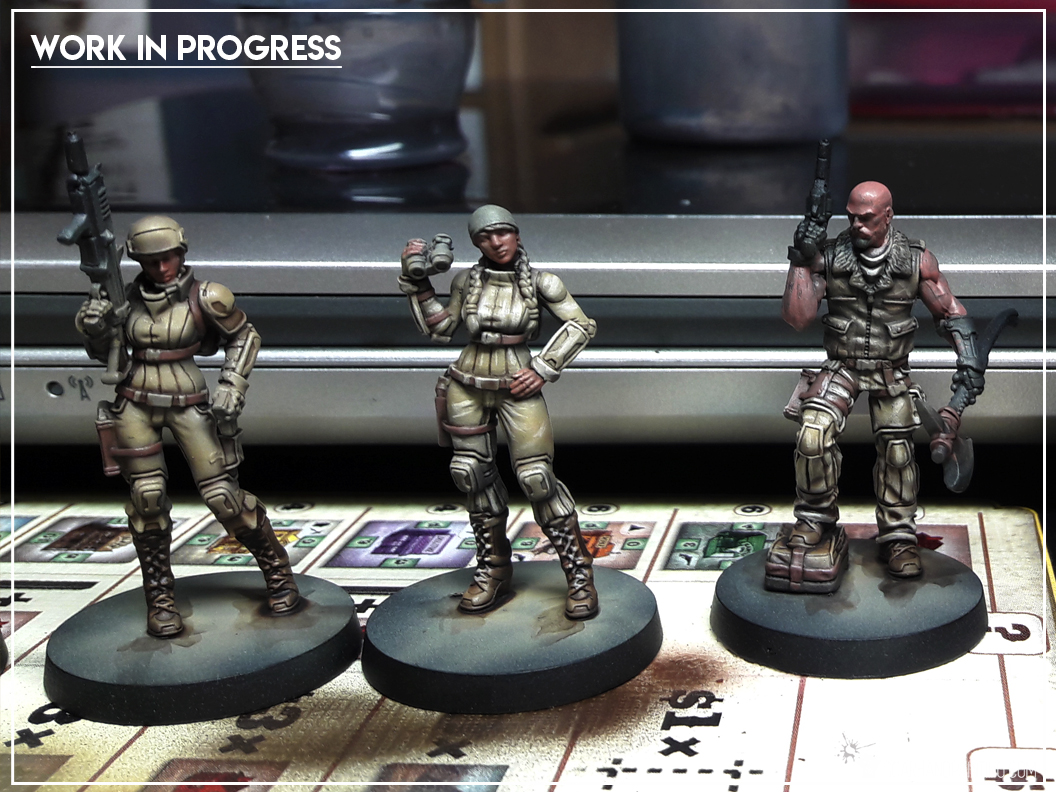
Here are some Colour Recipes for Infinity USAriadna Ranger Force from GALLERY: INFINITY USARIADNA. Please take note that this is a simple colour scheme, not covering multiple overlapping layers and blends inbetween, that lead to the final product. It is supposed to be used as guidline not a step-by-step.
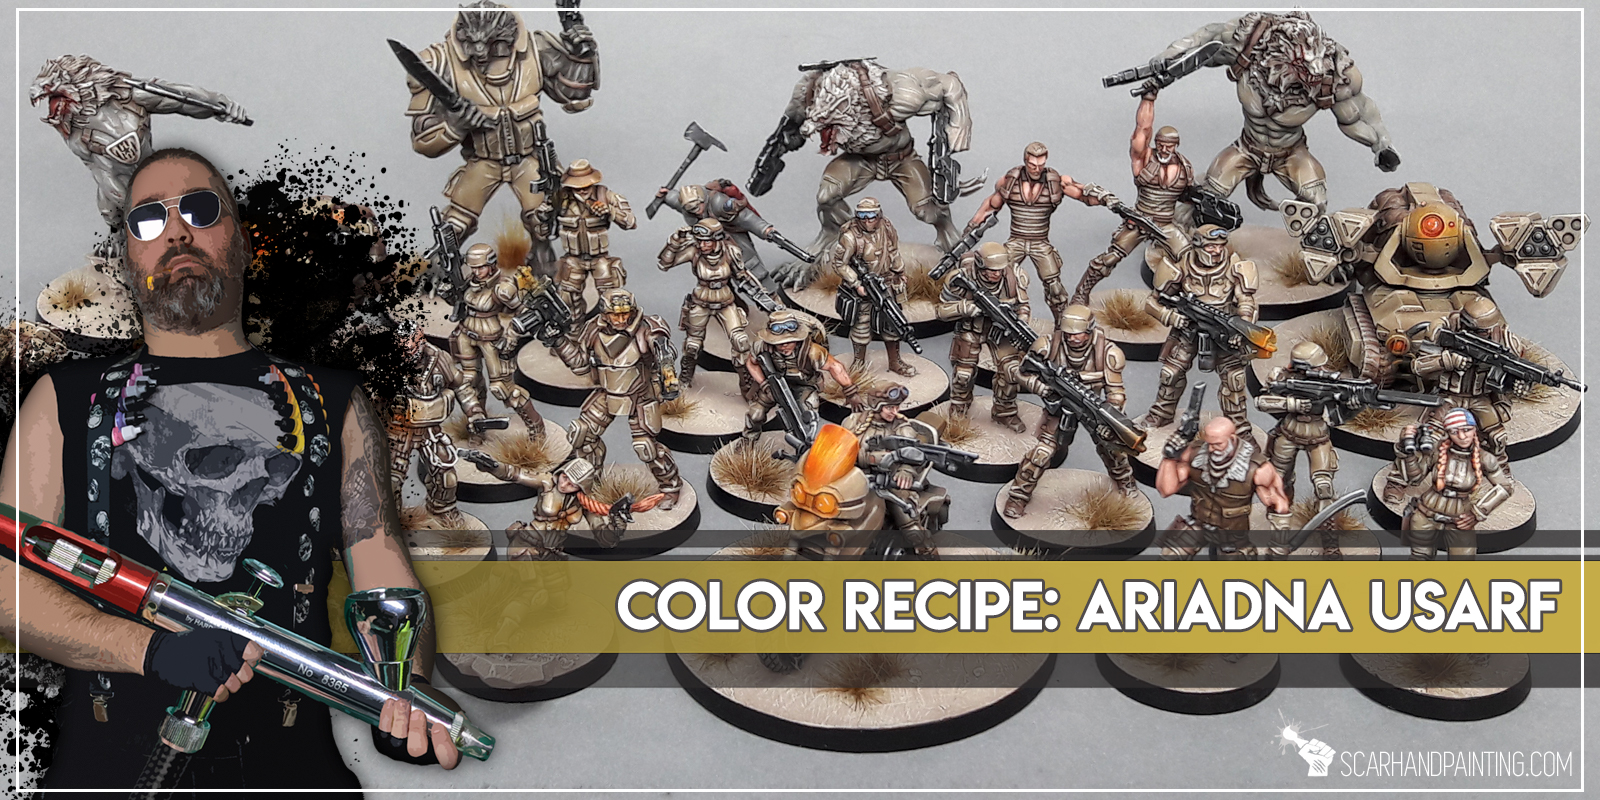
Armour & Uniforms:
Black Undercoat,
Dark Earth (Vallejo),*
Light Brown (Vallejo),*
Light Brown (Vallejo) points,*
Mix Strong Tone Ink (AP) 1:1 Soft Tone Ink (AP),
Flayed One Flesh (GW),
Pallid Wych Flesh (GW) l&p,
BLACK/GREY outfits & weapons:
Black Undercoat,
Skavenblight Dinge (GW),
Fenrisian Grey (GW),
Pallid Wych Flesh (GW) l&p,
Dark Tone Ink (AP),
Pallid Wych Flesh (GW) l&p,
White l&p,
BROWN elements:
Olive Drab (Vallejo),
Gorthor Brown (GW),
Gorthor Brown (GW) + Pallid Wych Flesh (GW),
Mix Strong Tone Ink (AP) 1:1 Soft Tone Ink (AP),
Karak Stone (GW) l&p,
SKIN:
Bugmans Glow (GW),
Dwarf Flesh (GW),
Dwarf Flesh (GW) + Pale Flesh (Vallejo),
Mix Strong Tone Ink (AP) 1:1 Soft Tone Ink (AP),
Pale Flesh (Vallejo),
Pale Flesh (Vallejo) + Pallid Wych Flesh (GW) l&p,

*Airbrushed (with multiple layers and mixes)
l&p – lines and points,
View the INFINITY GALLERY…

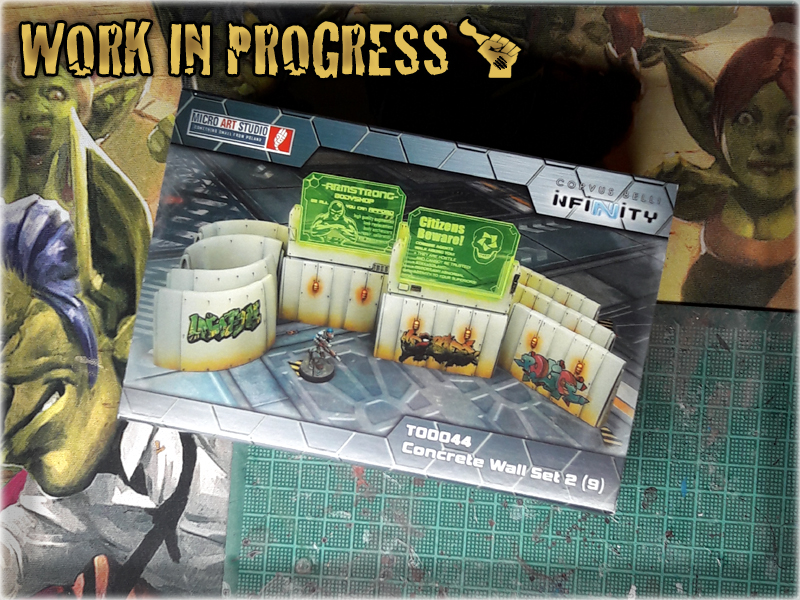
Micro Art Studio does some fantastic paint job on their stuff. At some level it might even be considered a bit intimidating. Thoughts like ‘This stuff is amazing, but I will never be able to paint it anything like they did’ had kept me from purchasing some awesome terrain pieces in the past. I bet that some of you feel the same right now. Well – that is clearly a bad way of thinking. That’s why I prepared this small Step-by-step painting tutorial with which I hope to bring you closer to your ideal of a Gaming Table.
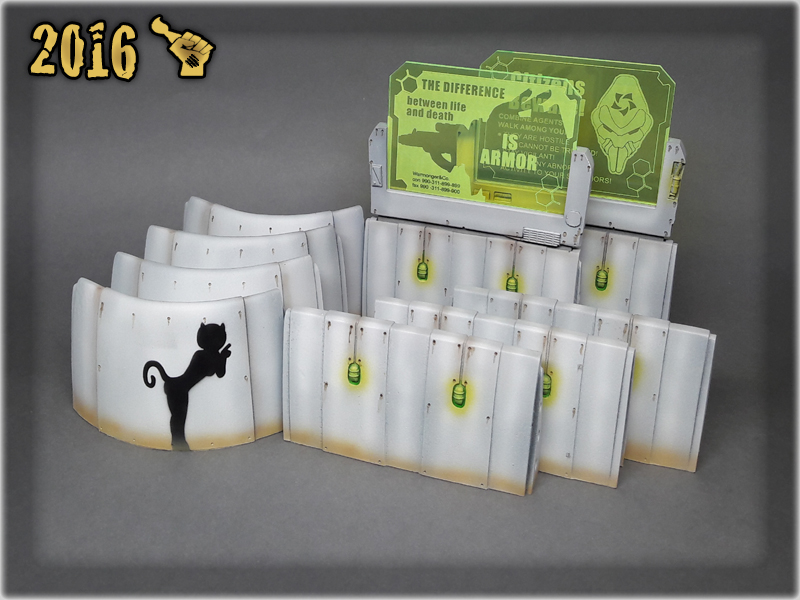
For this purpose I picked a Concrete Wall Set 2 by Micro Art Studio and tried to copy their style with a small variation of the colour scheme.
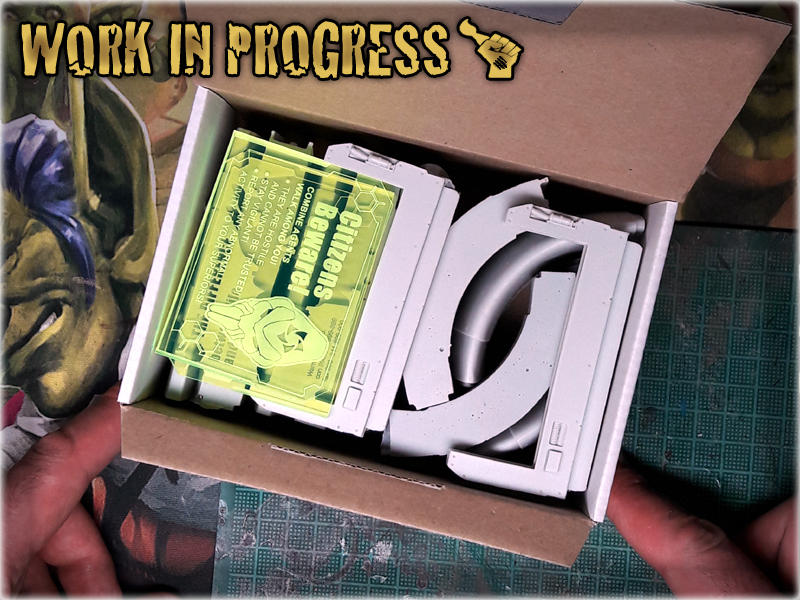
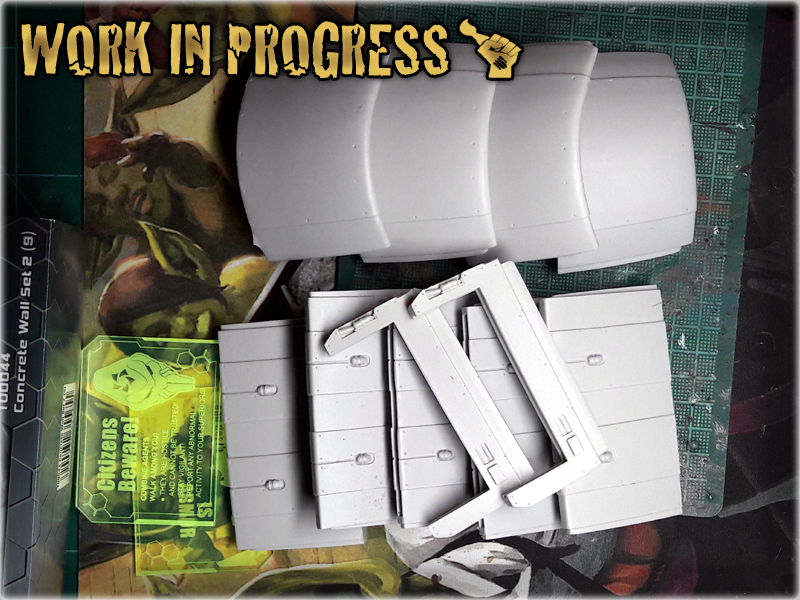
1 After unpacking the set I have cleared any extent of resin and prepared each piece for the undercoat.
I used THIS METHOD
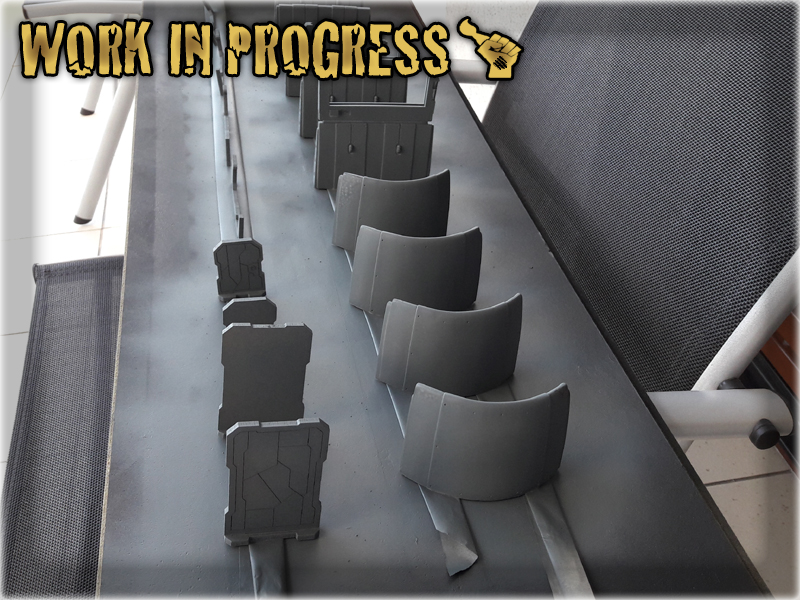
2 I have covered entire set with Games Workshop's Mechanicus Standard Grey primer. Usually I use Black Undercoat first, but in this case the surface was smooth and I knew it will work well with a Grey undercoat. Do not feel obliged to use the exact same primer - you can easily use Vallejo Grey Surface Primer instead and Airbrush it over the surface. I used spray just to save some time.
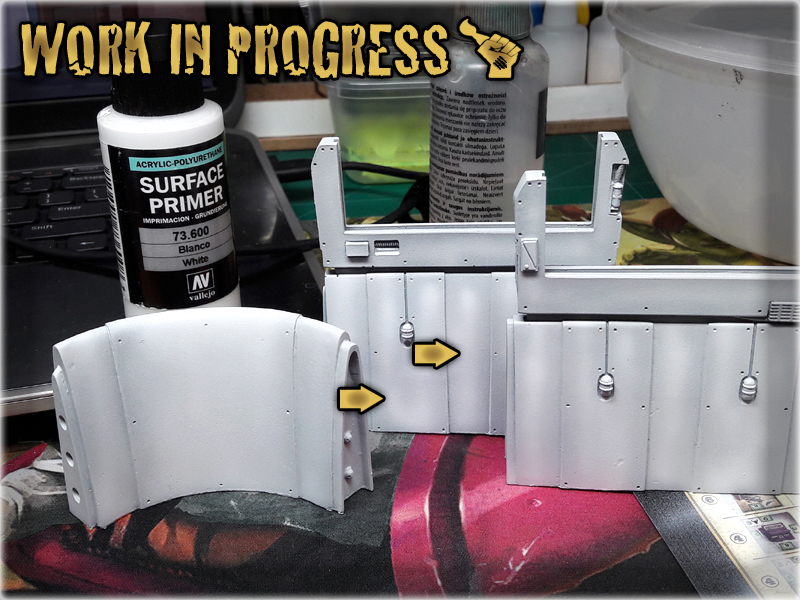
3 I gently arbrushed Vallejo White Surface Primer over the set. First I tried to cover entire surface from afar (15cm distance, constant flow, see pic - dark spots), then I outlined center of each flat surface with additional layers (5cm distance, soft puffs of paint, see pic - light spots). This resulted in the surfaces gaining some extra shadows.

4 I used airbrush to apply Vallejo Light Brown onto the lower parts of each Wall piece. I mixed a bit of Airbrush Flow Improver to build up a nice transition from brown to white. The key is to paint in smooth lines, then go backwards building up colour. Too much paint in the same spot will result in paint spilling all around and ruining the paint job.
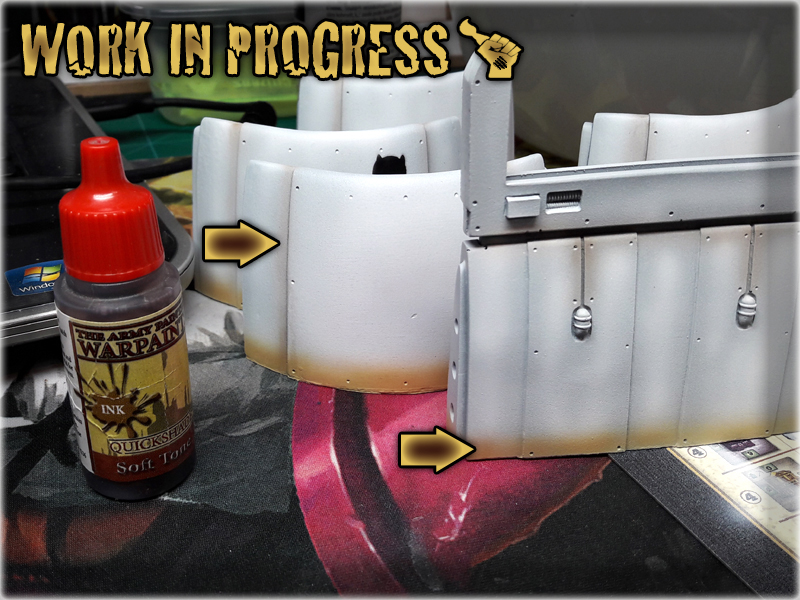
5 Then I moved to Army Painter's Soft Tone Ink and airbrushed it over Light Brown, with an addition of single strokes over the recesses of four oval Wall pieces. I was careful not to apply too much paint as in this particular case I wanted to build up a nice hume of colour, instead of 'washing' the surface with it.
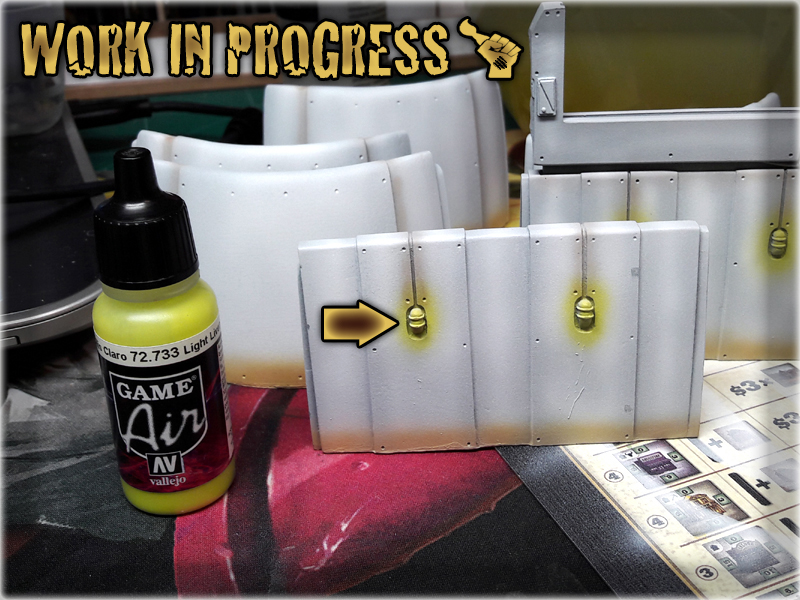
6 Then I applied a thin layer of Vallejo Light Livery Green over and around each lamp. A lot of small puffs of paint helped me to keep the base shape of light around the lamps. Even if one or two puffs went too far, they were so delicate as to remain unseen once the majority of colour was applied.
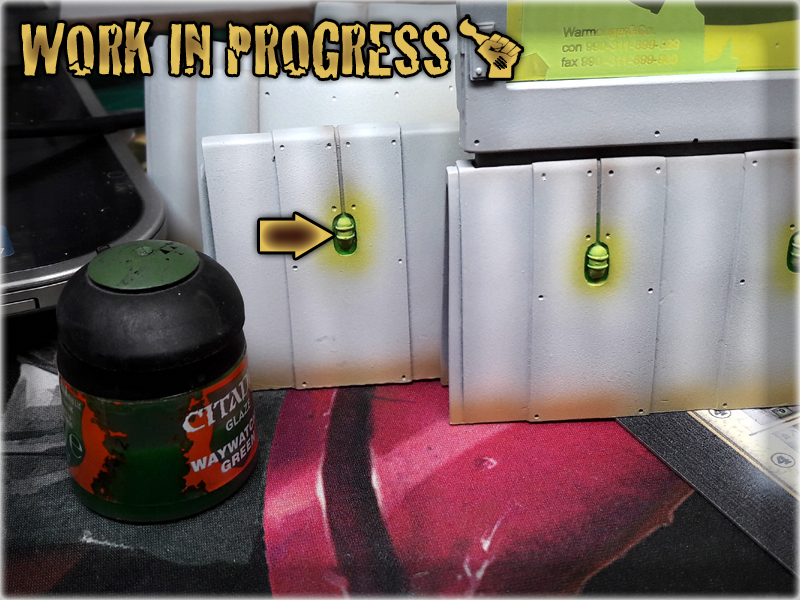
7 To strenghten the colour I used a small brush and applied Games Workshop's Waywacher Green onto the lamps. I tried not to exeed the boundries of their slots and in case I did - I used a small piece of paper towel to clear the paint out.
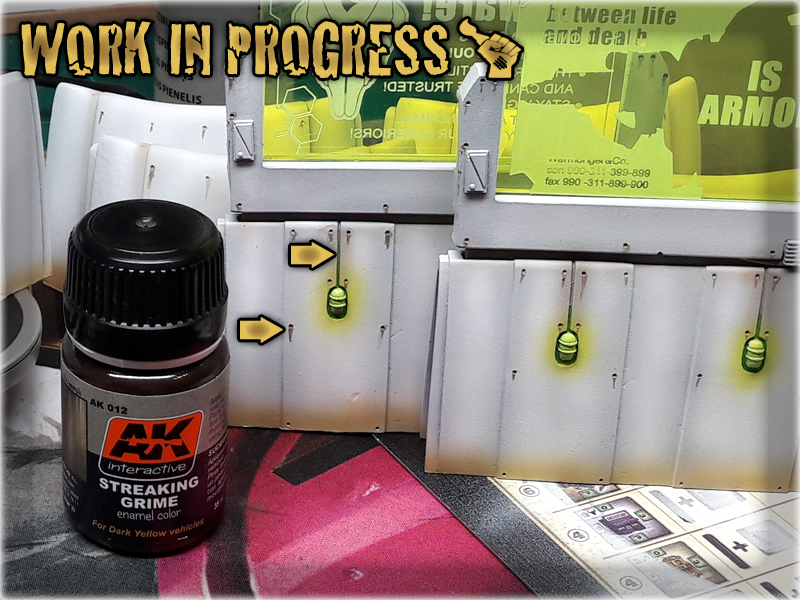
8 Finally I applied AK Interactive Streaking Grime. Using a small brush I poured this weathering effect paint into holes, then smeared it dow with a tip of the brush. The more irregular it went, the better to the overall visual effect.
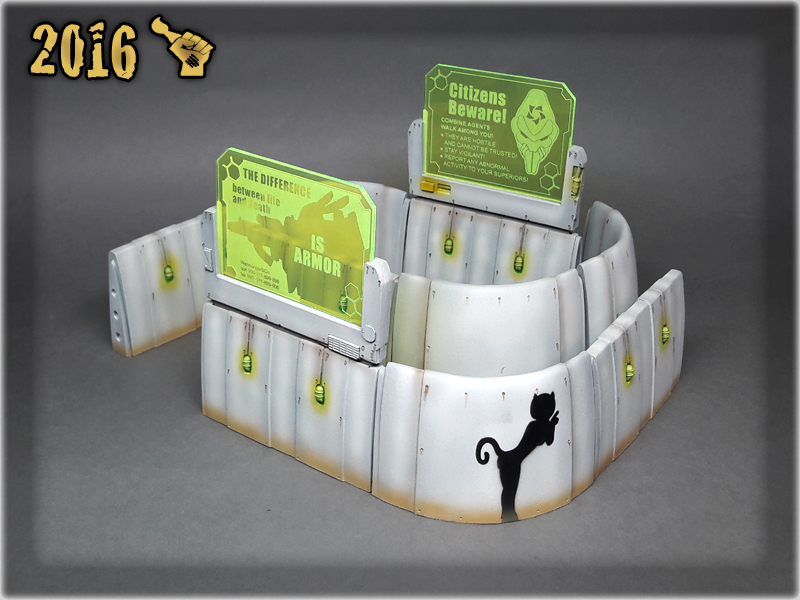
In the end I used a template provided by Reycast to airbrush a small Nomad prank onto the wall, with a Vallejo Black Paint. What’s left now is to purchase Micro Art Studio’s S-F Graffiti Transfers and job will be done.
Here is a result of my paint job:

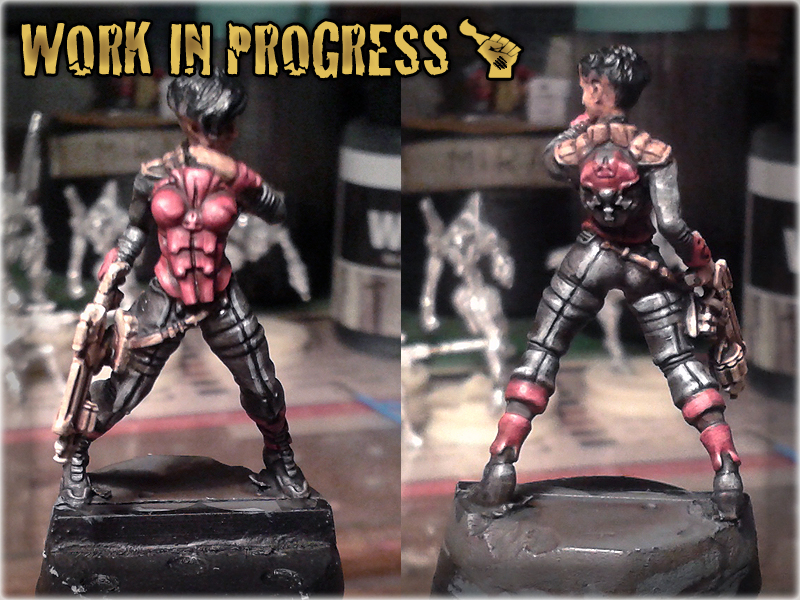
Here is a Step-by-step guide of how to paint Infinity Nomad Red Armour – Scar_hand Painting’s style 🙂
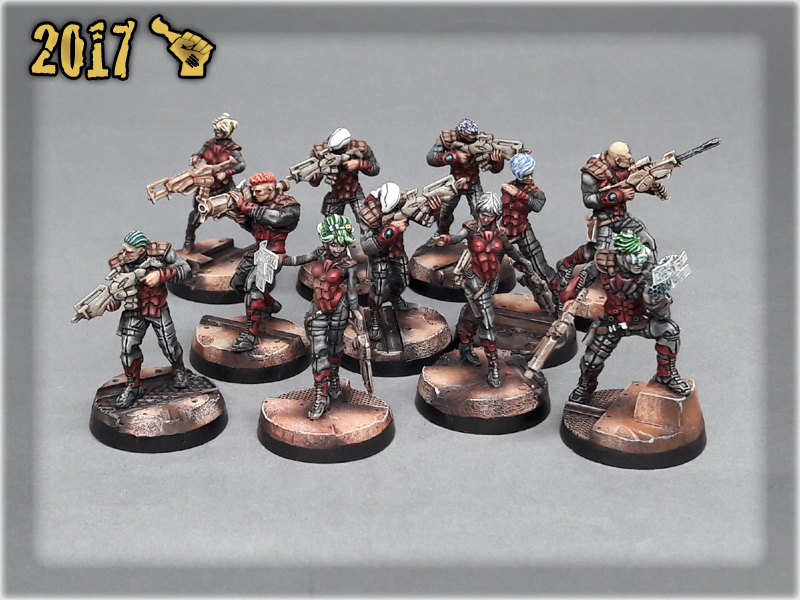
A complete Recipee used to paint my Infinity Nomads may be found in COLOUR RECIPEES: INFINITY NOMADS. You can also find some additional pictures in the NOMADS: CORREGIDOR lvl 4,5 Gallery.
* GW Standard Brush,
* Tamiya Modeling Brush HG,
* AP Wargamer: The Psycho,
* GW Chaos Black Undercoat,
* GW Mechrite Red, (When this one runs out i’ll switch to P3 Formula ‘Sanguine Base’ instead),
* GW Wazdakka Red,
* AP Skeleton Bone,
* White,
* AP Strong Tone Ink,
* AP Red Tone Ink,
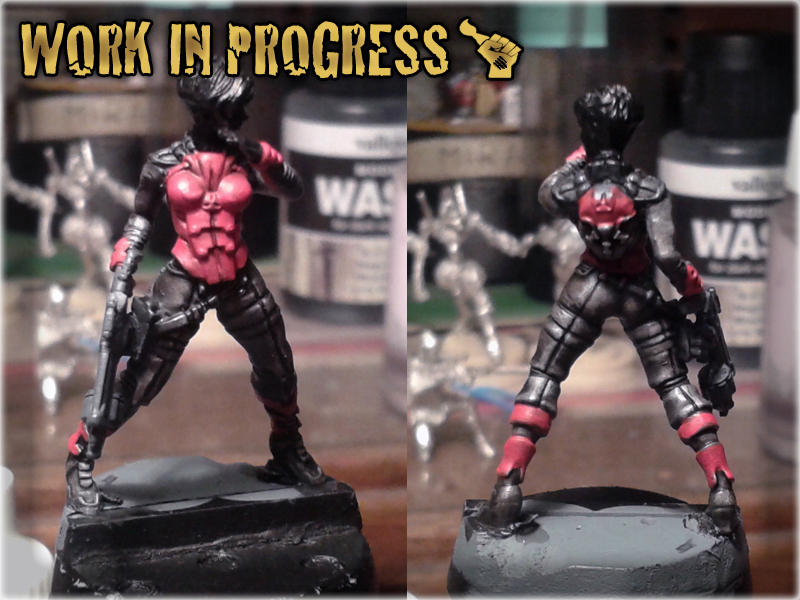
1 I used Chaos Black spray to undercoat the model. I usually do this by applying eight layers of undercoat from eight different angles (four at the front and four at the back of the model, each at the same 45* angle with one directed up, one down, one left and one right side of the model).
2 The first layer of Red was made with Standard Brush and Mechrite Red. I tried not to fill the recesses too much and to cover all buldes smoothly.
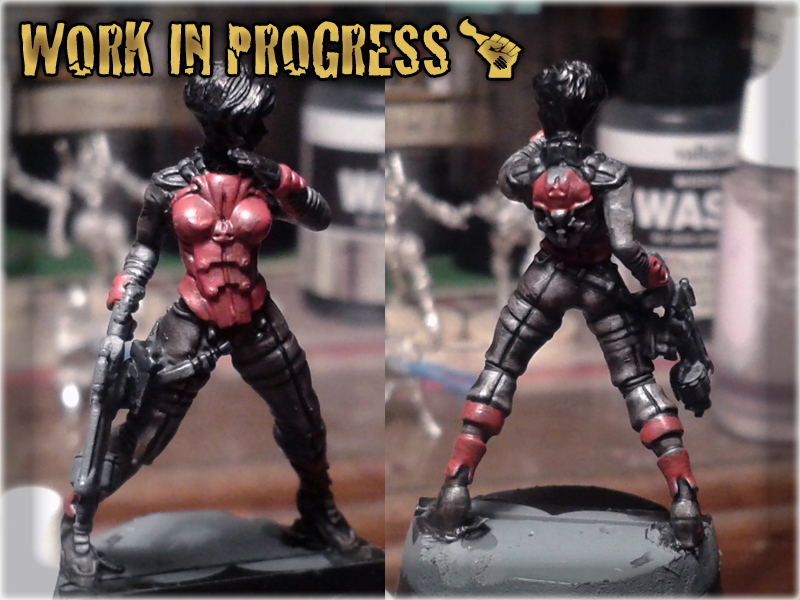
3 I switched to Tamiya Modeling Brush and applied Wazdakka Red to all bulges and flat surfaces of the armour, leaving cavities Mechrite Red'ed. This madethe armour look more smooth and ready to be highlighted.
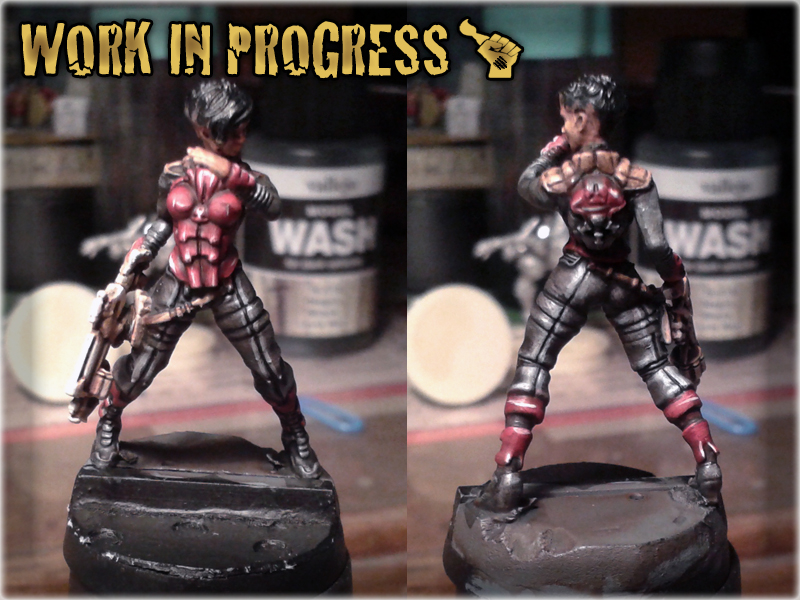
4 I applied a 50%/50% mix of Wazdakka Red and Skeleton Bone in the middle and on the edges of particular surfaces.
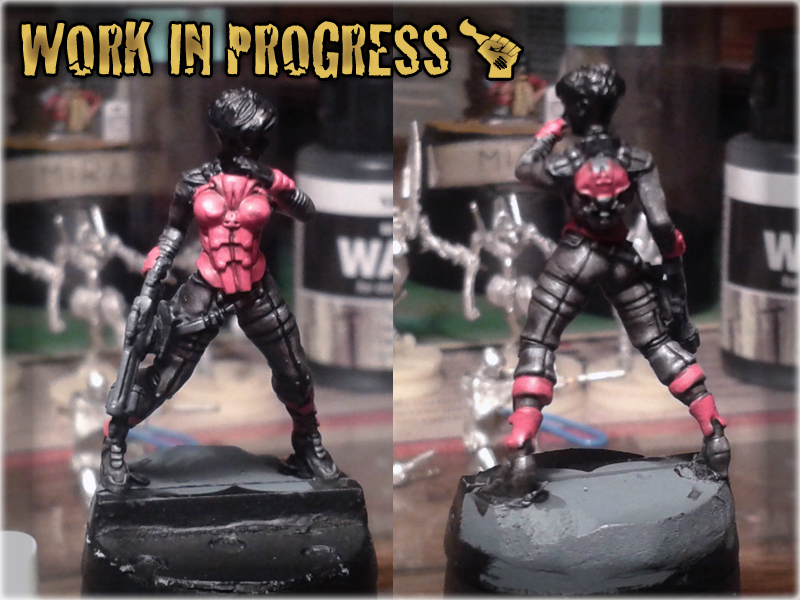
5 I added White to the Wazdakka/Skeleton mix and further lined the model.
6 More White was added to the mix and another layer of lines and points was made.
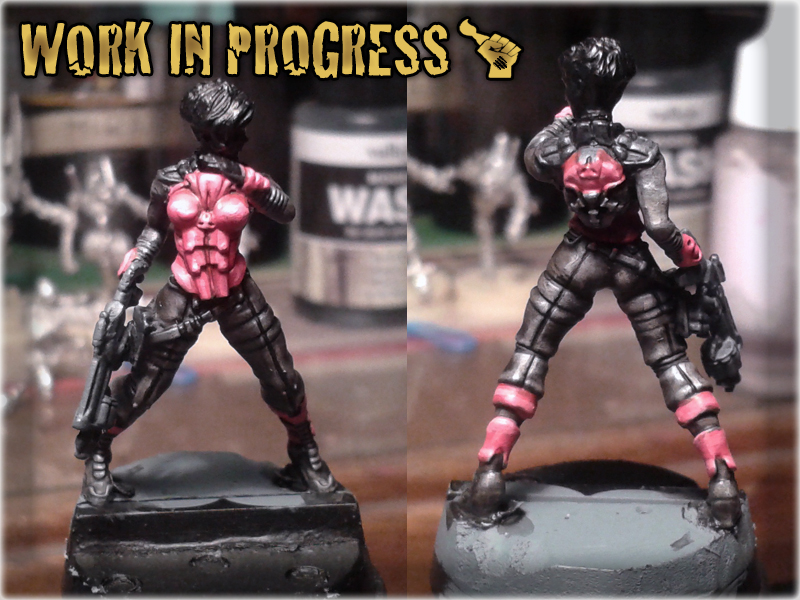
7 I switched back to Standard Brush and washed the armour with Strong Tone Ink.
8 I switched to The Psycho to add some Skeleton Bone/White lining in the key points of the armour.
9 I switched to Tamiya Modeling Brush and washed the armour with Red Tone Ink.
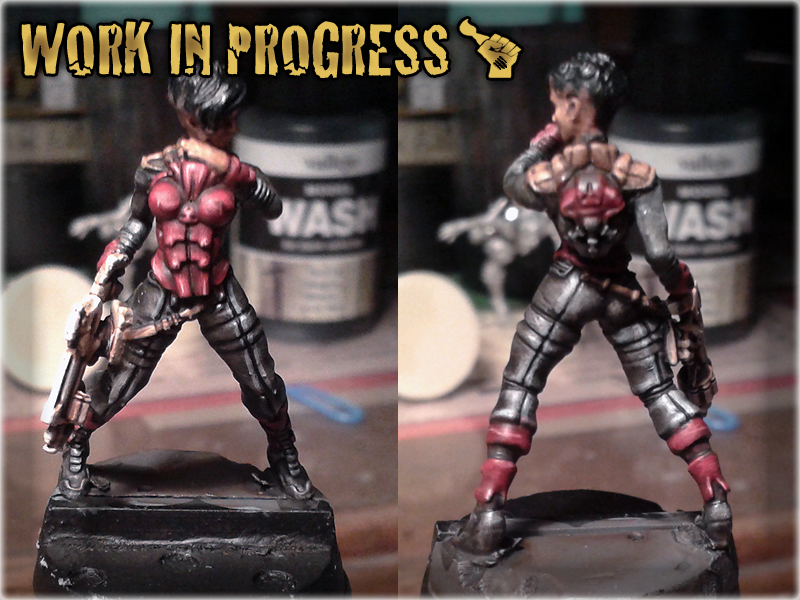
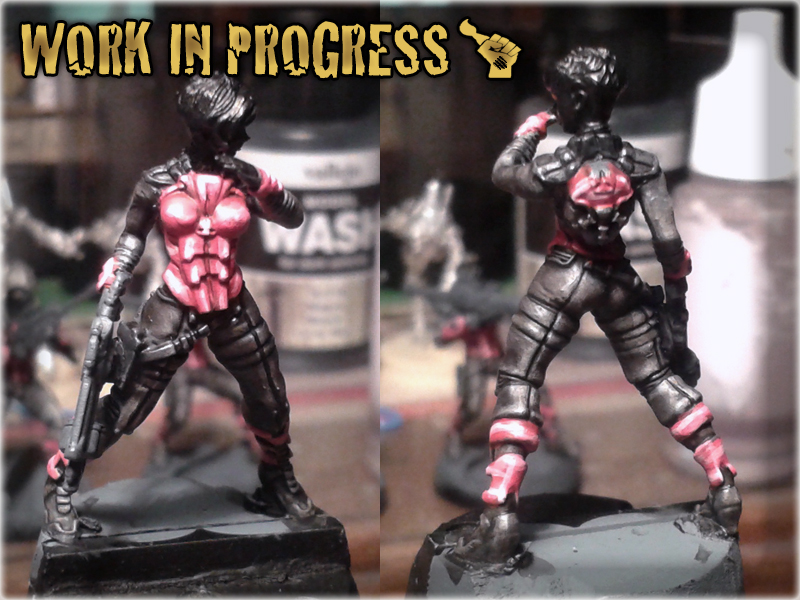
9 Oops! I did it again washing all the armour with Red Tone Ink to finally finish it.
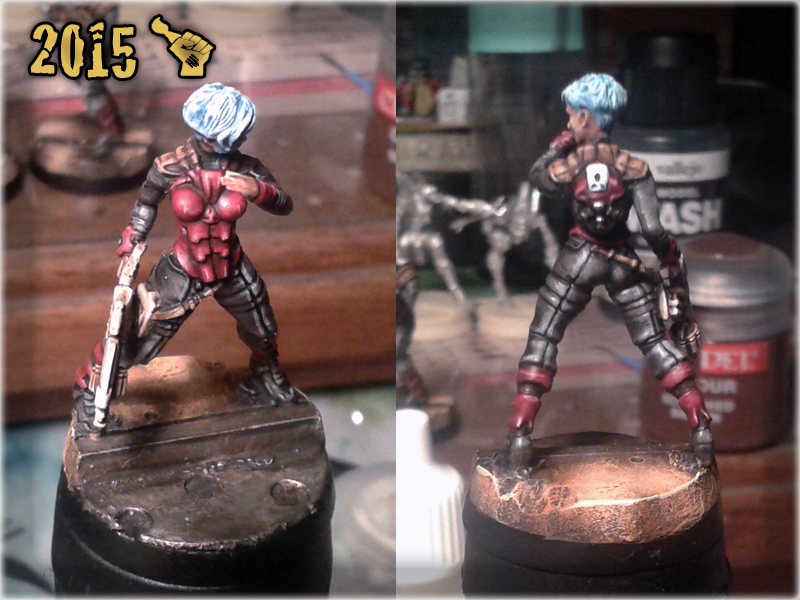
Hope that you find this little tut useful and that you will post some pictures of miniatures painted this way 😉