- contact@scarhandpainting.com


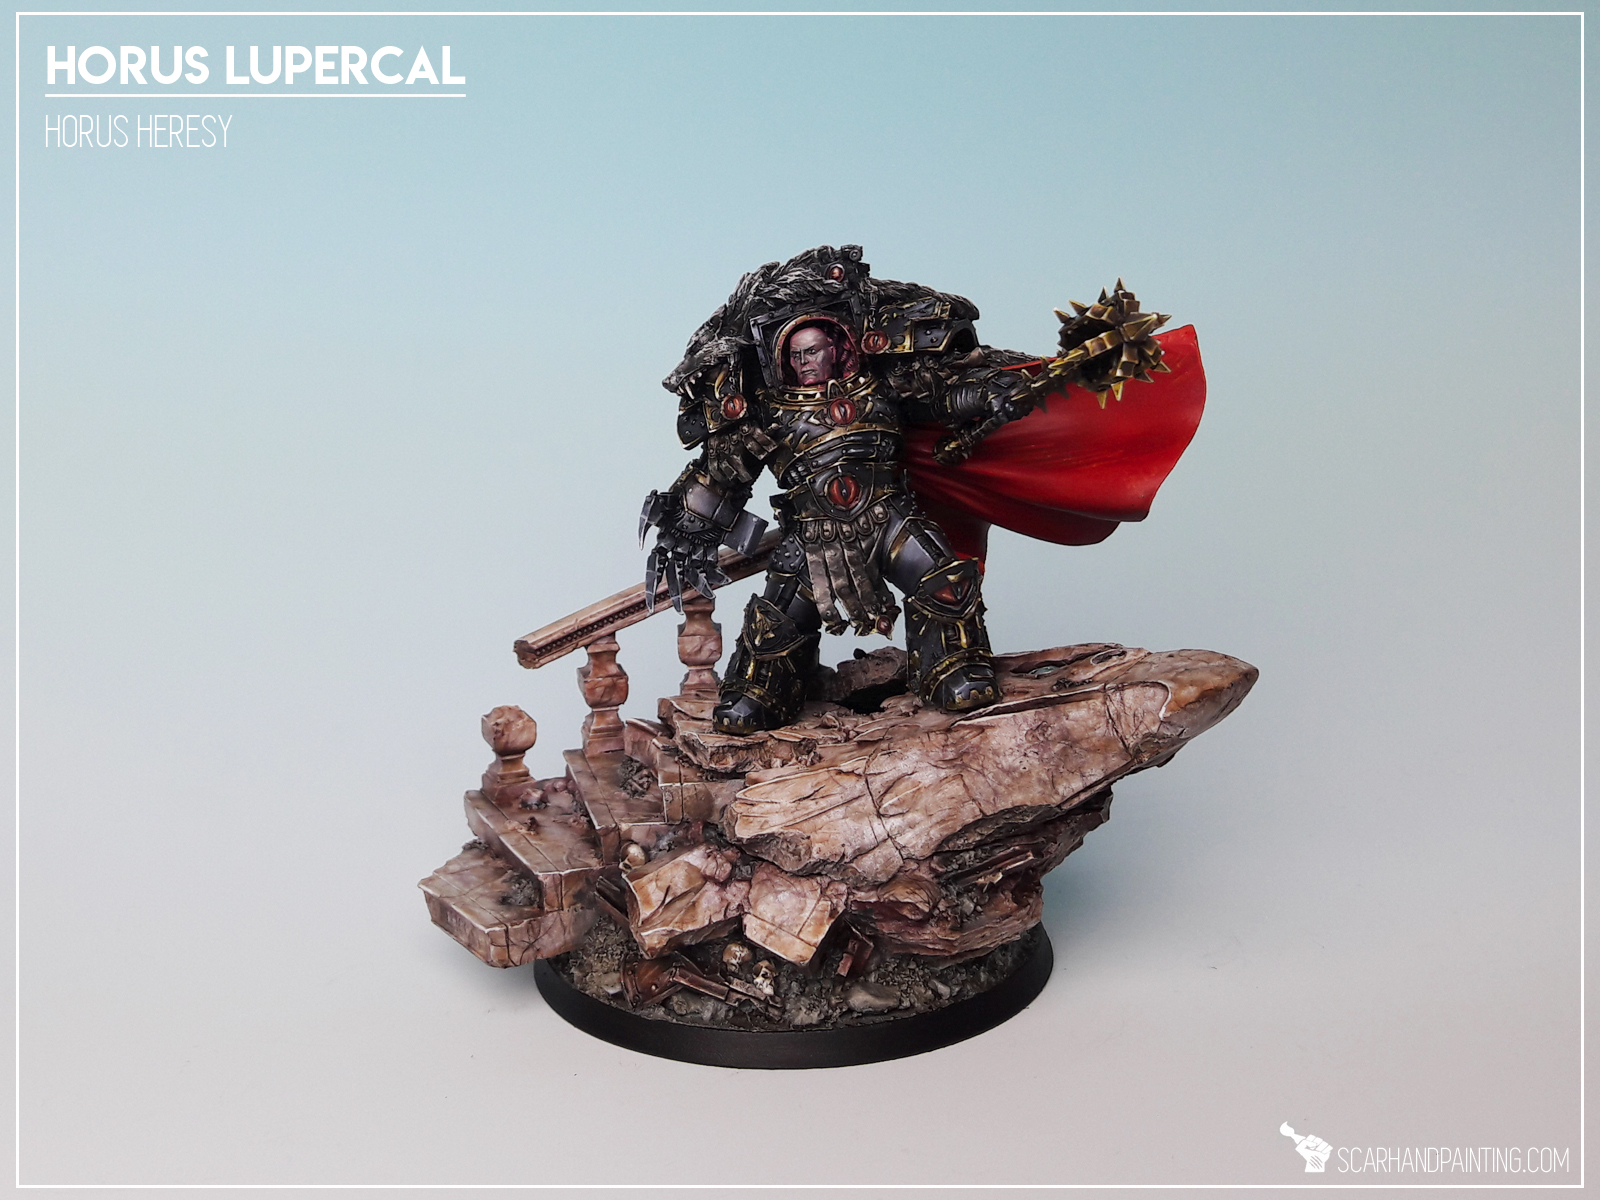
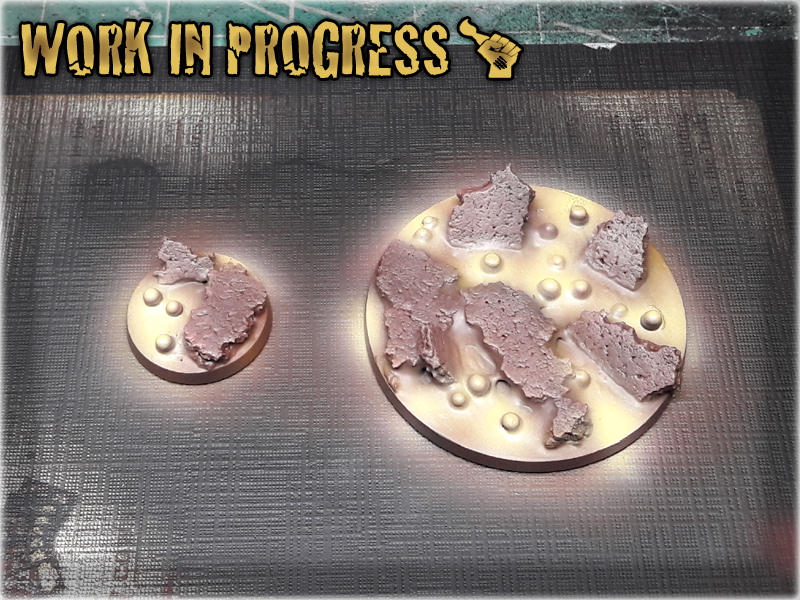
Welcome to Painting Marbe tutorial. Here I will take you on a Step-by-step trip through the process of painting marble the same way as seen at: Gallery: Horus Lupercal

Before we start, some notes:

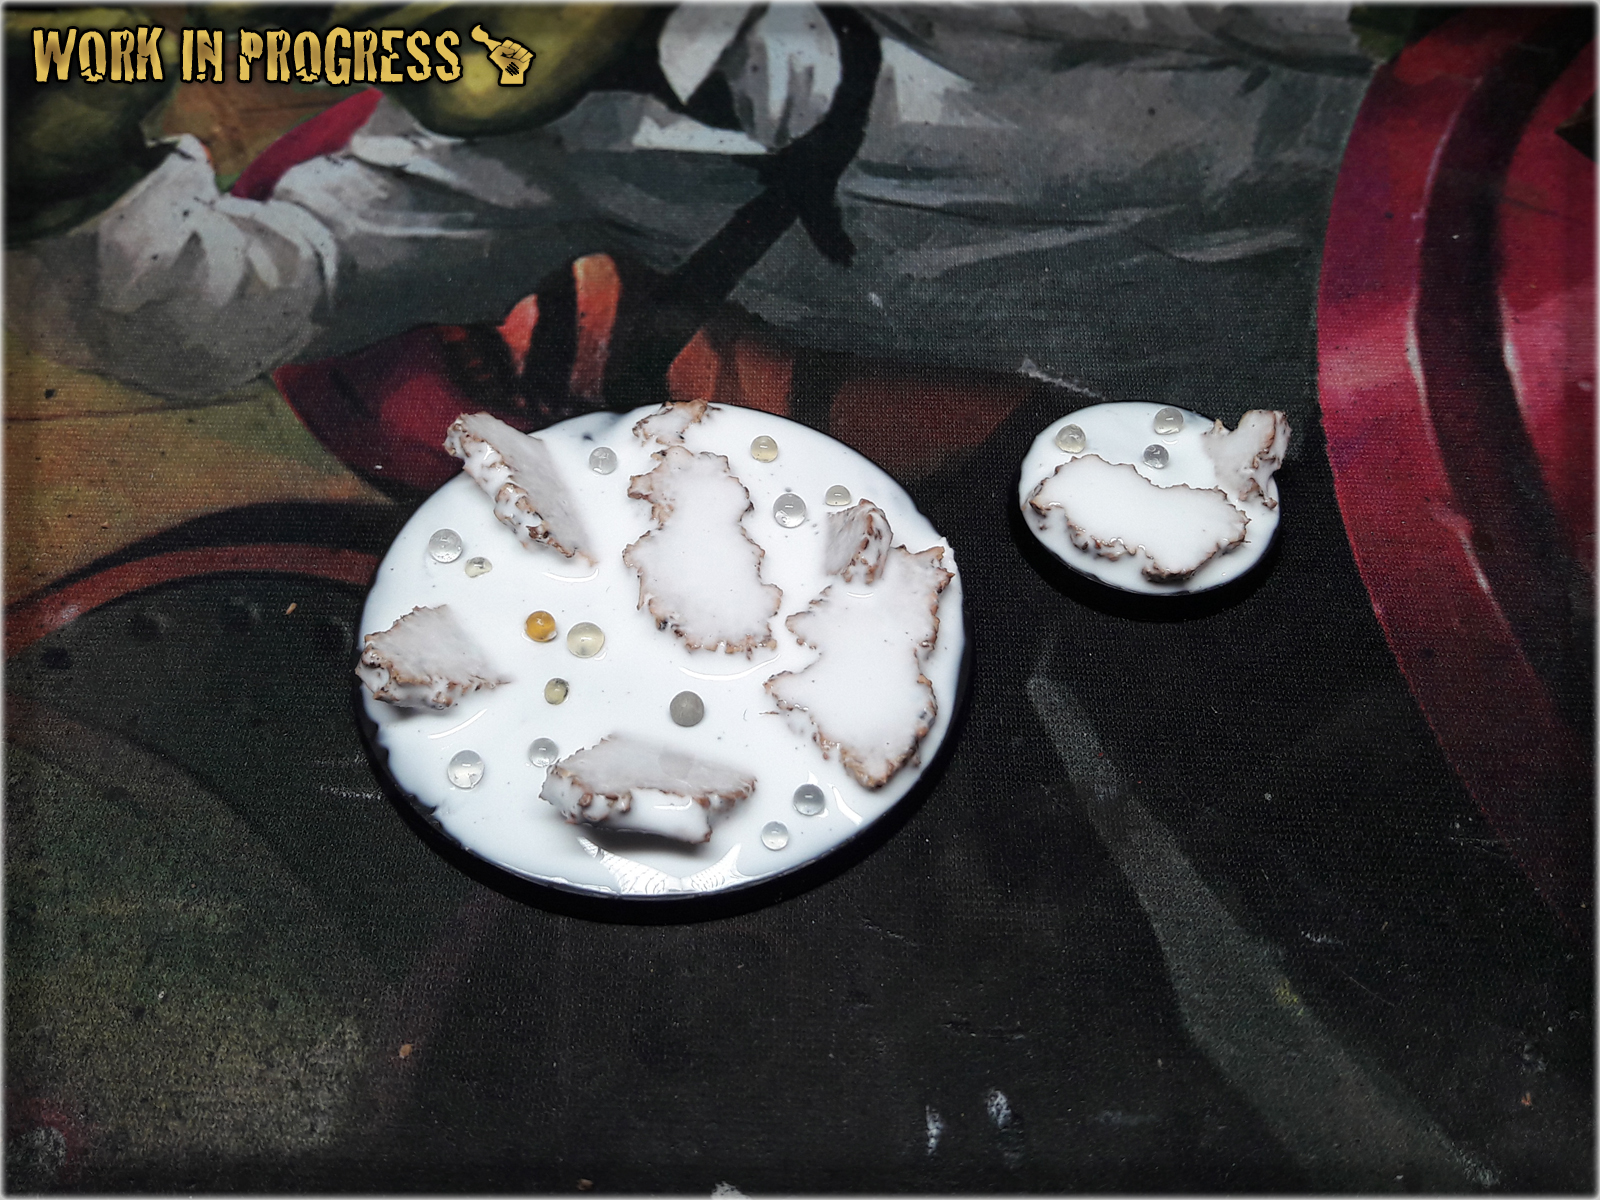
Step one: Undercoat
I started with a solid layer of Vallejo German Red Brown. Any similar colour would do.
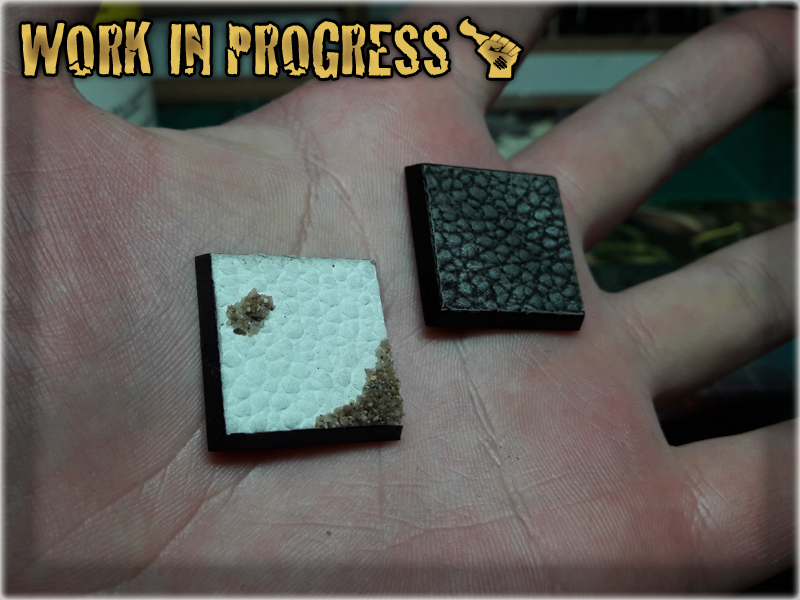
Step two: Base texture
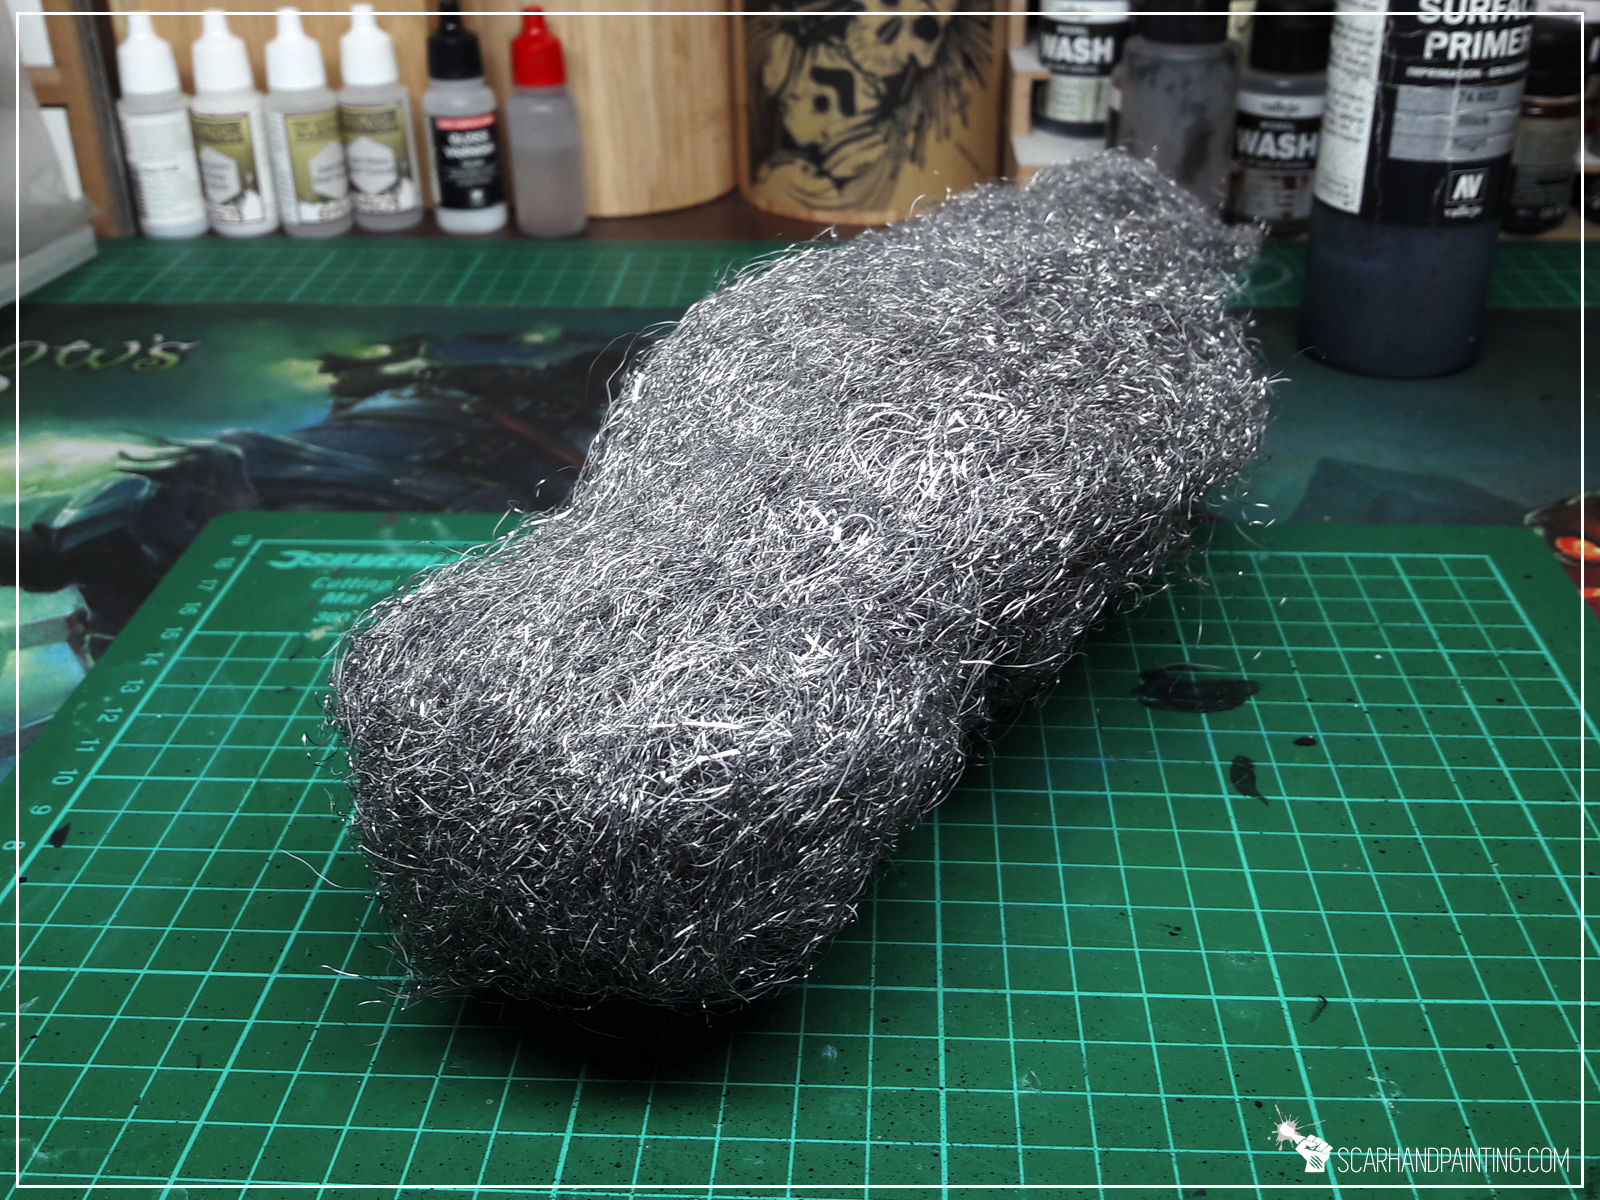
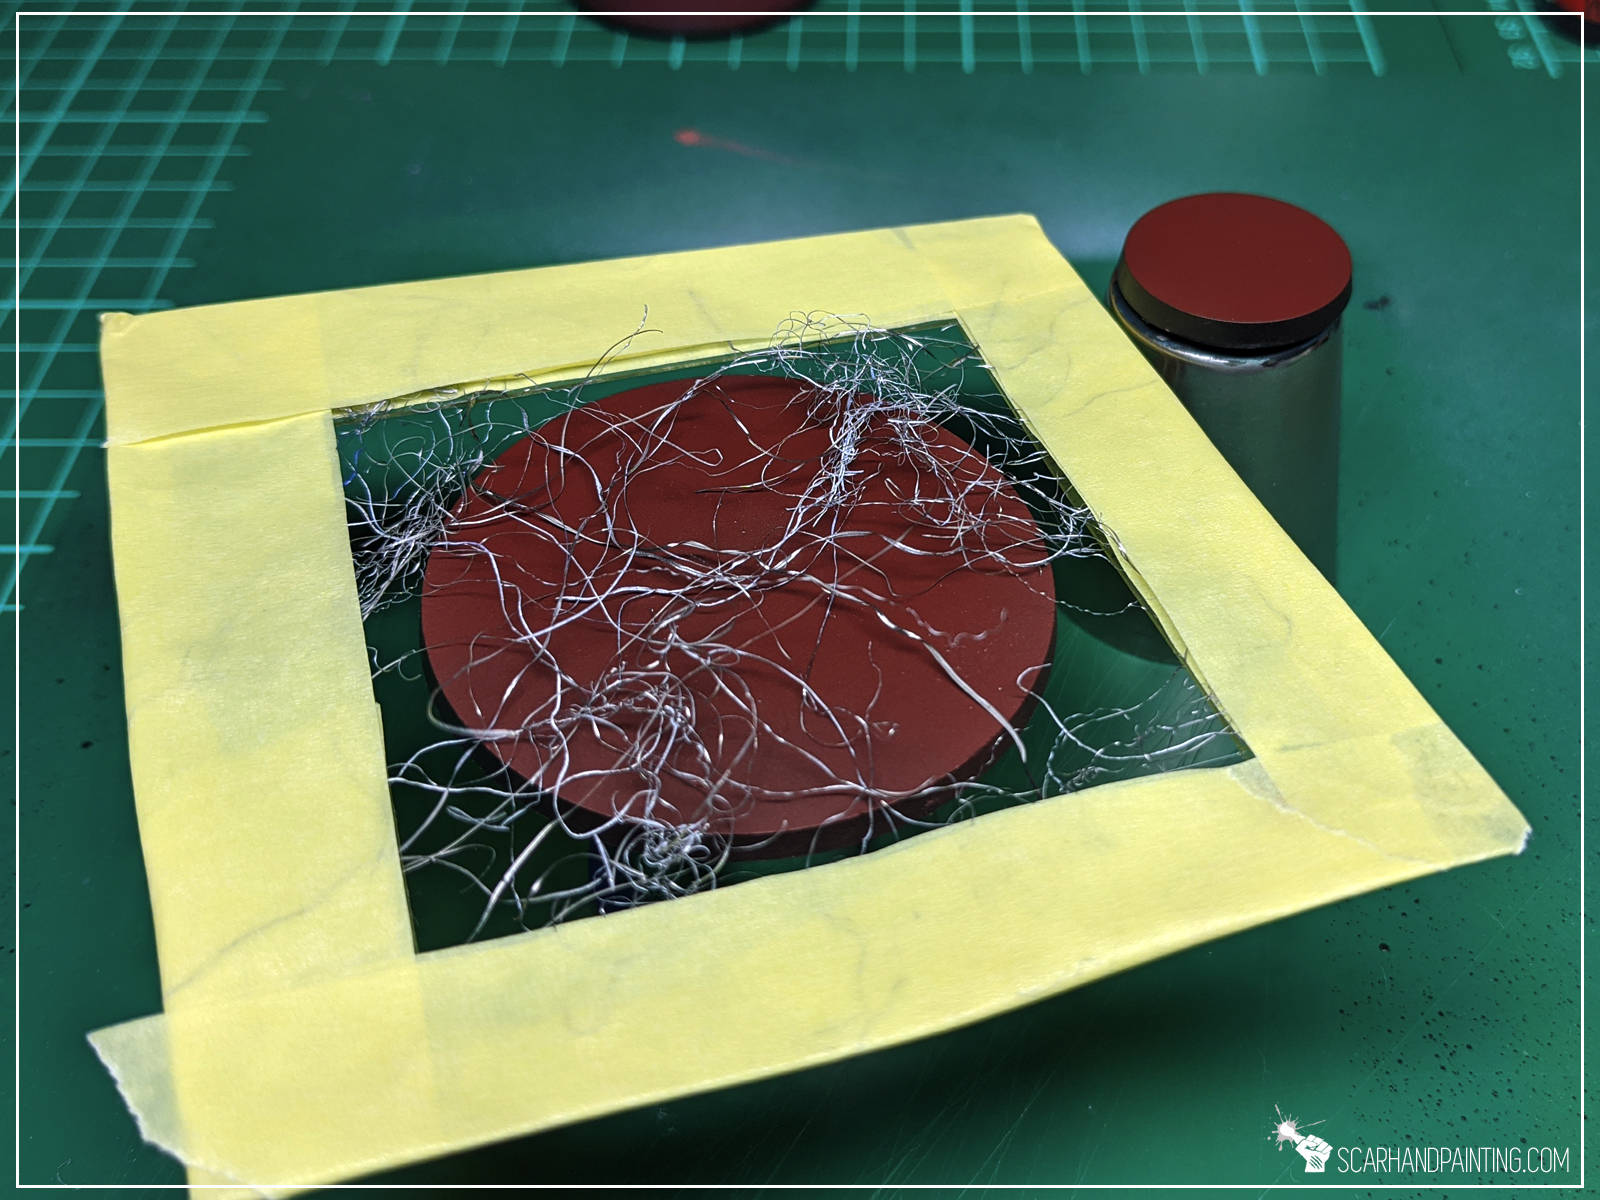
For this step I used a life hack. I took few pieces of steel wool, taped them together and used them as a stencil. I then airbrushed pure white paint through the stencil and onto the bases.


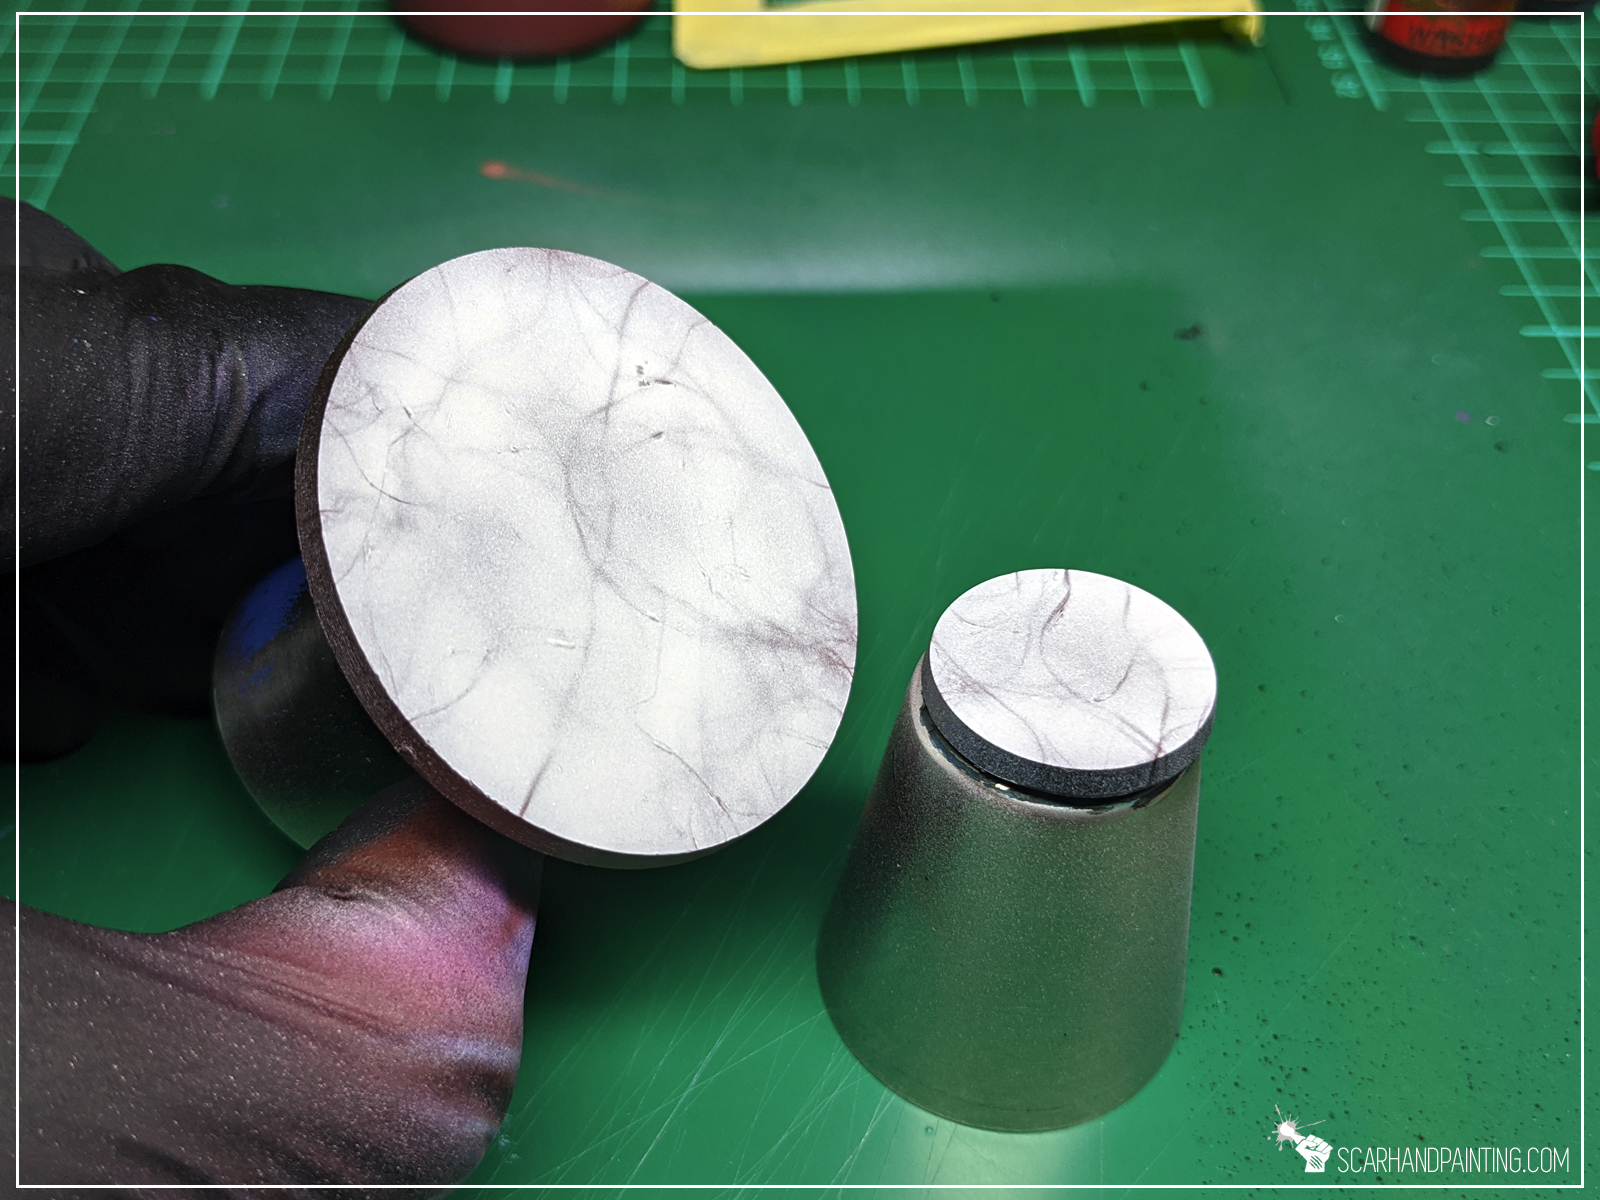
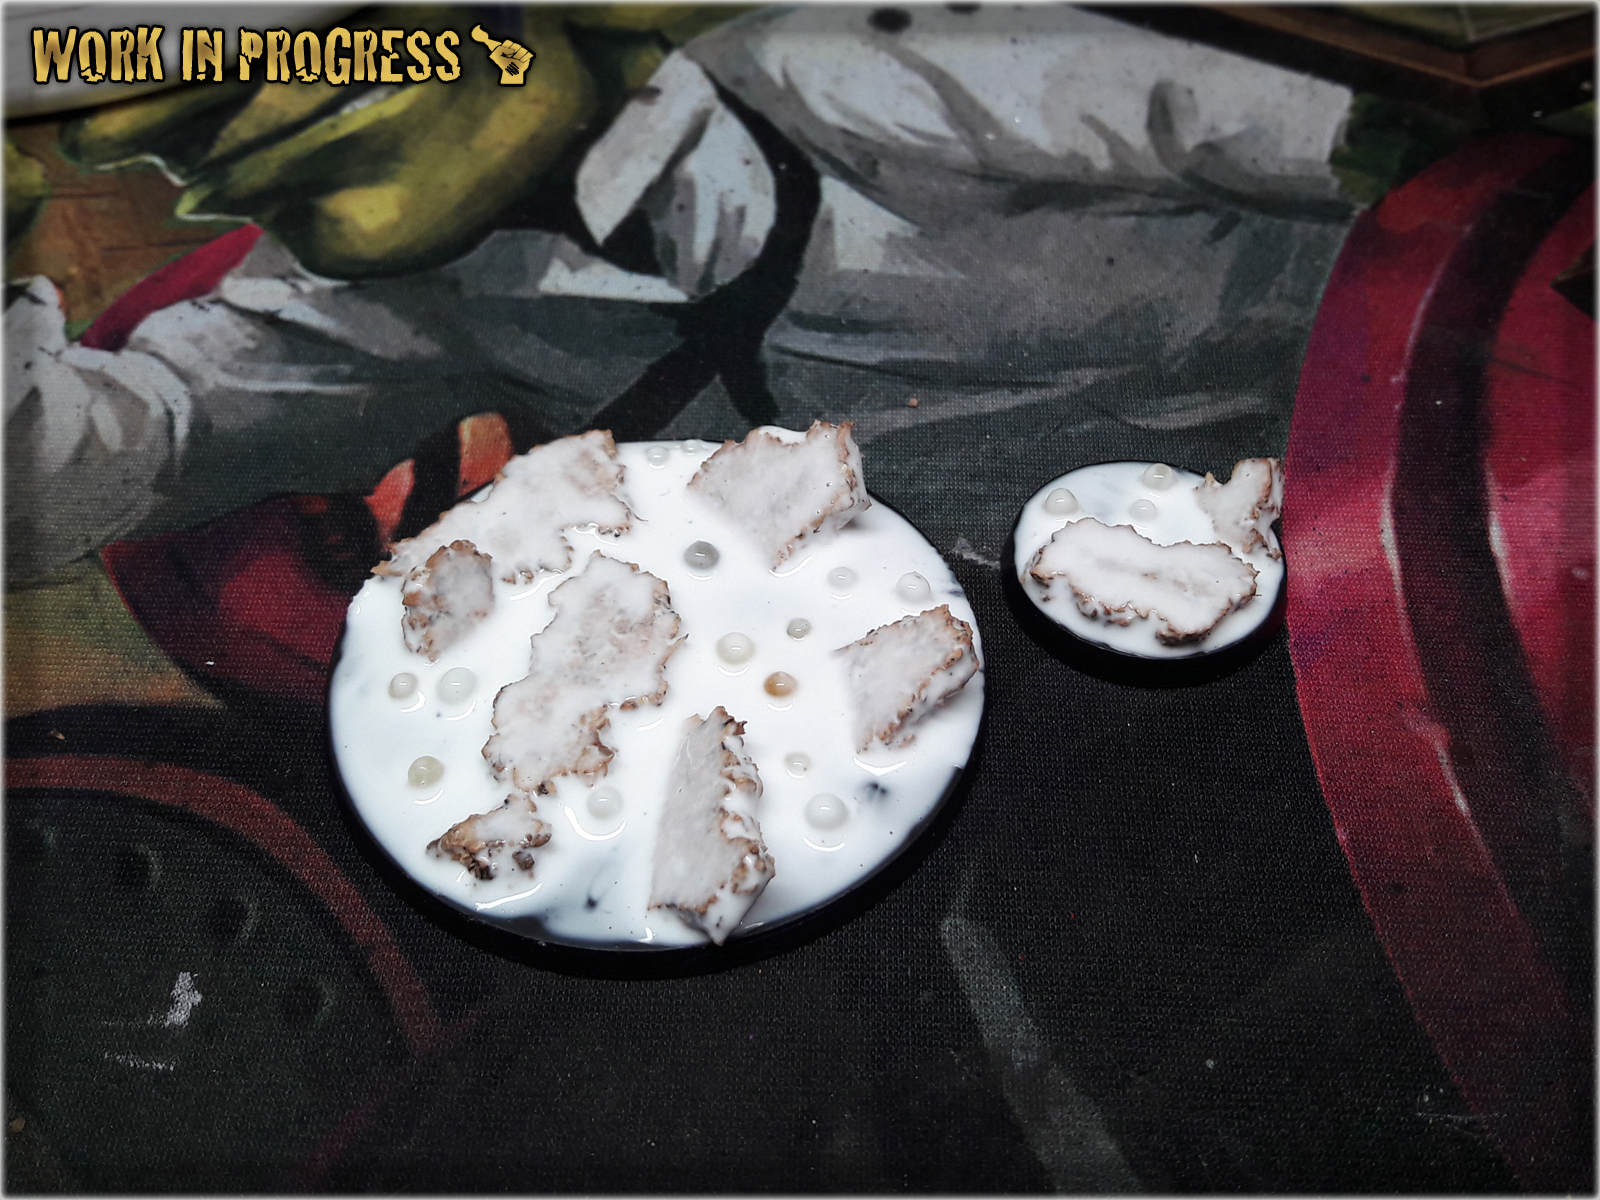
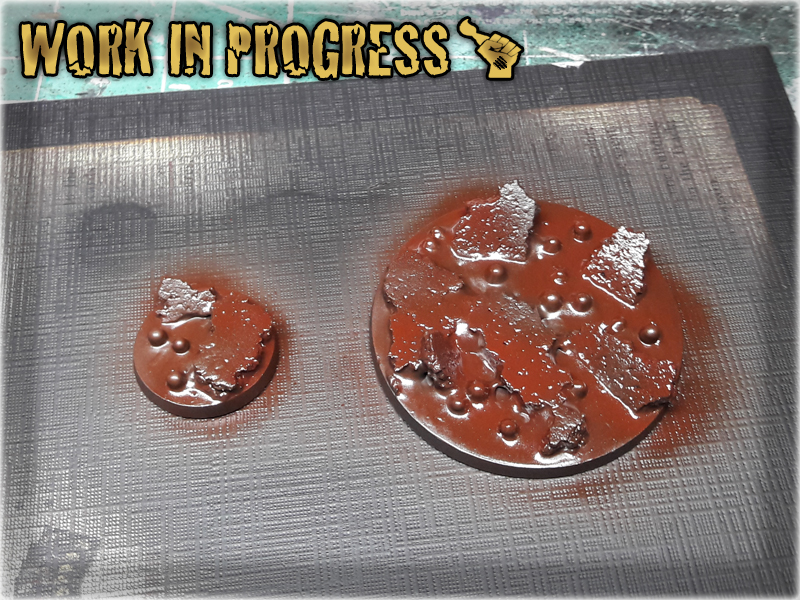
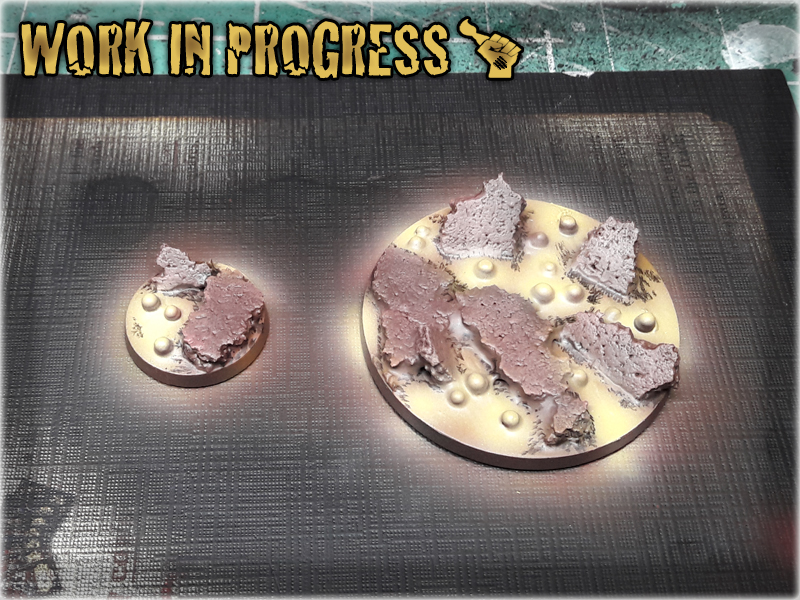
Step three: Texture
Next I applied more layers of marble texture. This time I manually applied irregular stains of Army Painter Strong Tone Ink, waited half a minute then removed the paint with a paper towel. I then repeated the process once again applying and then removing excess Strong Tone Ink.


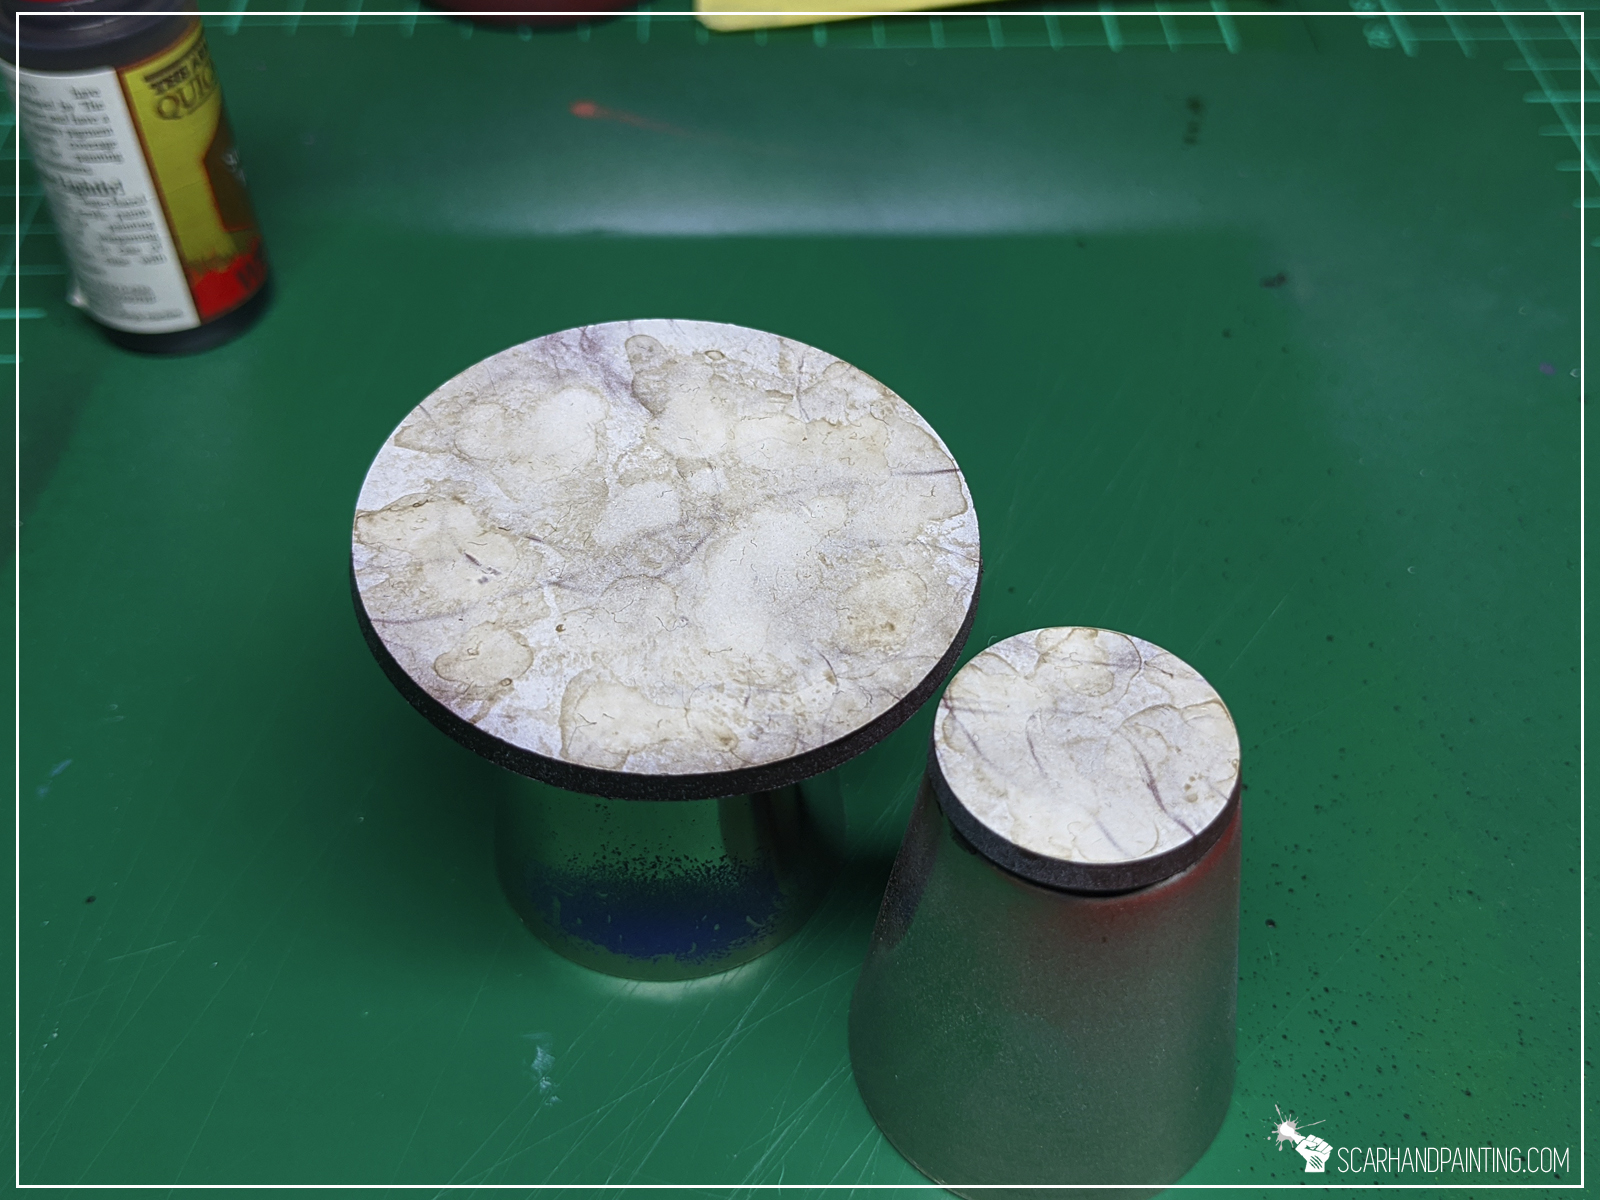
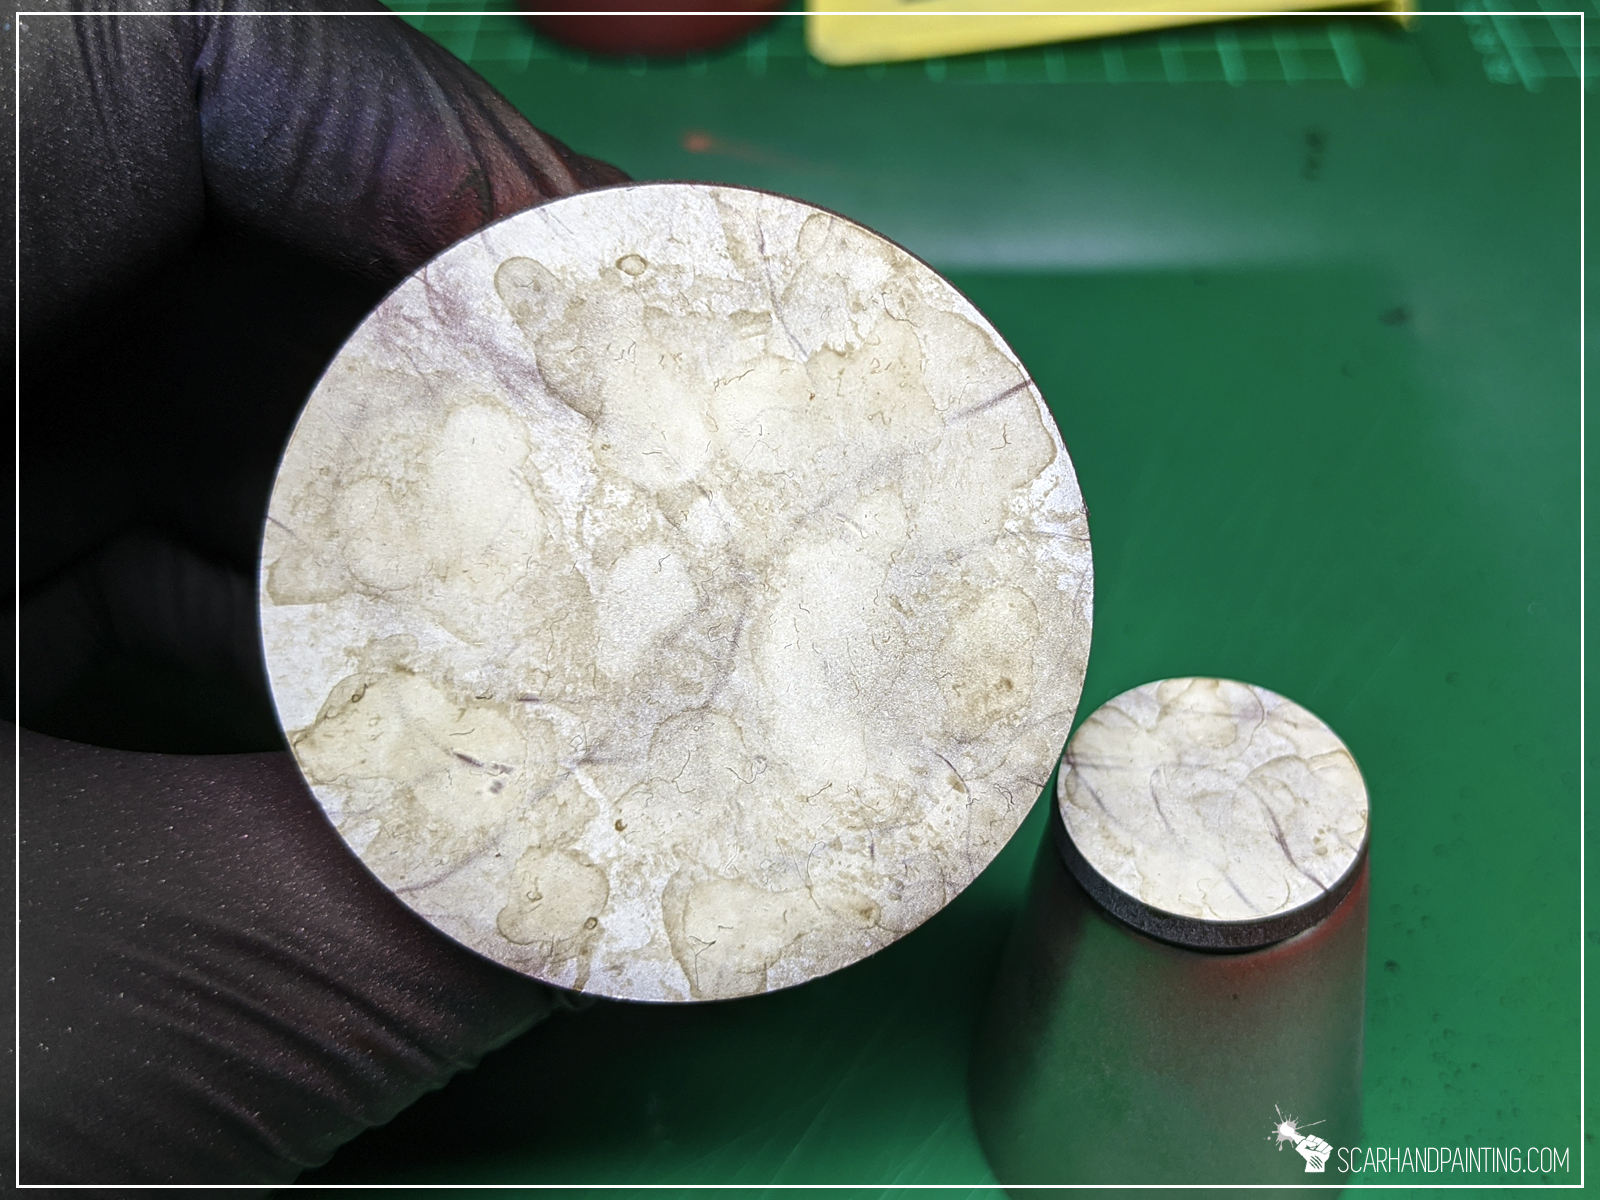
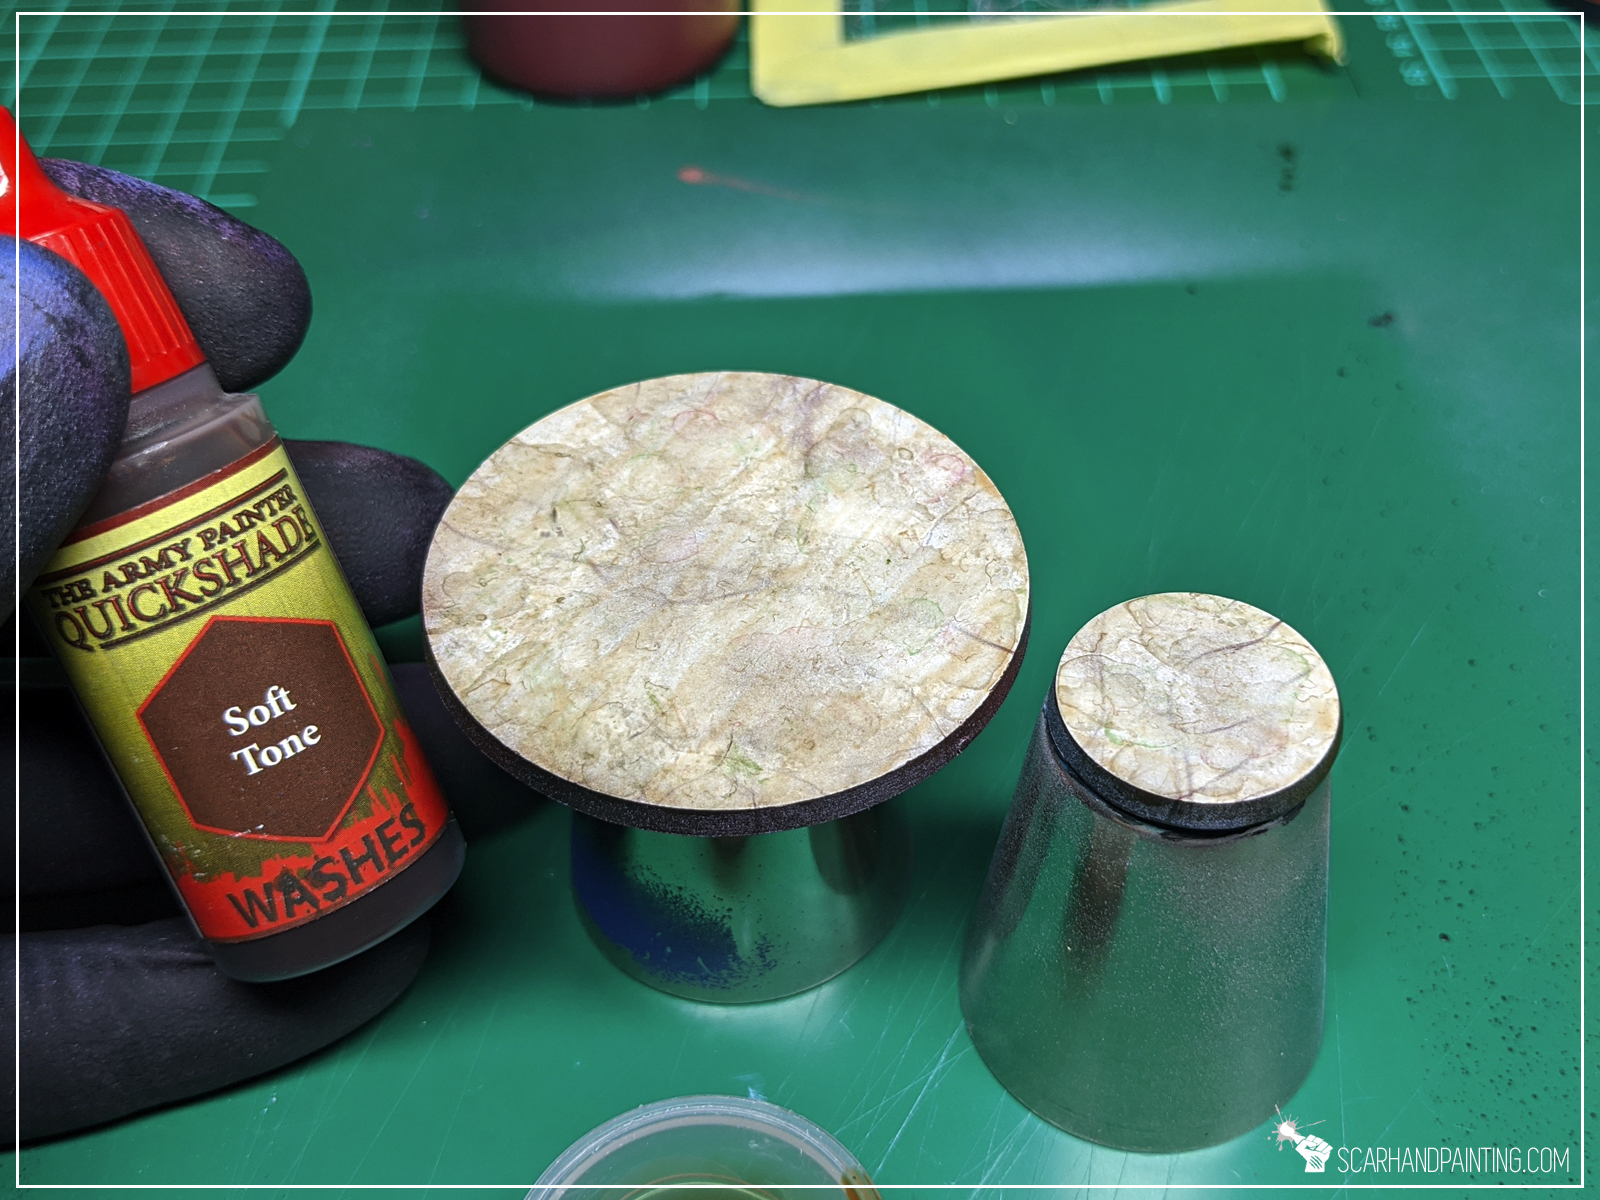
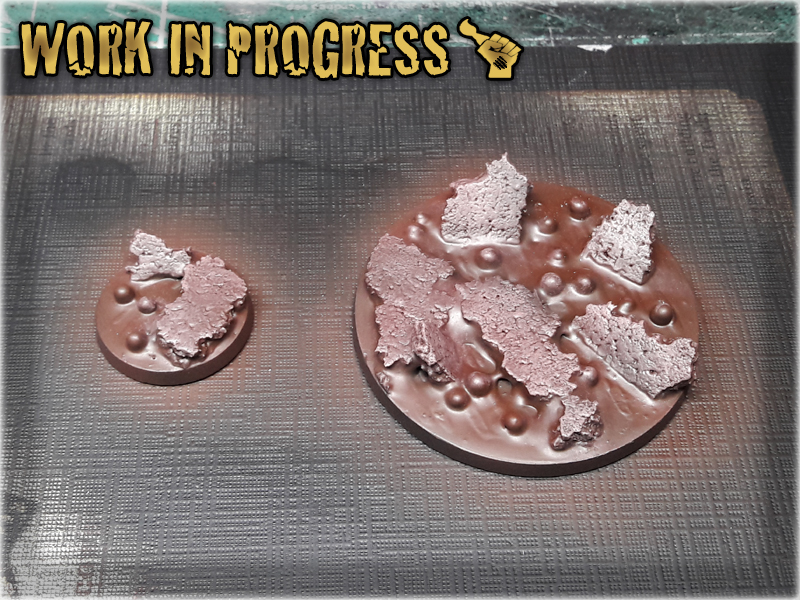
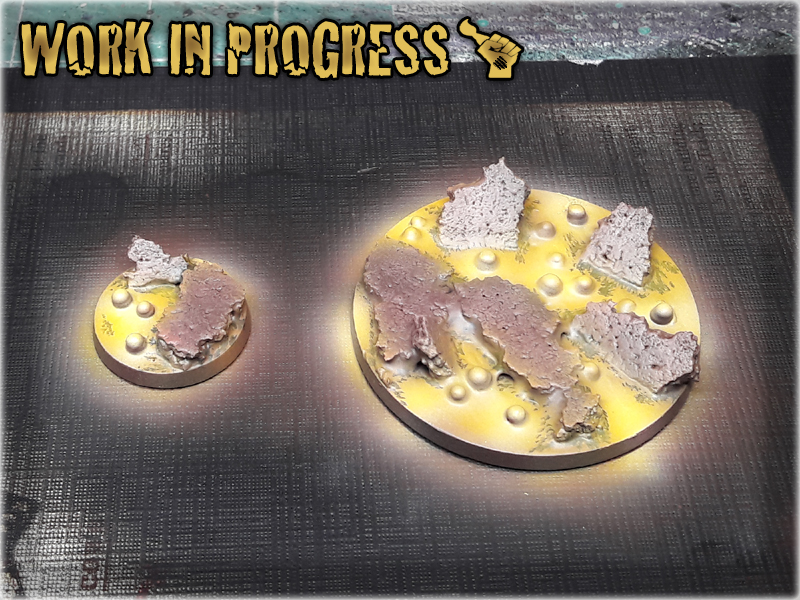
Step four: Sealing the colour
I then painted entire base with Army Painter Soft Tone Ink thinned with Games Workshop Lahmian Medium. I tried to keep the layer smooth and even.
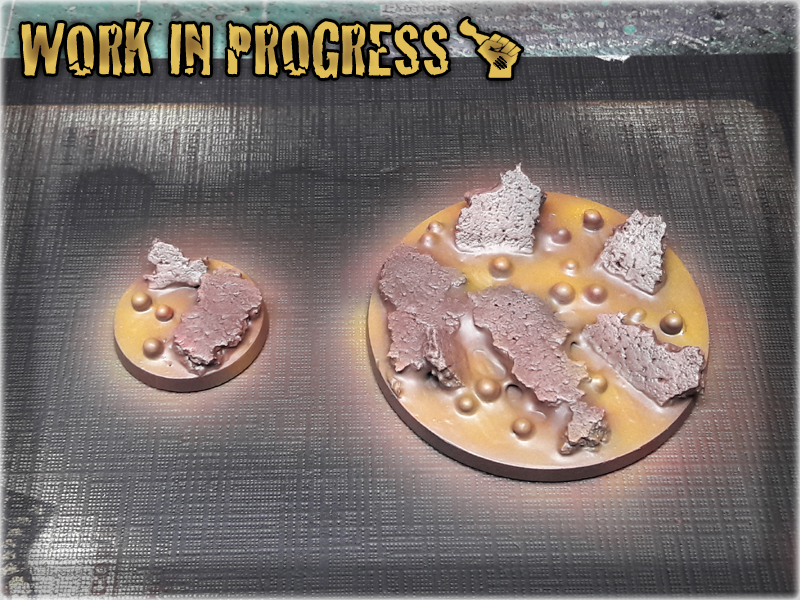
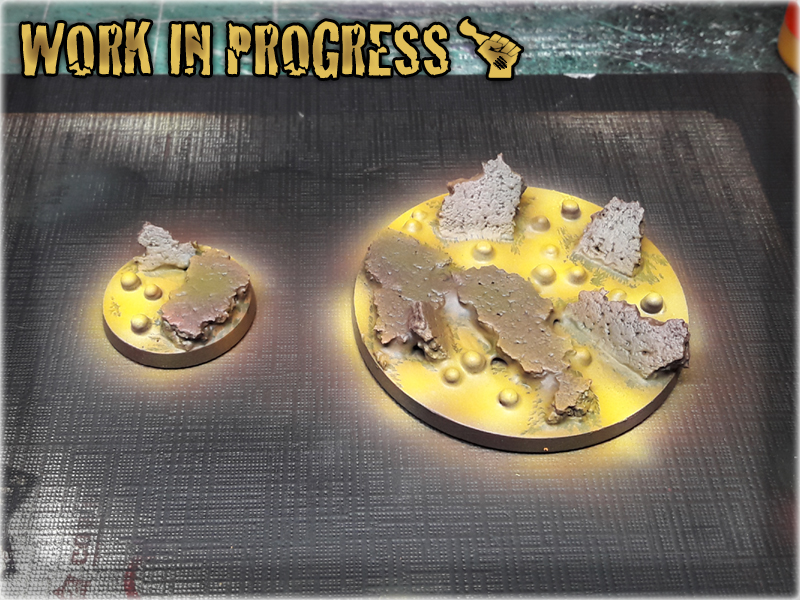
Step five: Gloss
Finally I applied two layers of airbrushed Gloss Varnish. This resulted in a nice polished glossy look. Depending on the effect you aim for Gloss Varnish can be switched with either Satin ot pure Matt.

Here’s how the finished base looks like.


Note from the author: This tutorial is by far the most popular article on Scarhandpainting.com. It was first published in early 2016 and then refurbished exactly four years later. I hope you enjoy this new look and that the tutorial is now much easier to follow. Comments and Critique are welcome.

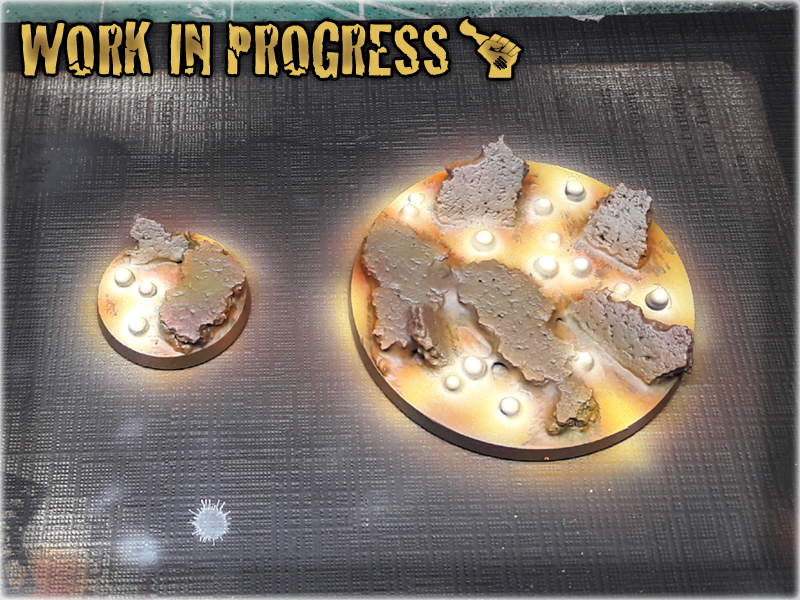
In this step-by-step tutorial I’m going to show you how to create Cityfight bases same way I did for Gallery: Tau Sa’Cea.

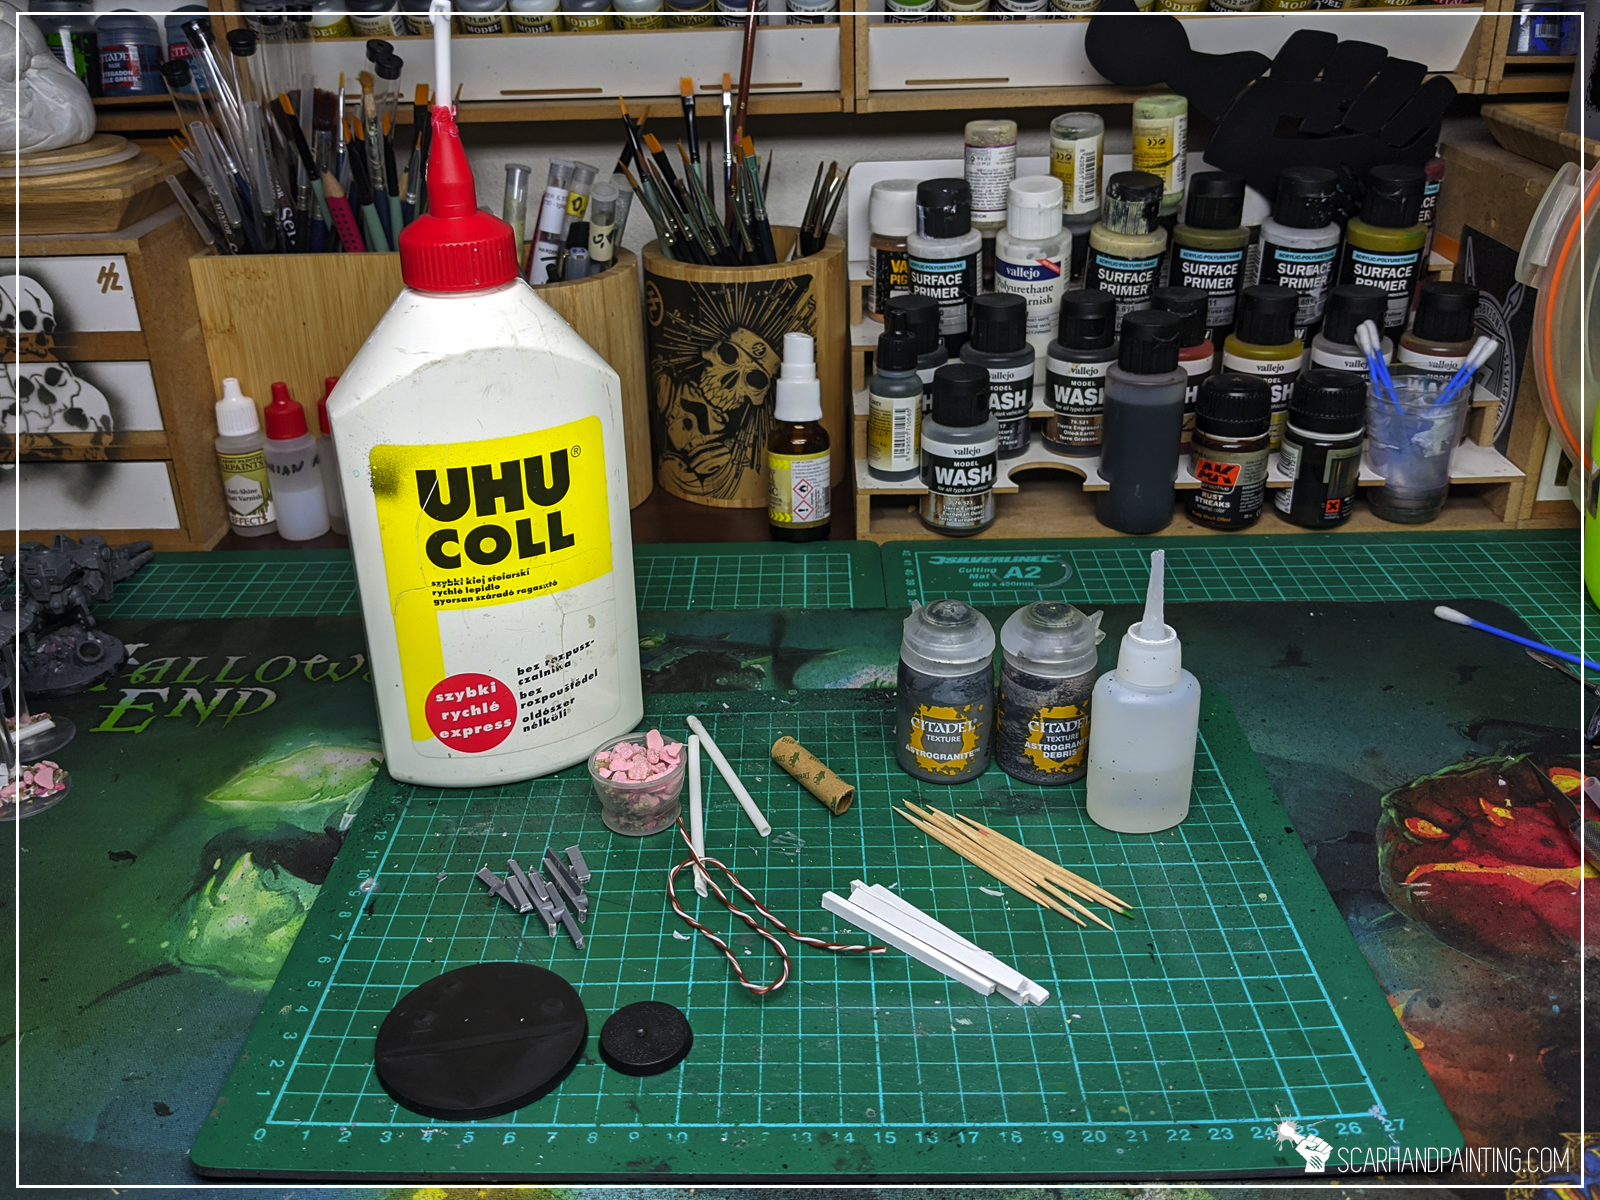
I used:
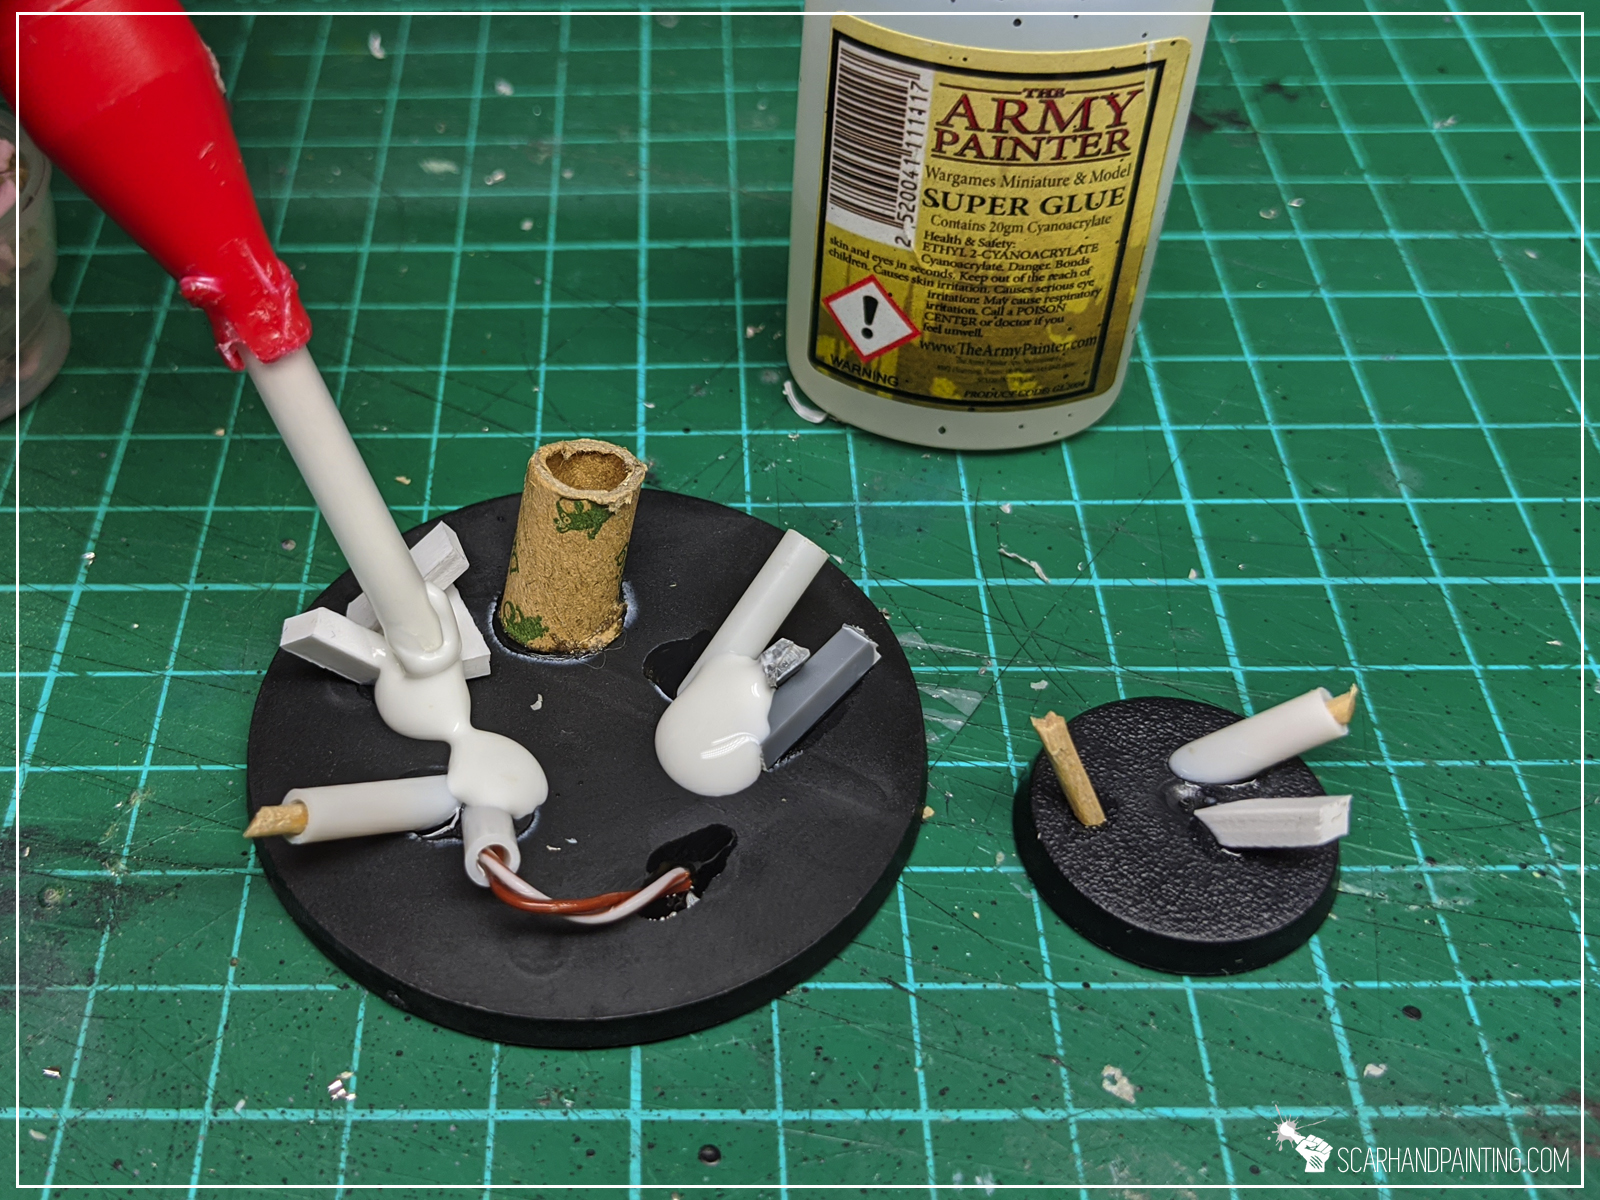
Step one: Special detail
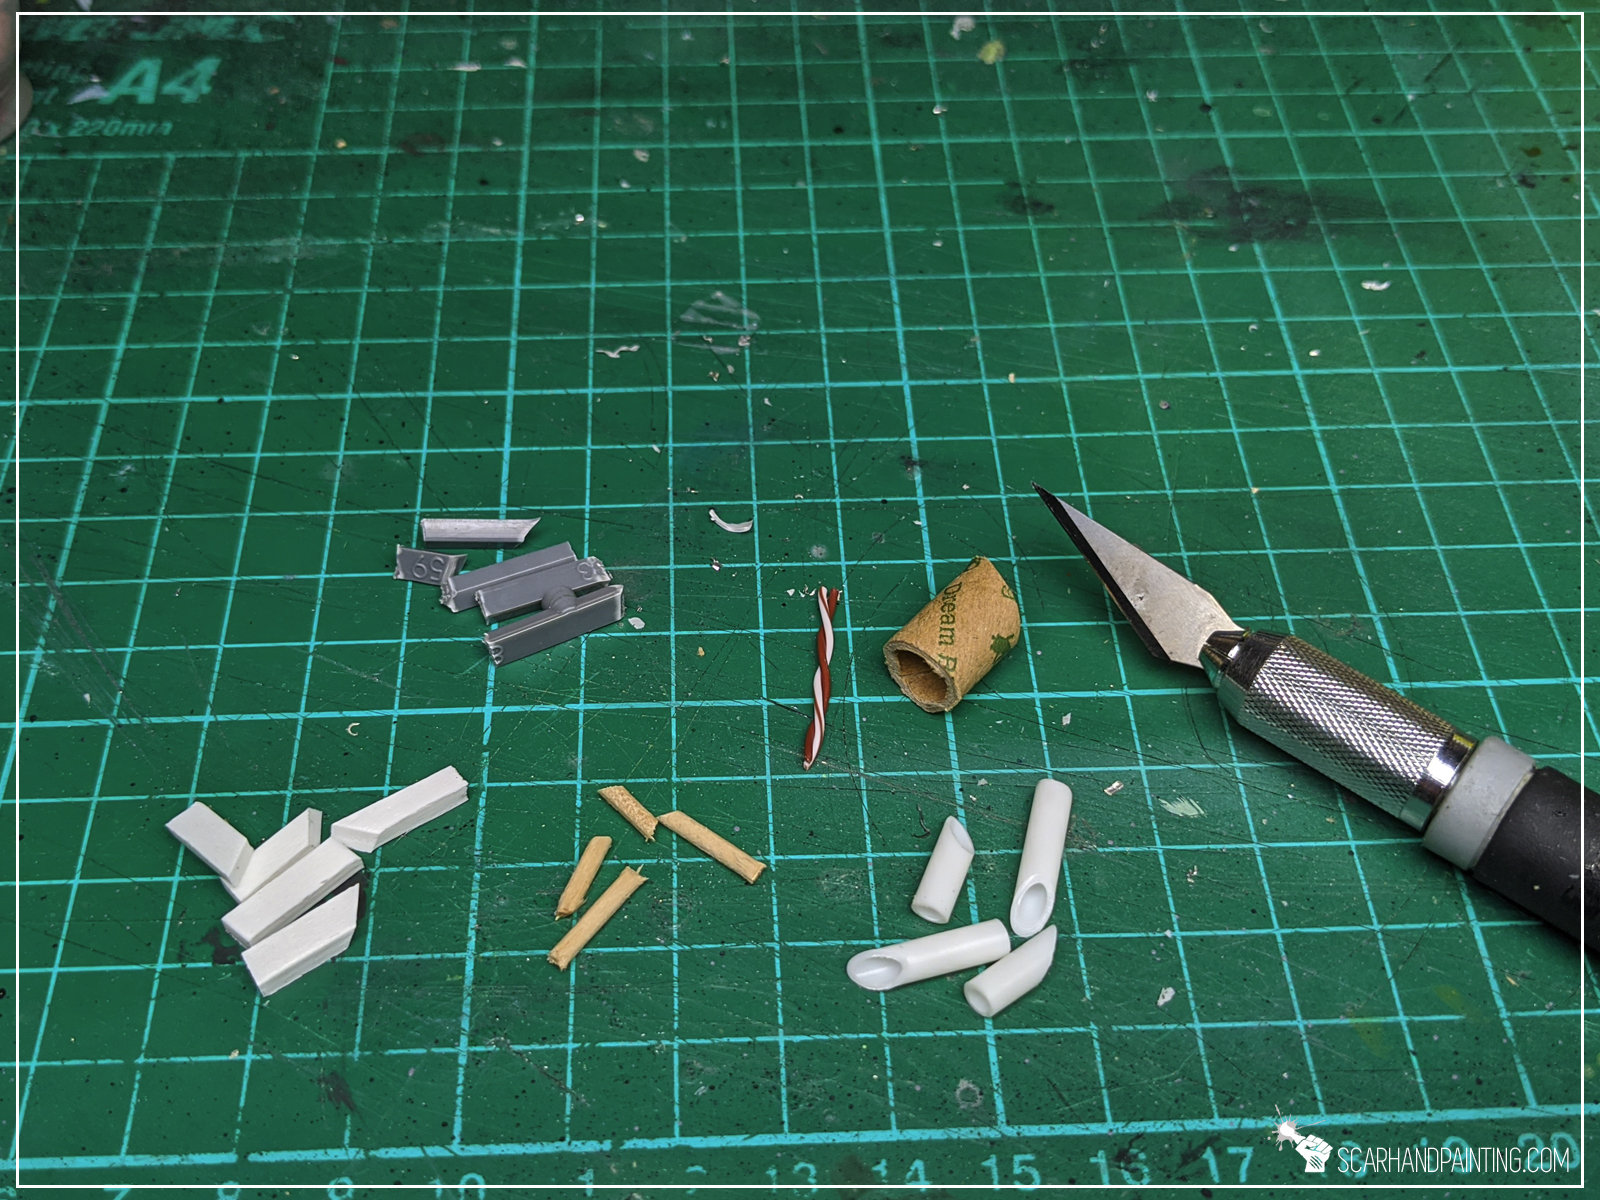

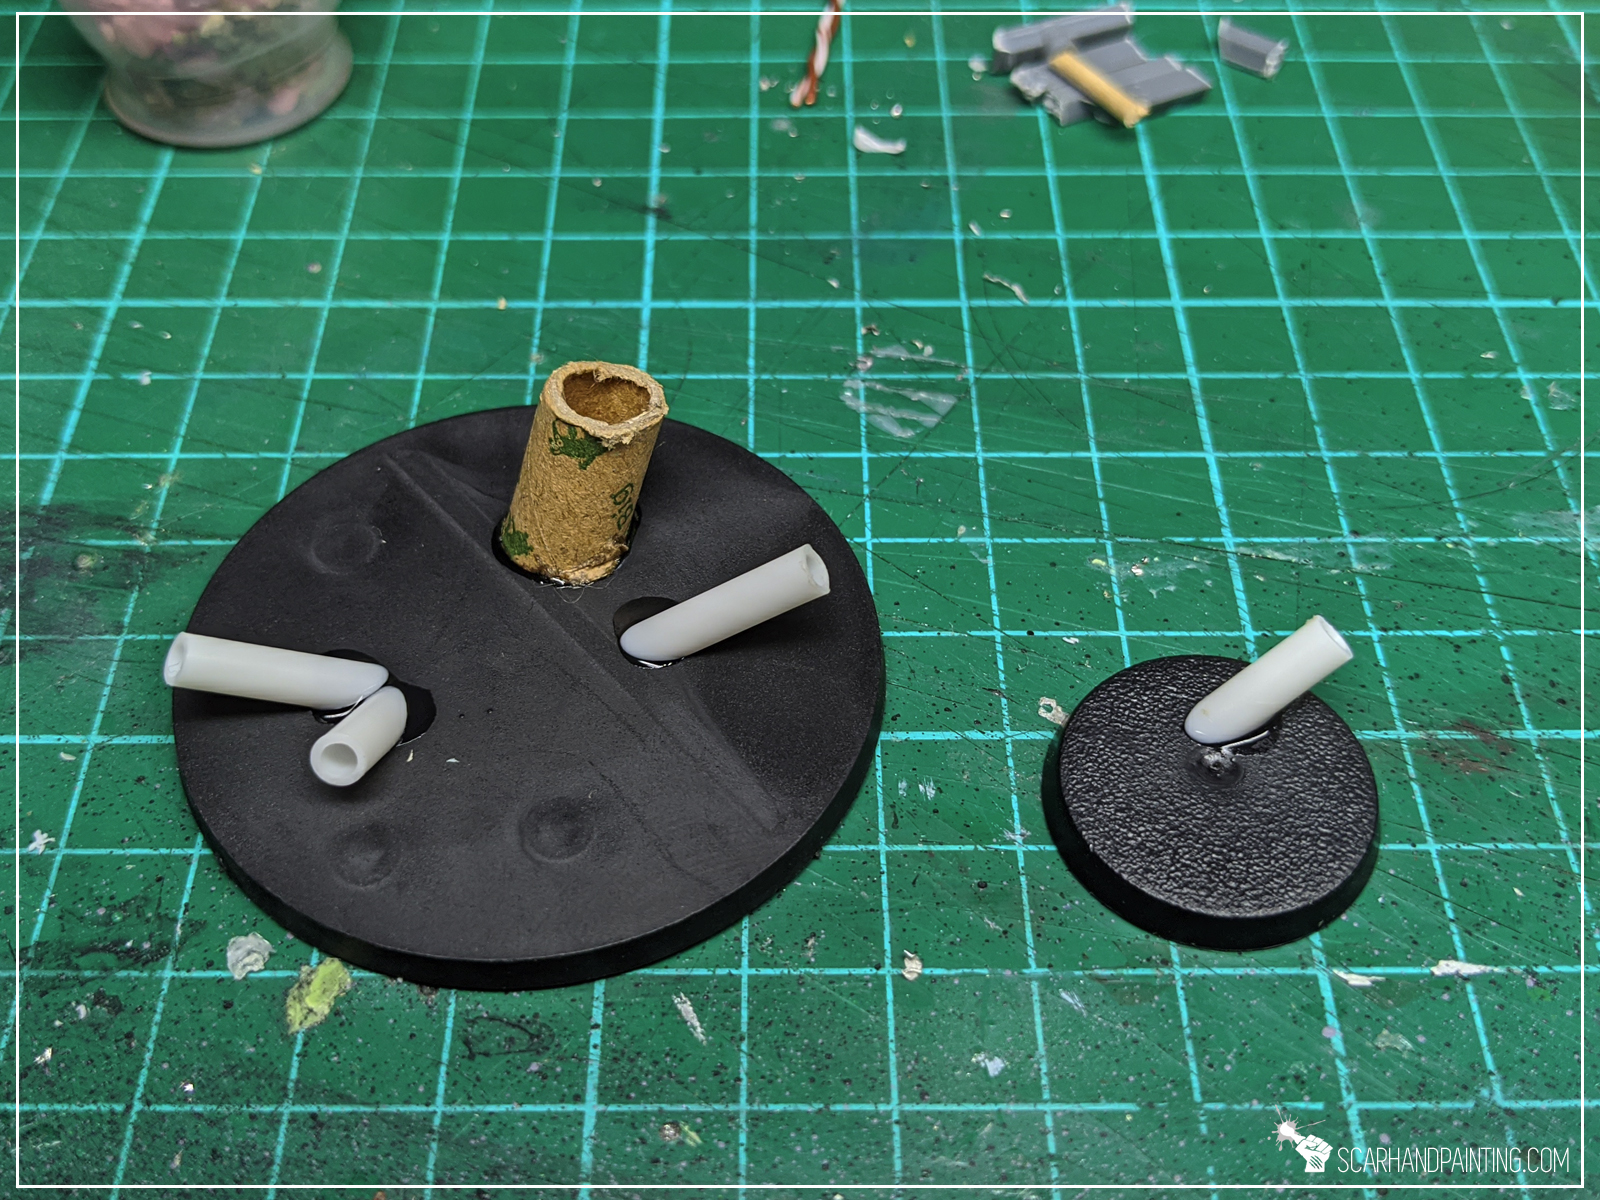

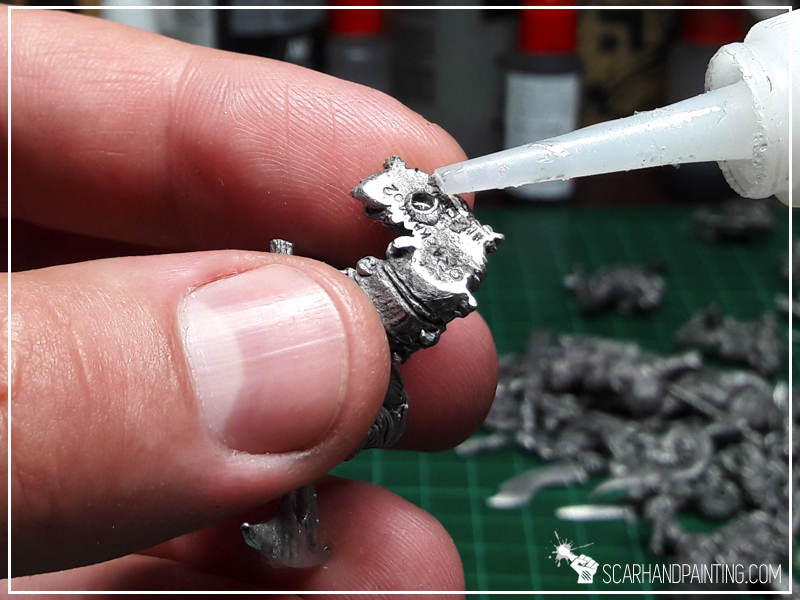
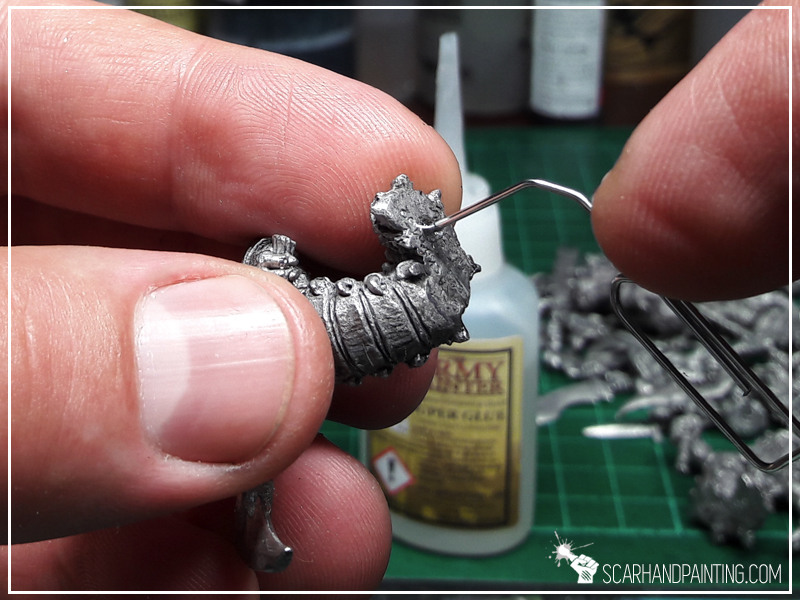
Using a hobby knife I cut all the sticks, sprues, toothpicks, plasticard and tube into small pieces. I made sure to cut one side of each piece at an angle, to better position each piece on the base. I then glued random pieces on top of a base using Super glue.
Step two: Gravel
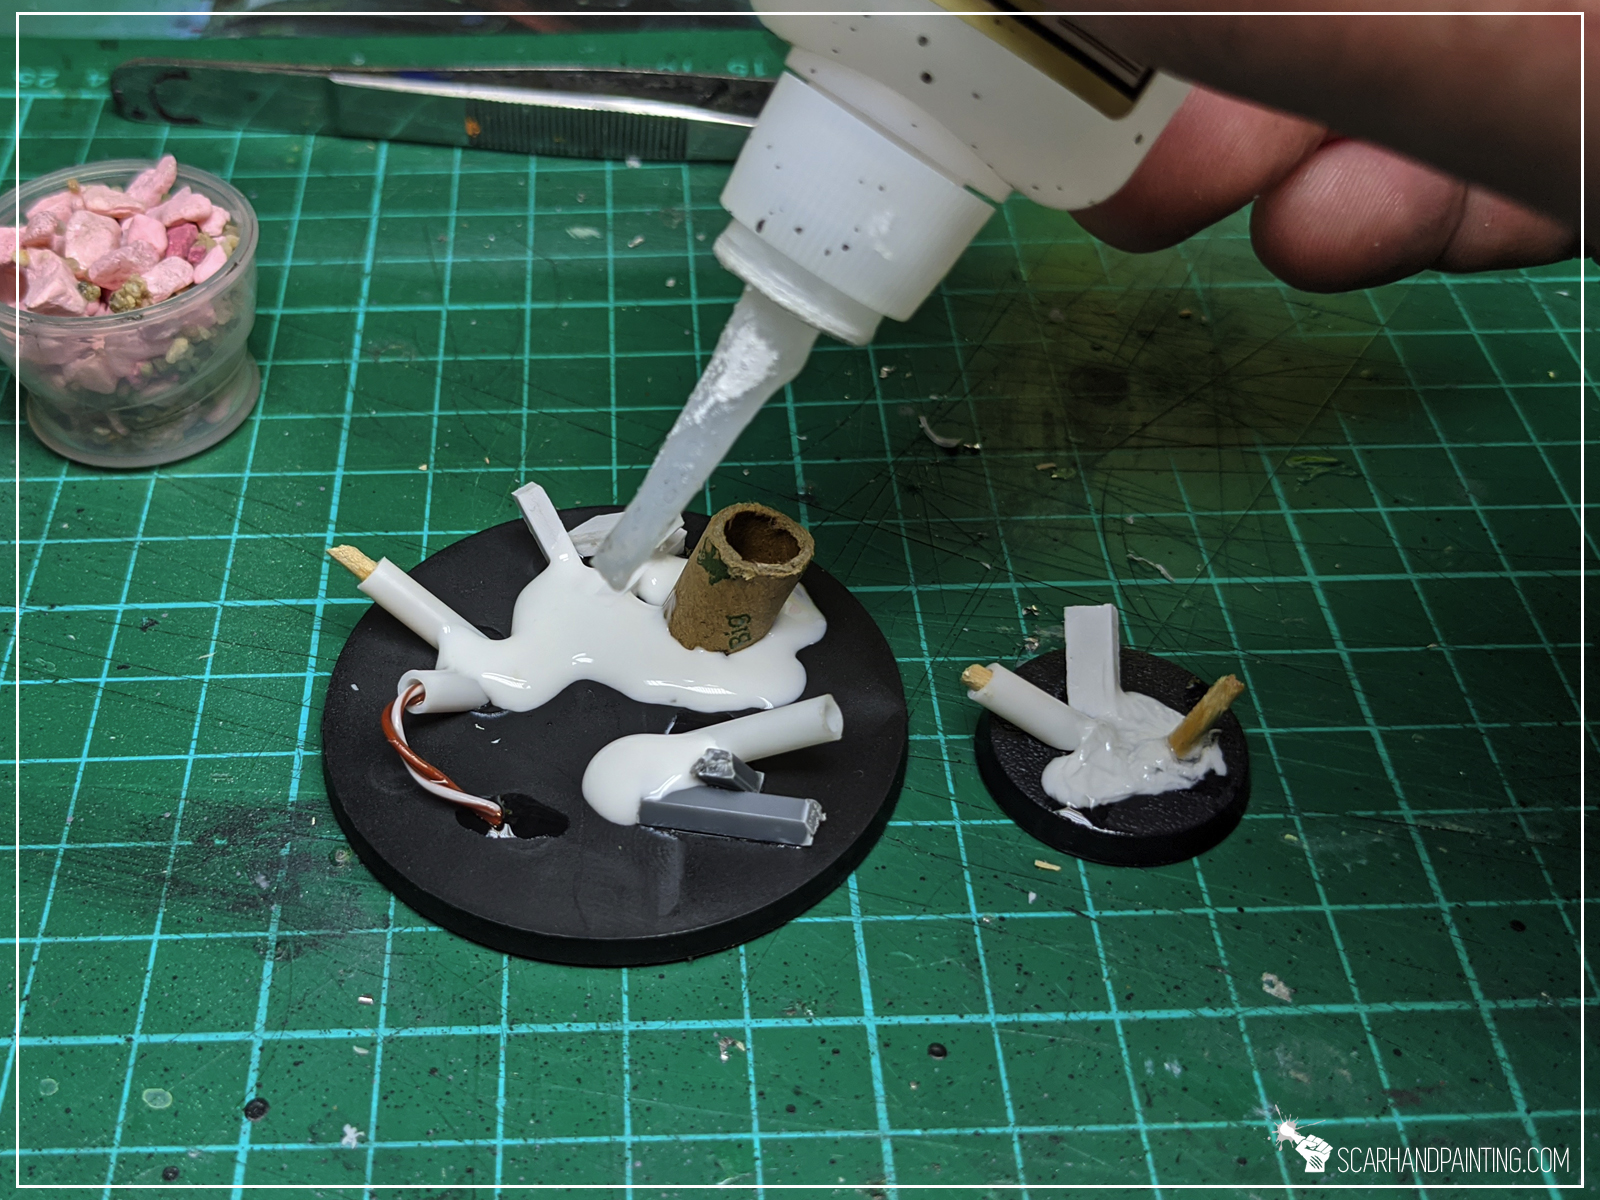


I applied PVA glue around previously glued pieces. I then applied Super glue on top of it and, before super glue hardened, covered entire thing with thick sand mixed with hobby gravel.
Step three: Texture
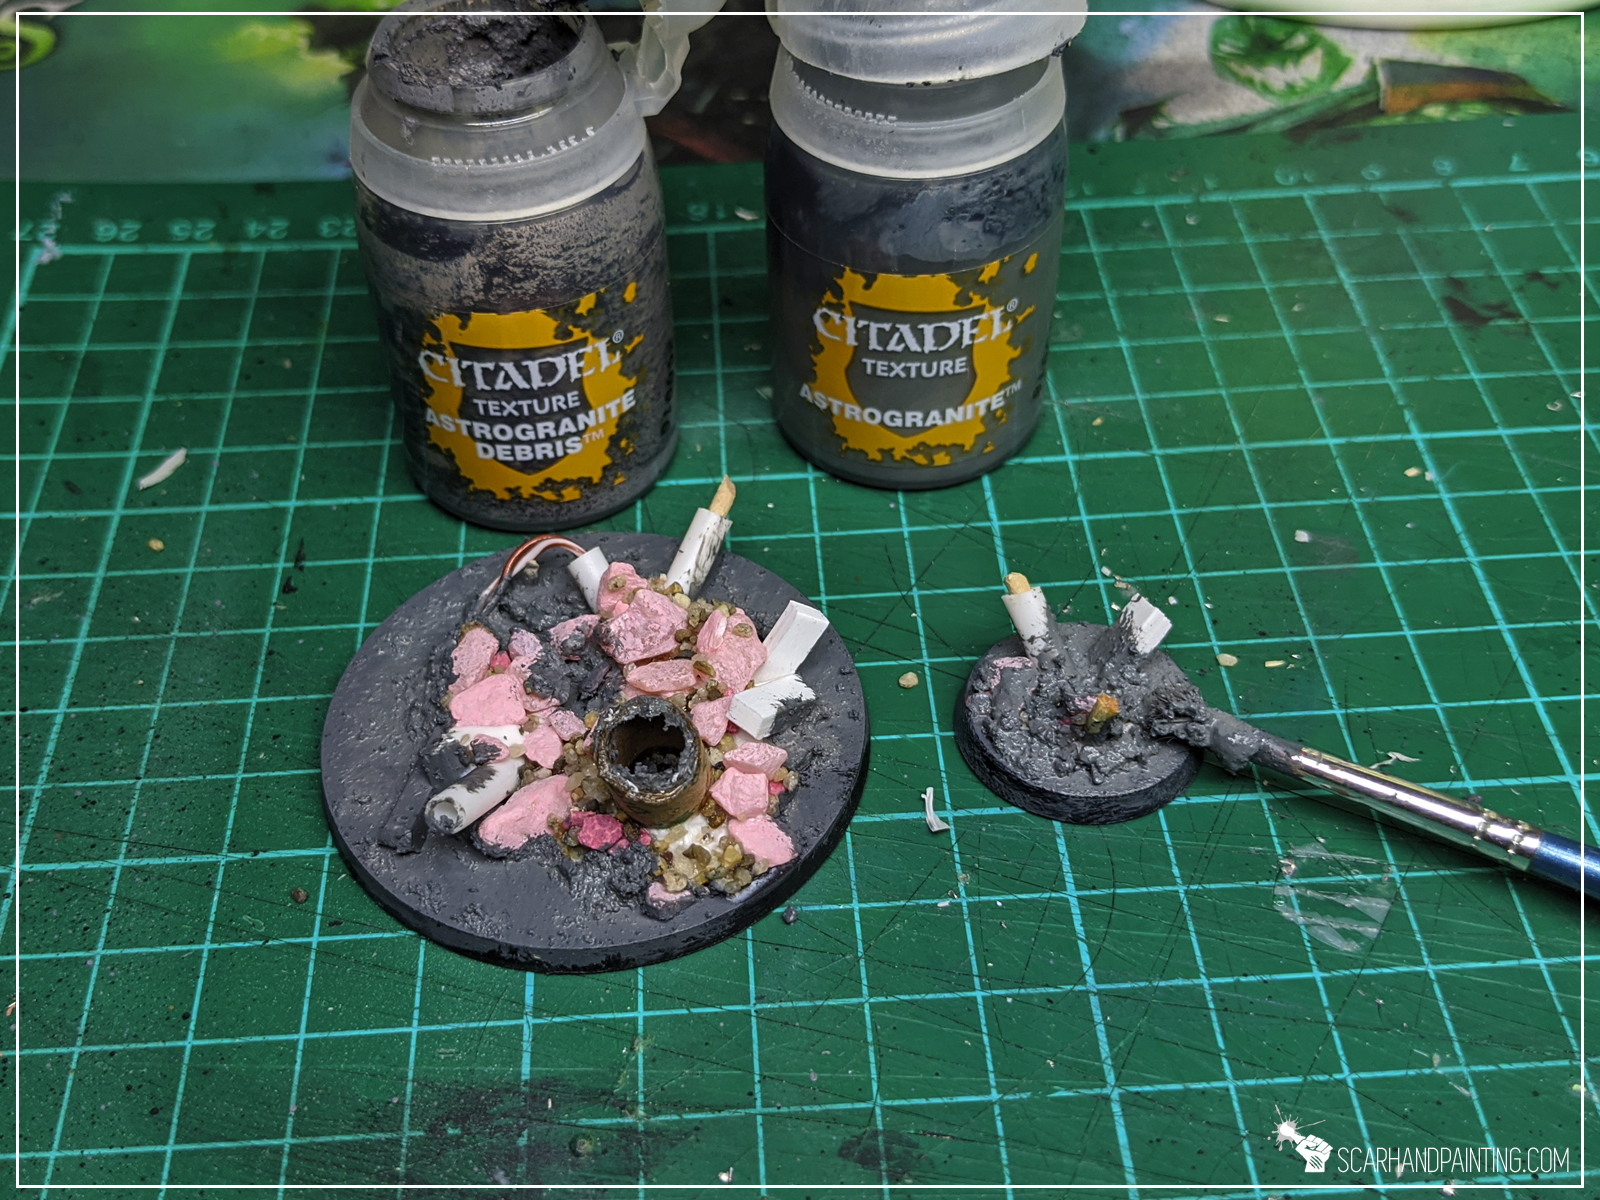
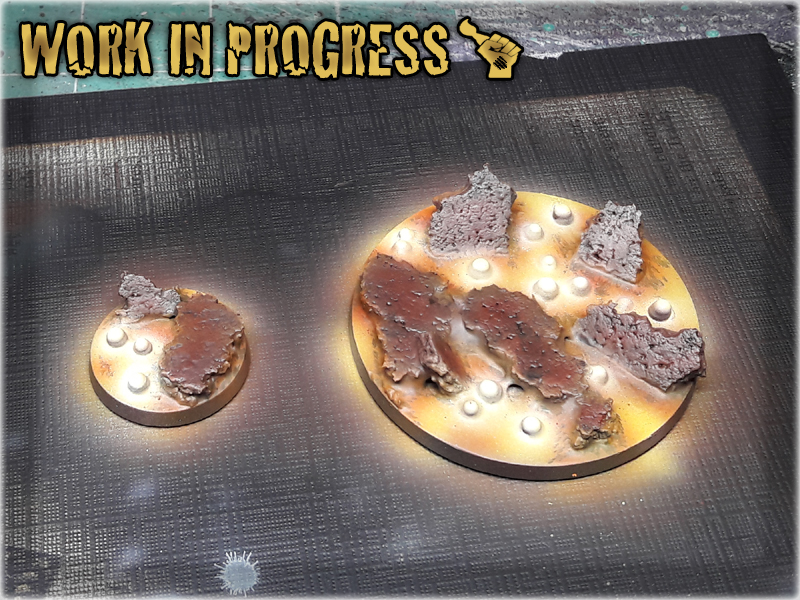
I then textured rest of the base using Games Workshop Astrogranite and Astrogranite Debris paints.
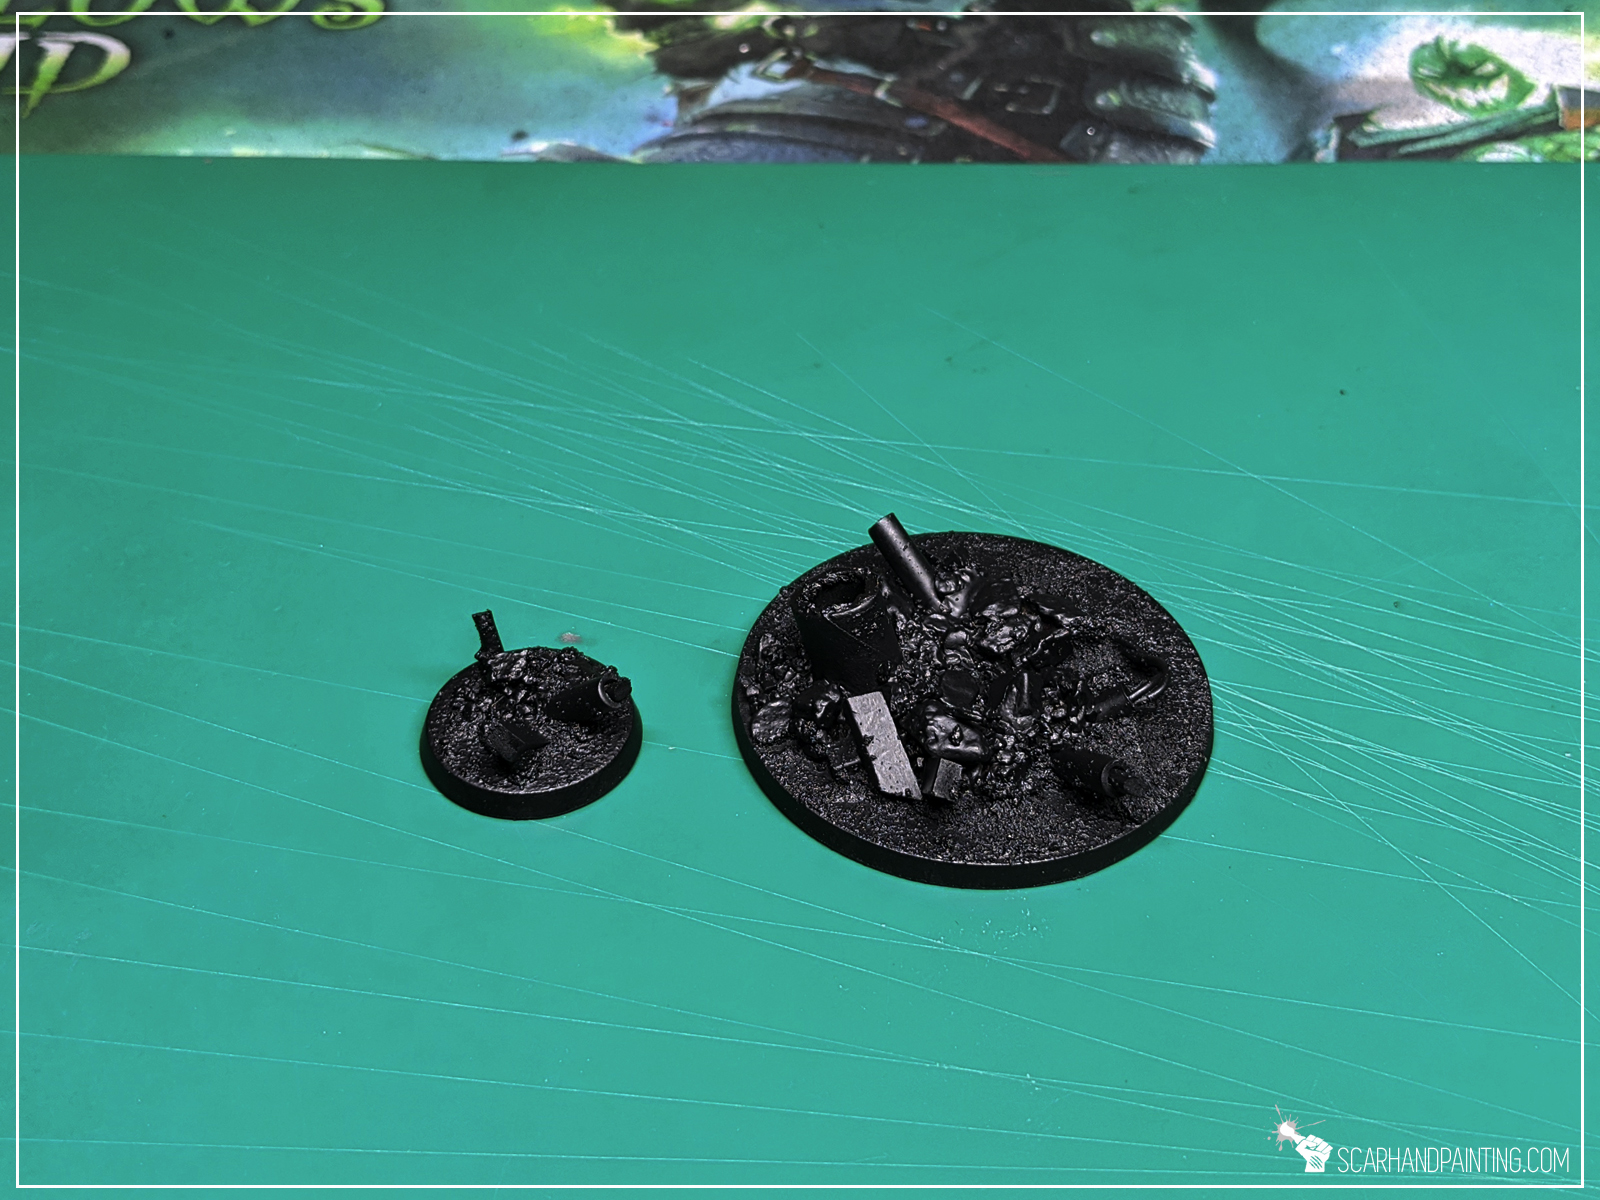


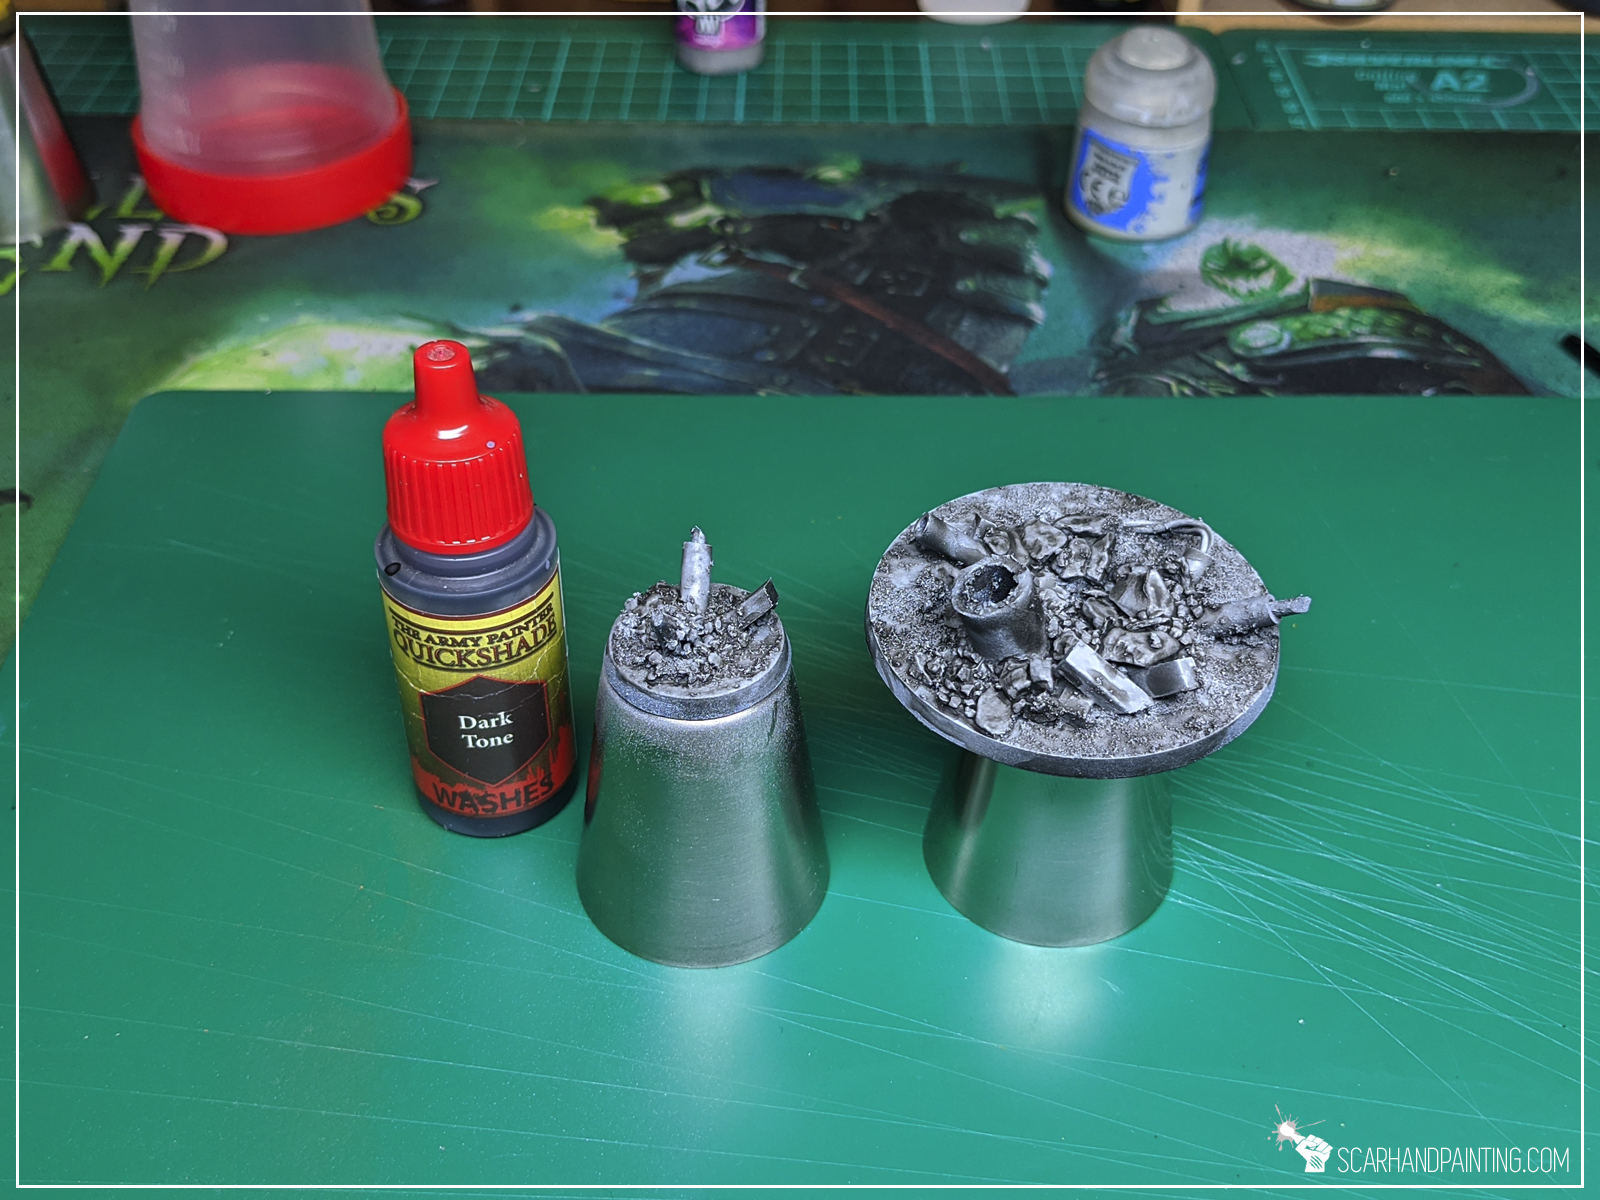
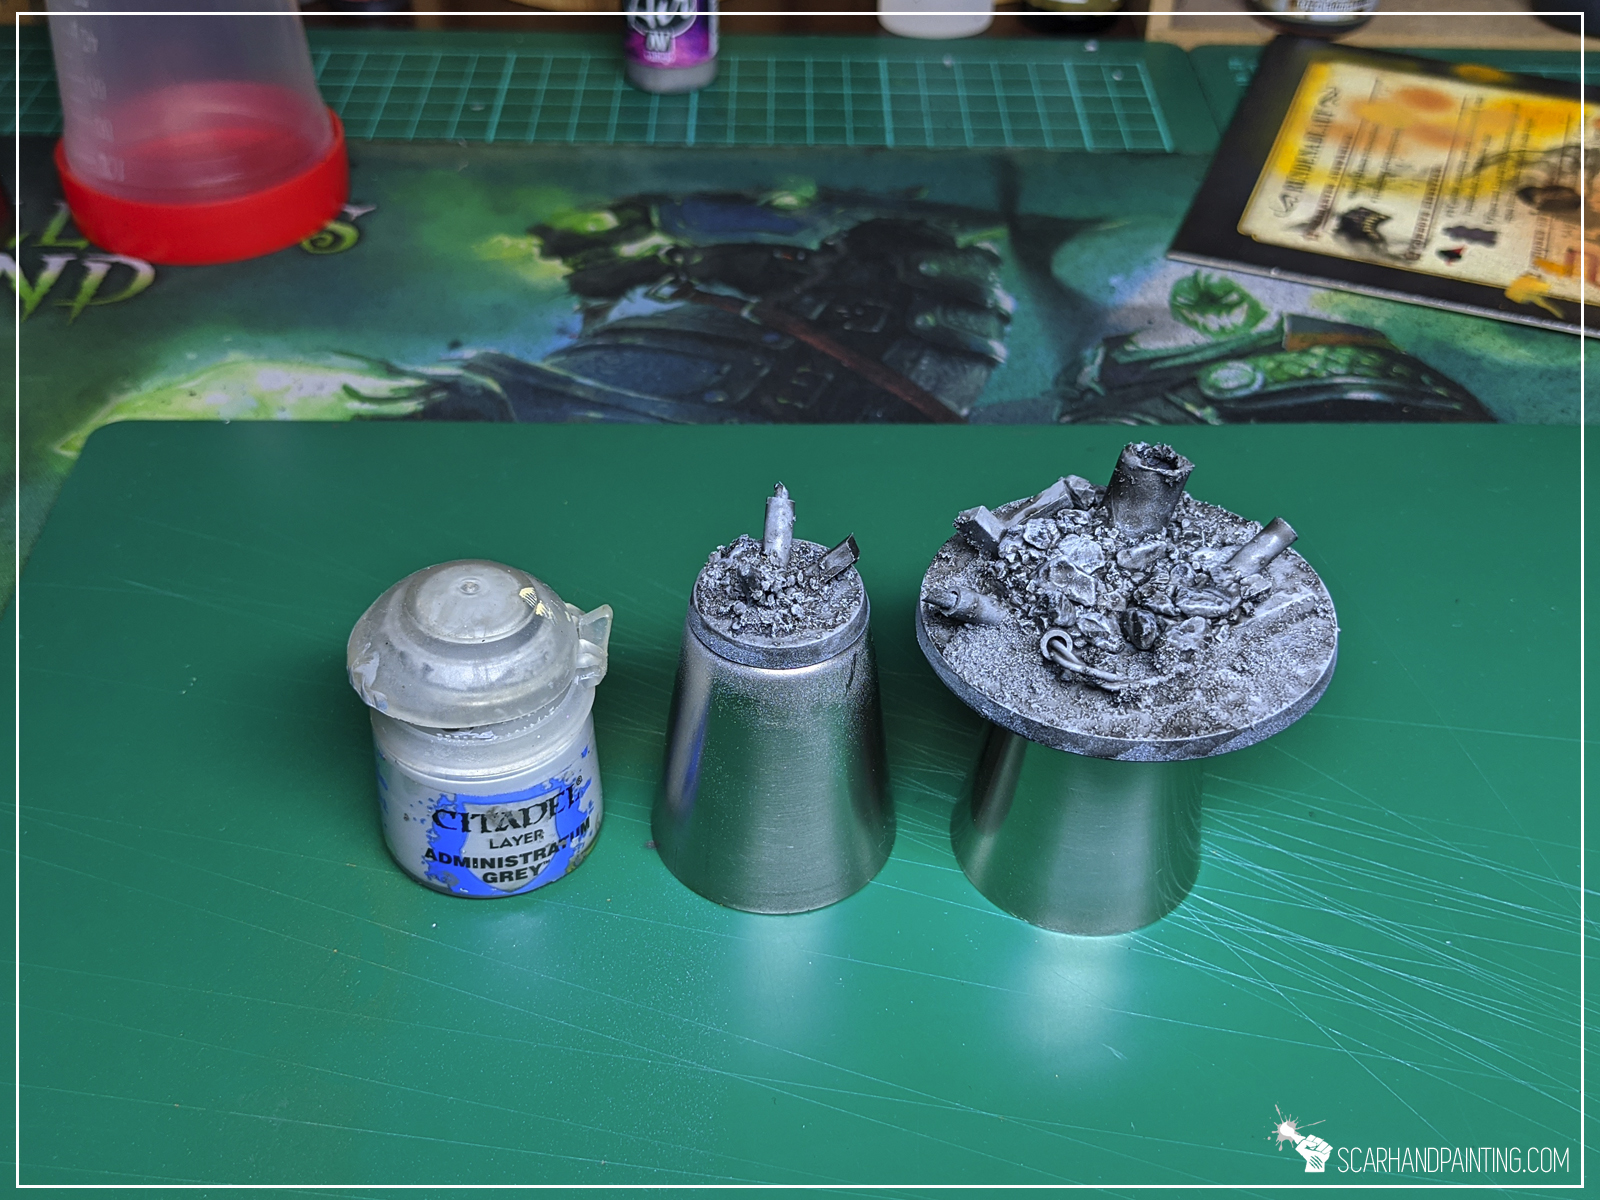
I started with Black Undercoat, then airbrushed a layer of Vallejo Cold Grey, followed short by Vallejo Stonewall Grey. I then washed everything black using Army Painter Dark Tone Ink and once it dried I drybrushed entire base with Games Workshop Administratum Grey.


For metal debris elements I used a mix of Games Workshop Warplock Bronze and Army Painter Gun Metal, followed by a highlight of Army Painter Shining Silver. I then washed all the pieces brown with Army Painter Strong Tone Ink.
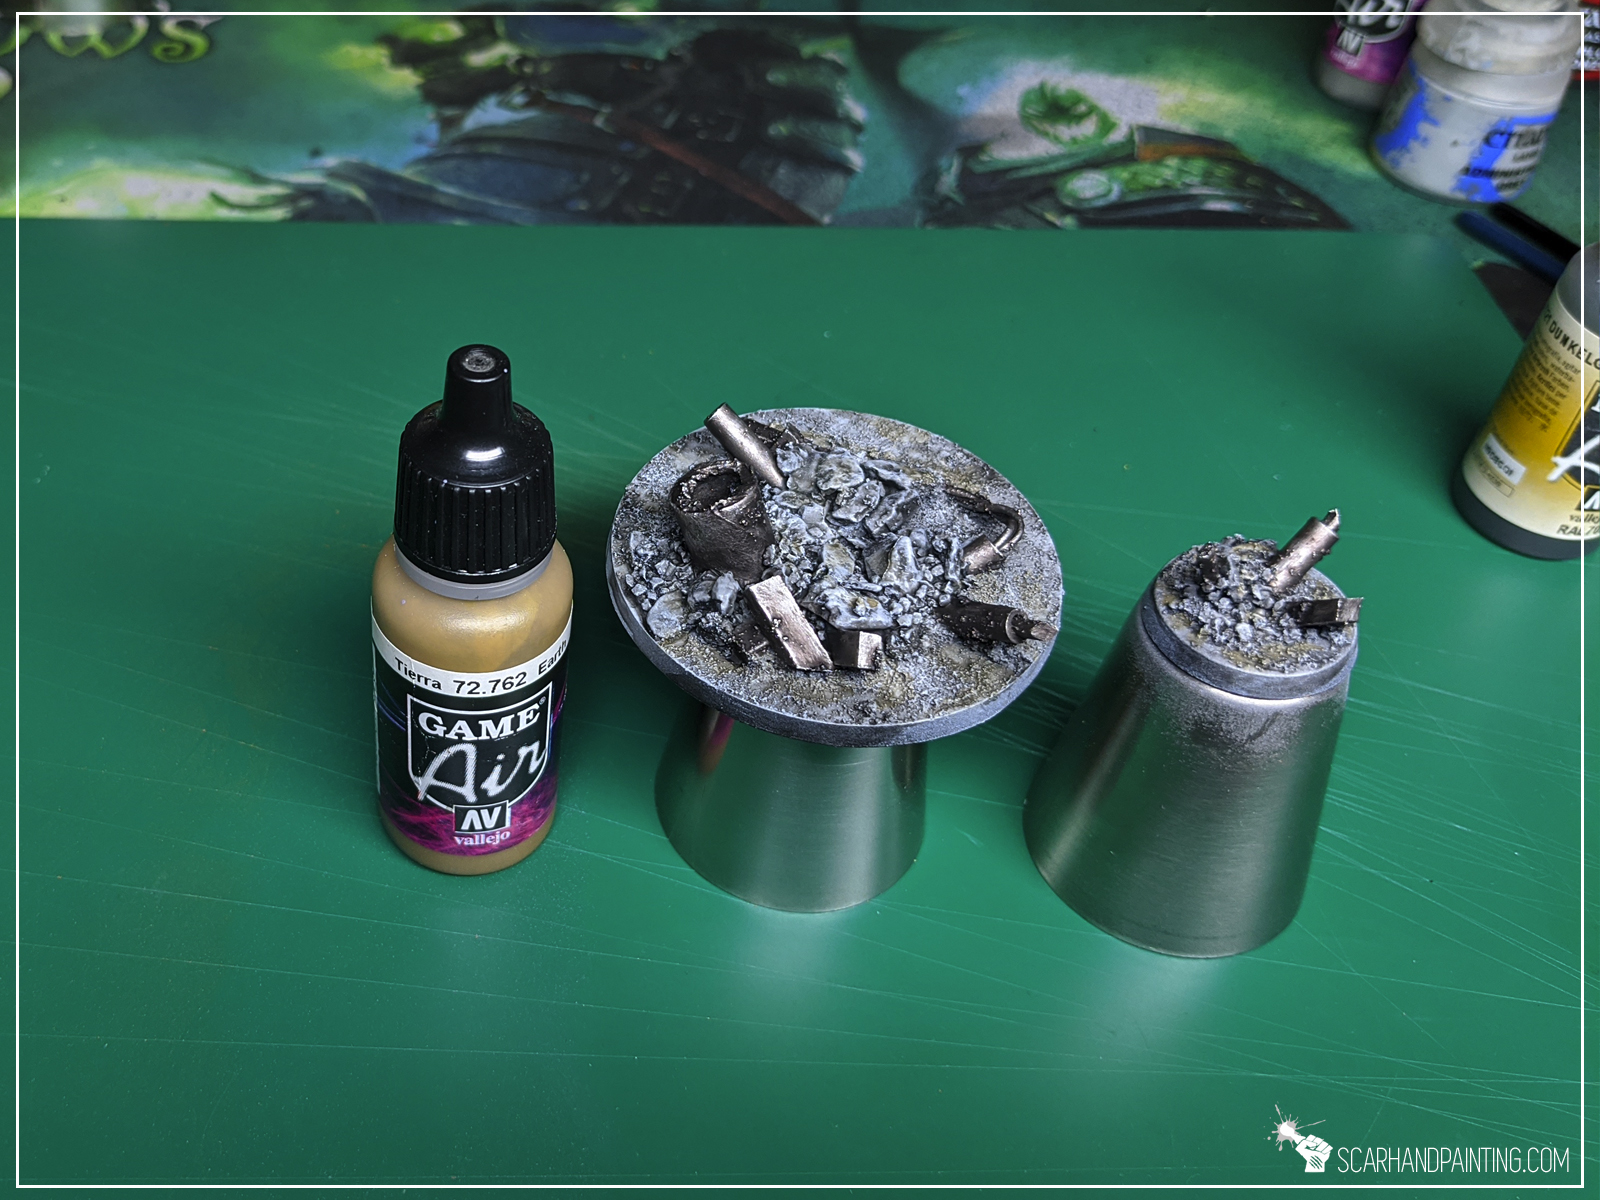
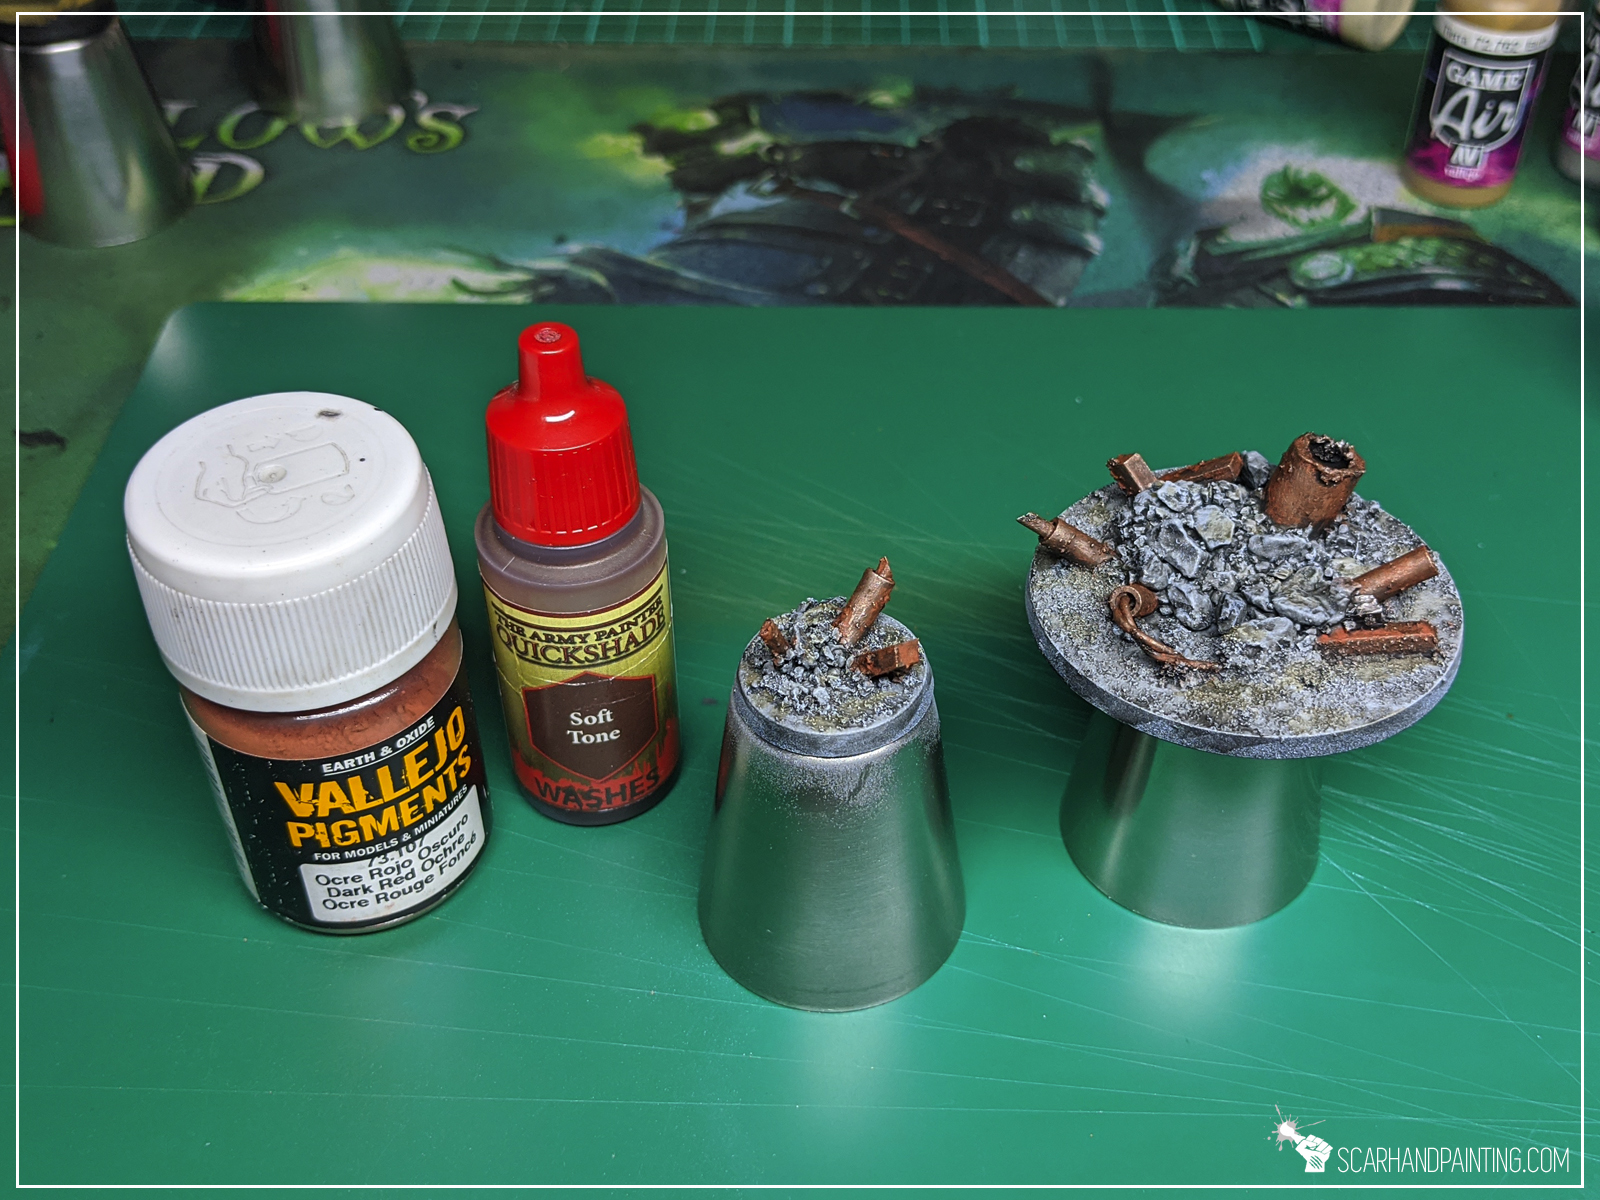

For additional depth and effects I blended in some watered Vallejo Earth. Next I washed all metal debris with a mix of Vallejo Dark Red Ochre Pigment and Army Painter Soft Tone Ink. Lastly I drybrushed grey areas with Vallejo Ghost Grey.
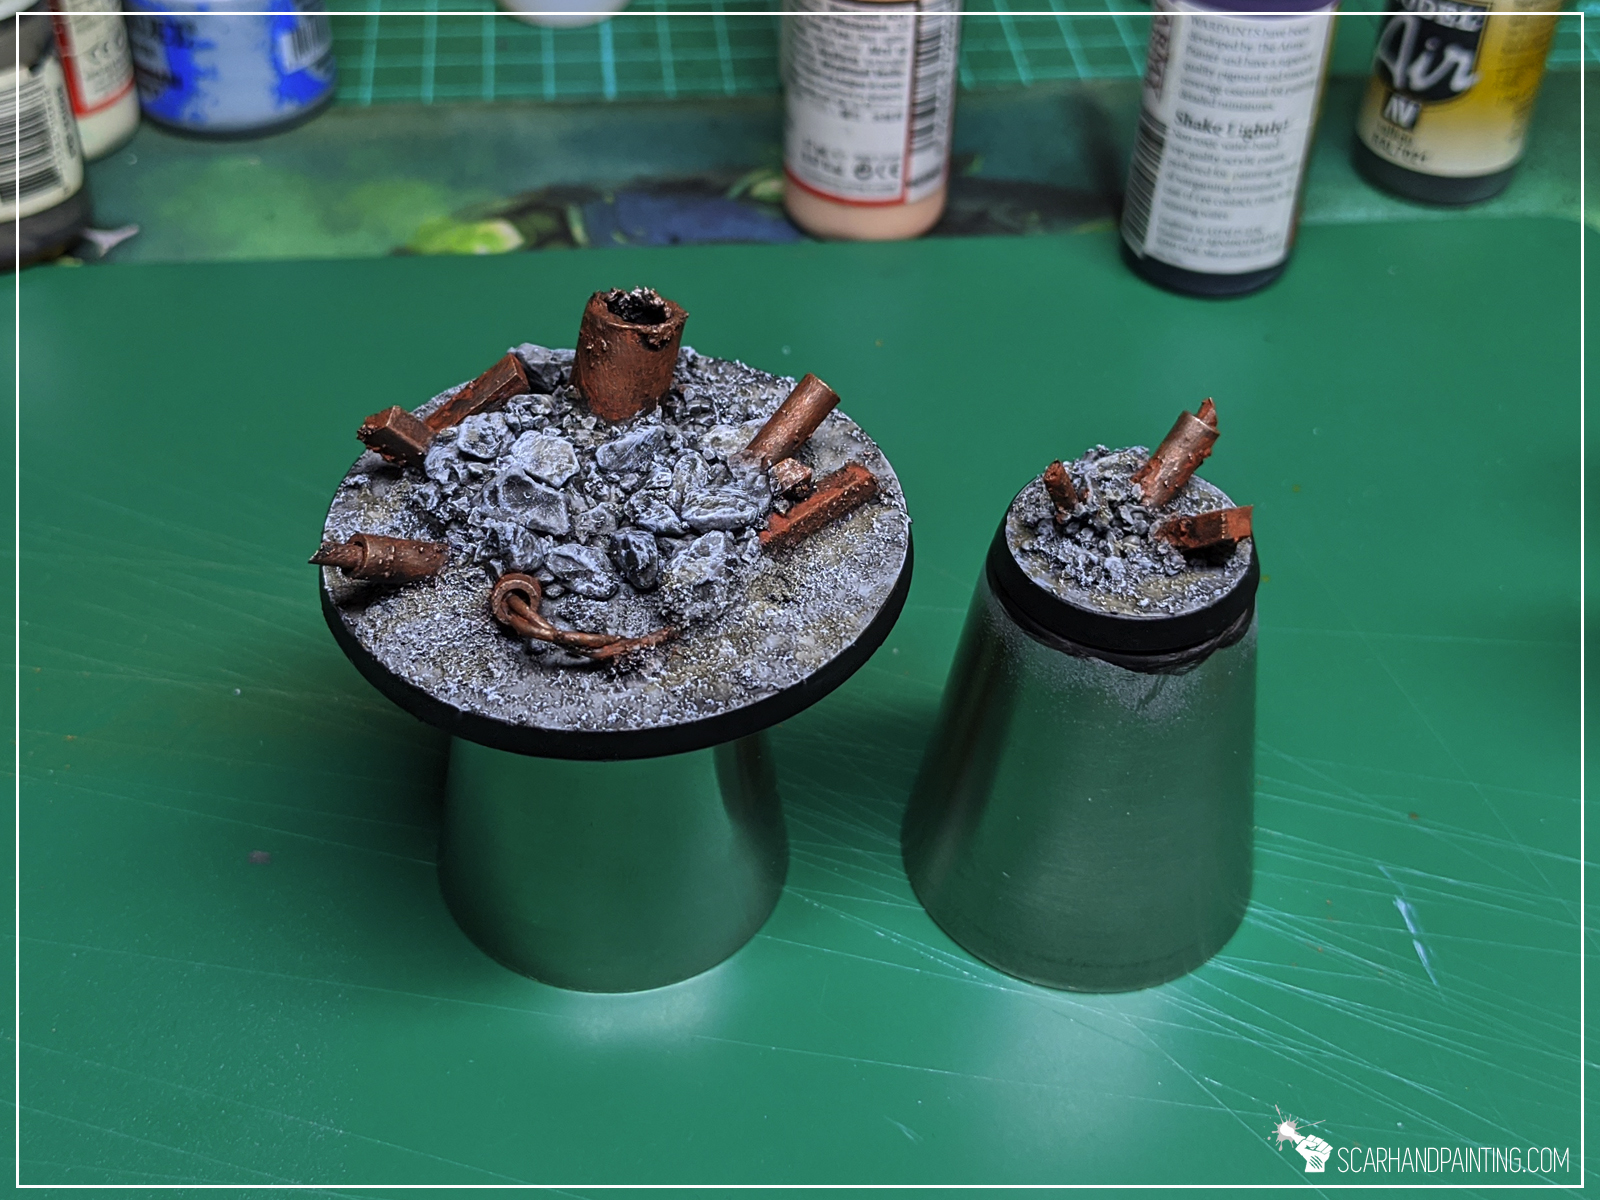
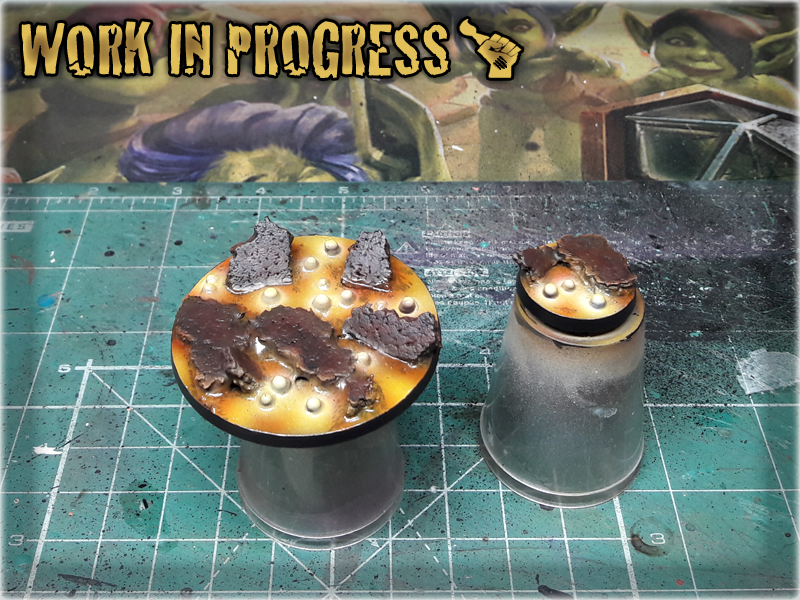
Edges repainted black and job done!
You like this article? Don’t be a stranger! Let me know what you think in the comments below or at my Facebook profile! Cheers!

In this step-by-step tutorial I’m going to show you how to base miniatures.

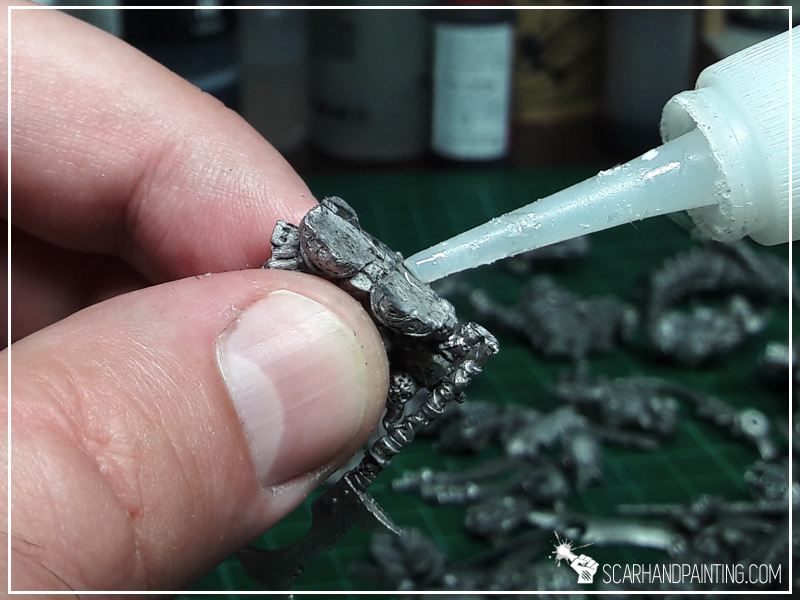
Basing miniatures is an overall easy thing, still every now and then I stumble upon hobbyists asking on how to properly do it. Let’s start the answer with: “There’s no one proper way, but there are certainly plenty of bad ways to base miniatures.” A quick example of a “bad way” would be if you glued irregular sand on top of a base and tried to glue a miniature on top of it with cyanoacrylate glue. Glue would go on a rampage all over the sand while it won’t hold the miniature in place due to insufficient area of contact. Another example of a “bad way” would be gluing a miniature on top of a painted base without a pin resulting in miniature being glued to paint rather than the base. This can only end badly for the miniature and your paint job. Ok, so what are the “proper ways”? Here’s three major techniques I use:

Some miniatures seem stable and have a large, flat area at the bottom be it giant feet, or an underside of a robe. In this case I usually go with with no pin at all and trust in the vast area of contact to keep the miniature in place.
Here’s how I go about it:
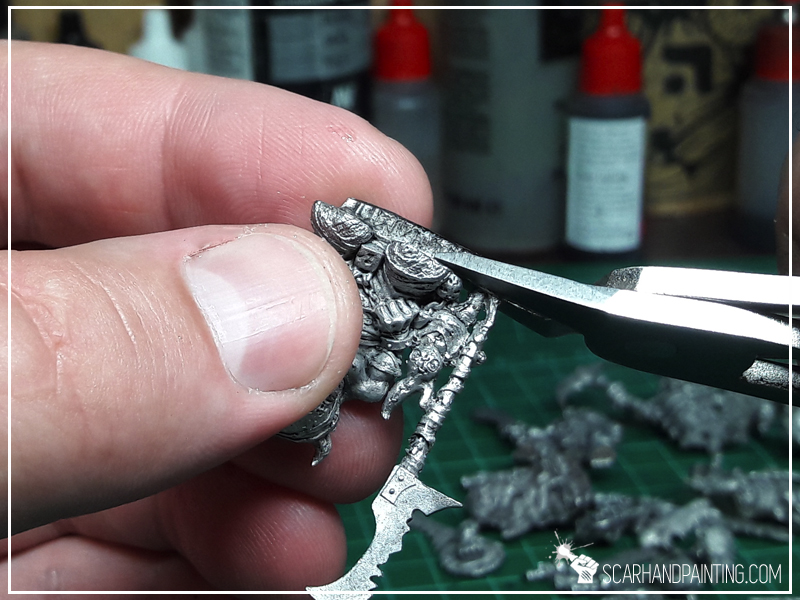
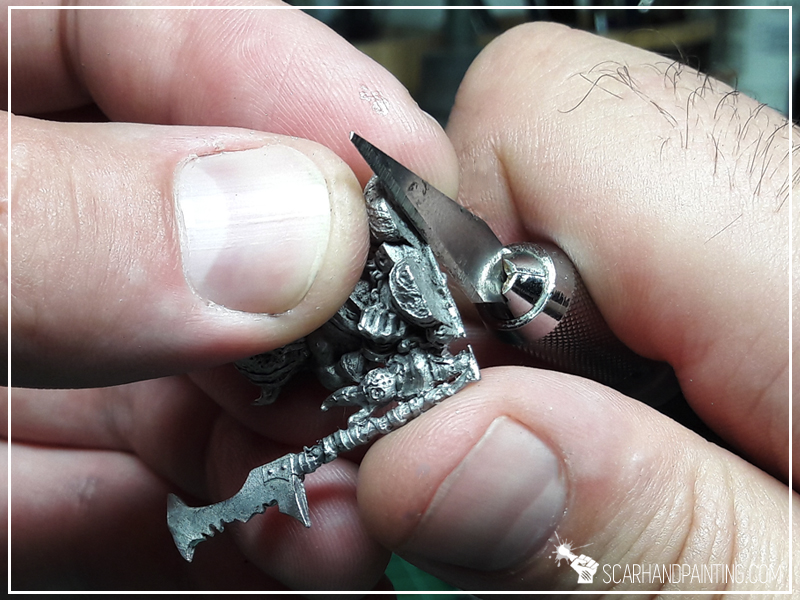
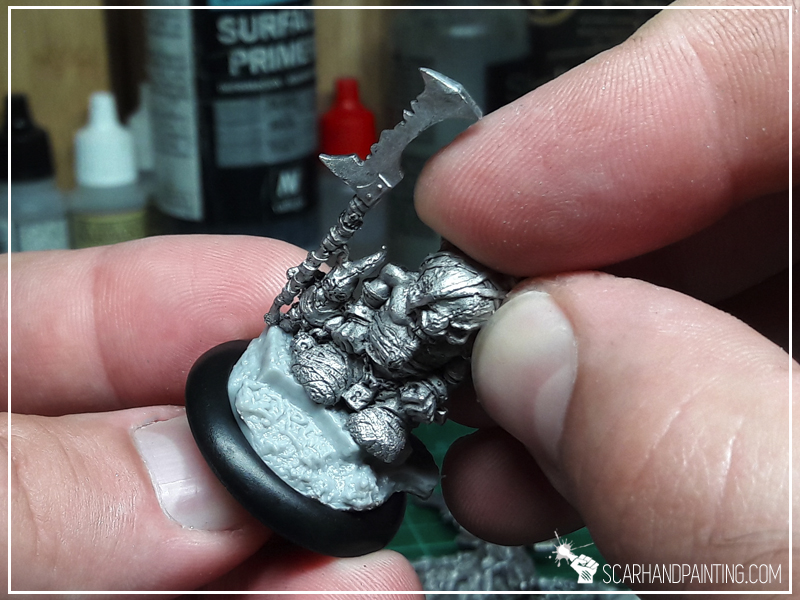
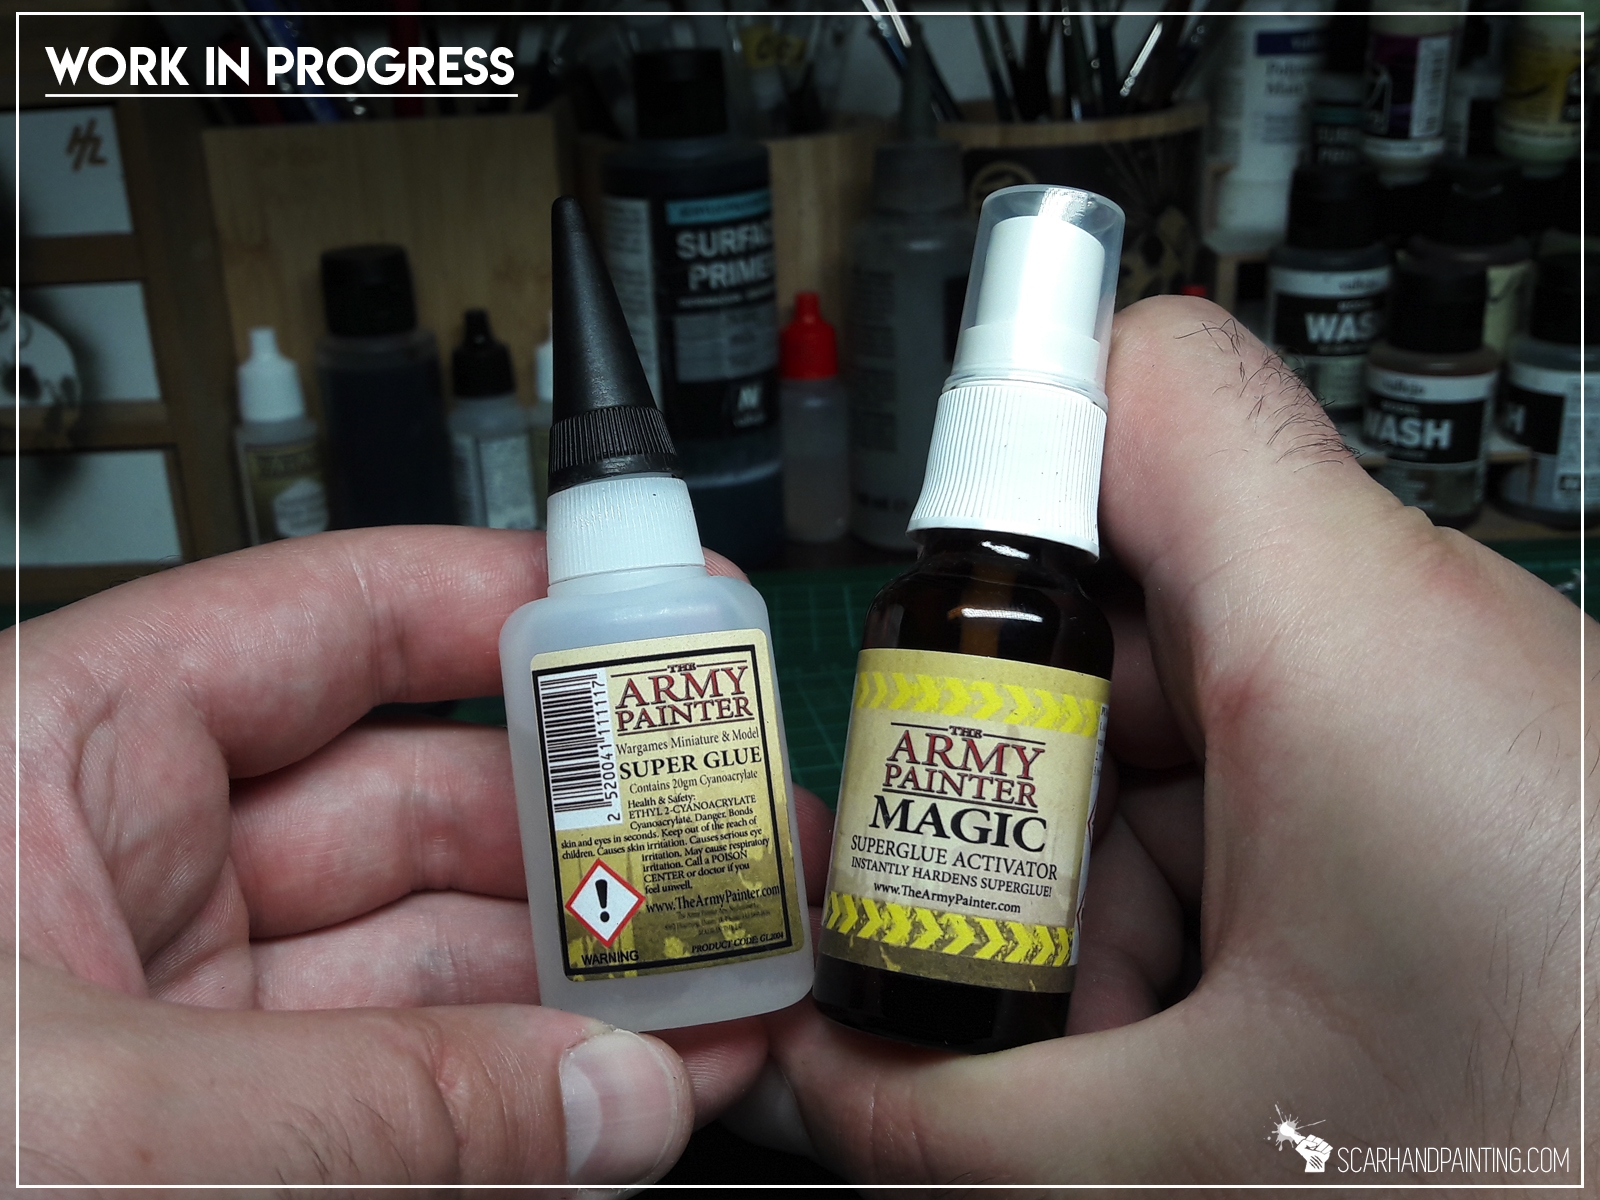
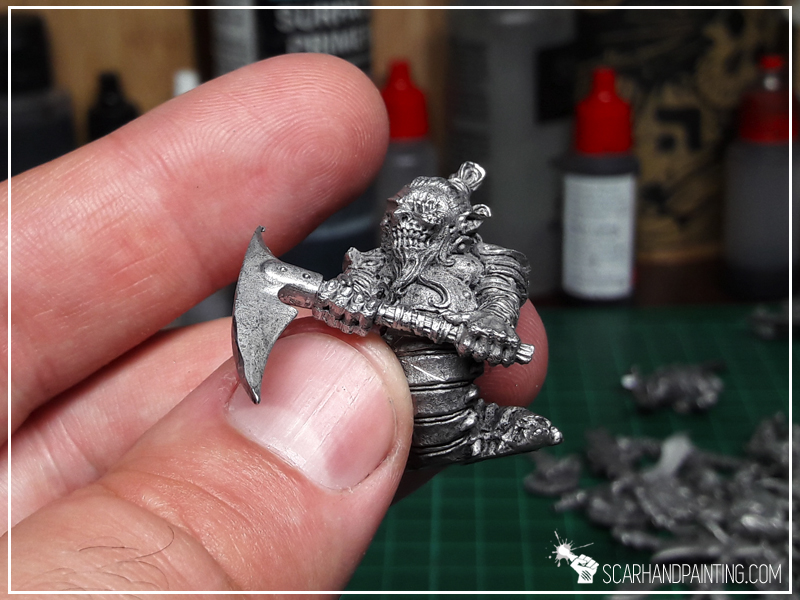
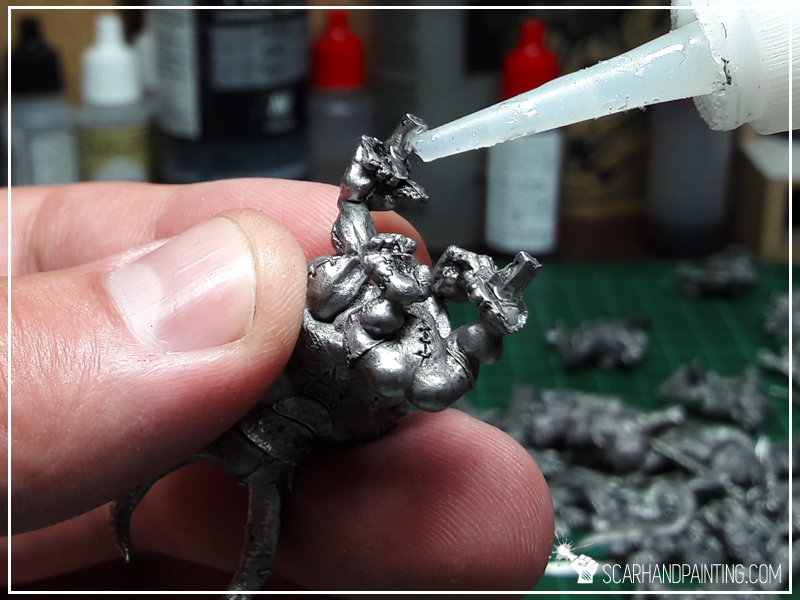
I use this method in case of wobbly miniatures with small area of contact that for some reason don’t have the rail. Such miniatures require to be pinned to the base to ensure their safety and durability. Note that pinning requires additional tools as well as proper pins. Alongside a trusted hand drill you can also purchase original hobby pins, but these are expensive. Depending on how thick is the miniature I use either paperclips or a thin steel wire.
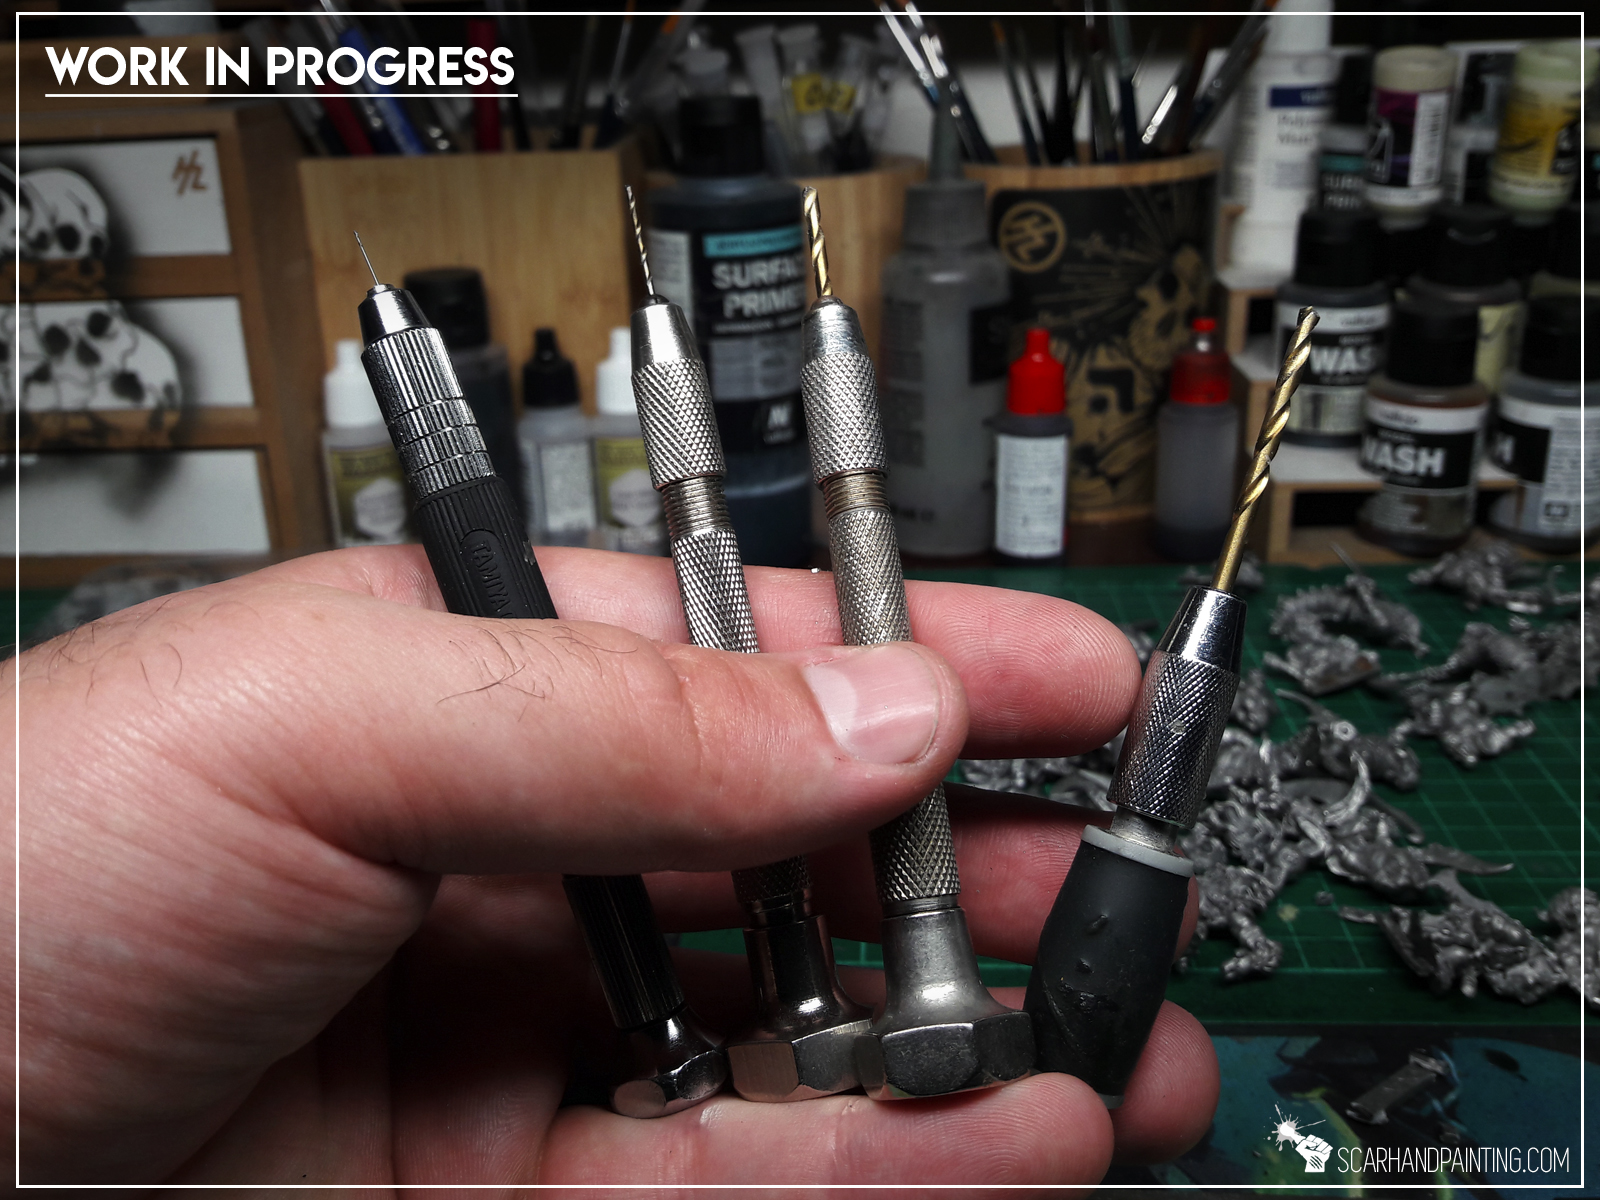

The steps I undertake to pin a miniature:


This is my favorite method. I believe that a natural part of the miniature is better at holding it in place rather than a smooth steel pin.
This is what I do:


From all the other methods this one works the best for me. Plus it’s faster than normal pinning. Just remember, there’s no one proper method. If you feel like a miniature might use a pin – Just follow your guts on this and pin it. Better safe than sorry.
I might drop another article on basing miniatures in the future. Maybe some Painting Philosophy type with insight on why I paint my miniatures based and not separately. If you think it’s an interesting topic and/or if you liked this article – consider letting me know in the comments or at my Facebook profile… or even share if you think the article deserves it. 😉
PS: Check this stuff out! It blown my mind! XD
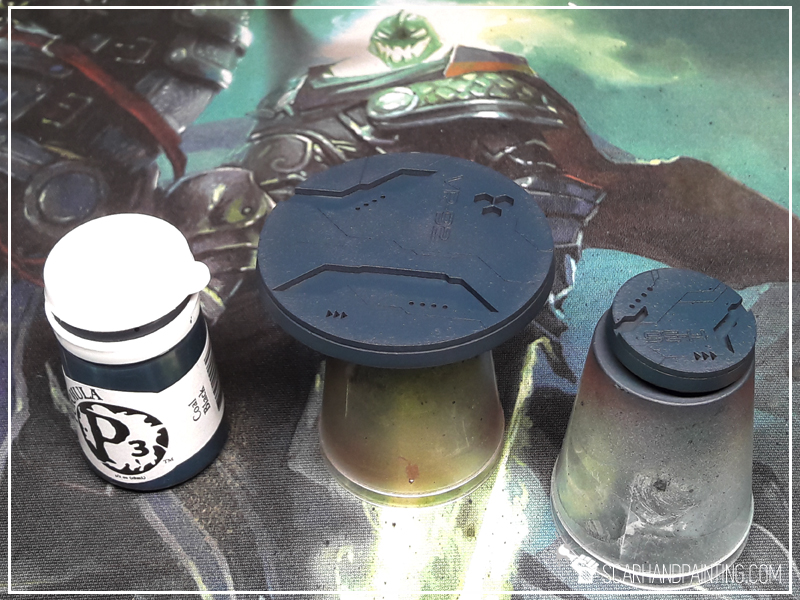
Welcome to Painting Jade Bases tutorial. Here I will take you on a Step-by-step trip through the process of painting jade Sci-Fi bases the same way as seen at: Gallery: Aleph S.S.S.

Before we start, some notes:
* This one requires an Airbrush.
* What works for me might not necessarily work for you.
* I used Zen Terrain “Futura” base toppers.
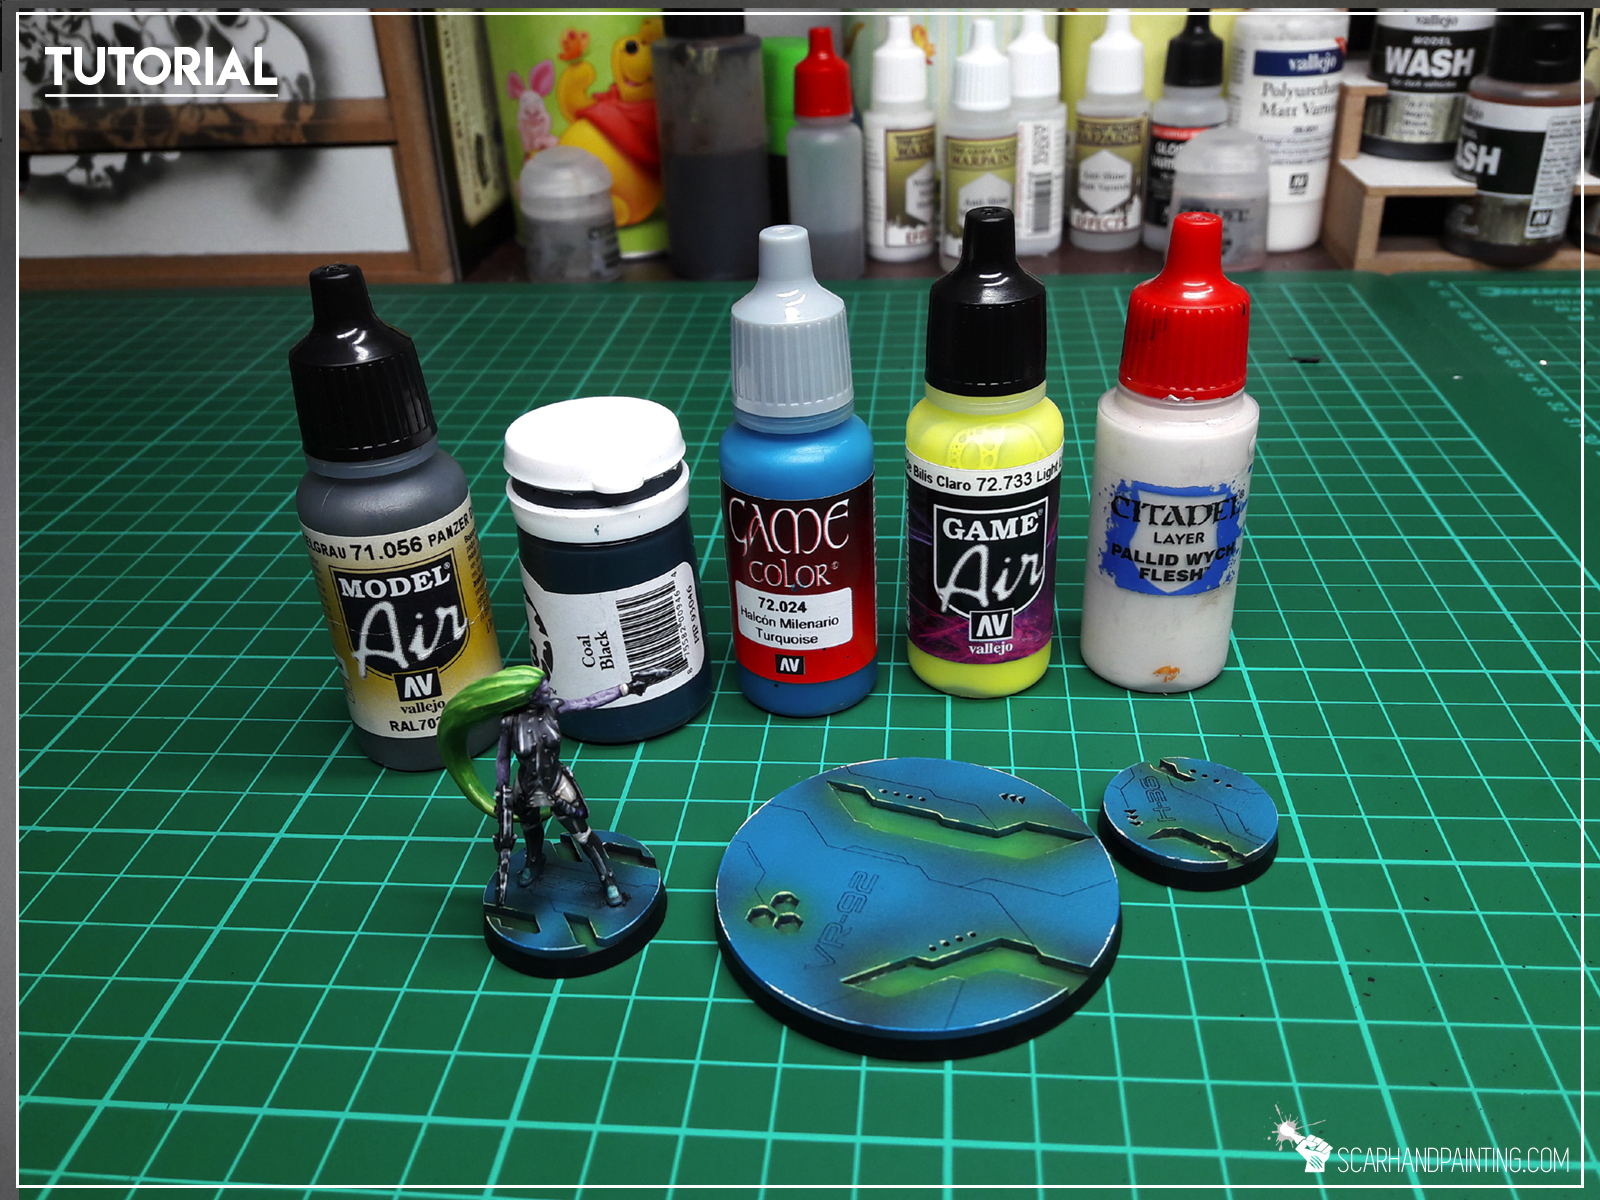
* I started by airbrushing a thick layer of Vallejo Panzer Dark Grey.

* I followed with a layer of P3 Coal Black, mixed with Flow Improover.
* Next I applied a layers of Vallejo Turquoise, mixed with Flow Improover, but this time made sure to leave some spots of previous layer visible.
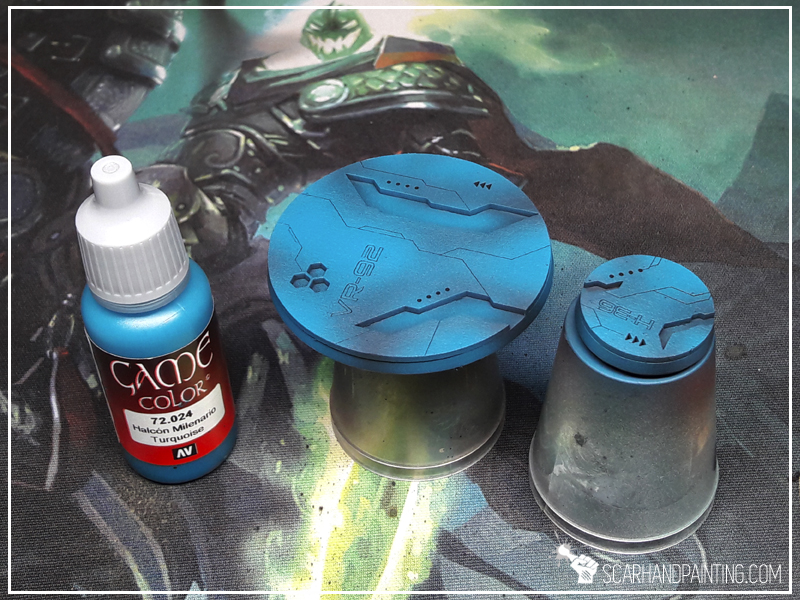
* Using a regular brush I then highlighted all the edges with Vallejo Turquoise.

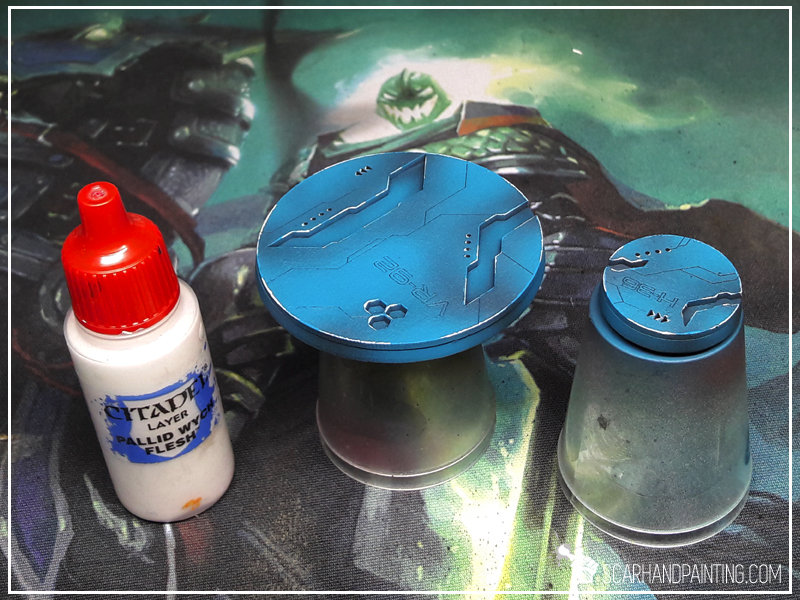
* Next I partially higlighted the edges with Games Workshop Pale Wych Flesh.
* Back to airbruush, I applied a layer of Vallejo Light Livery Green on top of all lower parts of the base.
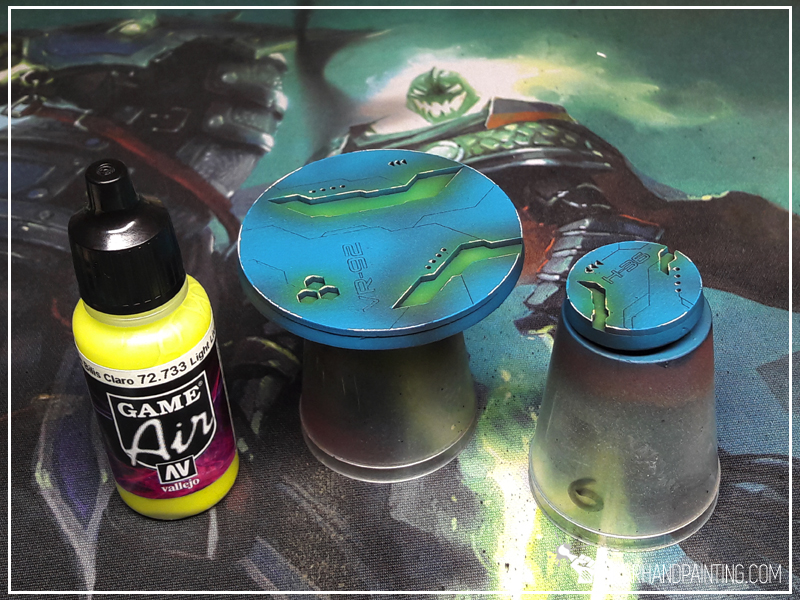
* I then washed all recess spots with Games Workshop Waywatcher Green, being careful not to leave stain outside the lower parts of the base.

* Finally I painted side edges black. Job done.

That’s all! If you followd this tutorial and painted your own bases this way, be sure to leave a comment and drop me some pics via Facebook 😉
Cheers!
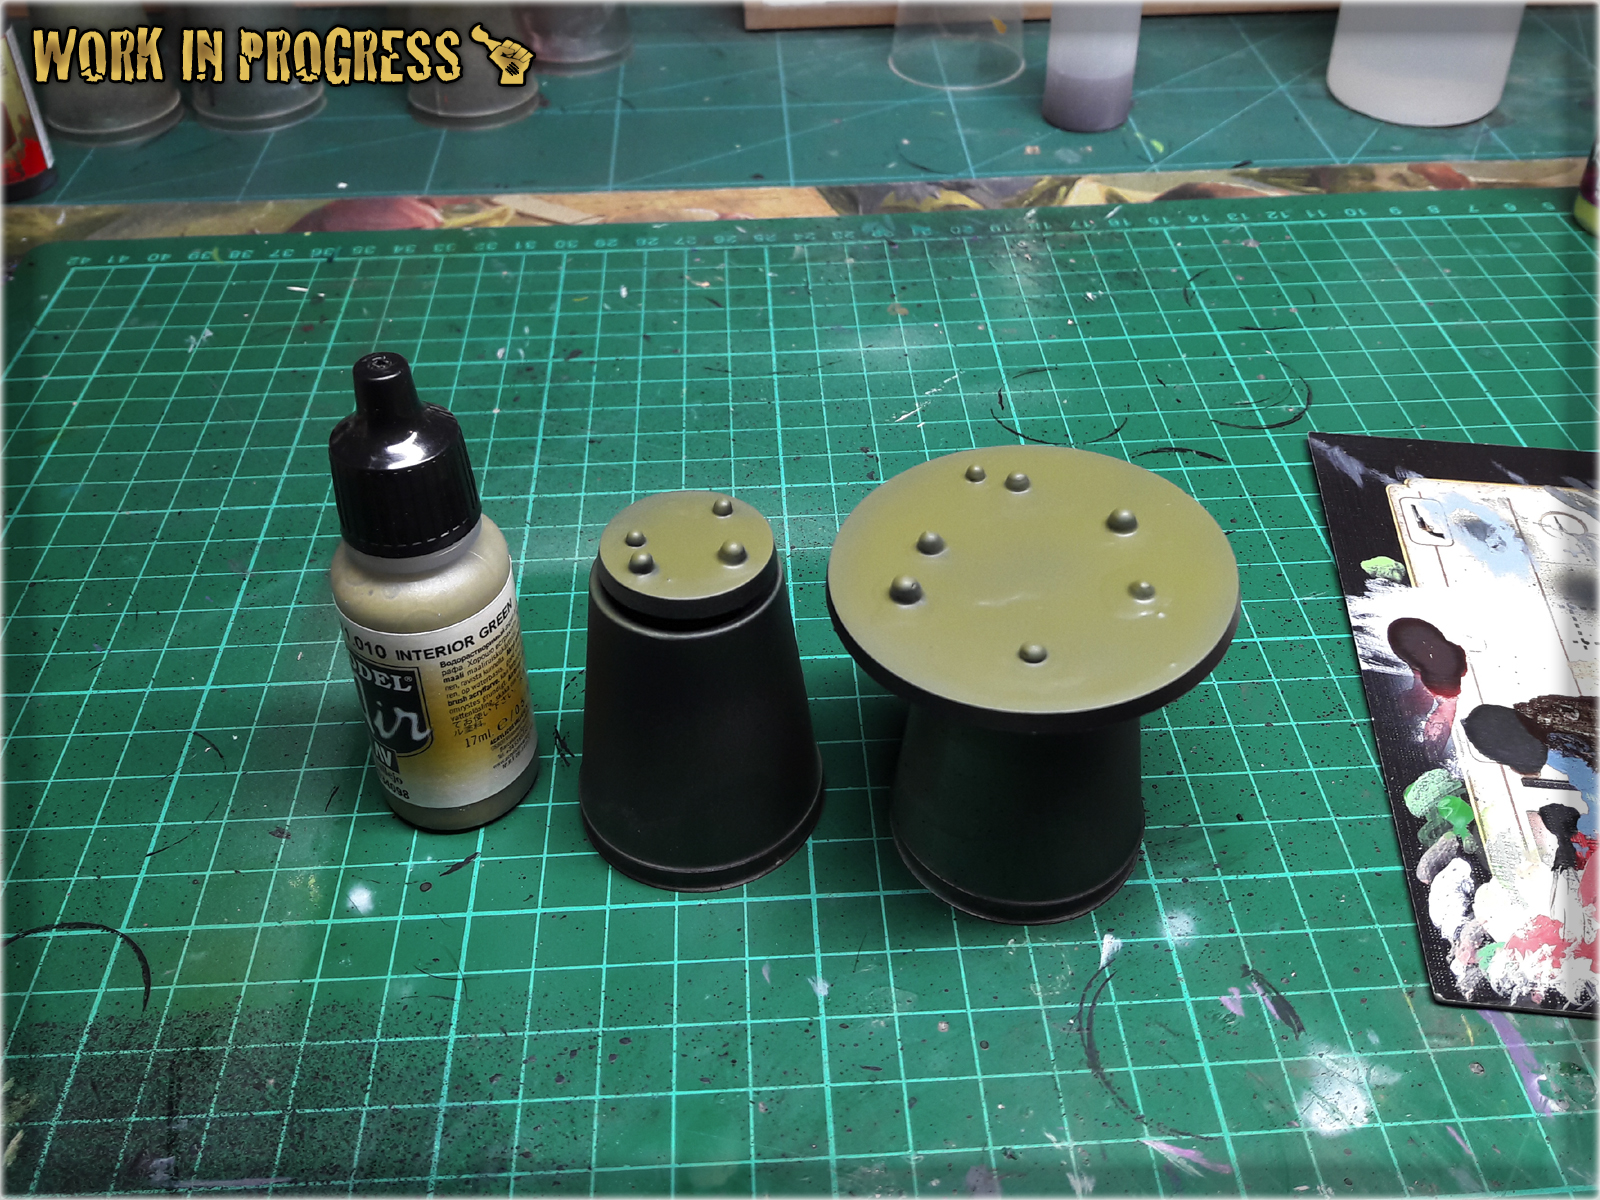
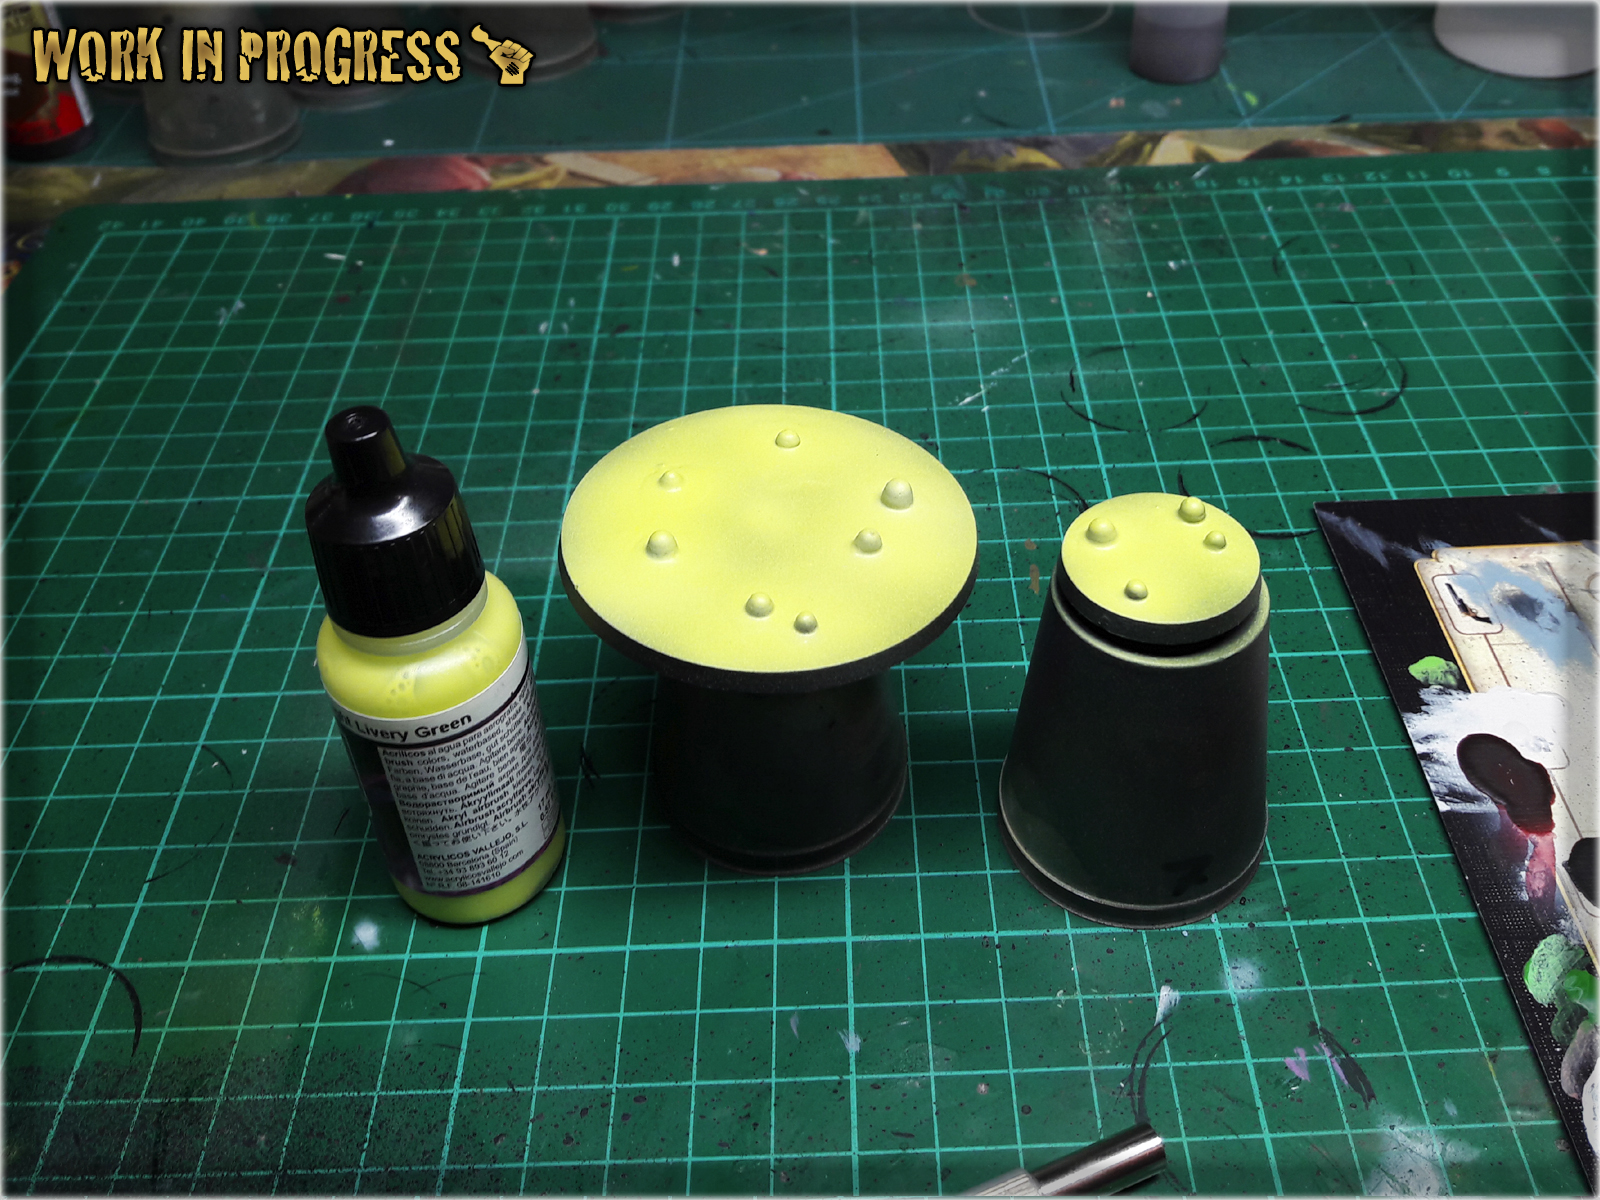
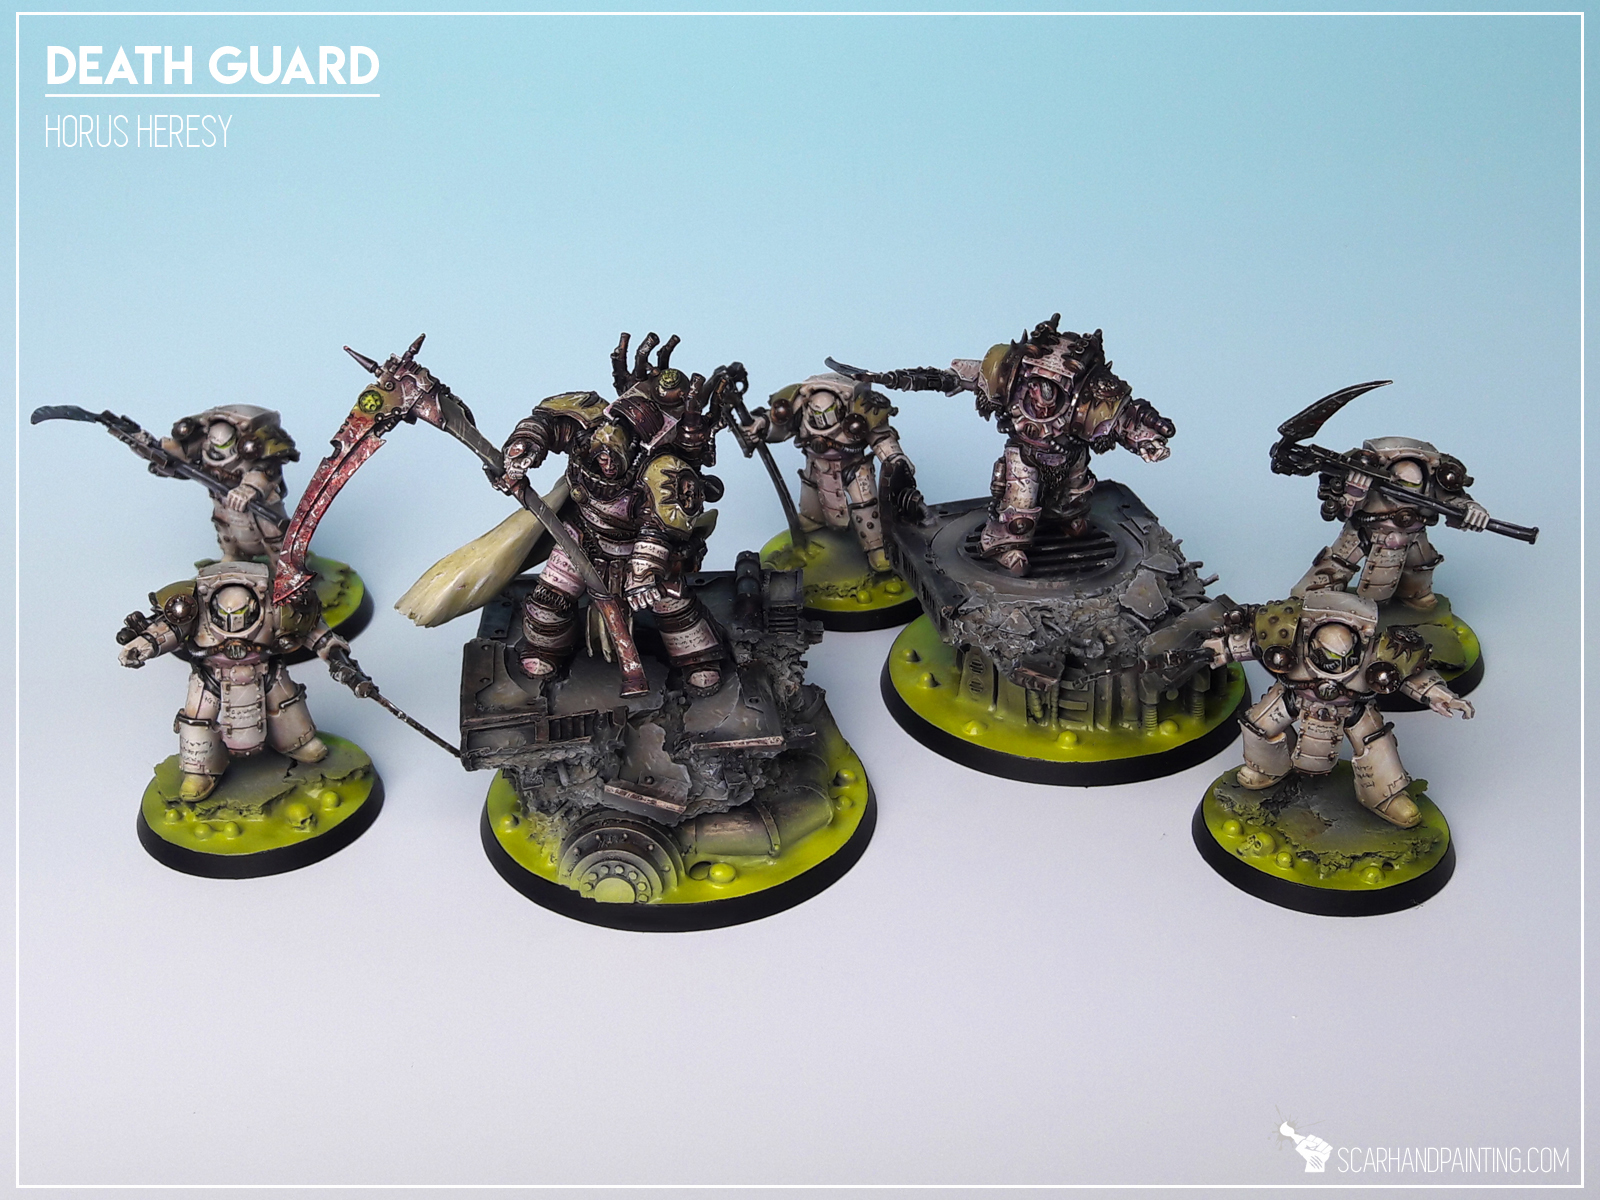
In this easy, step-by-step tutorial I’m going to show you how to create a Toxic Sludge Base. I designed these bases for Warhammer 40,000 Death Guuard Plague Marines.

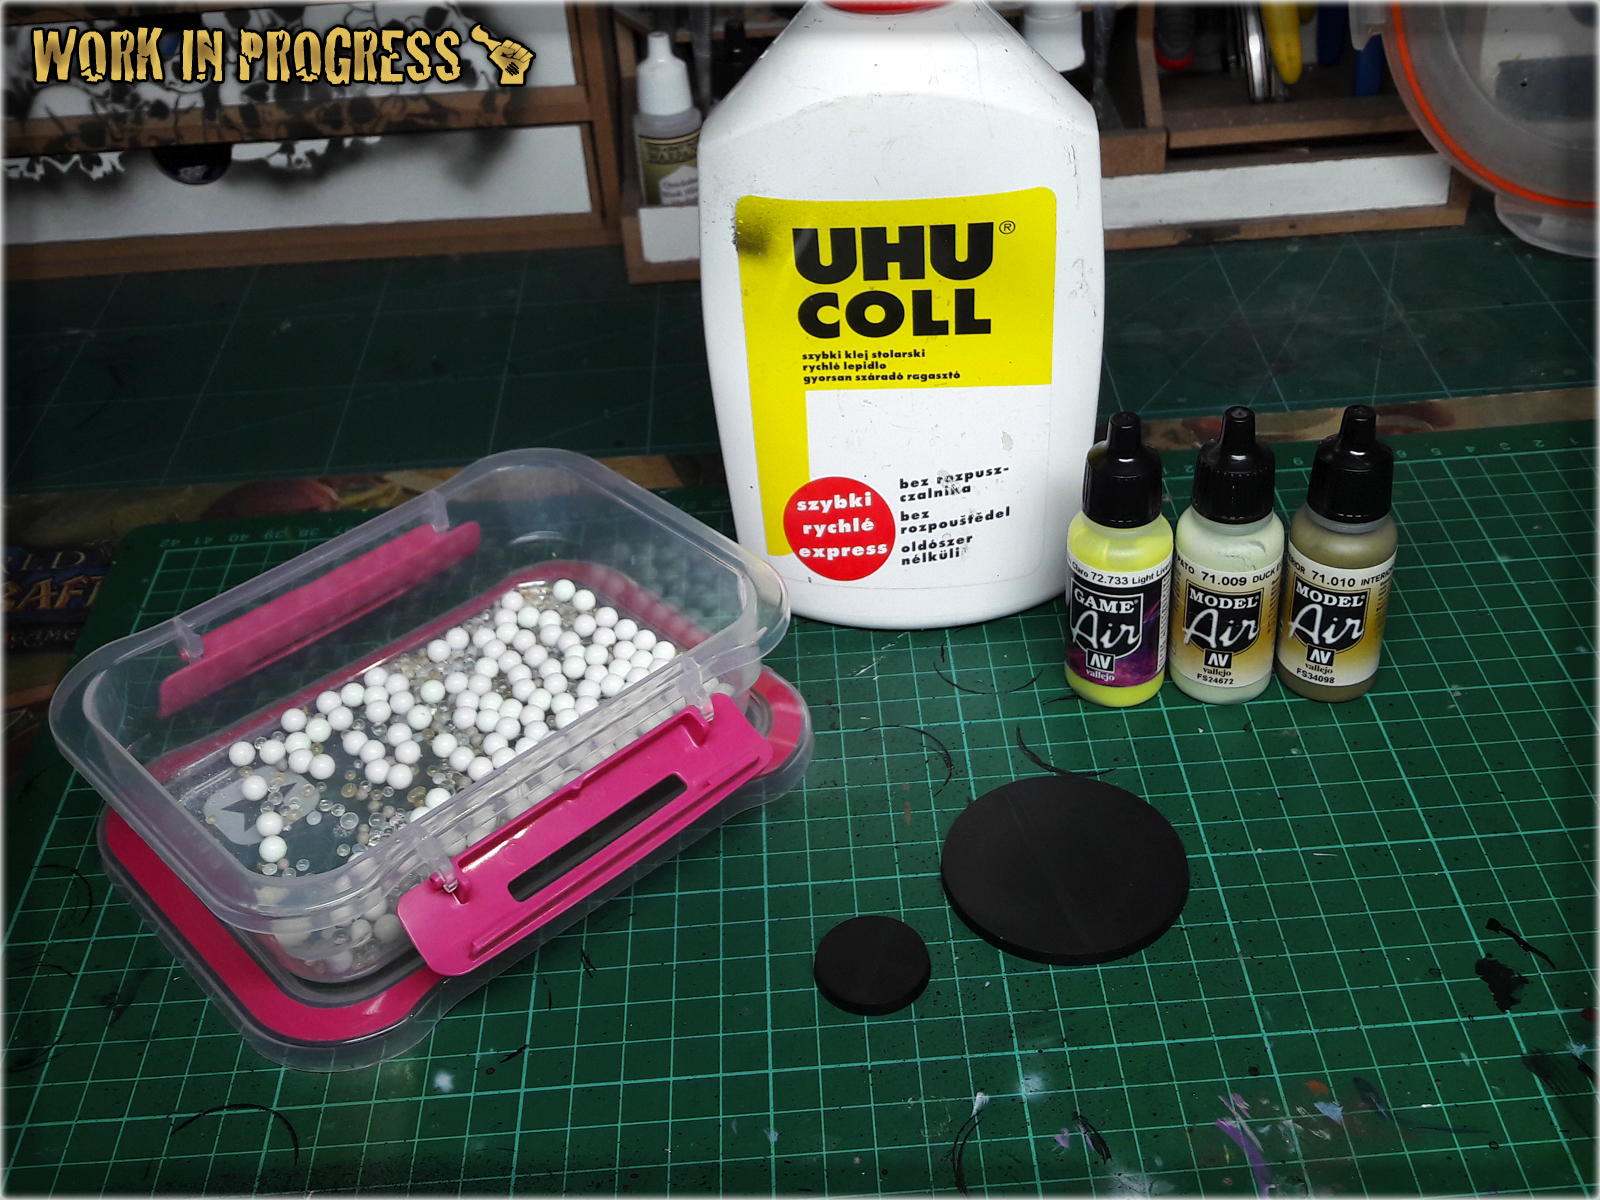
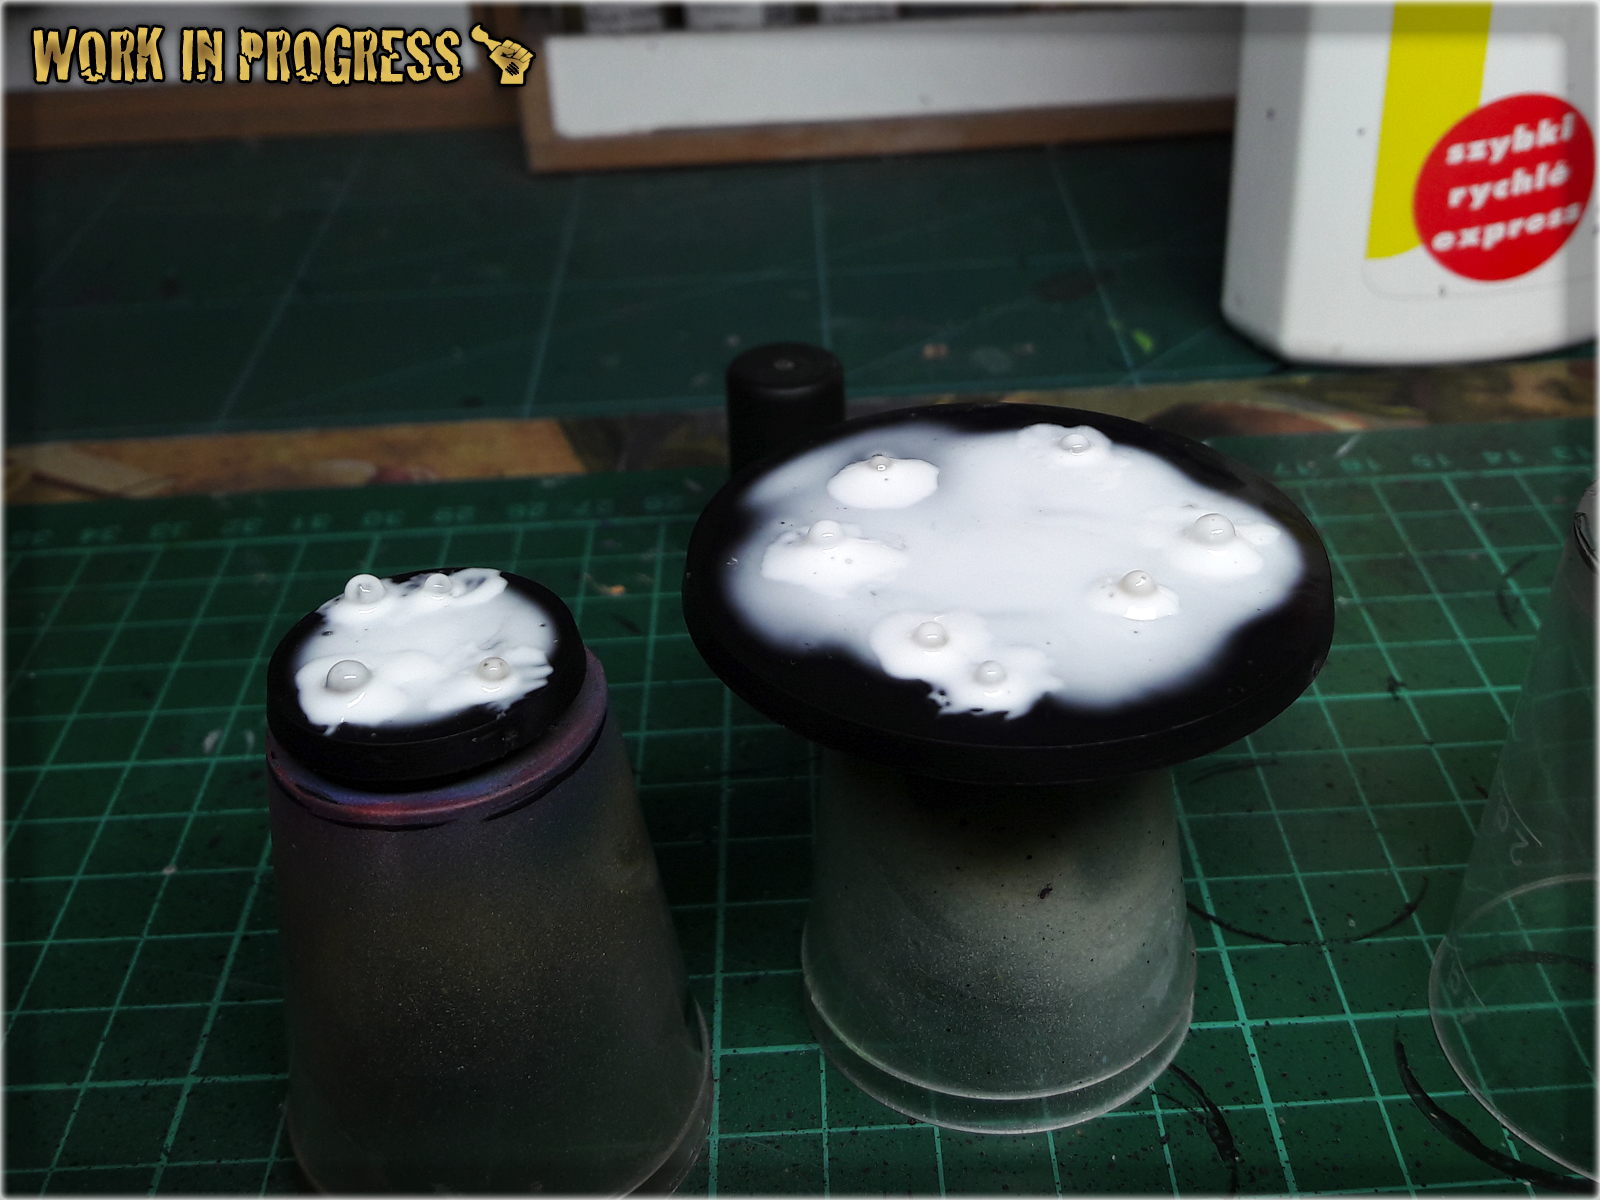
**Where I’m from there’s a small paper bag filled with moist absorbsion balls in every shoe box. If you can’t get that, just use some grains or make small balls out of green stuff or modeling clay.
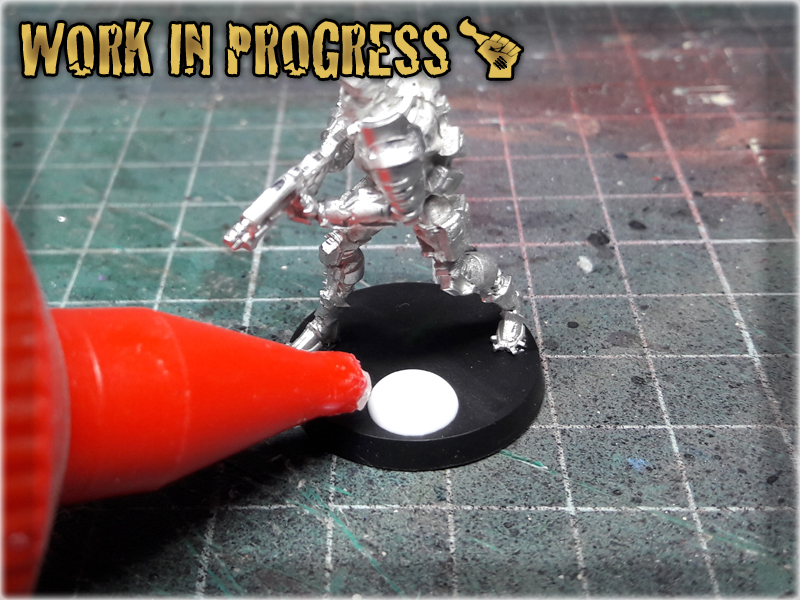
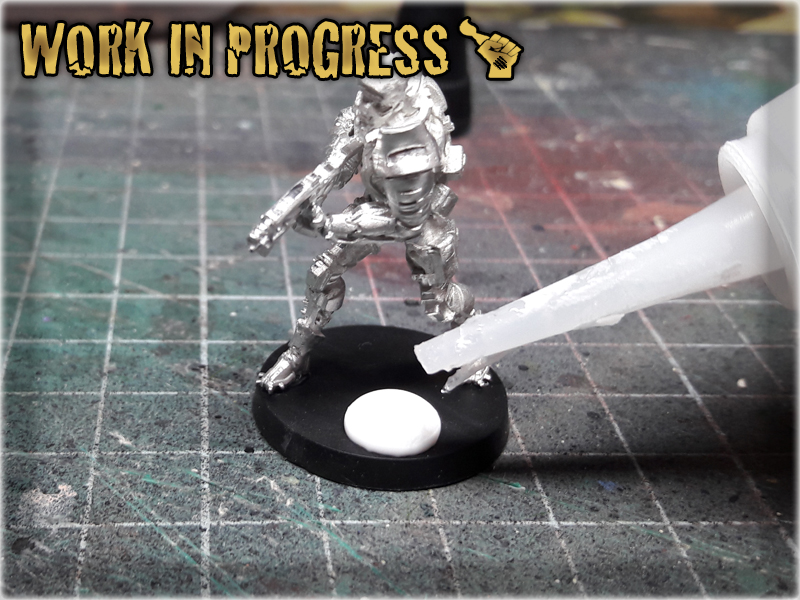
* I started by covering entire base with a layer of basing glue.

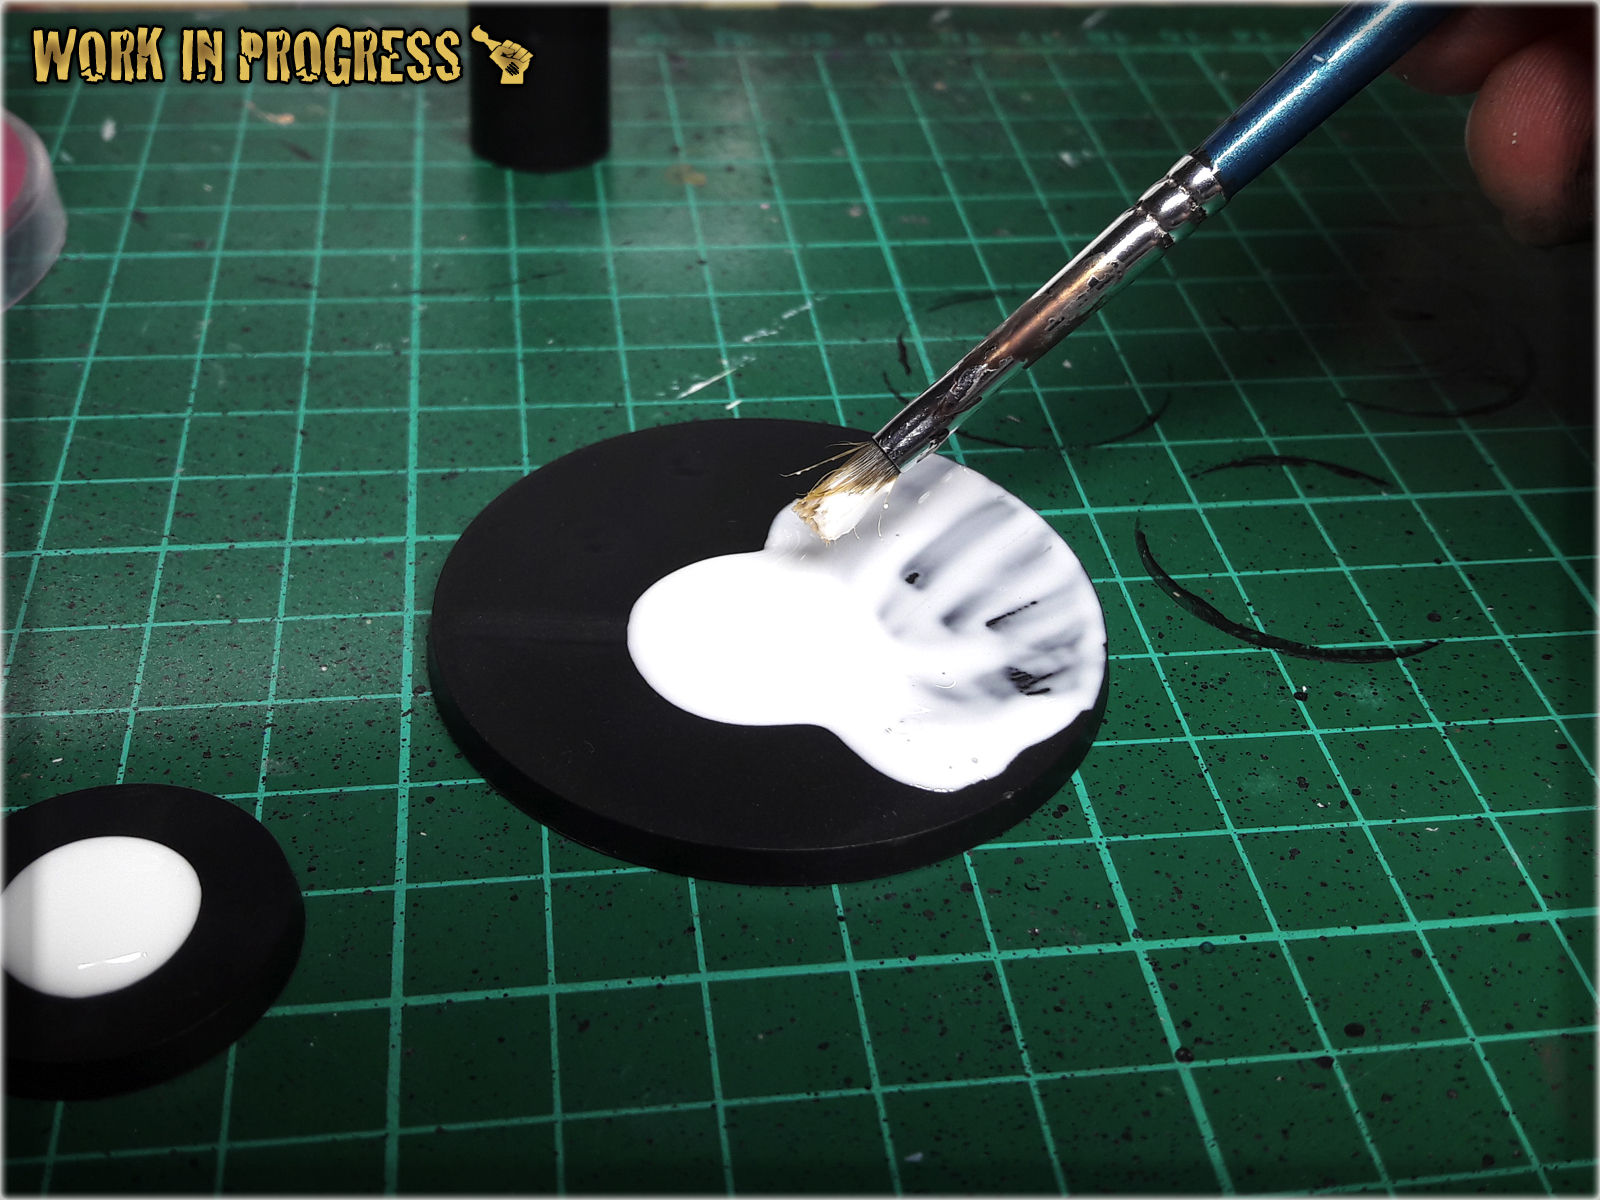
* I then put couple of tiny balls onto the base, creating 'buubbles' and let it all dry.

* Once dry, I covered are around the bubbles with another layer of basing glue.

* I let it all dry for about an hour, then undercoated entire base black.
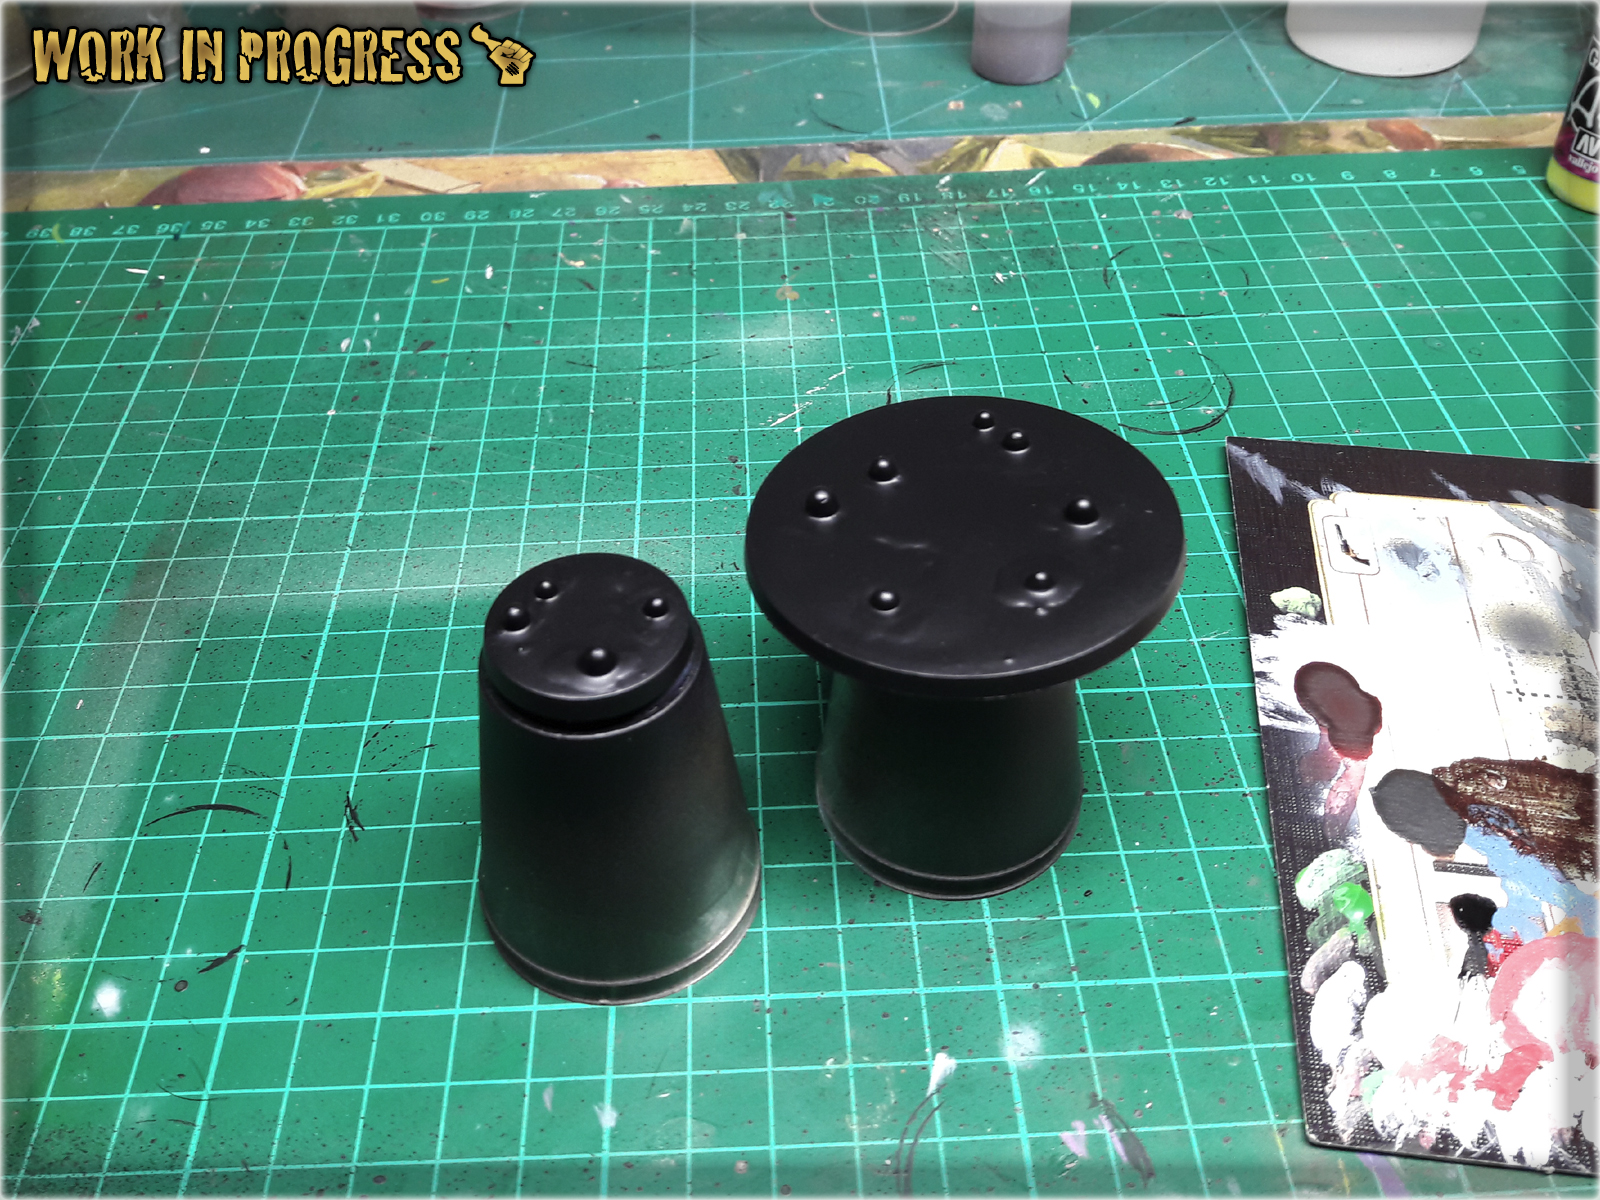
* I then airbrushed a layer of Vallejo Interior Green over entire base.
* Next I airbrushed a layer of Duck Egg Green concentrating on bubbles and surrounding areas.

* Last thing to do was to airbrush two layers of Light Livery Green over entire bases and paint the sides black.

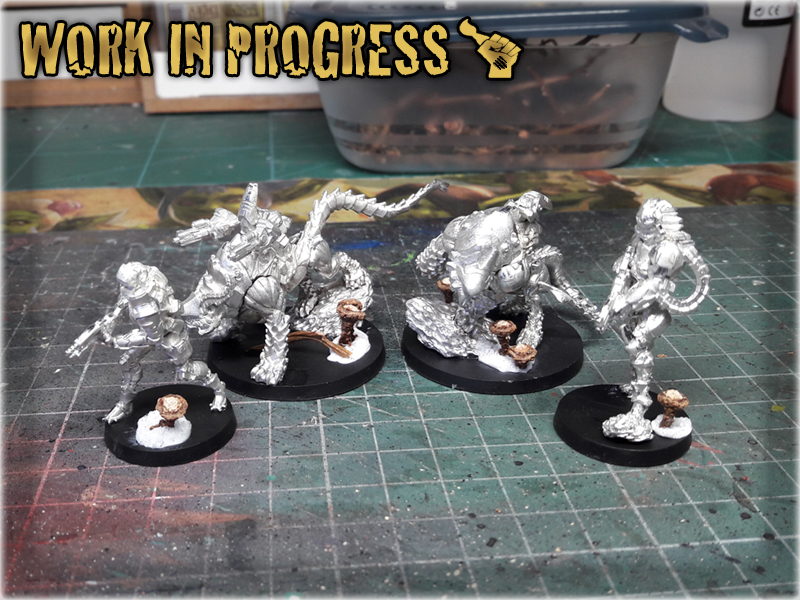
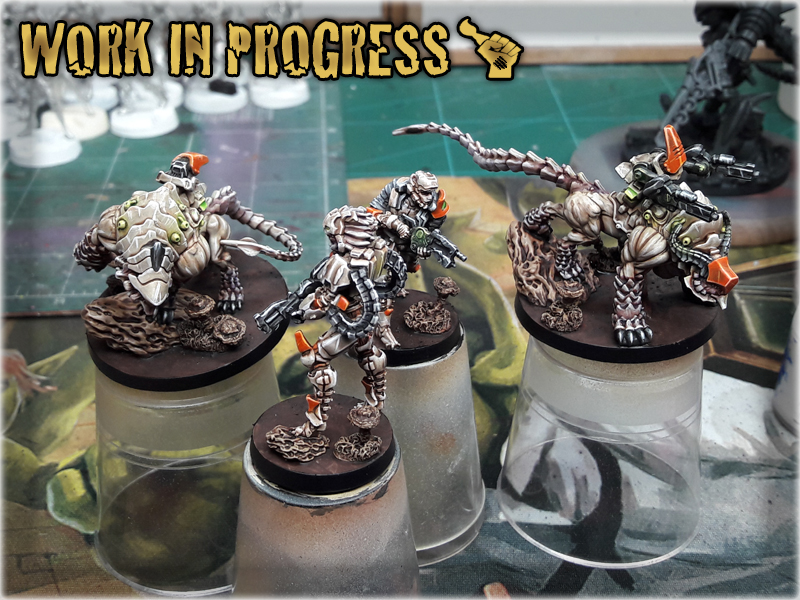
In this easy, step-by-step tutorial I’m going to show you how to create a Lush Base. I designed these bases to fit Infinity the Game Tohaa ‘tactical rocks’ – you can see how it turned out at Infinity TOHAA ‘Witness Me!’ gallery.
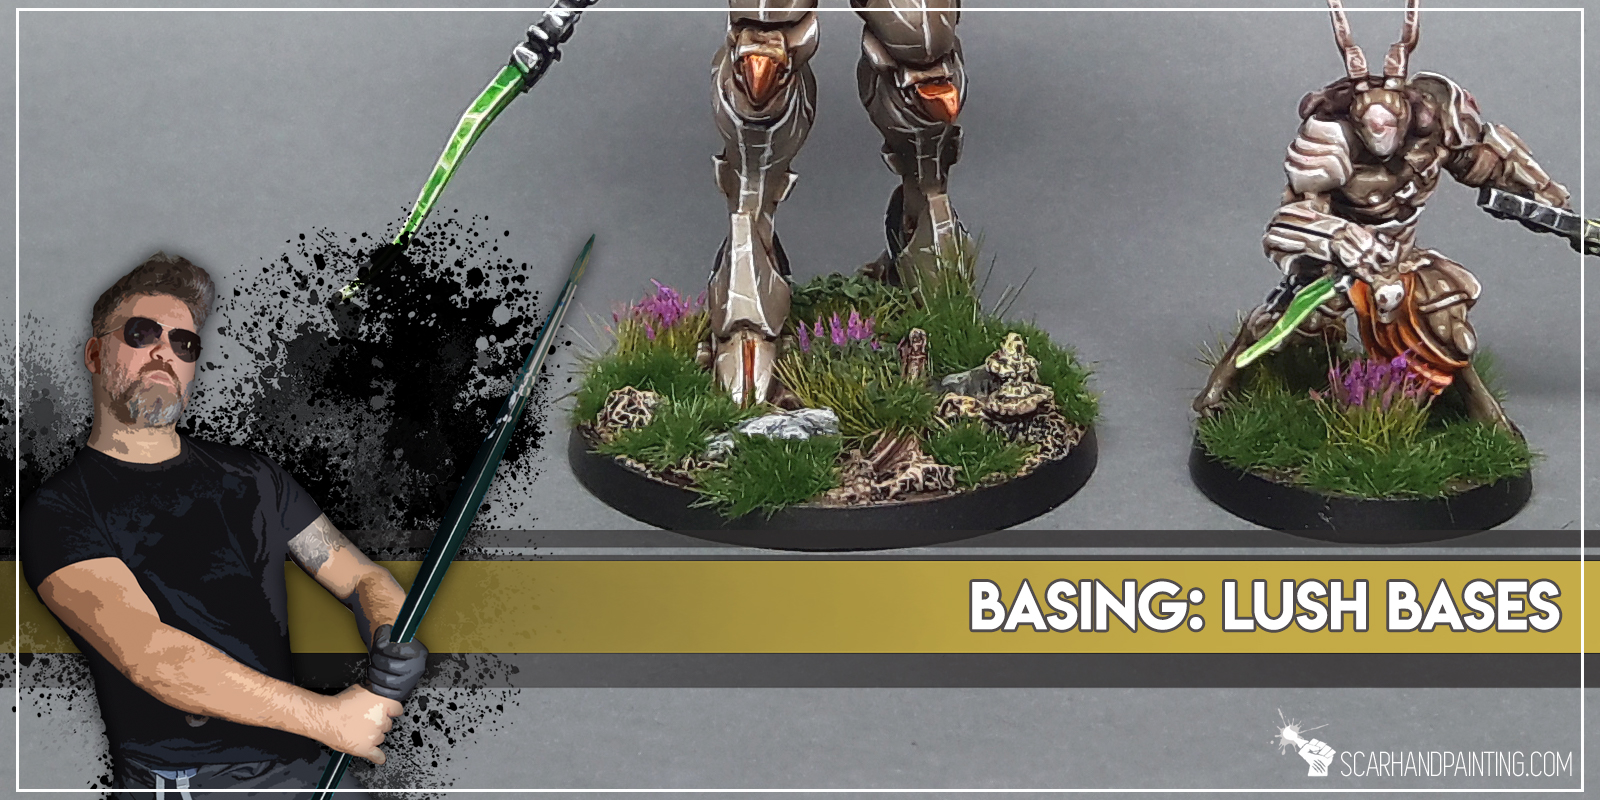

* I started by separating Grape mounts from the dried out Grape branch. Being rather soft, their topf have been removed to improove durability and shape.
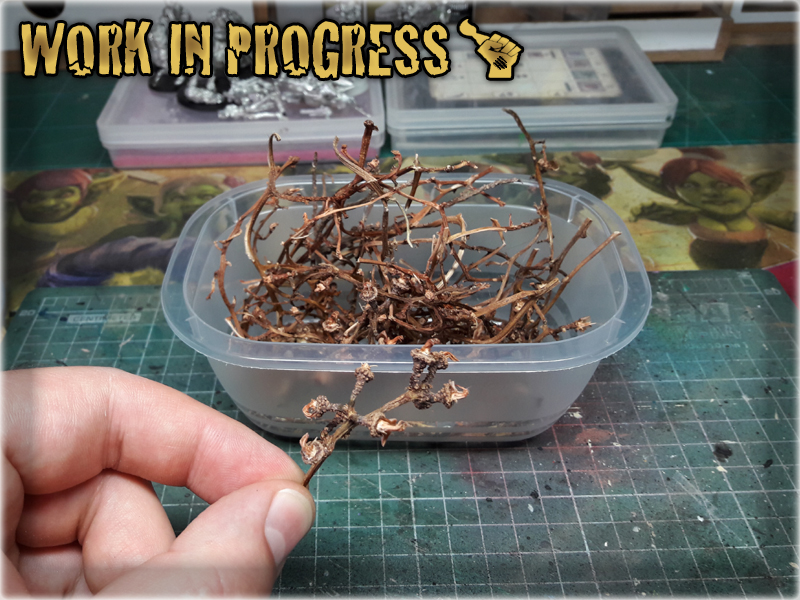
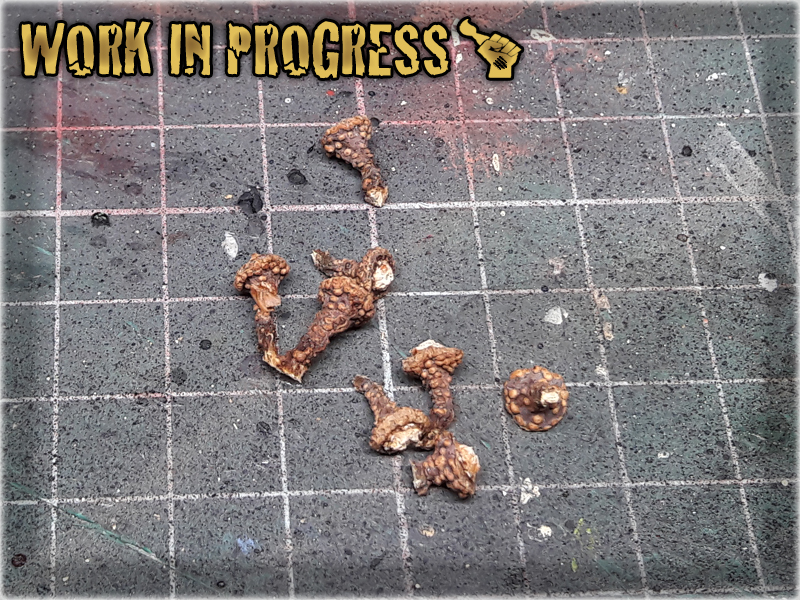
* I then applied a drop of basing glue onto the base, followed up shortly by another drop - this time super glue.
* Before mixed glue drop was able to dry out I've planted Grape mount on top of it, creating strange looking plant.
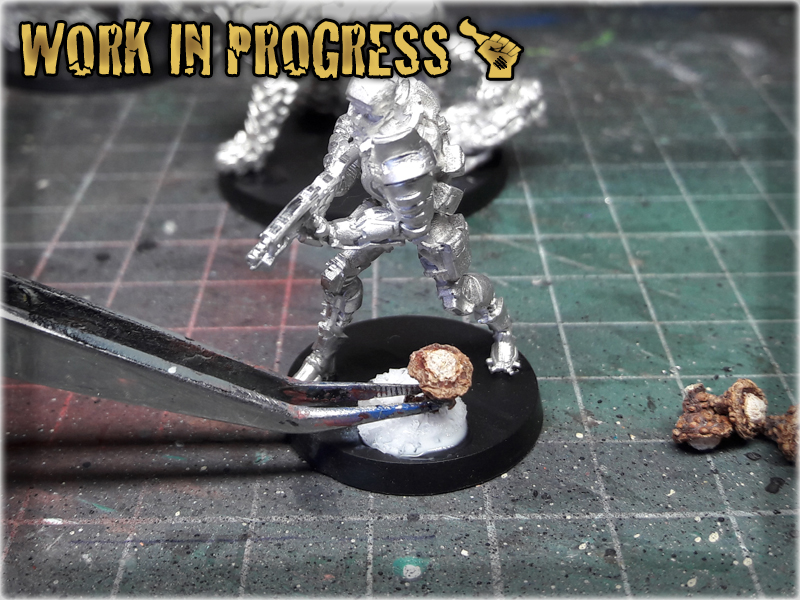
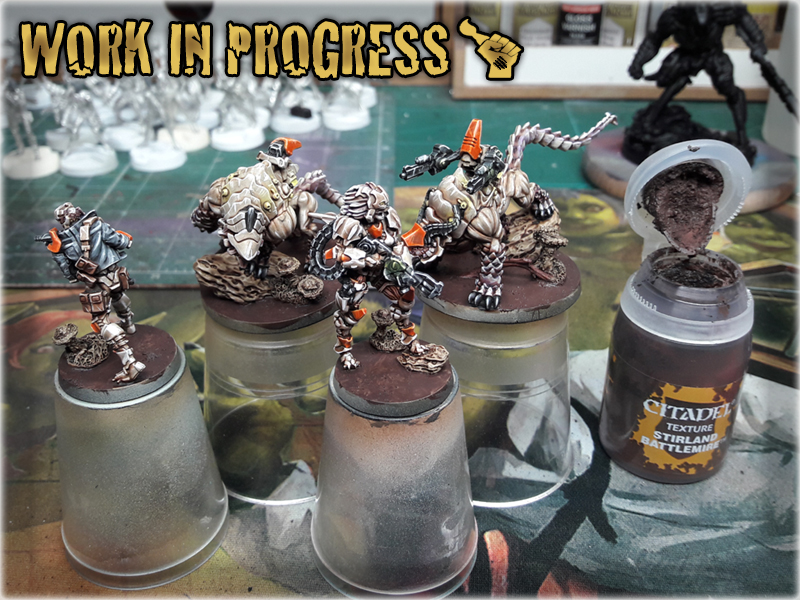
* Once glue dried up I've painted the bases following choosen colour scheme (see below). I then added some texture on top of them with Stirland Battlemire texture paint.
* orem ipsum dolor sit amet, Integer commodo tristiqu odio, aliquet ut. Maecenas sed justo imperdiet bibendum. Vivamus nec sapien imperdiet diam. Aliquam erat volutpat. Sed onsectetur suscipit nunc et rutrum. Lorem ipsum dolor sit amet,volutpat. Sed onsectetur suscipit nunc et rutrum. Lorem ipsum dolor sit amet, volutpat.

* Last step was to apply regular tufts. I used some noname tufts in large numbers filling most of the flat areas. Job done.


Black Undercoat,
Stirland Battlemire (GW), texture
Karak Stone (GW), stones & plants
Flayed One Flesh (GW), flatbrush stones & plants
Mix Strong Tone Ink (AP) 1:1 Soft Tone Ink (AP), wash
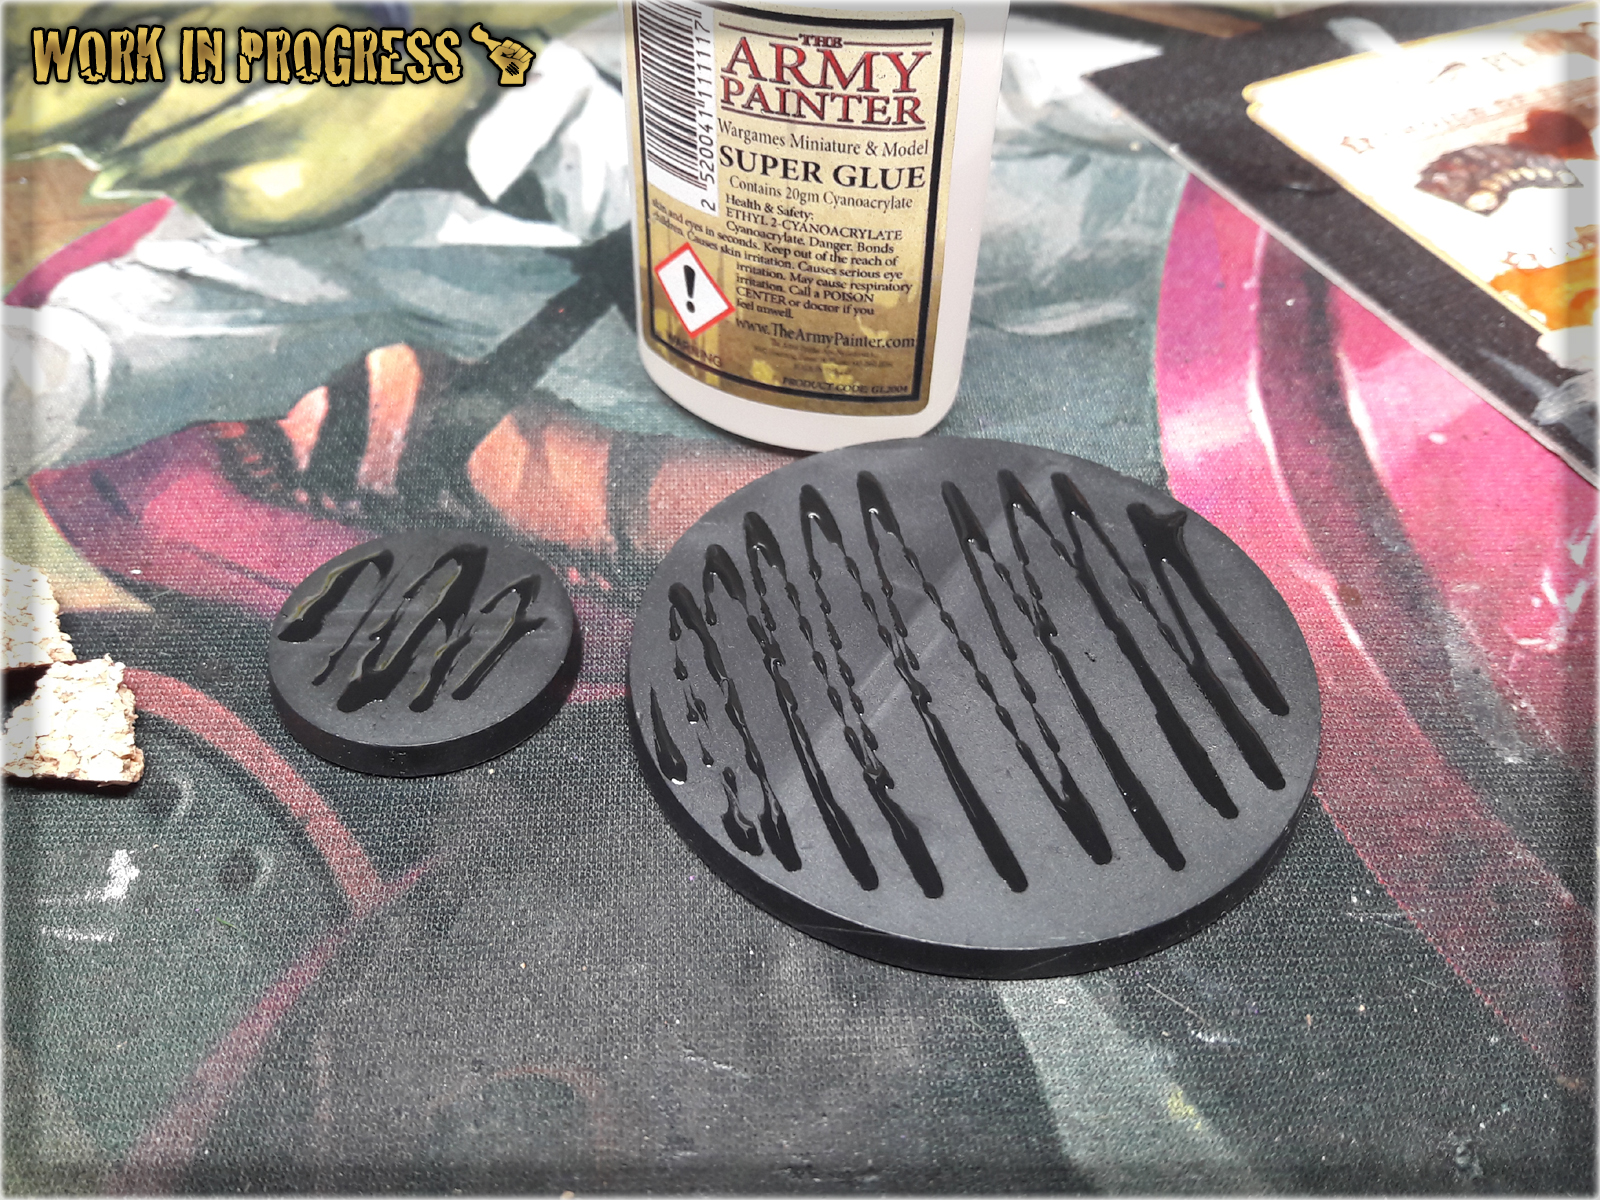
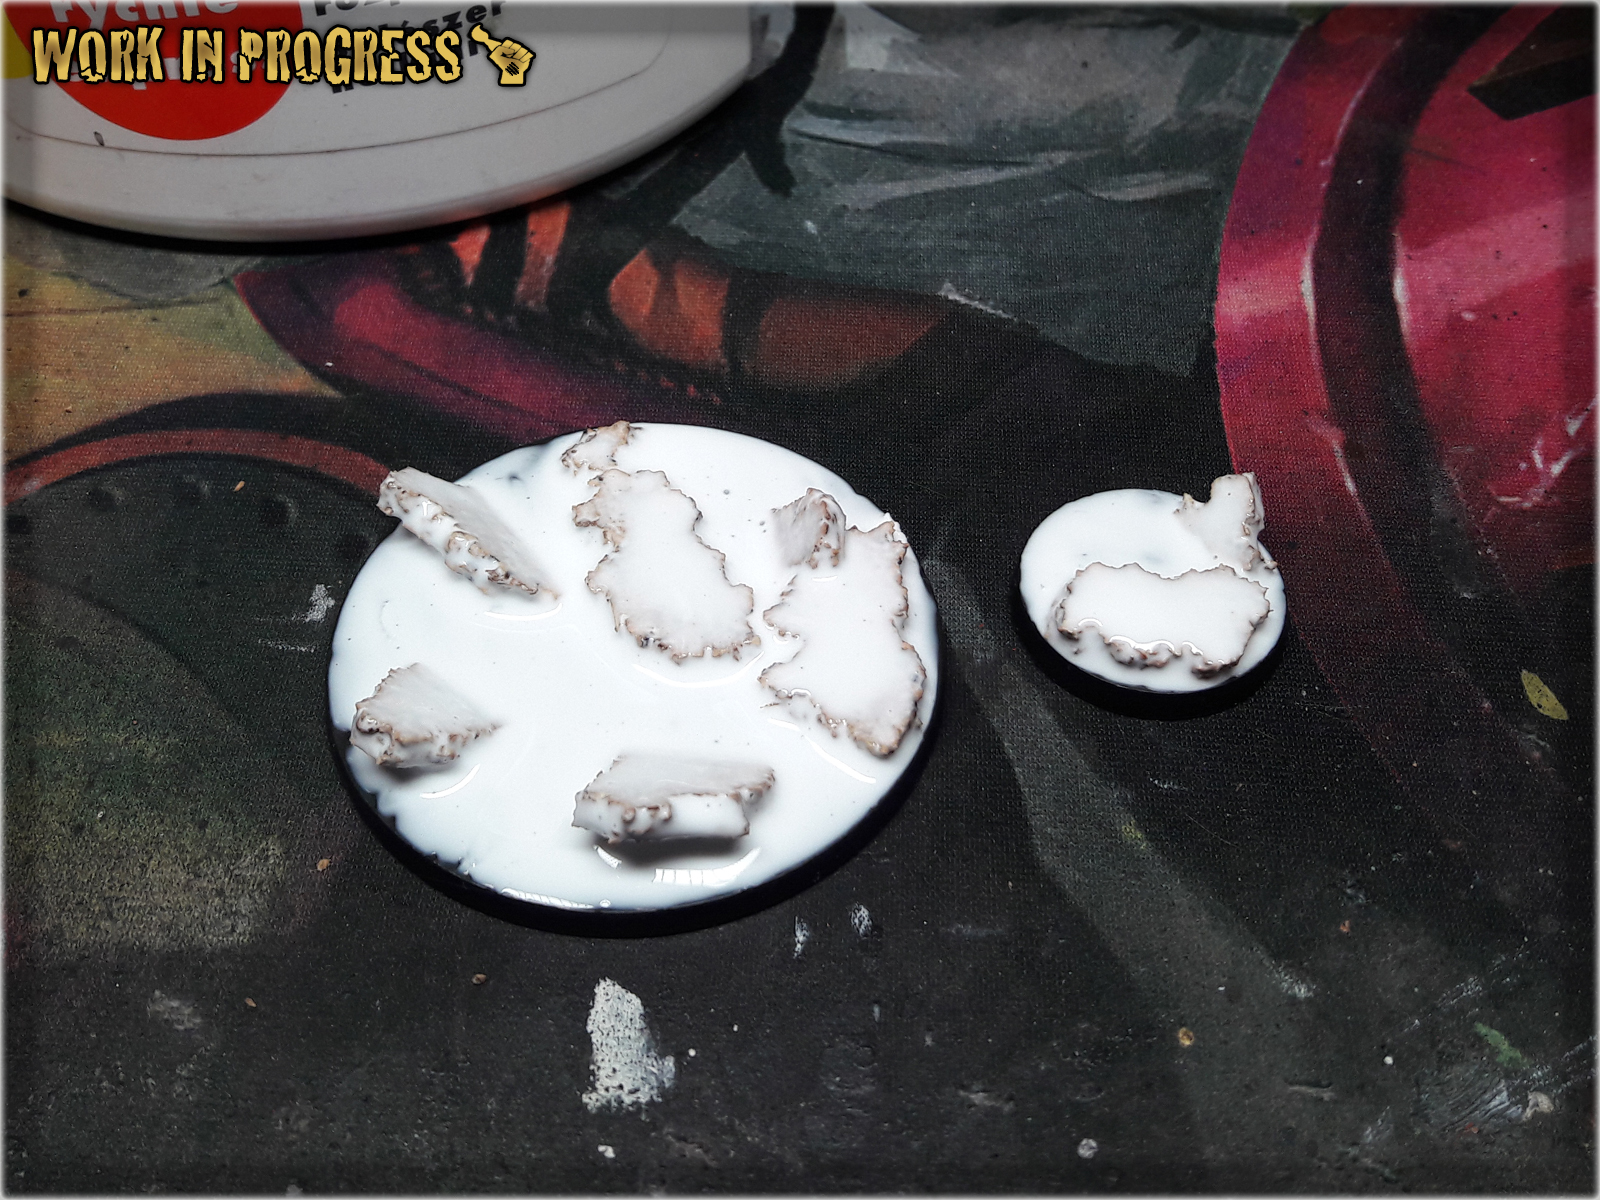
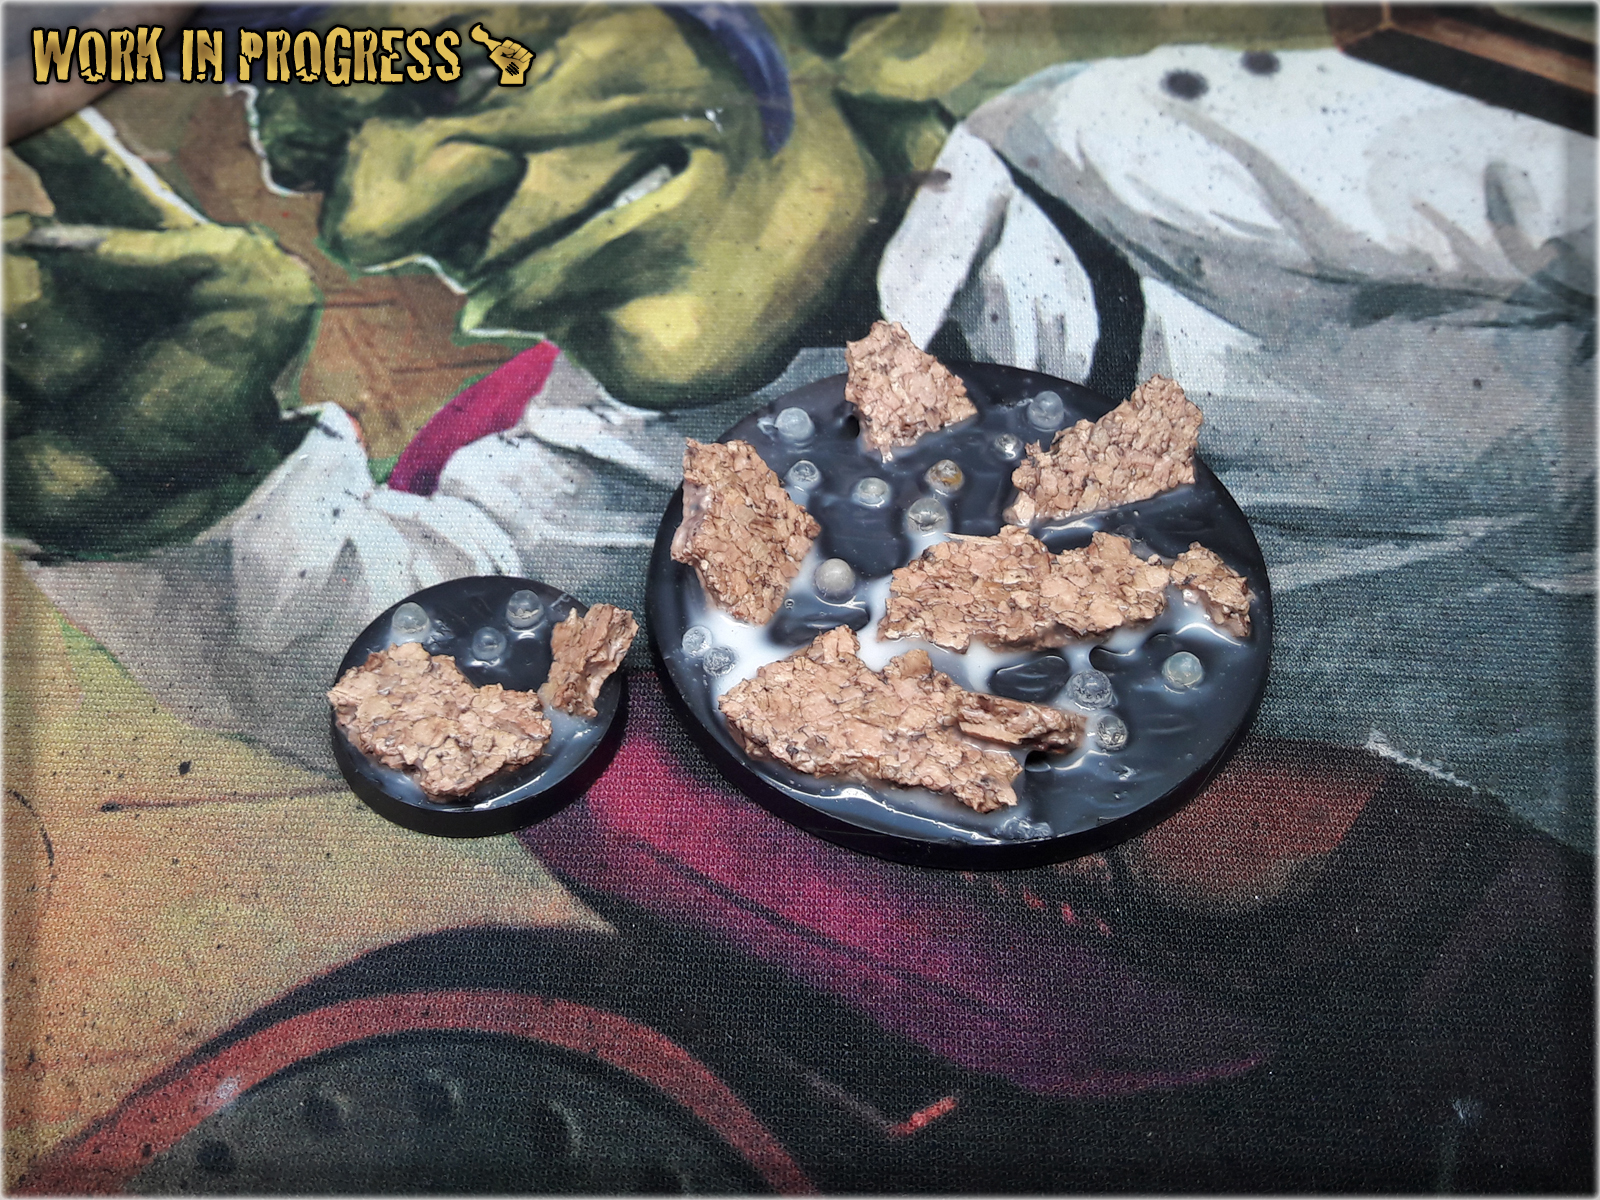
In this easy, step-by-step tutorial I’m going to show you how to create and paint a Lava Bases. I used these bases for Infinity the Game Combined Army – you can see how it turned out at Infinity COMBINED ARMY ‘Witness Me!’ gallery.
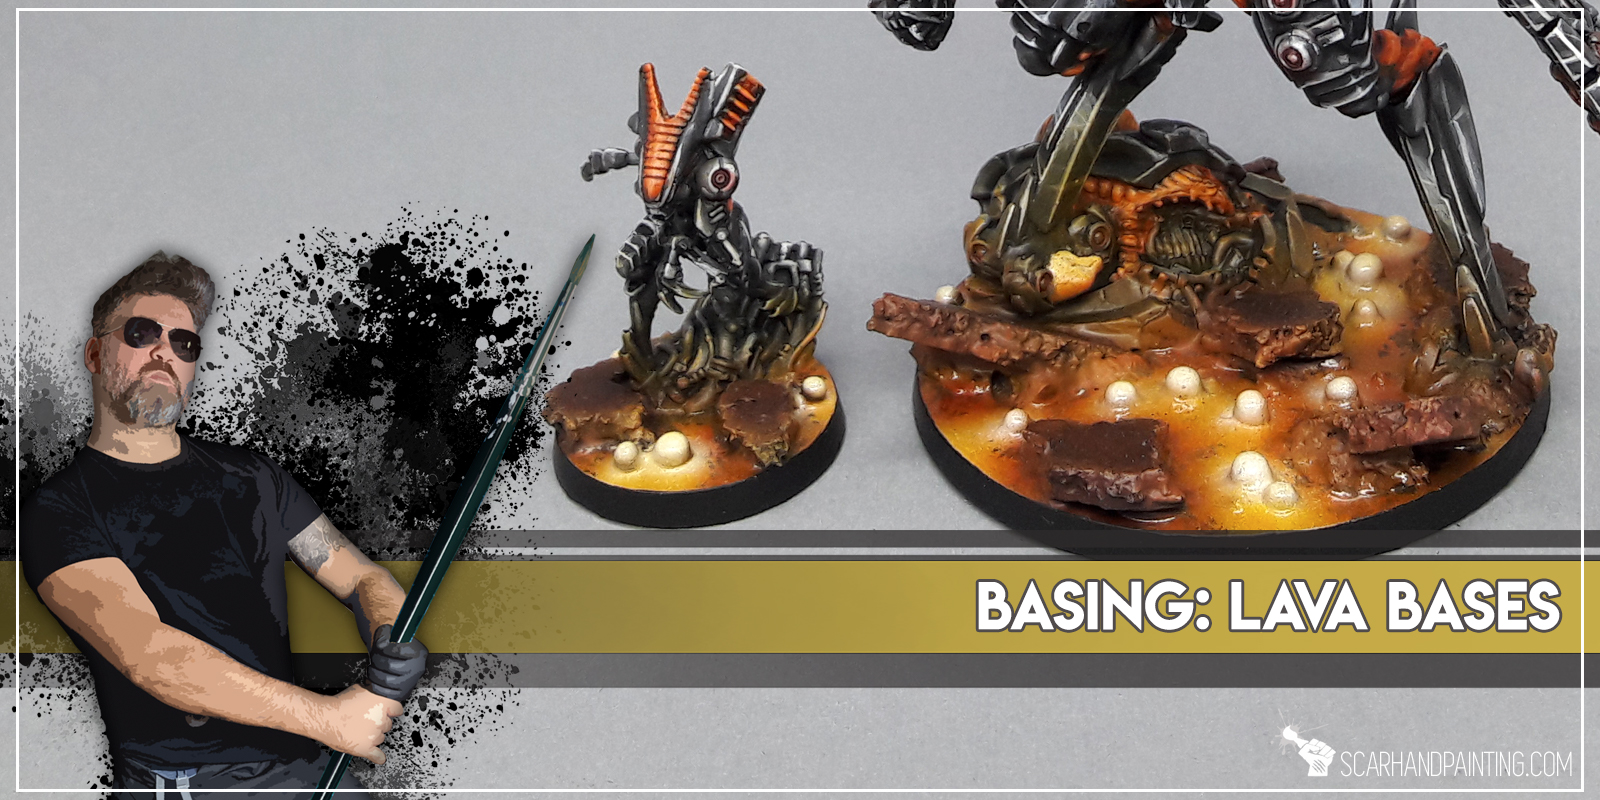

**Where I’m from there’s a small paper bag filled with moist absorbsion balls in every shoe box. If you can’t get that, just use some grains or make small balls out of green stuff or even modeling clay.
* I started by breaking a piece of Cork into smaller bitz.
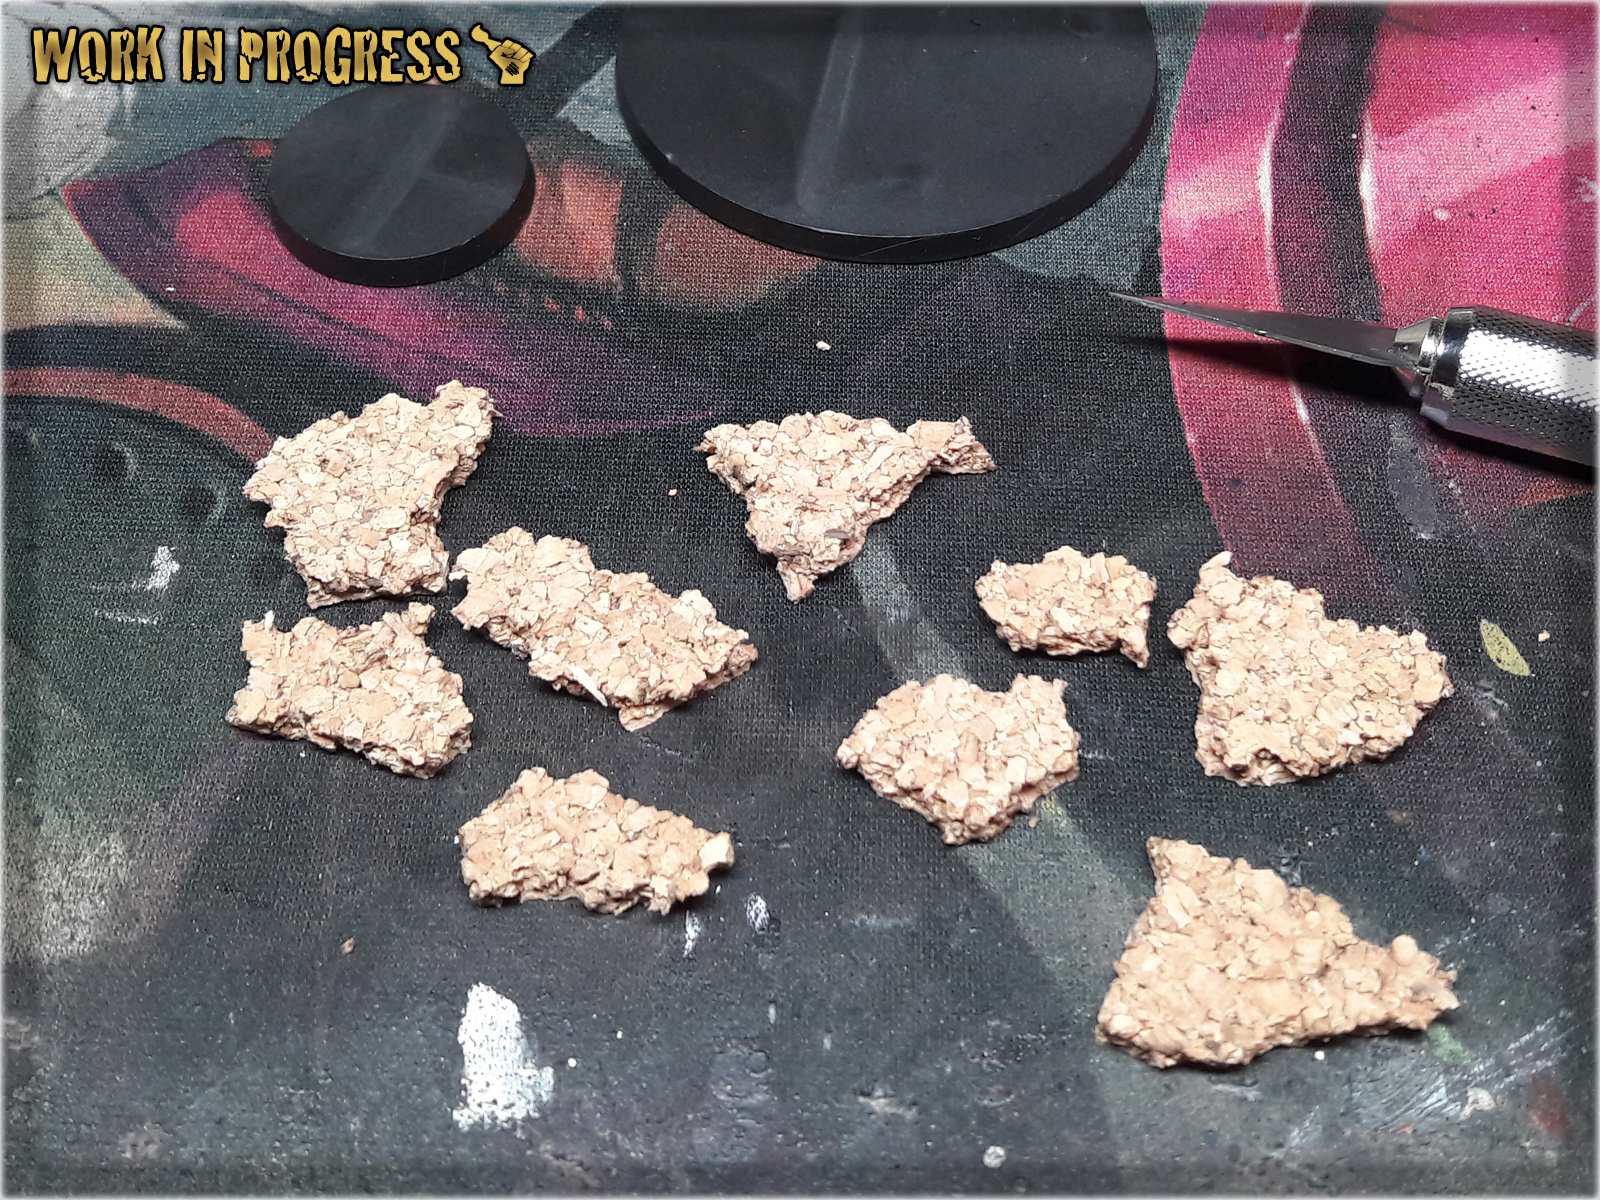
* I then applied Super Glue over the bases in a random pattern. No need to be precise here.
* Pieces of Cork followed to form 'volcanic rocks' and future spots for the miniatures to be mounted on.
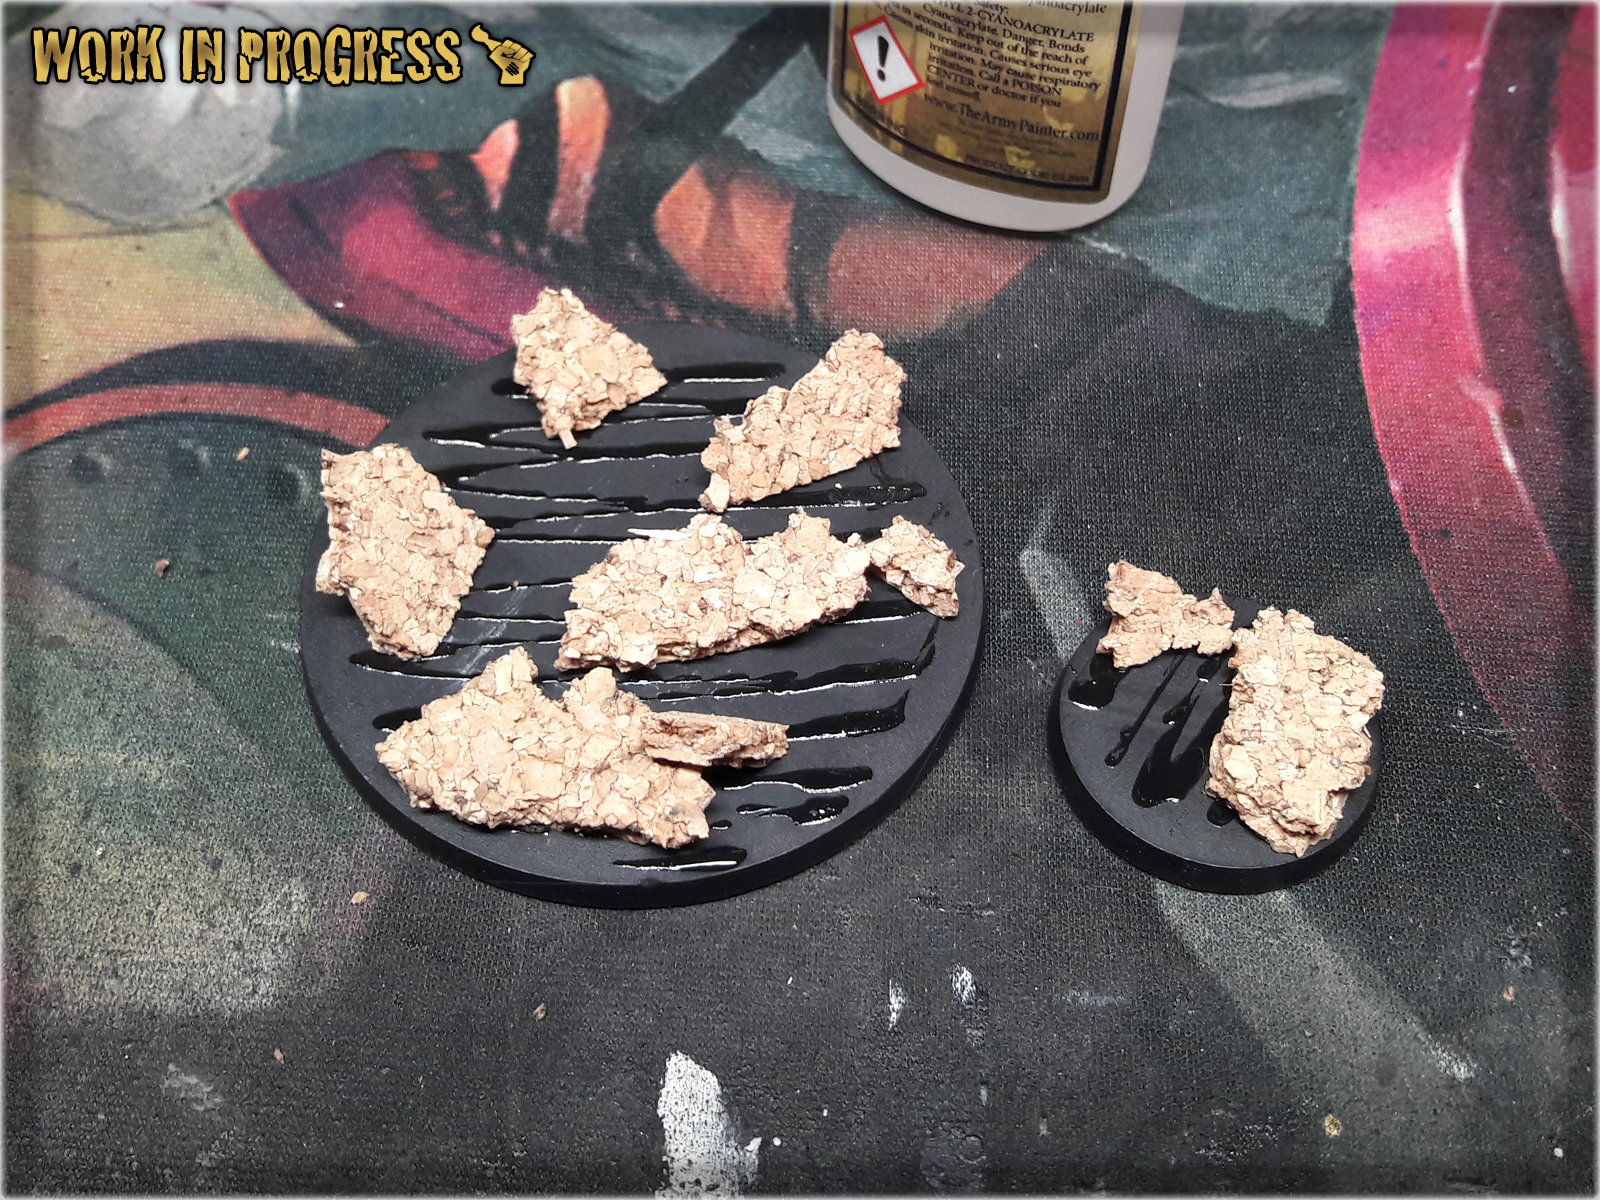
* Once Super Glue dried out I covered entire base with Basing Glue.
* I then dropped tiny balls (shoe moist absorbers) oon top of the Basing Glue, between 'volcanic rocks' to create an effect boiling lava bubbles.
* Next I applied Basing Glue over the bubbles.
* Black Undercoat.
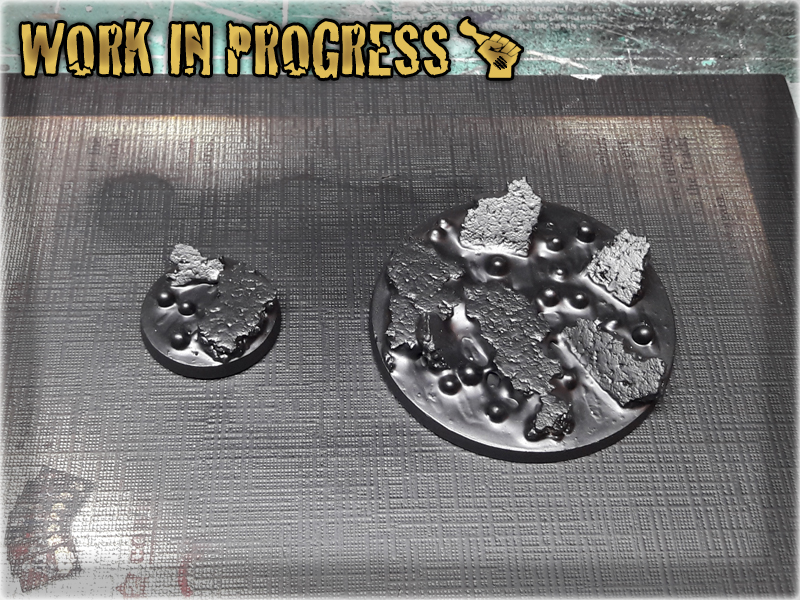
* Mahogany (Val) airbrushed all over the base.
* Gorthror Brown (GW) drybrush over the Rocks.
* Gory Red (Val) airbrushed over Lava.
* Scrofulous Brown (Val) airbrushed over Lava.
* Scrofulous Brown (Val) + White airbrushed over Lava.
* Black spots added around Rocks
* Scrofulous Brown (Val) airbrushed over Black spots.
* Lamenters Yellow (GW) airbrushed over Lava.
* Hot Orange (Val) spots airbrushed over Black spots, White airbrushed over bubbles.
* Scrofulous Brown (Val) + Black, then pure Black glaze applied oved the Rocks.
* Gloss Varnish applied over Lava.
![]()
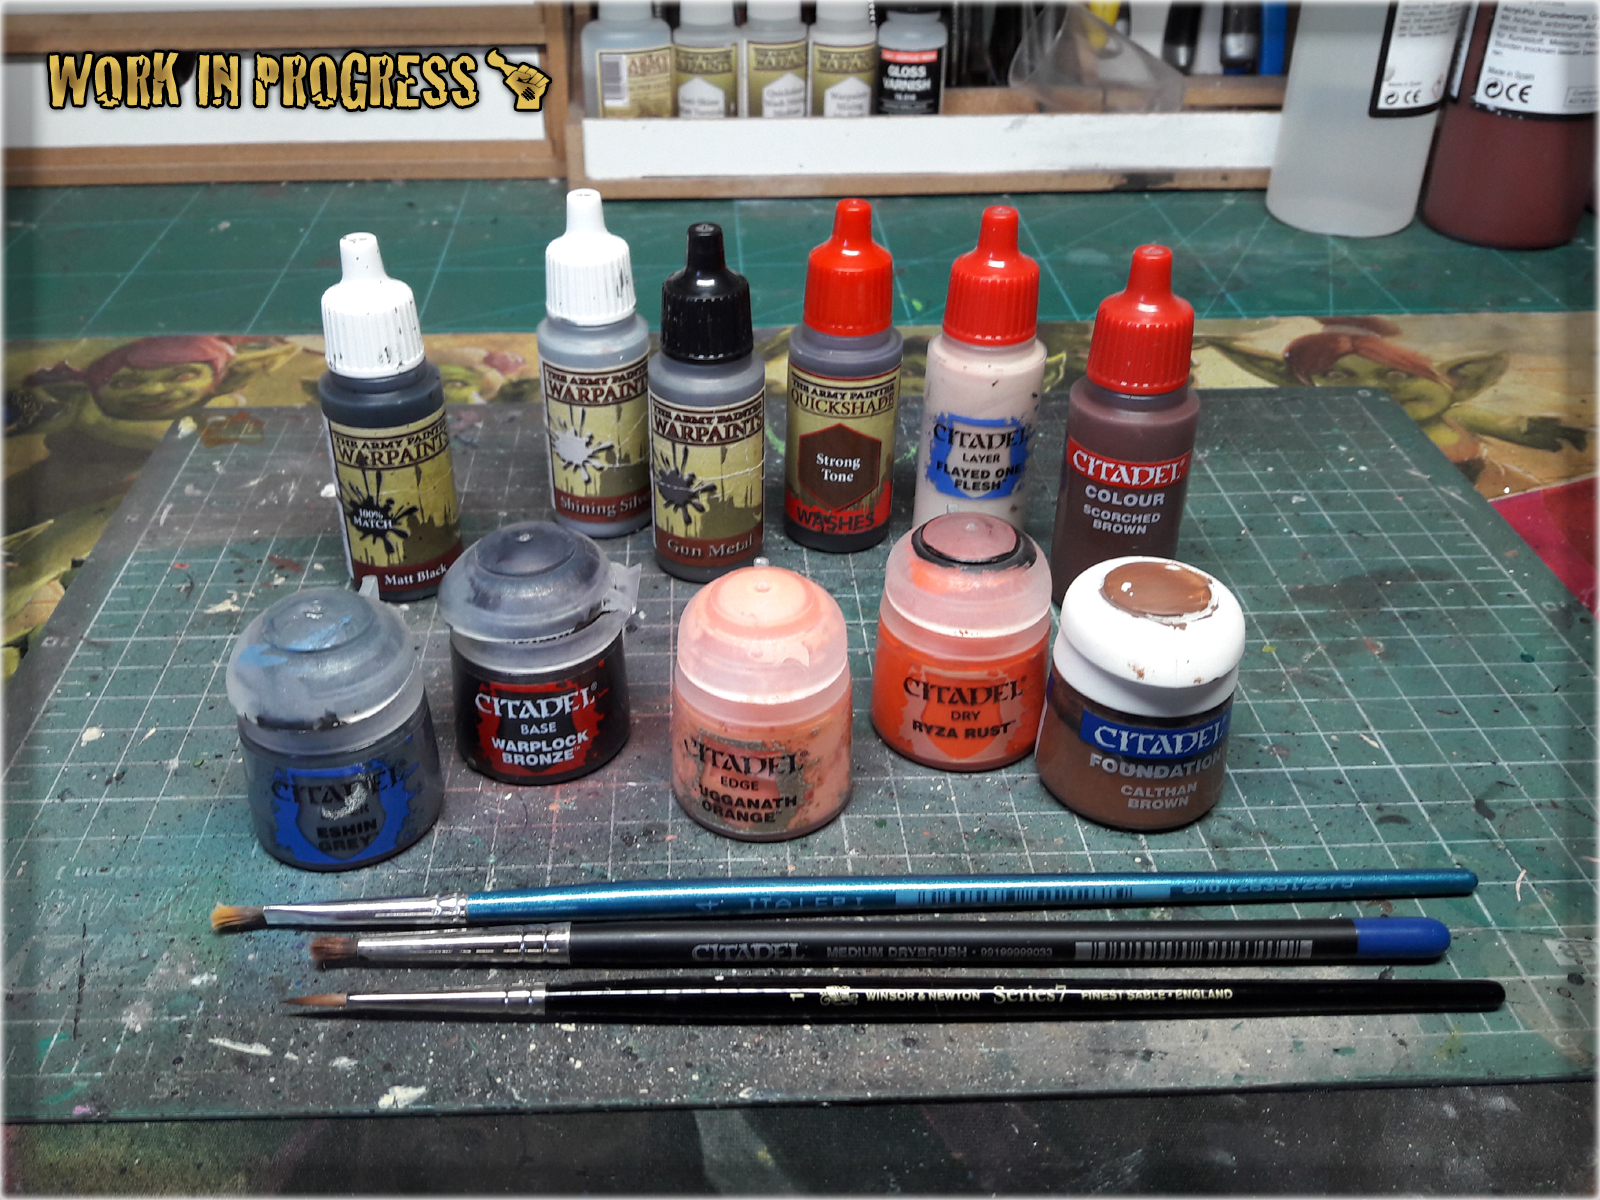
In this Step-by-Step tutorial I would like to take you on a spin with some Micro Art Studio’s Corregidor Bases. Guys from MAS did a fantastic job painting this product, but I have my own way which I would like to share with you. Buckle up and let’s get to it!
* Regular Brush,
* Stippling Brush,
* Black,
* Tin Bitz / Warplock Bronze (GW)
* Eshin Grey (GW),
* Strong Tone Ink (AP),
* Gun Metal (AP),
* Shining Silver (AP),
* Scorched Brown (GW),
* Calthan Brown (GW),
* Ryza Rust (GW),
* Lugganath Orange (GW),
* Flayed One Flesh (GW),
! You can achieve similar results using different paints as long as you followTutorial's basics. For example Eshin Grey (GW) might be switched for Panzer Dark Grey (Val).
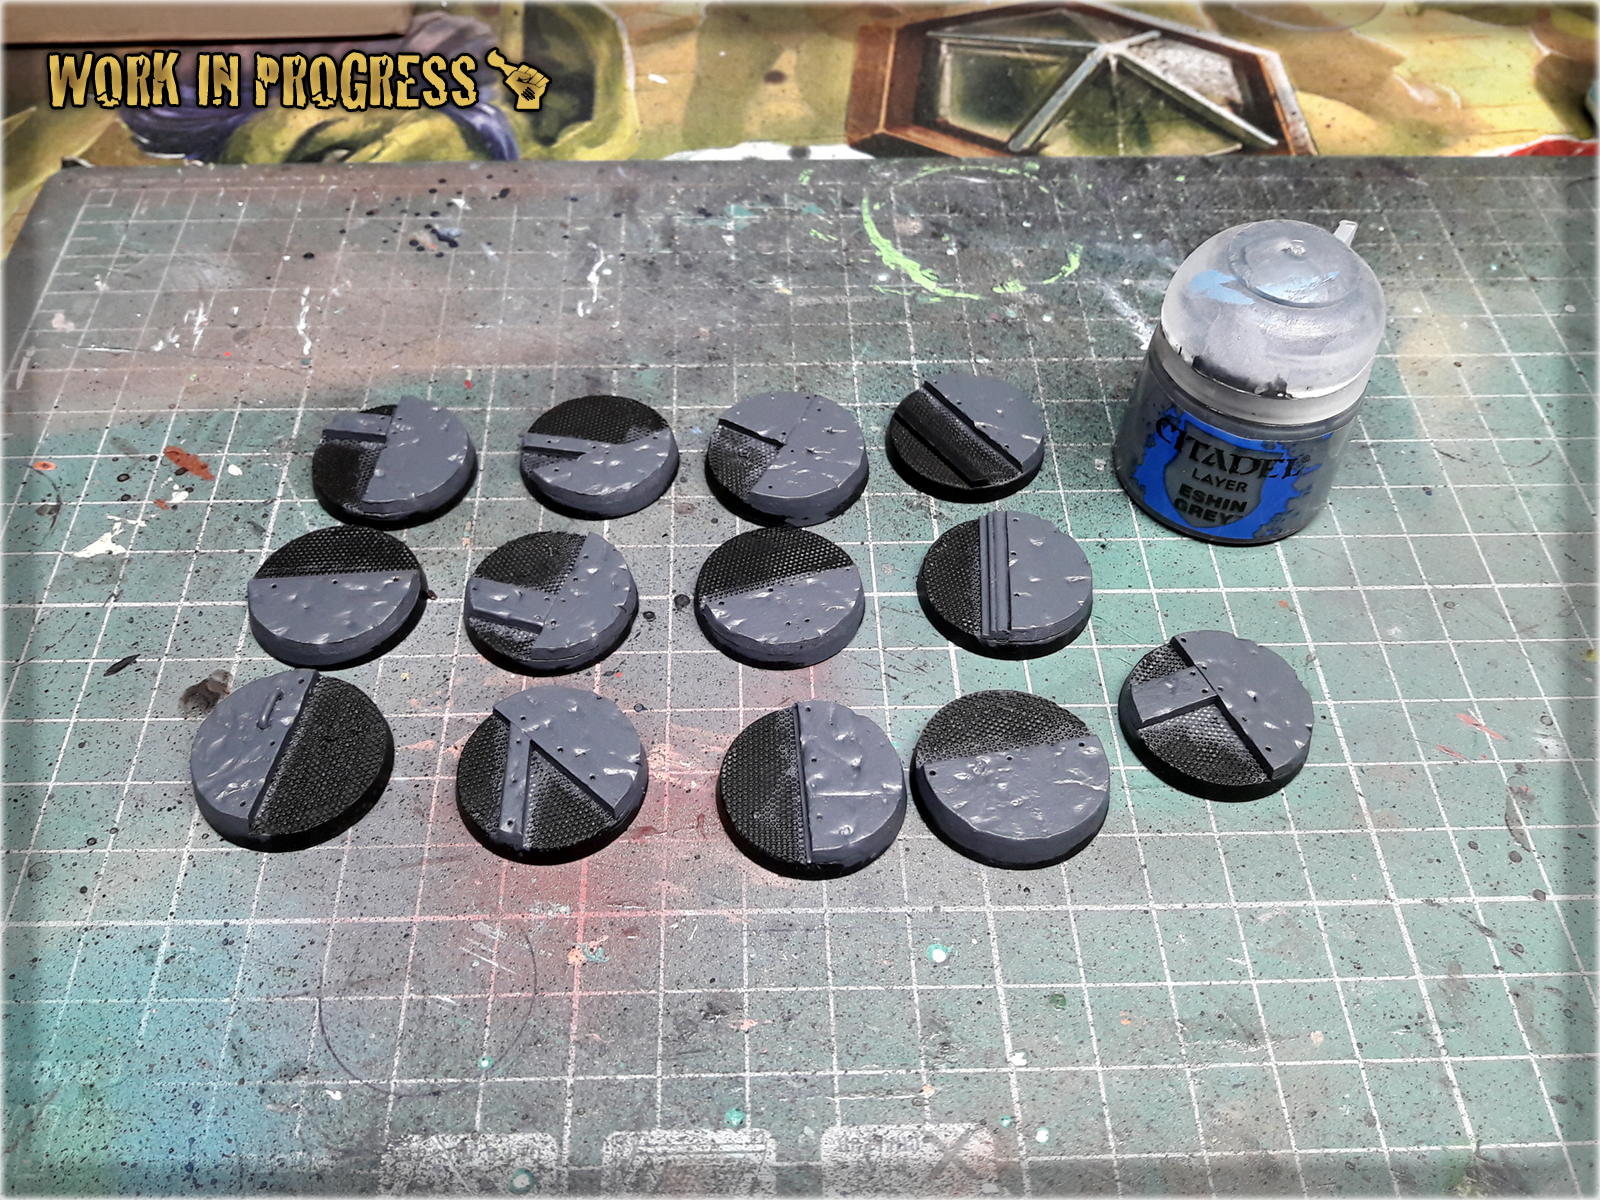
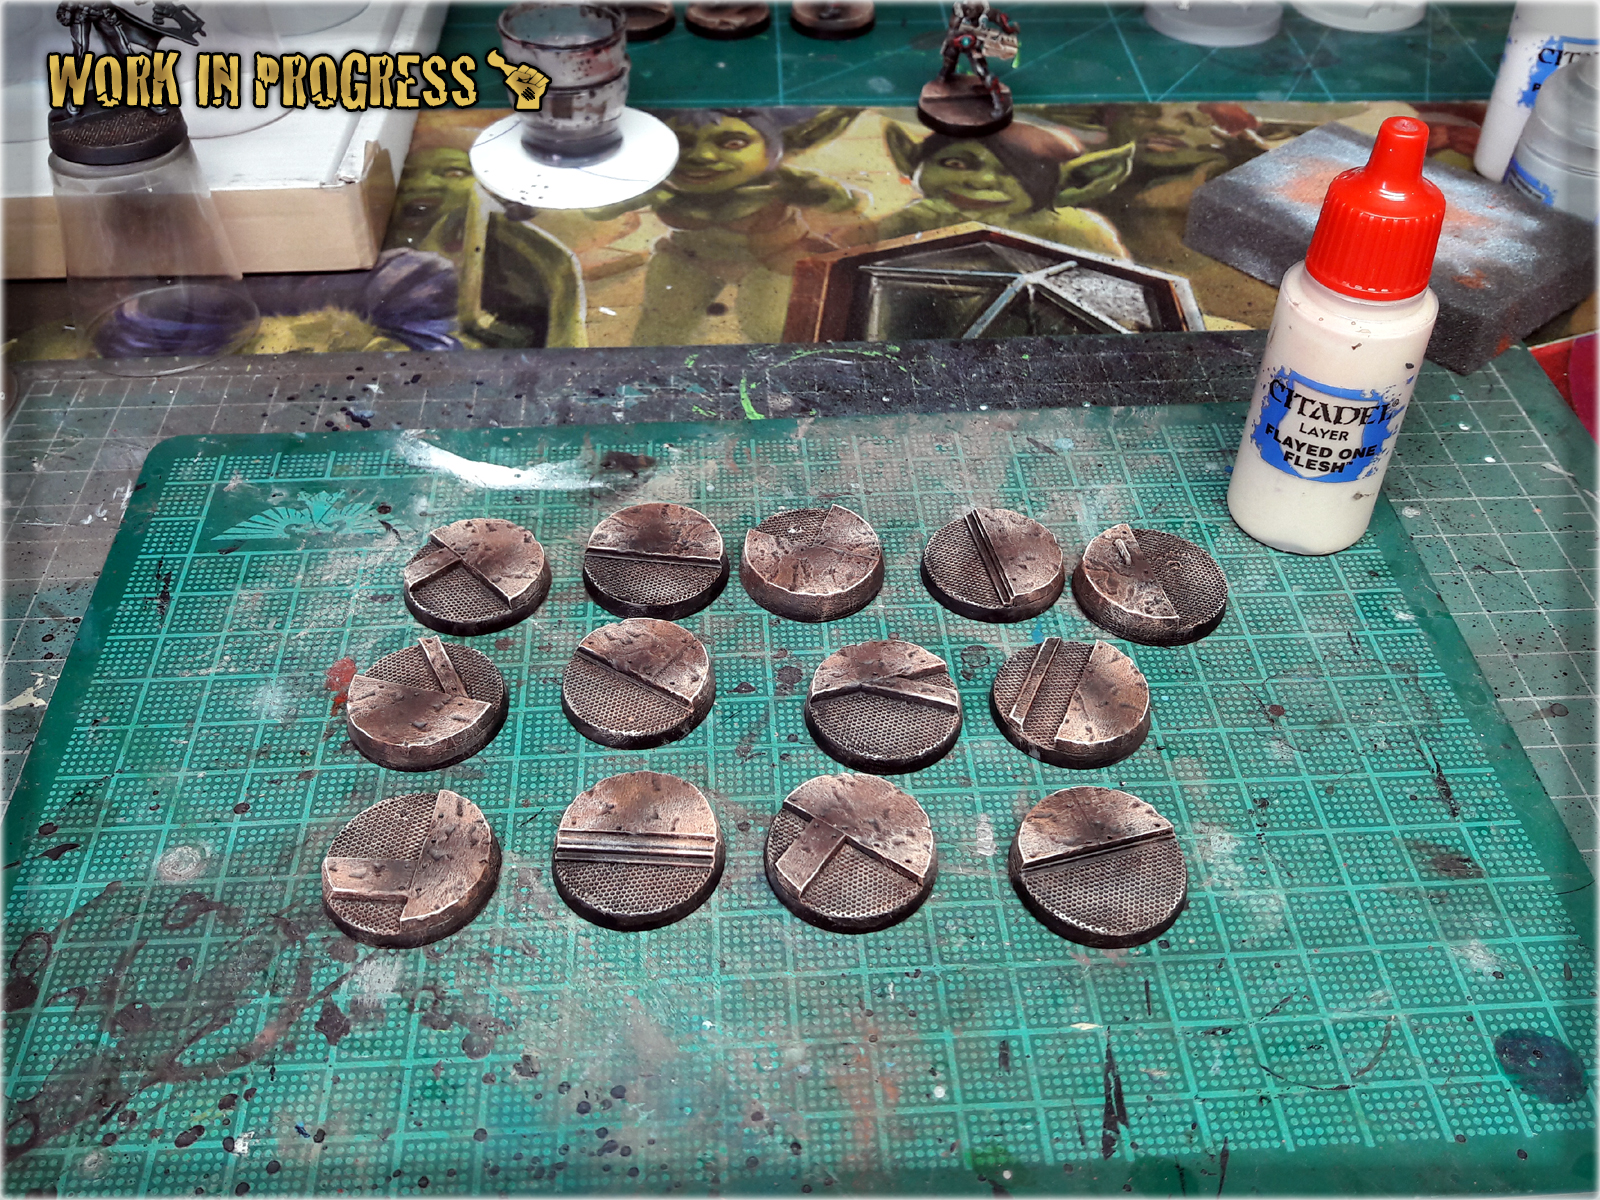
1 I started by applying a layer of Eshin Grey (GW) to all raised areas of the base, over Black undercoat. Just a hint that applying two slightly diluted layers goes much faster and produces a similar result.
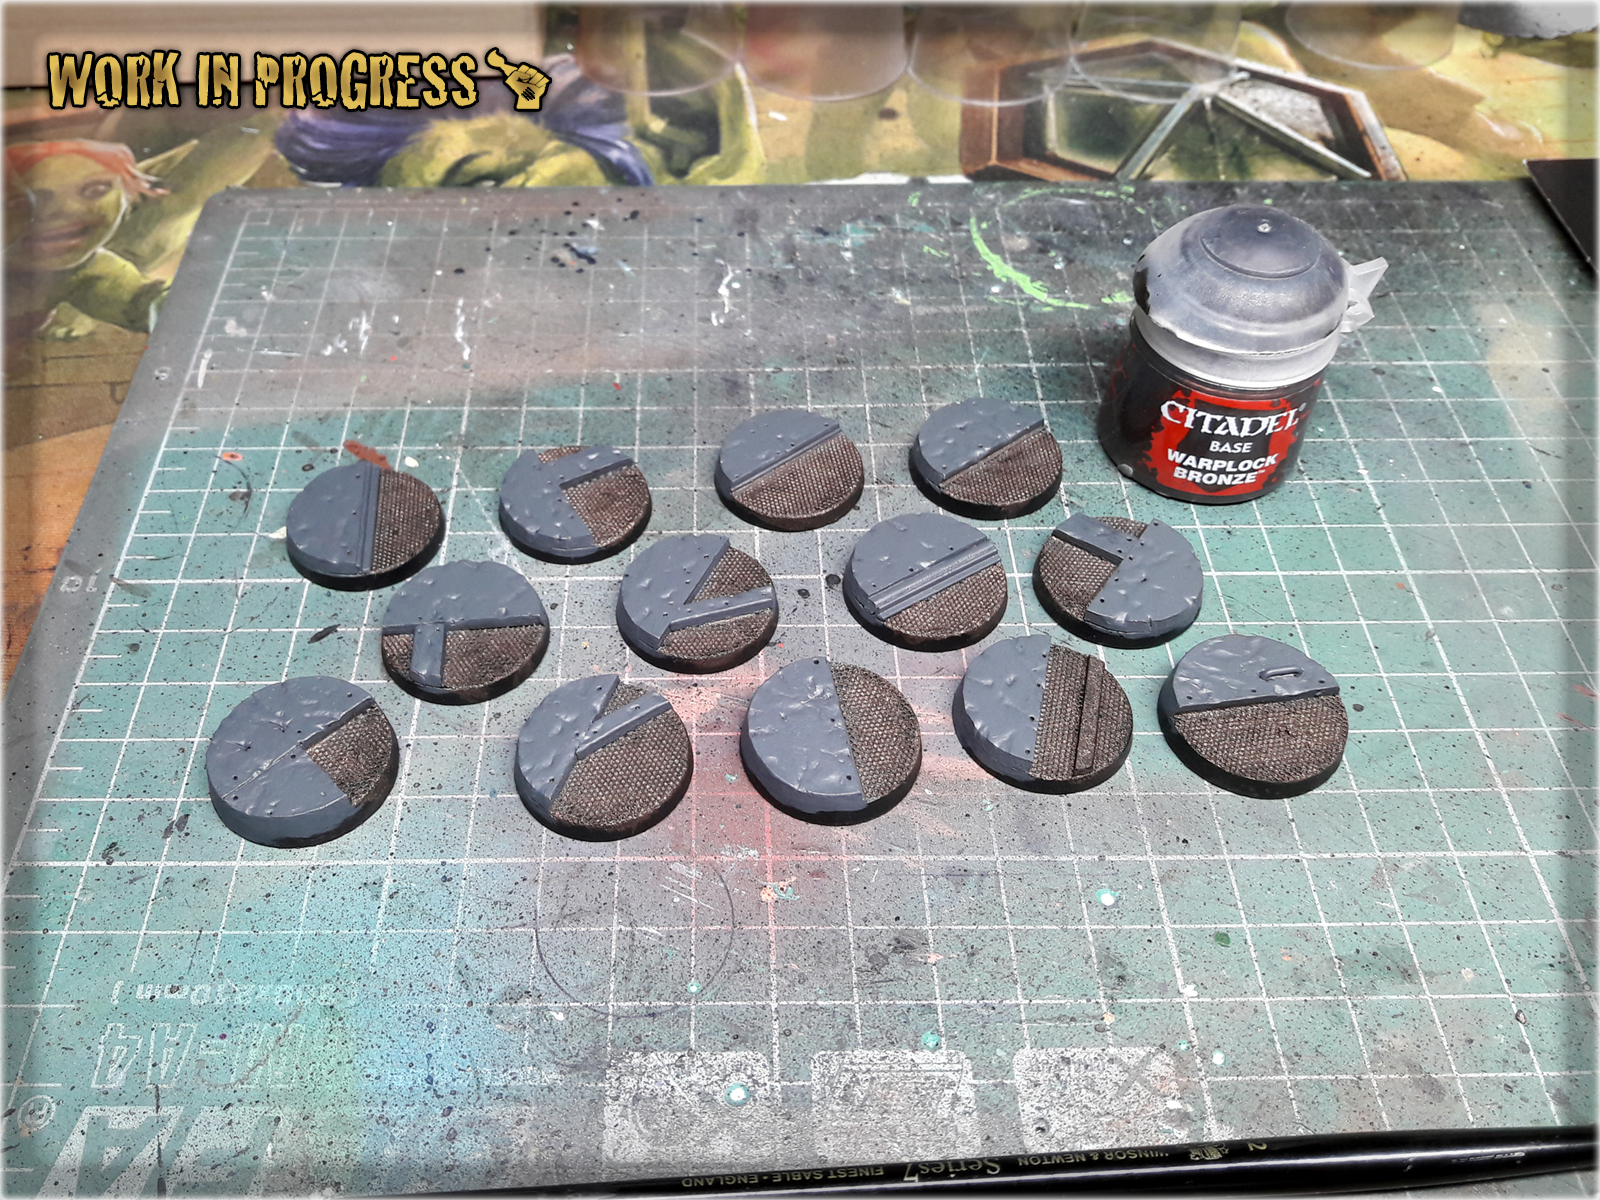
2 I then moved to the mesh areas and painted them with Warplock Bronze (GW). Once again this paint might be diluted but this time no need to apply two layers - one will suffice.
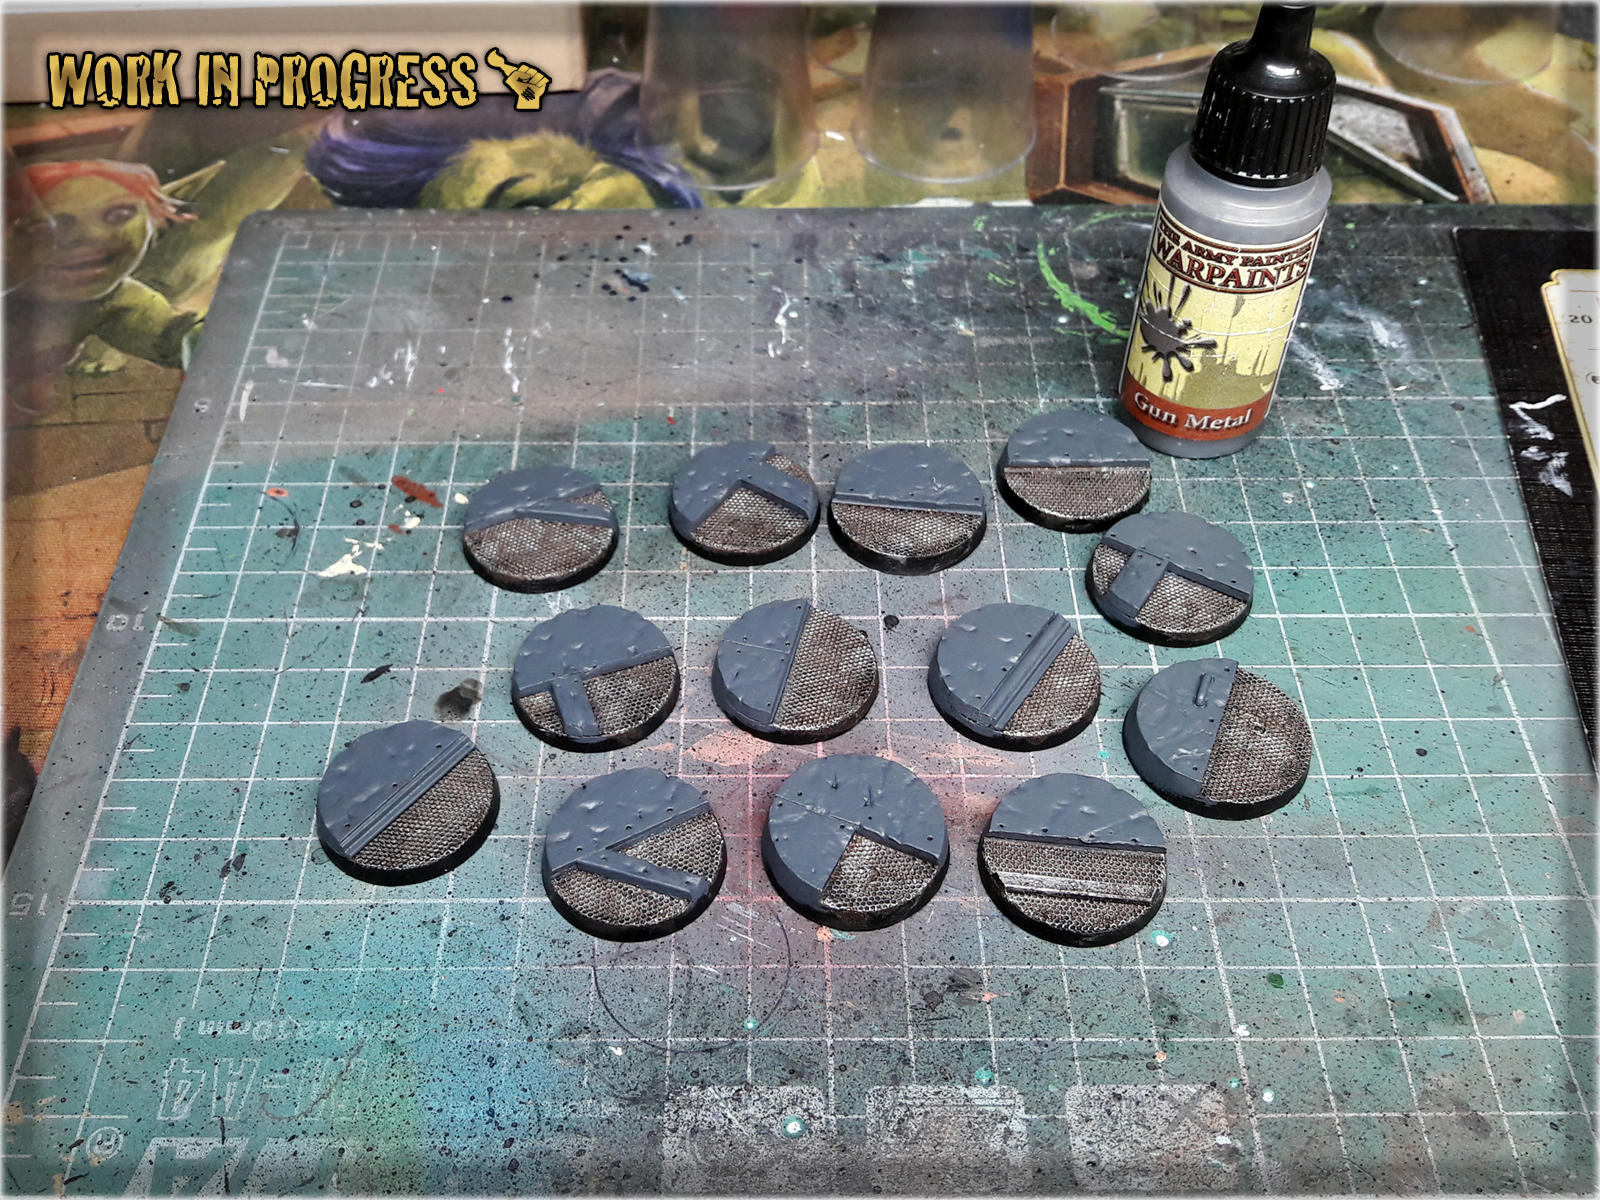
3 Once Warplock Bronze dried out, I applied a layer of Gun Metal (AP). For best results I did this with regular brush and using a Flatbrush technique following:
Five Layers Technique – Metal basis
4 Next Shining Silver (AP) came in. I applied one layer over Gun Metal with regular brush, Flatbrushing.

5 I then applied a wet, thick layer of Strong Tone Ink (AP) over entire base. Once it dried out - I applied another, identical layer. (Picture seem grey'ish - in real life this would look more brown and juicy)

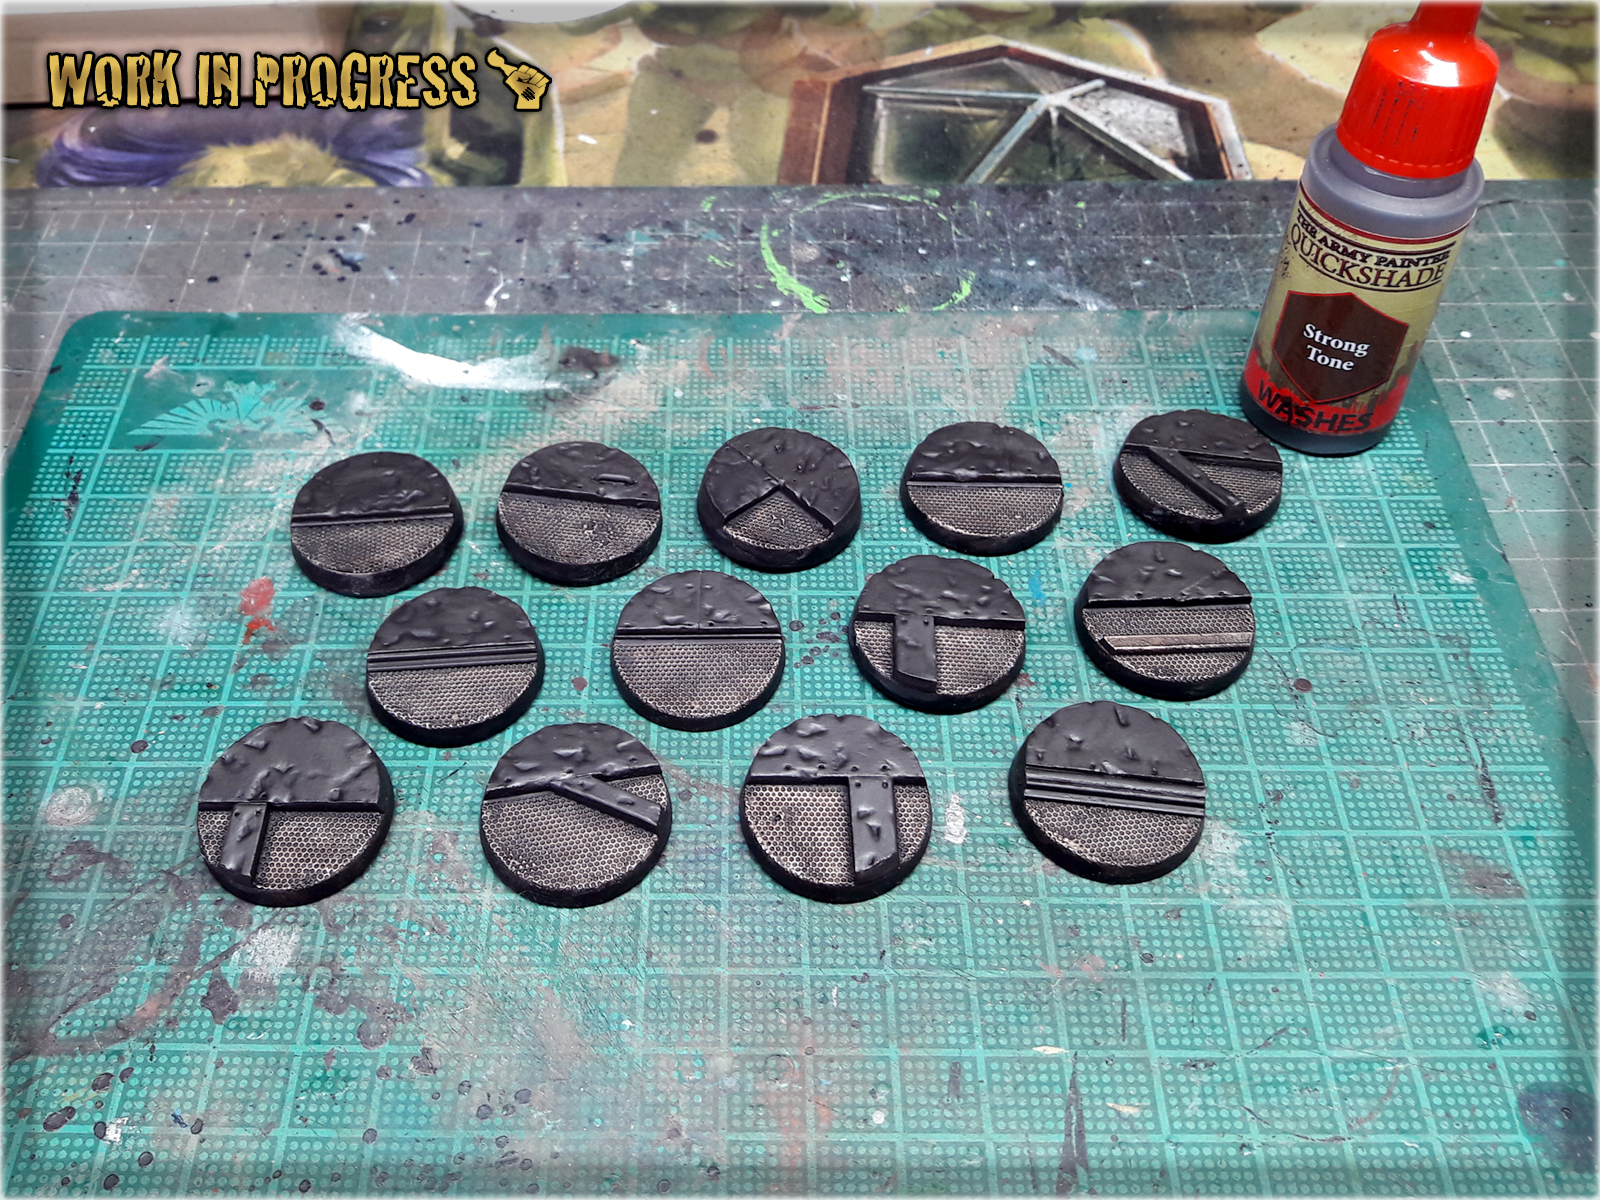
! orem ipsum dolor sit amet, Integer commodo tristiqu odio, aliquet ut. Maecenas sed justo imperdiet bibendum. Vivamus nec sapien imperdiet diam. Aliquam erat volutpat. Sed onsectetur suscipit nunc et rutrum. Lorem ipsum dolor sit amet,volutpat. Sed onsectetur suscipit nunc et rutrum. Lorem ipsum dolor sit amet, volutpat.
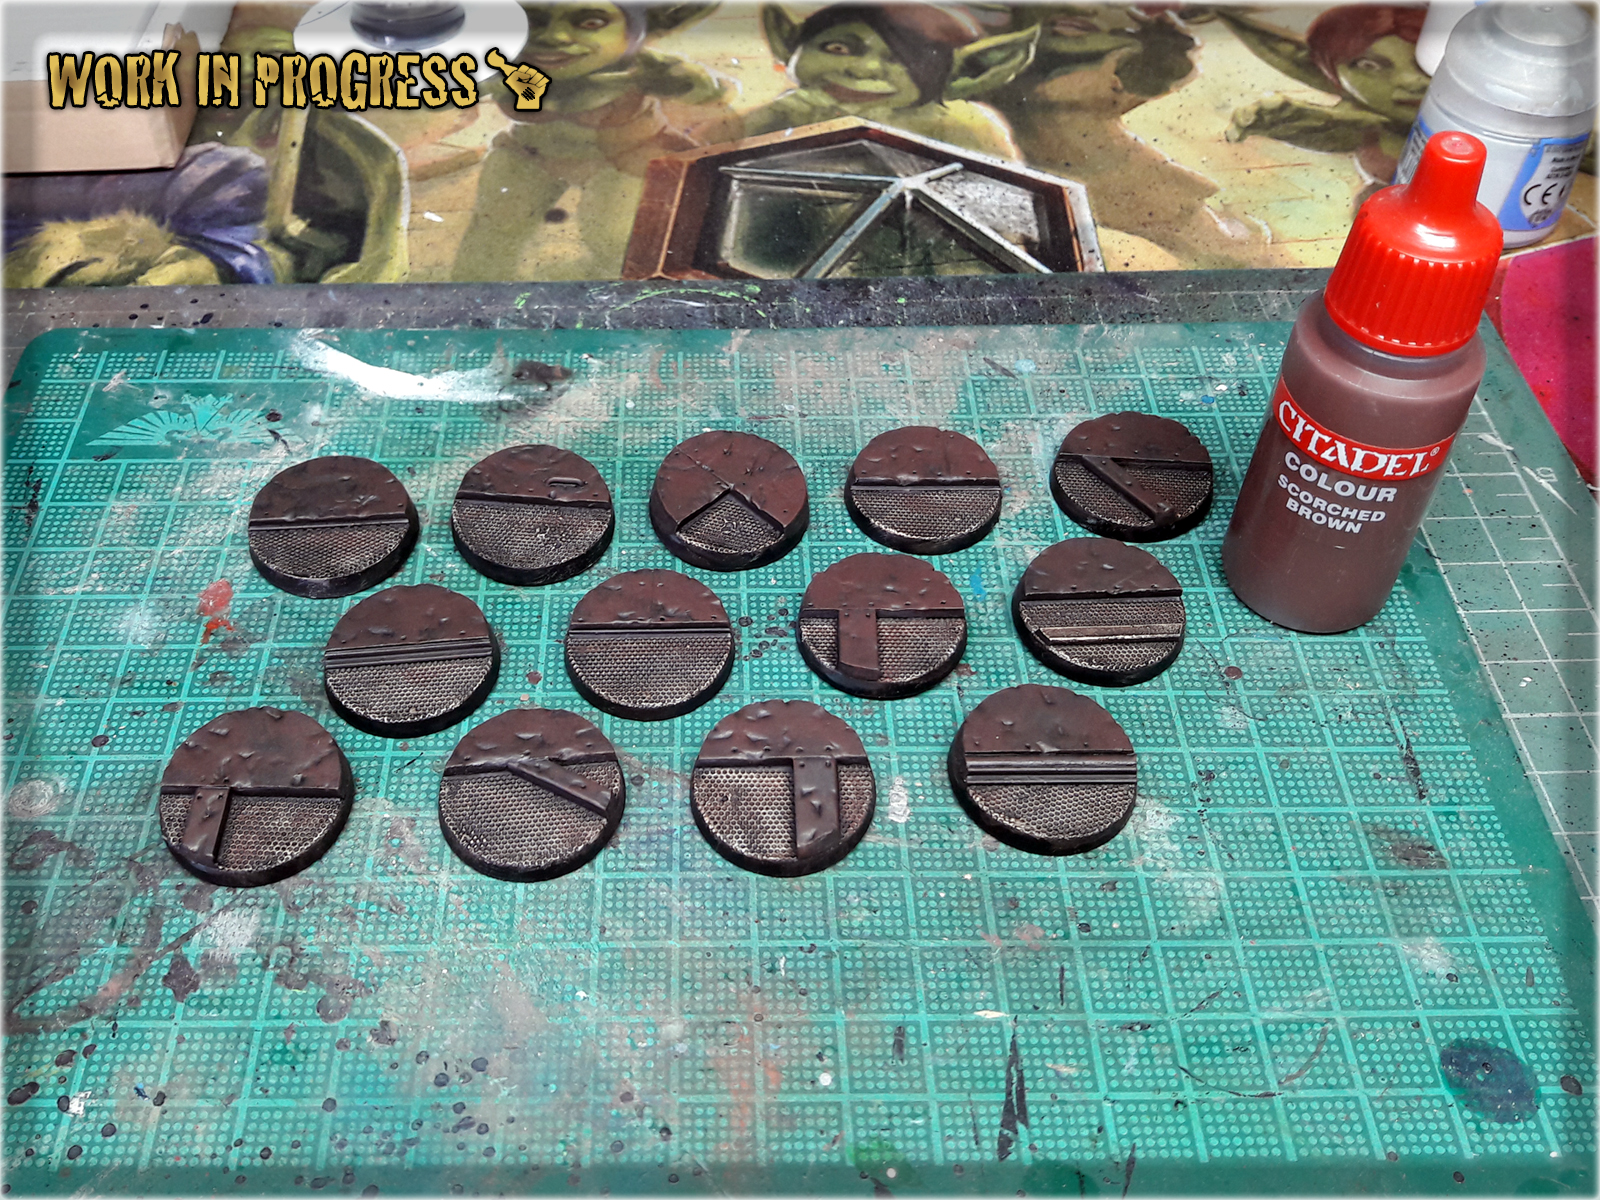
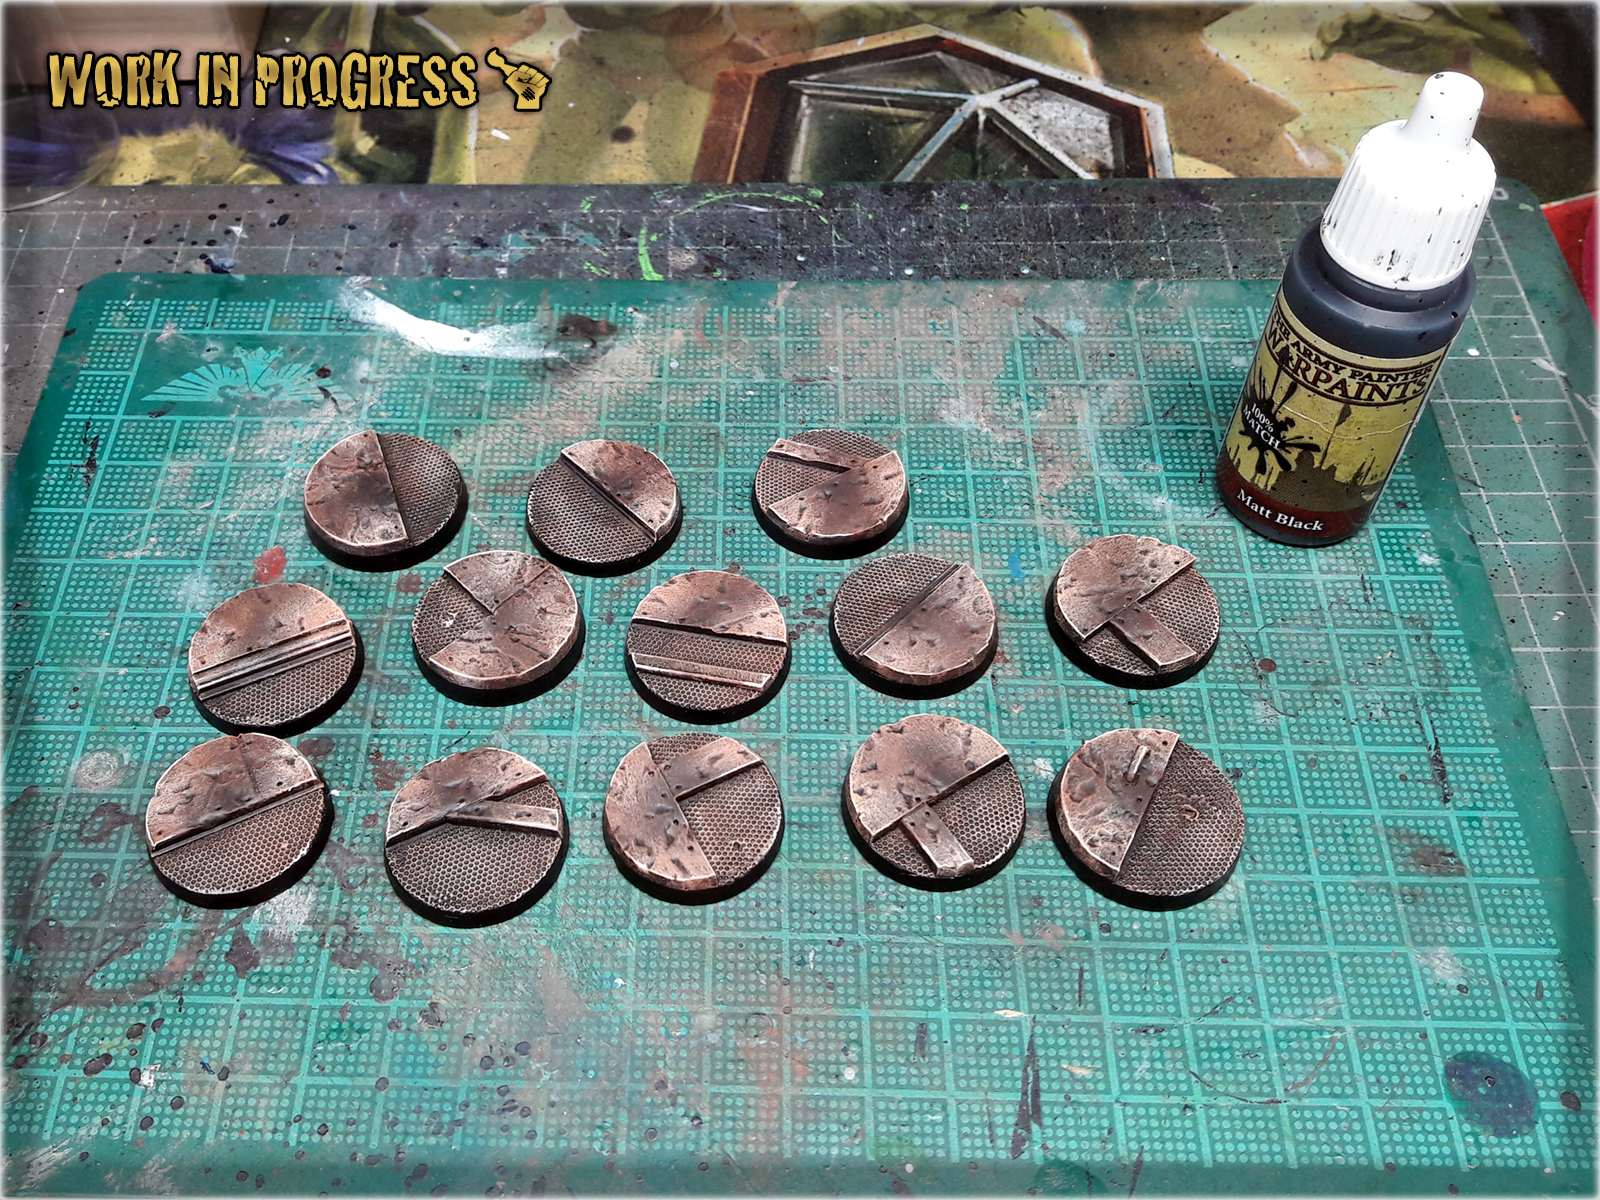
1 Using either a Stippling brush or a well used up large brush I applied stains of Scorched Brown (GW) over all raised areas. Was carefull not to use too much paint.
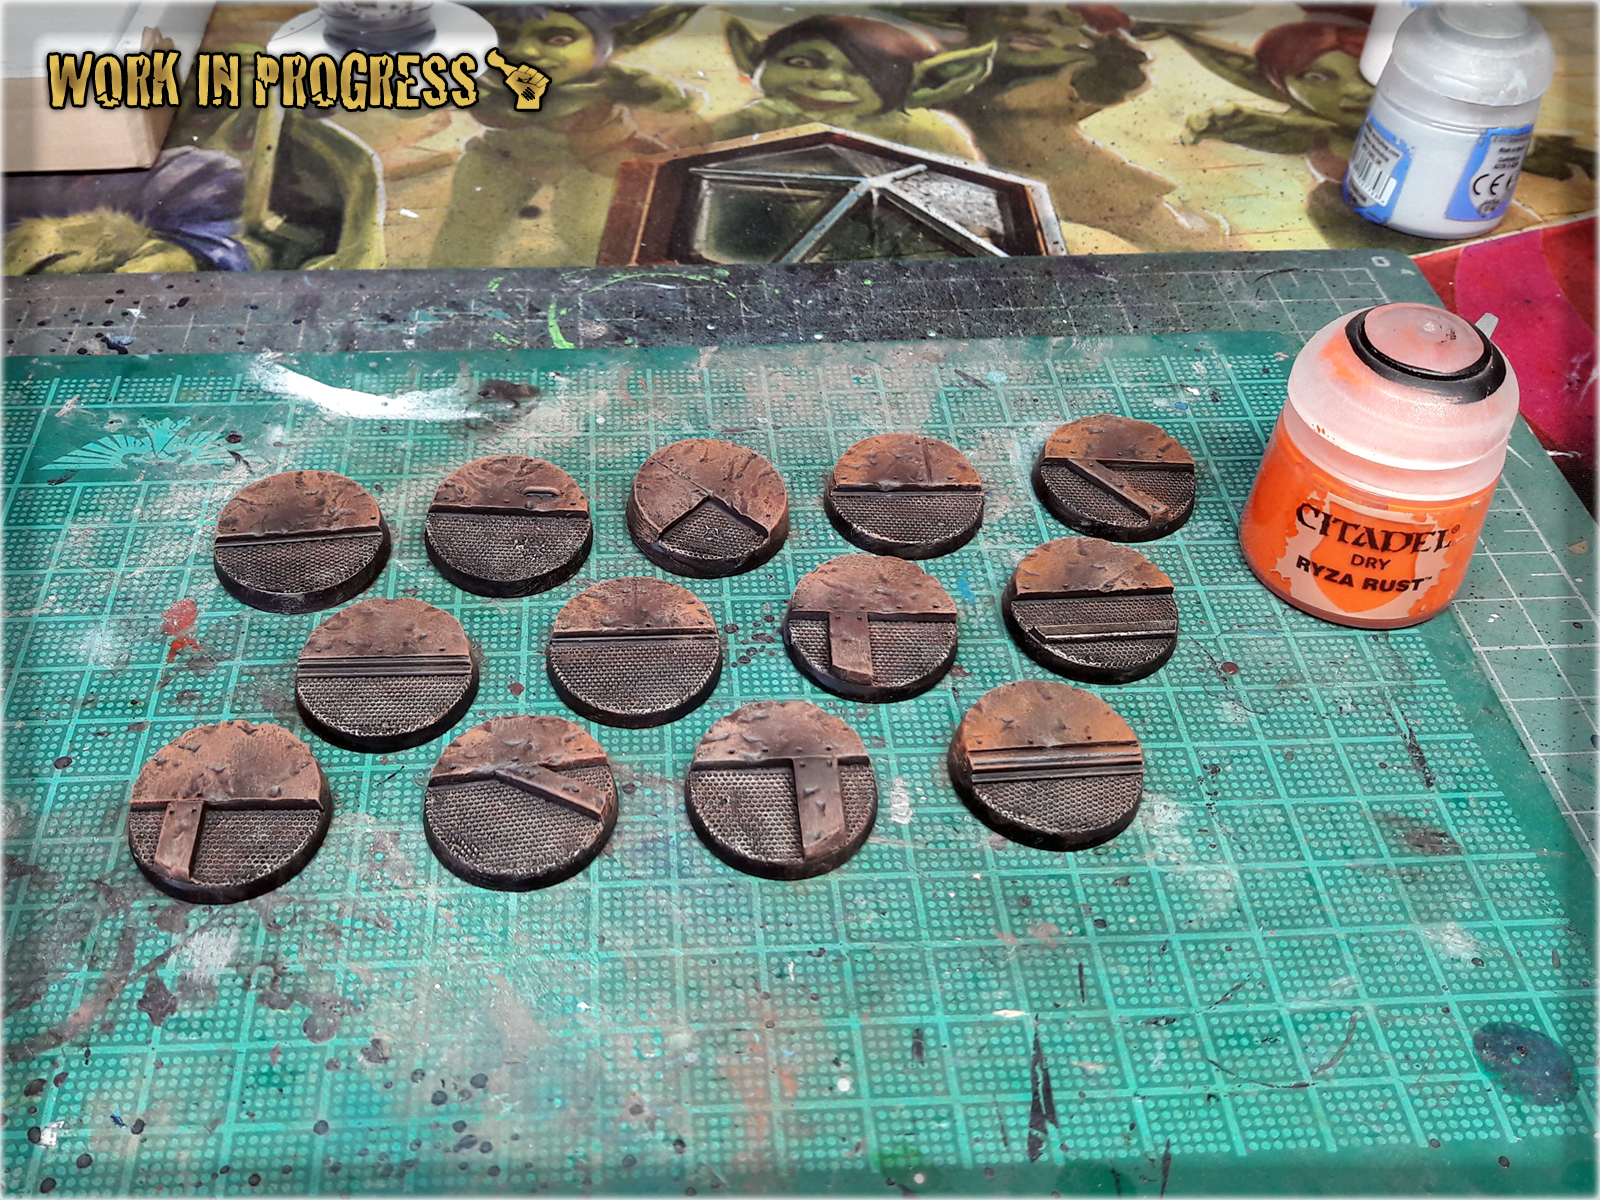
2 I then drybrushed edges and some large parts of raised areas using Calthan Brown (GW).

3 Next I Stippled some Ryza Rust (GW) on top of previous layer, ensuring to leave some Calthan Brown visible.
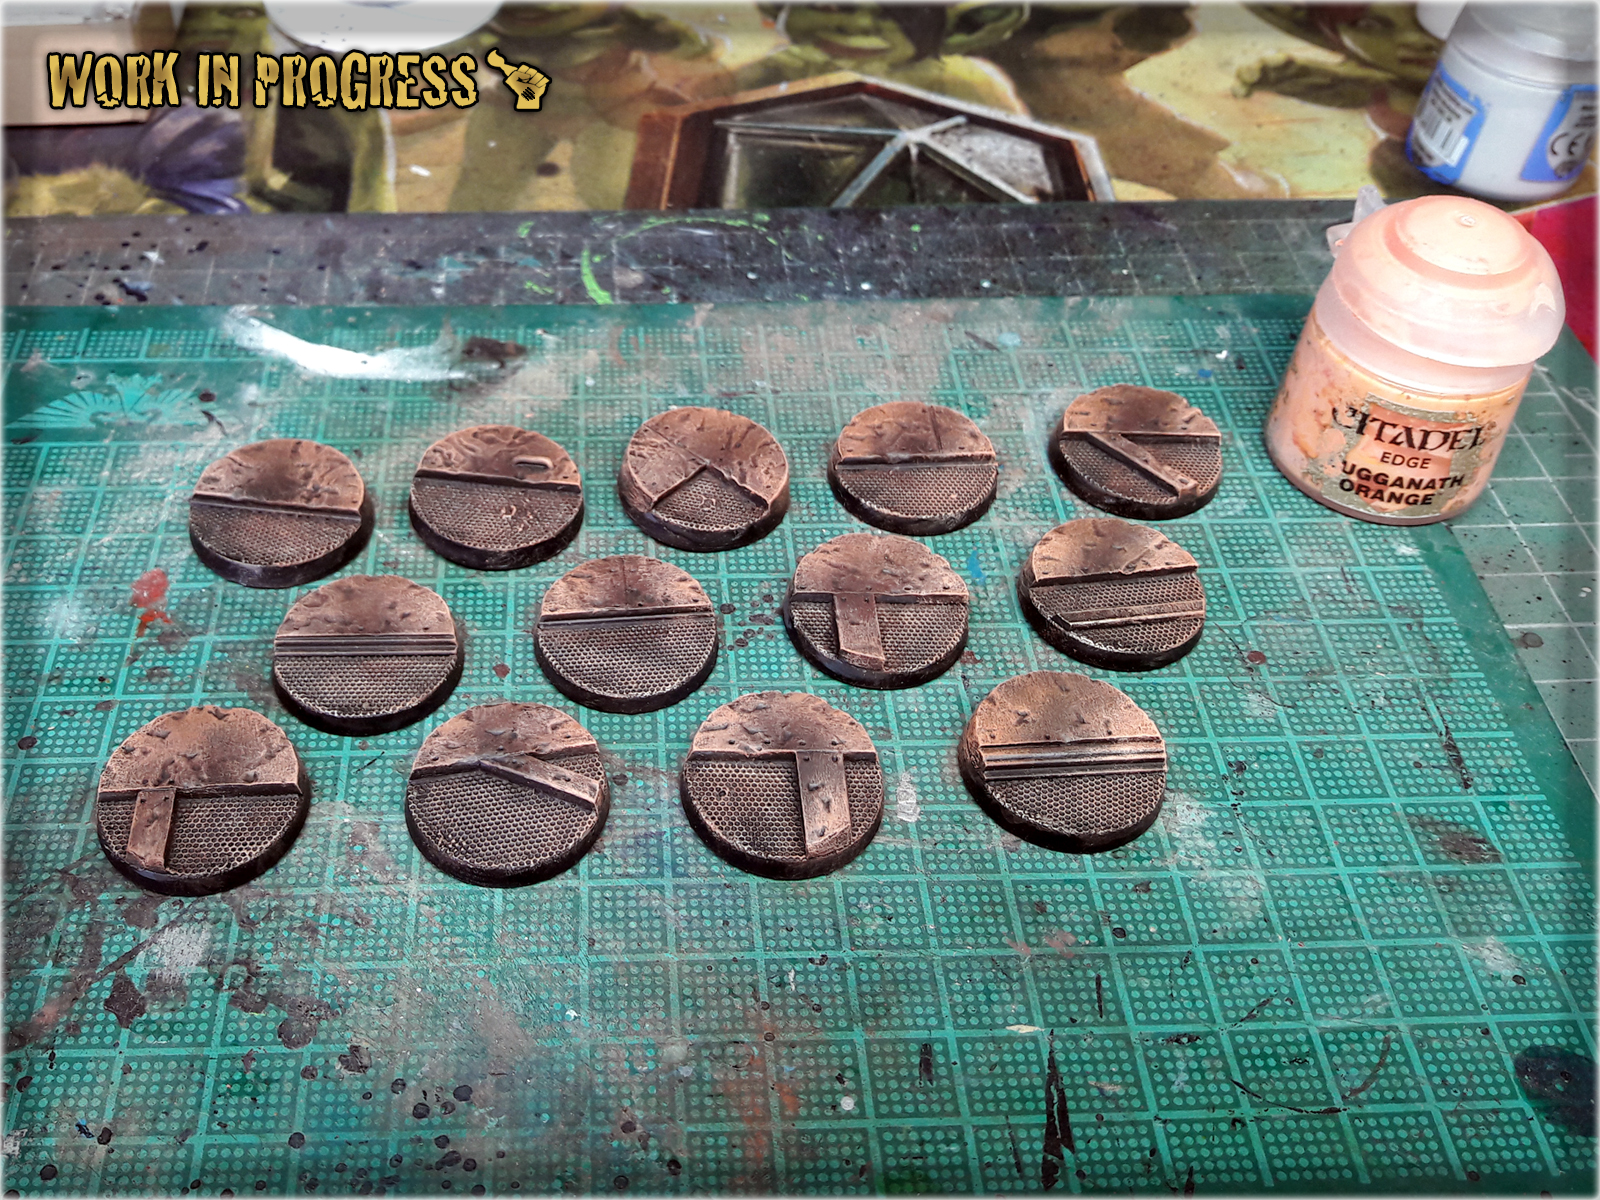
4 Same technique, different paint. I stippled Lugganath Orange (GW) on top of Ryza Rust layer, leaving previous layer visible on the sides of the new one.
! From this layer onward I usually paint over both raised and mesh areas. For the purpose of this Tutorial I left mesh parts clean, but do not be alarmed if you see pictures of my own bases with a less differentiated colour scheme.
5 Flayed one Flesh (GW) followed. This time I Drybrushed over Lugganath Orange layer and then used regular brush to paint thin lines on the edges.
6 Adding a final touch I painted edges smooth Black to add contrast and keep the paint job clean.
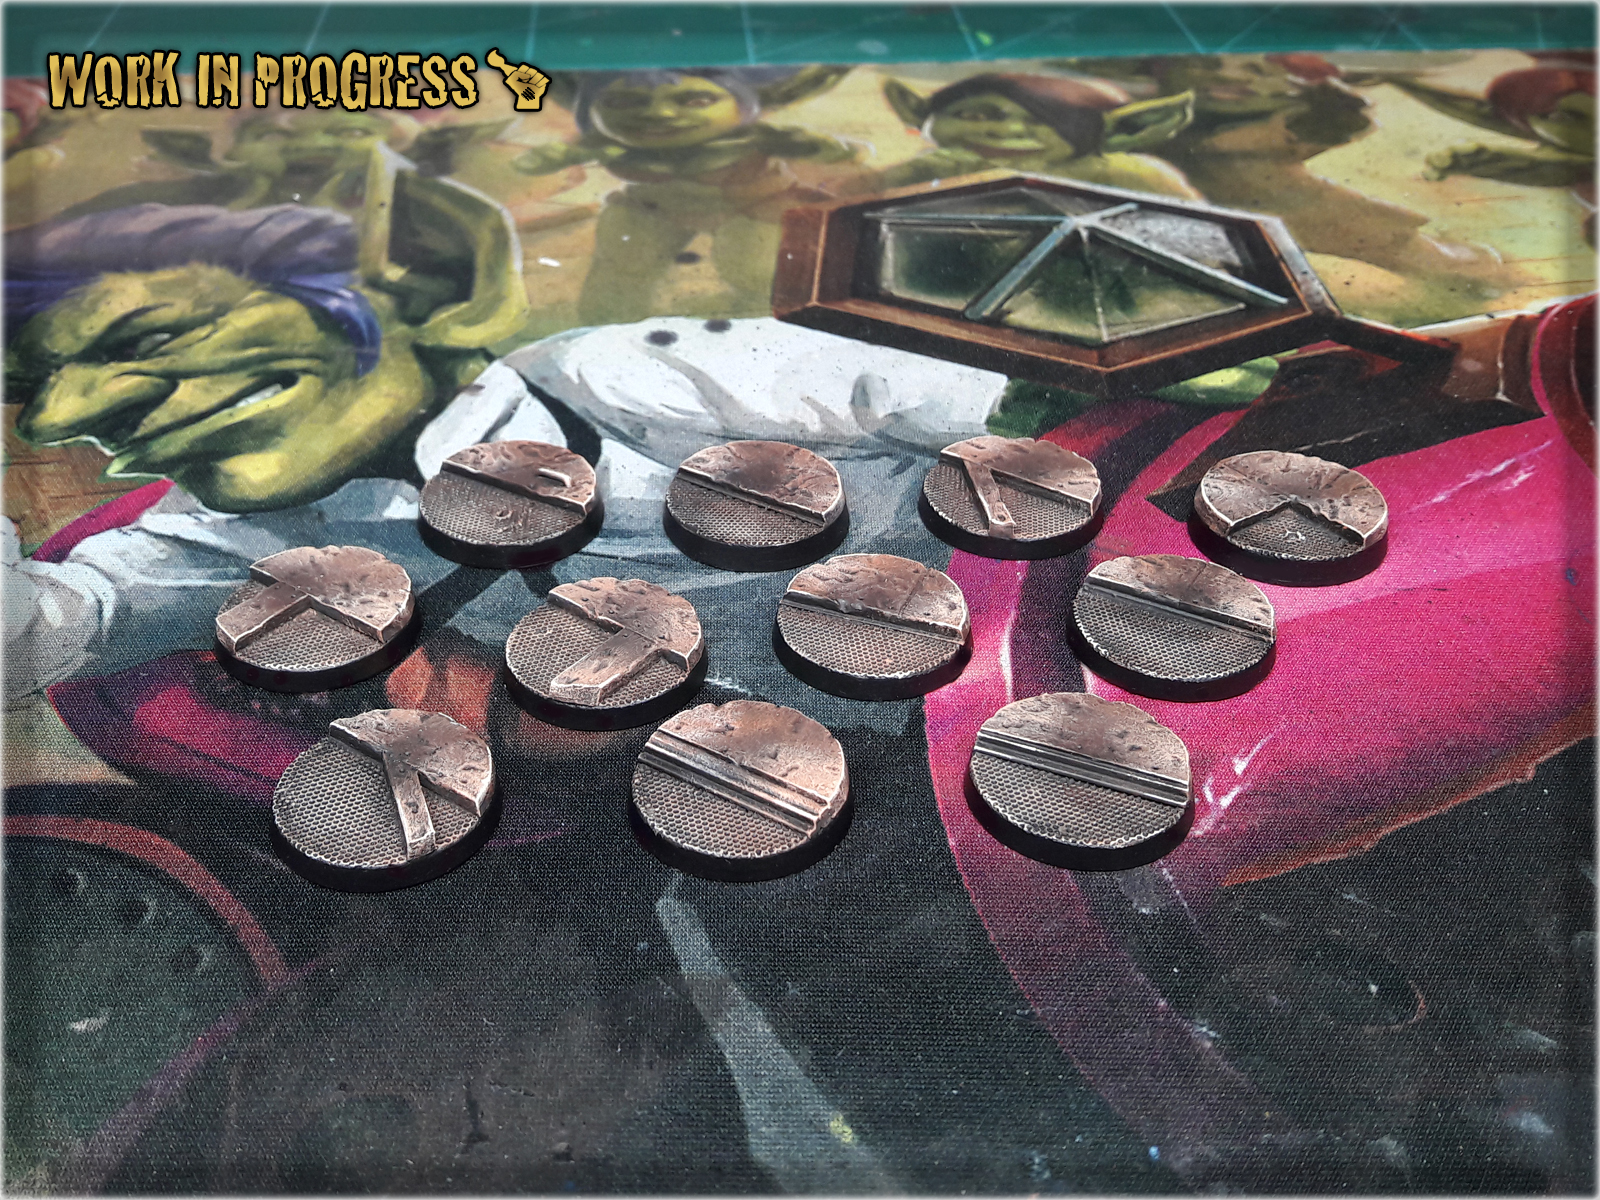
That’s it – you have followed me on my short journey from black undercoat to finished Corregidor Bases. Below you will find some examples of finished Corregidor Bases. Each bunch turns out slightly different from the rest. That’s because a slight difference in surface coverage or layer to layer proportion might result in change of how eye can see these bases. Either way – here they are:


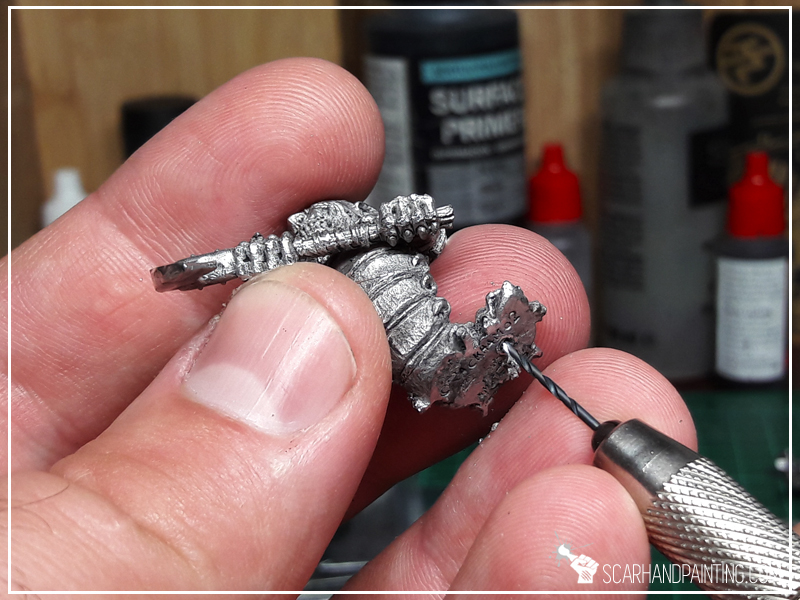
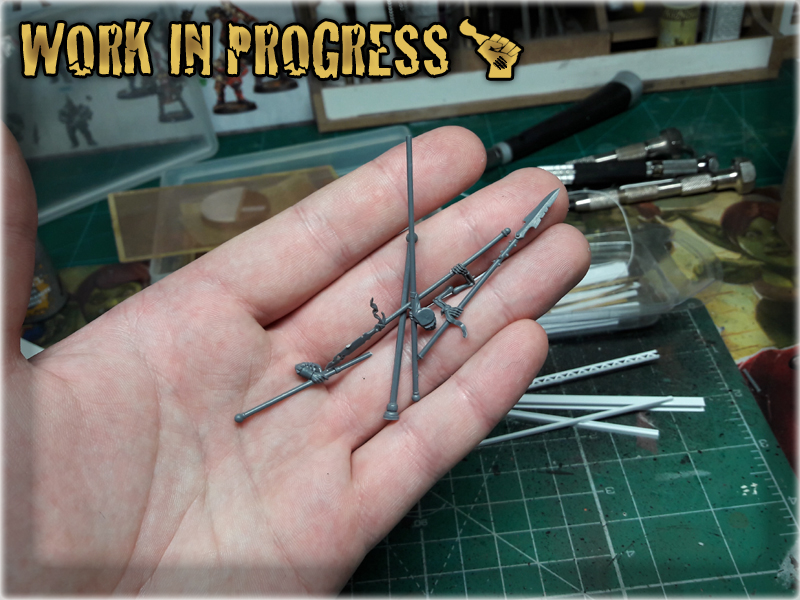
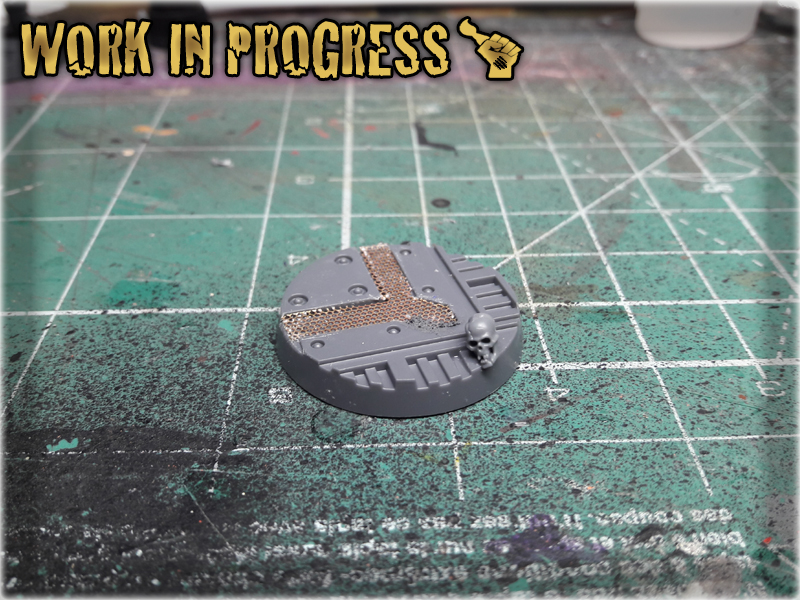
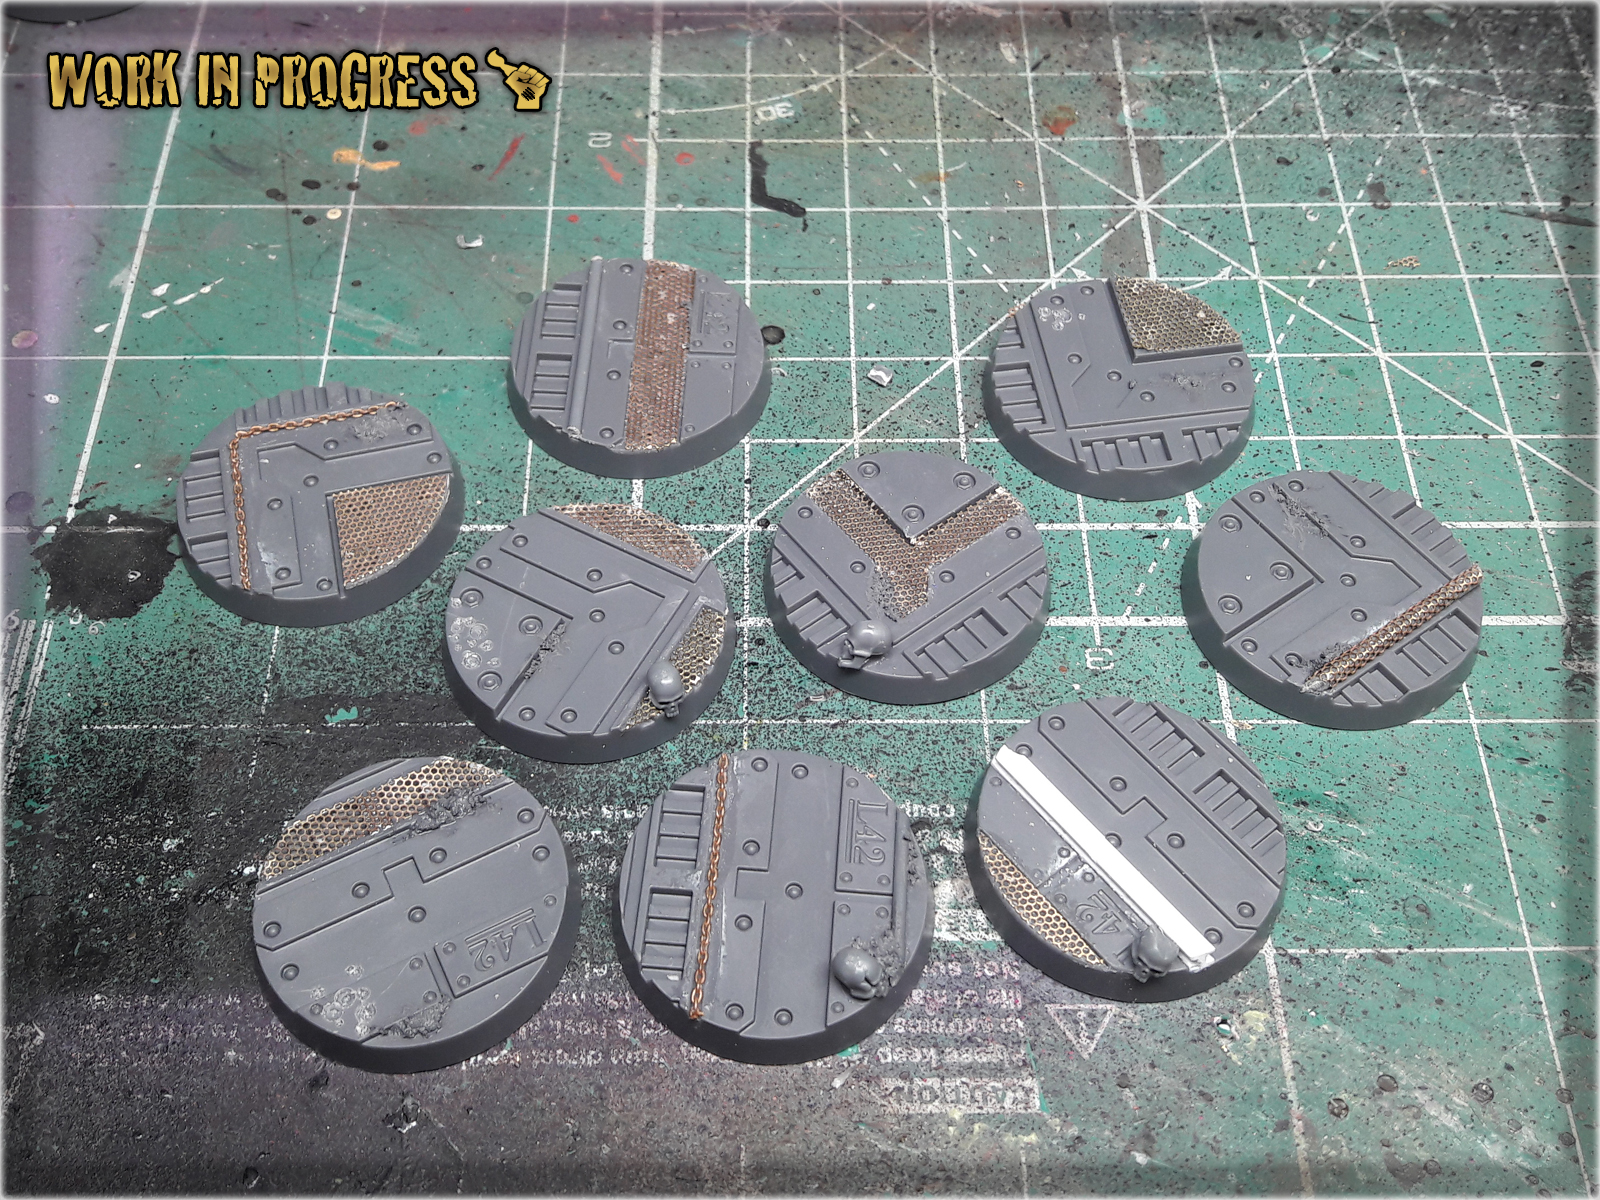
Necromunda: Underhive is a game full of nicely detailed plastic miniatures. As much as I hate endorsing Games Workshop – It should be mentioned that in terms of miniatures – they did a really nice job, extending the set so that it includes 25 industrial themed plastic bases. I appreciate this move from GW, even tho the variety of Necromunda bases designs is scarce. For example my own set came with just two versions among a total of ten bases. This is where I come in with a Tutorial on how to Enchance Necromunda bases in a fast, simple way. Below you will find few ideas on how to do it – but let me say this in advance: keep an open mind cause there’s plenty of awesome stuff that can be used to differentiate your Necromunda bases set (and actually any Industrial bases).
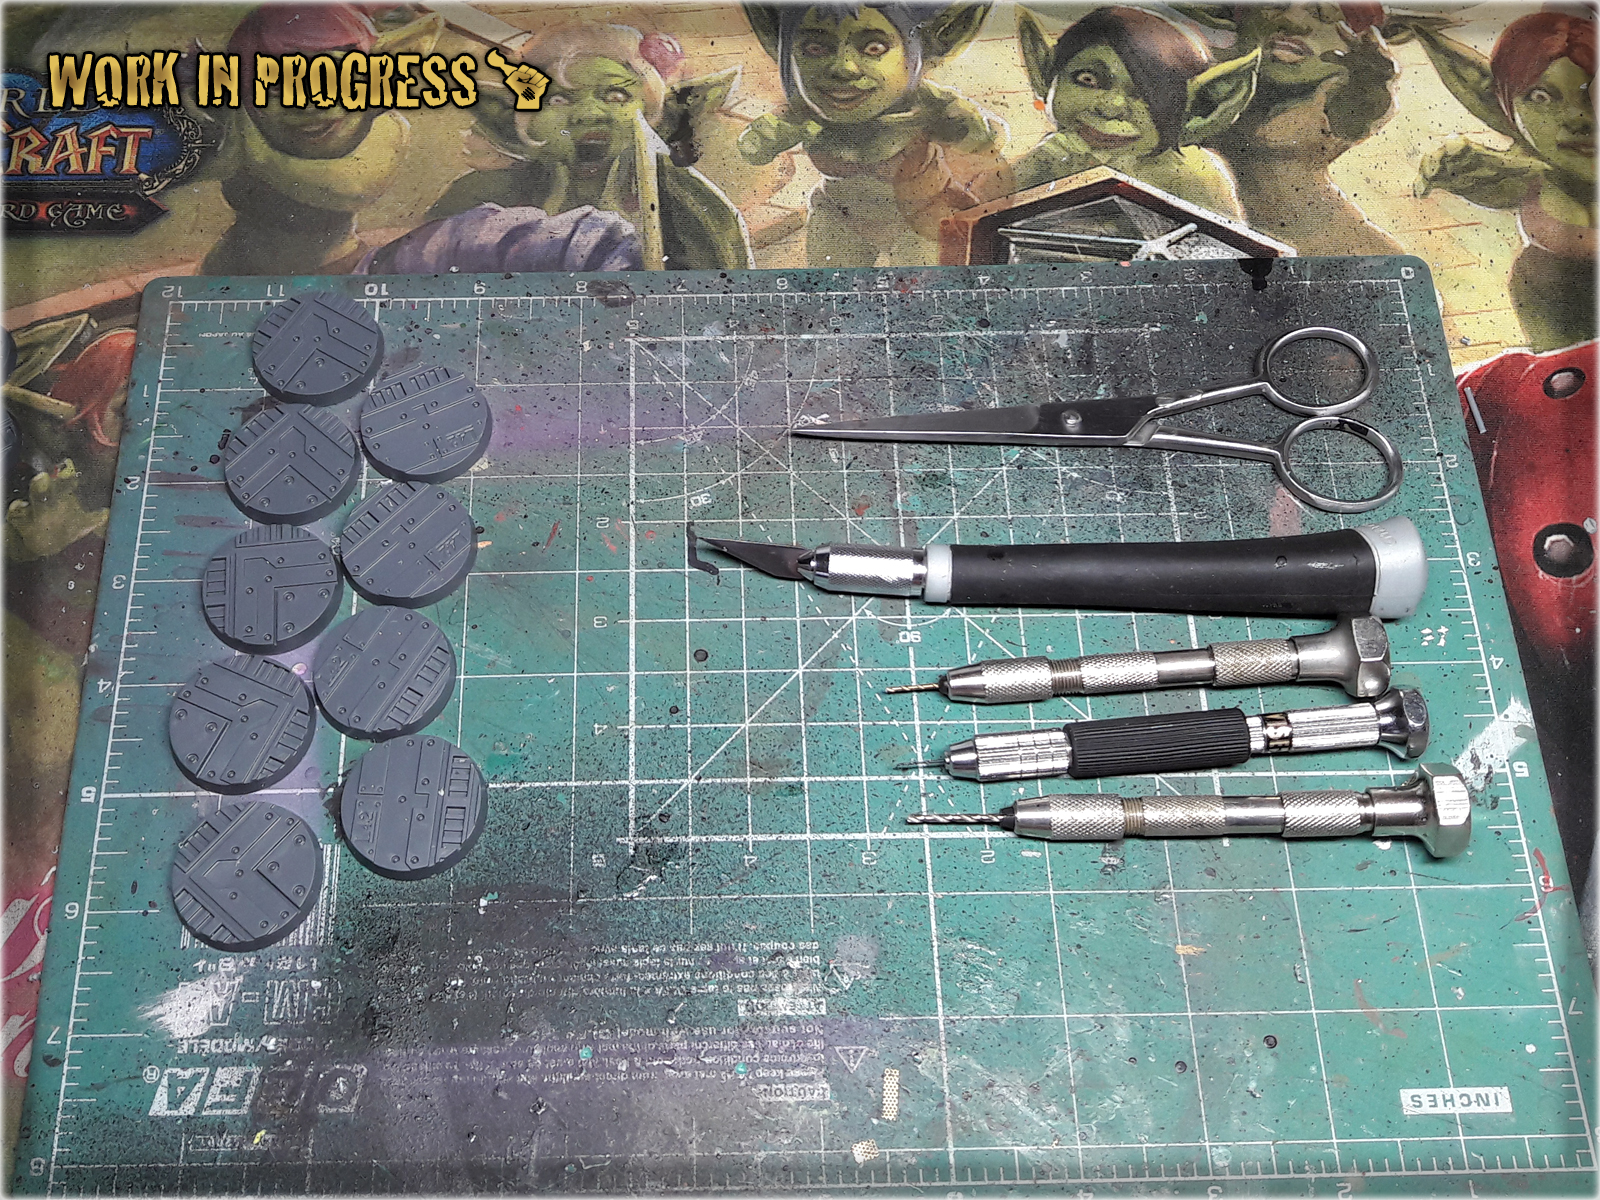
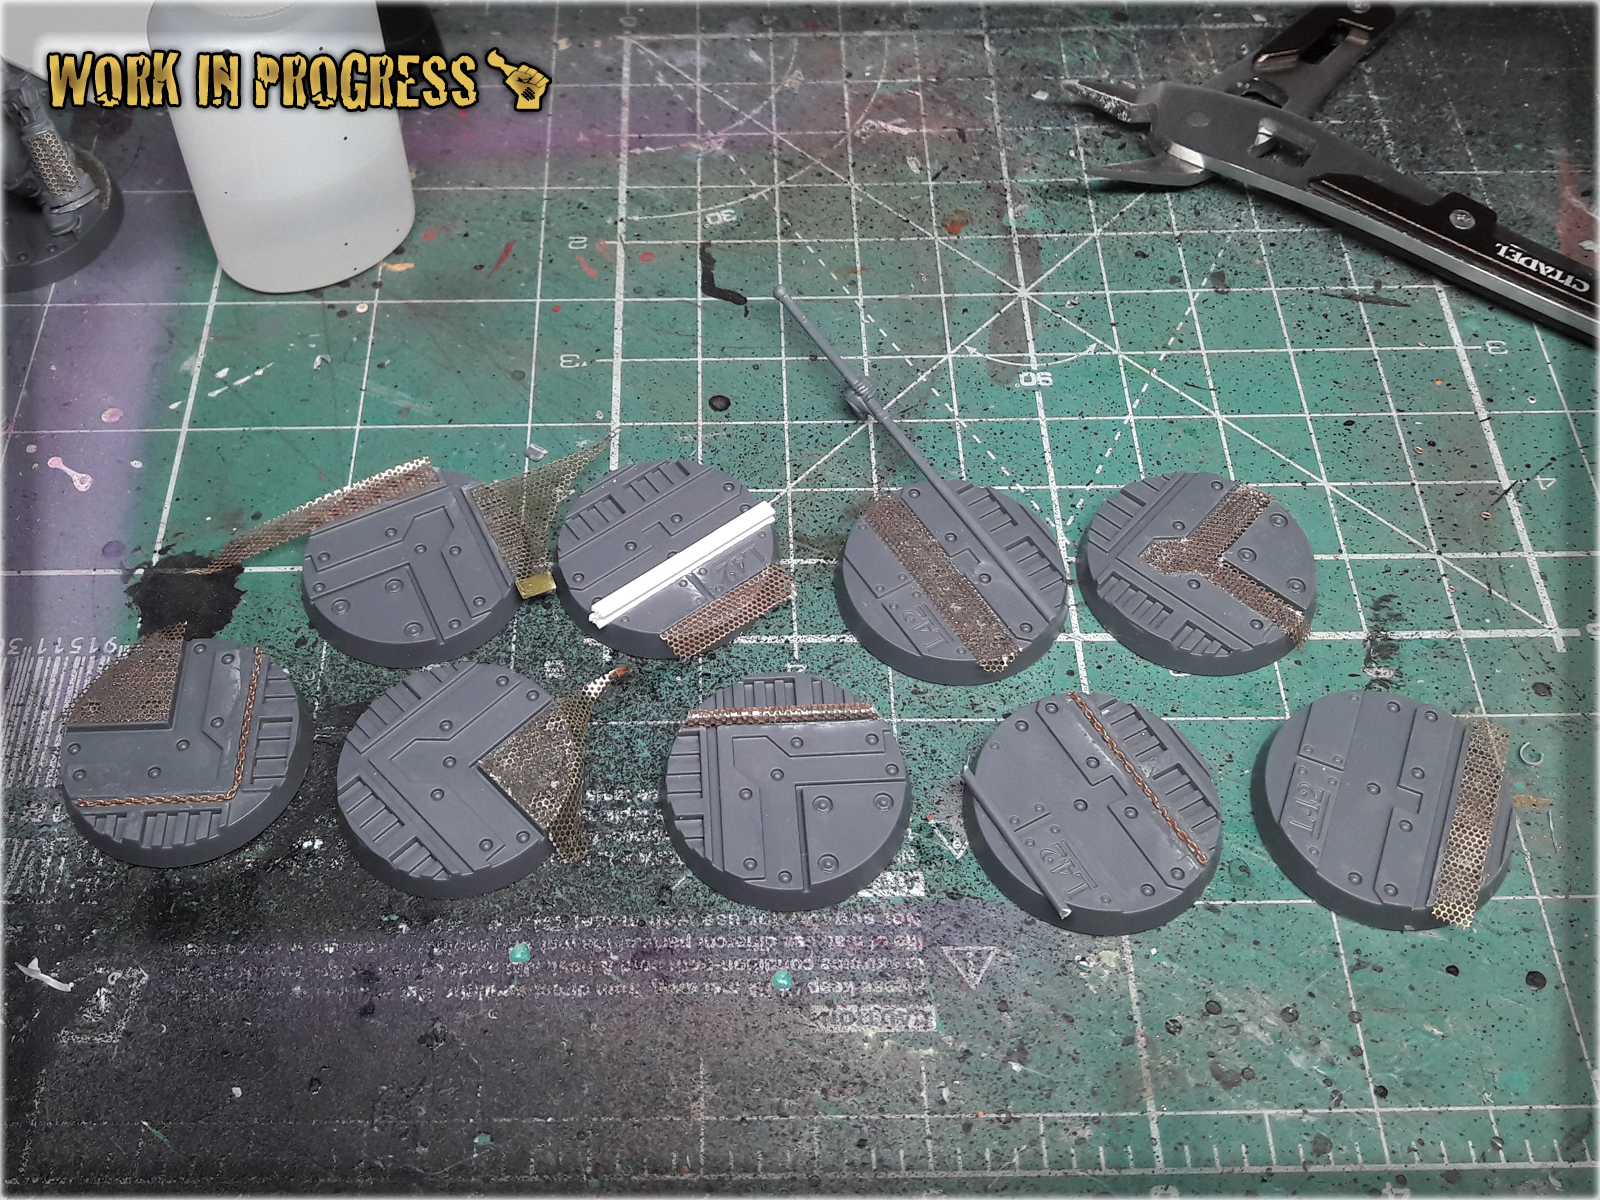
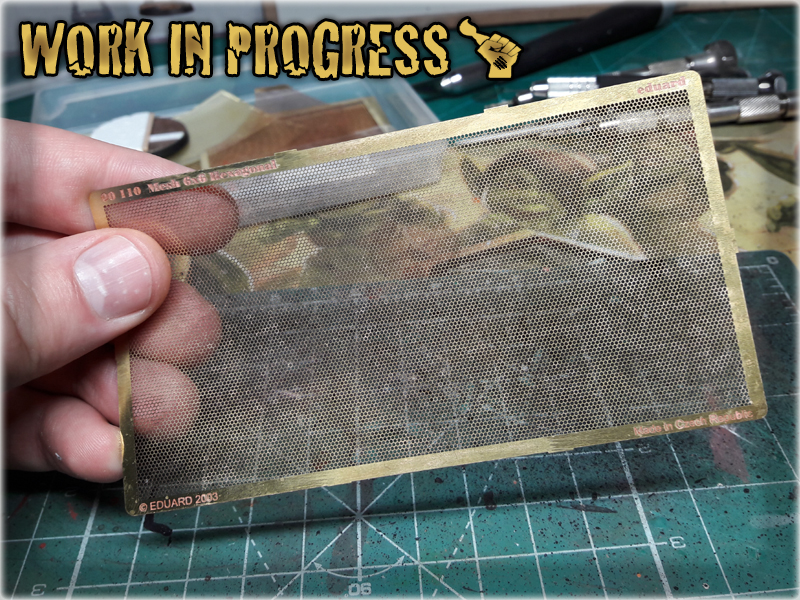
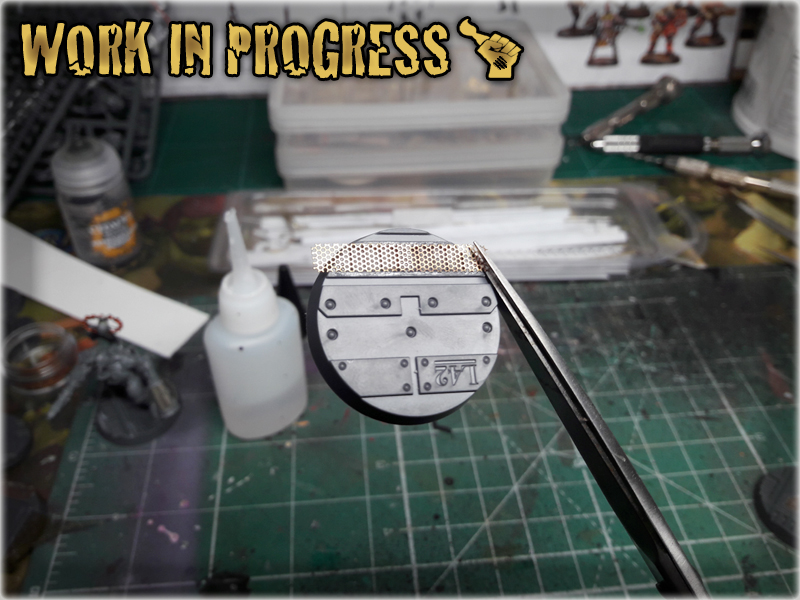
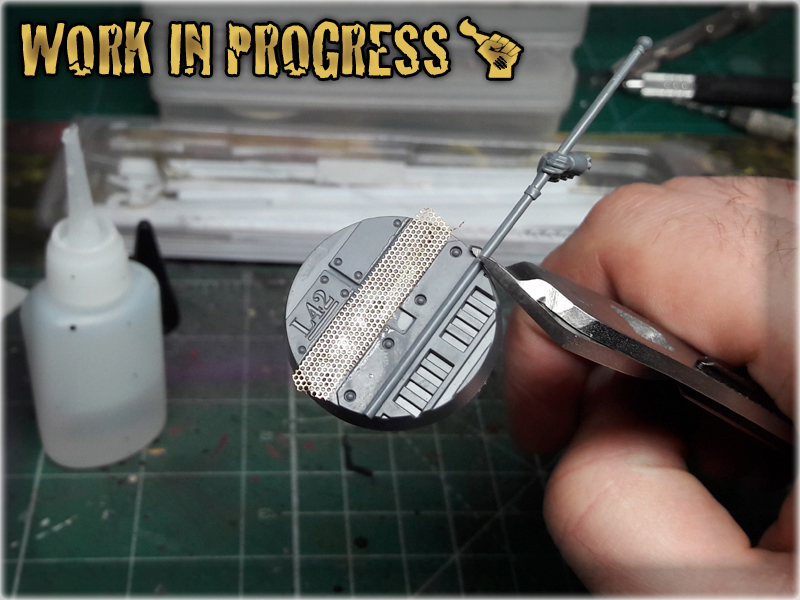
This stuff can be found in most modellers hobby stores. Personally I love it, cause it let’s me add awesome texture to the bases. It is very easy to use. I tend to cut a piece of mesh with scissors and glue it onto a designated surface, leaving an excess to hang outside the base. Once Super Glue dries out I just cut the excess mesh with scissors and file it on the edge – driving a file from top to bottom of the bases edge. This keeps the mesh glued onto the base, but smoothers the edge nicely.
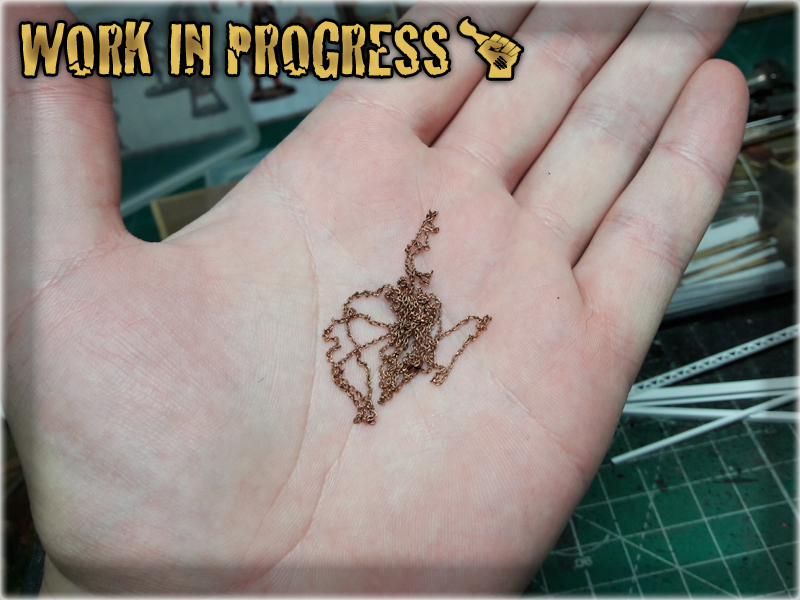
Another item from a hobby store. I just glue it onto the base and cut the excess with plastic cutters. Brass Chain is thin and rather frail so it does not damage the cutters.
Awesome, hobby friendly and easy to use material. It comes in either flat sheets of different thickness, or in prefabricated shapes. For bases I usually use flat sheets, gluing them onto the base, then cutting to fit the edge. In case of Necromunda bases – there’s plenty of industrial texture already, so I uused a prefabricated piece of PCV to add here and there. Same technique – glue onto the base, then cut to match the edge.
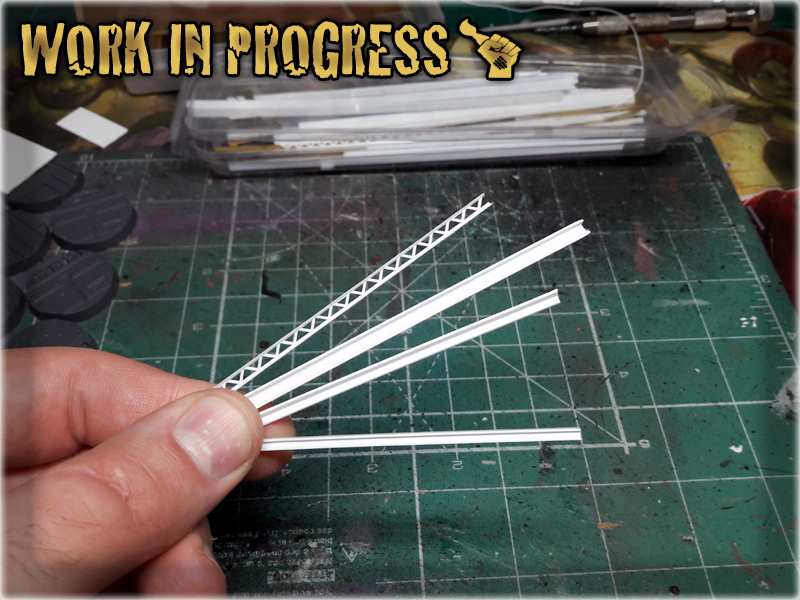
Everybody has some. For Necromunda bases I preffered thin, long spears and banner poles. I just glued them over certain areas and cut with a plastic cutters to match the edge of the base and add variety to the base’s surface.
Games Workshop’s Skulls set is something that everyone should get. If you haven’t got yours – damn – just go and order one. For what you get the price is just insane. Either way – some Skulls on the base would certainly make it stand out.
Actually any grain-texture paint would do just fine. I used Astrogranit Debris cause I don’t have many uses for this particular colour and here it is meant to go under a black undercoat anyway. I applied small amount to certain places, just to add texture.
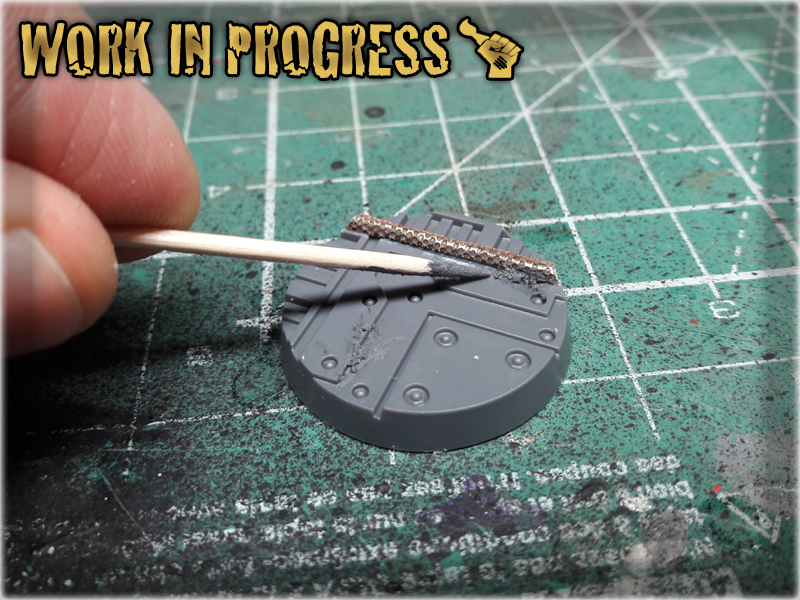
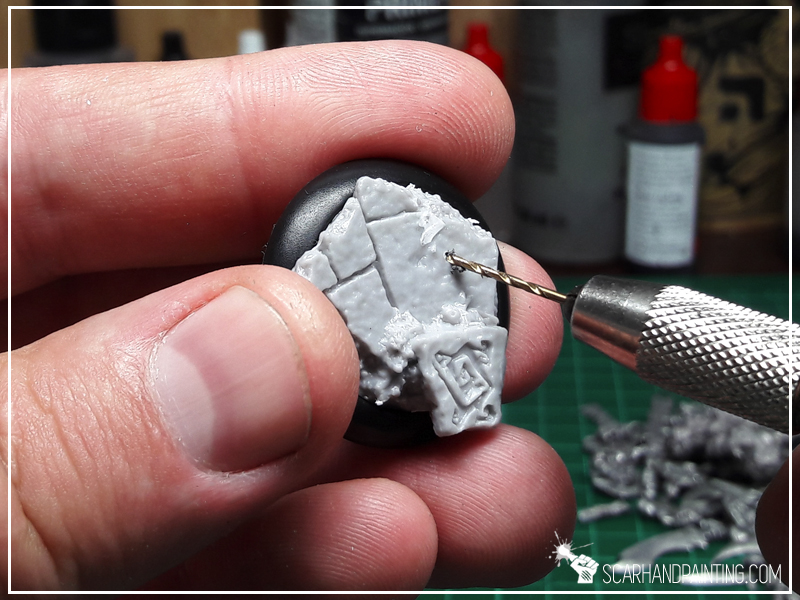
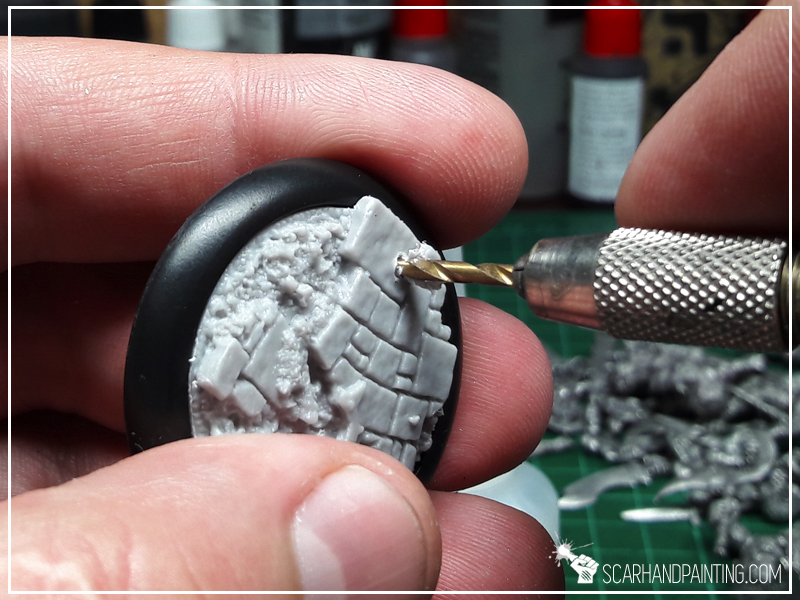
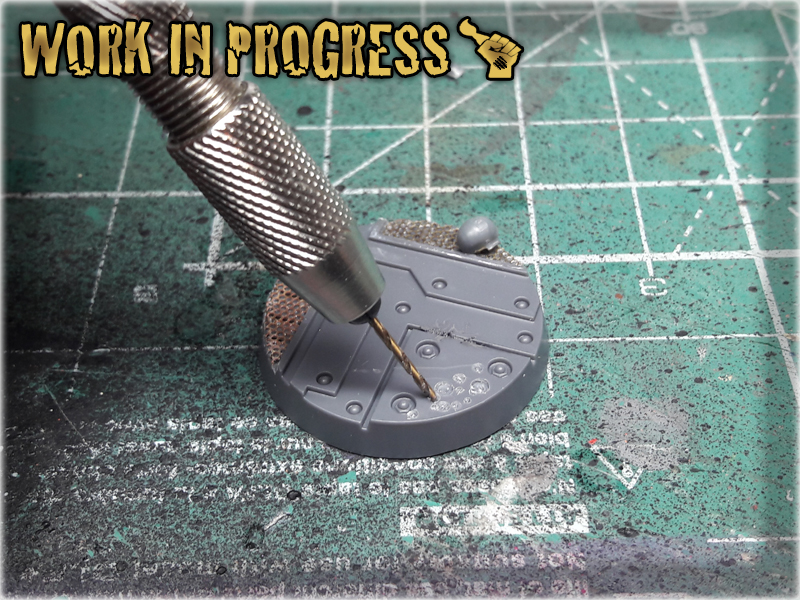
I drilled some holes in different sizes here and there to look like corrosion or some form of acid damage. Easy to do – looks cool once painted.
So, there’s that. These are just few ways to enchance Necromunda bases. I bet you can find a lot more ways to differentiate the set. Here’s how mine looks like after the above additions:

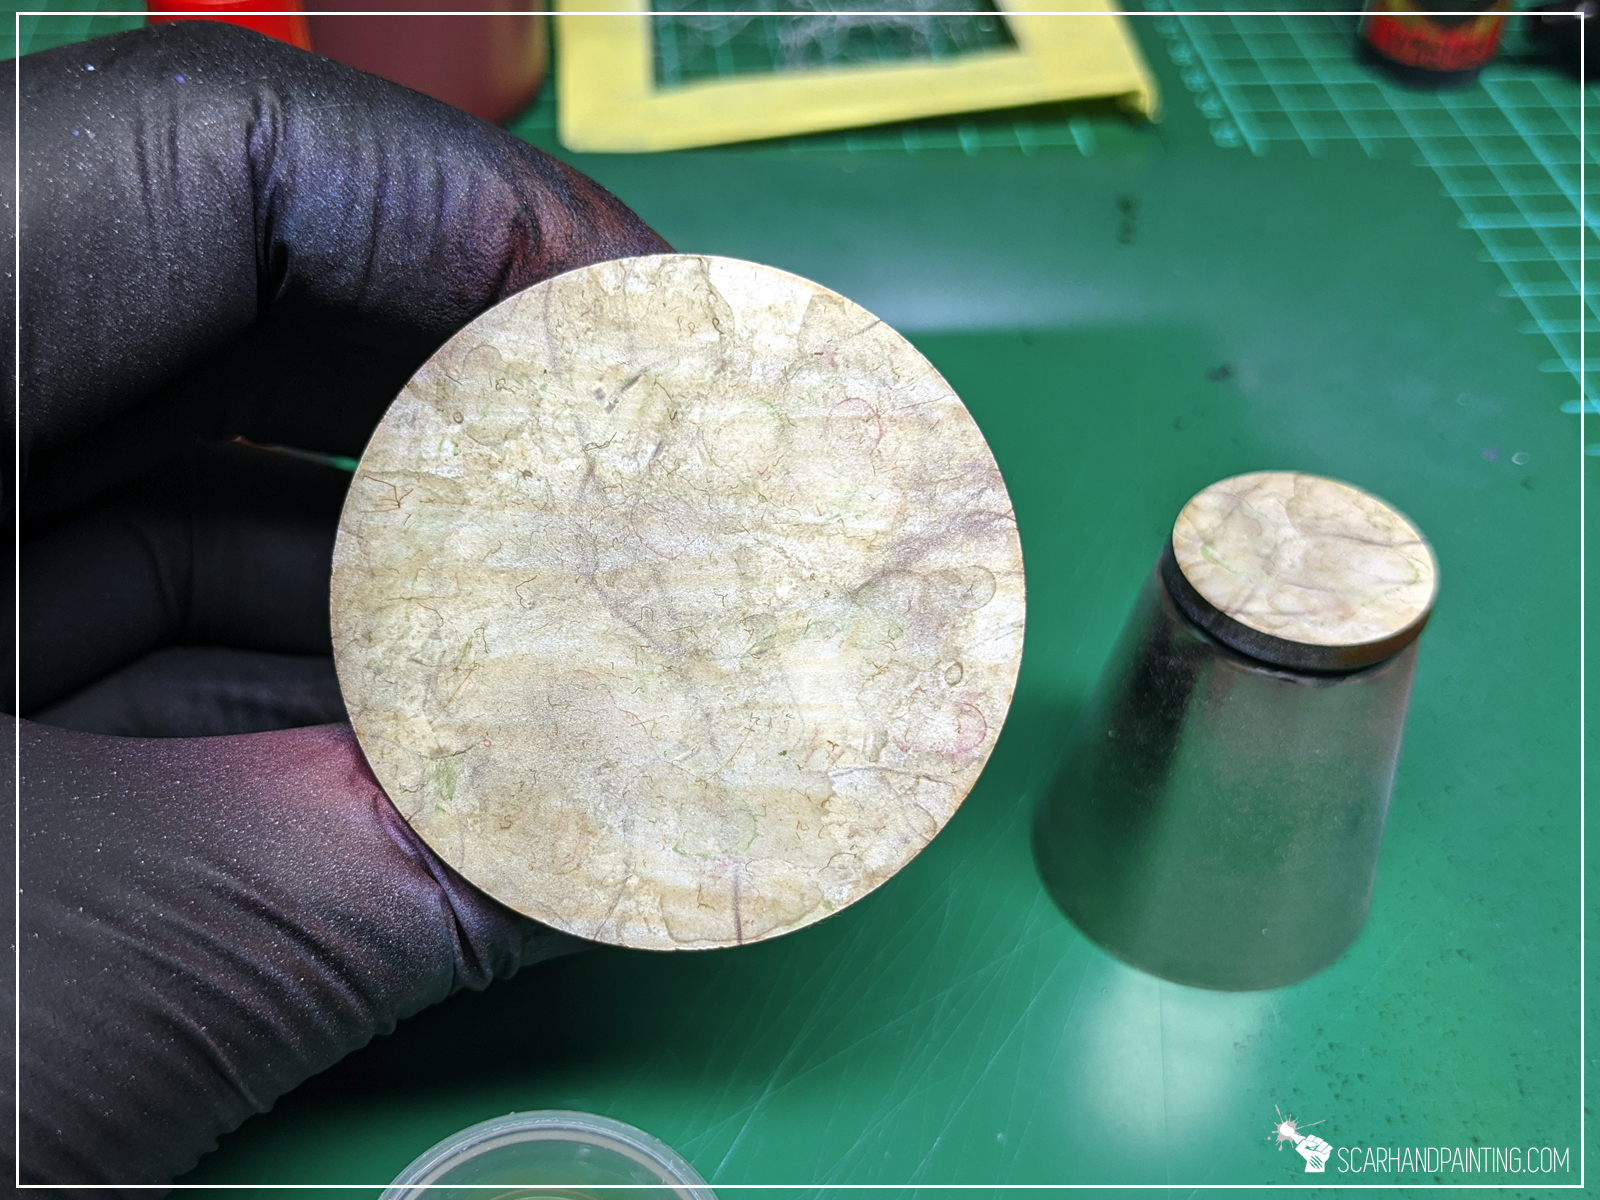
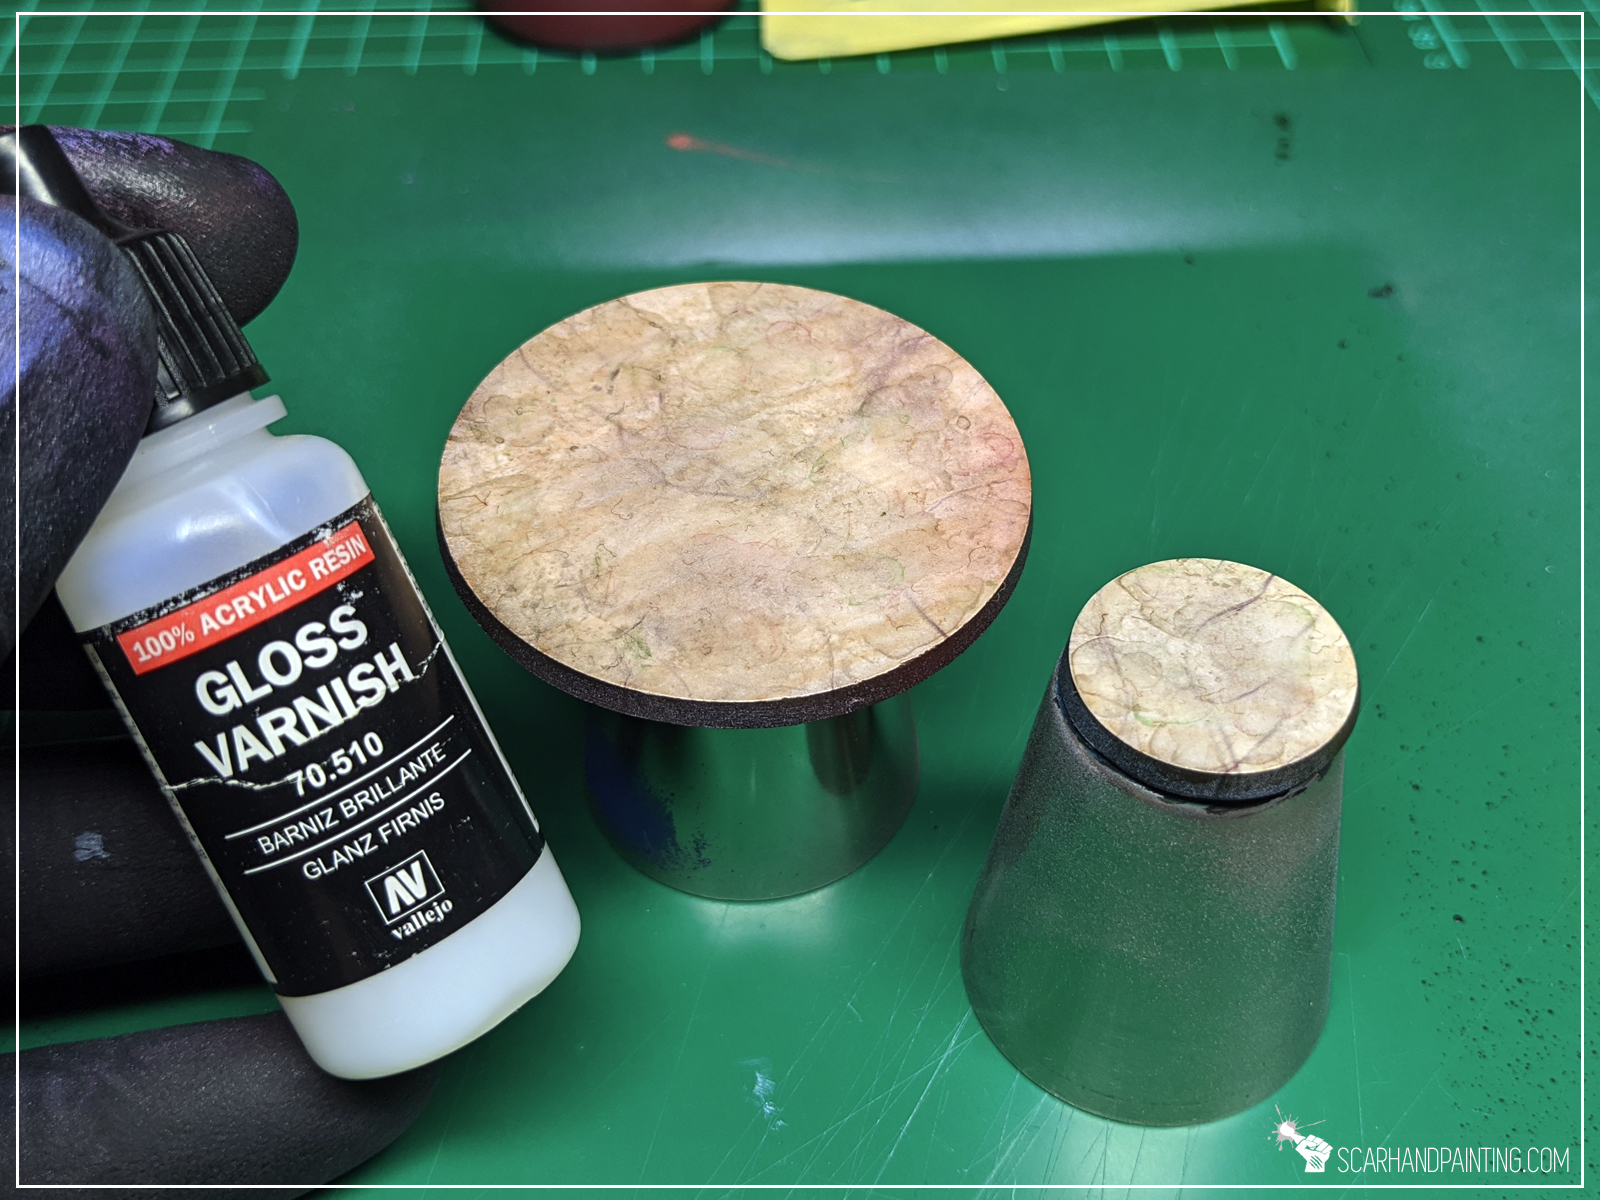
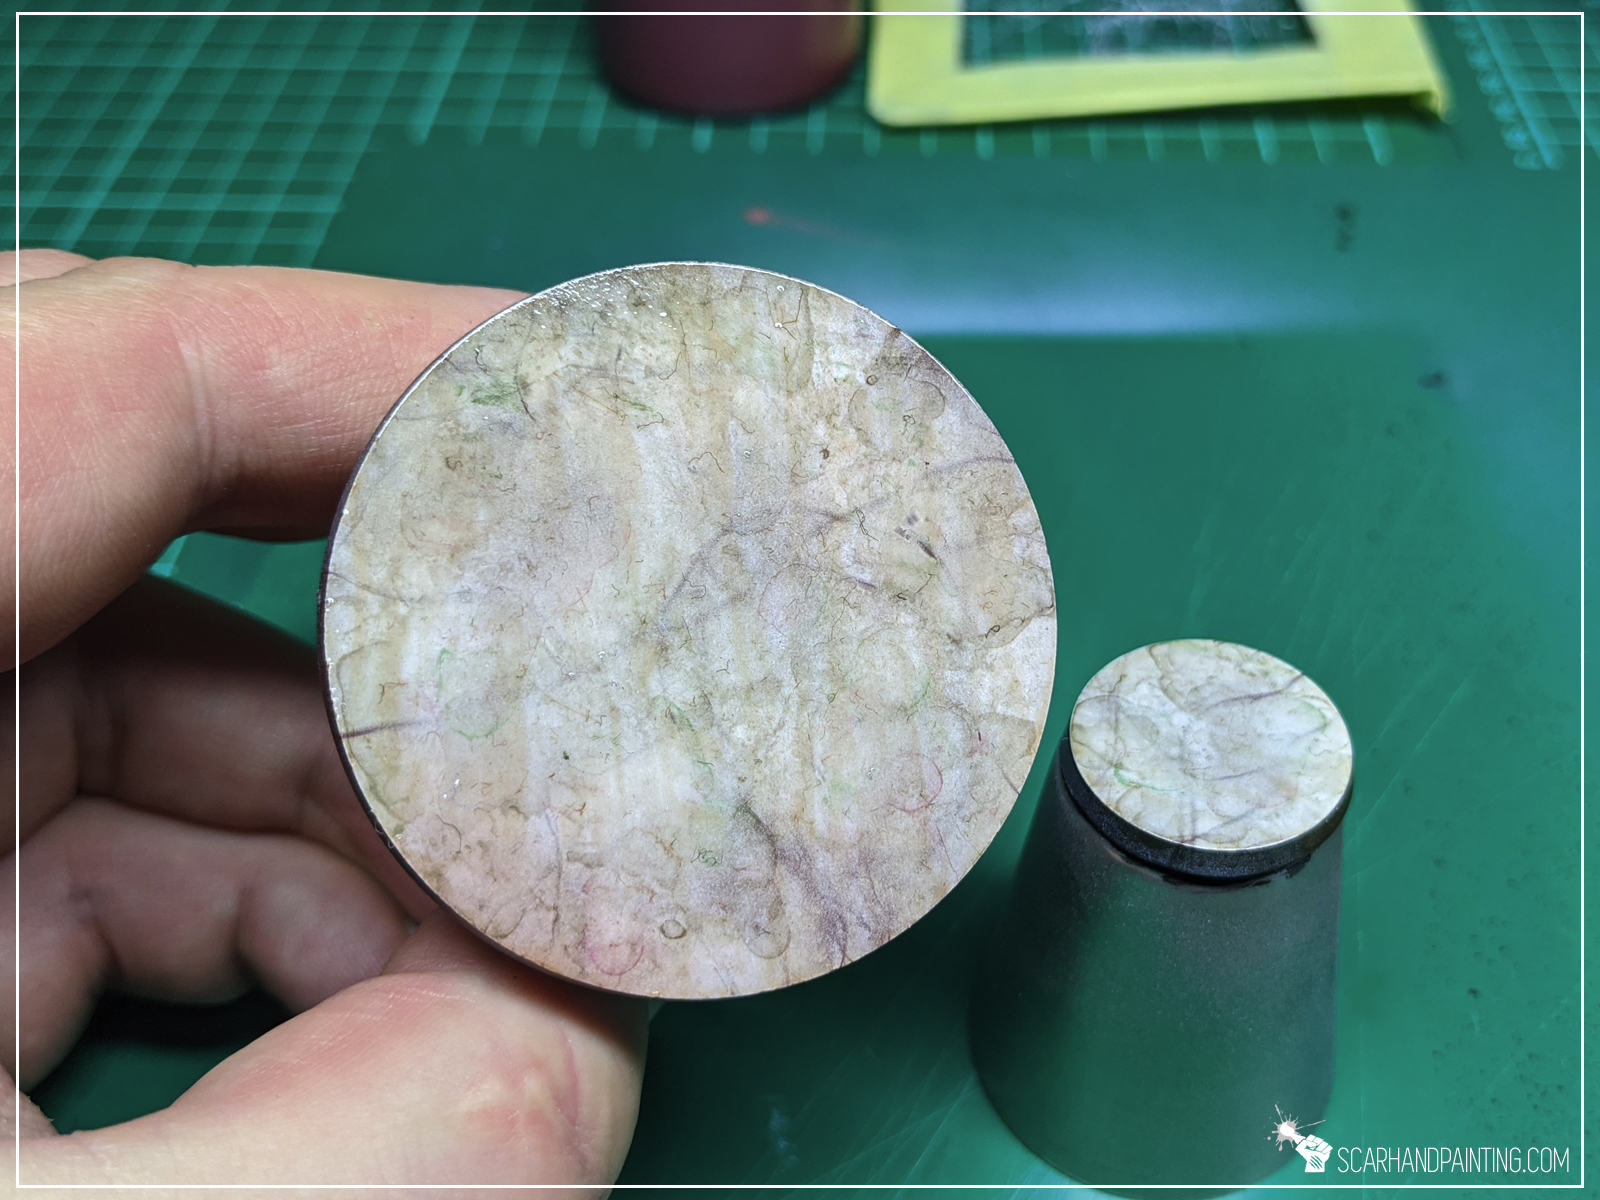
In this easy, step-by-step tutorial I’m going to show you how to create a Cobblestone Base in a what is probably the fastest and simplest way ever.

*Just find a suitable one at a local builder’s store.
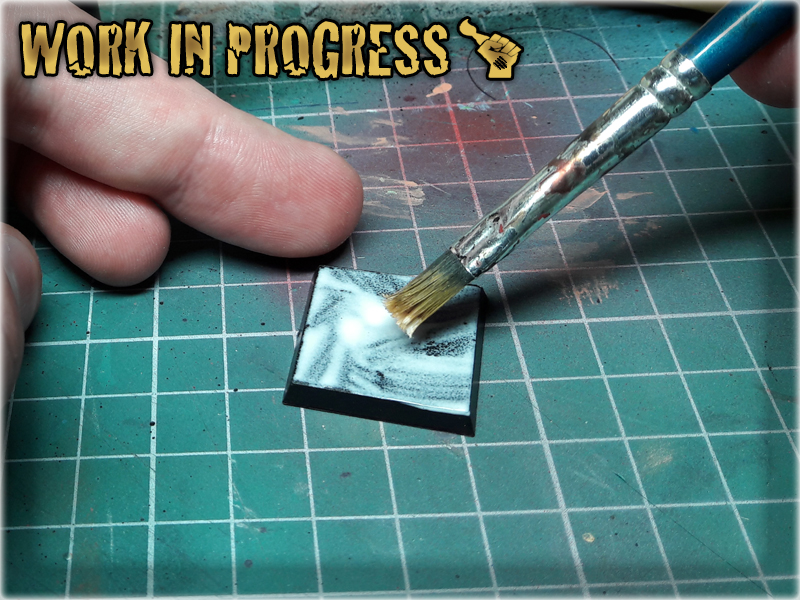
1 I started by covering entire base with Basing Glue.
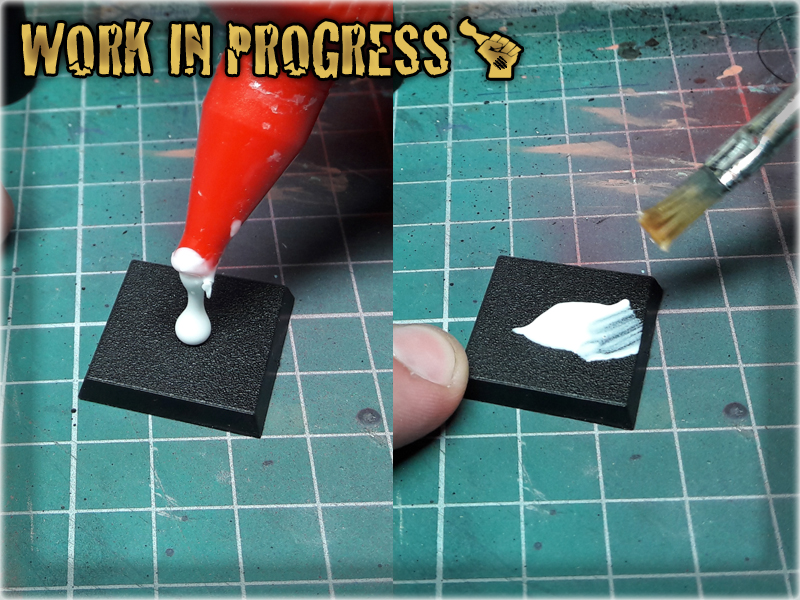
2 I then cut off a piece of the wallpaper to be slightly larger then the base itself.

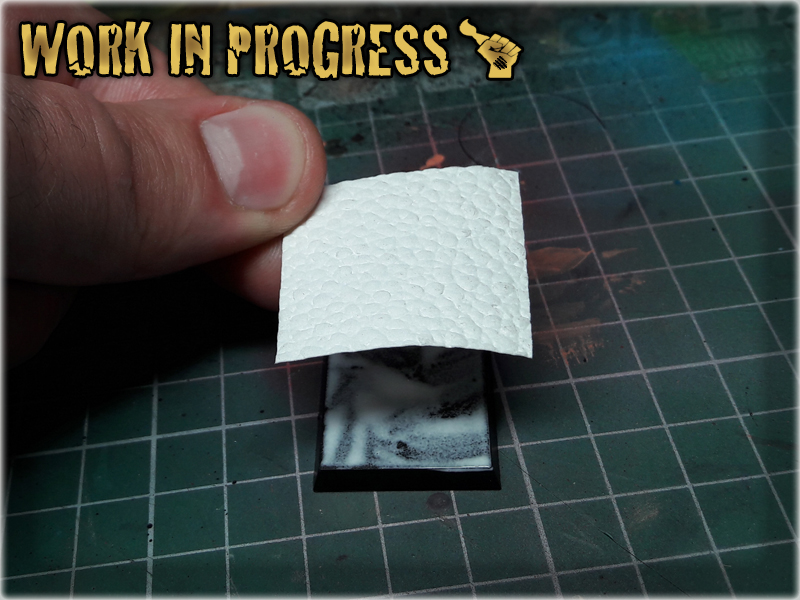
3 Next I glued the piece onto the base, turned the base upside down and cut off the excess of the wallpaper with a Hobby Knife.
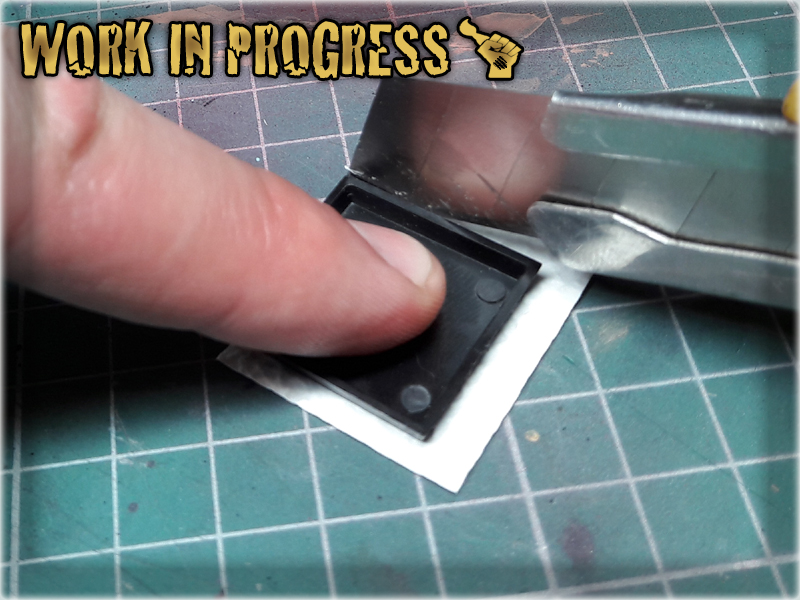
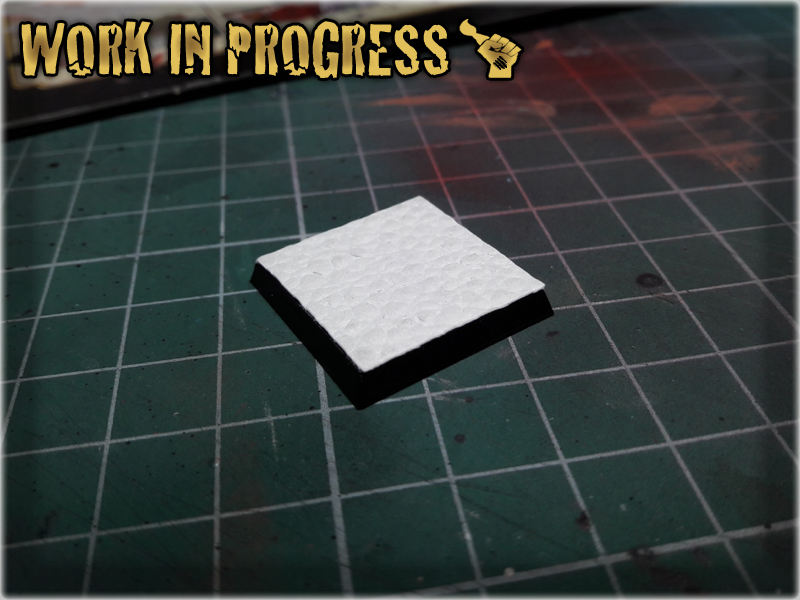
4 Last step was to smoother the edges with a slightly moisted fingertip.

Now you see how insanely fast and easy this was. For the purpose of this tutorial I made just this simple base, but once you get your hands on a proper wallpaper, options are limitless. You can use it to texturize bases and terrain, add more detail or even mix different types of texture.