- contact@scarhandpainting.com


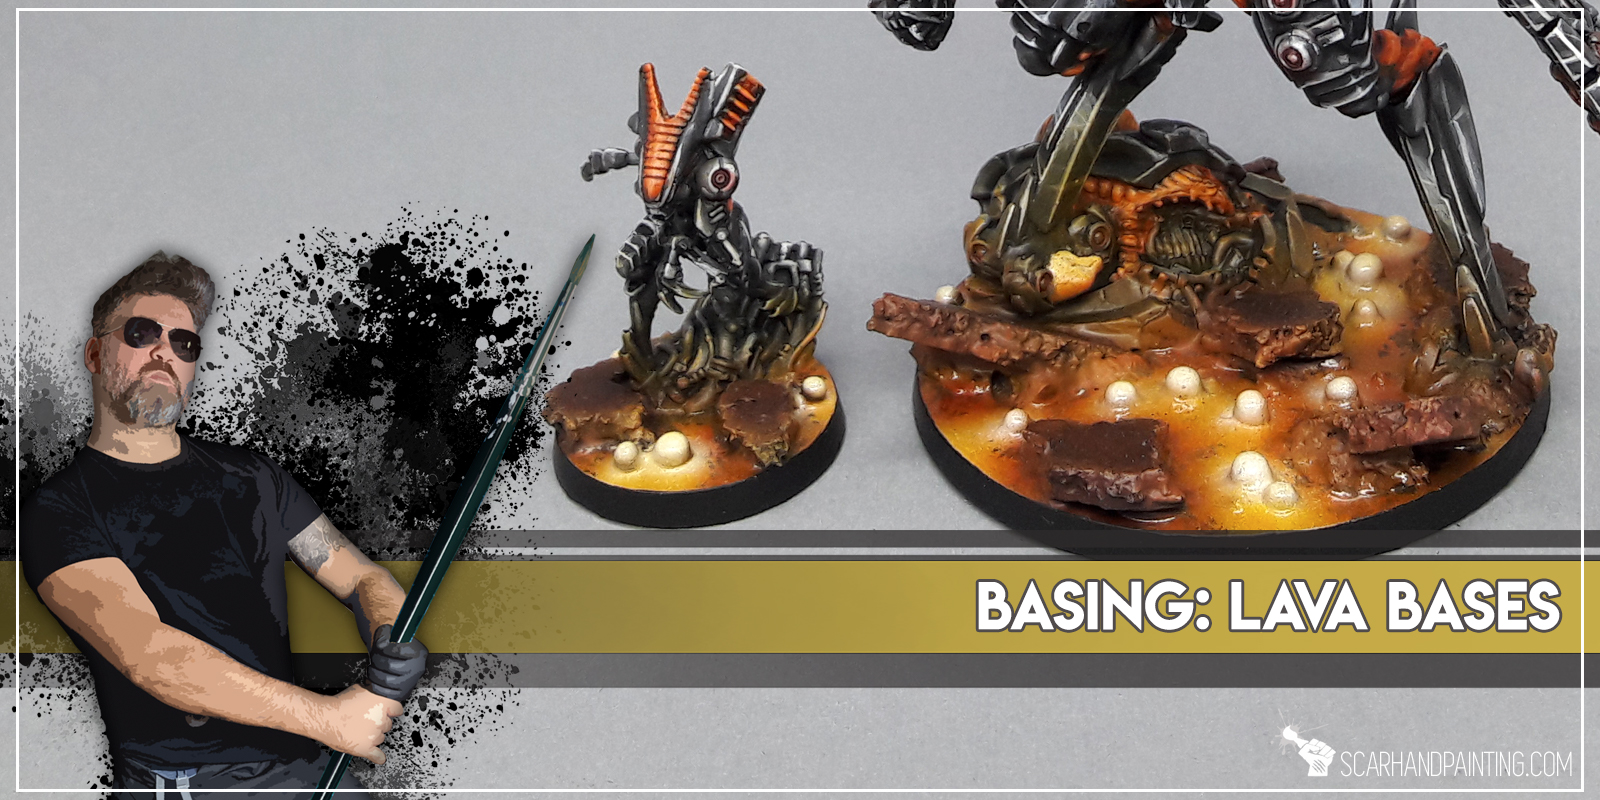
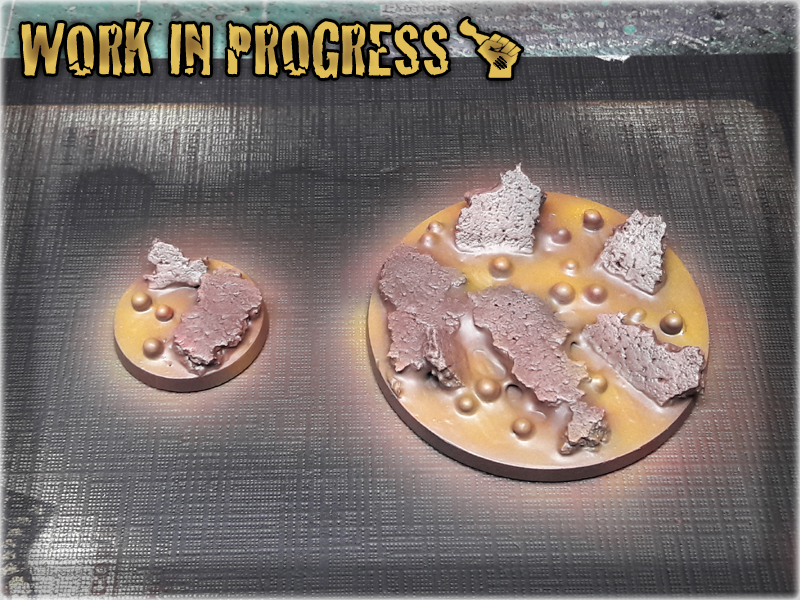
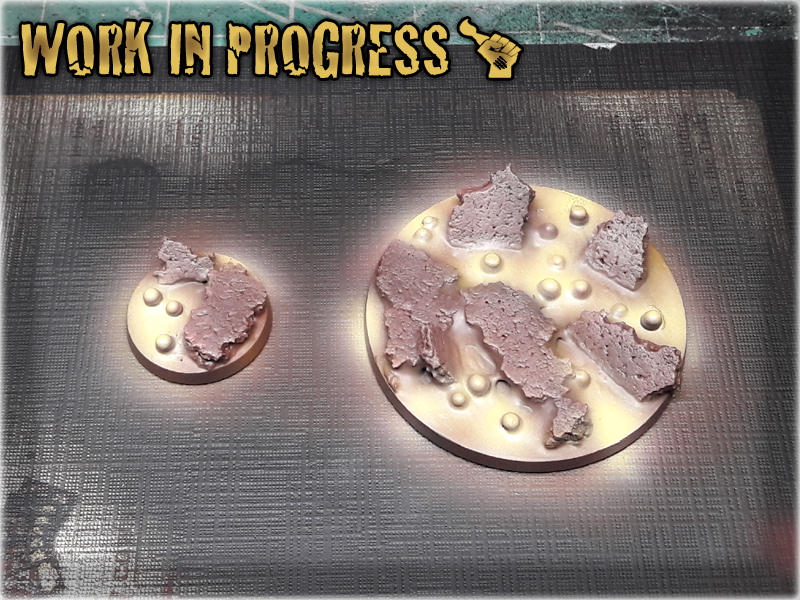
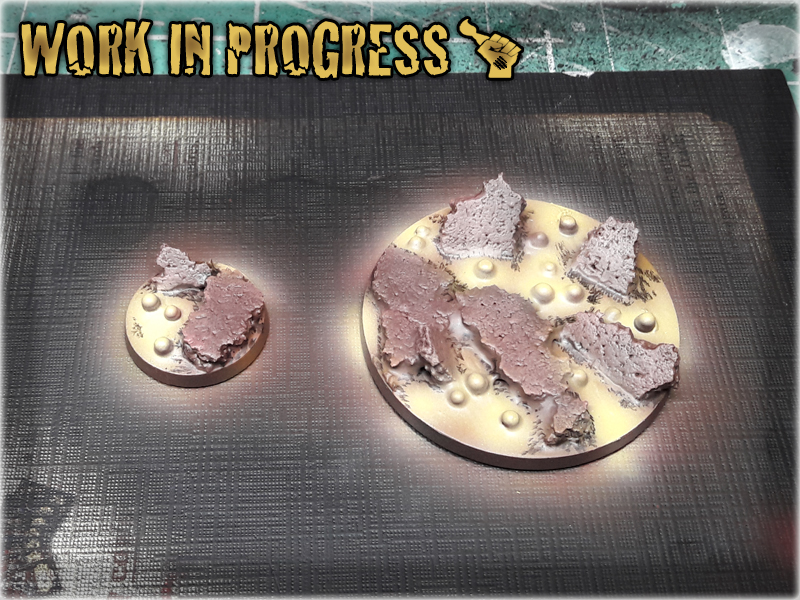
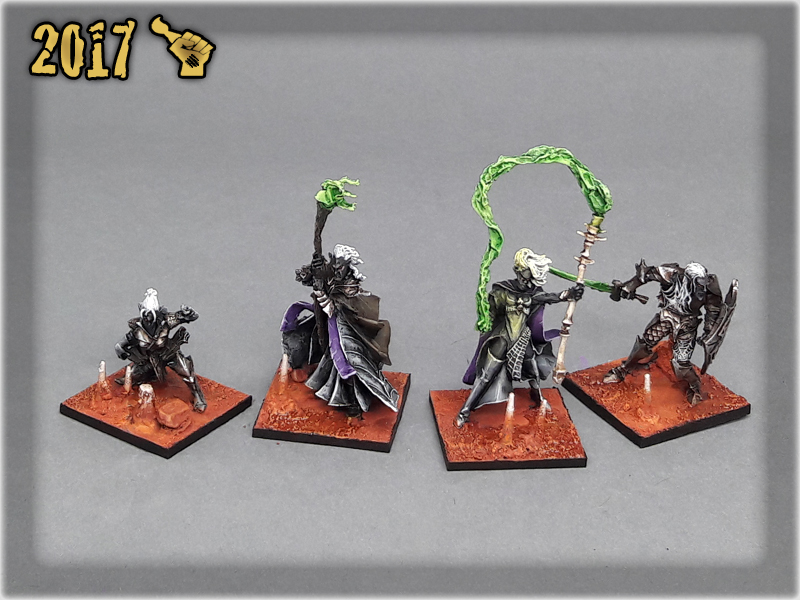
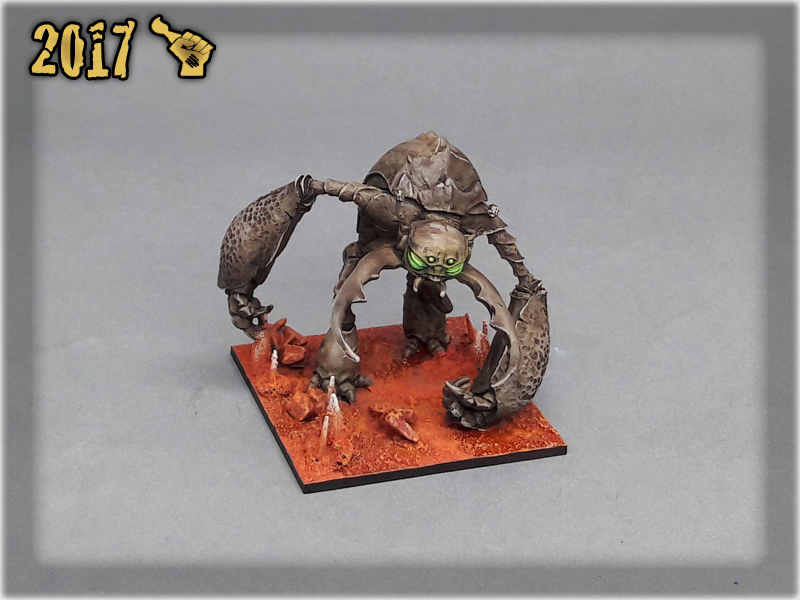
In this easy, step-by-step tutorial I’m going to show you how to create and paint a Lava Bases. I used these bases for Infinity the Game Combined Army – you can see how it turned out at Infinity COMBINED ARMY ‘Witness Me!’ gallery.

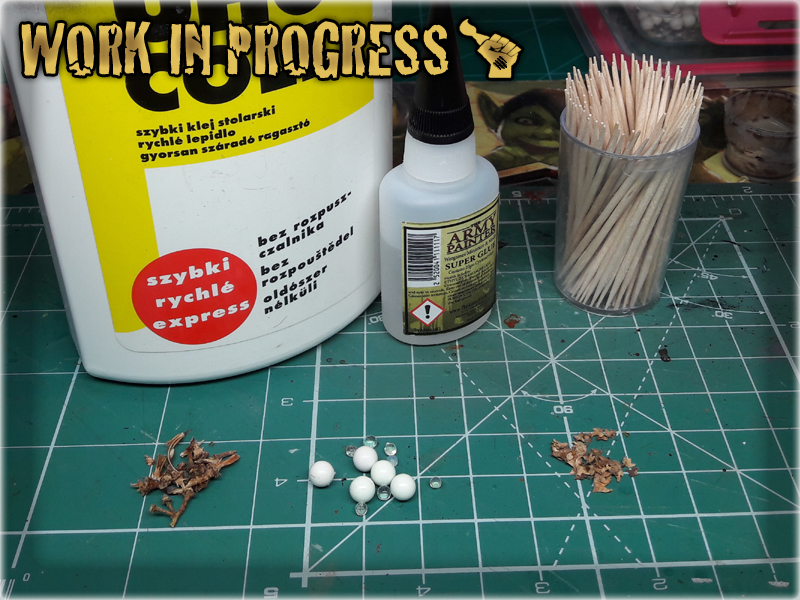
**Where I’m from there’s a small paper bag filled with moist absorbsion balls in every shoe box. If you can’t get that, just use some grains or make small balls out of green stuff or even modeling clay.
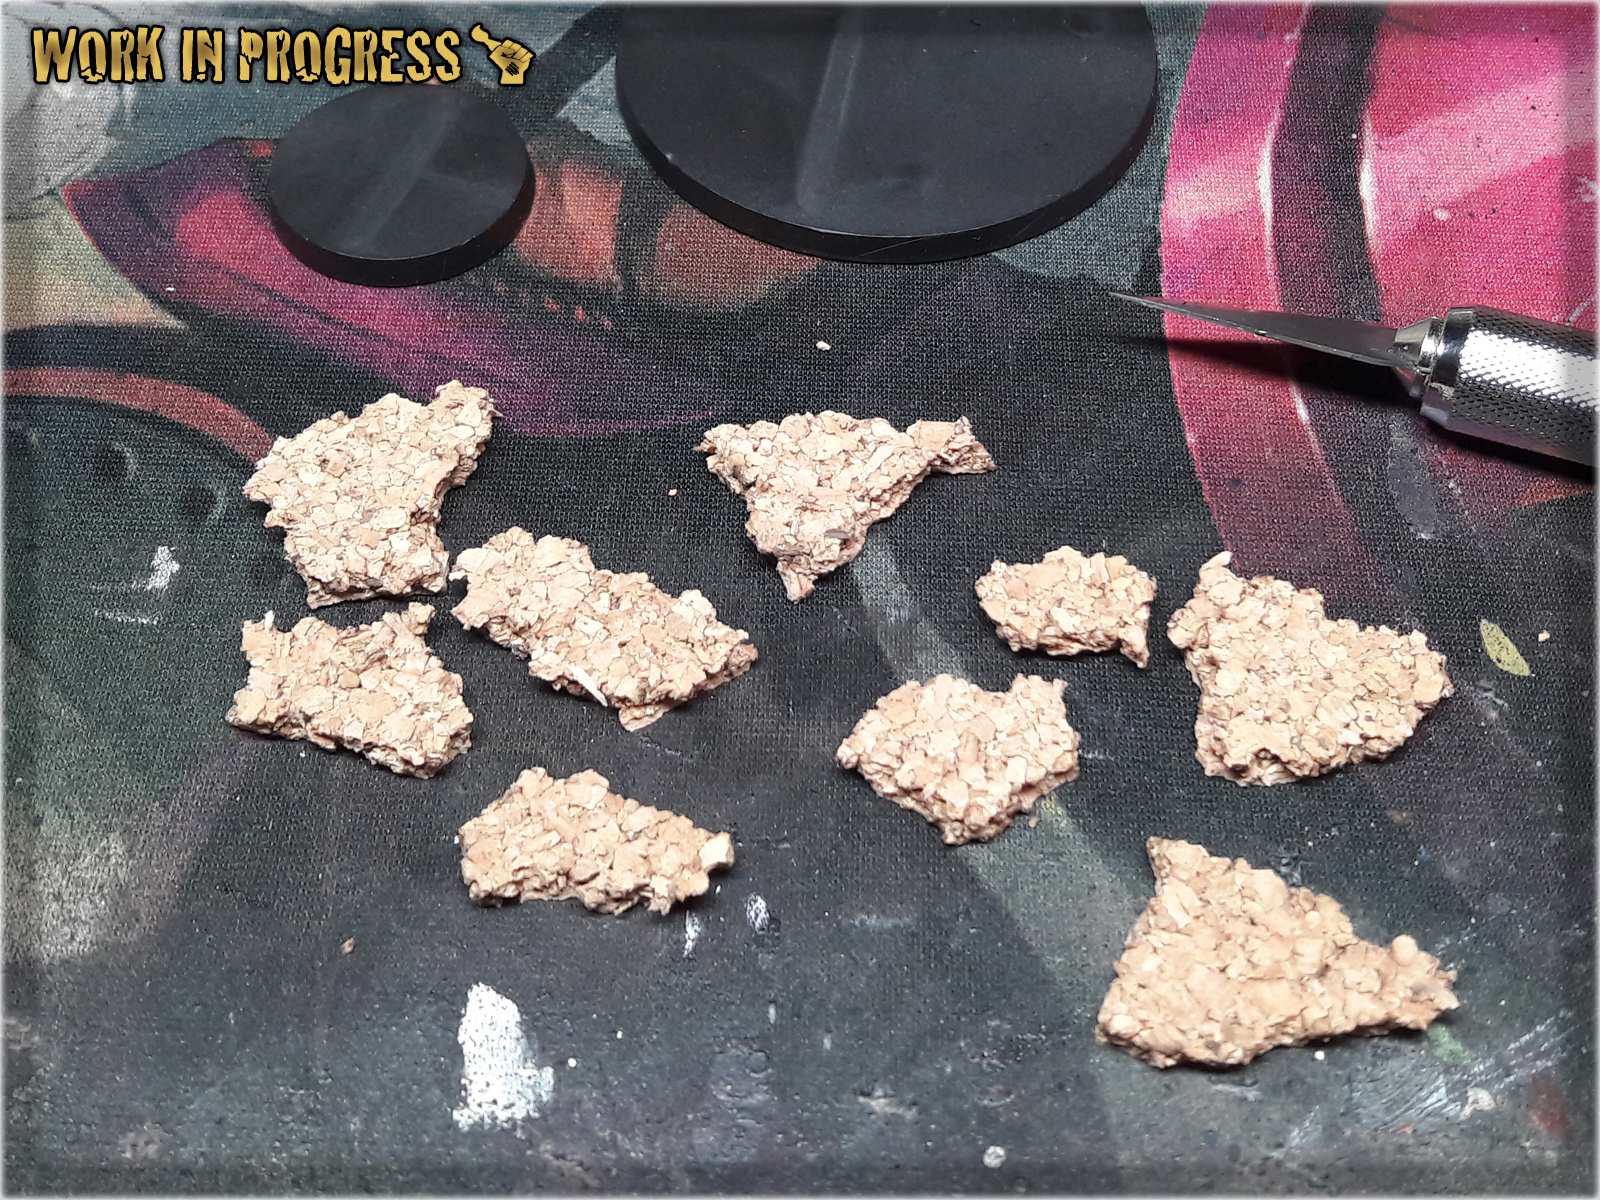
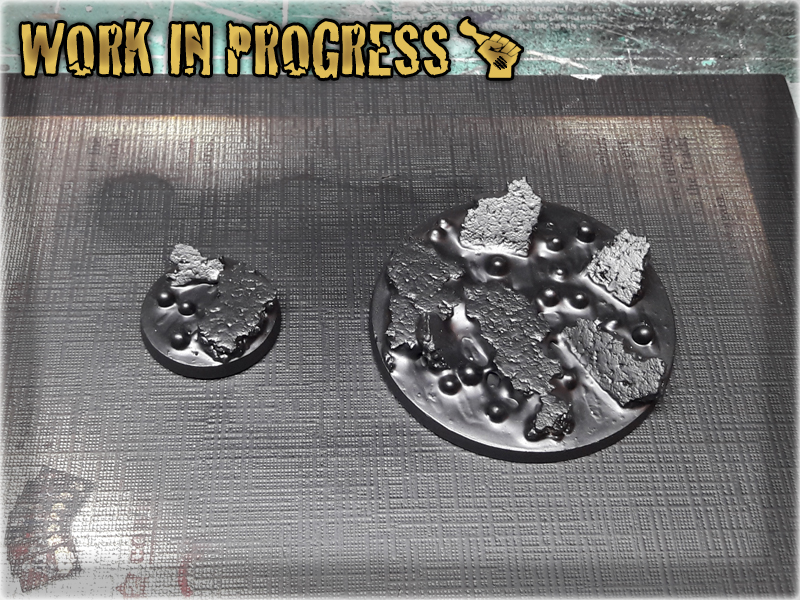
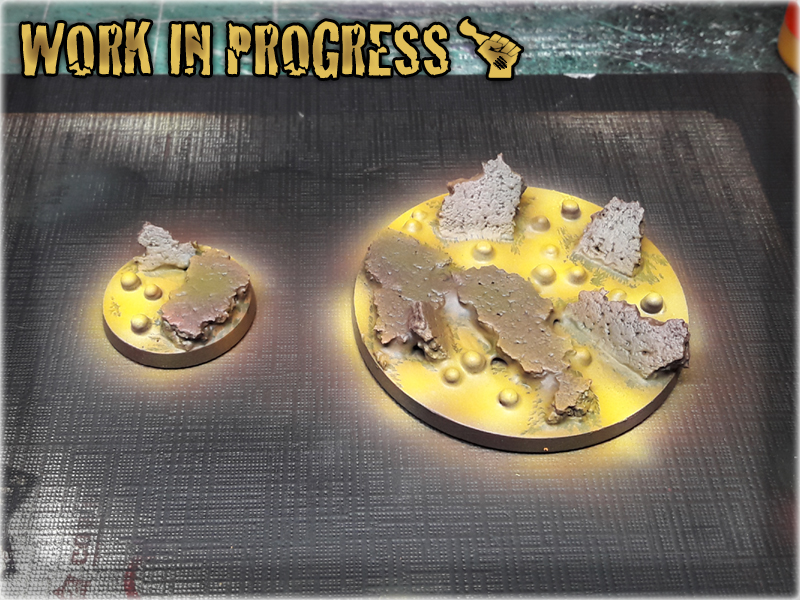
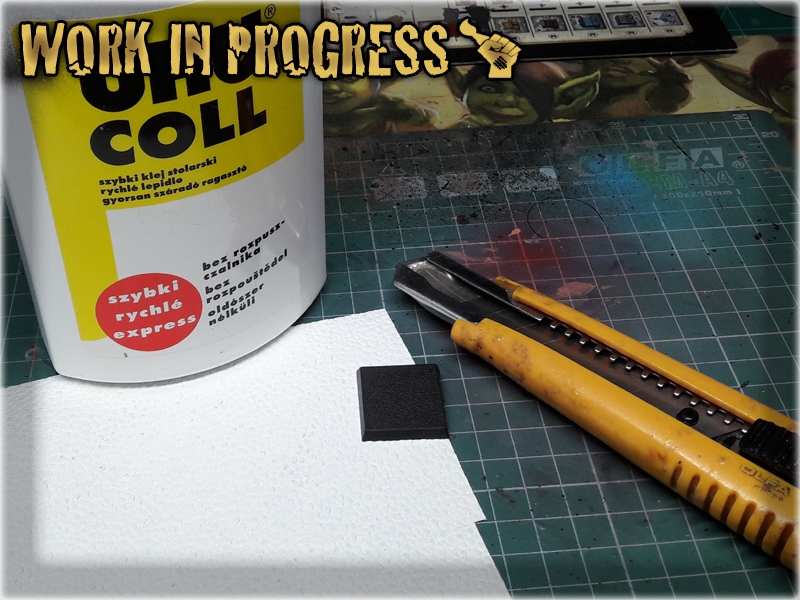
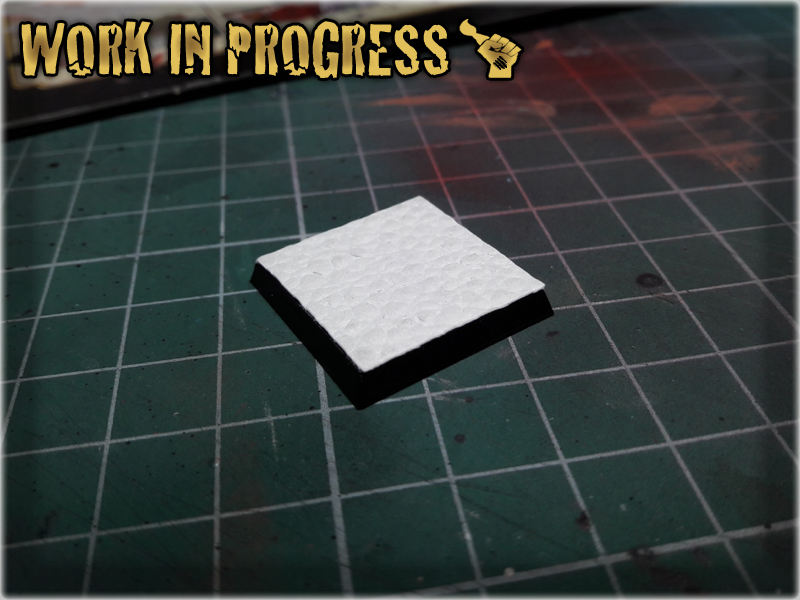
* I started by breaking a piece of Cork into smaller bitz.
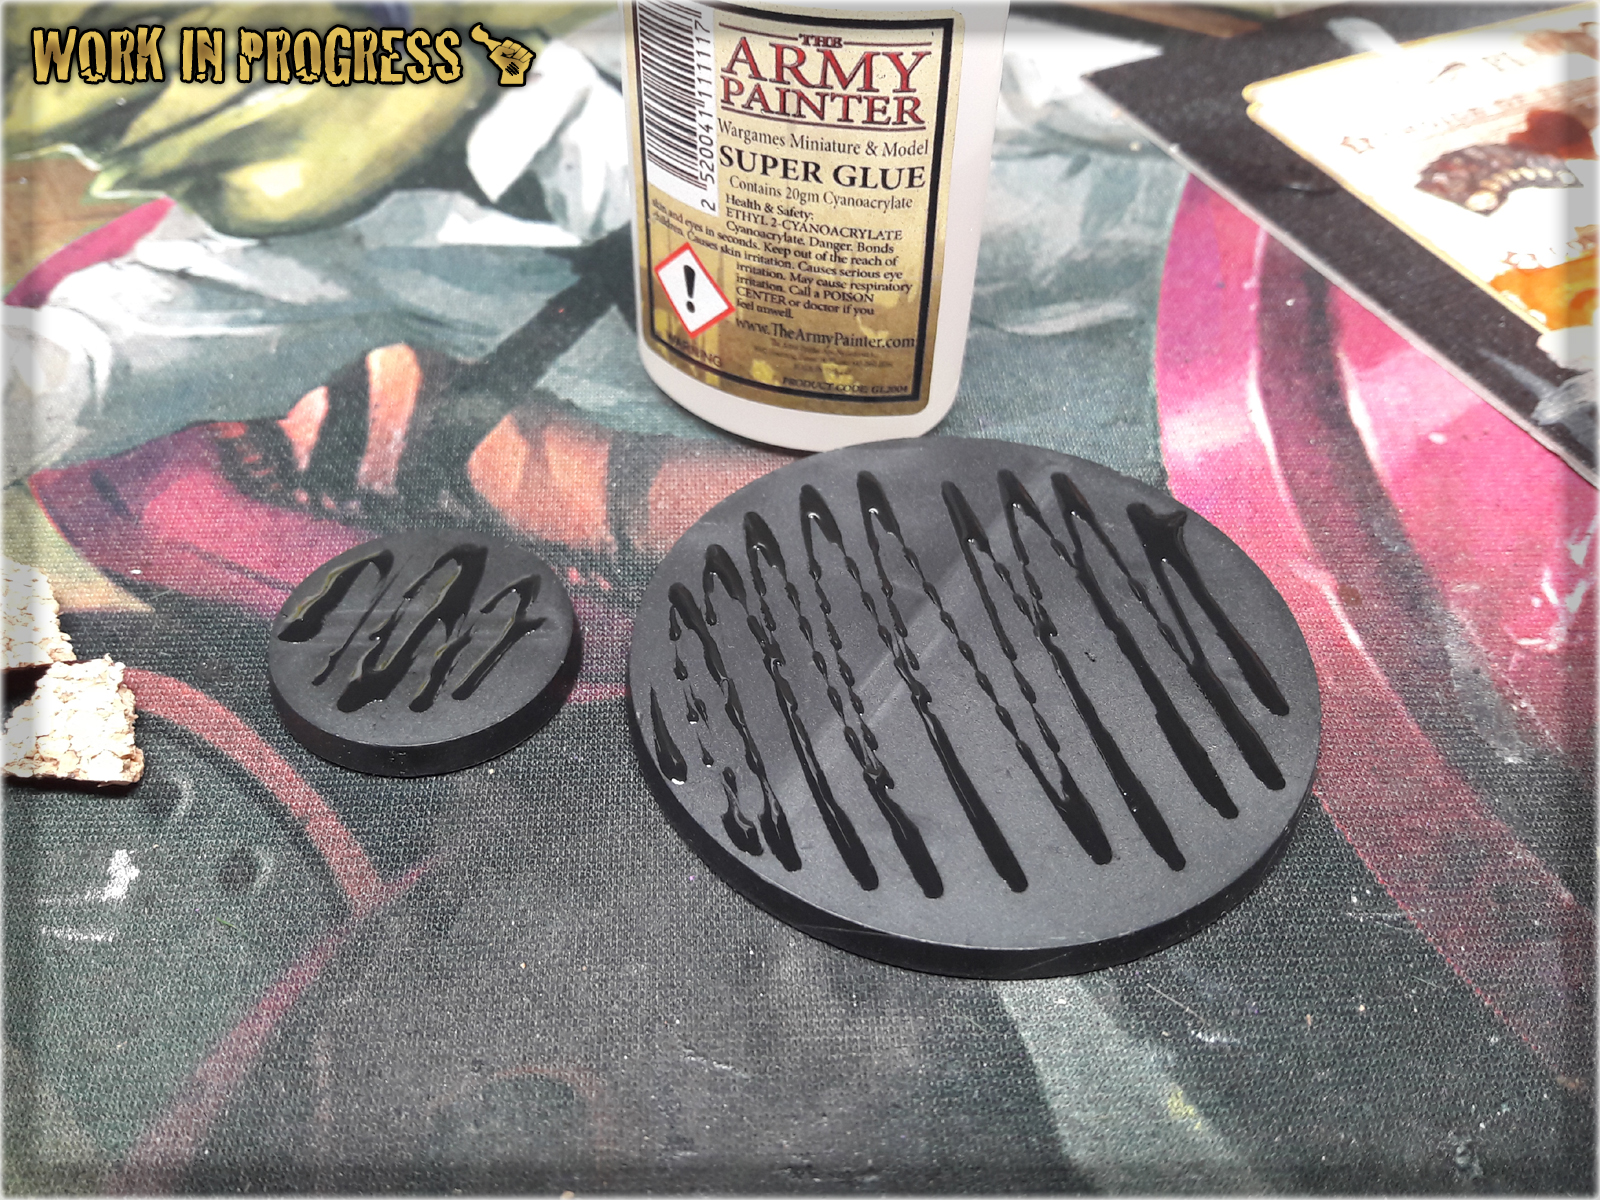
* I then applied Super Glue over the bases in a random pattern. No need to be precise here.
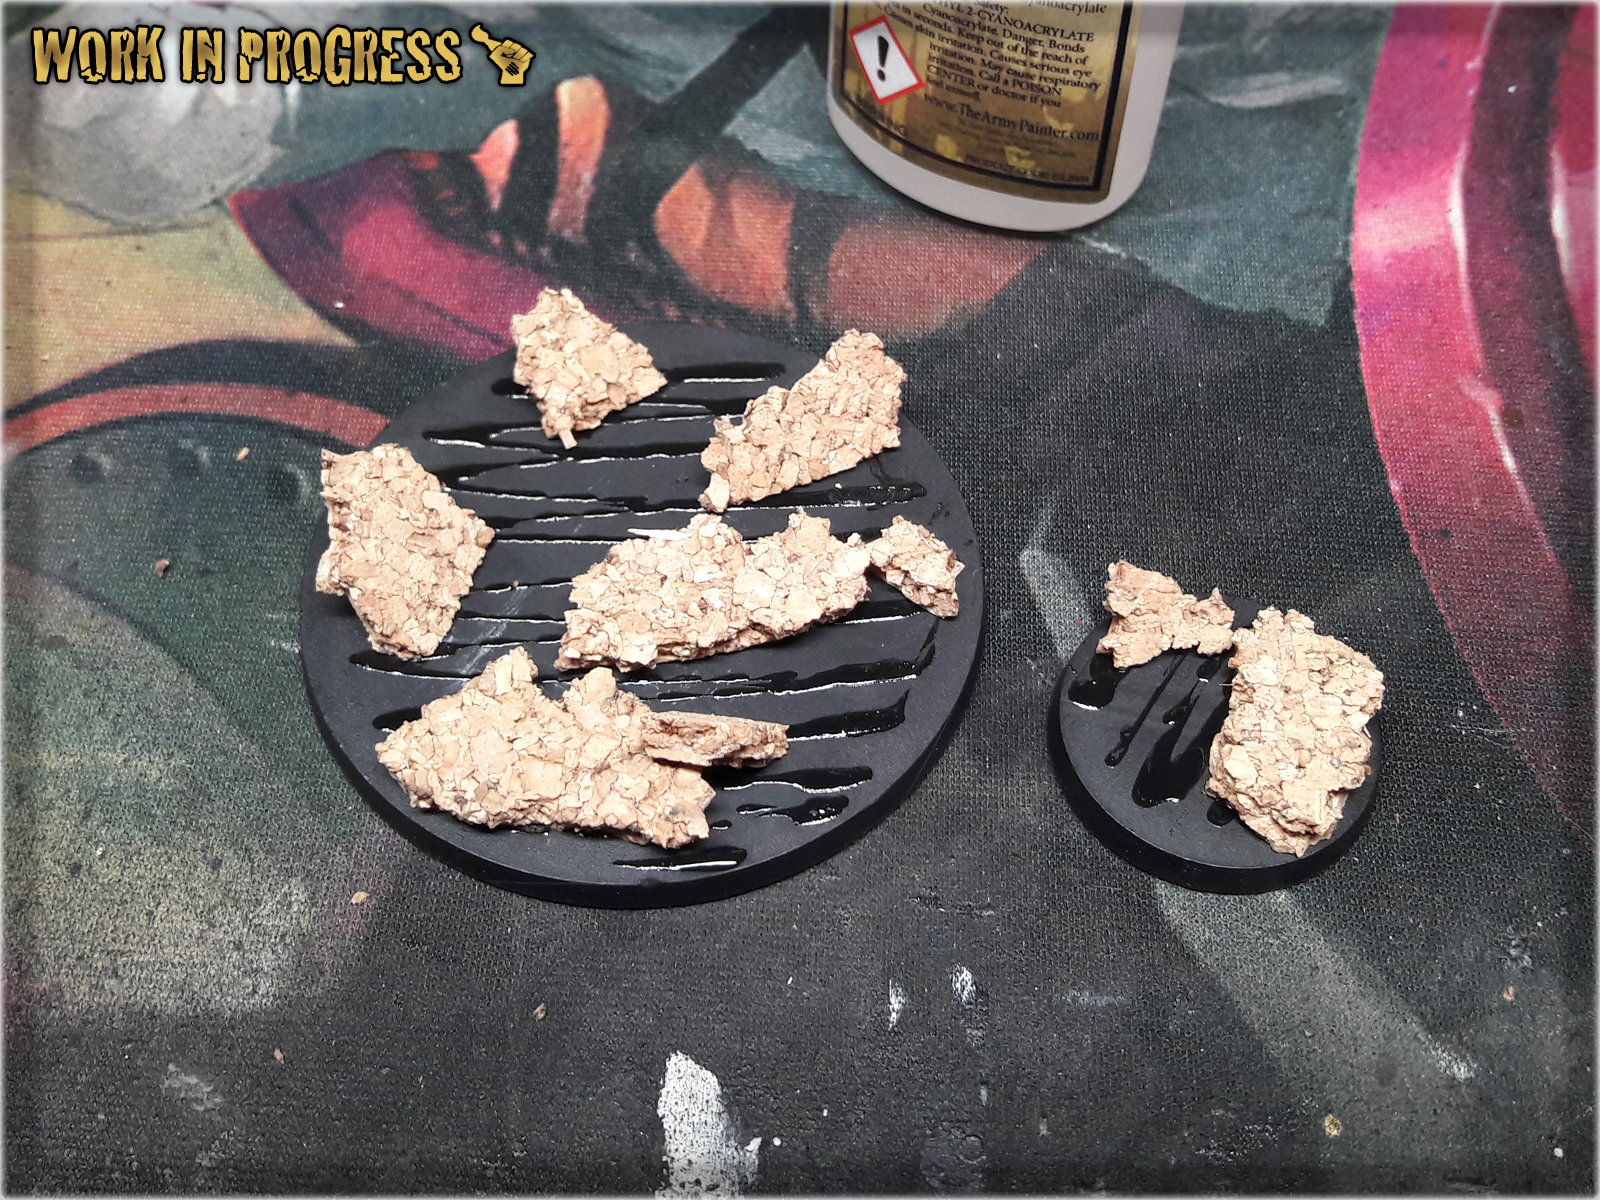
* Pieces of Cork followed to form 'volcanic rocks' and future spots for the miniatures to be mounted on.
* Once Super Glue dried out I covered entire base with Basing Glue.
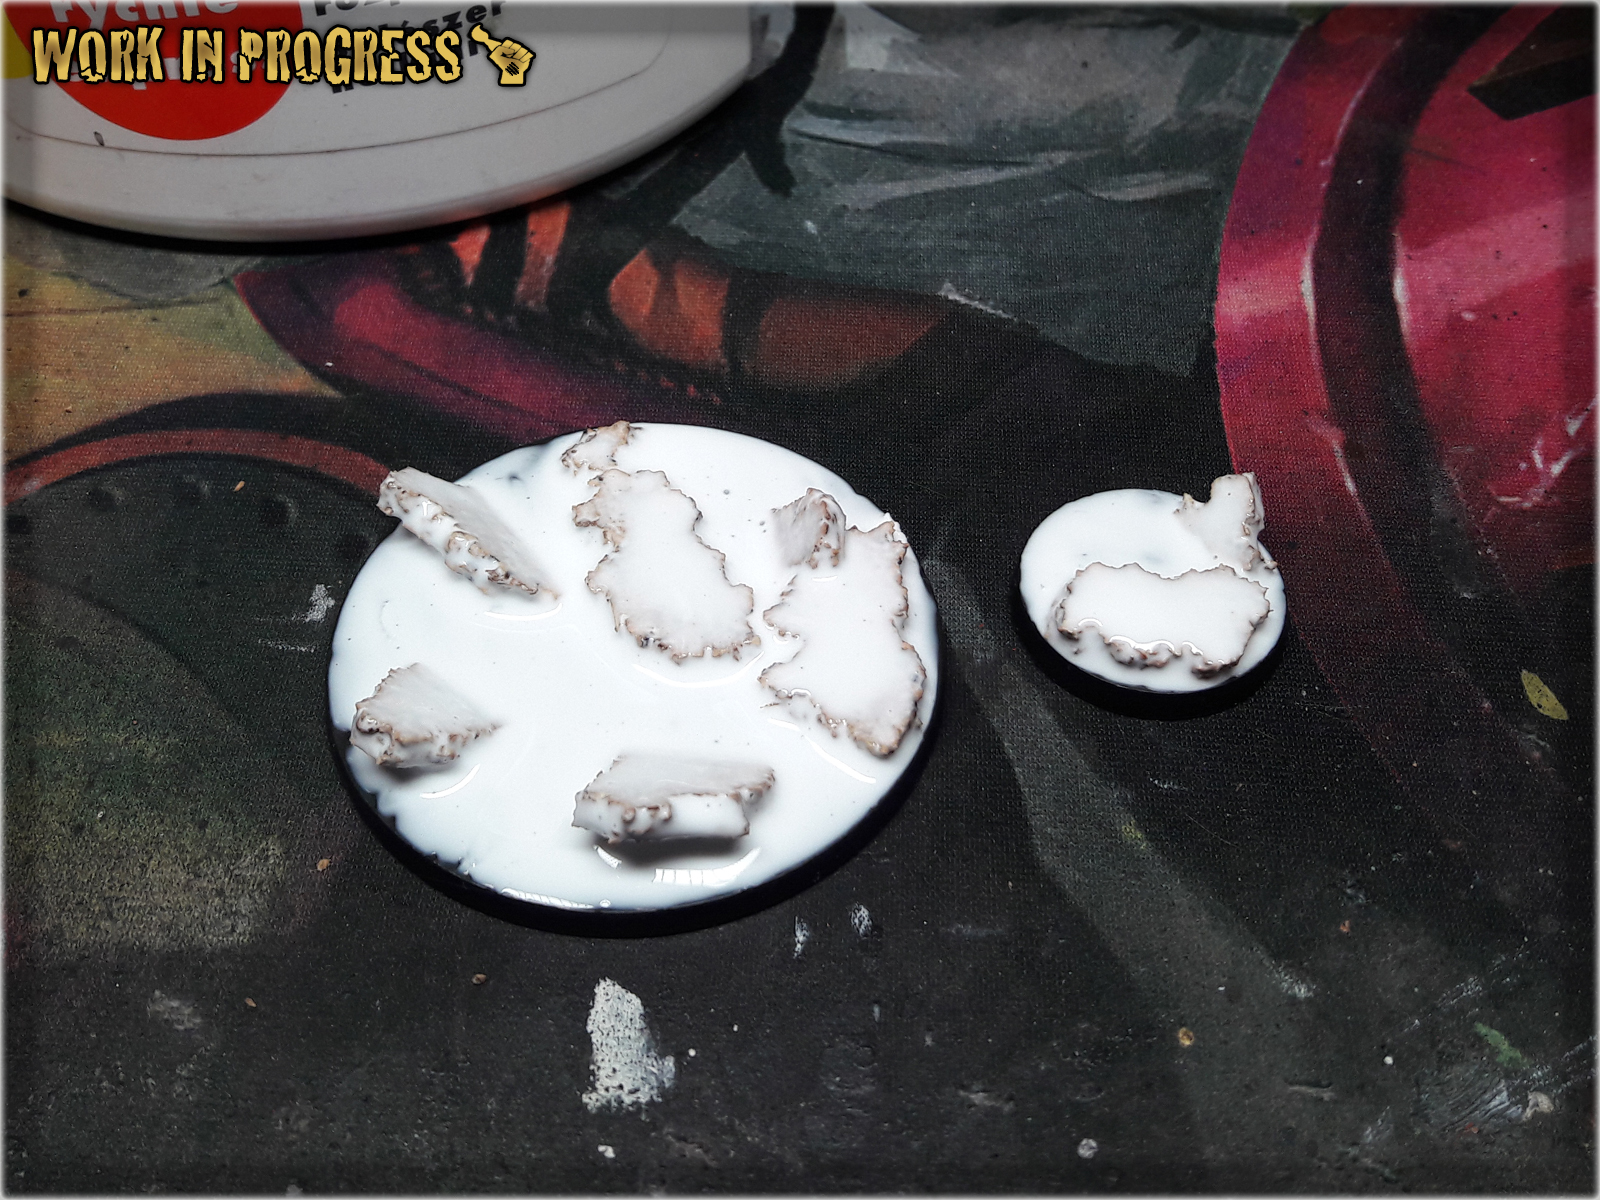
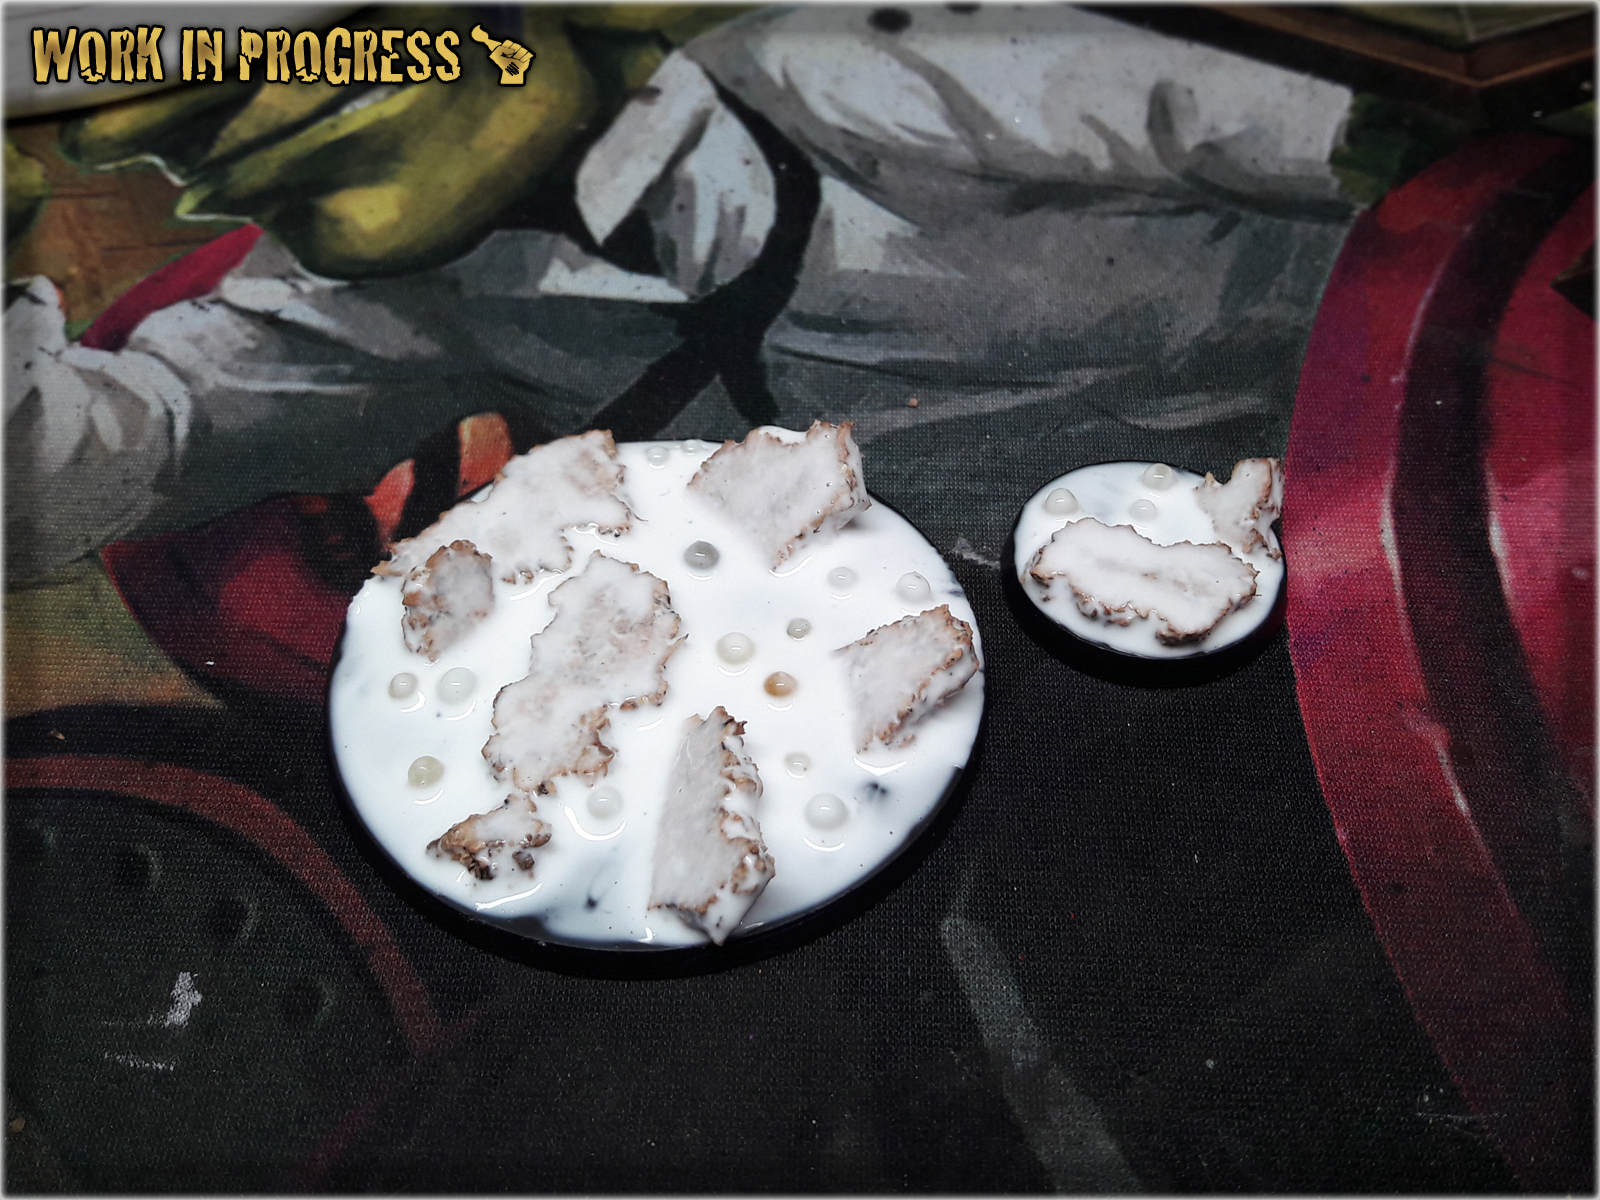
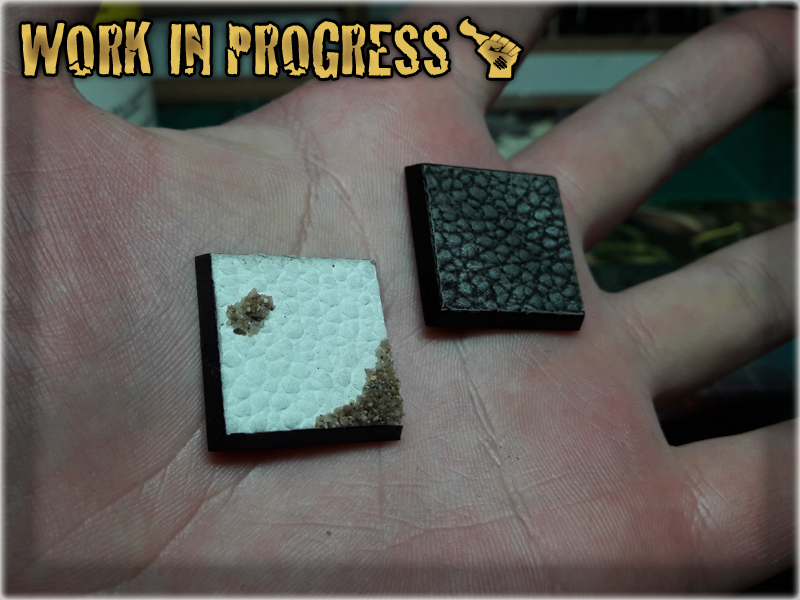
* I then dropped tiny balls (shoe moist absorbers) oon top of the Basing Glue, between 'volcanic rocks' to create an effect boiling lava bubbles.
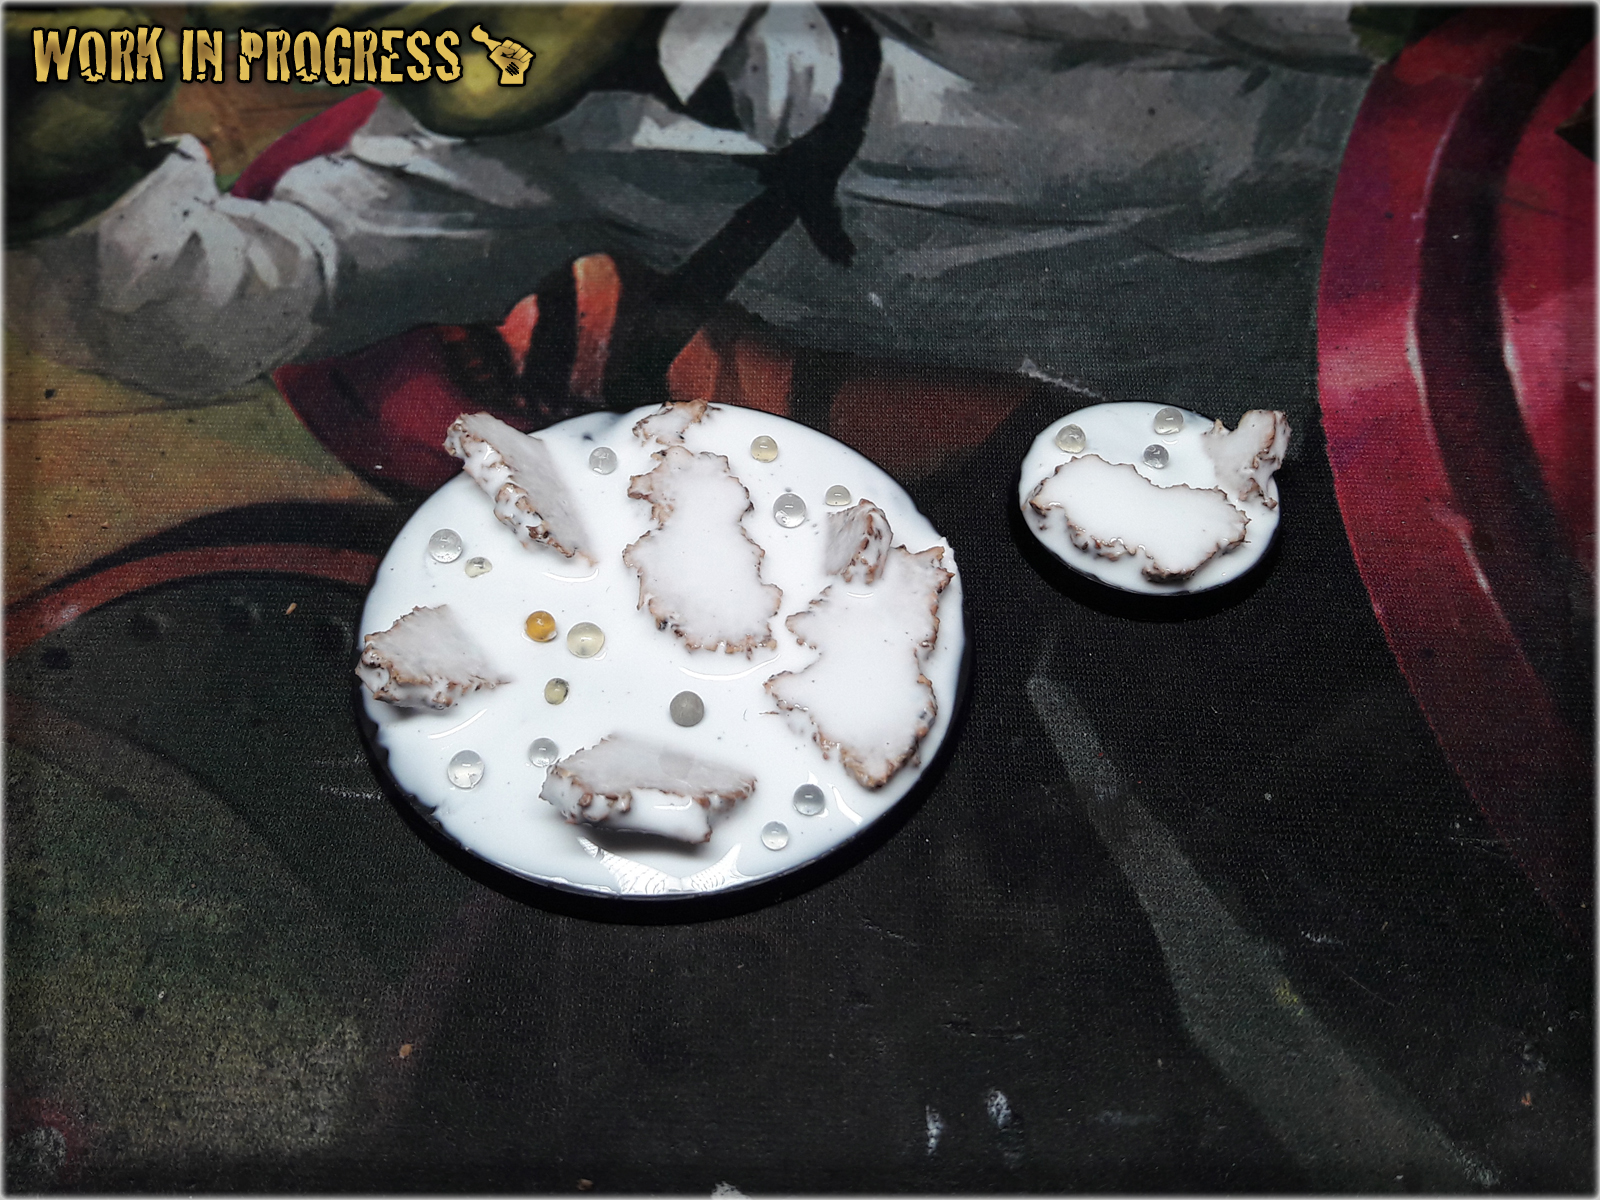
* Next I applied Basing Glue over the bubbles.
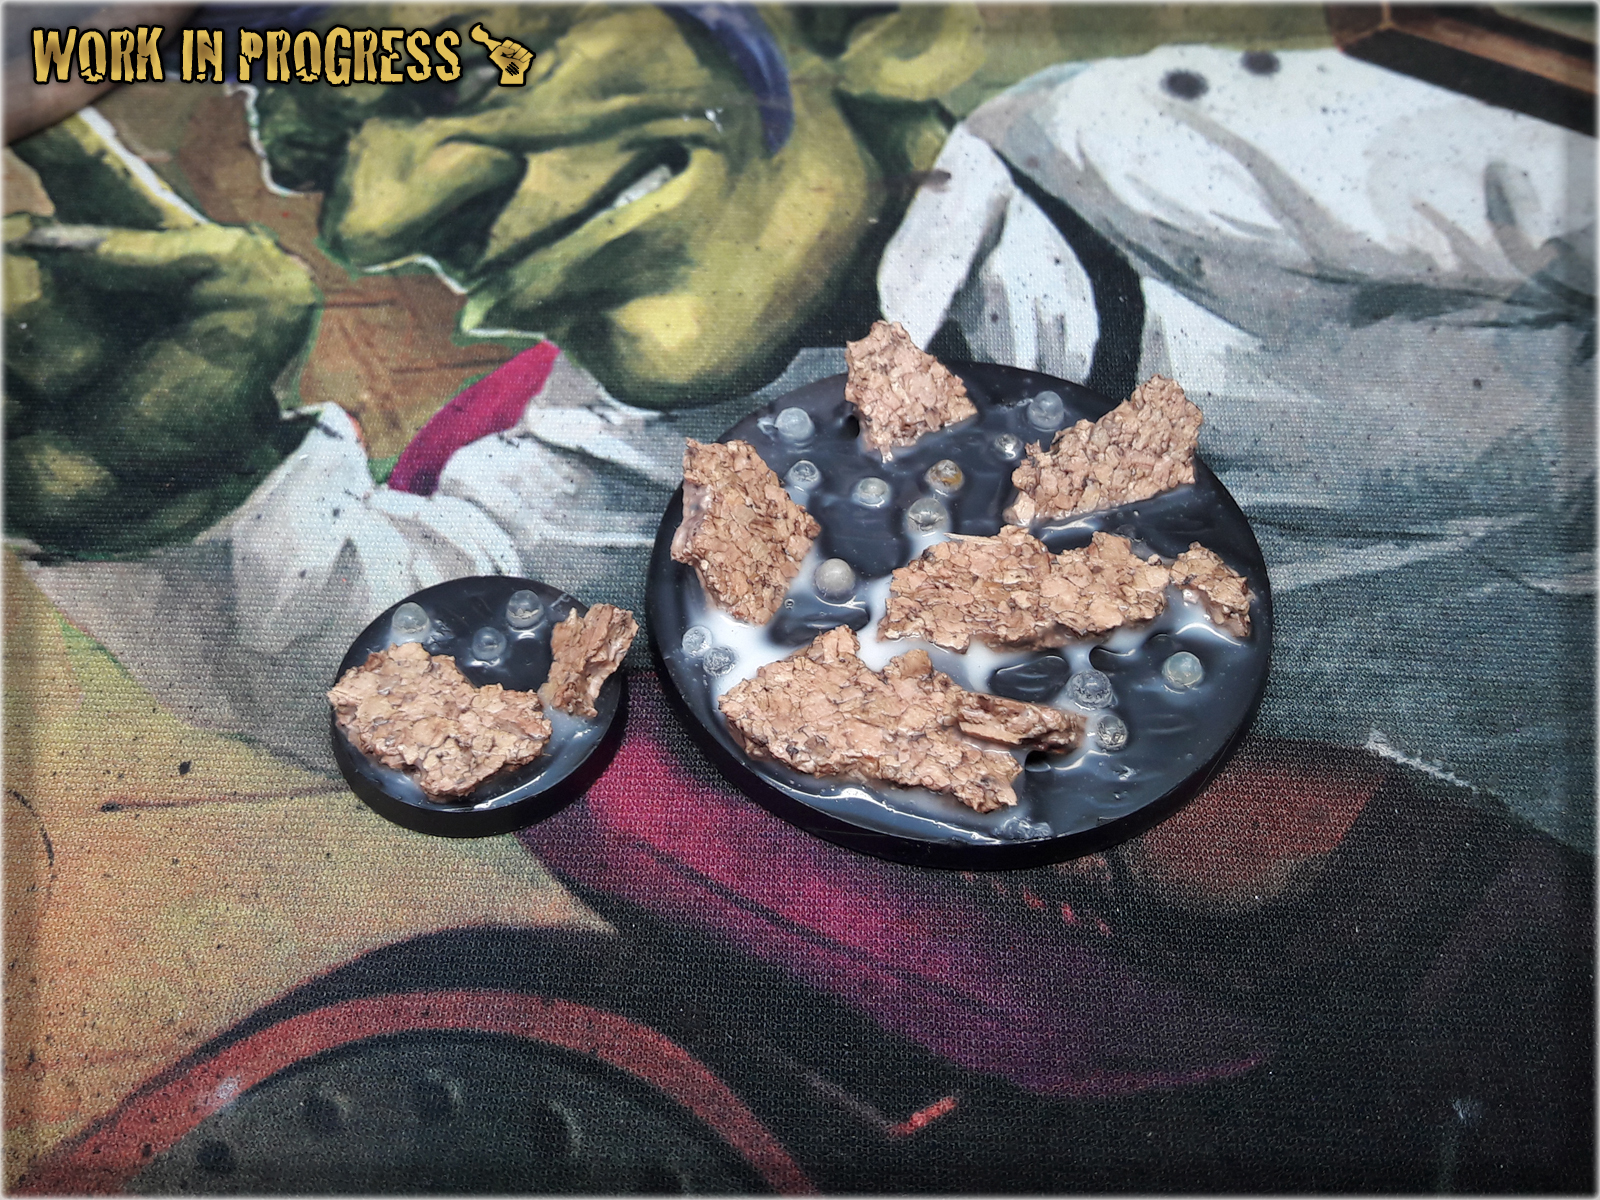
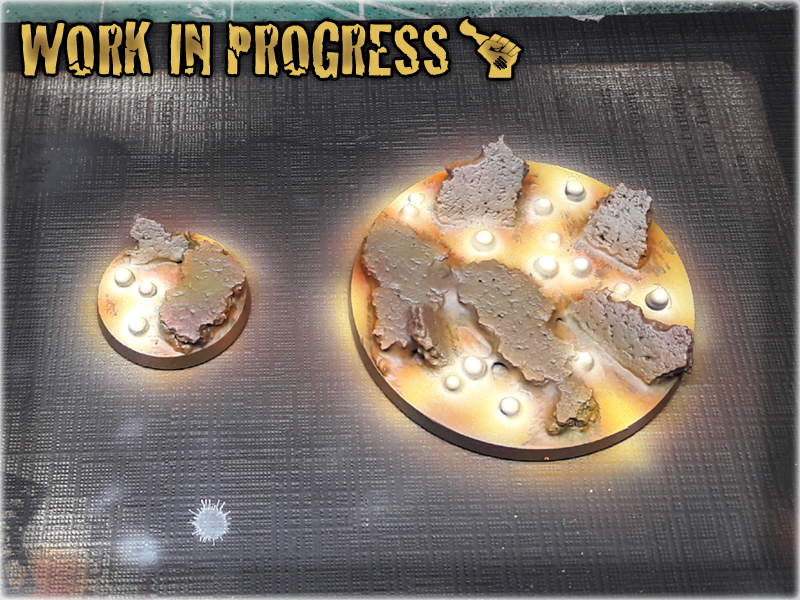
* Black Undercoat.
* Mahogany (Val) airbrushed all over the base.
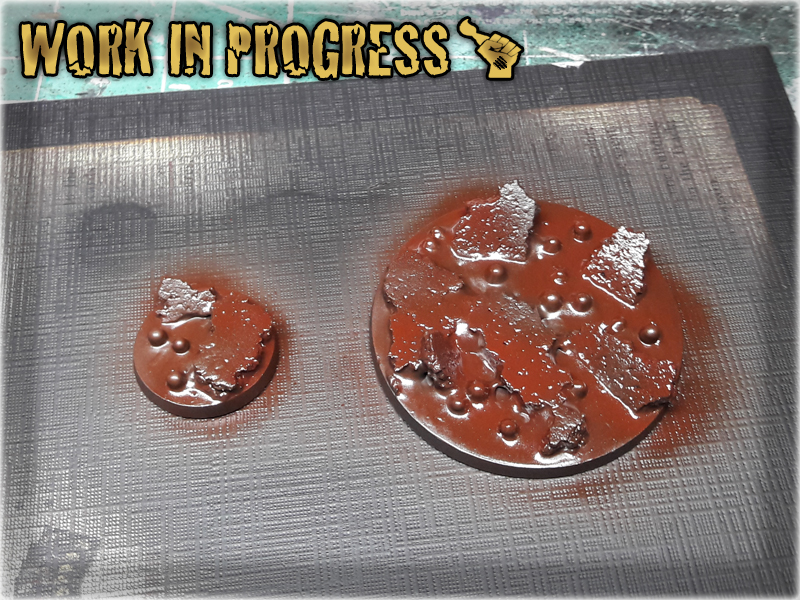
* Gorthror Brown (GW) drybrush over the Rocks.
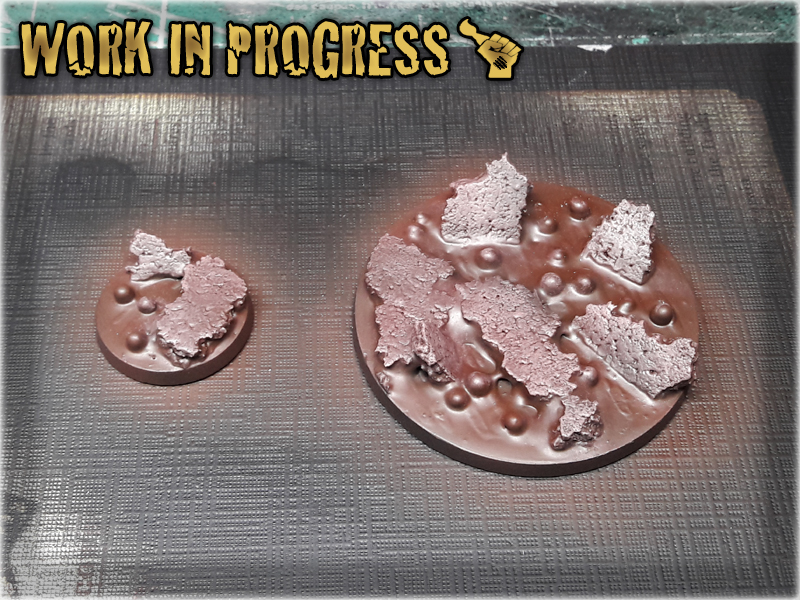
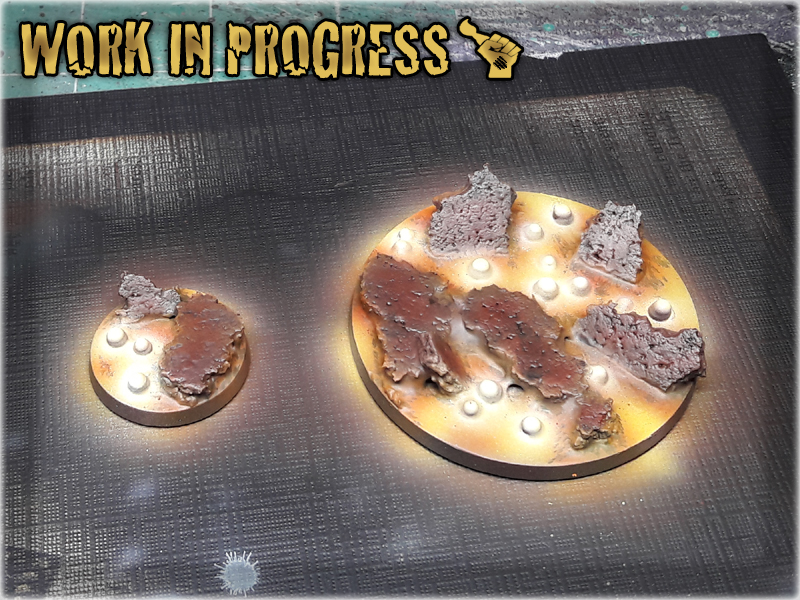
* Gory Red (Val) airbrushed over Lava.
* Scrofulous Brown (Val) airbrushed over Lava.
* Scrofulous Brown (Val) + White airbrushed over Lava.
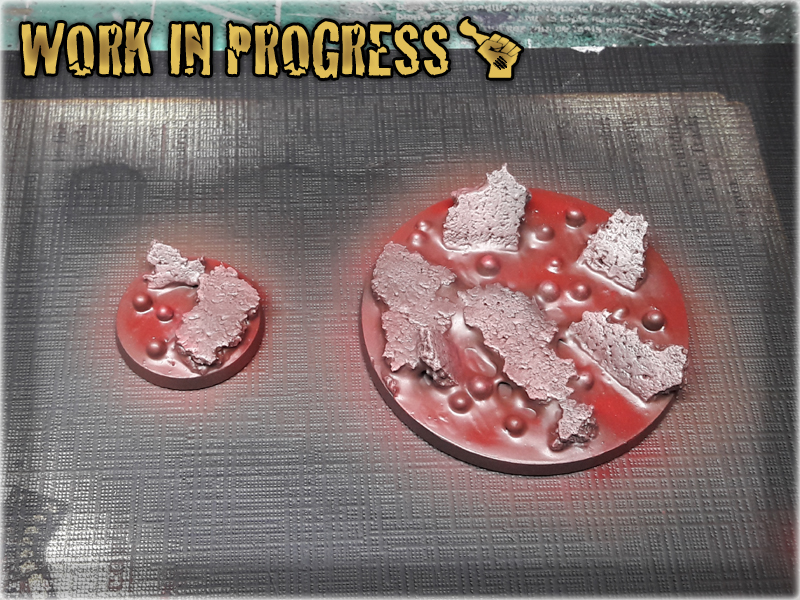
* Black spots added around Rocks
* Scrofulous Brown (Val) airbrushed over Black spots.
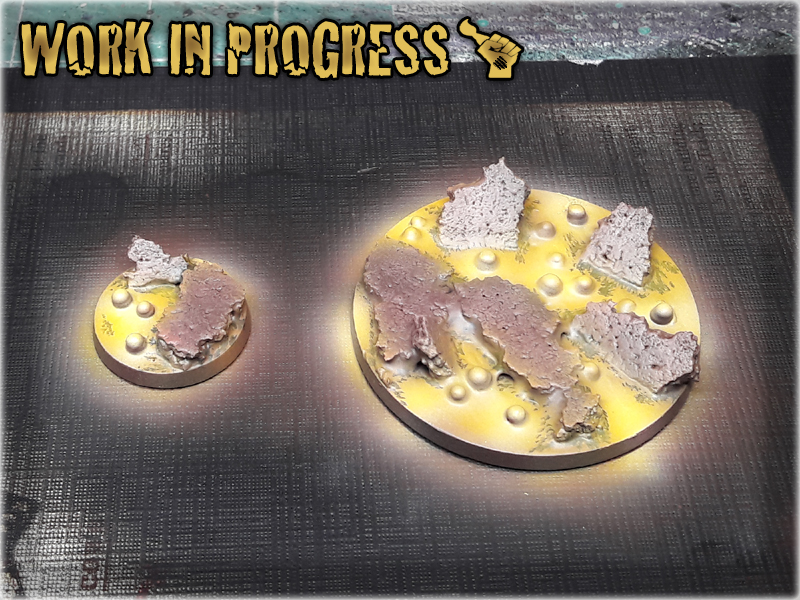
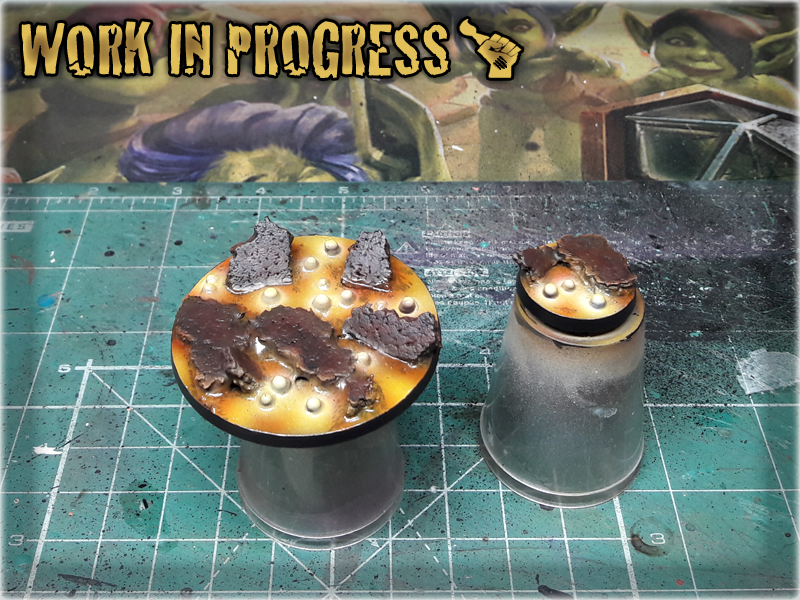
* Lamenters Yellow (GW) airbrushed over Lava.
* Hot Orange (Val) spots airbrushed over Black spots, White airbrushed over bubbles.
* Scrofulous Brown (Val) + Black, then pure Black glaze applied oved the Rocks.
* Gloss Varnish applied over Lava.
![]()
In this Step-by-Step tutorial I would like to take you on a spin with some Micro Art Studio’s Corregidor Bases. Guys from MAS did a fantastic job painting this product, but I have my own way which I would like to share with you. Buckle up and let’s get to it!
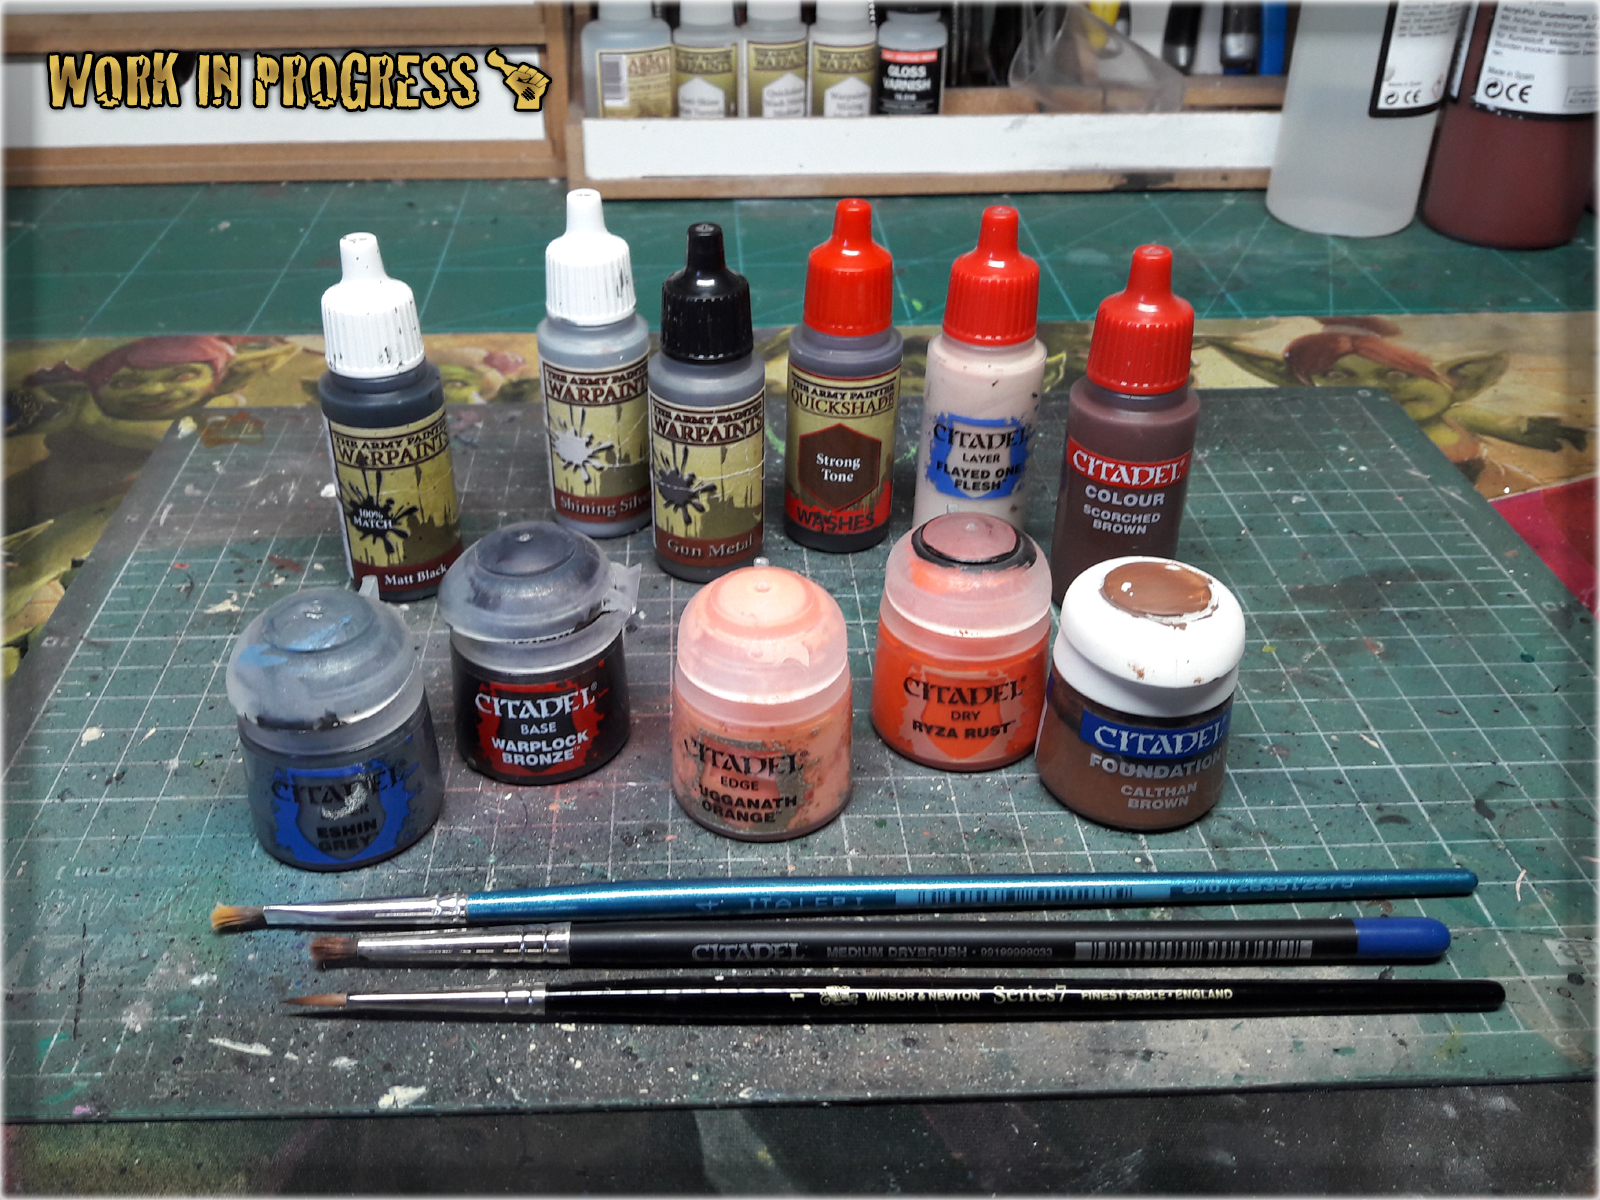
* Regular Brush,
* Stippling Brush,
* Black,
* Tin Bitz / Warplock Bronze (GW)
* Eshin Grey (GW),
* Strong Tone Ink (AP),
* Gun Metal (AP),
* Shining Silver (AP),
* Scorched Brown (GW),
* Calthan Brown (GW),
* Ryza Rust (GW),
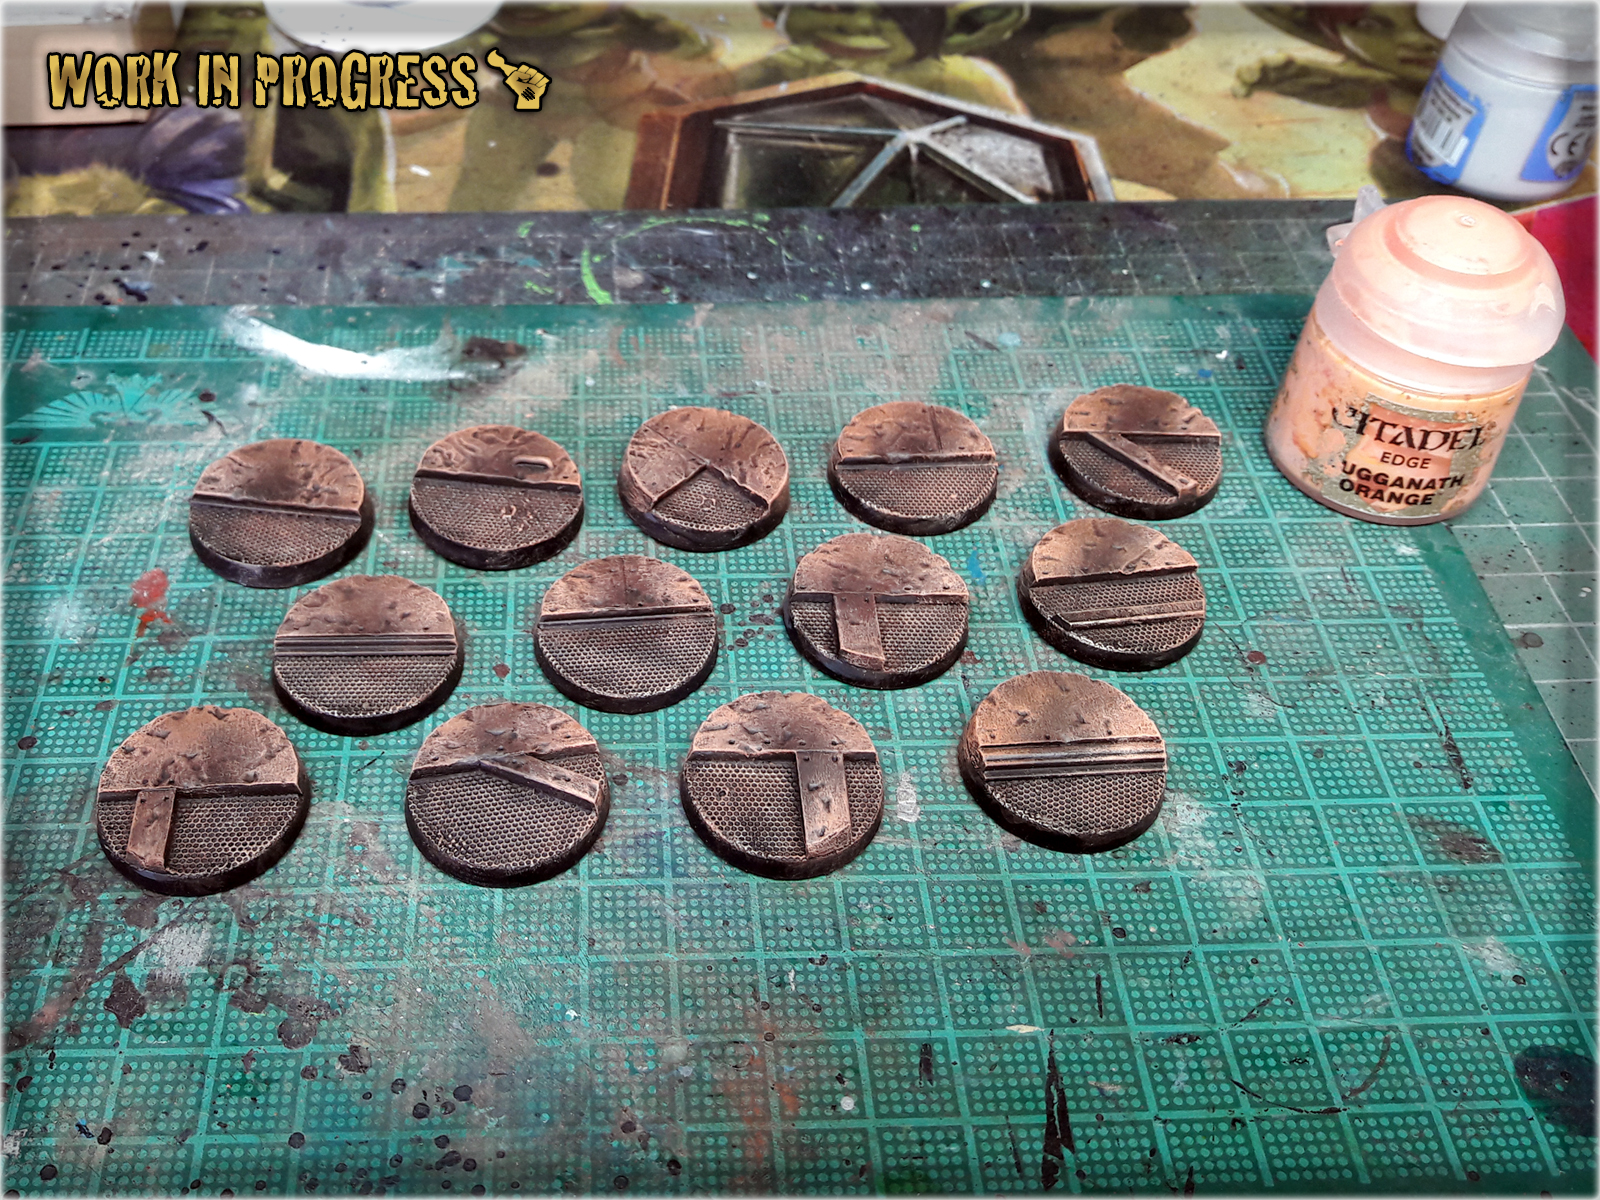
* Lugganath Orange (GW),
* Flayed One Flesh (GW),
! You can achieve similar results using different paints as long as you followTutorial's basics. For example Eshin Grey (GW) might be switched for Panzer Dark Grey (Val).
1 I started by applying a layer of Eshin Grey (GW) to all raised areas of the base, over Black undercoat. Just a hint that applying two slightly diluted layers goes much faster and produces a similar result.
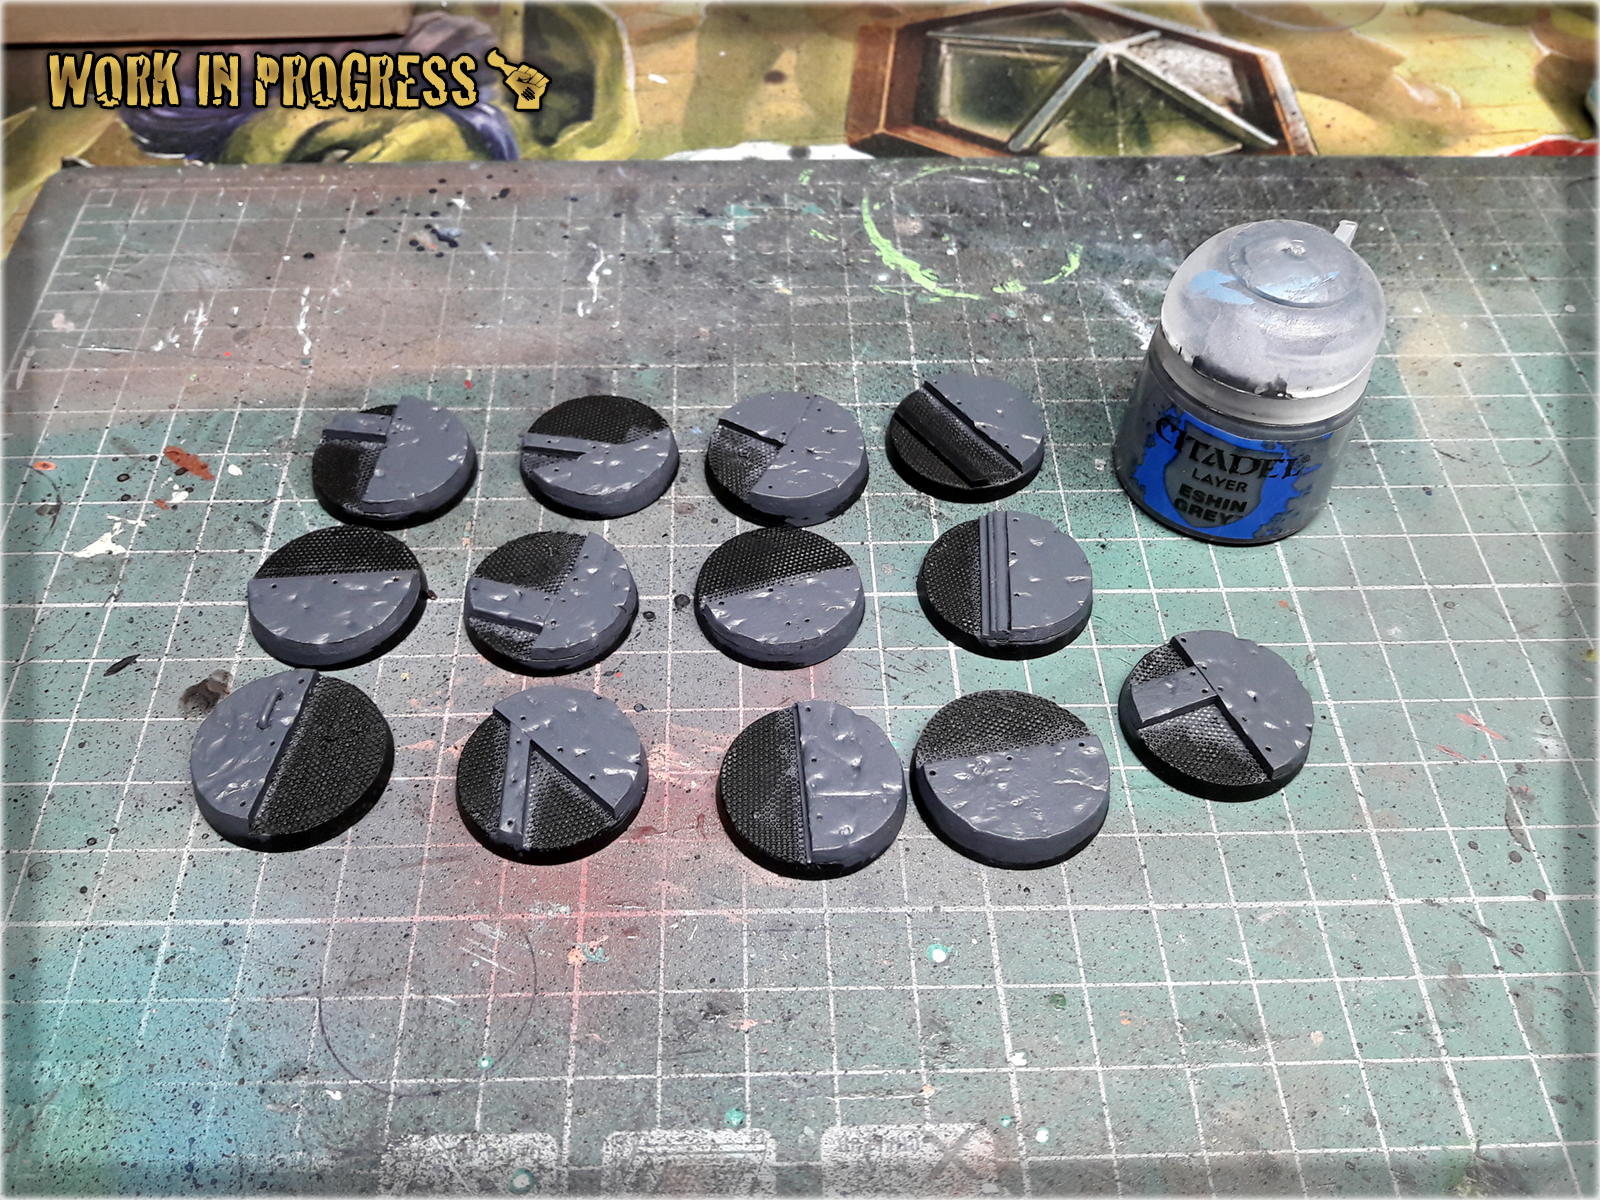
2 I then moved to the mesh areas and painted them with Warplock Bronze (GW). Once again this paint might be diluted but this time no need to apply two layers - one will suffice.
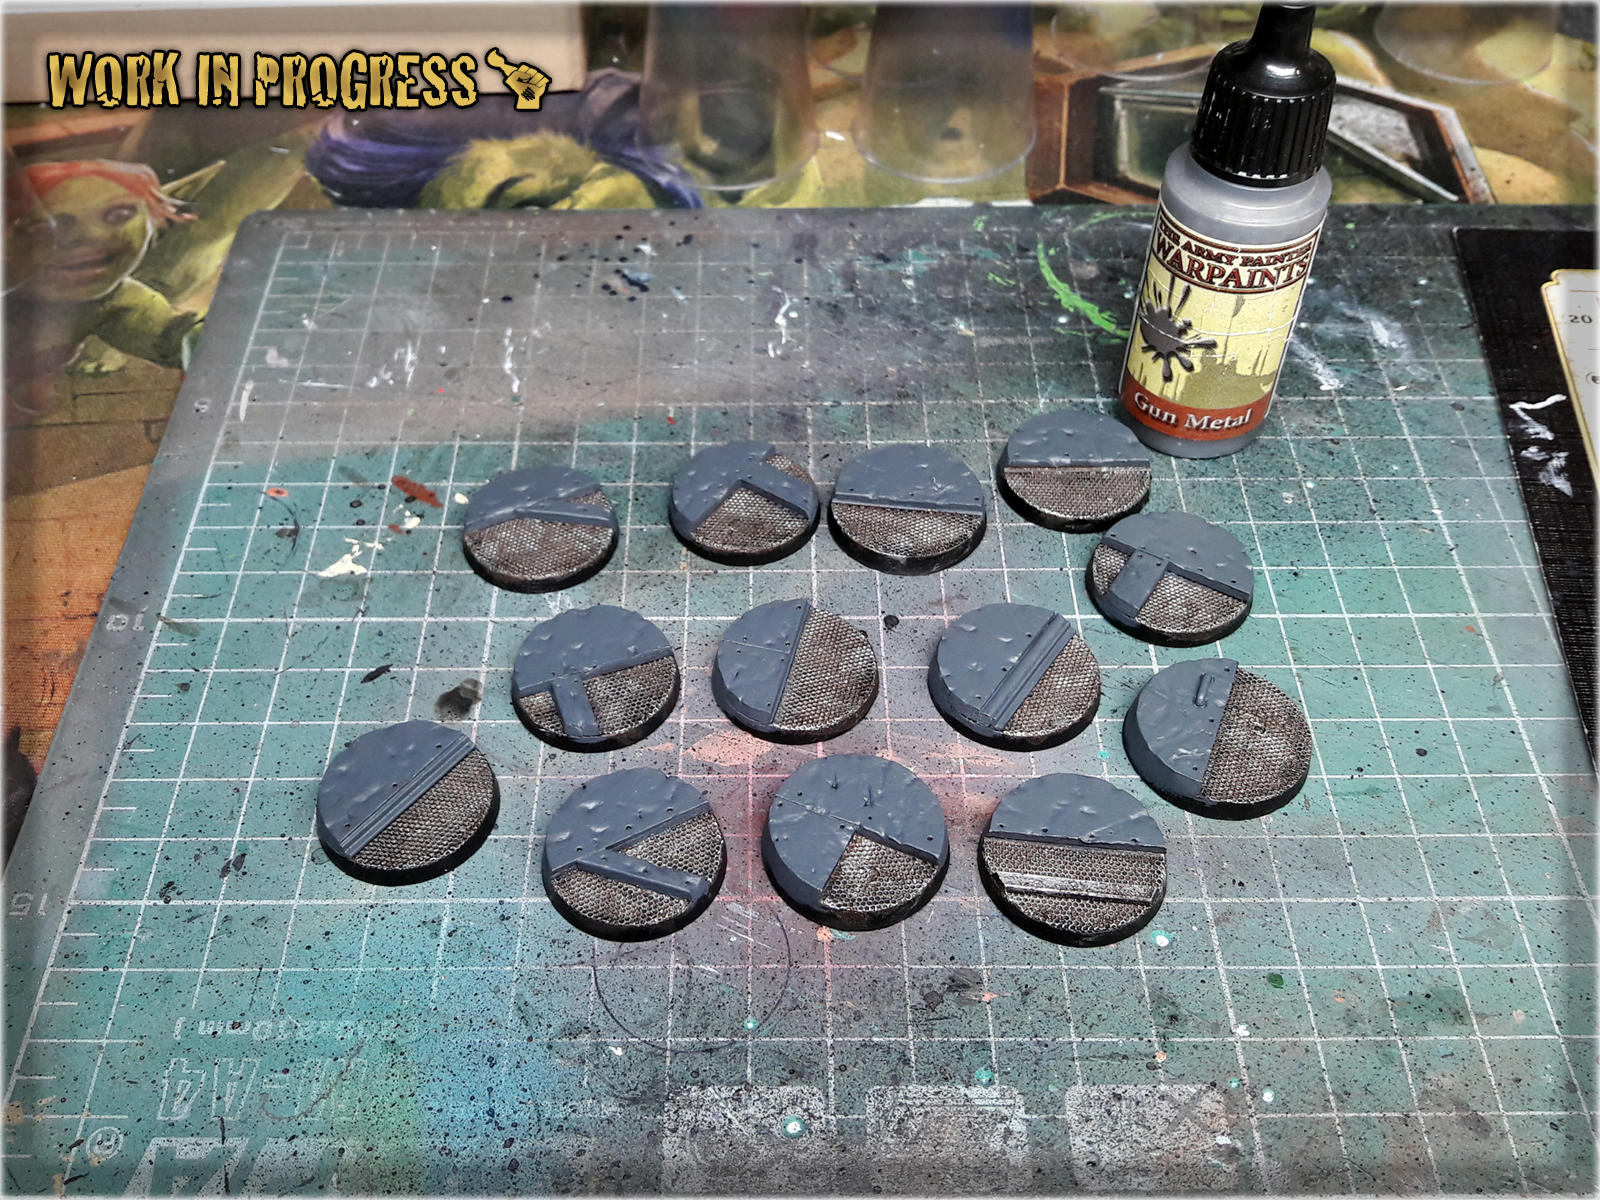
3 Once Warplock Bronze dried out, I applied a layer of Gun Metal (AP). For best results I did this with regular brush and using a Flatbrush technique following:
Five Layers Technique – Metal basis
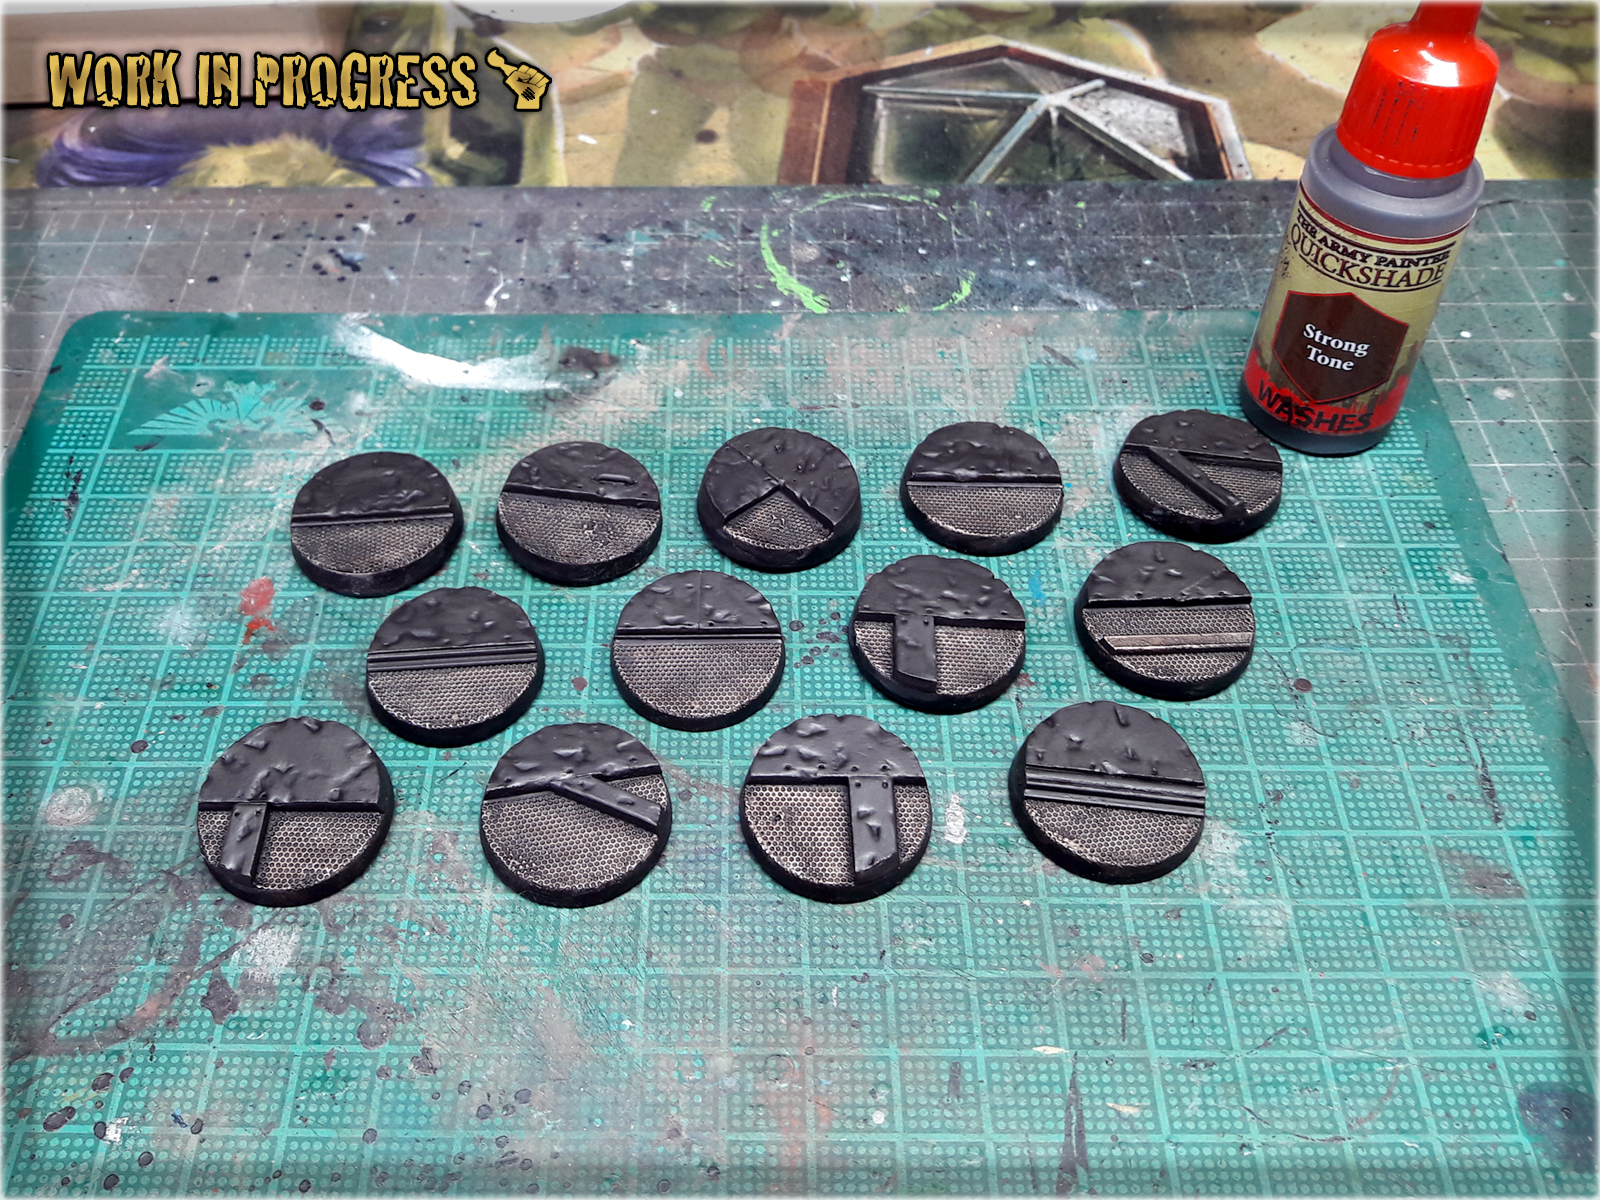
4 Next Shining Silver (AP) came in. I applied one layer over Gun Metal with regular brush, Flatbrushing.

5 I then applied a wet, thick layer of Strong Tone Ink (AP) over entire base. Once it dried out - I applied another, identical layer. (Picture seem grey'ish - in real life this would look more brown and juicy)

! orem ipsum dolor sit amet, Integer commodo tristiqu odio, aliquet ut. Maecenas sed justo imperdiet bibendum. Vivamus nec sapien imperdiet diam. Aliquam erat volutpat. Sed onsectetur suscipit nunc et rutrum. Lorem ipsum dolor sit amet,volutpat. Sed onsectetur suscipit nunc et rutrum. Lorem ipsum dolor sit amet, volutpat.
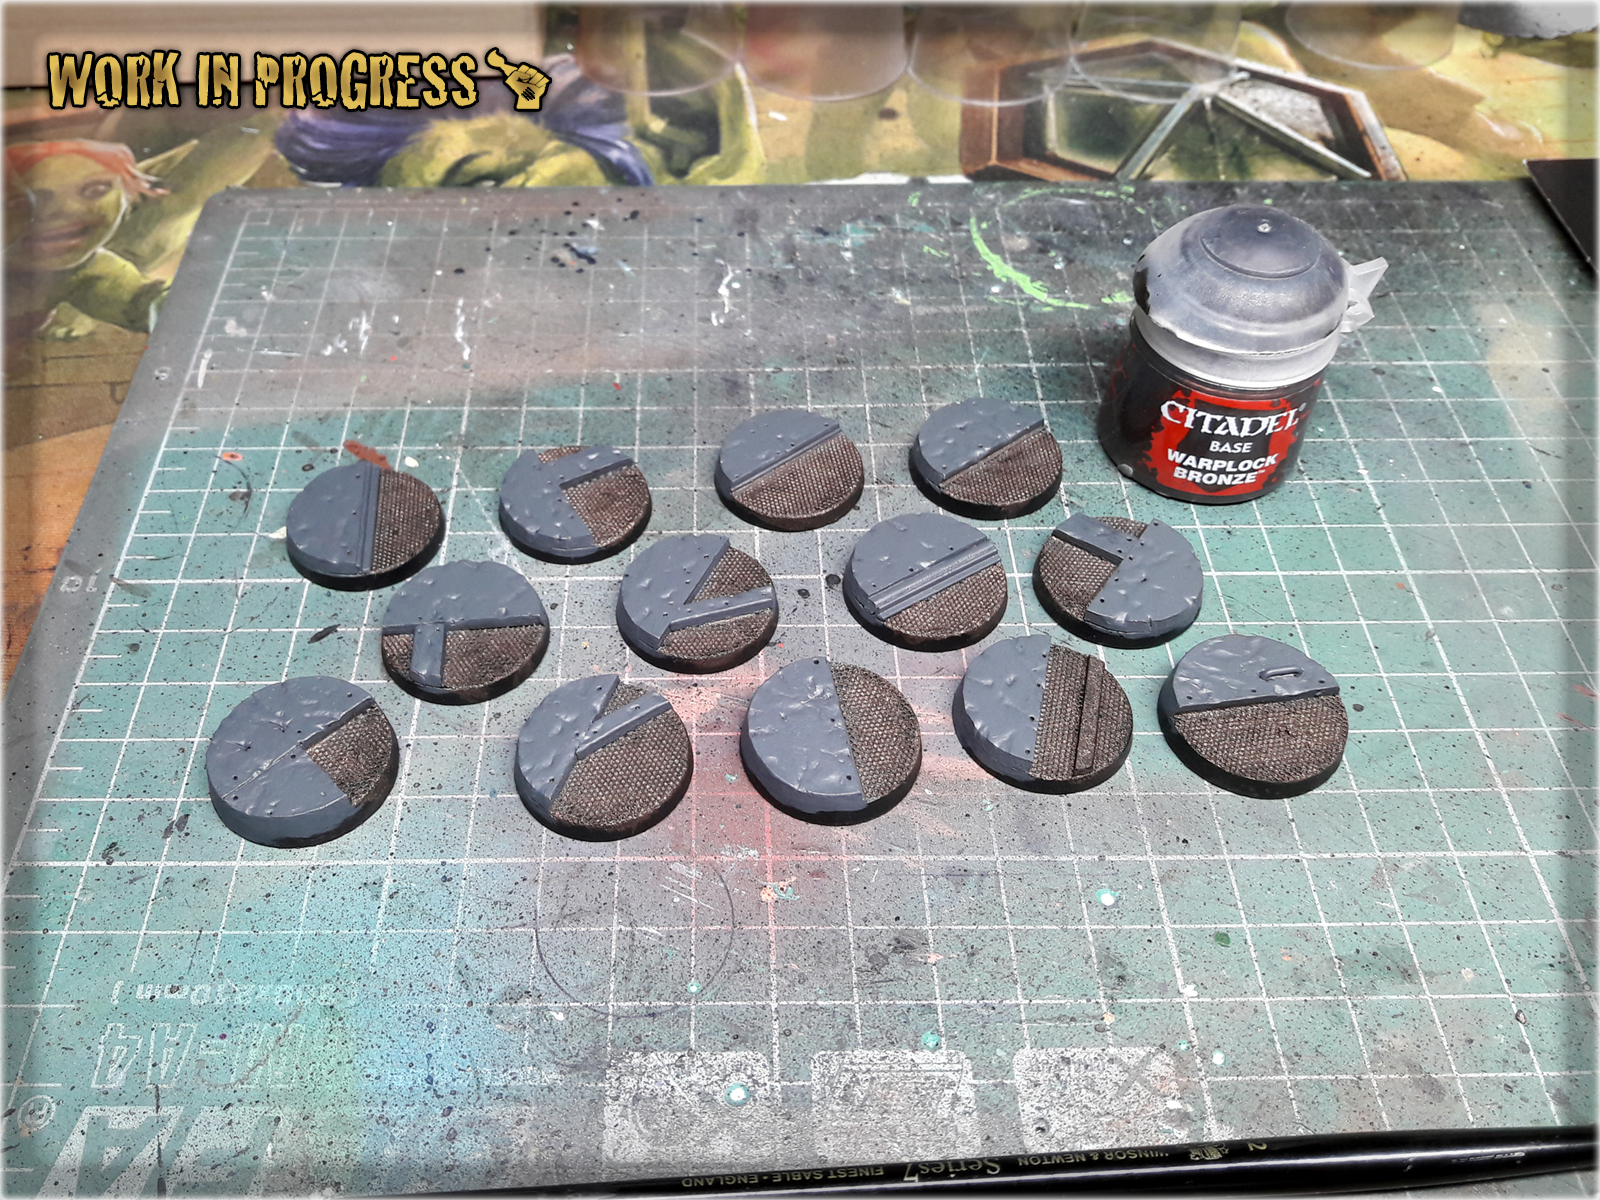
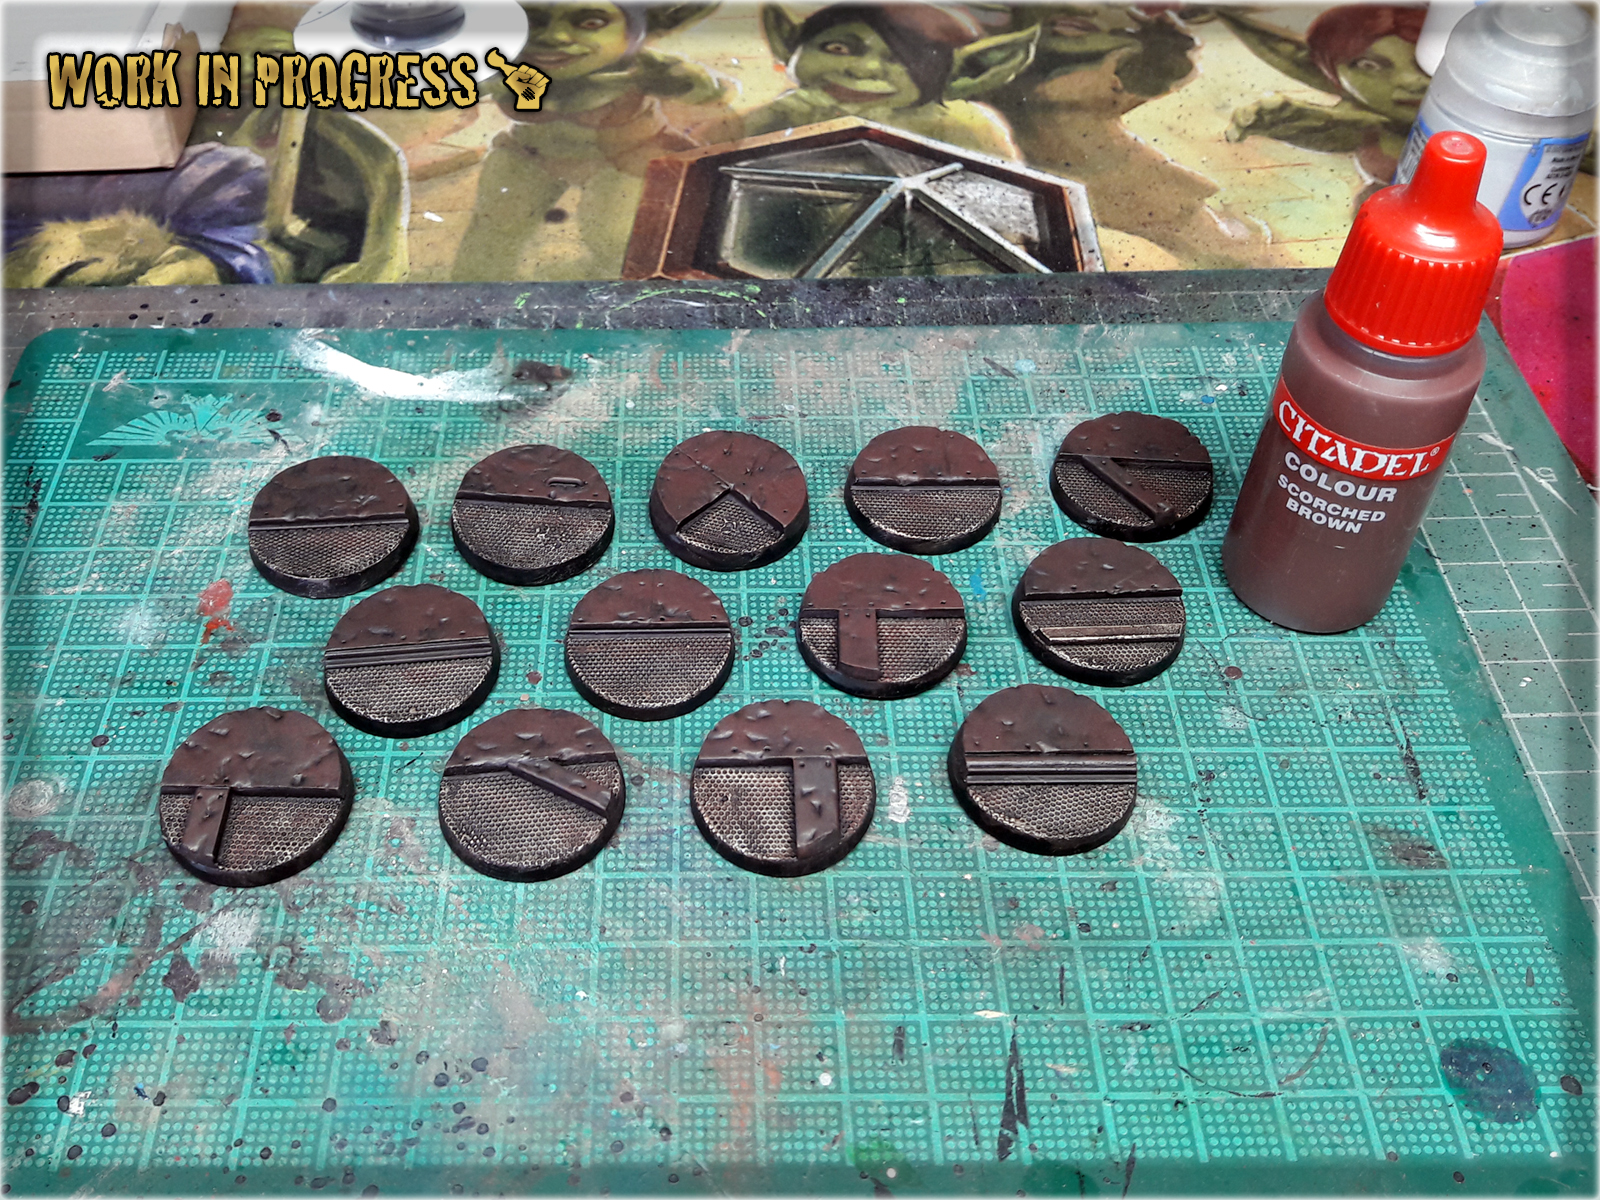
1 Using either a Stippling brush or a well used up large brush I applied stains of Scorched Brown (GW) over all raised areas. Was carefull not to use too much paint.
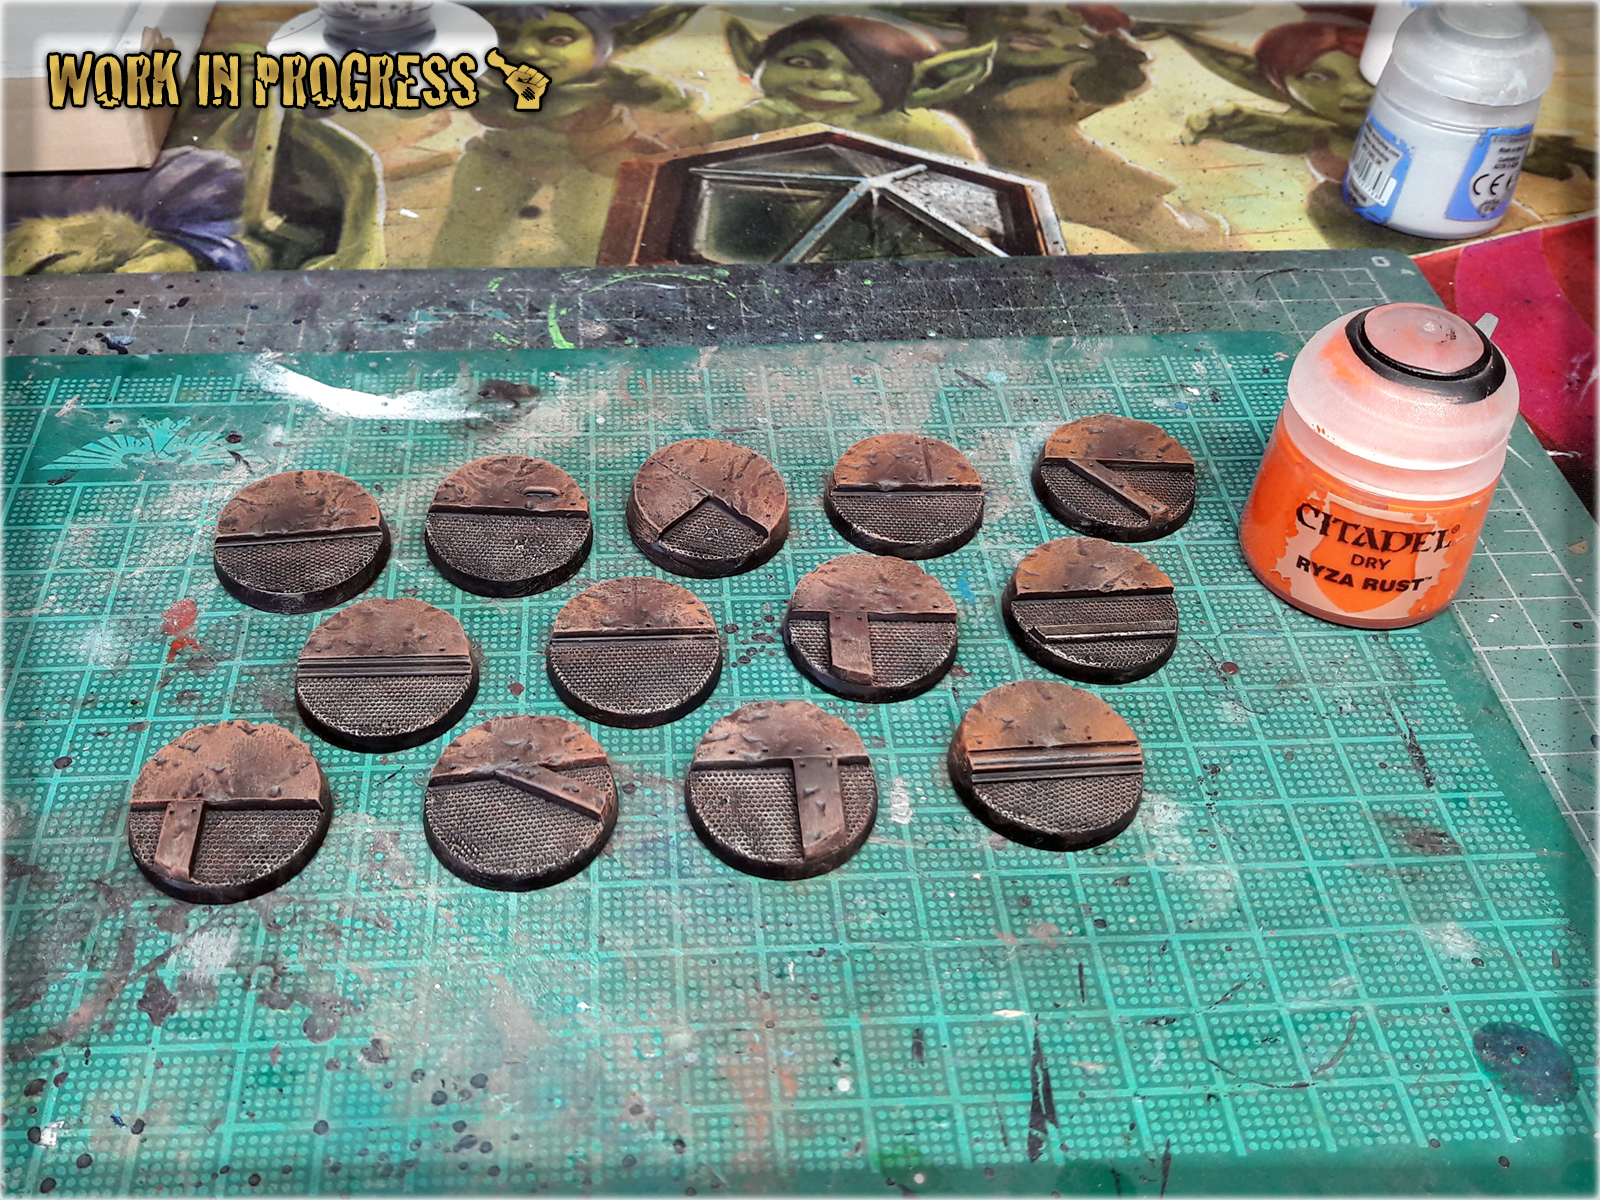
2 I then drybrushed edges and some large parts of raised areas using Calthan Brown (GW).

3 Next I Stippled some Ryza Rust (GW) on top of previous layer, ensuring to leave some Calthan Brown visible.
4 Same technique, different paint. I stippled Lugganath Orange (GW) on top of Ryza Rust layer, leaving previous layer visible on the sides of the new one.
! From this layer onward I usually paint over both raised and mesh areas. For the purpose of this Tutorial I left mesh parts clean, but do not be alarmed if you see pictures of my own bases with a less differentiated colour scheme.
5 Flayed one Flesh (GW) followed. This time I Drybrushed over Lugganath Orange layer and then used regular brush to paint thin lines on the edges.
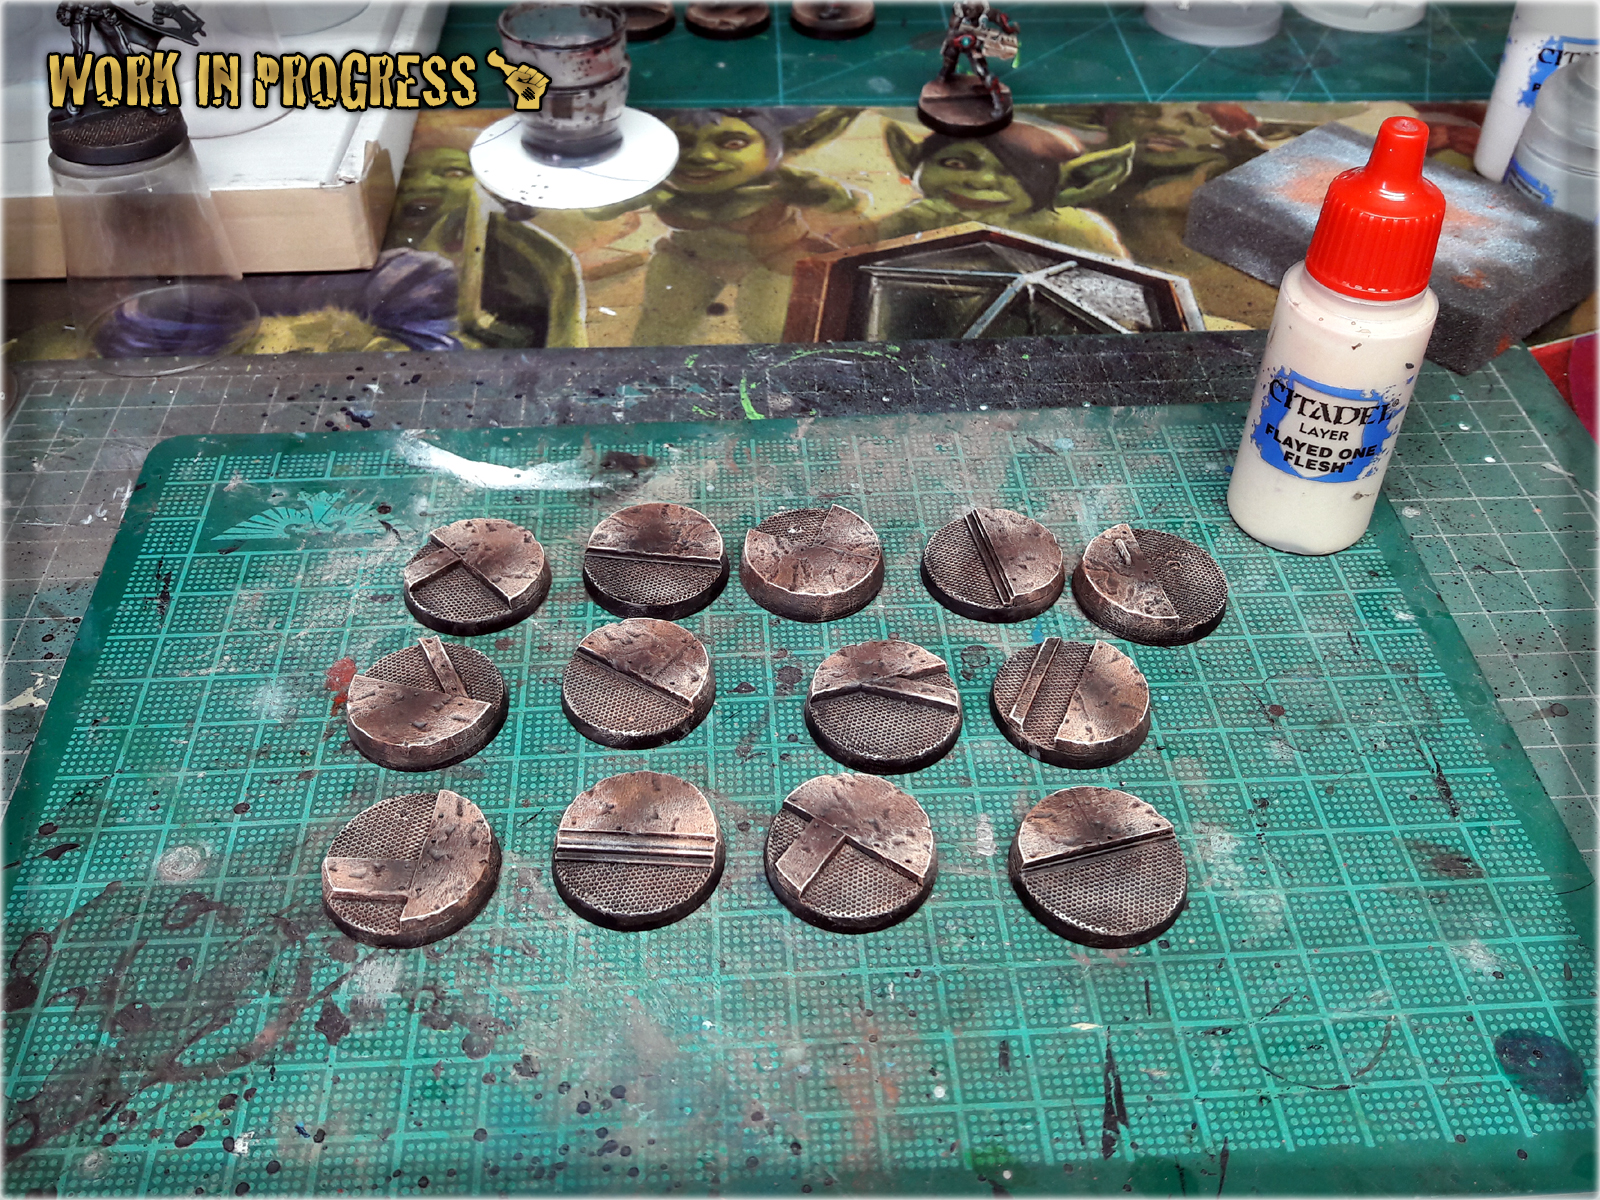
6 Adding a final touch I painted edges smooth Black to add contrast and keep the paint job clean.
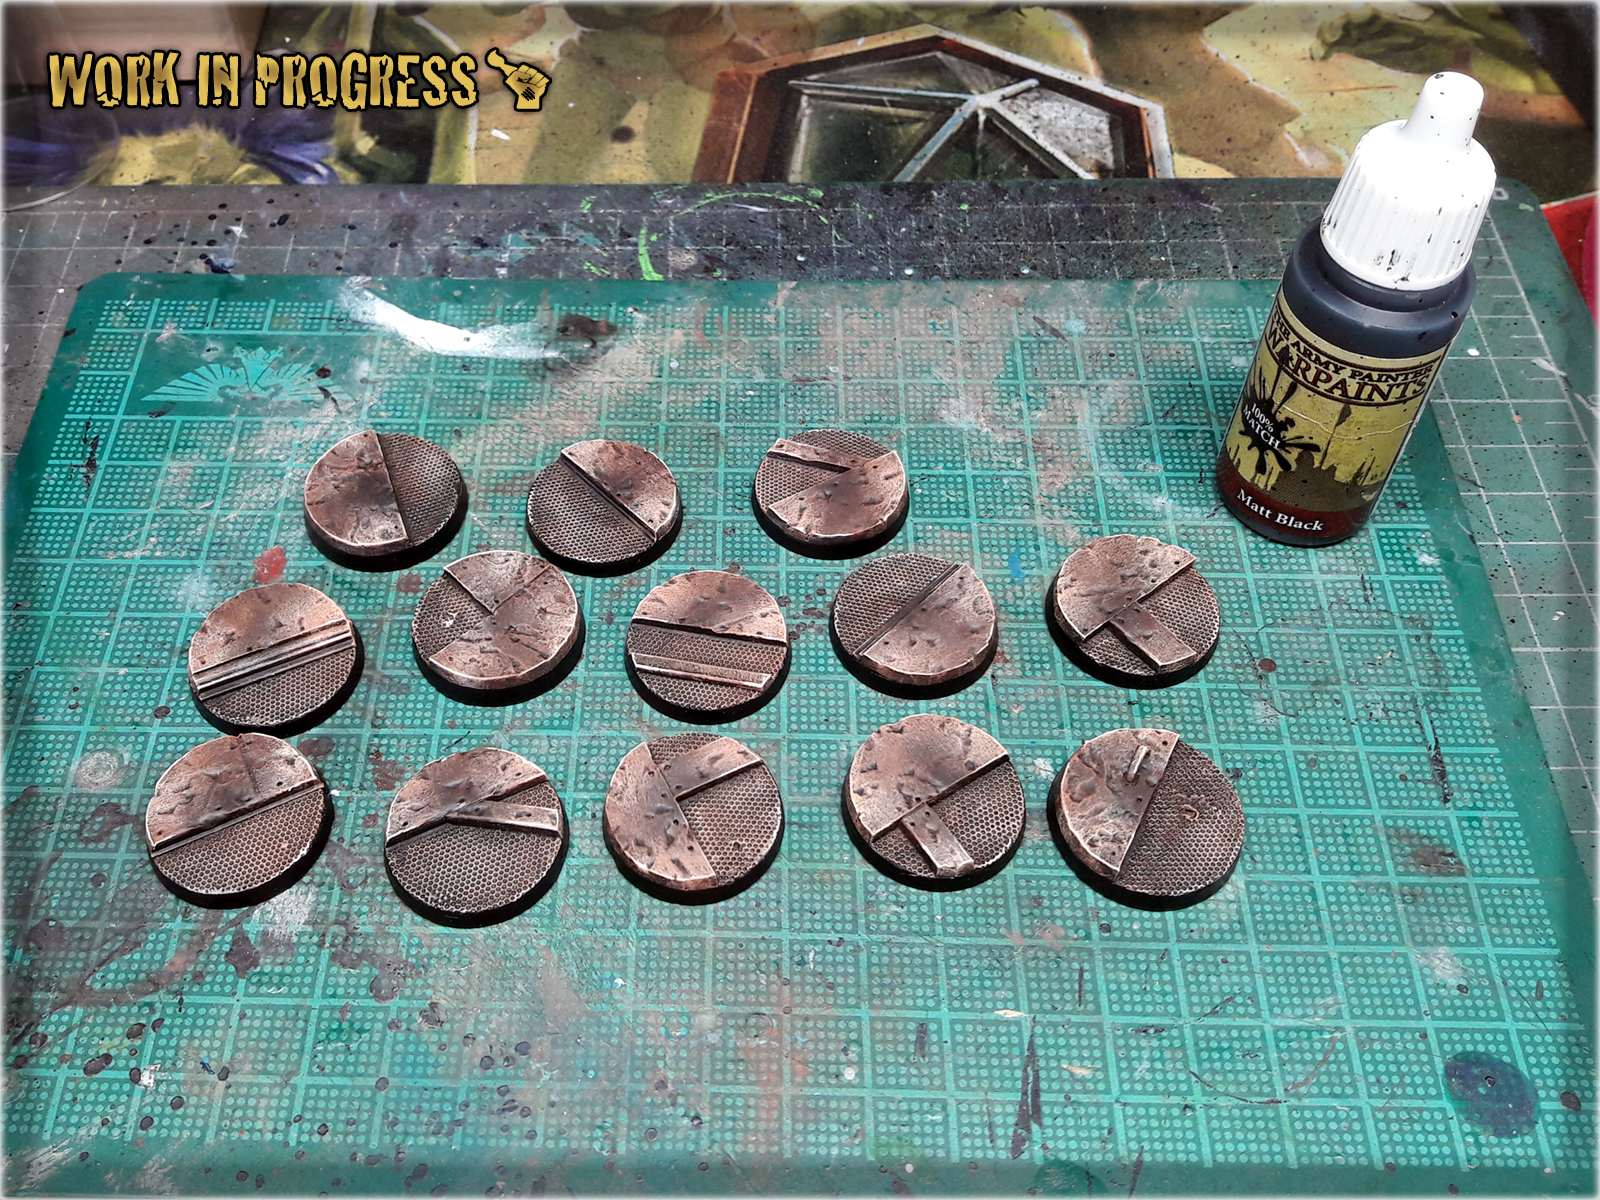
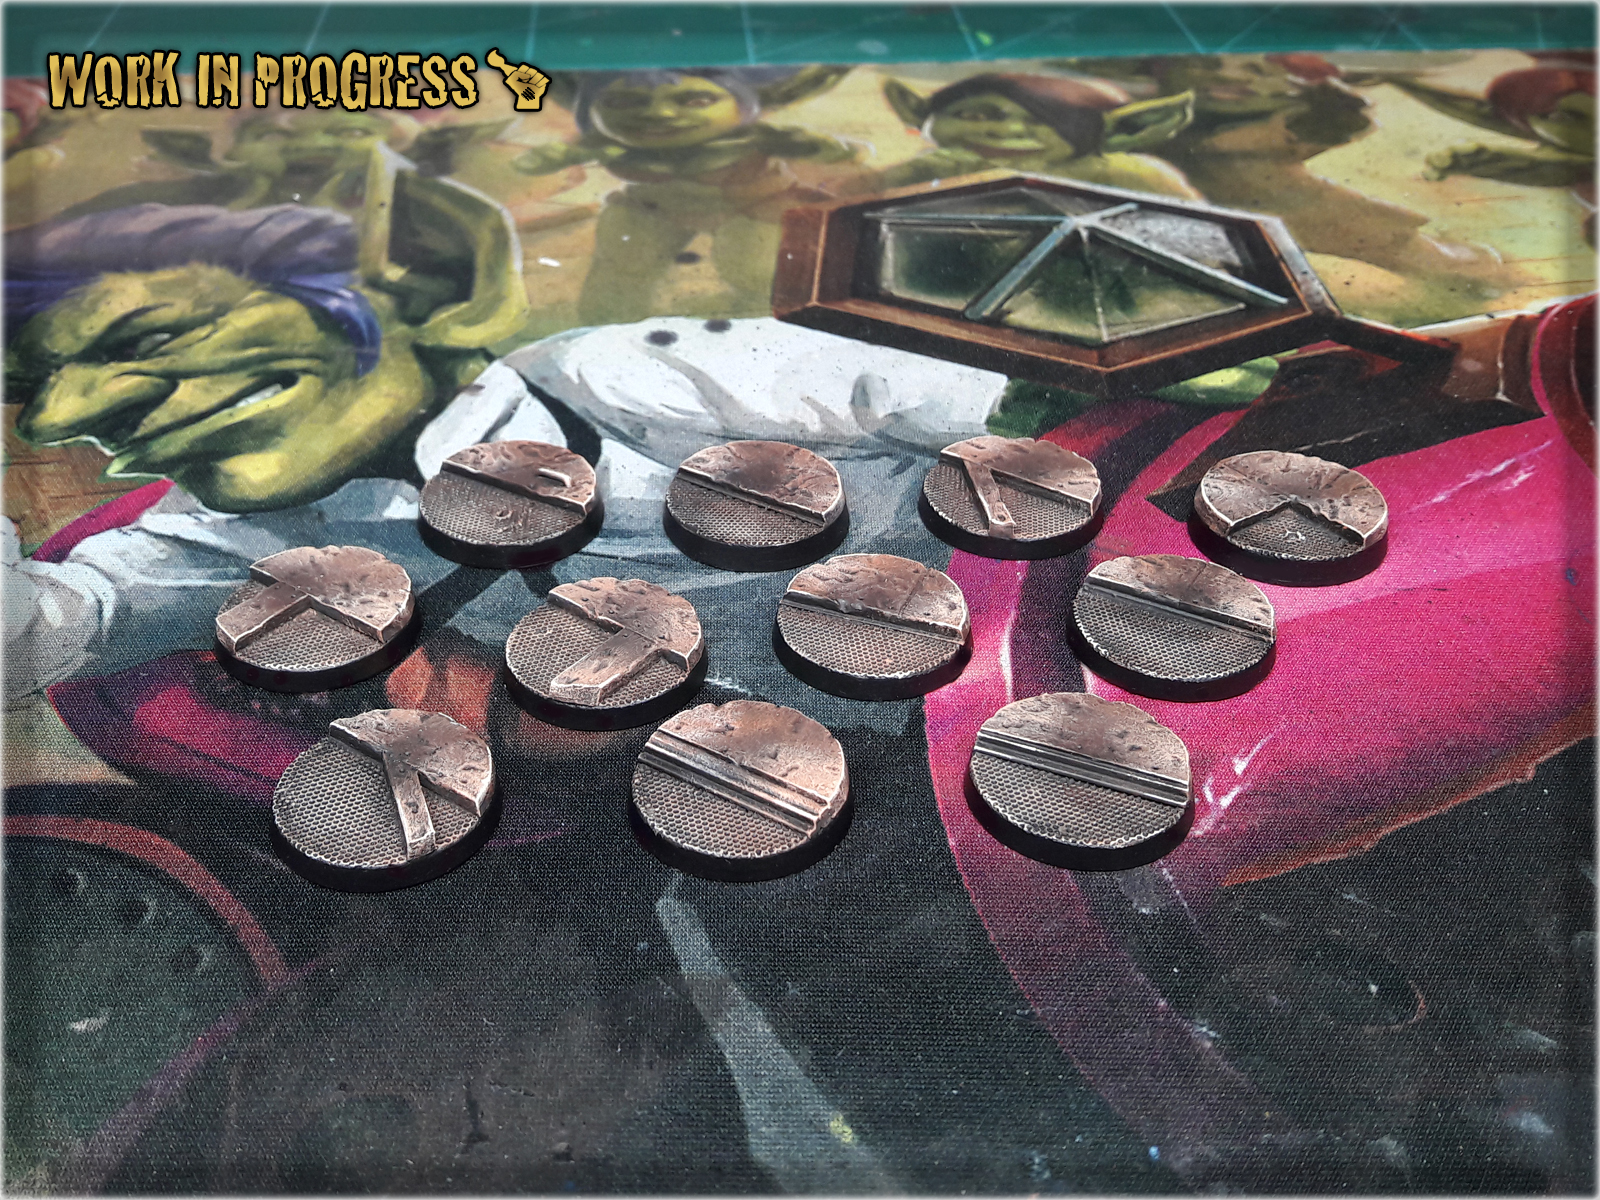
That’s it – you have followed me on my short journey from black undercoat to finished Corregidor Bases. Below you will find some examples of finished Corregidor Bases. Each bunch turns out slightly different from the rest. That’s because a slight difference in surface coverage or layer to layer proportion might result in change of how eye can see these bases. Either way – here they are:

In this easy, step-by-step tutorial I’m going to show you how to create a Cobblestone Base in a what is probably the fastest and simplest way ever.

*Just find a suitable one at a local builder’s store.
1 I started by covering entire base with Basing Glue.
2 I then cut off a piece of the wallpaper to be slightly larger then the base itself.

3 Next I glued the piece onto the base, turned the base upside down and cut off the excess of the wallpaper with a Hobby Knife.
4 Last step was to smoother the edges with a slightly moisted fingertip.

Now you see how insanely fast and easy this was. For the purpose of this tutorial I made just this simple base, but once you get your hands on a proper wallpaper, options are limitless. You can use it to texturize bases and terrain, add more detail or even mix different types of texture.
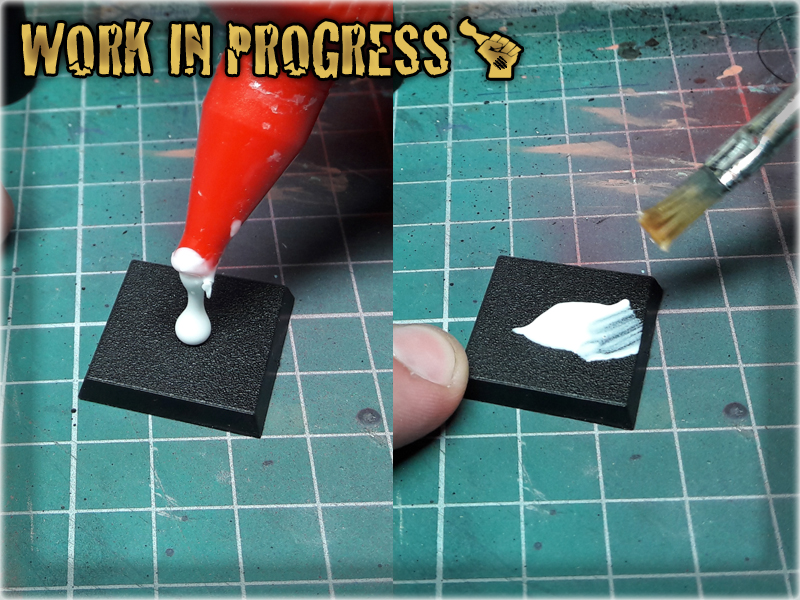
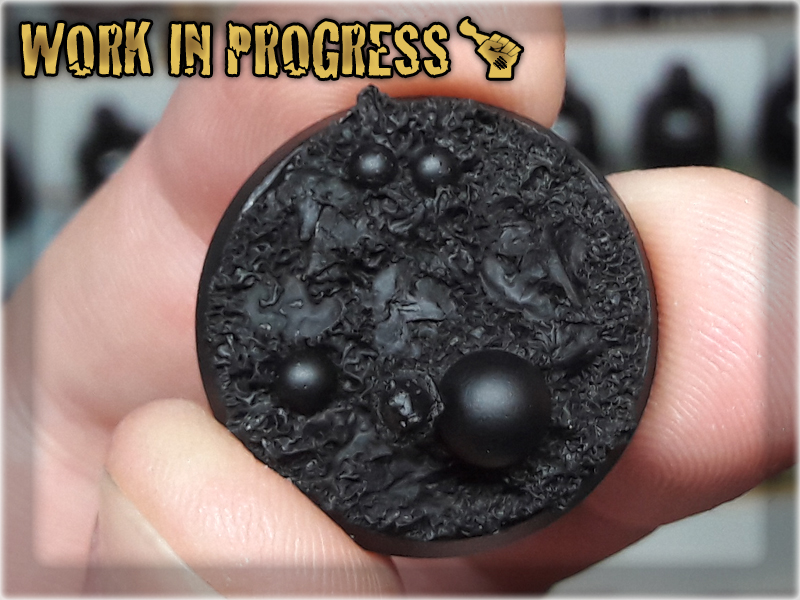
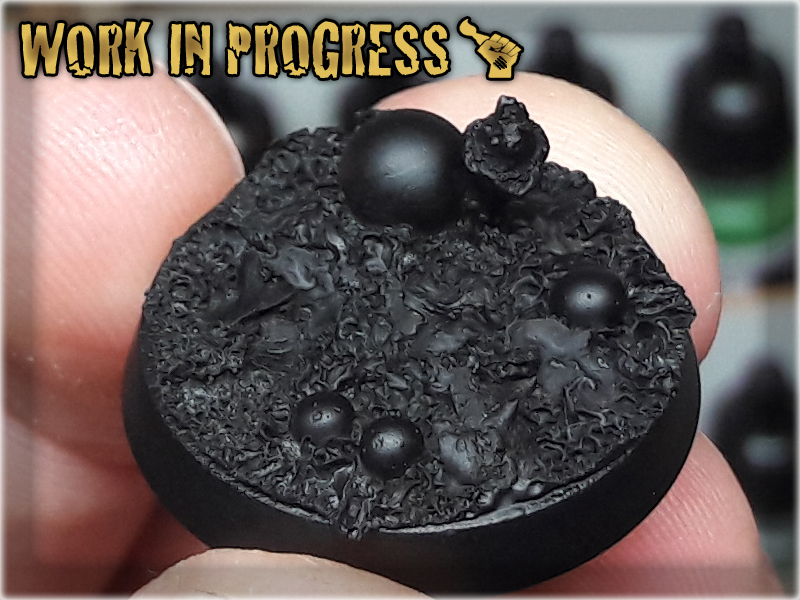
Today I’m going to reveal one of my dearest secrets: how Super Glue and Basing Glue can be used to make some fantastic, crazy, awesome stuff! I have invented it by accident when I was a kid, used it since and love it for both simplicity and awesome texture effect. In this easy, step-by-step tutorial I will show you how to produce your own Overgrown Bases!

*I purchased a huge pack of these for approximately 1€,
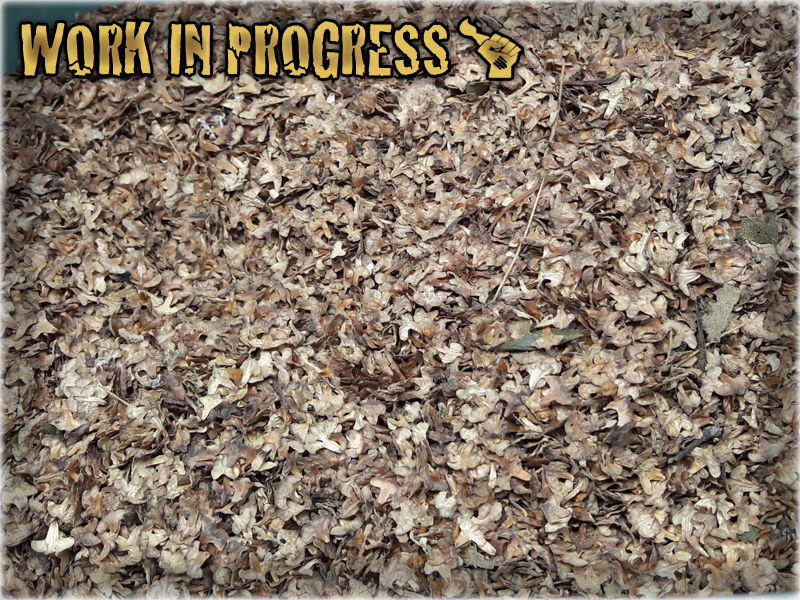
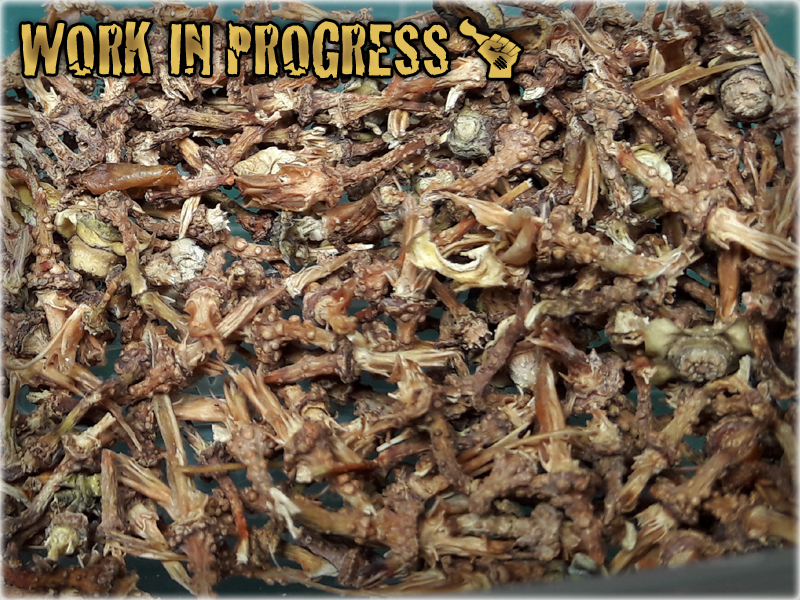
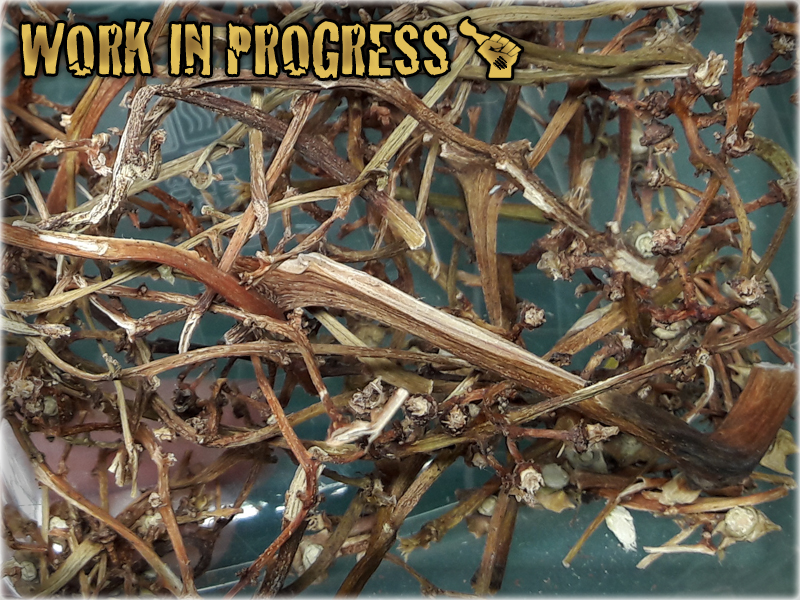
**Once you eat up all the goodie goodie grapes, you have like a bunch of wooden leftovers. Once dried out these are awesome bor basing miniatures.
***I use either Air Soft Gun ammuniton, or for smaller calliber moist absorber balls obtainable with every new pair of shoes. Just ask your gf to dig out one of her shoeboxes, there should be a small paper bag filled with tiny, translucent balls in it.
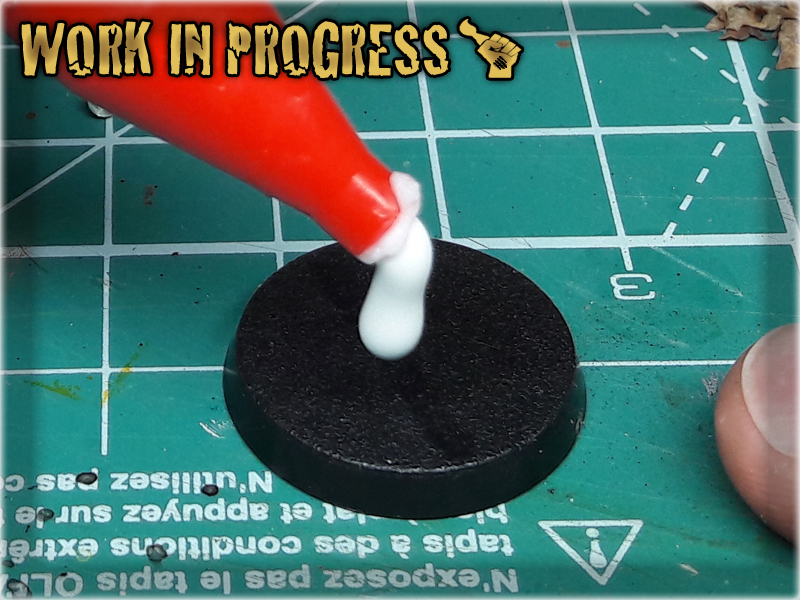
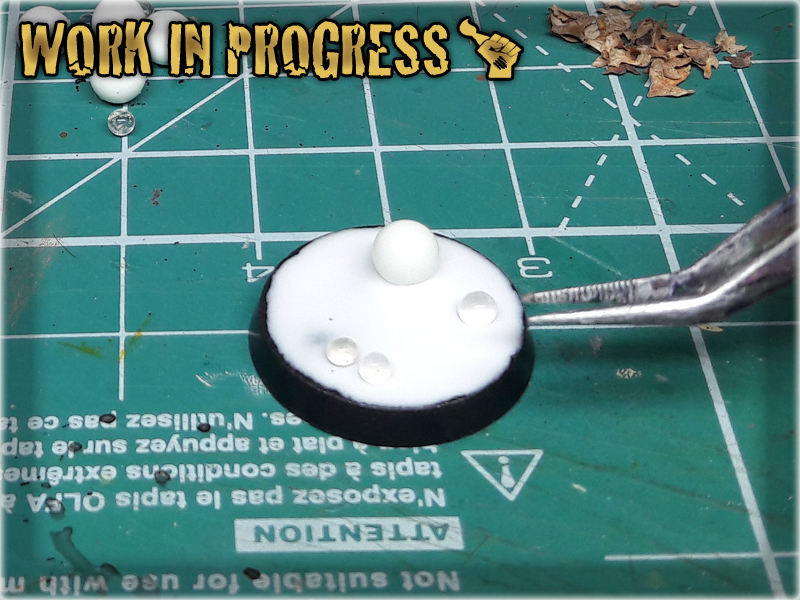
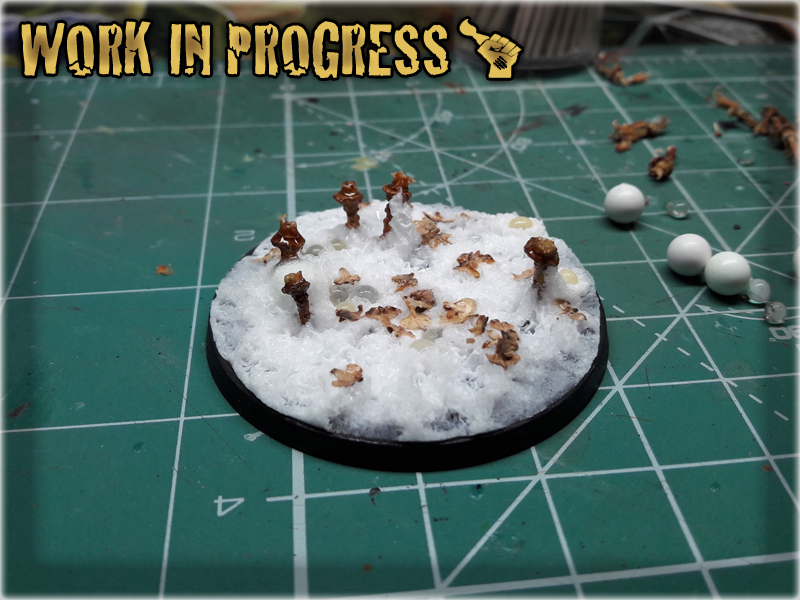
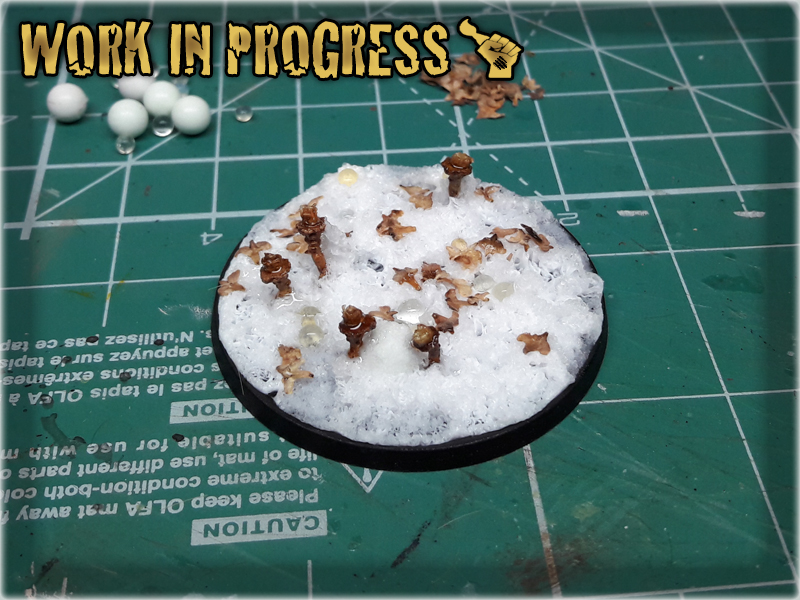
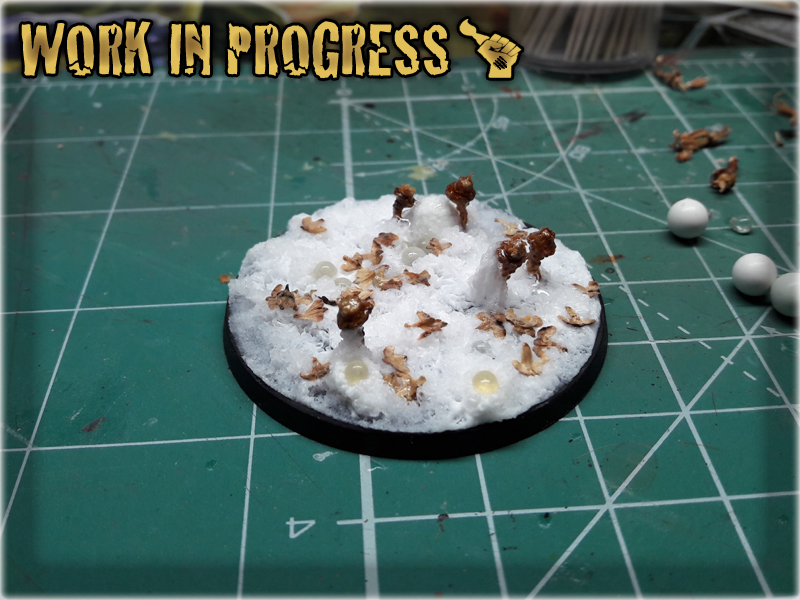
1 I started by applying basing glue all over the base. No need to make it smooth, just enough not to leave any empty spaces.
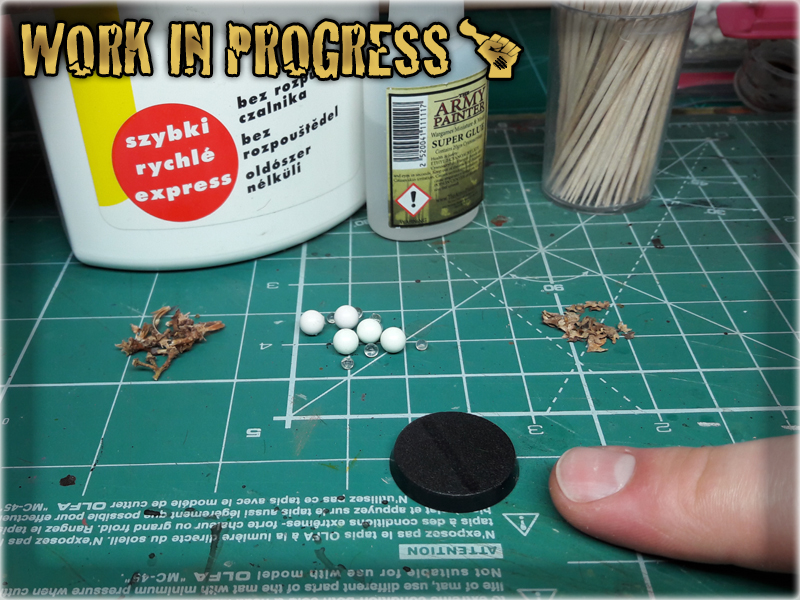

2 I then dropped some of the tiny balls and Birch-tree seeds over the wet glue.
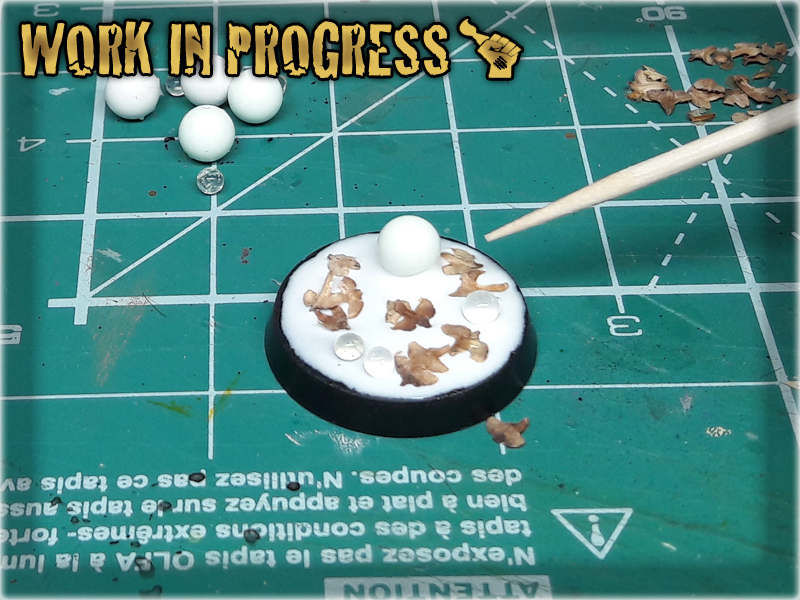
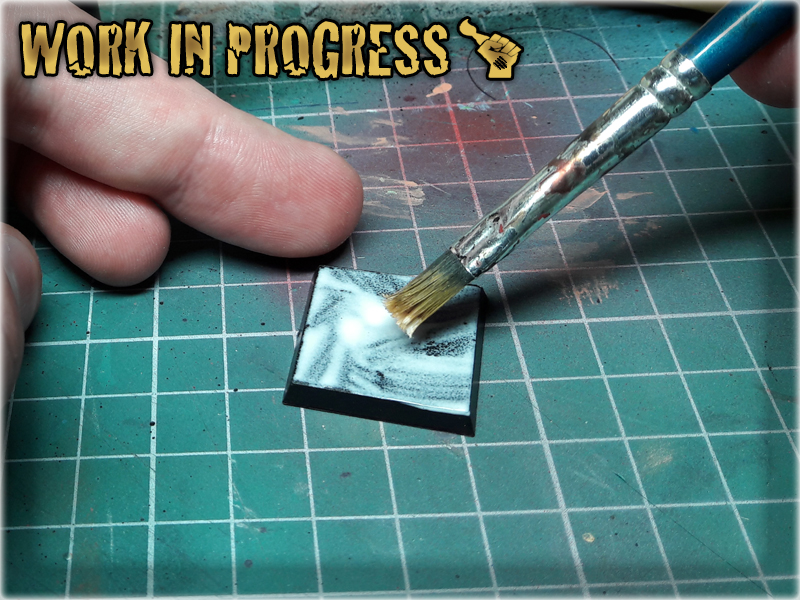
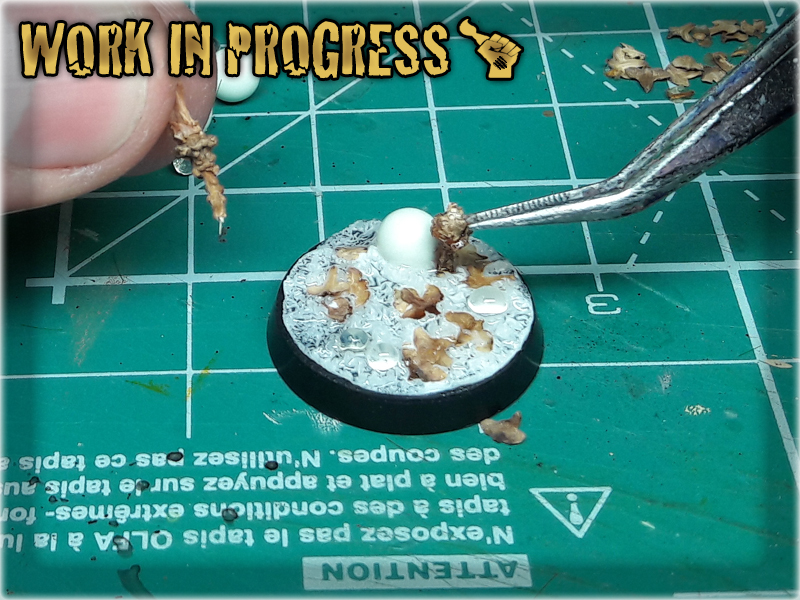
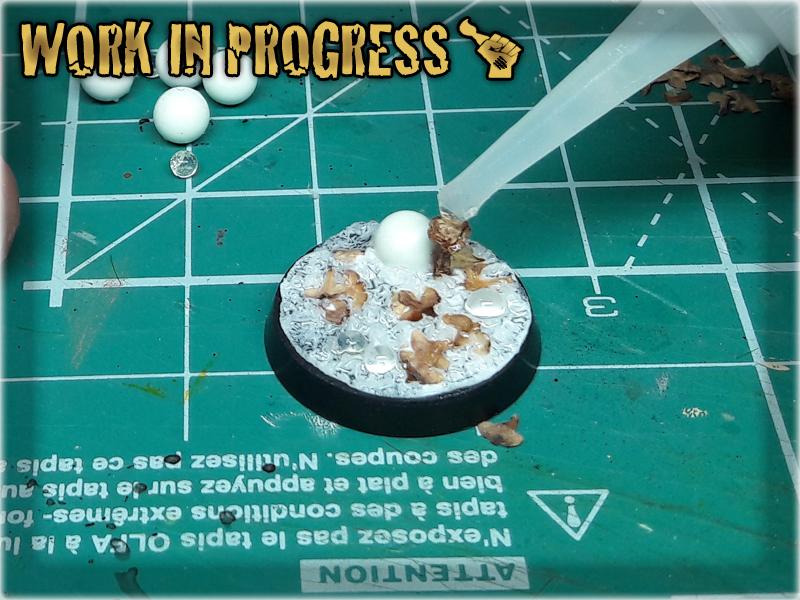
3 Here's where MAGIC begun. I covered entire base with Super Glue and watched as it was warped before my eyes in a matter of merely seconds.


4 Before it dried out I added some pieces of dry grape vines to make it look like some strange, alien mushrooms, or plants. I then covered additional stuff with more Super Glue to harden it.
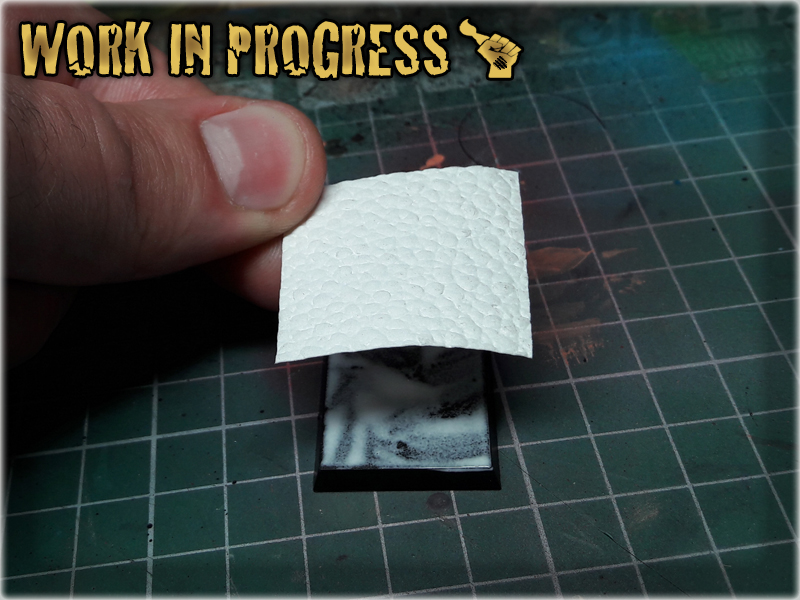
5 Last step was to leave entire thing to dry out. Usually it takes around five minutes for a base to get dry, but it might take a bit longer, depending on how much basing glue is used.

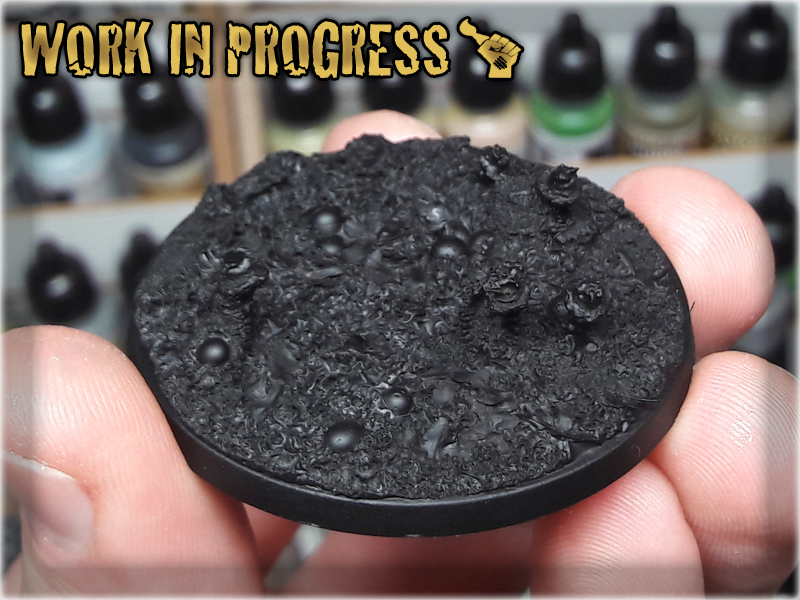
6 The final step was to undercoat dried out base with Chaos Black spray... then do a quick paint job with random colours.
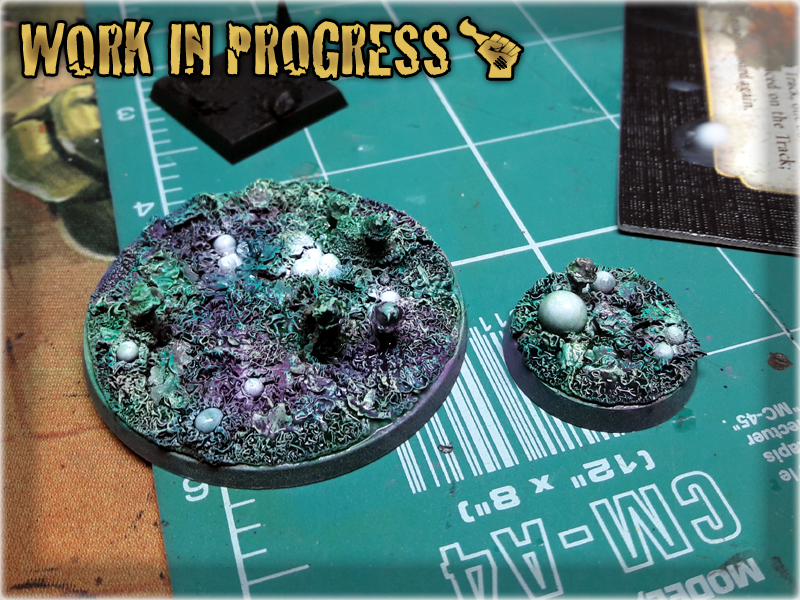
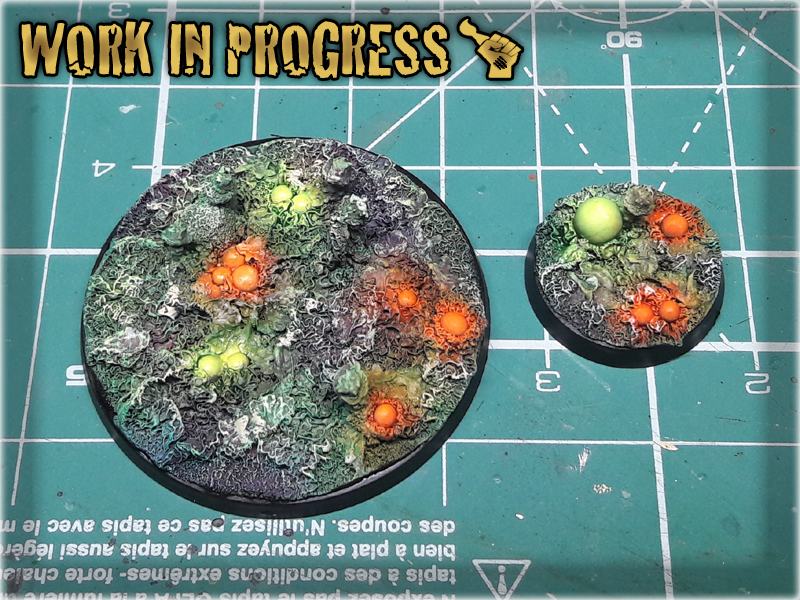
Now seriously – tell my that’s not an awesome texture effect XD This is like ultra-fast, mega-cool way of using two glues to create utter chaos on any surface. Chaos mutations, warped stuff, Zerg creep, alien planet foliage, jungle floor, faerie glade, name it – then glue+glue it 😉

Do not hesitate to let me know and send some pictures via FACEBOOK if you ever use the tutorial. I will be happy to see how it turned out 😉
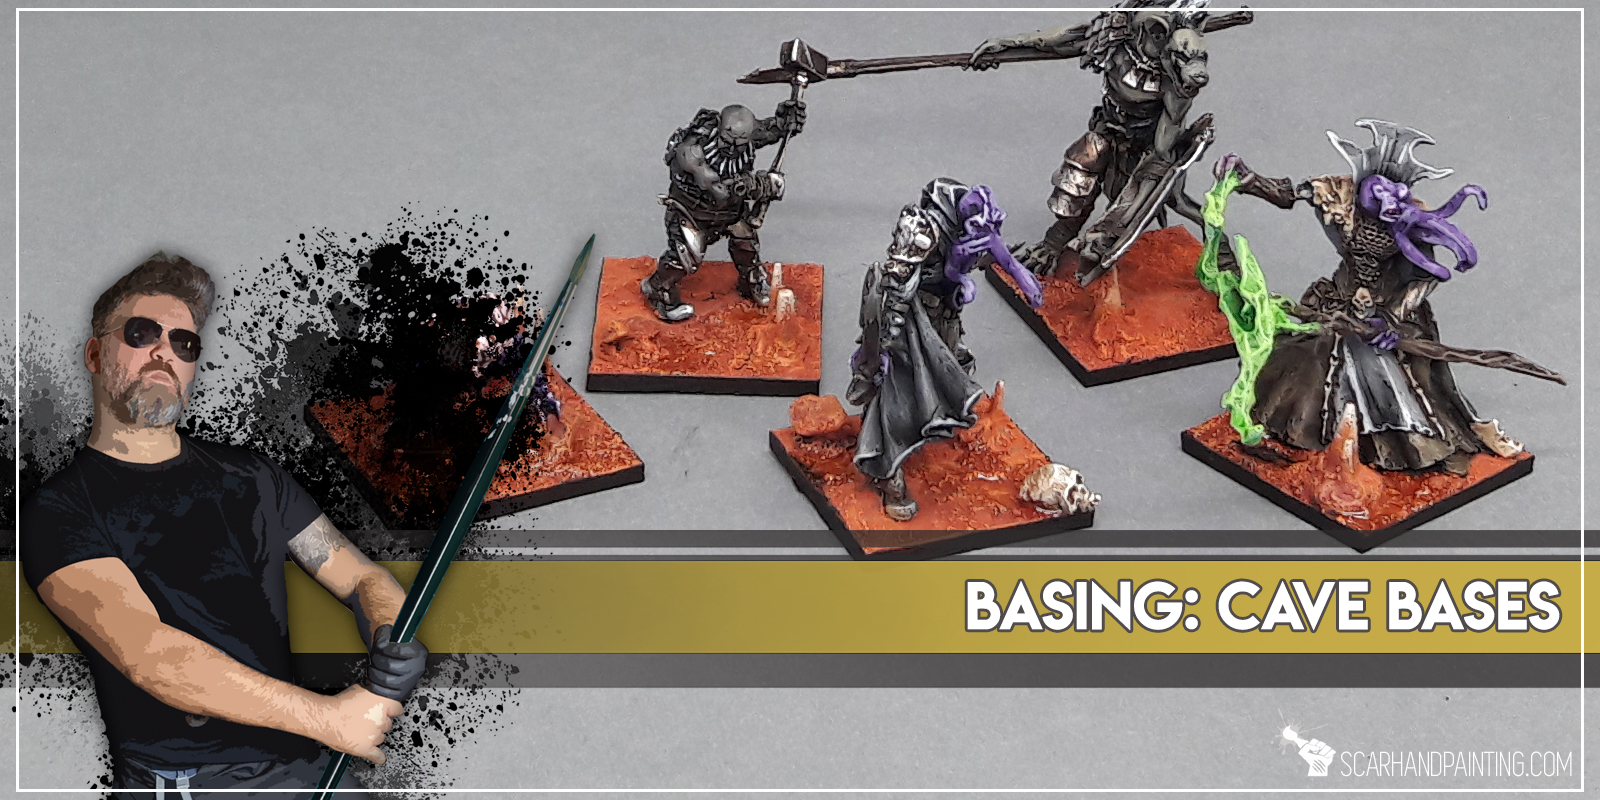
In this easy, step-by-step tutorial I’m going to show you how to create a Cave Base.

*Ask your GF if you don’t know where to obtain the latter.
**Search in IKEA or any home/garden store. A lifetime stockpile of these is less than 5€.
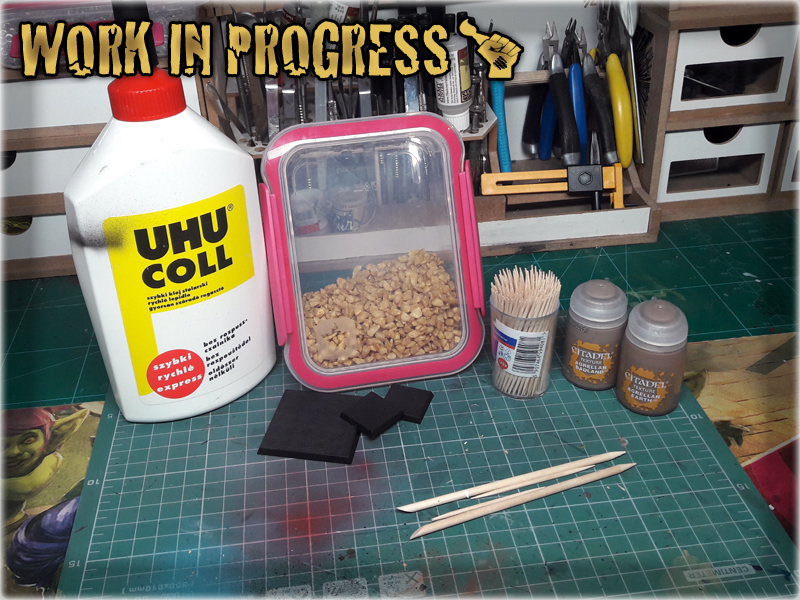
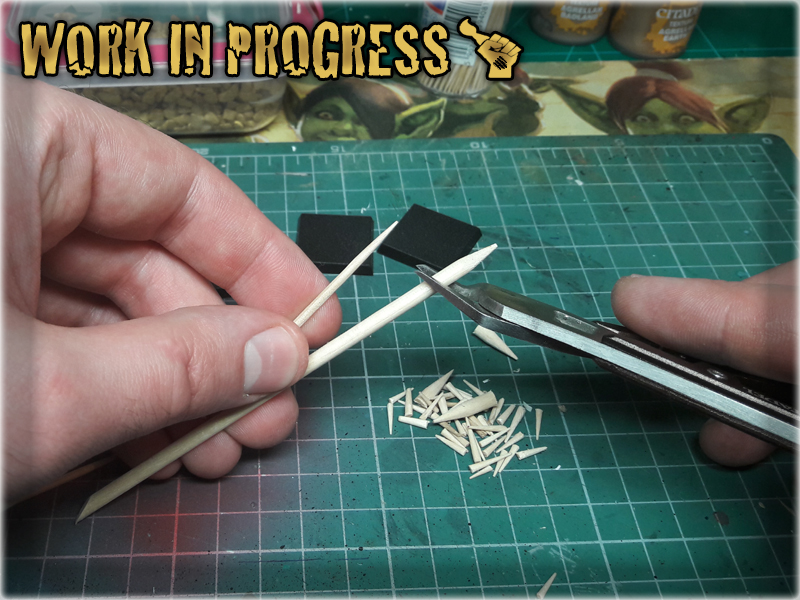
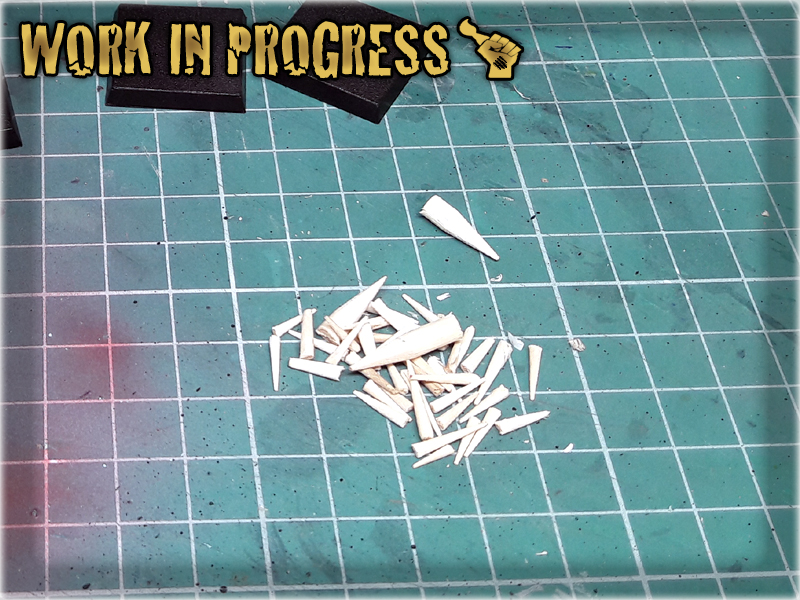
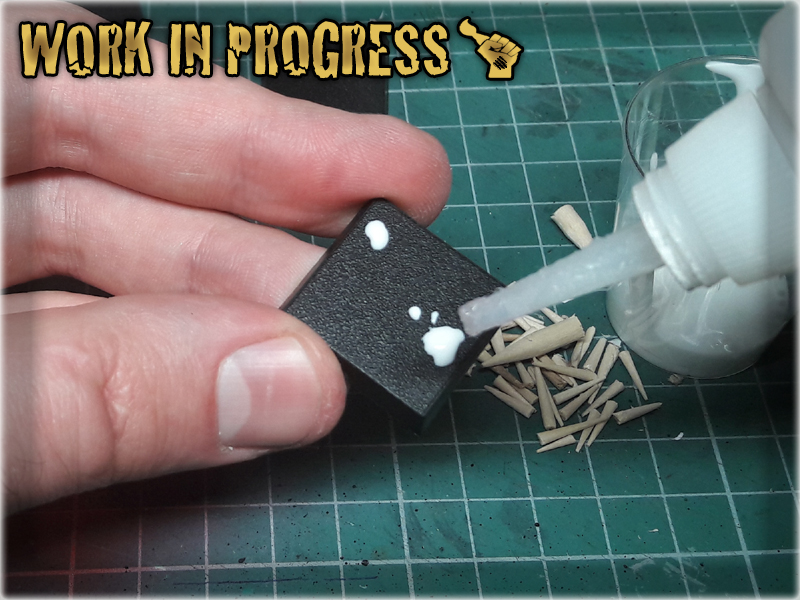
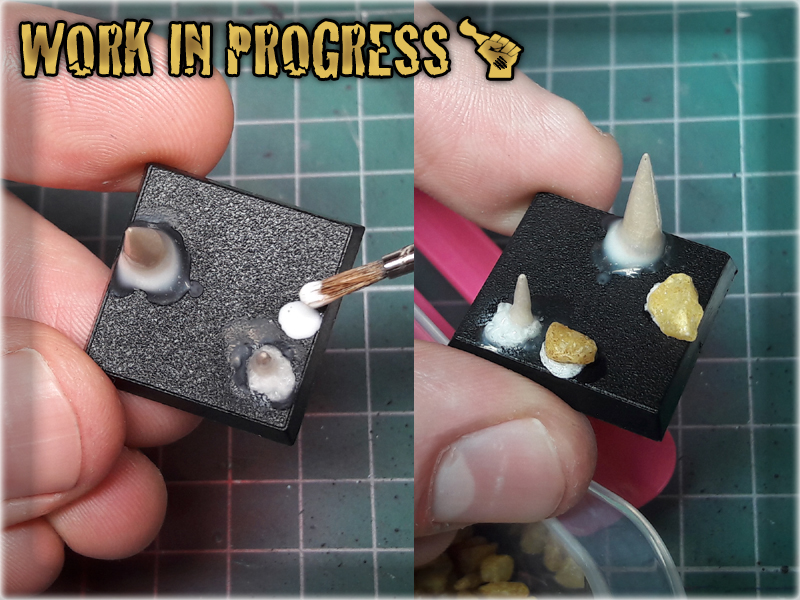
1 I started by cutting off the tips of both toothpicks and nail sticks. These would do for fine stalagmites later on.
2 I then applied couple of drops of basing glue onto the base. Before it dried out I applied Super Glue on it and mounted stalagmites, tip upwards, on the mix.

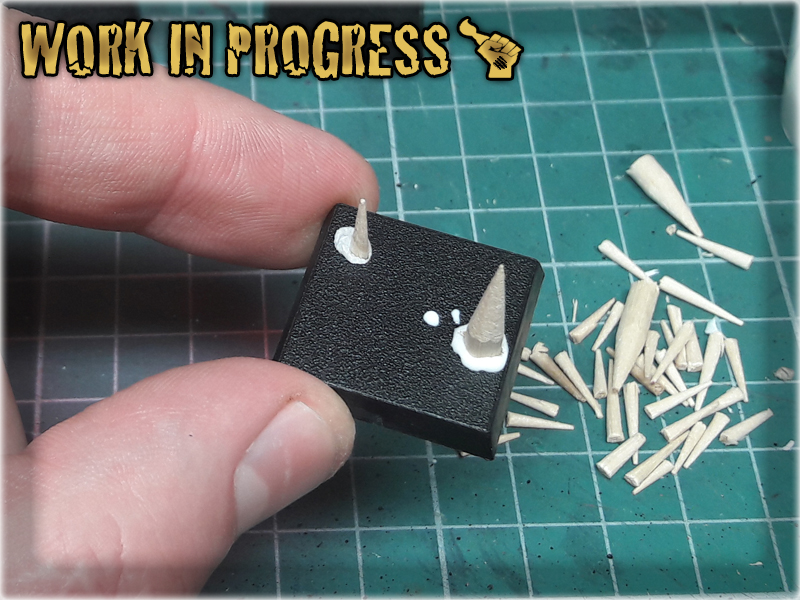
3 Next I covered entire stalagmites with basing glue and left it to dry. The excess glue, moved by the power of gravity, was drawn downwards, where it rested around the base of the stalagmites, making them look smooth and natural.
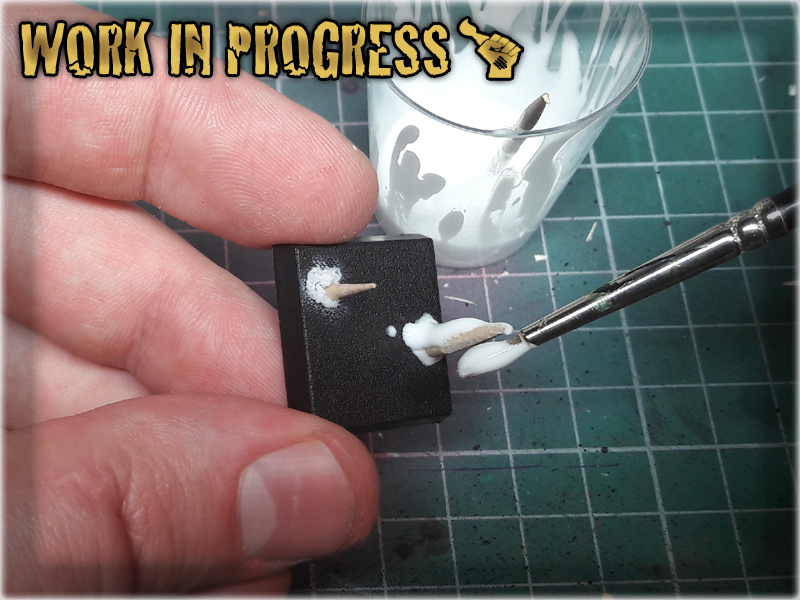
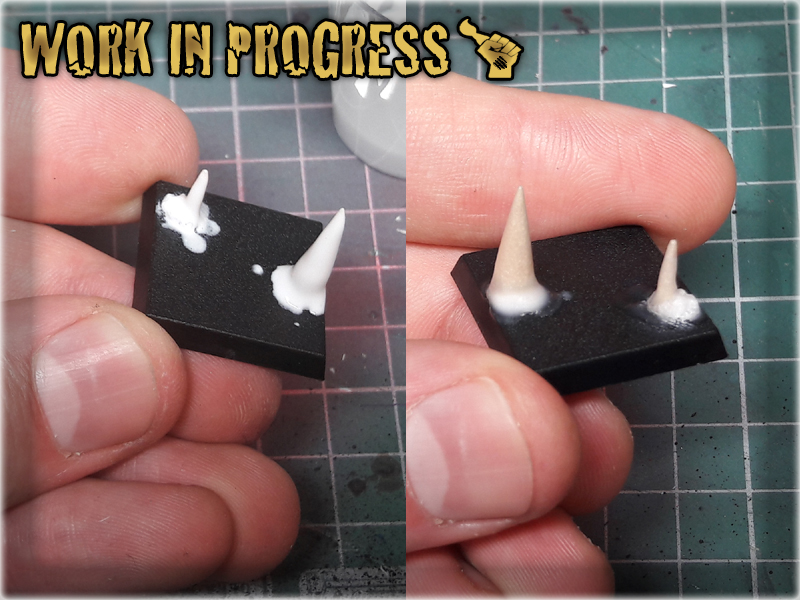
4 Using the previous technique I applied some basing glue in few spots and then Super Glue'ed some gravel over it. You can actually glue any type of stuff with this - like skulls, some pieces of armour etc.
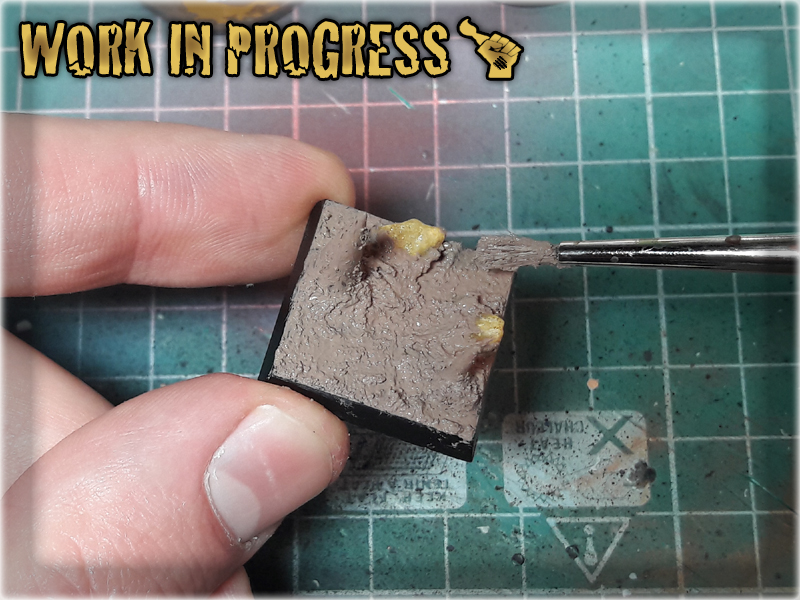
5 I then covered antire surface, except for any fillers, with Games Workshop's texture paints. I used a mix of Agrellan Earth and Agrellan Badland for this tutorial, but actually any of the range will do - as long as you would like to undercoat the base afterwards.


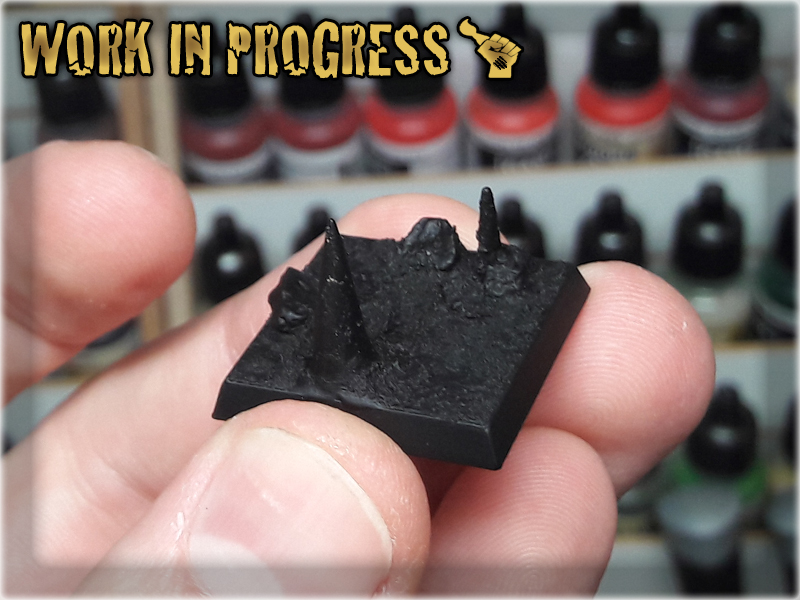
6 The final step was to undercoat dried out base with Chaos Black spray...


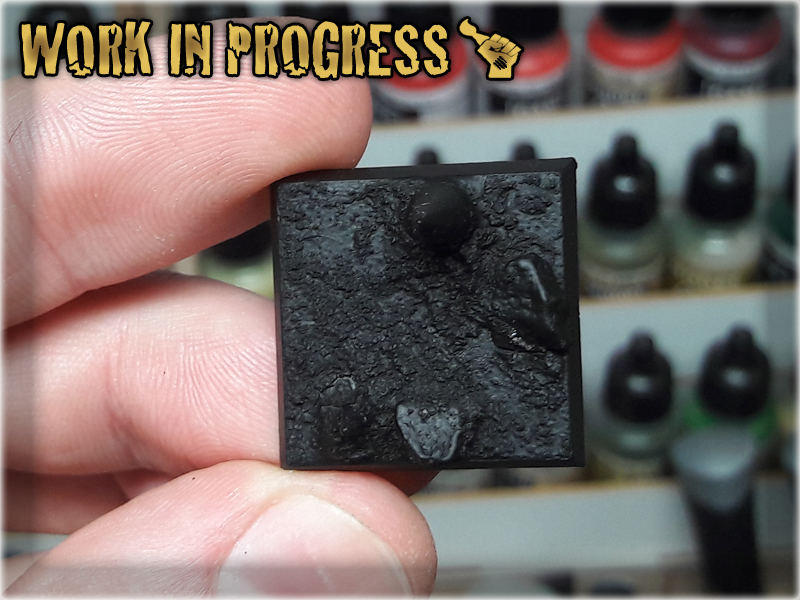
Now, what’s left is just to paint the bases with your preferable colour scheme. I chose to go red/copper style similar to ‘the Wave’ and watered some spots with clear resin, but the number of potential colour schemes is unlimited.
If you ever use the tutorial – be sure to let me know and send some pictures via FACEBOOK. I will be happy to see how it turned out 😉