- contact@scarhandpainting.com


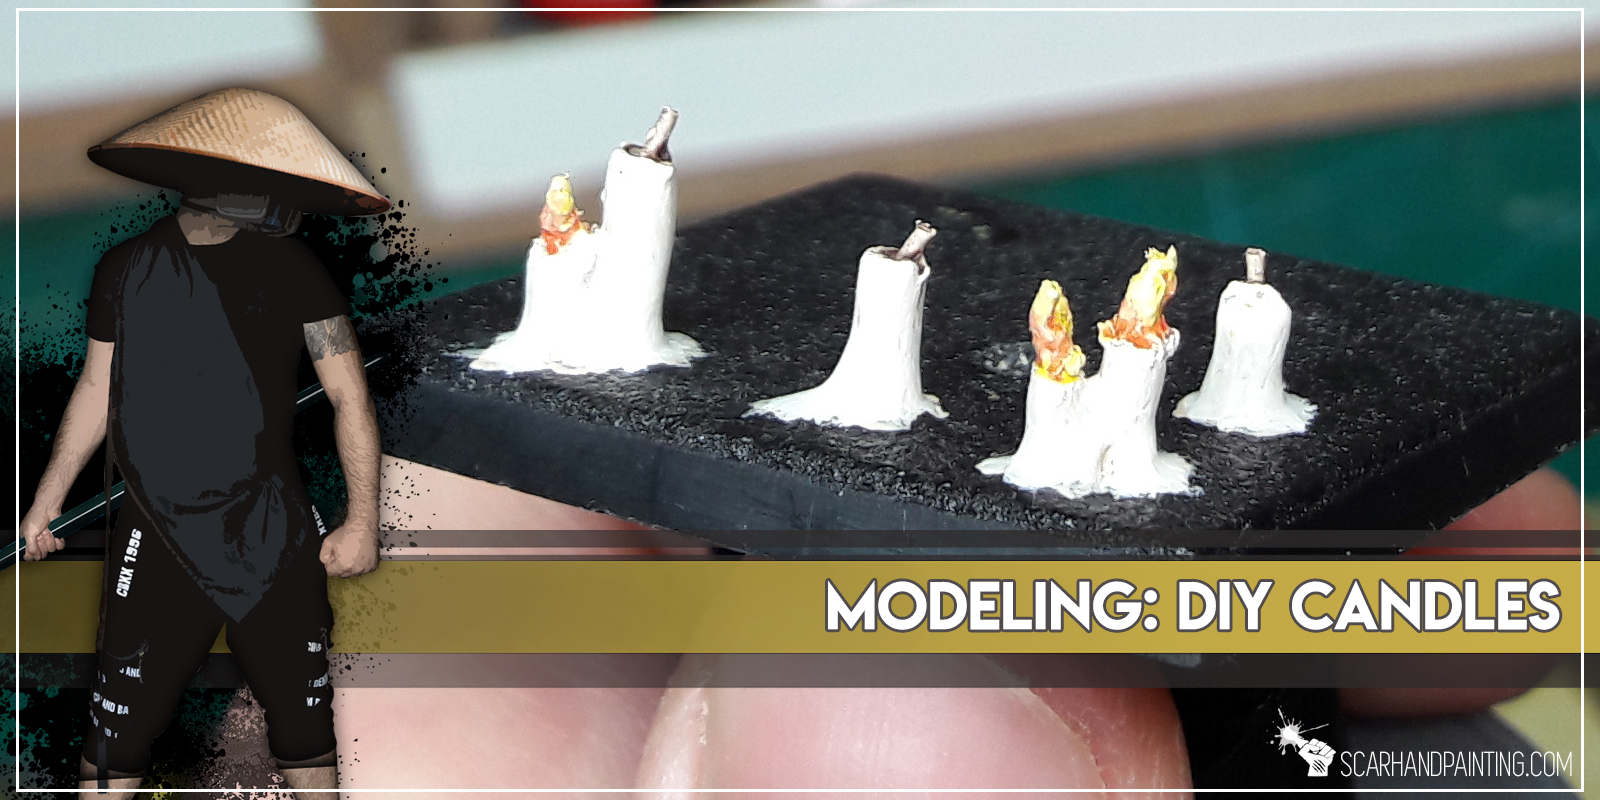
Winter is already here thus I thought about warming the theme a bit by introducing a tutorial of how to make candles for 28-30mm scale. Why produce such things? In miniatures hobby candles are rare bitz among what you get in the sets designed by main miniature producers. Even if a set contains some, their number is scarce. Why not make your own and adorn bases, miniatures and even scenery with them? Be it Age of Sigmar, Mordheim, Warhammer 40,000 or just a fantasy dungeon – candles will provide mood to both miniatures and scenery. Below is a quick and easy step-by-step of how to produce your own 28-30mm scale candles. Enjoy…

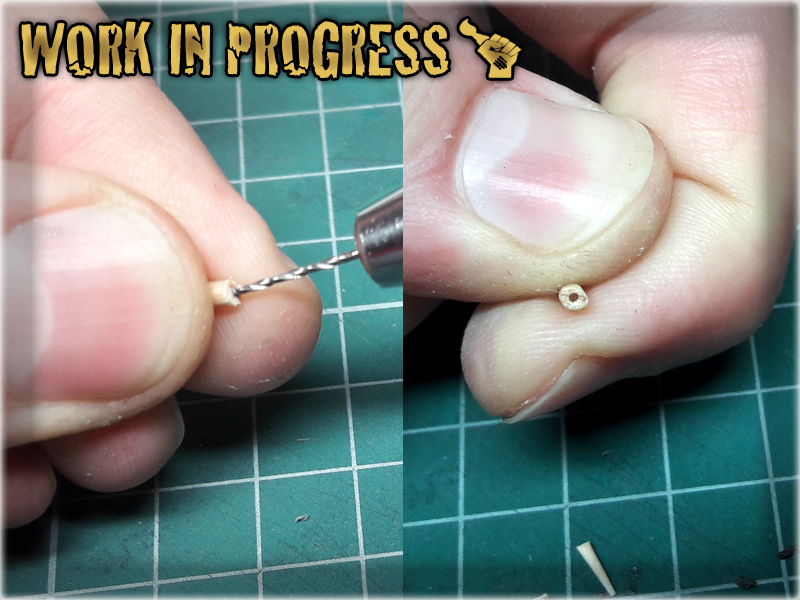
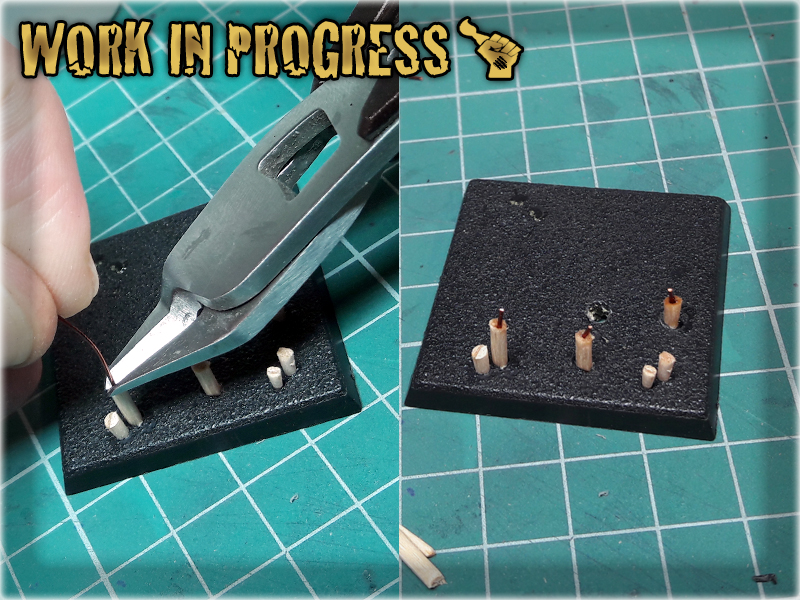
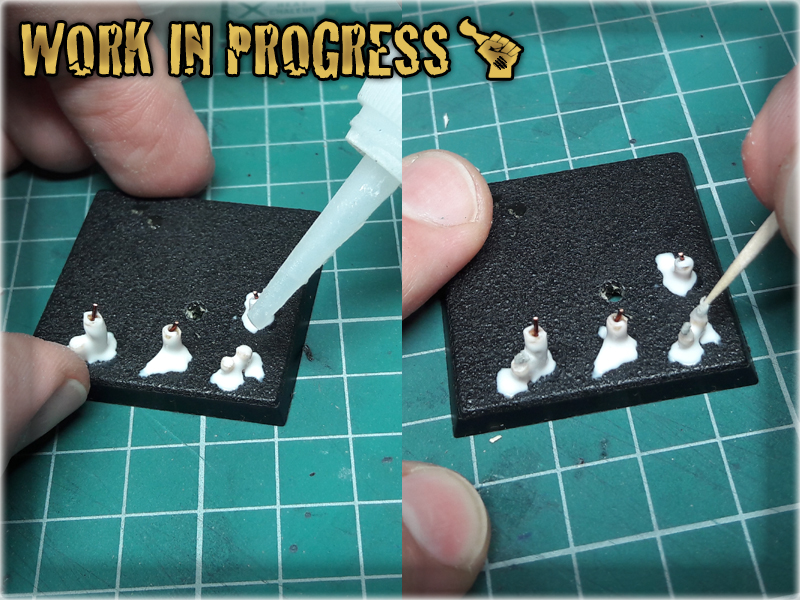
1 I started with preparation of candles-to-be by cutting toothpicks into small pieces. I tried to keep all of them between 5-10mm long, to better fit into the 28-30mm fantasy scale. Once I had couple pieces done I choose some of them and drilled small holes from one side. These will be used later to hold candlewicks.

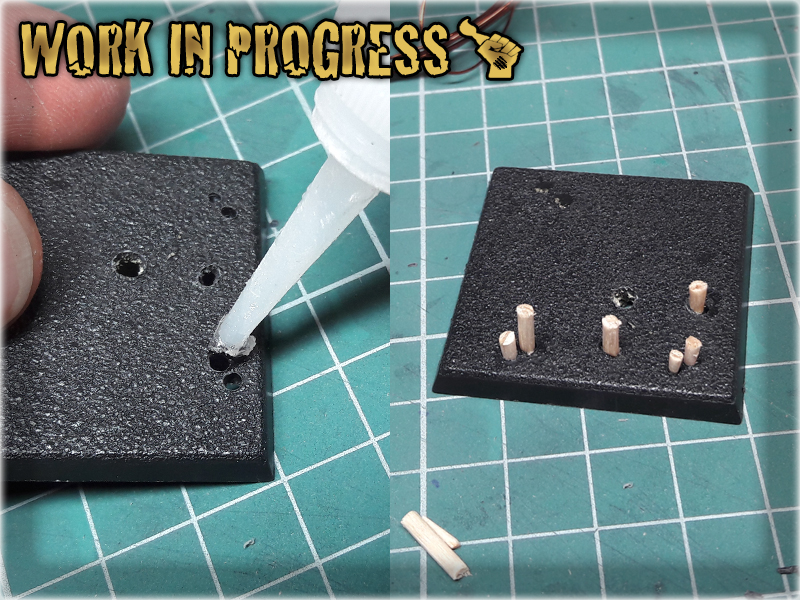
2 Next I glued the candles onto the base. In case of scenery I usually drill small holes to hold the candles in place or just glue them as it is if I'm sure the scenery won't require enchanced durability. For the purpose of this tutorial I drilled some holes in an old square Warhammer base.
3 I then glued small pieces of wire into the holes, to look like candlewicks.
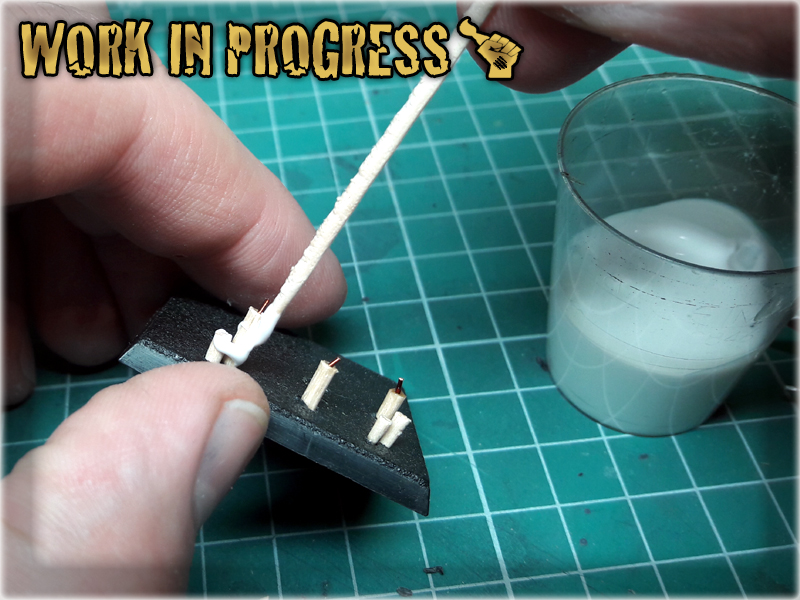
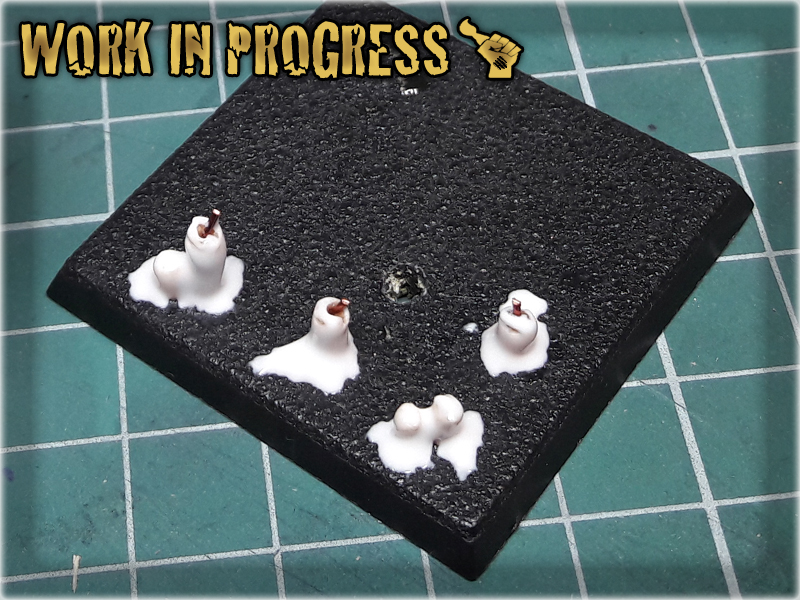
4 Then came the time to cover the candles with a basing glue, applying additional glue around the base of each candle to create an effect of spilled wax.
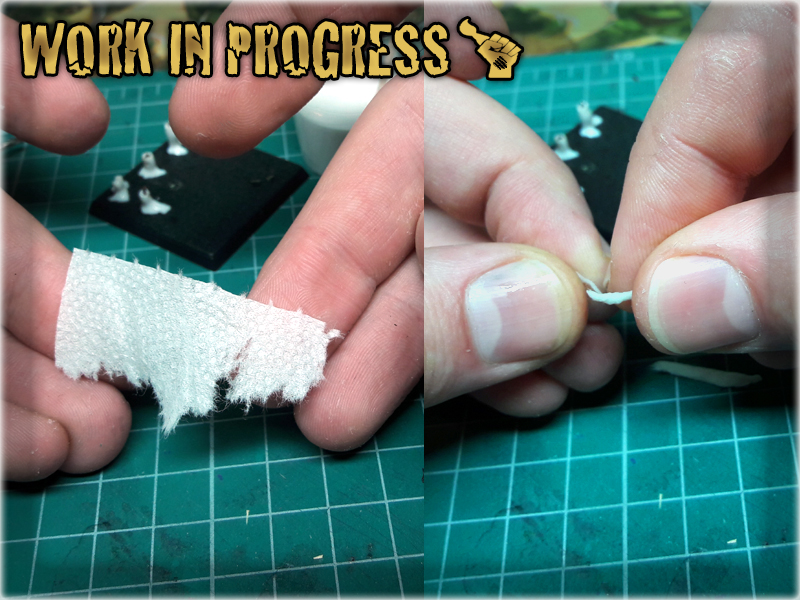
5 Next step was to prepare couple of small flames, using a wet paper tissue. I just rolled, then cut it into small pieces, which I then rolled once again.

6 The flames where then glued to the candles with super glue and once in place - covered with glue to harden entirely.

7 I left the stuff to dry, then painted it with mix of creme and white, washed the candlewicks and flames with some washes.

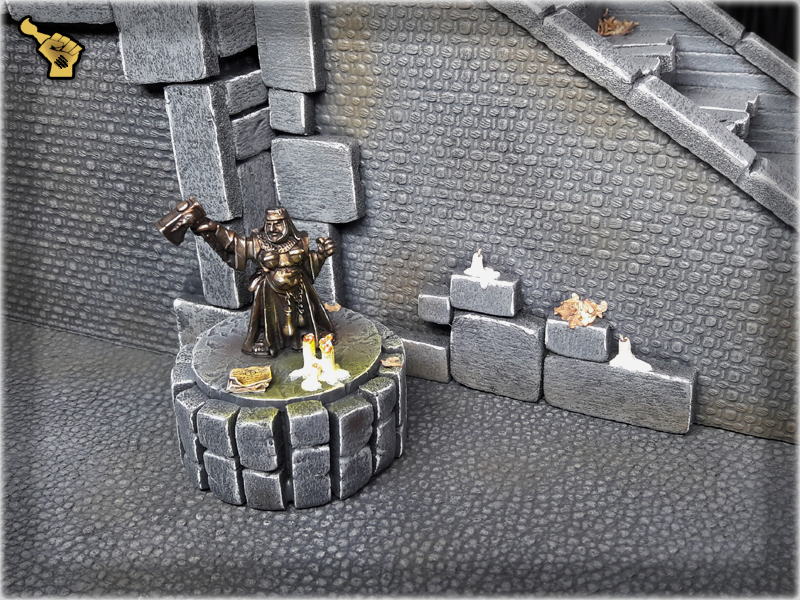
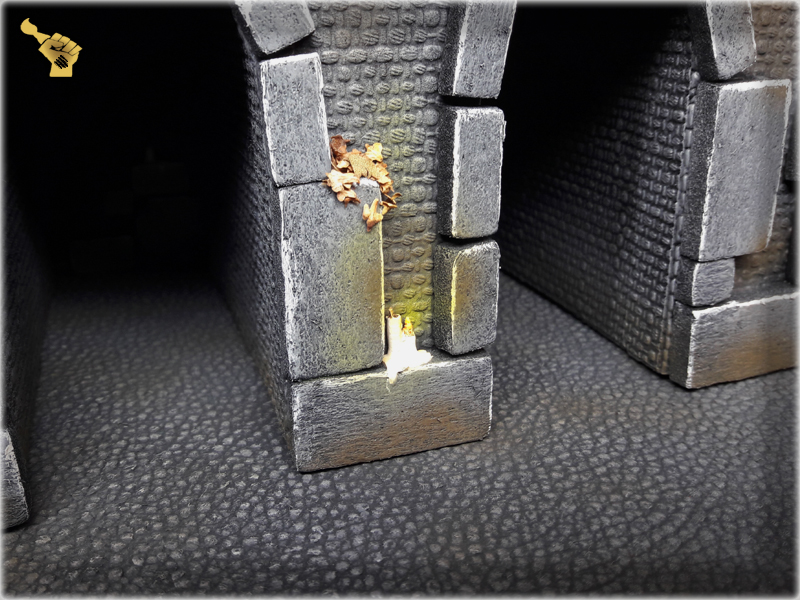
The end result will look more or less like this:
5 comments so far
OrlacienPosted on8:55 am - Dec 18, 2016
Brilliant! You definitely should give us tips like that frequently. You know, making our bases look better is a part of making the world better. Keep up the good job and be a DIY hero 😀
Joe BPosted on6:05 am - Dec 20, 2016
Nice tutorial. They are rather simple to build, but with the extra time it makes a nice difference to the base.
ThorPosted on9:58 pm - Dec 22, 2016
Fantastic work. It’s such a simple method too, but I’d never have thought of it. Also, great work on organizing the tutorial. Great pictures, easy to follow, and professional looking.
CyldePosted on11:54 pm - Dec 23, 2016
Great
NazrothPosted on4:45 am - Jan 3, 2017
Thanks to all of you guys for your comments – glad you like the tut. Will try to bring something of the kind once in a while.