- contact@scarhandpainting.com


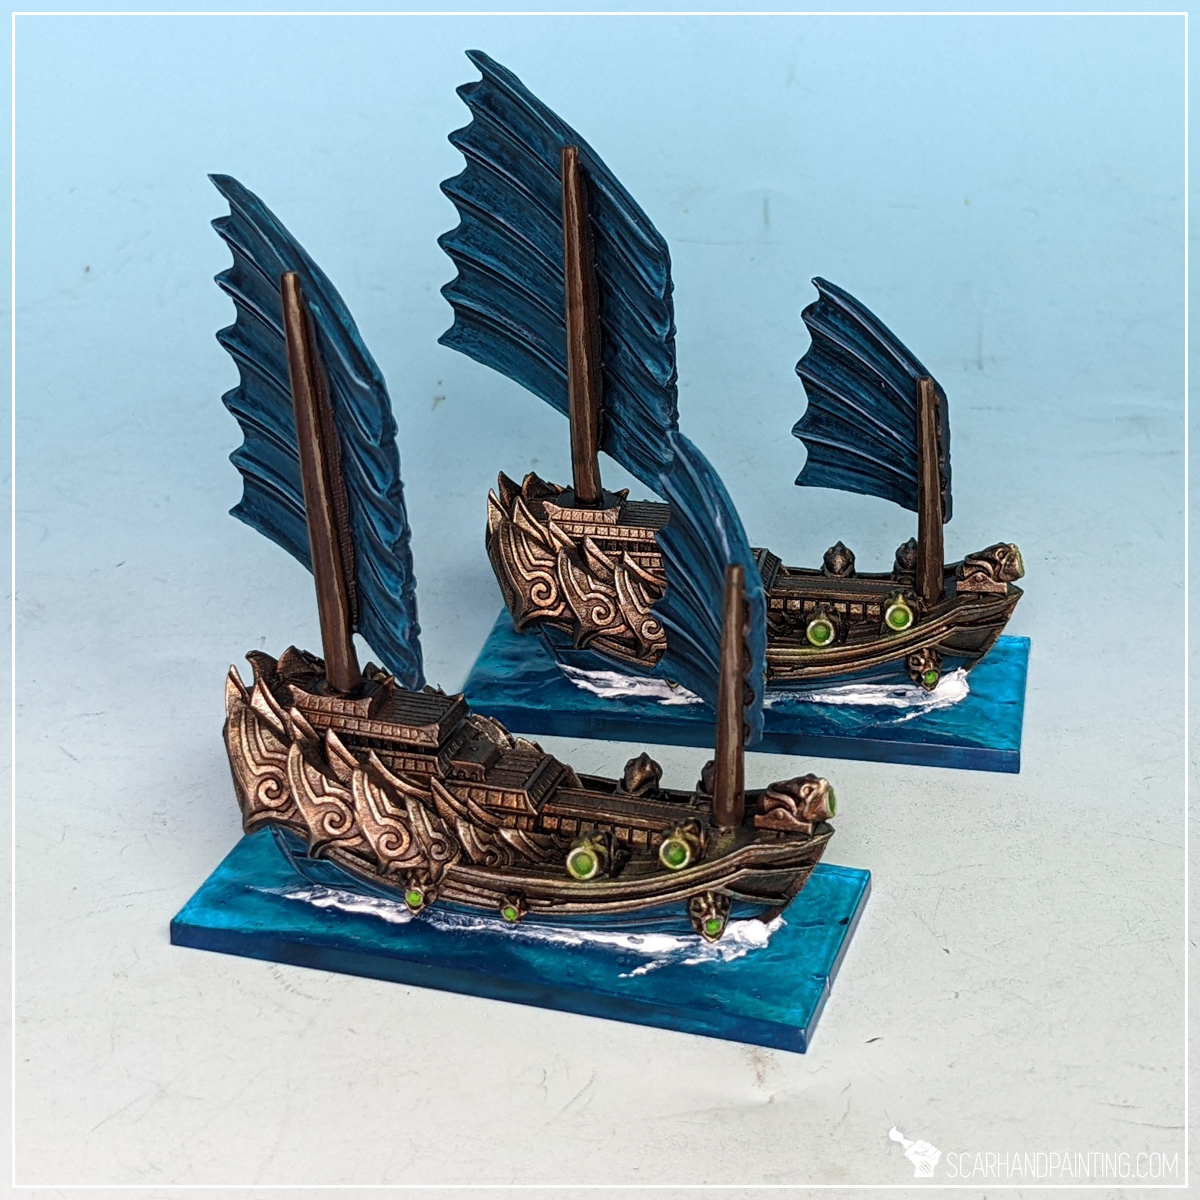
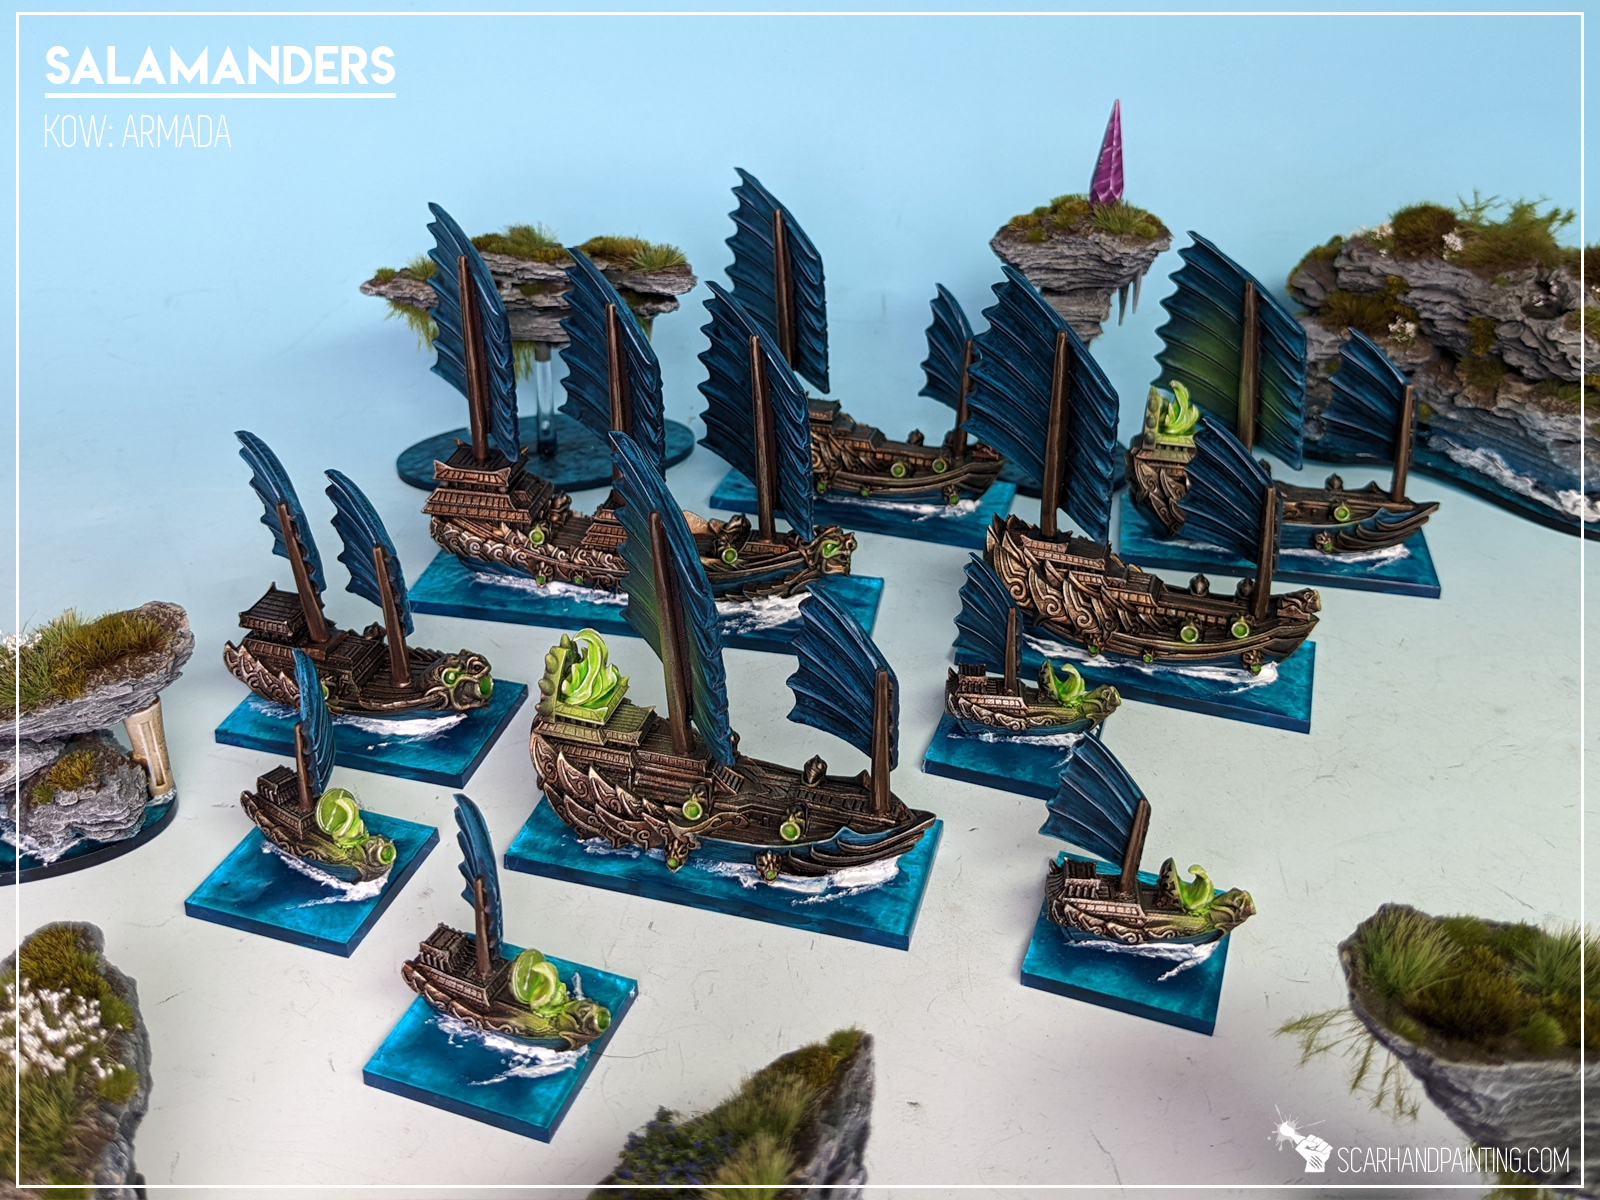
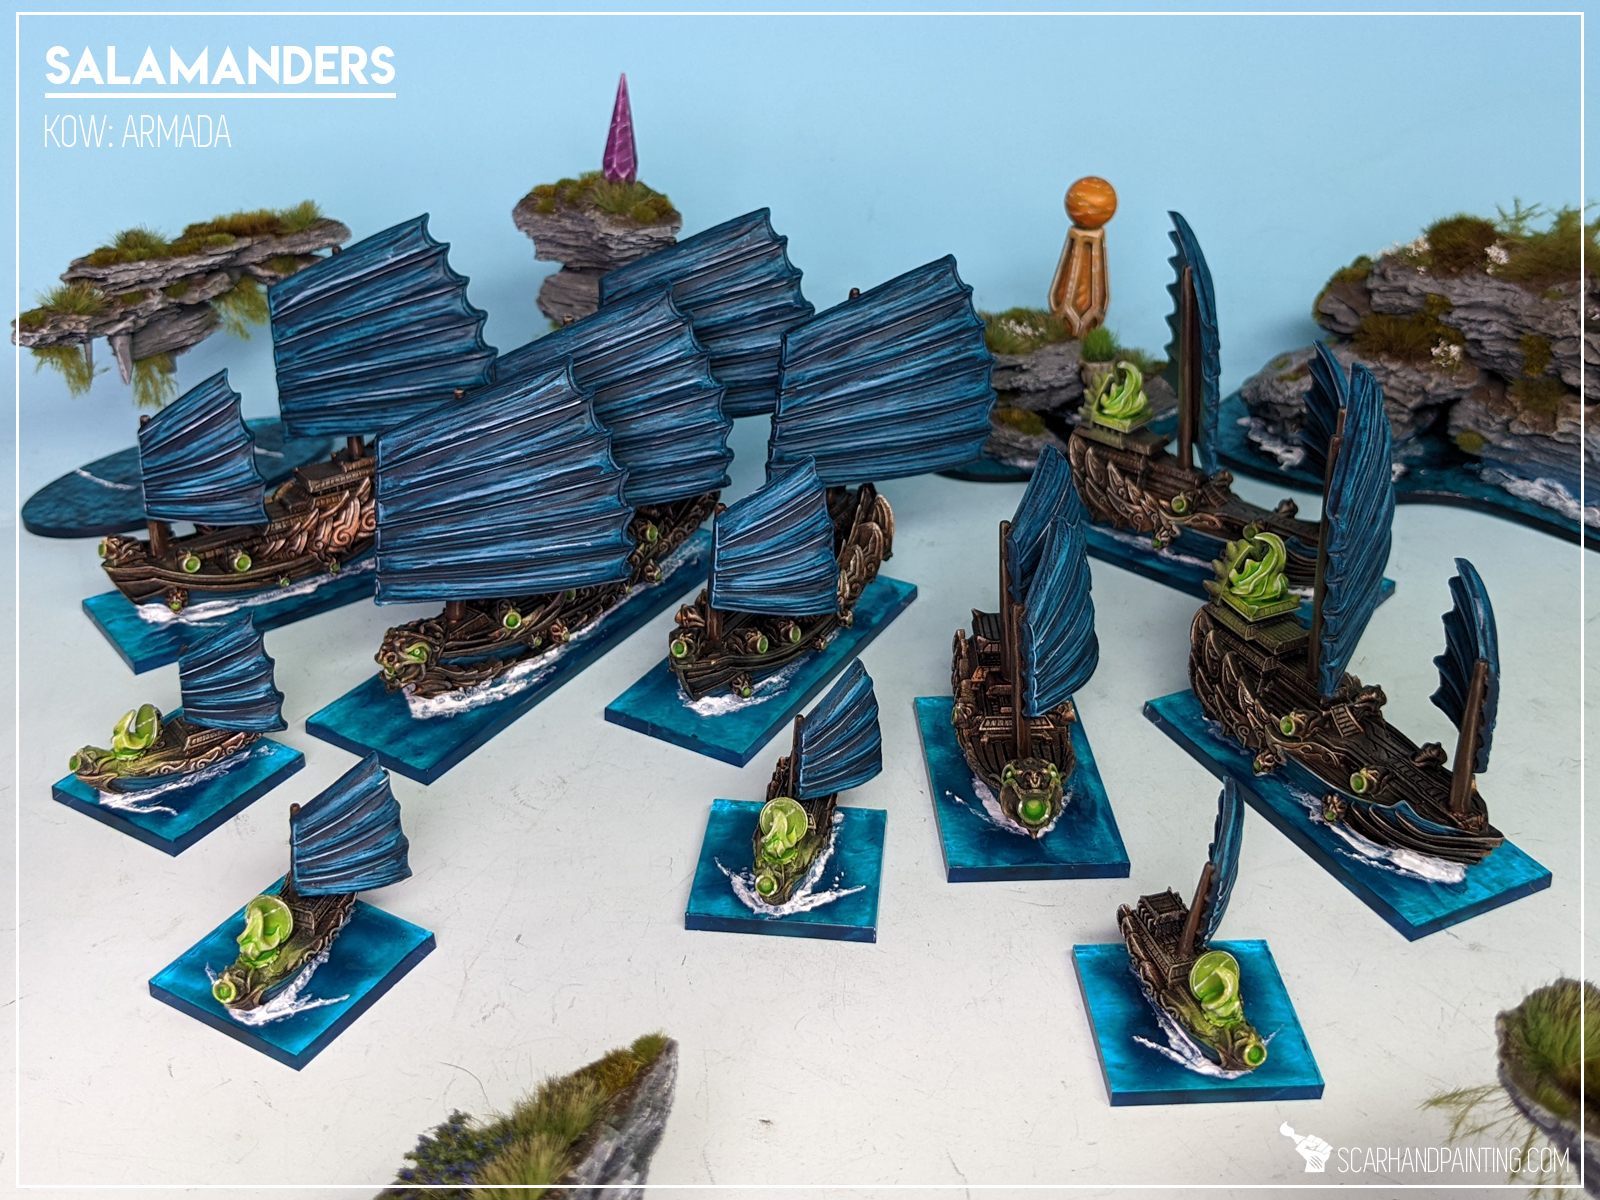
Kings of War: Armada is a fantastic game, full of beautifully crafted miniatures. Still some wargaming veterans might feel intimidated by the unusual scale and plentiful detail of Armada ships. Today I will present to you how easy it is to paint Armada Salamanders ships as can be seen in Gallery: Armada Salamanders. All techniques presented in step-by-step tutorial can be applied to different colors to produce a variety of awesome color schemes for your fleet.
Before we start, some notes:


Step one: Undercoat
I started with a thorough layer of Games Workshop Chaos Black spray. Chaos Black spray is my go to choice when it comes to undercoat, leaving a solid, durable layer with detail intact. Some might consider adding a zenithal preshade on top, but the techniques used in this tutorial would render such practice irrelevant.

Step two: Hull base
Hull, being the largest and most detailed part of the ship, was my choice of where to start the actual paintjob. I applied a solid layer of thinned Games Workshop Warplock Bronze all over the miniature, except for sails. I used an airbrush, but this can easily be done manually.
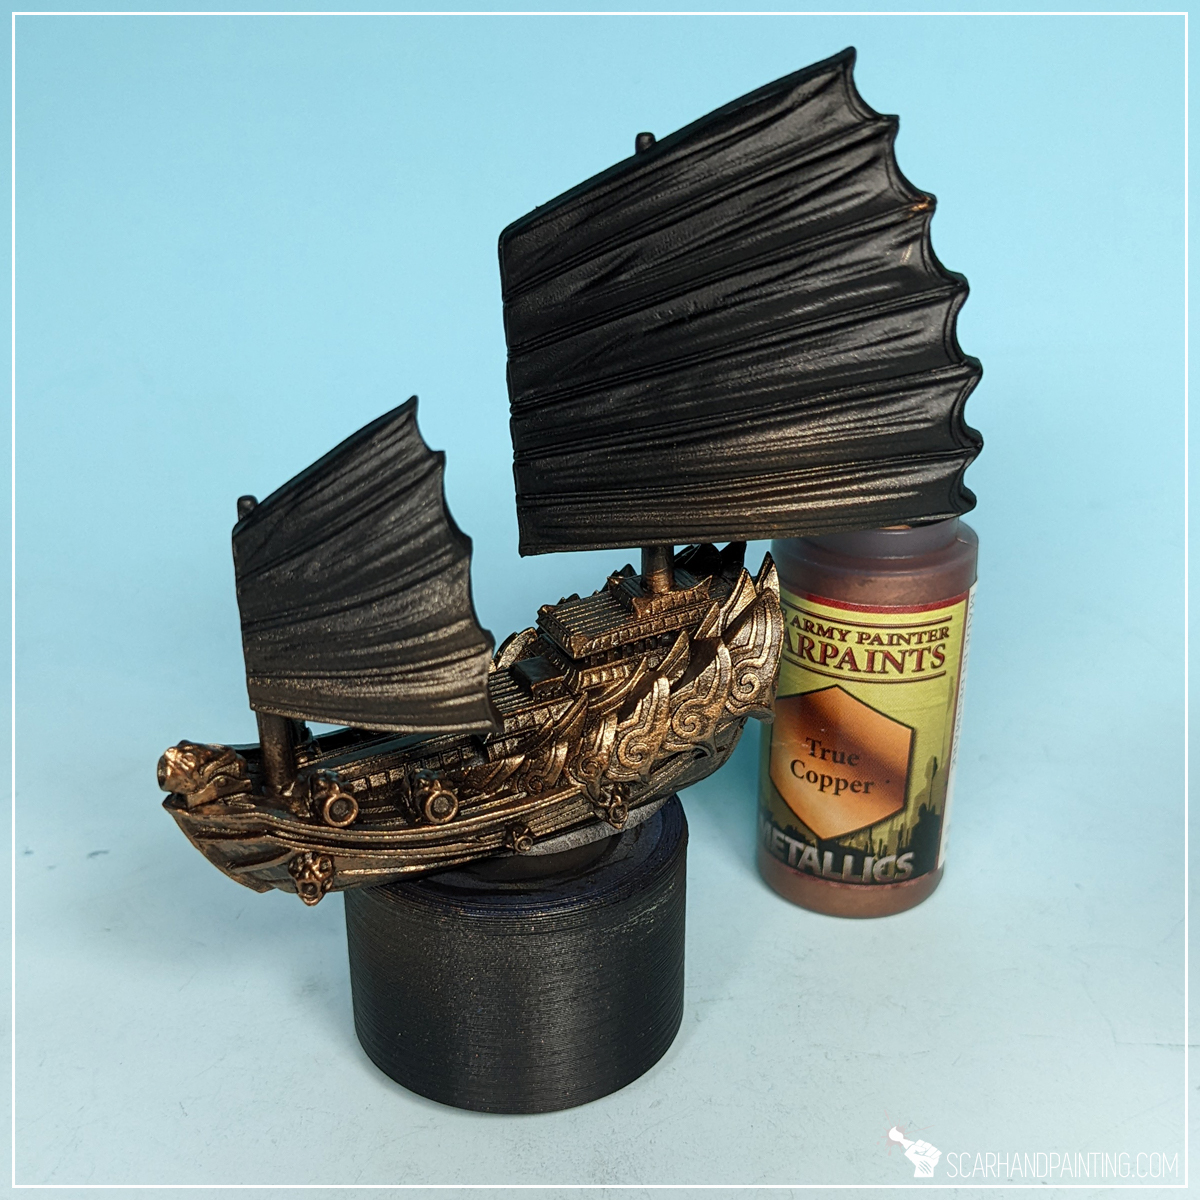
Step three: Hull highlight
Next, using a medium size, soft brush I applied a highlight of Army Painter True Copper. Flatbrush was my technique of choice for this one, as it applied a solid layer of paint sparing most recesses, thus leaving some of the previous layer still visible.
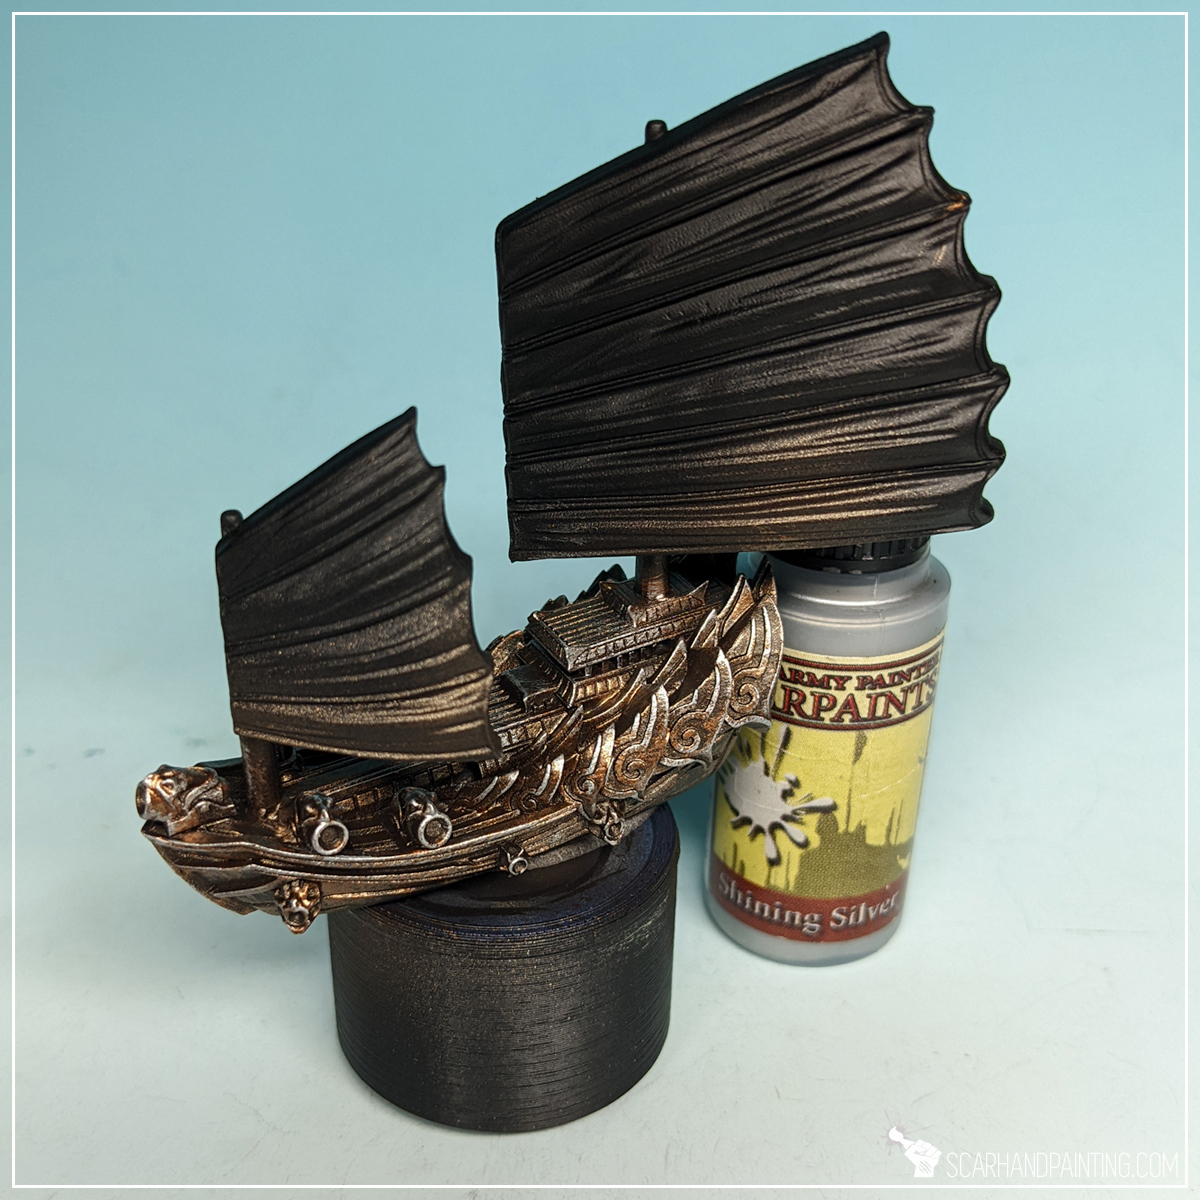
Step four: Hull final highlight
I then applied an edge highlight of Army Painter Shining Silver to make all the detail pop and provide a bit more contrast between recesses and exposed edges.
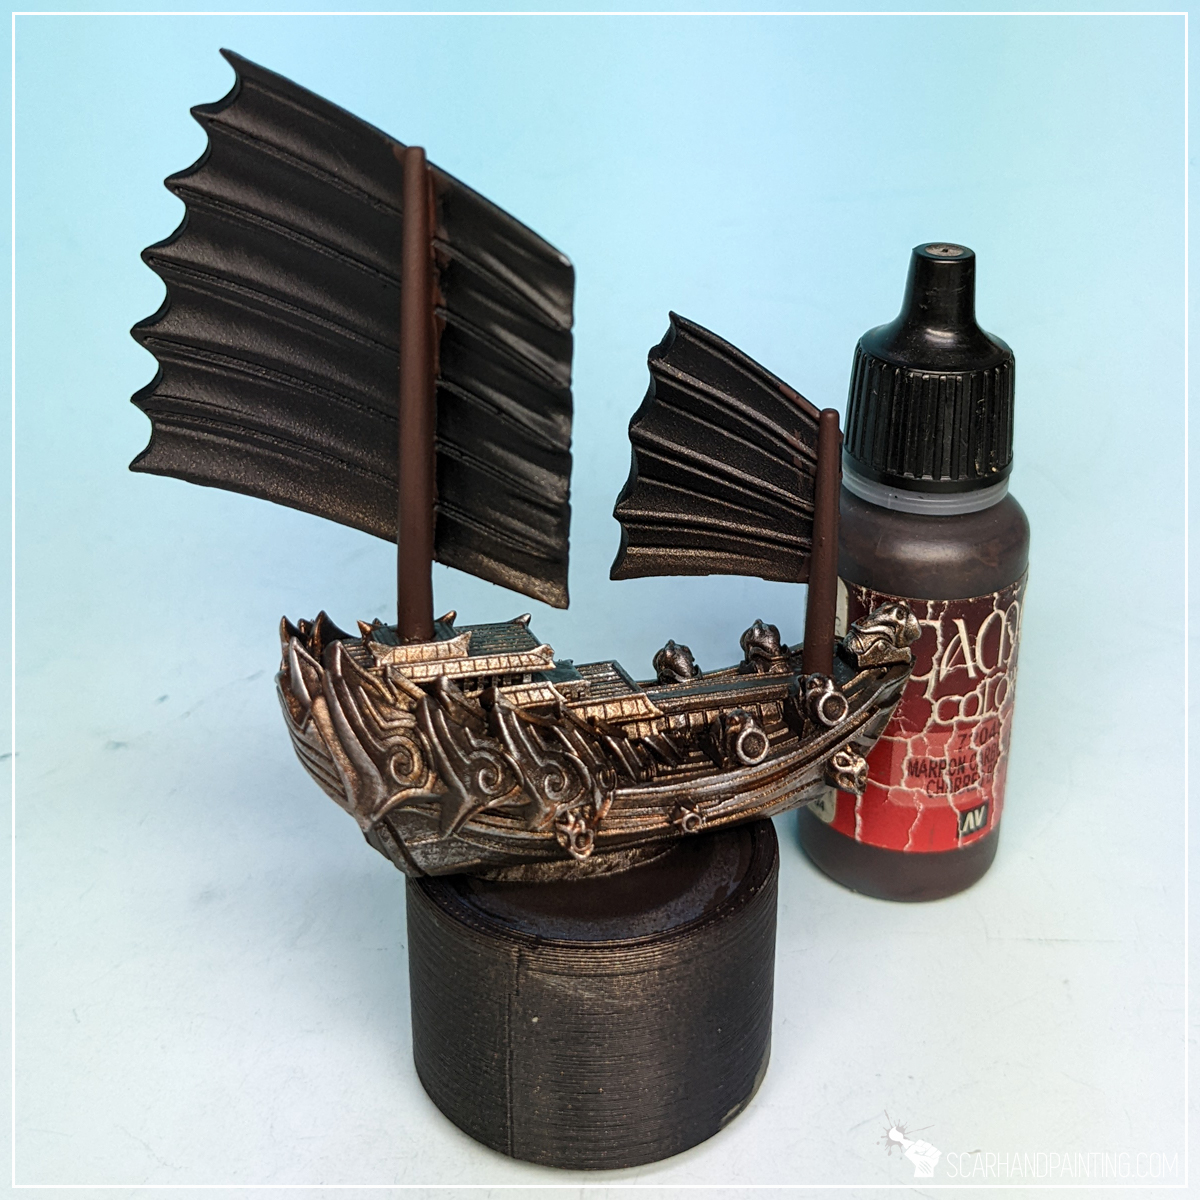
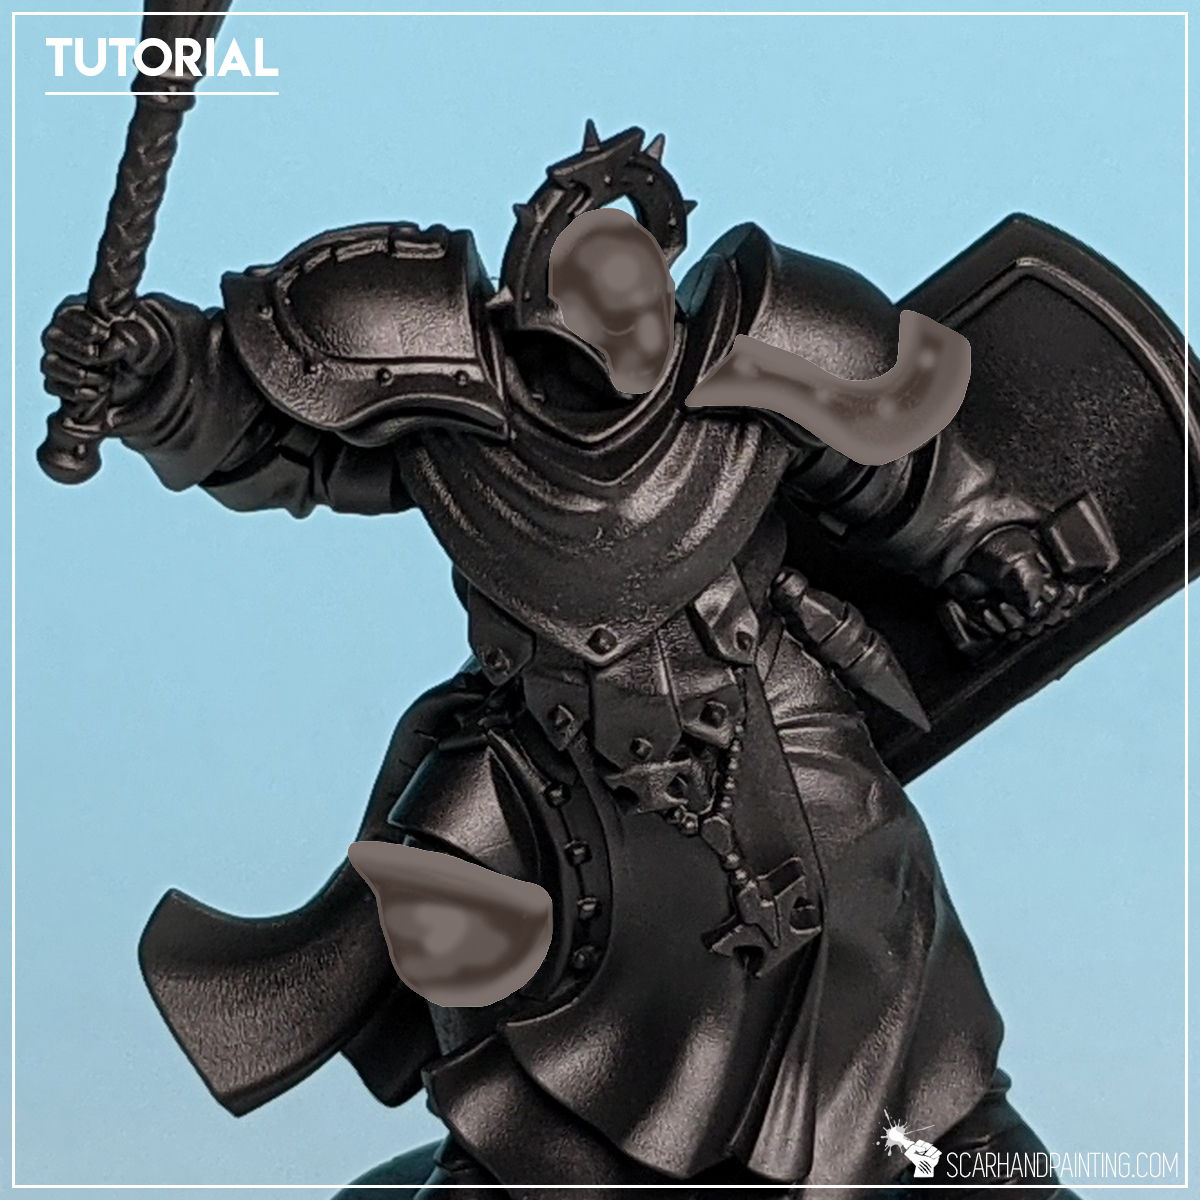
Step five: Masts base
I left the Hull for a bit and moved on to masts, applying a thick layer of Vallejo 72.045 Charred Brown. Once again I would like to point out that the colors I used are my personal preference and you can use any brand, or even any similar color, to achieve similar results.
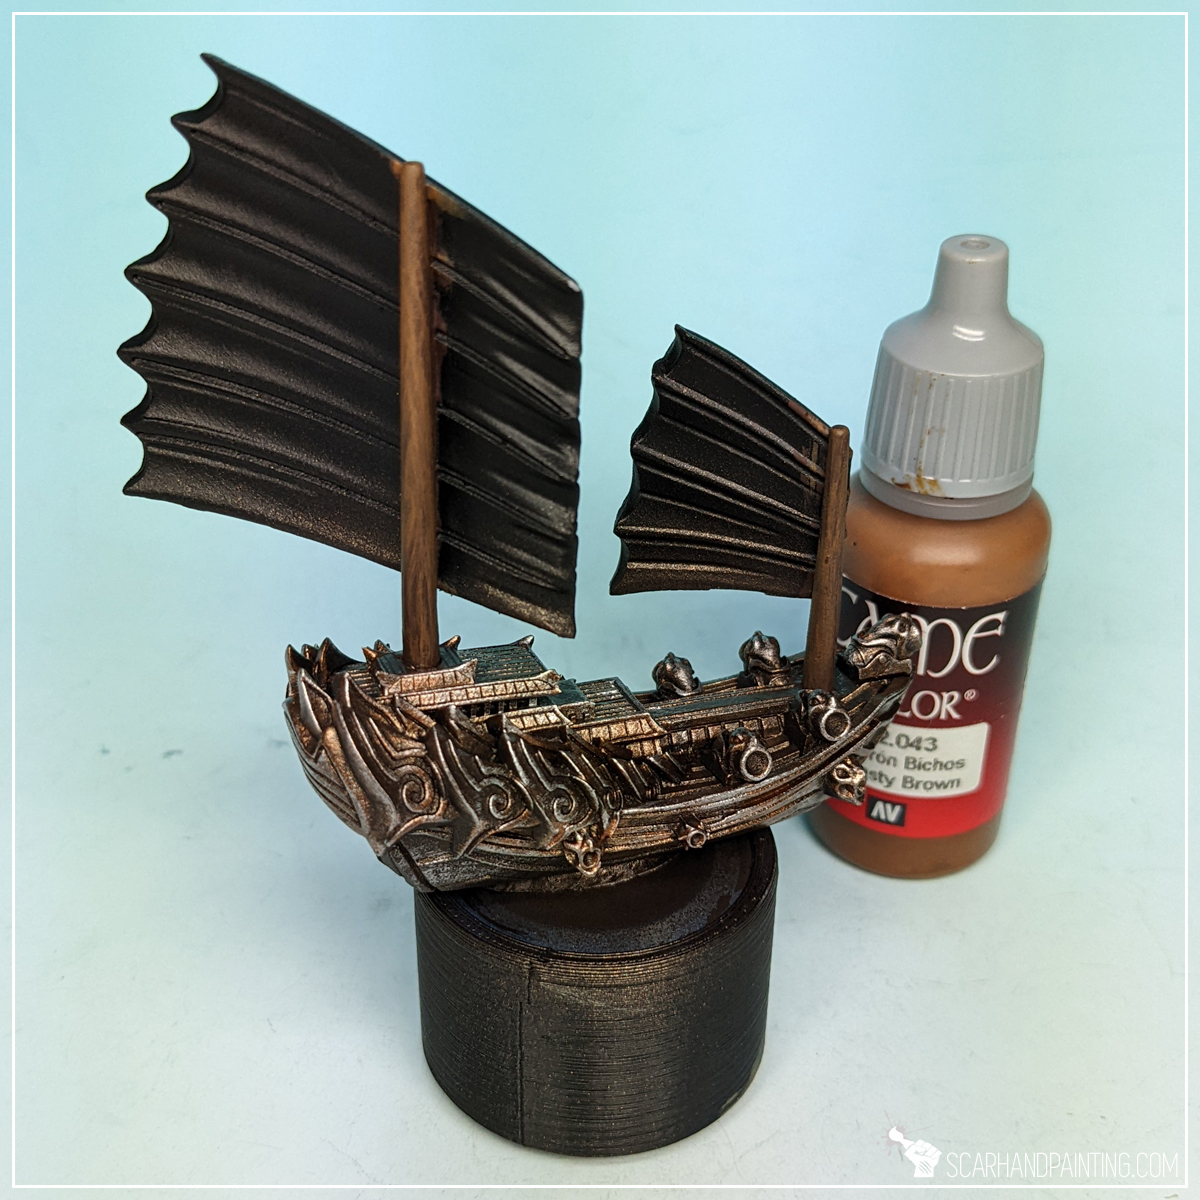
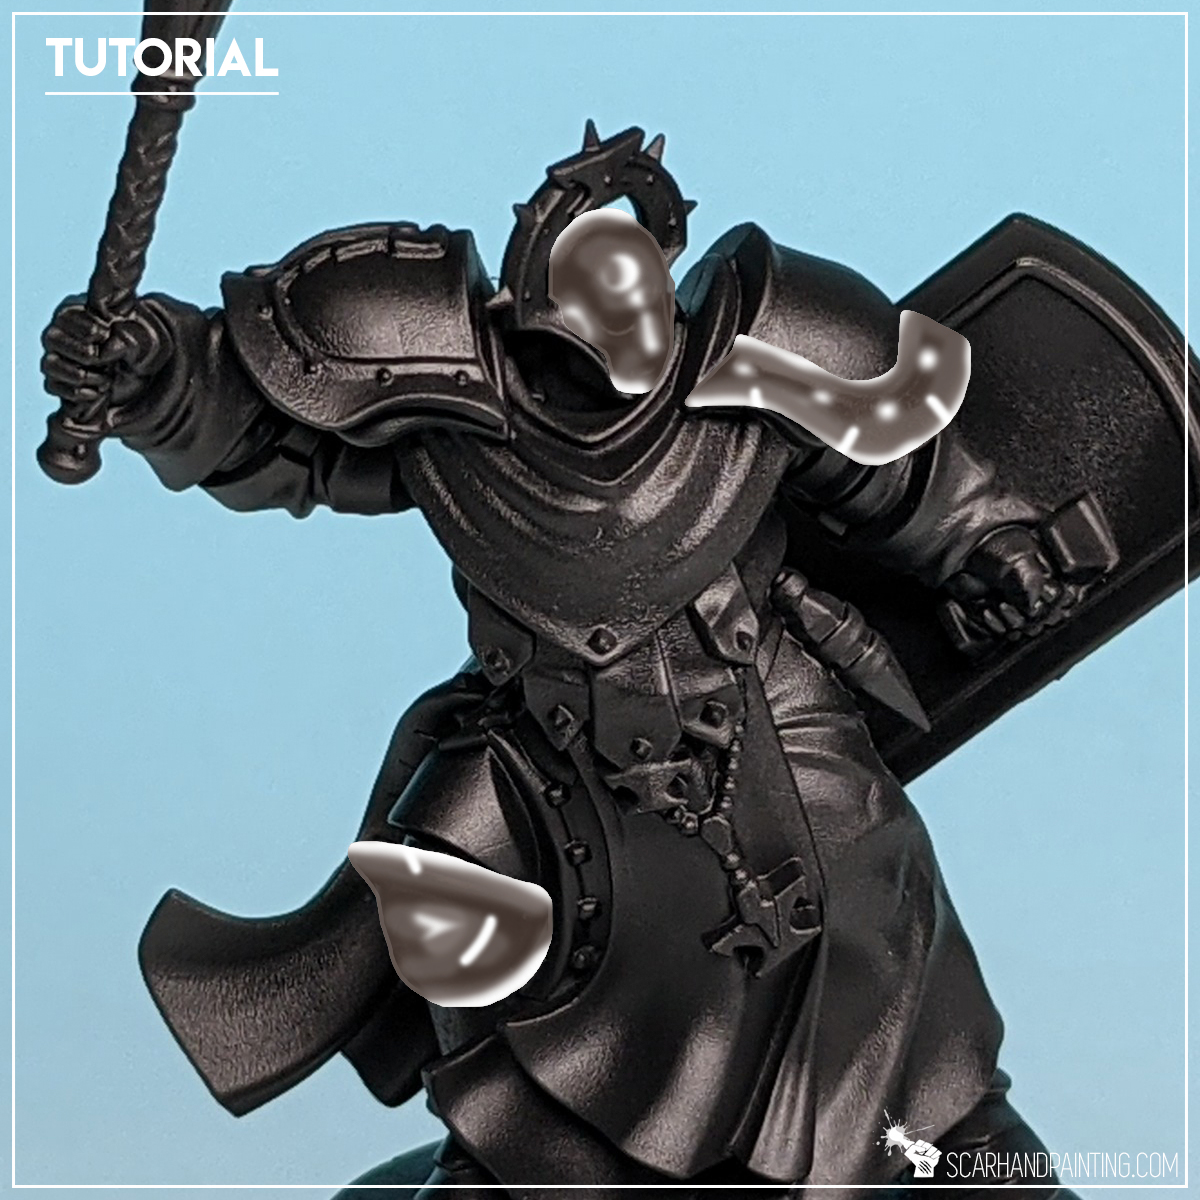
Step six: Masts highlight
Another step was to apply a slightly blurry highlight of Vallejo 42.043 Beasty Brown. By blurry I mean a thinned down paint applied with a relatively large, soft brush. You can see in the picture how this layer seem a bit misty, partially translucent and not as strong as usual base application. This can be achieved by keeping a brush barely loaded with thinned down paint and sliding its edge up and down the surface. If I ever decide to have a Patreon this technique will probably be the first thing I would like to do a deep dive into, but for now my chaotic description must do.
Step seven: Masts edge highlight
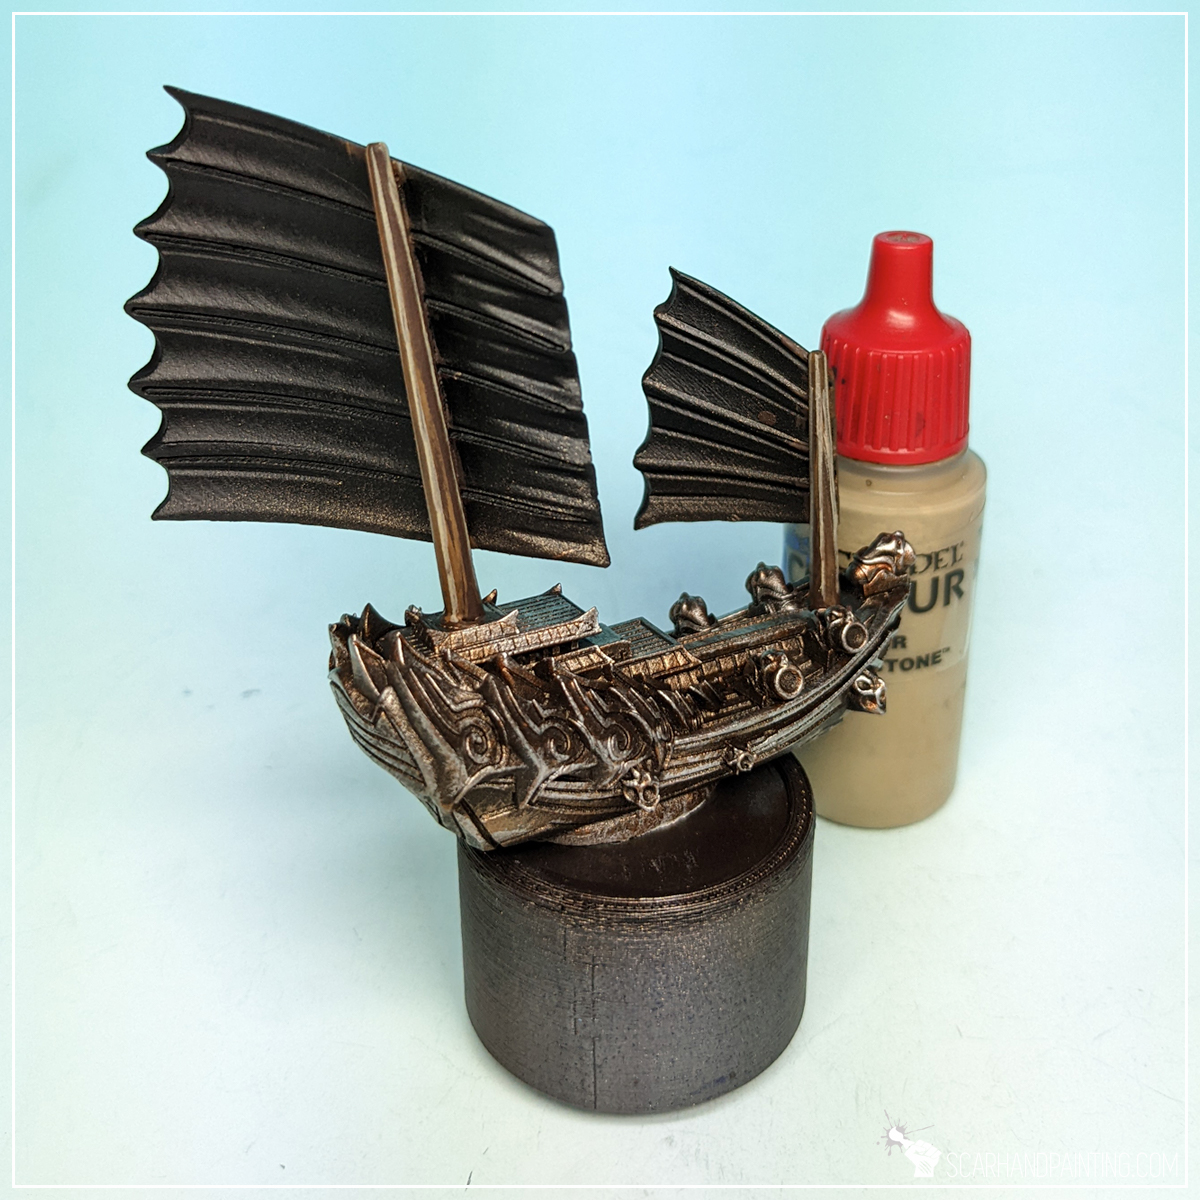
Due to masts shape they do not have edges on their sides, but they still can be imitated with standard edge highlight of Games Workshop Karak Stone. If you struggle with edge highlights check out this in-depth article from 2018, where I describe the process and share some related life hacks.

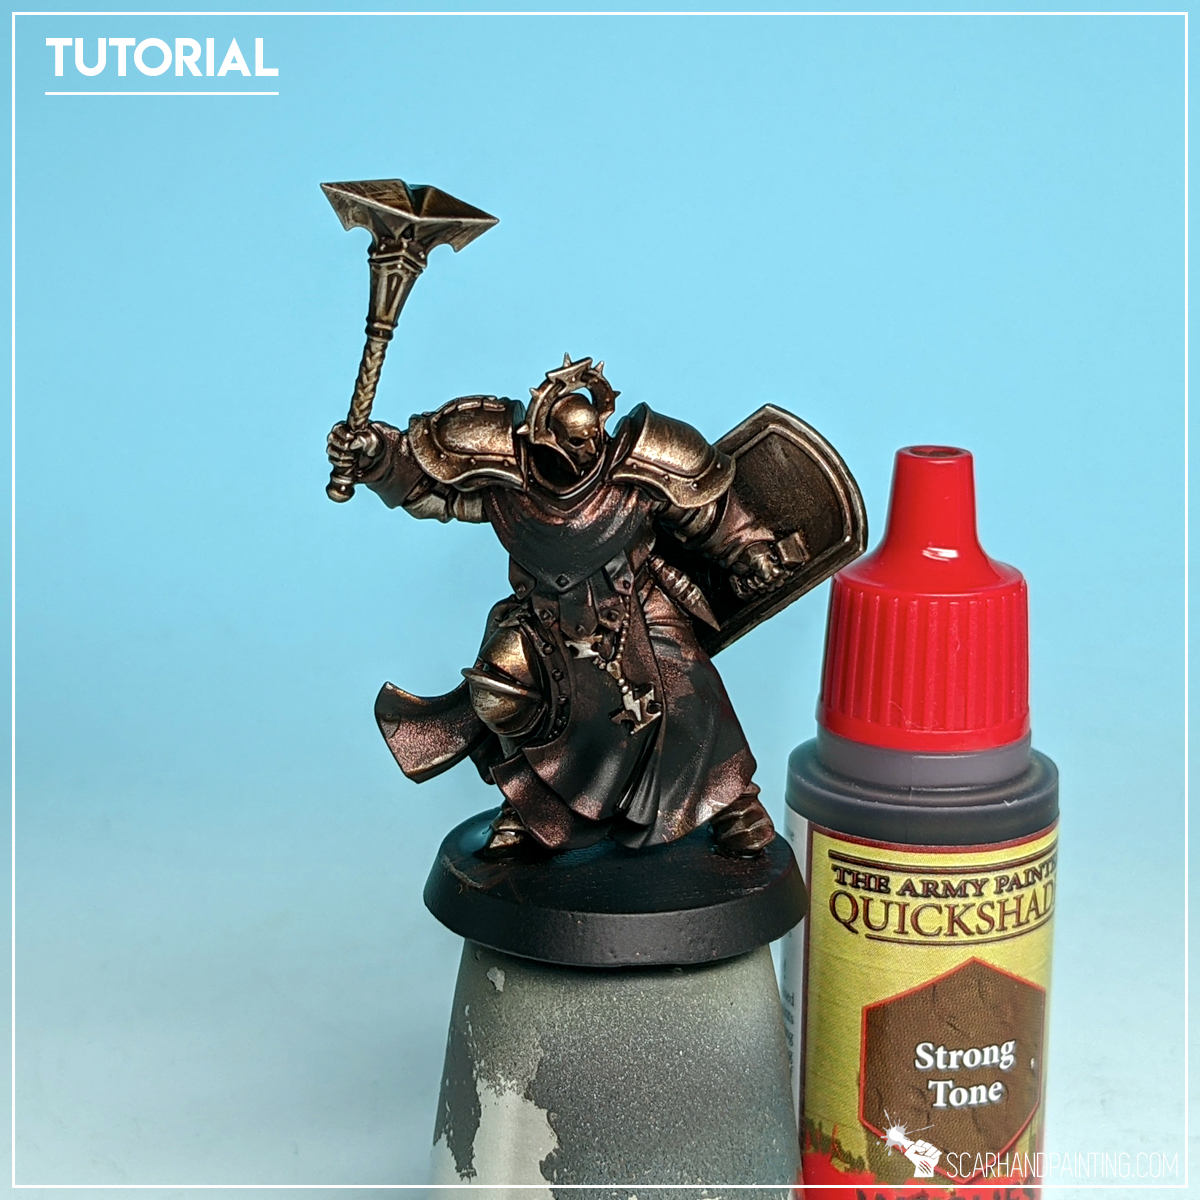
Step eight: Wash
Here’s where real magic happens. I applied a strong layer of Army Painter Strong Tone wash over the miniature. This is probably the most important moment of the entire paint job. Wash applied en-masse blends all the colors beneath, toning them down a bit, adding coherency and that extra juicy look. One thing to look out for is large drops of wash forming on flat areas and lower parts of the miniature, then leaving stains of very dark paint while drying. This can be avoided by removing the excess of paint with a soft wet brush few minutes after application.

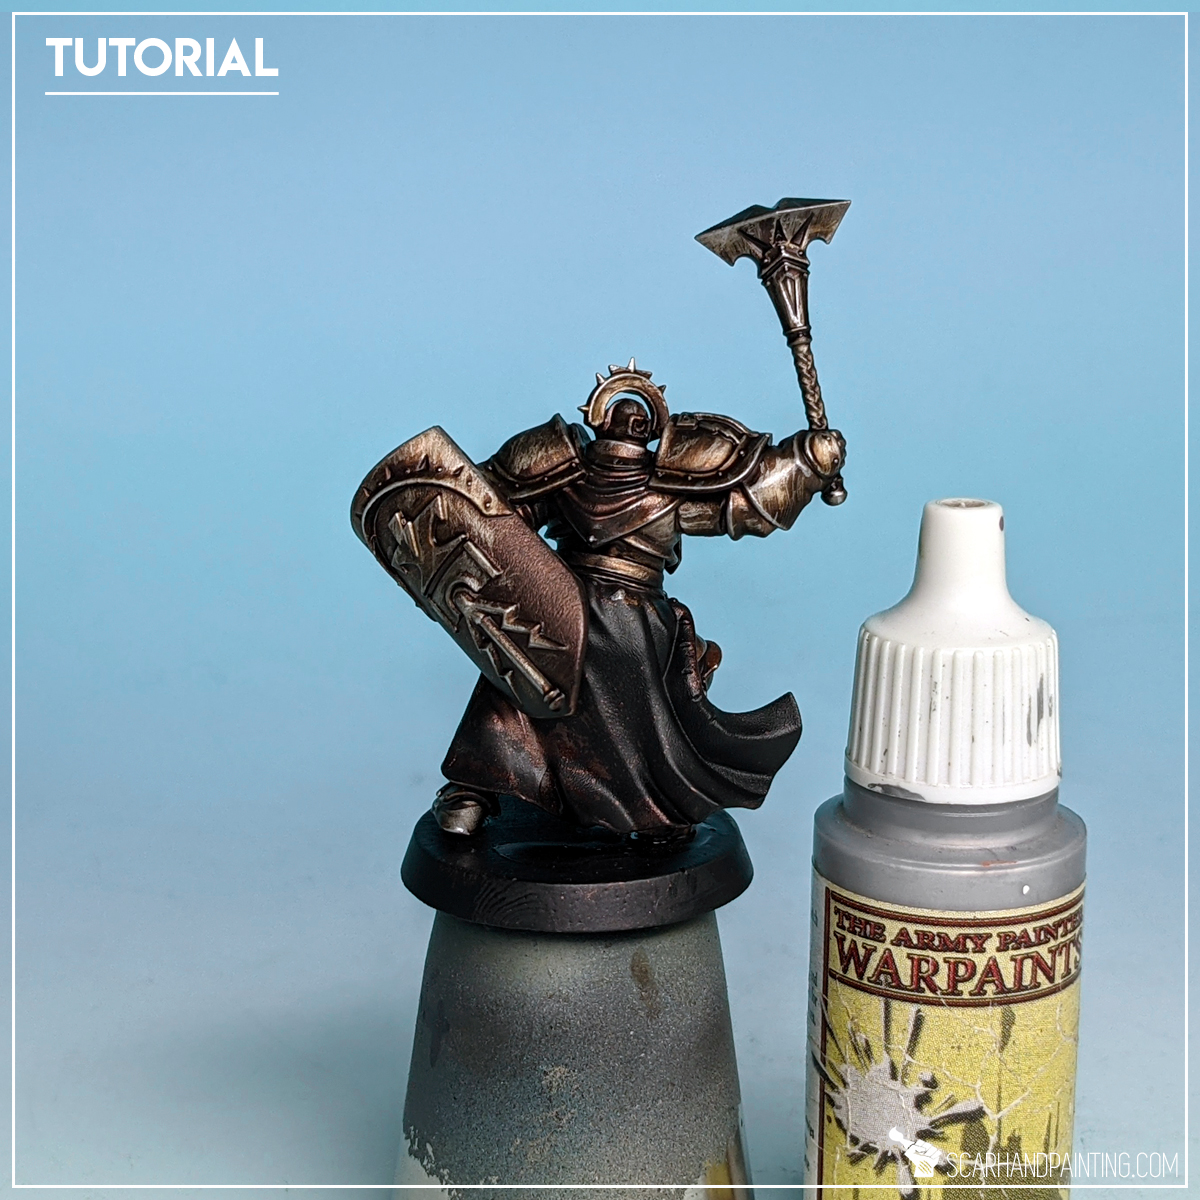
Step nine: Sails base
Once wash dried out nicely I moved to Sails and lower hulls. I applied a thick layer of P3 Coal Black, which is something between dark turquoise mixed with dark grey.

Step ten: Sails highlight
Next I applied a flatbrush highlight of slightly thinned Vallejo 309 Periscopes. This exposed most texture of the sails why also providing a more juicy color overall.
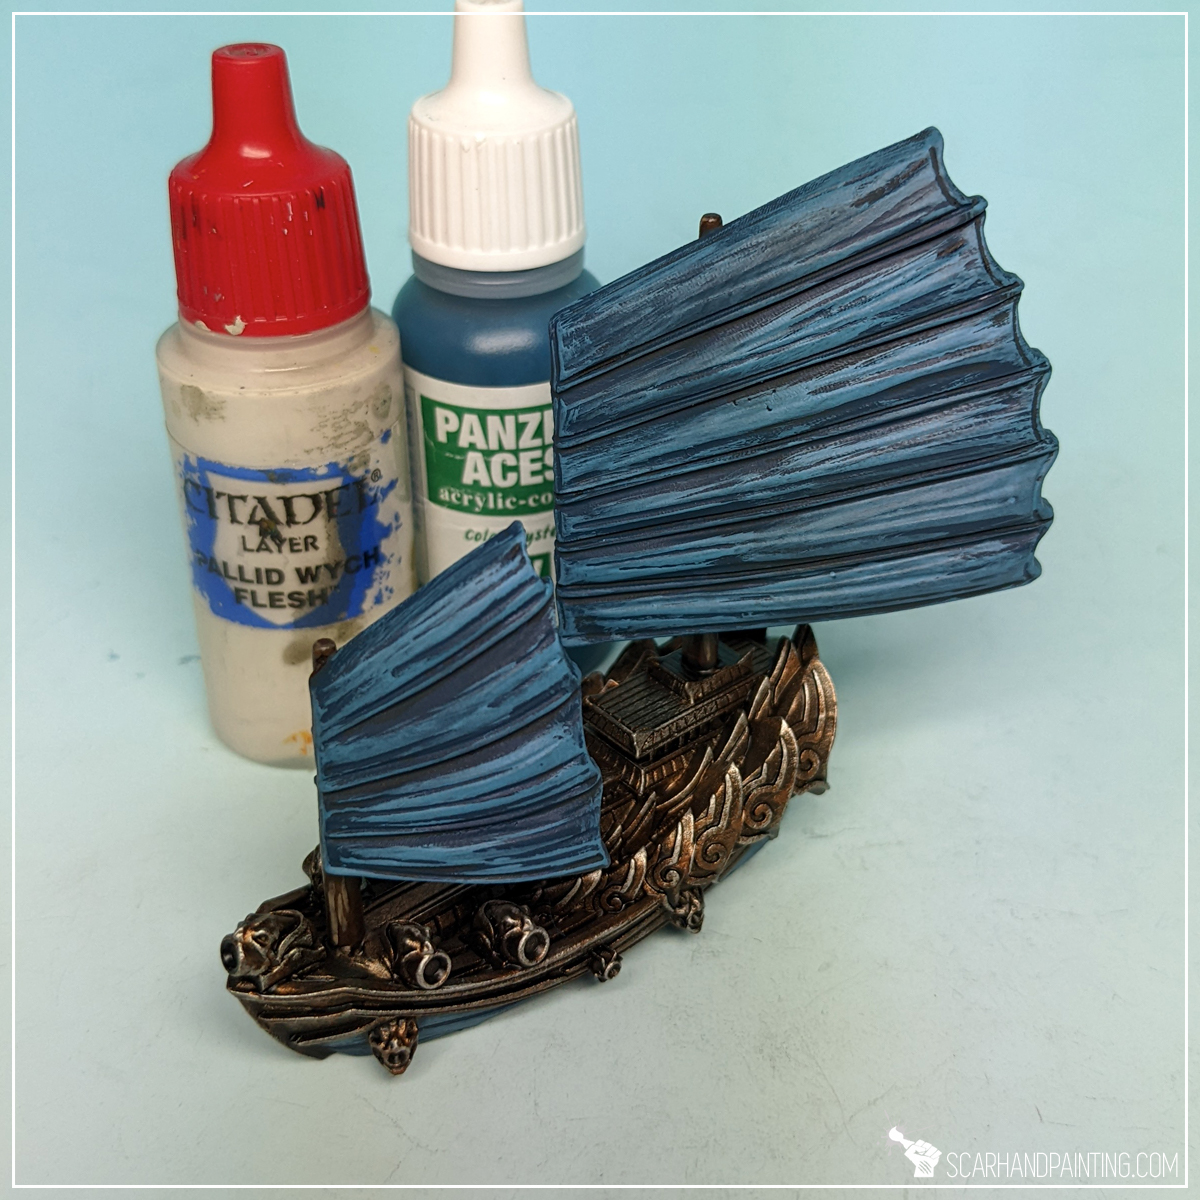
Step eleven: Sails highlight
Another highlight was applied with a 1:1 mix of Games Workshop Pallid Wych Flesh and Vallejo 309 Periscopes. A much more visible highlight to build volume.
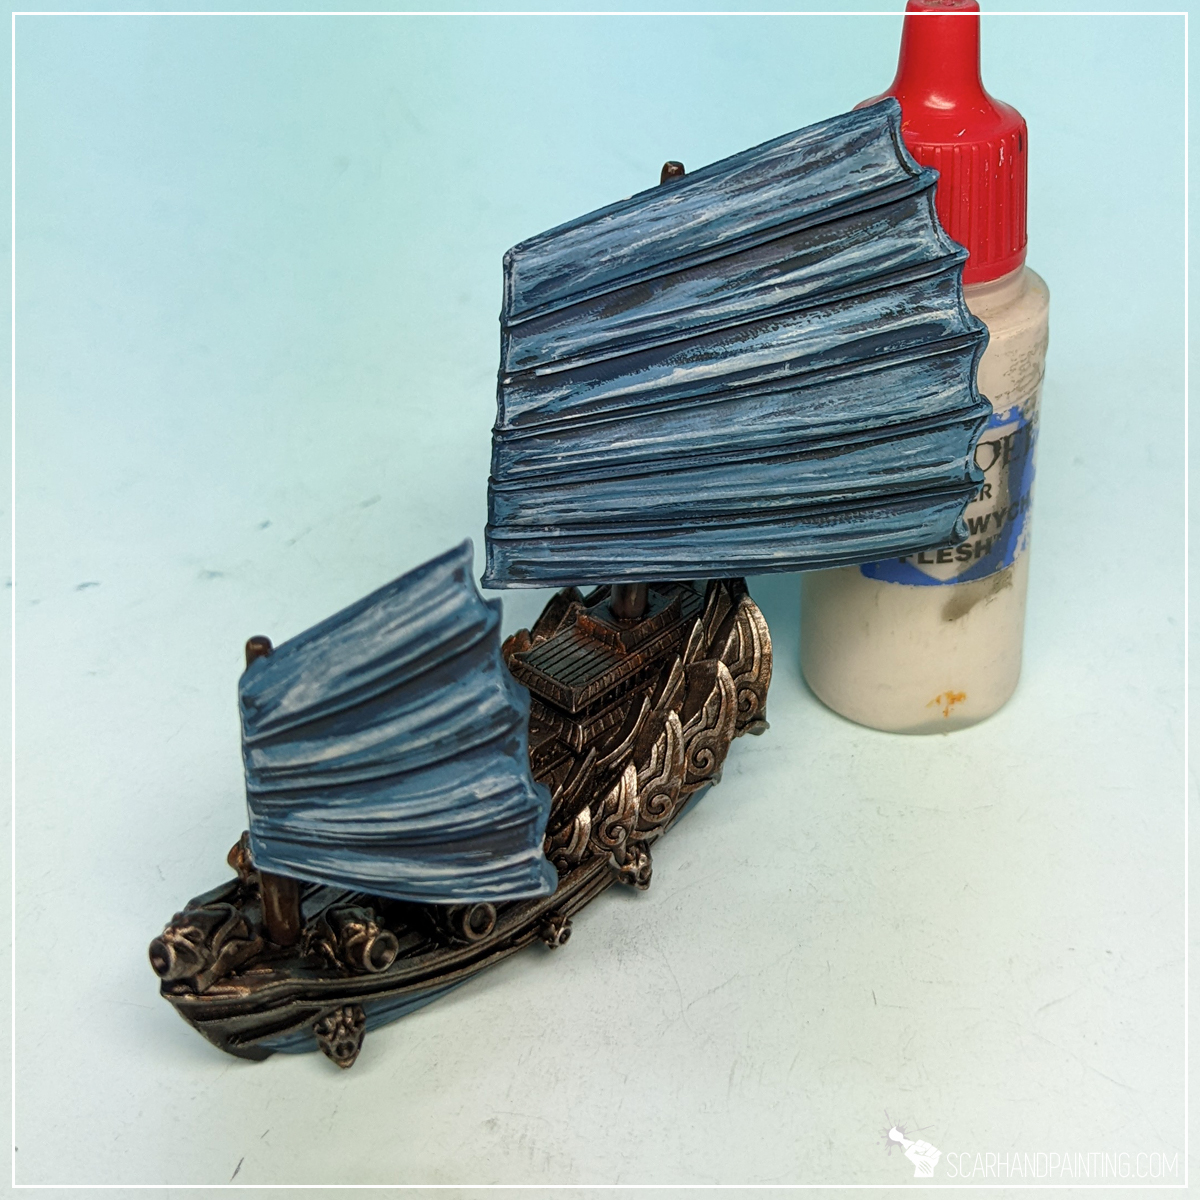
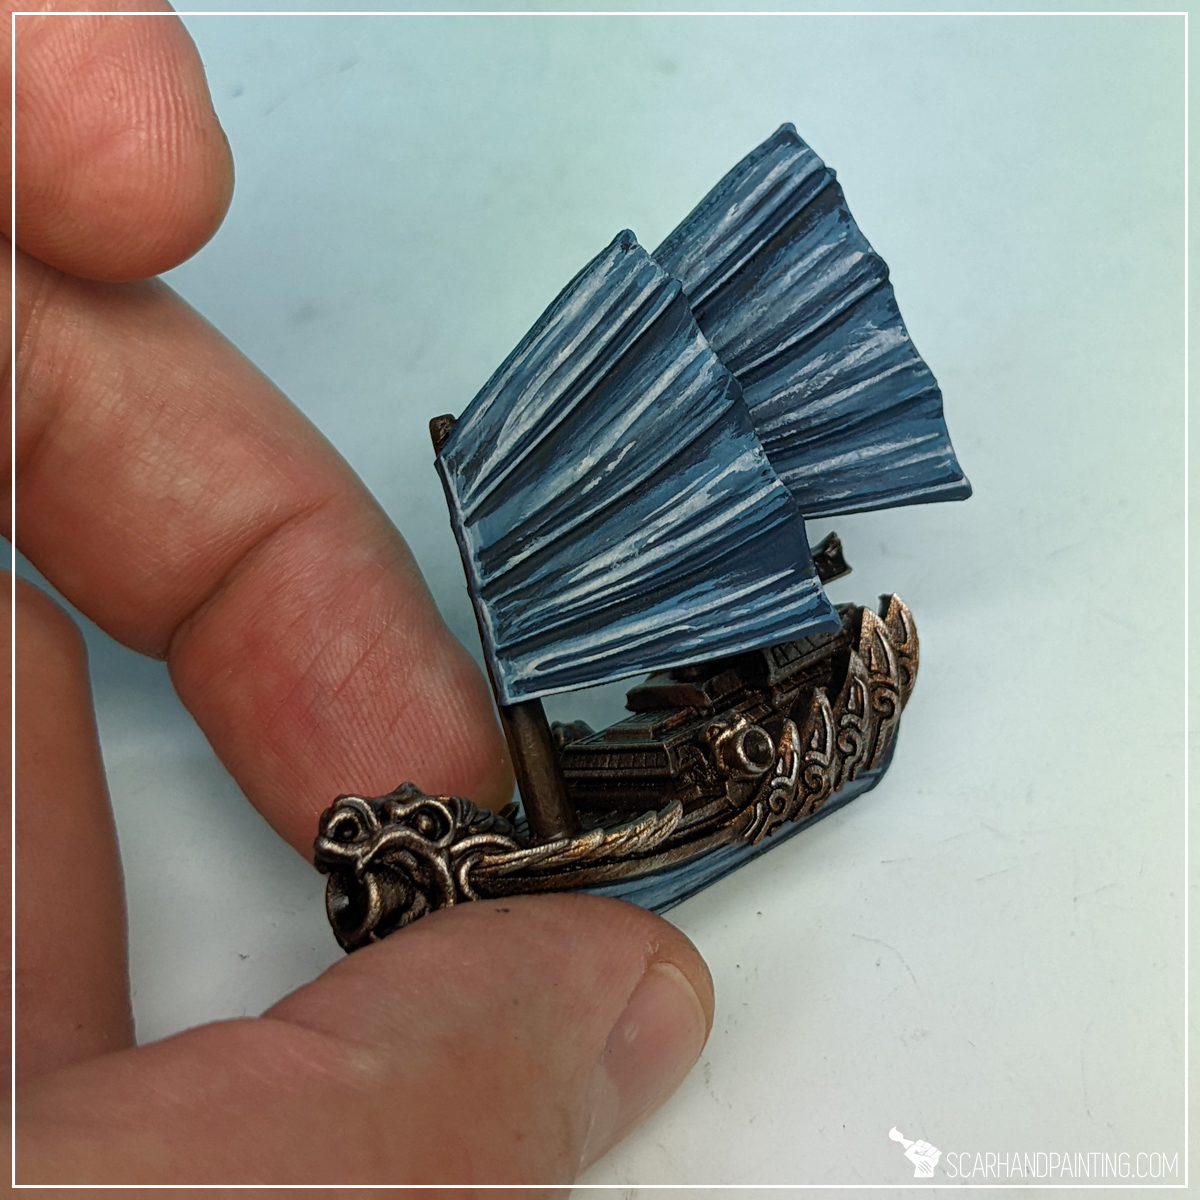
Step twelve: Sails final highlight
Final highlight was applied with pure Games Workshop Pallid Wych Flesh. Similar to edge highlight this one was applied to most exposed detail and edges on the sails. Looks messy and ugly, but everything goes according to a plan…
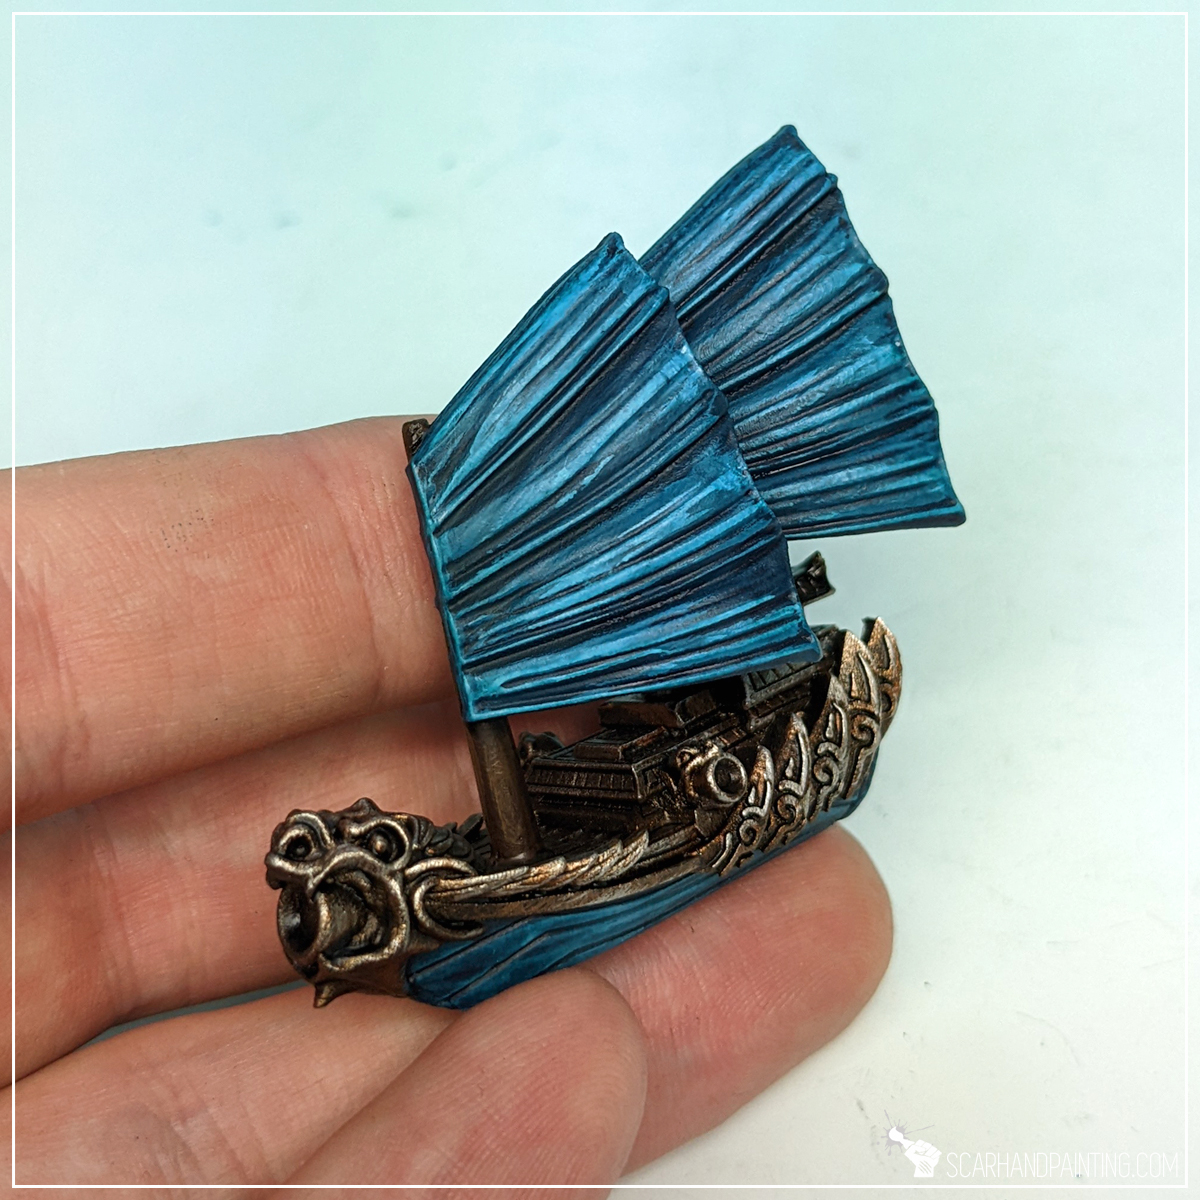
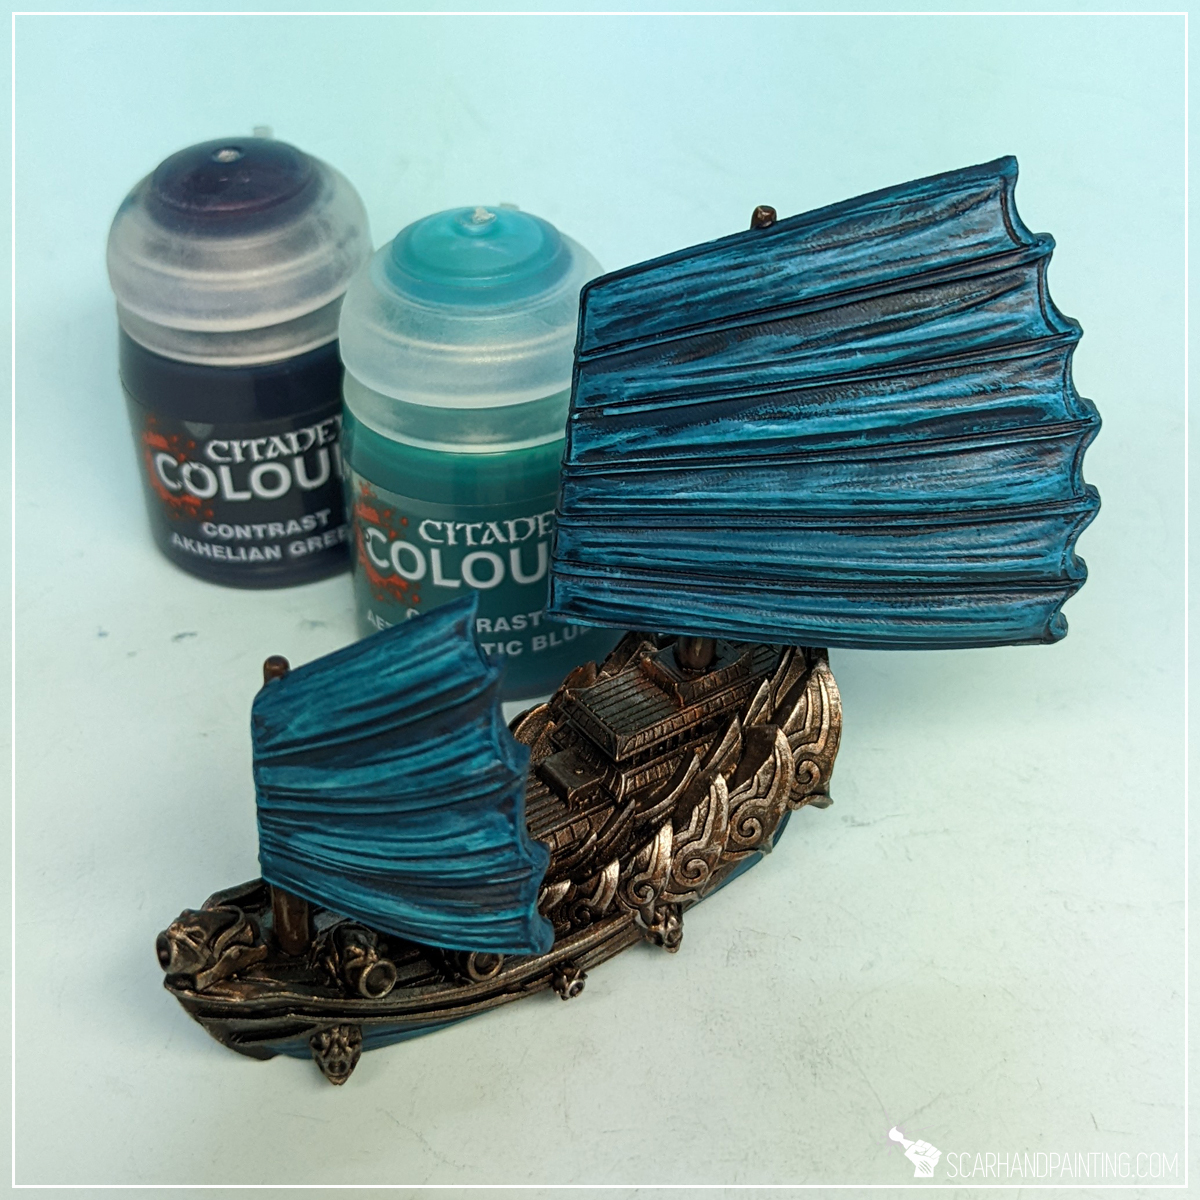
Step thirteen: Glaze
Glazing is a topic on its own that usually refers to rather time consuming and precise application of strongly thinned down paints. The way I apply glazes is more simplified. I apply them with a large, soft brush just like washes, except I avoid applying too much paint. This way I both smooth up and juice up the colors underneath. In case of Salamanders I used a 1:1 mix of Games Workshop Akhelian Green nd Aethermatic Blue contrast paints.


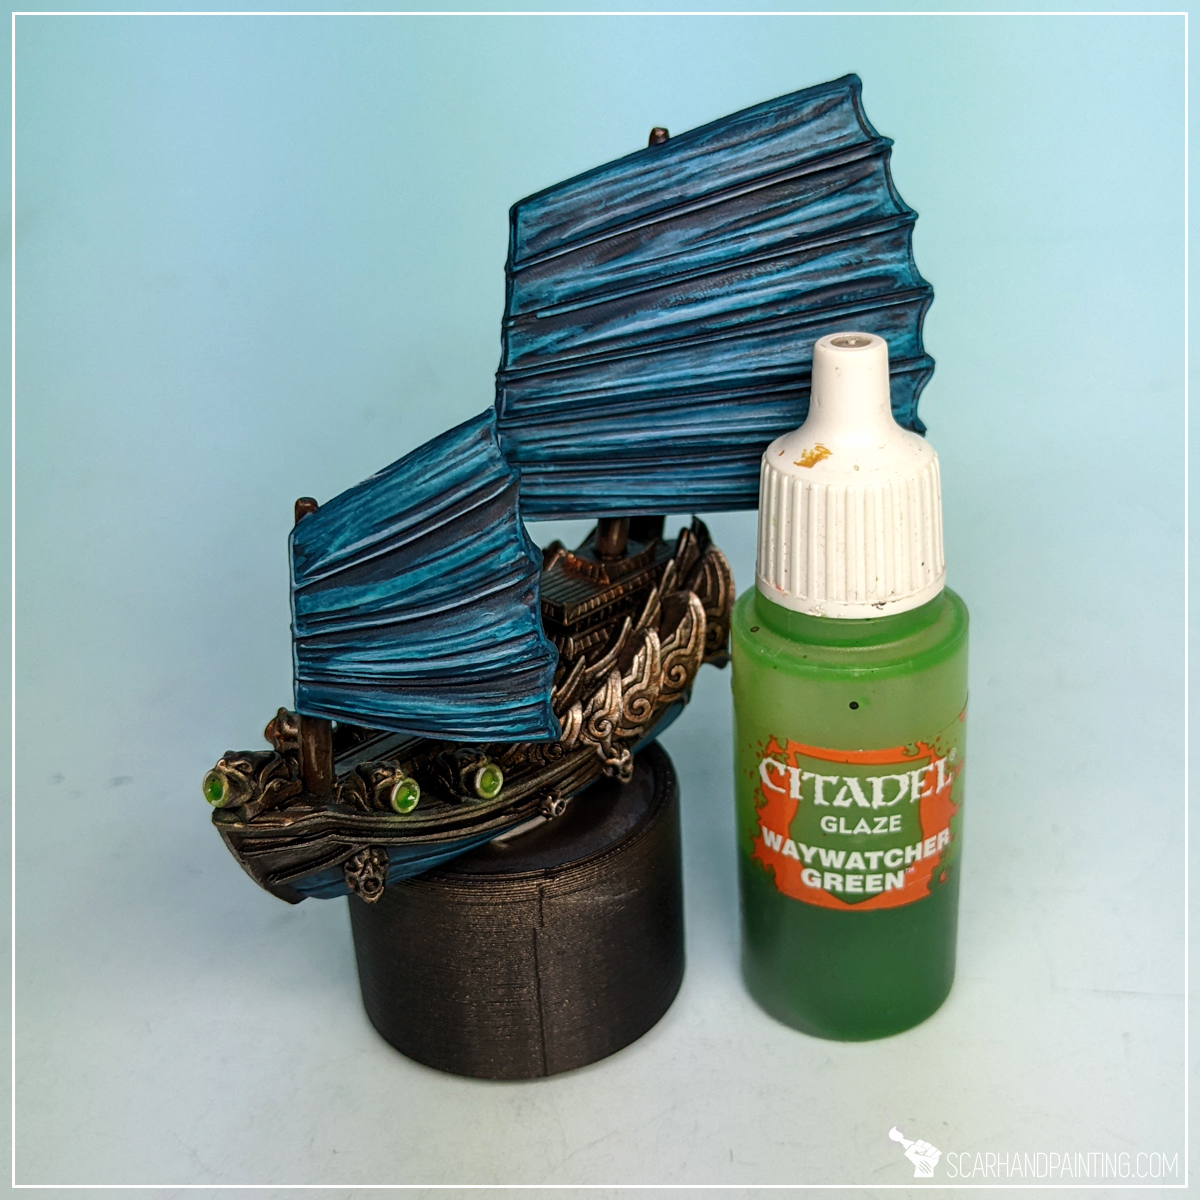
Step fourteen: Green osl
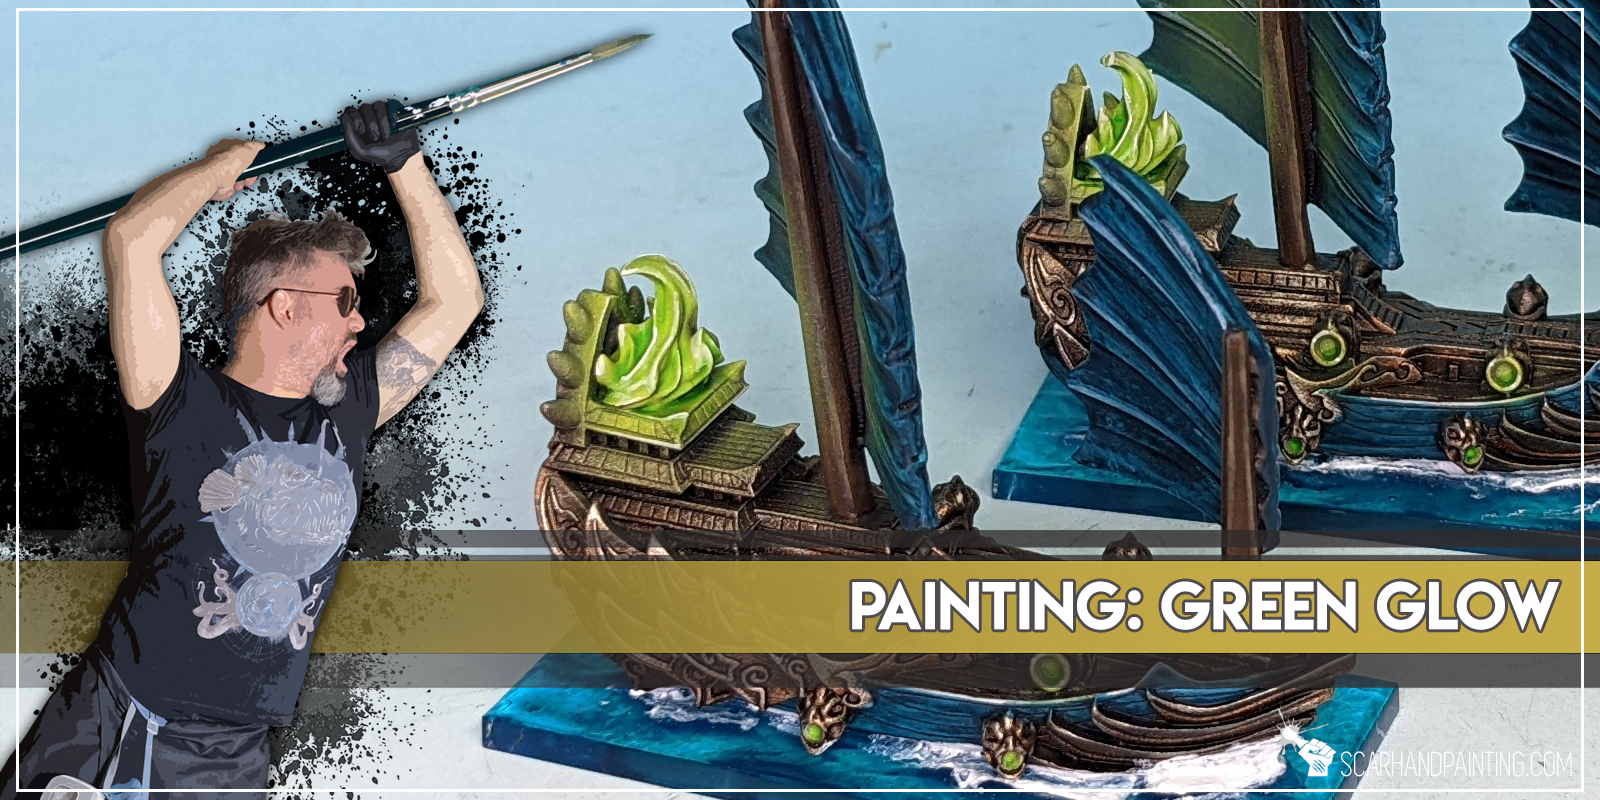
Final color range to add onto the miniature was Greens. I applied four paints one after another to build volume and then add depth to weapons and any fire elements across the fleet. In this tutorial I deliberately linked all the steps into one, as this particular topic was just recently covered in Tutorial: Painting Green Glow that you can read in order to get a better grasp of the entire process.
Step fifteen: Bases
The paint job done and sealed with a matt varnish the last thing left to do was a base. Again, this is something I covered before in KoW Armada Water Bases tutorial that I invite you to read in order to get to know the process. In case of Salamanders I simplified basing by applying one thick, smooth layer of AK Interactive Atlantic blue, then another rough layer of the same texture to finally add waves with AK Interactive Water Foam effect. Very simple while also quite effective.
This marks the end of the tutorial. Feel free to ask any questions in the comments below or via social media.

I hope you find this tutorial interesting. Be sure to let me know your thoughts in the comments below or via Facebook or Instagram. I would also appreciate if you considered sharing this content with your friends, who might find it useful. Finally if you are looking for a professional miniatures painting service, be sure to contact me with this contact form. I always reply within 24 hours, after which please check out your spam folder.

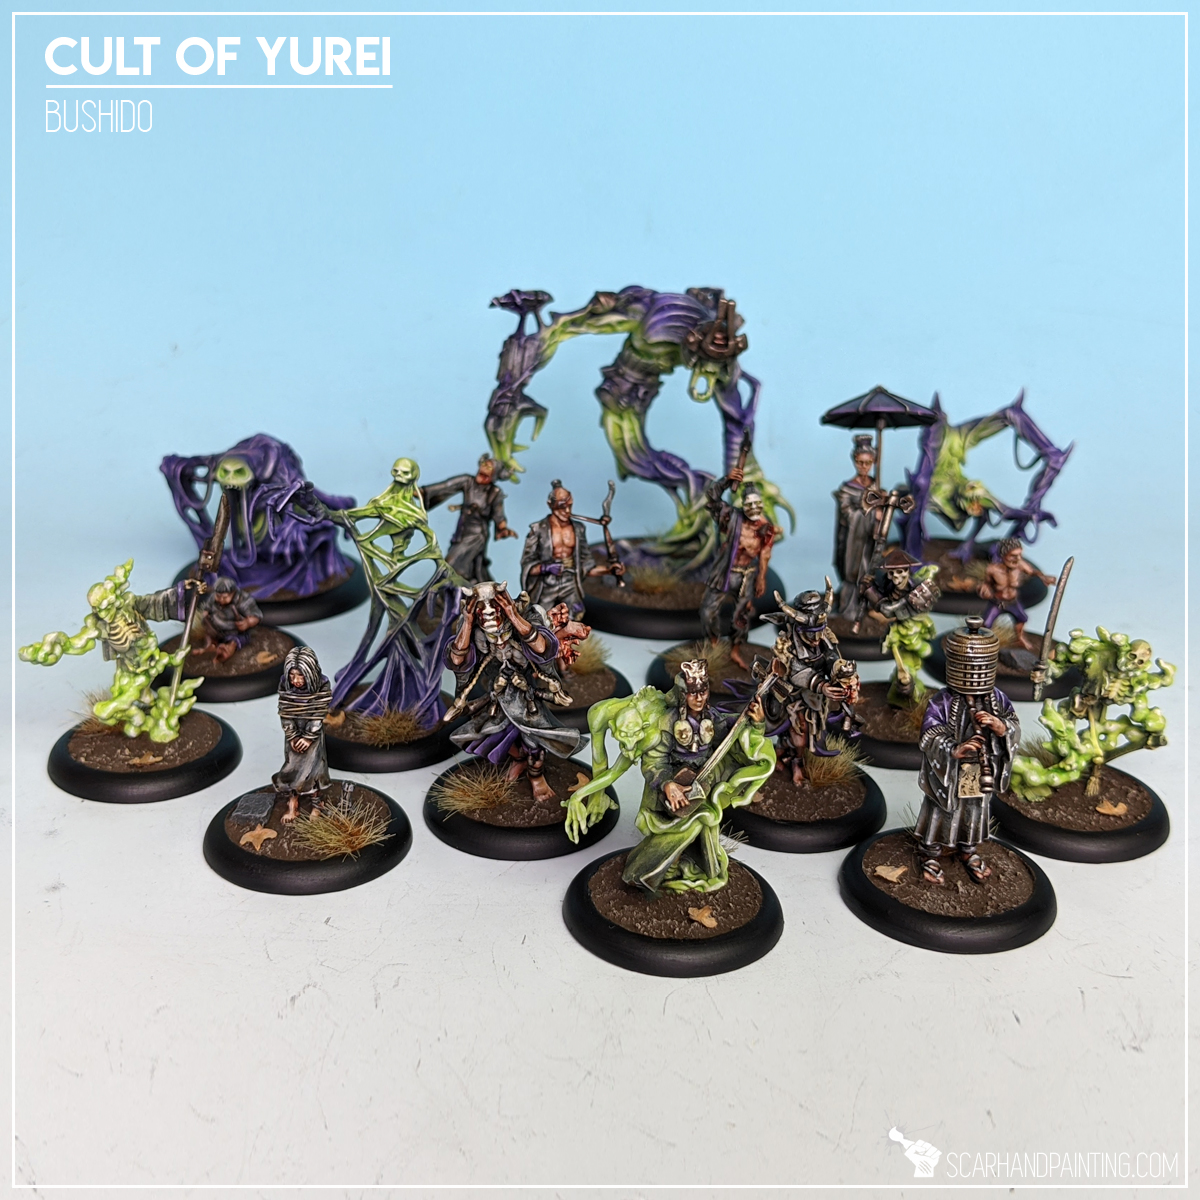
As a full time professional miniatures painter I strive to specialize in techniques that provide the maximum effect on the gaming board, while being relatively simple and easy to mass duplicate. Here I will present to you a Step-by-step guide to painting green glow effect similar to that used in most of the projects, for example Gallery: Cult of Yurei and Gallery: Legio Vulpa.
Before we start, some notes:
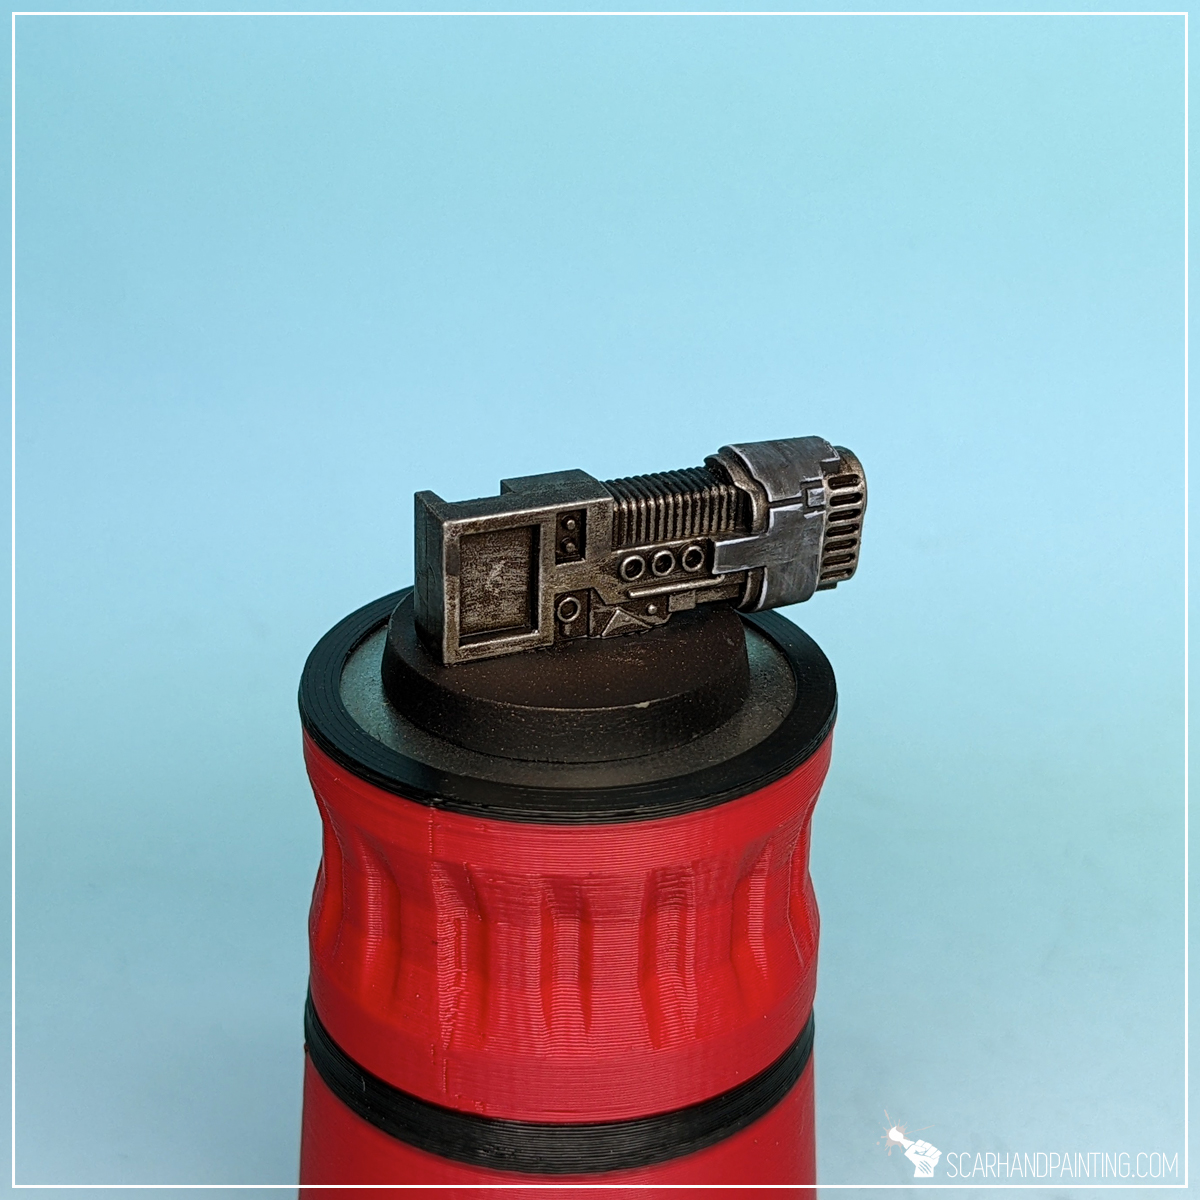
Step one: Duck Egg preshade
I started with a soft layer of slightly thinned airbrushed Vallejo 71.009 Duck Egg Green (air). While airbrushing I made sure to cover potential light source areas plus the immediate surroundings.

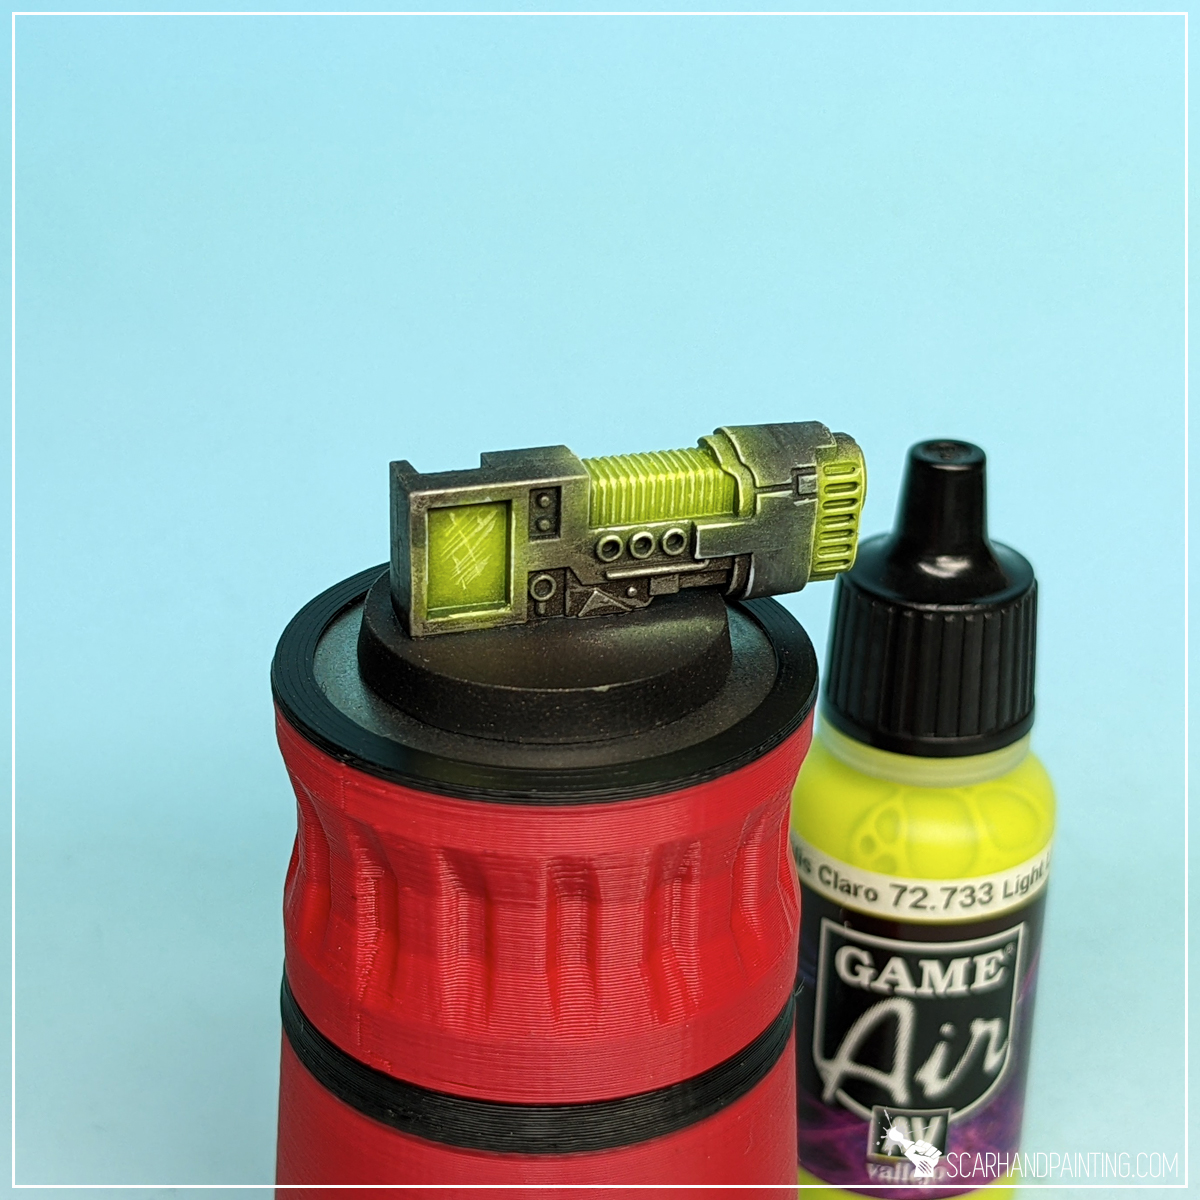
Step two: Green base
Next I airbrushed a layer of Vallejo 72.733 Light Livery Green (air) without thinning. This layer was applied on top of previously airbrushed Duck Egg Green.

Step three: highlight
I then highlighted green with Vallejo 72.101 Off-White, pulling the edges out to create a solid base for future juicing up back to strong toxic green.
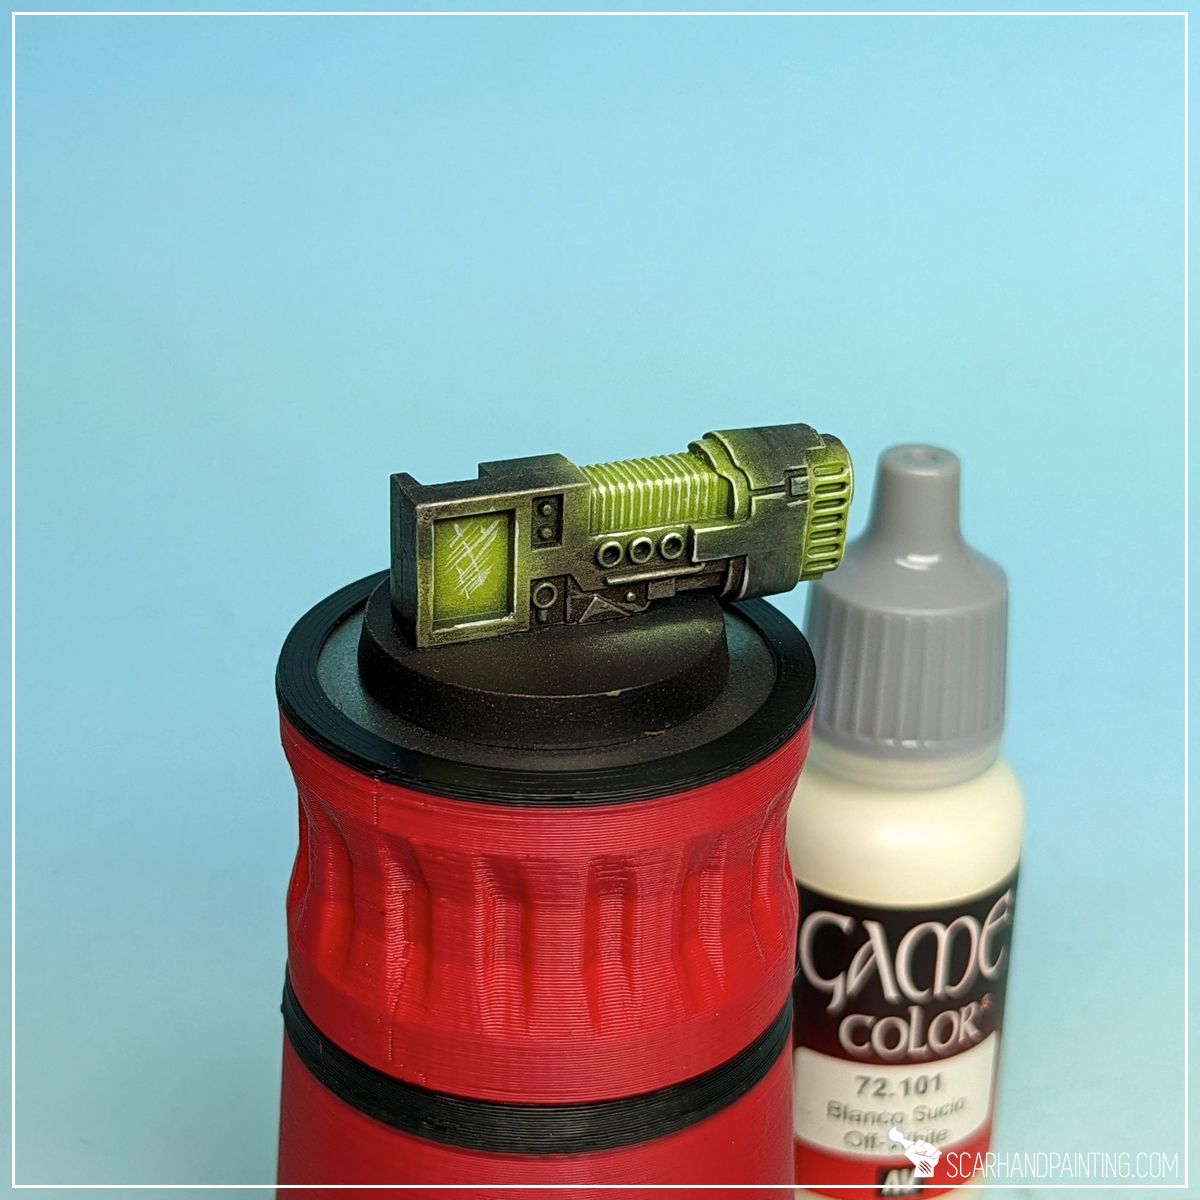
Step four: glaze
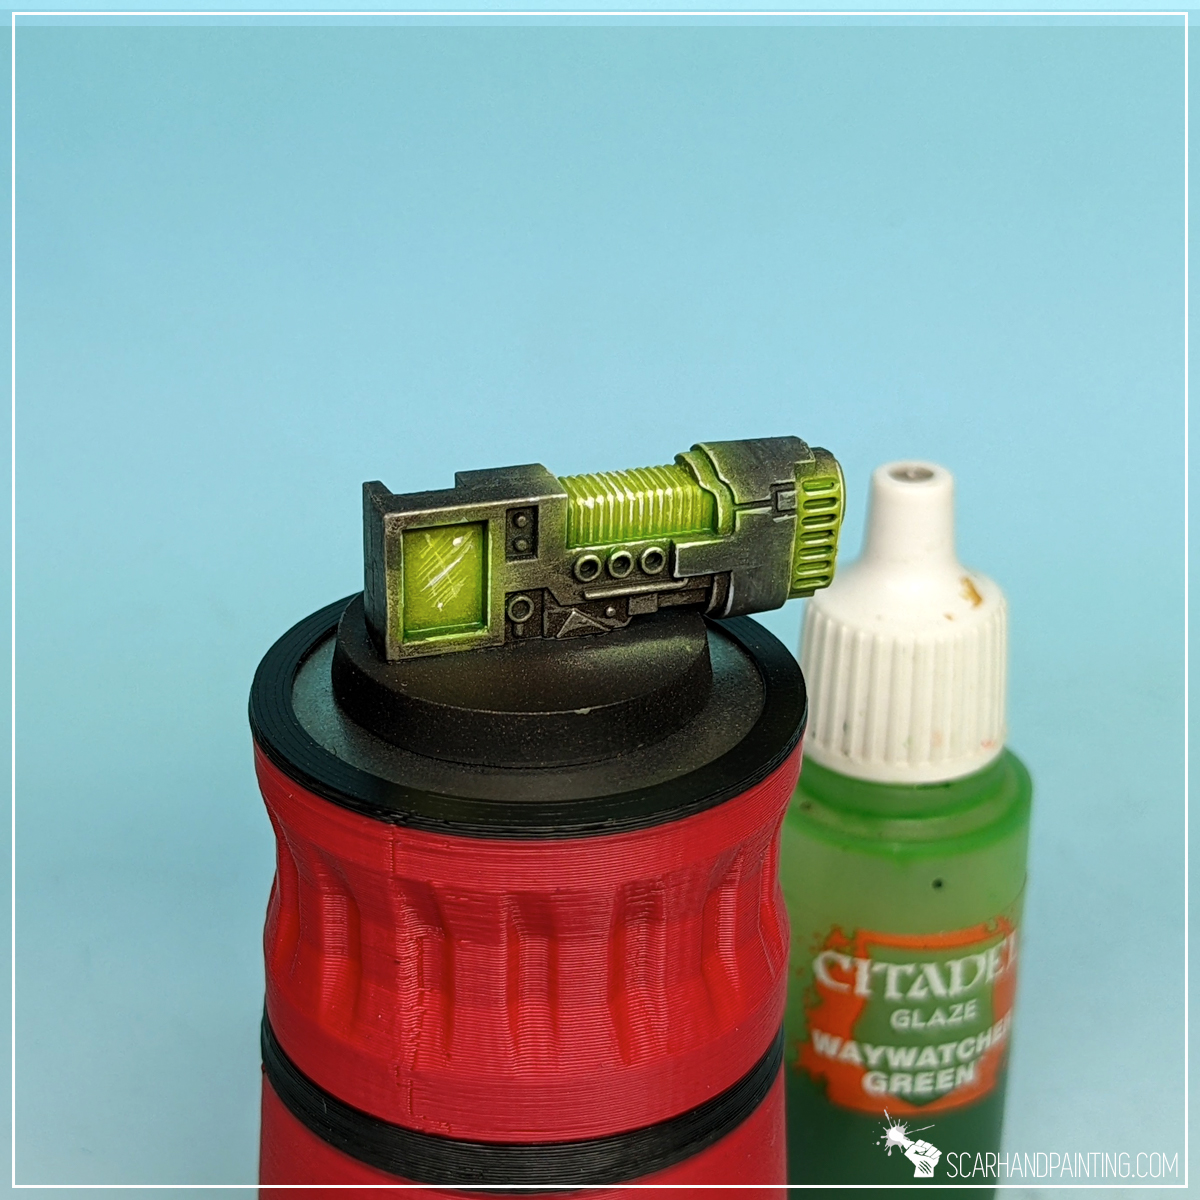
Next I manually applied a glaze of slightly thinned down Vallejo 72.733 Light Livery Green over the most intense green parts of the miniature. This includes plasma coils, glow on the side of the barrel and large rectangle area at the back.
Step five: highlight
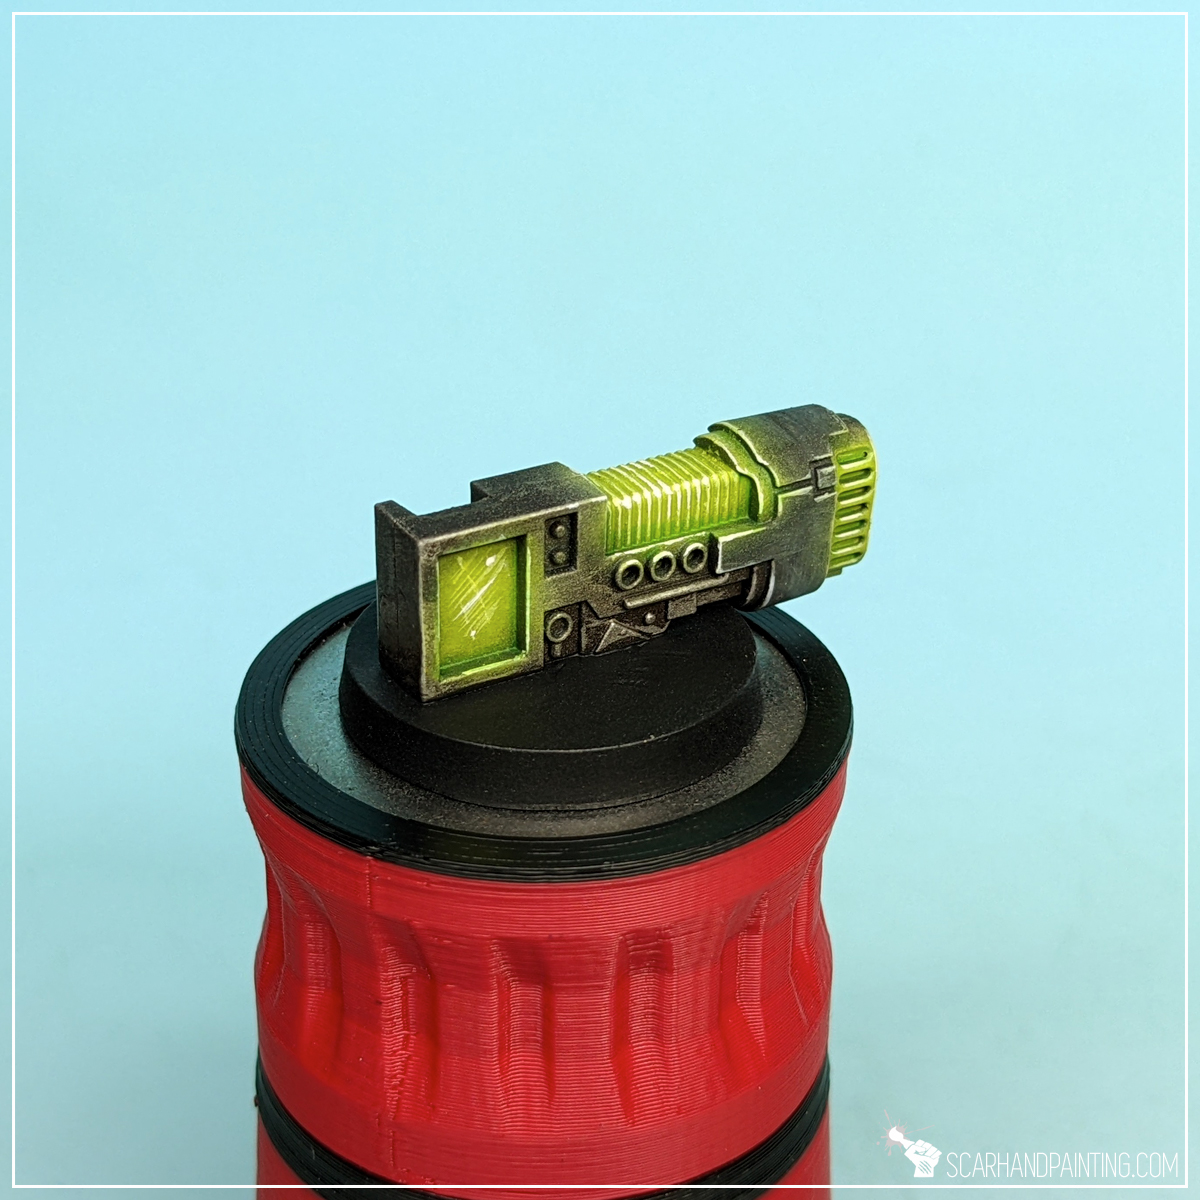
Then, I once again applied a highlight of Vallejo 72.101 Off-White. This time I kept it contained to most exposed areas, barely few lines and dots to add focus points and add more overall contrast on the piece.

Step six: wash
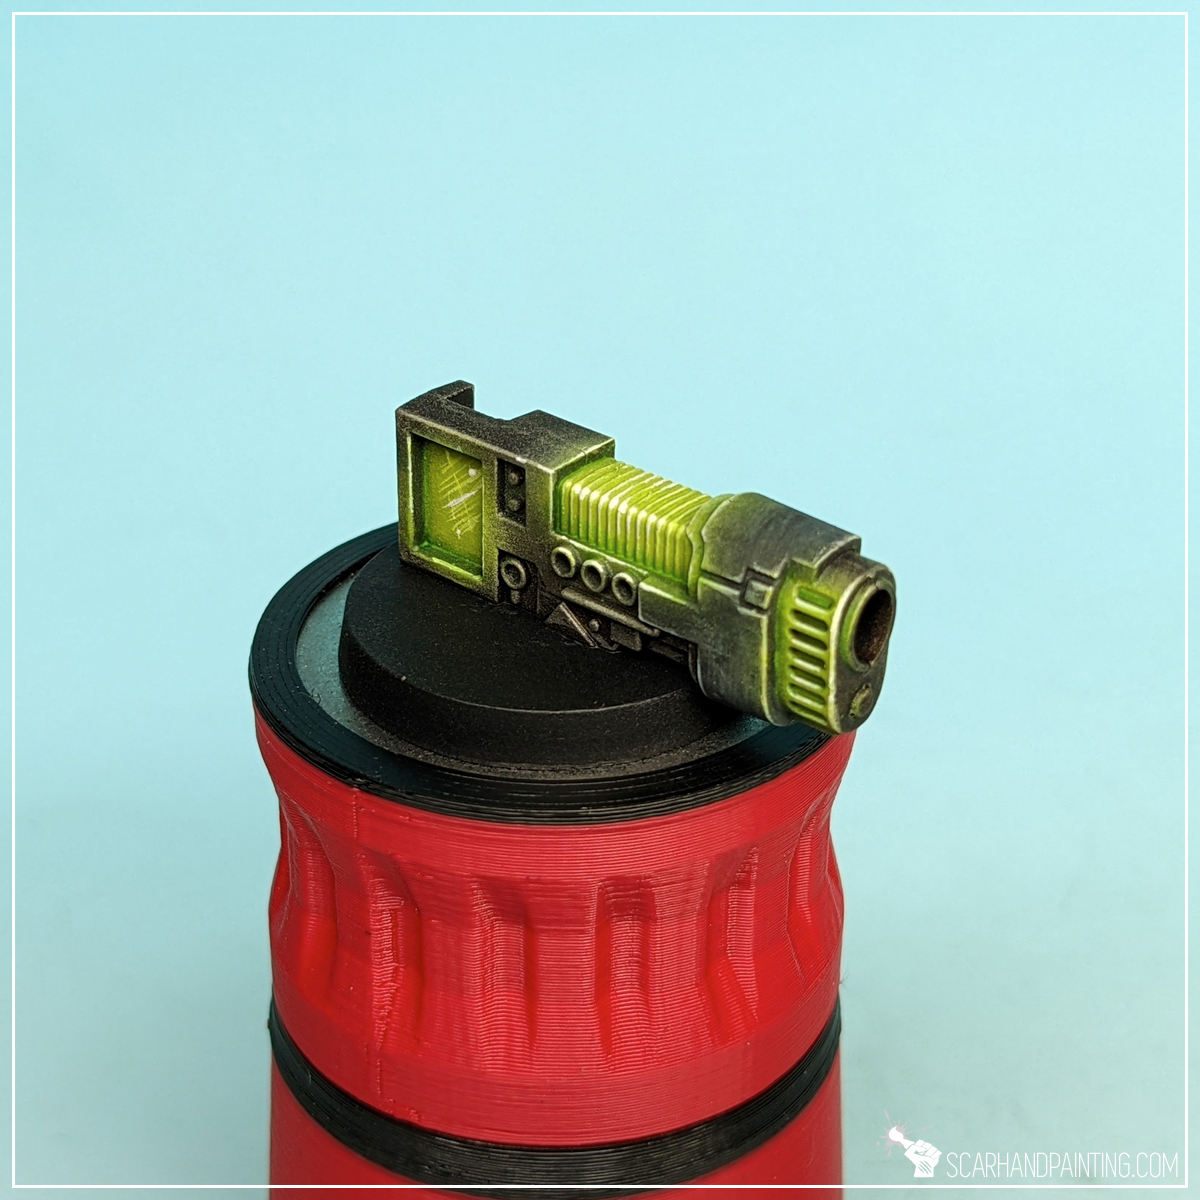
Finally I applied a mix* of Vallejo 72.089 Green Ink ( 3 drops), Vallejo 72.085 Yellow Ink (2 drops) and water (10 drops). I made sure to apply the paint to deepest recesses only, avoiding exposed plasma coils and edges.
* You might notice a GW Waywatcher Green bottle in the picture below. The Vallejo mix is a recipe for GW Waywatcher Green, that is out of production. You can find more GW Glaze – Vallejo mix recipes in this article.
Work complete. Four colors, six layers an an interesting effect of toxic green plasma coils / ghosts / goo is done!


I hope you find this tutorial interesting. Be sure to let me know your thoughts in the comments below or via Facebook or Instagram. I would also appreciate if you considered sharing this content with your friends, who might find it useful. Finally if you are looking for a professional warhammer 40k miniatures painting service, be sure to contact me with this contact form. I always reply within 24 hours, after which please check out your spam folder.
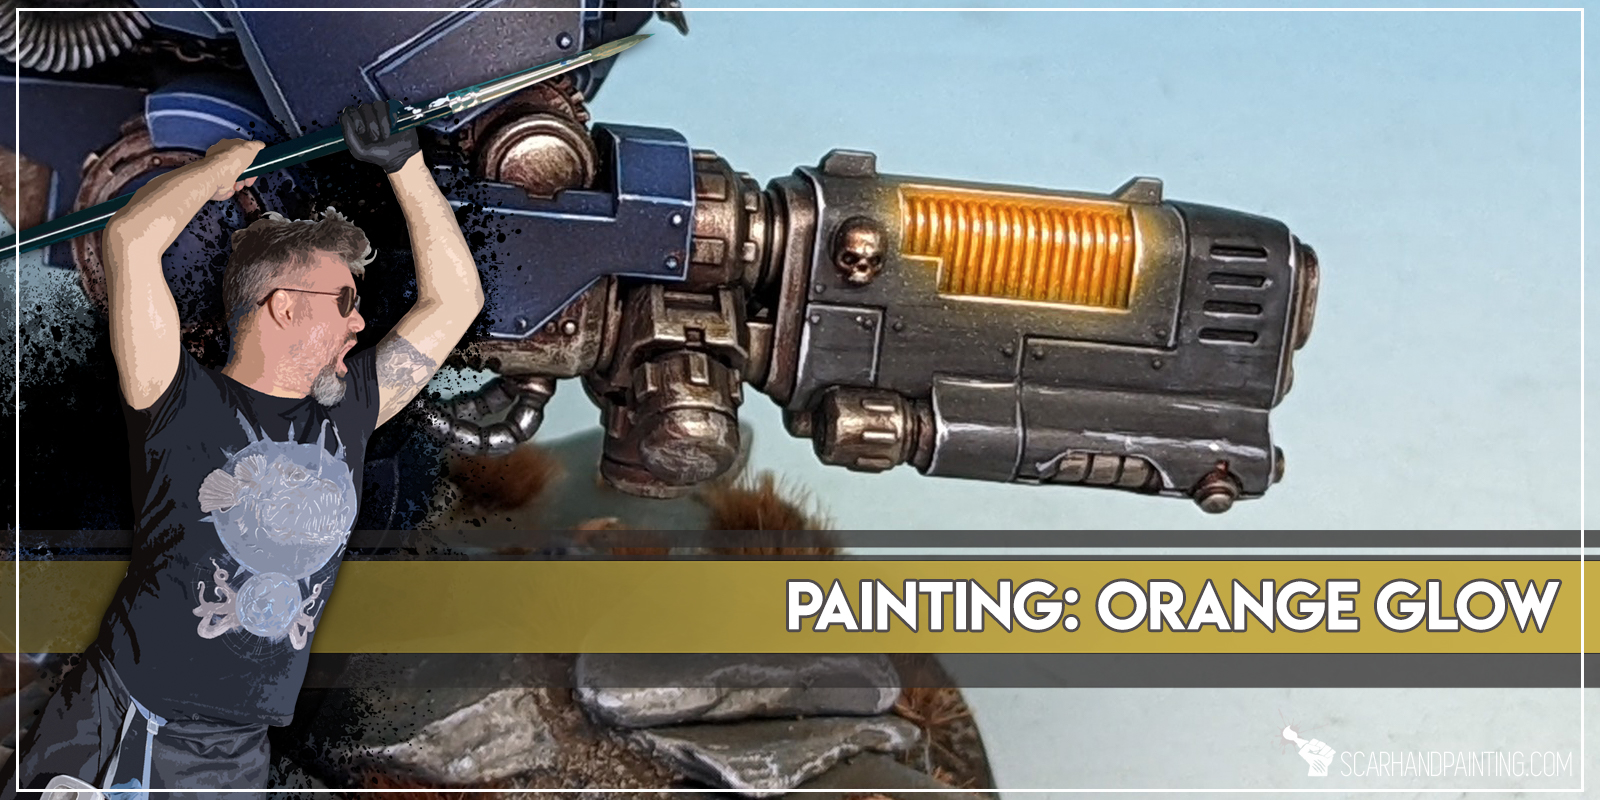
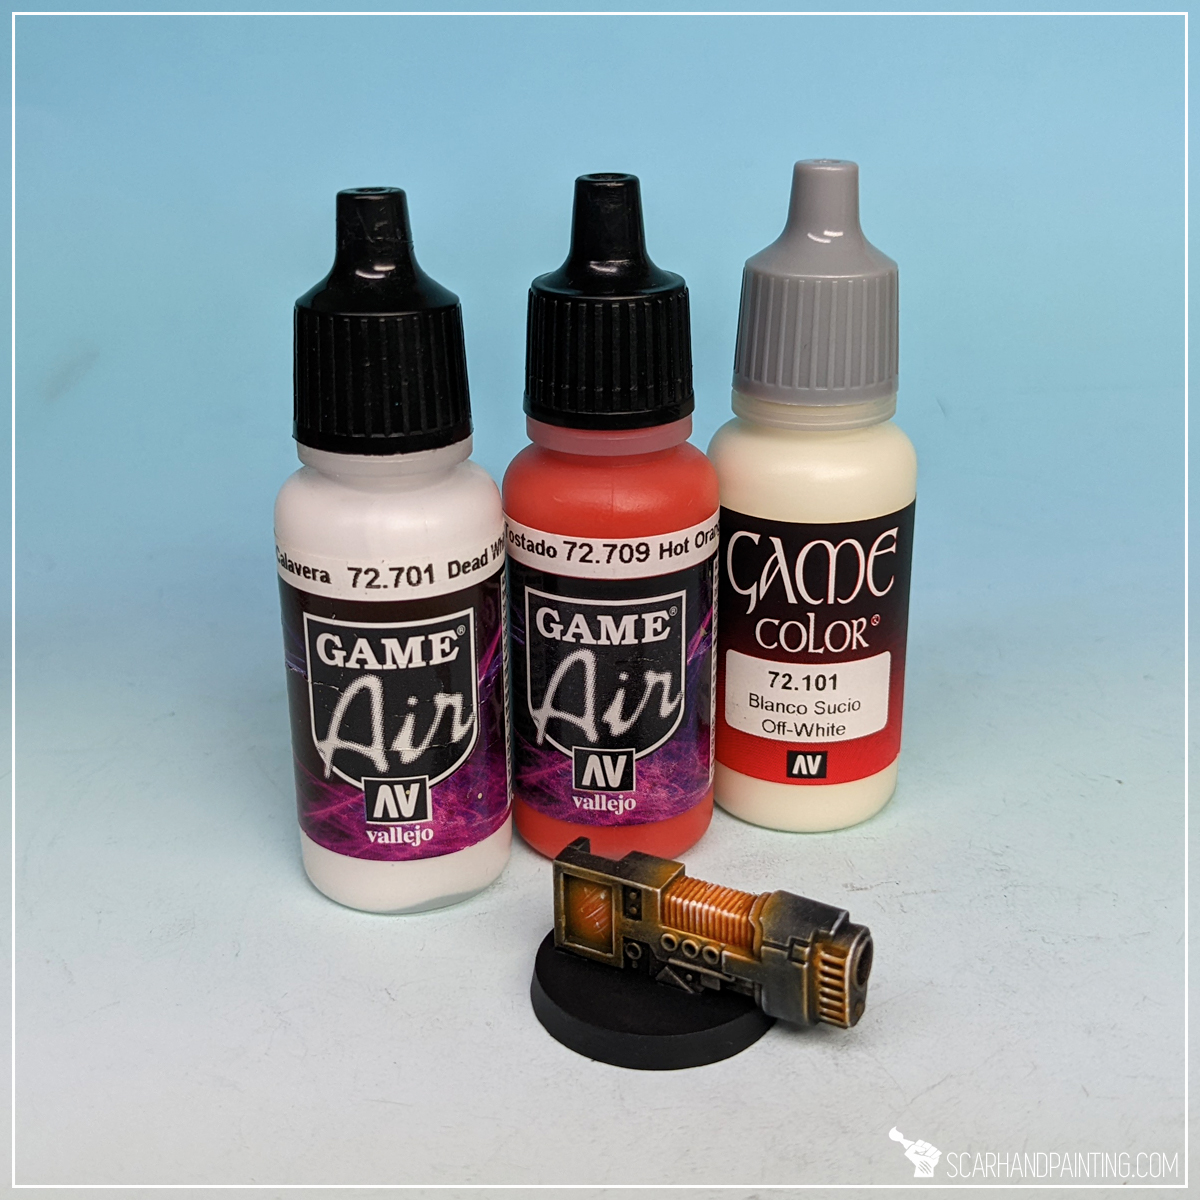
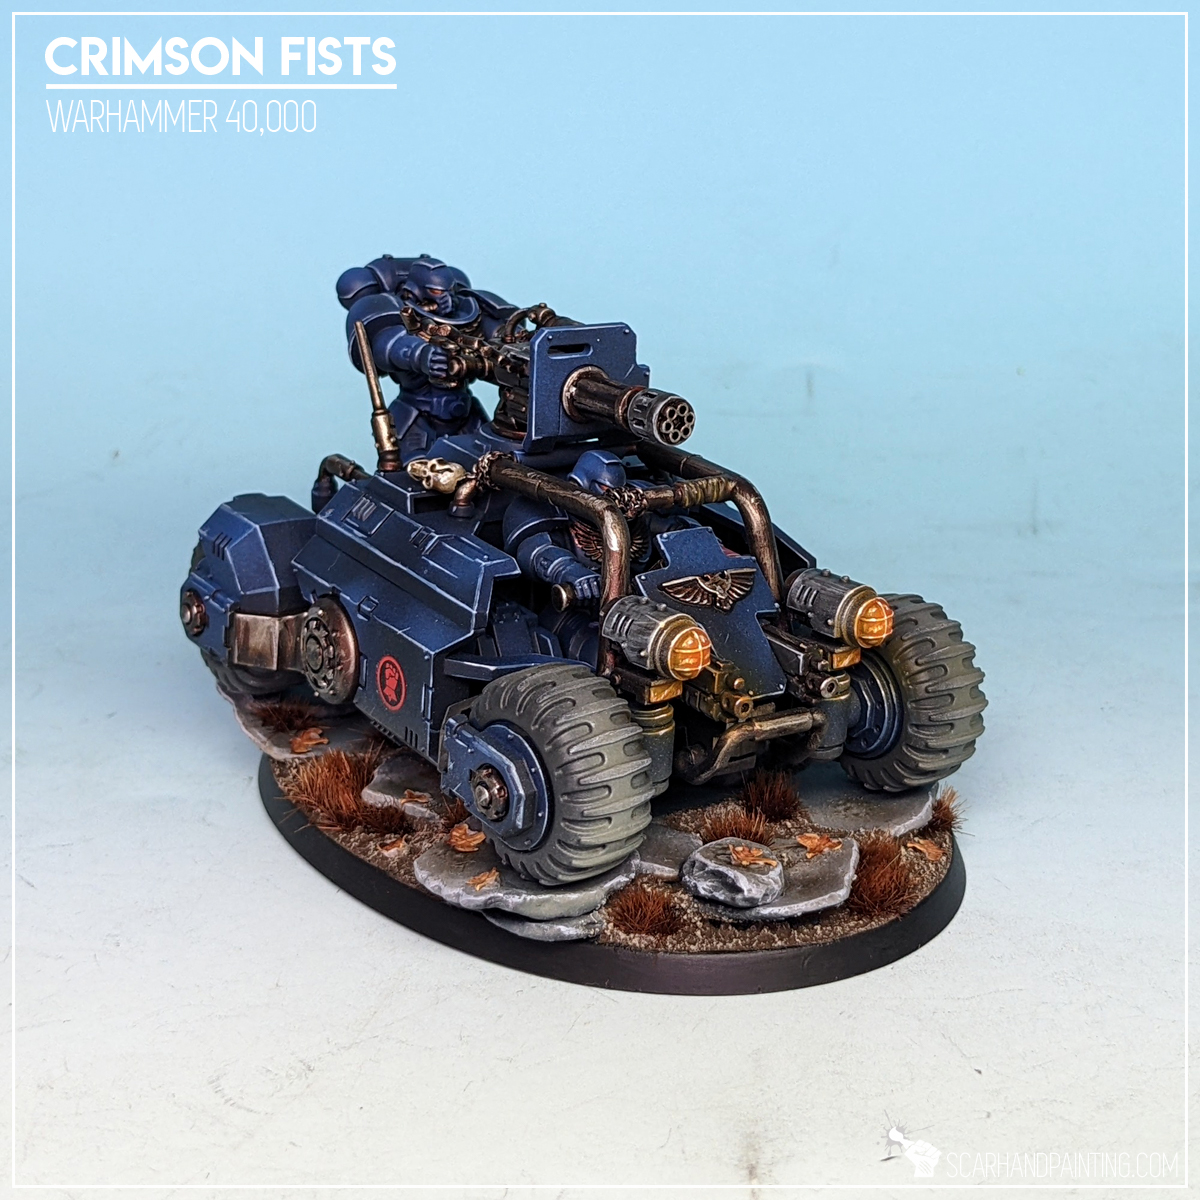
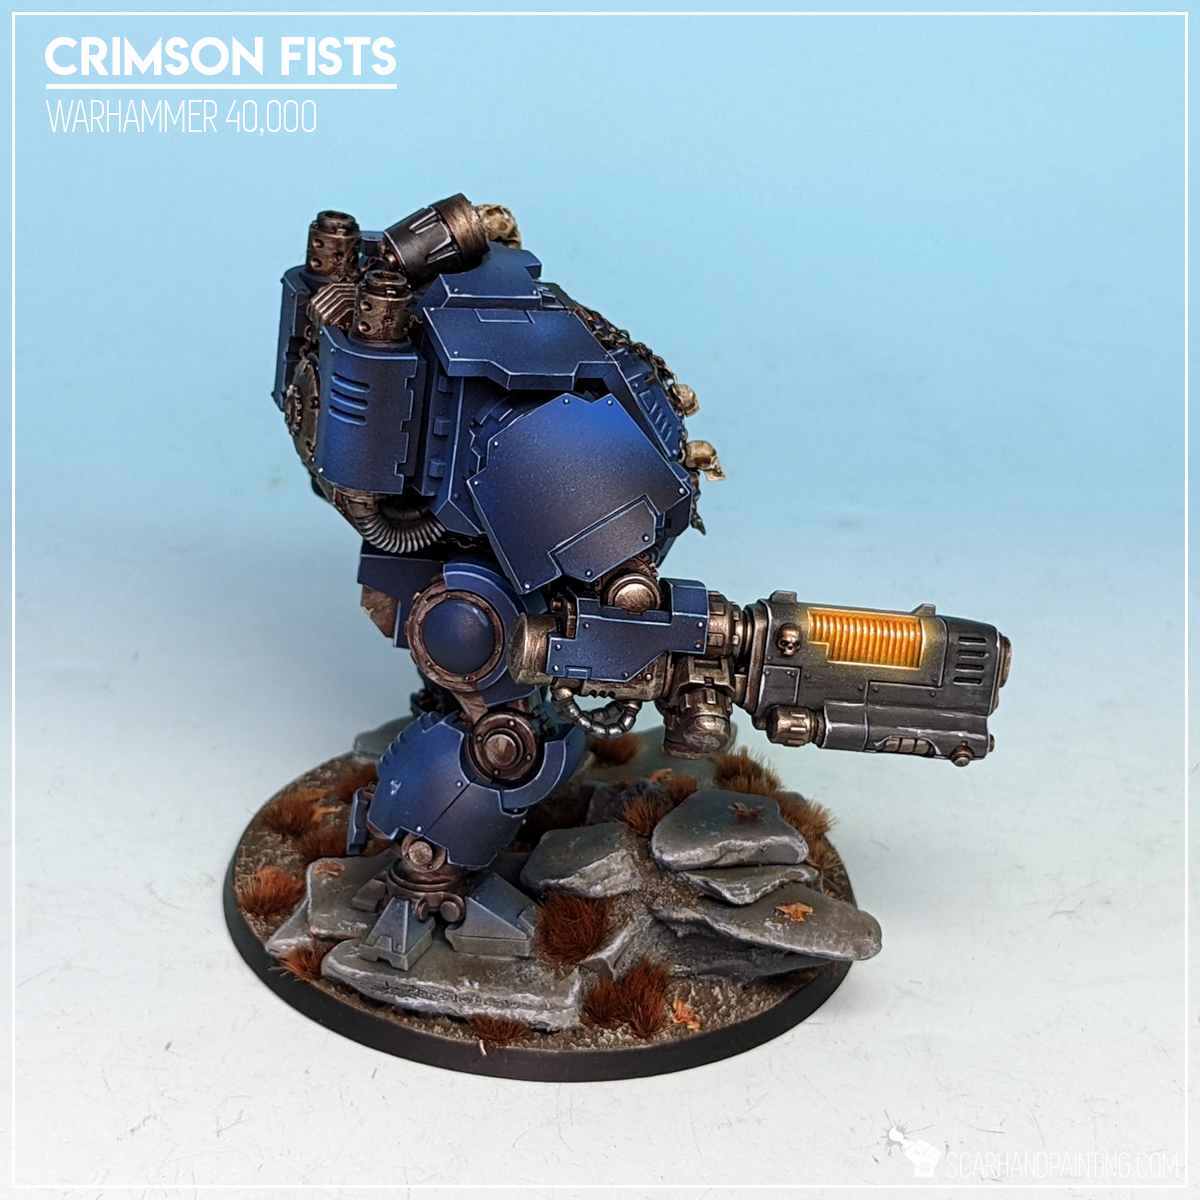
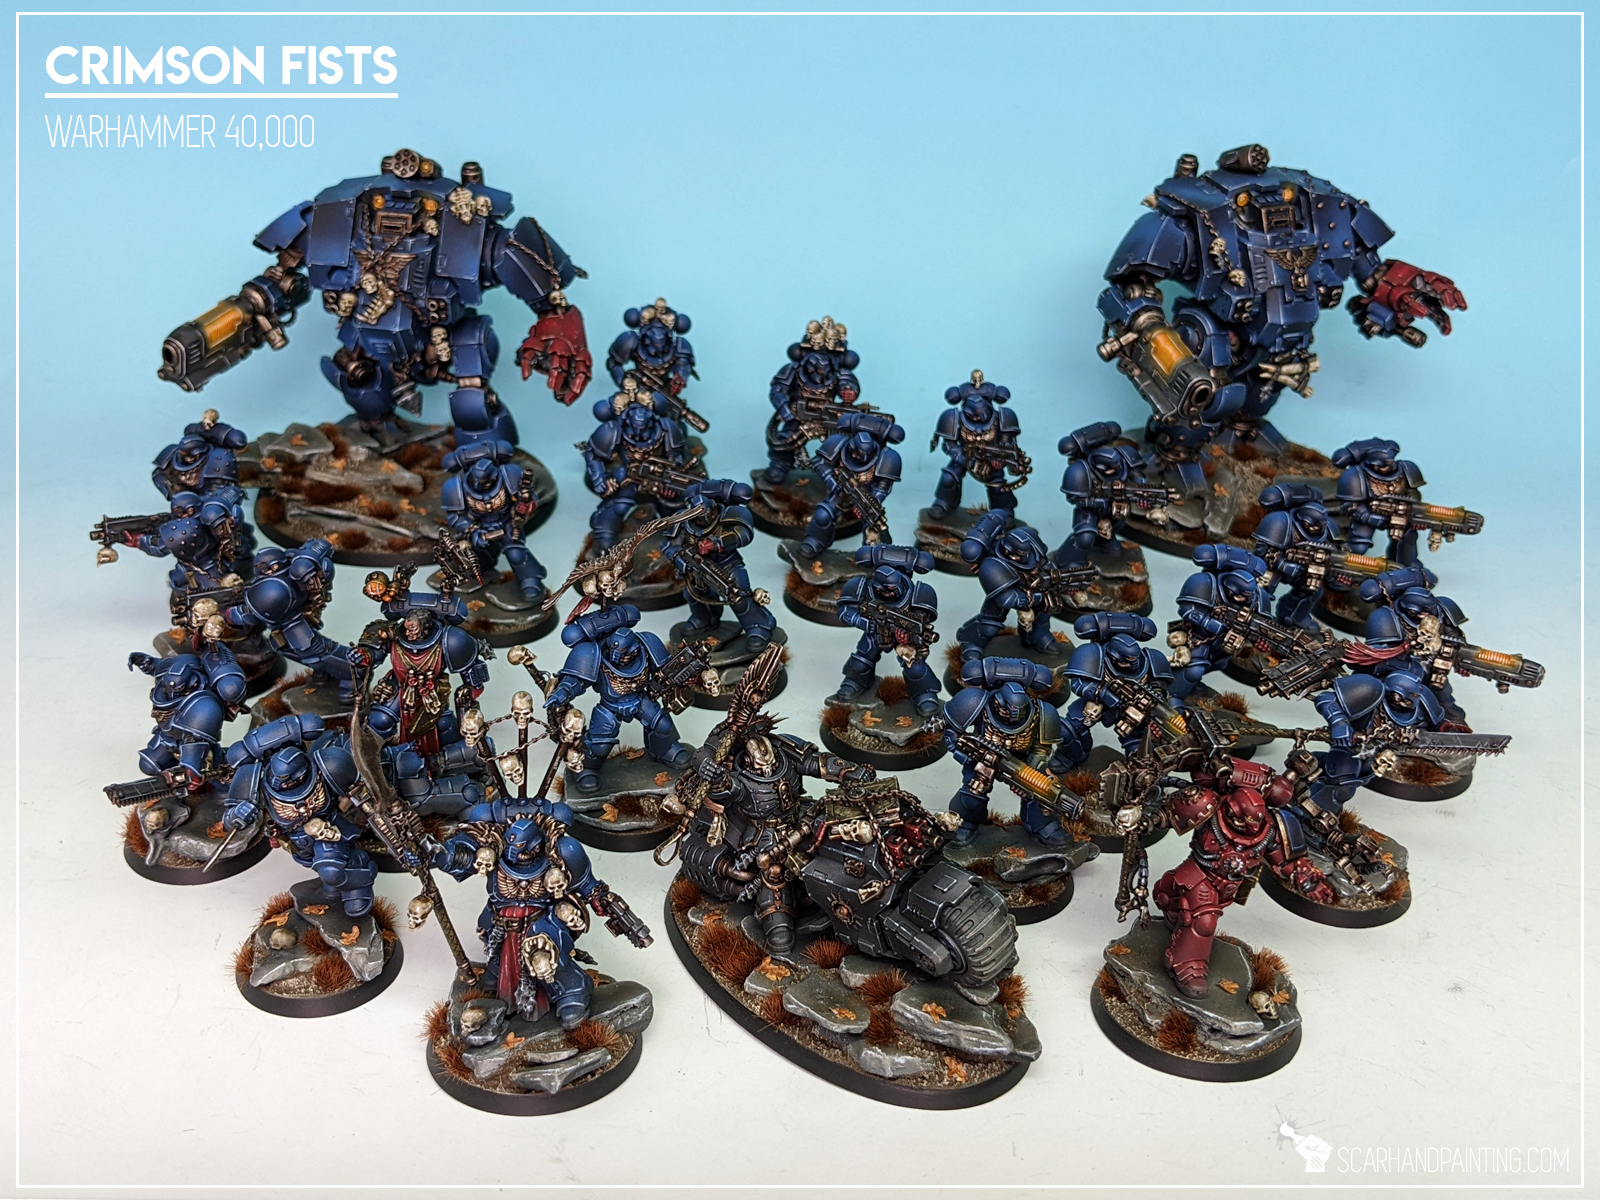
As a full time professional miniatures painter I strive to specialize in techniques that provide the maximum effect on the gaming board, while being relatively simple and easy to mass duplicate. Here I will present to you a Step-by-step guide to painting orange glow effect similar to that used on my Games Workshop Crimson Fists army as can be seen in Gallery: Crimson Fists.
Before we start, some notes:
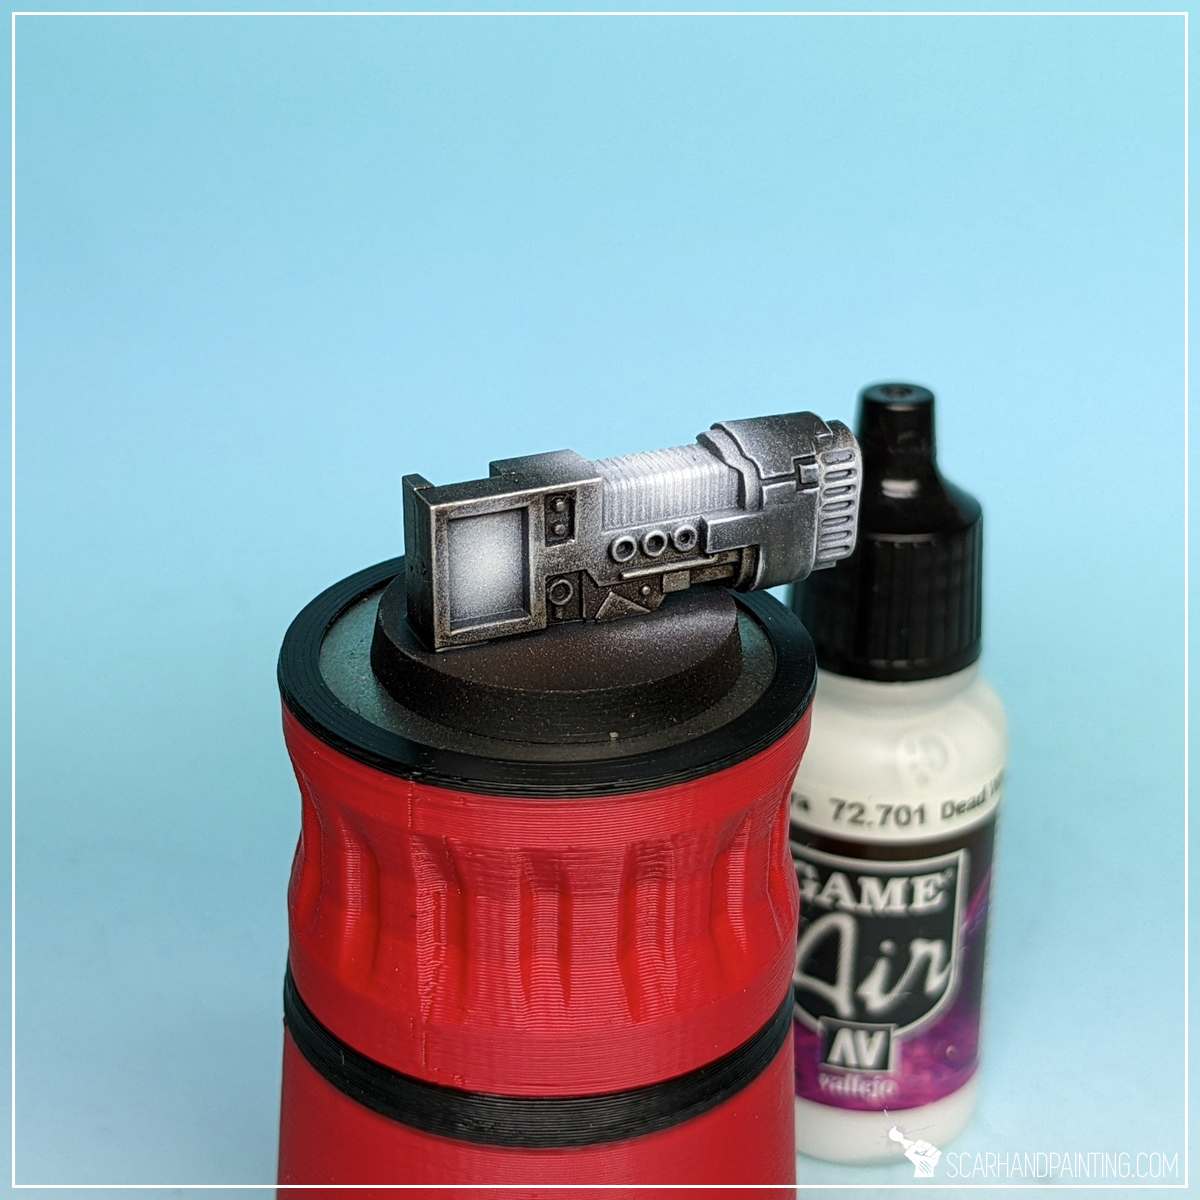
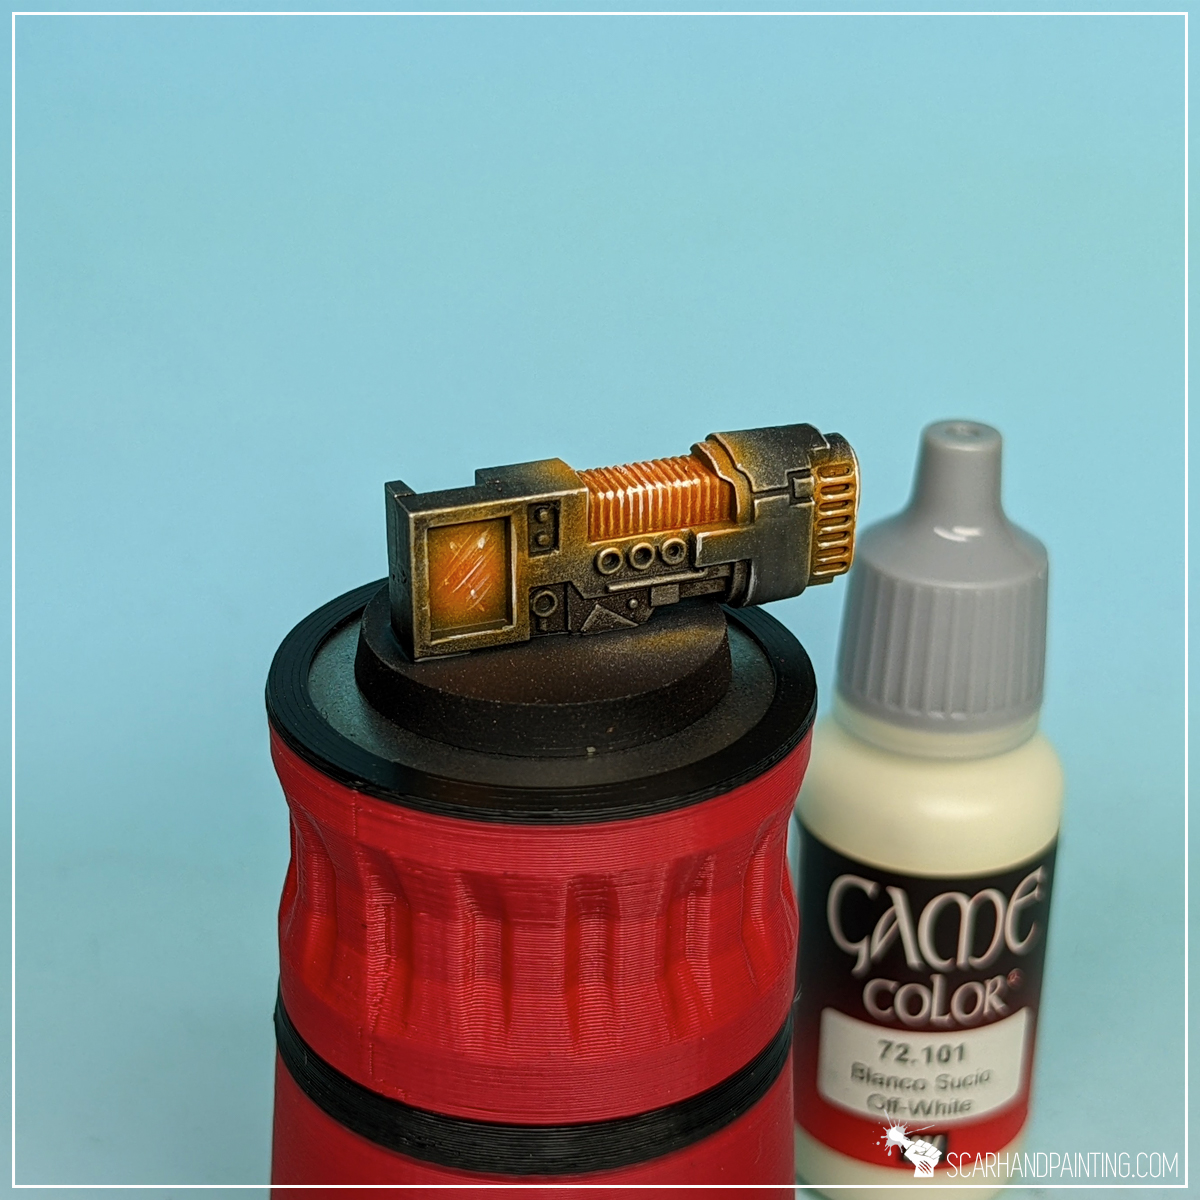
Step one: White preshade
I started with a soft layer of airbrushed Vallejo 72.701 Dead White (air). For the purpose of this tutorial I went straight from the bottle, although usually I thin the paint down just a bit with a drop of Flow Improver and a drop of Airbrush Thinner, resulting in less speckling. While airbrushing I made sure to cover potential light source areas plus the surroundings.
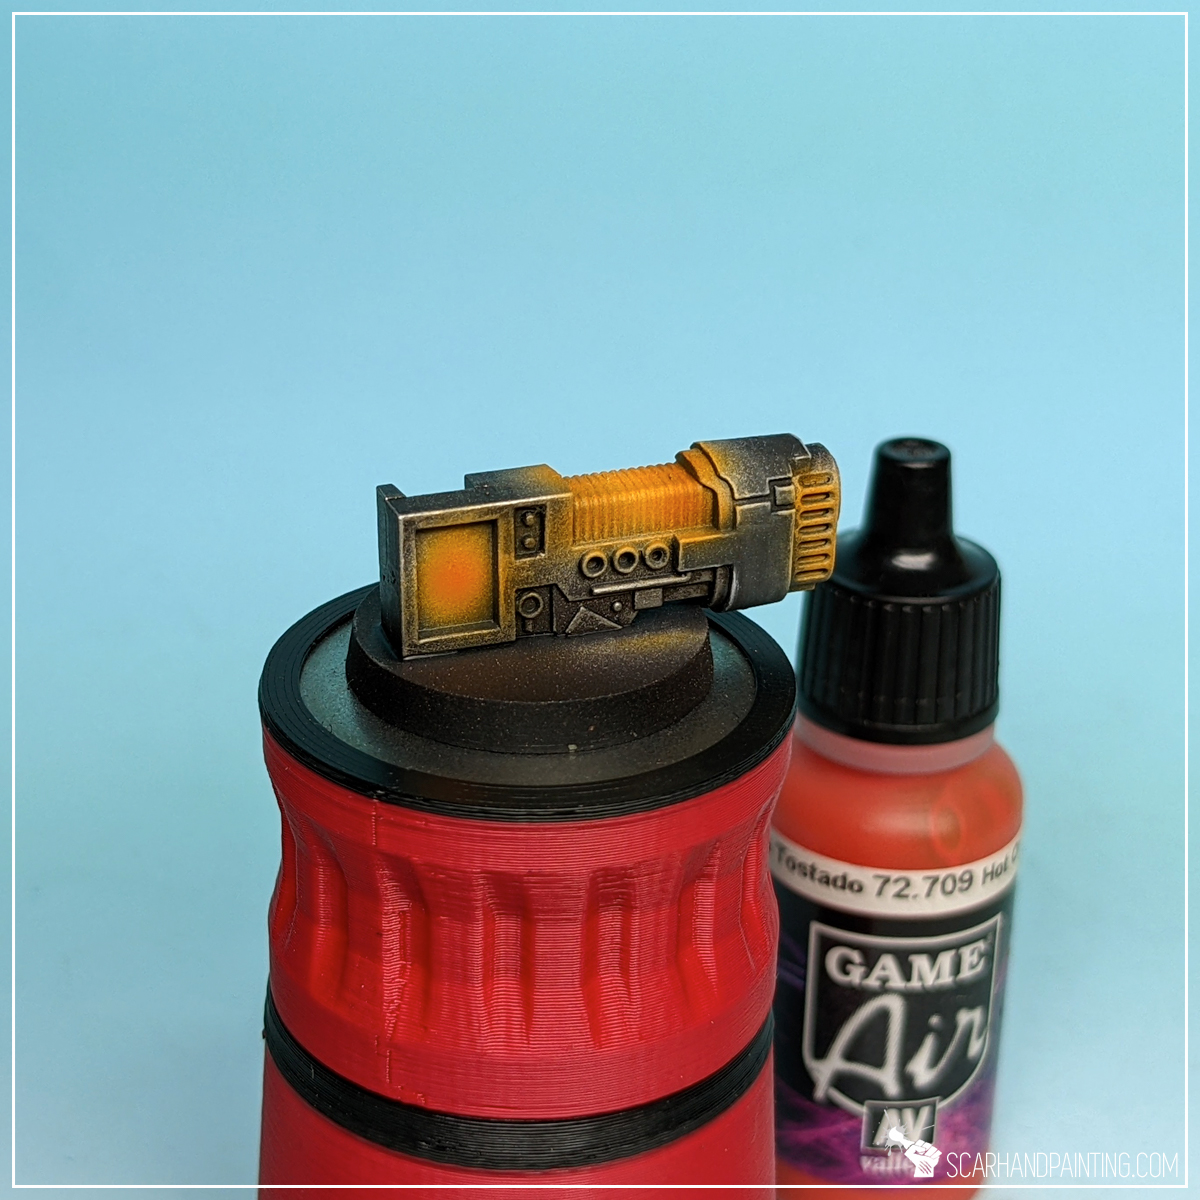
Step two: Orange base
Next I airbrushed a layer of Vallejo 72.709 Hot Orange (air) without thinning. This layer was applied on top of previously airbrushed Dead White.
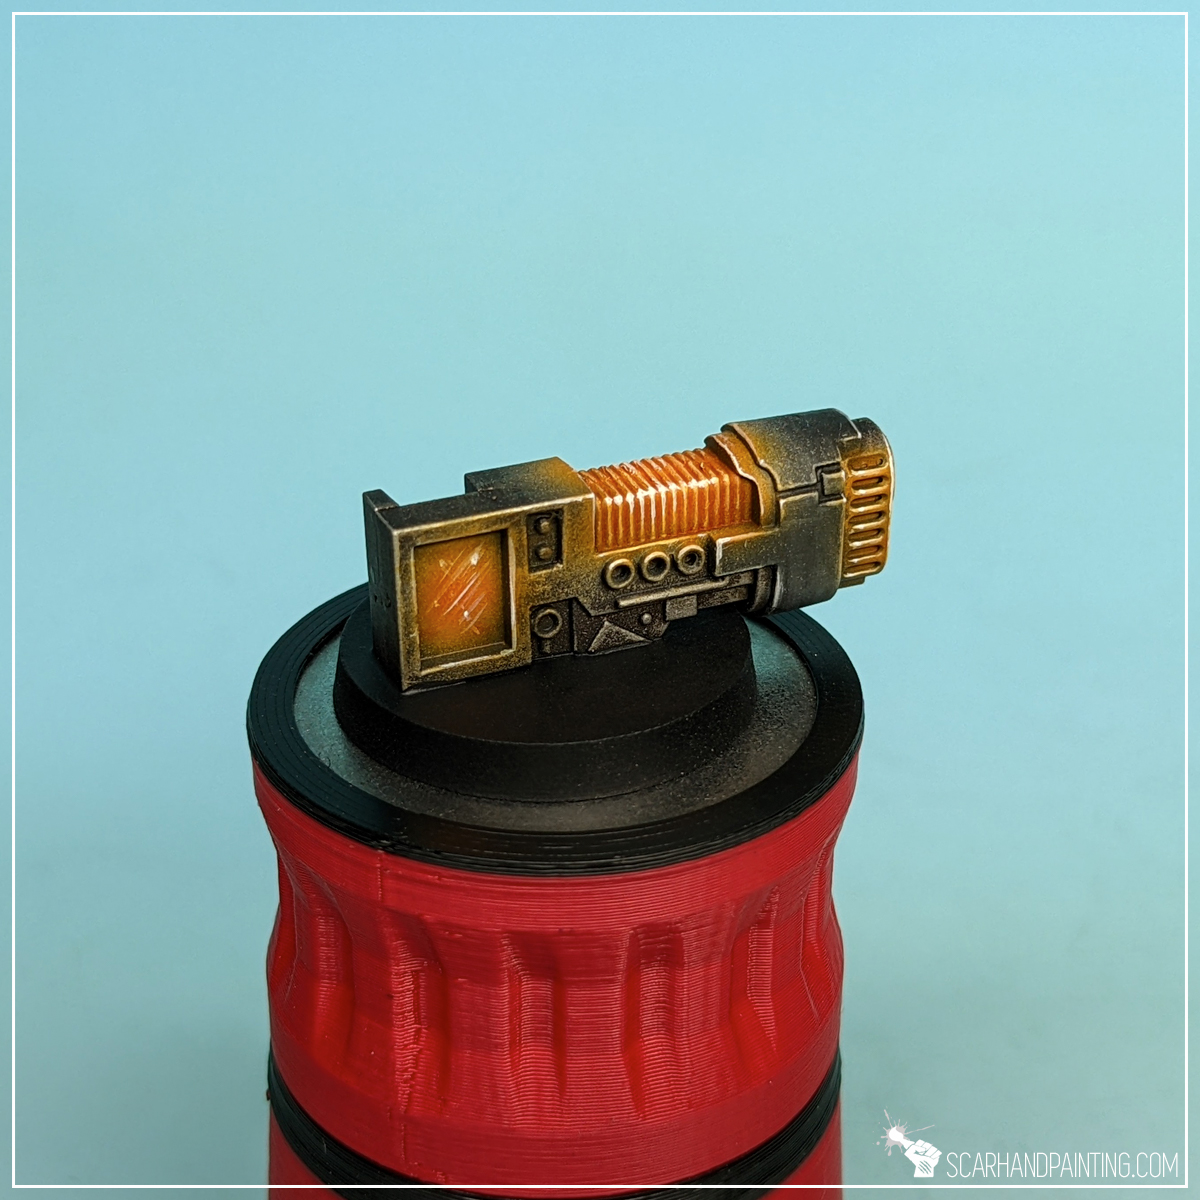
Step three: highlight
I then highlighted orange with Vallejo 72.101 Off-White. Such a bright color might seem like an overkill, but this one is a bit cream’ish and can get juiced up to bright orange easily later on.

Step four: glaze
Here’s where real magic started. I thinned down Vallejo 72.709 Hot Orange (air) with a bit of water and manually glazed over the most intense orange parts of the miniature. This includes plasma coils, glow on the side of the barrel and large rectangle area at the back. Vallejo air series are perfect for hard glazing, retaining a lot of ‘juice’ even after thinning.

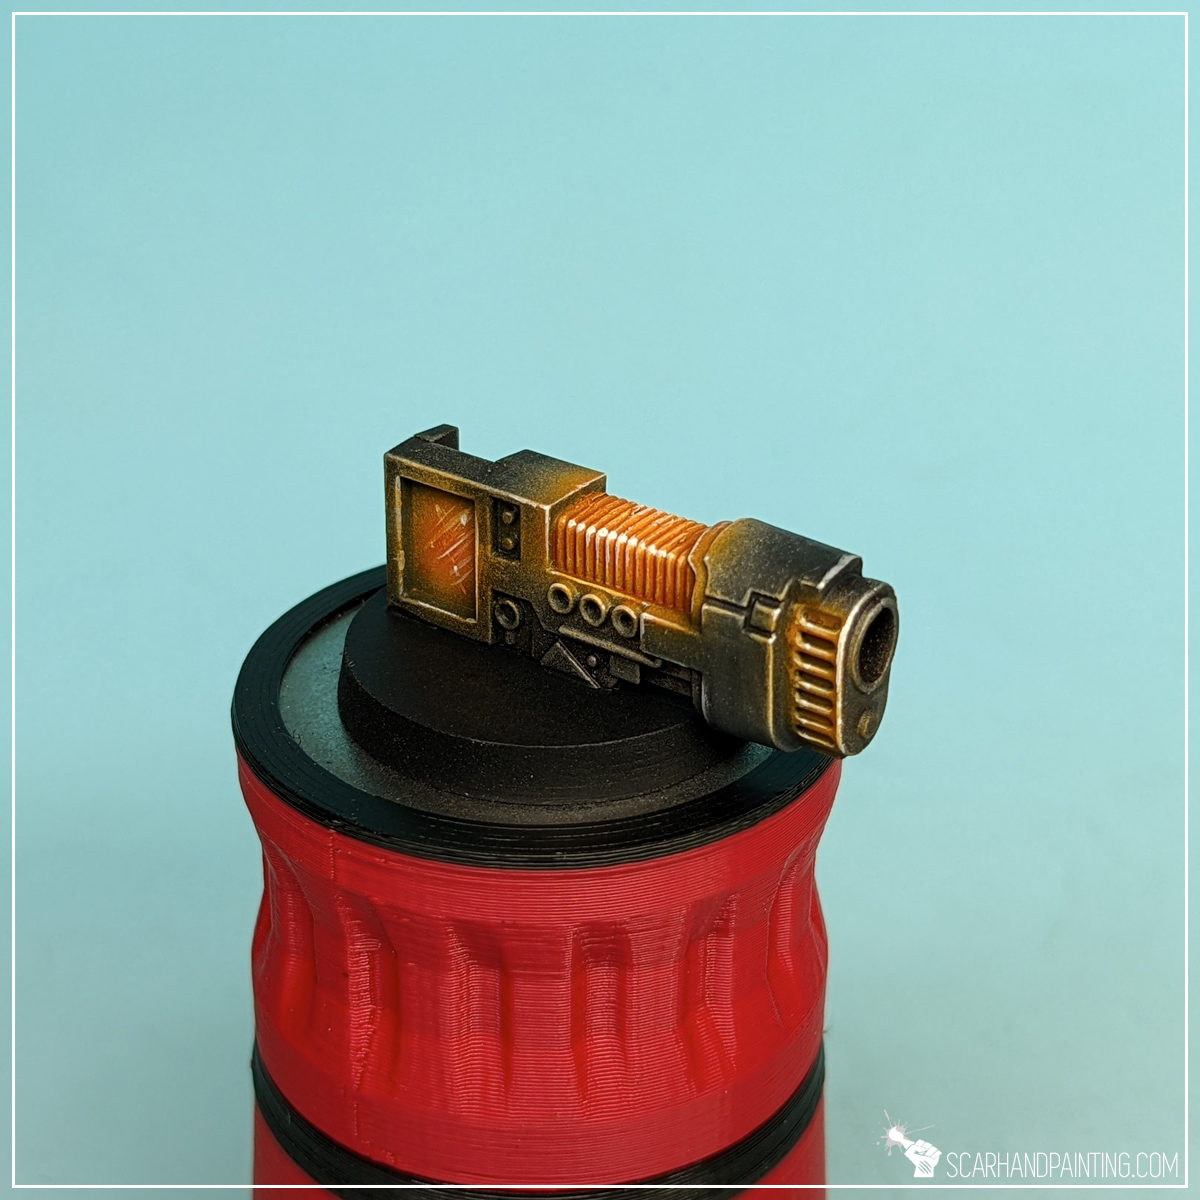
Step five: highlight
Finally I once again applied a highlight of Vallejo 72.101 Off-White, but this time limited to barely few dots and lines in the most exposed areas. This created focus points for the eye, while also providing better overall contrast on the piece.
Job done. Three colors, five layers is all it takes to achieve an interesting effect that will steal a glance or two on the gaming board.

I hope you find this tutorial interesting. Be sure to let me know your thoughts in the comments below or via Facebook or Instagram. I would also appreciate if you considered sharing this content with your friends, who might find it useful. Finally if you are looking for a professional warhammer 40k miniatures painting service, be sure to contact me with this contact form. I always reply within 24 hours, after which please check out your spam folder.
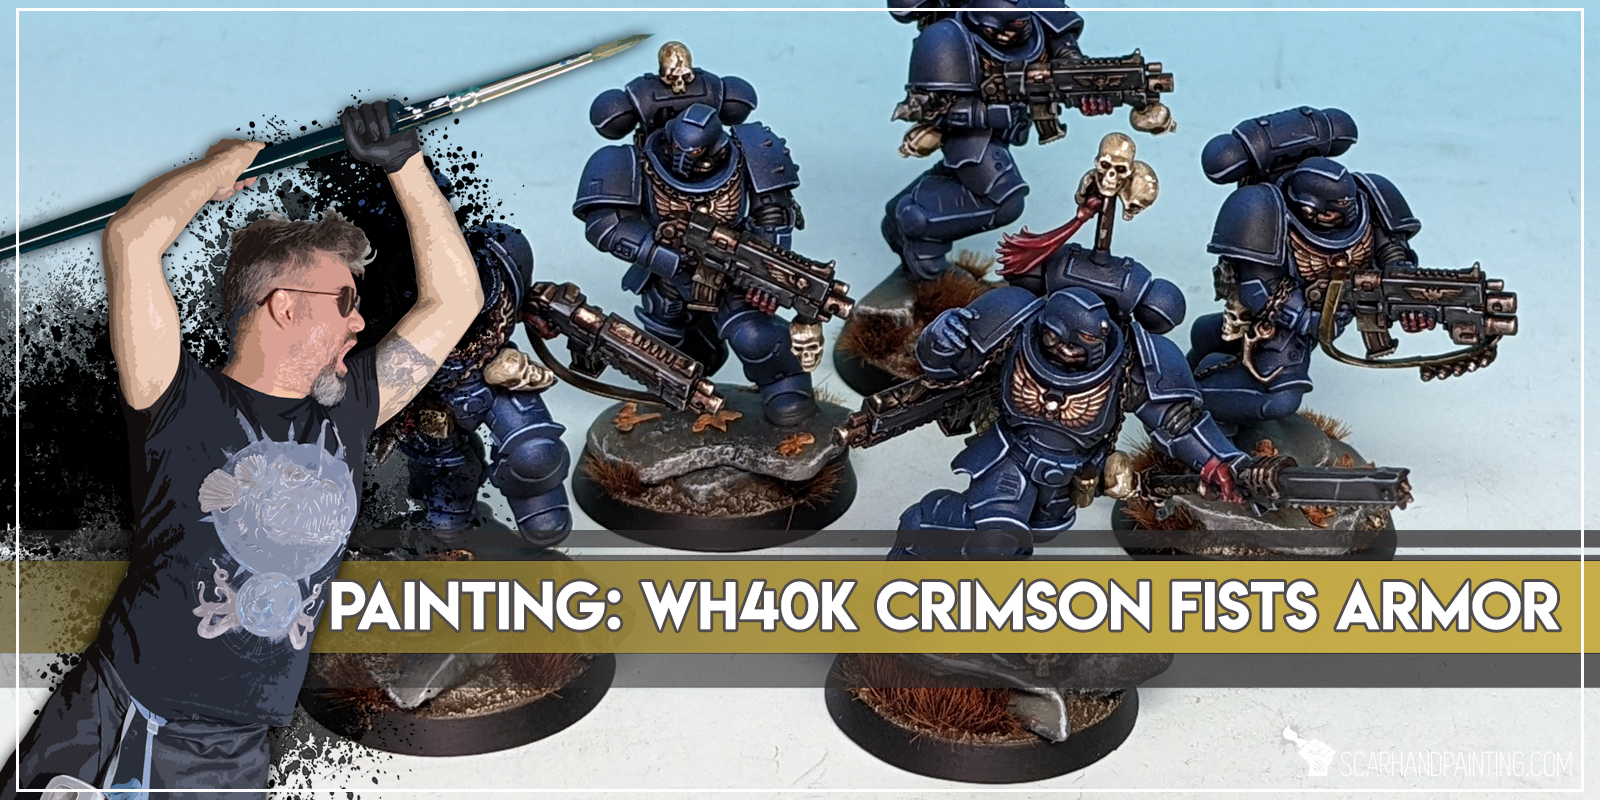
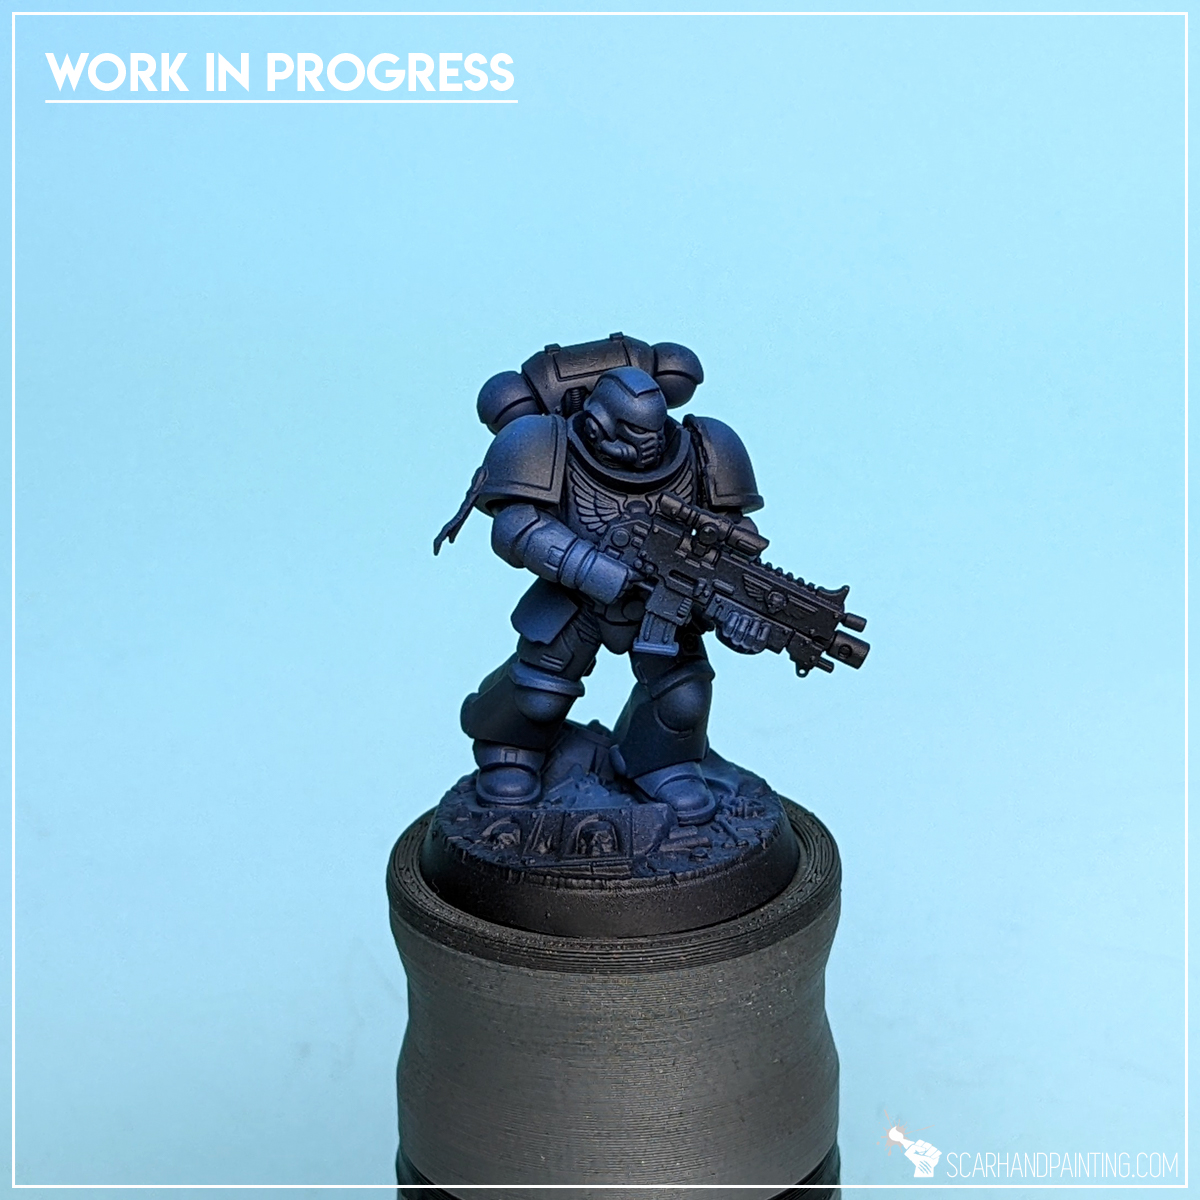
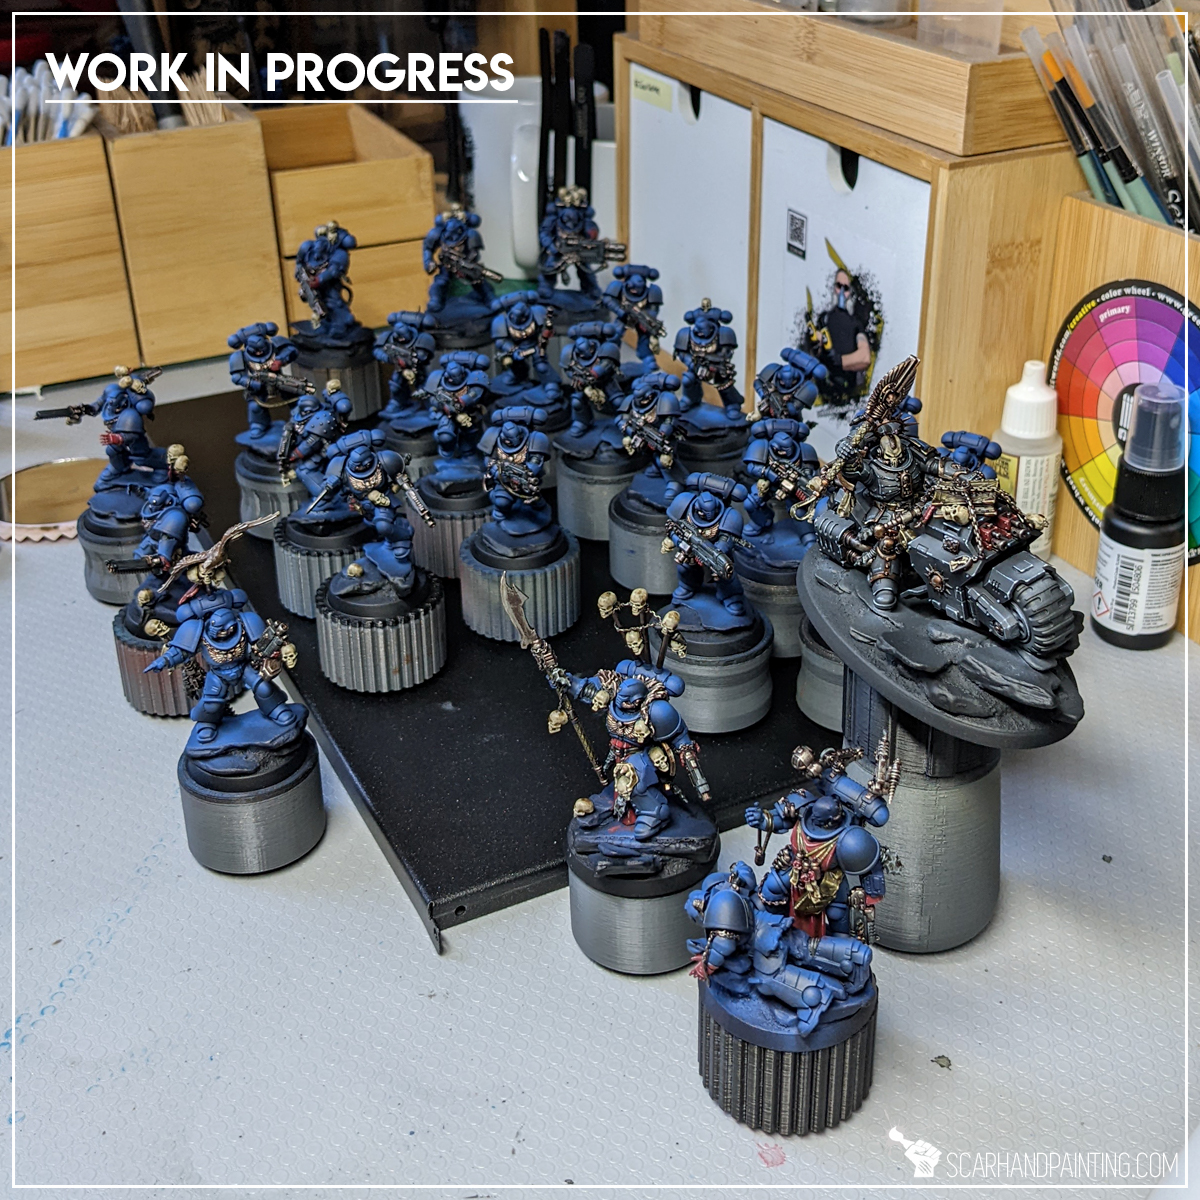
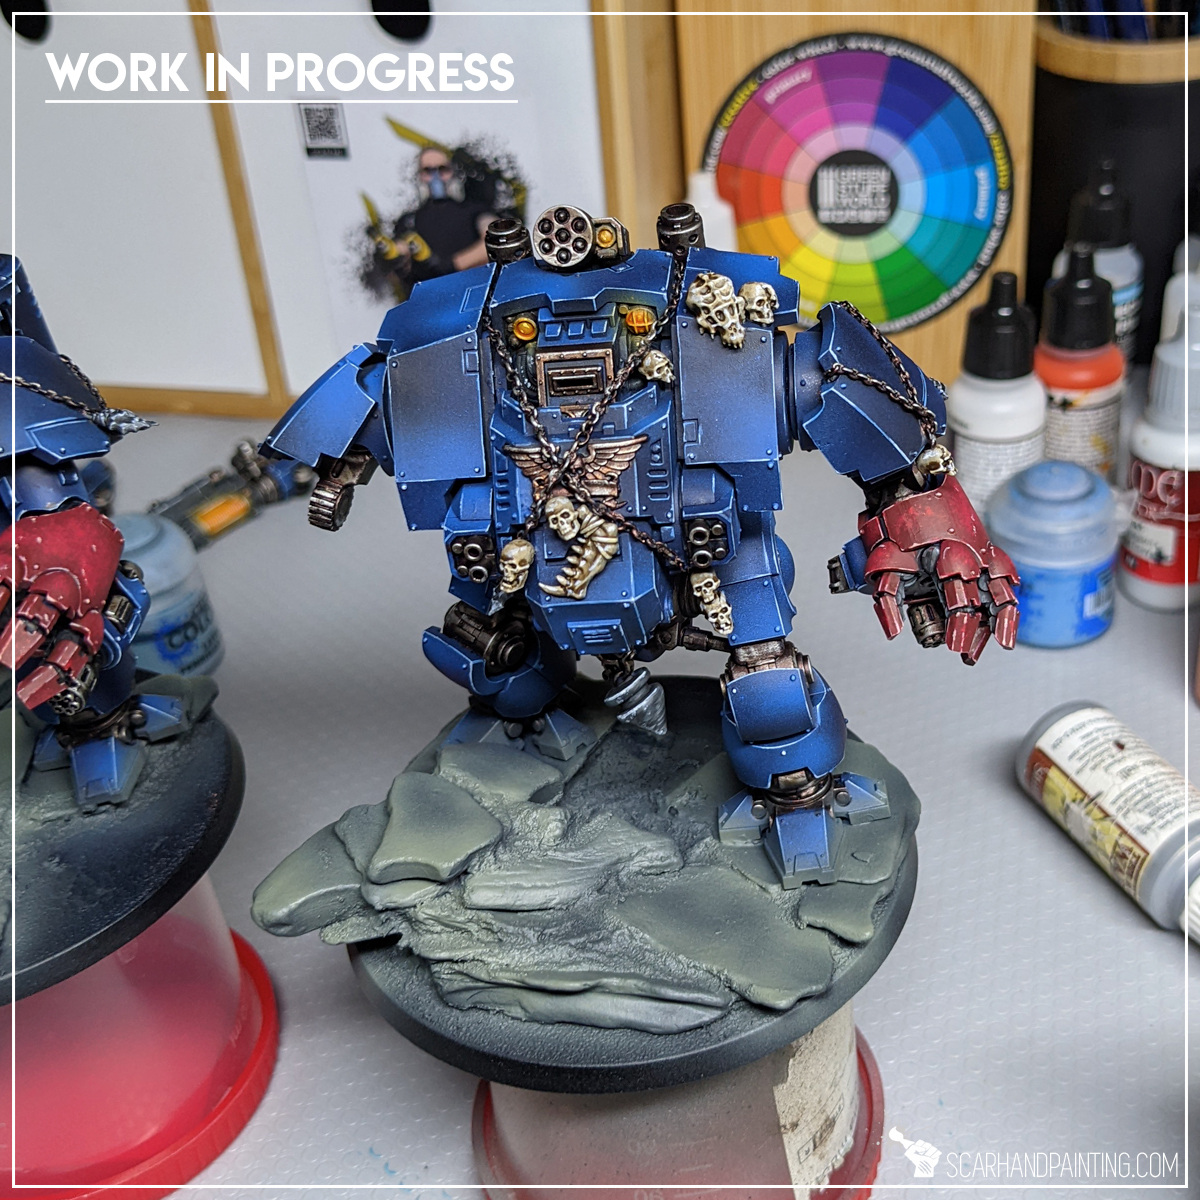
Welcome to Painting Warhammer 40,000 Crimson Fists tutorial. Here I will present to you a Step-by-step of an easy and fast painting process for Games Workshop Crimson Fists Primaris Marines armor as can be seen in Gallery: Crimson Fists.
Before we start, some notes:
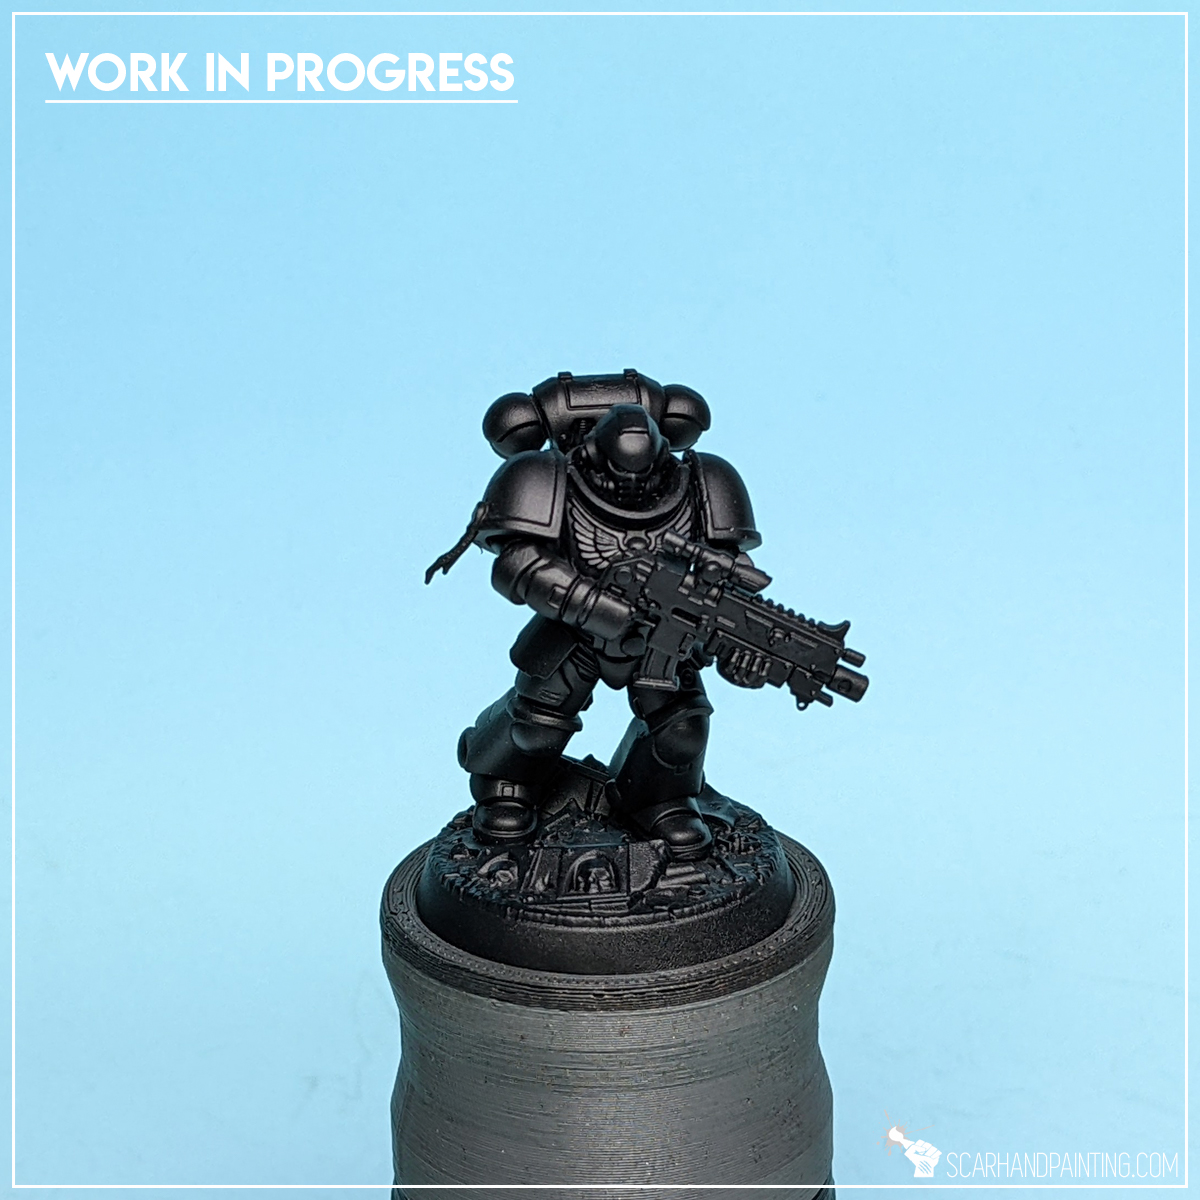
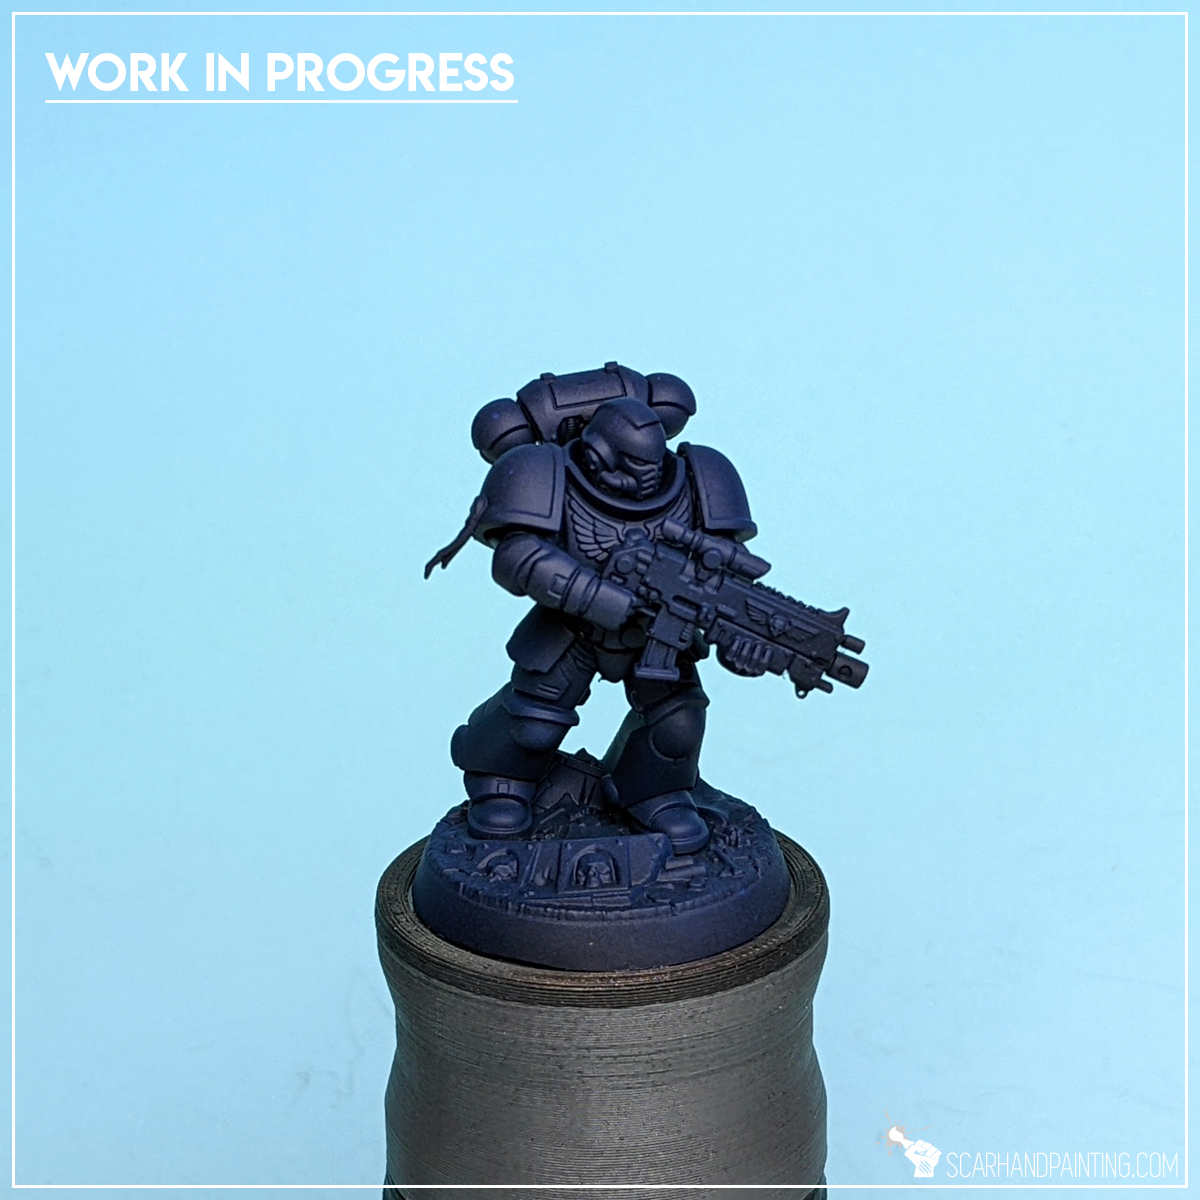
Step one: Undercoat
I started with a thorough layer of Games Workshop Chaos Black spray. This is a standard procedure for me. Chaos Black spray is my go to choice when it comes to undercoat.
Step two: Base Color
For the initial layer I chose Vallejo Model Air – French Blue (71.088). The color is a somewhere medium tone blue, with much vibrancy that got a bit toned down by black undercoat beneath. I applied a thin, dry layer of French Blue by airbrushing it on top and around the miniature. I took extra care not to make the layer too strong.
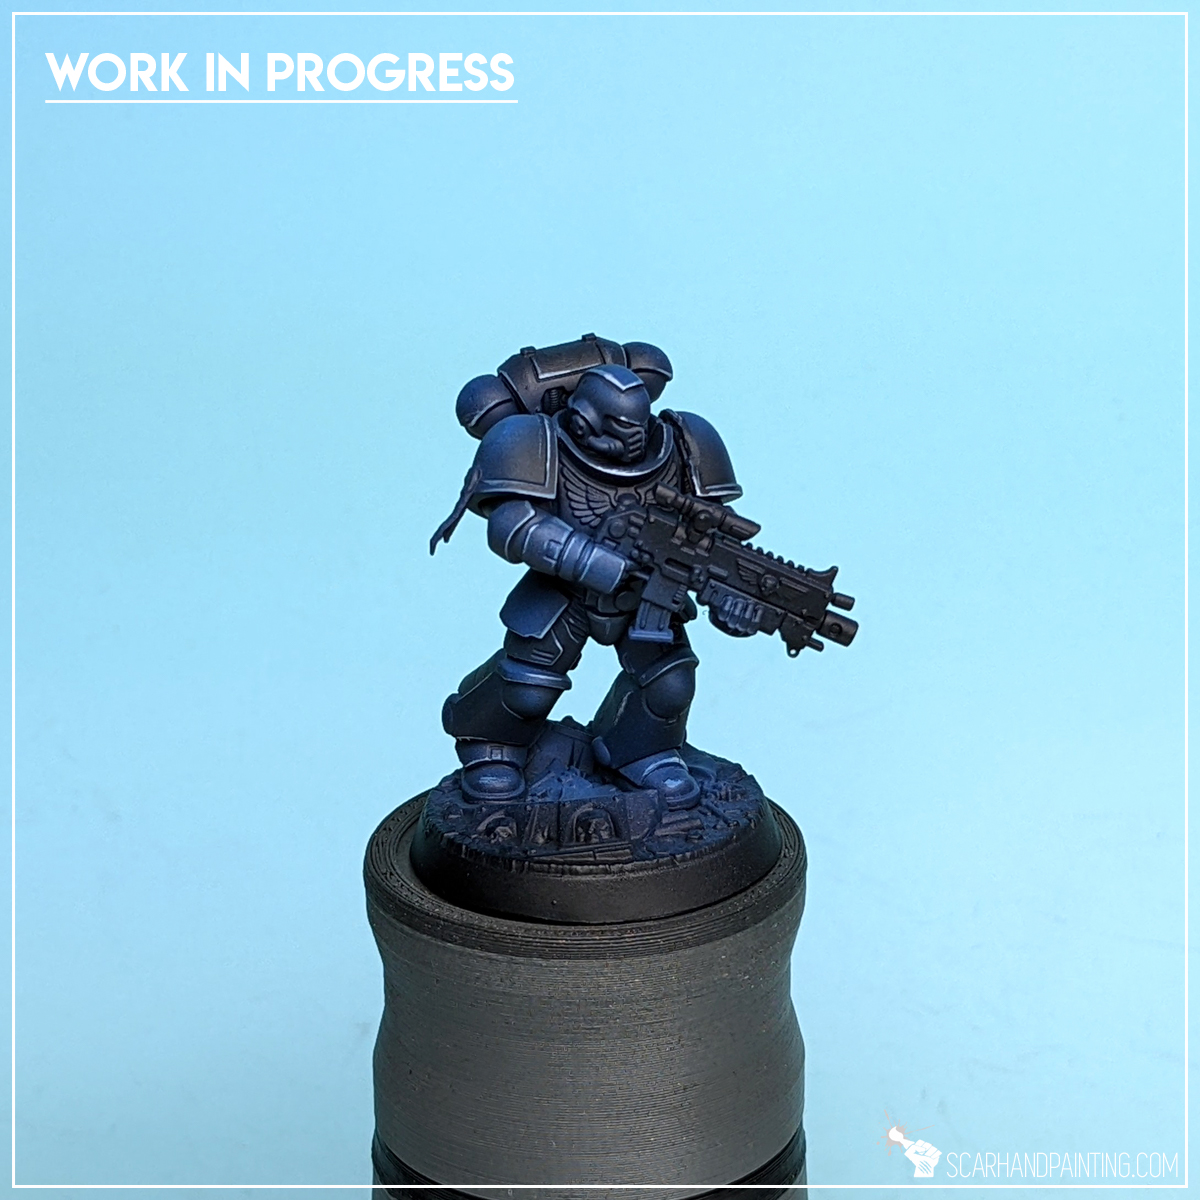
Step three: Highlight
Next I applied a mix of Vallejo Game Air – Ultramarine Blue (72.722) proportioned 5:2 with Vallejo Model Air – Light Sea Blue (71.089). This layer was also airbrushed, but this time I applied it zenithally and on the most exposed areas of the armor. Once again I took extra care to keep the layer dry and soft.
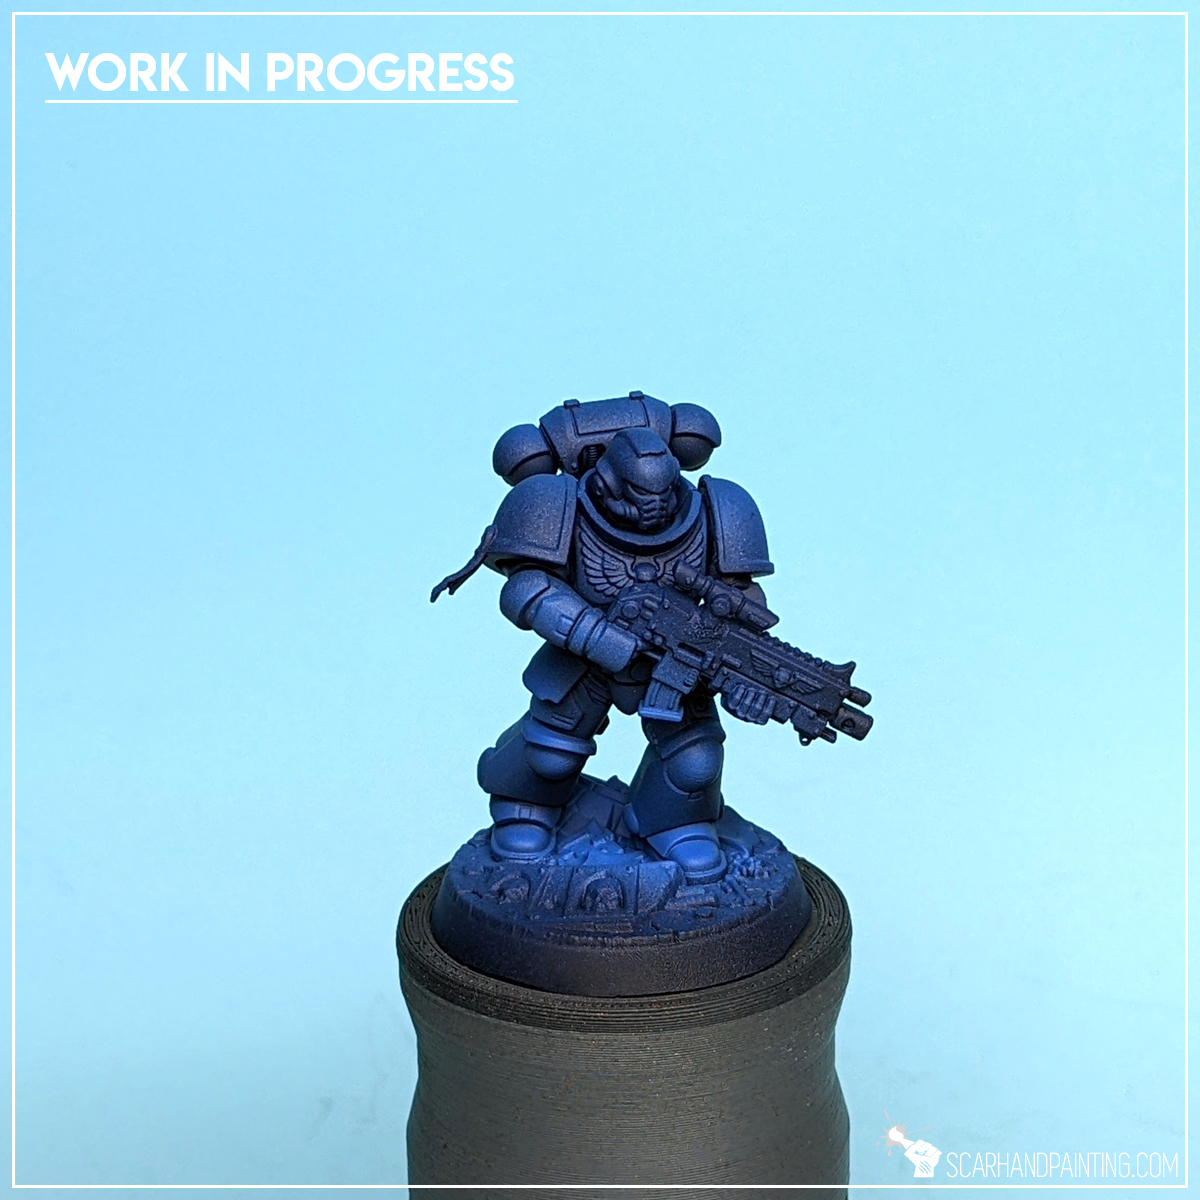
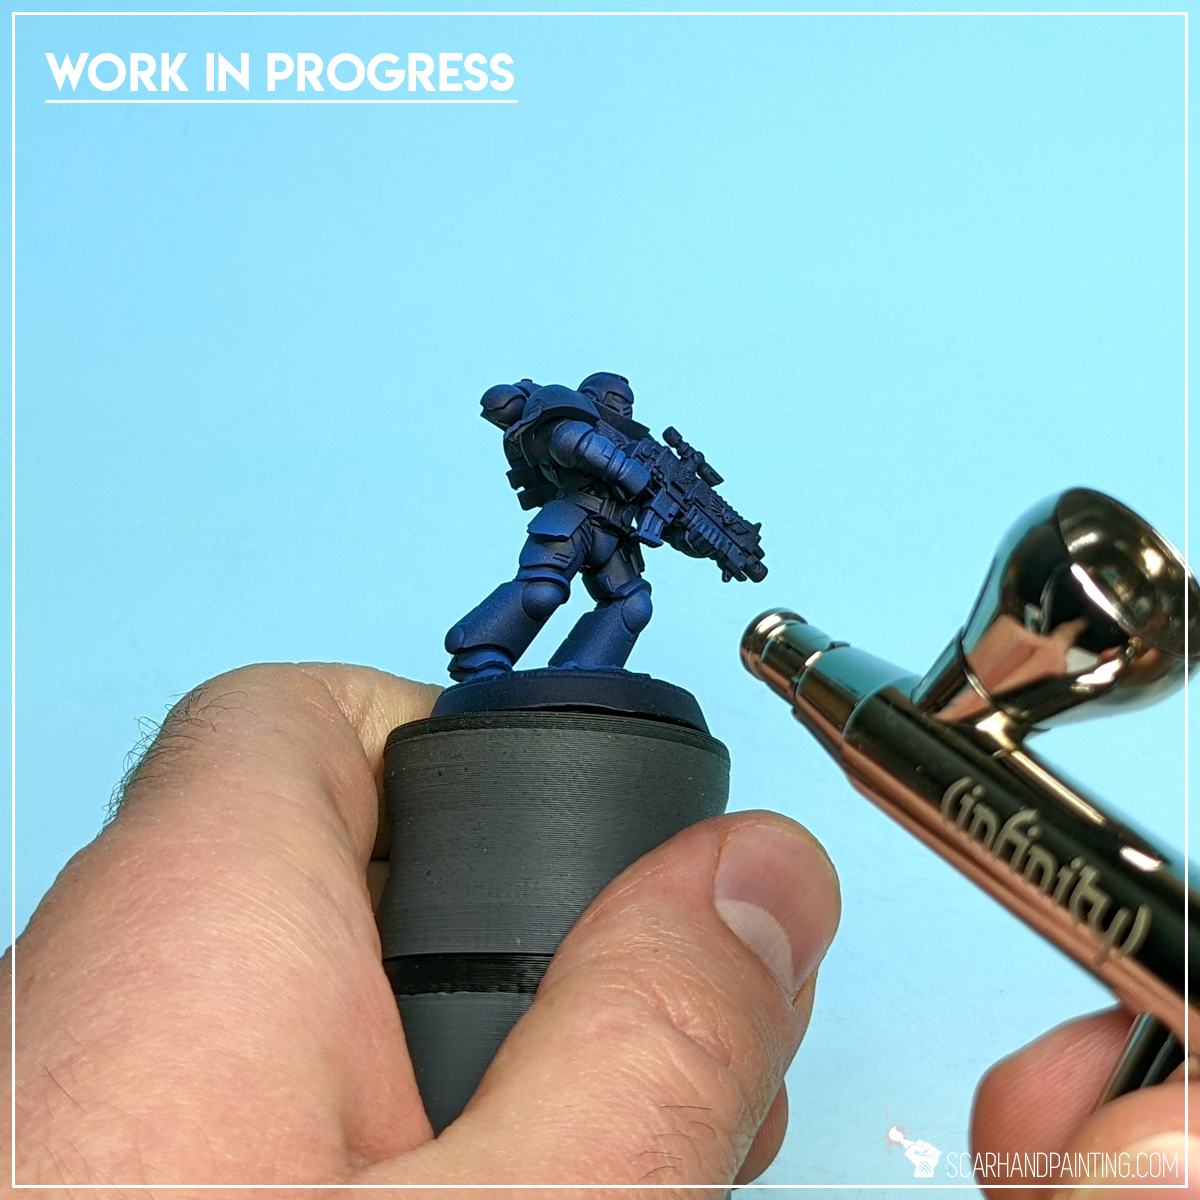
Step four: Shading
I then applied Vallejo Wash for Dark Vehicles (76.518) by airbrushing it from the bottom of the miniature (reverse zenithal) and onto low parts of large areas, including lower shoulder guards, sides of leg armor and lower part of the backpack. This particular paint is very thin, forcing me to apply it by multiple tiny, mist-like “puffs”, that dried out almost instantly. It significantly toned down all the armor and blended any dry specks leftovers from previous layers.
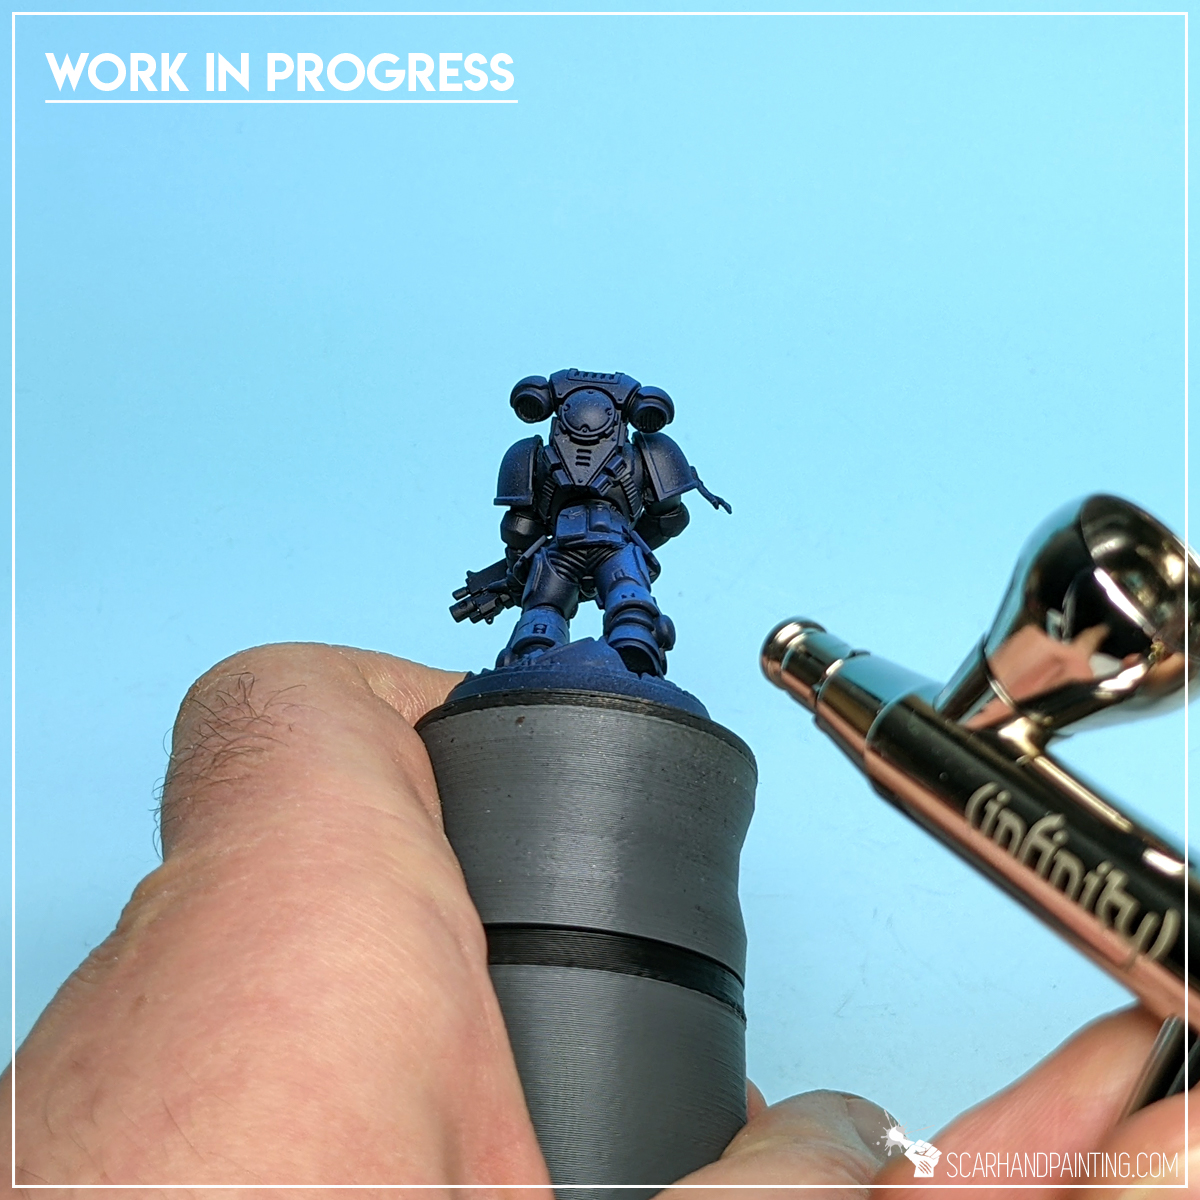
Step five: First Highlight
Next I switched to manual brush and applied an edge highlight of Citadel Layer – Hoeth Blue. I picked only the most exposed edges, skipping all places that were too difficult to reach or hidden from sight.

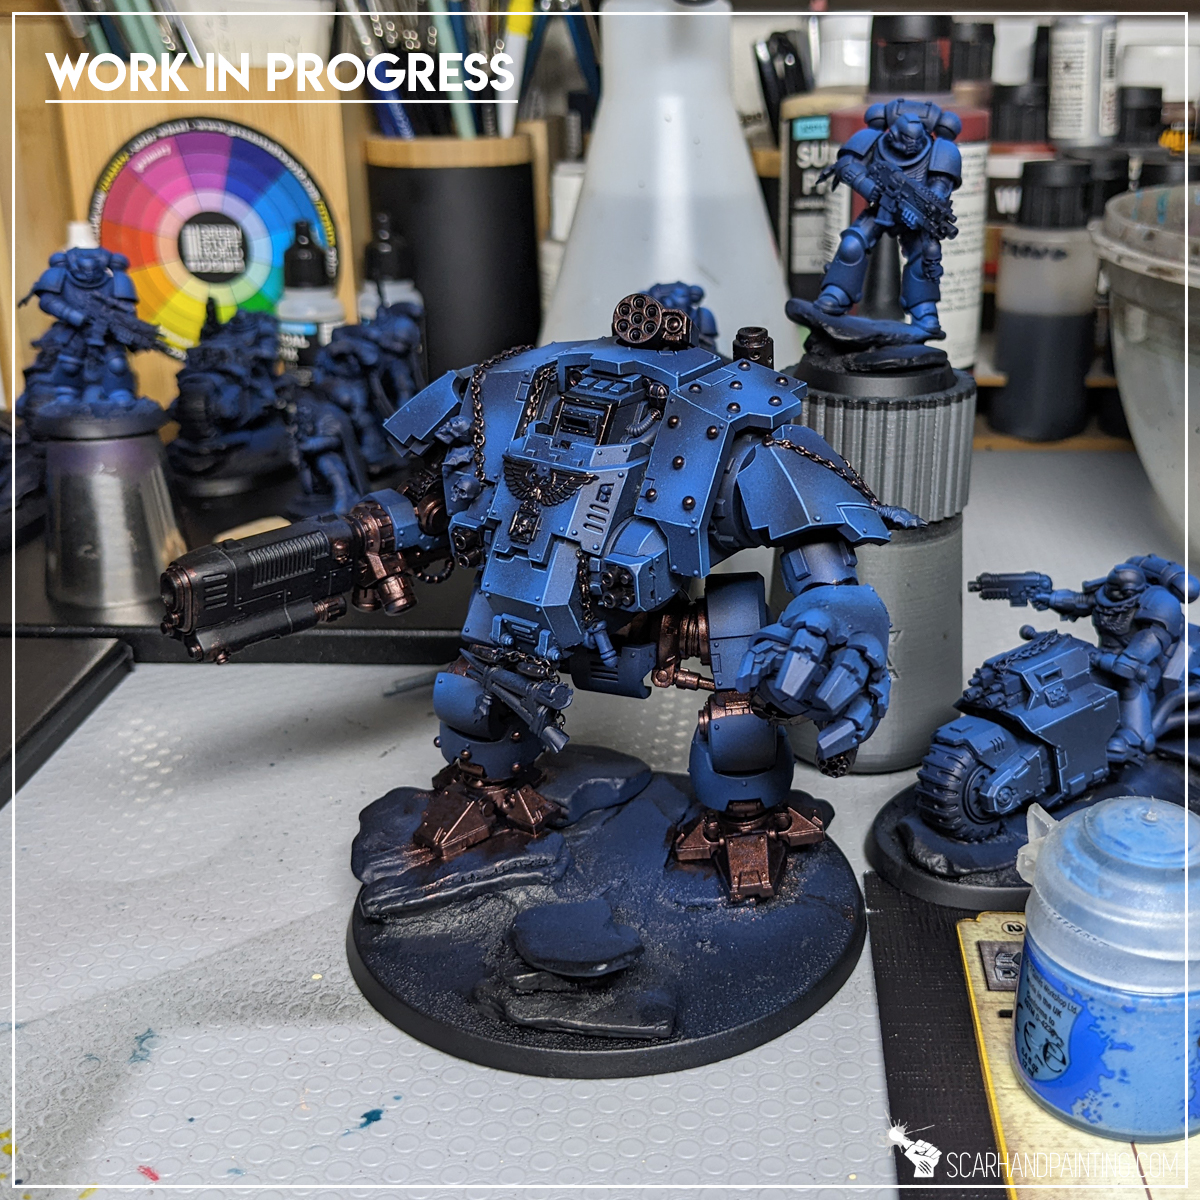
Step Six: Second Highlight
Finally I applied an edge highlight with Vallejo Game Color – Glacier Blue (72.095). Contrary to previous layer, I kept this one concentrated on top areas and corners, adding extra focus and depth to the exposed armor detail.
That wraps up the armor. Only five layers of paint for an eye catching effect of dark blue armor, that stands out on the gaming board. Now with this solid base out of the way, we can start building character of the miniatures, by adding more colors and enriching the overall feel of the miniatures – but that is a topic for another day. Stay tuned for part two of the tutorial.
I hope you’ve enjoyed this article. Be sure to let me know your thoughts in the comments below or via Facebook or Instagram. I would also appreciate it if you considered sharing this content with your friends, who might find it interesting. Finally if you are looking for a professional miniatures painting service, be sure to contact me with this contact form. I always reply within 24 hours, after which please check out your spam folder.

Here are some Colour Recipes for Warhammer 40,000 Crimson Fists from Gallery: Crimson Fists. Please take note that this is a simple colour scheme, not covering multiple overlapping layers and blends in between, that lead to the final product. It is supposed to be used as guideline not a step-by-step.

BLUE armor:
Black undercoat,
French Blue (val a), * around
Mix Ultramarine Blue (val a) 5:2 Light Sea Blue (Val a), * from top, points focused
Black Wash for Vehicles (val), * from bottom, points focused
Hoeth Blue (gw), l&p
Glacier Blue (val), p
RED armor:
Hull Red (val),
Burnt Red (val)
Flat Red (val), l&p, highlight flbr (x3)
Lugganath Orange (gw), l&p
Vehicles: Flat Red (val), stpl (large areas)
DARK mesh:
Panzer Dark Grey (val a),
Fenrisian Grey (gw), l&p
Dark Tone Ink (ap),
Glacier Blue (val), l&p / Ghost Grey for vehicles)
METAL:
Warplock Bronze (gw),
True Copper (ap) / Gun Metal (ap), flbr
Shining Metal (ap), l&p
Strong Tone Ink (ap),
Shining Metal (ap), l&p
BROWN detail:
Burnt Umber (val a),
Karak Stone (gw) l, detail filling,
Off White (val), l&p
Dark Olive Drab (val a), bl
Flayed One Flesh (gw), l&p
Mix: Strong Tone Ink (ap) 1:1:1 Soft Tone Ink (ap), Flesh Tone Ink (ap),
Flayed One Flesh (gw), l&p
SKULLS & PAPER:
Karak Stone (gw),
Flayed One Flesh (gw), flbr
Mix: Off White (val) 1:2 Skeleton Bone (ap), flbr
Strong Tone Ink
Off White (val), l&p
ORANGE OSL:
White (val a), *
Hot Orange (val a), *
Off White (val), l&p
Hot Orange (val a), bl
EYES:
Flat Red (val),
Lugganath Orange (gw), dots
Hot Orange (val a), glaze

l&p – lines and points,
p – points,
dl – deep lining,
bl – blend,
gl – glaze,
drbr – drybrush,
flbr – flatbrush,
lobr – loaded brush,
stpl – stippling,
*Airbrushed (with multiple layers and mixes)
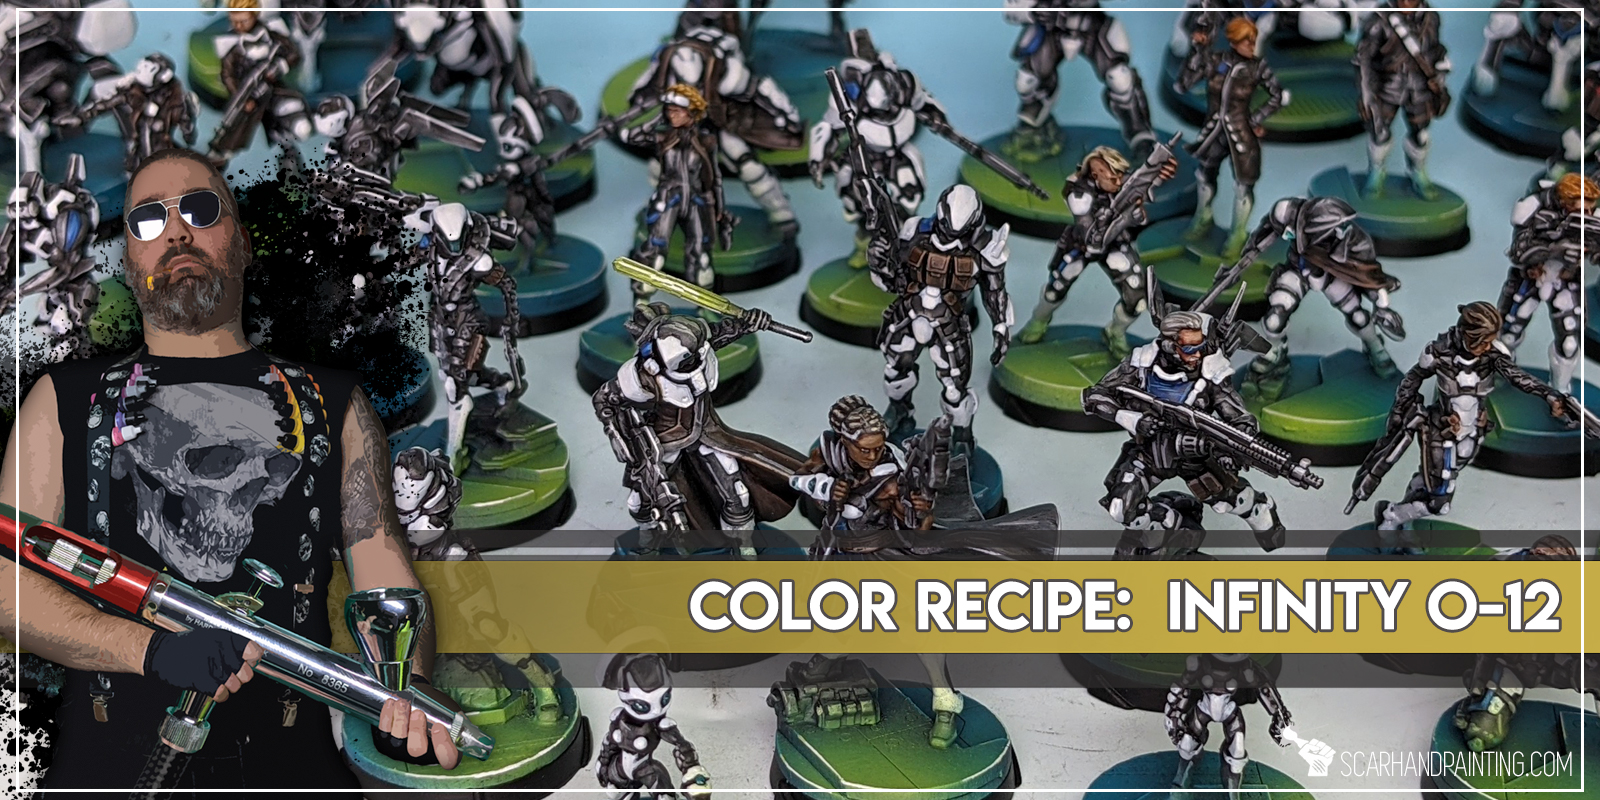
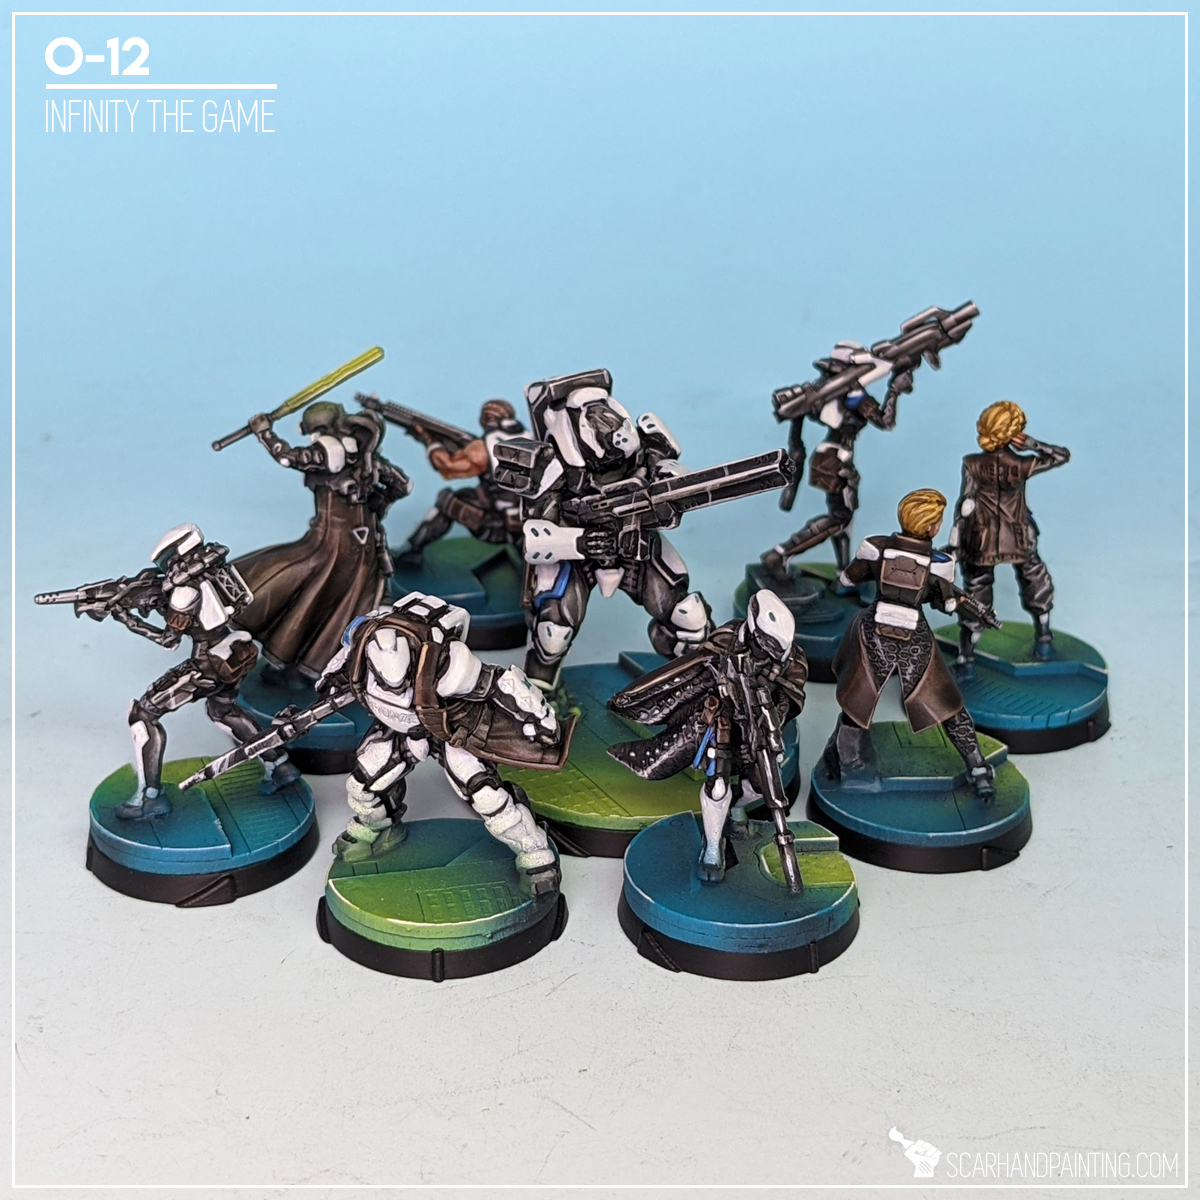
Here are some Colour Recipes for Infinity O-12 from Gallery: Infinity O-12. Please take note that this is a simple colour scheme, not covering multiple overlapping layers and blends in between, that lead to the final product. It is supposed to be used as guideline not a step-by-step.
BLACK armor:
Chaos Black, undercoat
Pancer Dark Grey (Val a), *
Fenrisian Grey (GW), flbr
Pale Wych Flesh (GW), flbr, l&p
Dark Tone Ink (AP), wash
Pale Wych Flesh (GW), l&p
WHITE armor:
Mix Ghost Grey (Val) 1:1 Wolf Grey (Val a),
Mix Ghost Grey (Val) 1:1 Wolf Grey (Val a),
White (Val a), bl
Off White (Val), bl, l&p

BROWN clothes:
Black Armor base,
Dark Brown (Val A), bl
Mix Strong Tone Ink (AP) 1:1 Soft Tone Ink (AP), wash
Karak Stone (GW), l&p
BLUE elements:
French Blue (val a),
Ultramarine Blue (val a), l
Heth Blue (gw), l&p
Glacier Blue (val), l&p
VISIERS:
Emerald (Val),
Mix Emerald (Val) x:x Off White (Val), l&p
TURQUOISE helmet dots,
Coelia Greenshade (GW),

BASES:
Coal Black (P3), *
Turquoise (Val), *
Turquoise (Val), l
Pale Wych Flesh (GW), l
Duck Egg Green (Val a), OSL
Light Livery Green (Val a), OSL
Off White (Val), l
l&p – lines and points,
p – points,
dl – deep lining,
bl – blend,
gl – glaze,
drbr – drybrush,
fltbr – flatbrush,
lobr – loaded brush,
stpl – stippling,
*Airbrushed (with multiple layers and mixes)
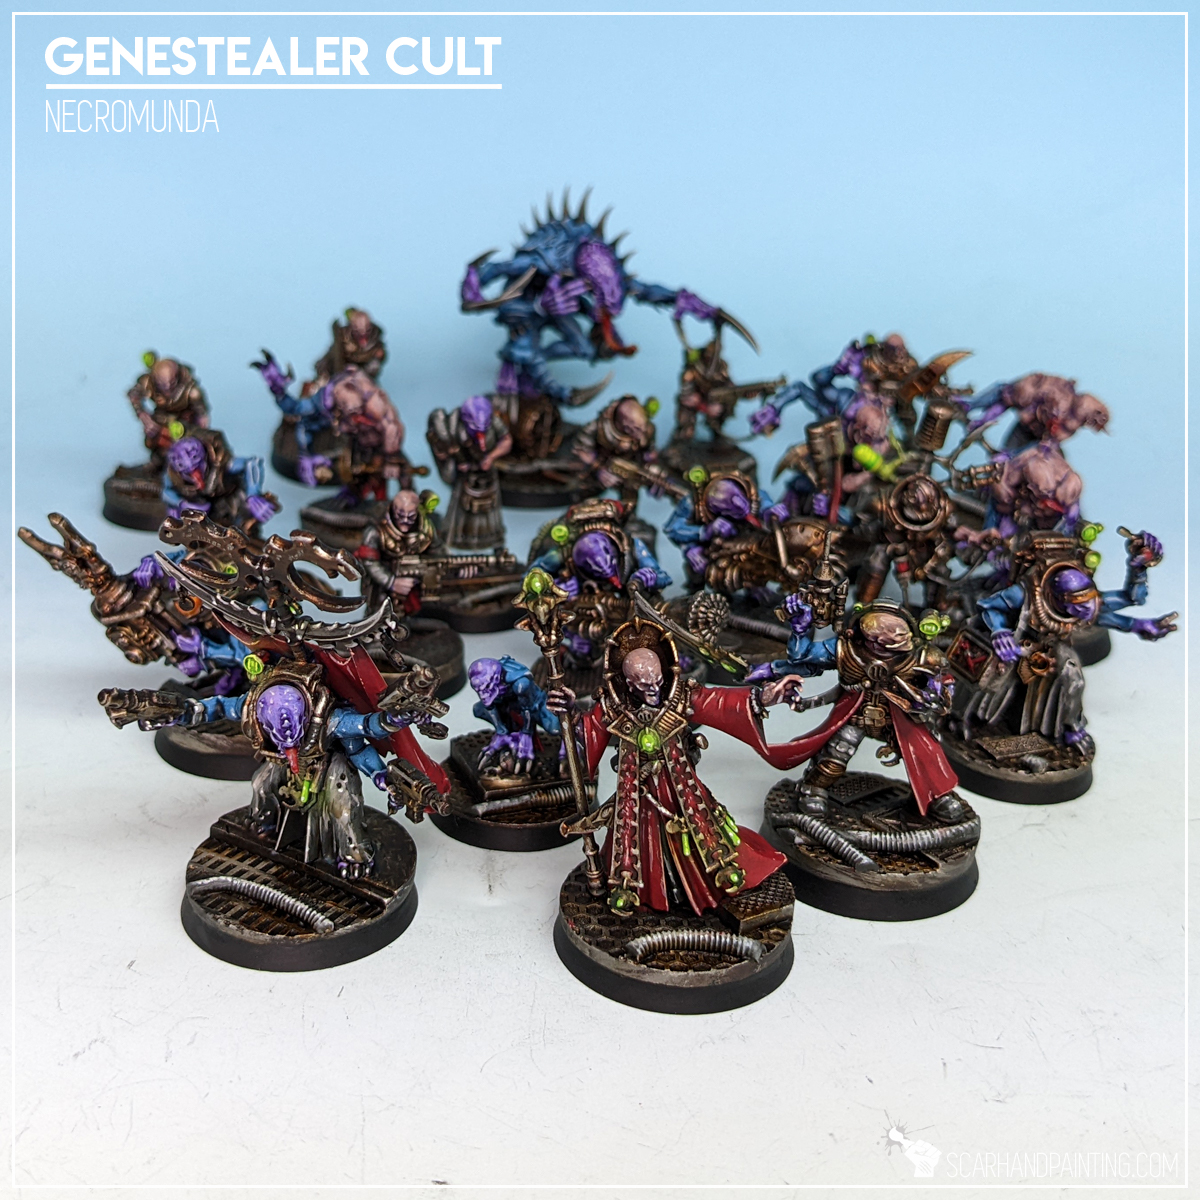
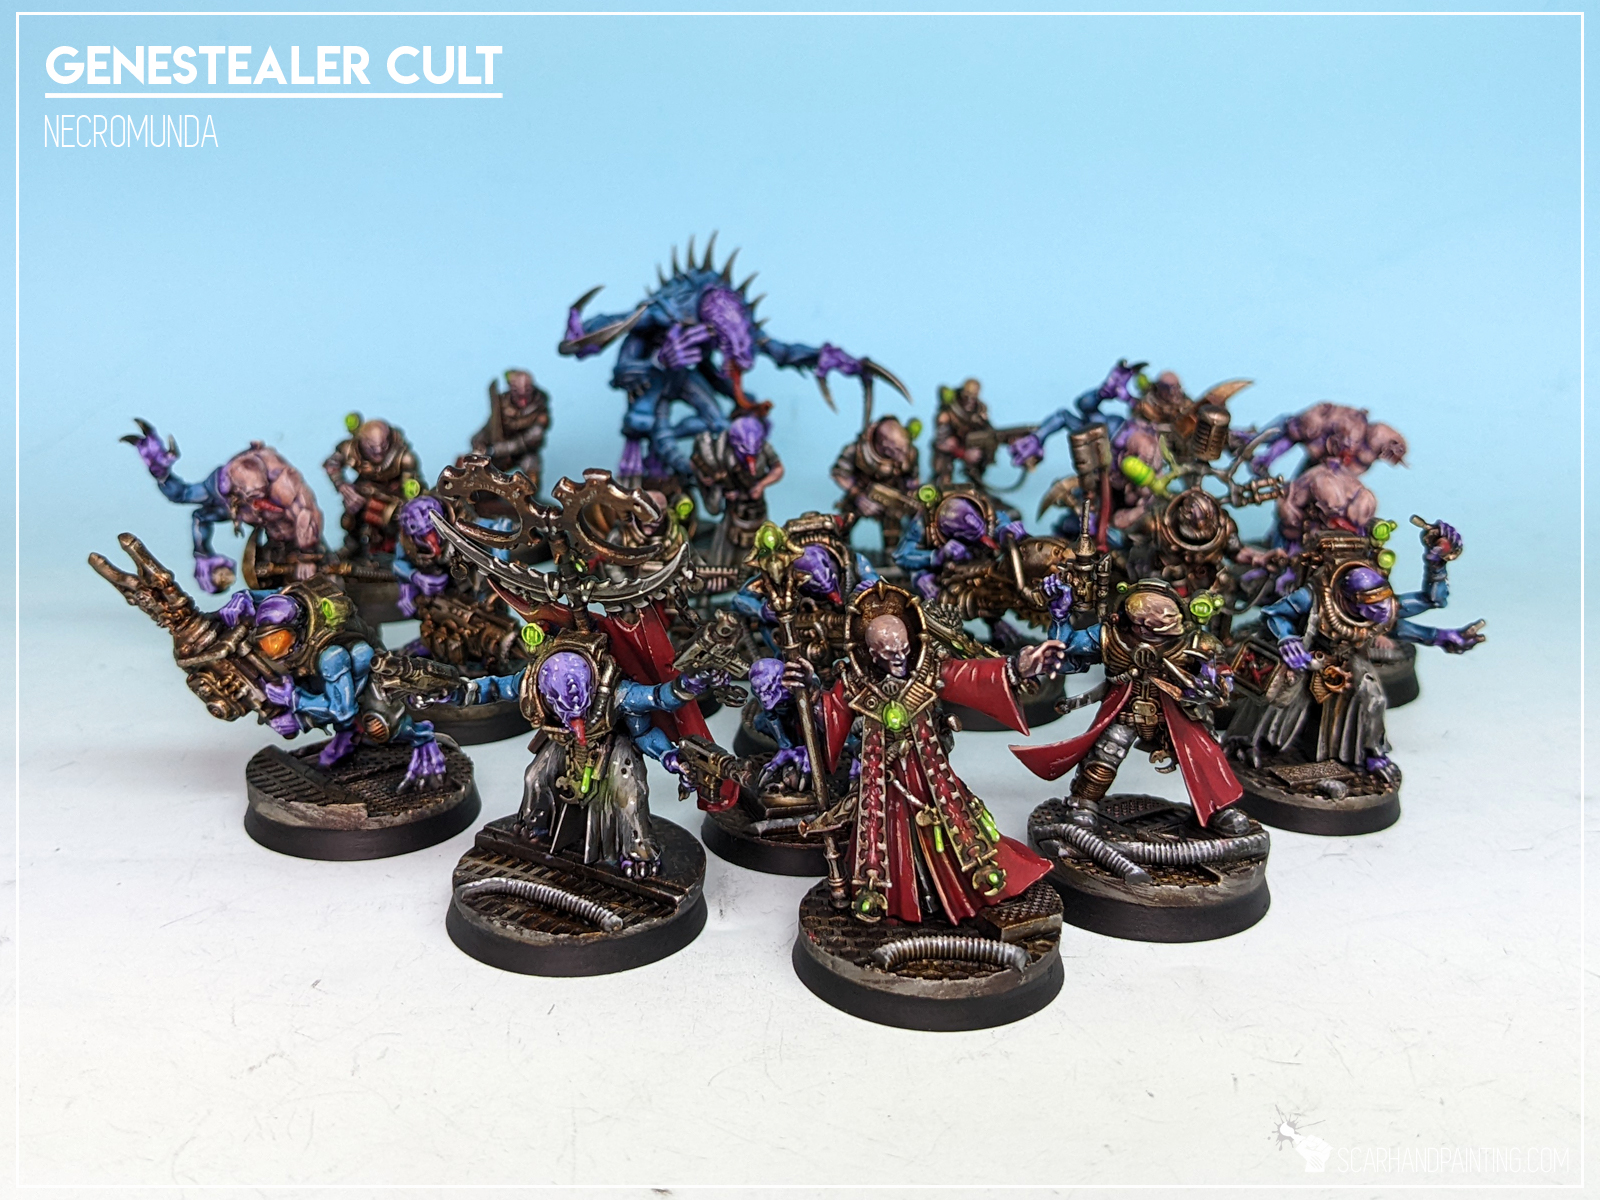
Here are some Colour Recipes for Infinity Haqqislam from GALLERY: GENESTEALER CULTS. Please take note that this is a simple colour scheme, not covering multiple overlapping layers and blends in between, that lead to the final product. It is supposed to be used as guideline not a step-by-step.
BLUE armor:
Black Undercoat,
Imperial Blue (val),*
Mix: Imperial Blue (val) 4:1 Electric Blue (val),*
Electric Blue (val),*
Mix: Electric Blue (val) 1:3 White,*
Blue Tone Ink (ap),
Pallid Wych Flesh (gw), l&p
Off White (val), l&p
METAL:
Warplock Bronze (gw),
Gun Metal (ap), / True Copper (ap), flbr
Shining Silver (ap), l&p
Mix: Strong Tone Ink (ap) 1:1 Soft Tone Ink (ap),
Streaking Grime (ak int),

PURPLE skin:
Black Undercoat,
Alien Purple (val),
Mix: Alien Purple (val) 2:1 Squid Pink (val), flbr
Mix: Alien Purple (val) 1:1:1 Squid Pink (val), Pale Flesh (val), flbr
Purple Tone Ink (ap),
Pallid Wych Flesh (gw), l&p
Off White (val), l&p
SKIN:
Alien Purple (val a),
Dwarf Skin (val a), flbr
Flesh (val a), flbr
Mix: Purple Tone Ink (ap) 1:1:1:1, Strong Tone Ink (ap), Soft Tone Ink (ap), Medium,
BLACK/GREY outfits:
Black Undercoat,
Panzer Dark Grey (val),
Cold Grey (val), flbr
Fenrisian Grey (gw), flbr
Pallid Wych Flesh (gw), l&p
Mix Strong Tone Ink (ap) 1:1 Soft Tone Ink (ap),
Pallid Wych Flesh (GW), l&p
Off White (Val), l&p
BROWN clothes:
Grey Outfits base,
Dark Brown RLM61 (val), bl
Mix Strong Tone Ink (ap) 1:1 Soft Tone Ink (ap),
Karak Stone (gw), l&p
Flayed One Flesh (gw), l&p
GREEN light:
Duck Egg Green (val a),
Off White (val), l&p
Light Livery Green (val a),*
Waywatcher Green (gw), wash
Off White (val), l&p
l&p – lines and points,
p – points,
dl – deep lining,
bl – blend,
gl – glaze,
drbr – drybrush,
fltbr – flatbrush,
lobr – loaded brush,
stpl – stippling,
*Airbrushed (with multiple layers and mixes)
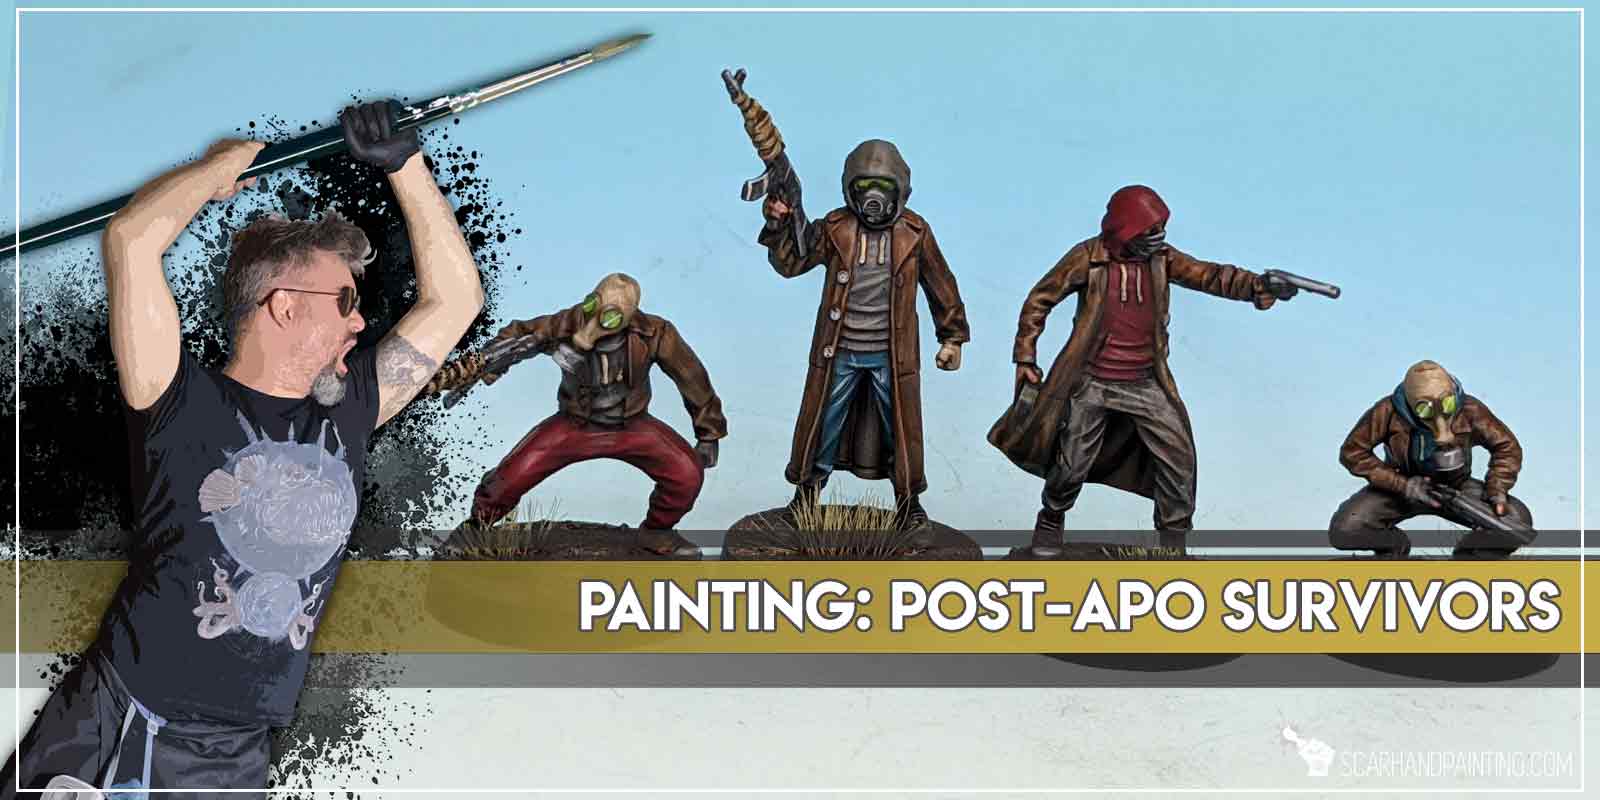
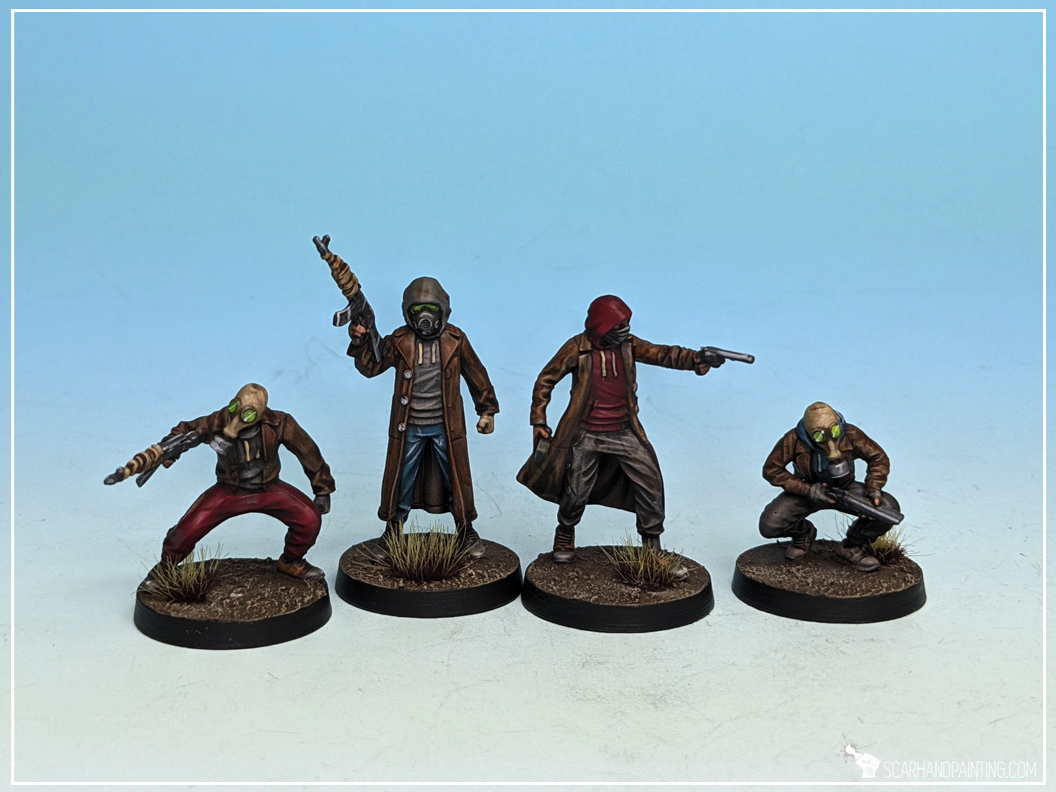
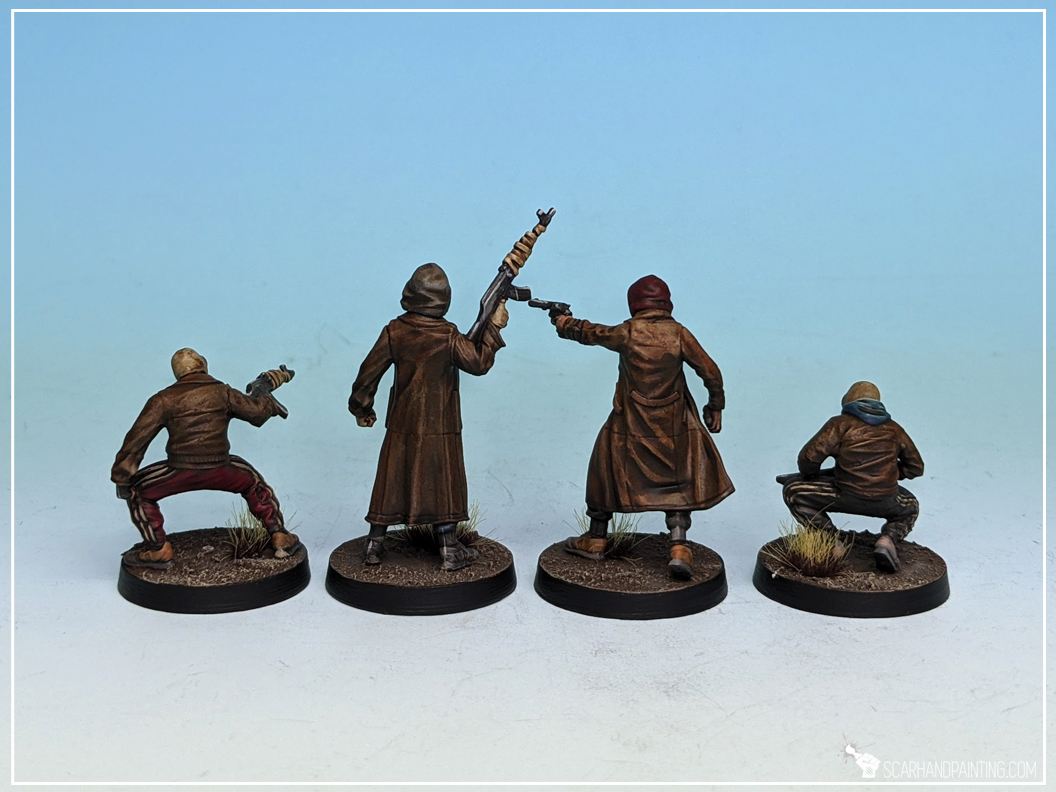
Welcome to Painting Road to Survival Bandits tutorial. Here I will present to you a Step-by-step of an easy and fast painting process for Orzol Studio’s Bandits team from the Post-apo Survivors Kickstarter.
Before we start, some notes:
Step one: Undercoat
I applied a strong layer of Citadel Chaos Black spray. I prefer spray over manual application, but this is just a personal preference. Any matt black undercoat will do, as long as it’s thorough.
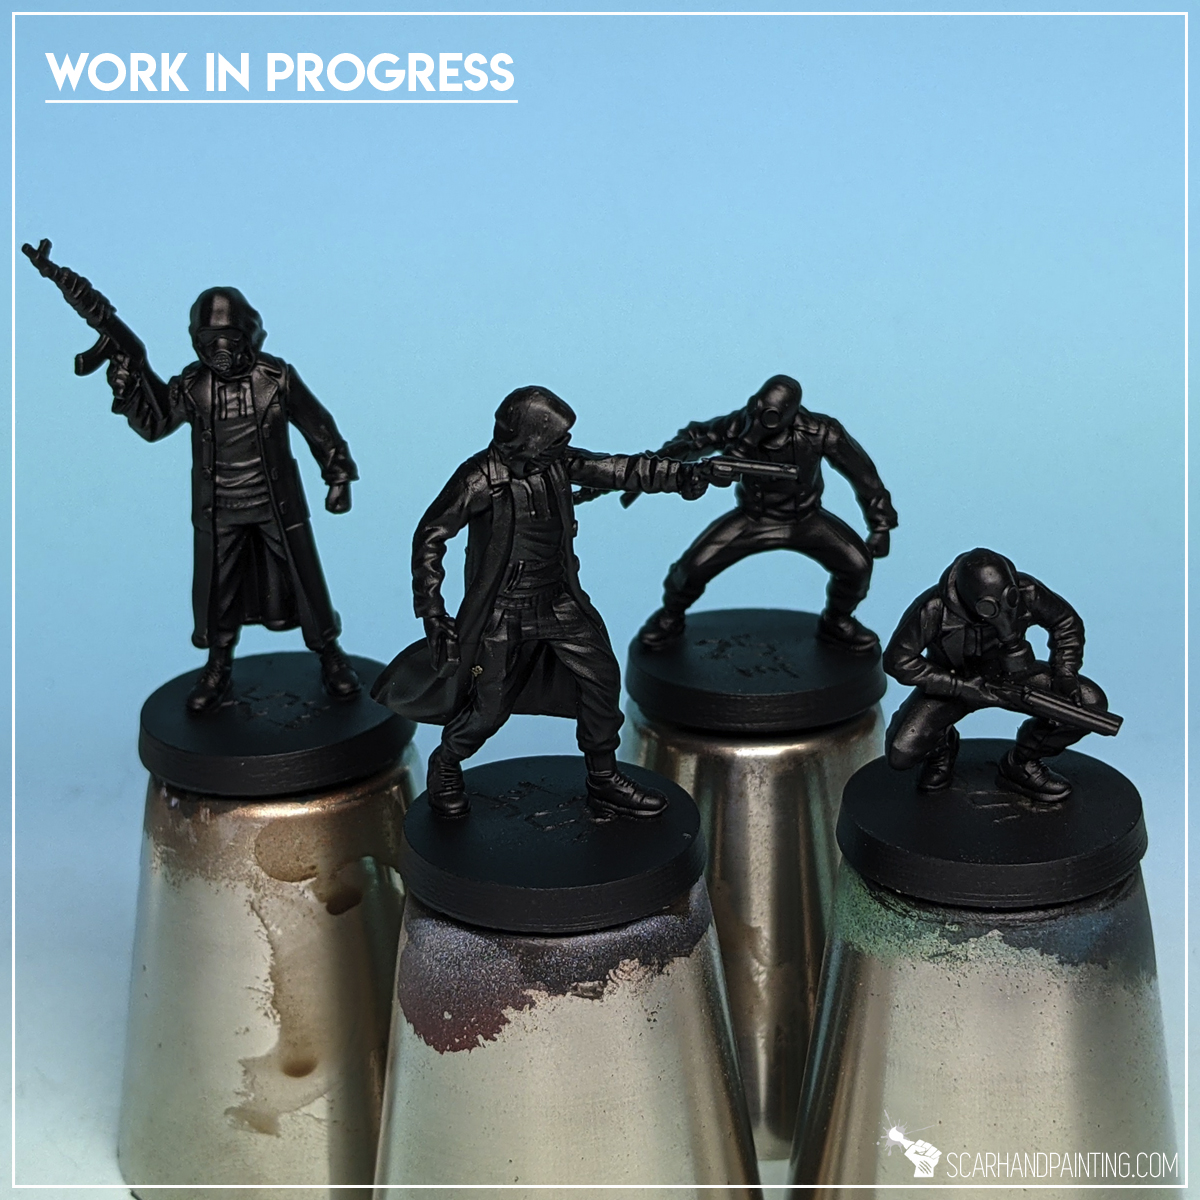
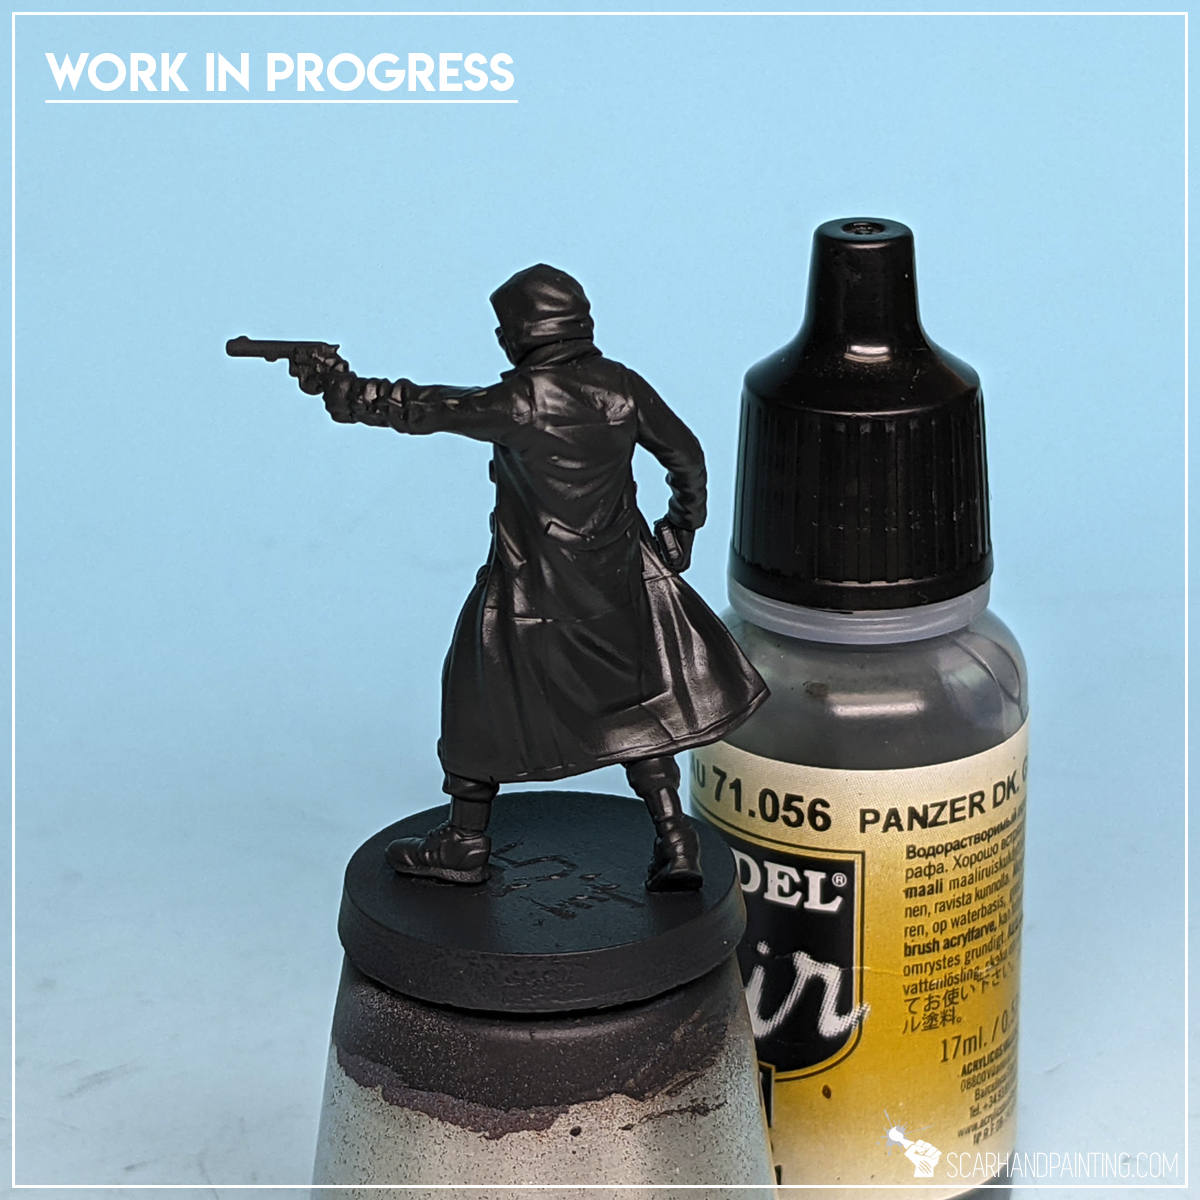
Step two: Grey clothes base
I started by airbrushing a strong layer of Vallejo Panzer Dark Grey all over the miniature. I used an airbrush mainly to have a thin but also strong and smooth layer.
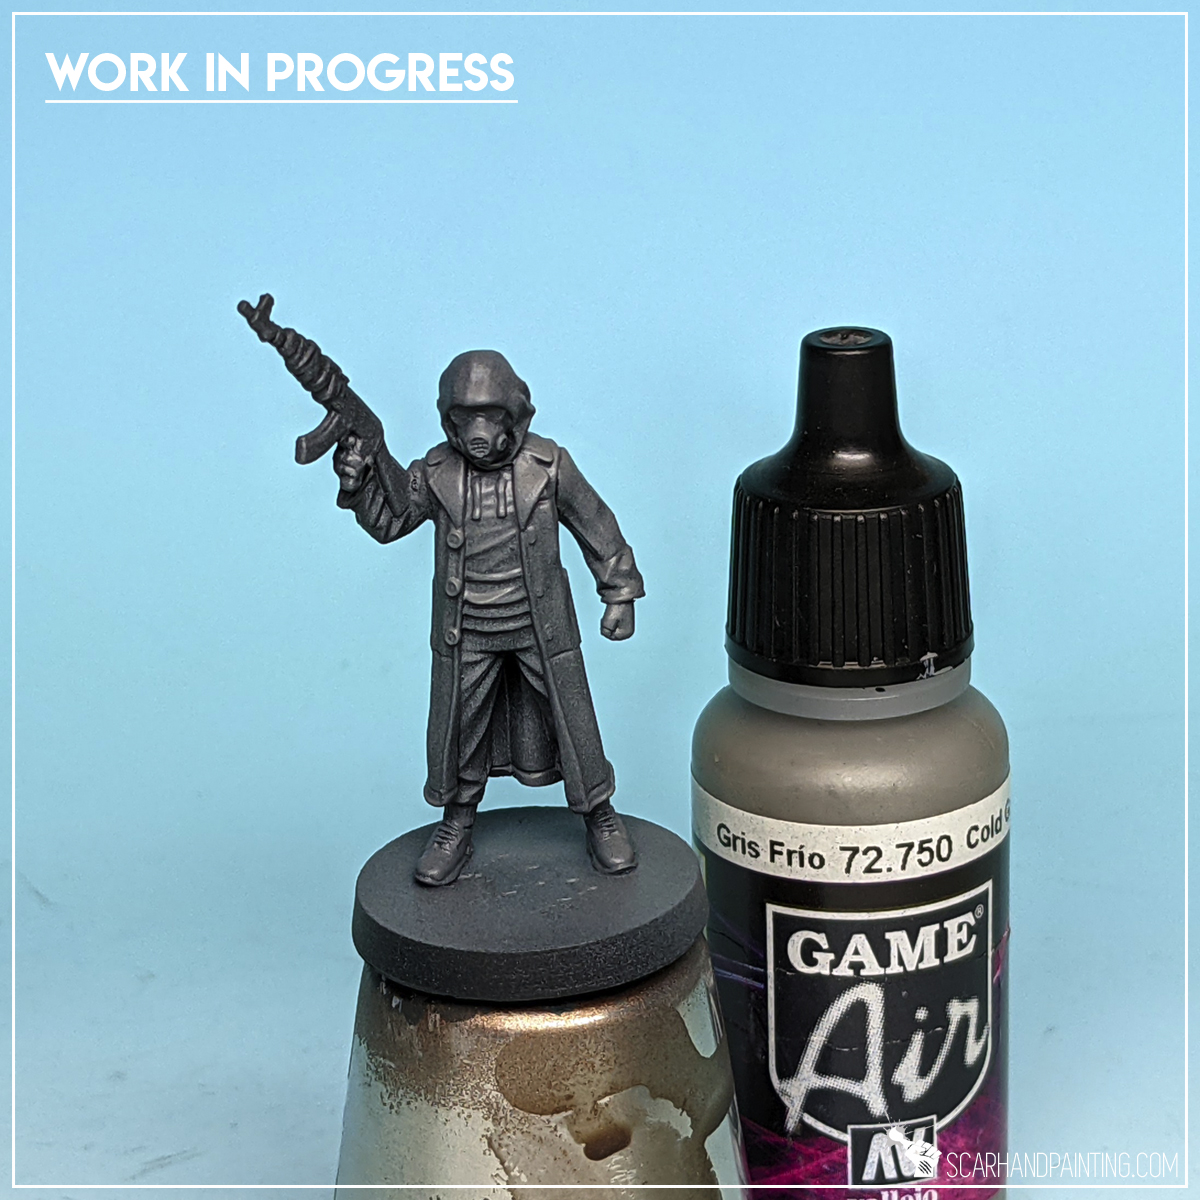
Next I airbrushed a layer of Vallejo Cold Grey on top, zenithally and partially on the sides of the miniature.

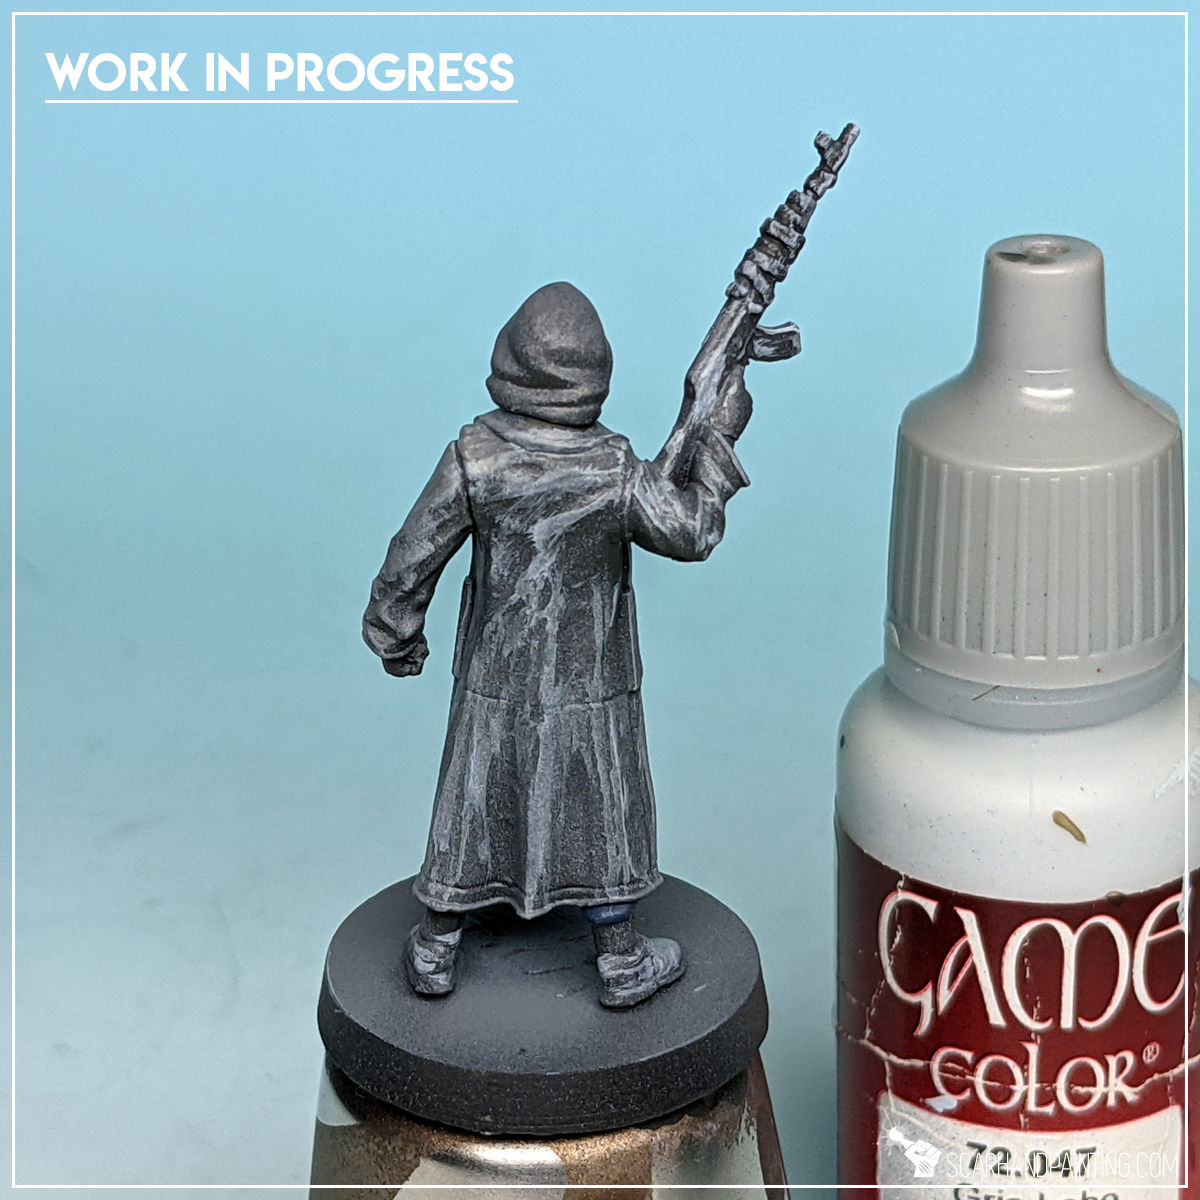
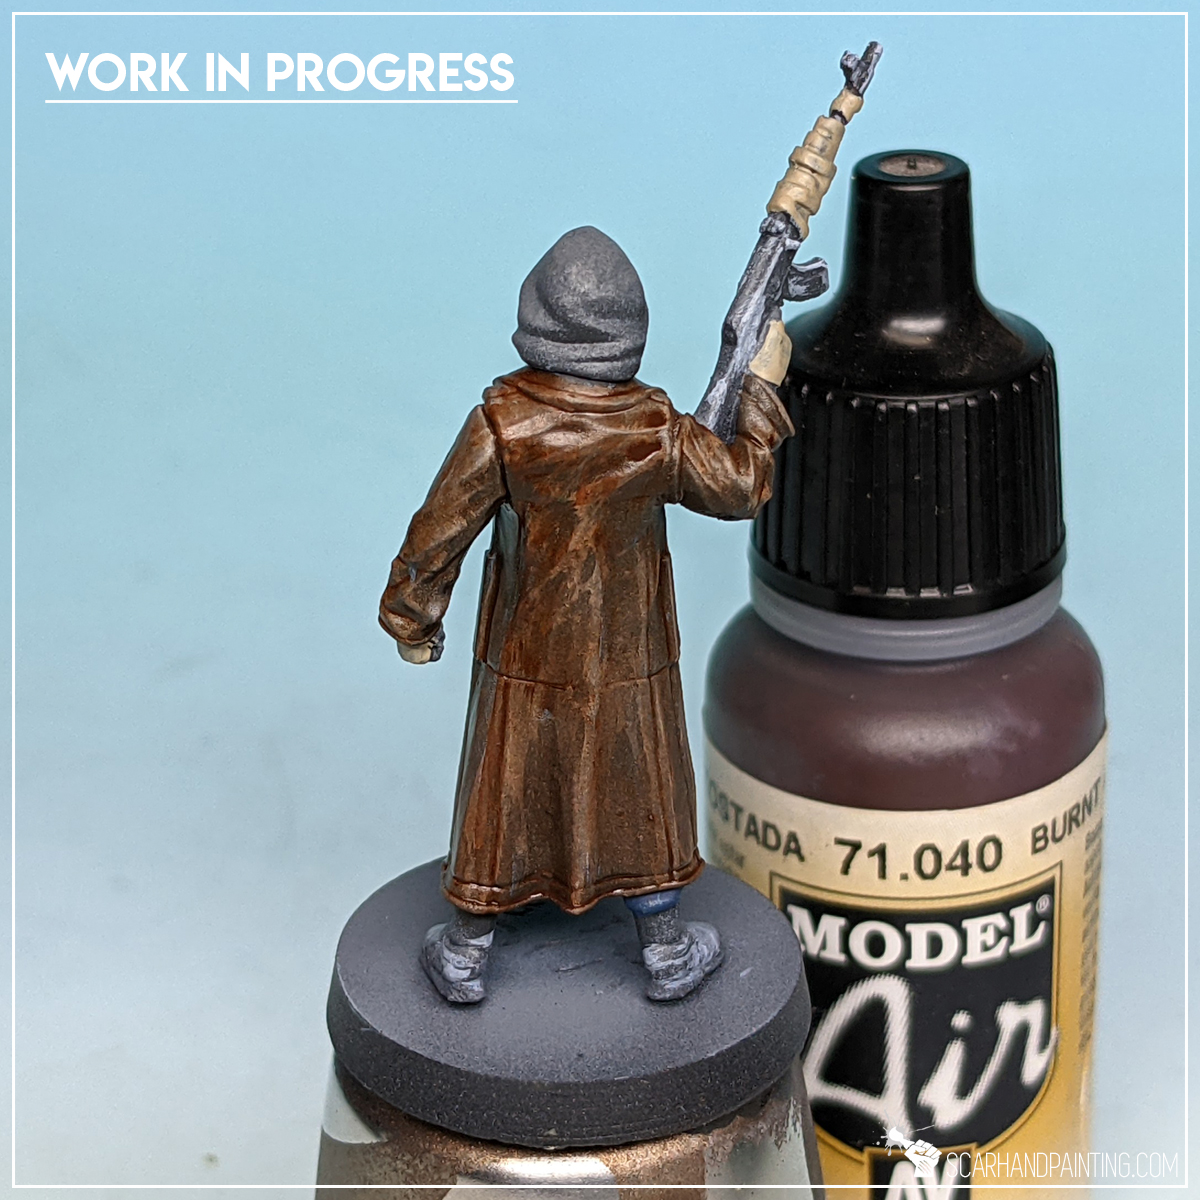
Step three: Brown clothes
With a solid grey foundation I moved to painting browns. I started by applying a thinned down Vallejo Ghost Grey in a gritty, haphazard fashion on top of everything soon to be brown. I also used this opportunity to apply highlights on weapons and pieces of clothes meant to be black.
Then I applied a strongly thinned layer of Vallejo Burnt Umber instantly changing grey to nice vibrant brown, but keeping all the detail of the previous layer still visible. You might say I glazed with Burnt Umber.
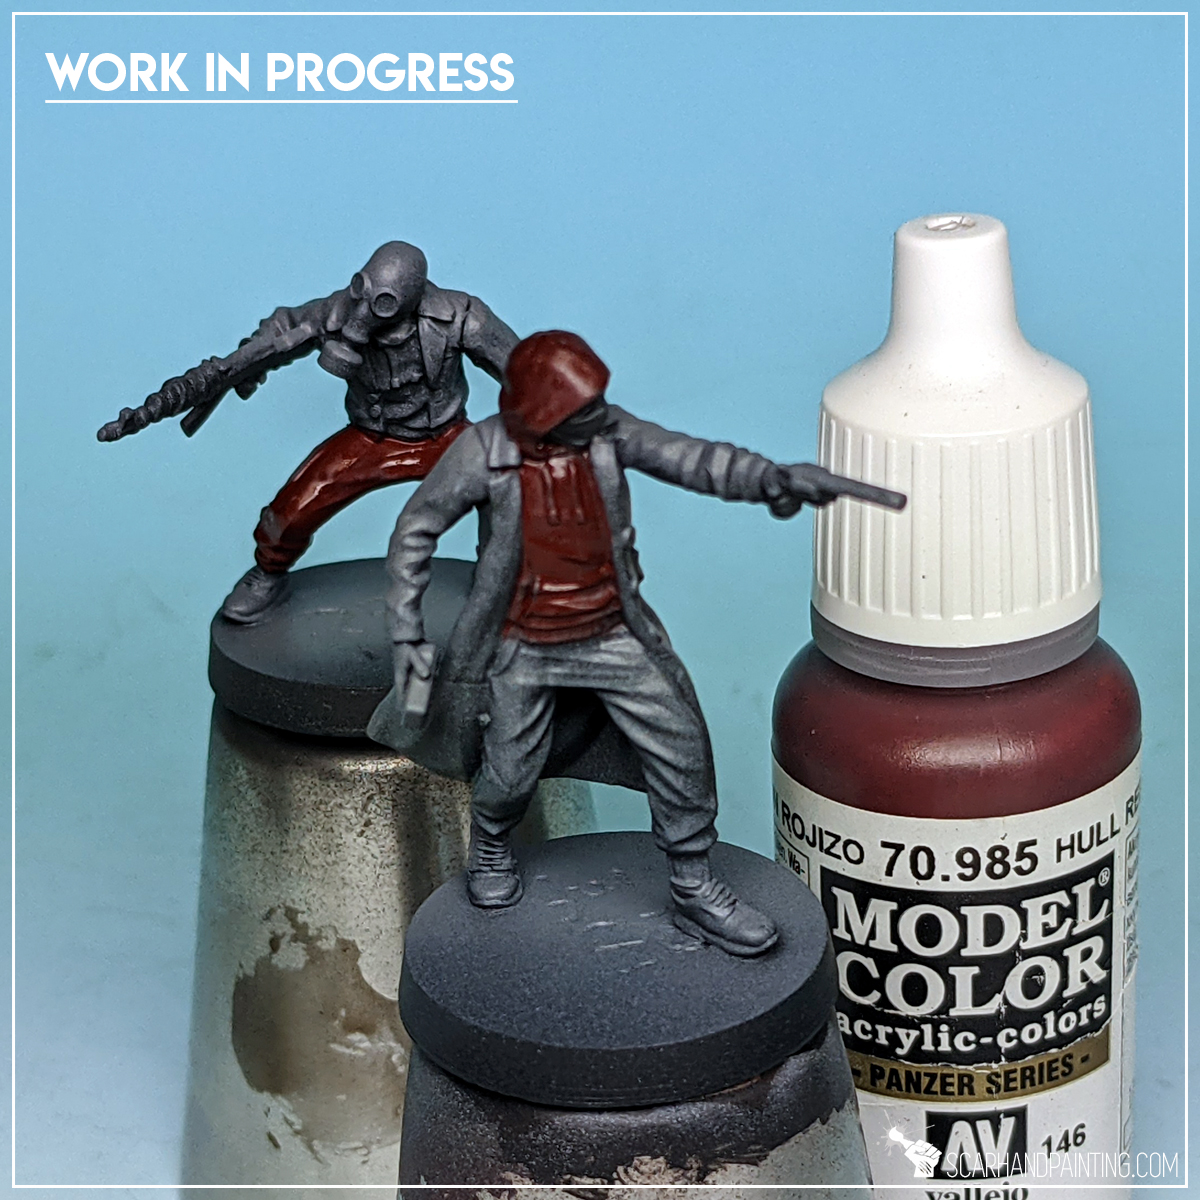
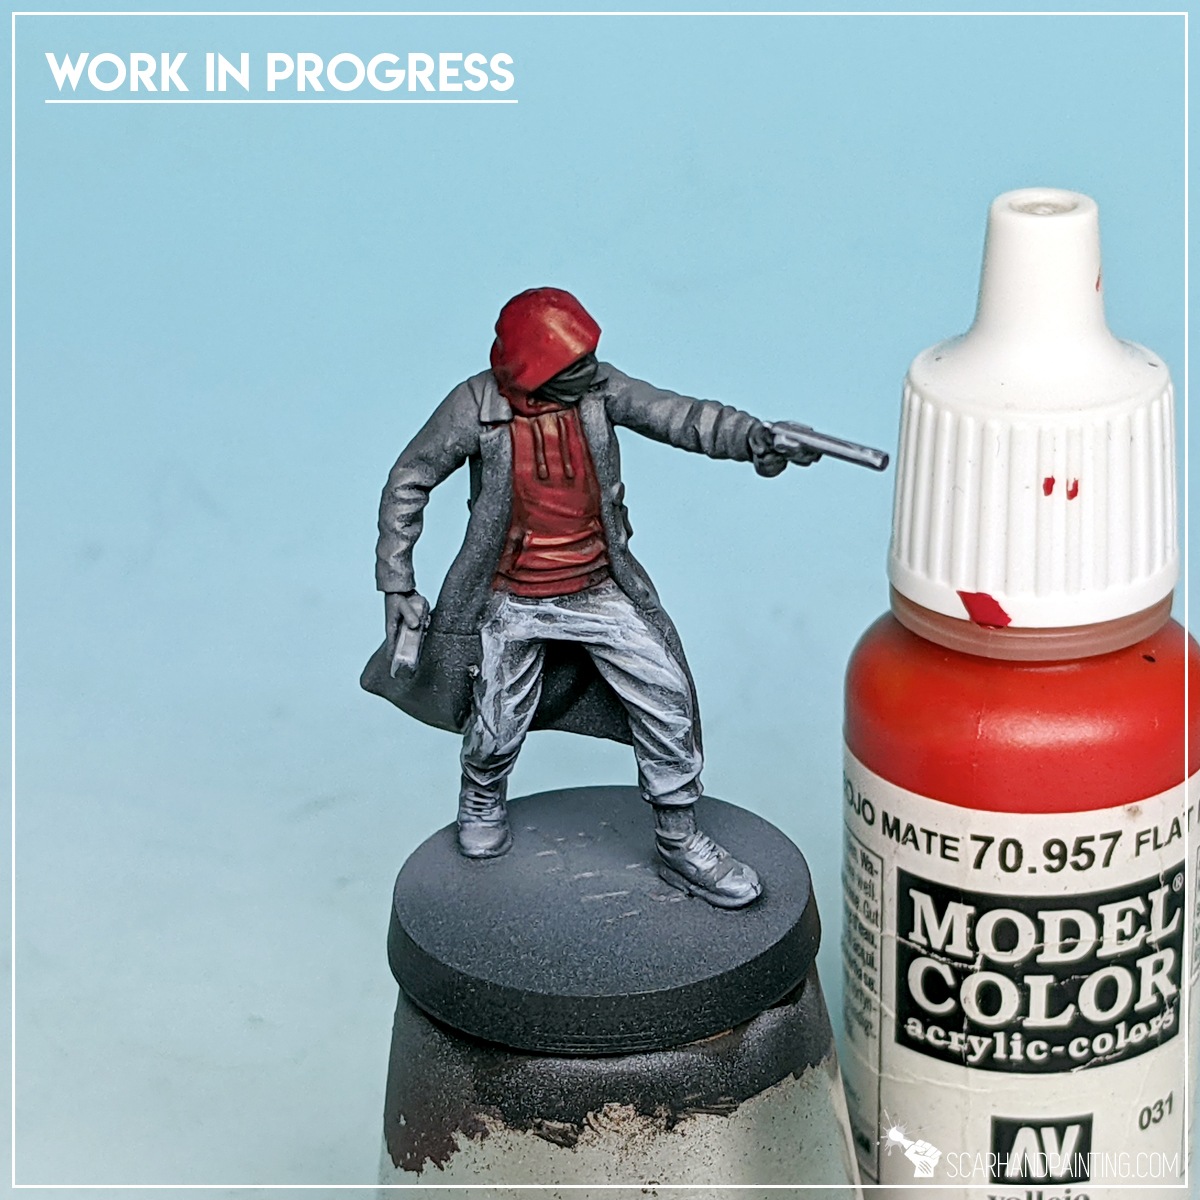
Step four: Red clothes
I moved to Reds, staring with a strong layer of Vallejo Hull Red, followed by a wide highlight of Vallejo Flat Red.
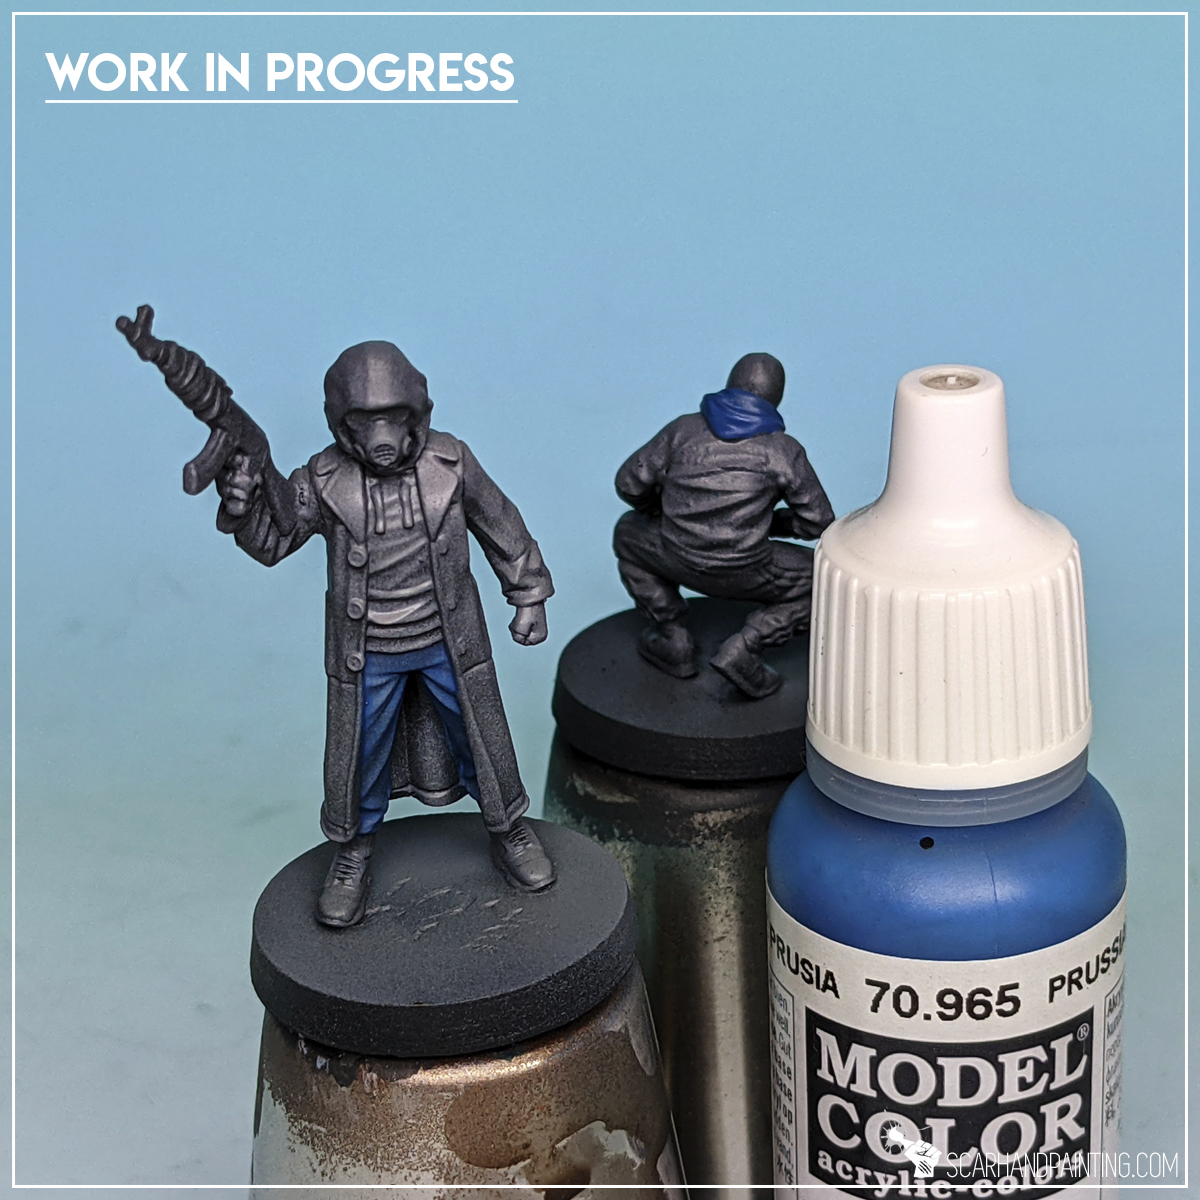
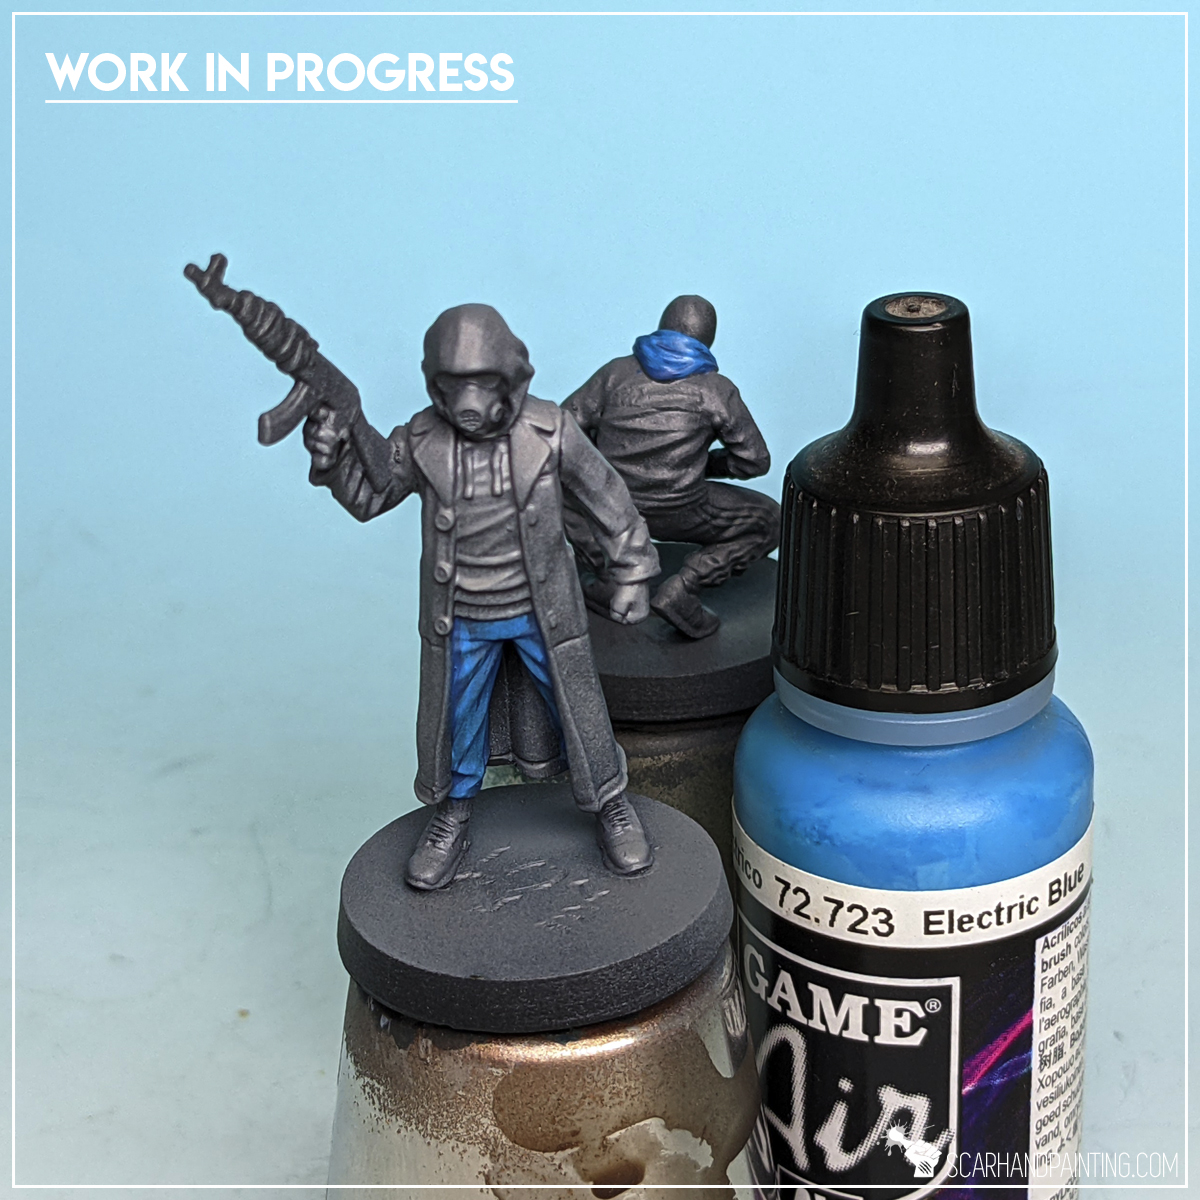
Step six: Blue clothes
Another color I took on was blue. I applied Vallejo Prussian Blue then highlighted with Vallejo Electric Blue.
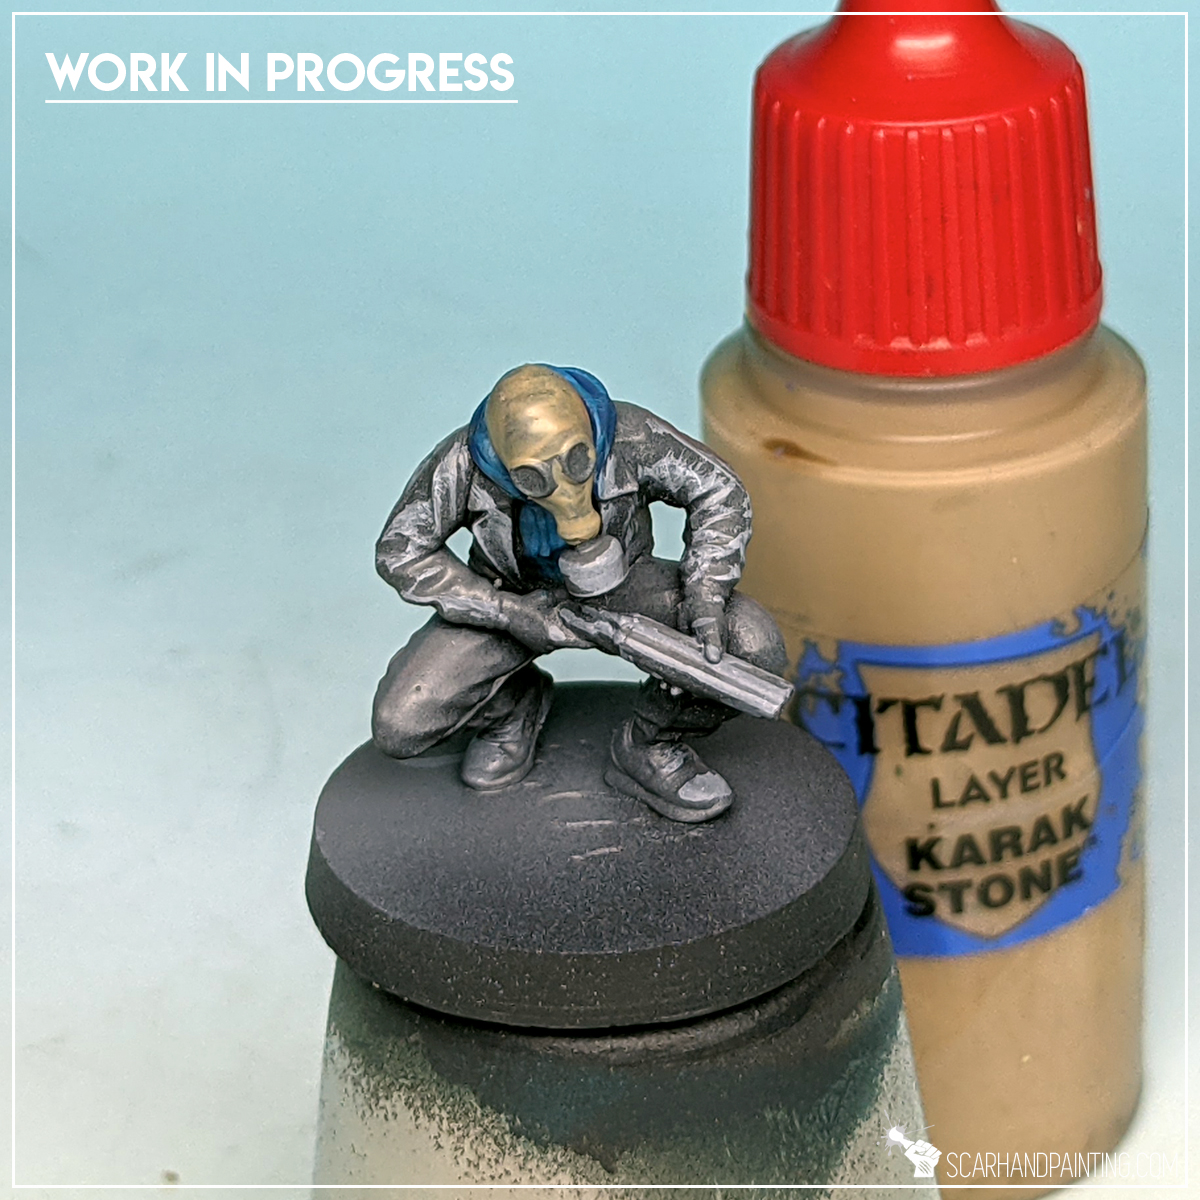
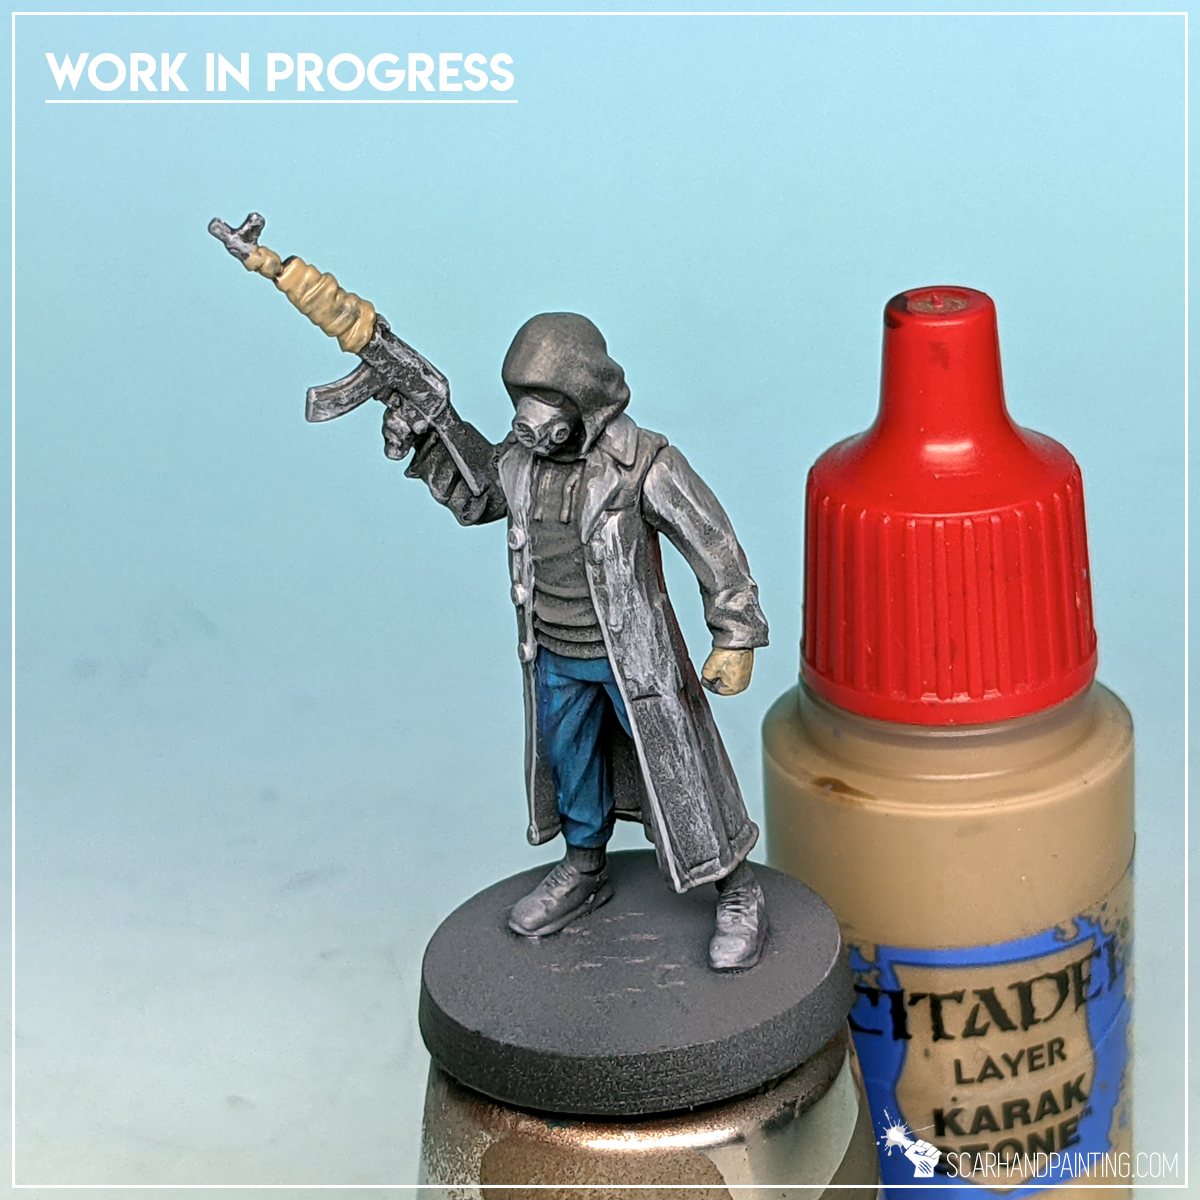
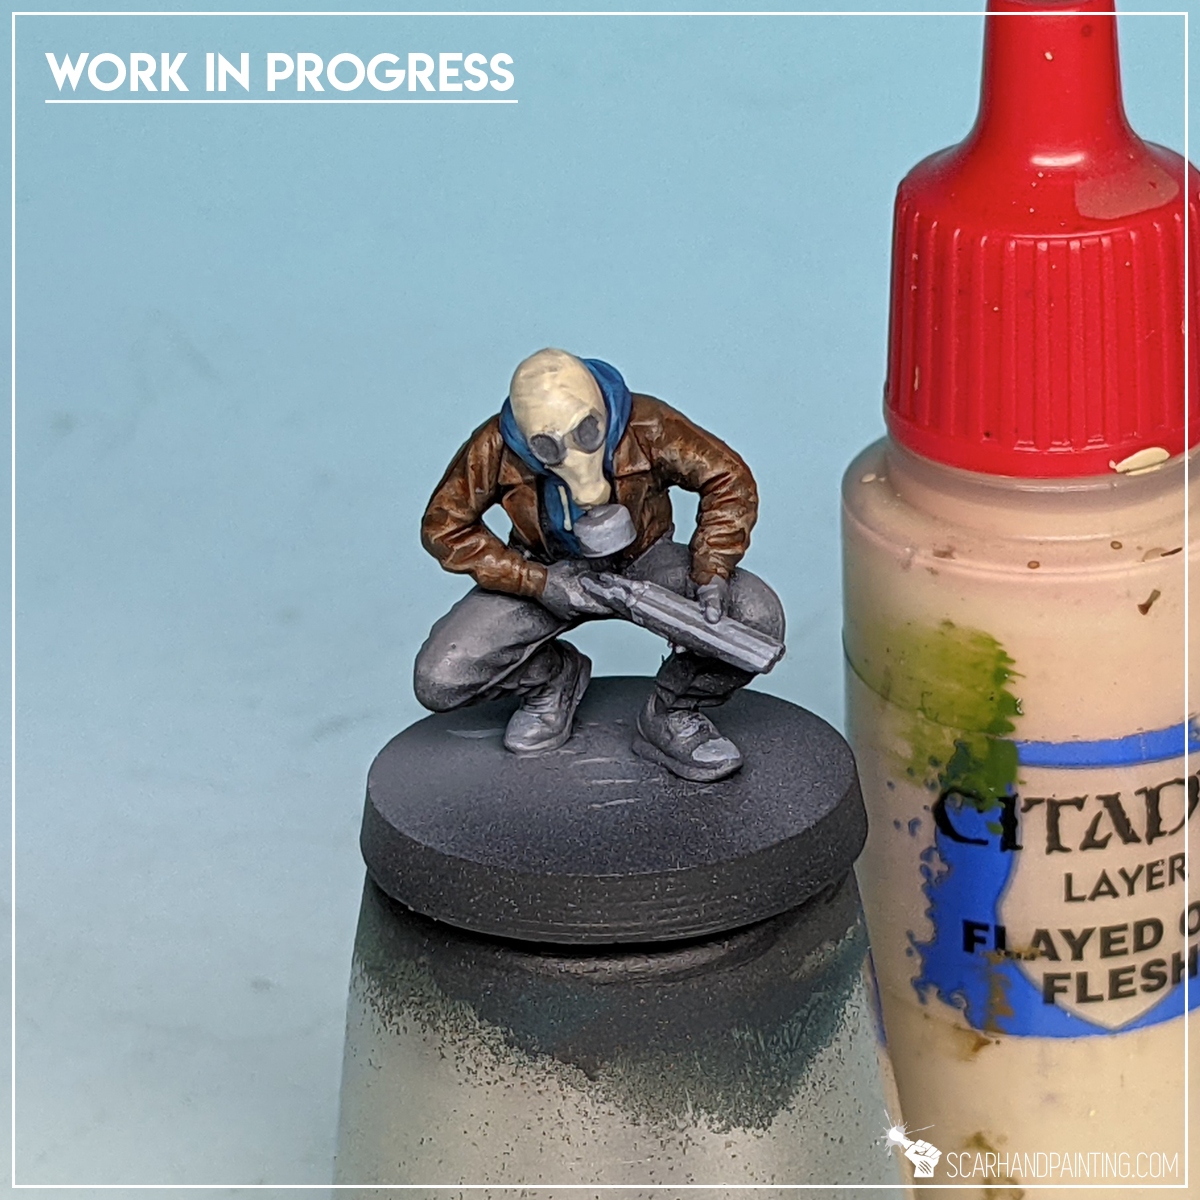
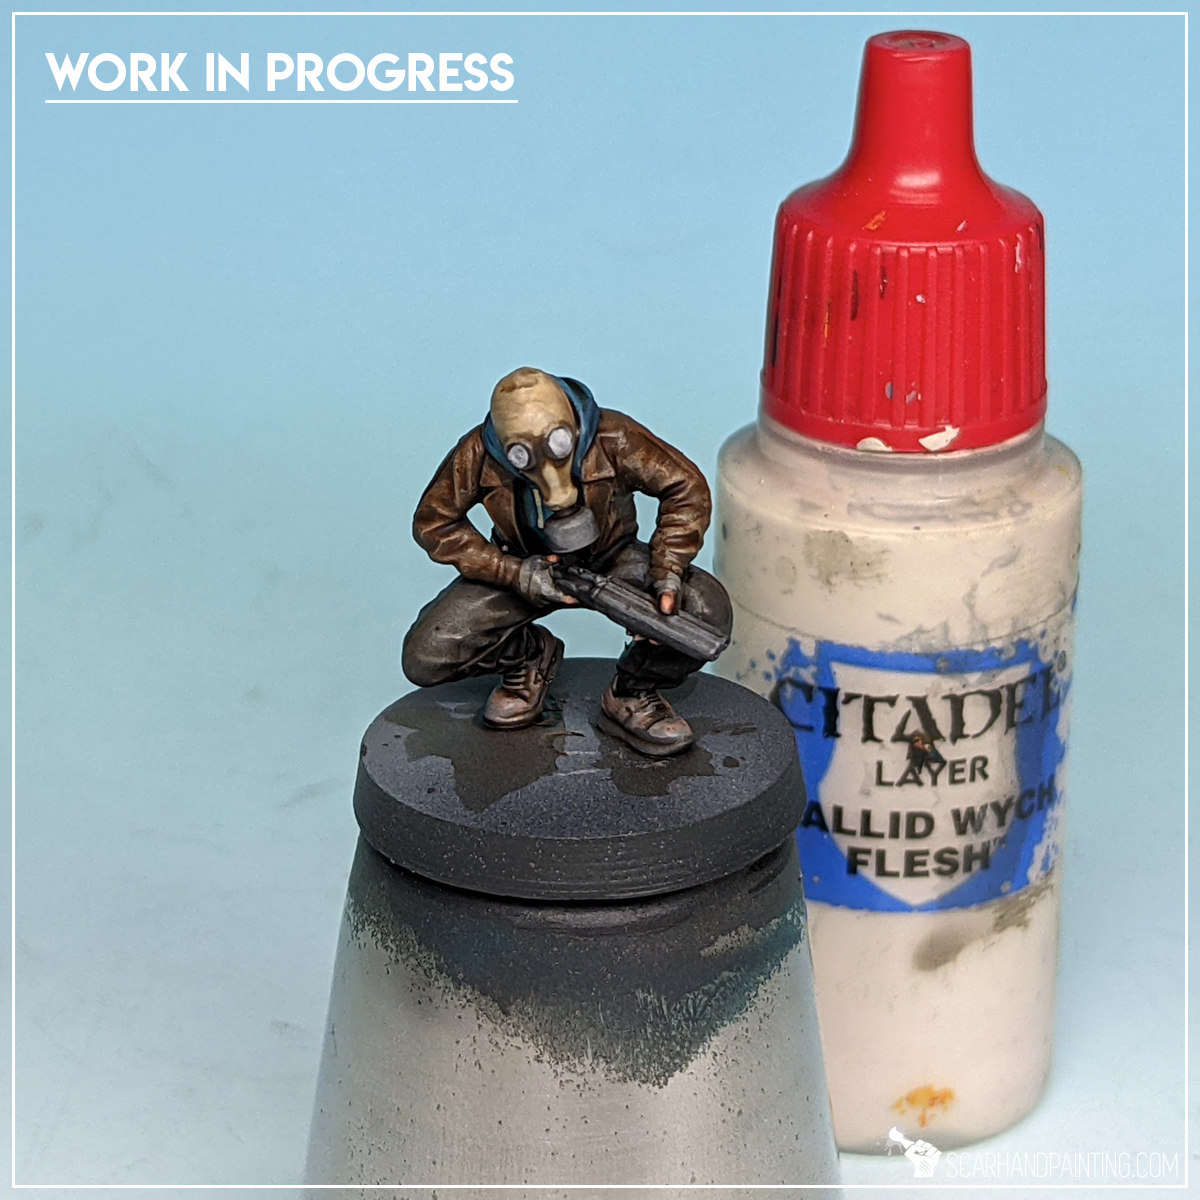
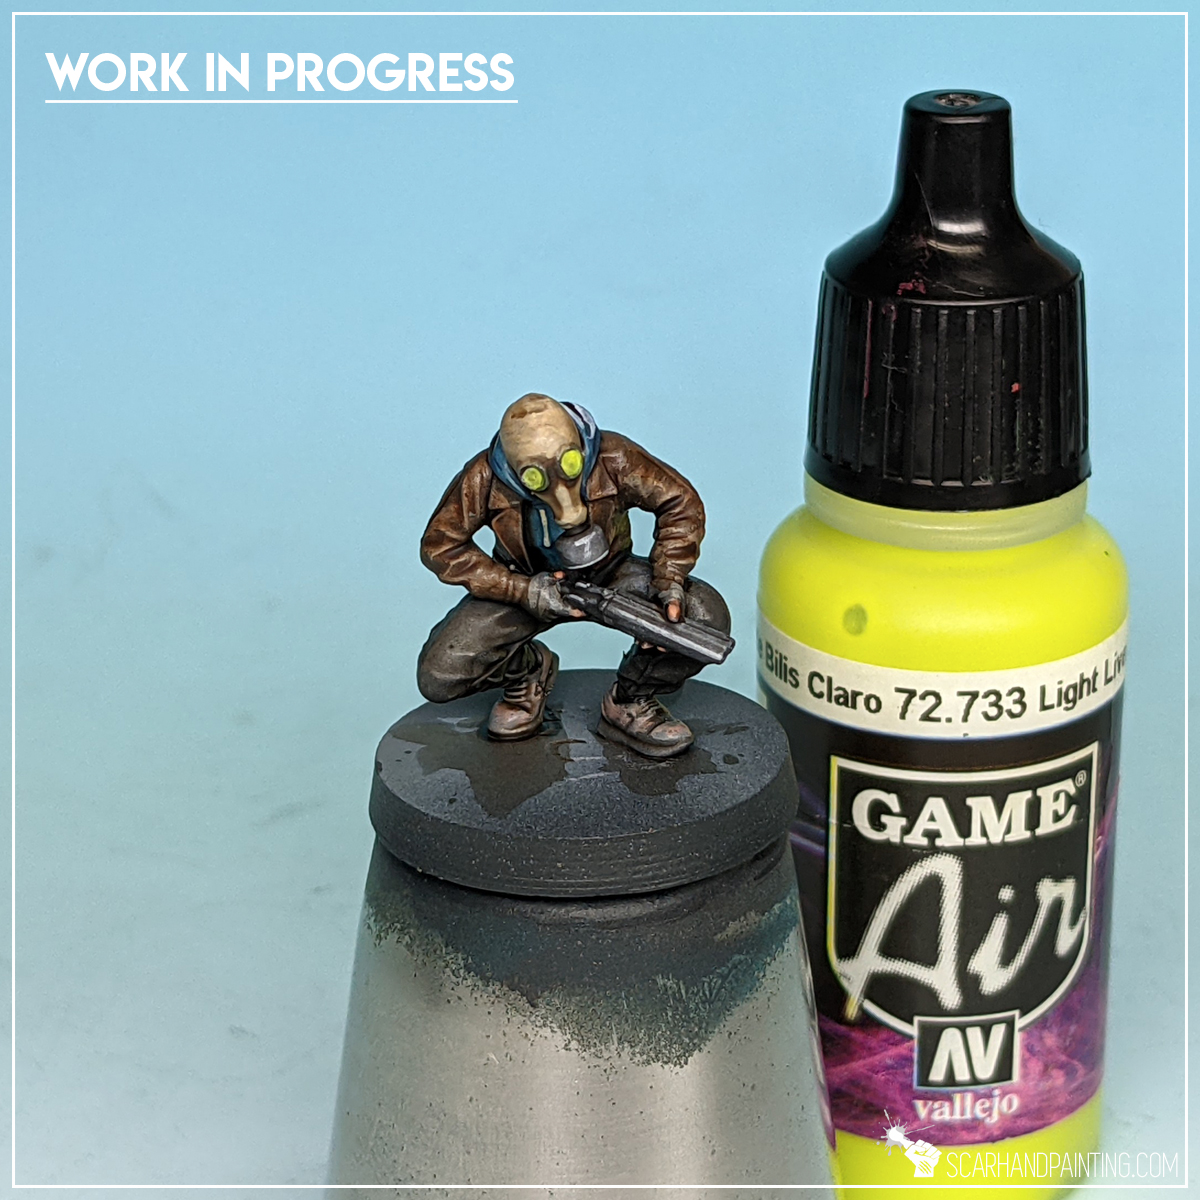
Step seven: Gas masks
For the masks and some additional detail I applied a layer of Games Workshop Karak Stone. I then strengthened the layer using Games Workshop Flayed One Flesh.
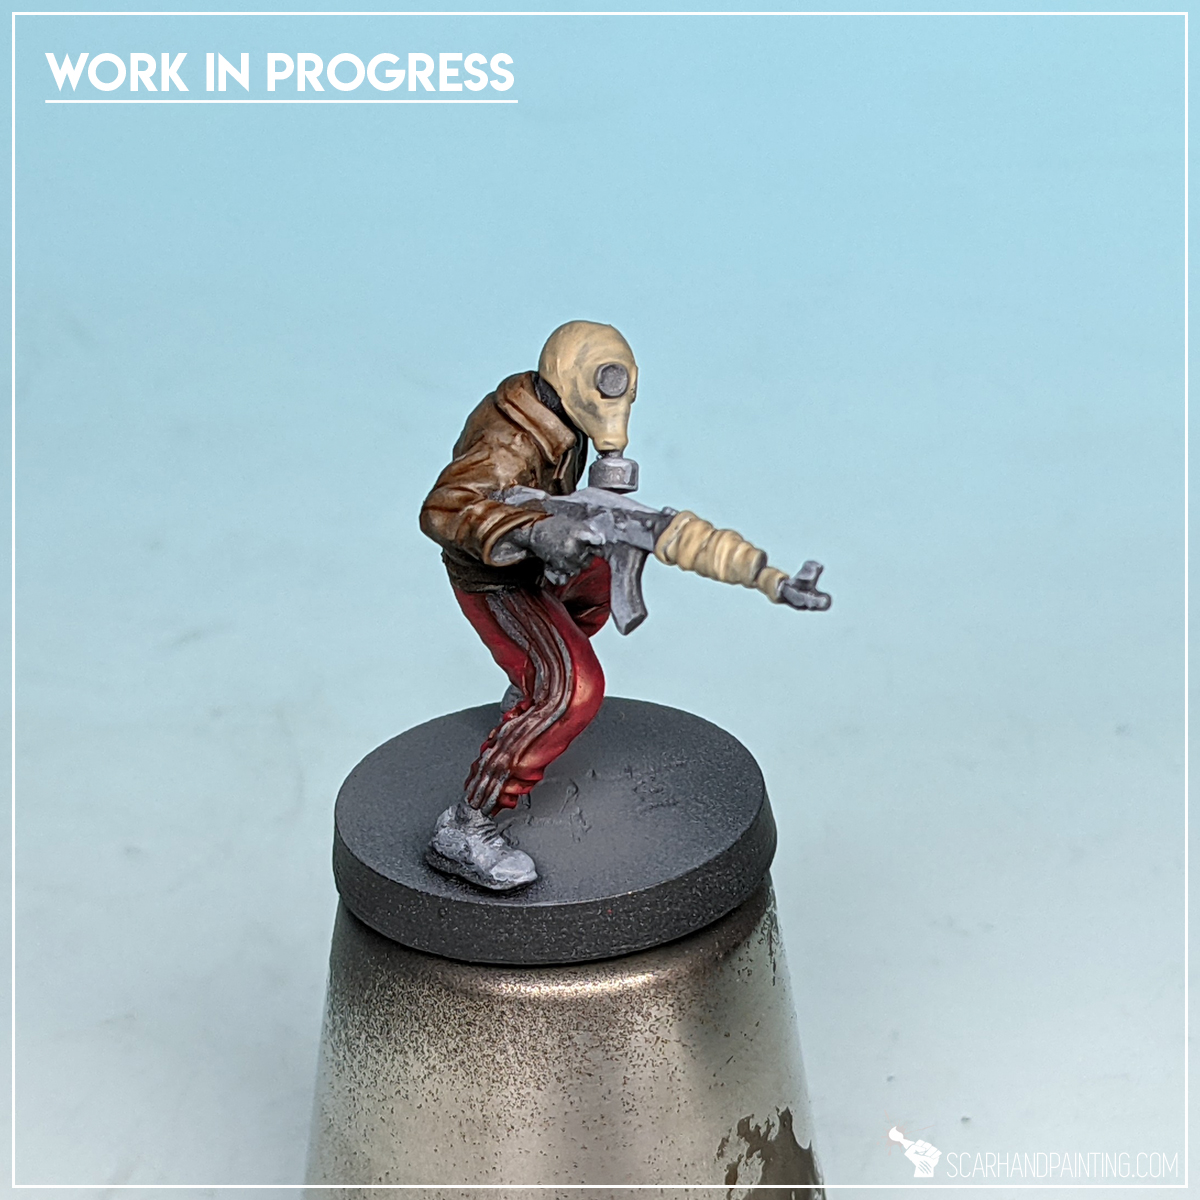
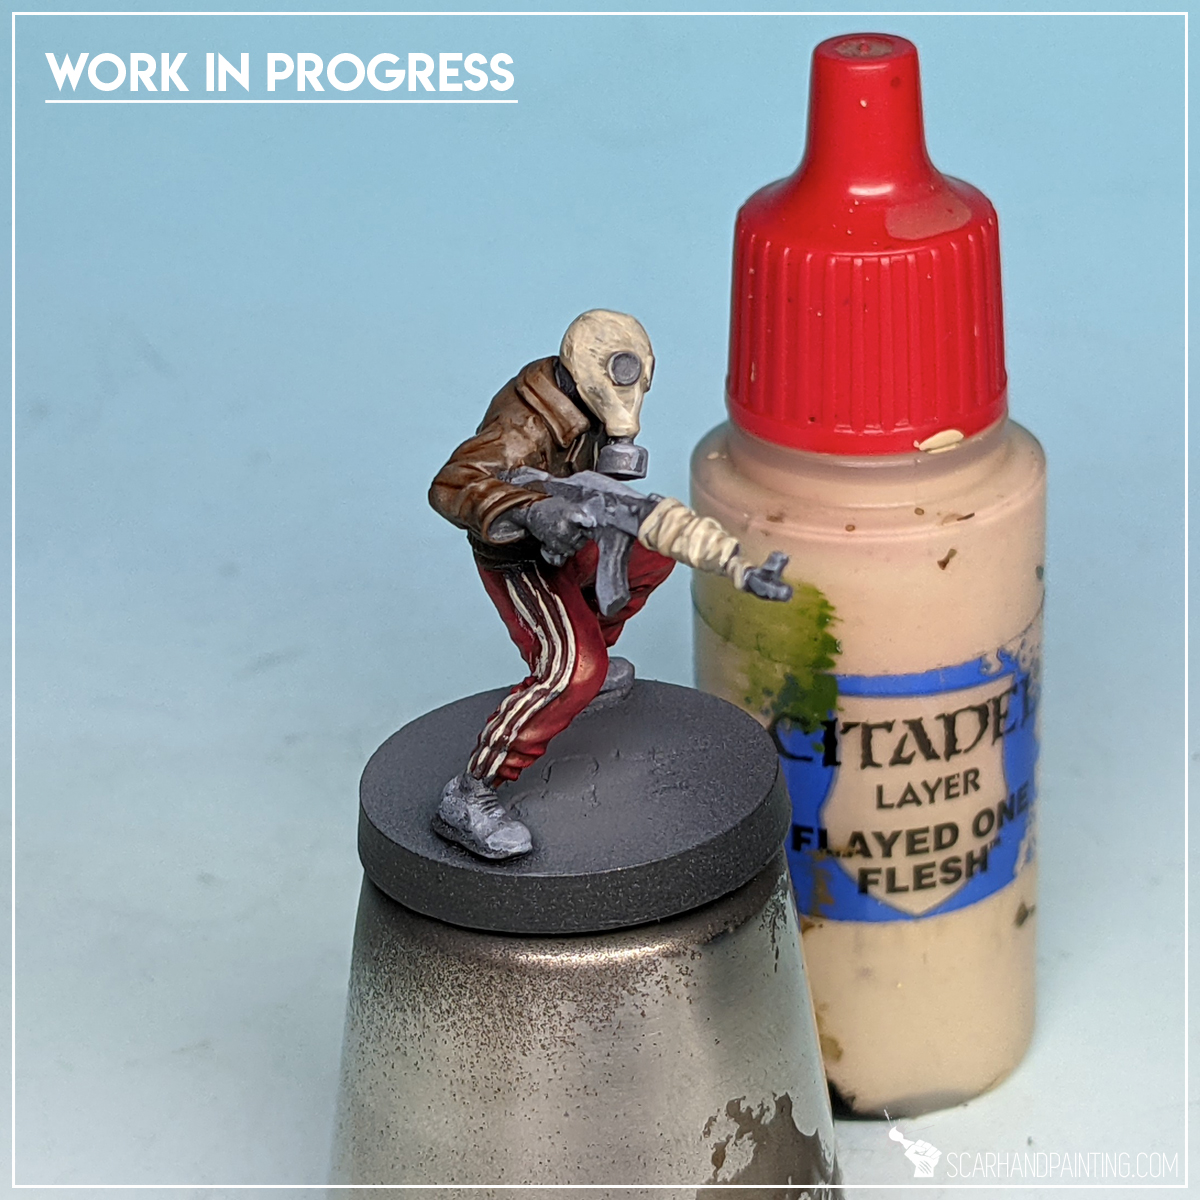
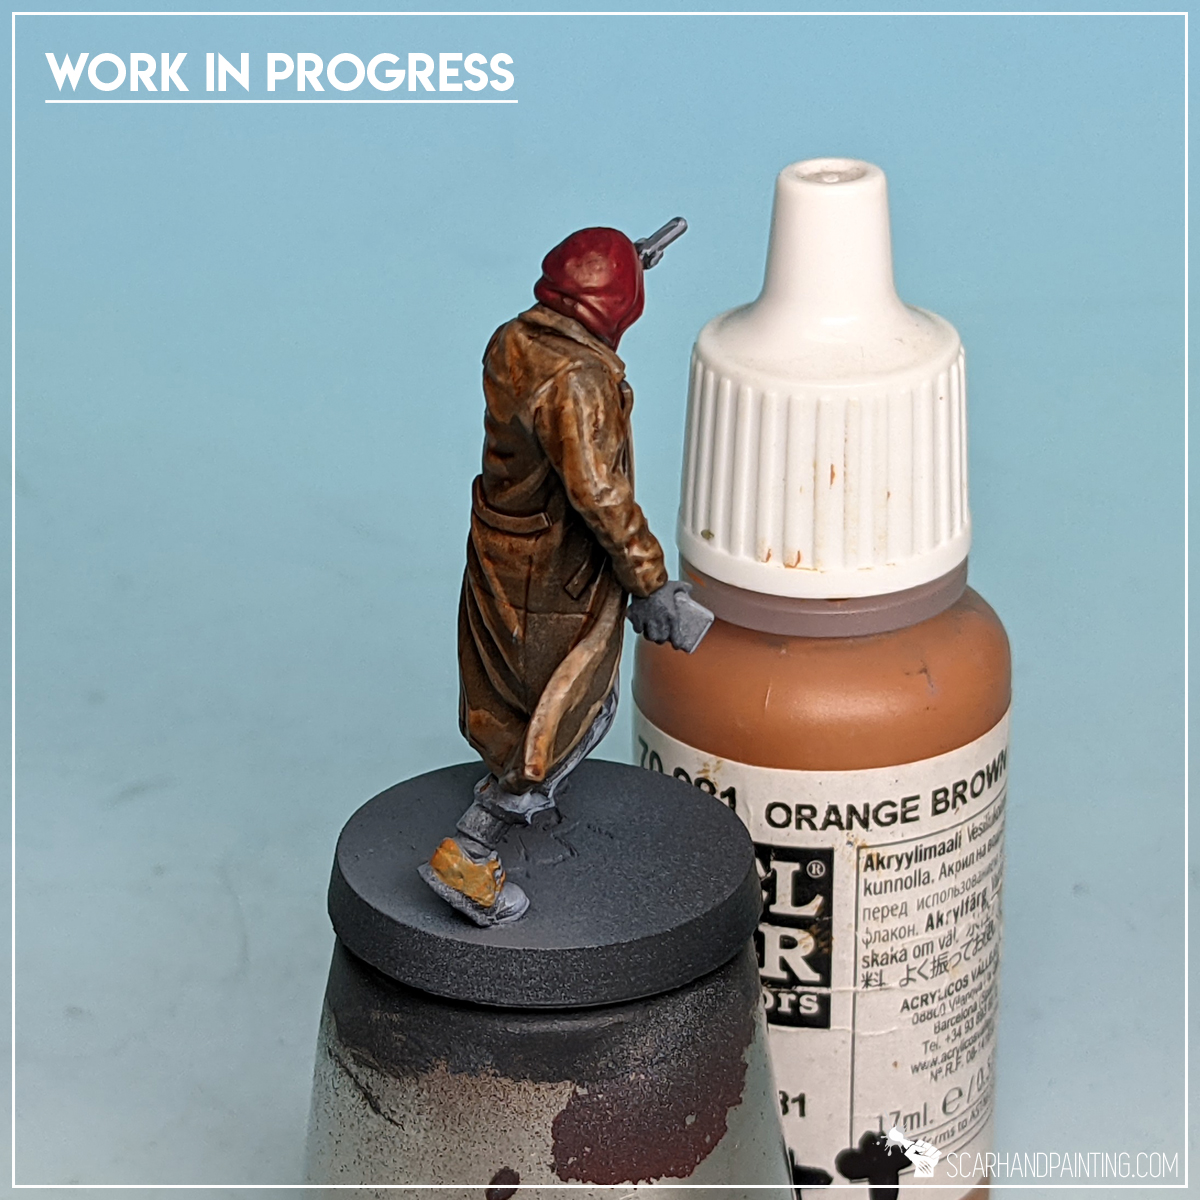
Step eight: Orange boots
For some shoes I applied a single layer of Vallejo Orange Brown. I knew boots will inevitably get messy during basing, so I decided to keep them super-simple.
Step nine: Brown wash
Here’s where all the magic happens. I applied a strong layer of Army Painter Strong Tone Ink mixed with just a drop of Matt Varnish. I washed everything, skin* included, except for weapons*. I kept coming back to the miniatures to remove the ostentatious excess of wash throughout the drying process.
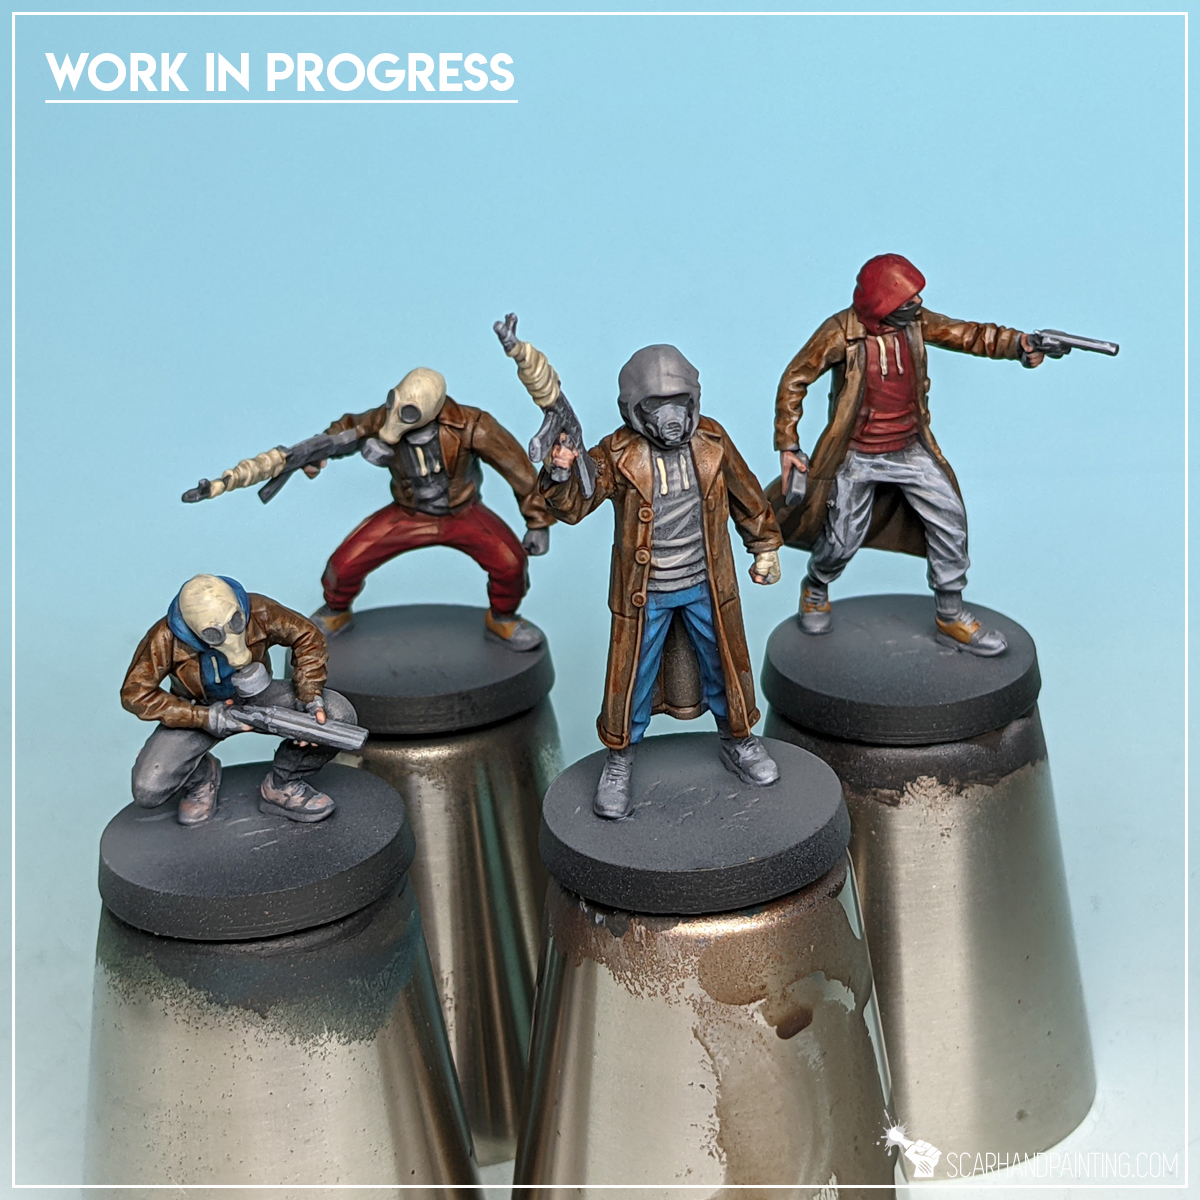
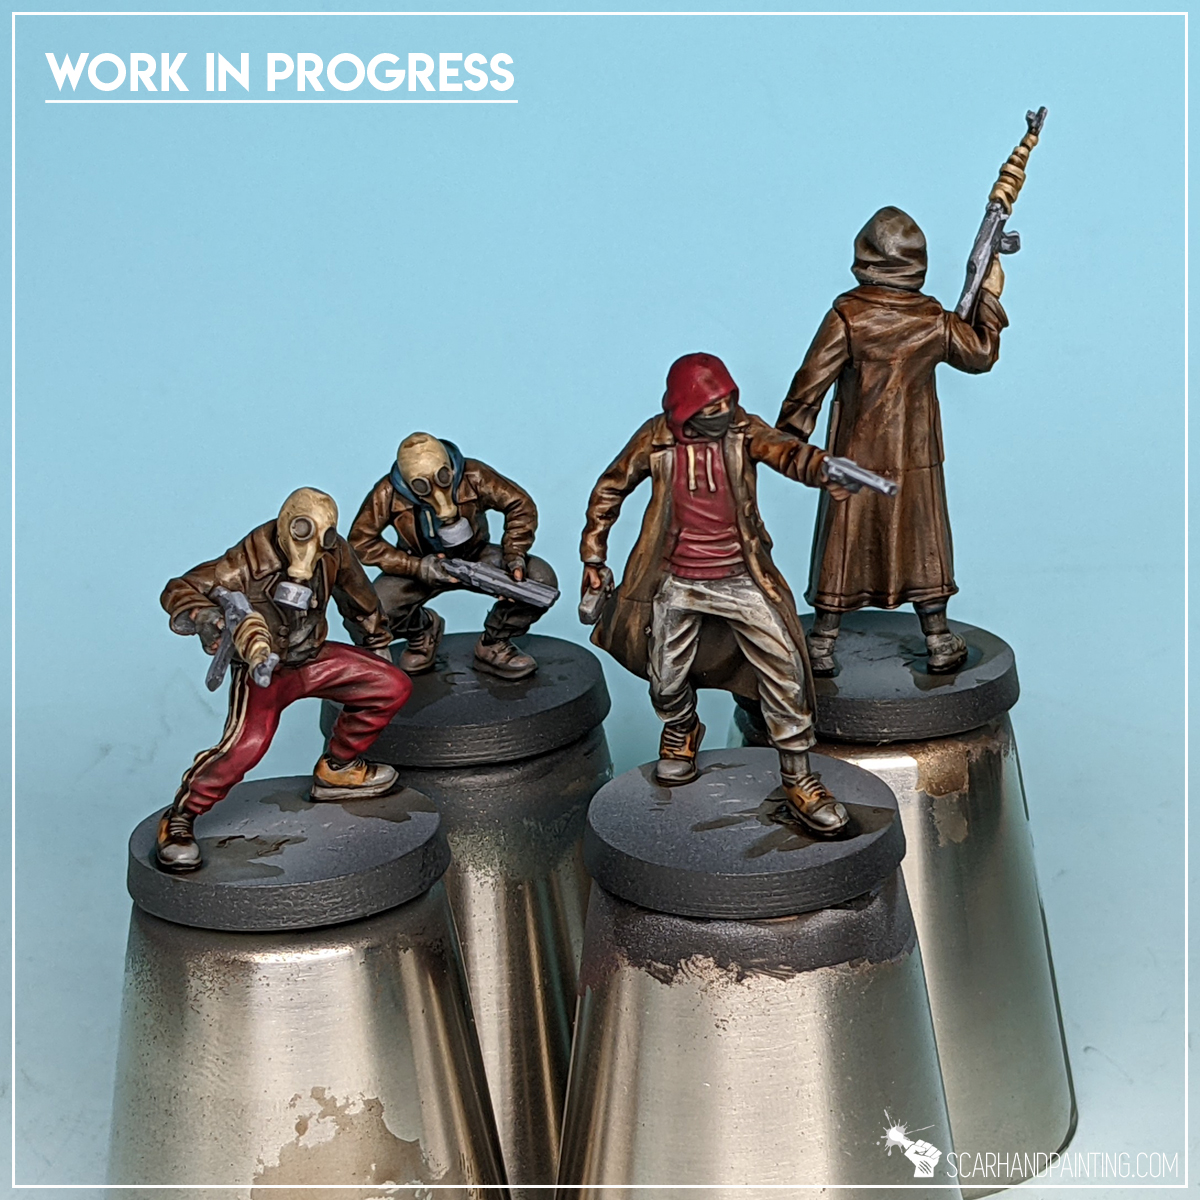
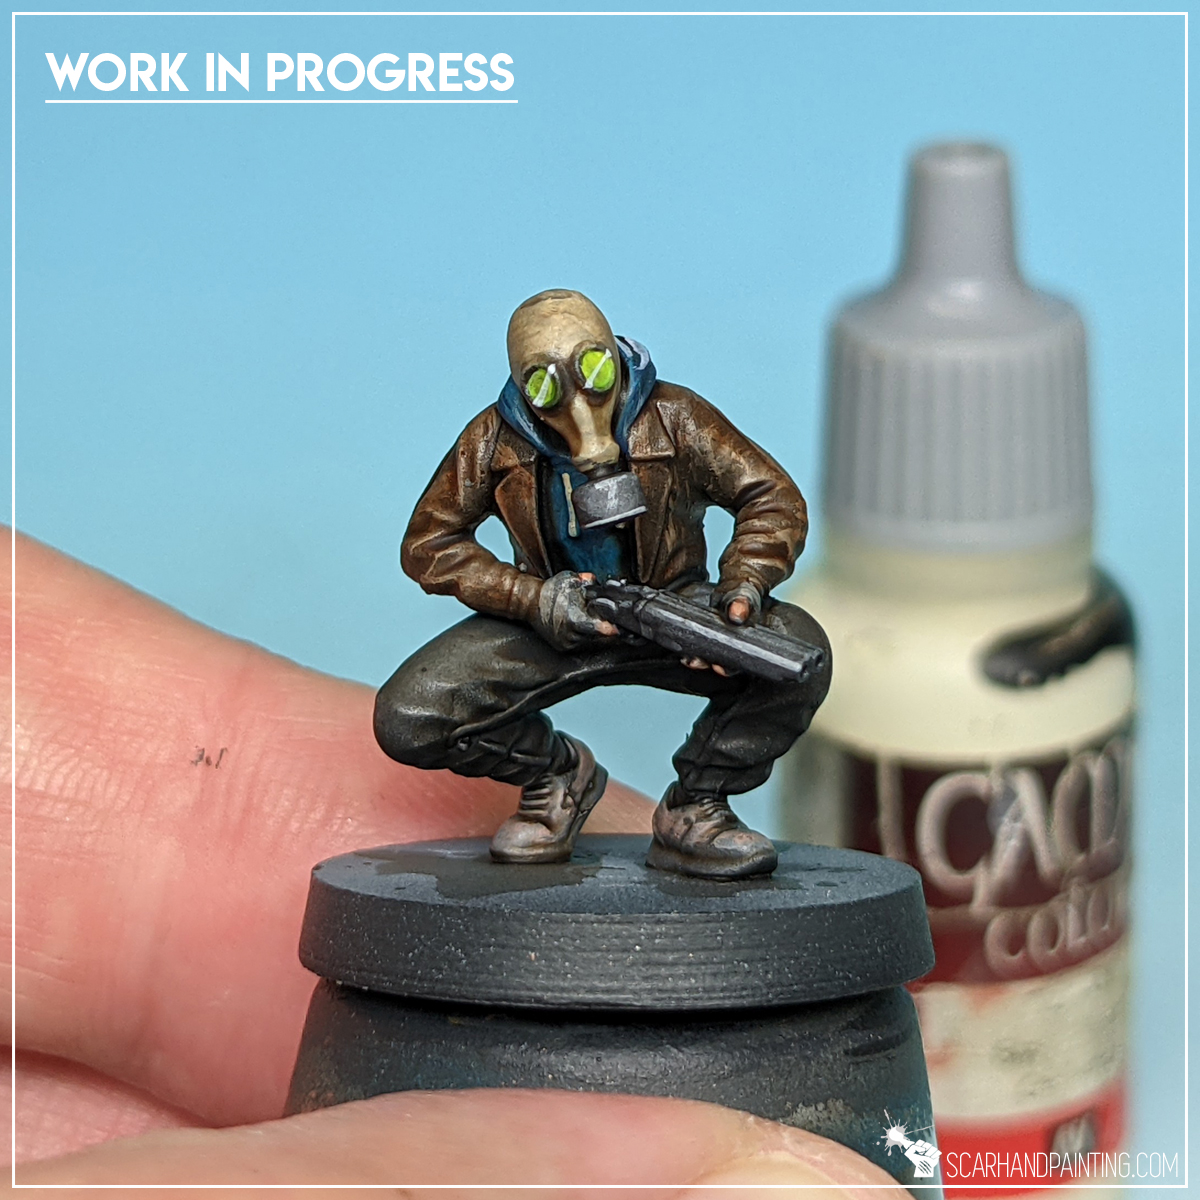
Step ten: Highlights
I used Vallejo Glacier Blue and Games Workshop Pallid Wych Flesh to highlight blue, black and paint some extra detail on the shoes and buttons.
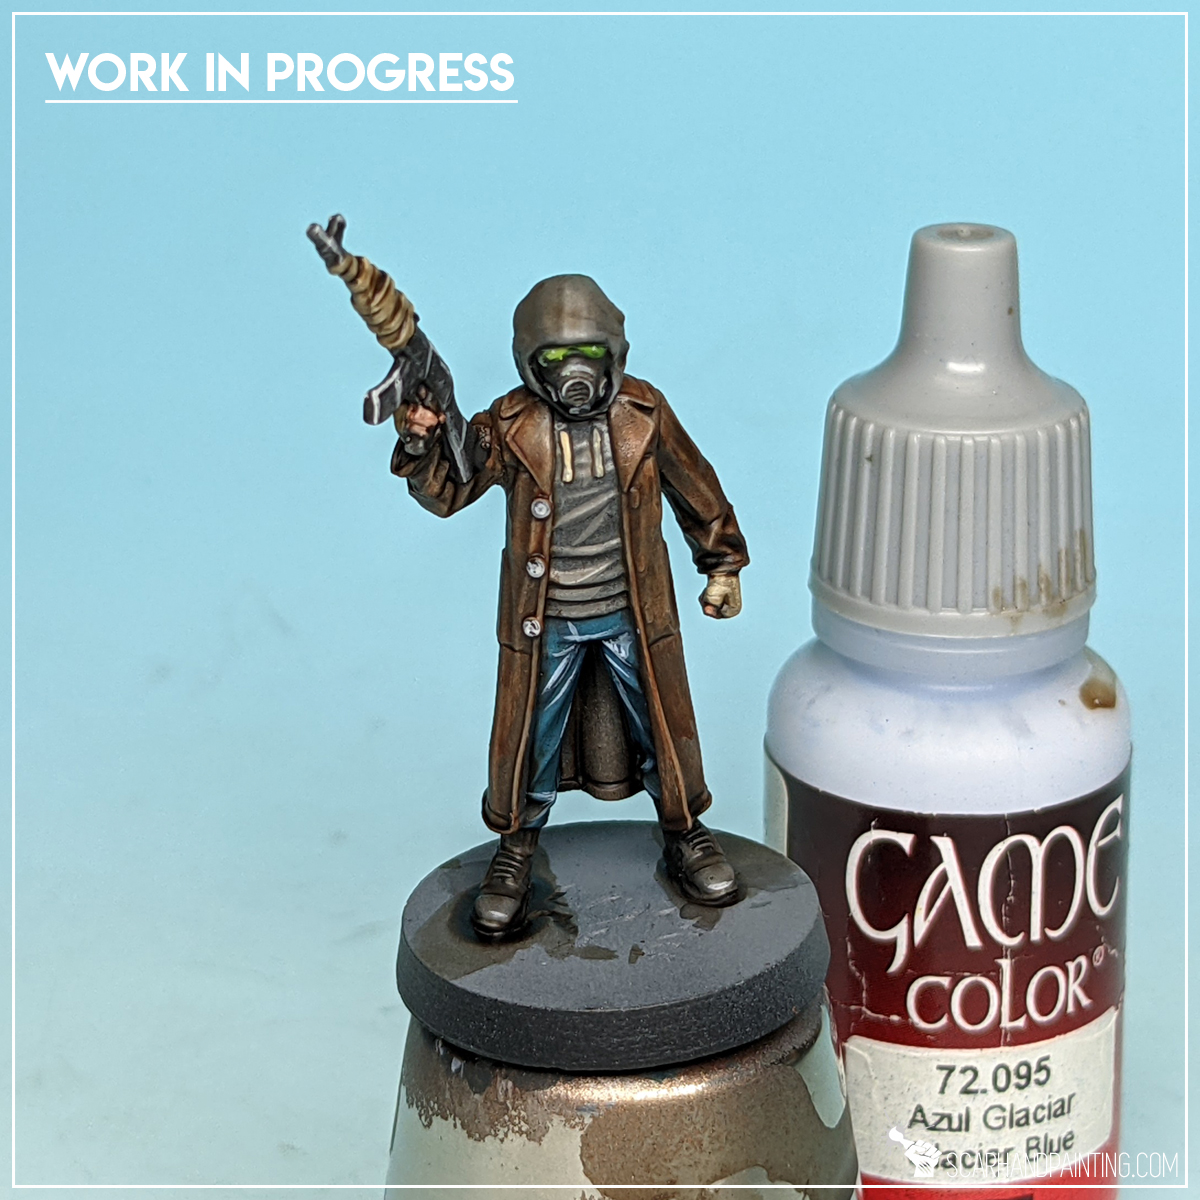
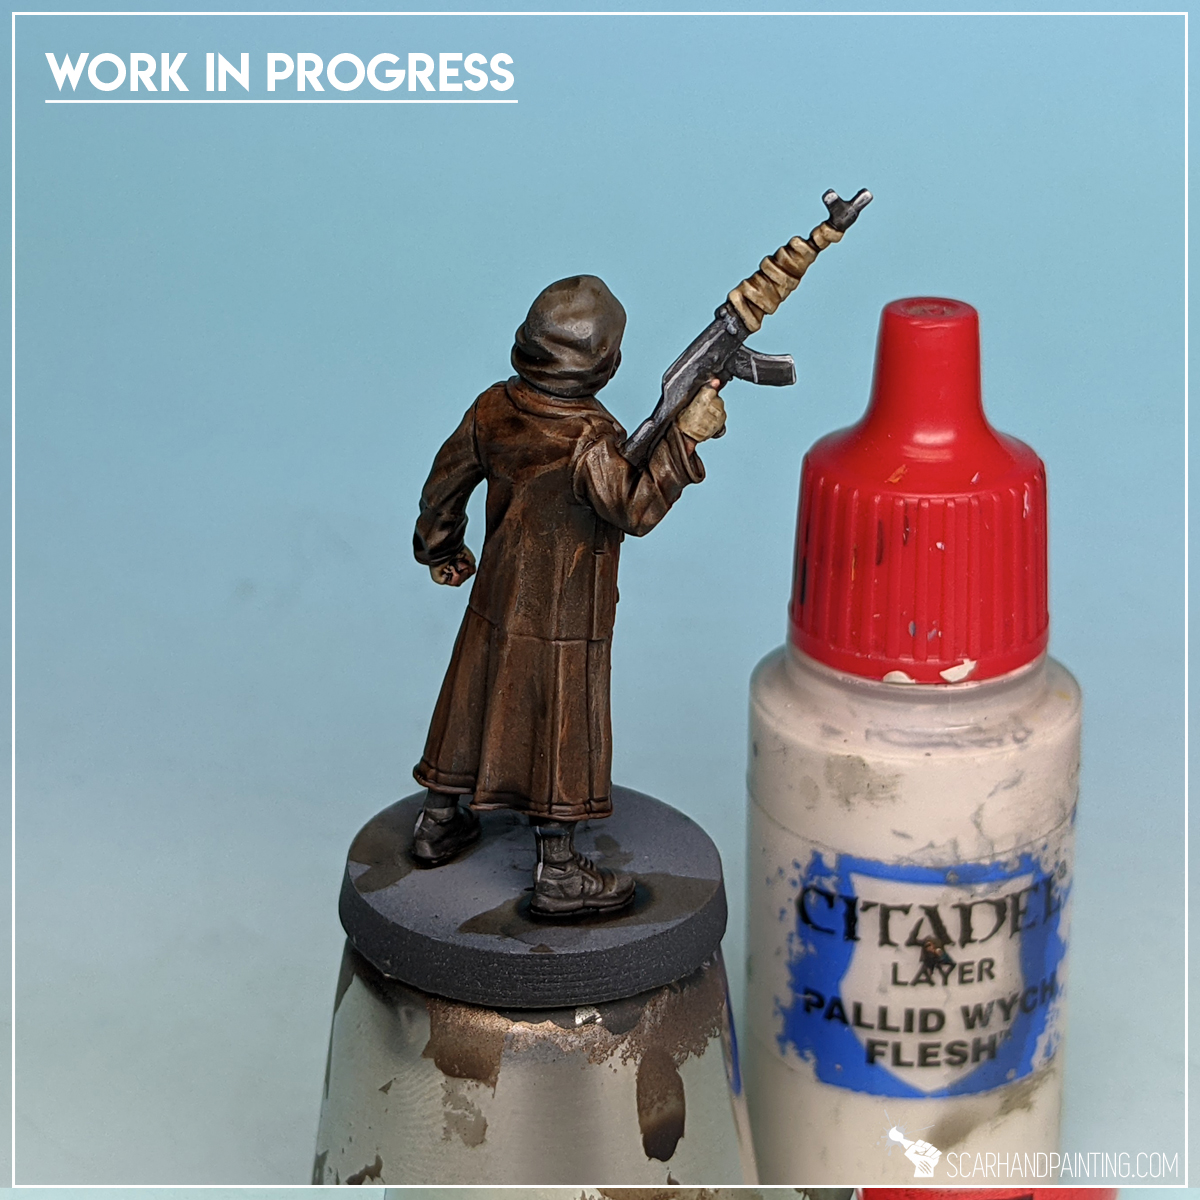
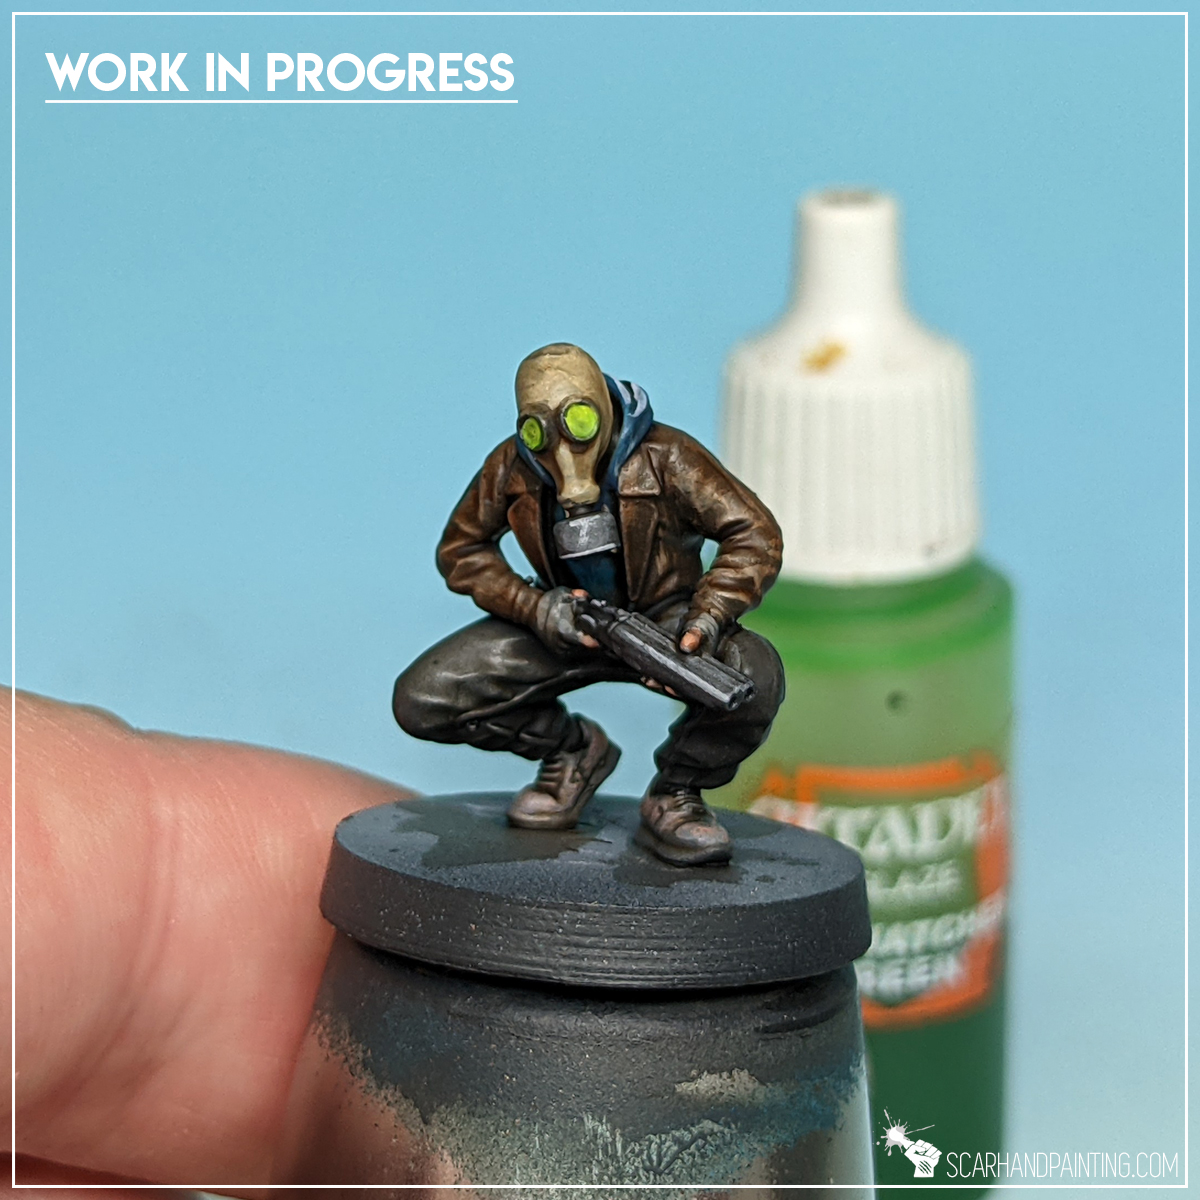
Step eleven: Gasmask visors
Finally I painted gasmask visors with Games Workshop Pallid Wych Flesh, followed by Vallejo Light Livery Green. I then applied a glaze of Games Workshop Waywatcher Green. Last step was to paint diagonal lines of Vallejo Off White through the visors – adding that extra flash effect to them.
Other steps: *You can learn how to paint weapons, skin and bases in previous tutorial: Painting Post-apo Survivors part 1 Stalkers
I hope you find this tutorial interesting. Be sure to let me know your thoughts in the comments below or via Facebook.or Instagram. I would also appreciate if you considered sharing this content with your friends, who might find it useful. Finally if you are looking for a professional miniatures painting service be sure to contact me with this contact form. I always reply within 24 hours, after which please check out your spam folder.
Welcome to Painting Five Layers Technique – Metal tutorial. Here I will present to you a Step-by-step of an easy and fast painting process for metal, that I myself use in most of my projects.

Before we start, some notes:
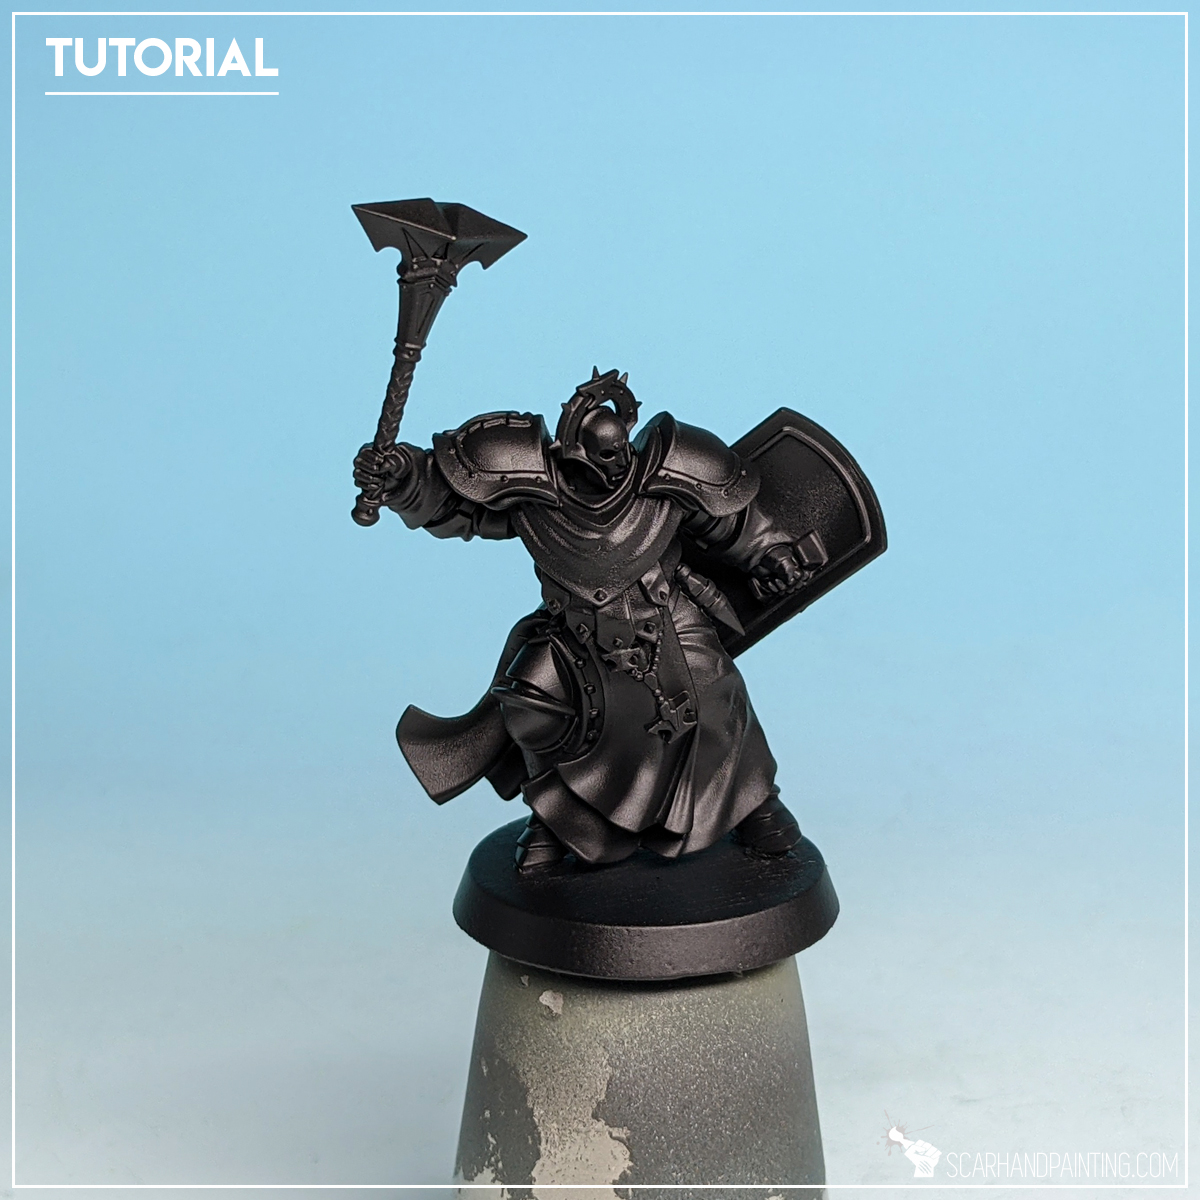
Prep: Undercoat
I started with a thorough layer of Games Workshop Chaos Black spray.
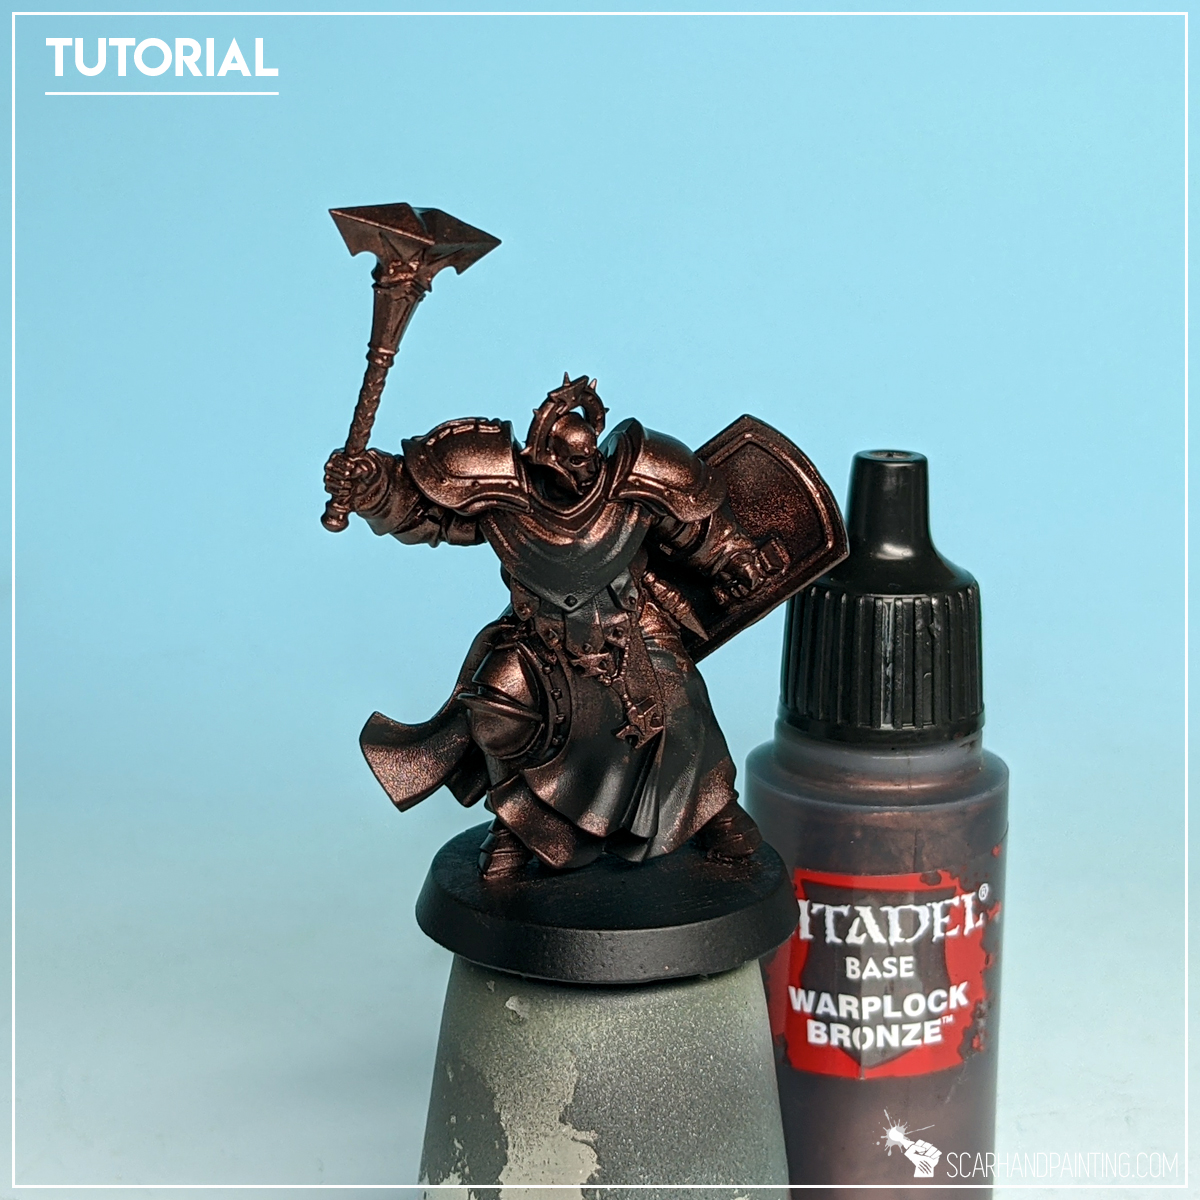
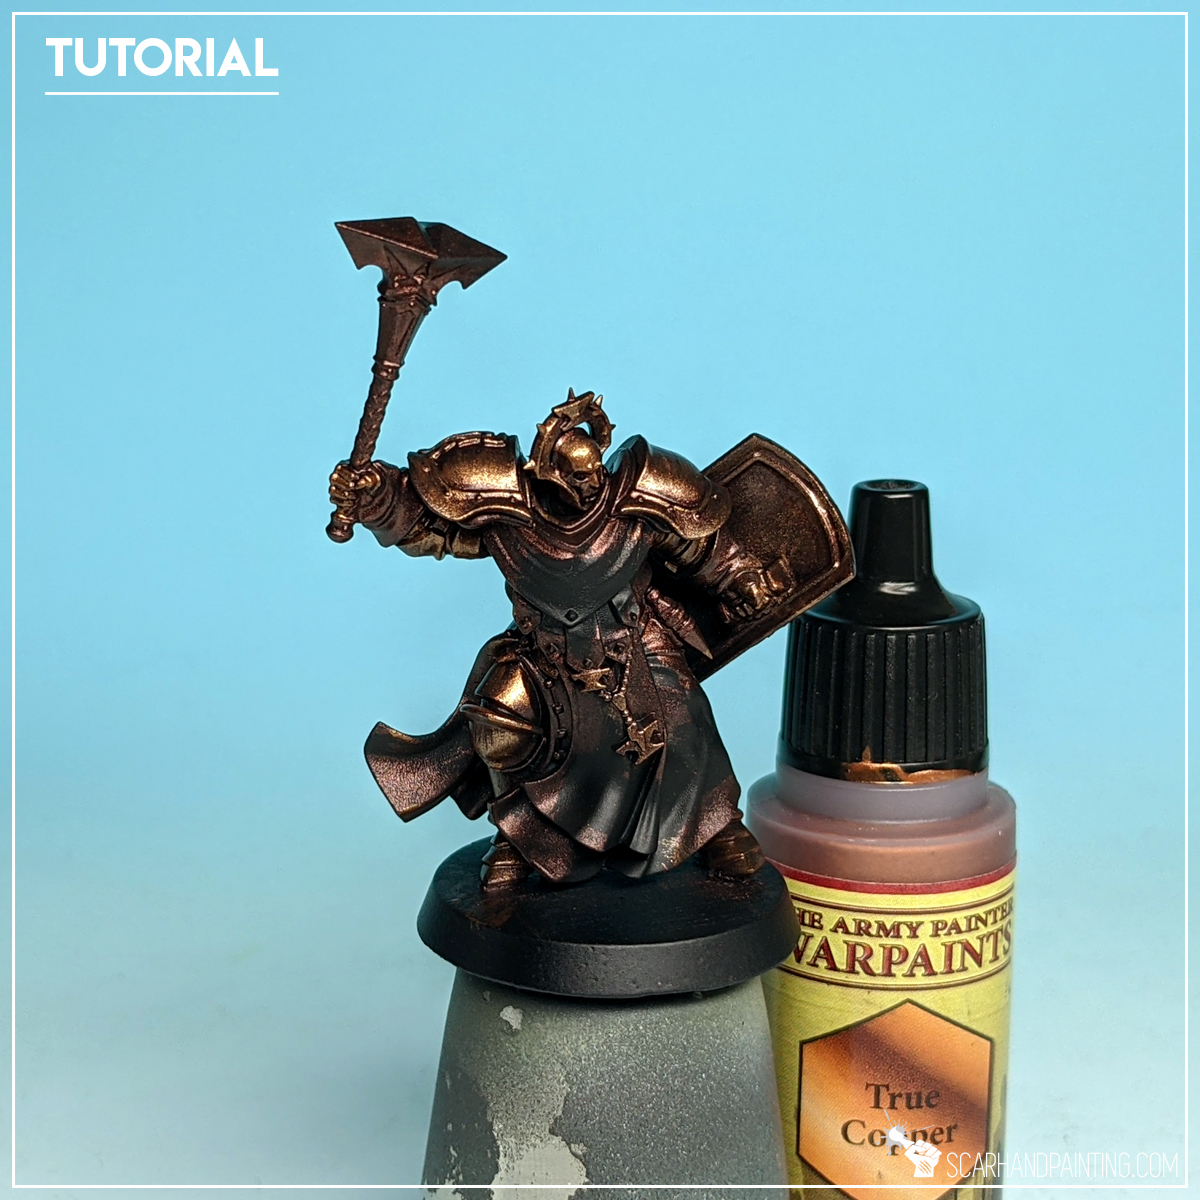
Step one: Base layer
I then applied first layer (base) with GW Warplock Bronze. Thinning the paint down a notch might help leading the paint to recesses and speed up the process.
Step two: Bronze Highlight
Next, with a side of a large brush tip, I applied a layer of Army Painter True Copper. The movement and technique behind this layer was similar to flatbrushing. The key was to leave some of the previous layer visible in recesses, all the while applying new color to everything beyond.

Step two alt: Metal Highlight
I did the same for weapon, except I switched to Army Painter Gun Metal, instead of True Copper.
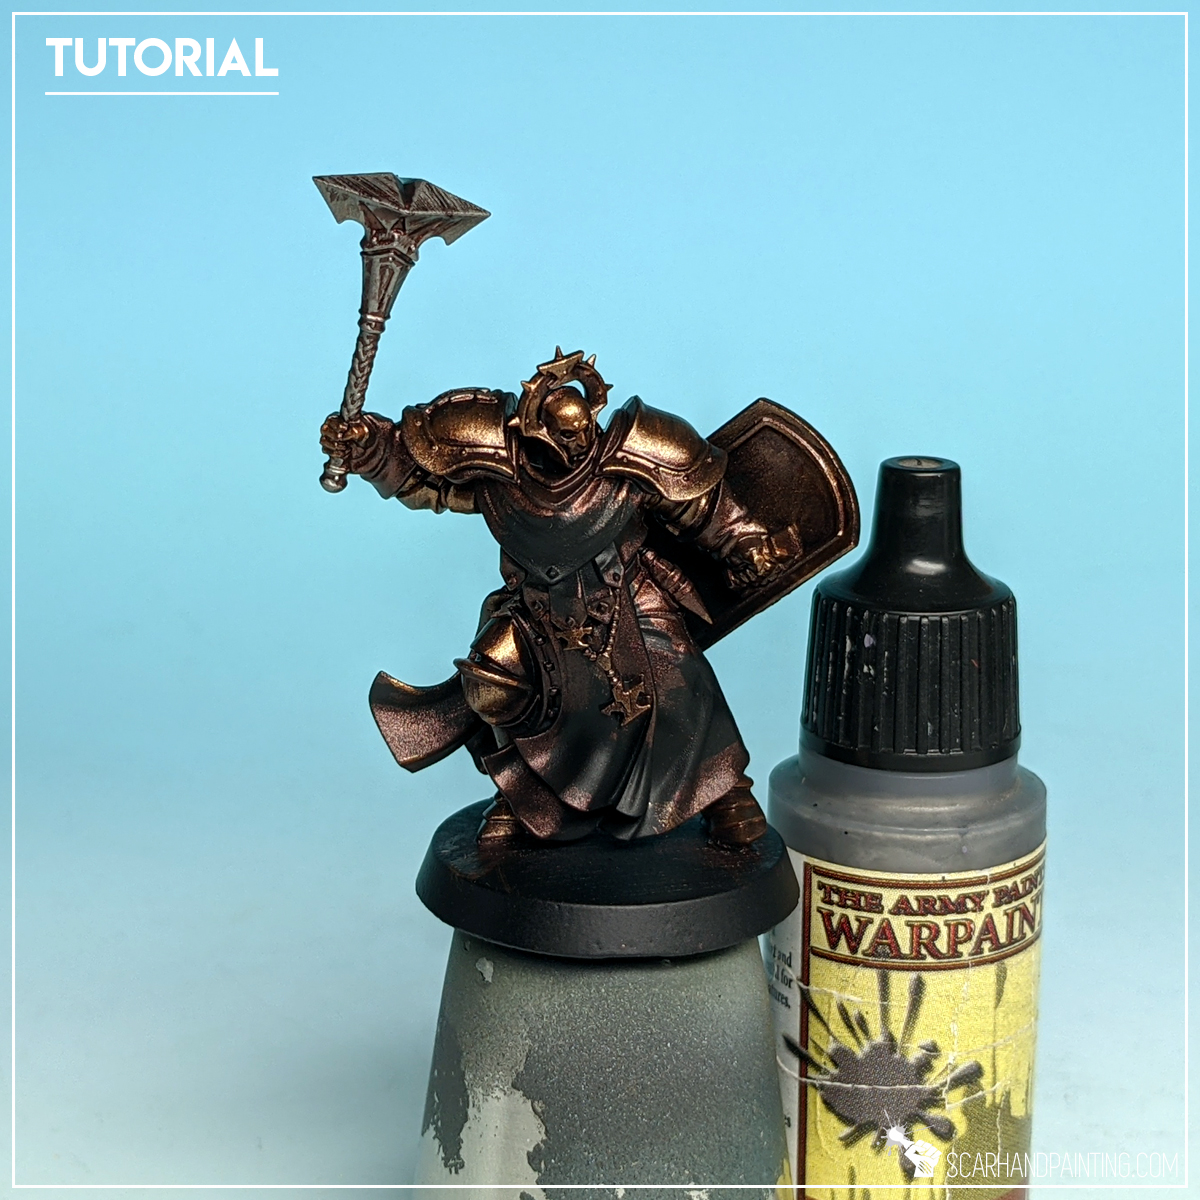
Step three: Edge highlight
Next I edge highlighted all areas with Army Painter Shining Silver. This one does not have to be precise and might get a bit messy. Any additional scratches or lines painted on the armor will benefit the final result.
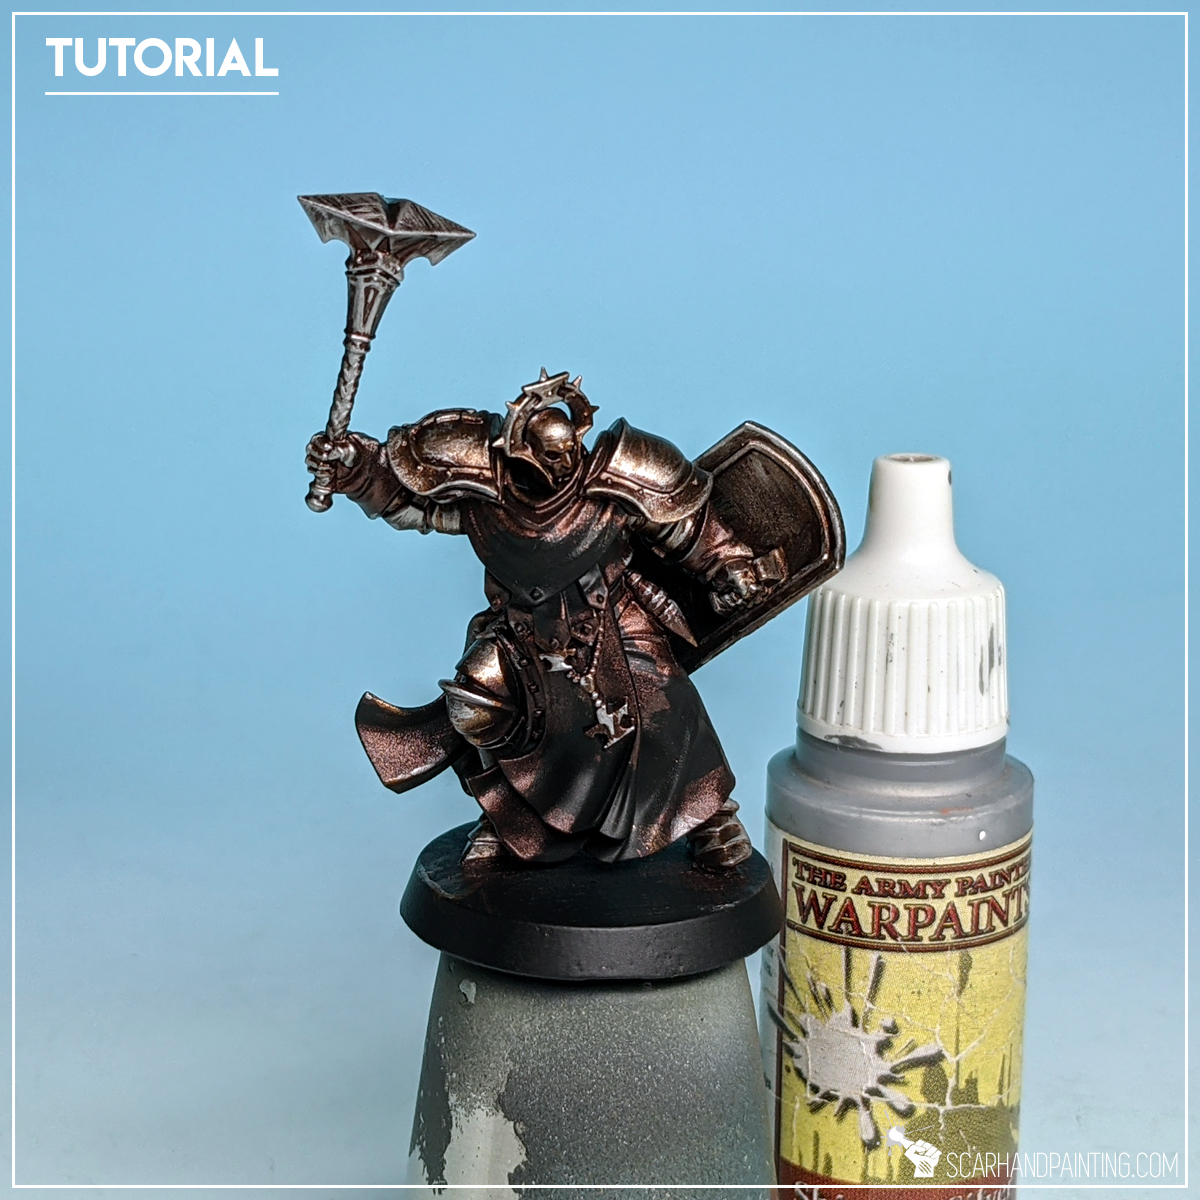
Step four: Wash
The Army Painter Strong Tone was next. I applied a rich layer of wash all over the miniature.
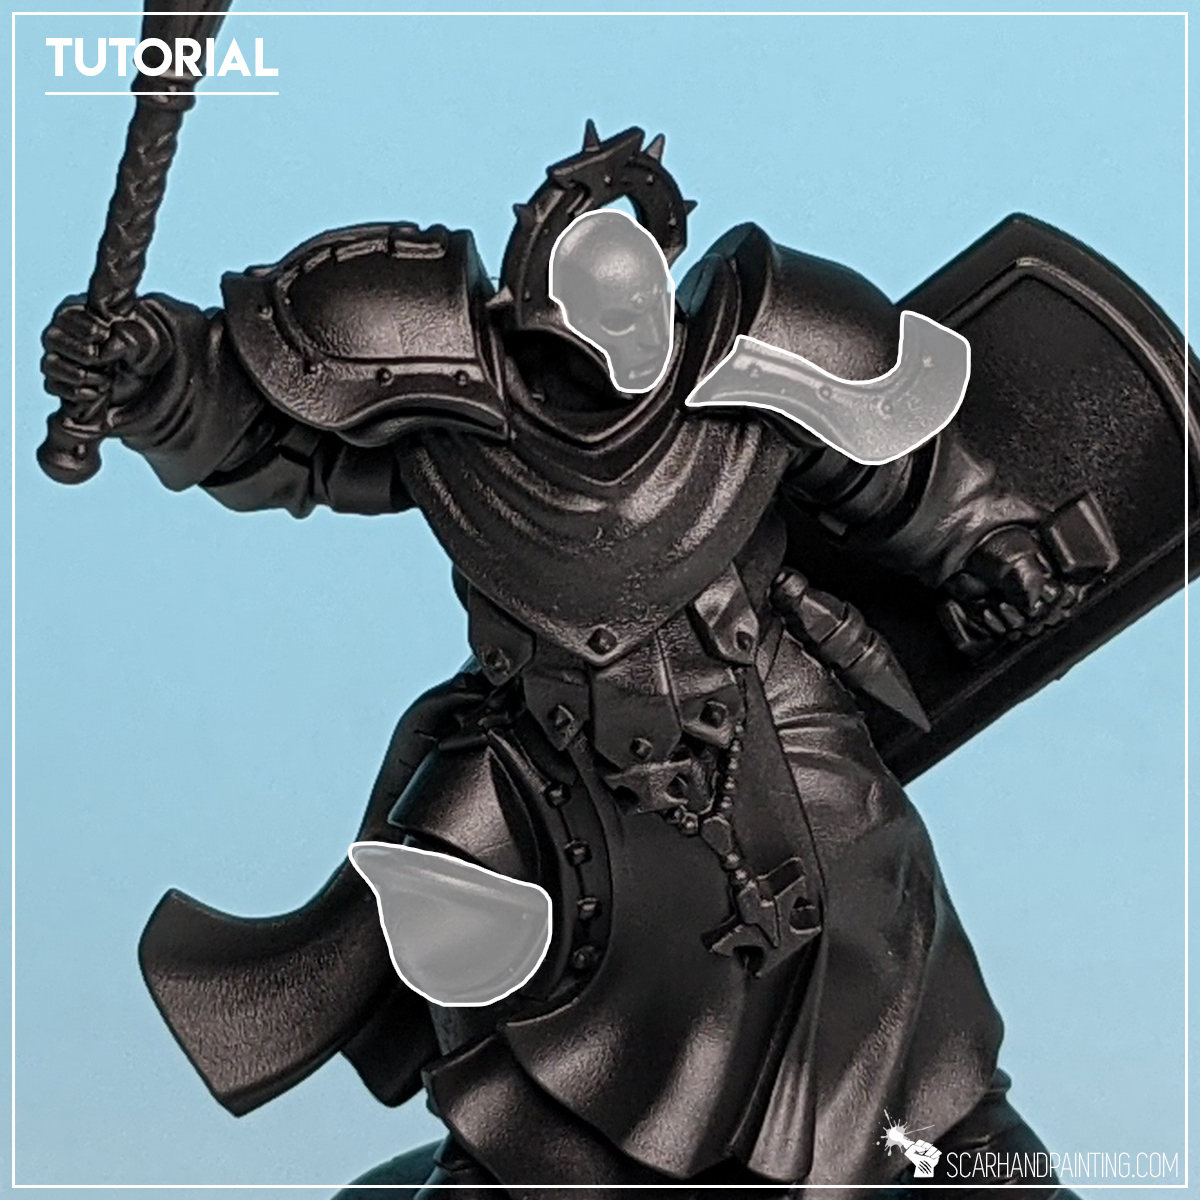
NOTE: I recommend applying and highlighting any colors compatible with Strong Tone before commencing this step. Proper layer planning is key to achieving fast painting time. For this tutorial I left the rest of the miniature as is.
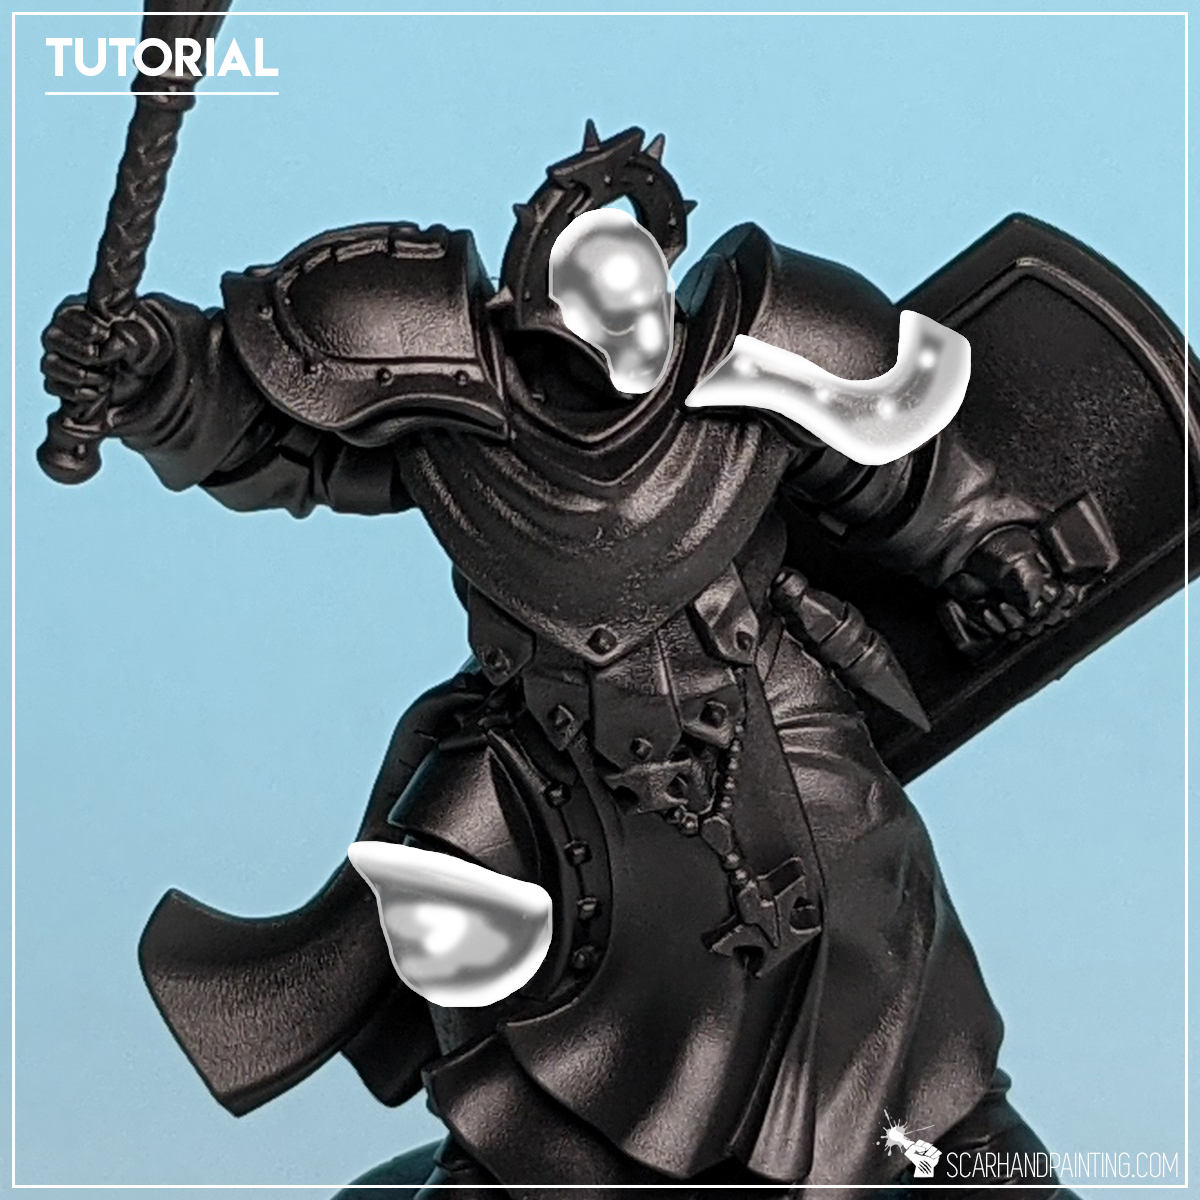
Step five: Highlight
Finally I edge highlighted with Army Painter Shining Silver. I also painted few additional scratches and lines to add diversity to some areas.

Job complete. It is just that simple. Now you have a nice base to add depth and additional detail with color washes/glazes, or you can just leave it as is, if you prefer. Below are some examples of Metal painted with Five Layers Technique.

I hope you find this tutorial interesting. Be sure to let me know your thoughts in the comments below or via Facebook or Instagram. I would also appreciate if you considered sharing this content with your friends, who might find it useful. Finally if you are looking for a professional miniatures painting service be sure to contact me with this contact form. I always reply within 24 hours, after which please check out your spam folder.

Being a commission painter, or even just a casual hobbyist, might see you grow attached to a certain line of paints. What if suddenly these paints become out of production? Having to change one’s painting habits is rough. Being left in a middle of a project, without means to continue seems even worse!
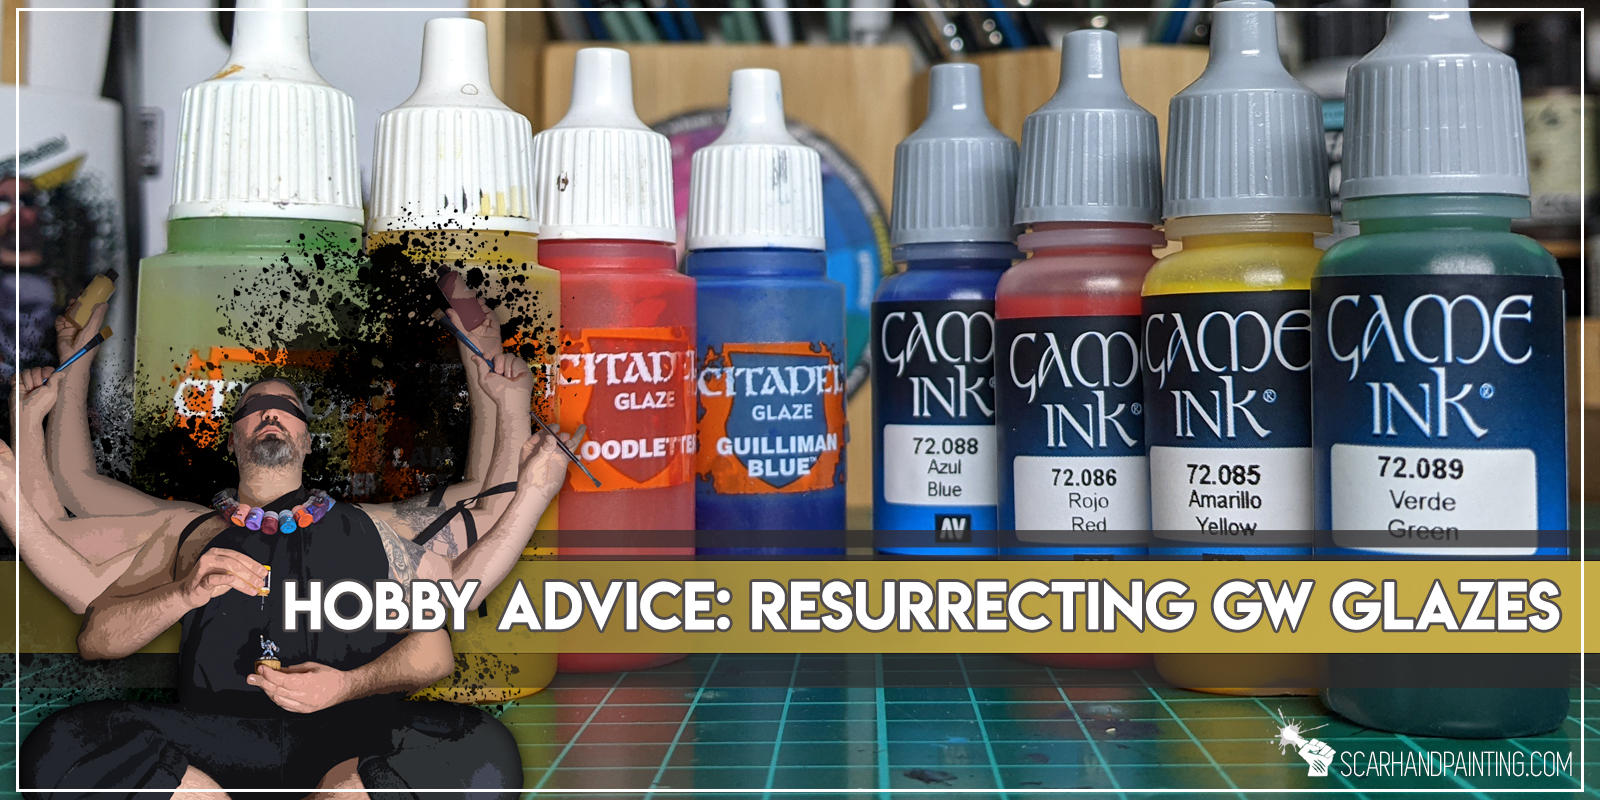
I’ve been hobbying for over twenty years now. Easy to say I have seen my share of paints going OOP. Been on a receiving end of such blows far too many times. The most recent and by far most painful was Games Workshop’s removal of the amazing Glaze series. Using these as Washes, Glazes and even Mix ingredients I grew to love them. No amount of Contrast paints will fill the void, as these are a thing of their own with different qualities and behavior.
And thus after burning (or rather flowing) though my stash of GW Glazes I started searching for a stable source of substitute. I experimented with Army Painter, Privateer Press, Games Workshop and more. In the end salvation came from Vallejo. It turned out their Game Inks are already pretty close to old GW Glazes. Few tweaks saw these pretty much spot on. See for yourself.
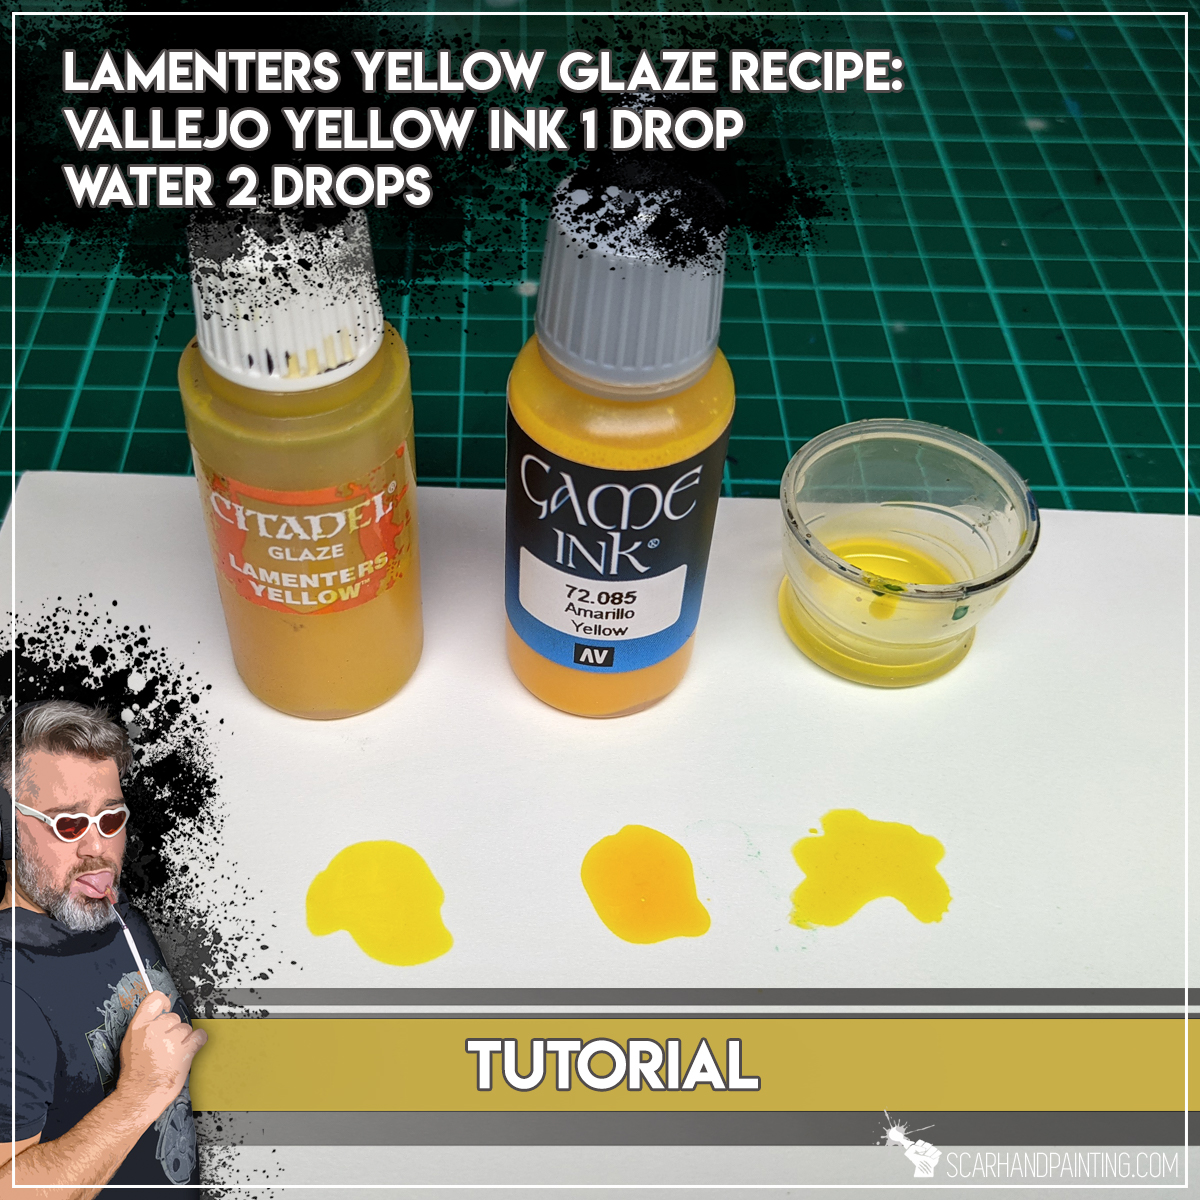
Recipe:
Vallejo Game Ing 72.085 Yellow 1 drop
Water 2 drops

Recipe:
Vallejo Game Ink 72.086 Red 4 drops
Vallejo Game Ing 72.085 Yellow 1 drop
Water 10 drops
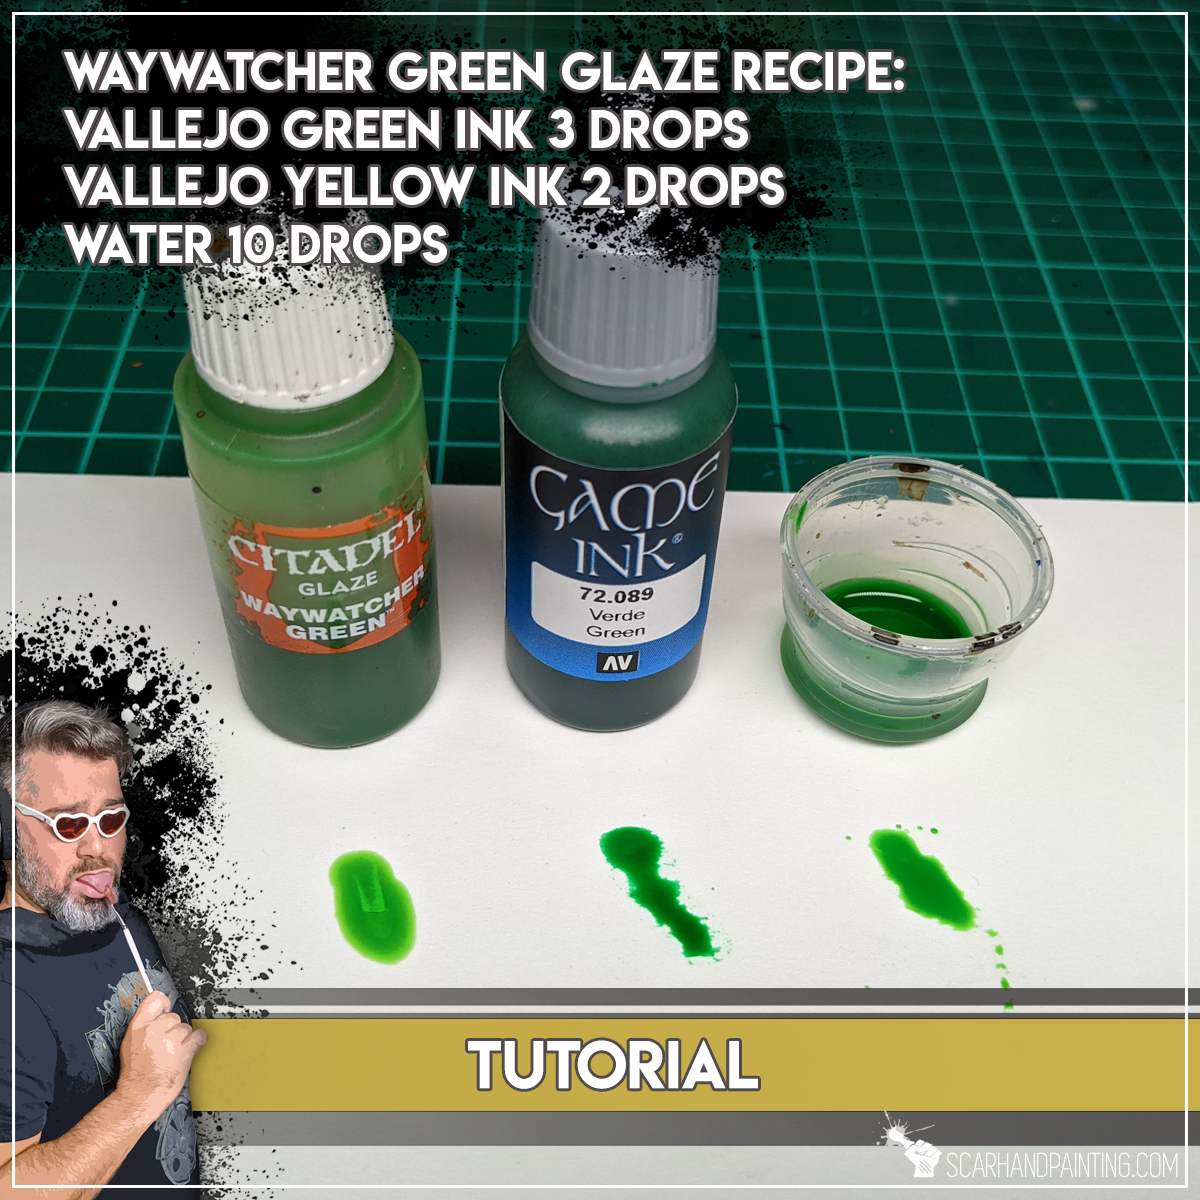
Recipe:
Vallejo Game Ink 72.089 Green 3 drops
Vallejo Game Ing 72.085 Yellow 2 drops
Water 10 drops
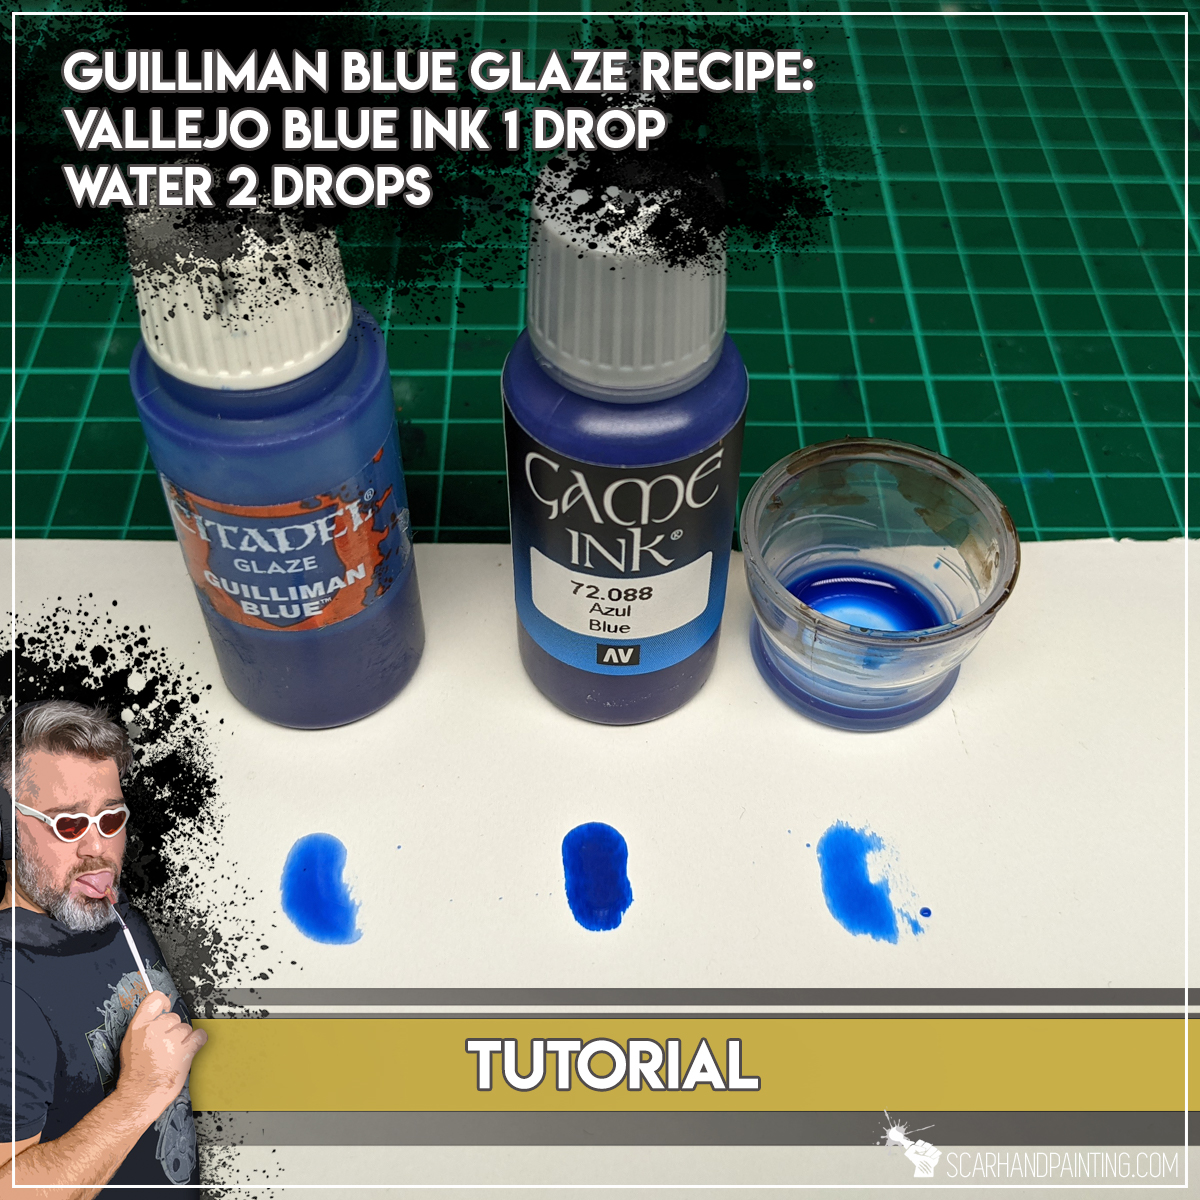
Recipe:
Vallejo Game Ink 72.088 Blue 1 drop
Water 2 drops
There you have it. I hope this will help you refill your own bottles of old GW Glazes.
If you like the article, consider sharing it with someone who likes hobbying around with miniatures. Find me on Facebook and Instagram. Most importantly have a great hobby time!