- contact@scarhandpainting.com


Here are some Colour Recipes for Kings of War: Armada Empire of Dust from Gallery: Armada Empire of Dust. Please take note that this is a simple colour scheme, not covering multiple overlapping layers and blends in between, that lead to the final product. It is supposed to be used as guideline not a step-by-step.

GREY hulls:
Panzer Dark Grey (val), *
Cold Grey (val), *
Mix: Strong Tone Ink (ap) 1:1 Soft Tone Ink (ap),
Medium Sea Grey (val), drbr
Ghost Grey (val), drbr
BRIGHT BROWN decks:
Khaki (val), *
Flayed One Flesh (gw), flbr
Mix: Strong Tone Ink (ap) 1:1 Soft Tone Ink (ap),
Flayed One Flesh (gw), l&p

WHITE sails:
Khaki (val), *
Wolf Grey (val), *
White (val), *
GOLD ornaments:
Tin Bitz (gw),
Molten Bronze (p3), flbr
Shining Metal (ap), l&p
Mix: Strong Tone Ink (ap) 1:1 Soft Tone Ink (ap),
Shining Metal (ap), l&p
BLUE ornaments:
Magic Blue (val),
Electric Blue (val), flbr
Glacier Blue (val), l&p
Blue Tone Ink (ap),
Glacier Blue (val), l&p
PINK Flames:
Warlord Purple (val),
Mix: Warlord Purple (val) 2:1 Off White (val), flbr
Off White (val), l&p
Purple Tone Ink (ap), wash

l&p – lines and points,
p – points,
dl – deep lining,
bl – blend,
gl – glaze,
drbr – drybrush,
fltbr – flatbrush,
lobr – loaded brush,
stpl – stippling,
*Airbrushed (with multiple layers and mixes)

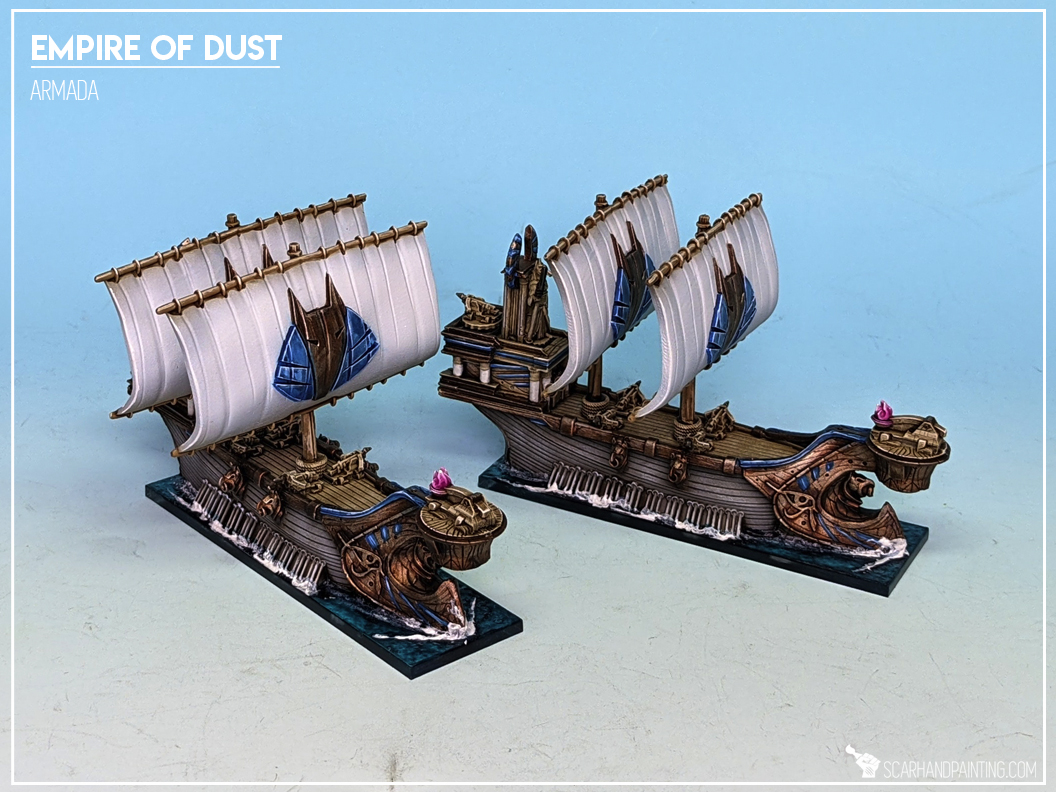
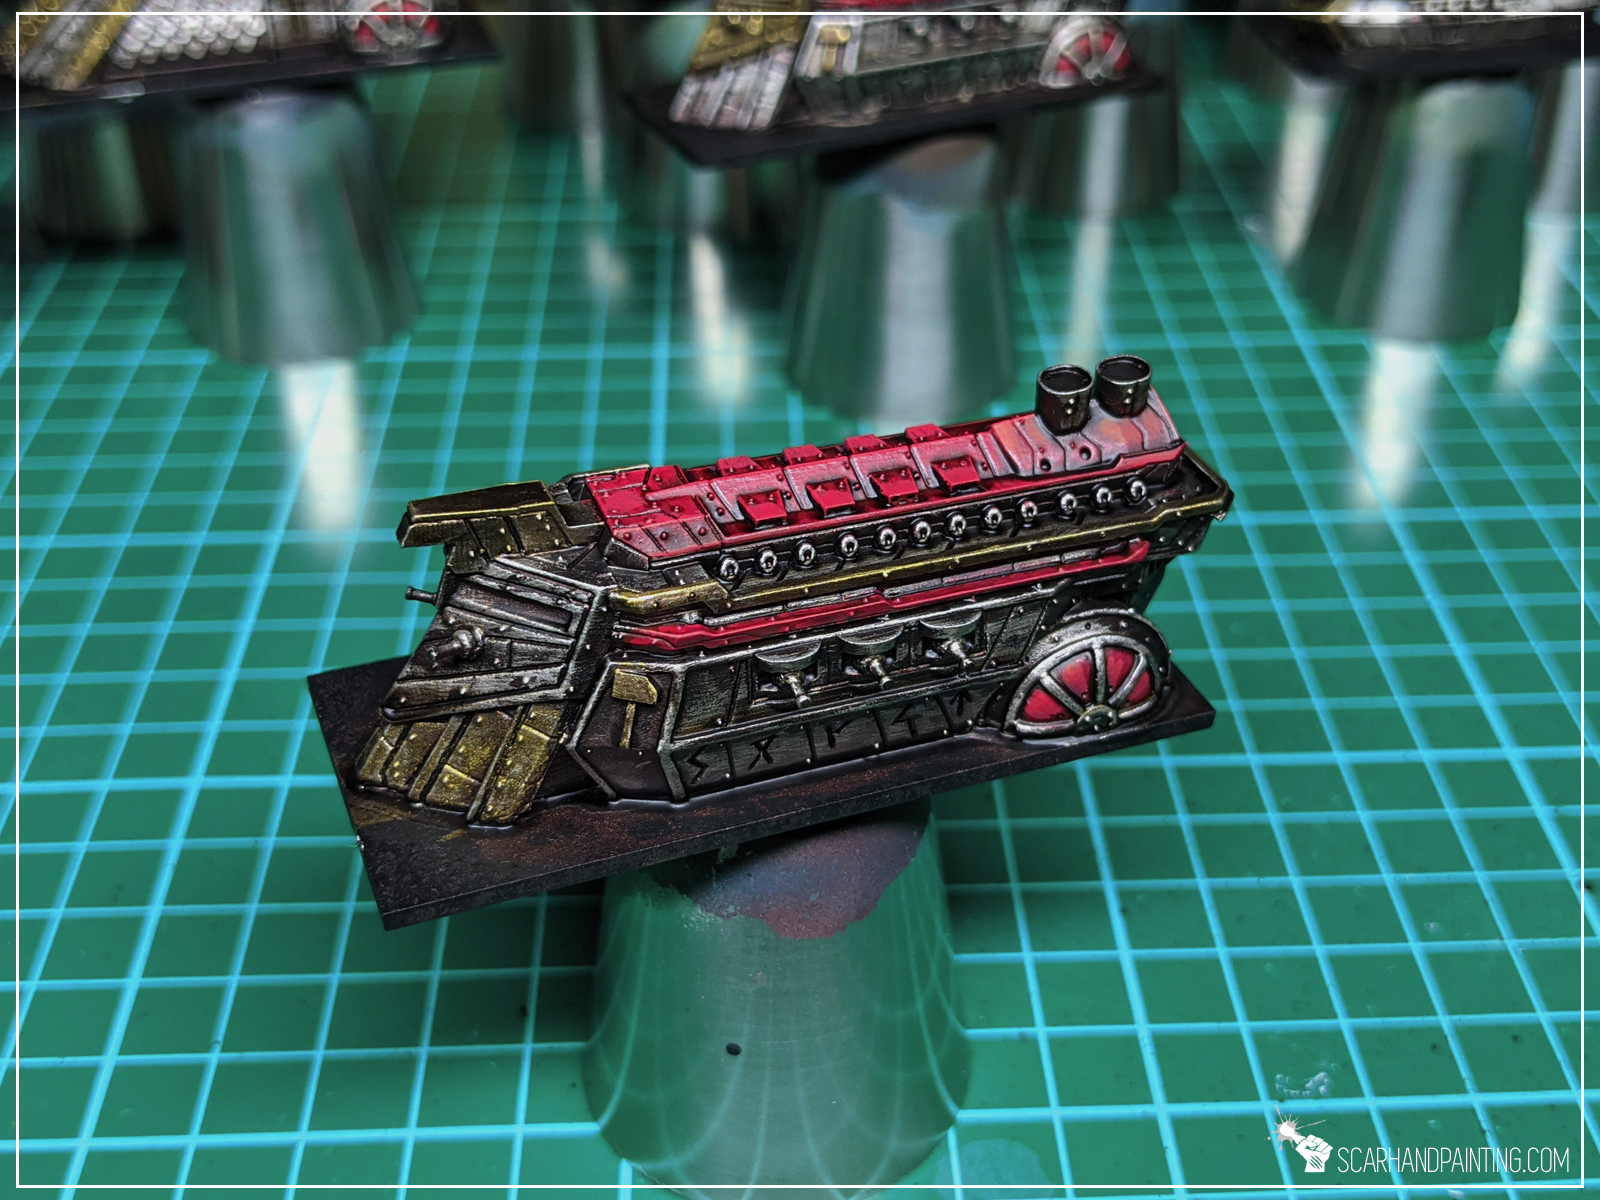
Welcome to Painting KoW Armada Dwarf Fleet tutorial. Here I will present to you a Step-by-step of an easy and fast painting process for Mantic’s Armada Dwarfs as can be seen in Gallery: Armada Dwarfs.

Before we start, some notes:

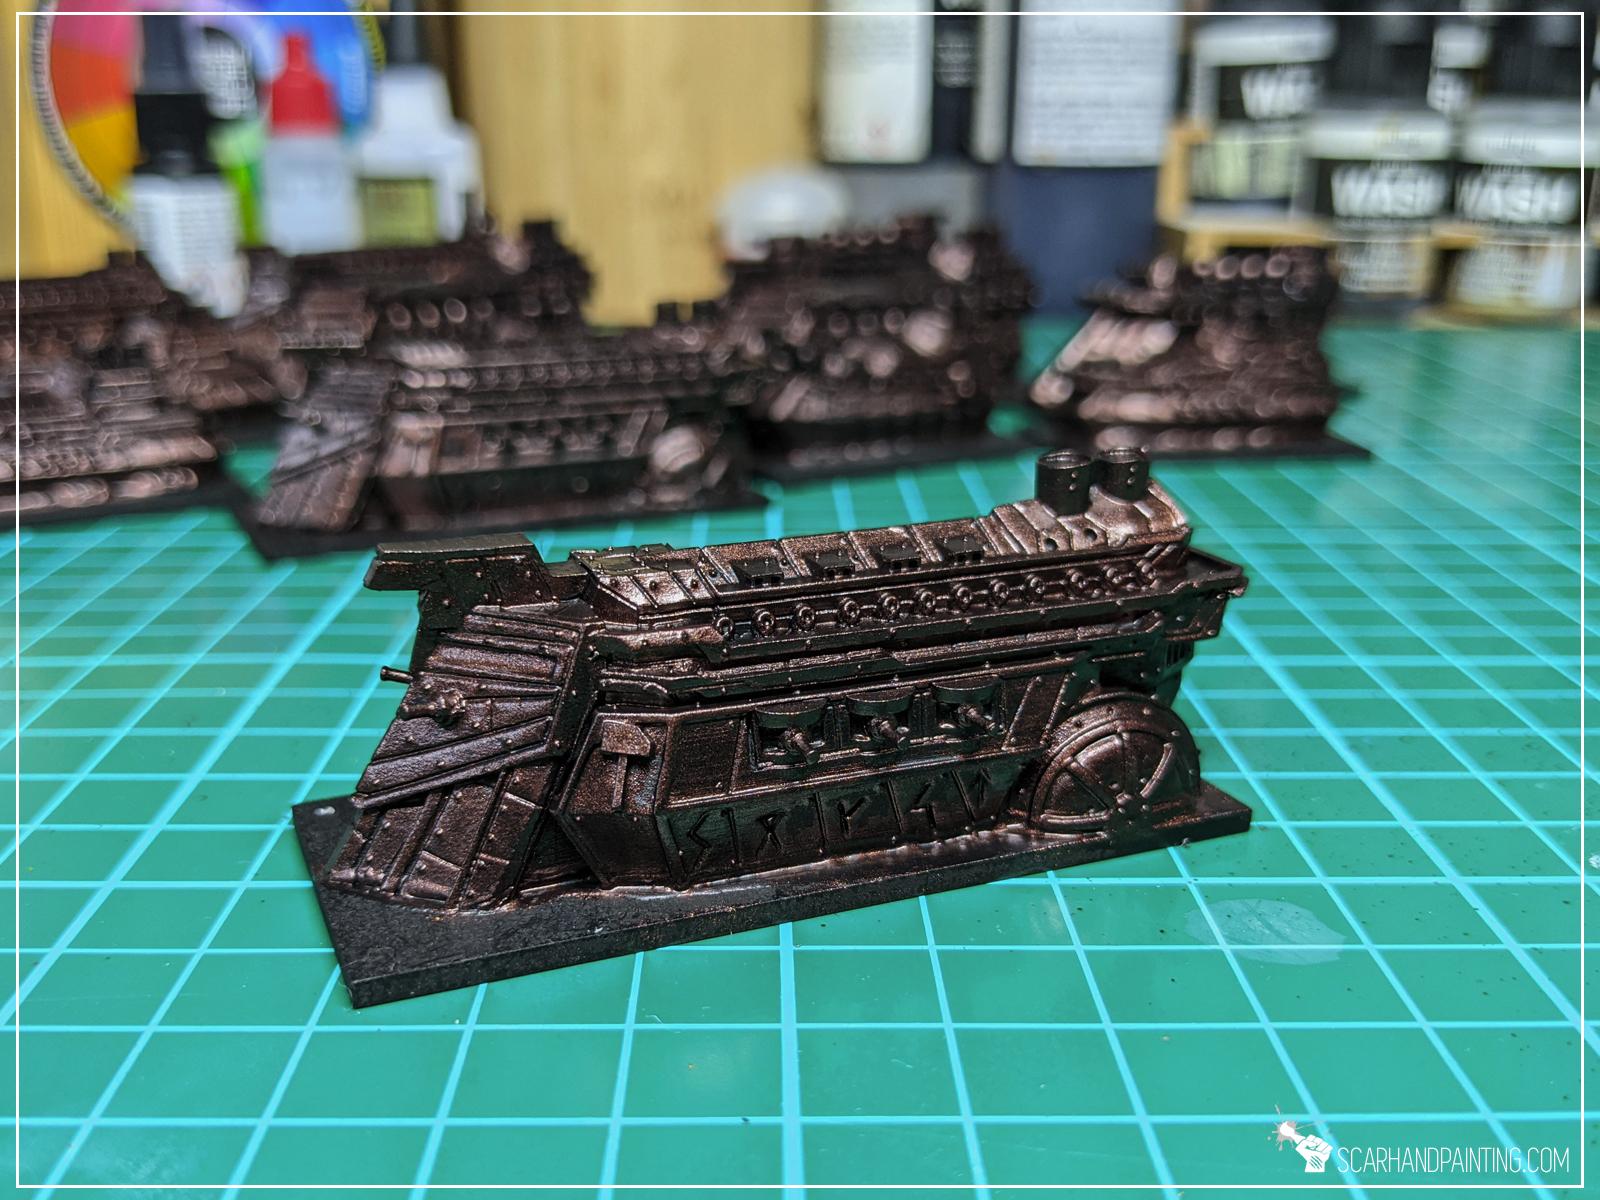
Step one: Undercoat
I started with a thorough layer of Games Workshop Chaos Black spray. This is a standard procedure for me. Chaos Black spray is my go to choice when it comes to undercoat.

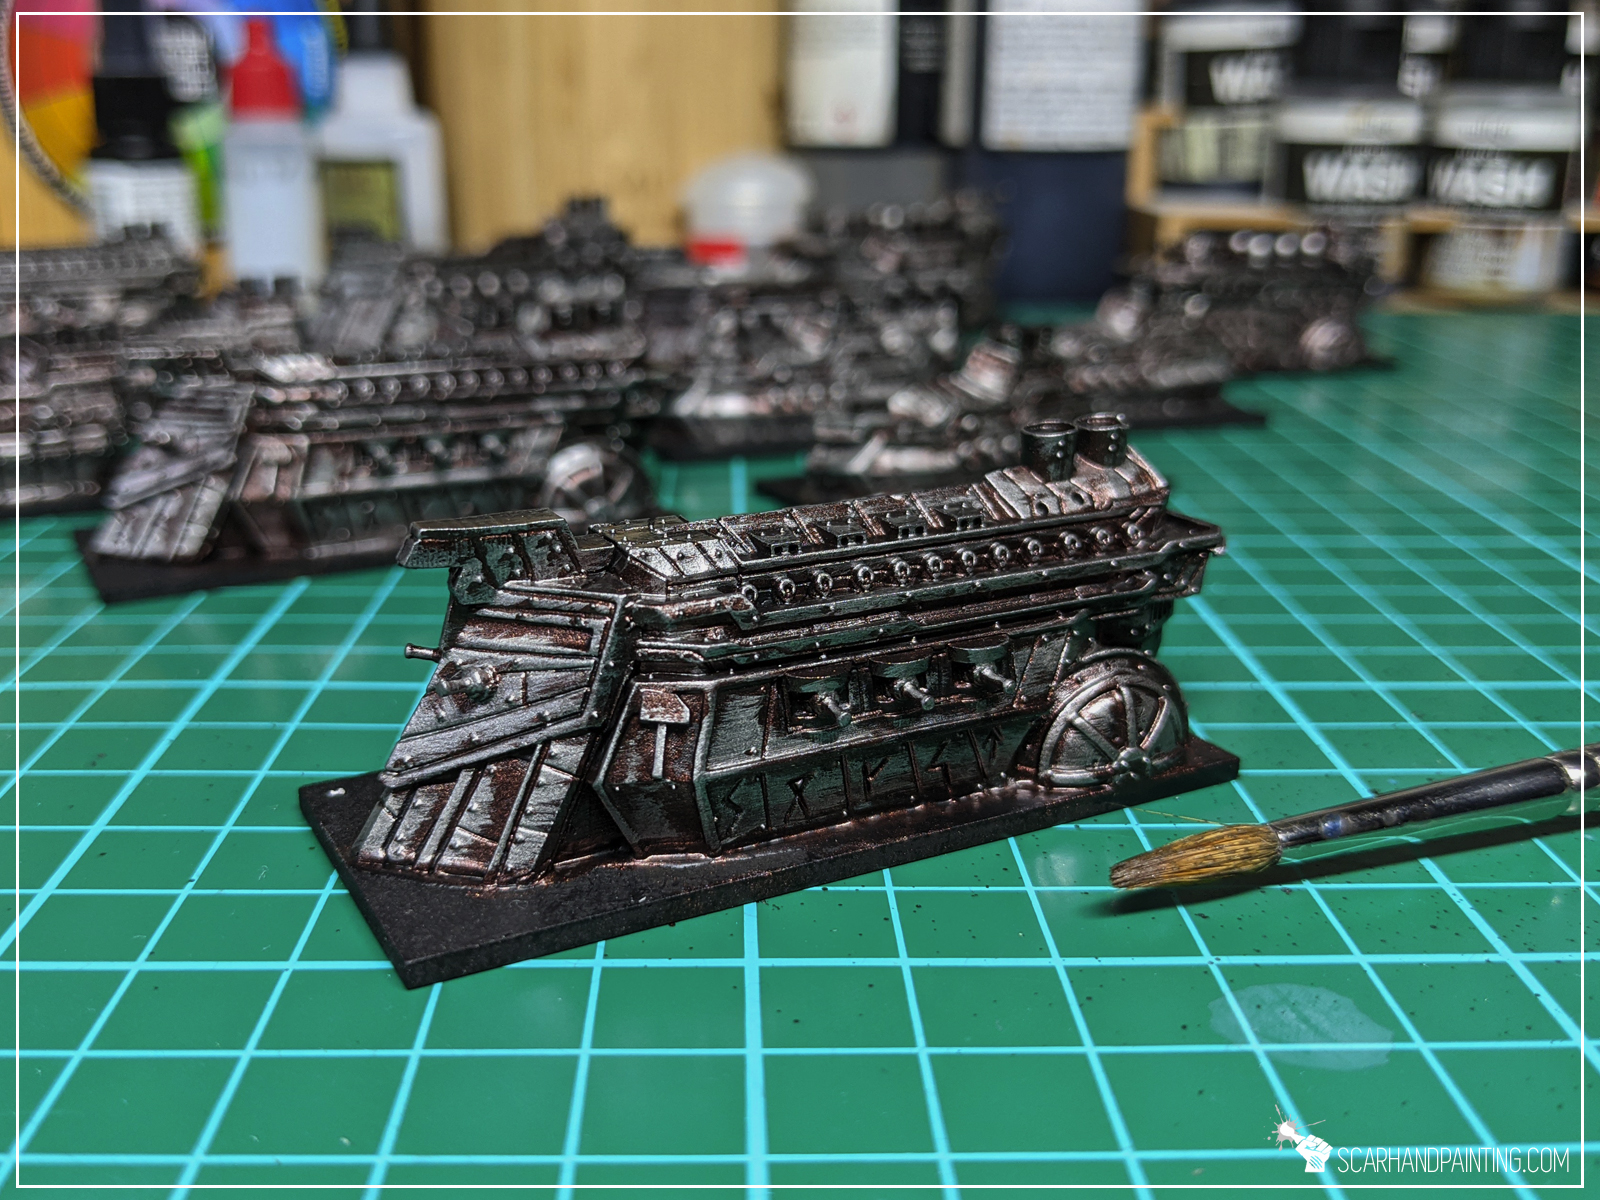
Step two: Armor
I painted entire ship with slightly thinned Games Workshop Warplock Bronze. Once Warplock Bronze dried I flatbrushed entire miniature with Army Painter Gun Metal followed by another flatbrush, this time Army Painter Shining Silver. Finally I painted few elements with P3 Blighted Gold.


Step three: Red
Next I added some color to the ship by painting roof and side balcony elements with Vallejo Burnt Red which was in turn highlighted with a single layer of Vallejo Flat Red.

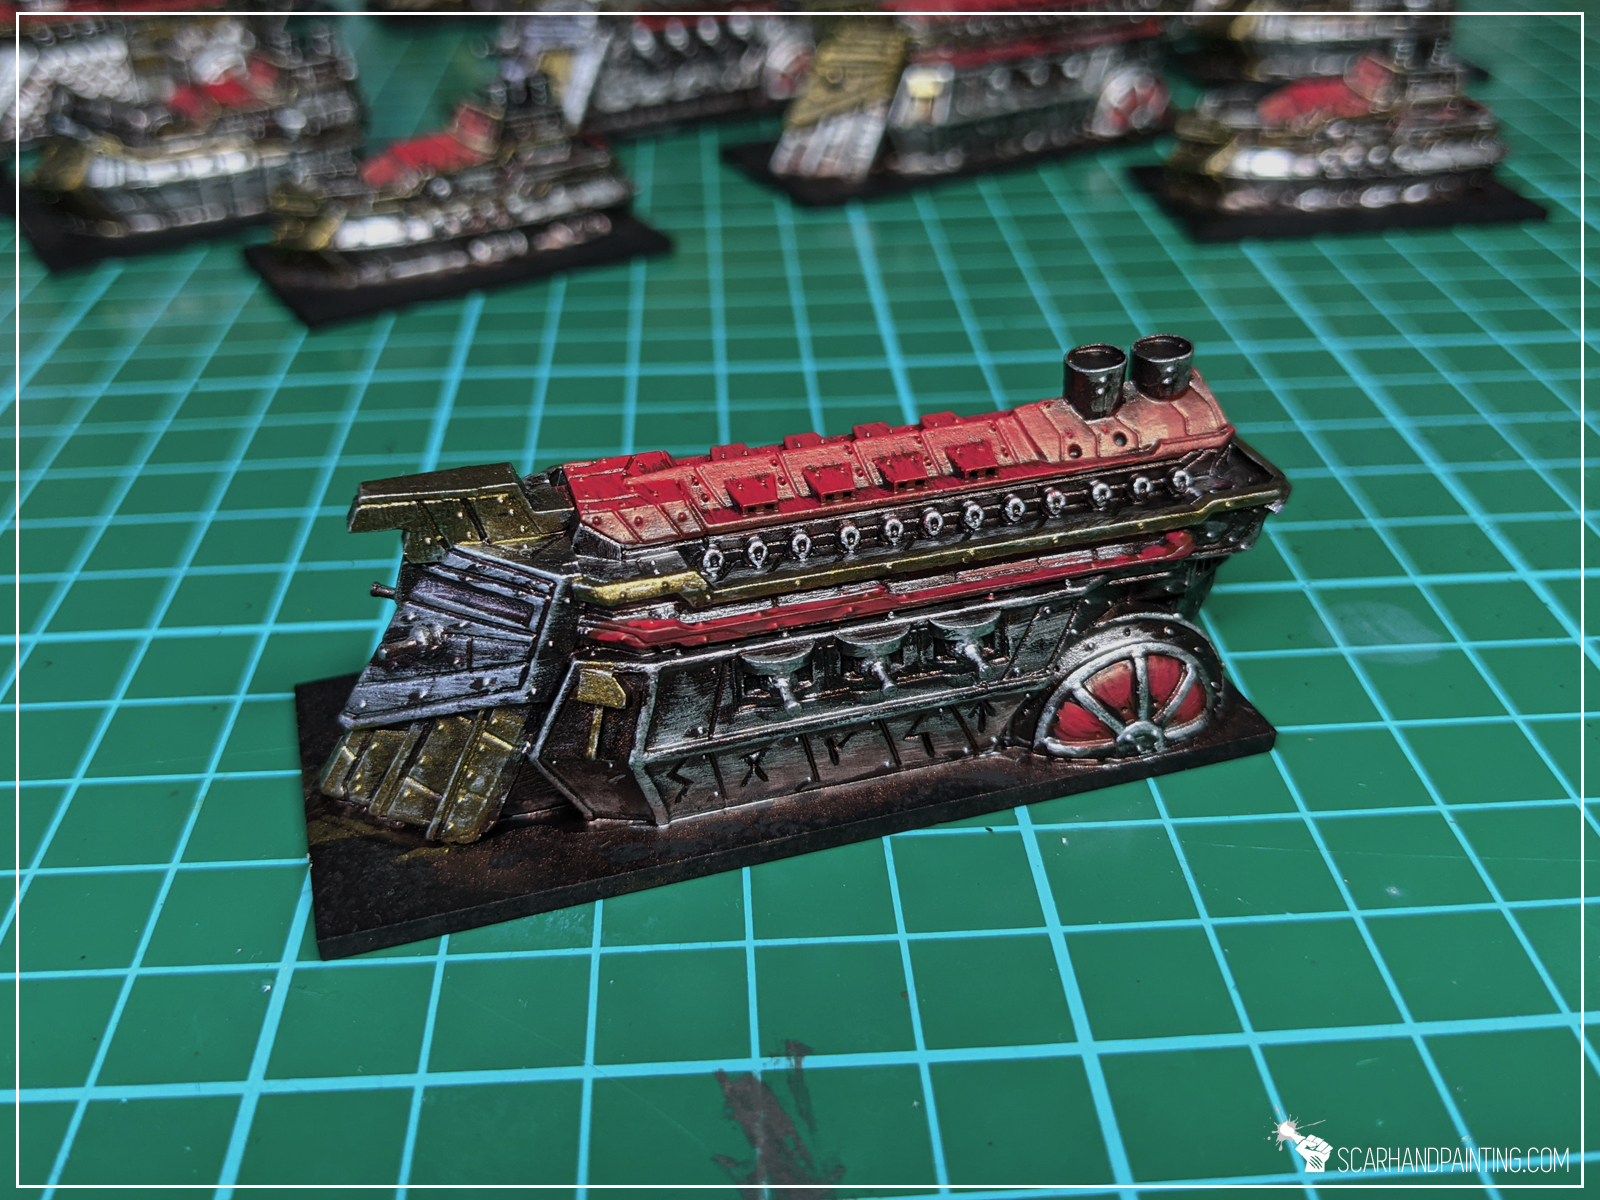
Step four: Wash
I richly applied Army Painter Strong Tone Ink onto entire miniature. The paint might be glossy depending on particular pot you got. I recommend adding just a bit of Matt Varnish before use.

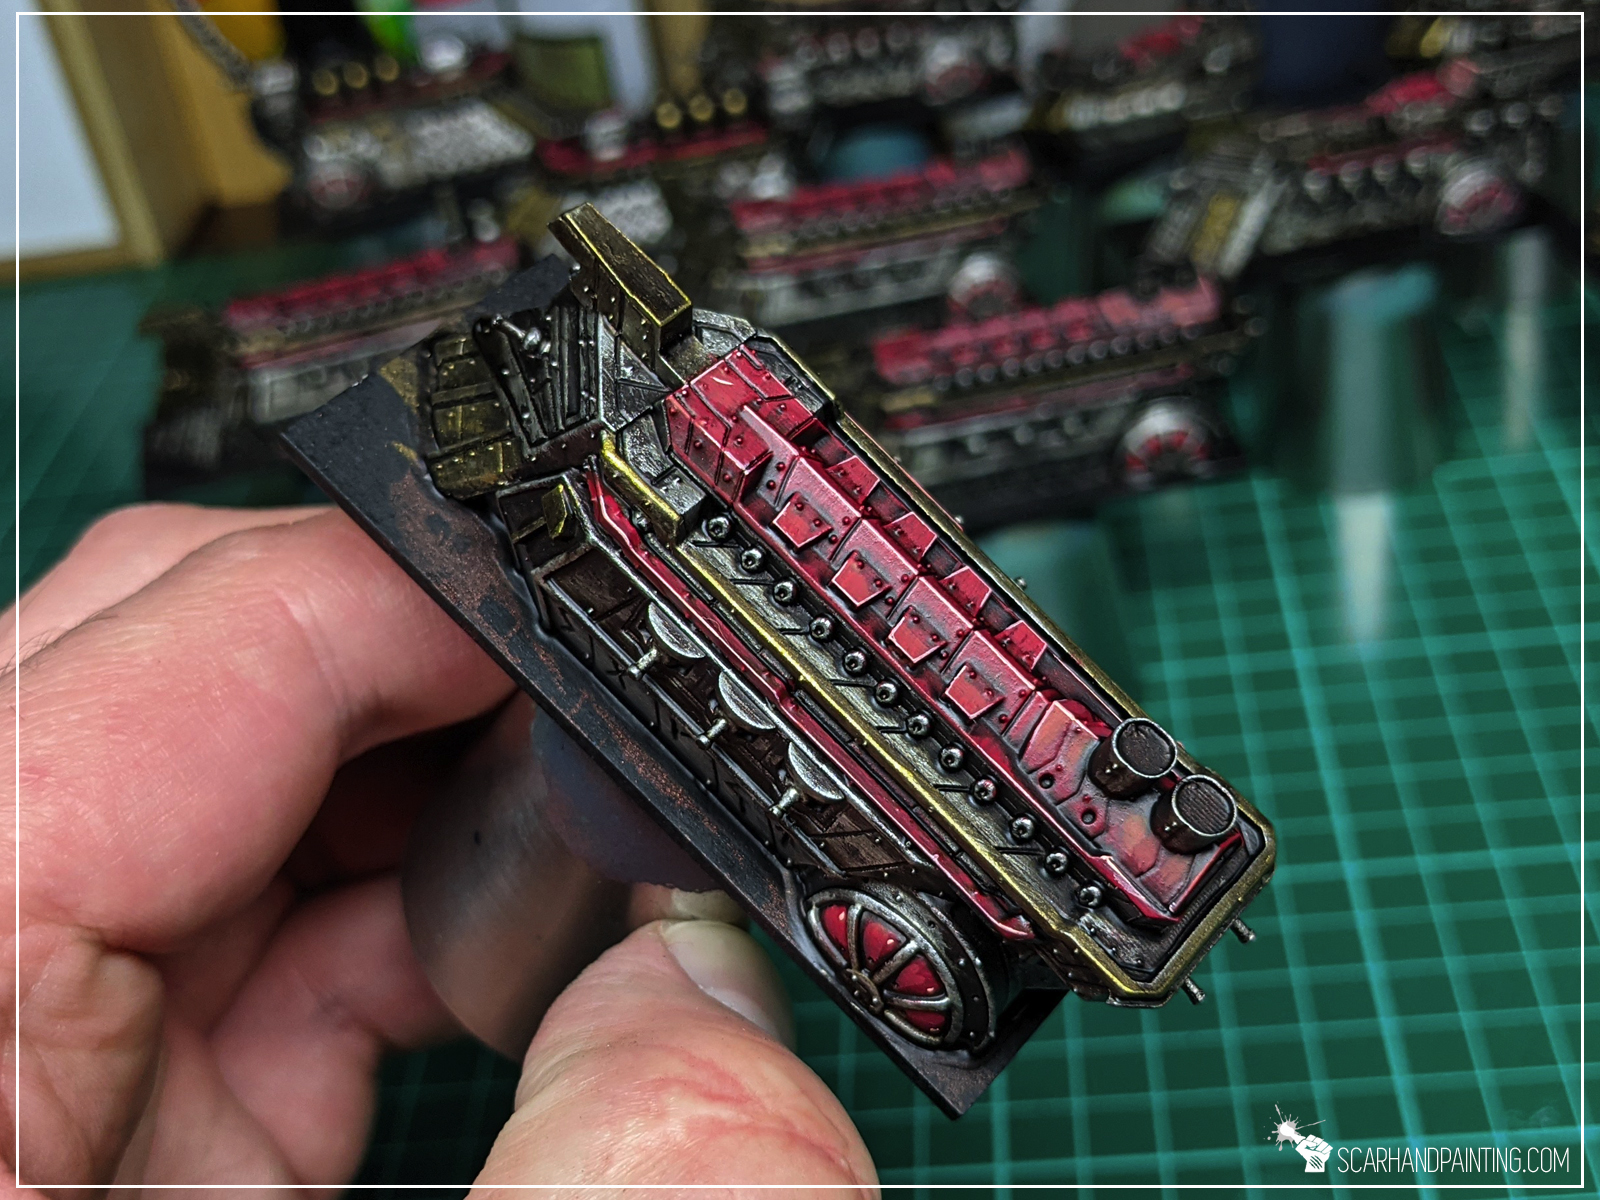
Step five: Highlights
With wash dried out nicely I applied a layer of Vallejo Flat Red in most exposed red areas. I then followed with edge highlights and few lines/dots of Games Workshop Lugganath Orange. I then done the same for gold except I used GW Auric Armour Gold. For silver I went back to Army Painter Shining Silver, highlighting few exposed spots and edges.
Step six: Front slots
I decided to add additional touch to the front of the ship, by painting two frontal slots blue. I done this by applying a layer of thinned GW Fenrisian Grey and then a wash of GW Contrast Ultramarines Blue.
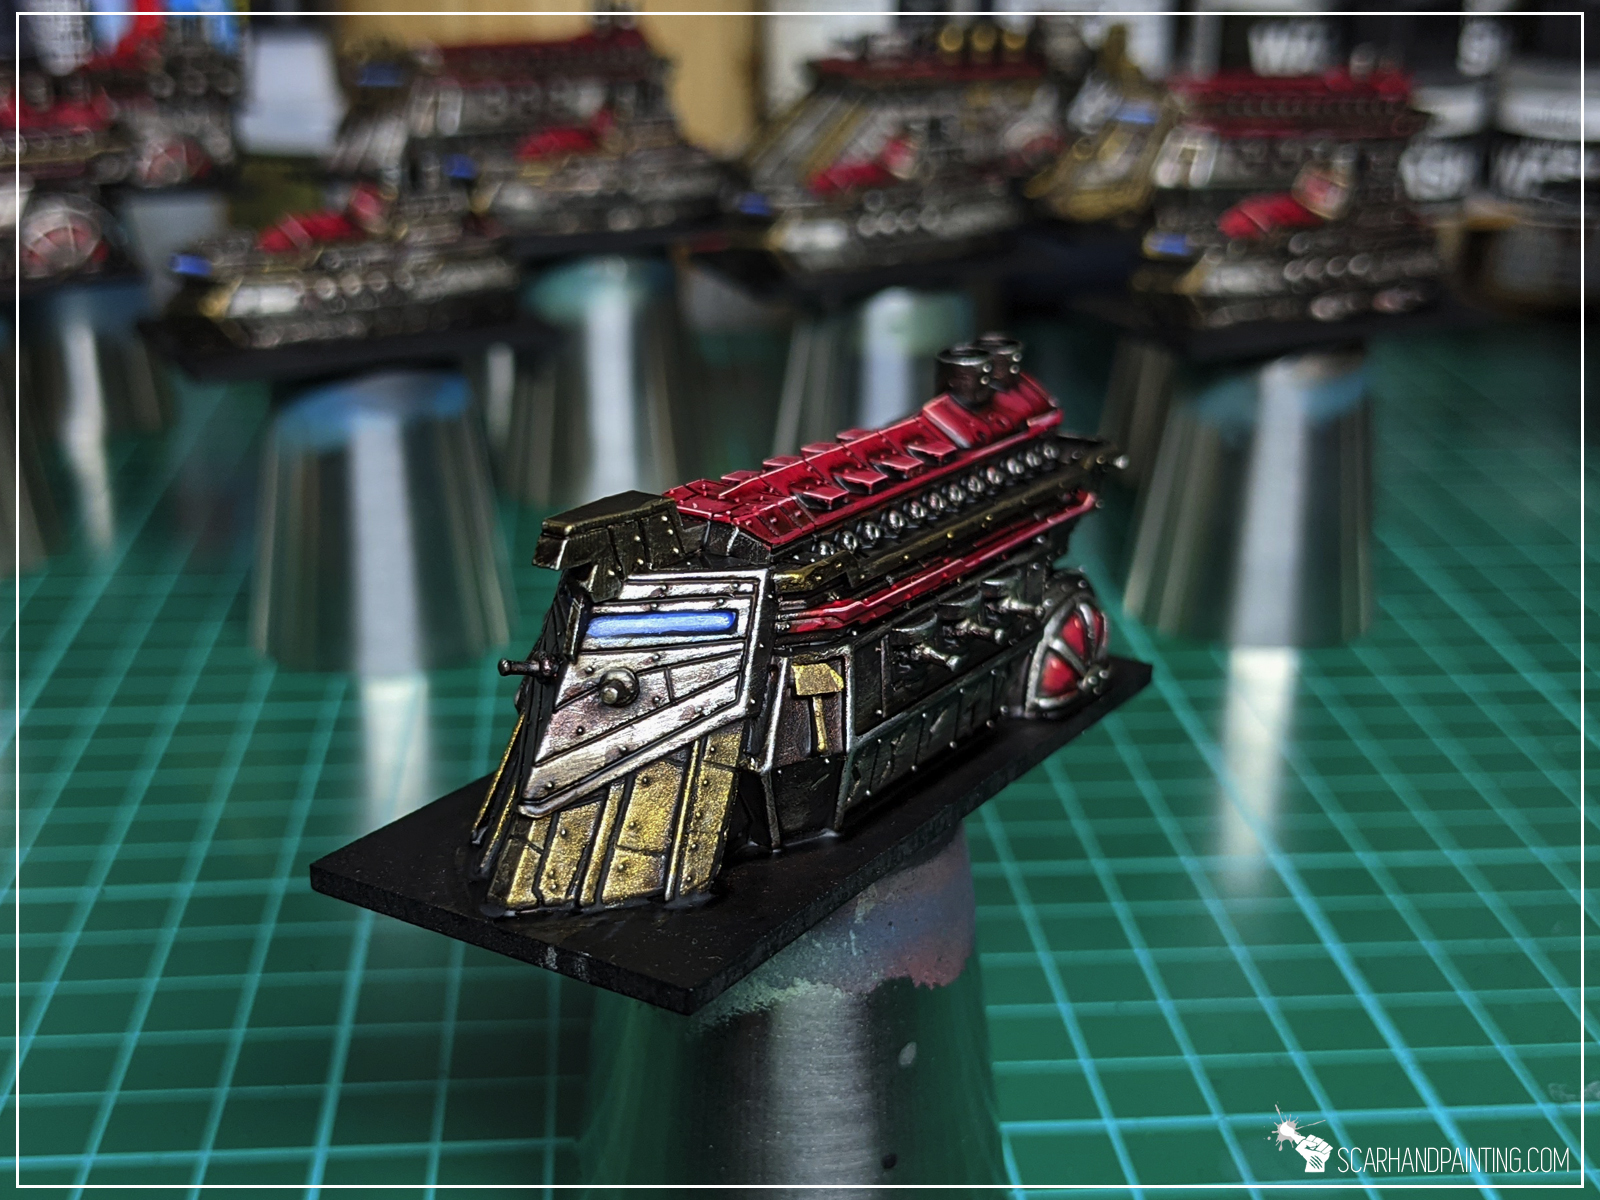
Step seven: Basing
In simple terms I followed my own tutorial for Armada Basing, that you may find HERE, except I used standard hdf bases painted with a single layer of Vallejo UK Mediteranean Blue, followed by standard AK Interactive Pacific Blue, AK Interactive Water Effect and AK Interactive Water Foam textures.


I hope you find this tutorial interesting. Be sure to let me know your thoughts in the comments below or via Facebook. I would also appreciate if you considered sharing this content to any groups or forums, where it might help someone paint their miniatures. Scarhandpainting is not just about professional miniatures painting service. I do my best to provide interesting tutorials and share my experience with other hobbyists.
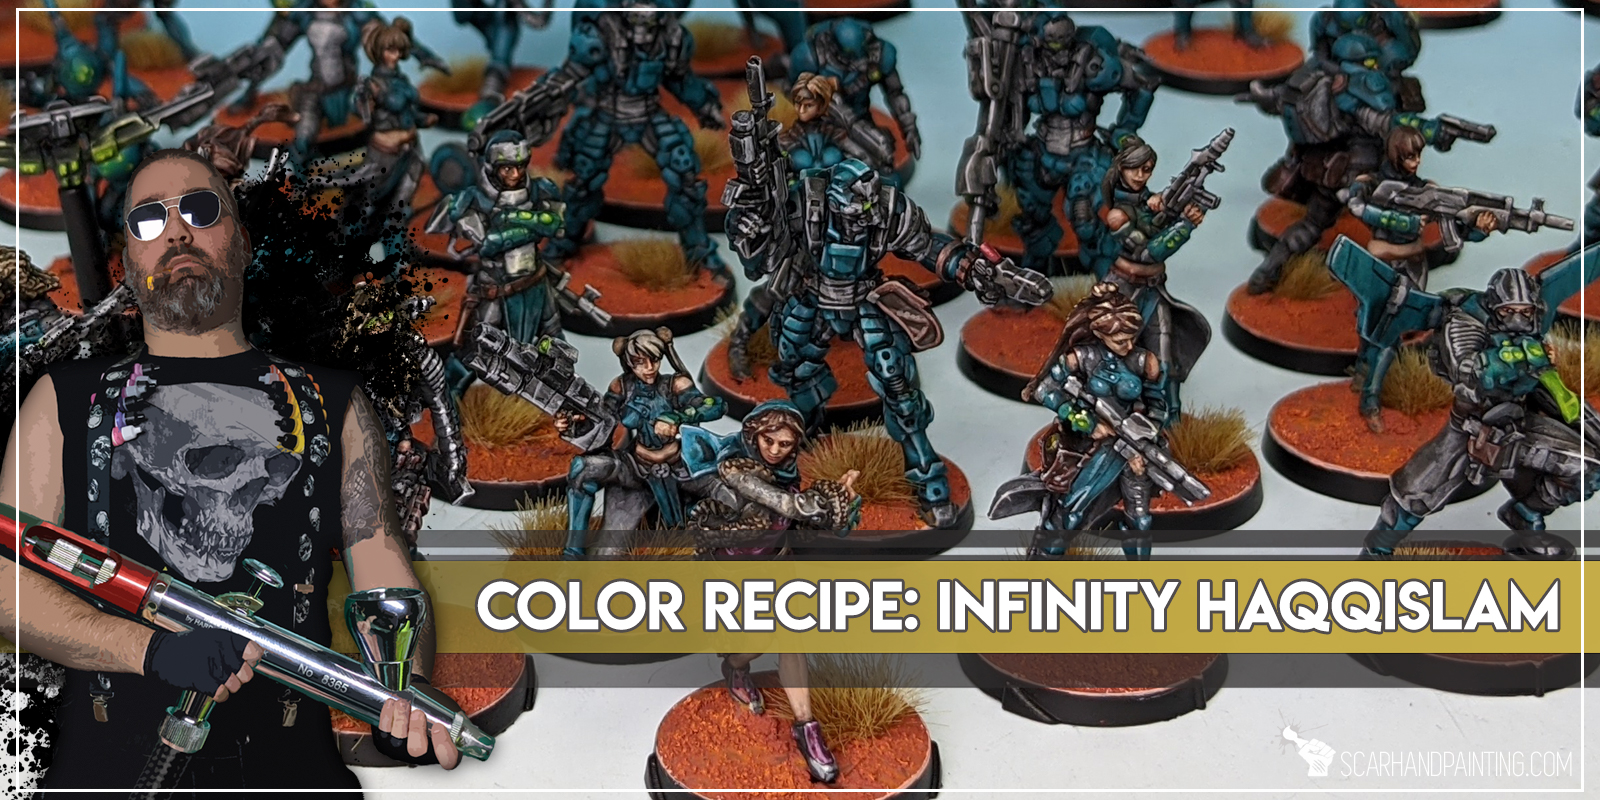
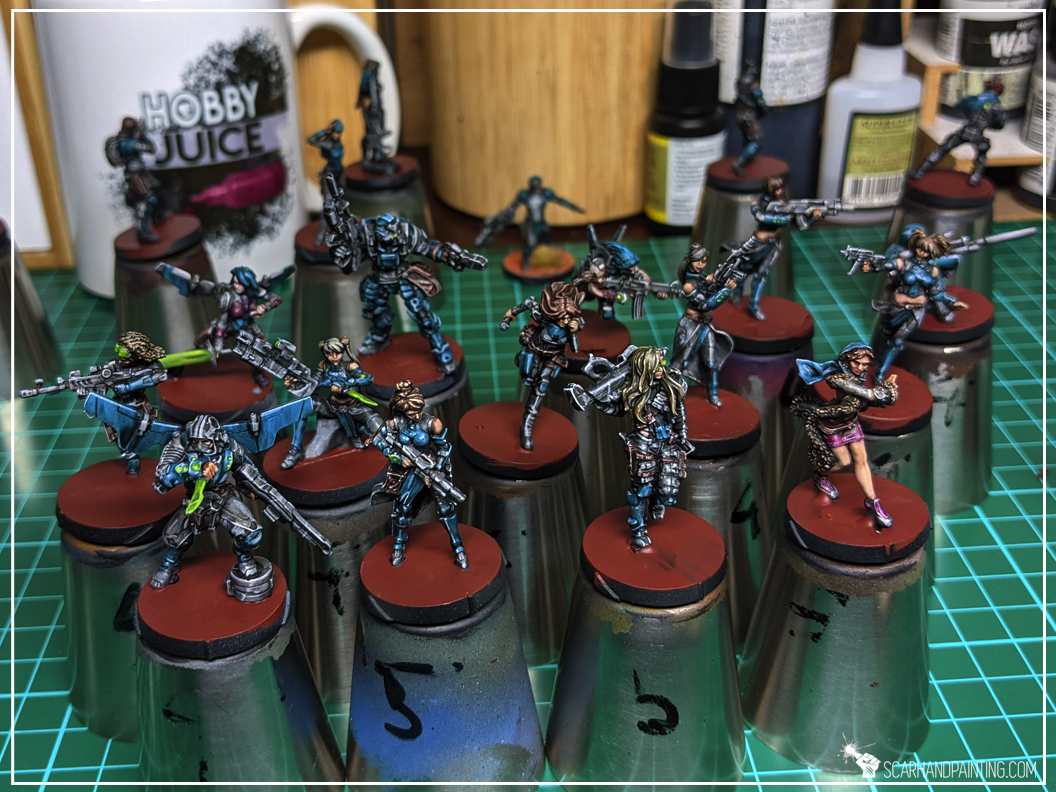
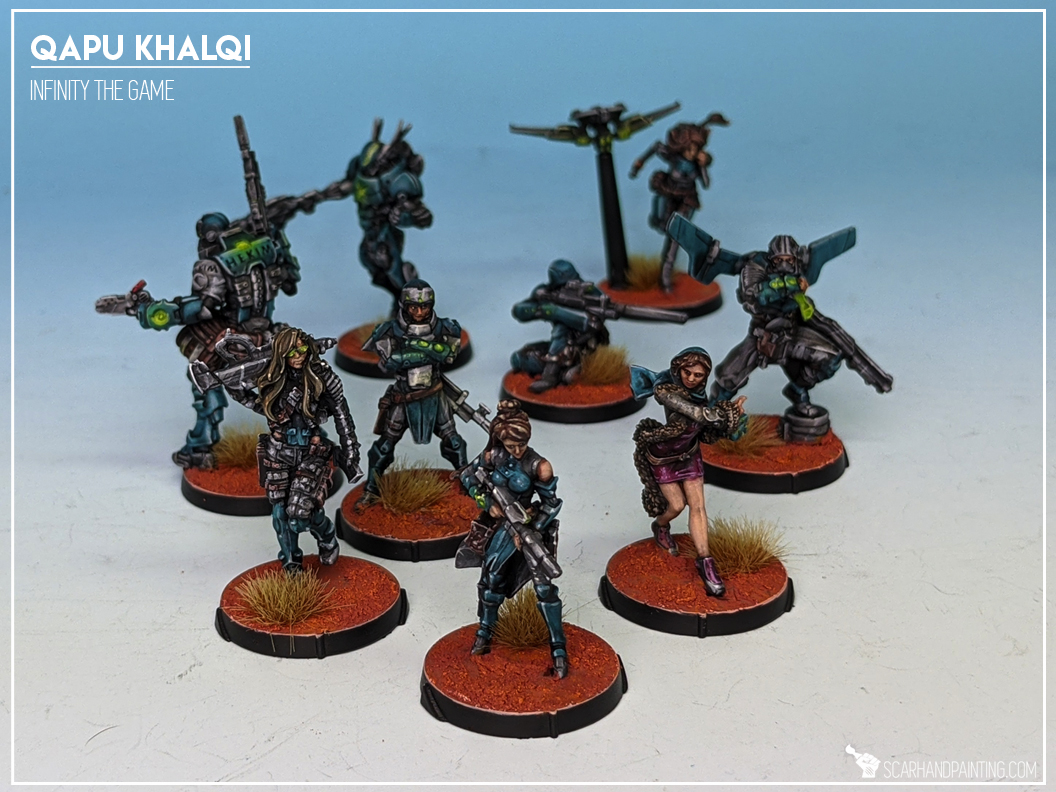
Here are some Colour Recipes for Infinity Haqqislam from Gallery: Quapu Khalqi. Please take note that this is a simple colour scheme, not covering multiple overlapping layers and blends in between, that lead to the final product. It is supposed to be used as guideline not a step-by-step.
BLACK/GREY outfits & weapons:
Black Undercoat,Panzer DK Grey (Val),
Panzer DK Grey (Val a), *
Barely Grey (Val a), *
Wolf Grey (val a), flbr
Pallid Wych Flesh (GW), l&p
Dark Tone Ink (AP), wash
Pale Wych Flesh (GW), l&p
Off White (Val), p

TURQUOISE armor:
Coal Black (P3),
Hydra Turquoise (AP), flbrMix Hydra Turquise (AP) 5:1 Pale Wych Flesh
GW), flbr
Arcane Blue (P3), l&p
Coelia Greenshade (GW), wash
Pale Wych Flesh (GW), l&p
Off White (Val), p
SKIN:
Carne Marron Tan (Val), Flow
Dwarf Skin (Val a),
Flesh (Val a), l&p
Mix Strong Tone Ink (AP) 1:1 Soft Tone Ink (AP),
Flesh (Val a), l&p
Pale Flesh (Val), l&p
BROWN elements:
Black/Grey outfits base,
Mix Hull Red (Val a) + Soft Tone Ink (AP), blend
Karak Stone (GW), l&p
Flayed One Flesh (GW), l&p
GREEN osl:
Olive Green (Val),
Duck Egg Green (Val a), * / standard
Pale Wych Flesh (GW),
Light Livery Green (Val a),
MARTIAN BASES:
German Red Brown (Val),
Martian Ironcrust (GW t),
Martian Ironearth (GW t),
Orange Fire (Val), drbr
AP Mountain Tufts & Paint Forge Steppe Tufts 12mm

l&p – lines and points,
p – points,
dl – deep lining,
bl – blend,
gl – glaze,
drbr – drybrush,
fltbr – flatbrush,
lobr – loaded brush,
stpl – stippling,
*Airbrushed (with multiple layers and mixes)

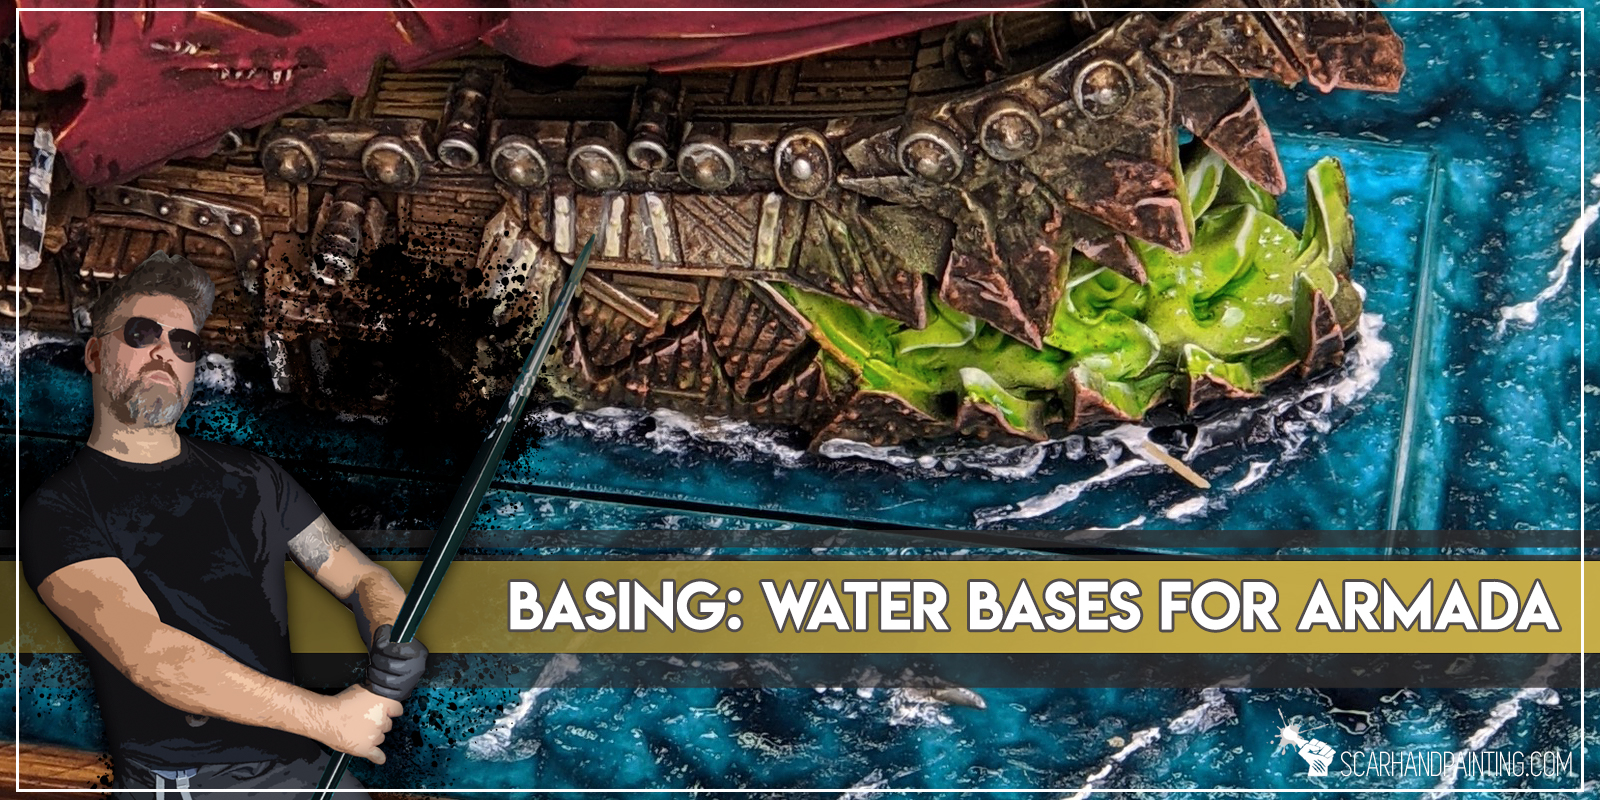
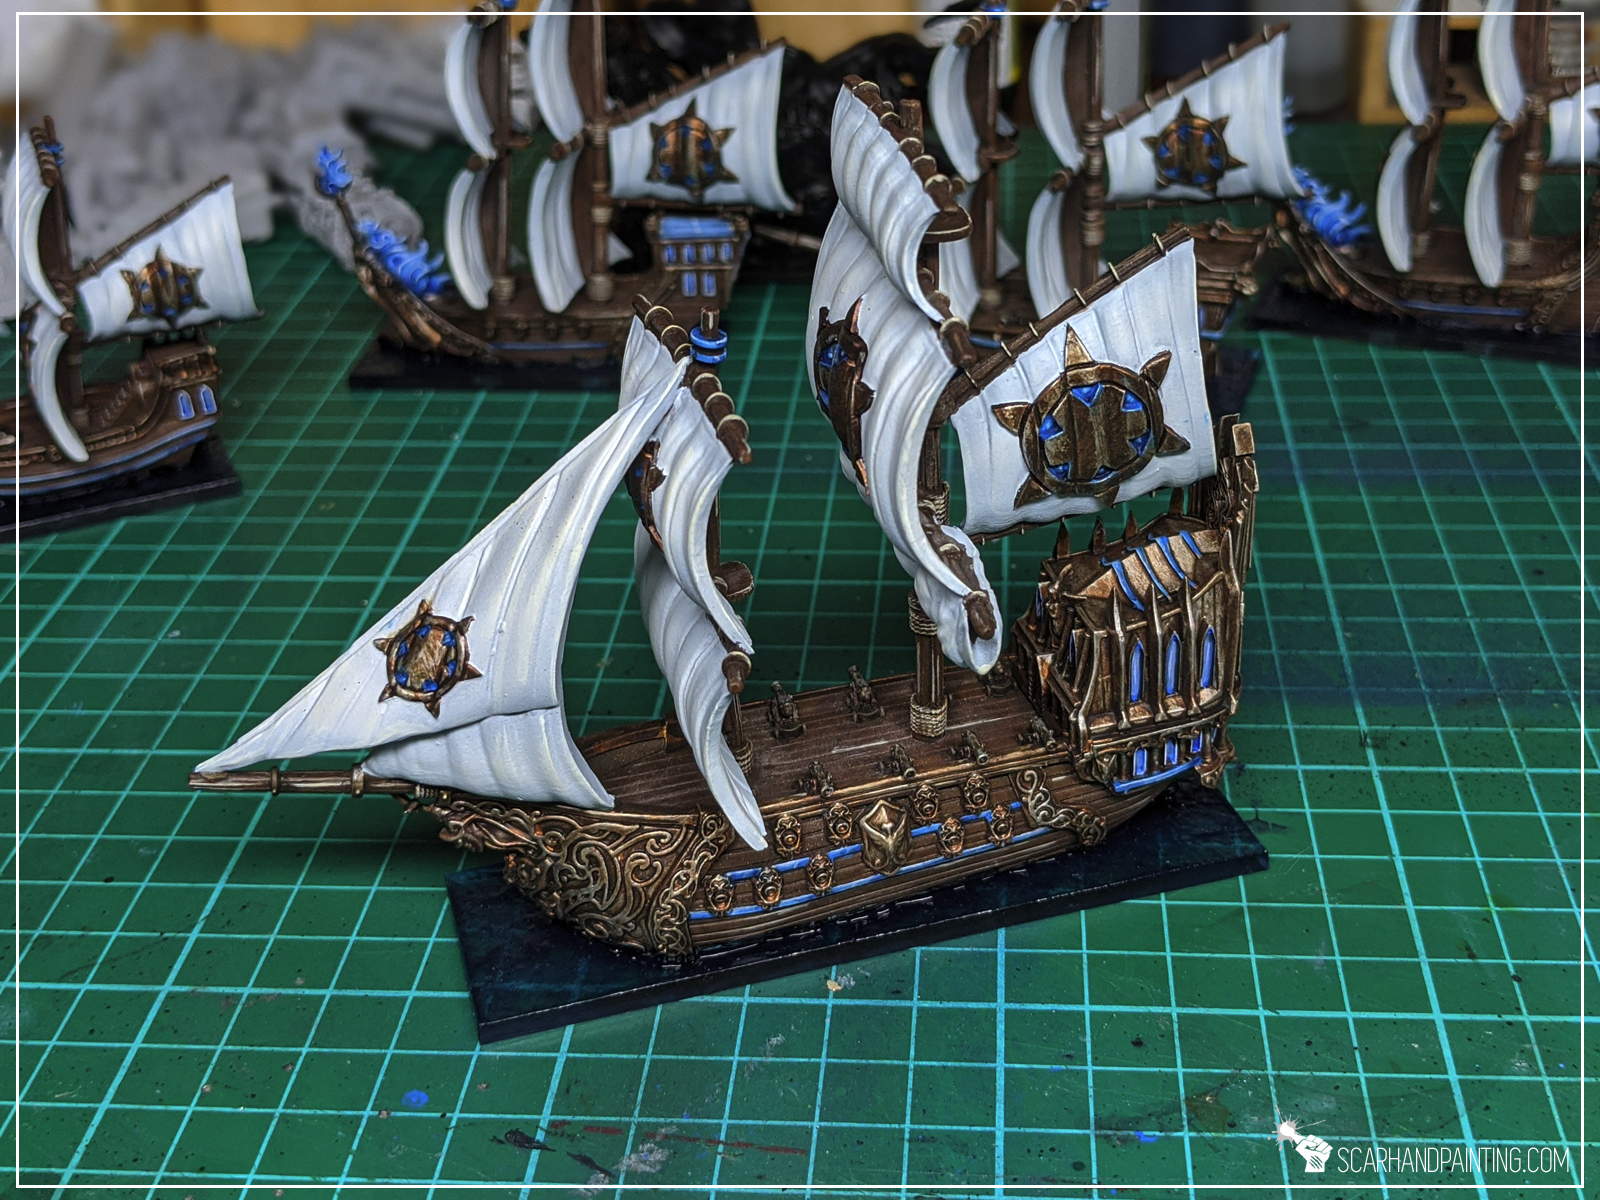
Welcome to Kings of War Armada Water Bases tutorial. Here I will take you on a Step-by-step trip through the process of creating and painting bases as can be found in the Gallery: Armada Basileans from Mantic Games Kings of War Armada.
Before we start, some notes:

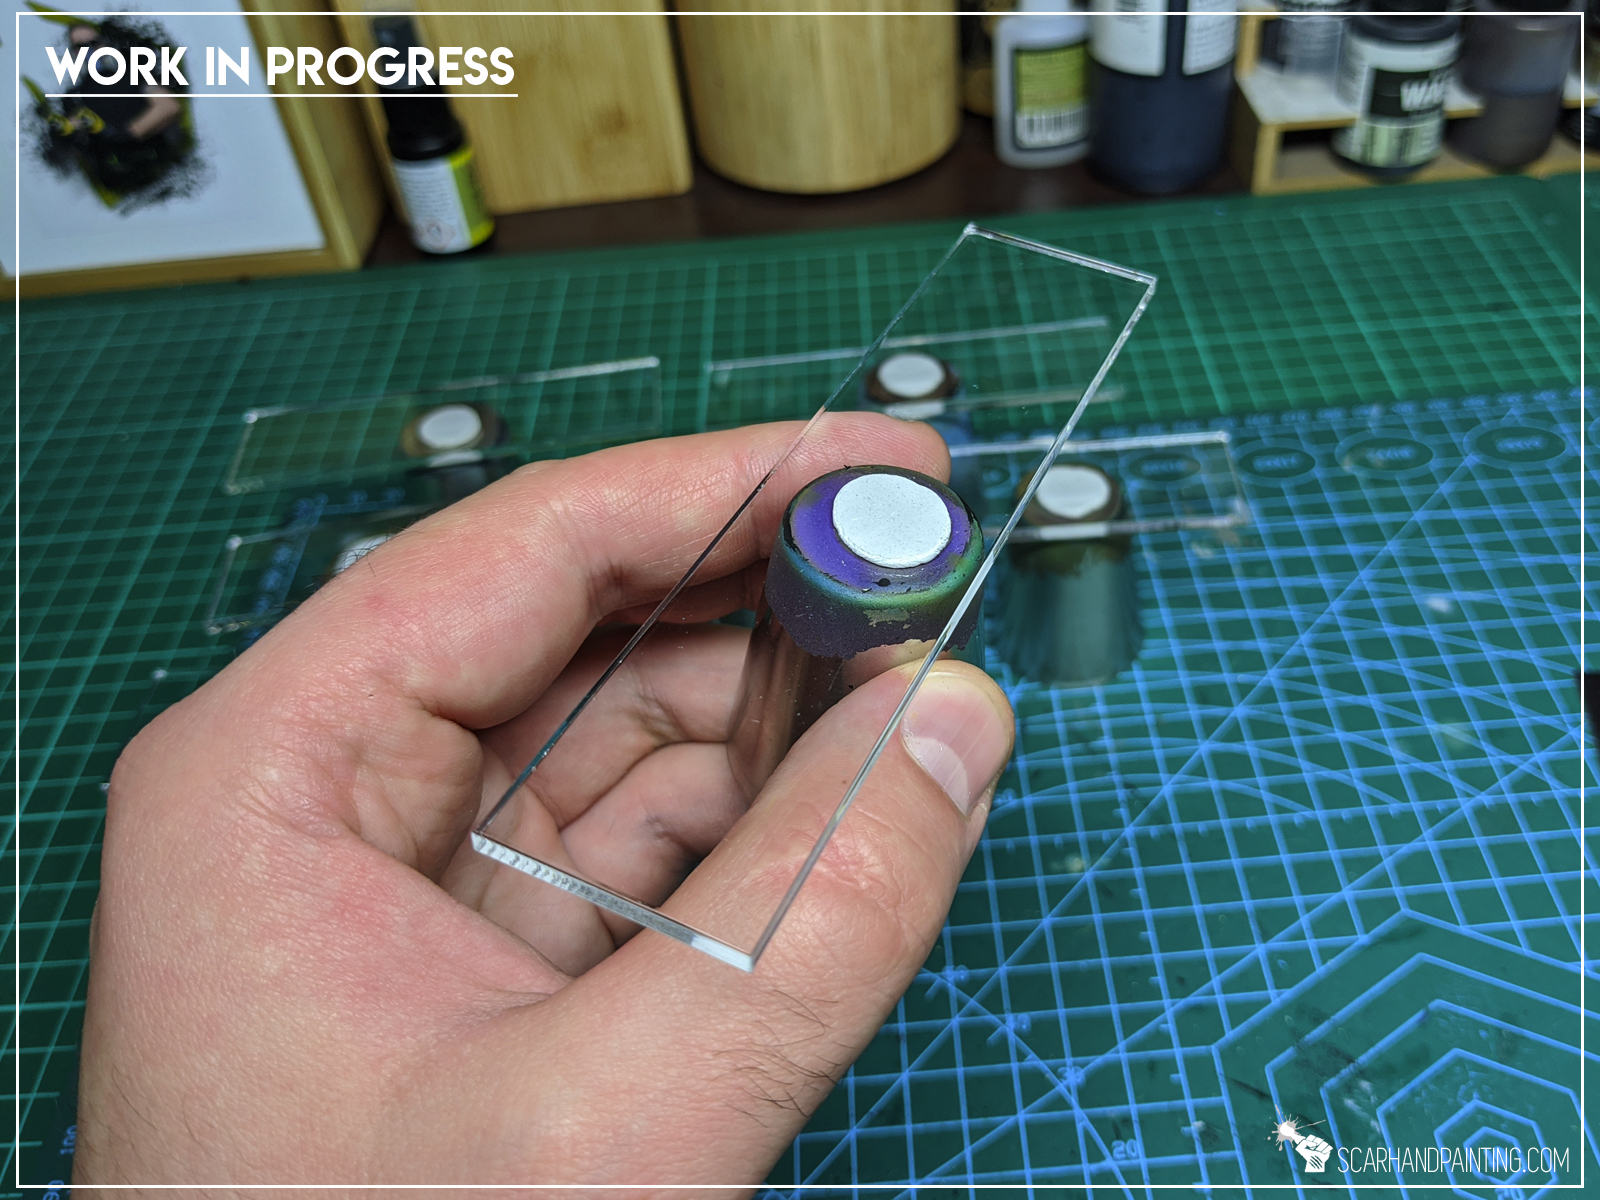
I plan to go all-in with Mantic’s KoW: Armada. This means a lot of ships from across numerous fleets. To keep my bases easy to paint and visually coherent I decided to limit myself to some water effects and simple tricks. Instead of going through a lot of effort, trying to build multiple layers of transparent water, I switched out standard MDF bases for clear acrylics.
That doesn’t mean the method wouldn’t work with MDF’s. If you’d rather stick with Mantic’s bases – undercoat them white, then paint sides with some dark blue and you’d be ready to go. That being said, this method was developed with clear acrylic bases in mind so please take that into account when trying different approaches.
Without further ado, let’s get these bases wet!
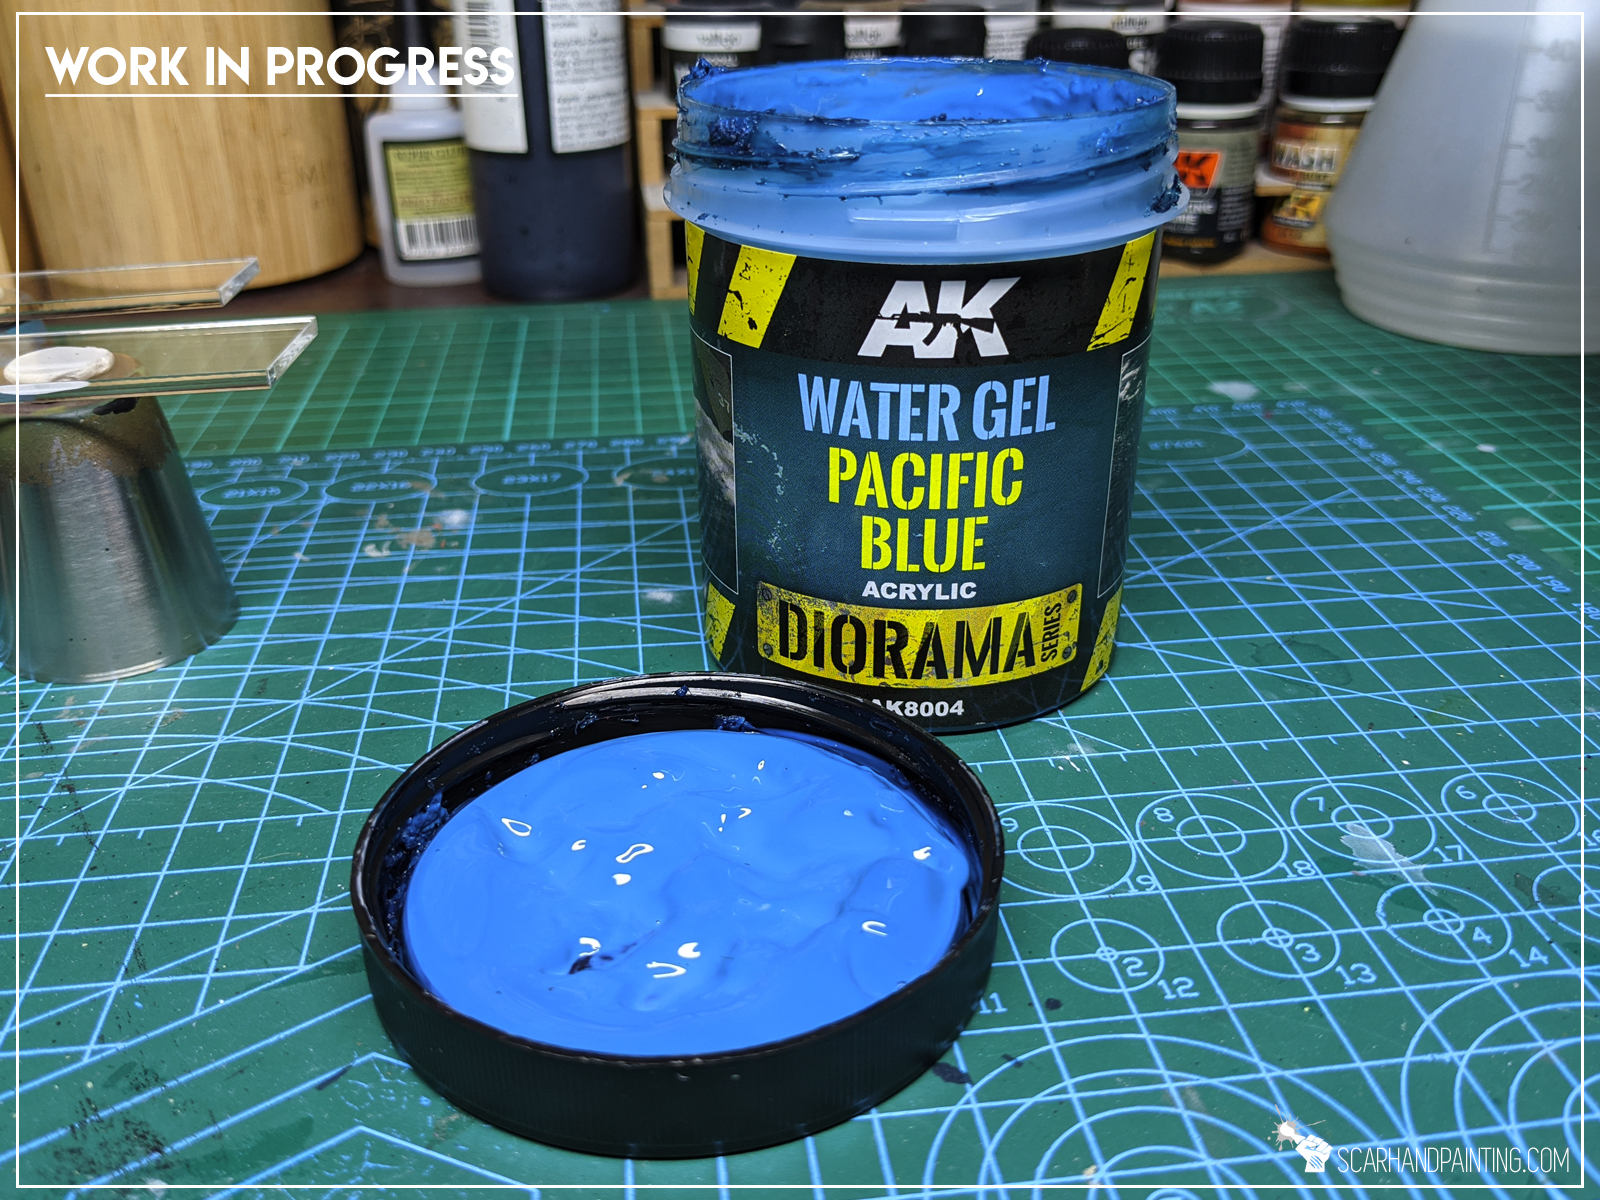
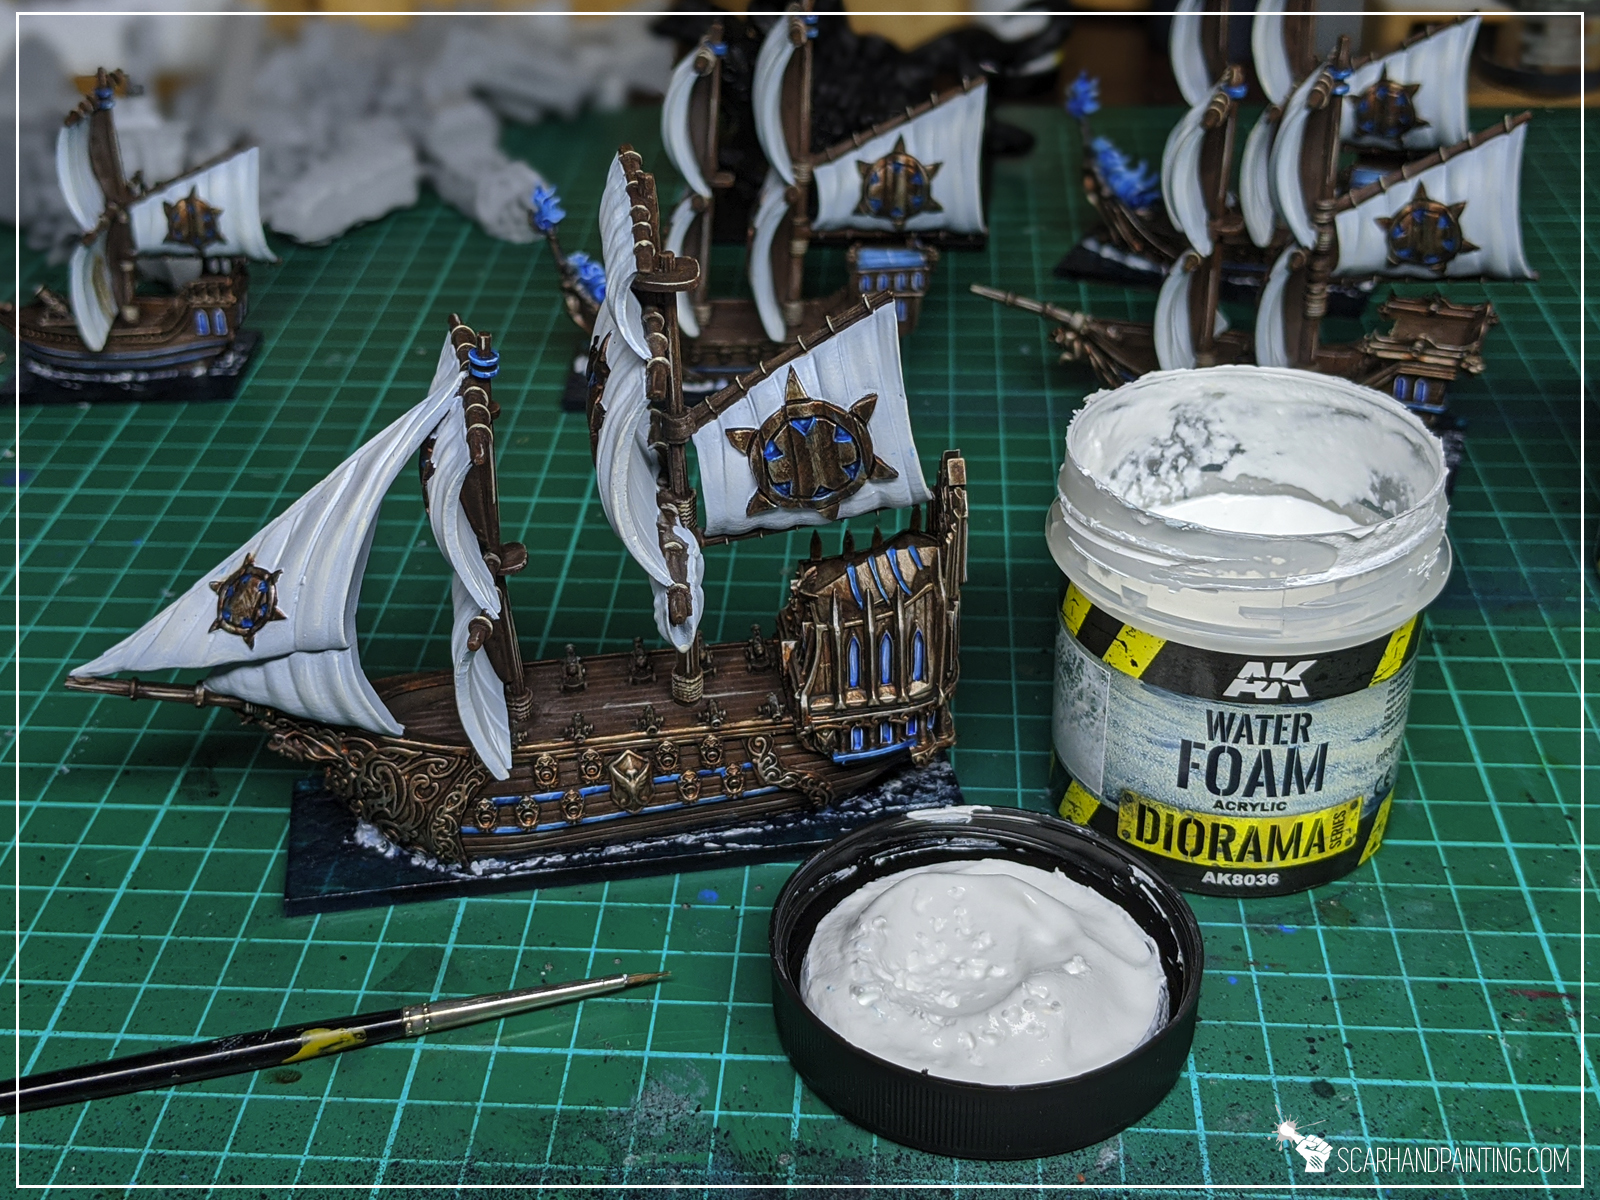
I used:

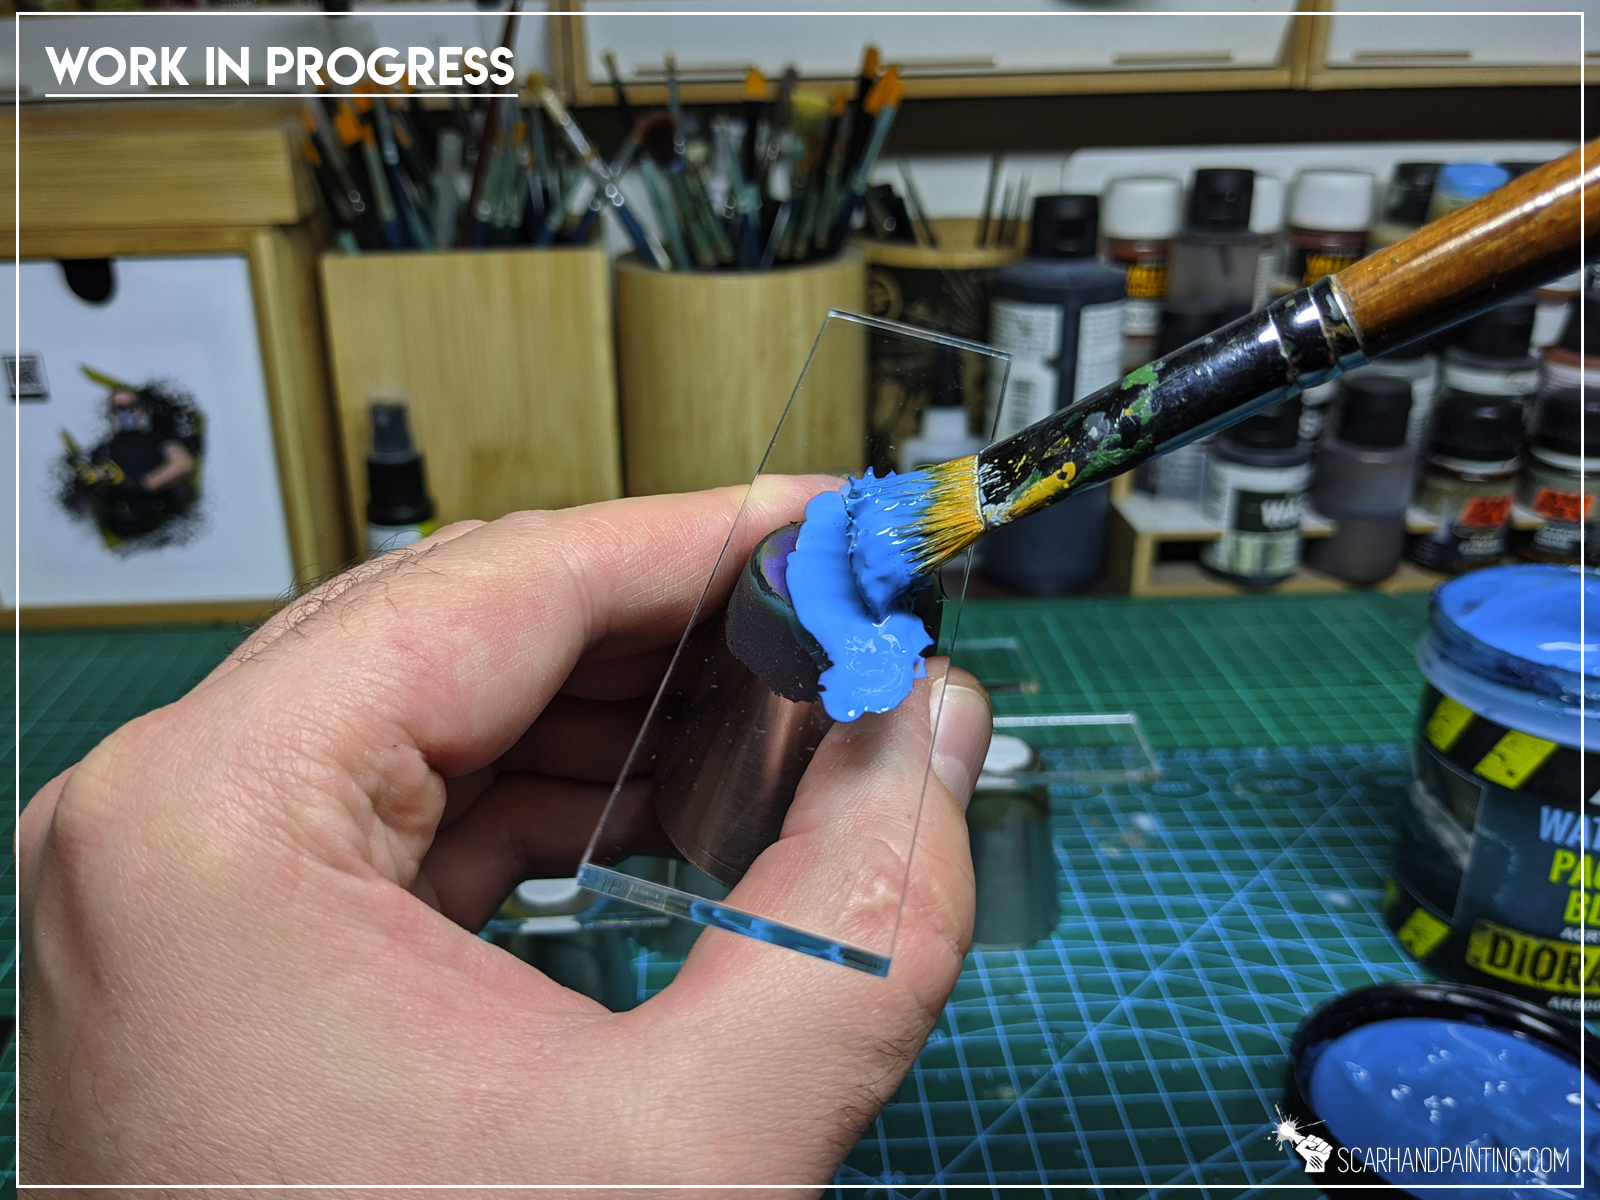
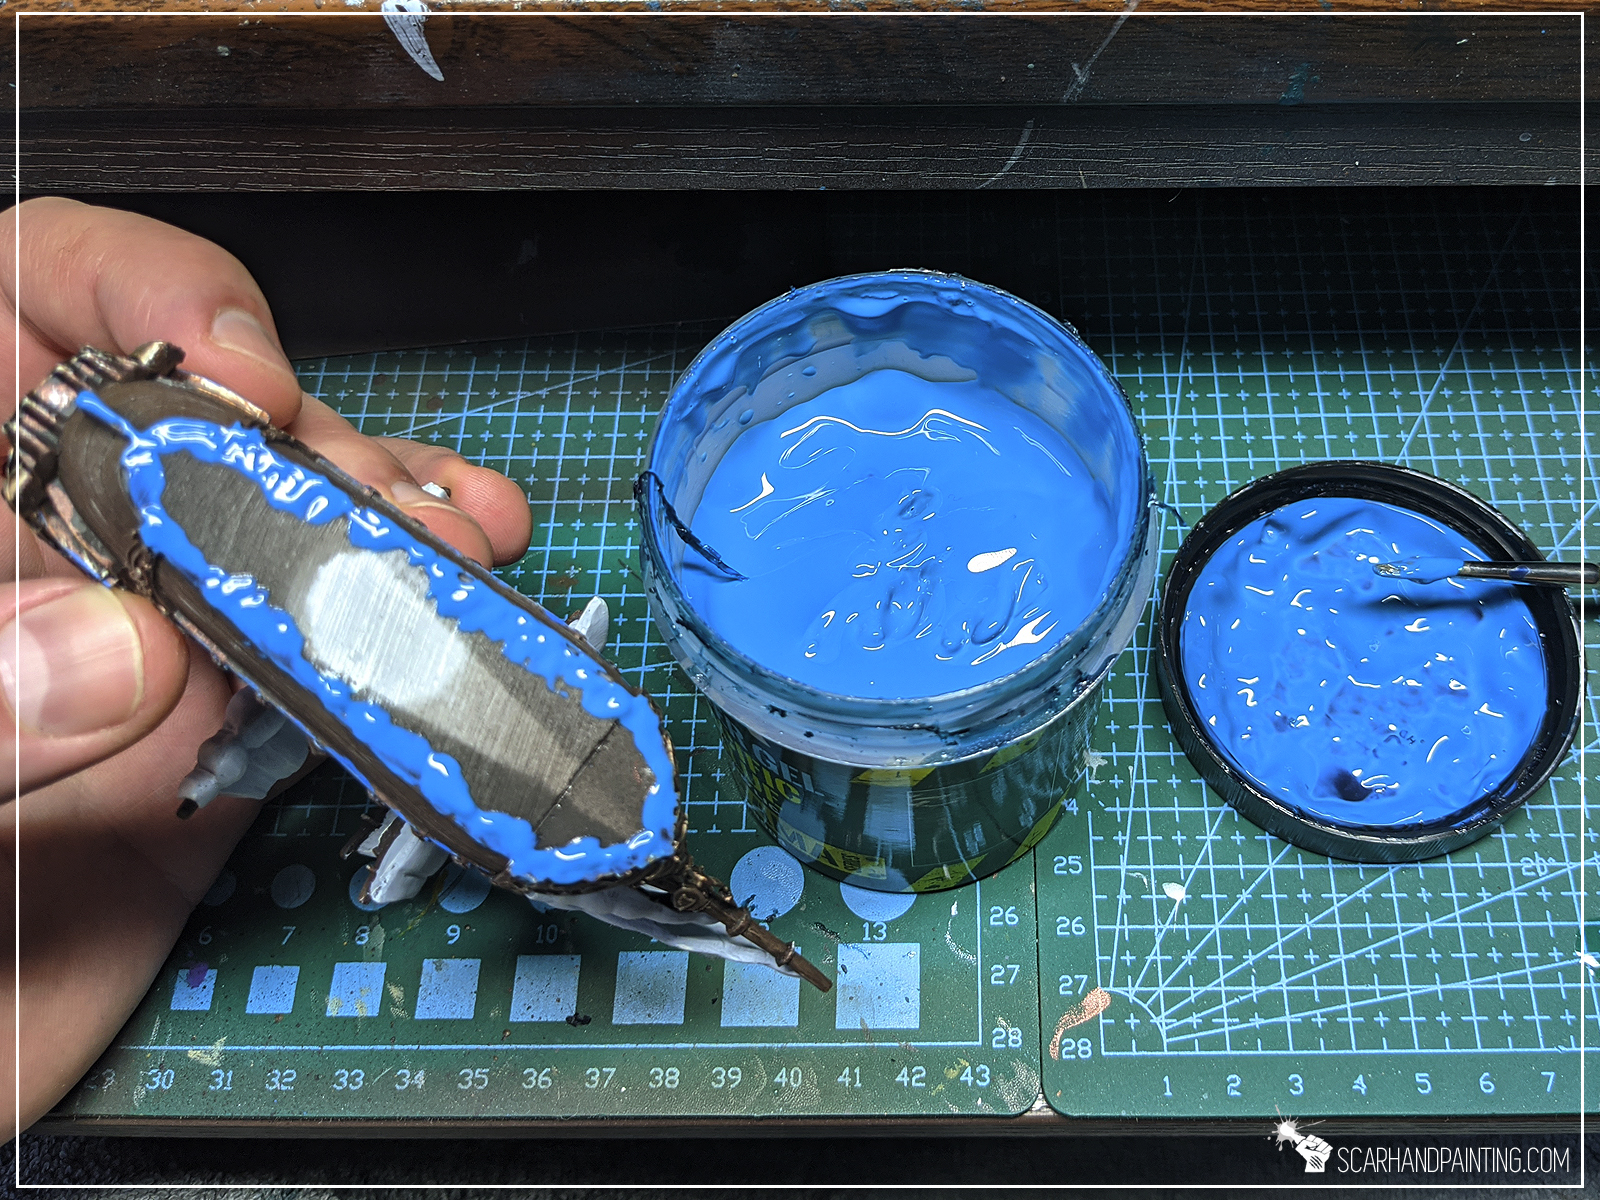
Step one:
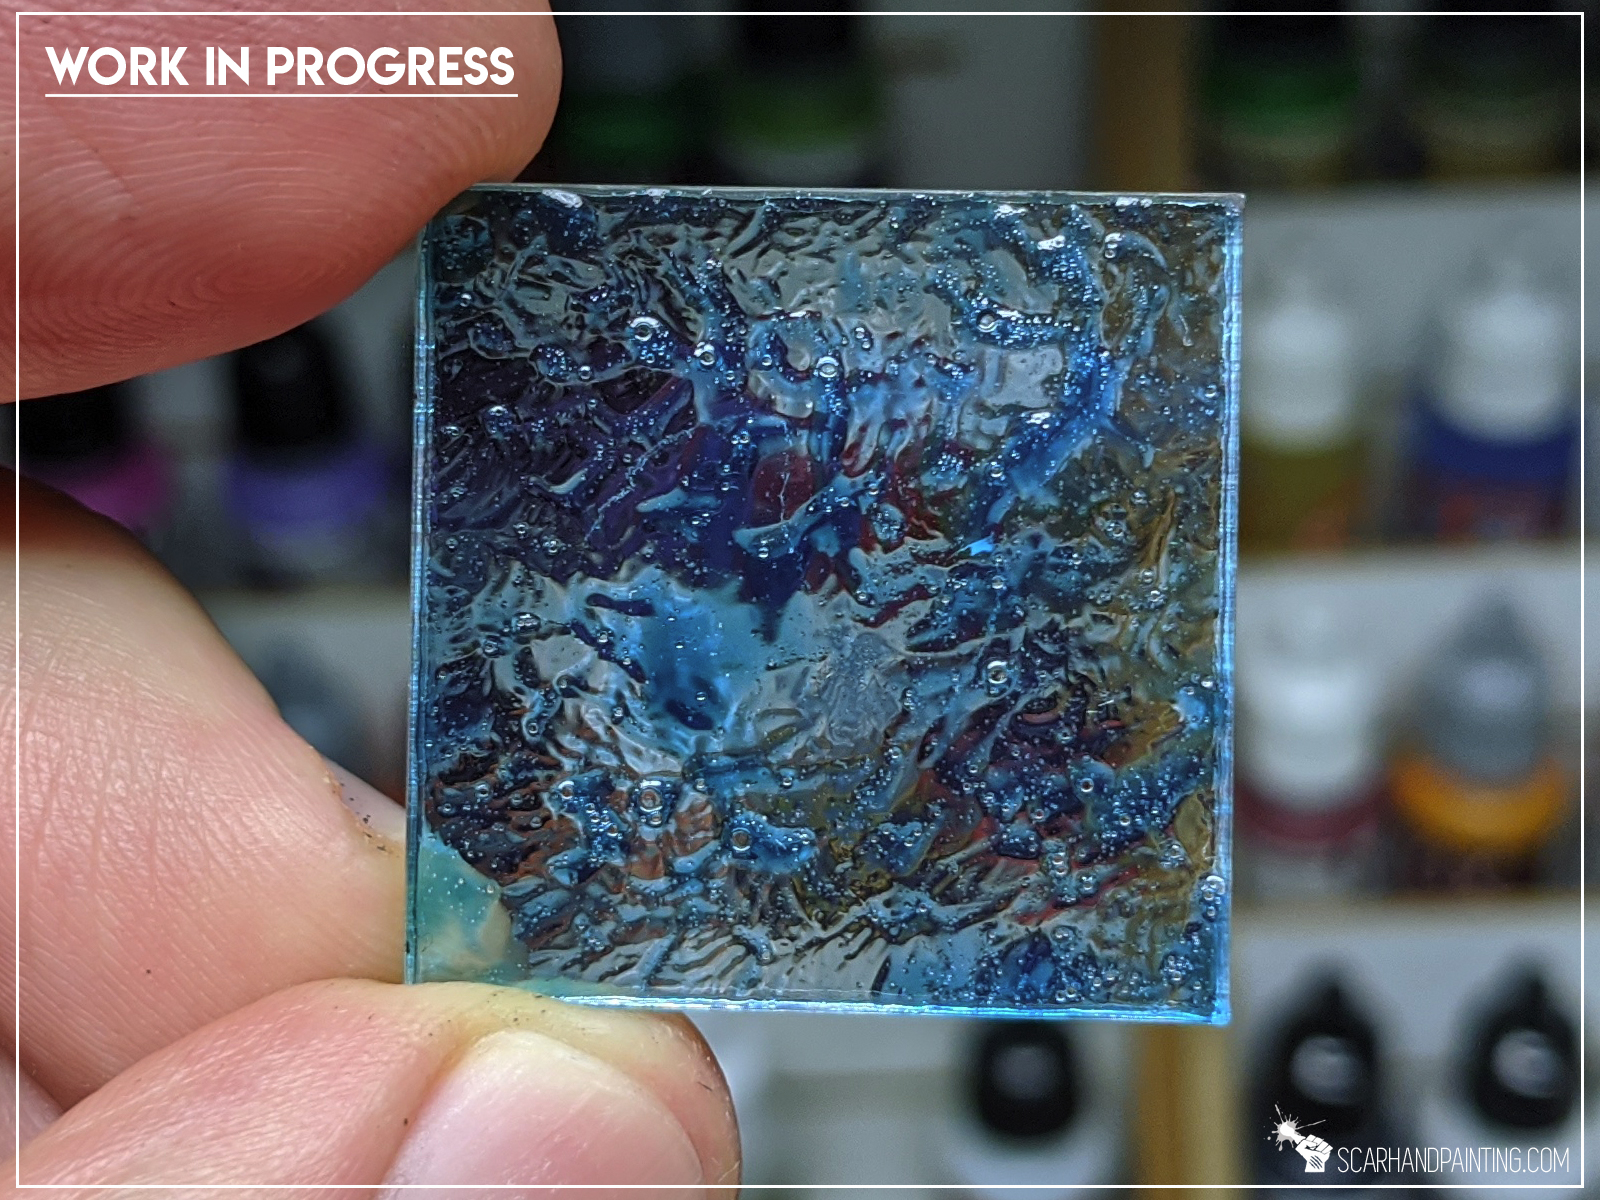
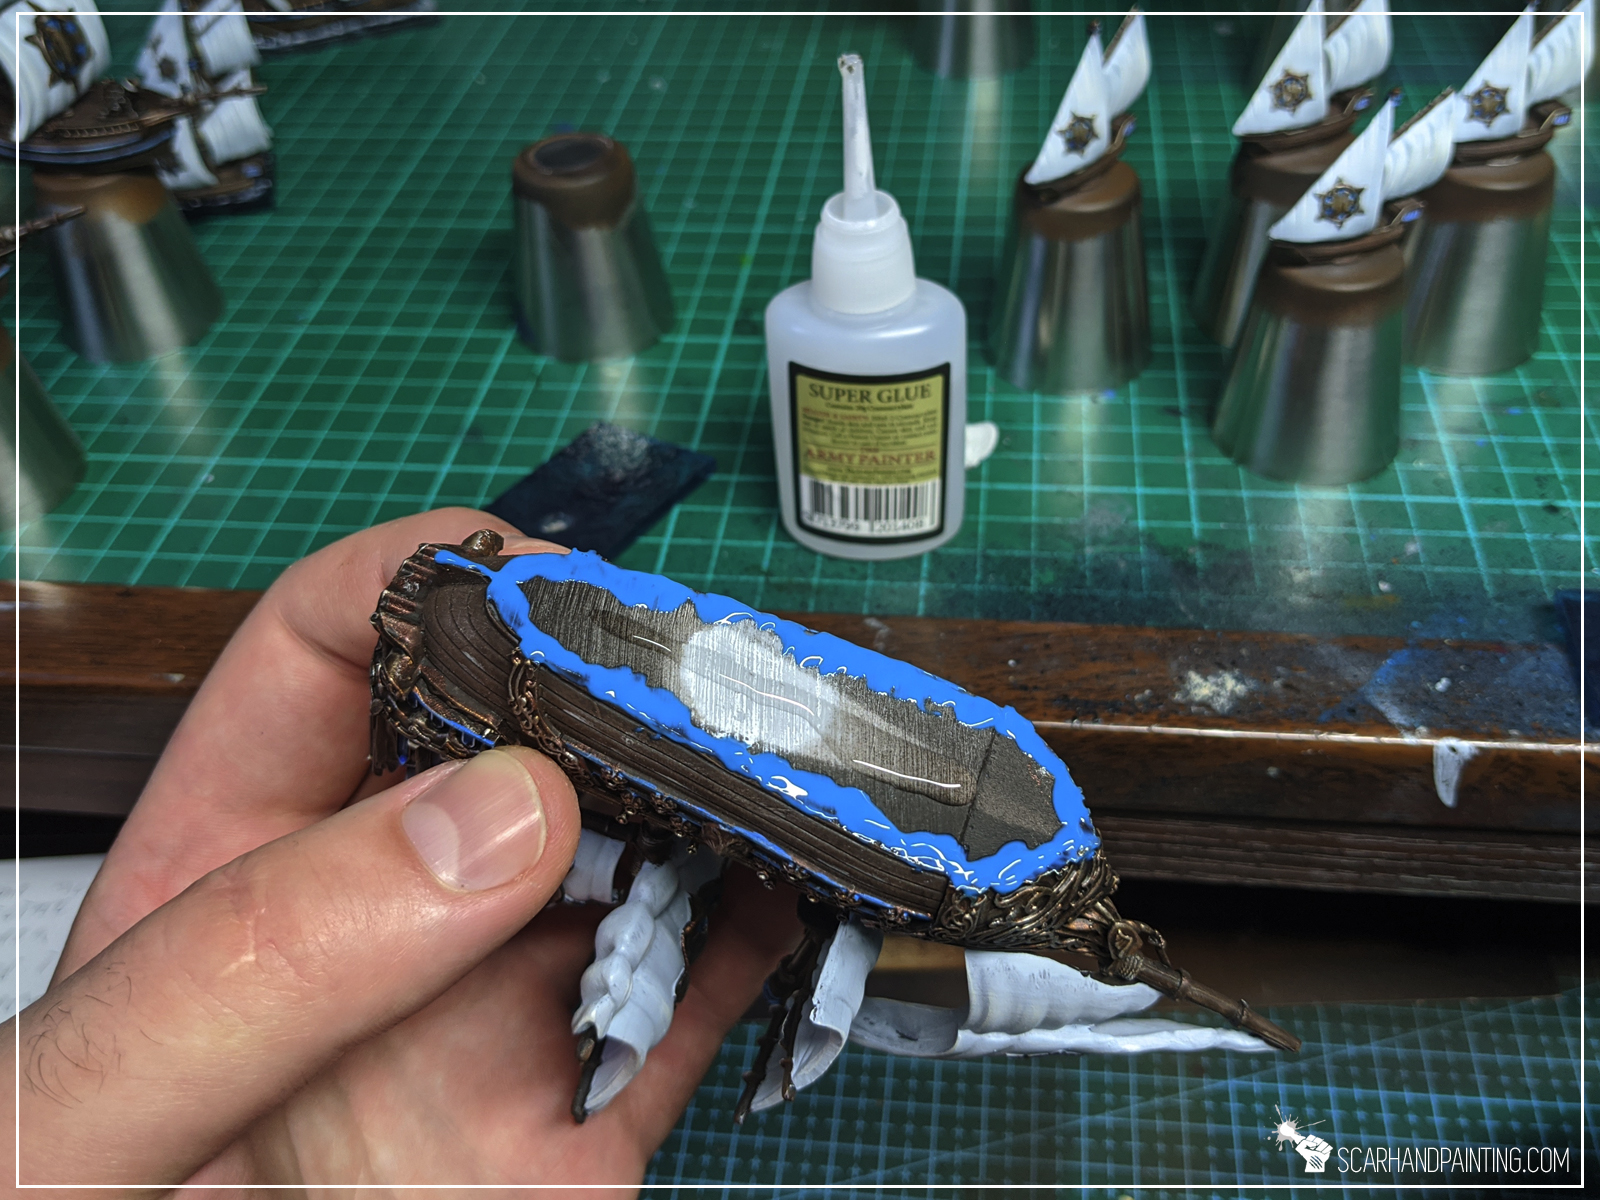
I used a large brush to apply AK Interactive Diorama Series: Pacific Blue Water Gel onto entire surface of the base. I then stippled a bit to create an uneven surface. Lastly I used a finger to remove the excess gel from the sides of the base.
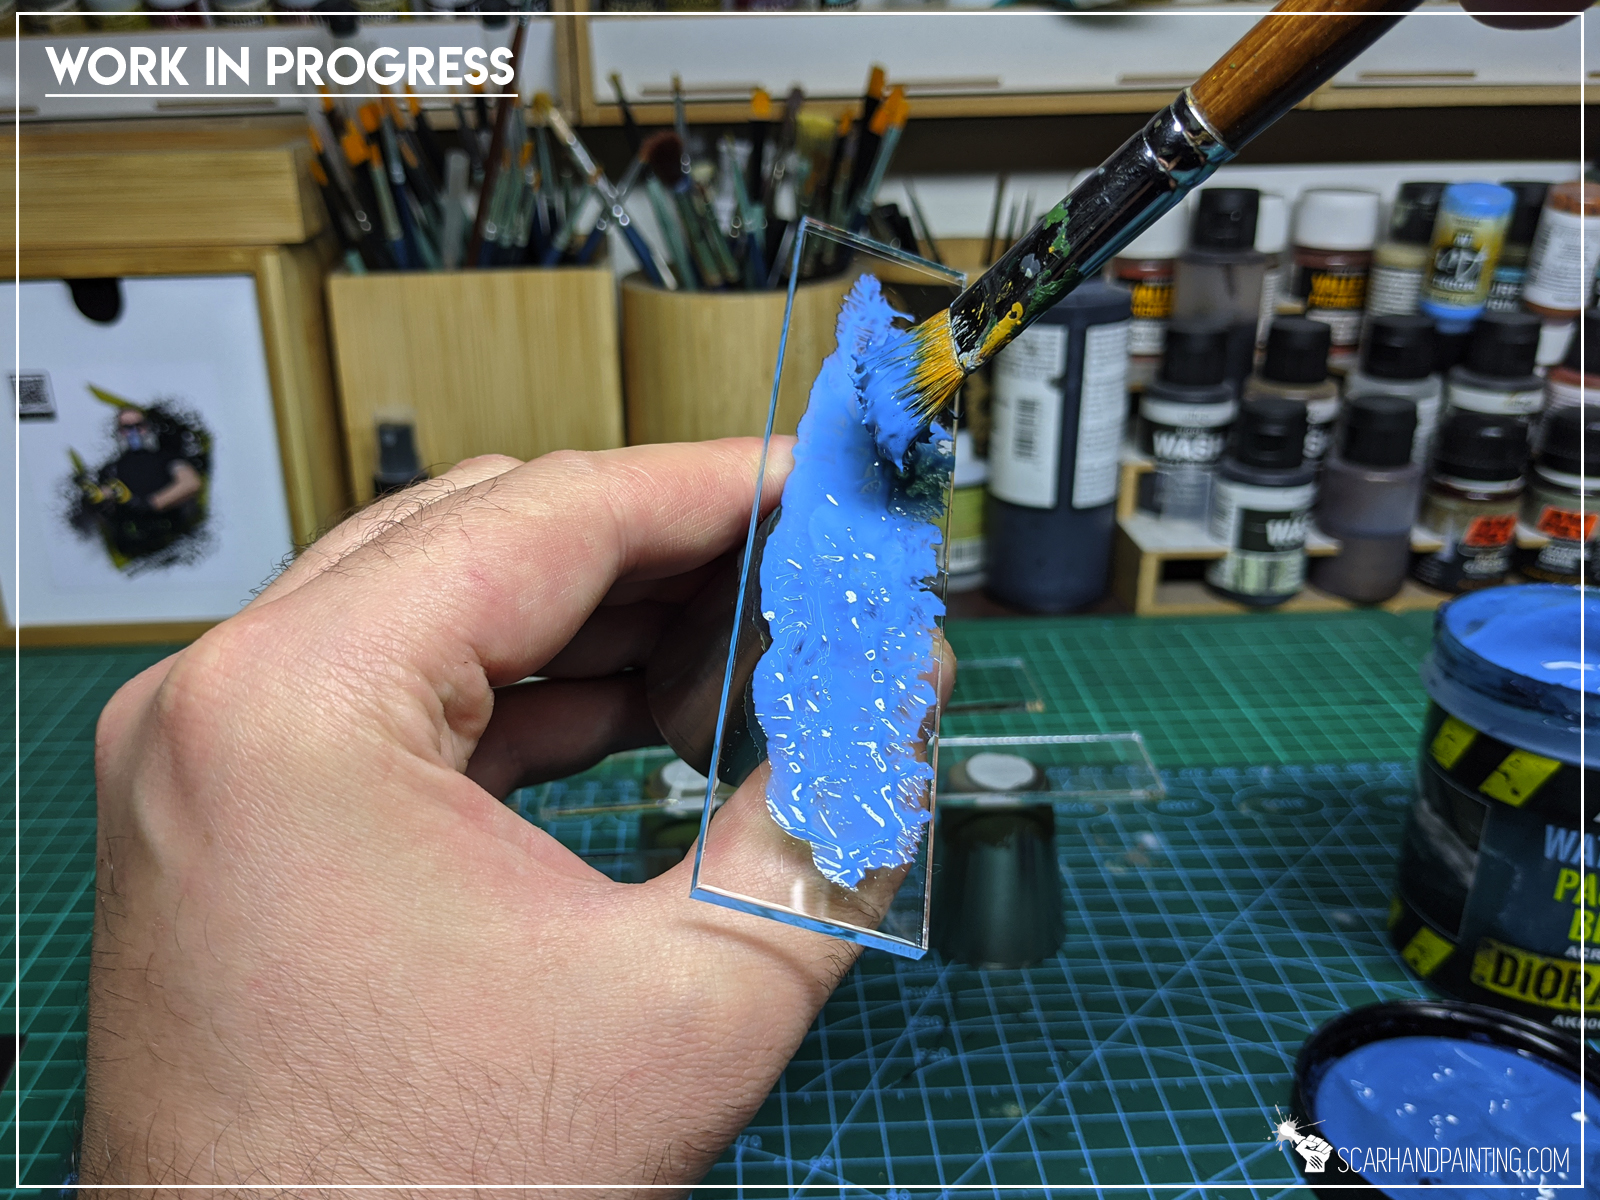


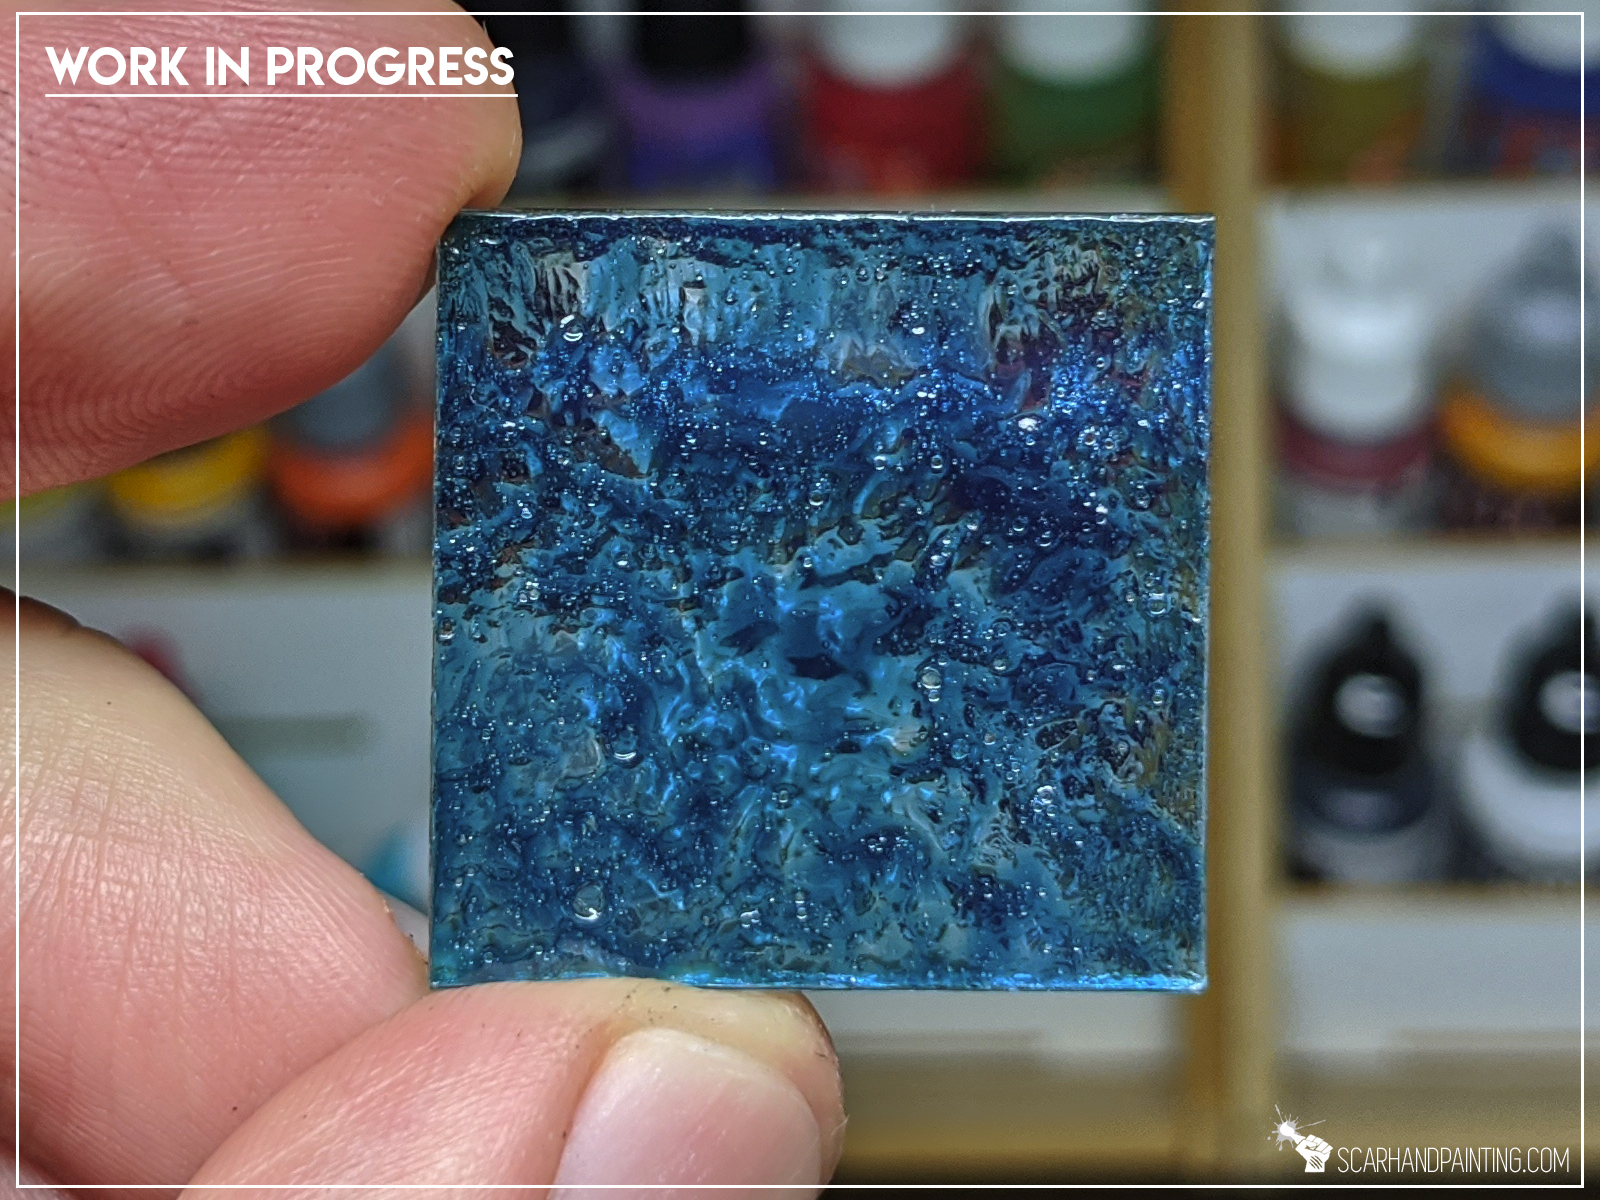
Step two:
I repeated first step two more times, leaving the paint to dry between each repeat. This darkened the base significantly and resulten in a nice solid layer with a lot more detail on top of the first one.

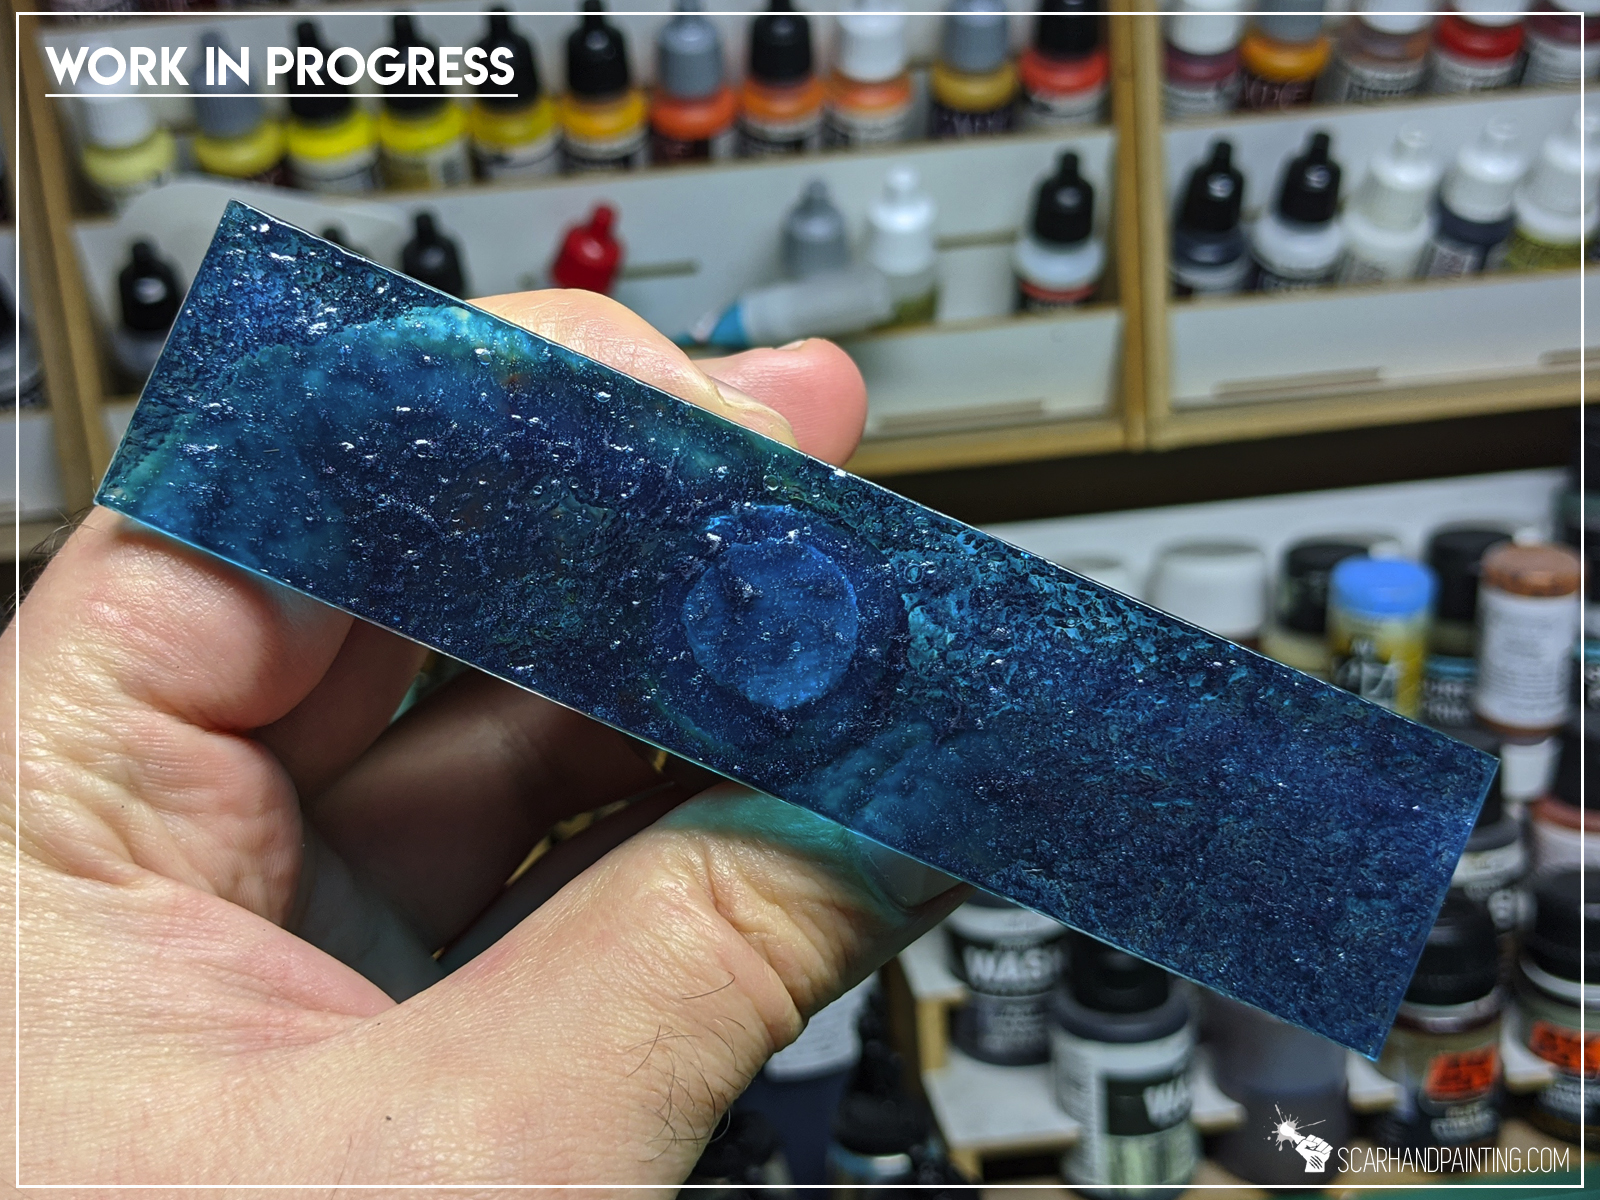
Step three:
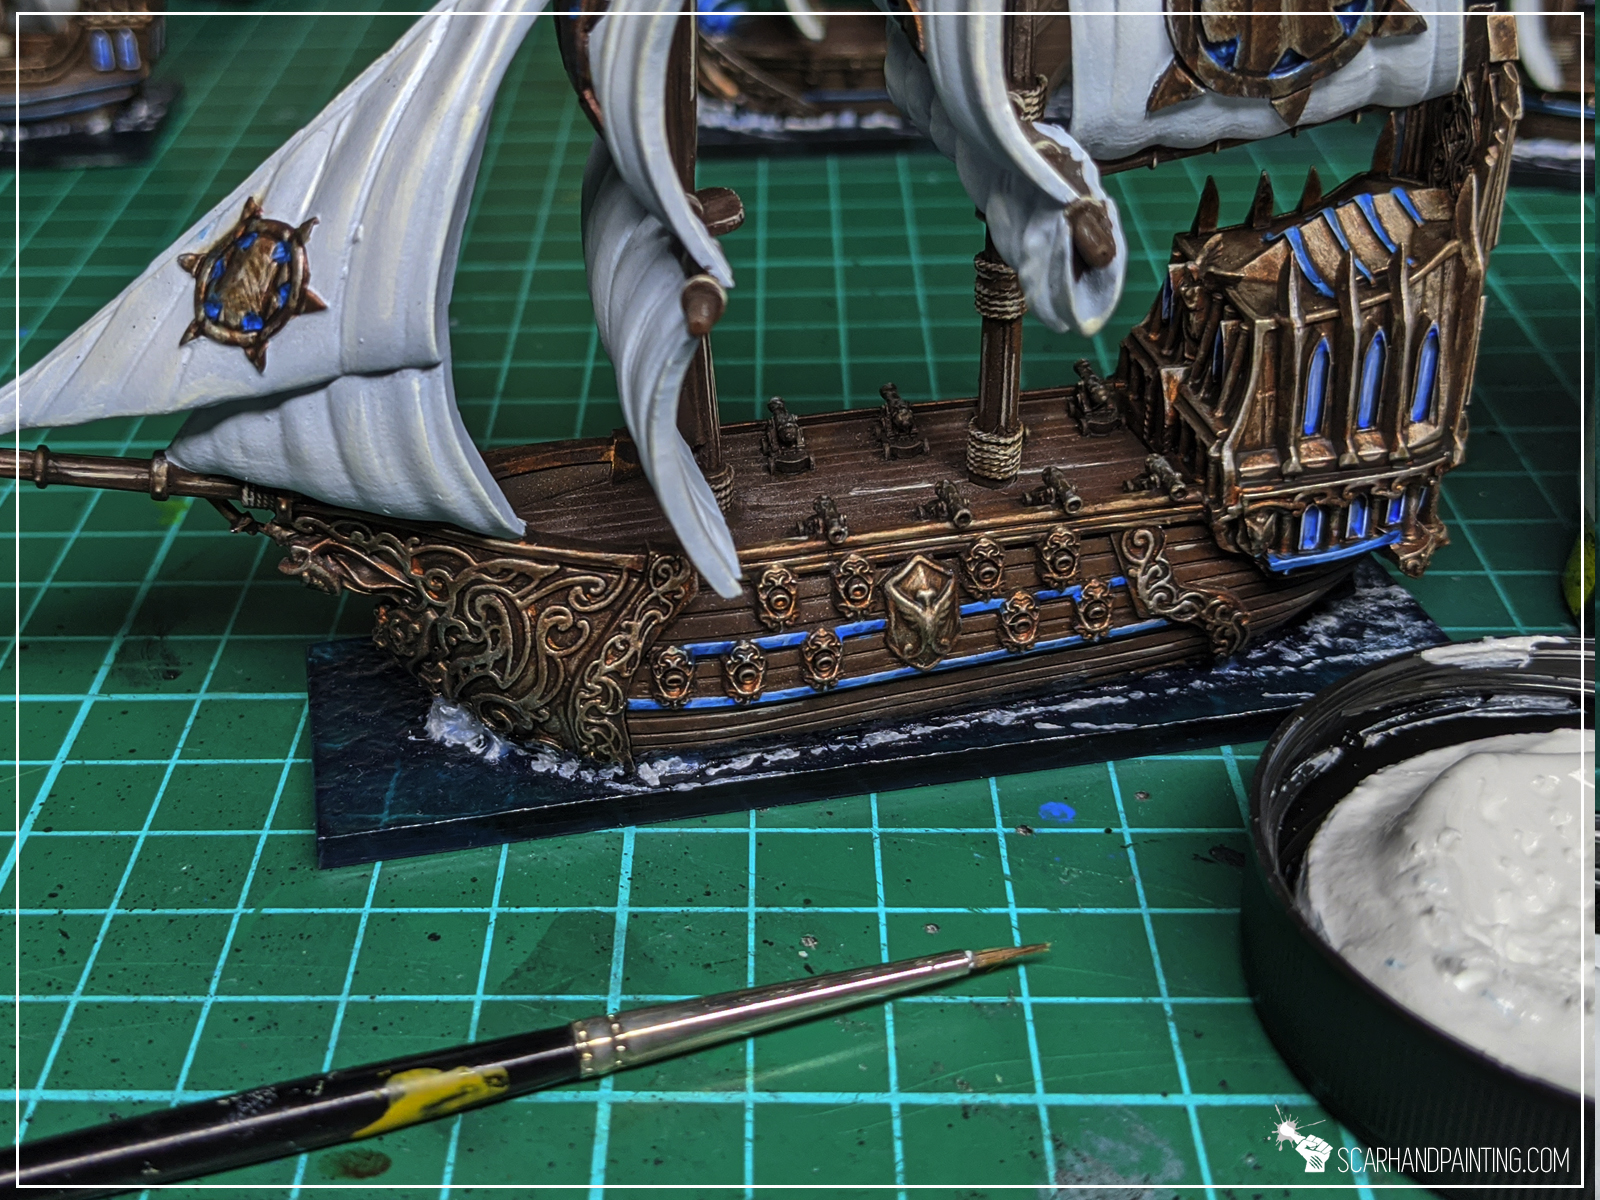
Once I was done painting ships I applied AK Interactive Pacific Blue Gel at the edges of each ship’s underside. I then followed with Super Glue through the middle and glued the ship on top of a base. Excess gel was queezed out and filled any holes between the ship and the base.

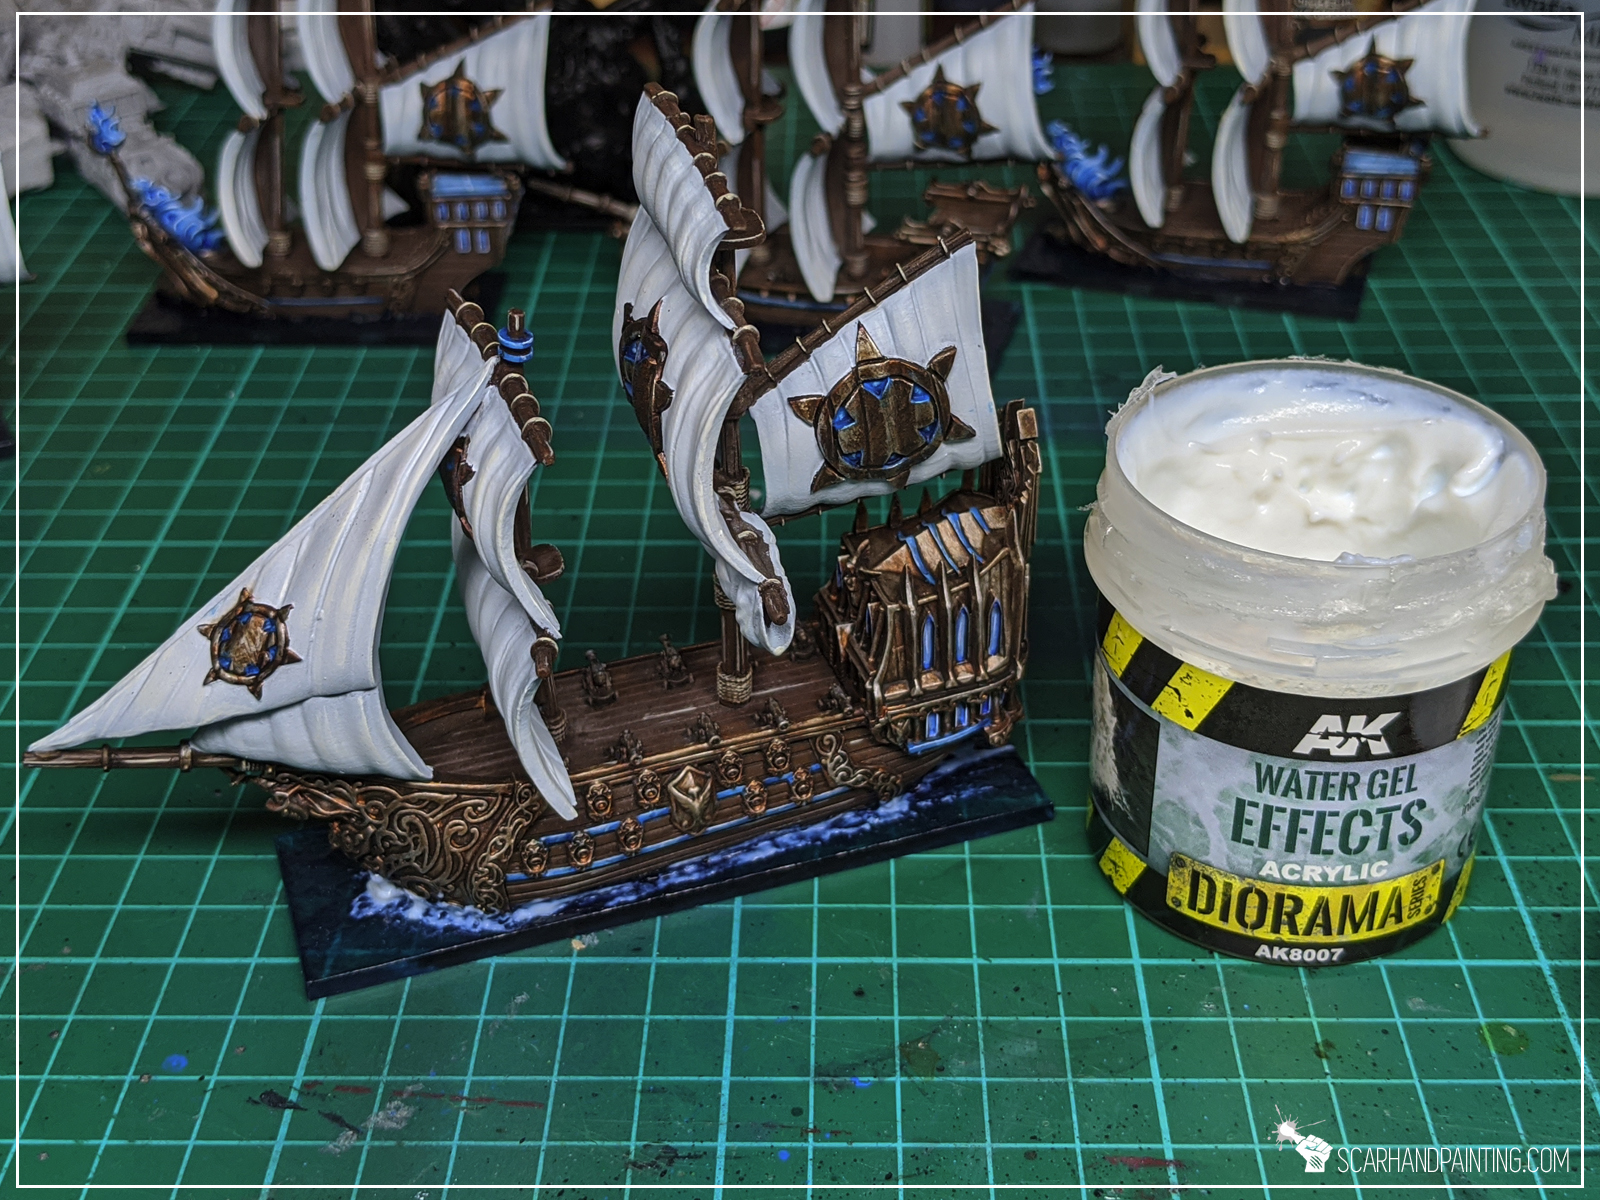
Step four:
I then applied more Pacific Blue Gel around the ship. It was a bit messy so I used a clean flat brush to move any excess gel from the ship’s sides and onto the base.


Step five:
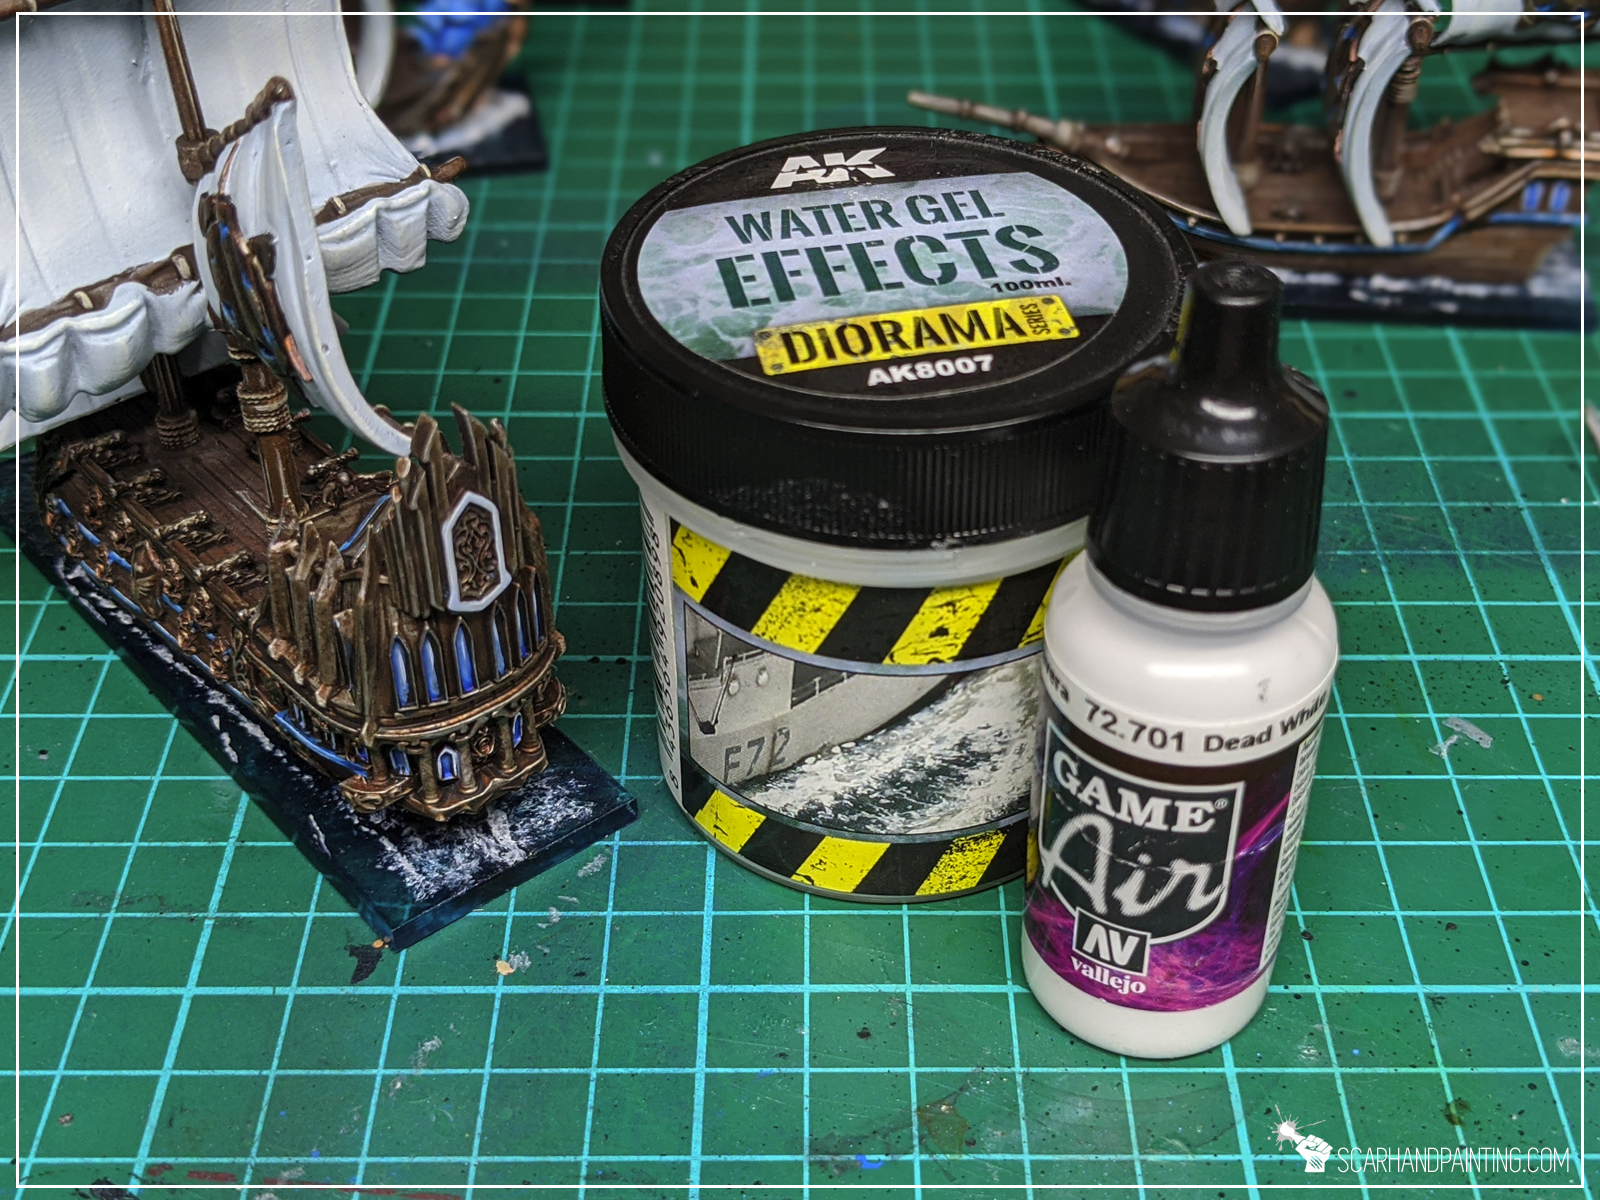
Some time later I applied AK Interactive clear Water Gel effects around the ship. I used a small brush and slowly built the mass of splashing water at the front and on the sides of the ship. This time I didn’t care about messing up the hull.
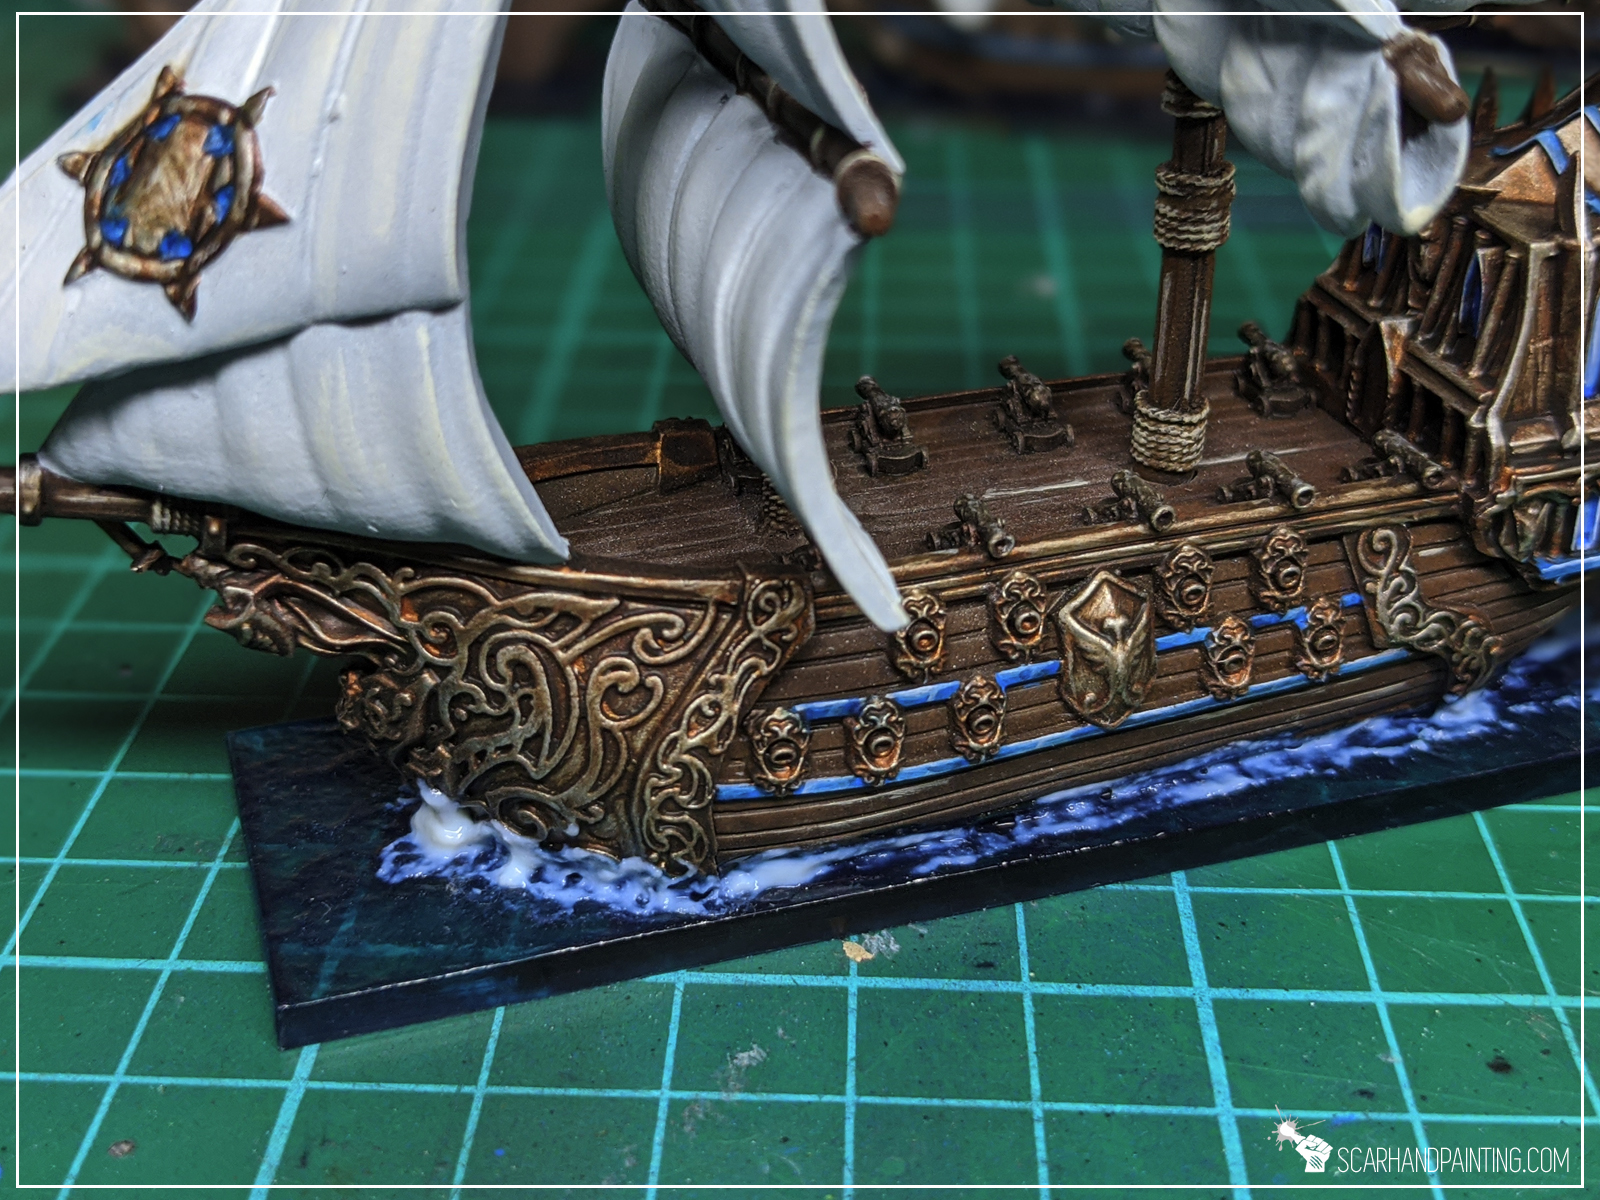
Step six:
Next I applied AK Interactive Water Foam. Using a small brush I applied small dots of the effect on top of previous layer. This one is very white so I tried to avoid applying to much. Mistakes were removed with a clean flat brush – pushed into more tight lines, where necessary.
Step seven:
Lastly I mixed white paint, water and AK Interactive clear Water Gel effect and stippled a bit behind and around the ship to create a nice effect of dissolving water foam.

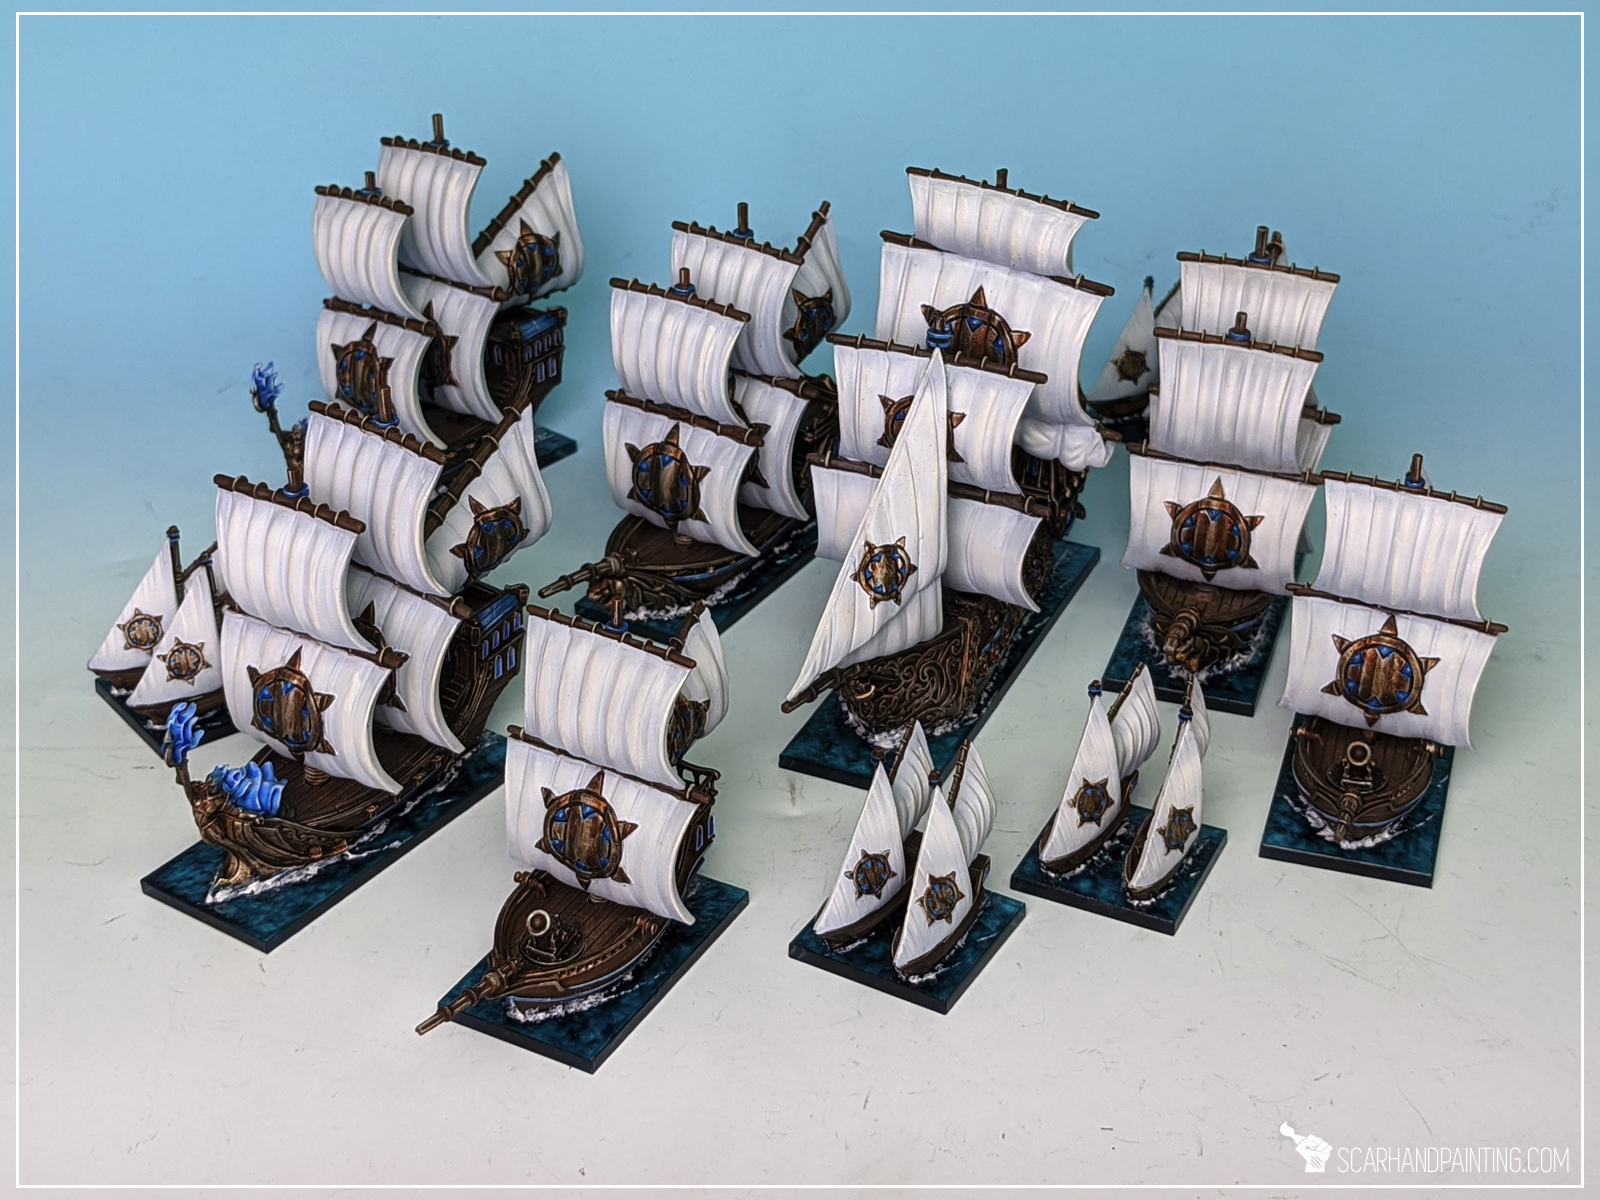
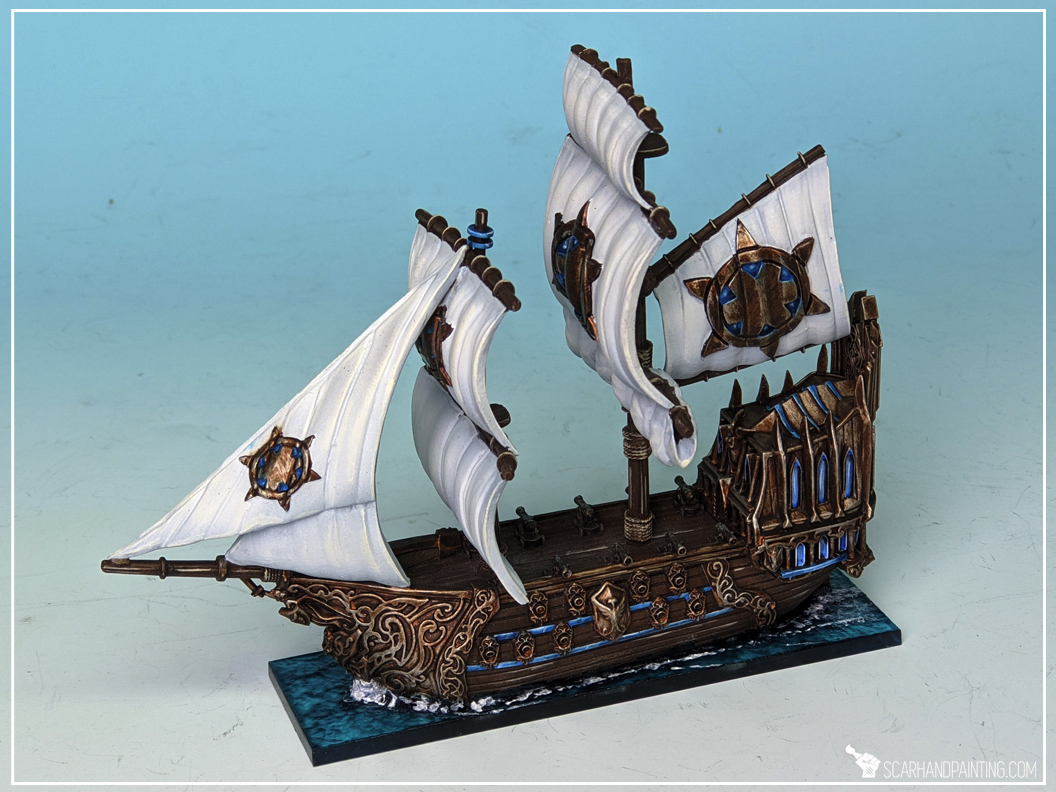
Task complete! The fleet is now sailing into the unknown. I hope you like this tutorial. For more pictures of finished fleet visit Gallery: Armada Basileans
Be sure to let me know your thoughts on the method either in the comments below or at my facebook profile.
Please link this tutorial to anyone who likes to learn new hobby tricks.
Lastly I also invite you to follow me at Instagram, where I drop some nice pictures from time to time.
All speed ahead and see you in the next article!
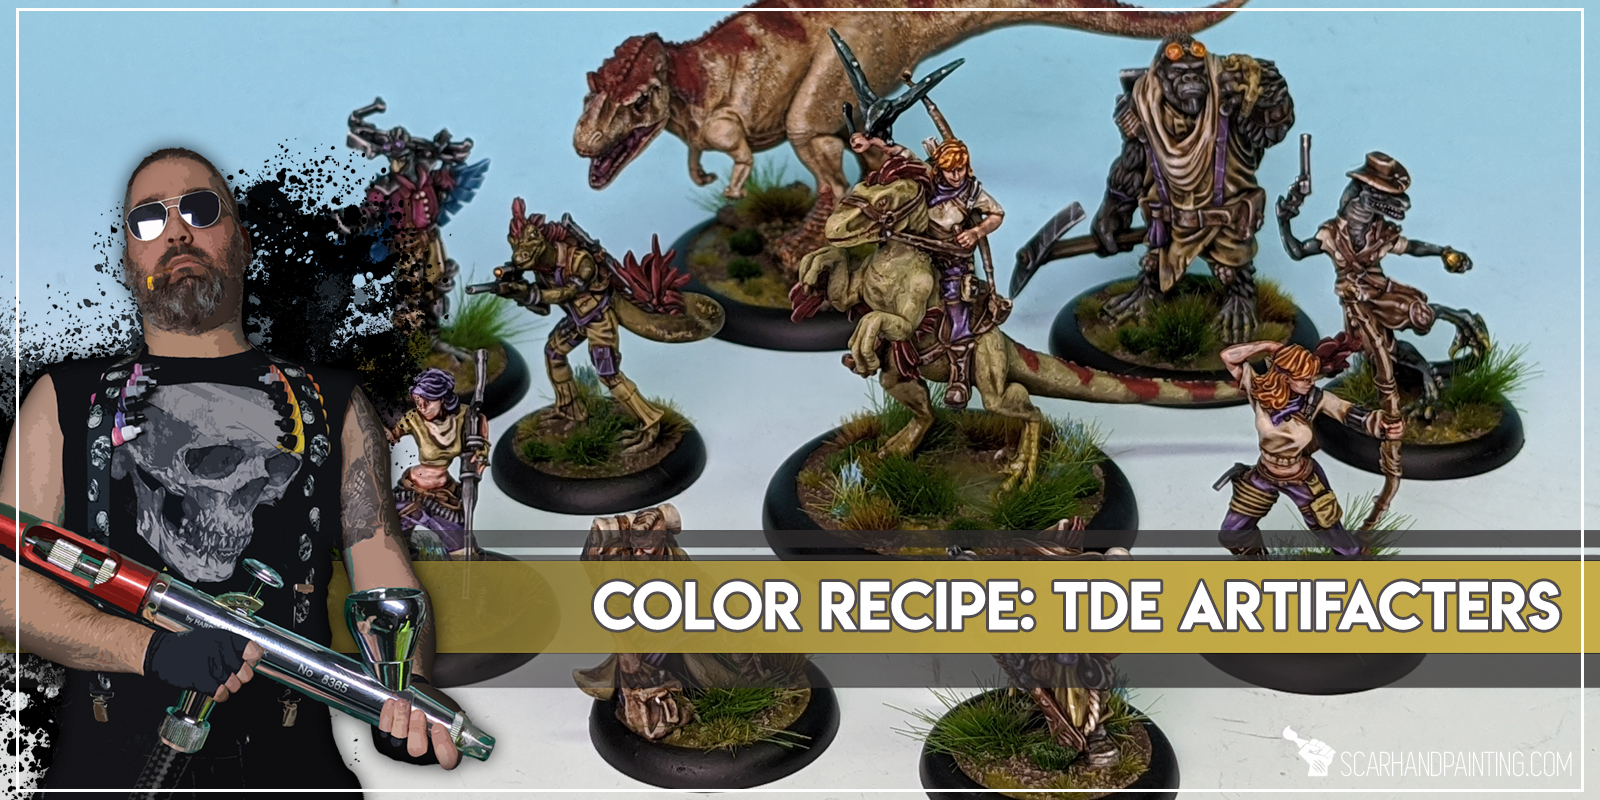
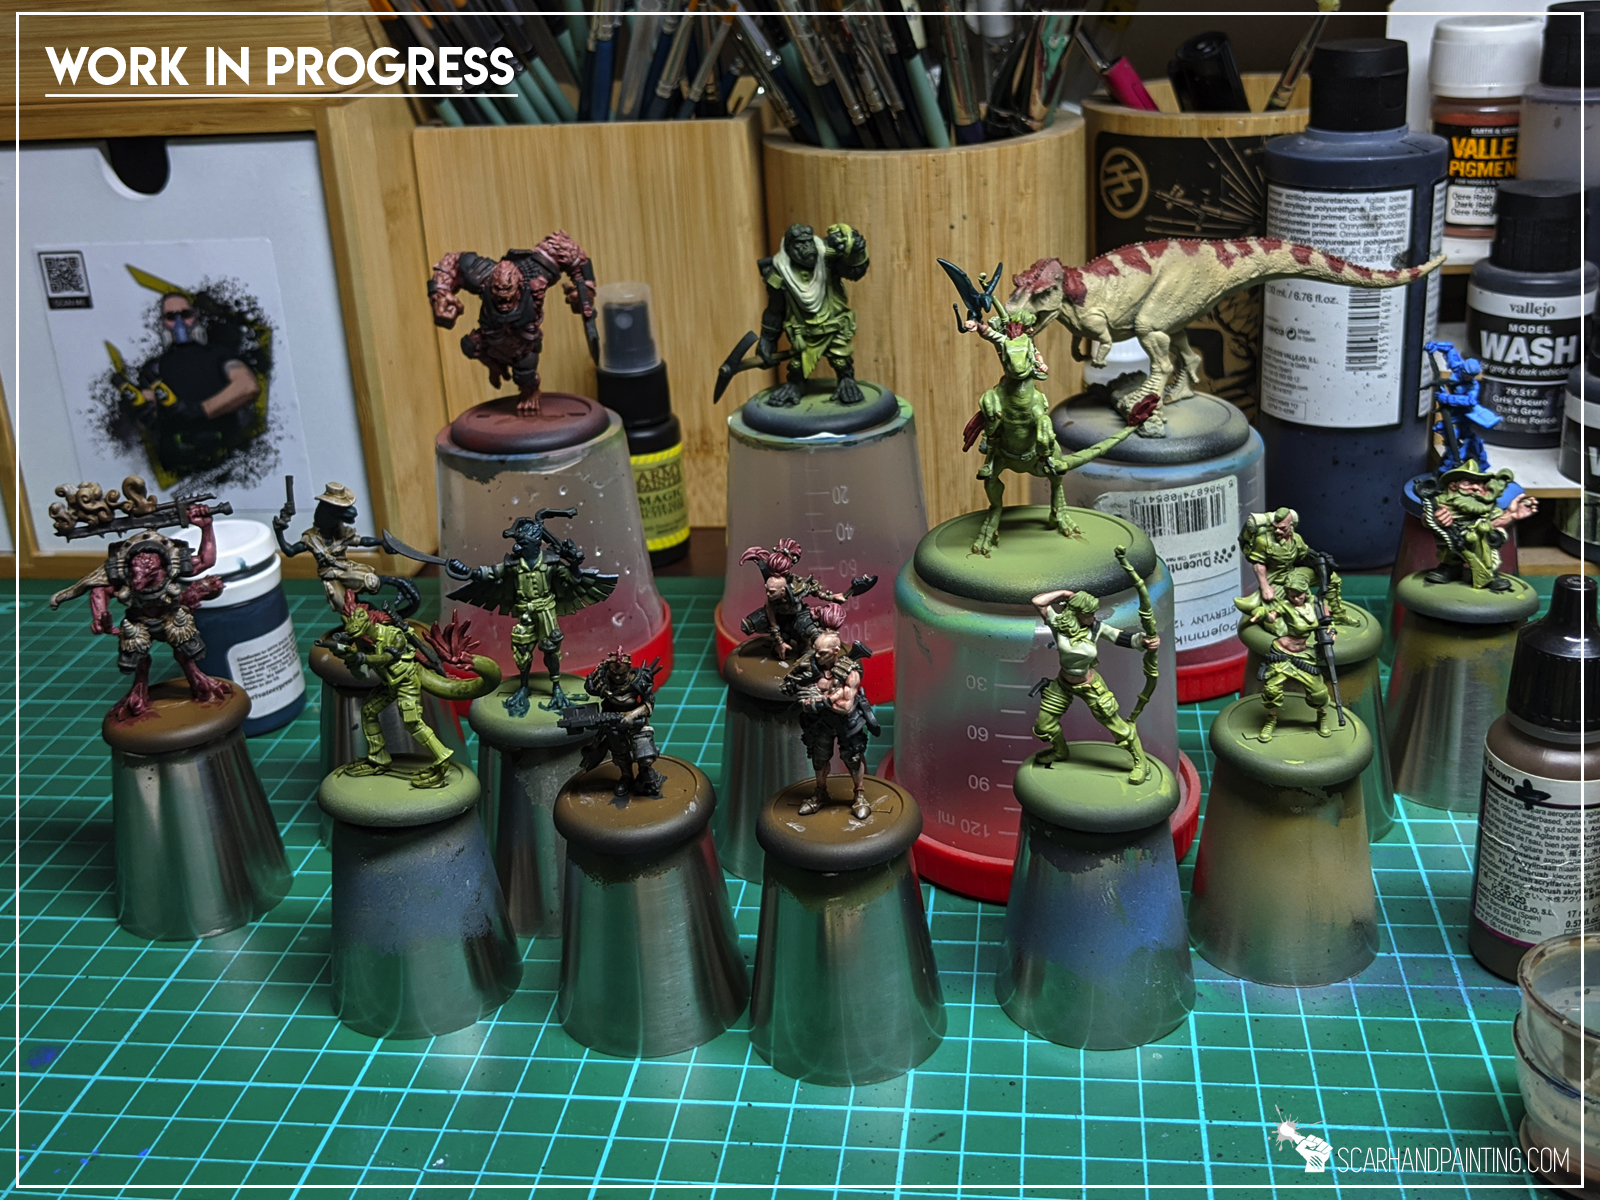
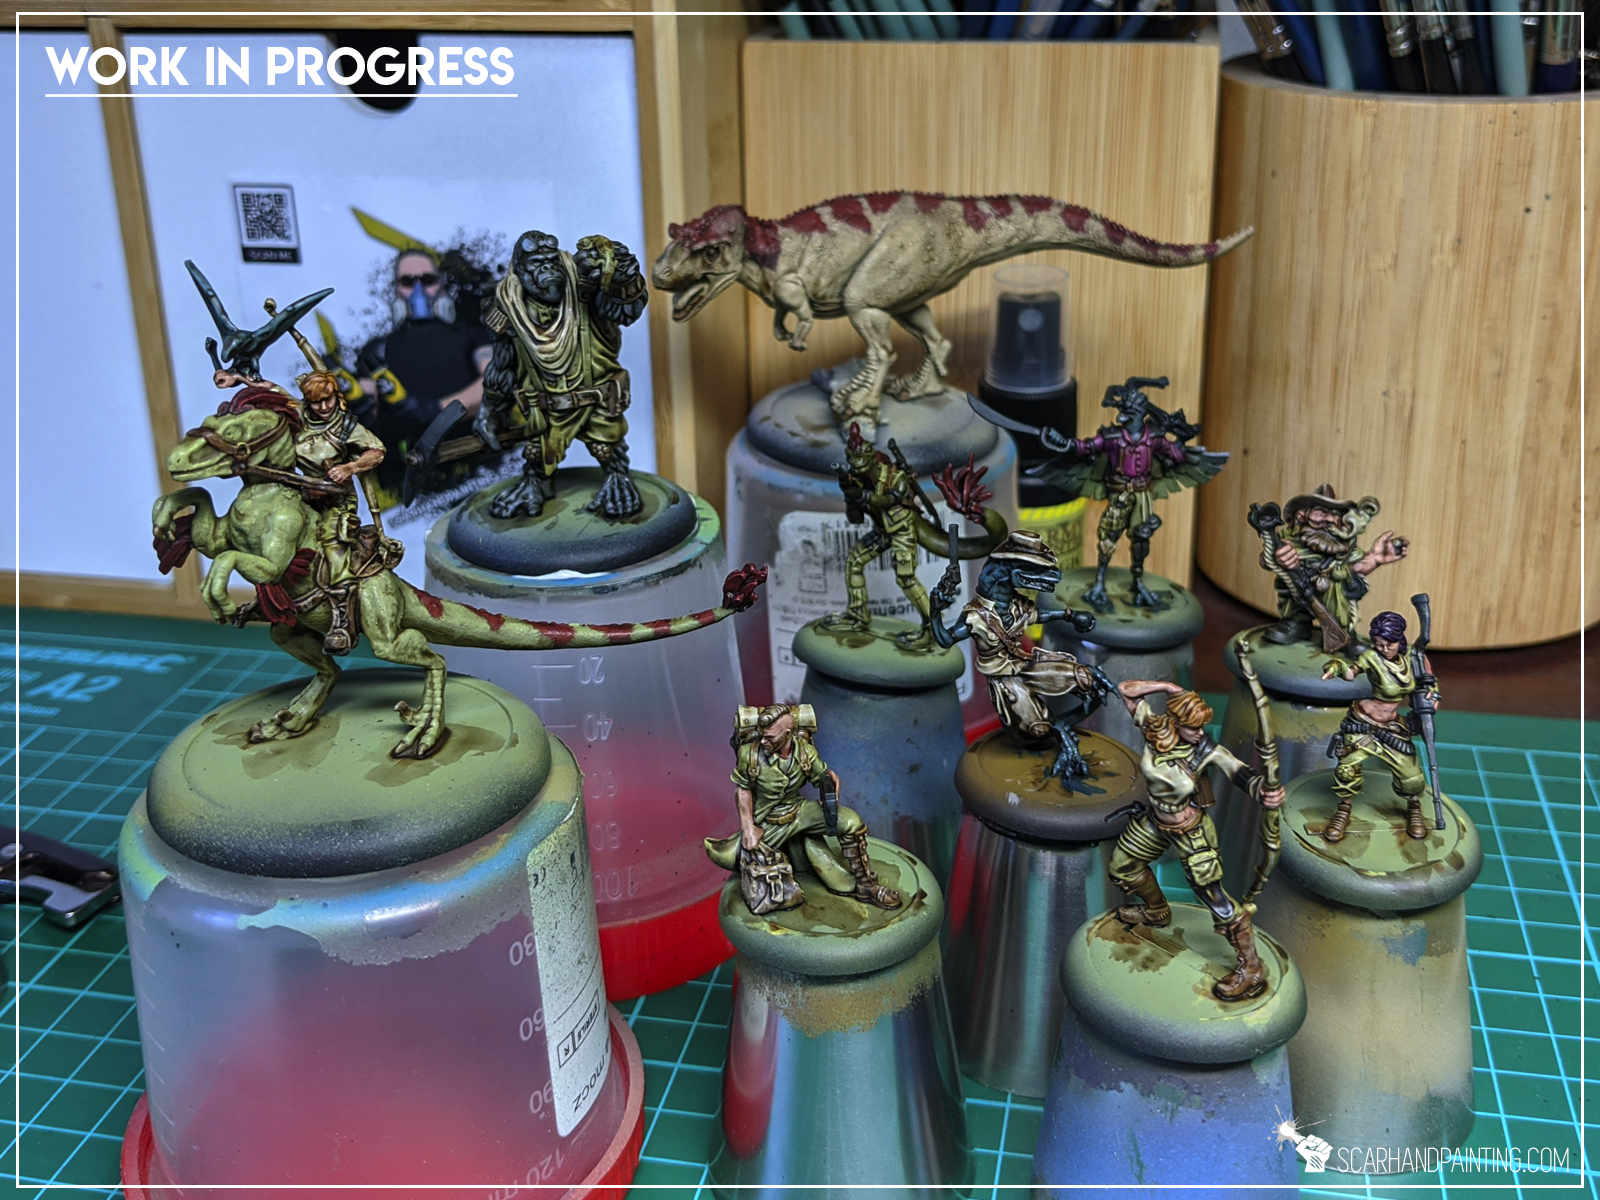
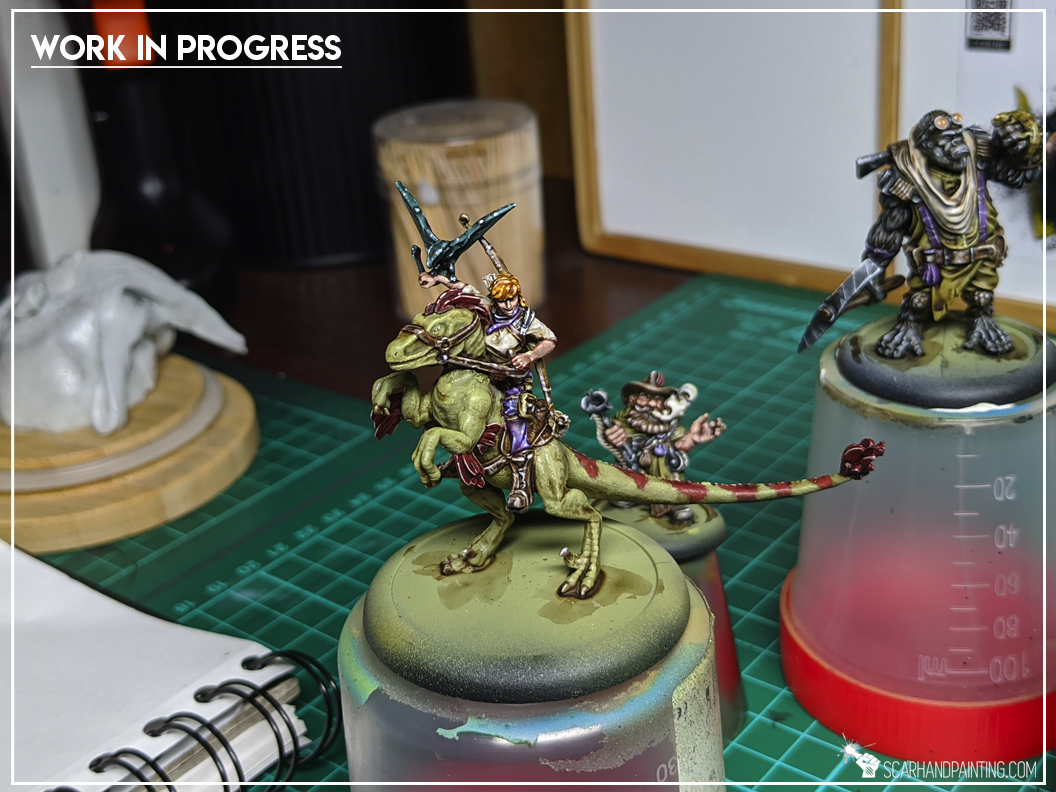
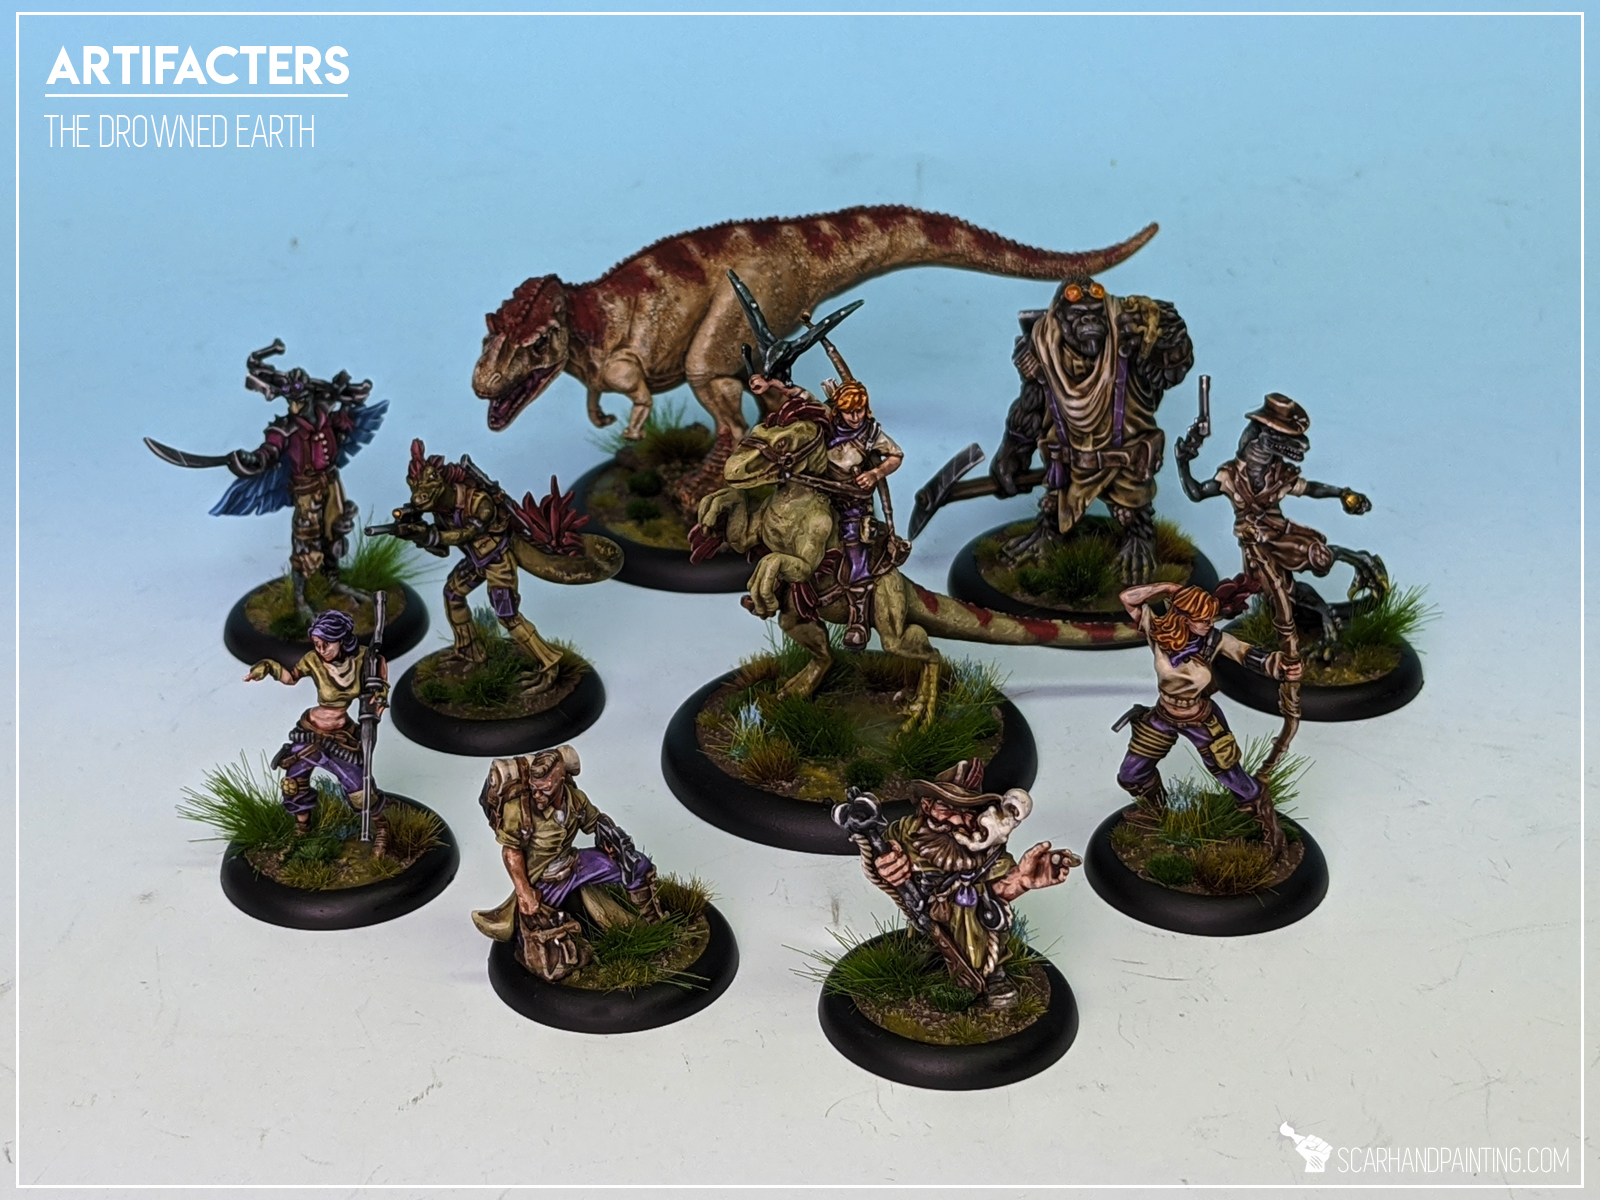
Here are some Colour Recipes for Artifacters from Gallery: The Drowned Earth Artifacters. Please take note that this is a simple colour scheme, not covering multiple overlapping layers and blends in between, that lead to the final product. It is supposed to be used as guideline not a step-by-step.
GREEN OLIVE clothes:
White preshade, *
Interior Green (Val), *
Mix Interior Green (Val) 2:1 Duck Egg Green (Val),*
Mix Interior Green (Val) 1:1 Duck Egg Green (Val),*
Mix Heavy Khaki (Val), 1:1 Pale Wych Flesh (GW), flbr
Strong Tone Ink (AP),
Heavy Khaki (Val), bl
Mix Heavy Khaki (Val), 1:1 Pale Wych Flesh (GW), l&p
Off White (Val), p
PURPLE clothes:
Green Olive clothes base (up to Strong Tone),
Hexen Lichen (Val a), blend
Genestealer Purple (GW), l&p
Dechala Lilac (GW), l&p
Off White (Val), p

CREEME clothes:
Bonewhite (Val a),
Mix Bonewhite (Val) 1:1 Pale Wych Flesh (GW), flbr
Pale Wych Flesh (GW), l&p
Strong Tone Ink (AP),
Bonewhite (Val a), bl
Ivory (Val), l&p
Off White (Val), p
BLACK weapons:
Panzer Dark Grey (Val a),
Fenrisian Grey (GW), flbr & bl
Pallid Wych Flesh (GW), l&p
Dark Tone Ink (AP)
Pallid Wych Flesh (GW), l&p
Off White (Val), p
BASES:
Dark Earth (AK texture),
Karak Stone (GW), drbr
Nurgle’s Rot (GW effect),
TUFTS:
Swamp 4mm (Gamers Grass),
Tiny Dry Green 2mm (Gamers Grass),
Light Blue Flowers (Paint Forge),
Shady Green 2mm (Paint Forge),
Dark Forest 12mm (Paint Forge),
l&p – lines and points,
p – points,
dl – deep lining,
bl – blend,
gl – glaze,
drbr – drybrush,
fltbr – flatbrush,
lobr – loaded brush,
stpl – stippling,
*Airbrushed (with multiple layers and mixes)
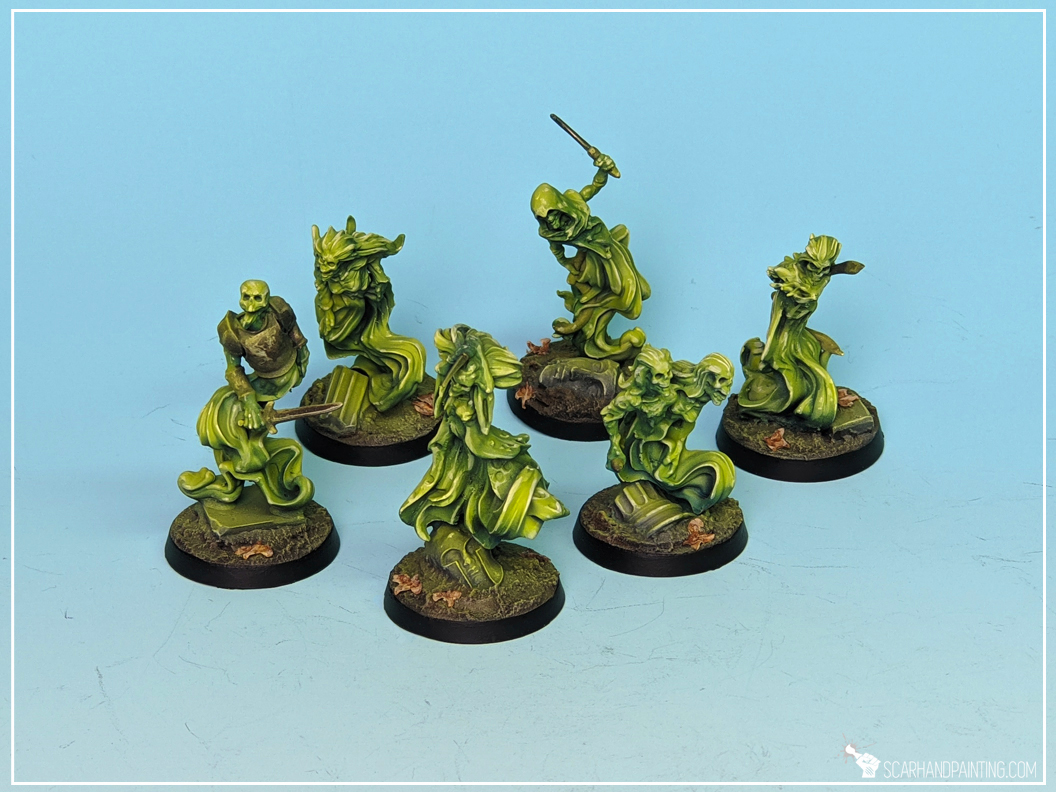
Here are some Colour Recipes for Thorns of the Briar Queen from Gallery: Shadespire Thorns of the Briar Queen. Please take note that this is a simple colour scheme, not covering multiple overlapping layers and blends in between, that lead to the final product. It is supposed to be used as guideline not a step-by-step.
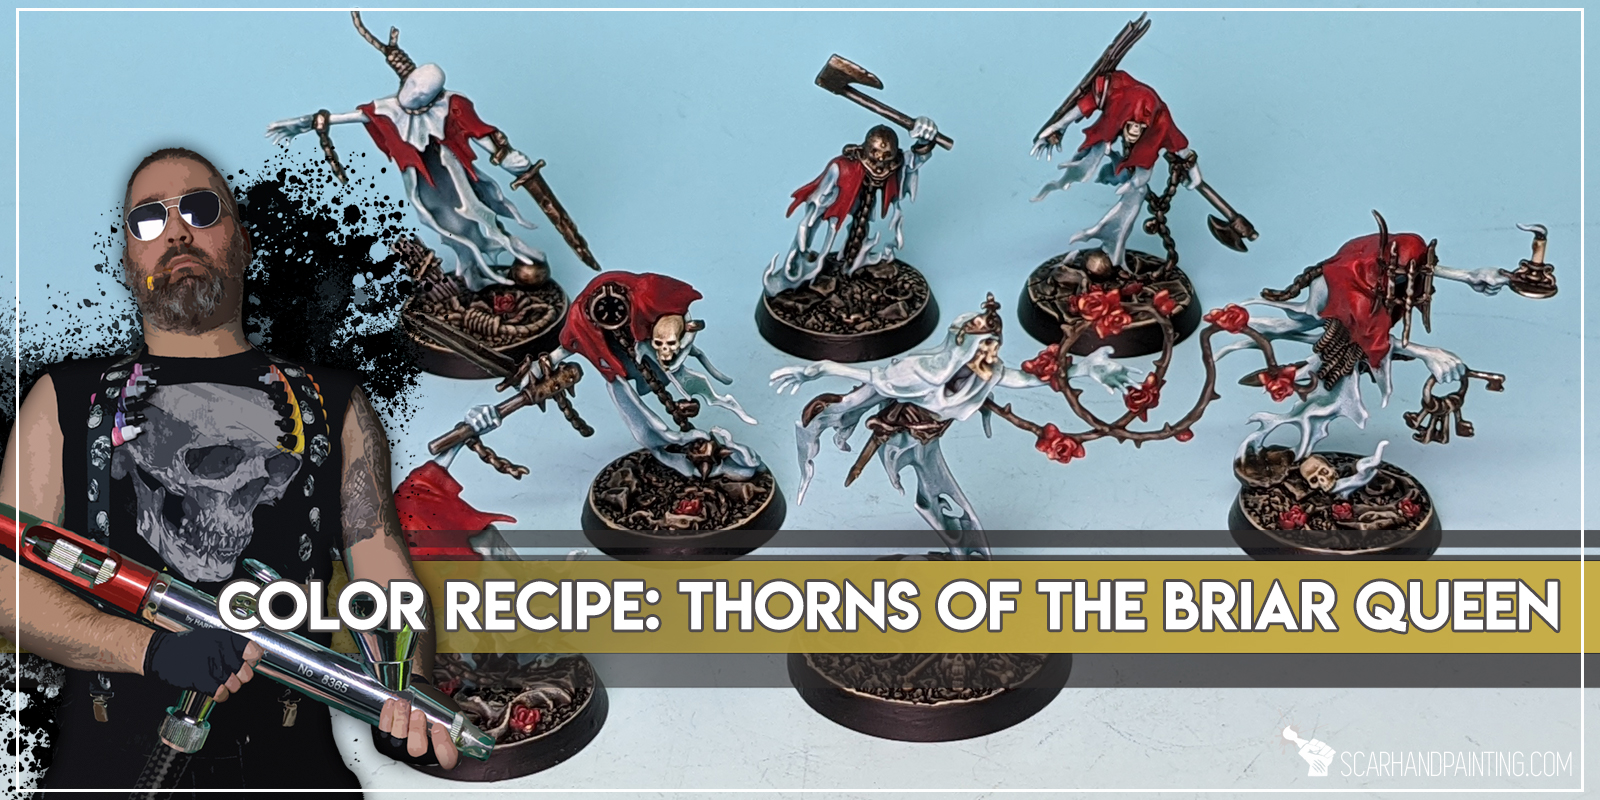
GHOSTLY bodies:
Turquise (Val),*
Mix Turquise (Val) 1:4 White,*
White, bl/l&p
Lahmian Medium (GW),
Mix Coelia Greenshade (GW) 1:1 Lahmian Medium (GW), bl
White, bl/l&p
RED clothes:
Burnt Red (Val),
Flat Red (Val), flbr
Mix: Flat Red (Val) 4:1 Elf Skintone (Val),
Red RLM23 (Val), bl
Red Tone Ink (AP), dl

METAL weapons:
Warplock Bronze (GW),
Gun Metal (AP), flbr
Shining Metal (AP), flbr
Strong Tone Ink (AP),
Shining Metal (AP), l&p
SKULLS:
Flayed One Flesh (GW),
Mix: Flayed One Flesh (GW) 1:1 Pale Wych Flesh (GW),
Strong Tone Ink (AP),
Flayed One Flesh (GW), l&p
Off White (Val), l&p

BASES:
Panzer Dark Grey (Val a),
Fenrisian Grey (GW), flbr
Pale Wych Flesh (GW), flbr
Strong Tone Ink (AP), x2
Flayed One Flesh, l&p
l&p – lines and points,
p – points,
dl – deep lining,
bl – blend,
gl – glaze,
drbr – drybrush,
fltbr – flatbrush,
lobr – loaded brush,
stpl – stippling,
*Airbrushed (with multiple layers and mixes)

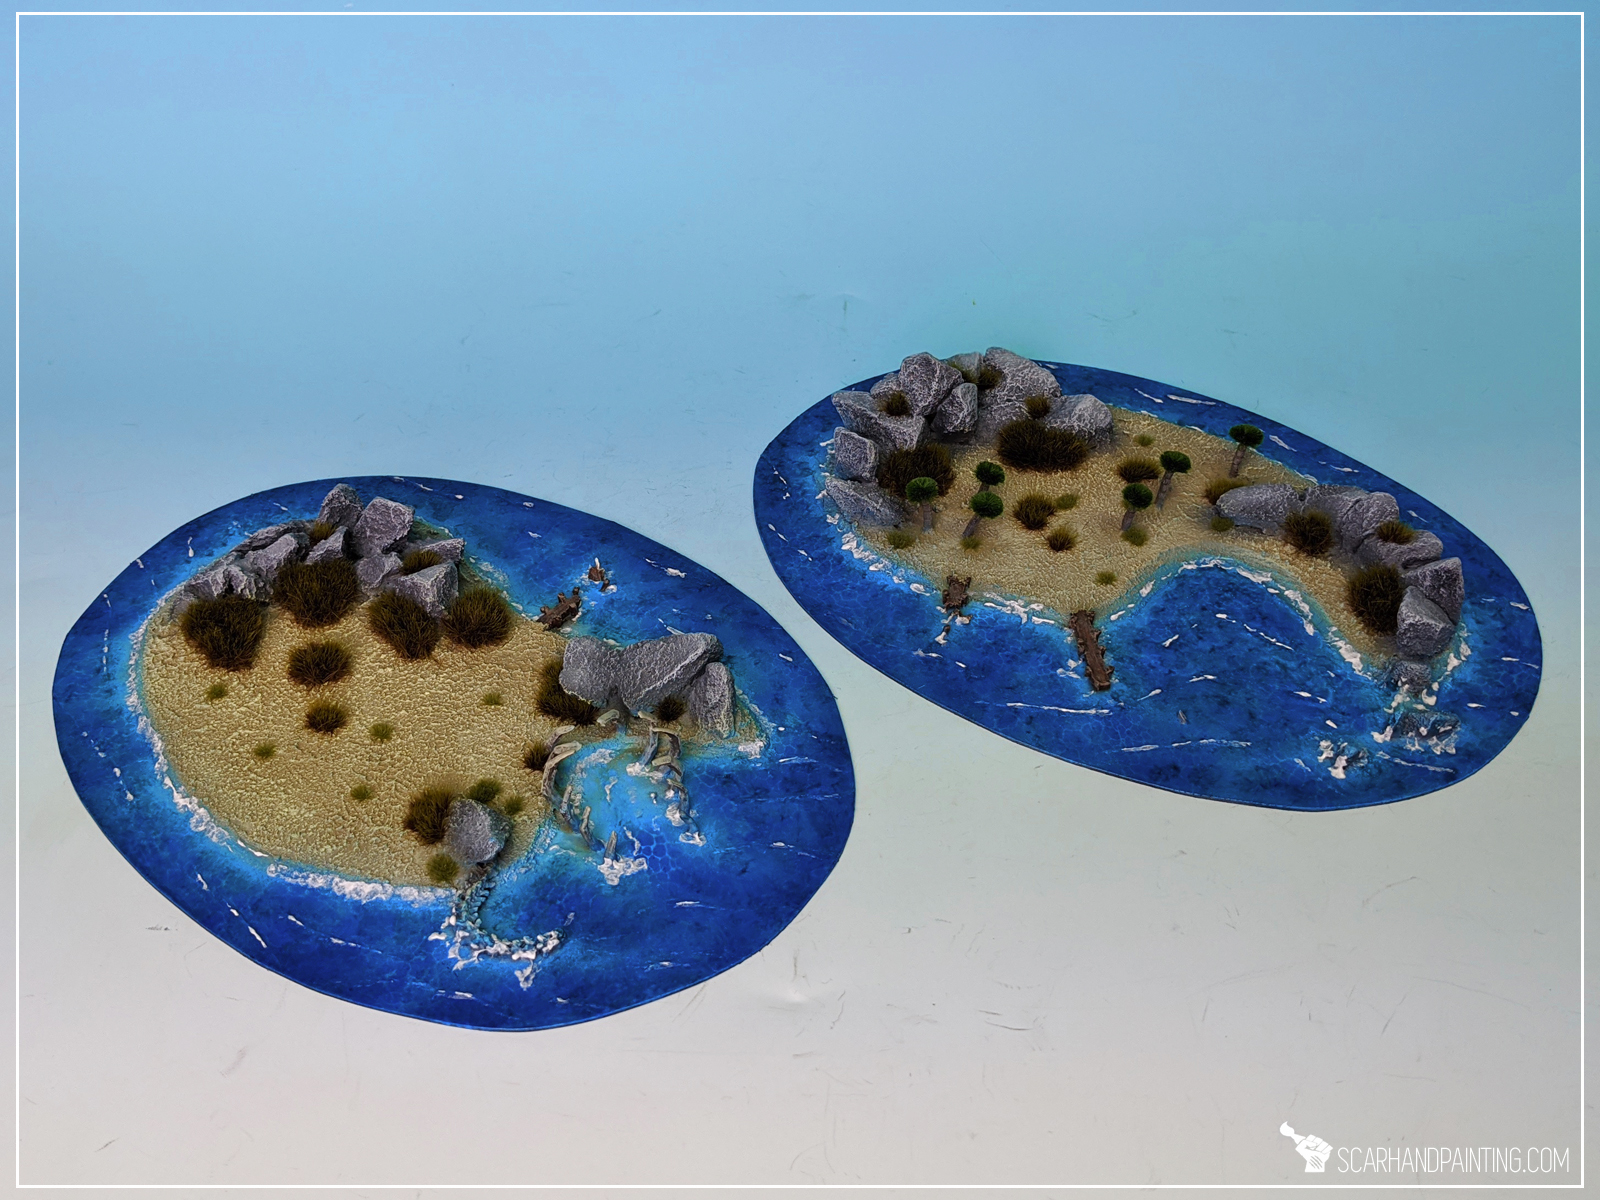
Welcome to Kings of War Armada Islands tutorial. Here I will take you on a Step-by-step trip through the process of creating and painting DiY islands scenery for Mantic Games Kings of War Armada as presented in the picture below.

Before we start, some notes:
Playing a friendly game on a set of fully painted and modeled scenery is always a great experience. In my opinion there’s nothing better than to let yourself go “full immersion mode” during a game of plastic dudesmen, or in this case – resin boats. That’s why I decided to create a set of appropriate scenery and use this opportunity to let you in on some of my hobby secrets.
When planning the set and how to make it my priorities were ease of build (and copy), durability, stability and obviously cool looks! Thus choice of material being mostly PCV and stones. PCV sheets are easy to work with, stay flat and are very glue friendly, whereas stones provide cheap and easy to use terrain features that will add weight and improve stability of the scenery pieces. With that in mind – let’s begin!
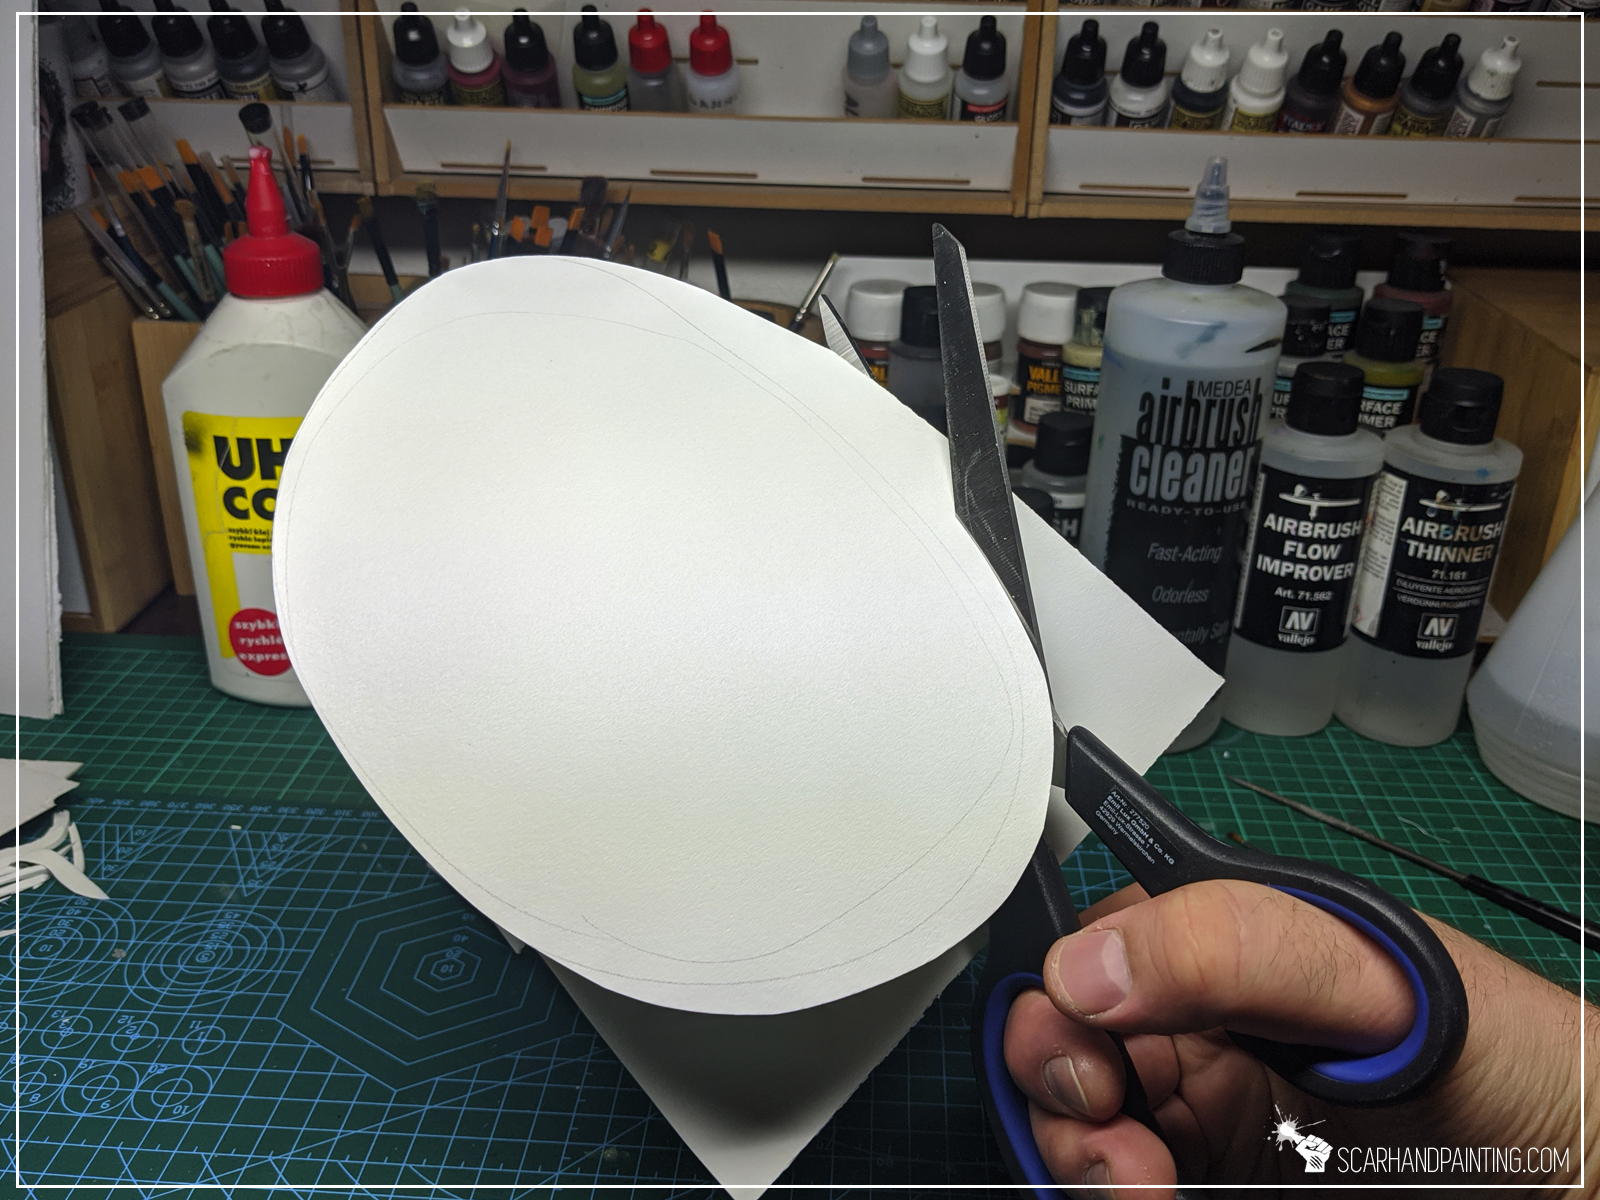
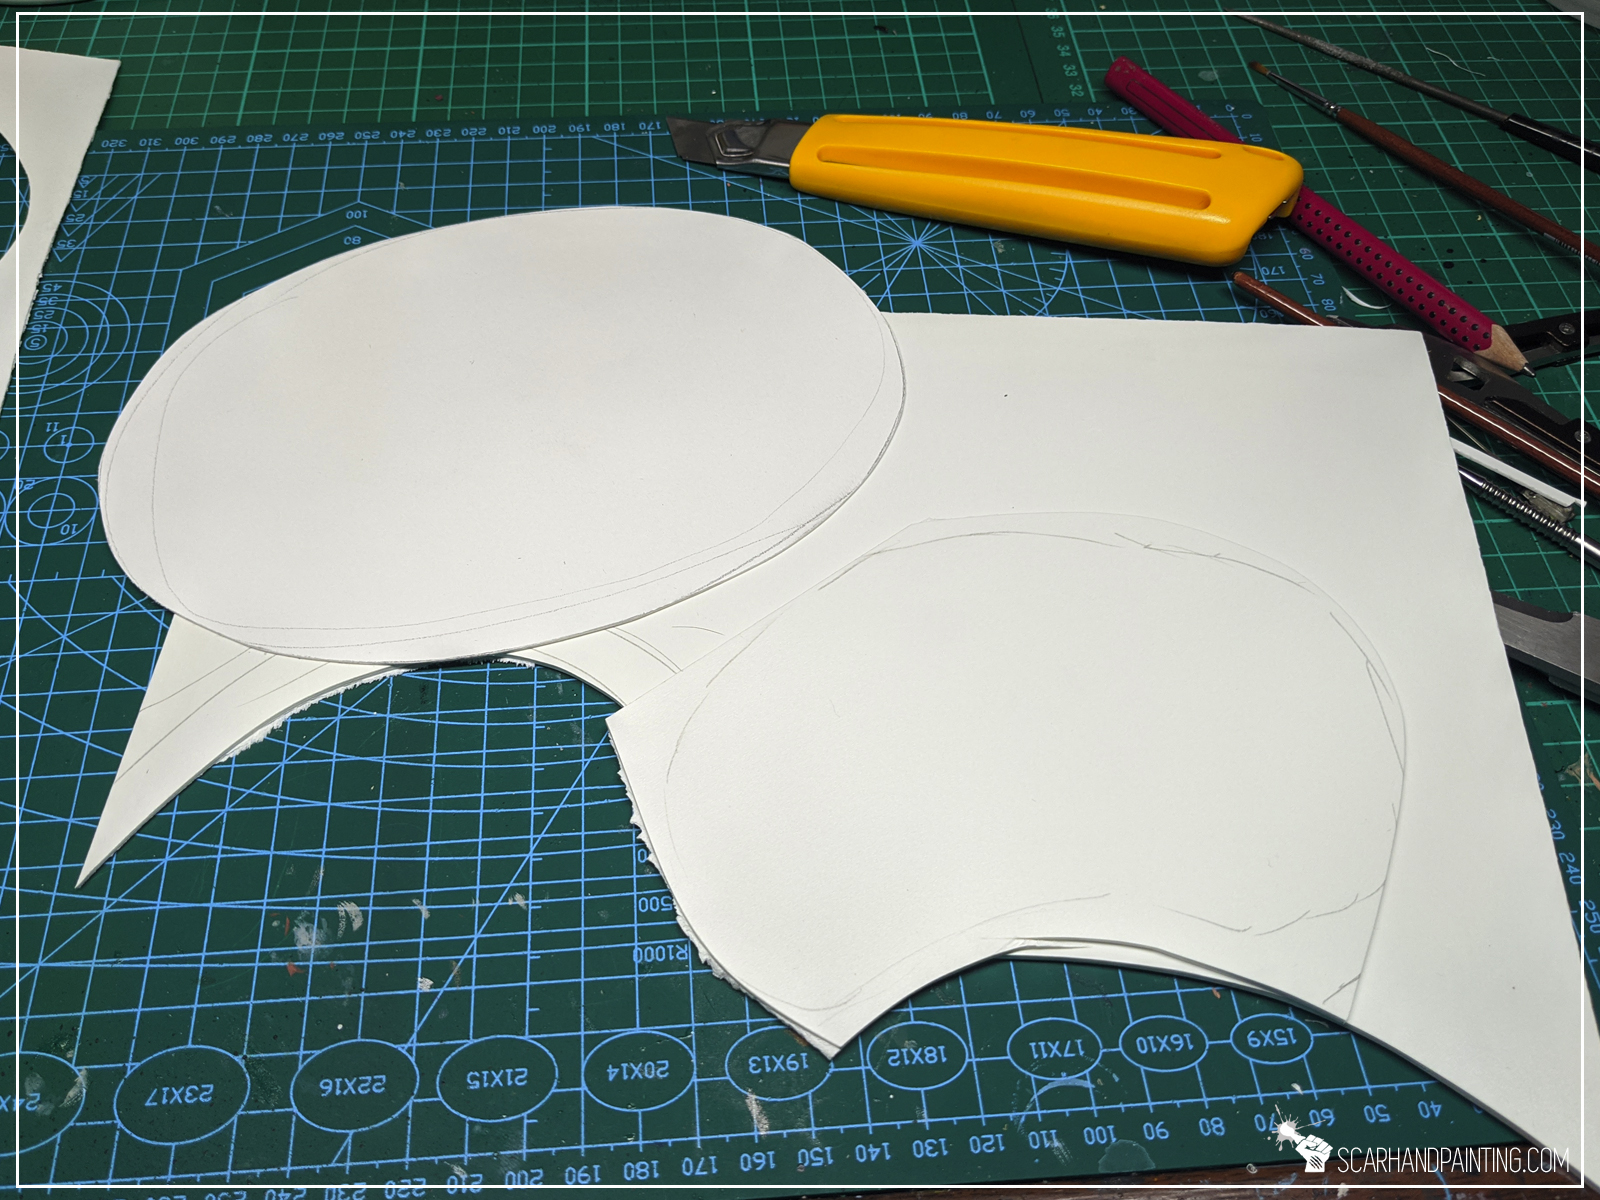
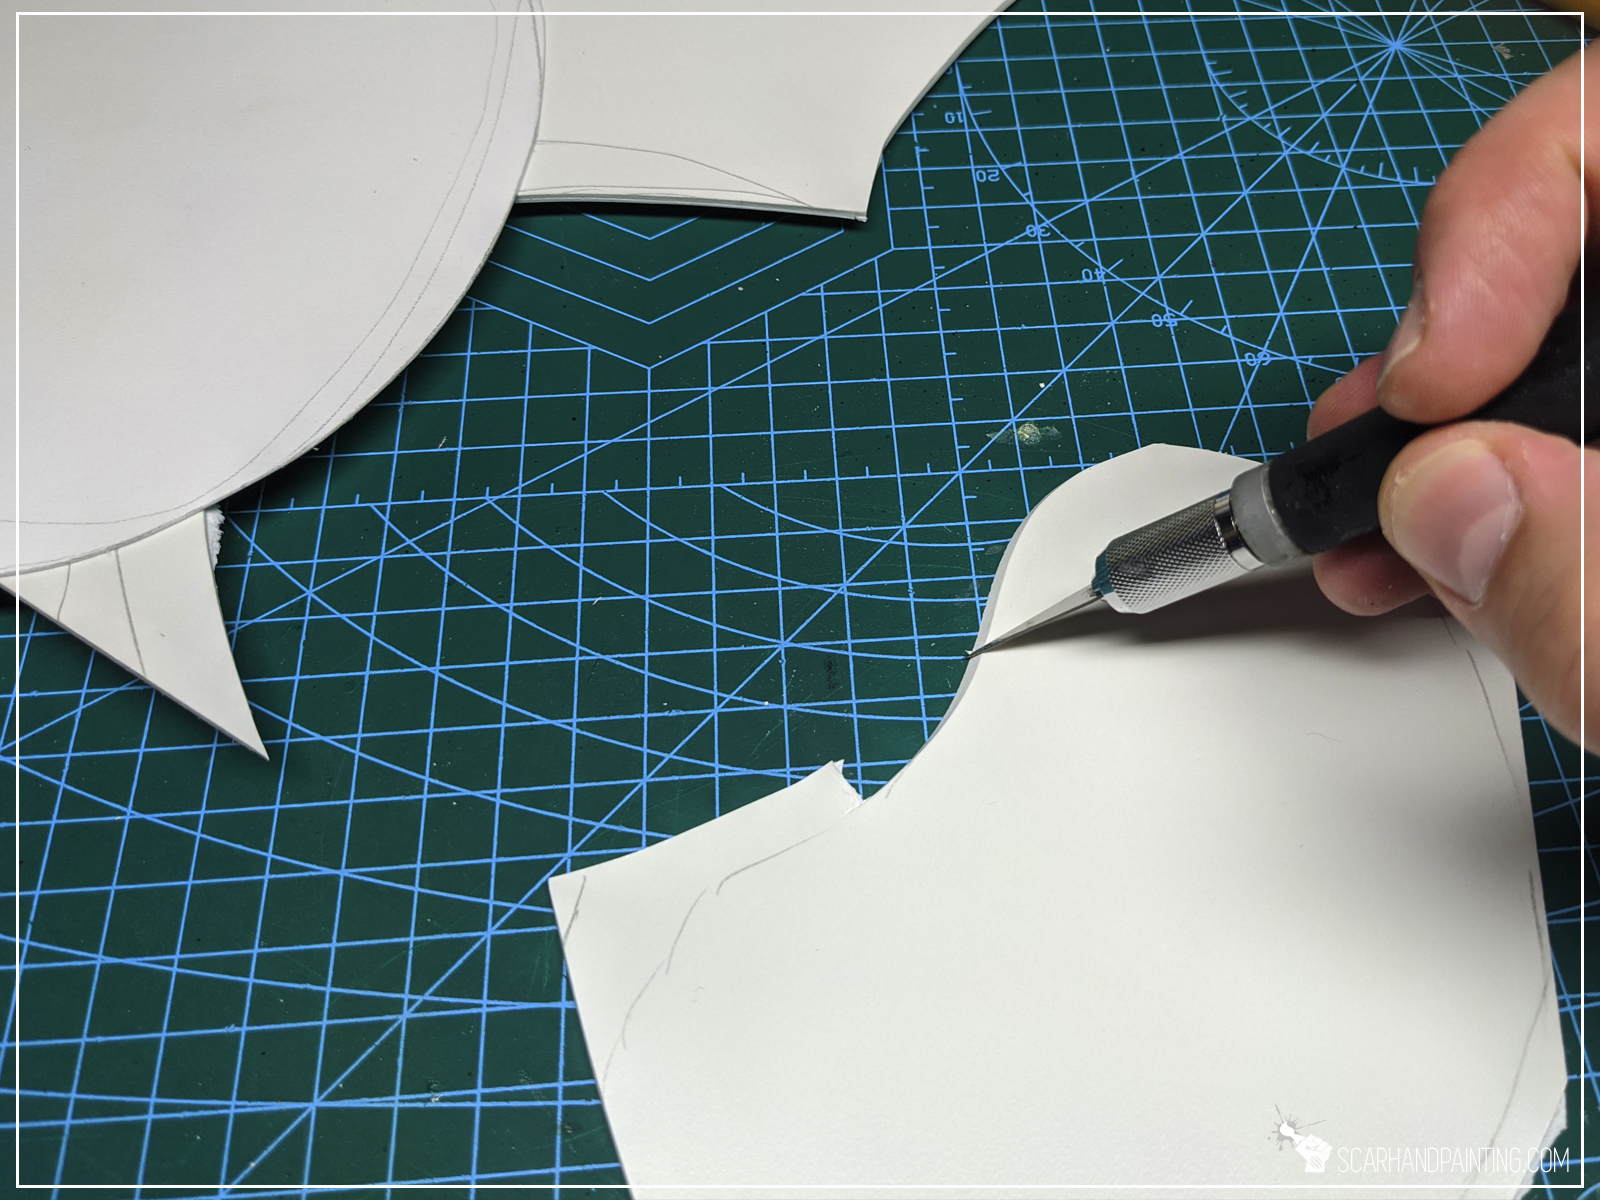
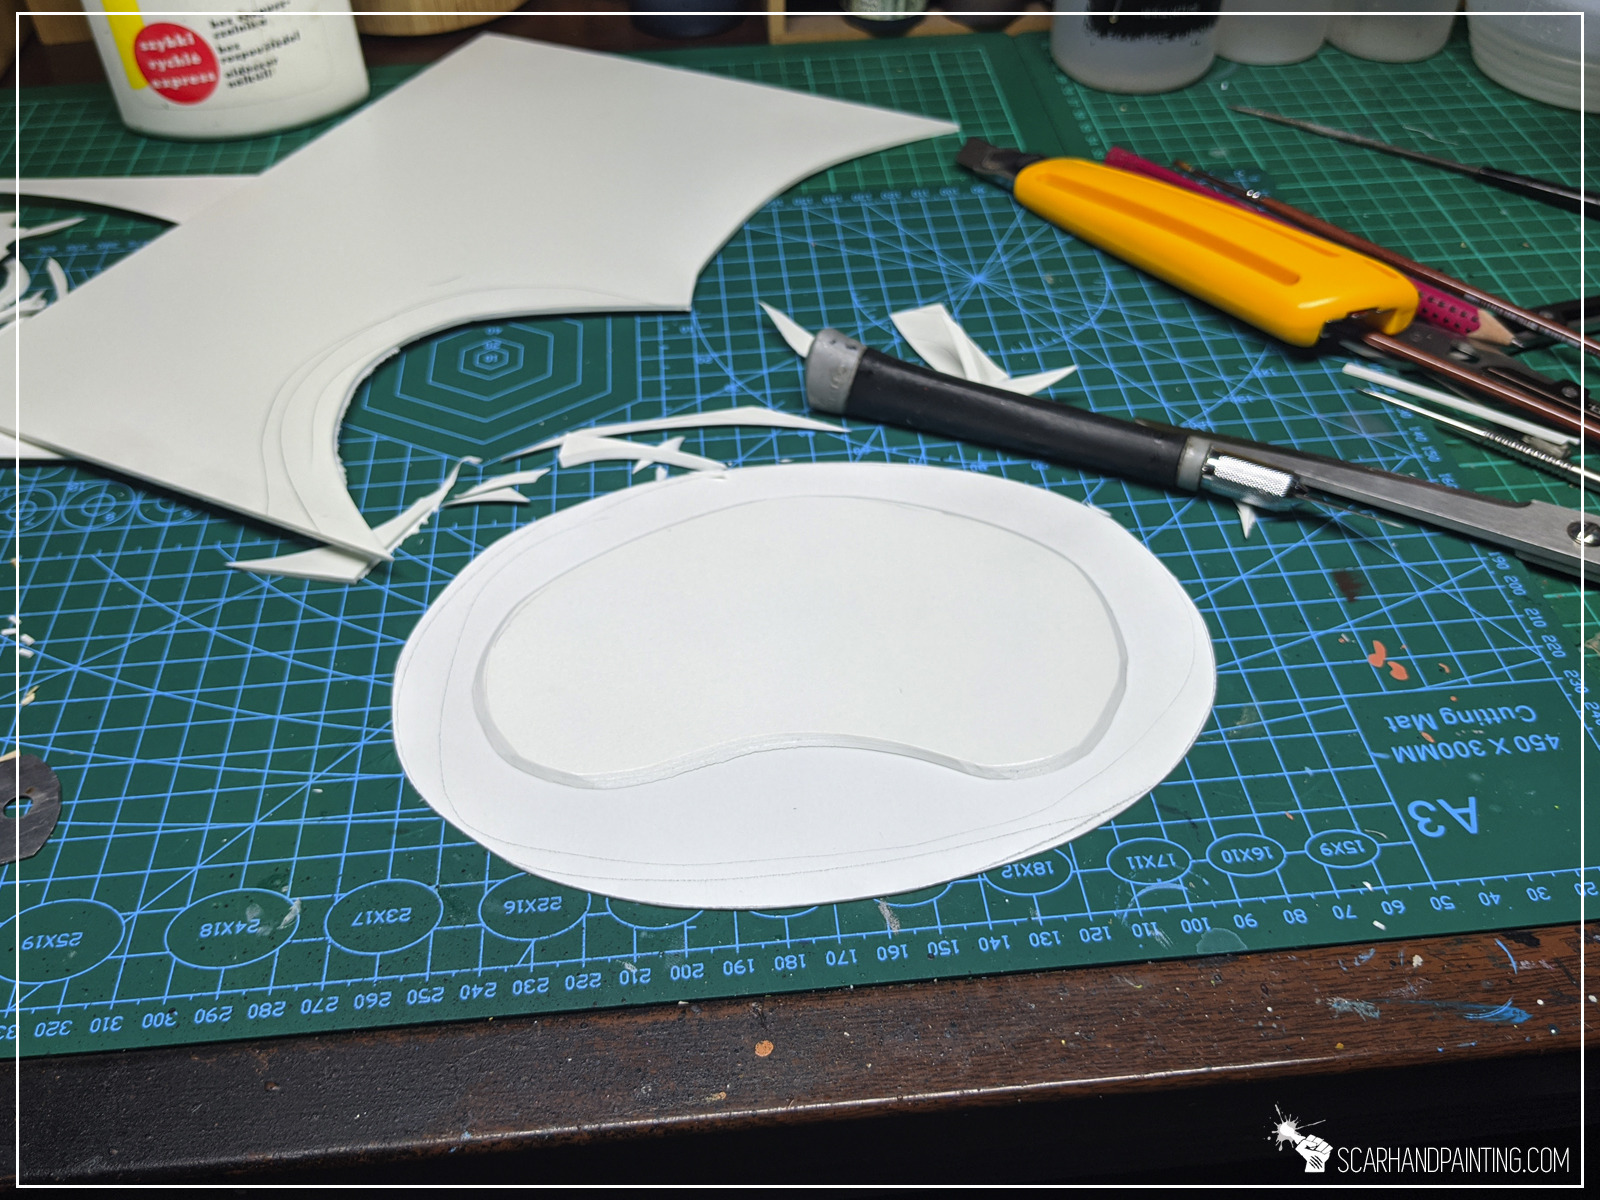
Step one: Basic shapes
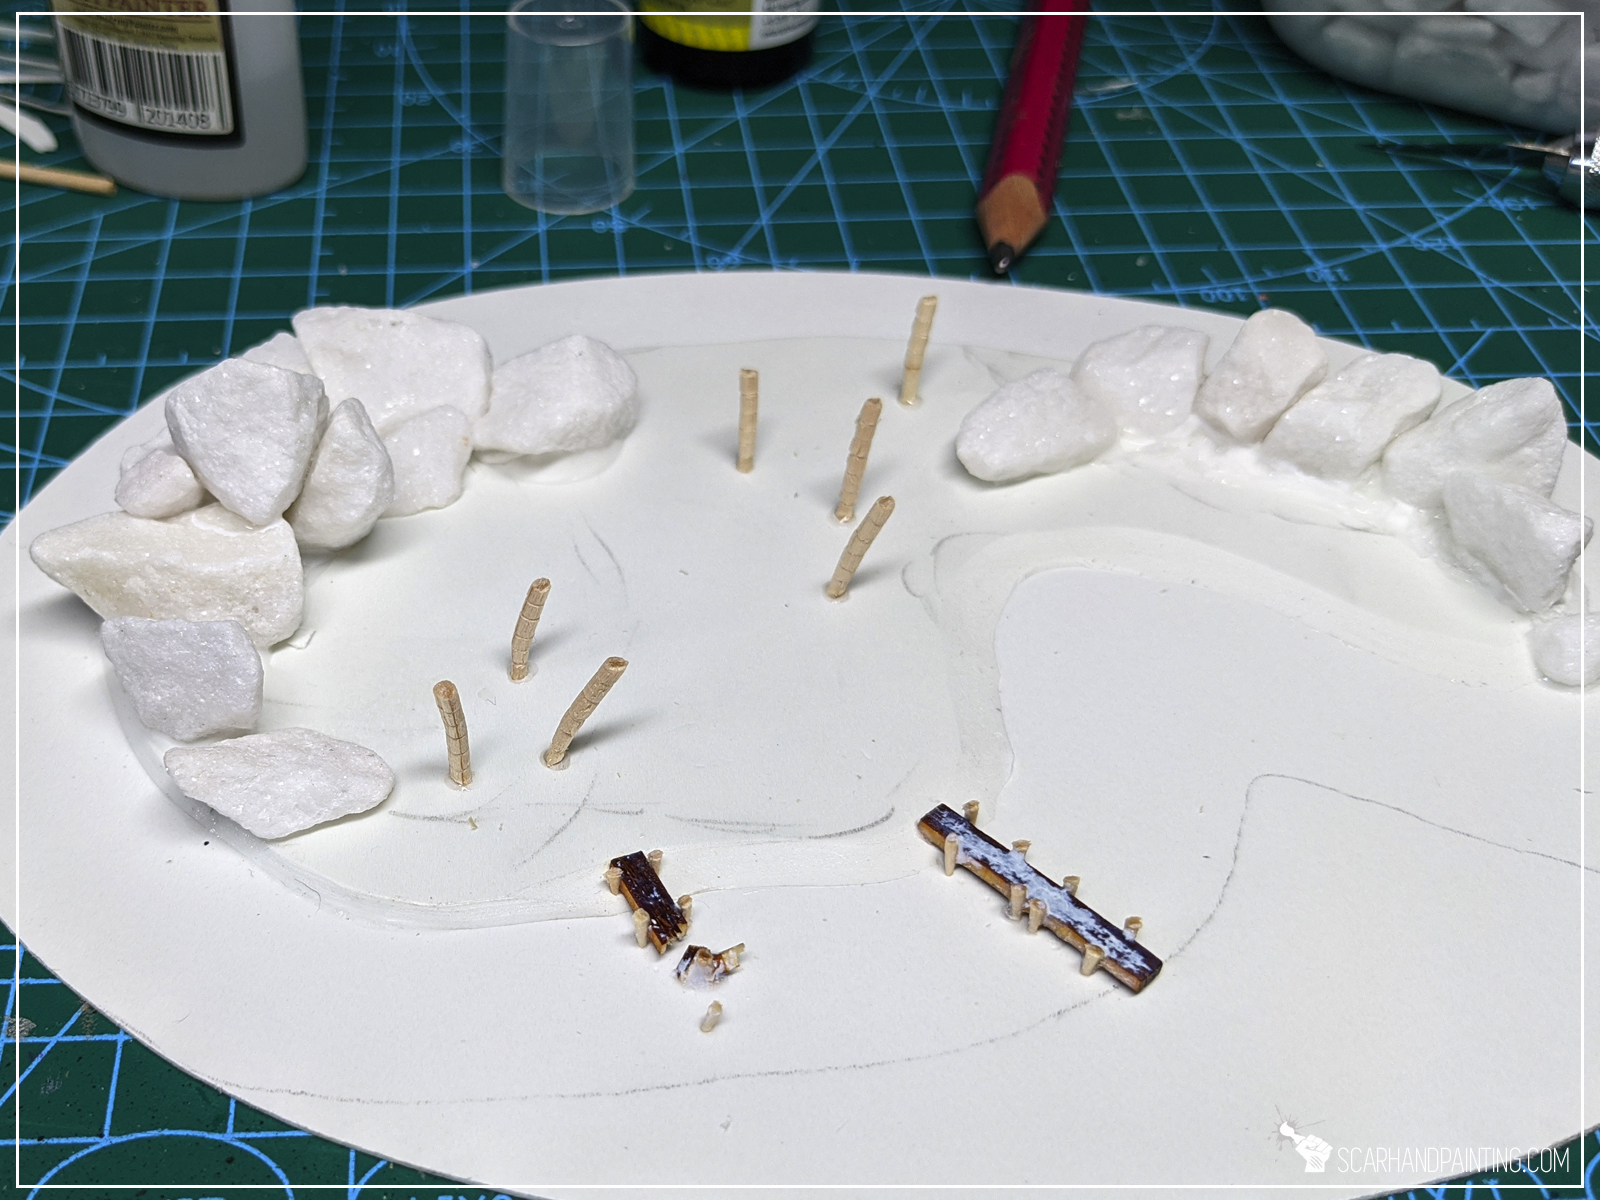
I started by cutting a island’s base out of 1mm thick PCV sheet with a pair of scissors. I then smoothed the edges with a piece of sandpaper.
Next, using a hobby knife, I cut the island itself. This time I used 3mm thick PCV and cut the edges at a 30-45* angle, leaving approximately 1,5cm of the base all around the island. Once done I glued both pieces together, using Army Painter’s Super Glue.

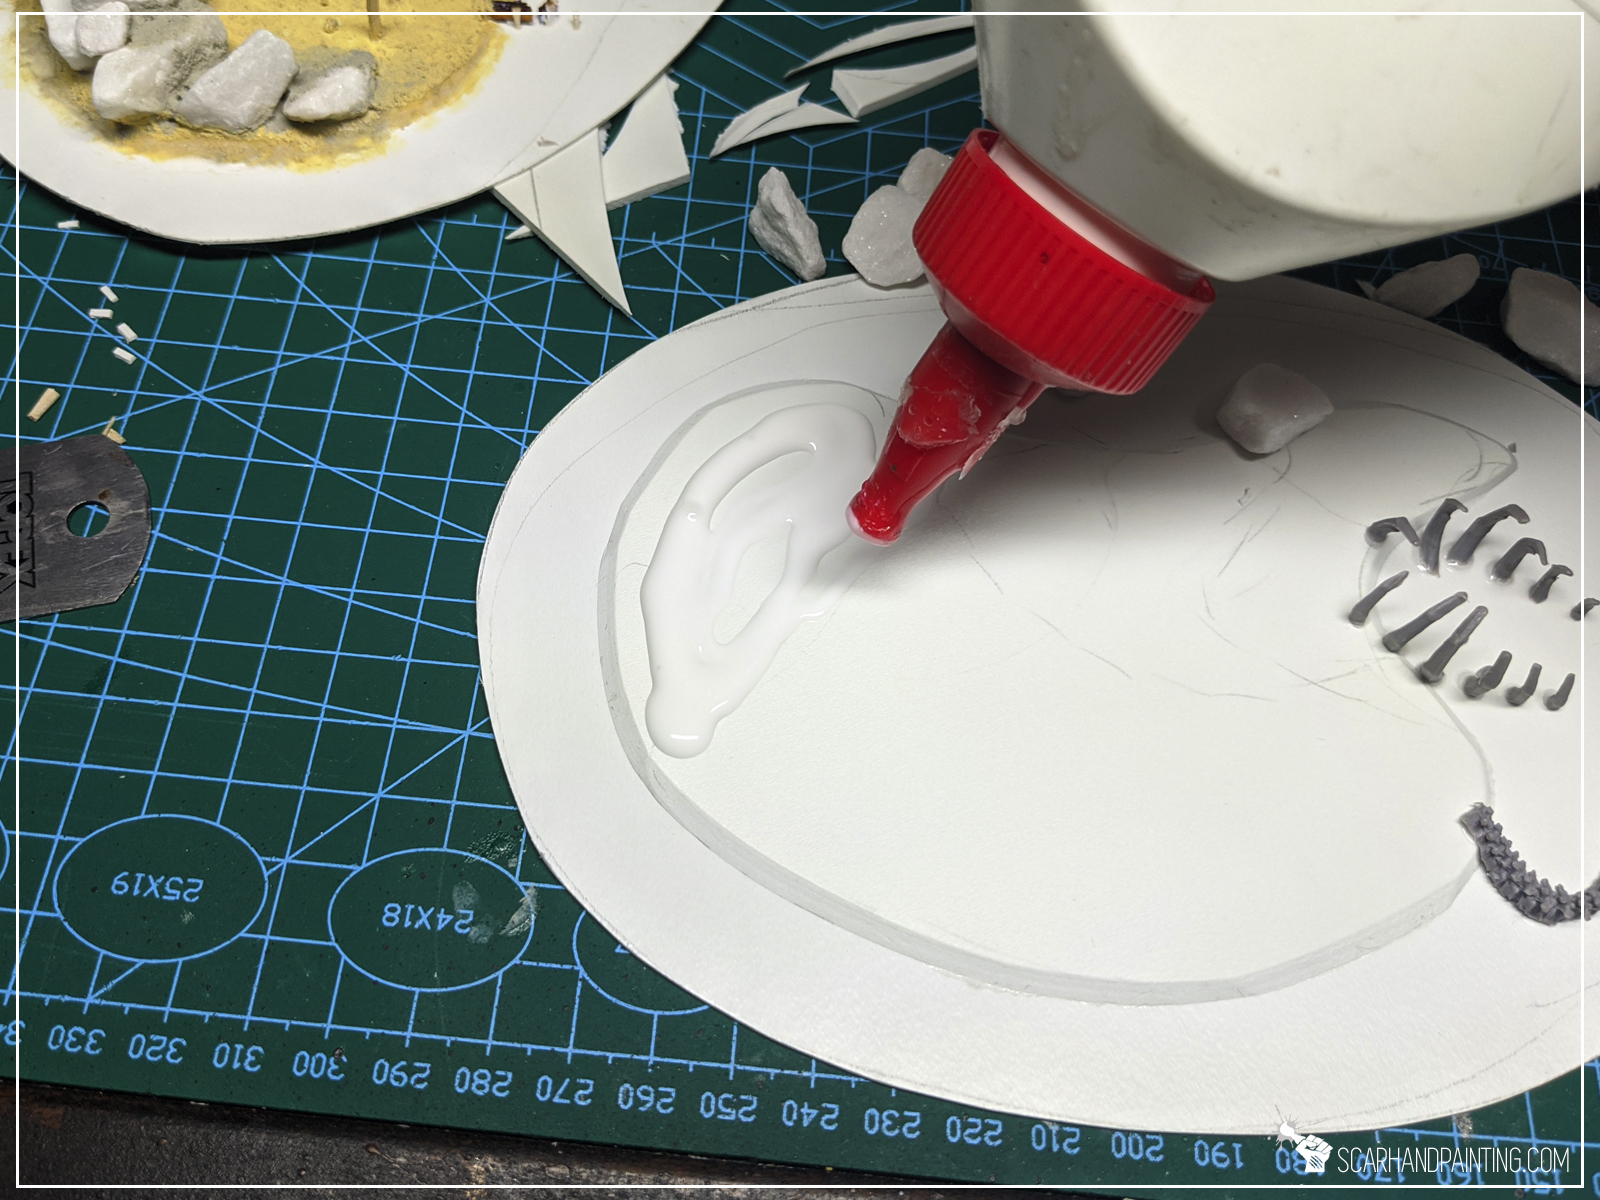
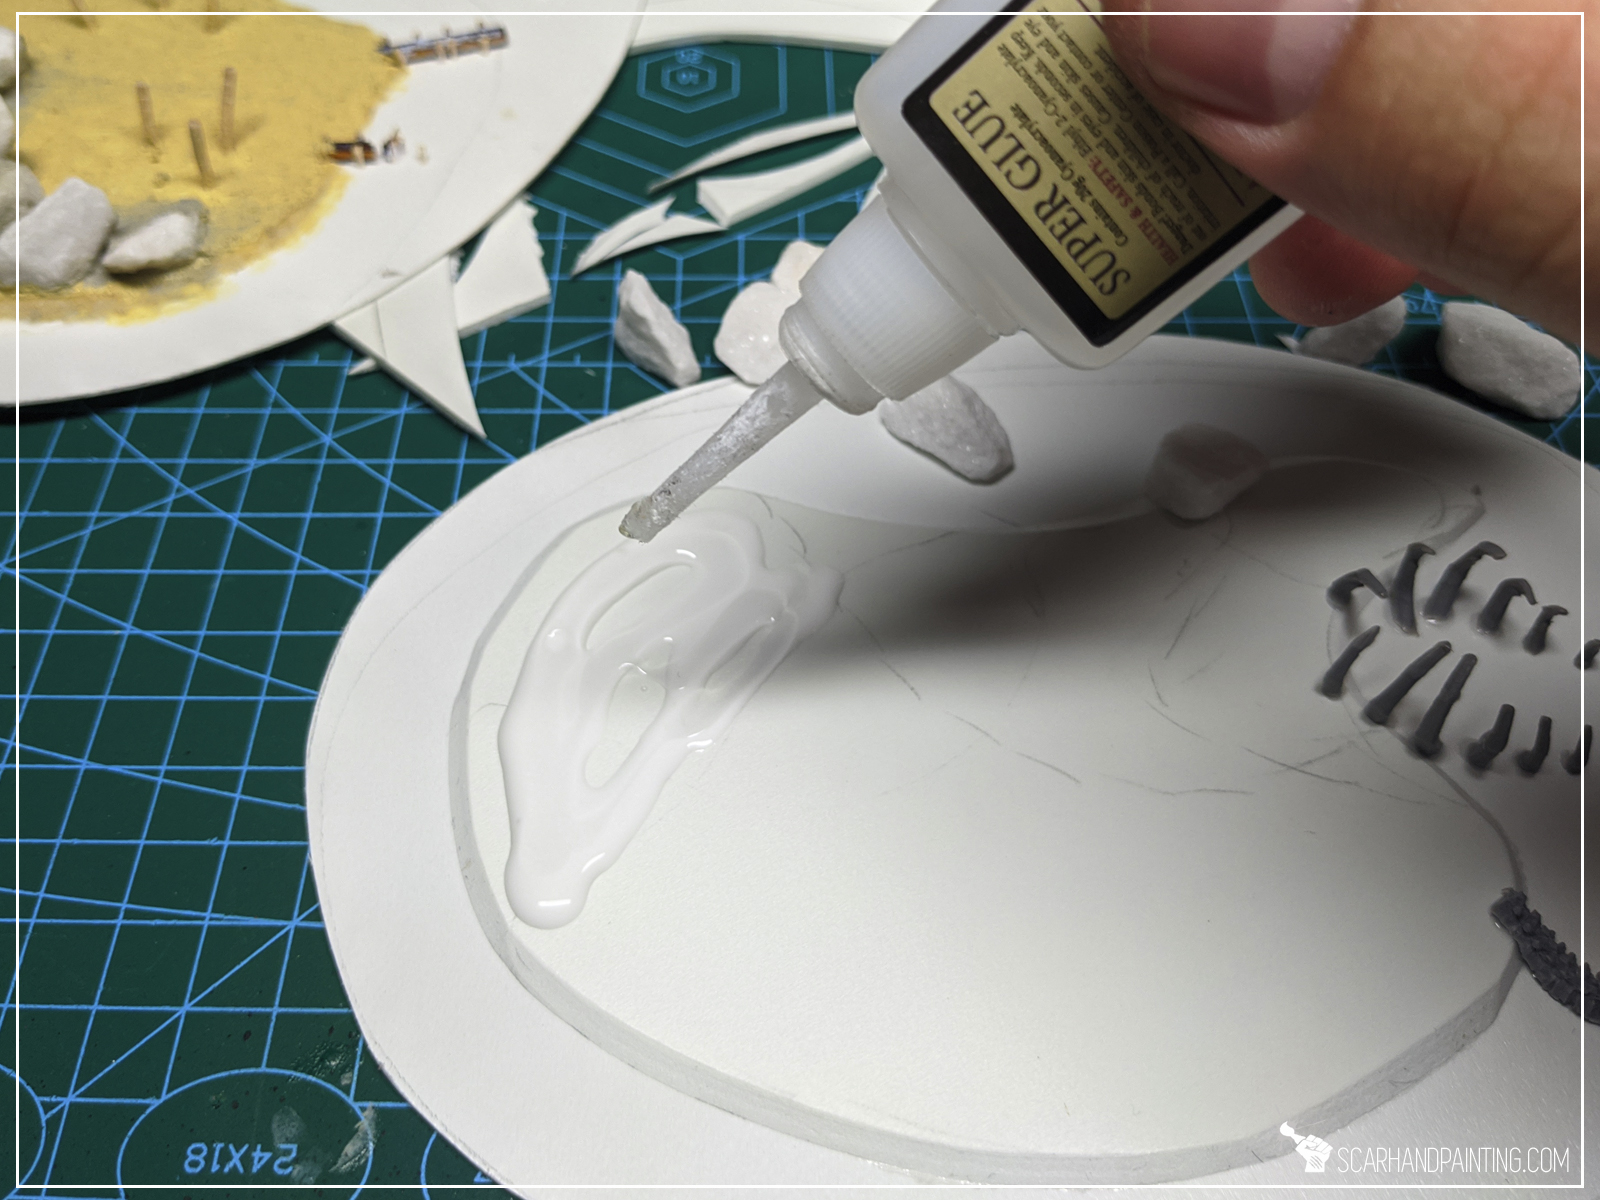
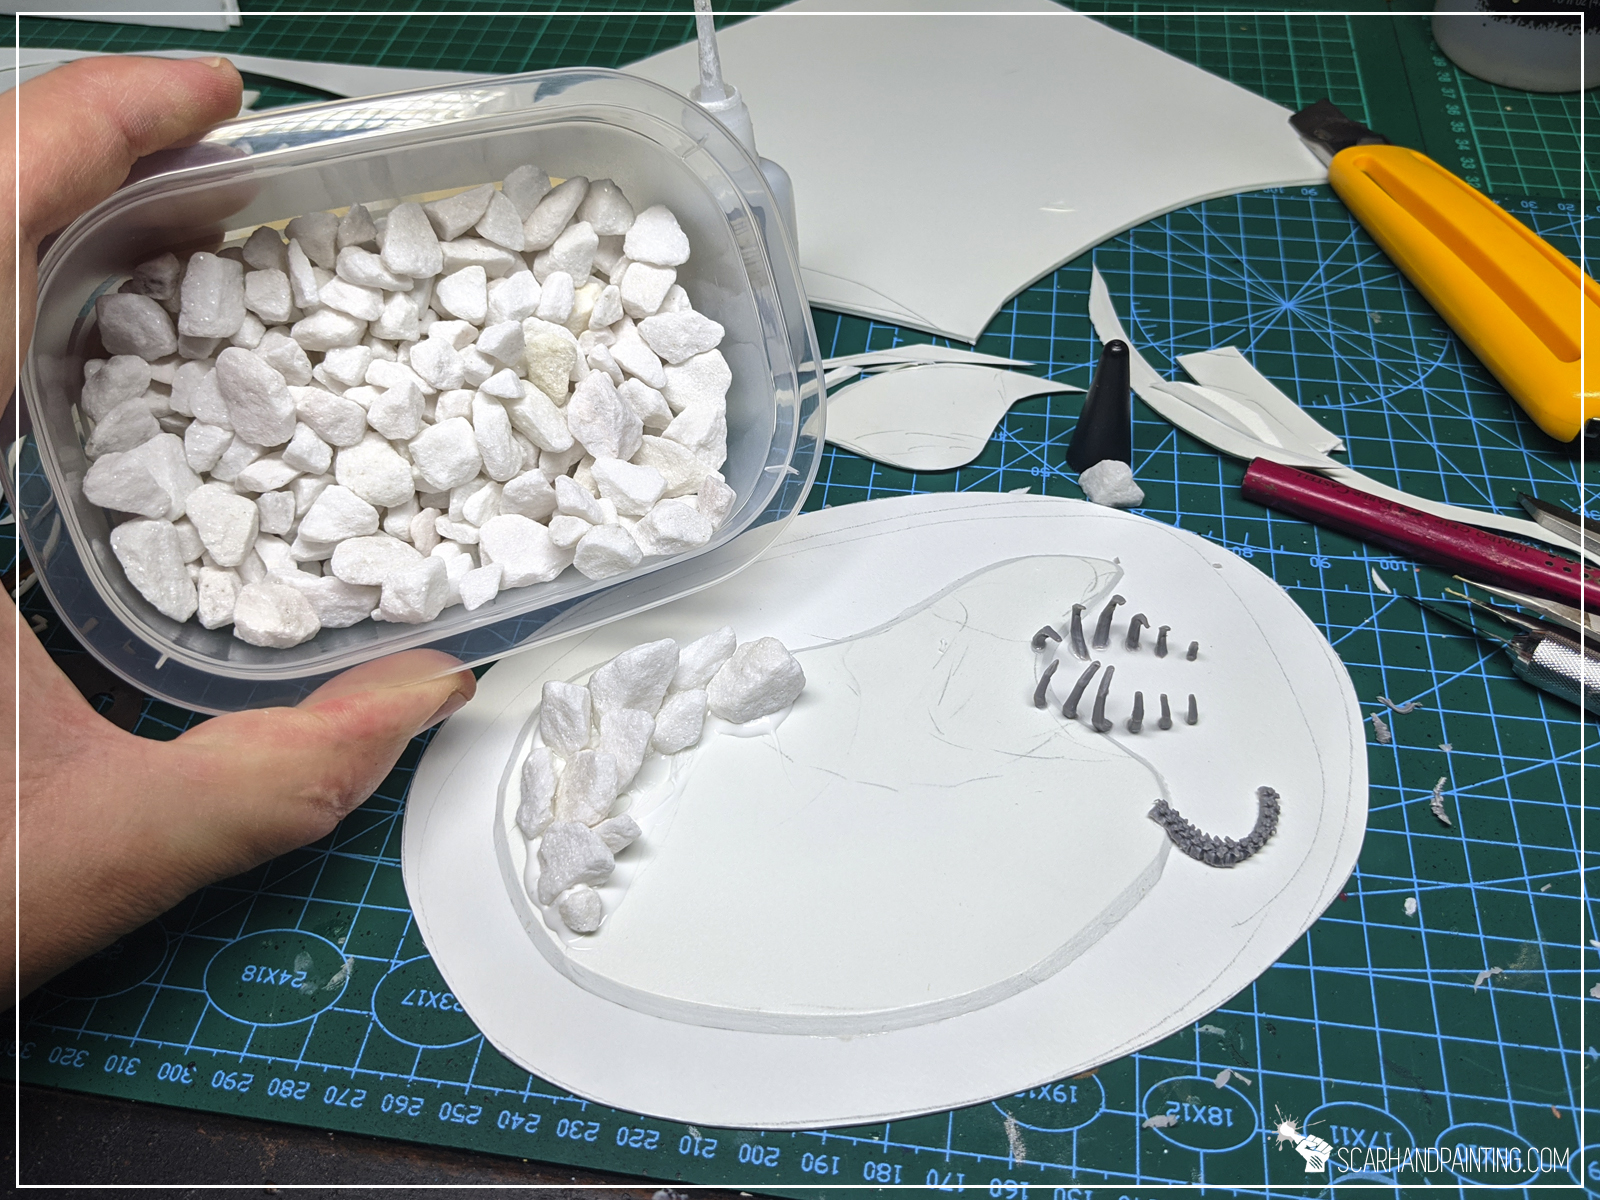
Step two: Rocky features
I then applied PVA glue to some areas on the island, followed by AP’s Super Glue and finally Rocks – repositioned to look interesting. I also added some bitz, but I leave it up to you to decide if you want to do the same.
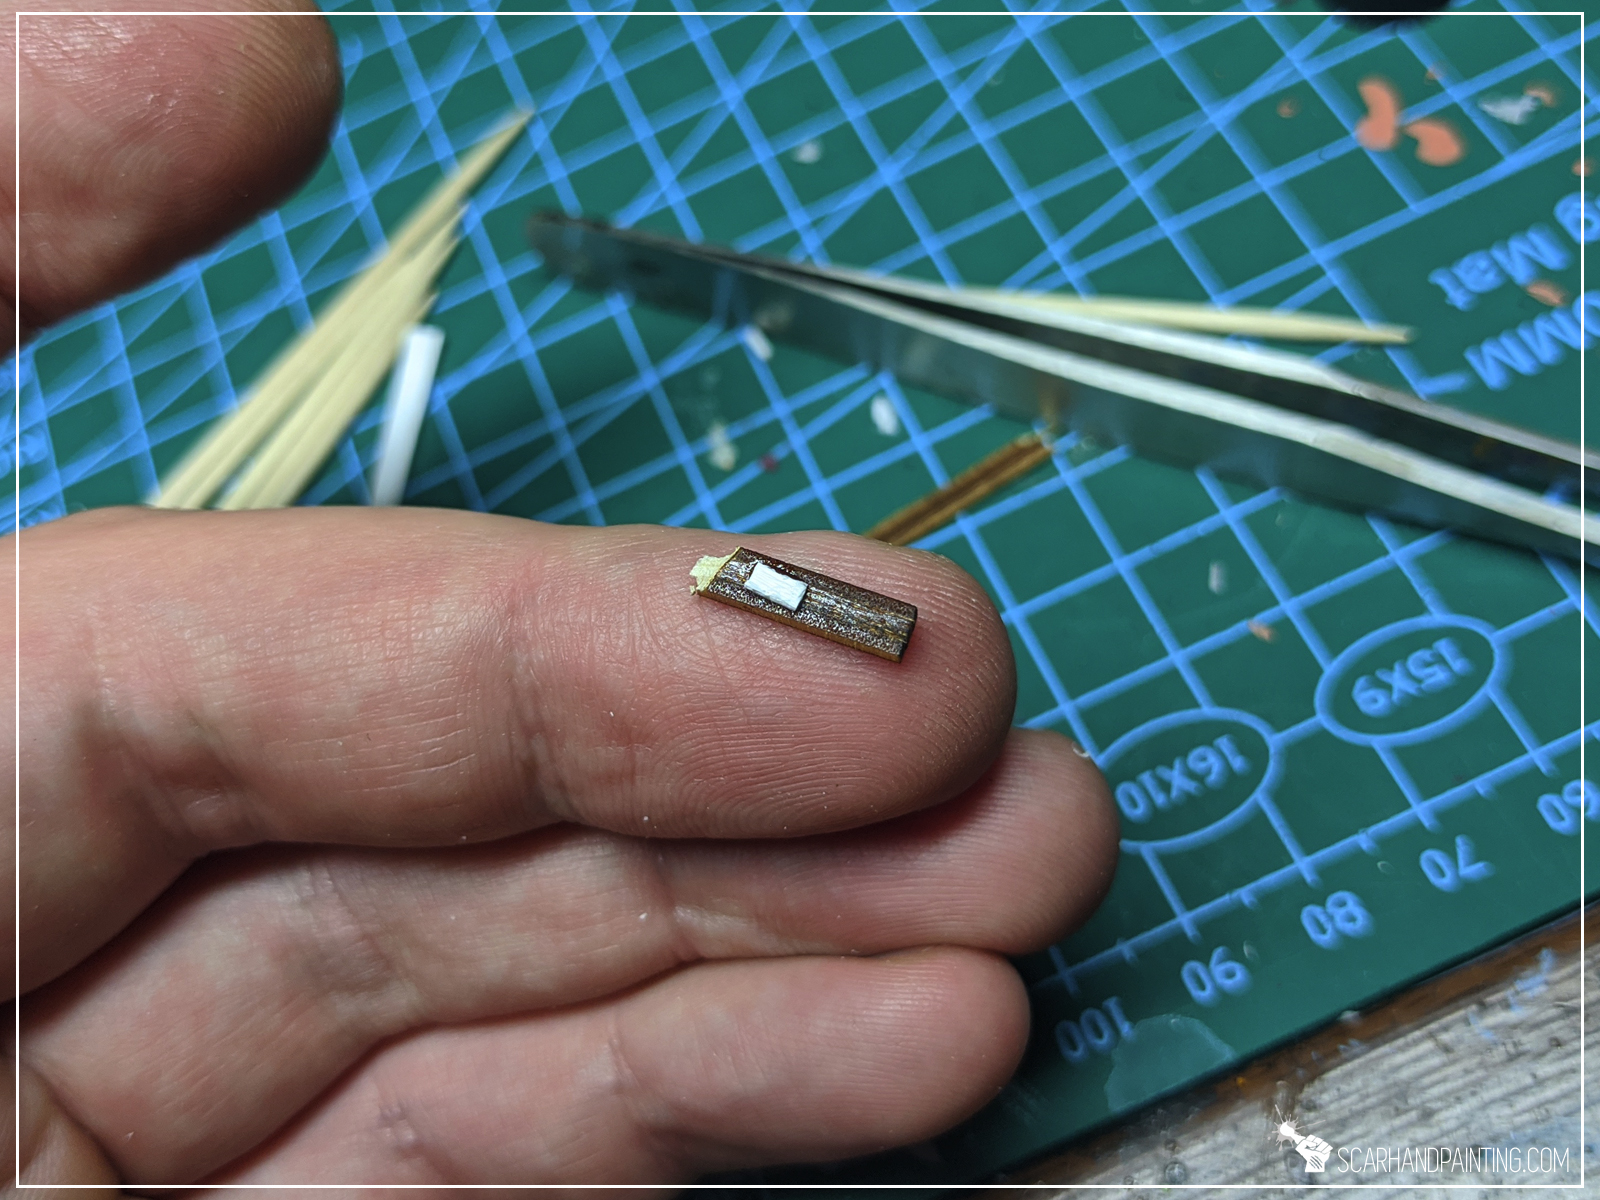
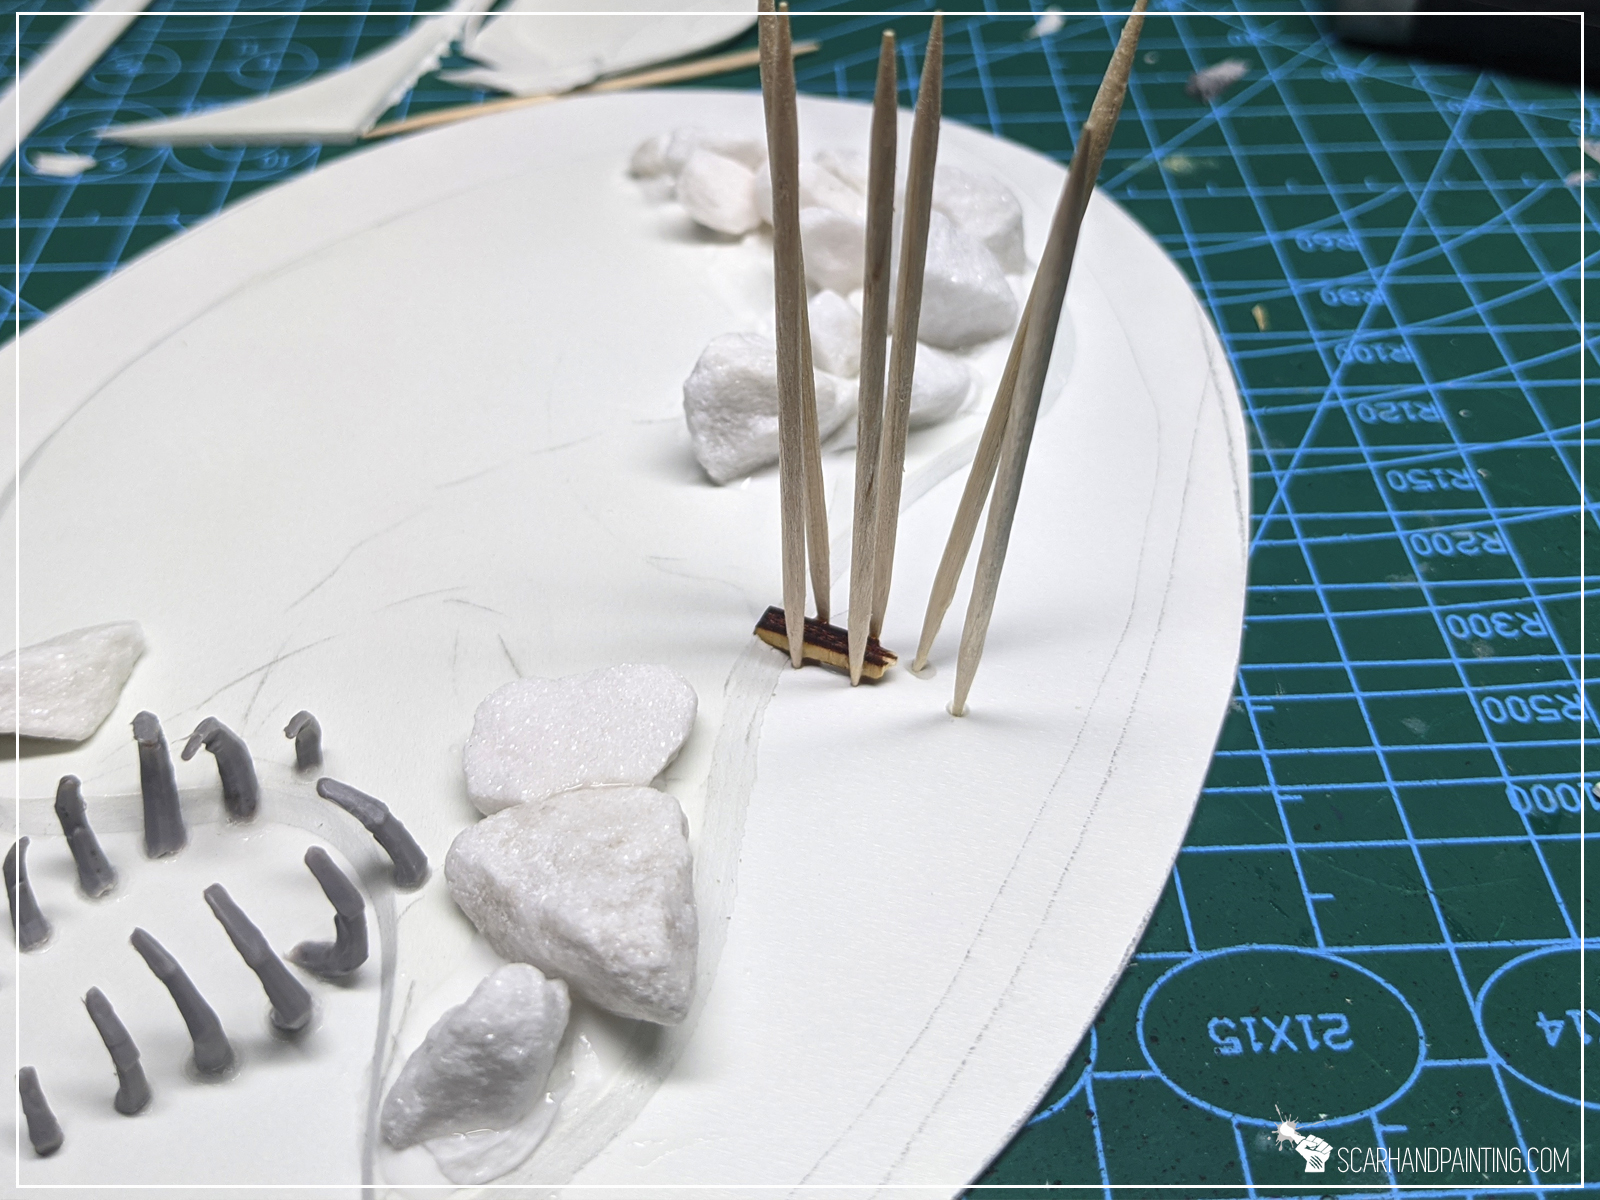
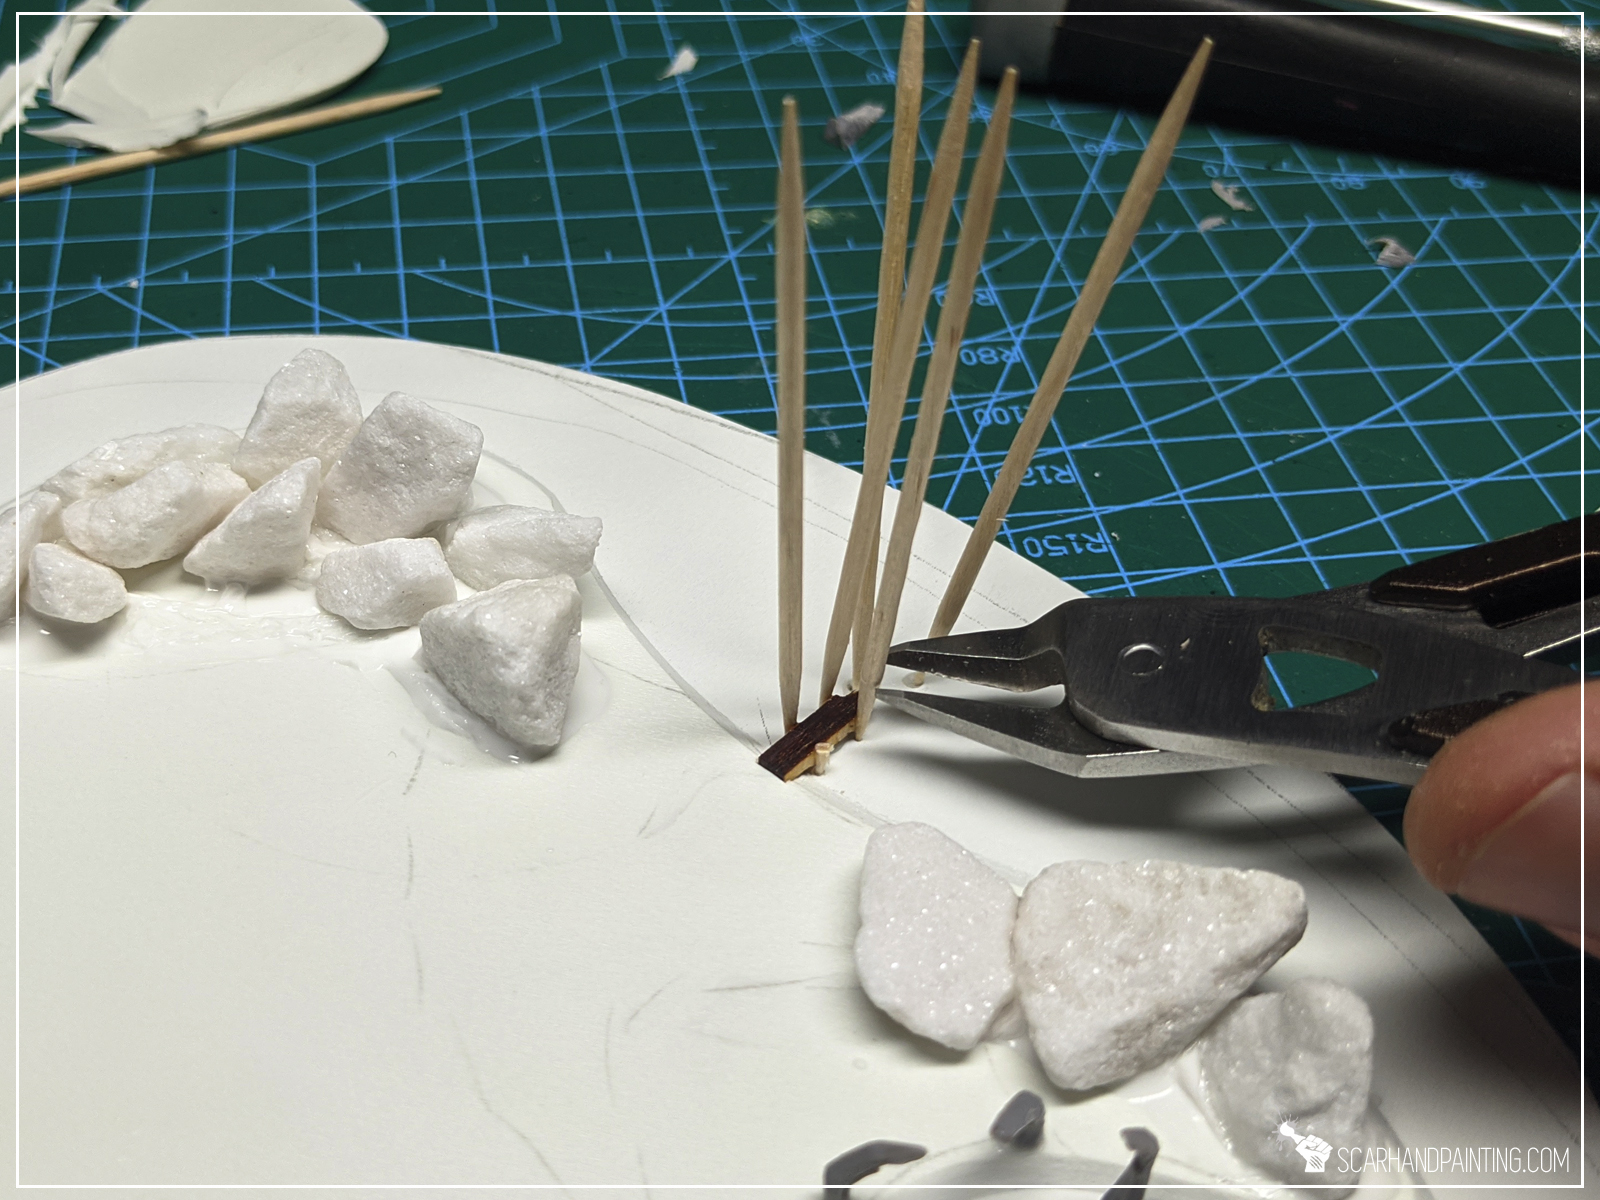
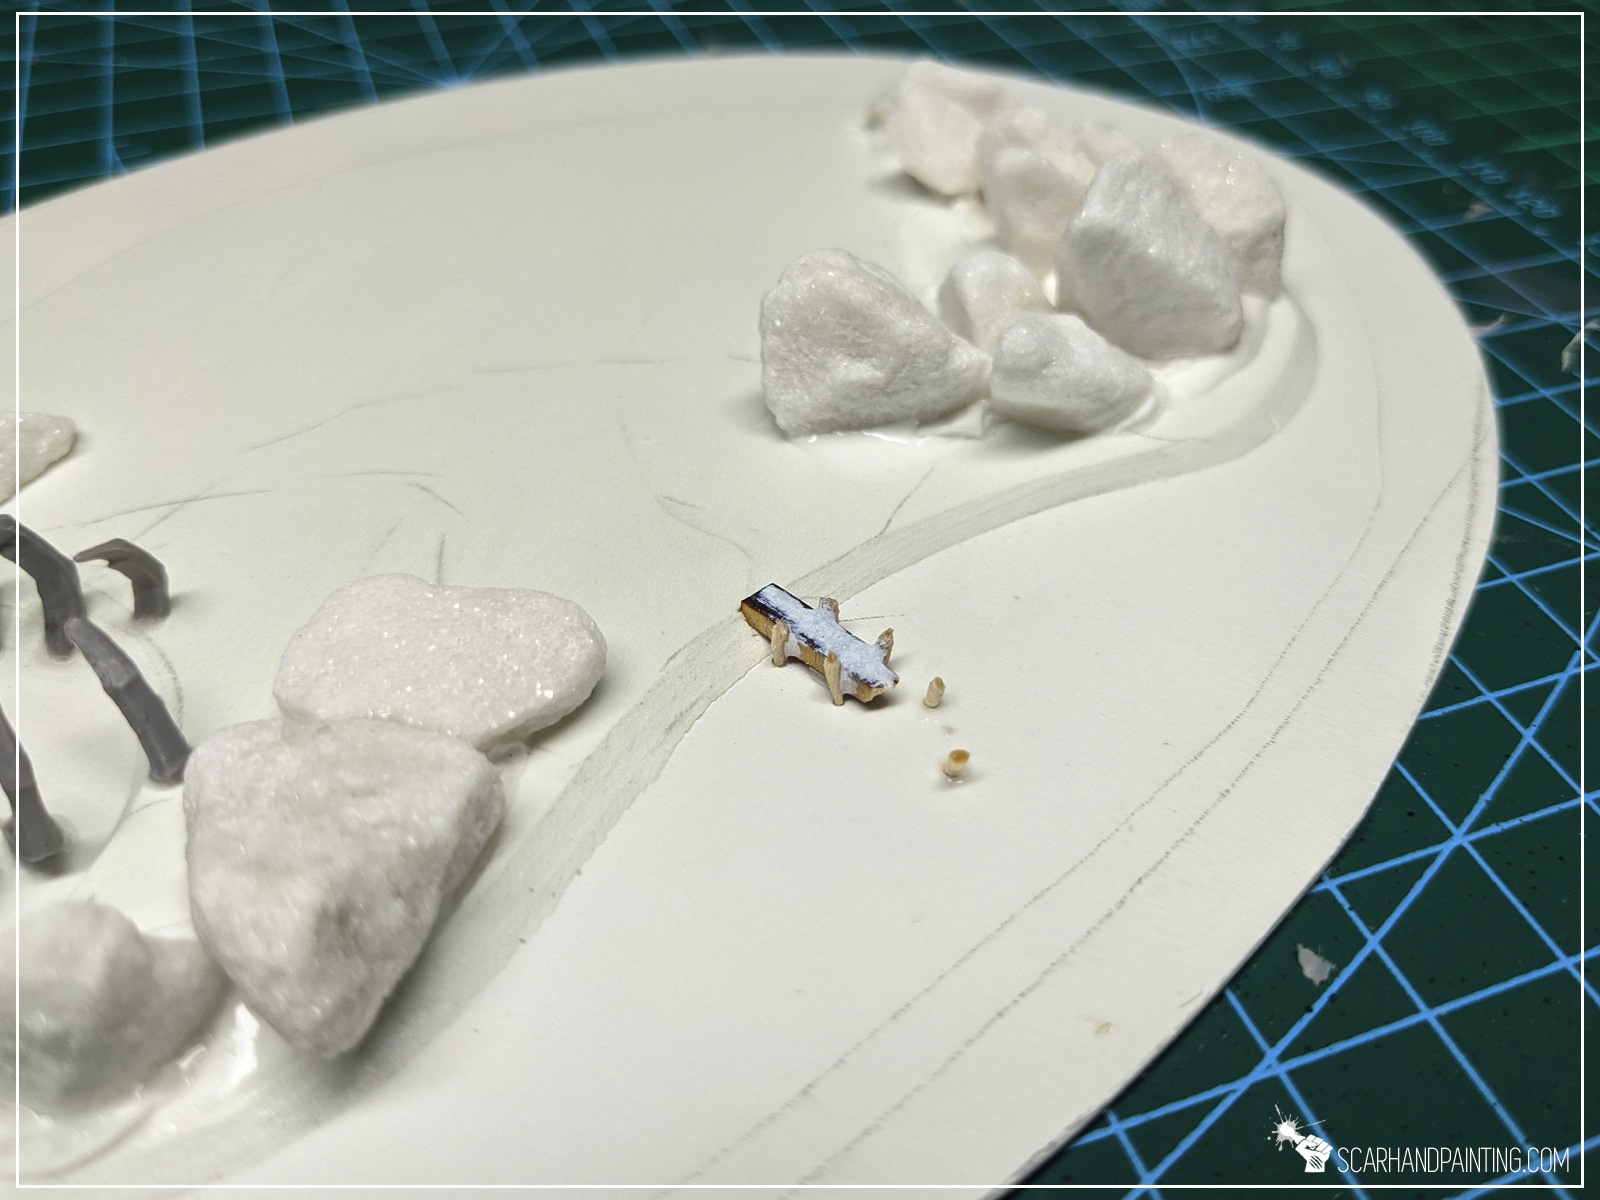
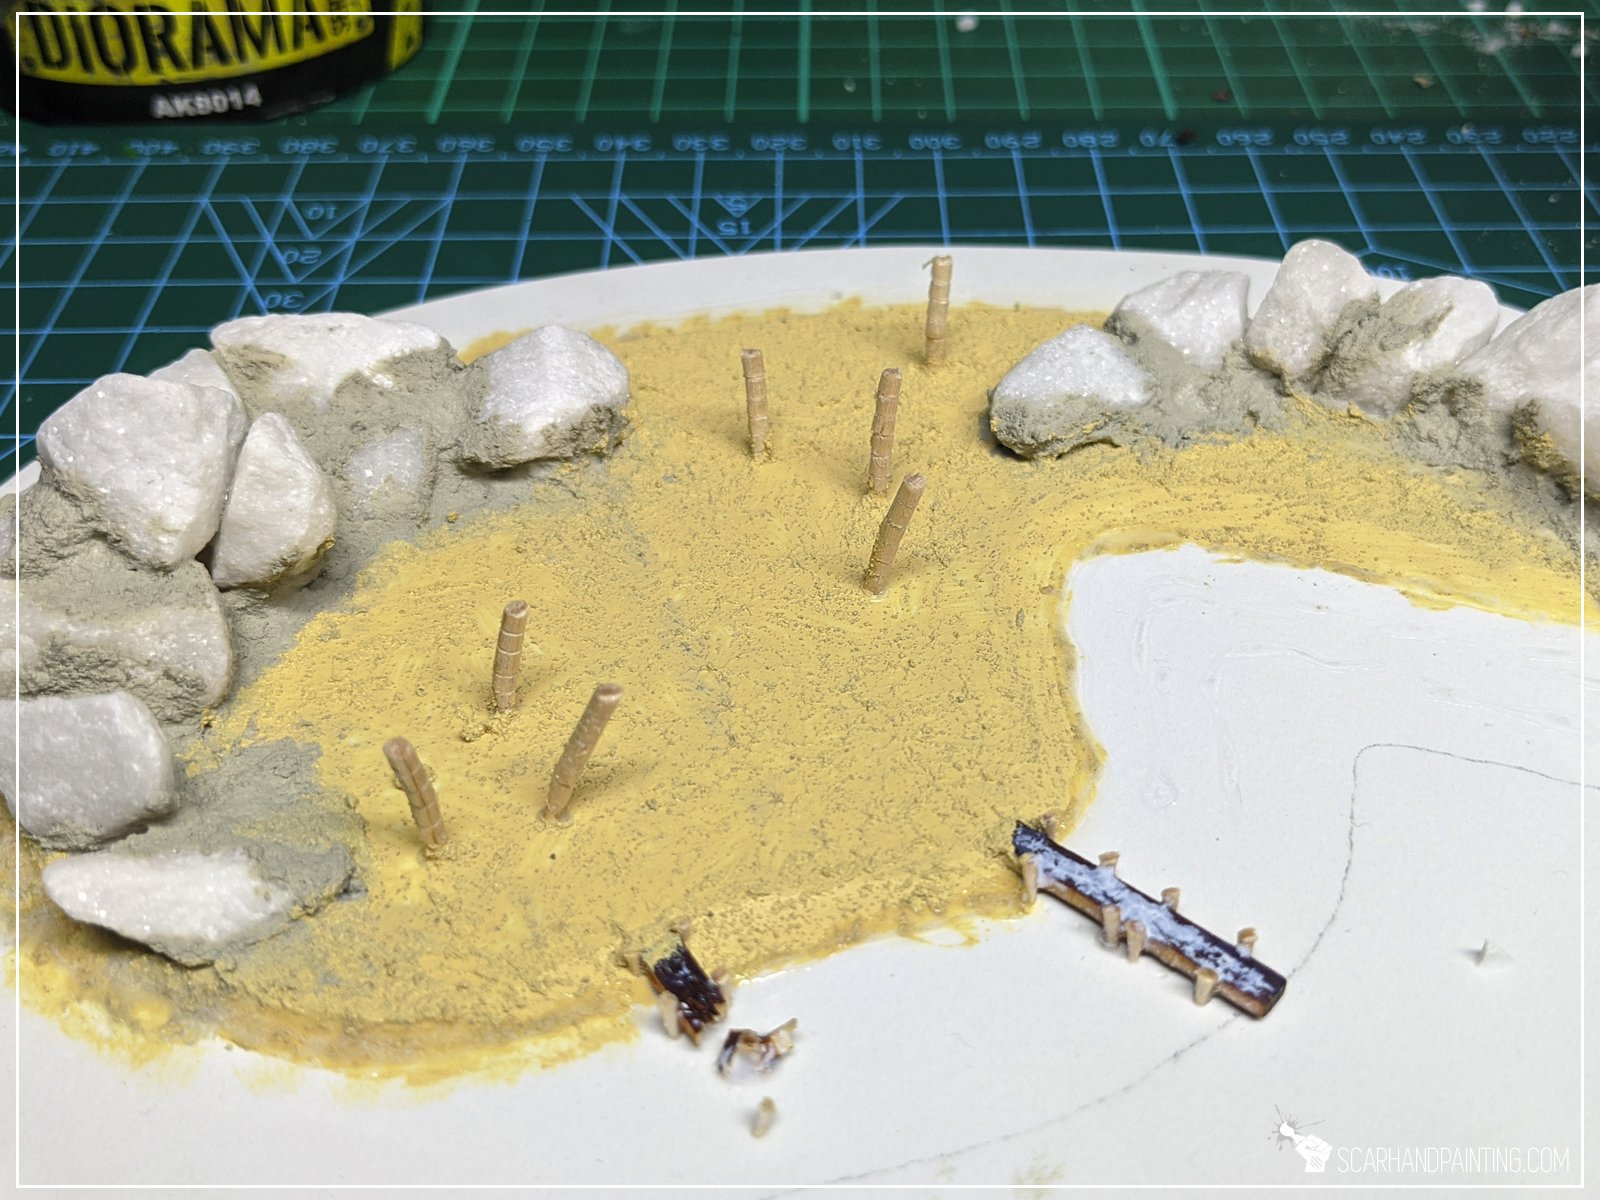
Step three: Wooden piers
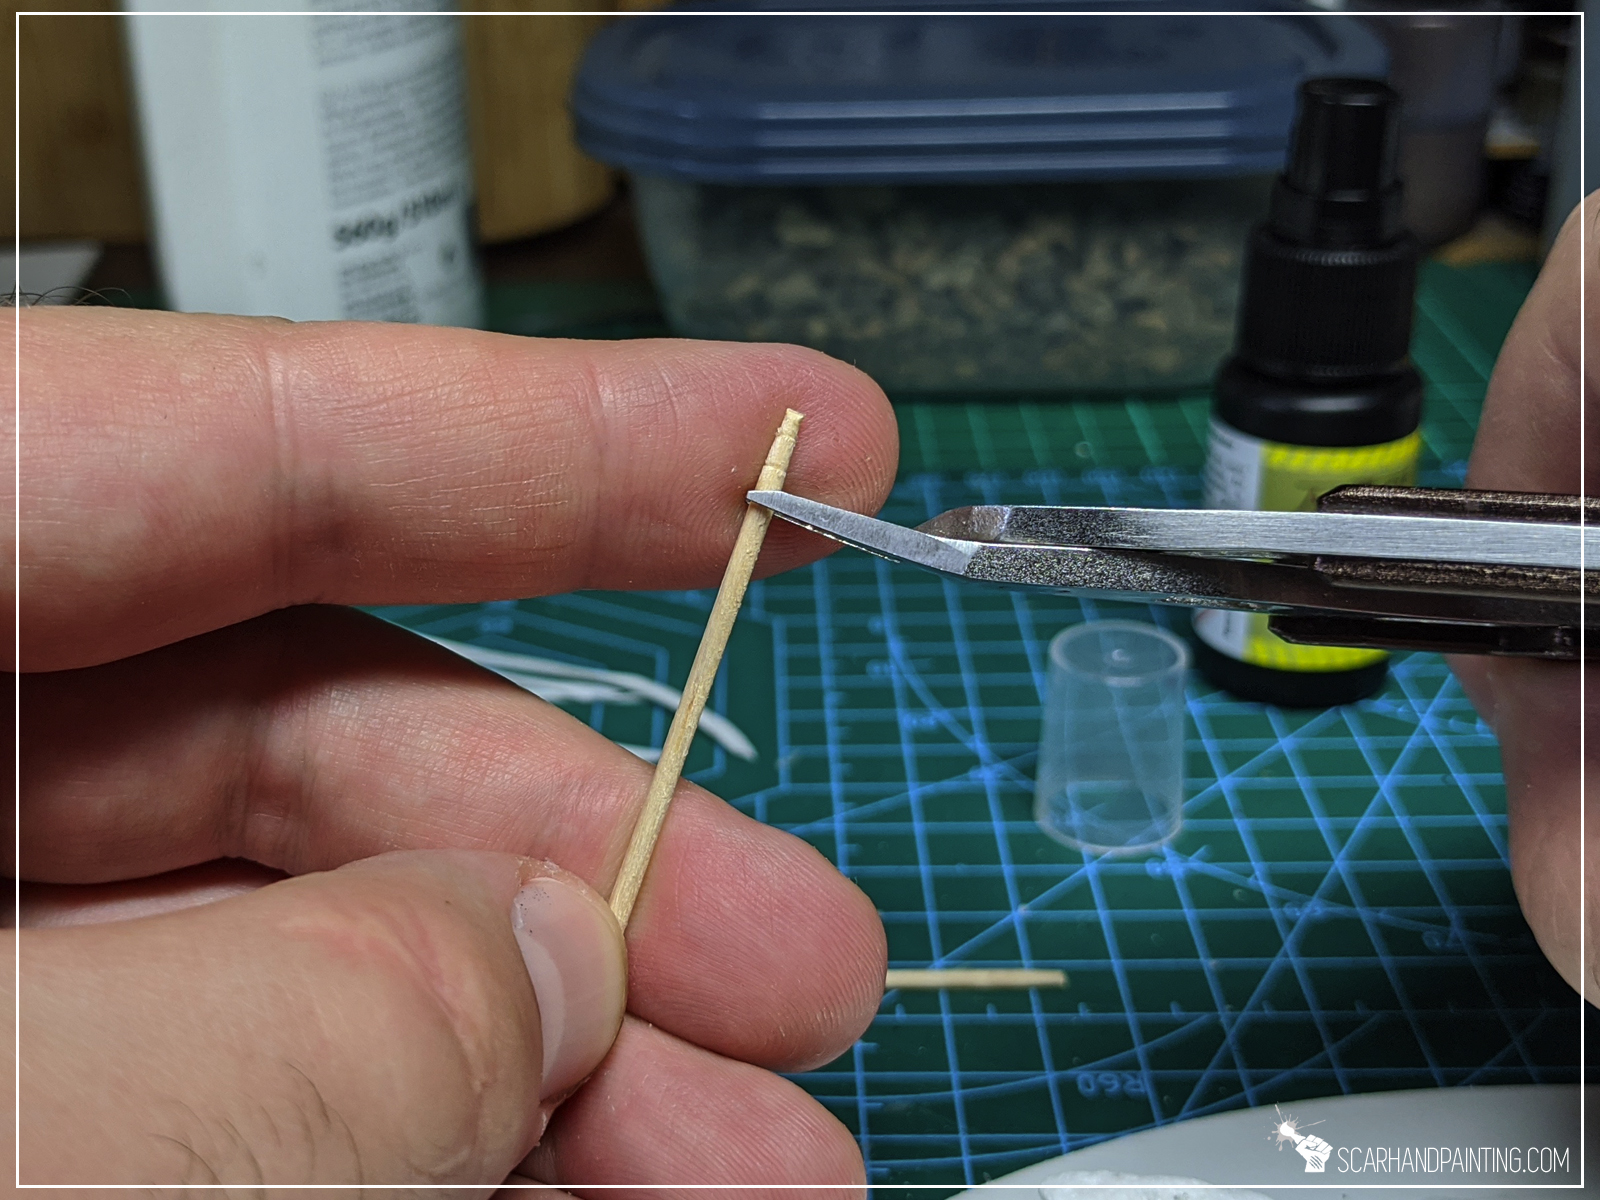
Next I decided to add a bit of character with an old, damaged wooden pier jutting into the sea. I used a piece of MDF cut into a thin strip as a base for the pier, but you can really use anything – including 1mm thick PCV. Just cut a strip, glued tiny bit underneath, then glued it on top of the island and it’s base. Finally marked tiny holes along the sides of the pier and ‘superglued’ toothpicks in place, just to cut them off close to the pier’s level. Done.
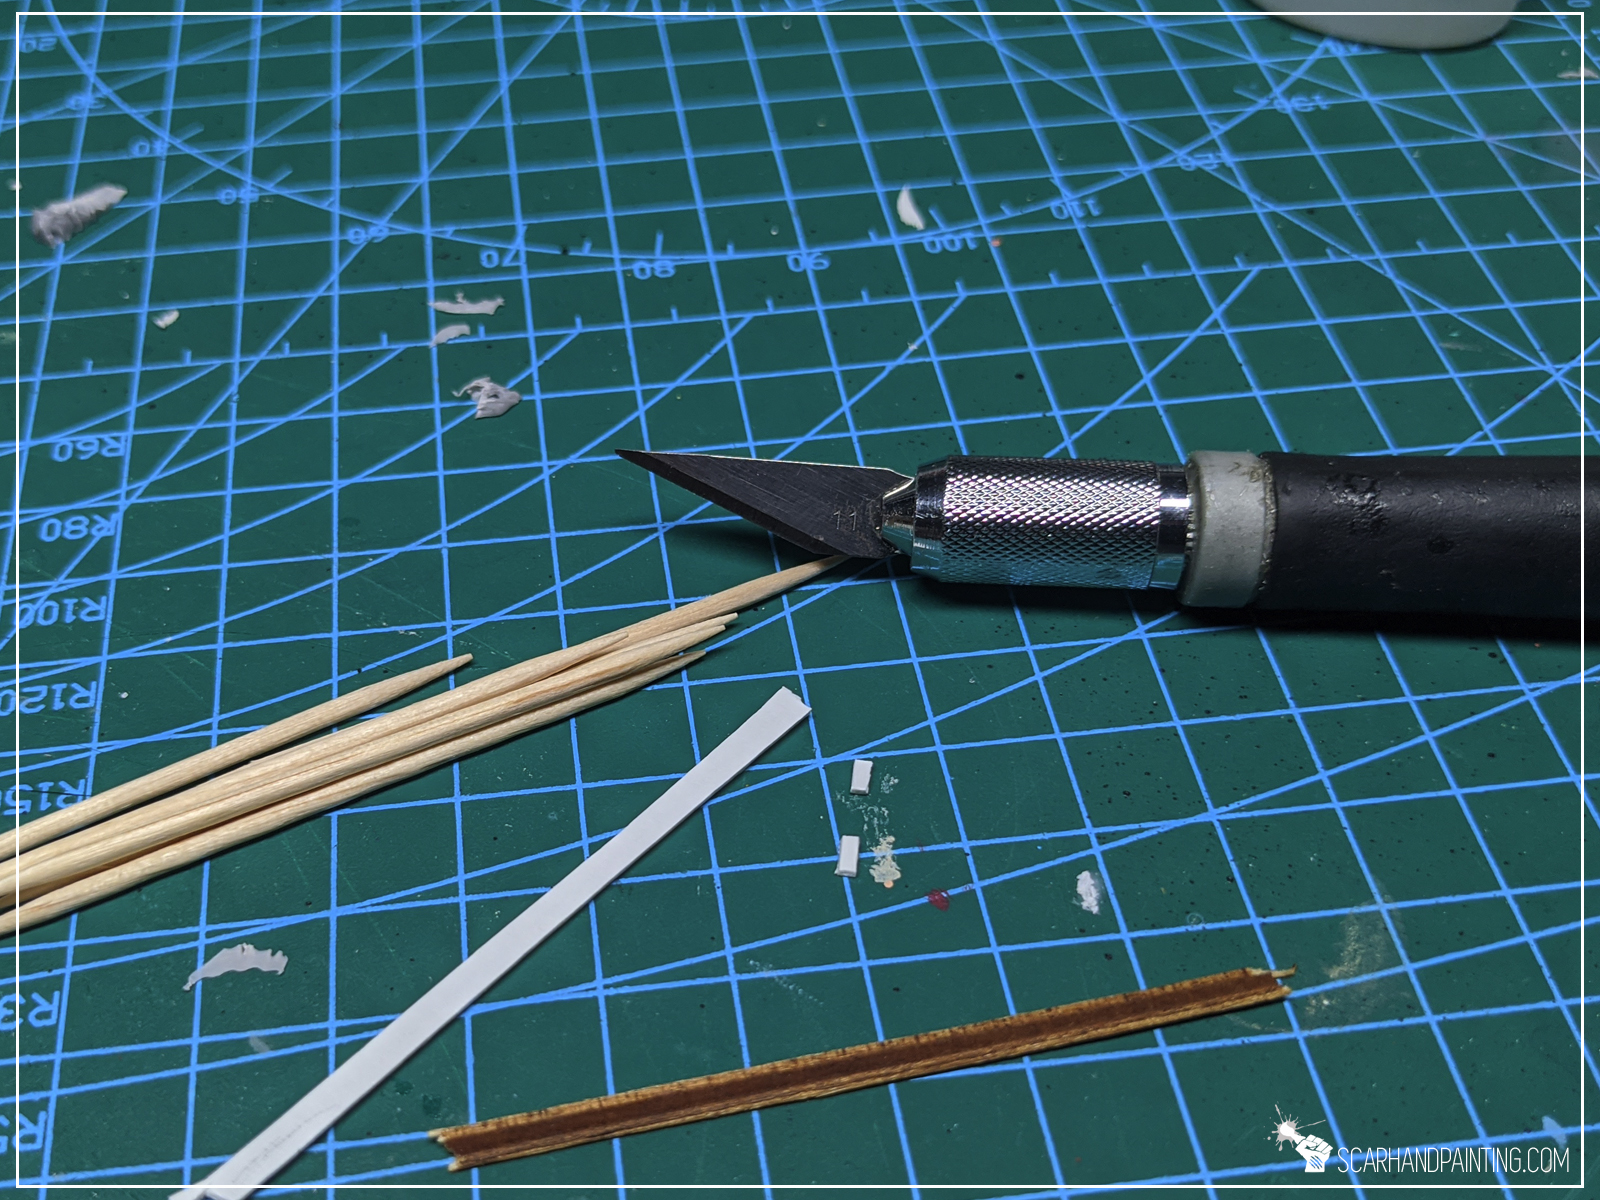

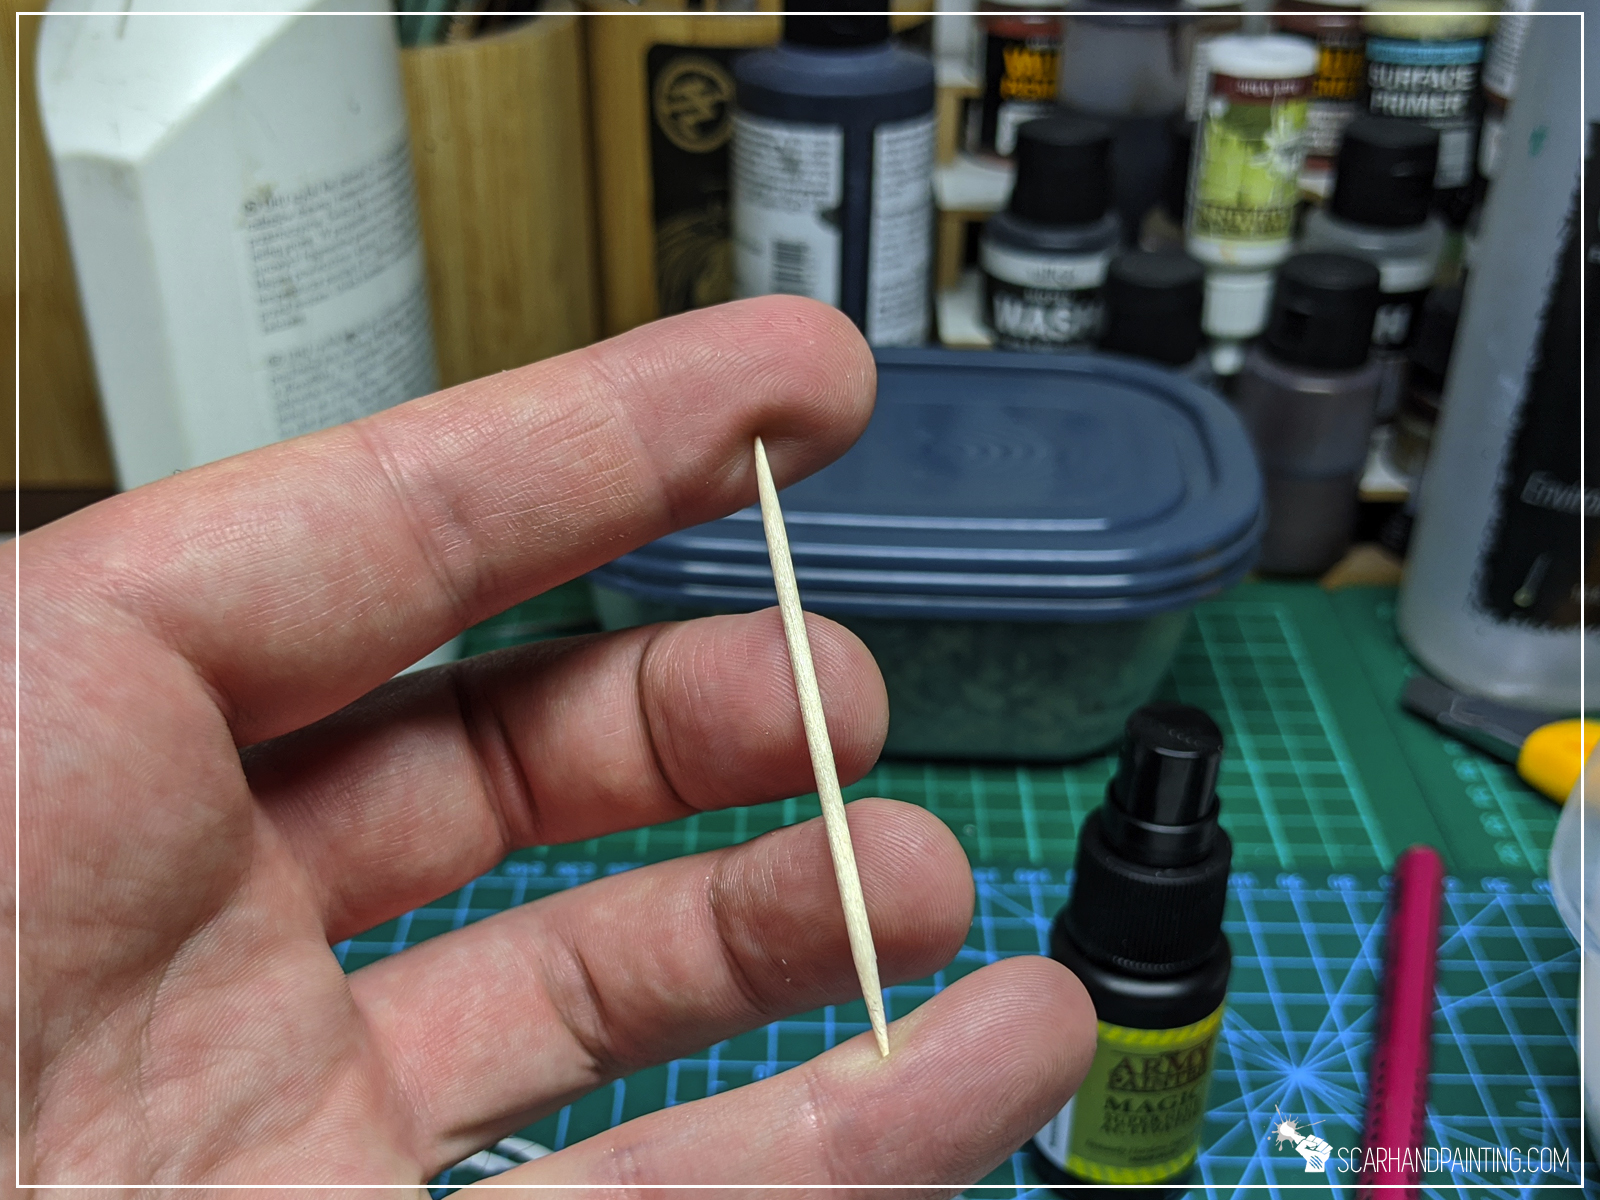
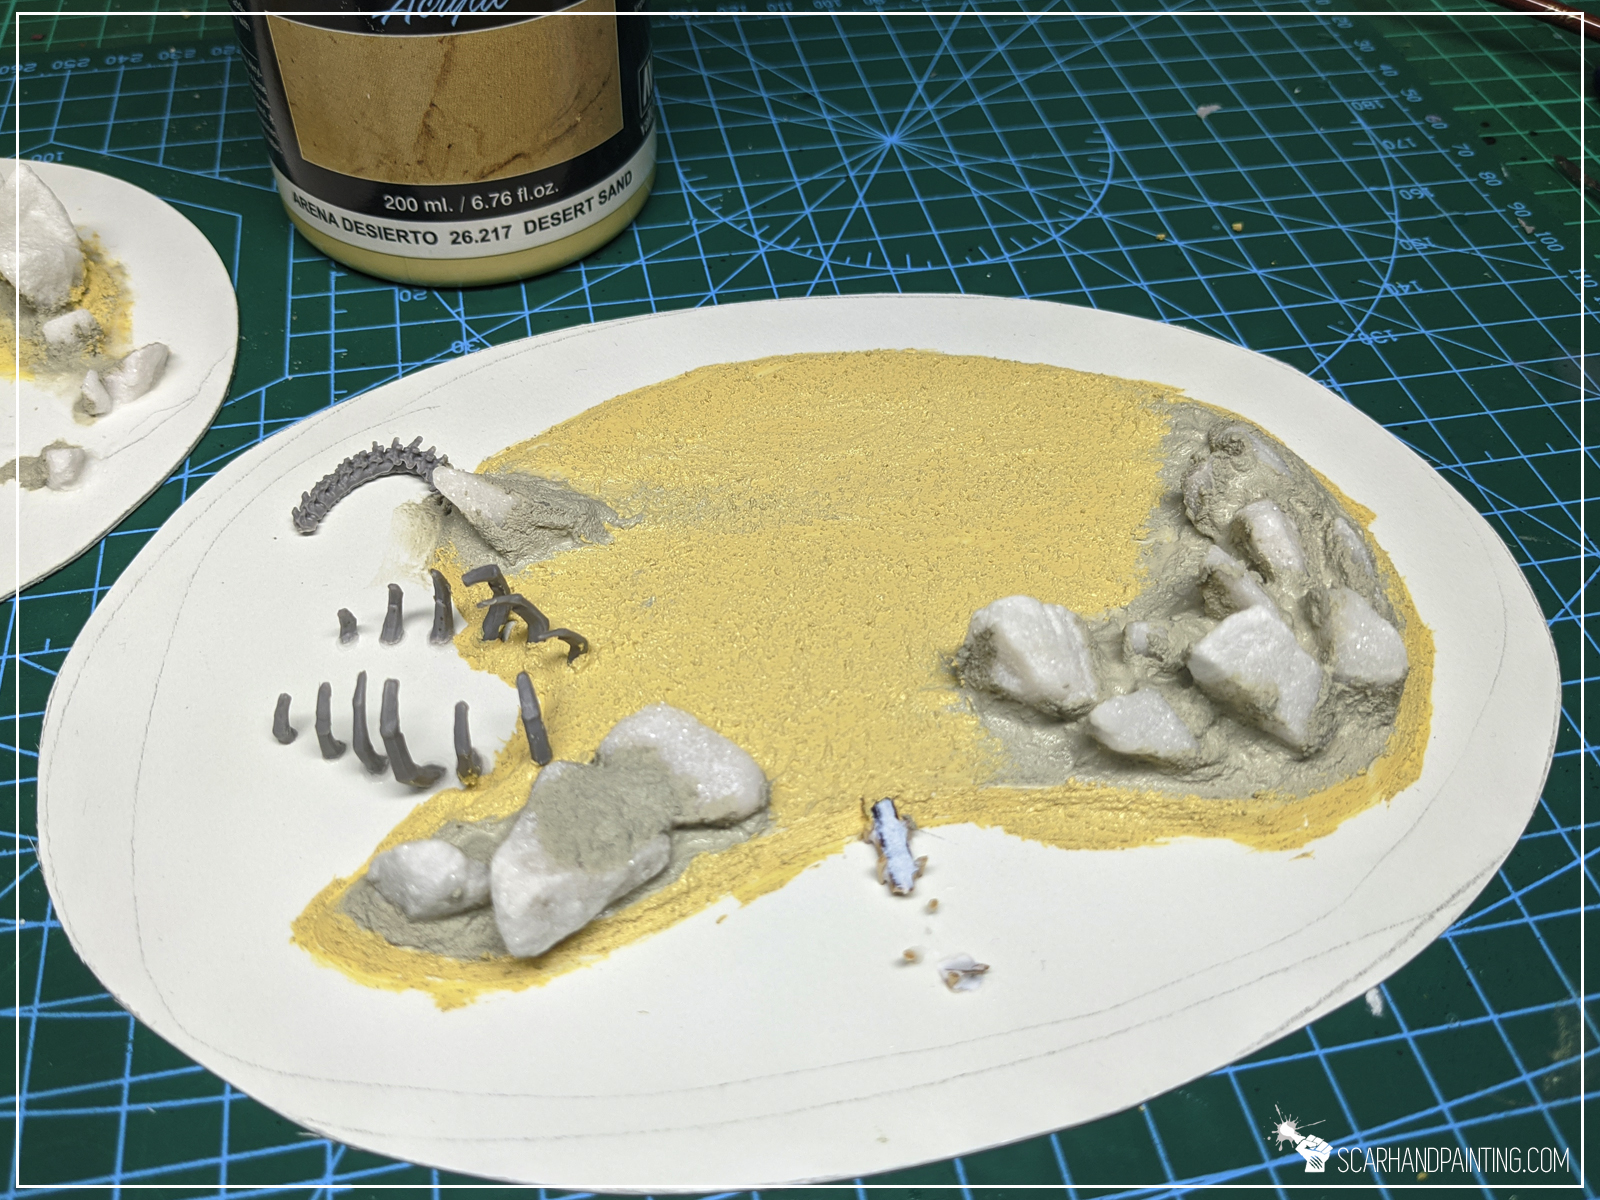
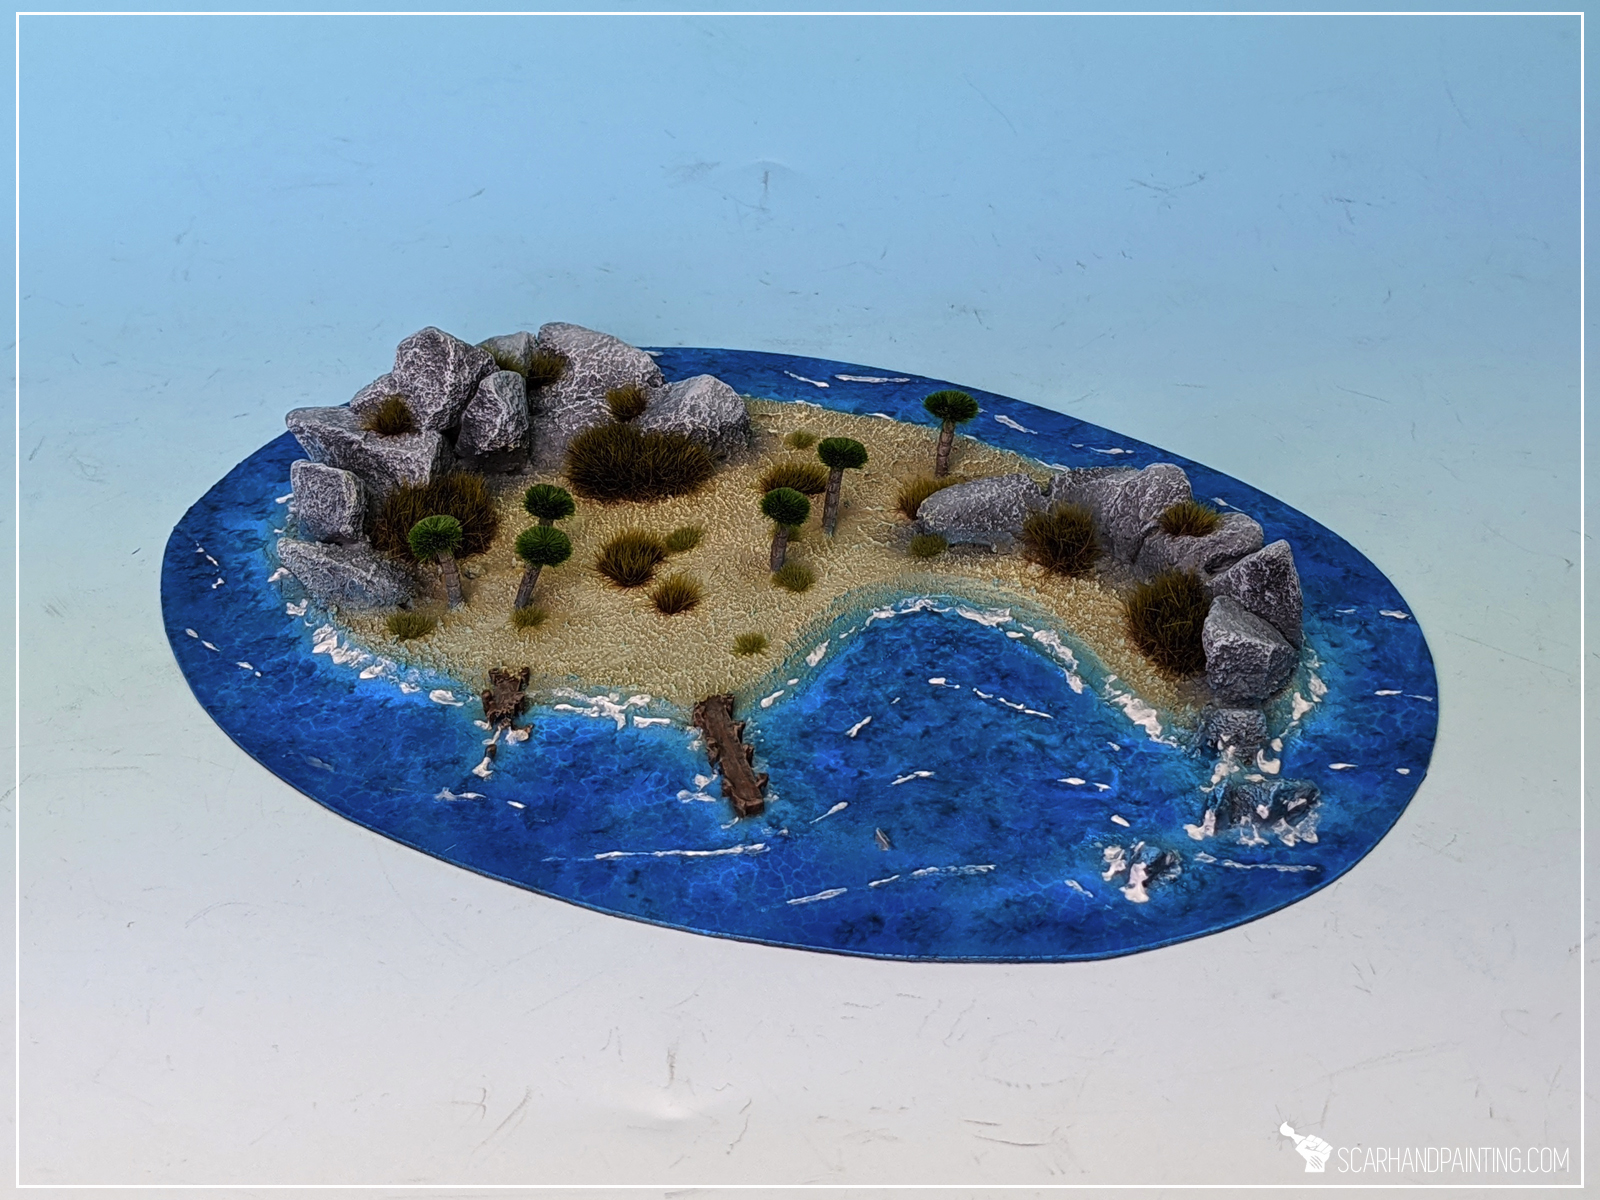
Step four: Palm trees
At that point I didn’t wanted to waste good toothpicks and here’s where palm trees idea originates from. I gently squeezed the blunt tip of a toothpick with cutters and moved it around. I made this every two or so mm on the length of the toothpick. I then cut a piece off and gently bent it. With palm trees trunks ready to be added on top to the island, I just pushed a sharp tool into the PCV to create tiny holes and glued the trunks into it.


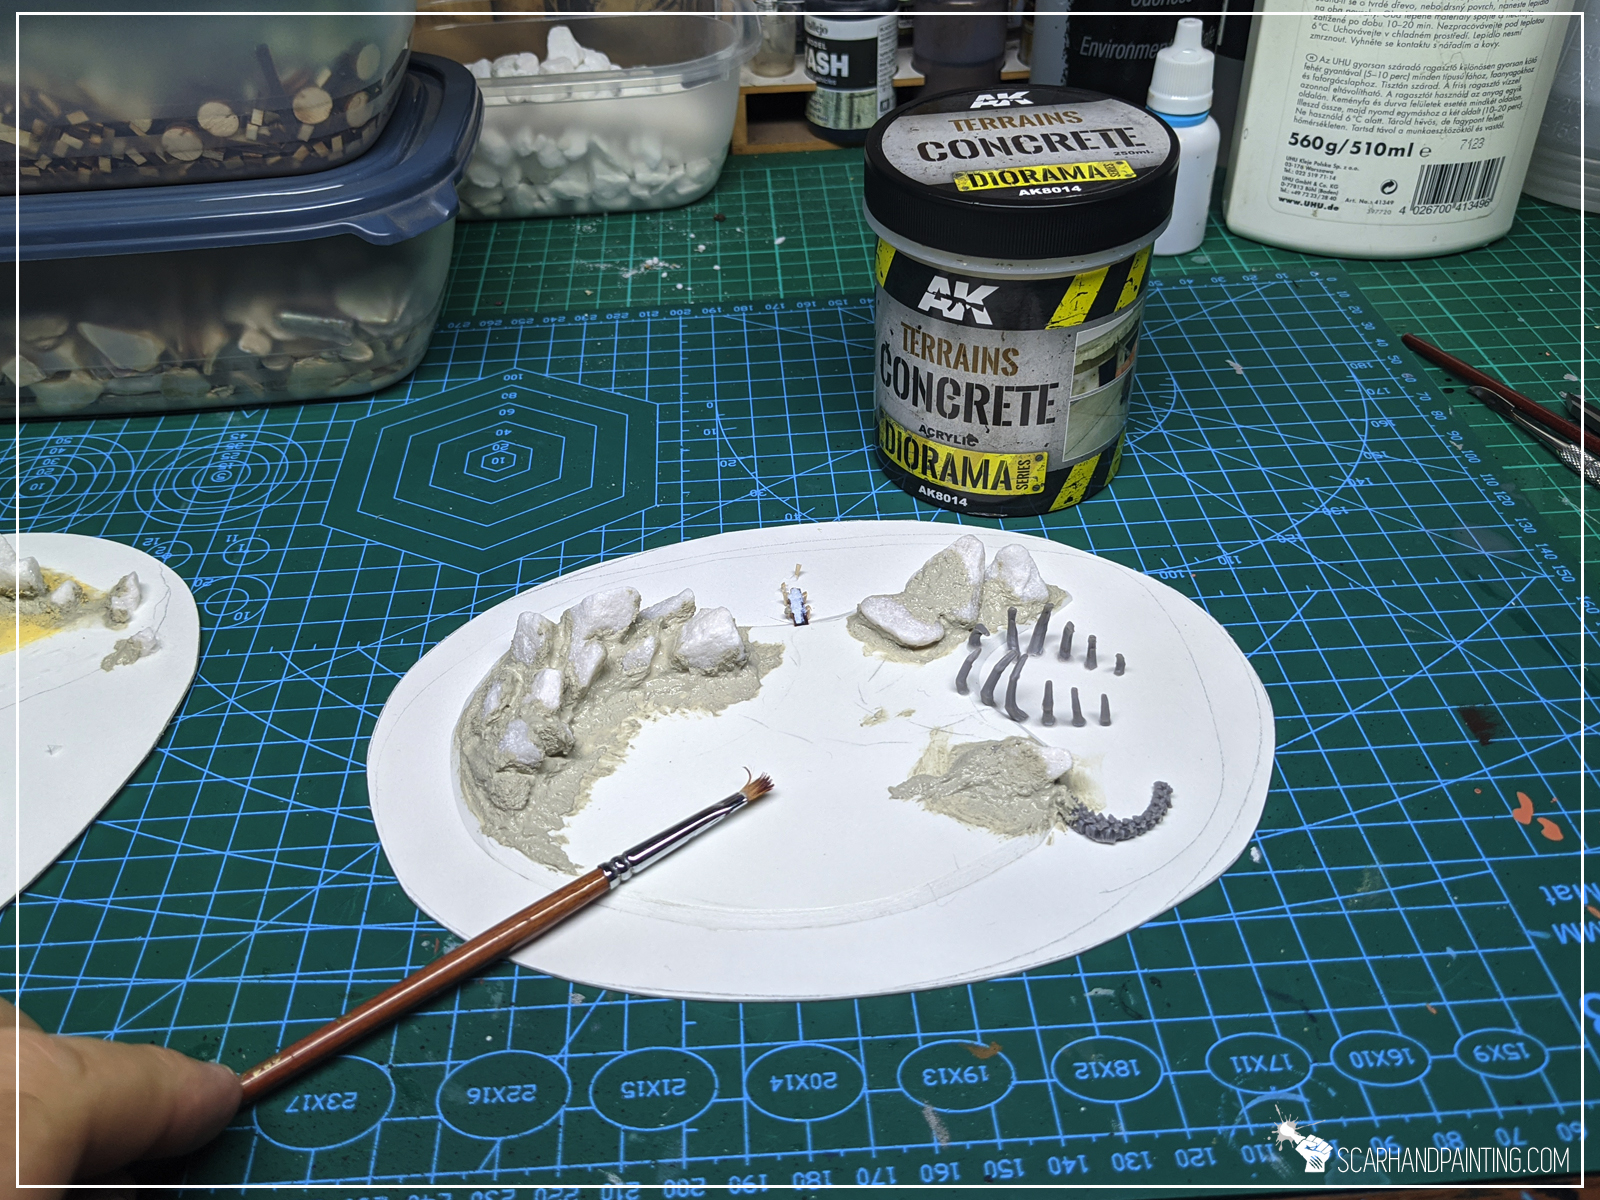
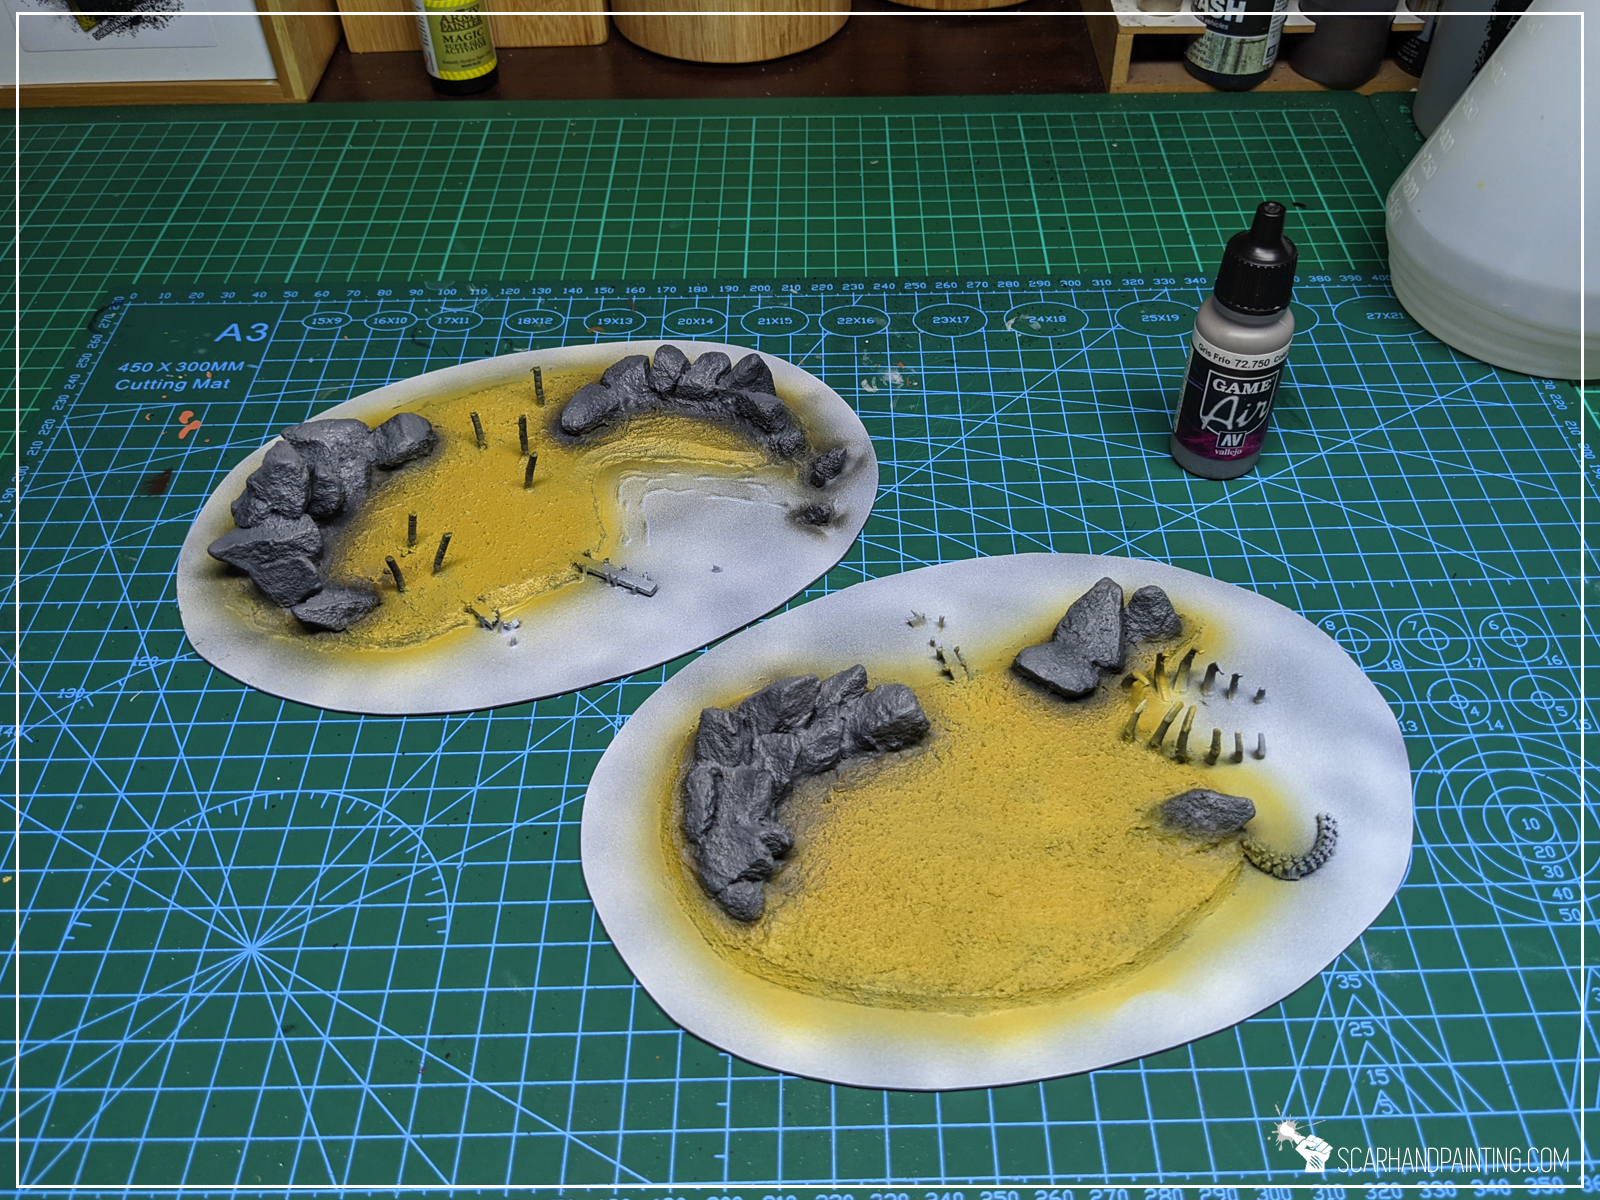
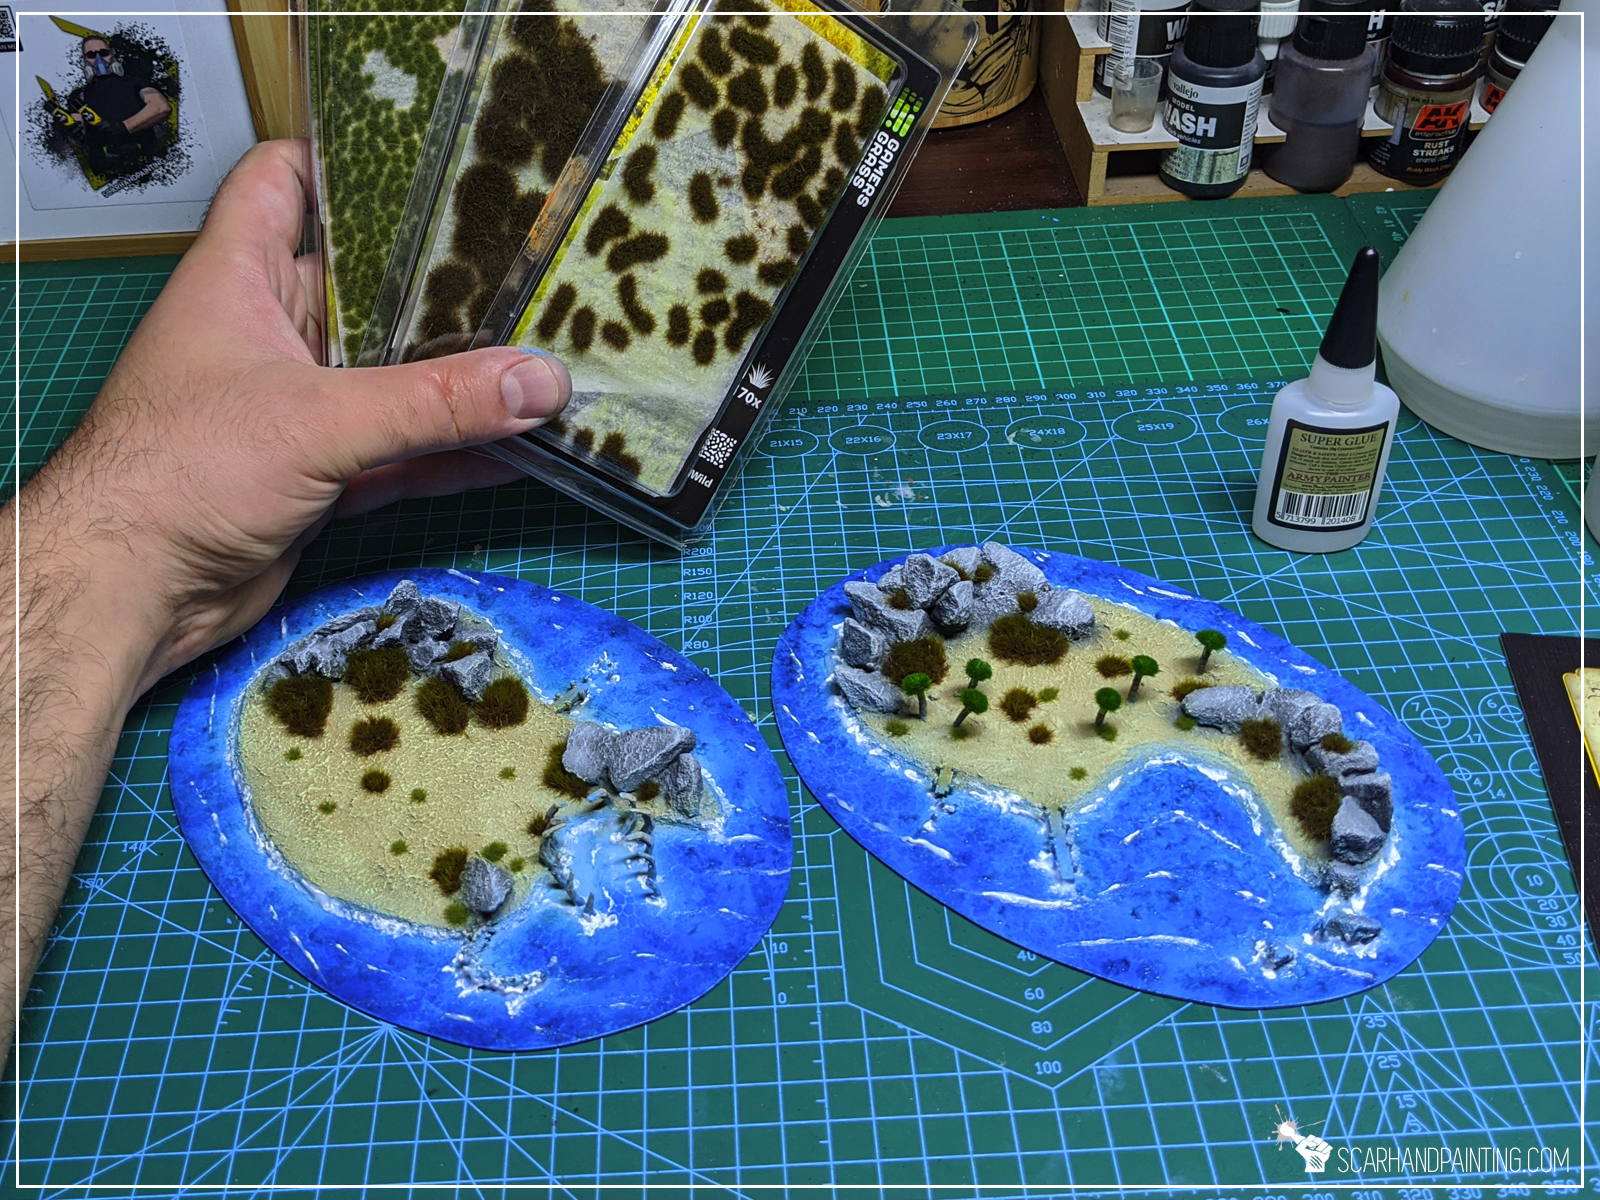
Step five: Textures
Final modelling step was to apply textures. First I filled gaps and surrounding areas between stones with AK Interactive Concrete from diorama series. I then covered rest of the island with Vallejo Desert Sand texture.
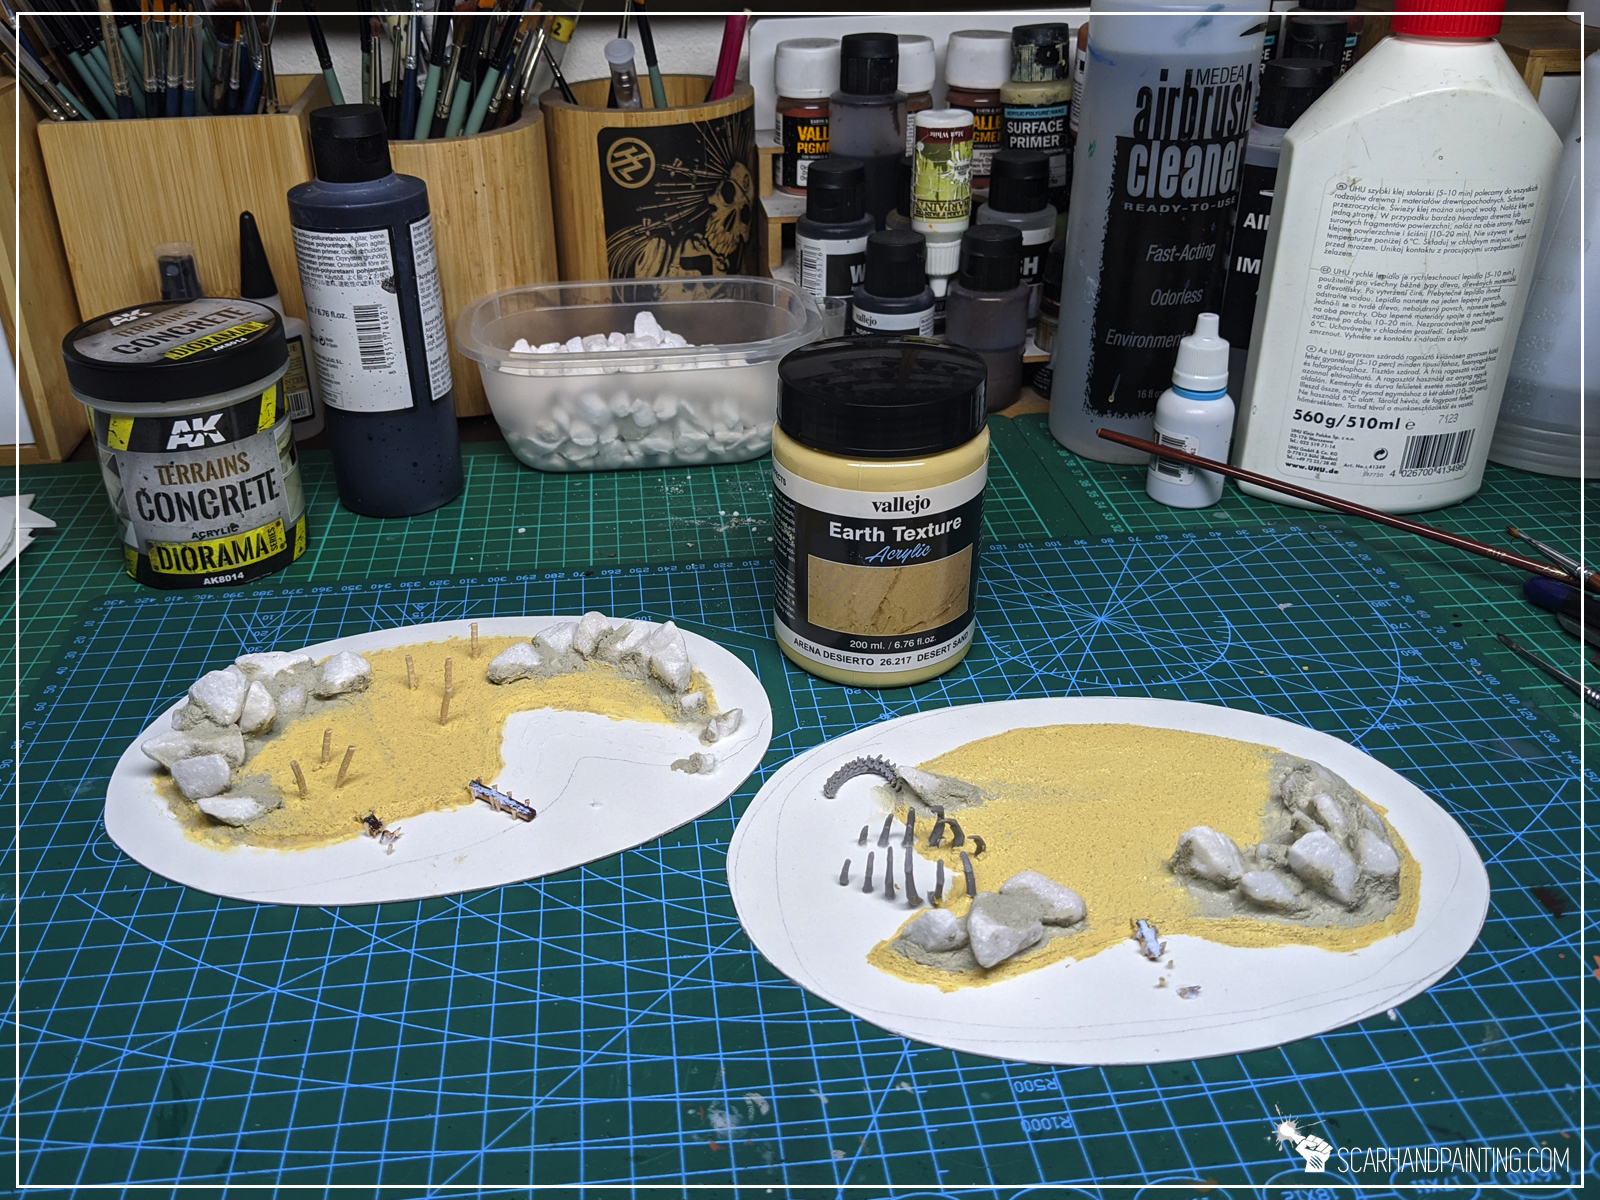
Sandy beaches, rocky coast and vibrant blue water around. With such theme in mind I started the paint job.
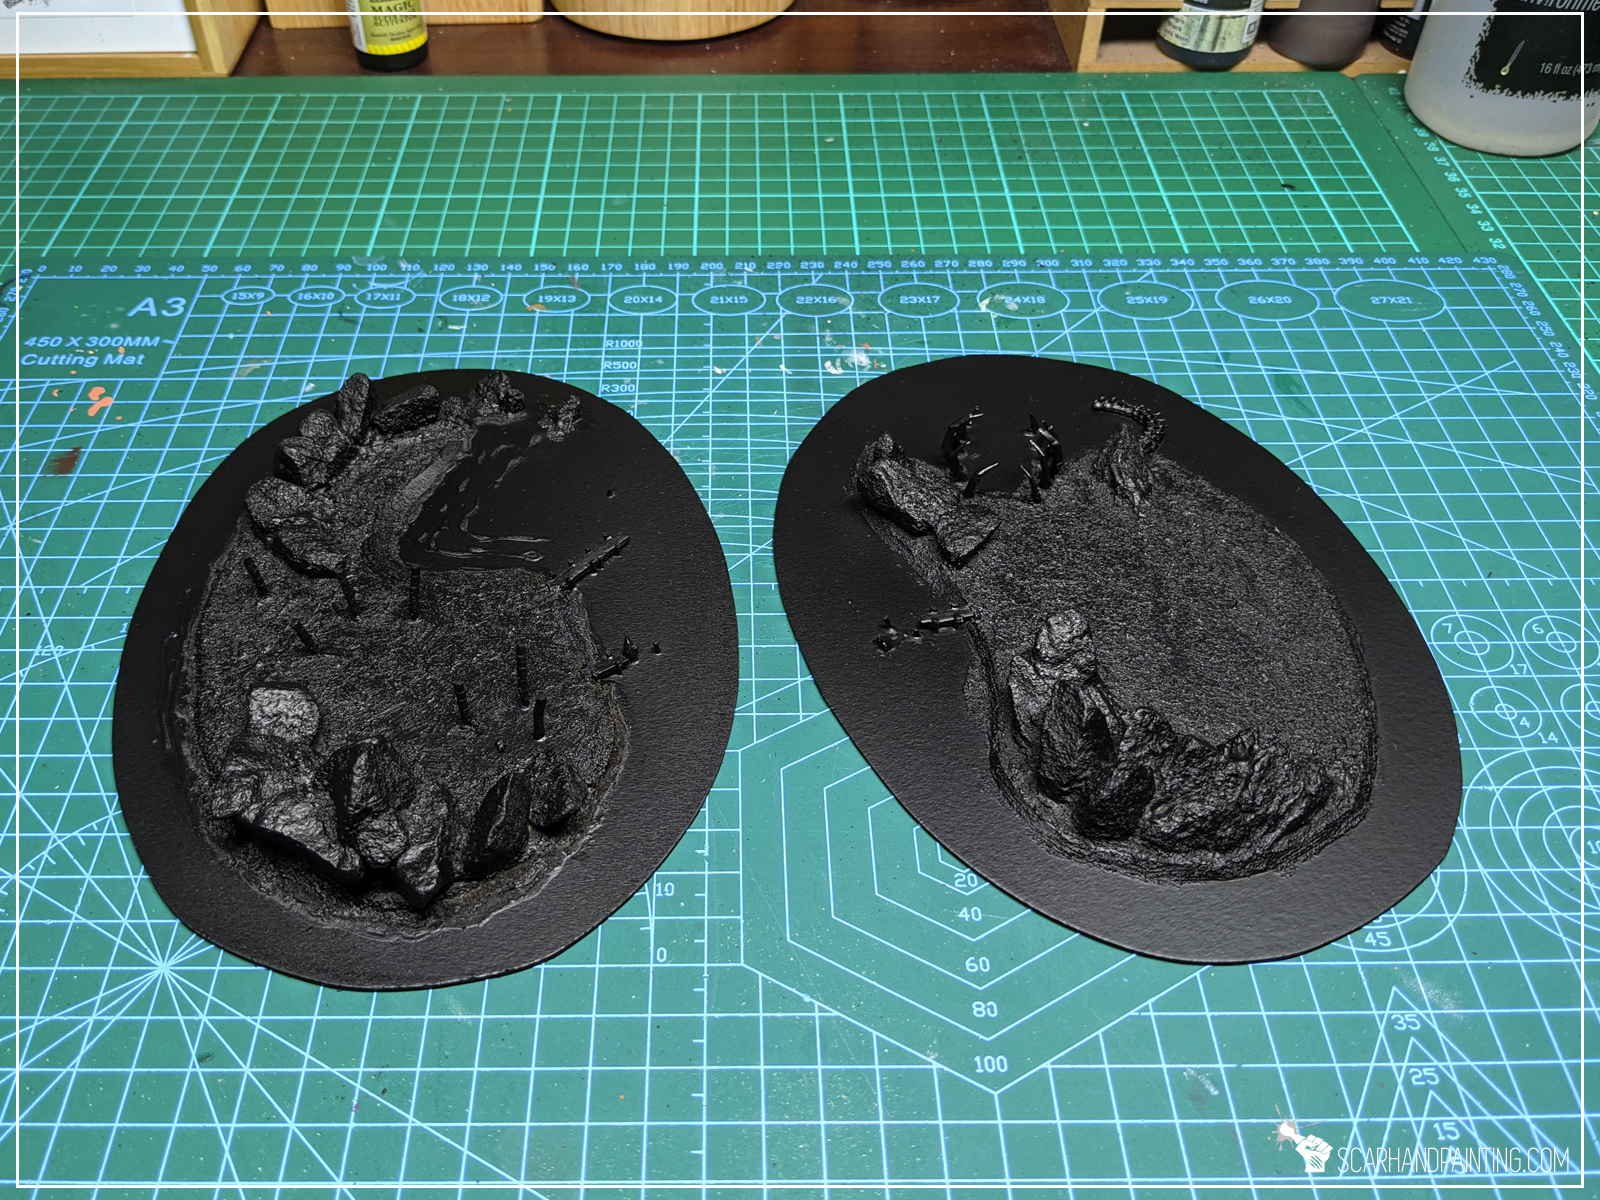
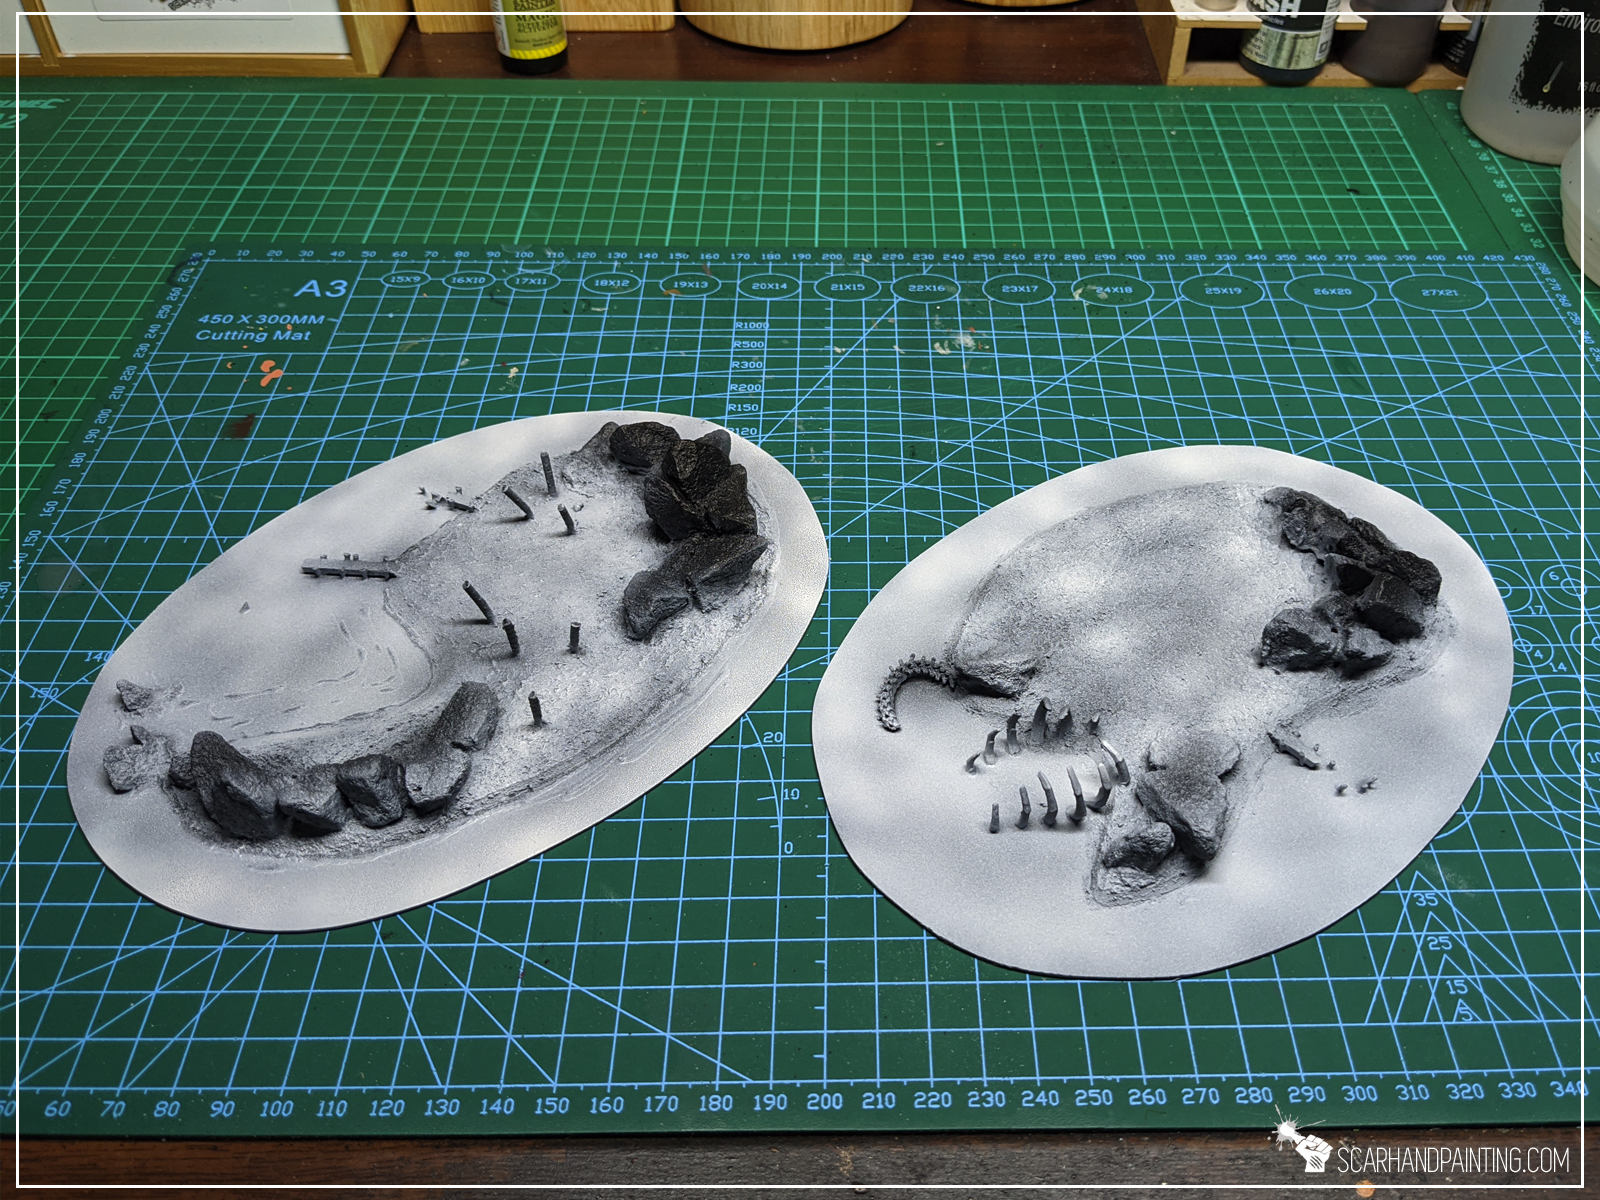
Basics:
First step was to undercoat the islands black and then airbrush white all over it to create a nice base for both water and sand colors.
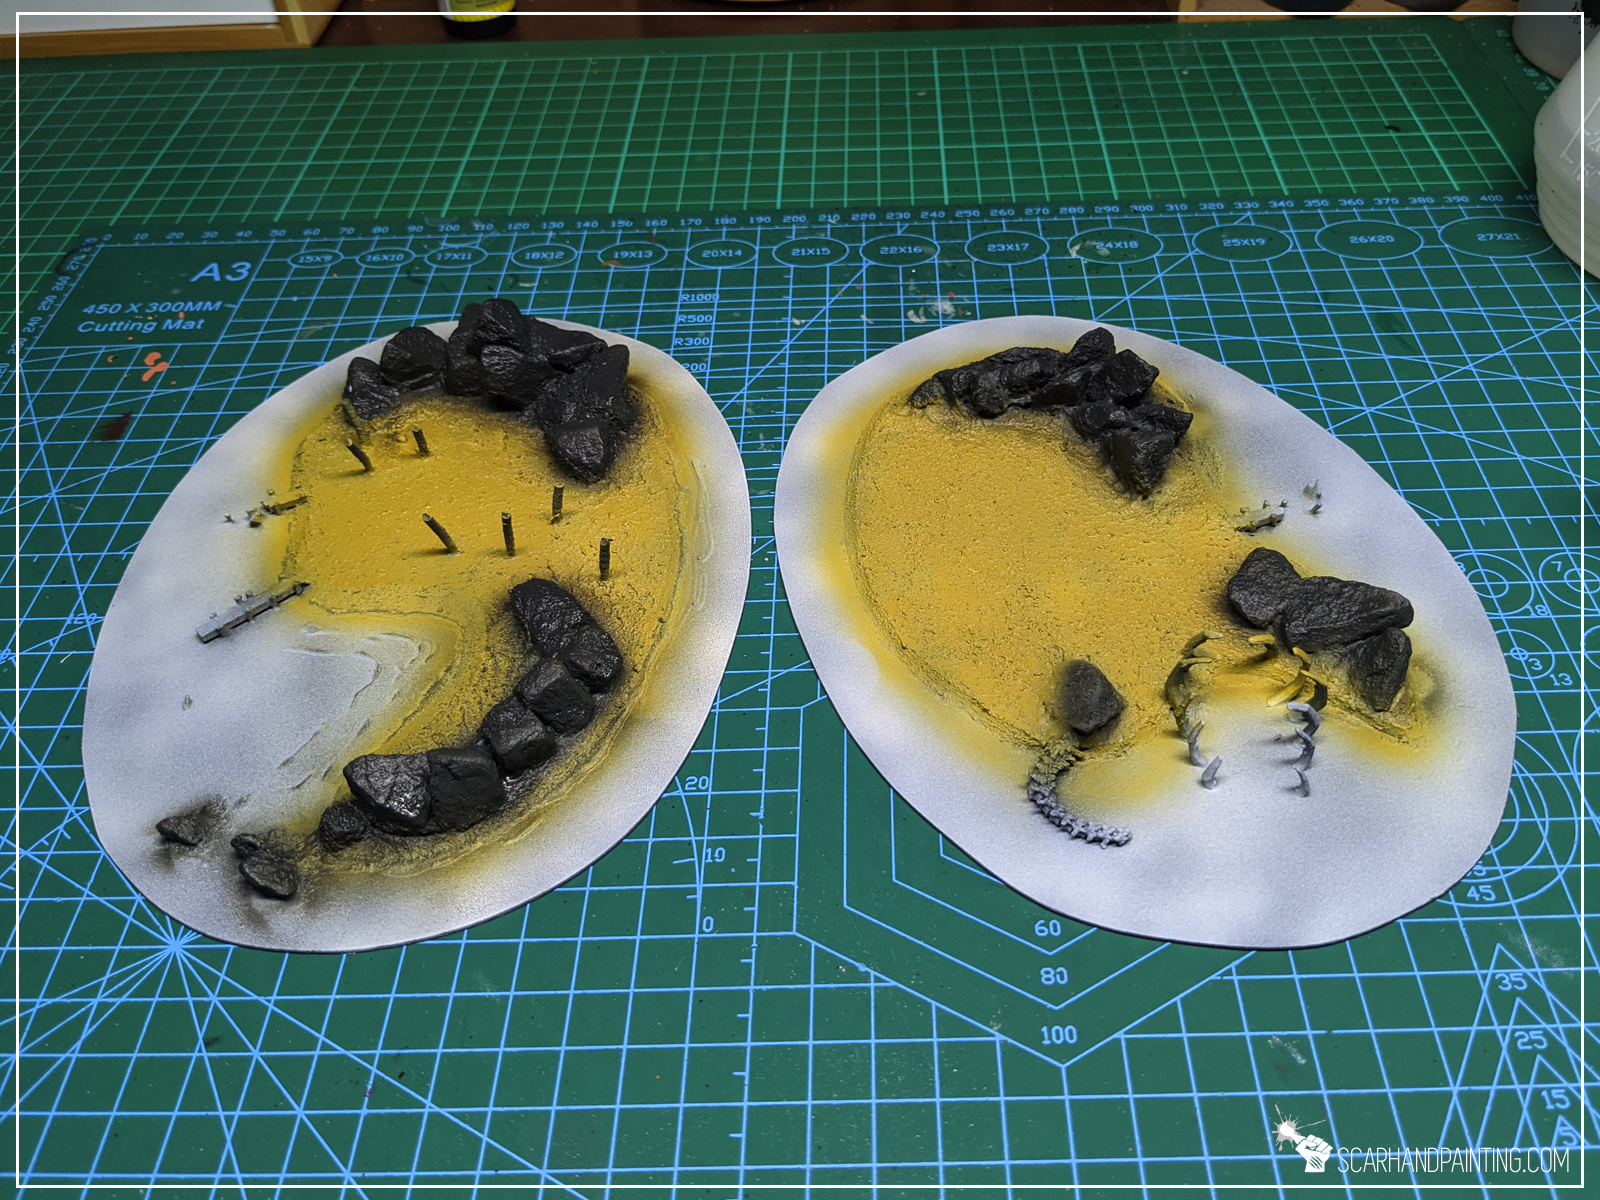
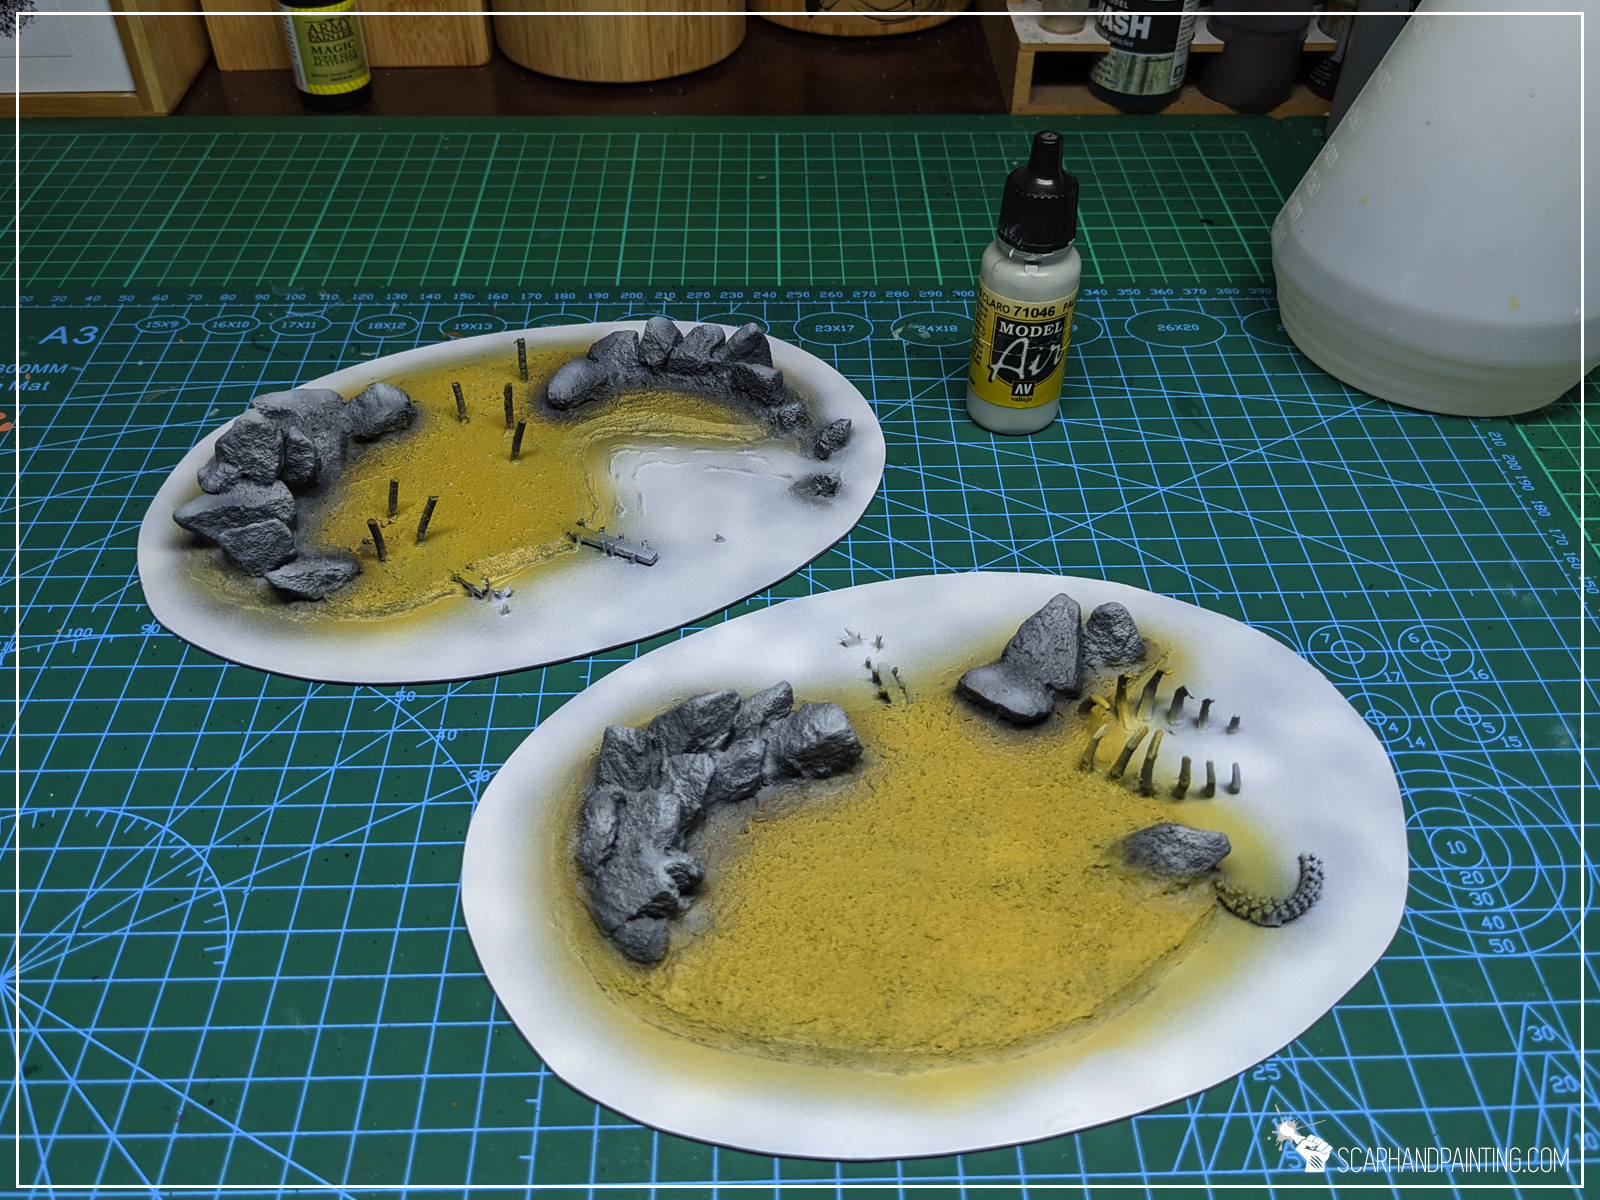
Sand:
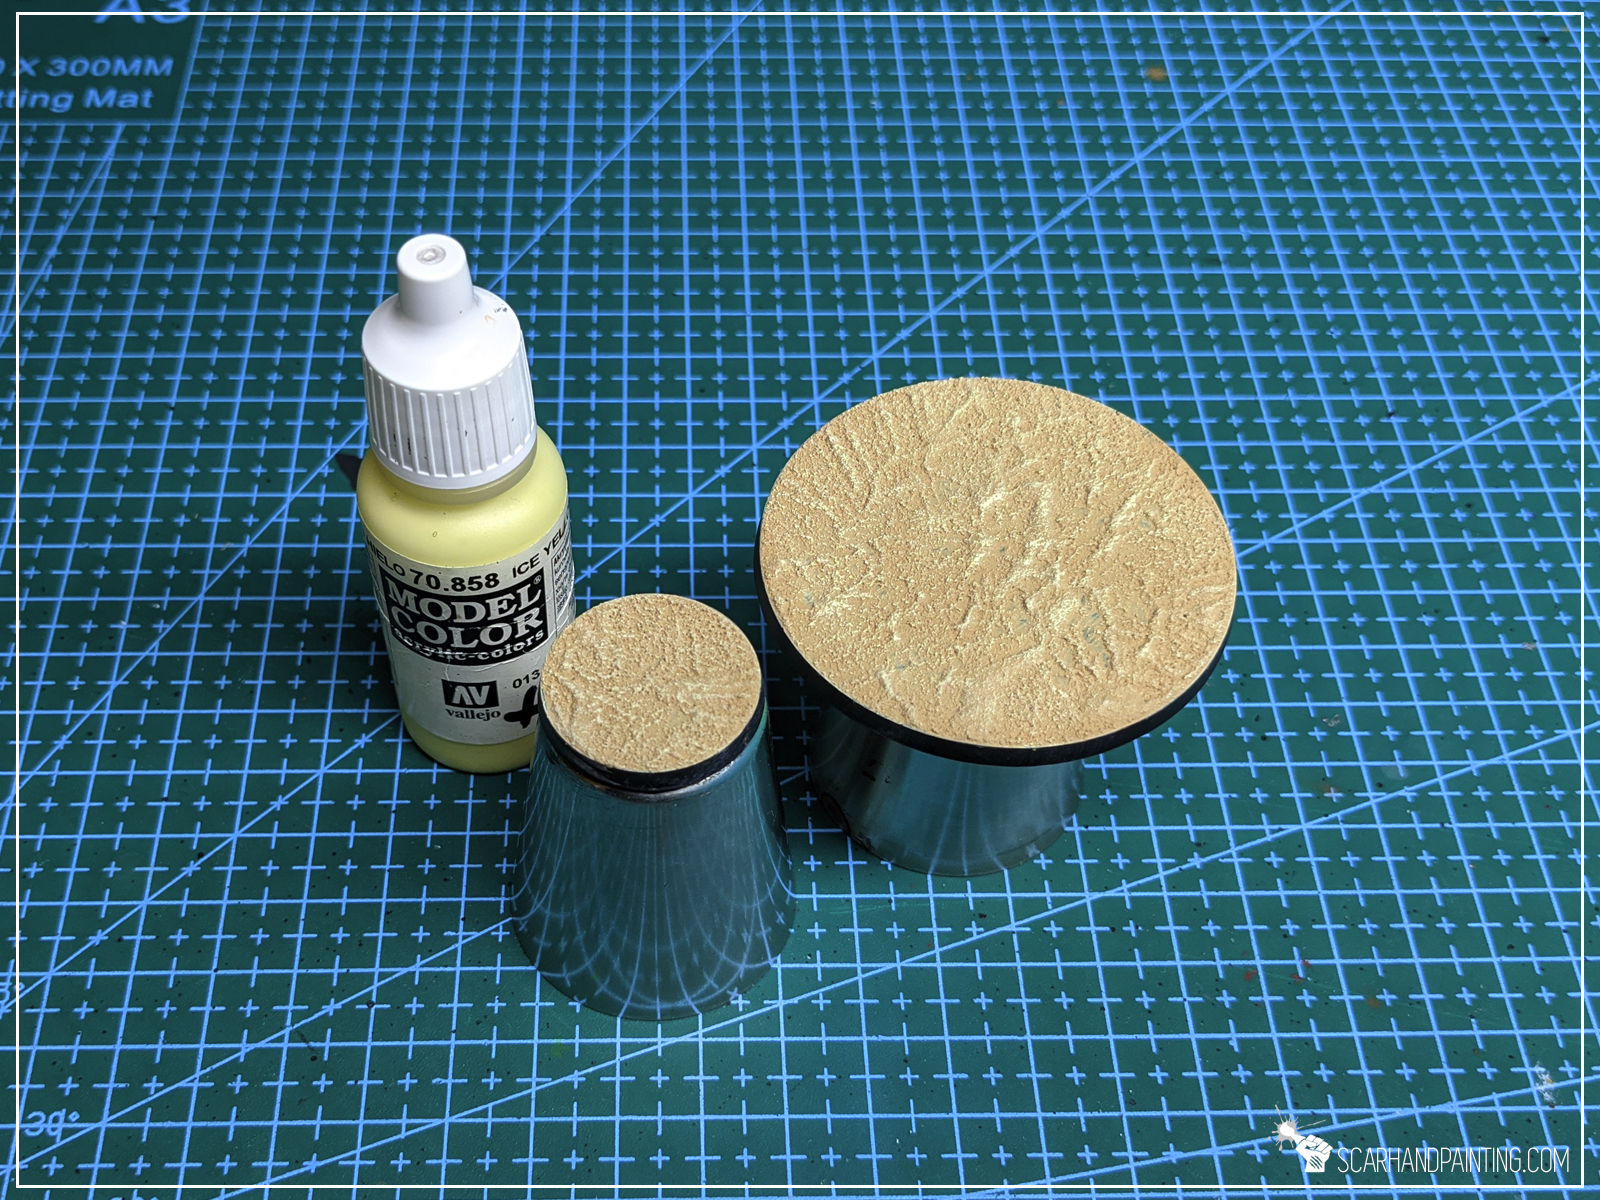
Sand was painted using airbrushed Vallejo Desert Sand, followed by Light Brown and finally drybrushed with Ice Yellow.
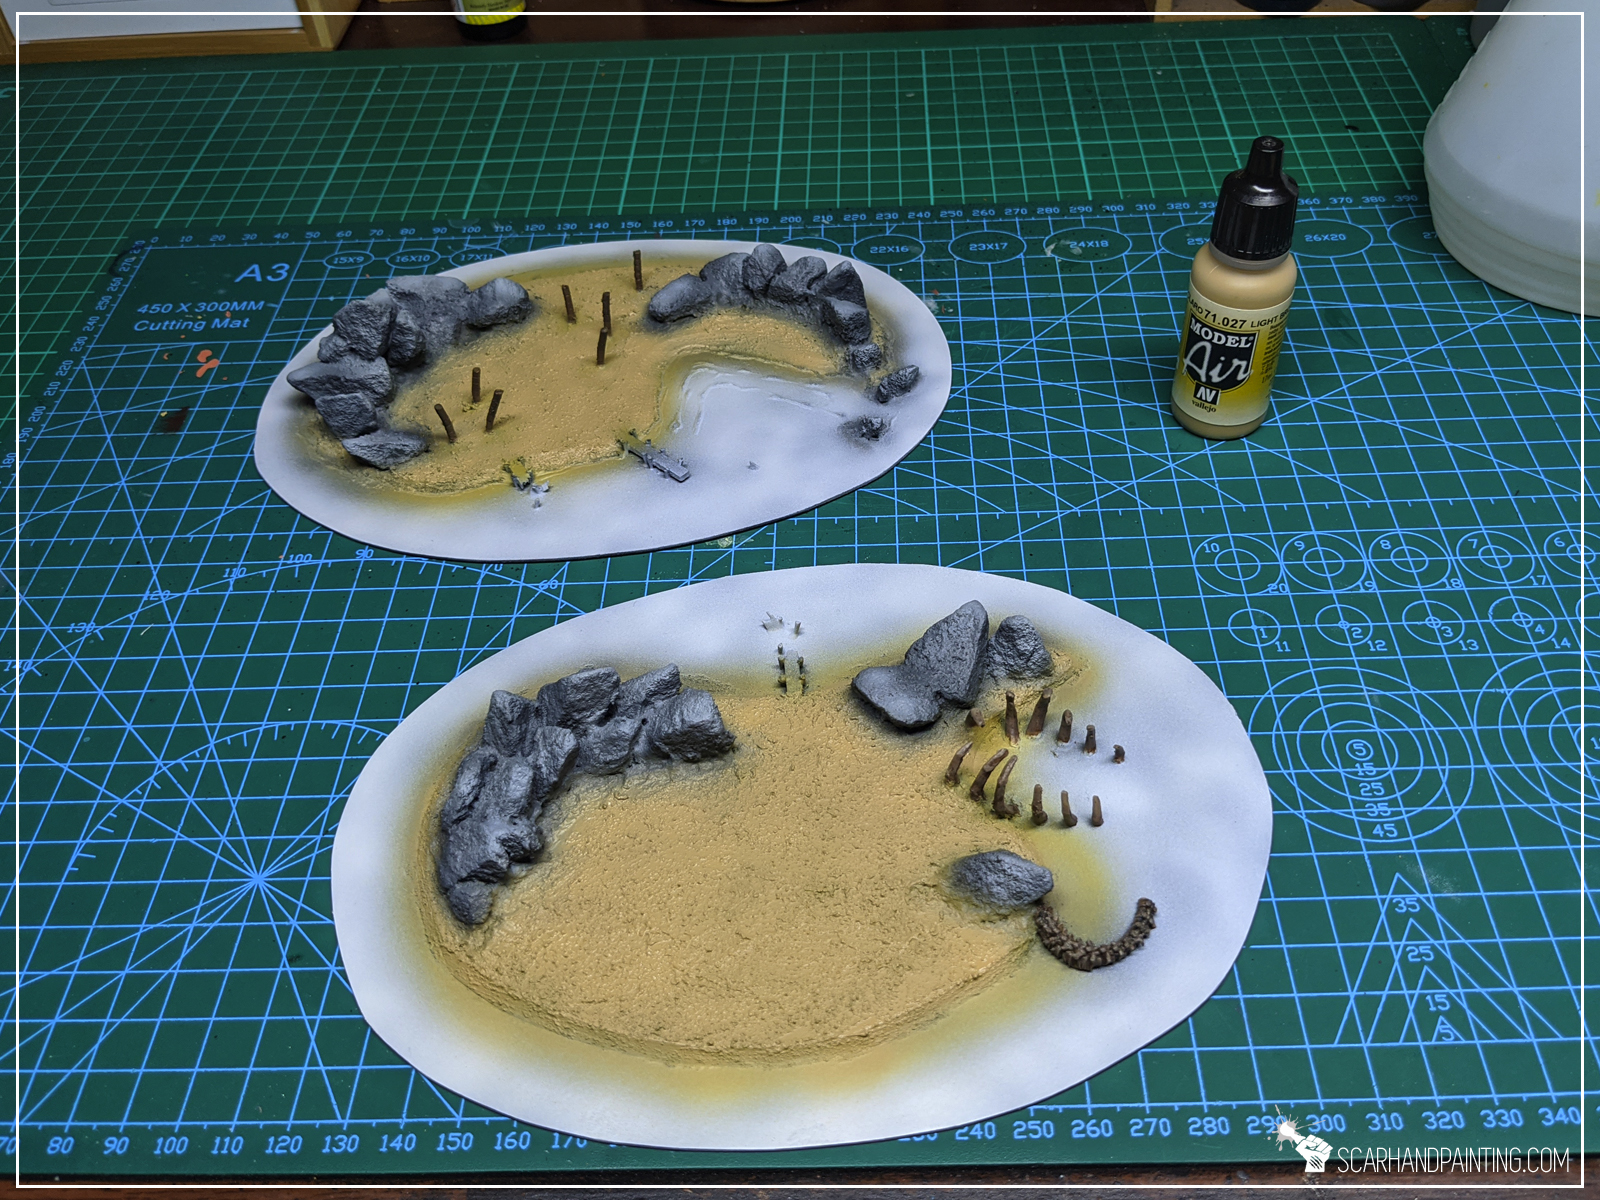
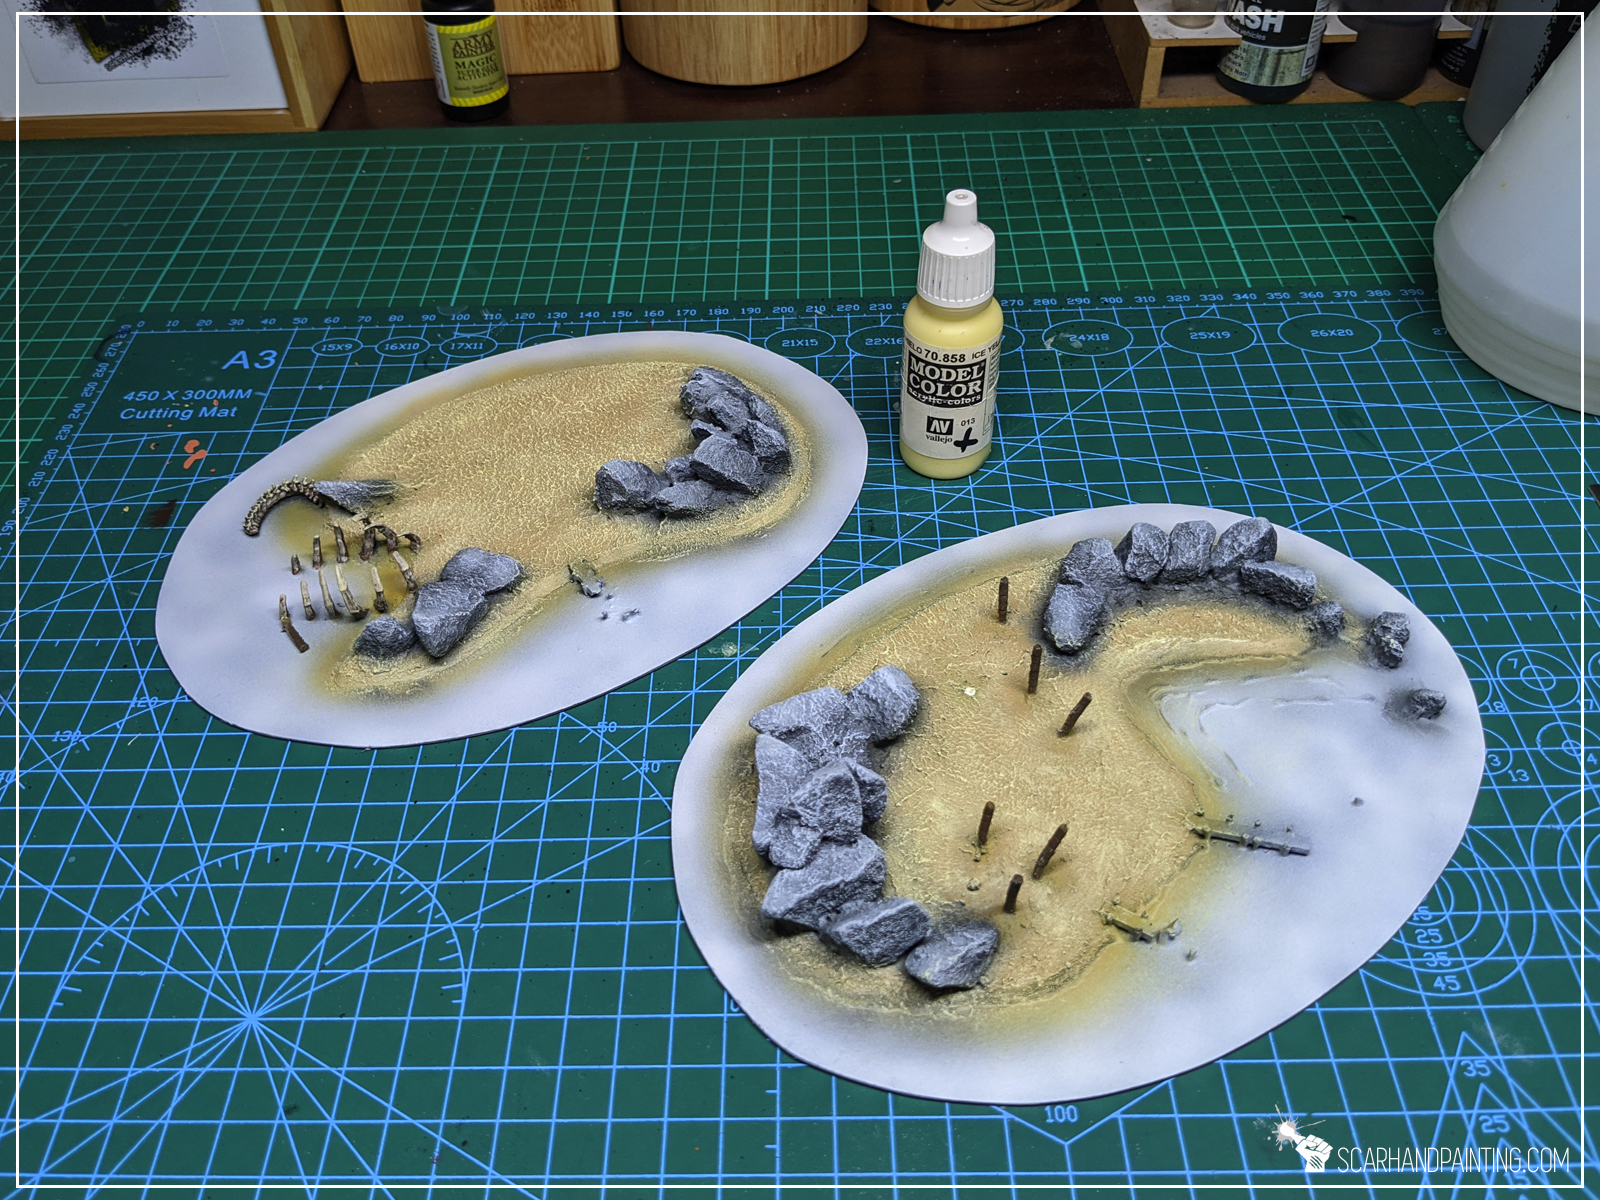
Rocks:
Rocks followed with a similarly easy recipe being airbrushed Vallejo Dark Panzer Grey, Cold Grey, Pale Grey Blue and drybrushed Ghost Grey.

Water:
Here’s the tricky one. I decided to go hard with stencil airbrushed Vallejo Light Sea Blue, Magic Blue and spots of airbrushed Army Painted Blue Ink. I then sealed it with airbrushed Gloss Varnish.

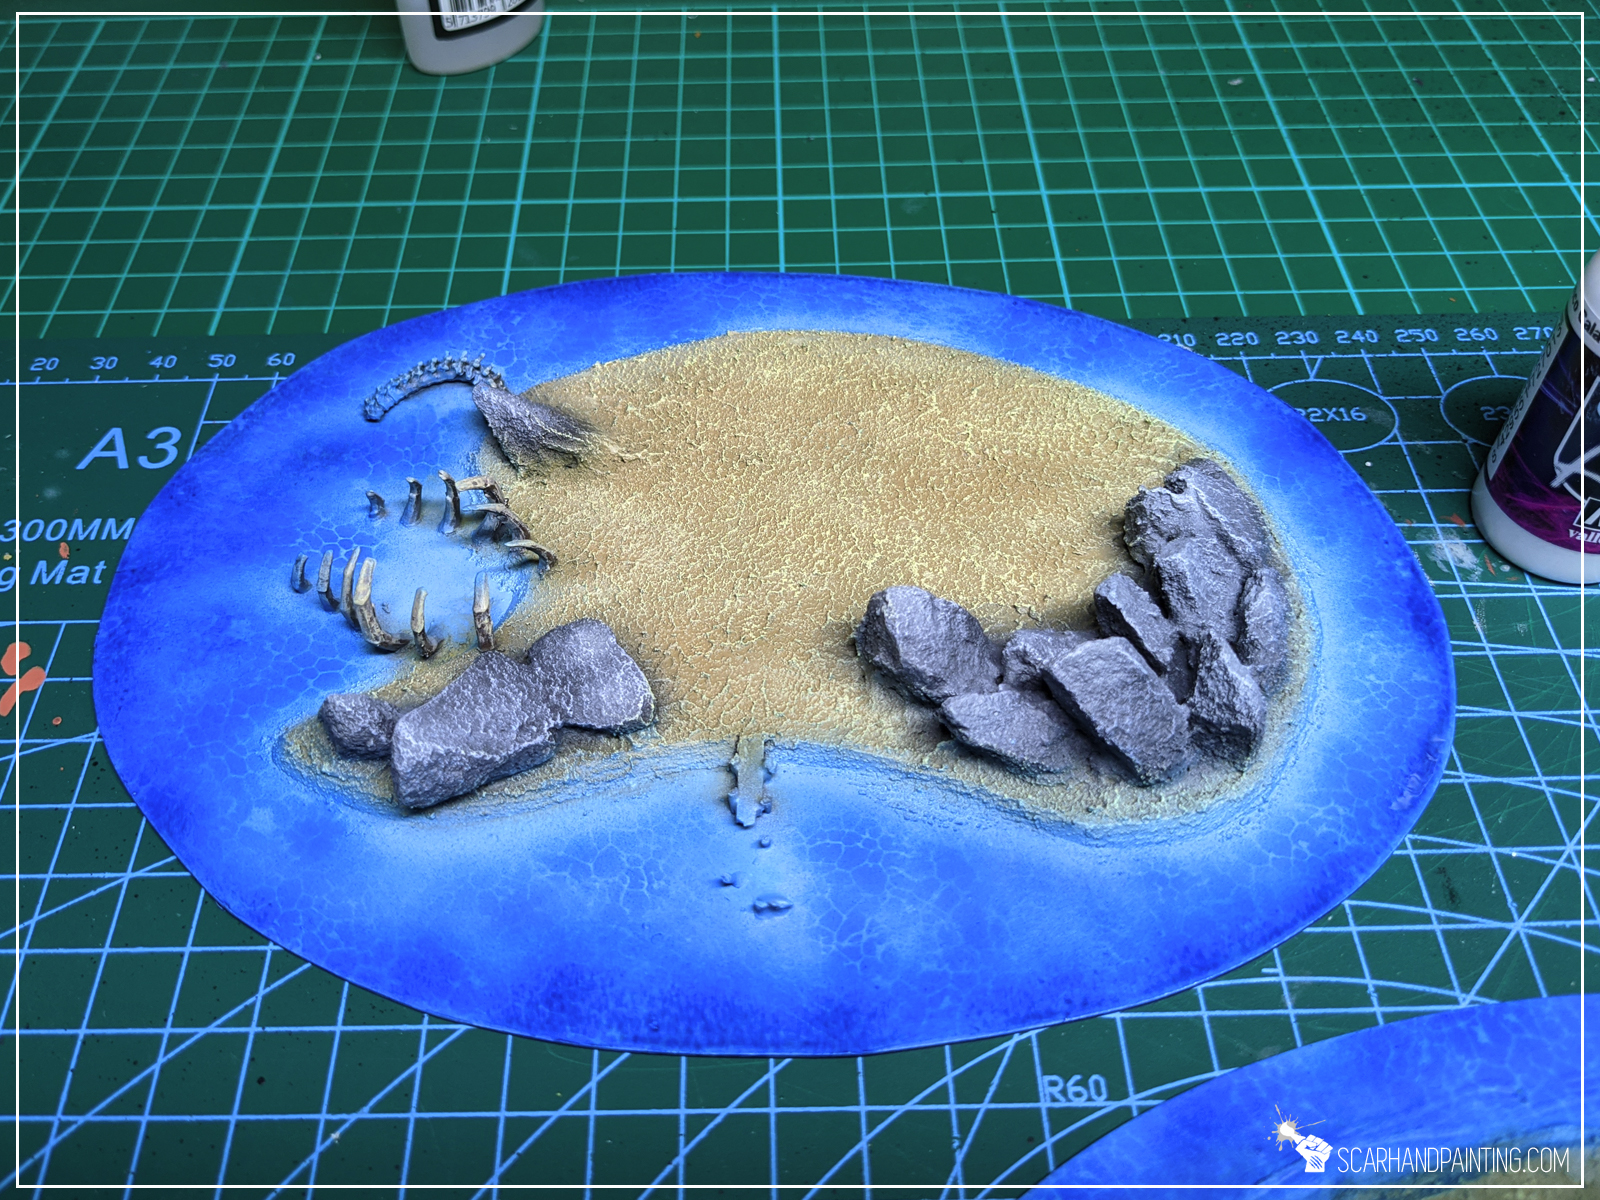


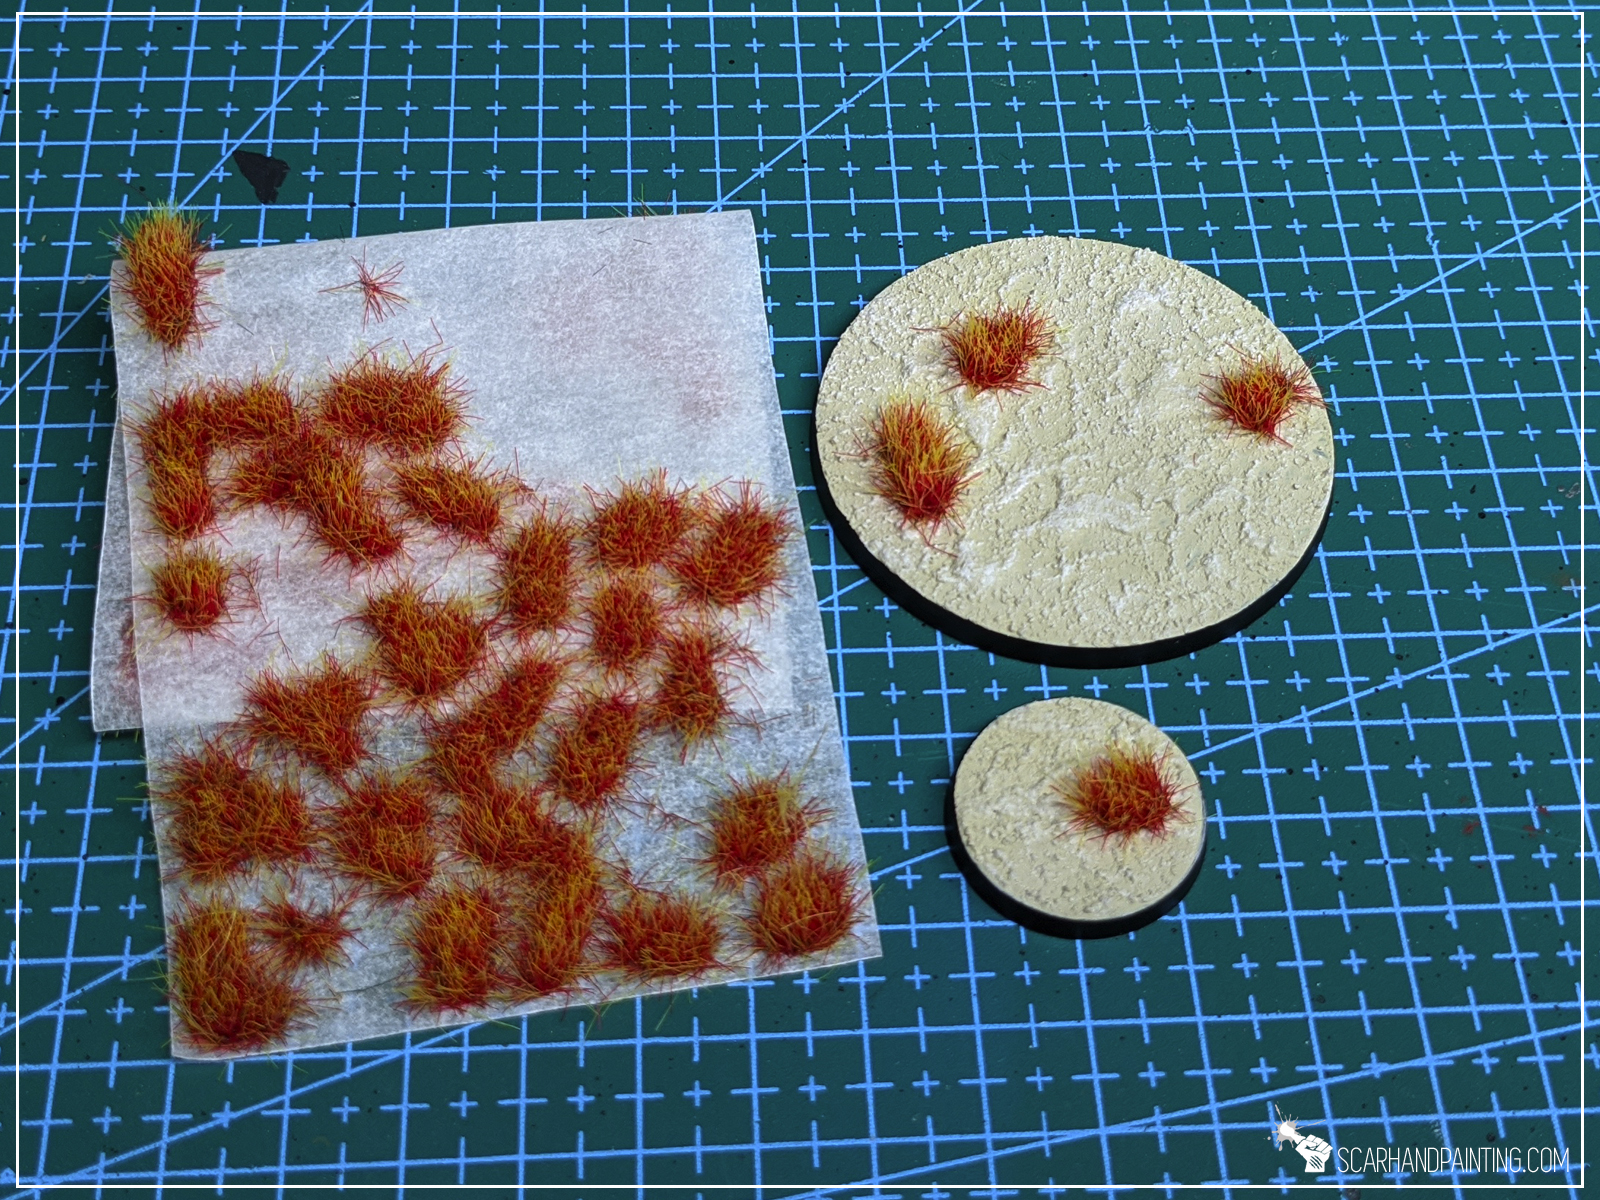
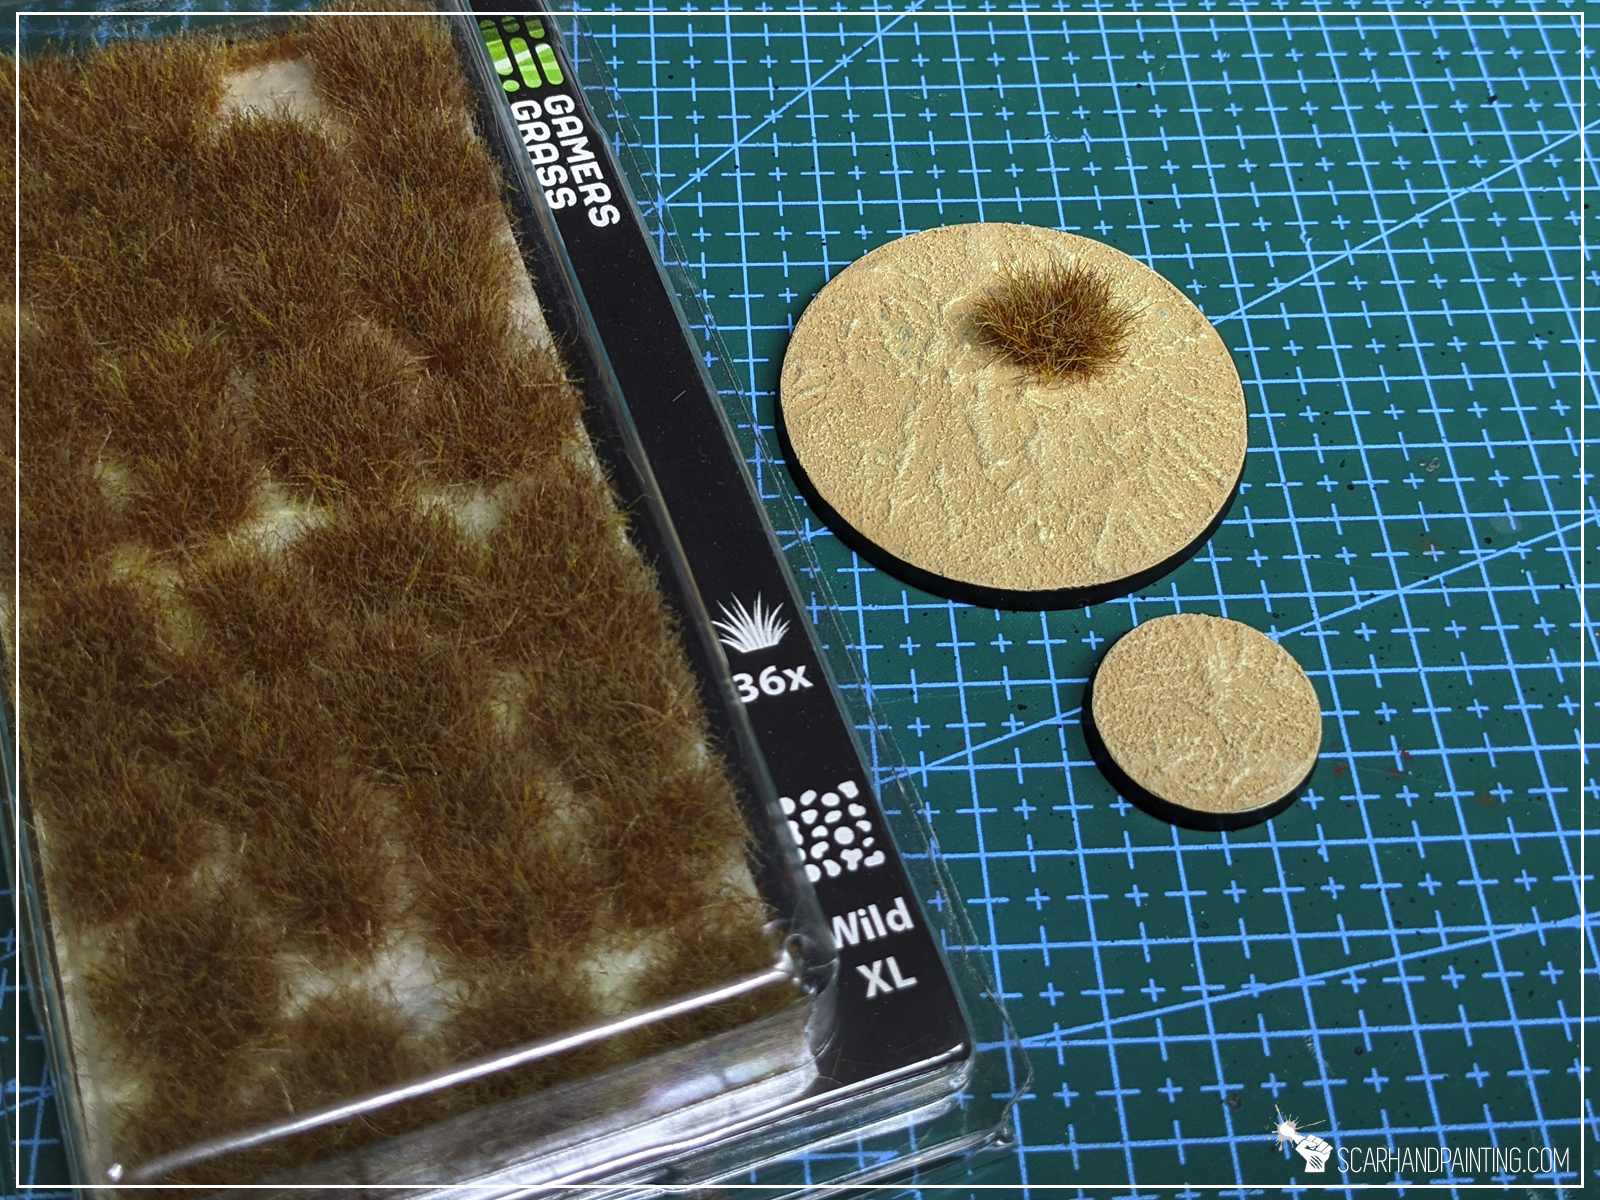
I added some final touches by manually applied AK Interactive effects creating waves and water foam. To add a nice color diversity on top of the island I also applied Gamers Grass Dry Green and Swamp tufts. Pal trees got finished with Shady Green tufts from Paint Forge.
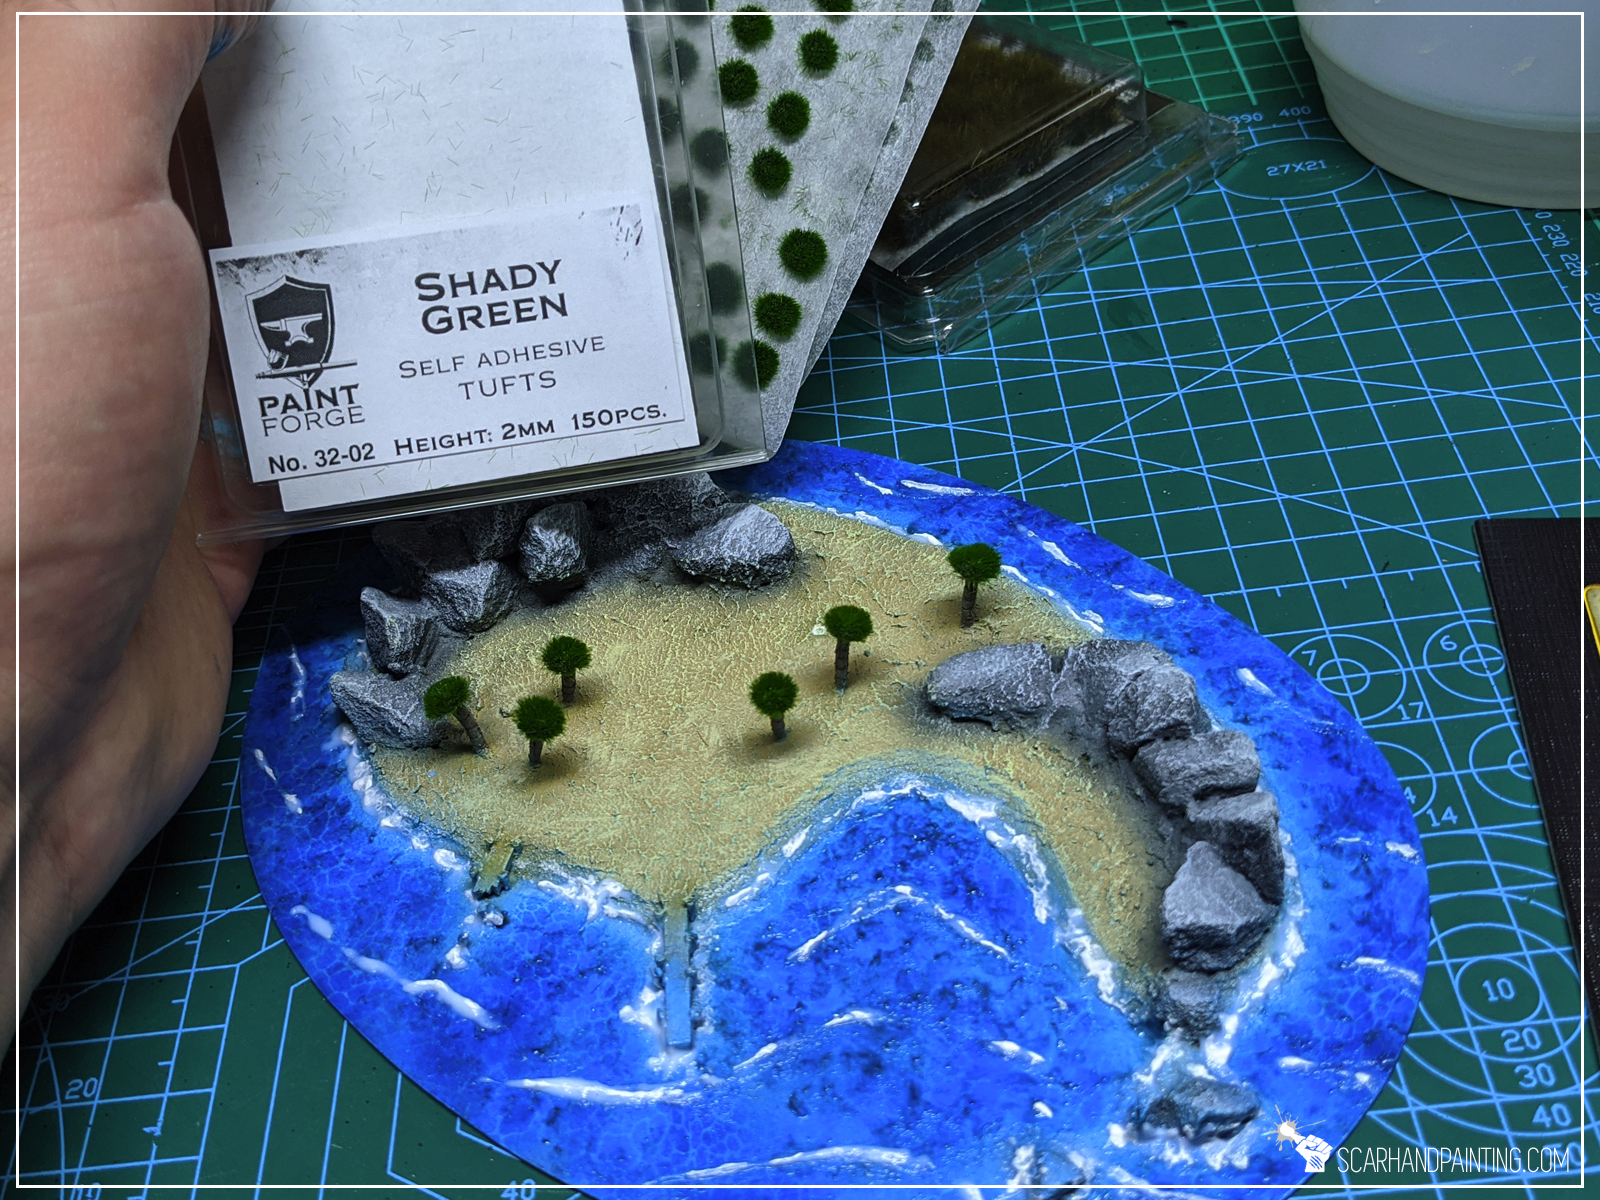


First two islands discovered, I’m ready to head up for the unknown waters. More scenery to come, following the same template. If you stick a while at my blog you’re bound to see more islands and other scenery types, including deadly rocks and shipwrecks. Be sure to visit Scarhandpainting next time you hit a port! Ahoy!


![]()
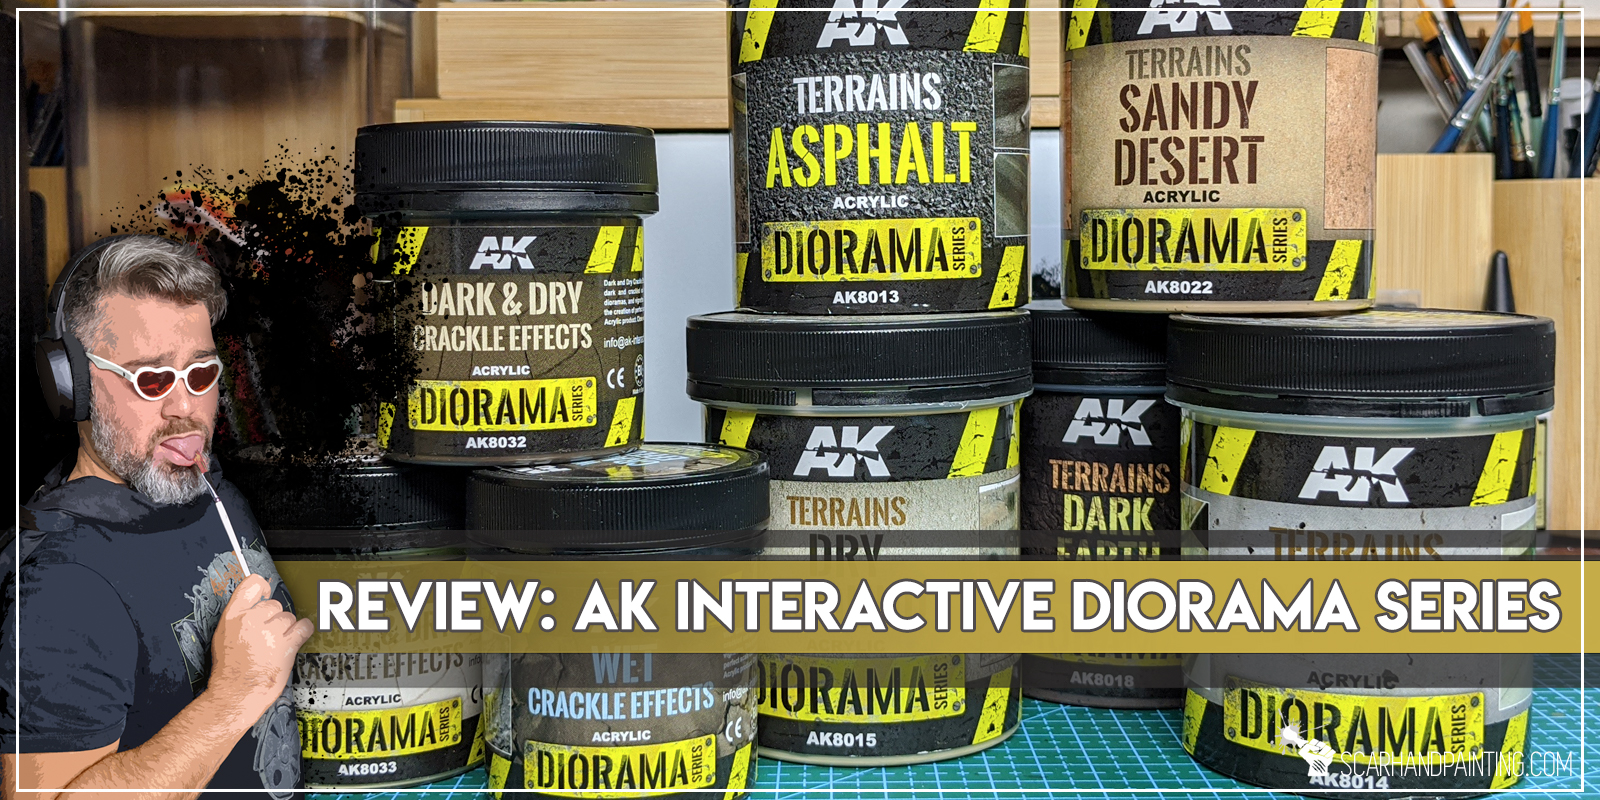
AK – Interactive – a Spanish company behind a well established series of products for modelers. They managed to become one of the most recognized brands in the modeling world with continuously evolving range of paints, brushes, weathering products and effects. I have been a fan of their products for years now. Recently I decided to take another step and expand a range of texture paints at my disposal. Knowing the quality of AK’s products and lured by sweet pricing I went berserk and got a lot of Diorama Series textures.
Now I’m here to share my impressions.
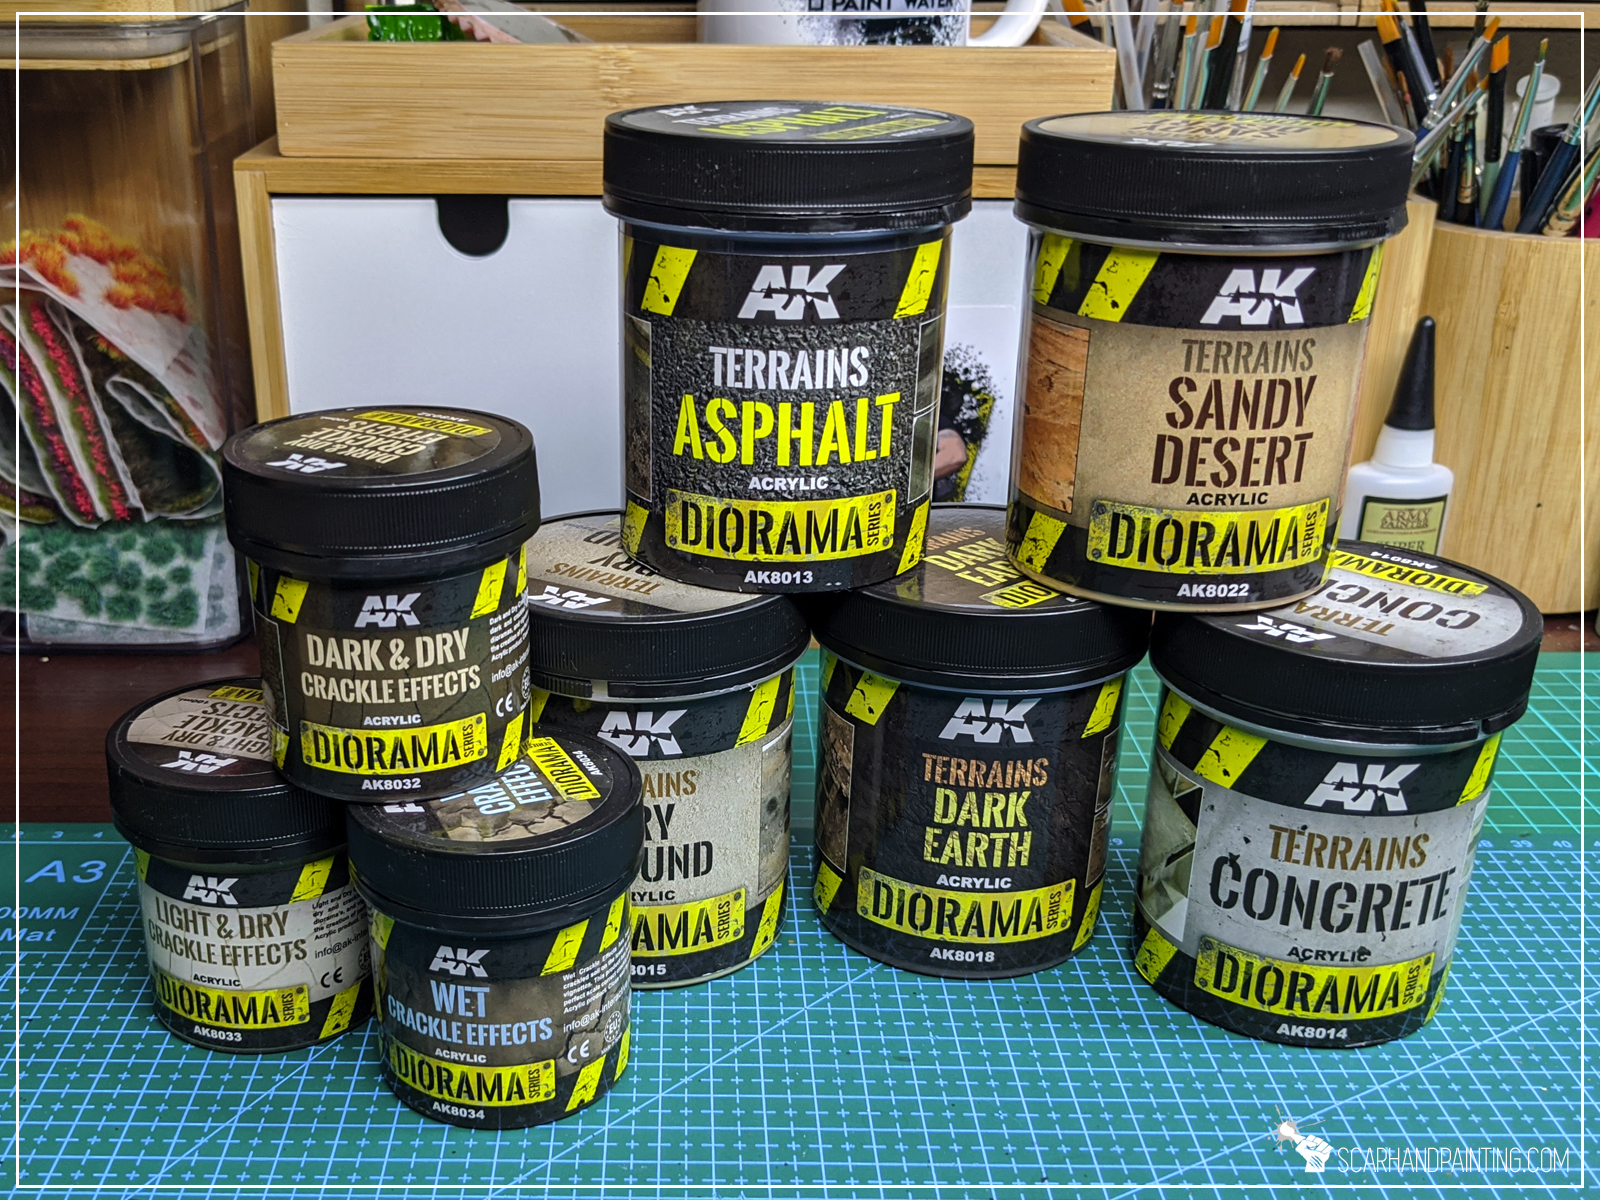

Usually I do the entire Quality, Visuals, Functionality thing. This time though I decided to take a different approach and just jump right into testing the actual products, with pictures taken at every step. Consider this to be a Review/Tutorial hybrid. I will share my thoughts in the summary, so no worries 😉
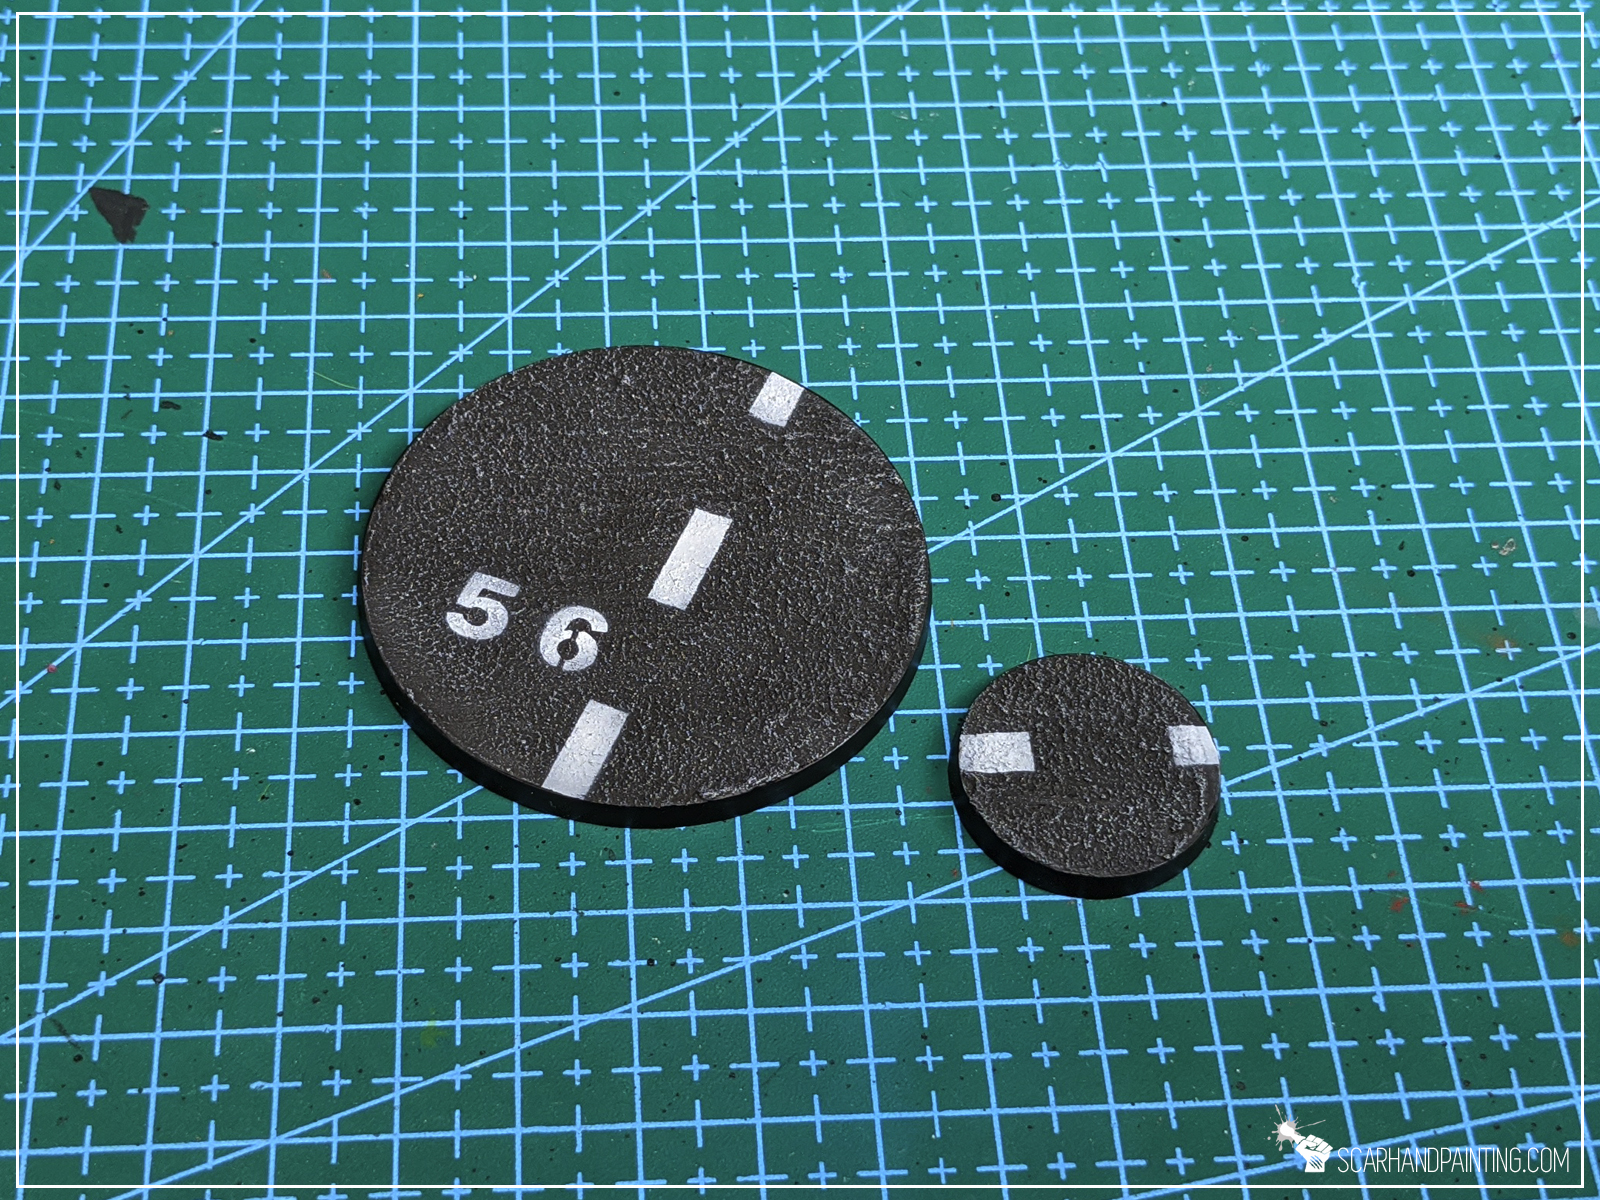
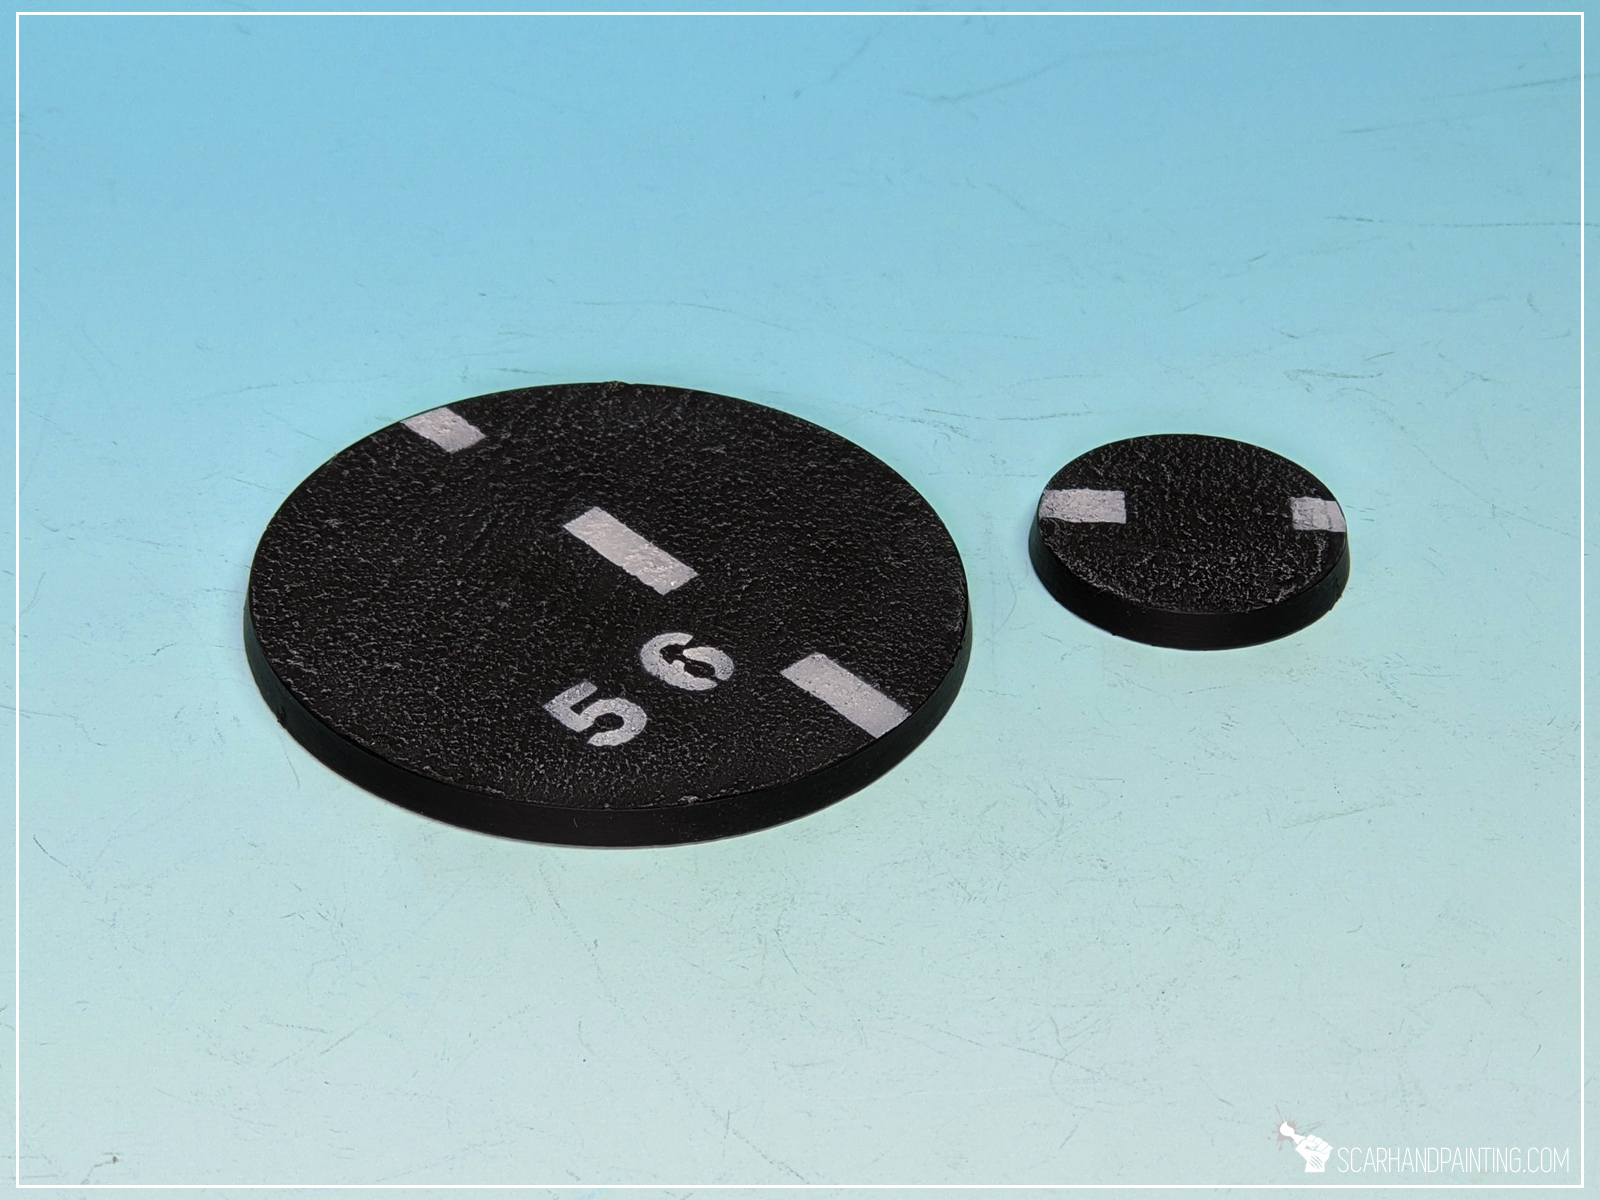
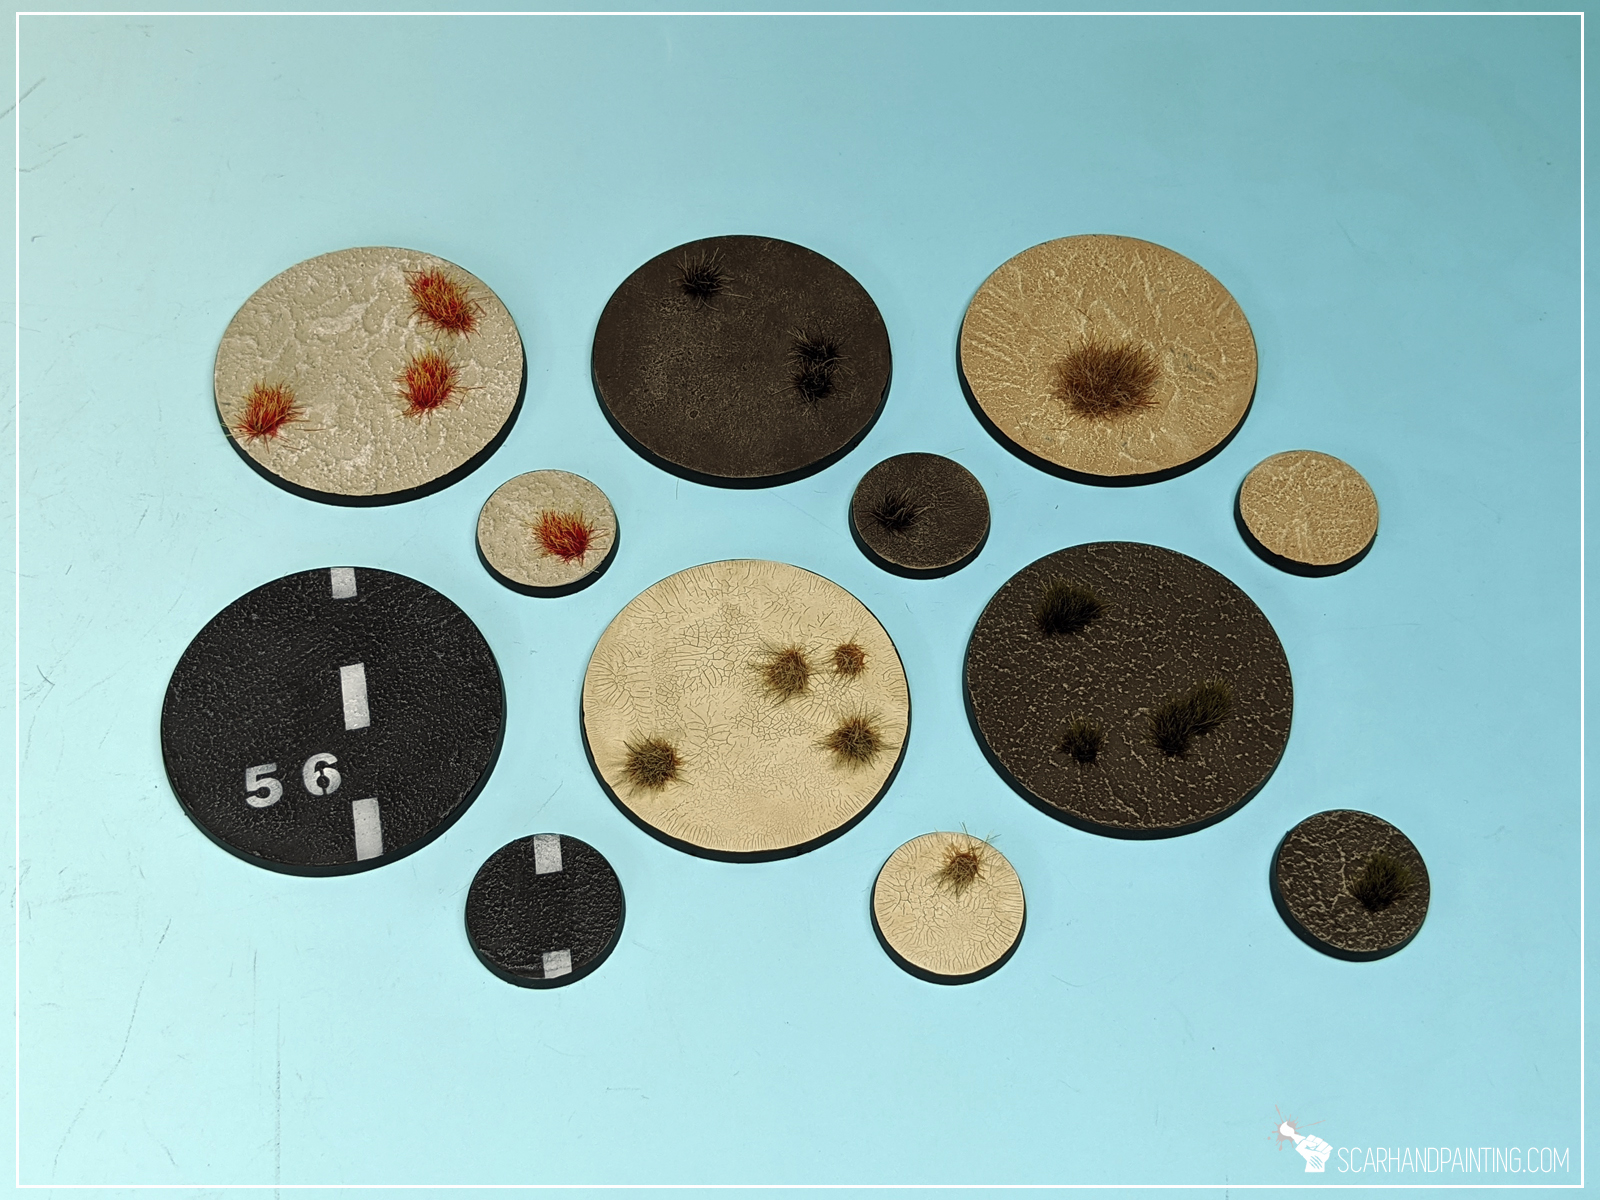
Very happy with this one. Not too grainy. Perfect coloration. Two steps process with a final touch of white markings airbrushed through a stencil. End result – very satisfactory.
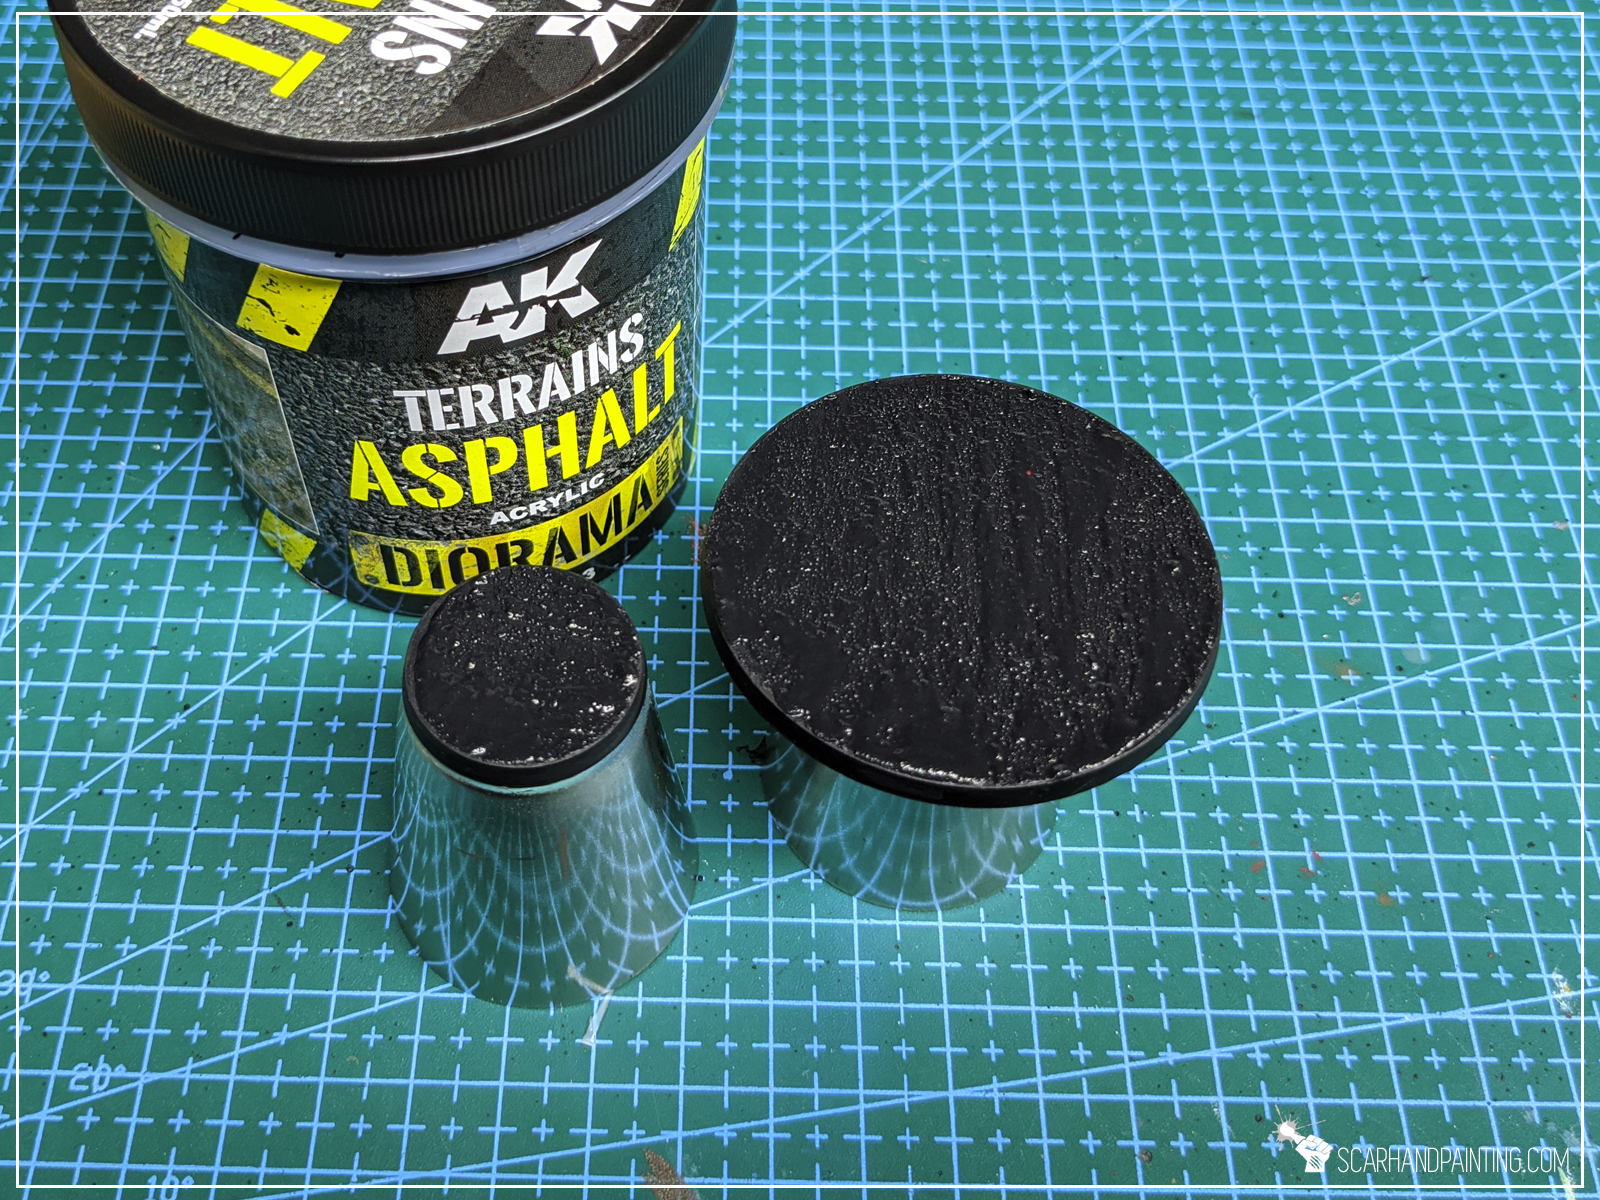
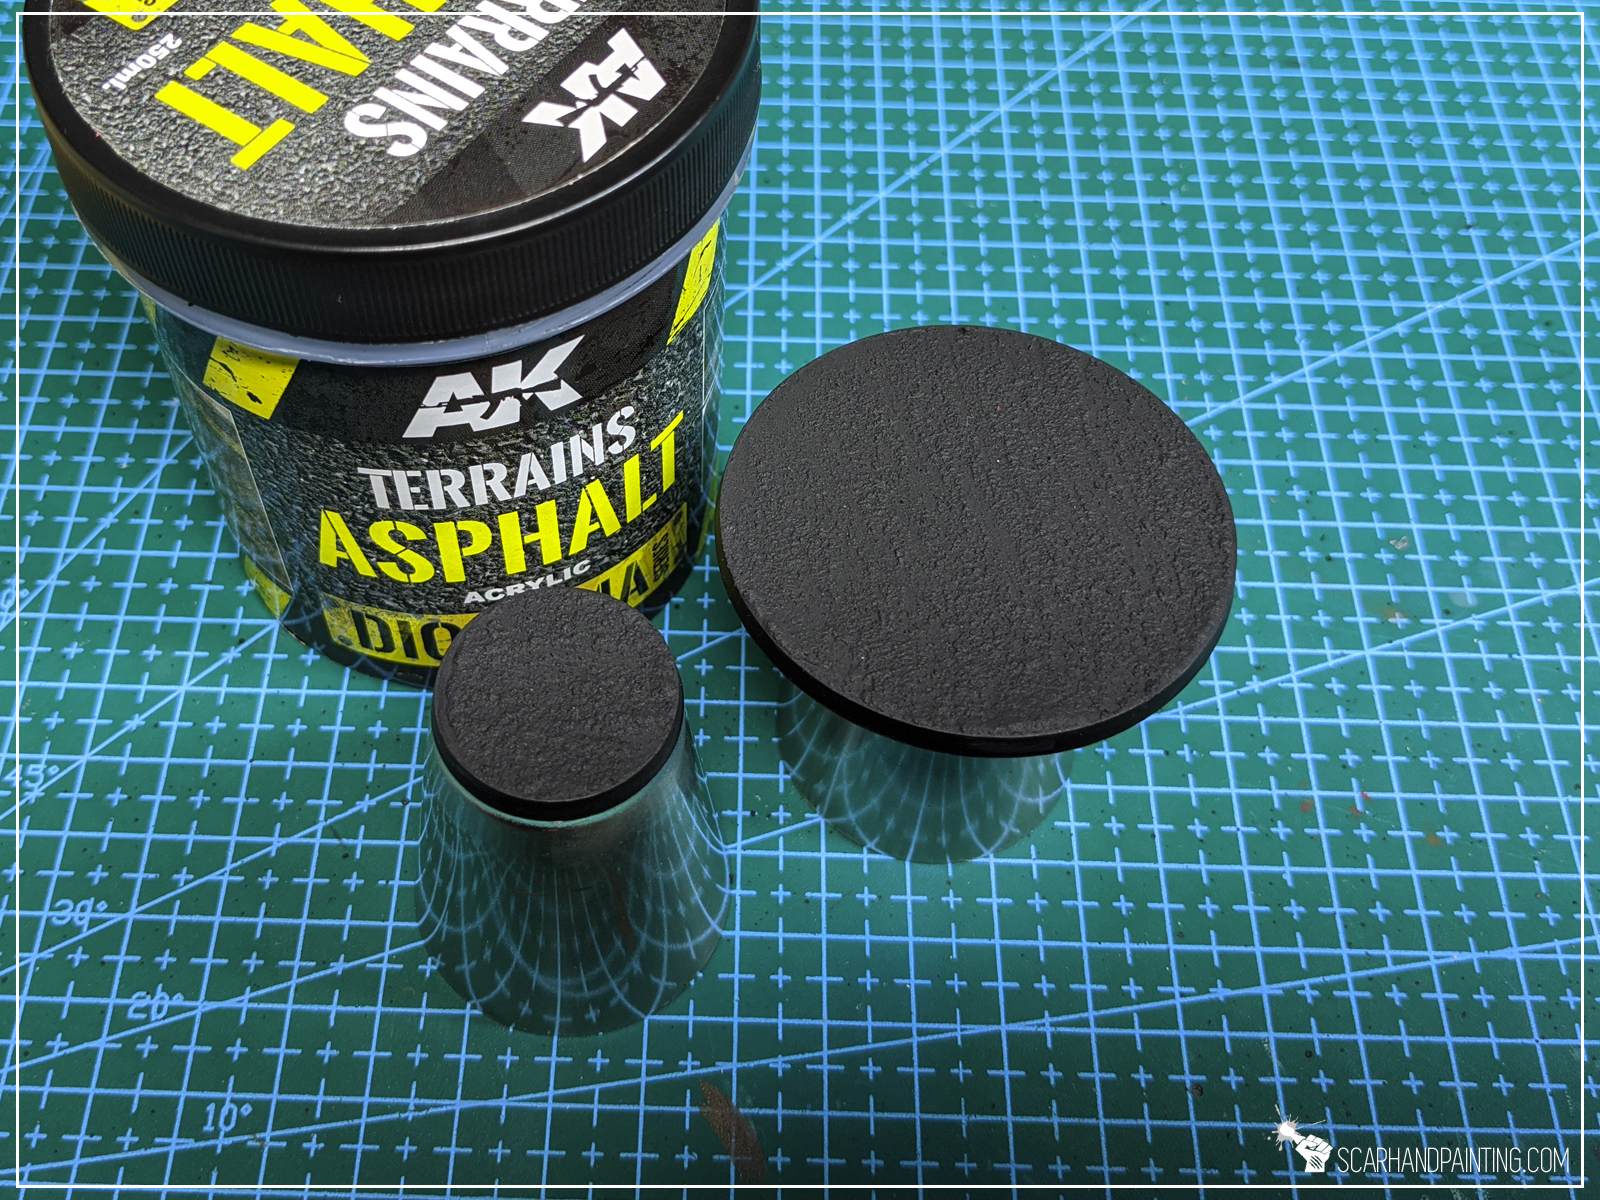
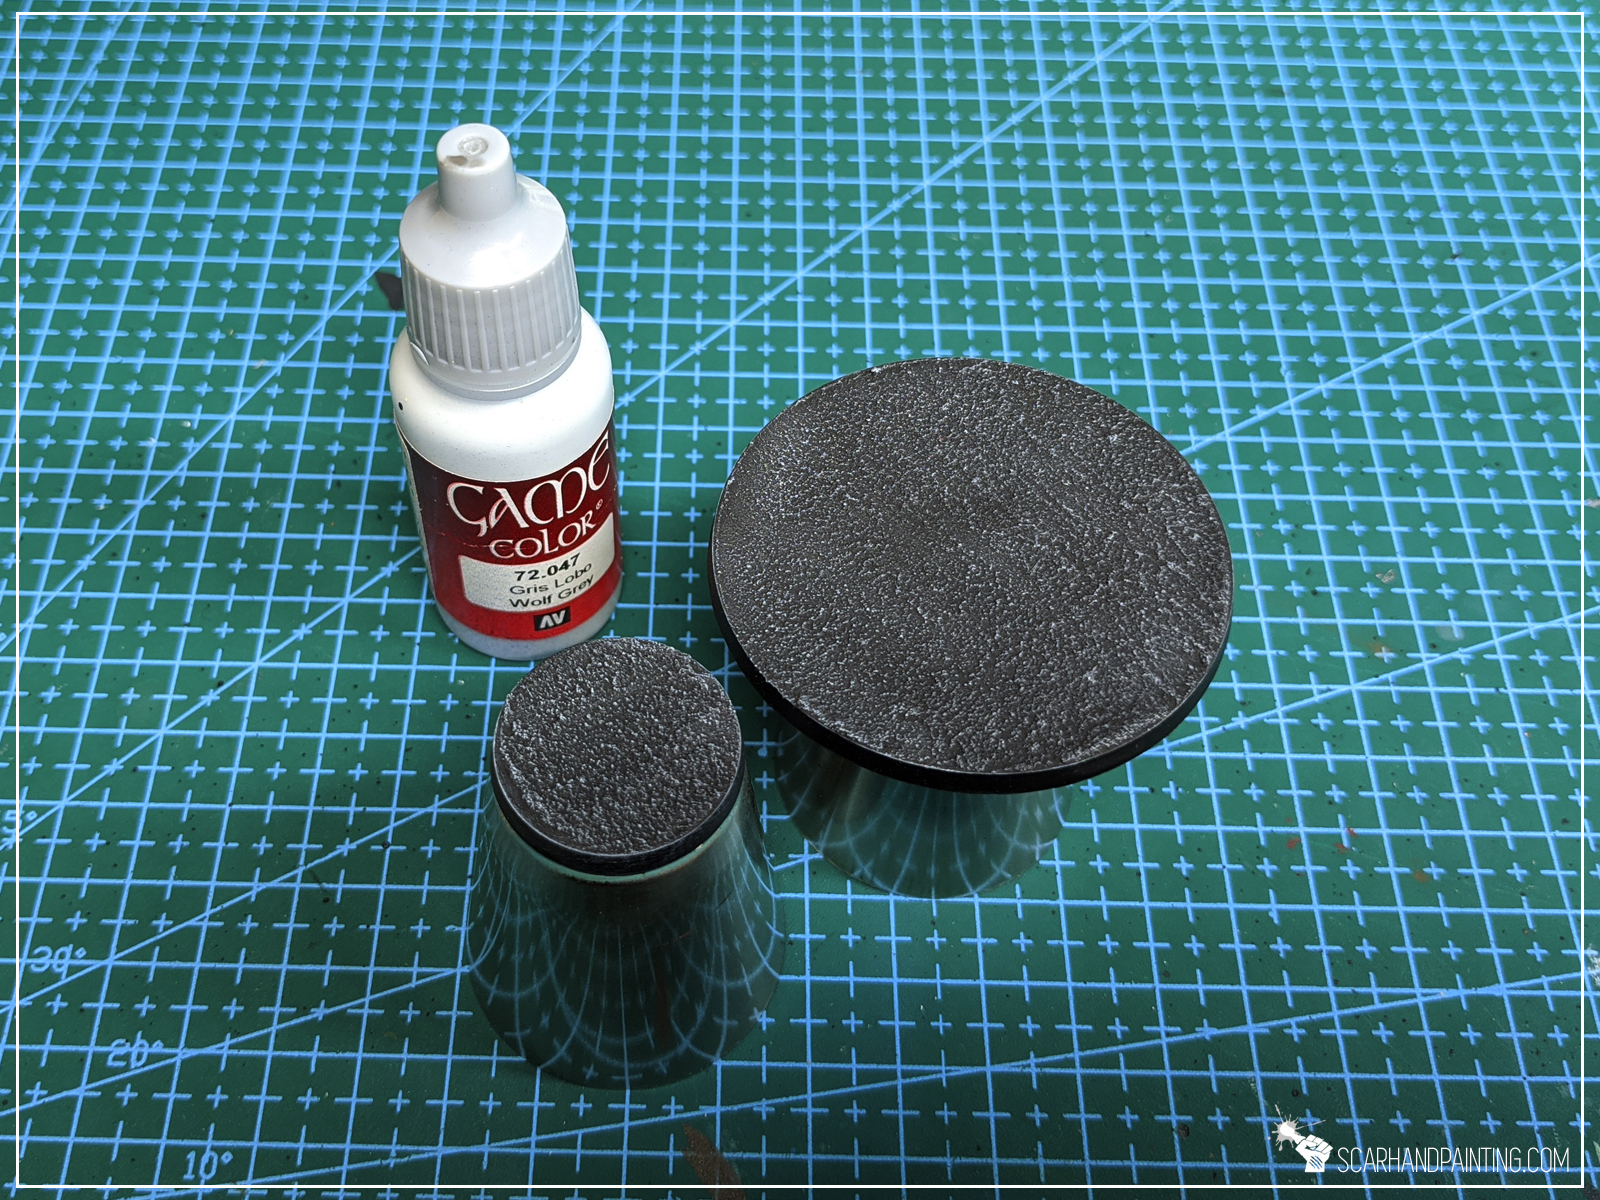
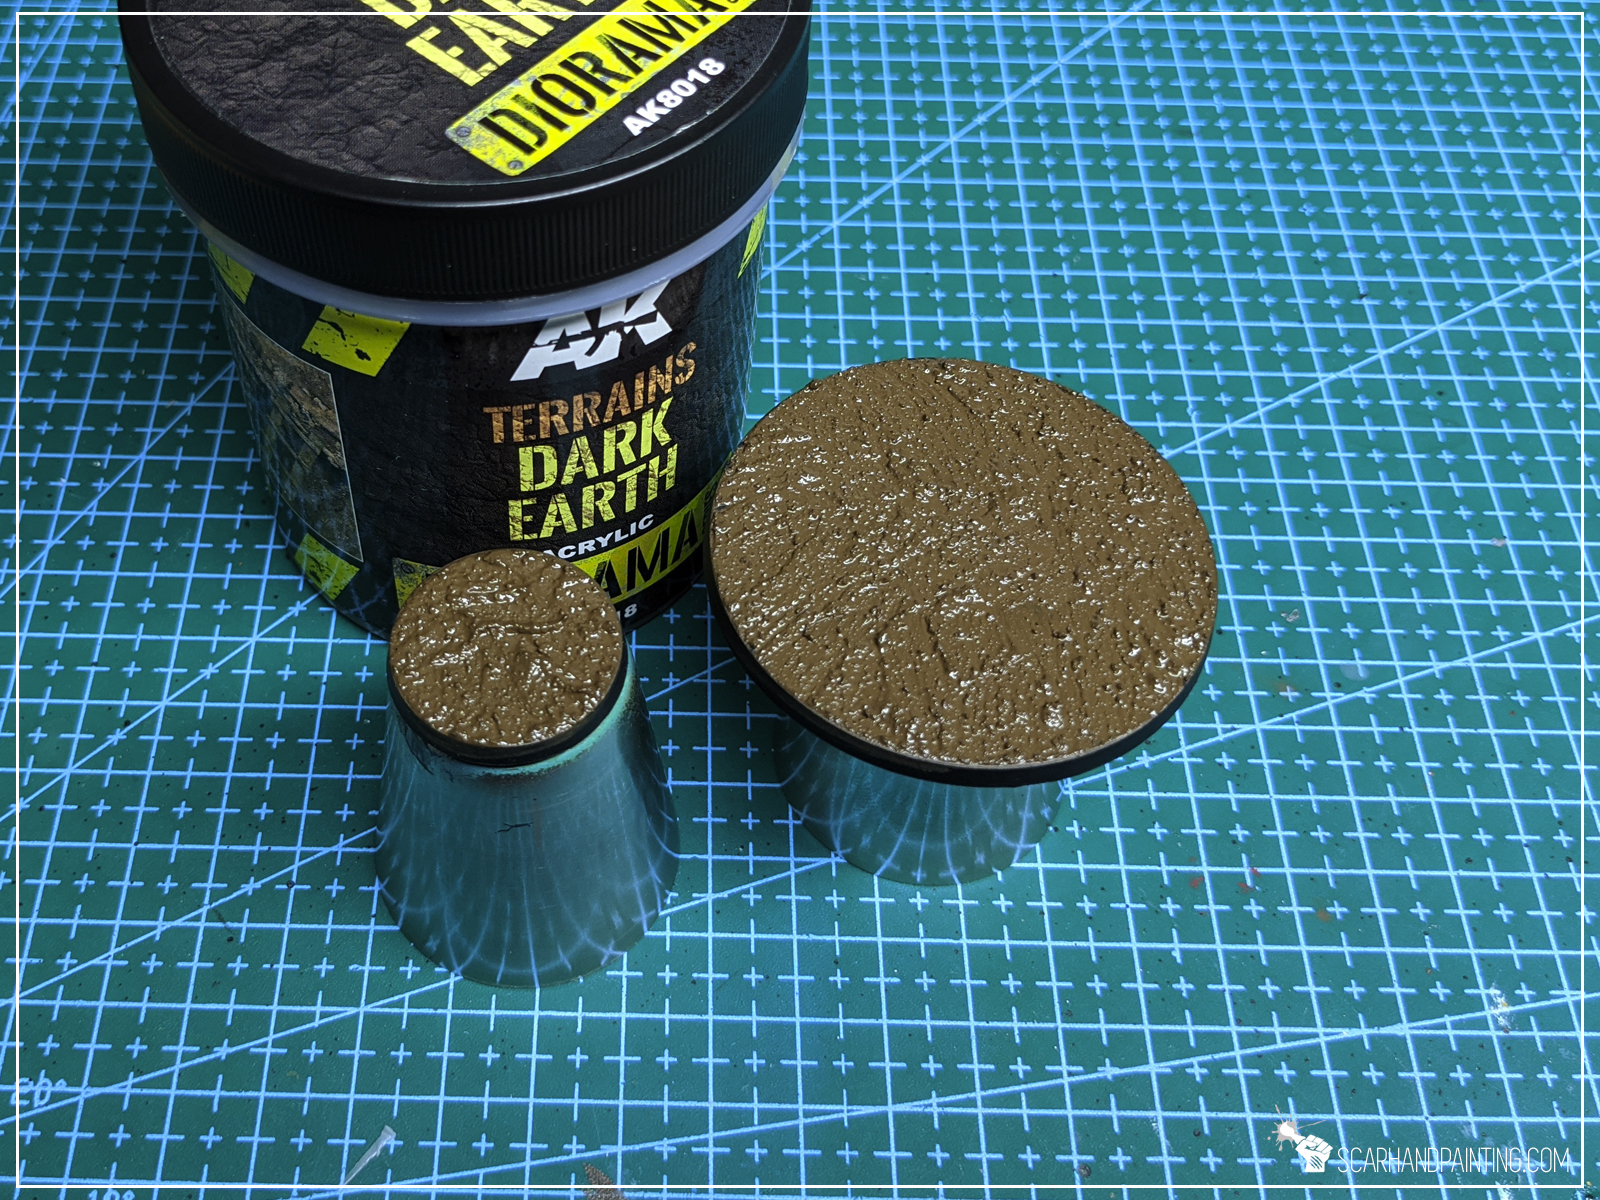
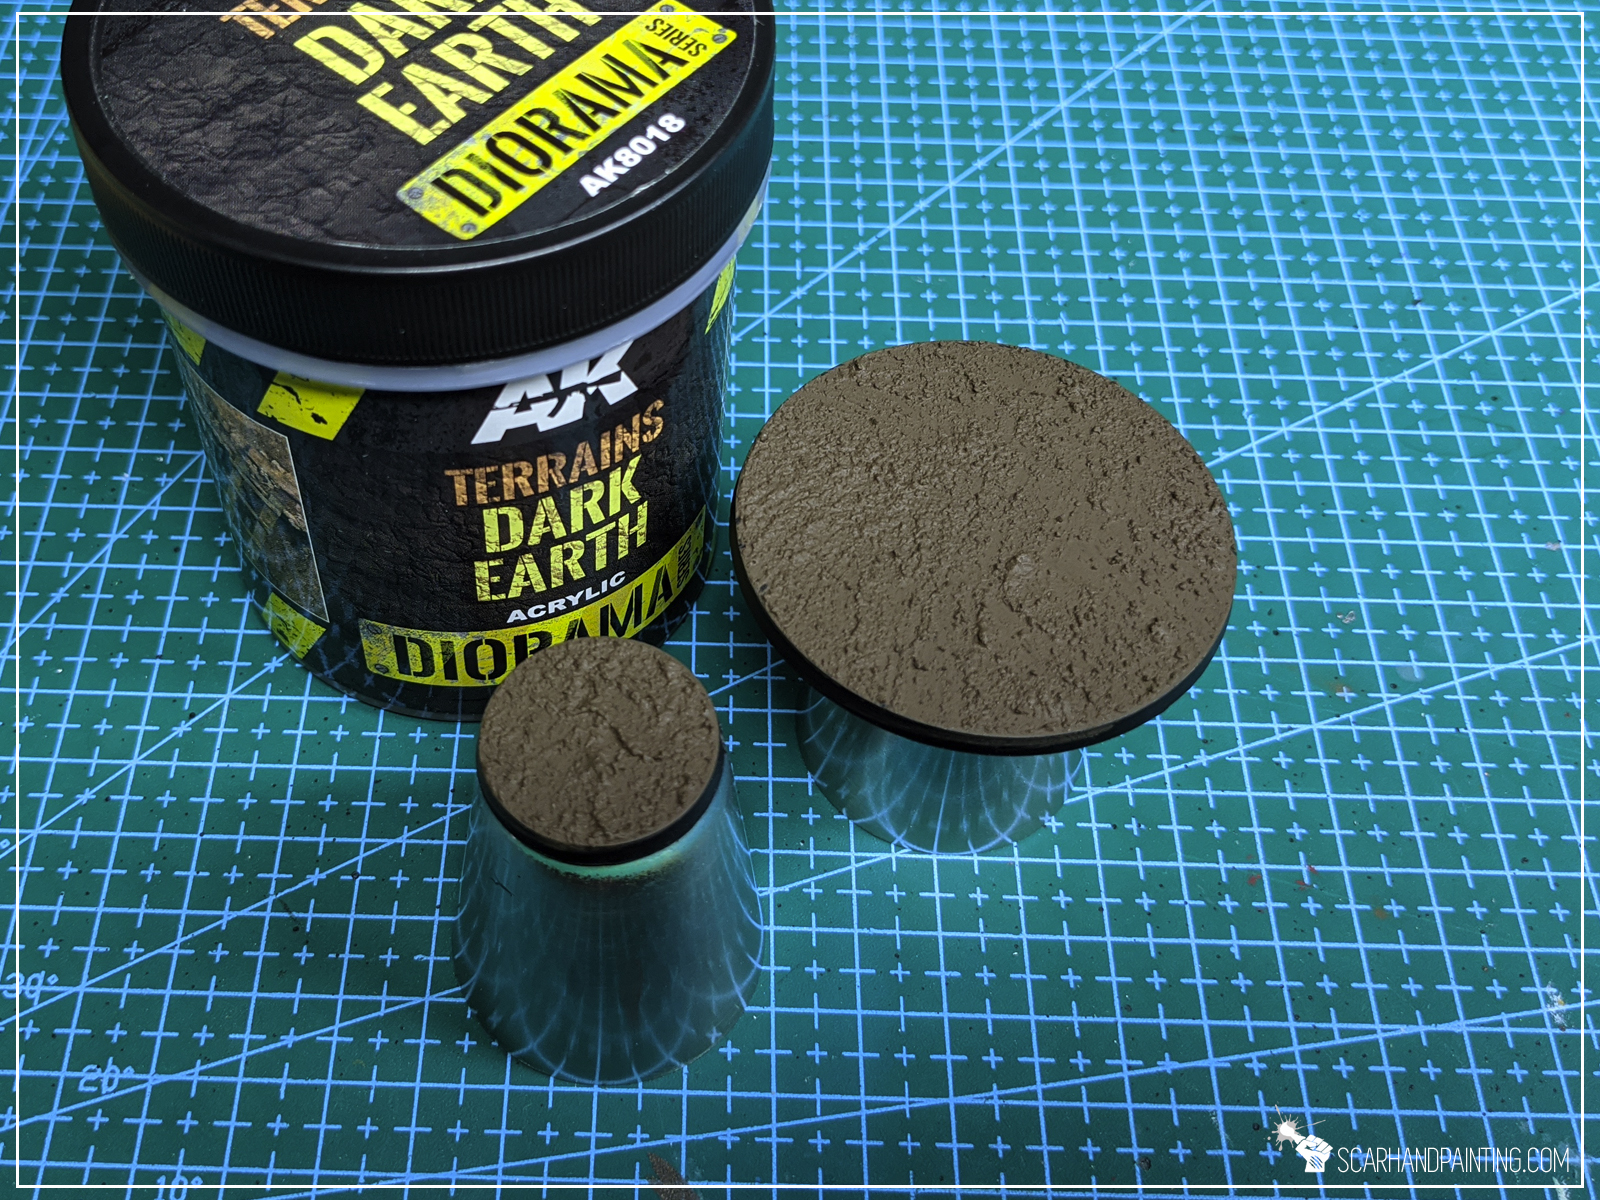
Say goodbye to sand on PVA glue! This puppy is now my favorite two-steps basing for fantasy miniatures!

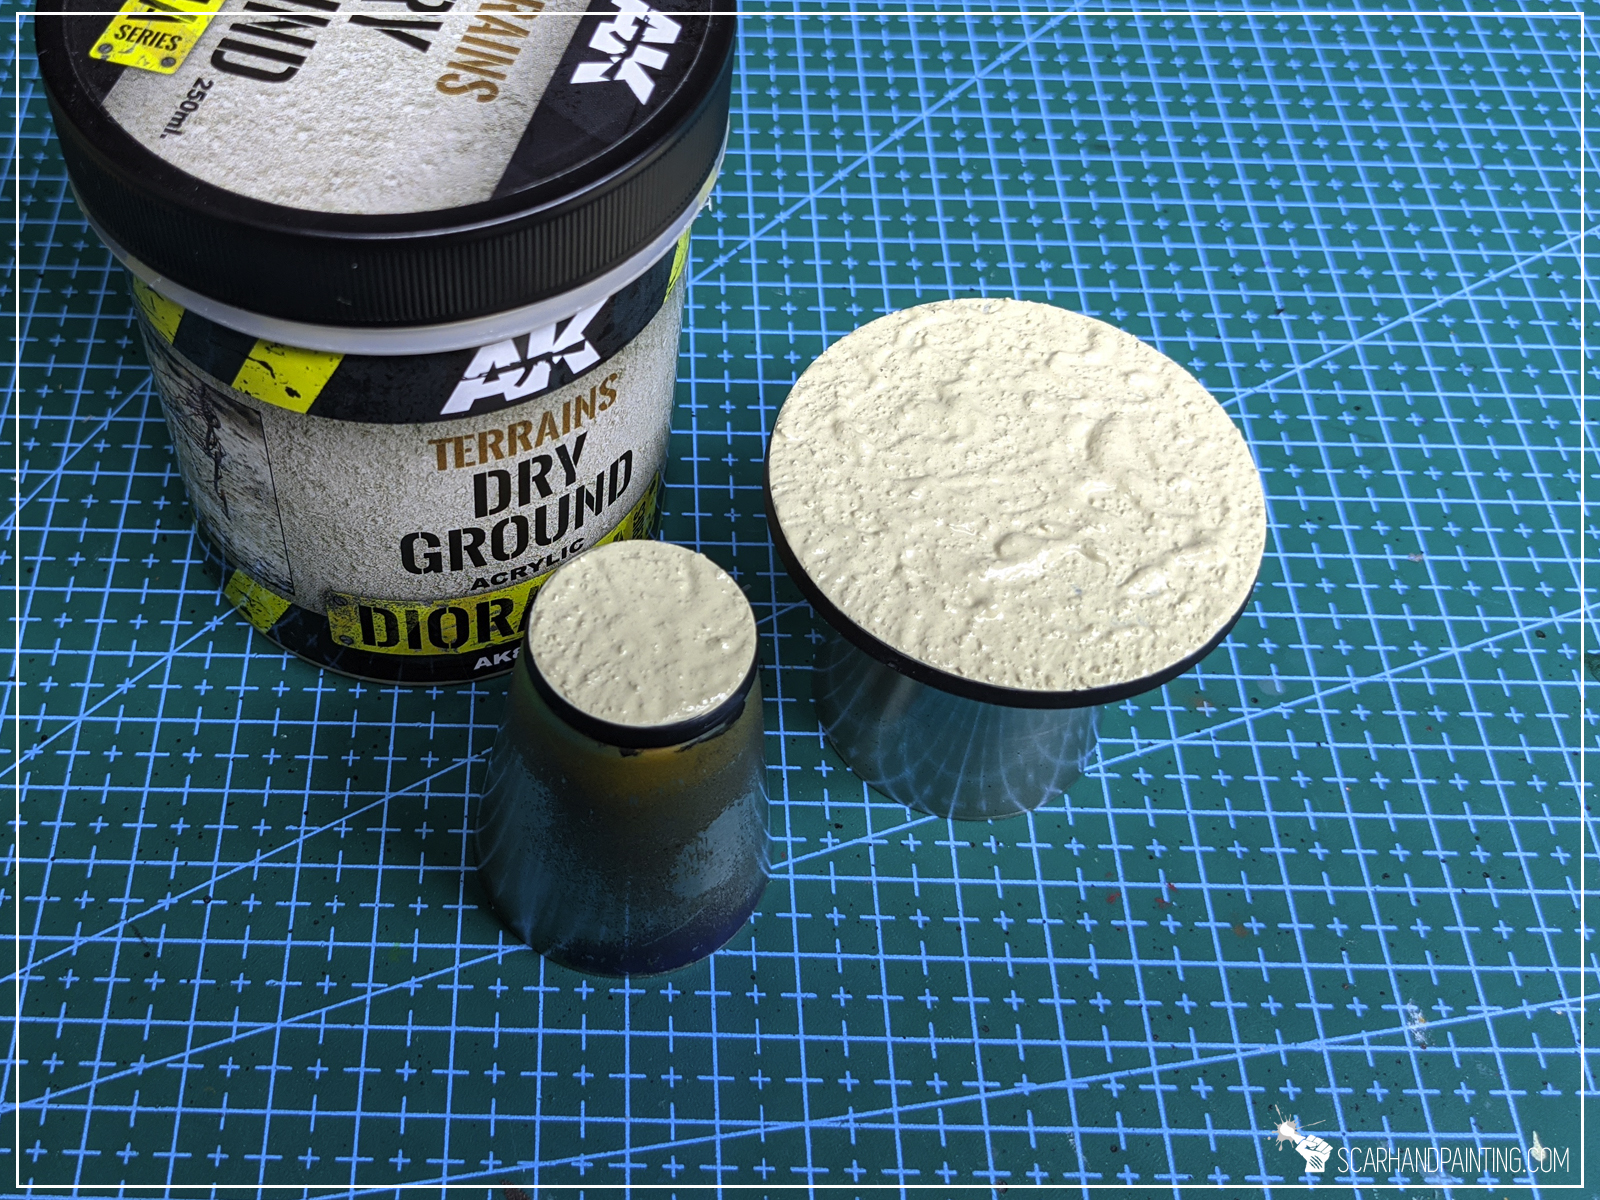
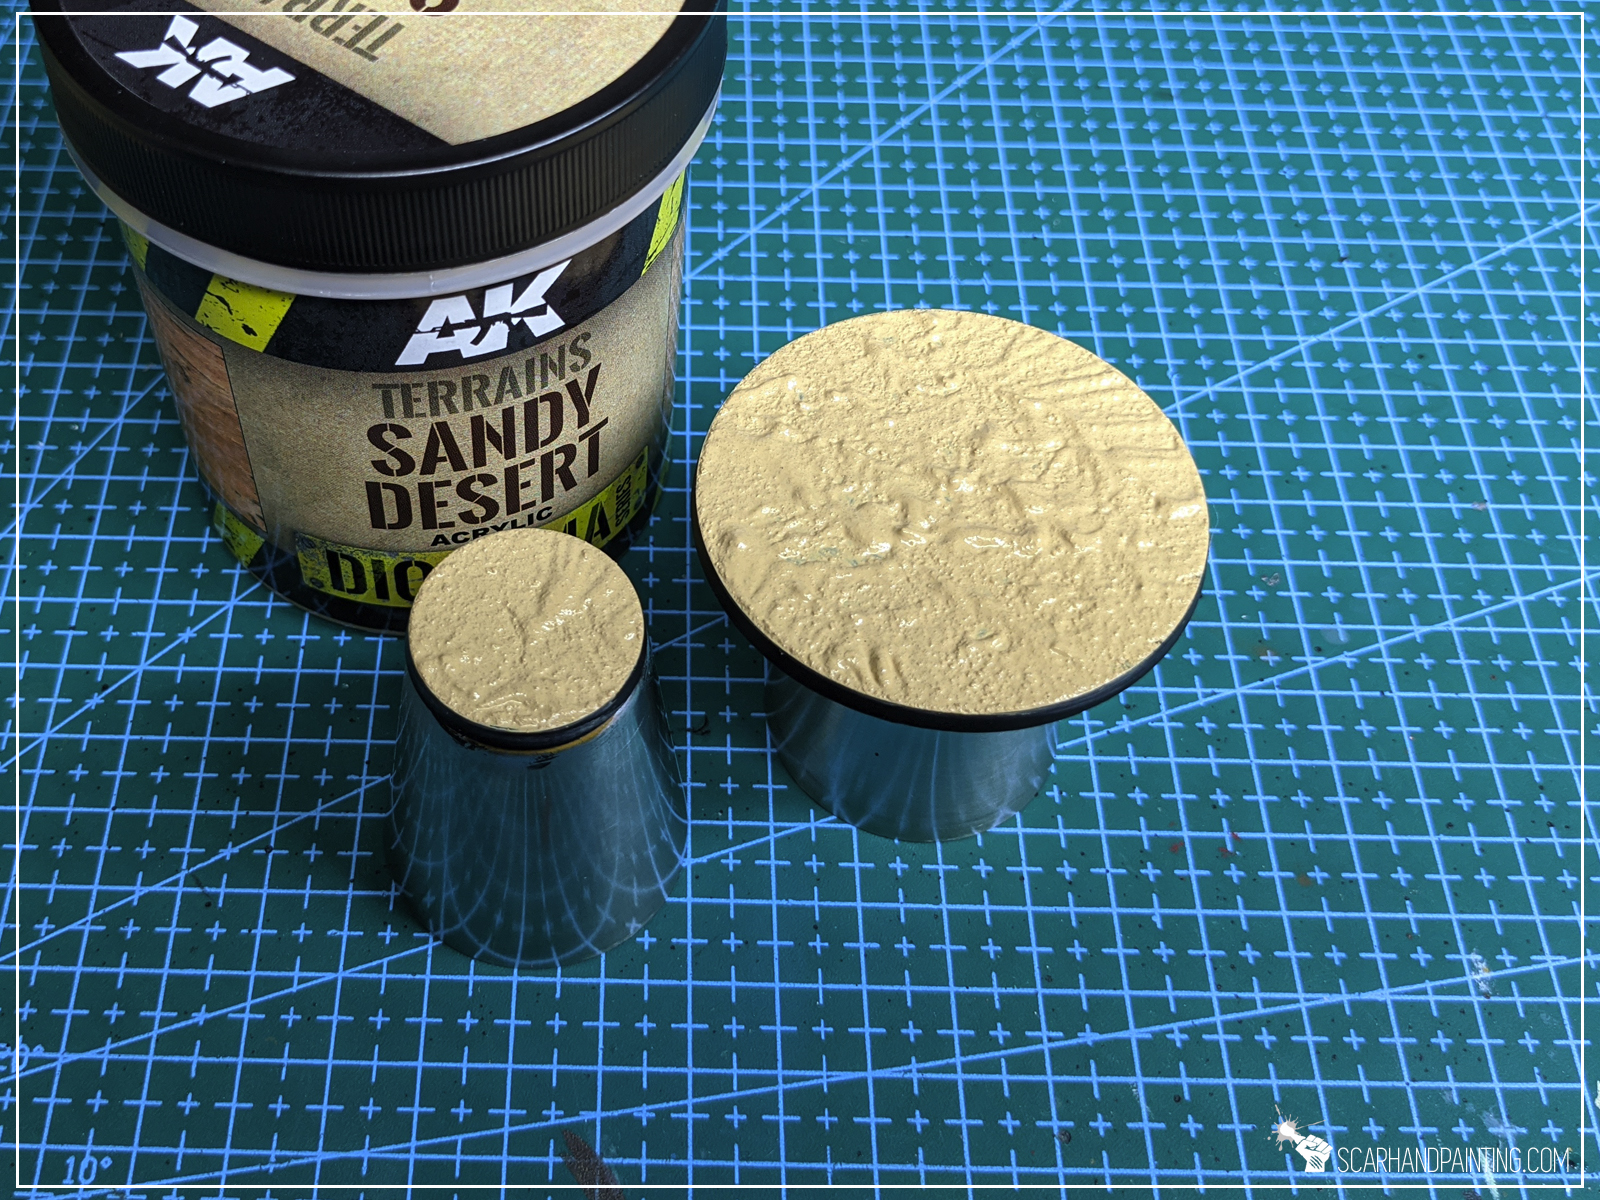
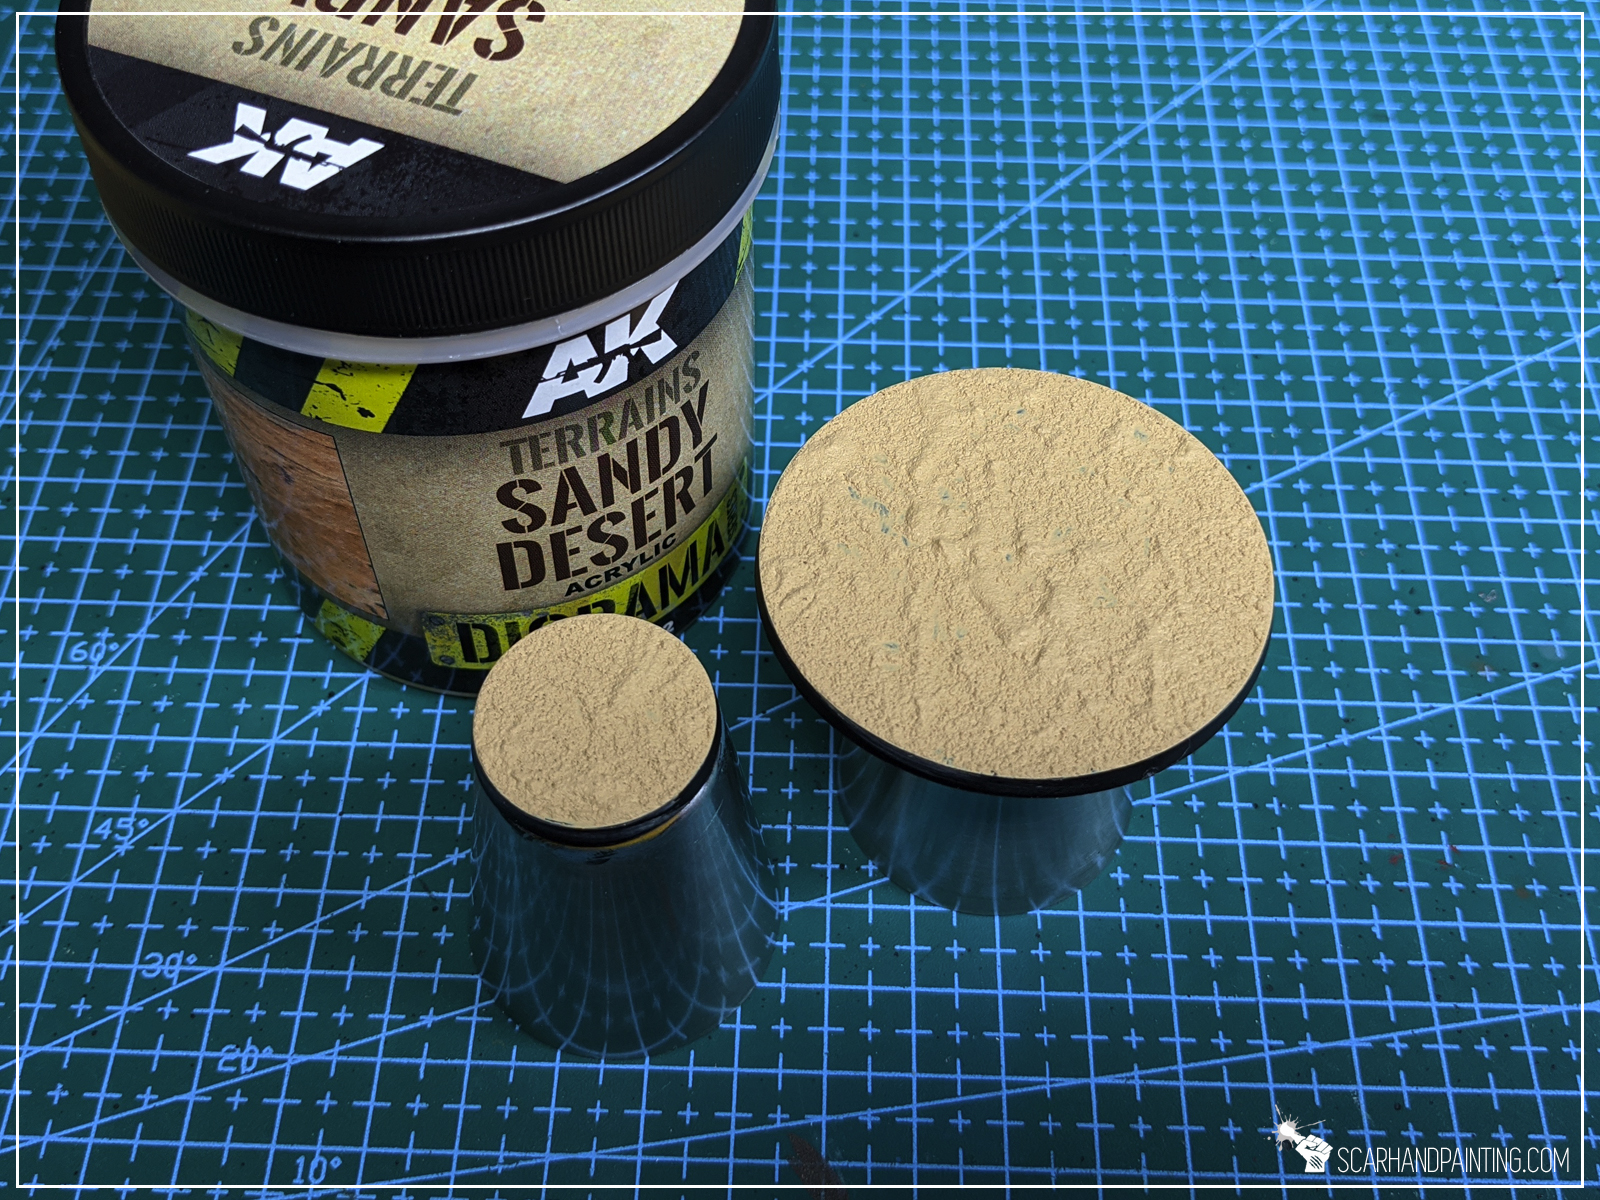
Would have never expected to go with such a color, but seeing the end result I’m getting strong Star Wars The Last Jedi / Mad Max Salt Planes vibes… many possibilities!
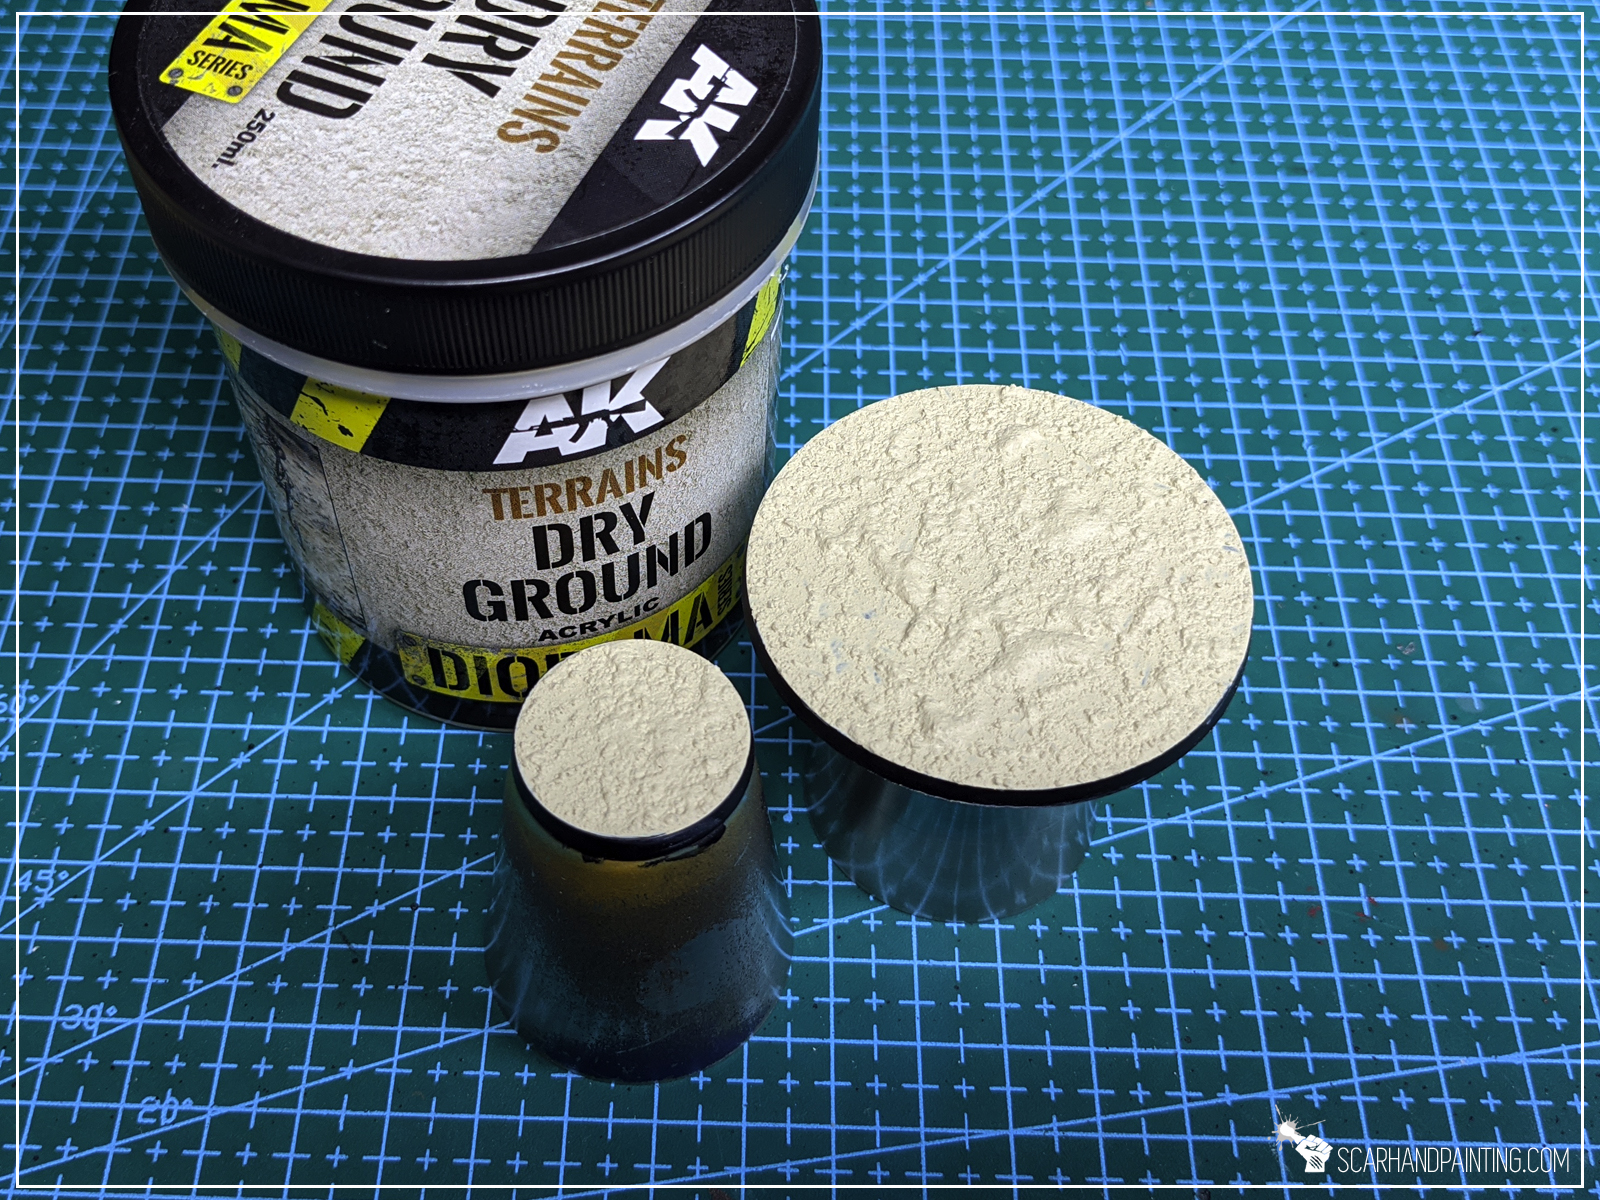

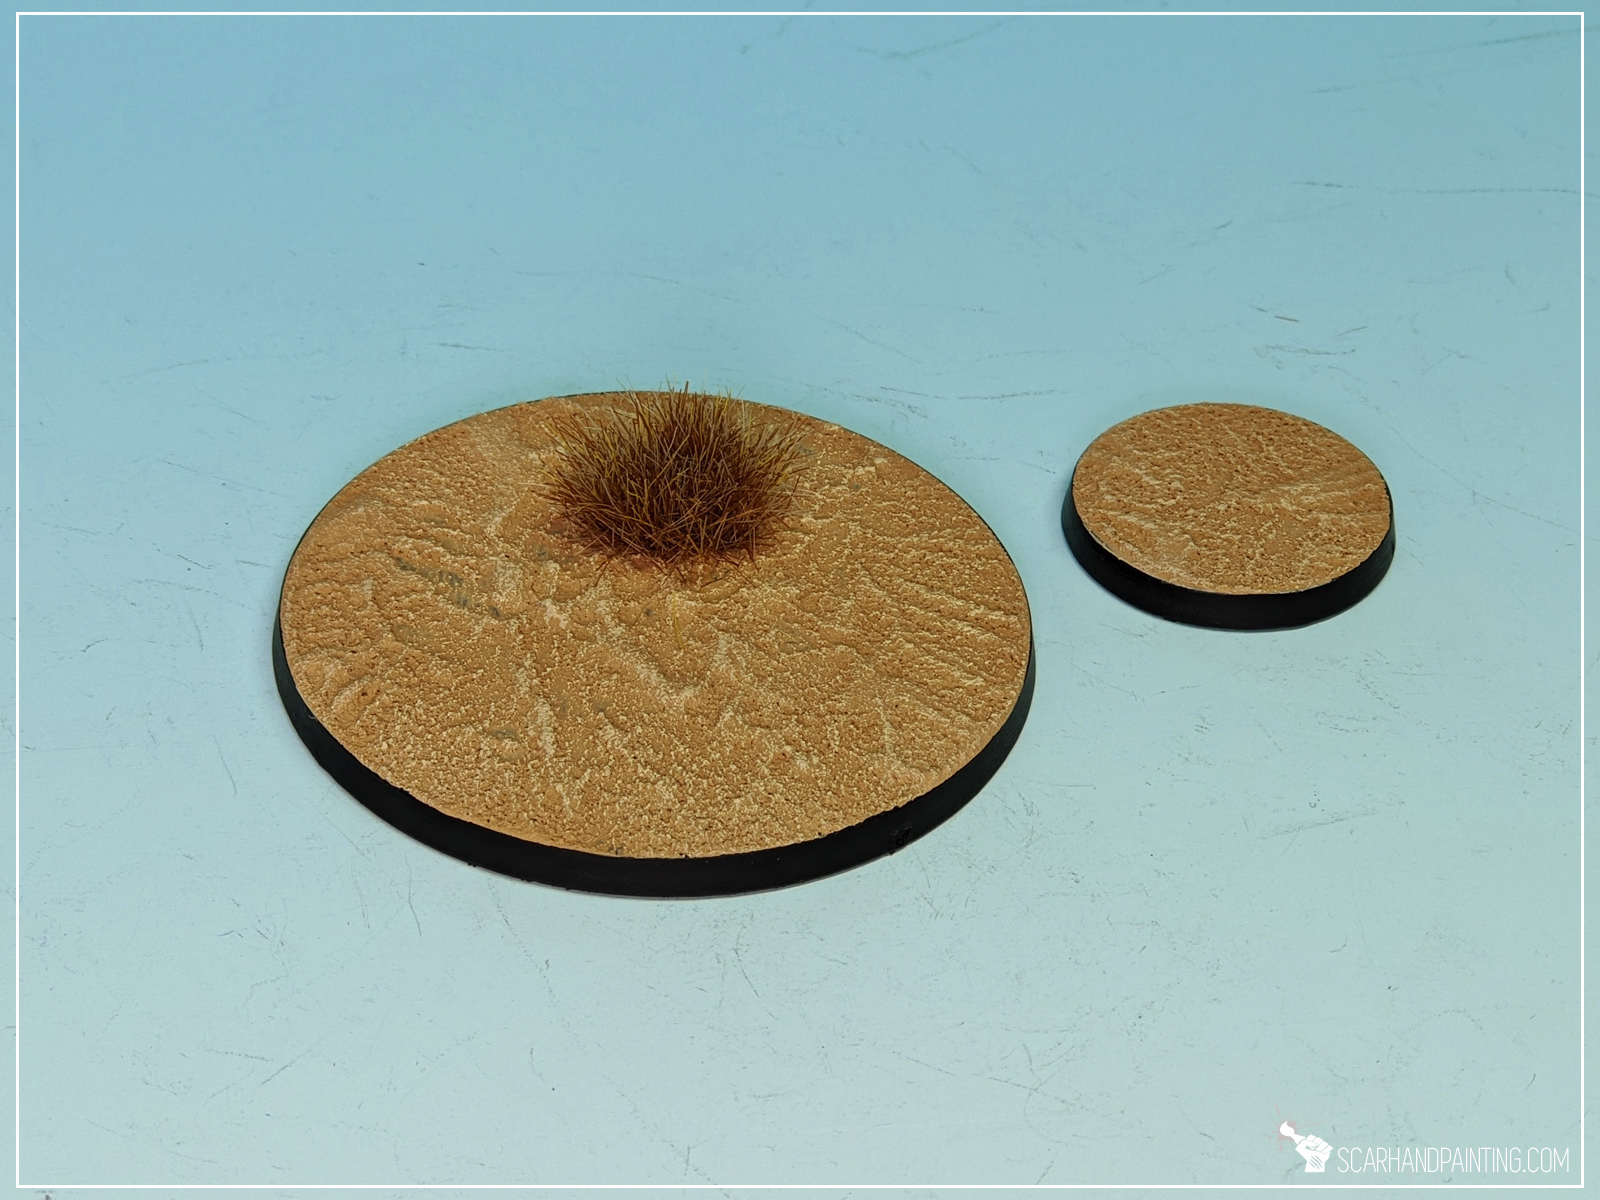
No need to explain – just look at this! Two steps and your miniature is based on a desert!
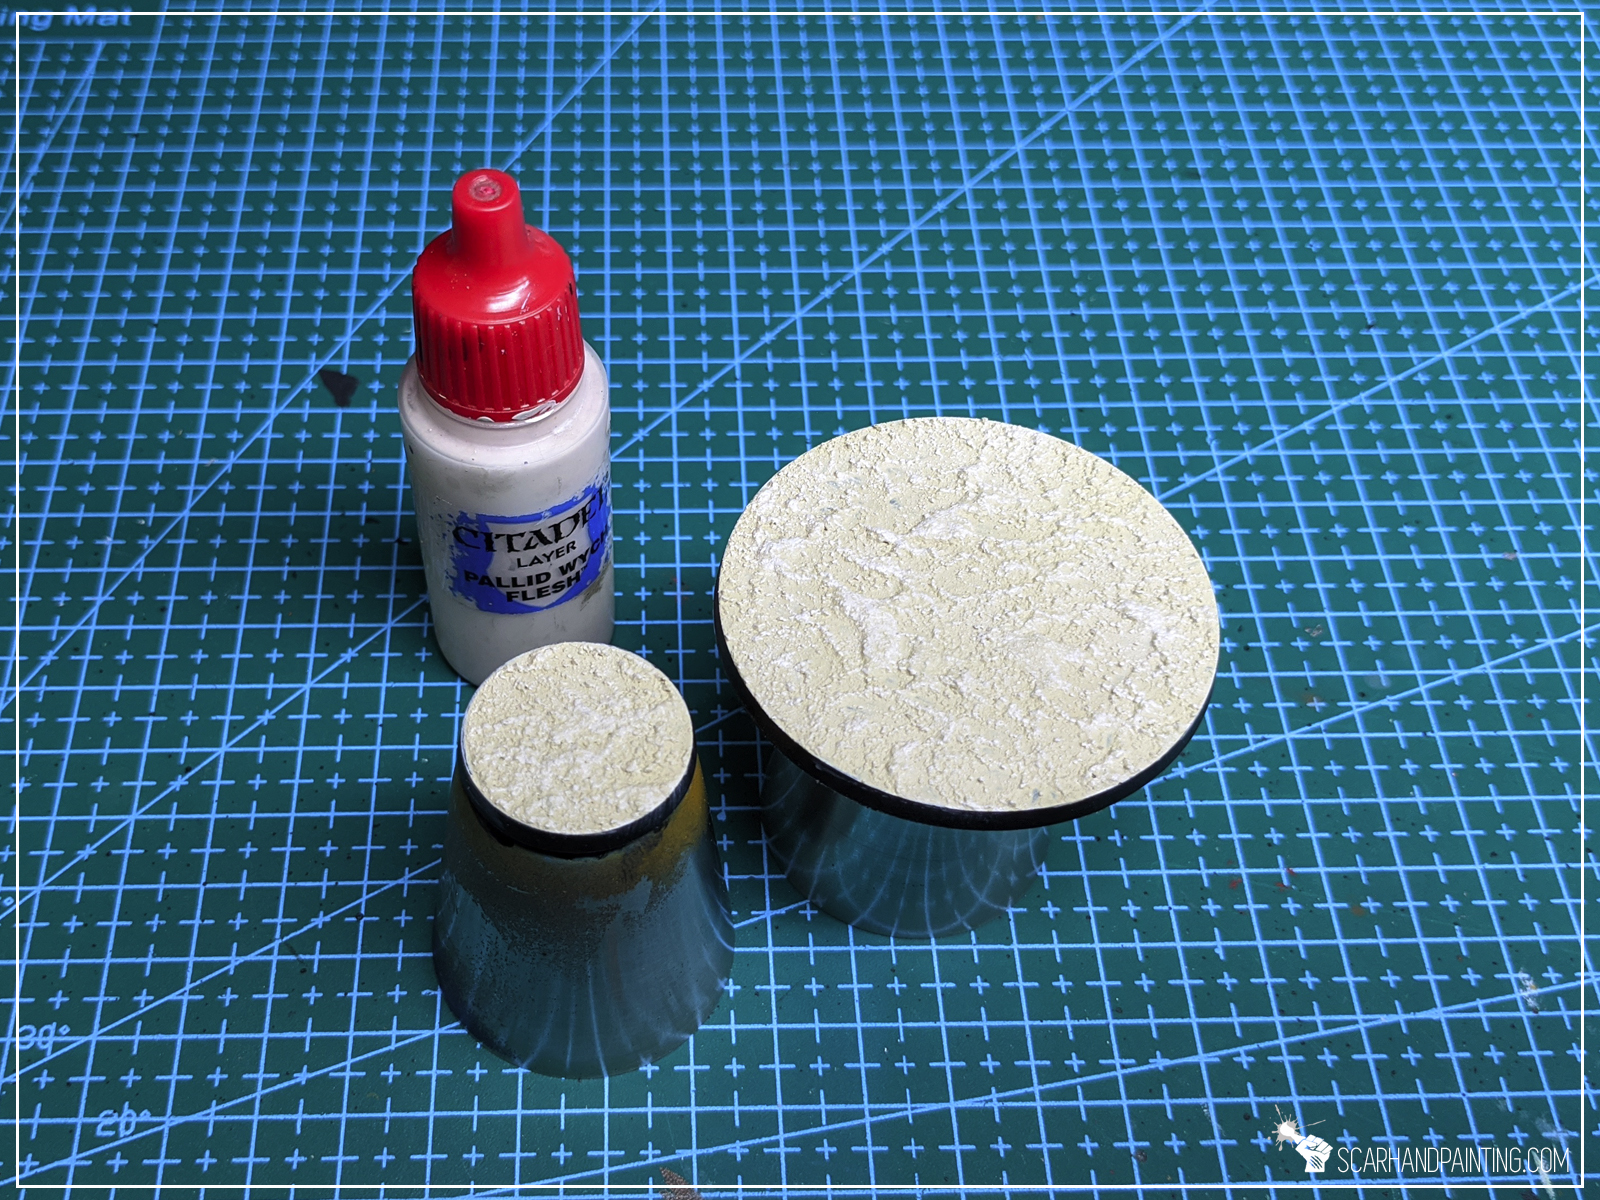
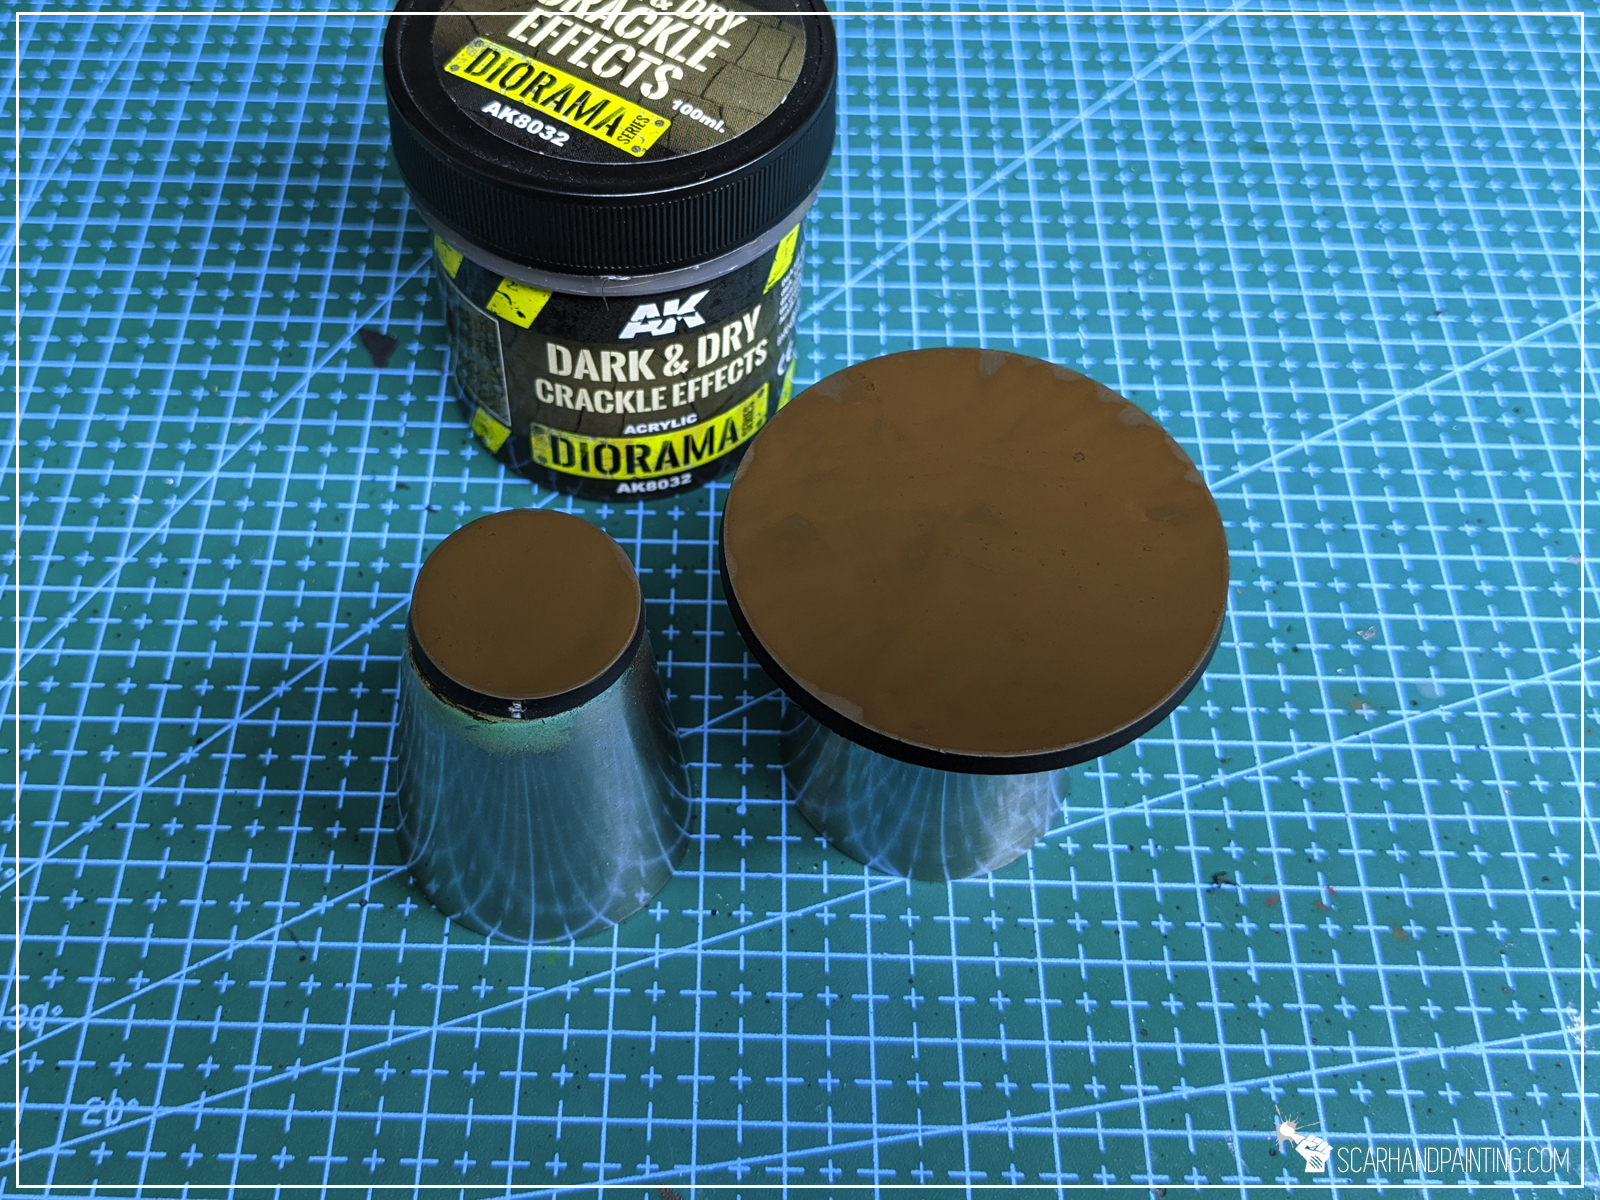
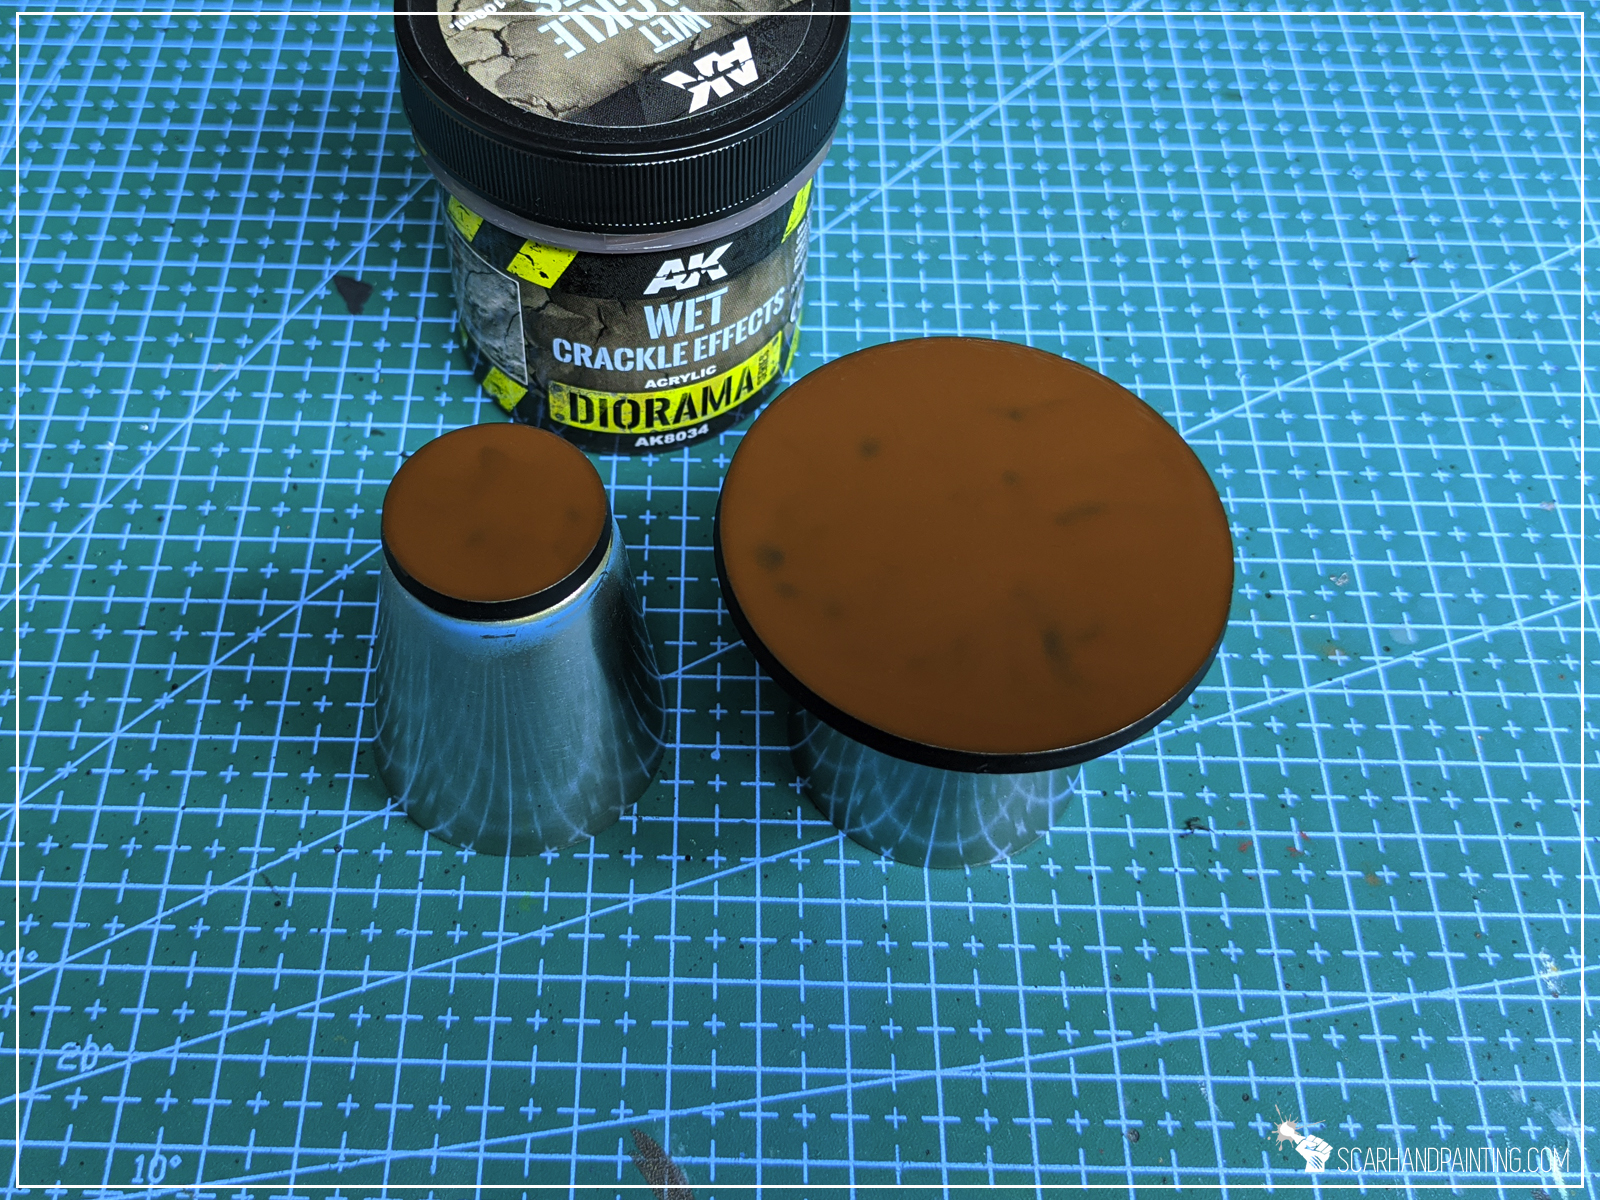
This one didn’t hit the mark for me. I expected a more paste-like, smooth surface. More of a Dark & Dry Crackle end result (below). Either way the product itself is solid, just not what I expected, thus once dried, I didn’t follow up on it. I plan to give it another go on my next project so who knows…
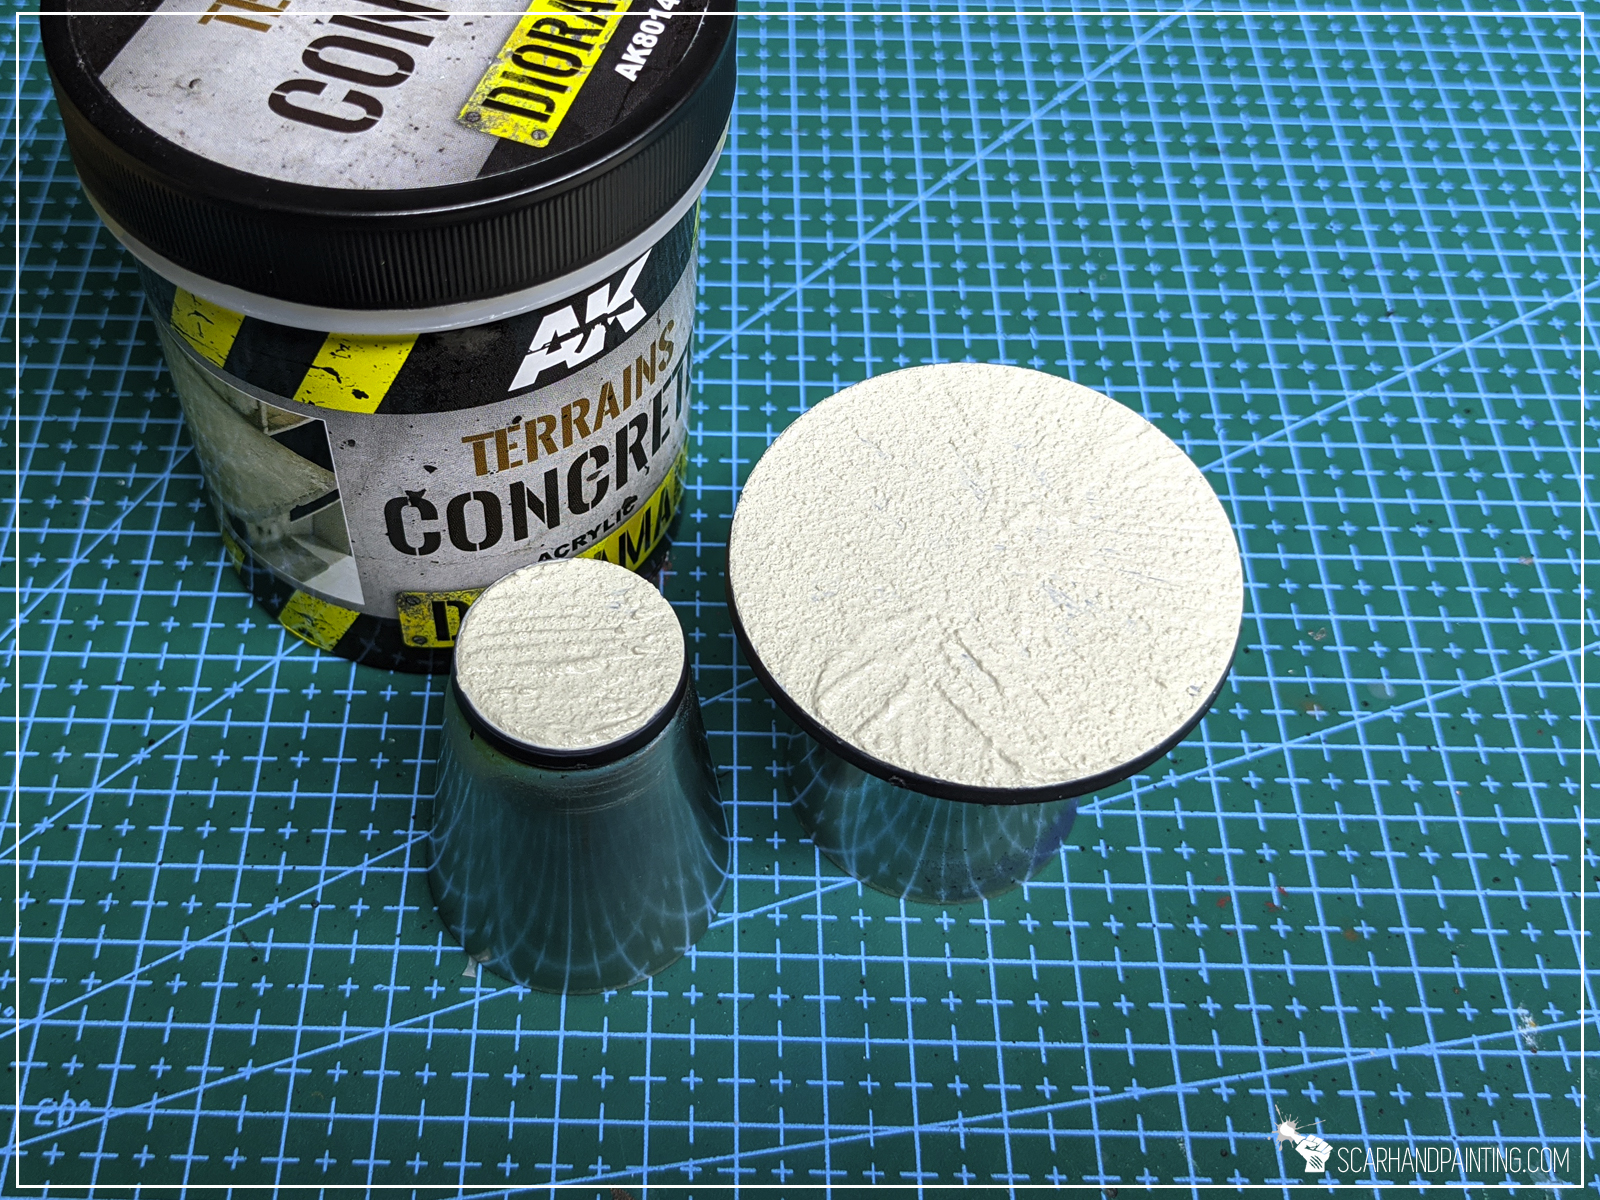

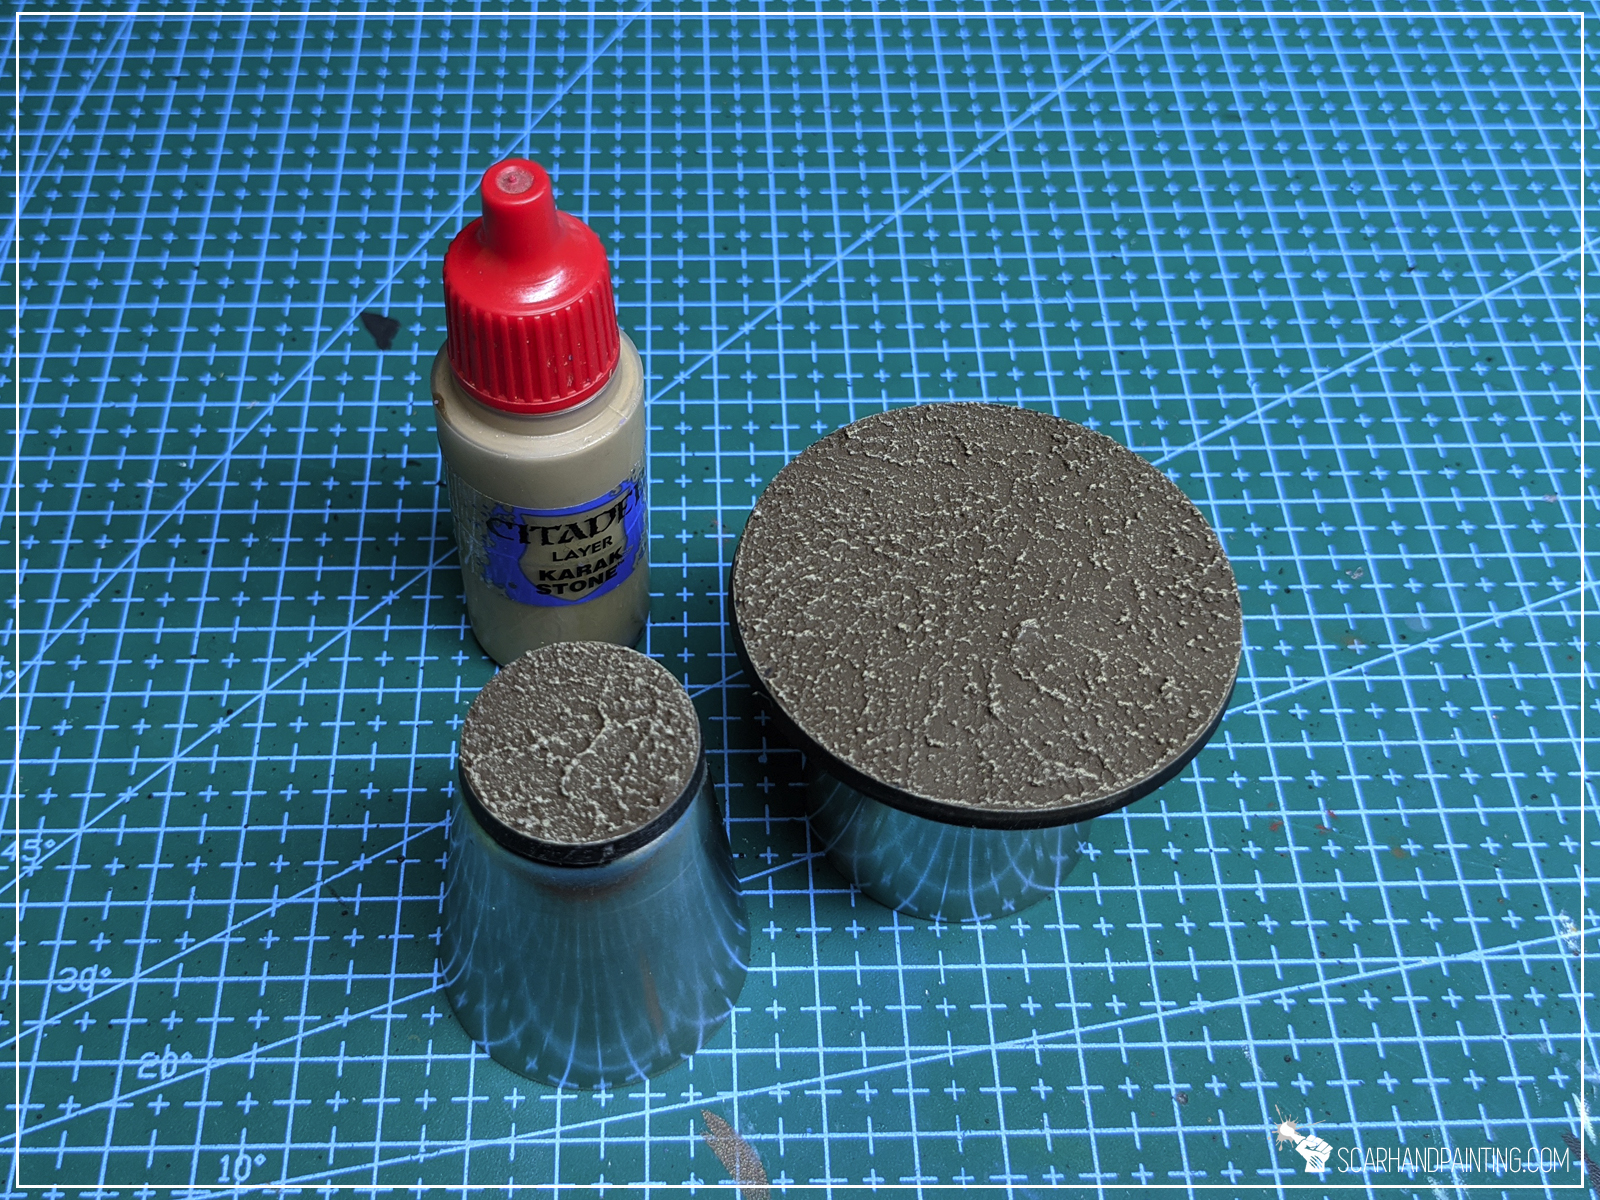
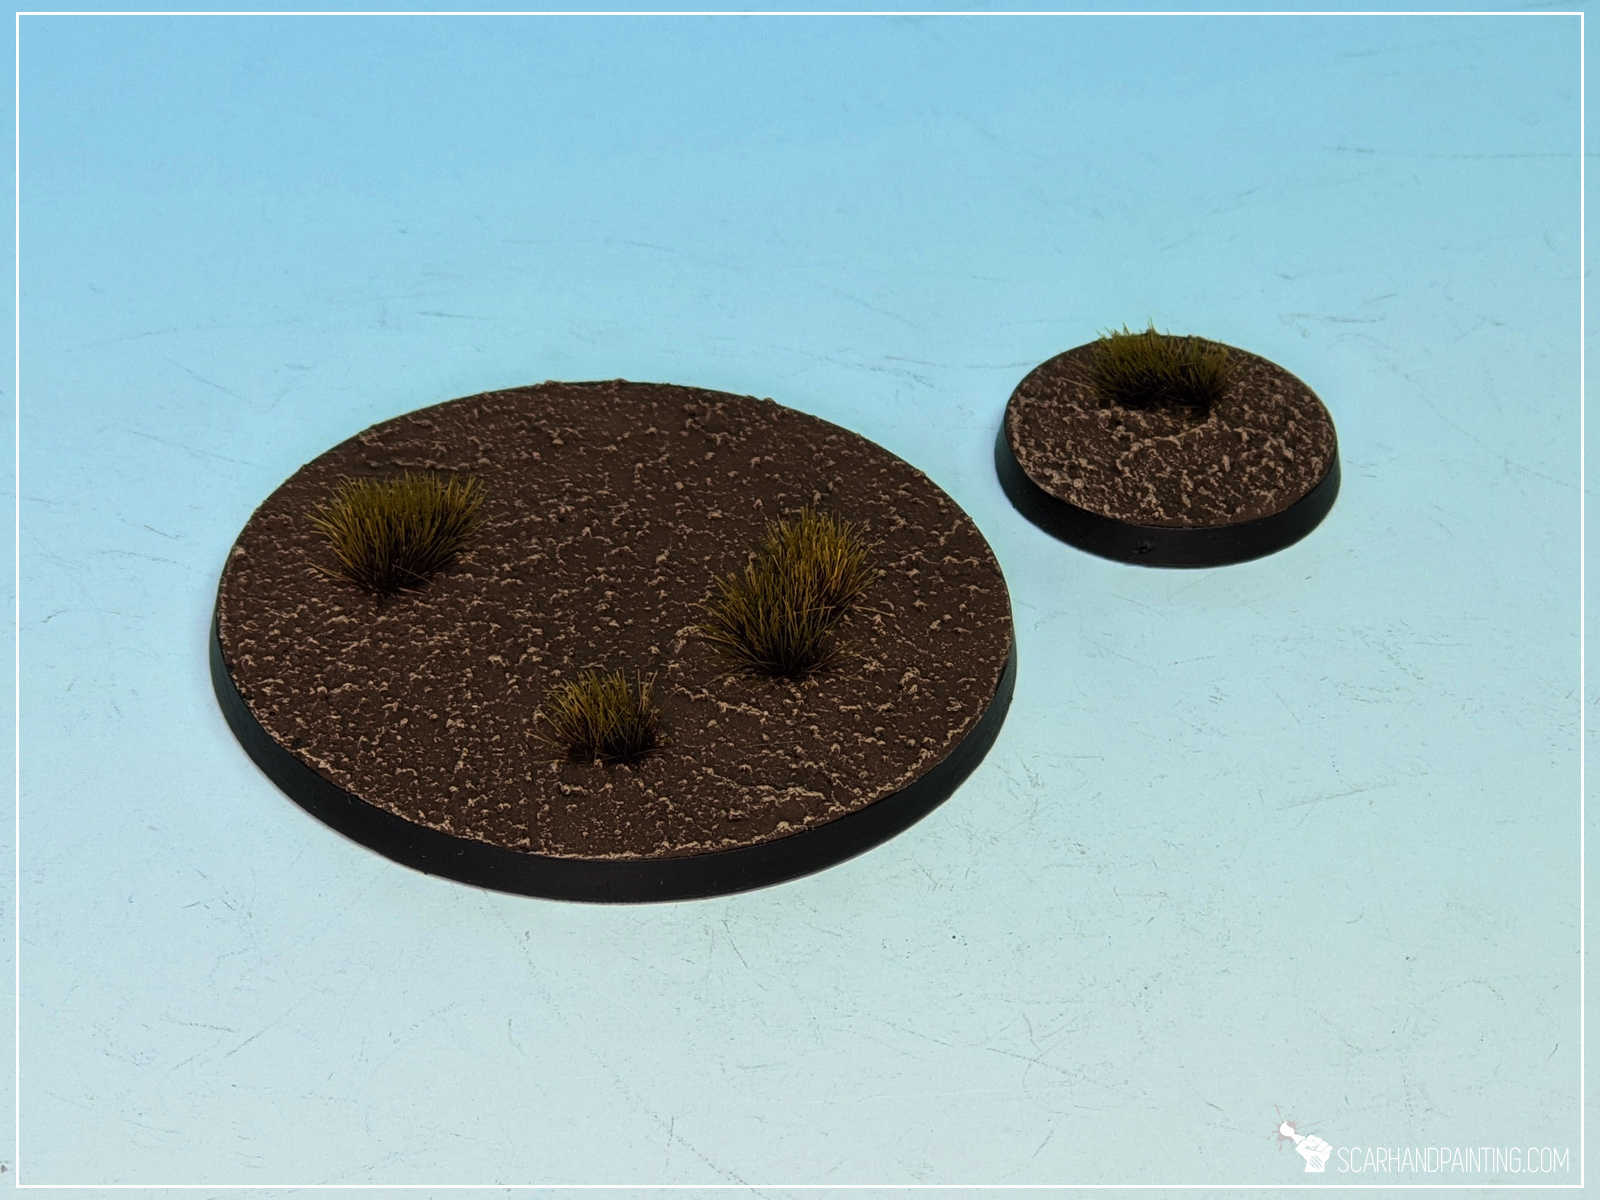
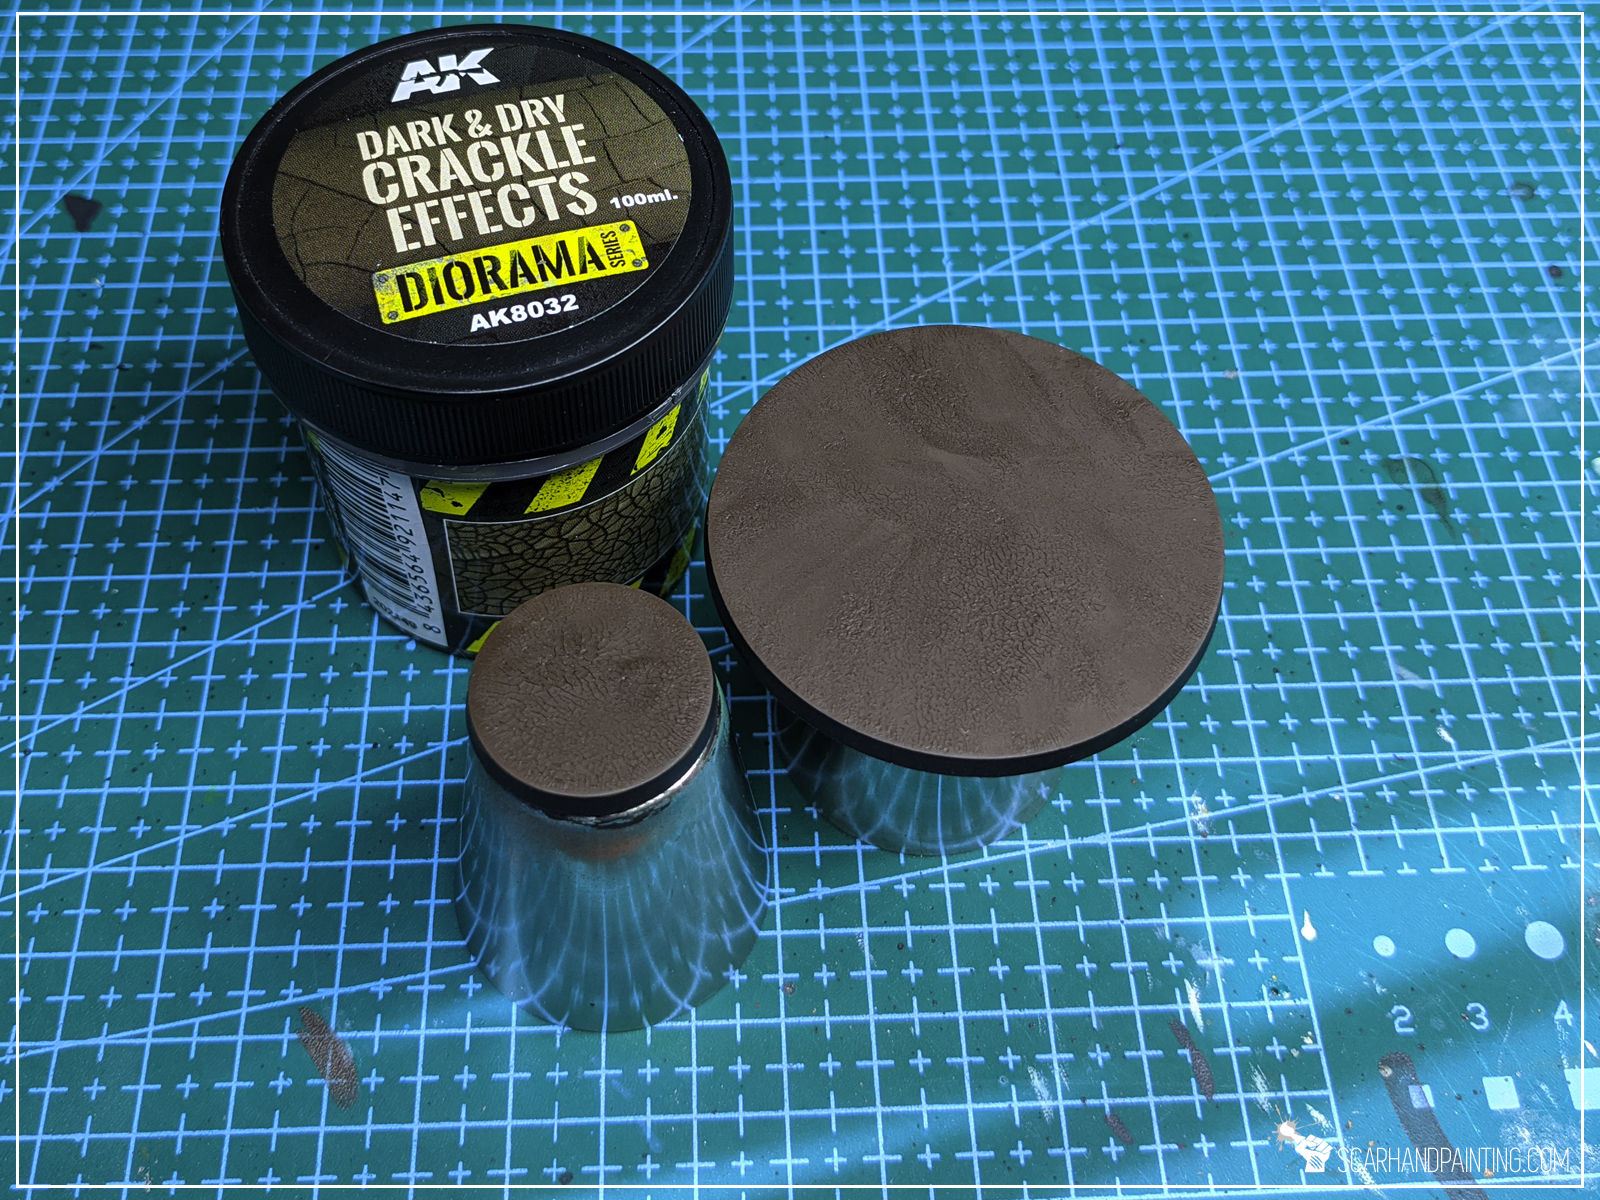
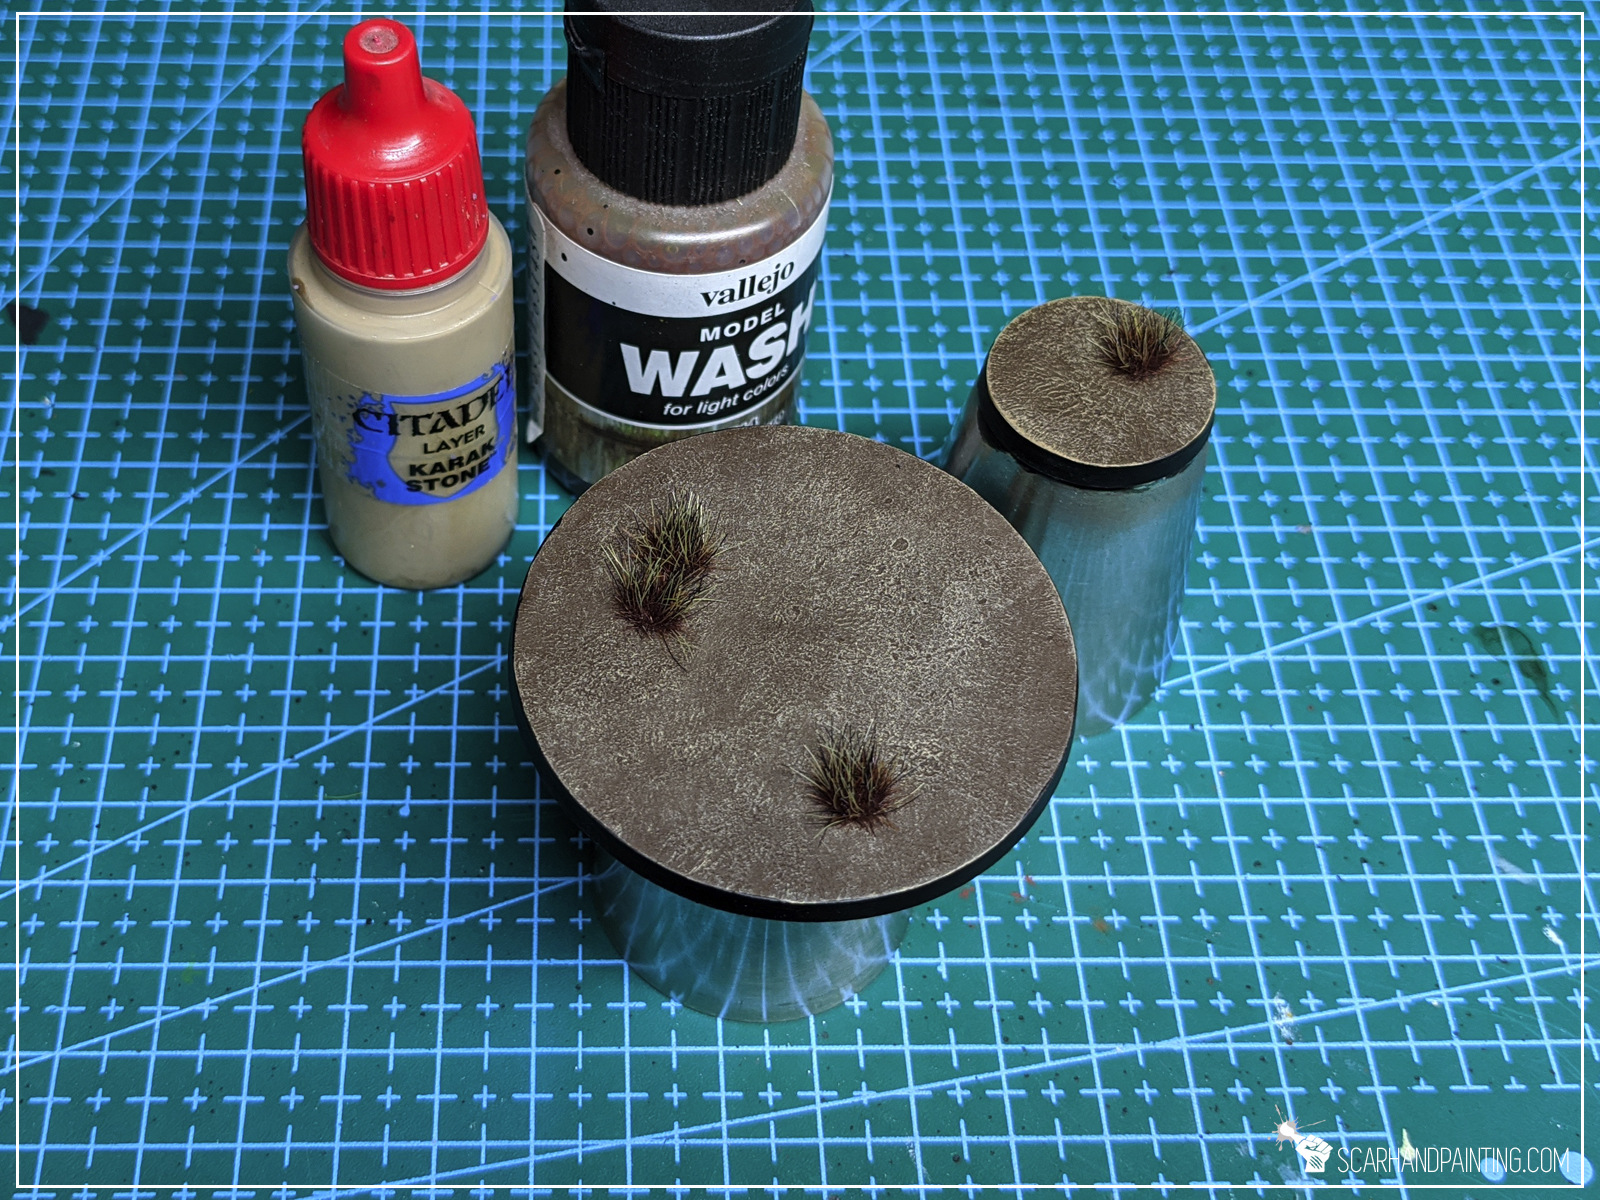
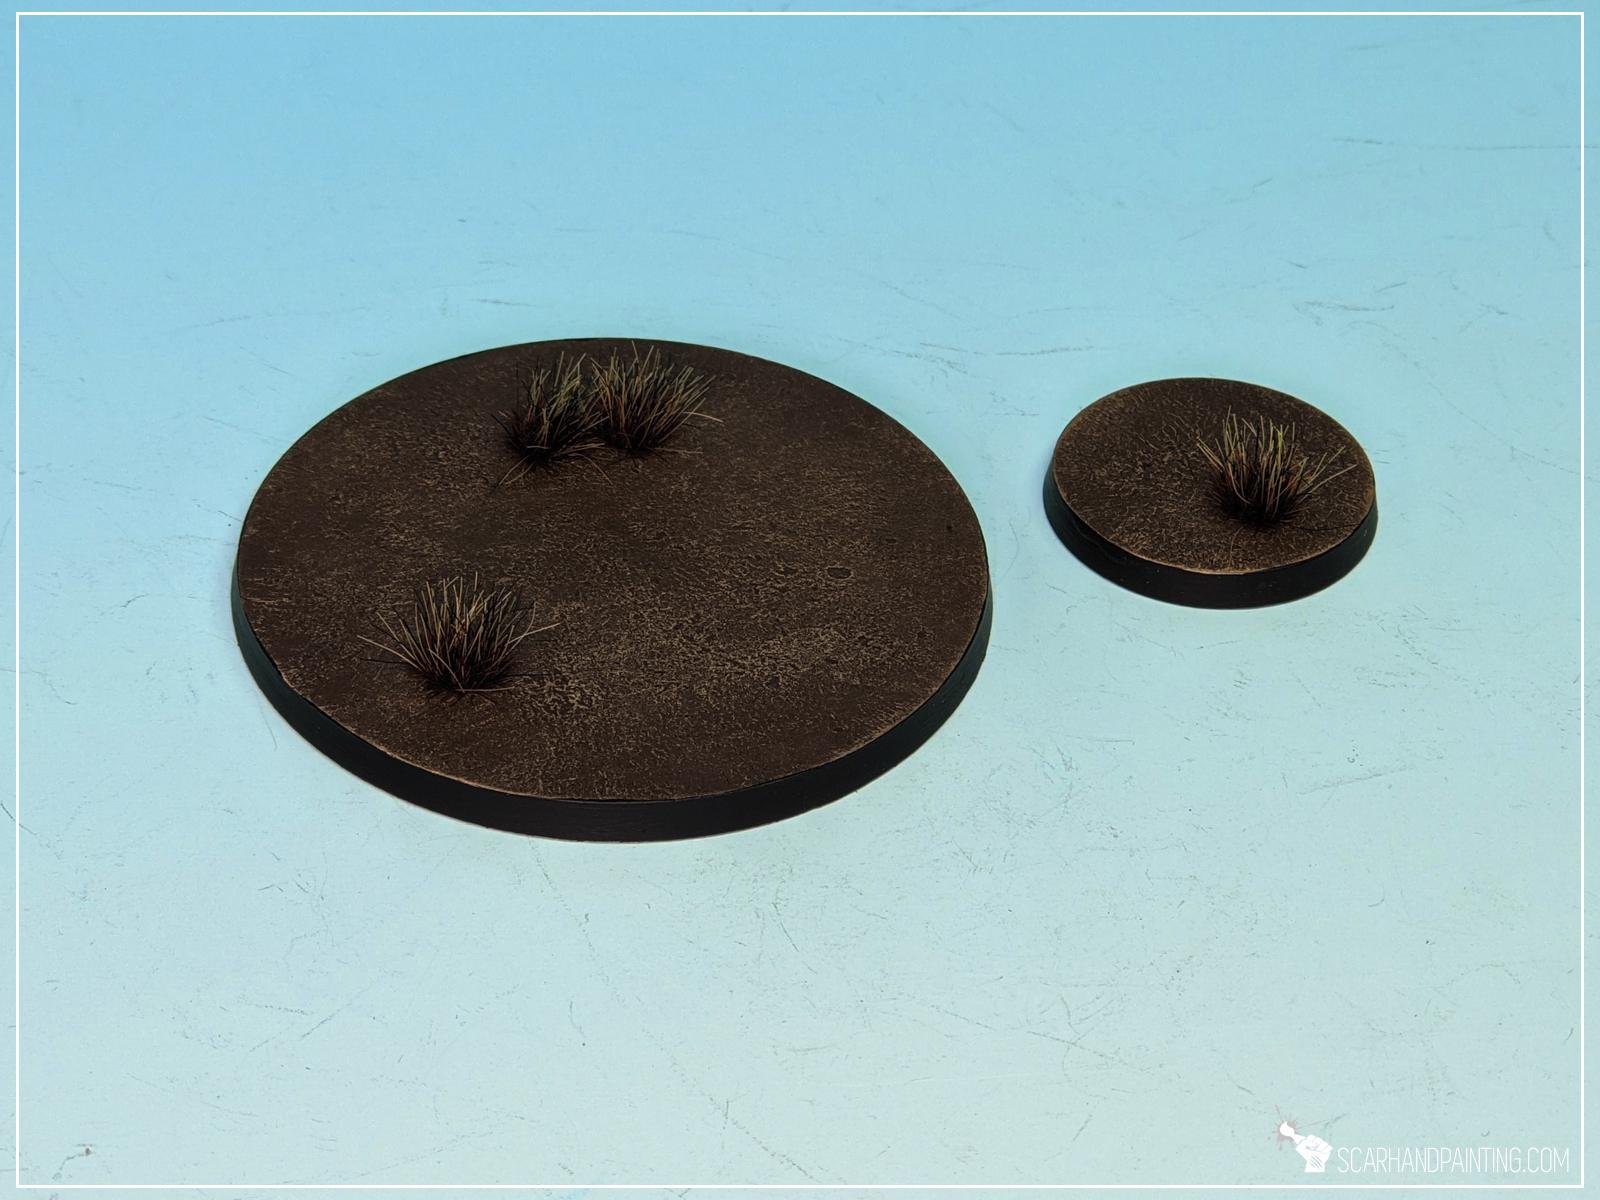
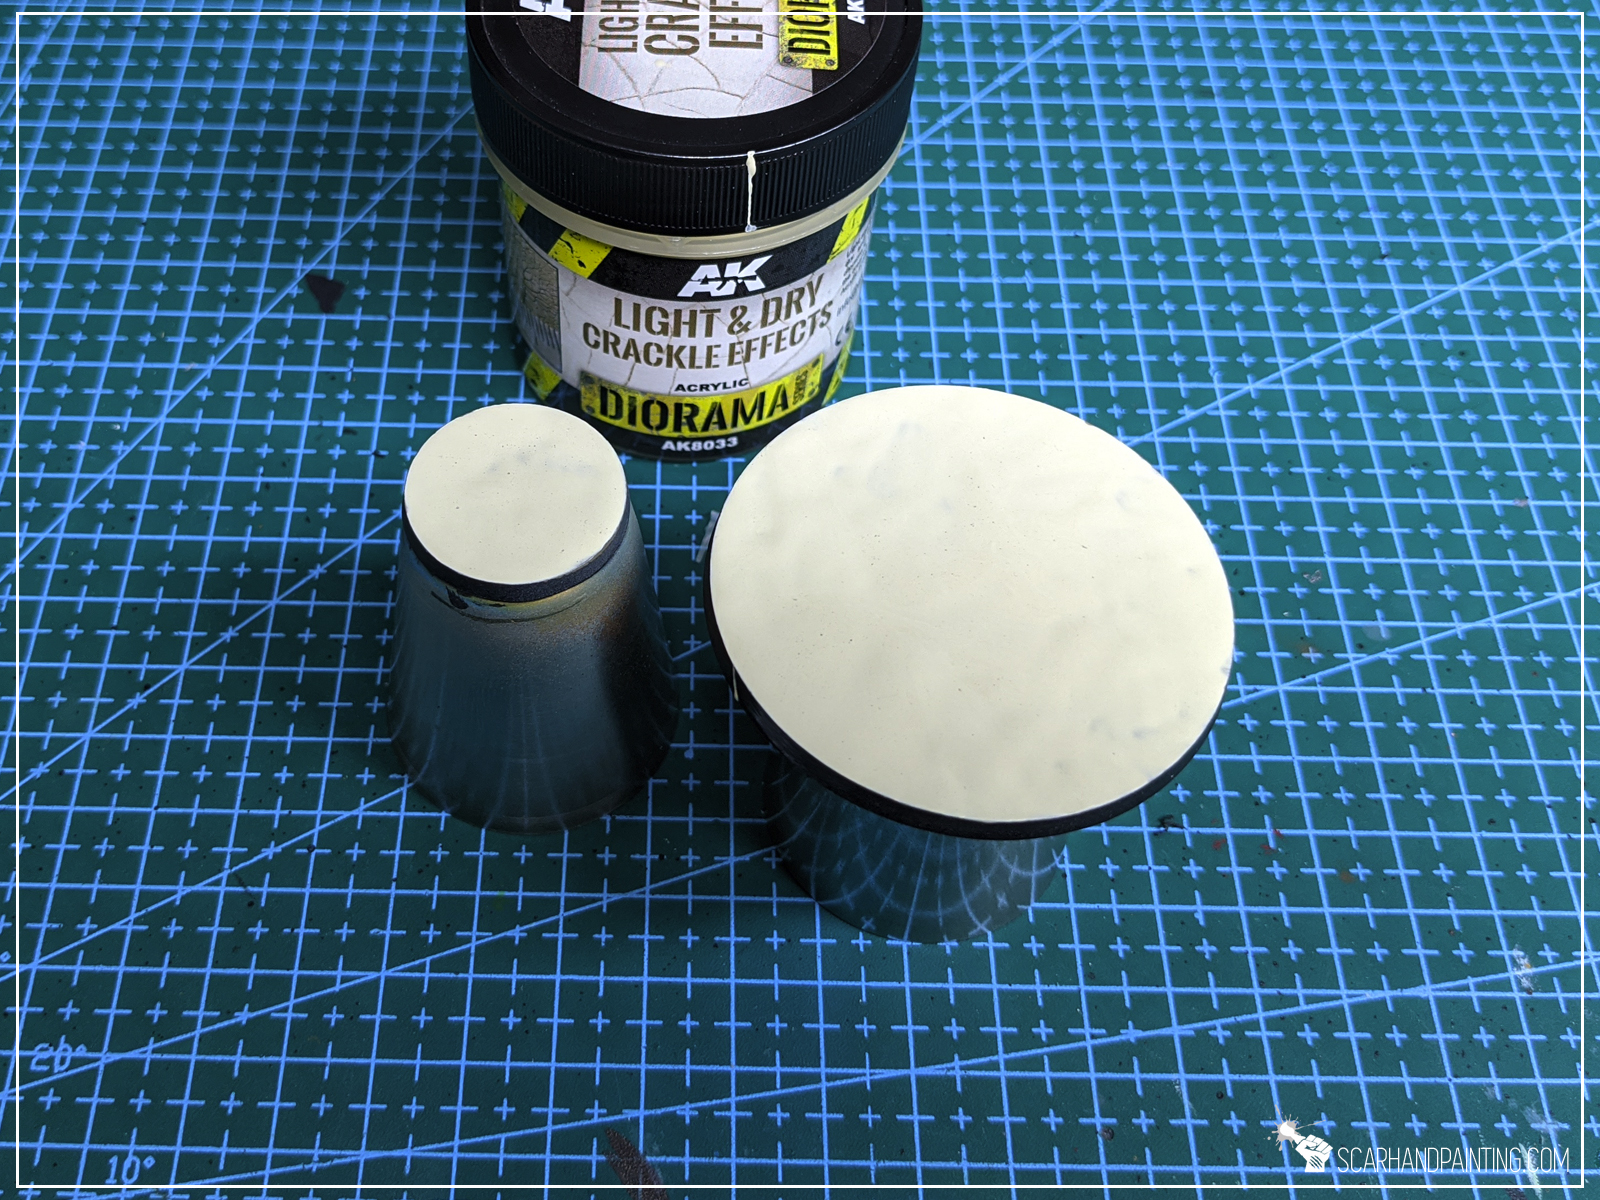
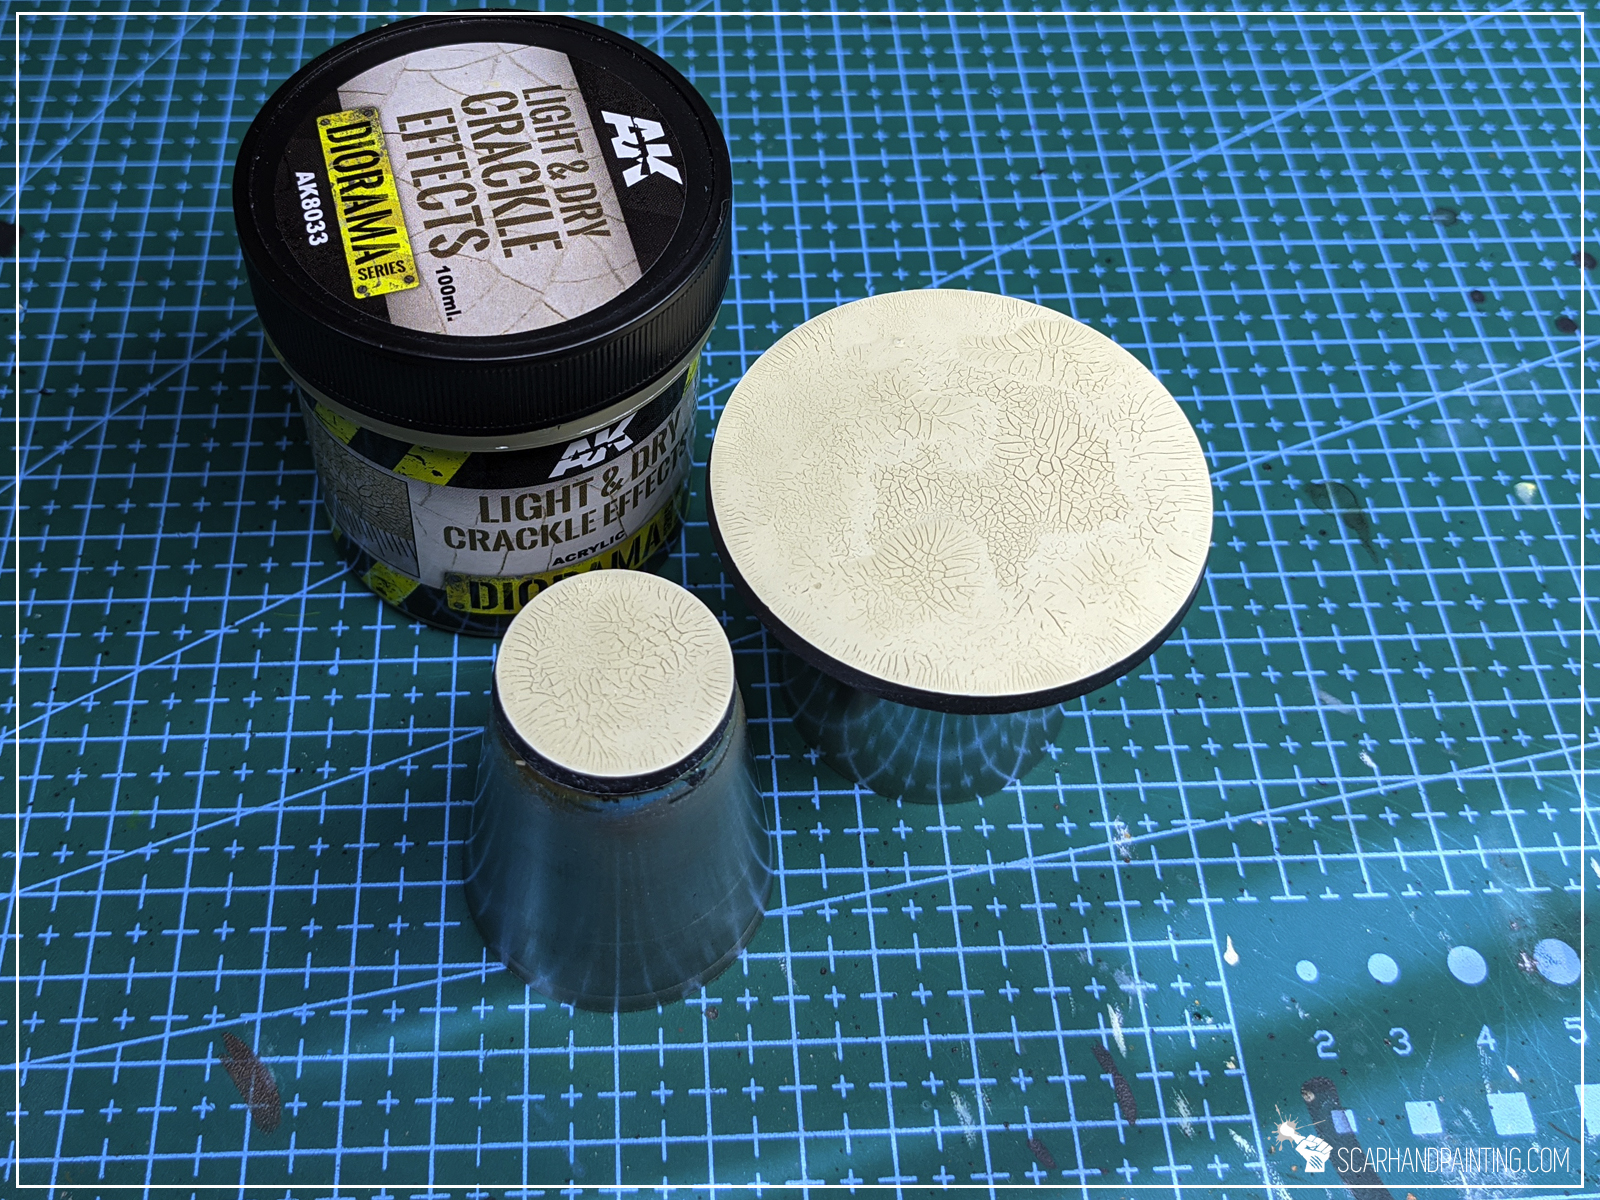
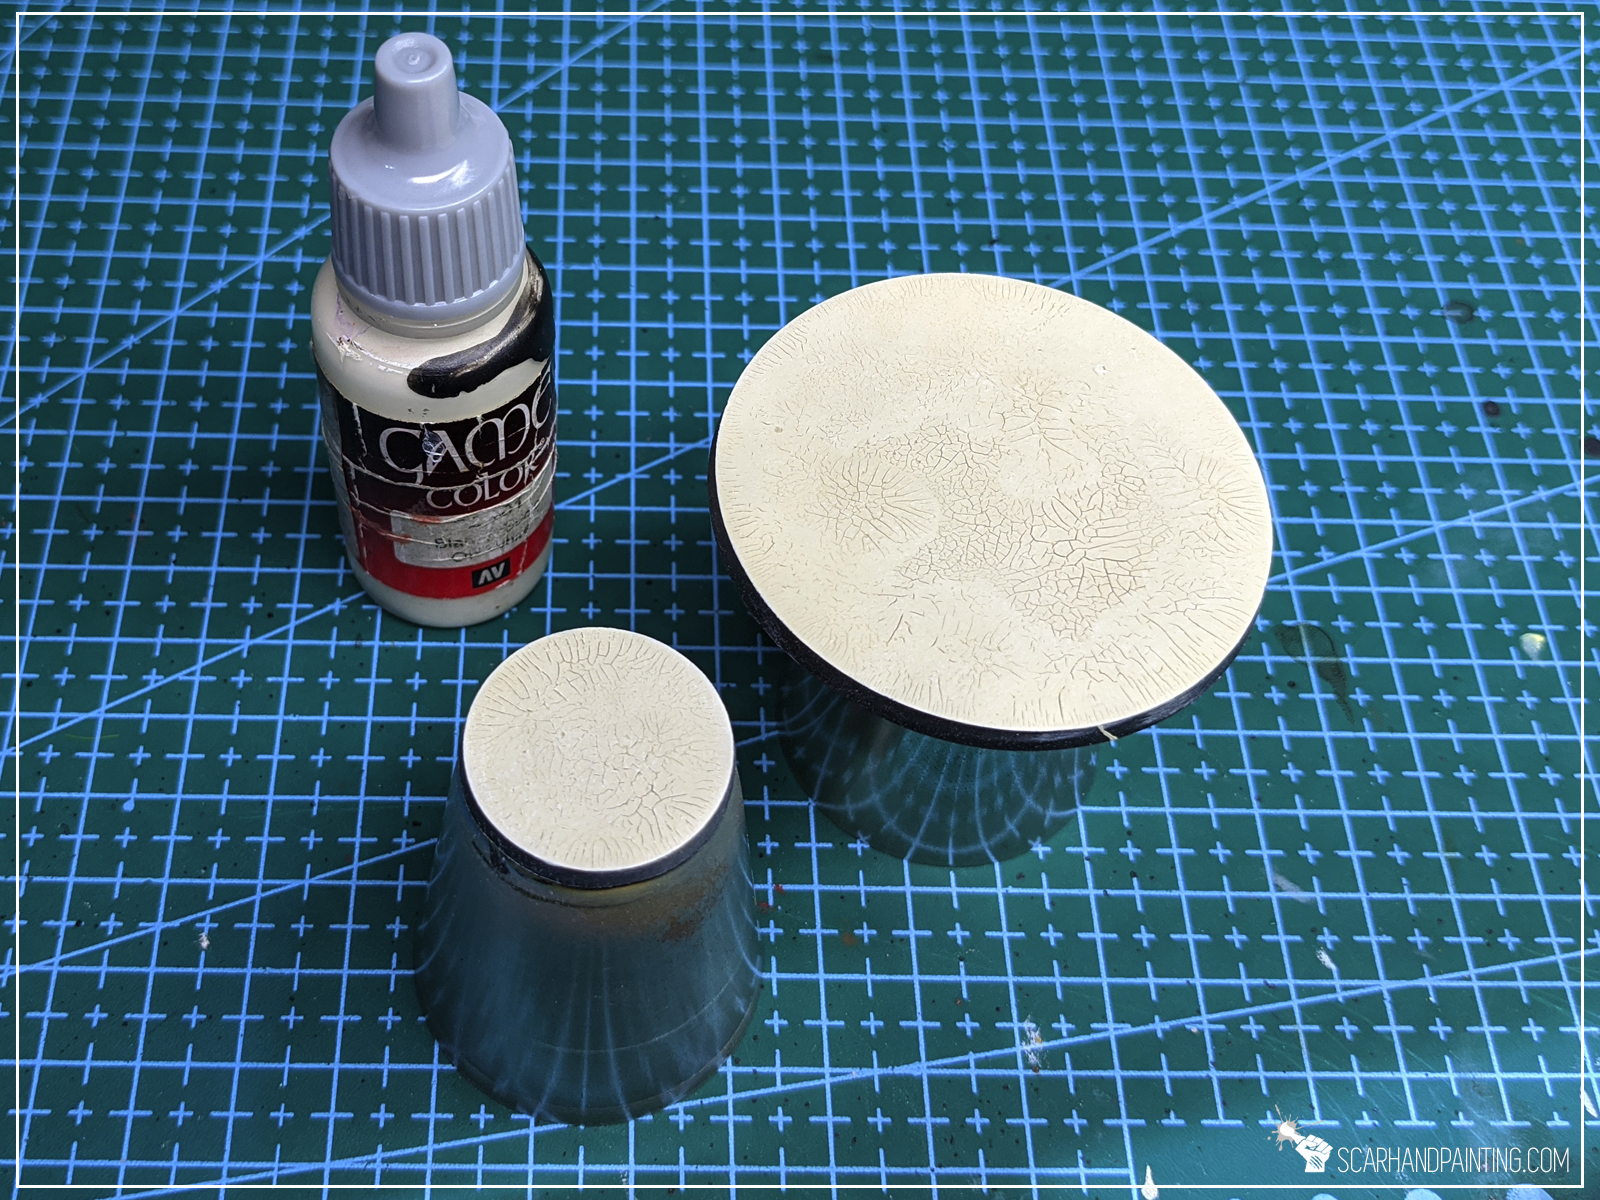
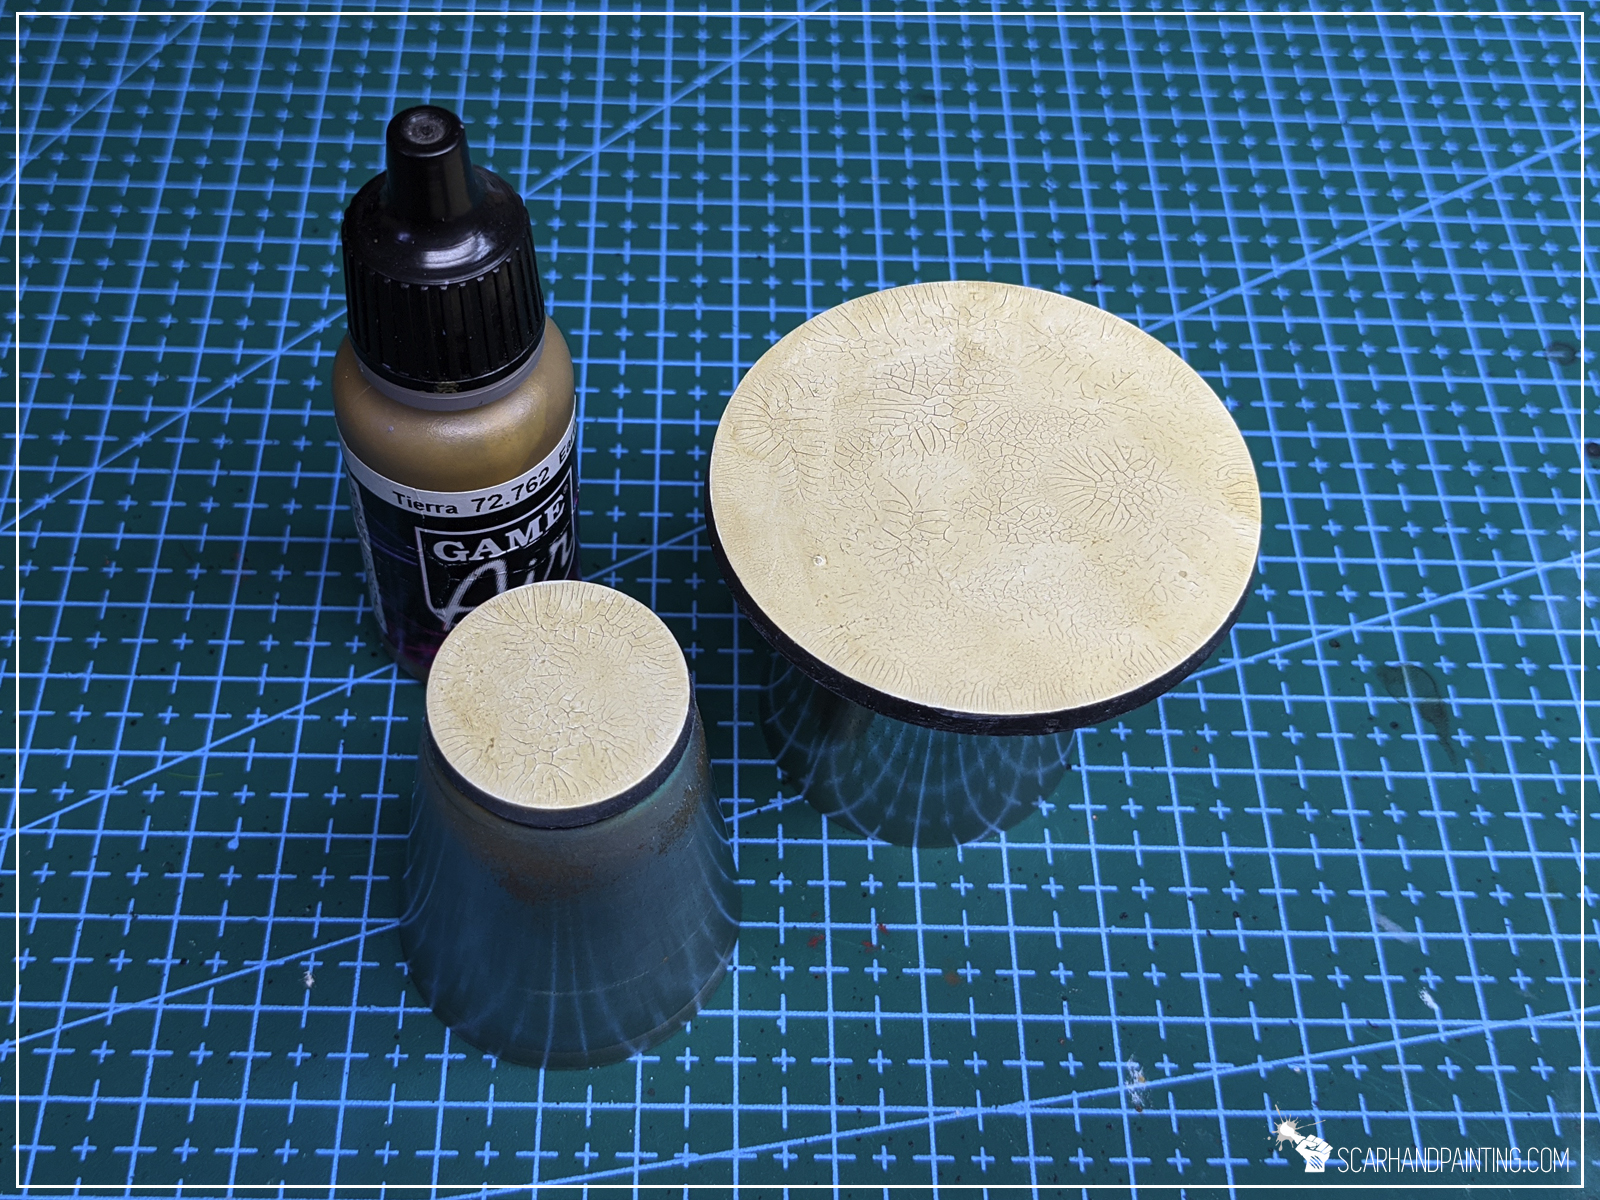
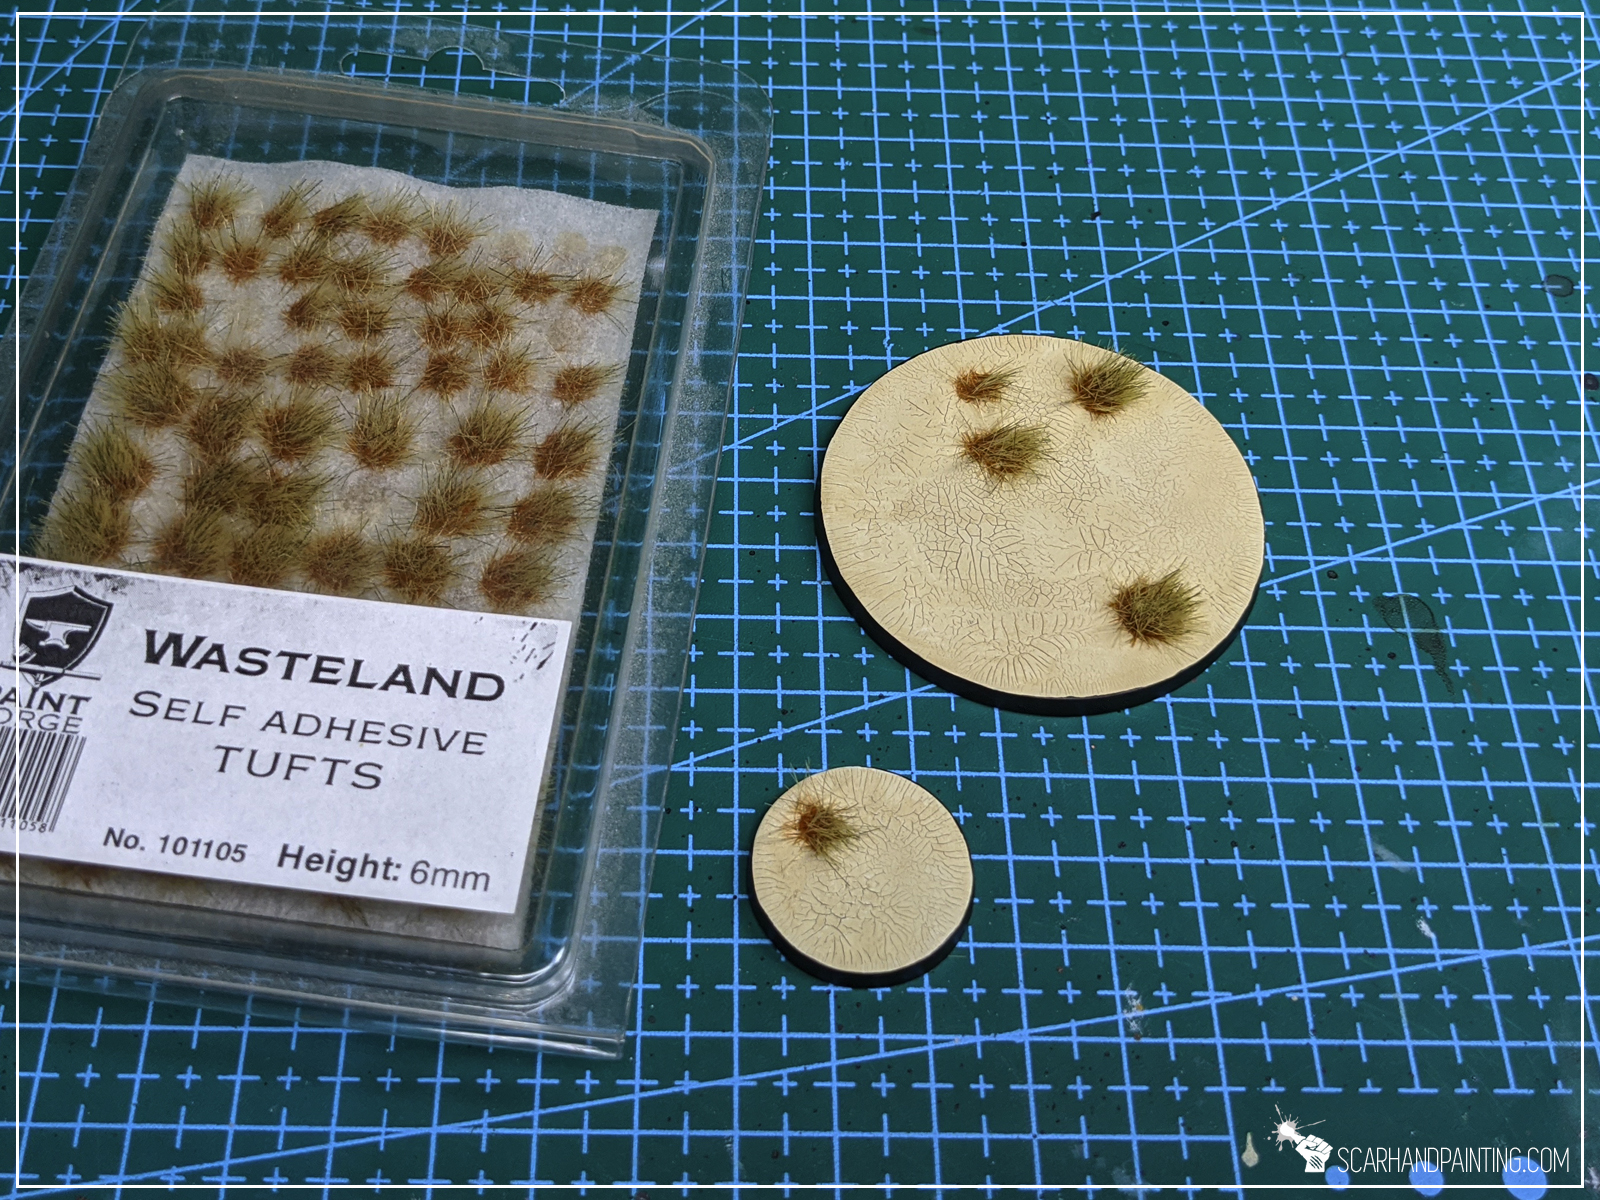
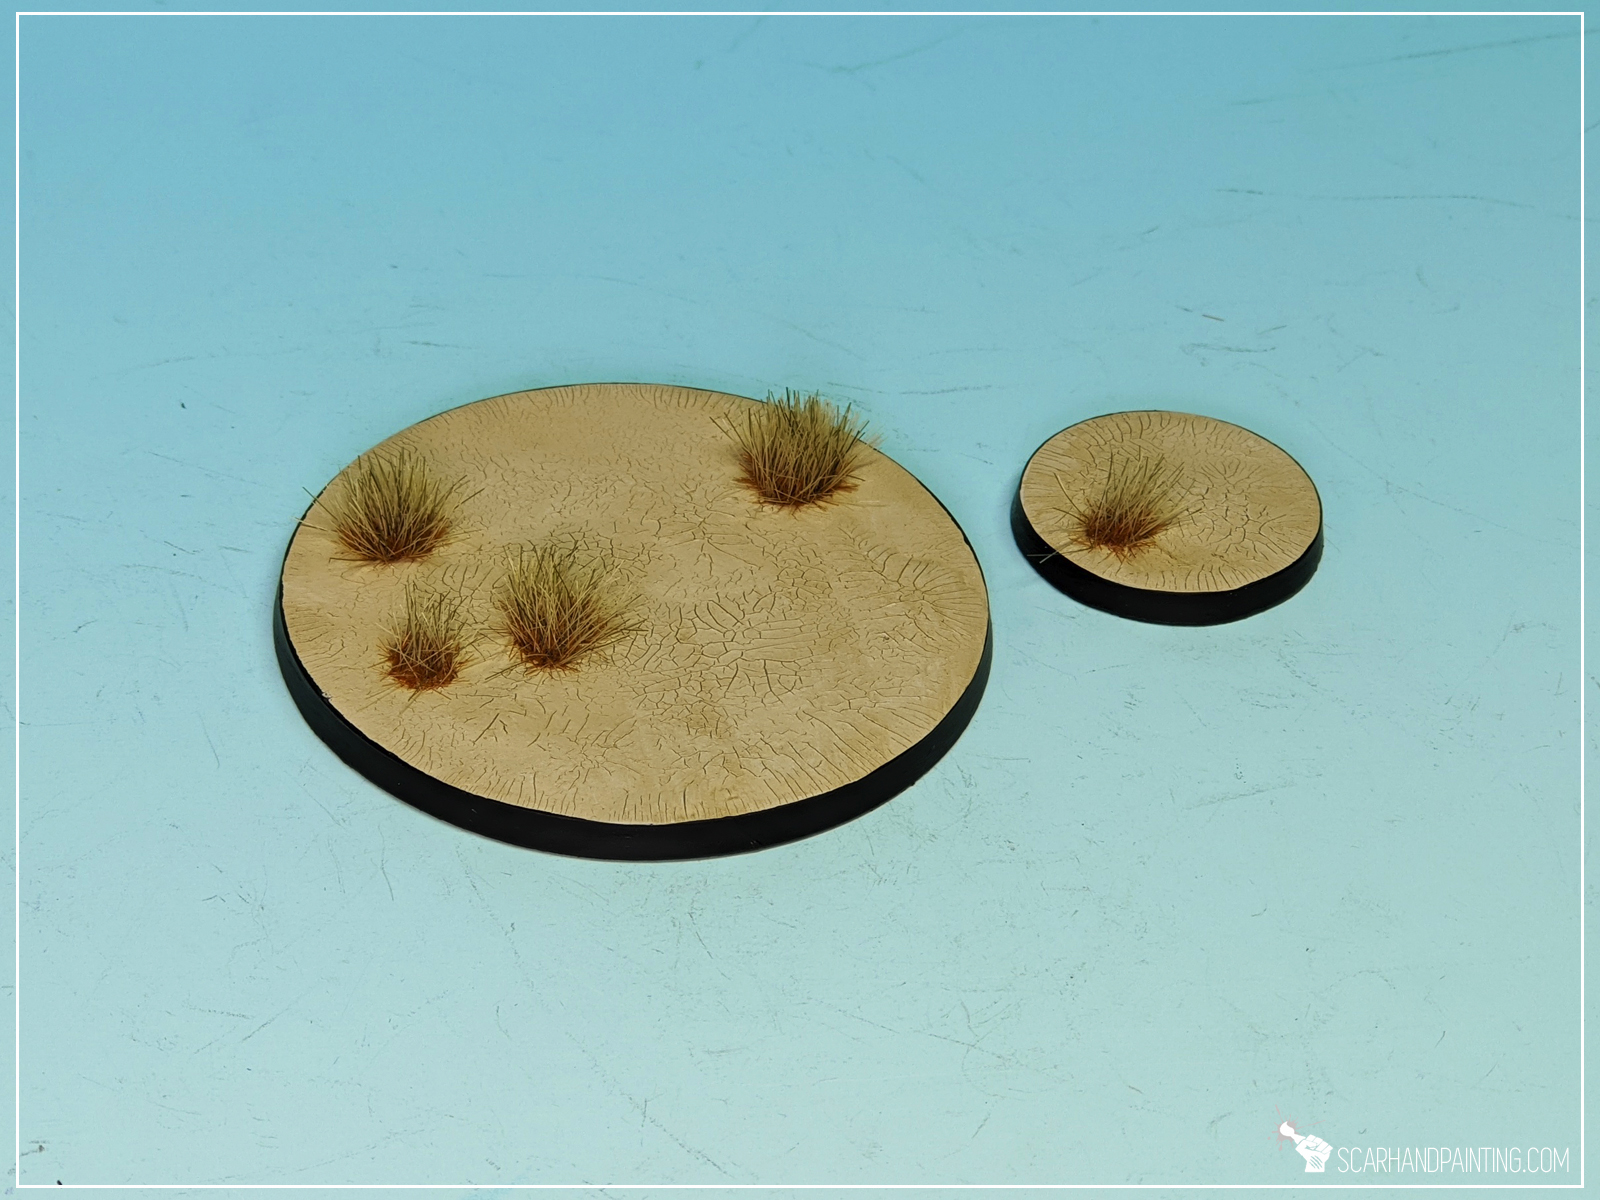
This one required a third step to bring out the cracks as they are super tiny. The end result is very interesting. I’m sure that a mix with Dark Earth will bring magnificent results. Right now it looks like a trampled ground, or a road. Will definitely use.

Well… not what I’ve expected. Tried few times, taking different routes. End result is pretty disappointing. So much so that I just skipped further work with this.

Now that’s “crackled”! Three steps and it looks great! I bet it would look even better with Terrain Dry Ground. Count me in babe!
Working with these products was very comfortable. These are definitely high quality and very user friendly. I used a large brush to apply all the effects and simply cannot stress enough how great and easy it was! Growing up on Games Workshop’s products, moving onto these I felt like if I switched a worn out car for a new one, straight out of the factory! No more “fishing” for dry’ish conglomerates of grains to try and smear them onto a base. Nothing of the sort! Smooth. Great to use. Very easy. Zero stress. Just awesome!
Now Wet Crackle Effect turned out to be a disappointment, but all the rest behaved as they should and brought awesome results. The rest is so good that I’m willing to give Wet Crackle a benefit of a doubt and assume I’ve used it incorrectly. Will go back to it at some point and try to bring forth it’s full potential.
Other than that – these are pure gold! I love them. I will be working with them from now on and definitely prefer them over other products that I used until now.

Price factor is very important, especially with paints. You know how it is – you spill half of it, then use up like a one third and the rest dries out 😛 Just kidding, still I’m sure we can all agree that for many hobbyists pricing matters a lot. Just take a look at this:
What else is there to add? 🙂
Except for the Wet Crackle, the AK – Interactive’s Terrains series is a solid 10/10. On top of being extremely easy to use and very efficient, the effects look great. Full recommendation on my end.
I hope you enjoyed this little Review/Tutorial. Share your thoughts in the comments below. Cheers!
You can get these straight from AK’s web store, or if you happen to live in Poland, go to a well equipped Vanaheim online store.
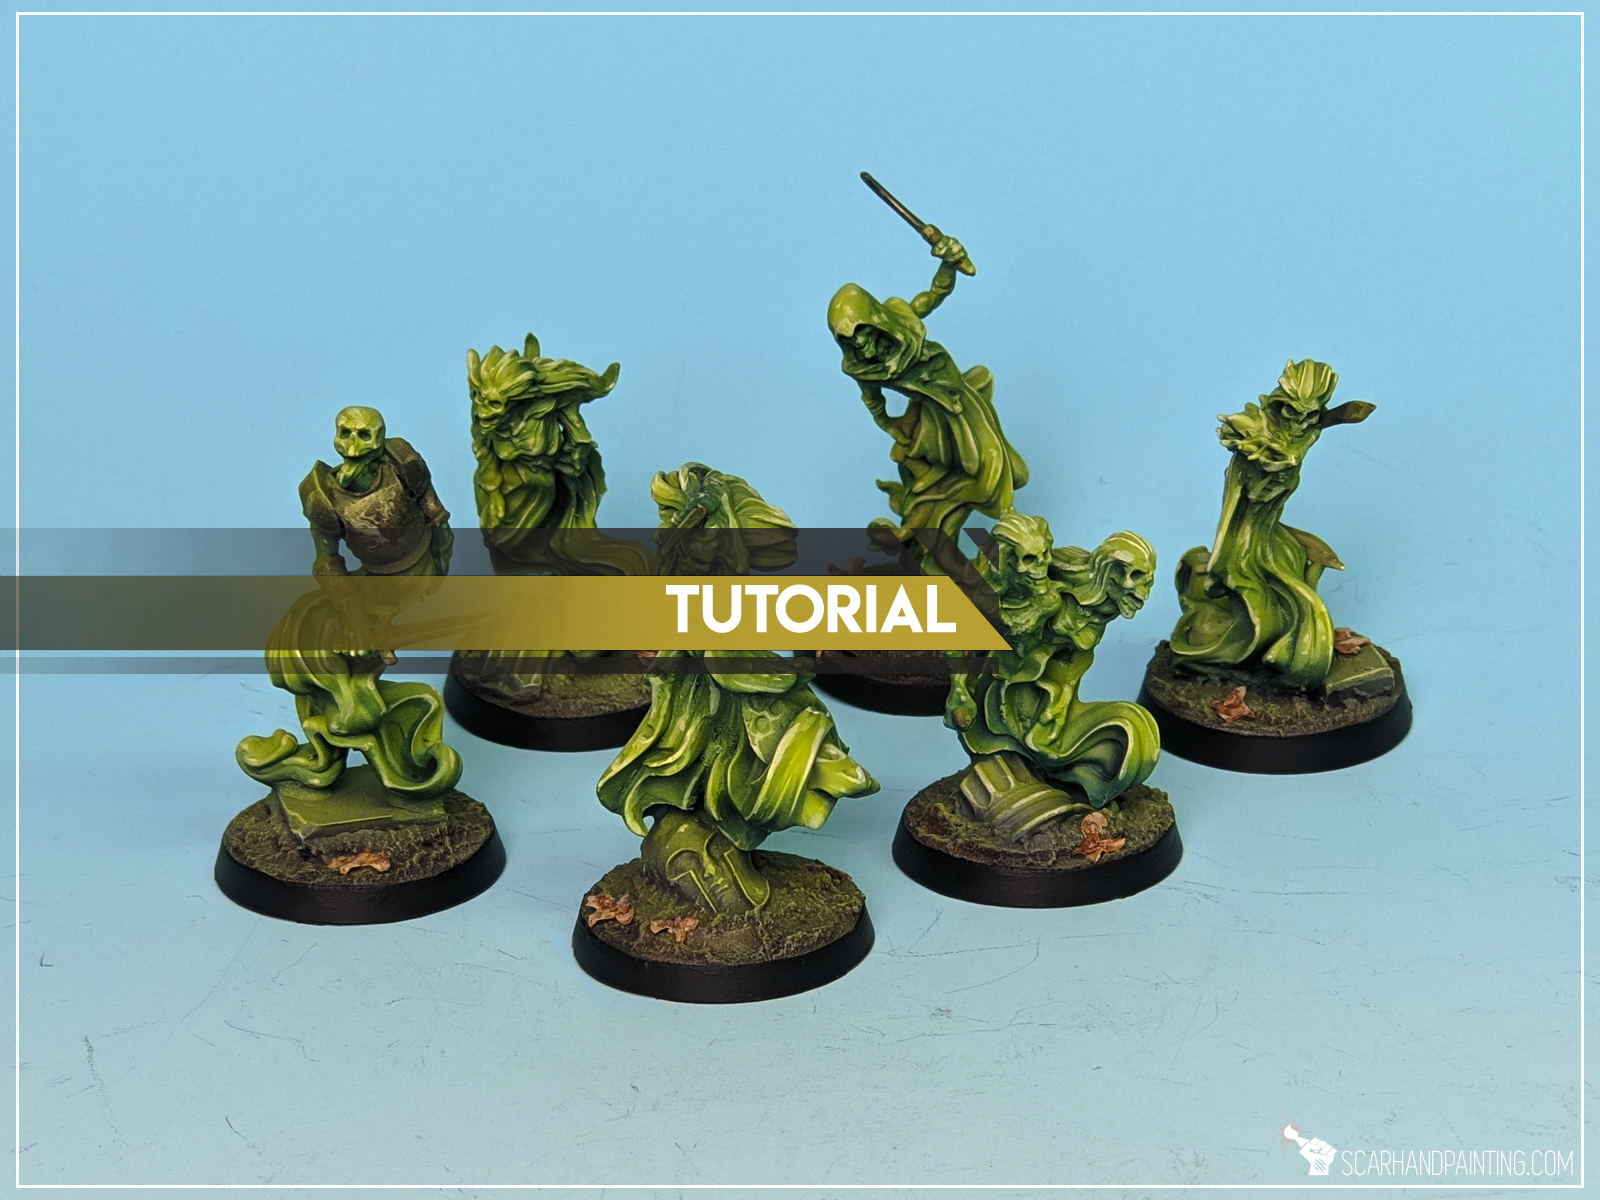
Welcome to Painting Ghosts tutorial. Here I will present to you a Step-by-step of fast and easy painting Ghosts process.
Before we start, some notes:
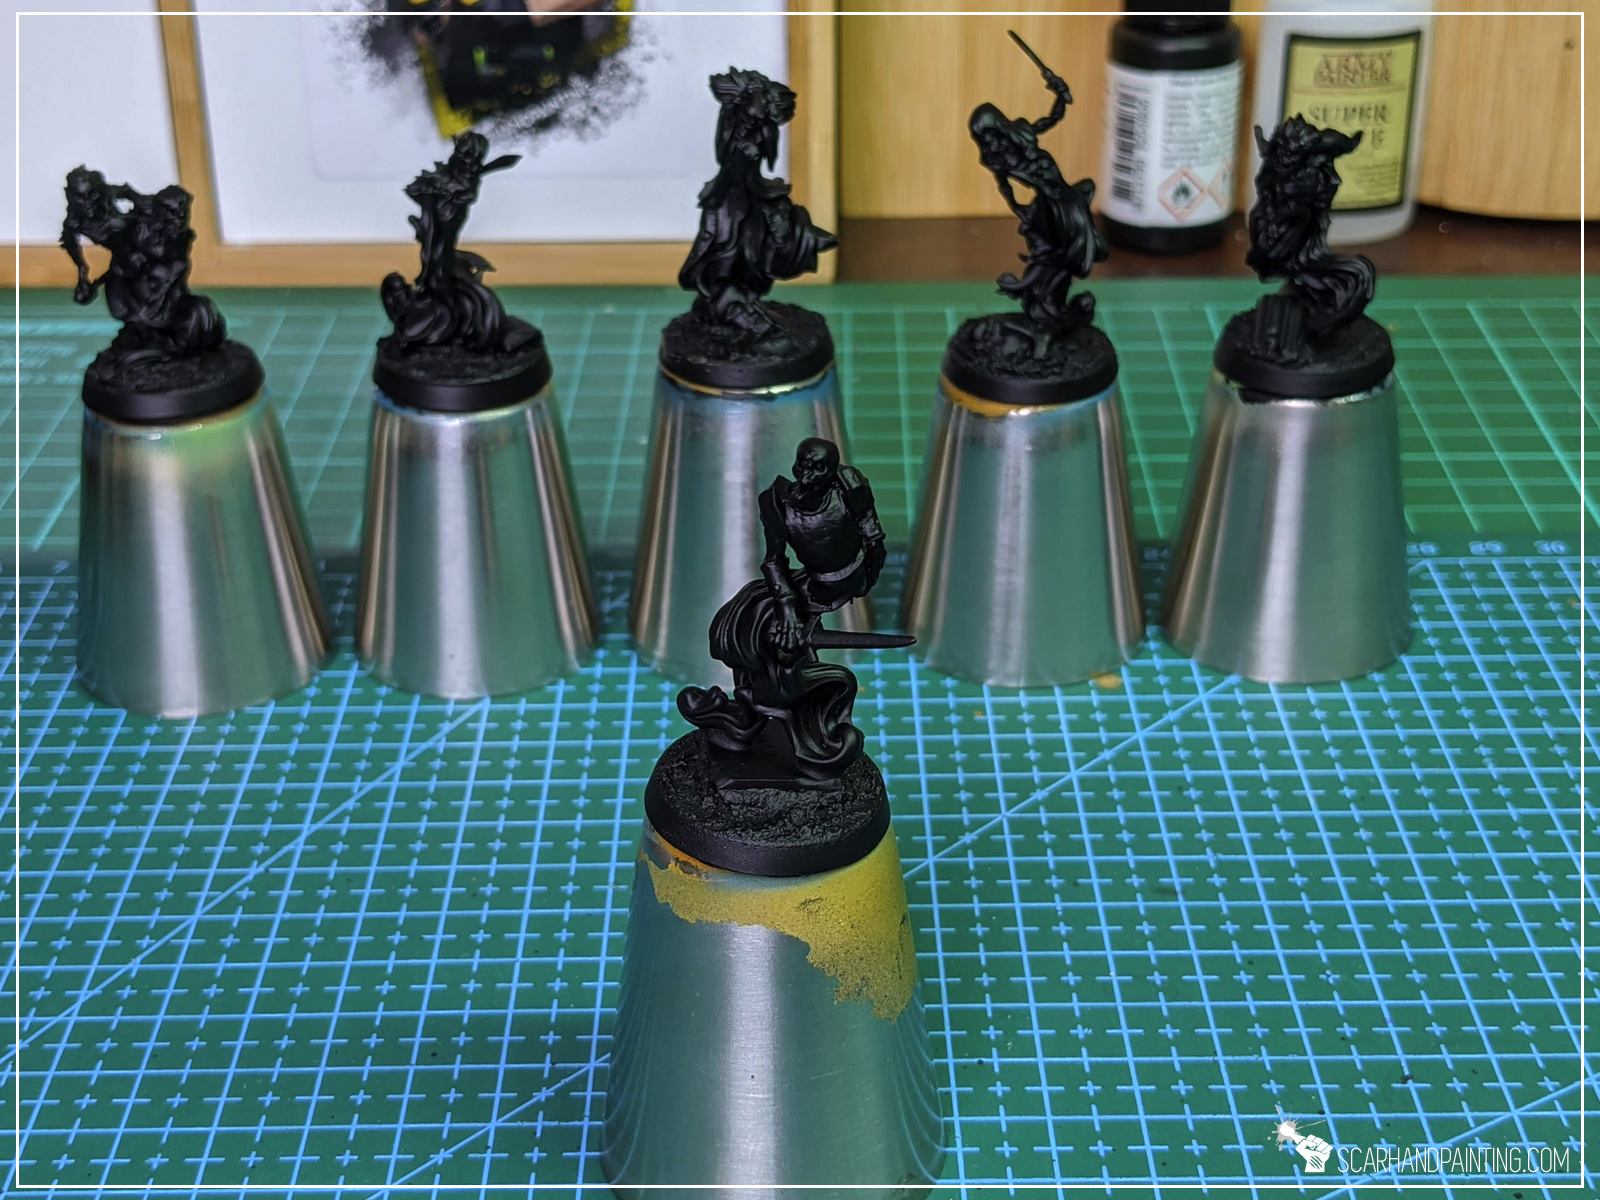
Step one: Undercoat
I started with an airbrushed layer of Black.
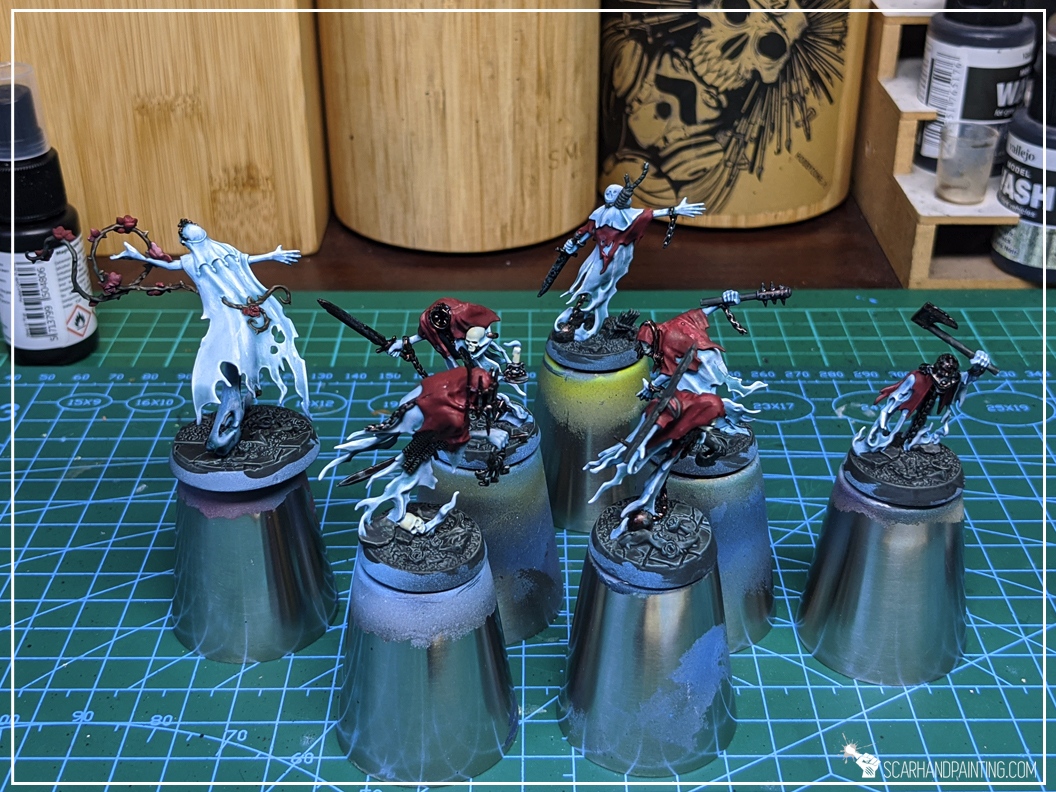
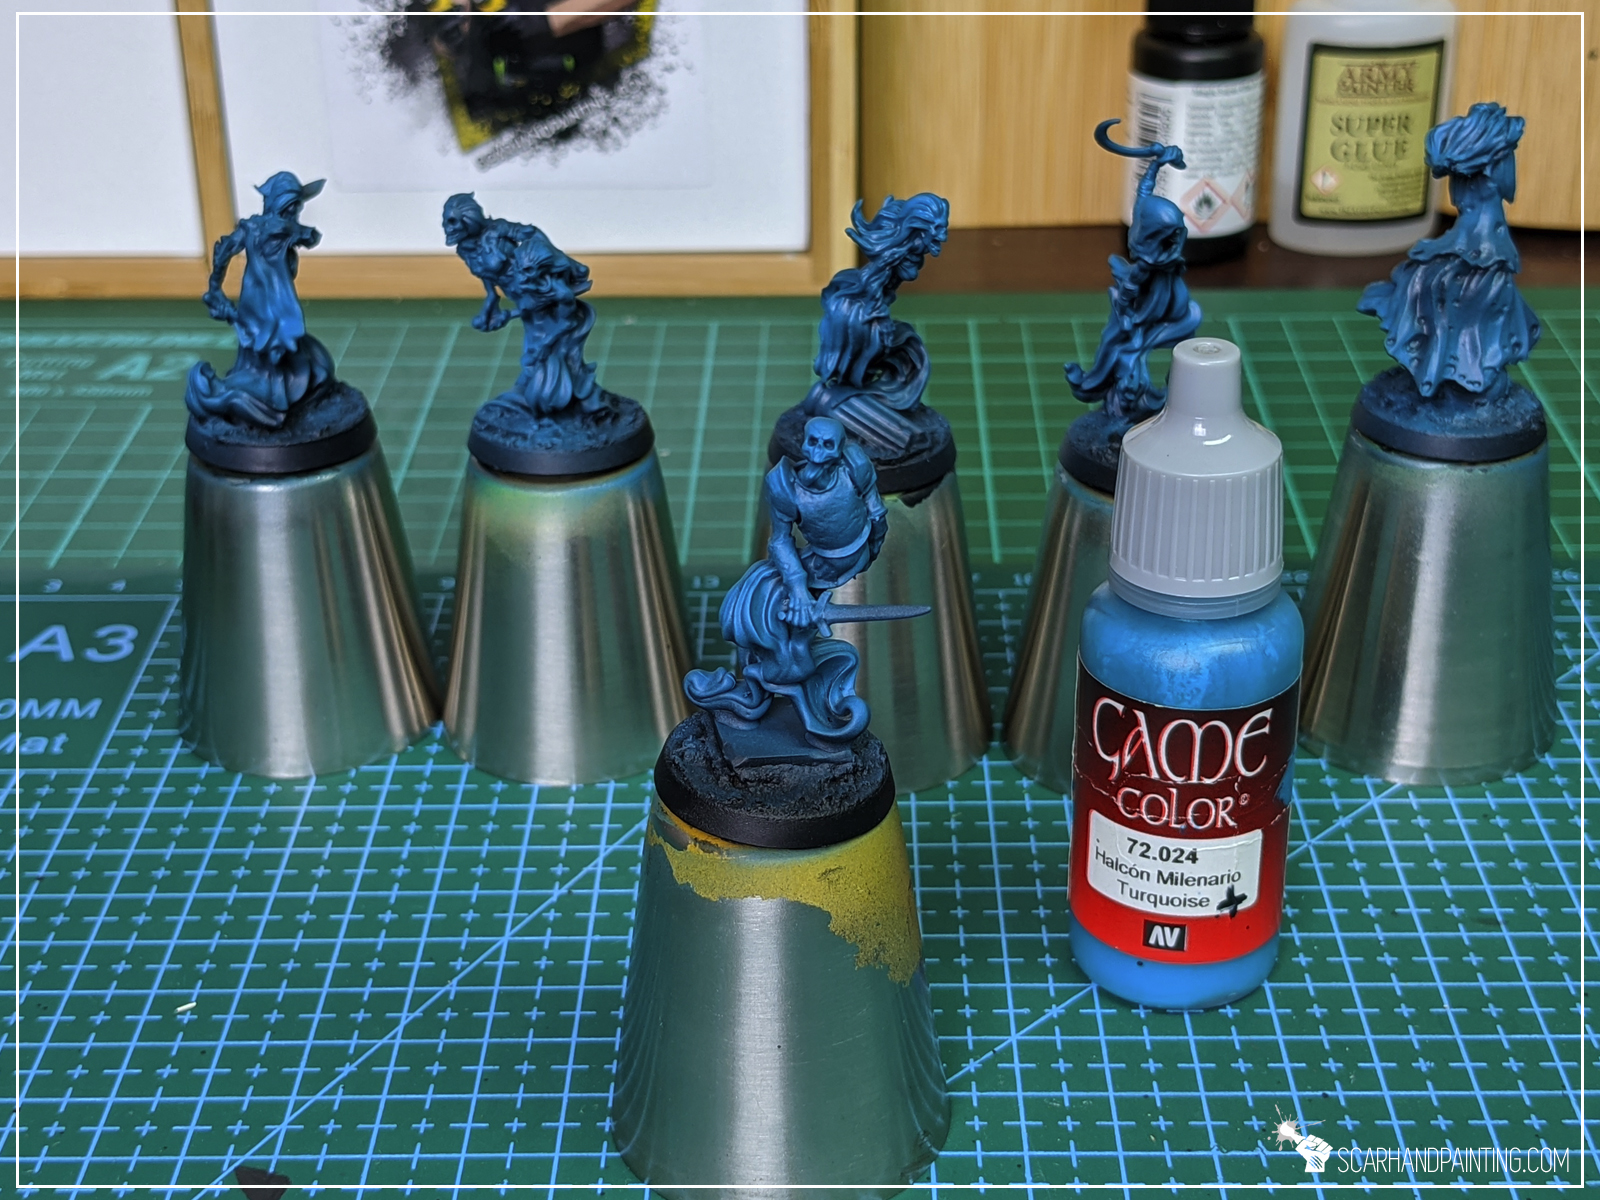
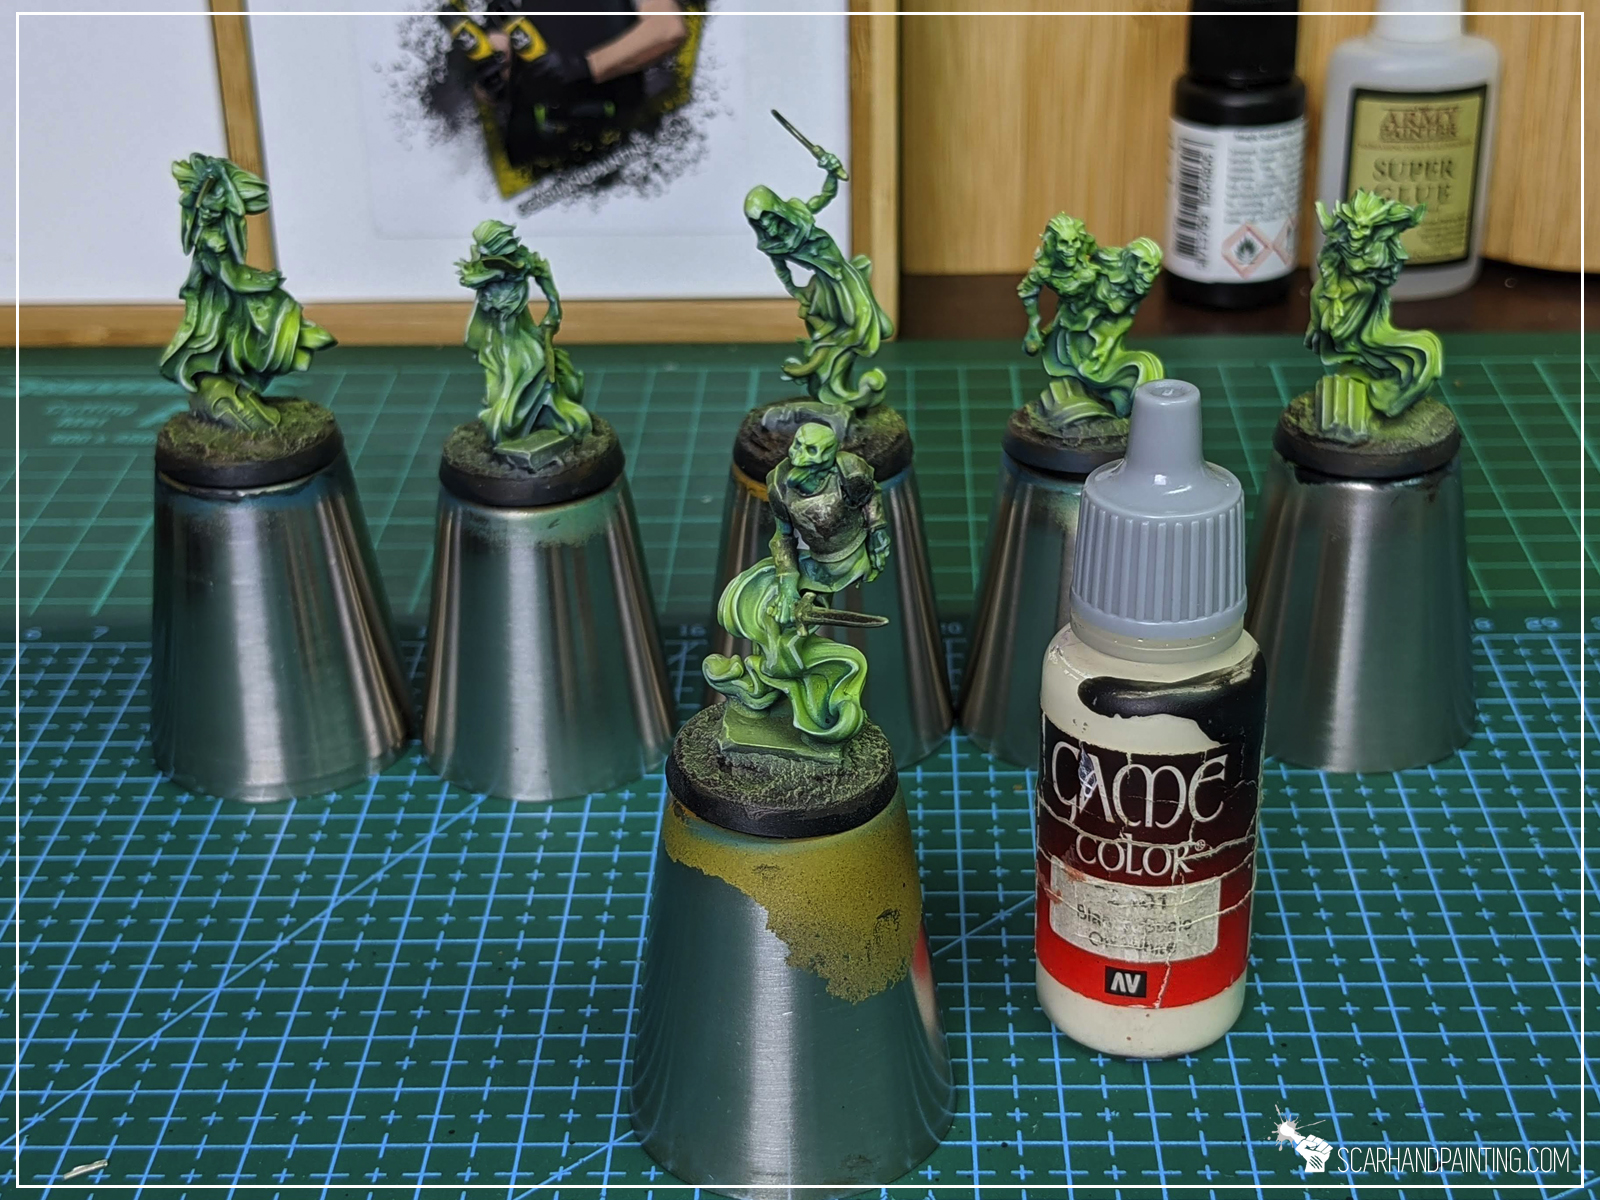
Step two: Vallejo Turquoise, airbrushed
I airbrushed thinned Vallejo Turquoise all over the miniatures.

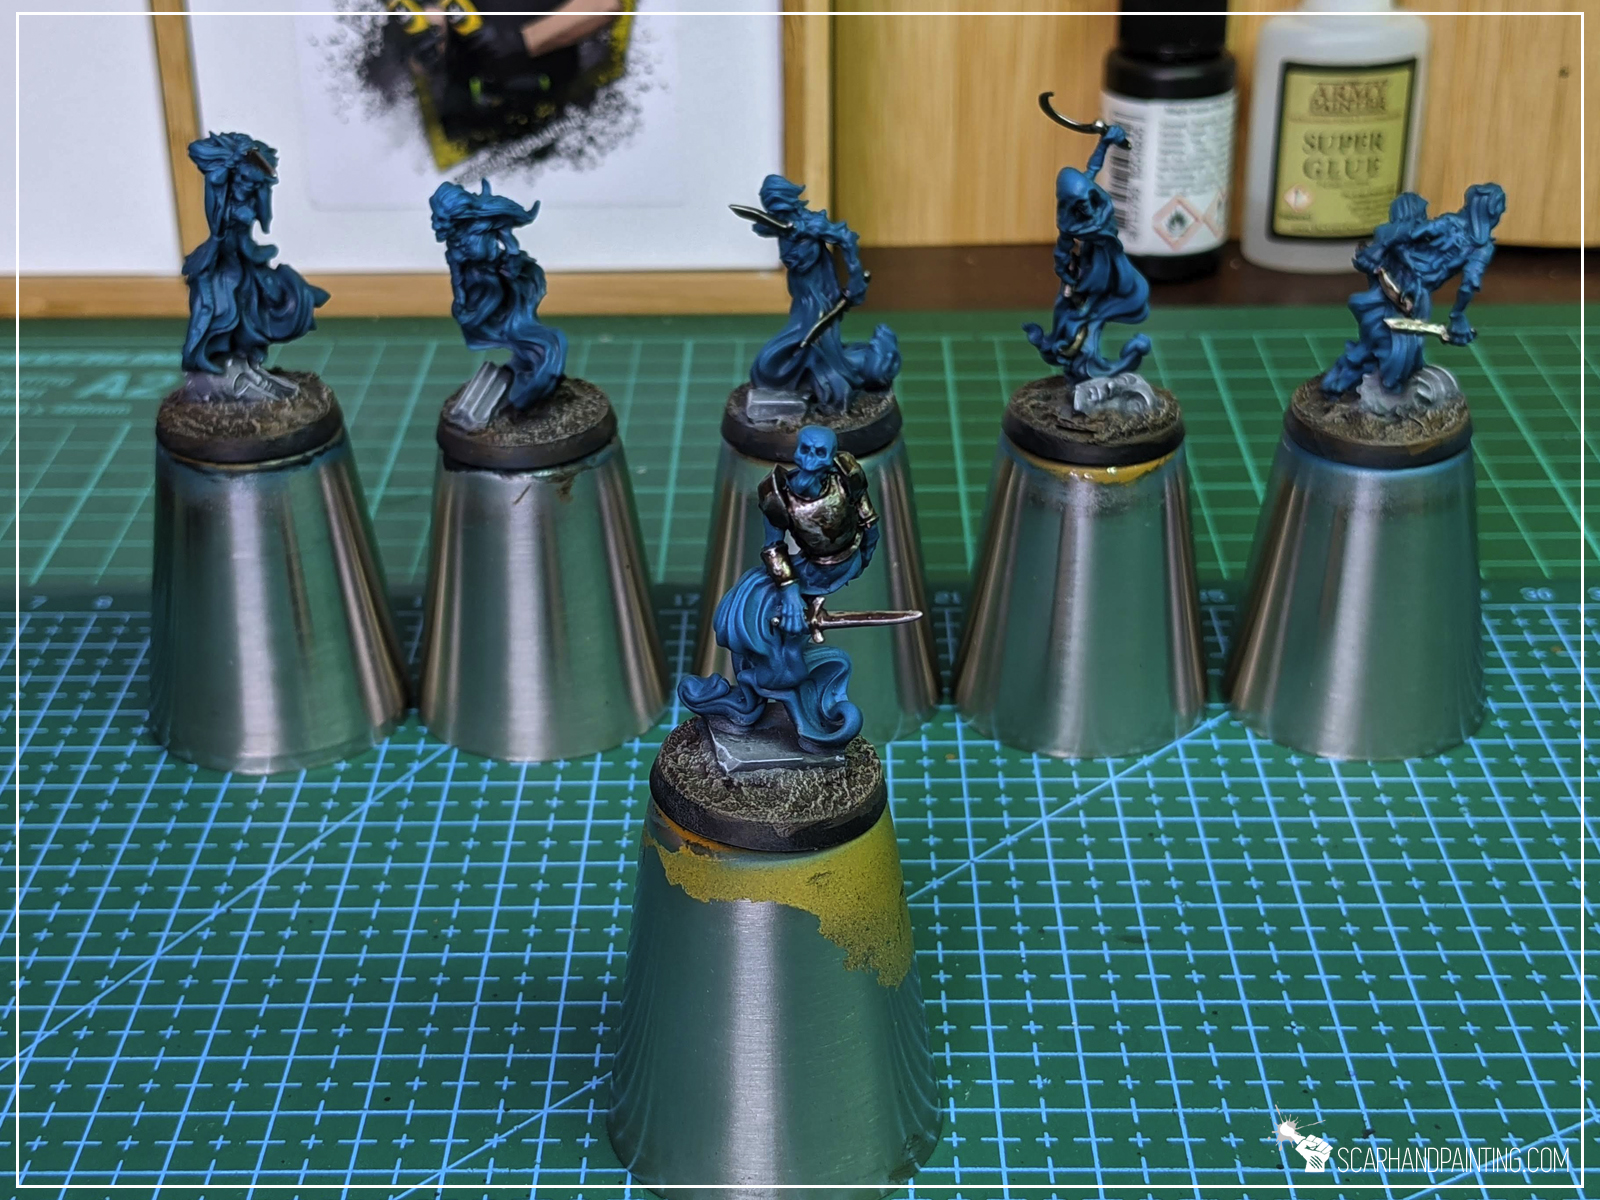
Insert: Additional detail
At that point I have painted all the none-ghost detail, following these two recipes: Painting Metal , Painting Bases. This tutorial is about painting ghostly elements so I leave this step to you. I have painted these elements now to build up ghostly light on top of them alongside layers to come next.
Step three: Vallejo Duck Egg Green, airbrushed
Next I airbrushed Vallejo Duck Egg Green air over ghostly elements, focusing on the most exposed areas. I have thinned this paint just a bit to mitigate speckling.

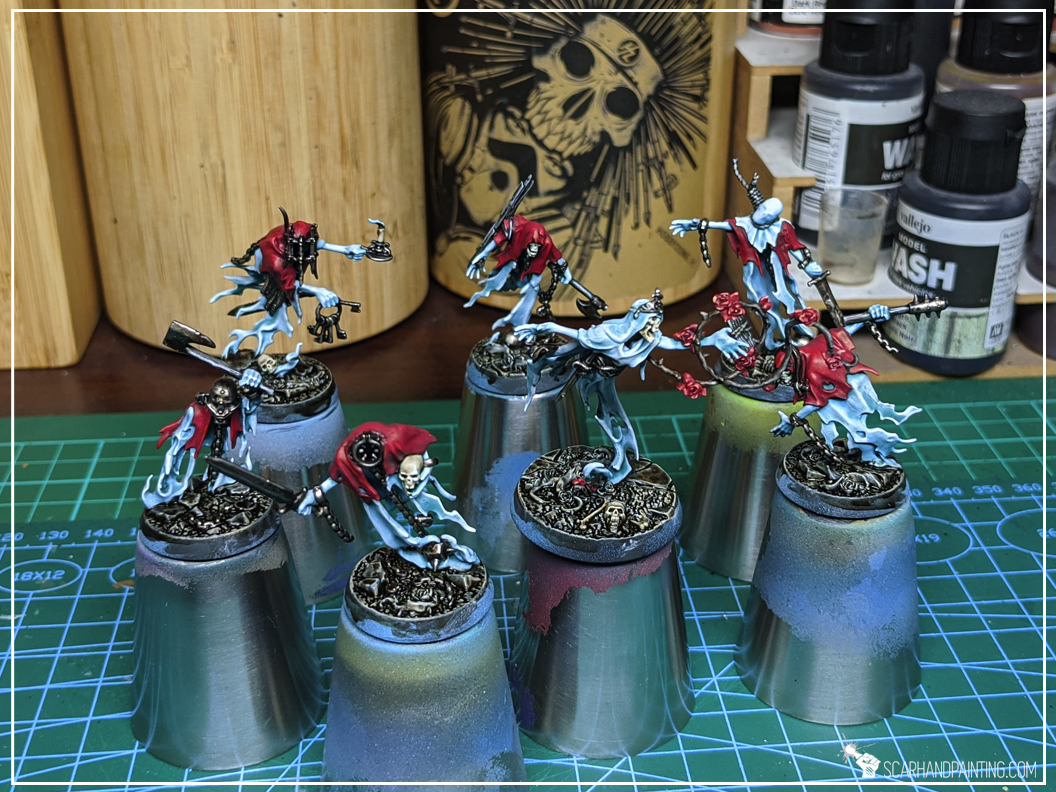
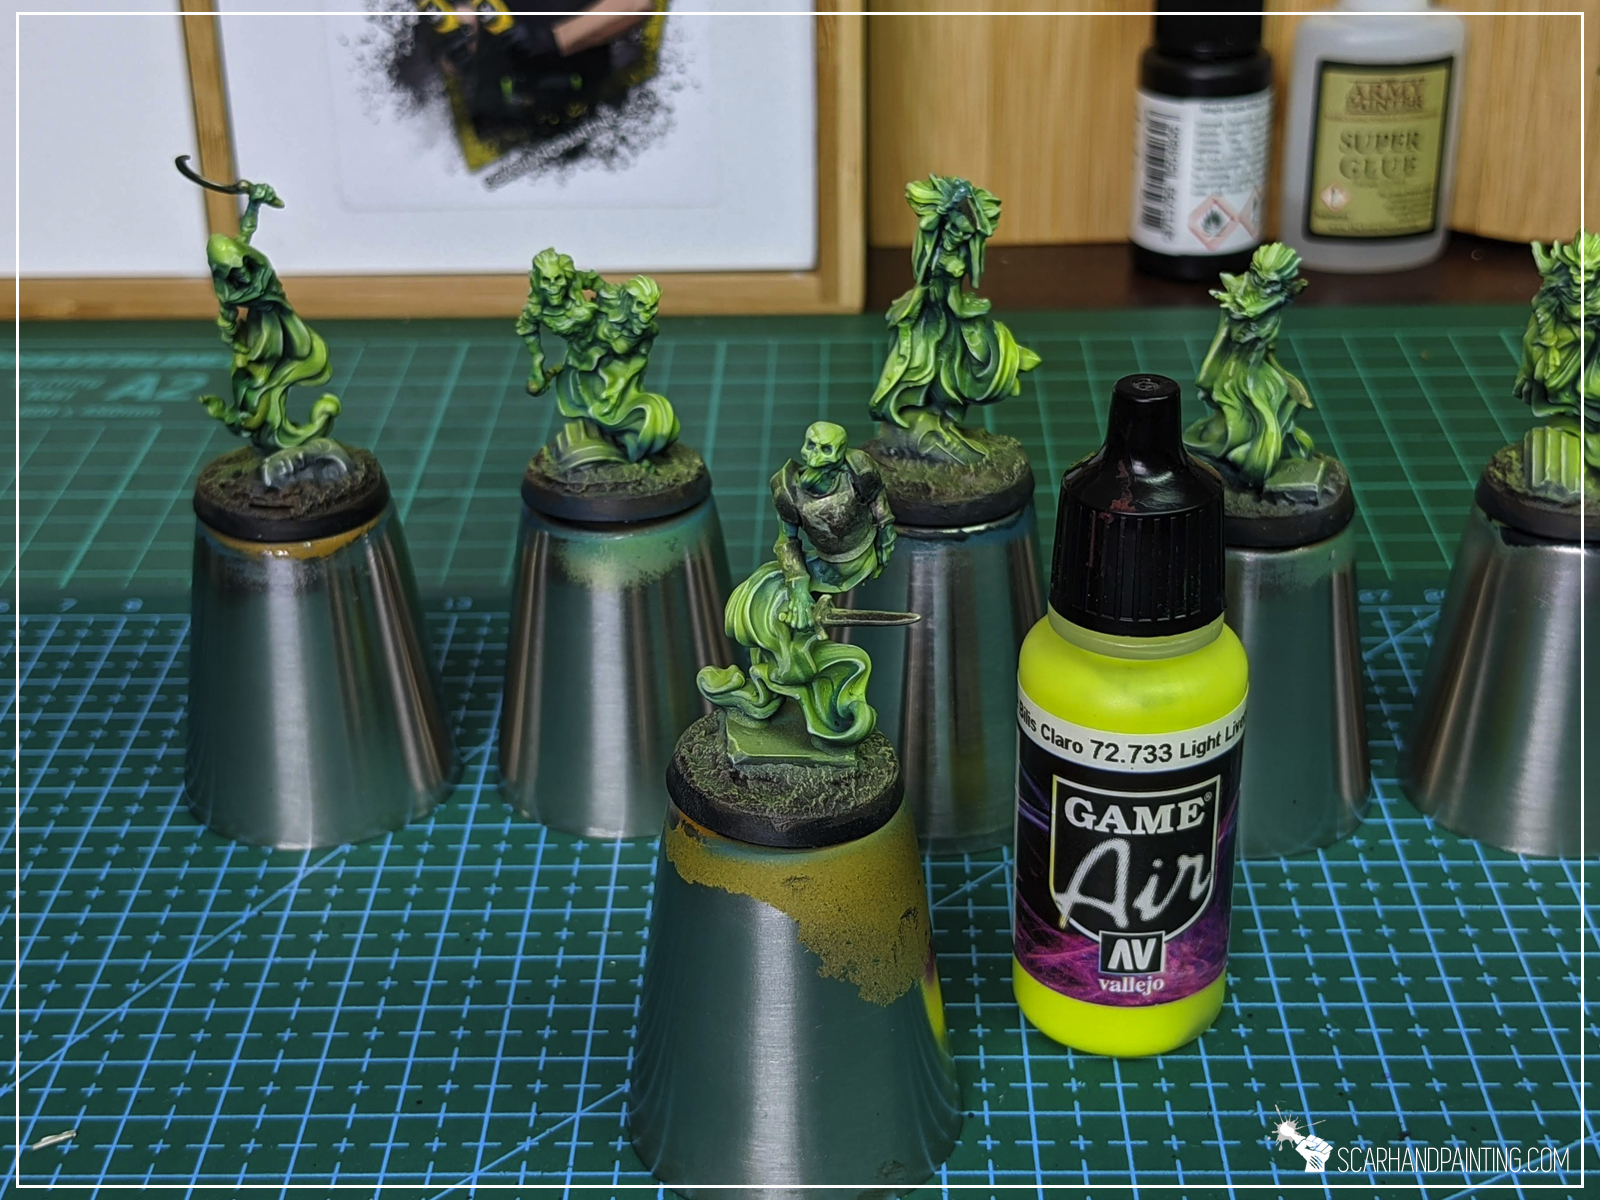
Step four: Vallejo Light Livery Green, airbrushed
I then airbrushed Vallejo Light Livery Green air over previous layer.

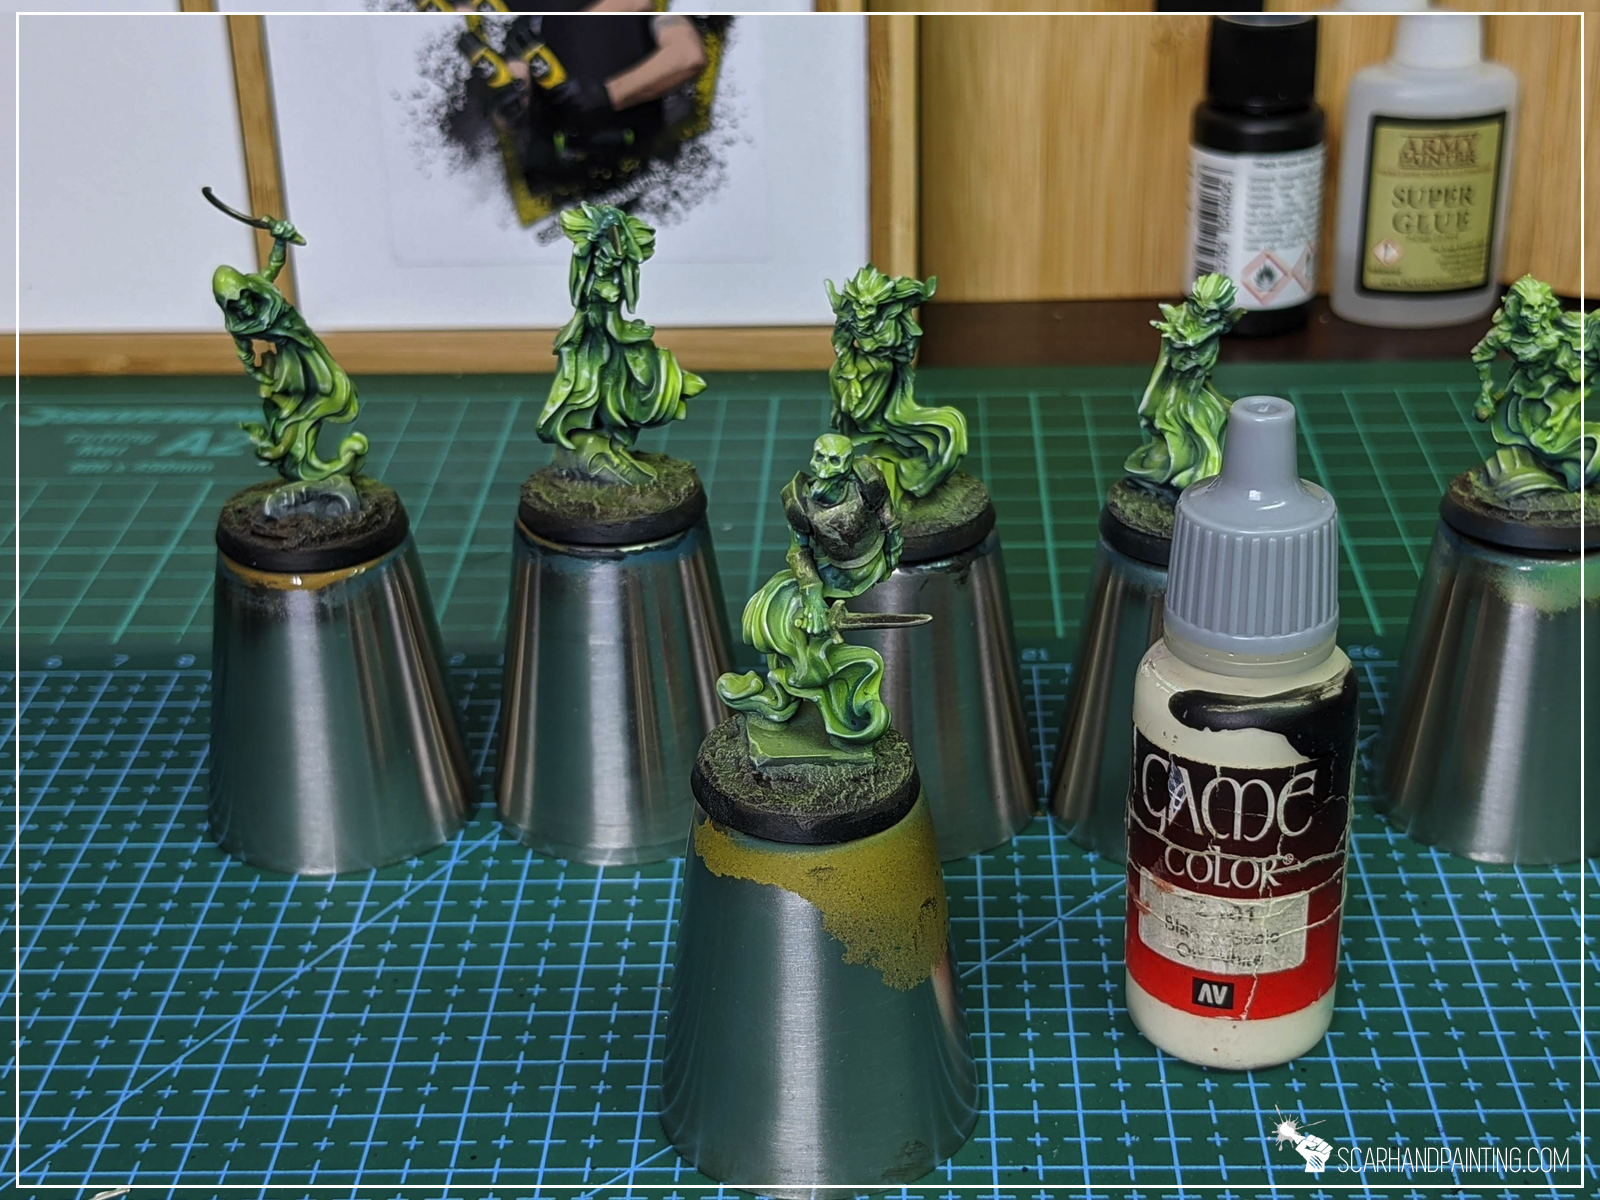
Step four: Vallejo Off White, highlights
I manually painted edge highlights with Vallejo Off White.
Step five: Vallejo Light Livery Green, juice up
I manually blended highly thinned Vallejo Light Livery Green air on top of previous highlights.
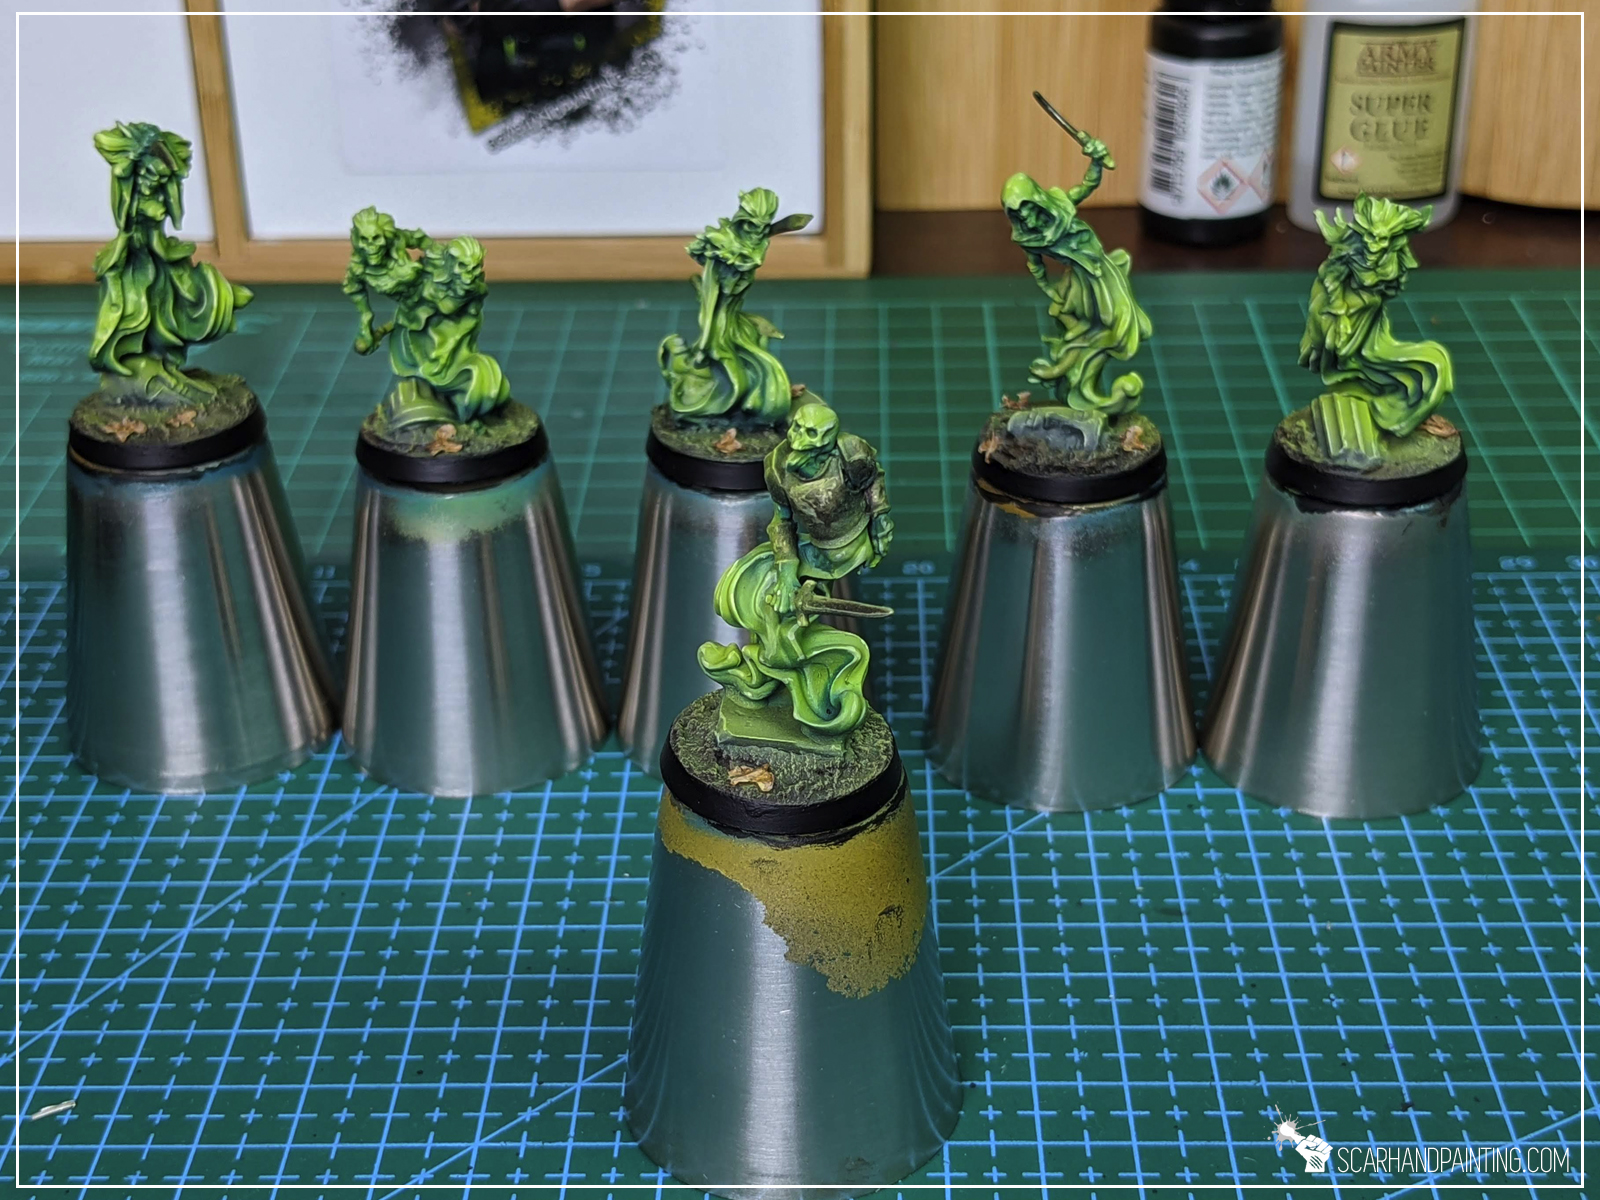
Step six: Vallejo Off White, highlights
I manually painted edge highlights with Vallejo Off White, but this time contained to dots and points of focus.
Step seven: Vallejo Light Livery Green, blend
I airbrushed thinned Vallejo Light Livery Green air all over the miniatures, after which I sealed it with Vallejo Polyurethane Matt Varnish and painted the base’s edge black, as it should be. Added few Birch Tree seeds as a final touch.
Note from the author: I hope you enjoyed this article. Be sure to let me know what you think in the comments or at my facebook. If you ever use the tutorial – please tag me at facebook or send pics to my e-mail, so I can enjoy your work 😉

Back in the days I decided to start the ‘Painting Philosophy’ series to let you in on ‘how’ and especially ‘why’ I do some things in a certain way. In my opinion a proper approach to painting is crucial to maintain healthy and rewarding experience. Final result depends on it in the same way as on techniques, know-how and tools used. Nowadays internet is full of painting tutorials yet it takes some inner understanding of our own capabilities to find what suits us best and fully benefit from all acquired knowledge. That being said – In this series I will reveal what works best for me as a painter. I hope you will find some wisdom in it…
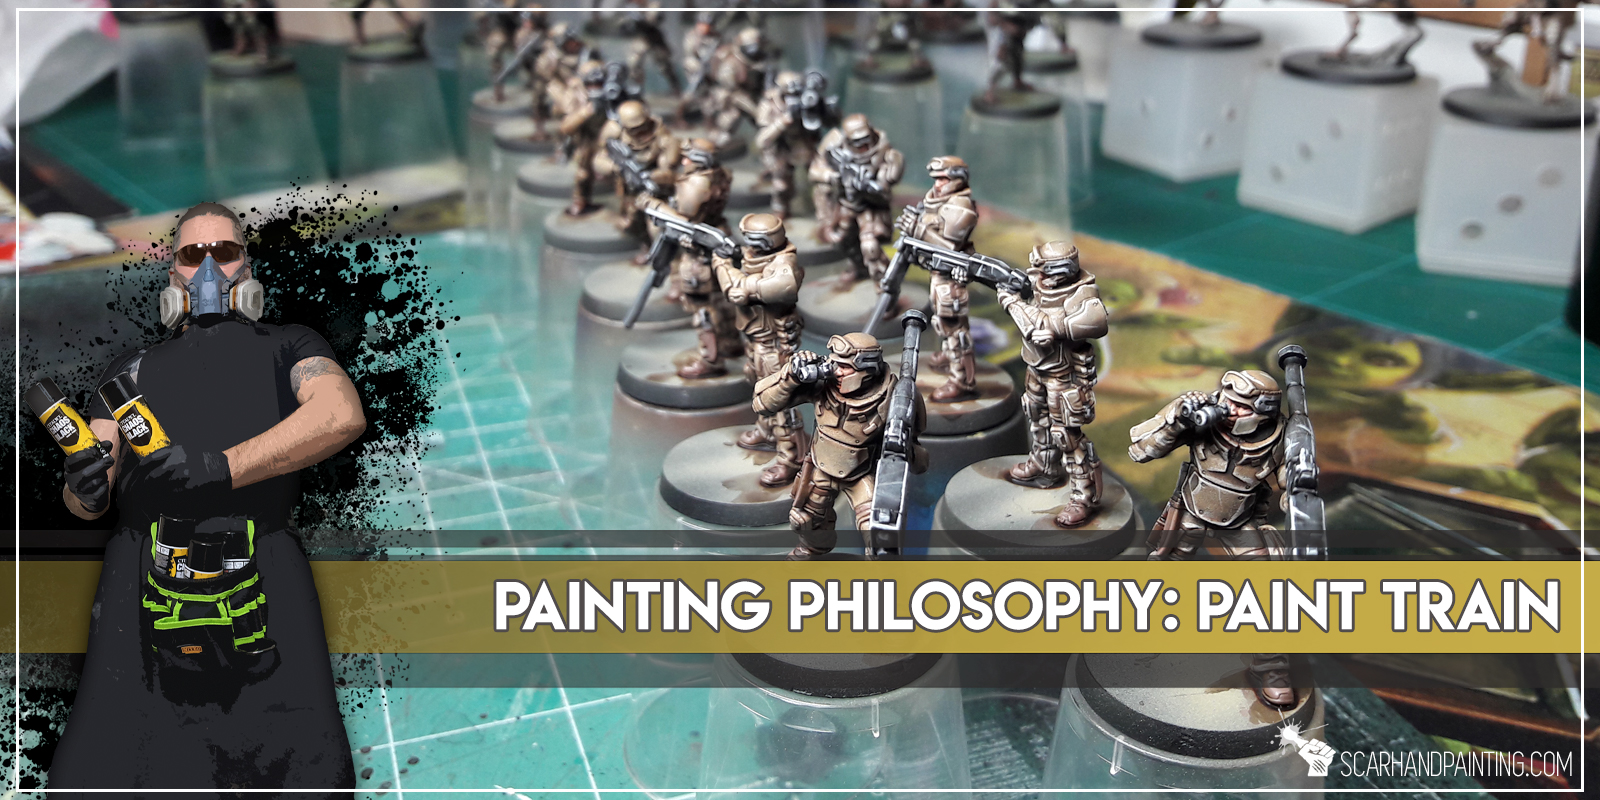

Painting in groups is a term that I use to describe painting entire groups of miniatures, usually one layer at a time. There are many different approaches to painting miniatures. Some painters prefer to paint a single miniature from start to finish, one layer at a time. Others avoid painting by layers and instead paint a single piece of a miniature, applying all the colors, before proceeding to next part. I on the other hand, feel most comfortable when painting groups of miniatures. The size of such groups might vary between six to about a hundred pieces at a time. They don’t even need to follow the exact same colour scheme as long as they share majority of layers. Off course this method is reserved for armies and collections and would not benefit a single miniature project.

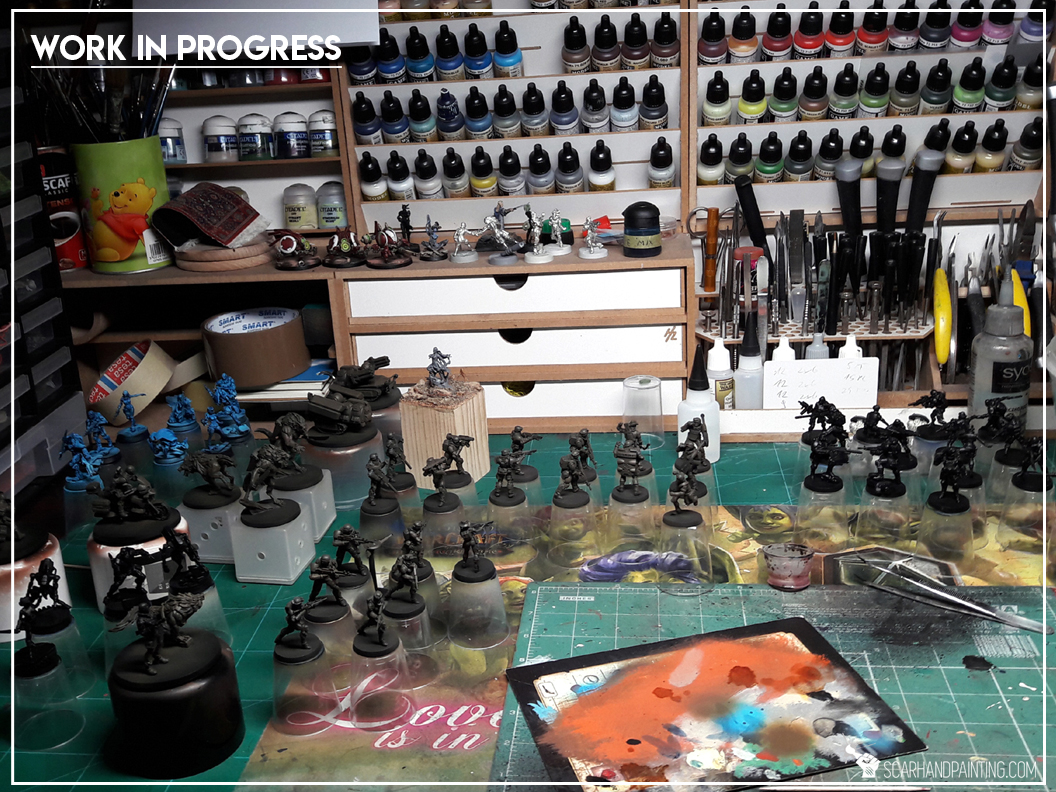
After years of practice this method triggered somehow on itself. I love painting miniatures but get really excited once projects enter final stages. I’m really hooked up on that feeling of accomplishment. That’s why I like to plan projects so that by not undertaking unnecessary actions I save time. If I have a bunch of miniatures to get painted I’d rather prepare and undercoat them all in one go, instead of repeating this for every single miniature, one at a time. It not only quickens the process but also leaves a ‘not entirely fun’ part, of a project, behind at some point. It is not limited to undercoat only and instead translates to all the layers. Every accomplished layer brings me a bit closer to the final steps of a project – the place where ‘choirs’ are left behind, most stuff looks pretty cool already and there’s most fun for me to have.
I maintain my motivation by taking small, but important steps. My main goal is to accomplish a project, but there are many small targets to achieve between the start and the finish line. I set obtainable targets, then once accomplished I check if I have energy for another round. Never force myself to take more than one step at a time – this one step is important, but all the rest is just a bonus, and as mentioned before – each step brings me closer to project’s completion. In practice it might look more or less like this:

START
step: Black Undercoat,
MAIN STEP COMPLETE
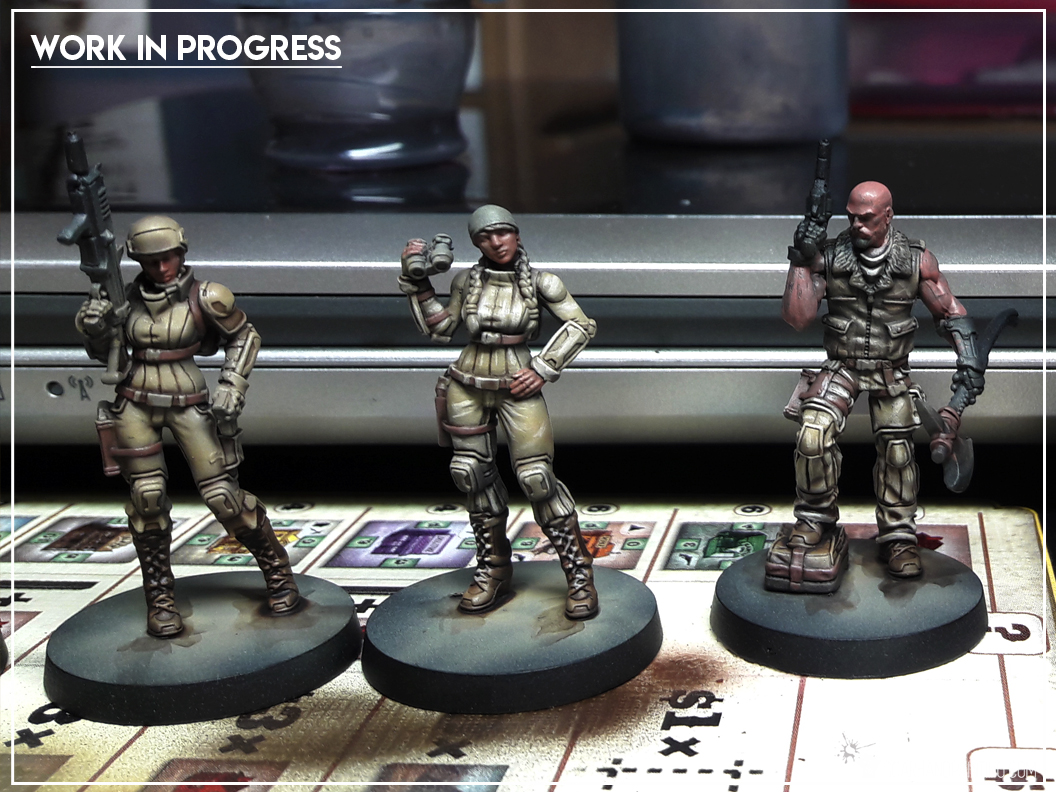
DESERT Armour & Uniforms:
step: Airbrushed layers (main colour), Dark Earth (Vallejo),
step: Airbrushed layers (main colour), Light Brown (Vallejo),
step: Highlights on the main colour, Light Brown (Vallejo),
step: Wash, Mix Strong Tone Ink (AP) 1:1 Soft Tone Ink (AP),
MAIN STEP COMPLETE
step: Edges on the main colour, Flayed One Flesh (GW),
step: Edges on the main colour, Pallid Wych Flesh (GW),
MAIN STEP COMPLETE
BROWN elements:
step: Secondary colour layer, Olive Drab (Vallejo),
step: Secondary colour layer, Gorthor Brown (GW),
step: Secondary colour layer, Gorthor Brown (GW) + Pallid Wych Flesh (GW),
step: Secondary colour Wash, Mix Strong Tone Ink (AP) 1:1 Soft Tone Ink (AP),
MAIN STEP COMPLETE
step: Edges on the secondary colour, Karak Stone (GW),
MAIN STEP COMPLETE
BLACK/GREY outfits & weapons:
step: Secondary colour layer, Skavenblight Dinge (GW),
step: Secondary colour layer, Fenrisian Grey (GW),
step: Secondary colour layer, Pallid Wych Flesh (GW),
step: Secondary colour Wash, Dark Tone Ink (AP),
MAIN STEP COMPLETE
step: Edges on the secondary colour, Pallid Wych Flesh (GW),
step: Edges on the secondary colour, White,
MAIN STEP COMPLETE
SKIN:
step: Secondary colour layer, Bugmans Glow (GW),
step: Secondary colour layer, Dwarf Flesh (GW),
step: Secondary colour layer, Dwarf Flesh (GW) + Pale Flesh (Vallejo),
step: Secondary colour layer, Pale Flesh (Vallejo),
step: Secondary colour Wash, Mix Strong Tone Ink (AP) 1:1 Soft Tone Ink (AP),
MAIN STEP COMPLETE
step: Edges on the secondary colour, Pale Flesh (Vallejo) + Pallid Wych Flesh (GW),
MAIN STEP COMPLETE
OTHER COLOURS…
step: Tetriary colours…
etc…
MAIN STEP COMPLETE
VARNISH:
step: Applying Varnihs,
MAIN STEP COMPLETE
BASES:
step: Modelling bases,
step: Painting bases,
step: Painting base edges,
MAIN STEP COMPLETE
step: Applying tufts and additional elements to the bases…
COMPLETION
As you can see there are approximately thirty steps required to accomplish this project so if I manage to take one step every day I will finish the project in about a month. Let’s say there are just six miniatures in the entire project. Would it be so difficult to accomplish one step with six miniatures in one day? How long can it actually take? It is not some extremely difficult, time consuming task. Easy to motivate myself to do that. Now let’s say I had a free weekend and managed to accomplish a MAIN STEP instead. This is worth between two to five regular steps. Let’s say I took out five. I just moved five days ahead of schedule. Can spend that time being lazy or move to another step… and there’s that – this is how the process works for me.


Coherent Colour Scheme – Painting in groups, one layer at a time, translates to a more coherent colour scheme. No need to mix paints between miniatures and try to achieve same exact tones – paint is prepared for entire group and will look exactly the same between first and last miniature. In the end this will provide a nice, coherent look of the entire project.
Understanding Through Repetition – After few miniatures of the same kind muscles get used to the detail naturally. Instead of interpretting every miniature I can follow a sort of ‘programmed muscle memory’ to paint much more efficiently, and thus faster. Quality also benefits from this, as there are no ‘uncertain’ brush strokes.
Reaching Ultimate Concentration – Repetition allows me to find myself in a state of utter concentration that won’t get disturbed by music or audio book, still lets me appreciate and take in anything that plays in the background, including videos. I know it’s not a super-power level state of mind and it is common among painters, still not being forced to reset every time and then to mix paints or plan the paint job helps to lenghten the ‘in the mood’ periods.
Purity of Purpose – With clear, obtainable targets in reach and a plan layed down before me it is easier for me to move forward, each step taken being deduced from the list. This makes my motivation thrive.
If you read through all of this banter – I hereby deem you worthy! With wisdom I bestowed, You now possess knowledge necessary to use the Multi-Miniature Ninja Painter technique. Use it wisely and with good intent and it will benefit you greatly. Do not fear to step in and teach other ‘Muggles’ some of that magic.
I have put a lot of effort into preparing this article, yet I am sure I missed something important. If you happen to have any questions related to it – feel free to hit me with them either at my Facebook profile, or via e-mail. Also take note that what works for me, might not necessarily work for you – still there are many ways to accomplish certain things – mine is just one of them.
