- contact@scarhandpainting.com


It took me more than a year to bring to you another Gaming article, but here I am and with something special none the less! Infinity the Game is still my favorite – that did not changed. Once again I’m knee deep in an online Campaign. This years hotness is called Strikezone: Wotan and it is a truly crazy ride! So, time to put your brushes down and supplement painting with some good oldschool gaming!
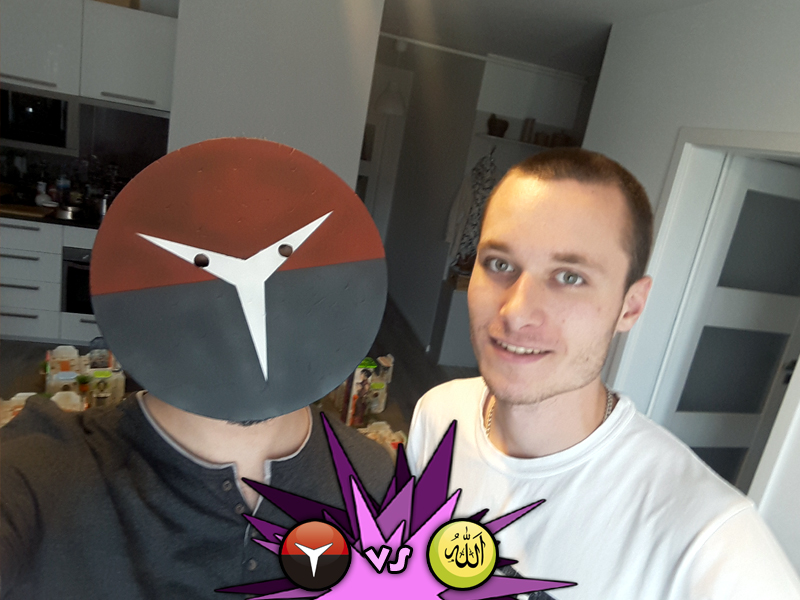
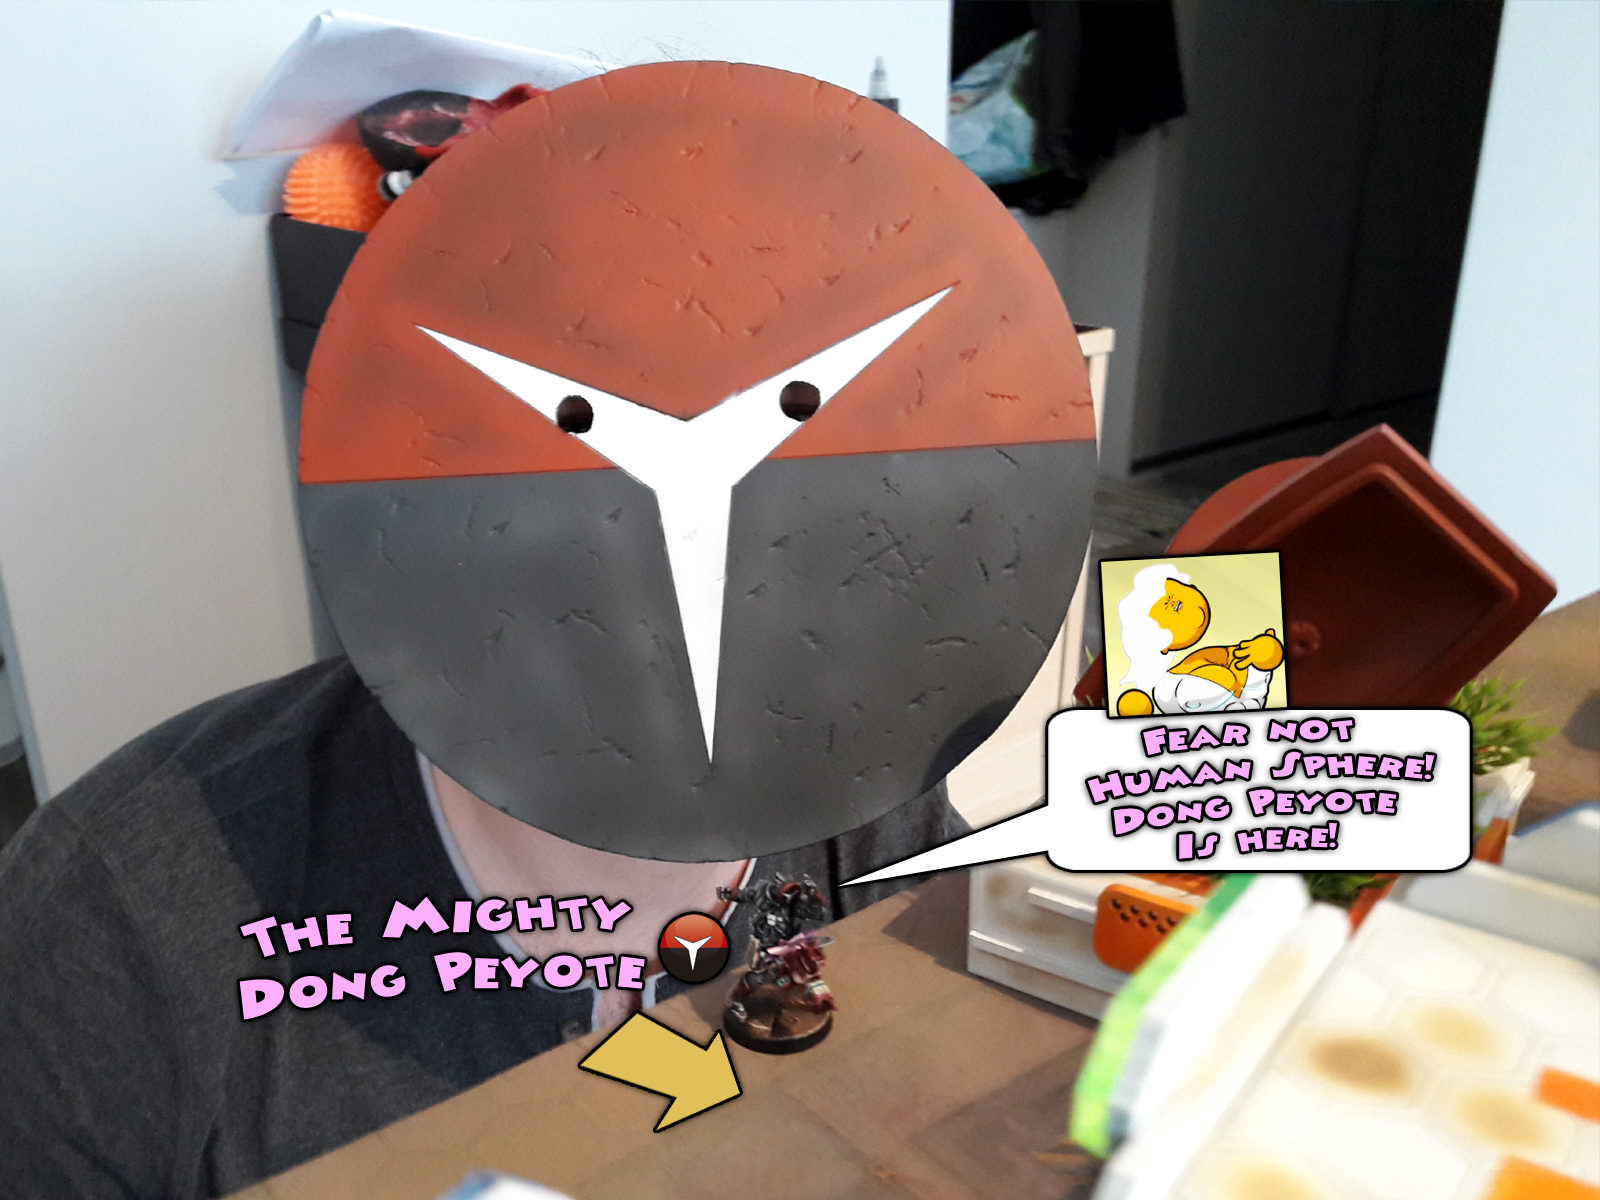
Having recently finished the ‘Dong Peyote’ Special Project I was eager to try out the miniature. It craved blood, watching me intensely from the scenic plinth – like if trying to force me to field it! Not that I tried to resist – in the contruary, I used the weekly gaming meetup with a friend to bring some action to the Mighty Dong Peyote!
Location: The Dong Peyote, Wotan Blockade
Time: day twenty nine of the Strikezone: Wotan campaign
Theater: Dong Peyote Repurposed Freighter
Mission: Annihilation
Special Rules: ‘The Dong Peyote’
Game size: 250pts.

For this fine battle I decided to dump the usual Intruder + smoke combo in favour of a new trick. I asked my opponent if he let me use the ‘Dong Peyote’ miniature, prepared just for the sake of Strikezone: Wotan and was granted a ‘go for it’. I restrained myself from building a list around the new character and decided to cut out enough of my usual 300pts. list to be able to field him, leaving the feel of the list intact.
So, there was the usual stuff like Interventor LT, which I find to work miracles, especially as a potent HD+ hacker. Be it defensive, secured Cybermasked LT, support with LT orders at his disposal, or even offensive hacker with chunky WIP and BTS, not to mention an arsenal of very good programs at his disposal.
Total Reaktion Zond is also a simple choice with it’s low points cost, Climbing Plus and ability to be Marksman L2 buffed by a hacker. Mobile HMG to snipe enemy targets – a very potent offensive piece.
A single Moran Maasai Hunter is new to me, as I usually field two of these. Still in this particular case I dumped one in favour of a cheaper Zero Minelayer, fielding two of the latter to deal with potential enemy Camo and spam the map with my Camo Markers, playing mind games with my opponent.
Single Chainguar as a potent corner ARO piece or a good, reliable counter.
Some Transductor Zonds to provide cheap orders and Mimetised, high BS (WIP) ARO pieces.
A Daktari with a Zondbot on top, to keep most of these guys afloat.
MSR Spektr in second group to be used as a surprise ARO piece, and then maybe to eliminate easy targets in active turn.
Three Morlocks to provide smoke cover and exploid openings in enemy defenses.
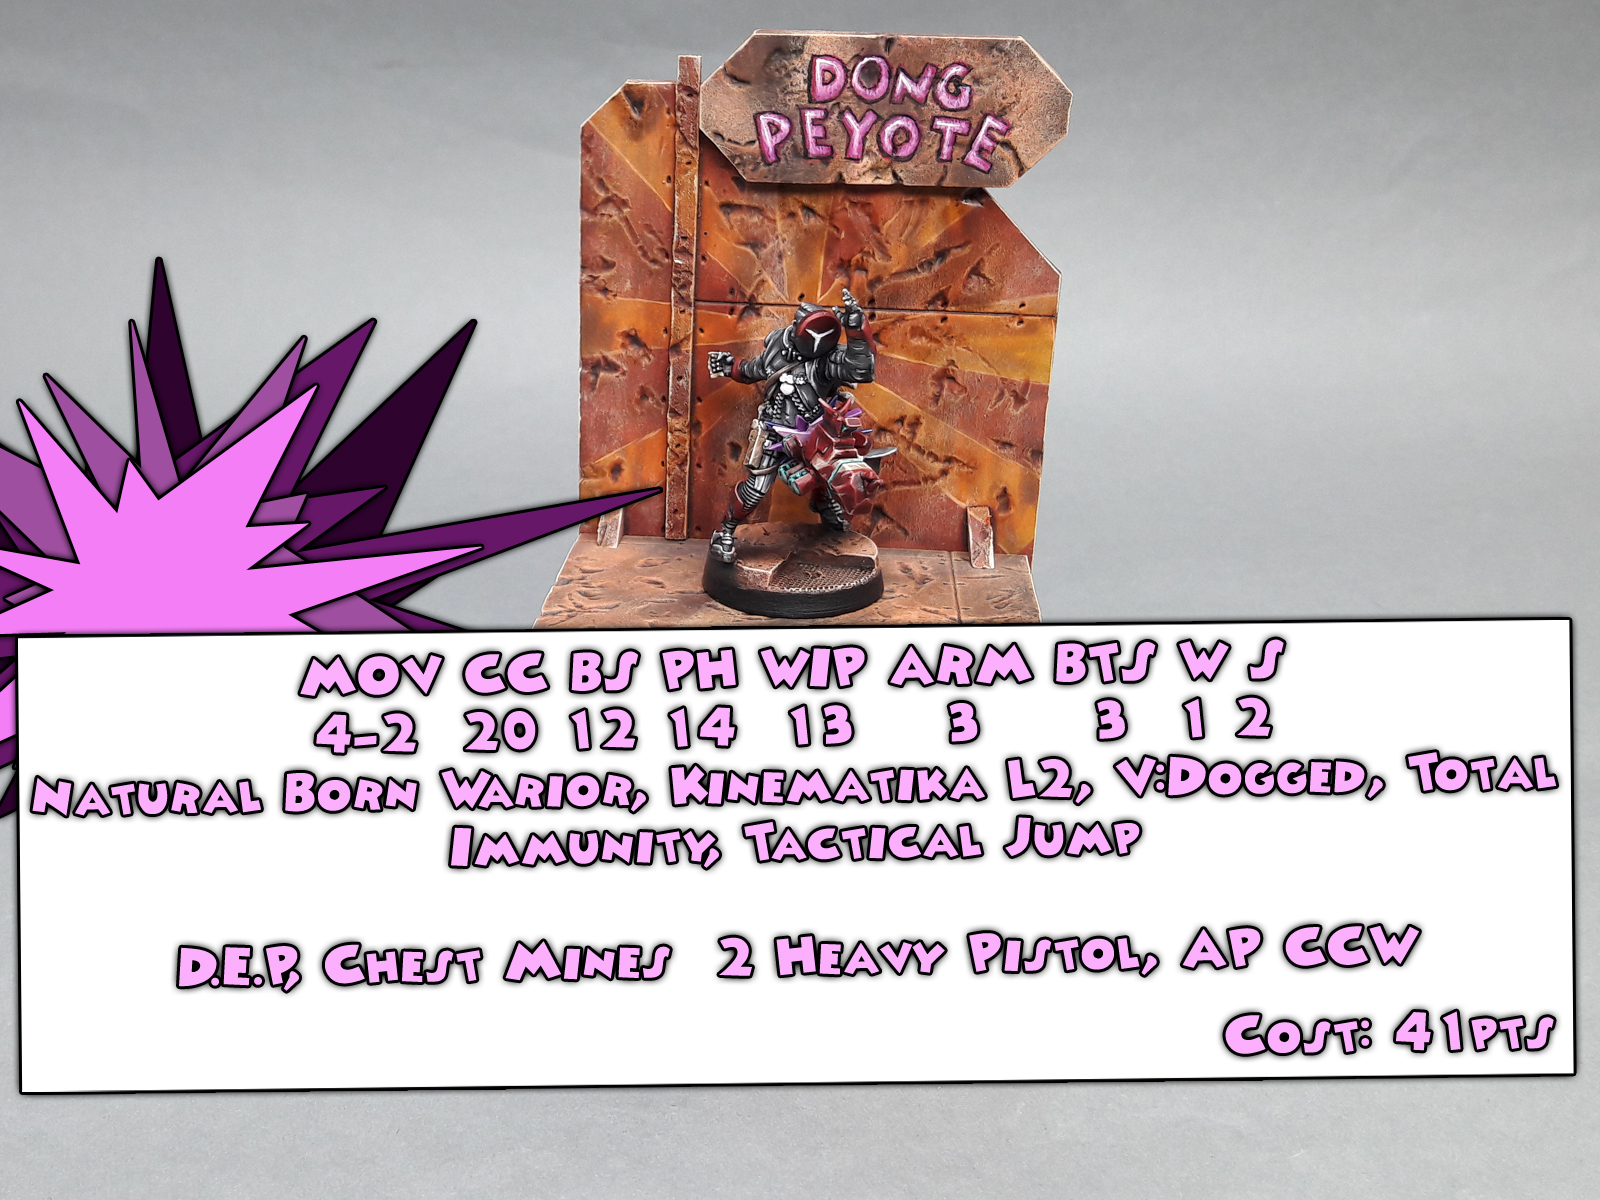
This left me with 41 points to be used on the Dong Peyote – a surprise attack piece, that had to outperform it’s big cost in order to help me achieve victory.
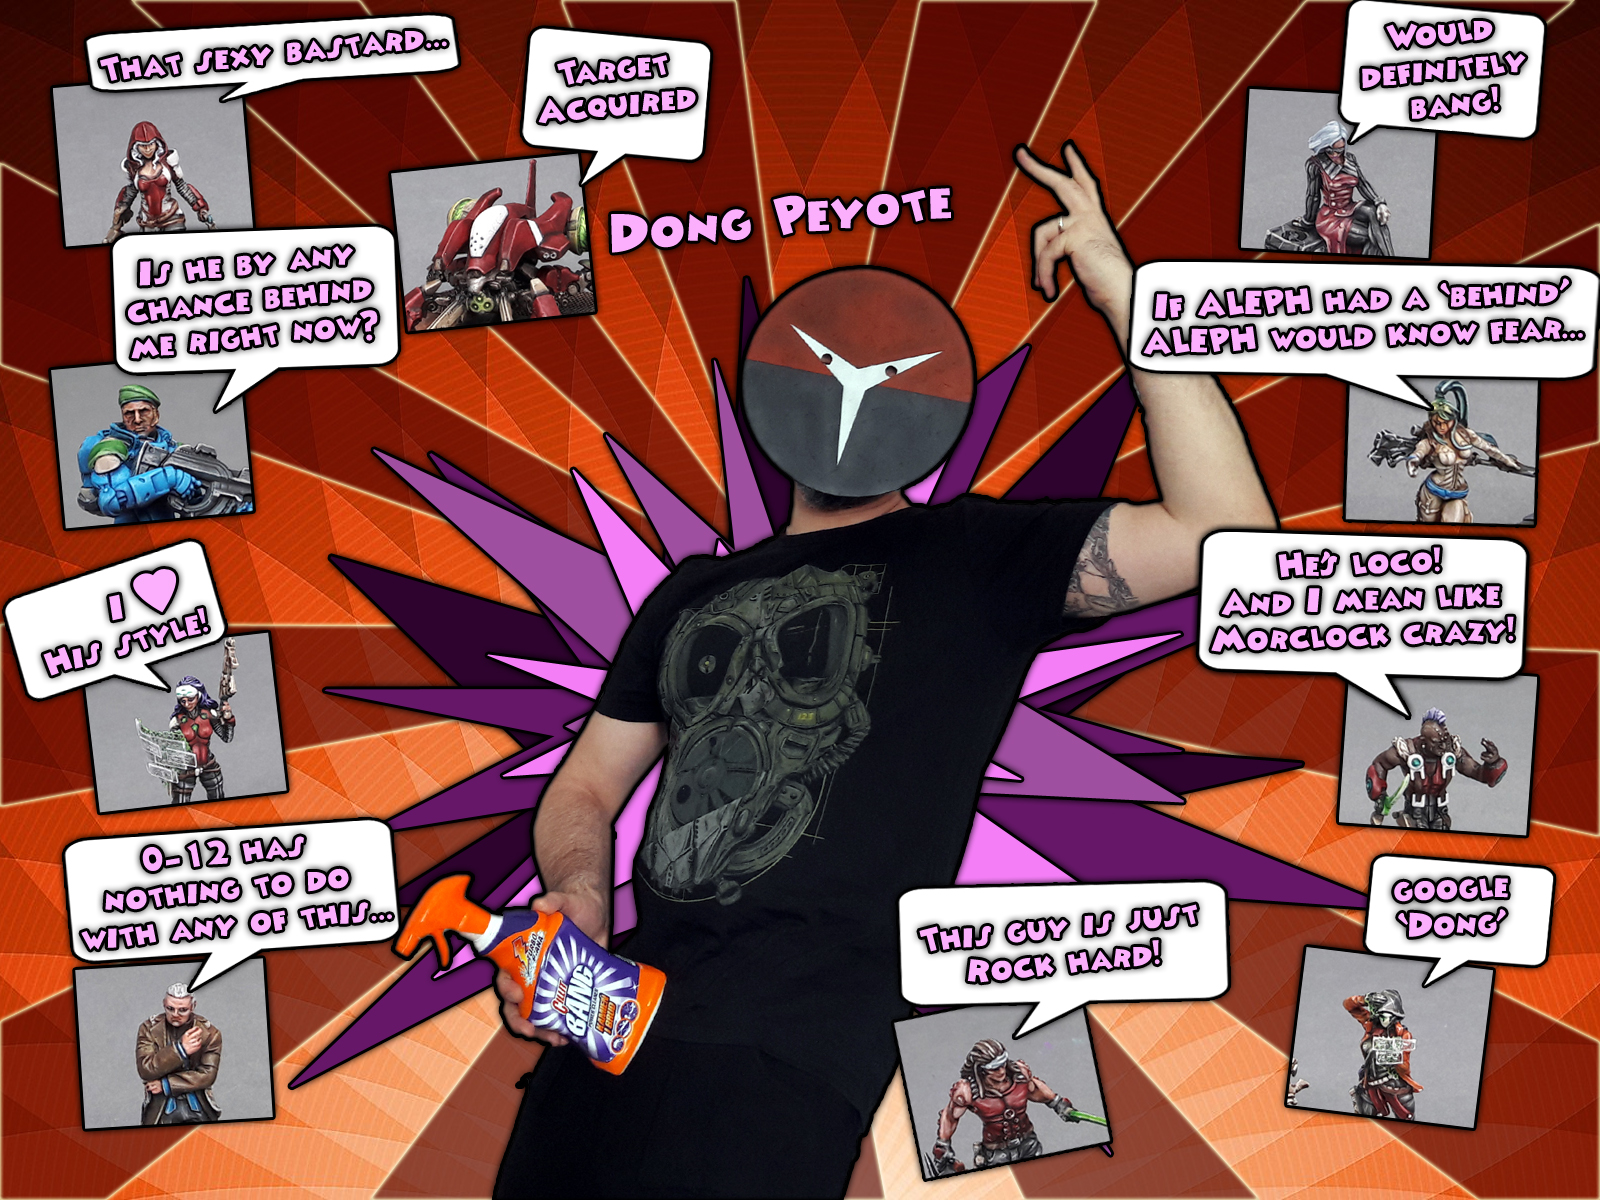
“Fear not Human Sphere – Dong Peyote is here!” Is a phrase that the Dong Peyote uses to announce himself, once he plunges balls deep into enemy lines! He strikes from behind, but not like a shadow – No! He goes hard, guns blazing, fists dealing punches and cock-rocket trailing clouds of smoke as it launches itself to deal tremendous damage! He cares not for the outcome, but for the performance itself! To adorn the Nomad mask and die in a blaze of glory is the ultimate reward!

In my experience Karol grasps the ‘tricks’ of the game very well. He loves to use shenanigans like TO Camo to surprise me. He tends to reveal his TO Camoed troops in unpredictable spots to deal major damage to my list. Then, just as I feel secure and drop my guard, he pops out another TO Camoed troop and prooves me wrong. On top of that he usually goes heavy on his deployment zone, keeping troops far away from my Nomads and then unleashing them in waves, using Coordinated Orders. Aaaand he likes snipers.
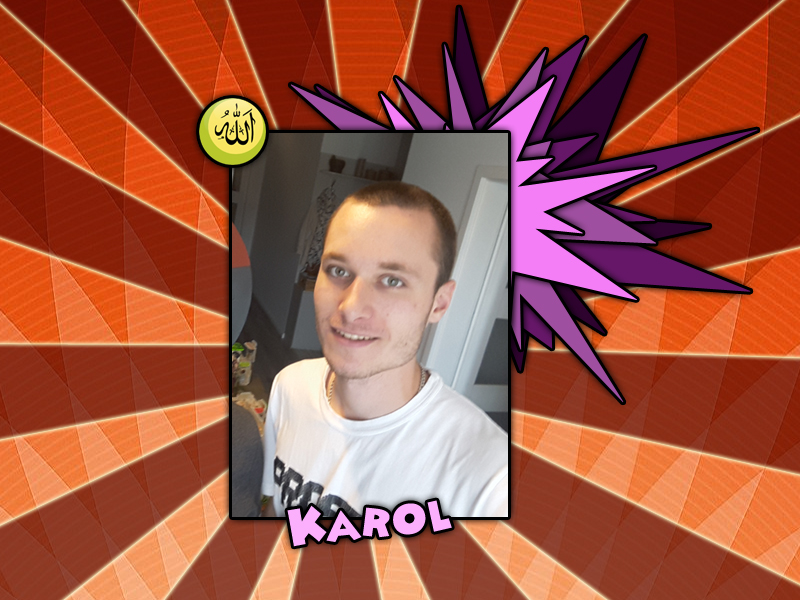
His list, which I know now, is just that. Two Tuaregs to mess me up. One Janissary HMG Heavy Hitter, some versatile troops to be coordinated with him. Lasiq sniper. Some orders to fuel this. A Doctor Plus on top cause it’s just awesome and tends to come back to live with his Auto Medicit time and time again.
I asked Karol to add a note about his list himself – he will do this in time and I will edit the Batrep with it – am curious of his point of view XD


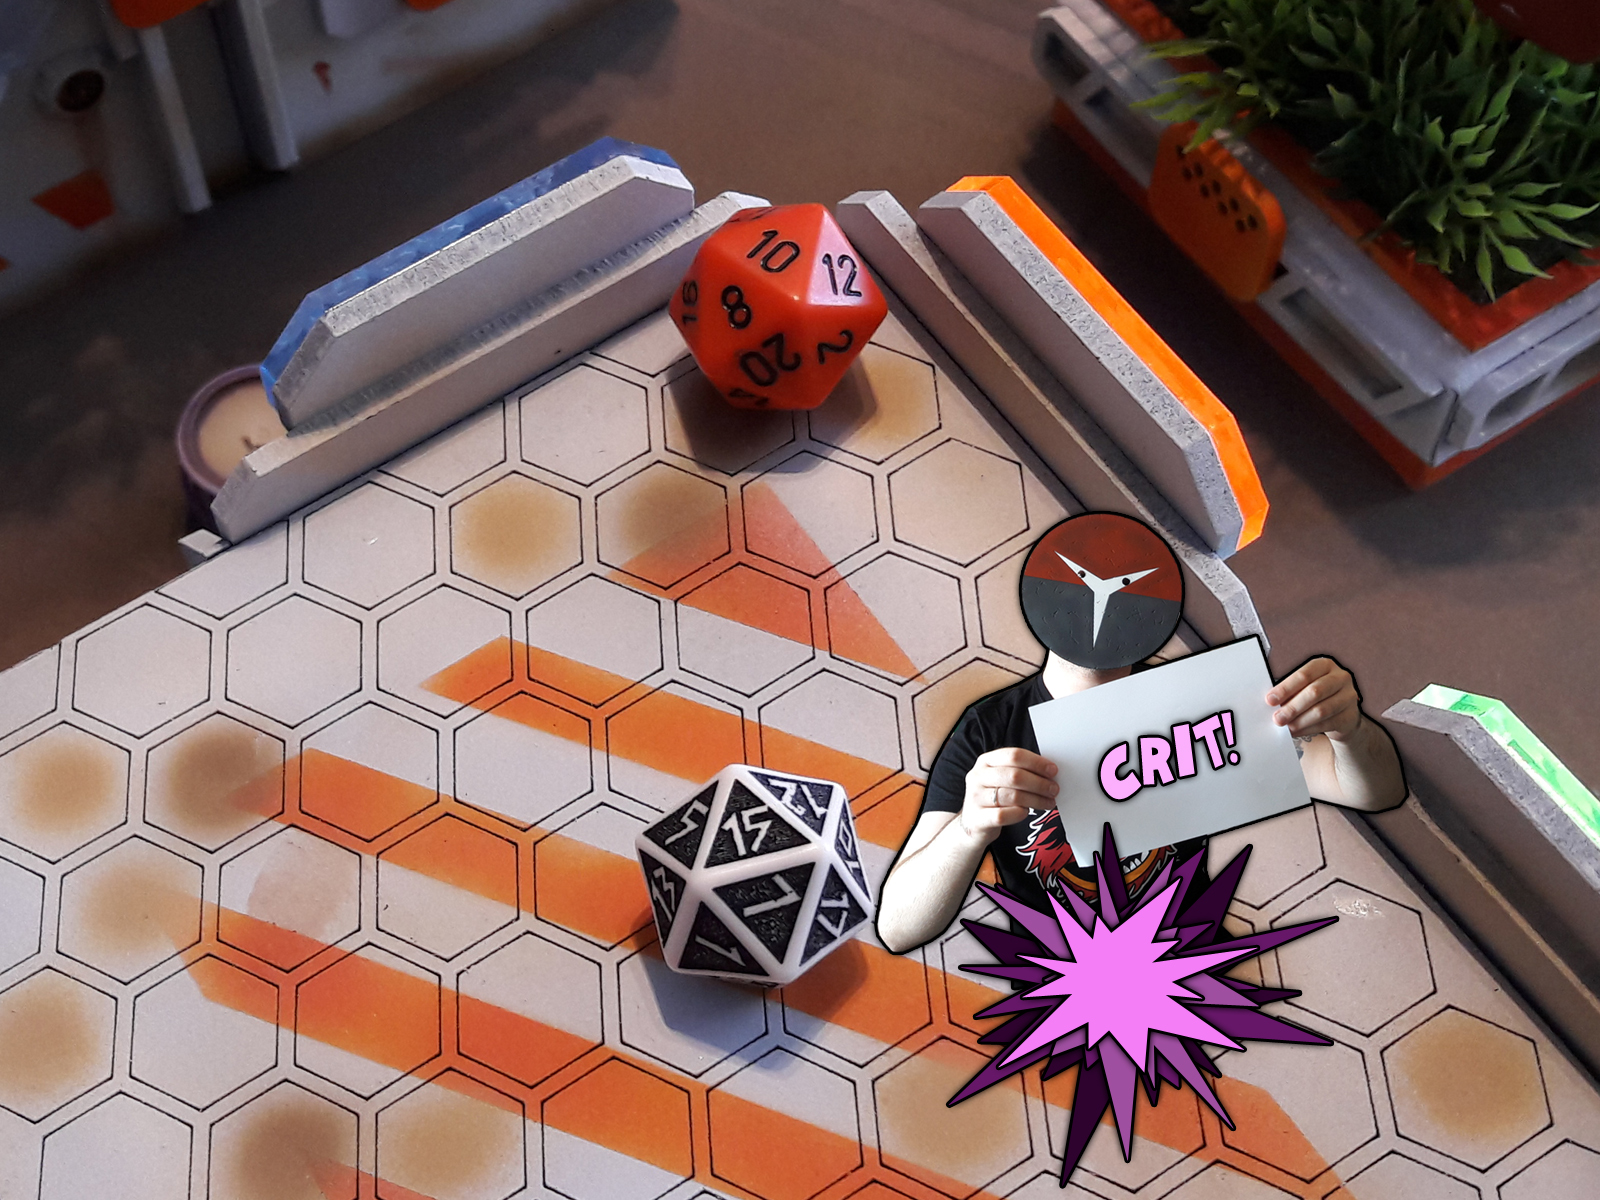
I won the roll off with a Critical pass of the LT’s WIP of 15. Needless to say that the gods of dice were just as eager to see me using the Dong Peyote as I was myself. Still I decided to forfeit the initiative in favour of luring my opponent to spread his troops, thus enabling me to use the Dong to his full potential and carve a deep path to gloory.
HAQQISLAM TURN ONE:
I used a Command Token to deny Karol the use of more than one of these at his first turn. No more rushing at me with half his troops with the damned Coordinated Orders.
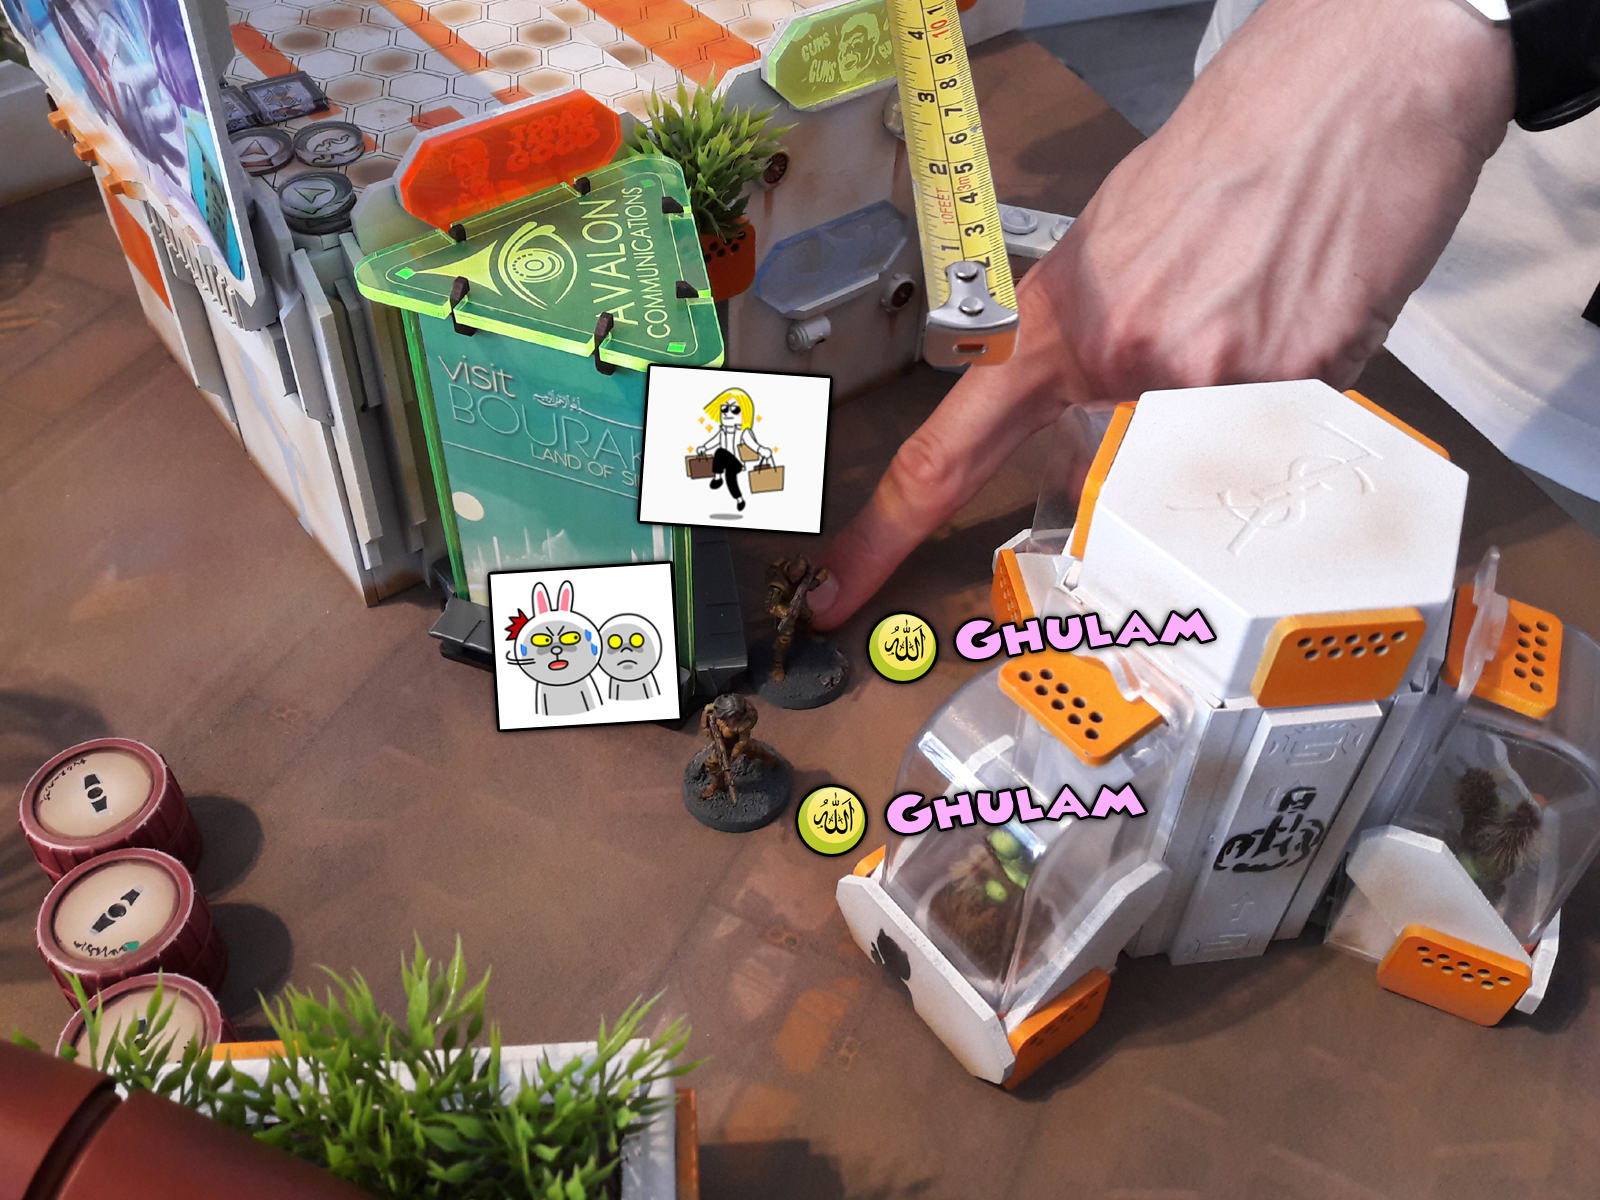
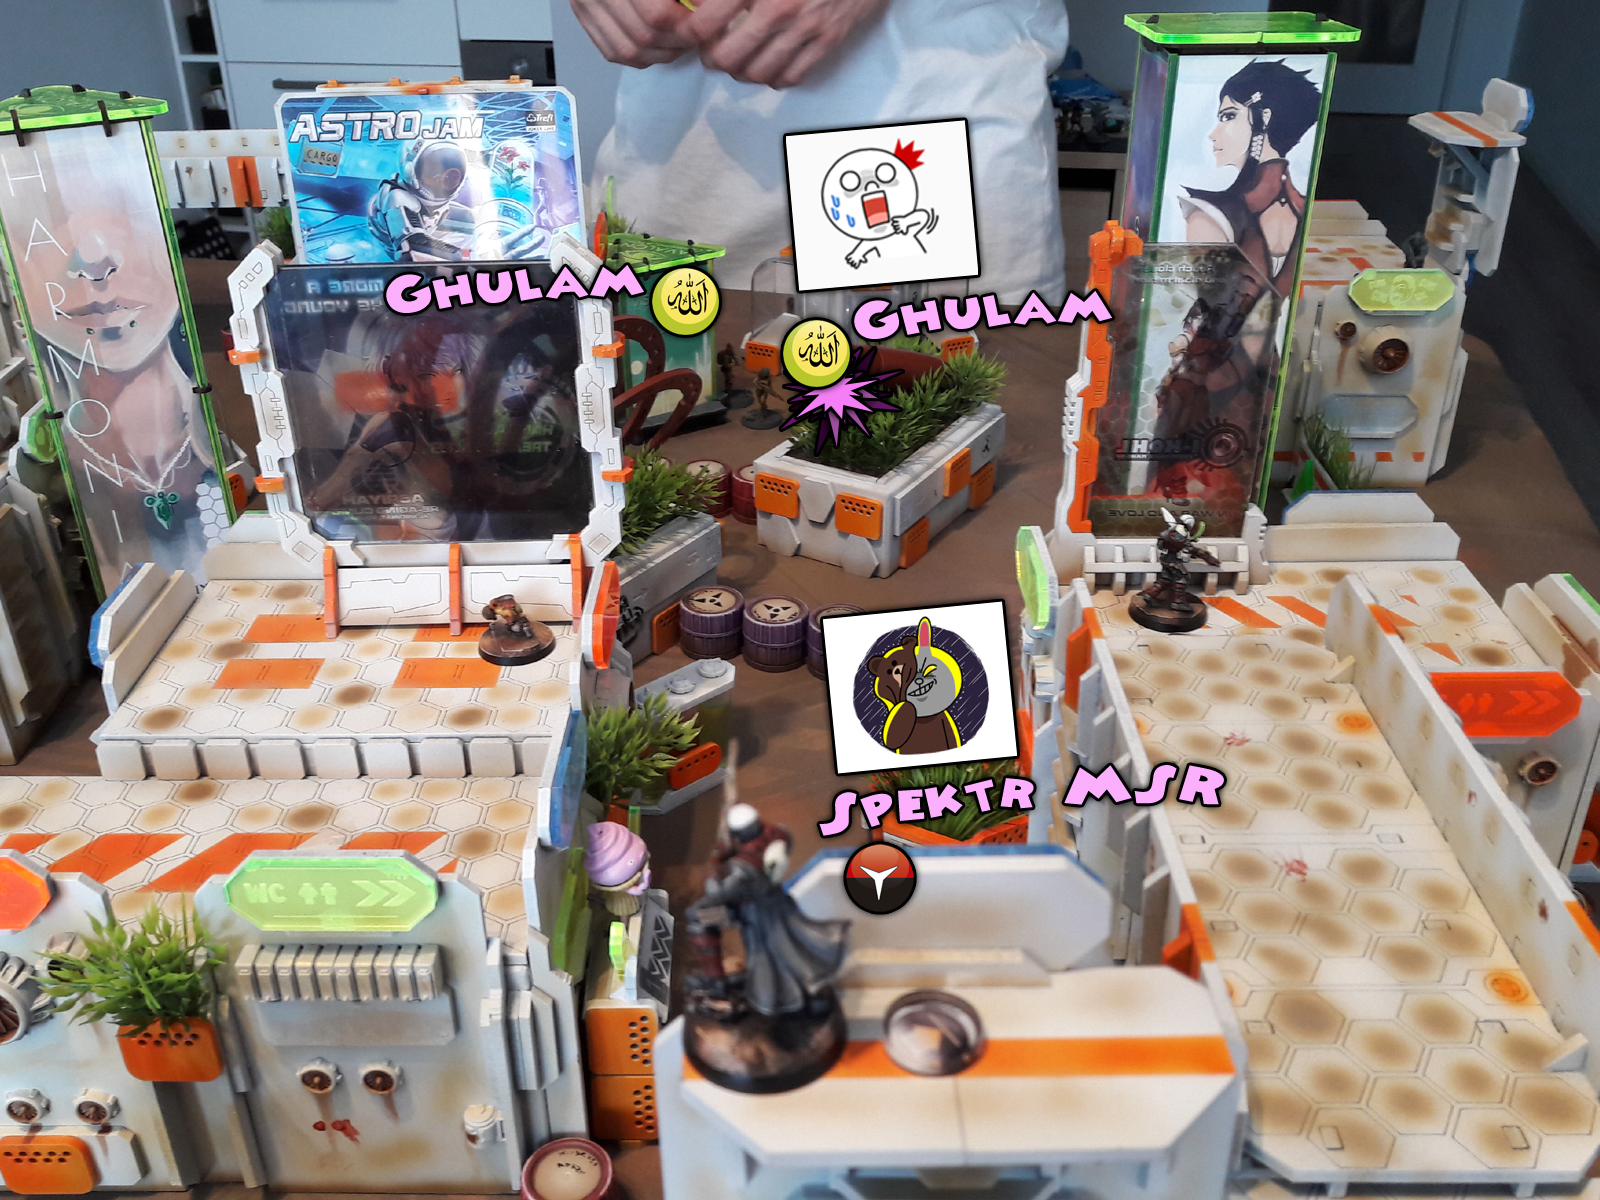
Haqqislam forces opened up with just that – a Coordinated Order, which saw a Janissary, two Ghulams and Khawarij advance. (It took me a while before I decided to reveal a TO Camoed trooper in first order of the first turn… but…) Out of thin air a Spektr MSR appeared to put a bullet through the head of the leading Ghulam. The latter fell to the ground, bleeding and unconcious.
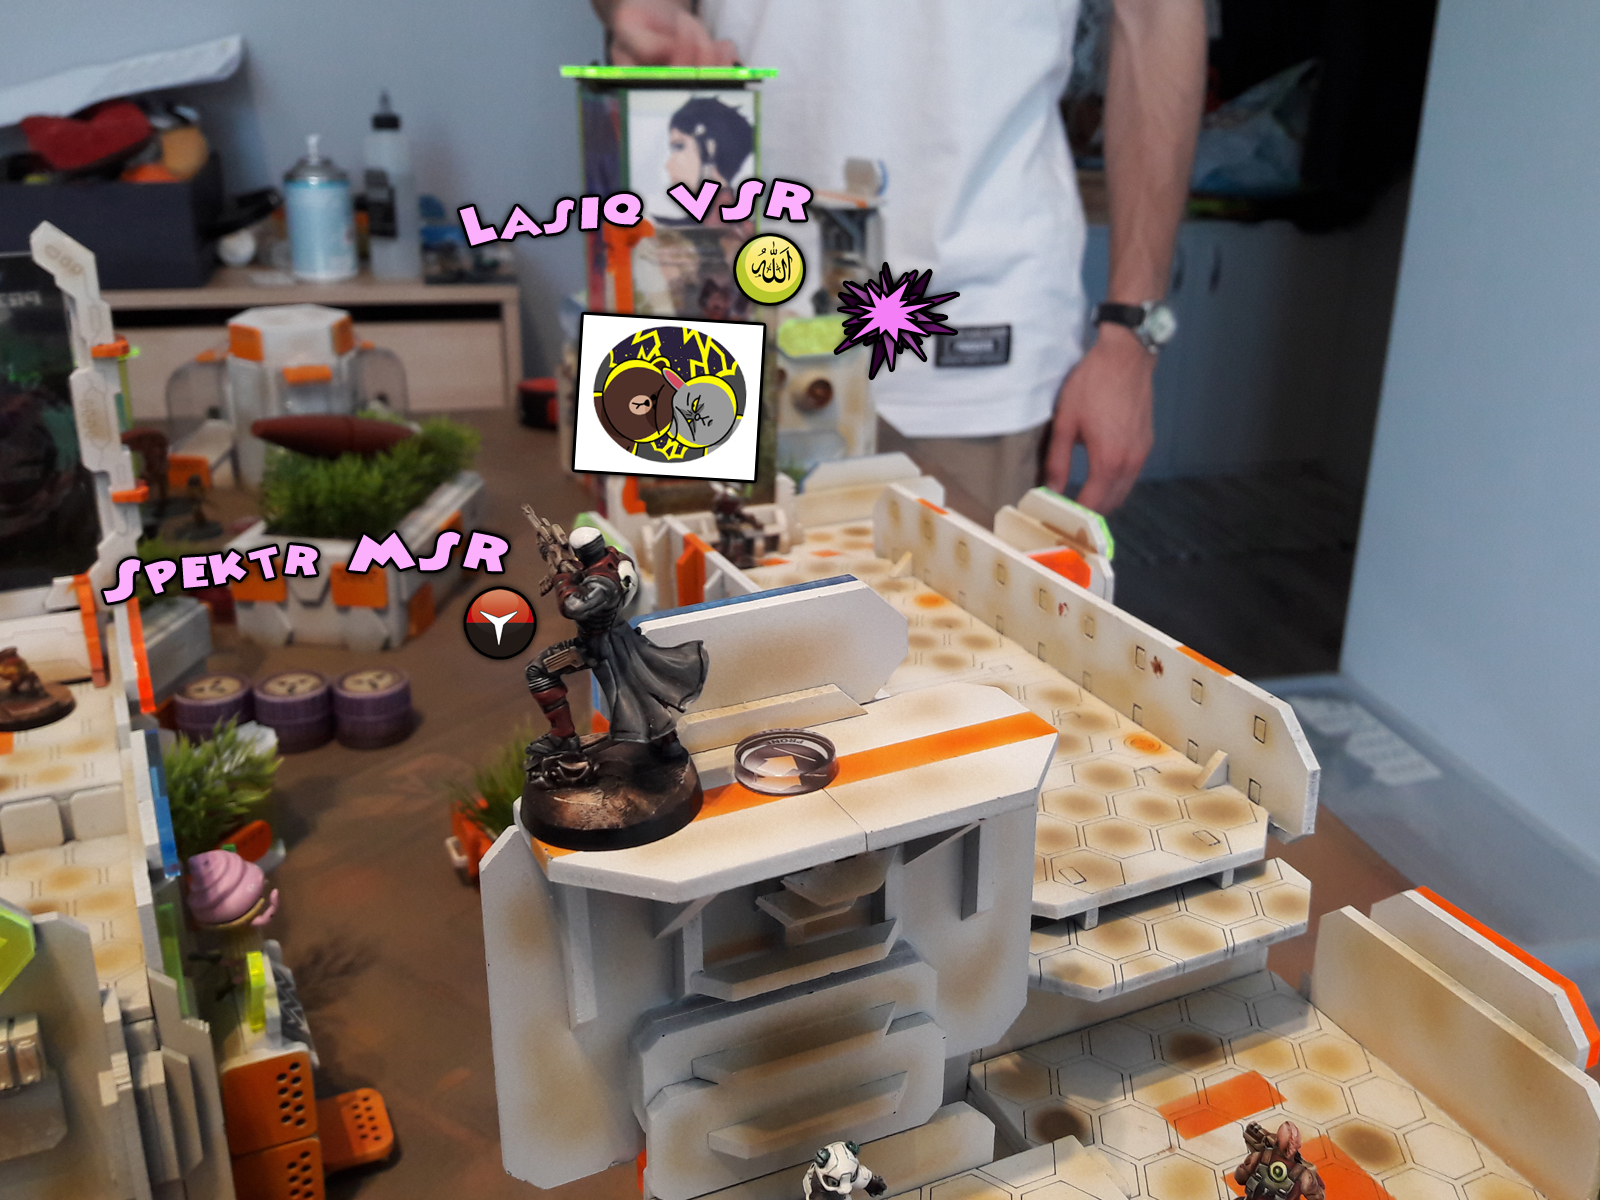
Just like in the ‘Enemy at the gates’ a Lasiq sniper sprang instantly from behind cover to try and deal with this new ARO threat. Unfortunatelly for Lasiq he failed in three attempts in a raw. With his final shot he managed to hit the Spektr, who shrugged the bullet off and used a failed Guts Roll to hide behind solid cover, thus denying the kill.
Zhayedan Doctor+ saw the opening, rushed to try to heal the fallen Ghulam but his medikit sent the poor guy into overdose – the Ghulam died.
In meantime a Camo token (Farzan, which was not known to me at the time) moved closer to Nomad lines in preparation for future outflank options…

NOMADS TURN ONE:
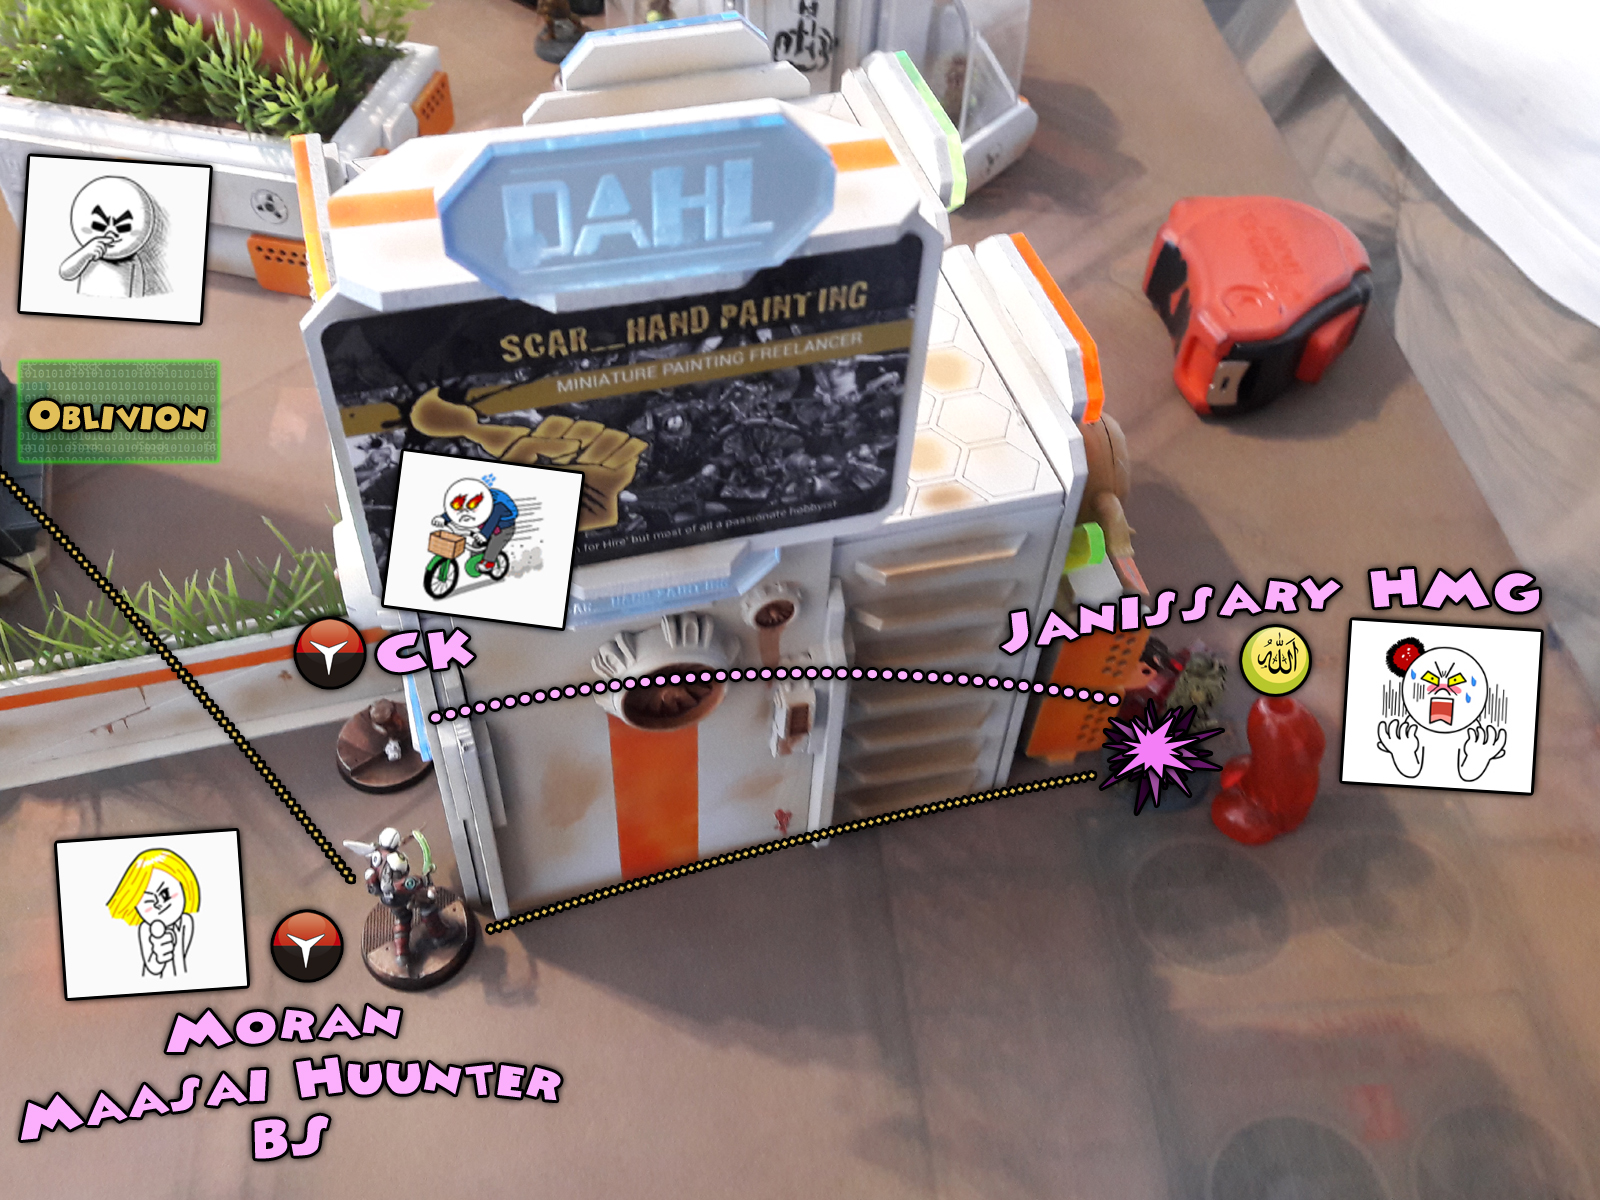
The Haqqislam’s ‘behind’ was pretty well defended, thus the Mighty Dong Peyote withheld his entrance for just one more turn. Instead a Moran Maasai Hunter advanced forward to sneak close to enemy troops rounded up on top and behind a small building. A Repeater and a Crazy Koala in range of both a Lasiq and Janissary meant a potentially good outcome for the Nomads in this part of the table.
A Morlock burst into action, using his 8-4 Metachemistry move to cover entire battlefield, jump out from around a corner and basked both the Zhayedan Doctor Plus and the HMG Janissary in a warm light from his flashlight, cause for unknown reason – he took a flashlight instead of a Chainrifle. The sassy targets stood there, mouths agape, then peppered the Morlock with enough bullets to turn him into a strainer.
A loud facepalm announced the Spektr comming out of his cover just in time to witness the Morlock’s demise. With no targets in sight he just prepared for another turn of ARO.
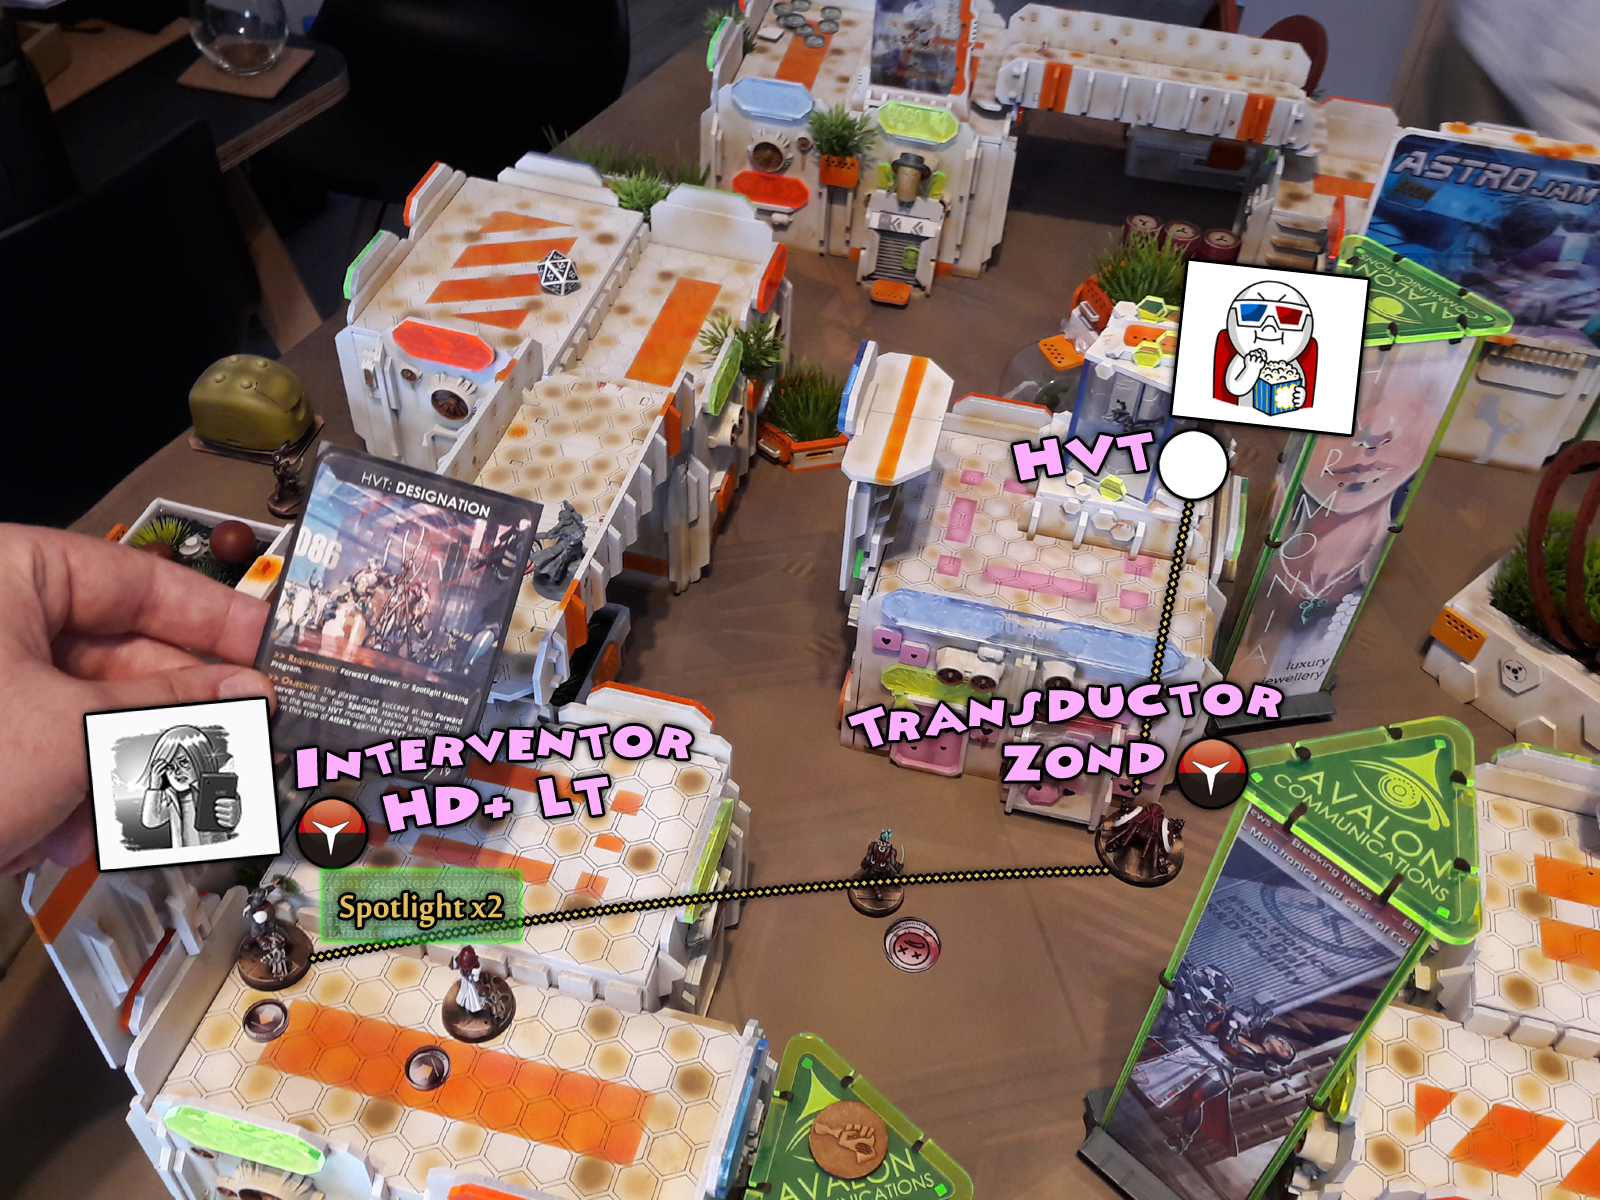
A Transductor Zond moved in, closed on the enemy HVT and let it’s Repeater be used by Interventor LT’s Order to Spotlight the Civilian.
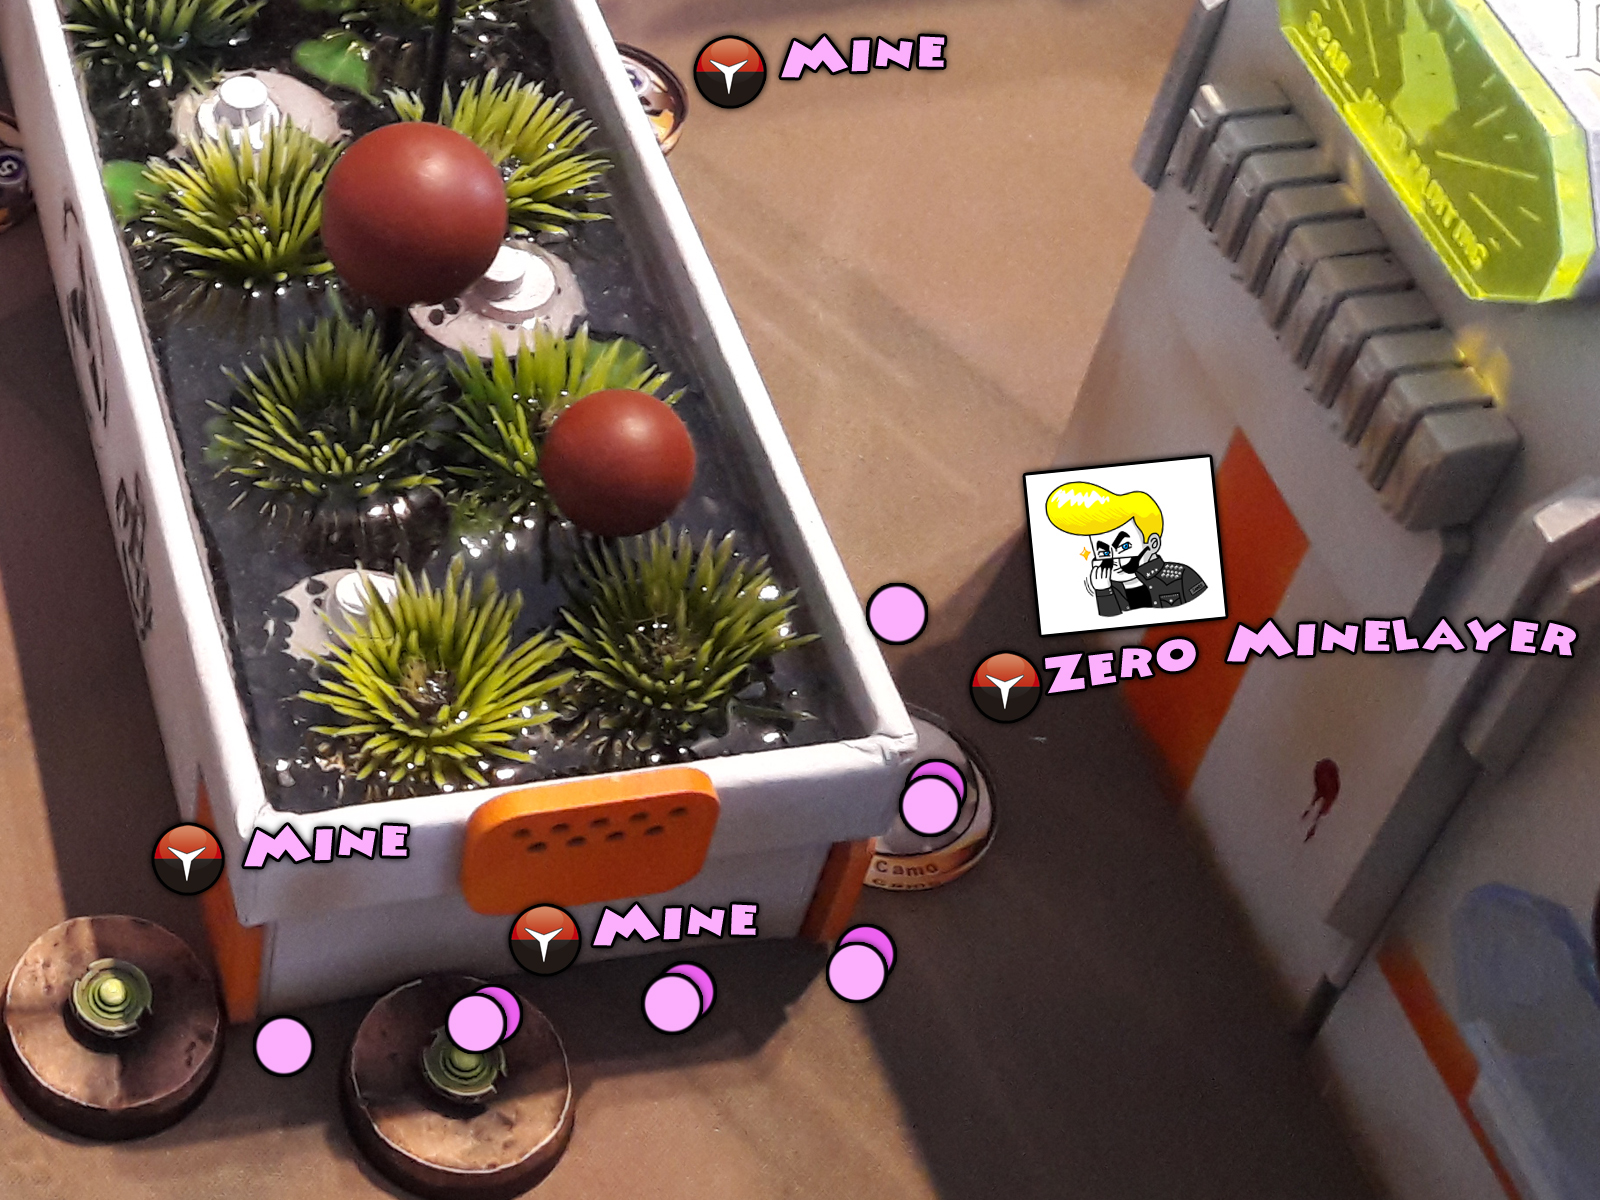
The turn closing to an end, a Zero Minelayer, moved forward, mined the area and then went back to being Camoed, just to mess the Haqq’s up with the ammount of Camo Markers laying around.
Last order of the turn was spent on a Morlock, who advanced through the middle of the board, just to be stopped by an appearance of a Tuareg AHD’s shot. If not for a splendid reflex of the Morlock and a Smoke Grenade throw that smoked the entire area around him – he might got killed…


HAQQISLAM TURN TWO:
With a Moran and a Crazy Koala covering the Lasiq, a Janissary opened up in a try to deal with both of these threats at once. On top of Crazy Koala bursting into action, the Moran replied with a Boarding Shotgun blast, all the while Interventor LT Oblivioned the Janissary through the Moran’s Repeater. Janissary reacted, sending four HMG bullets in Moran’s direction. Bad luck befell him, as he ate up all three ARO’s and failed to do any damage to the Moran. He was as good as done, going to Unconcious.
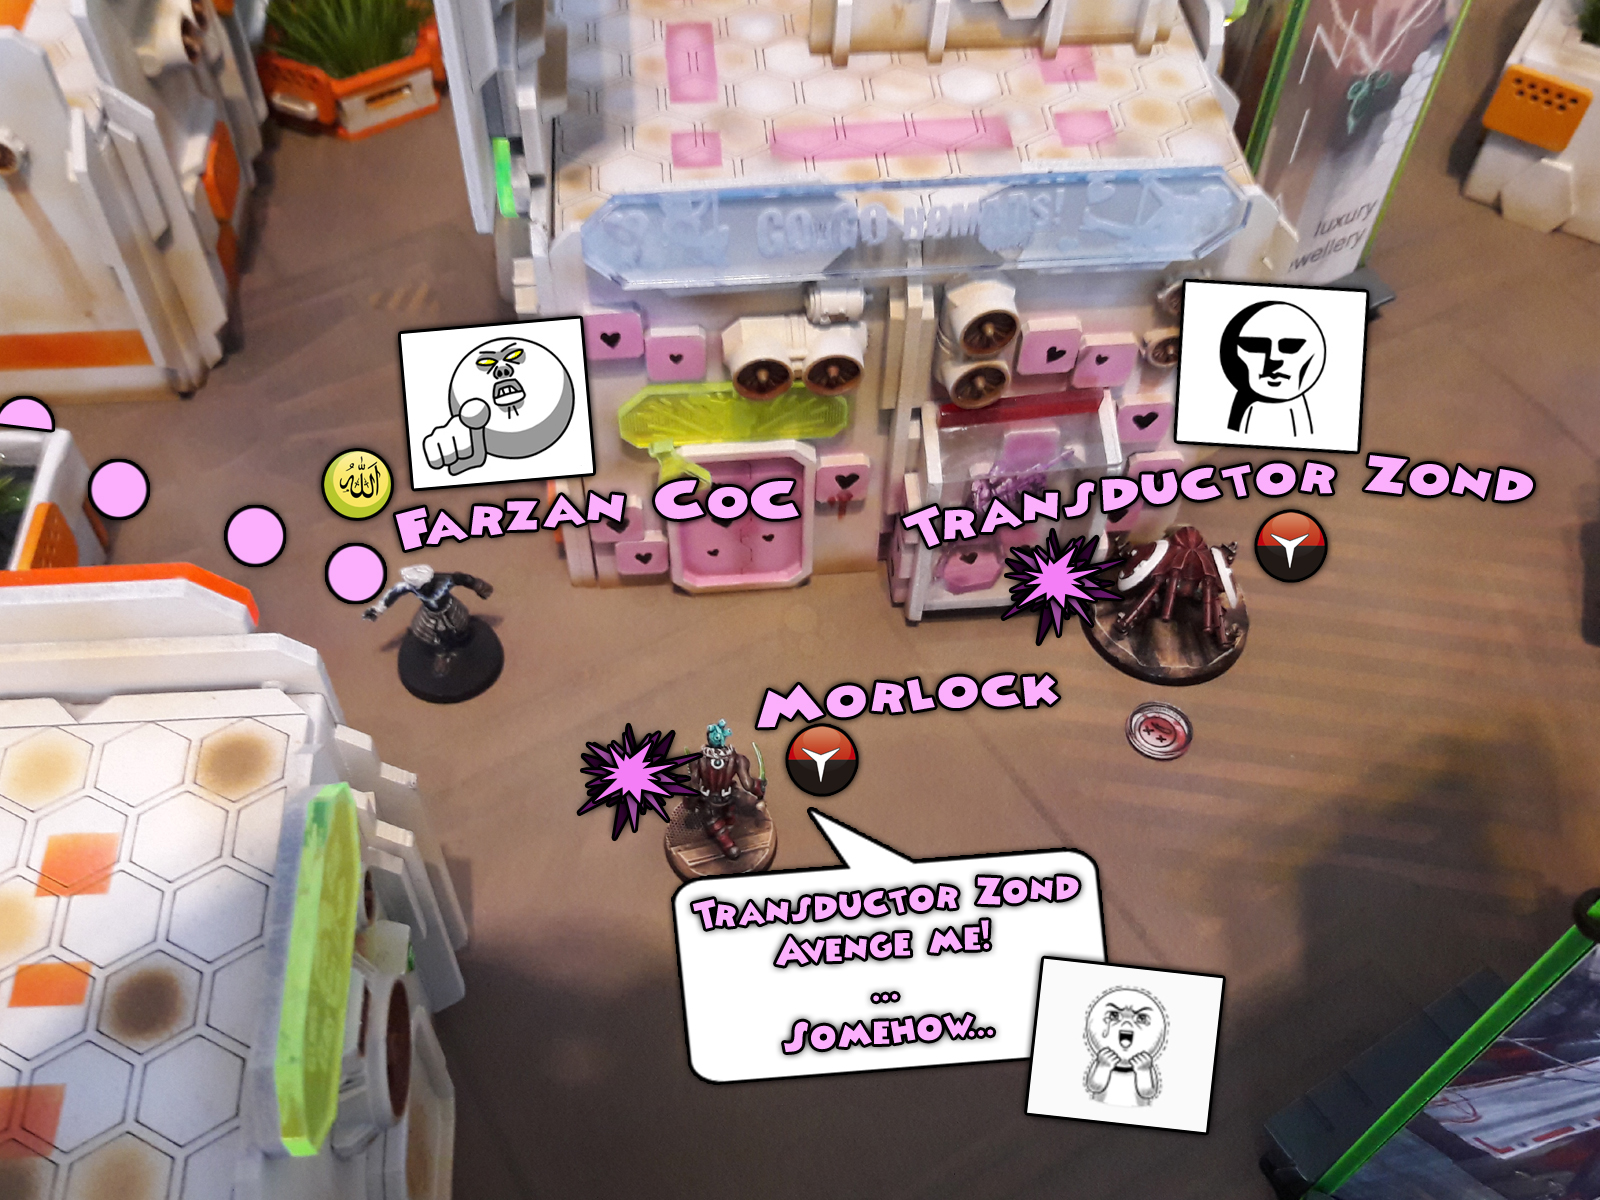
Crazy Koala gone, a Tuareg Sniper appeared over the spot where the Lasiq was hiding and shot the shocked Spektr to unconcious. He then continued trying to take out a Transductor Zond from HVT’s range, but failed spectacularly in four orders. He took out a Morlock standing nearby the Zond instead, this one falling to Unconcious without complaints.
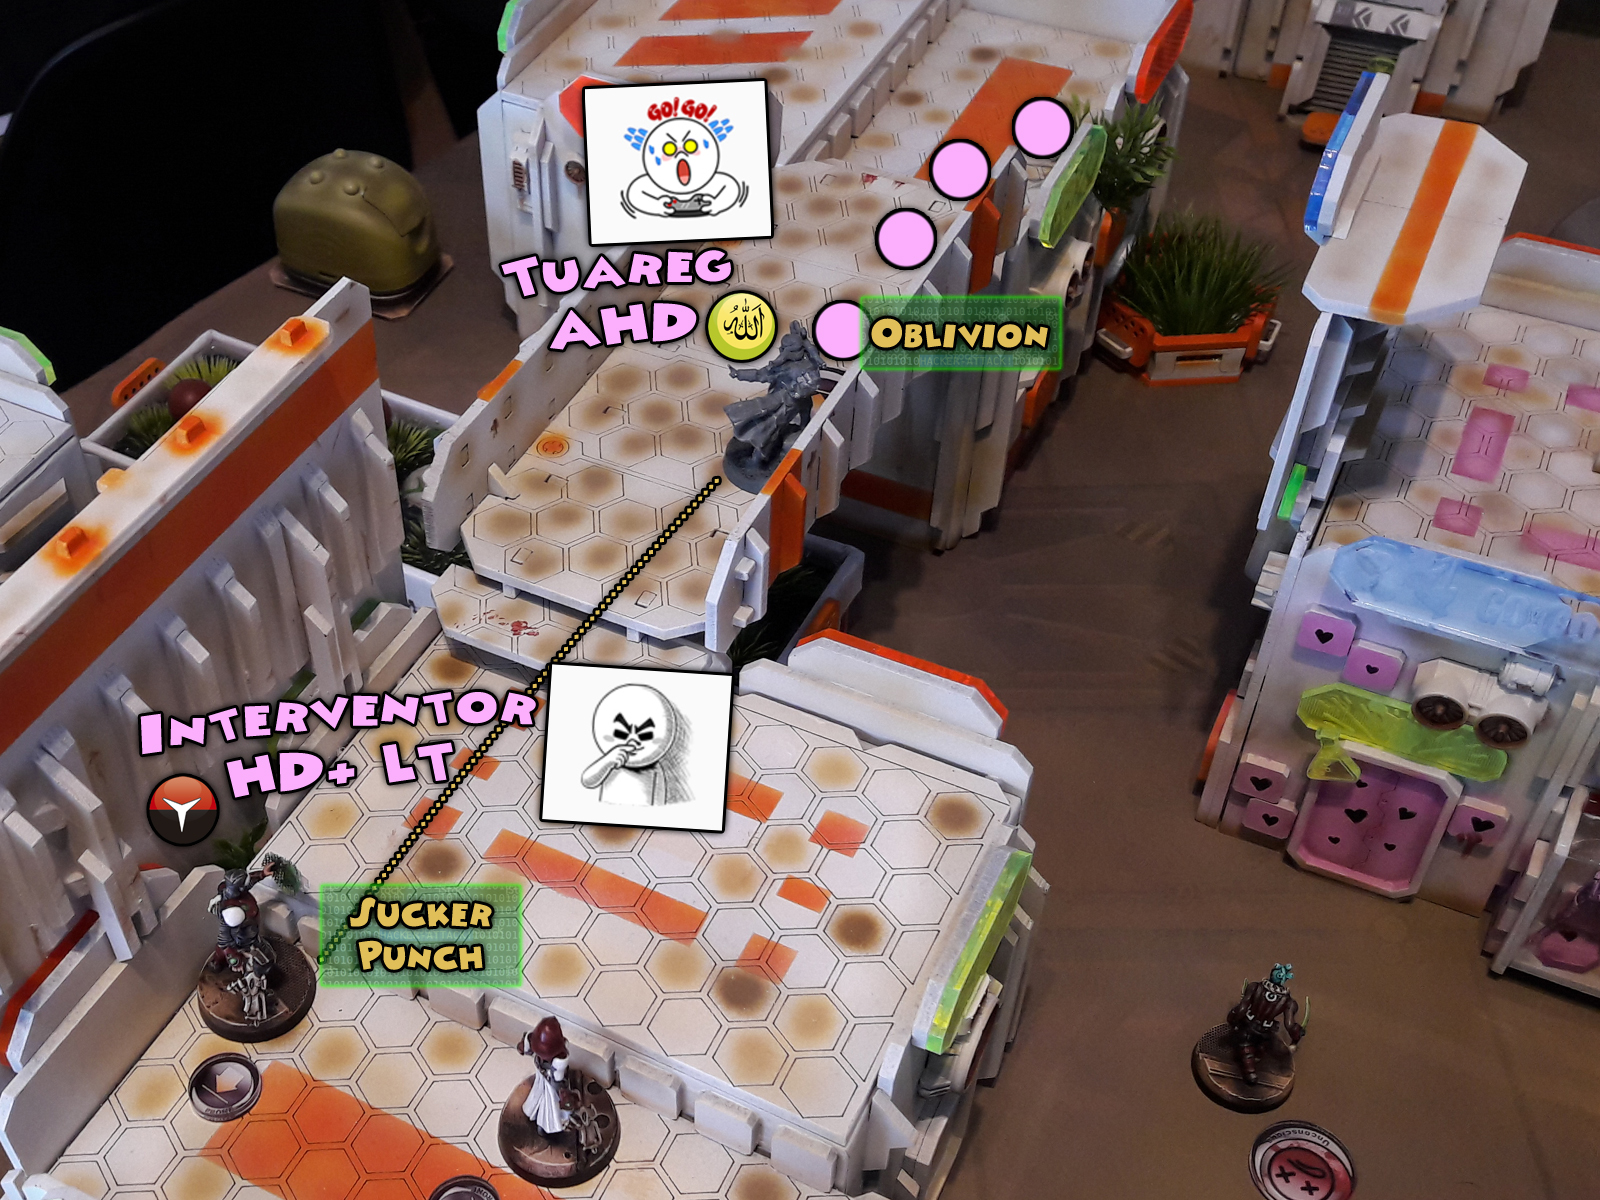
AHD Tuareg moved forward, avoiding the Mines nearby, by moving prone. He slowly closed in on the Nomad Interventor LT and hacked to isolate him, but in typical ‘against an Interventor’ situation, he got Sucker Punched to unconcious in return…
NOMADS TURN TWO:
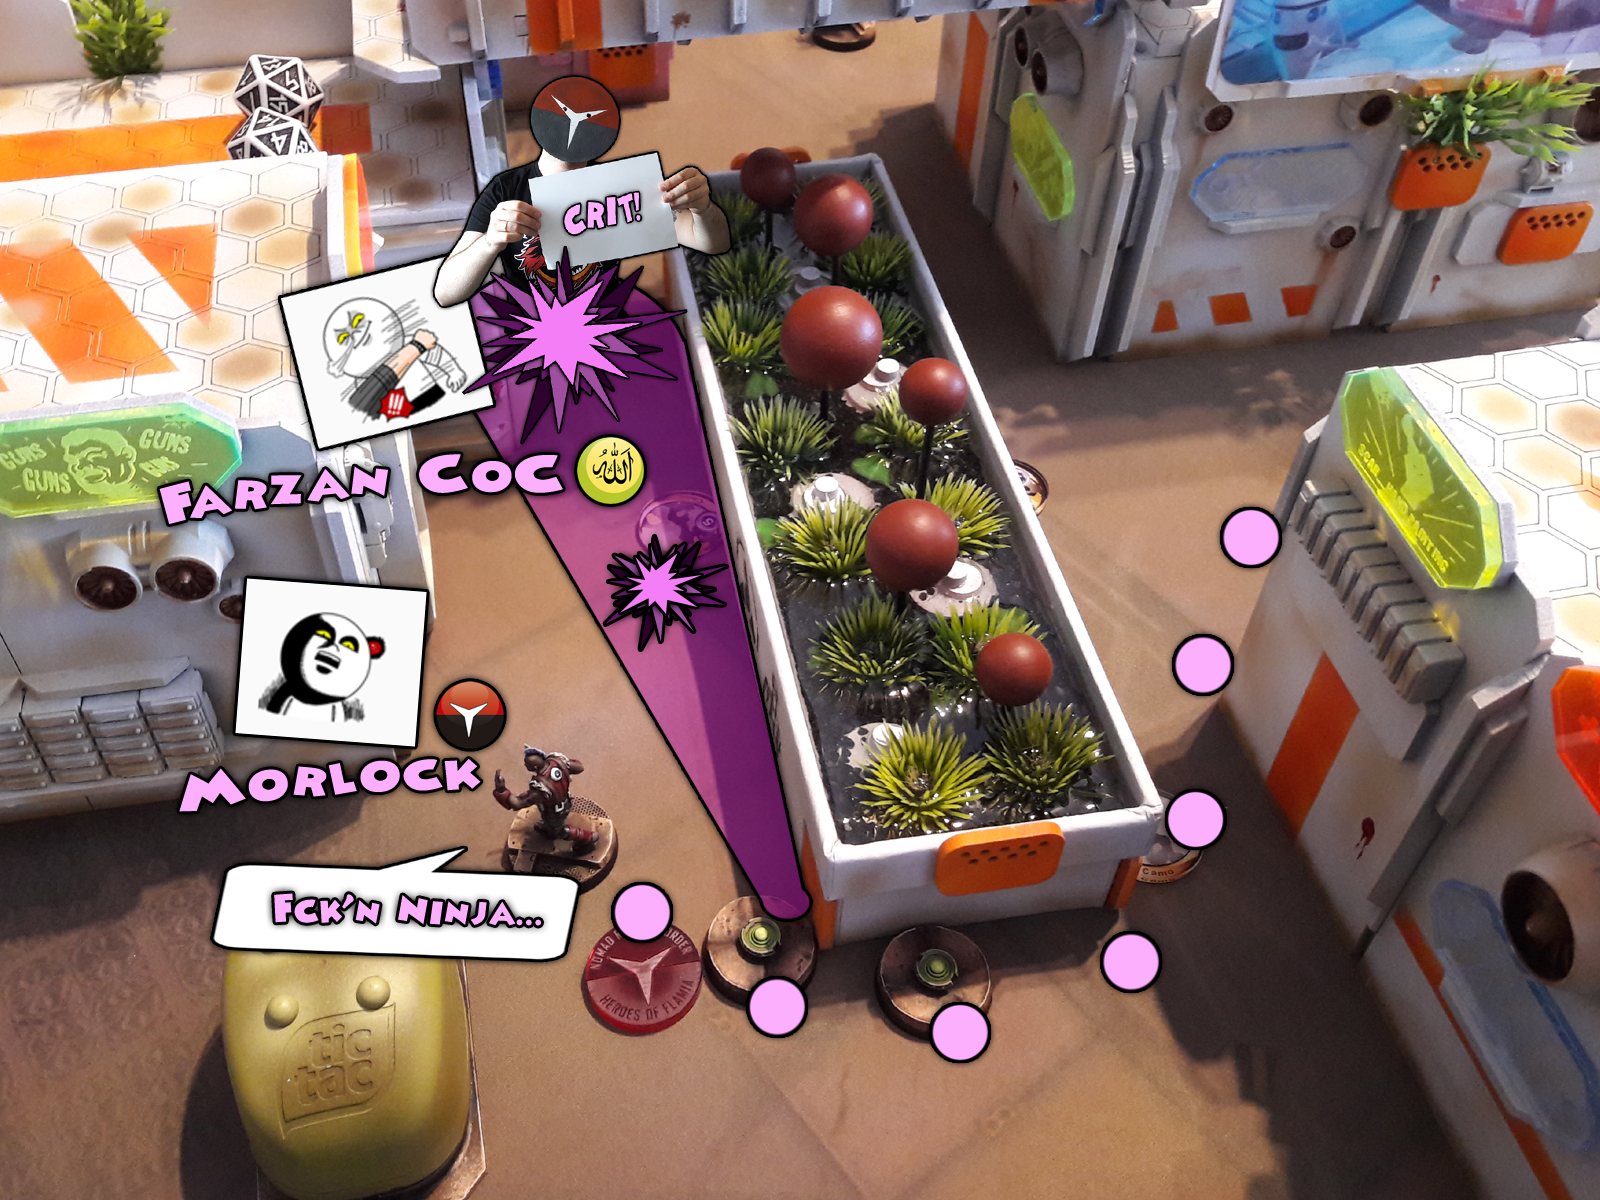
The last of the Morlocks rushed in the direction of the closest enemy. A Camoed Farzan withheld his ARO not to eat up a mine, that layed nearby and basked in the sun. The Morlock, being the last one of his entire group, spent his Irregular Order, Discovering then Shooting the Farzan, who to his surprise, Dodged both the pistol shot and a mine on a Crit…
That triggered me. With a loud announcement of “Fear not Human Sphere – Dong Peyote is here!” I put my ‘dong’ on the board…
In a whirlwind of blasts, punches and a cock rocket shots The Mighty Dong Peyote entered the board…

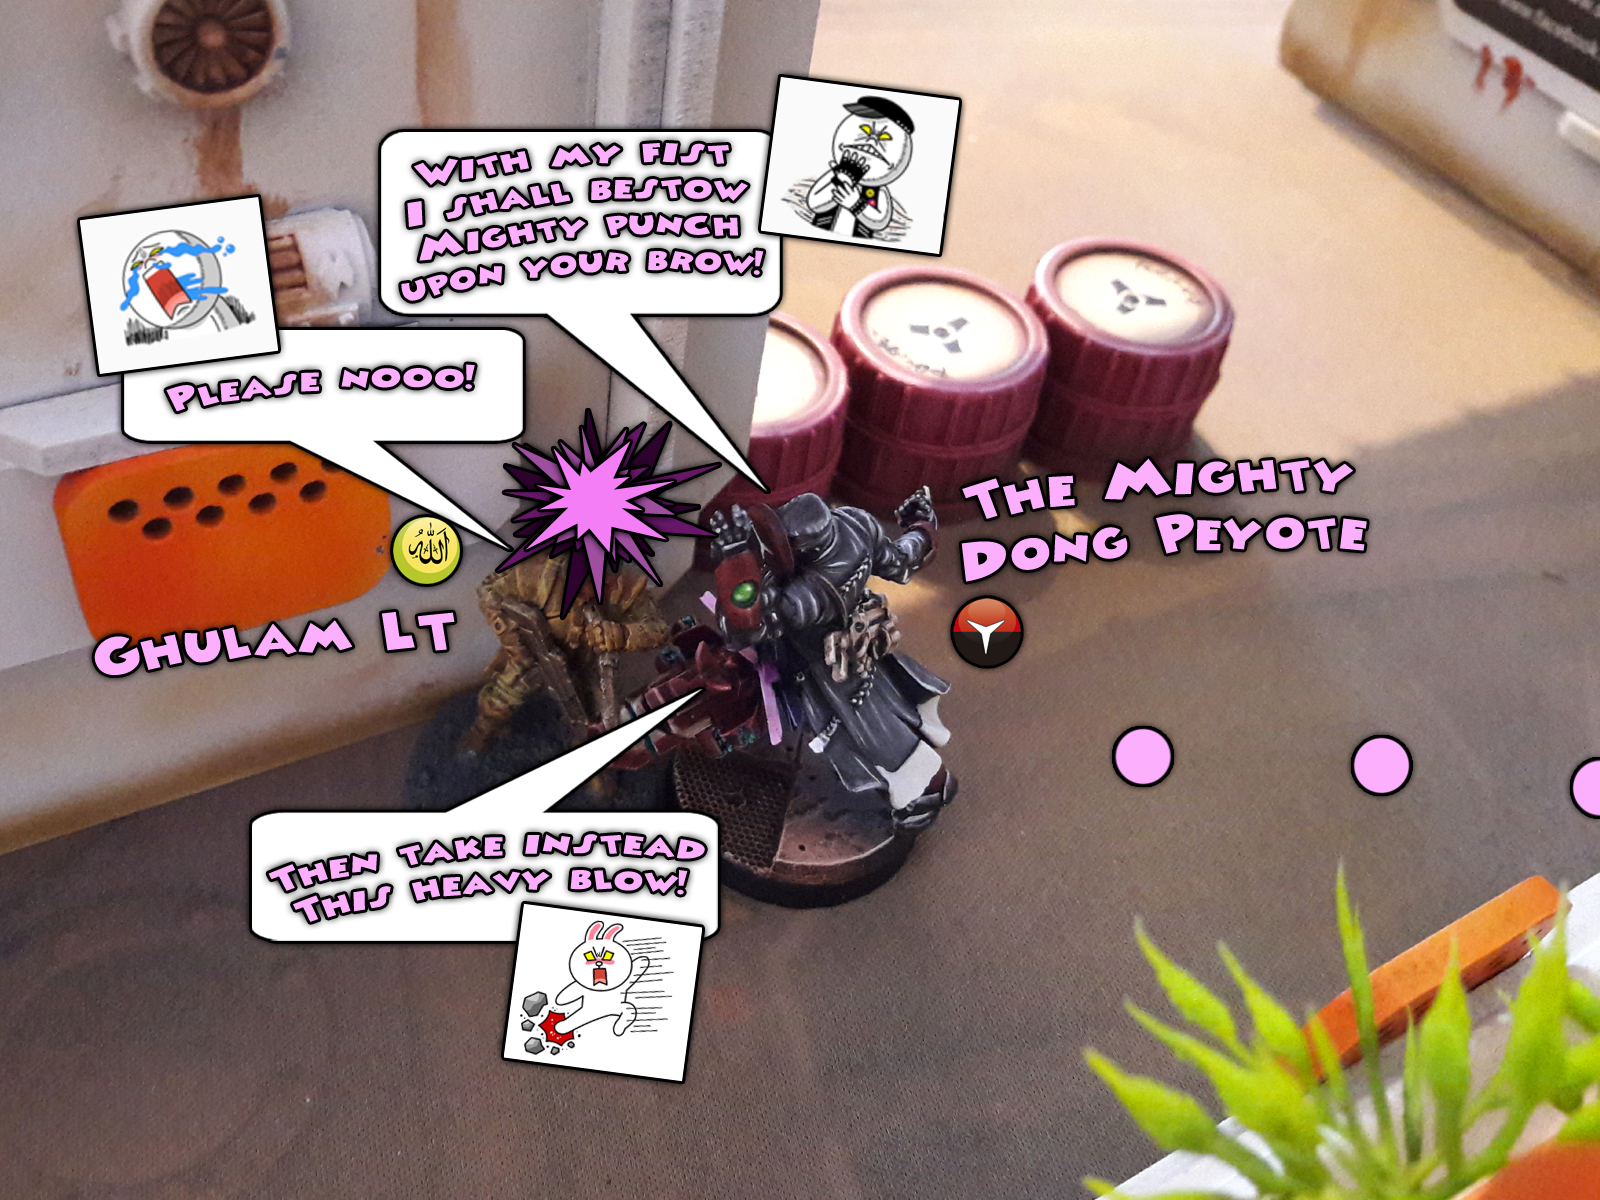

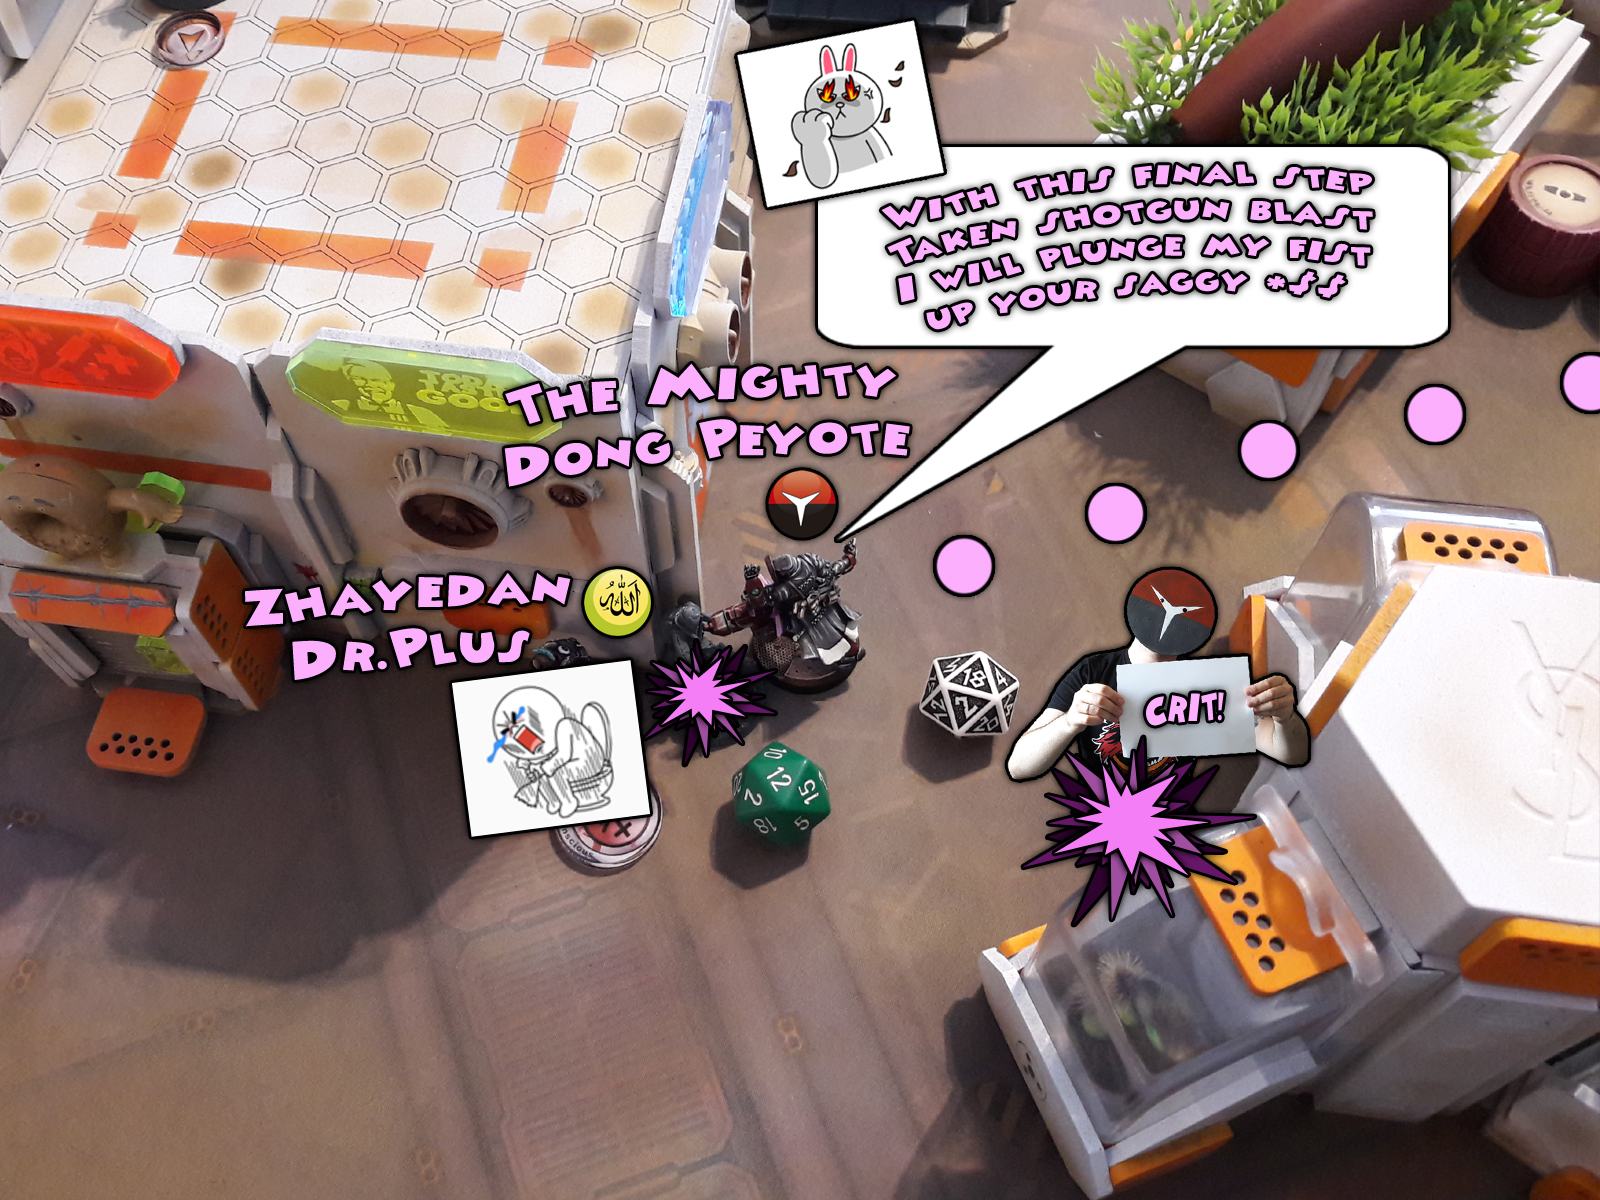
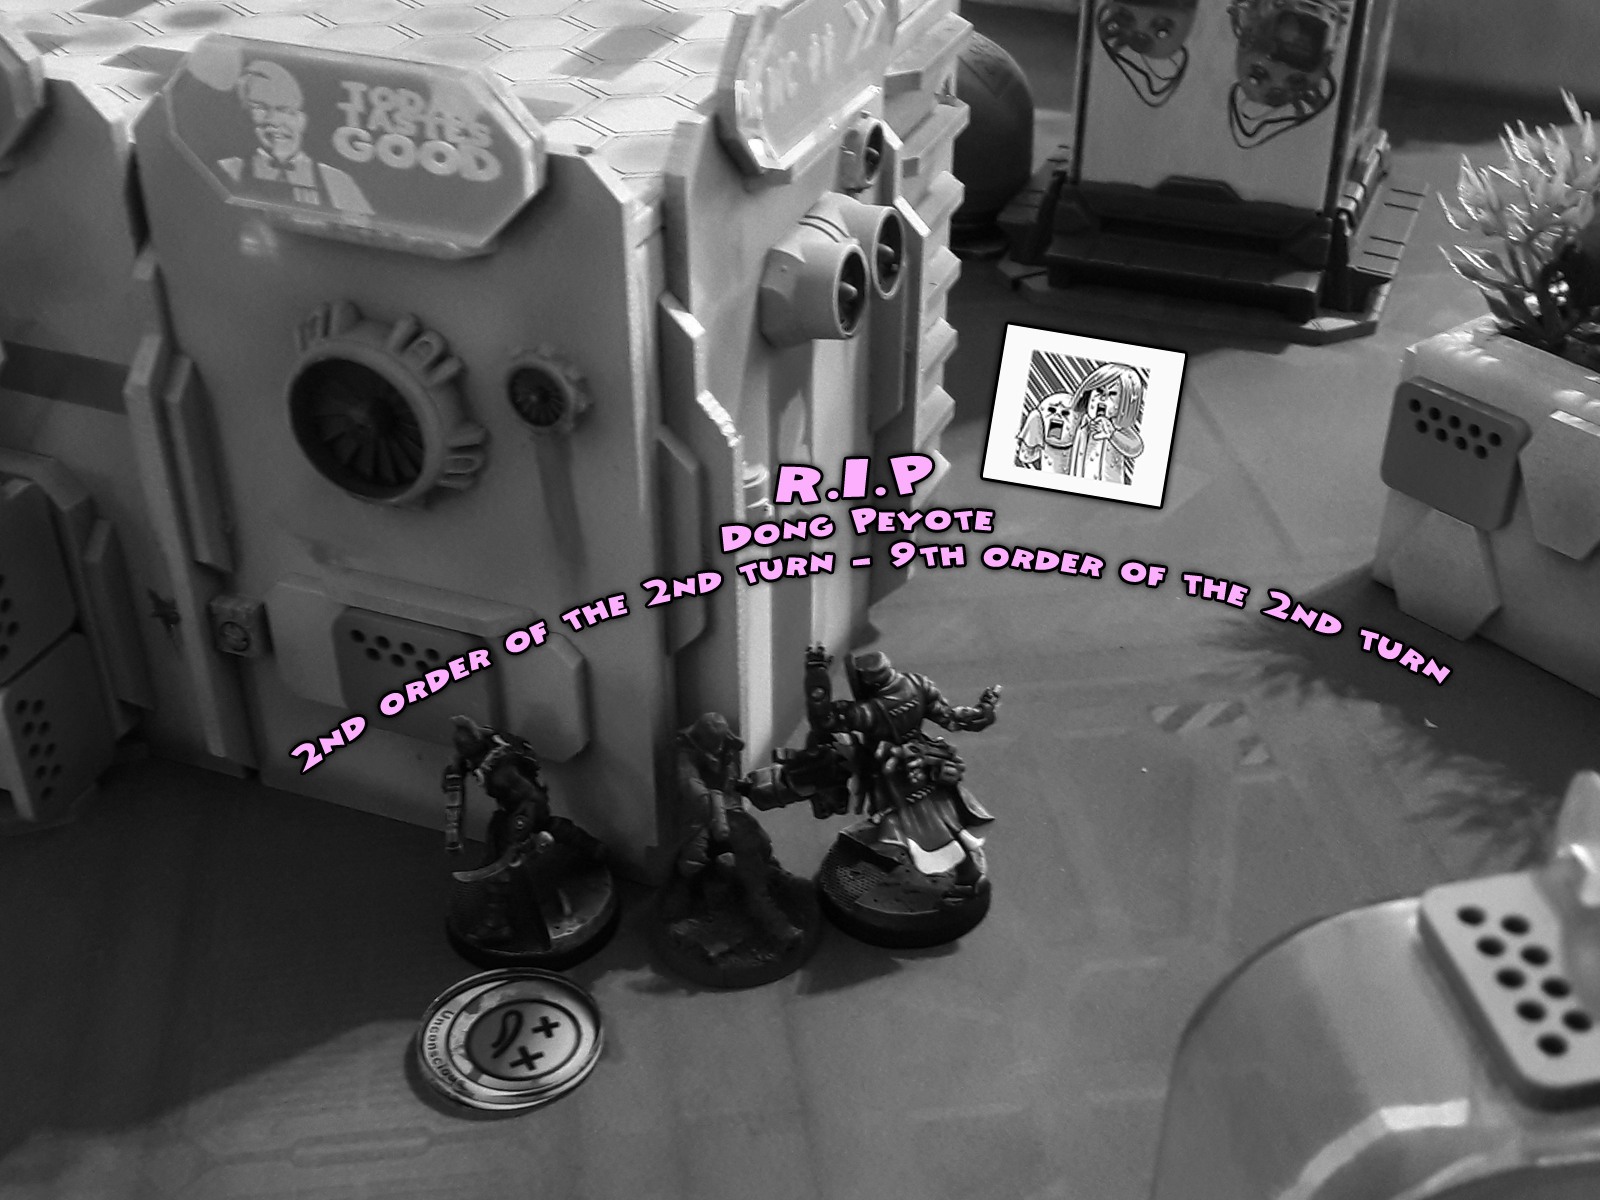
With a kill count worth of four enemy troops and 78 total points, entire order pool spent, the Mighty Dong Peyote finally succumbed to his wounds and died, but not before he screamed #Hoooodoooong! in a Braveheart style, with his last breath…
Wiping the teatrs from his eyes, the Interventor LT used his order to Spotlight the enemy HVT, thus honoured the fallen hero, ensuring a fulfillment of the Classyfied Objective…
HAQQISLAM TURN THREE:
Loosing four troops, LT among them, was a blow to Haqqislammers. Farzan took over command and advanced to enact revenge. He shot the versatile Transductor Zond in the back and closed in on the Nomads.
Just as usual, the Zhayedan Doctor Plus got up with an auto-medikit (he always does!) and took a defensive position, along with Lasiq and Tuareg Snipers.
Haqqislam troops braced for the last Nomad turn to come…
NOMADS TURN THREE:
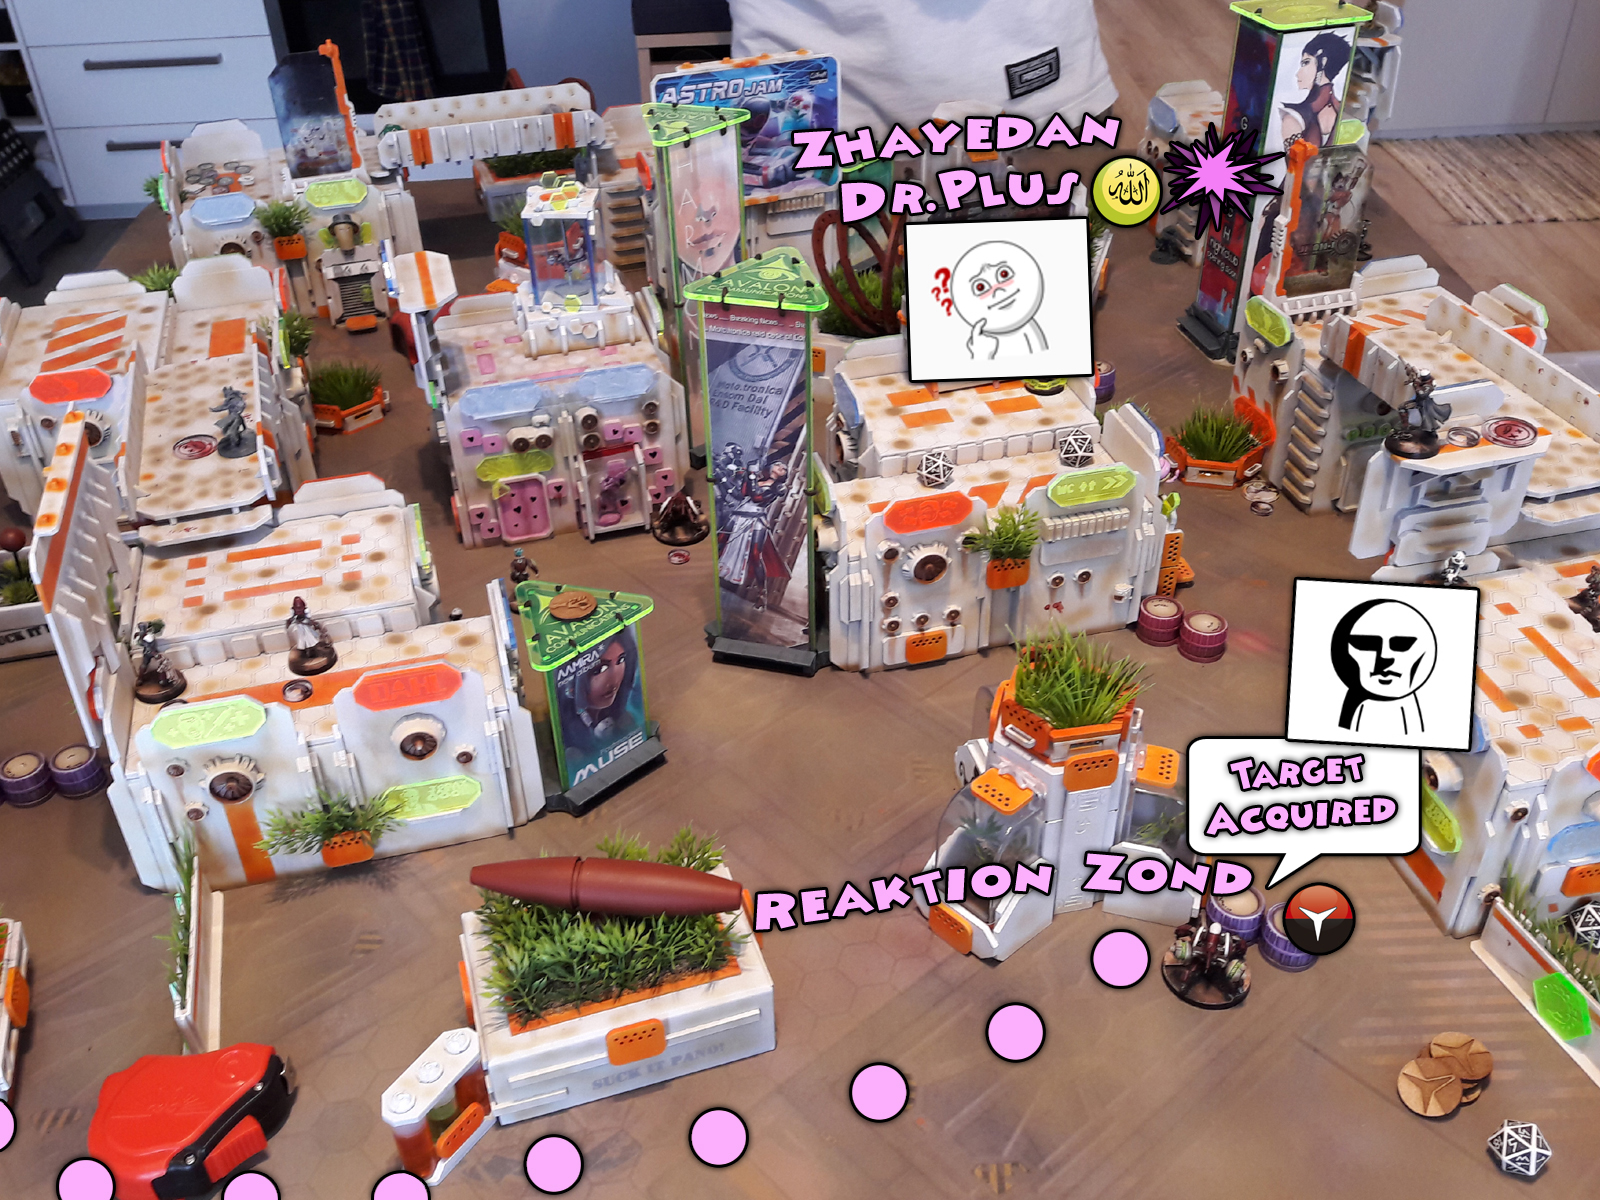
Last Nomads turn was a real massacre. Interventor LT buffed the Total Reaktion Zond with Marksman L2 and let it loose on the enemy.
The berzerk Zond moved right through the Nomad Deployment Zone, taking out Zhayedan Doctor Plus from behind a cover. Next to fall was the Farzan, peppered with bullets, instantly dead. Lasiq followed short. Tuareg sniper – last to face the Zond – performed a bit better, goping through the first wave of shots without a scratch. He fell down in next order tho. Being the last Haqqislam warrior on the board, Tuareg delivered the last points to the Nomads score…

Once the dust settled down the remaining Nomad forces swiped the area. This was a fine victory of 9:1 for the Nomads, but not without a cost. The mighty hero who appeared on the battlefield at the time of the direst need and turned the tables on the Haqqislammers got killed. Strangely, his body was not found among the dead…
This was a very interresting game. I had a blast, while some of Haqqislam units got blasted XD At this point the Strikezone: Wotan is still on the roll and I hope this Battle Report helped Bromads in achieving their goal to keep the Dong Peyote afloat!

There’s probably as many recipes for painting black as there are painters all over the globe. On top of that there are many different techniques to choose from. Painting a lot of detailed Infinity the Game miniatures, I have found one that works best for me. Today I would like to present to you a ‘Five Layers Technique‘ based color scheme that I myself use.
First of all some home brewed theory. Just like most colors – Black looks great when highlighted. Black surfaces make good impression, when we are able to see different overlapping layers and how color works with natural curves and detail. For this purpose I always use grey to highlight and texturize black. This leads to black effectively turning grey in the end, so I usually wash it with black ink/wash to deepen the ‘blackness’ in recesses and darken flat surfaces. That in turn lessens the highlights and flattens the entire impression. Here’s where I figured to follow wash with an edge of white’ish color to produce strong contrast and ‘pop’ the blackness.
* Chaos Black Undercoat (GW),
* Skavenblight Dinge (GW),
* Fenrisian Grey (GW),
* Pallid Wych Flesh (GW),
* Dark Tone Ink (AP),
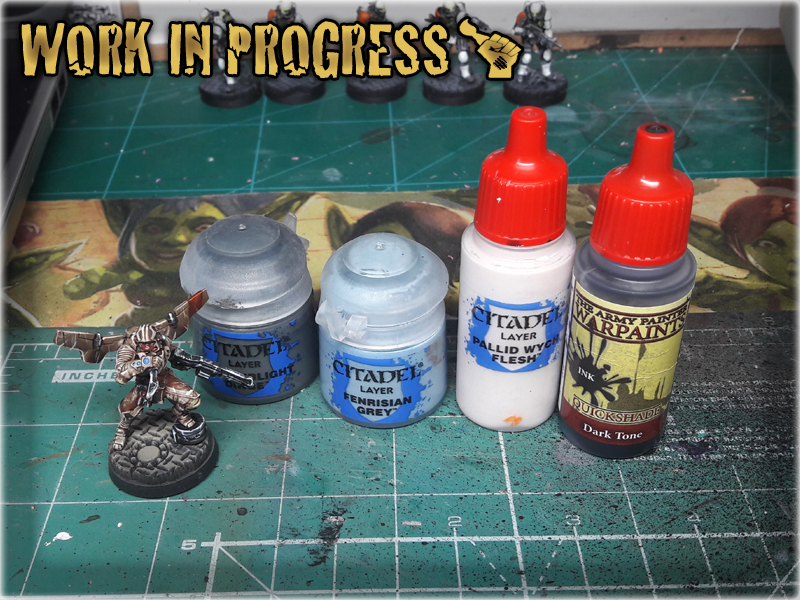
! Important note: For this technique you don't need to re-paint entire surface with pure black. I use it on different, mixed colours - usually being previously airbrushed all over the miniature.

1 First I covered the entire target surface with Skavenblight Dinge. To fasten and ease the process I added a bit of watter to the paint. No need to cover everything with a strong layer - just smoother what's undeneath it with a nice dark grey.
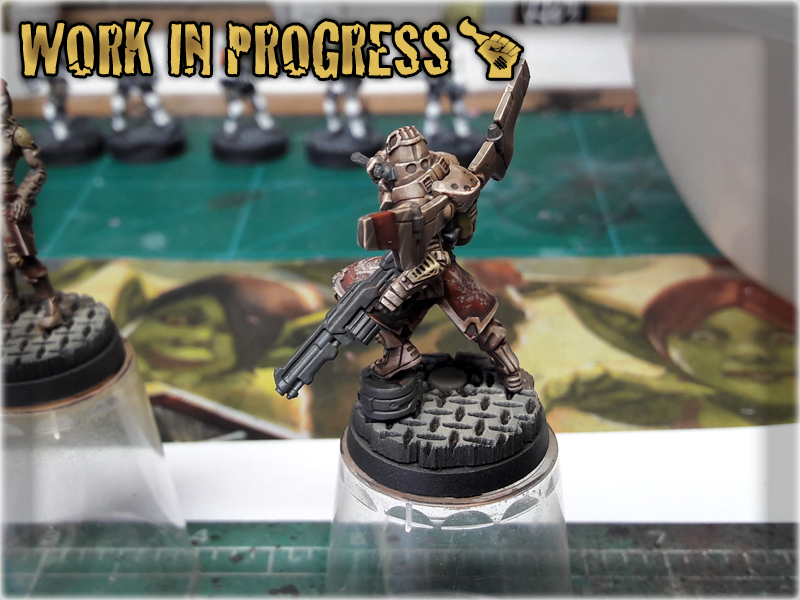
2 Then I made some random strokes with Fenrisian Grey. Once again I diluted the paint a bit, to make it more transparent. This layer provides texture and some irregularities to all the flat surfaces.
3 I then edged with Pallid Wych Flesh. I tend to edge only the natural sharp edges and some easy accessible spots. the most important are the ones on top of the surface I paint. Added some random scratches here and there too.

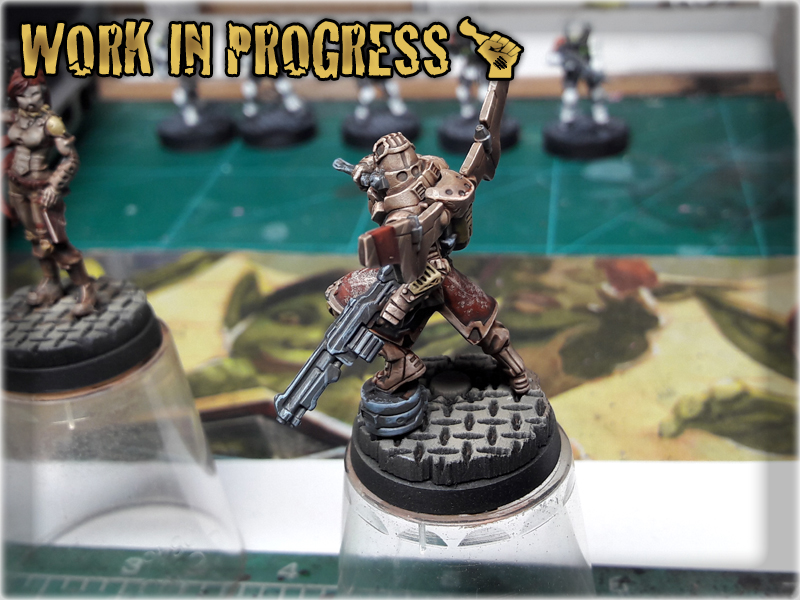
4 I then washed the entire thing black with AP's Dark tone Ink. (no picture)
5 Finally I edged once again with Pallid Wych Flesh. Added some more scratches. Job done.
That is the entire secret behind my Painting ‘Infinity’ Black technique. Fast and easy. Sure, no perfectly smooth transitions, no none metallic metal, but still a very rewarding result. With a bit of imagination and practice – this might be used as a perfect starting point for a much more complicated paint job. Hope it works for you.


“Fear not Human Sphere – Dong Peyote is here!”
The story of the ‘Dong Peyote’ character begun in Strikezone: Wotan, an online campaign of Infinity the Game, launched by Beasts of War may 2017. The whole idea was inspired by an abrupt appearance of the ‘Don Peyote Repurposed Freighter’, a Nomad vessel shaped like… well – it looks like a dong. Throughout the first stage of the campaign Nomad players had their share of laugh about this peculiar fact and the name of the ship evolved to ‘Dong Peyote’ pretty fast. ‘Plunged balls deep into the enemy lines’ and ‘He’s a hero we deserve’ are just some of the standard lines used in the Nomad Briefing Room and in the hidden command facebook groups. This positive hype about the joke inspired me to turn the ‘Dong Peyote’ into an ingame character – a symbol for the Bromad players to relate to. In terms of fluff, the Nomads are a rather diverse bunch, a group where it is certain for some not entirely sane individuals to be found at times. I bet that there’s plenty among the Nomad to simply follow the idea, adorn the Nomad symbol mask and rampage throuugh the battlefield with a ‘Don Peyote’ shaped dongs strapped to their belts just for the thrill of doing it. These individuals will probably go full commando just to die in a blaze of utter glory soon after…

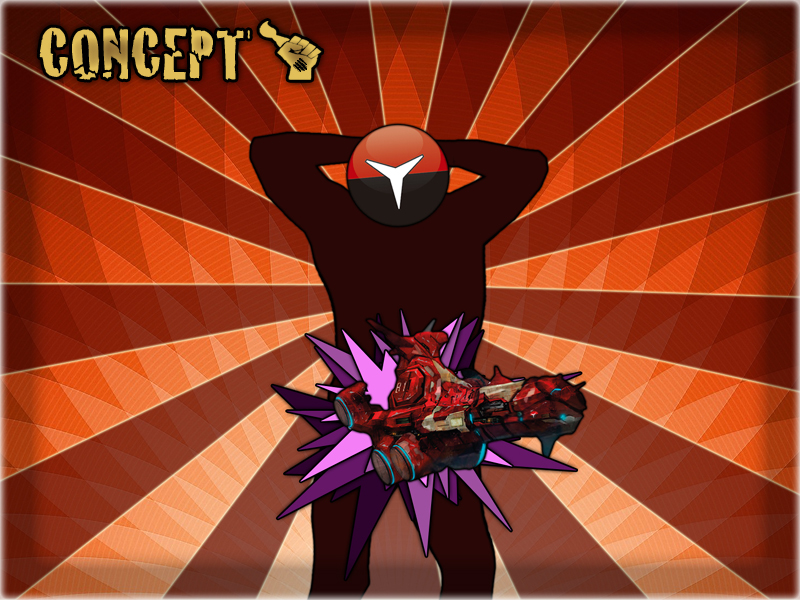
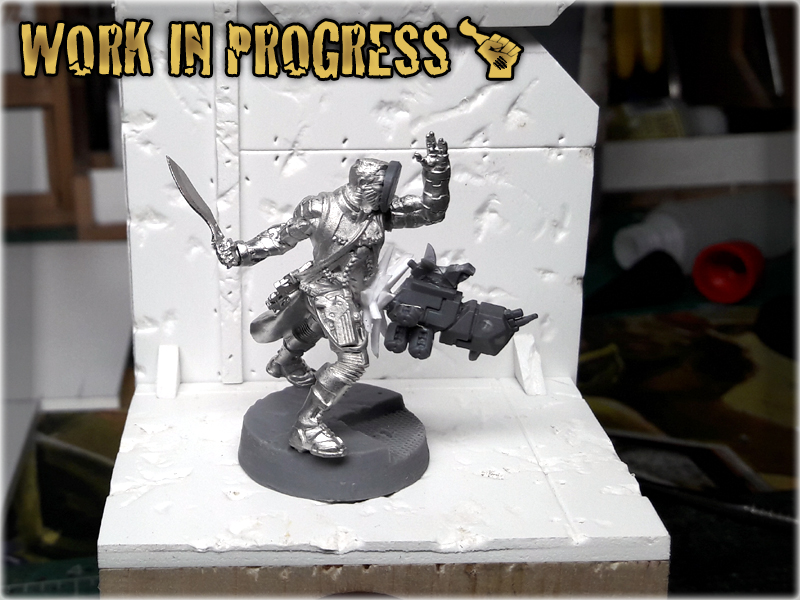
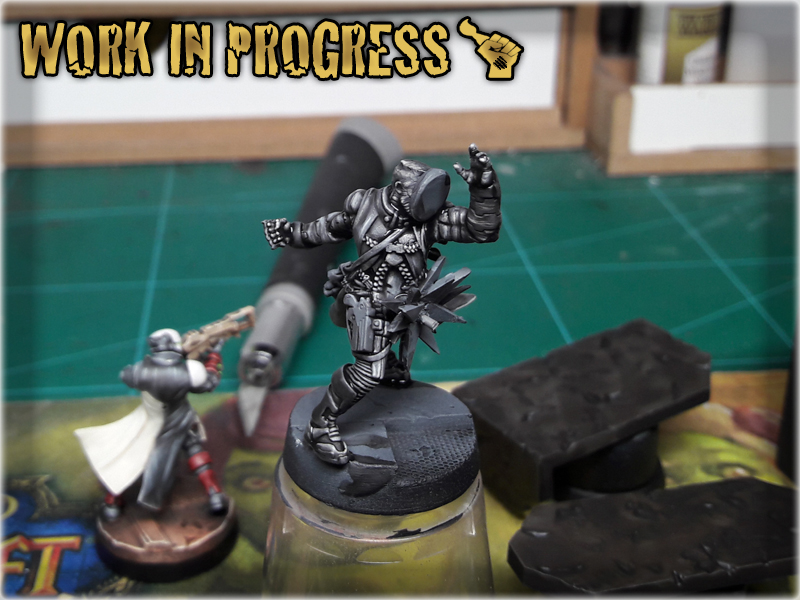
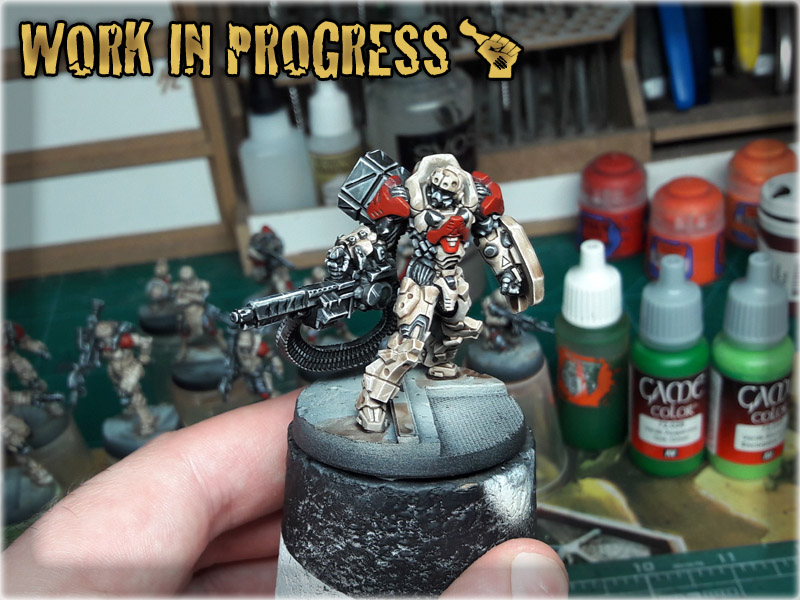
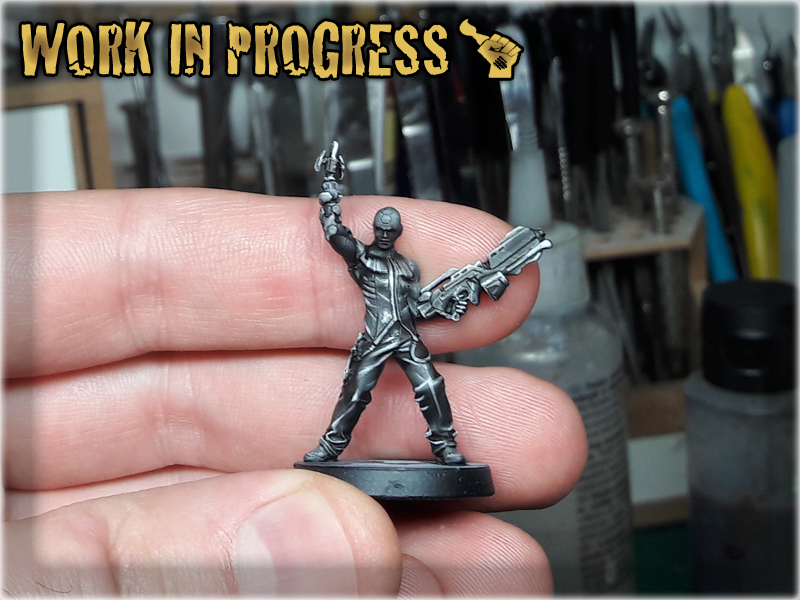
The entire idea of the ‘Dong Peyote’ miniature was to provide a mighty look and a heroic pose plus all the important features like the mask and the actual ‘dong’. I chose to use a Nomad Morlock miniature, as it already had most of what I expected for. The newest Morlock is a badass looking, huge, muscled chunk of a miniature in a dynamic pose and with a lot of great details. It looks so mighty that I had real problems using it to represent a puny Morlock. A perfect candidate for the ‘Dong Peyote’, even in terms of fluff – as Morlocks would be the first to follow the trend end adorn the Nomad mask.
Plunged balls deep into the enemy lines, the Dong Peyote is a sight to behold! His incredible feats of manliness are well known in the entire Human Sphere! This is a hero the Nomads deserve!
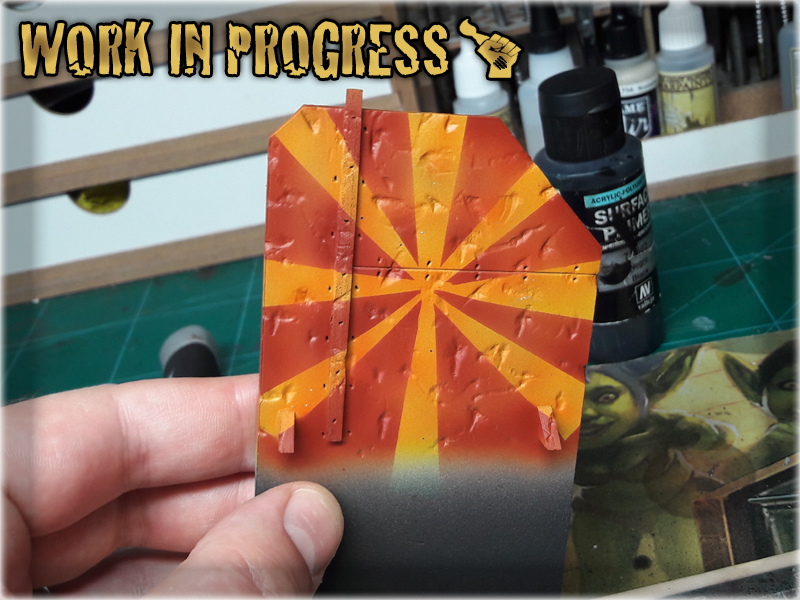
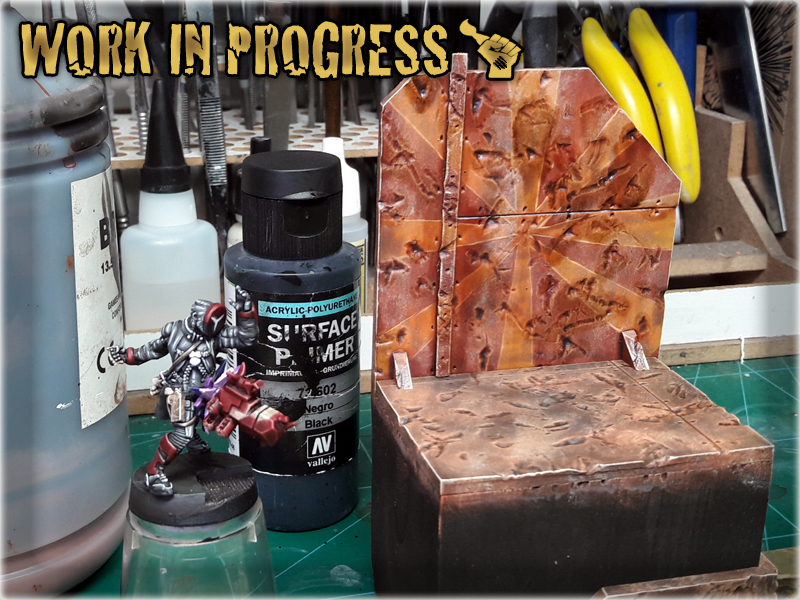
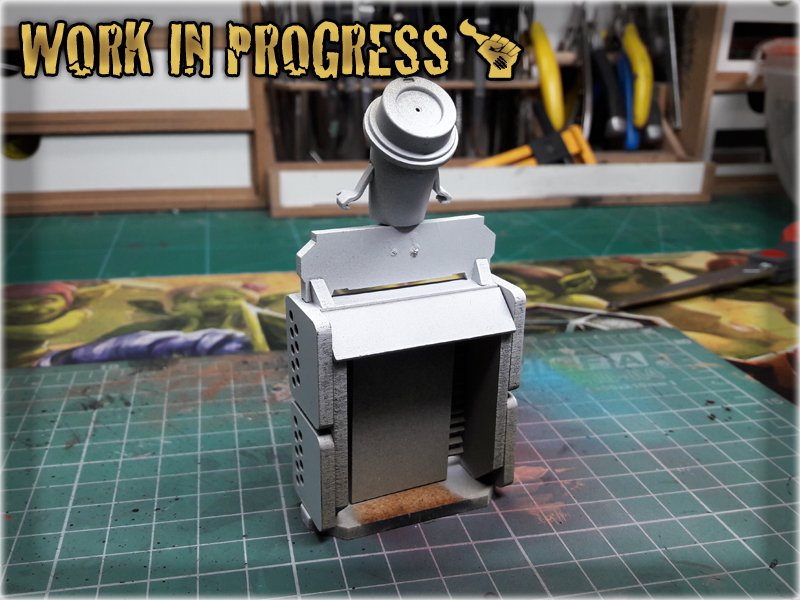
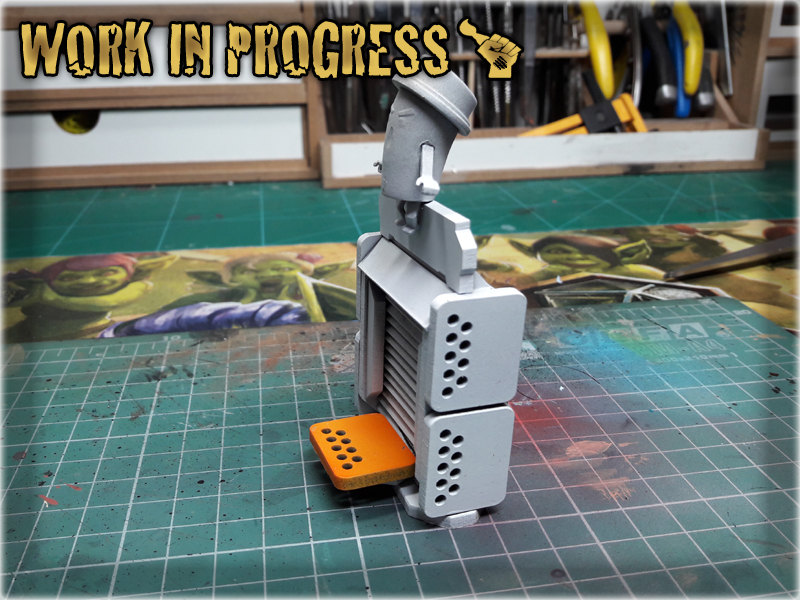
The proud prow of the ‘Dong Peyote’ was a real challenge. The picture provided by Corvus Belli is insanely hard to bring to life in such a tiny scale. I used some Warhammer 40,000 bitz to create something akin to the Don Peyote Freighter. This one took most of the work, but in the end looks mighty enough 🙂

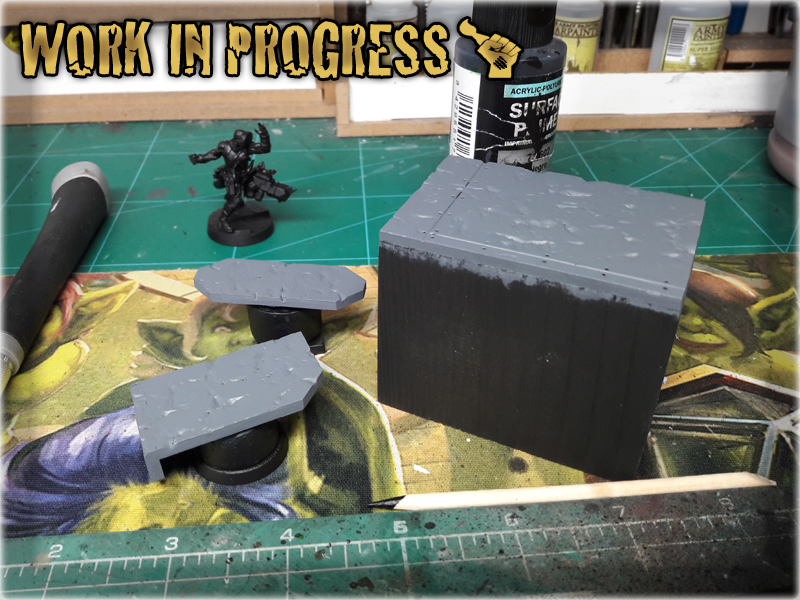
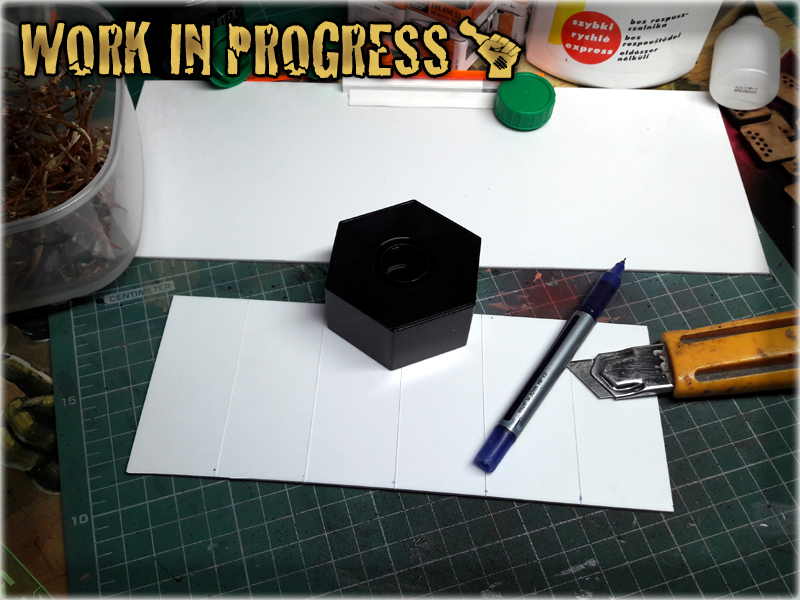
A single miniature is not enough to fully support the concept, of an urban legend incarnate. With all the videos in which I used the image of the Dong Peyote character I wanted to follow the colour scheme and the background idea. I used plasticard and a wooden cube to build a simple background scenic base. I then painted the entire thing throughout few hours. I tried hard to merge the initial colour scheme with the looks of the rest of my Nomad miniatures, so that both the character and his base would not stand out too much…
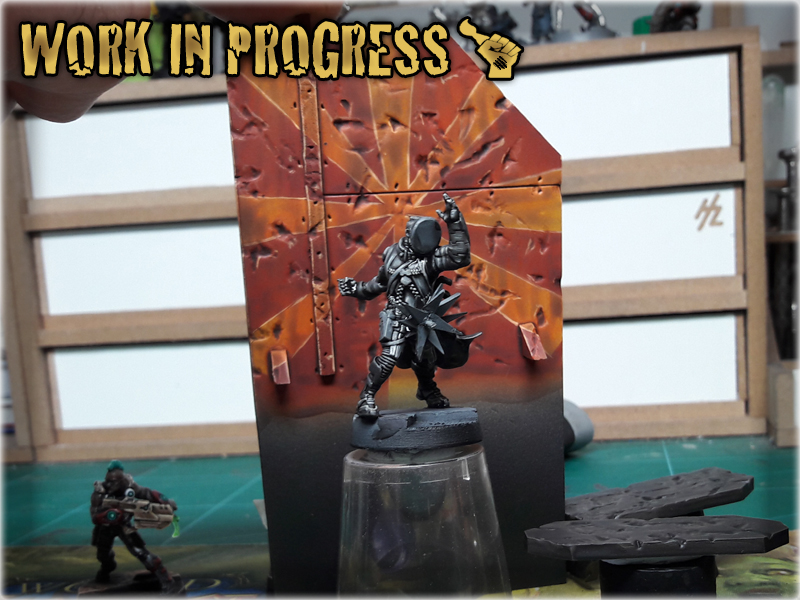
The final product of my labour exceeded my expectations. I now have a fully playable ‘Dong Peyote’ miniature and a scenic base to proudly display it. As I filled the “DONG PEYOTE” SPECIAL PROJECT GALLERY with pictures and presented them to my fellow Bromads – only one more thing was missing…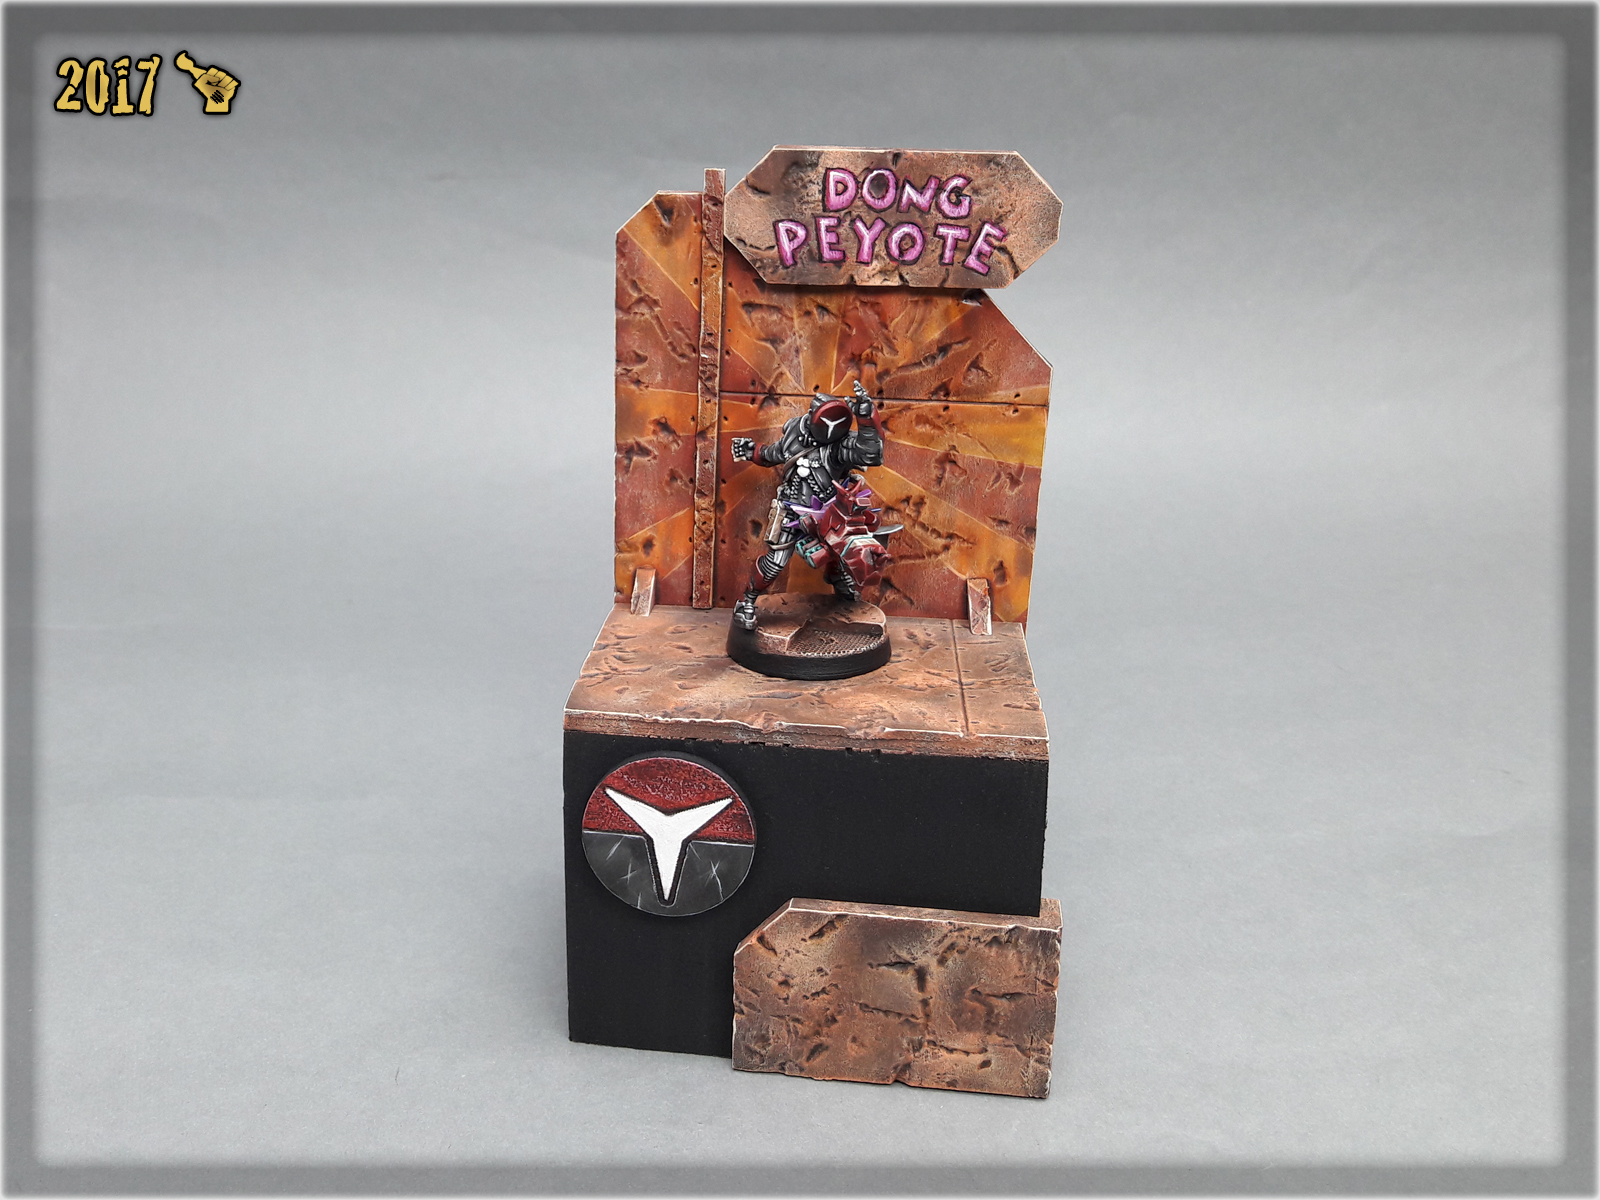
This mighty character required a set of playable stats and off course a point cost to be used in game. Some of my brethren had the idea of how this character should work, among them Del S was the closest to create a playable statline for the ‘Dong Peyote’, but as in case of every miniature game – players should not be allowed to tinker too much with stats for the miniatures of their own factions. Trying to introduce the character to my gaming group was not easy – some of my friends considered the proposed stats to be not entirely balanced. I asked one of them (Narrator) to create his own version for the ‘Dong’ and he actually managed to come up with a really nice and what looks like a well balanced statline…
Thus the ‘Mighty Dong Peyote’ was born. I gave him a try just next day in a Strikezone: Wotan game of Infinity against one of my friends. I do hope that this Special Project inspires some of my Nomad brethren to use the character in their own games and thus lead to the ‘Dong Peyote’ being a part of the lore – even if only as a recognisable unnoficial part…

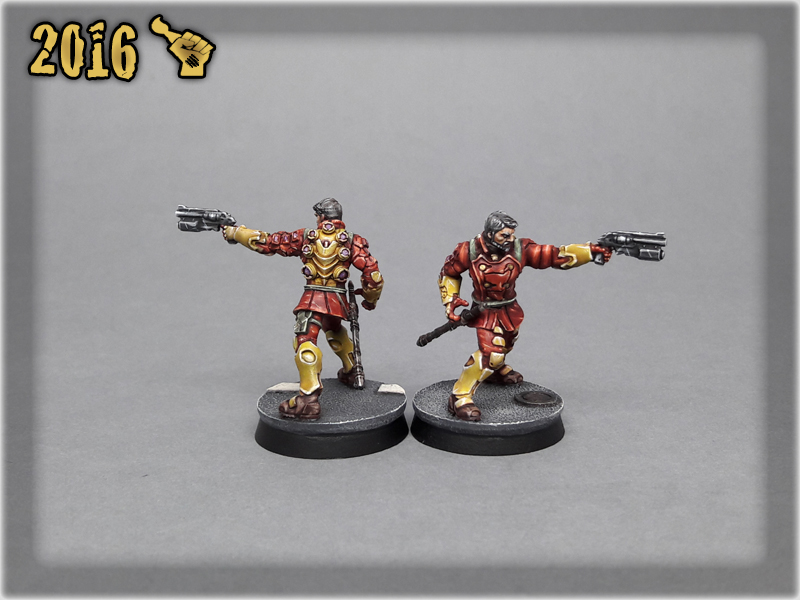
Here are some Colour Recipes for Infinity Haqqislam from GALLERY: INFINITY HAQQISLAM lvl 4. Please take note that this is a simple colour scheme, not covering multiple overlapping layers and blends inbetween, that lead to the final product. It is supposed to be used as guidline not a step-by-step.

SANDY armour:
Black Undercoat,
Light Brown (VAL),*
Bonewhite (Val),*
White, l&p
Soft Tone Ink (AP),
RED elements:
Sanguine Base (P3),
Mephiston Red (GW),
Evil Sunz Scarlet (GW),
Troll Slayer Orange (GW), l&p
Fire Dragon Broght (GW), l&p

GREEN lights:
Sick Green (VAL),
Escorpena Green (VAL),
MIX: Escorpena Green (VAL) 1:1 Off White (VAL), l&p
Waywatcher Green (GW), glaze
Light Livery green (VAL), blend
WHITE elements:
‘Sandy Armour’ base,
Pallid Wych Flesh (GW),
White,
White, corrections
BROWN elements:
‘Sandy Armour’ base,
Off White (VAL), l&p
Dark Fleshtone (VAL),
MIX: Mix Strong Tone Ink (AP) 1:1 Soft Tone Ink (AP),

l&p – lines and points,
p – points,
b – blend,
drbr – drybrush,
flbr – flatbrush,
*Airbrushed (with multiple layers and mixes)
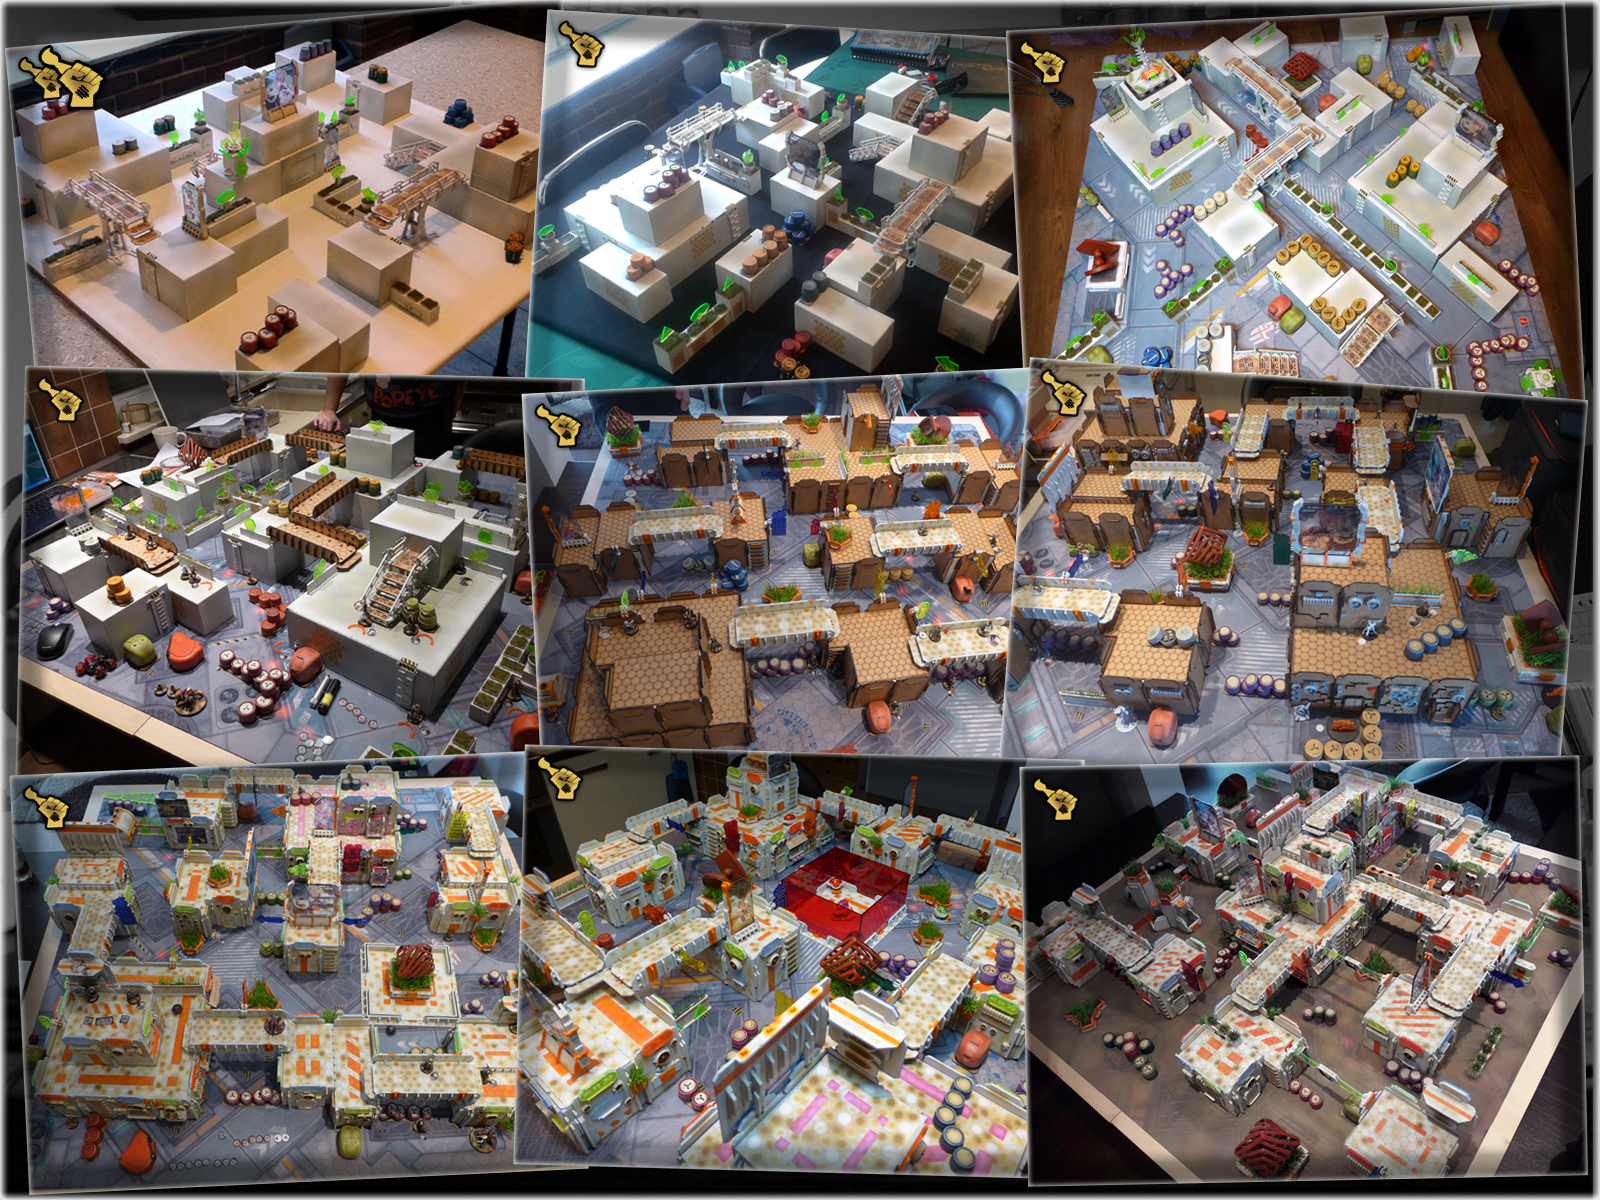
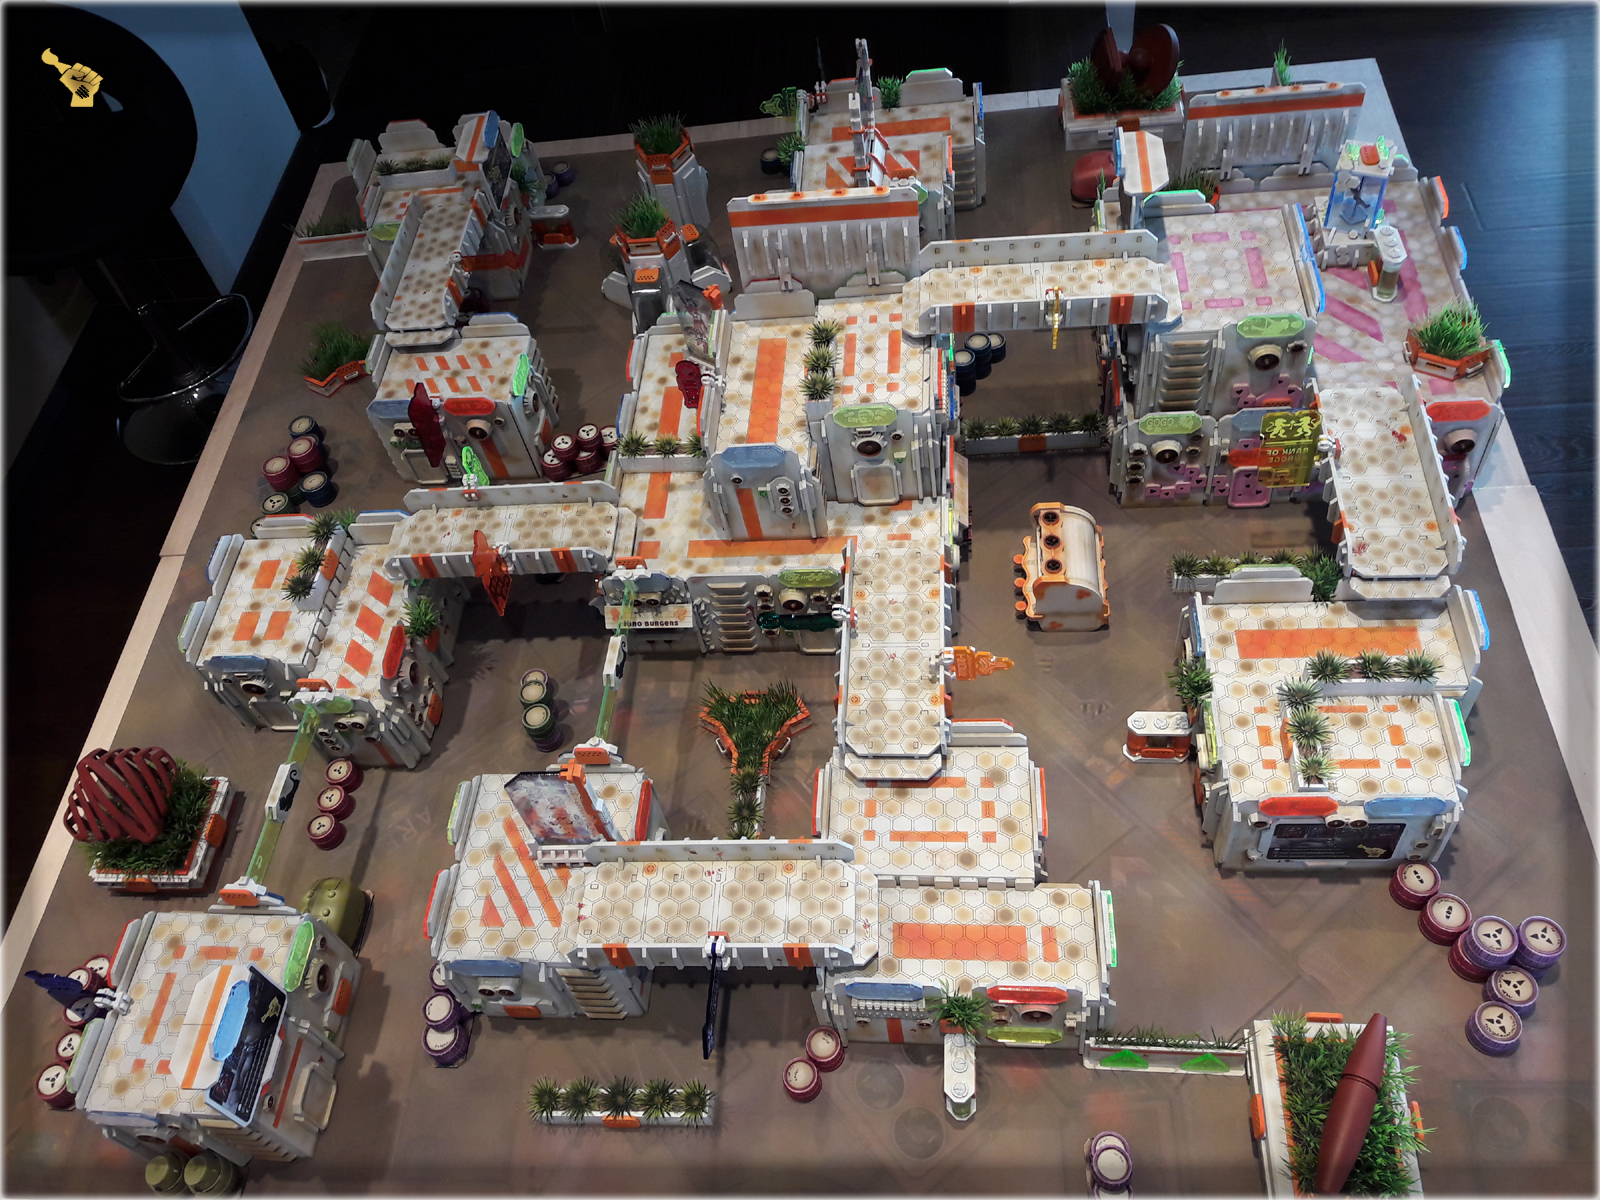
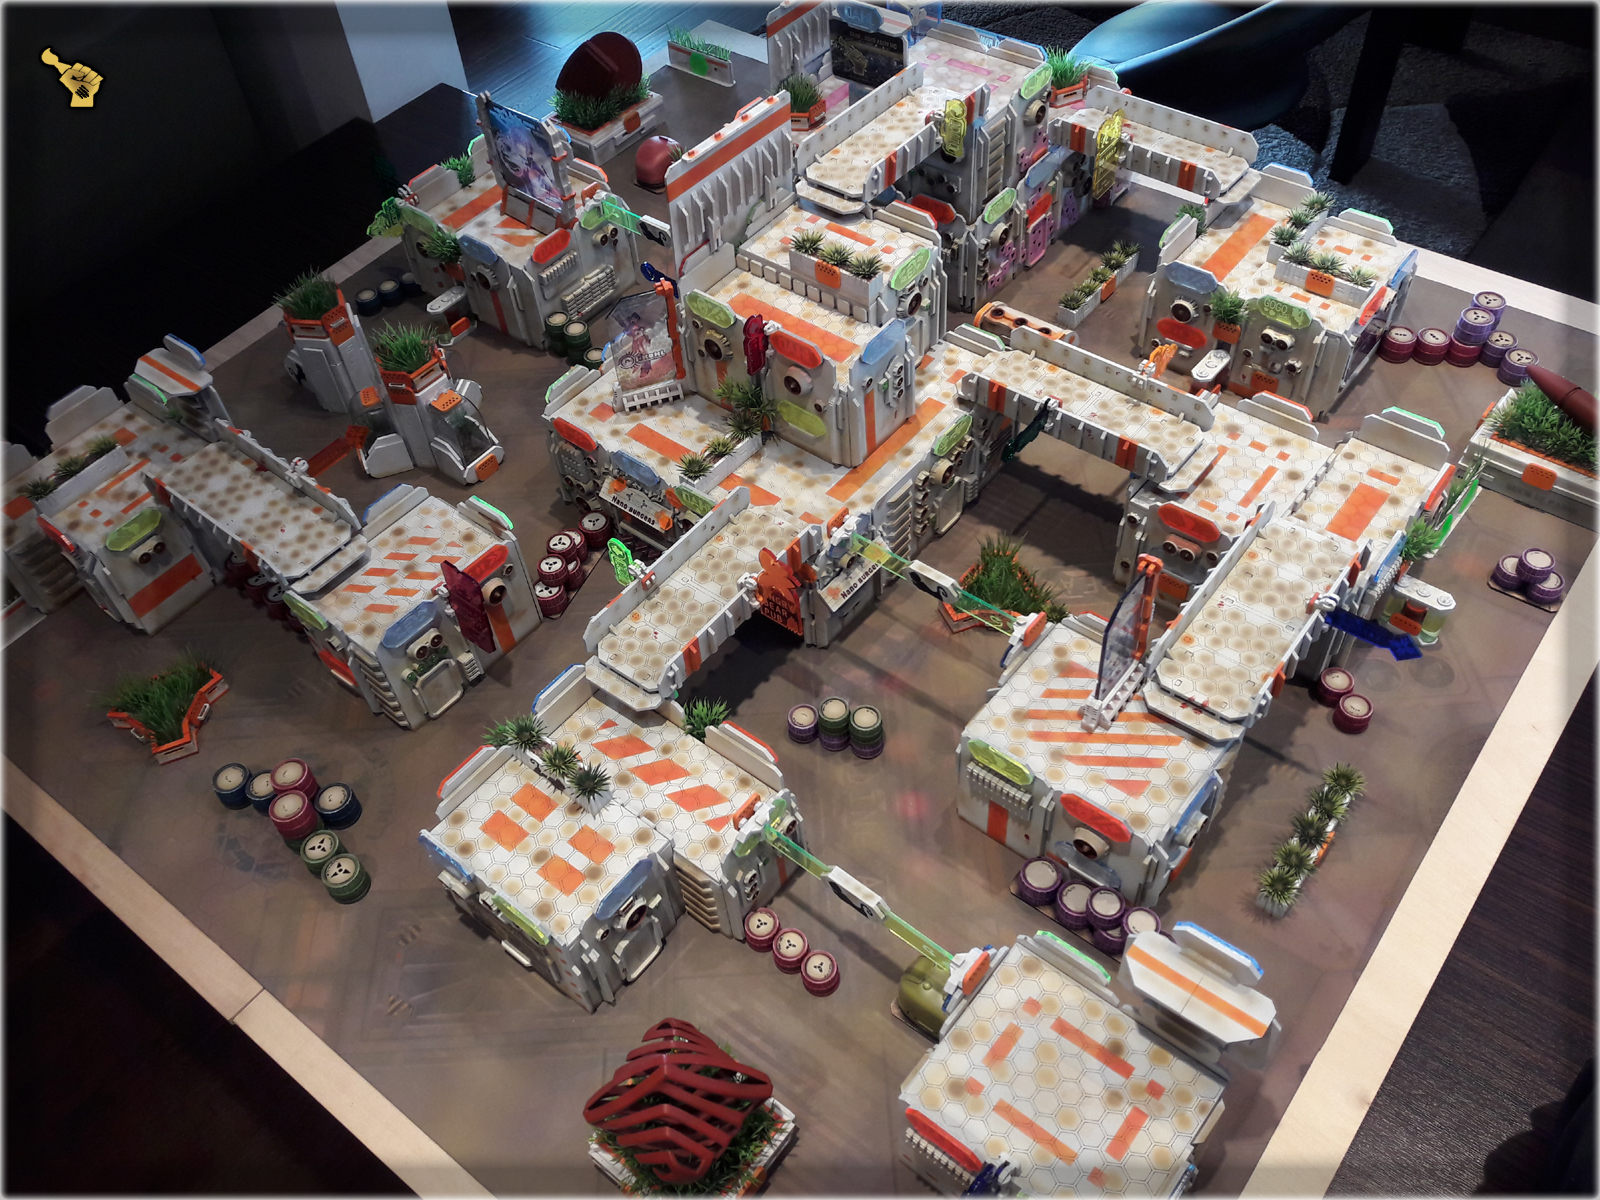
It has been six months of peace for The Colony Special Project. I’ve mentioned before that such grand projects are never fully complete – so here I am, adding even more stuff to the already vast collection of scenery. The reason for this is obviously the restless muse, but also I grew up to a decision to expand my scenery collection. On top of more variety I will be able to cover two gaming boards and that might come in handy from time to time…

Not so long ago I have attended a big Infinity the Game event. About 40 participating players, including some of my friends. As a co-organizer I took The Colony with me, so that along with Micro Art Studio, Zen Terrain and After Hours Workshop, there were more fully painted tables at the event. I even streched my terrain set to cover two gaming tables, thus was hyped by the vision of creeping onto another 48×48″ board. At that point I already had some new stuff purchased at Antenocitis, so it’s not like I was ever going to stop anyway 😛
Still, once the dust settled and I had a moment to thik about it, I realized that more terrain was inevitable if I was to do it again in the future…
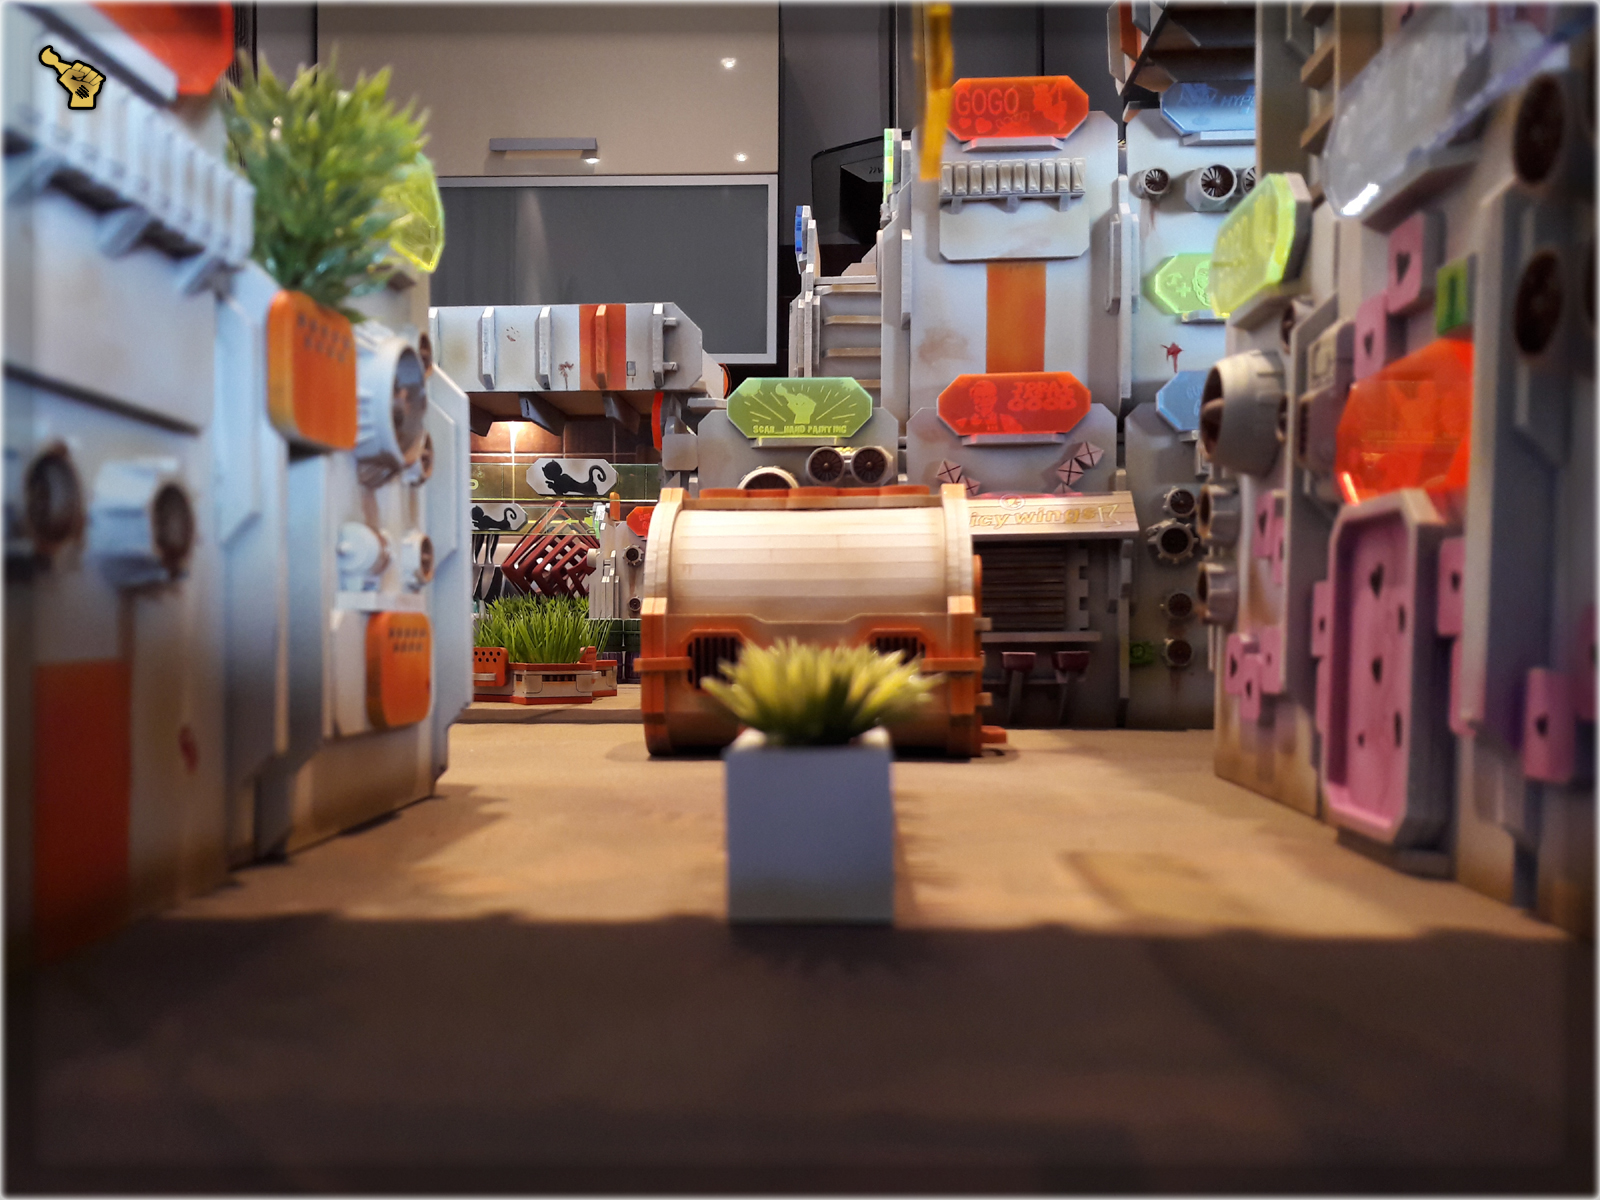
The idea was to build more interresting stuff to fill all the empty spaces between buildings. At that point more buildings were rather out of question as I’d rather produced terrain pieces to improove single gaming table, with an option to allow me to eliminate vast empty spaces if I went double…
The obvious choice was to produce more sculptures, as these look nice, are awesome LOF blockers and work pretty well with the theme of The Colony.
For this purpose I used a hard box and some random leftovers provided by friendly Terrain making companies and my wife.

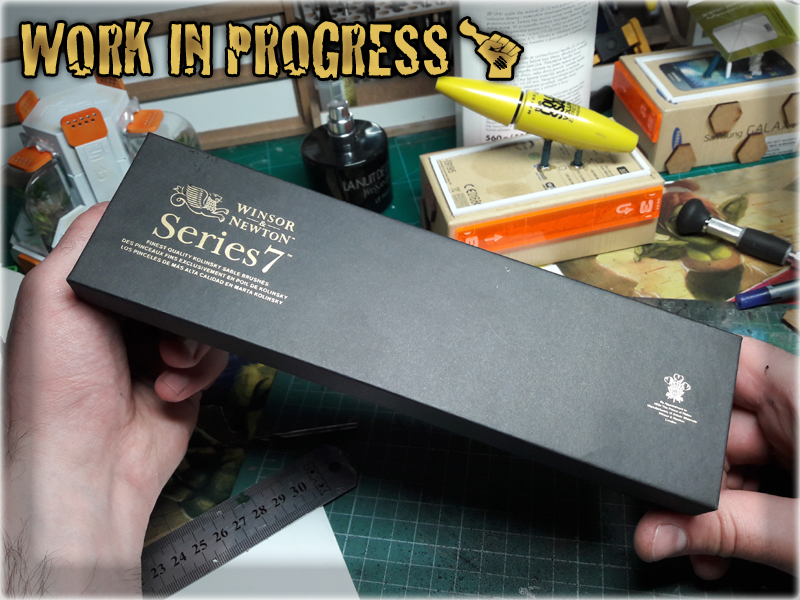
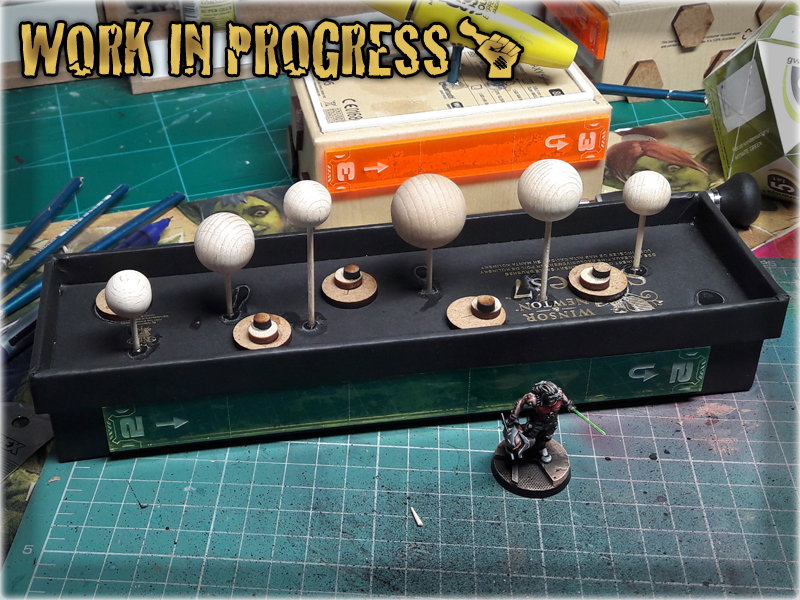
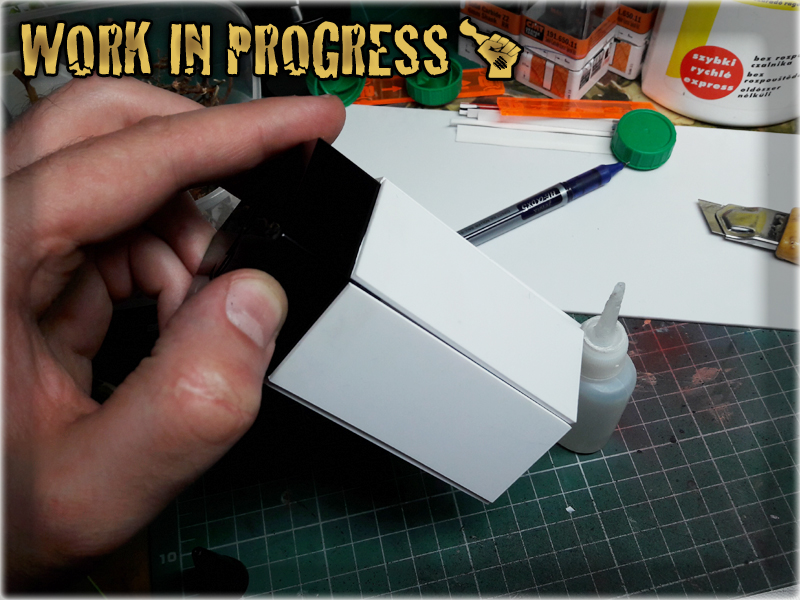
This one was a totally new approach to the ‘sculpture’ idea. The exclusive Winsor & Newton brush box was an inspiration on it’s own and summed with my newly acquired experience in using clear resin – a fountain or a pond was a must go. I decided to use wooden balls as a sculpture to compliment the water theme with their smooth oval shapes. Now I feel like a second Winsor & Newton box is soon to follow…
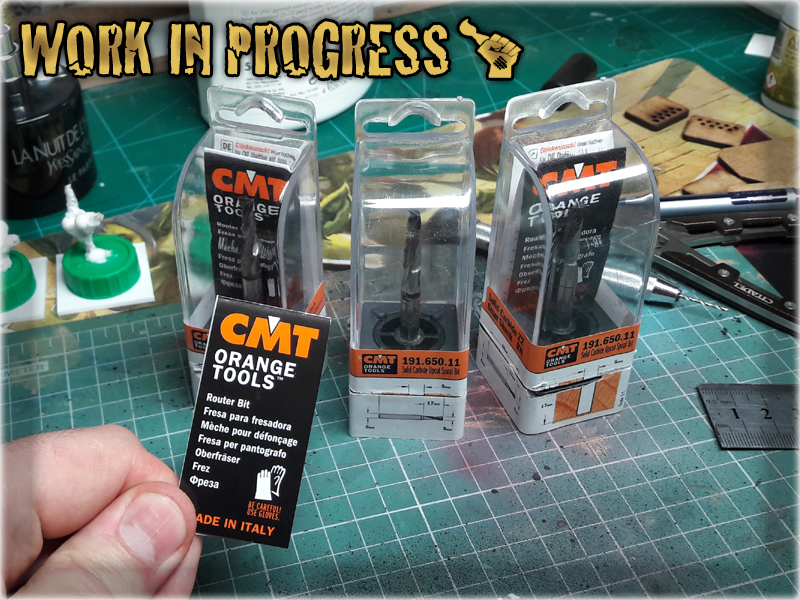
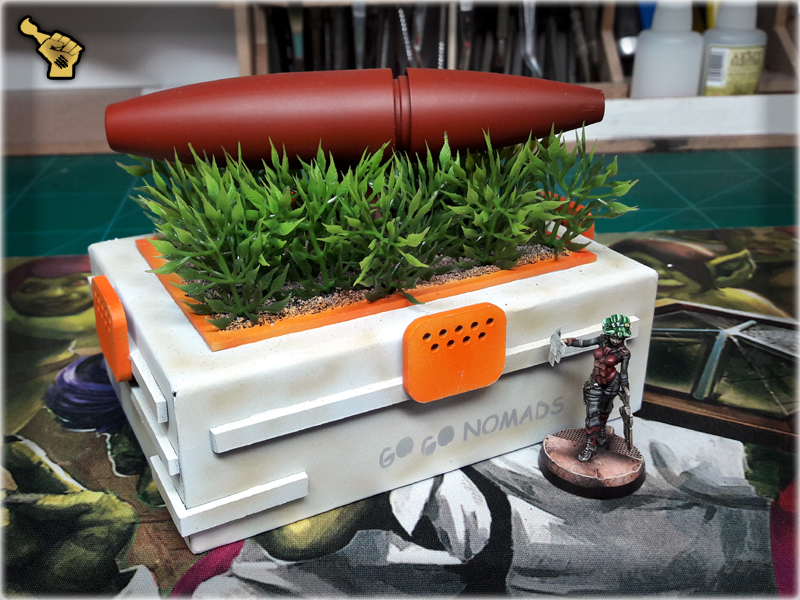
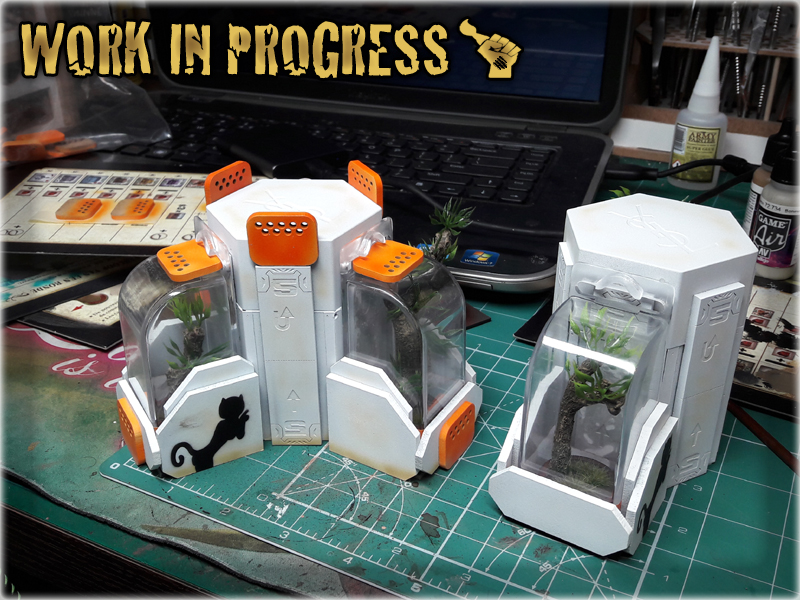
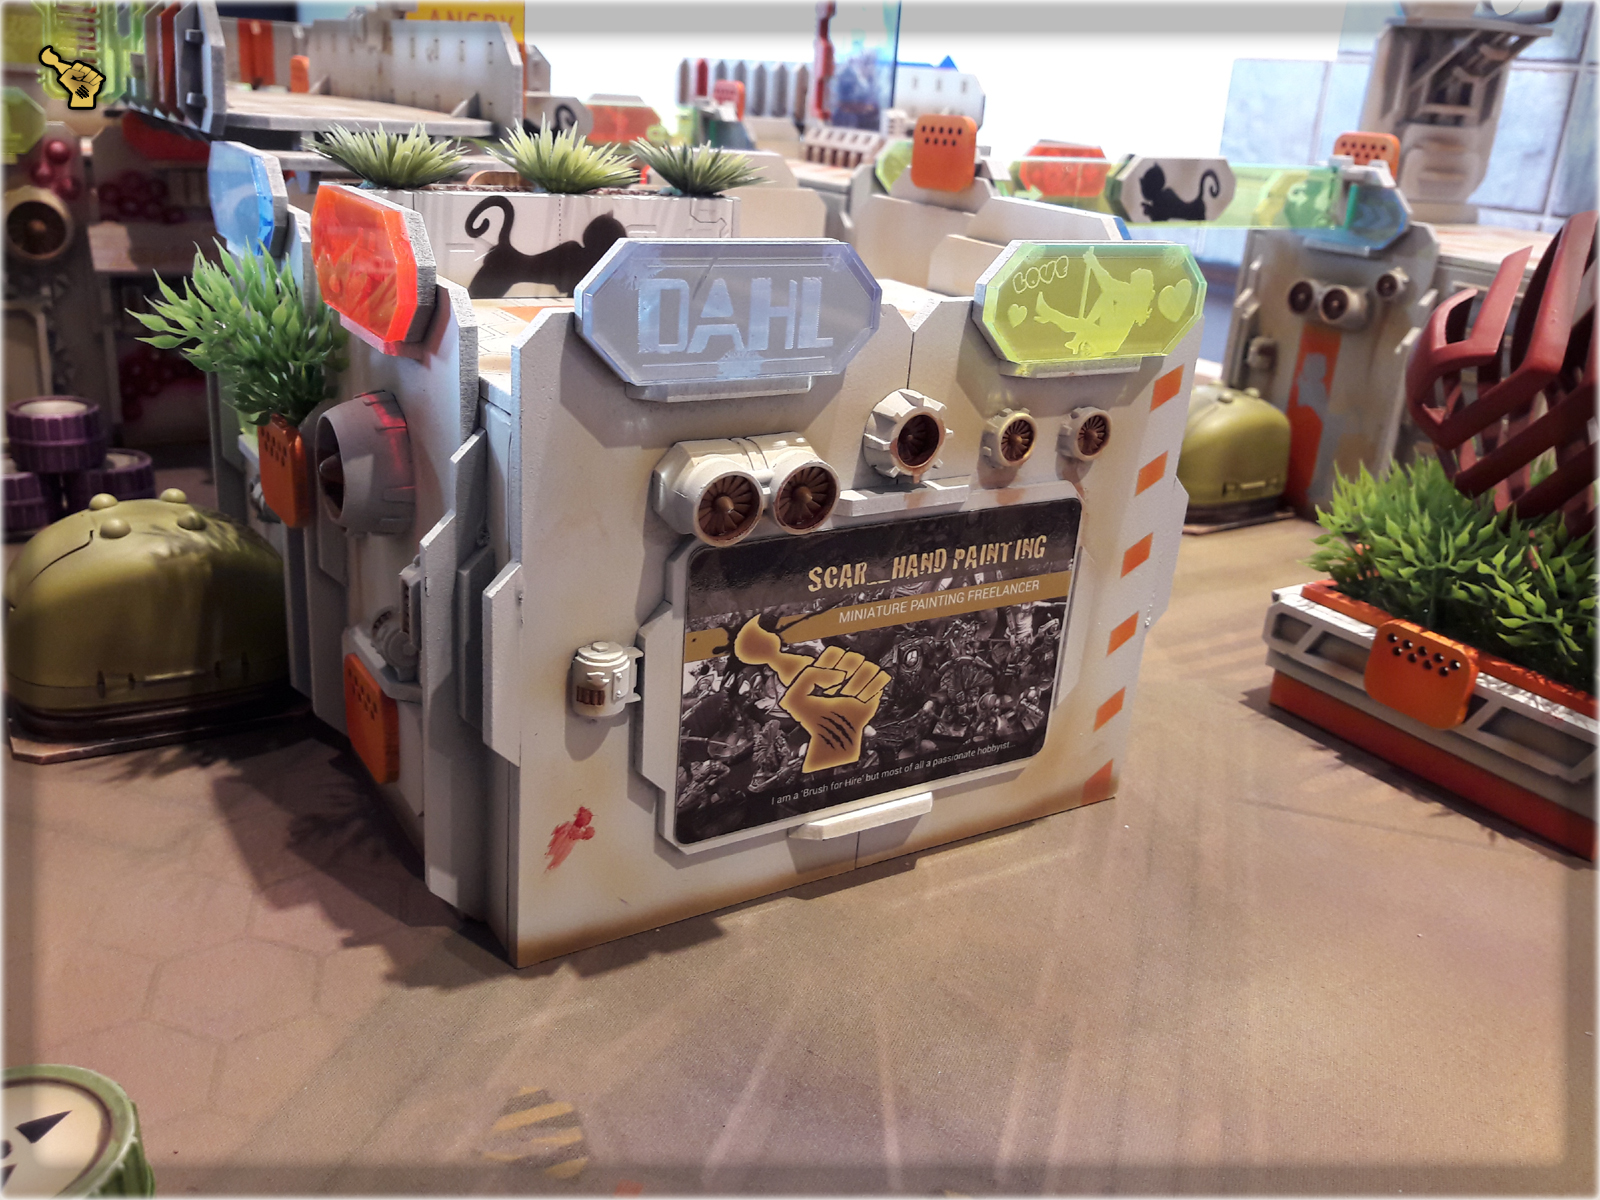
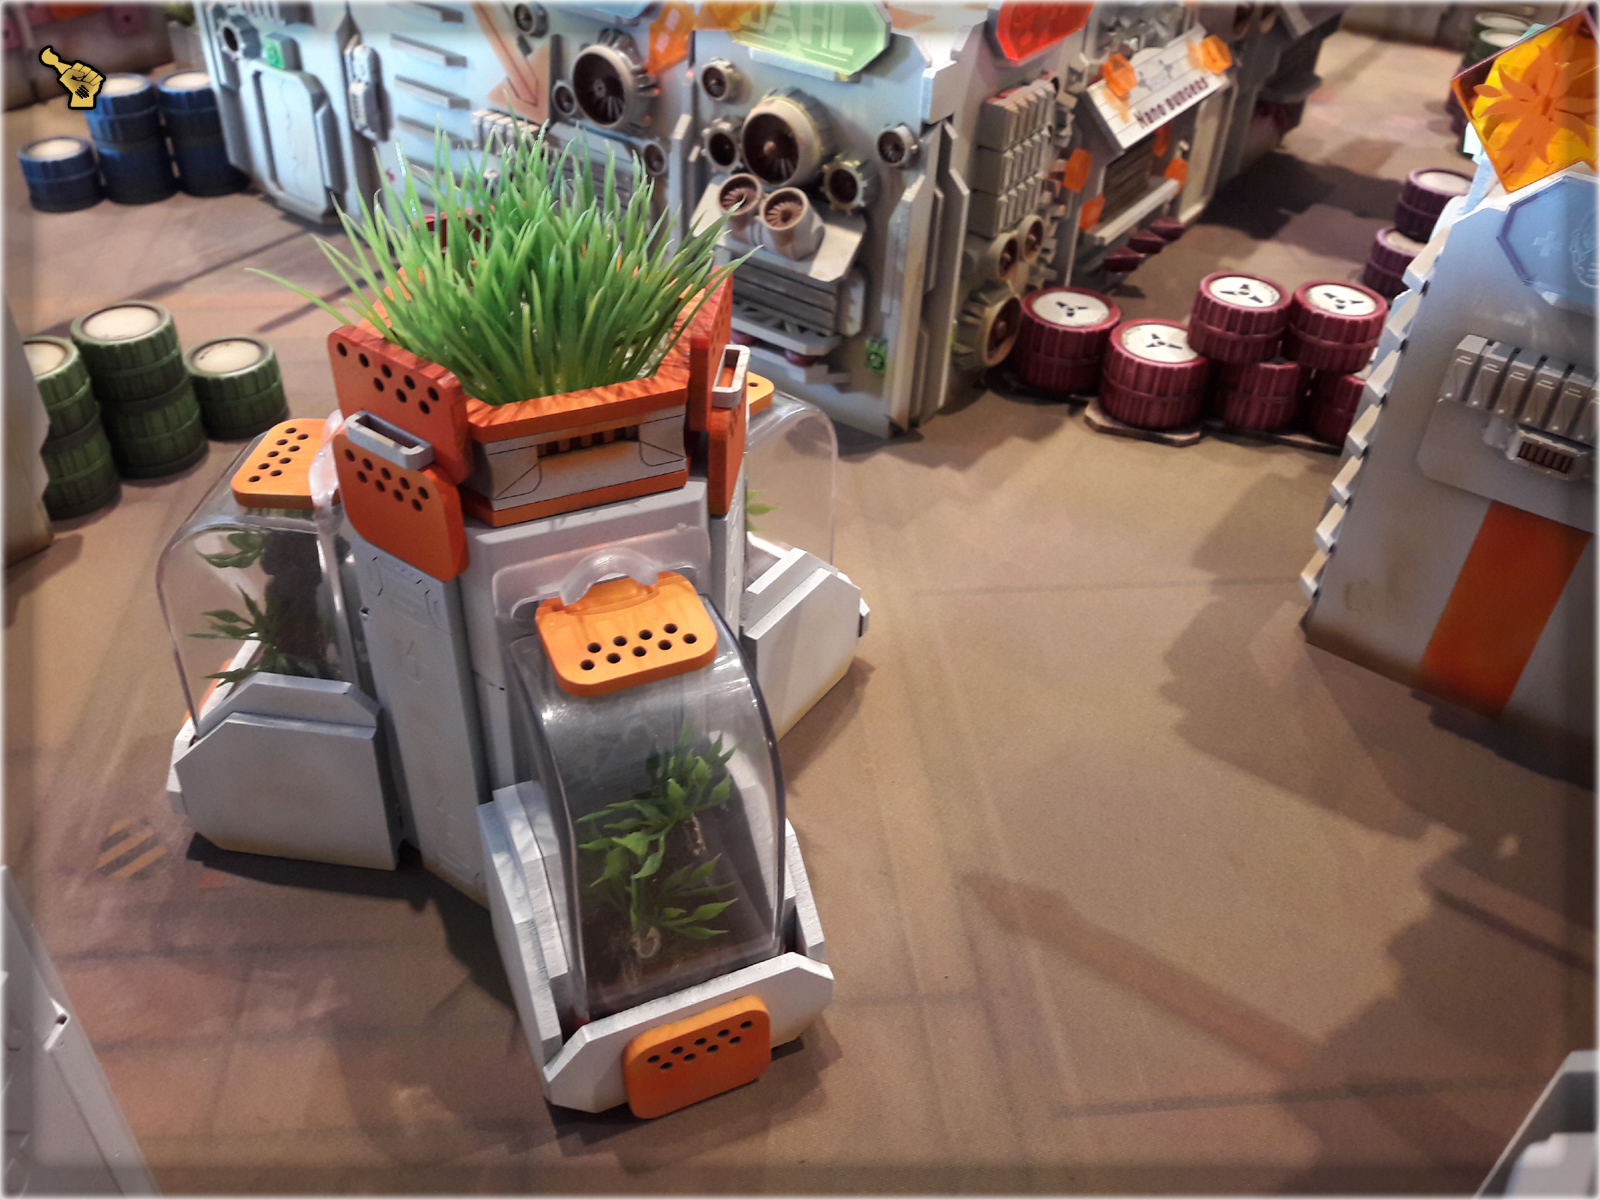
Plant compartments from THE COLONY – part seven: BEYOND are by far one of the best Infinity scenery pieces I have created. They have the looks but are also very playable, providing a lot of cover and breaking long shooting corridors. Yves Saint Laurent cosmetics plug and couple more drill covers, that I received from a friend, and an I was ready to build another Plant compartment. This time tho I lacked some of the MDF pieces, necessary to build an exact copy of the previous template. I decided to do some magic and tinker a bit with the design – using materials I actually had.


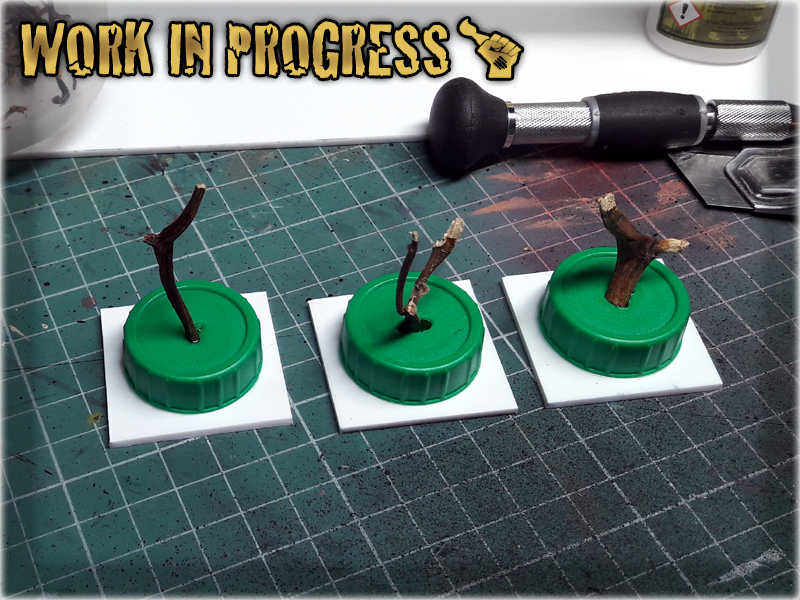
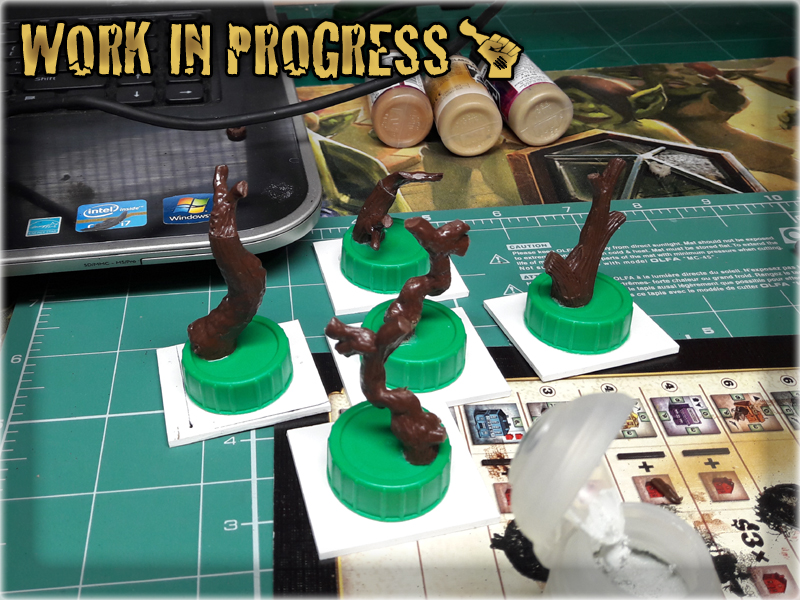
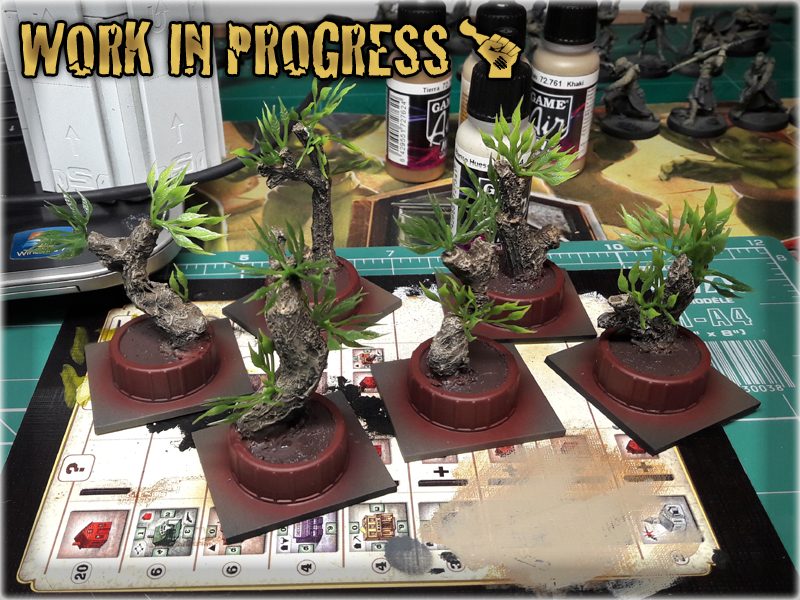
I also redesigned the plant to add variety on the table. These were made using a method from THIS TUTORIAL. It is simple and very effective and can be used to create many awesome shapes and textures. It took me around ten minutes to prepare three of these, so if you ever wandered if you should try the tutorial out – just go for it 😉

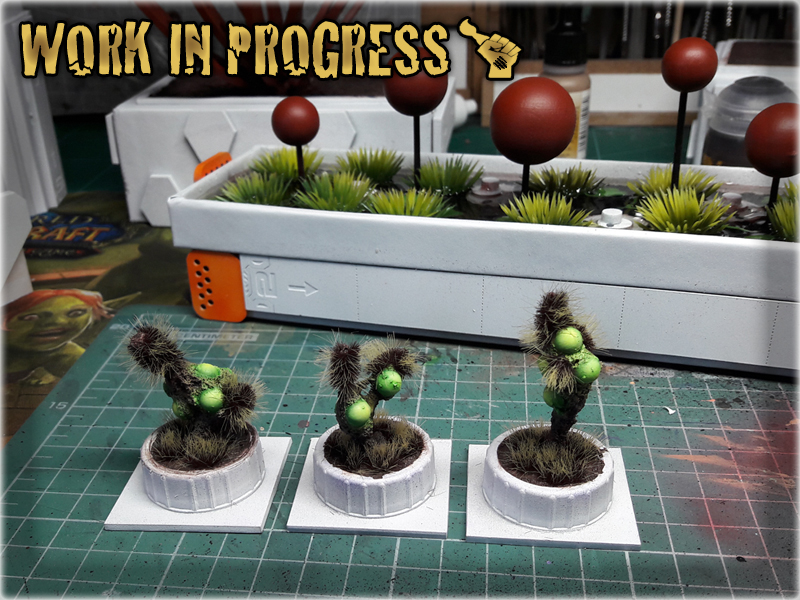
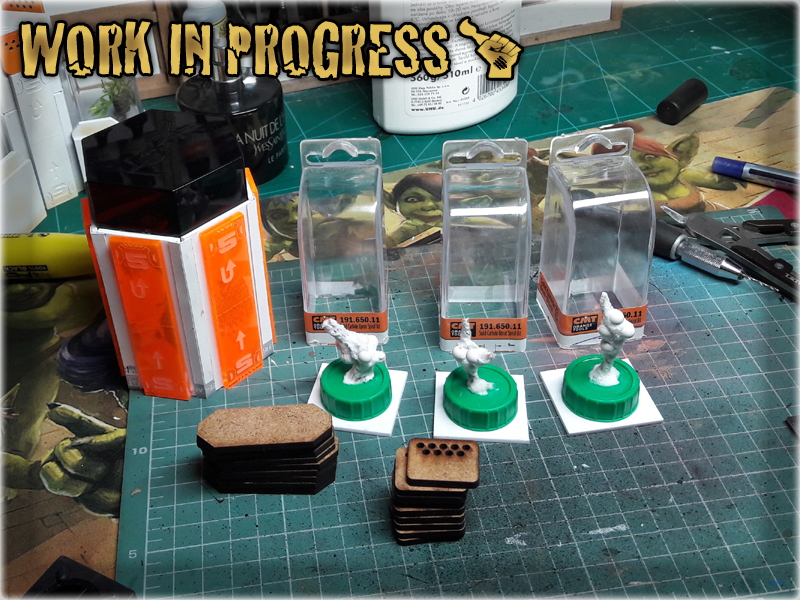
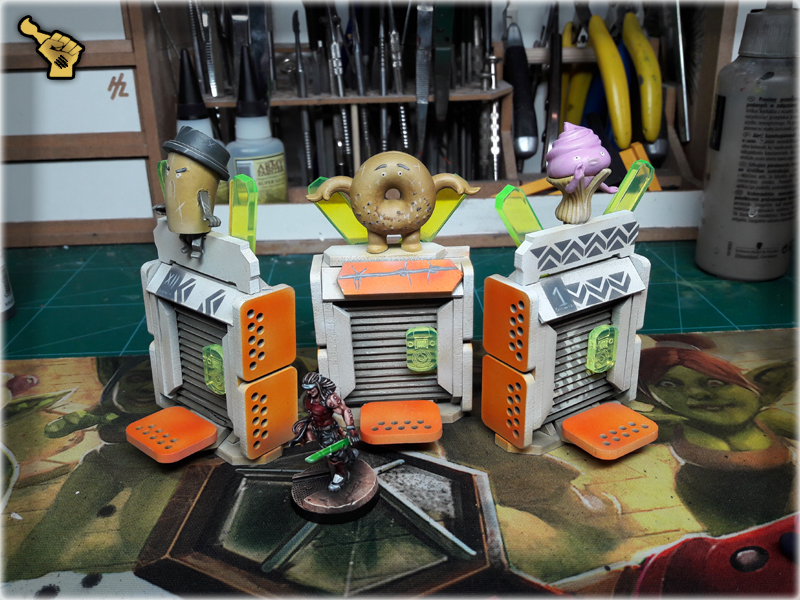
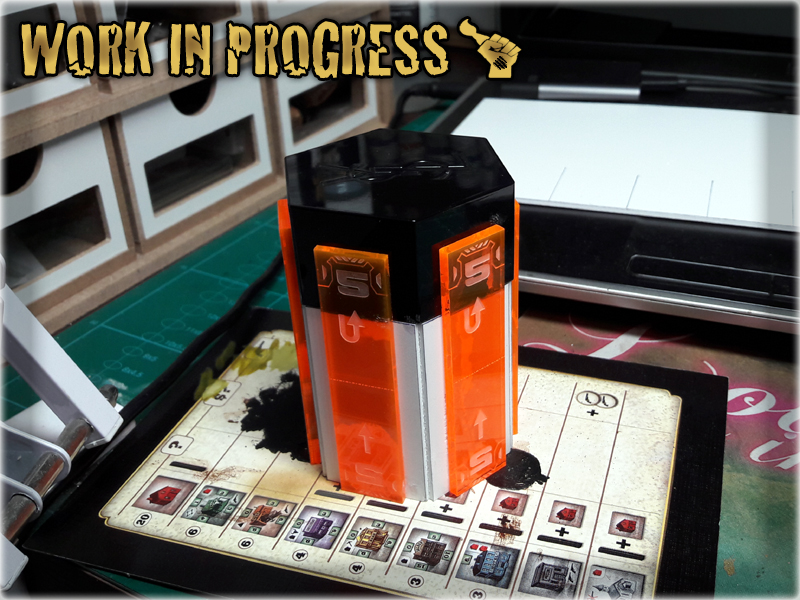
These three were inspired by boredom and awesome looking Orbit Gum pendants. Upon seeing the pendants I grabbed a bunch of them, knowing well that they will come in handy in the future. Did not took much time to try and use them for Infinity scenery and a set of Food Mashines (closed and secured cause ‘Nomads are in town’) are now complete. On top of three Orbit pendants I mostly used trash and leftovers, but there also are some special MDF pieces which you probably reckognize by now.
Another weekend well spent. Now I can’t stop to think about other ways of using clear resin, wooden balls, basing-super glue made plants and all the new stuff. Might also want to shift my attention to designing the actual MDF scenery as recently I’ve entered into an arrangement with Every Little War which will tweak some of my stuff, including Objective Room and provide it in the online offer. A lot of stuff to wait for XD
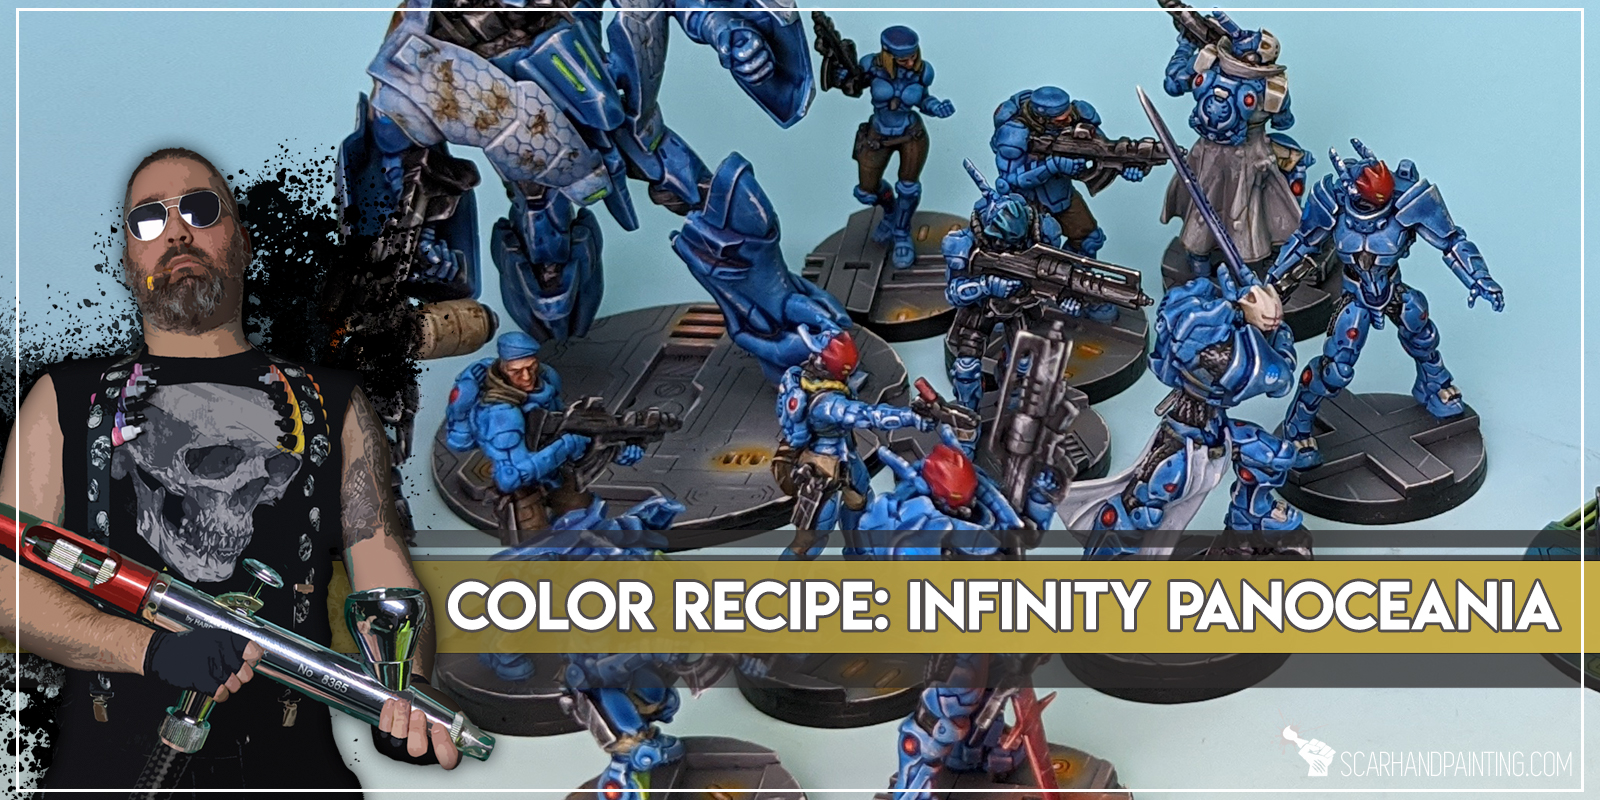
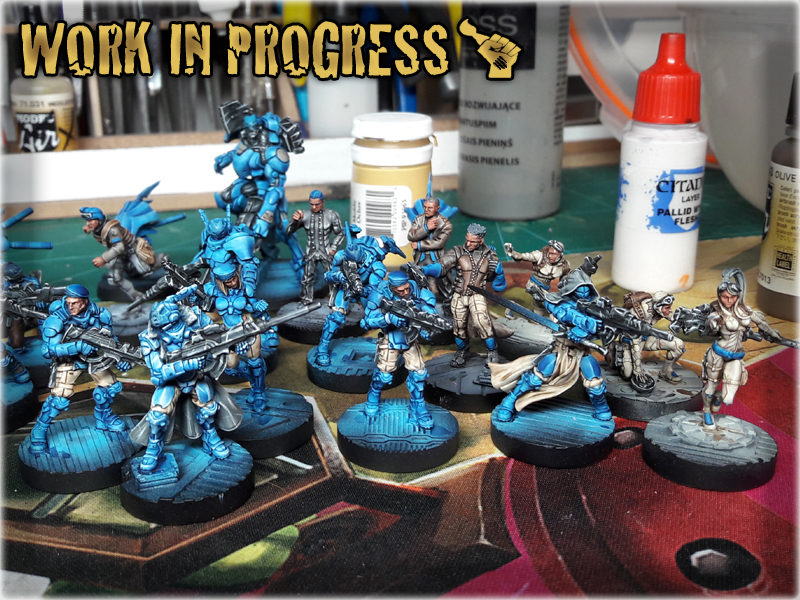
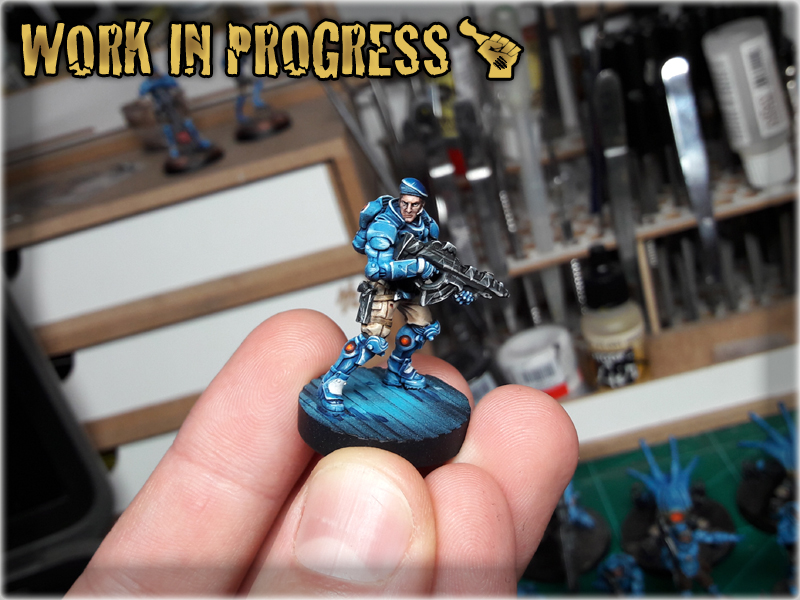
Here are some Colour Recipes for Infinity Panoceania from GALLERY: INFINITY NEOTERRA lvl 5. Please take note that this is a simple colour scheme, not covering multiple overlapping layers and blends inbetween, that lead to the final product. It is supposed to be used as guidline not a step-by-step.
BLUE armour:
Black Undercoat,
French Blue (VAL),*
Light Sea Blue (Val),*
Mix Light Sea Blue (Val) 8:3 White,*
Mix Guilliman blue (GW) 1:1:1 Blue Tone Ink (AP), Lahmian Medium (GW),
Pale Wych Flesh (GW) l&p,
Light Sea Blue (Val) glaze,
White glaze & l&p,
Black Wash (Val) deep lining,
CREME/BROWN clothes:
Karak Stone (GW),
Flayed One Flesh (GW),
Flayed One Flesh (GW),
Mix Strong Tone Ink (AP) 1:1:1 Soft Tone Ink (AP), Lahmian Medium (GW),
Flayed One Flesh (GW) l&p
Mix Flayed One Flesh (GW) 1:1 Pale Wych Flesh (GW) l&p,
Dark Brown Wash (Val) deep lining,
SKIN:
Bugmans Glow (GW),
Dwarf Flesh (GW),
Mix Dwarf Flesh (GW) 1:1 Elf Skintone (Val),
Elf Skintone (Val) l&p,
Mix Strong Tone Ink (AP) 1:1 Soft Tone Ink (AP),
Flesh (Val) l&p,
RED helmets:
Sanguine Base (P3),
Mephiston Red (GW),
Evil Sunz Scarlet (GW),
Red Tone Ink (AP),
Bloodletter (GW) glaze points,
Troll Slayer Orange (GW) l&p,
Lugganath Orange (GW) l&p,
RED lights:
Evil Sunz Scarlet (GW),
Troll Slayer Orange (GW),
Lugganath Orange (GW) p,
Pale Wych Flesh (GW) p,
Bloodletter (GW),
Lugganath Orange (GW) p,

BASES:
Administratum Grey (GW),
/ Skeleton Bone (AP),
Mix Skeleton Bone (AP) 1:1 Pale Wych Flesh (GW),
/Frostbite (P3) drbr,
l&p – lines and points,
p – points,
drbr – drybrush,
*Airbrushed (with multiple layers and mixes)

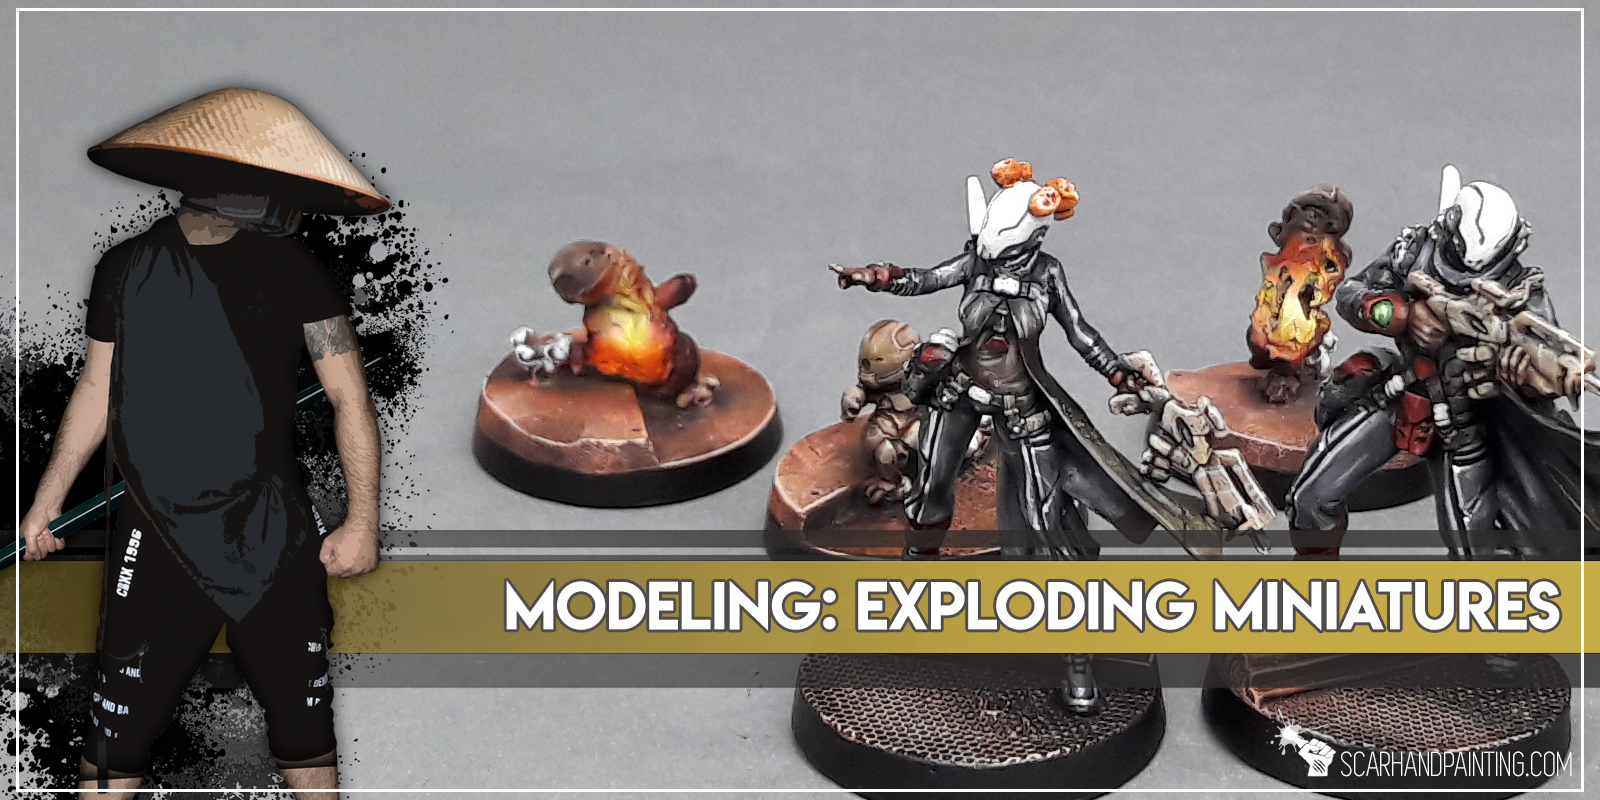
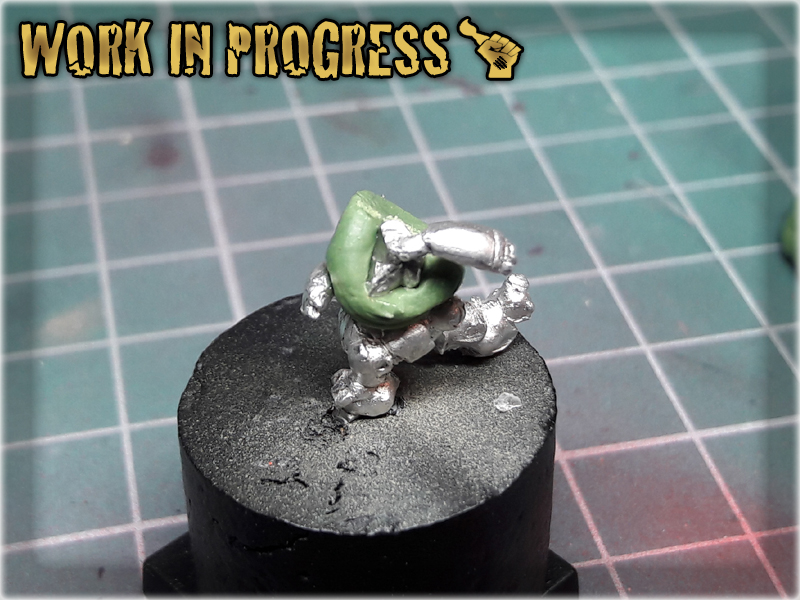
In this easy, step-by-step tutorial I’m going to show you how to create an ‘explosion from inside’ effect on the miniatures. Personally I use this method to create exploding mines or in this case Crazy Koalas from Infinity the game, but the number of potential uses is limited only by your imagination. That being said, buckle up and have a nice ride.
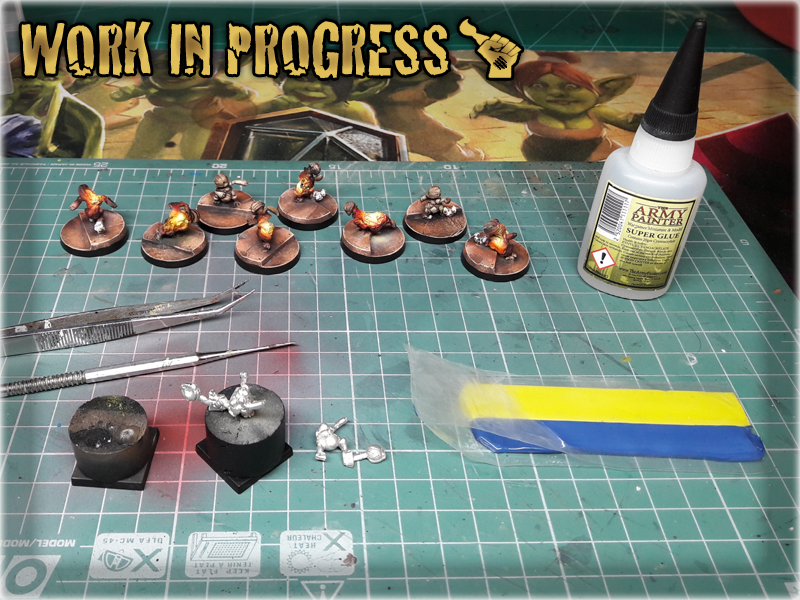
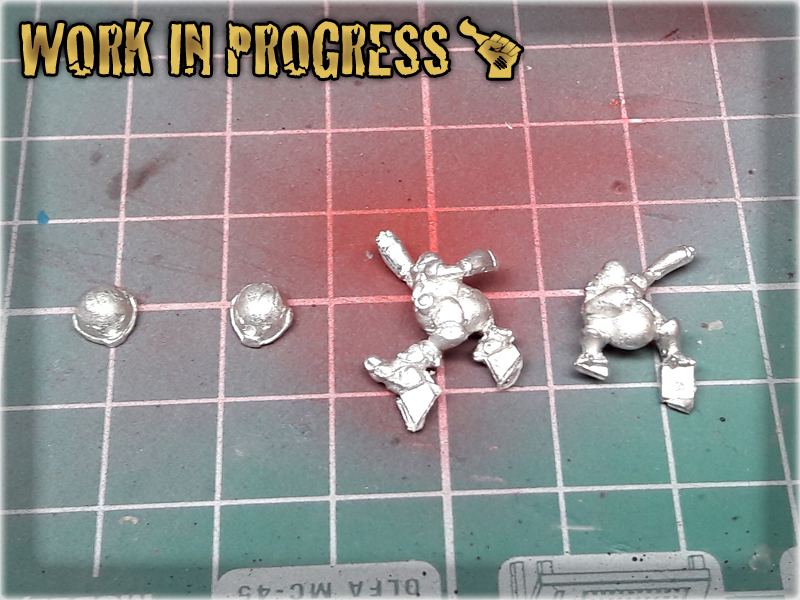
1 I started with cutting the miniature diagonally in two. I didn't thought too much about where to cut, just about the waist, leaving one hand attached to the lower part of the body.

2 I then rolled some Green Stuff and glued it onto the lower body part.
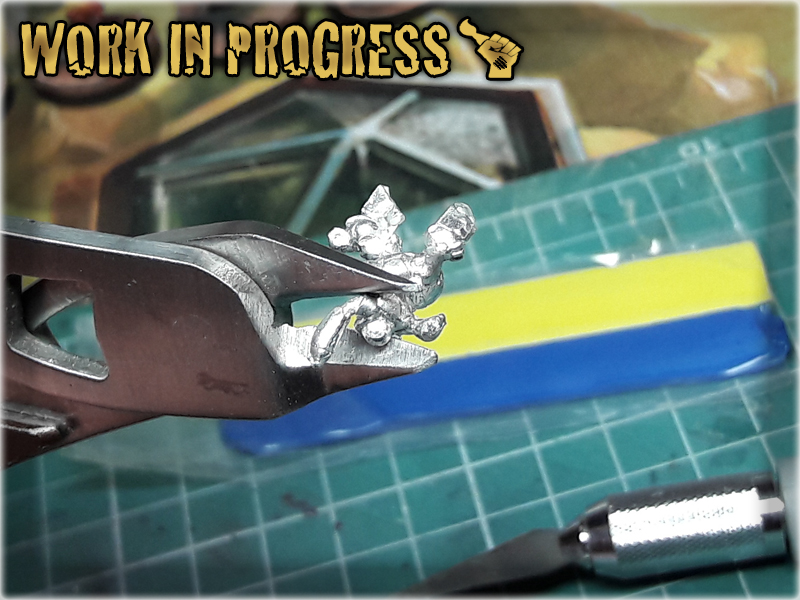
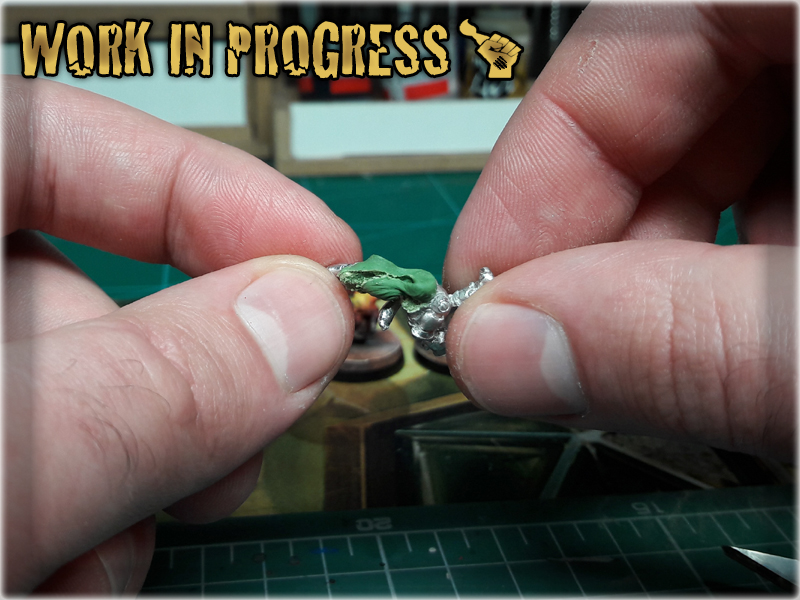
3 Next I applied a small drop of Super Glue onto the Green Stuff and attached the upper body part to it.

4 Then I squeezed both part, forcing the Green Stuff out.
5 Next I gently pulled both body parts away, creating a gap with rended Green Stuff inbetween the parts.
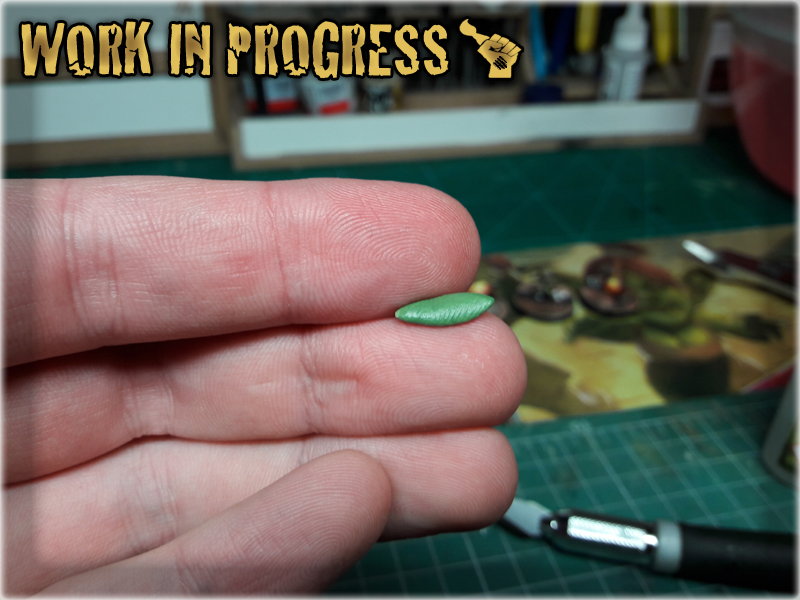
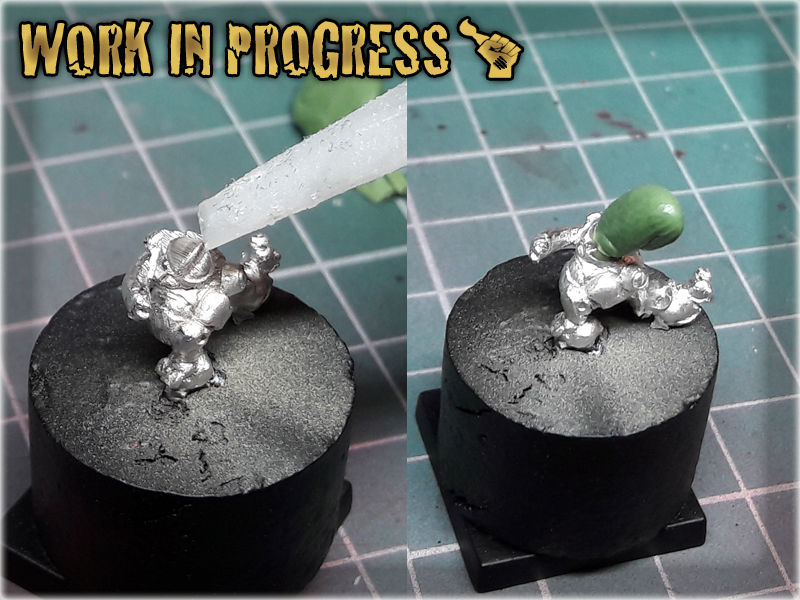
6 Next I rolled another piece of Green Stuff and repeated the technique, adding head to the miniature.

7 After pulling the head away I used a modelling tool to stretch the excess Green Stuff to the sides.
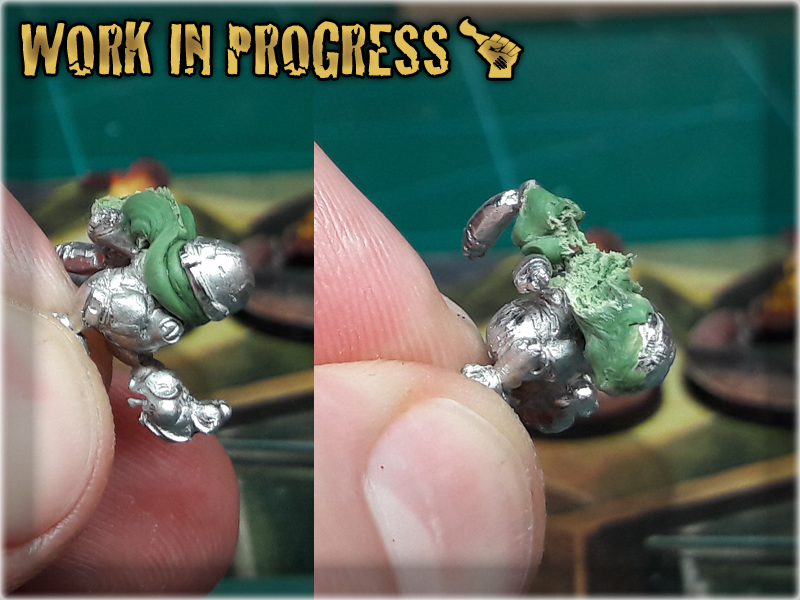
8 I also applied Super Glue onto the Green Stuff to fasten it's hardening.
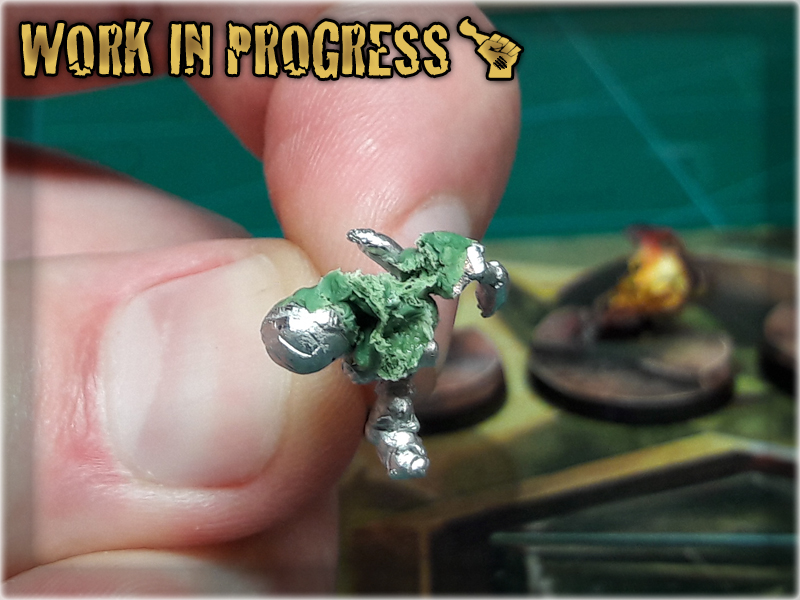
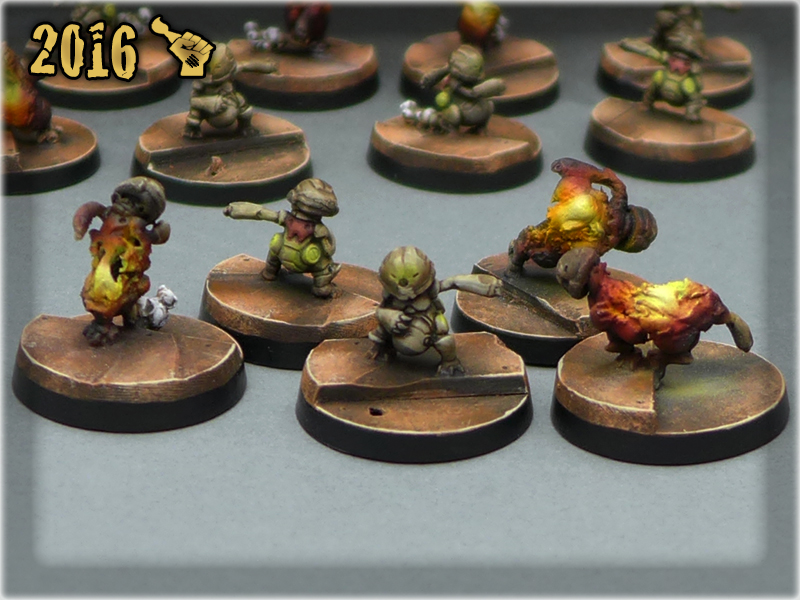
The end result is below:

Here are some Colour Recipes for Infinity ALEPH from GALLERY: INFINITY ALEPH lvl 4,5. Please take note that this is a simple colour scheme, not covering multiple overlapping layers and blends inbetween, that lead to the final product. It is supposed to be used as guidline not a step-by-step.

TURQUISE armour:
Black Undercoat,
Coal Black (P3),
Hydra Turquise (AP),
Mix Hydra Turquise (AP) 5:1 Pale Wych Flesh (GW) l&p,
Mix Hydra Turquise (AP) 1:5 Pale Wych Flesh (GW) l&p,
Coelia Greenshade (GW),
Pale Wych Flesh (GW) l&p,
DARK clothes:
Black Undercoat,
Dark Sea Grey (Val)*,
Barley Grey (Val)*,
Dark Sea Grey (Val)*,
Wolf Grey (Val)*,
Pale Wych Flesh (GW) l&p,
Dark Tone Ink (AP),
…DEEP dark effect:
Pale Wych Flesh (GW) l&p,
Dark Tone Ink (AP),
…BROWN clothes:
Dirt (Val),
Mix Strong Tone Ink (AP) 1:1 Soft Tone Ink (AP),
Off White (Val) l&p,

SKIN:
Bugmans Glow (GW),
Dwarf Flesh (GW),
Elf Skintone (Val),
Mix Strong Tone Ink (AP) 1:1 Soft Tone Ink (AP),
Flesh (Val) l&p,
GREEN OLS:
Sick Green (Val),
Mix Sick Green (Val) 1:1 Off White (Val),
Mix Sick Green (Val) 1:2 Off White (Val) l&p,
Light Livery Green (Val)*,
Waywatcher Green (GW),
Off White (Val) l&p,

l&p – lines and points,
*Airbrushed (with multiple layers and mixes)
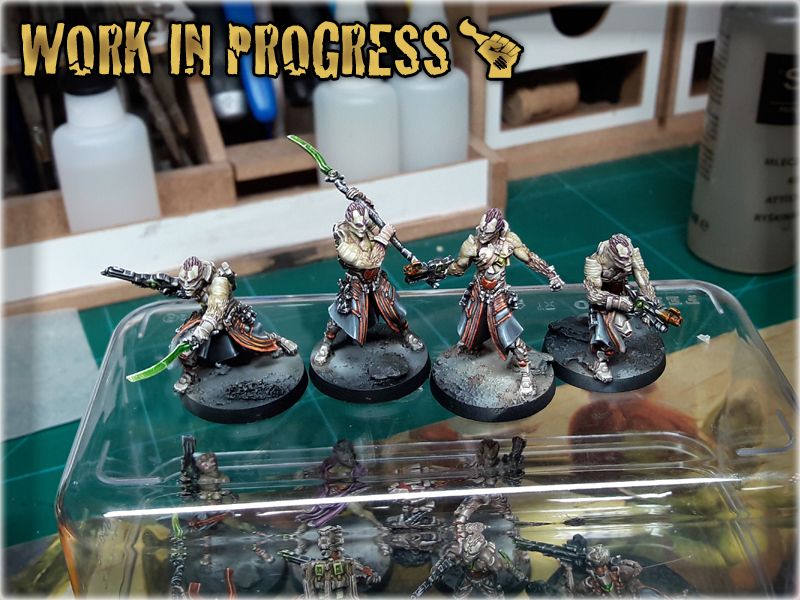
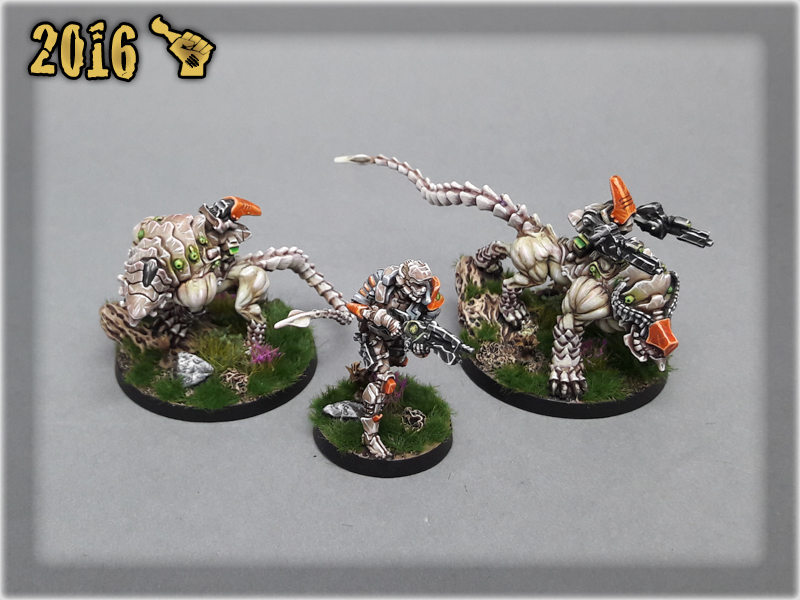
Here are some Colour Recipes for Infinity Yu-Jing lvl 5 from GALLERY: INFINITY TOHAA lvl 5. Please take note that this is a simple colour scheme, not covering multiple overlapping layers and blends inbetween, that lead to the final product. It is supposed to be used as guidline not a step-by-step.

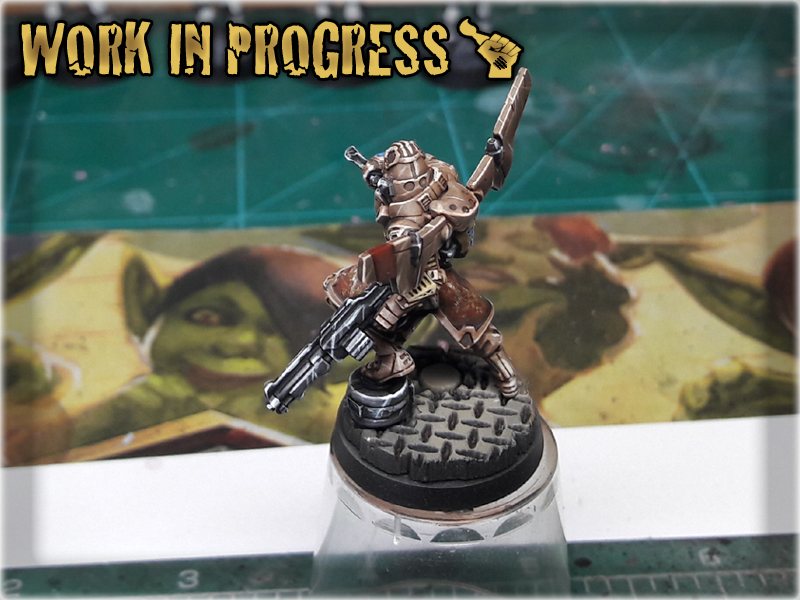
BONE armour:
Black Undercoat,
Earth (Vallejo)*,
Khaki (Vallejo)*,
Bonewhite (Vallejo)*,
Pallid Wych Flesh (GW) l&p,
Mix Strong Tone Ink (AP) 1:1 Soft Tone Ink (AP),
Pallid Wych Flesh (GW) l&p,
White l&p,
SYMBIONT armour:
Hot Orange (Vallejo),
Hot Orange (Vallejo) + Pallid Wych Flesh (GW),
Mix Strong Tone Ink (AP) 1:1 Soft Tone Ink (AP),
Lugganath Orange (GW),
Lugganath Orange (GW) + Pallid Wych Flesh (GW),
Pallid Wych Flesh (GW) l&p,
BLACK weapons:
Black Undercoat,
Skavenblight Dinge (GW),
Fenrisian Grey (GW),
Pallid Wych Flesh (GW) l&p,
Dark Tone Ink (AP),
Pallid Wych Flesh (GW) l&p,
White l&p,
NECROTIC skin:
Dead Flesh (Vallejo),
Mix Strong Tone Ink (AP) 1:1 Soft Tone Ink (AP),
Necrotic Flesh (AP) + Pallid Wych Flesh (GW) l&p,
White l&p,
ORANGE clothes:
Hot Orange (Vallejo),
Hot Orange (Vallejo) + Fire Dragon Bright (GW),
Hot Orange (Vallejo) + Fire Dragon Bright (GW) + Pallid Wych Flesh (GW) l&p,
Pallid Wych Flesh (GW) l&p,
Mix Hot Orange (Vallejo) 3: 1 Bloodletter (GW),
Lugganath Orange (GW) l&p,
GRAY/BLUE clothes:
Eshin Grey (GW),
Mix Strong Tone Ink (AP) 1:1 Soft Tone Ink (AP),
Eshin Grey (GW),
Eshin Grey (GW) + Fenrisian Grey (GW),
Eshin Grey (GW) + Fenrisian Grey (GW) + Pallid Wych Flesh (GW) l&p,
Dark Tone Ink (AP) shadows,
Pallid Wych Flesh (GW) l&p,
White l&p,
l&p – lines and points,
*Airbrushed (with multiple layers and mixes)
It’s been almost four months since I have ‘finished’ The Colony Special Project. Such grand endavours are the reason I’m into painting and miniatures wargaming. That wondrous feel of completion once a huge project hits the finish line. It always comes with a great satisfaction but once the dust settles, a void starts to grow inside my heart. I’m happy with results, yet long for the ‘process of creation’. That is why I consider every major project to be alive for at least as long as I am. In case of The Colony – well, a gaming table could always be improoved or use some more scenery. That is the exact way of thinking which led me to writing another part of this article…
That being said I must confess that I wasn’t able to invest much time into The Colony in the last few months. Other artistic projects fell on me from all around the globe and I lived a prosperous life by lending my brush to all those in need of decent painting. Still, once in a while I stumbled upon some cool looking items that just screamed to be unleashed onto my gaming board in form of some sweet looking terrain. Many sources provided me with items of great value, among them my girlfriend (cosmetics), my friend Garran (his personal collection of ‘cool stuff’) and even some of befriended companies like Micro Art Studio, or Ekograf, who (knowing my tastes) sent me some of their leftovers. I sincerly thank all of you, my beloved providers, and proudly announce that I couldn’t resist the temptation and used all the items, you so willingly parted with, to further expand my scenery collection and bring The Colony’s theme beyond the bounds of my early predictions.

Anyone remembers that picture? It was published at the end of “THE COLONY” SPECIAL PROJECT part six article. Some of this stuff still awaits being used, but more than half of it has already reincarnated in a form of these scenery pieces:
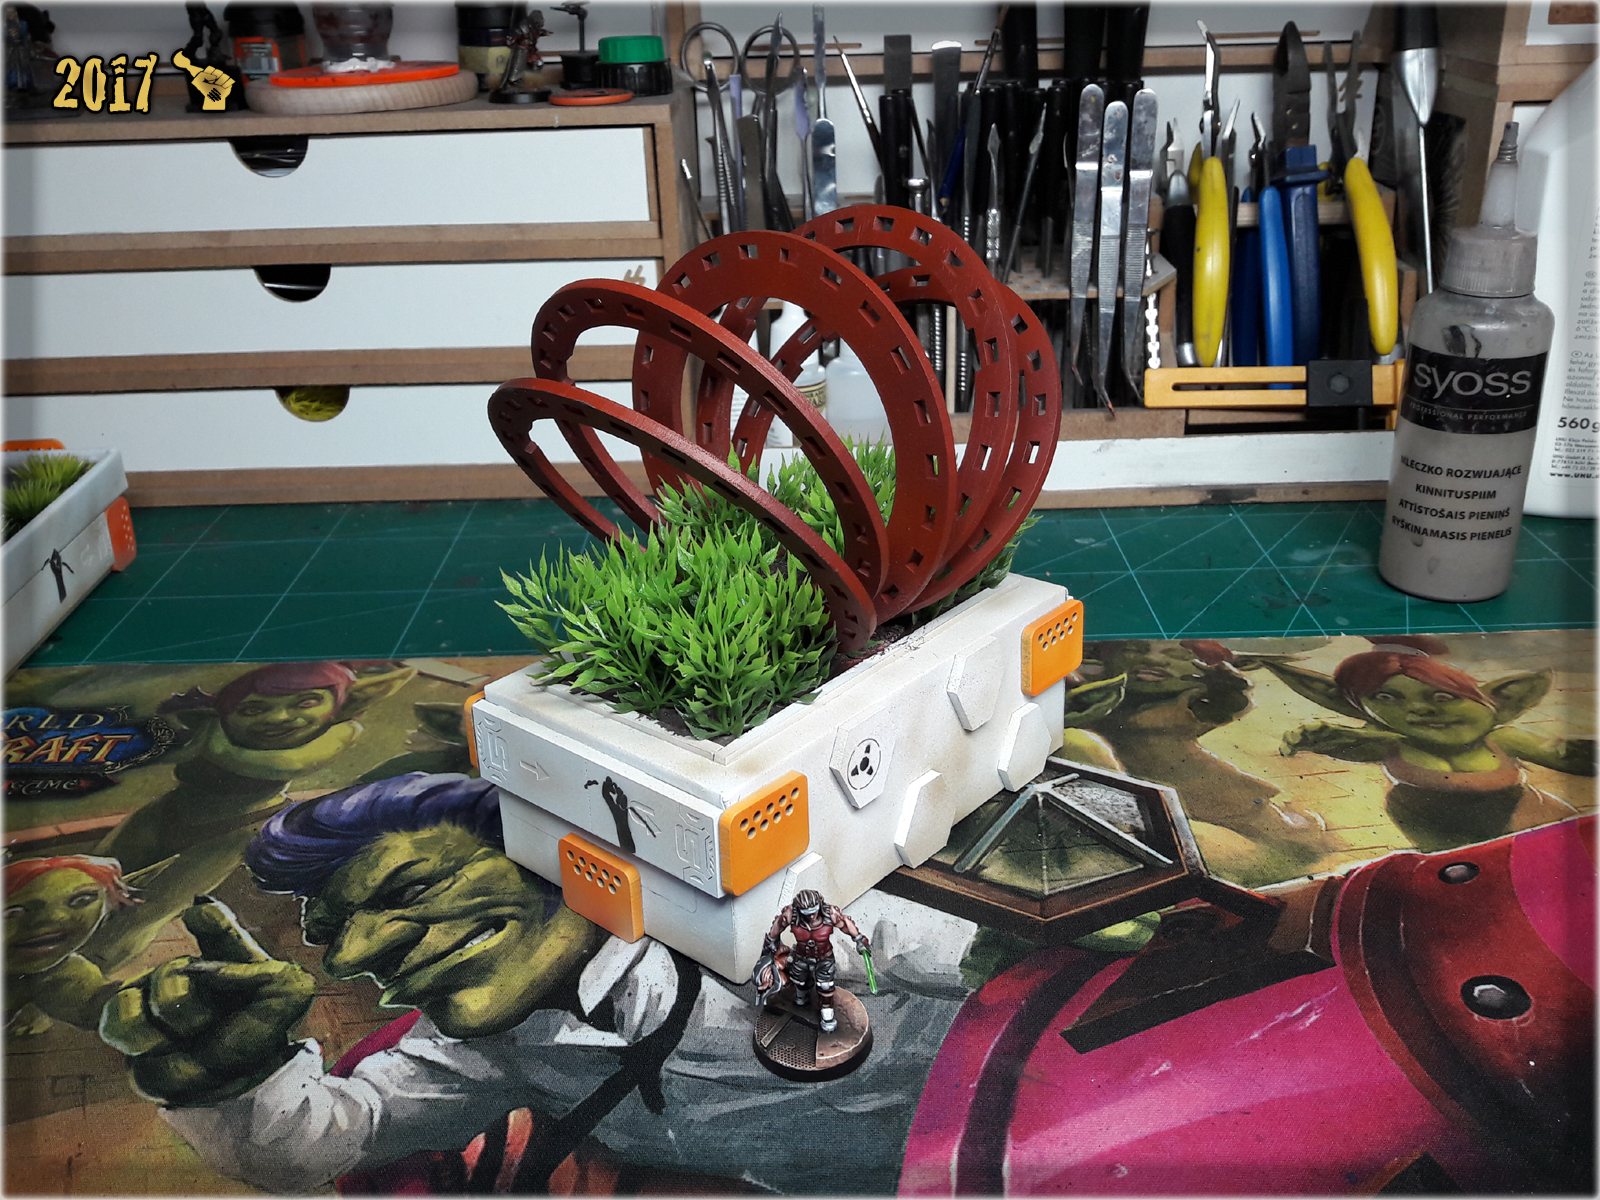
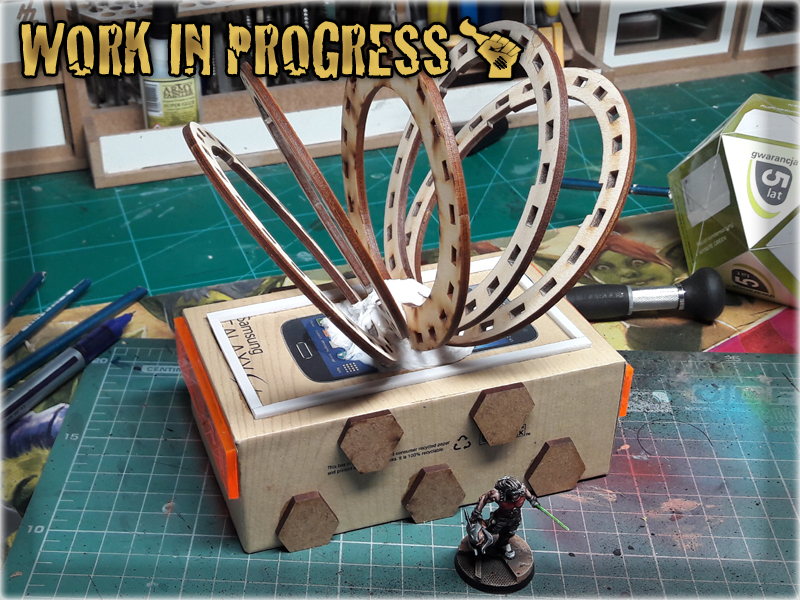
A futuristic sculpture made out of a Maybelline eyelashes mascara. Once I stole this precious item from my GF’s secret stash I had a real wrinkle with how to use it. So many ideas, including an antenna, a column, a laser tube – in the end I couldn’t decide so I got back into a well known territory of futuristic sculpures. It is only fair to use items stolen from my GF as pieces of art, otherwise she might not be swayed to turn a blind eye on my theft 😛
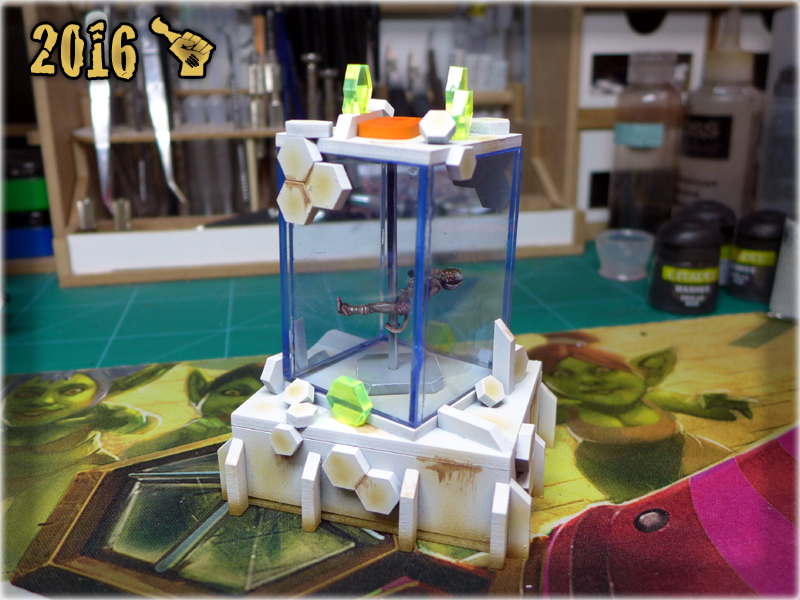
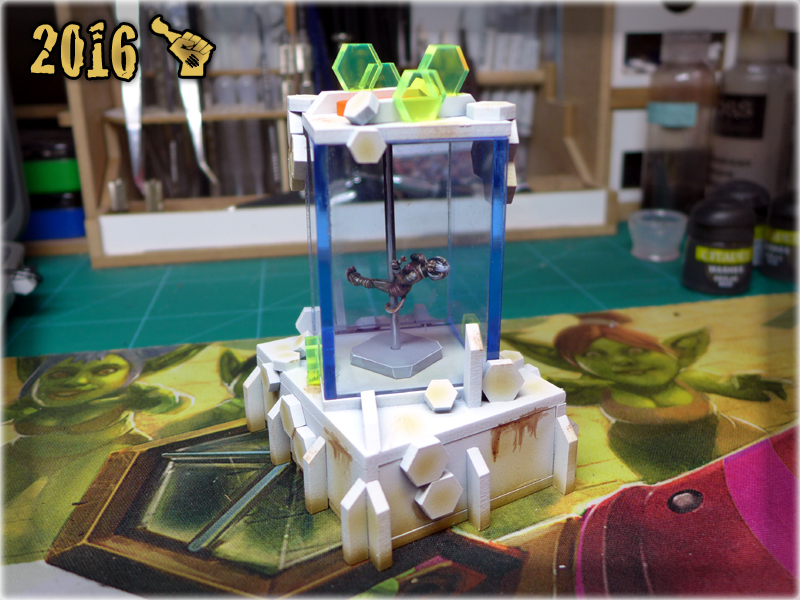


I got that awesome Dactari from my Girlfriend somewhere along two years of gaming. Untill now I hadn’t had use for it, as I was more into Corregidor-like miniatures, but finally I got the idea, made up what MDF pieces I will need to ‘cage’ this chick and ordered them from a friendly company. Once I got the stuff I just build the cage and here’s the result. It makes foir a nice rooftop piece or a great standalone scenery piece.
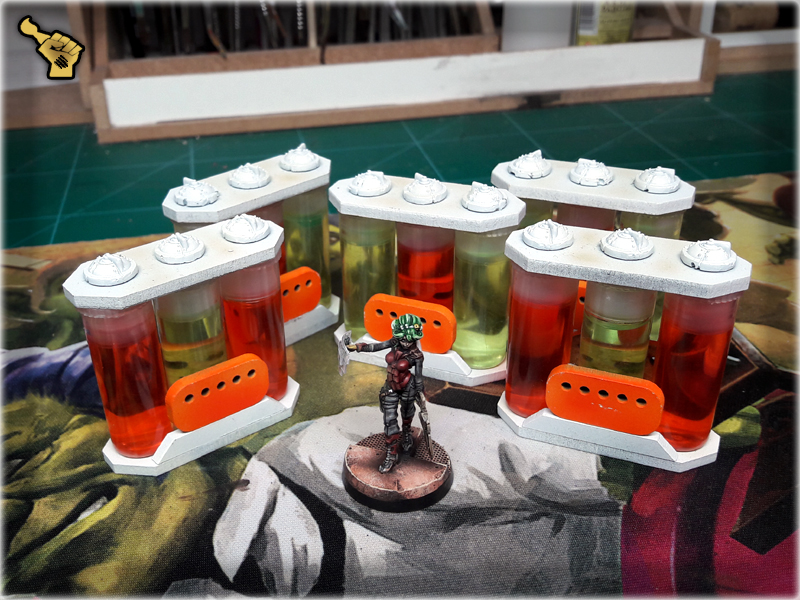
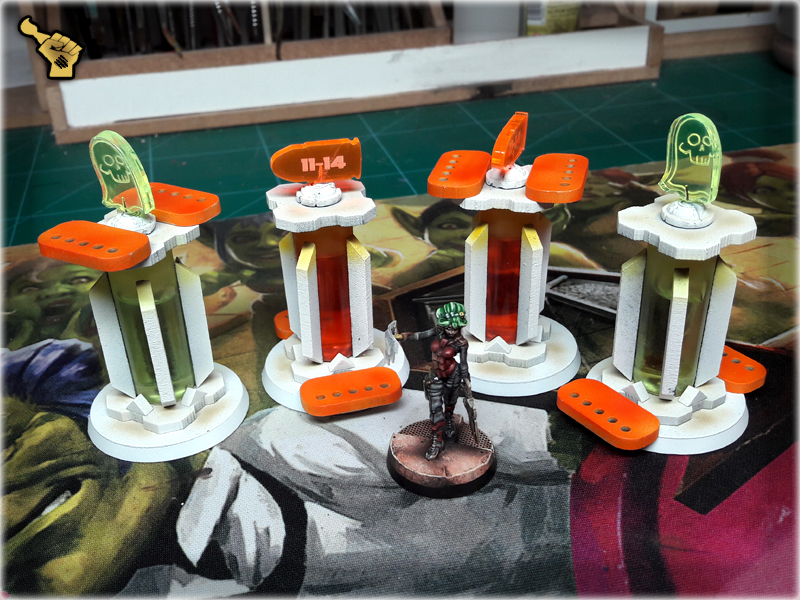
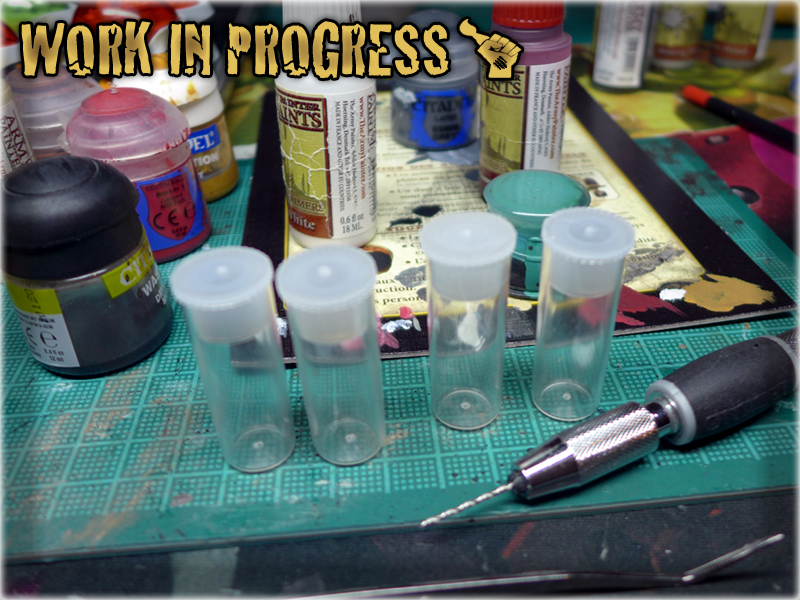
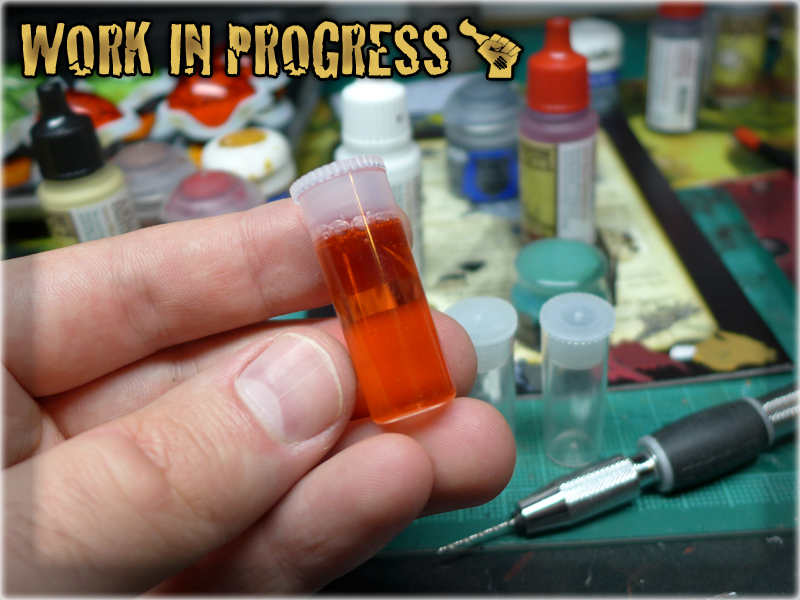
These can be used as objectives or just some random scenery pieces. I made them out of HDF pieces, leftovers and small plastic tubes* filled with shower gell. The tubes were given to me by Garran with which I tend to play Infinity, but also exchange concepts during our long painting/modelling talks. The guy is so nice as to share some of his stuff with me and I try hard not to let this gesture go to waste.
This is another source of endless inspiration. These are some throwbacks from Micro Art Studio’s production. MAS is very serious about their products – each and every one is checked for defects before it proceeds to packing. Once a defect is discovered, all imperfect products are kept as samples to avoid same kind of mistake in the future. In case of large quantities tho – some items may be sent to a friendly modeller to be used for awesome scenery building! One might even say that these can be used in a variety of crazy ways…
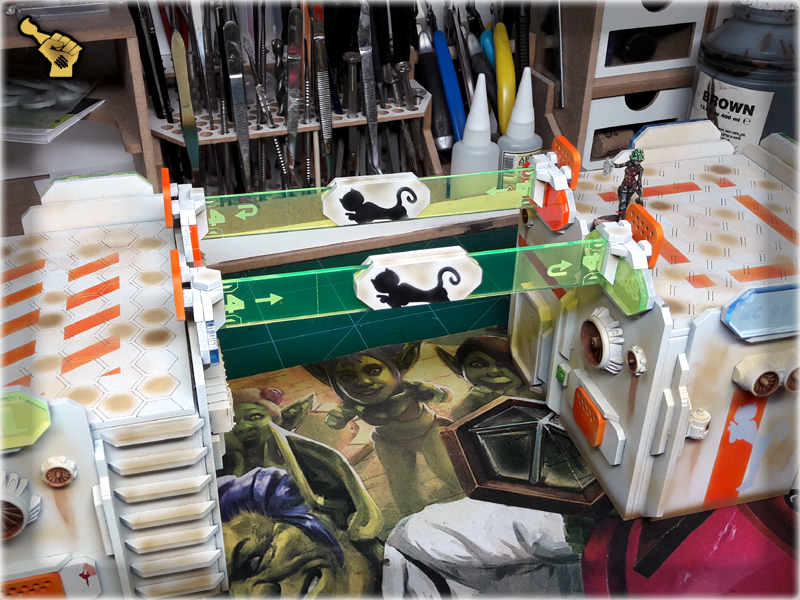
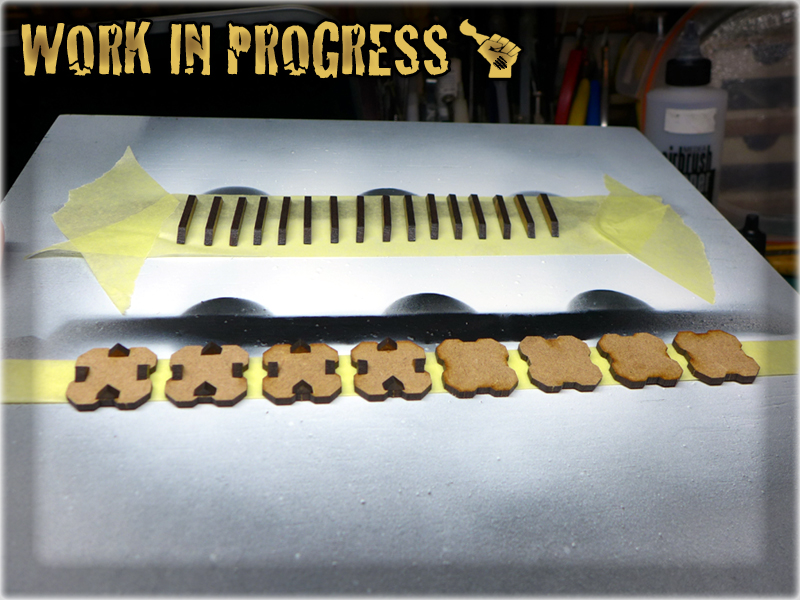
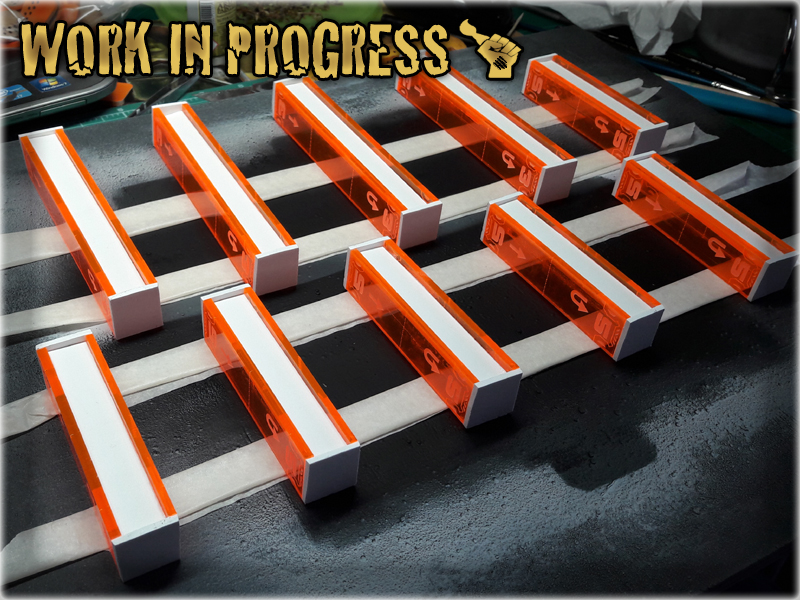
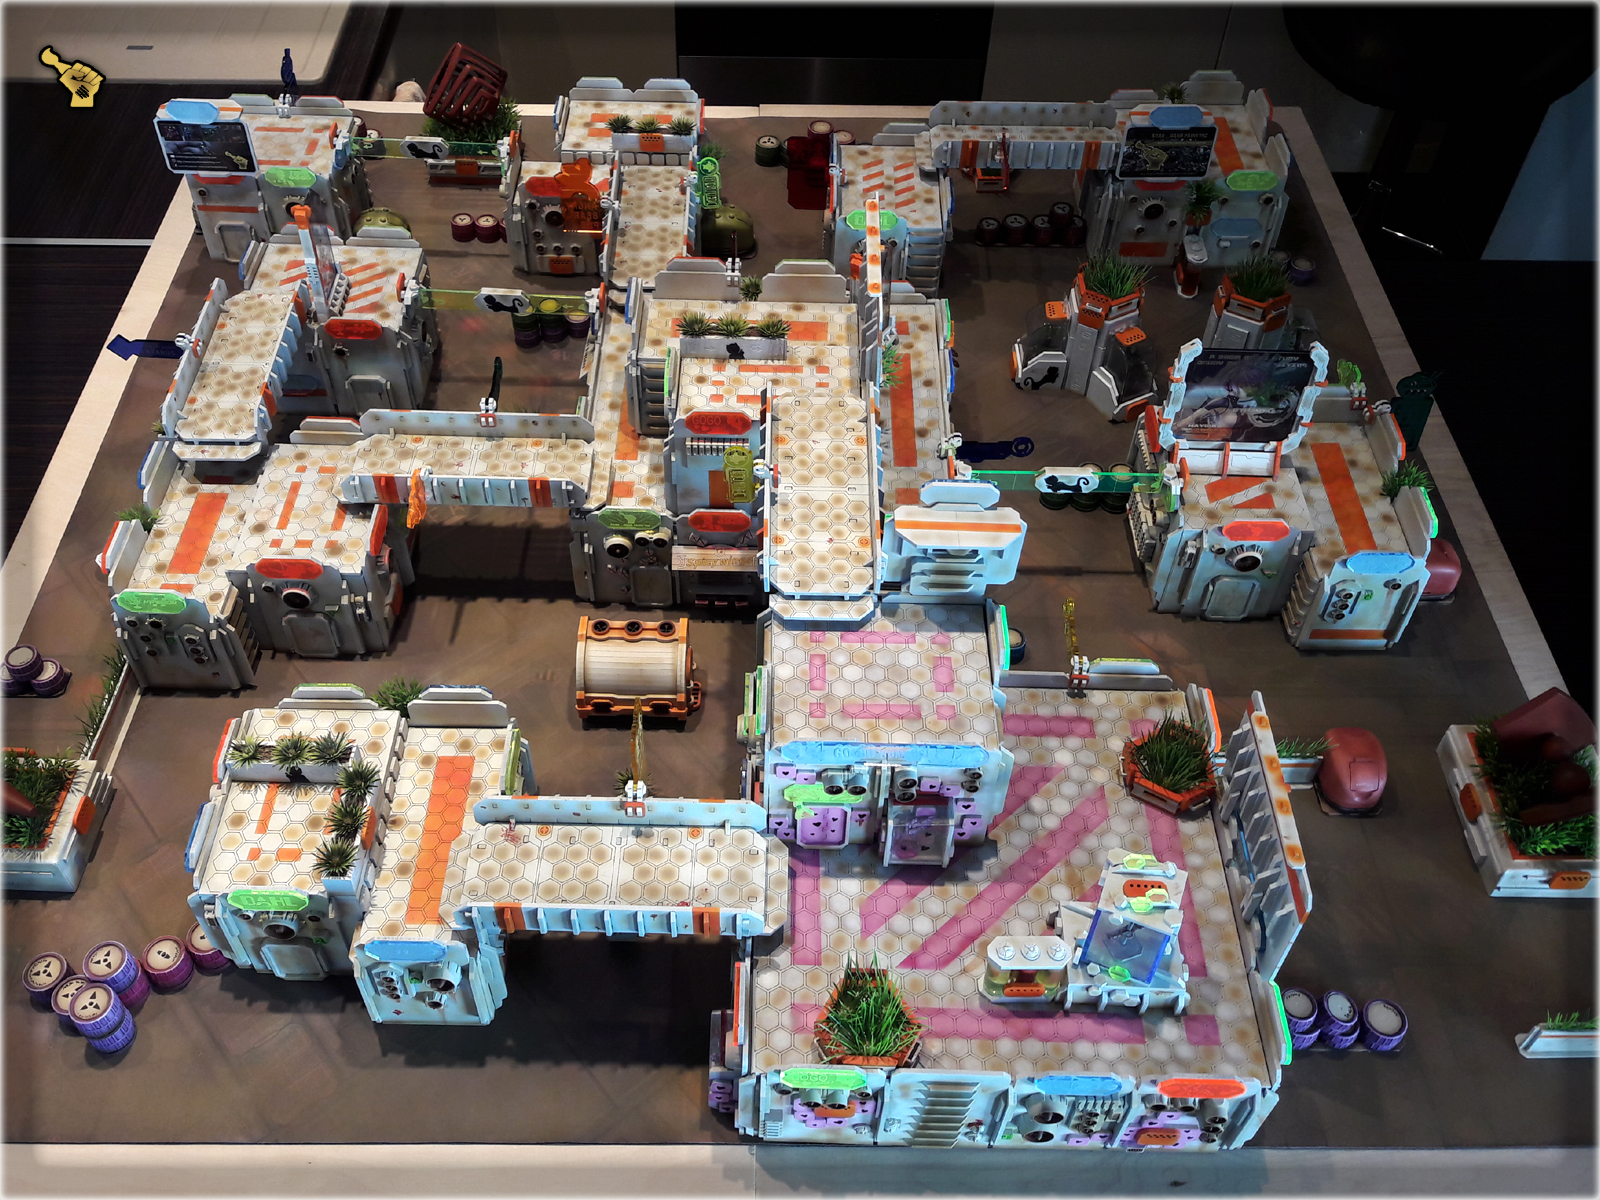
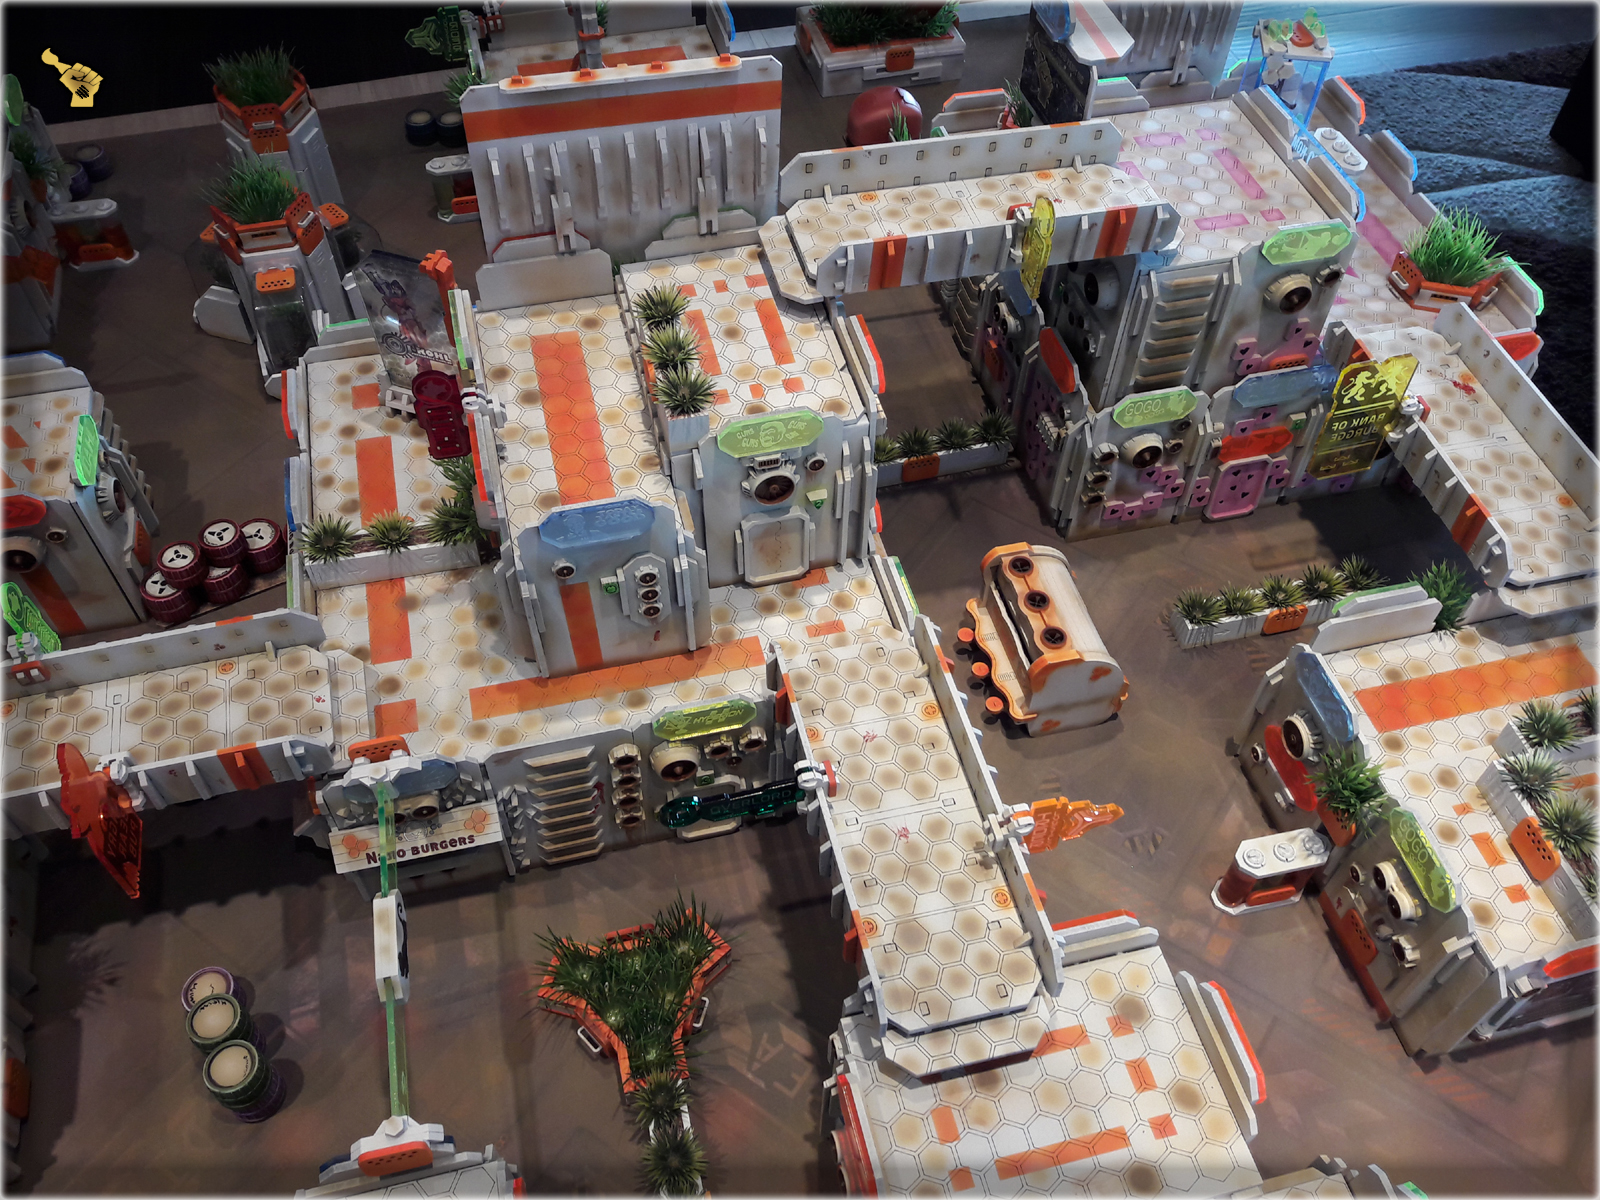
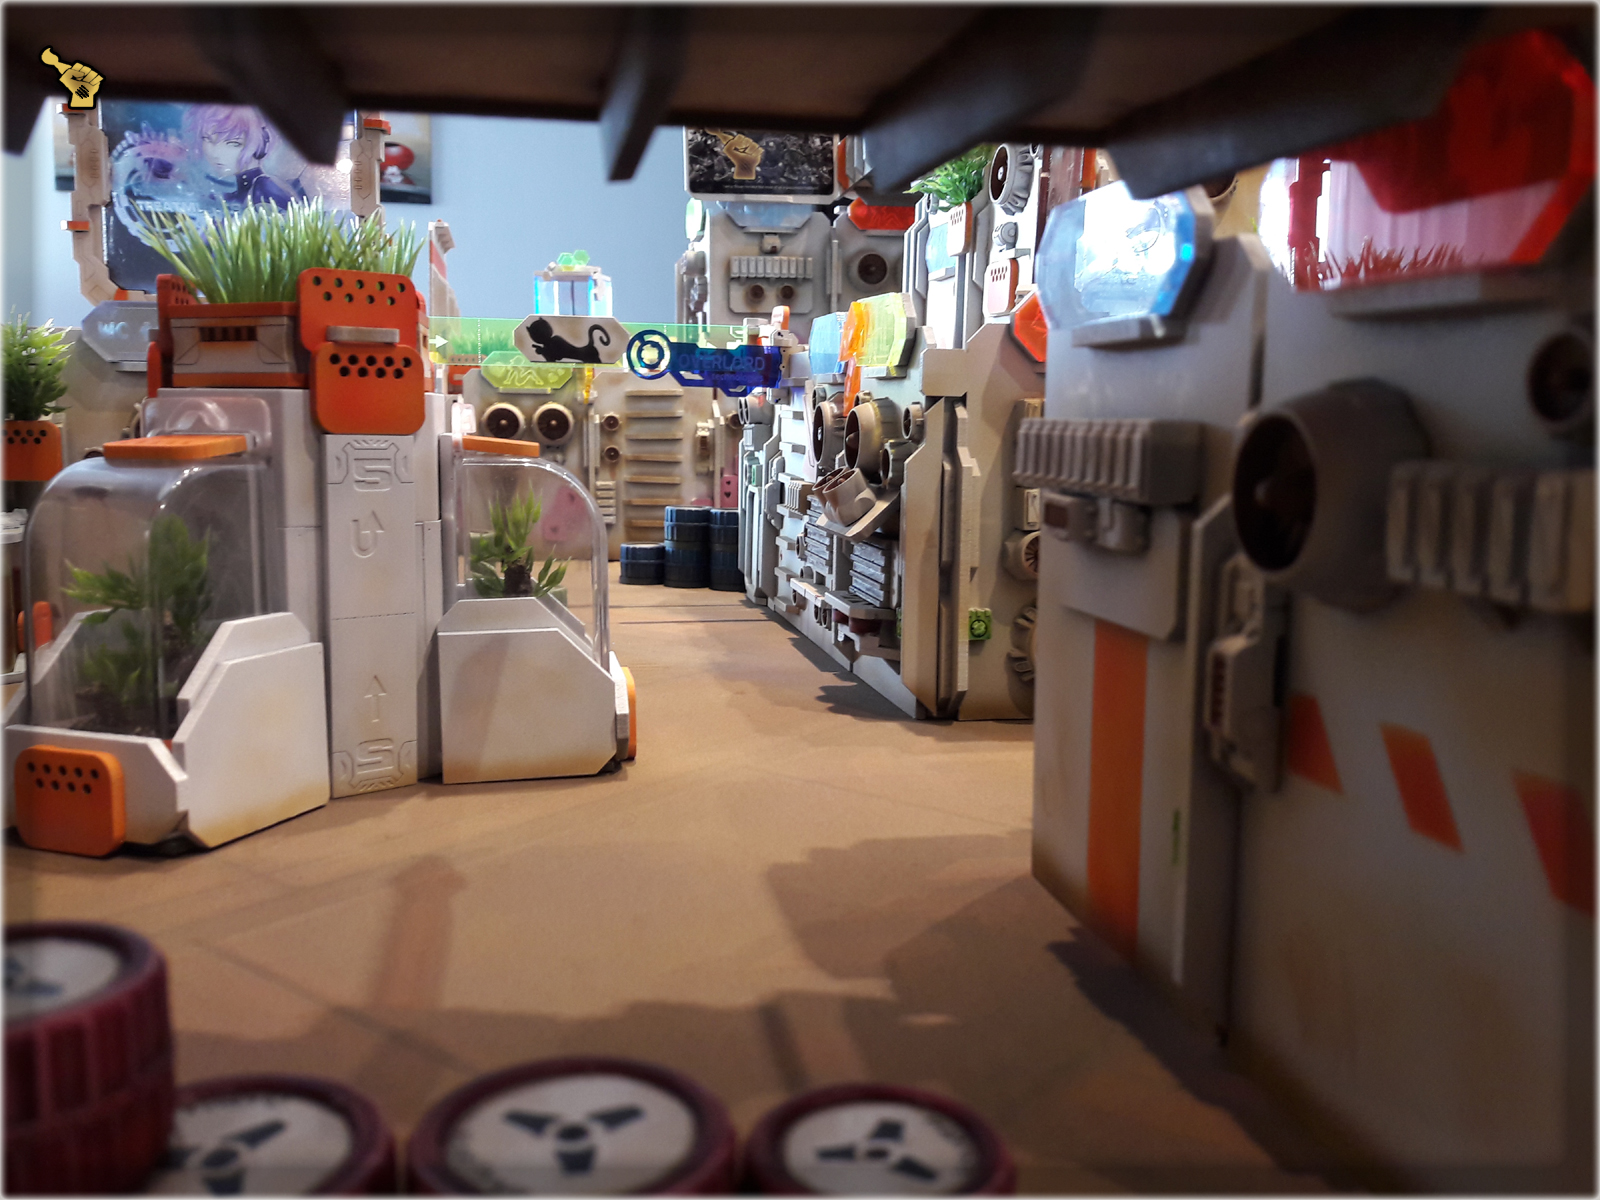
Six bridges are a bit too much on a 48×48″ table so I designed these scenery pieces to help me setup and then keep the gaming board in order. Simple yet effective, adding depth to streets and a nice futuristic note to the overall visual effect.
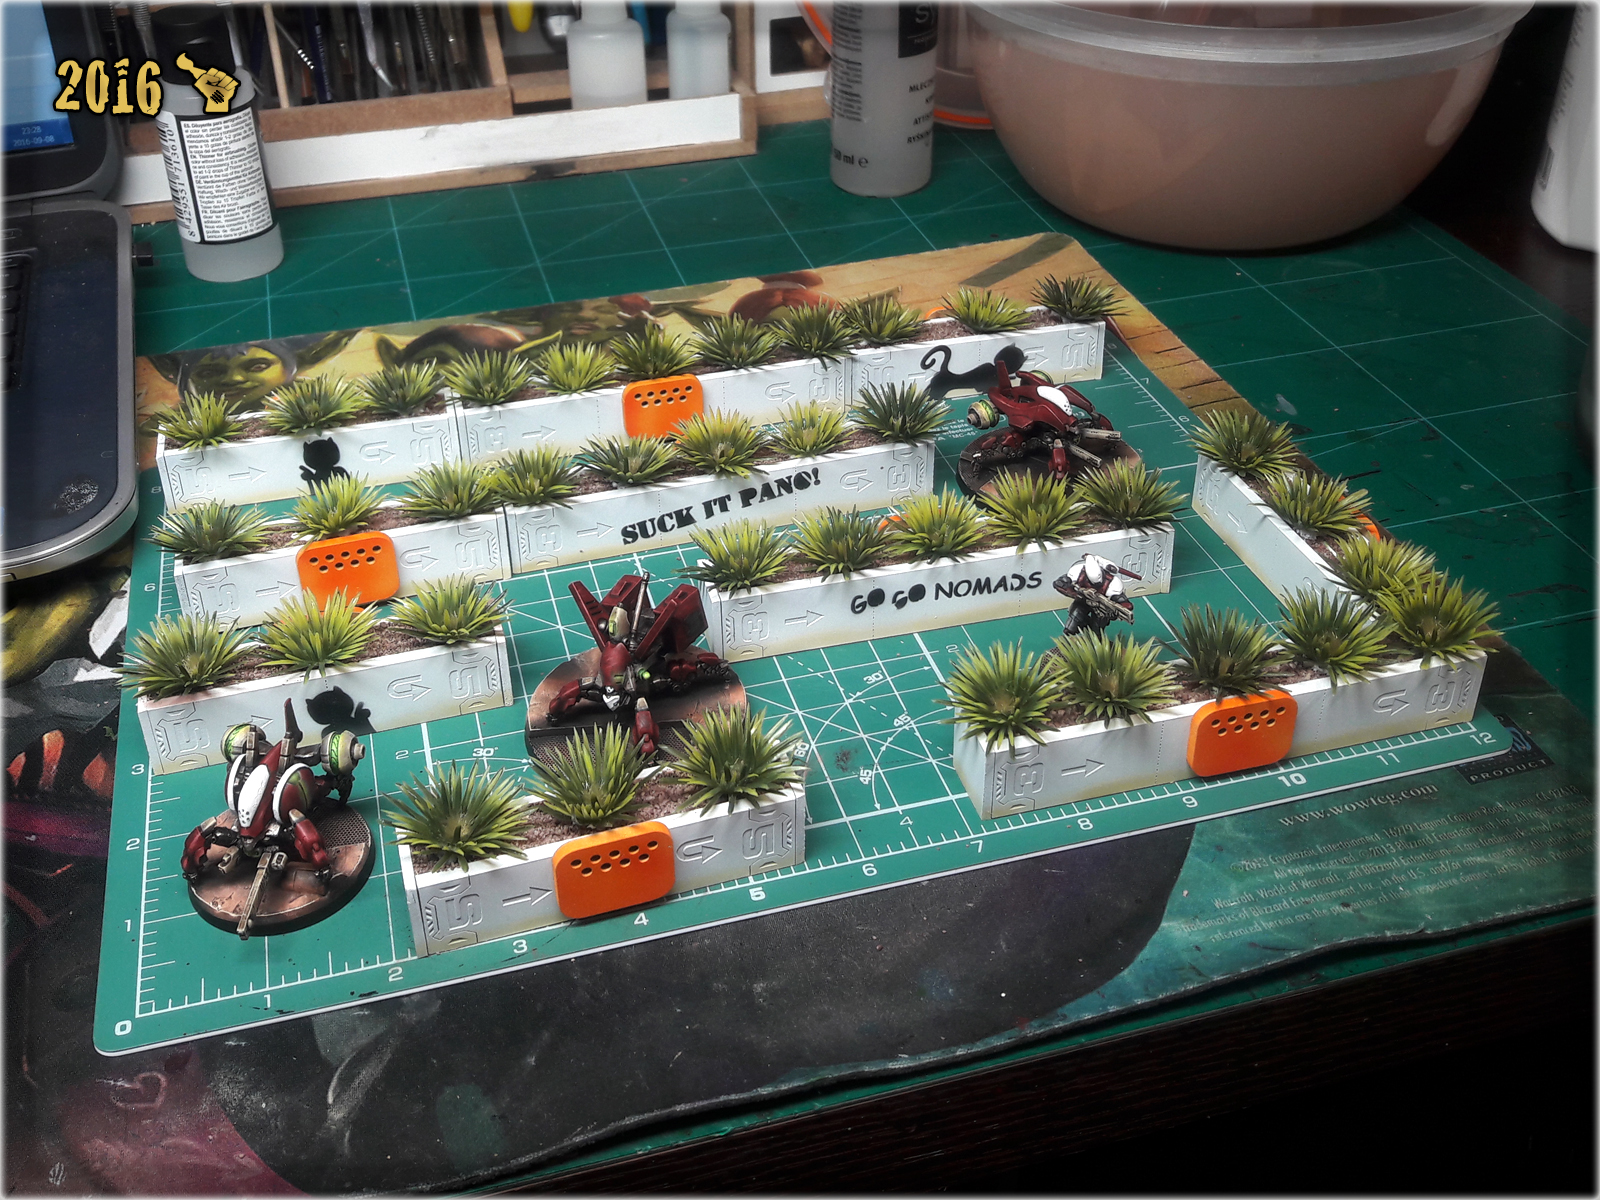
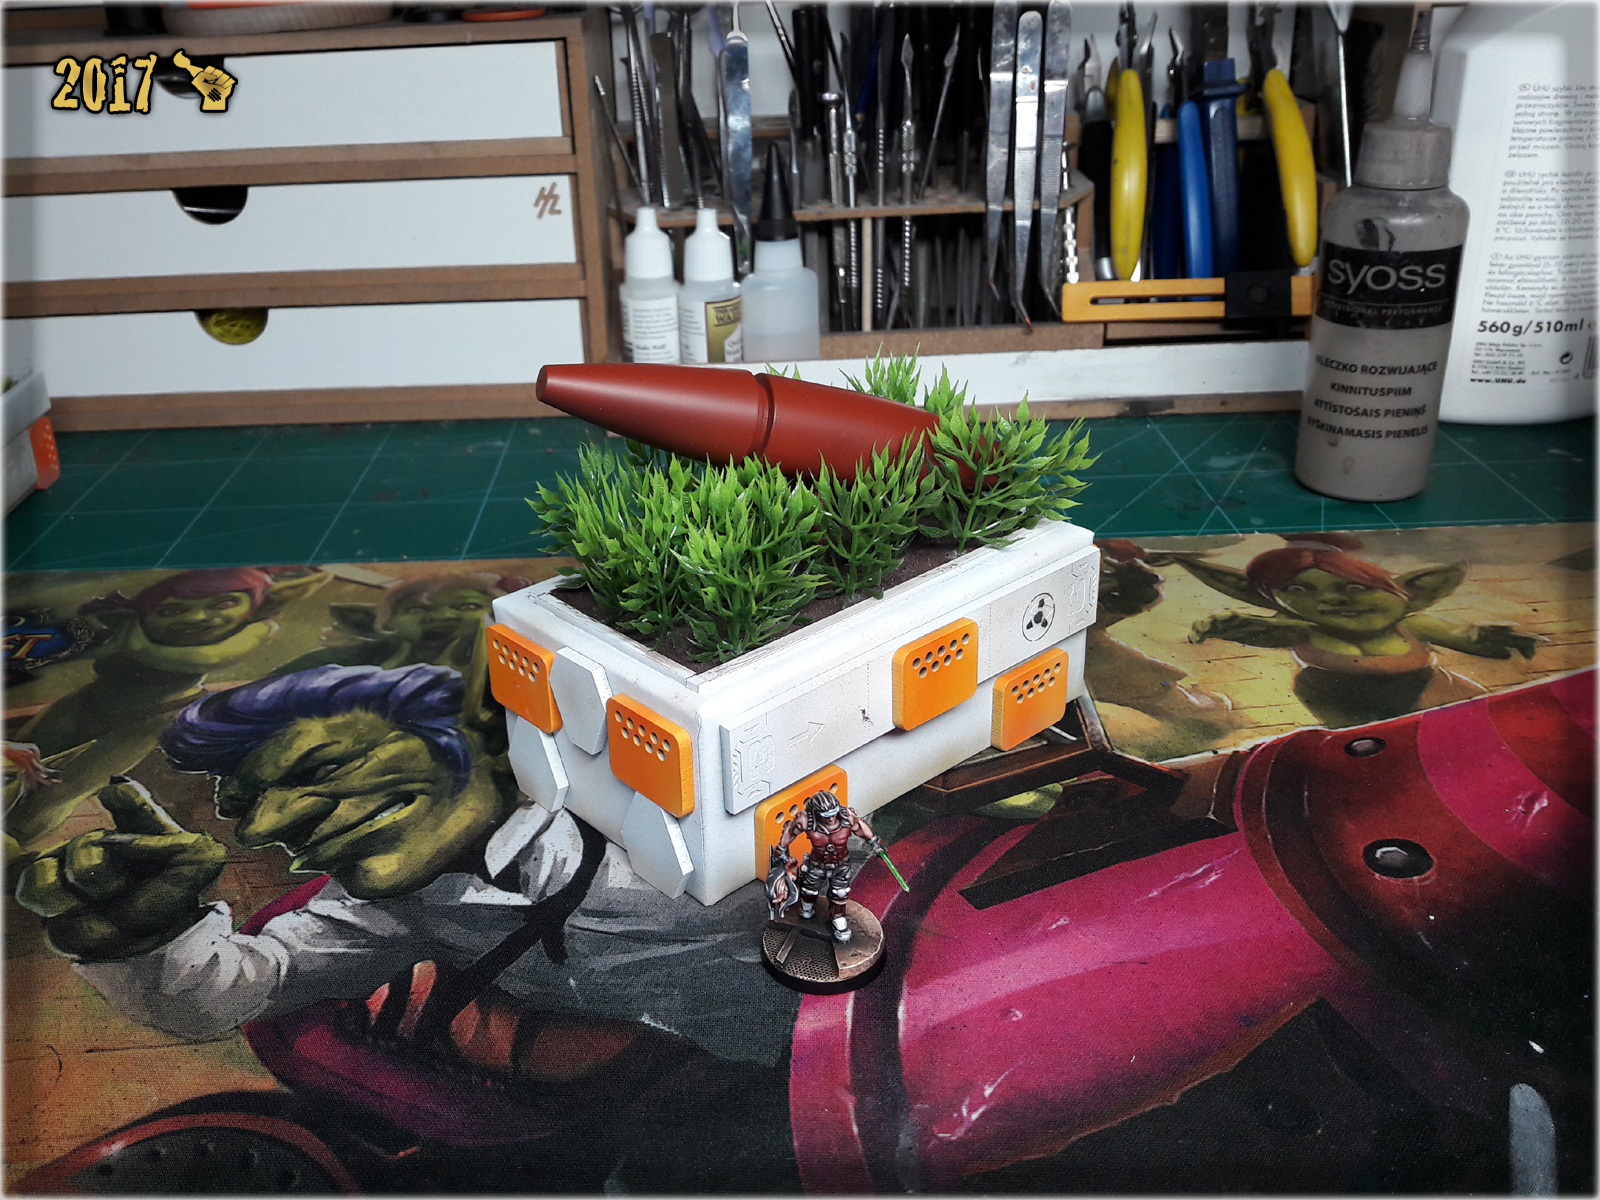
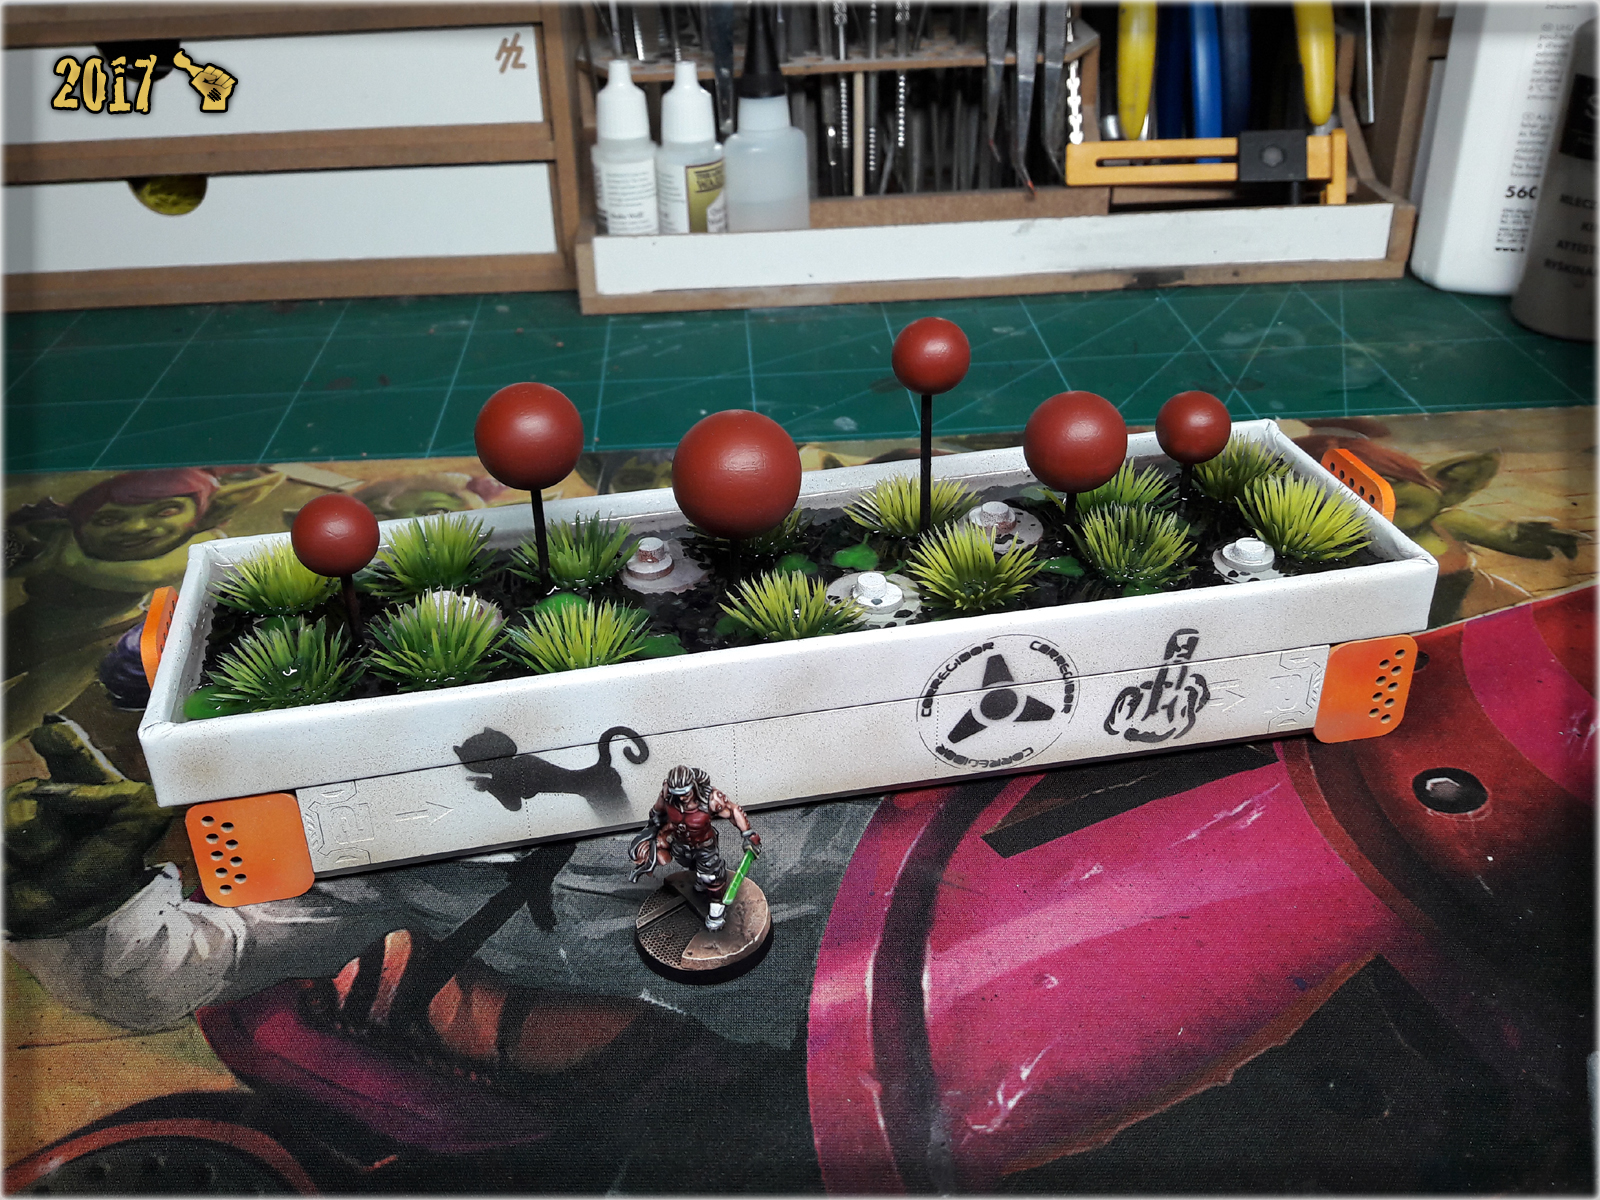
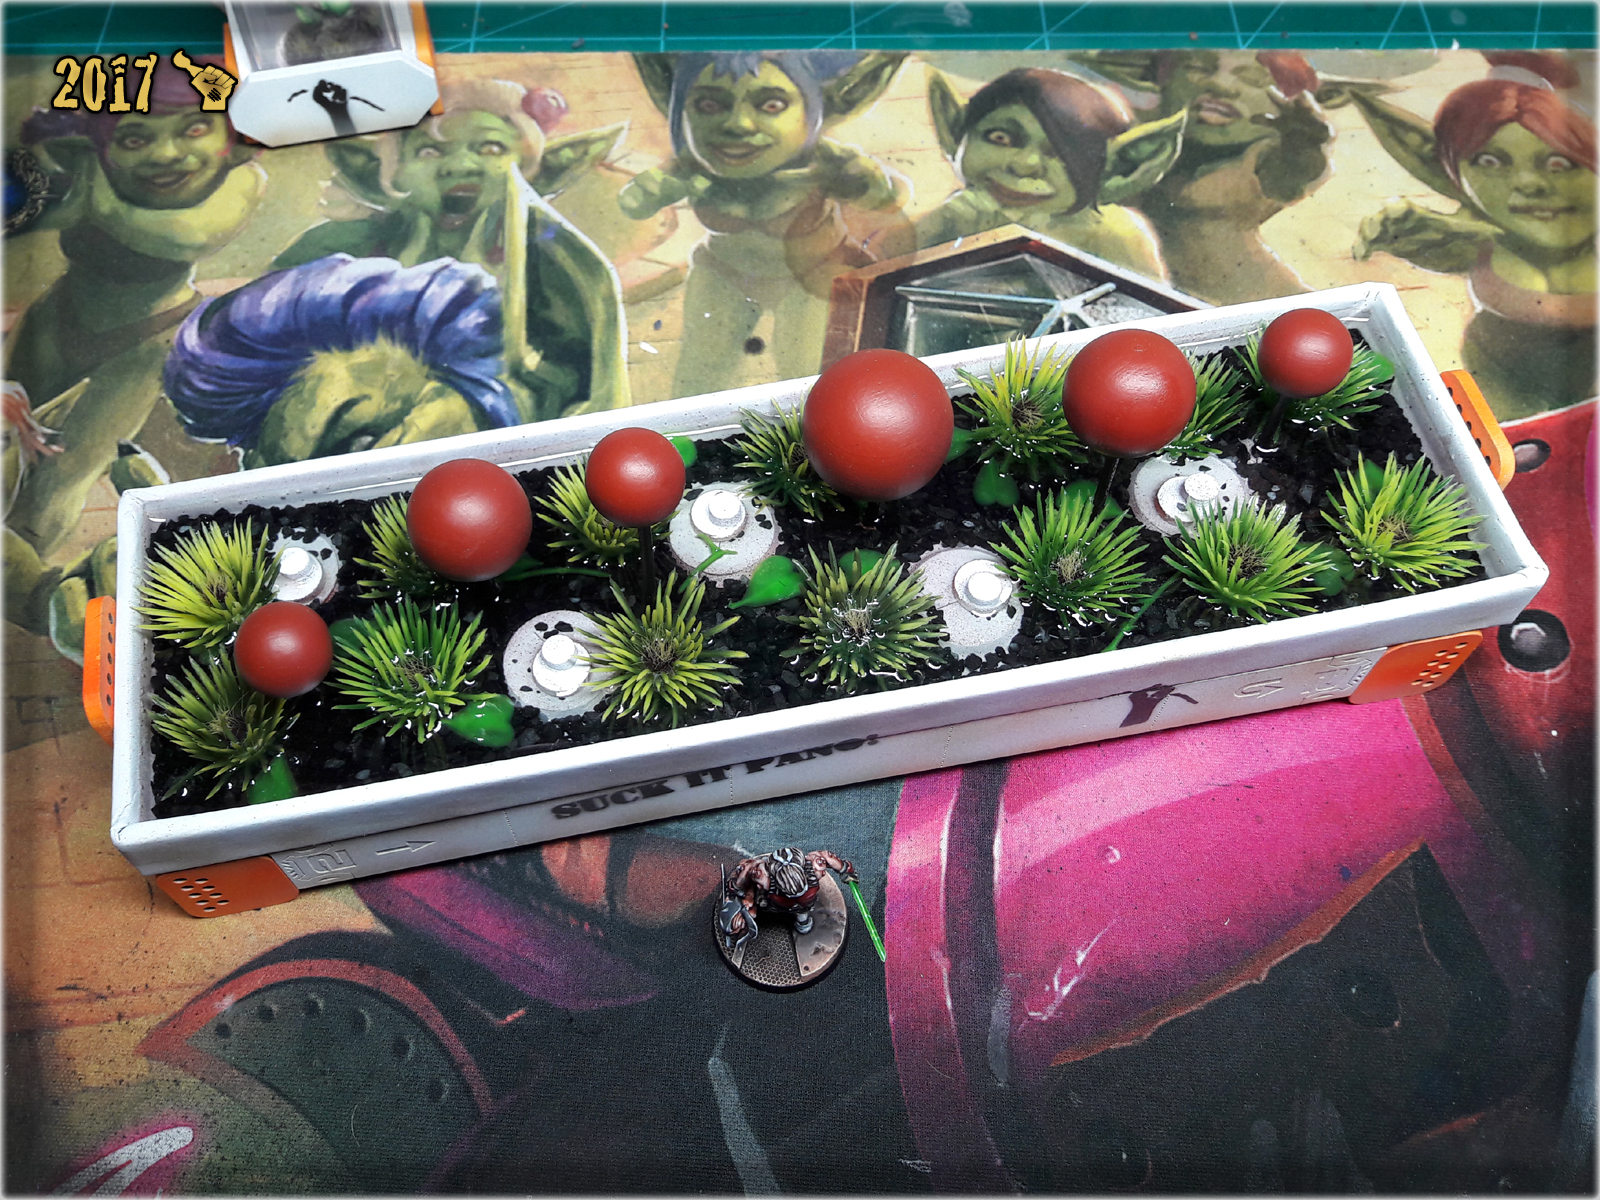
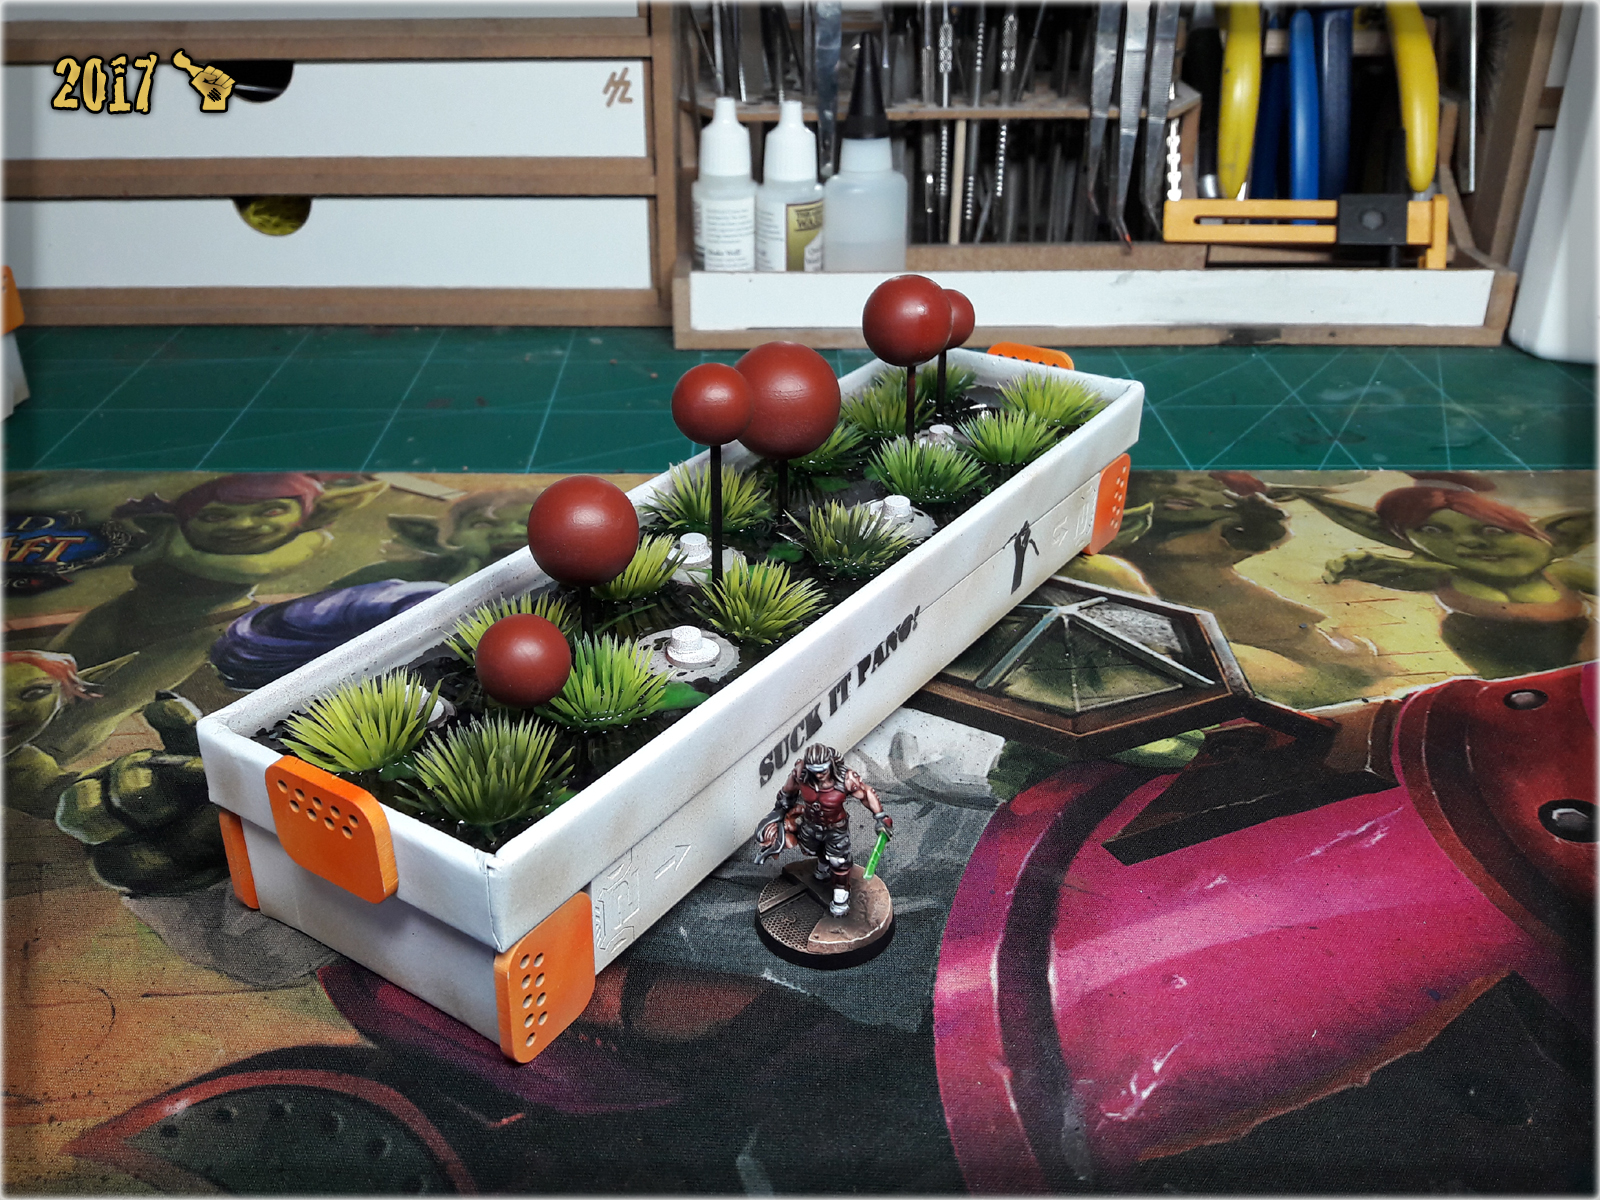
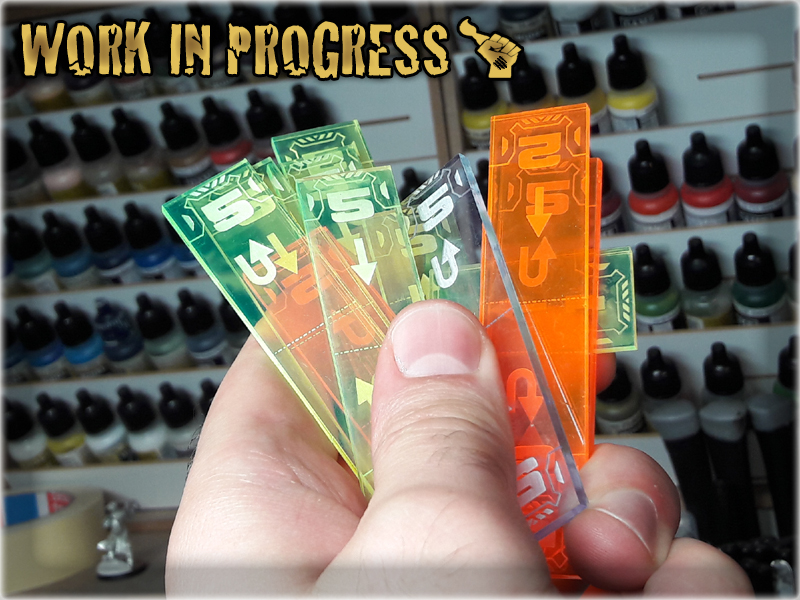
Made with playability in mind, these low planters are perfect to fill my choosen theme of white/orange/green scenery. They fit both at the ground level and in the rooftops. I made these using pleksi rulers to provide detail, while the rest is just plasticard cut to fit the empty spaces. The visuals vere enchanced by plants and HDF ‘orange’ pieces.
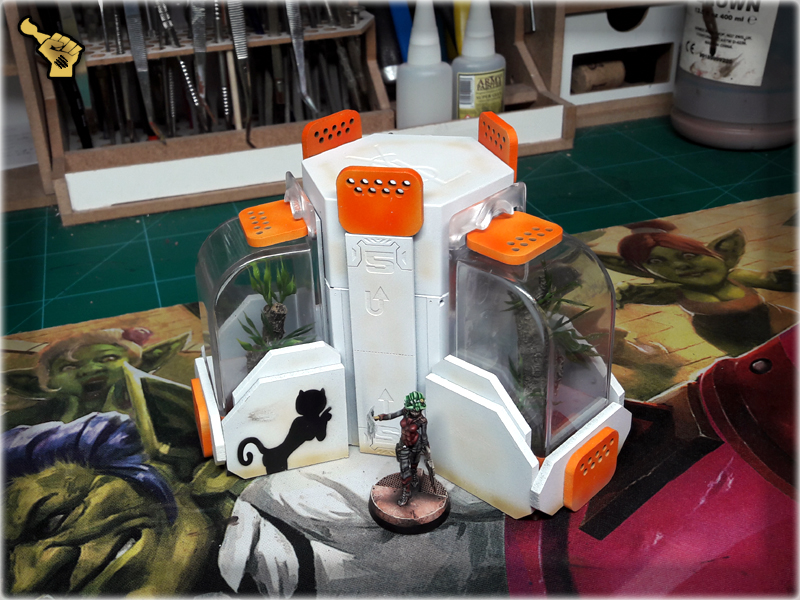
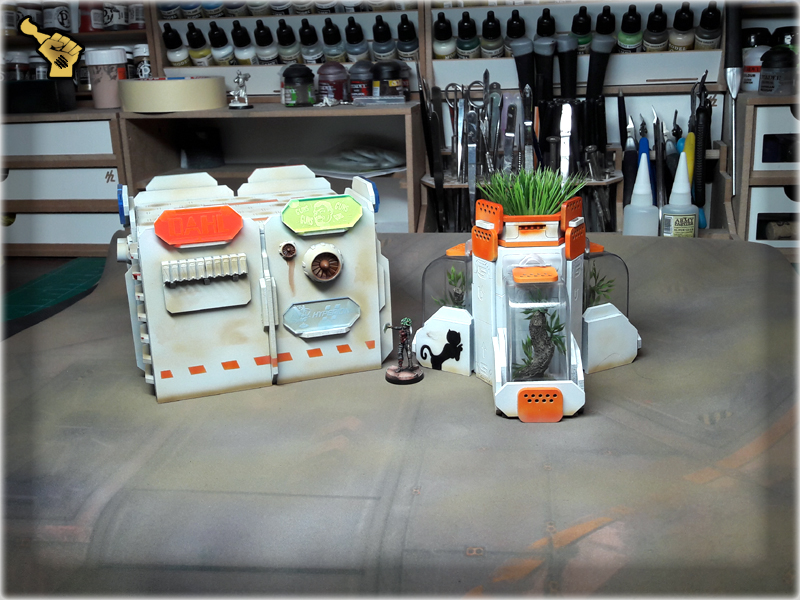
This plant compartment module is a pearl among the scenery pieces I’ve created lately. I’m really happy with how it came out. To think that I struggled for almost a year before I decided how to use two Yves Saint Laurent caps. But let’s get to the way these items (there are actually two identical scenery pieces) came to life. Some time ago I got a set of used up cutter casings from Ekograf to use in my quest of bringing imagination to reality. My friend Garran was the one to dig these out specially with me in mind (Once again thanks mate!). Once I layed my hands on these fine pieces I knew that something wondrous will come out of them. So I started planning and was quickly drawn to still unused Yves Saint Lauren caps. Their hexagonal shape fit perfectly to The Colony’s theme so I based the entire construction on them. After adding couple of PCV pieces to make the construction higher I used plexi rulers to add detail, then used cutter casings and some HDF leftovers to build particular compartments and mounted them around the central column. For the plants I used a fake Bonsai tree made out of gum. It was to fragile to be used as a standalone scenery piece, but inside the compartments it could easily outlive all the other terrain pieces. So I used glue and some tricks of my own to enchance the vicualts of tree stupms, added fake greenery and mounted these fine looking plants inside the compartments. ‘Orange’ elements followed and themed paint job done the rest. Now I have two LOF blocking pieces of scenery, that provide a lot of cover, fill empty spaces between the buildings and go along with the theme.
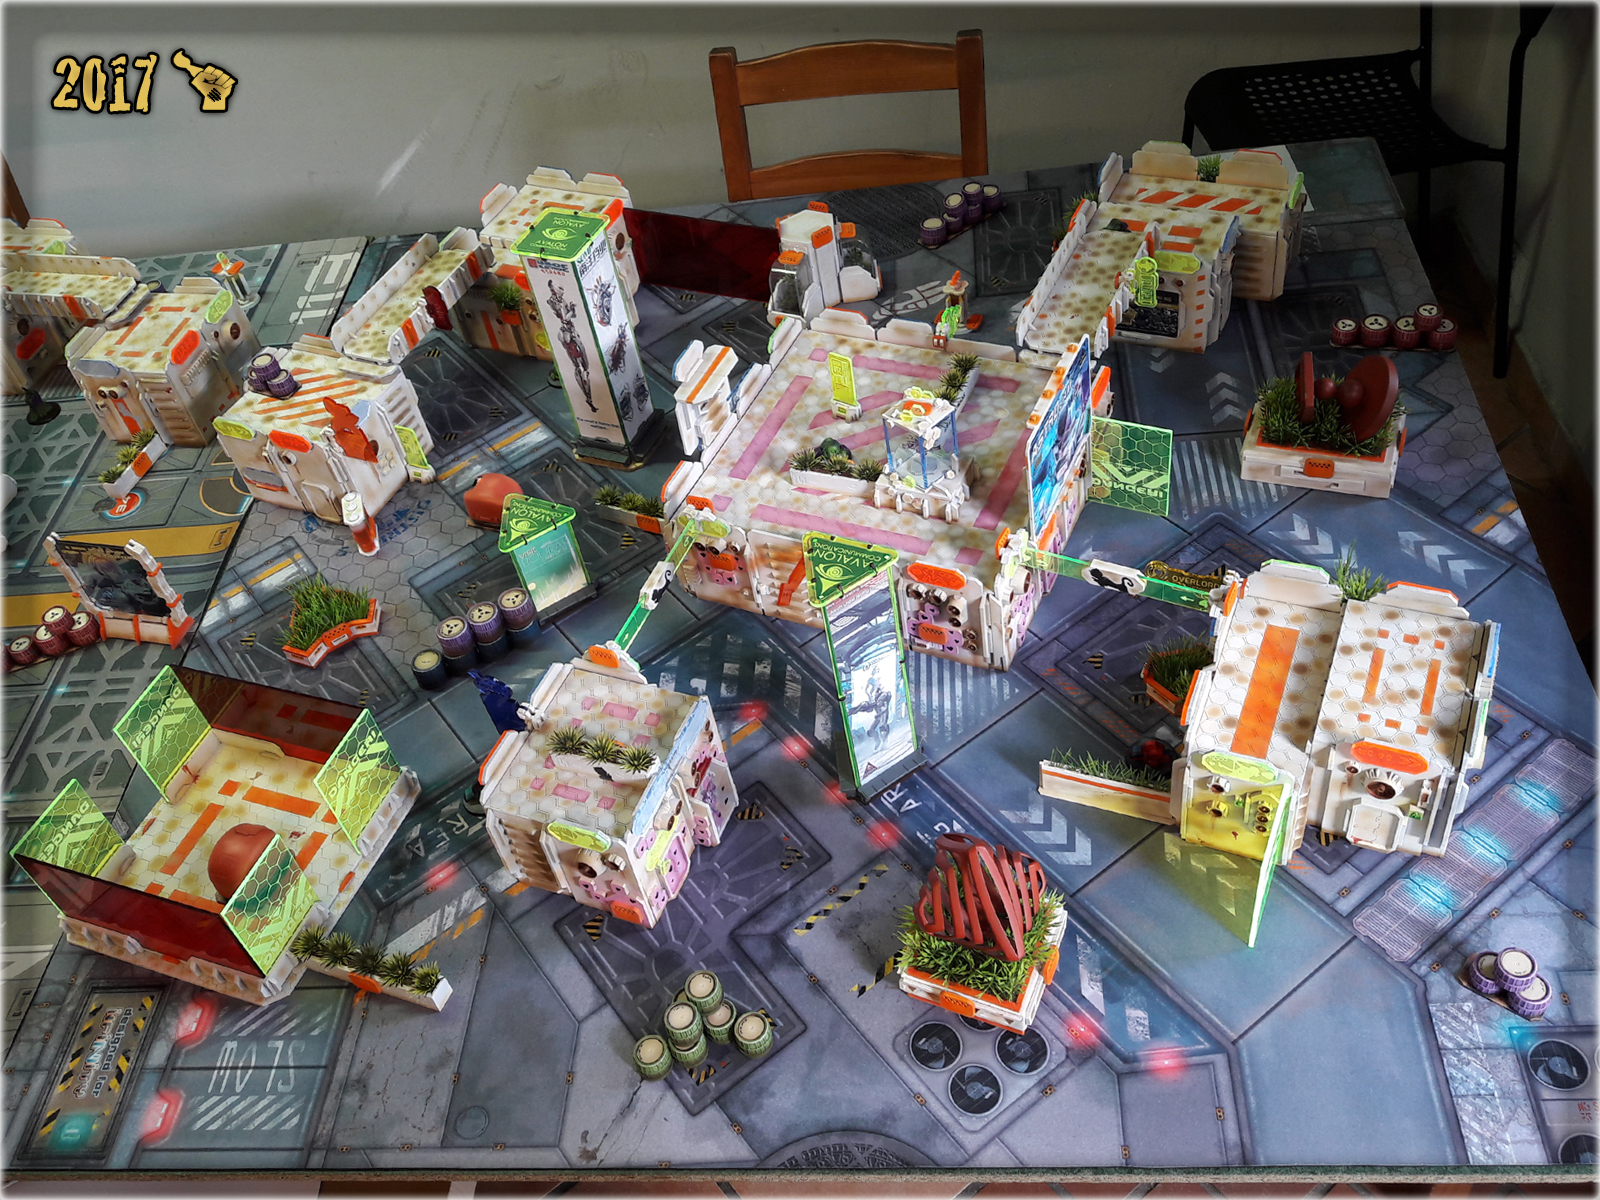
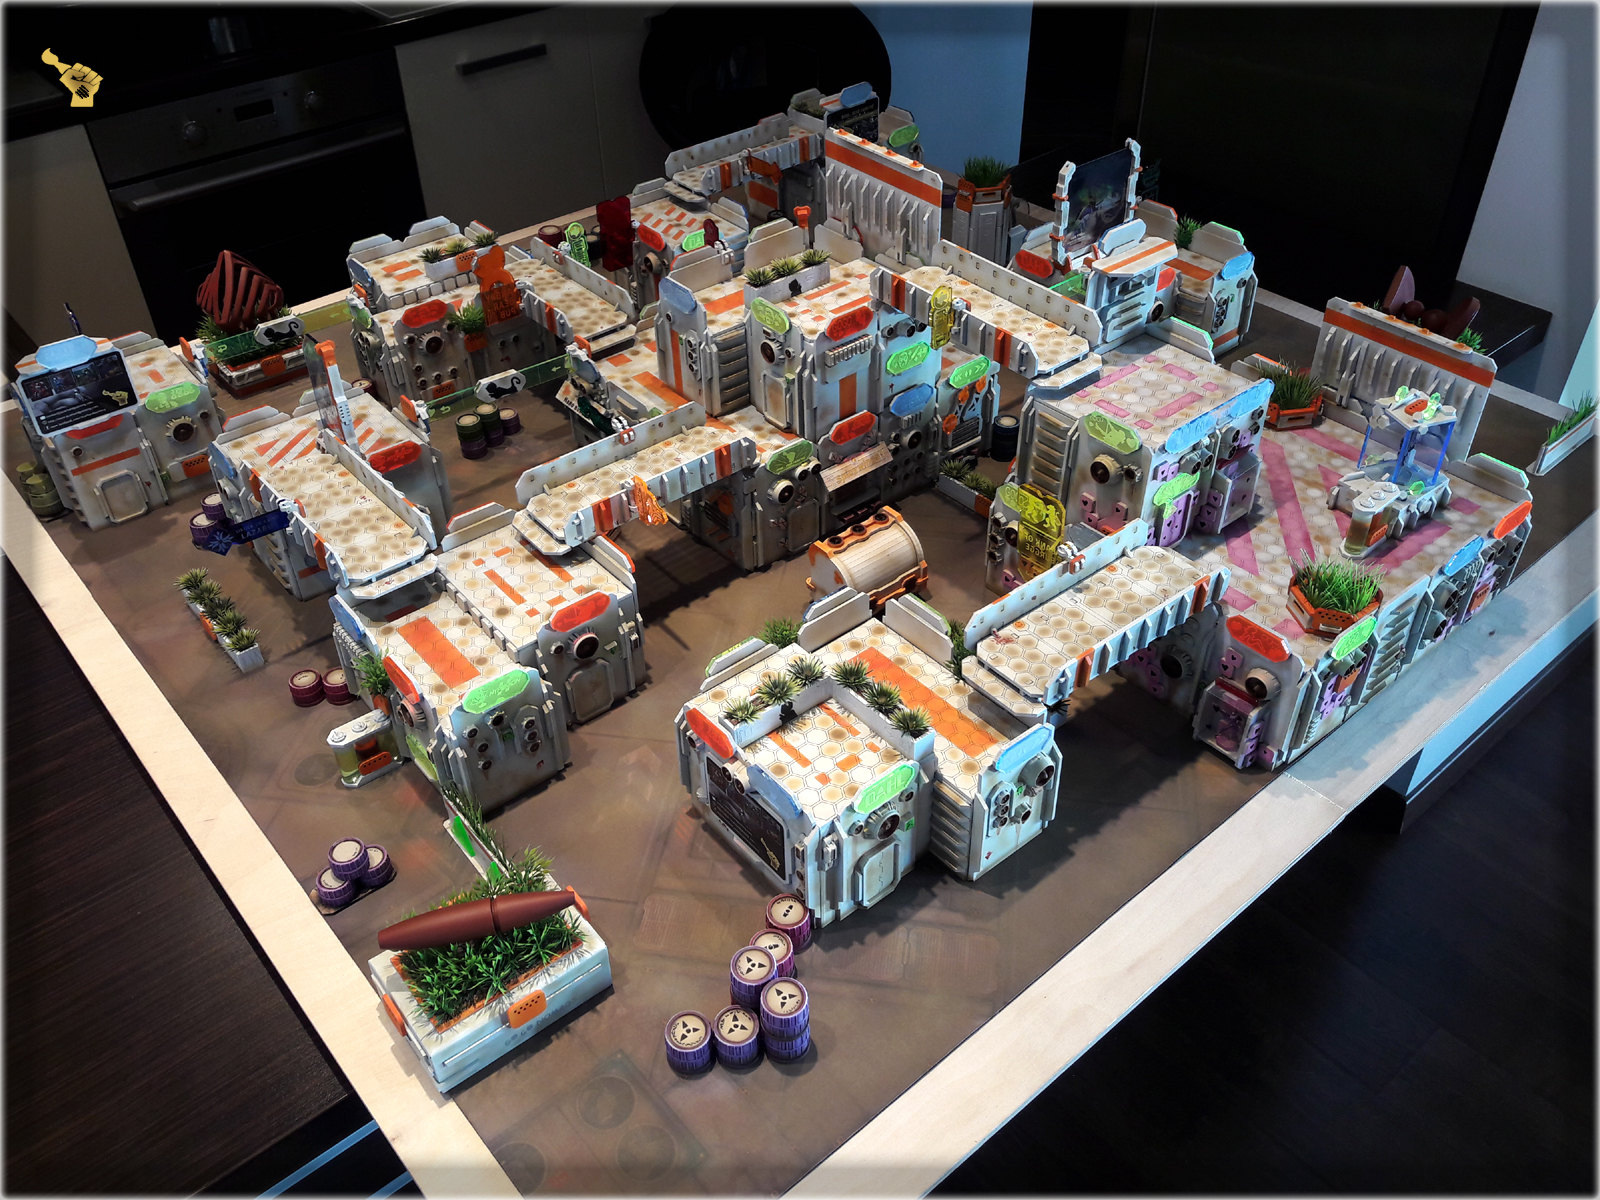
One thing still stood out of The Colony’s theme. The Micro Art Studio’s gaming mat (which I just love and don’t want to ever switch for anything else) was screwing with my colour scheme too much. I’ve figured to try and paint it, using sprays and airbrush. For this purpose I’ve airbrushed the entire mat with Vallejo’s German Red Brown, then used Vallejo’s white primer to lighten some spots and finished with Games Workshop’s Zandri Dust primer spray. Once the last layer was dry I moisted the gaming mat and used a piece of cloth on it to ensure that no paint will leave marks on my terrain, miniatures and accessories. Must say that MAS’s gaming mat holds the paint perfectly, while keeping it’s previous properties. The picture does not entirely cover the hue but rest assured that now the gaming mat fits perfectly to The Colony.

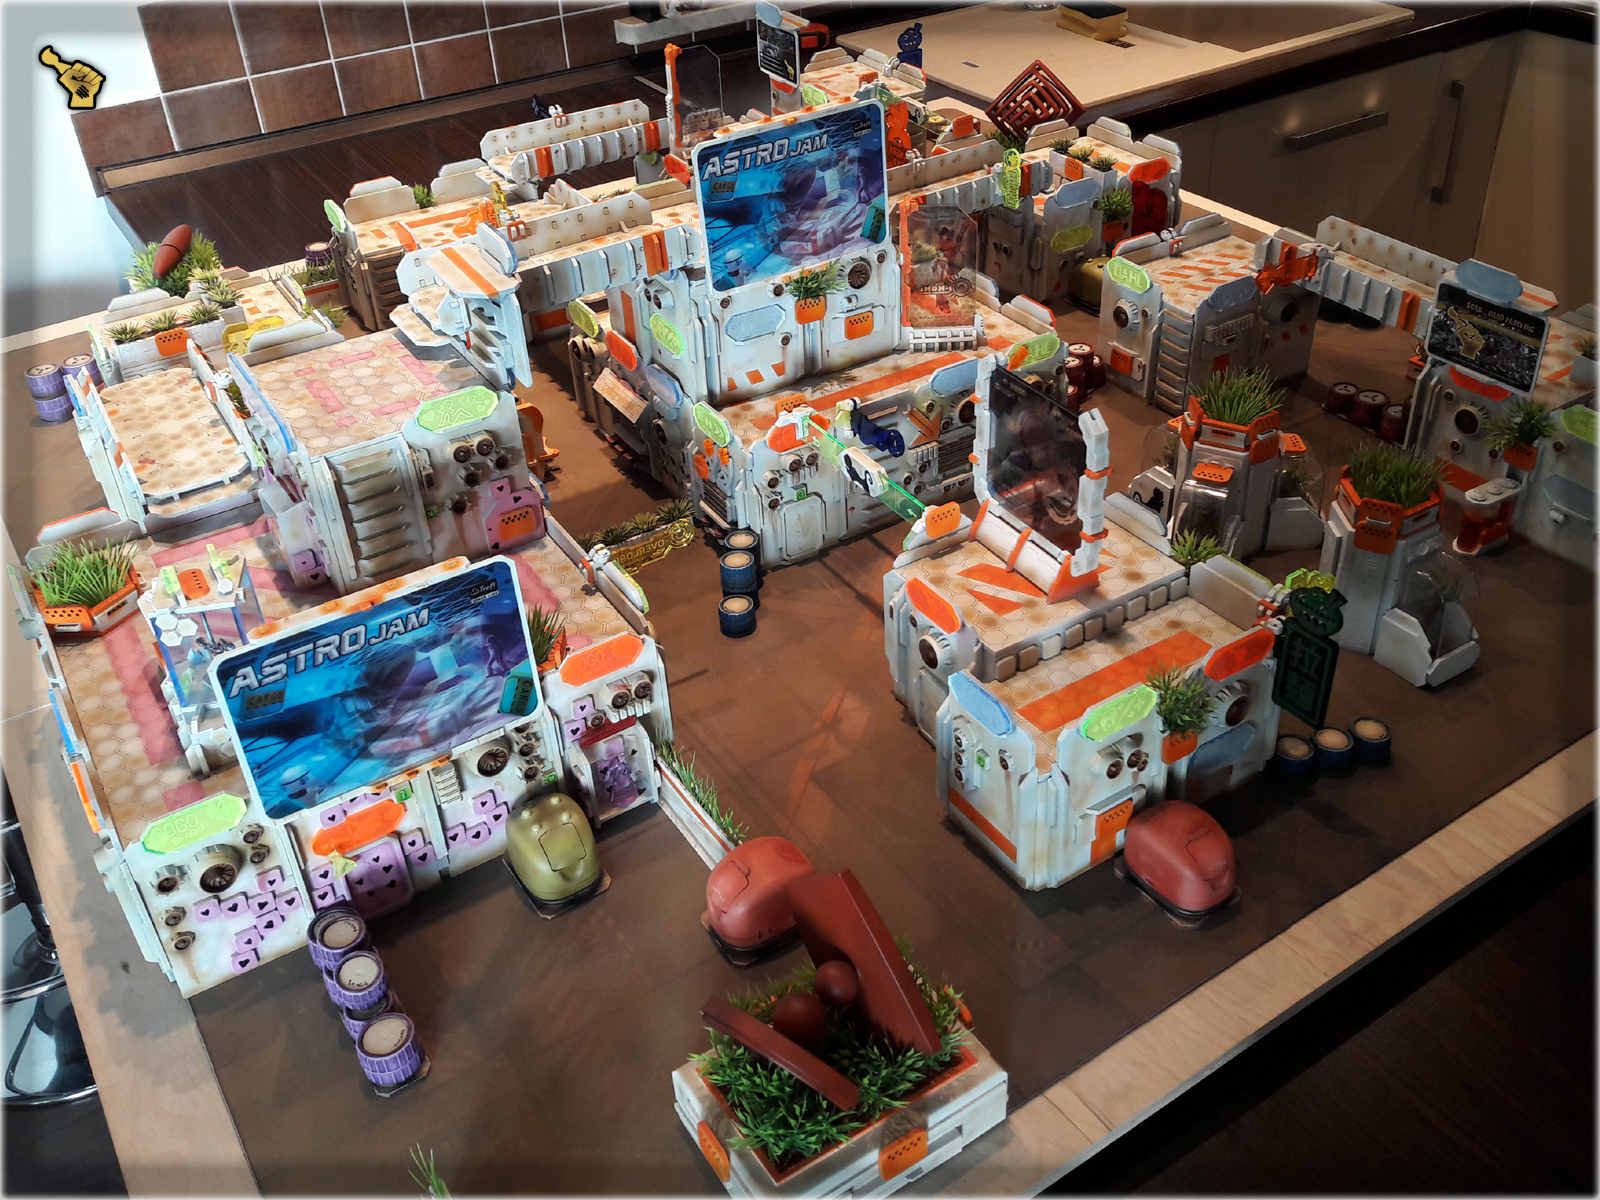
Last four months might not seen me The Colony-centered, still I’ve managed to improove the inicial concept of this gaming table. I’m really glad to be able to transform this:
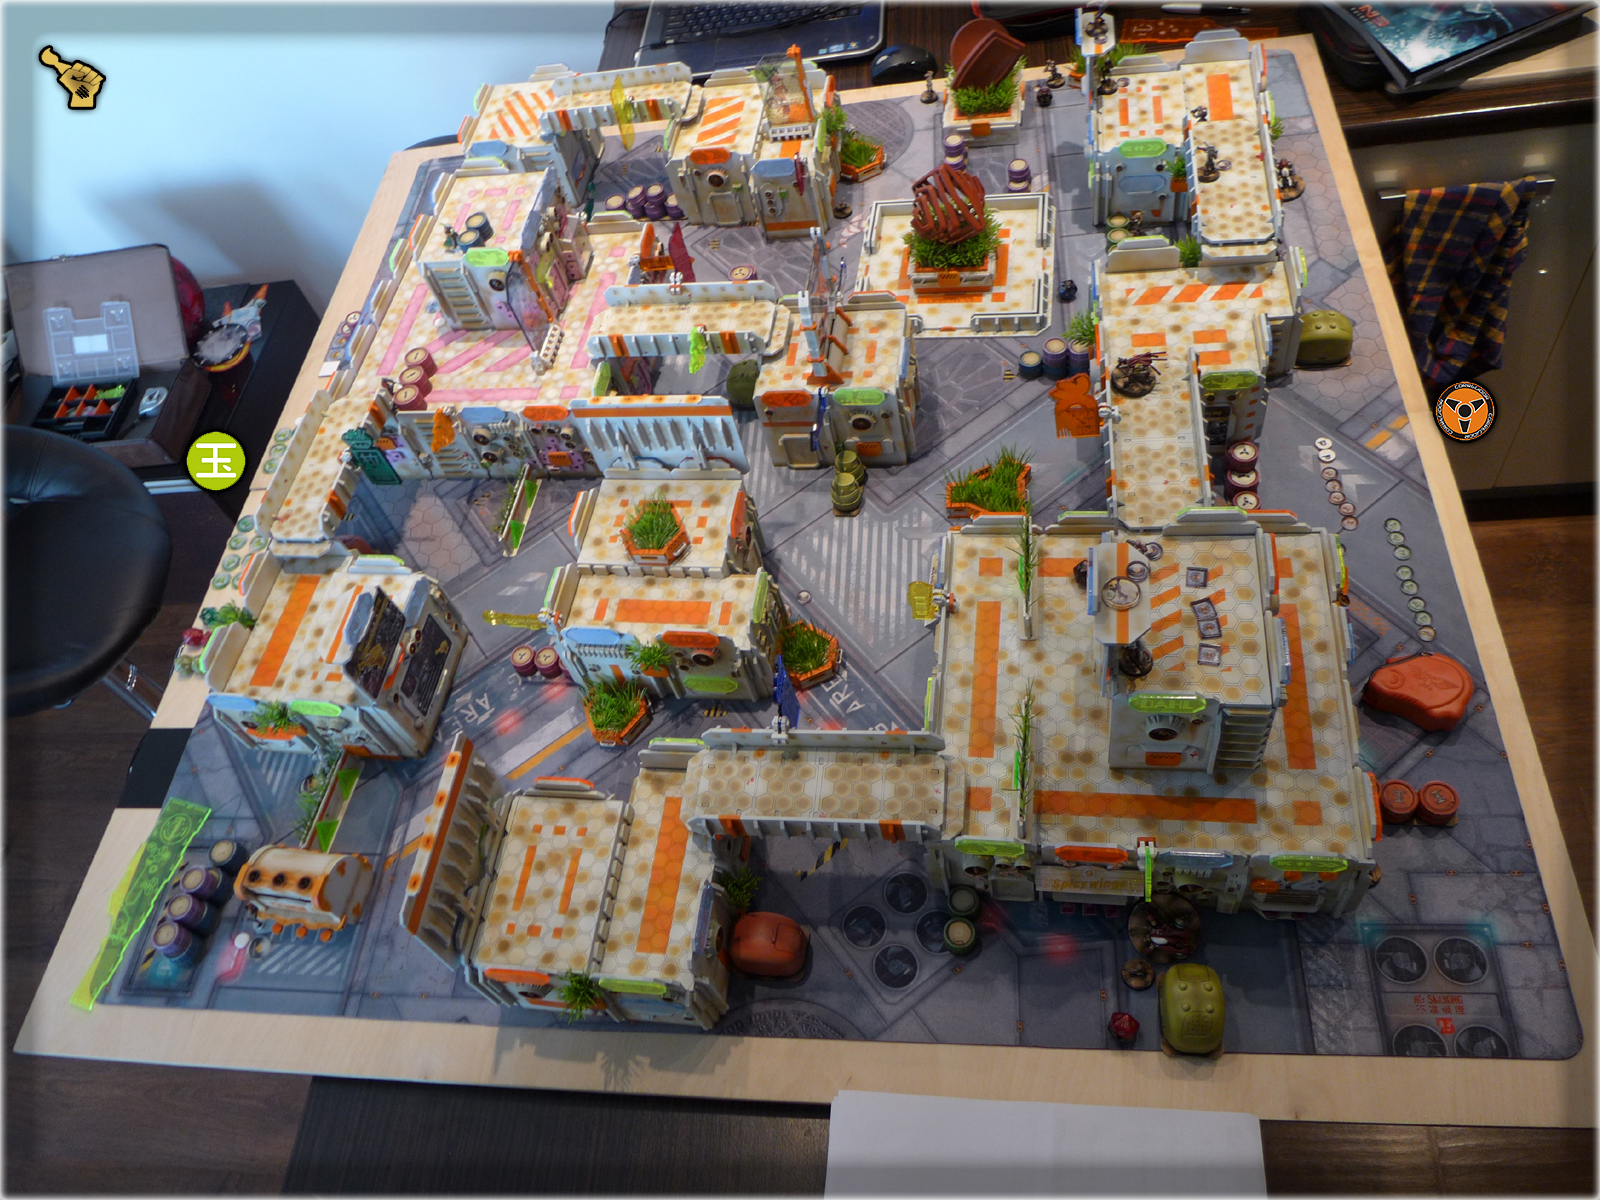
Into this:
Are more upgrades incomming? As long as I live and am into Infinity – that’s not a matter of if, but when. Stay tuned for more of The Colony.

You want to learn more about The Colony? Check out the entire series using THIS TAG