- contact@scarhandpainting.com


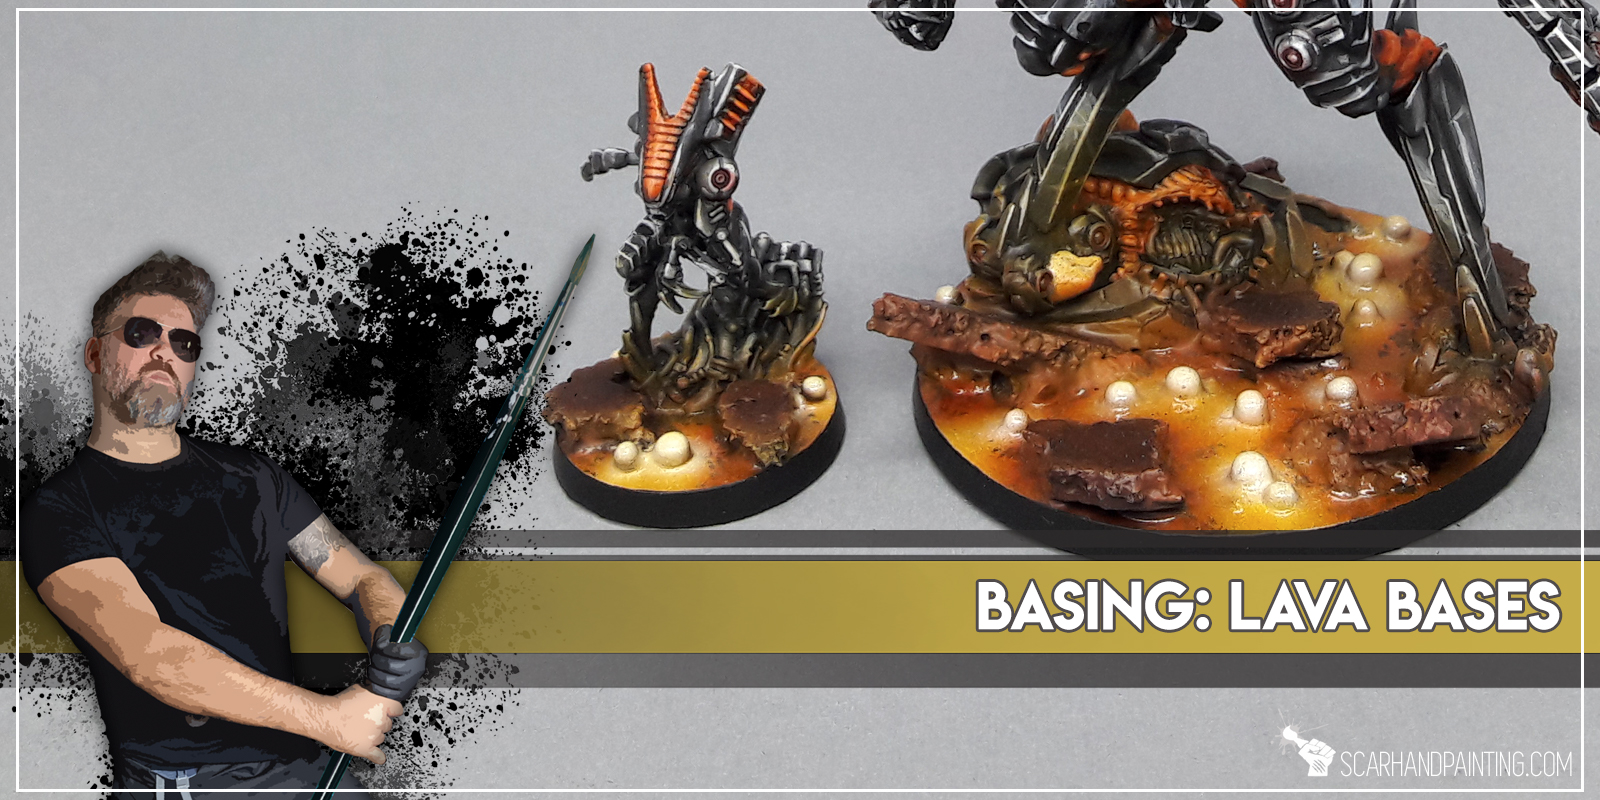
In this easy, step-by-step tutorial I’m going to show you how to create and paint a Lava Bases. I used these bases for Infinity the Game Combined Army – you can see how it turned out at Infinity COMBINED ARMY ‘Witness Me!’ gallery.

**Where I’m from there’s a small paper bag filled with moist absorbsion balls in every shoe box. If you can’t get that, just use some grains or make small balls out of green stuff or even modeling clay.
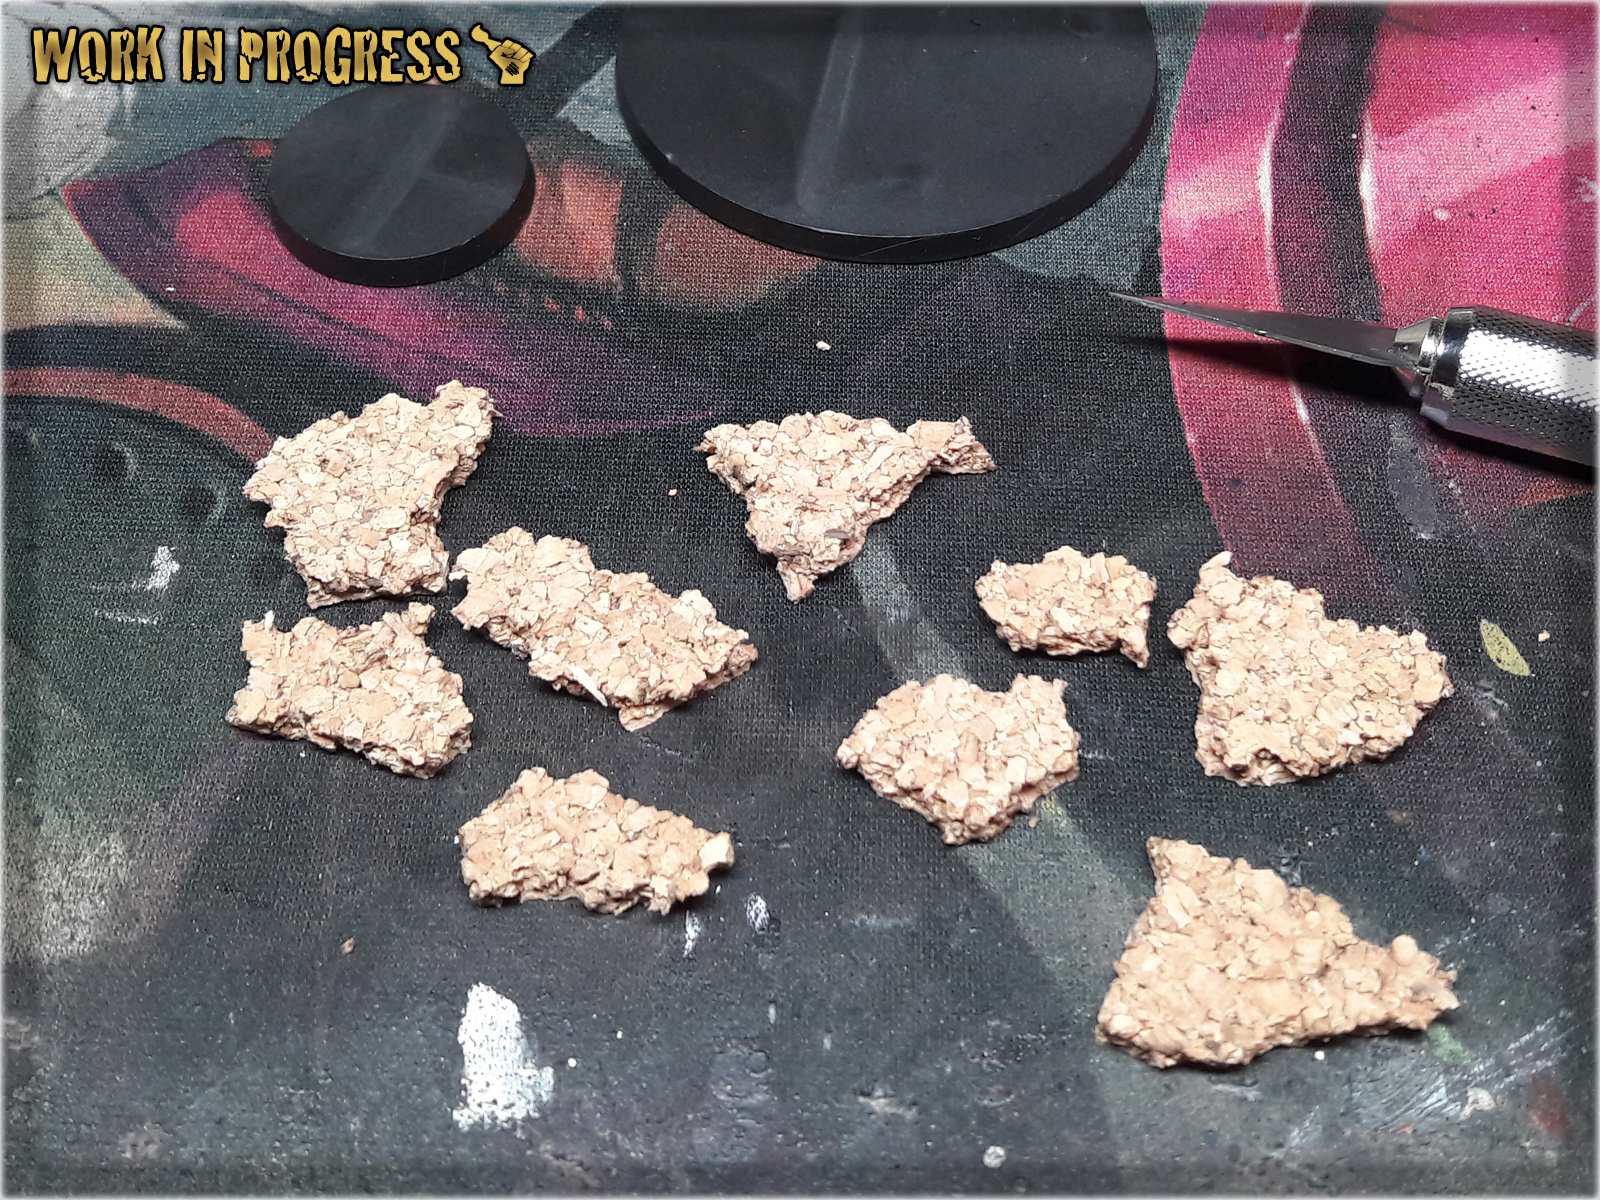
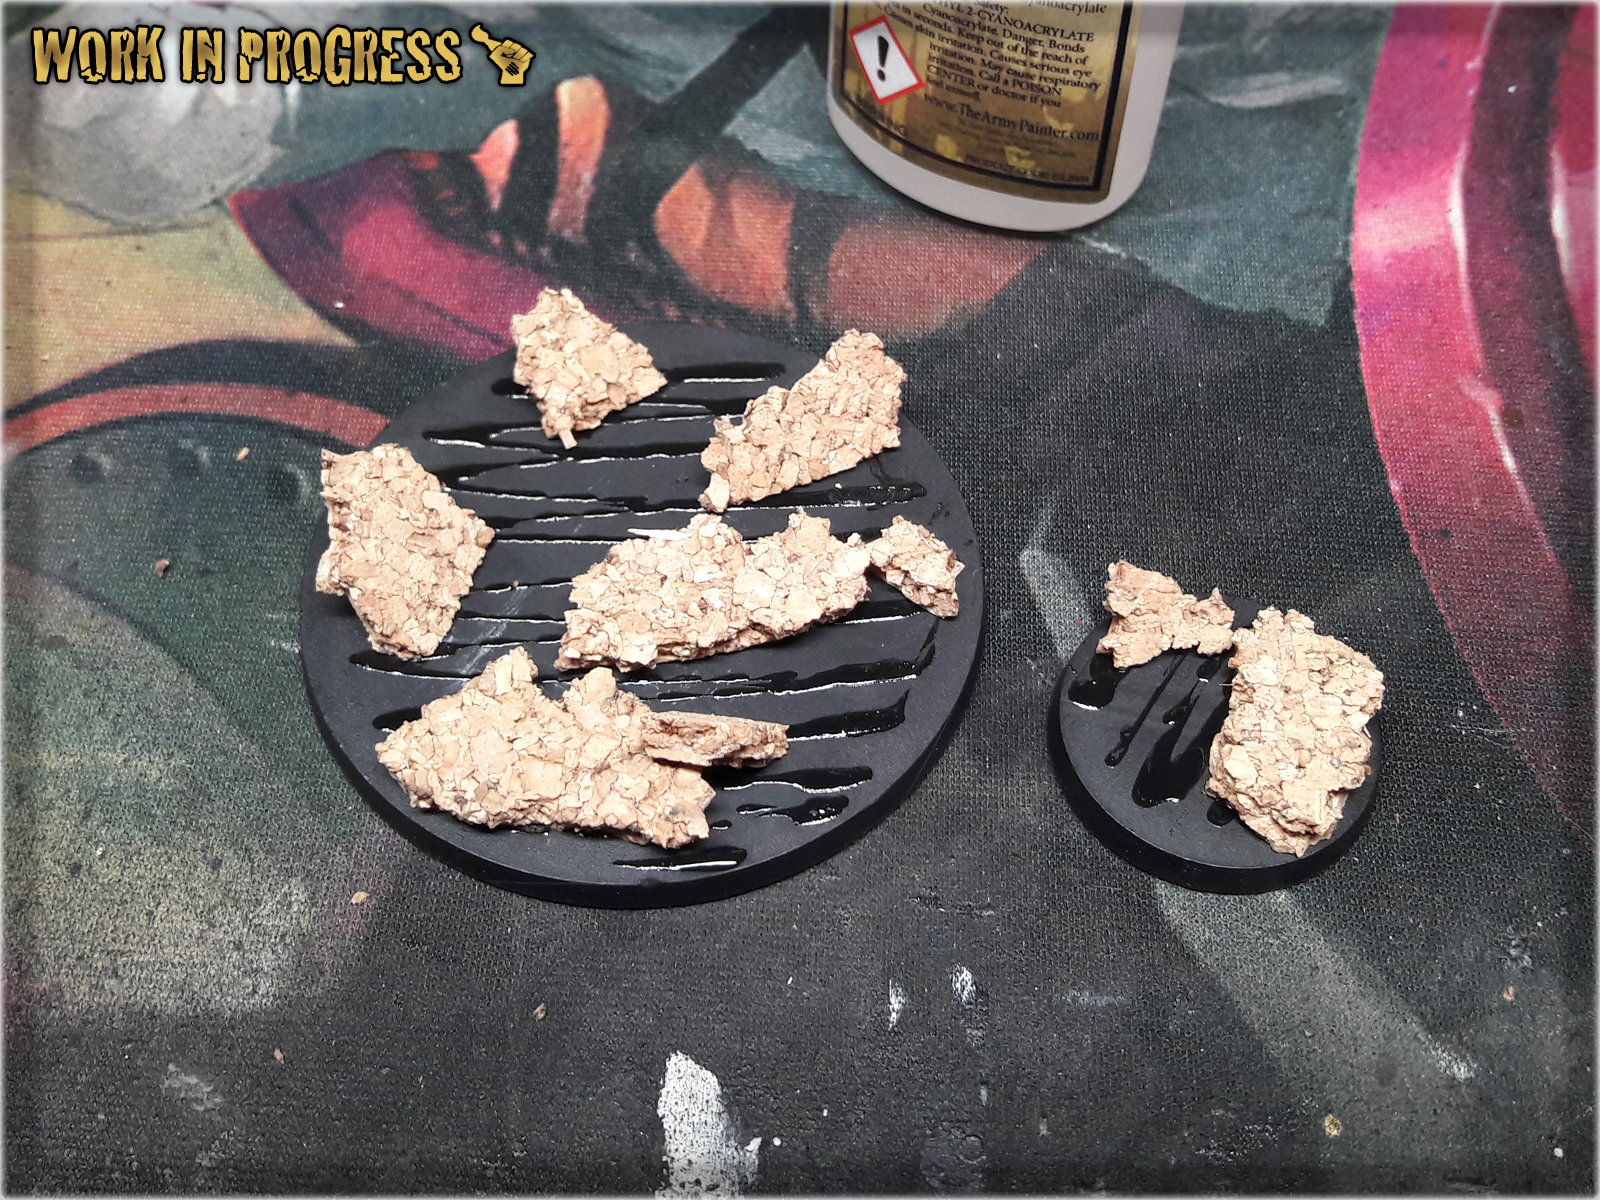
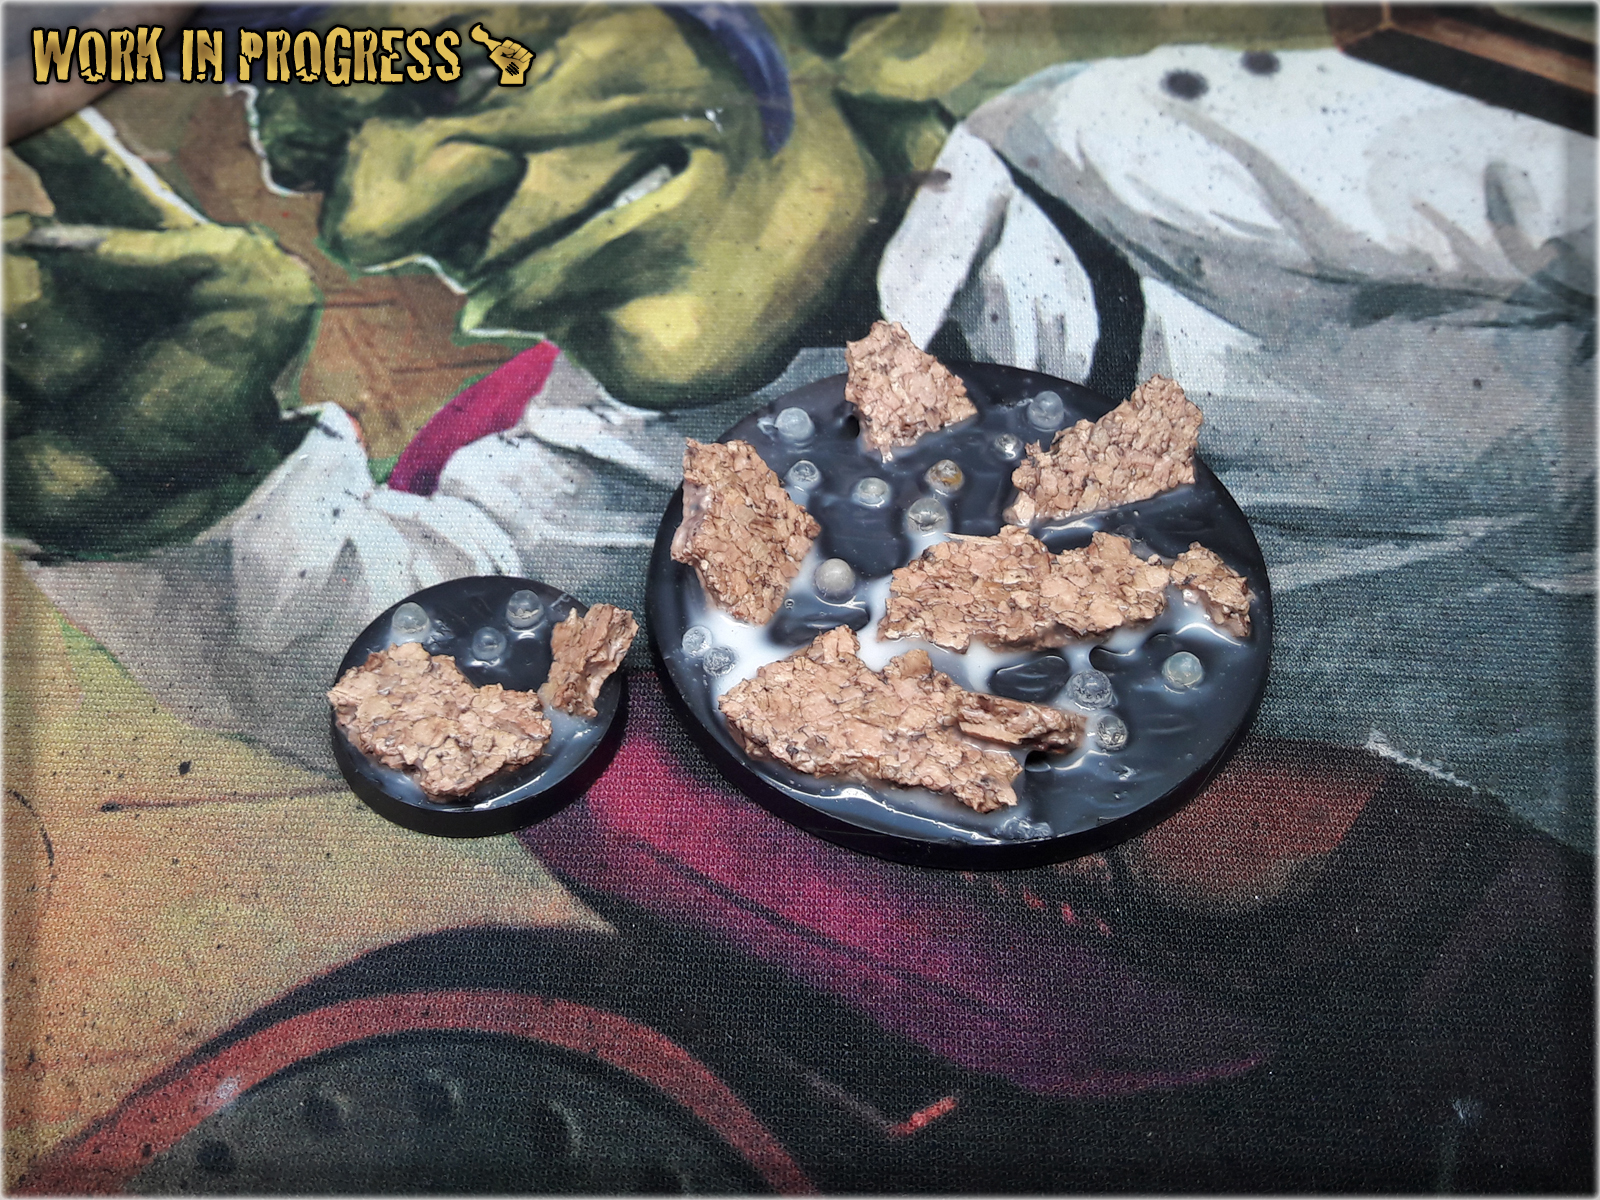
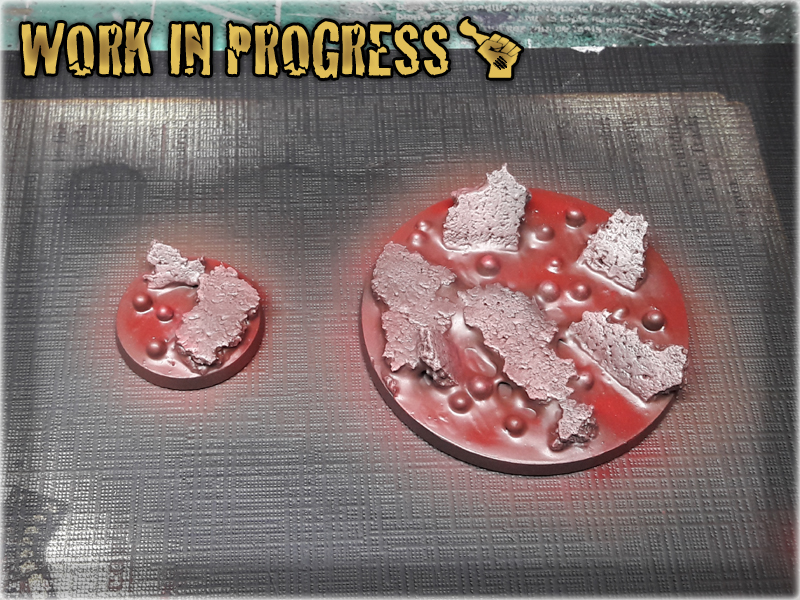
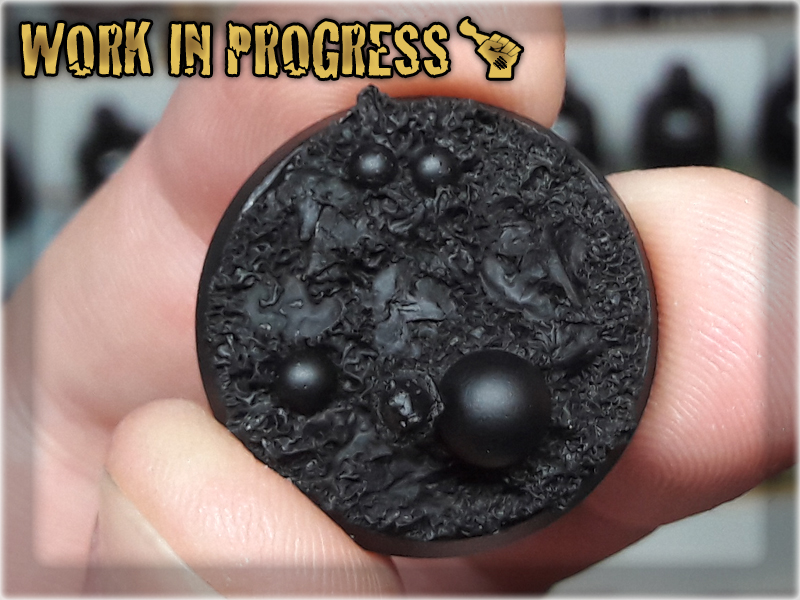
* I started by breaking a piece of Cork into smaller bitz.
* I then applied Super Glue over the bases in a random pattern. No need to be precise here.
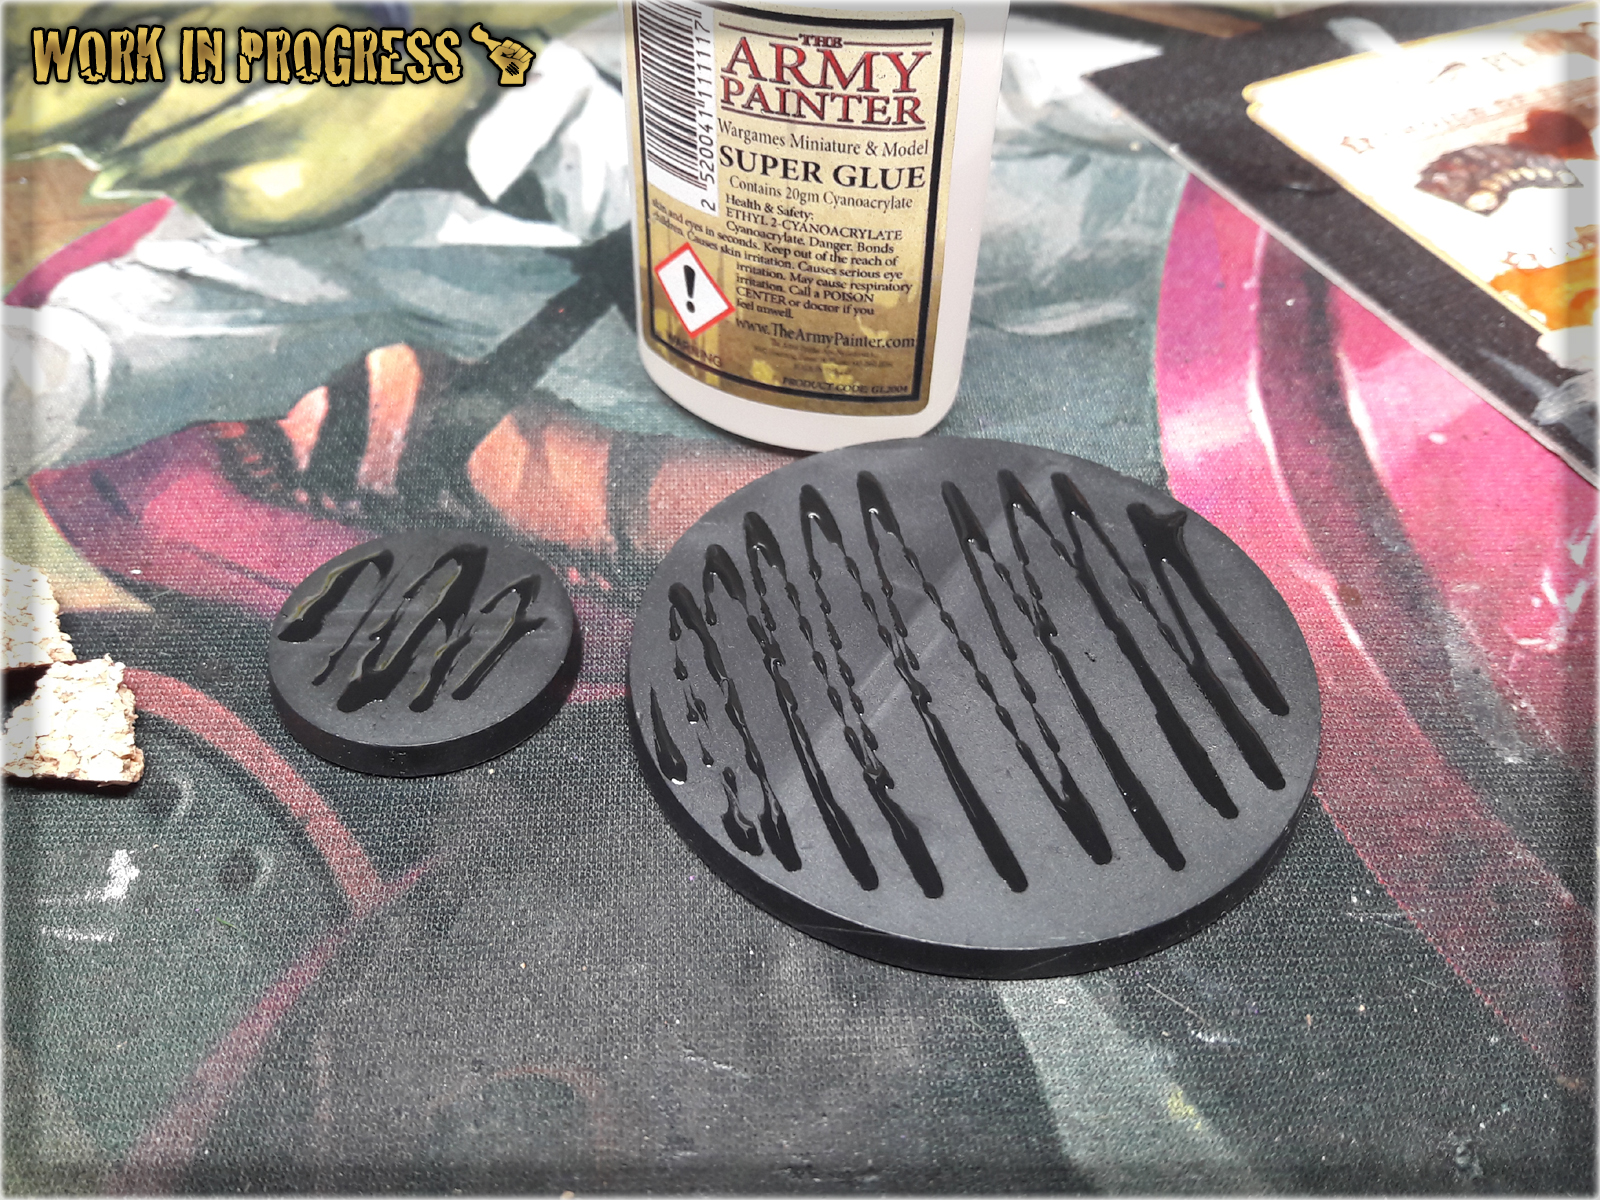
* Pieces of Cork followed to form 'volcanic rocks' and future spots for the miniatures to be mounted on.
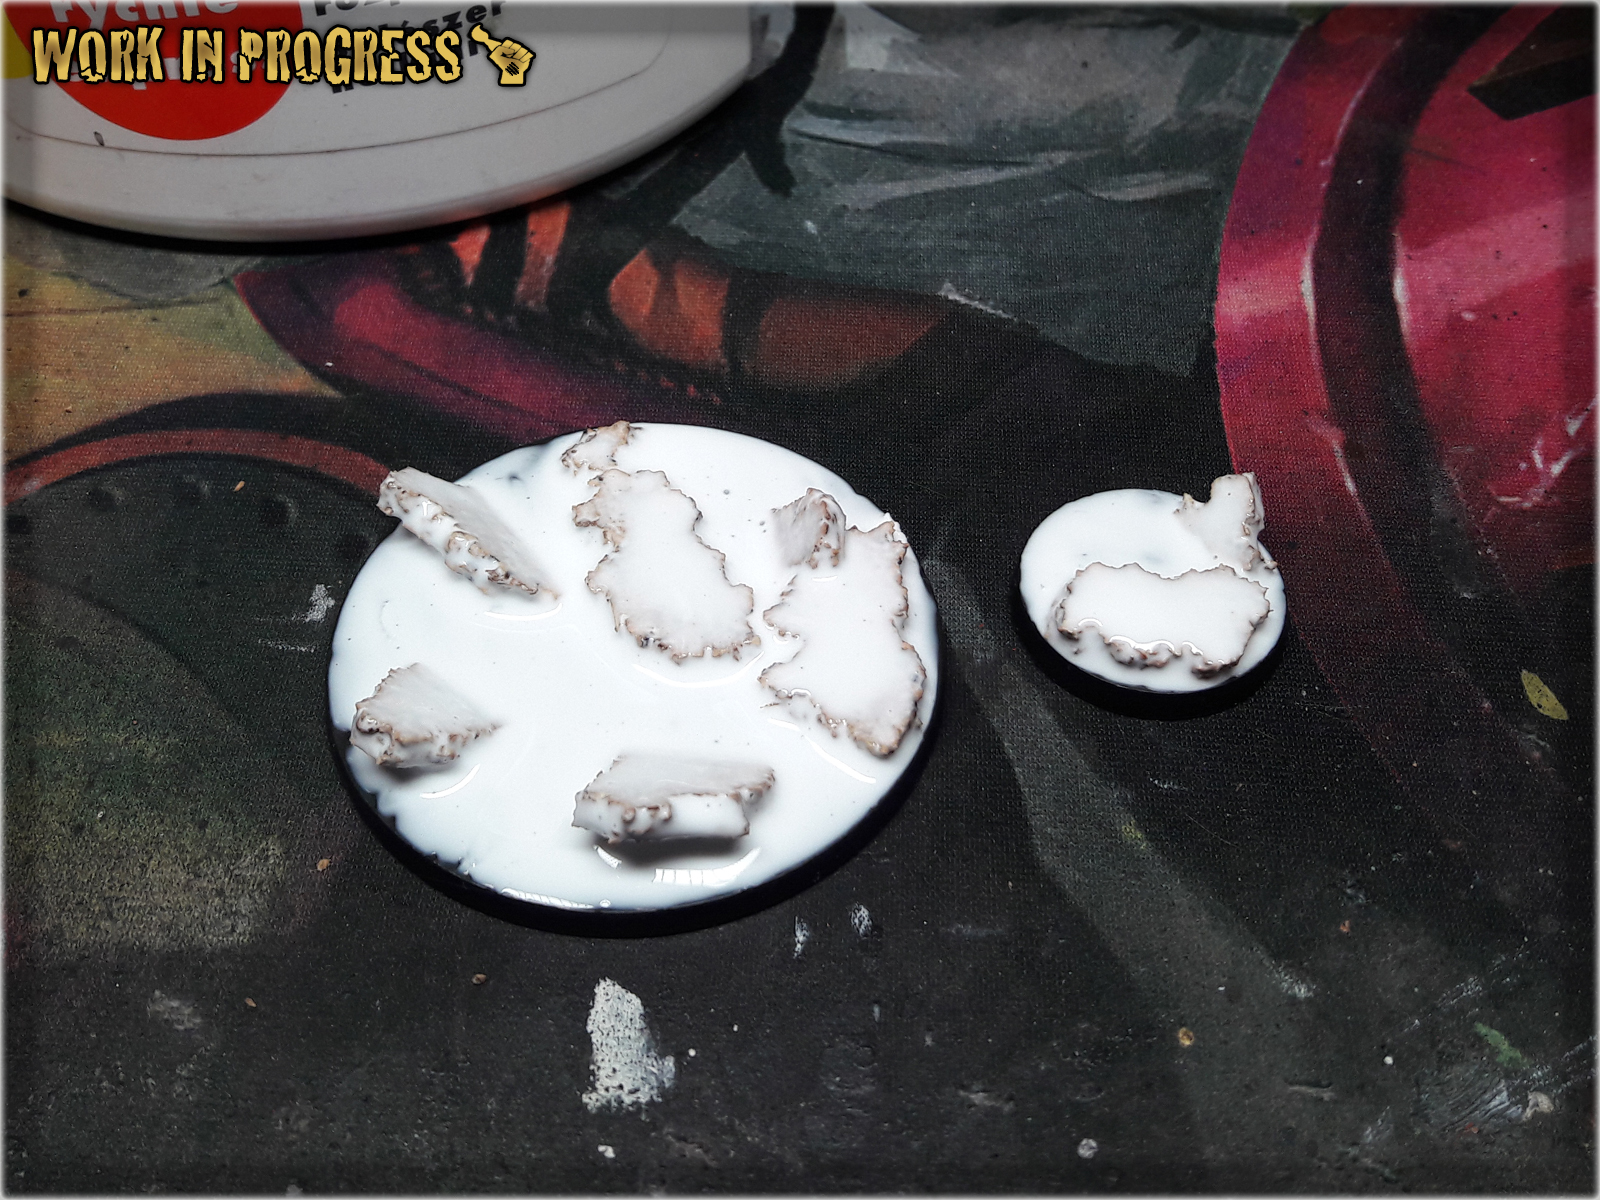
* Once Super Glue dried out I covered entire base with Basing Glue.
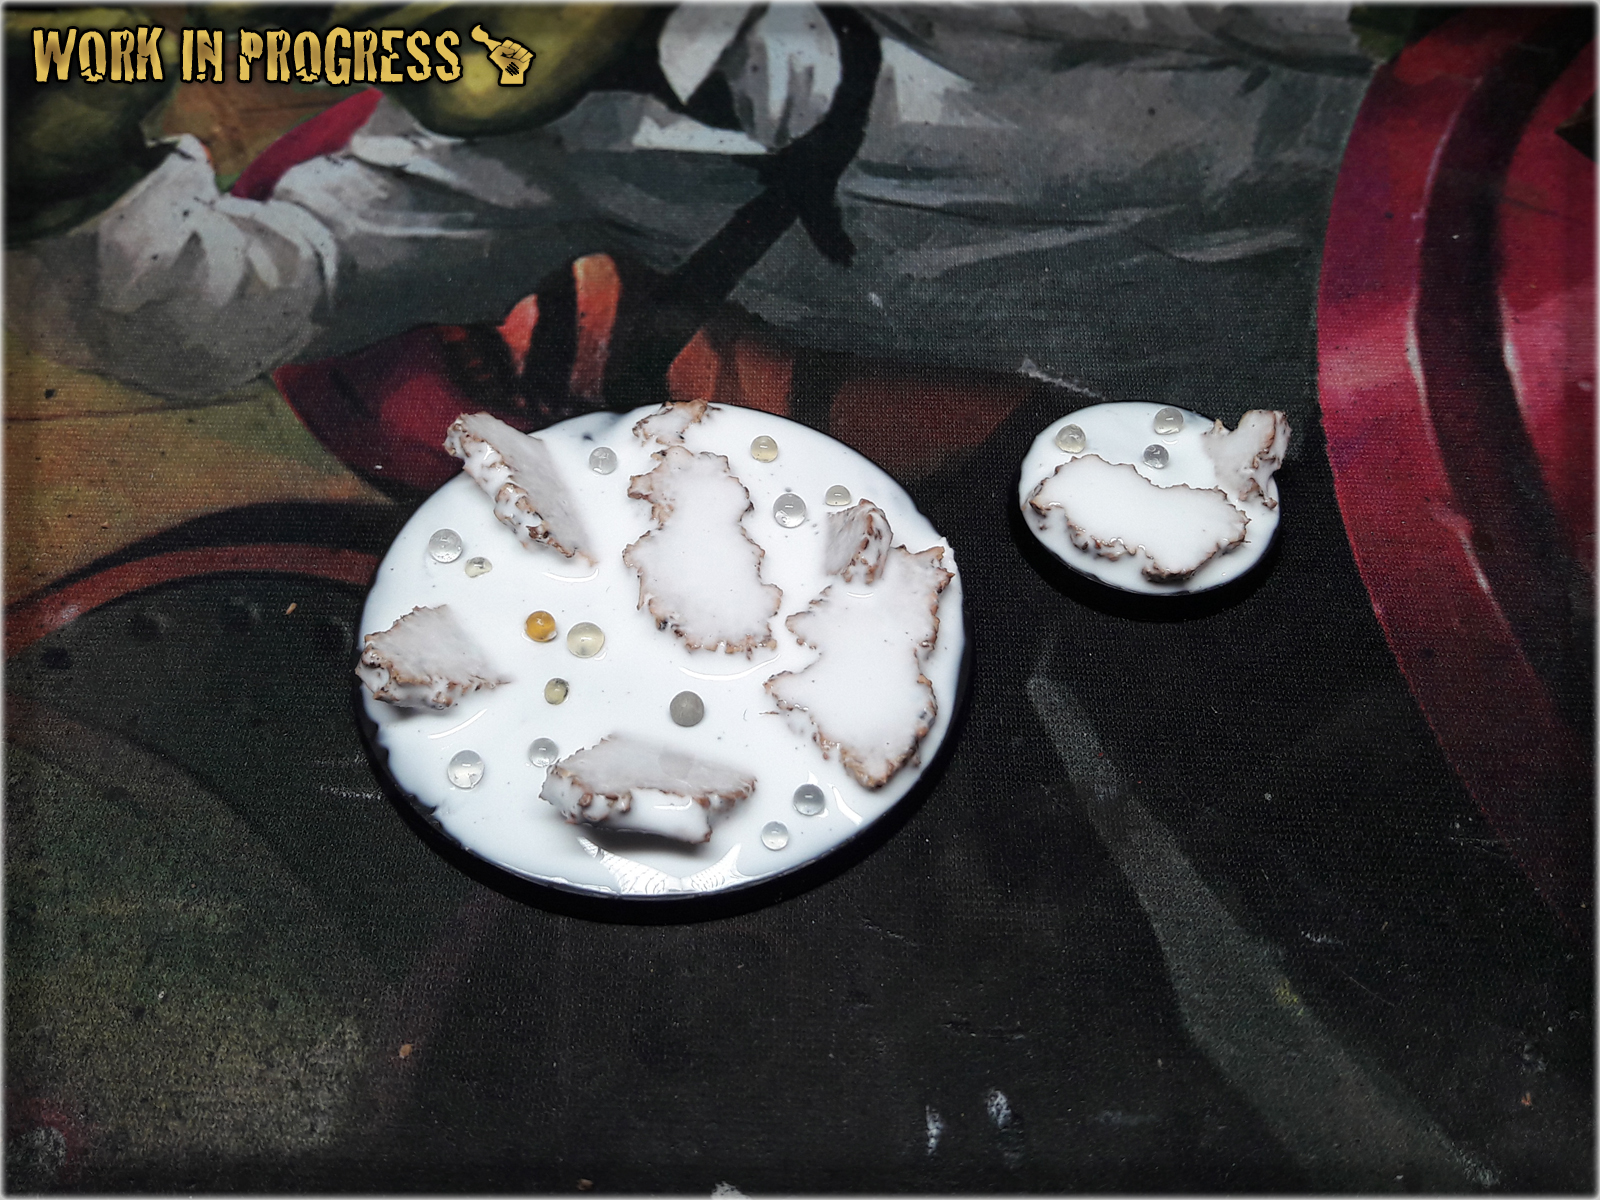
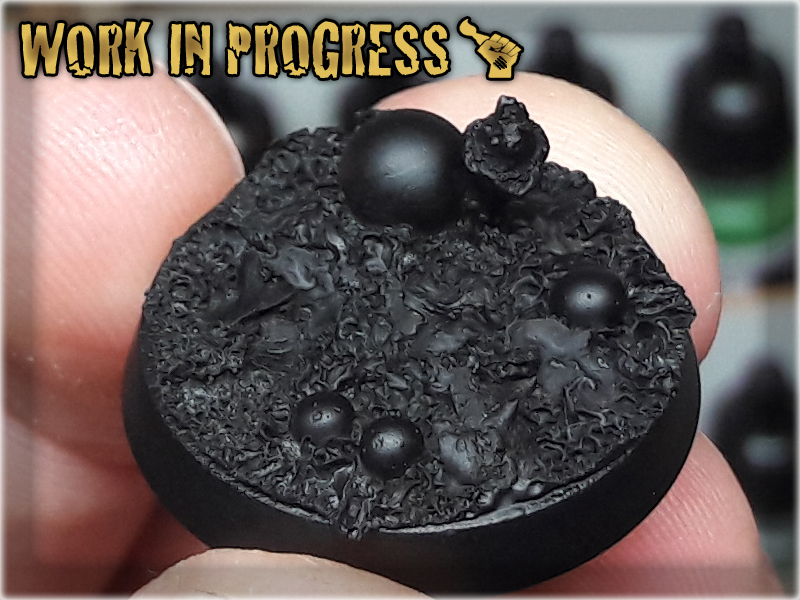
* I then dropped tiny balls (shoe moist absorbers) oon top of the Basing Glue, between 'volcanic rocks' to create an effect boiling lava bubbles.
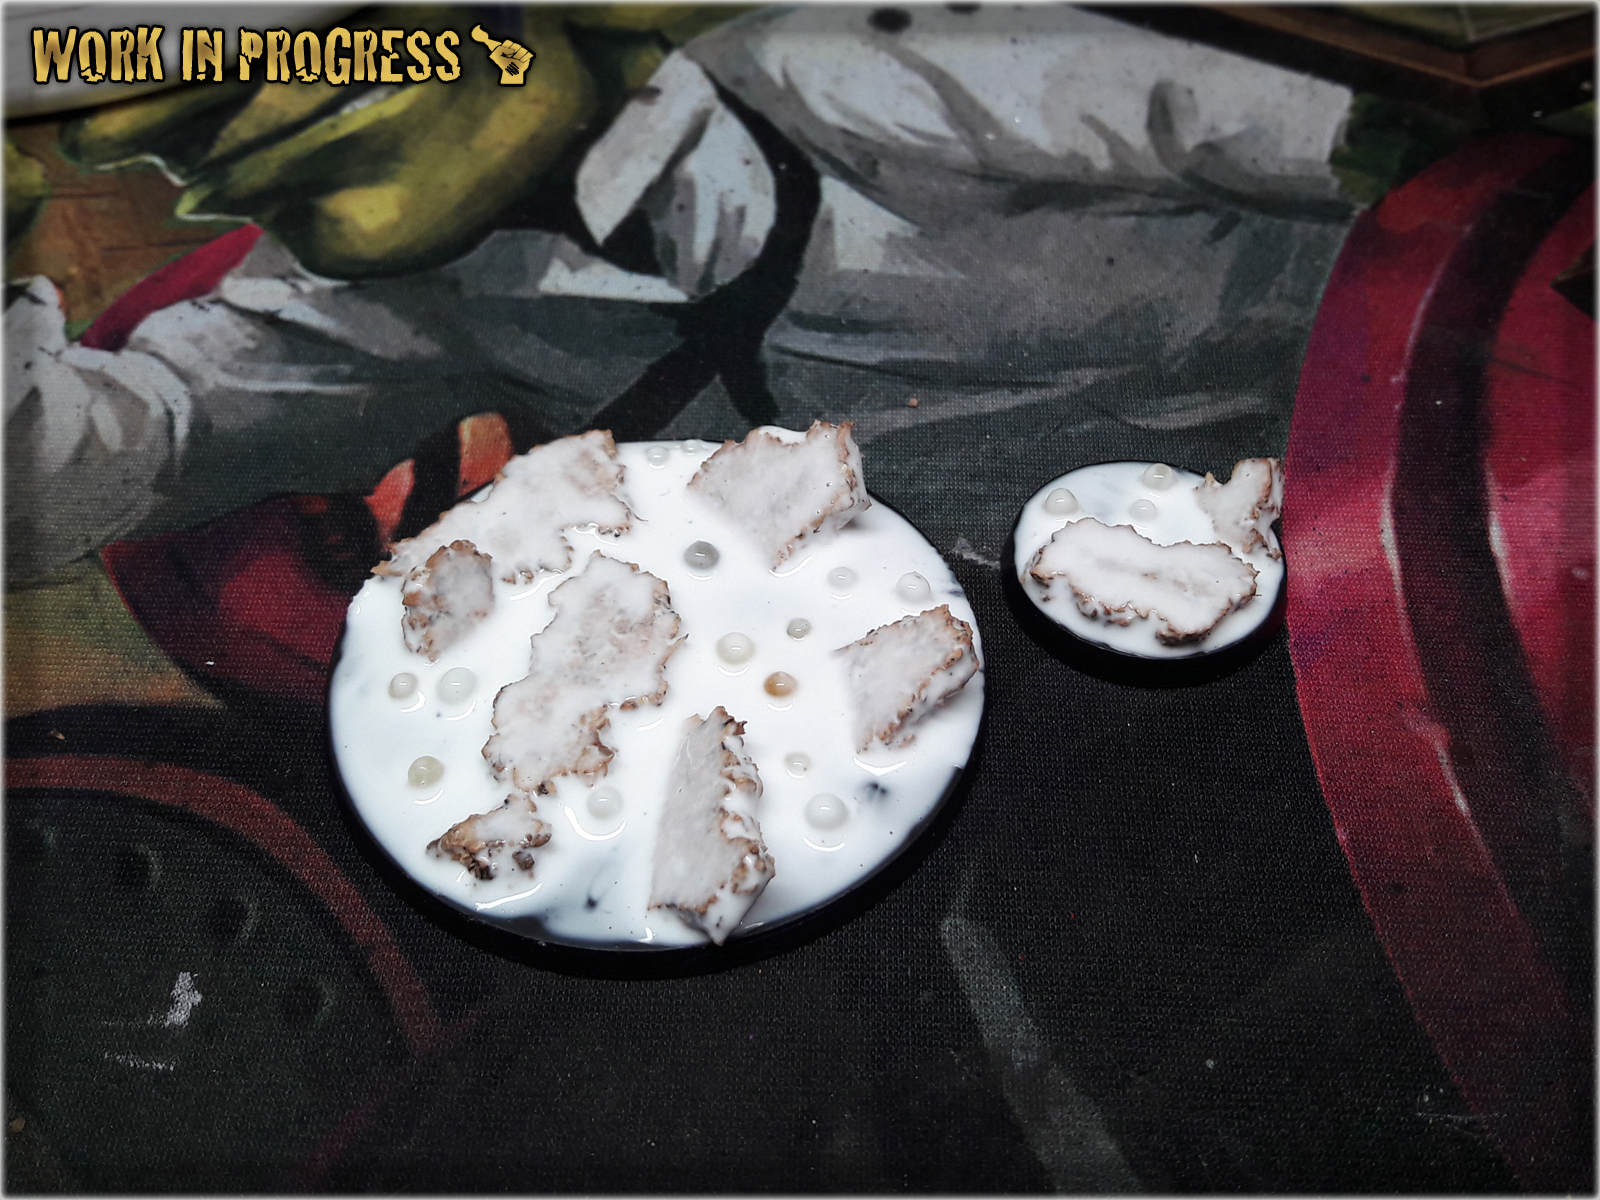
* Next I applied Basing Glue over the bubbles.
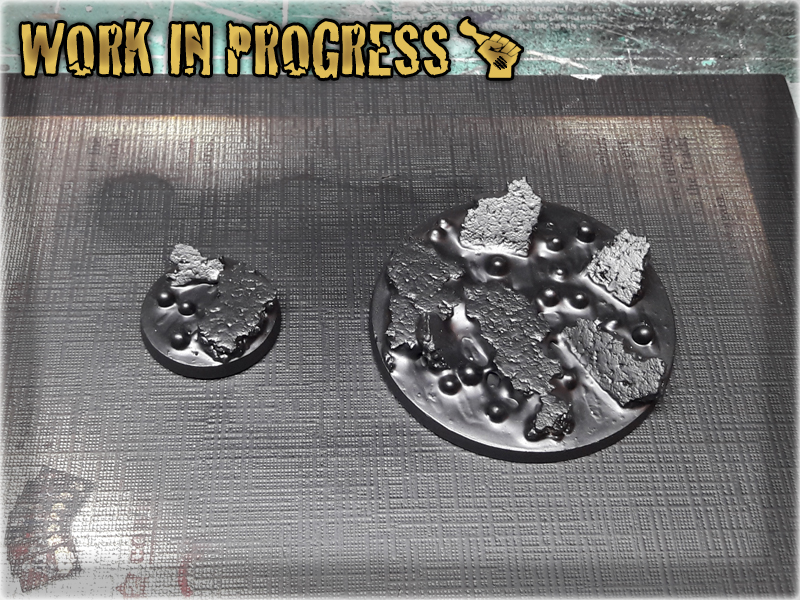
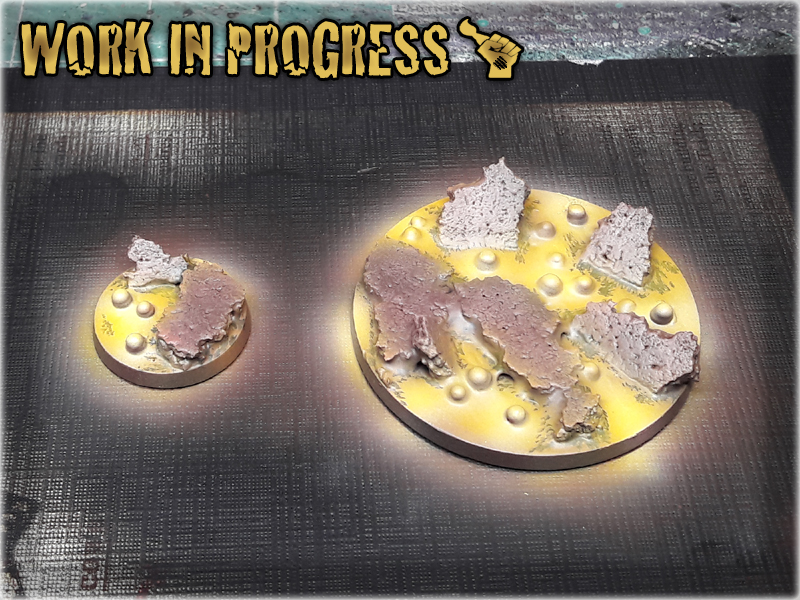
* Black Undercoat.
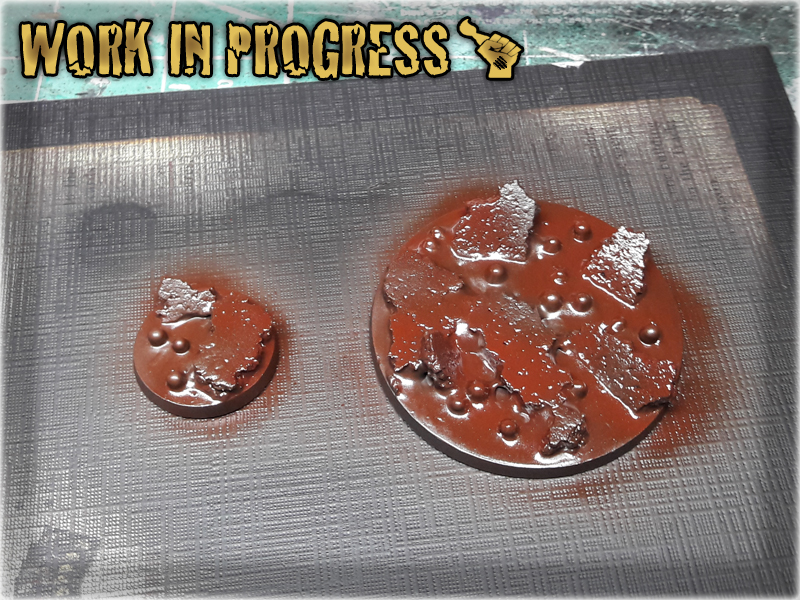
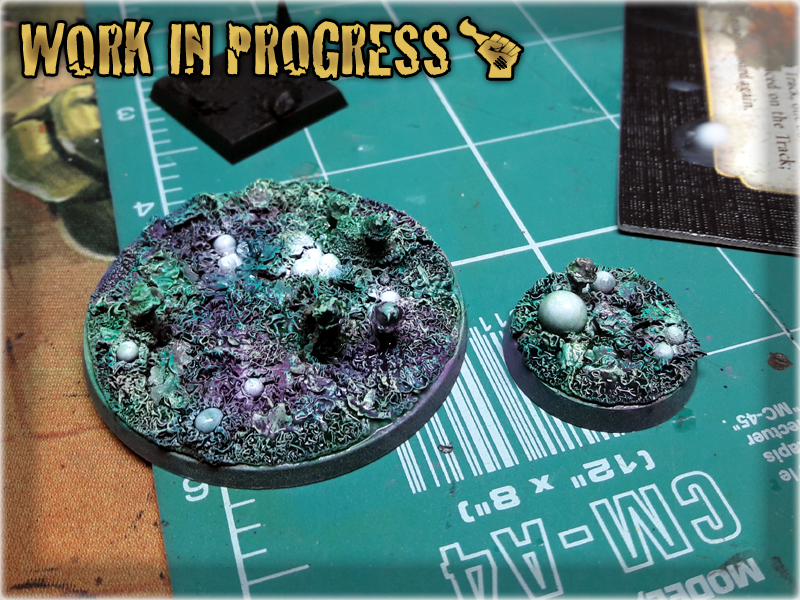
* Mahogany (Val) airbrushed all over the base.
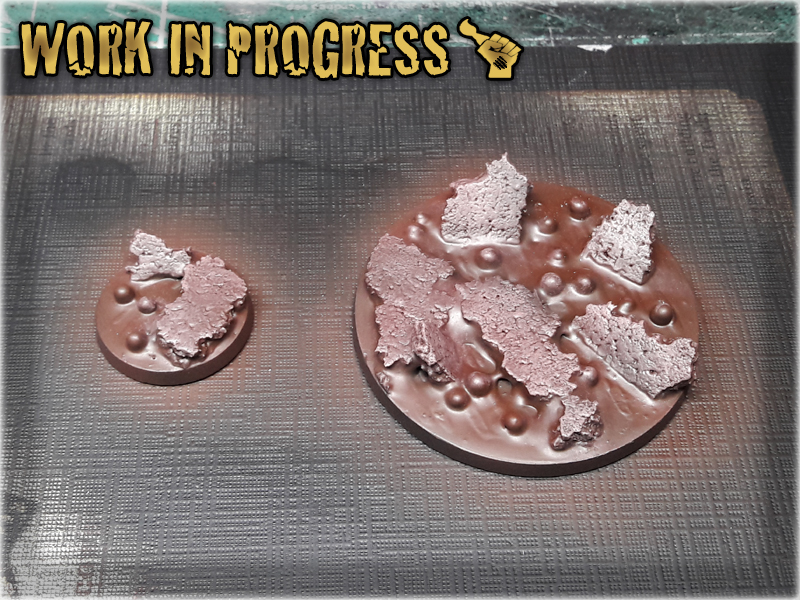
* Gorthror Brown (GW) drybrush over the Rocks.
* Gory Red (Val) airbrushed over Lava.
* Scrofulous Brown (Val) airbrushed over Lava.
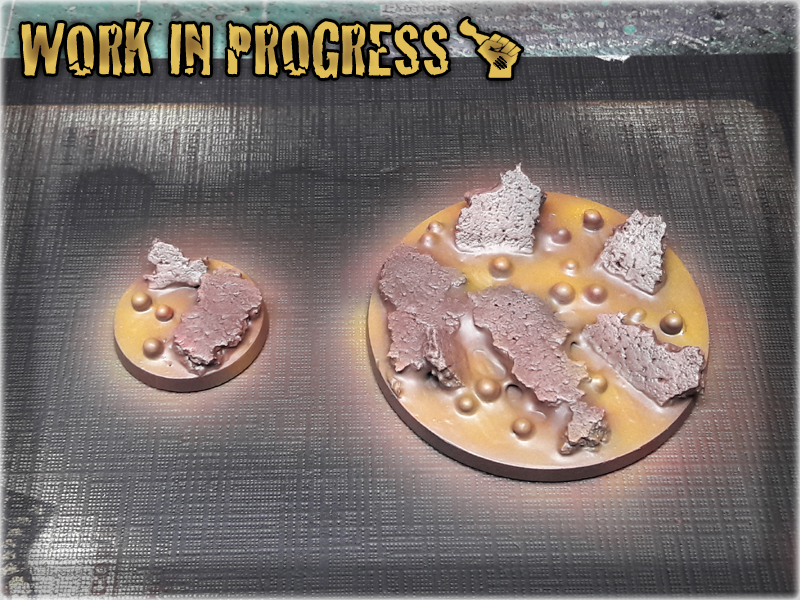
* Scrofulous Brown (Val) + White airbrushed over Lava.
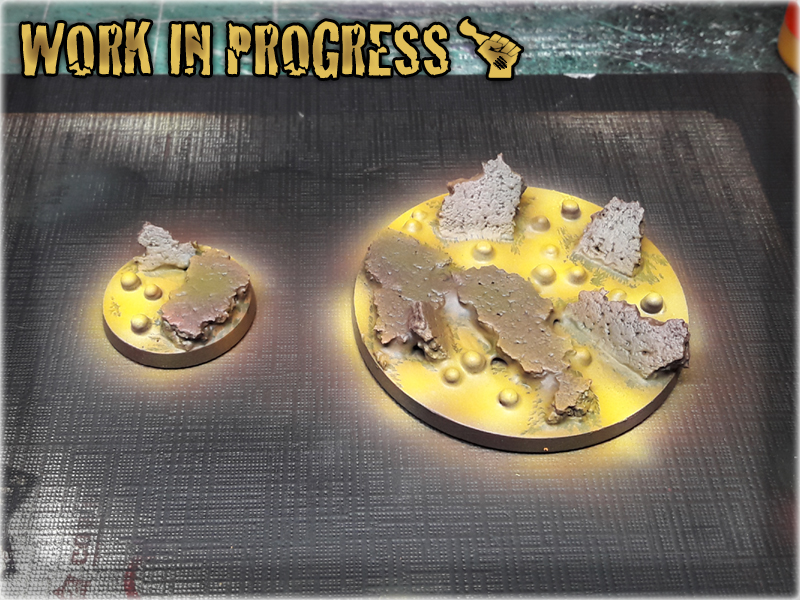
* Black spots added around Rocks
* Scrofulous Brown (Val) airbrushed over Black spots.
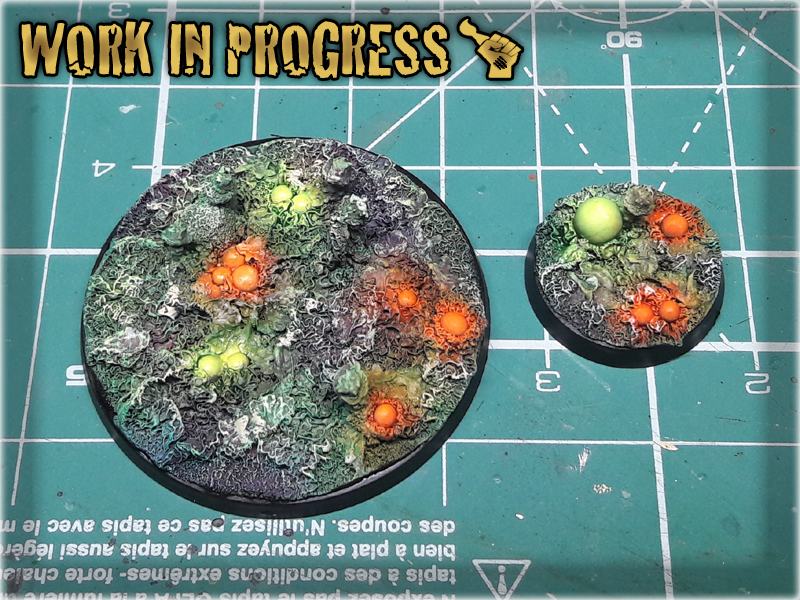
* Lamenters Yellow (GW) airbrushed over Lava.
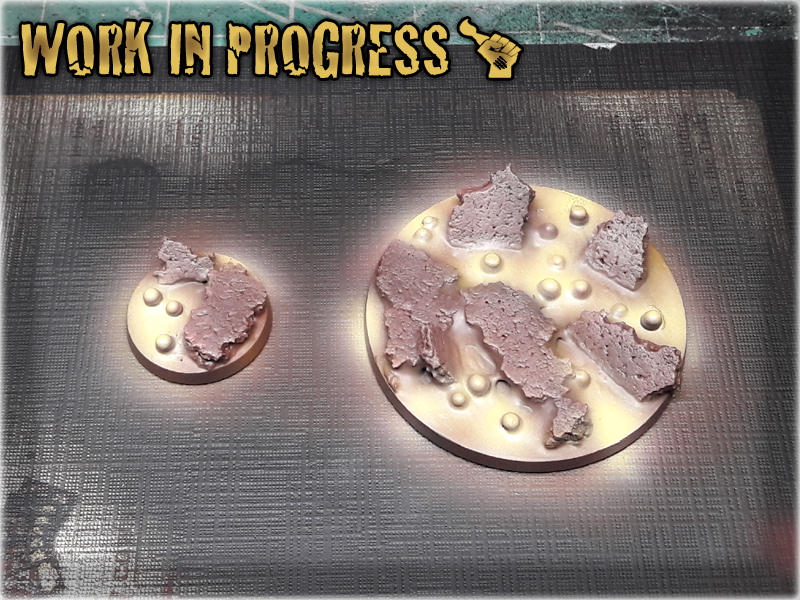
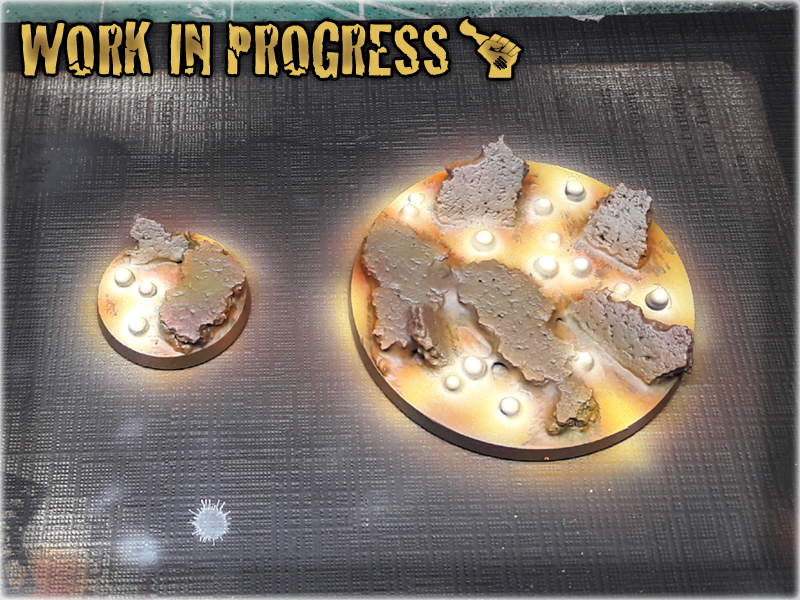
* Hot Orange (Val) spots airbrushed over Black spots, White airbrushed over bubbles.
* Scrofulous Brown (Val) + Black, then pure Black glaze applied oved the Rocks.
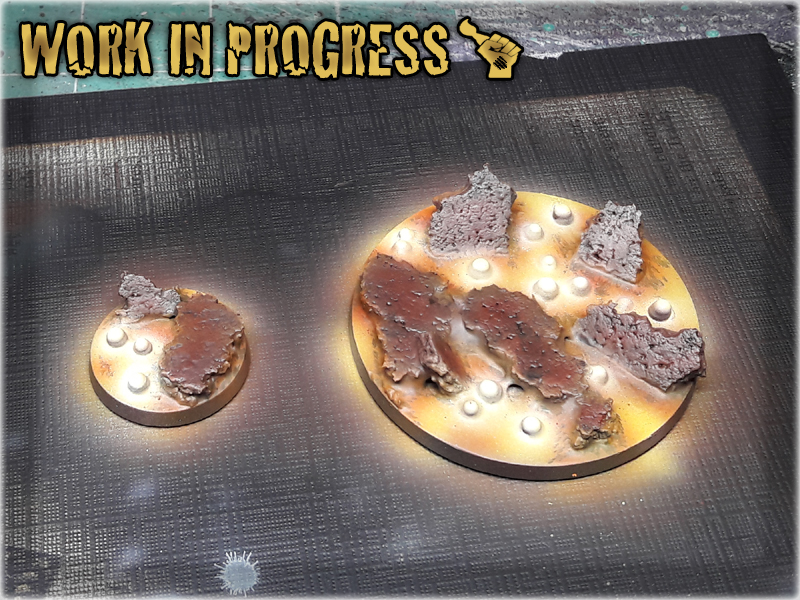
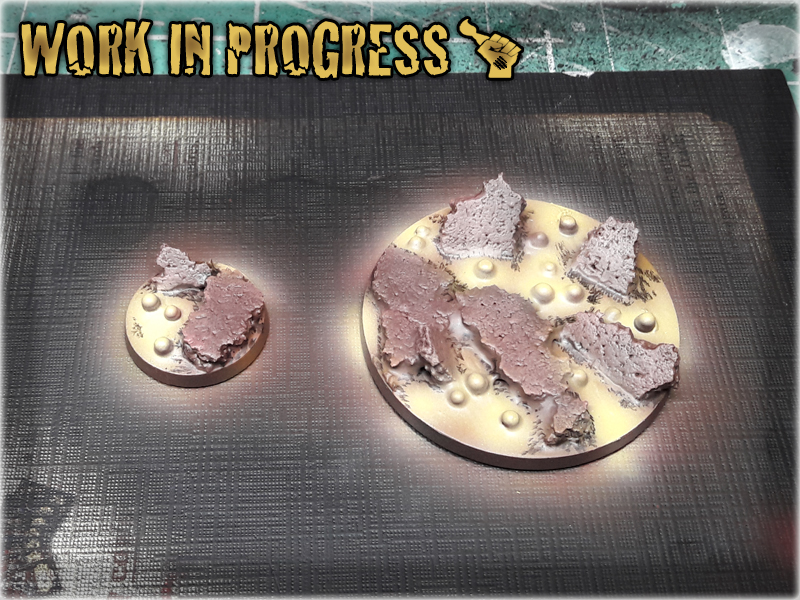
* Gloss Varnish applied over Lava.
![]()

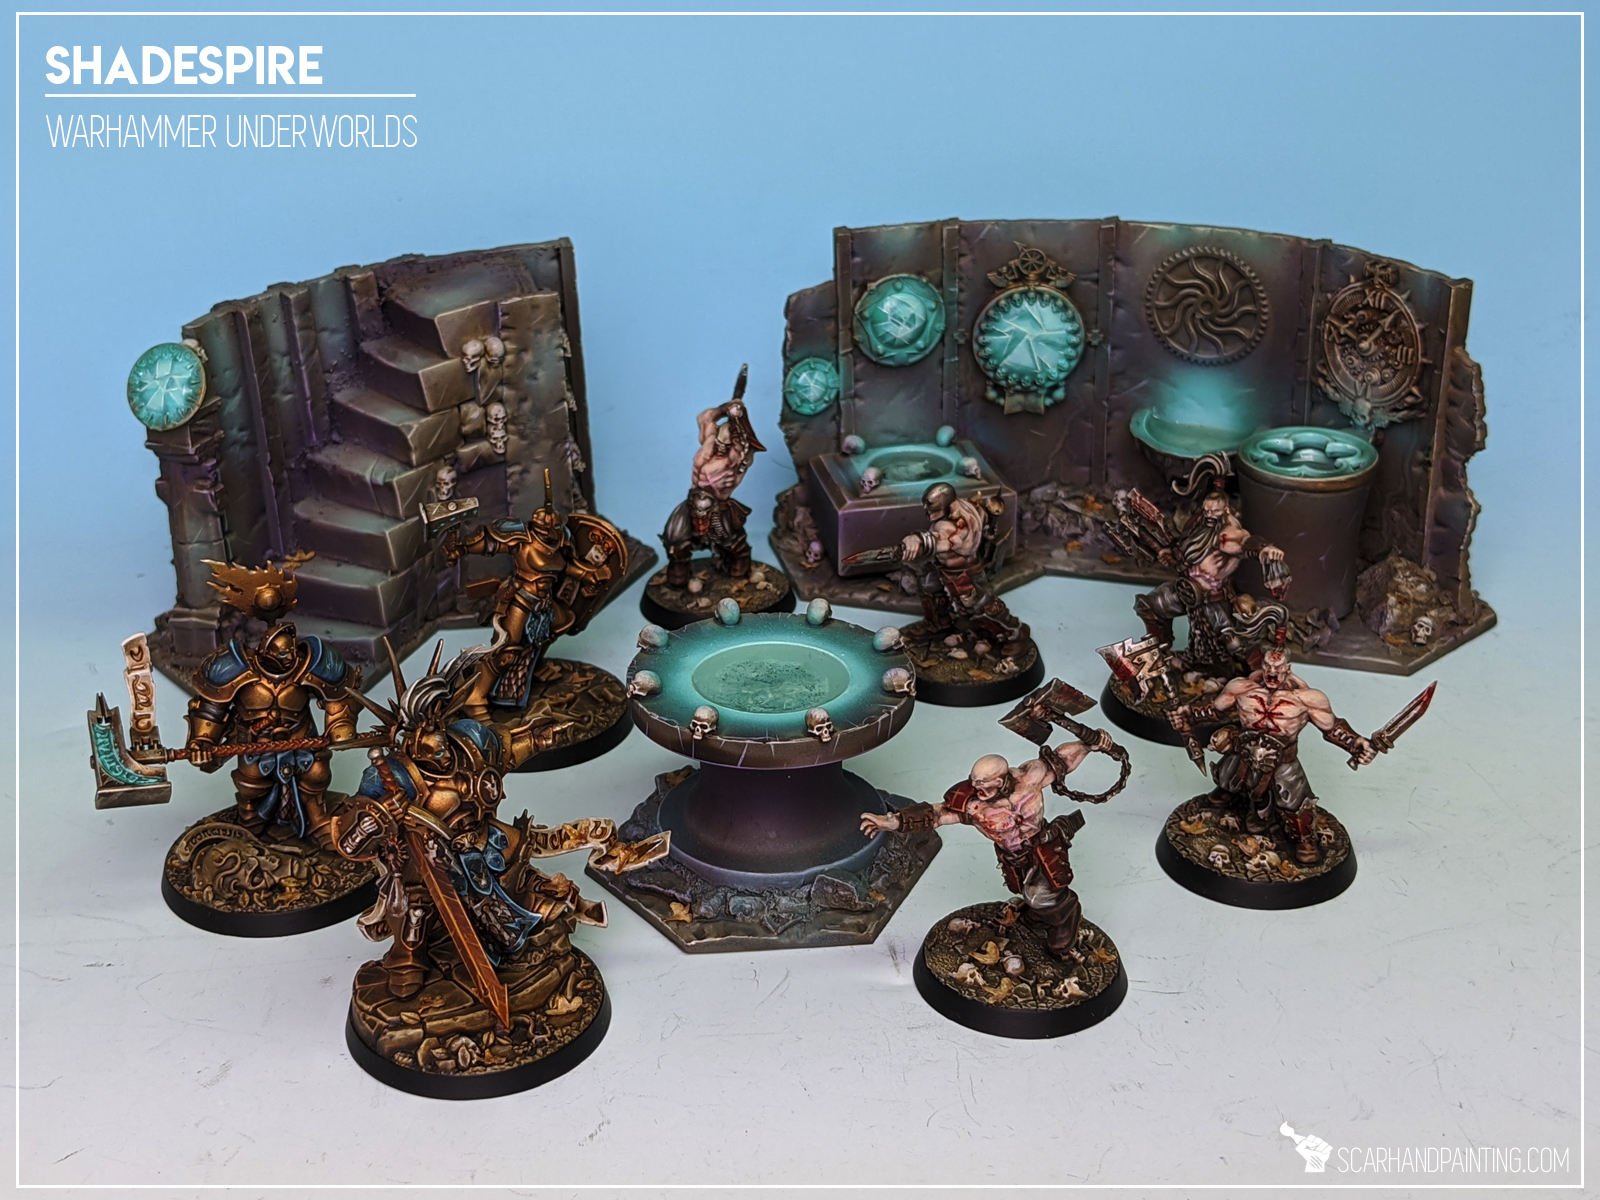
“The Mirrored City of Shadespire is a nightmare plane of illusions and madness, an ever-changing labyrinth of endless stairs, cramped streets and soaring archways. The original city is drained of all color and life, and for thousands of years, it has rested as a foreboding ruin. Those unfortunate, brave, or foolhardy adventurers that set foot within its walls are drawn through the veil between realms and trapped within the Mirrored City. For such wayward souls, all hope seems lost. Yet there are those who will not accept their fate without a fight.”
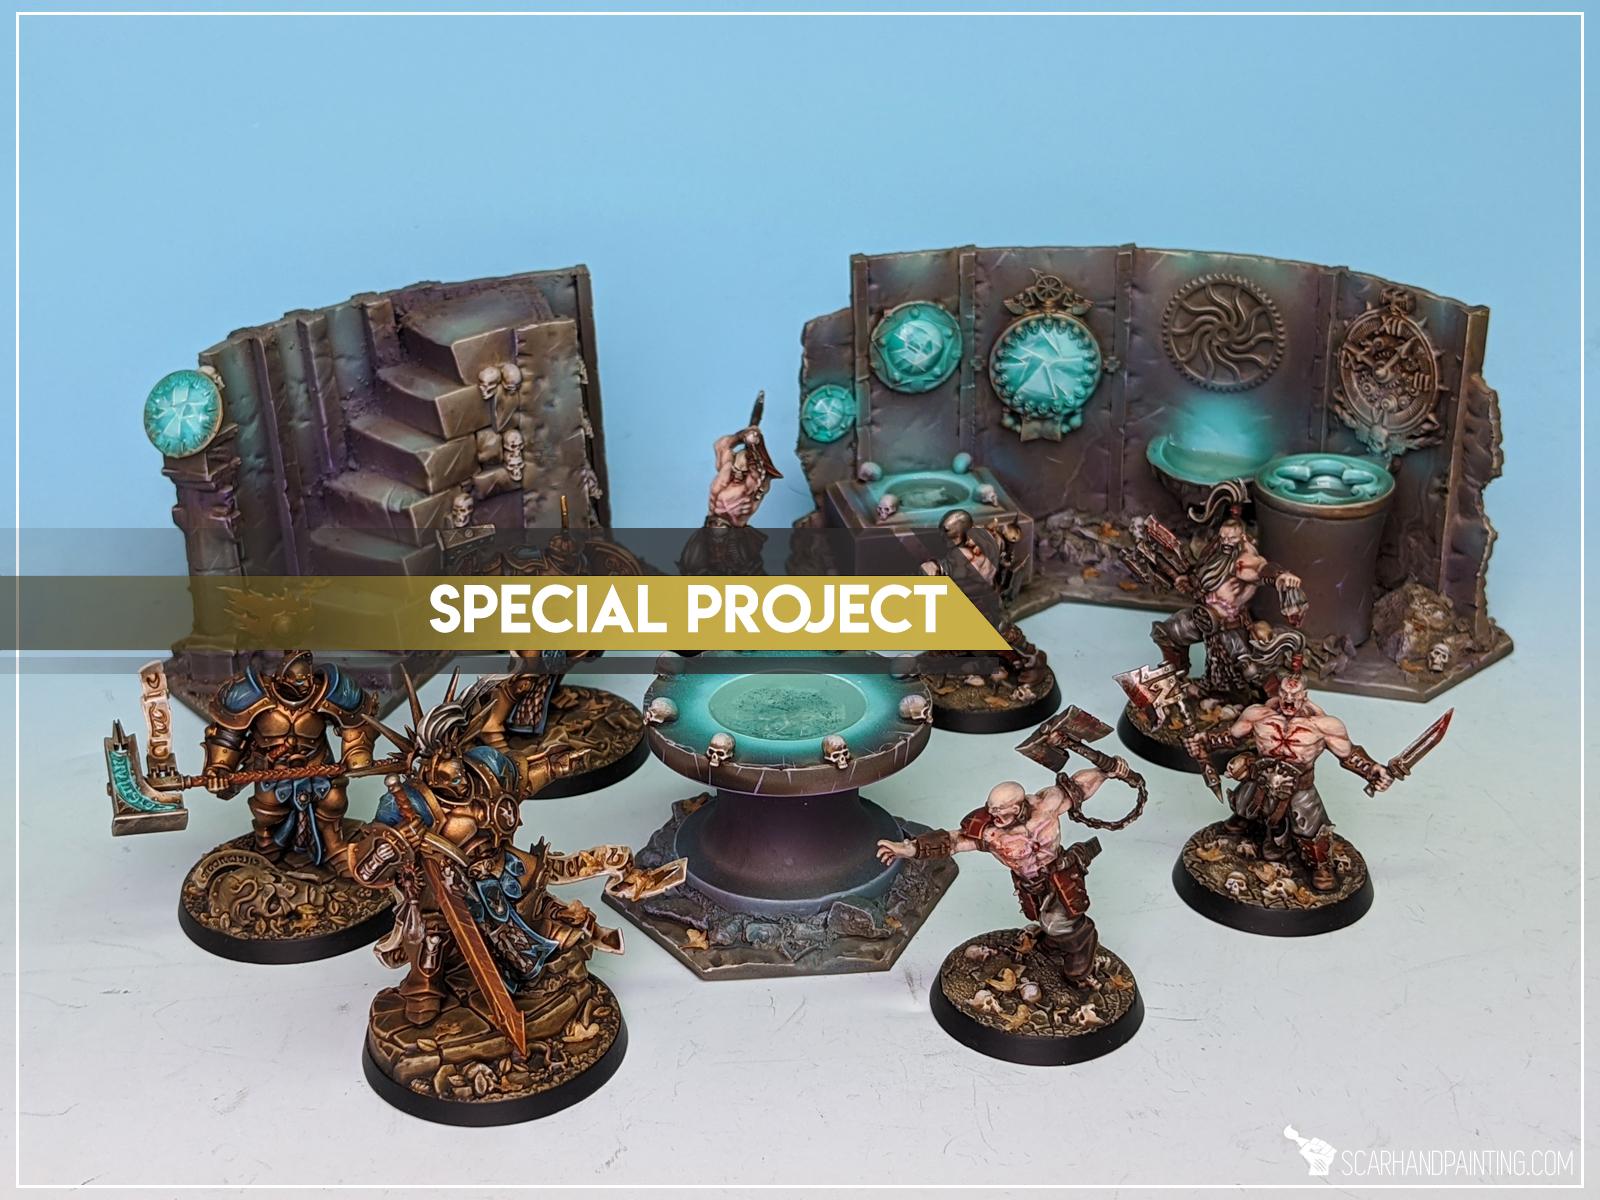
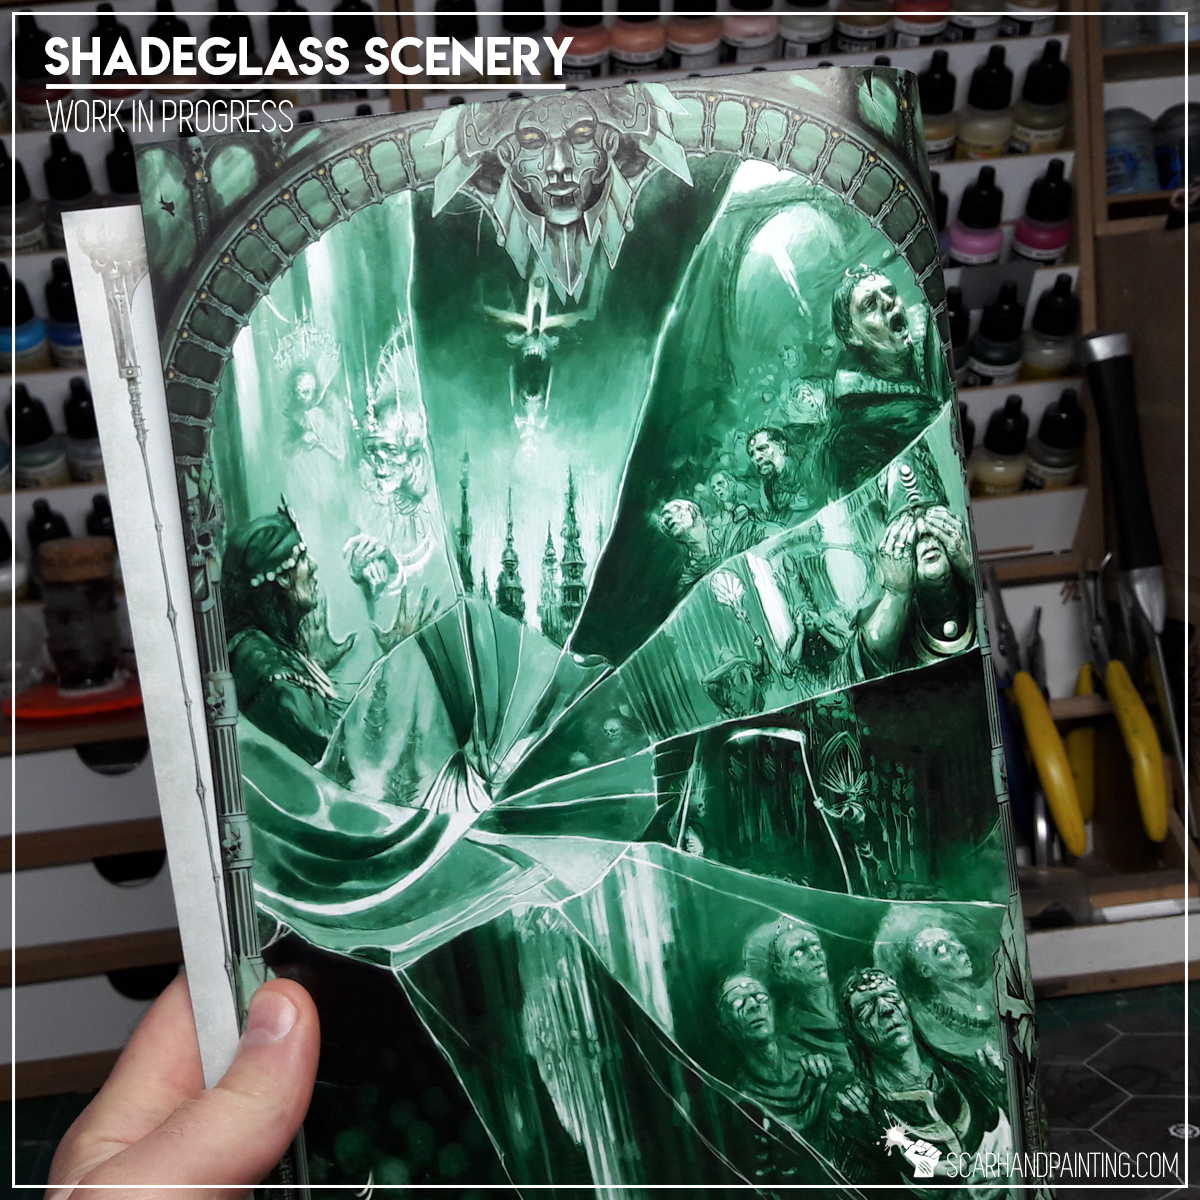
Whenever I pick a new title I always crave to have an ultimate gaming set – the same happened with Warhammer Underworlds: Shadespire. It started when I’ve finished working on a small Shadespire commission and was instantly drawn into the game. Two days later I was already painting my first warband – the Sepulchral Guard, but it wasn’t enough to quench my hobbystic thirst. I moved to another warband, being Garrek’s Reavers, all the while my hype was kept strong by Shadespire facebook group – full of awesome inspiration. Somewhere in the middle of Garrek’s Reavers paint job I let myself be overwhelmed by hype and decided to go for a Shadespire scenery set. The idea was to keep it as crazy cool as I am capable of. Concept was there – inside my head – all along, fueled by Shadespire’s background story and insanely sweet art from the rulebook. So, the scenery was to fit the board with a ‘ruined city of sorcery and mysticism’ theme in mind. Most important part: ‘Shadeglass’ – broken, ghostly lit mirrors incorporated to a variety of trinkets, statues, pools, wells etc.
The way I see scenery making is this:
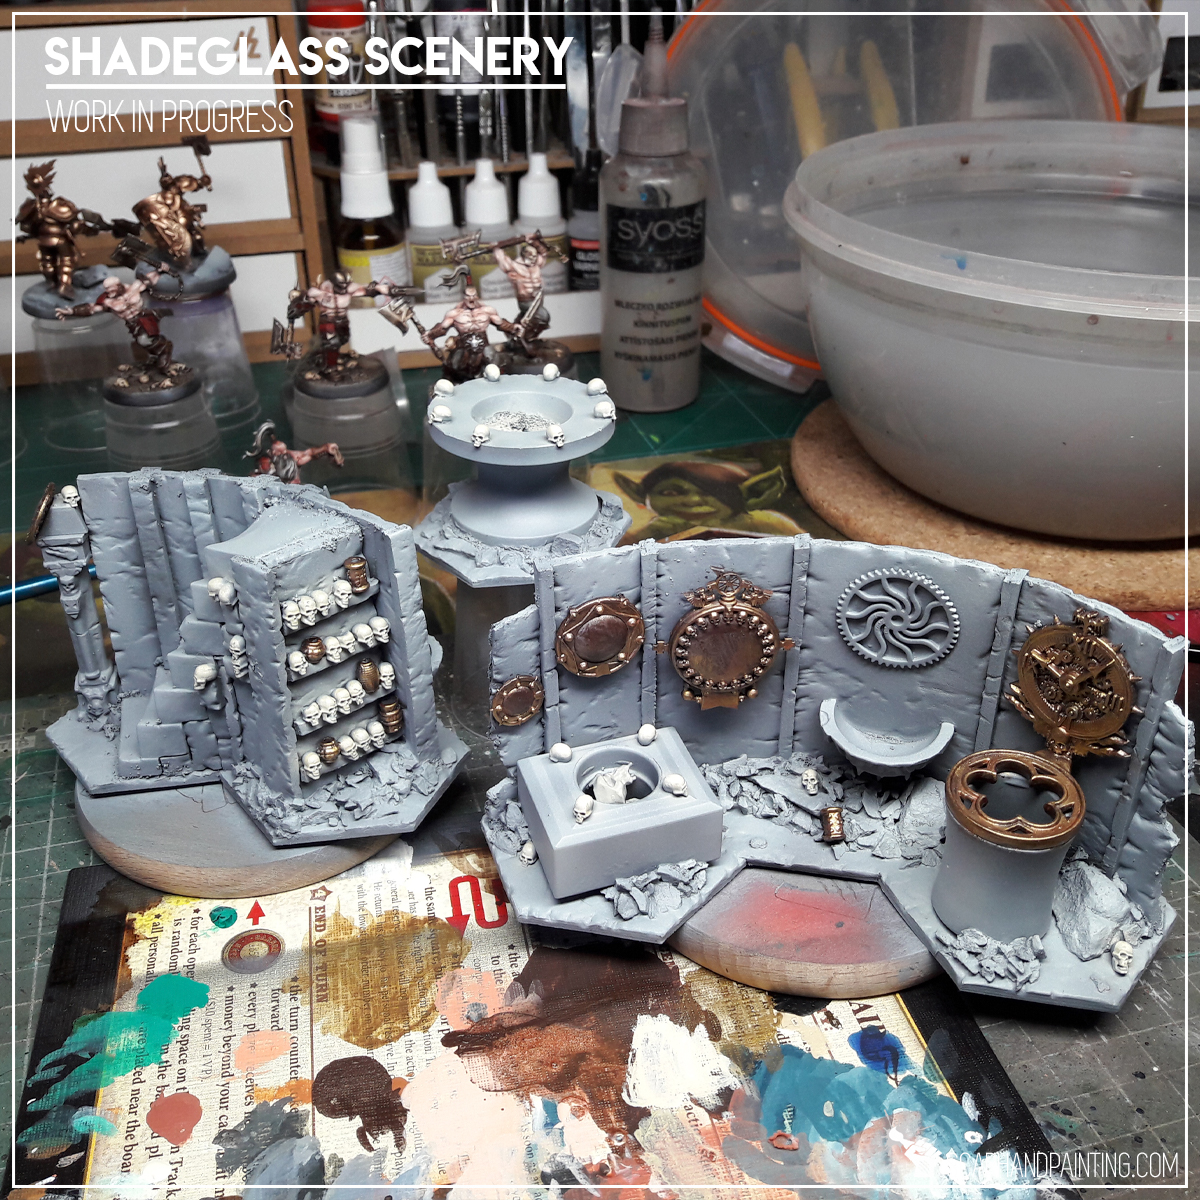
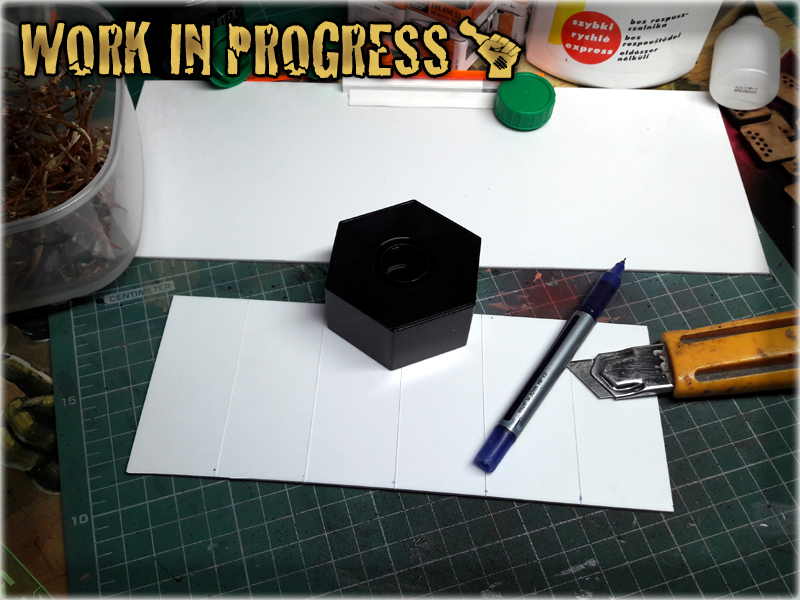
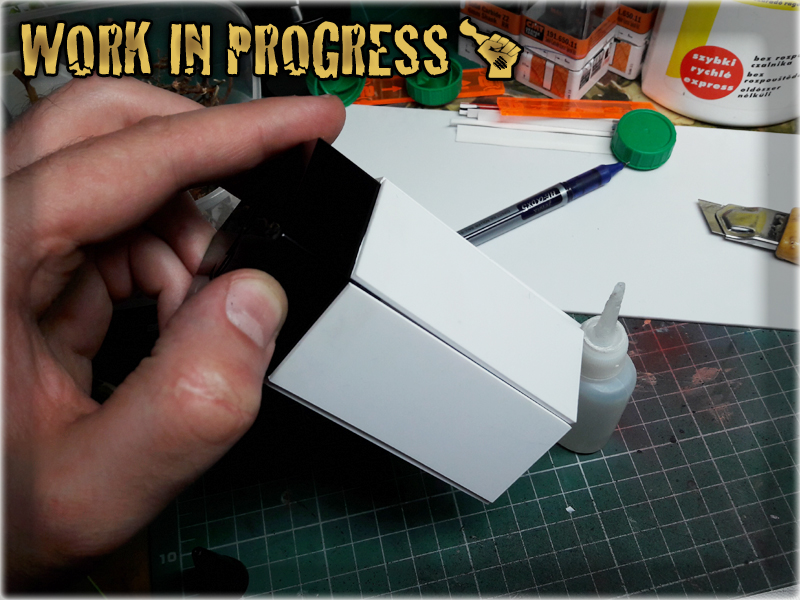
I faced “Shadeglass Scenery” Project following these key points. Started by preparing all the stuff that seemed usable and/or necessary. I like my scenery to be light, durable and painting friendly, so I picked 3mm plasticard to become both bases and baseline shape. Used hot water to bend some pieces, then cut ‘walls’ and hex bases out of the stuff…
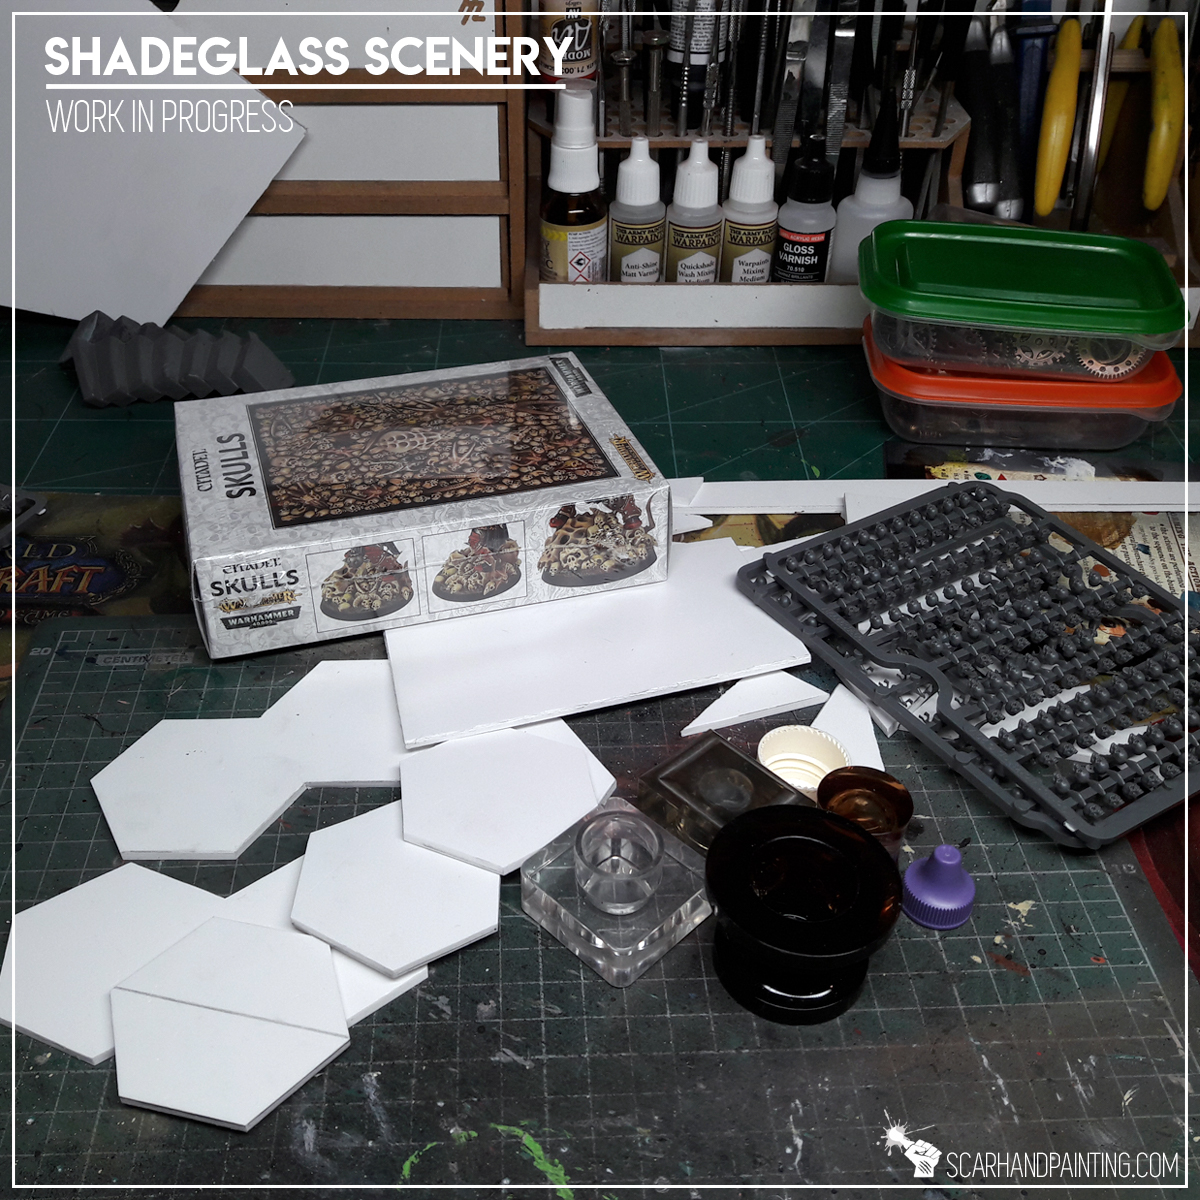
Plasticard is very easy to work with. Adding texture all over newly created ‘pieces’ was a matter of using a right tool, rather than sophisticated and time consuming techniques…

With texturized walls and bases I was ready to move to major features – Shadeglass vessels of all sorts and sizes. For this purpose I used perfume cups plundered from my wife’s collection. (At the point when I’m writing this article she already noticed all the missing cups – fortunately the scenery is done and we played with it so she’s more like – ‘for the greater good’)…

Throughout about twenty years in the hobby I accumulated a vast collection of bitz, although until recently skulls where a rare commodity in the collection – Praise Nagash, Games Workshop released a set of skulls thus rendering them near to unlimited. Skulls backstory aside – I used some bitz to add detail and points of focus to the scenery…
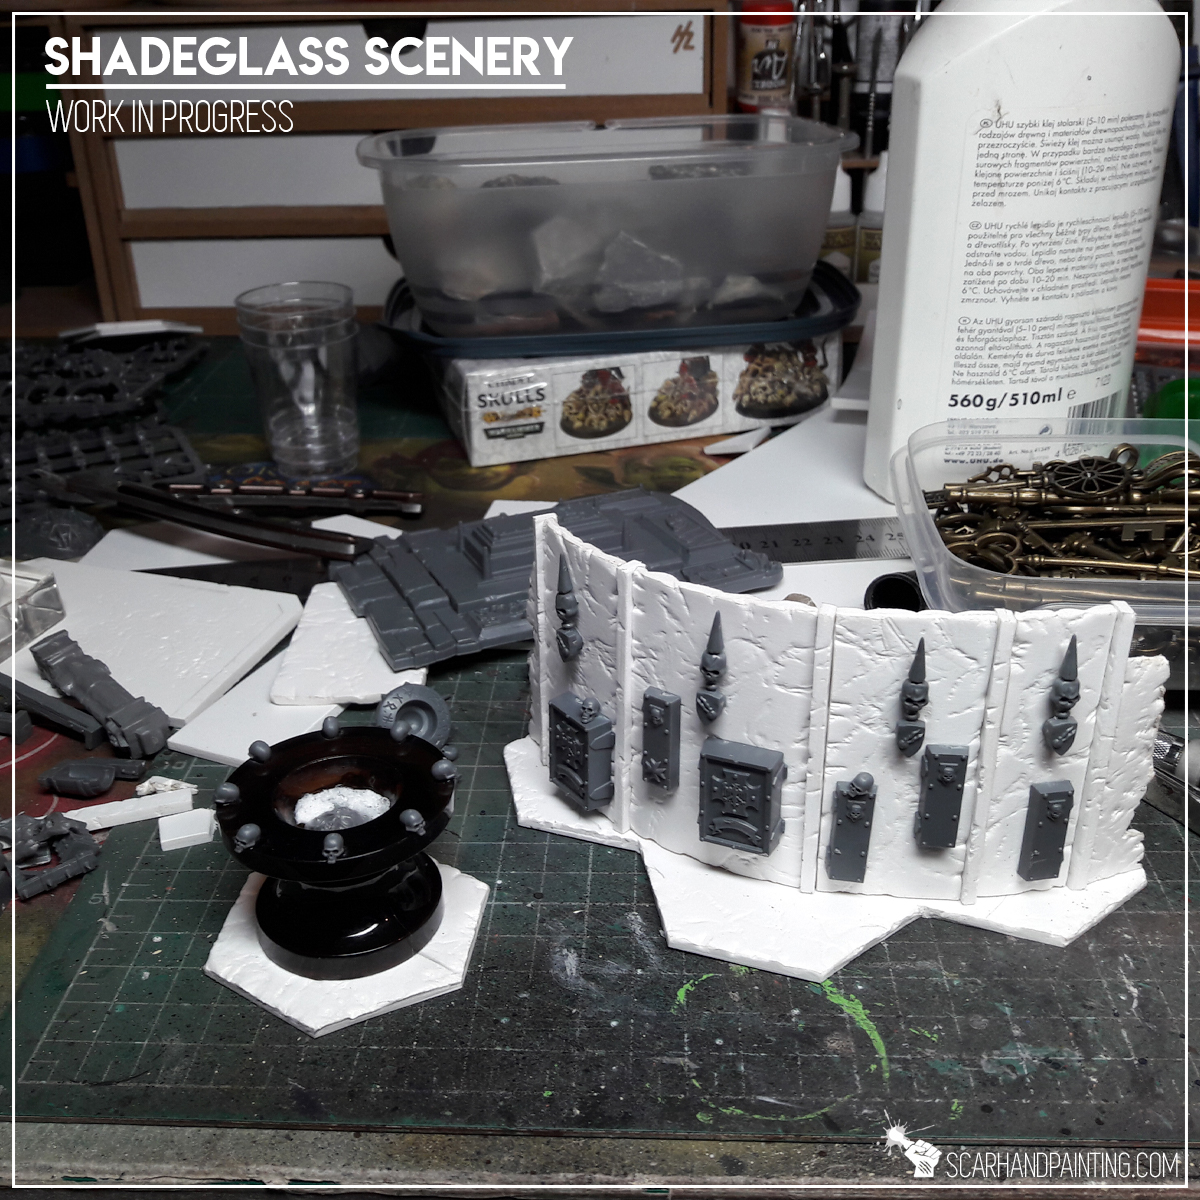
I then used self prepared Hobby Gravel to add more detail and make the scenery pieces look ‘ruined’. Once I was sure that each piece is telling it’s own story – final polish followed and all was ready to get painted…
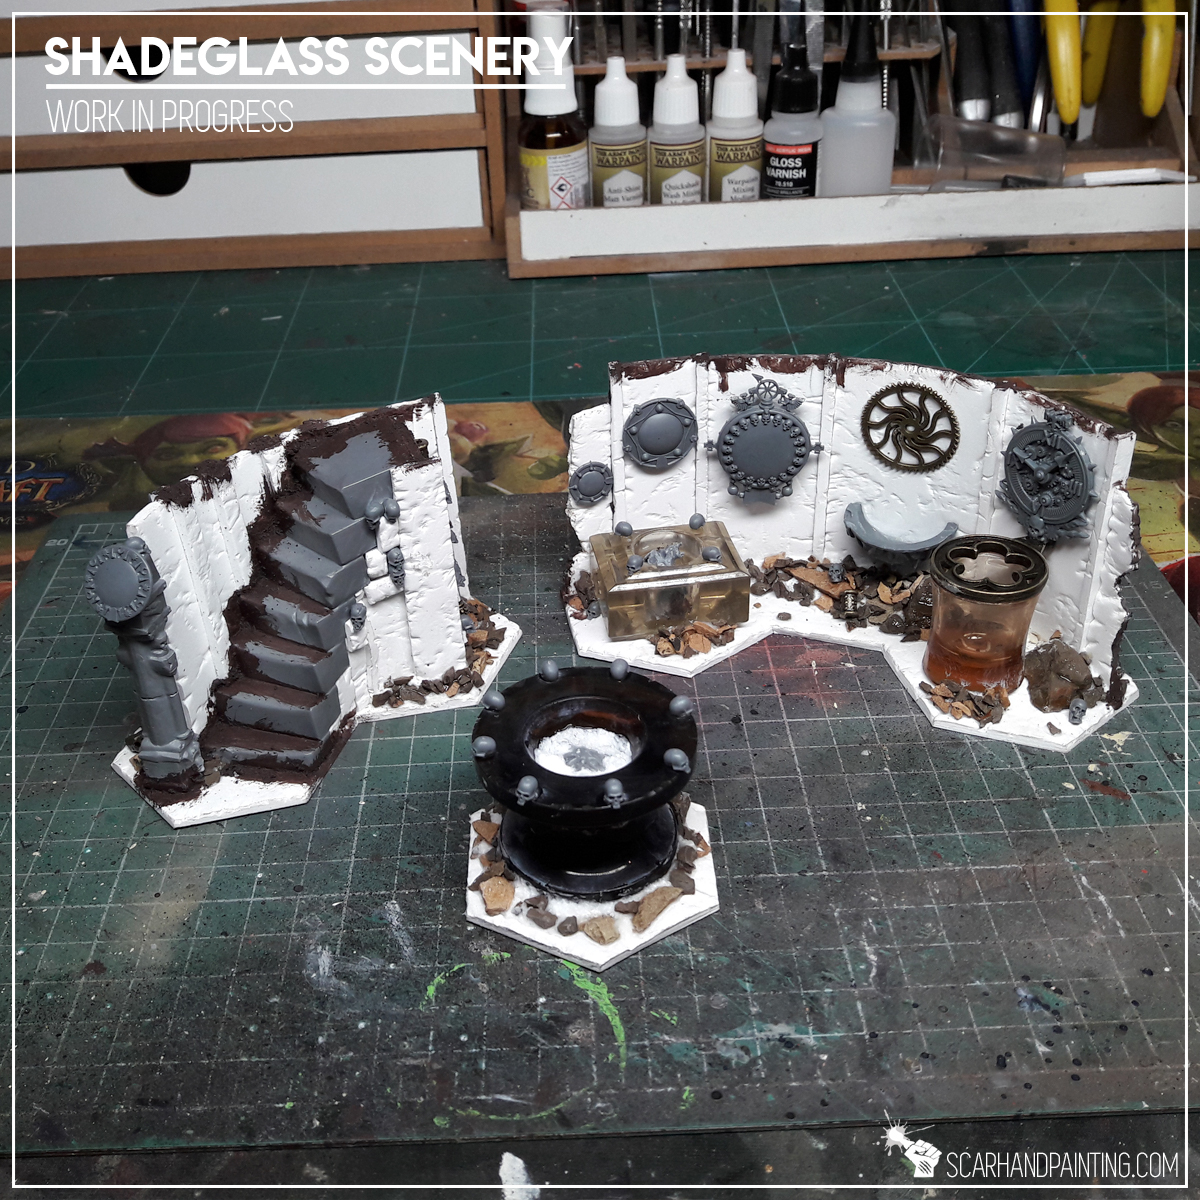

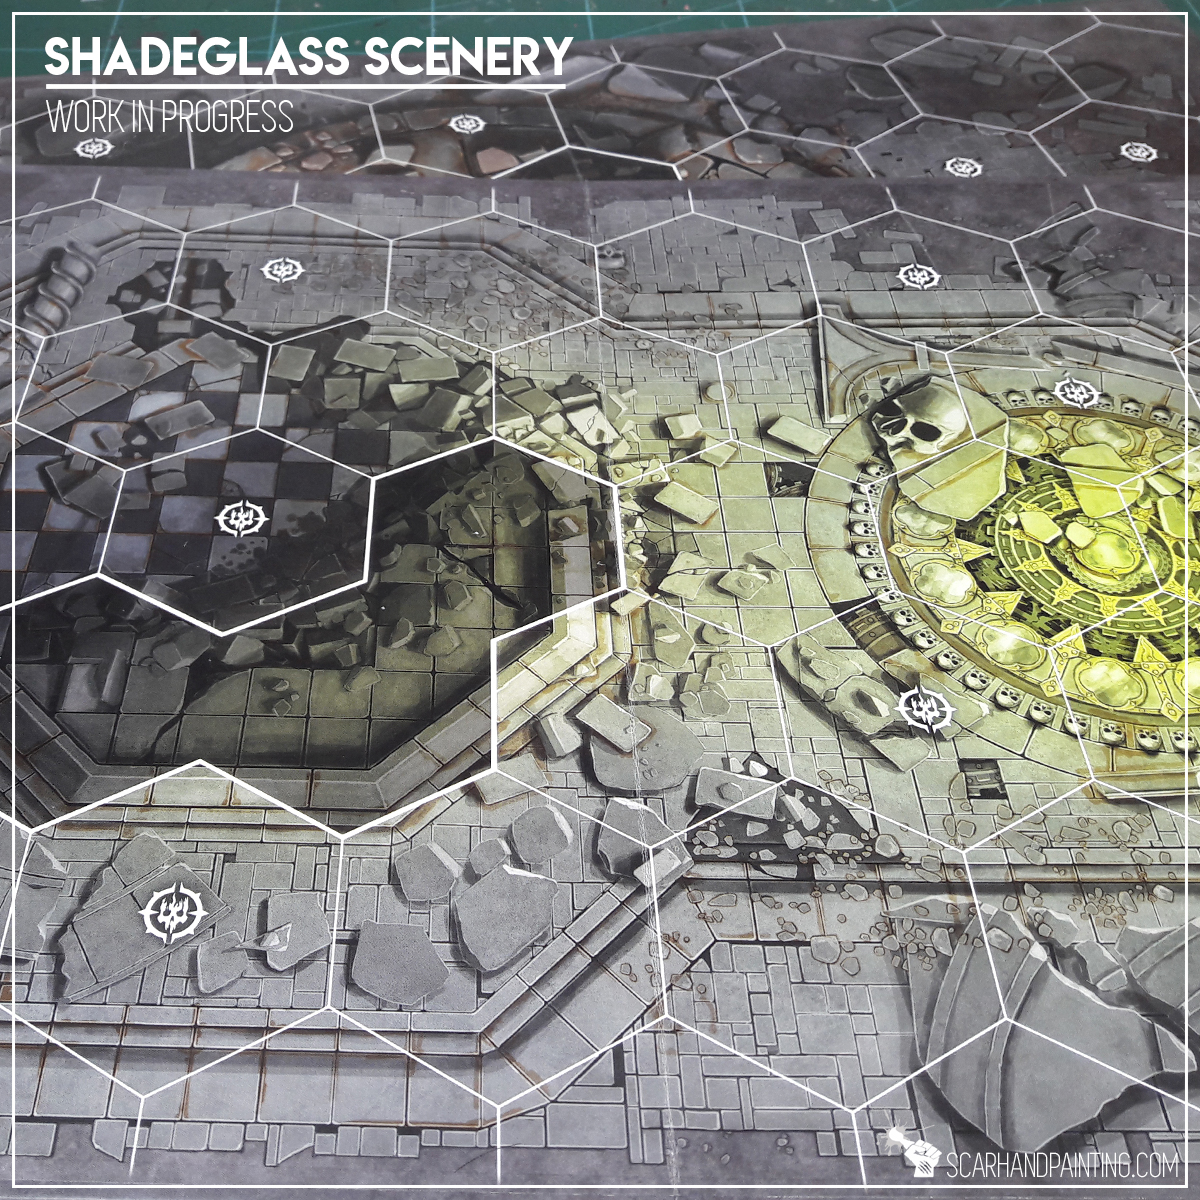
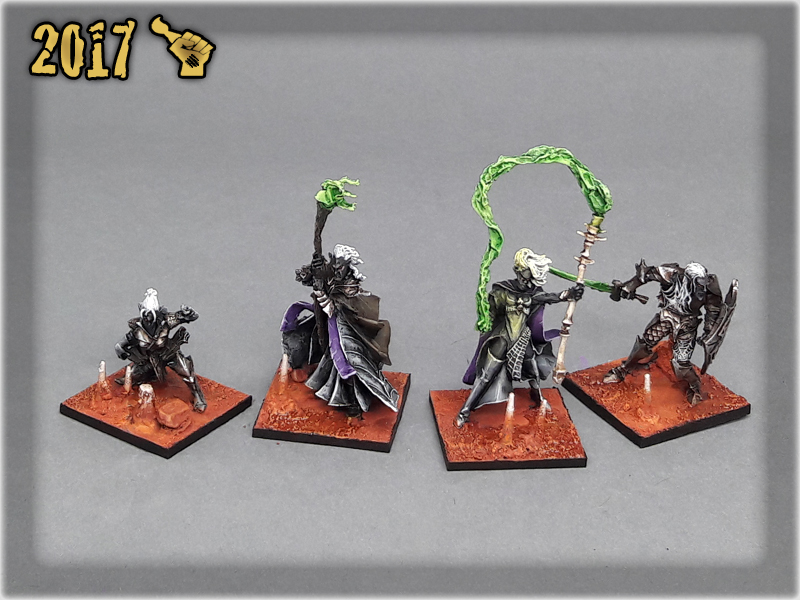
Painting a ruined city of sorcery and ghosts was an interesting transition between a color recipe I use for Shadespire warband’s bases and working on a much more bigger scale. I decided to follow my guts – start as usual and then see where it would take me. Somewhere along the way I started adding blends of purple to compliment incoming ghostly green’ish-turquoise hum. This turned out to be a bullseye hit, creating an illusion of morbid, colorful lights dancing across the ruins…

The ghostly hum of Shadeglass was a real challenge. I feel very comfortable with toxic green light, but going turquoise is moving away from warm color spectrum – my sphere of comfort. Still a hobbyist gotta do what a hobbyist gotta do – I braved the unknown with a mix of Vallejo’s Jade Green and White.
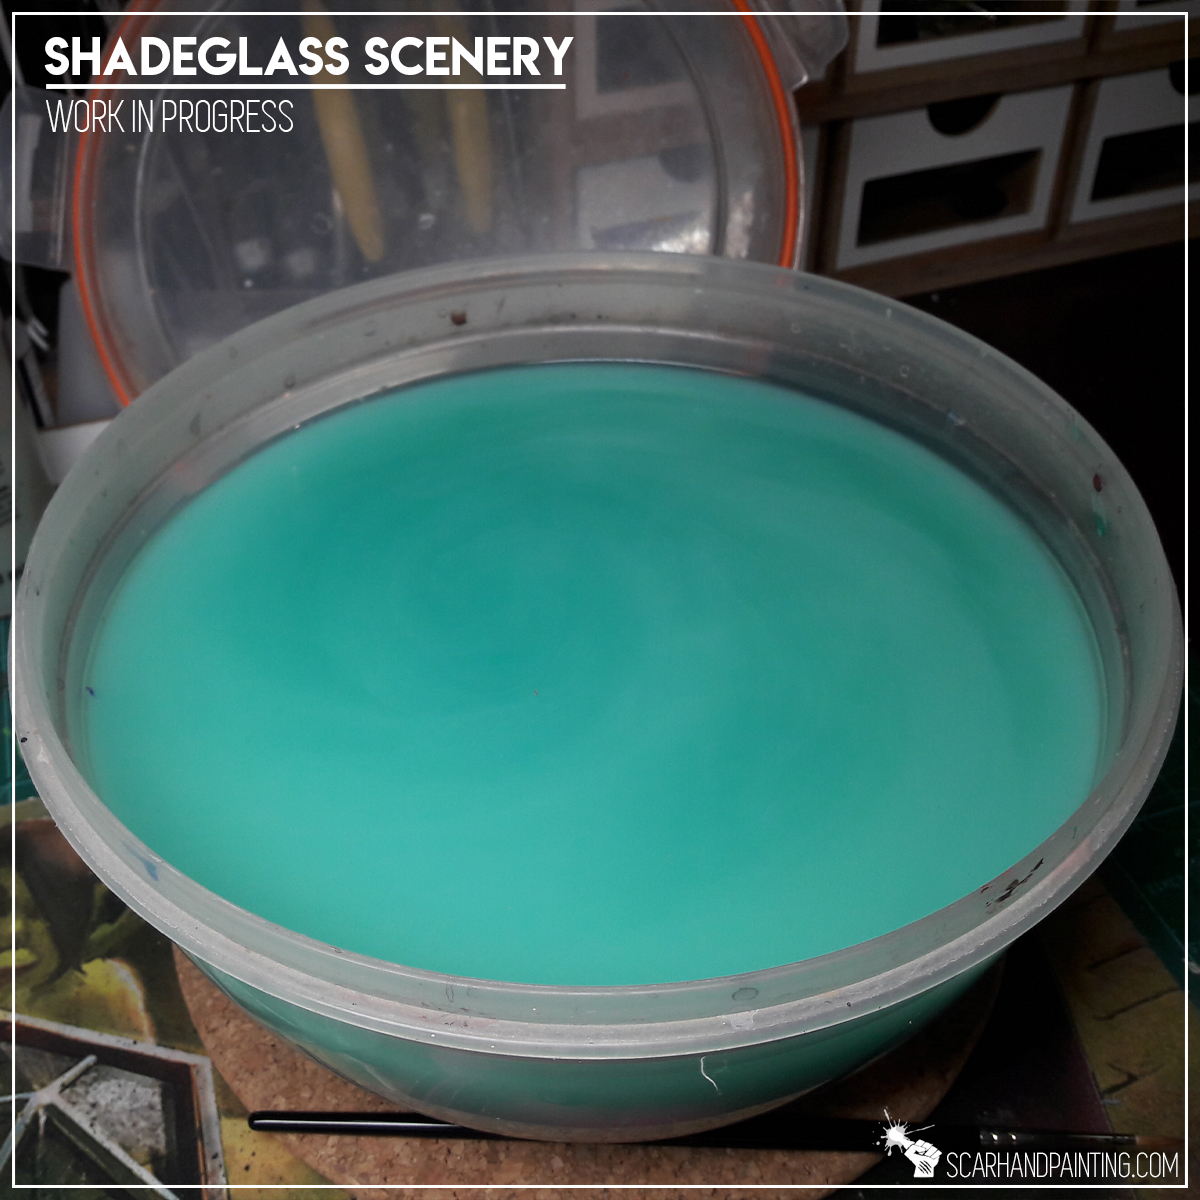
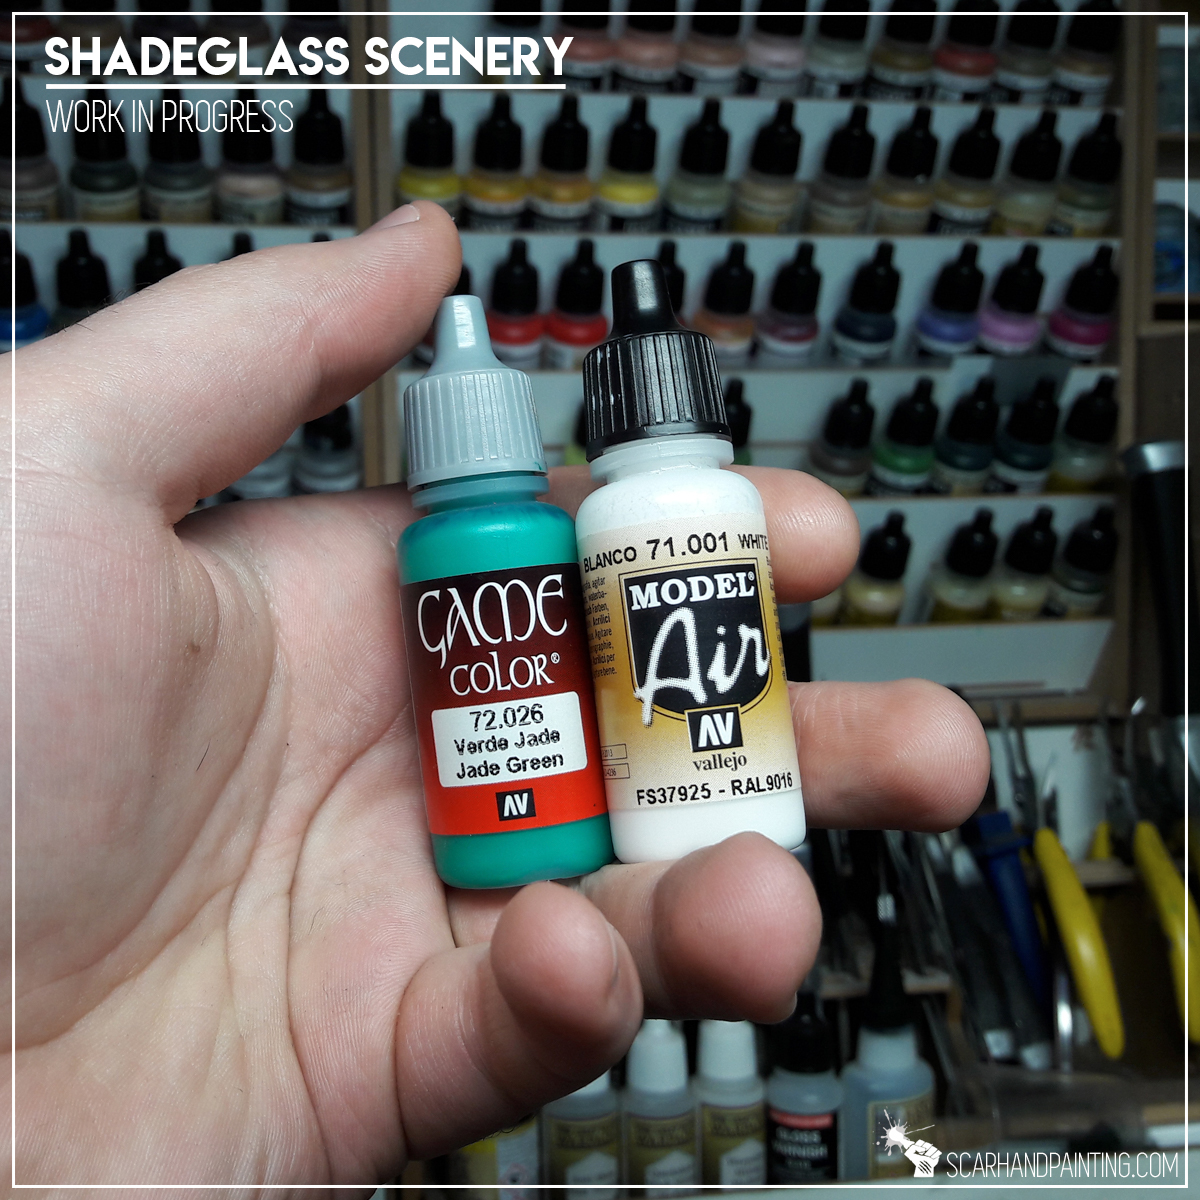

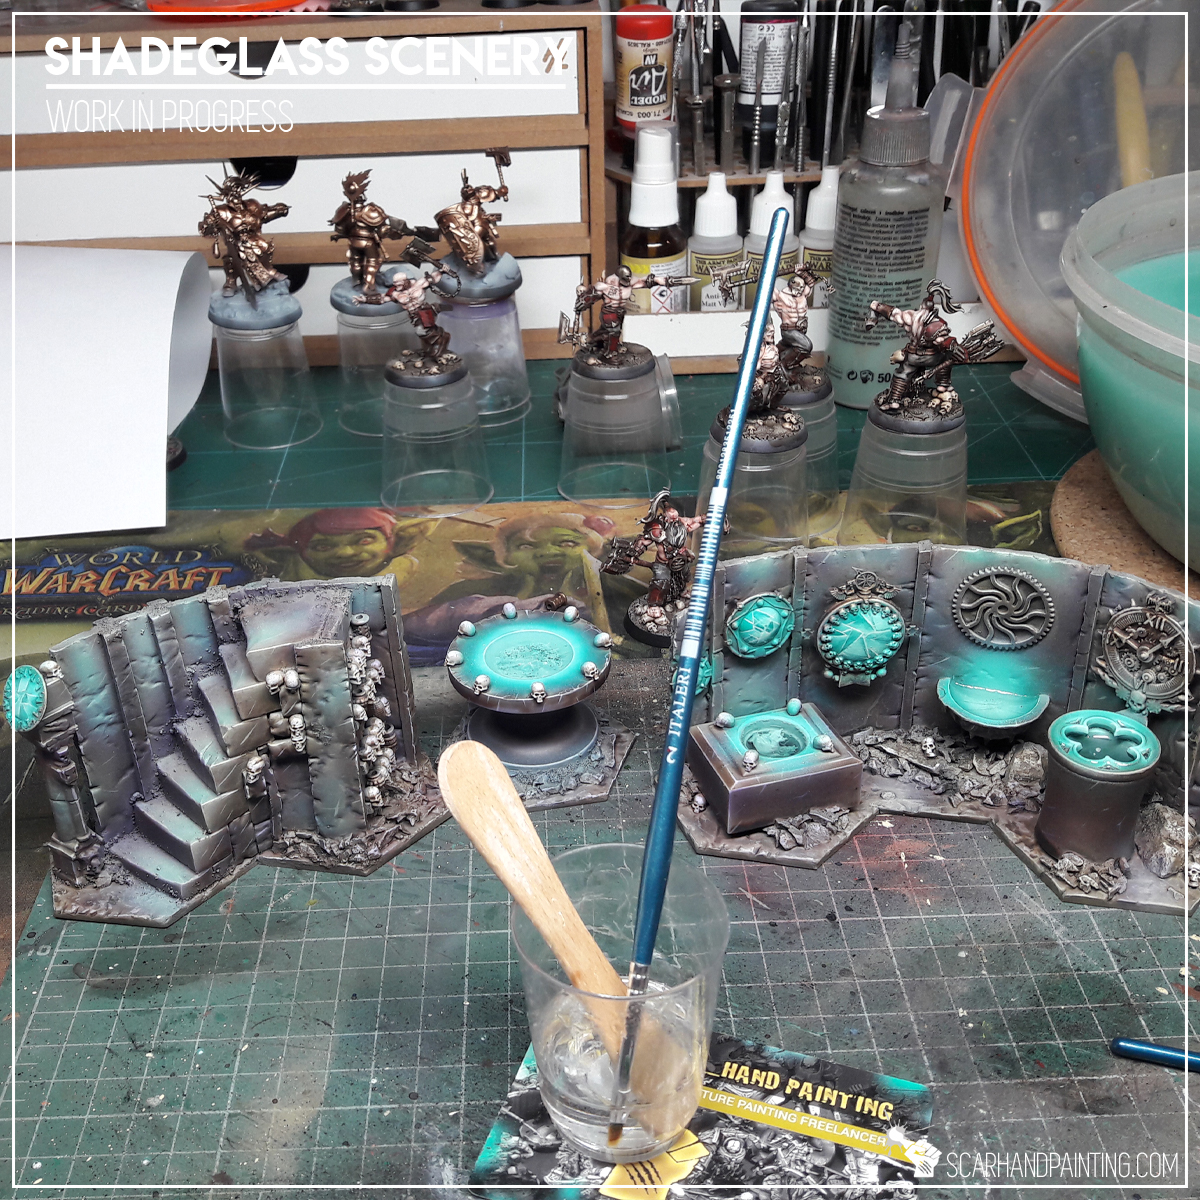
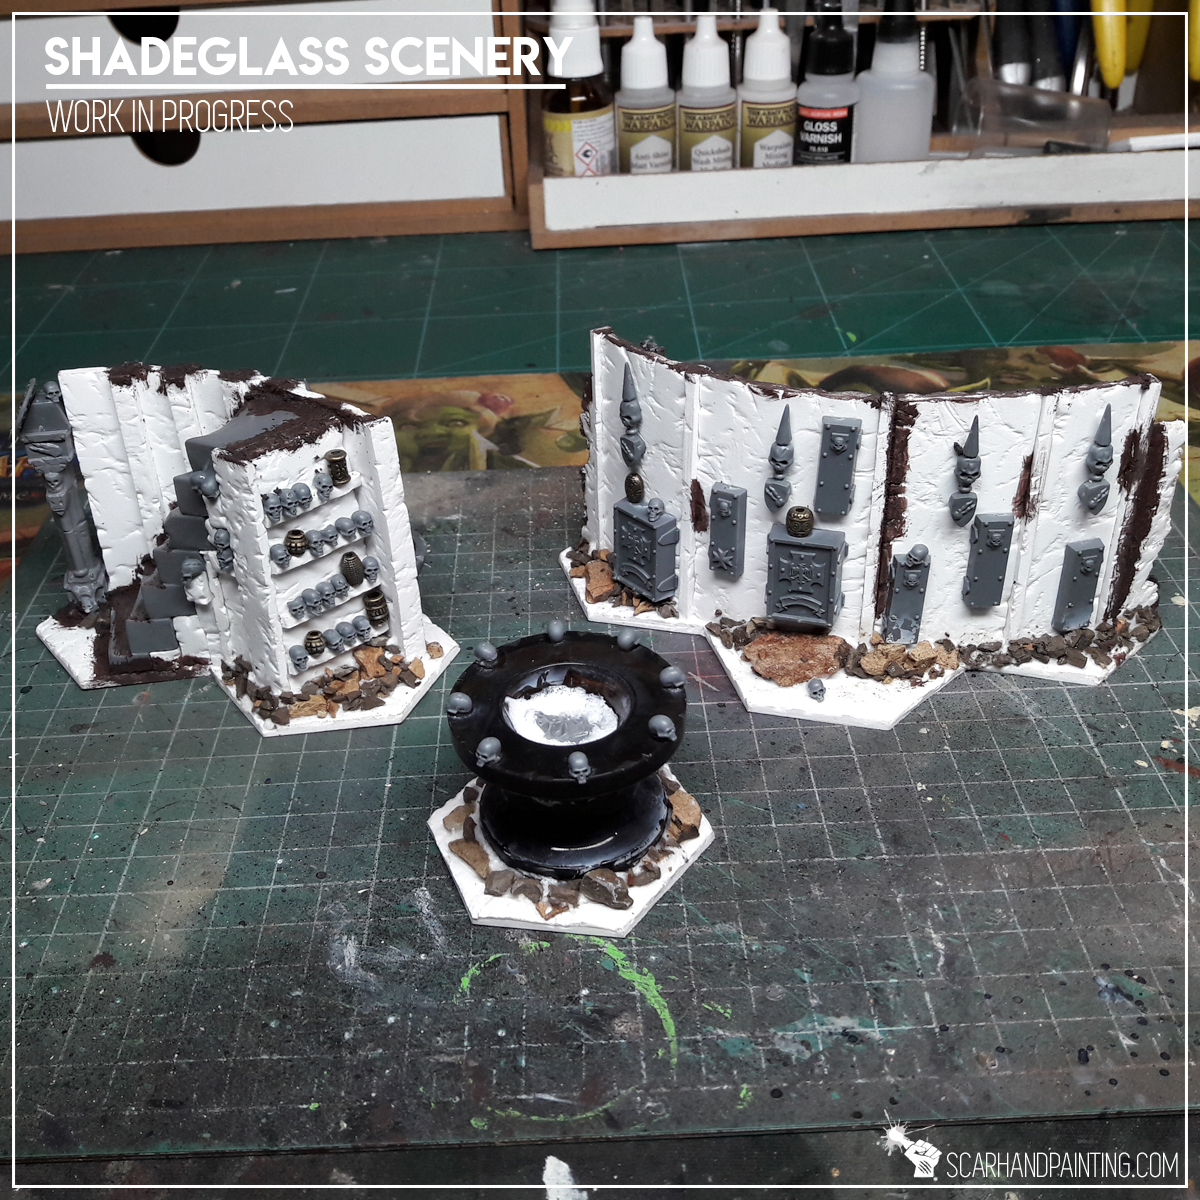
Broken Shadeglass mirrors – a special feature and main theme of the scenery. Decided to approach this in two different ways. First are the hand painted broken mirrors, adorning walls. I simply airbrushed hard angles with a mix of Jade Green and White using a Scarhandpaing’s business card like a stencil. I then adjusted transitions of particular ‘pieces’ of glass and made them more distinct with sharp white lining. Other vessels were a different story. I cut translucent plastic into shards and tossed them into resin-filled vessels. Some sunk instantly, while others stayed afloat – creating a really nice effect – which unfortunately looks much more badass in real life, than in the pictures.


The “Shadeglass Scenery” set is done and it have already seen some Shadespire action. Who knows what will come next if the hype continues? Either way – if you plan to venture into the Mirrored City – be sure to head there through “SHADEGLASS SCENERY” SPECIAL PROJECT gallery…


If you like the article, consider sharing it with someone who likes hobbying around with miniatures. Find me on Facebook and Instagram. Most importantly have a great hobby time!

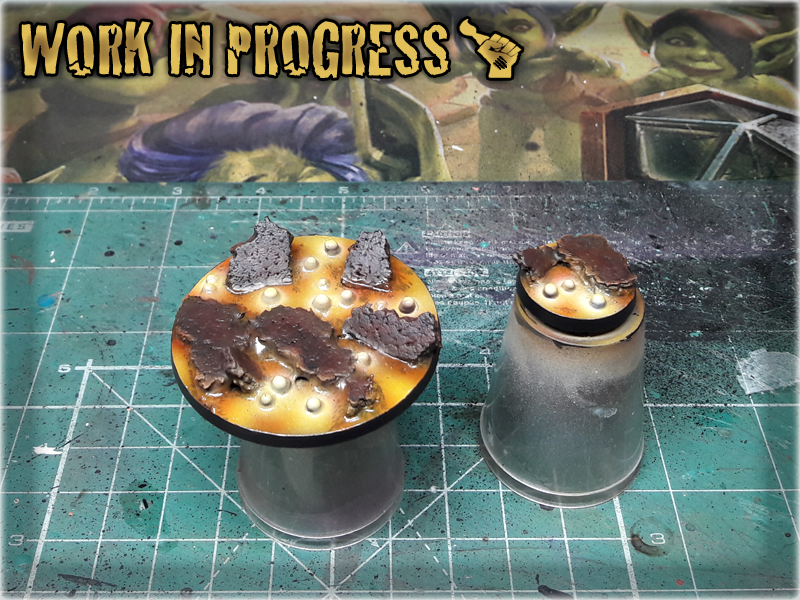
In this article I would like to present to you an easy way to prepare and then paint your own Camo Markers for Infinity the Game.
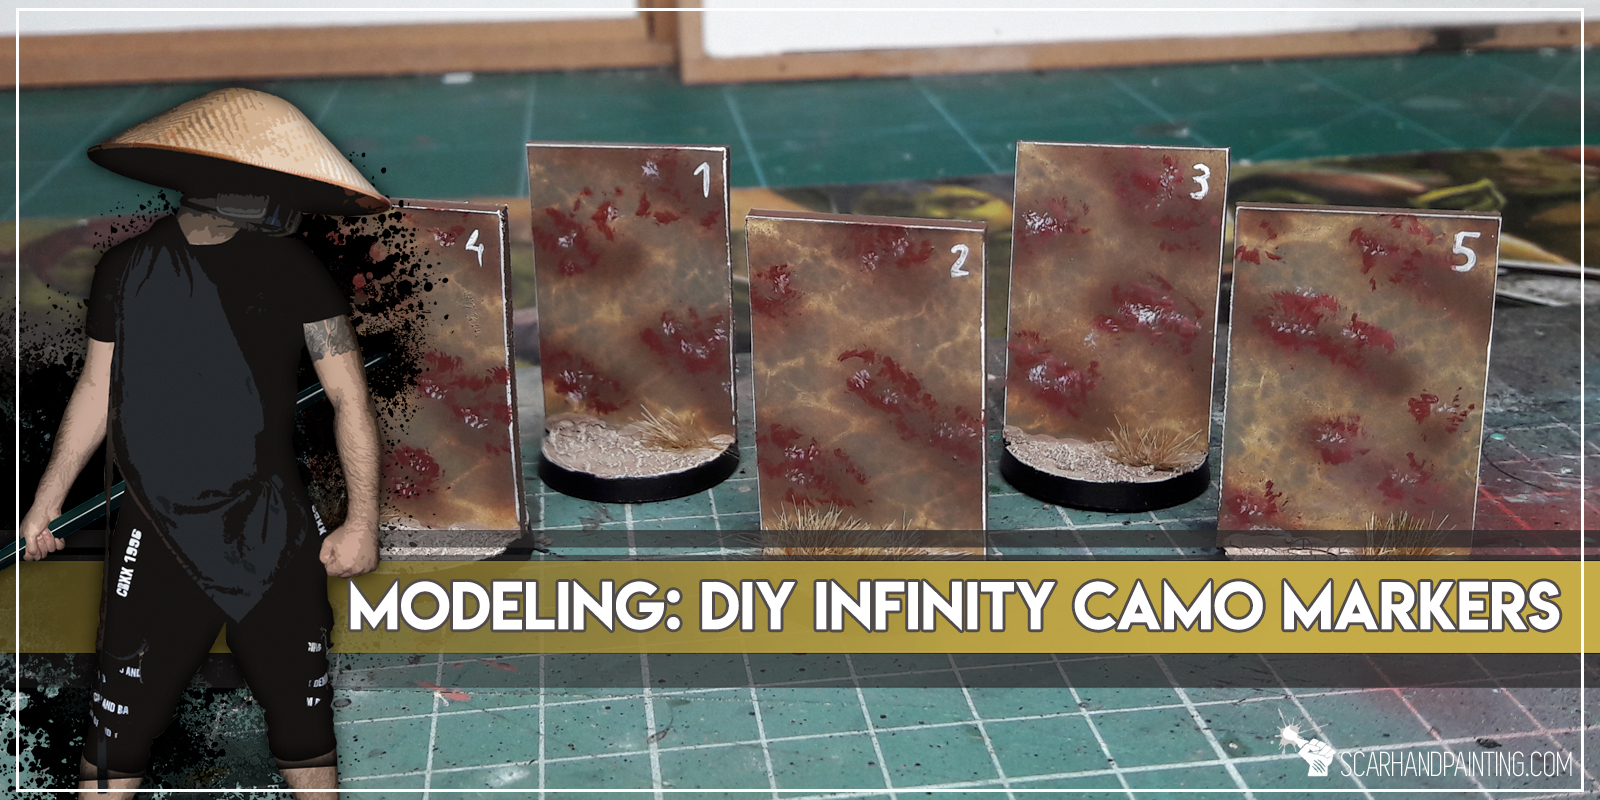
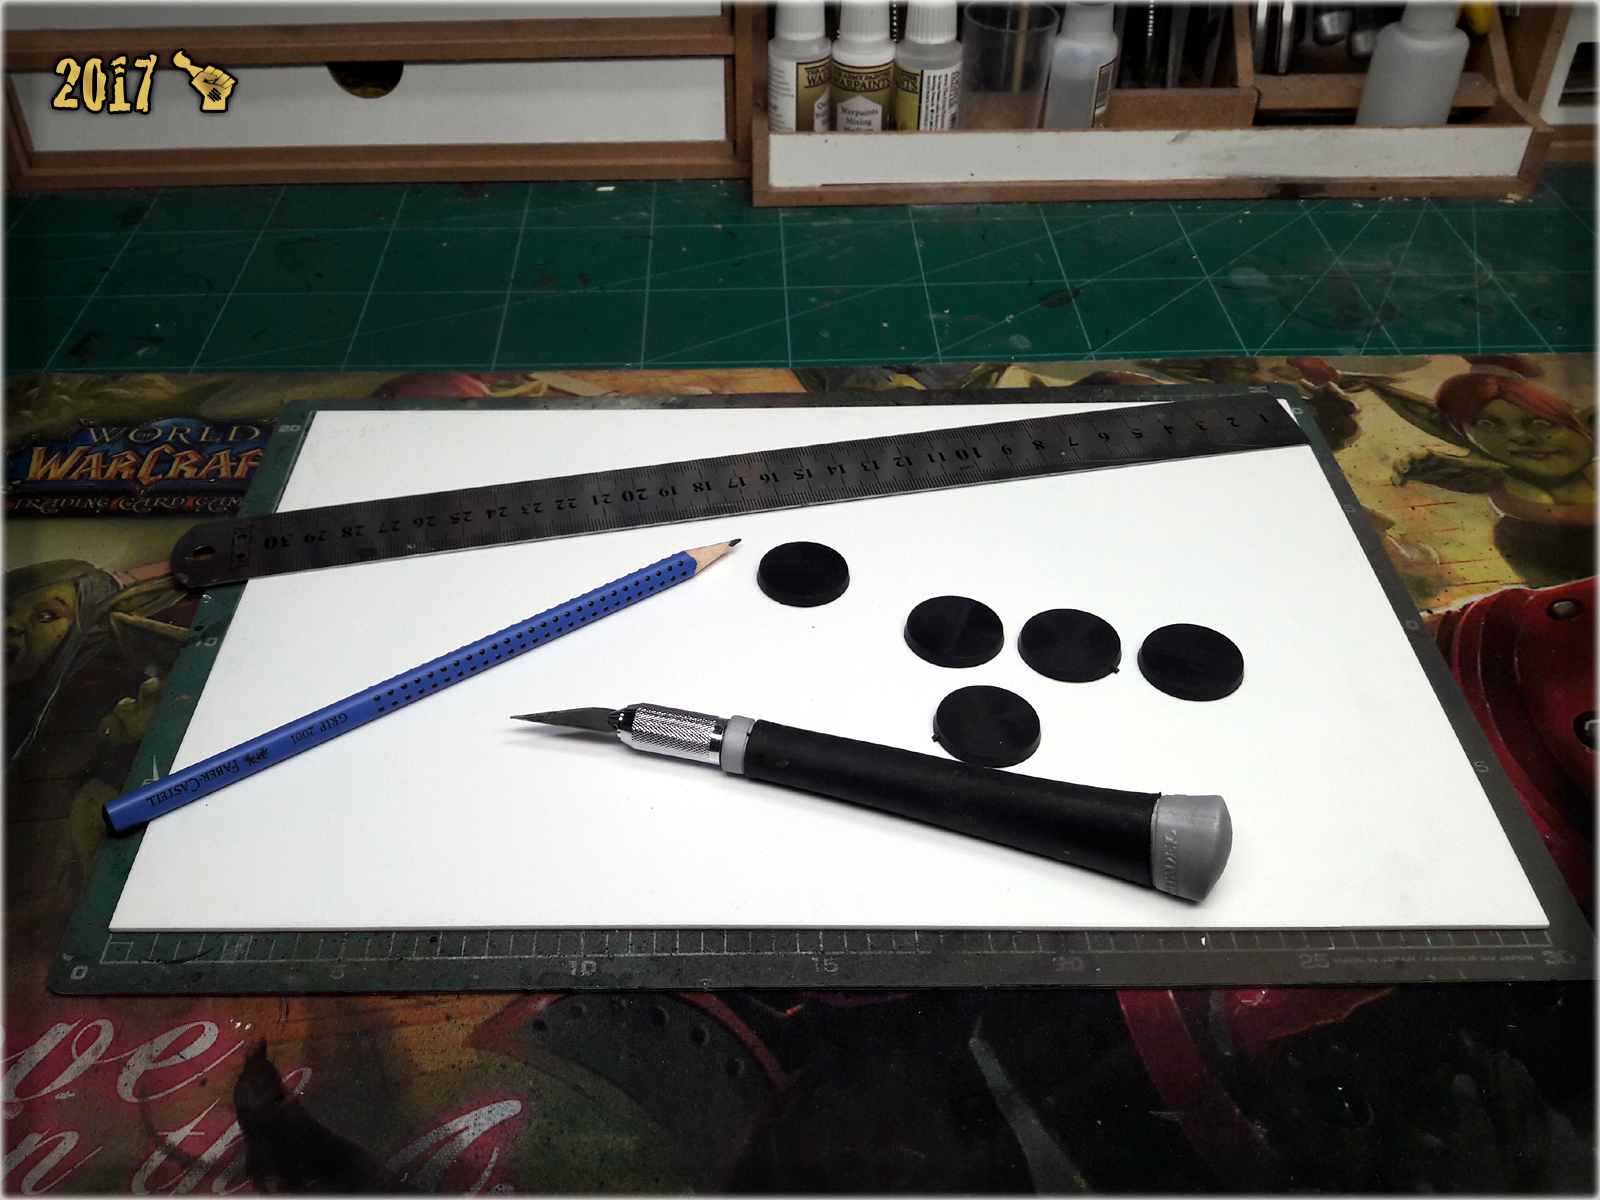
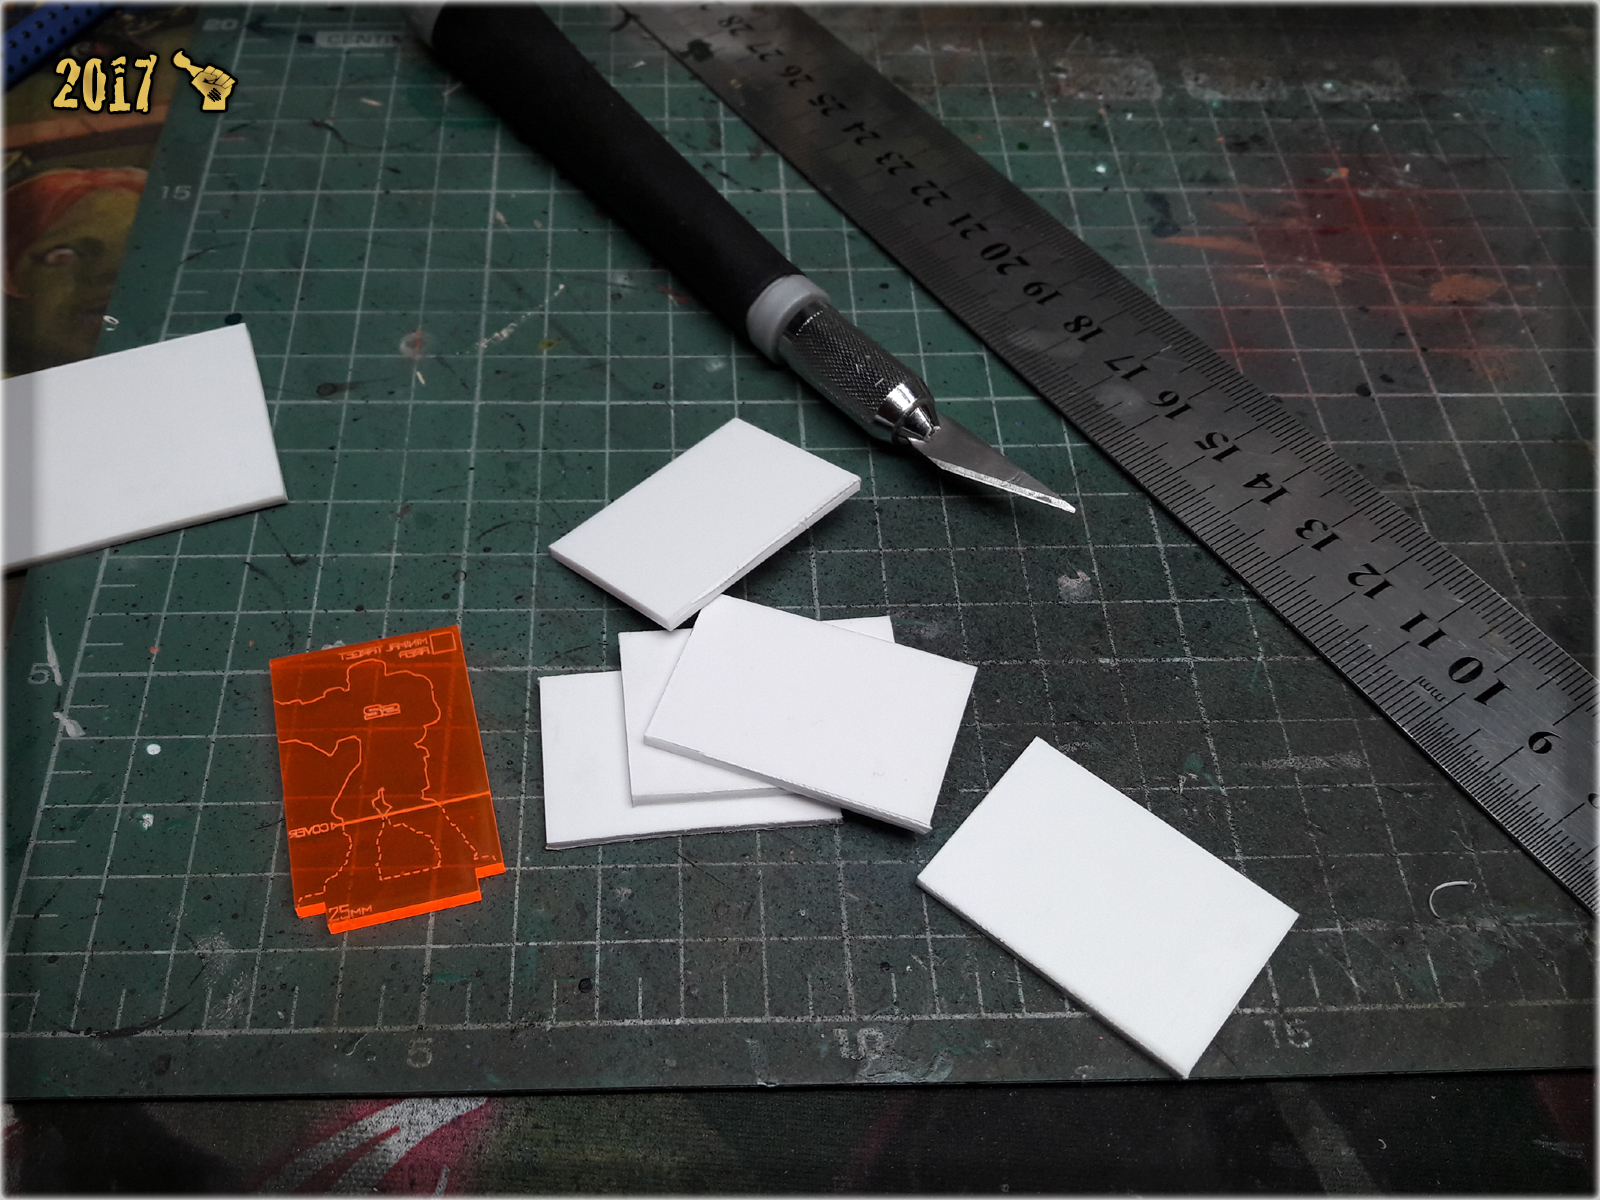
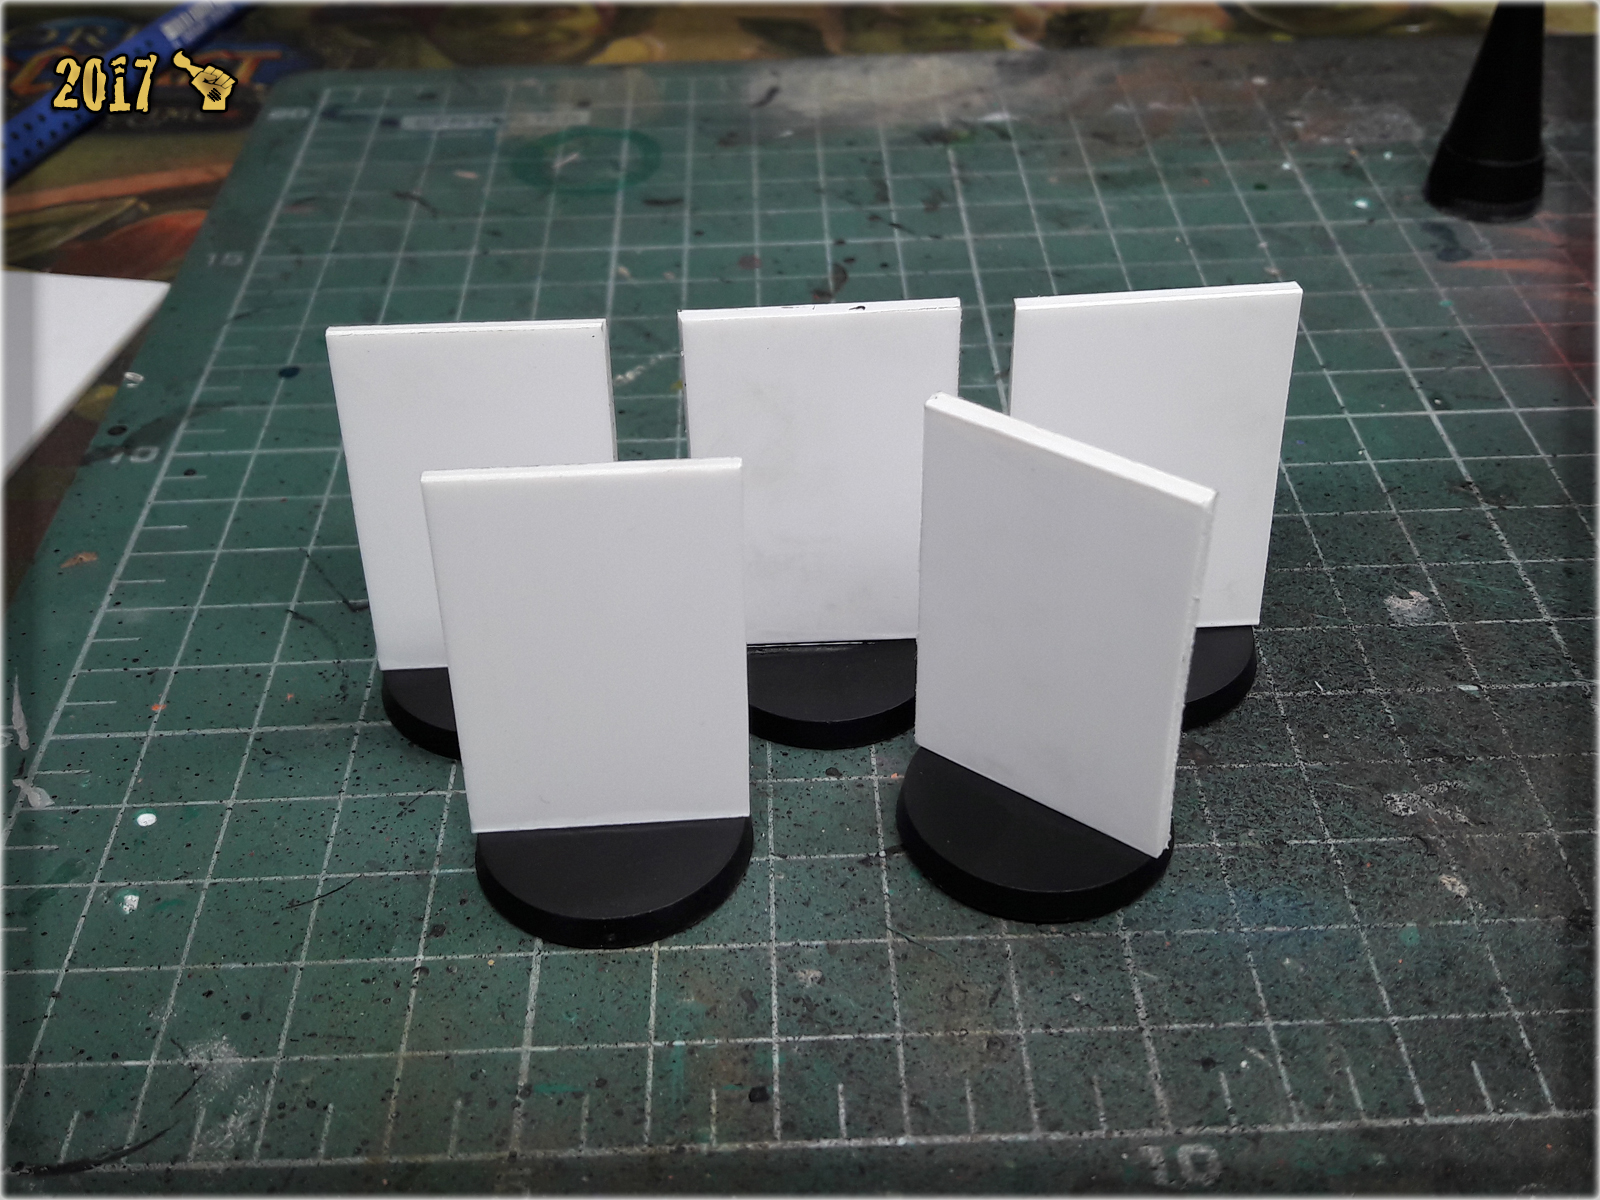
Obviously, the preparation process was pretty simple. Using a ruler, pencil and hobby knife I first drawn and then cut five 25x47mm rectangles made of PCV. I then glued them on top of 25mm round bases. At this point Camo Markers were ready to get painted.

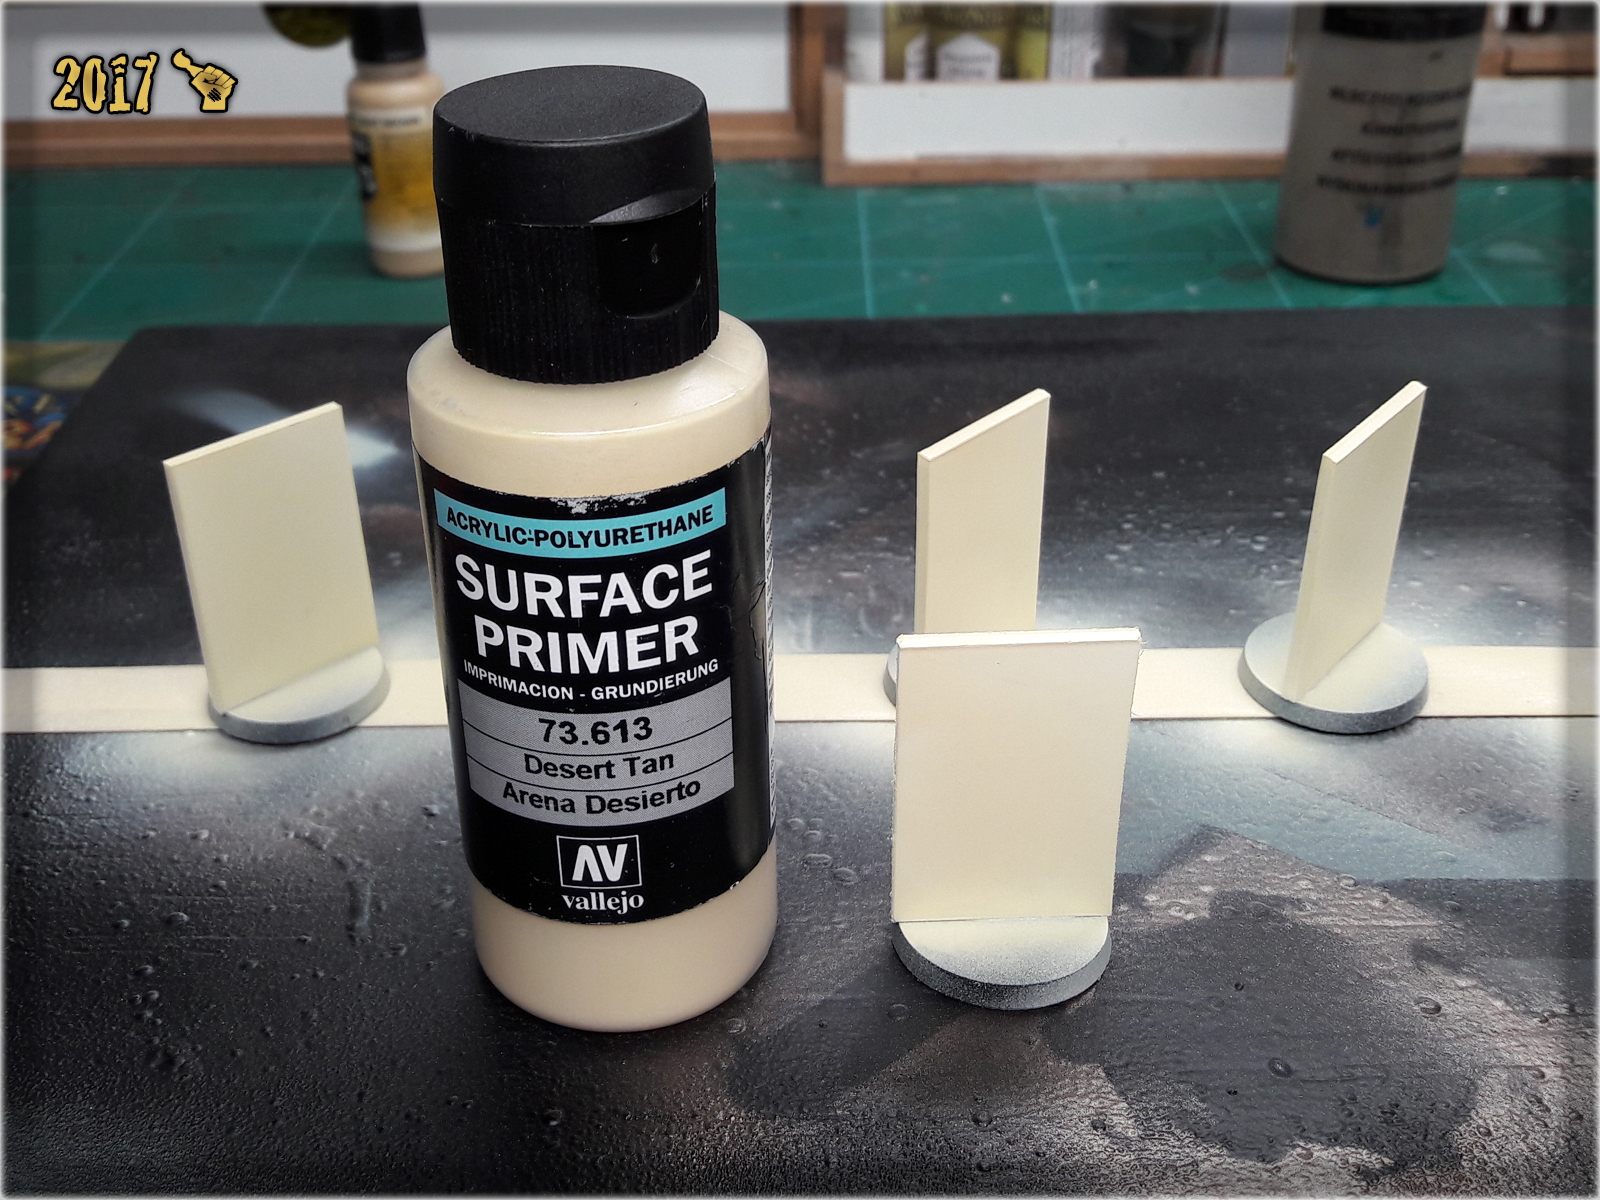
1 First step was to undercoat entire Camo Markers with Vallejo's Desert Tan.
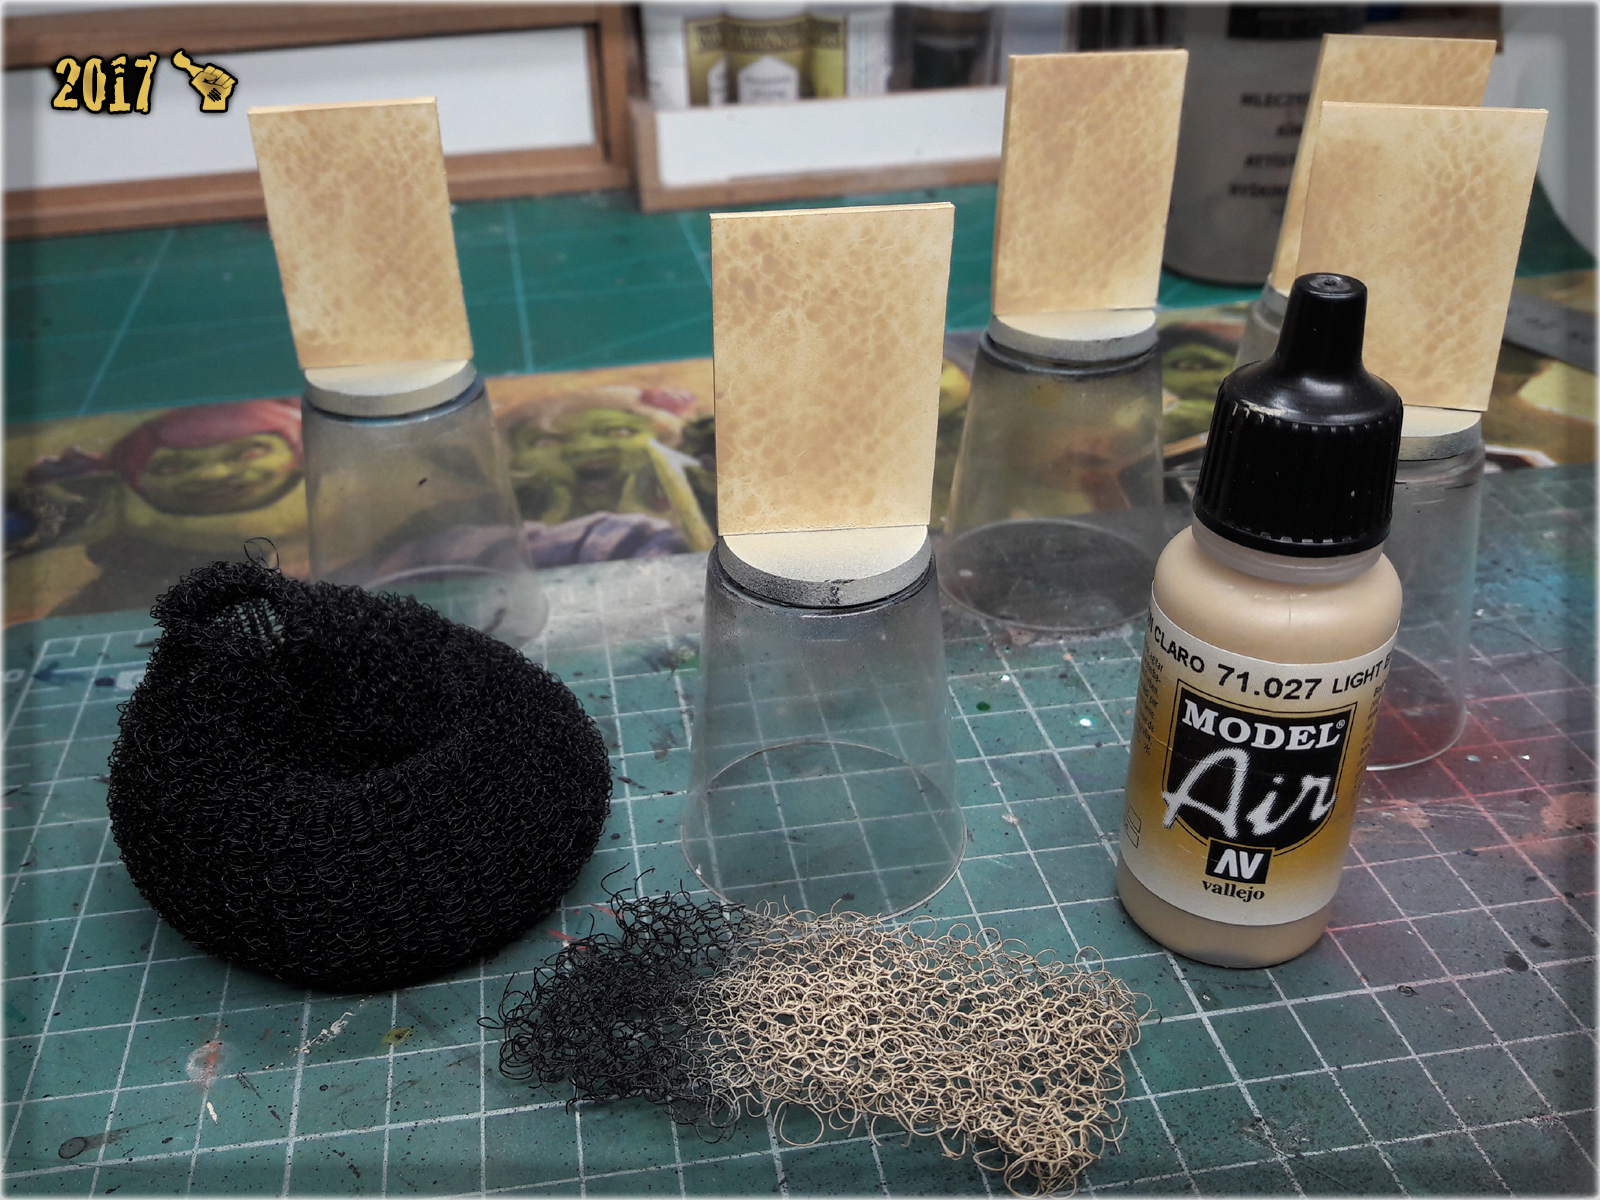
2 Next I used a piece of synthetic hair holder as a stencil and airbrushed Vallejo Light Brown over the Markers.
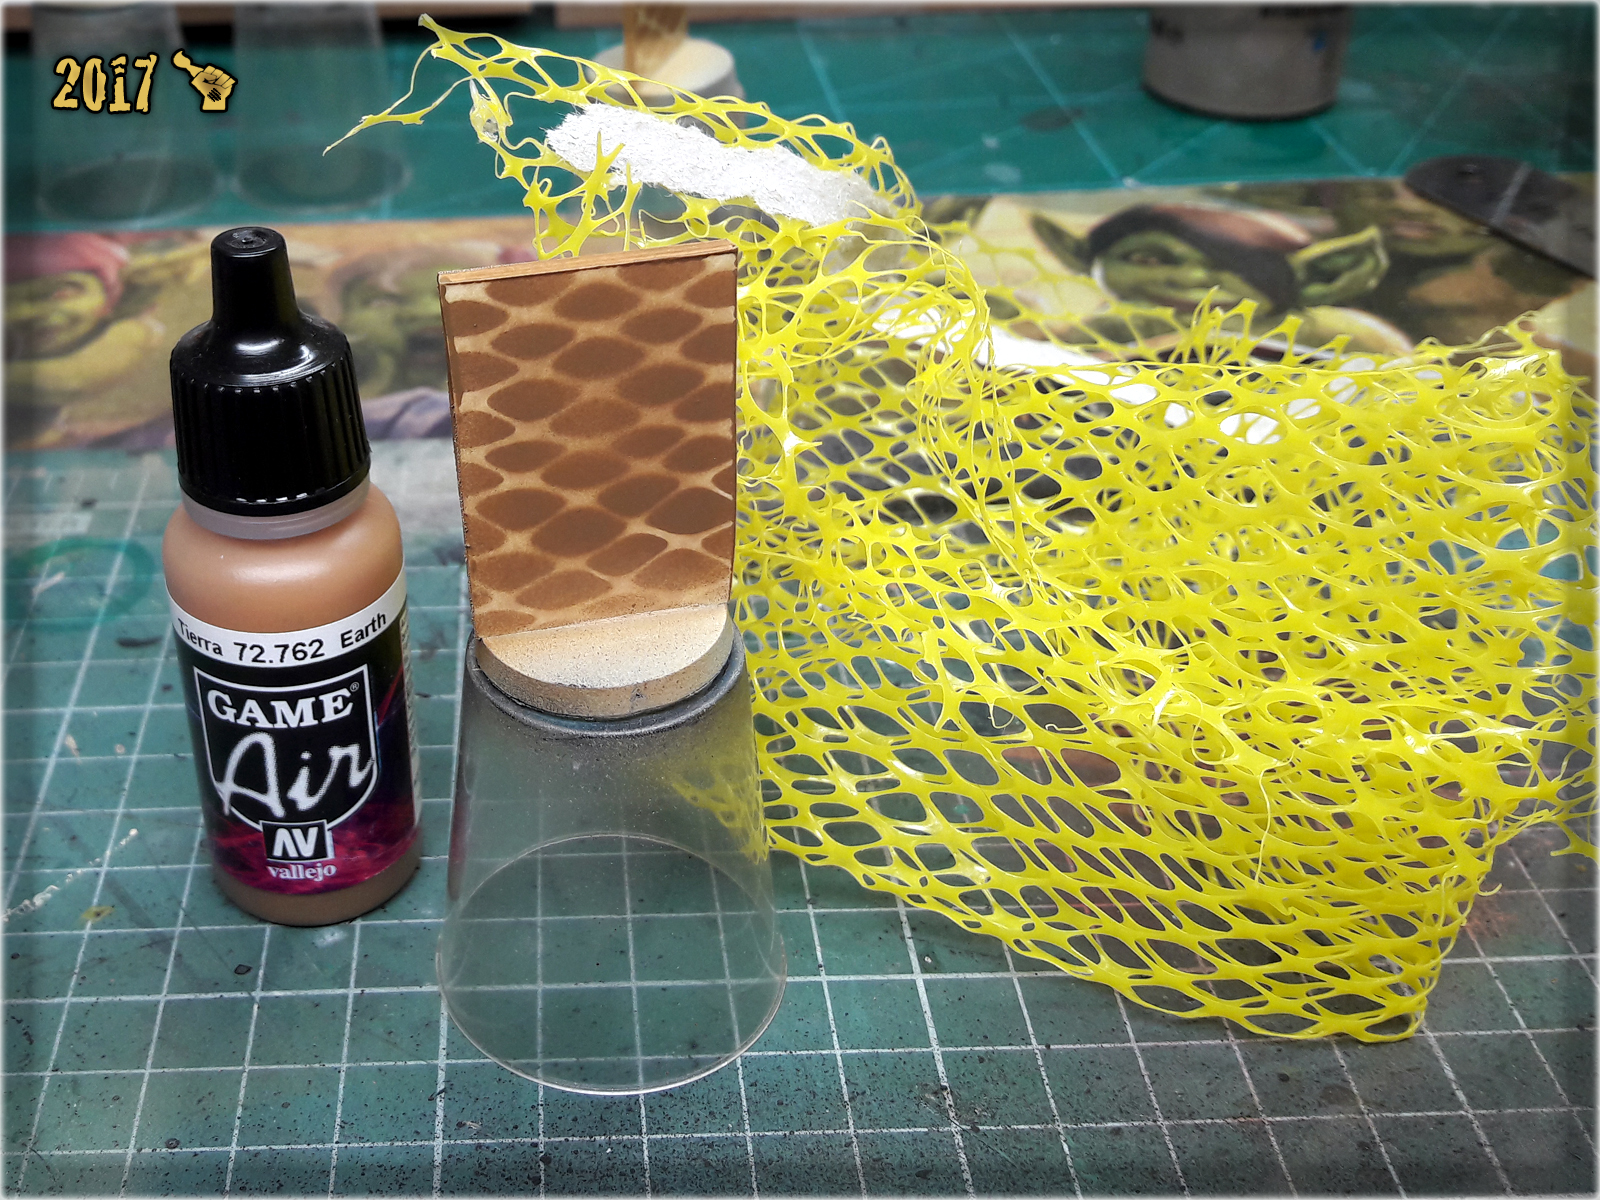
3 Then I switched to Vallejo Earth and airbrushed it over the markers using a piece of net that I got patatoes in. This net should be easily obtainable in every grocery store and makes for a really cool stencil.
4 I then got back to hair holder stencil and airbrushed a layer of Vallejo Light Grey Green.

5 Next I airbrushed points of Vallejo Dark Flesh.
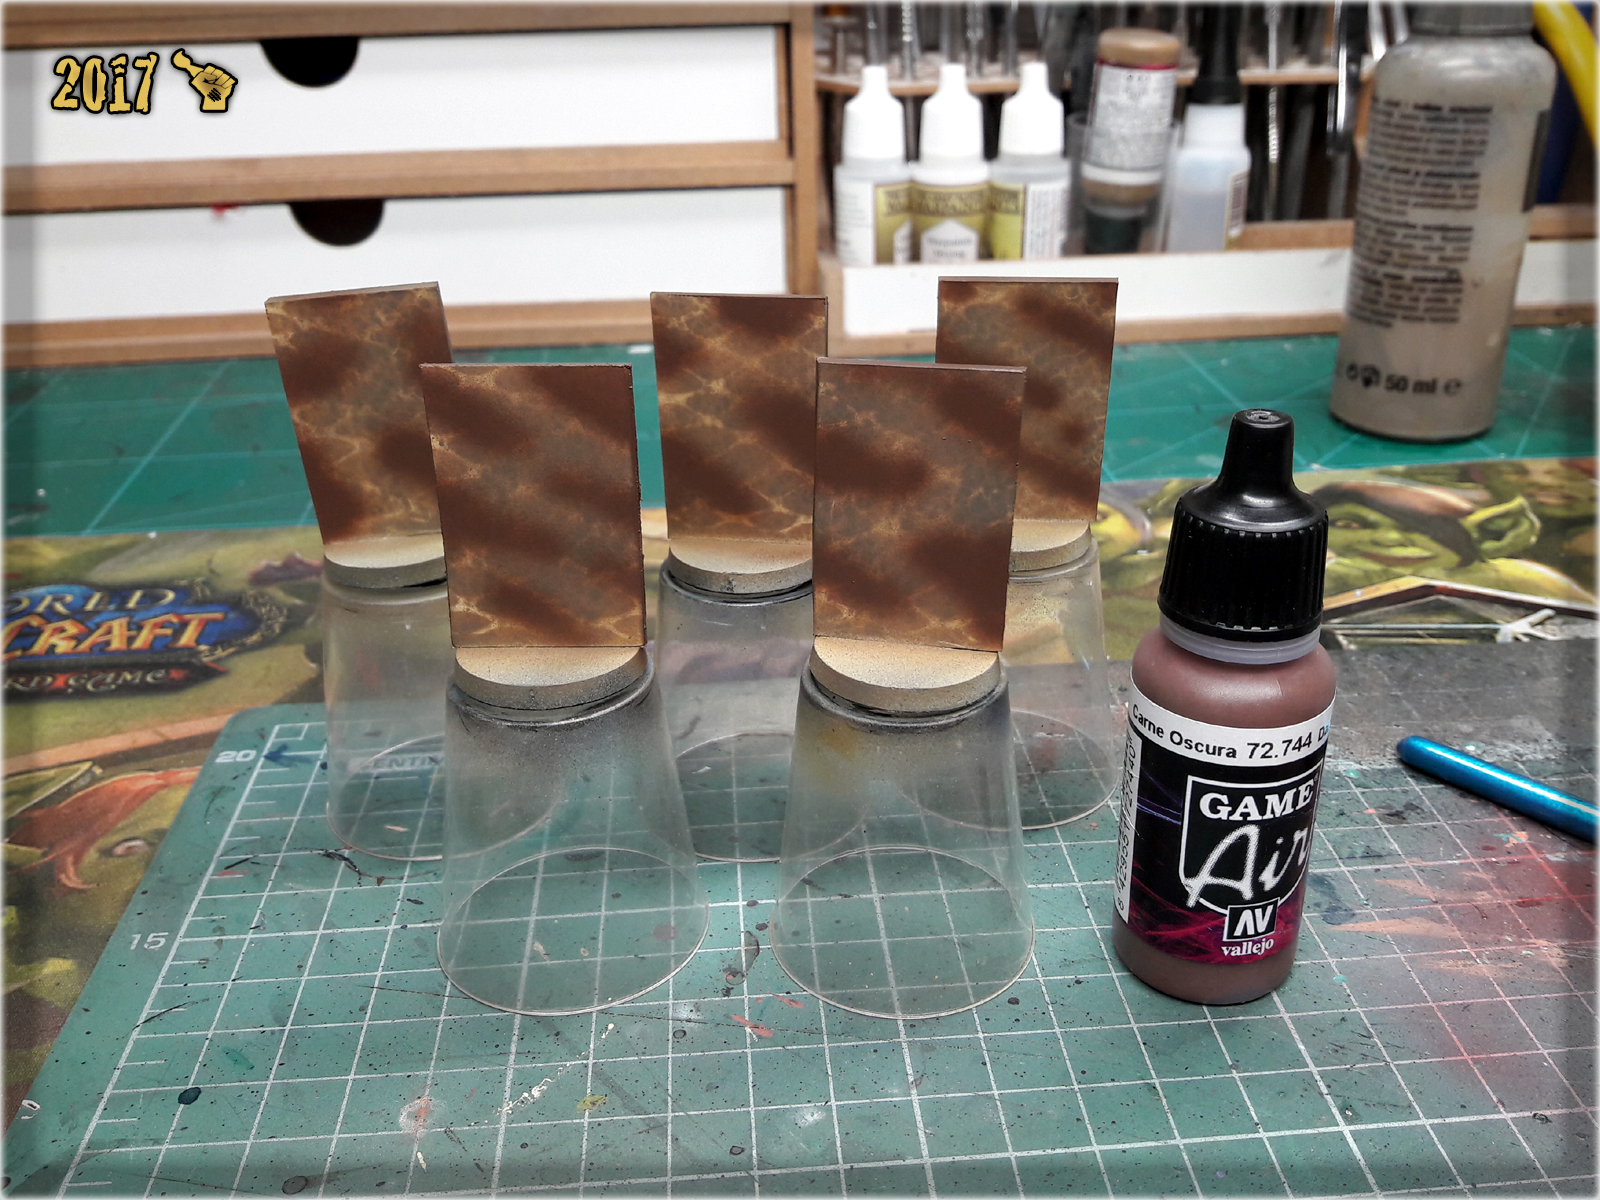
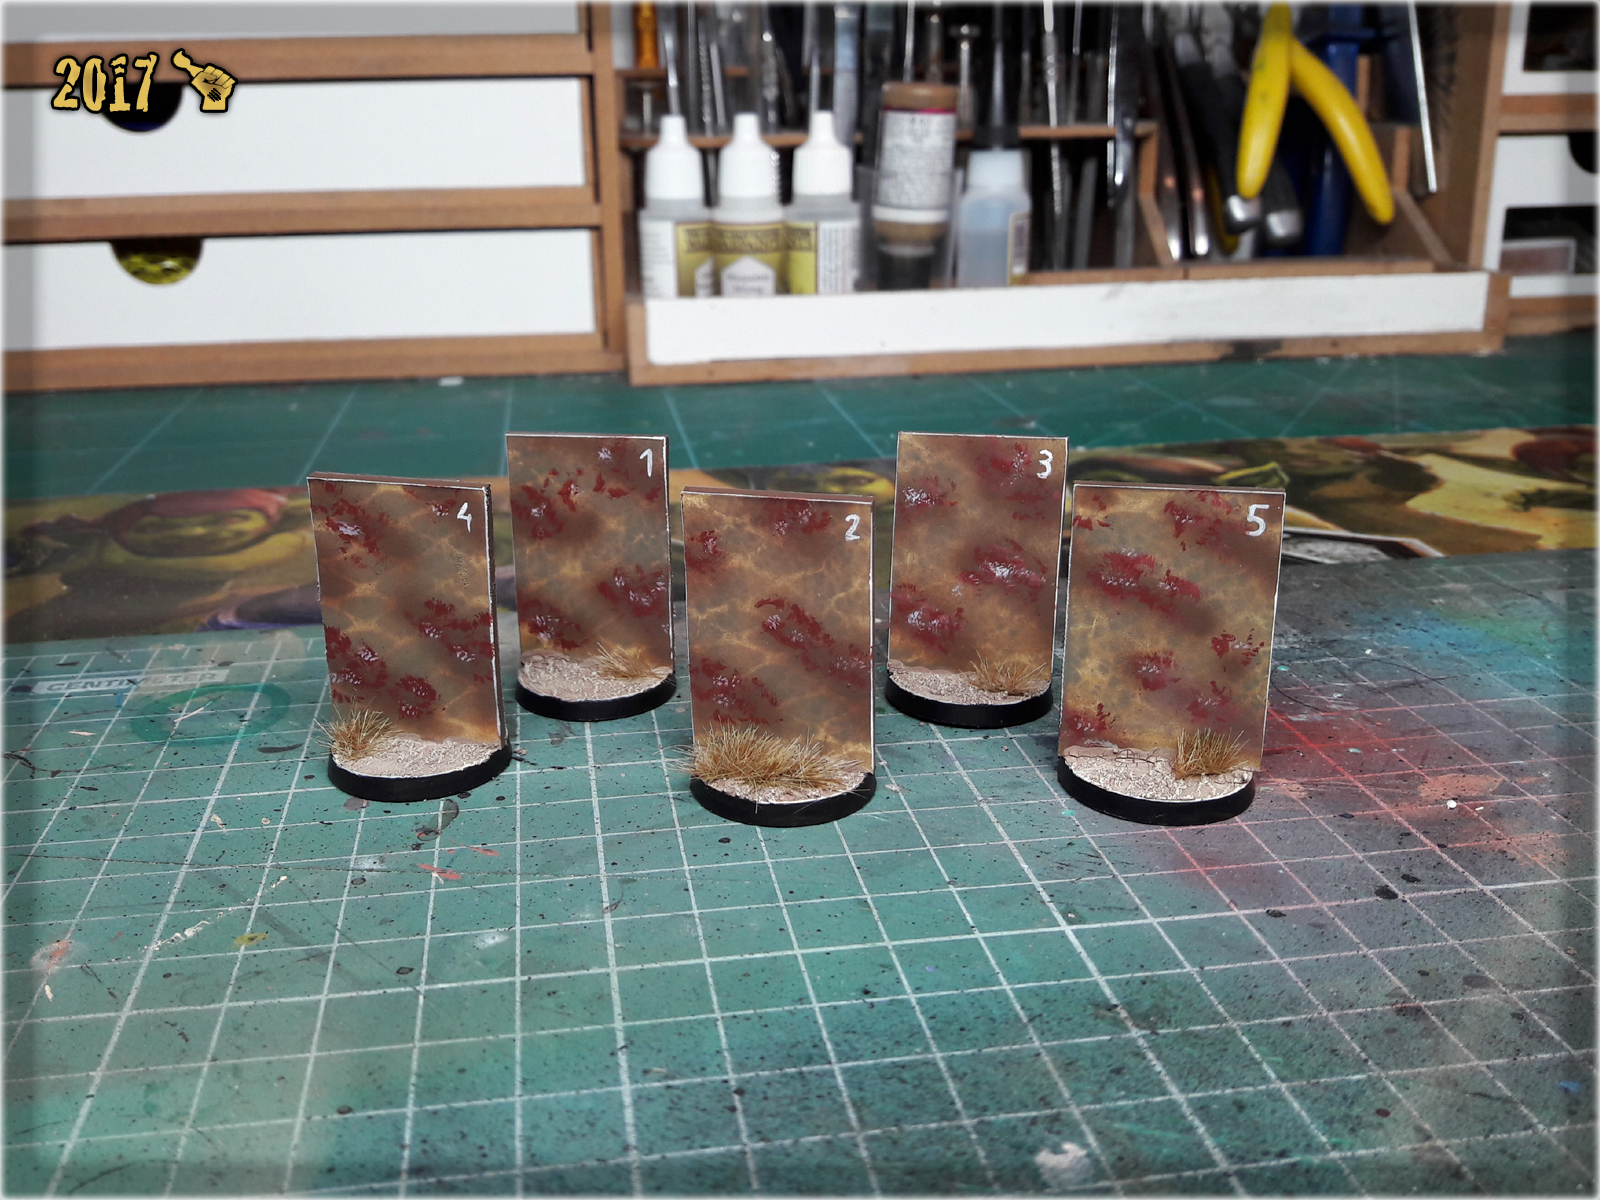
6 Some wet stippling went next. First I applied clumsy dots of Vallejo German Red Brown, then did the same with Games Workshop Pallid Wych Flesh. Afterwards I used Pallid Wych Flesh to mark edges of the markers and provide number to distinguish them from one another on the gaming board.

7 Basing came last. I used Games Workshop Agrellan Earth and Agrellan Badland, then drybrushed them with Karak Stone and Flayed One Flesh. Work done.
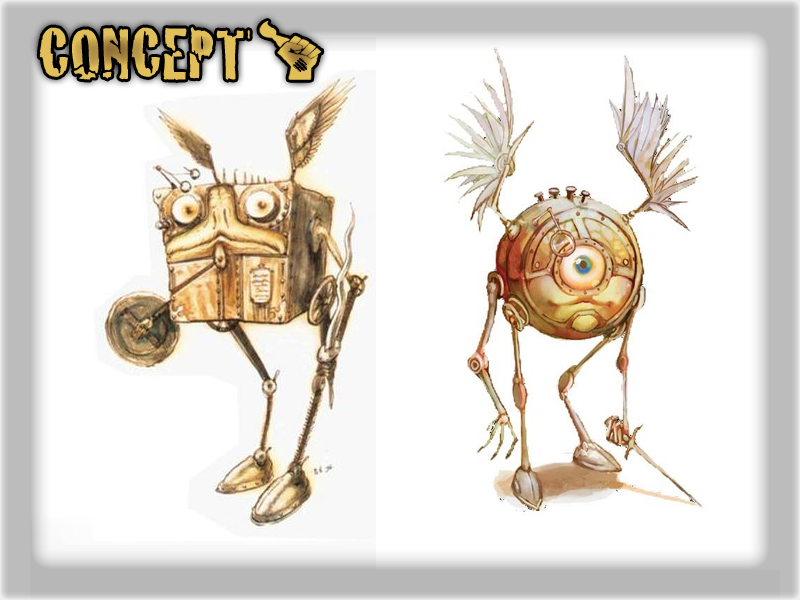
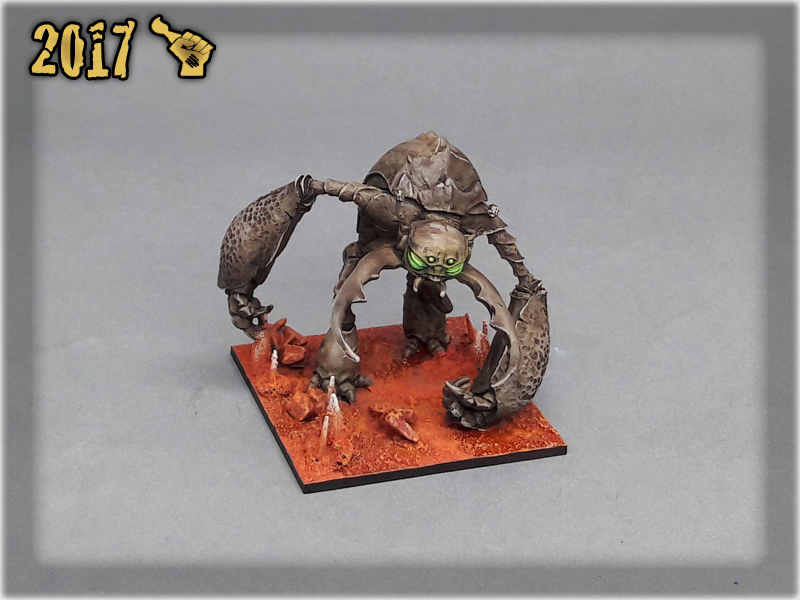
“In the fictional multiverse of the Dungeons & Dragons fantasy role-playing game, Modrons are creatures native to the outer plane of Mechanus. Modrons resemble geometric shapes with humanoid limbs and represent a living, physical manifestation of law without regard to good or evil. They follow a strict hierarchy, with each rank reporting to the rank directly above it, and issuing commands to the ones ranking beneath it. For example, a quadrone modron will report to a pentadrone, and command several tridrones.”
This Special Project is a part of the ever growing Thomas’s Peculiar Collection. With new D&D adventure just being released and the Modrons playing an important role in it – Thomas have asked me to prepare a set of Modrons of different shapes and sizes – to fill eventual requirements of his Game Master needs. He then provided some fantastic and imaginative materials to base my work on.

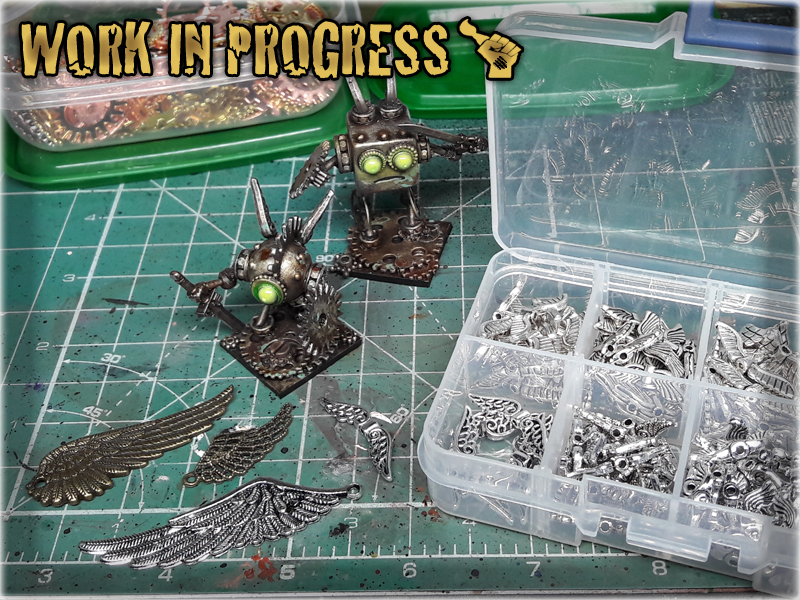
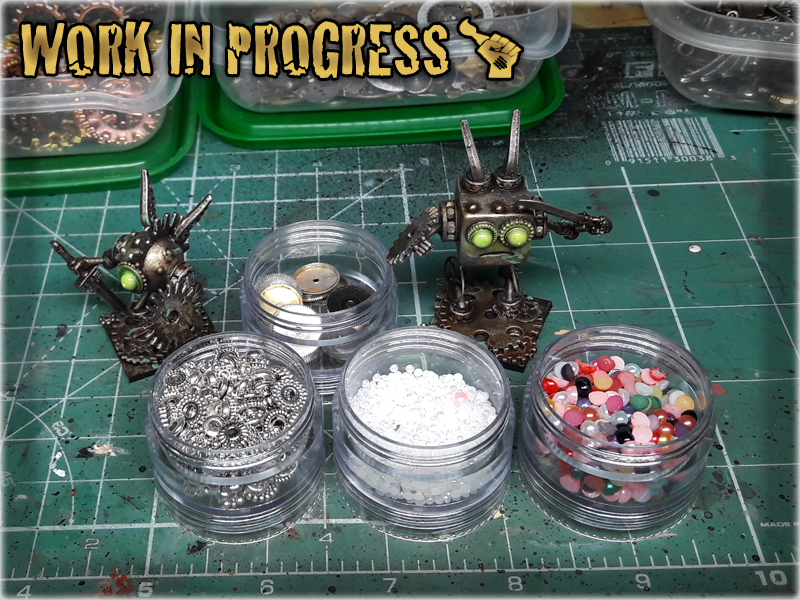
Thomas knew very well how to support his favorite Arcane Artificer for the grand task of creating an entire collection of Modrons. He ordered a variety of awesome hobby (and not entirely hobby) materials that were meant to bolster my own collection of ‘scrap’. With the concept already implanted in my mind and a magnificent drop of loot delivered by a courier – I spent half a day just segregating and preparing bitz and usable stuff for later use.
The project was then put on hold, due to other projects standing in the way (schedules must be met). Fortunatelly it did not took long and about a month later I reignited the spark of the arcane – sat down and started working on the Clockwork Modrons.
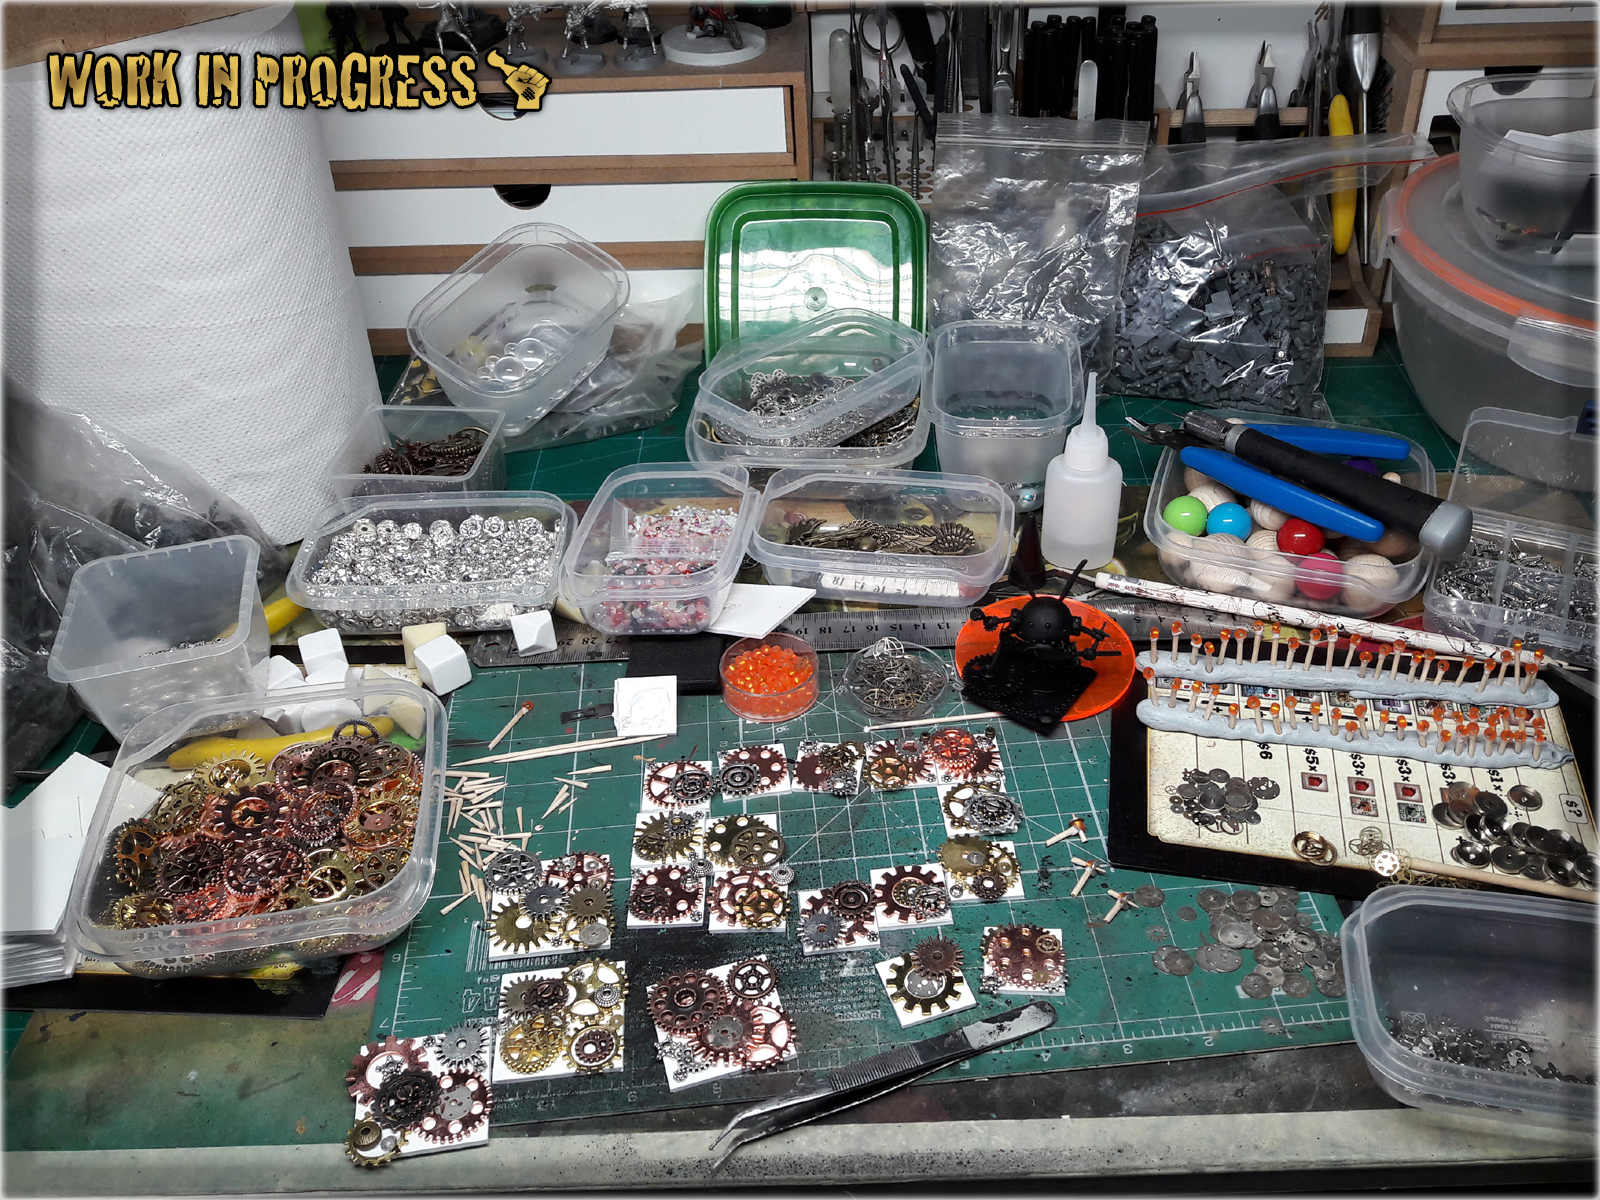
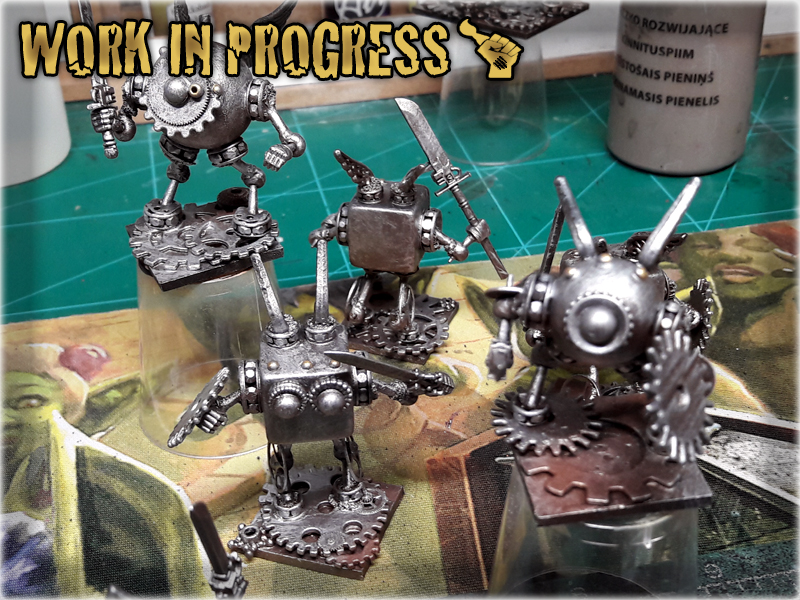
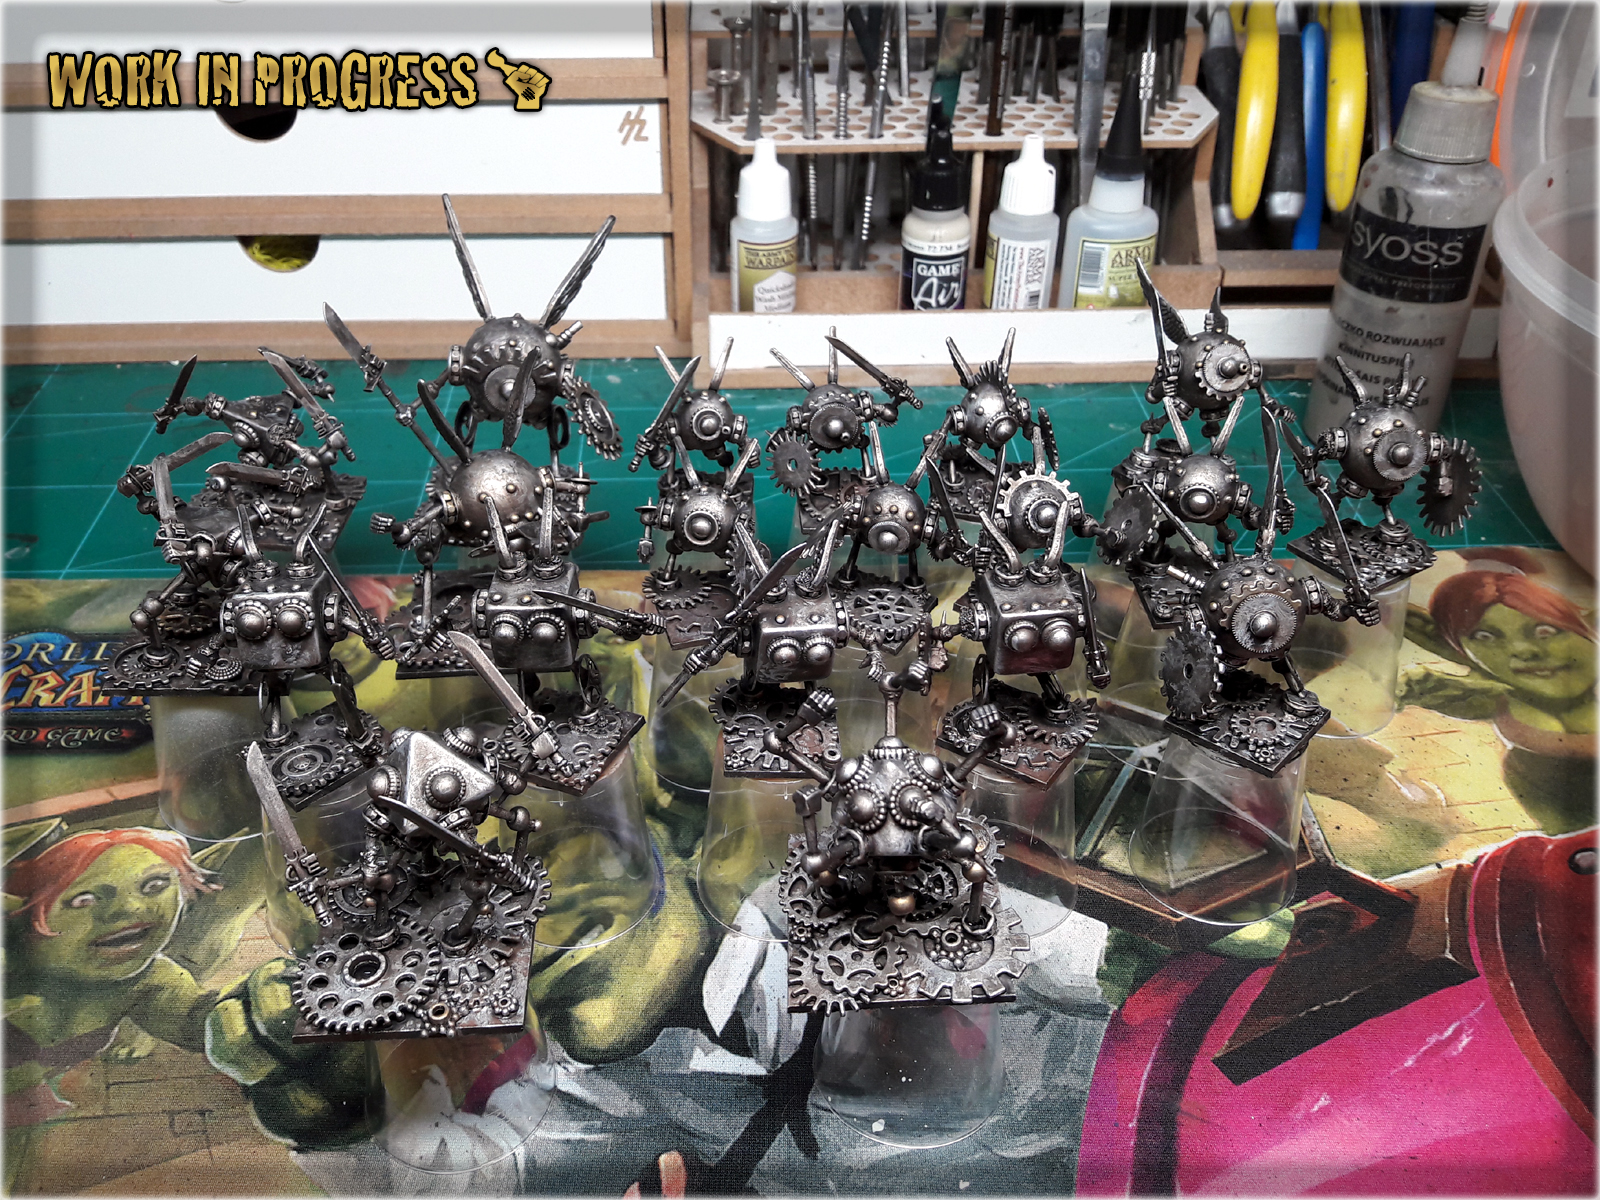
First a test subject, and then – upon it being accepted by my master – I worked day and night to bring more such magical creatures into being. Bodies invoked with use of wooden balls and smooth dice of many shapes. Sockets, joints and detail forged with decorative beads. Limbs created with toothpicks, bases cut of plasticard, weapons stolen from the Warhammer 40,000 miniatures… A wast production line was set up on my workbench and I was at the same time the coordinator, concept supervisor and the working force…
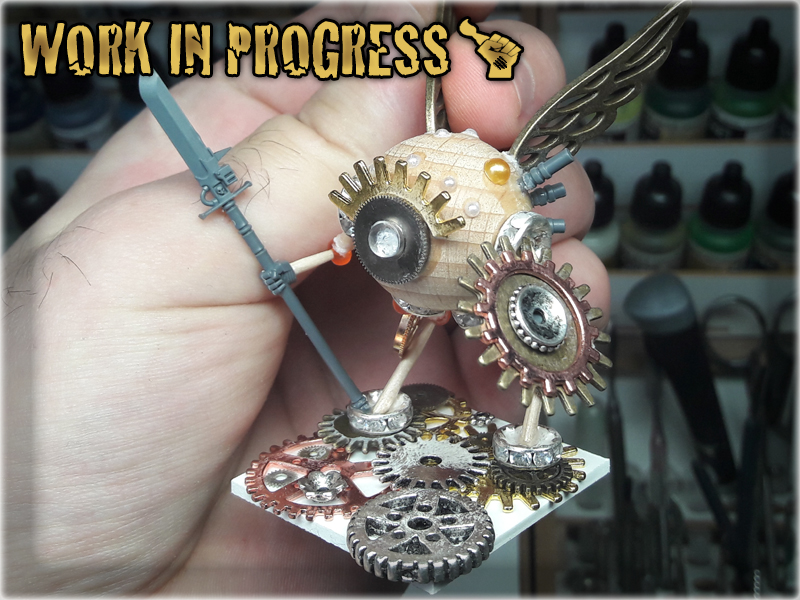
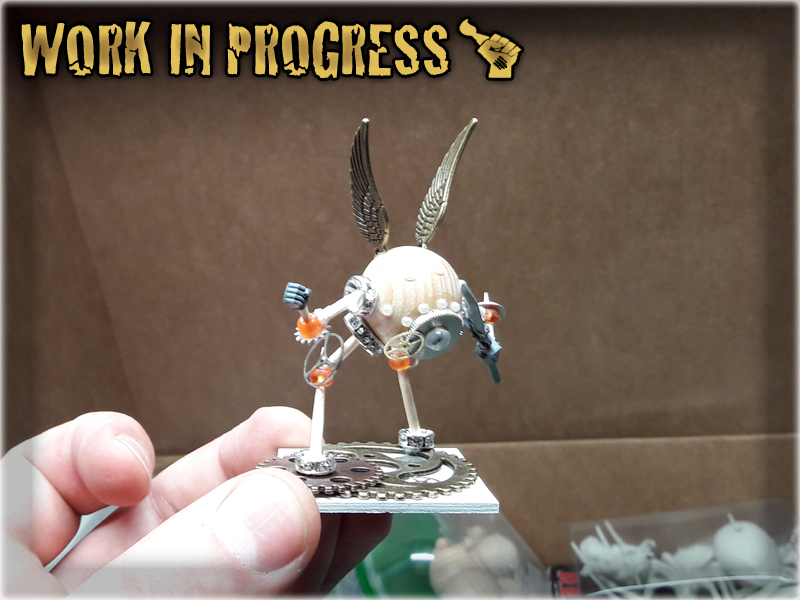


Some time passed, before totally exhausted and with fingers covered in a layer of hardened super glue, I reached the goal of creating vessels for souls of the Modrons to occupy. I then put a lot of effort to bolster them against the forces of gravity and potential stress they might suffer during games to come.
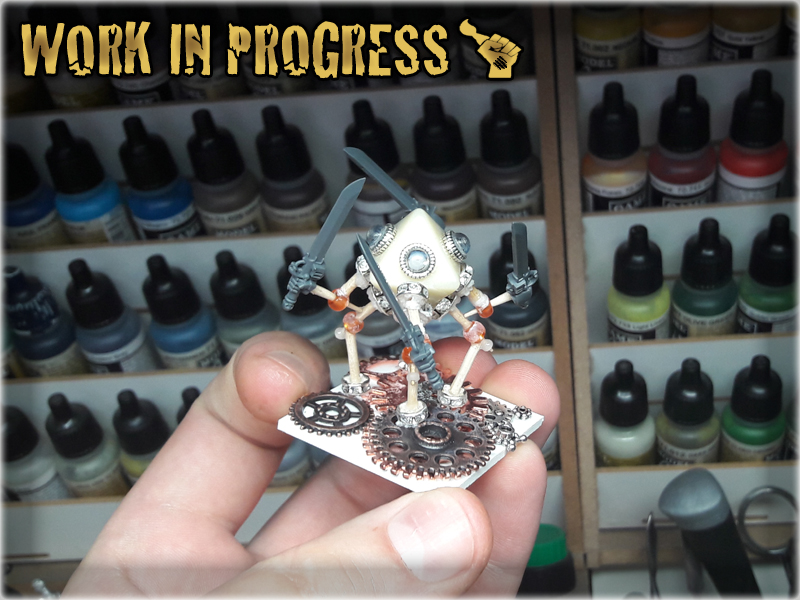


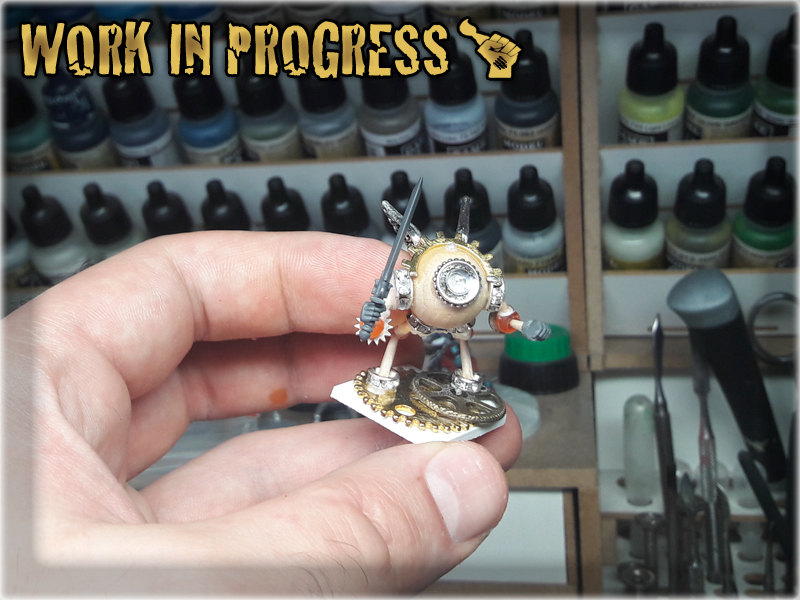
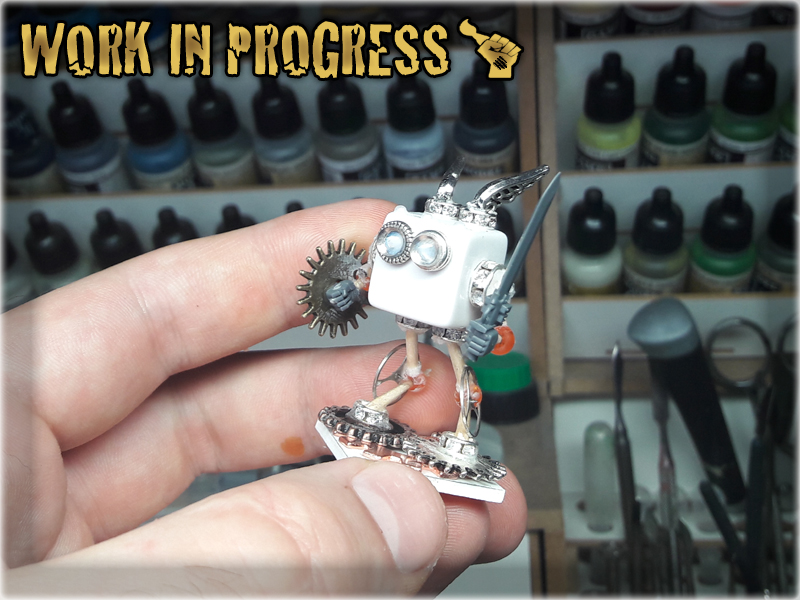
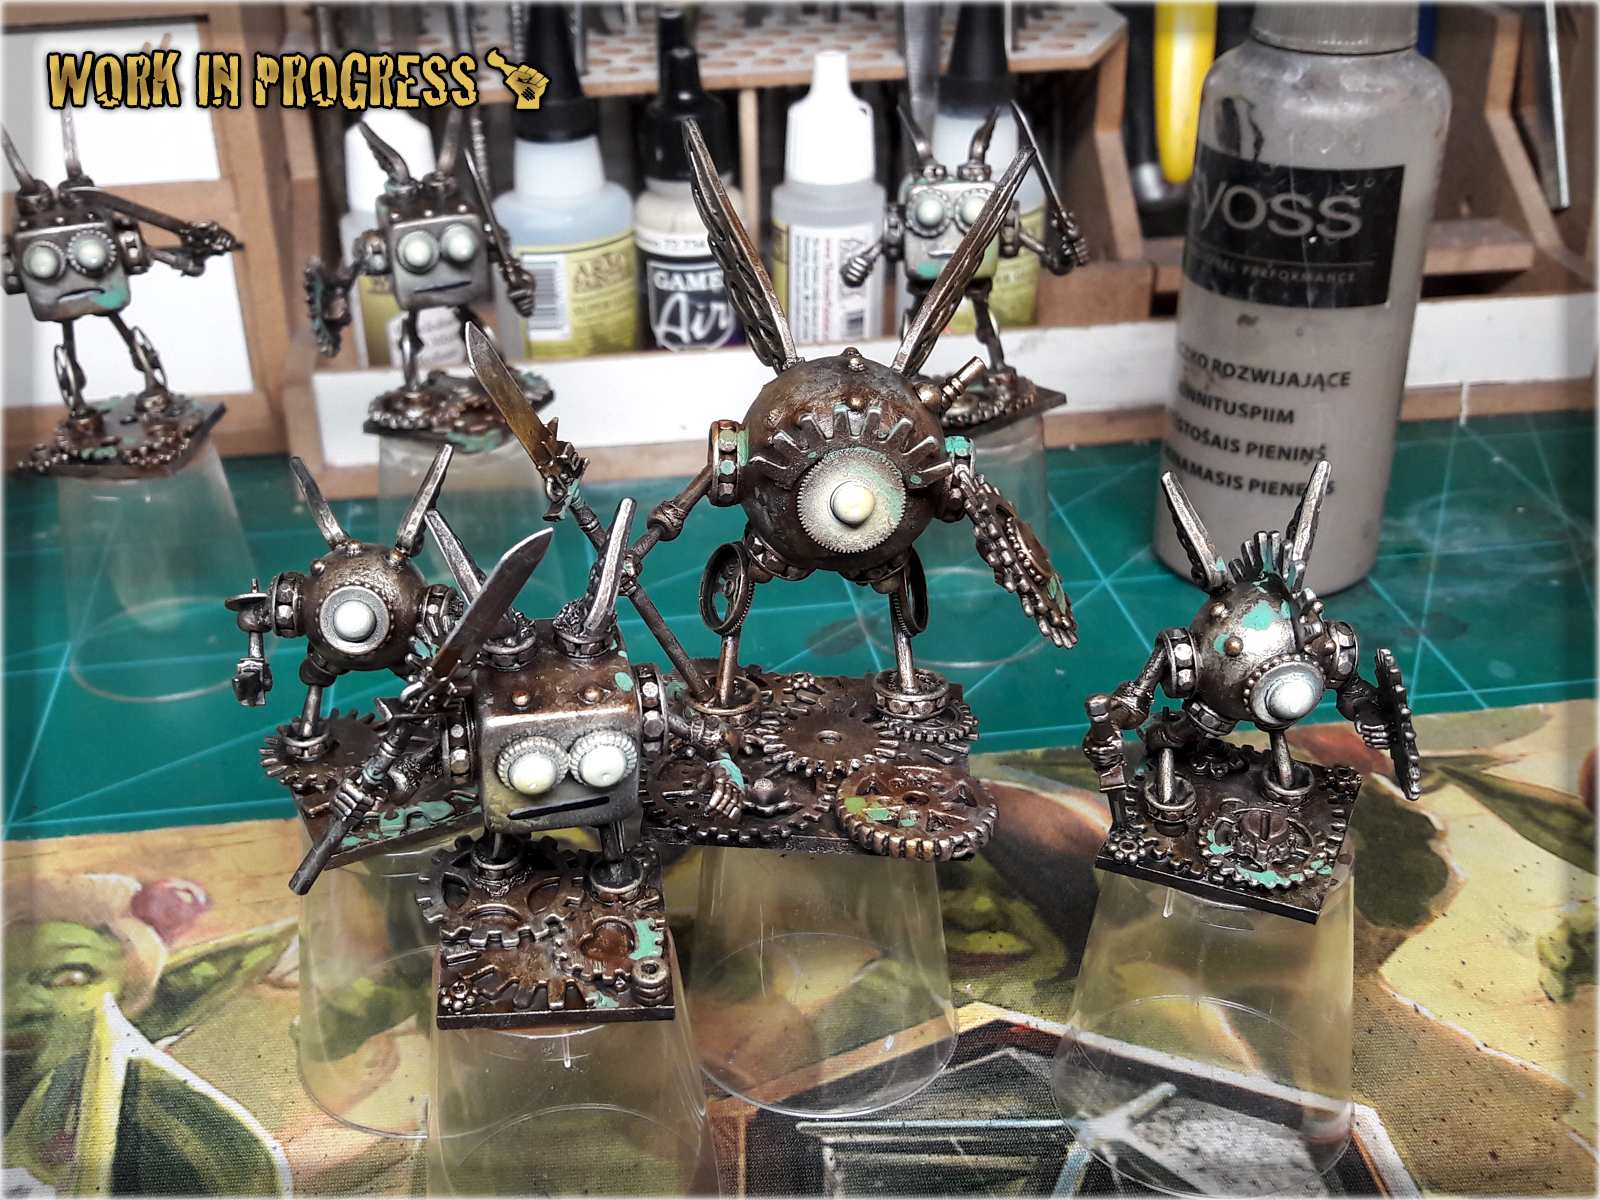
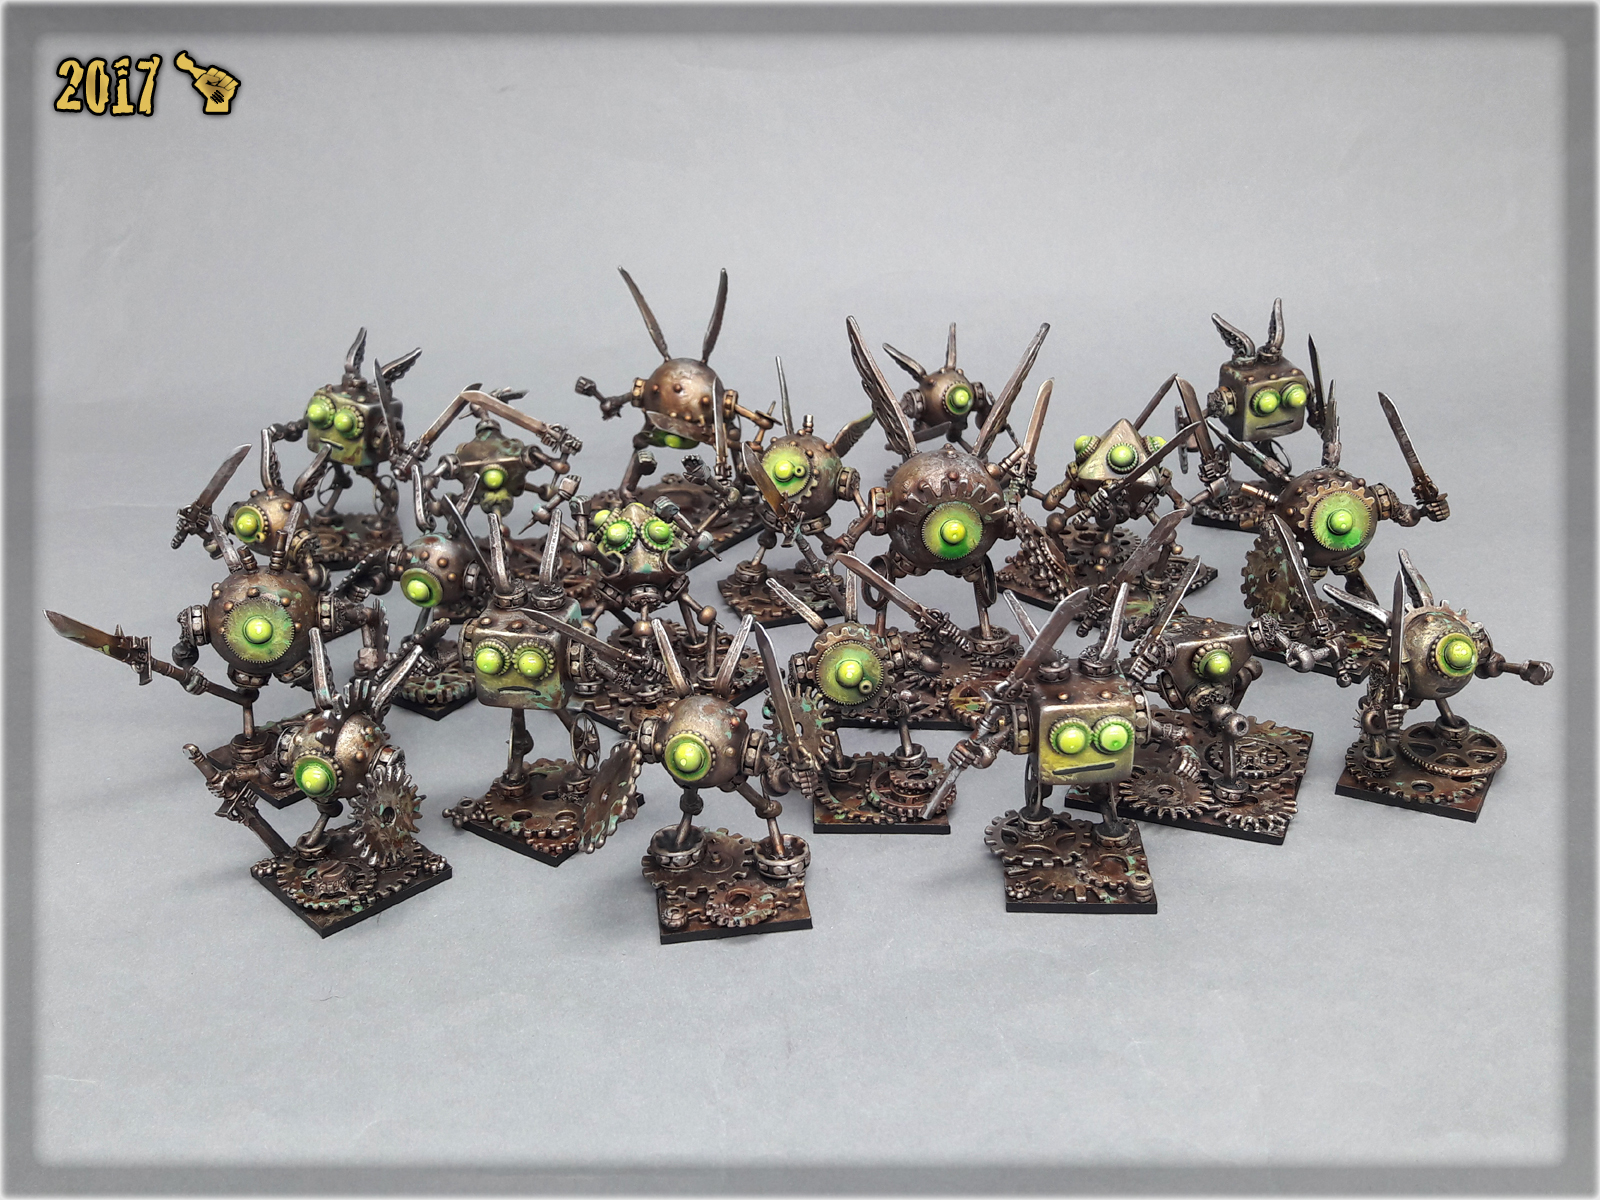
For the Modrons to truly come alive I obviously had to do my magic and paint them. The entire process was long and not without challenges. Modrons are mechanical constructs so I decided to go ‘metal’ with a trusted Five Layer Technique: Metal. I then added more and more layers of different effects like rust streaks, smears, patina, splatters of stippled metal and some edges. In this the ‘AK Interactive’ paints became a vital factor. Slowly, steadily the Modrons came alive at my desk.
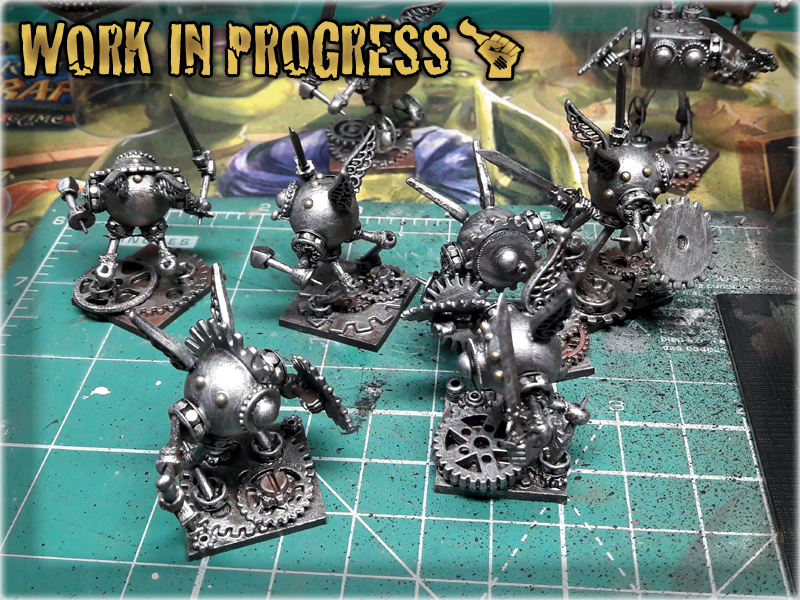
Finally I’ve reached the goal and reported a success to my master. His bidding done I can now present to you the fruits of my arcane labour in the “CLOCKWORK MODRONS” Special Project gallery…
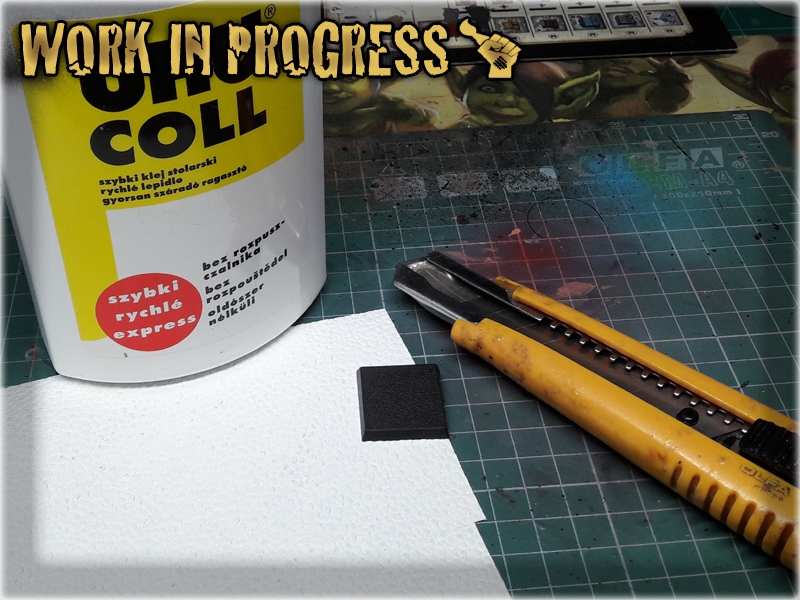
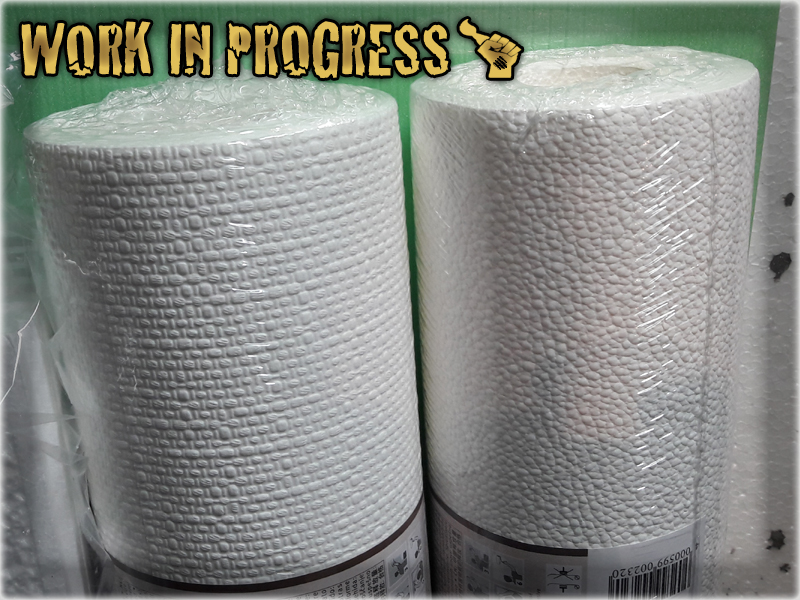
In this easy, step-by-step tutorial I’m going to show you how to create a Cobblestone Base in a what is probably the fastest and simplest way ever.

*Just find a suitable one at a local builder’s store.
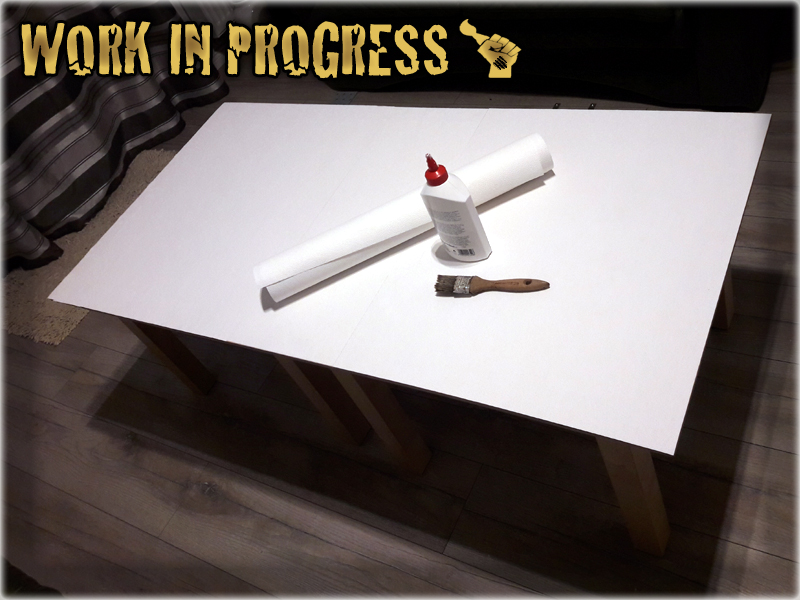
1 I started by covering entire base with Basing Glue.
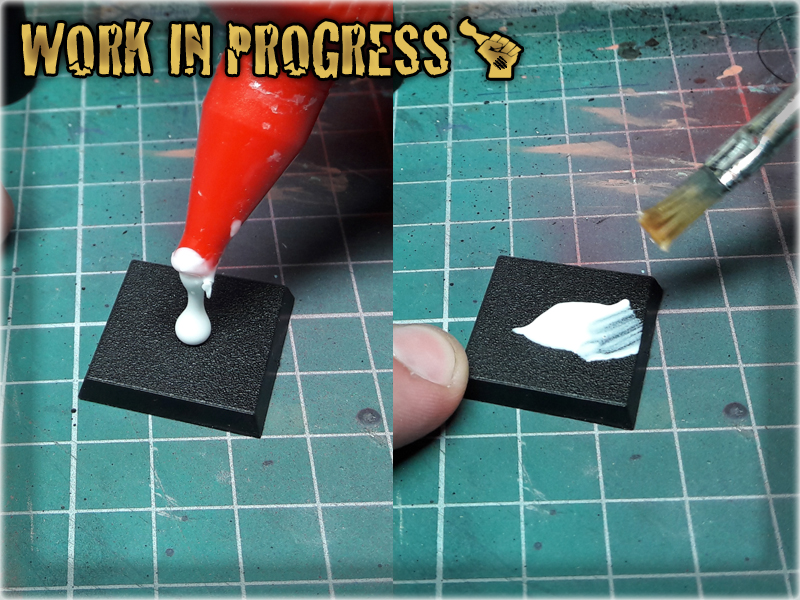
2 I then cut off a piece of the wallpaper to be slightly larger then the base itself.

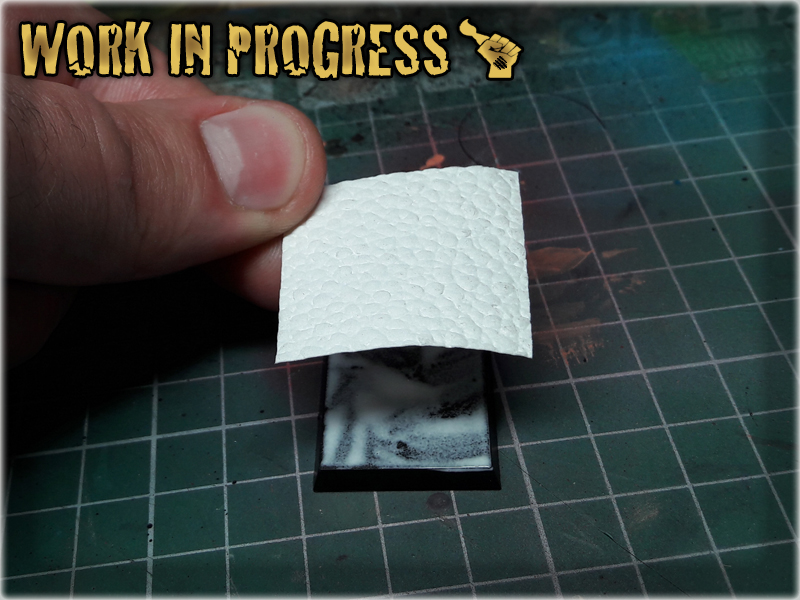
3 Next I glued the piece onto the base, turned the base upside down and cut off the excess of the wallpaper with a Hobby Knife.
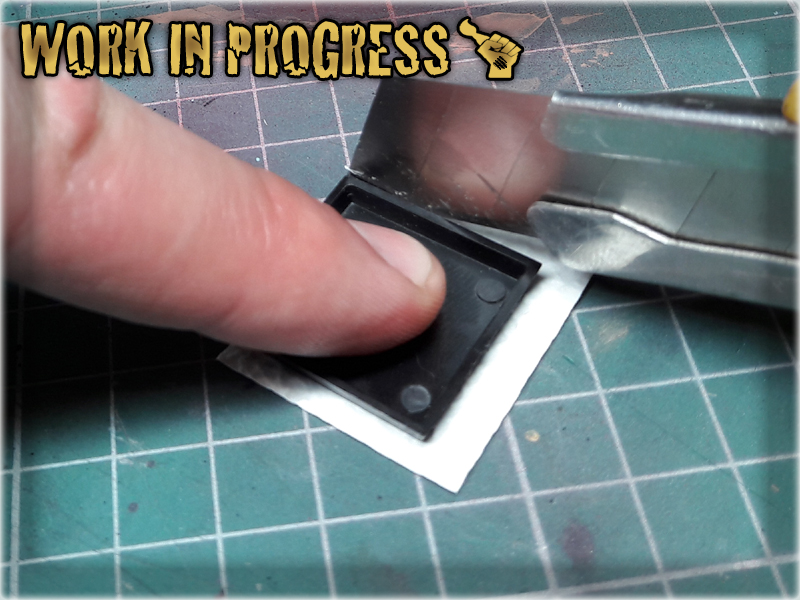
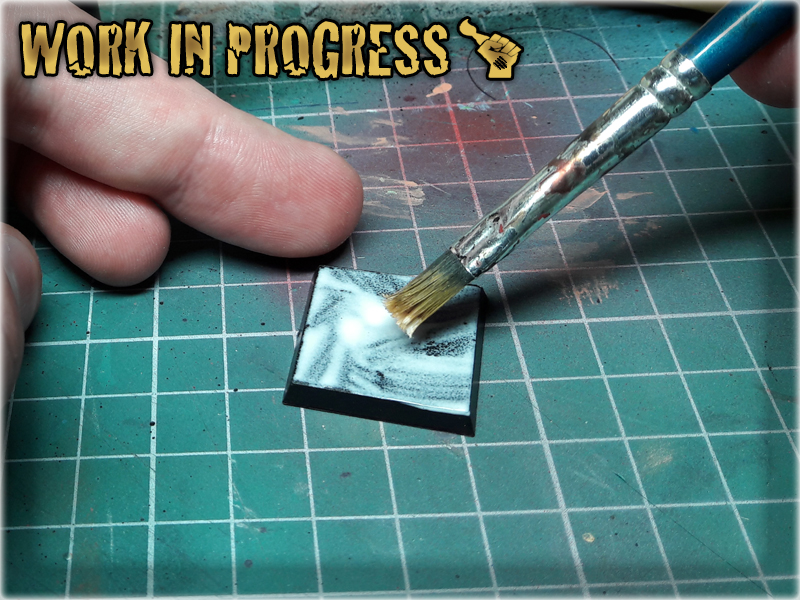
4 Last step was to smoother the edges with a slightly moisted fingertip.

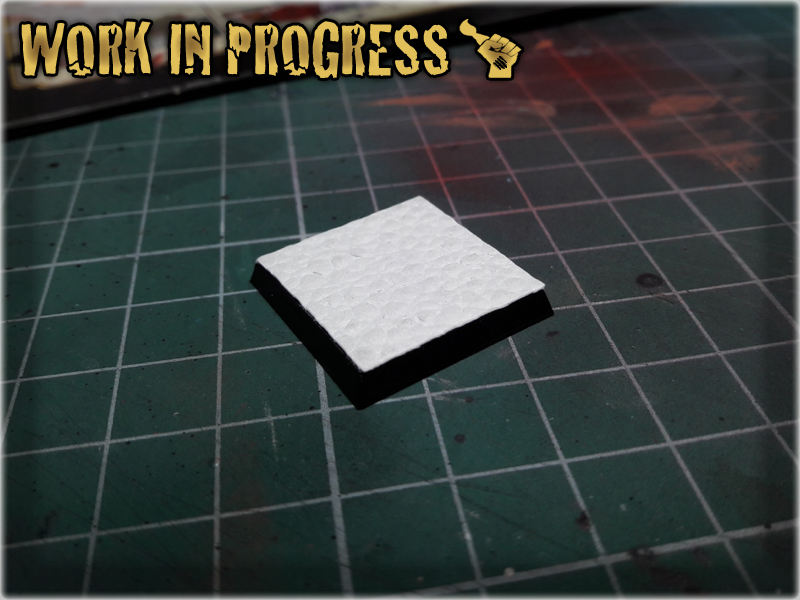
Now you see how insanely fast and easy this was. For the purpose of this tutorial I made just this simple base, but once you get your hands on a proper wallpaper, options are limitless. You can use it to texturize bases and terrain, add more detail or even mix different types of texture.
It has been six months of peace for The Colony Special Project. I’ve mentioned before that such grand projects are never fully complete – so here I am, adding even more stuff to the already vast collection of scenery. The reason for this is obviously the restless muse, but also I grew up to a decision to expand my scenery collection. On top of more variety I will be able to cover two gaming boards and that might come in handy from time to time…

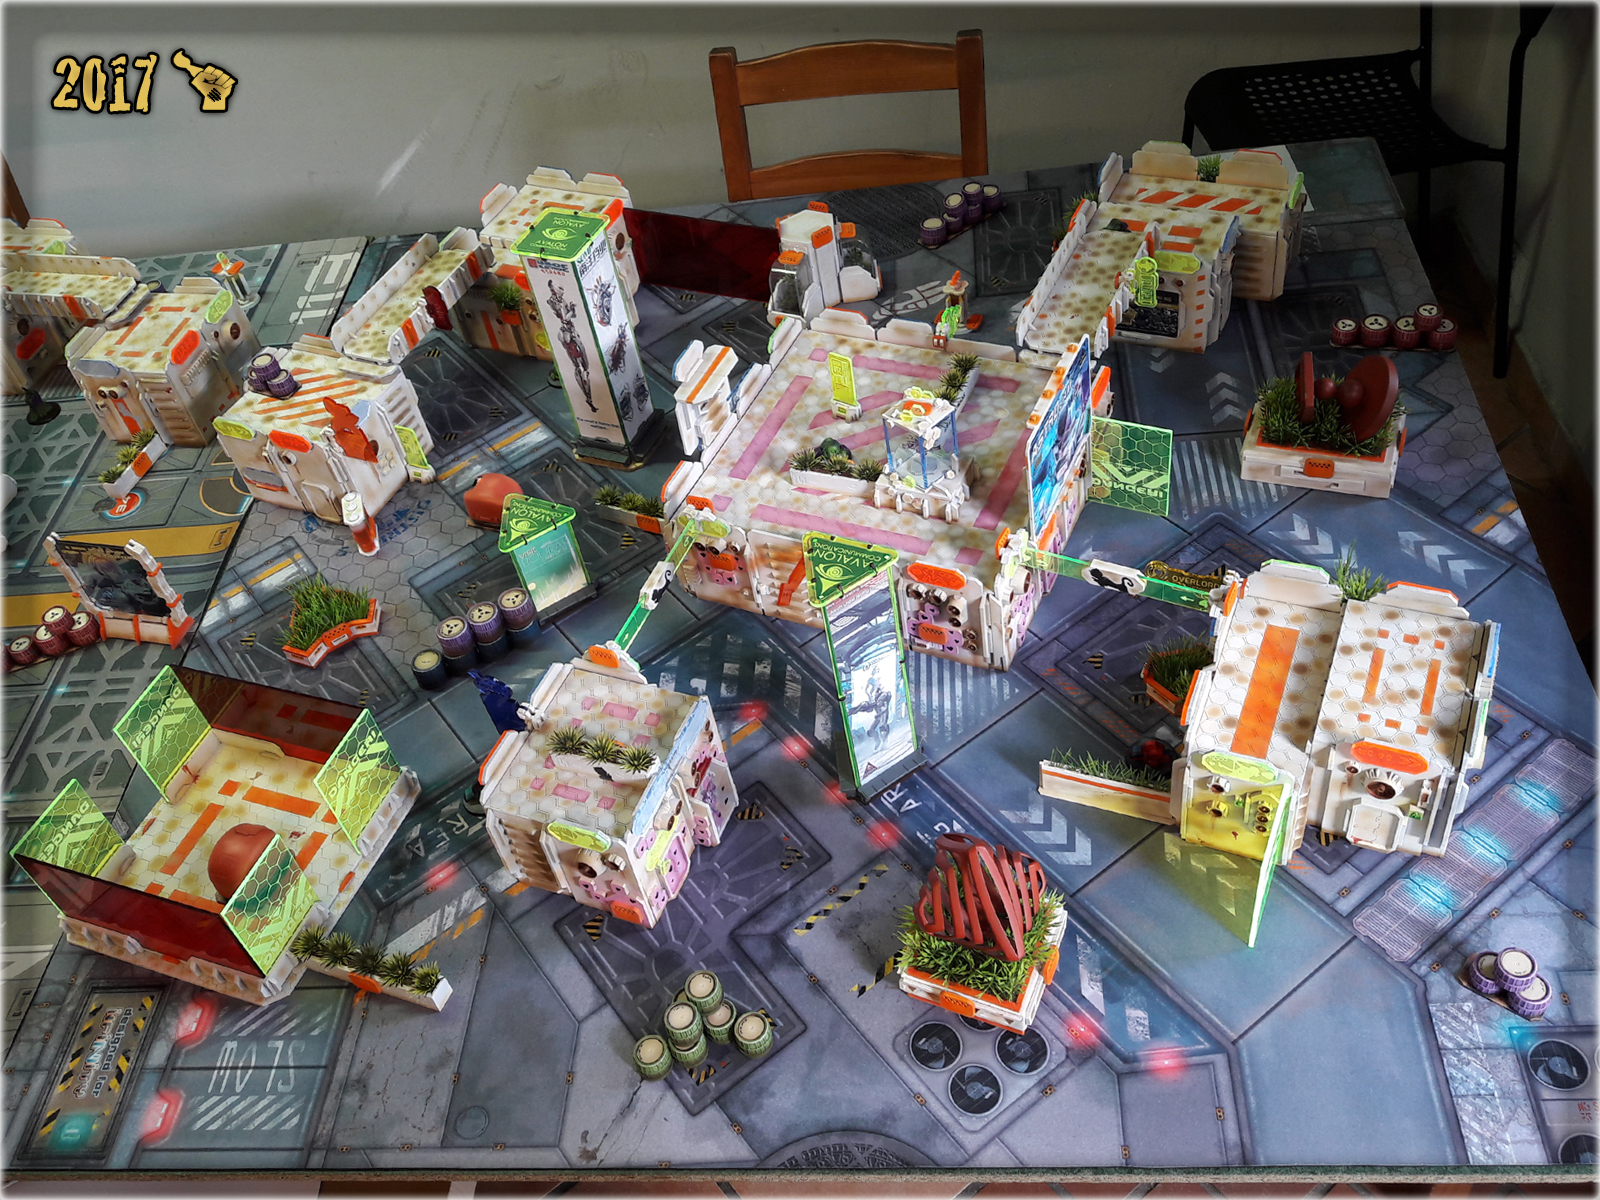
Not so long ago I have attended a big Infinity the Game event. About 40 participating players, including some of my friends. As a co-organizer I took The Colony with me, so that along with Micro Art Studio, Zen Terrain and After Hours Workshop, there were more fully painted tables at the event. I even streched my terrain set to cover two gaming tables, thus was hyped by the vision of creeping onto another 48×48″ board. At that point I already had some new stuff purchased at Antenocitis, so it’s not like I was ever going to stop anyway 😛
Still, once the dust settled and I had a moment to thik about it, I realized that more terrain was inevitable if I was to do it again in the future…
The idea was to build more interresting stuff to fill all the empty spaces between buildings. At that point more buildings were rather out of question as I’d rather produced terrain pieces to improove single gaming table, with an option to allow me to eliminate vast empty spaces if I went double…
The obvious choice was to produce more sculptures, as these look nice, are awesome LOF blockers and work pretty well with the theme of The Colony.
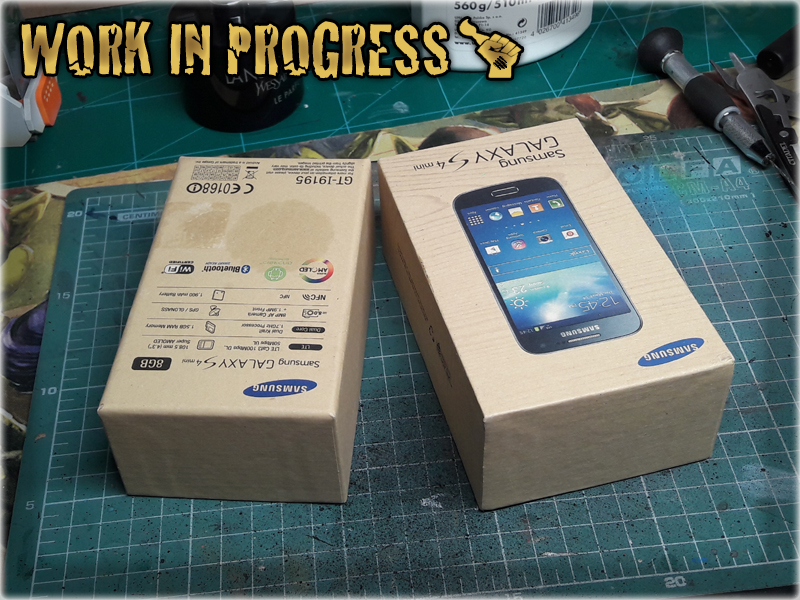
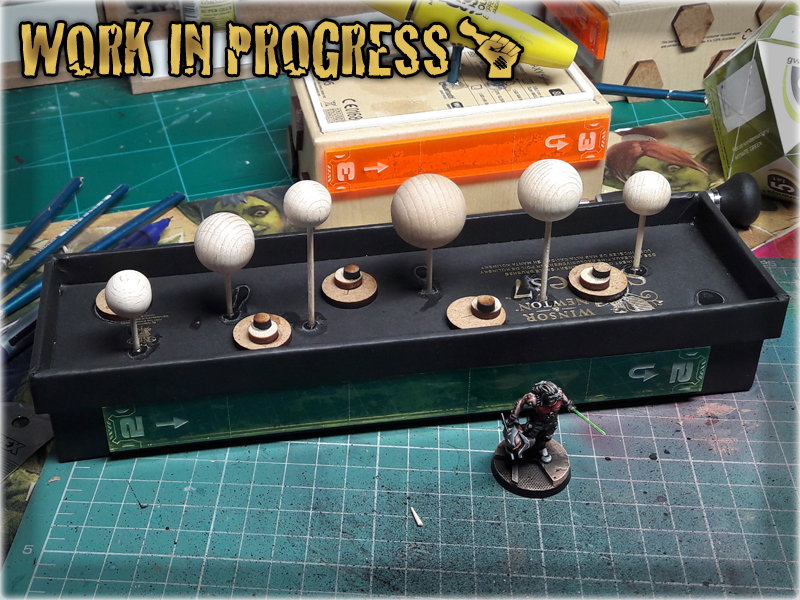
For this purpose I used a hard box and some random leftovers provided by friendly Terrain making companies and my wife.
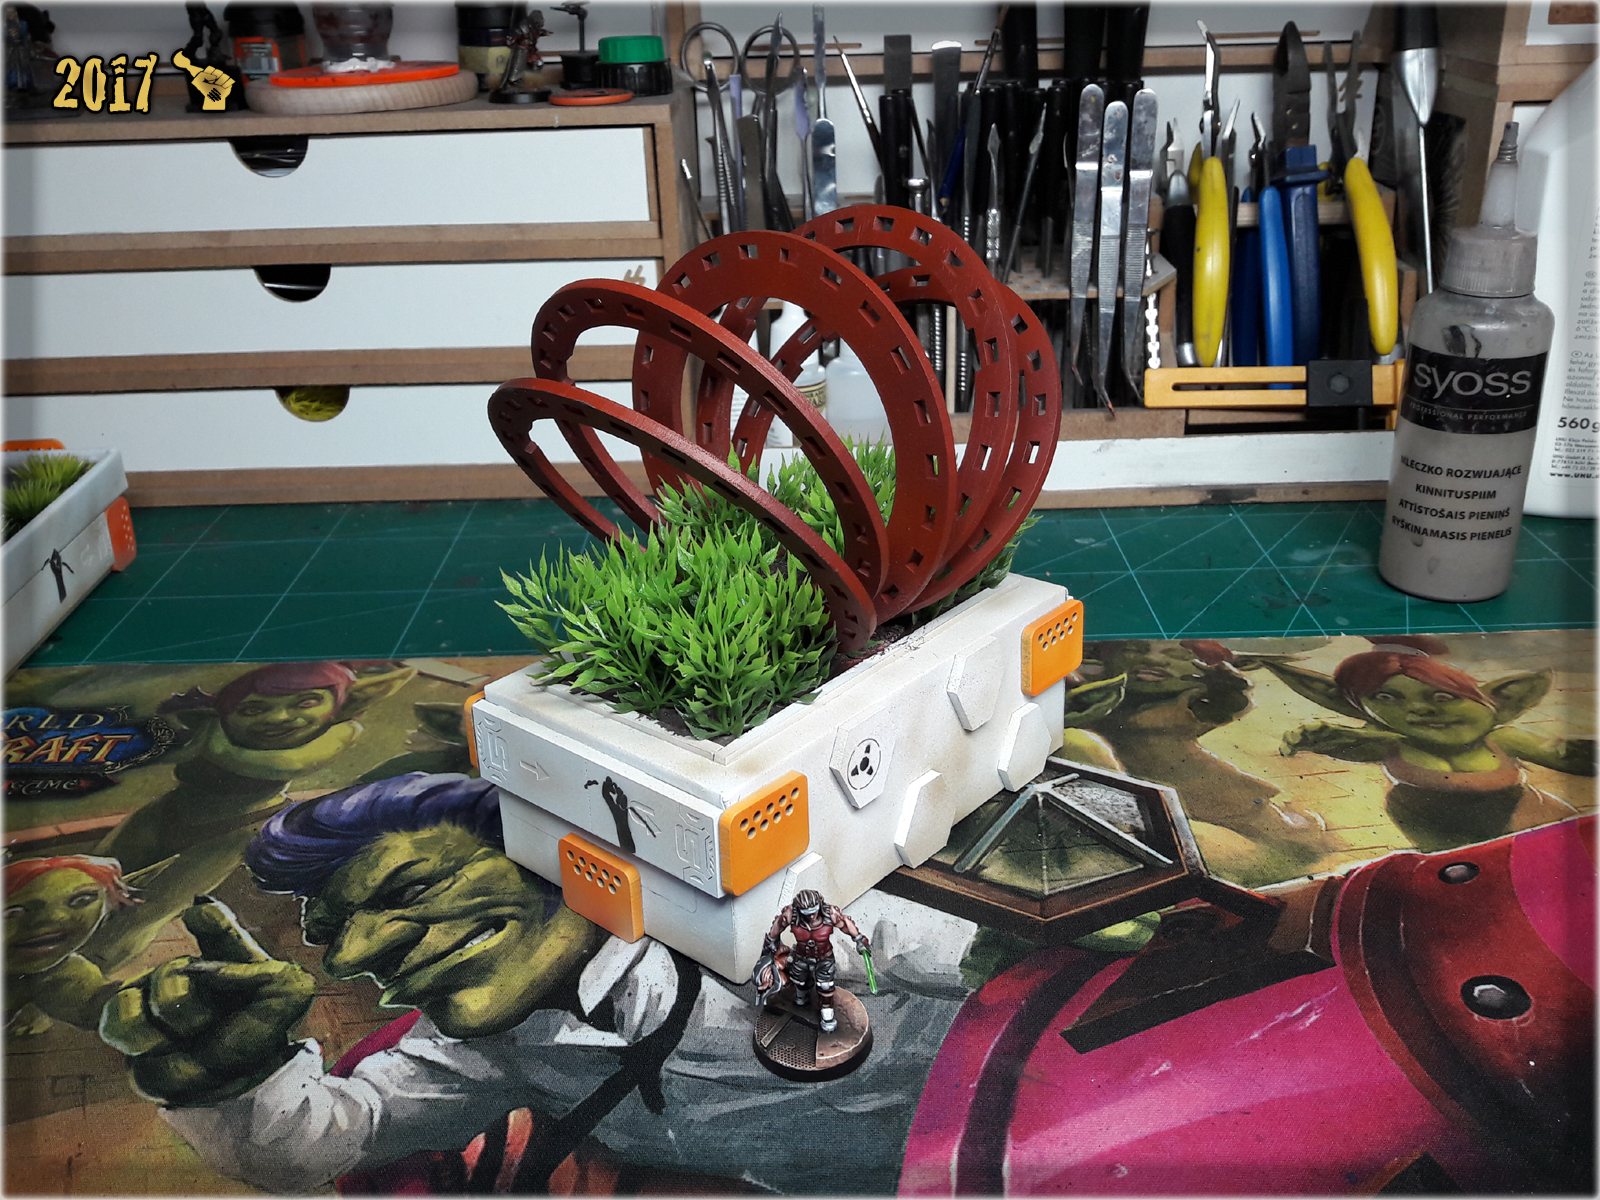

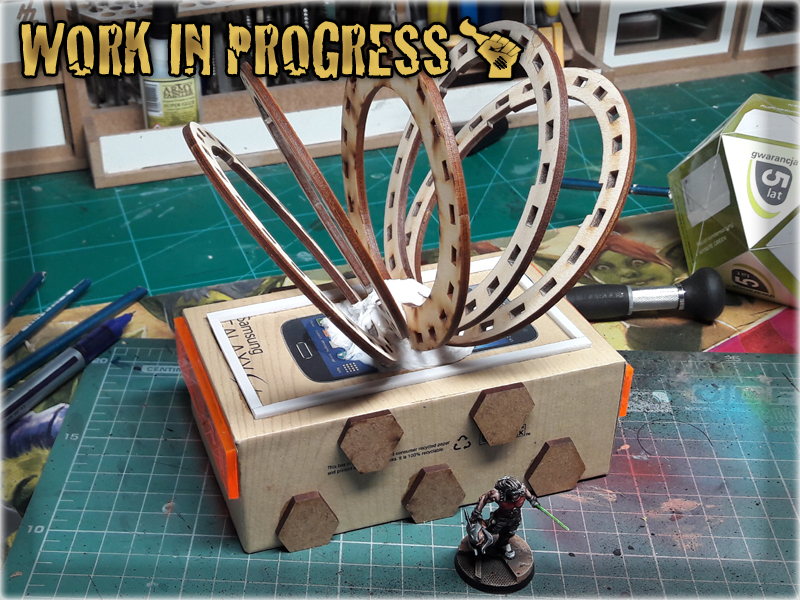
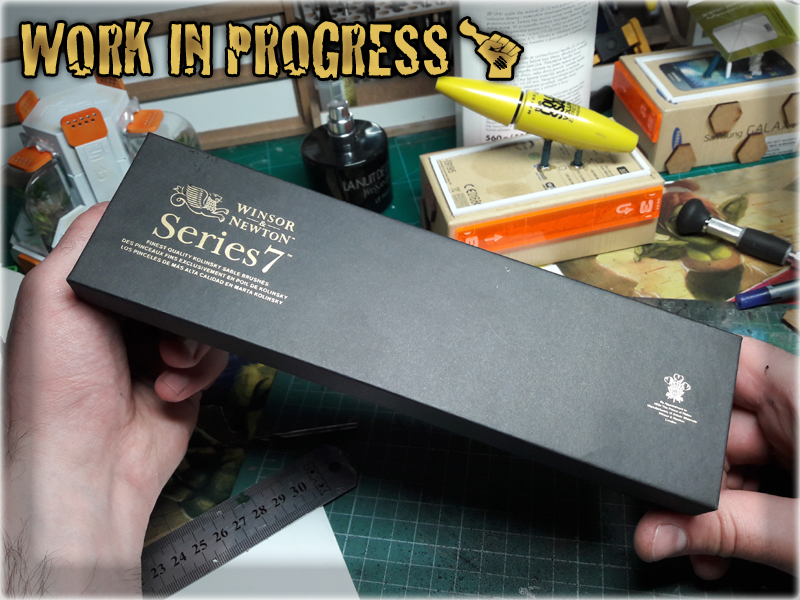
This one was a totally new approach to the ‘sculpture’ idea. The exclusive Winsor & Newton brush box was an inspiration on it’s own and summed with my newly acquired experience in using clear resin – a fountain or a pond was a must go. I decided to use wooden balls as a sculpture to compliment the water theme with their smooth oval shapes. Now I feel like a second Winsor & Newton box is soon to follow…
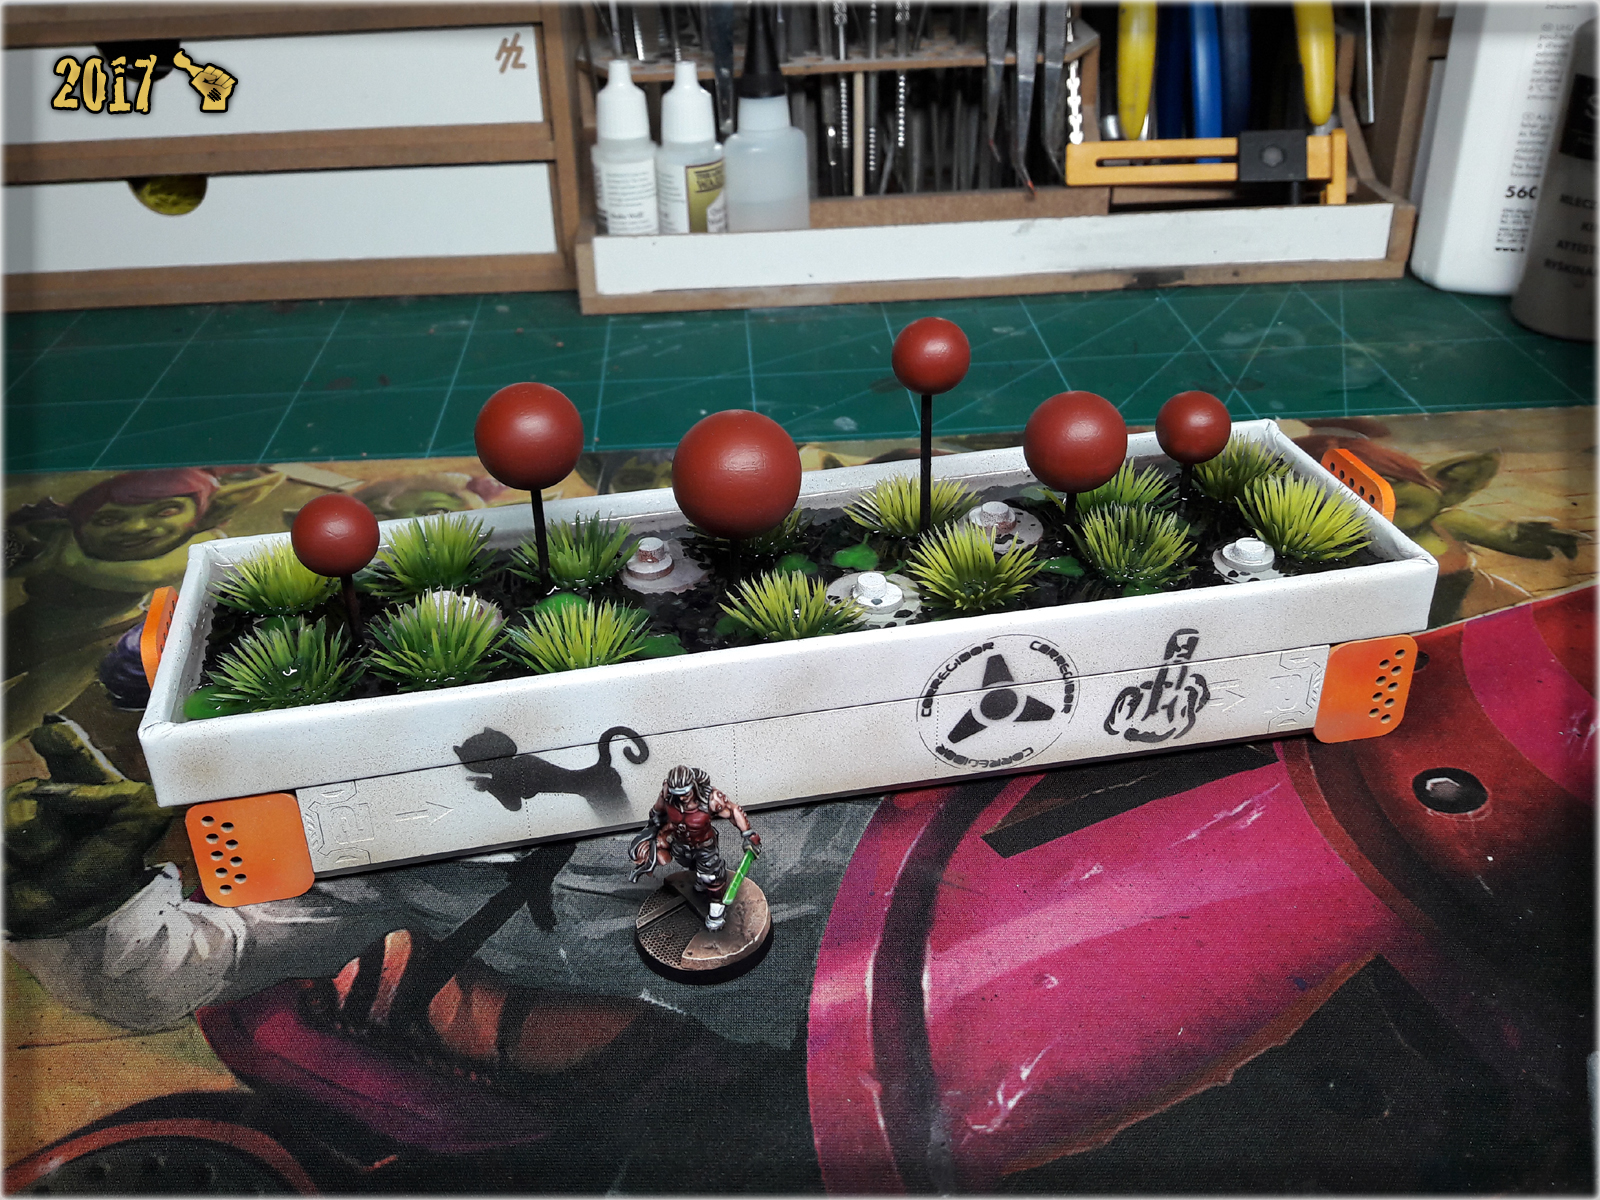
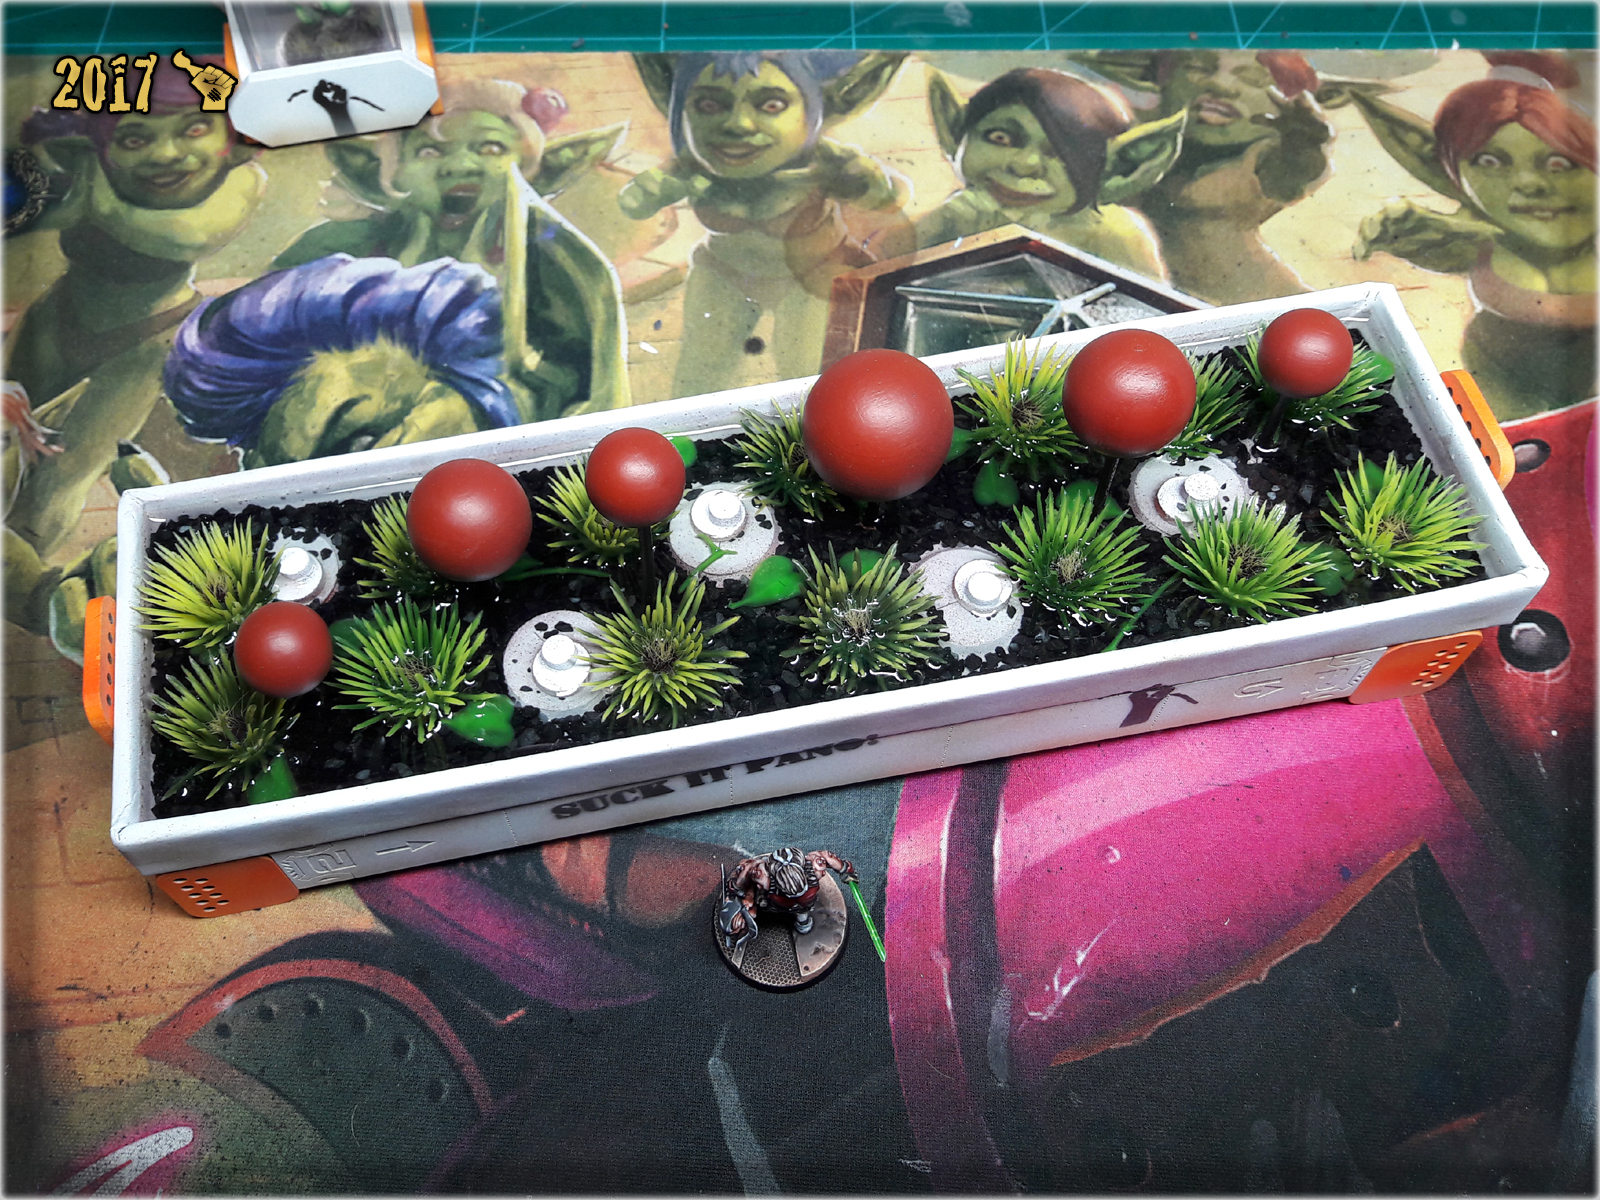
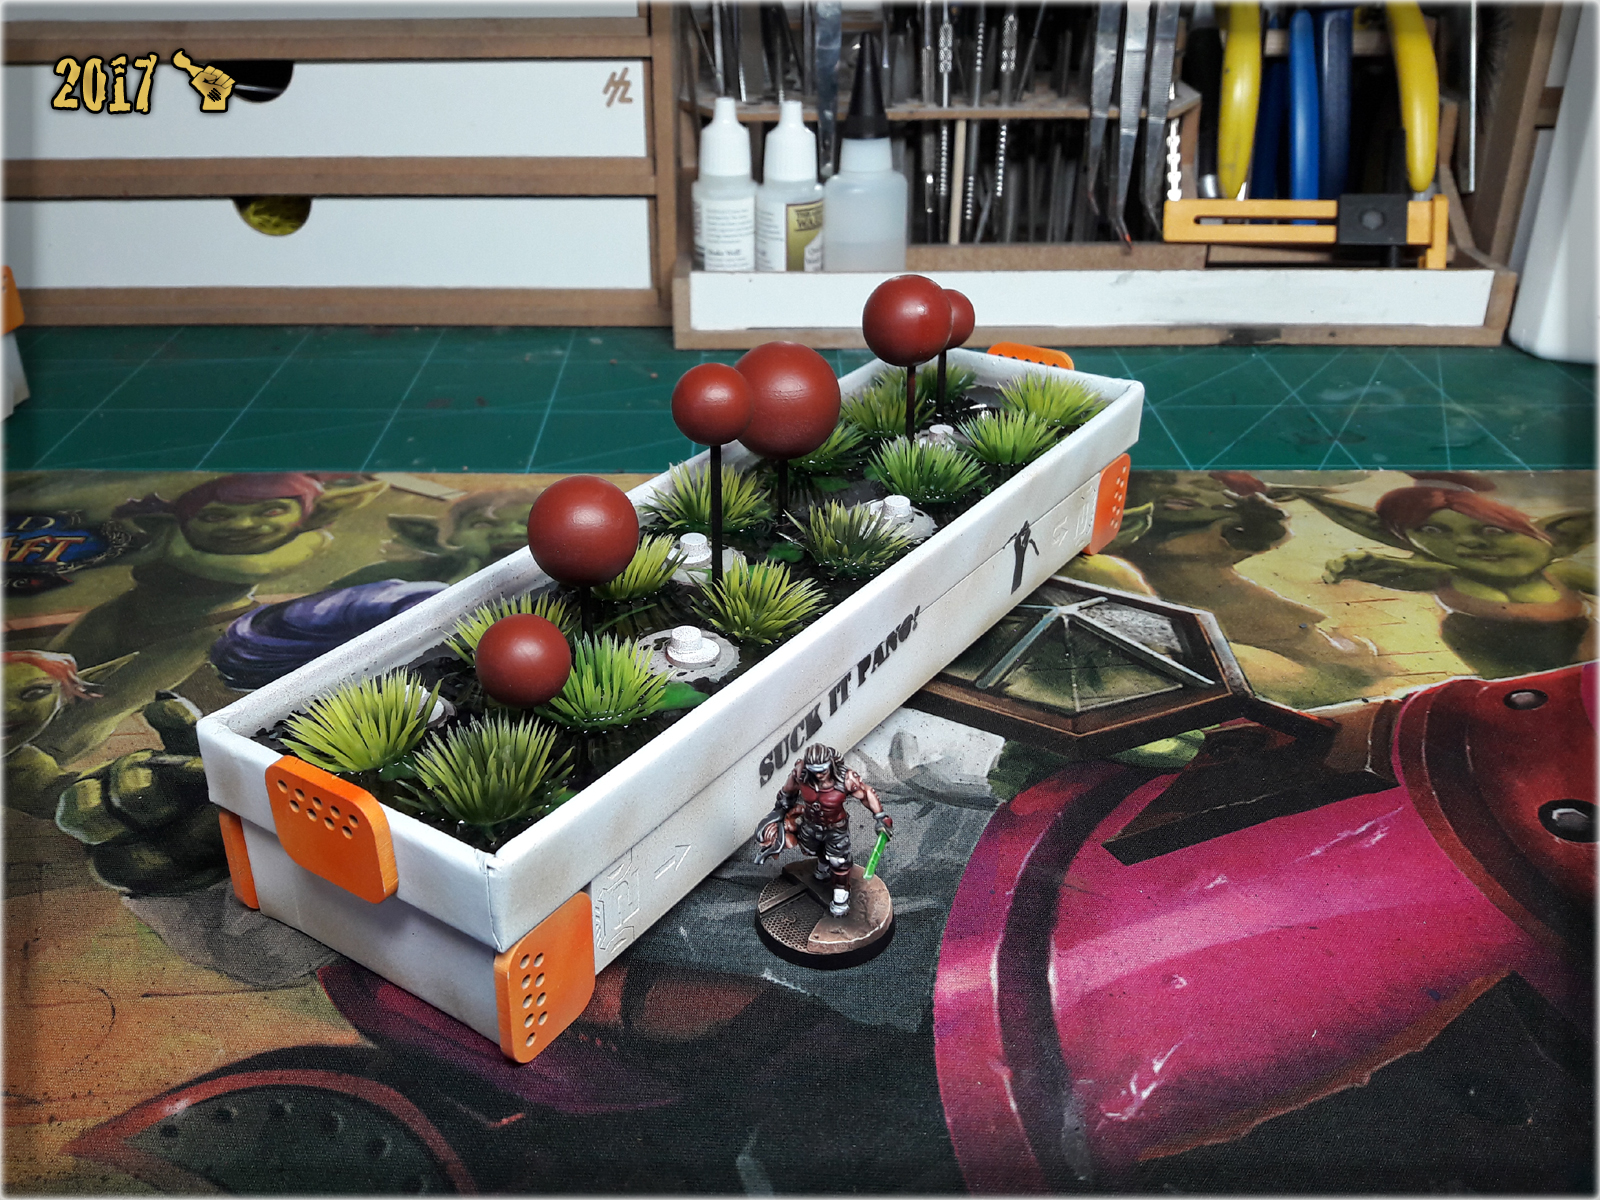
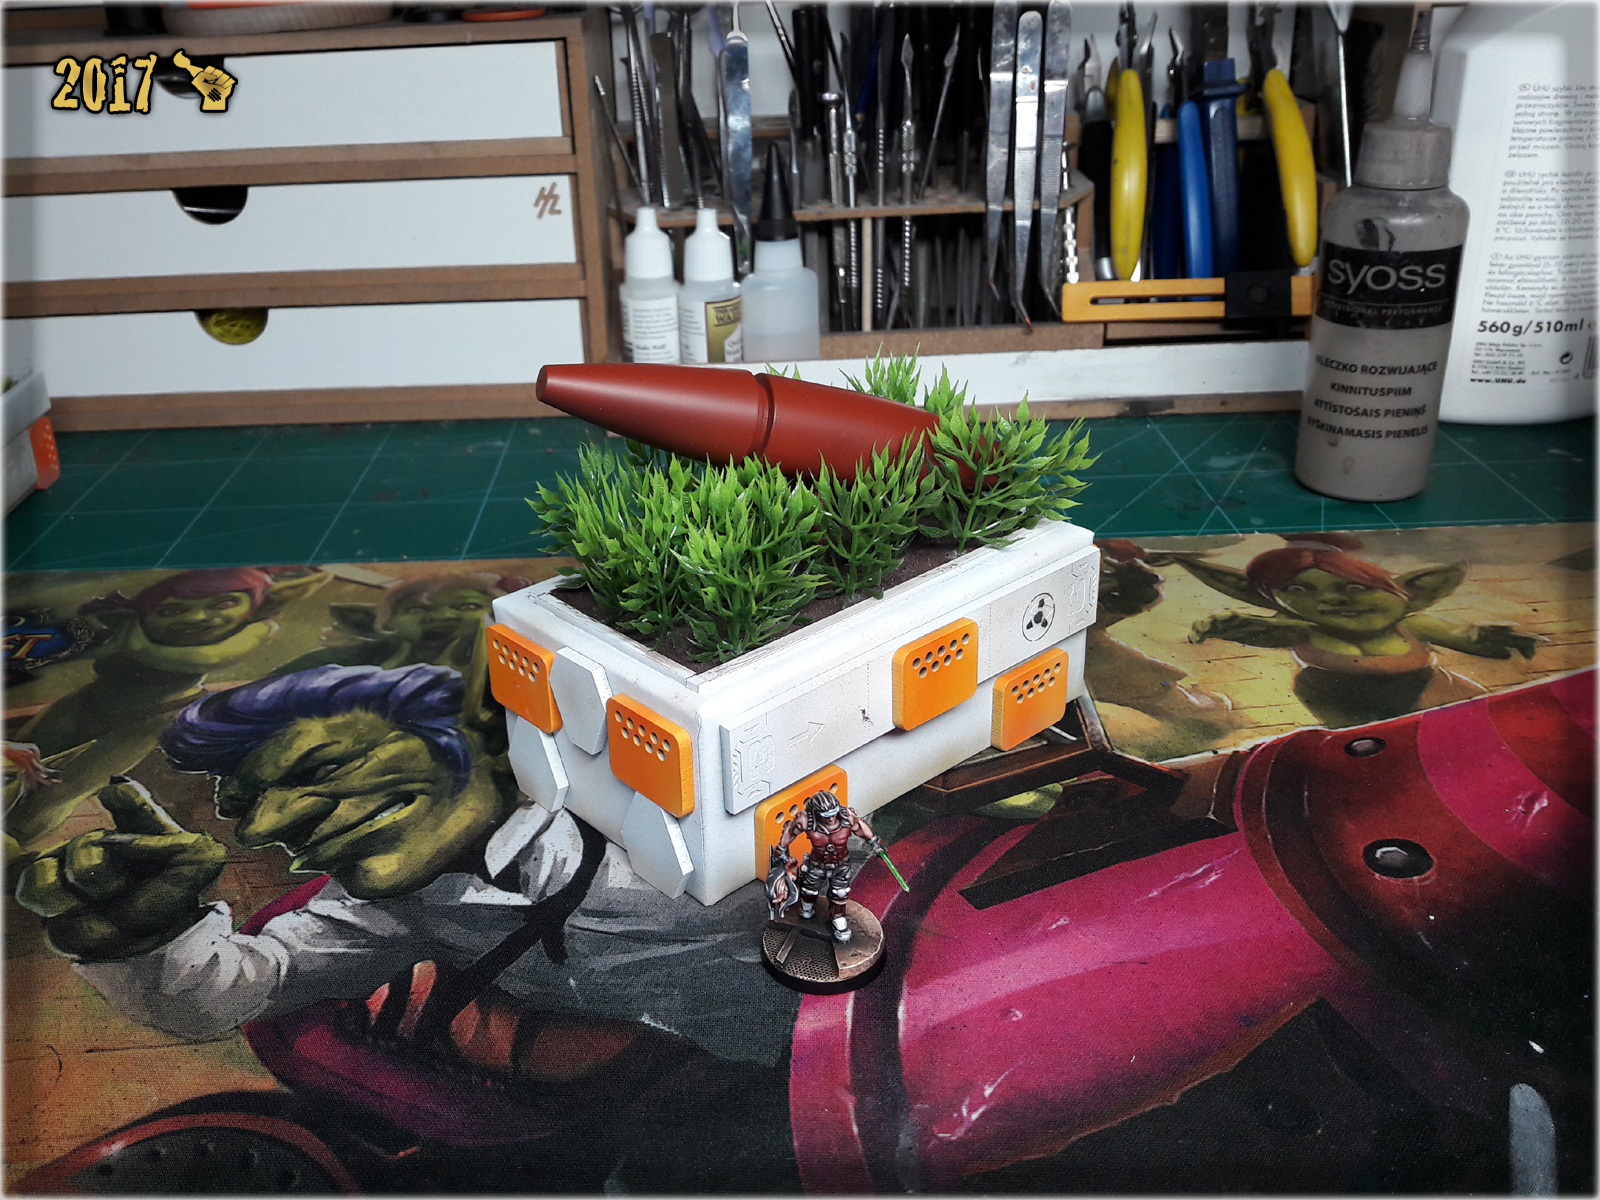
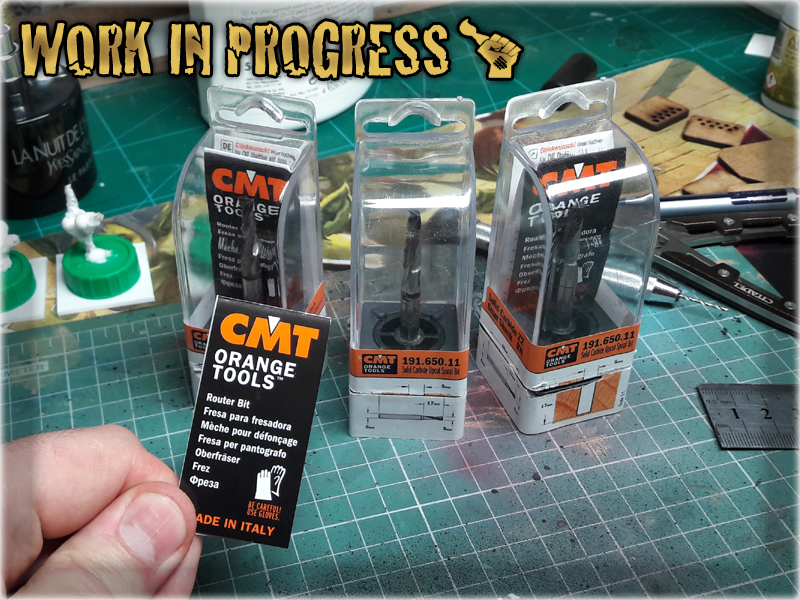
Plant compartments from THE COLONY – part seven: BEYOND are by far one of the best Infinity scenery pieces I have created. They have the looks but are also very playable, providing a lot of cover and breaking long shooting corridors. Yves Saint Laurent cosmetics plug and couple more drill covers, that I received from a friend, and an I was ready to build another Plant compartment. This time tho I lacked some of the MDF pieces, necessary to build an exact copy of the previous template. I decided to do some magic and tinker a bit with the design – using materials I actually had.


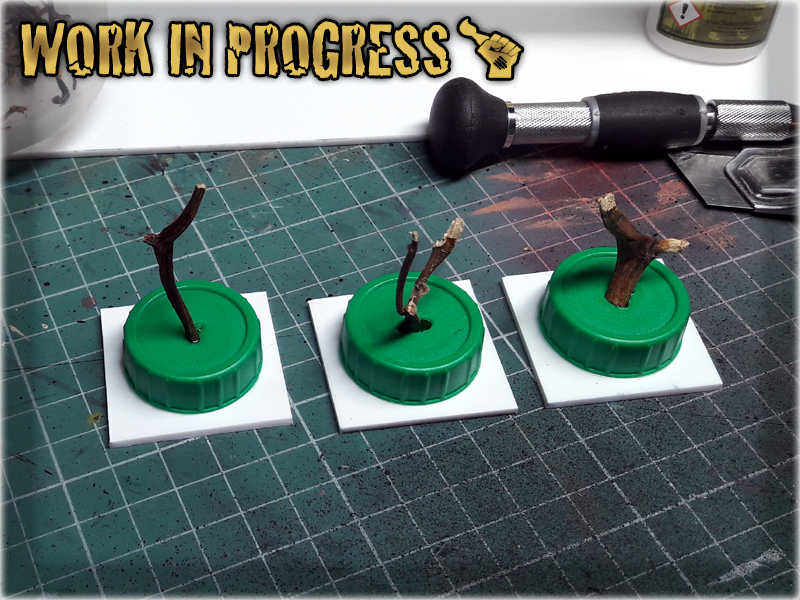
I also redesigned the plant to add variety on the table. These were made using a method from THIS TUTORIAL. It is simple and very effective and can be used to create many awesome shapes and textures. It took me around ten minutes to prepare three of these, so if you ever wandered if you should try the tutorial out – just go for it 😉

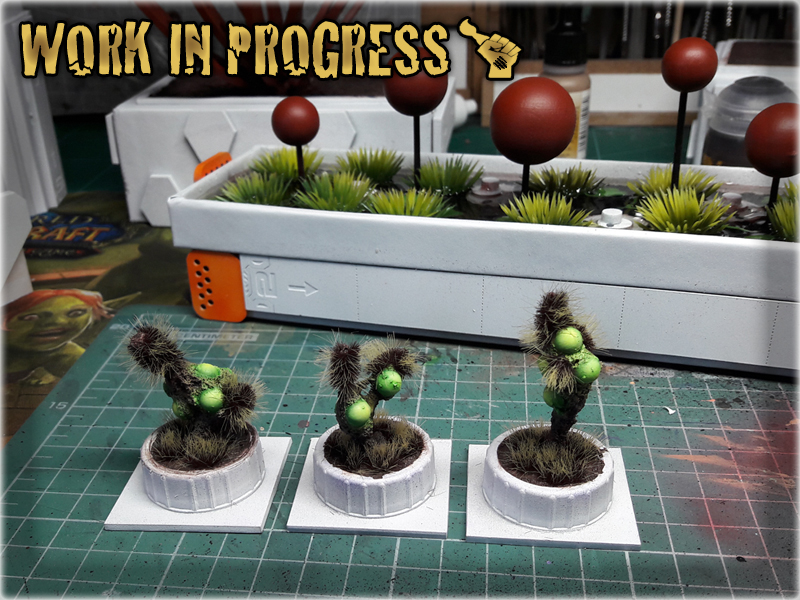
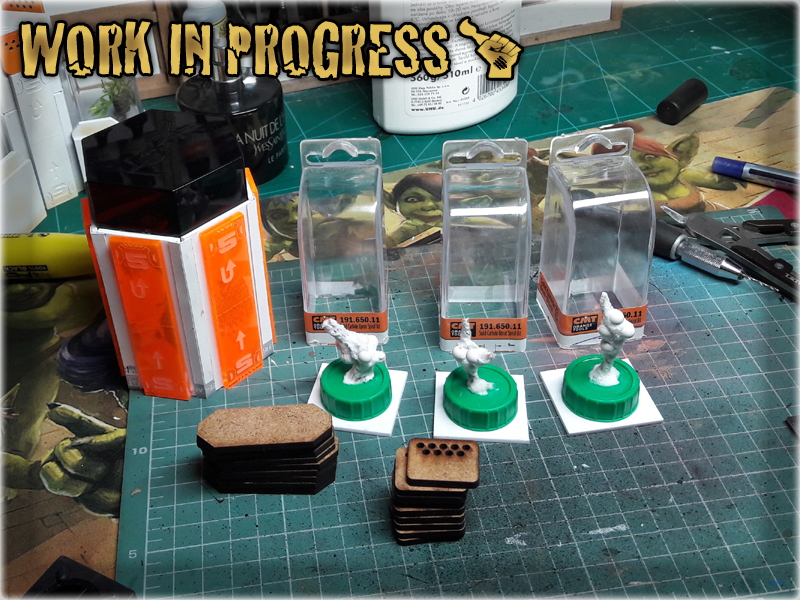
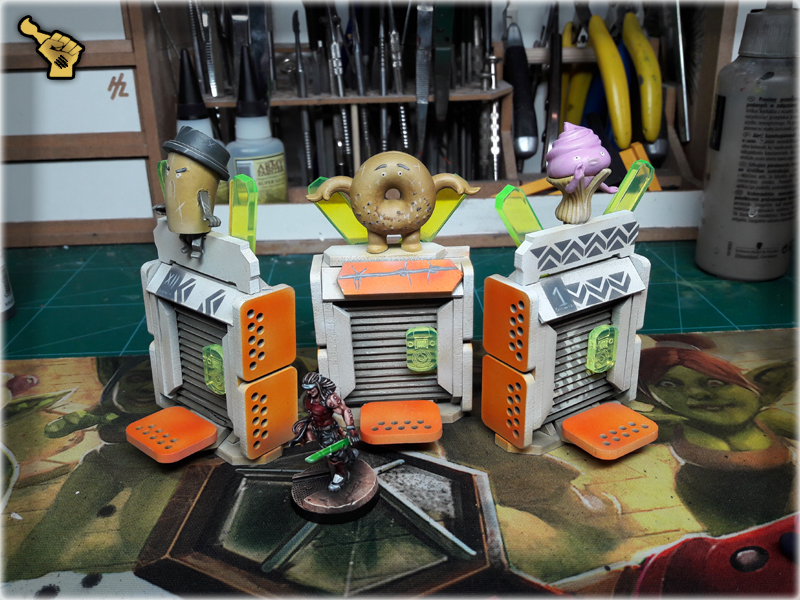
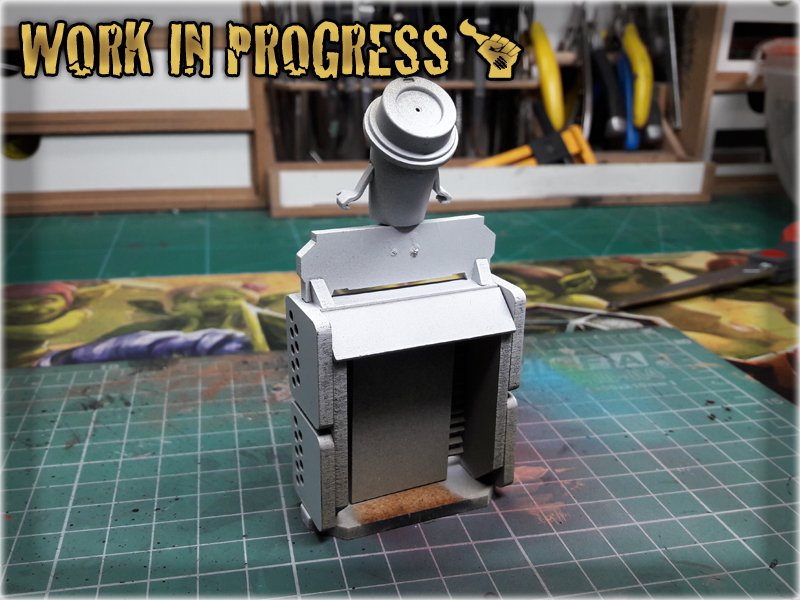
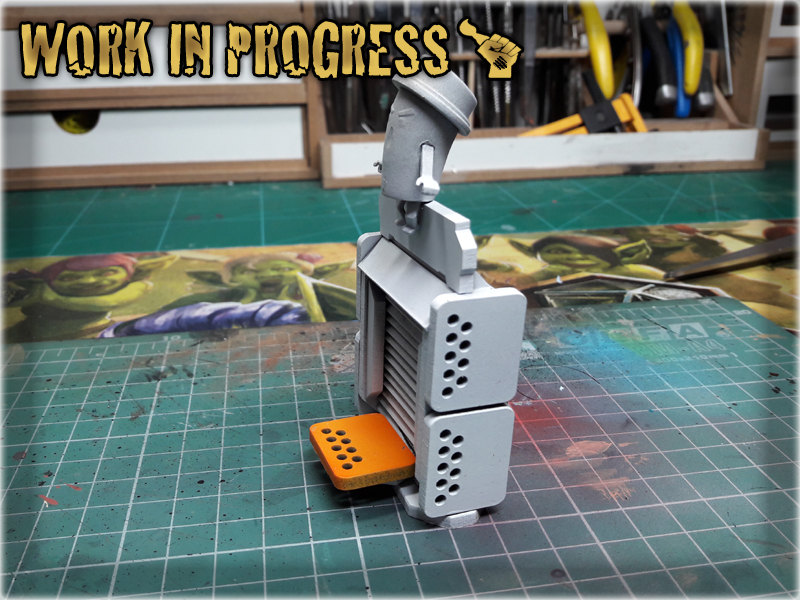
These three were inspired by boredom and awesome looking Orbit Gum pendants. Upon seeing the pendants I grabbed a bunch of them, knowing well that they will come in handy in the future. Did not took much time to try and use them for Infinity scenery and a set of Food Mashines (closed and secured cause ‘Nomads are in town’) are now complete. On top of three Orbit pendants I mostly used trash and leftovers, but there also are some special MDF pieces which you probably reckognize by now.
Another weekend well spent. Now I can’t stop to think about other ways of using clear resin, wooden balls, basing-super glue made plants and all the new stuff. Might also want to shift my attention to designing the actual MDF scenery as recently I’ve entered into an arrangement with Every Little War which will tweak some of my stuff, including Objective Room and provide it in the online offer. A lot of stuff to wait for XD
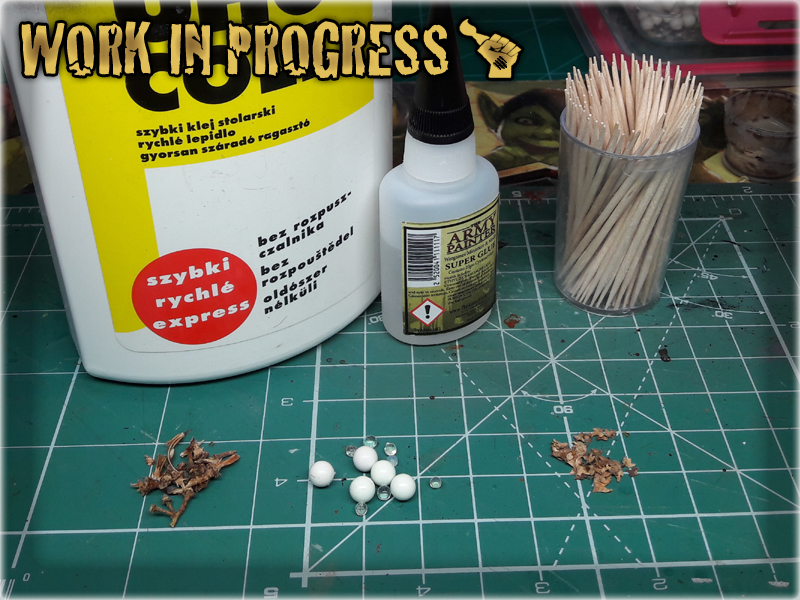
Today I’m going to reveal one of my dearest secrets: how Super Glue and Basing Glue can be used to make some fantastic, crazy, awesome stuff! I have invented it by accident when I was a kid, used it since and love it for both simplicity and awesome texture effect. In this easy, step-by-step tutorial I will show you how to produce your own Overgrown Bases!

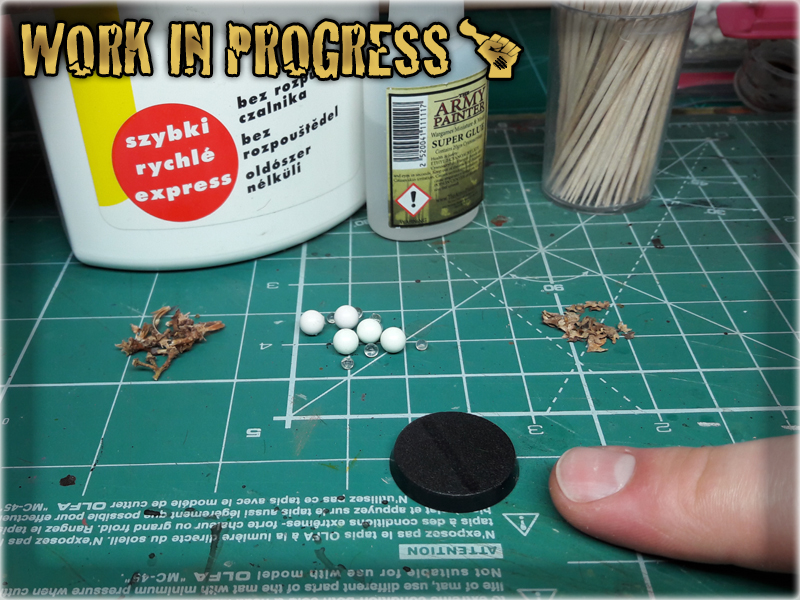
*I purchased a huge pack of these for approximately 1€,
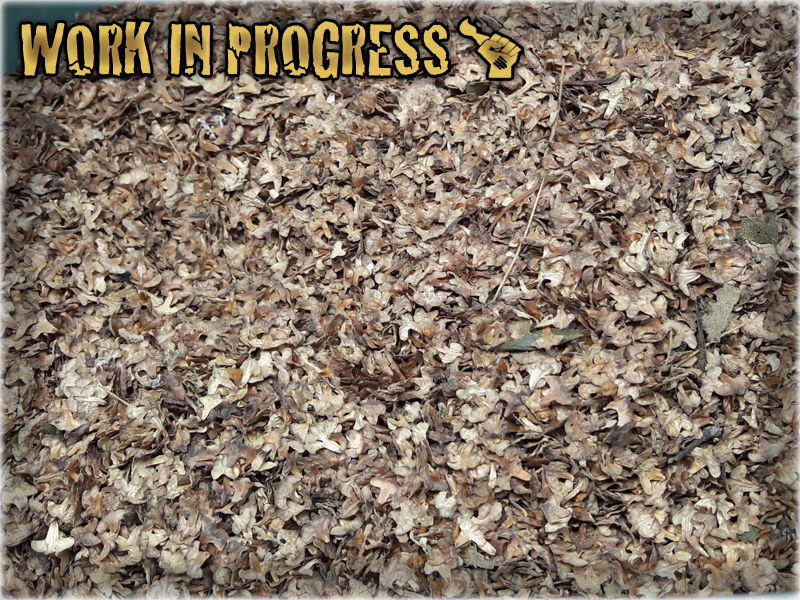
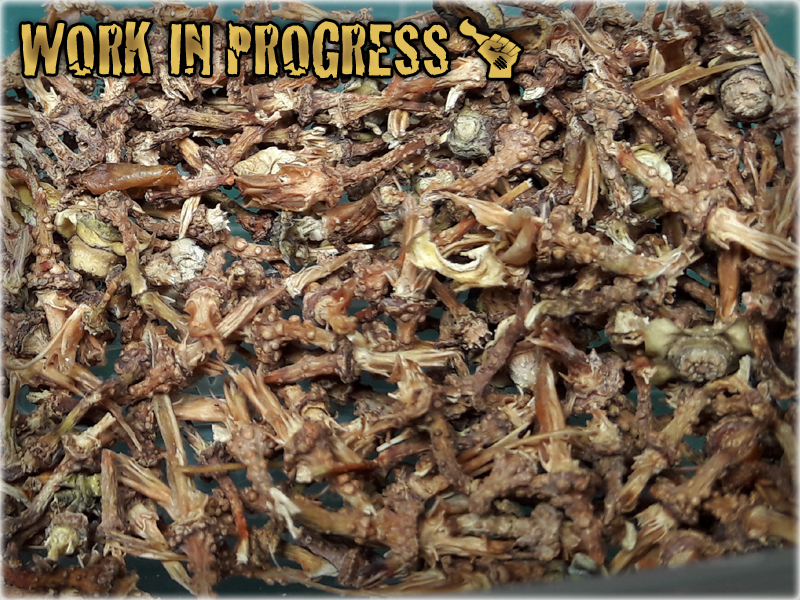
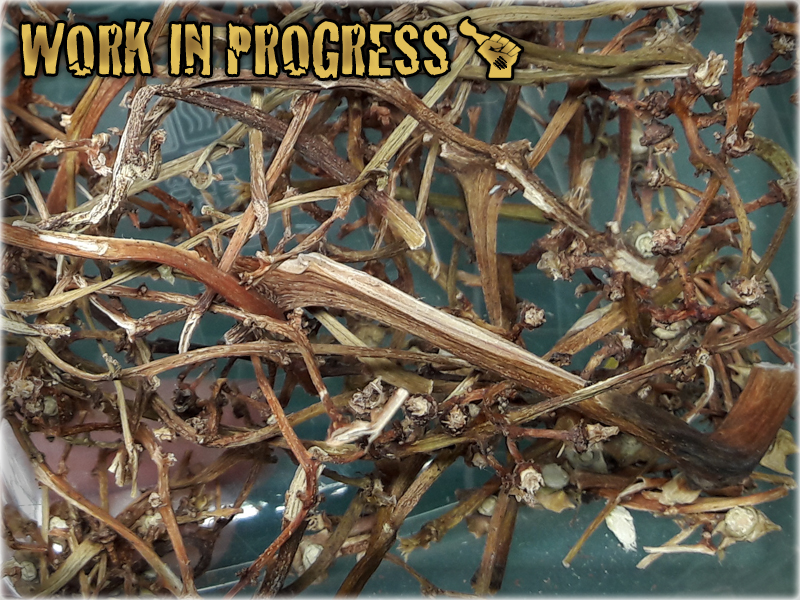
**Once you eat up all the goodie goodie grapes, you have like a bunch of wooden leftovers. Once dried out these are awesome bor basing miniatures.
***I use either Air Soft Gun ammuniton, or for smaller calliber moist absorber balls obtainable with every new pair of shoes. Just ask your gf to dig out one of her shoeboxes, there should be a small paper bag filled with tiny, translucent balls in it.
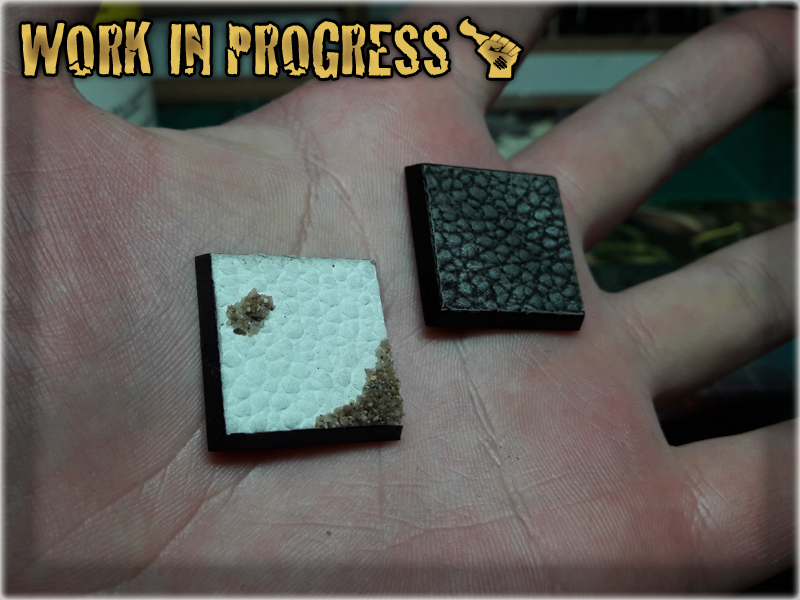
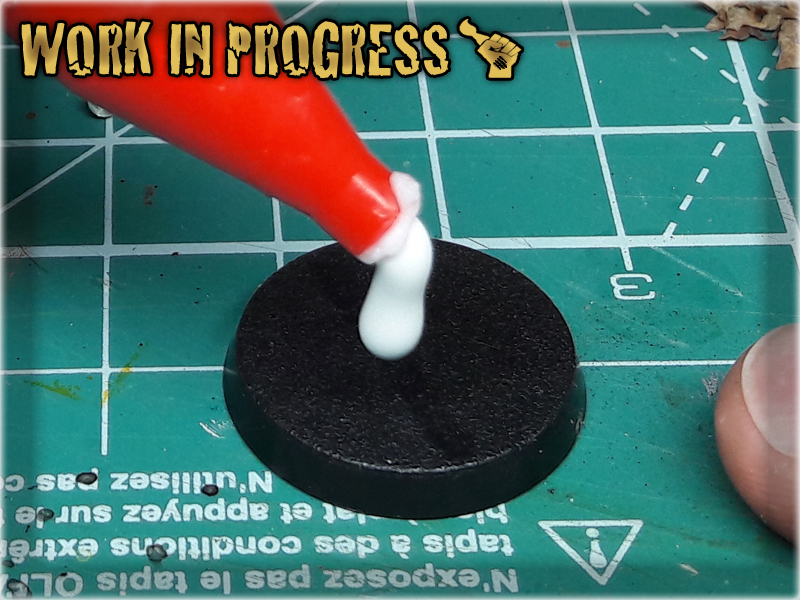
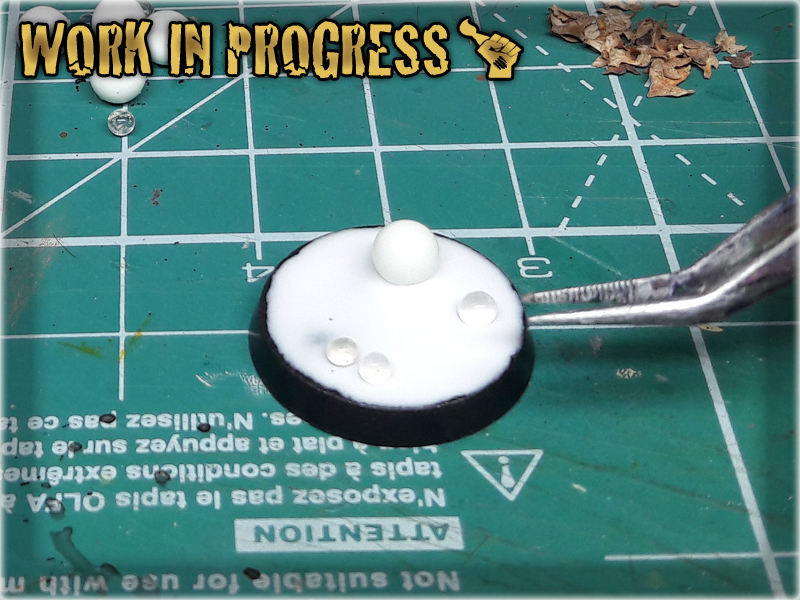
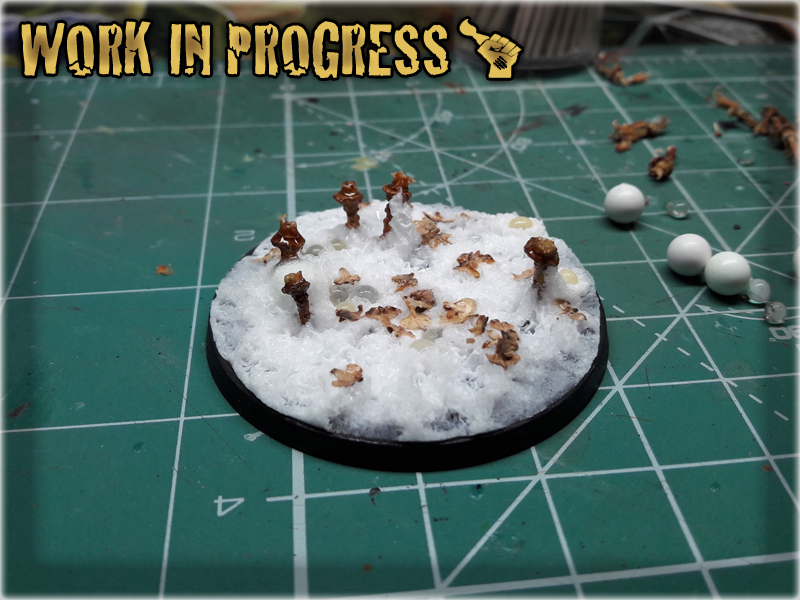
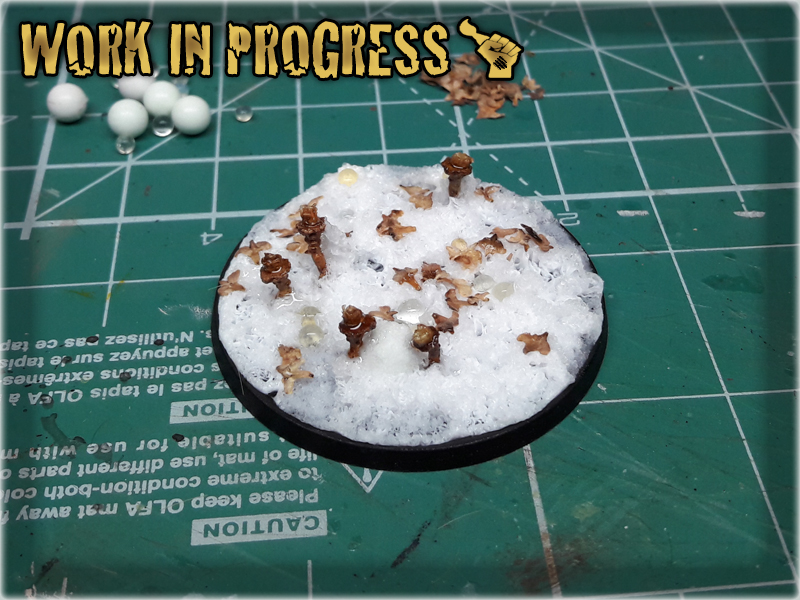
1 I started by applying basing glue all over the base. No need to make it smooth, just enough not to leave any empty spaces.

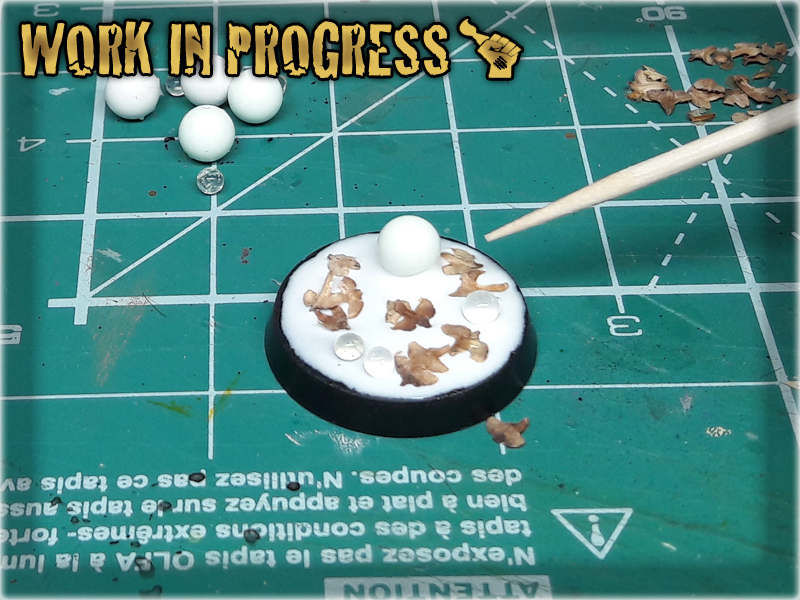
2 I then dropped some of the tiny balls and Birch-tree seeds over the wet glue.
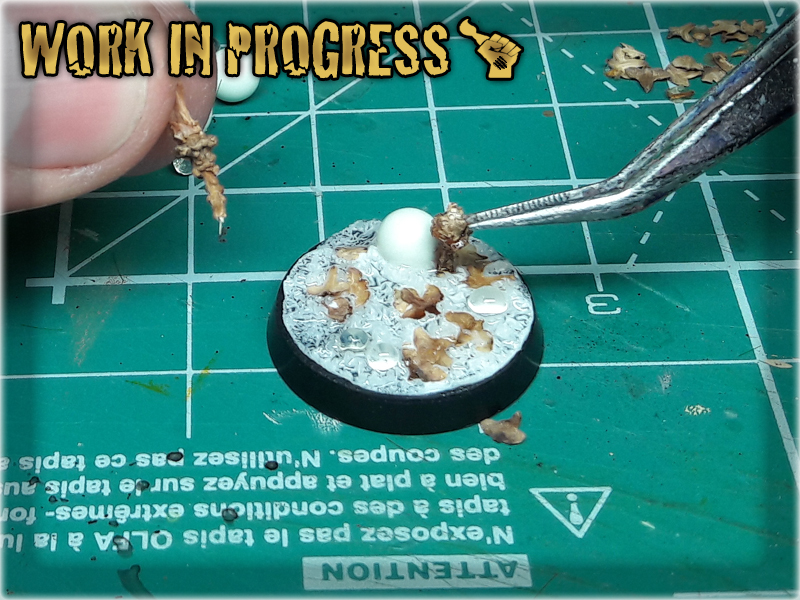
3 Here's where MAGIC begun. I covered entire base with Super Glue and watched as it was warped before my eyes in a matter of merely seconds.


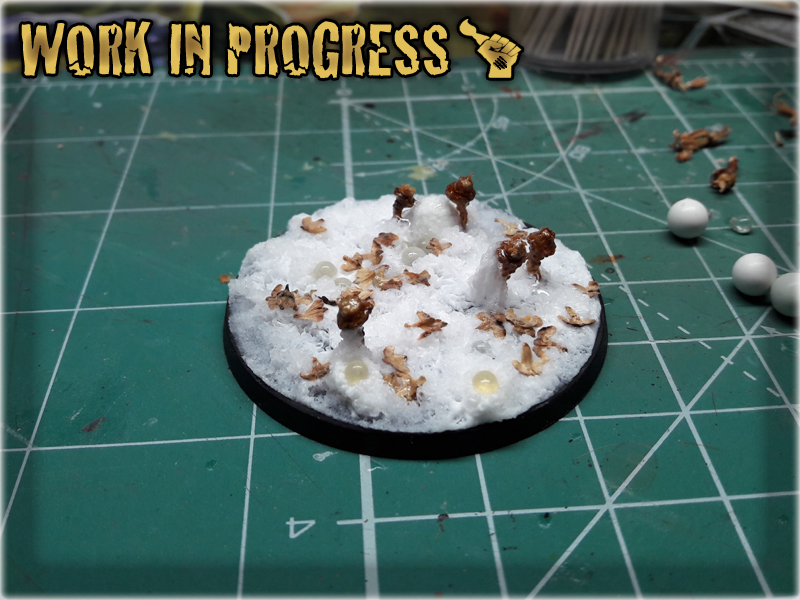
4 Before it dried out I added some pieces of dry grape vines to make it look like some strange, alien mushrooms, or plants. I then covered additional stuff with more Super Glue to harden it.
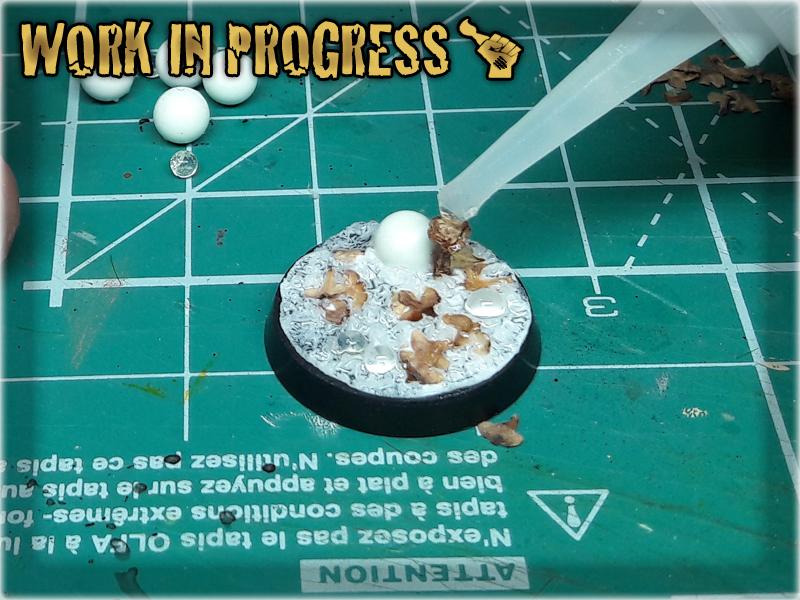
5 Last step was to leave entire thing to dry out. Usually it takes around five minutes for a base to get dry, but it might take a bit longer, depending on how much basing glue is used.

6 The final step was to undercoat dried out base with Chaos Black spray... then do a quick paint job with random colours.
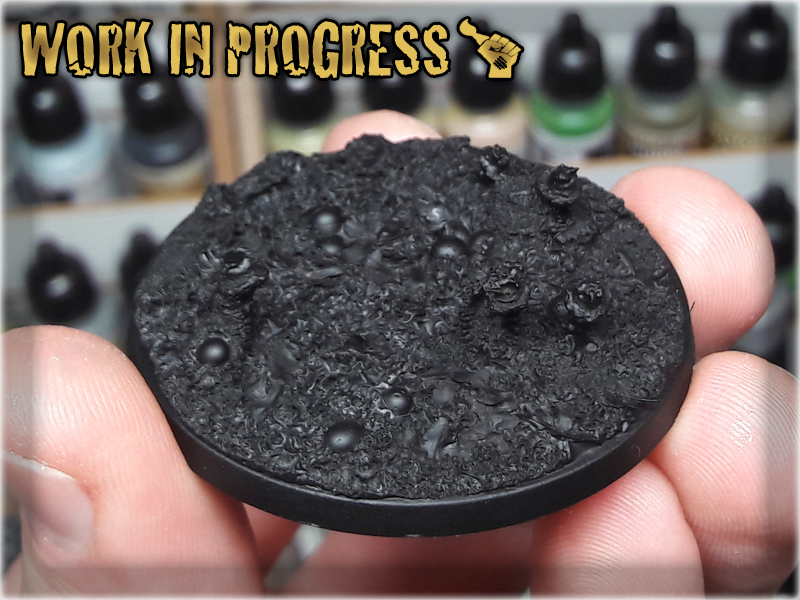
Now seriously – tell my that’s not an awesome texture effect XD This is like ultra-fast, mega-cool way of using two glues to create utter chaos on any surface. Chaos mutations, warped stuff, Zerg creep, alien planet foliage, jungle floor, faerie glade, name it – then glue+glue it 😉

Do not hesitate to let me know and send some pictures via FACEBOOK if you ever use the tutorial. I will be happy to see how it turned out 😉
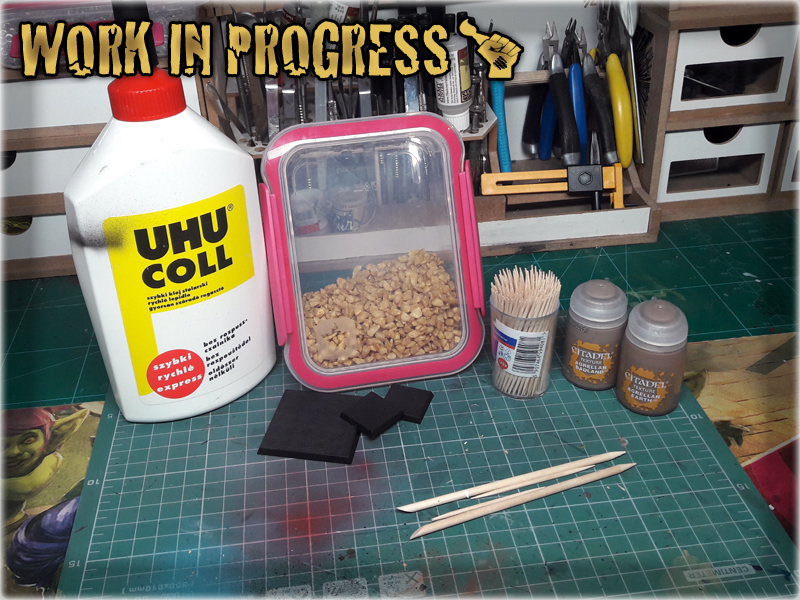
In this easy, step-by-step tutorial I’m going to show you how to create a Cave Base.

*Ask your GF if you don’t know where to obtain the latter.
**Search in IKEA or any home/garden store. A lifetime stockpile of these is less than 5€.
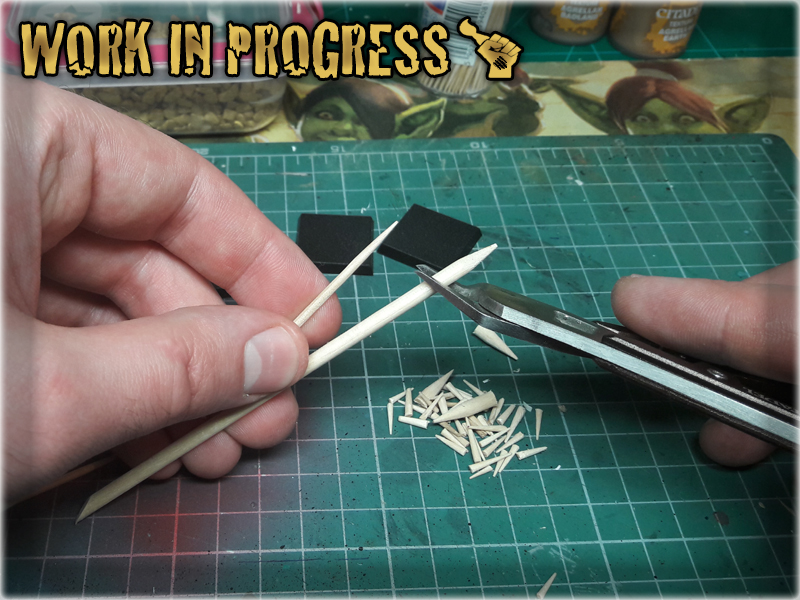
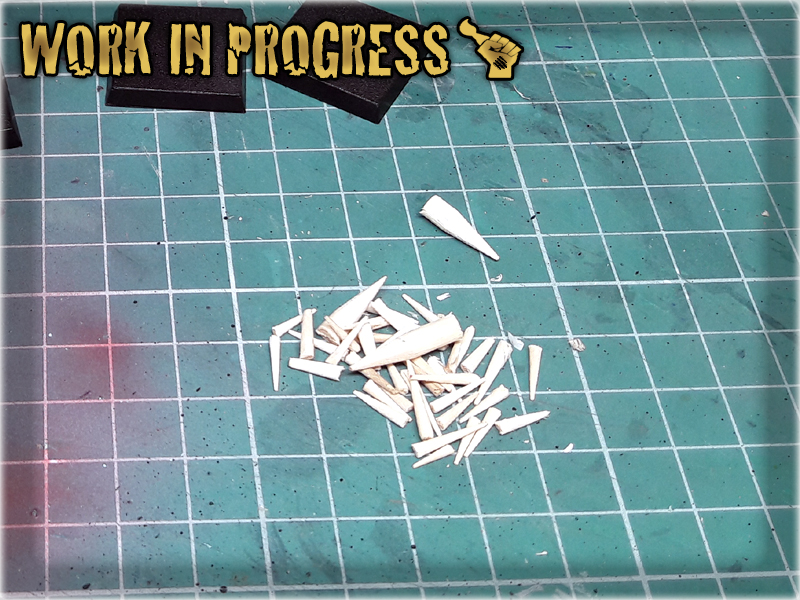
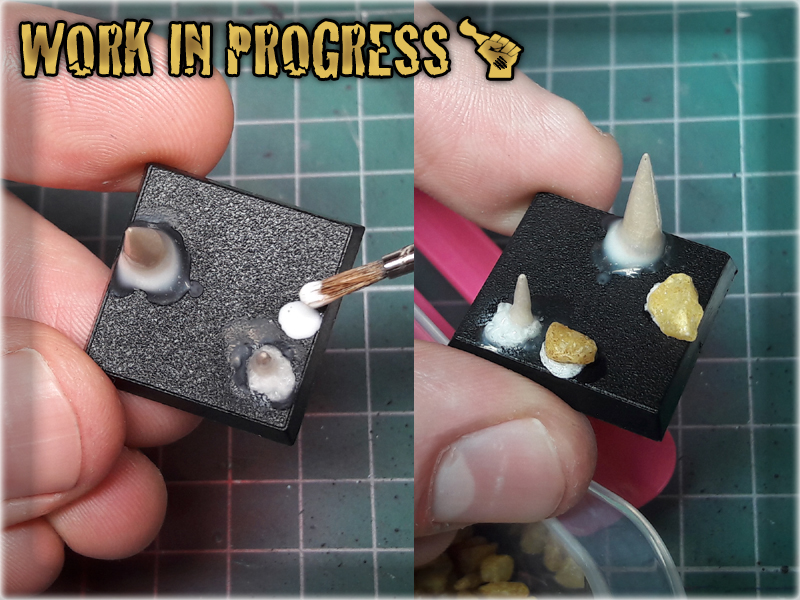
1 I started by cutting off the tips of both toothpicks and nail sticks. These would do for fine stalagmites later on.
2 I then applied couple of drops of basing glue onto the base. Before it dried out I applied Super Glue on it and mounted stalagmites, tip upwards, on the mix.

3 Next I covered entire stalagmites with basing glue and left it to dry. The excess glue, moved by the power of gravity, was drawn downwards, where it rested around the base of the stalagmites, making them look smooth and natural.
4 Using the previous technique I applied some basing glue in few spots and then Super Glue'ed some gravel over it. You can actually glue any type of stuff with this - like skulls, some pieces of armour etc.
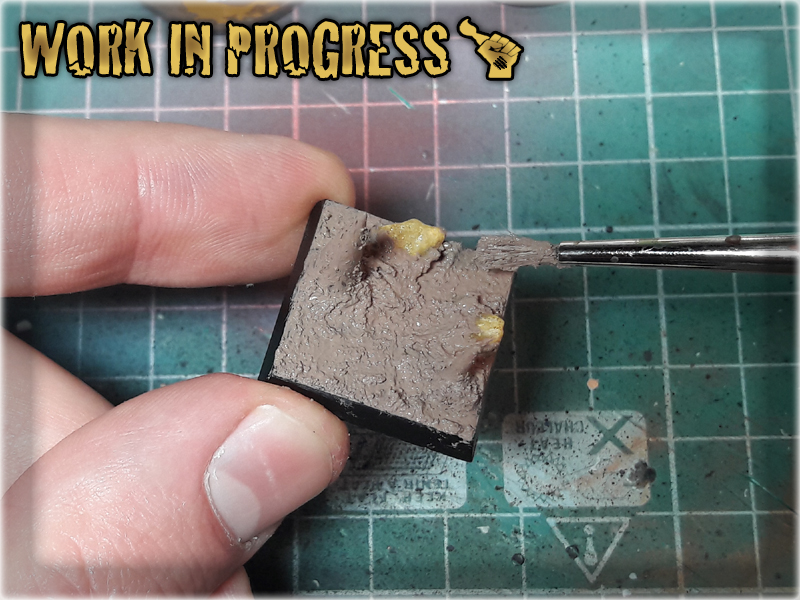
5 I then covered antire surface, except for any fillers, with Games Workshop's texture paints. I used a mix of Agrellan Earth and Agrellan Badland for this tutorial, but actually any of the range will do - as long as you would like to undercoat the base afterwards.


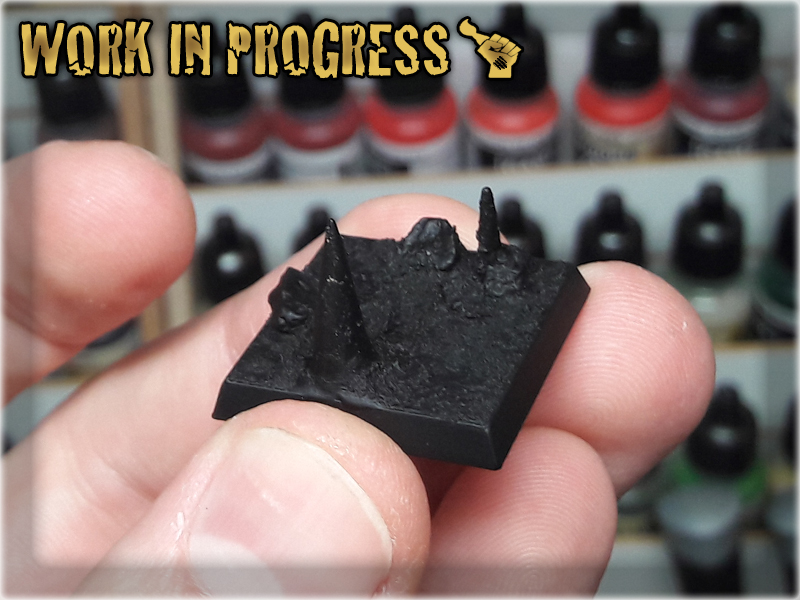
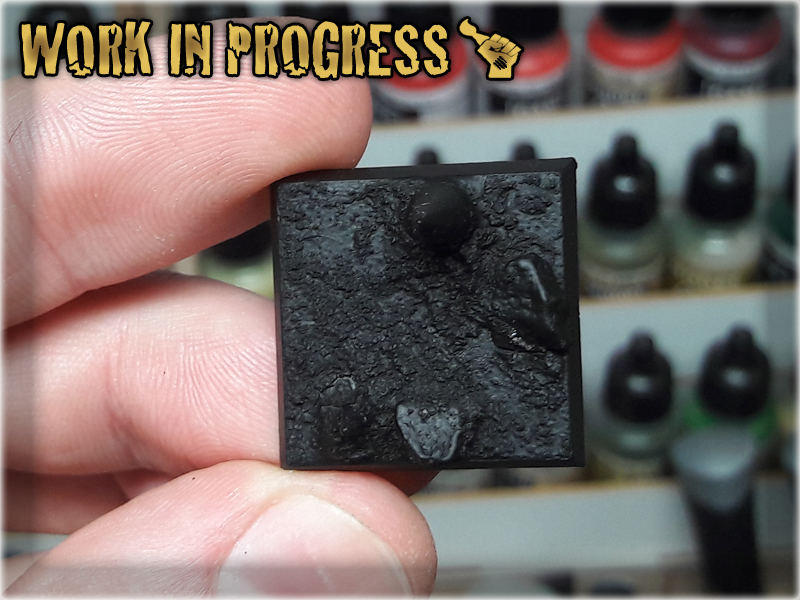
6 The final step was to undercoat dried out base with Chaos Black spray...


Now, what’s left is just to paint the bases with your preferable colour scheme. I chose to go red/copper style similar to ‘the Wave’ and watered some spots with clear resin, but the number of potential colour schemes is unlimited.
If you ever use the tutorial – be sure to let me know and send some pictures via FACEBOOK. I will be happy to see how it turned out 😉
“It is a Dark Time.
The might of the Empire is dust, their crown is lost to them and their glory forgotten.
The promise of an age of peace and prosperity is drowned in blood.
This is your time. For the ruins of Mordheim hold prize beyond imagination: stones of power which can grant all your wishes.
But beware of your enemies.
Fear the Possessed, the Beasts of the Pit which roam the night.
Watch for the thieves of the Rat men, the Skaven of the Underworld.
Dread the corpses who walk like the living: the foul Vampires and their rotting minions.
This is Mordheim, the city of the Damned. This is the home of all your hopes. Be wary or it will be your grave as well.”
Mordheim rb.s.124
It all started with a single idea that came to me one day. I installed “Mordheim: City of the Damned” on a PC and played for the first time. It took me back on a memory trip through all the campaigns played throughout the years and further – as for the first time I saw Mordheim in it’s dark glory! It looked so effective. I figured to make myself a gaming board based on this…
You see – terrain making is similar to PC map building. You take base shapes, you texturize them and then color them. If you happen to plan it beforehand, you will have just that: base shapes, texture pieces and paints – to work with. So , the idea was totally within my reach. Not a priority – just ‘an idea’. One to haunt me throughout my everyday life from then on. Sometimes it stayed dormant for couple of weeks just to emerge from the depth of imagination without any warning. Many times I was on the verge of realizing it into existence, then just hid it deeper within me like “meh, takes up too much time, I don’t need it right now”. But the right moment finally came. I was gaming in a local hobby store, where I saw an inspiring collection of Mordheim scenery. This was too much – I couldn’t resist. There was just too much inspiration to walk by. I broke that invisible mental barrier – took this like a man – a day later I went to construction store, purchased all necessary materials and started working on this project…

I already had a Mordheim Gaming Board along with all the terrain that might come in handy throughout a vast campaign. The old scenery set was rather solid but lacked some key features in terms of theme and most importantly – texture. Back in the days I praised short construction time and playability over looks and strong theme. I produced terrain pieces really fast, but at a cost of visuals. This time around I set off for looks and theme as the highest priority with playability a bit lower, followed by durability and other usual stuff. Due to current Nomad’ish way of life I also wanted for this gaming board to be transportation friendly and rather light. To achieve that I had to fulfill these assumptions:
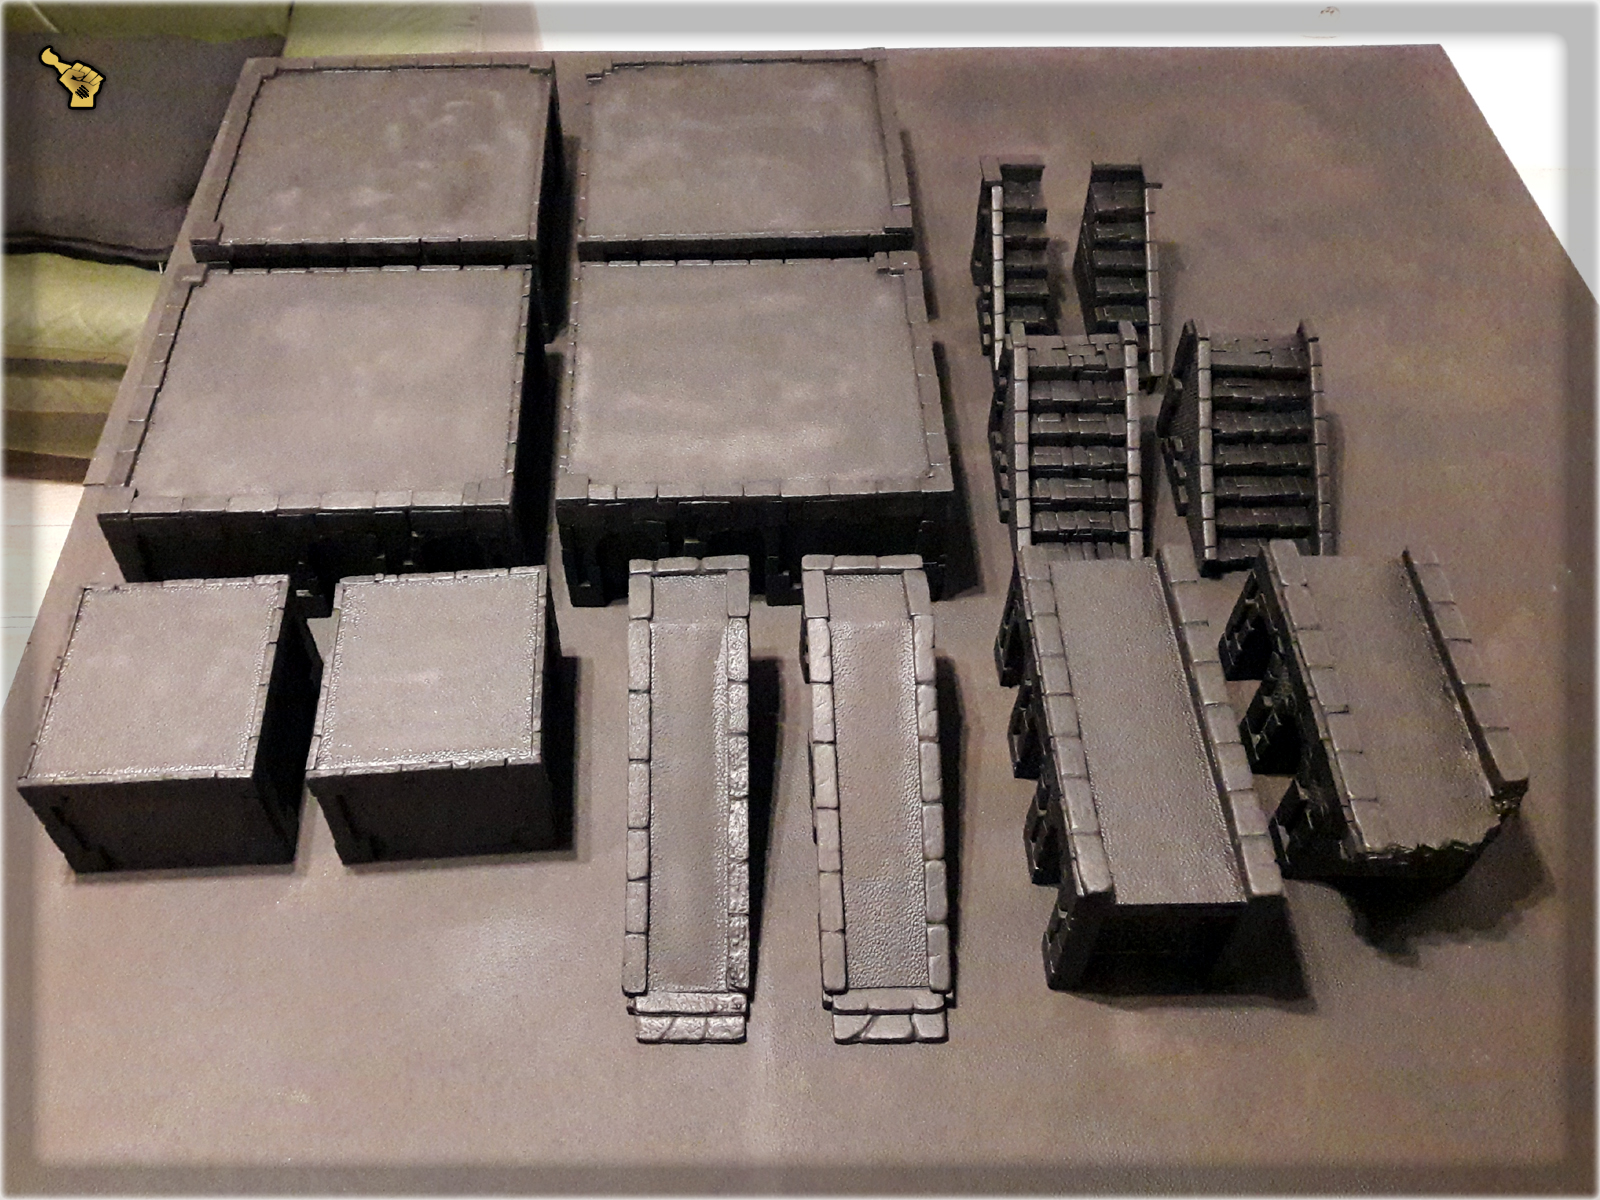
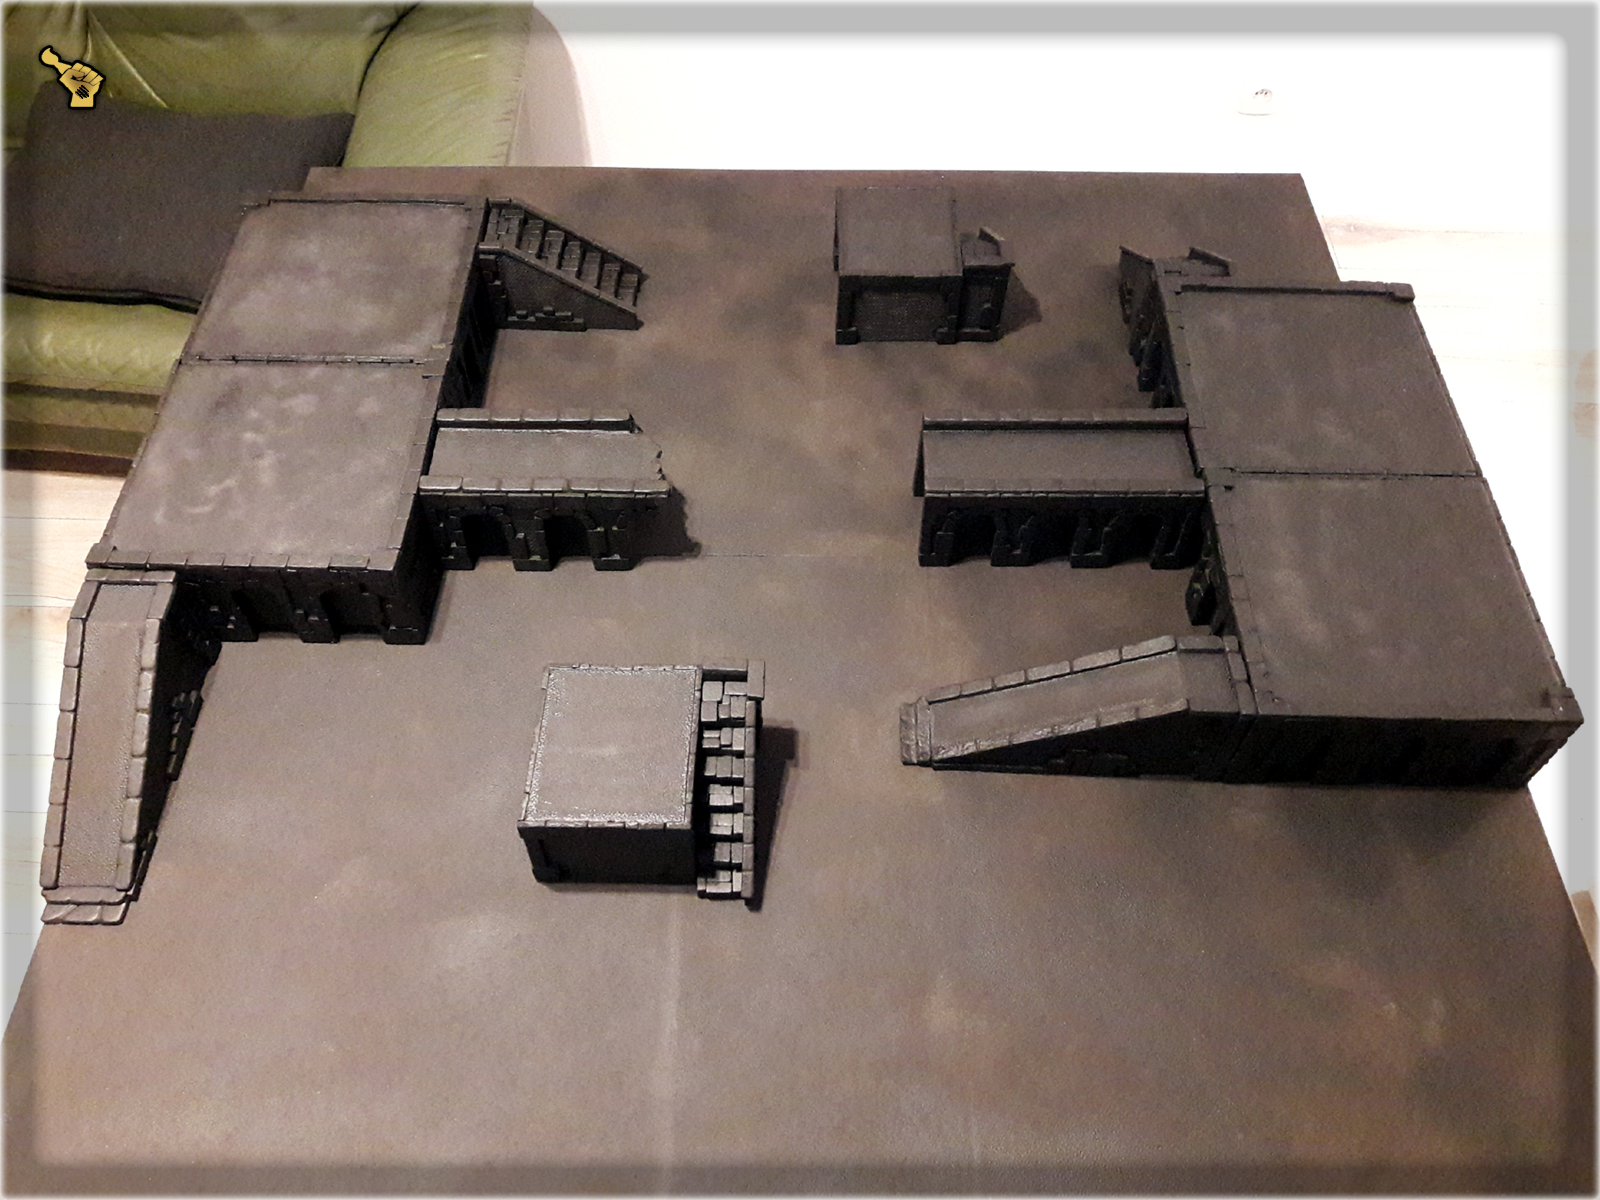
As with most terrain projects, I started by preparing a simple visualisation of how much space the foundations will take up on the gaming board. By ‘the foundations’ I mean simple terrain pieces that will take up most space, creating different levels on the gaming board. In case of “The Colony” gaming board these would be buildings, but this time I’ve decided to use urban hills for the job. This was just a formality, but as usual I wanted to be prepared for what’s to come…
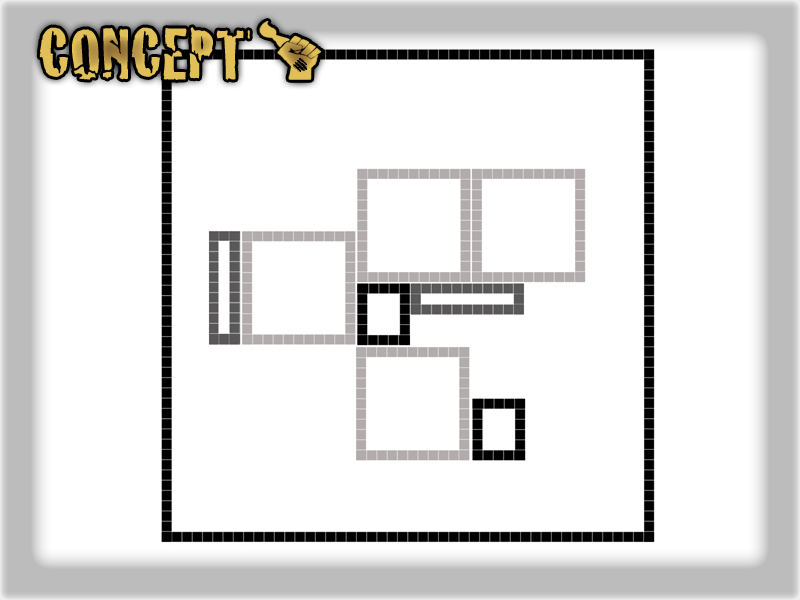
The base concept was to create four urban hills, that might be combined in many different ways to create a large elevated space, or set up individually. Along with these, two small urban hills and two platforms were to be made. While small hills might be used for shape diversity and to link the bigger ones, platforms were to provide easy access to elevated positions on the map…
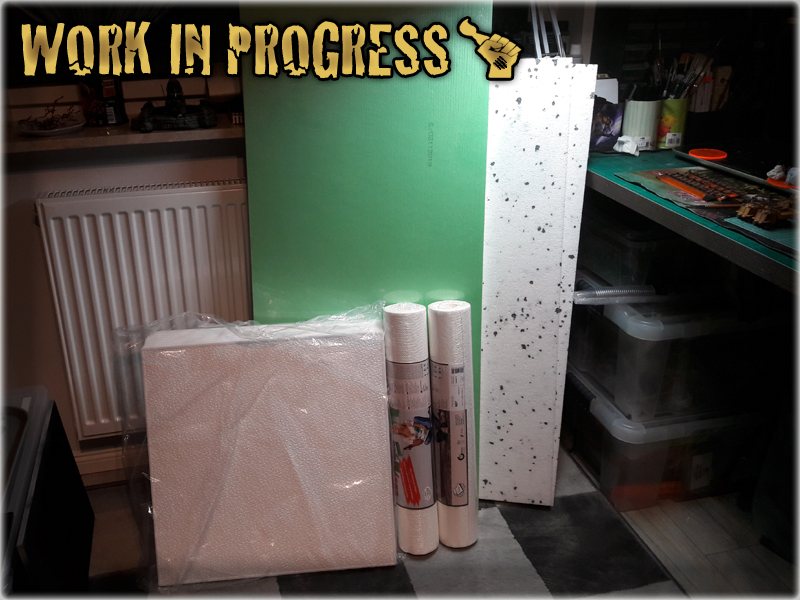
One of the most important things in terrain building is choosing the right materials. Let’s say that I wanted to provide a lot of texture and detail, keeping gaming board/scenery durable, easy to setup and easy to transport (Not to mention – wallet friendly), at the same time. Plaster was obviously a bad choice as it’s heavy and tends to get damaged all the time. Personally I try to avoid it. Any type of Resin or Hardfoam might do but these are extremely expensive and in case of a project on such a scale, they would require professional equipment to be fully implemented. So I decided to go for styrofoam for base shapes and wallpaper for texture. I personally hate light terrain pieces, that tend to fly all over the table, but in this case – solid buildings could keep the rest pinned to the table, thus following all the assumptions of my initial idea at the same time.
I had all the materials needed along with the concept. The only thing left was to start working on the project. I started with the most simple task – preparing a ‘cobblestone’ gameboard. It took like half an hour with me just applying a lot of basing glue onto the board and then cutting large pieces of wallpaper to be gluedon top of the board. The picture looks nothing special, but once painted – small cobblestone could be seen all over the game board…
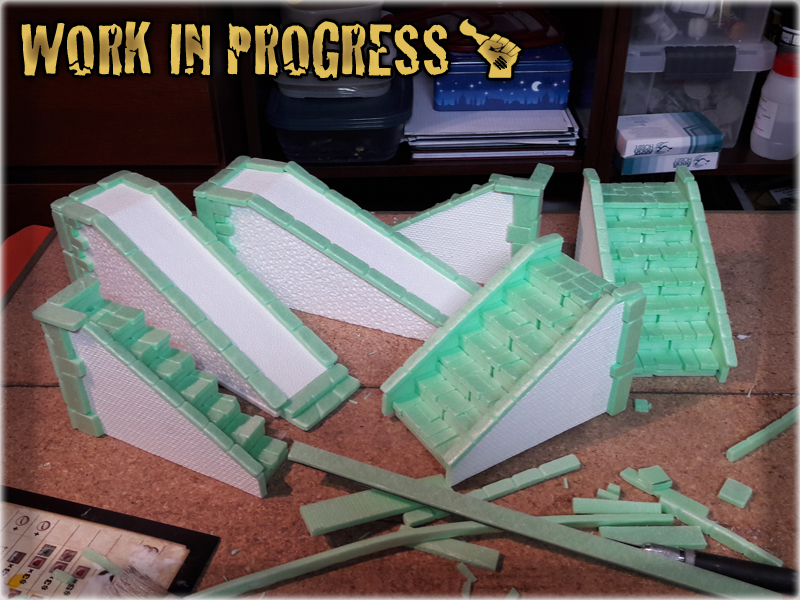
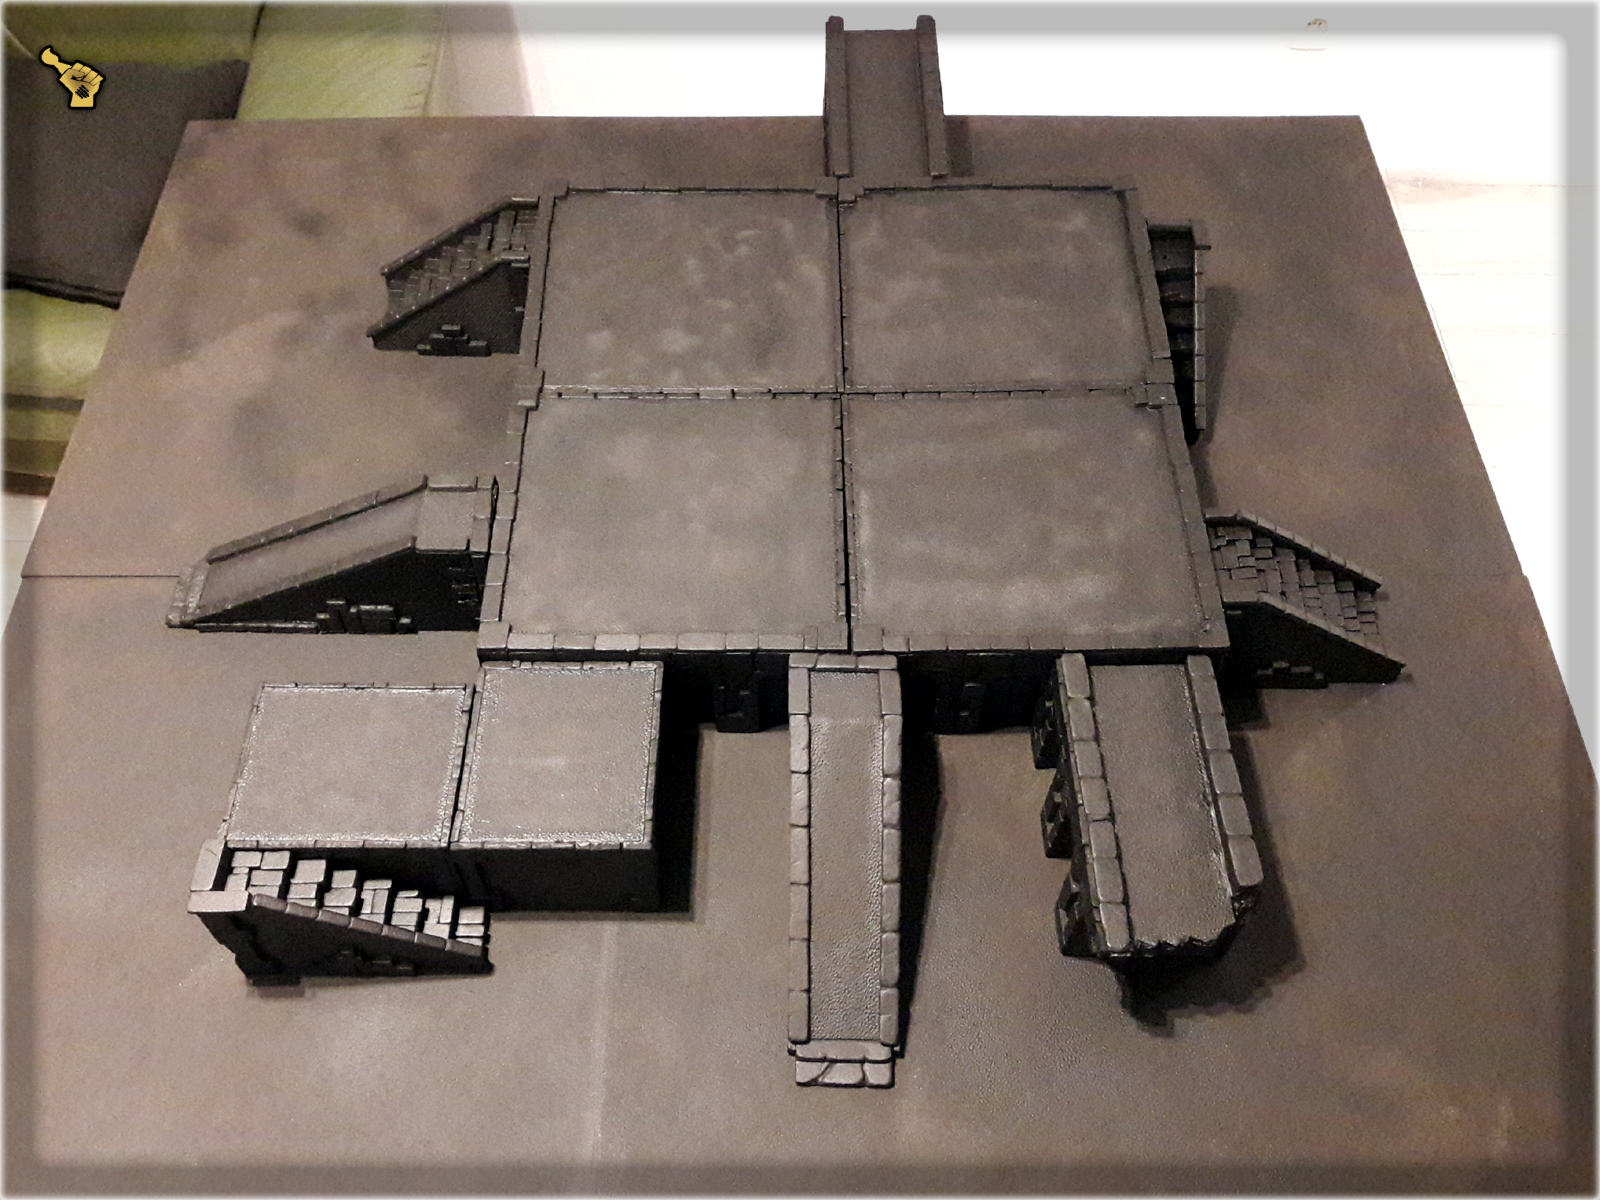
As soon as I took on the platforms, an idea of additional items appeared. Having in mind that the upper level should be rather accessible for all the miniatures I added four sets of stairs to the fold. Started with base shape cut out of rough pieces of styrofoam, then added texture on the sides to finally cover certain places with handmade stones. The stones (or just ‘huge bricks’) were made by cutting the base rectangular shape out of styrofoam and then rolling droves of these in my hands so that all the hard angles became nicely rounded.
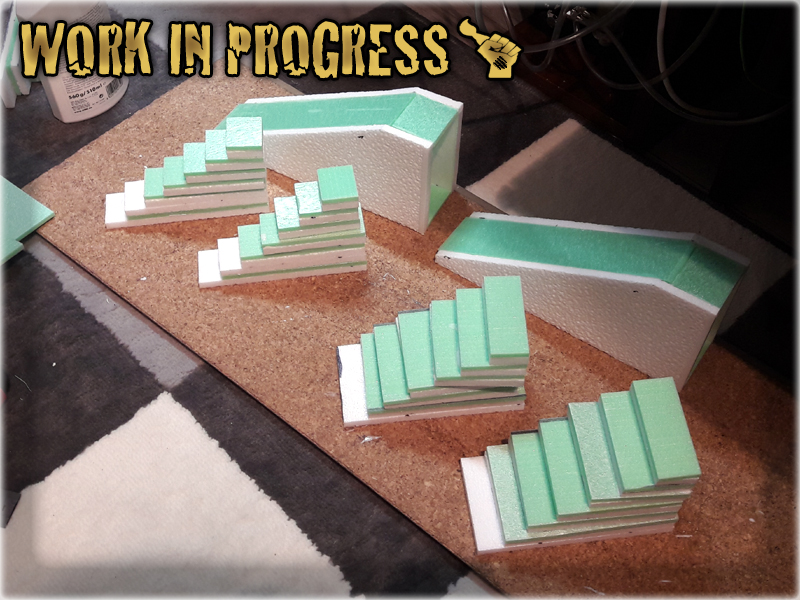
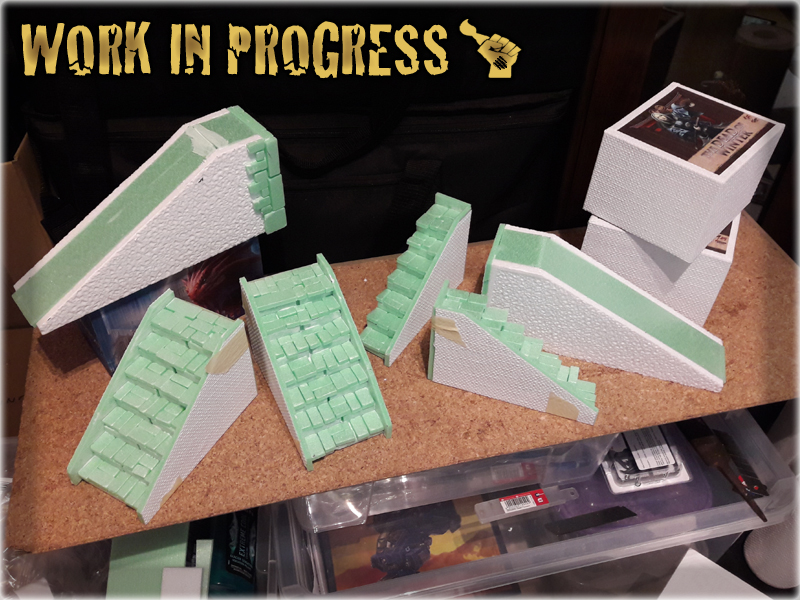

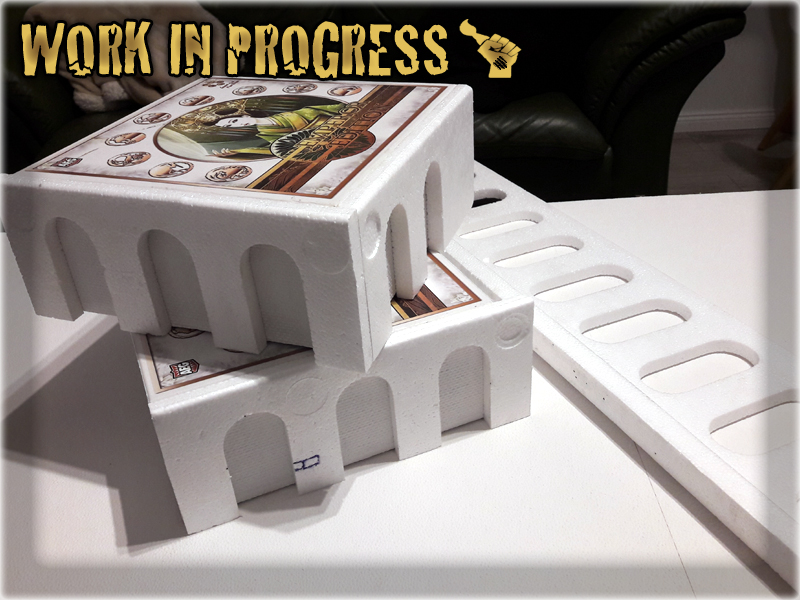
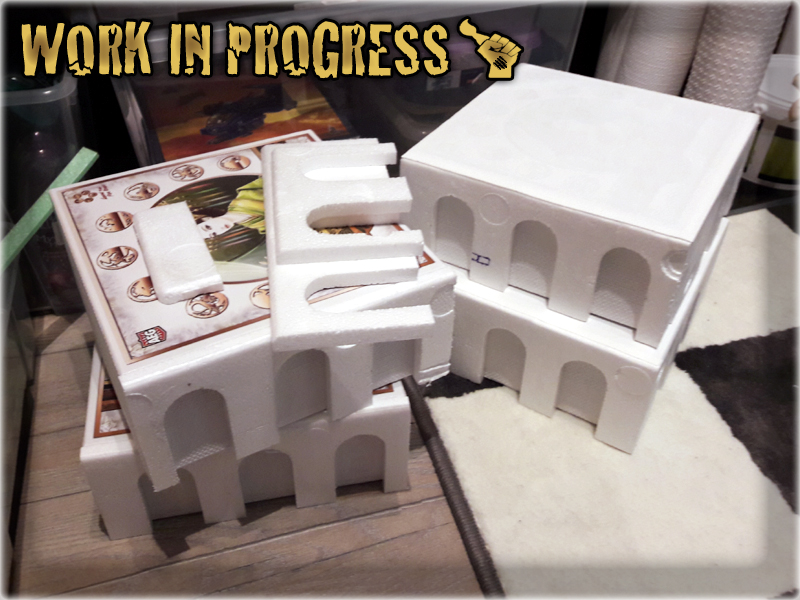
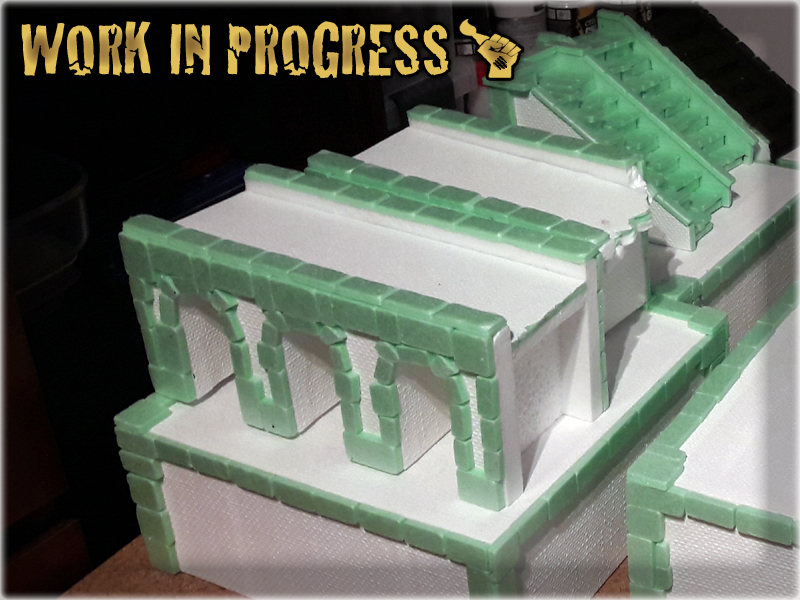
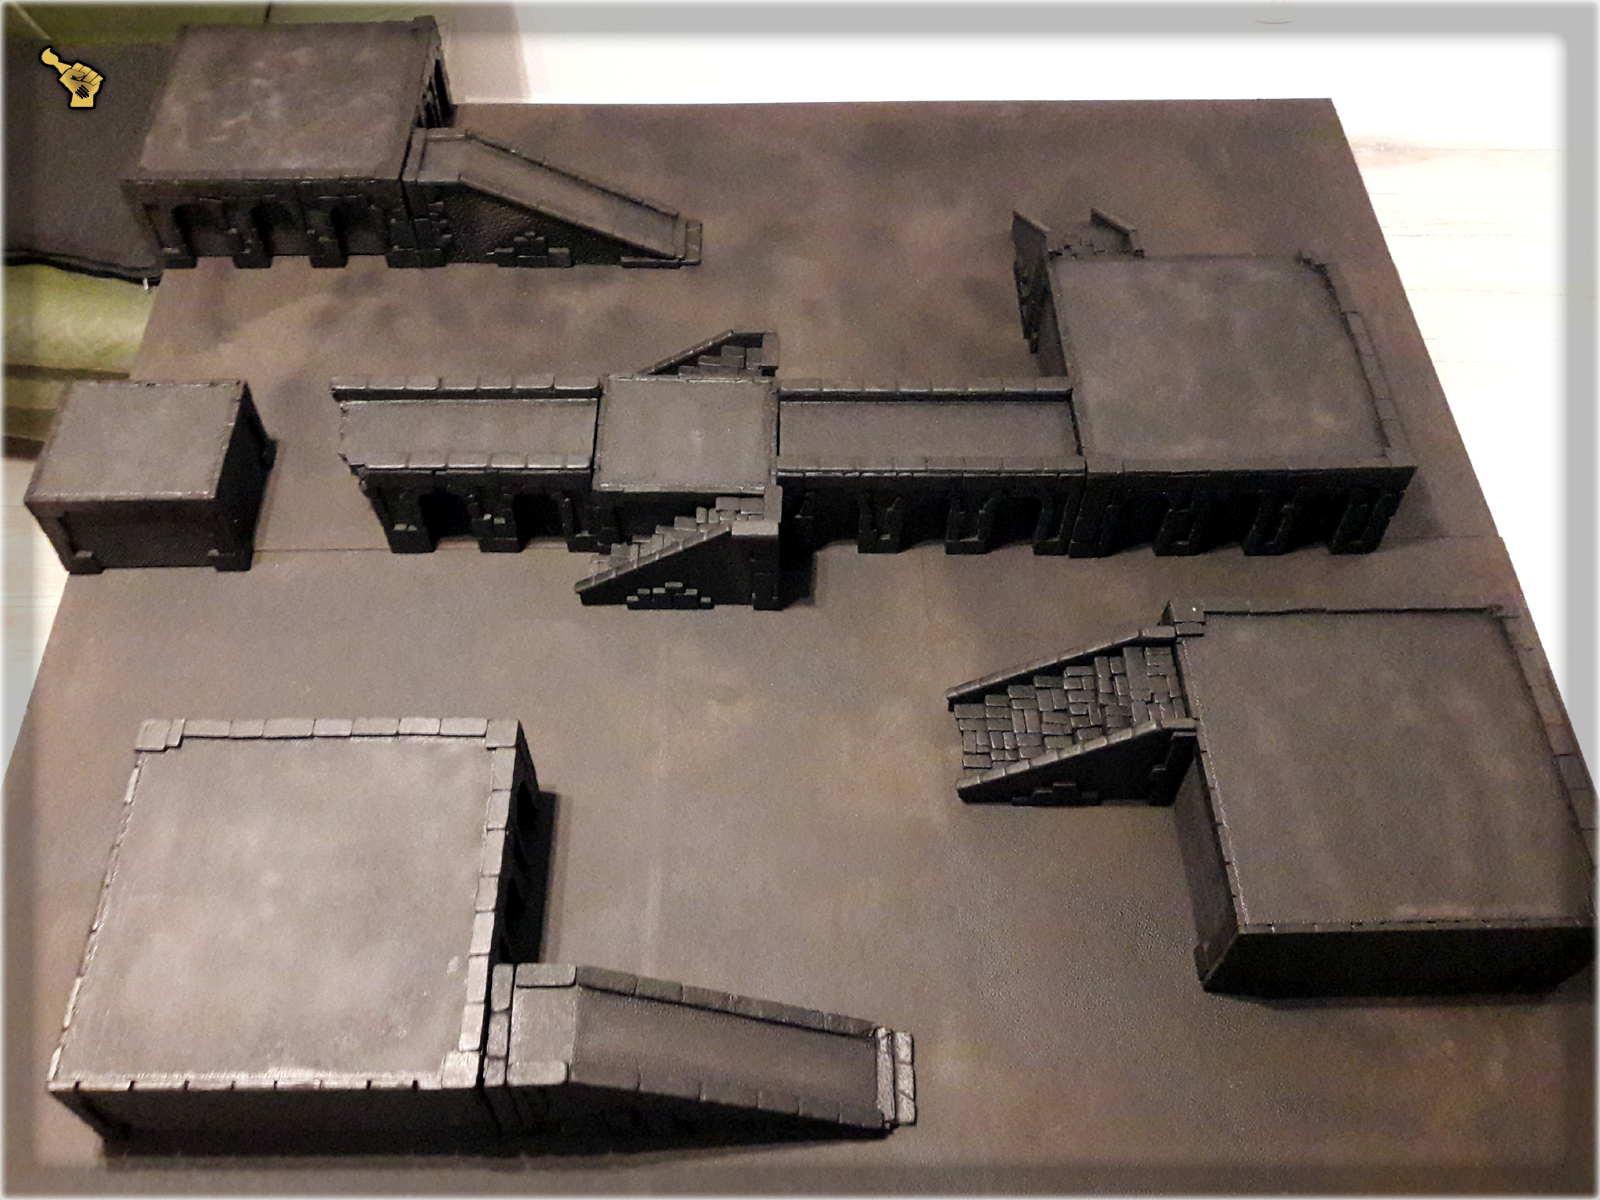
Along with all the platforms and stairways I also prepared a set of urban hills. I used ‘Legend of the five rings ccg’ boxes to gain access to base shapes of a similar height. The best method to texturise them was to cover entirety of them with glue and then use wallpaper all over it. Once glue dried out I added styrofoam pieces cut out of the fridge protecting casing ( I like to keep such stuff in case it’ll come in handy – and guess what – it did…). Just like with stairs and platforms, I texturized urban hills with styrofoam bricks/blocks of stone.
Usually at this point I would have spent a lot of time correcting small imperfections, but I’ve figured out to cover them with a finishing touch of fake autumn leaves, once the paint job is done. This way I wanted to strengthen the mood of the entire table while having all the small holes and defects covered.


One of the things I usually mess up aree bridges. Up to now I can’t recall any of these that would actually turn out to look good. Having excess materials I decided to give it a try, this time though I used the same concept as in case of urban hills. I tweaked the design a little to better suit the gaming board and added two short bridges to the set.
Once undercoated I set up couple of different battlefields to take proper pictures. I was able to confront the idea of a modular table with what I’ve created. Checked out different layouts but also made mental notes of what and how many buildings I would require in the future…
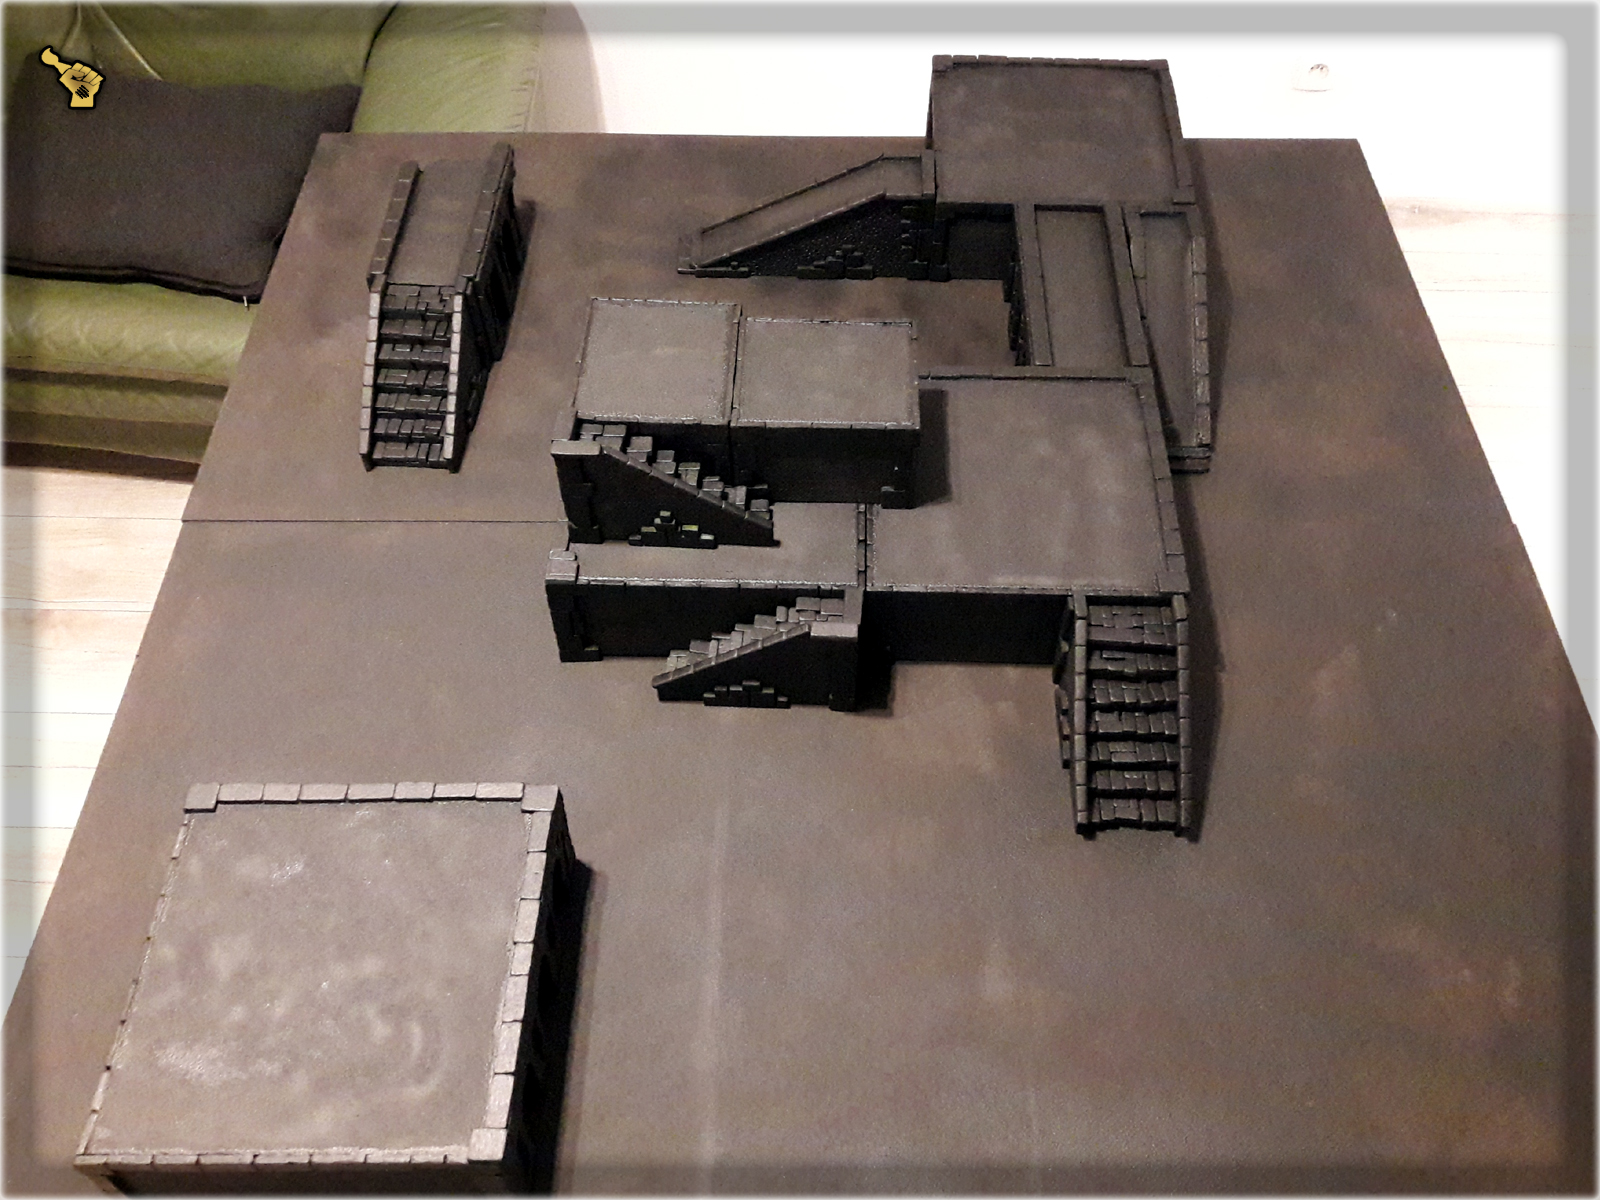
Paint job followed soon after. I used entire 200ml of Vallejo Black Surface Primer mixedwith gray and white to provide different layers of both wet paint job and drybrush. After that I also edged all corner stones with GW’s Pale Wych Flesh and added some extras in form of broken skulls, torches and Wyrdstone Shards. I also covered some spots with Autumn Leaves made out of Birch-tree seeds. This set a strong, dark mood to the scenery and comboed nicely with already painted ‘Toad Fountain’ and ‘Dead Tree’ pieces…
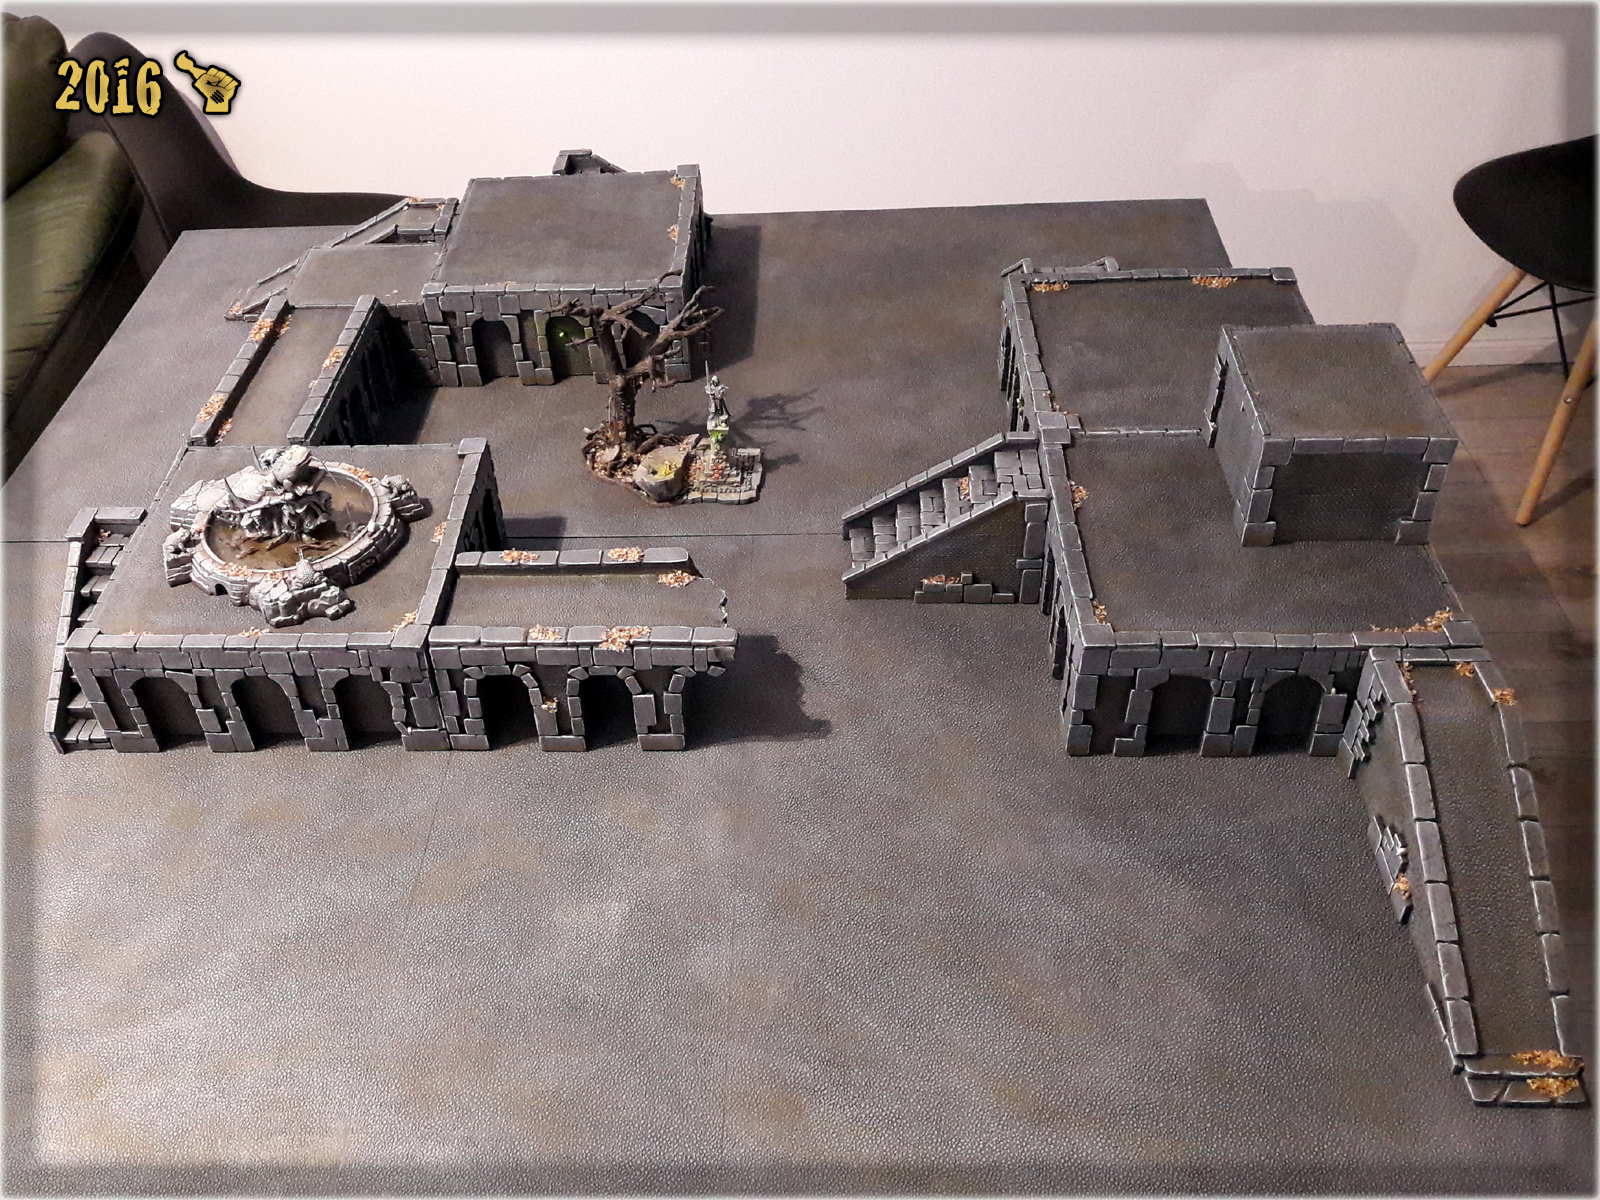
More than happy with the visual results I put the project on hold until end of the year in hope to get back to it with some cool looking buildings later on. We’ll see how it goes once 2017th hits the callendar…
Winter is already here thus I thought about warming the theme a bit by introducing a tutorial of how to make candles for 28-30mm scale. Why produce such things? In miniatures hobby candles are rare bitz among what you get in the sets designed by main miniature producers. Even if a set contains some, their number is scarce. Why not make your own and adorn bases, miniatures and even scenery with them? Be it Age of Sigmar, Mordheim, Warhammer 40,000 or just a fantasy dungeon – candles will provide mood to both miniatures and scenery. Below is a quick and easy step-by-step of how to produce your own 28-30mm scale candles. Enjoy…
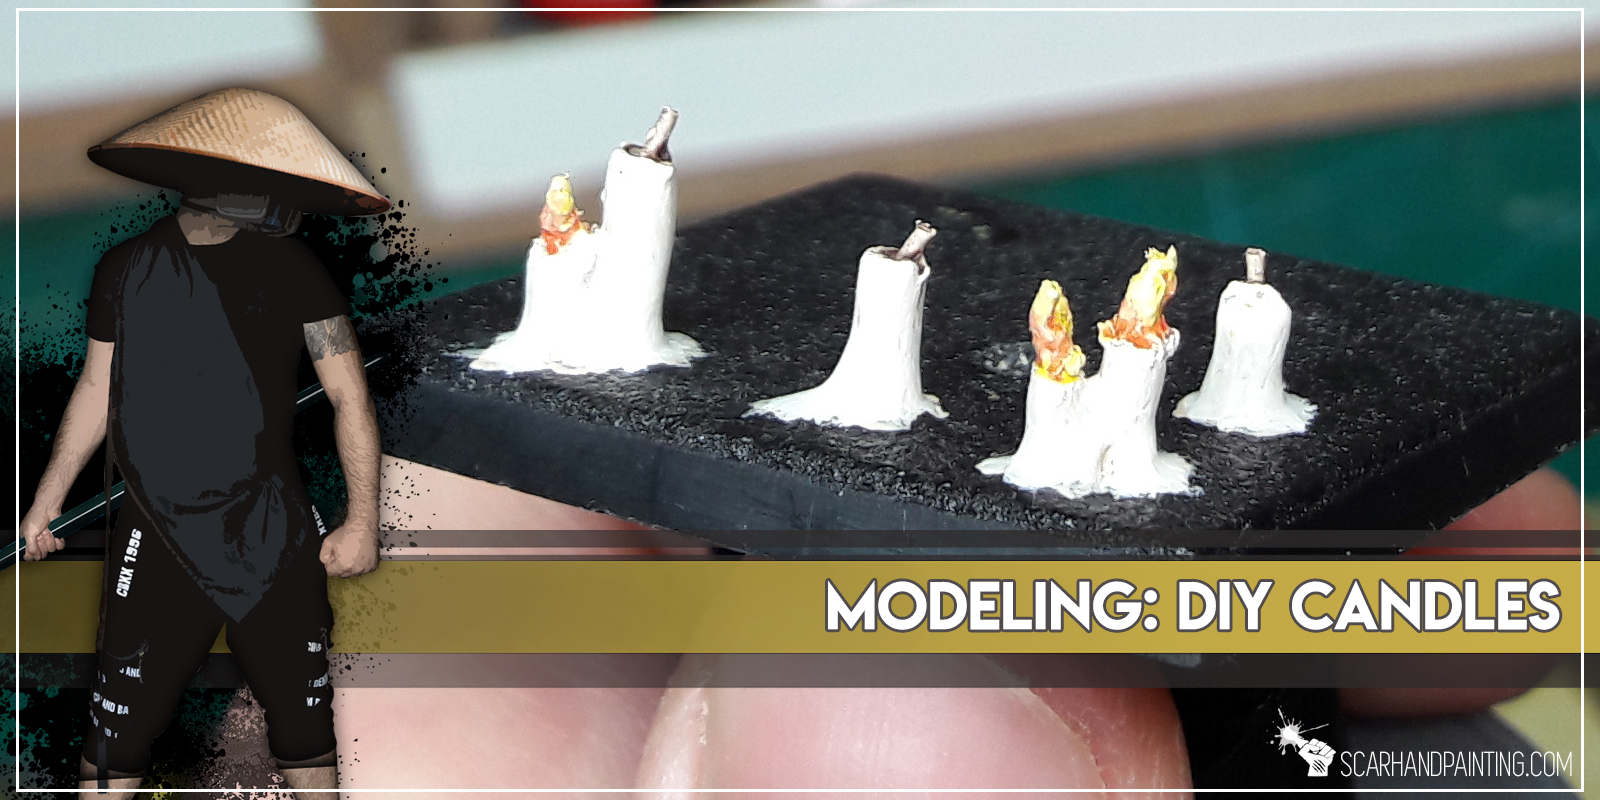

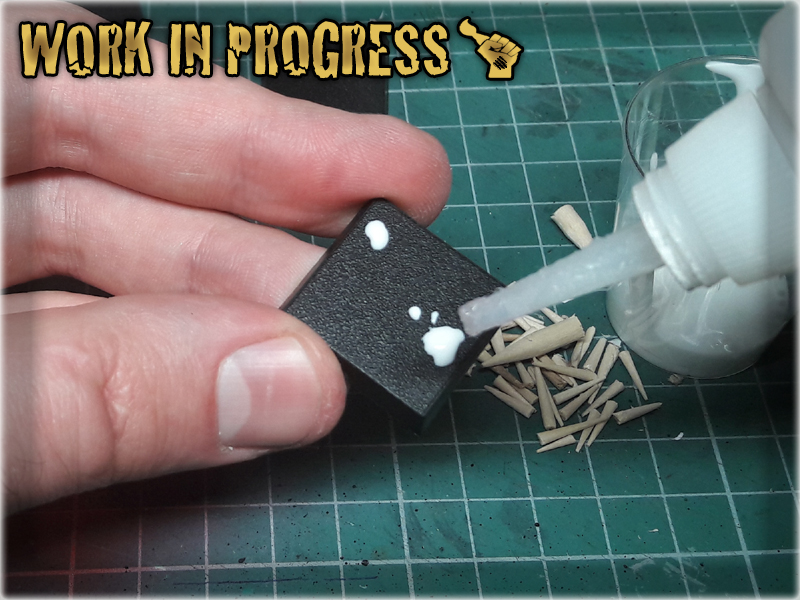
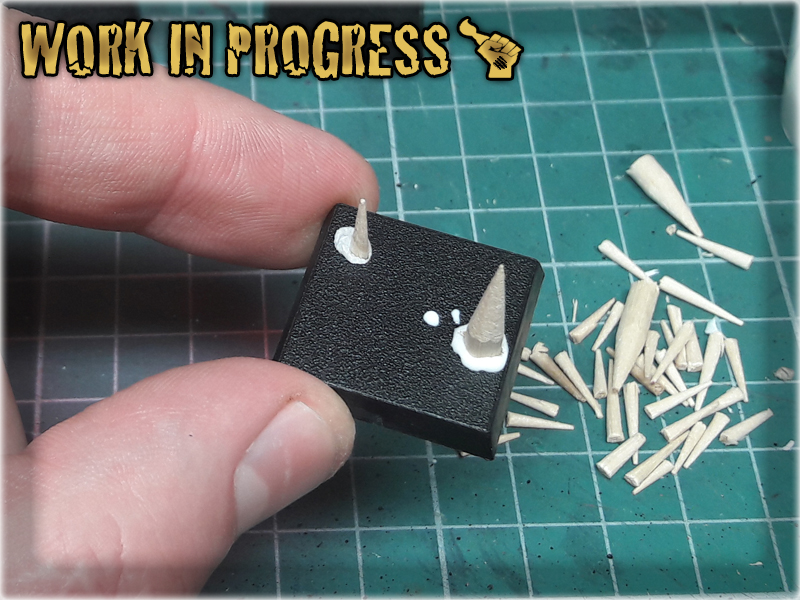
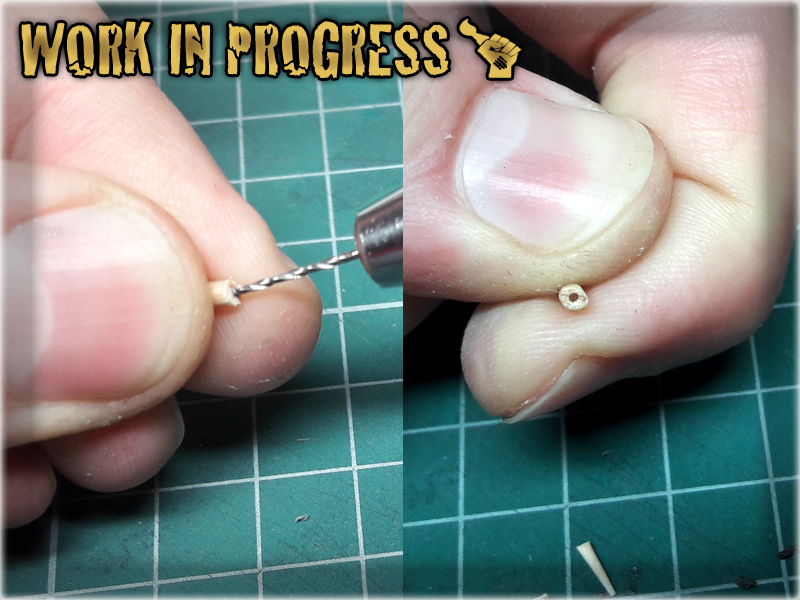
1 I started with preparation of candles-to-be by cutting toothpicks into small pieces. I tried to keep all of them between 5-10mm long, to better fit into the 28-30mm fantasy scale. Once I had couple pieces done I choose some of them and drilled small holes from one side. These will be used later to hold candlewicks.

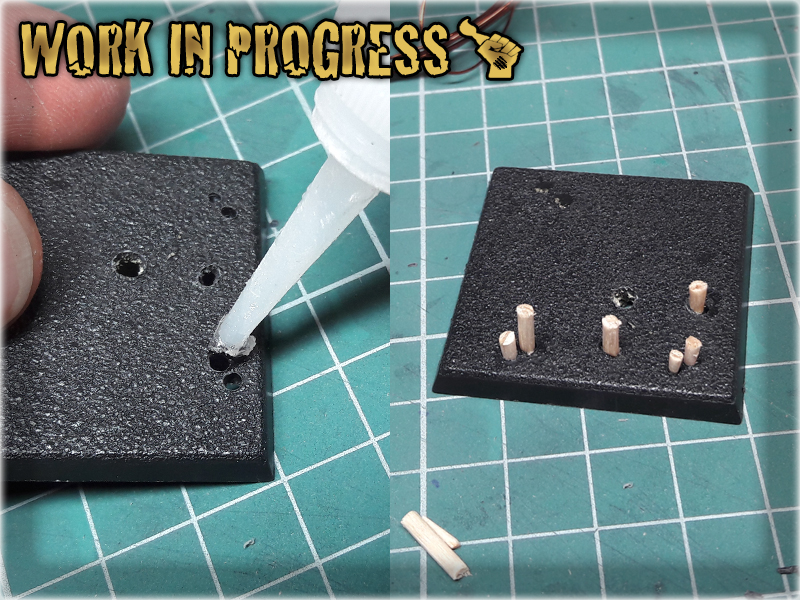
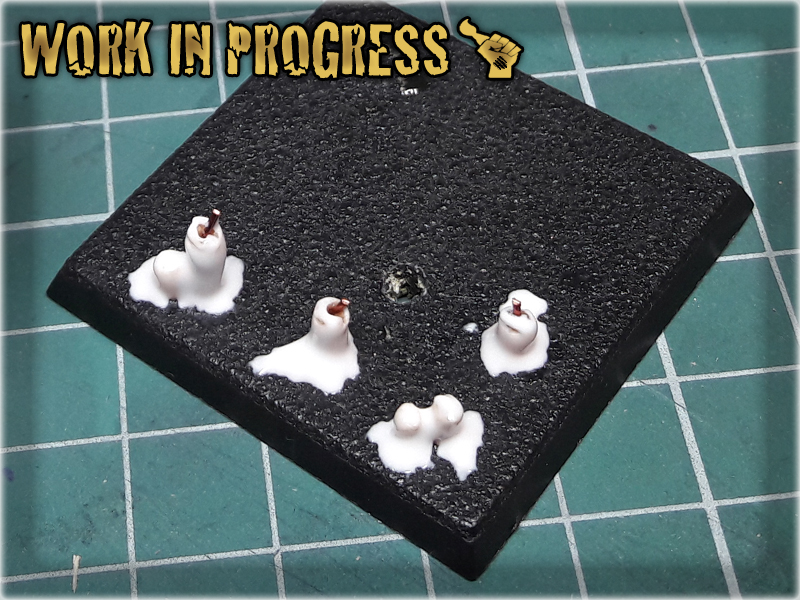
2 Next I glued the candles onto the base. In case of scenery I usually drill small holes to hold the candles in place or just glue them as it is if I'm sure the scenery won't require enchanced durability. For the purpose of this tutorial I drilled some holes in an old square Warhammer base.
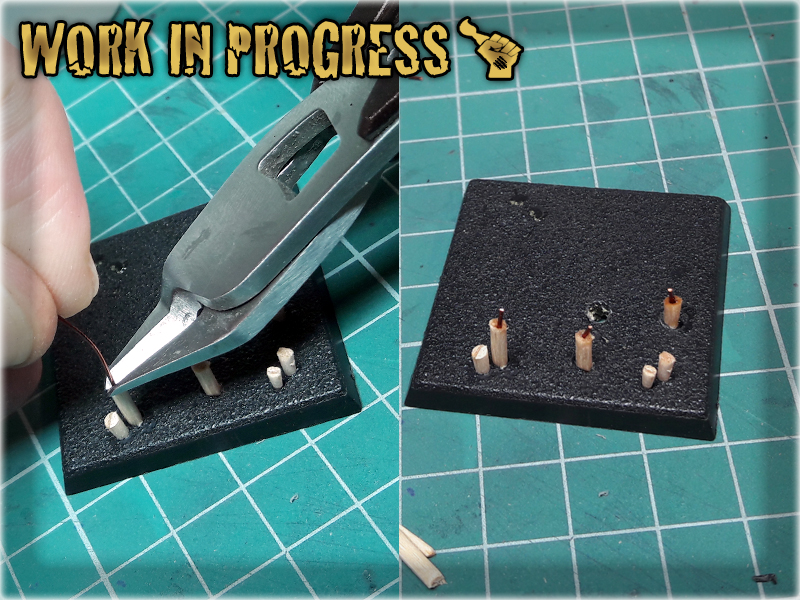
3 I then glued small pieces of wire into the holes, to look like candlewicks.
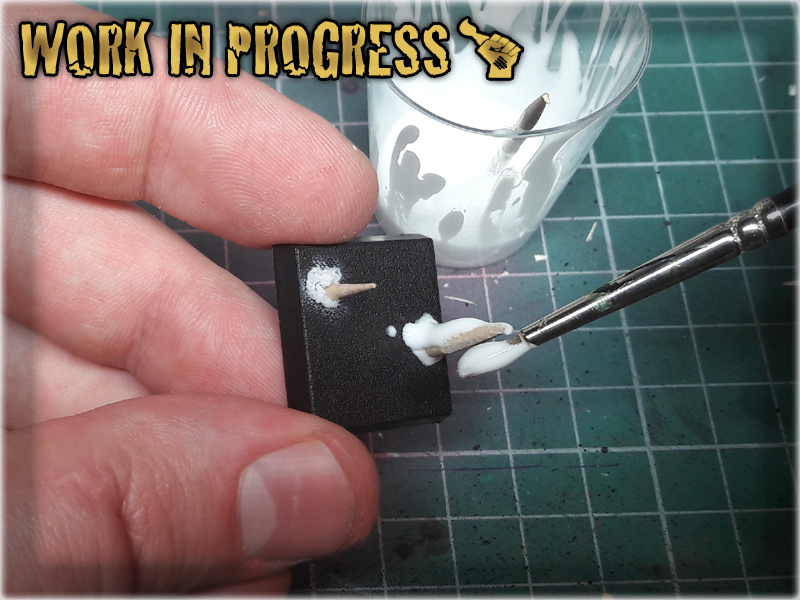
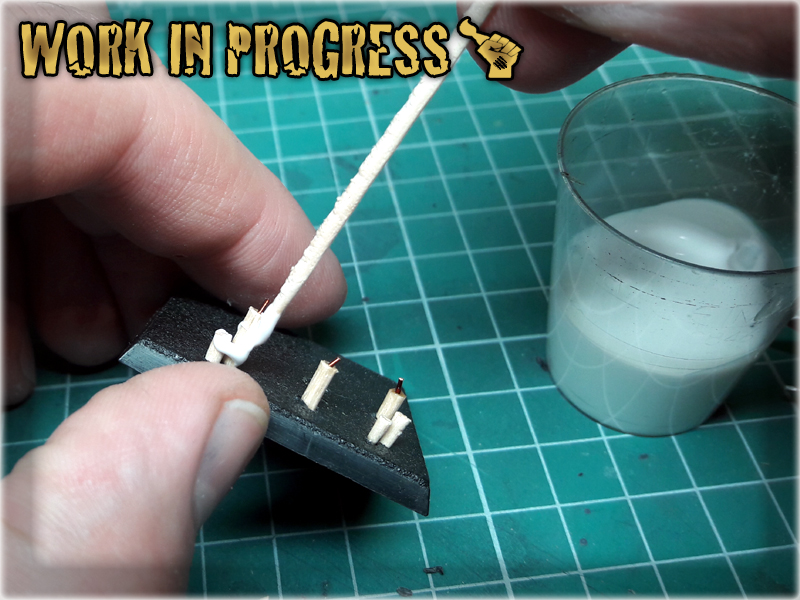
4 Then came the time to cover the candles with a basing glue, applying additional glue around the base of each candle to create an effect of spilled wax.
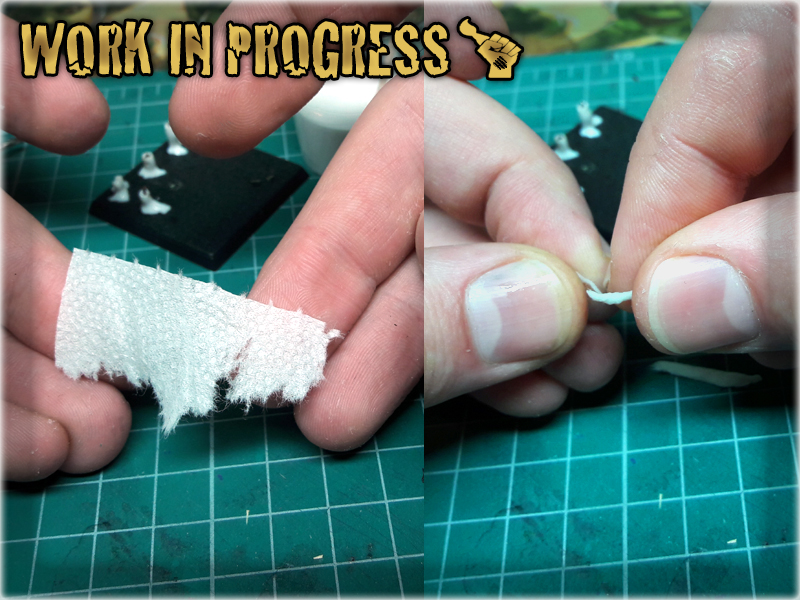
5 Next step was to prepare couple of small flames, using a wet paper tissue. I just rolled, then cut it into small pieces, which I then rolled once again.

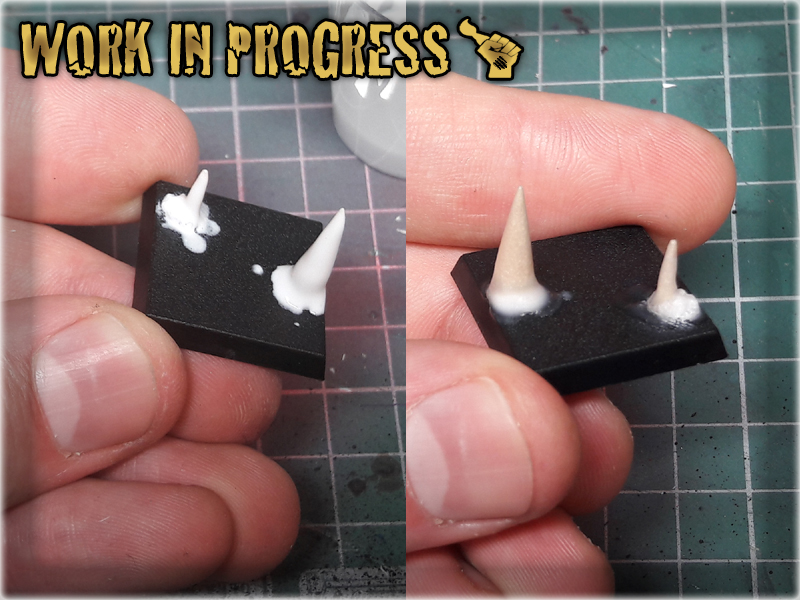
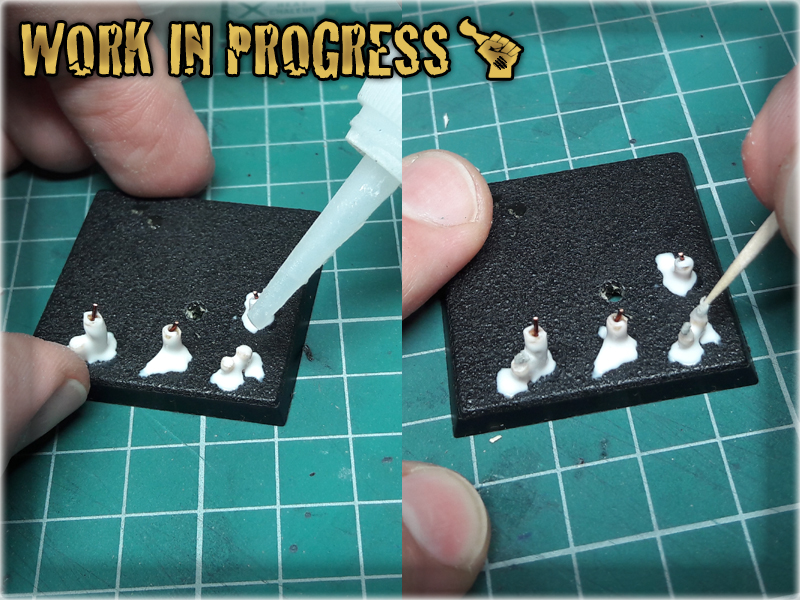
6 The flames where then glued to the candles with super glue and once in place - covered with glue to harden entirely.

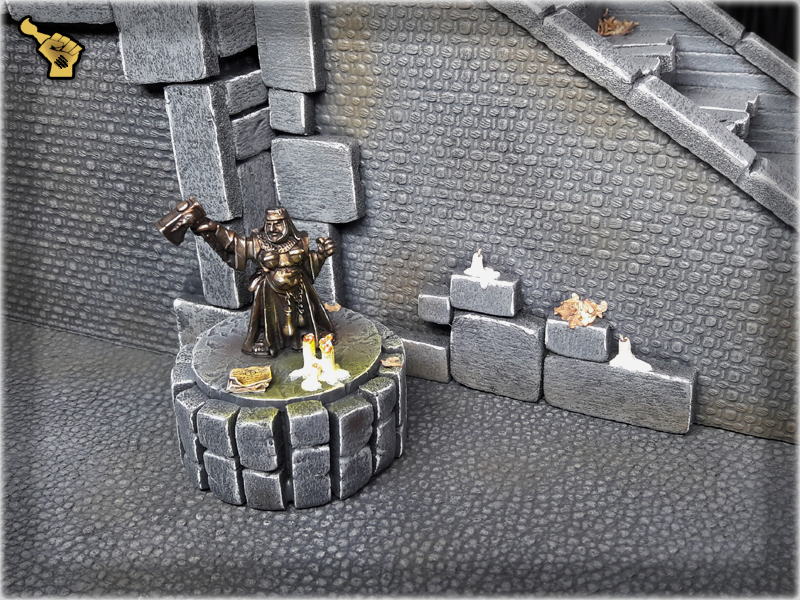
7 I left the stuff to dry, then painted it with mix of creme and white, washed the candlewicks and flames with some washes.

The end result will look more or less like this: