- contact@scarhandpainting.com


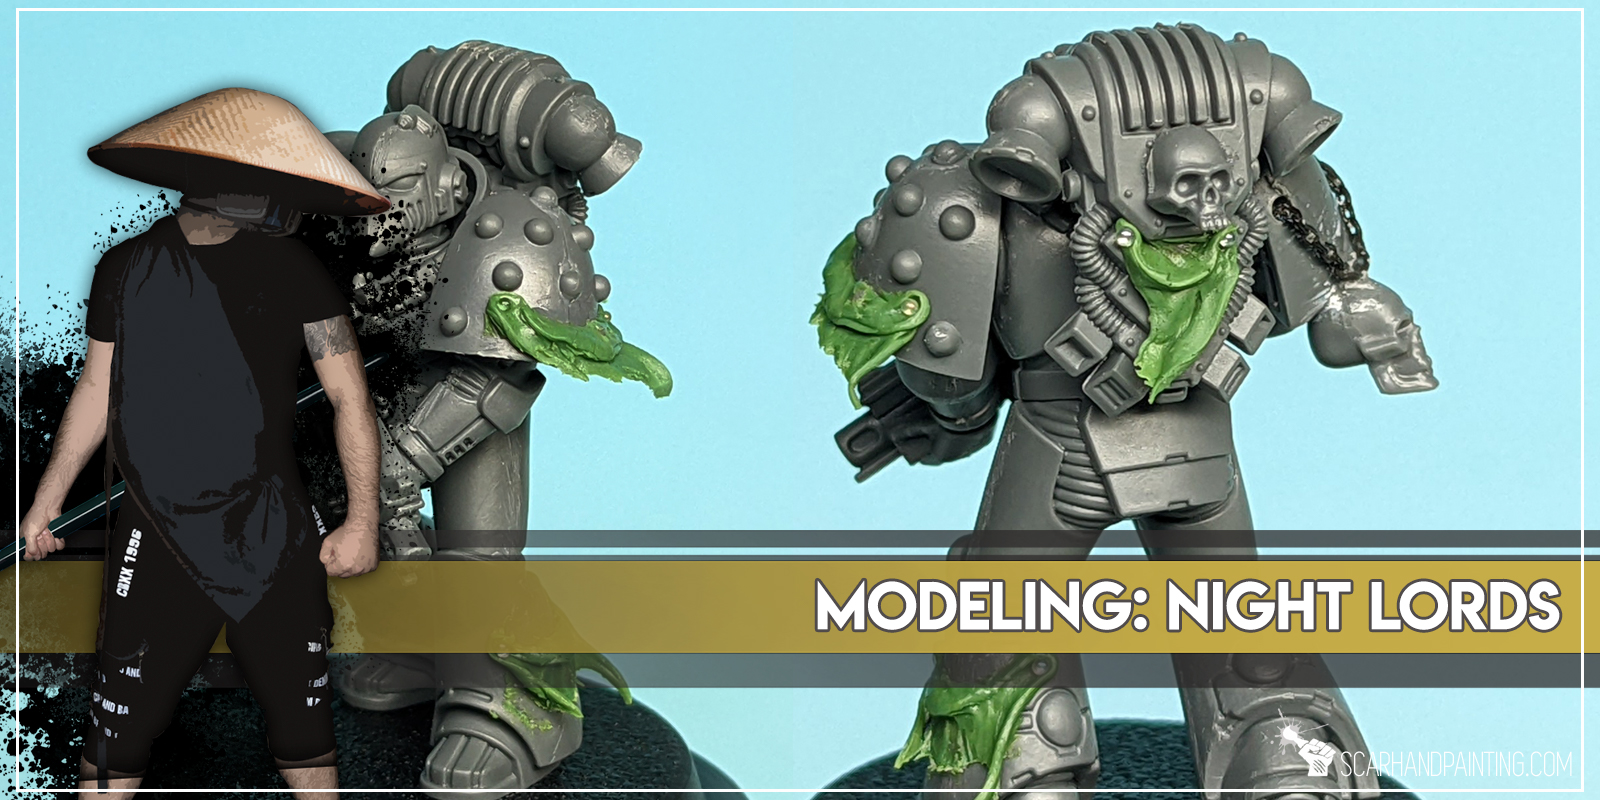
It is middle of the night. You and the boys just engaged Prey Sight and head out in search for the guilty. “In Midnight Clad”, but not without some fancy ‘fleshy’ adornments. Time to pimp that Night Lords armor.
If this sounds like something that tickles your fancy, or if you just want to make your Horus Heresy Night Lords feel like the real Eight Legion, then this tutorial is for you. Ave Dominus Nox!
Before we start, some notes:


The Basics:
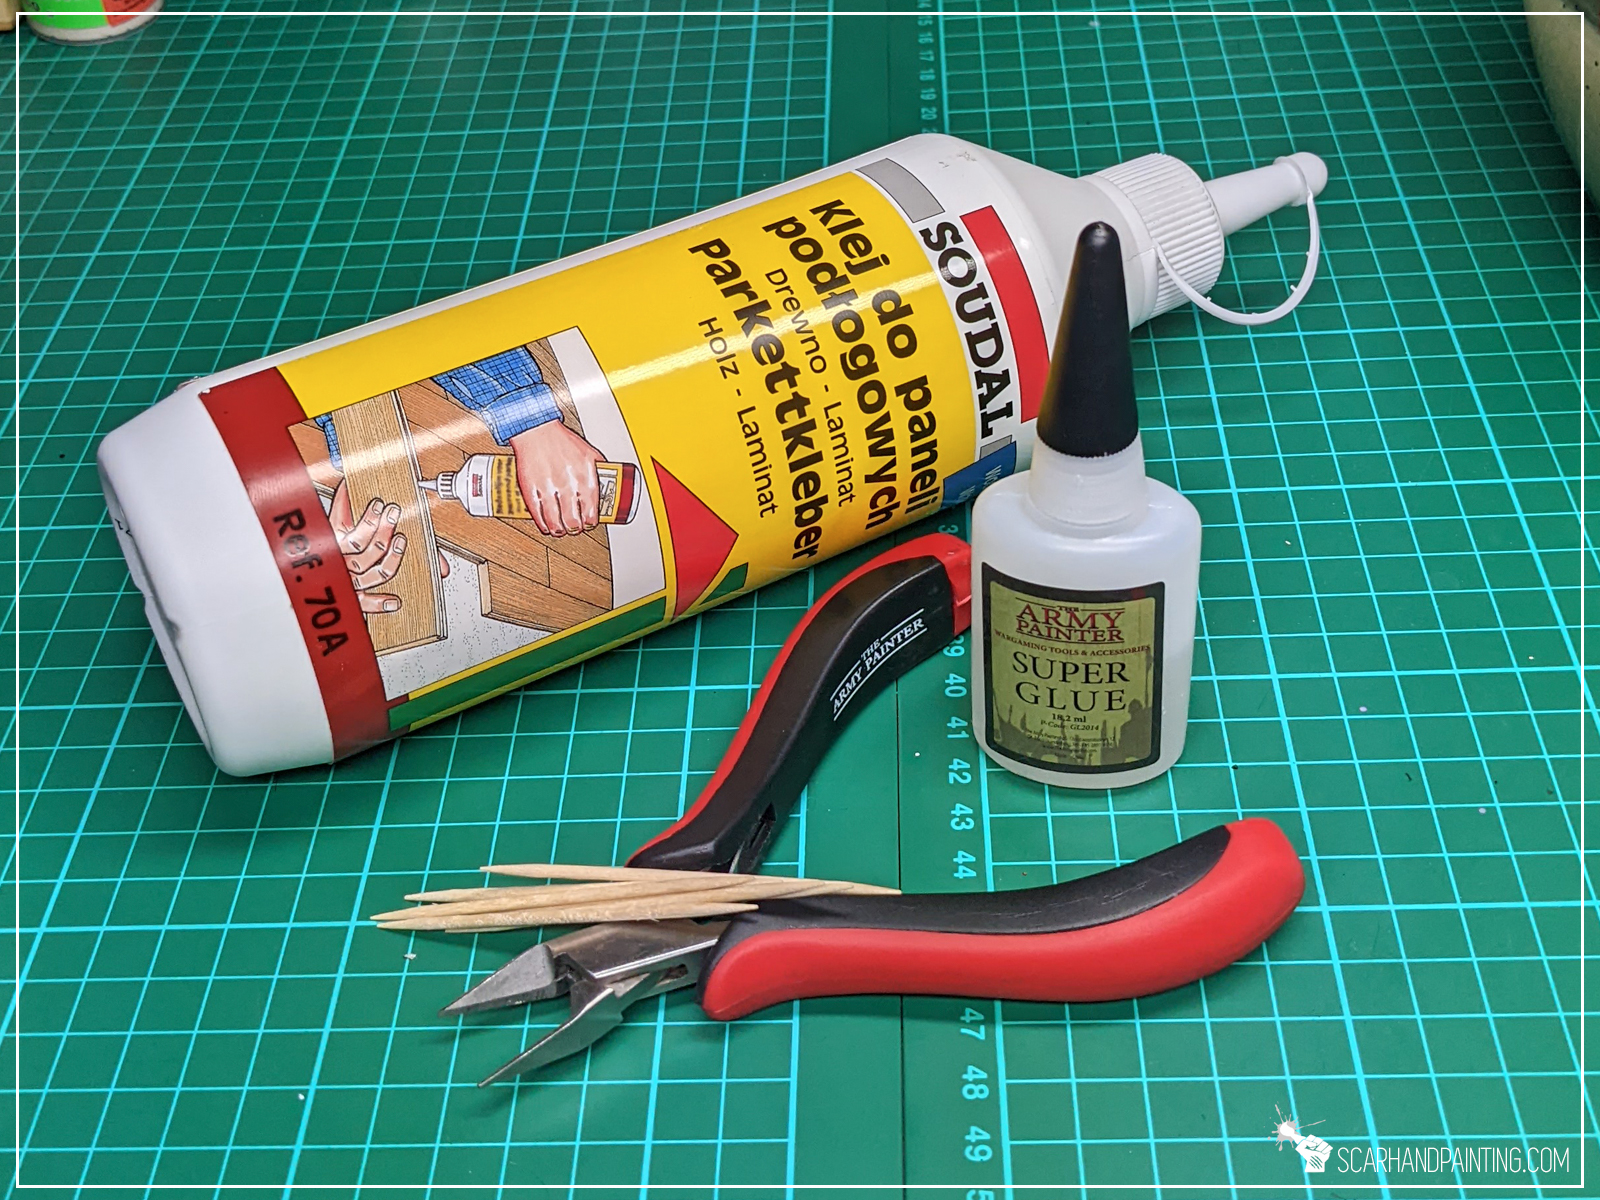
Before we head into the night to wreak sculpting havoc, let’s go through some basics. Night Lords are all about skulls, chains, flapping coats of tanned flesh, hooks, bones and bat wings. Some of these are easier to get than others. Skulls come in a phenomenal package straight from GW. Bones and hooks are plenty amongst Games Workshop boxes, be it Drukhari, Savage Urruks, Kroot, Skeletons and more. Getting these is usually as simple as asking around friends who might have a pile of leftovers. Bat Winged Helmets are really something that you’d rather get 3d printed as the effort and time required to sculpt these greatly exceeds the value. As for all the rest, here’s where I come in, to help out my VIII Legion brothers.
Chains:
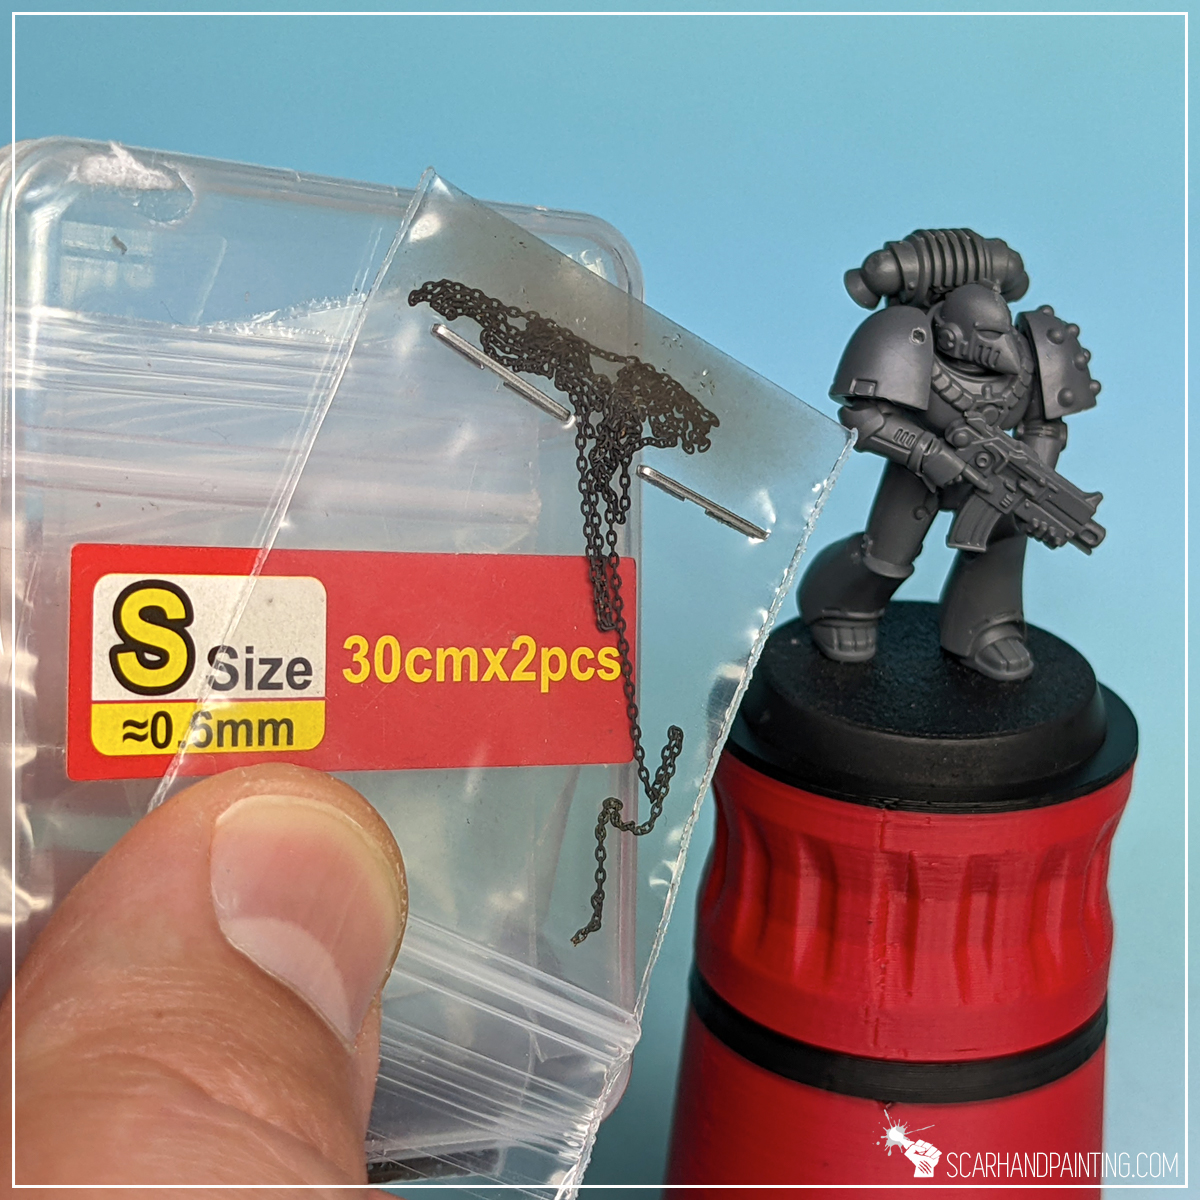
I’ve been searching for a cheap source of miniatures-compatible chains for a long time. Went through some of the classic wargaming related products, like Green Stuff World, but without good results. Most chains were just too big to fit the theme. Finally after a thorough research I found Trumpeter Universal Fine Chains and for the love of the Long War, my hobbying changed instantly. These come in three different sizes, are relatively affordable and are great to work with. They tend to come a bit rusted, but it is all the better as paint and glue stick stronger this way.
Ok, so we have them chains. This is how I go about mounting them on miniatures.

Step one: Drill
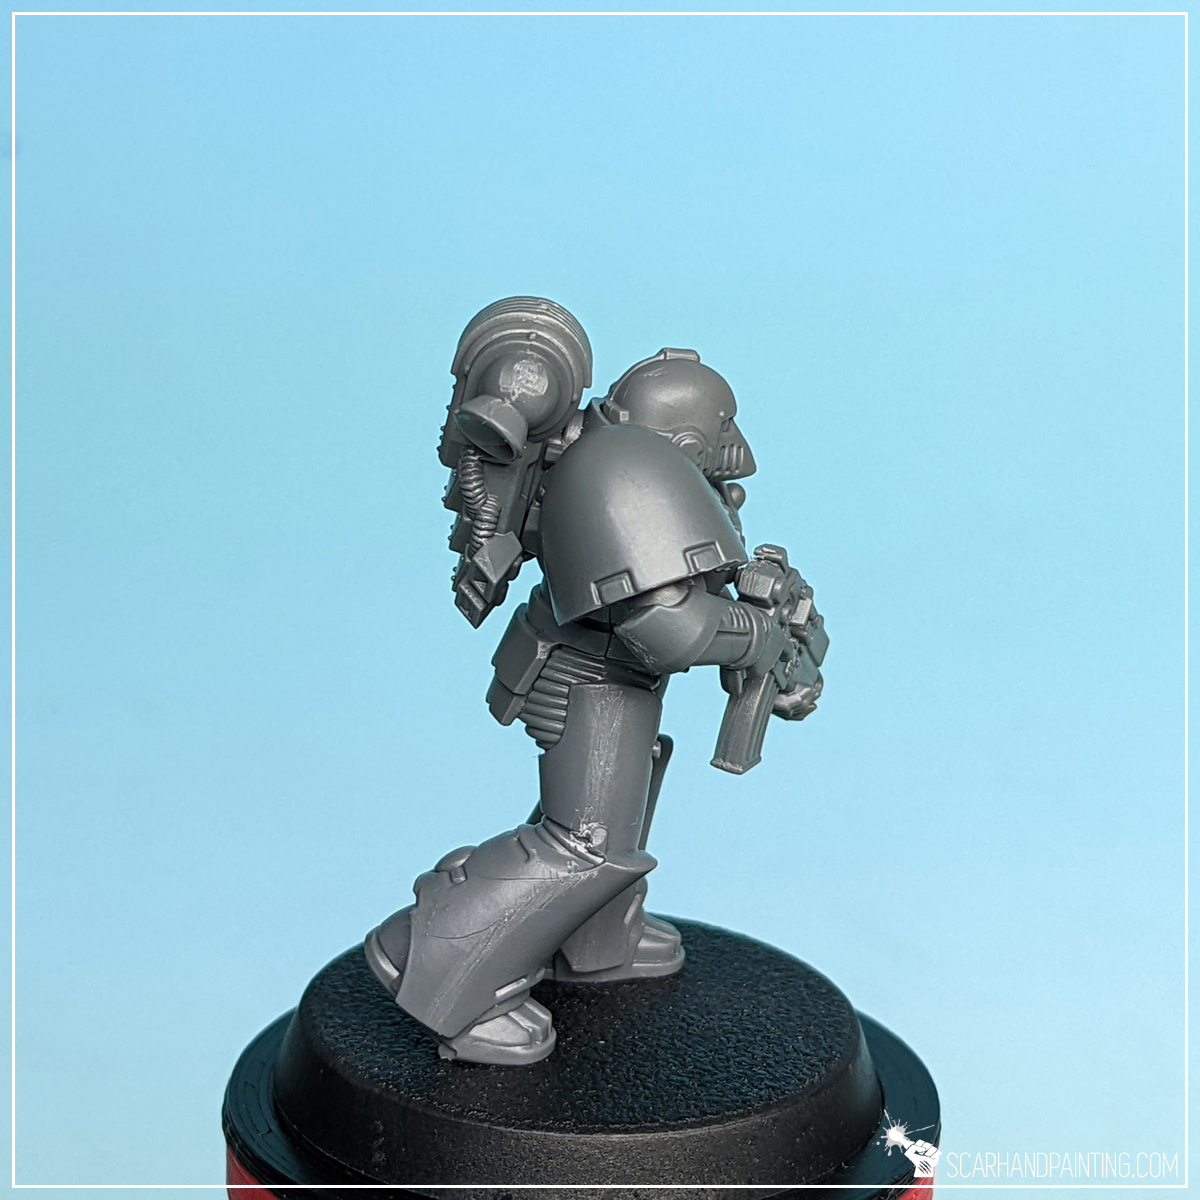
First I pick spots where I want to mount the chain and drill small holes with a hand drill. At times I skip this part and hide ends of the chain behind pauldrons, or in recesses, but most of the time I like to have a clear spot where a chain is mounted at.

Step two: Glue
Next I apply a small drop of Cyanoacrylate glue (Super Glue) on the hole and use tweezers to insert the end of the chain inside. This way I have a chain mounted strongly onto the miniature and doesn’t have to worry about keeping it in place myself.
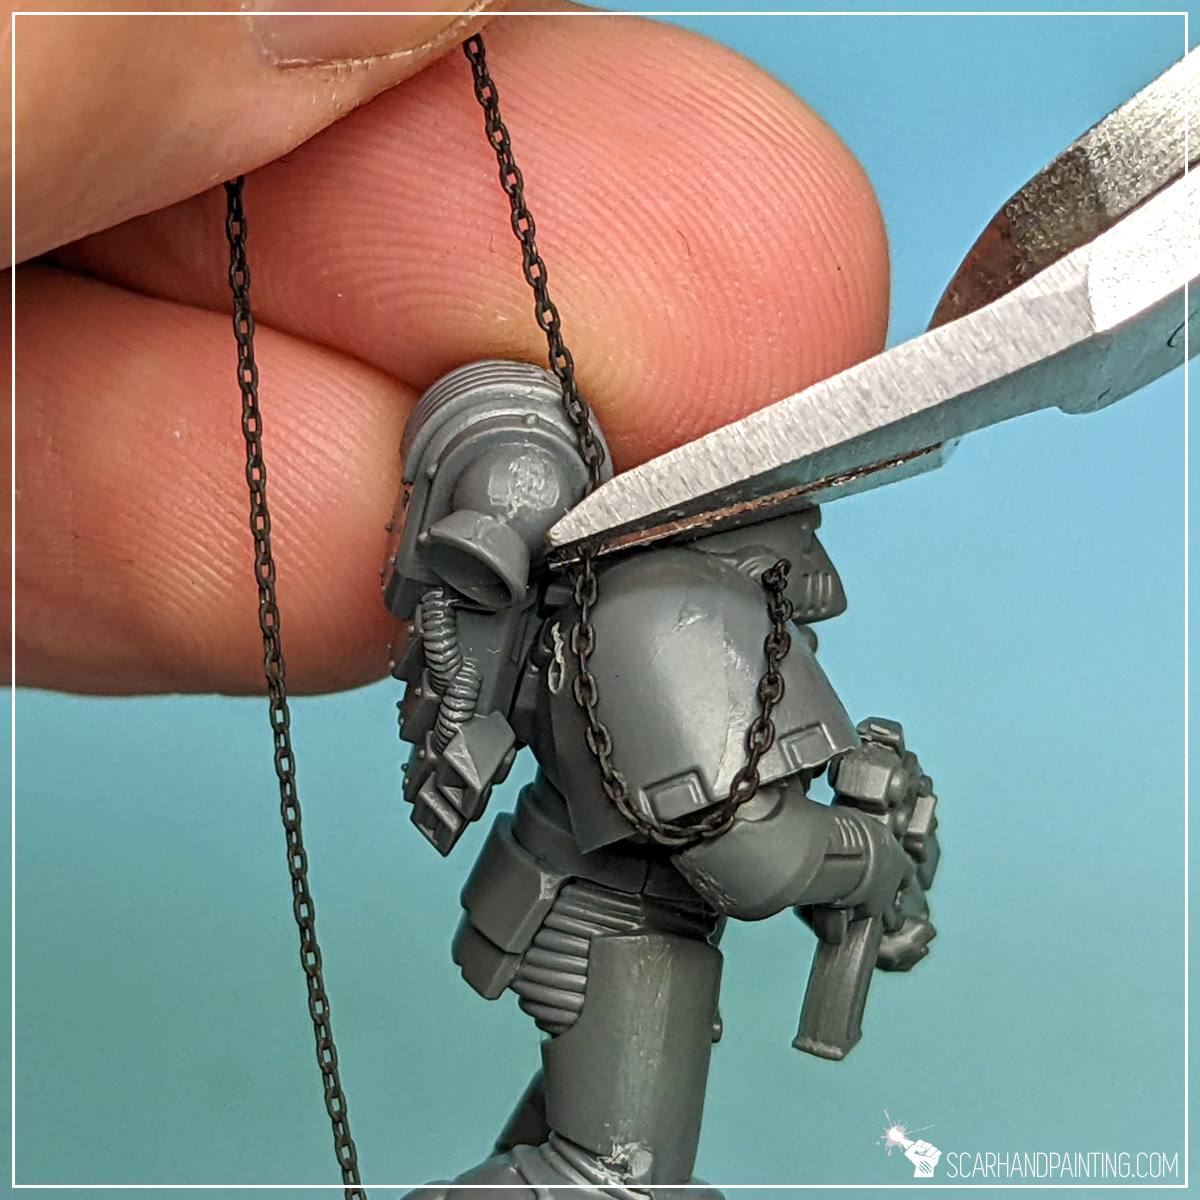

Step three: Other end
I then fit the chain on the surface and between the holes. Once I am satisfied with how it looks I cut a proper length and glue the other end inside another hole.


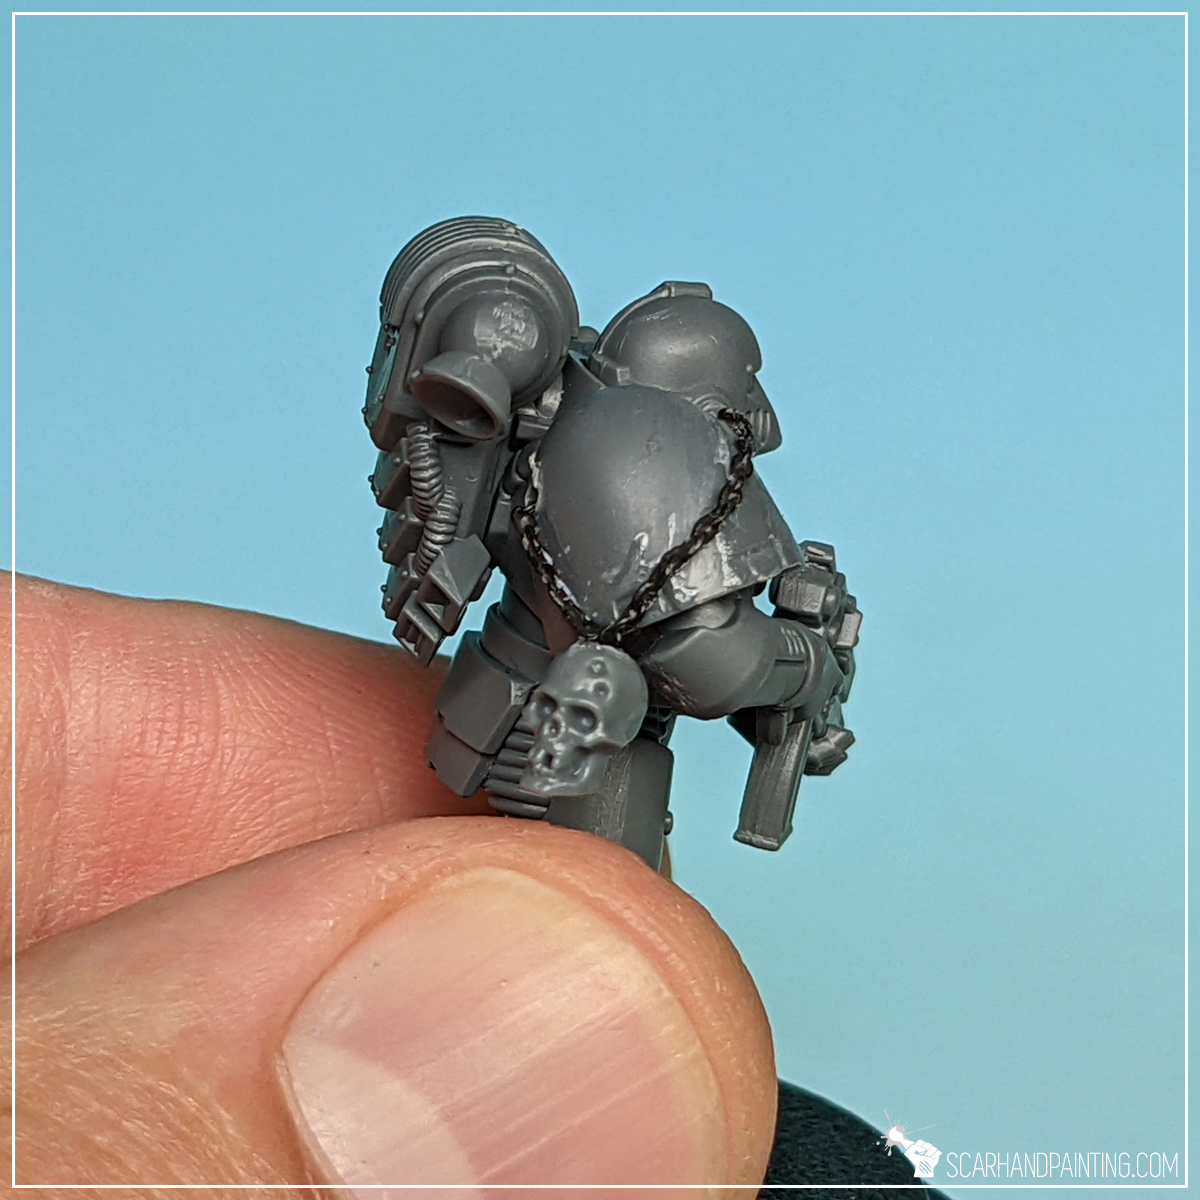
Step four: Seal it
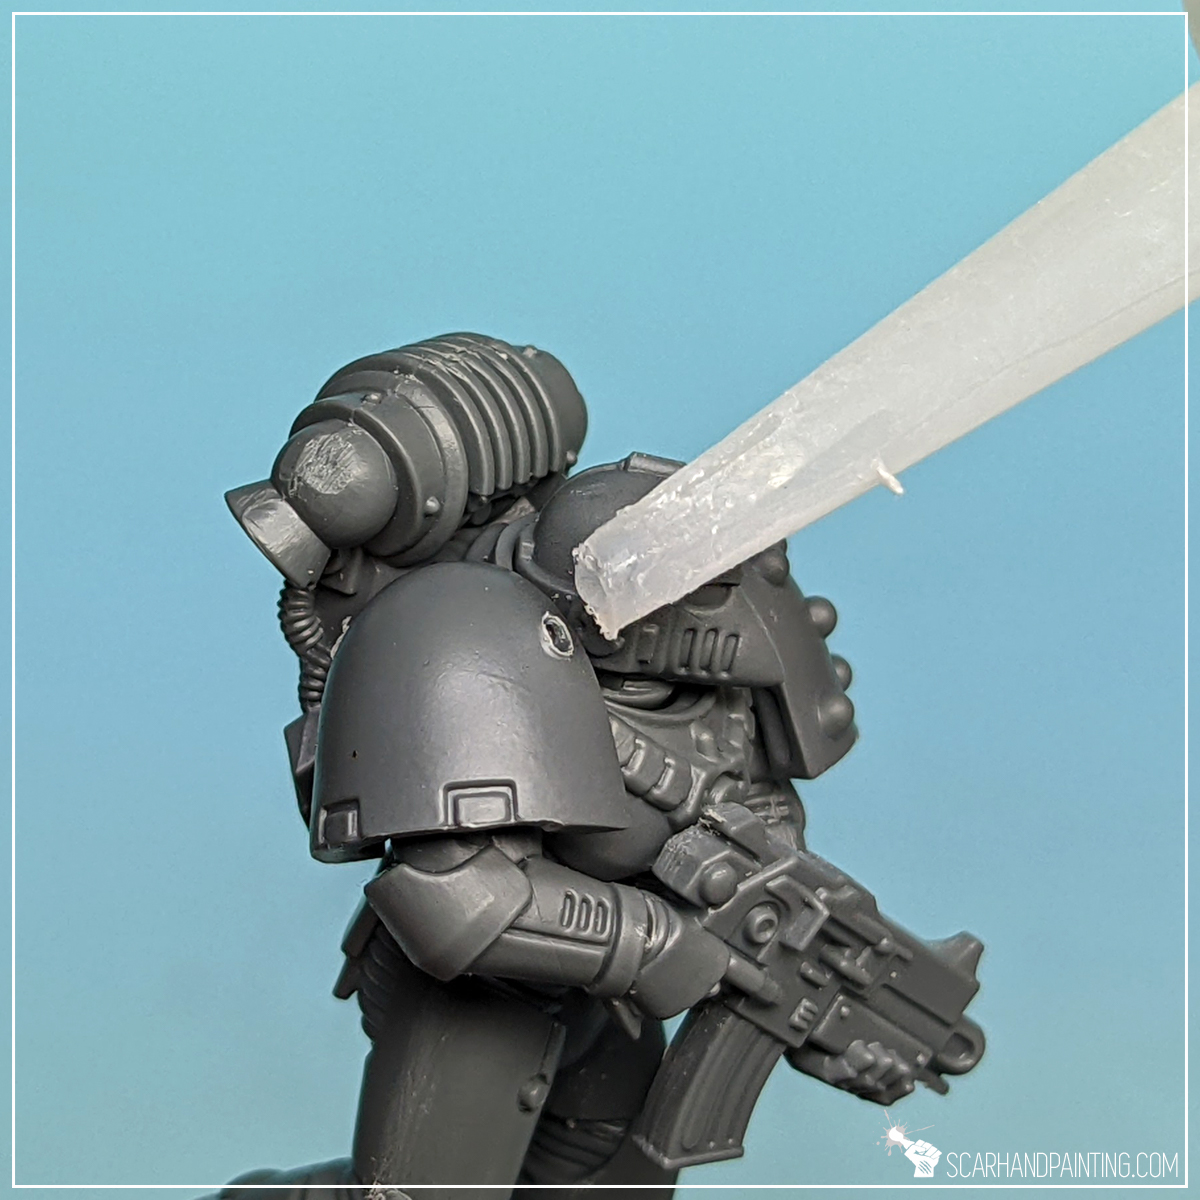
With everything dangling around it’s time to seal the chain in place. To do this I apply a drop of Super Glue onto a toothpick and slide the tip around the chain. This is also the last moment to add some shape corrections before it’s finalized.

Skulls:
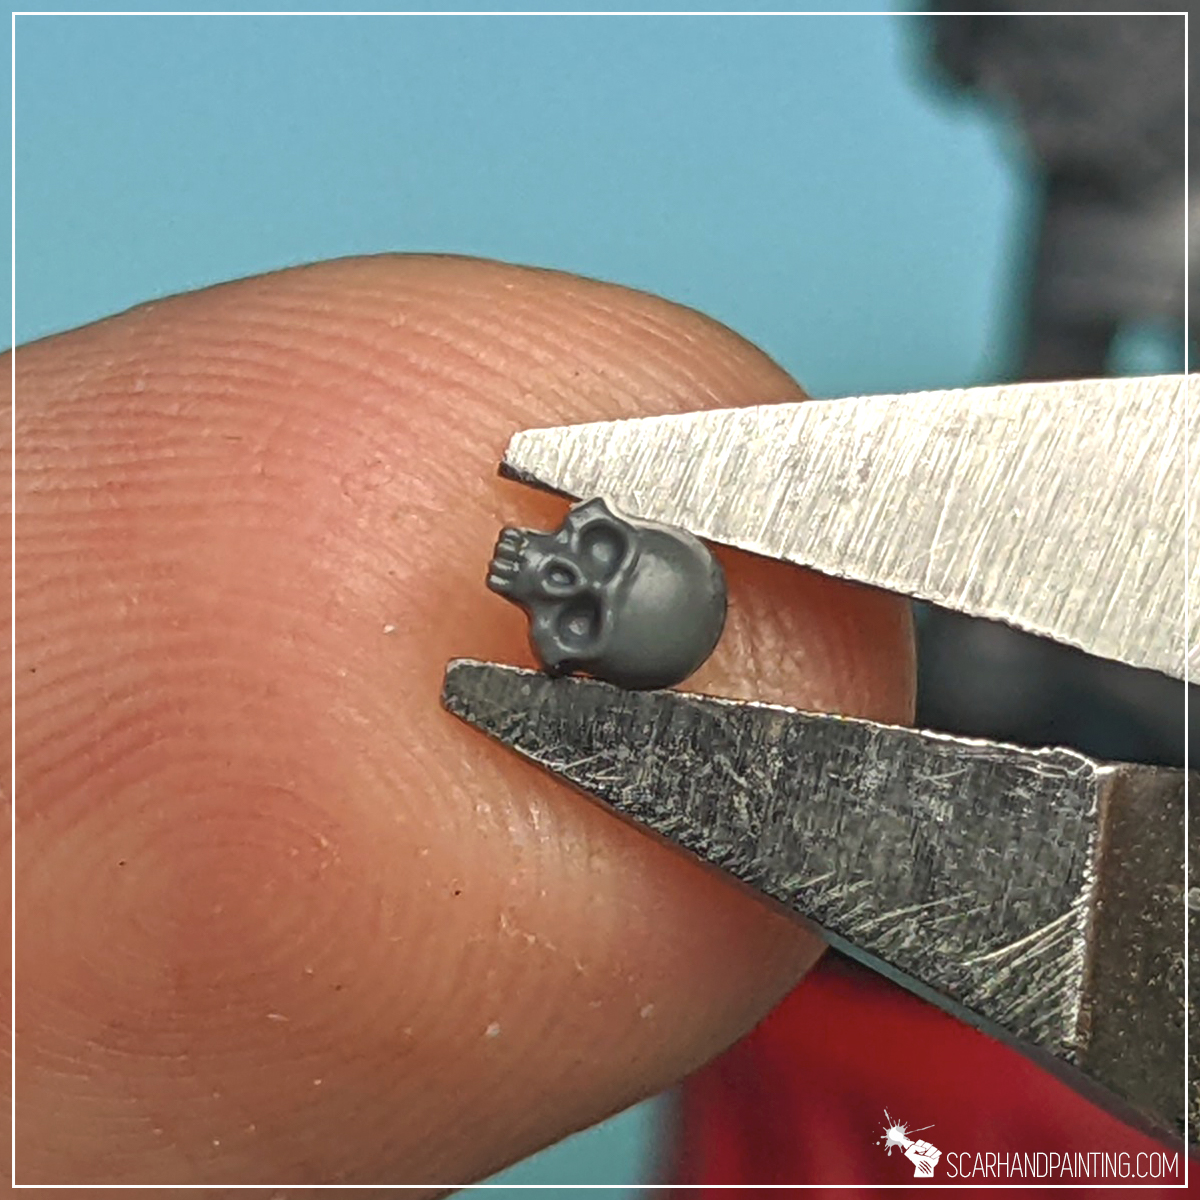
Skulls are perfect to add a bit of character to your miniatures. They’re positive, always grinning and just funny to have around. Fortunately for us, the hobbyists, Games Workshop put out the best possible source of Skulls in the history of wargaming – the Citadel Skulls! Now what’s left is to siimply mount them onto our miniatures. Here’s how I go about it.
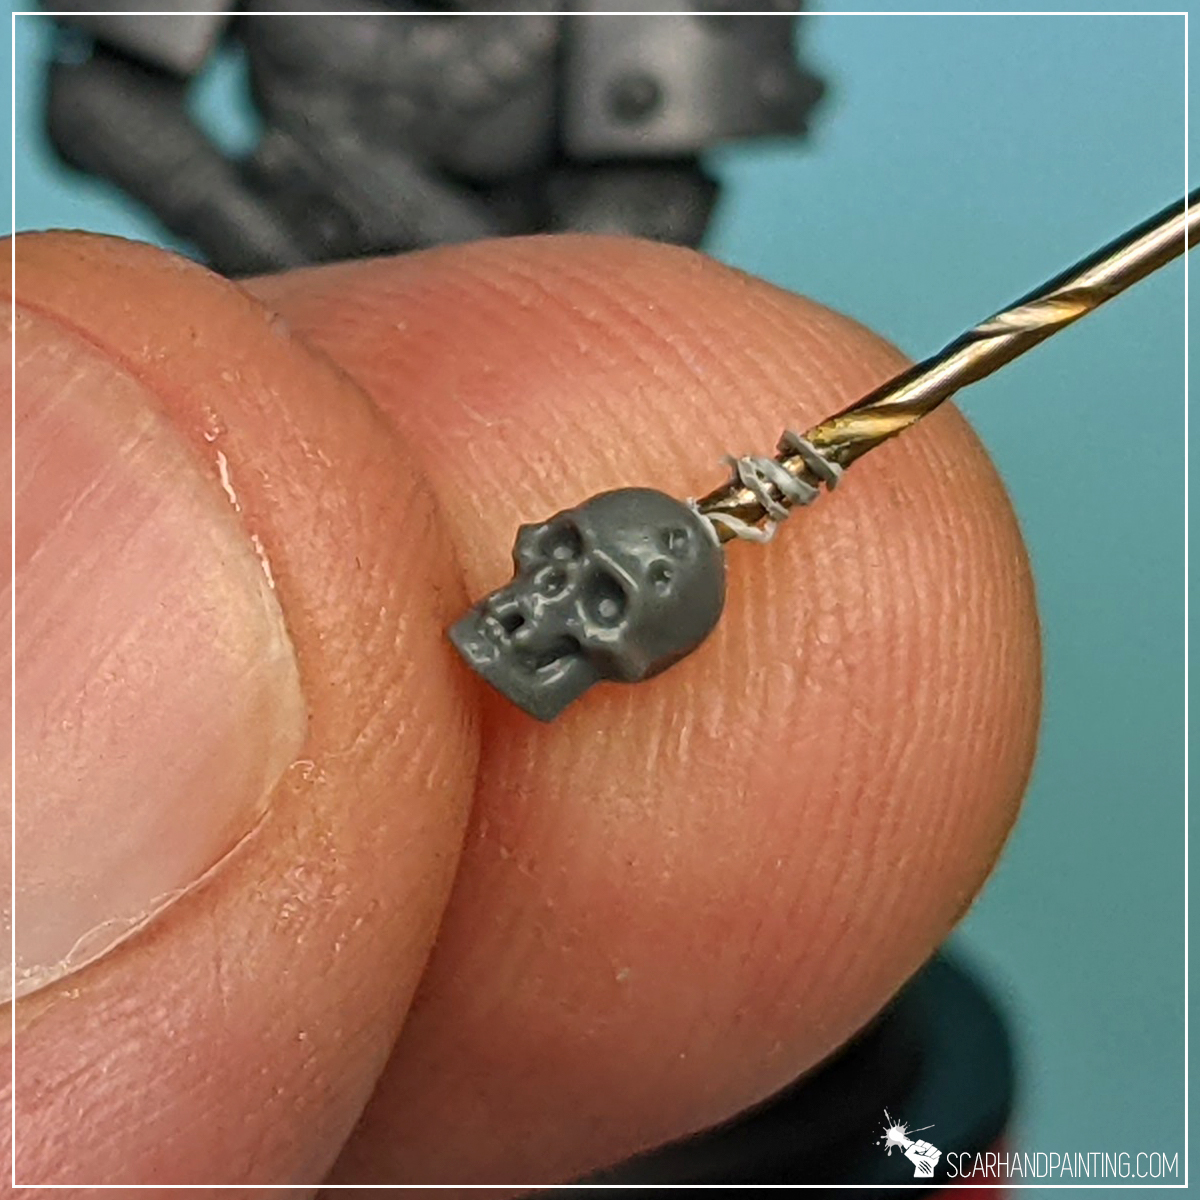
Option A:
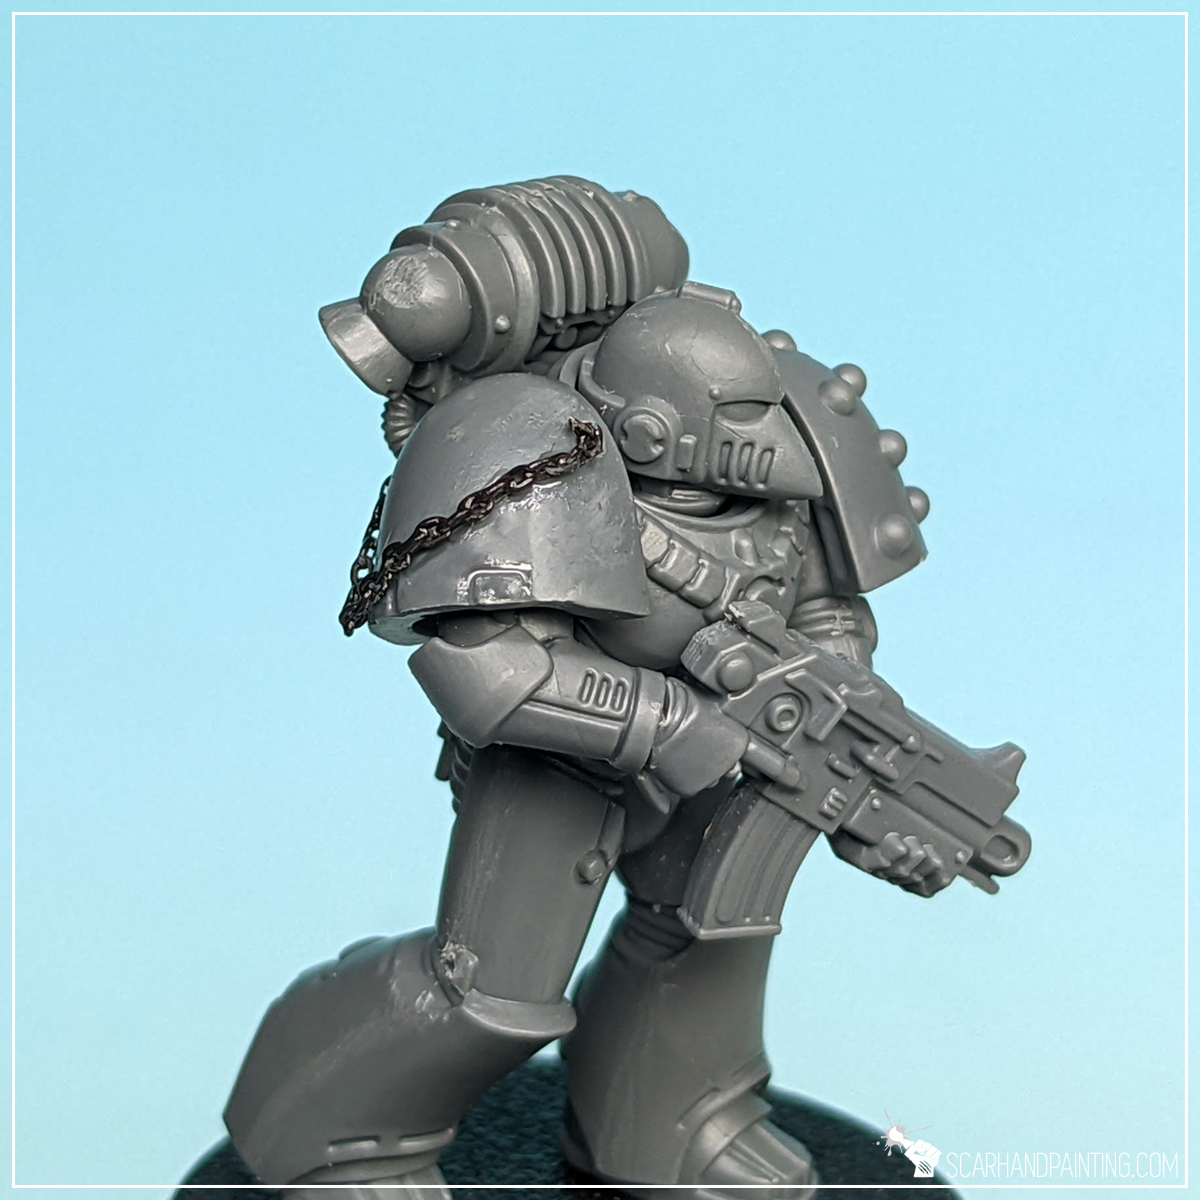
I drill a small hole in the upper part of a skull to then mount it on a chain, partially supported by a piece of plastic in close vicinity to the point of contact. I use Super Glue to bind it in place.

Option B:
I mount a piece or an entire skull in place with Super Glue. This works very well as a piece of ornamentation.
Flesh:
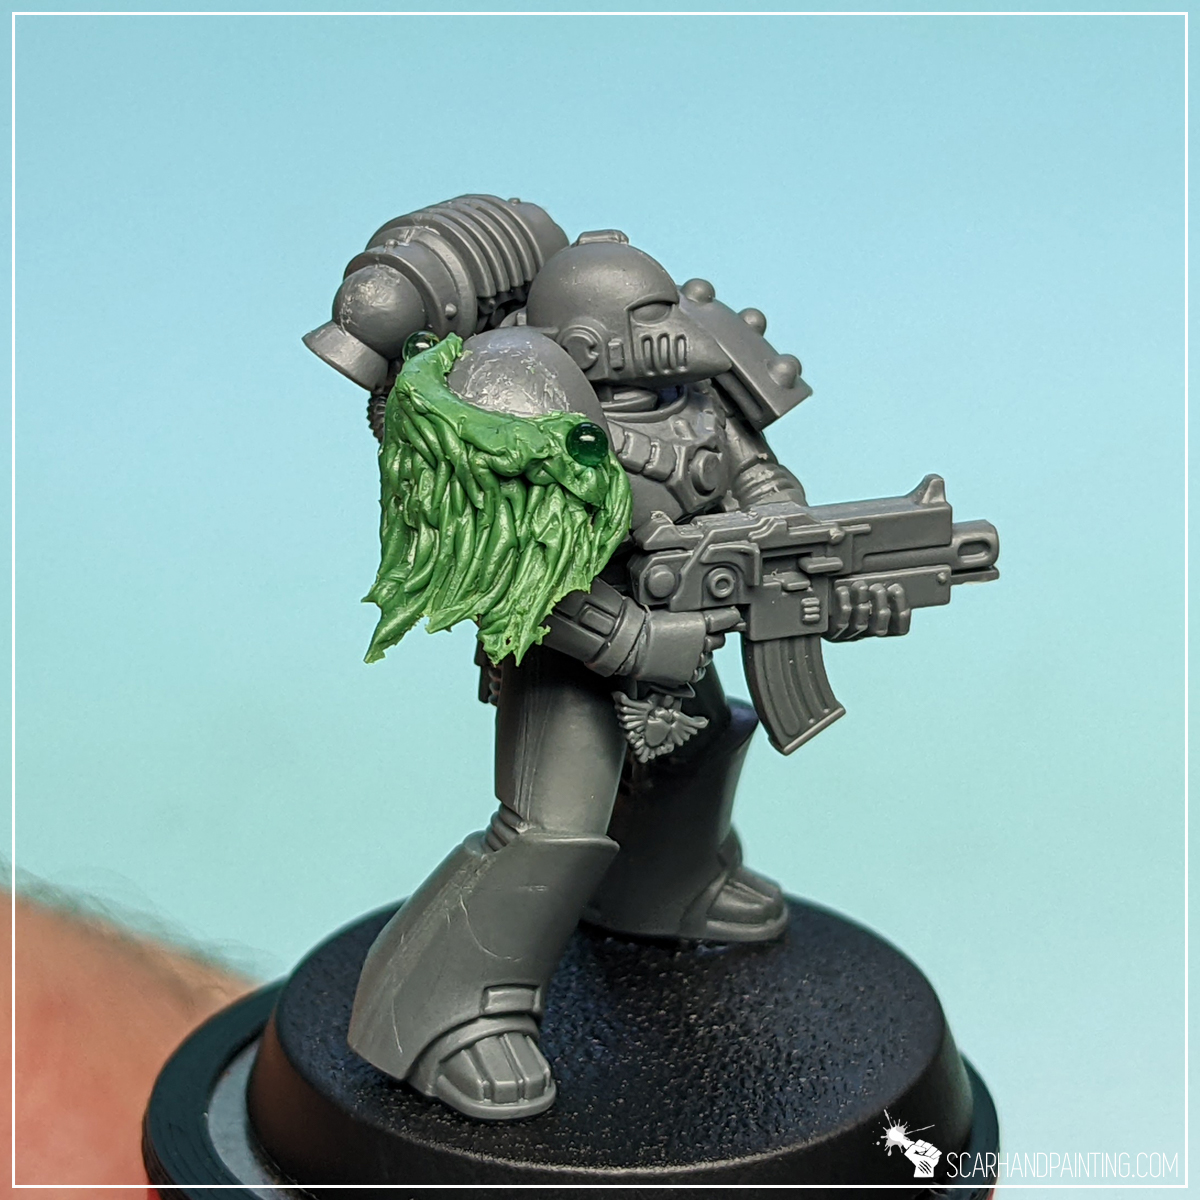
Alright, here’s what most of you really came here for. Sculpting tanned flesh.
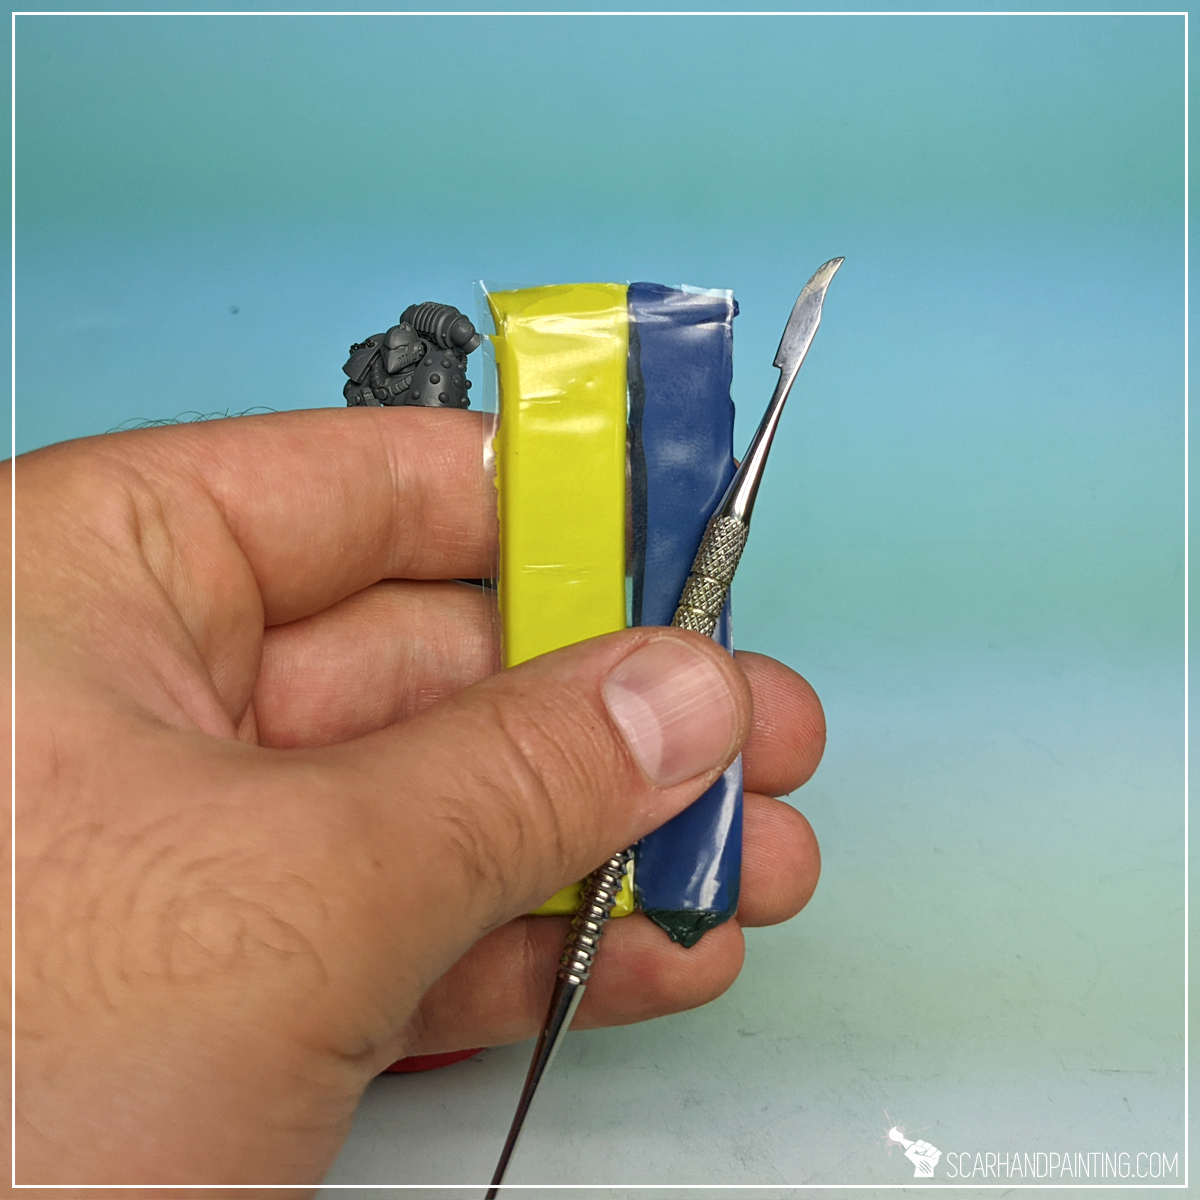
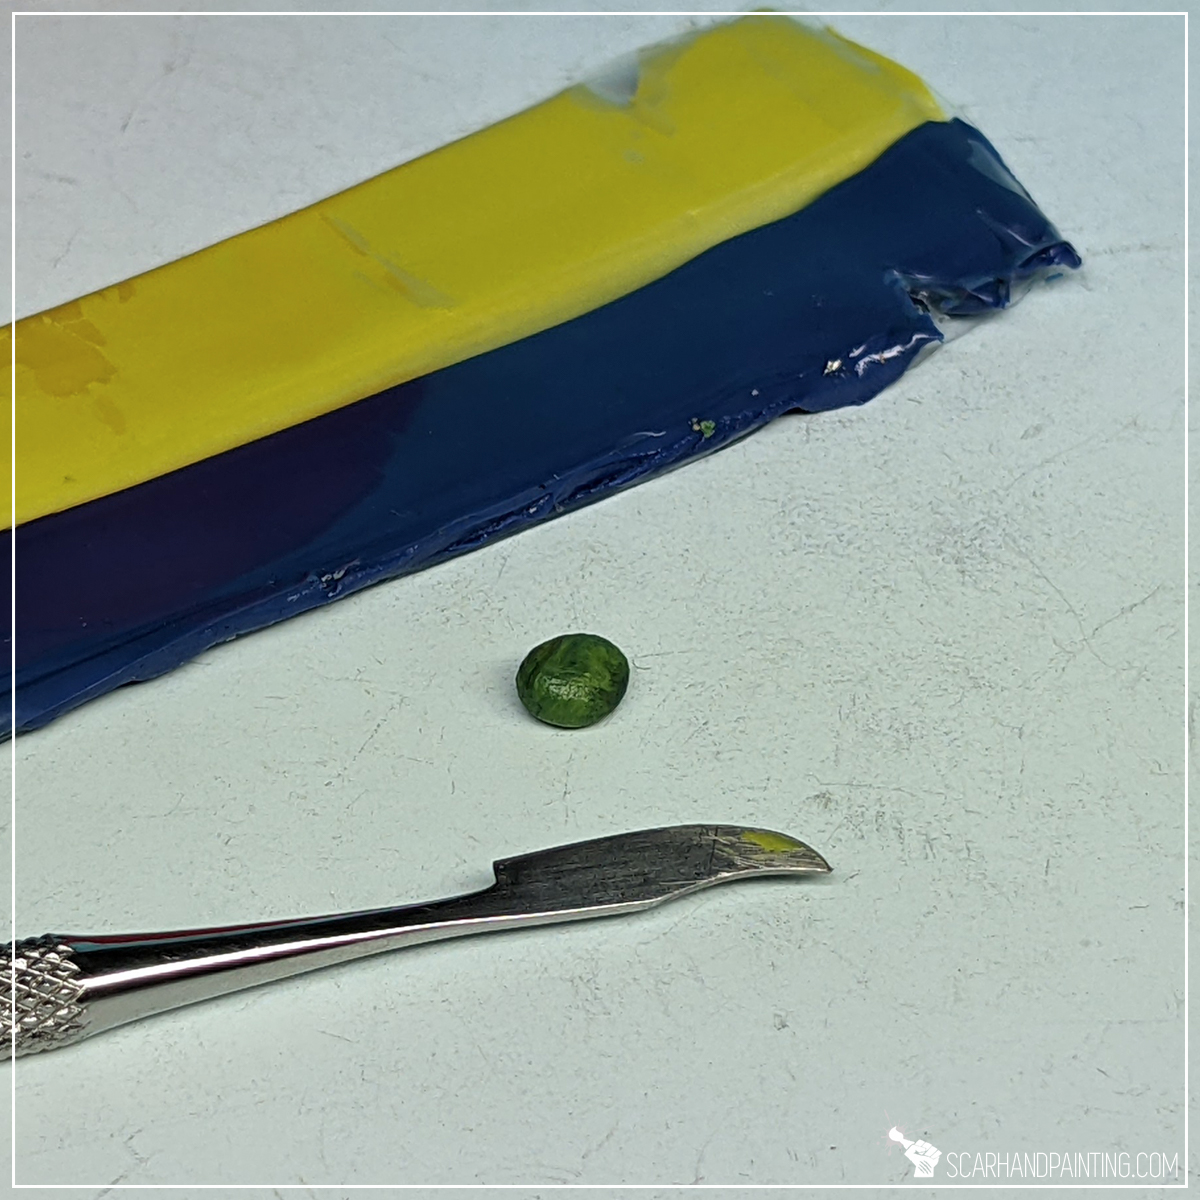
The process itself is rather easy and does not require sculpting skills. I started by mixing Green Stuff into an evenly colored green mass, then divided it into few small balls.
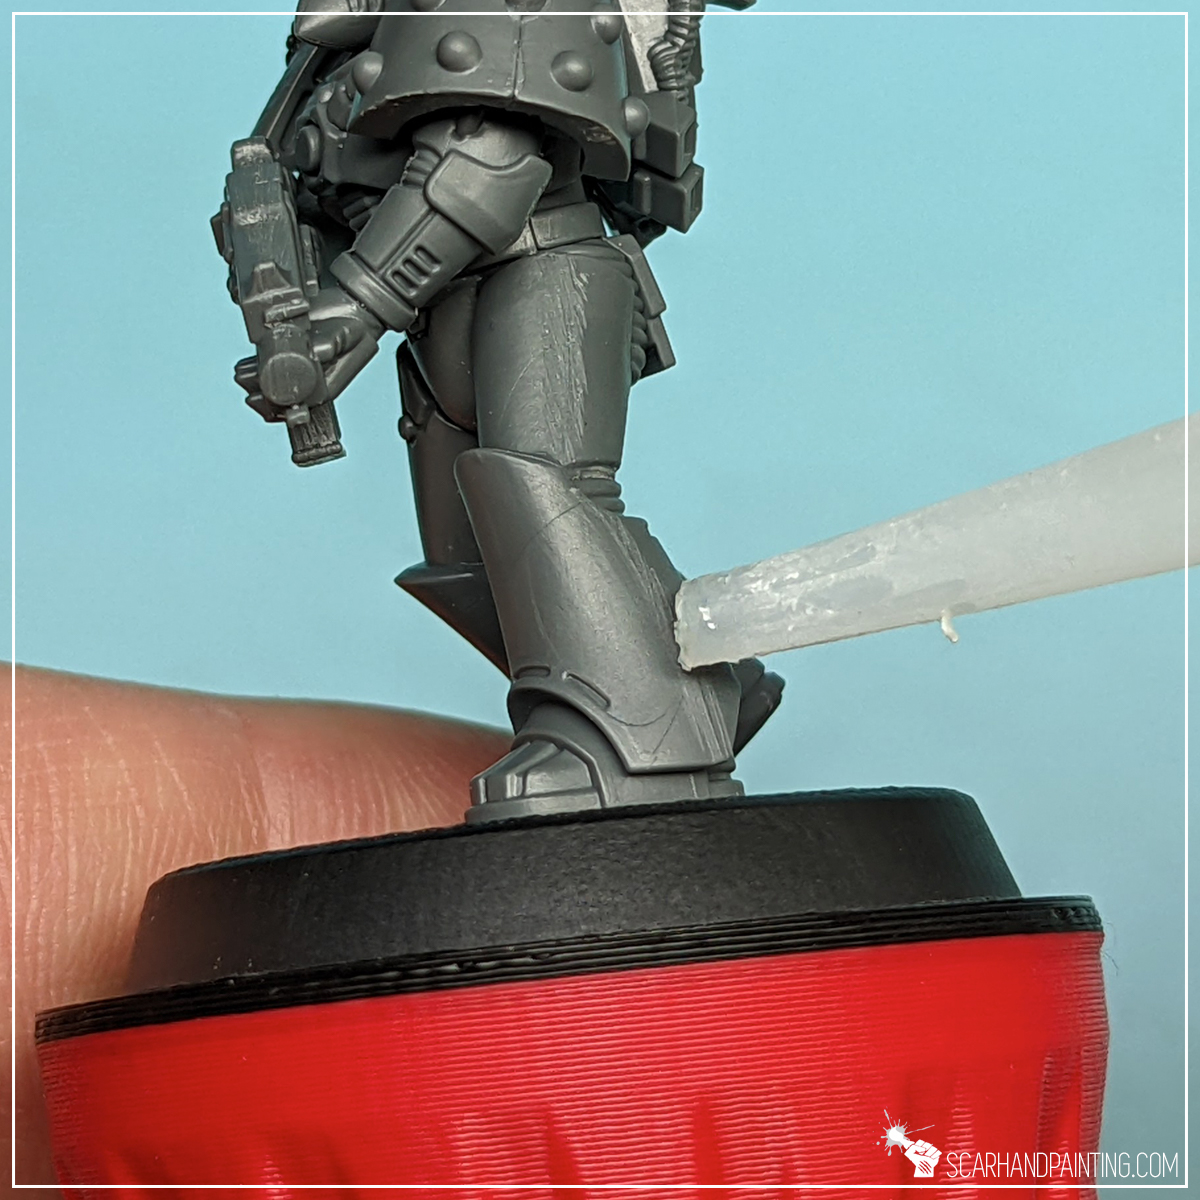
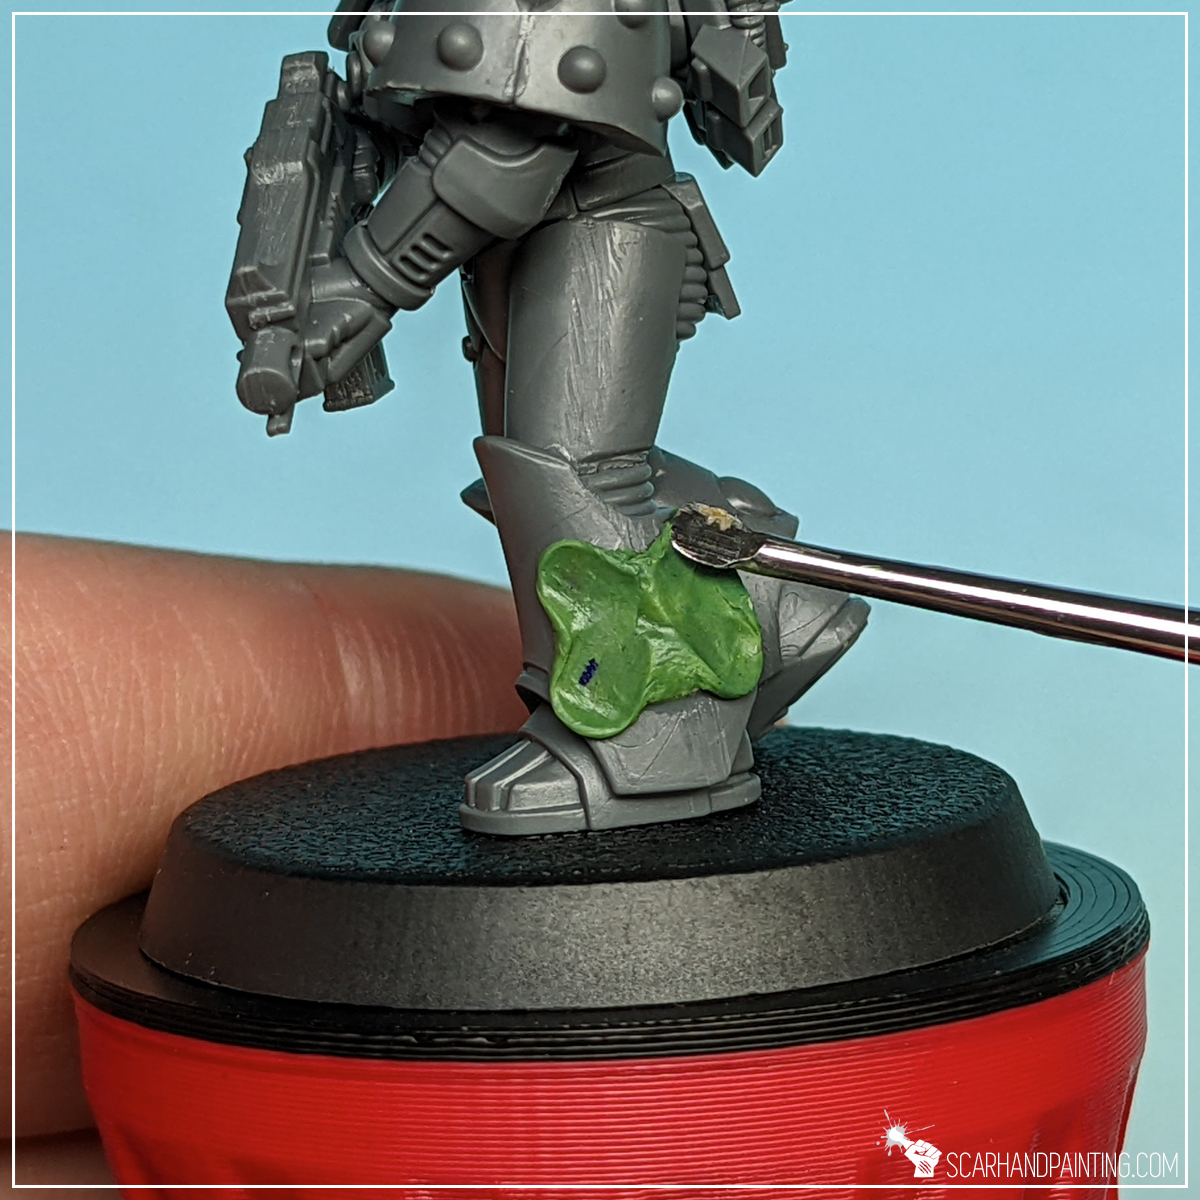
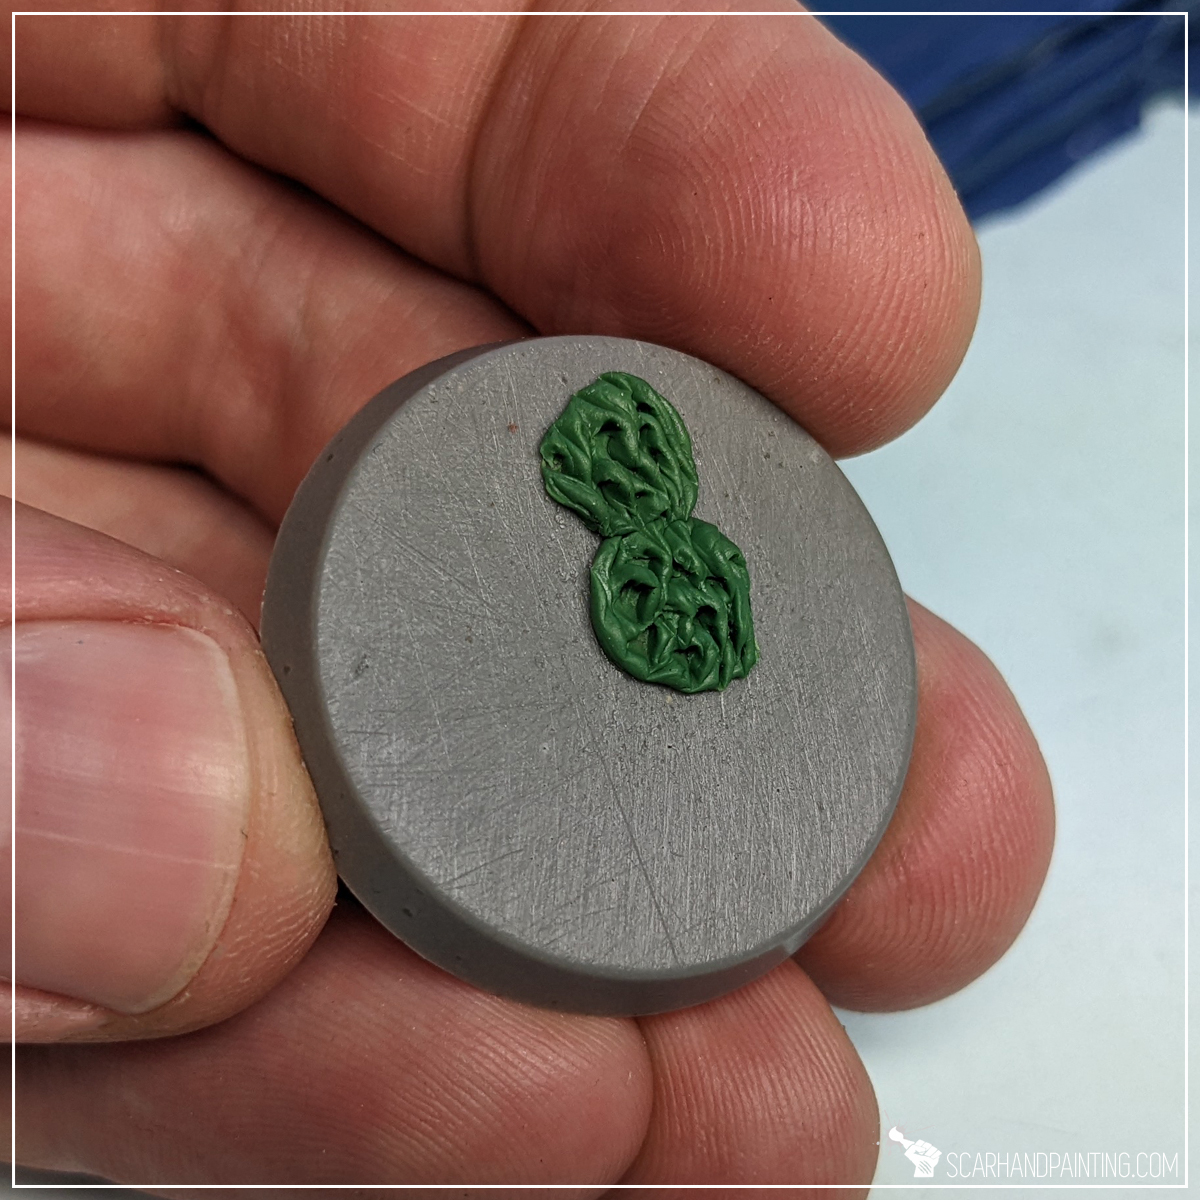
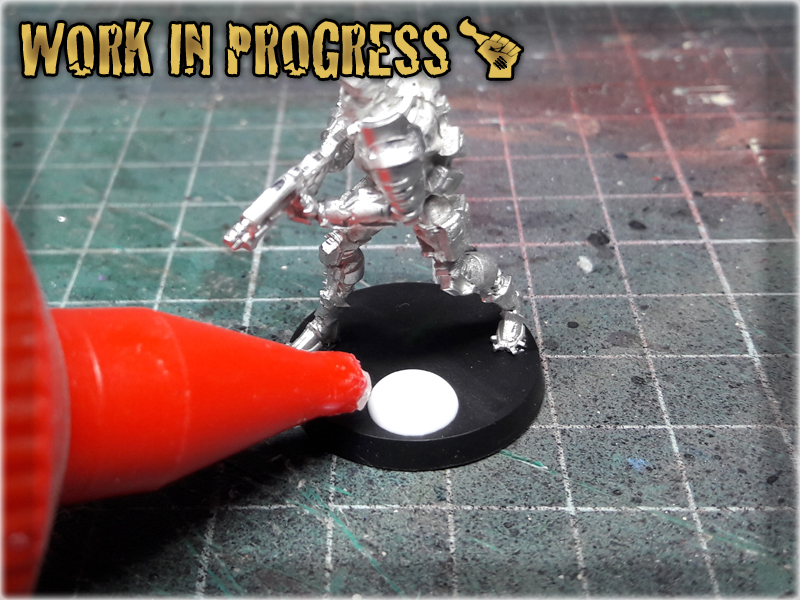
Step one: Glue
Similarly to other sculpting tutorials I begun ‘sculpting’ by applying a small drop of Super Glue into a chosen surface. This is to keep Green Stuff from coming off and sliding left and right during work.
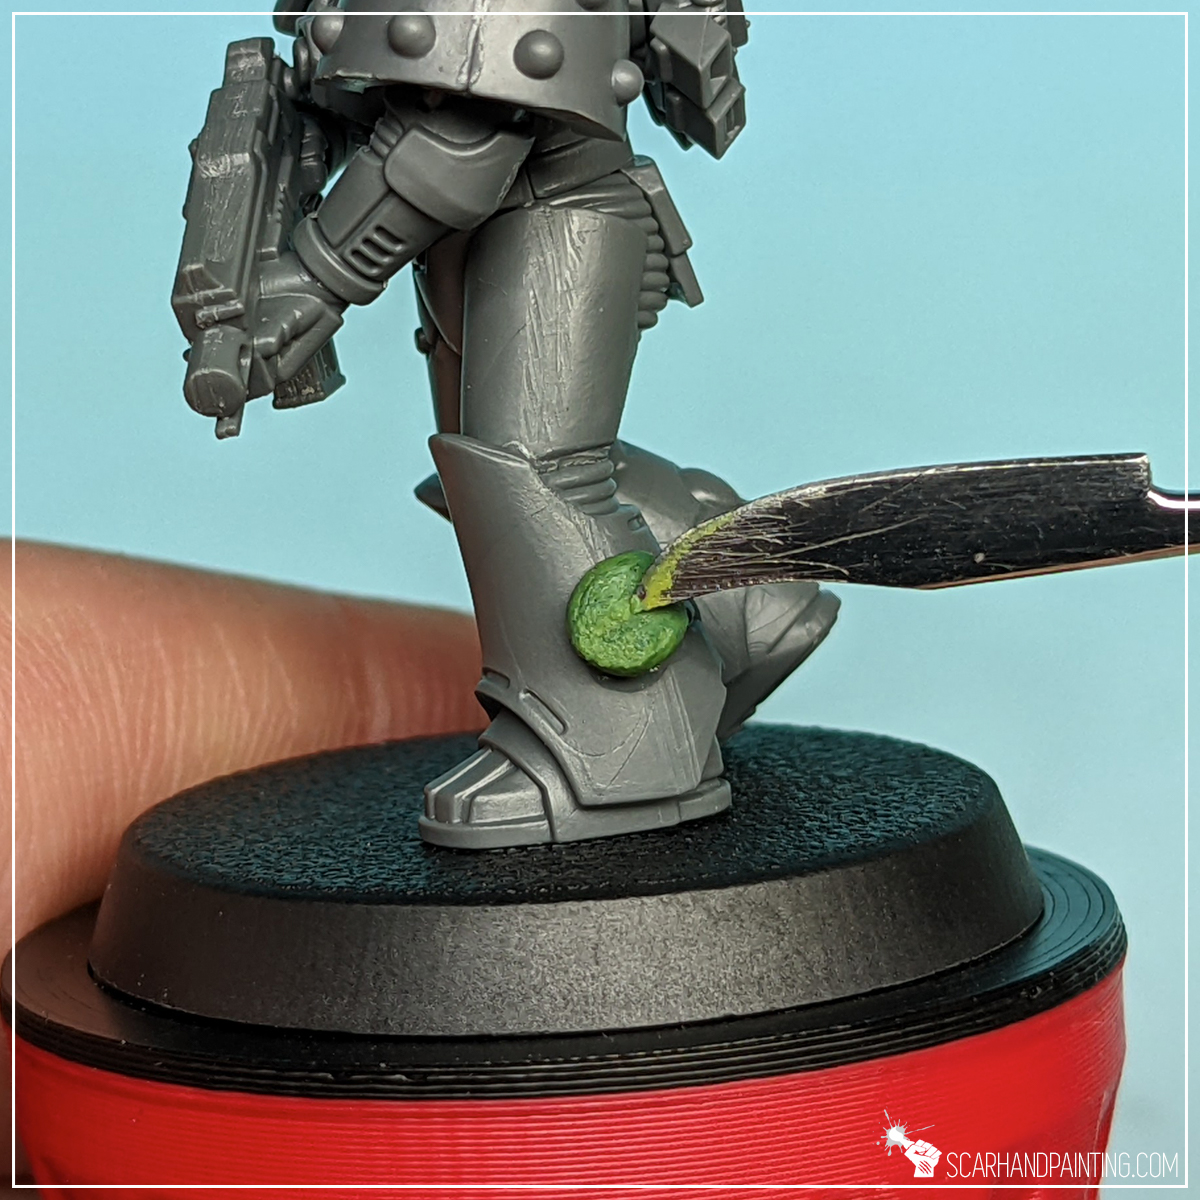

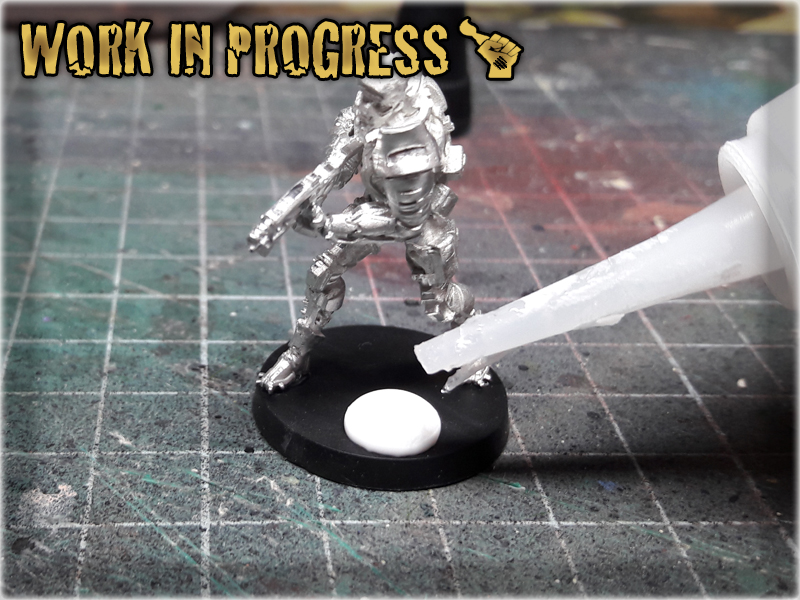
Step two: Green Stuff
Next I glued a small ball of Green Stuff on top, flattening it with a wet finger. Keeping your tools (and fingertips) wet makes Green Stuff less sticky.

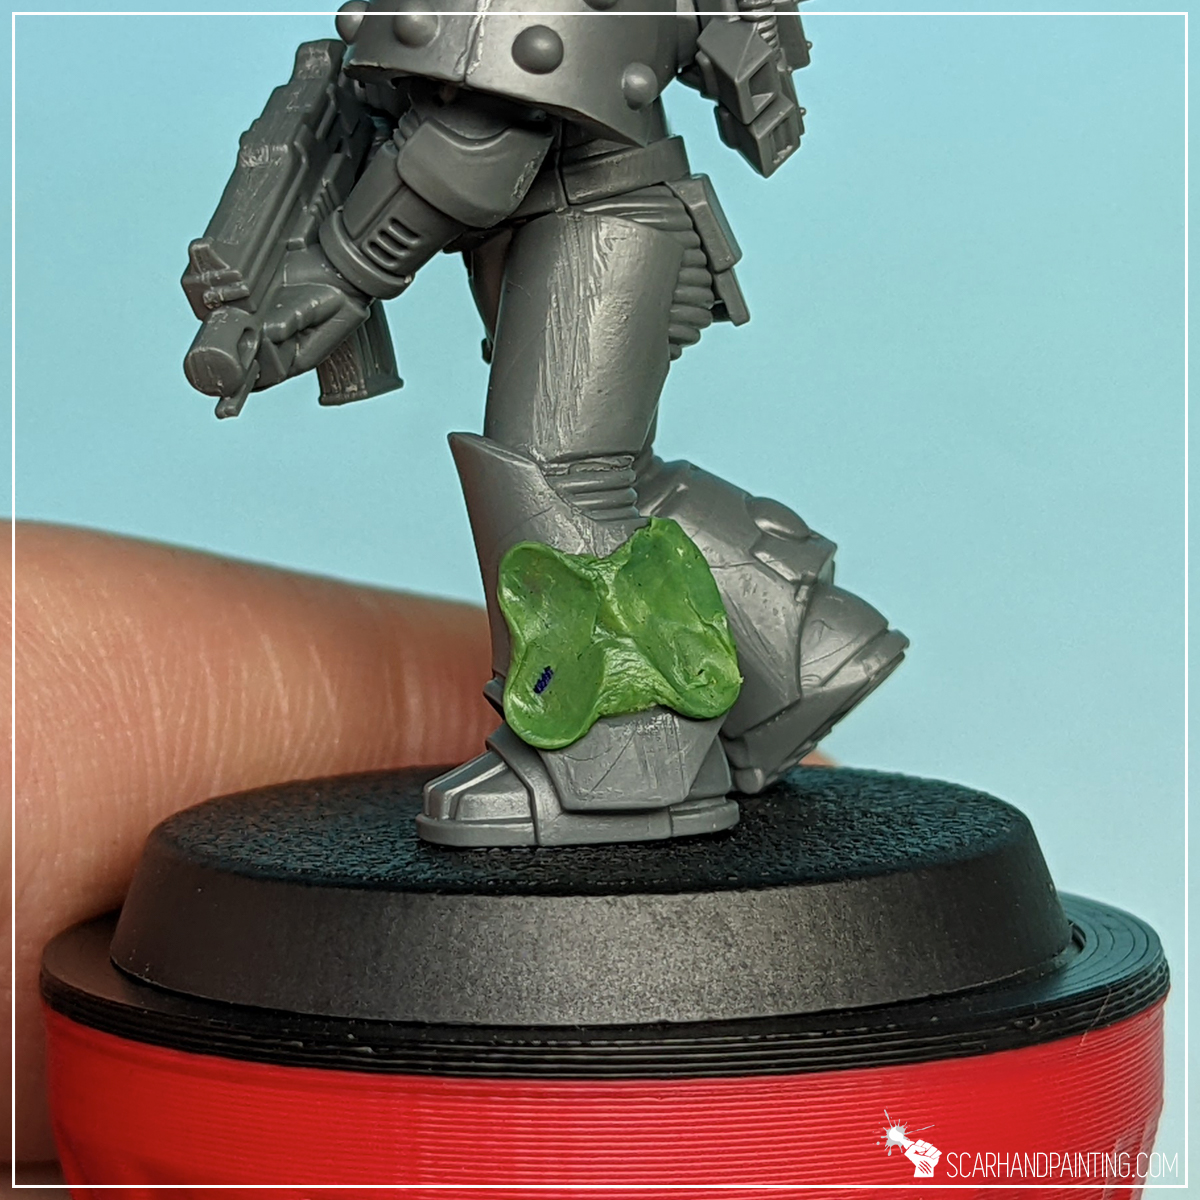
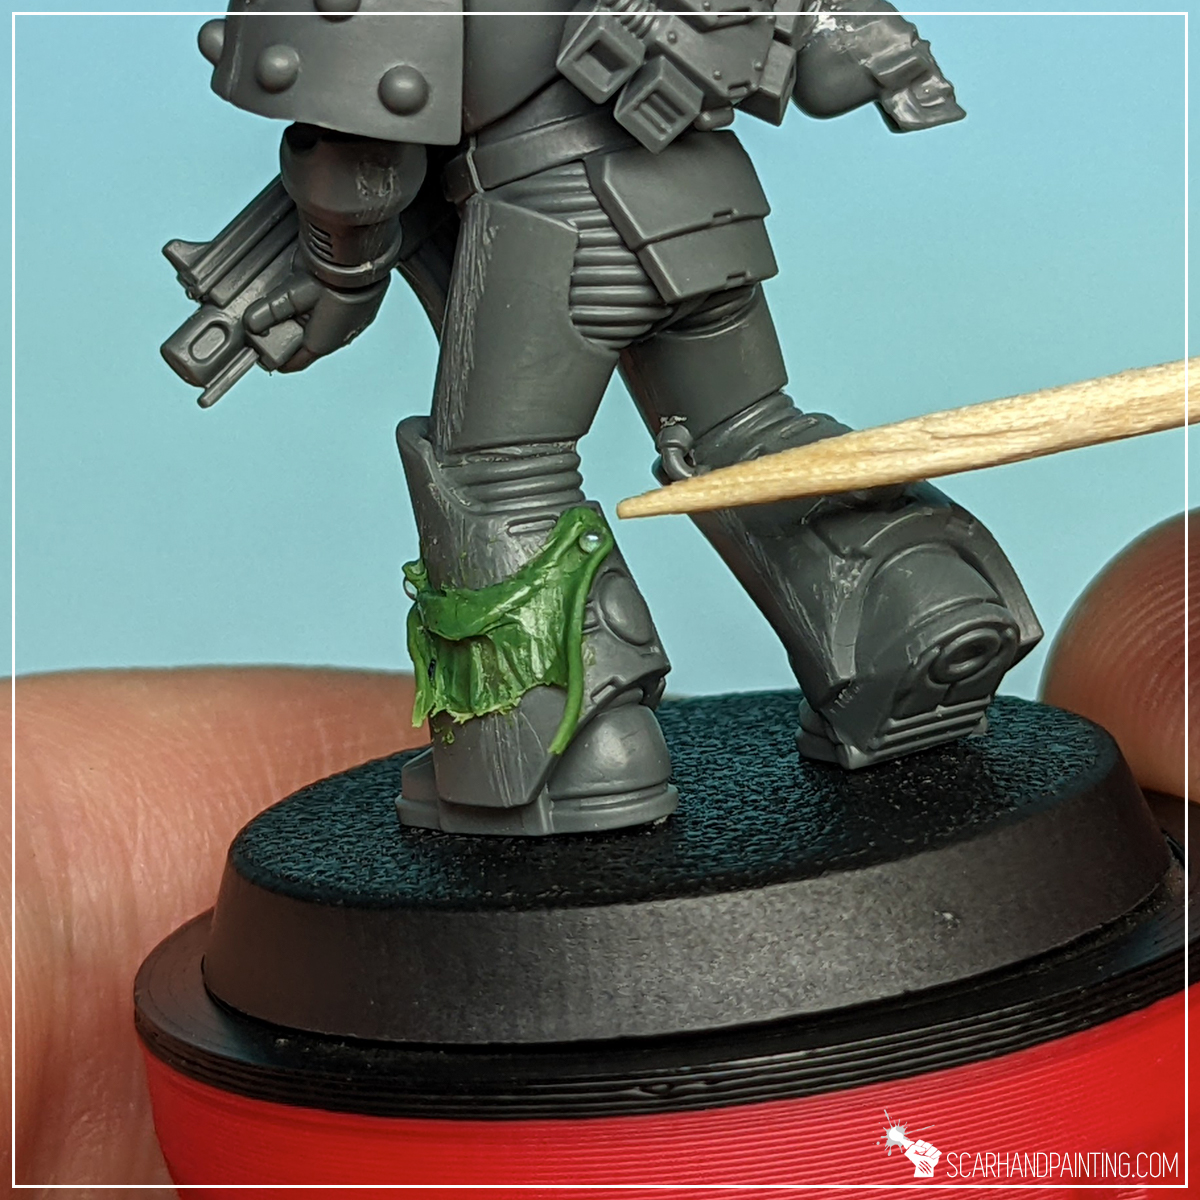
Step three: Basic shape
I then used the rounded tip of a sculpting tool to shape the ‘flattened ball’ into something resembling a butterfly. Four diagonal moves in total.

Step four: Upper edge
Next, using the same rounded tip of the sculpting tool I flattened the upper edge of the ‘batterfly’, resembling a flapping piece of skin. The more rough it is, the more texture it will retain later on so there’s no need to smoother it to perfection.
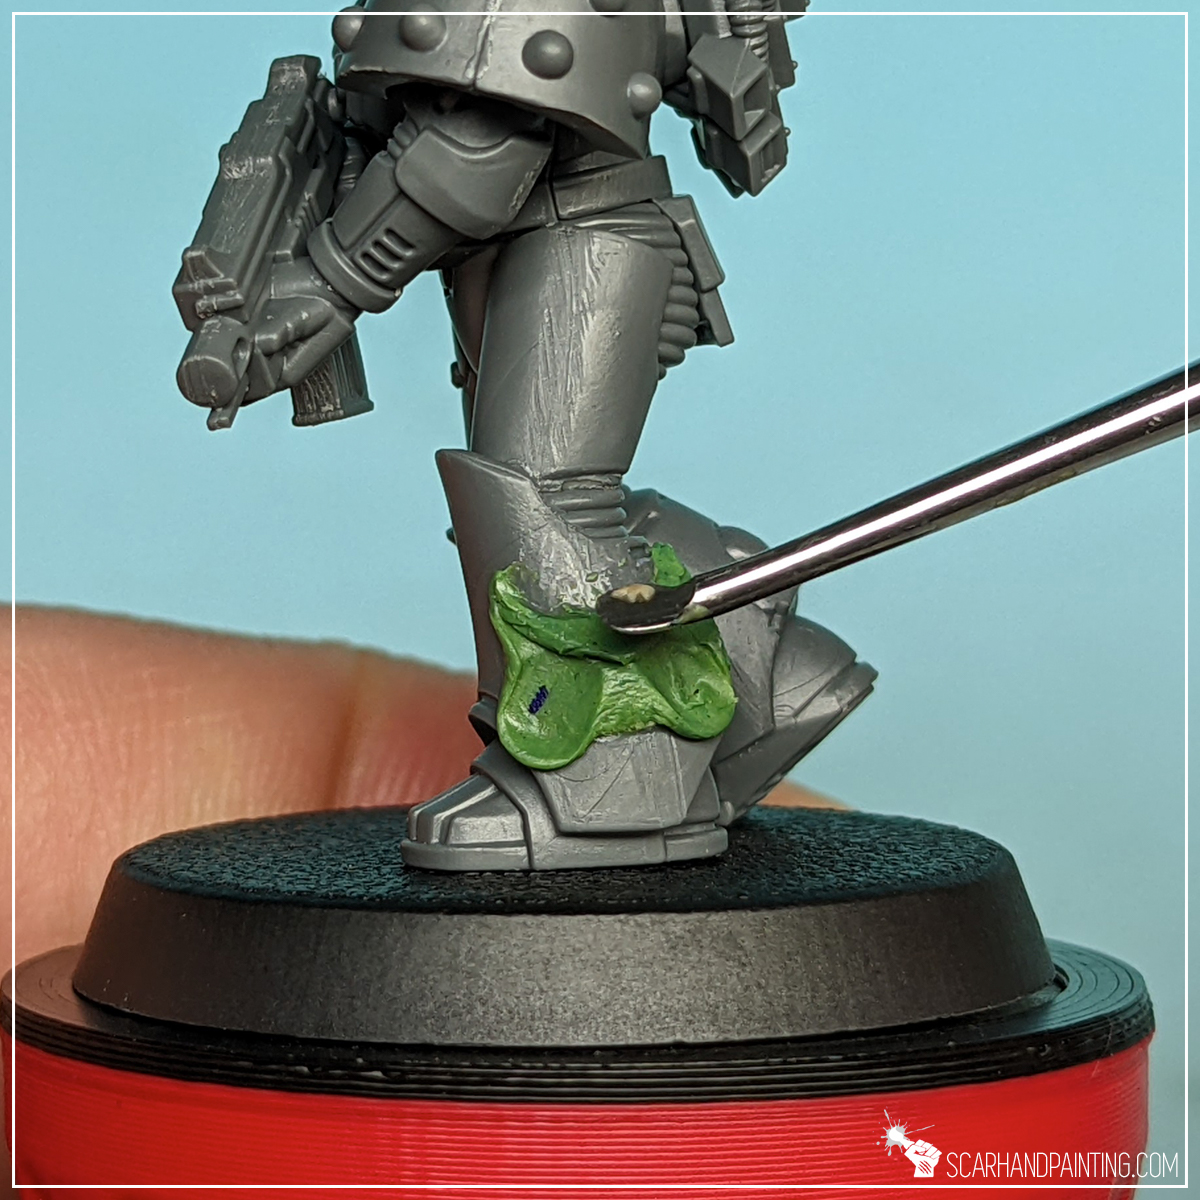
Step five: Lower edge
Finally I flattened the lower edge of the ‘batterfly’ just a bit, so there was a line of overhang below where glue kept Green Stuff in place.
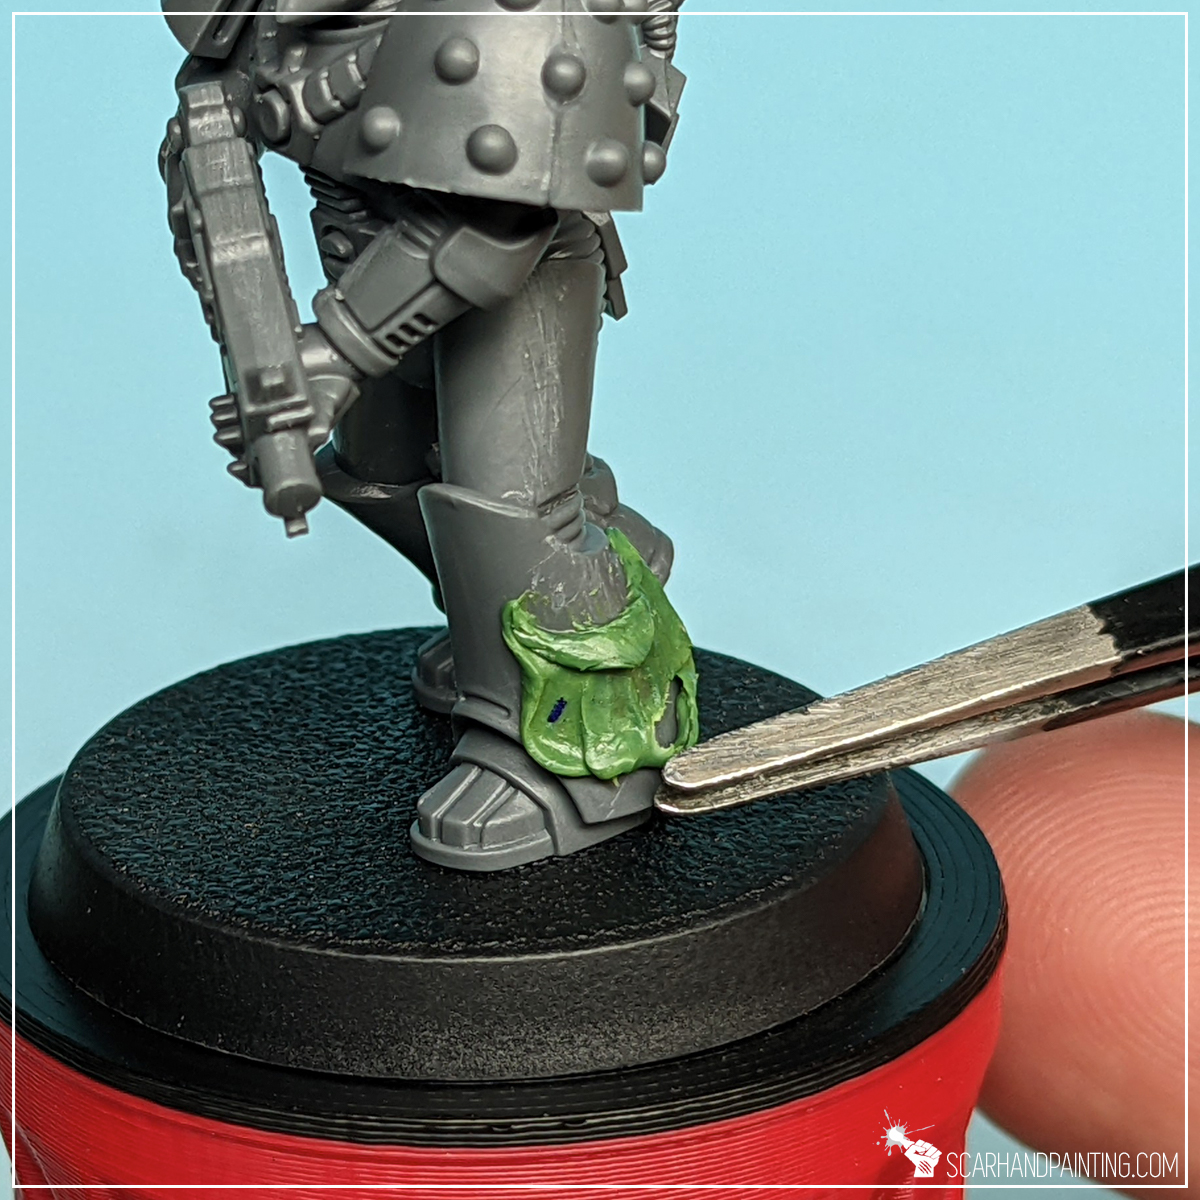

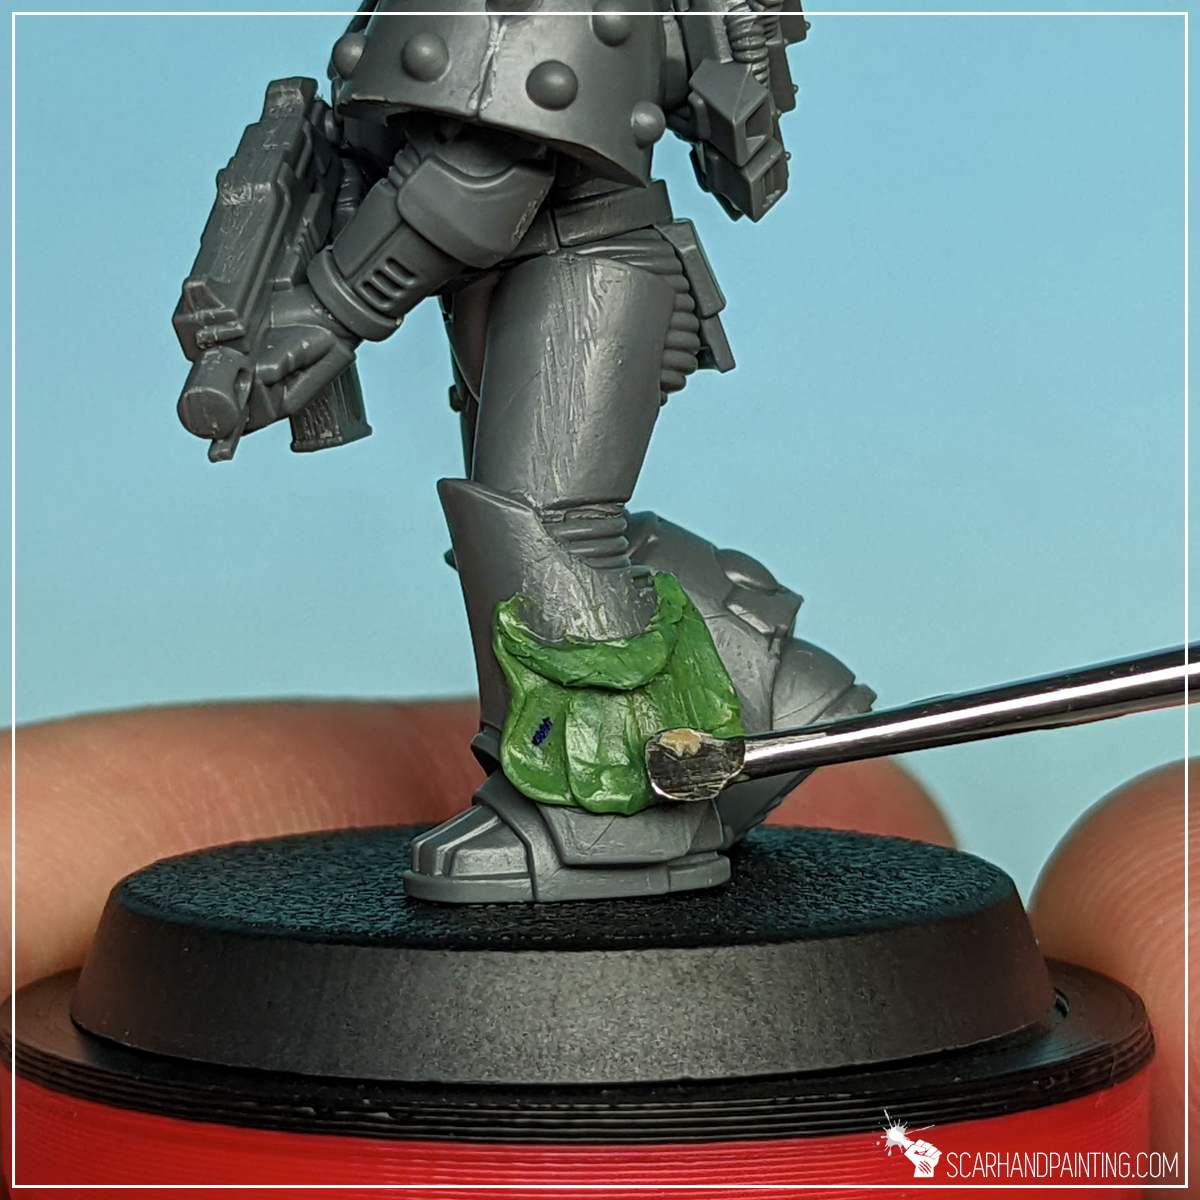
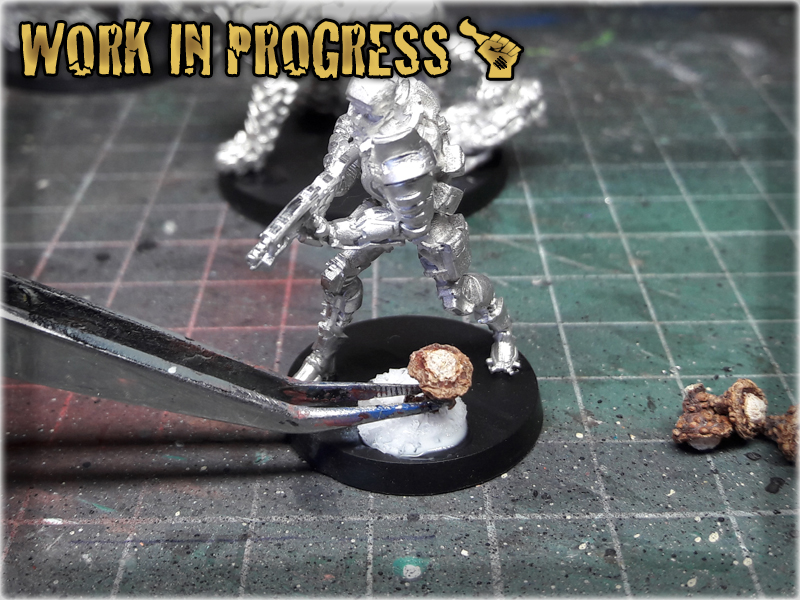
Step six: Shaping
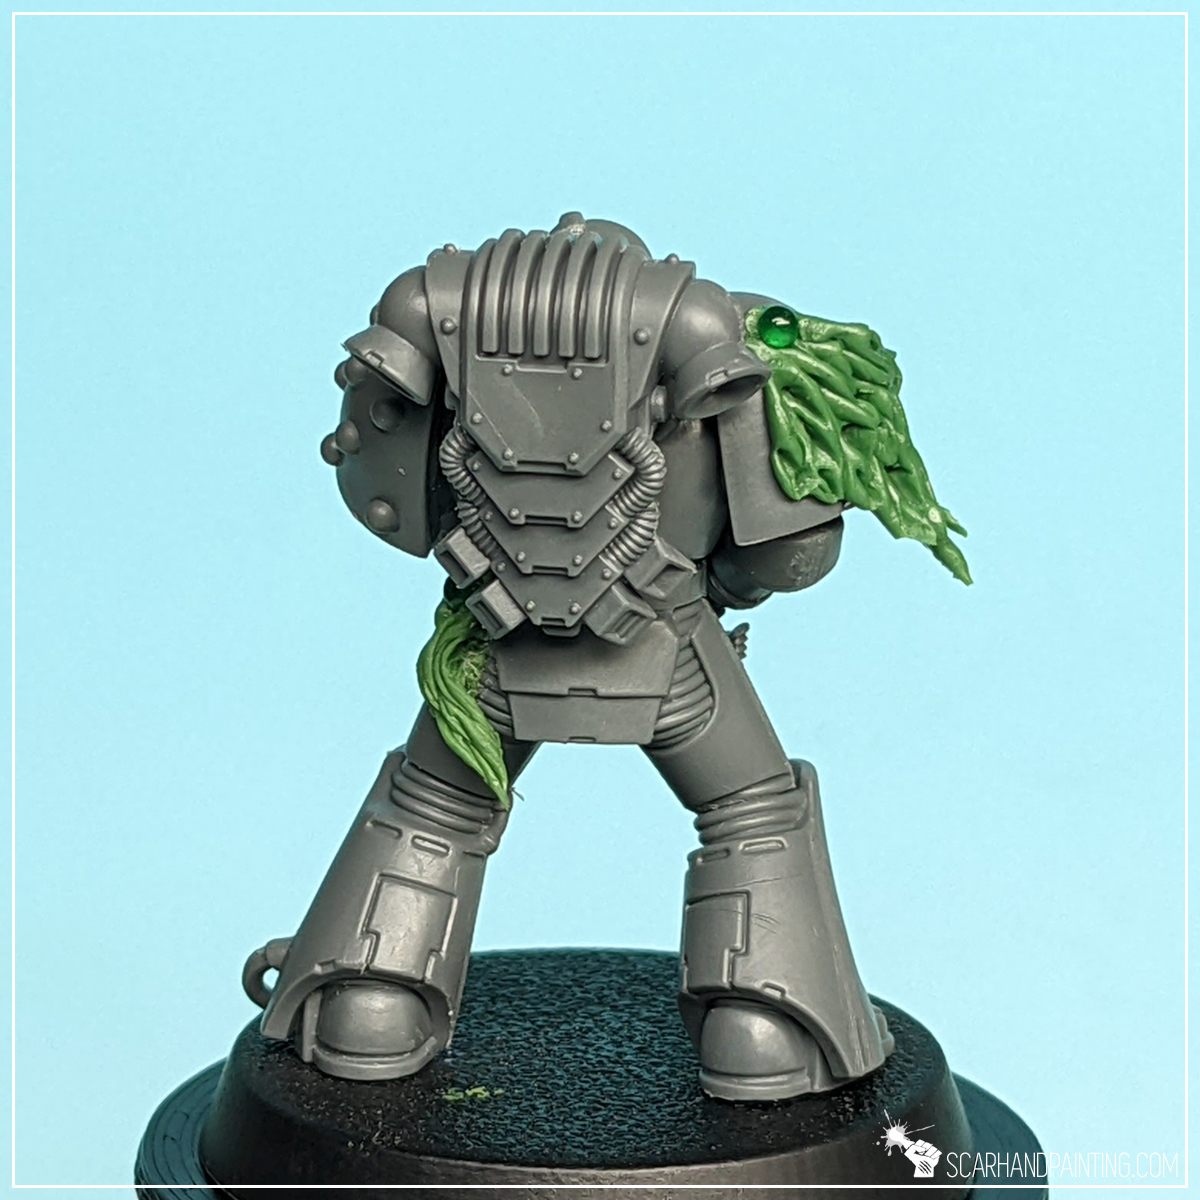
Using a pair of tweezers I then grabbed, teared and shaped the lower part of the sculpt to add an impression of movement. Job well done… although something still seemed missing.

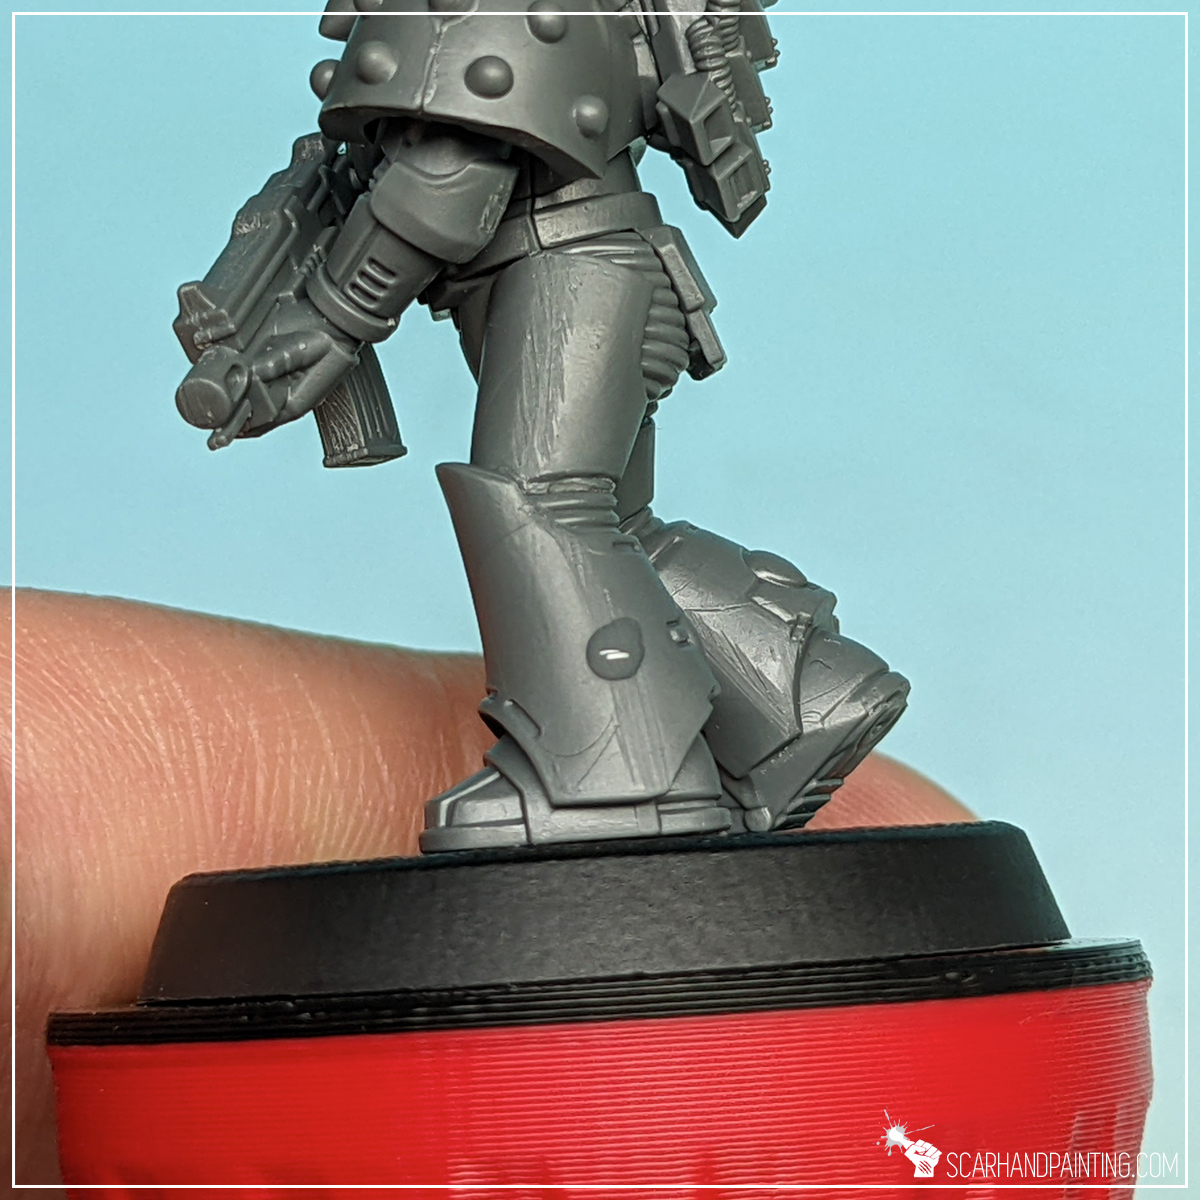
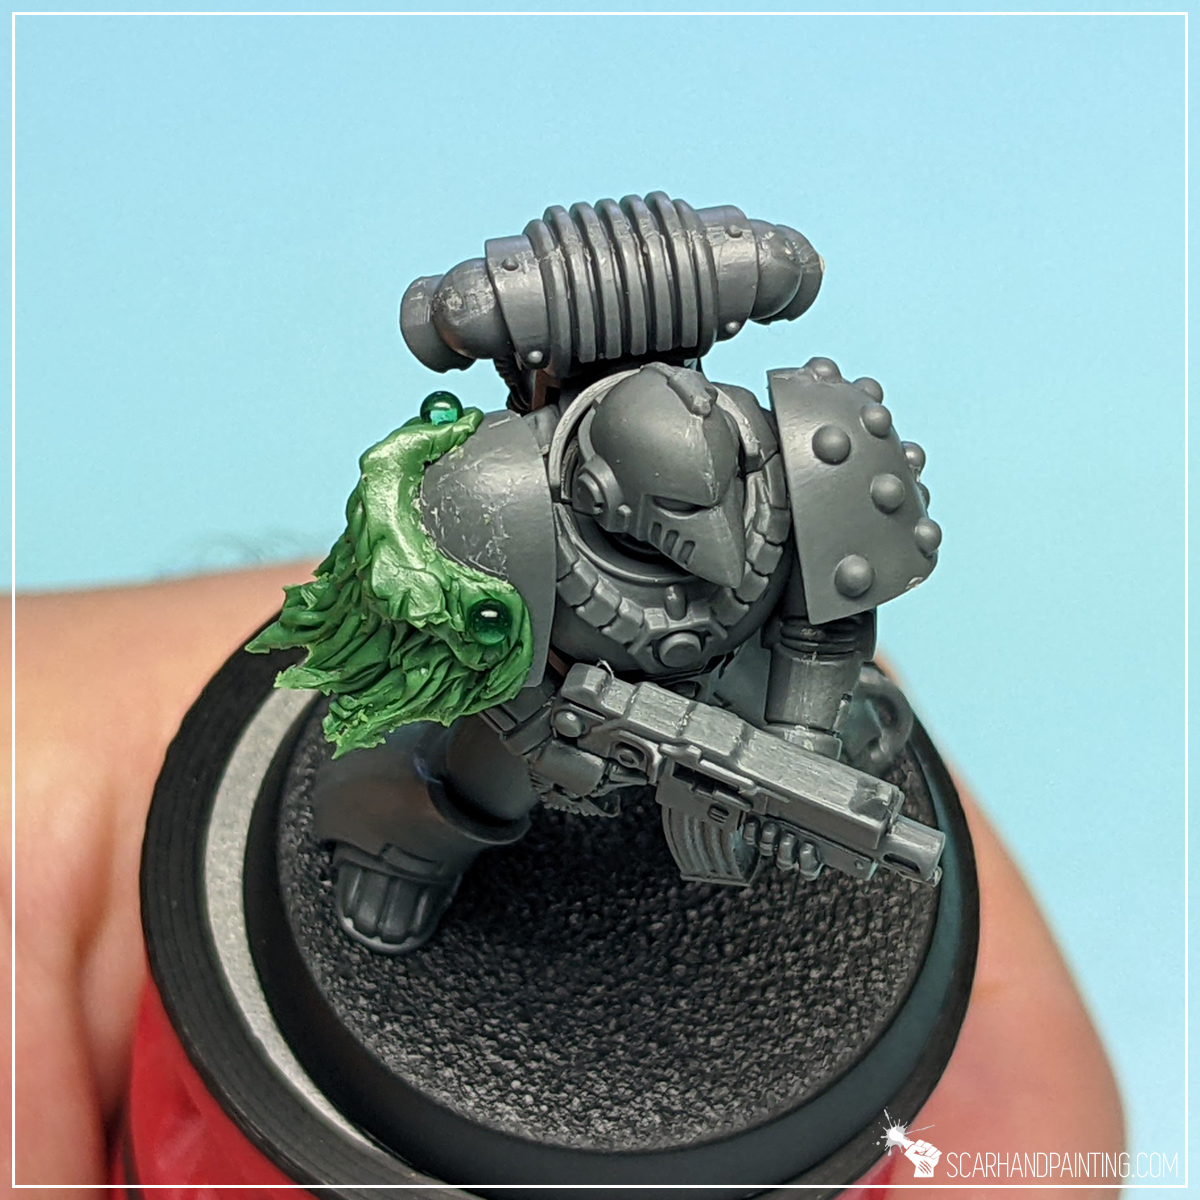
Step seven: Studs
That’s what I’m talking about! A pair of studs to bolt a piece of flapping skin to the armor.
These can be made of anything really, starting with a tiny piece of a toothpick, or some sort of plastic leftovers. Personally I like to use nail cosmetic glass balls. You can read more about them in Unlimited Tiny Balls for Miniatures article.

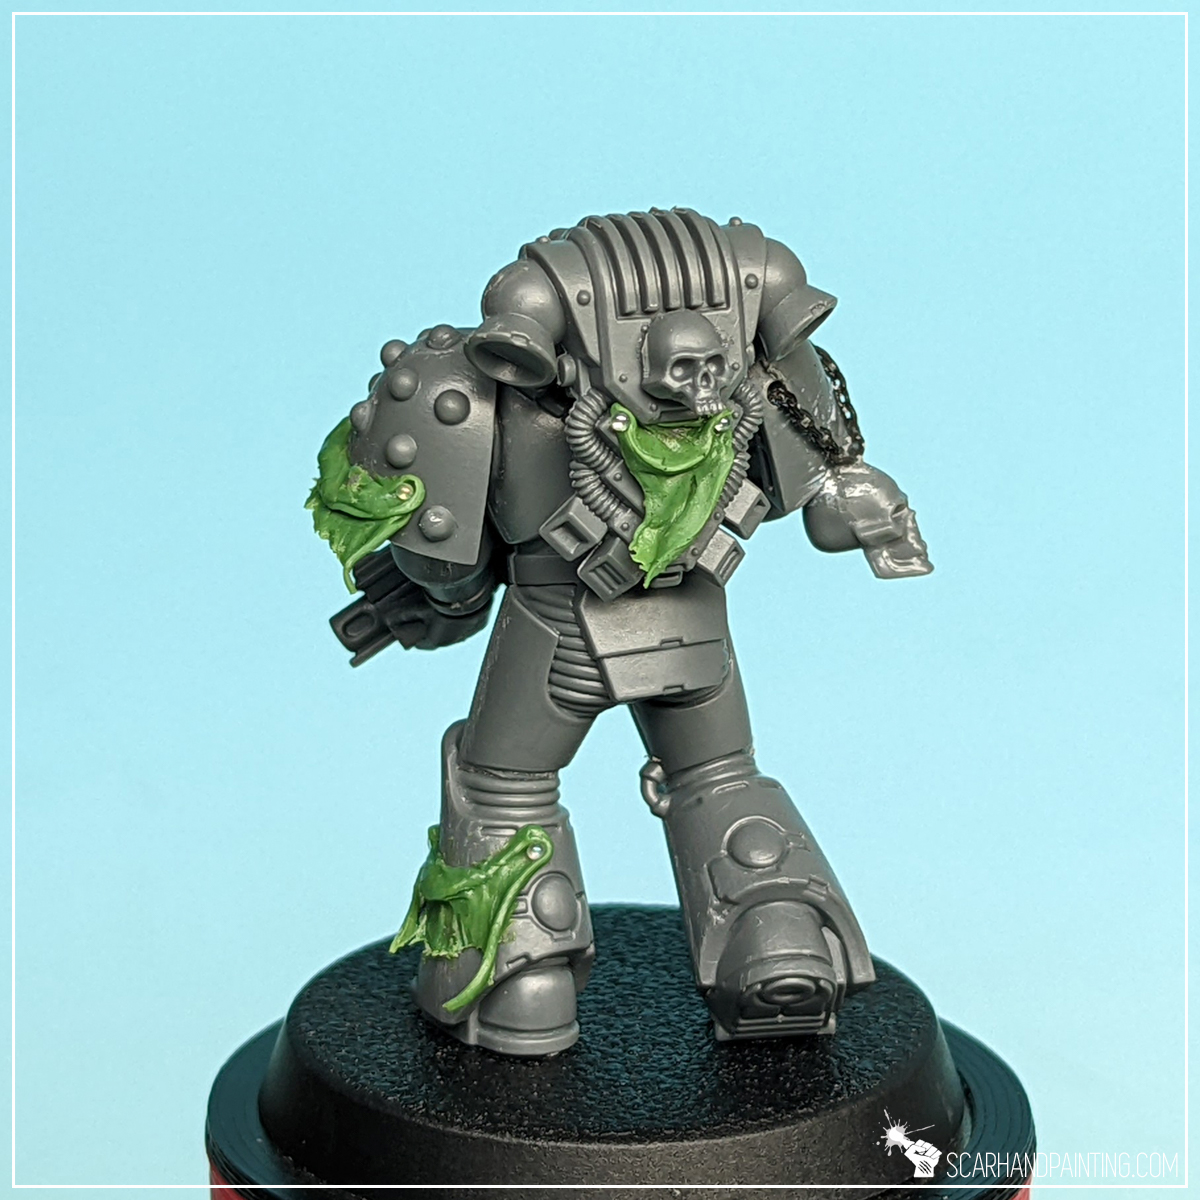

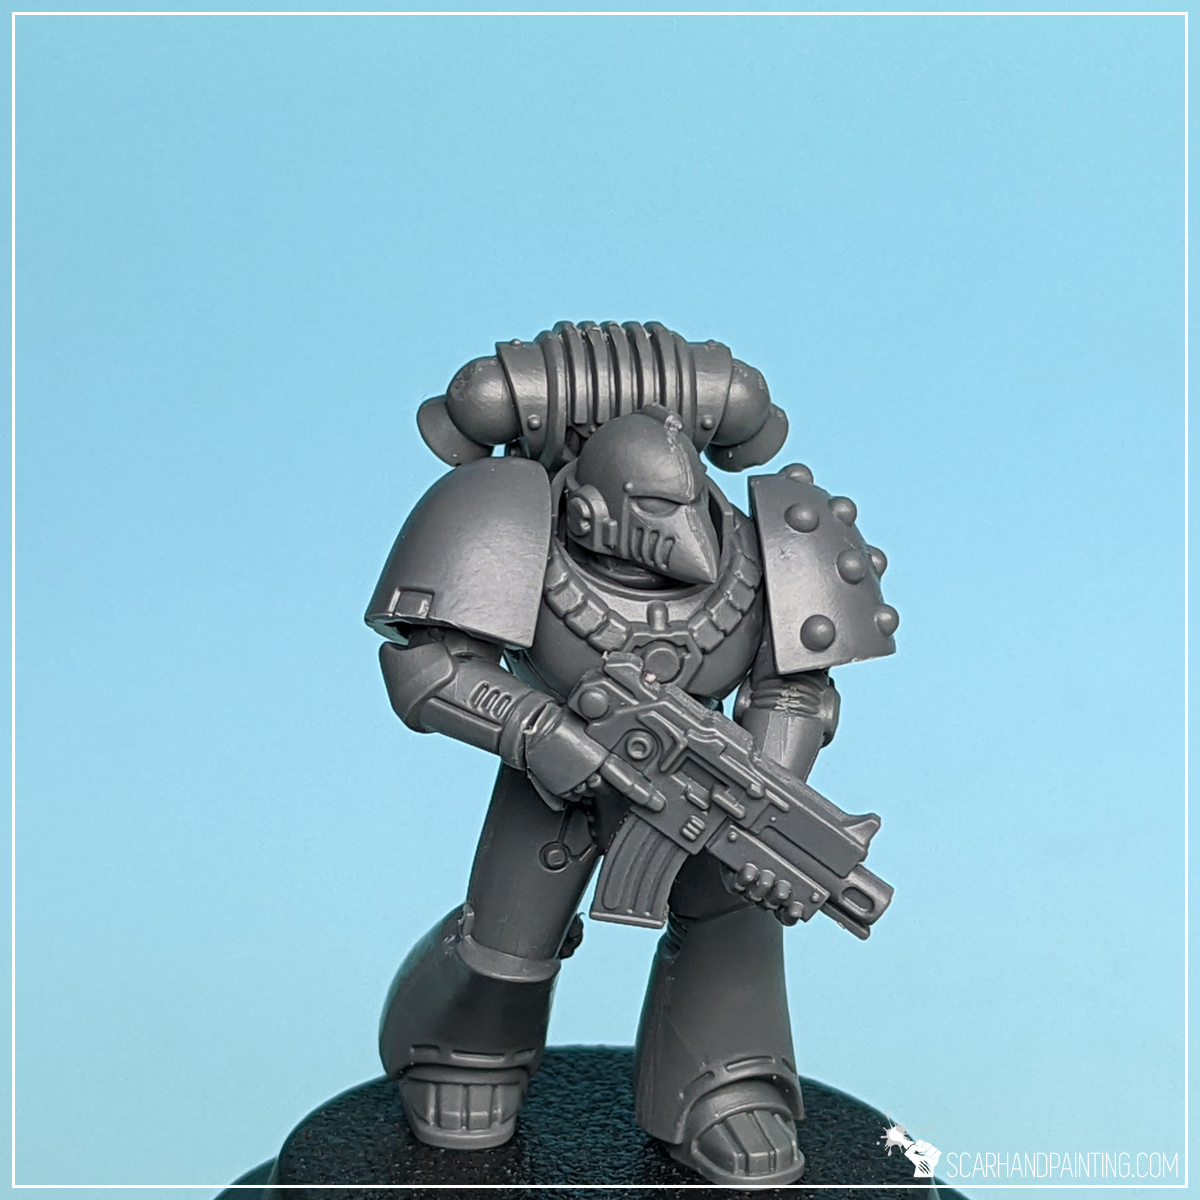
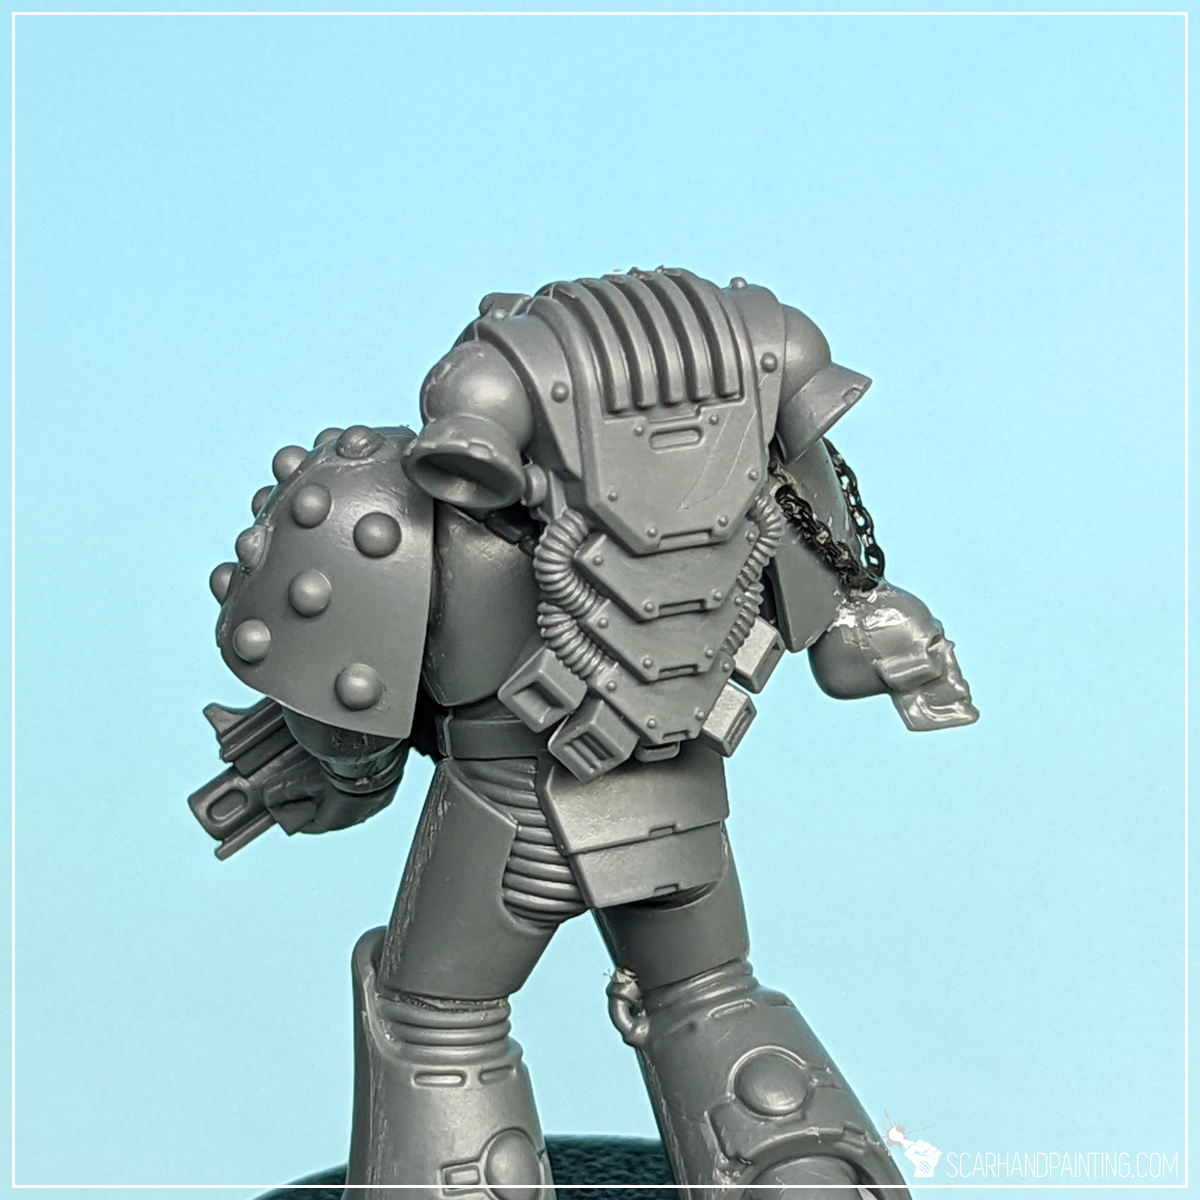
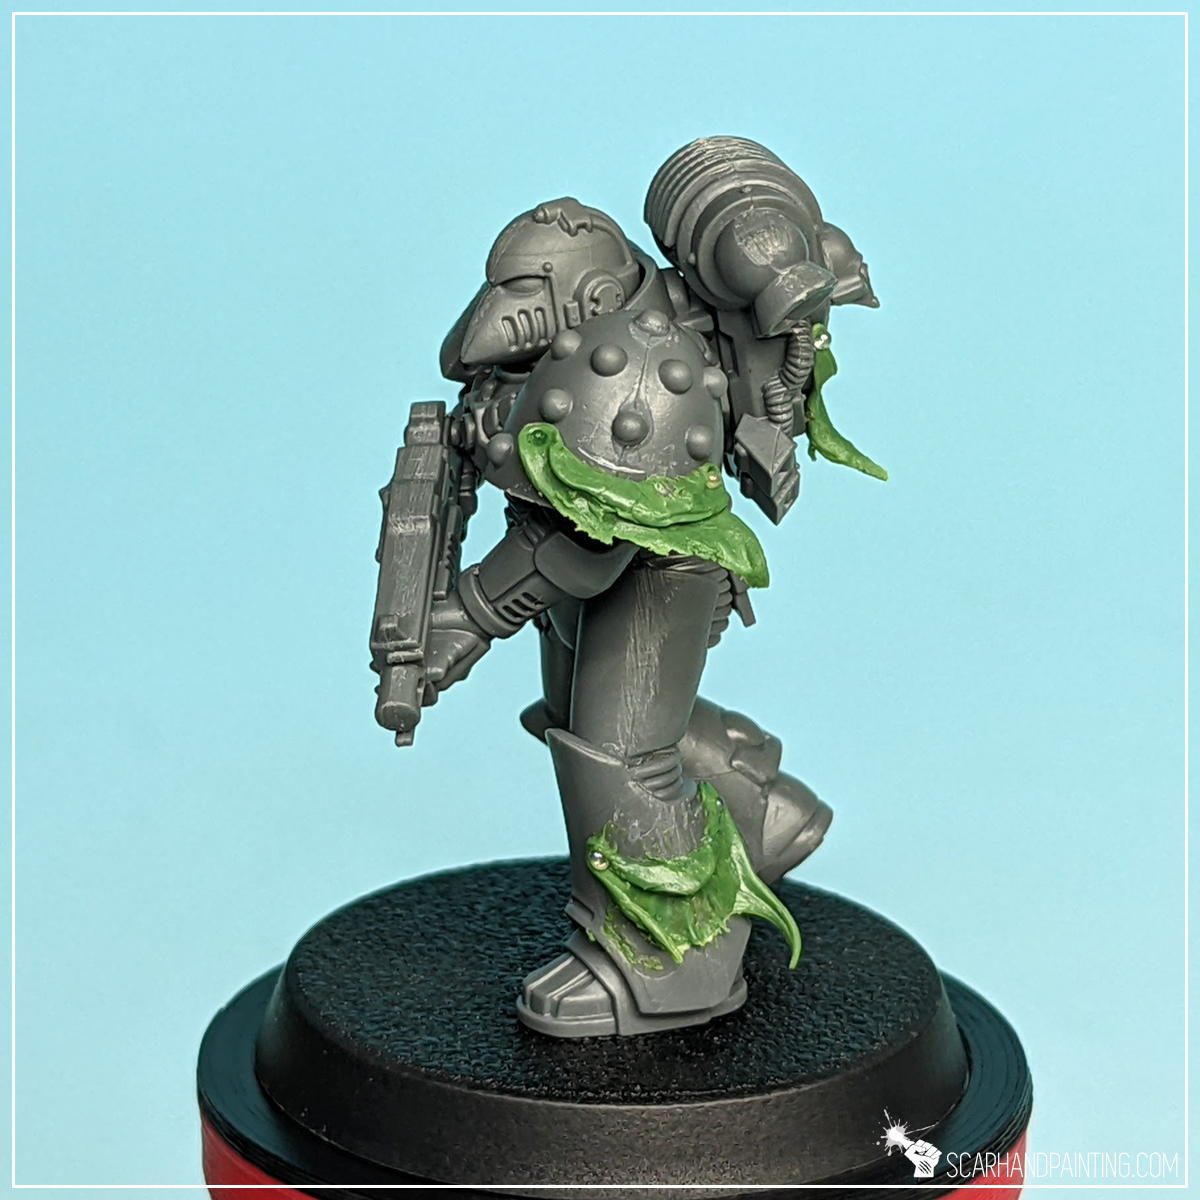
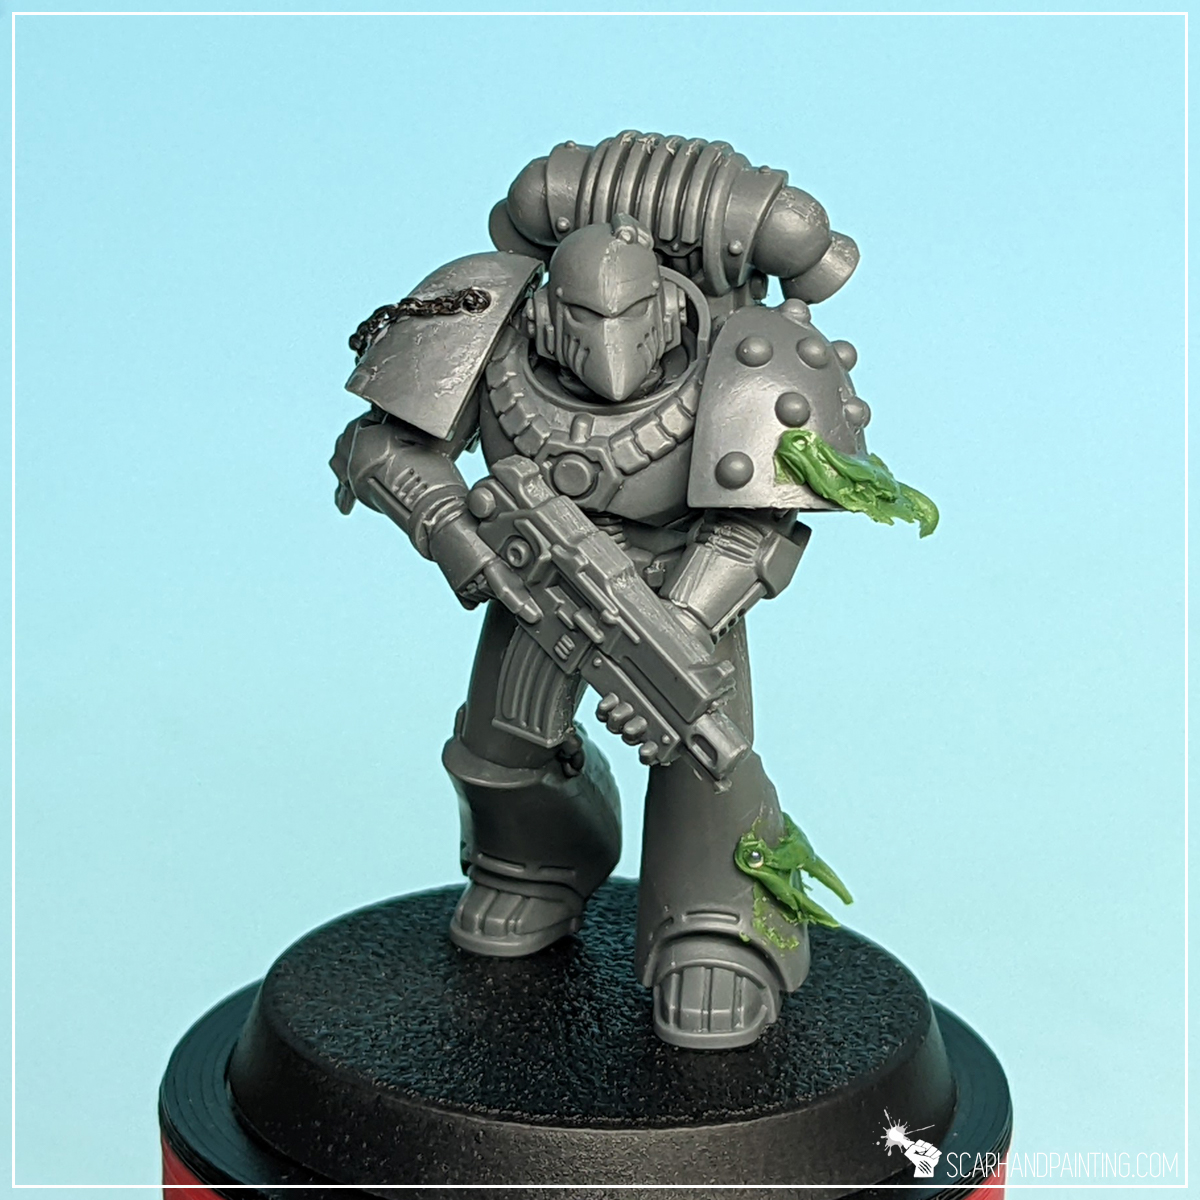
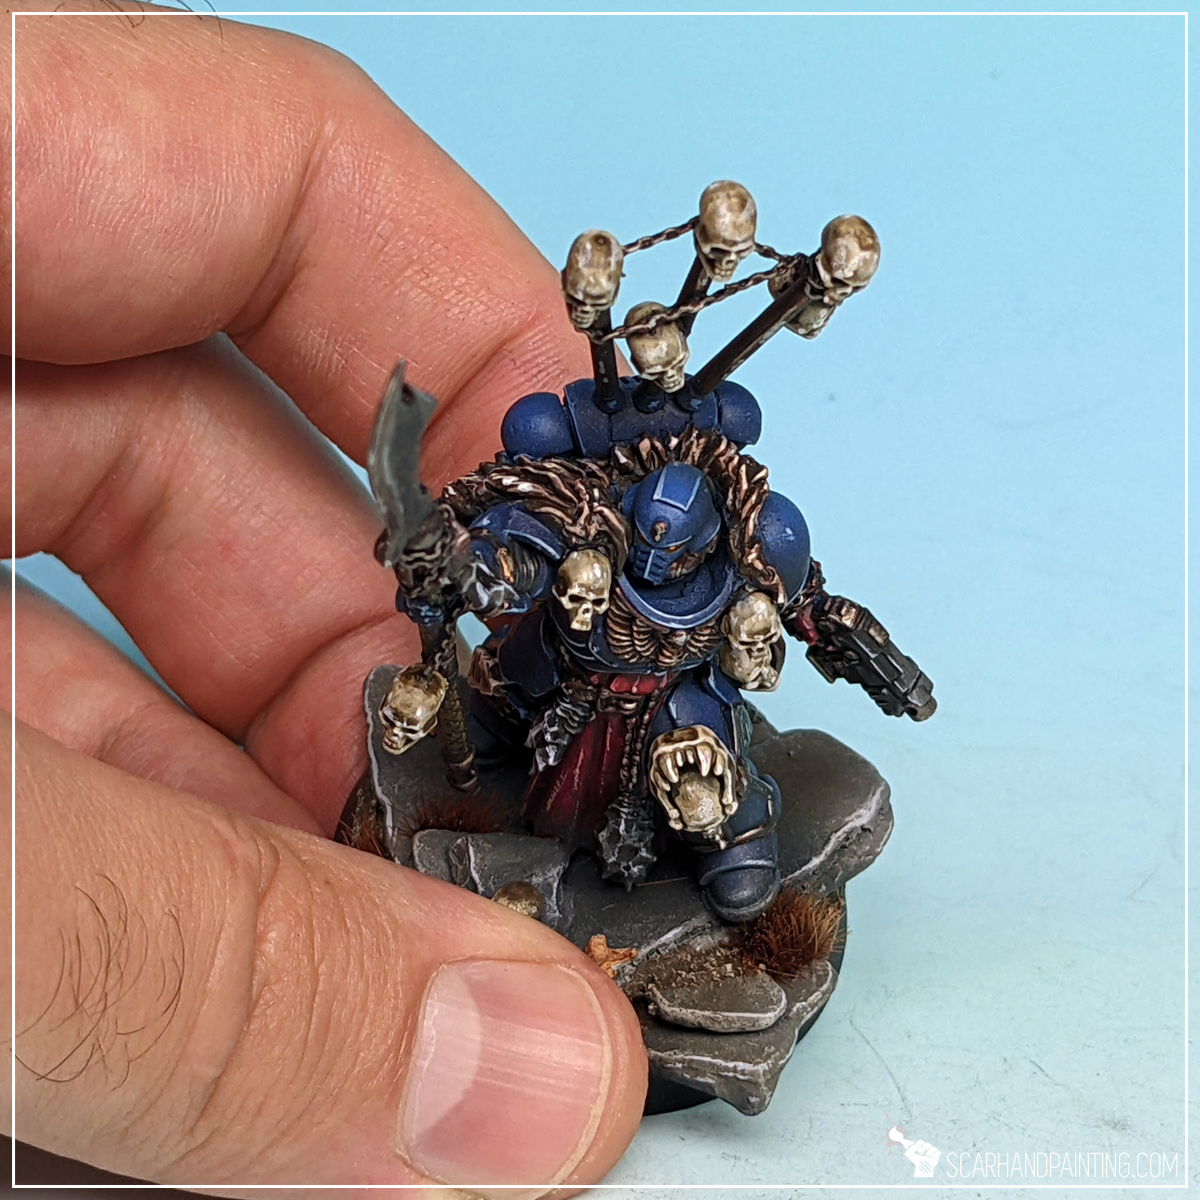
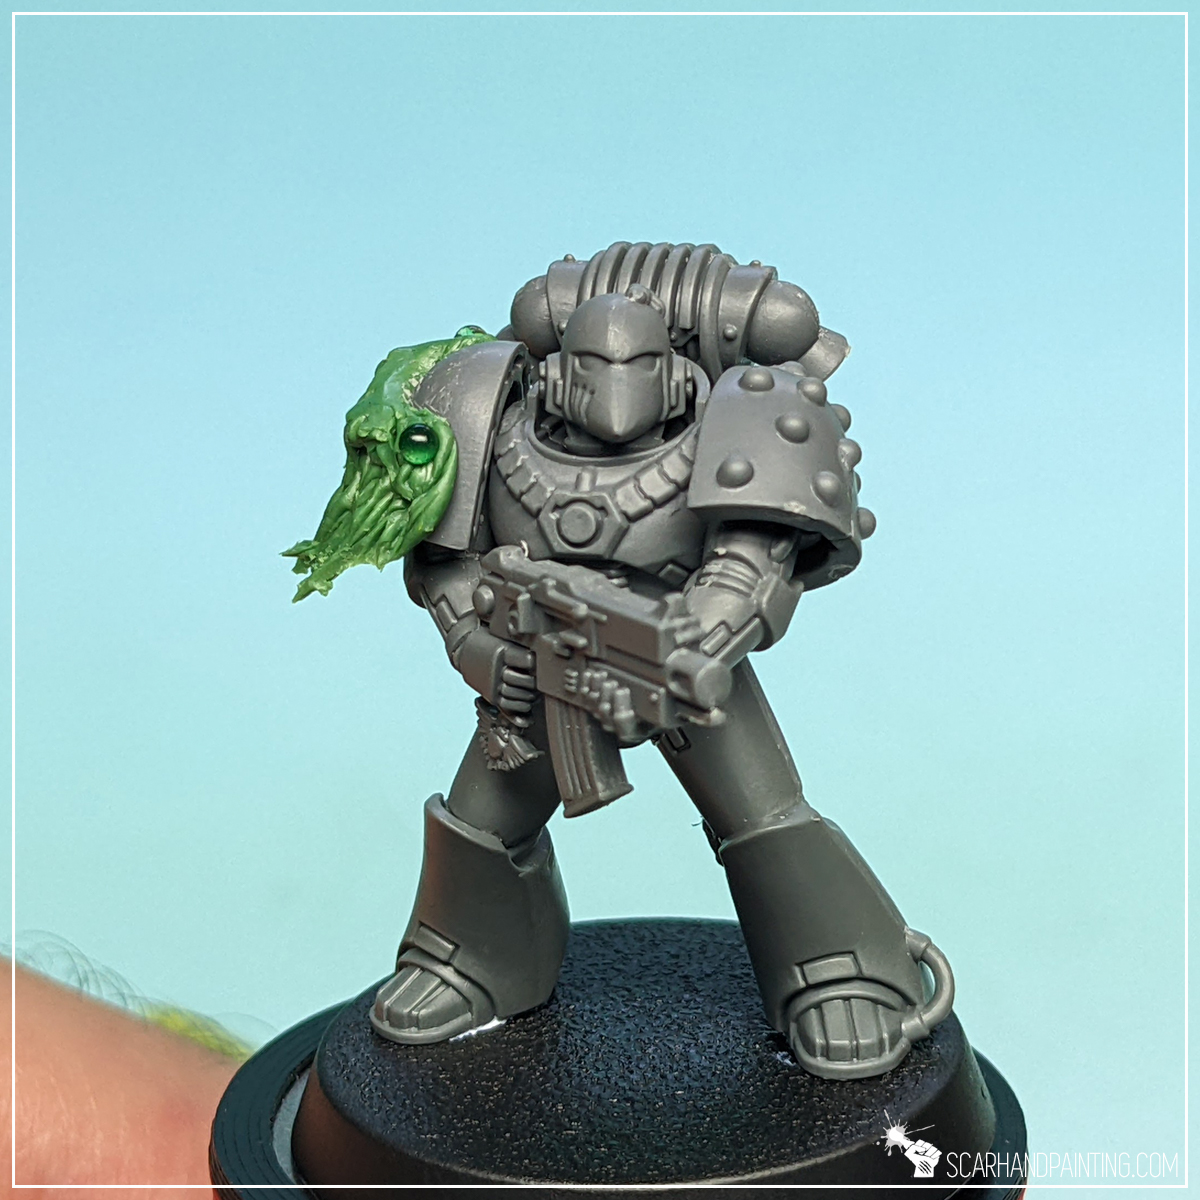
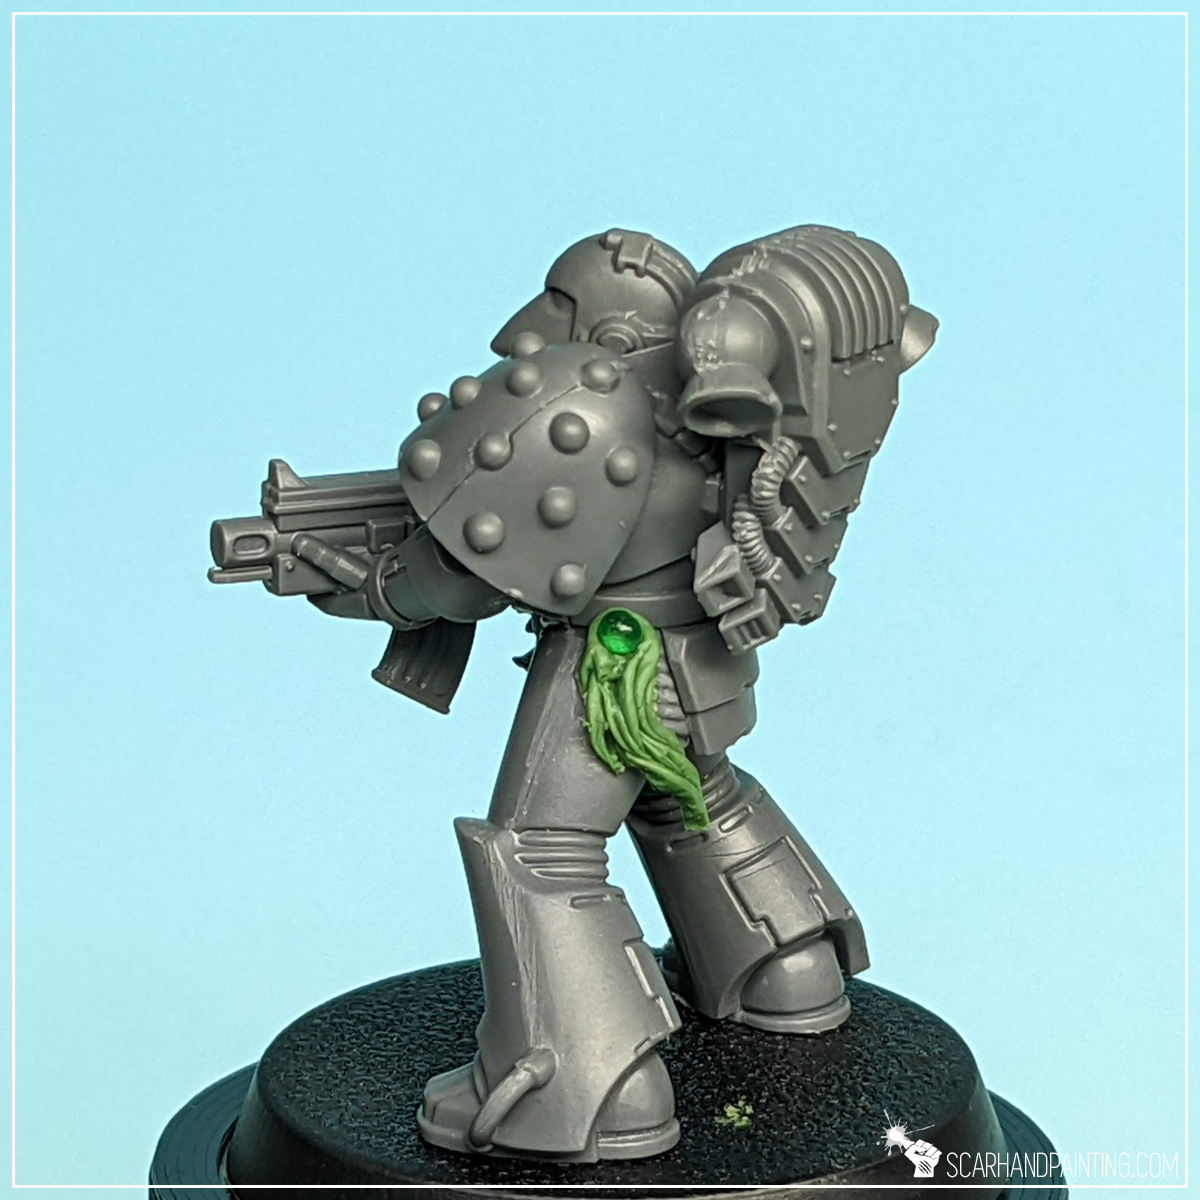
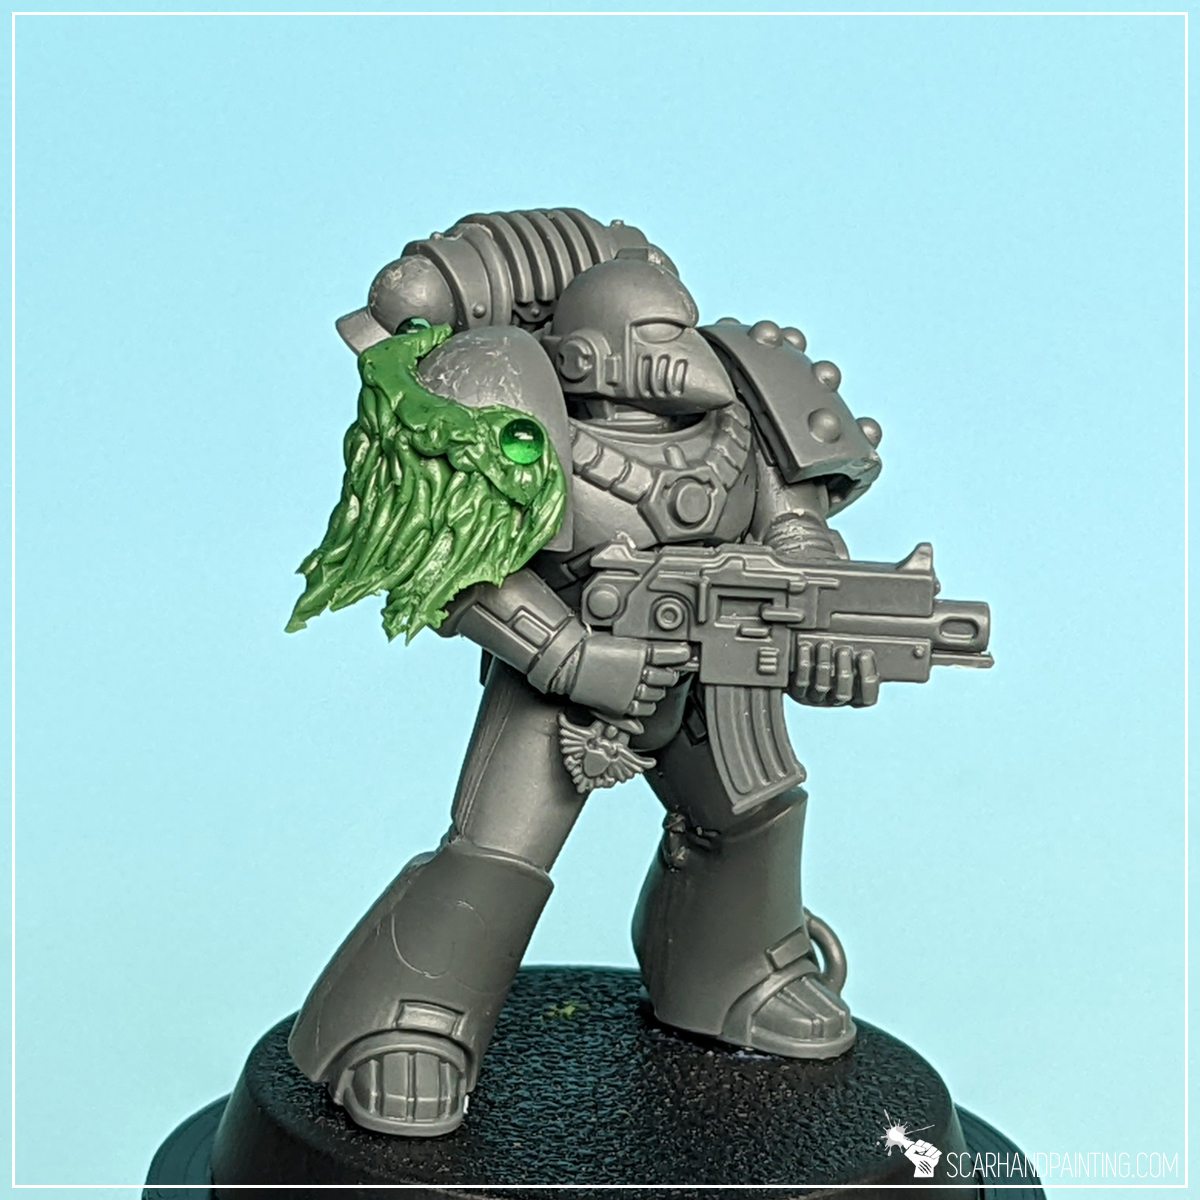
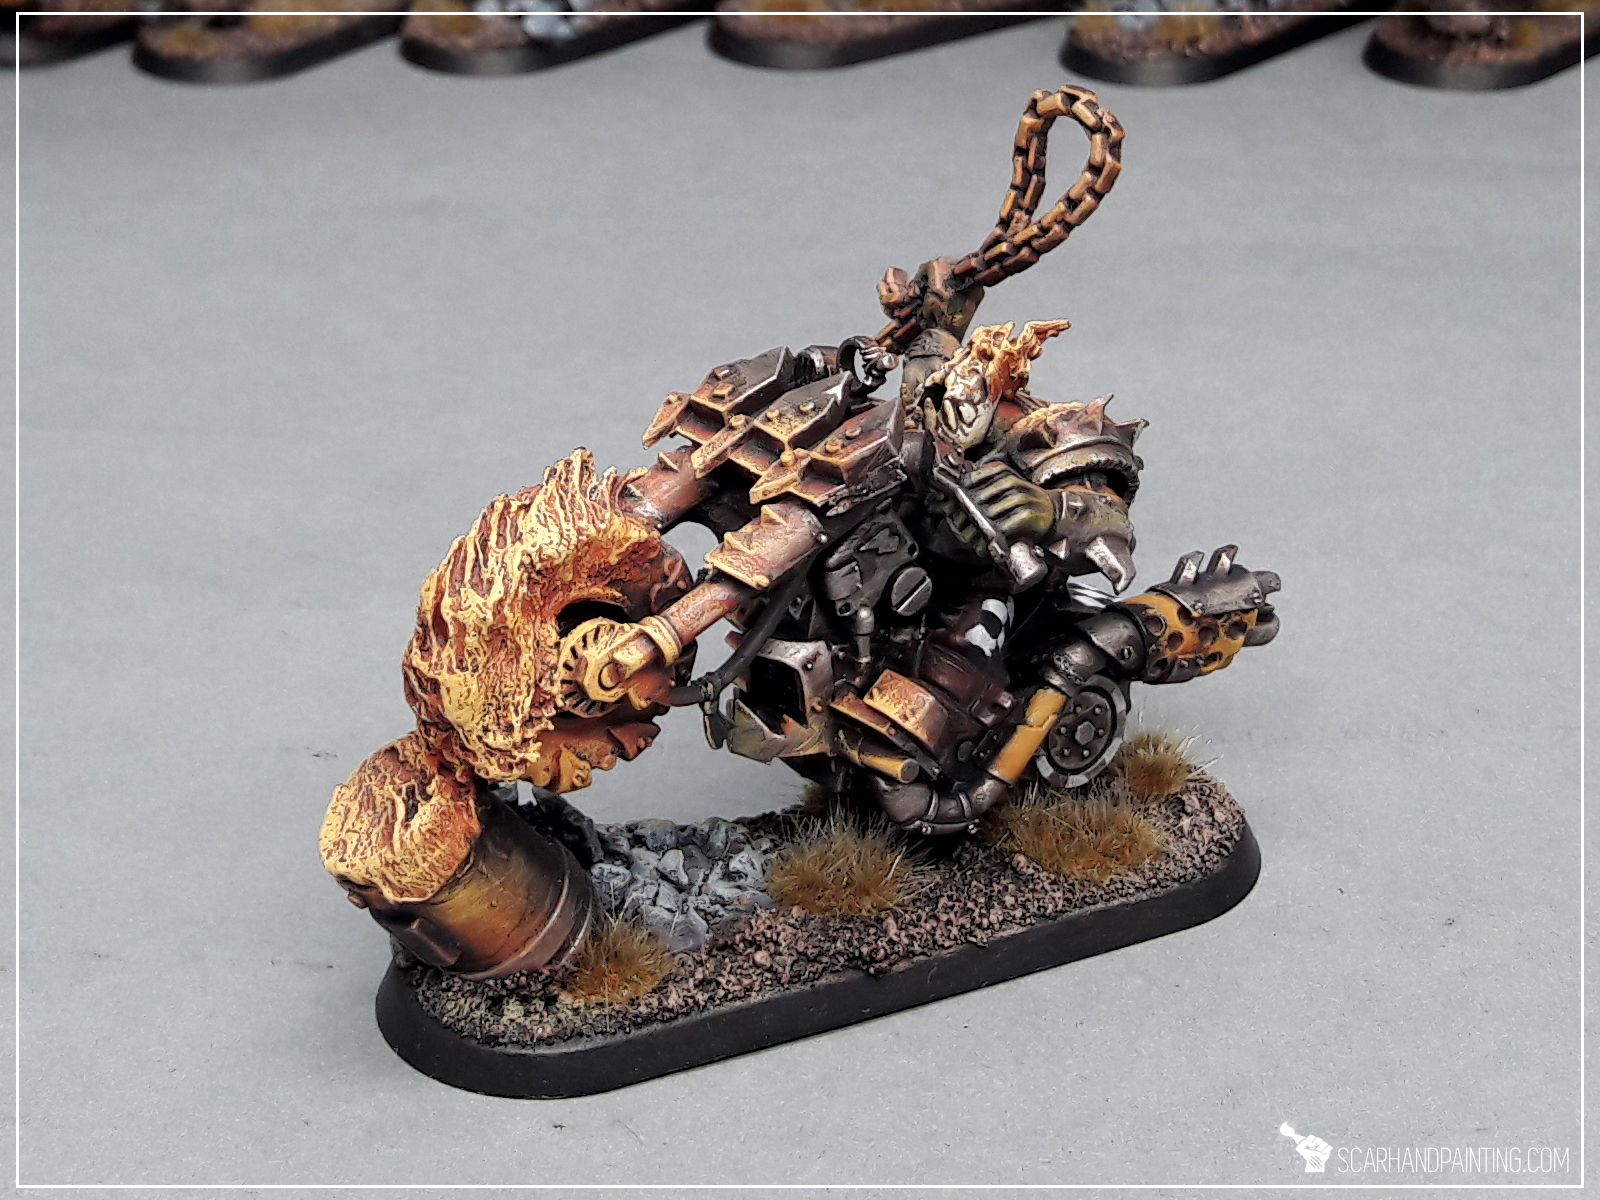
Now look at this serious lad. All the skulls, a chains and some fancy fleshy souvenirs from previous raids. I bet no one will joke around this guy!
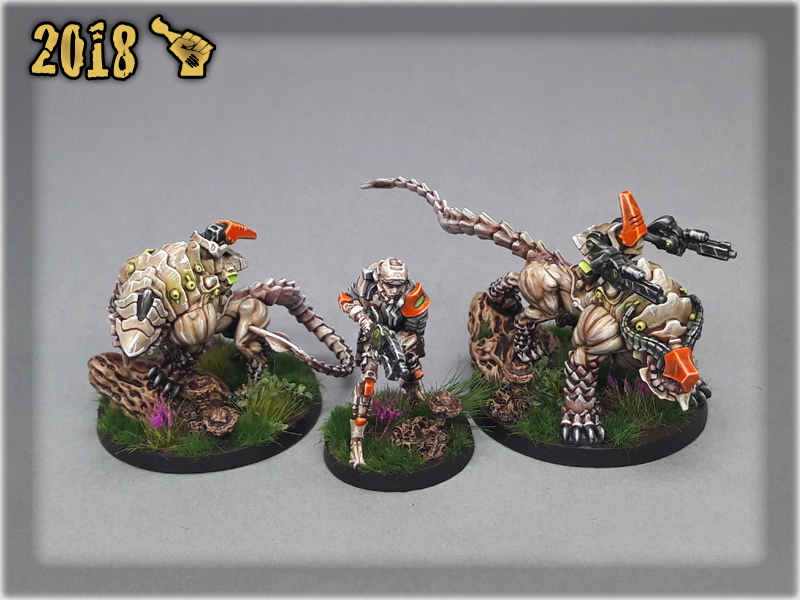
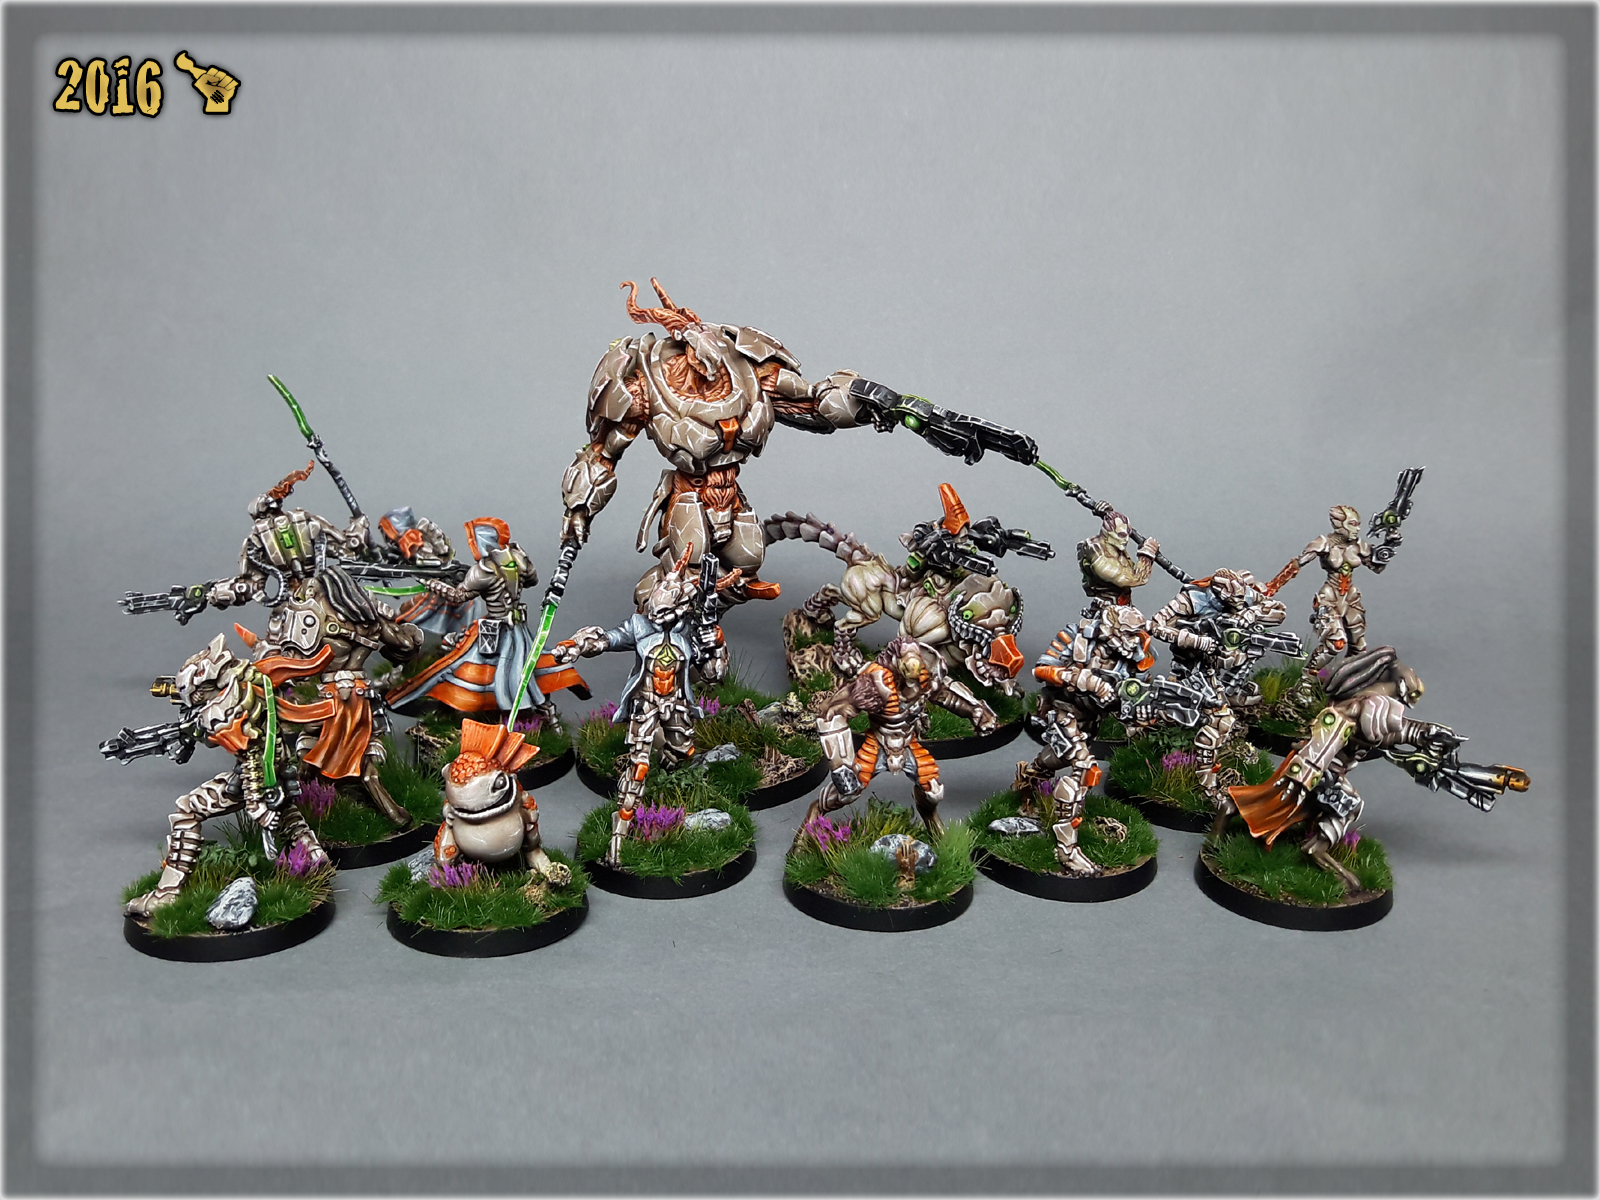
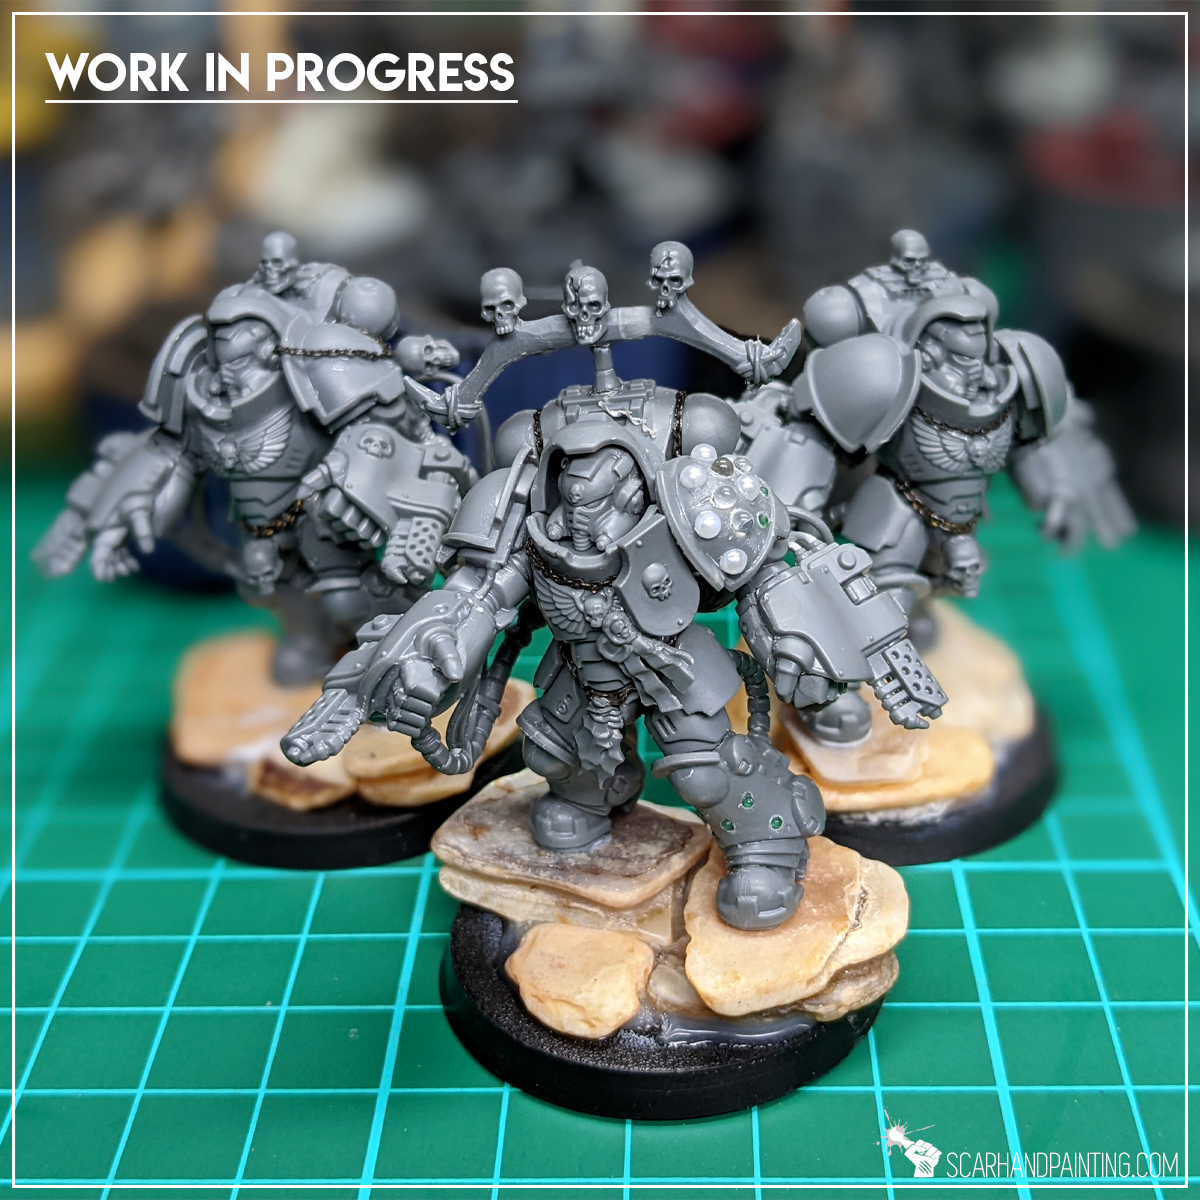
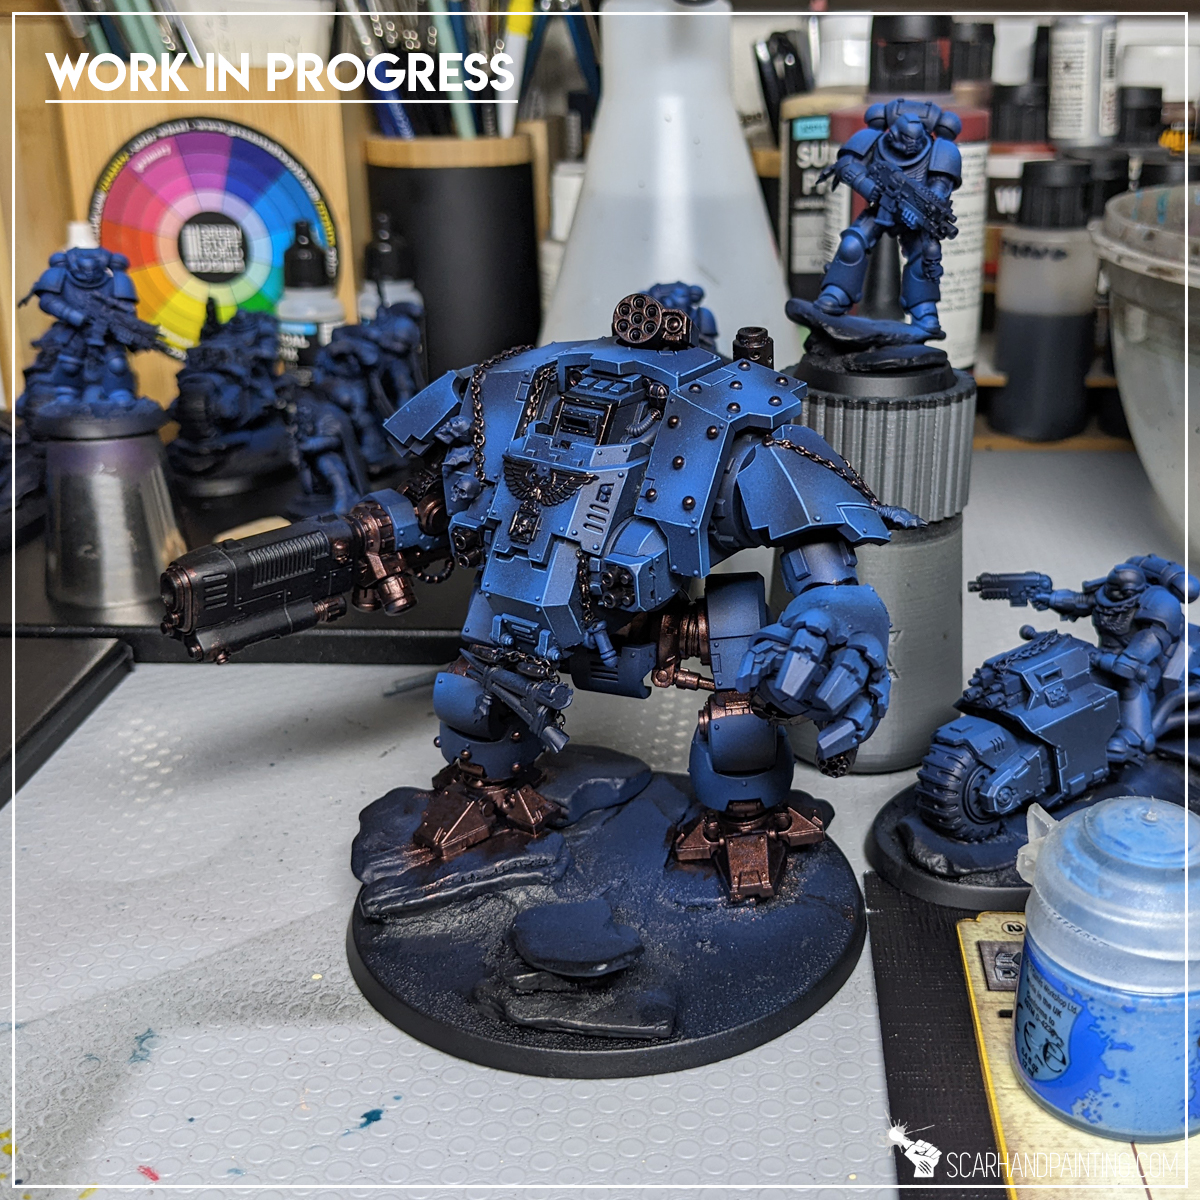
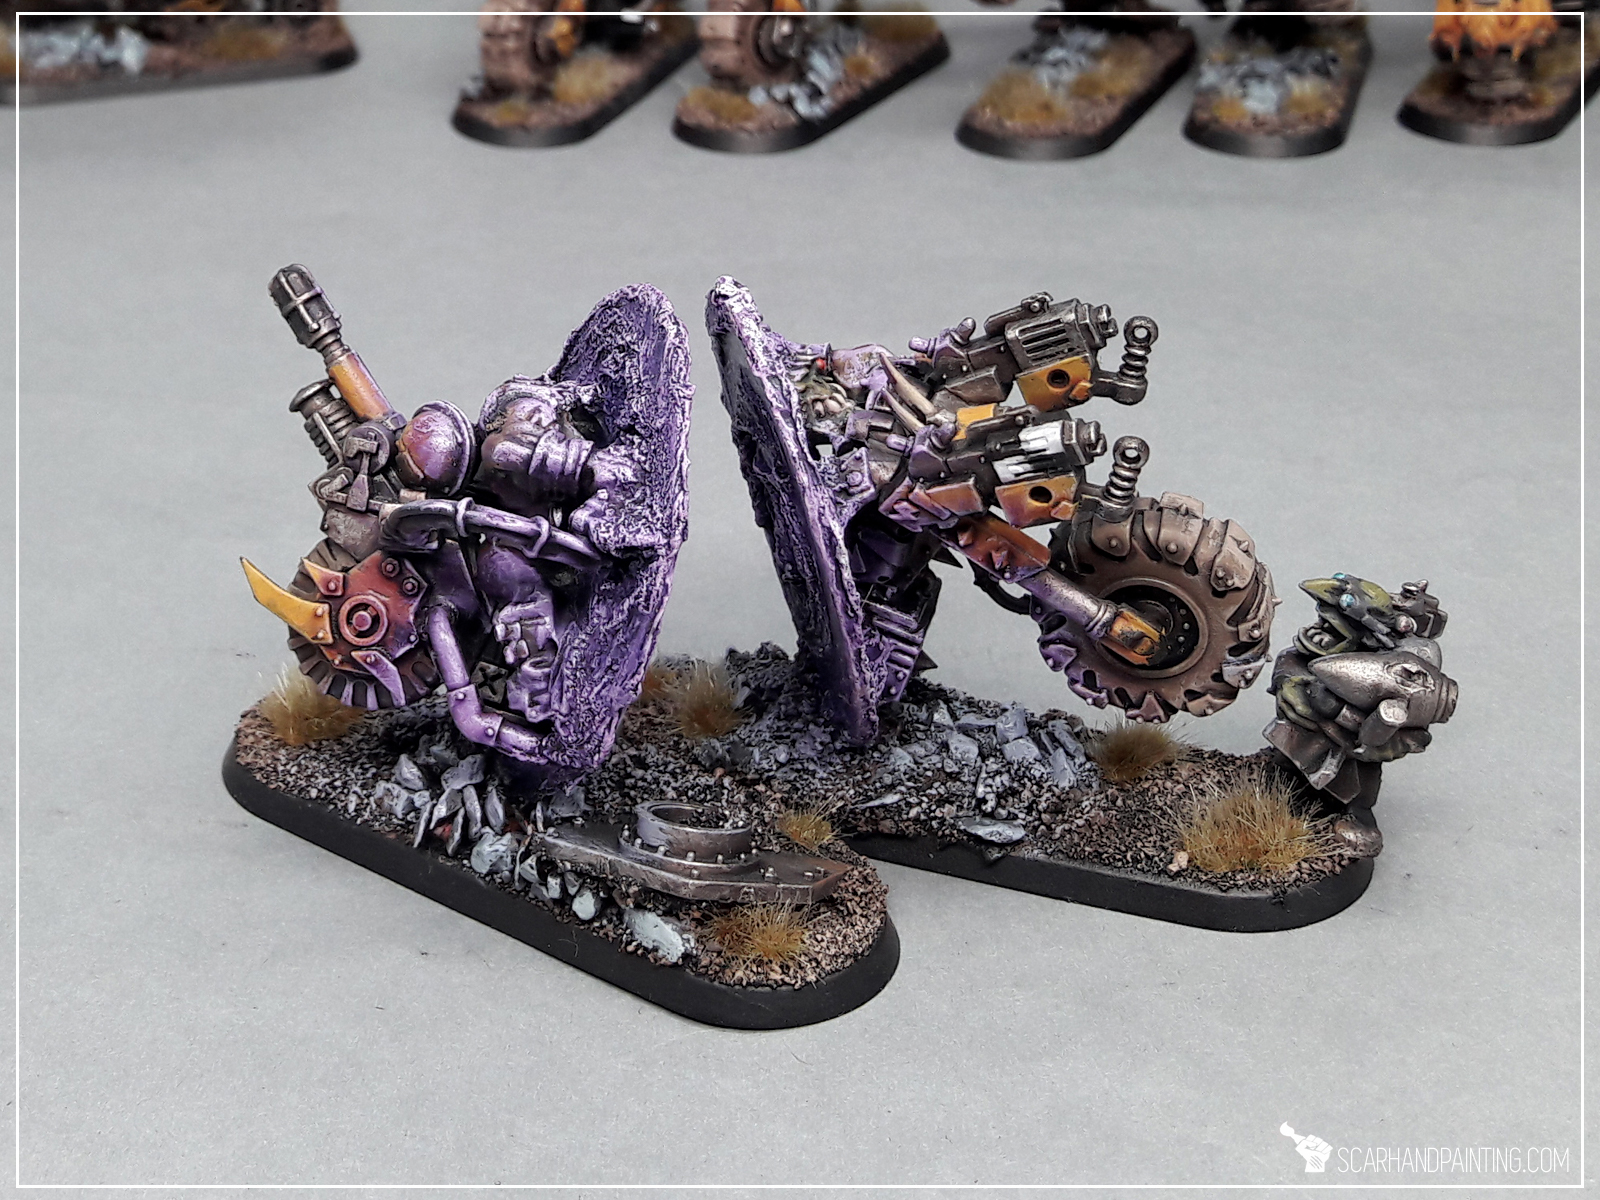
Below are some pictures of how I went about skulls and chains on my personal collection:
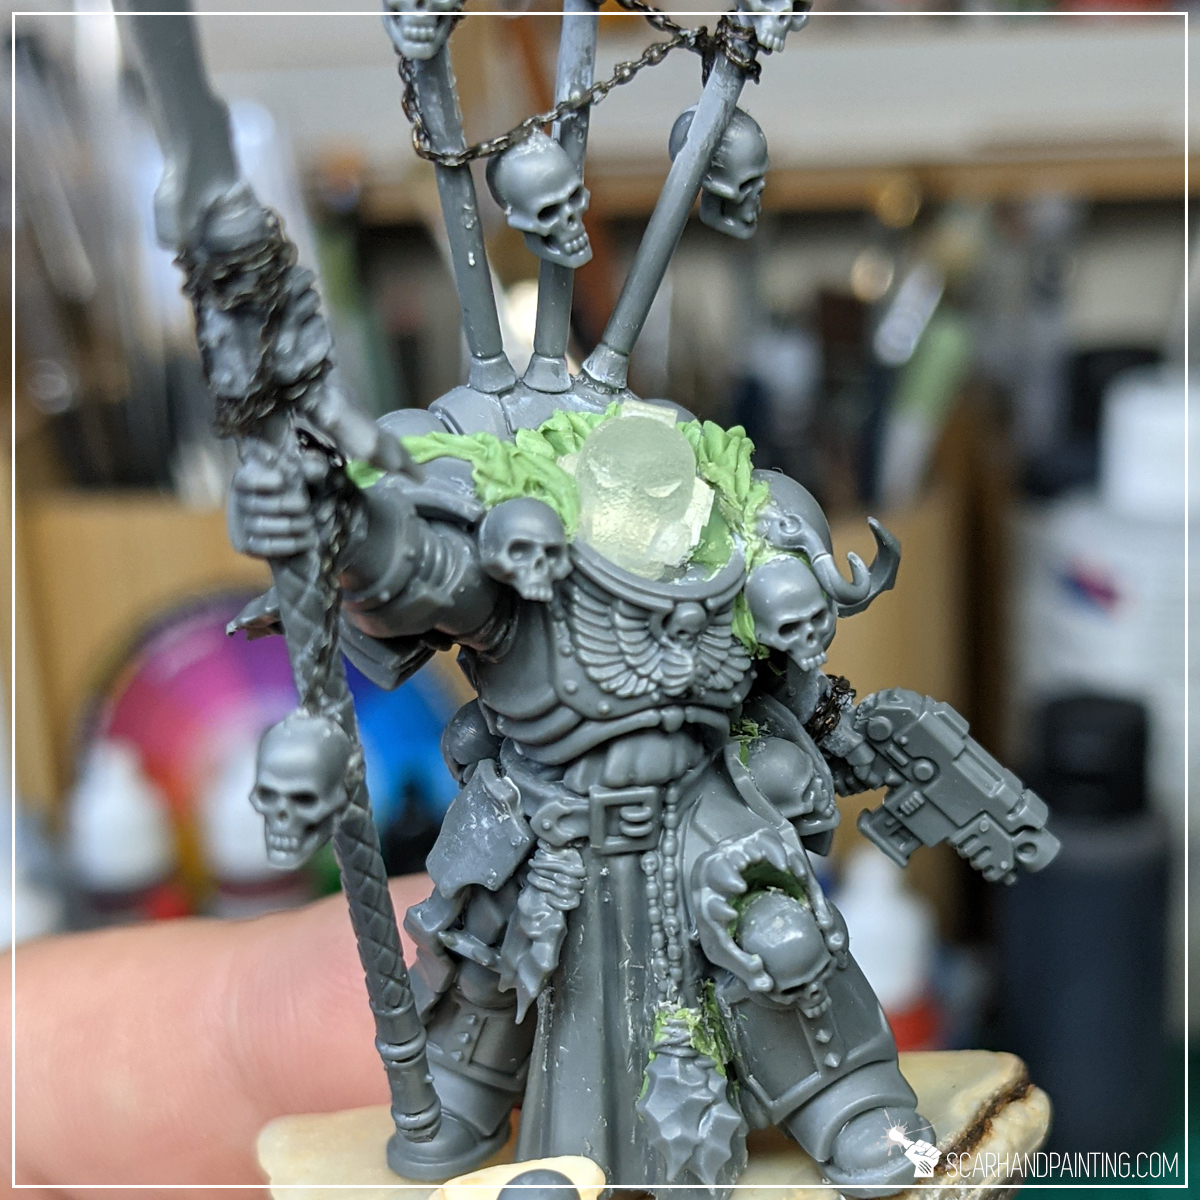

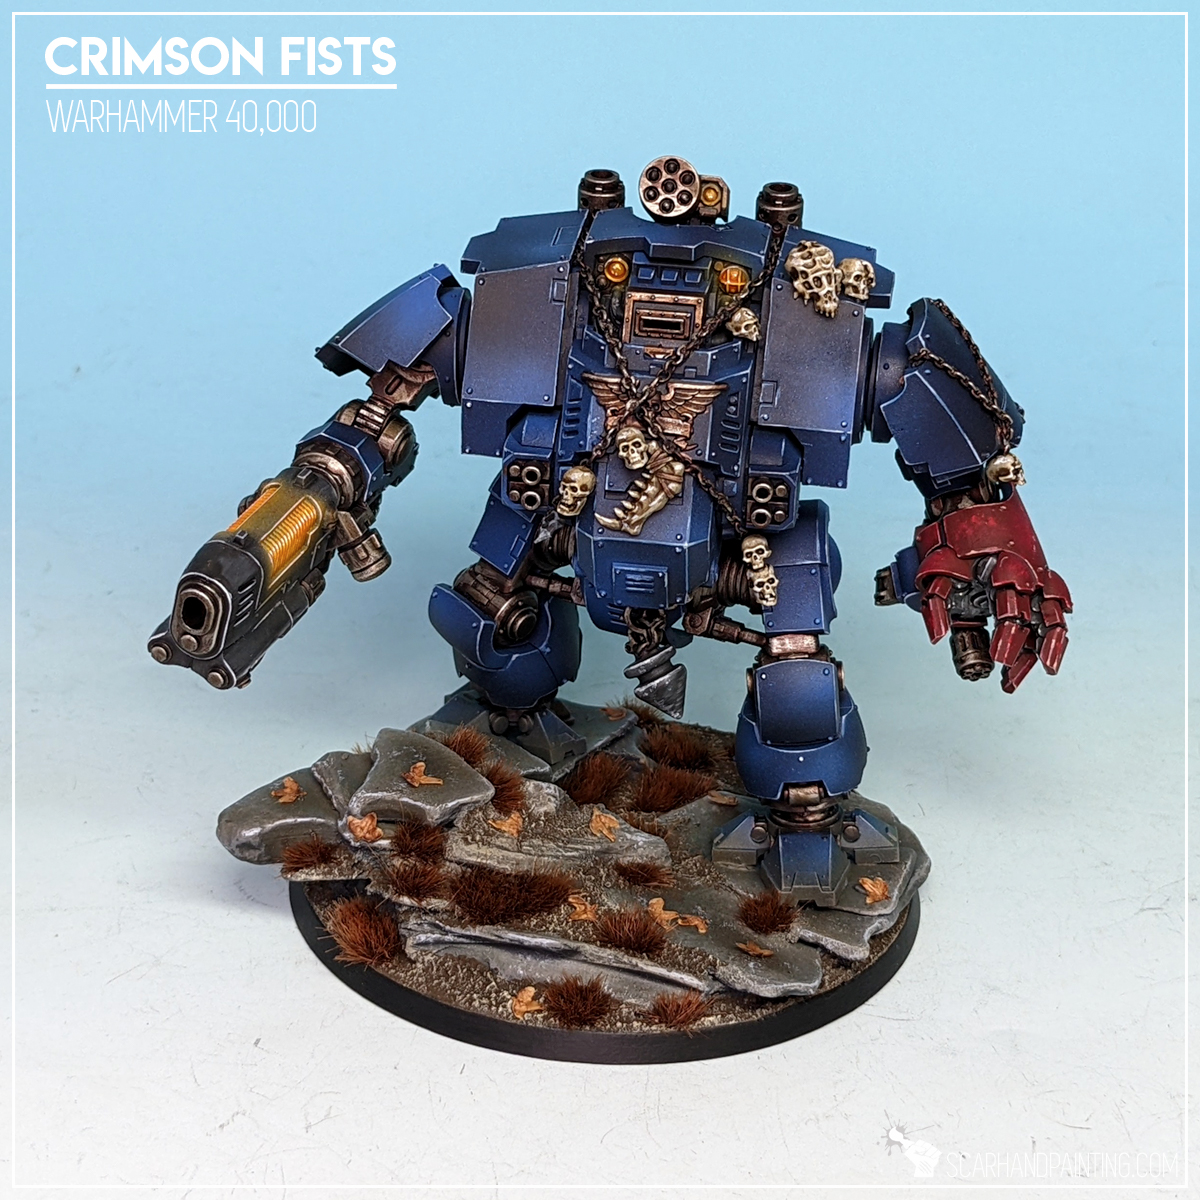


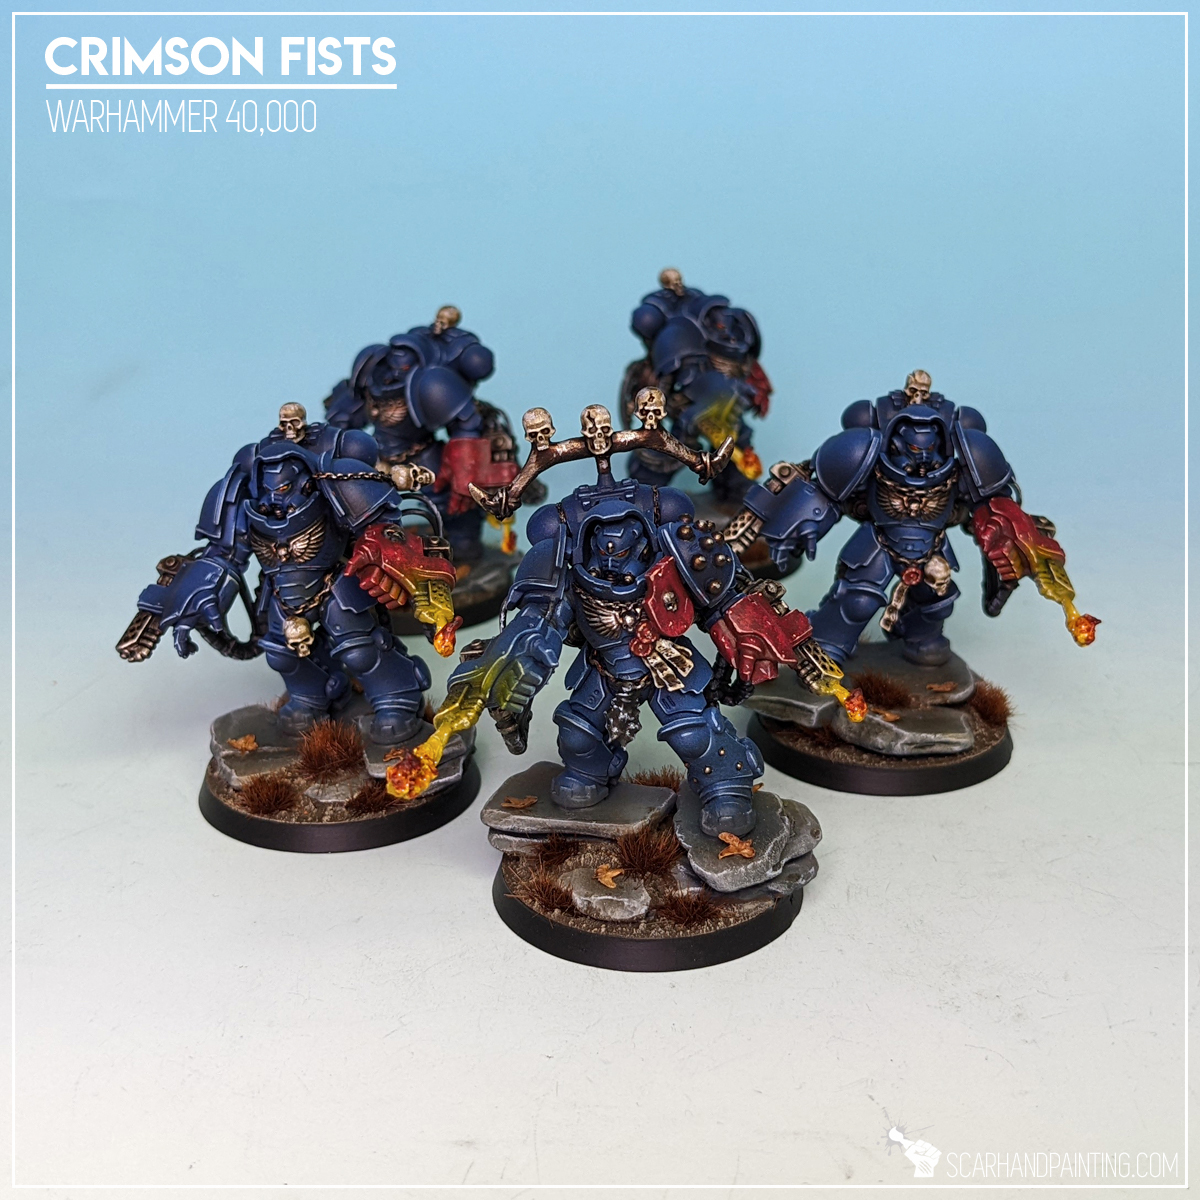
And if you require even more inspiration, why not check Gallery: Crimson Fists, for plenty more pictures of my heavily Night Lords themed 40k army. Ave Dominus Nox!

I hope you find this tutorial interesting. Be sure to let me know your thoughts in the comments below or via Facebook or Instagram. I would also appreciate if you considered sharing this content with your friends, who might find it useful. Finally if you are looking for a professional warhammer 40k miniatures painting service, be sure to contact me with this contact form. I always reply within 24 hours, after which please check out your spam folder.
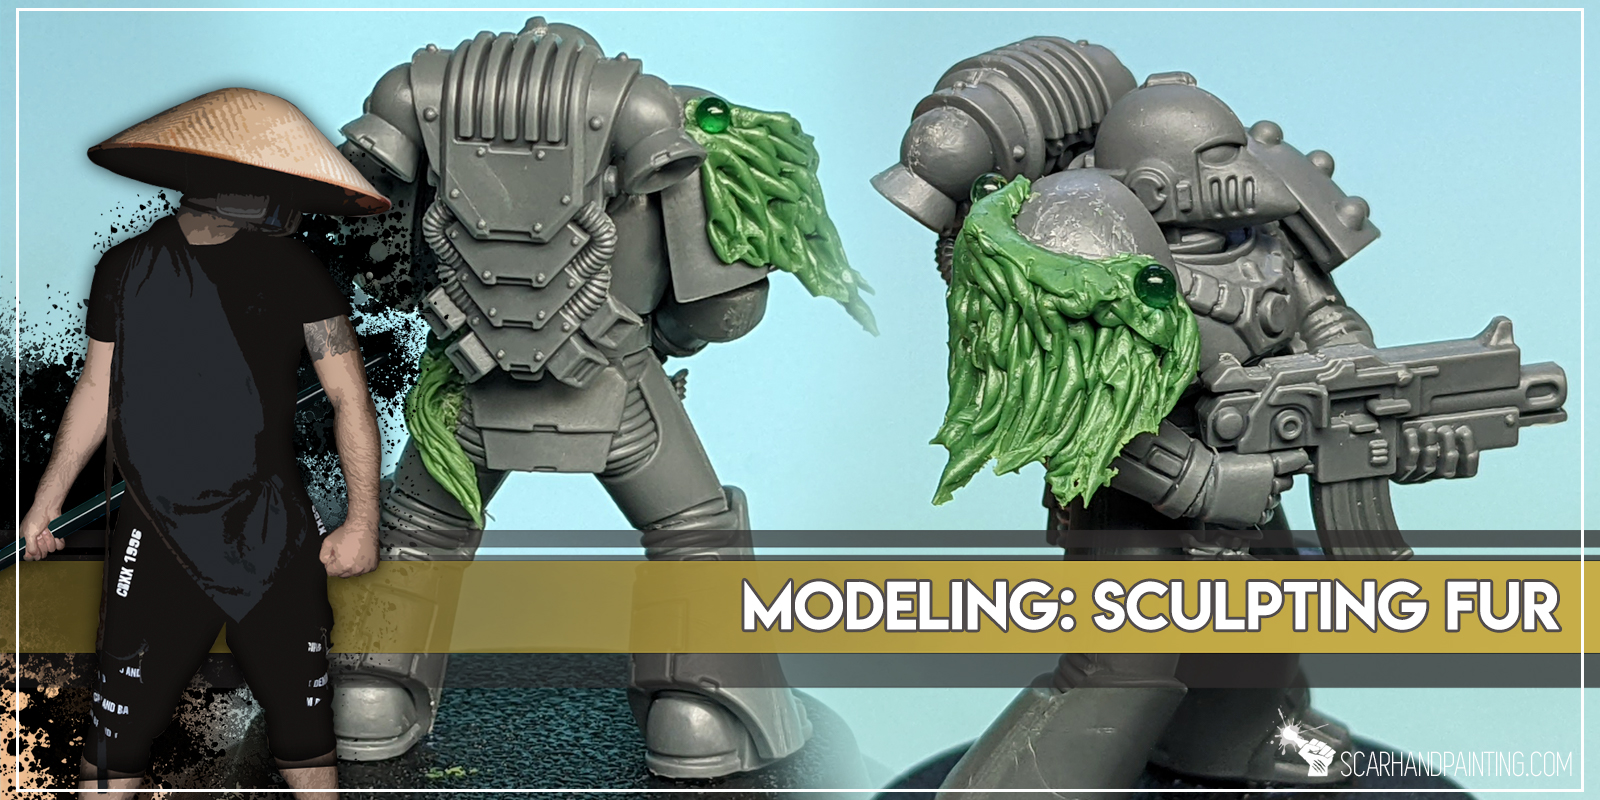
Sculpting fur on miniatures might seem a bit difficult. Still with new Codes: Chaos Space Marines hitting the stores, 2nd edition of Horus Heresy ravaging countless battlefields, Warcry: Heart of Ghur at the horizon and oldies such as Mordheim living the life as never before (not to mention furry going mainstream) – I’d imagine a lot of miniatures hobbyists wouldn’t mind a simple yet effective fur sculpting tutorial. I actually managed to post one many years ago, sadly it’s not up to nowadays standards. This is why I decided to completely revamp the article. If you’re one of the hobbyists aiming to adorn some of them Horus Heresy Space Wolves, or dig the furry style of Mordheim Kislevites – buckle up and enjoy, as this tutorial is for you!
Before we start, some notes:

The Basics:
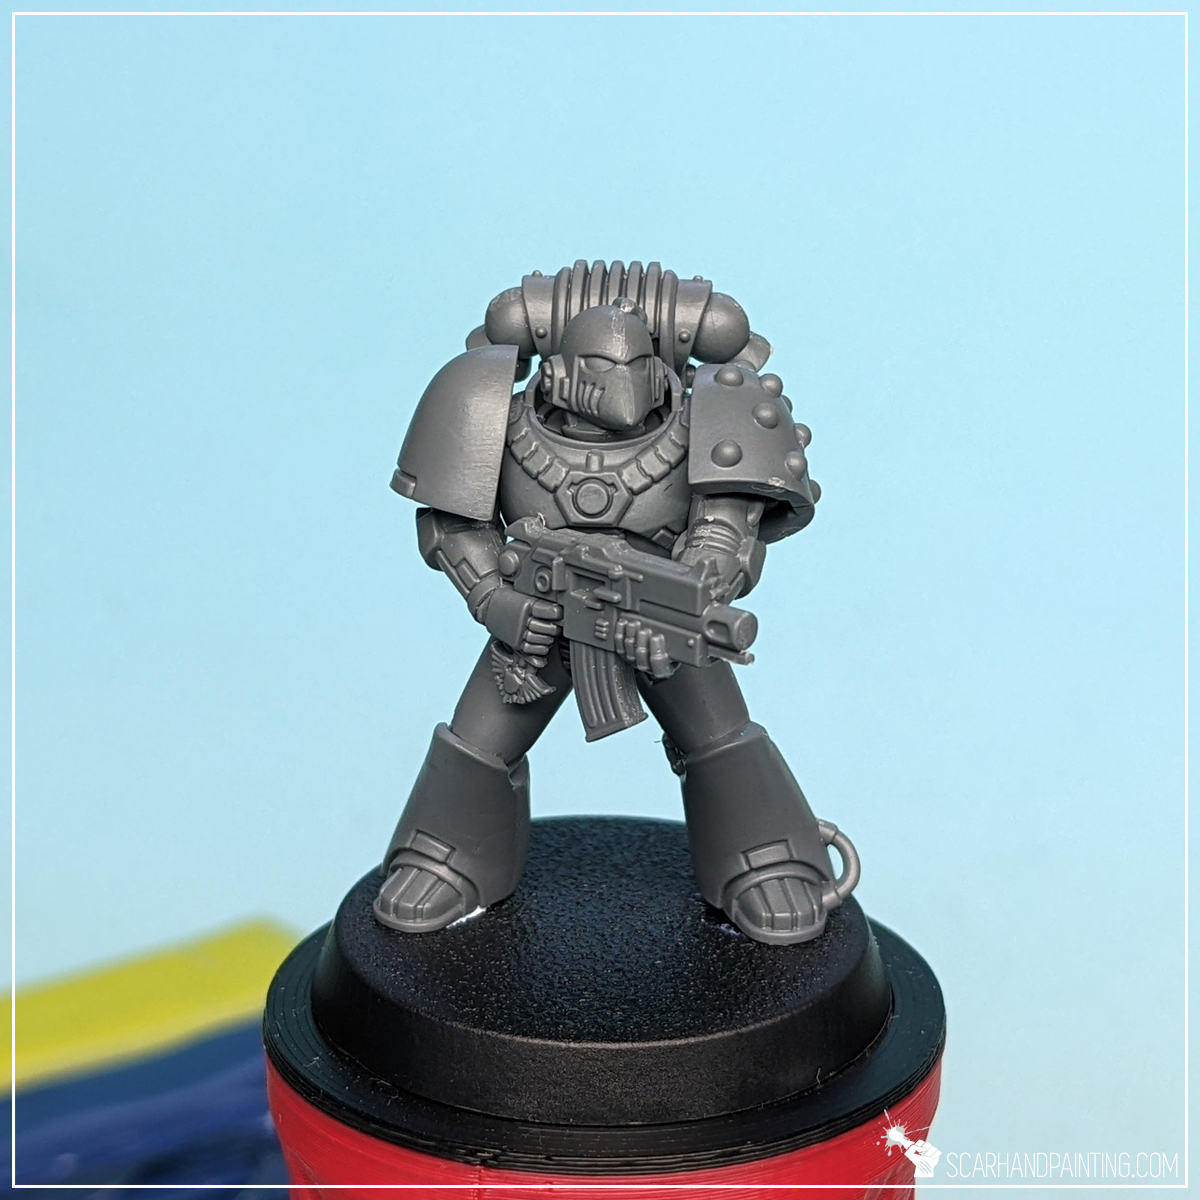
Before we go on a sculpting rampage, let’s talk some basics. The entire process is rather simple and consists of preparation and few main steps, after which you repeat the steps until satisfied. I assume standard Green Stuff is the most popular and available sculpting material out there thus I chose to use it for this tutorial. Apart from Green Stuff you will also need a proper sculpting tool, some cyanoacrylate glue and a miniature to work on.
Mix a piece of Green Stuff until it’s ready and make small balls out of it. Once done, we are ready to begin fur sculpting.
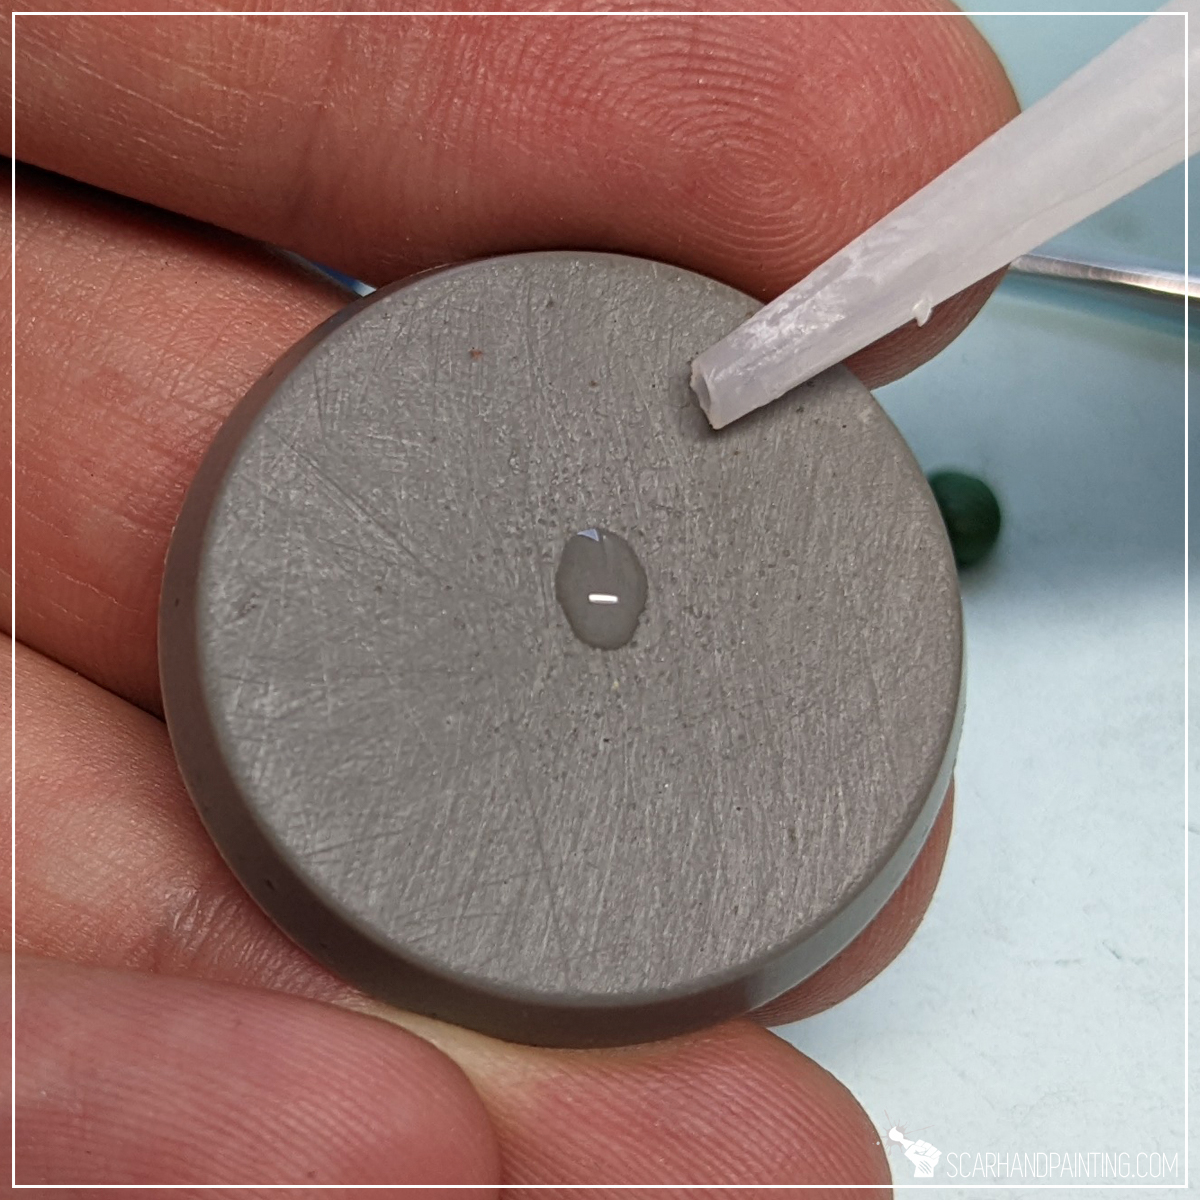

Step one: Glue
I started by applying a small drop of cyanoacrylate glue (Super Glue) onto the surface. This is to ensure instant binding between Green Stuff and the miniature, thus making the sculpting process so much easier.


Step two: Apply Green Stuff
Next I applied a small ball of Green Stuff on top of the glue and flattened it slightly with a fingertip.

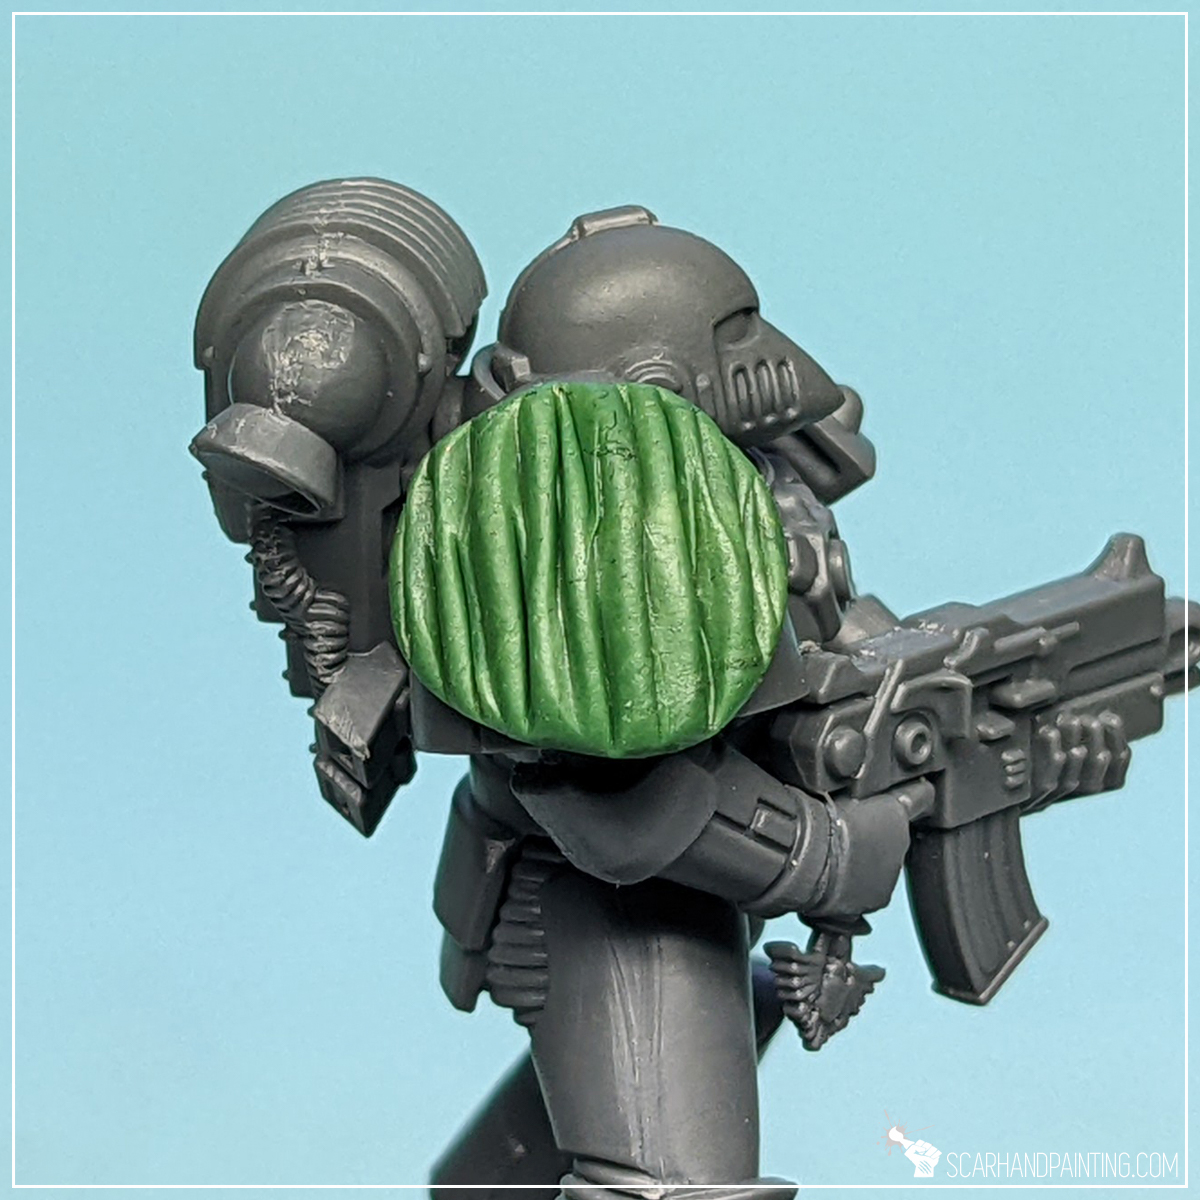
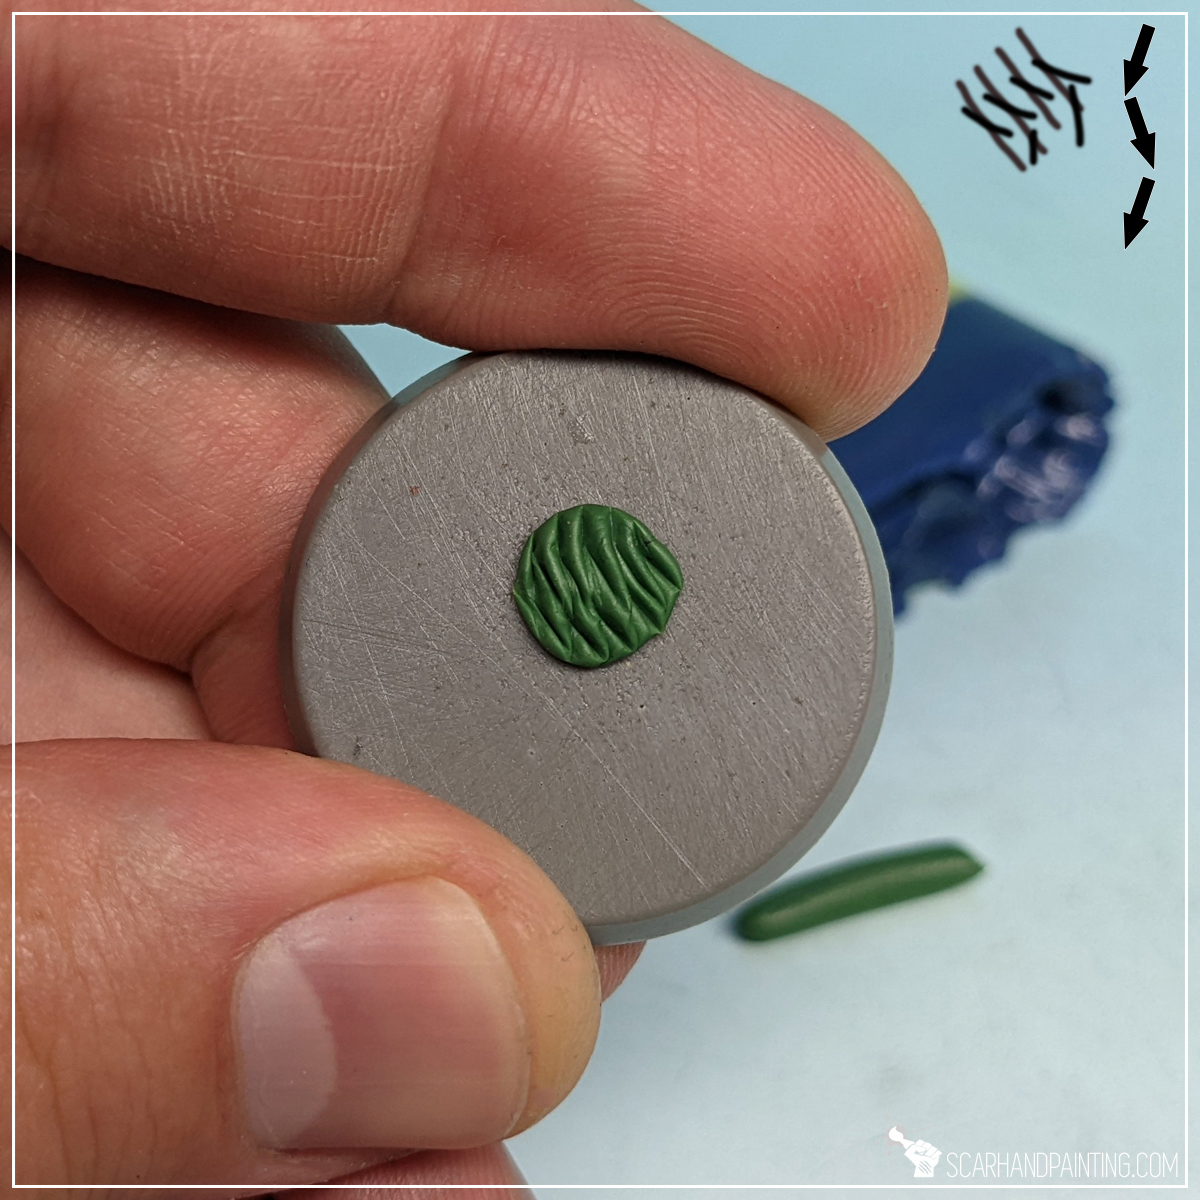
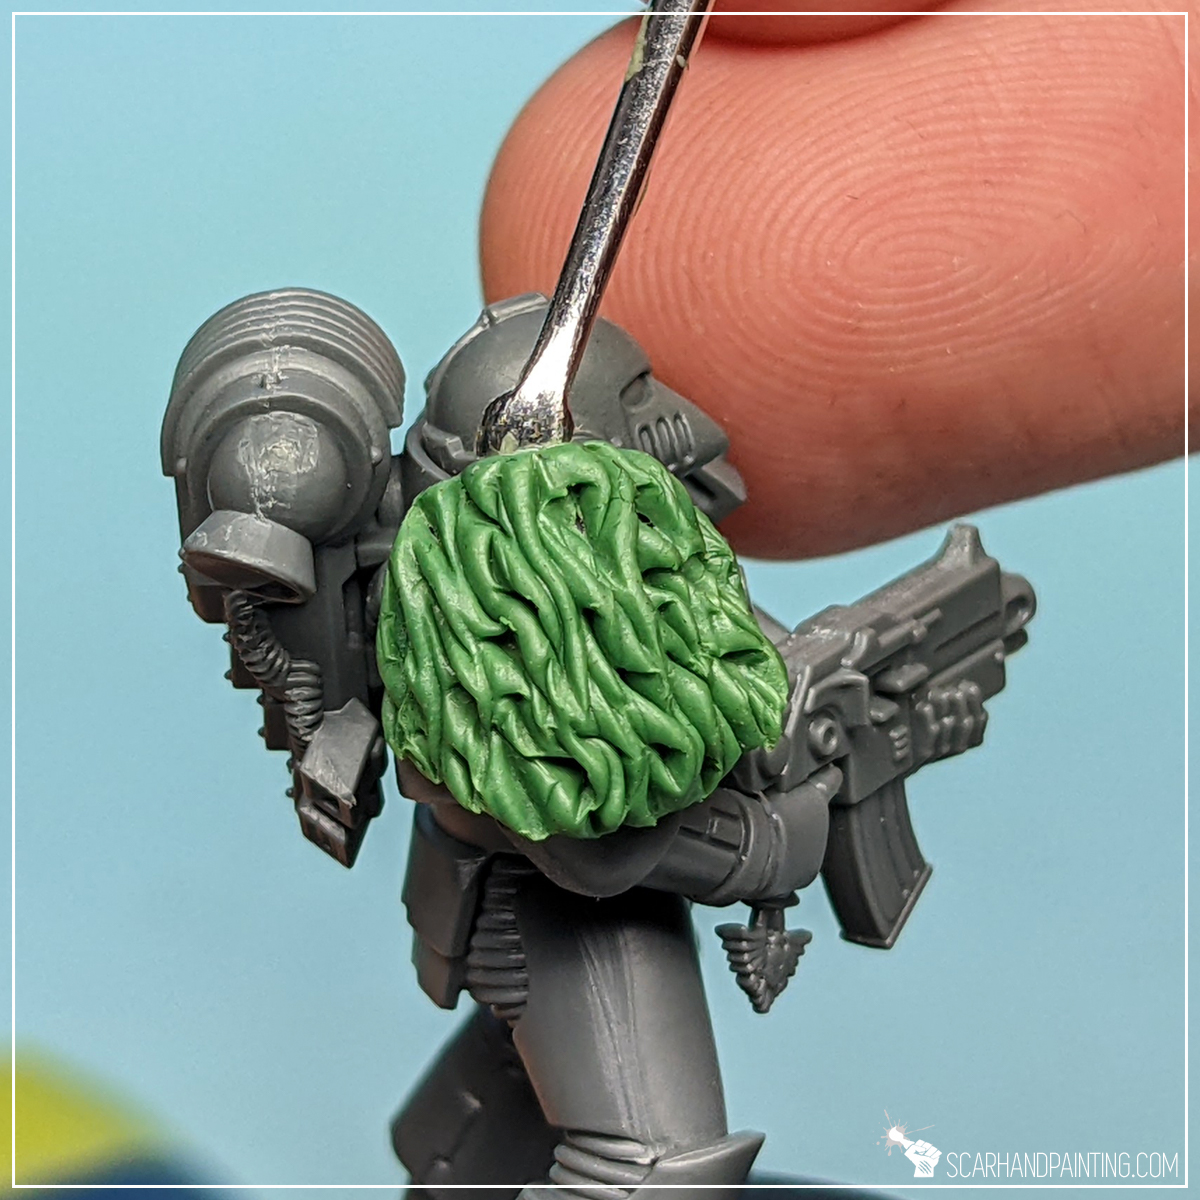
Step three: Straight lines
Using an edge of a sculpting tool, I then sculpted a series of relatively straight vertical lines. These doesn’t have to be perfect or even. Just a bunch of lines from top to bottom as can be seen in the pictures above.
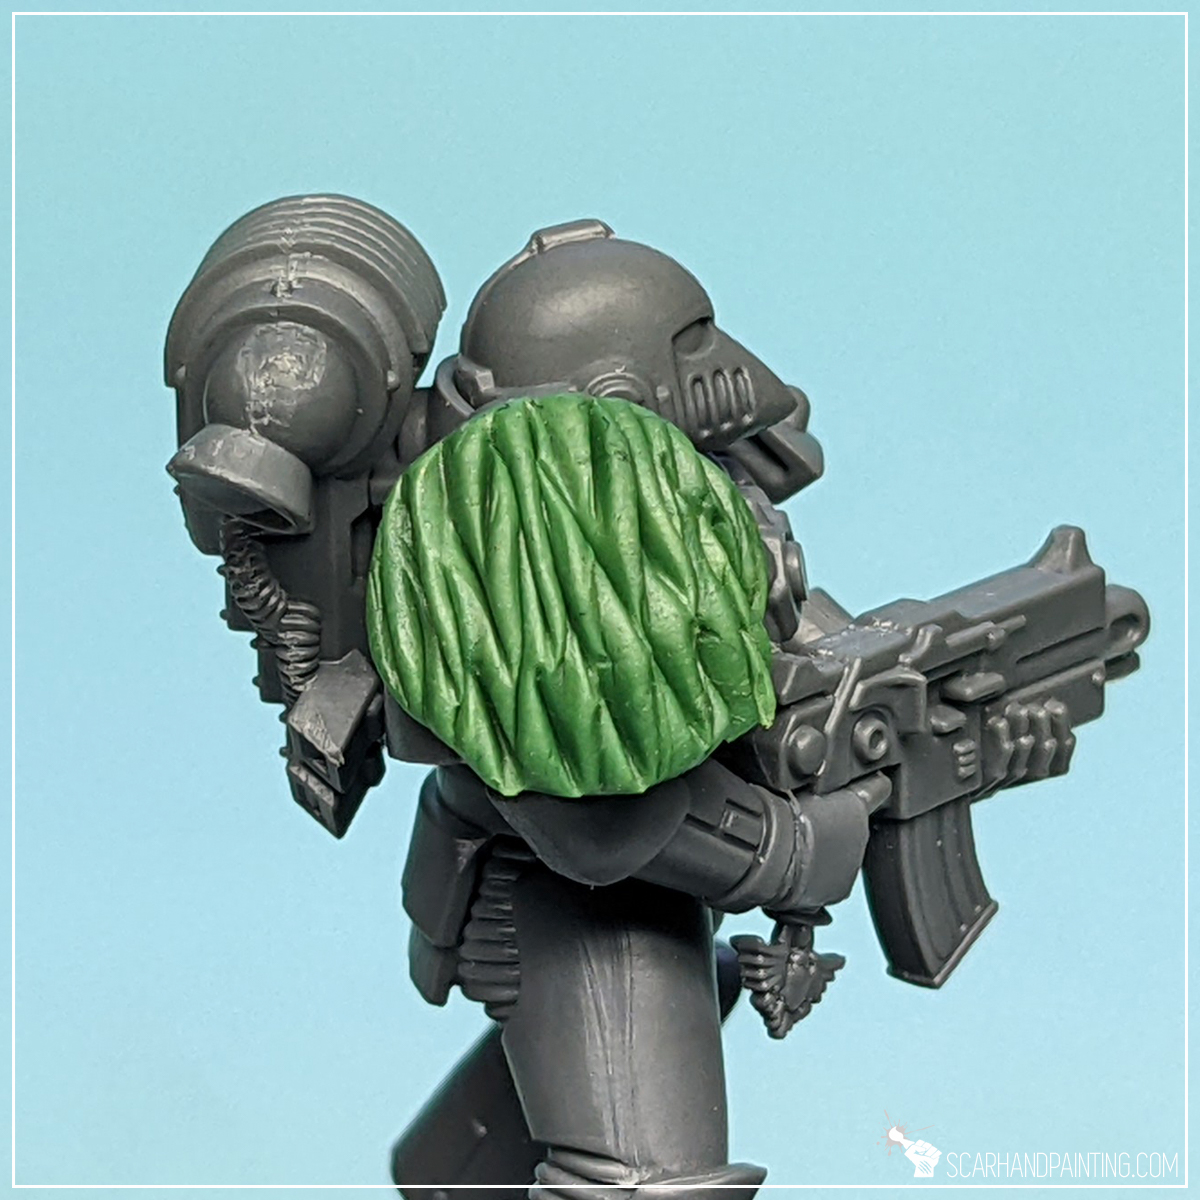
Step four: Diagonal texture
I then cut and pushed with a tip of a sculpting tool to add some diagonal lines, shortening and sharpening the lines from previous step.

Step five: Messy texture
Finally I used the very tip of the sculpting tool, gently pushing it in and leveraging, pushing particular strains of fur up and to the side, so they became rounded and a bit shaggy. This is basically how I sculpt fur on different surfaces.
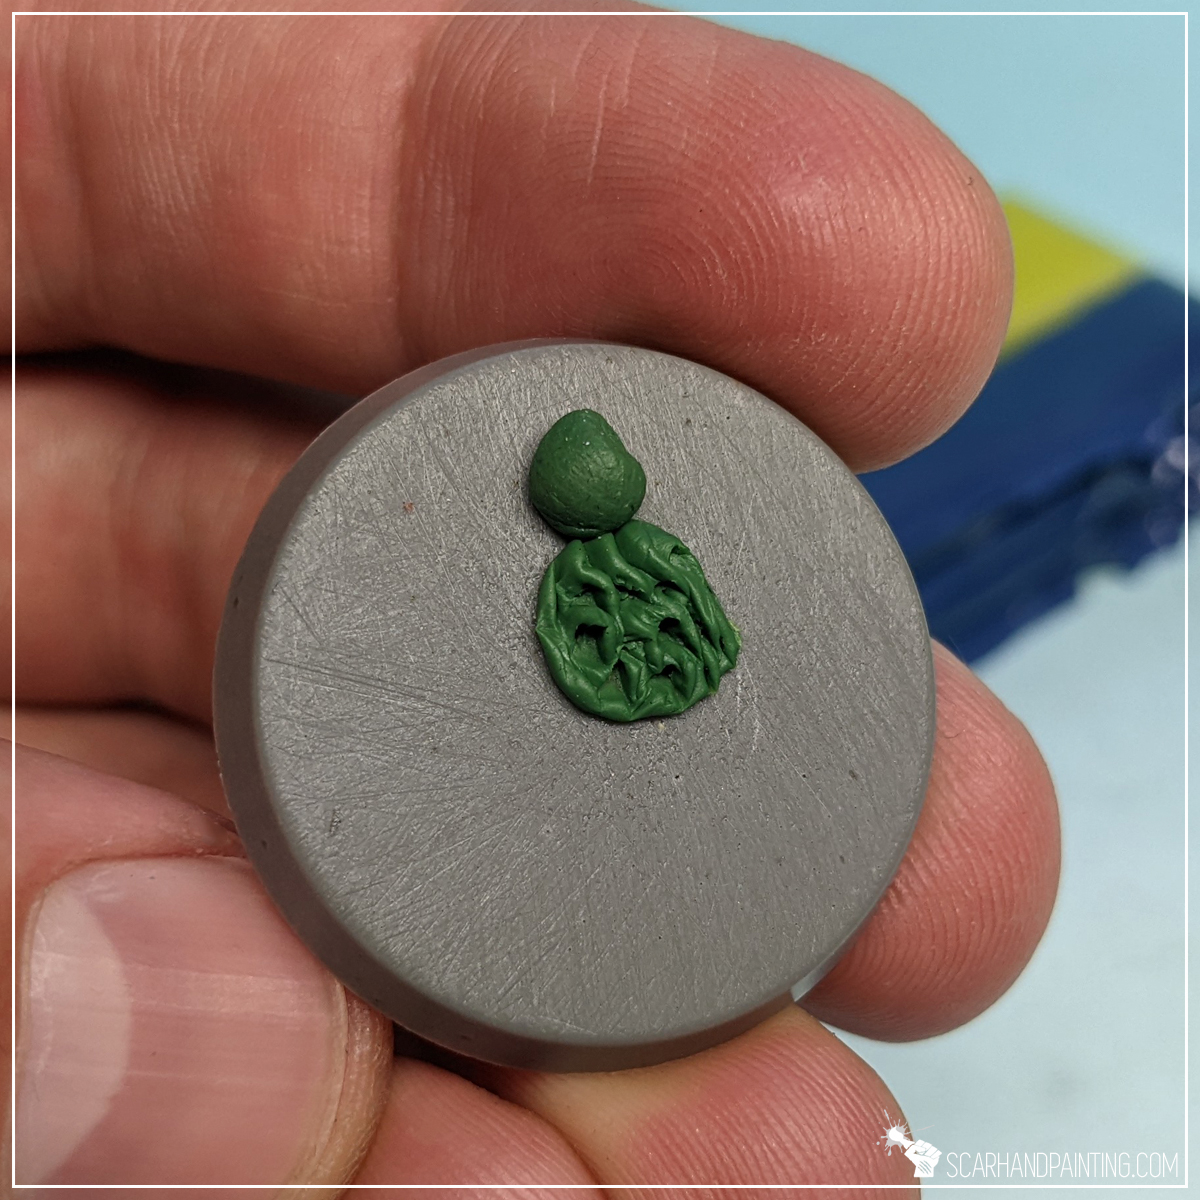
TIP:
You can repeat this step multiple times, by adding more balls of Green Stuff and sculpting intertwined layers on a larger surface, or to add volume.
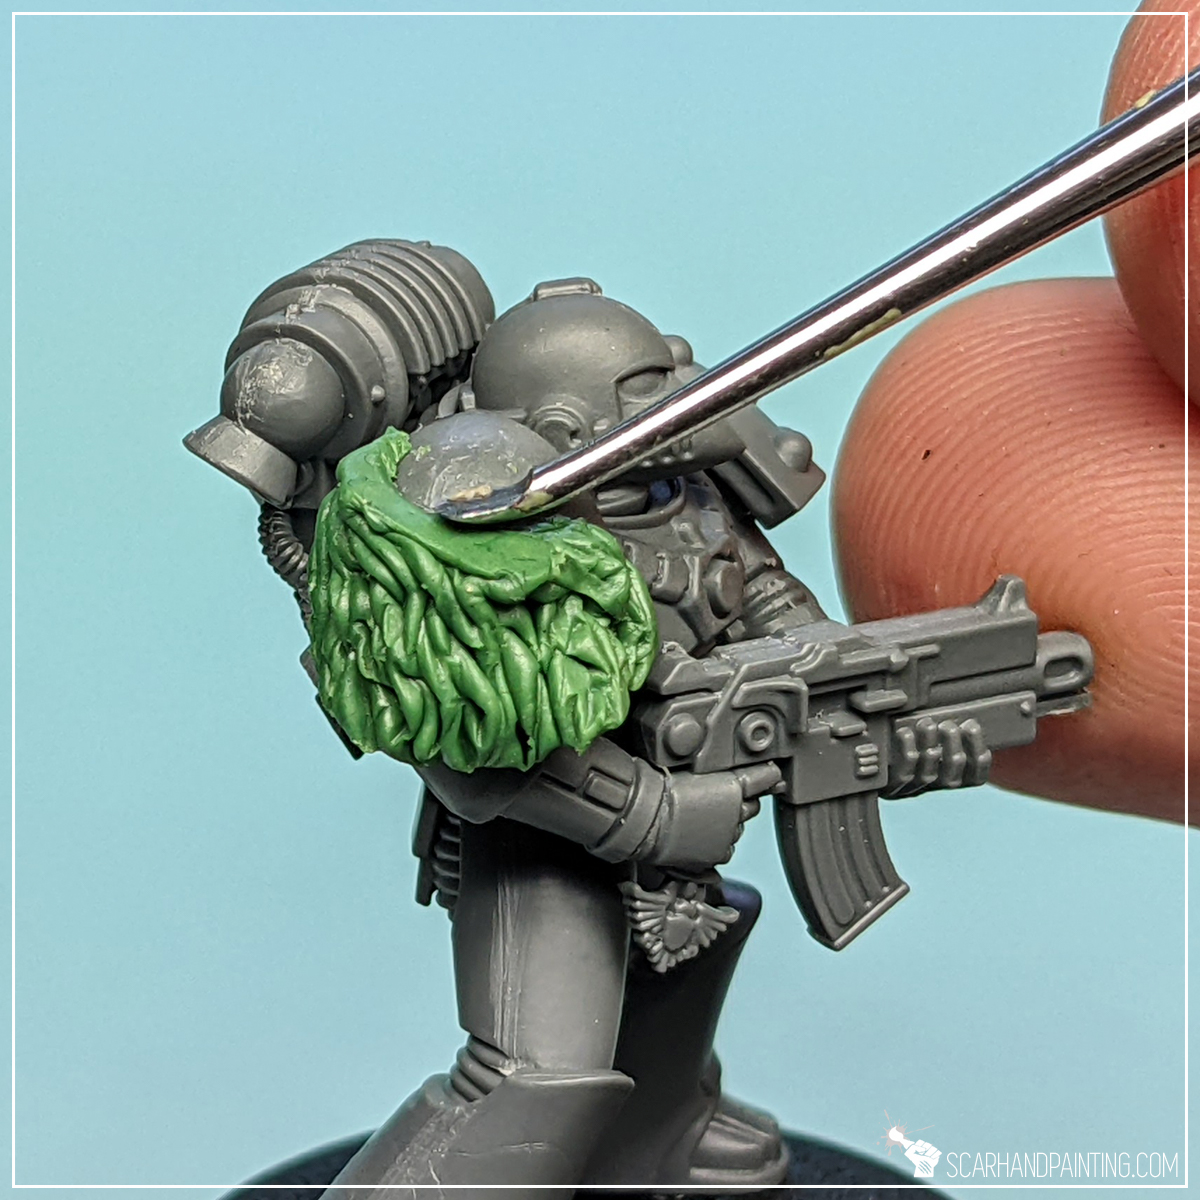
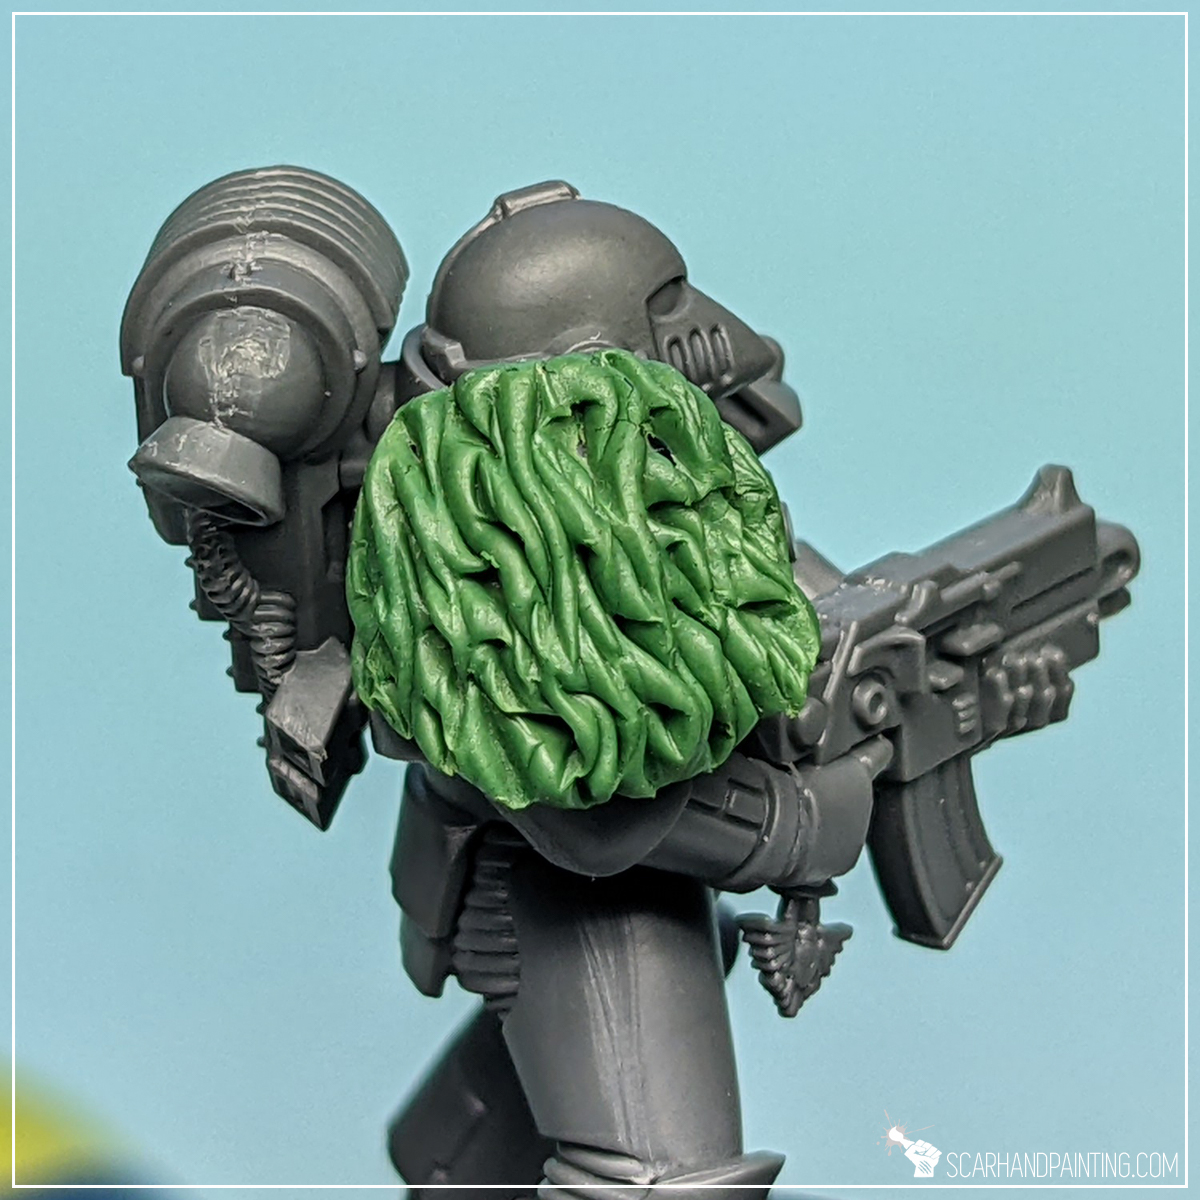
Step six: Shaping
Having a fur covered coat or a piece of gear is great, but to really make it feel at place, I recommend shaping it’s upper part to resemble a piece of tanned leather. It is quite simple. First I pushed a rounded tip of the sculpting tool between excess fur on top and plastic surface. I then pulled down gently, to squeeze the upper fur. I’ve done this multiple times to get a nice smooth line, then smoothed if further. Depending on how much fur gets underneath the flat area it can either rest on top, or be squeezed further to look like flapping around. It’s all up to your personal tastes.
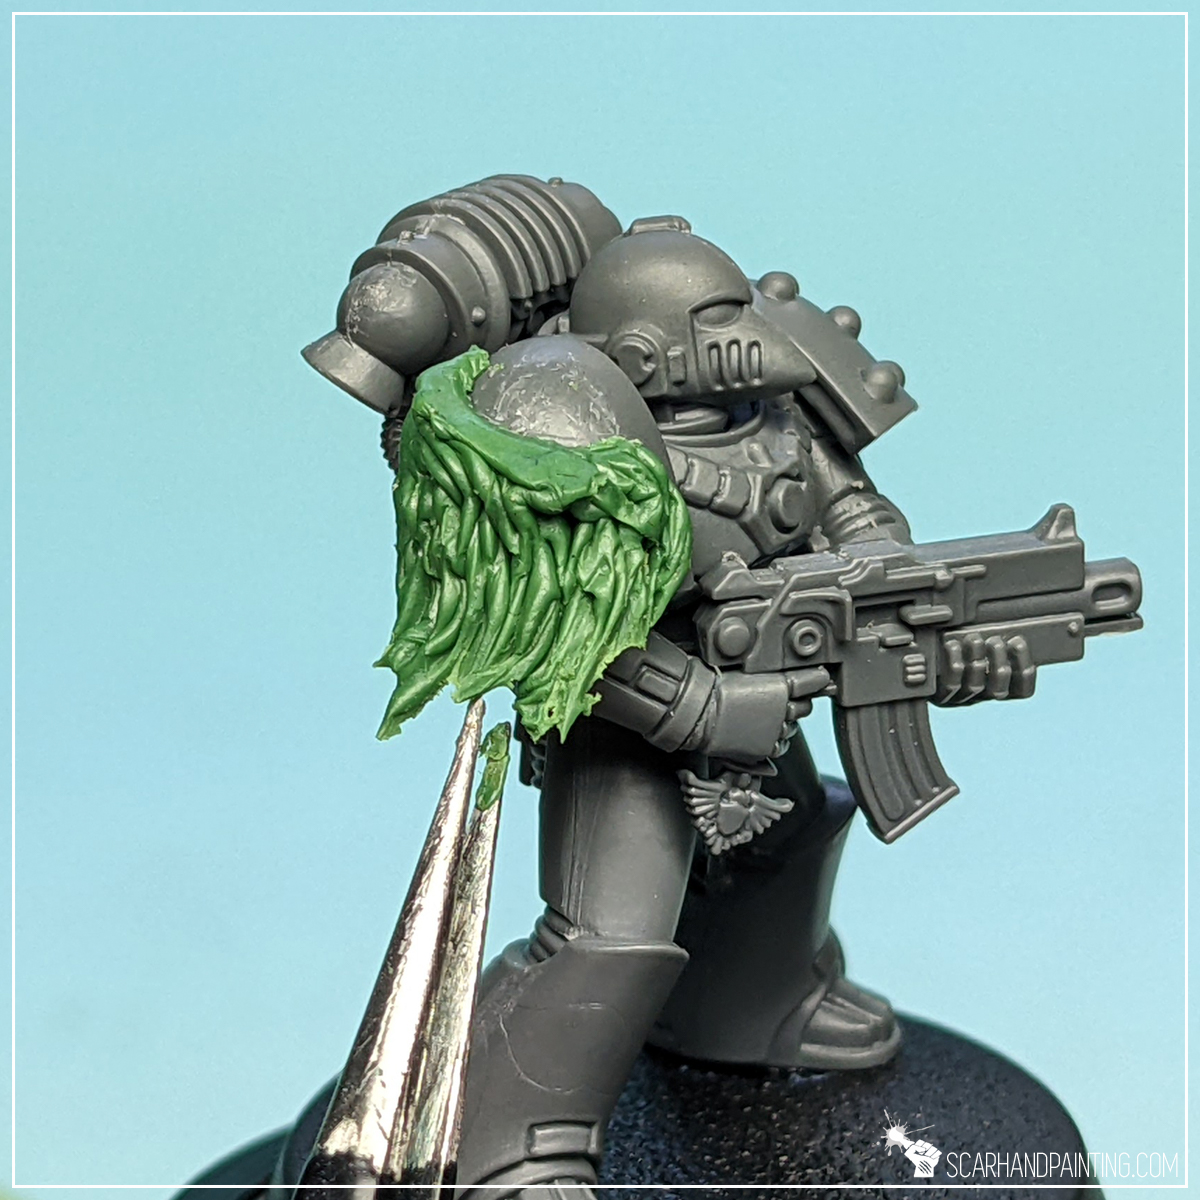
Step seven: Ragged edges
Very last step was to add motion and rough up the lower edge. I used pliers to gently grab and pull the lower part in the direction of where I felt the strains would lean. This technique allows for a really good control of the final shape.
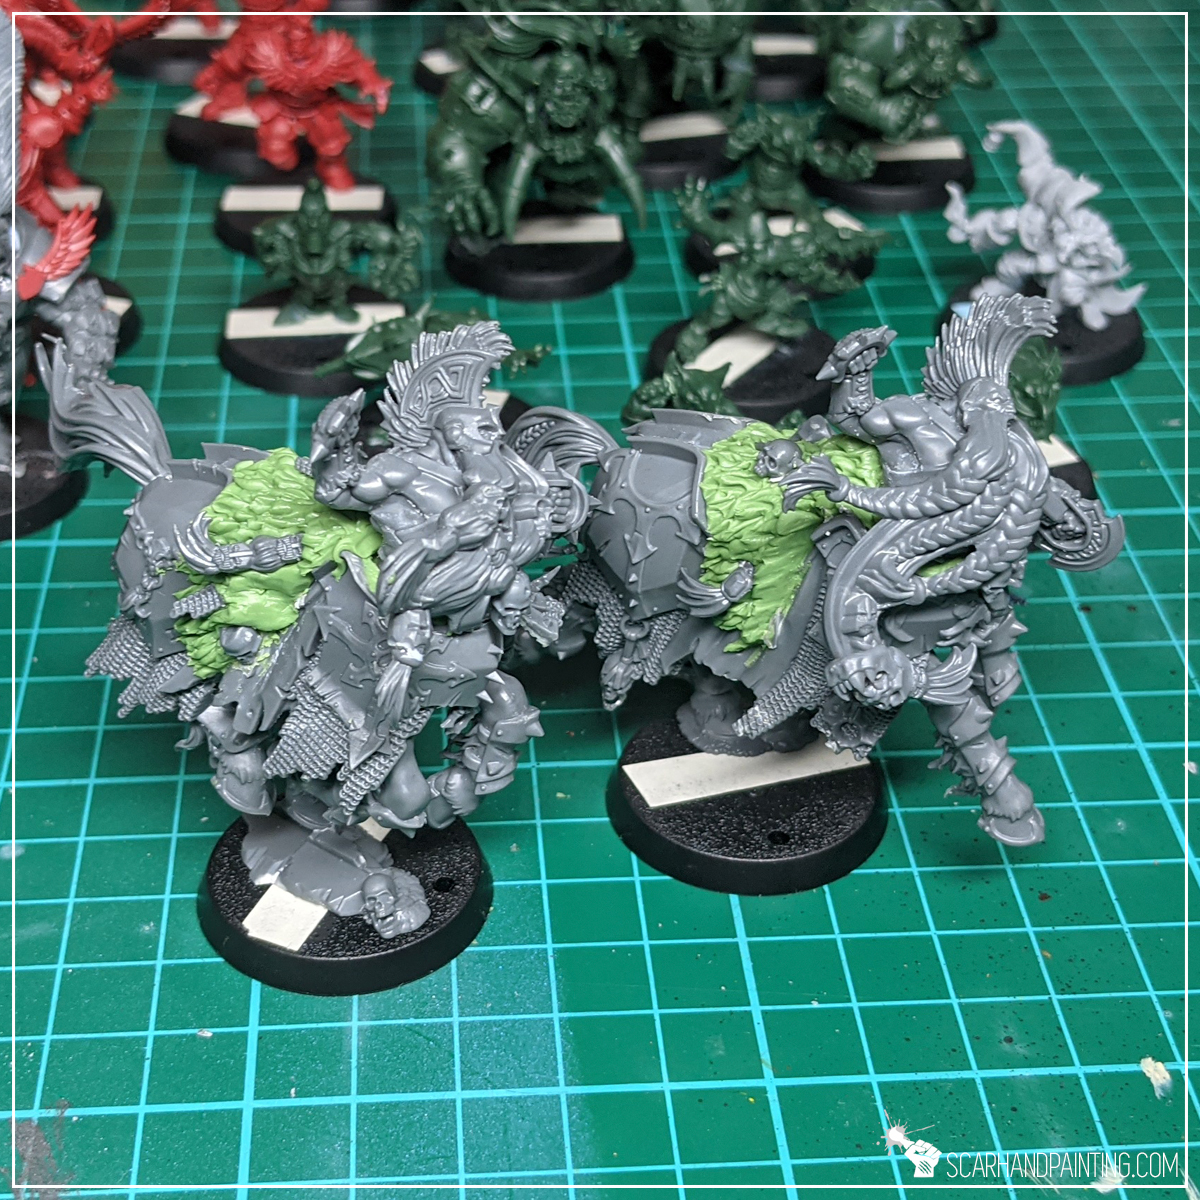
That’s it. Job done. Few bolts, skulls or other adornments here and there to give an impression of fur being bolted to the armor and the sculpting process is complete. Nothing special, just a piece of leather with fur dangling around to buff that Space Wolf theme.
Below are some other examples of this tutorial being used in practice.


I hope you find this tutorial interesting. Be sure to let me know your thoughts in the comments below or via Facebook or Instagram. I would also appreciate if you considered sharing this content with your friends, who might find it useful. Finally if you are looking for a professional warhammer 40k miniatures painting service, be sure to contact me with this contact form. I always reply within 24 hours, after which please check out your spam folder.
Welcome to tutorial for modelling Flames. Here I will present to you a Step-by-step guide on how to create fantastic, highly detailed flames for miniatures in a matter of seconds.
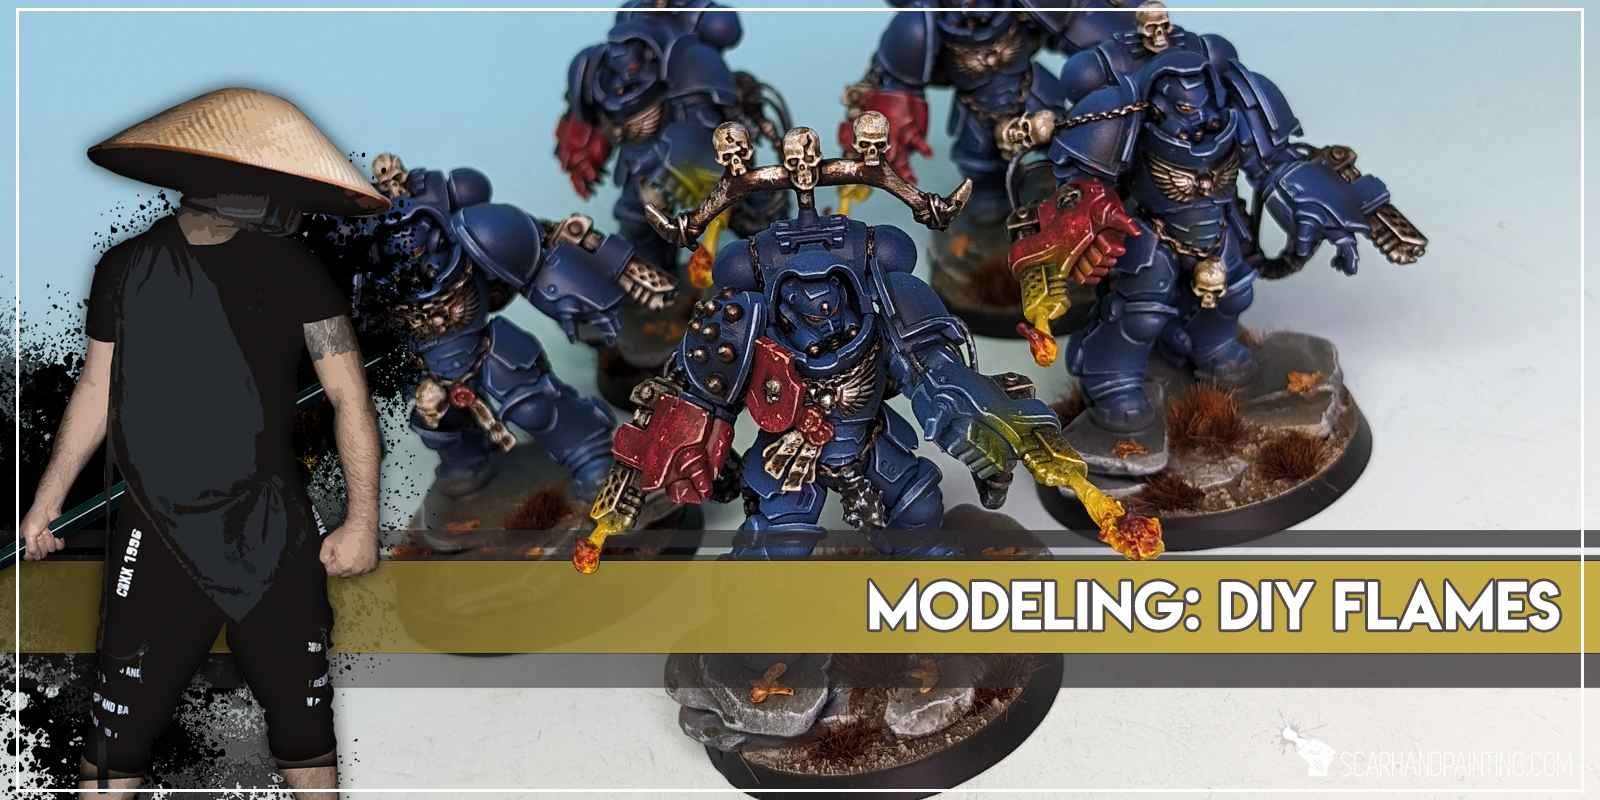
Blazing flamethrowers, crackling braziers, torches or balls of magical fire – in the world of miniatures wargames flames add a lot of character and dynamic to our favorite tiny characters. With 3d printing prevalence and a lot of bitz selling companies getting your hands on some awesome parts has never been easier. Still why pay and wait, when you can make your own flames of chosen size and shape in a matter of seconds and from materials you probably already have at home!
Before we start, as usual, please take note that what works for me might not necessarily work for you.
Step one: Foundation
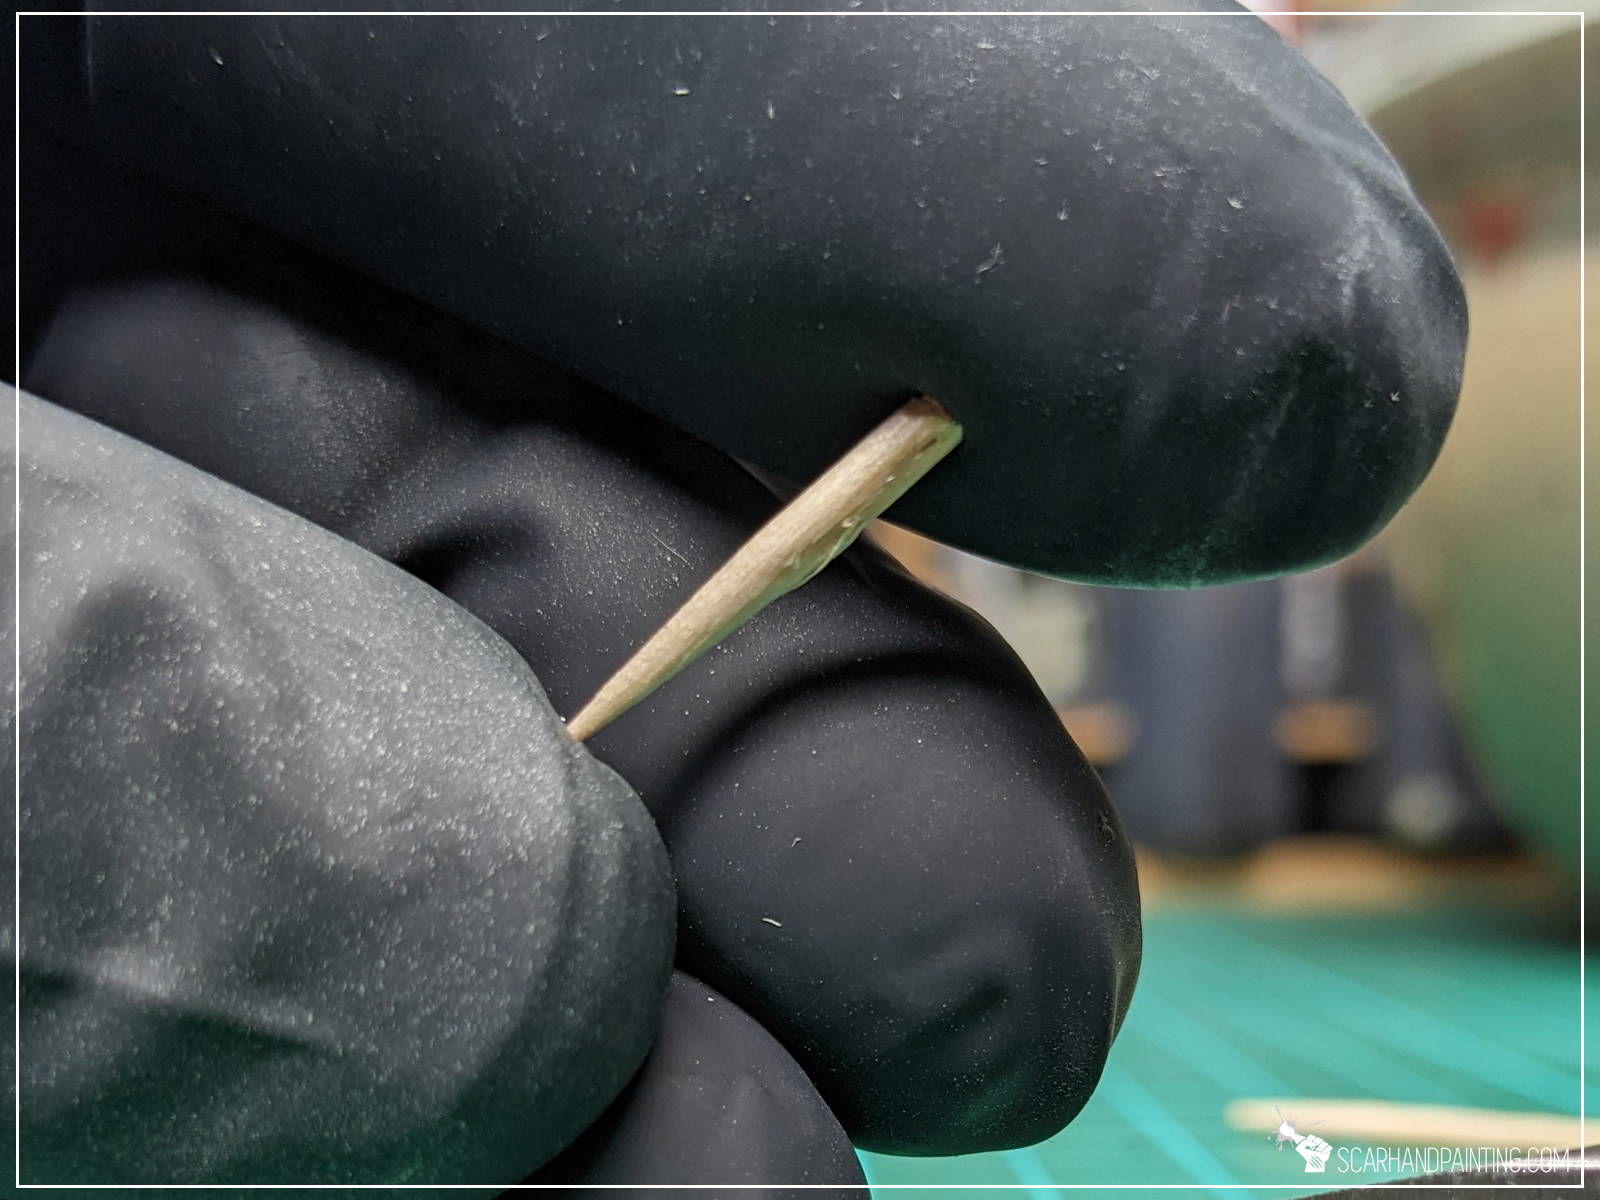
It is best to start by finding a base shape to build the flame around. It can be anything solid including toothpick, wire, piece of plastic, or even the miniatures themselves. In this case, with an idea of flames gushing out of a flamethrower, I cut a small piece of a toothpick.

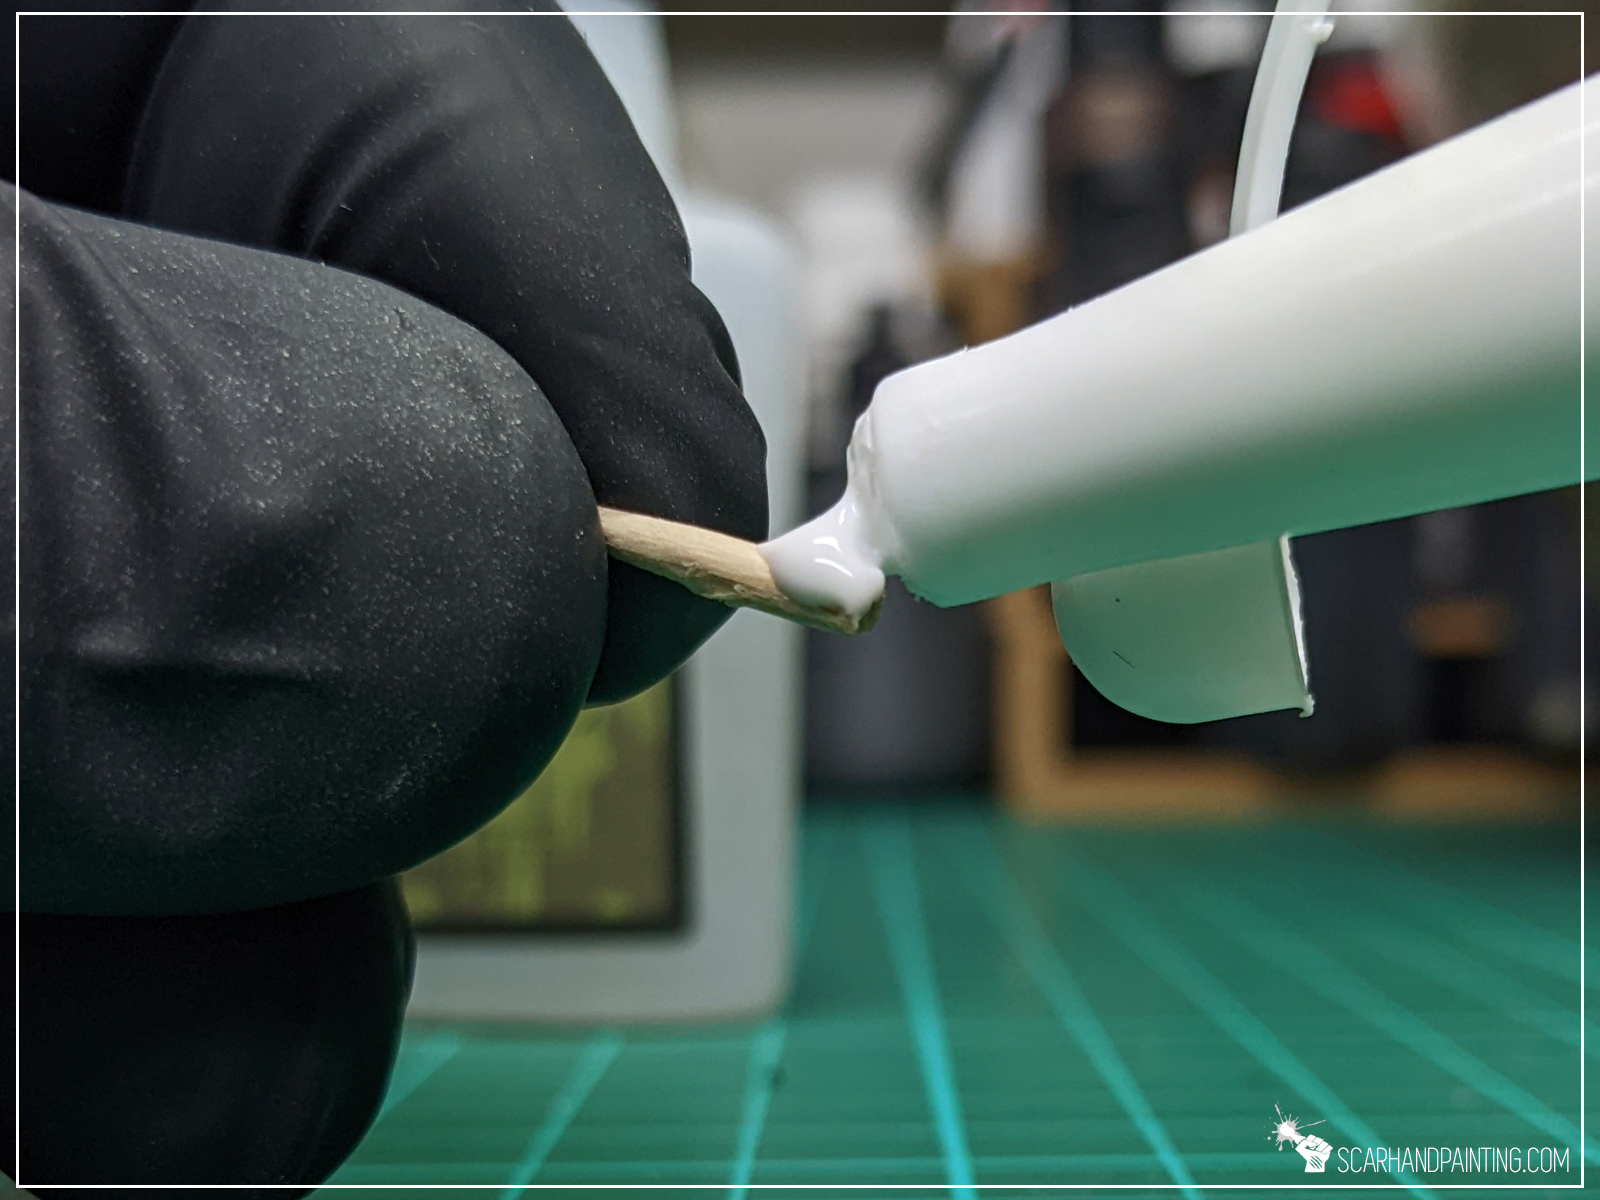
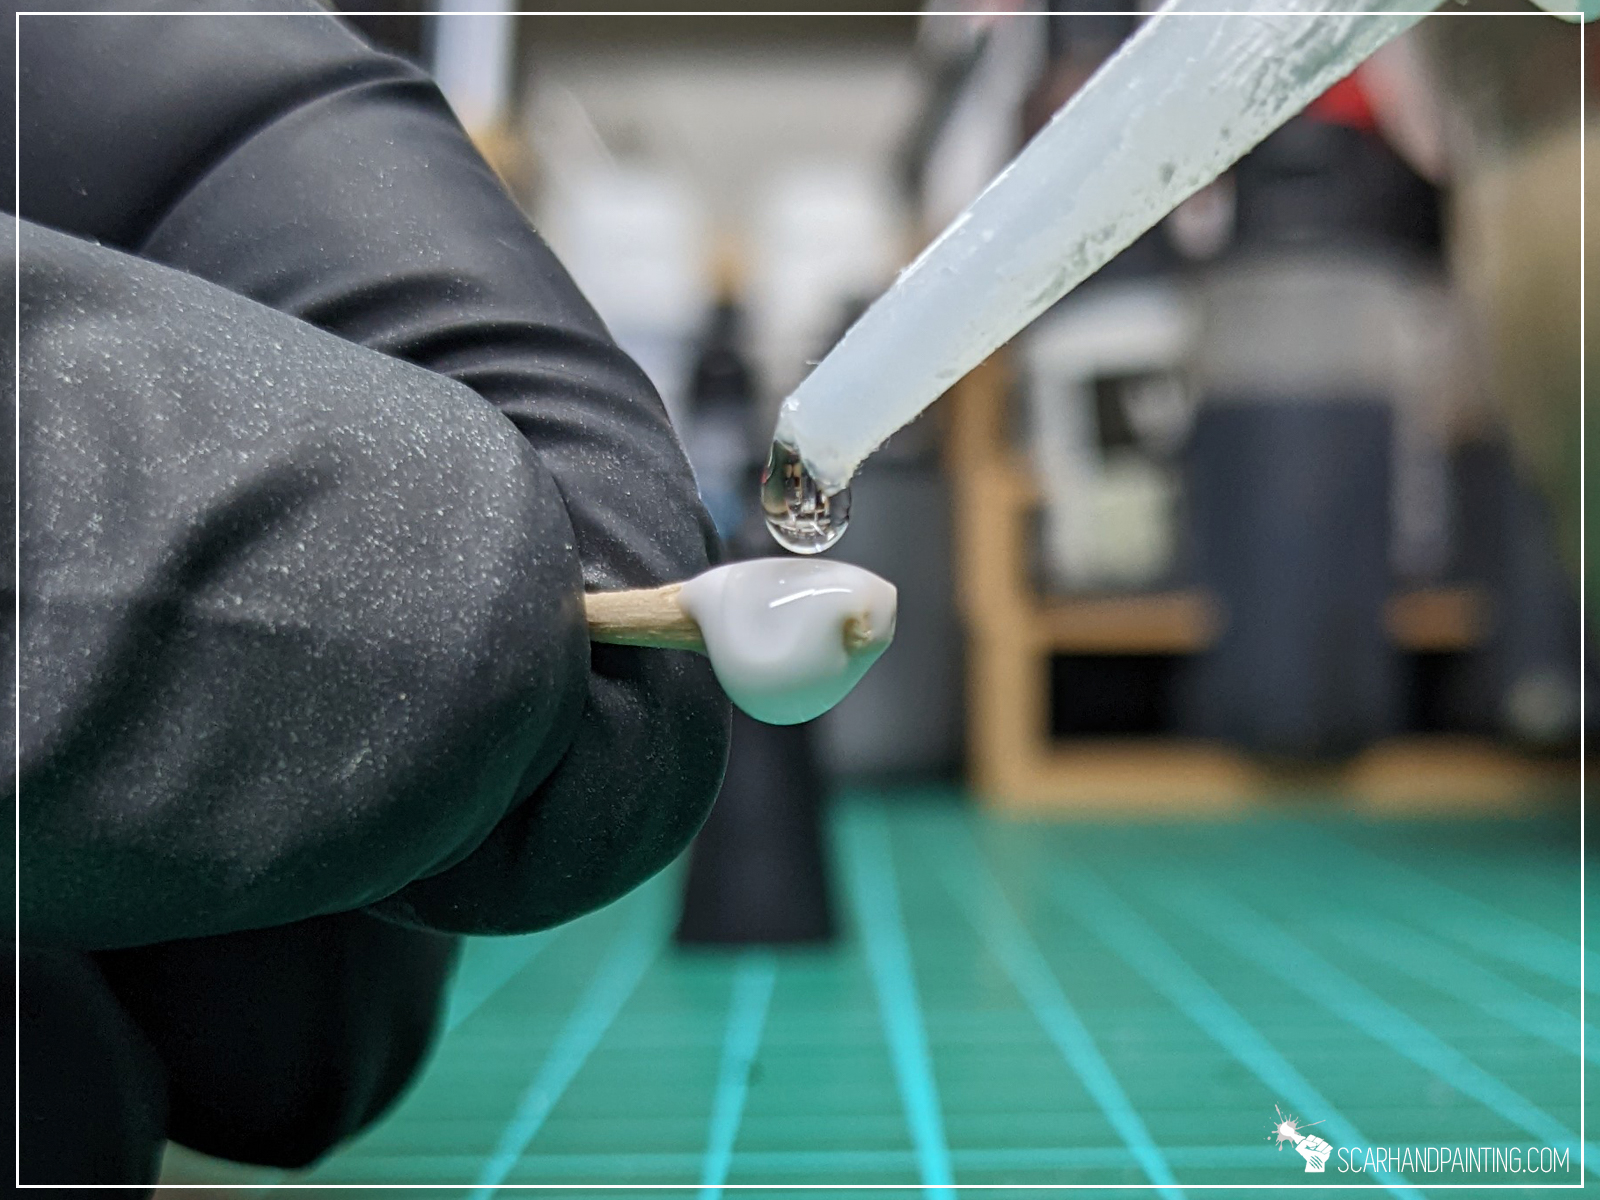
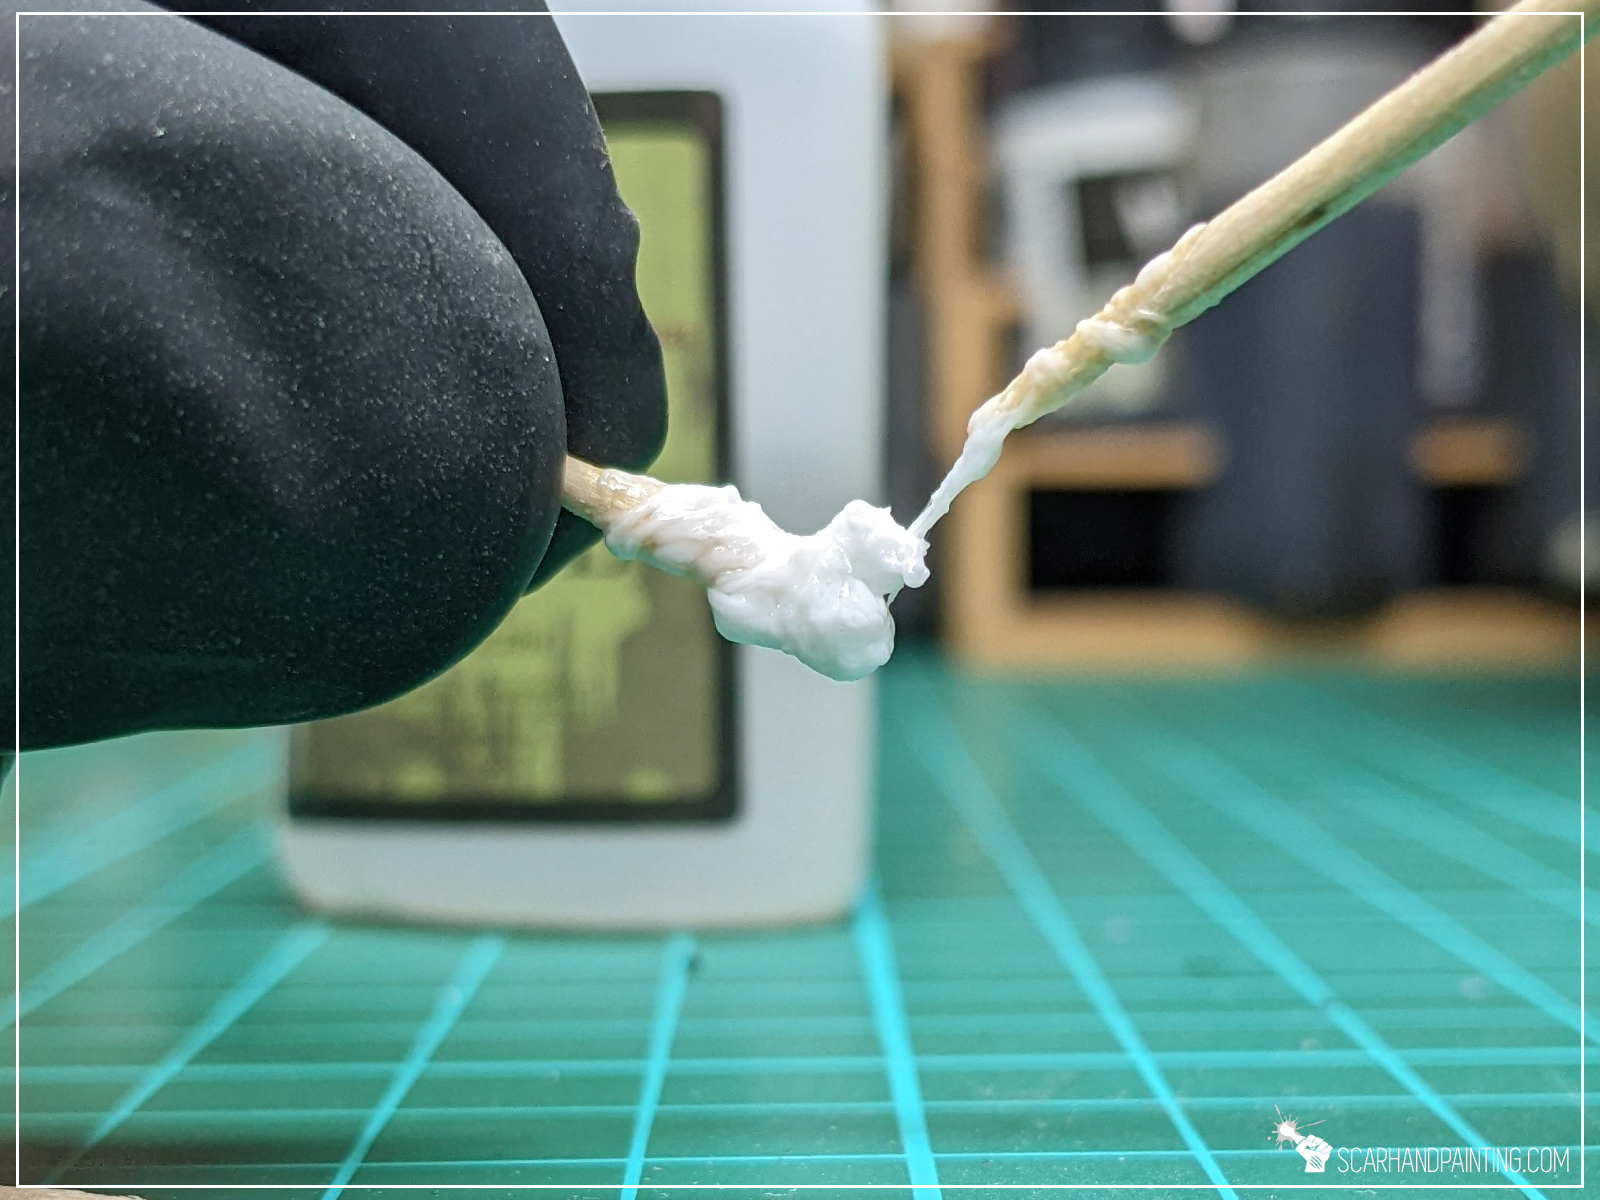
Step two: Ingredients
Next I poured few small drops of PVA glue onto the piece of toothpick. Just enough to cover the wider end. Right after that, while PVA was still wet, I poured Super Glue on top and moved the shape around so that Super Glue covered entire PVA beneath.
Step three: Shape
Here’s where modelling kicks in. I used another toothpick to mix both glues and guide a quickly hardening ‘paste’ around and finally in one direction to form a cone. The mix creates an organic, irregular texture when drying, which provided additional detail to the flame.
It might seem difficult at first, but once you get how the ‘paste’ behaves it will be as simple as barely few moves of a toothpick to get a desired cone.

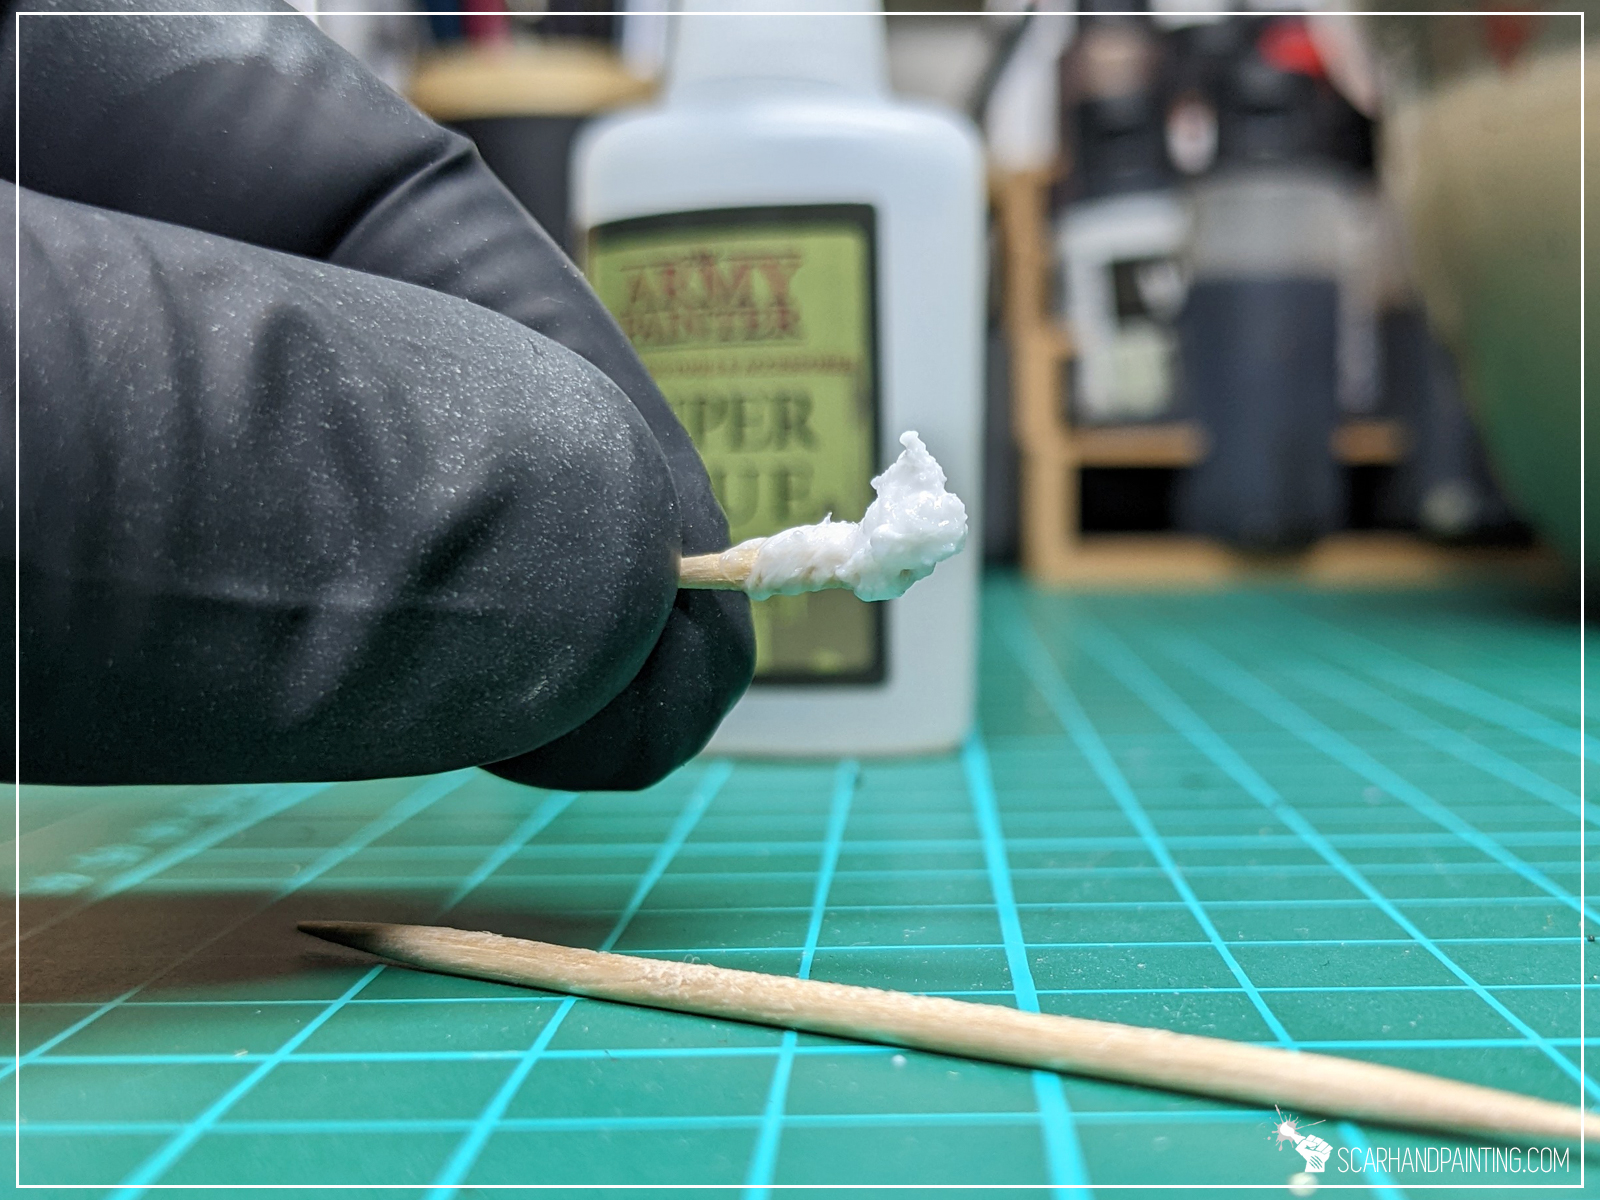
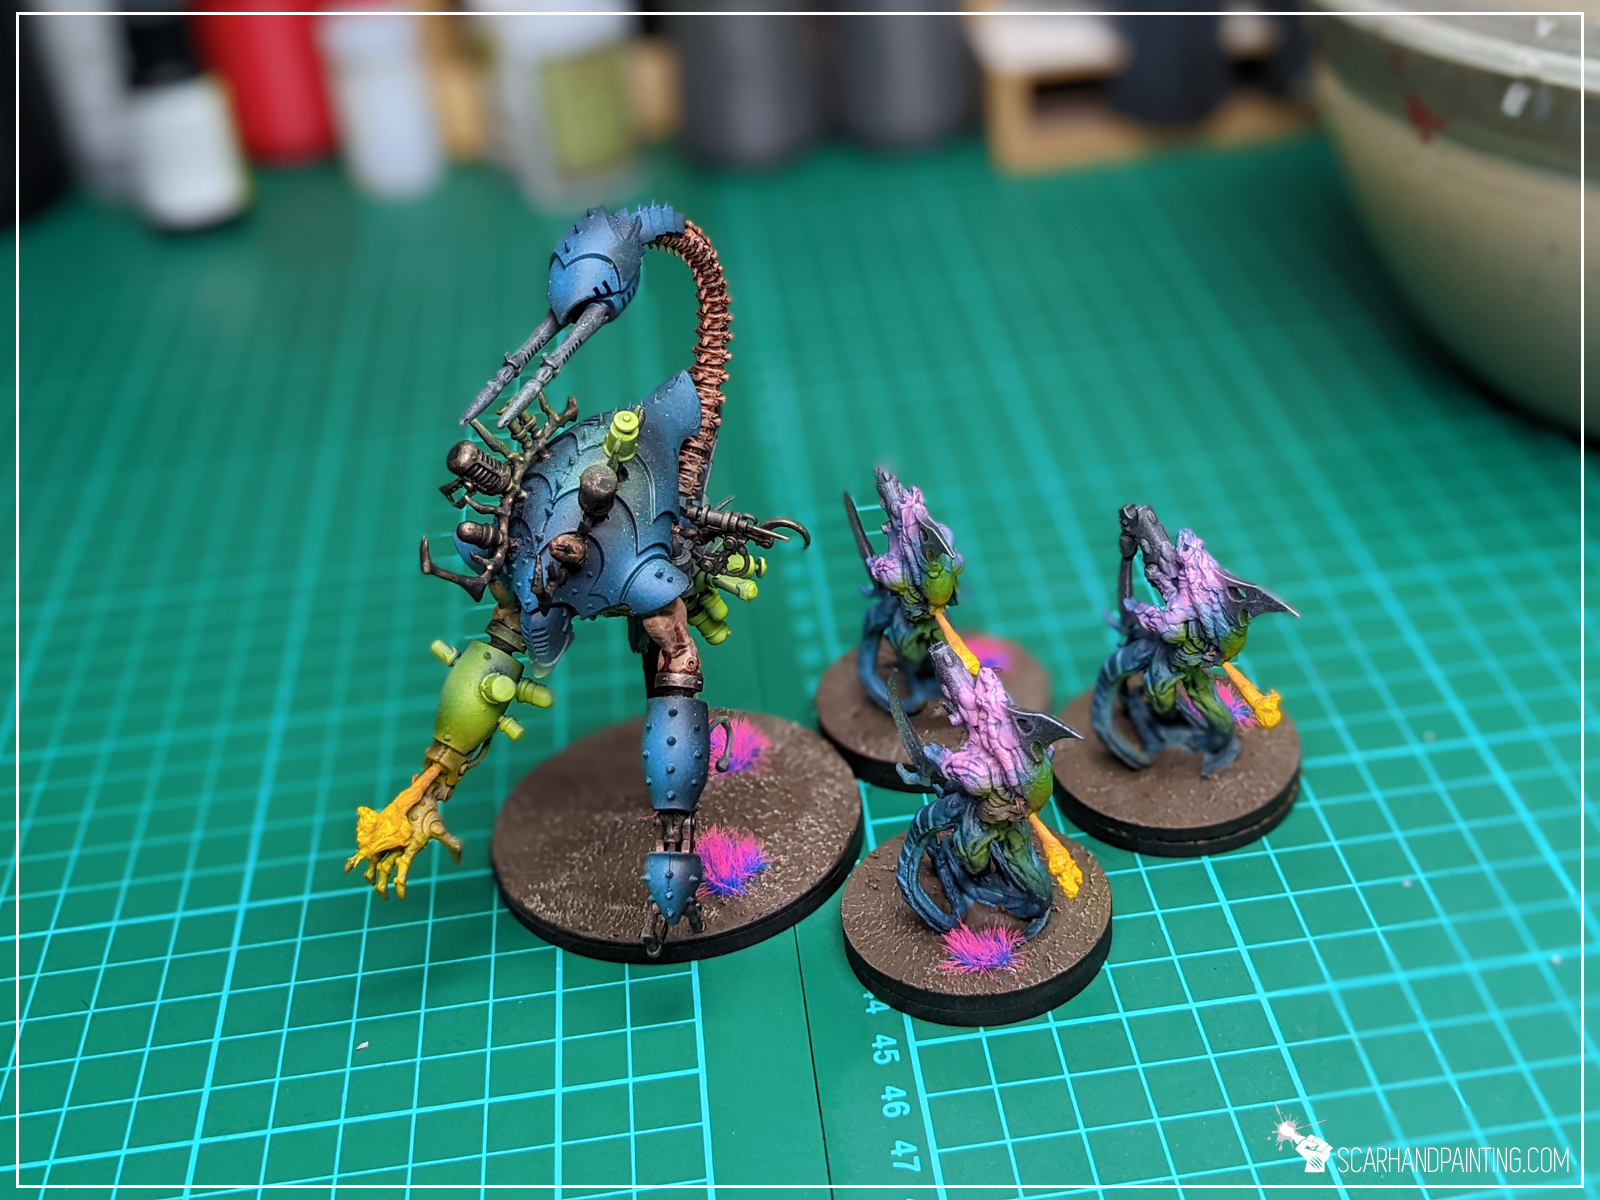
Three steps, that’s all it takes. With a bit of practice the process takes less than a minute and can be applied to any surface. Below are just some examples of the results:

I hope you find this tutorial interesting. Be sure to let me know your thoughts in the comments below or via Facebook or Instagram. I would also appreciate if you considered sharing this content with your friends, who might find it useful. Finally if you are looking for a professional miniatures painting service, be sure to contact me with this contact form. I always reply within 24 hours, after which please check out your spam folder.

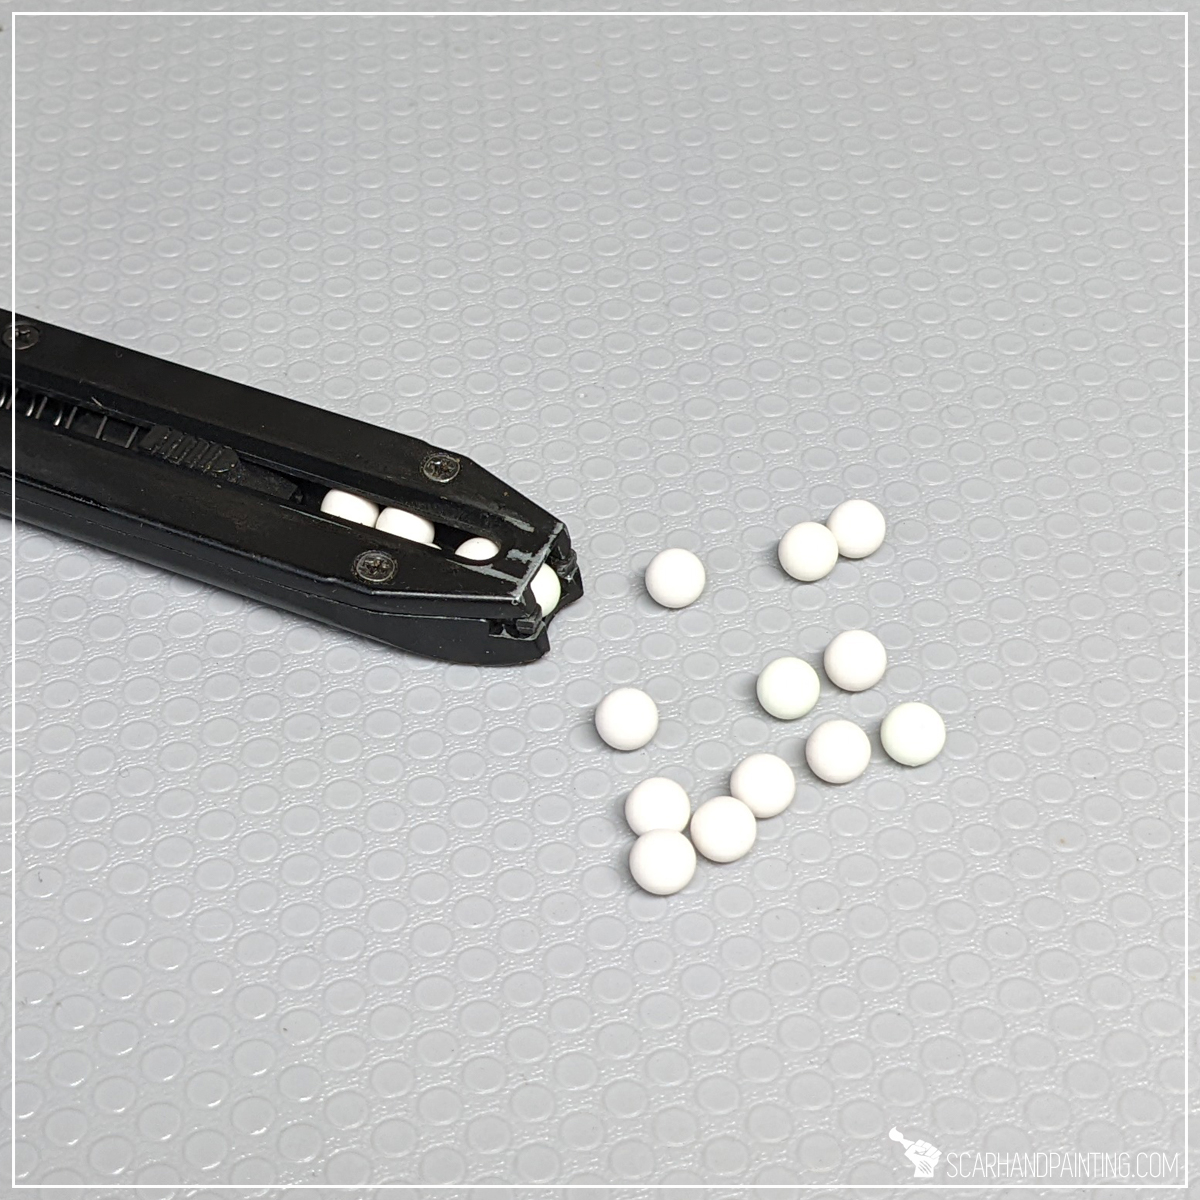
Forget about tiresome Greenstuff rolling! From now on, when modelling Lava bases, the only thing you’ll need to do is to pick a ready-to-use tiny ball from a box! Below is a short guide on how to gain access to unlimited tiny modelling balls.

Remember that time when you laboriously rolled about three dozen Greenstuff balls only to drop half of them on the messy floor and then accidentally squash the rest to a pulp? From this day onward traumatic events like this are forever left behind you. No more rolling, no more squashing! As of now you will be able to draw an unlimited number of tiny balls, perfect for any kind of miniatures modelling, from these three sources:
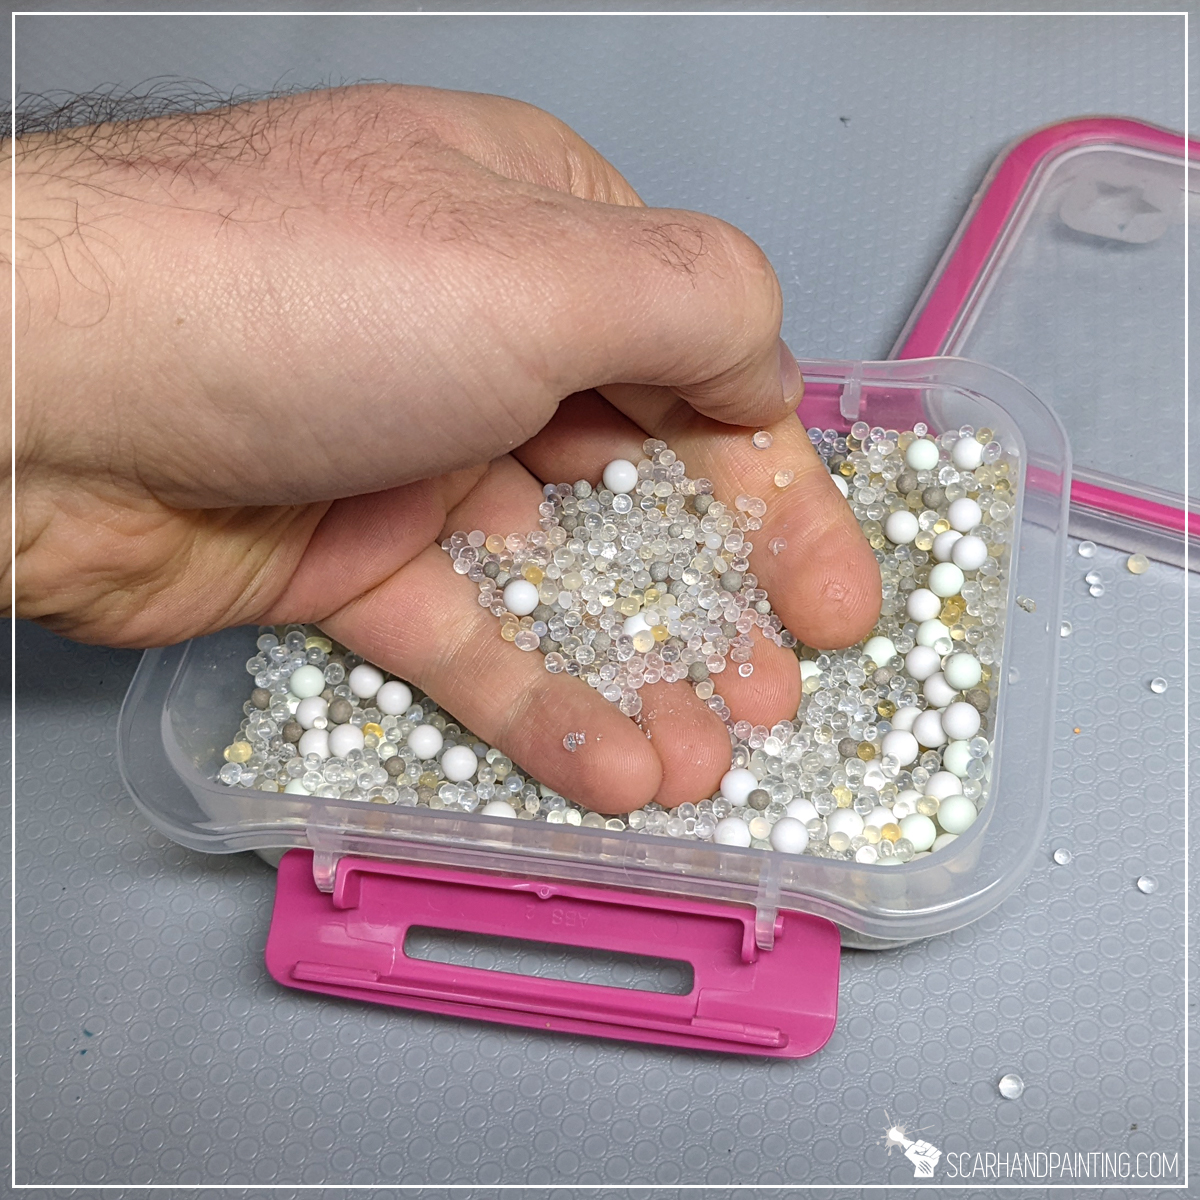
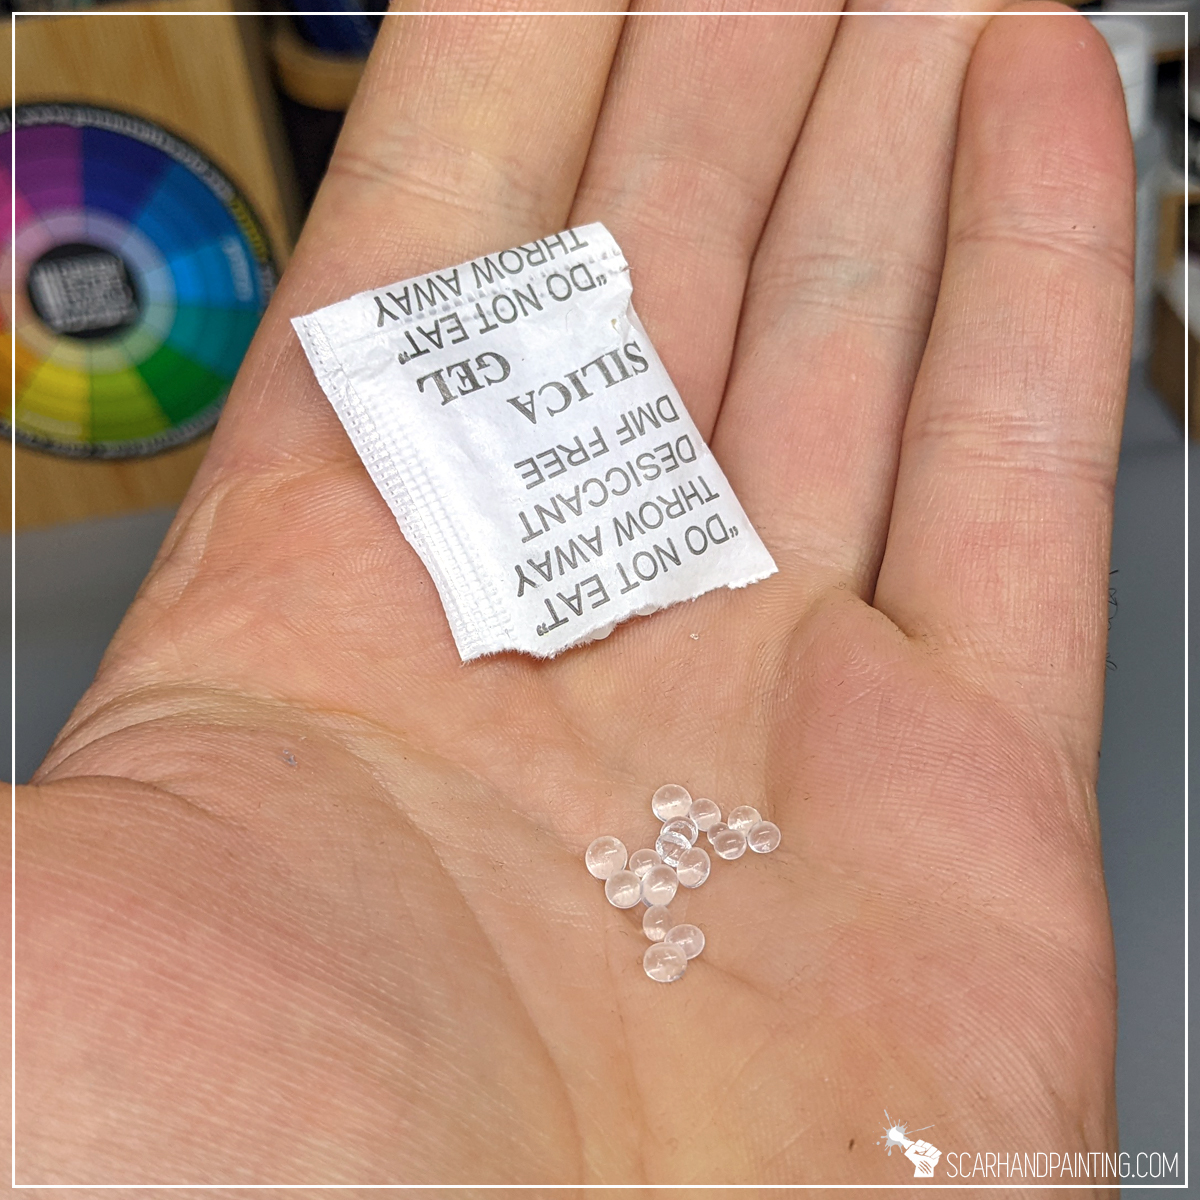
Most clothes and shoes comes pack with a tiny bag of Desiccant. Inside you will find few dozen Silica Gel balls of varied sizes. These work well with typical miniatures hobby paints and are perfect for overall modelling.


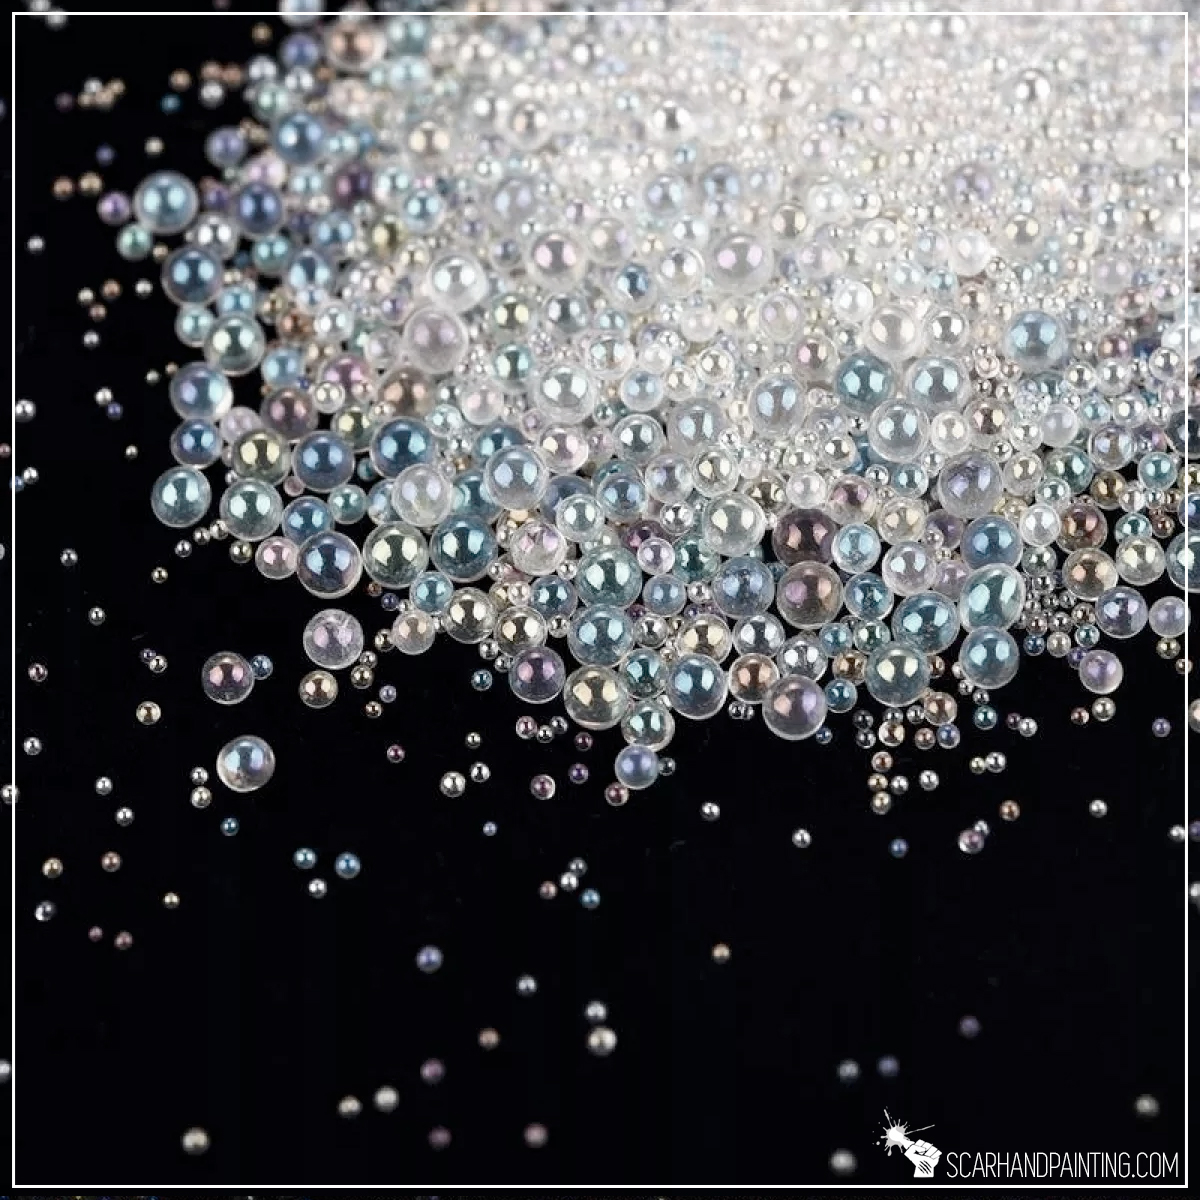
These super tiny glass balls come in small packs and can be obtained from many places including cosmetic stores, Amazon and Ali-express. Different sizes and colors make it a perfect modelling material.
Yup, you read this correctly. Air Soft Gun ammo is just a bunch of tiny balls. Usually ceramic, plastic or metal sold in packs of hundreds. The latter might be a bit expensive and inconvenient, but ceramics and plastics are great for our hobby.


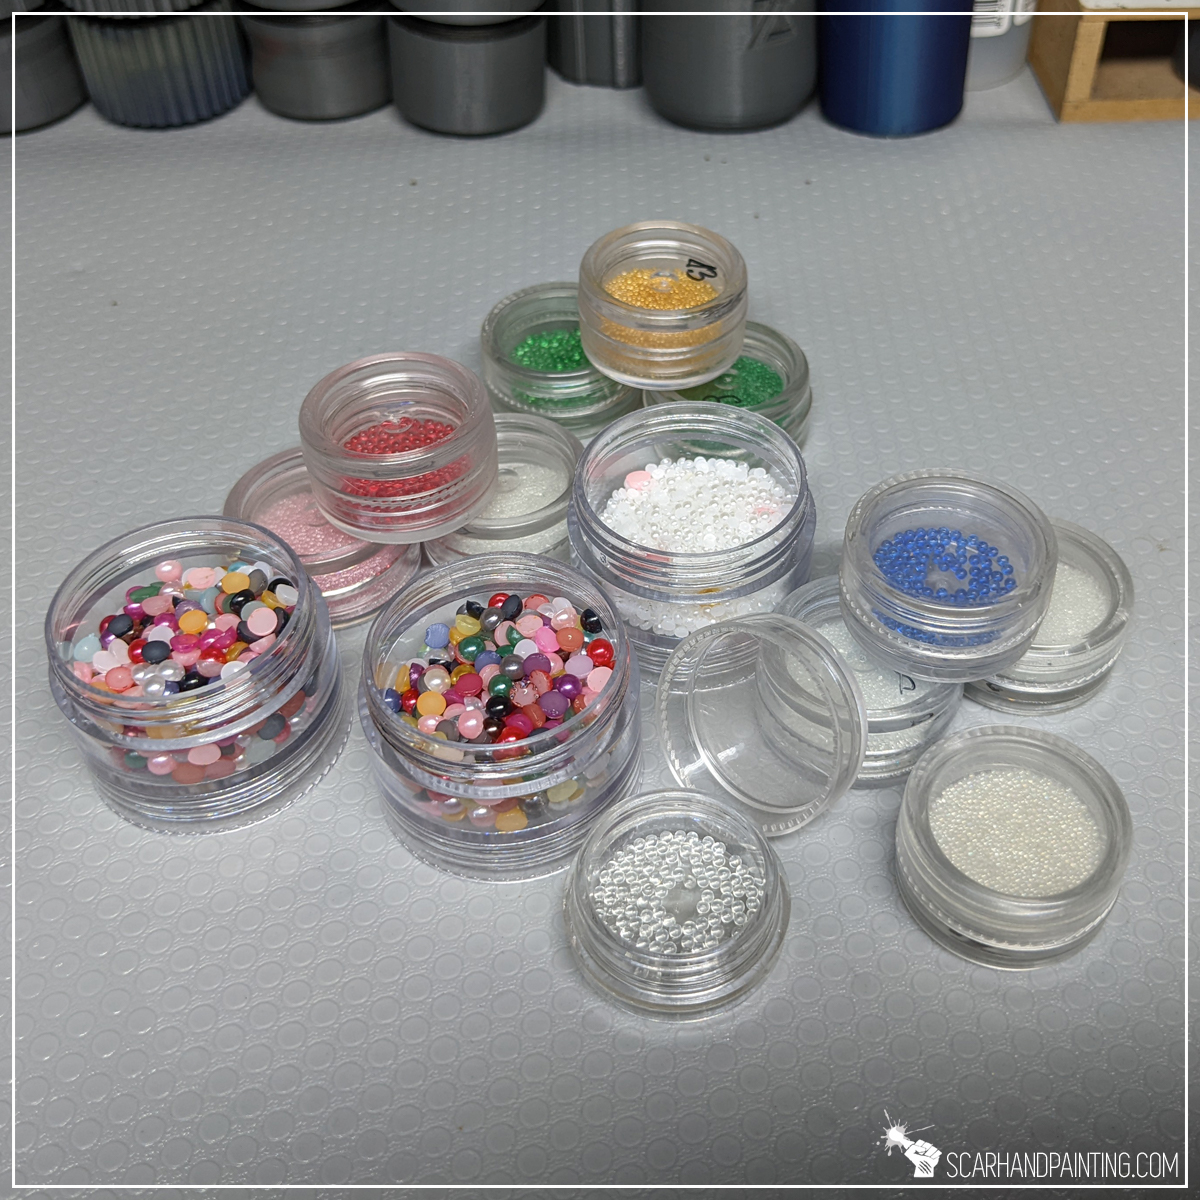
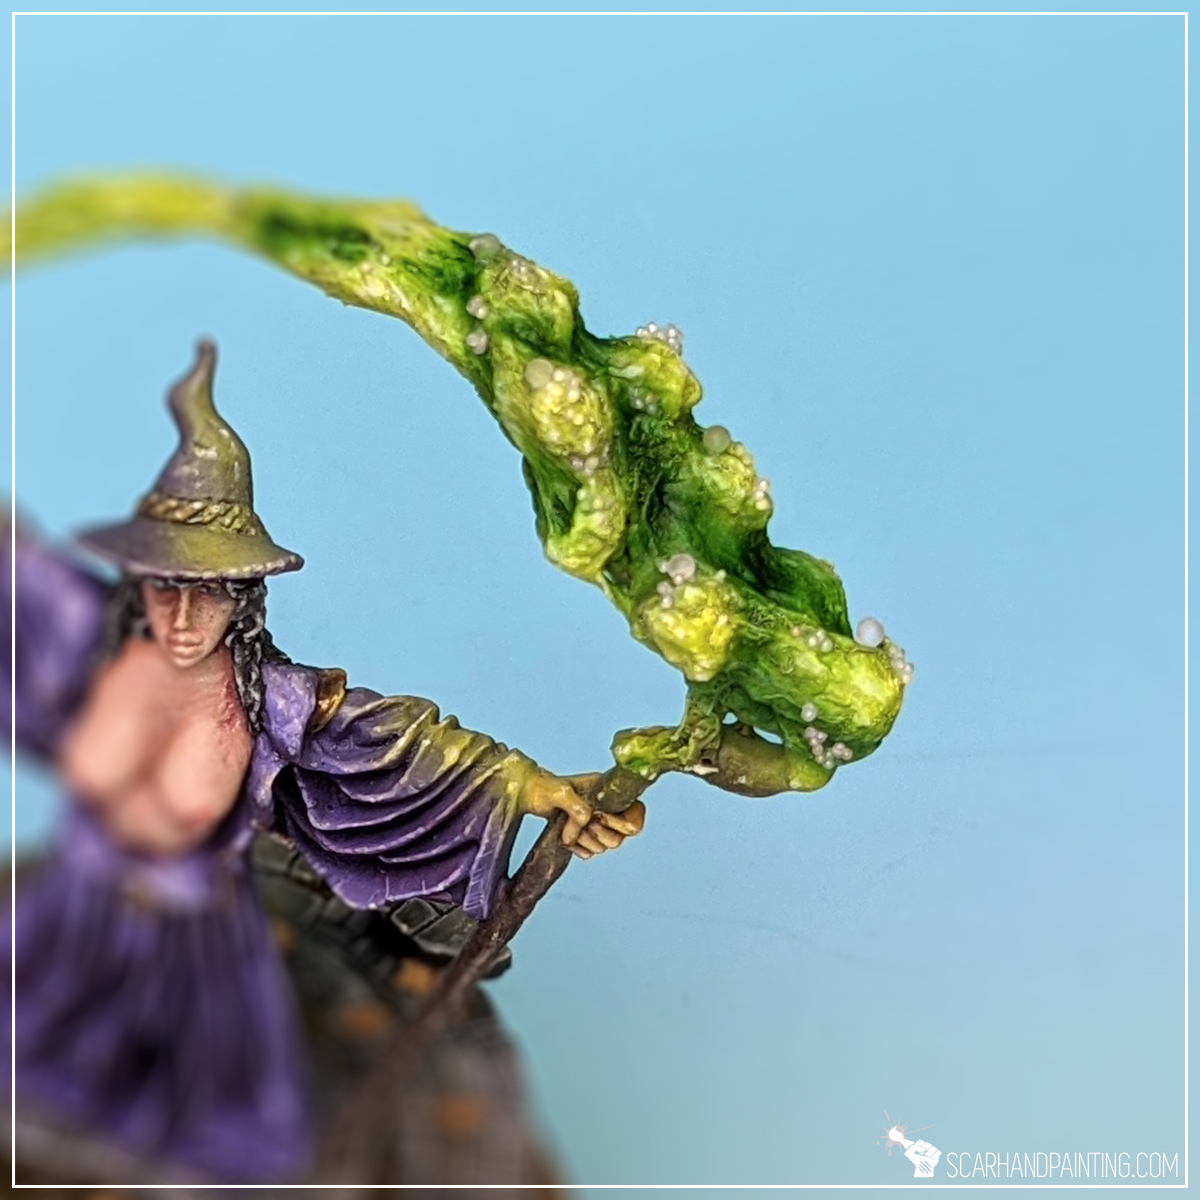
Below some practical use examples:
I hope you find this article entertaining. Be sure to let me know your thoughts in the comments below or via Facebook or Instagram. I would also appreciate if you considered sharing this content with your hobby buds, who might find it useful. Finally if you are looking for a professional miniatures painting service be sure to contact me via this contact form. I always reply within 24 hours, after which please check out your spam folder.
Cheers!

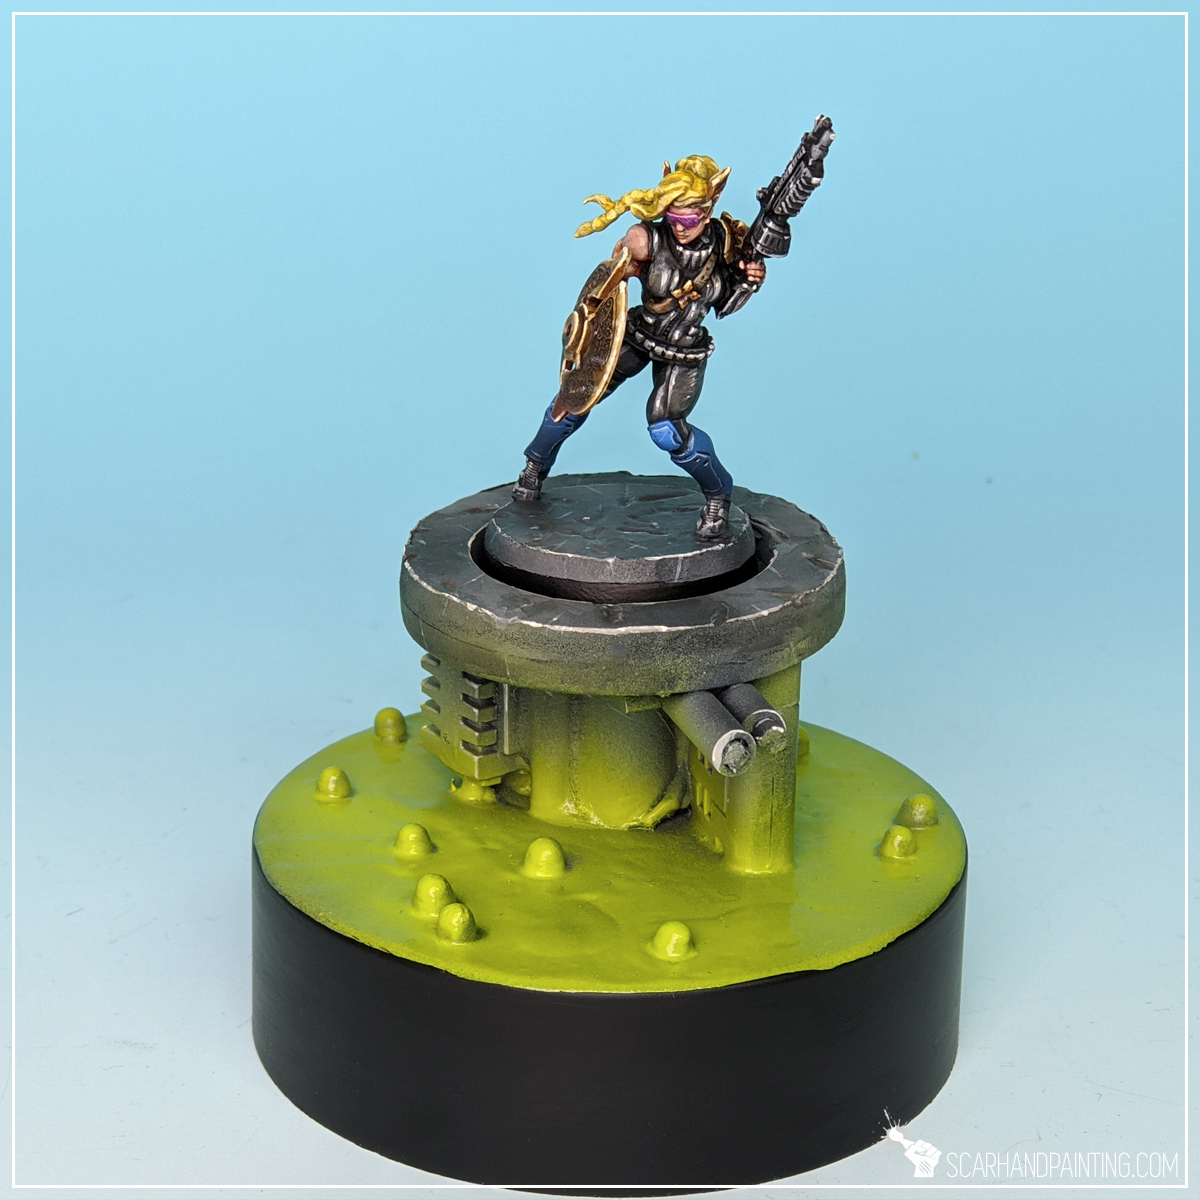
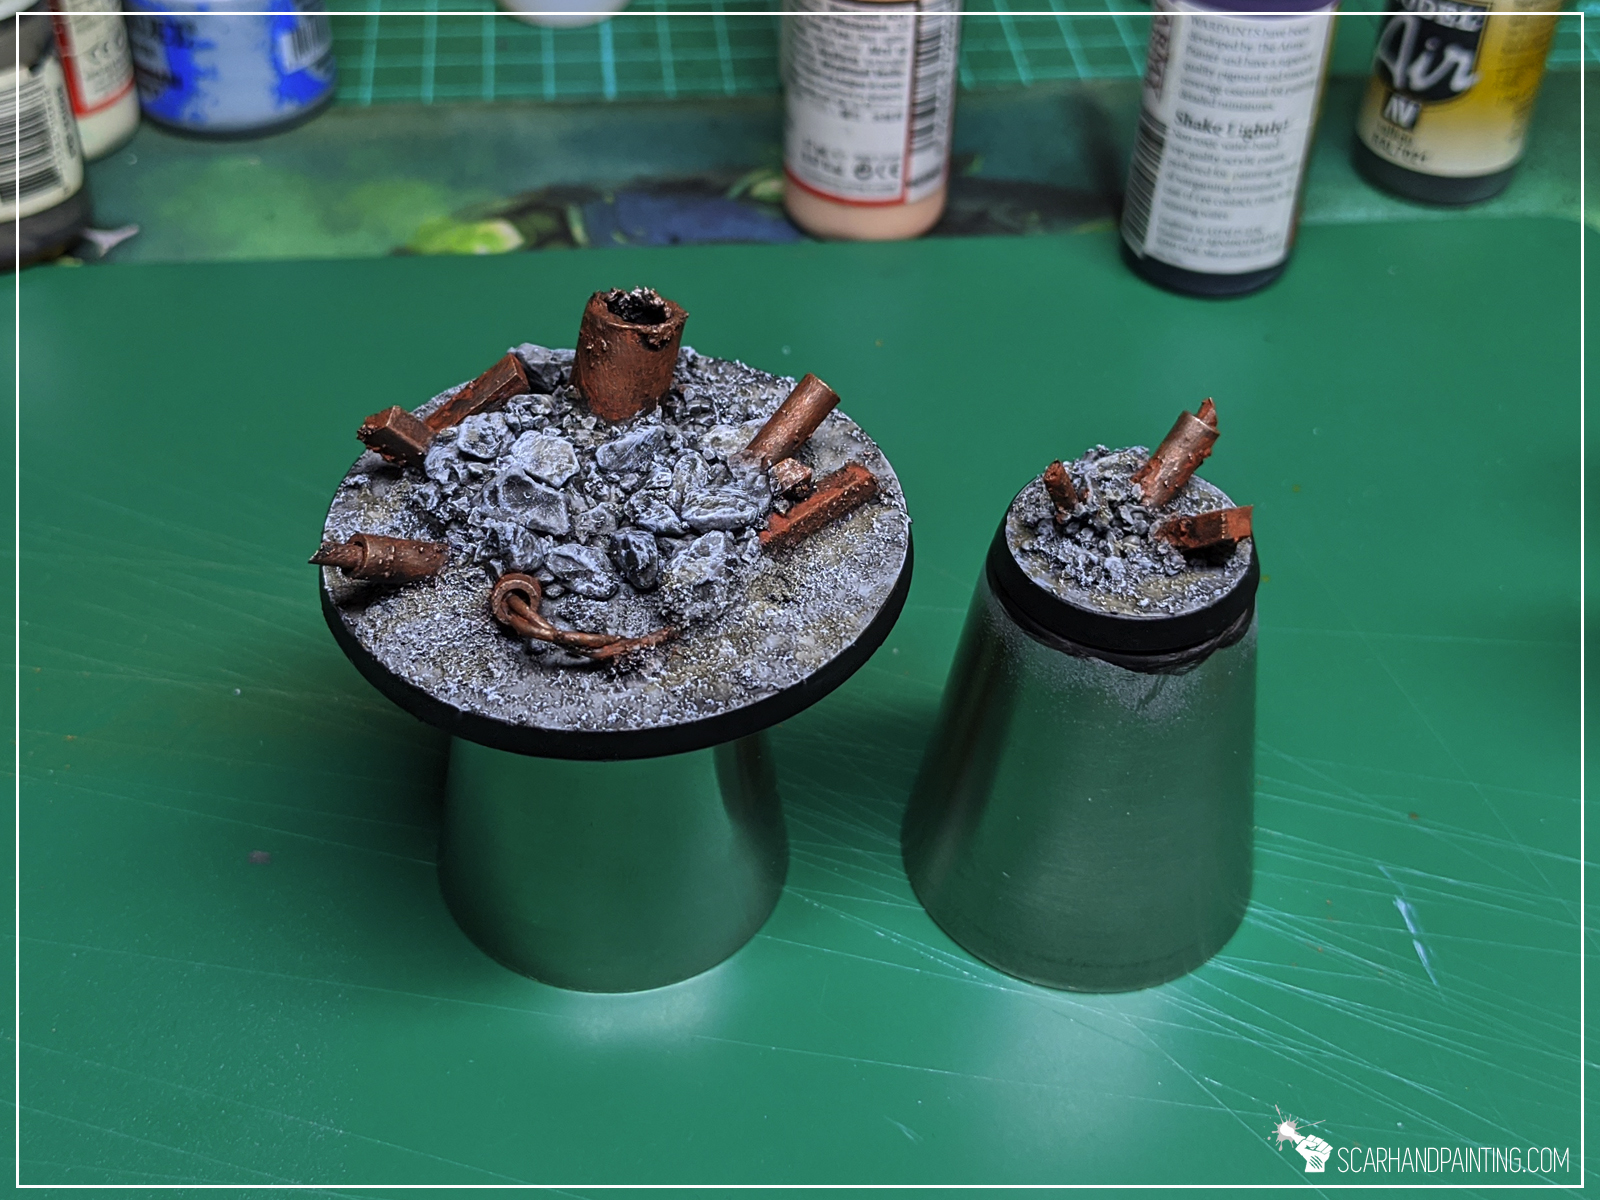
In this step-by-step tutorial I’m going to show you how to create Cityfight bases same way I did for Gallery: Tau Sa’Cea.

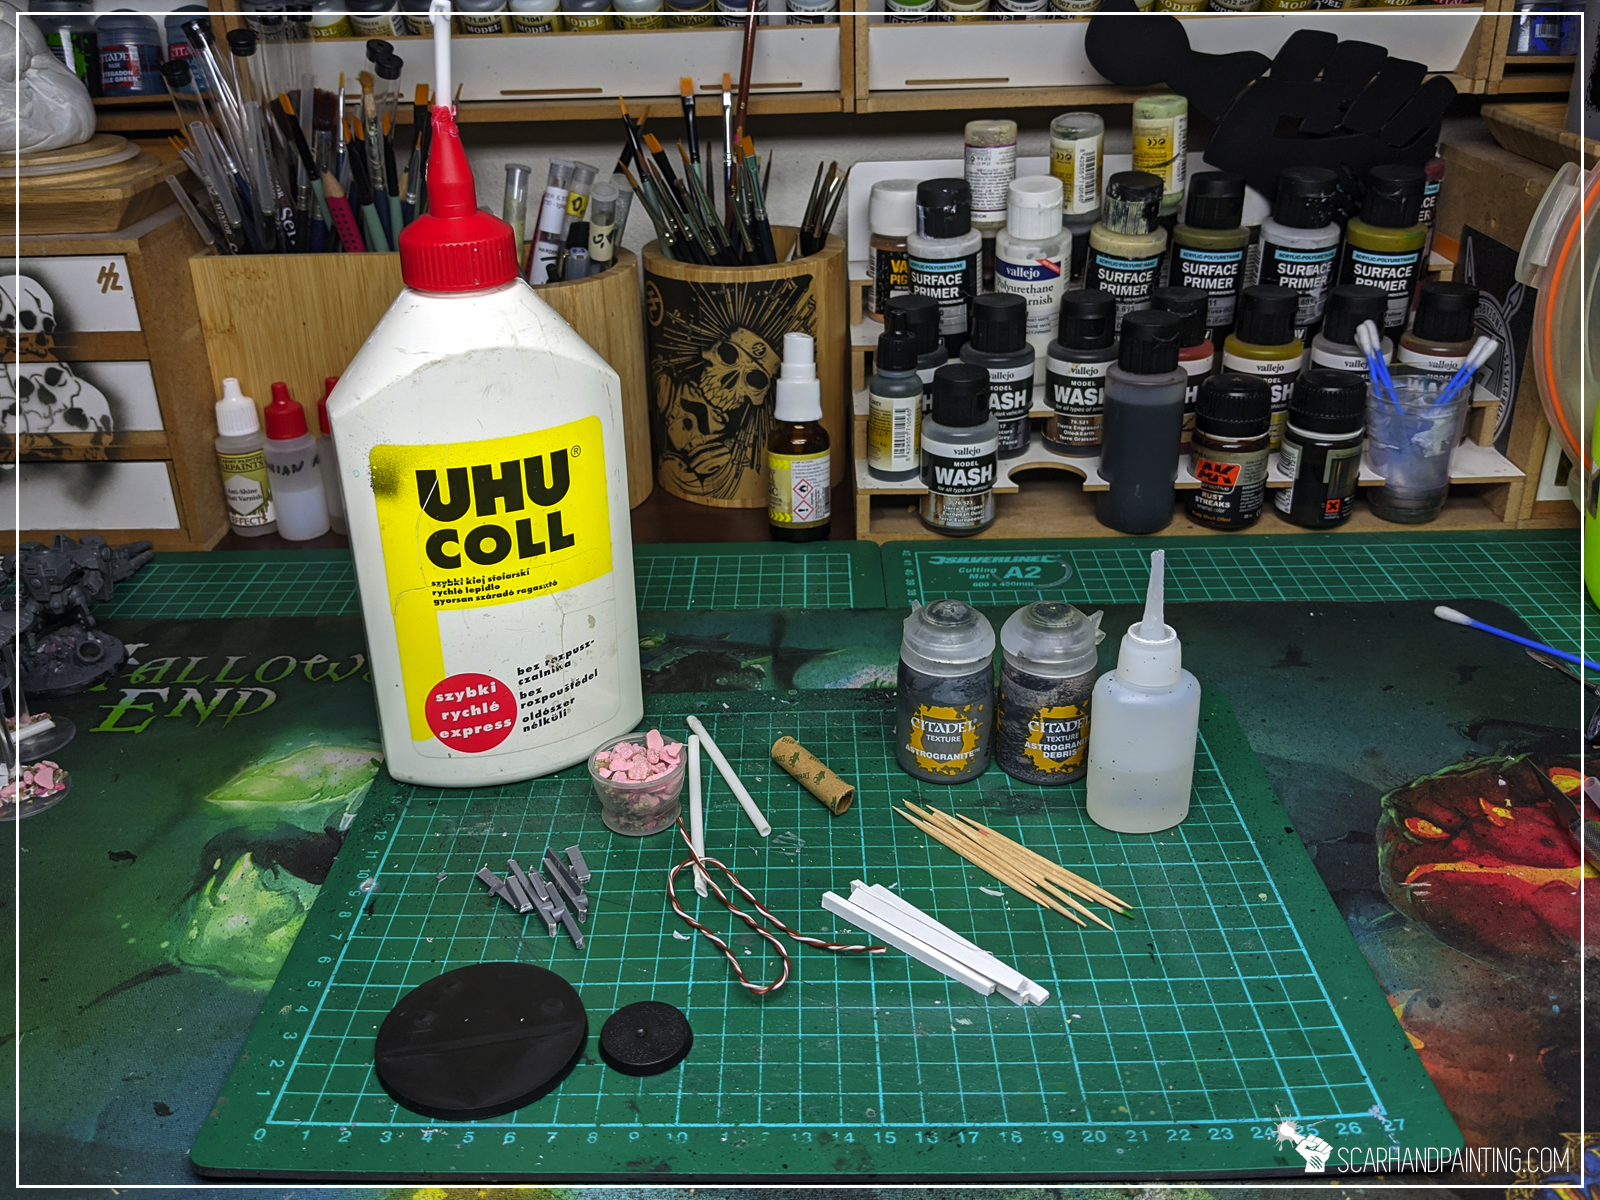
I used:
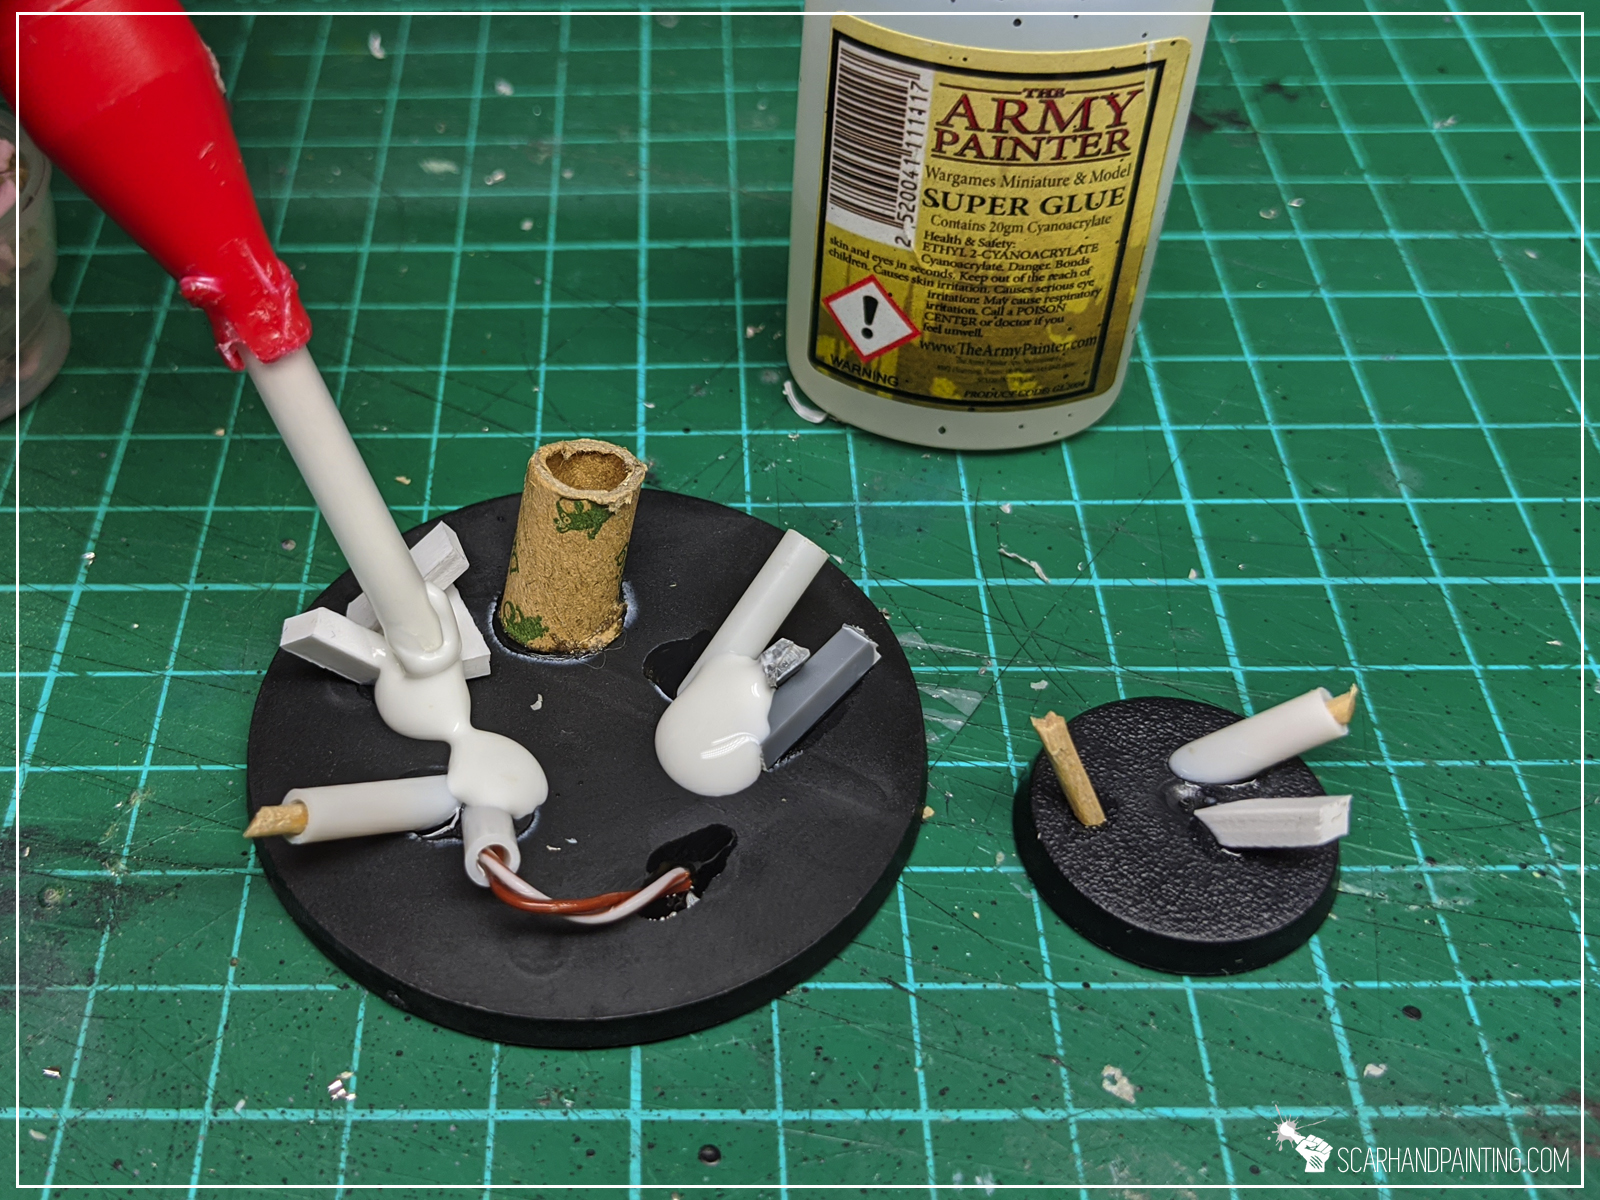
Step one: Special detail
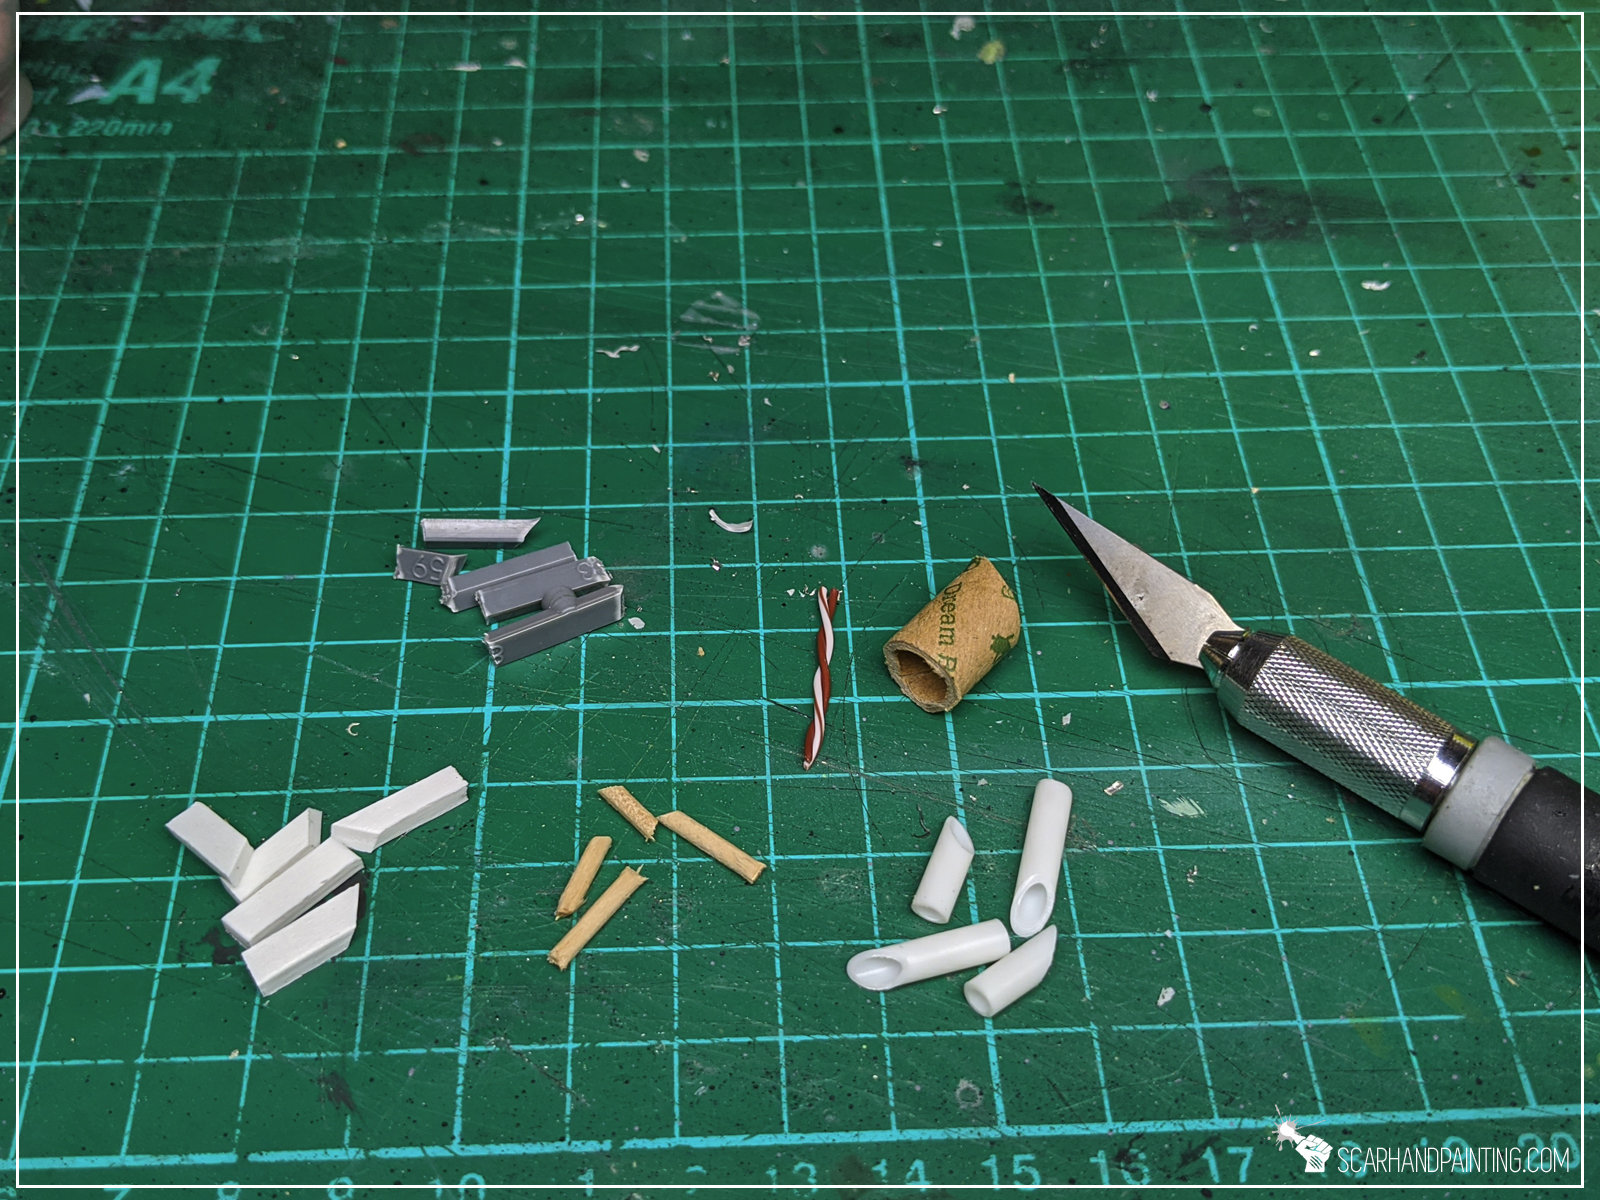

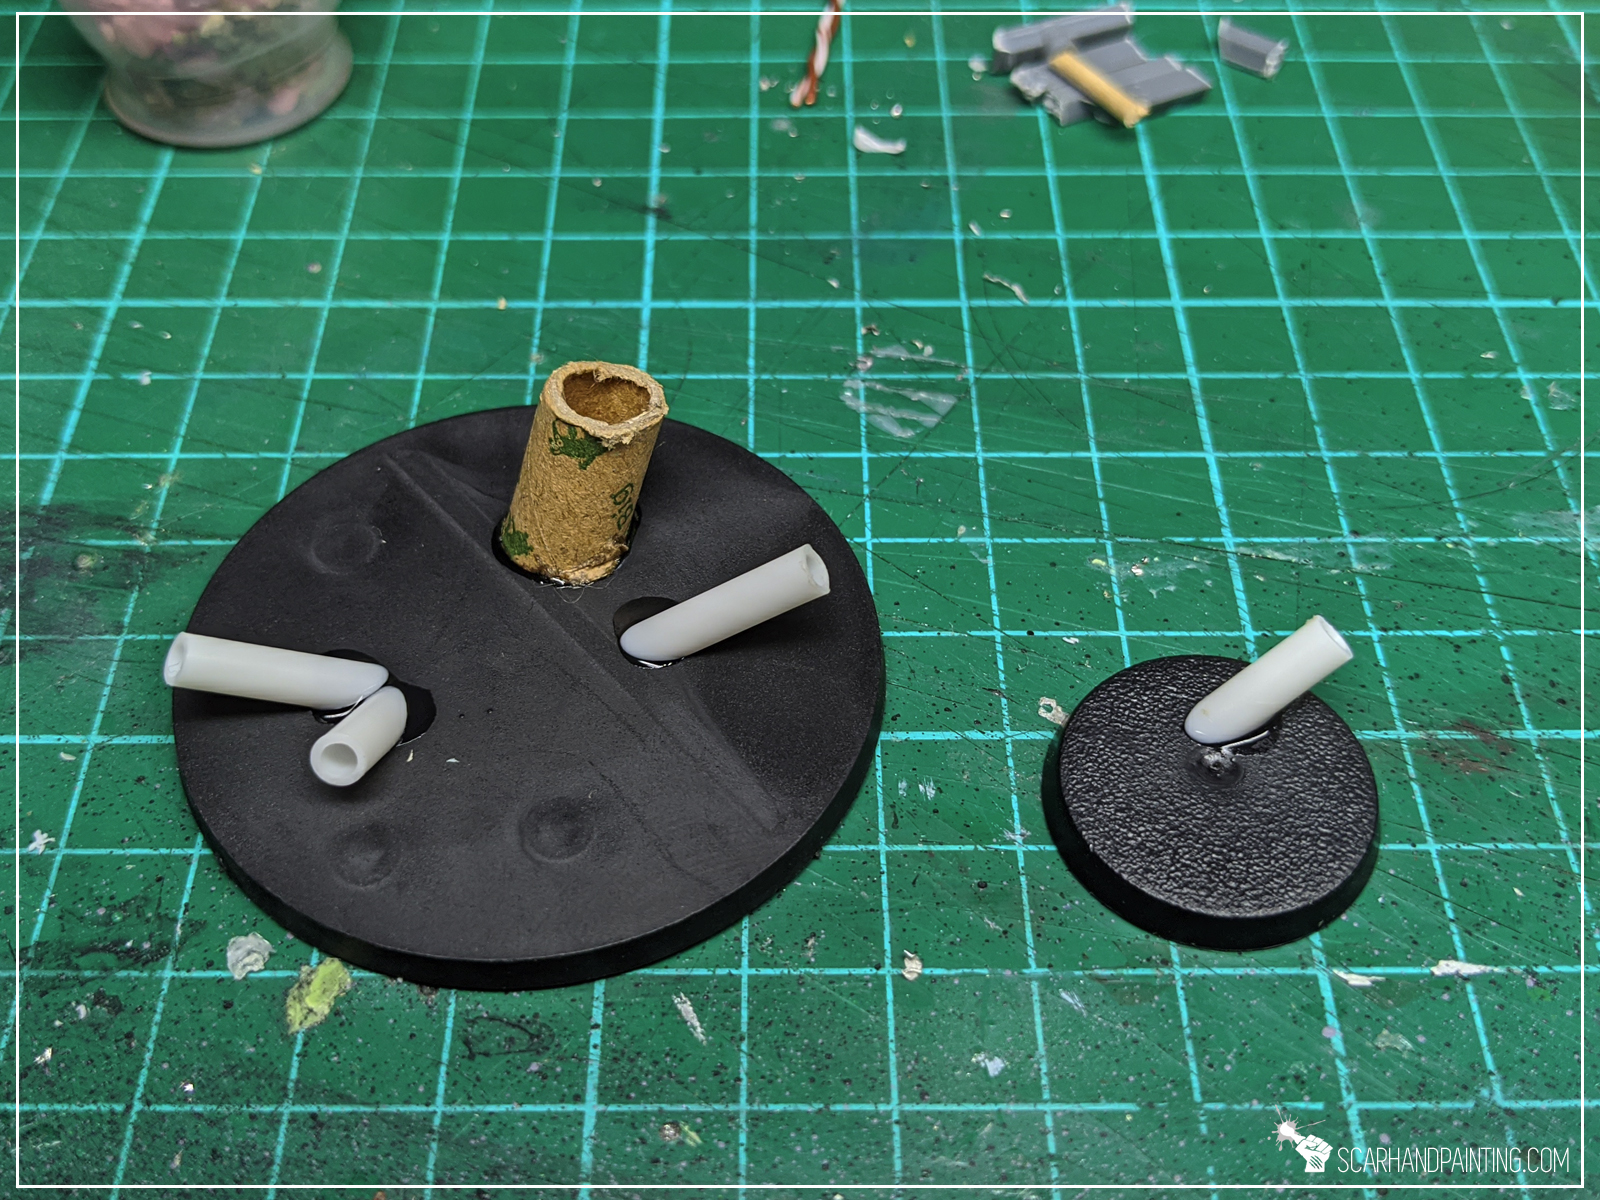

Using a hobby knife I cut all the sticks, sprues, toothpicks, plasticard and tube into small pieces. I made sure to cut one side of each piece at an angle, to better position each piece on the base. I then glued random pieces on top of a base using Super glue.
Step two: Gravel
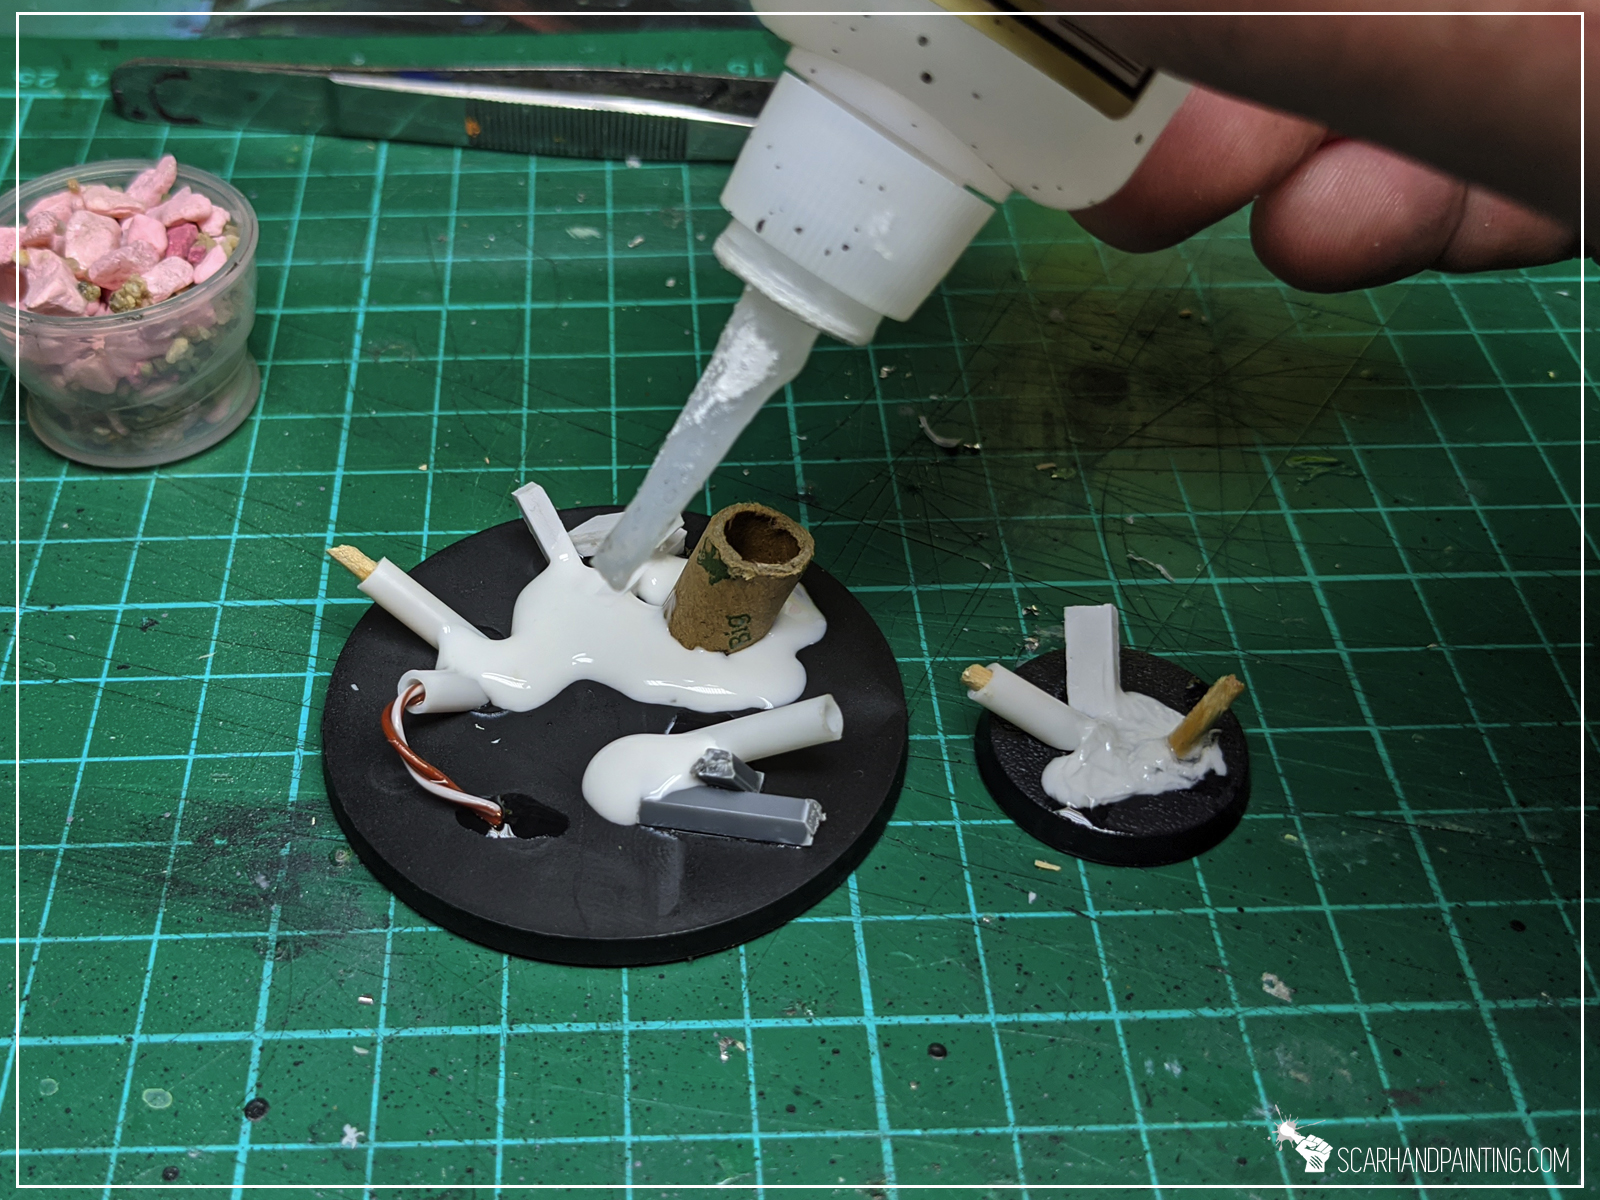


I applied PVA glue around previously glued pieces. I then applied Super glue on top of it and, before super glue hardened, covered entire thing with thick sand mixed with hobby gravel.
Step three: Texture
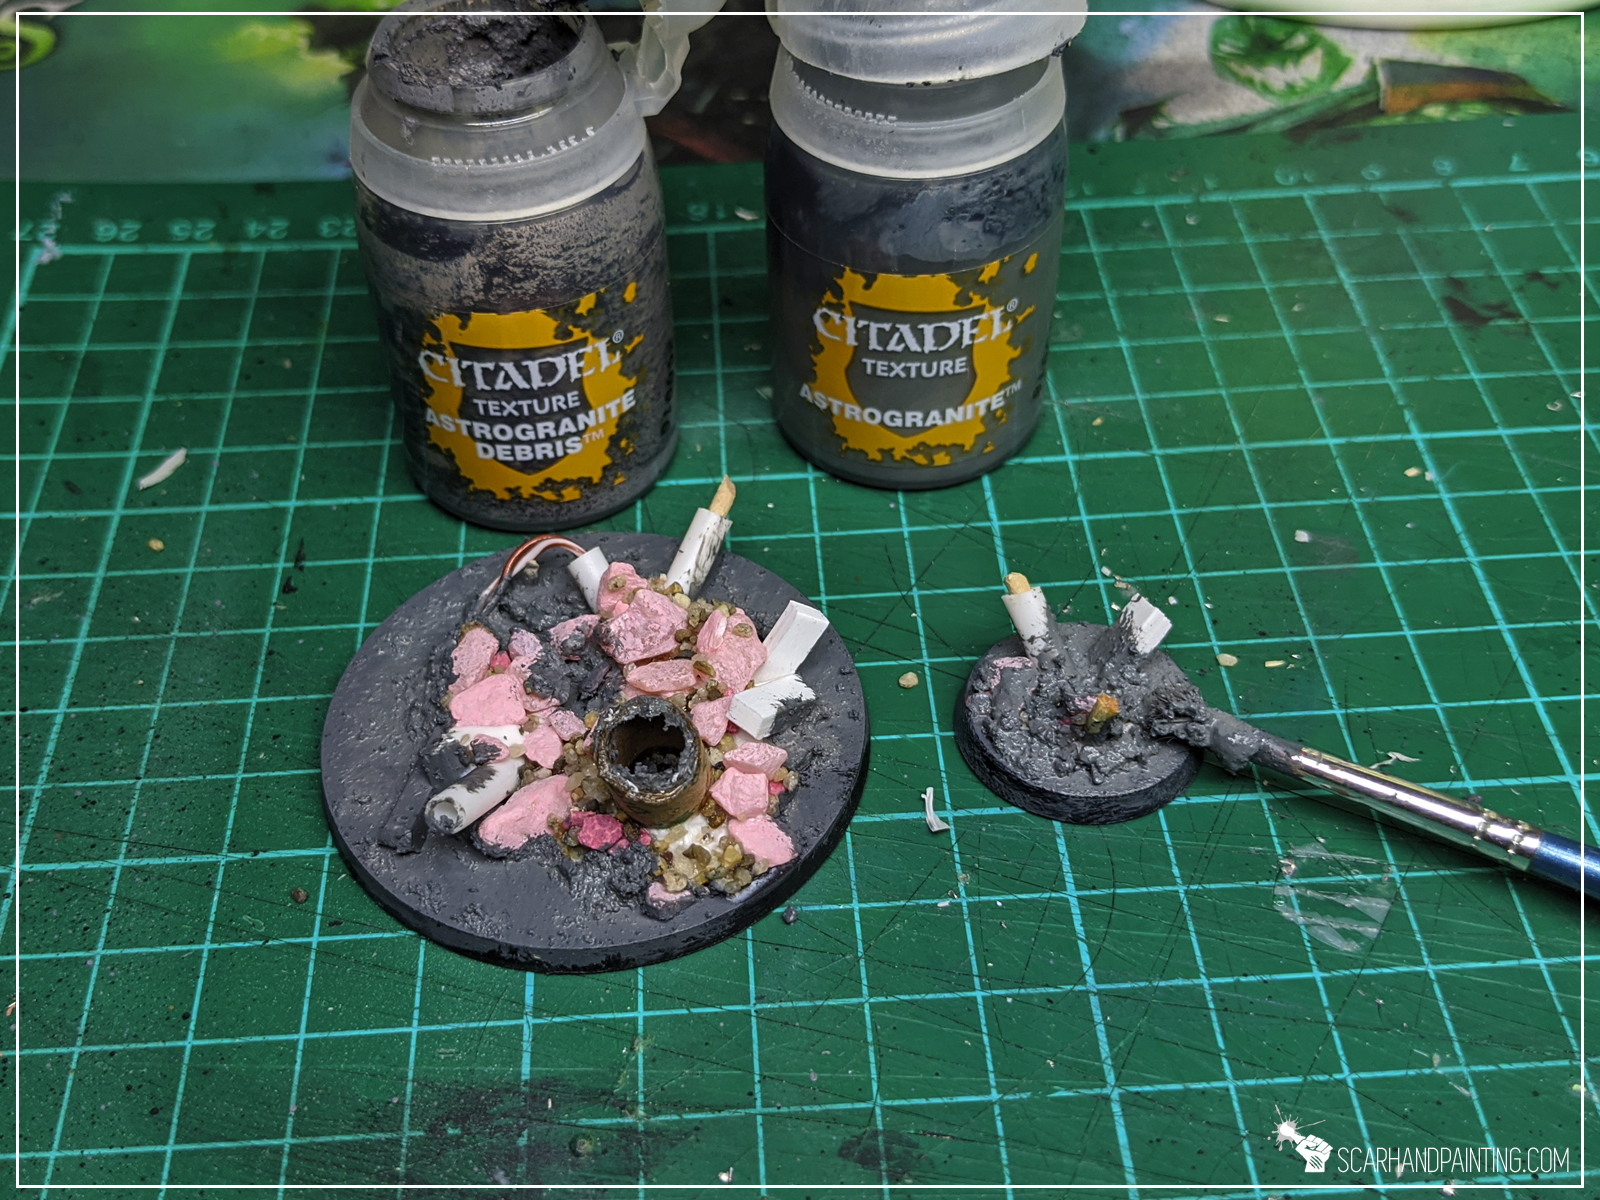
I then textured rest of the base using Games Workshop Astrogranite and Astrogranite Debris paints.
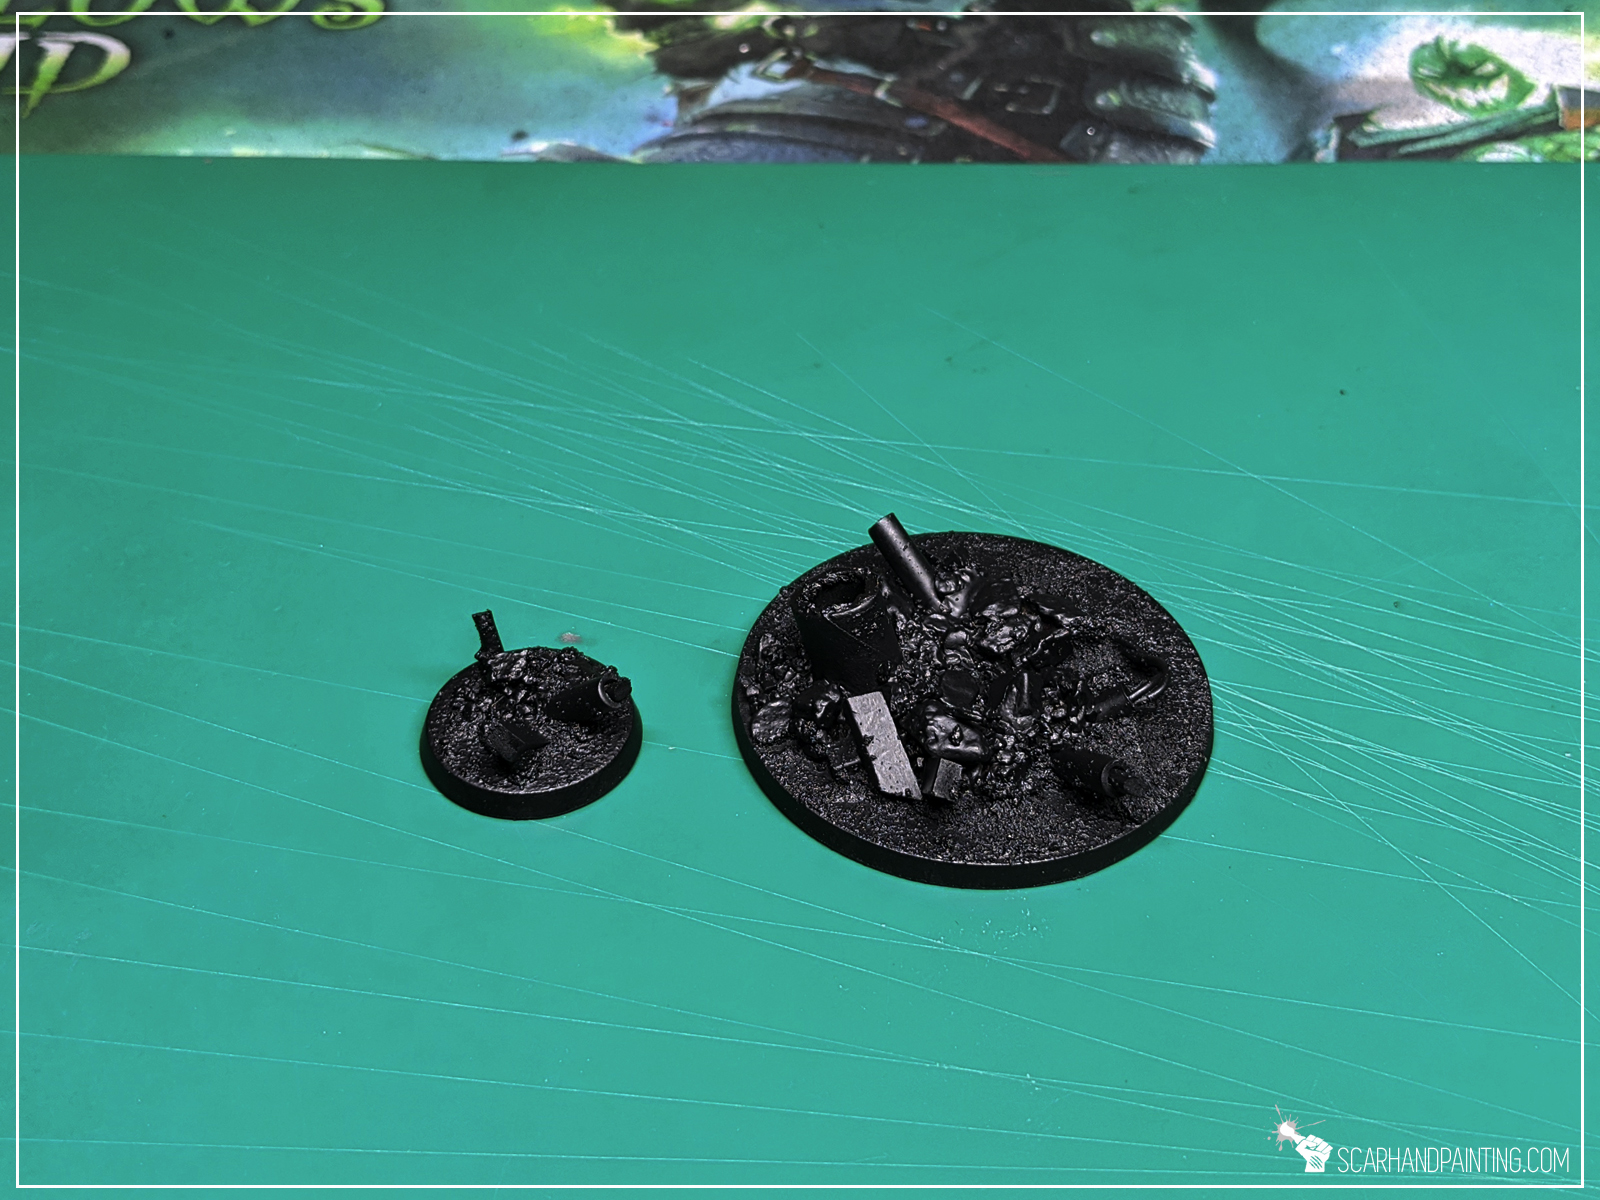


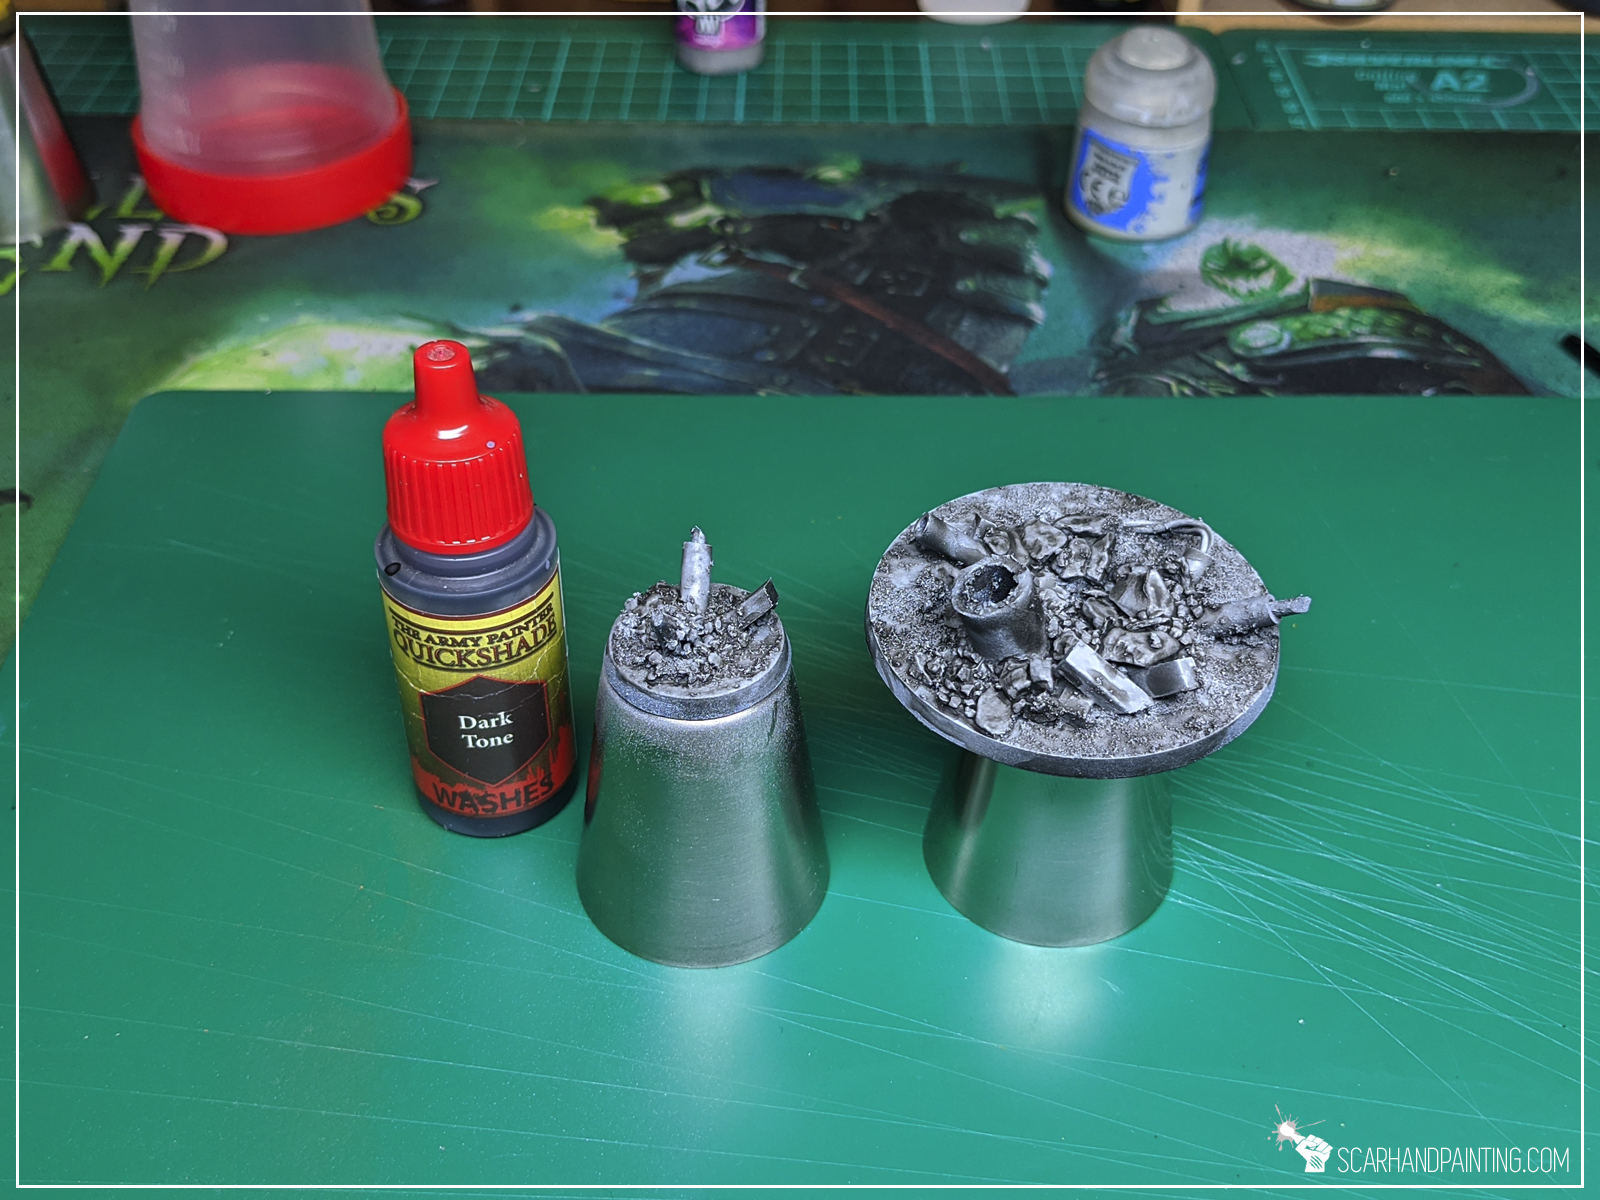
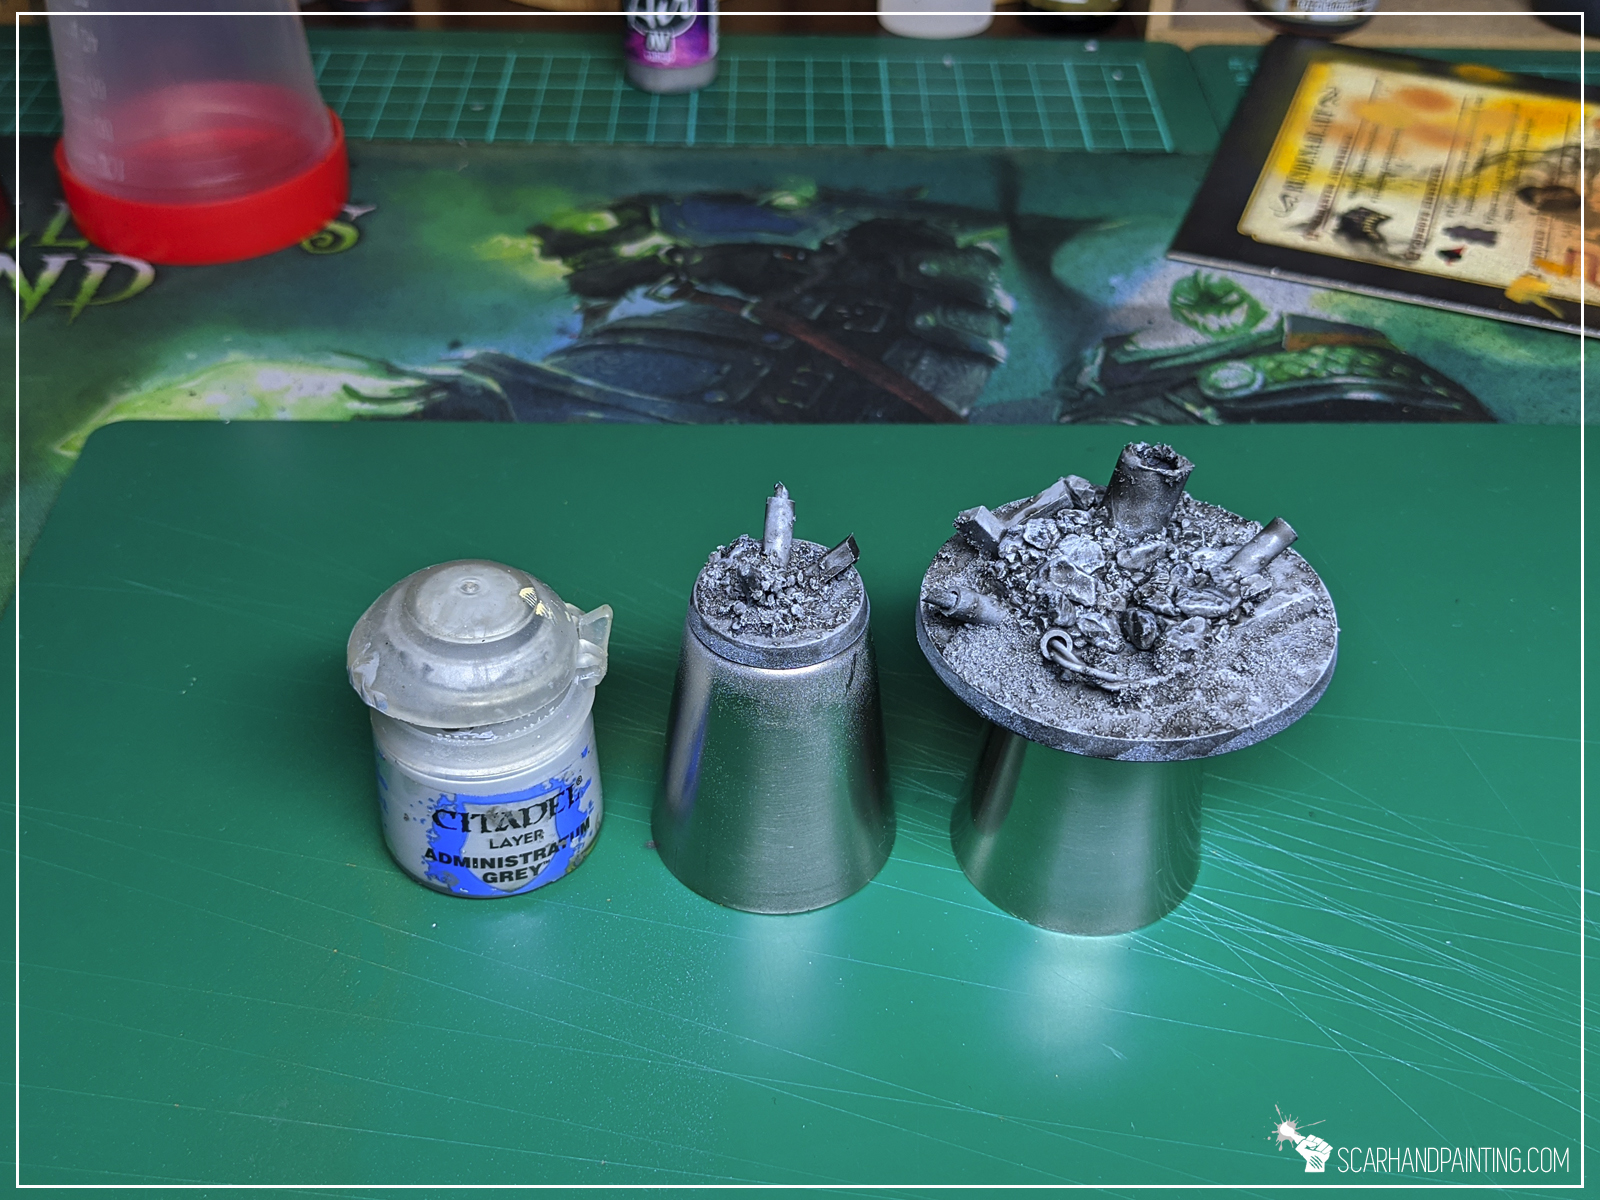
I started with Black Undercoat, then airbrushed a layer of Vallejo Cold Grey, followed short by Vallejo Stonewall Grey. I then washed everything black using Army Painter Dark Tone Ink and once it dried I drybrushed entire base with Games Workshop Administratum Grey.


For metal debris elements I used a mix of Games Workshop Warplock Bronze and Army Painter Gun Metal, followed by a highlight of Army Painter Shining Silver. I then washed all the pieces brown with Army Painter Strong Tone Ink.
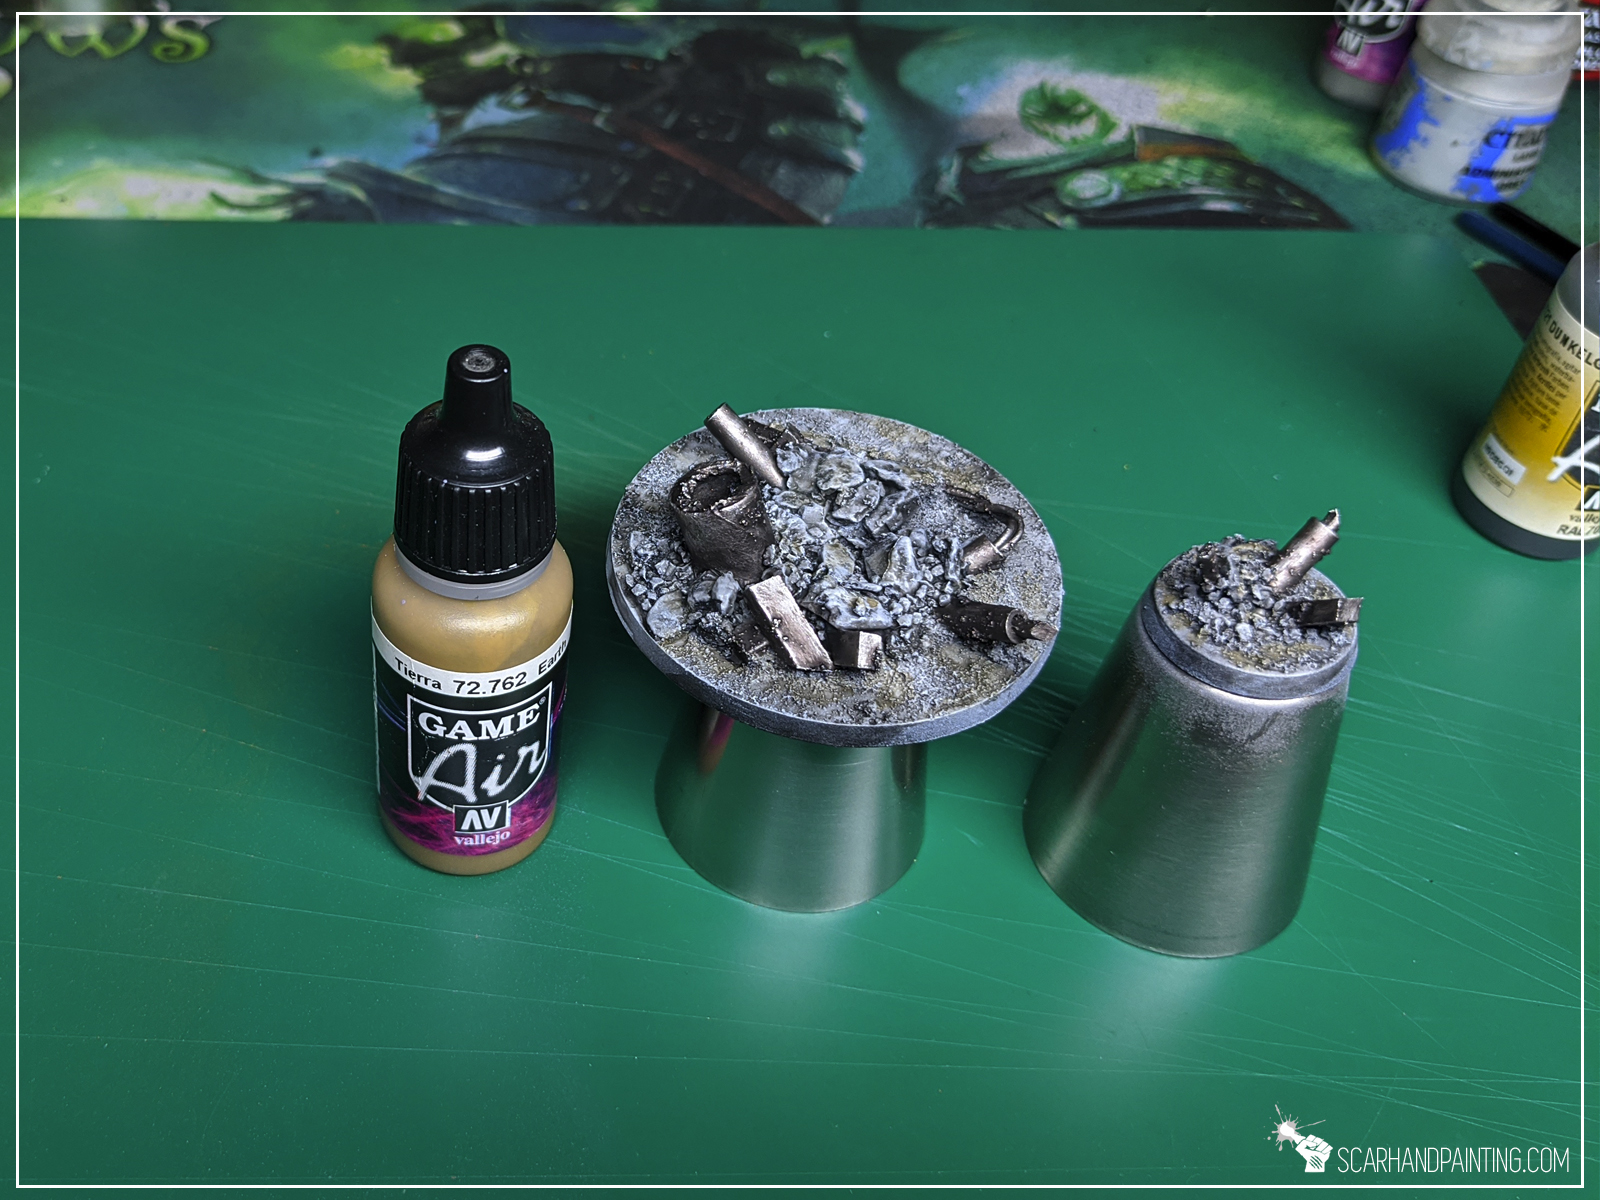
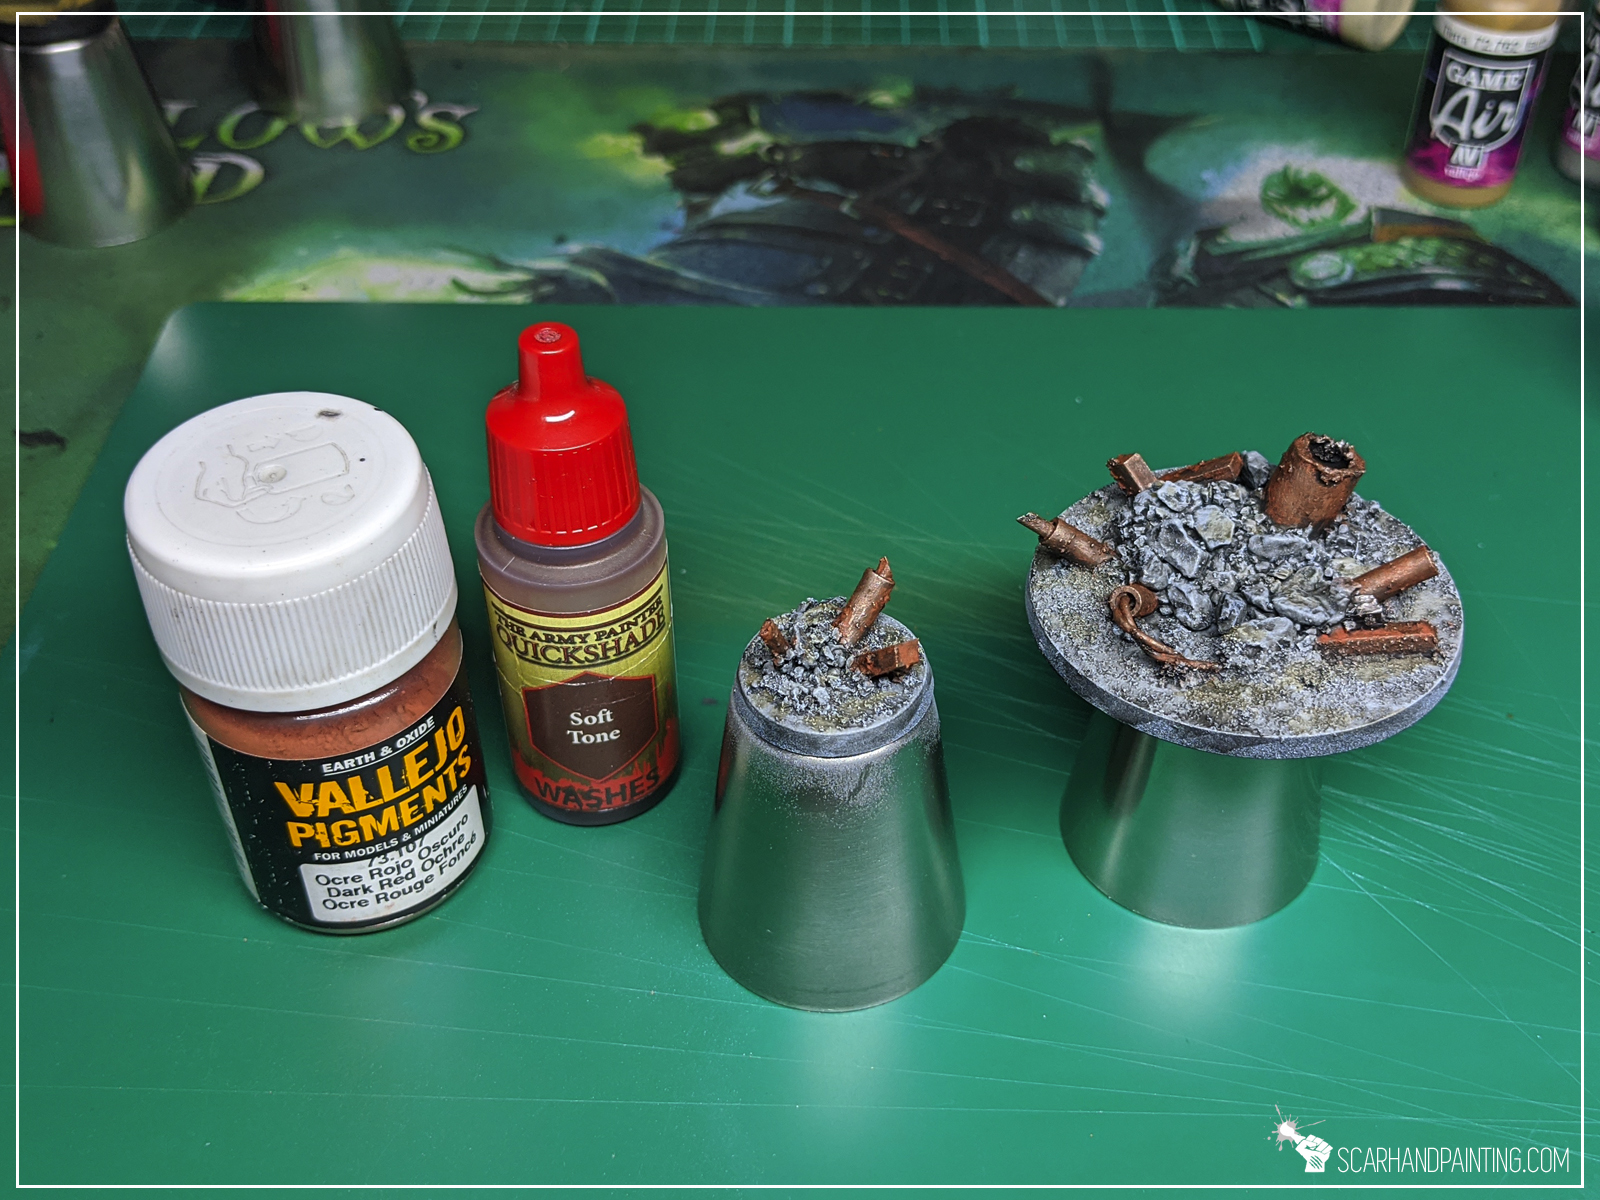

For additional depth and effects I blended in some watered Vallejo Earth. Next I washed all metal debris with a mix of Vallejo Dark Red Ochre Pigment and Army Painter Soft Tone Ink. Lastly I drybrushed grey areas with Vallejo Ghost Grey.
Edges repainted black and job done!
You like this article? Don’t be a stranger! Let me know what you think in the comments below or at my Facebook profile! Cheers!
Wet Palette – a hobby tool every or at least a vast majority of pro painters has. A Wet Palette is simply a piece of parchment sitting on a wet sponge that keeps your paints thin and allows you to “save” a certain colour mix to go back to without the necessity to mix the paints anew in hope to achieve same results. In this article I will show you how to make your own Wet Palette.
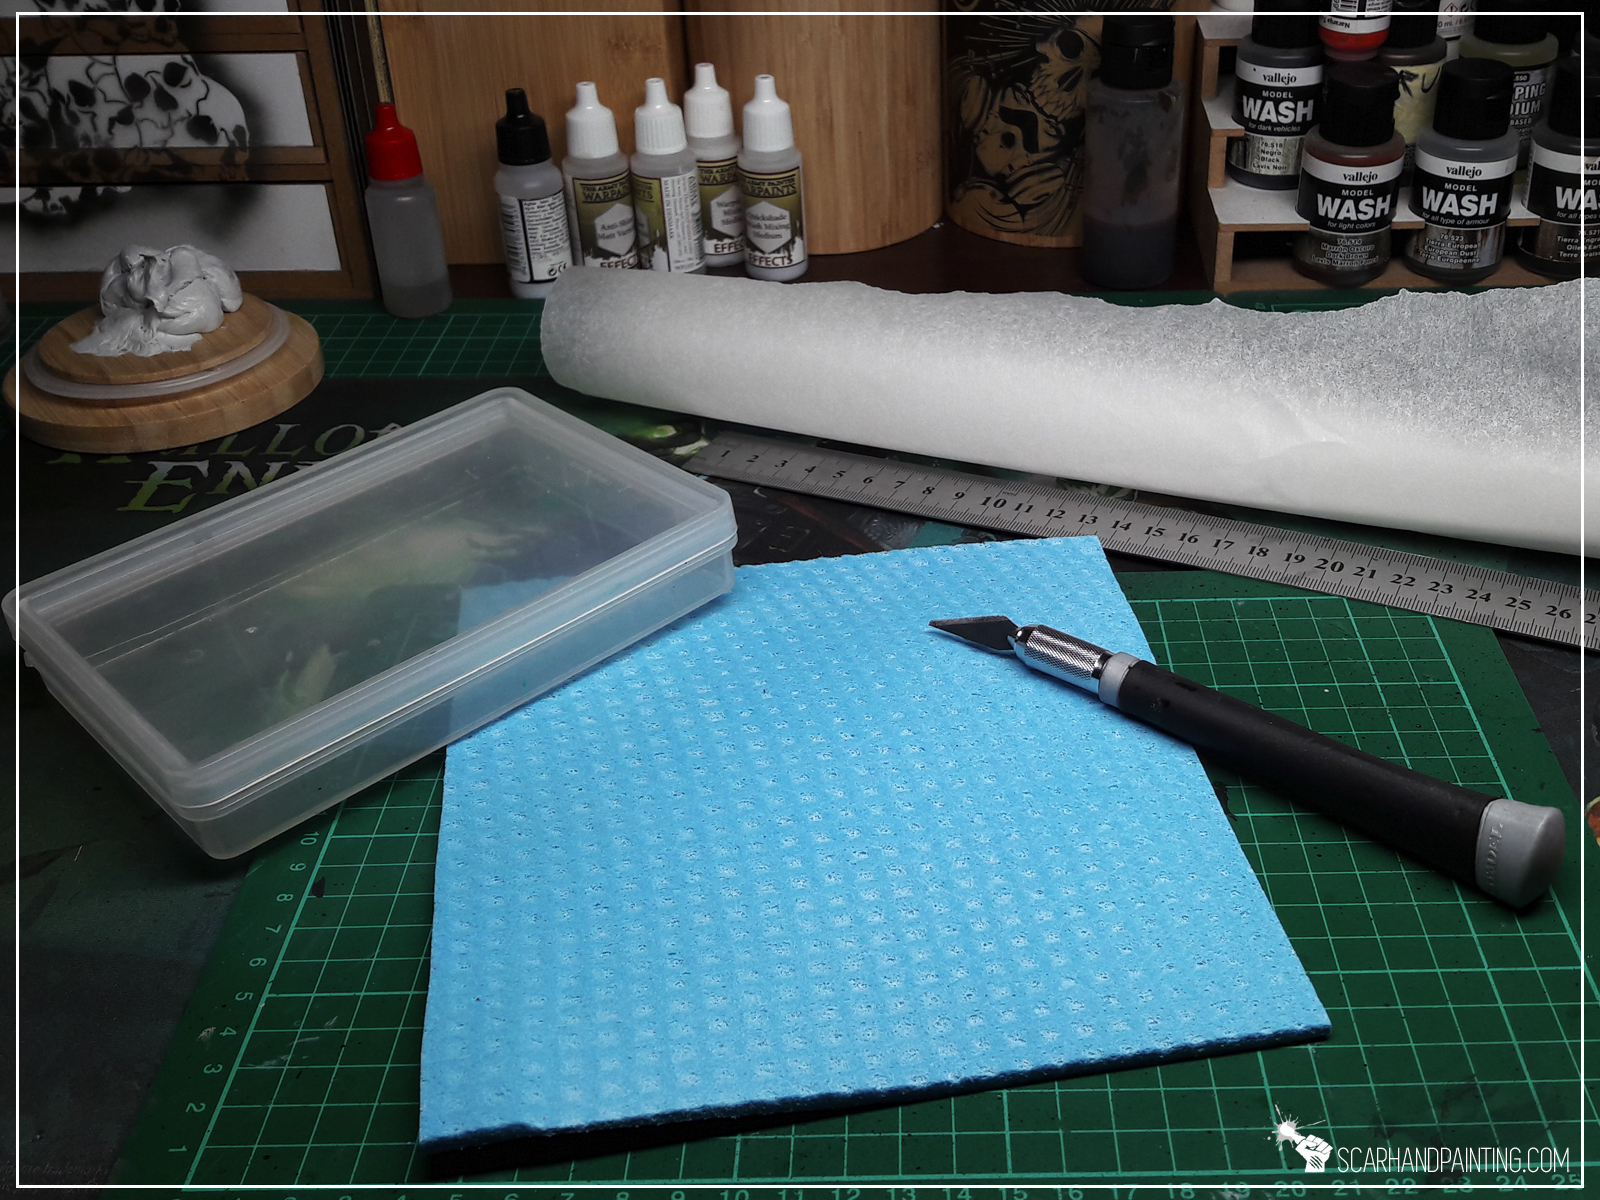

Picking a right box for the job is very important. For best results it should be hermetic, rather shallow and as wide and long as you prefer. I know a very good painter who uses a Ferrero Rocher box, I preffer to use a more hermetic and smaller Games Workshop Turf box. It suits my needs better, as I don’t use Wet Palette too often. Either way…
Step one:

I measured the insides of my box of choice and cut a piece of kitchen sponge to be approximately 5mm smaller. This is to leave some space for a sponge that might grow a bit once filled with water.

Step two:
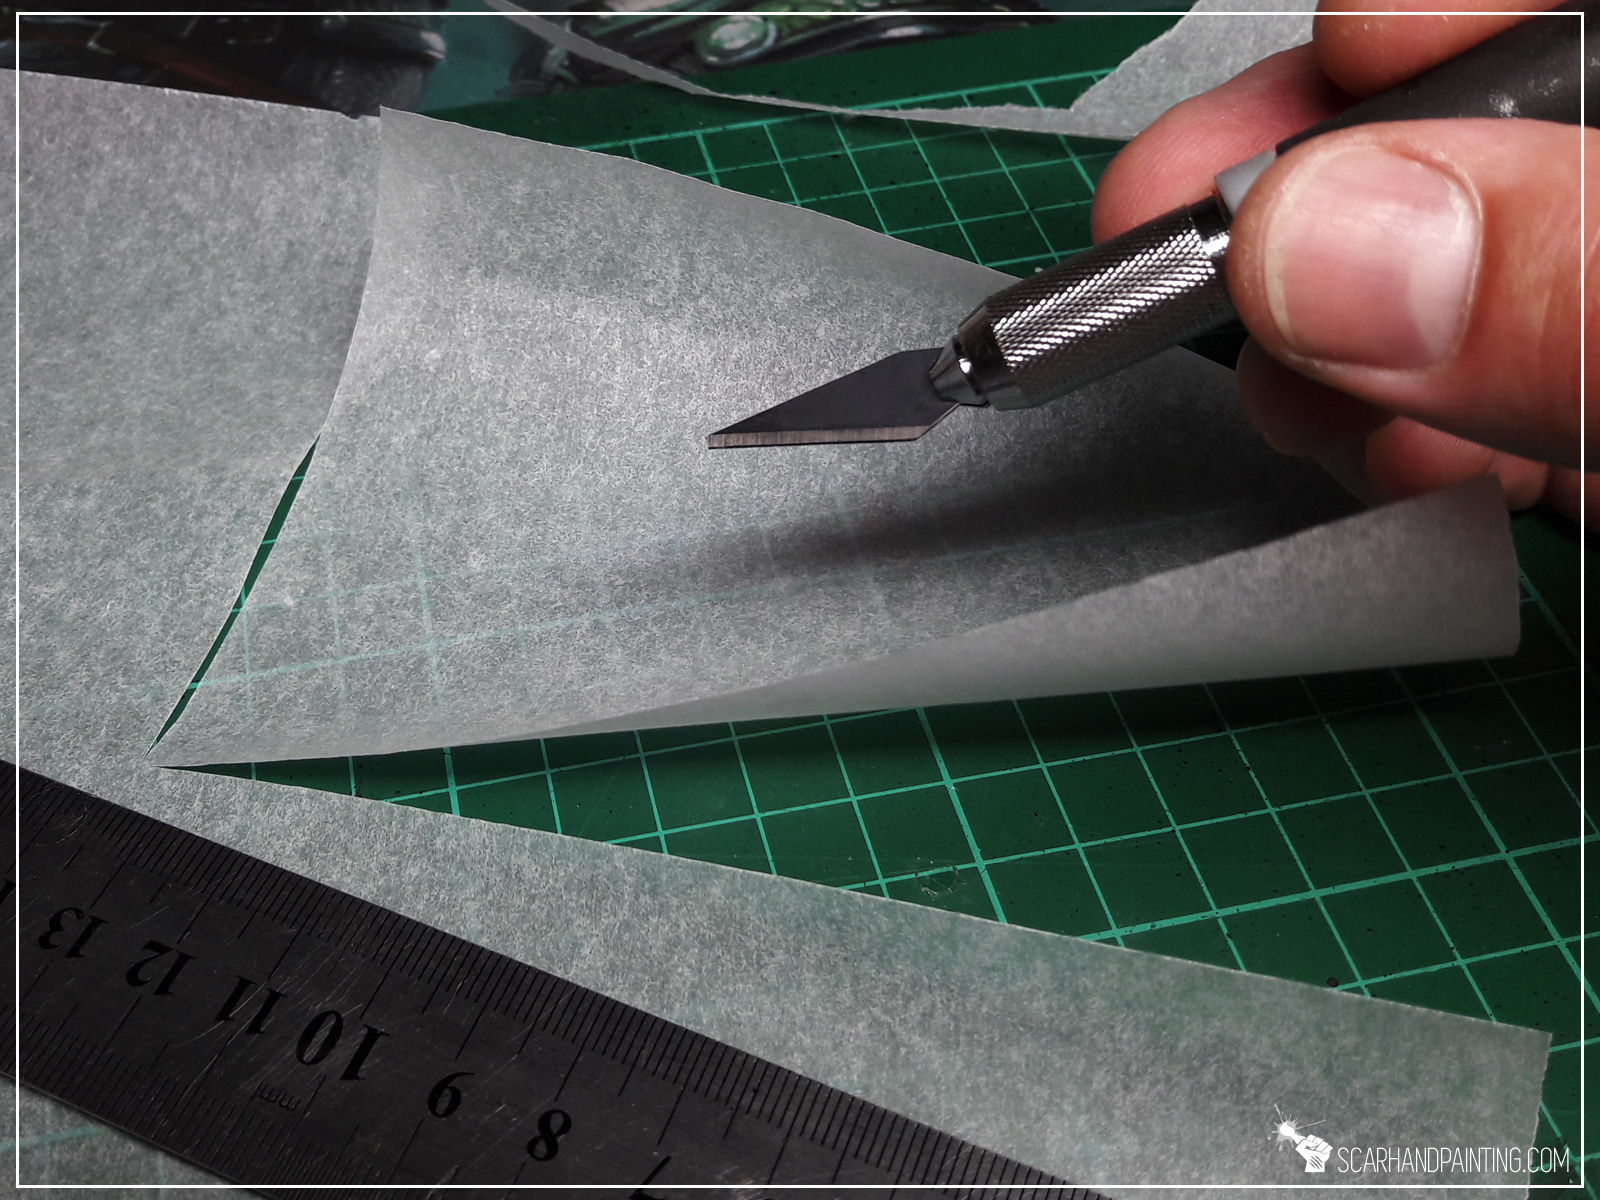
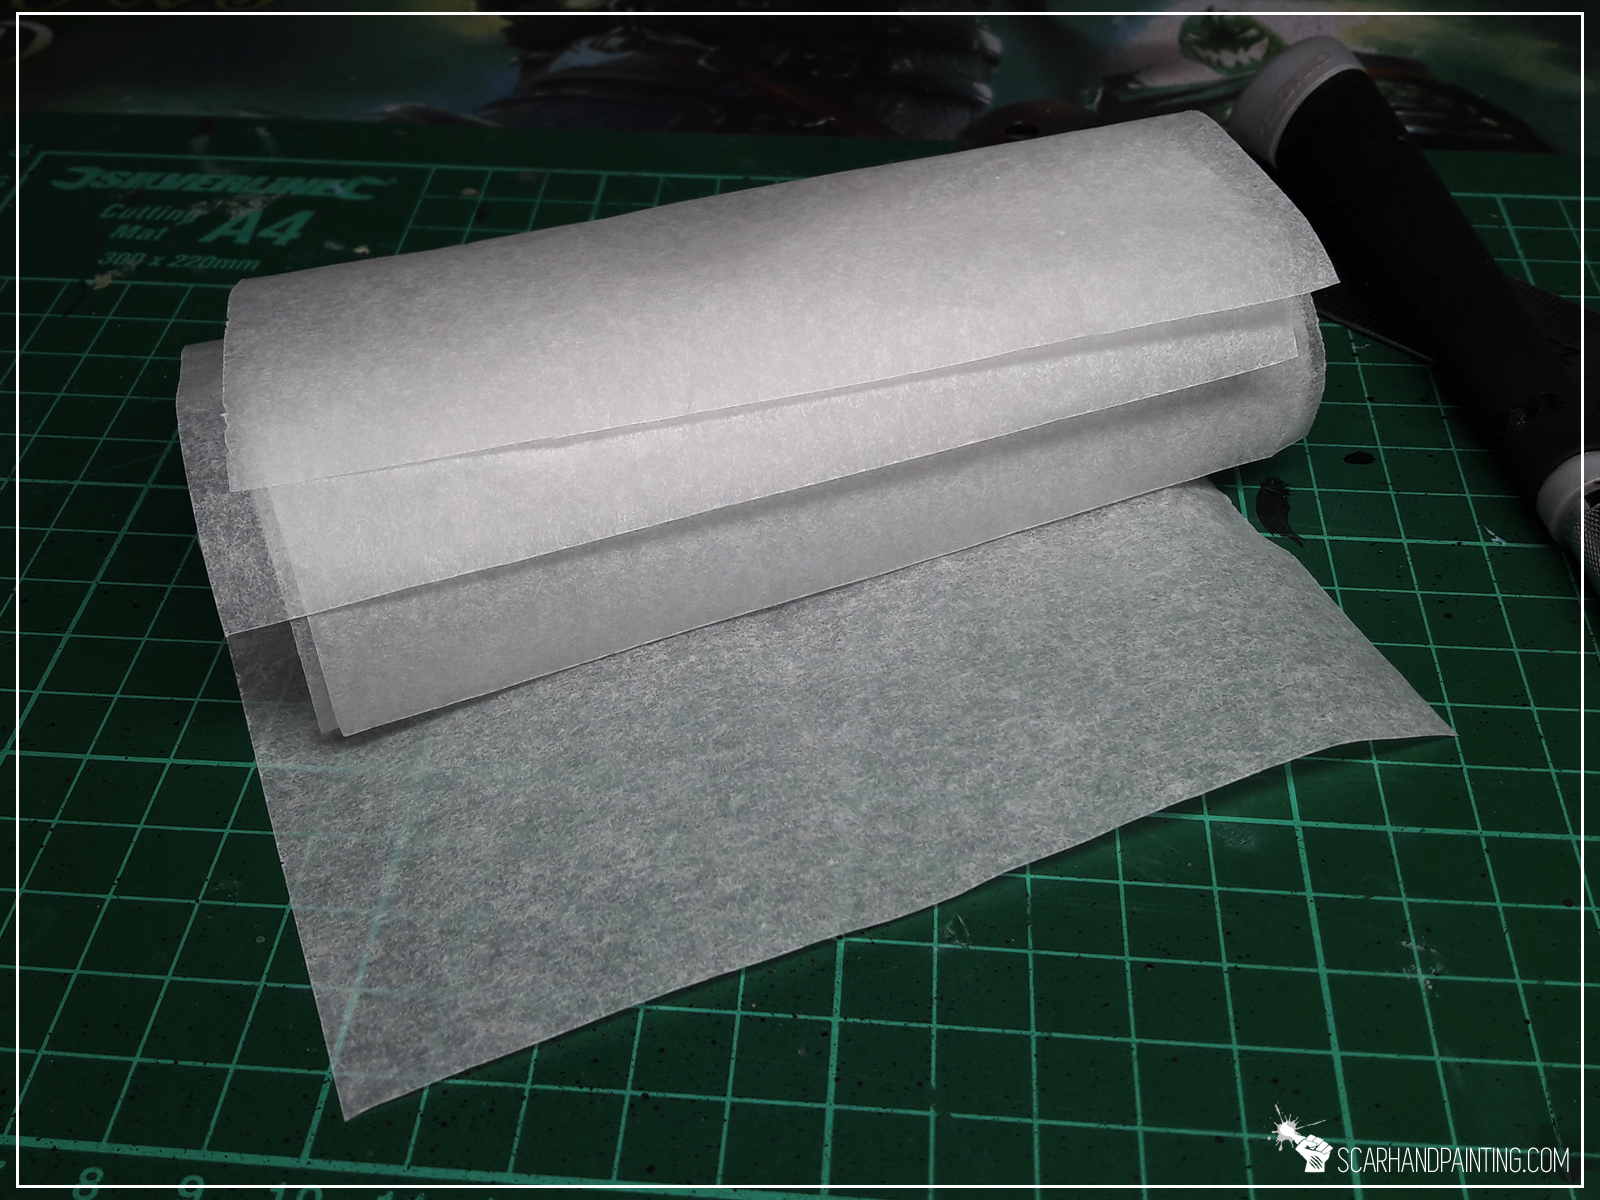
Next I cut a piece of baking paper to fit the sponge, again leaving about 5mm space between the edge of the sponge and the paper itself.
Step three:

I filled the “palette” with water until the sponge couldn’t take anymore. The key is to avoid water outside the sponge.
Step four:
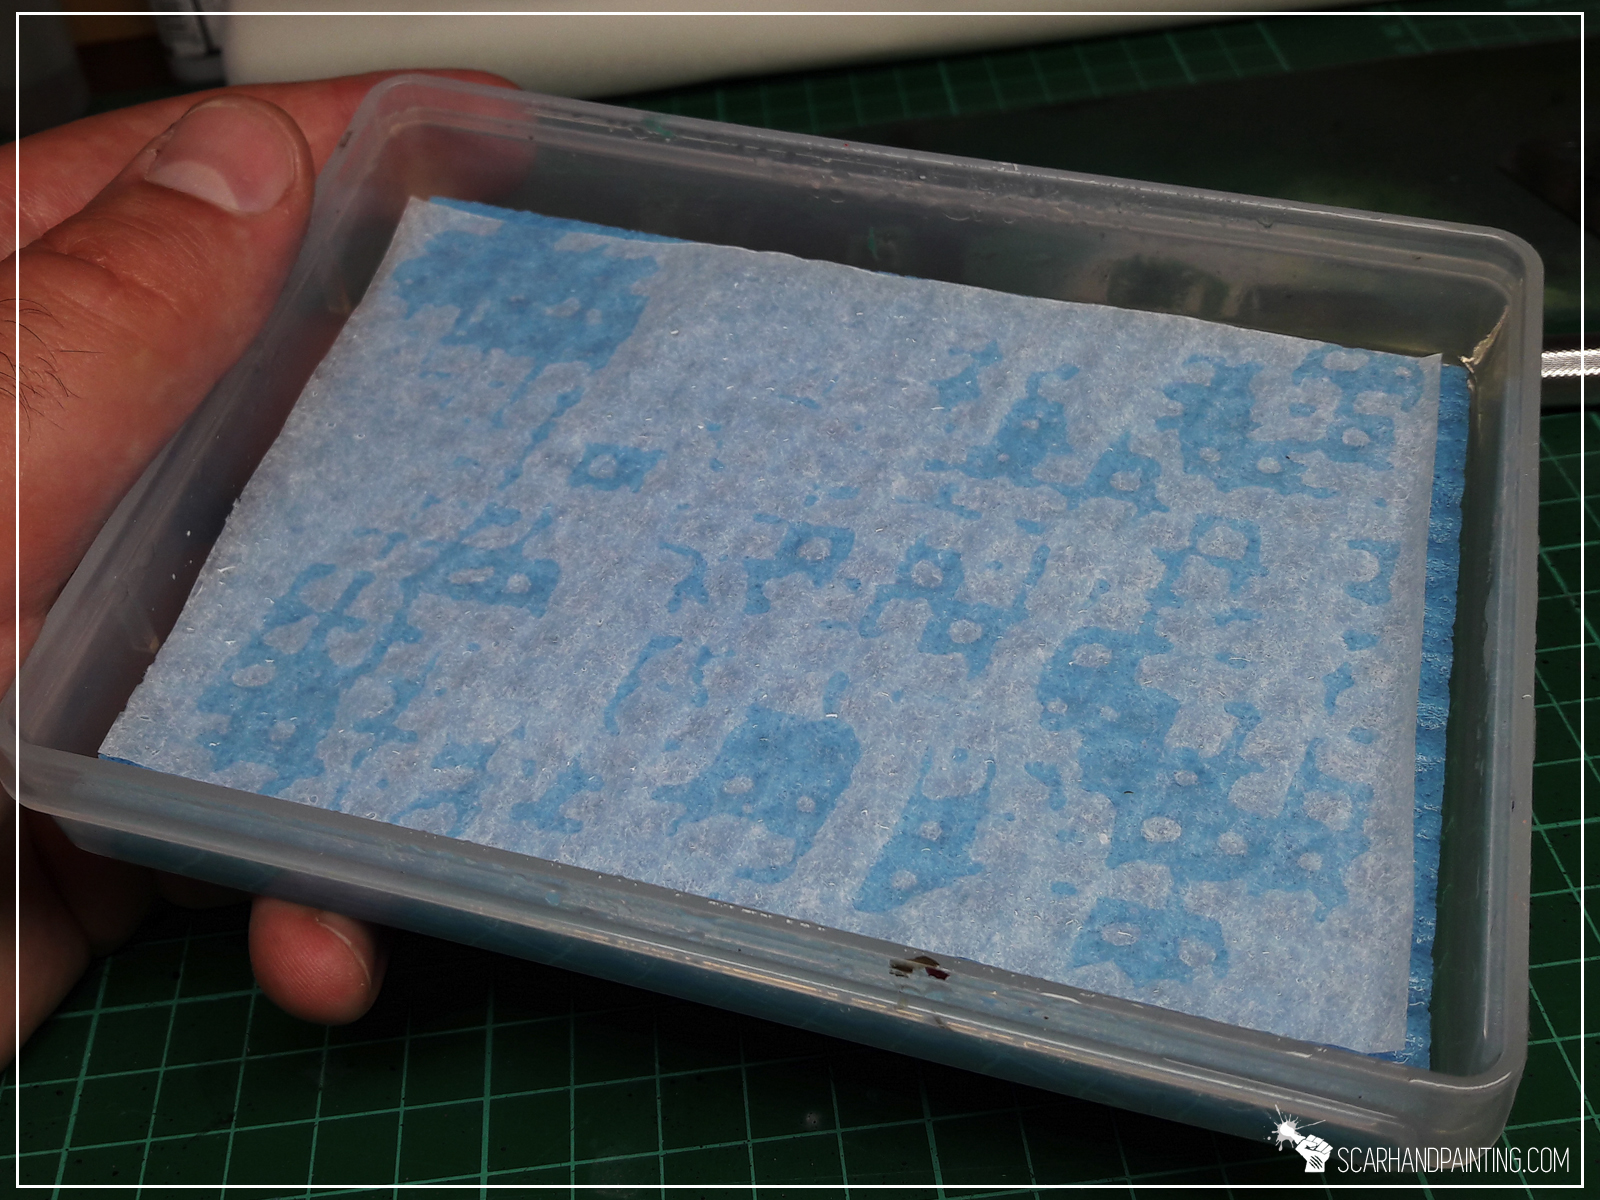
I then put a piece of baking paper on top of the sponge and held it in place, so that it took a little bit of water and flattened. That’s actually it – Wet Palette complete and ready for action!
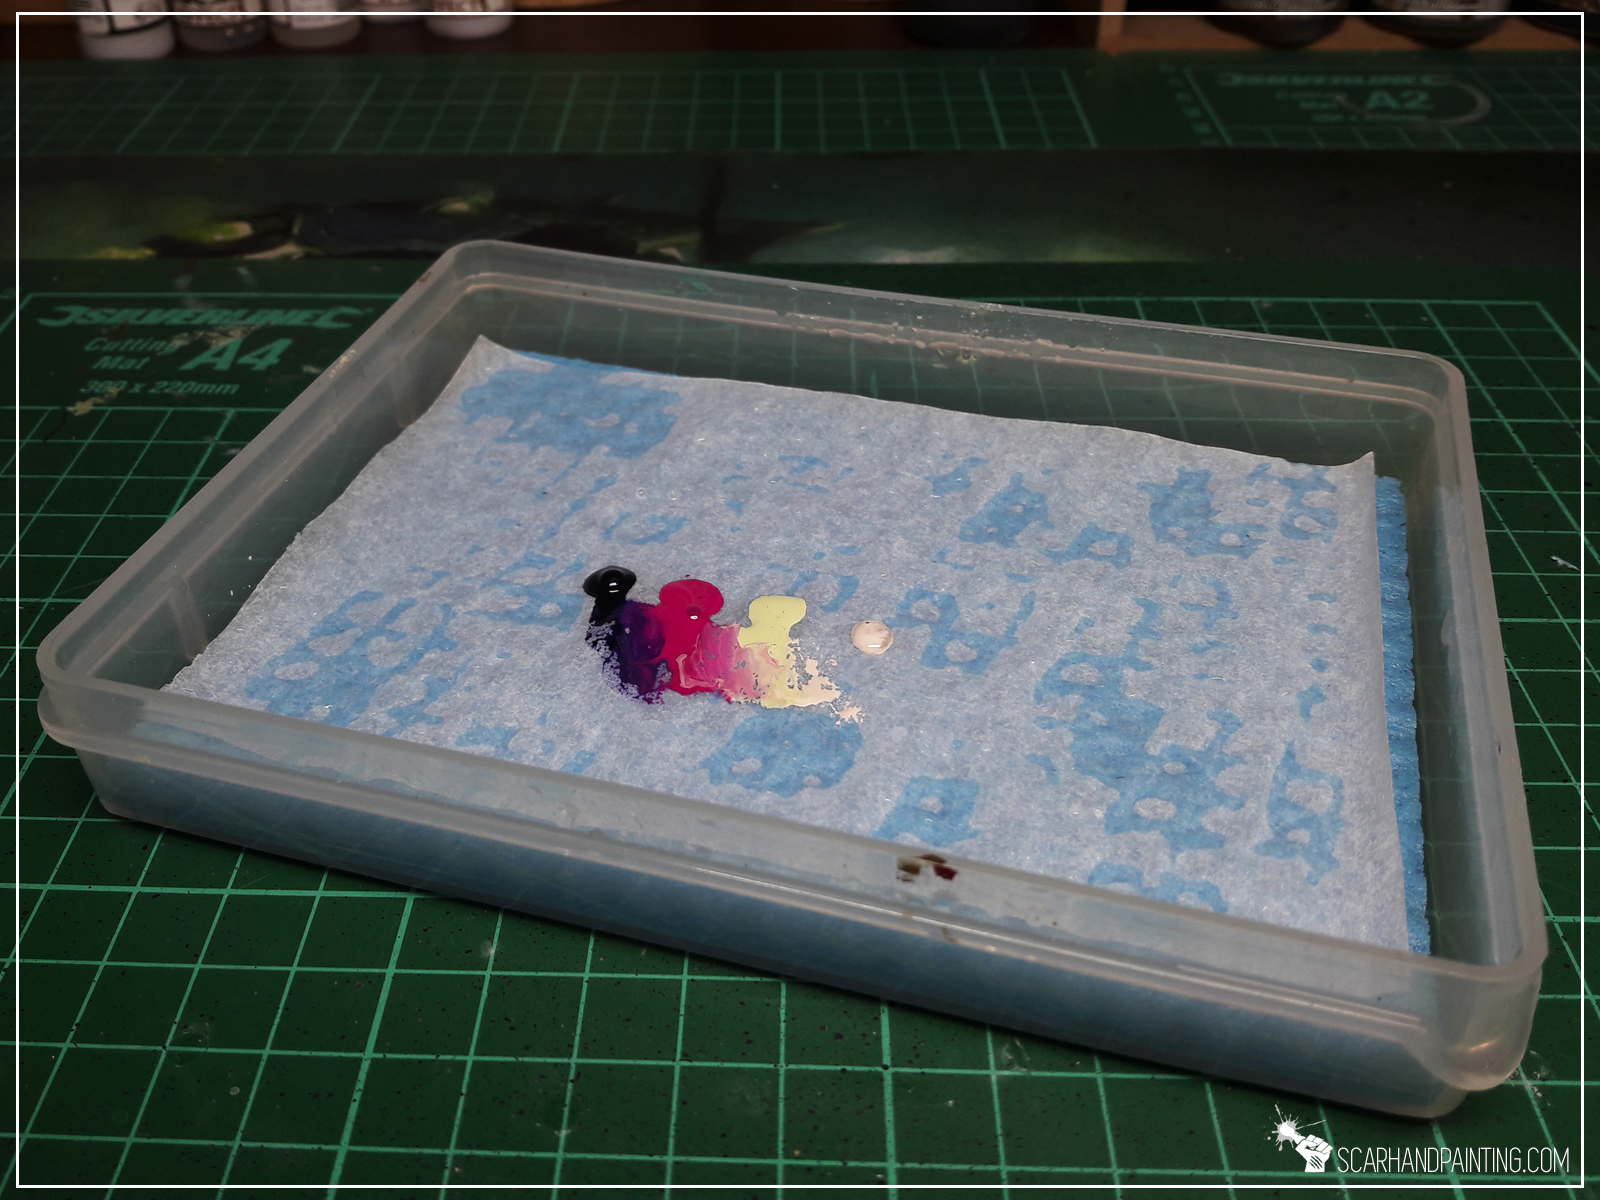
Now I can “save” the paints for later use…
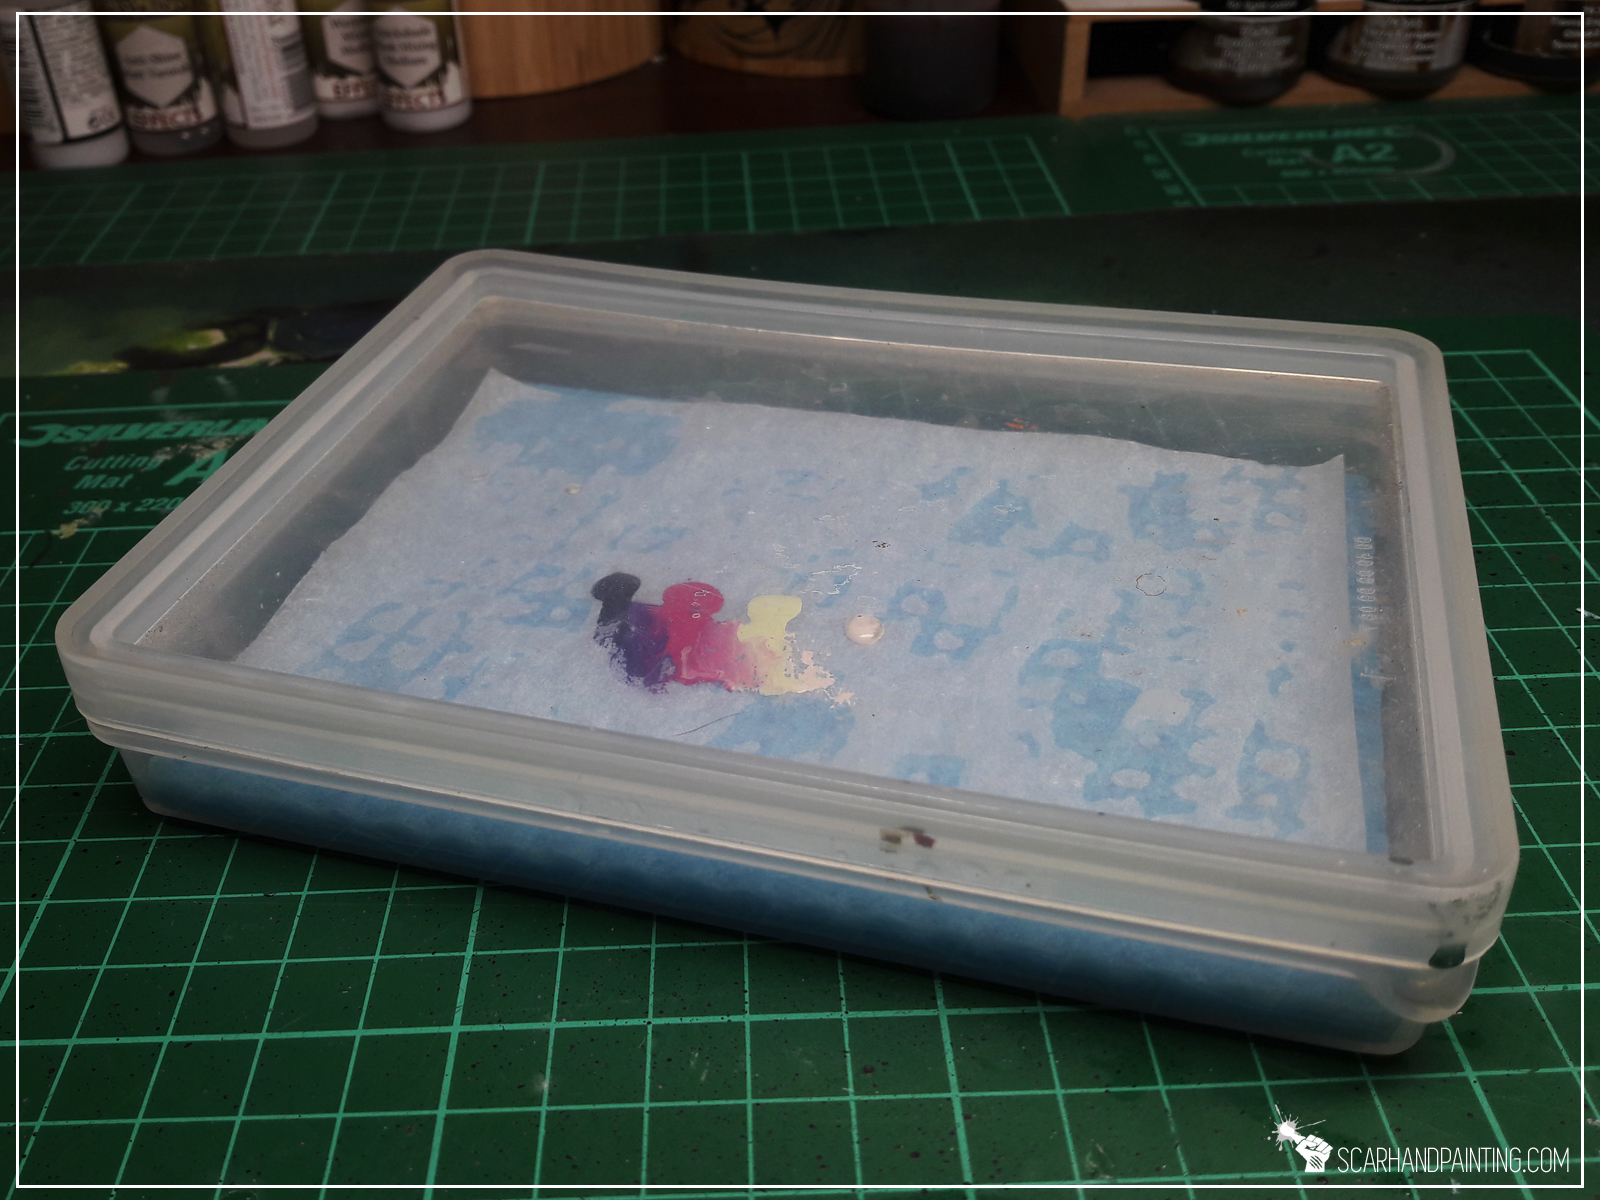
Important tip: You will be switching the piece of baking paper every now and then, but I advise you to occasionally switch the sponge too. Depending on what kind of soft sponge you’ll use it might get smelly after long use. It’s because nowadays kitchen sponges are made out of algae and similar organic material. Just saying 😉
You find this article helpful? Don’t be a stranger and drop me a comment below!

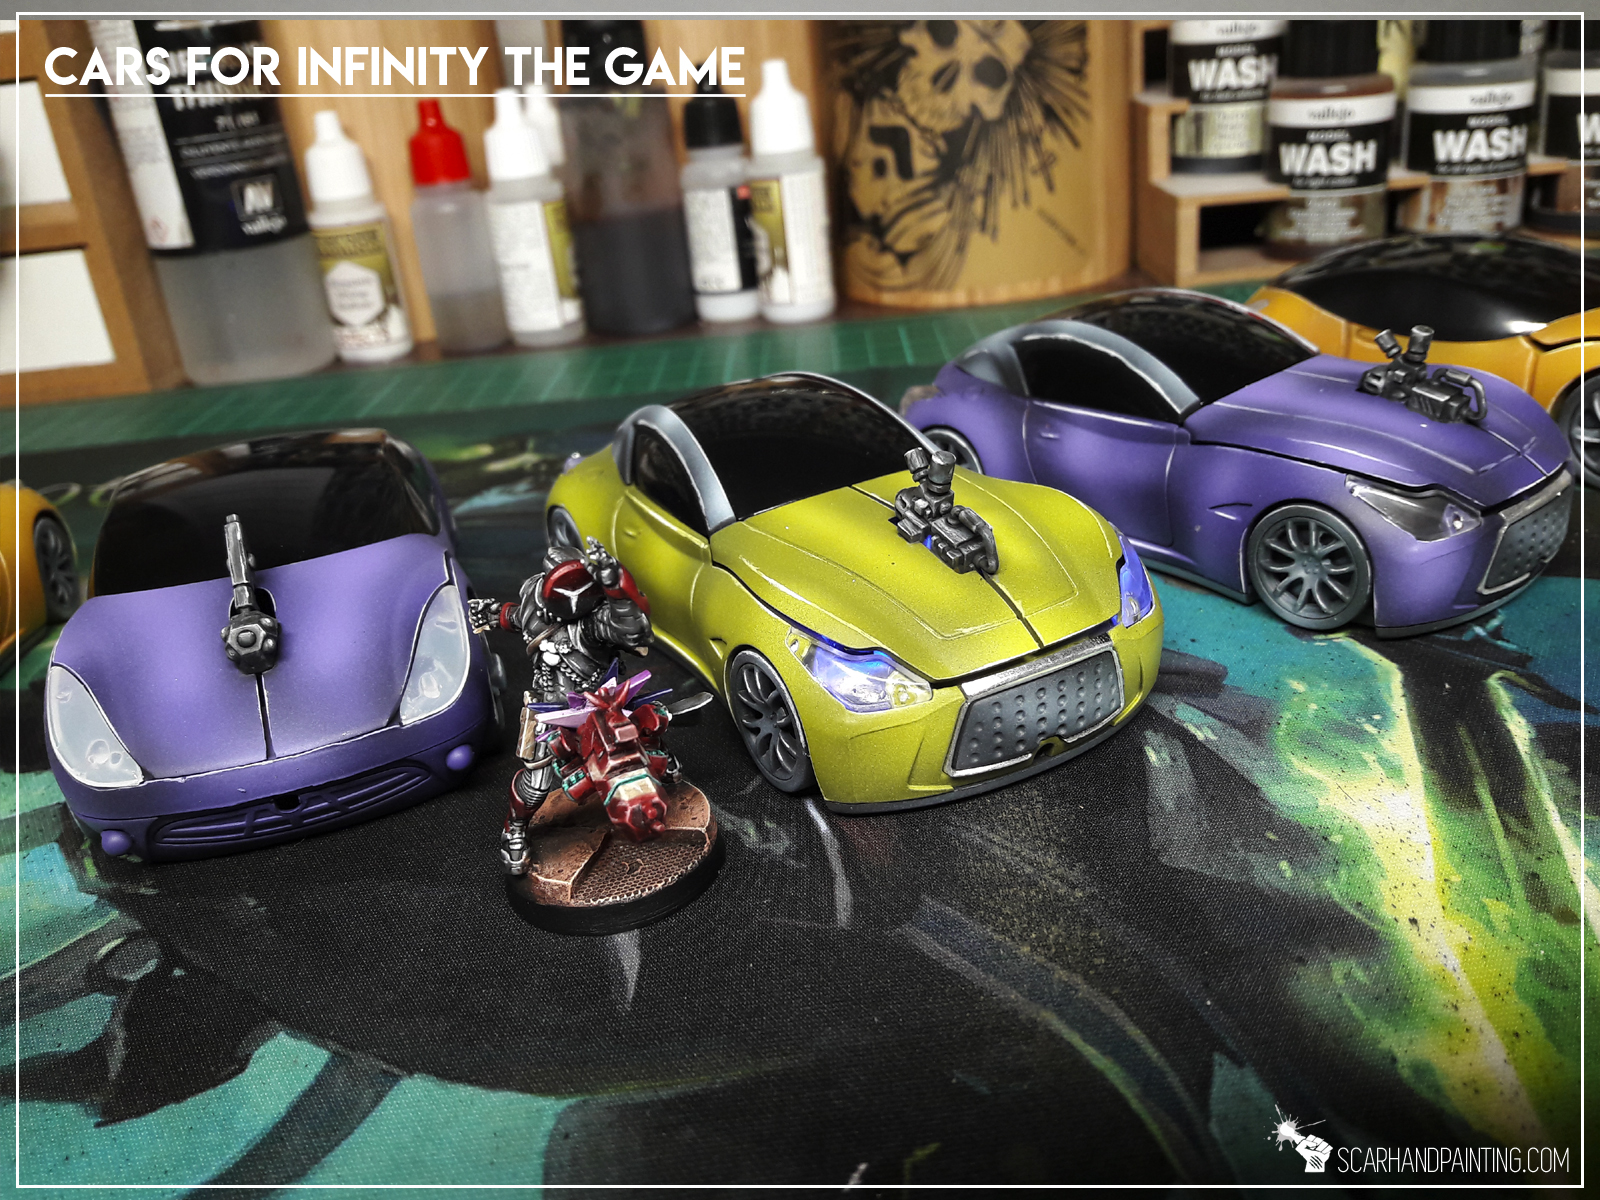
The idea of introducing cars to my Infinity gaming board is one to haunt me for quite some time now. Many times I found myself in a toy store, standing before a toy car shelf and trying to pick a right car to fit Infinity the Game scale and sci-fi theme. Easy to say that all my efforts were futile, thus I postponed the idea time and time again, slowly loosing hope. This state of things changed drastically just few days ago…
I was visiting the post office, when all of a sudden I saw it! The postal worker was playing with an ideal toy car. Wait!? She wasn’t playing at all! That was a PC Mouse! Imagine my shock, when that realization struck me. Shaped like a car, with lights glowing bright, the PC Mouse was just perfect!
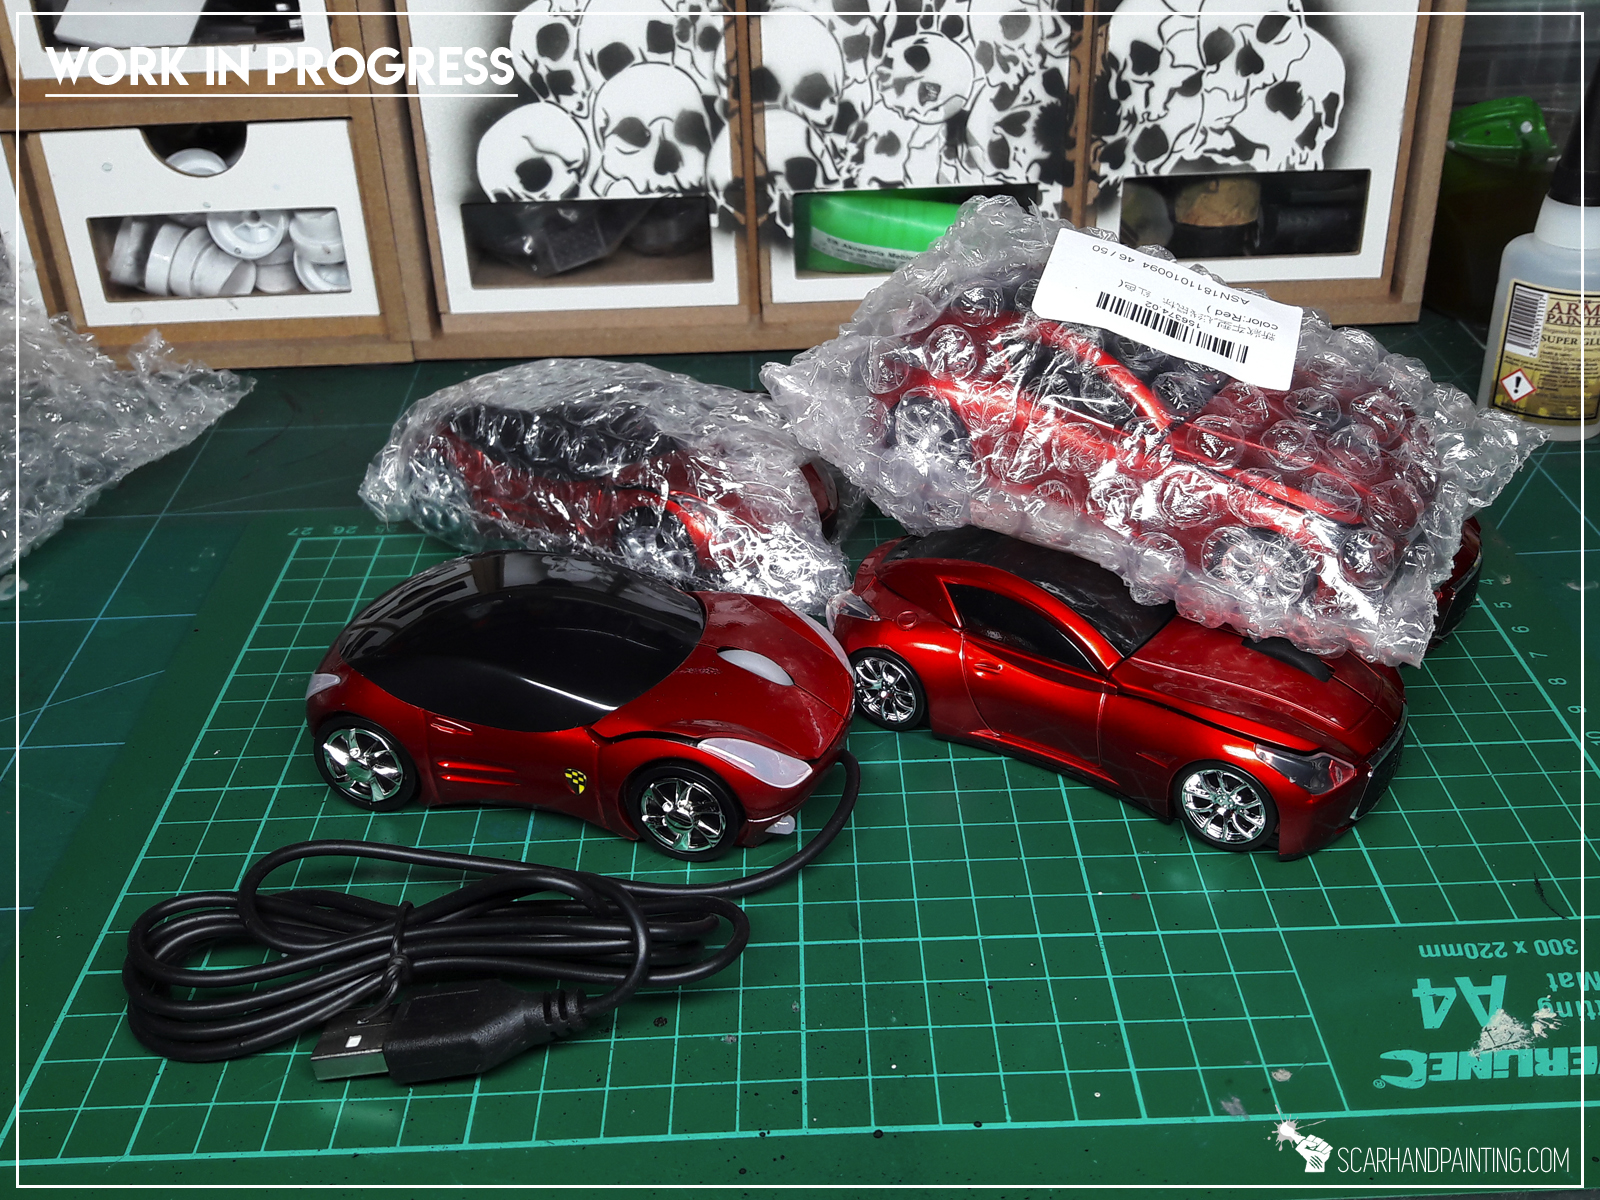
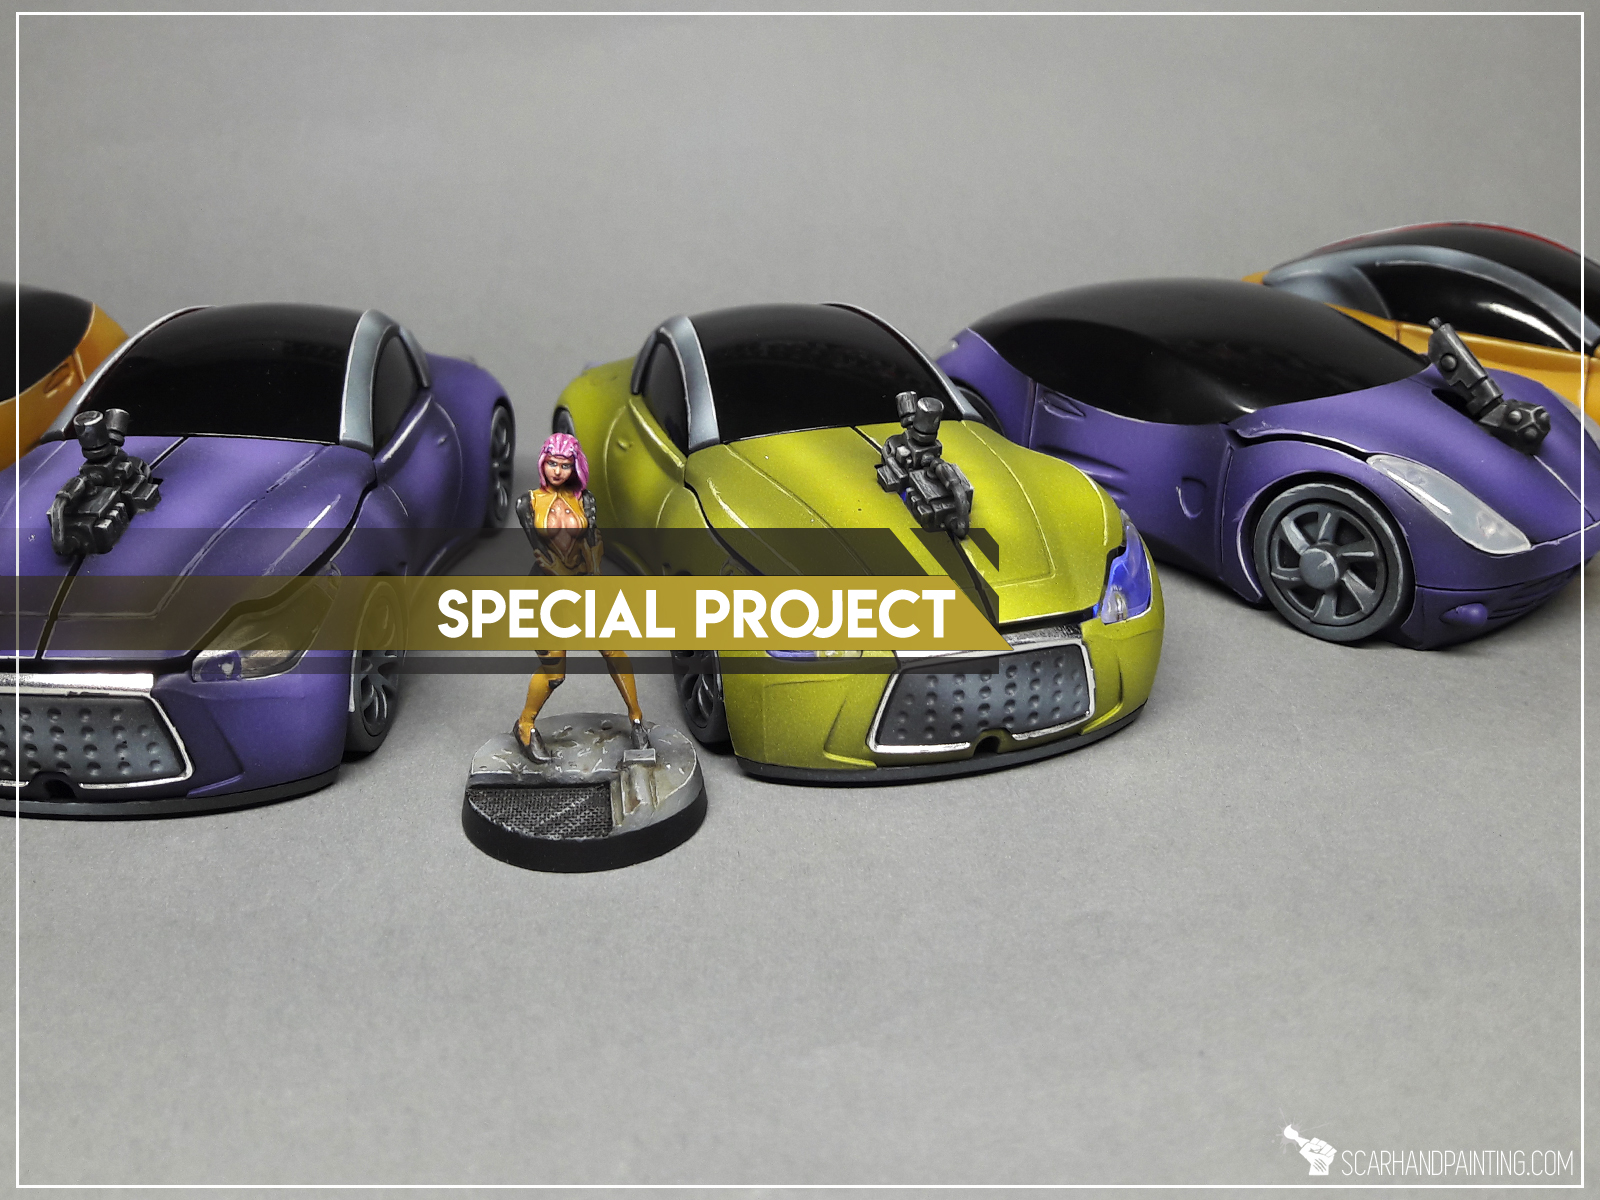
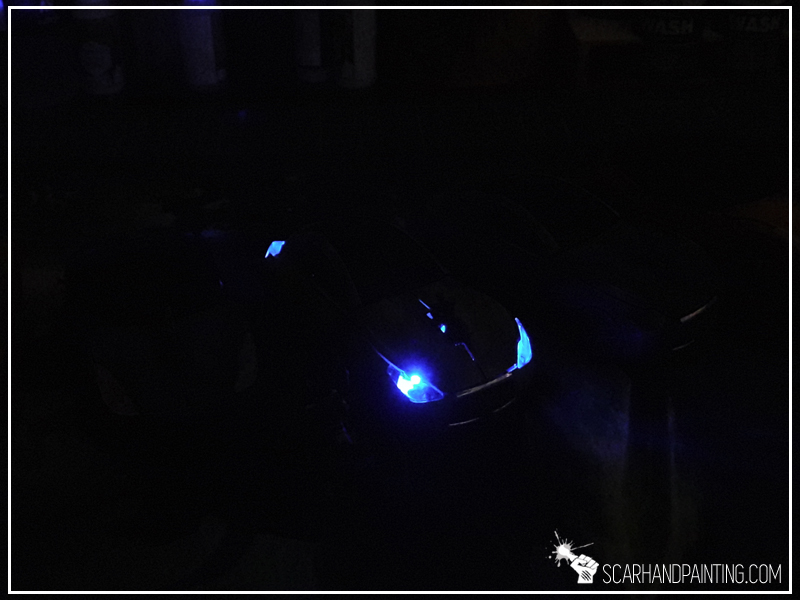
Two days later I was in possession of half a dozen PC Mouse cars. This was where “Infinity Cars” Special Project actually started. After a good look at the cars features I figured that apart of awesome futuristic design, the cars had translucent light covers, black mirrored glass, chrom elements plus some of them had battery powered interior glowing lights. These were key features I wanted to transfer onto final form. I started dismantling the cars to pieces…
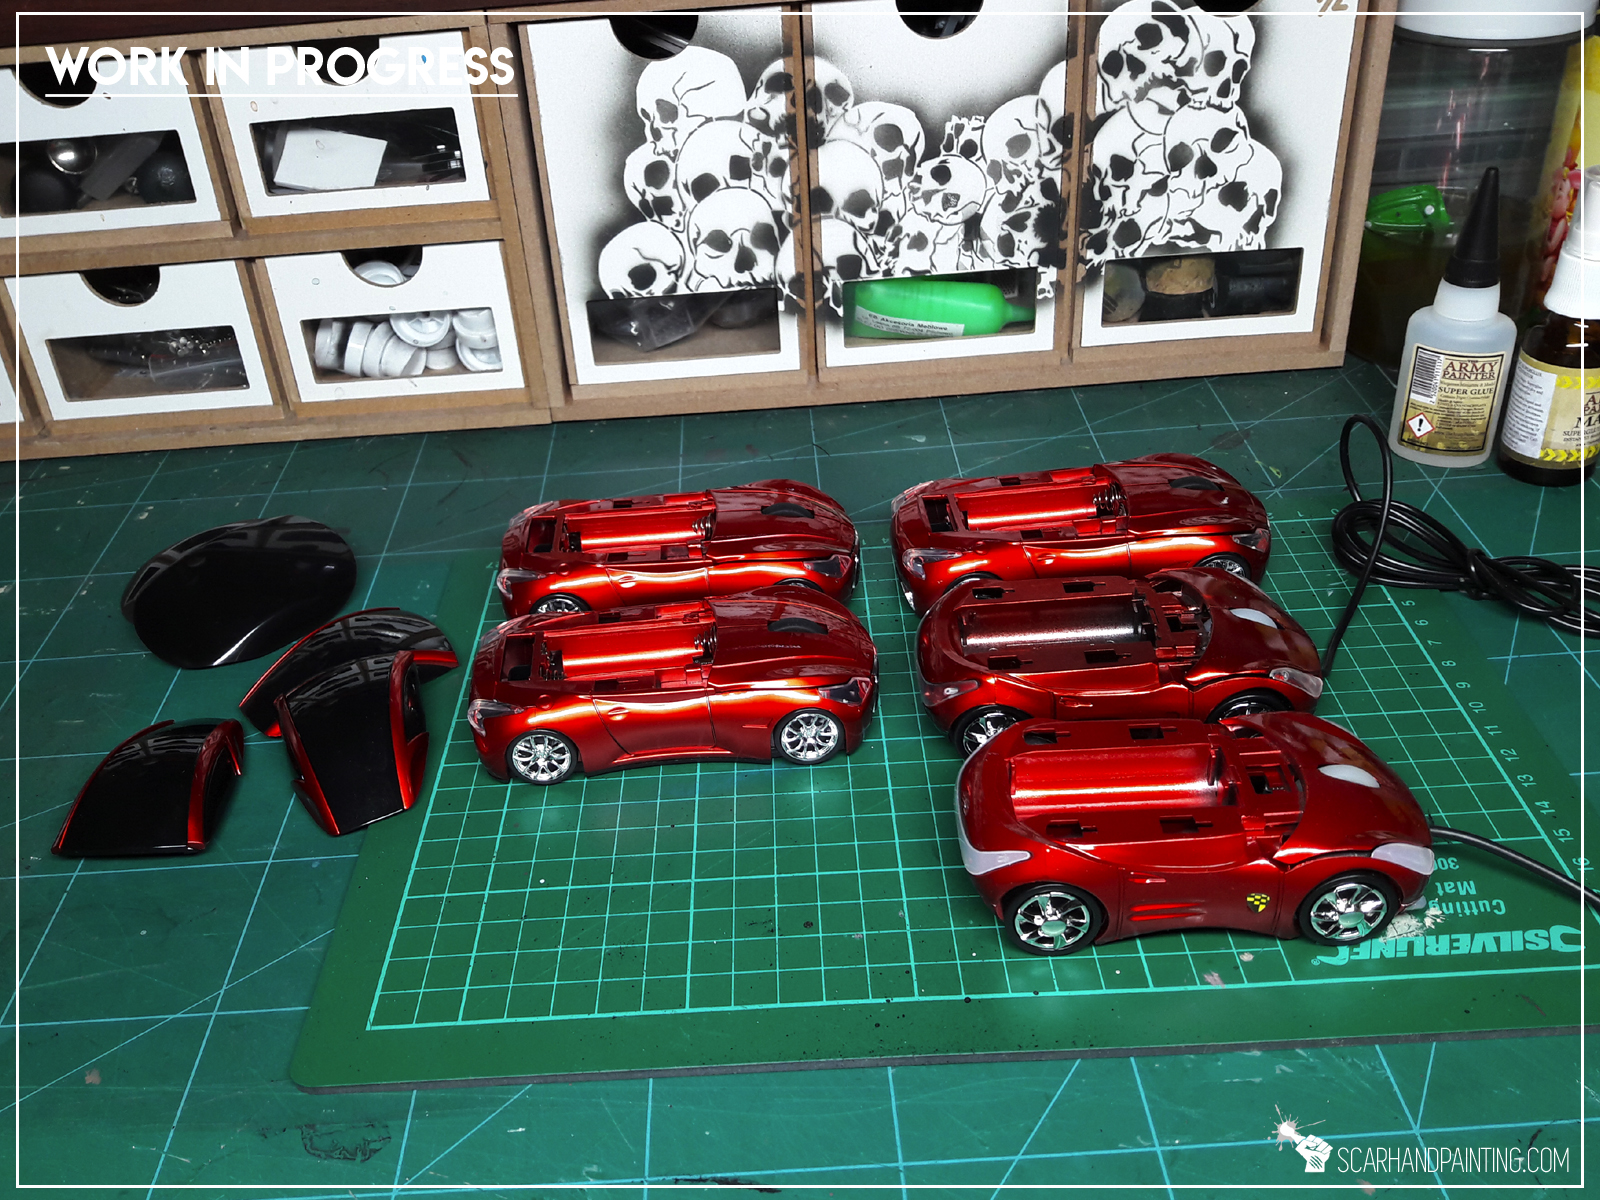
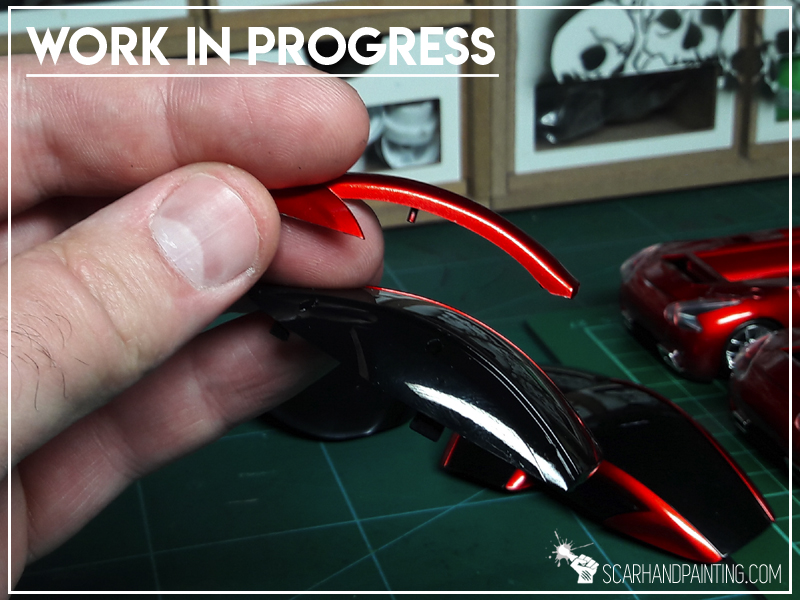

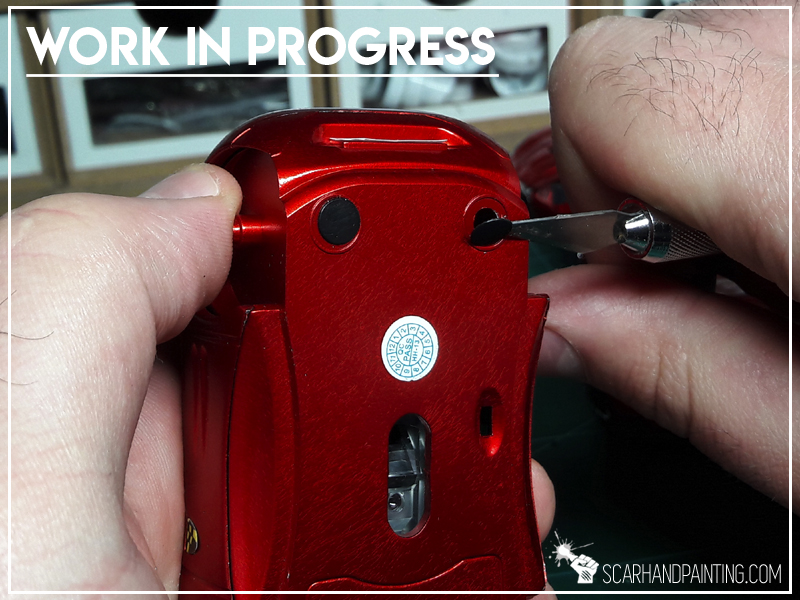
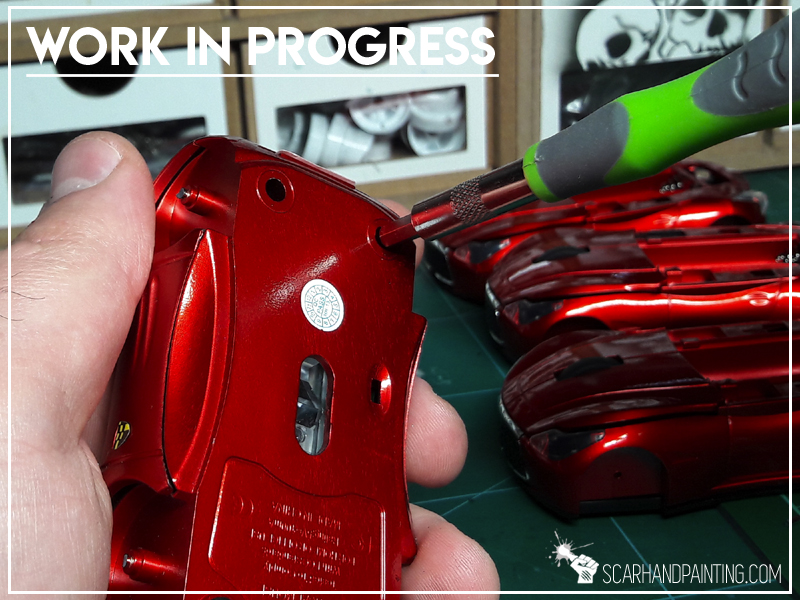
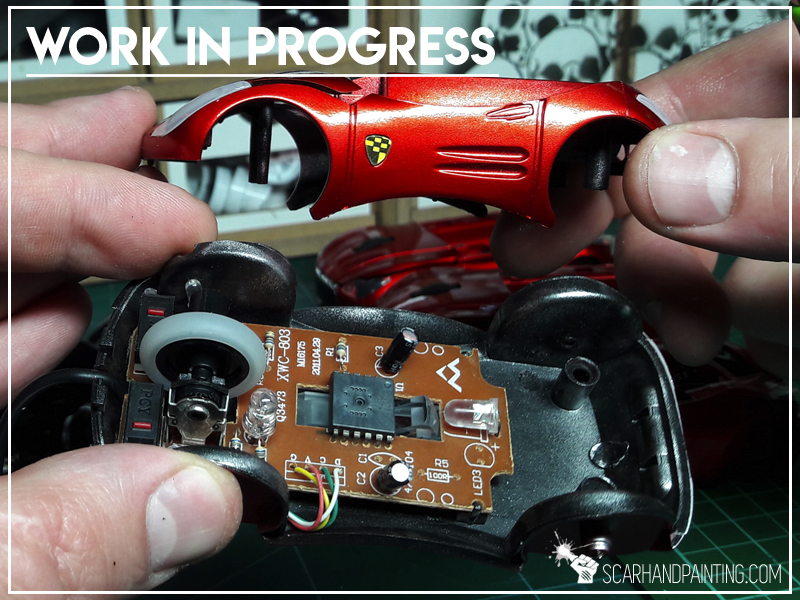

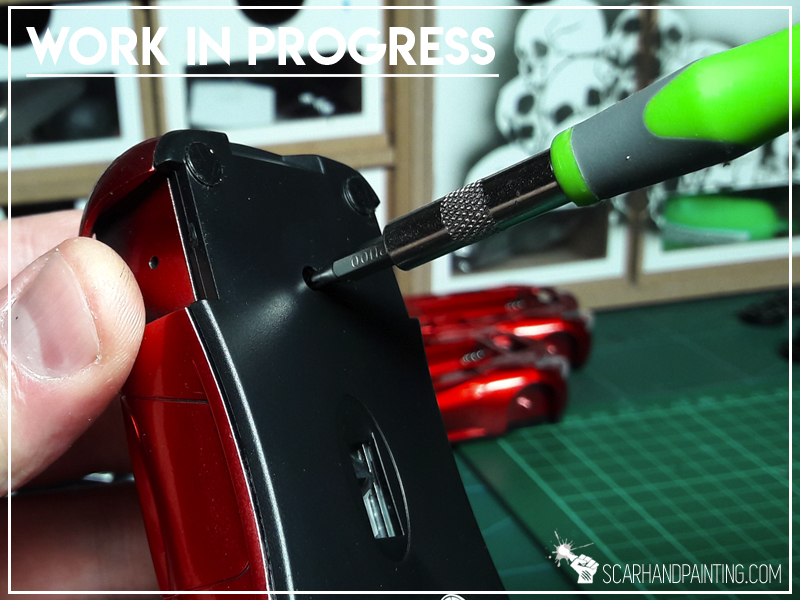

It didn’t took long, as parts came off pretty easily. Depending on a car type there were either one or two screws that needed handling, other than that I only needed to pull parts gently for them to come apart.
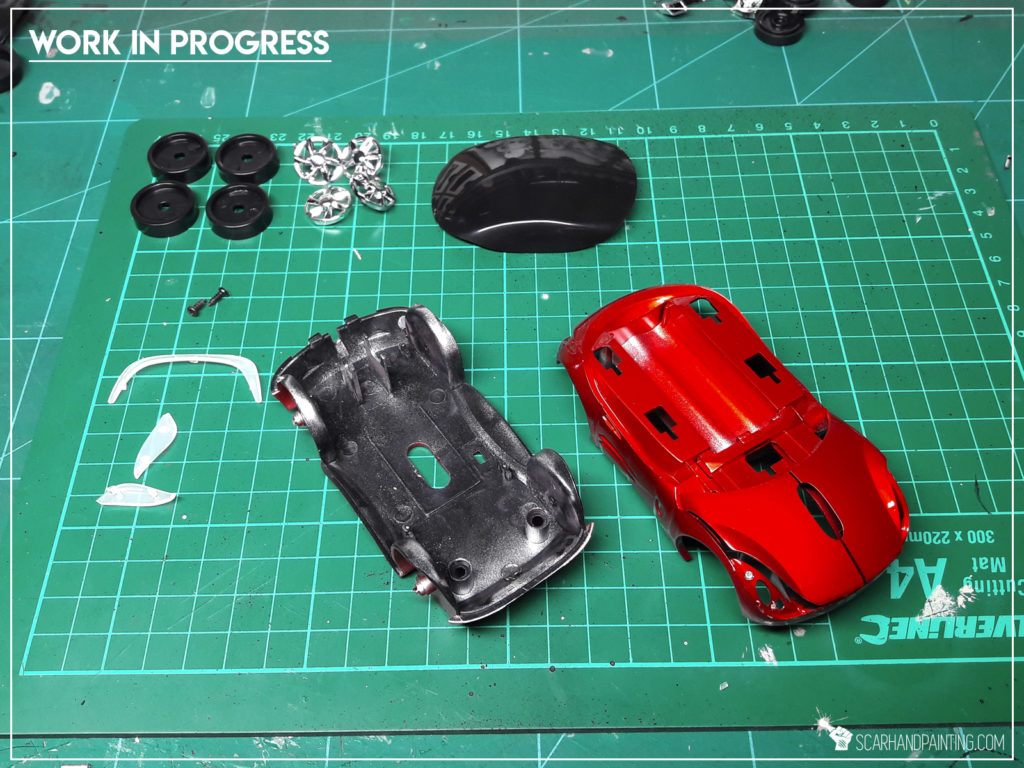

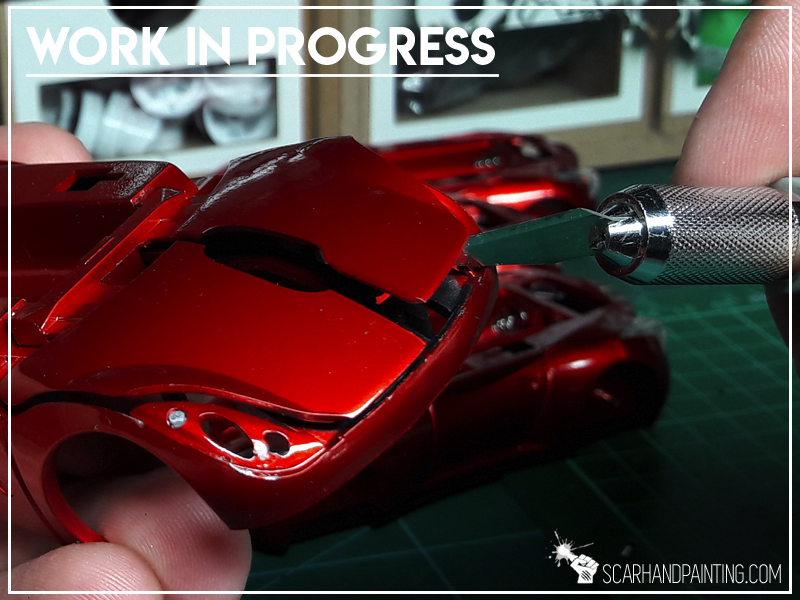
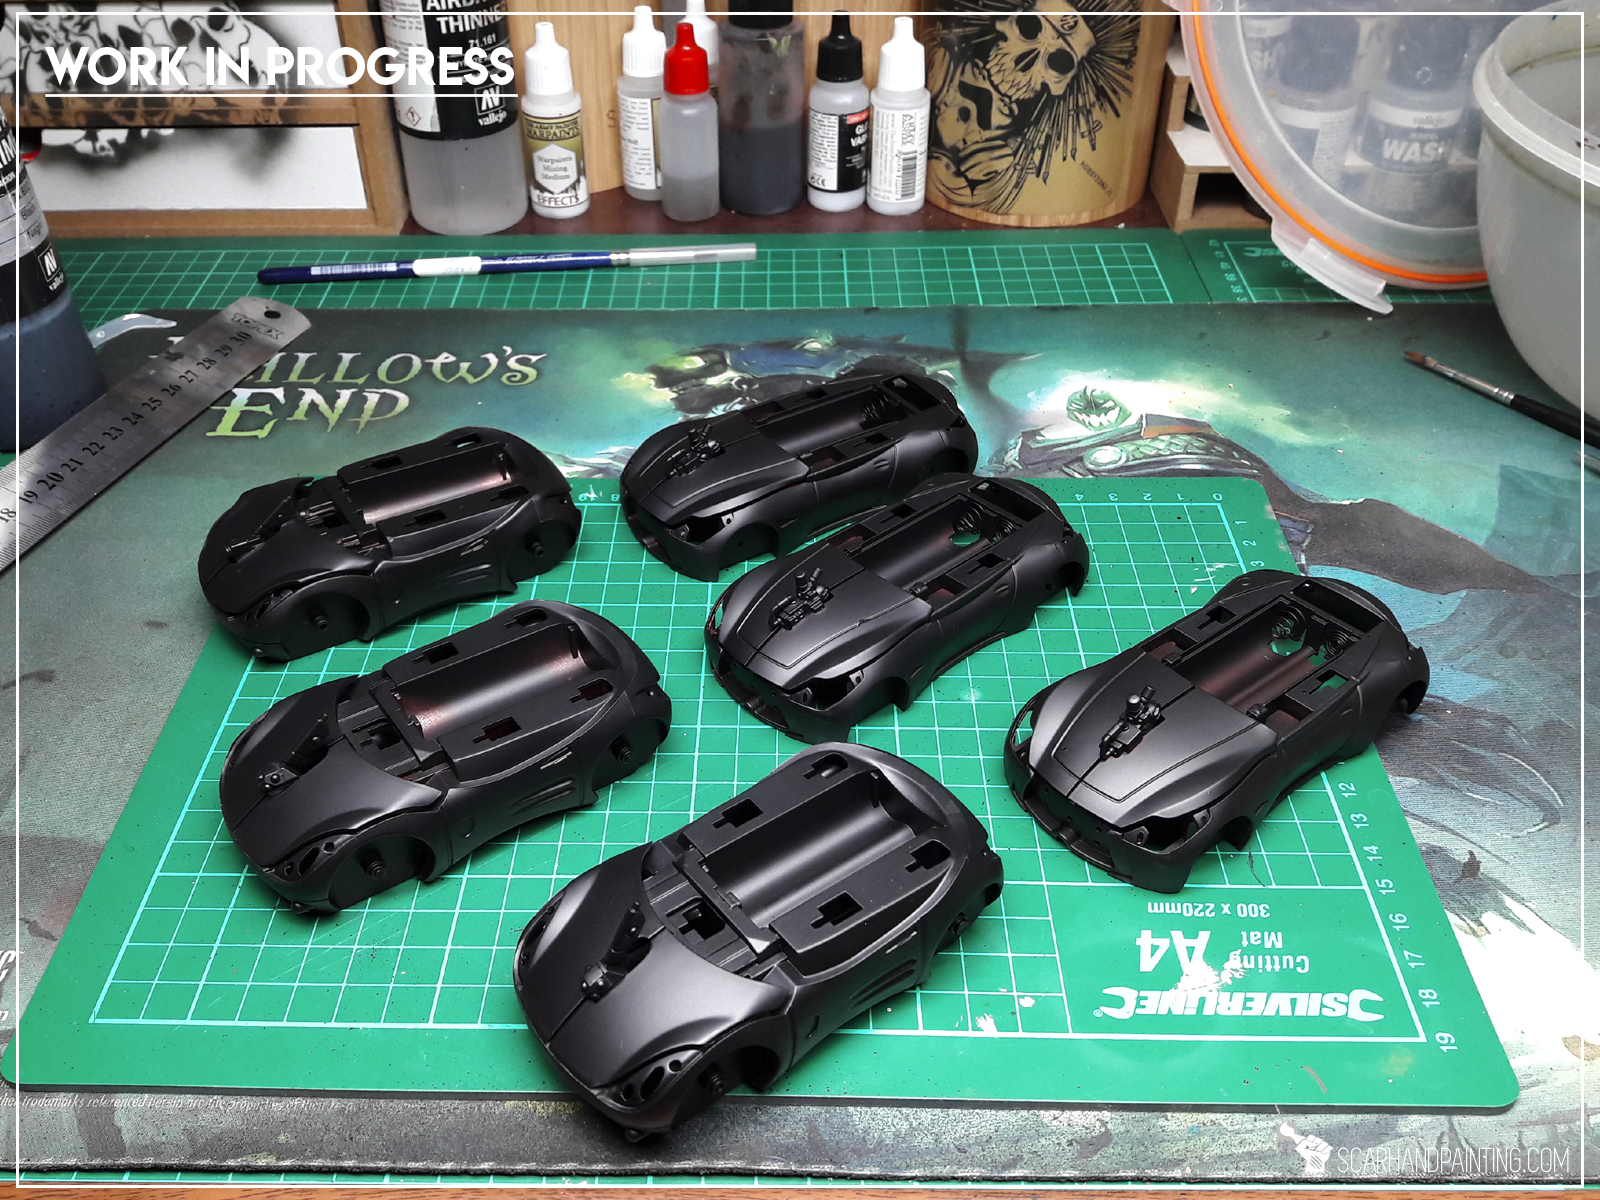
Every piece being separated, I prepared everything for a proper paint job. I didn’t modify the cars too much. Removed “scroll buttons” and glued in some Warhammer 40k bitz to add Sci-fi looks instead, glued left and right buttons firm, removed “the insides” of cable mouses. Didn’t even bother to strip the paint.
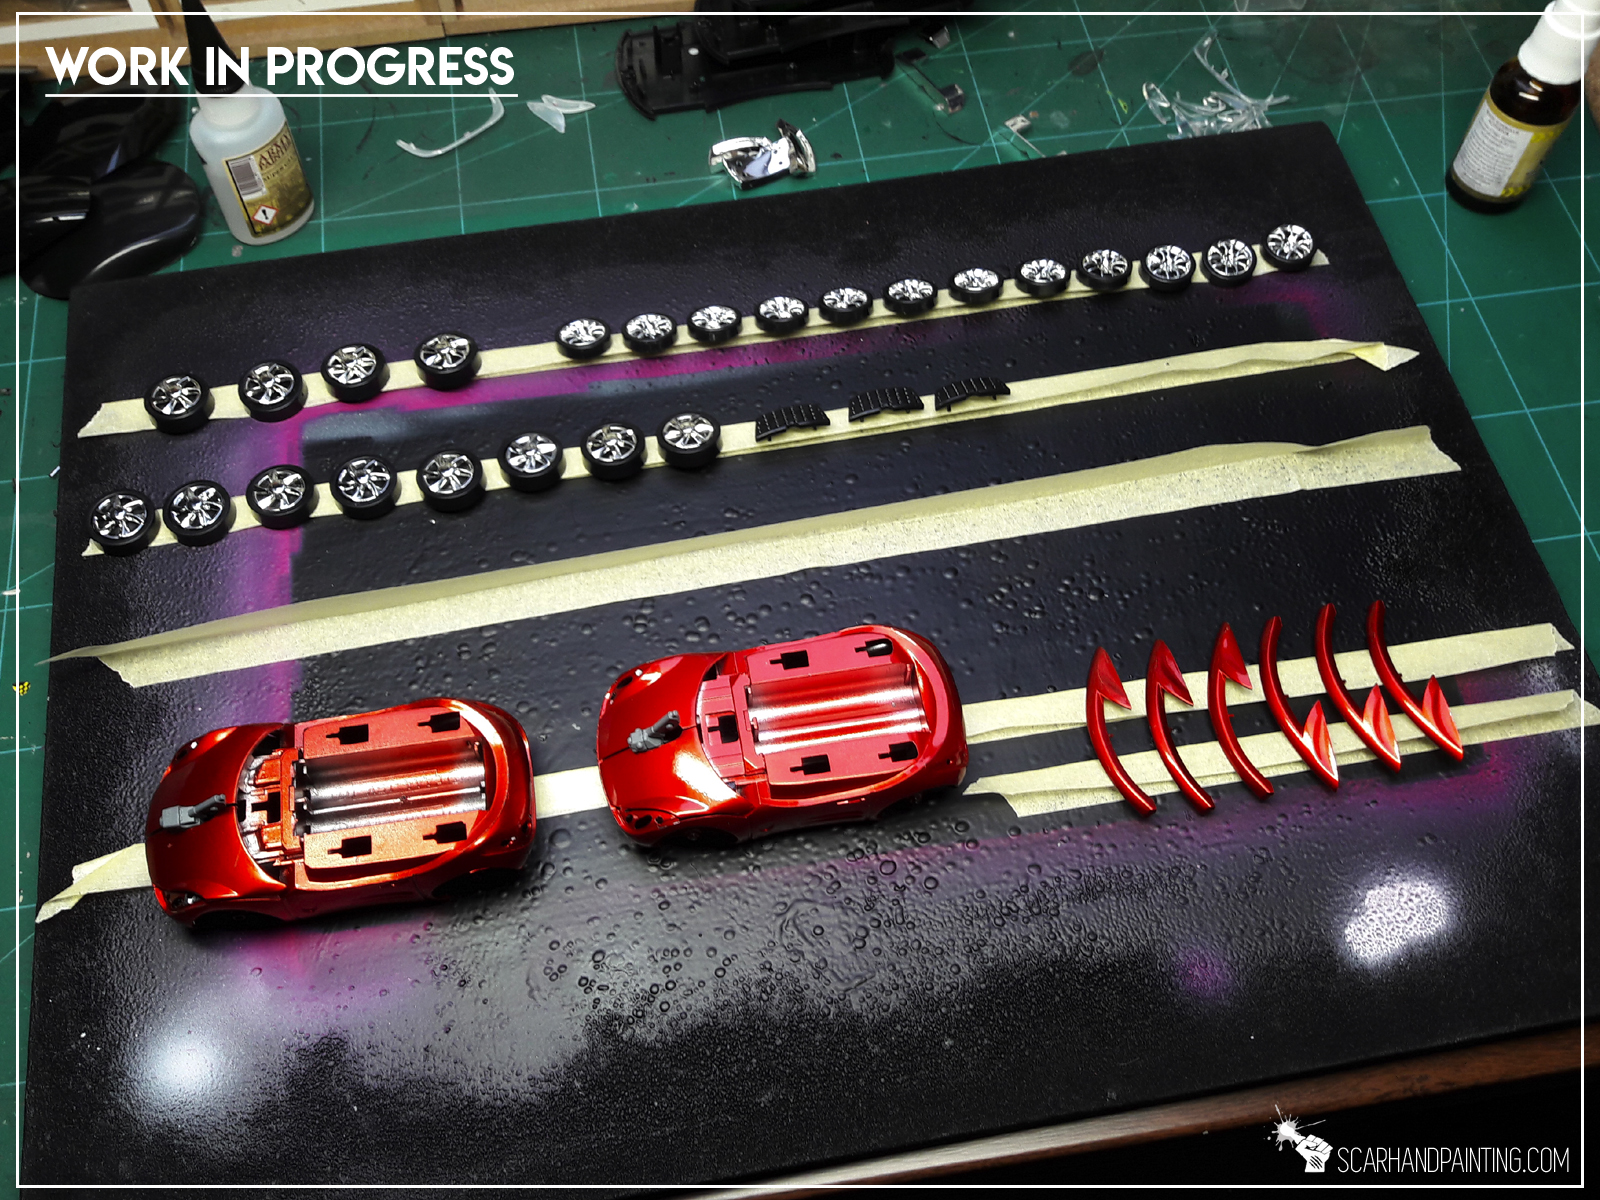
Afterwards the cars got undercoated and soon after I applied a paint job with bright, juicy colours. I decided to keep the paint job simple, with no decals, freehands and other stuff that could have spoiled the perfect shape of these futuristic cars bodies. These are scenery pieces after all, too much is not always same as better.

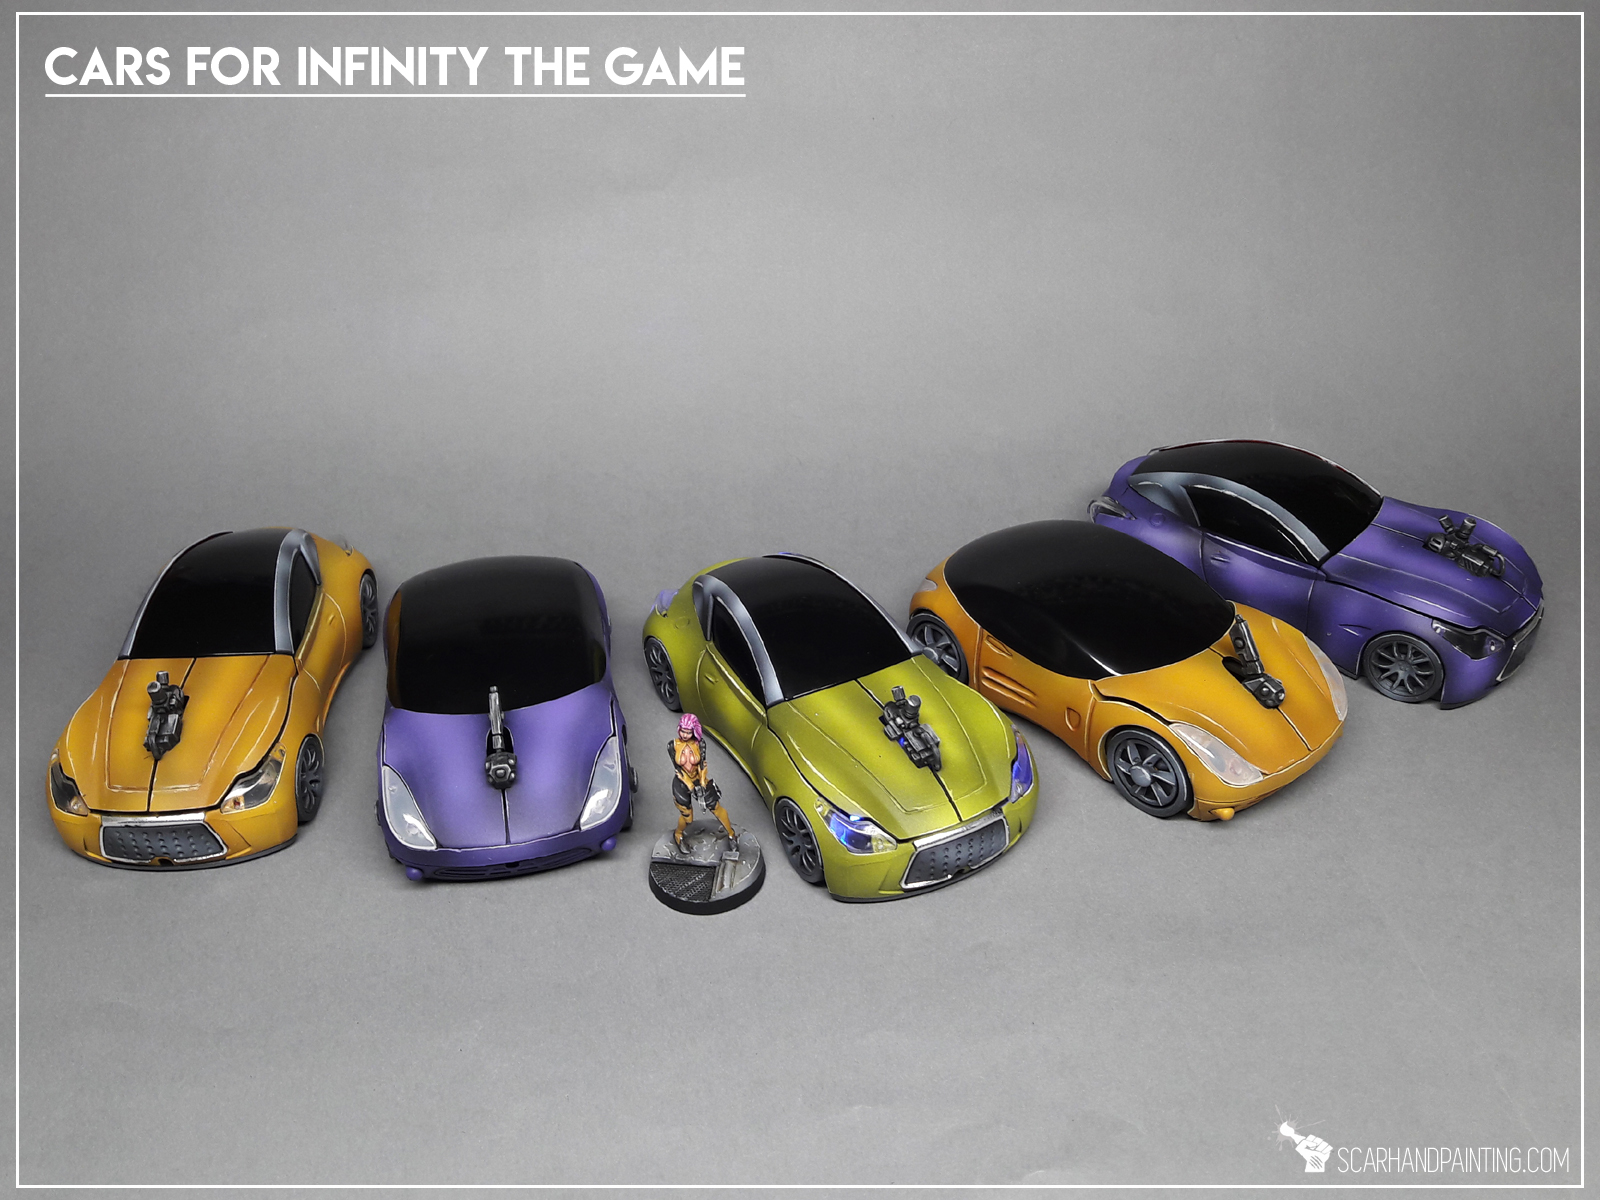
The “Infinity Cars” are nowe done and I cannot wait to use them in the upcoming games of Infinity. I do hope you like the idea of using PC Mouse as an Infinity scenery piece. If you want to grab your own, just look for “PC Mouse Car” at E-bay or google. In the meantime I invite you tocheck out the “Infinity Cars” Gallery… and tell me what you think in the comments below 😉
Cheers!

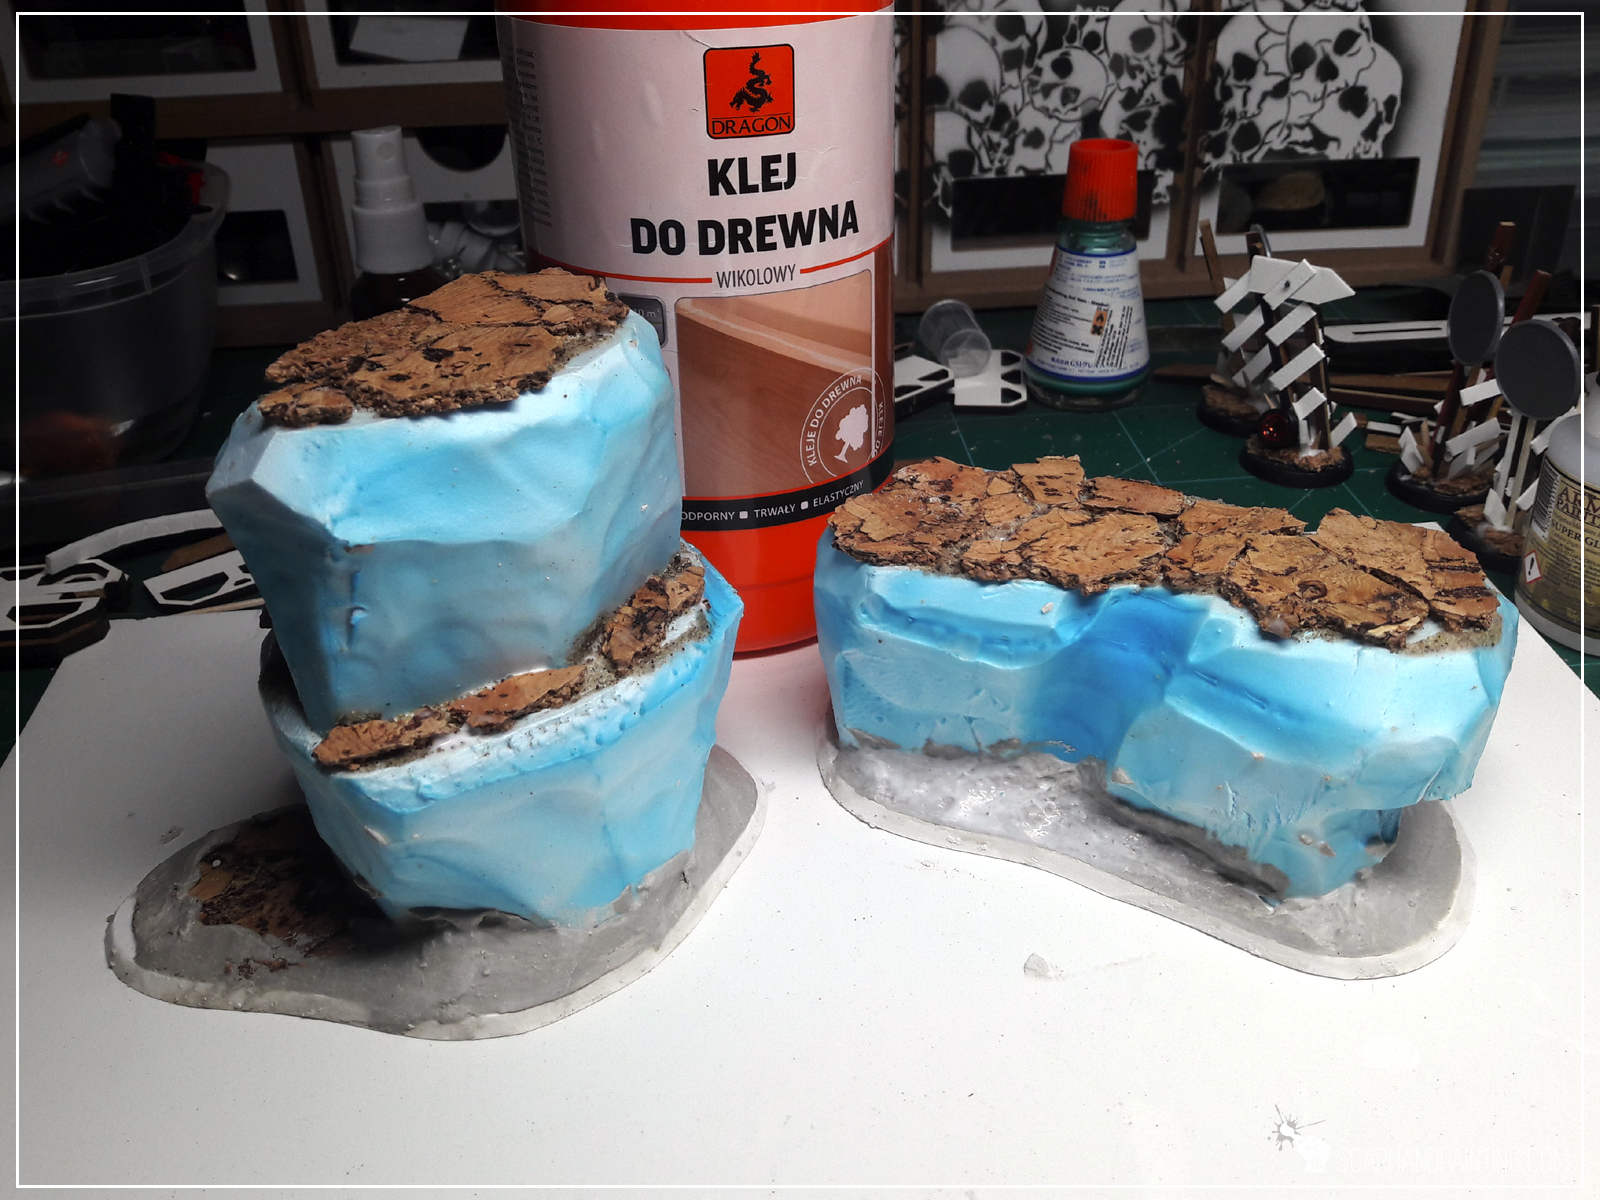
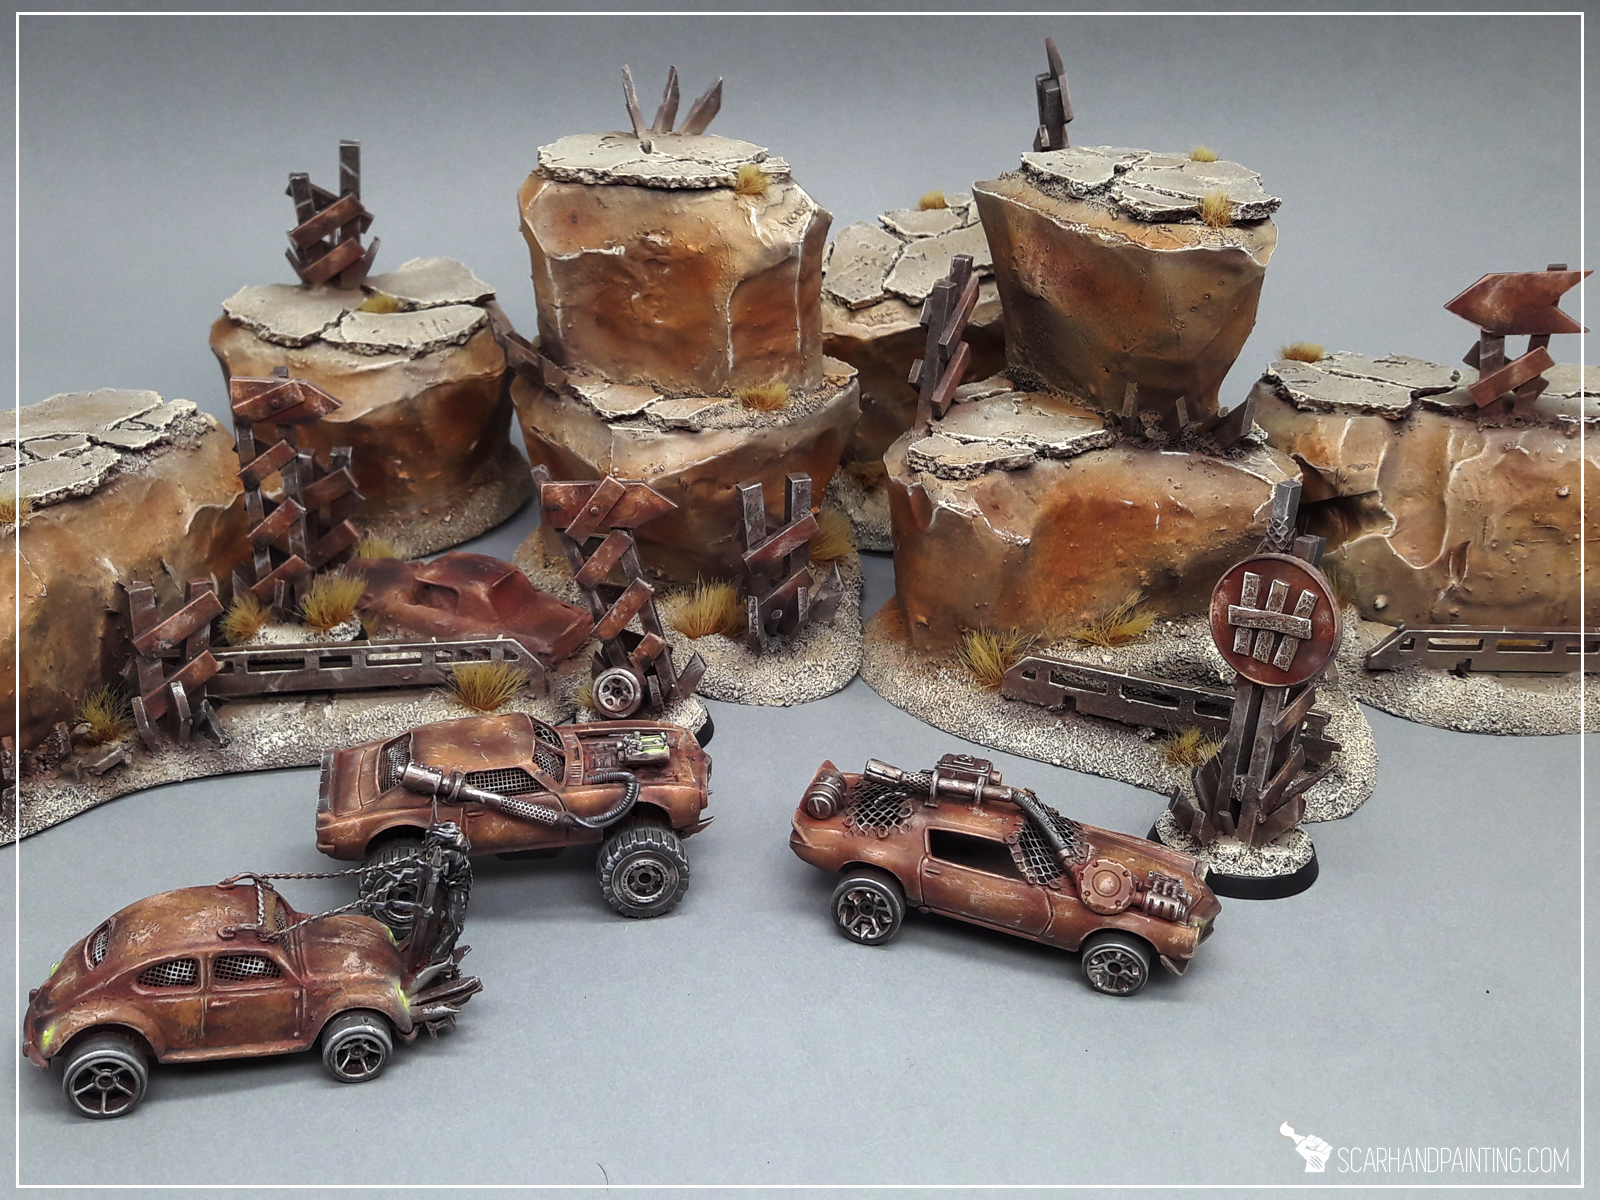
In this easy, step-by-step tutorial I’m going to show you how to create a Desert Scenery as could be found in “Gallery: Gaslands”.

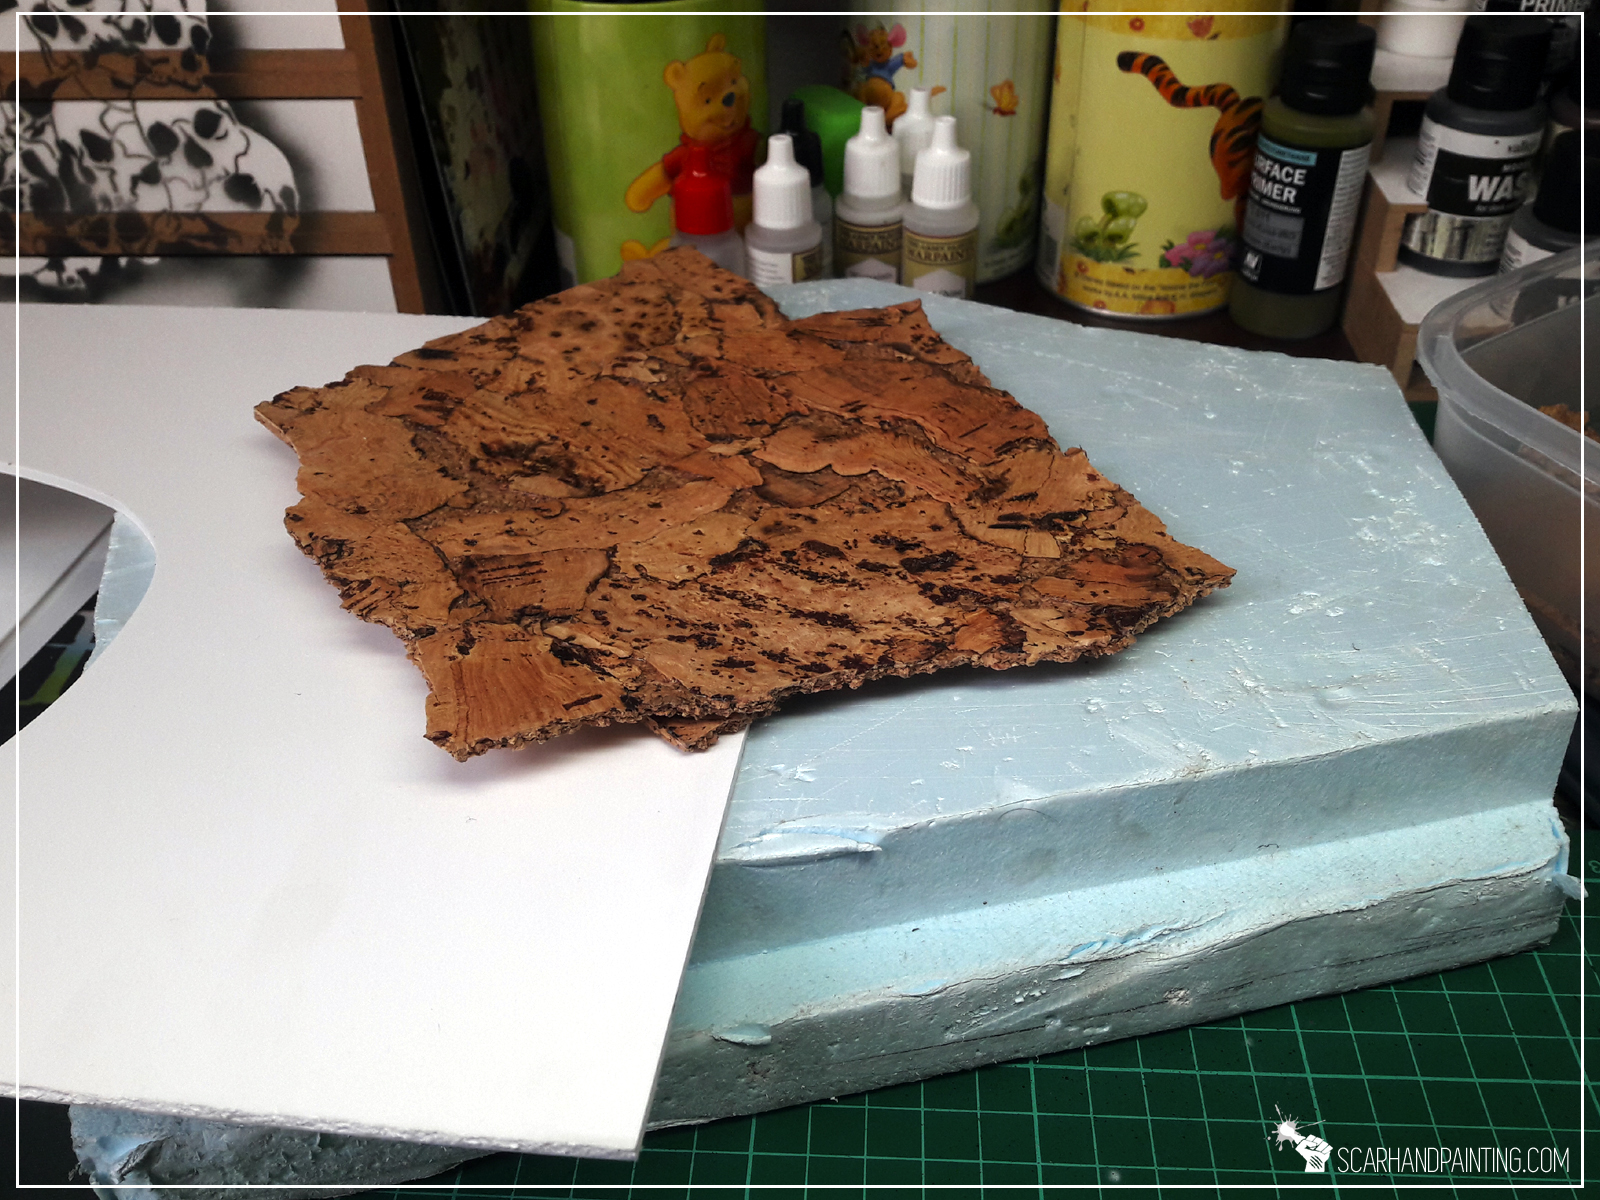
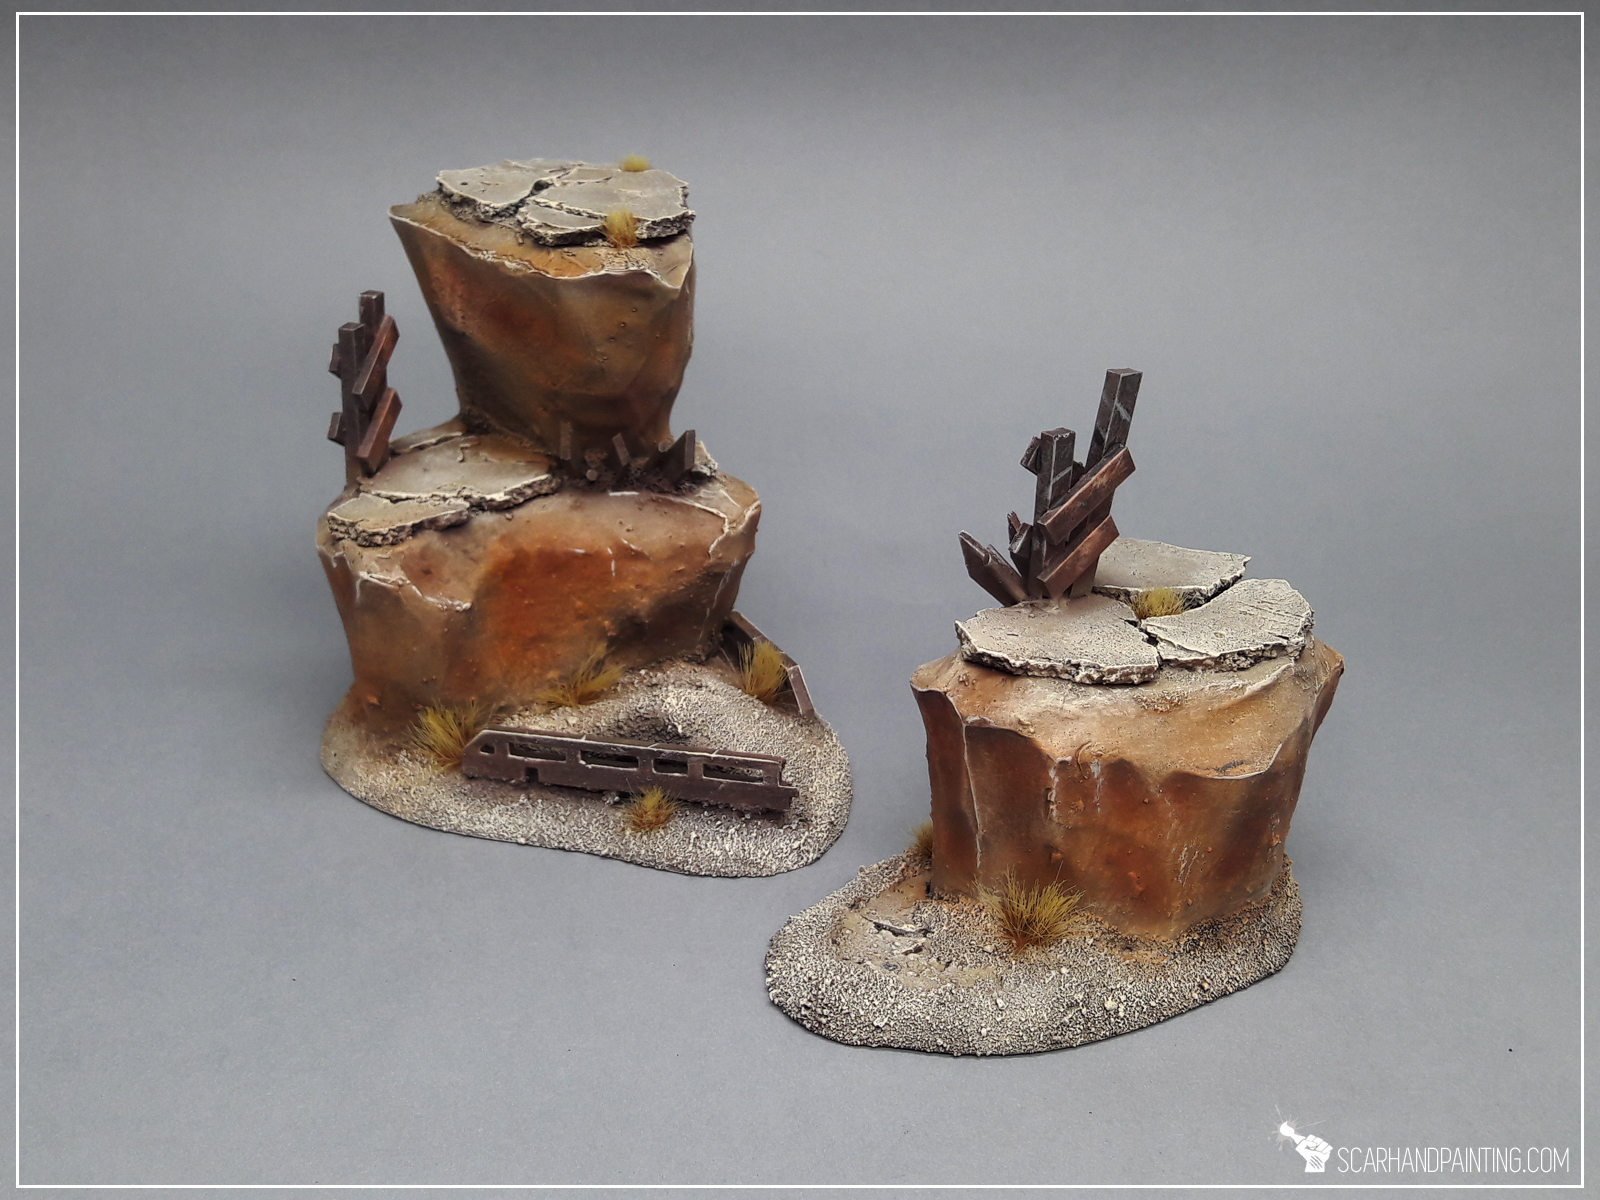
* I started by cutting foamed PCV (or styrofoam) into basic rocky blocks.
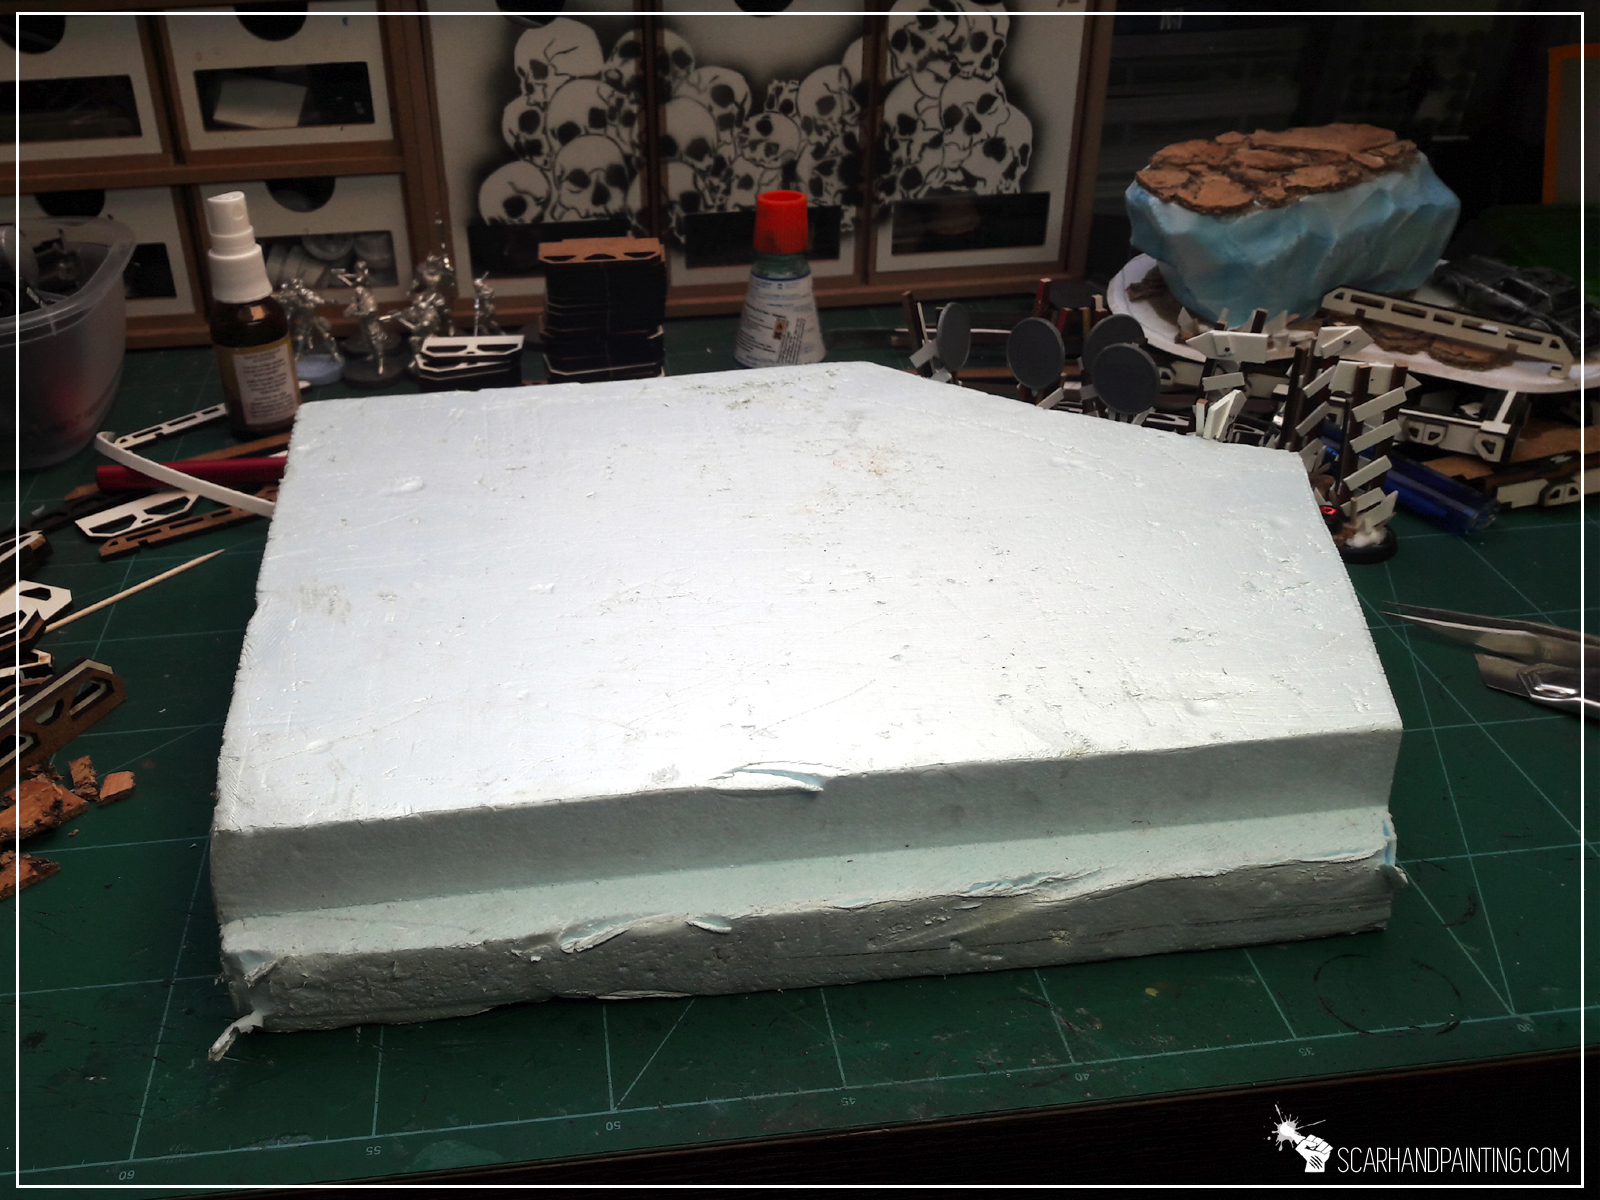

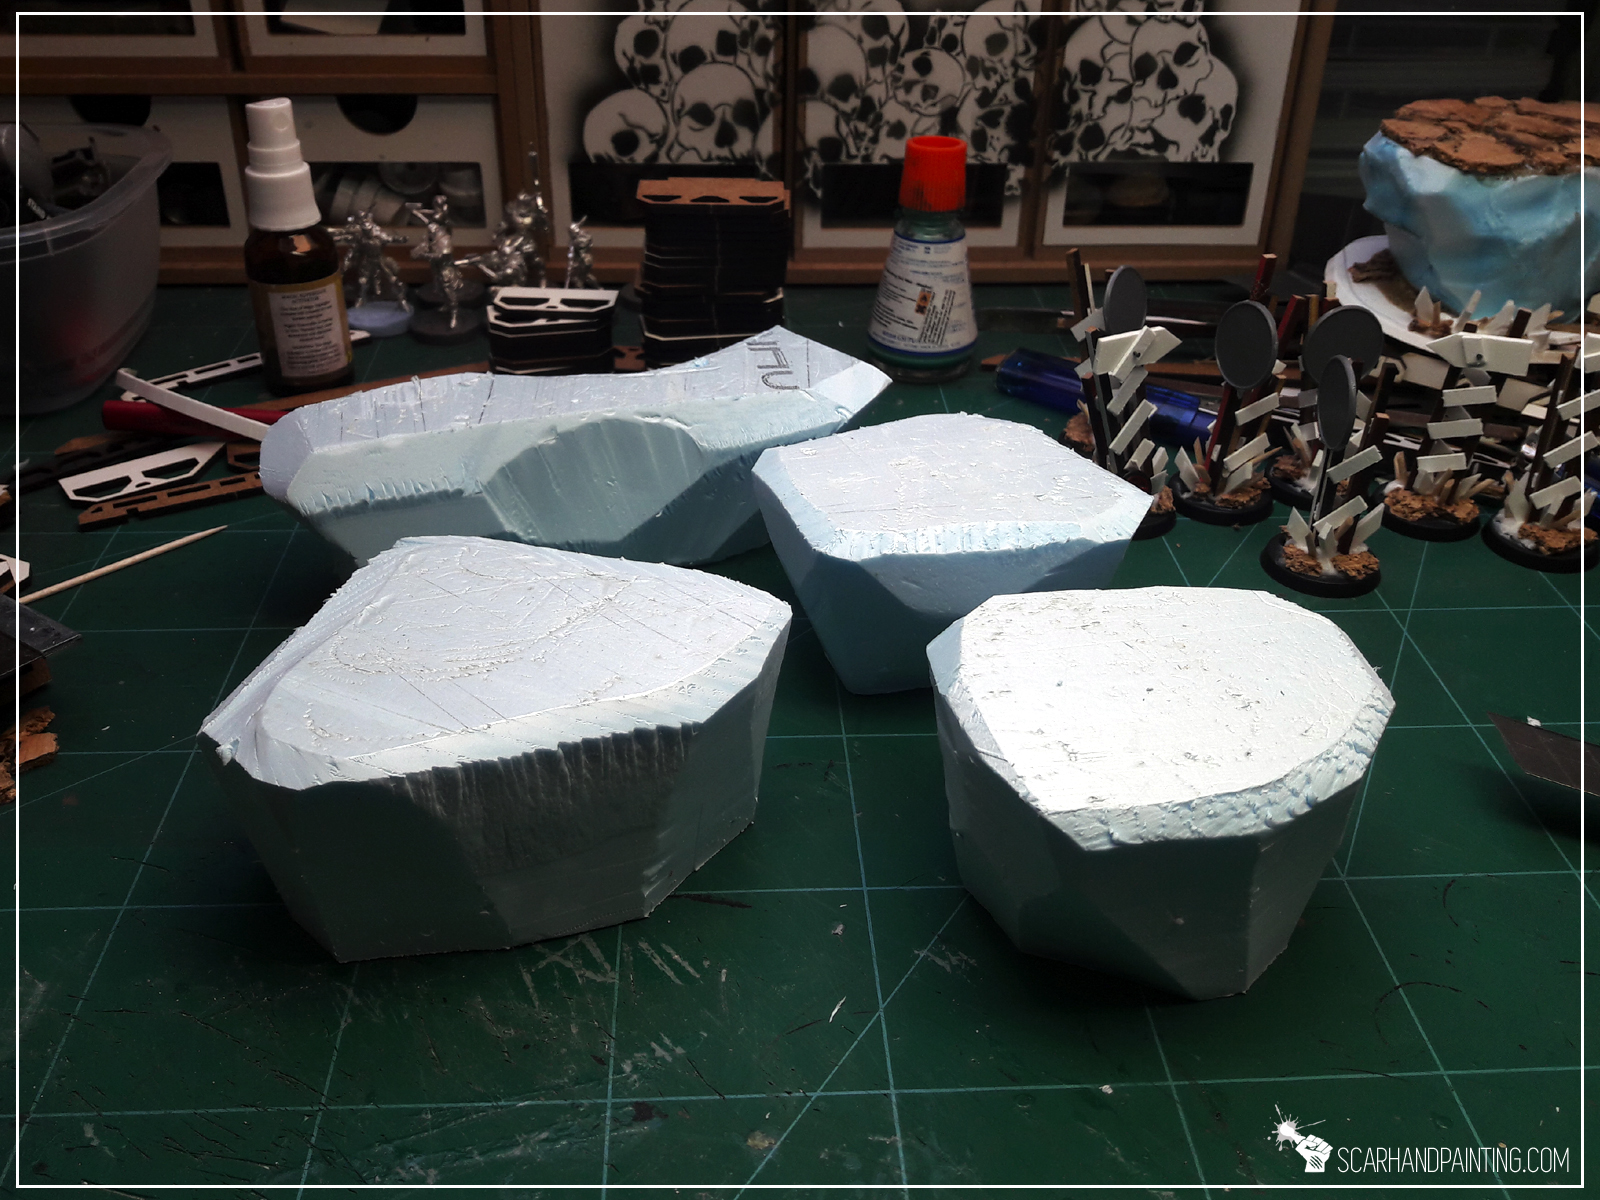
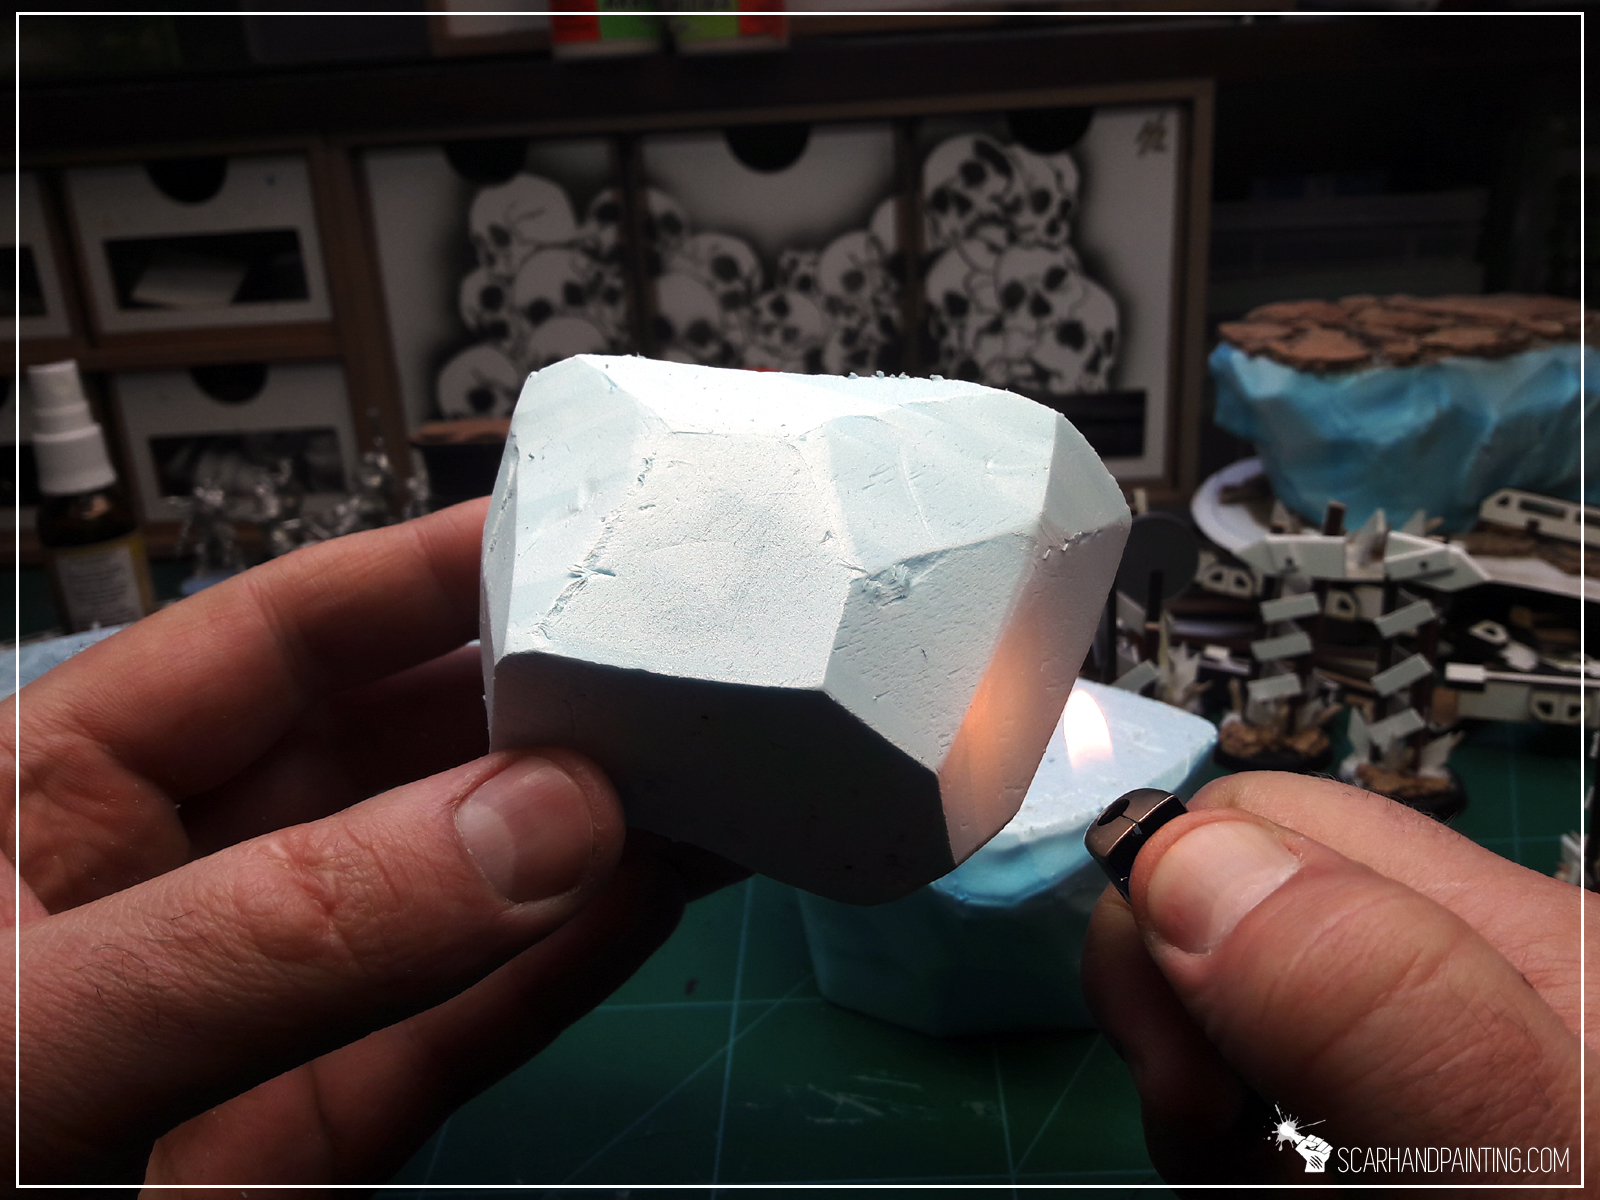
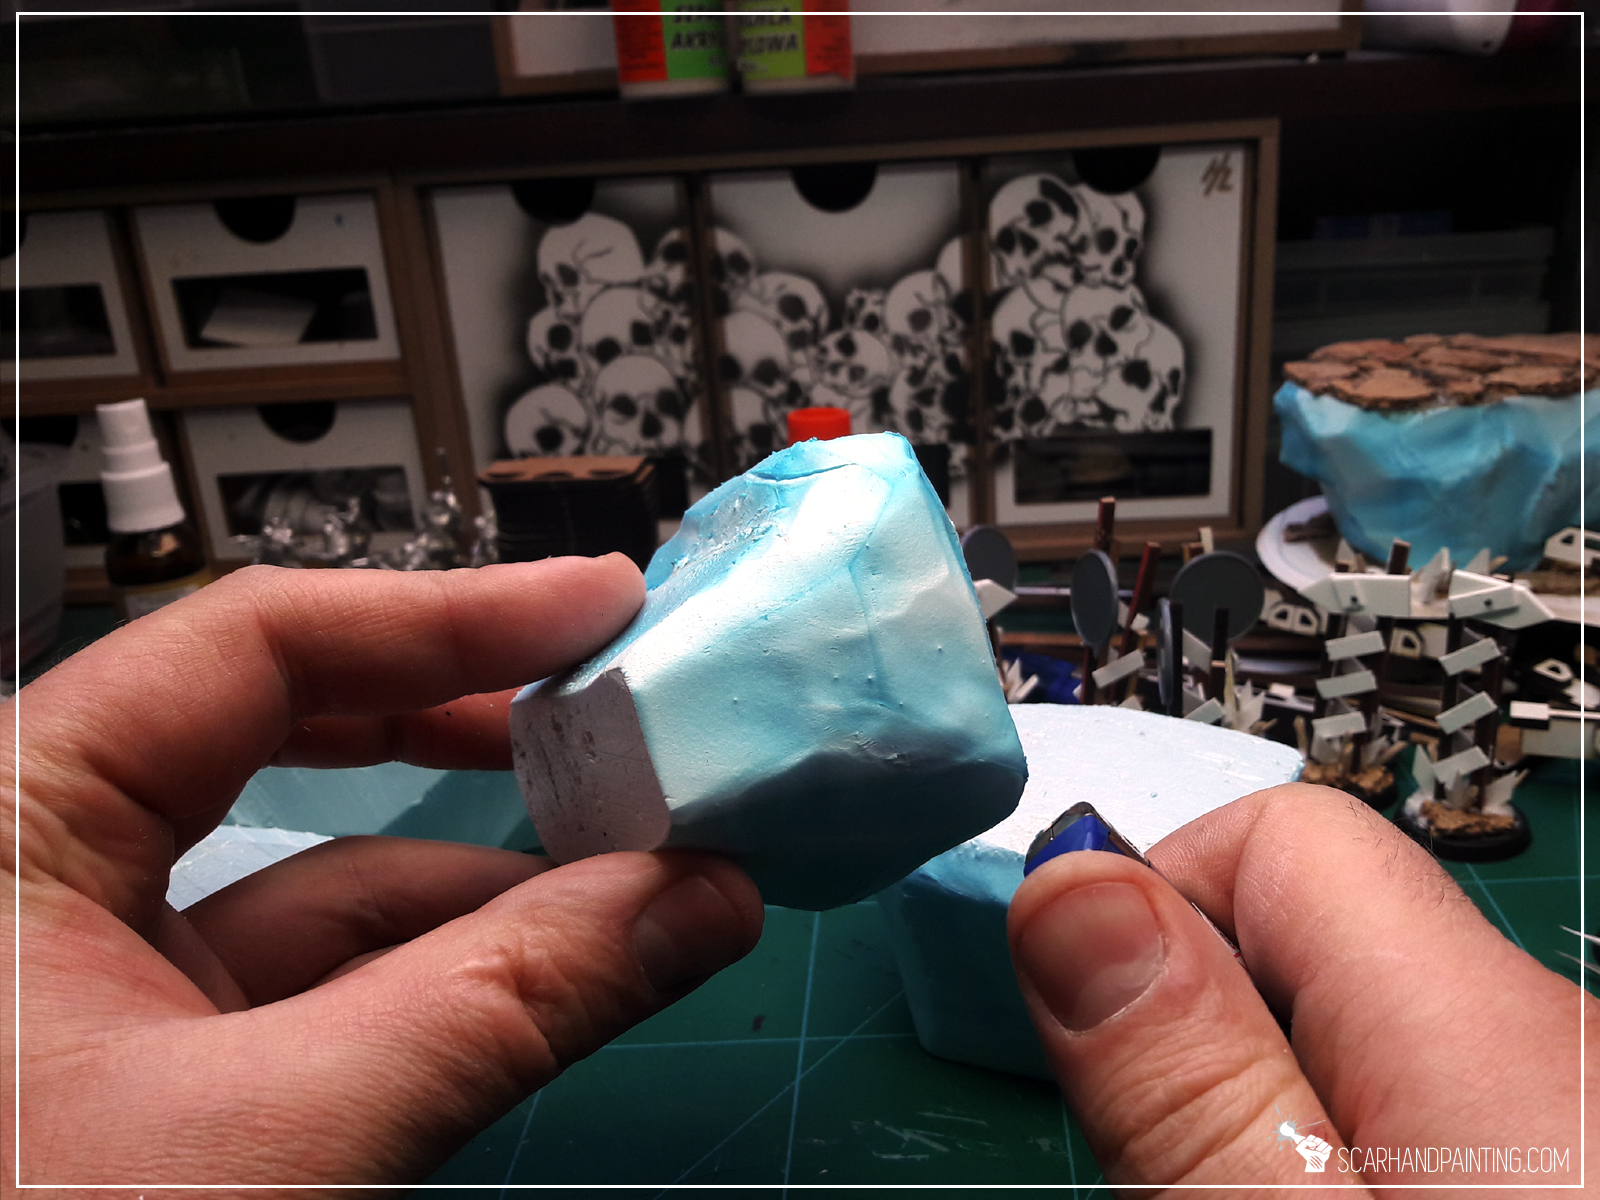
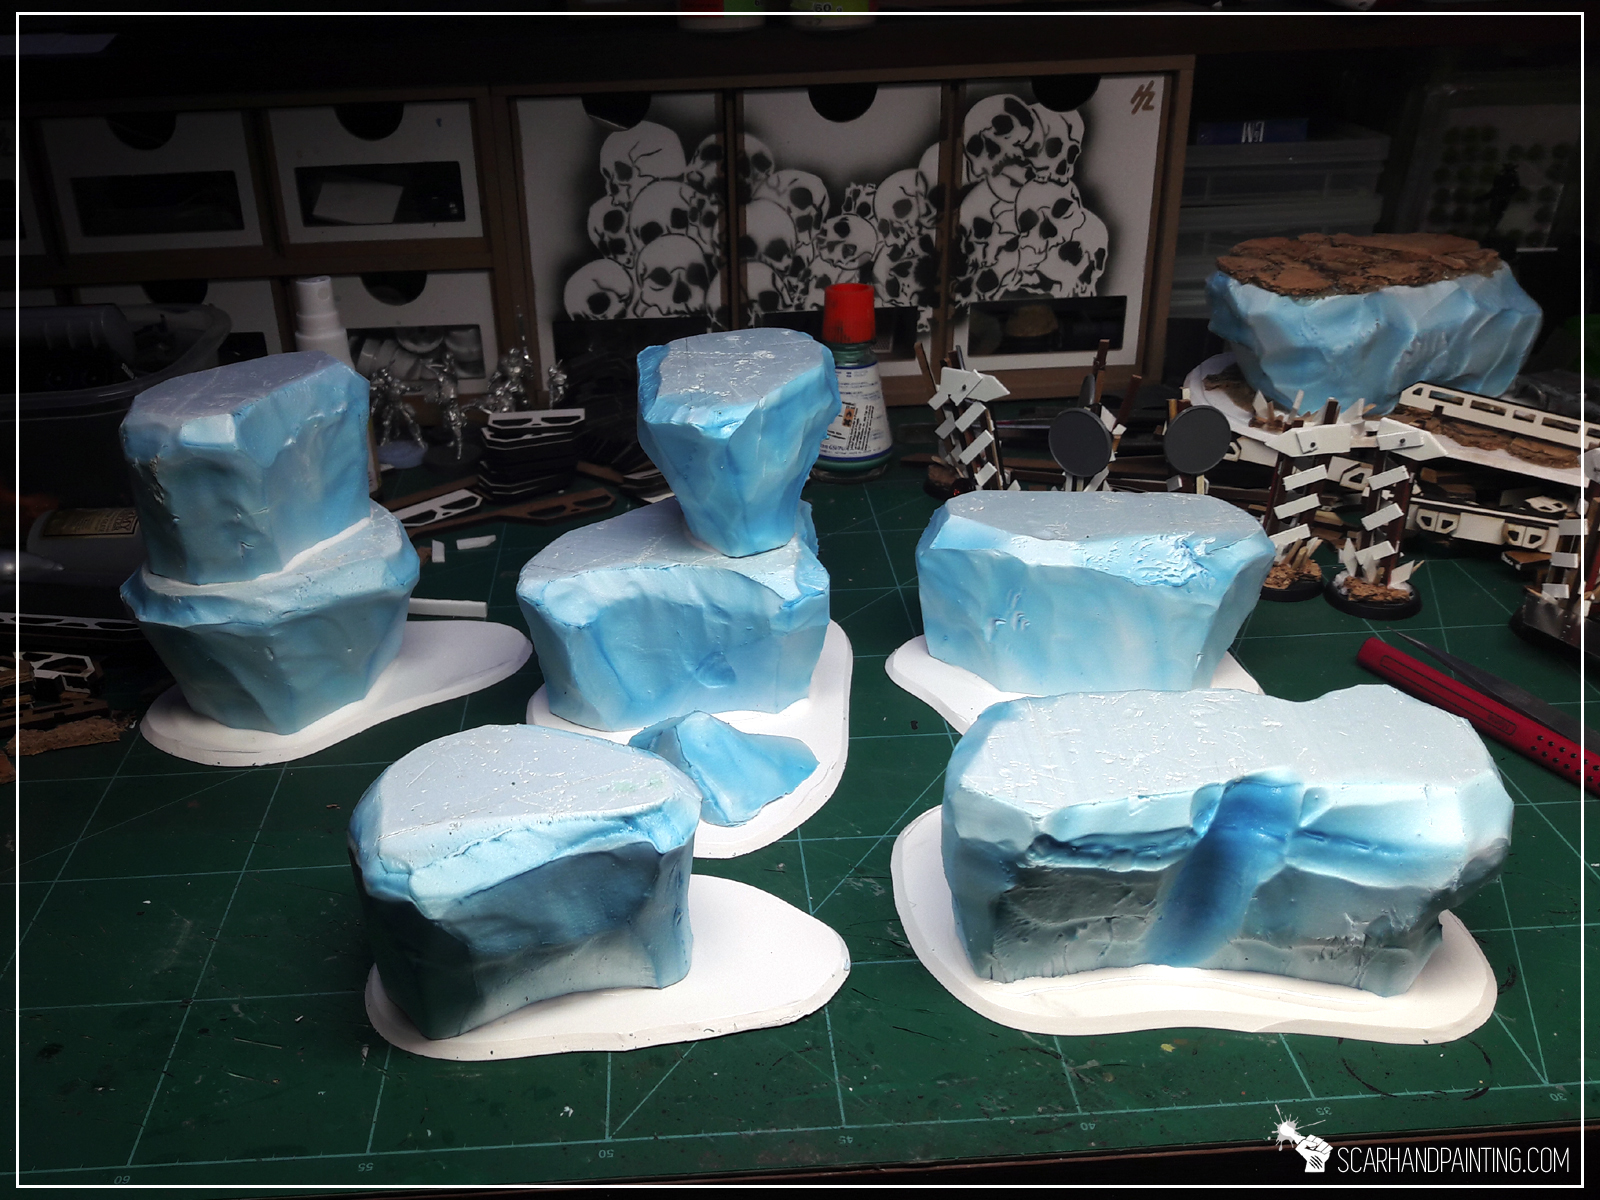
* I then used lighter to gently heat blocks on the sides, avoiding heating up top and bottom surfaces.
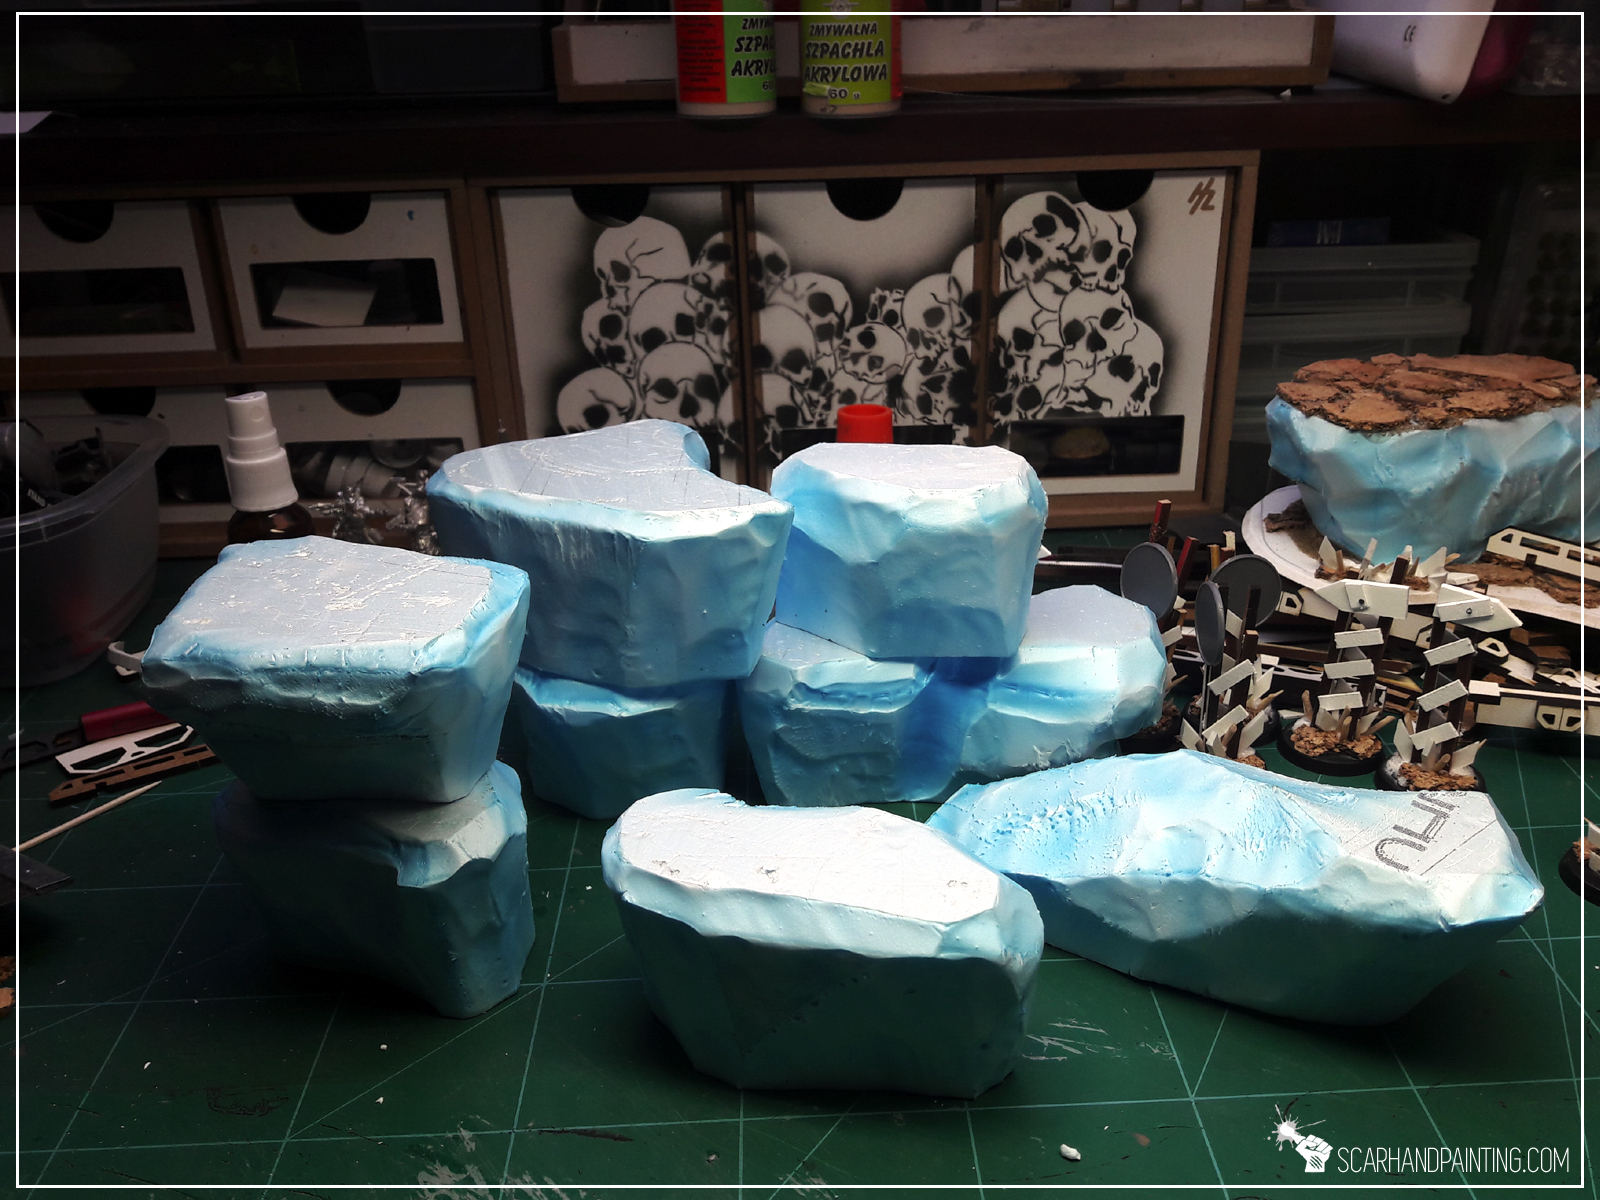
* Next, using a hobby knife, I cut bases from 3mm thick plasticard.

* I then glued rocky blocks on top of the bases with basing (PVA) glue. I also glued some blocks on top of one another for the scenery to look more diverse and interresting.
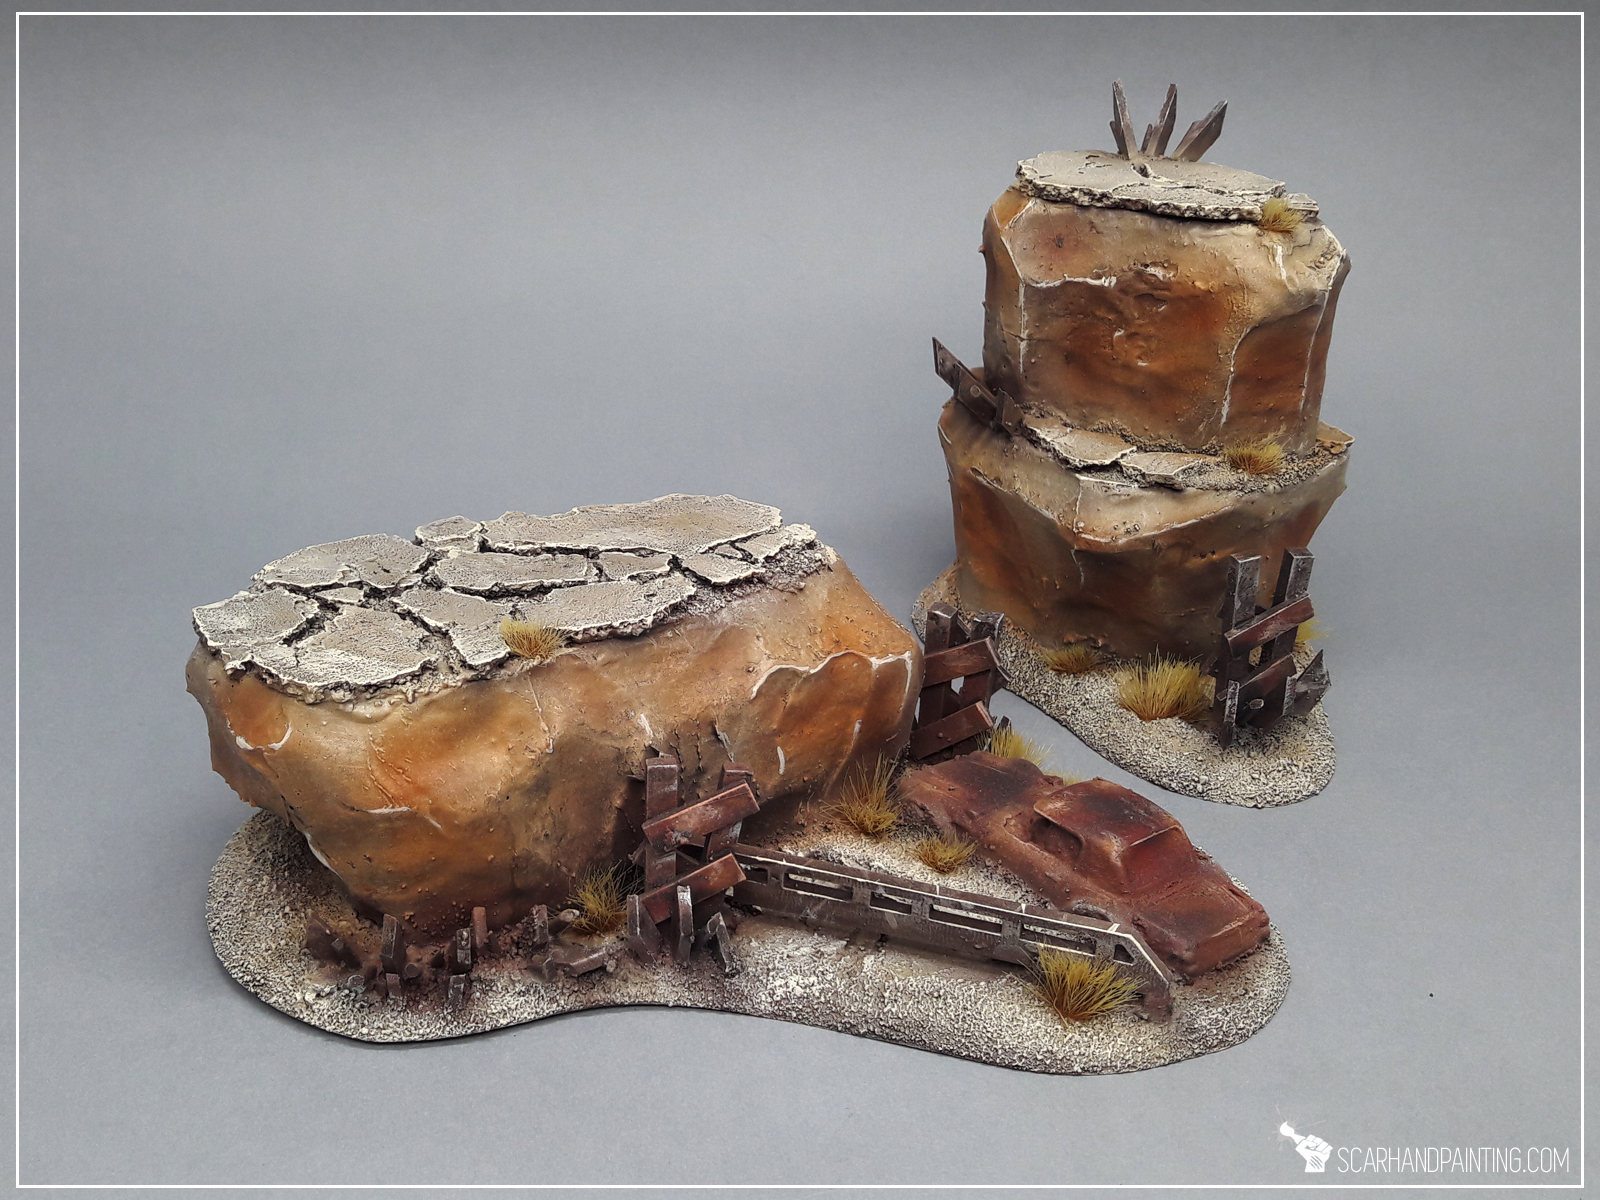
* Next I crumbled a sheet of cork into small pieces and glued them on top of the blocks with basing glue, sanding them before glue dried out to fill the gaps inbetween separate cork pieces.


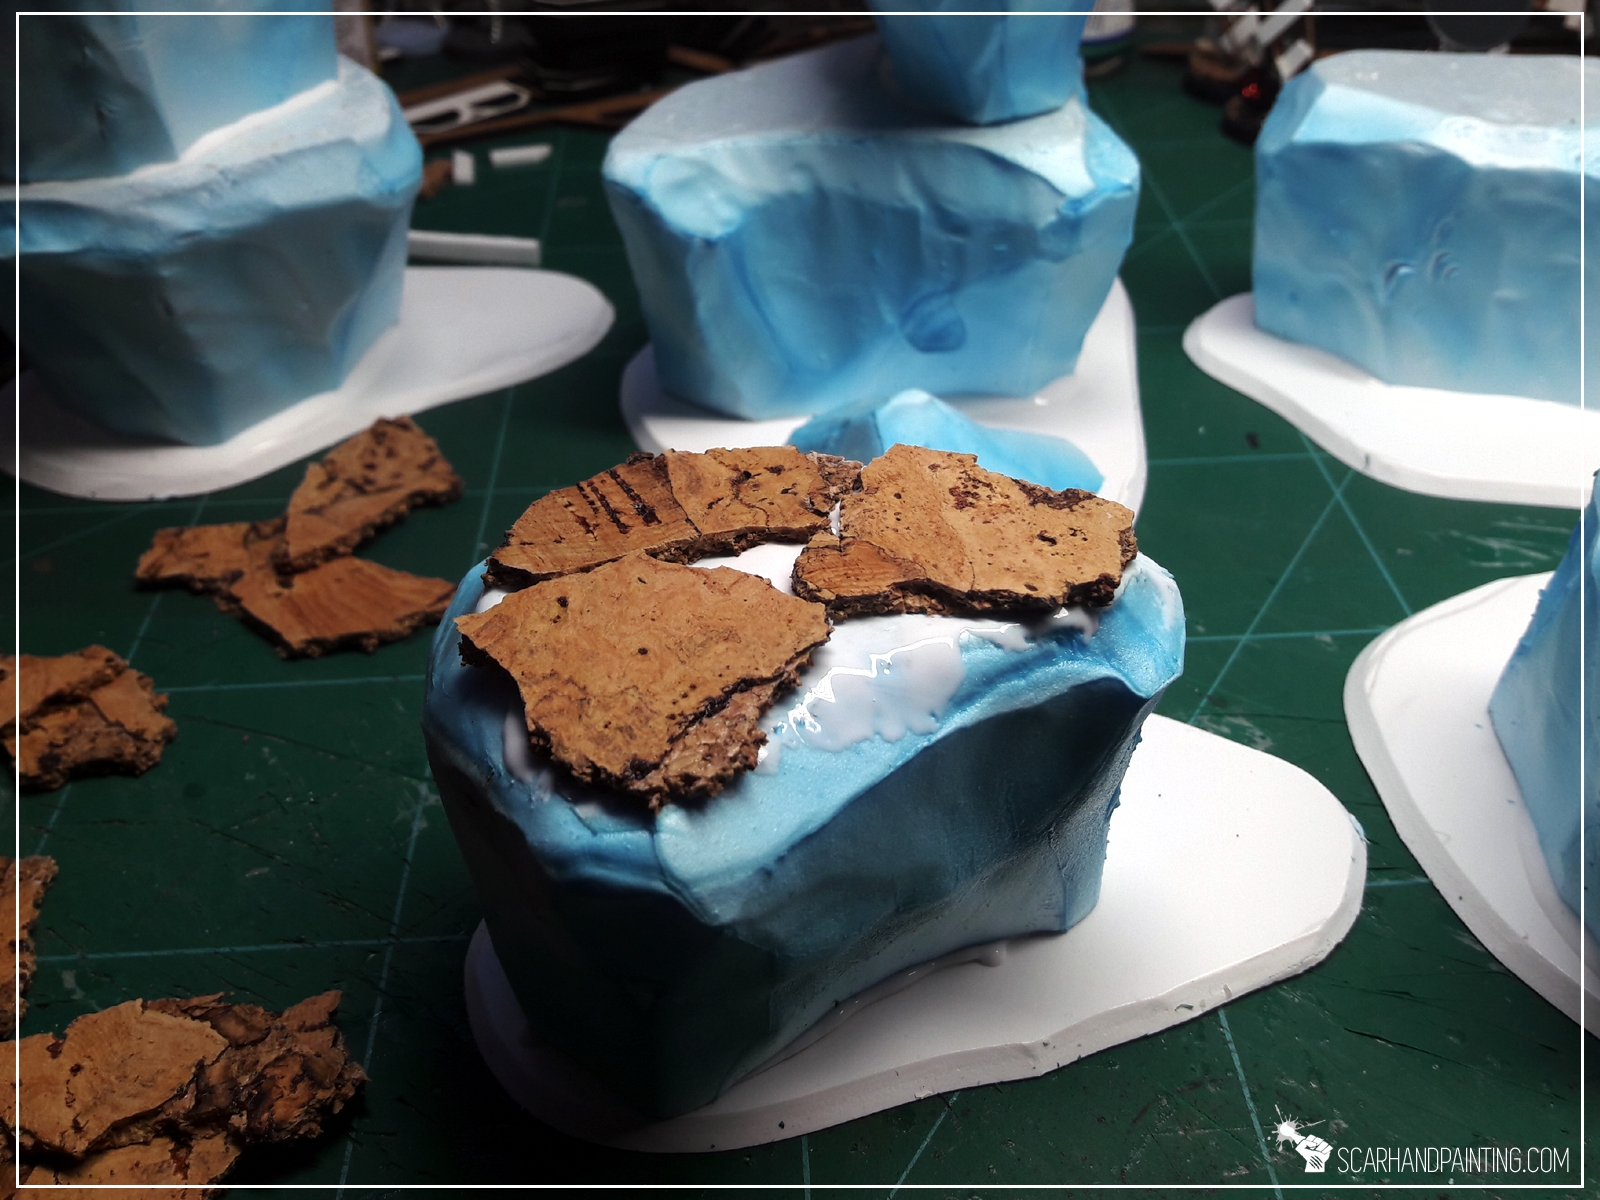
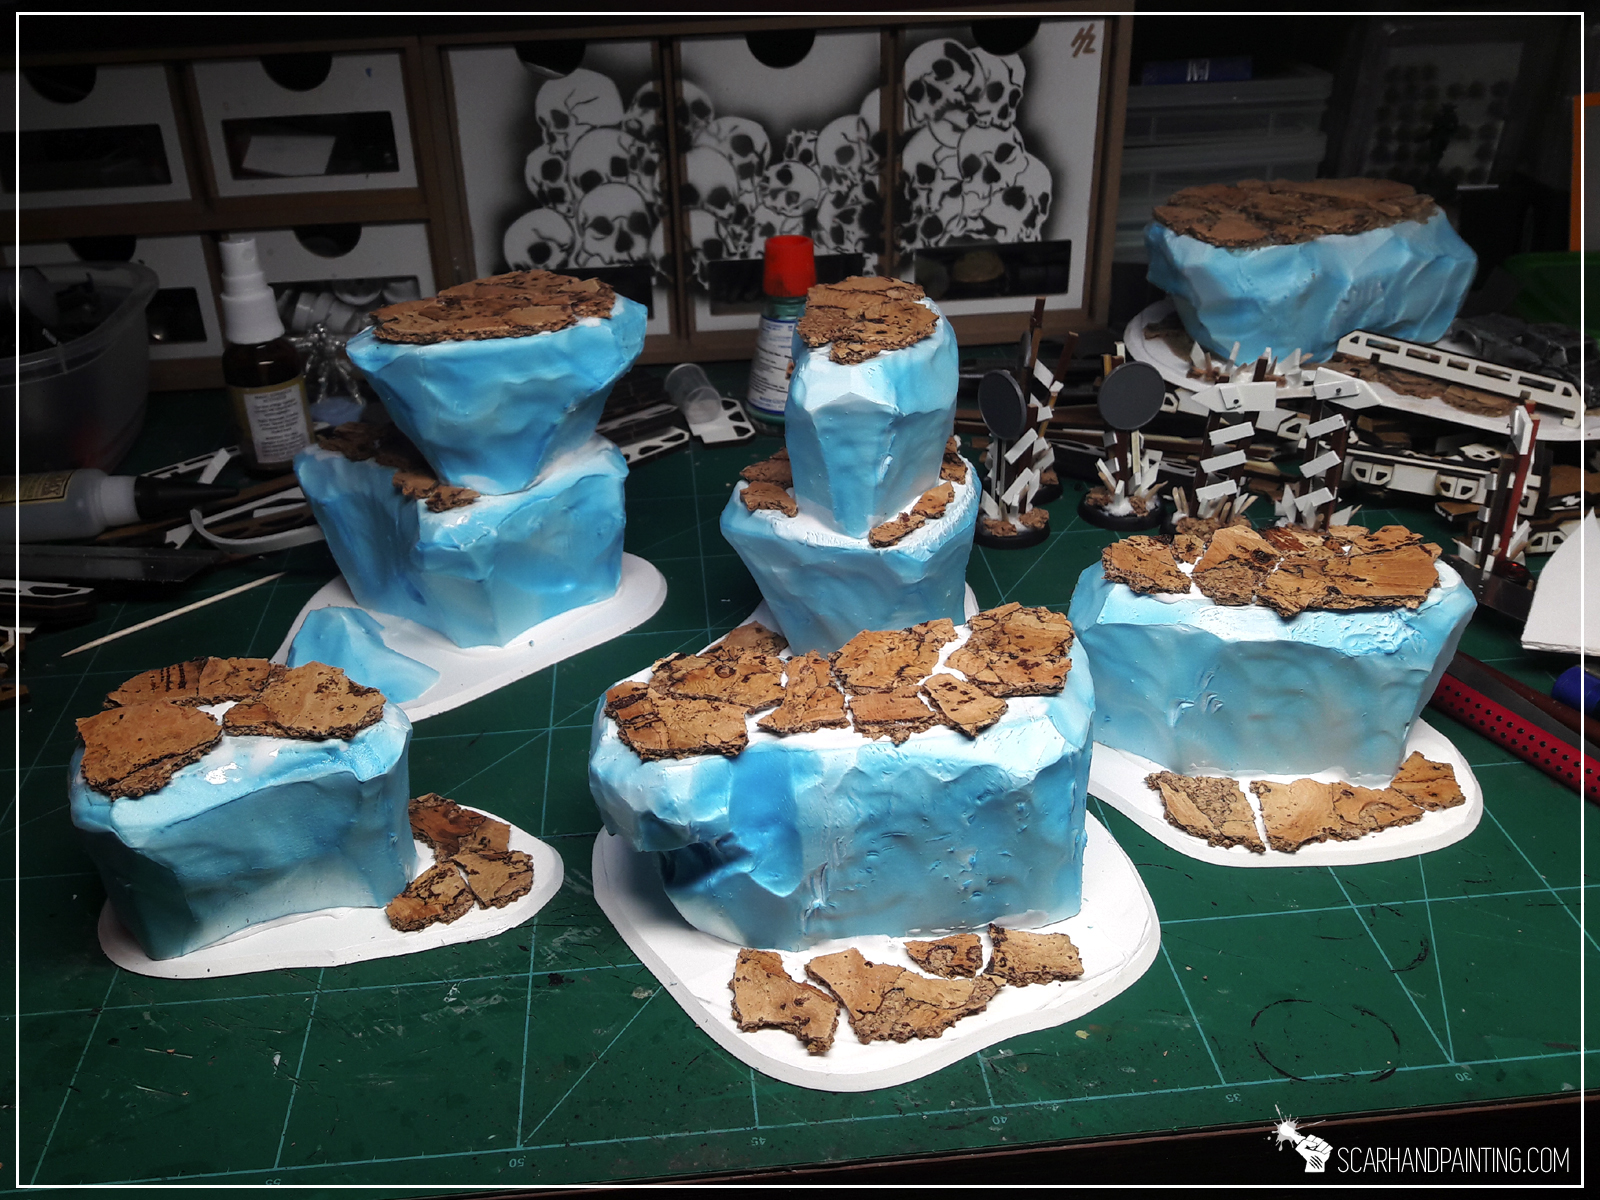

* I then used plaster (gypsum) to build a gentle transition between bases and blocks.
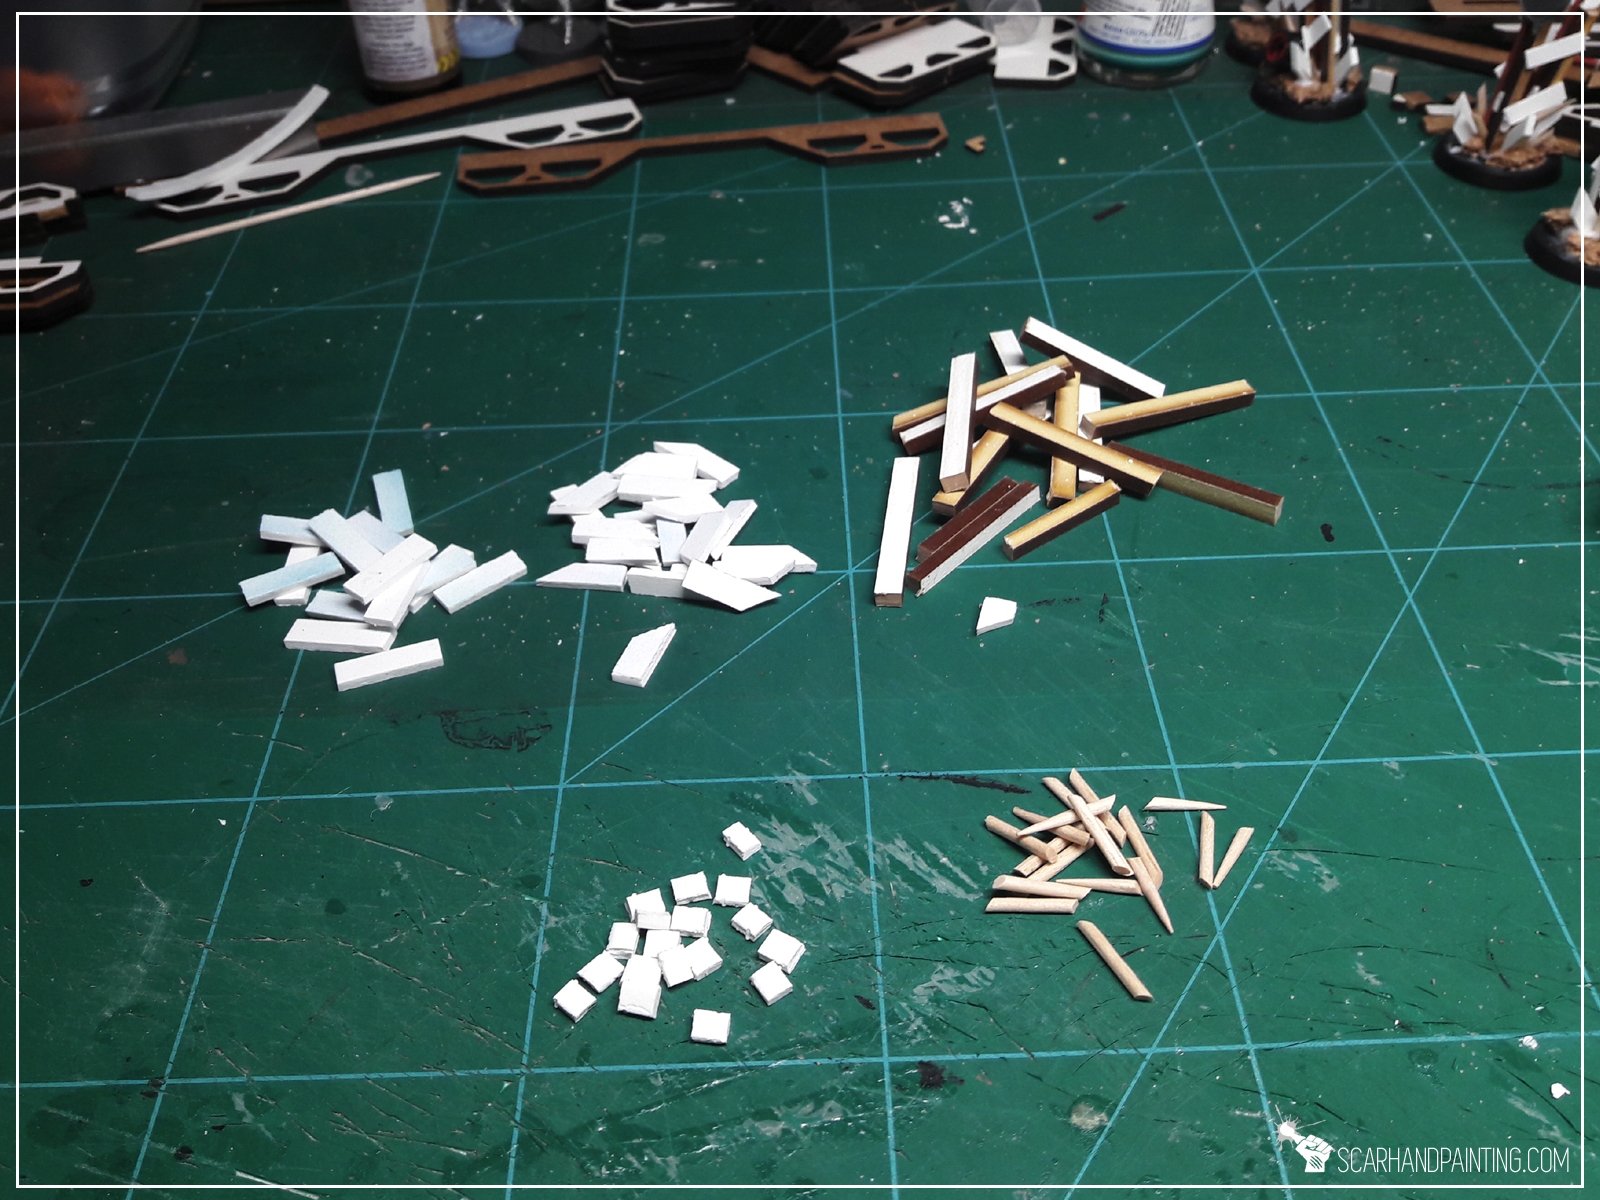
* A time has come for me to add some detail. Not much, just some texture to bring more life to the wasteland. I cut pieces of plasticard and used toothpicks, MDF leftovers and a toy car to create ragtag barricades and post-apo racing signs.
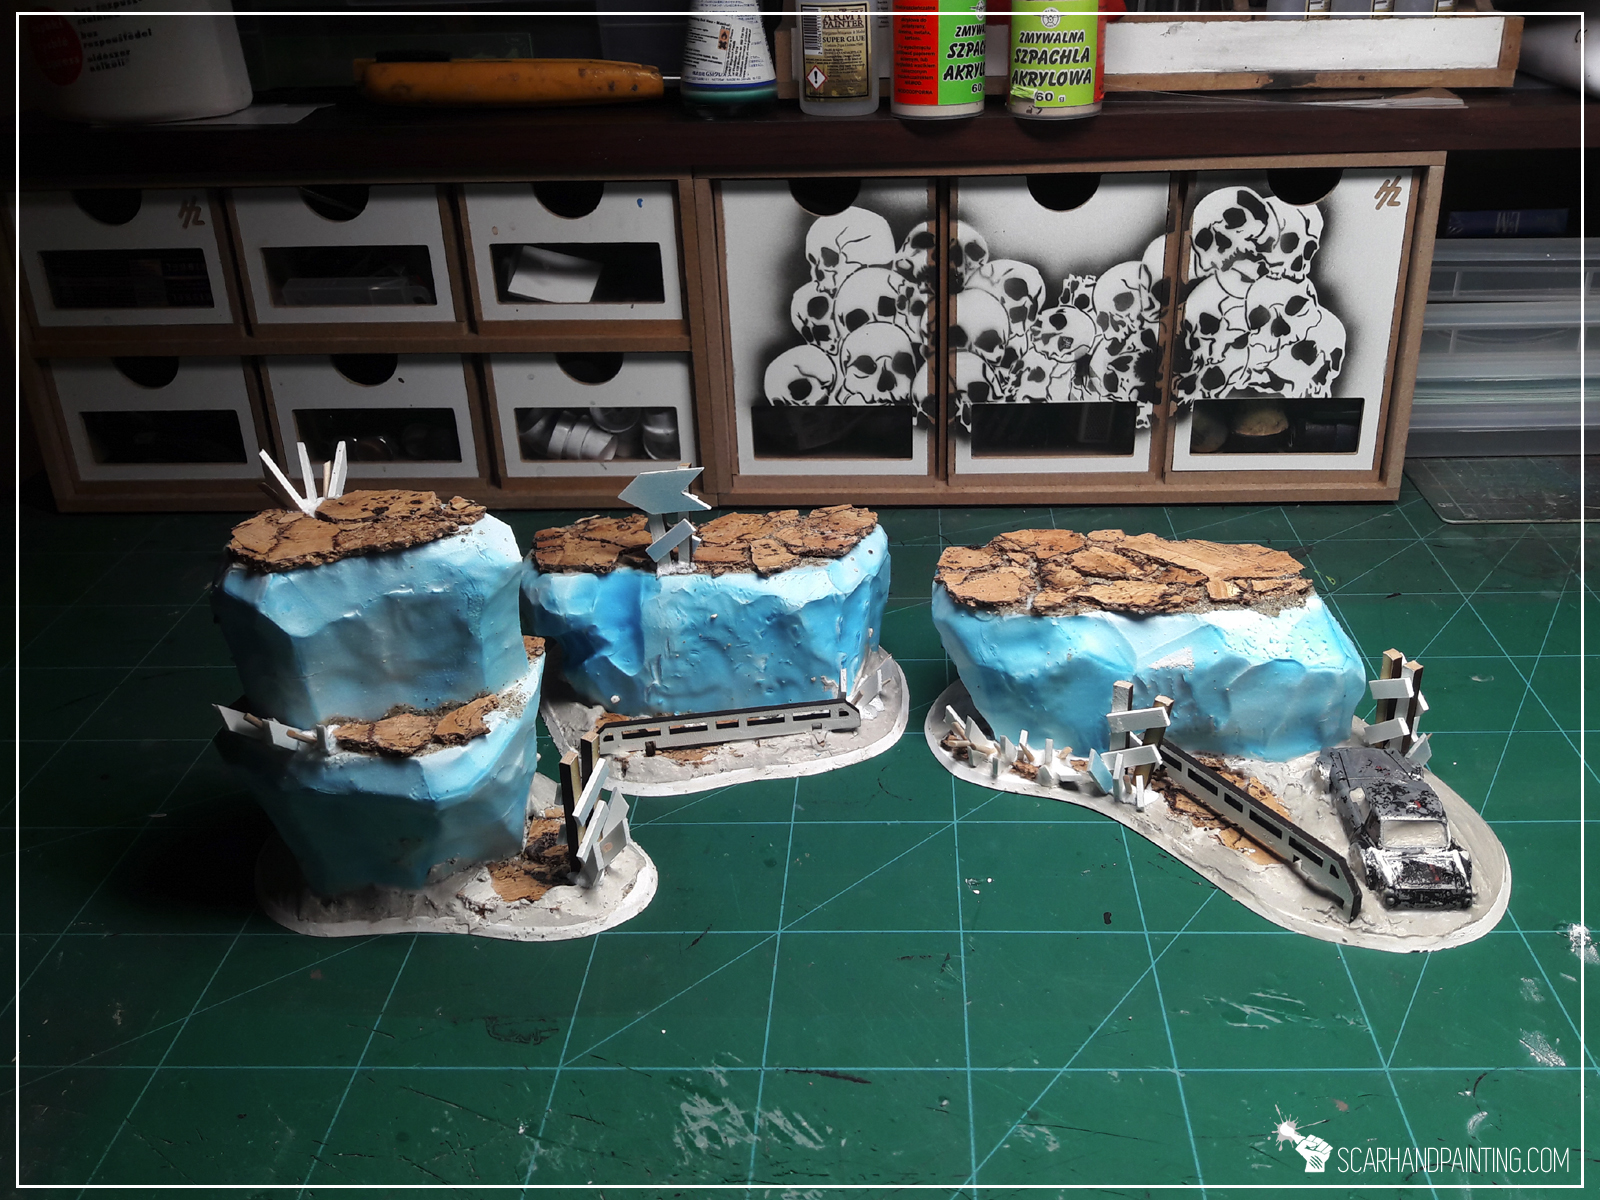
* Lastly, with a regular brush, I applied basing glue then sanded all the plaster, sides of the bases and some areas around cork pieces on top of the blocks.
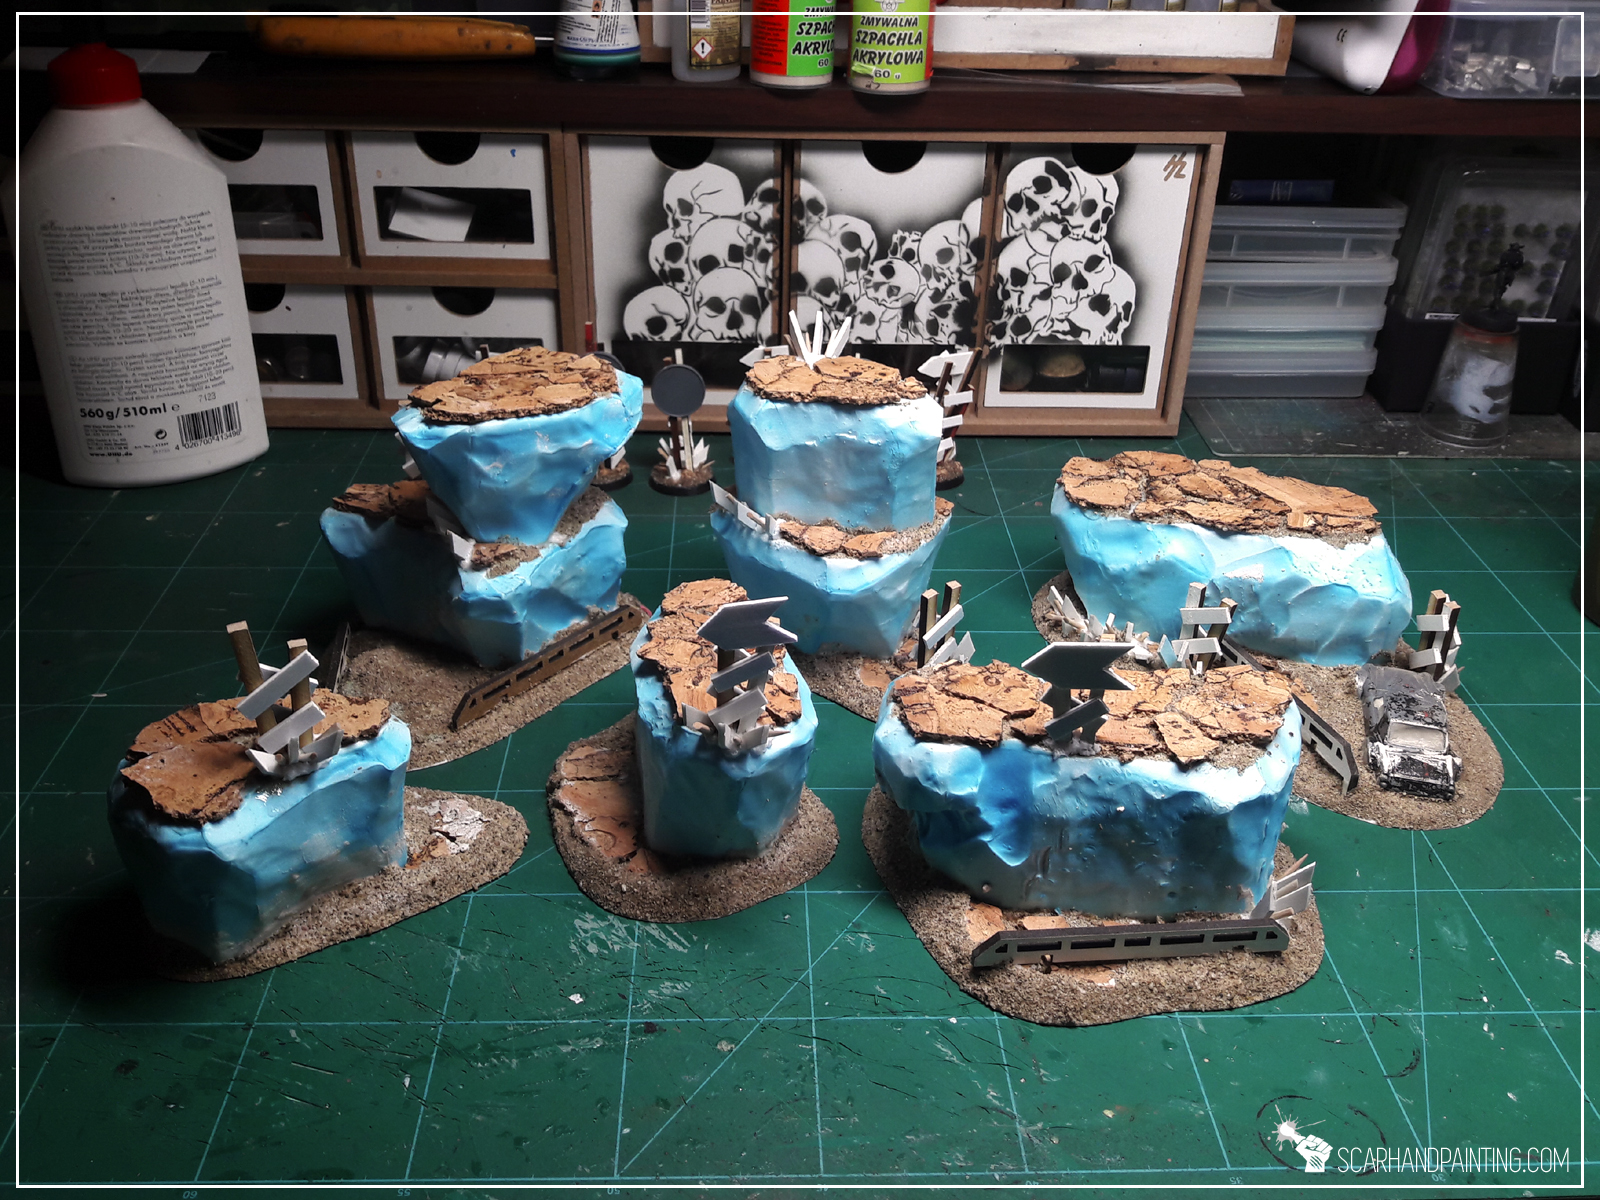
Couple of hours later I have painted this stuff and added some tuftsthe end result looks like this:

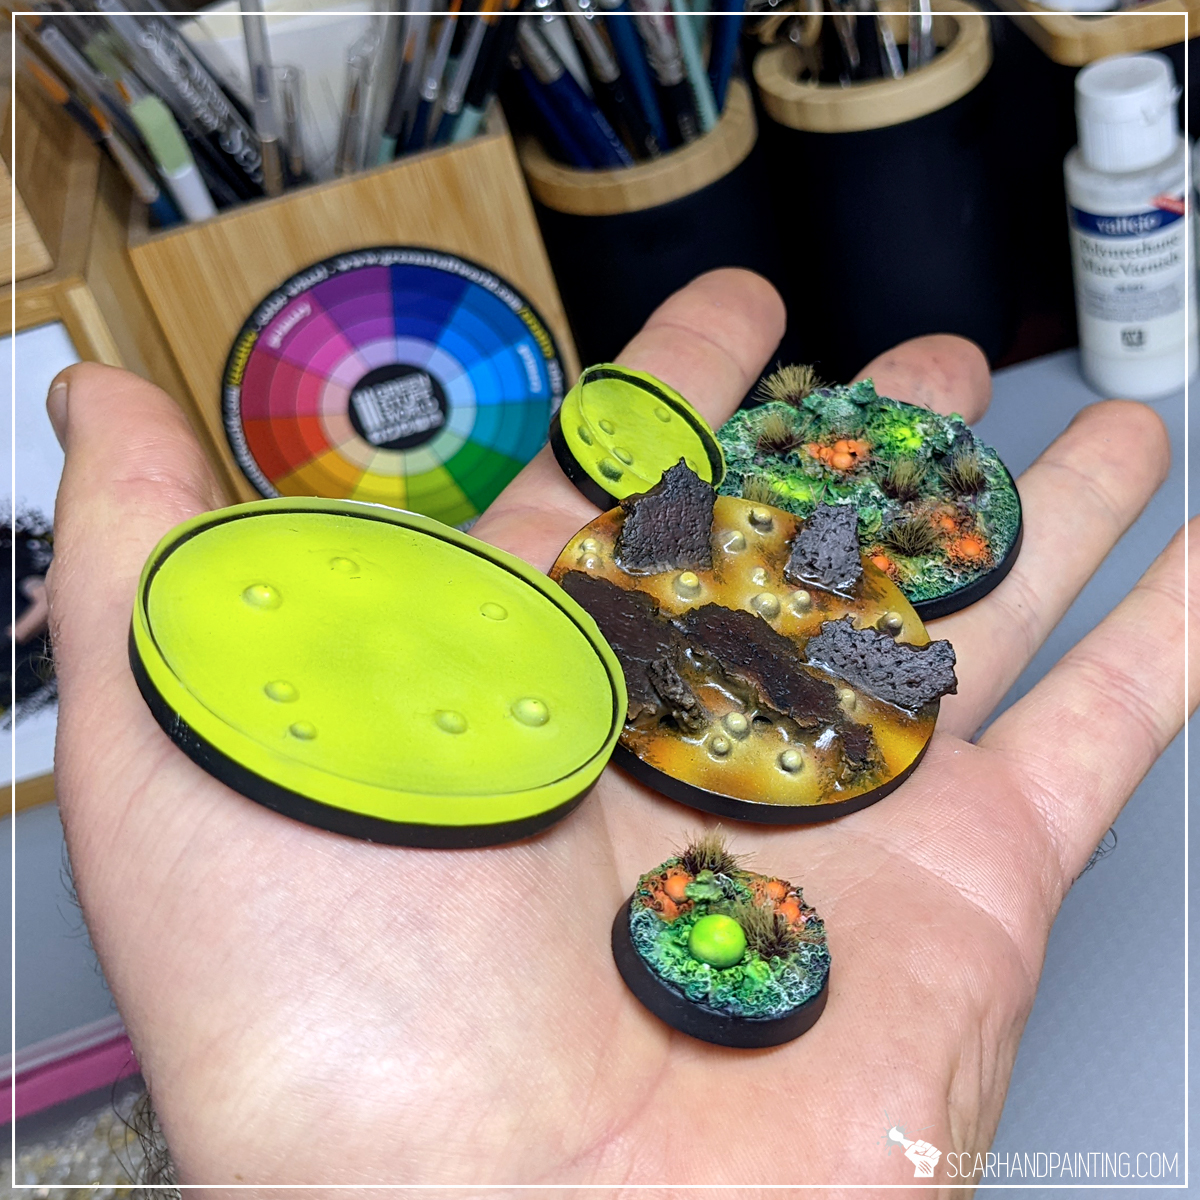
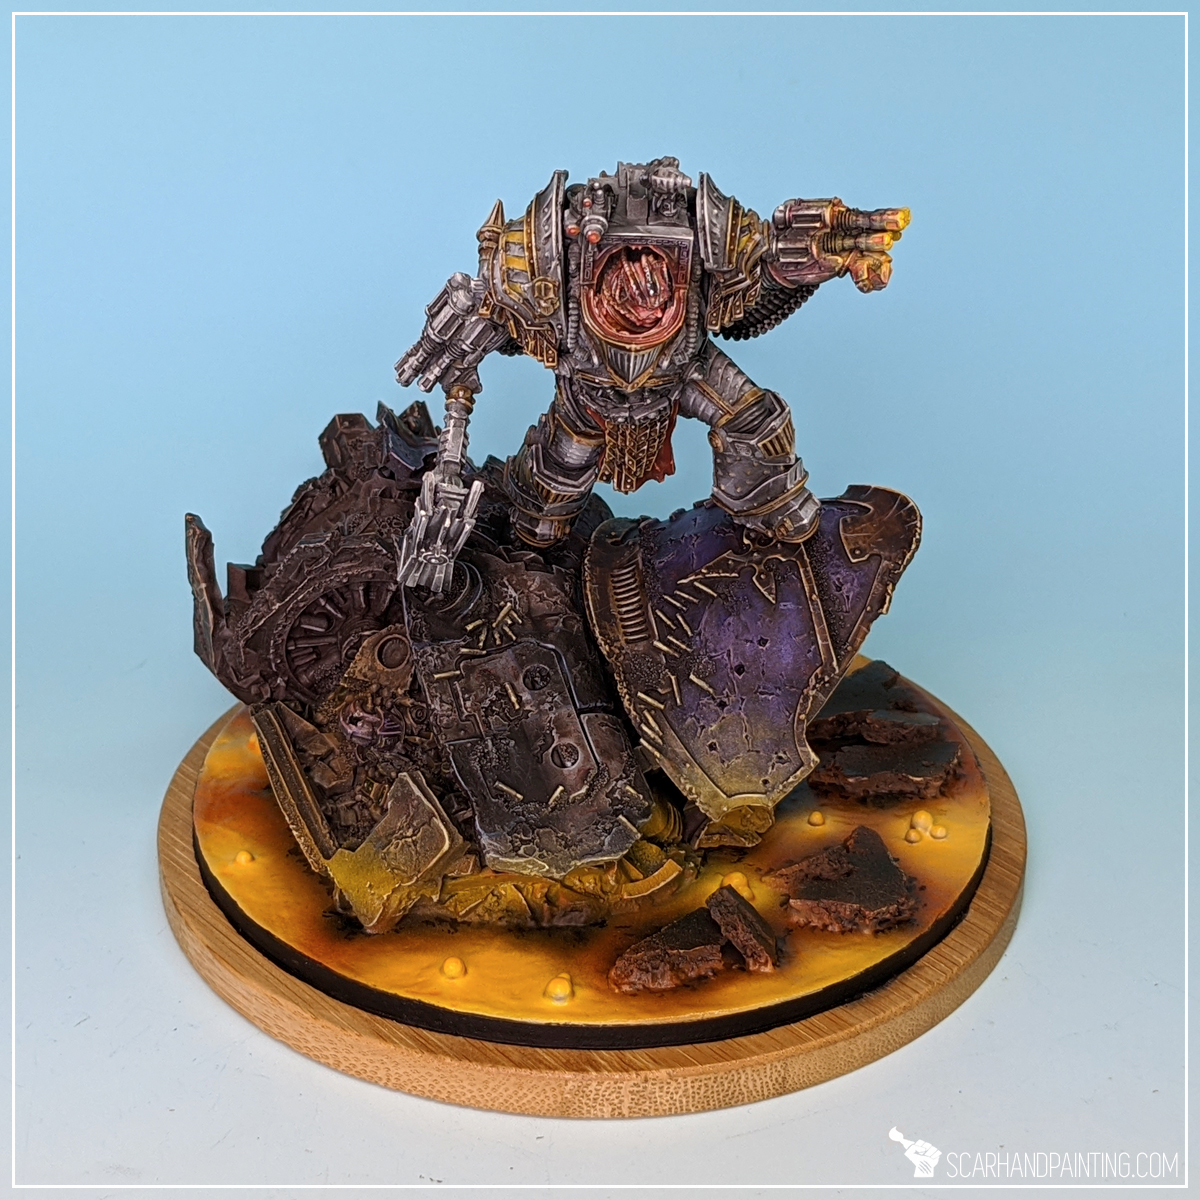
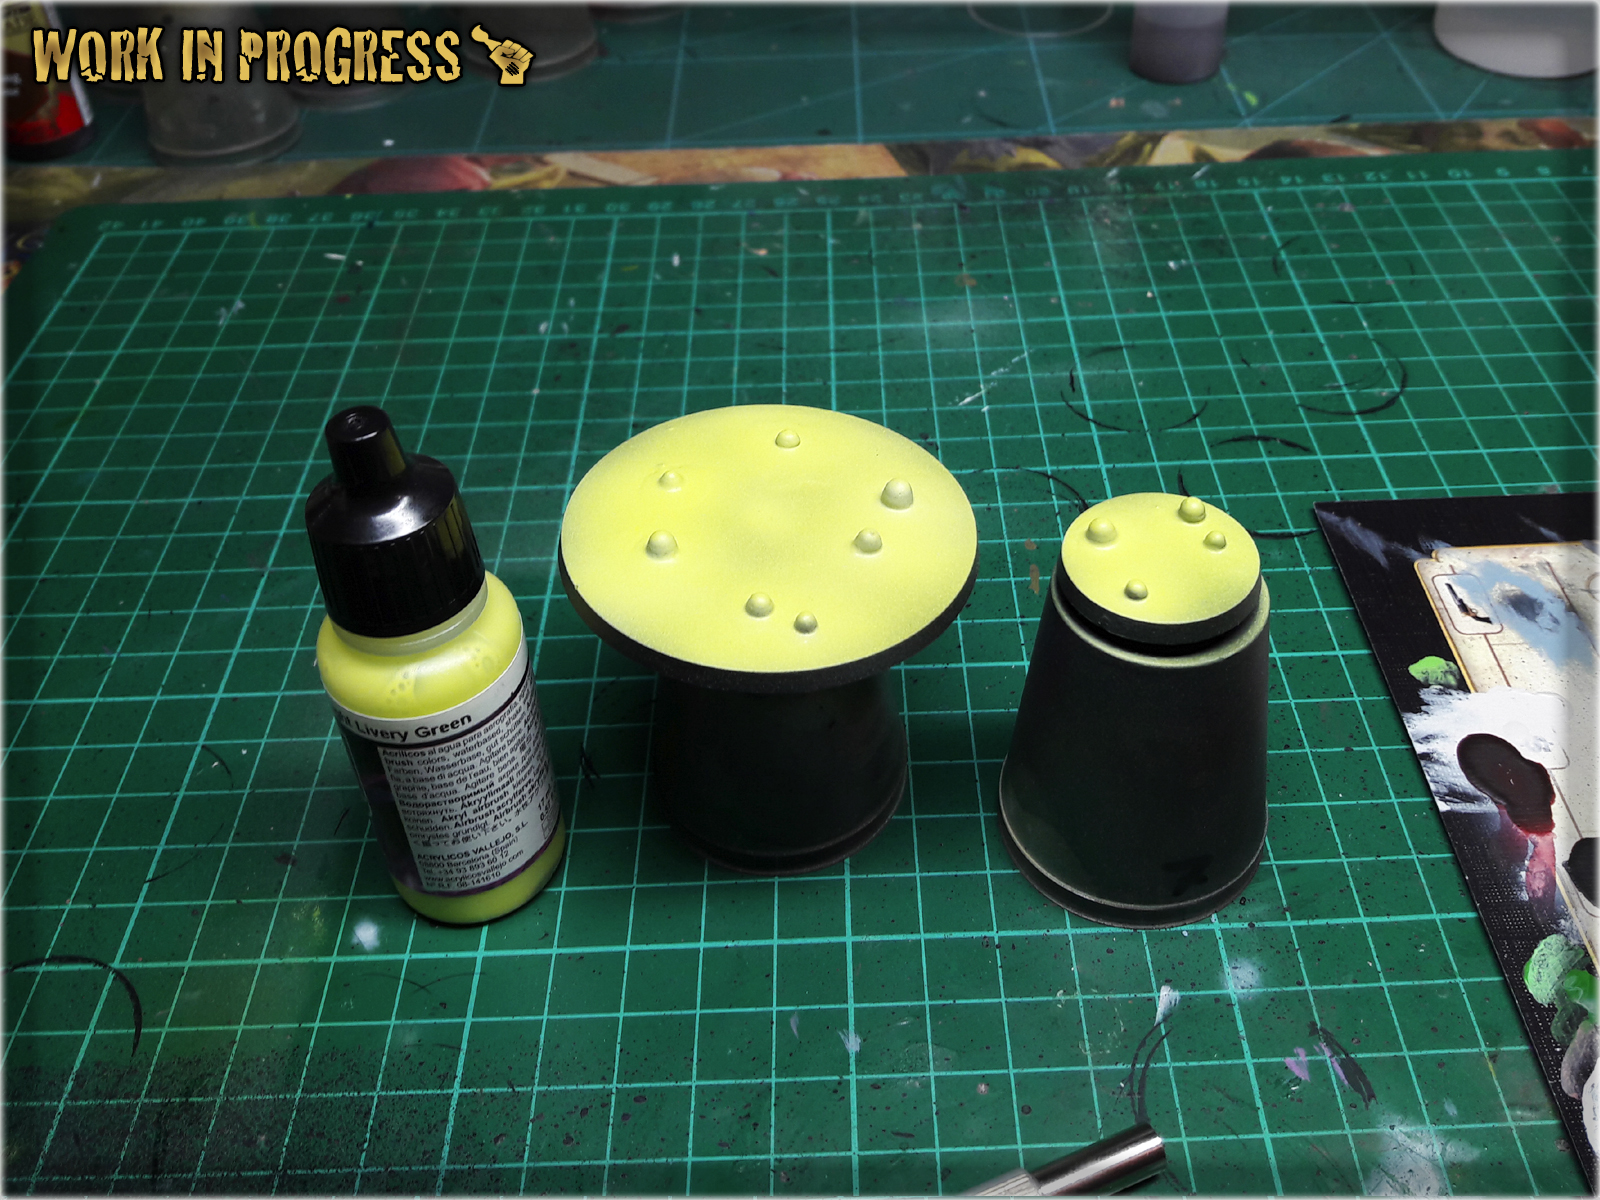
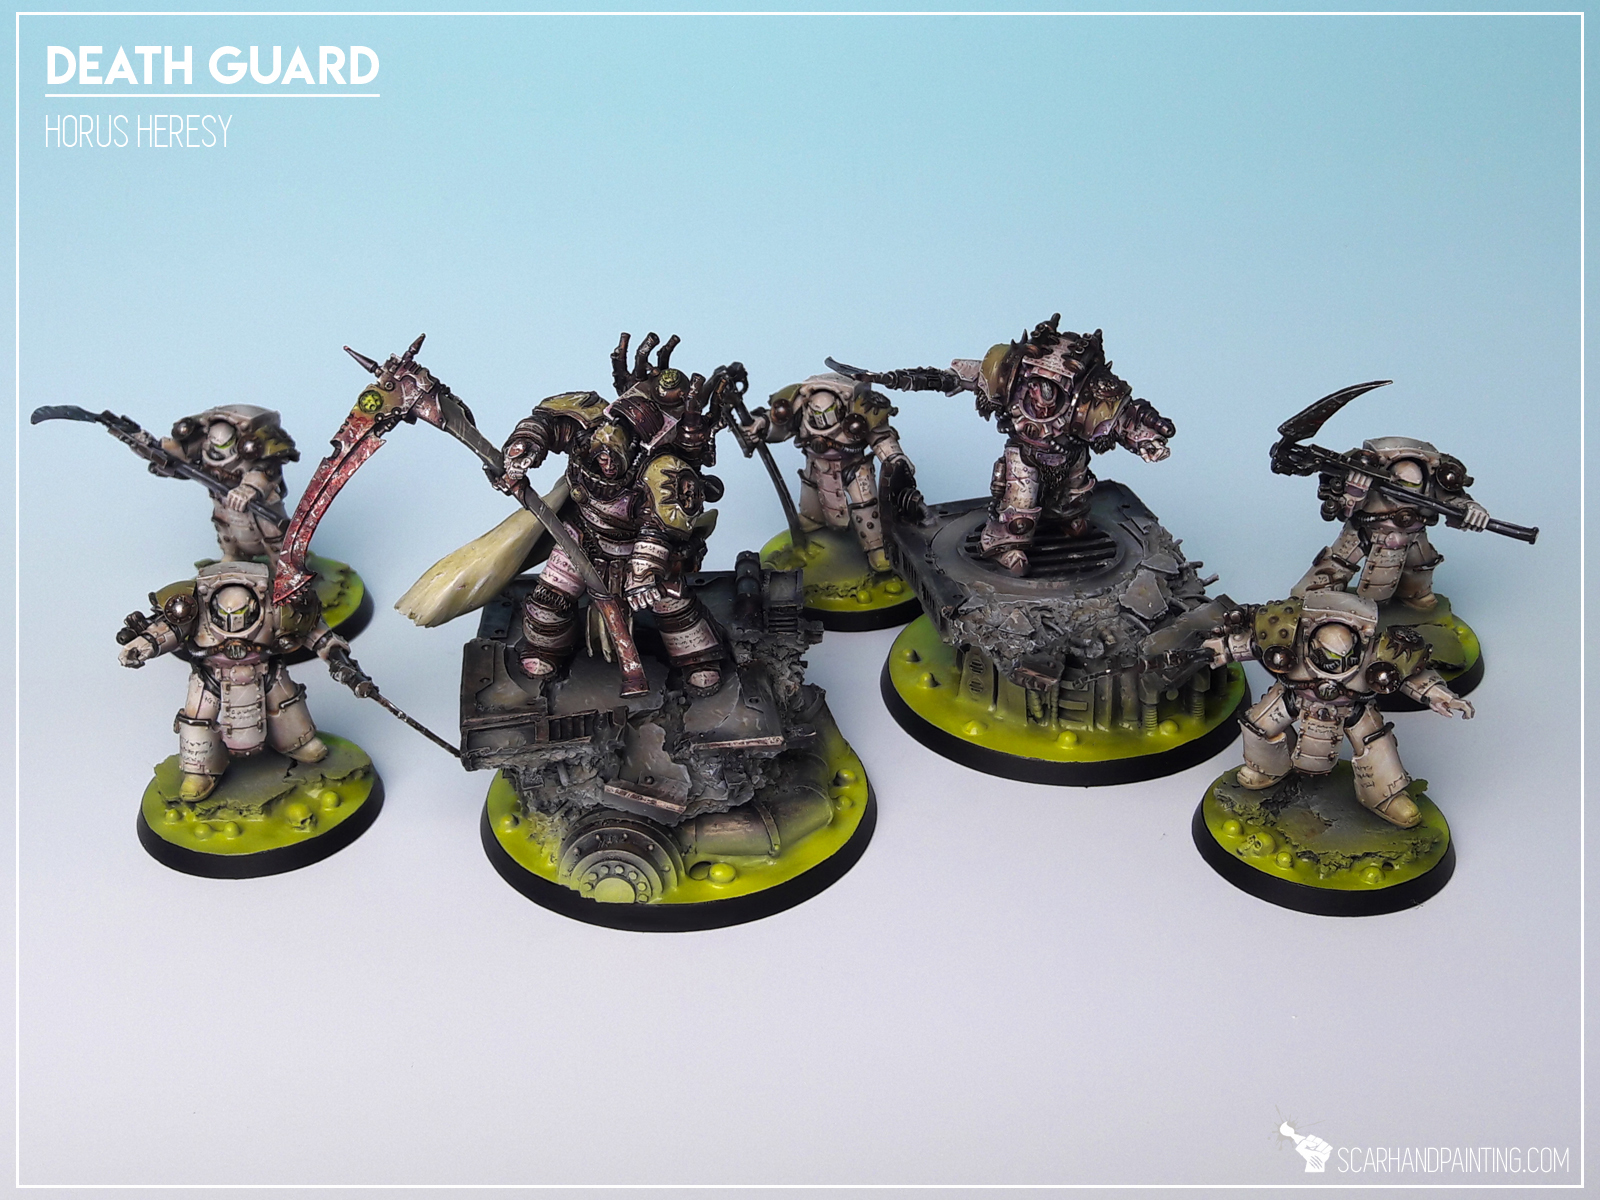
In this easy, step-by-step tutorial I’m going to show you how to create a Toxic Sludge Base. I designed these bases for Warhammer 40,000 Death Guuard Plague Marines.

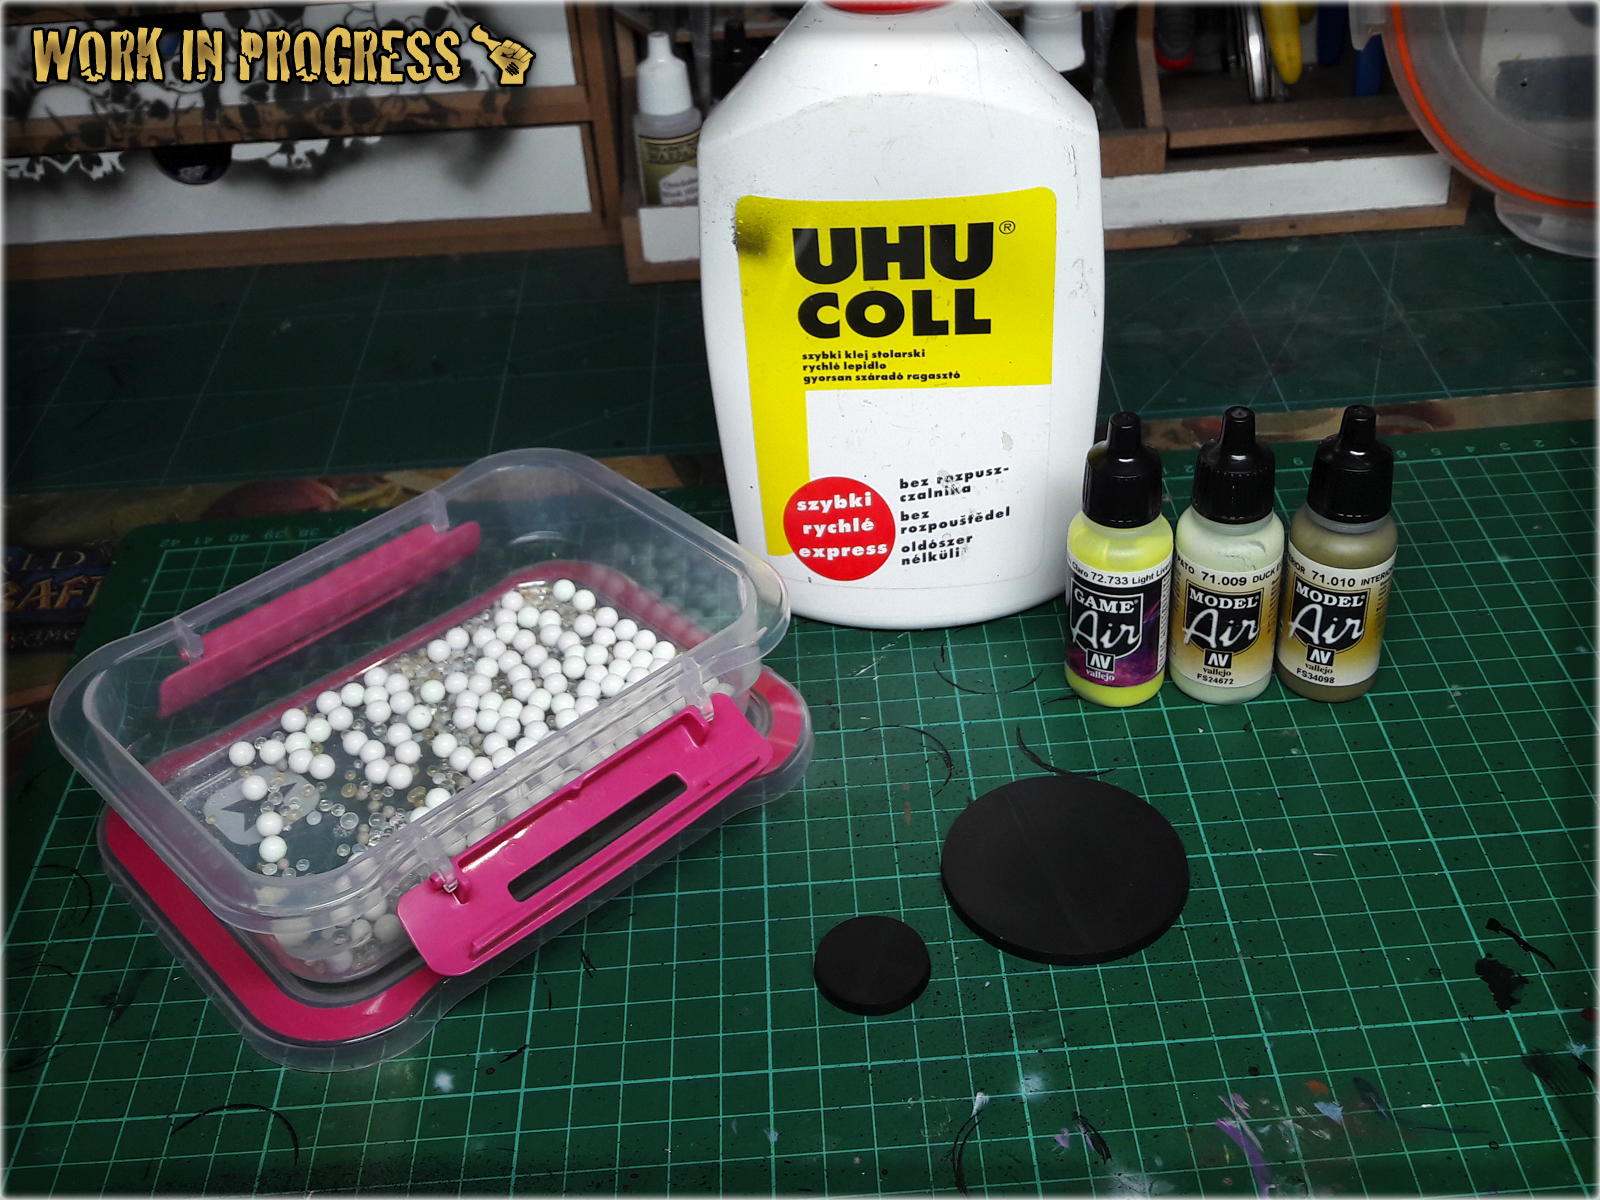
**Where I’m from there’s a small paper bag filled with moist absorbsion balls in every shoe box. If you can’t get that, just use some grains or make small balls out of green stuff or modeling clay.
* I started by covering entire base with a layer of basing glue.

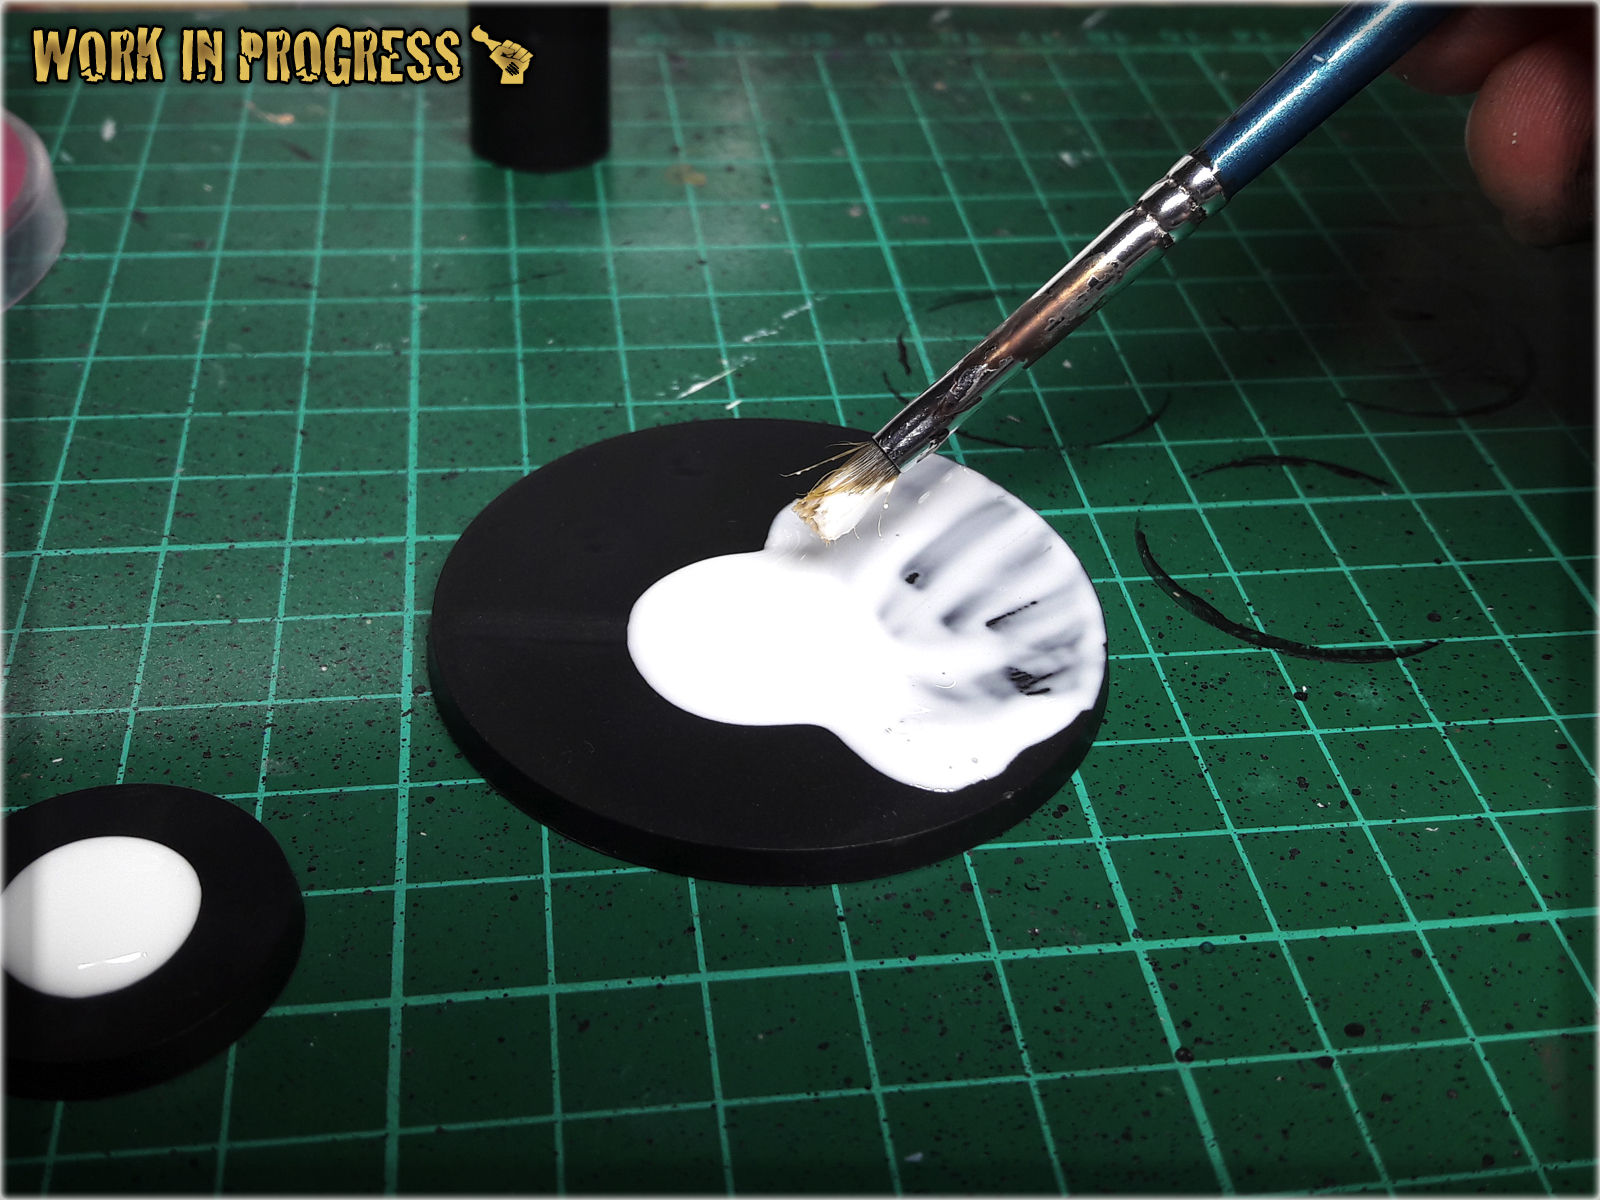
* I then put couple of tiny balls onto the base, creating 'buubbles' and let it all dry.

* Once dry, I covered are around the bubbles with another layer of basing glue.

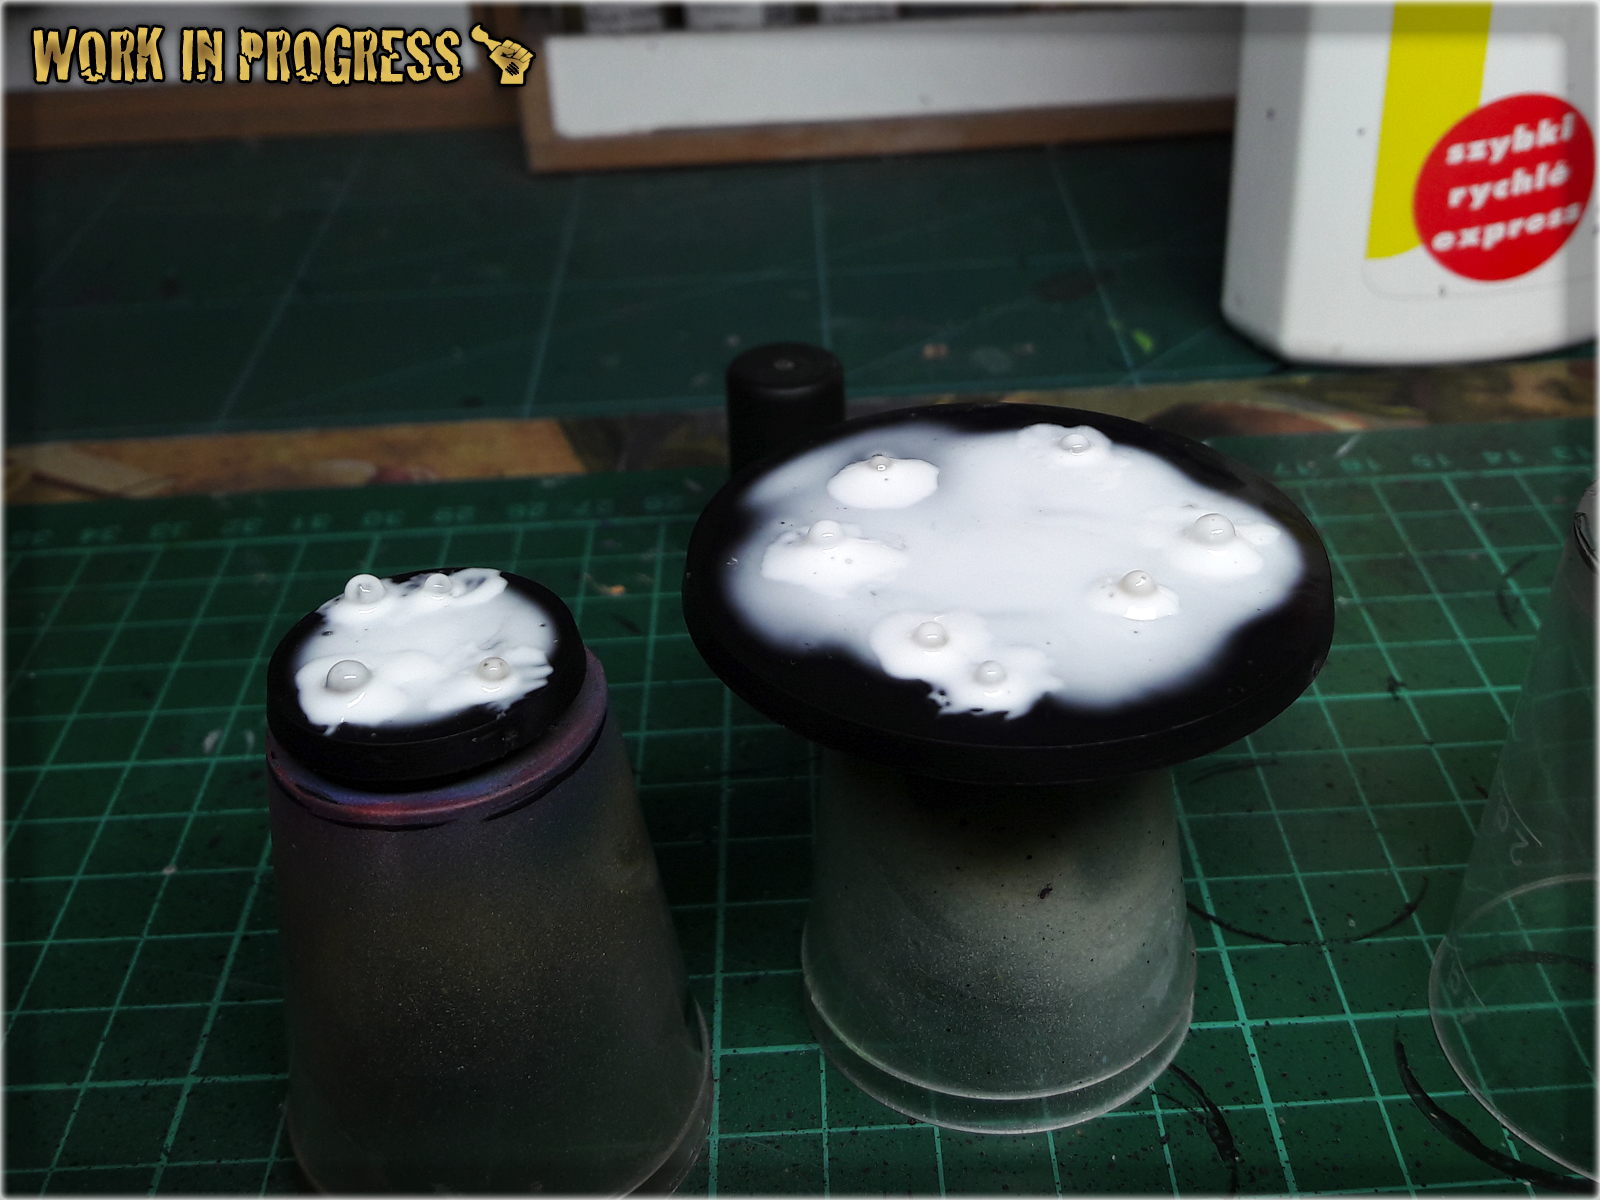
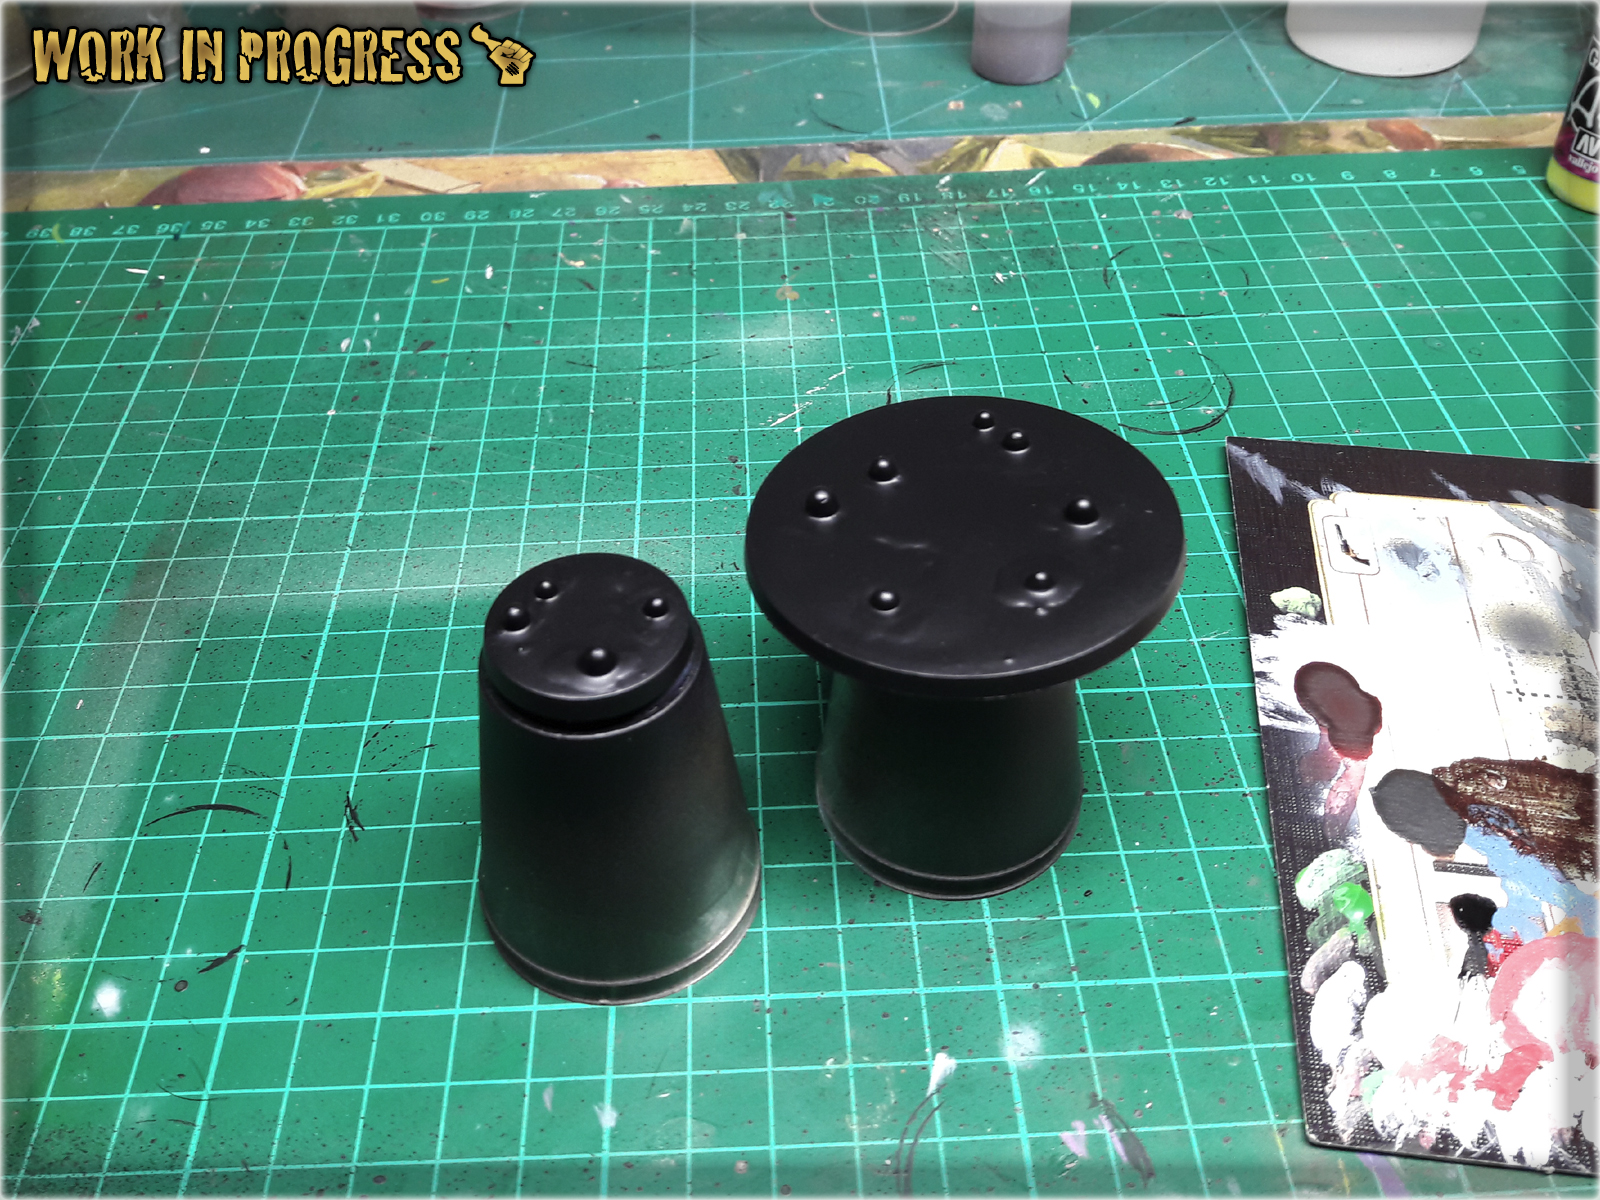
* I let it all dry for about an hour, then undercoated entire base black.
* I then airbrushed a layer of Vallejo Interior Green over entire base.
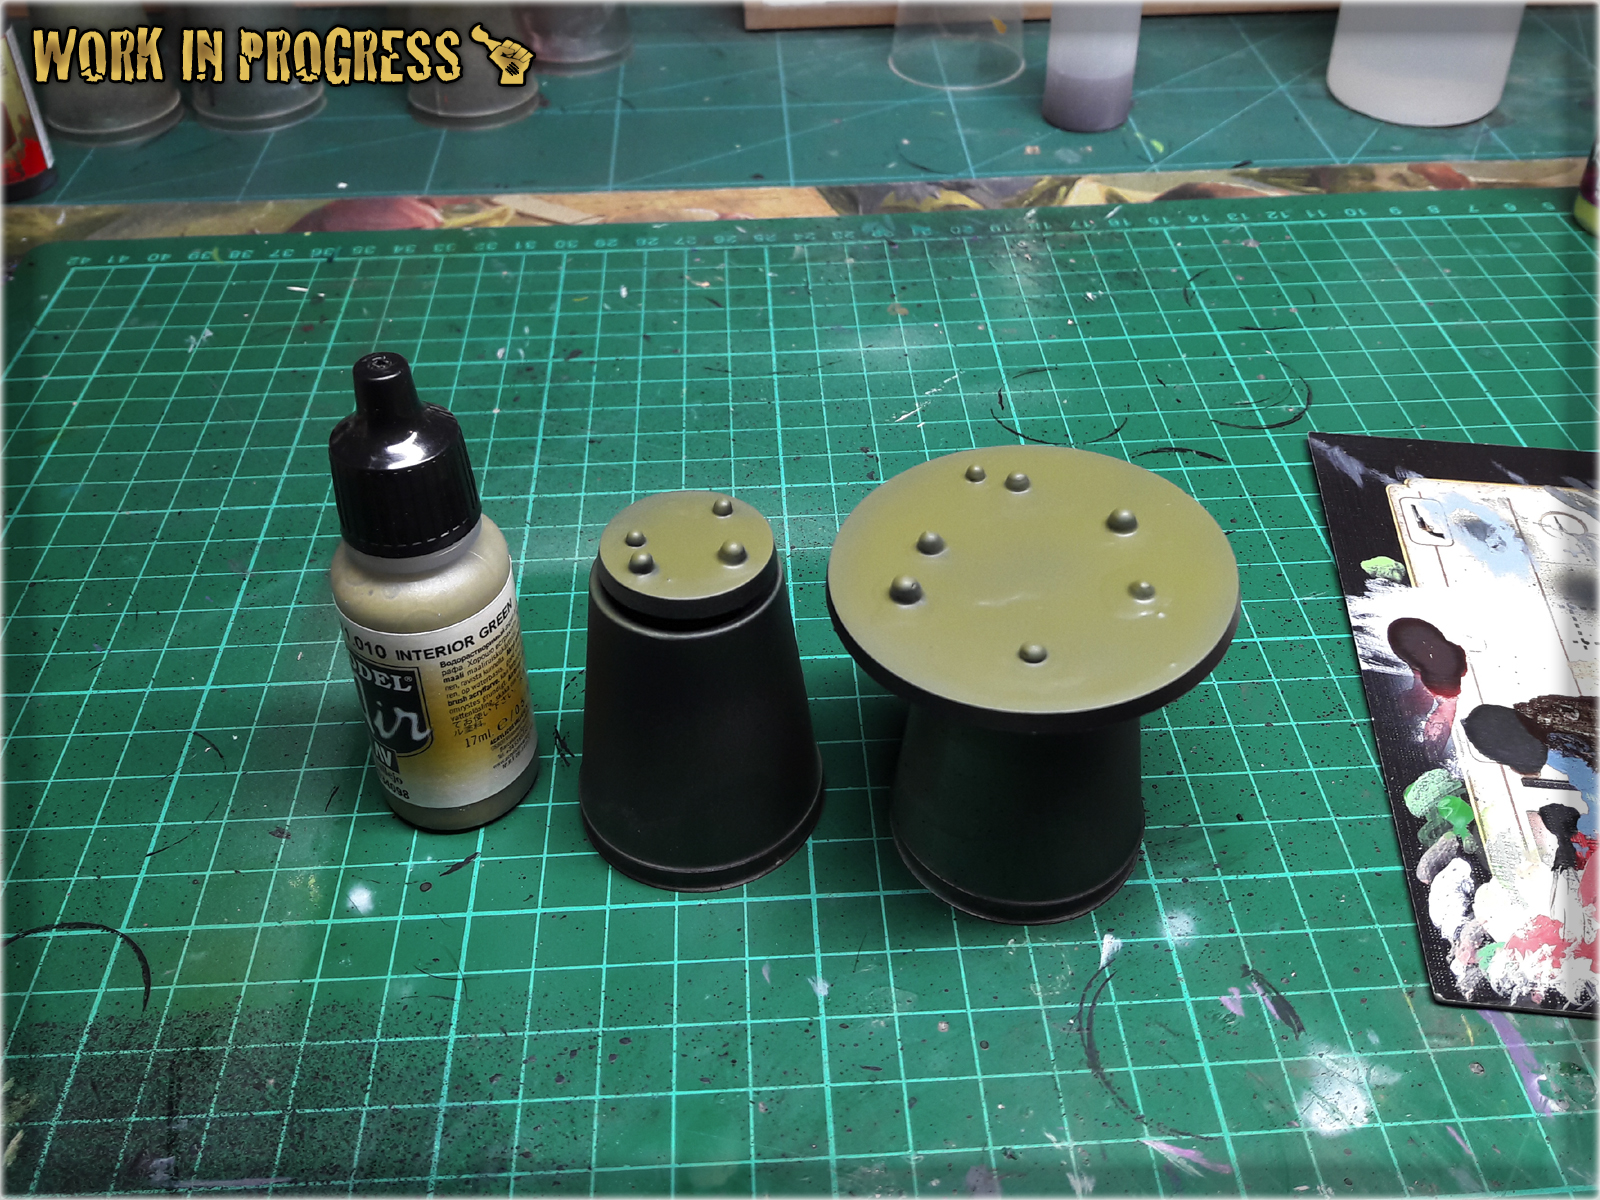
* Next I airbrushed a layer of Duck Egg Green concentrating on bubbles and surrounding areas.

* Last thing to do was to airbrush two layers of Light Livery Green over entire bases and paint the sides black.

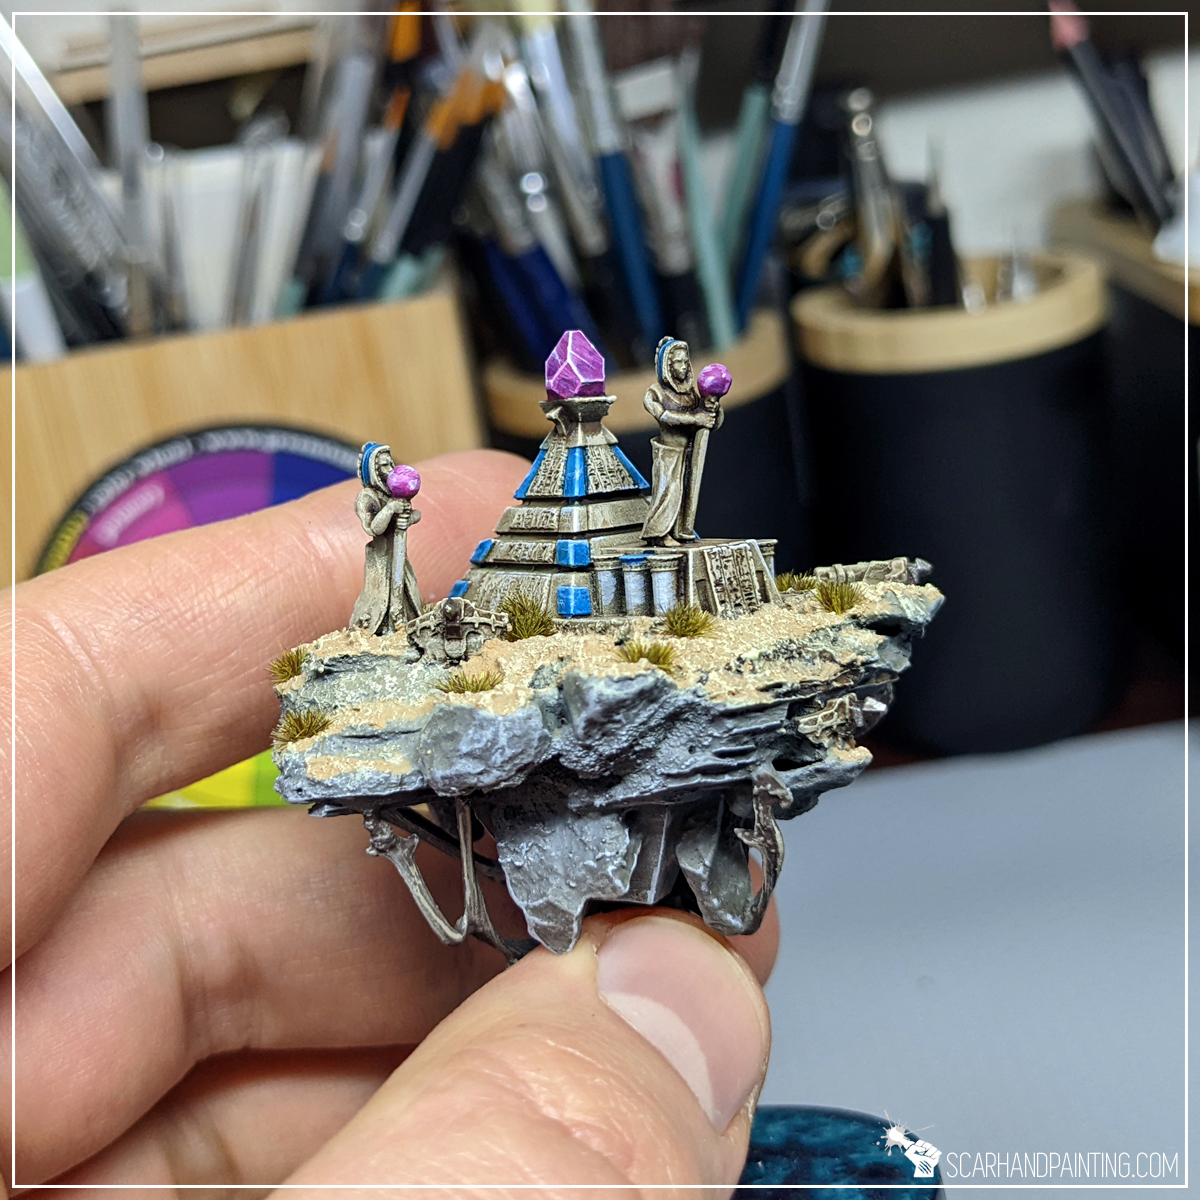
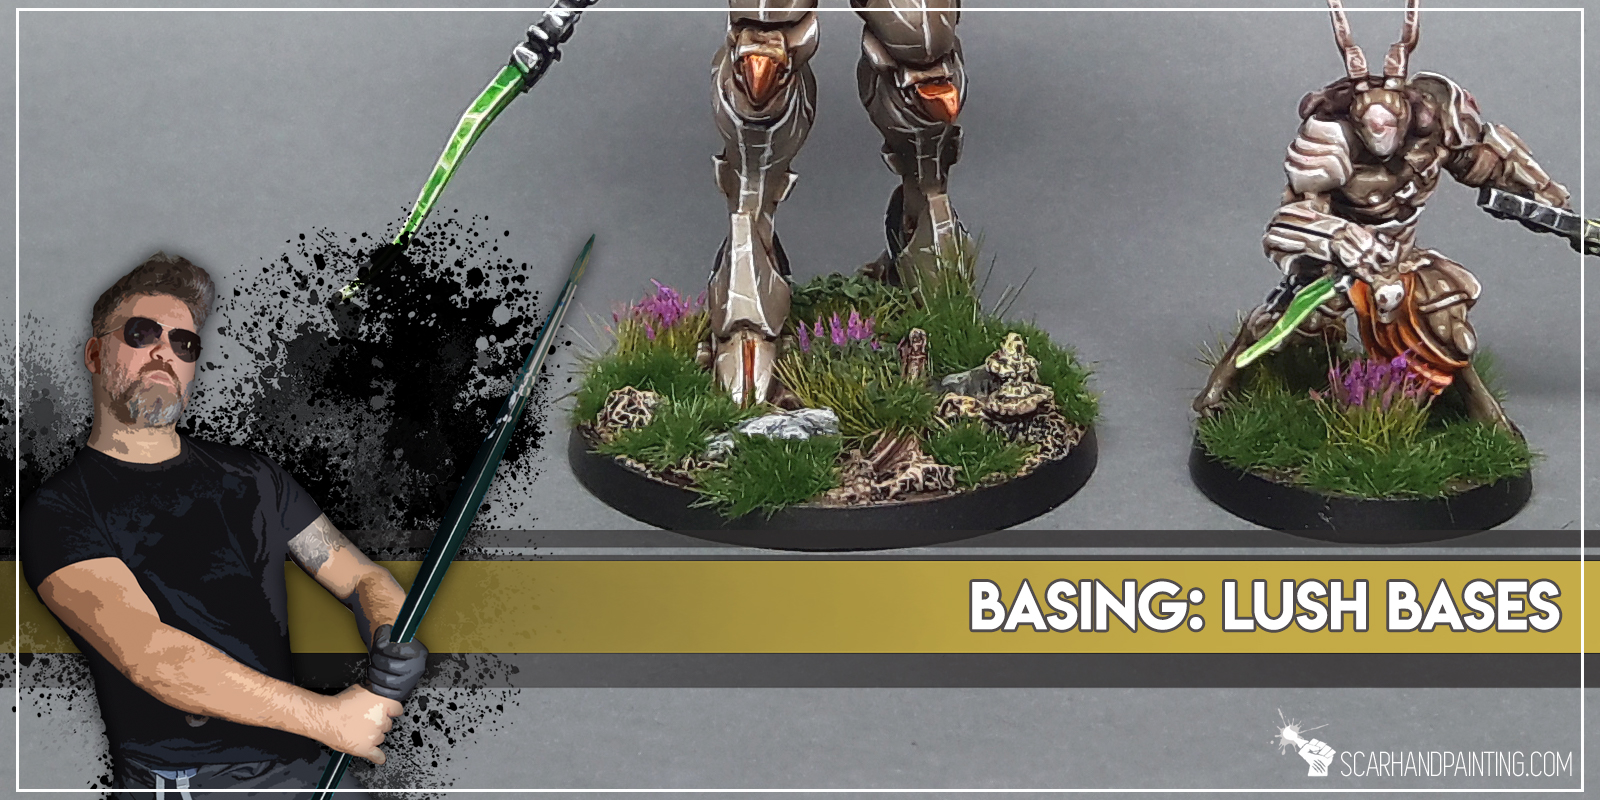
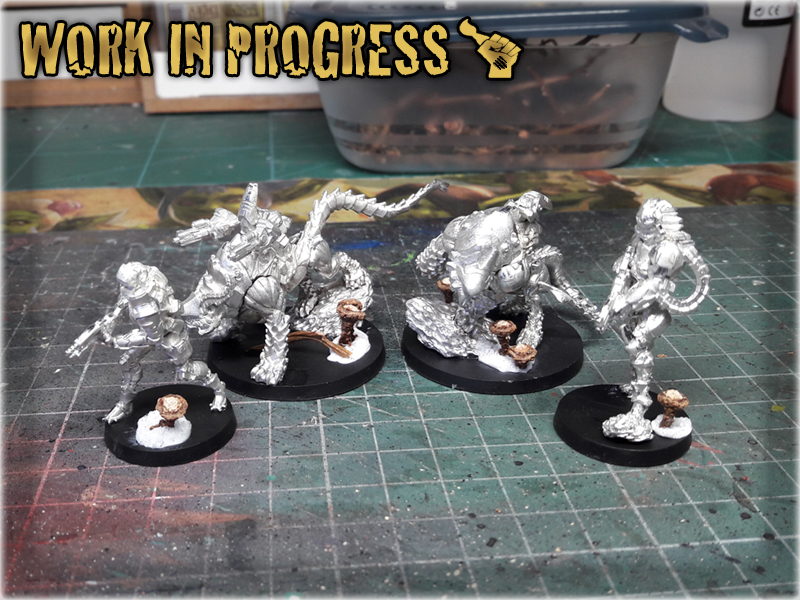
In this easy, step-by-step tutorial I’m going to show you how to create a Lush Base. I designed these bases to fit Infinity the Game Tohaa ‘tactical rocks’ – you can see how it turned out at Infinity TOHAA ‘Witness Me!’ gallery.

* I started by separating Grape mounts from the dried out Grape branch. Being rather soft, their topf have been removed to improove durability and shape.
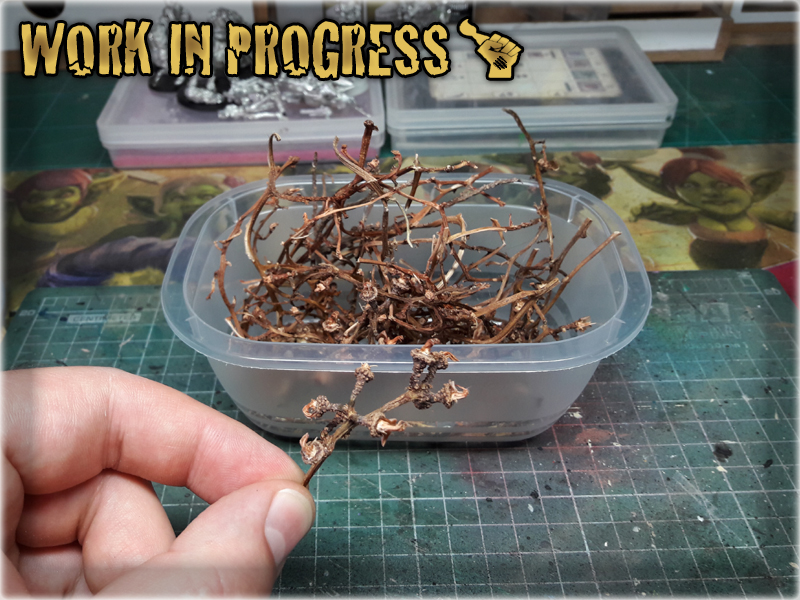
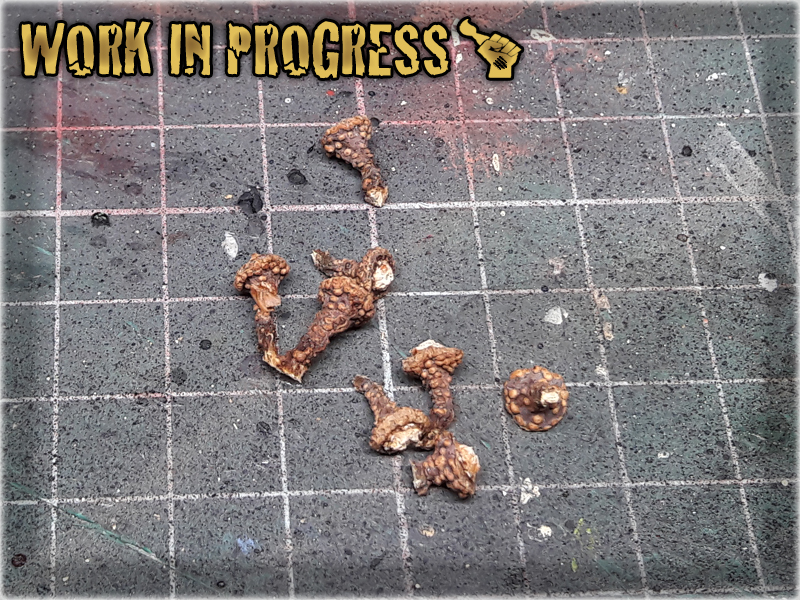
* I then applied a drop of basing glue onto the base, followed up shortly by another drop - this time super glue.
* Before mixed glue drop was able to dry out I've planted Grape mount on top of it, creating strange looking plant.
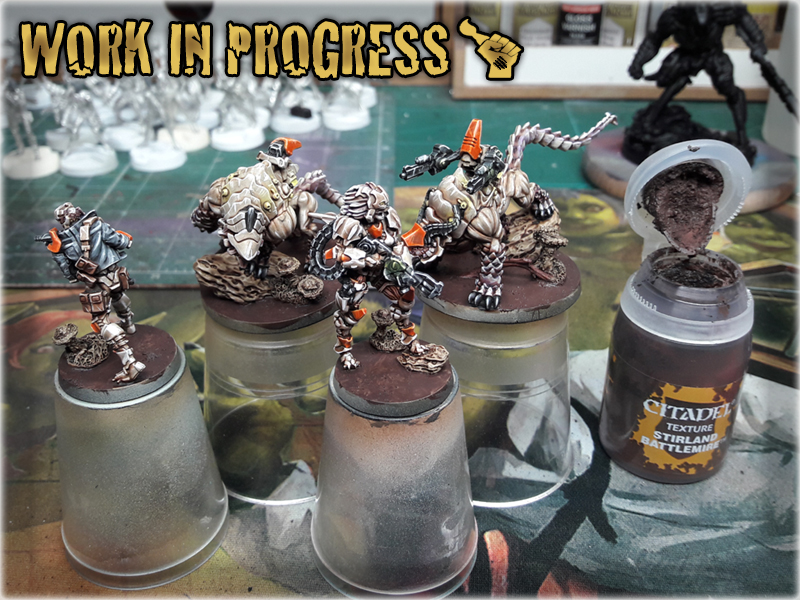
* Once glue dried up I've painted the bases following choosen colour scheme (see below). I then added some texture on top of them with Stirland Battlemire texture paint.
* orem ipsum dolor sit amet, Integer commodo tristiqu odio, aliquet ut. Maecenas sed justo imperdiet bibendum. Vivamus nec sapien imperdiet diam. Aliquam erat volutpat. Sed onsectetur suscipit nunc et rutrum. Lorem ipsum dolor sit amet,volutpat. Sed onsectetur suscipit nunc et rutrum. Lorem ipsum dolor sit amet, volutpat.

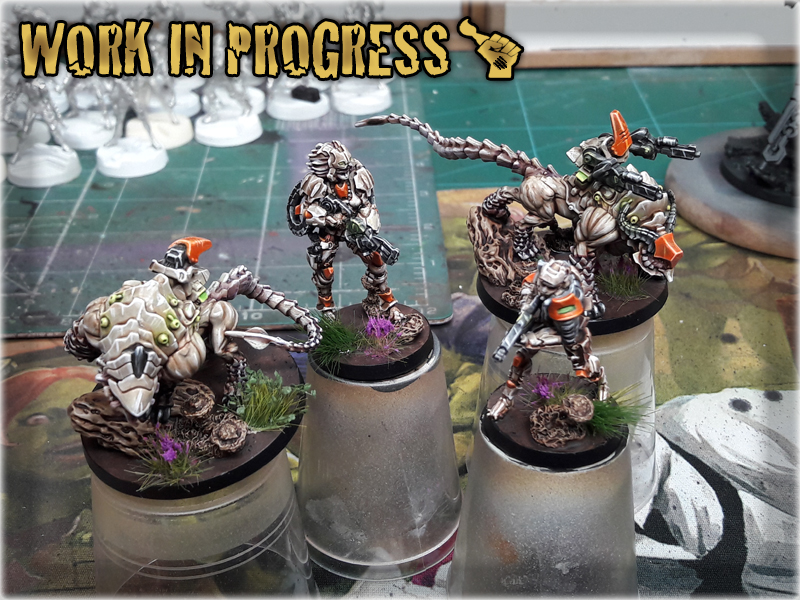
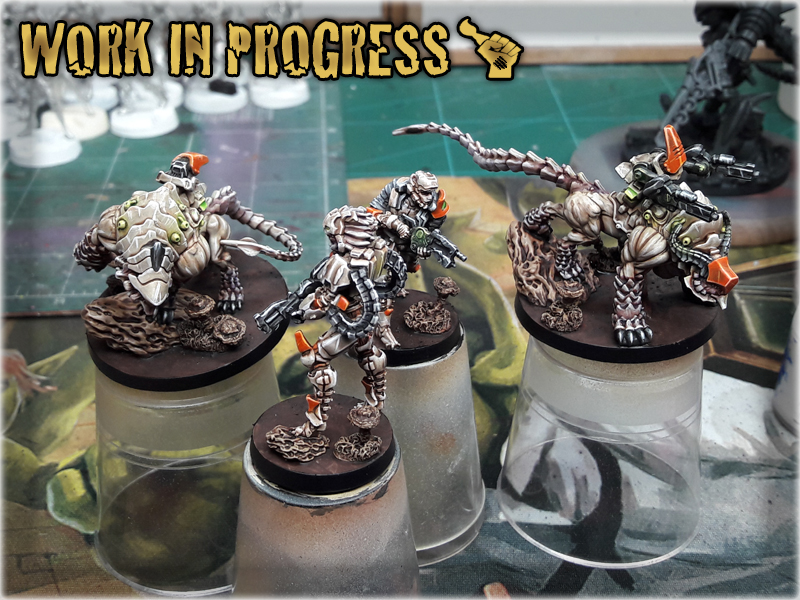
* Last step was to apply regular tufts. I used some noname tufts in large numbers filling most of the flat areas. Job done.


Black Undercoat,
Stirland Battlemire (GW), texture
Karak Stone (GW), stones & plants
Flayed One Flesh (GW), flatbrush stones & plants
Mix Strong Tone Ink (AP) 1:1 Soft Tone Ink (AP), wash