- contact@scarhandpainting.com


“It is a Dark Time.
The might of the Empire is dust, their crown is lost to them and their glory forgotten.
The promise of an age of peace and prosperity is drowned in blood.
This is your time. For the ruins of Mordheim hold prize beyond imagination: stones of power which can grant all your wishes.
But beware of your enemies.
Fear the Possessed, the Beasts of the Pit which roam the night.
Watch for the thieves of the Rat men, the Skaven of the Underworld.
Dread the corpses who walk like the living: the foul Vampires and their rotting minions.
This is Mordheim, the city of the Damned. This is the home of all your hopes. Be wary or it will be your grave as well.”
Mordheim rb.s.124
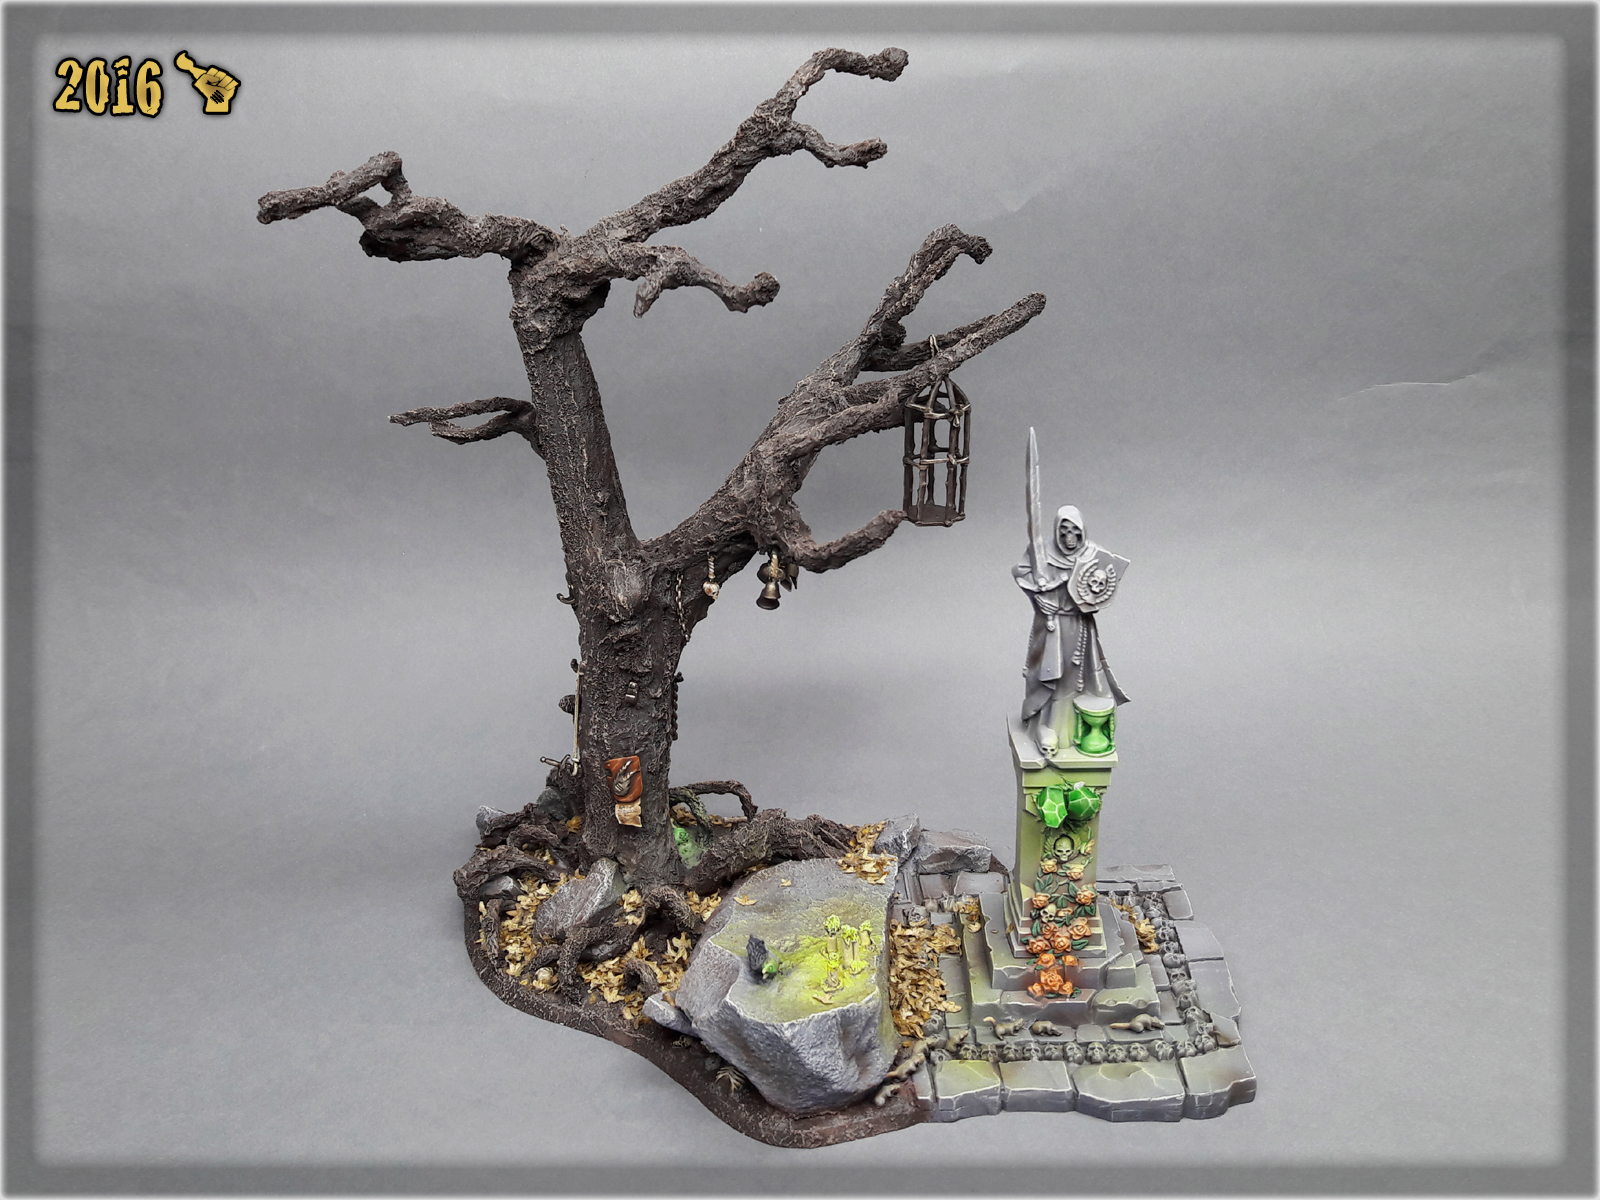
Working with some awesome Tabbletop World terrain bringed back memories of Mordheim and how I used to create fantasy scenery for my own gaming table. The idea to revitalize entire gameboard surfaced in my mind on more than one occasion but such a feat was somehow beyond my reach. To satisfy the muse and pacify my deepest Mordheim desires I decided to go one small step at a time. My attention focused on a piece I wanted to create since the earliest days of Mordheim – a creepy, dead tree. I already made an attempt to bring life to this piece couple of years ago, but the overall effect was rather poor and I ditched the project. This time I was much more experienced and much more hyped, but most of all I have acquired a lot of new skills and got to know new techniques during these last few years. I was ready to take on this Special Project head-on.
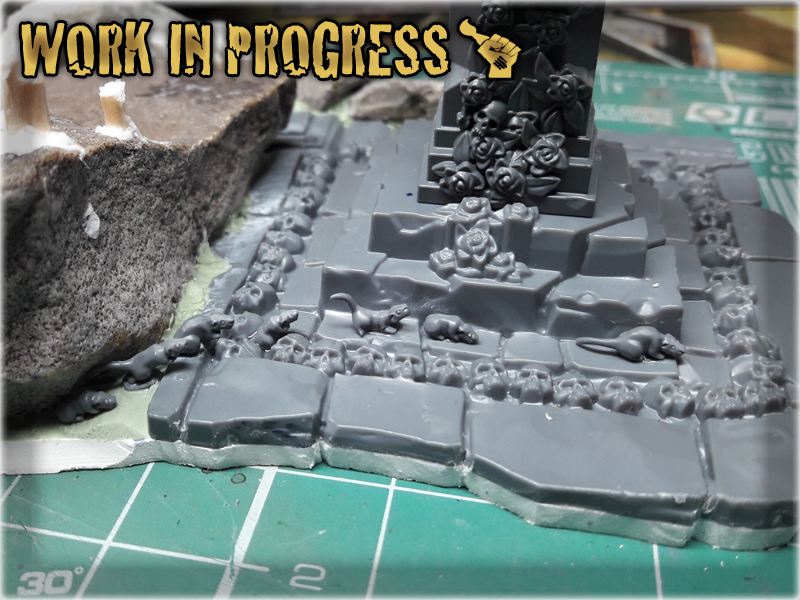
The idea was to make a sickly looking tree, hung some stuff on it then compose the surroundings so that the entire piece of scenery would create a nice visual effect. It was supposed to be a cool looking, mood providing centerpiece. The most important features were to be looks and being totally impassable so that the terrain piece won’t cause any placement problems during the game. Along with the tree there supposed to be some sort of eye-candies in form of small detail like a hidden treasure, bones, animals etc. Also I wanted to include either a small crypt or a monument somewhere on the base to provide a stronger mood to the piece.
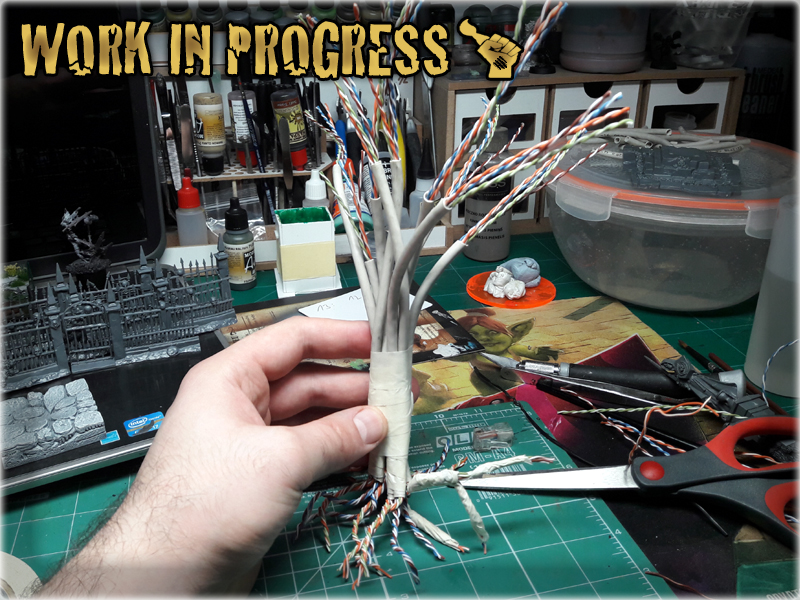
After selecting most of the initial materials and bitz for the project I started with the tree. I thought long and hard about where to get a long wire to base the tree upon, but in the end was able to get my hands on an old Ethernet cable. At that point I knew that I will have to strenghten the entire construction, but for the time being I concentrated on the base shape. I cut the cable into pieces, removed the excess of the outer layer and reshaped the inner wires into branches/roots on both ends of each piece. Then I grouped the pieces in twos and threes, taping them around the main trunk with a paper-tape. In the next step I composed the tree out of the newly created pieces and taped them together…
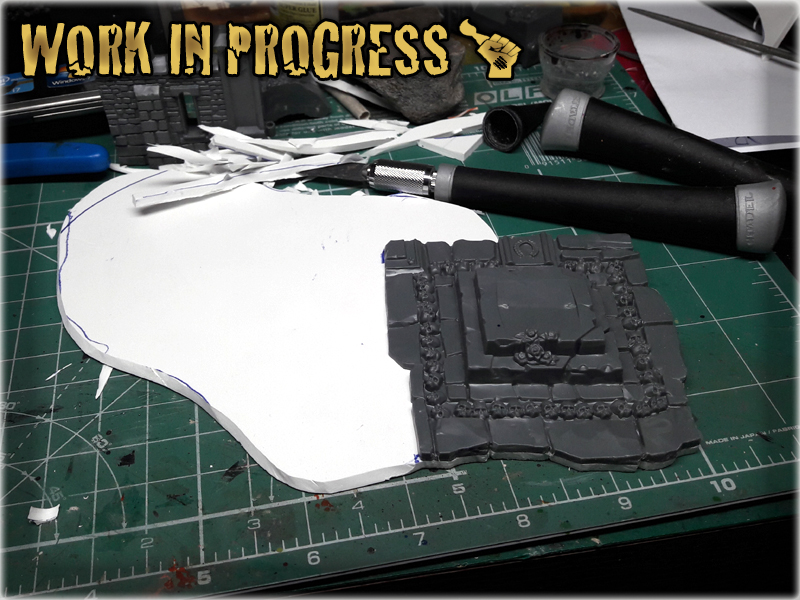
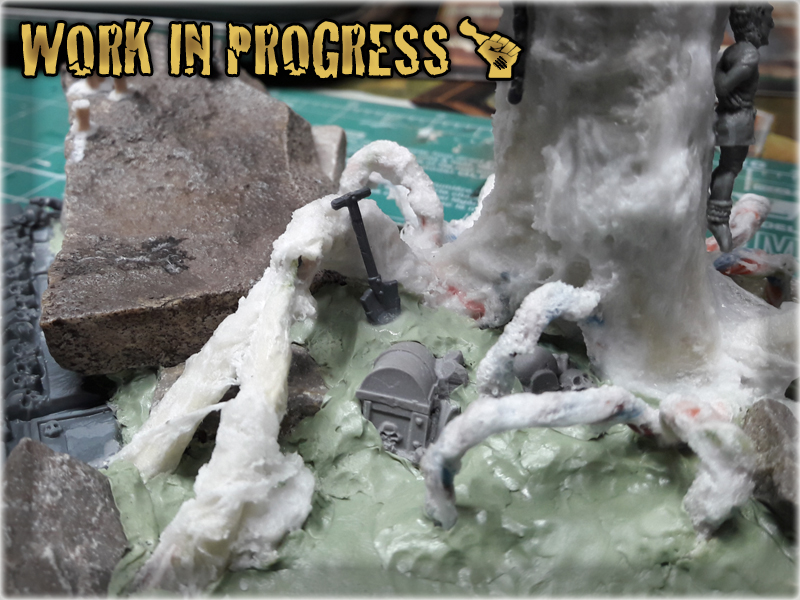
Having a tree I concentrated on basing it. Used a piece of PCV to cut the basic shape and glued a bottom piece of the statue I was going to add to the composition. I then cut the excess of PCV and modelled it a bit around the newly aded piece. I based the tree and added a huge natural rock to the base to serve as a sort of a sacrificial altar or something related to occultism (And to add weight to a base that was supposed to hold a big tree). I then used a basing glue on the entire trunk of the tree and taped it around with pieces of moisted paper towel. Left the entire thing to dry out for the night…
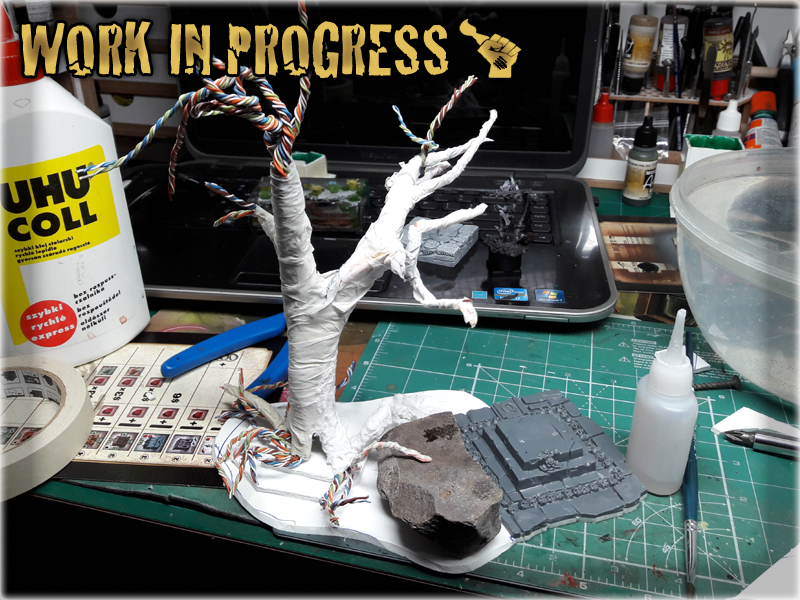
Upon waking up I started to add texture to the tree. There were two possible ways to achieve a durable and good looking effect. The first one was to use Green Stuff along with other sculpting putties to provide a nice texture. This one would take up a lot of time and cash so I ditched it in favor of the more simple and quicker way. Once again I used basing glue, but this time I covered entire tree. Once it was hard enough I added another layer and used a dryer to help it harden. I also applied a lot of Mourn Mountain Snow – texture paint from GW. Modelled a bit and then finished with a lot of Super Glue to harden the entire surface and strenghten the construction. This way I ended up with a nice looking, durable and highly textured tree…
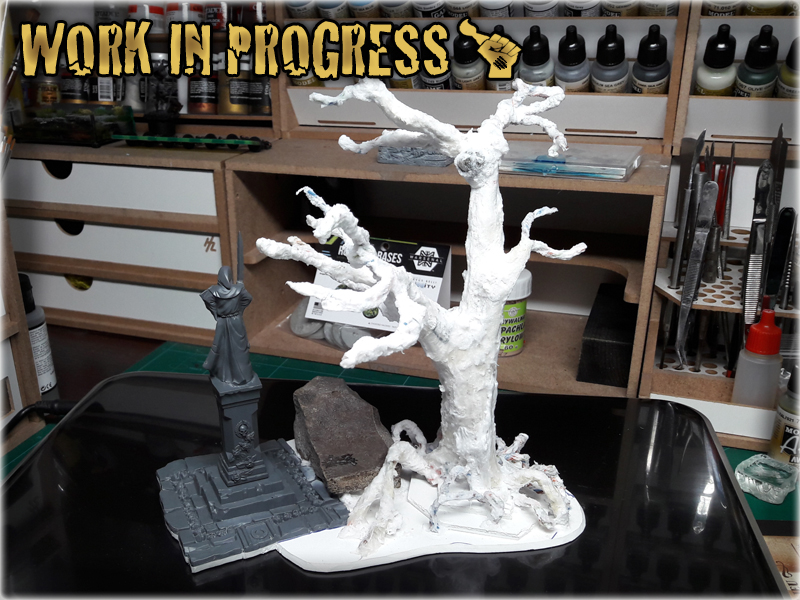
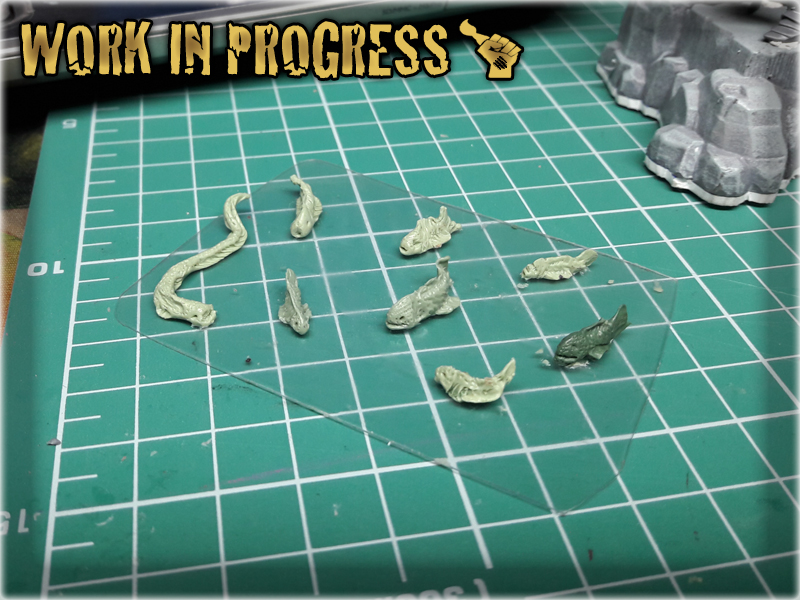
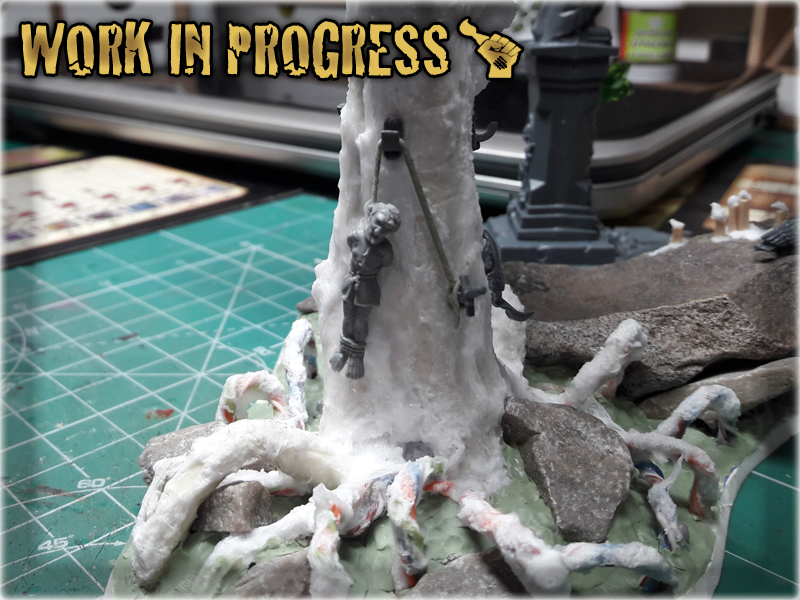
Next step was to add more stones onto the base and provide a more natural shape to it. I used Green Stuff and some other modelling putties to create the base shape. It was a bit expensive, but I hadn’t had plaster around and wanted to progress without any delays. I even used up excess of the putty to quick-sculpt some fish and mutated creatures for another Special Project going on beside this one. Somewhere on the way I also started to add bitz to the tree so that it looked more Mordheim-like with hooks, nails, a dead body hunging by the neck etc…
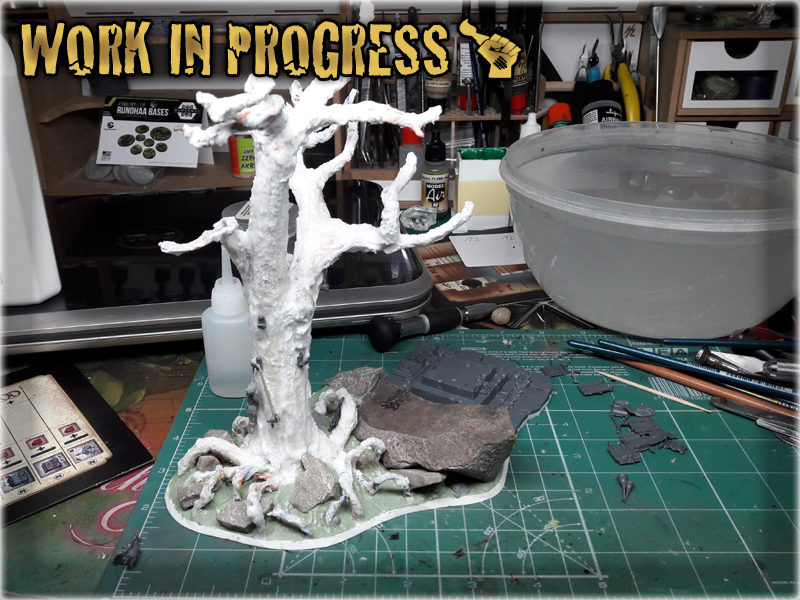
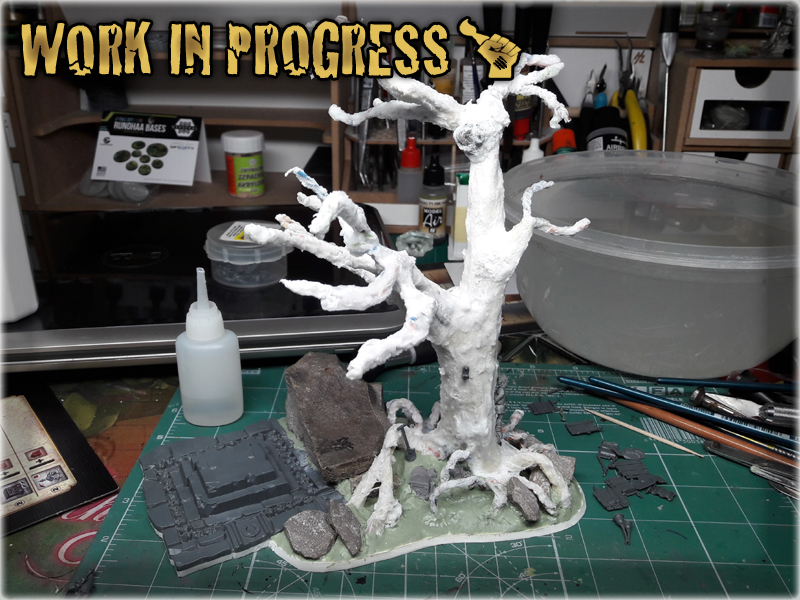
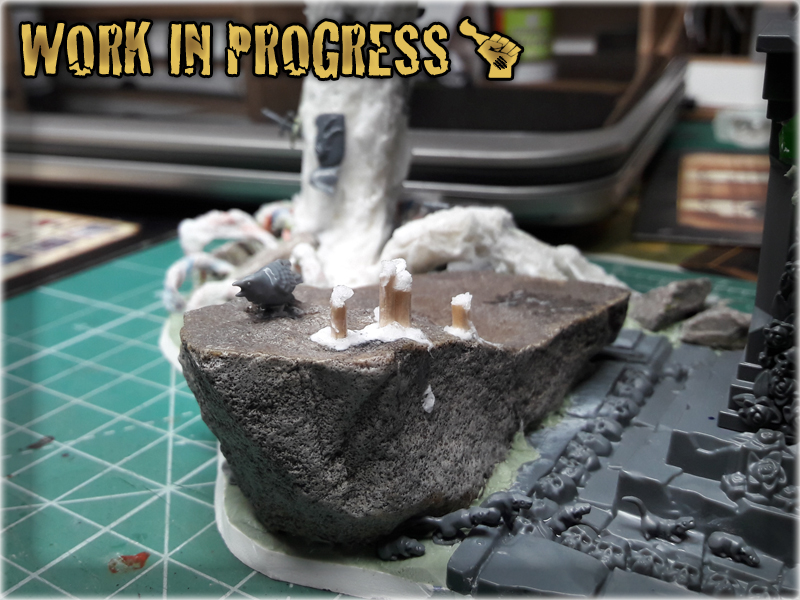
Detailing took some time as I wanted to bring life to the piece. A short line of running rats here, A bird interrested with the candles there and a half burried treasure chest somewhere else. The work moved steadily forward and with each new feature the ‘Dead Tree’ look much more alive.
Once everything was in place I covered the entirety of the base with Stirland Mud – tecxture paint from GW. Usually I just use basing glue and sand, but this time I wanted to create something more detailed. ‘No shortcuts’ I told myself when applying the texture. Ended up with a complete piece looking like this:

What can I say – I was totally in the mood. Once I sat to paint this thing I couldn’t take a break even if only to take a work in progress picture. Just couldn’t stop. Took couple of hours to complete with me testing new recipes – wanting this one to look superior to all my previous Mordheim scenery. It turned out to be a concept foundation on which I intend to build my new Mordheim gaming board terrain series.

One thing that I can say about the paint job is that most of it is made using Vallejo Air paints and actually airbrushed. Some surfaces were drybrushed just to be lined with Flayed One Flesh. What is unusual for me is that I almost used no washes, which usually are the main source of highlights in my works. This time tho I decided to go in the direction of a proper airbrushing, rather than risk unpredictability of a wash. Either way – I finished the project by applying Birch-tree seeds to imitate leaves all around the base and in particular small spots over the altar and monumet. This complimented the entire colour scheme and deepened the mood of the scenery piece.
Here is a picture of the finished piece, but theres a lot more in the “MORDHEIM DEAD TREE” Special Project gallery…
Some pictures can be also found at CoolMiniOrNot, where you can leave your votes for this one if you like.
“Dead Tree” is not my last word when it comes to Mordheim Terrain. Even now I’m working on a brand new pieces, not to mention the ‘Toad Fountain” which was completed in the same time as this one. Hope you like this piece and will enjoy the entire series. I encourage you to leave feedback, especially in case of any questions related to the project.