- contact@scarhandpainting.com


Taking some good quality pictures of our painted miniatures can be a real nightmare. I know for a fact that a lot of hobbyists struggle when presenting their work online because of how misrepresented, by bad quality photos, the paintjob is. Blurry or oversaturated pics can really undermine reception of our work, leading to our disappointment and anxiety, thus discouraging us from further painting attempts. Today I would present to you a few tips that should improve the quality of your pictures without a need for high end photographic equipment.
I have been painting miniatures for over twenty years now. During that time I really struggled with proper presentation. I followed multiple tutorials, tried different cameras and setups, shadow tents and specialist backgrounds. All that “ISO”, “Macro”, “Exposure” settings mambo jumbo made my head hurt while I failed to deliver satisfactory quality pictures. With time technology advanced and became simplified and more efficient. Smartphones are so common and their cameras advanced that there seems to be no need for specialist photographic equipment anymore – at least when it comes to sharing cool pics of painted miniatures.
Miniatures photography is still a part of the hobby I loathe with all my heart, but thanks to experience acquired through failure, my work’s presentation finally feels acceptable. That’s not to say I am now a miniatures photography specialist, just that I feel comfortable to share some tips in hope to help other hobbyists feel satisfaction from presenting their work.
Some notes:

Tip 1: Camera Handling
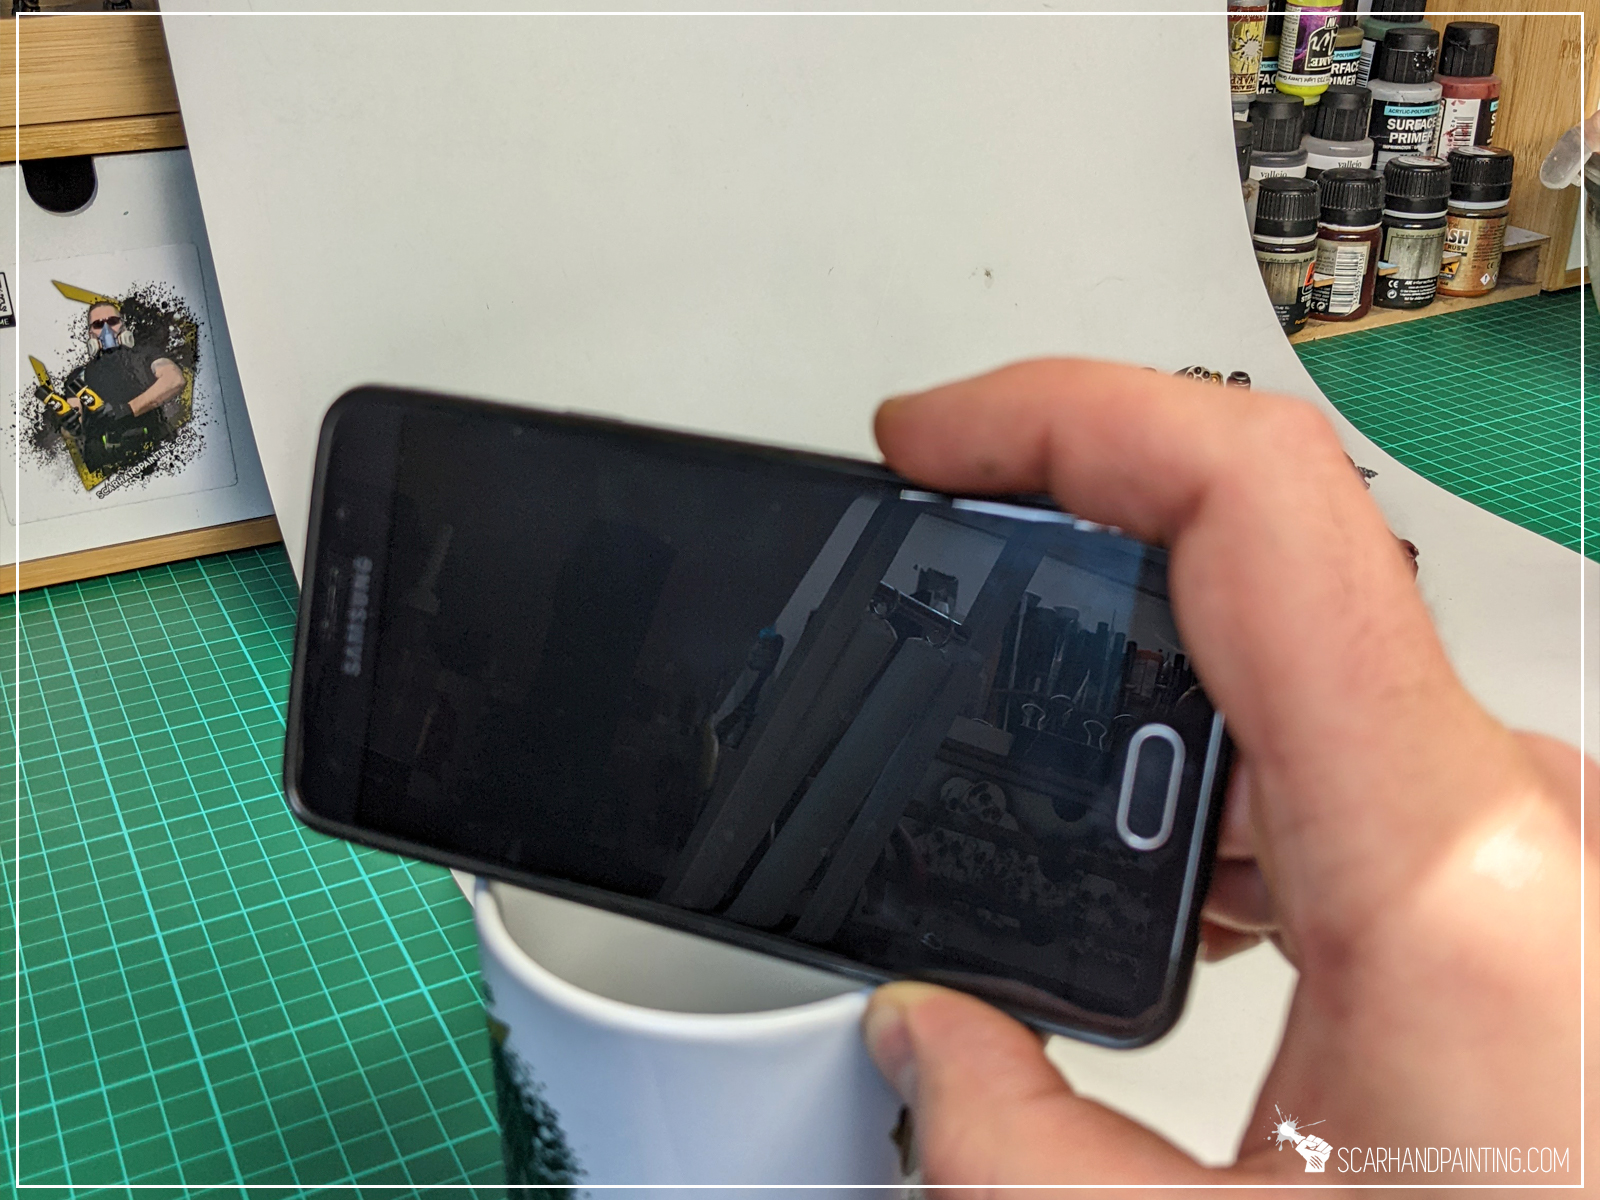
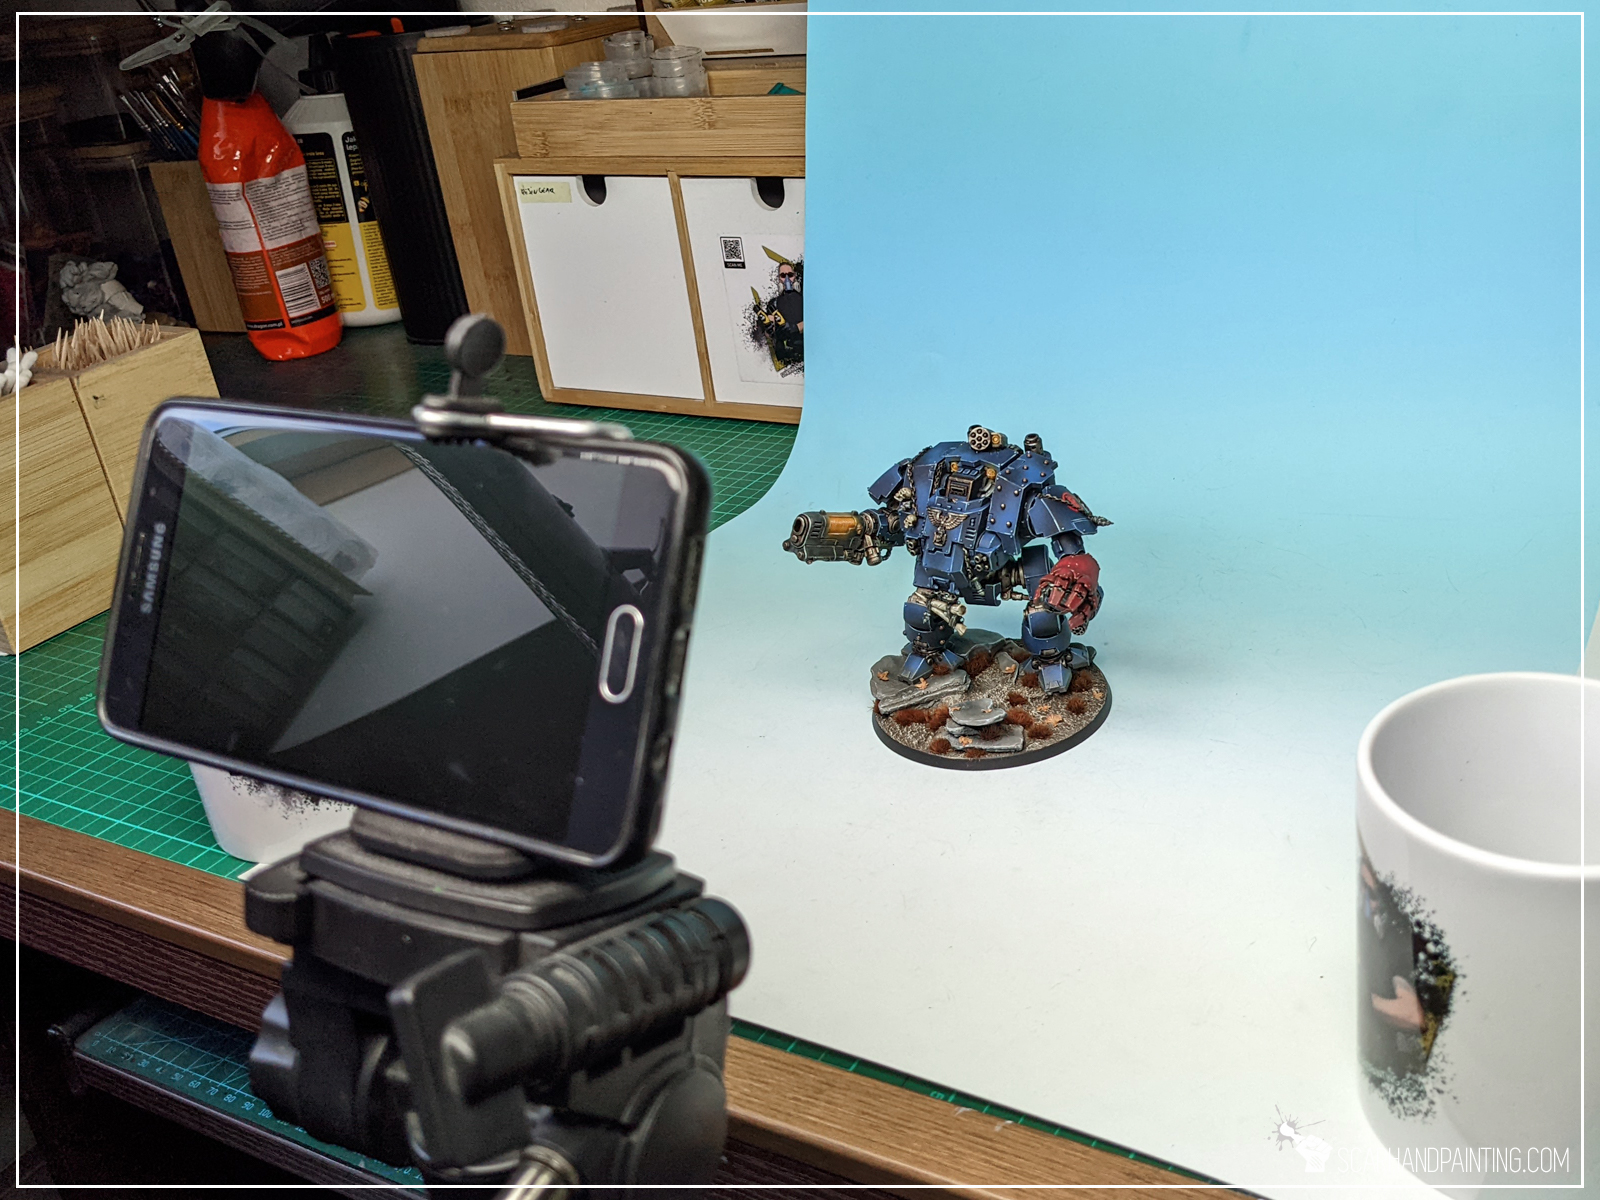
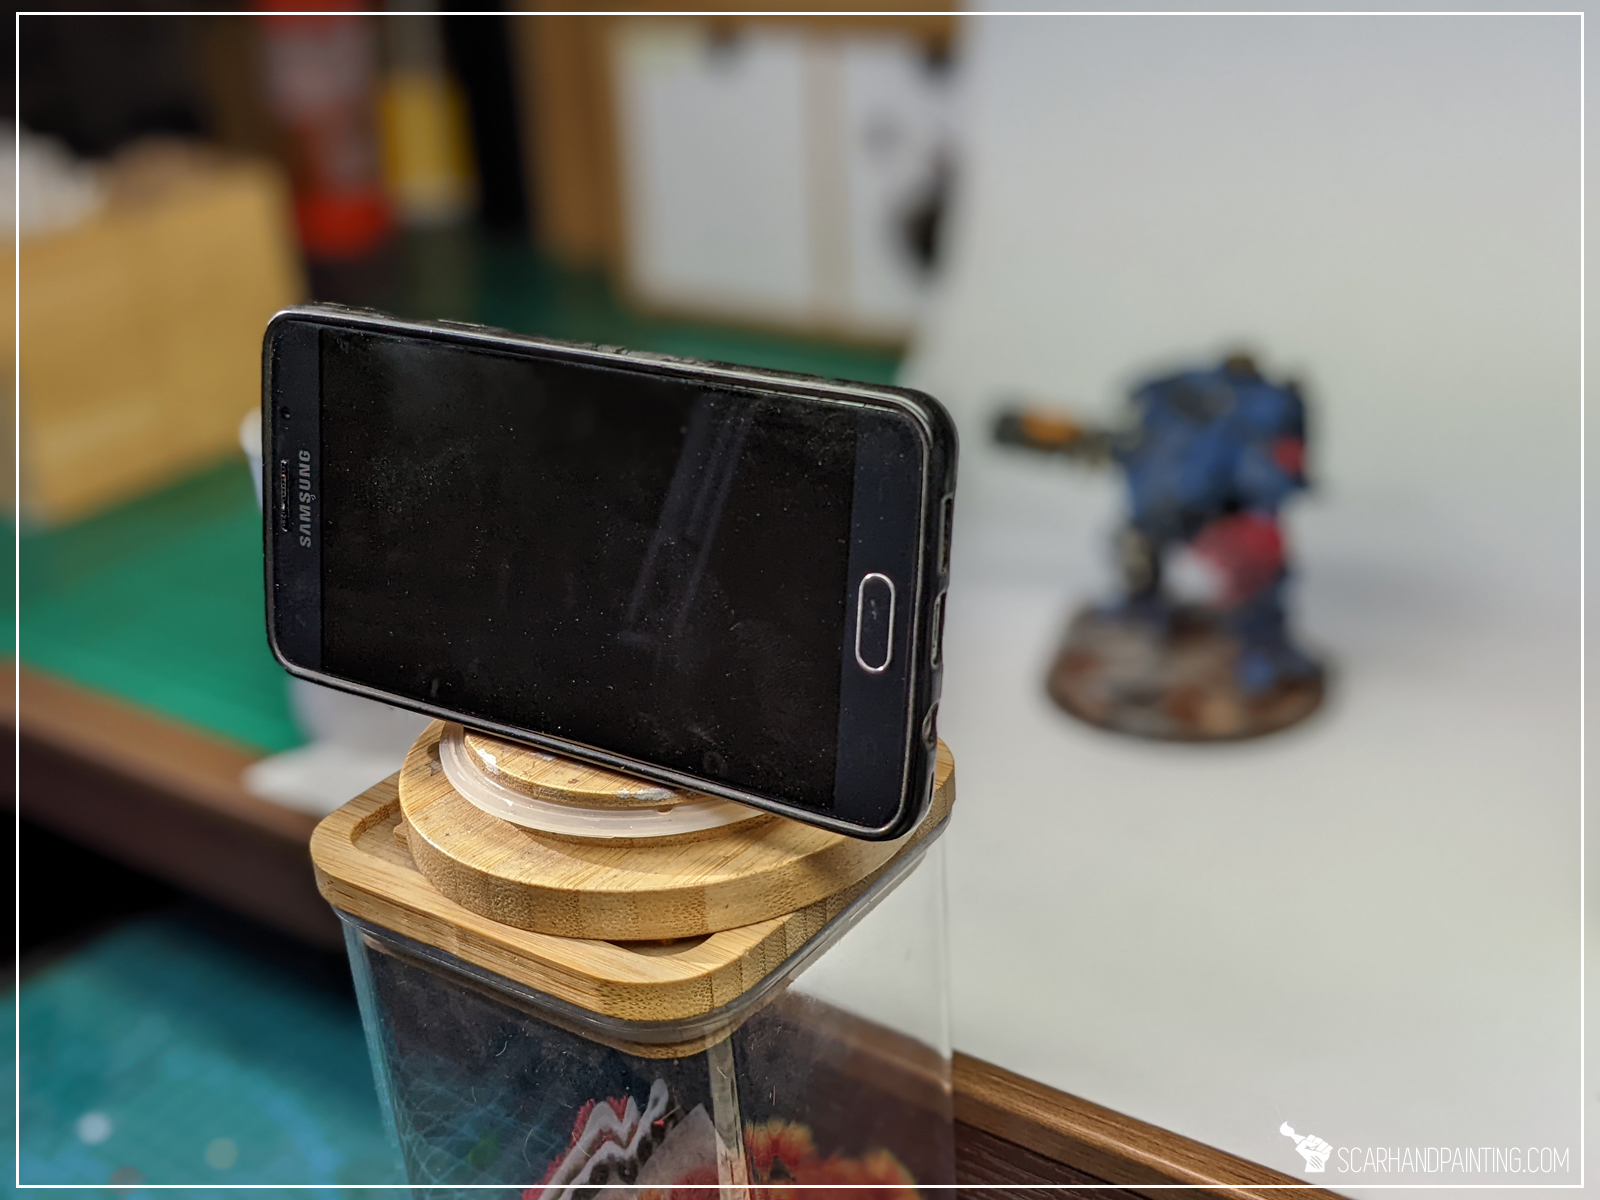
Be it on a tripod, or just held still on a piece of Blu Tack – keeping a camera perfectly still when taking pictures is key to achieving a nice sharp image. Holding the camera in hand, even if partially supported, results in micro movements disturbing focus. This includes taking a picture manually with a push of a button. To avoid unnecessary focus loss I recommend immobilizing the camera and setting a timer to three seconds to give it some time to settle after it got touched.
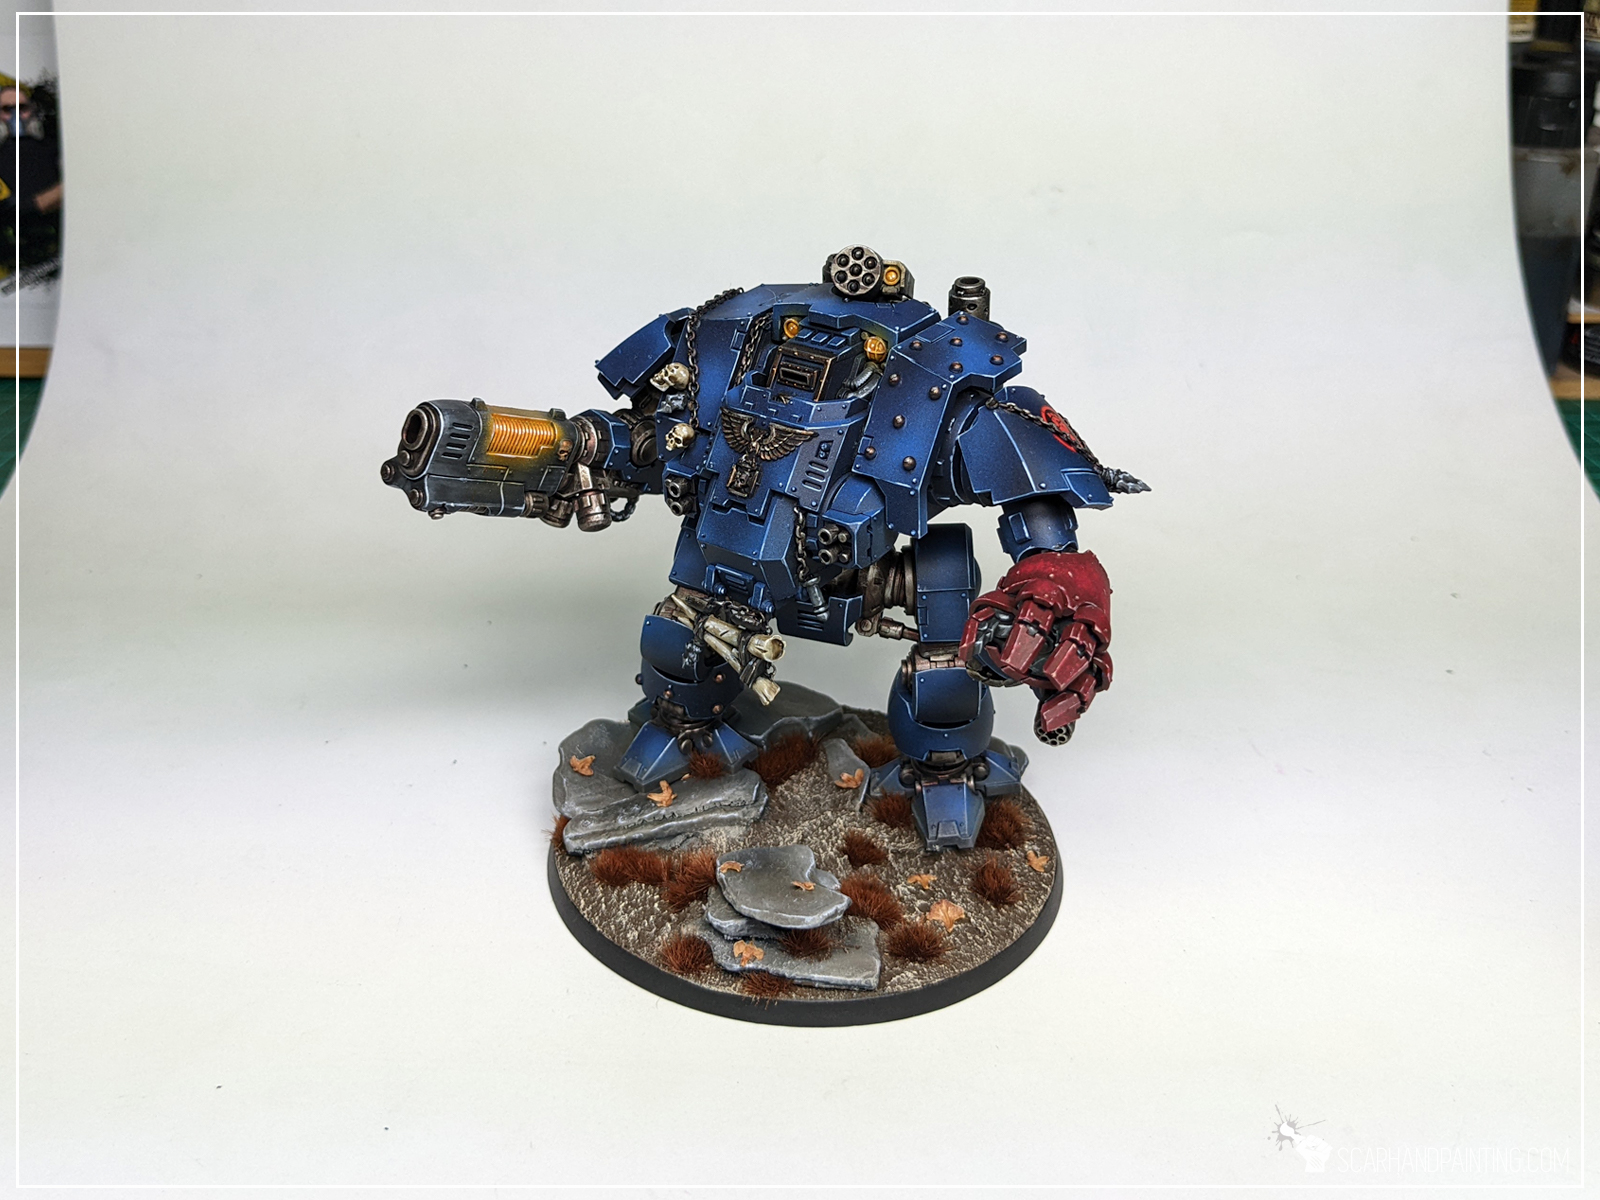
Example: Camera held in hand.

Example: Camera set up on a tripod or supported.

Tip 2: Light Setup
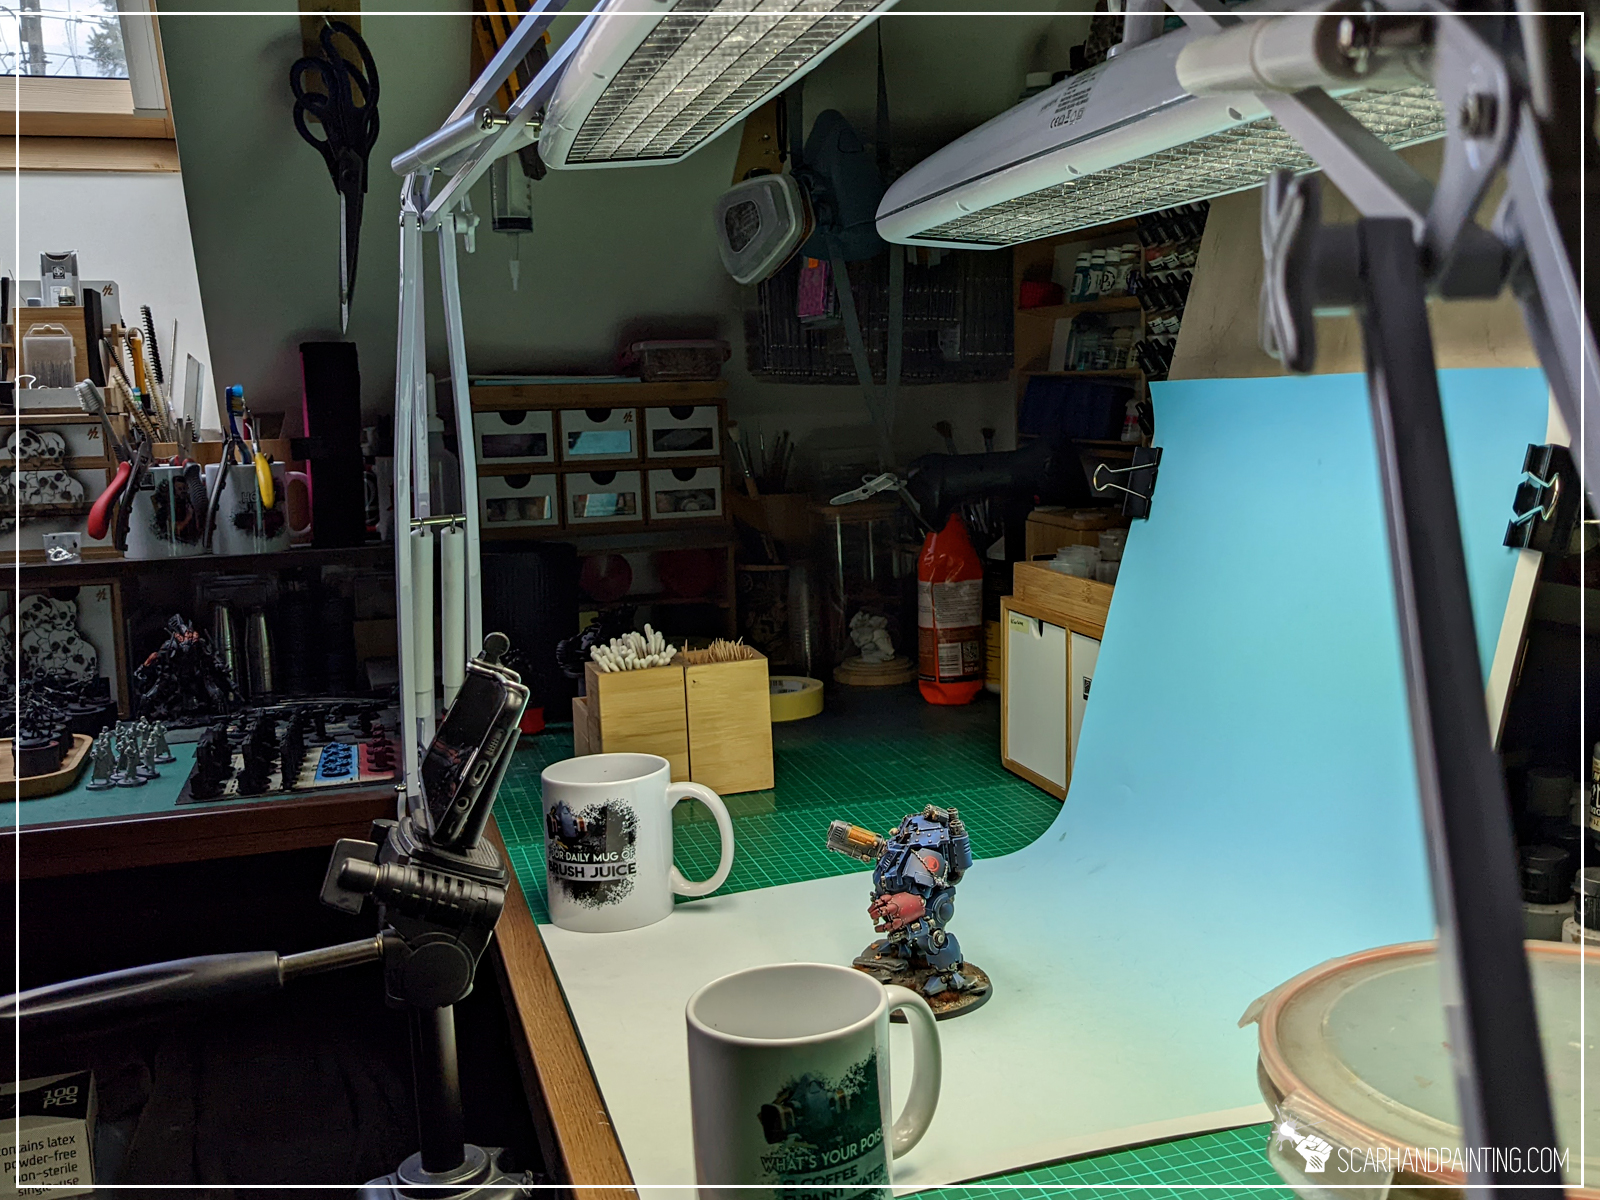
Most common light setup I’ve seen across multiple tutorials was one main light source positioned directly behind and slightly above the camera, backed by one to two supplementary light sources positioned at the sides pointing towards the miniature. After many tests I settled on two white light sources: One placed directly behind and slightly above the camera, pointing towards the miniature. The other is placed above and somewhere between the miniature and the camera, directed away from the camera and towards the miniature. Things to look out for would be placing a light source too far, behind the miniature, resulting in increased contrast and artificial shadows, or pointing towards the lens resulting in a too bright, blurry and fuzzy image.
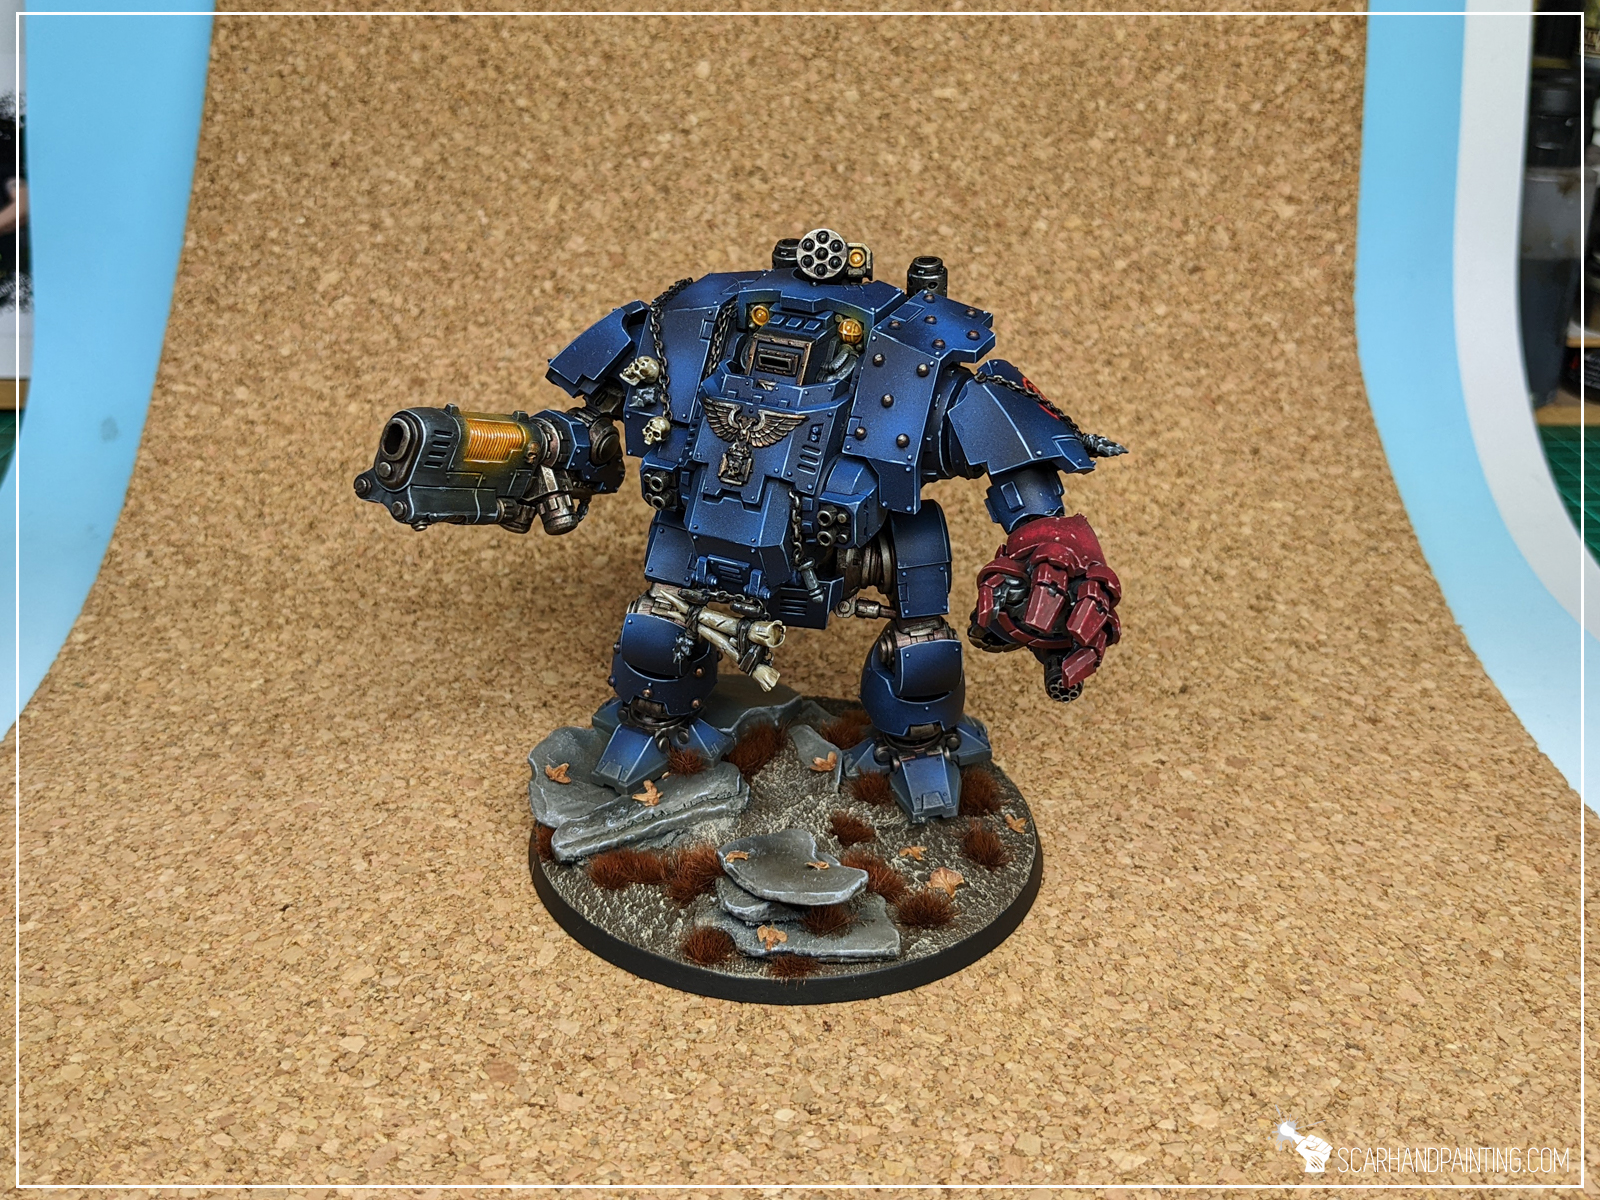
Example: Light sources placed zenithally, one lamp behind the miniature.
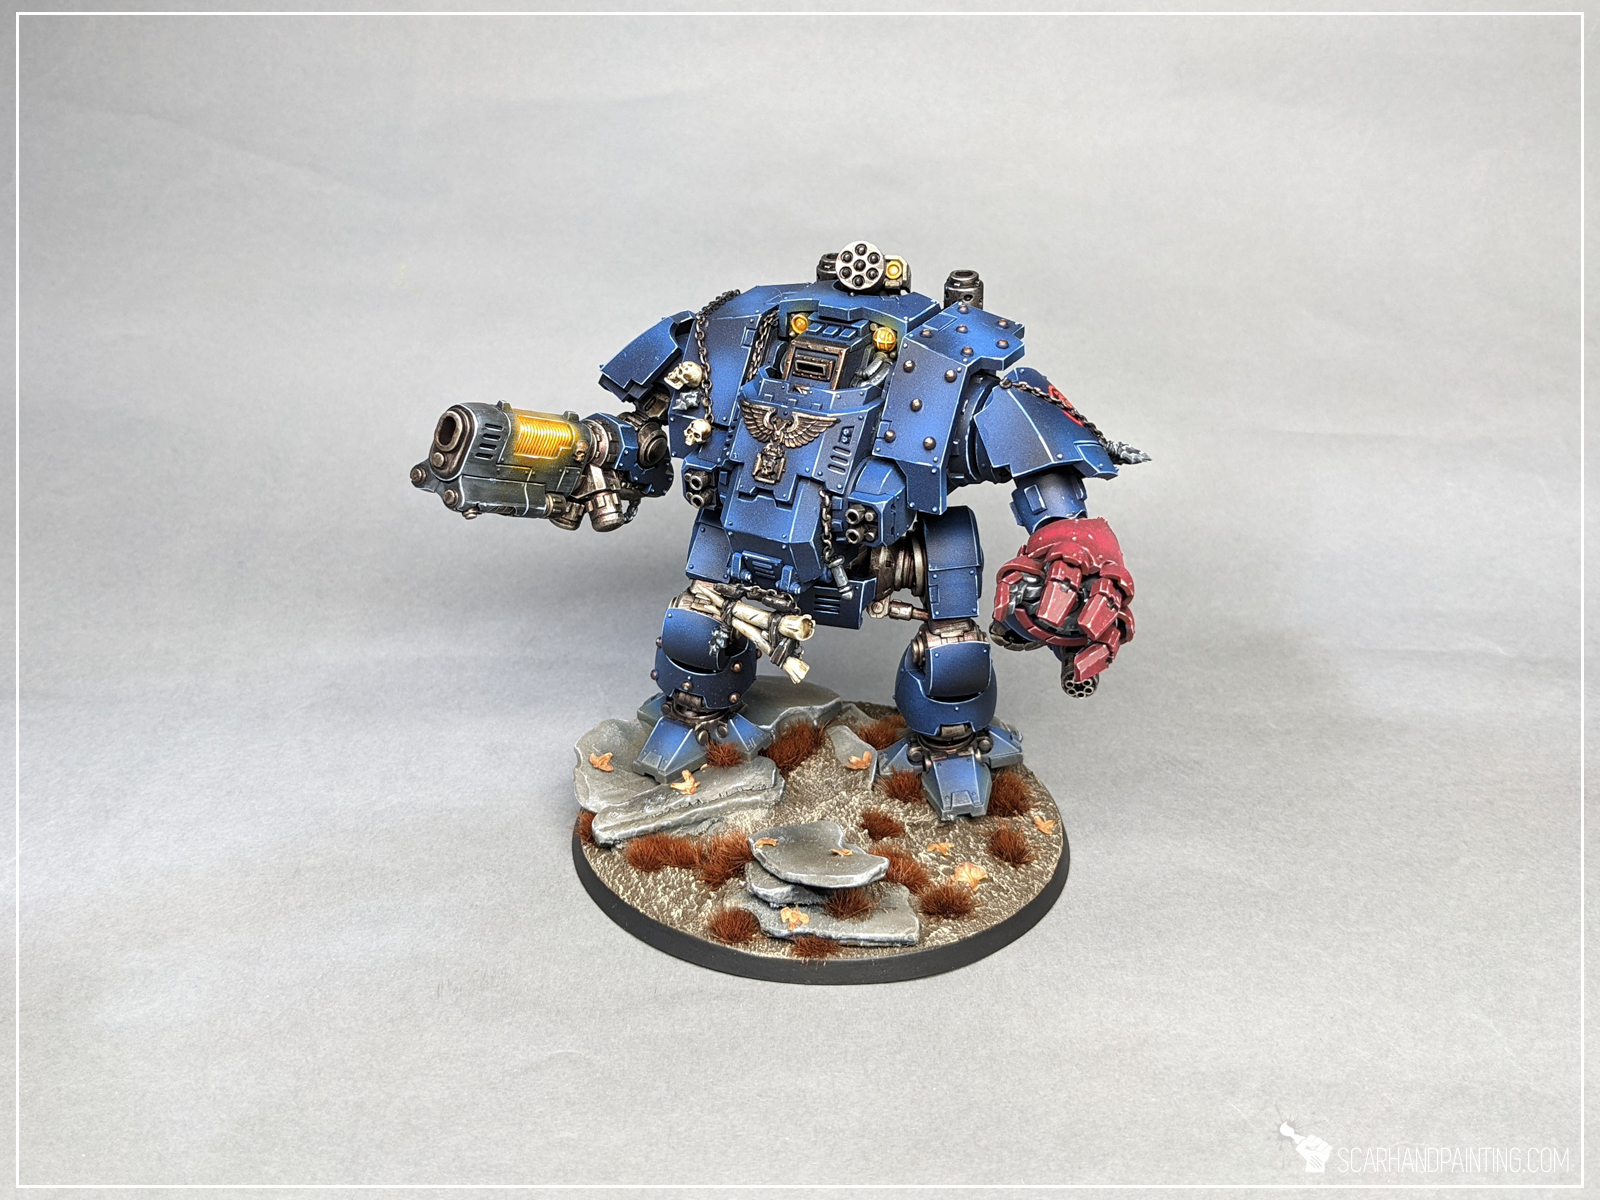
Example: Light sources placed according to the tip.

Tip 3: Background
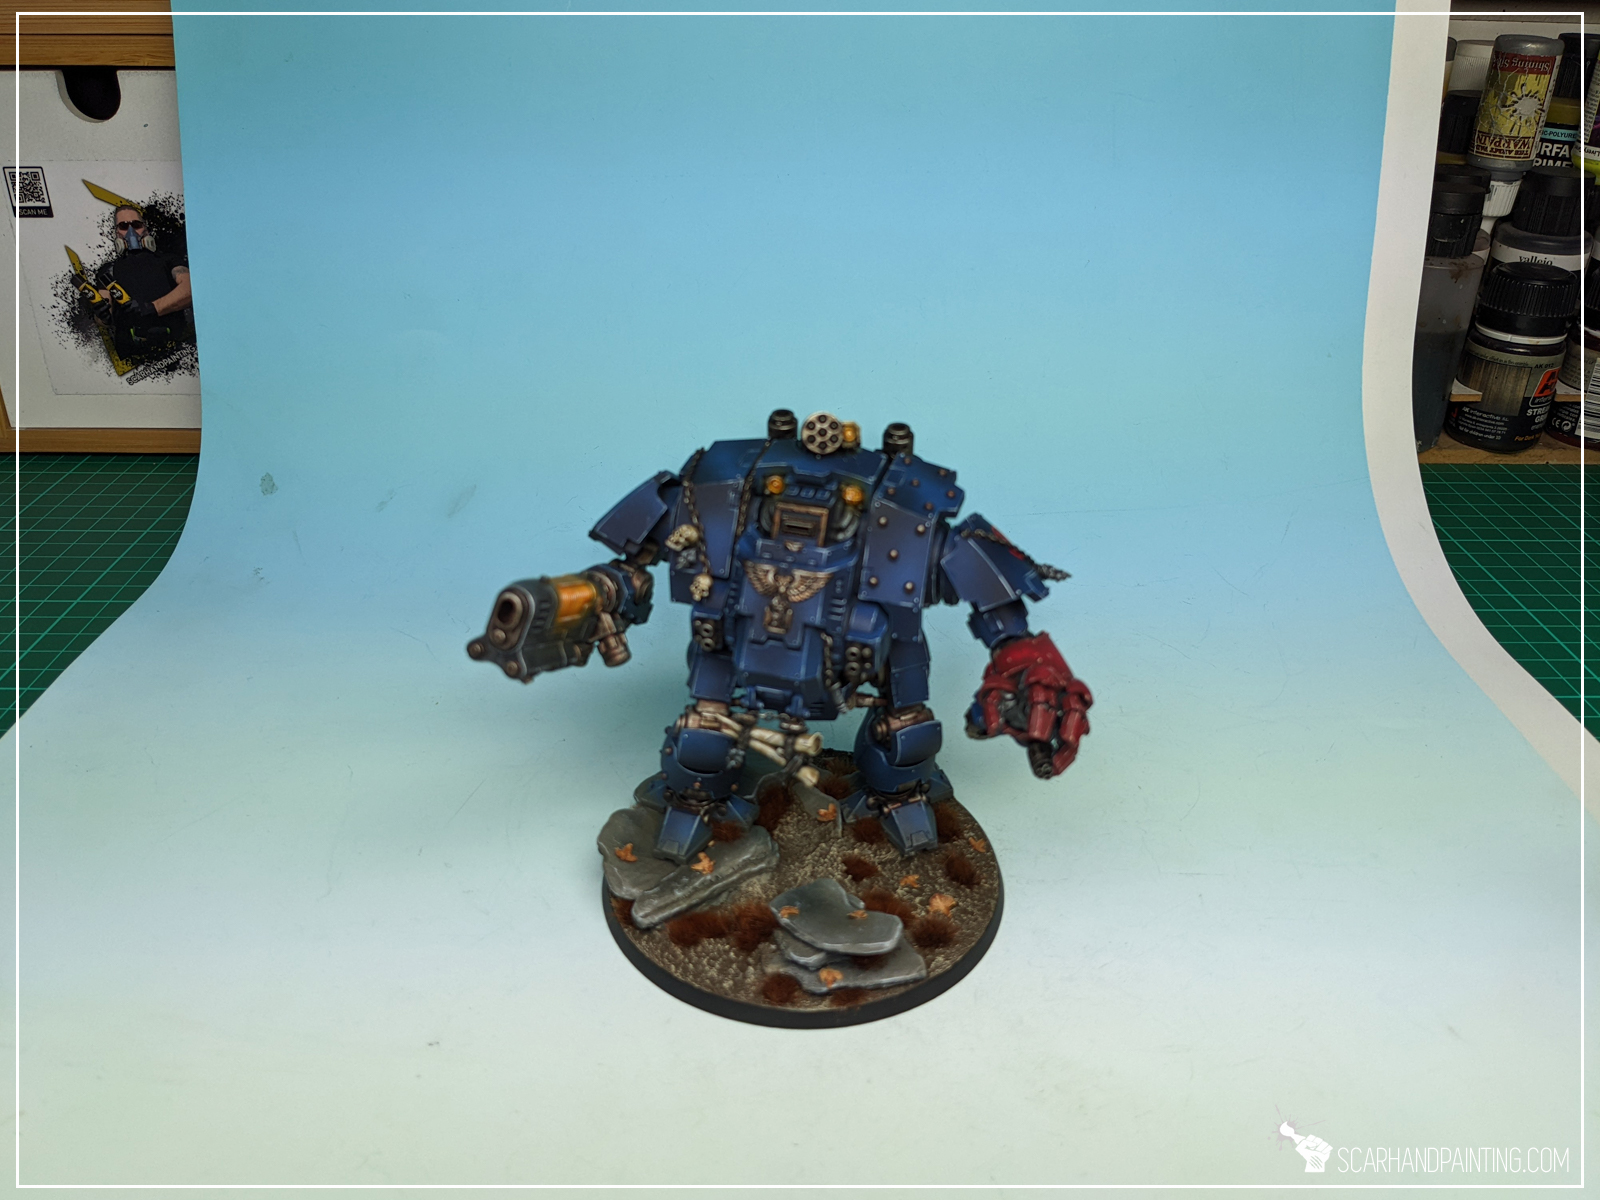
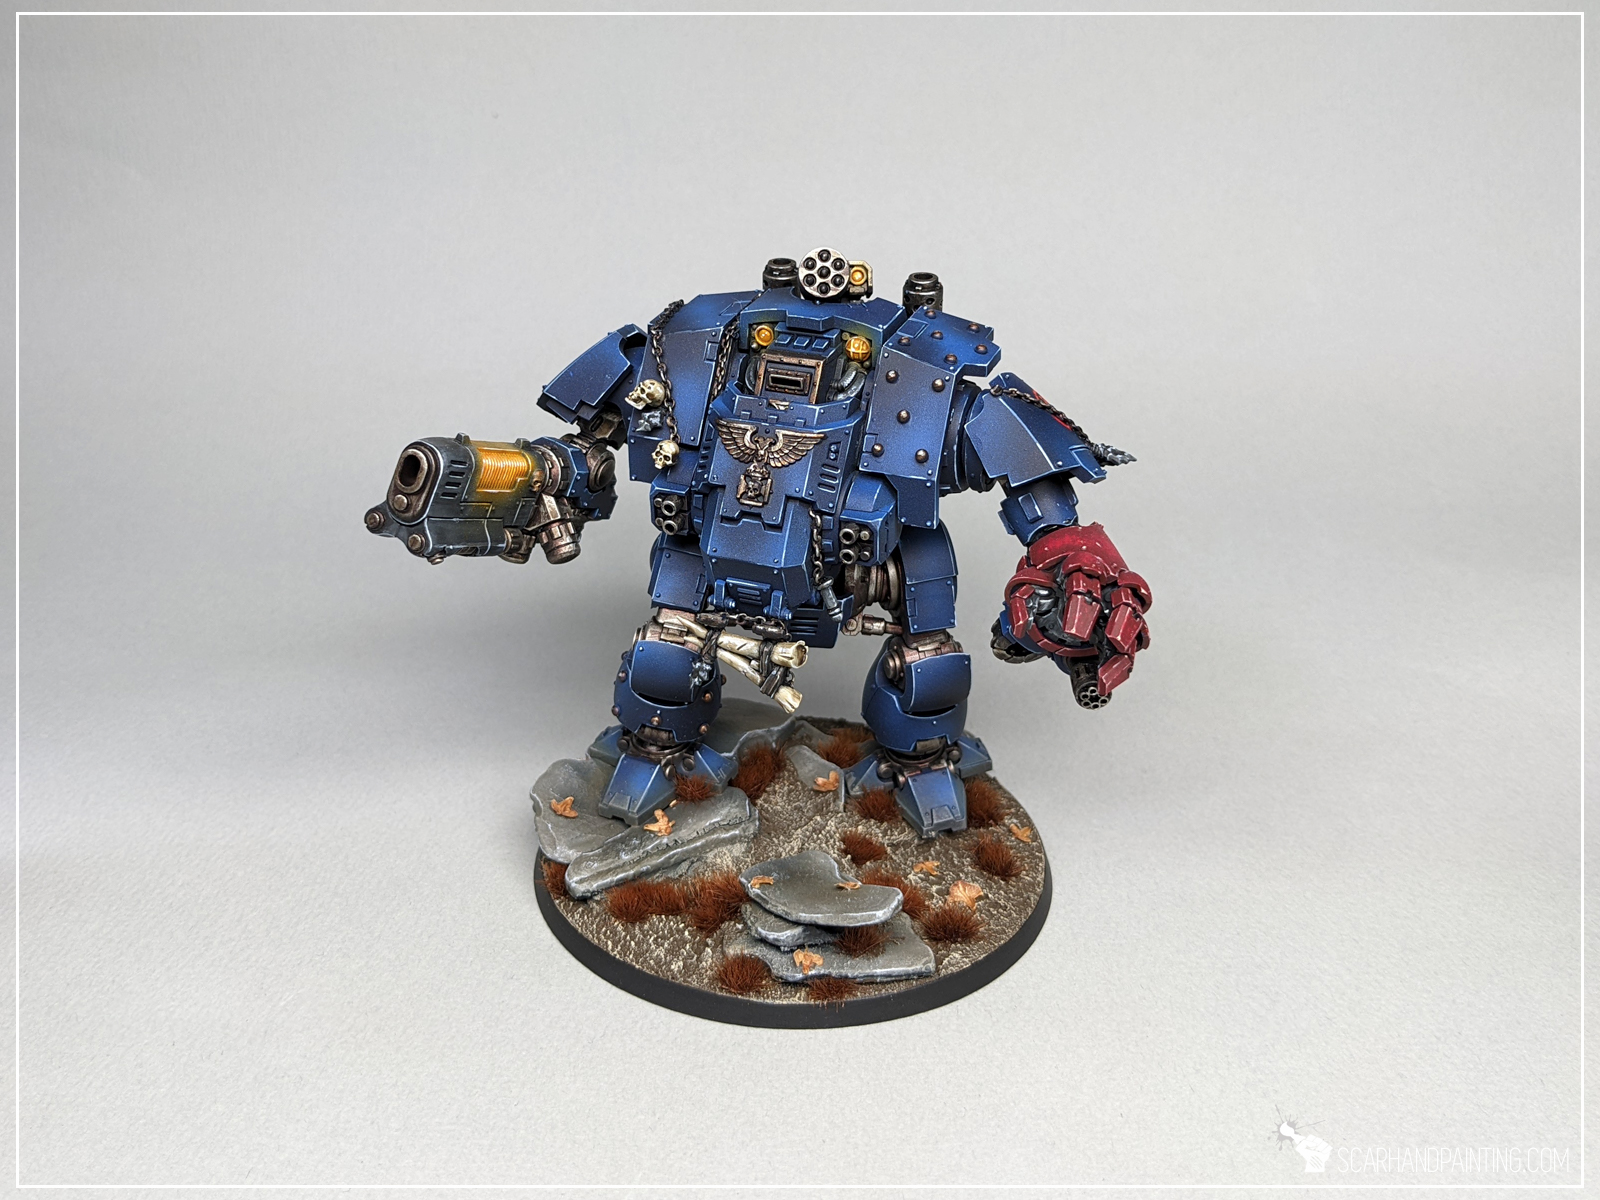
There are multiple approaches to choosing a background for a picture. Some painters prefer backgrounds that compliment a paint job, or produce a certain “feel” of the picture. This is all fine for a more artistic themed presentation. Still I feel that presenting a paint job for evaluation should be first and foremost about that paint job, not a picture. For this reason I try to aim for a background that would present my work in the most realistic way possible without a need to adjust colors in photoshop or create artificial shadows and surrealistic effects. After some ups and downs I feel that the blue to white transition background produces the best results by far, keeping the colors natural while allowing for clean, aesthetic images.

Tip 4: Composition
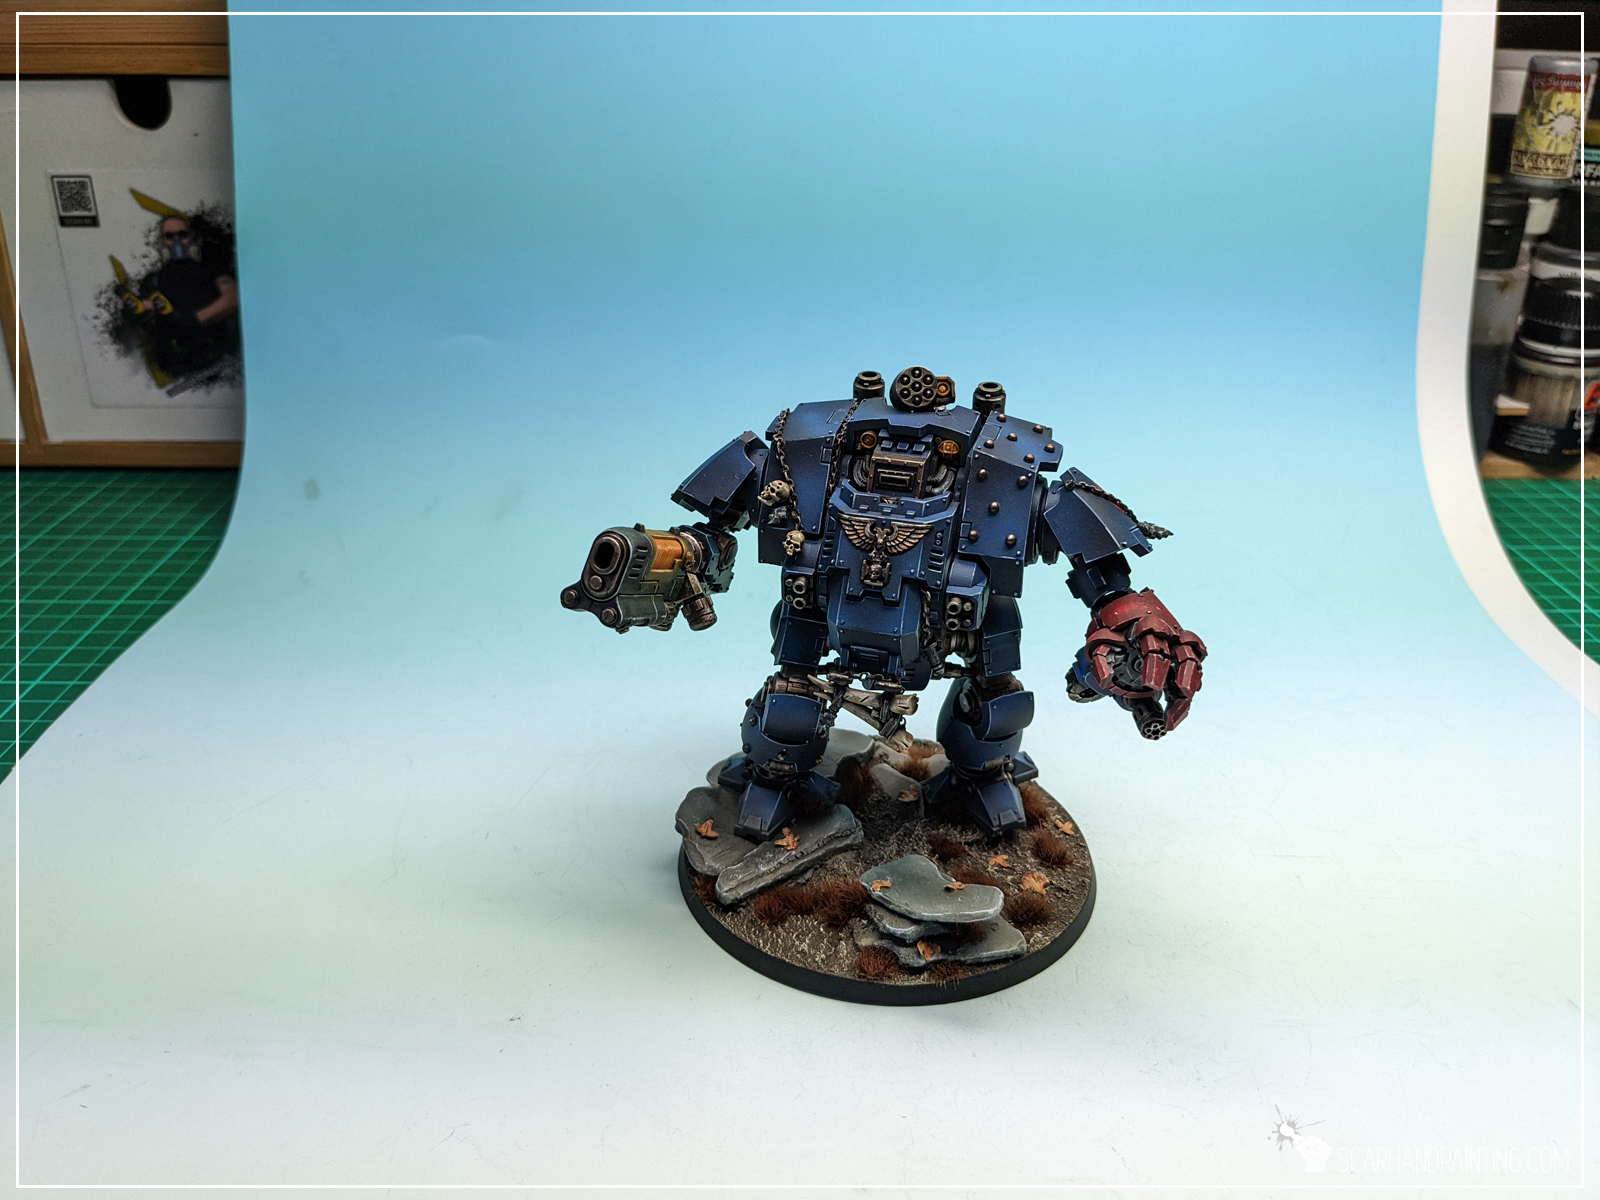
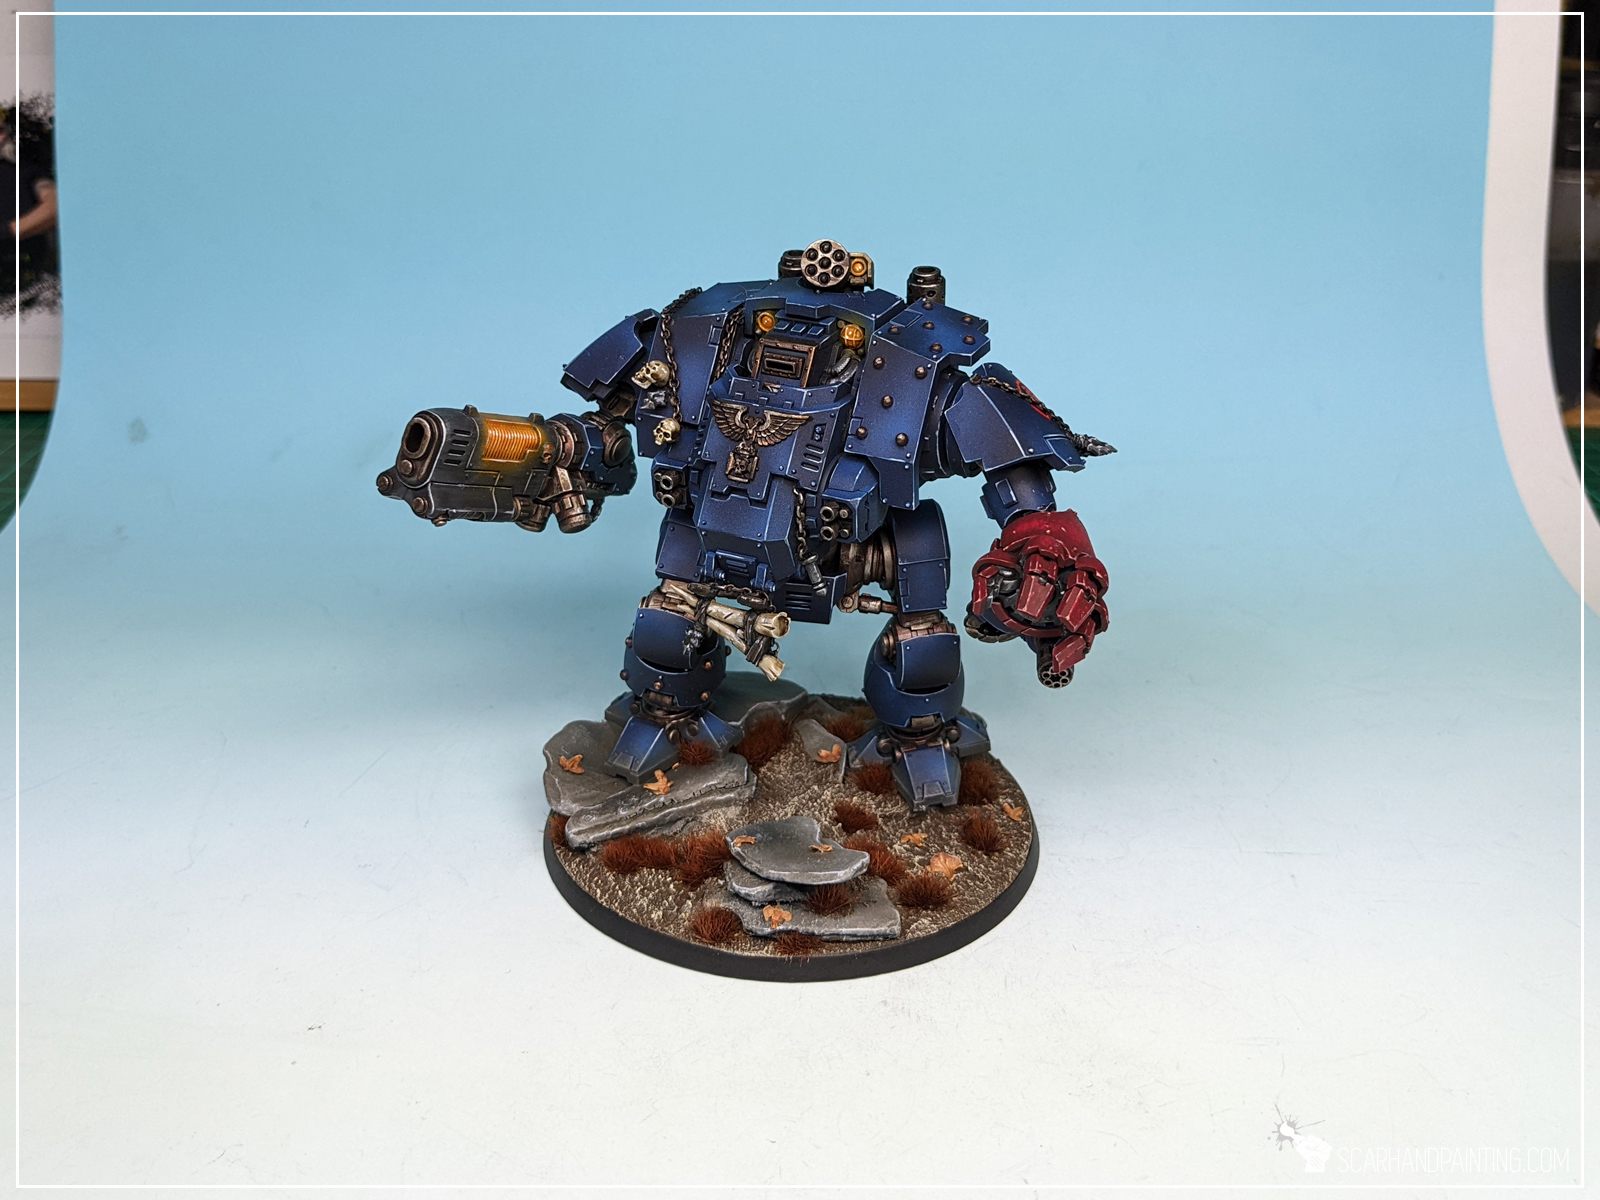
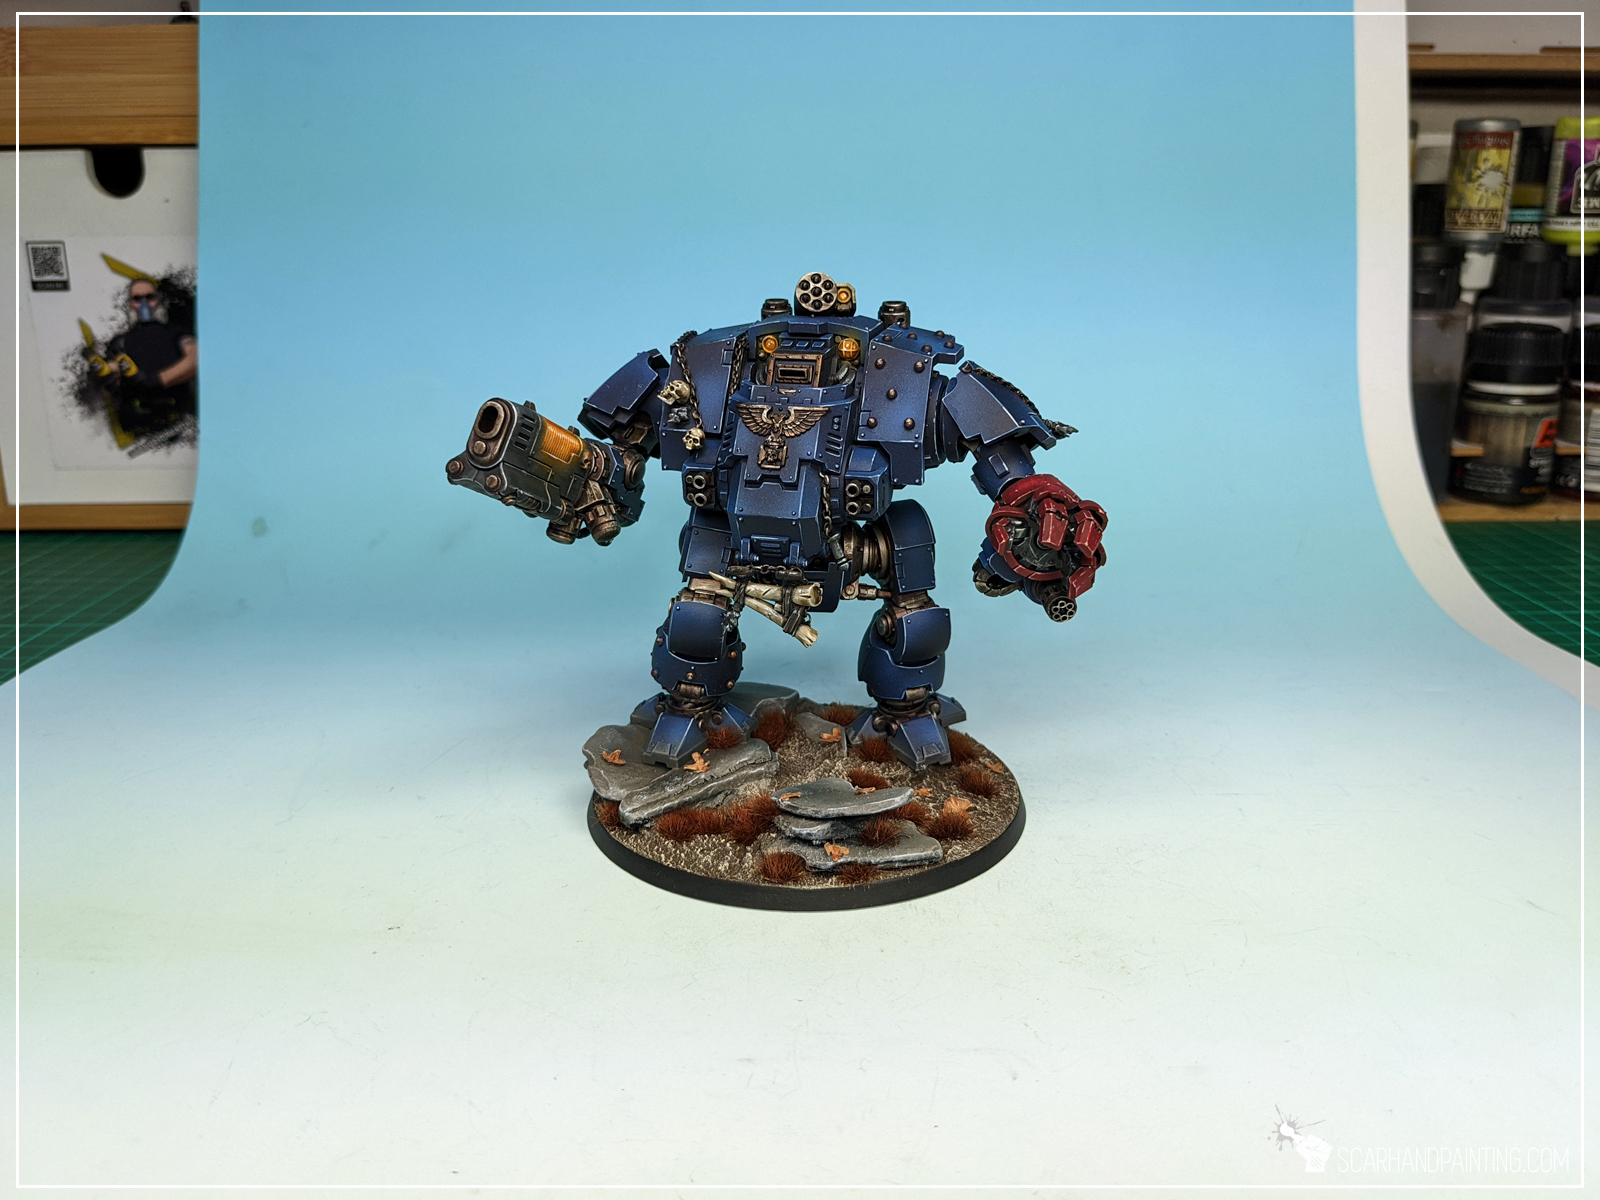
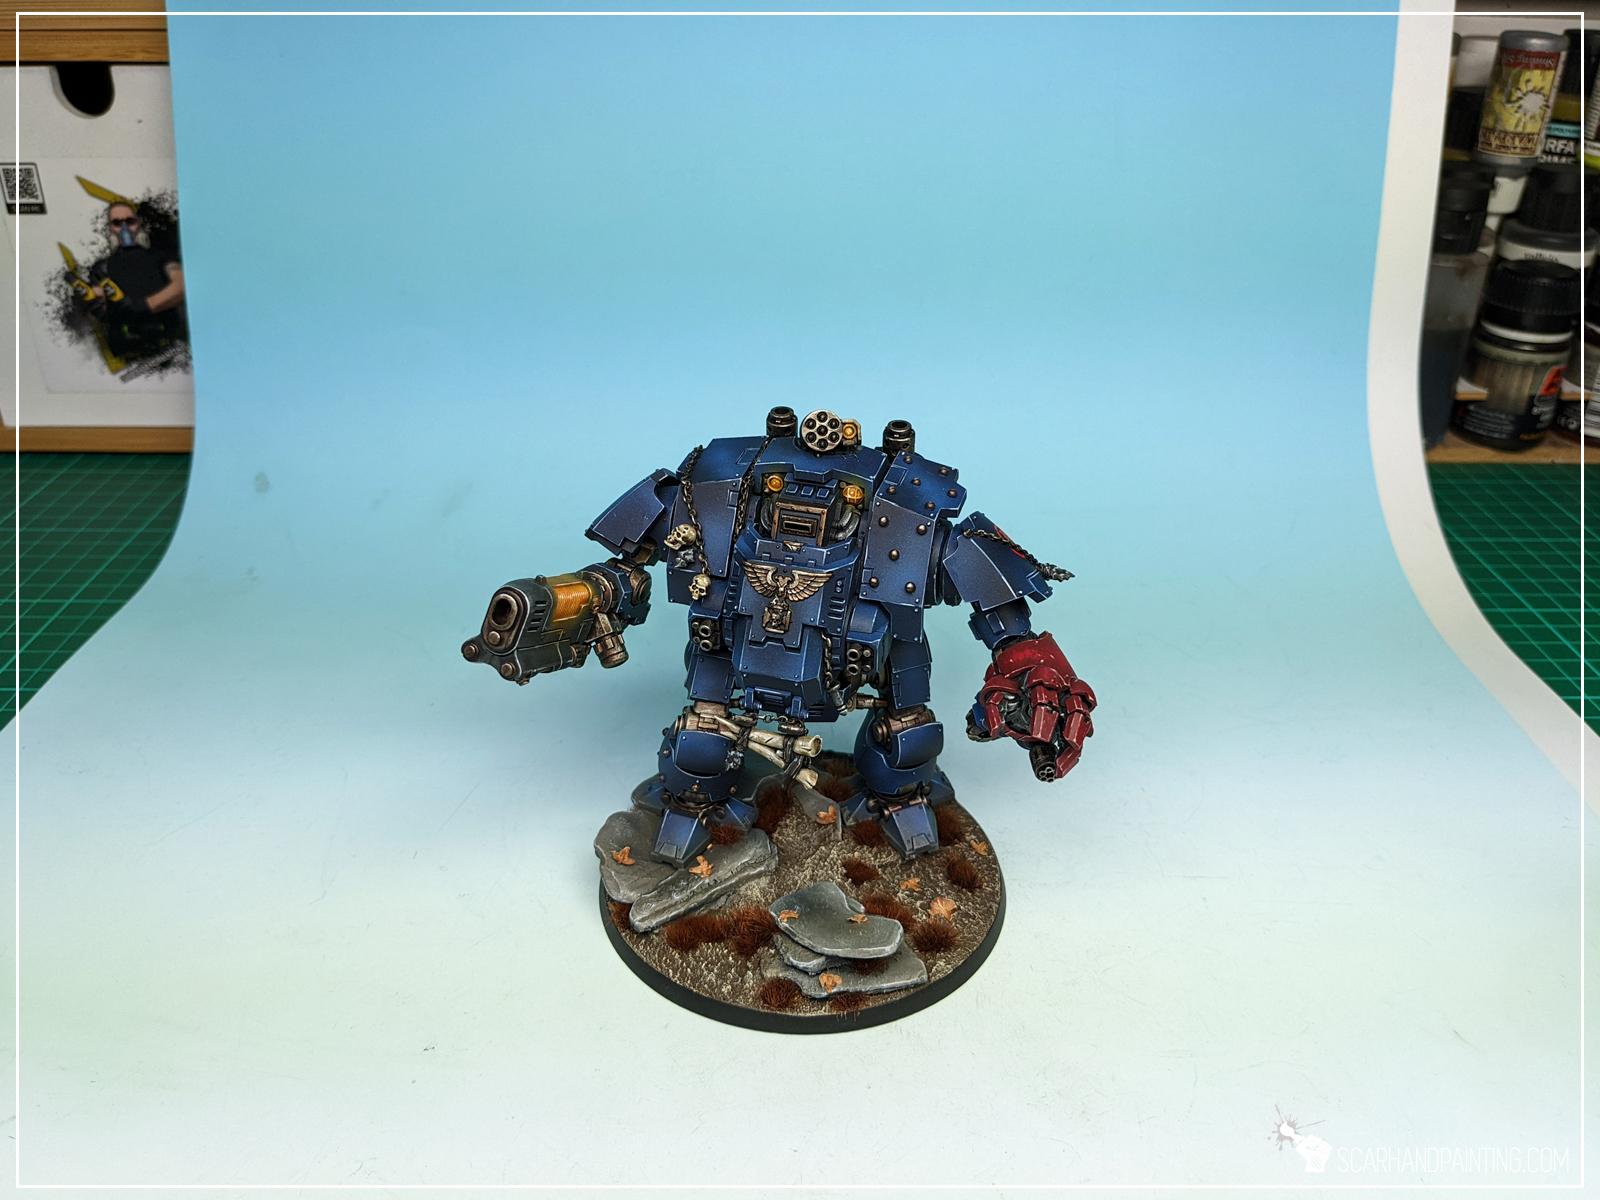
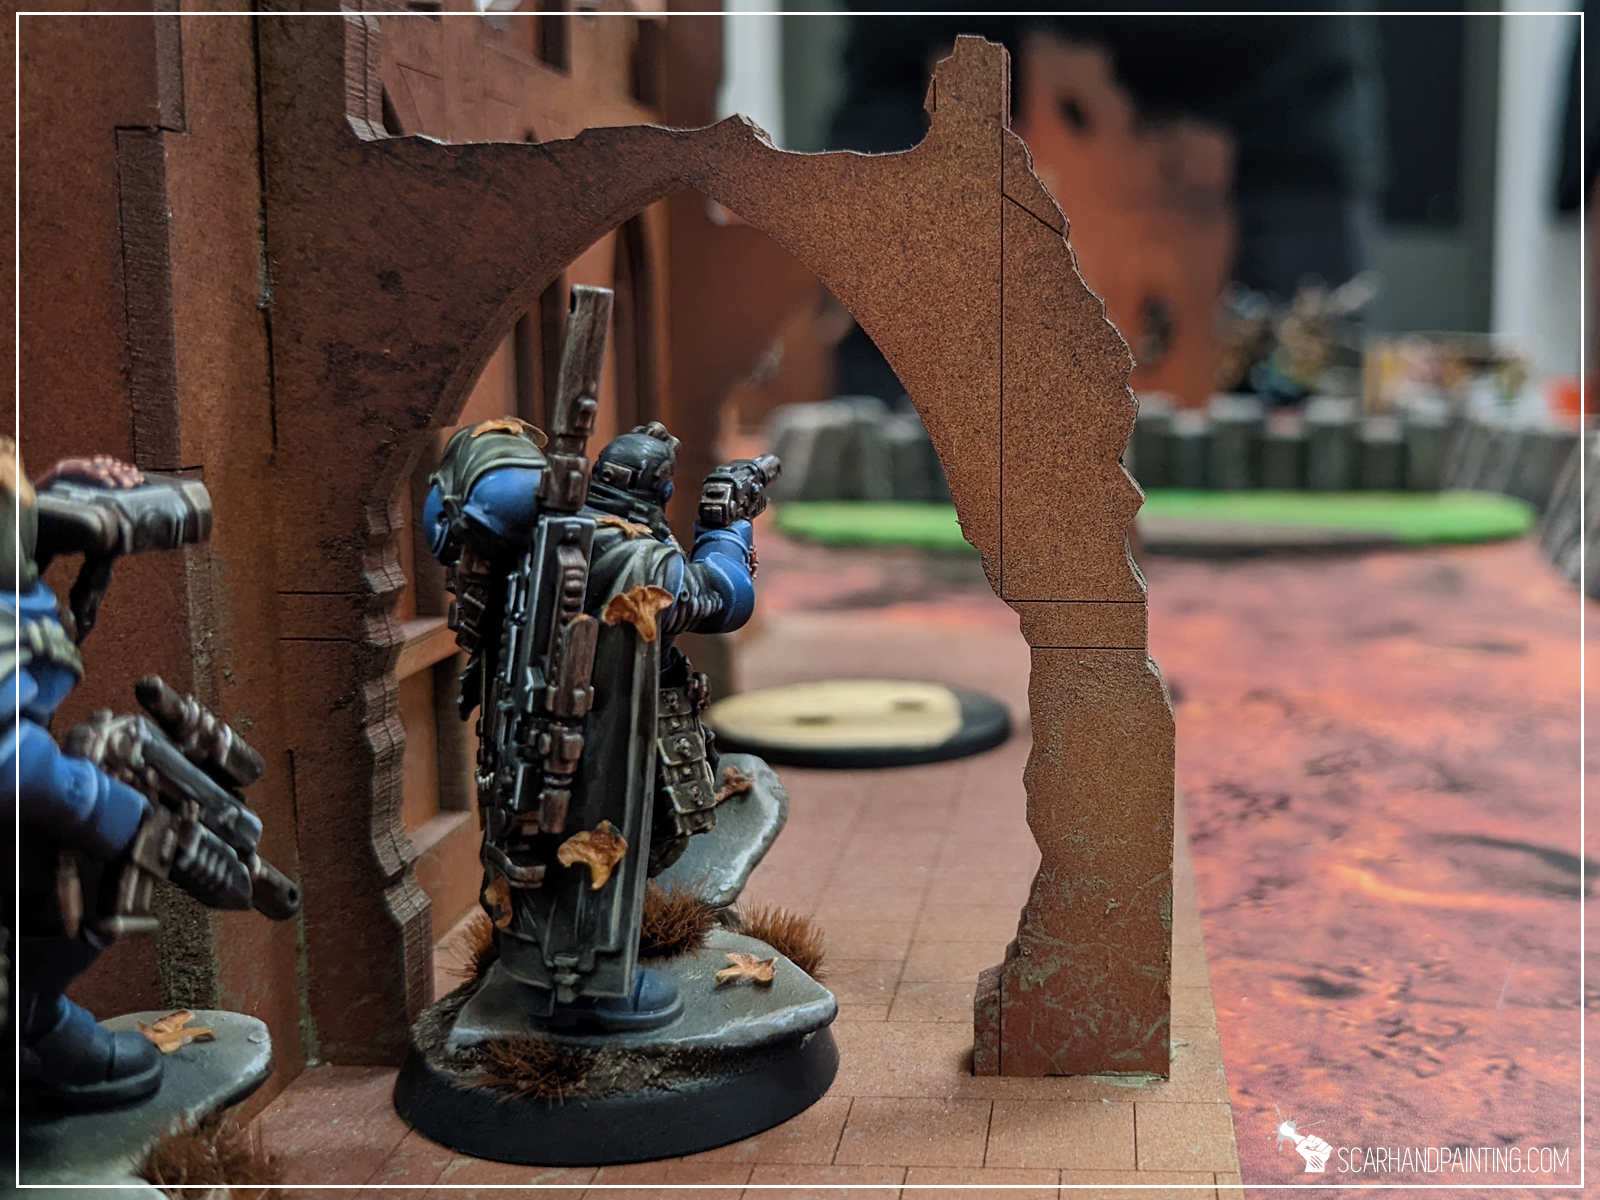
When setting up a miniature for a picture it is good to position it in a way to present an interesting angle. Some poses might look awkward resulting in entire parts losing depth or supplementary colors being hidden from view. I always check the miniature through the lens of a camera before taking a shot. Sometimes a small pose or angle adjustment might result in a much better shot.
Example: Awkward pose, weapon hidden from view, supplementary color barely visible, lack of depth around shoulder and top armor.
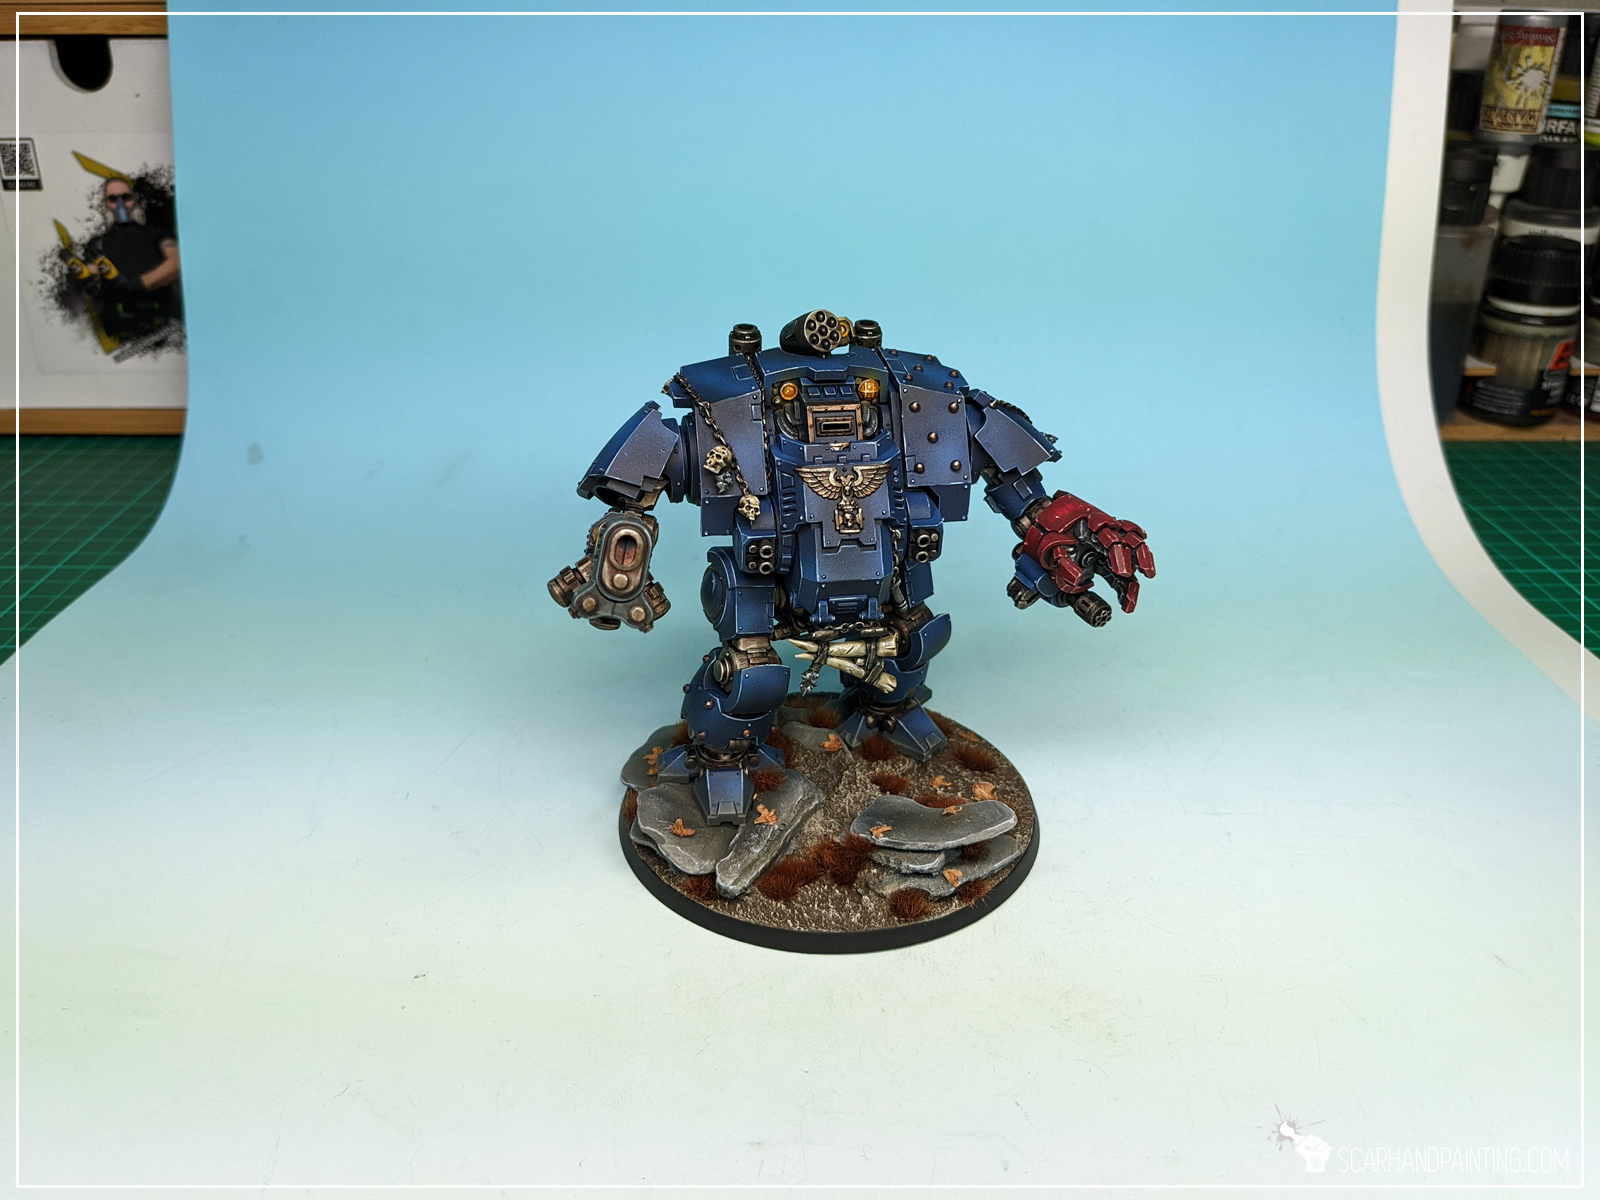

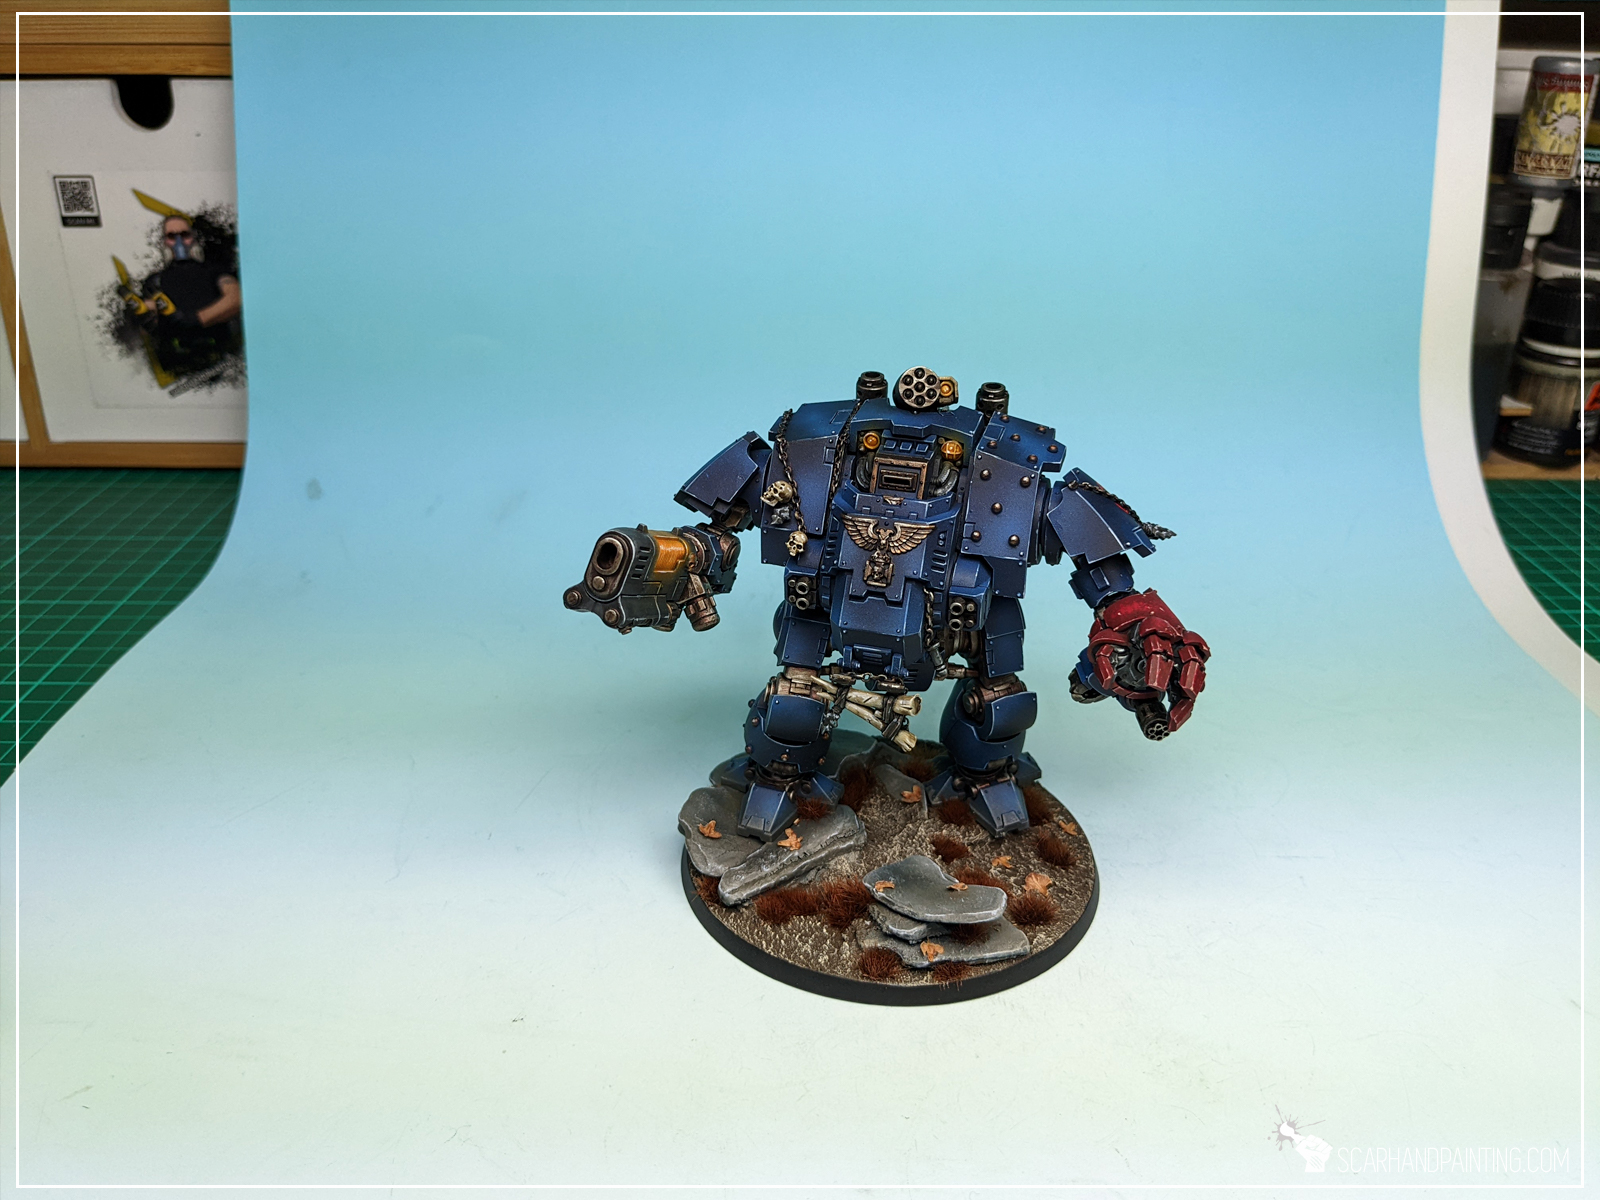
Example: Better proportions, weapon and supplementary color exposed, more depth to one arm and top armor.

Tip 5: Cropping
This might come as no surprise and yet a lot of hobbyists tend to forget about it. Cropping and adjusting an image so that the miniature is properly orientated and centered shows the audience that the author cares about their paint job and presentation. I strongly believe that it is much easier to get valuable feedback and engagement when treating the audience and own work with respect.

Bonus tip: Cinematic shots.
All of the above tips go to waste when talking cinematic in-game shots. There’s no choice of light sources or background. On top of that cinematic shots are just as much about the miniatures as the composition and overall feel of the image. Still most rules can be re-adjusted to work in the gaming area environment.
– Camera can still be supported on a piece of scenery or furniture, even if held in hand.
– Color depth and sharpness of the image will benefit from proper light source position (ceiling lamp behind and above head, instead up front).
– Miniature battlefields are filled with great compositions just asking to be immortalized!
– Cropping remains a thing 🙂


I hope you find this tutorial helpful and if so, please let me know in the comments below or via Facebook or Instagram. I would also appreciate it if you considered sharing this content with your friends, who might find it useful. Finally if you are looking for a professional miniatures painting service, be sure to contact me with this contact form. I always reply within 24 hours, after which please check out your spam folder.

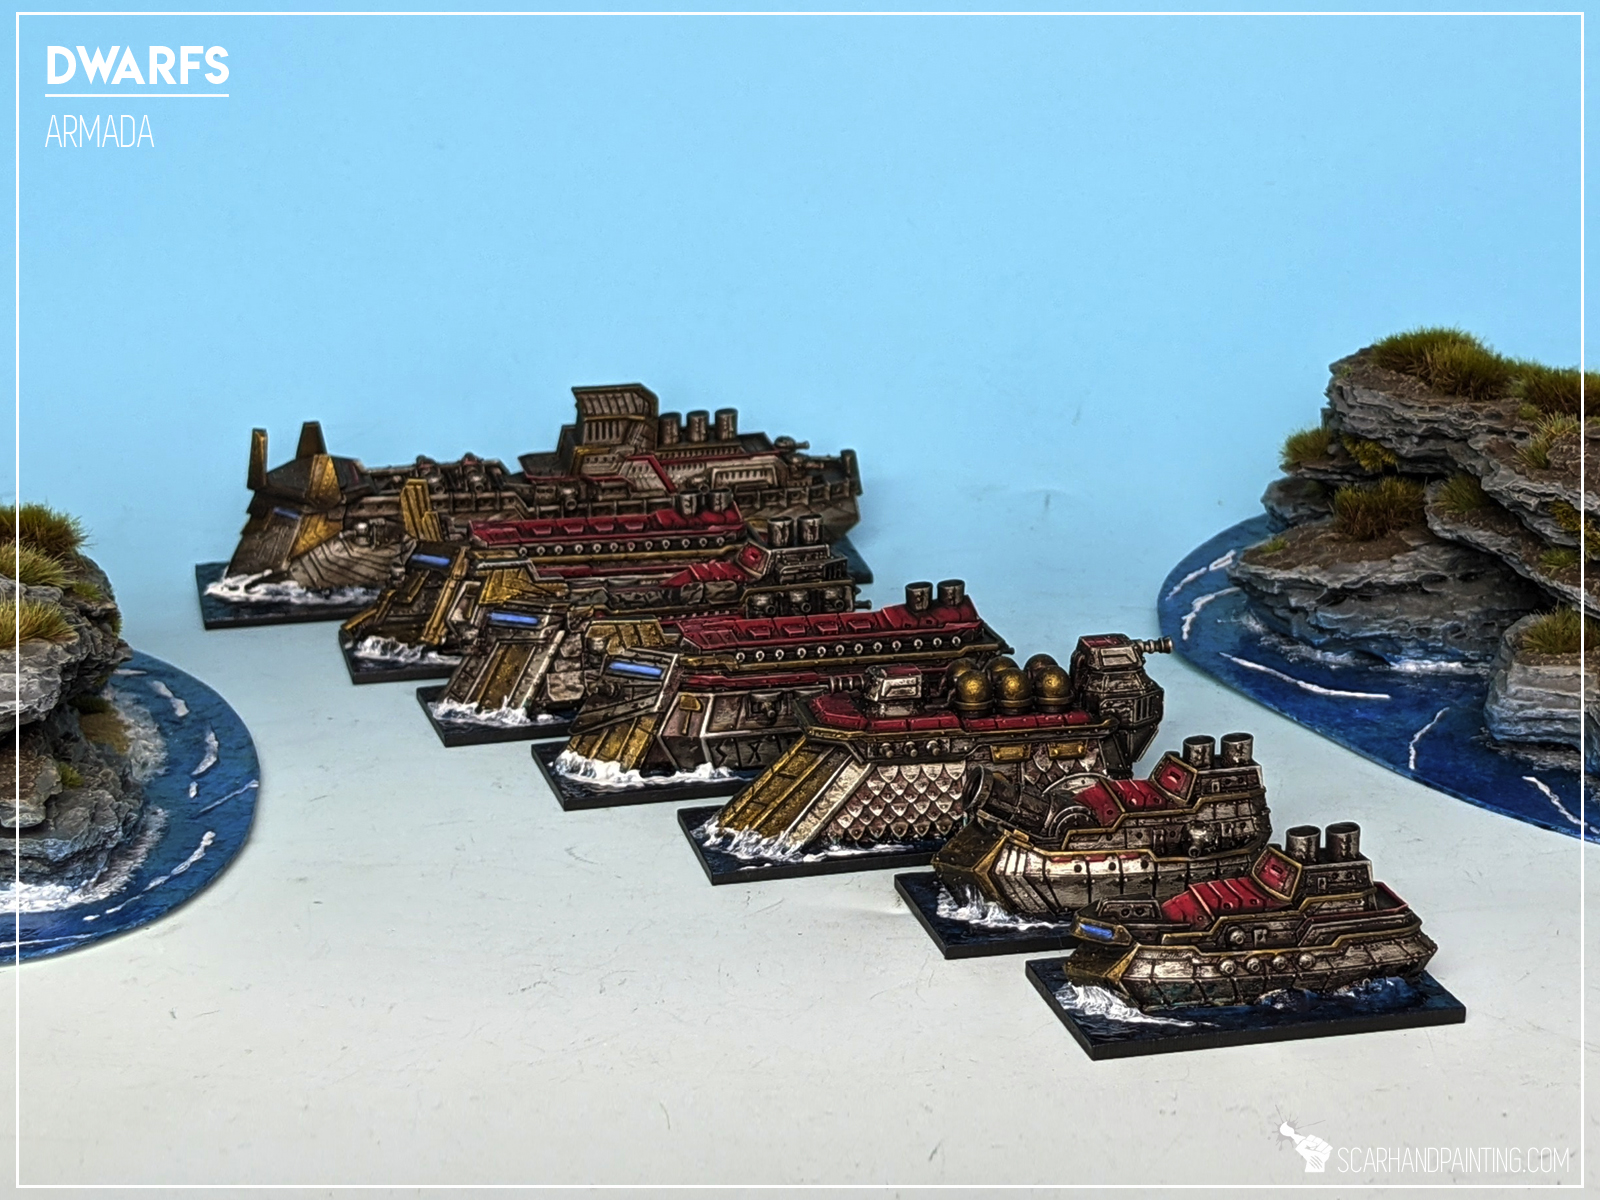
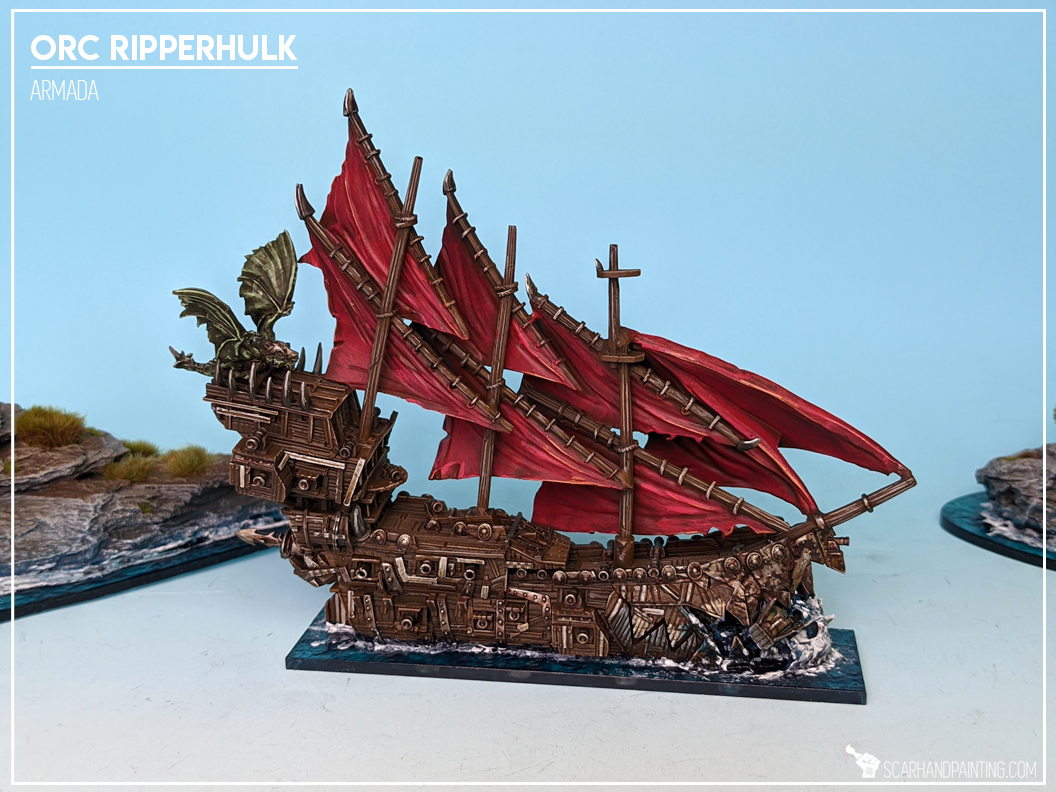
Ahoy Sailors! As you know I am most and foremost a passionate hobbyist. That being said I am also a pirate, a scoundrel and a fanatical enthusiast of Mantic Games Kings of War: Armada. The latter resulted in a few gaming/strategy related articles, one of which you found yourself reading right now.

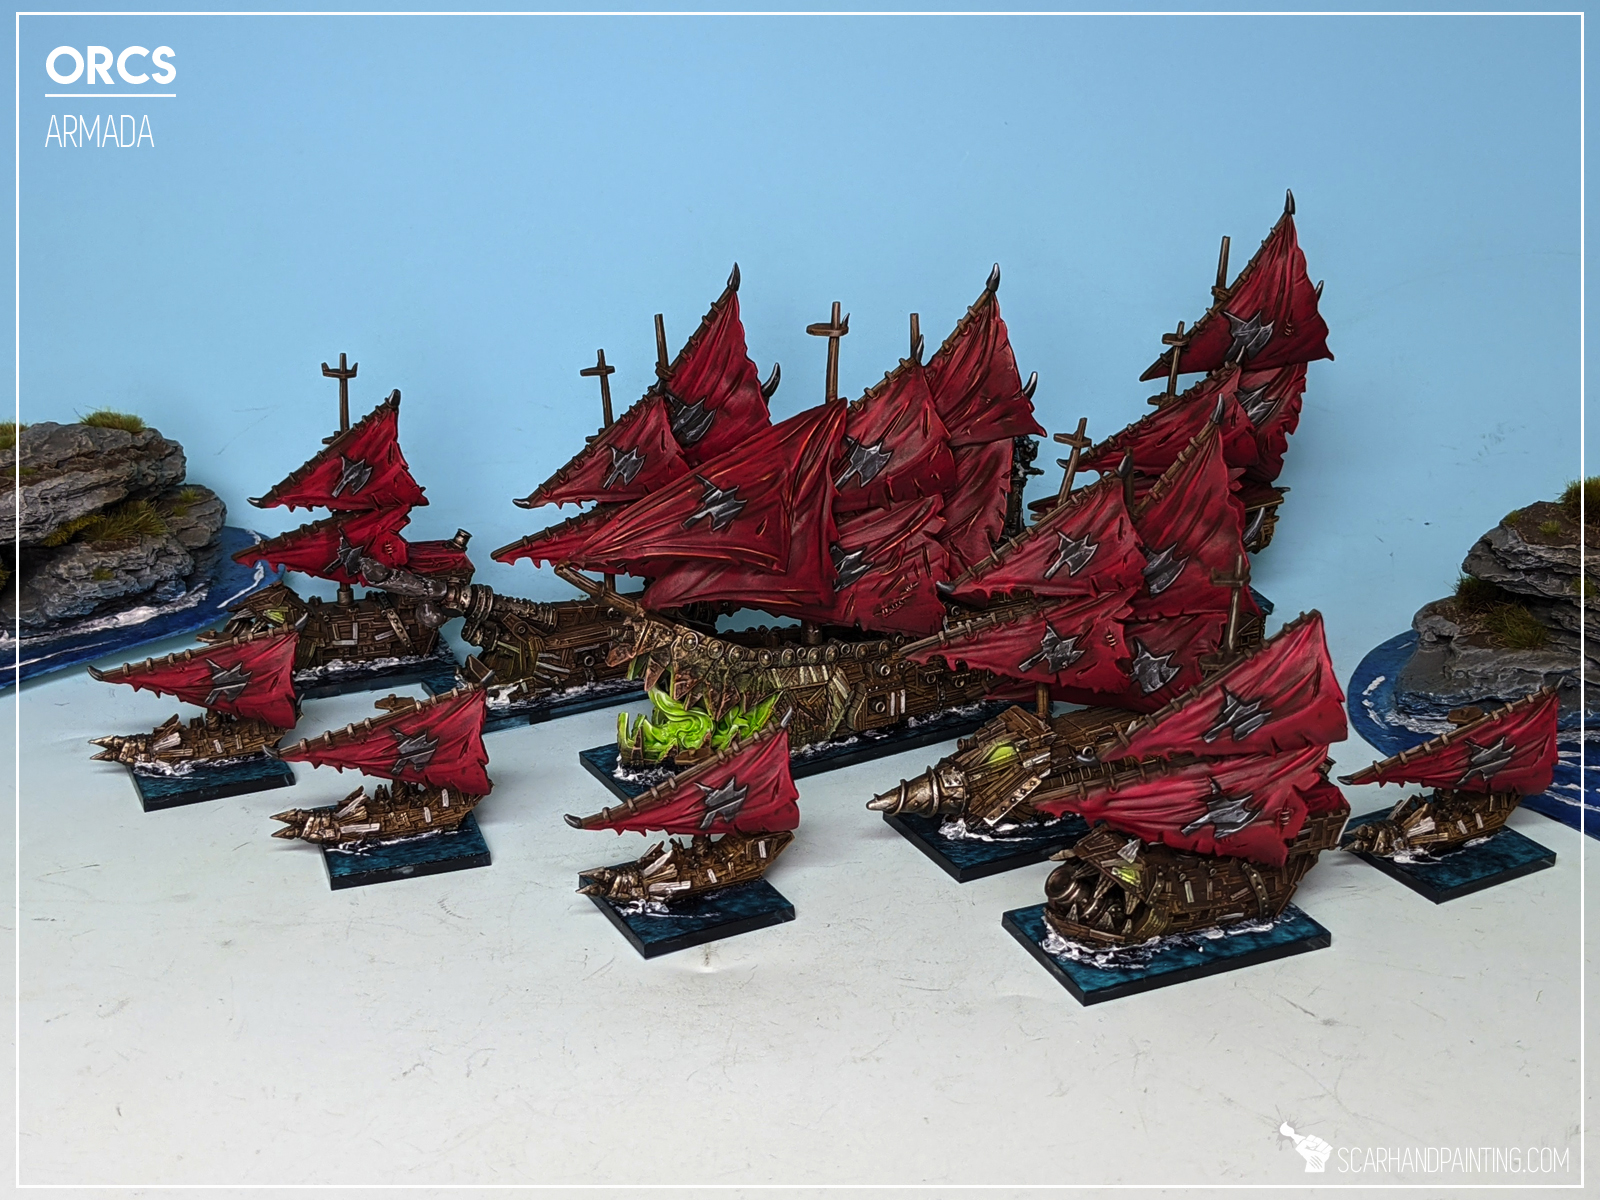
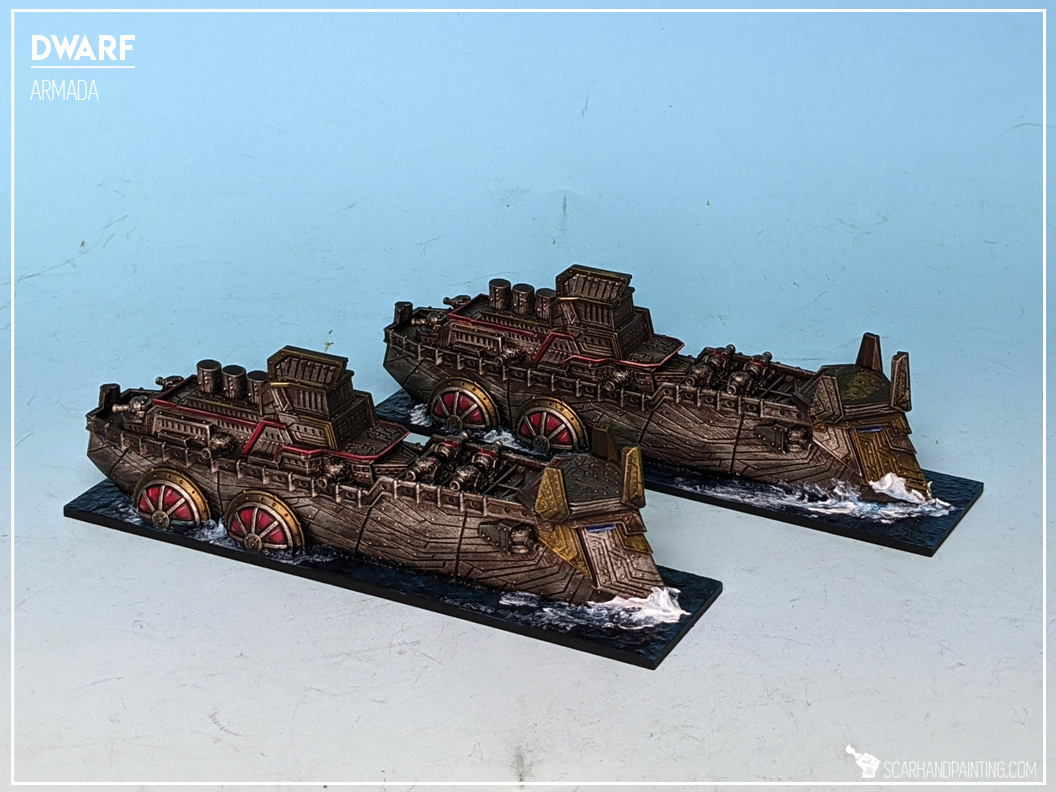
Kings of War: Armada is a naval strategy game set in a rich world of Pannithor, pitting multiple wonderfully crafted and strongly themed factions against one another. Divided between a Fleet Starter, a Fleet Booster and multiple individual sets, each faction comes with a range of ships and units to choose from. It is quite common for new players to ask what to purchase next in order to expand a collection. Today I would like to present to you a quick guide to Kings of War: Armada purchases.
Although each Armada fleet differs from one another, they all seem to follow a similar path from first purchase up to a complete collection. To keep things easy I have divided collection sizes into tiers, each of which represents a certain milestone allowing for more list building flexibility and in-game shenanigans. When considering how to expand your existing collection, treat tiers as casual guidelines. If for example you own a Fleet Starter and a Fleet Booster, consider adding anything missing from tier 2, preferably in order it is presented. This should, in theory, expand your collection in a way that offers new playstyles, diversity and a power boost.
Tier 1: Basic
This tier represents the usual entry point into Armada. A relatively low price start, allowing for a number of builds within a 150-250pts. range.
Tier 2: Standard
This tier, once achieved, is a golden tournament standard. An XL* Main Battle Ship, along with a pair of L and multiple M, backed with an array of Support Ships allows for flexible list building, enabling different playstyles and archetypes within a faction. Some players will stop right here, all tools already available.
* if available to your faction.
Tier 3: Advanced
Last tier is a complete collection including everything that you will ever need to build a wide range of 150-250pts. lists honed for specific scenarios and/or archetypes. Four copies od each Support Ship and a second XL allows for some edge case combo lists. Second pair of fliers, while not necessary, is always good to have, just in case of local meta going flier heavy in the future.
* if available to your faction.
Secret Tier X: Beyond
There’s no real gameplay advantage of adding more sets after tier 3, unless you plan on playing some huge climactic naval battles. Armada miniatures are truly beautiful and full of detail, thus I won’t judge you for further expanding your collection.

I hope you find this article entertaining. Be sure to let me know your thoughts in the comments below or via Facebook or Instagram. I would also appreciate if you considered sharing this content with your hobby buds, who might find it useful. Finally if you are looking for a professional miniatures painting service be sure to contact me via this contact form. I always reply within 24 hours, after which please check out your spam folder.
Cheers!
Ahoy Sailors! As you know I am most and foremost a passionate hobbyist. That being said I am also a pirate, a scoundrel and a fanatical enthusiast of Mantic Games Kings of War: Armada. The latter resulted in a few strategy related articles, one of which you found yourself reading right now.
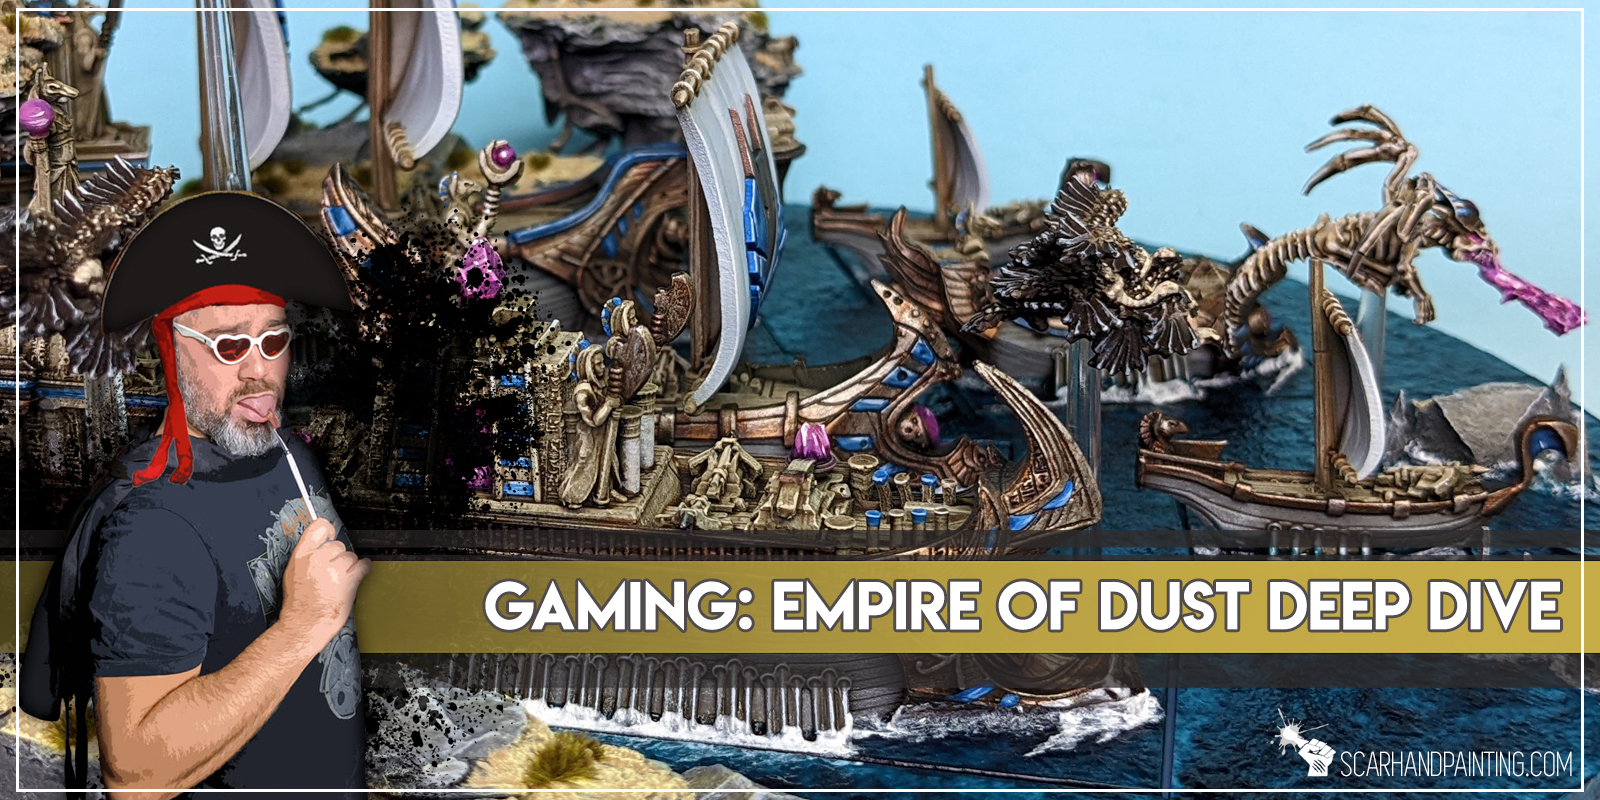
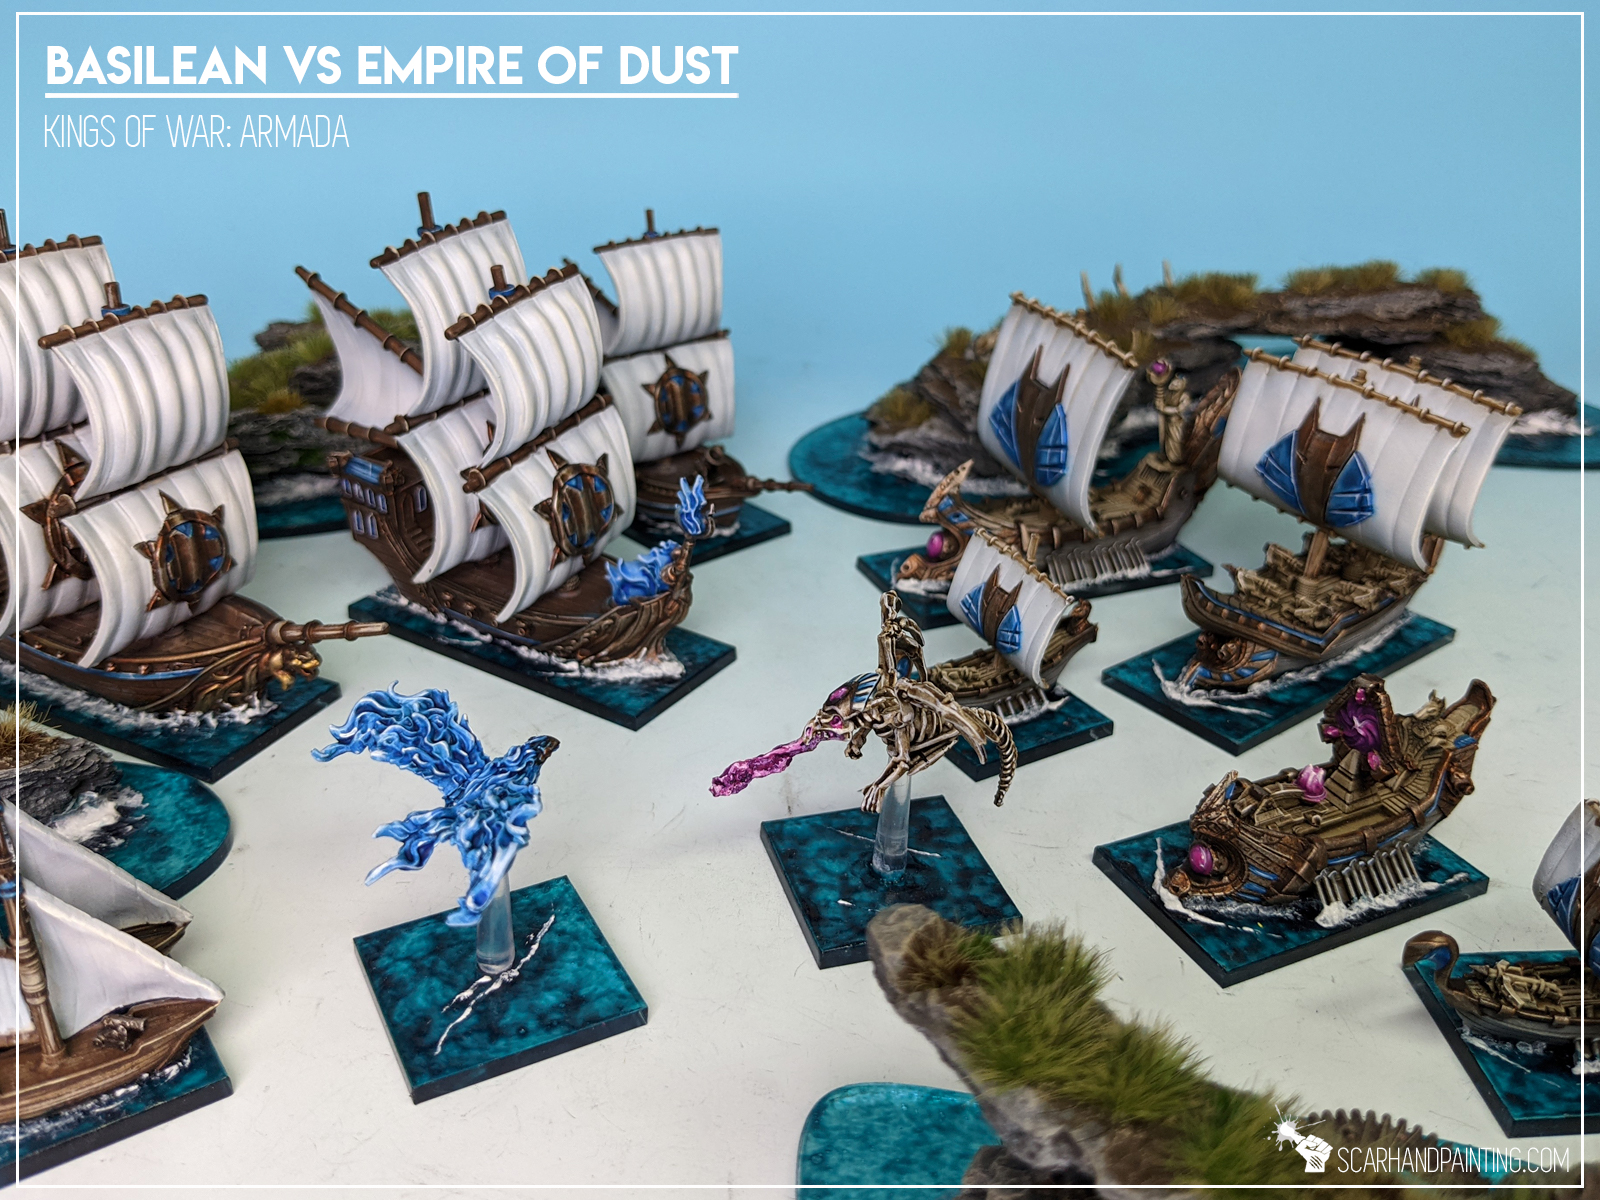
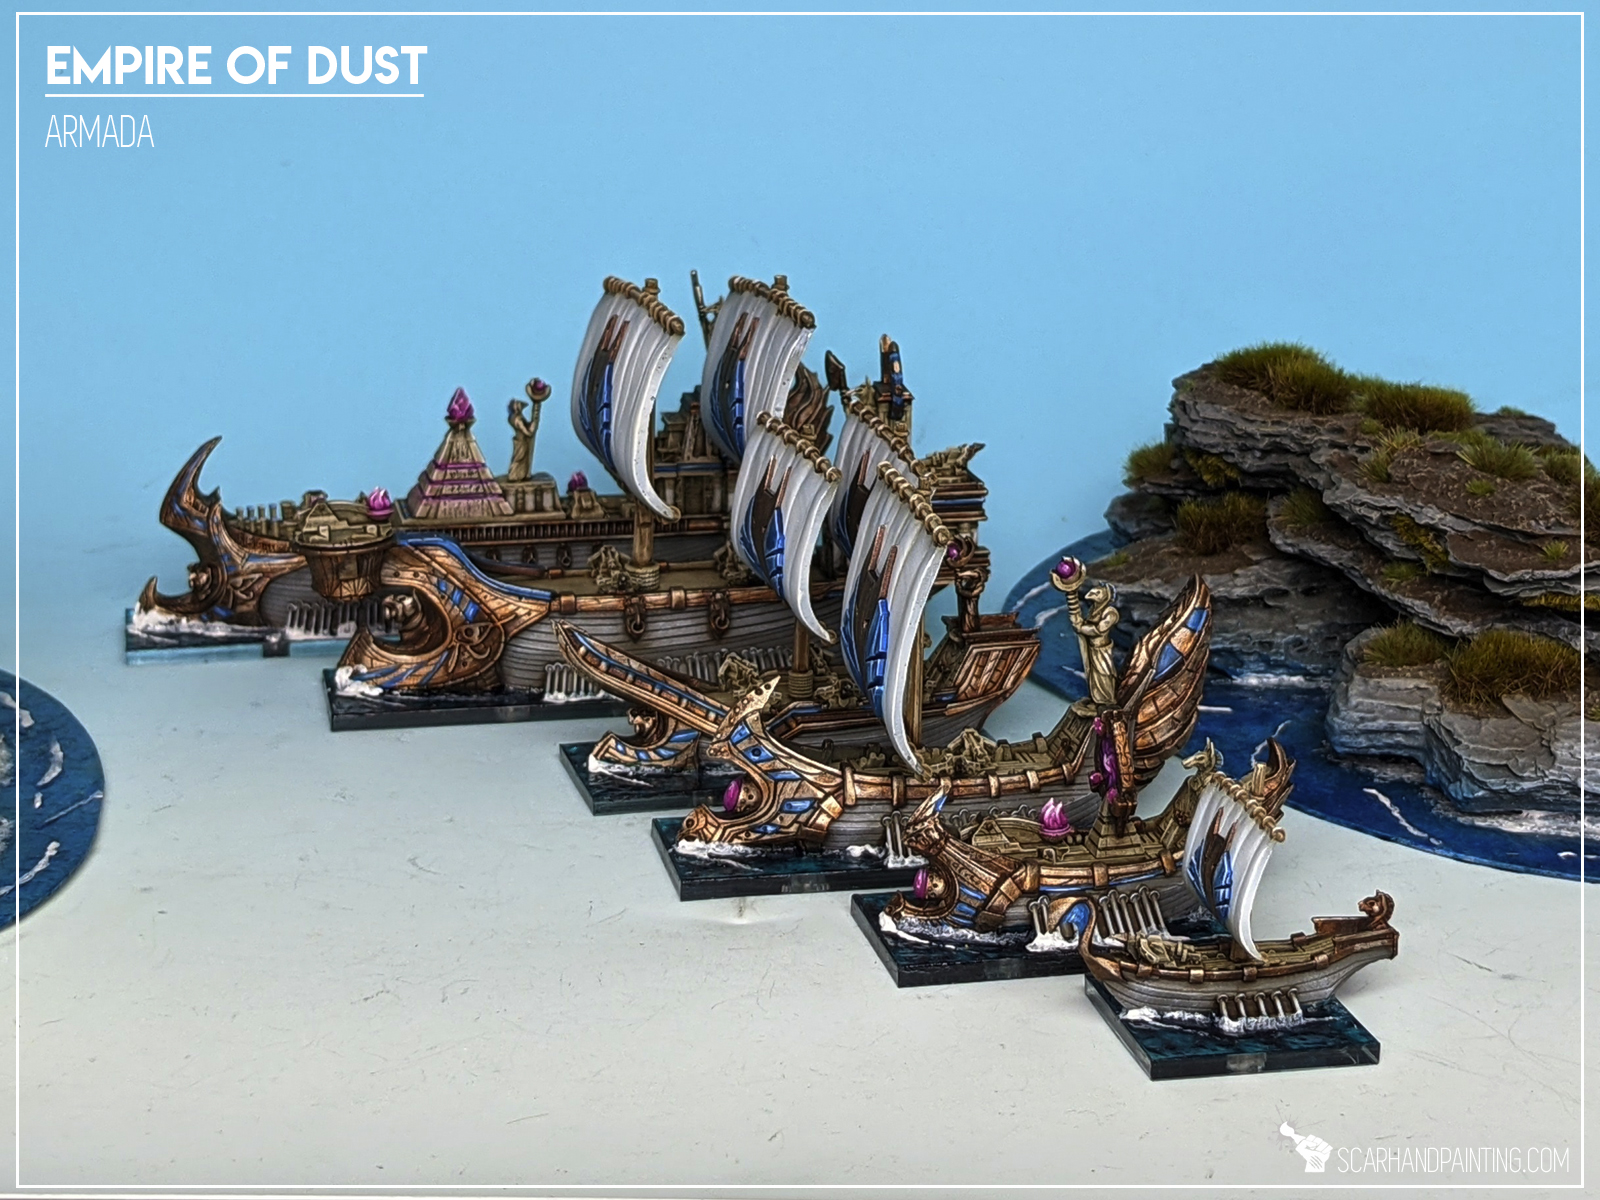
If you still don’t know what Kings of War: Armada is, I strongly invite you to read some of the previous Armada related articles. In short Kings of War: Armada is a naval strategy game set in a rich world of Pannithor, pitting multiple wonderfully crafted and strongly themed factions against one another. Today I would like to focus on one such a faction and especially some common misconceptions surrounding it.
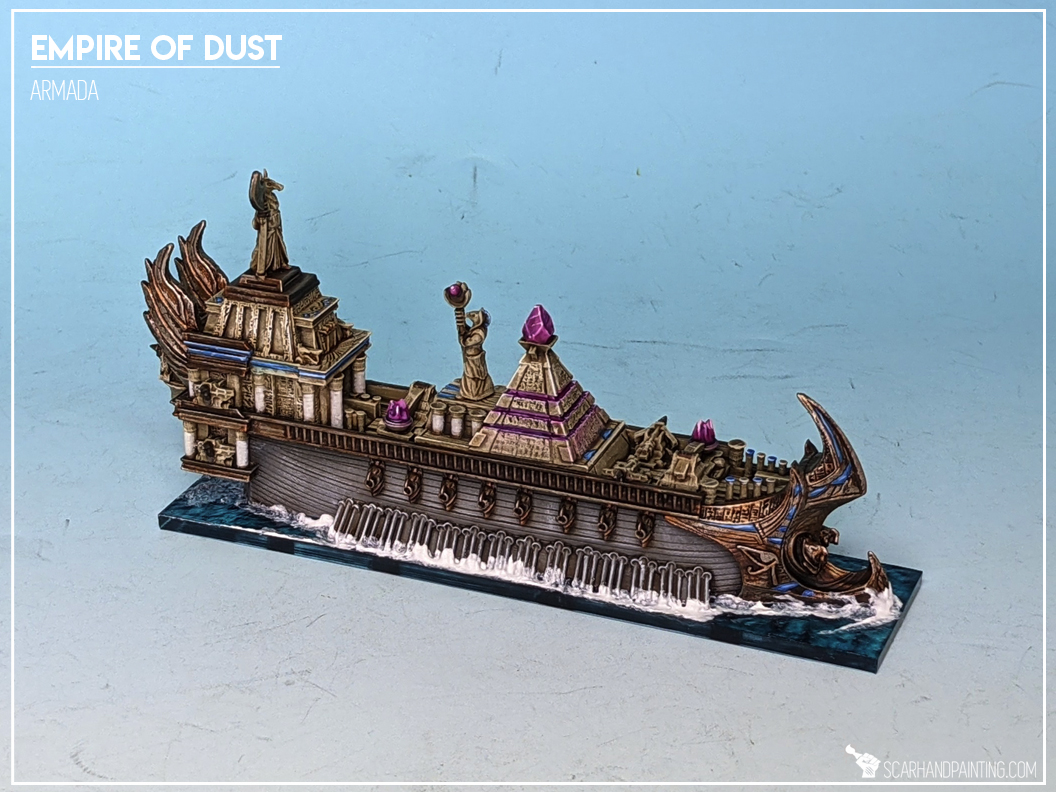
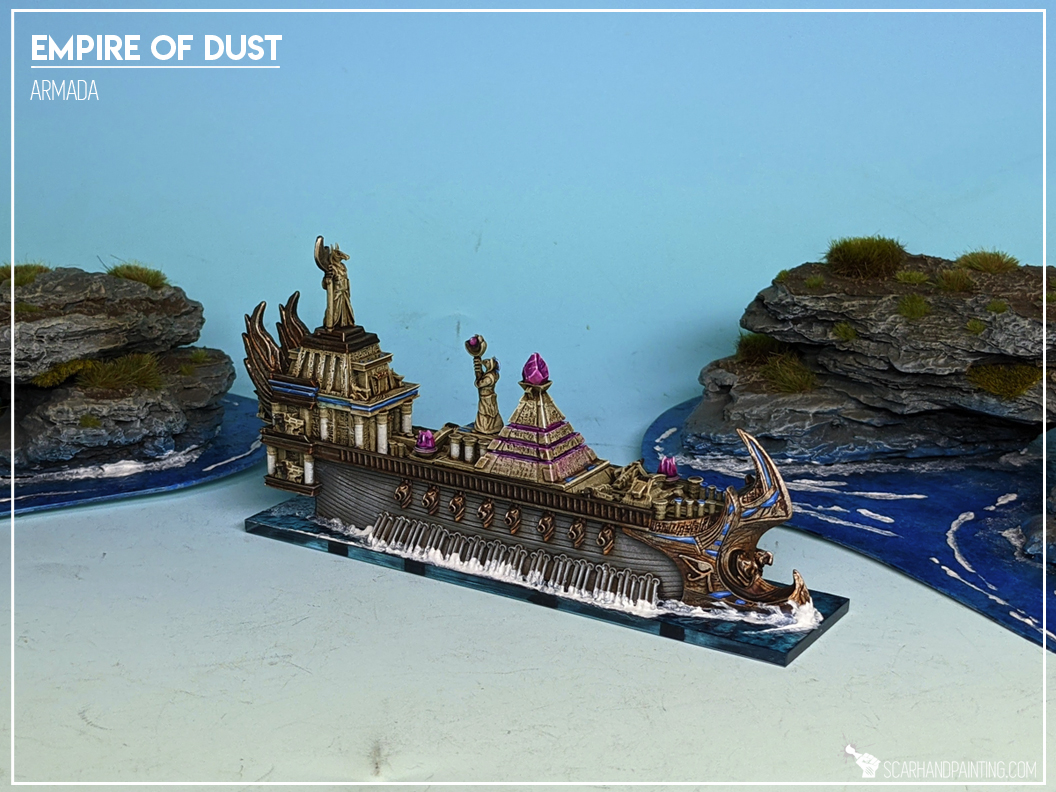
The Empire of Dust is ‘Weak’… not really
The Empire of Dust has it all. It has the looks, the special rules, ships of all sizes, access to all kinds of weapons, and yet it is commonly addressed as being weak and requiring a buff. Whereas some other factions are pretty one dimensional when it comes to list building and playstyle, the EoD comes across as a more advanced, ‘difficult’ fleet. The main fleet theme seem divided between particular ships and is very polarized. With devastating weaponry being shoved on top of Large and Extra Large ships, in exchange for extra Crew Strength and speed being transferred to Medium Main Battleships, it might seem like if the fleet as a whole, doesn’t know if it wants to shoot or board or both. Additionally, thanks to Kopeshiis being the most expensive Medium Main Battleships across the entire game, the list building process for the EoD is rather intimidating. It gets even harder when you realize that compared to other factions, the Slave Squadrons, which are supposed to be fillers, are also priced premium.
So yes, all of these issues might result in a faction being perceived as overall weak. Except it’s not! The Empire of dust is just difficult to master as I have learned the hard way…
Empire of Dust Main Archetype
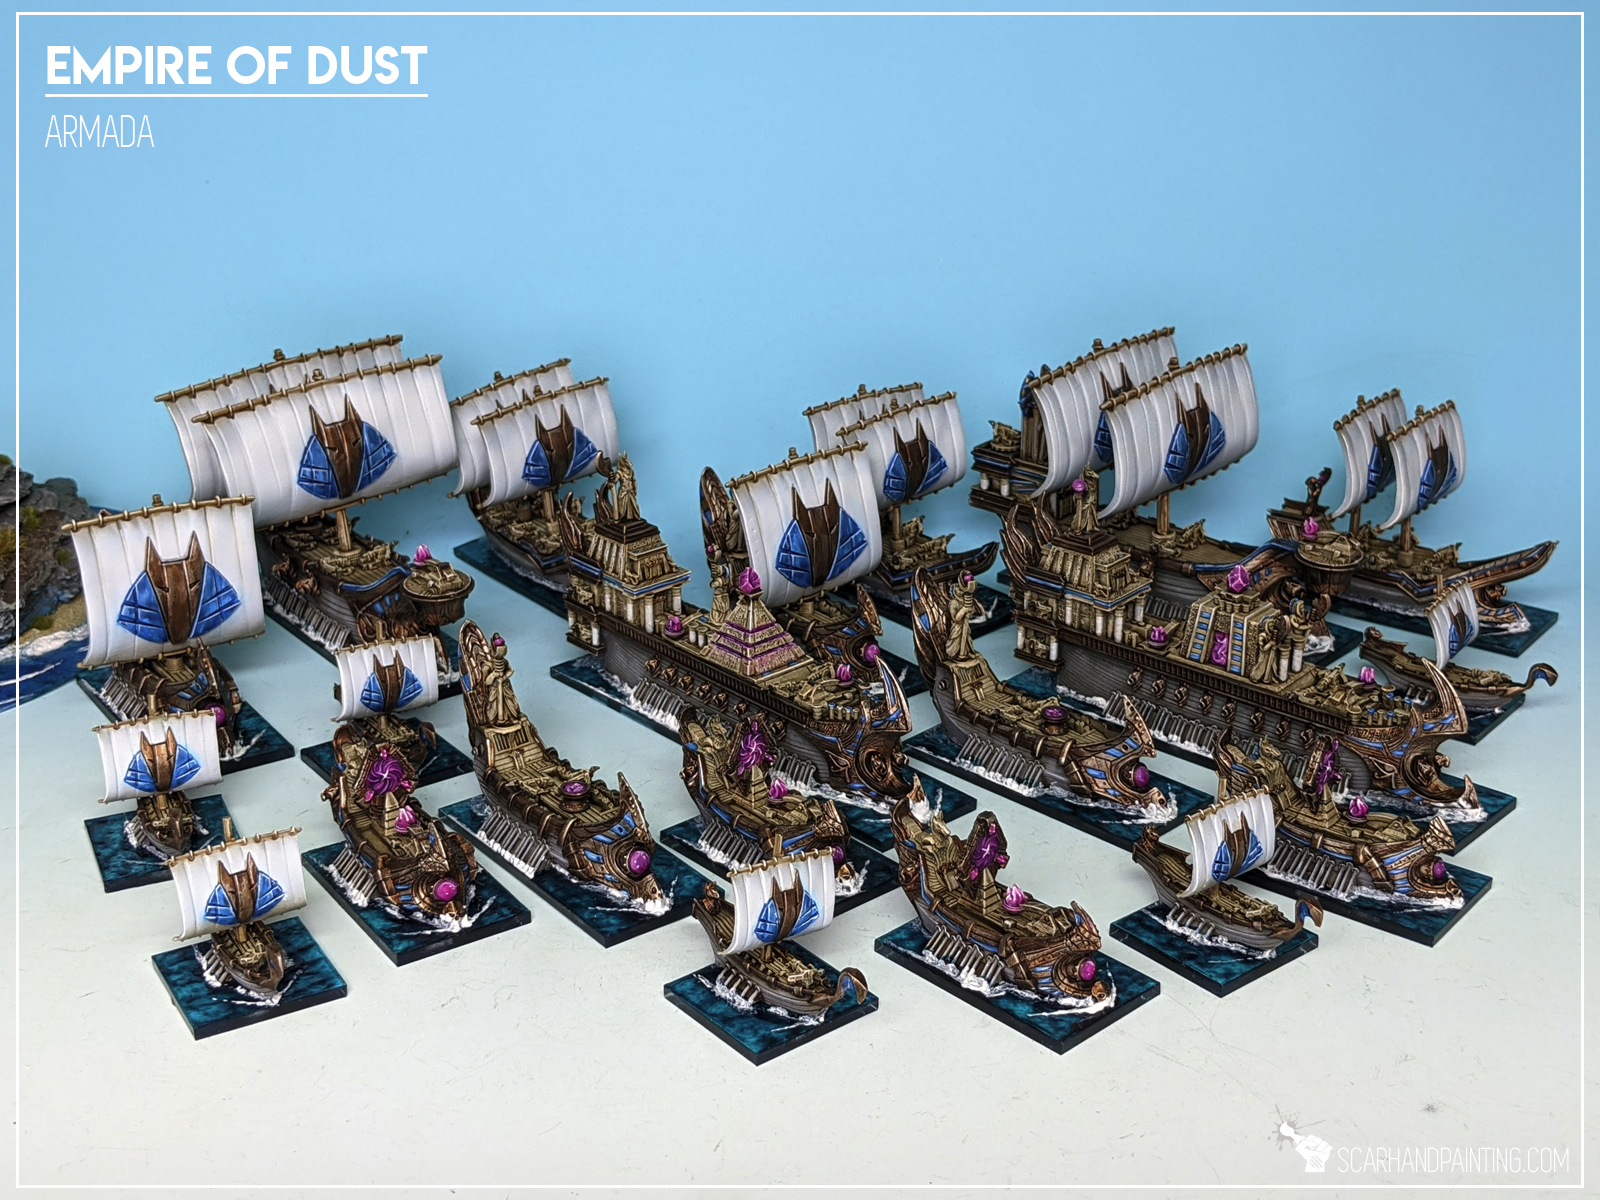
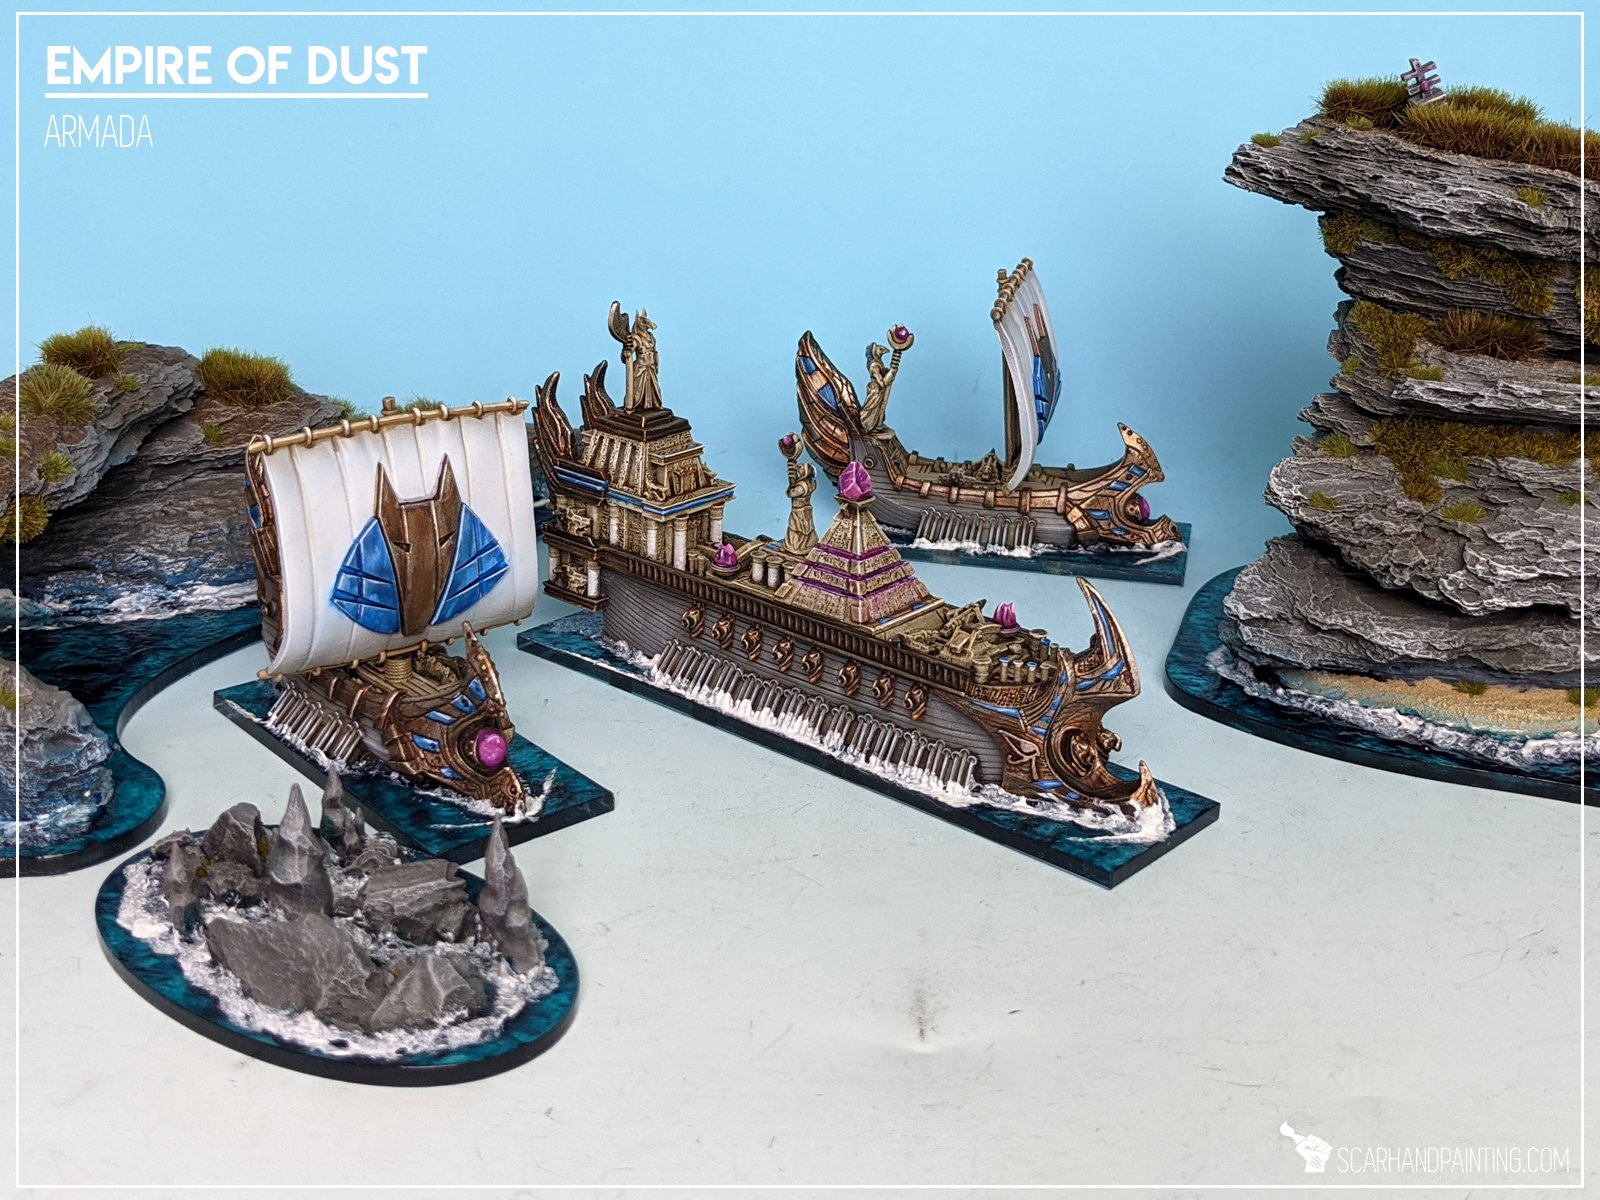
The Empire of Dust has a very strong, although somehow hidden theme of heavy artillery bombardment. I wrote “hidden” even though the theme is there in plain sight. This is because at first glance, not all EoD ships seem to go along with the archetype. It is somehow unusual for an Armada fleet and might confuse players that are relatively new to the game.
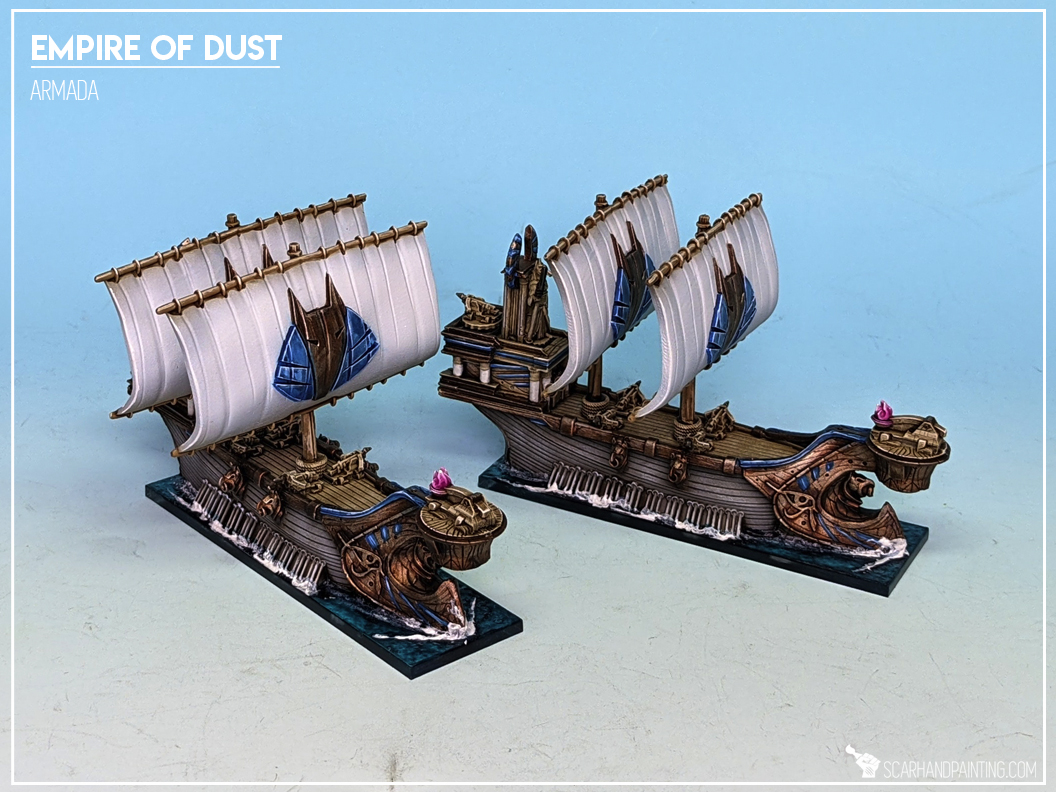
The theme is centered around Large War Galleys and Extra Large Monoliths Main Battleships, both types packing Indirect Weapons (IDW) on the sides. There is no other fleet with an array of Broadside mounted IDWs. This is an exception throughout the entire game and has some huge list building and gameplay ramifications.
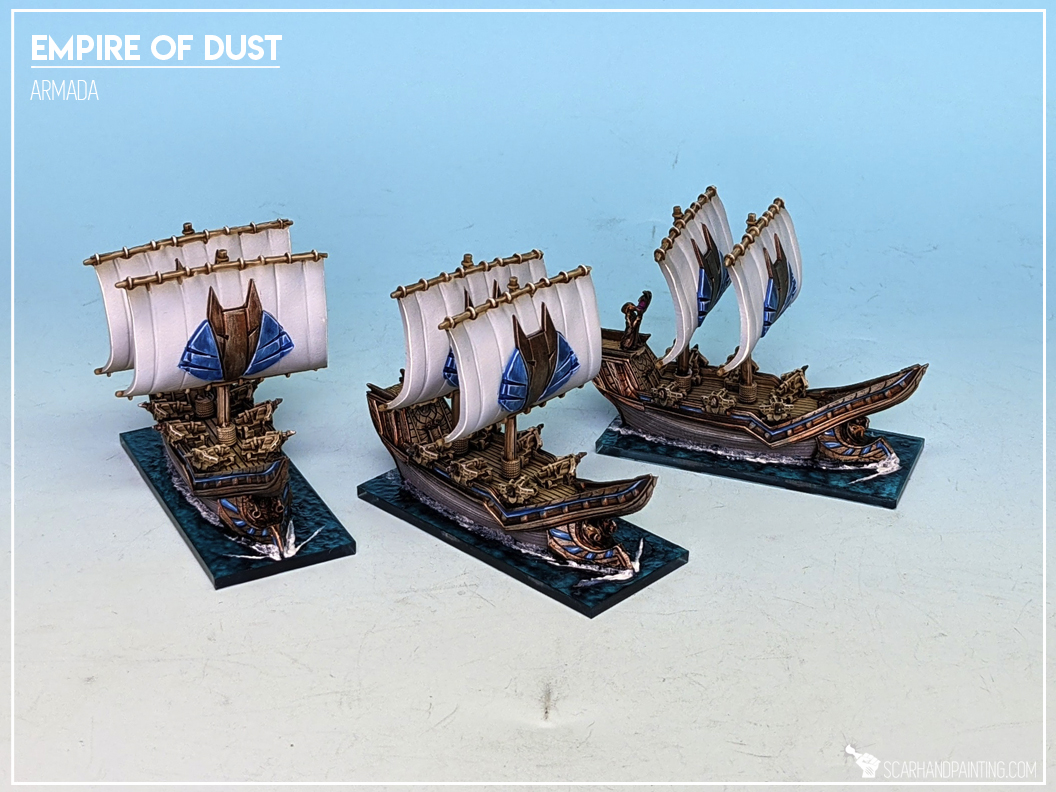
The rest of the EoD fleet is clearly honed to provide support for the L and XL centerpieces, mostly by intercepting hostile ships, engaging them up close and denying access to EoD artillery pieces, thus extending the ‘Bombardment’ duration.
Further main archetype improvements come from EoD’s Upgrades, Magic Upgrades and Captains.
Empire of Dust has partial access to Oars and Light Oars which makes positioning for a kill or simply keeping a healthy artillery formation so much easier. Entire fleet also benefits from Curse of the Undeath, potentially mitigating results of enemy Boarding attempts.
Finally, stat wise, the EoD excels at Nerve Value and this in not a coincidence. With a bulk of the fleet serving as speed bumps and reliable obstacles, high Nerve Value translates into their survivability, resulting in increased duration of the ongoing artillery bombardment served by the main pieces.
Once you take a deep dive, everything in Empire of Dust revolves around the main theme.
The Empire of Dust List Building
So now that we’ve toppled the main archetype of the Empire of Dust, where does this leave us in terms of list building? First of all the EoD should definitely be built around L or XL centerpieces. Being ‘forced’ to field a War Galley or a Monolith is a bit of a crutch, but at the same time these ships are probably what drove you into playing the Empire of Dust in the first place, so… there’s that. Once you decide between aggressive and passive playstyle and build an appropriate configuration for a centerpiece, just fill the remaining points with a protective screen of Kopeshii (s), and a mix of Support Ships that best suit that playstyle.
Off course I could go for another round over each ship and describe in detail what it does and how to use it, but at this point you probably already have a grasp on what each ship’s roll is. Plus there’s no better learning process than to play the actual game, so instead, allow me to present some Ship Configuration ideas that I myself use. This should allow you to intuitively place a ship on a mental power scale and ‘feel’ it’s designated role.
Veteran Crew, Balefire, Additional Weaponry (Broadside) – IDW+1, Magical Rudder/Soul Snare, Lucky Crew/Master Gunner.
Veteran Crew, Balefire, Arkhanten the Cursed Slayer, Kedge Anchor, Soul Snare.
Veteran Crew, Balefire, Additional Weaponry (Broadside) – IDW+1, Lucky Crew/Master Gunner.
Veteran Crew, Balefire, Arkhanten the Cursed Slayer, Soul Snare.
Veteran Crew, Ogre Mercenaries, Fire Oil.
Inexperienced Crew, Sturdy Construction.
Regular Crew/Veteran Crew, Crow’s Nest.
Regular Crew/Veteran Crew, Sturdy Construction.
Inexperienced Crew/Regular Crew.
Sample Fleet Lists
Below are sample EoD lists that, in my opinion, represent the EoD preferred archetype well.
Monolith: Veteran Crew, Balefire, Additional Broadside, Magical Rudder, Lucky Crew. 137p.
Kopeshii: Veteran Crew, Ogre Mercenaries, Fire Oil. 54p.
Dust Chaser: Inexperienced Crew, Sturdy Construction. 13p.
Dust Chaser: Inexperienced Crew, Sturdy Construction. 13p.
Soul Hunter: Veteran Crew. 24p.
Slave Squadron. 9p.
250pts.
Monolith: Veteran Crew, Balefire, Additional Broadside, Magical Rudder, Lucky Crew. 137p.
Kopeshii: Regular Crew, Ogre Mercenaries, Fire Oil. 45p.
Slave Squadron. 9p
Slave Squadron. 9p
200pts.
War Galley: Veteran Crew, Balefire, Additional Broadside, Lucky Crew. 89p.
Kopeshii: Veteran Crew, Ogre Mercenaries, 52p.
Dust Chaser: Inexperienced Crew, Sturdy Construction. 13p.
Dust Chaser: Inexperienced Crew, Sturdy Construction. 13p.
Soul Hunter: Veteran Crew. 24p.
Slave Squadron. 9p.
200pts.

All in all the Empire of Dust is a solid faction, on par with other Armada fleets, offering an interesting (if somehow rigid) playstyle. It is hard to master which might lead to some initial disappointments, but once you put some games in and get a grasp of how things work, the EoD is a very rewarding fleet. Is it good in everything? No. Is it good in some things? Oh yeah, definitely. Is it fun to play? Totally!
I hope you find this article entertaining. Be sure to let me know your thoughts in the comments below or via Facebook or Instagram. I would also appreciate if you considered sharing this content with your hobby buds, who might find it useful. Finally if you are looking for a professional miniatures painting service be sure to contact me via this contact form. I always reply within 24 hours, after which please check out your spam folder.
Cheers!

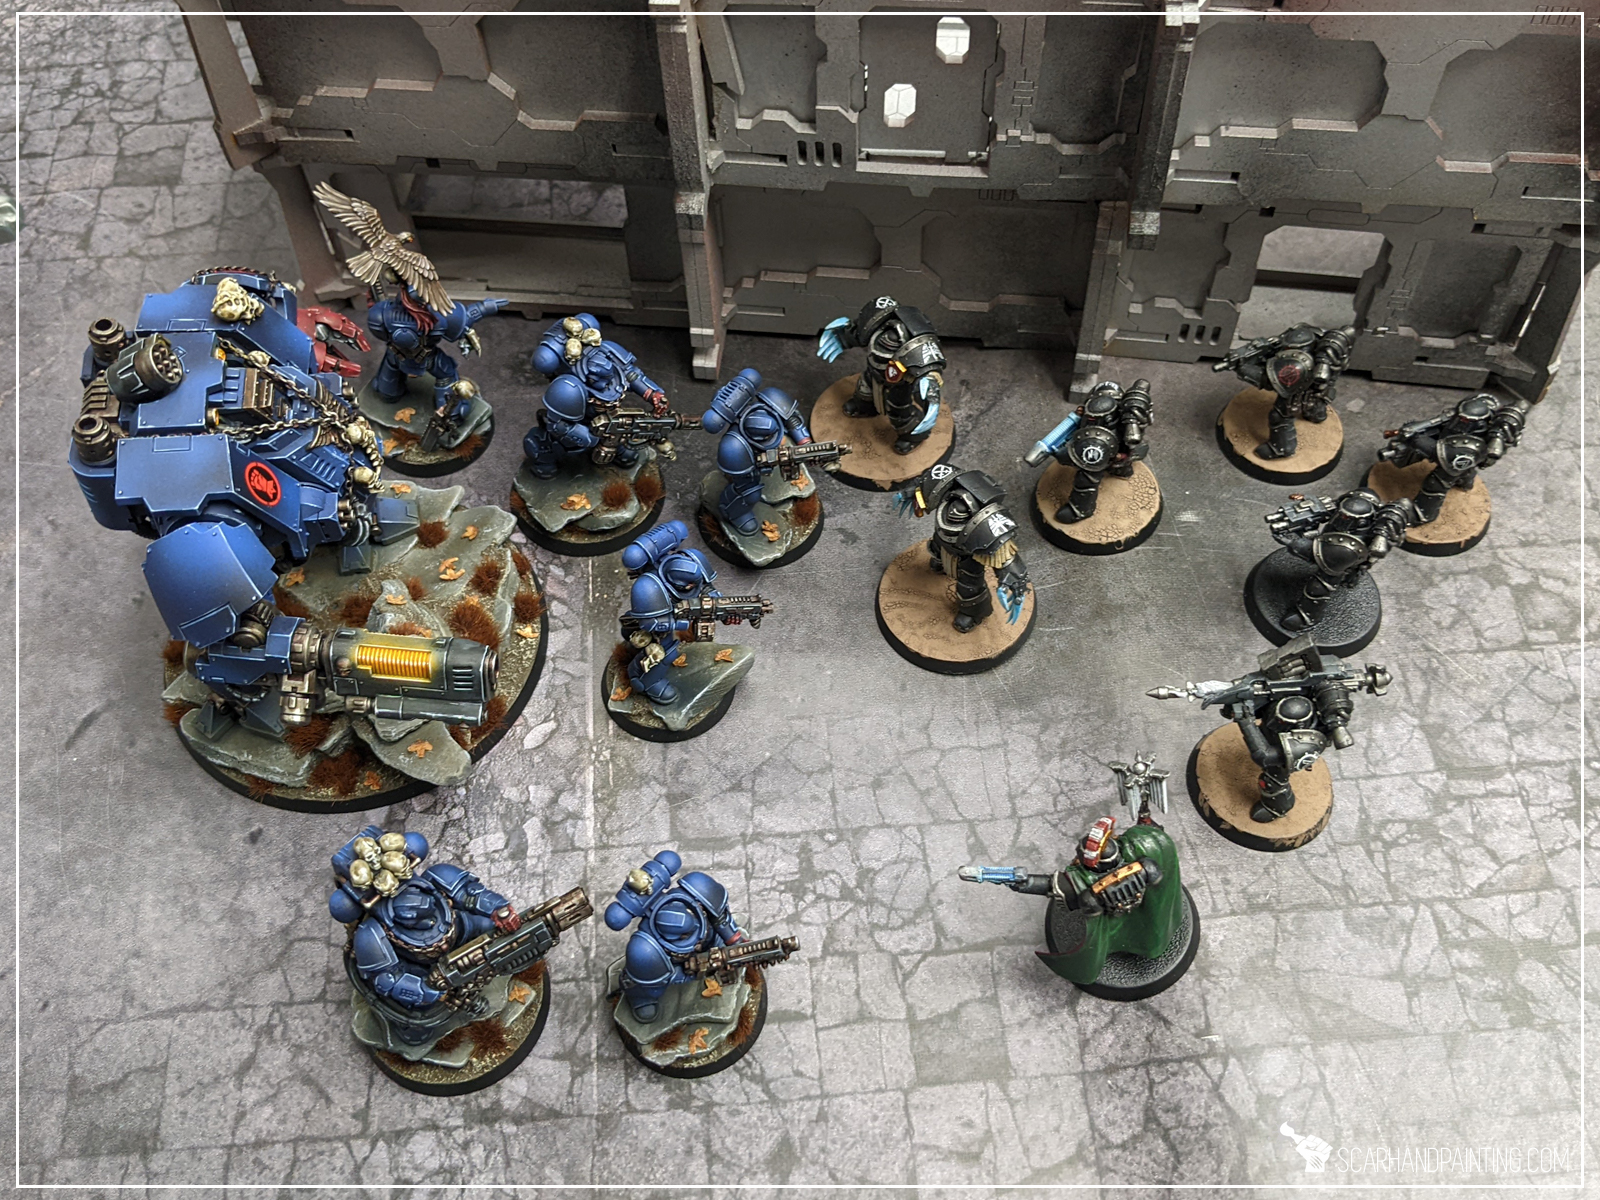
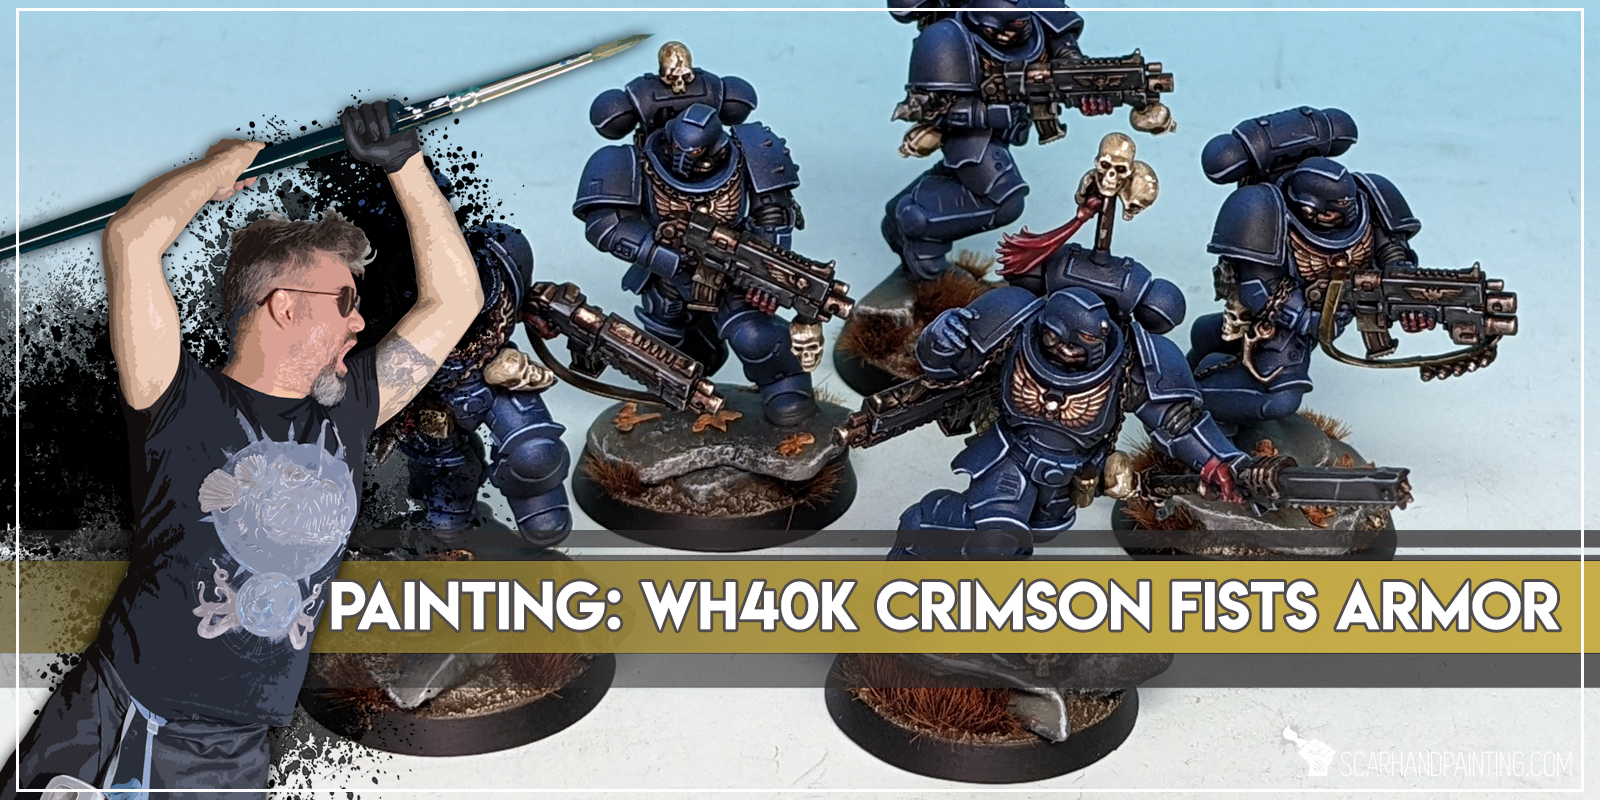
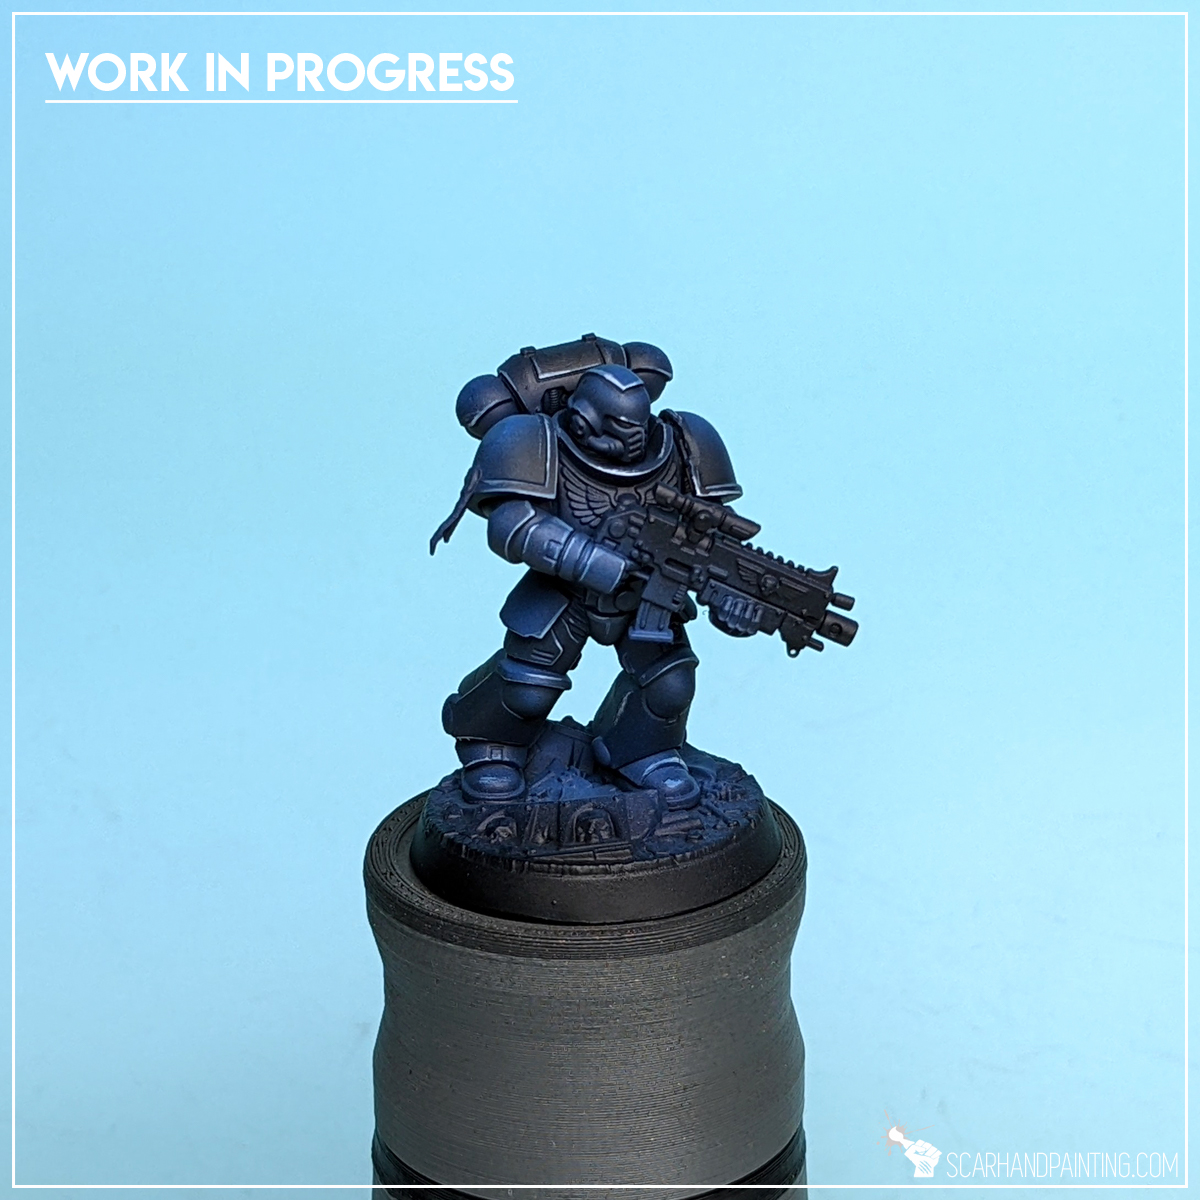
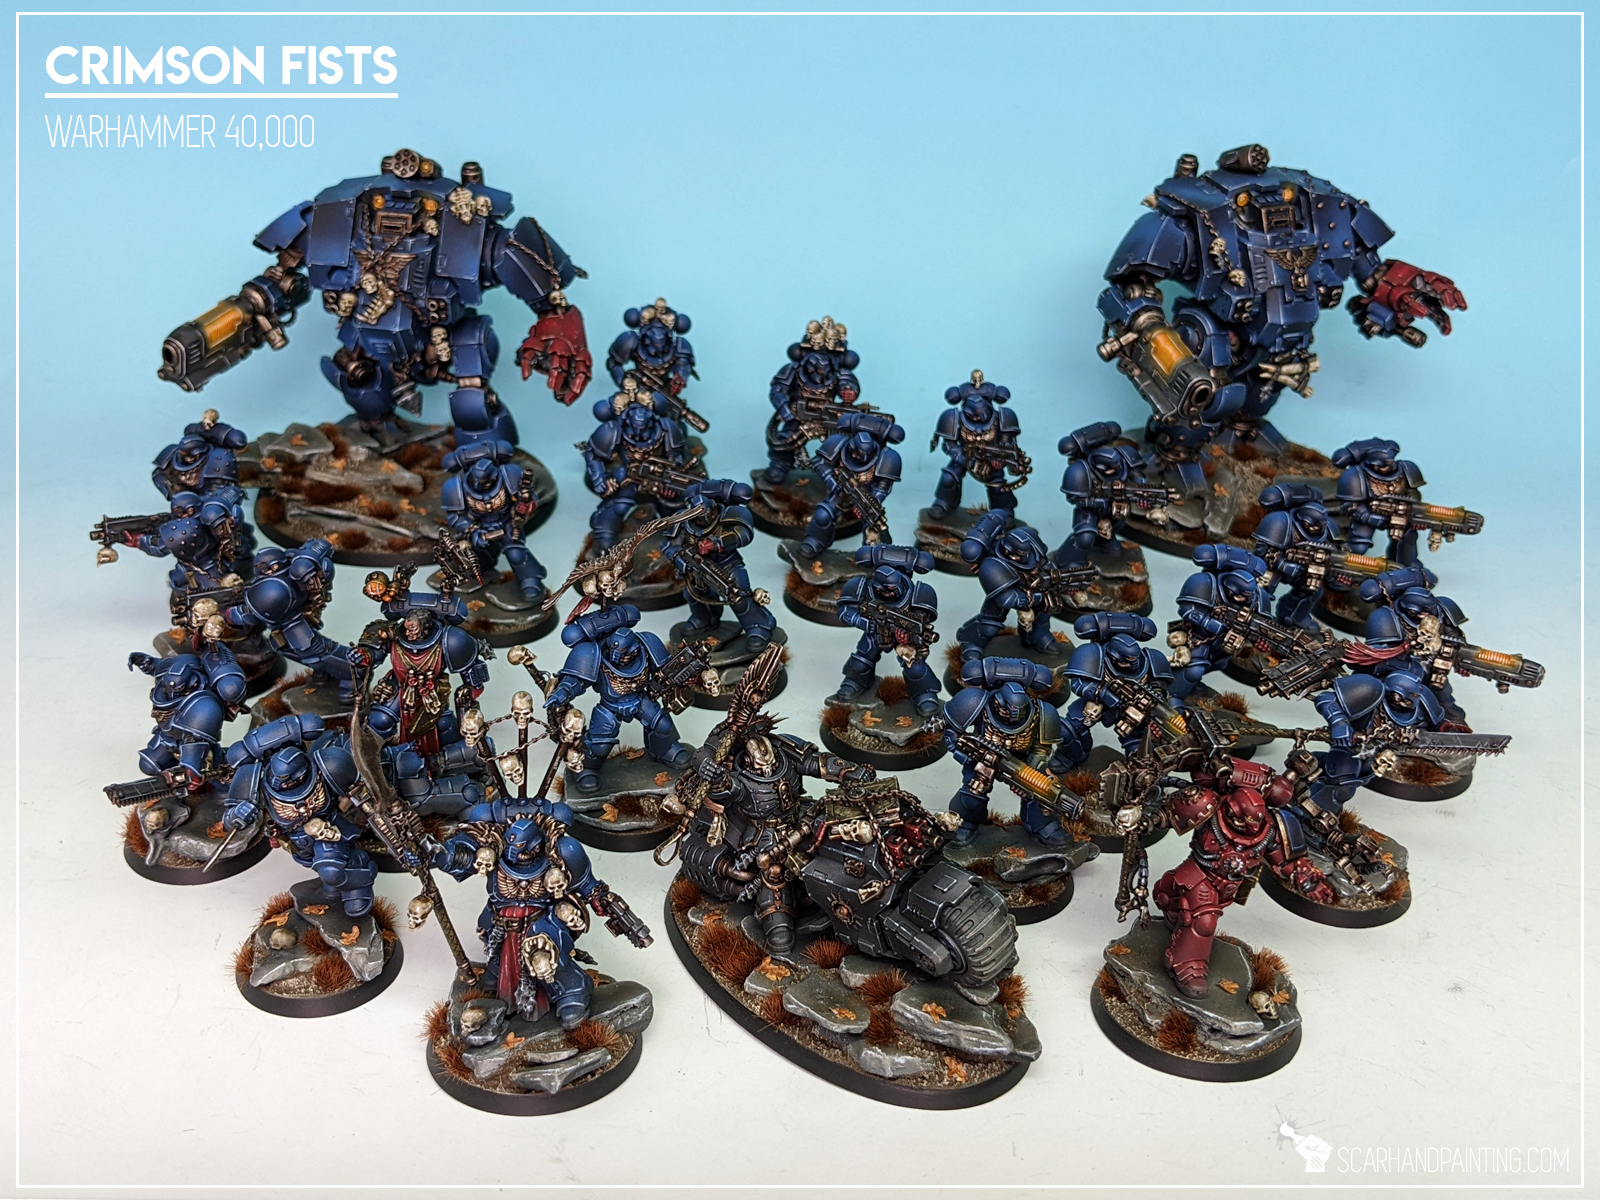
Welcome to Painting Warhammer 40,000 Crimson Fists tutorial. Here I will present to you a Step-by-step of an easy and fast painting process for Games Workshop Crimson Fists Primaris Marines armor as can be seen in Gallery: Crimson Fists.
Before we start, some notes:
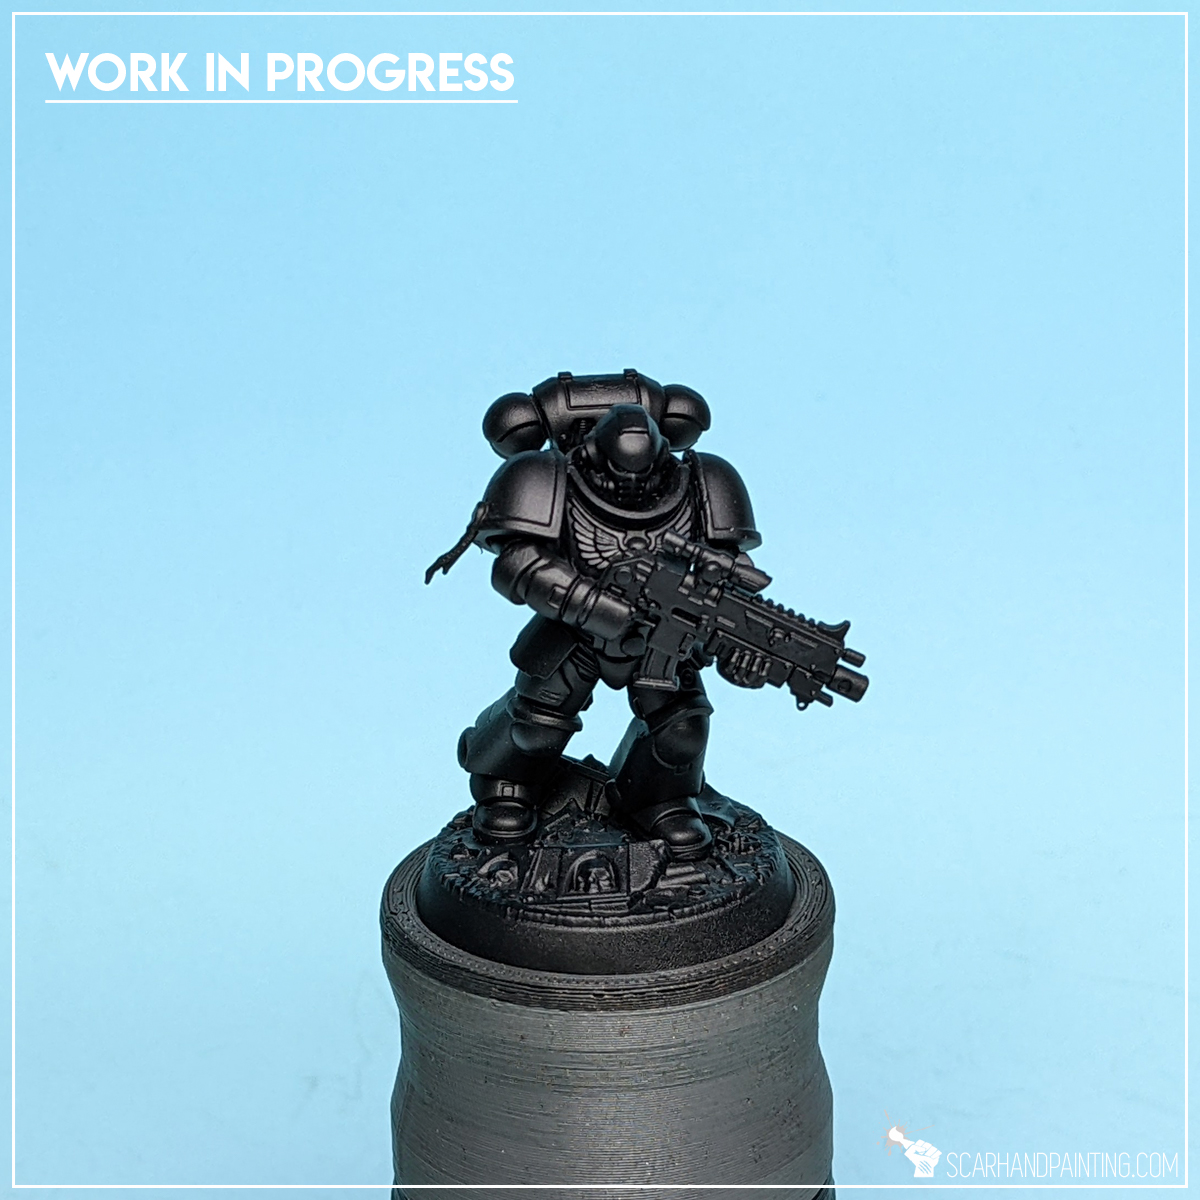
Step one: Undercoat
I started with a thorough layer of Games Workshop Chaos Black spray. This is a standard procedure for me. Chaos Black spray is my go to choice when it comes to undercoat.
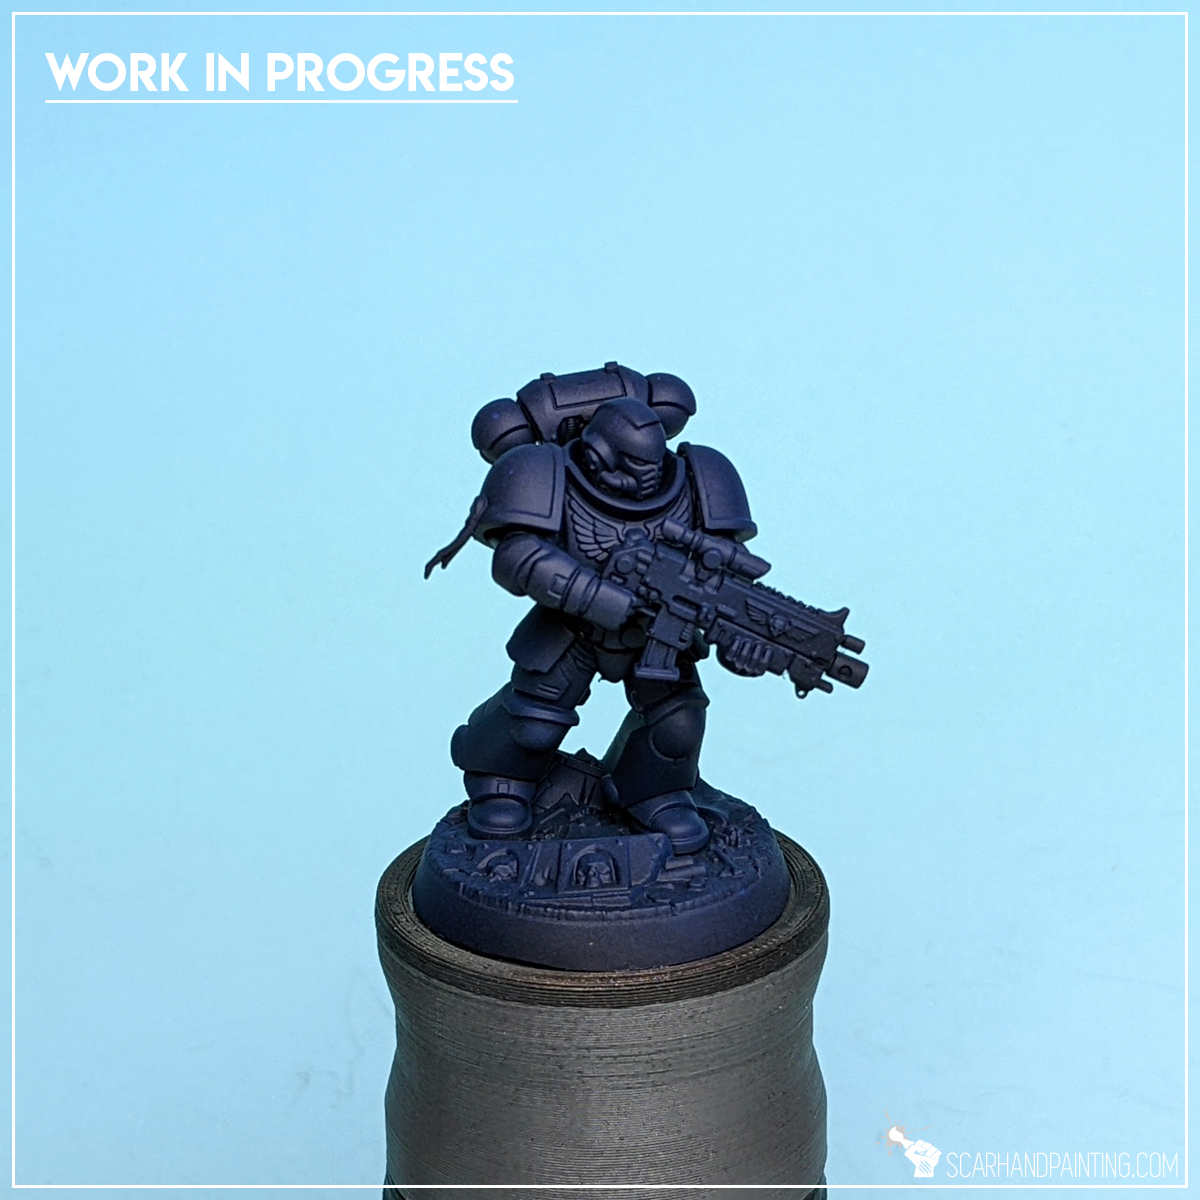
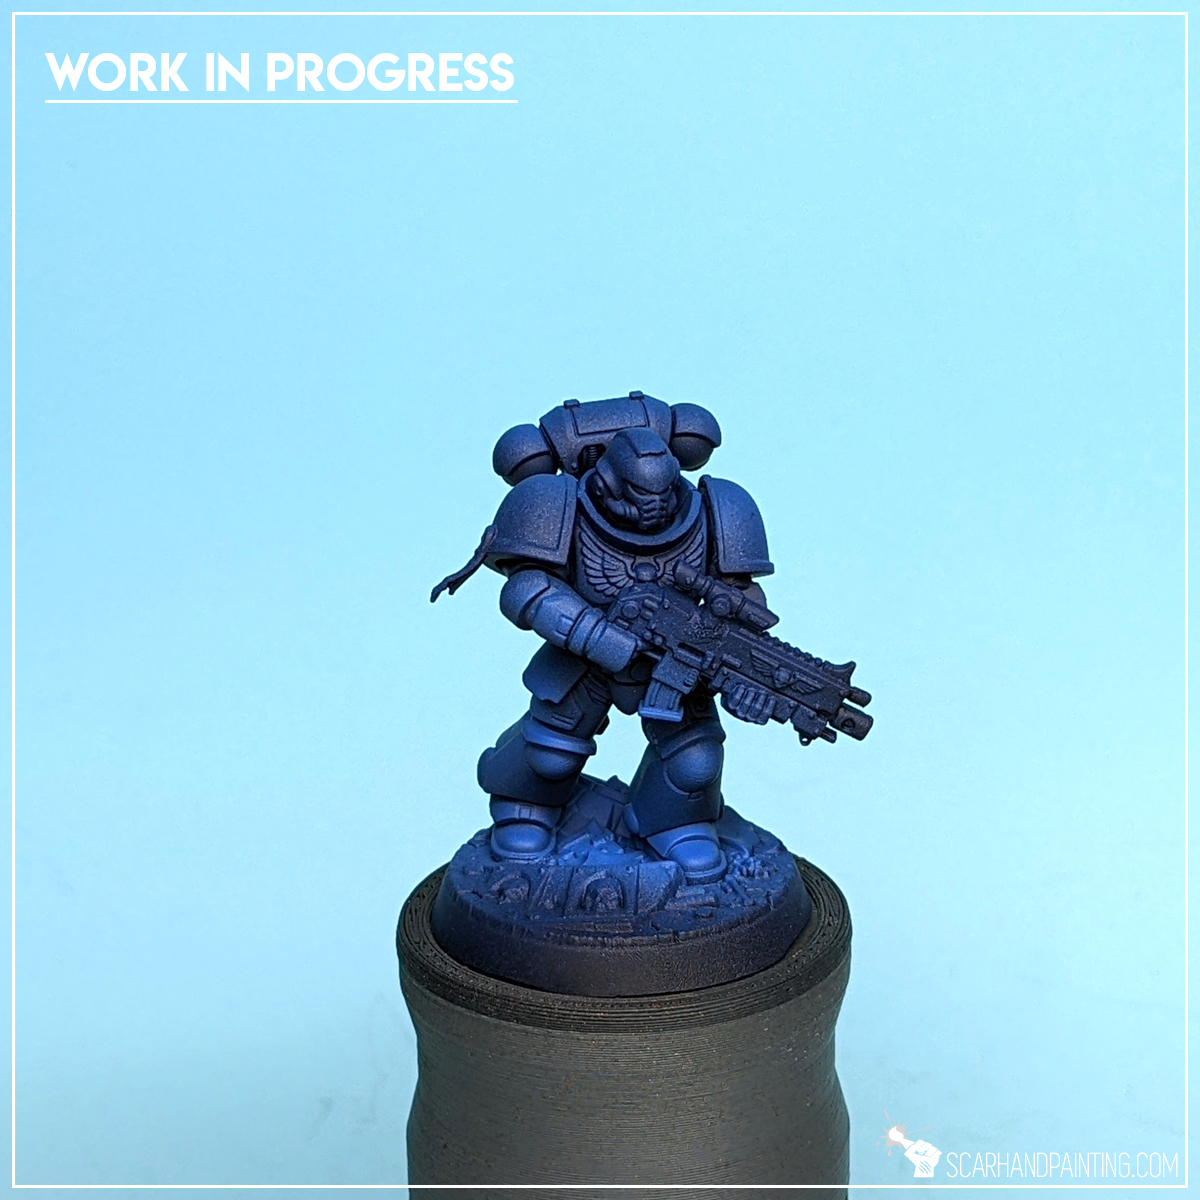
Step two: Base Color
For the initial layer I chose Vallejo Model Air – French Blue (71.088). The color is a somewhere medium tone blue, with much vibrancy that got a bit toned down by black undercoat beneath. I applied a thin, dry layer of French Blue by airbrushing it on top and around the miniature. I took extra care not to make the layer too strong.
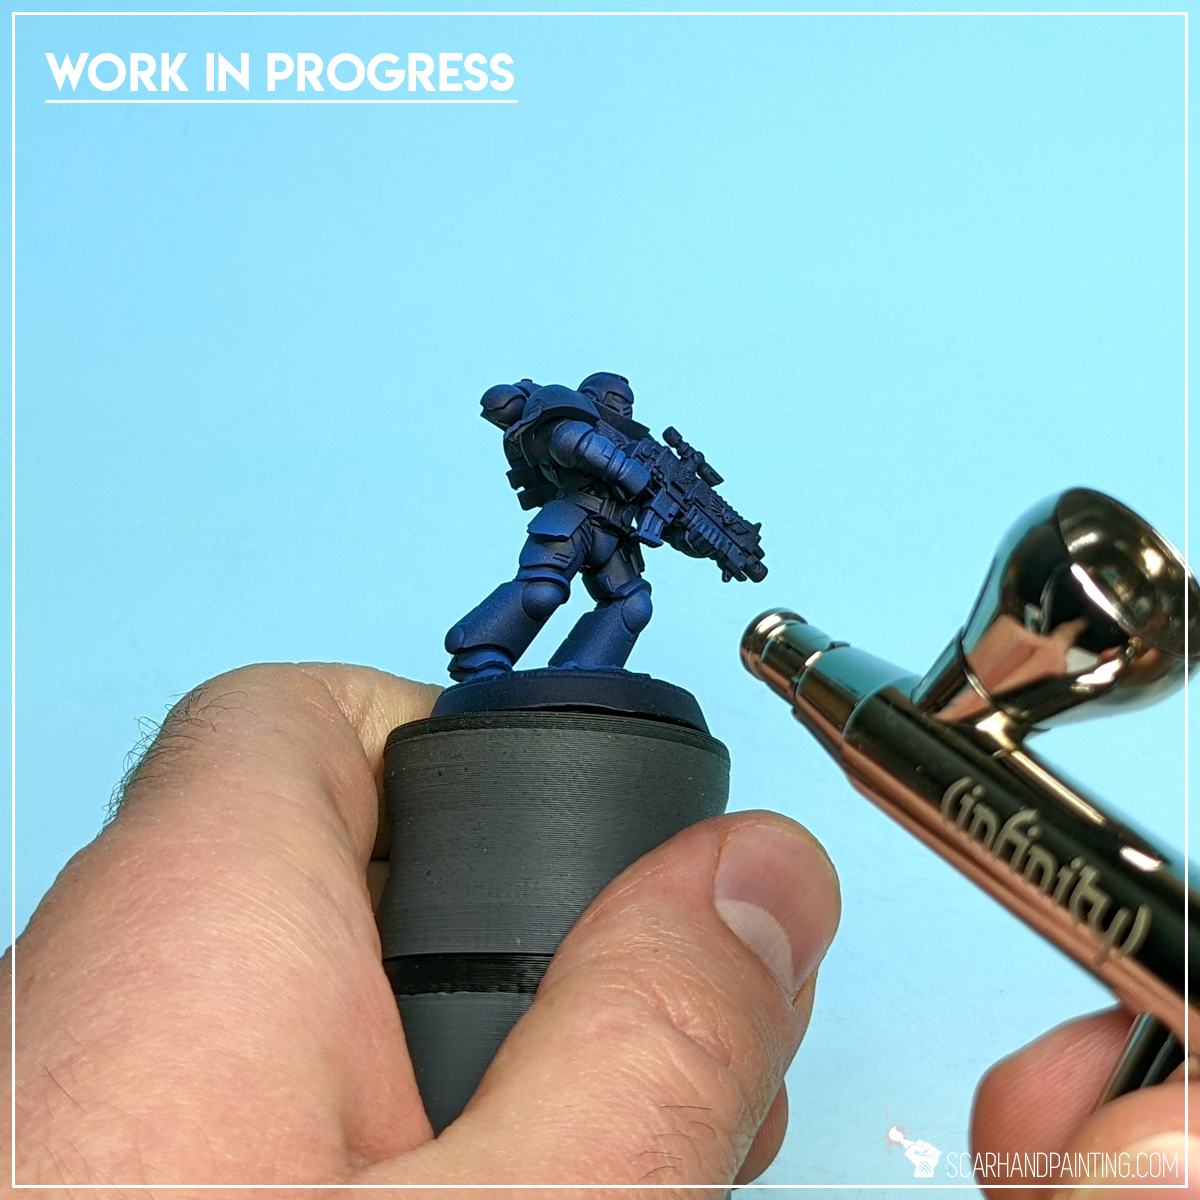
Step three: Highlight
Next I applied a mix of Vallejo Game Air – Ultramarine Blue (72.722) proportioned 5:2 with Vallejo Model Air – Light Sea Blue (71.089). This layer was also airbrushed, but this time I applied it zenithally and on the most exposed areas of the armor. Once again I took extra care to keep the layer dry and soft.
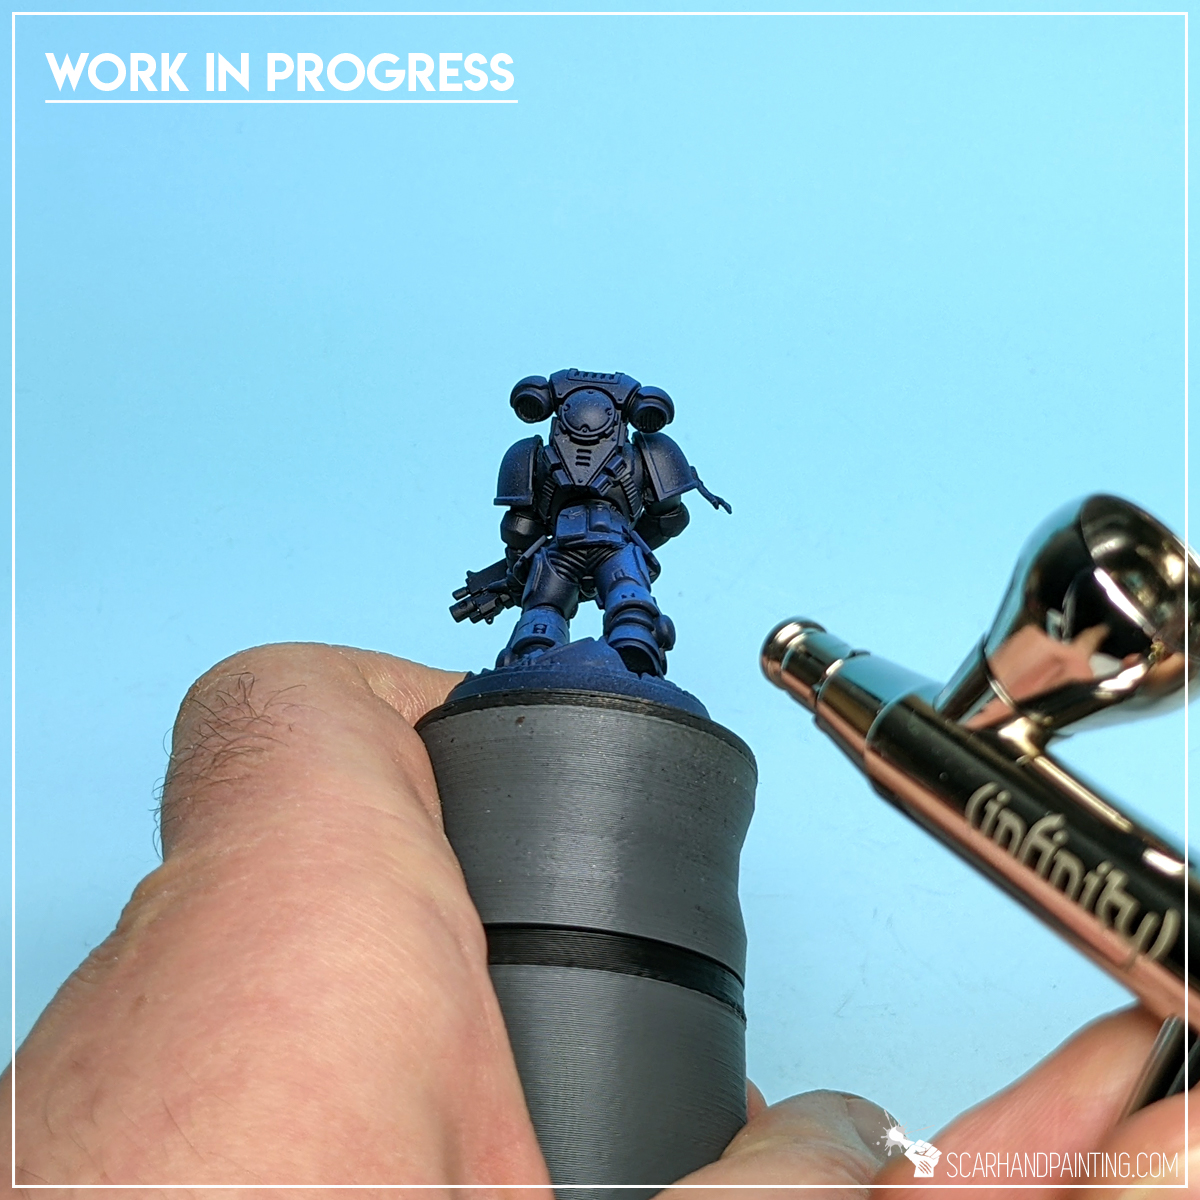
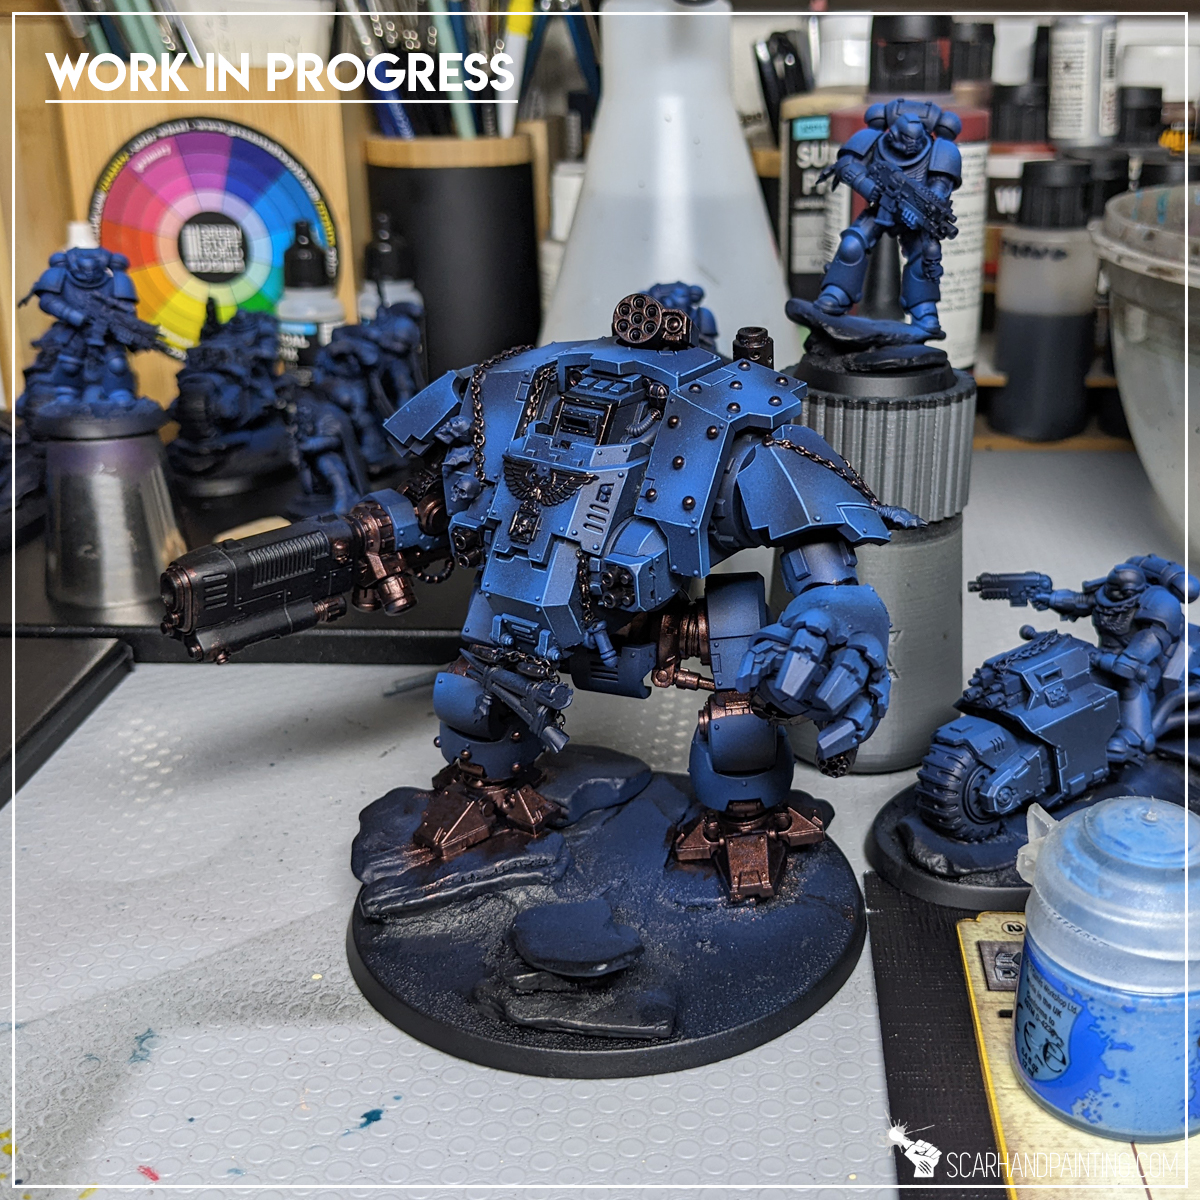
Step four: Shading
I then applied Vallejo Wash for Dark Vehicles (76.518) by airbrushing it from the bottom of the miniature (reverse zenithal) and onto low parts of large areas, including lower shoulder guards, sides of leg armor and lower part of the backpack. This particular paint is very thin, forcing me to apply it by multiple tiny, mist-like “puffs”, that dried out almost instantly. It significantly toned down all the armor and blended any dry specks leftovers from previous layers.
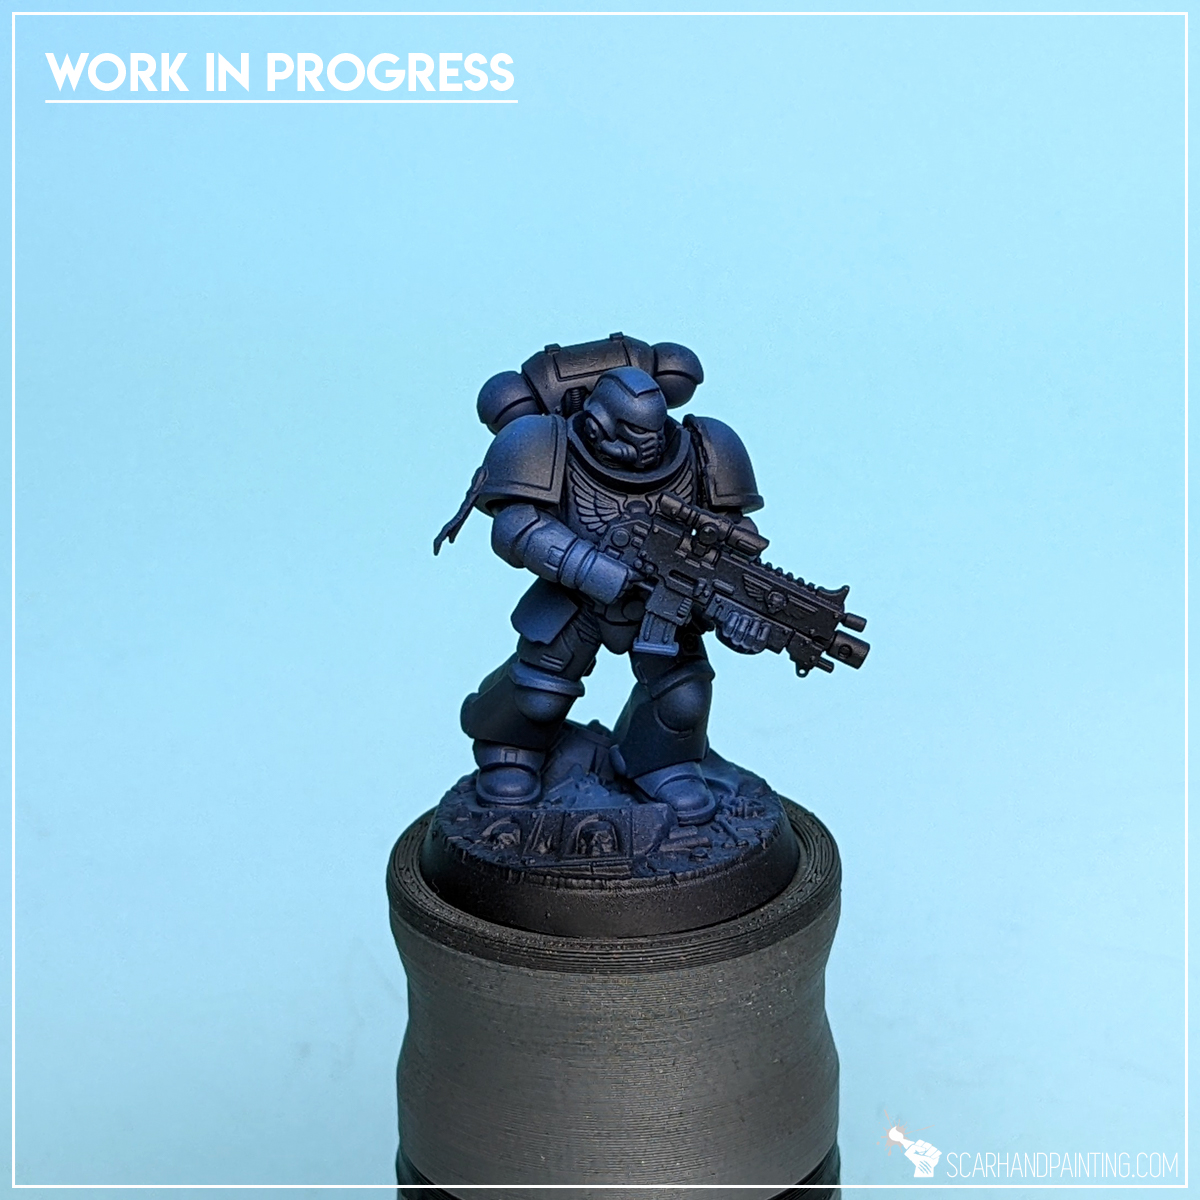
Step five: First Highlight
Next I switched to manual brush and applied an edge highlight of Citadel Layer – Hoeth Blue. I picked only the most exposed edges, skipping all places that were too difficult to reach or hidden from sight.

Step Six: Second Highlight
Finally I applied an edge highlight with Vallejo Game Color – Glacier Blue (72.095). Contrary to previous layer, I kept this one concentrated on top areas and corners, adding extra focus and depth to the exposed armor detail.
That wraps up the armor. Only five layers of paint for an eye catching effect of dark blue armor, that stands out on the gaming board. Now with this solid base out of the way, we can start building character of the miniatures, by adding more colors and enriching the overall feel of the miniatures – but that is a topic for another day. Stay tuned for part two of the tutorial.
I hope you’ve enjoyed this article. Be sure to let me know your thoughts in the comments below or via Facebook or Instagram. I would also appreciate it if you considered sharing this content with your friends, who might find it interesting. Finally if you are looking for a professional miniatures painting service, be sure to contact me with this contact form. I always reply within 24 hours, after which please check out your spam folder.

Here are some Colour Recipes for Warhammer 40,000 Crimson Fists from Gallery: Crimson Fists. Please take note that this is a simple colour scheme, not covering multiple overlapping layers and blends in between, that lead to the final product. It is supposed to be used as guideline not a step-by-step.

BLUE armor:
Black undercoat,
French Blue (val a), * around
Mix Ultramarine Blue (val a) 5:2 Light Sea Blue (Val a), * from top, points focused
Black Wash for Vehicles (val), * from bottom, points focused
Hoeth Blue (gw), l&p
Glacier Blue (val), p
RED armor:
Hull Red (val),
Burnt Red (val)
Flat Red (val), l&p, highlight flbr (x3)
Lugganath Orange (gw), l&p
Vehicles: Flat Red (val), stpl (large areas)
DARK mesh:
Panzer Dark Grey (val a),
Fenrisian Grey (gw), l&p
Dark Tone Ink (ap),
Glacier Blue (val), l&p / Ghost Grey for vehicles)
METAL:
Warplock Bronze (gw),
True Copper (ap) / Gun Metal (ap), flbr
Shining Metal (ap), l&p
Strong Tone Ink (ap),
Shining Metal (ap), l&p
BROWN detail:
Burnt Umber (val a),
Karak Stone (gw) l, detail filling,
Off White (val), l&p
Dark Olive Drab (val a), bl
Flayed One Flesh (gw), l&p
Mix: Strong Tone Ink (ap) 1:1:1 Soft Tone Ink (ap), Flesh Tone Ink (ap),
Flayed One Flesh (gw), l&p
SKULLS & PAPER:
Karak Stone (gw),
Flayed One Flesh (gw), flbr
Mix: Off White (val) 1:2 Skeleton Bone (ap), flbr
Strong Tone Ink
Off White (val), l&p
ORANGE OSL:
White (val a), *
Hot Orange (val a), *
Off White (val), l&p
Hot Orange (val a), bl
EYES:
Flat Red (val),
Lugganath Orange (gw), dots
Hot Orange (val a), glaze

l&p – lines and points,
p – points,
dl – deep lining,
bl – blend,
gl – glaze,
drbr – drybrush,
flbr – flatbrush,
lobr – loaded brush,
stpl – stippling,
*Airbrushed (with multiple layers and mixes)


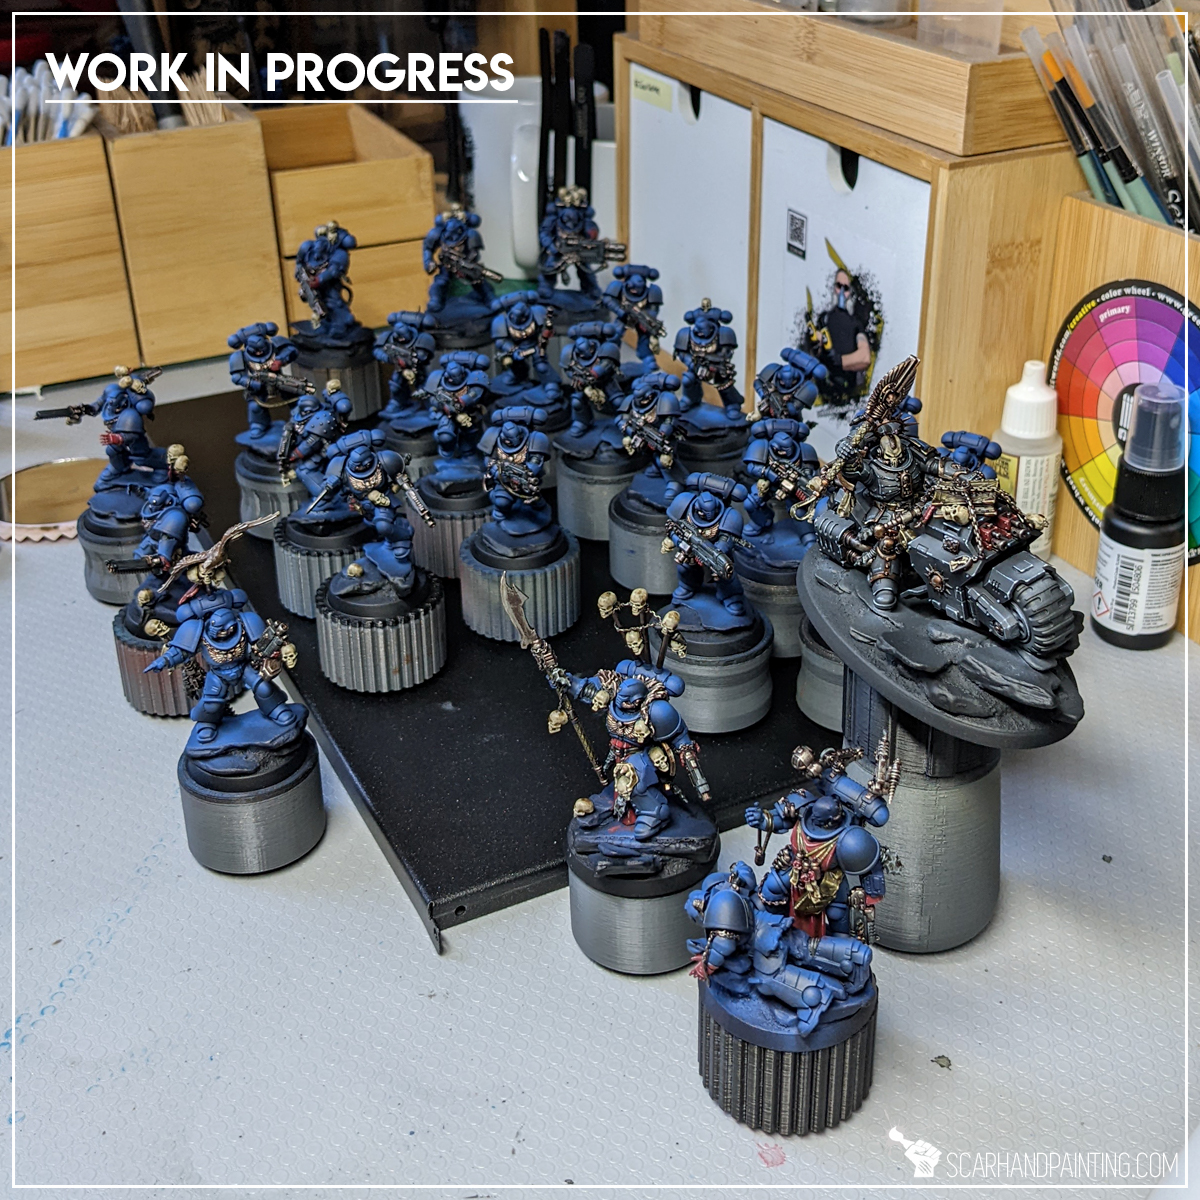
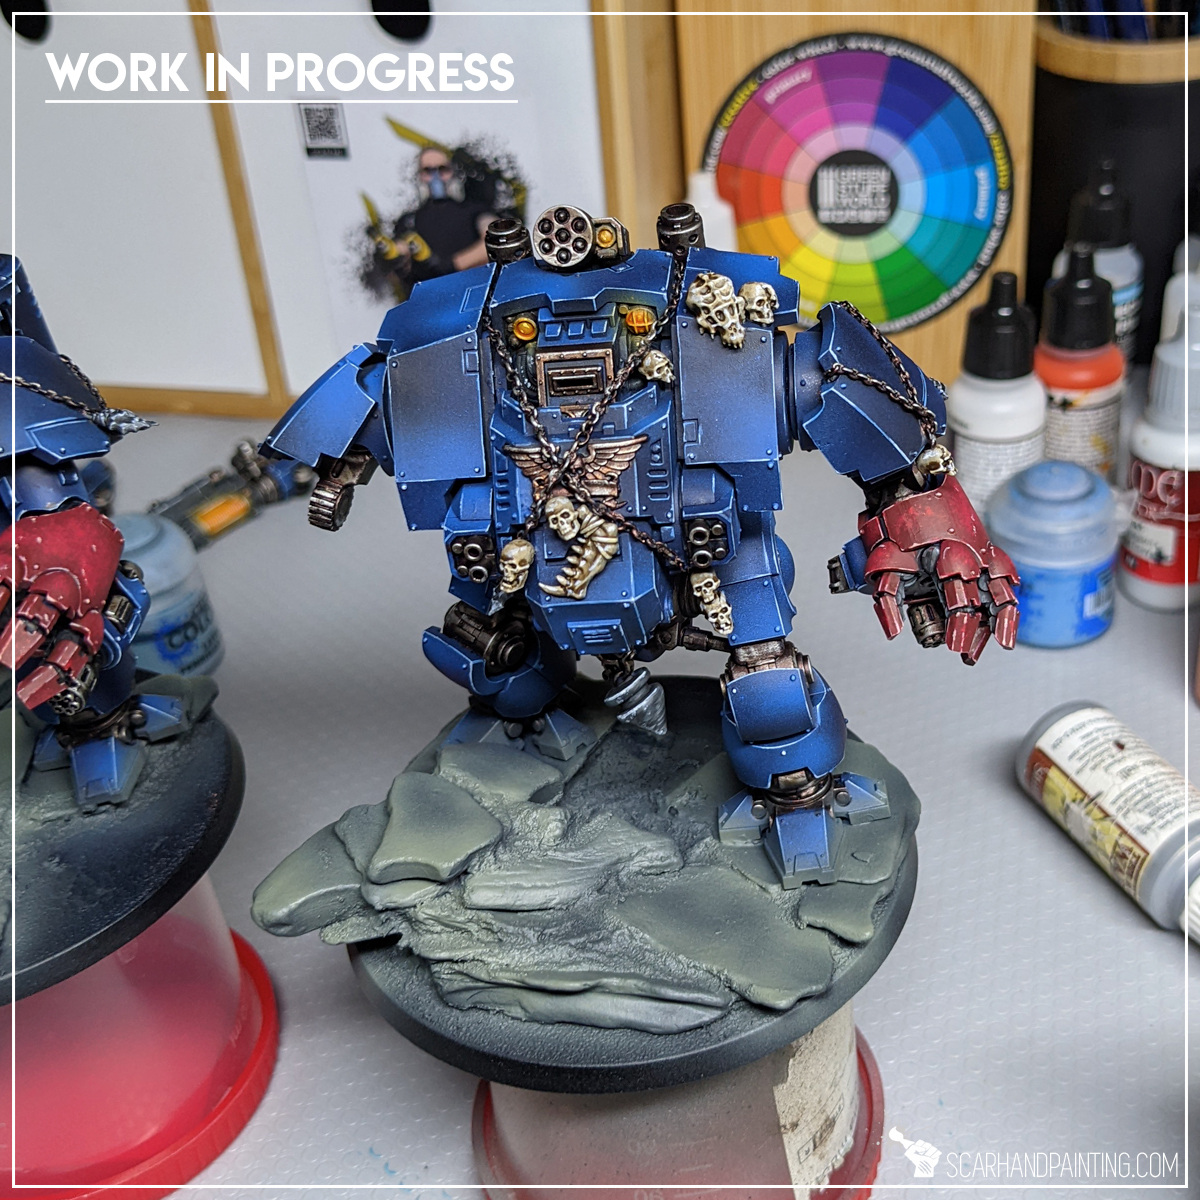
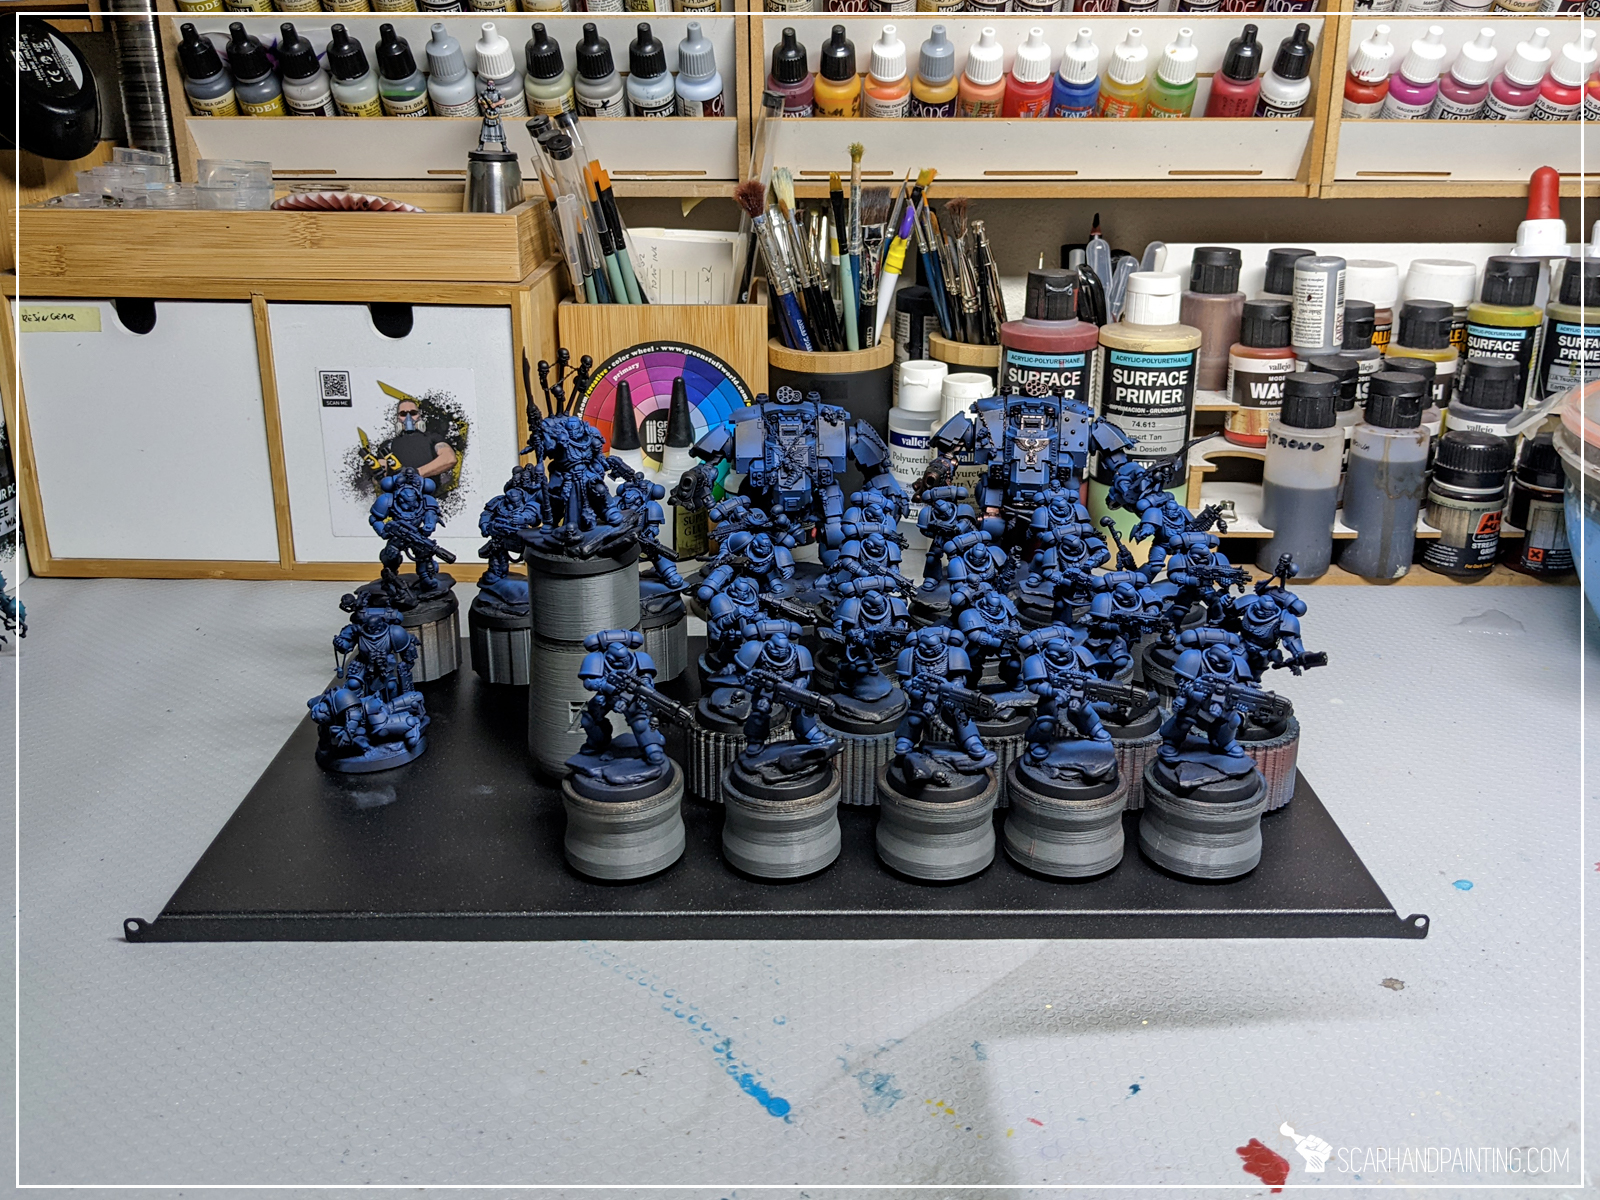
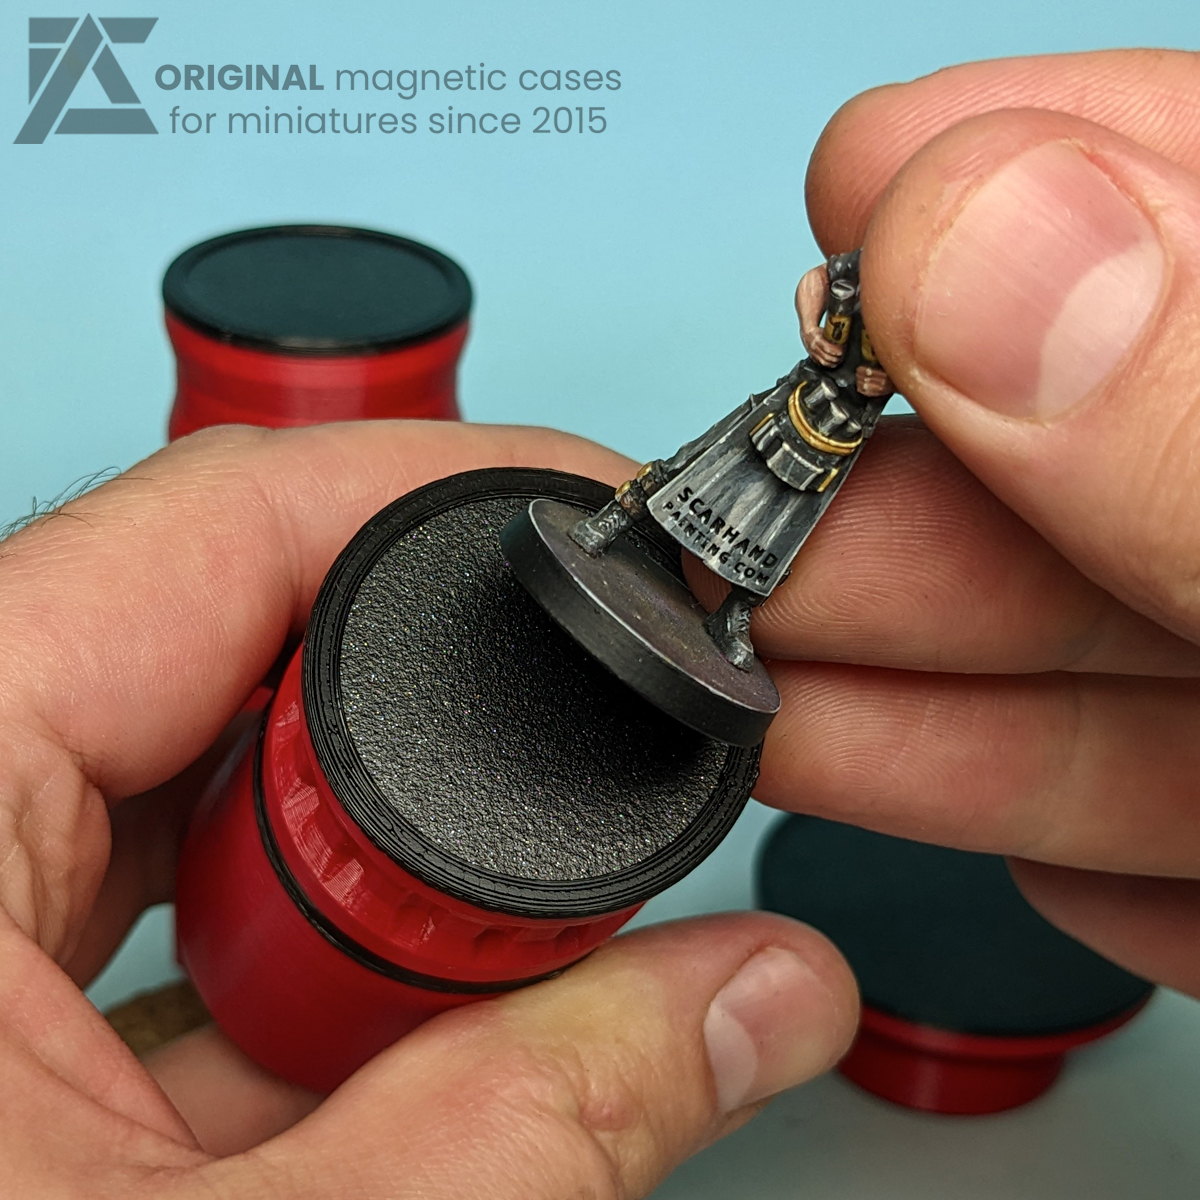
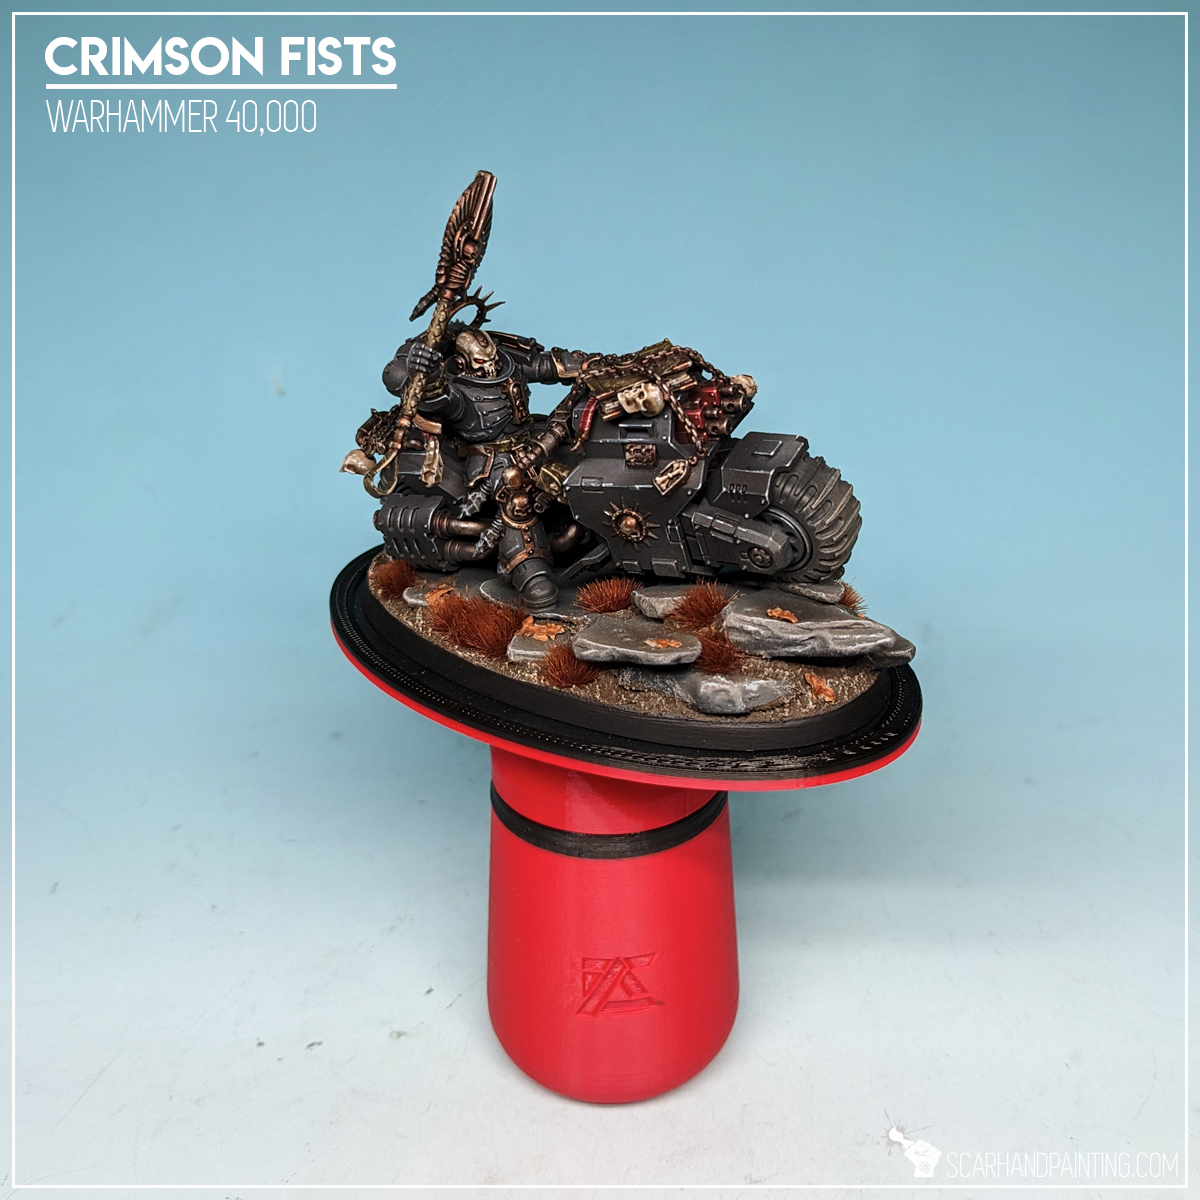
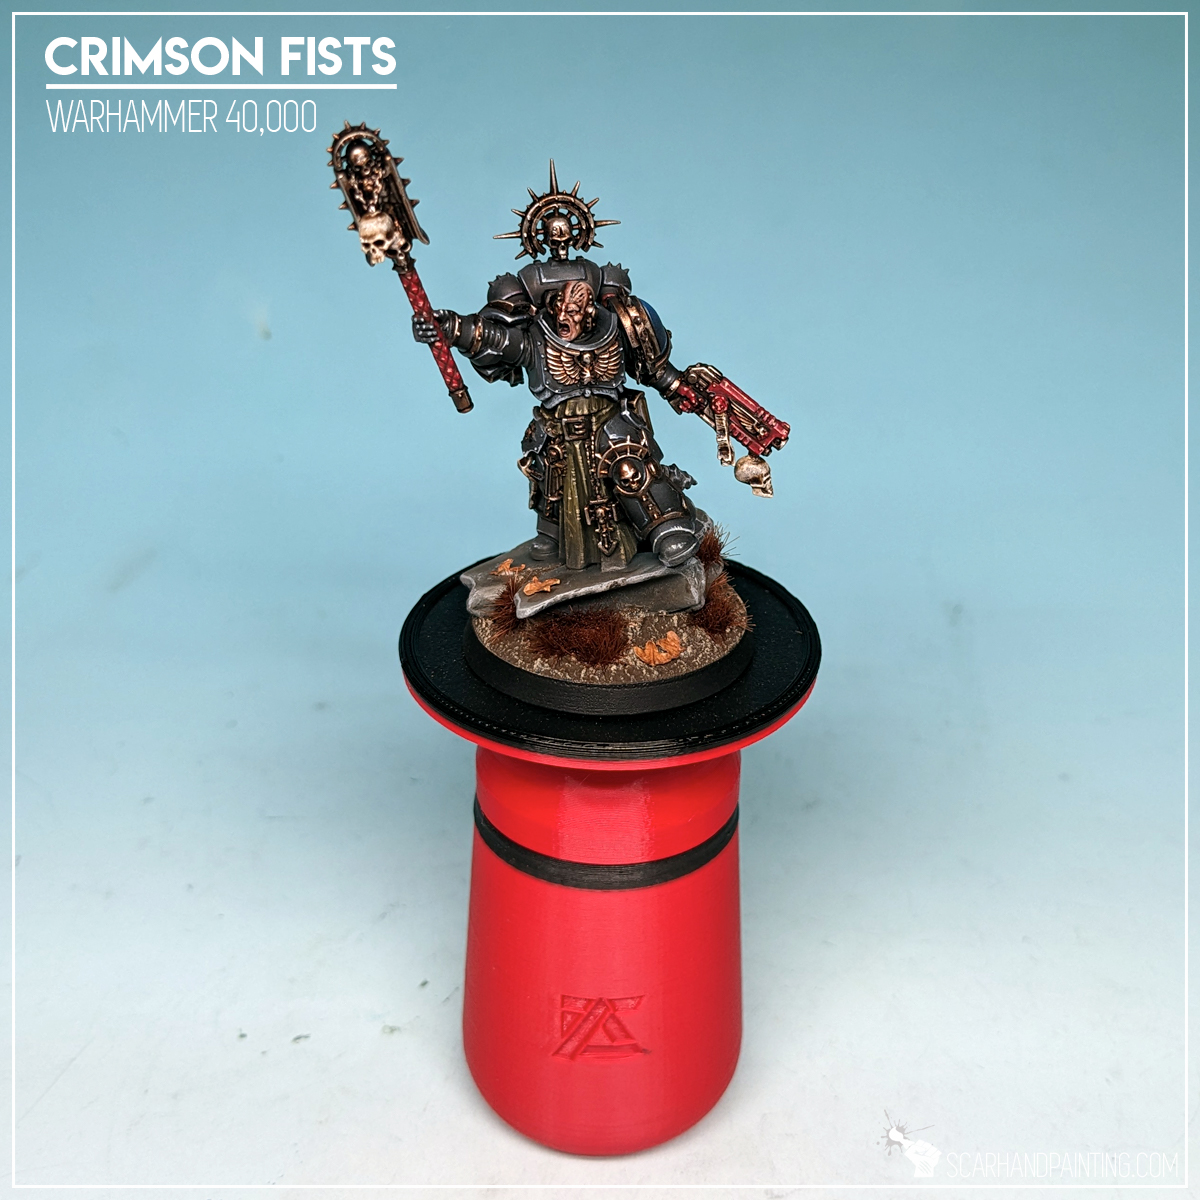
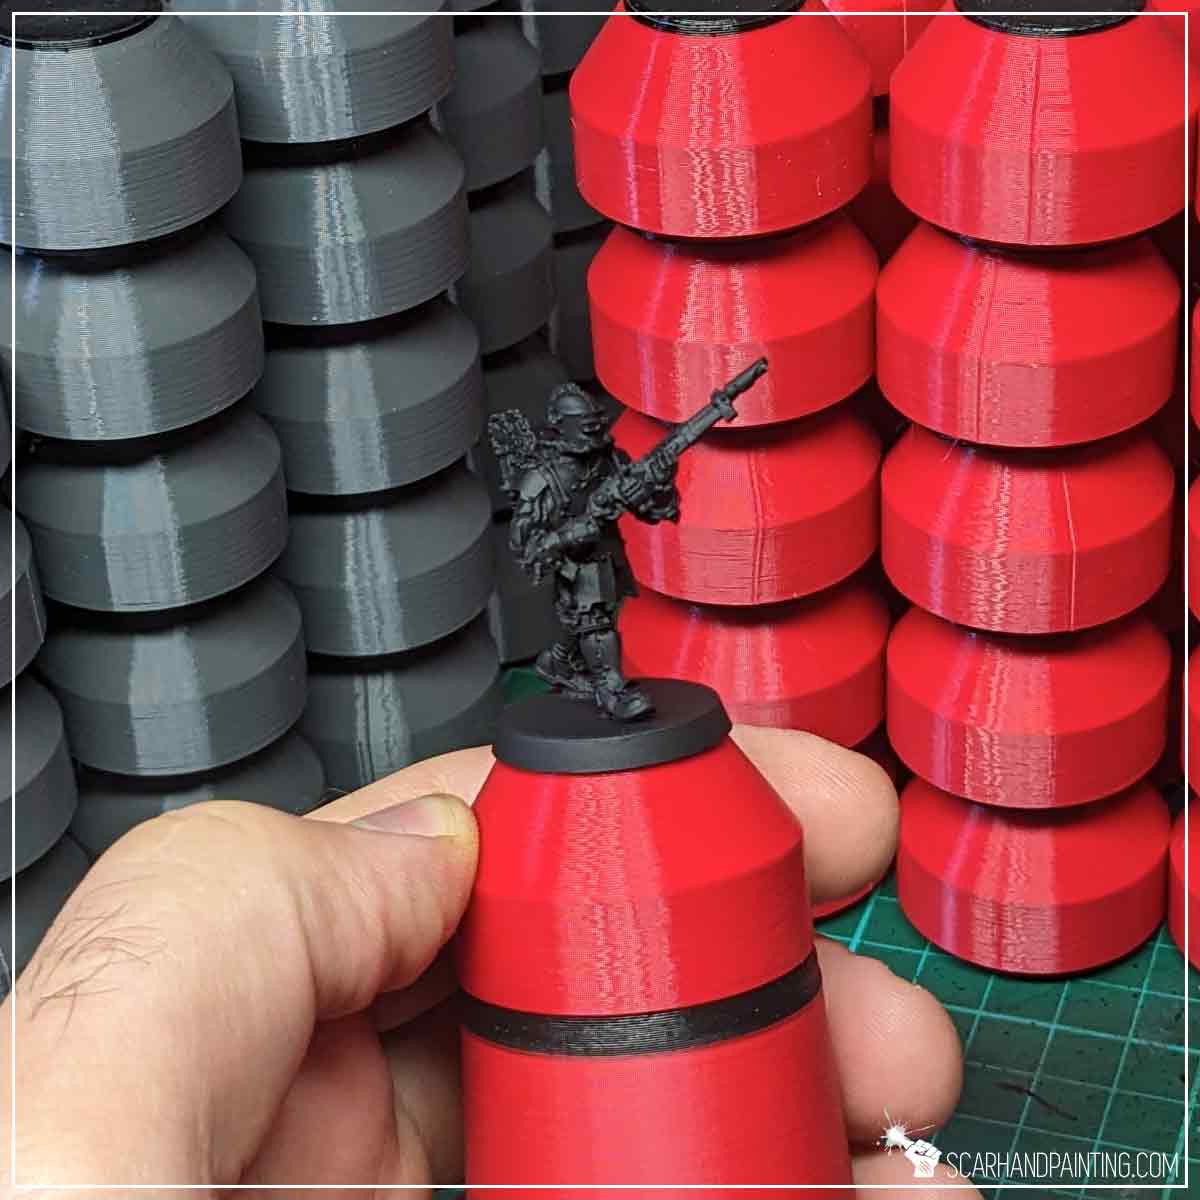
Painting holders… love them or hate them, am I right? Personally, due to sheer quantity of miniatures that go through my desk I’m used to paint miniatures mounted on shot glasses. Standard painting grips are bulky and take up too much space, not to mention price and need of at least few dozen of these to keep up a comfortable work flow. This is why I was never truly interested in any Painting Grips available in the market… until now!
A-Case is a well known, one-man company from Poland, specializing in probably the best magnetic carrying cases for miniatures that money can buy. Let me put this up front: I am a big fan of A-Case product line and grew tight with the company. I might be a bit biased here. That being said I try my best not to get influenced by sympathy for A-Case, to a point of being very sceptic about any new product lines. Luckily I got samples for thorough beta testing. After some brutal, ruthless hobbying, I can honestly say all my misgivings got put to rest. More so I grew fond of Magnetic Painting Grip to a point of pre-purchasing multiple sets and extensions and switching to work with it almost exclusively.


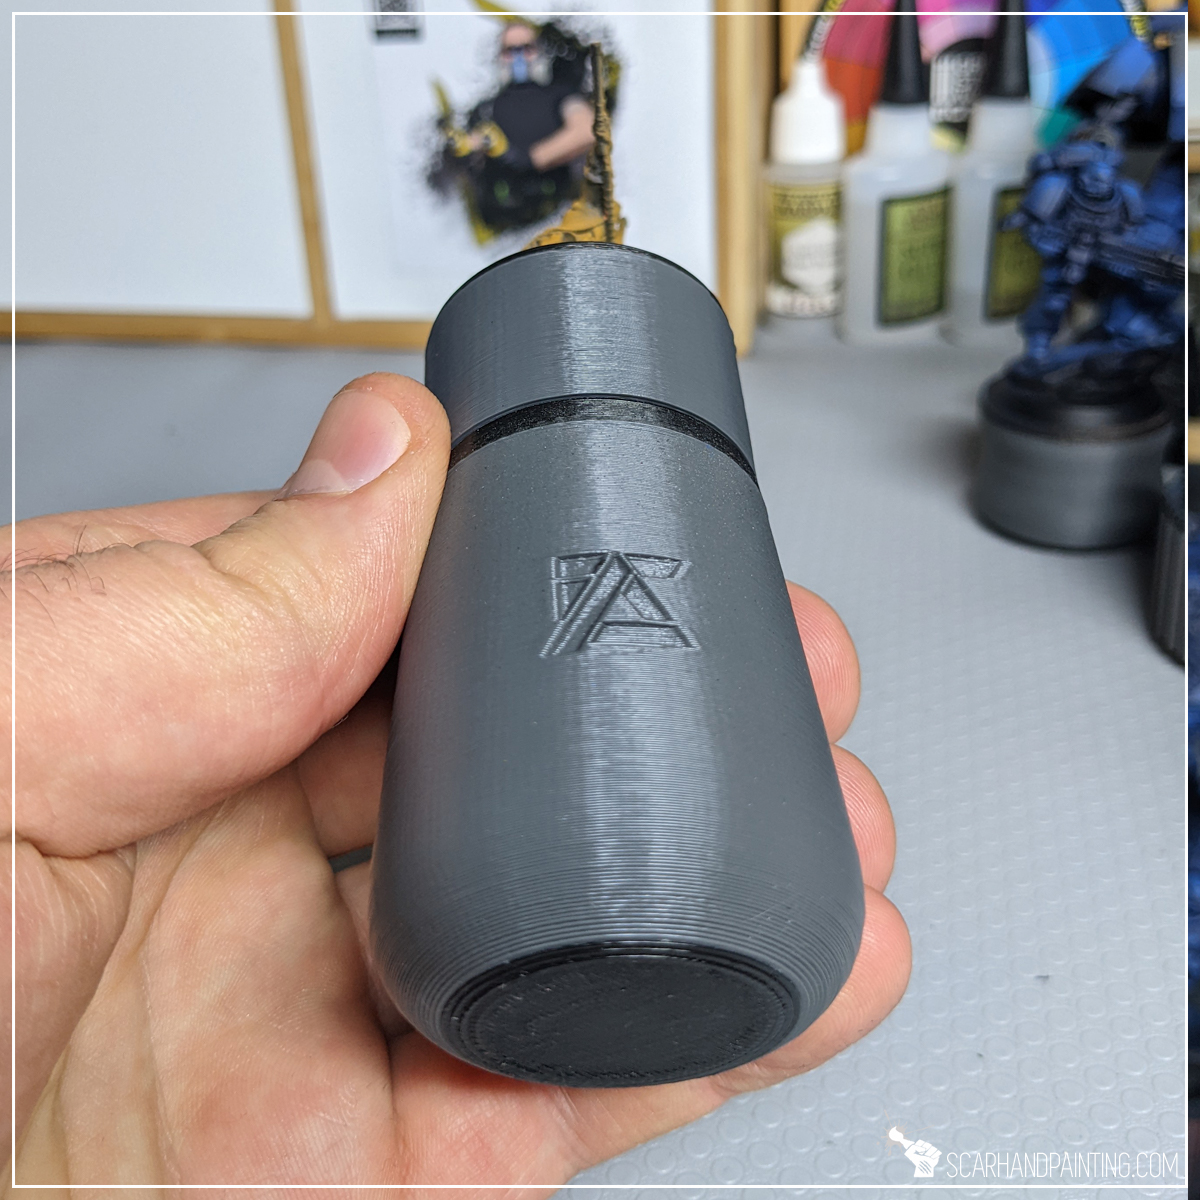
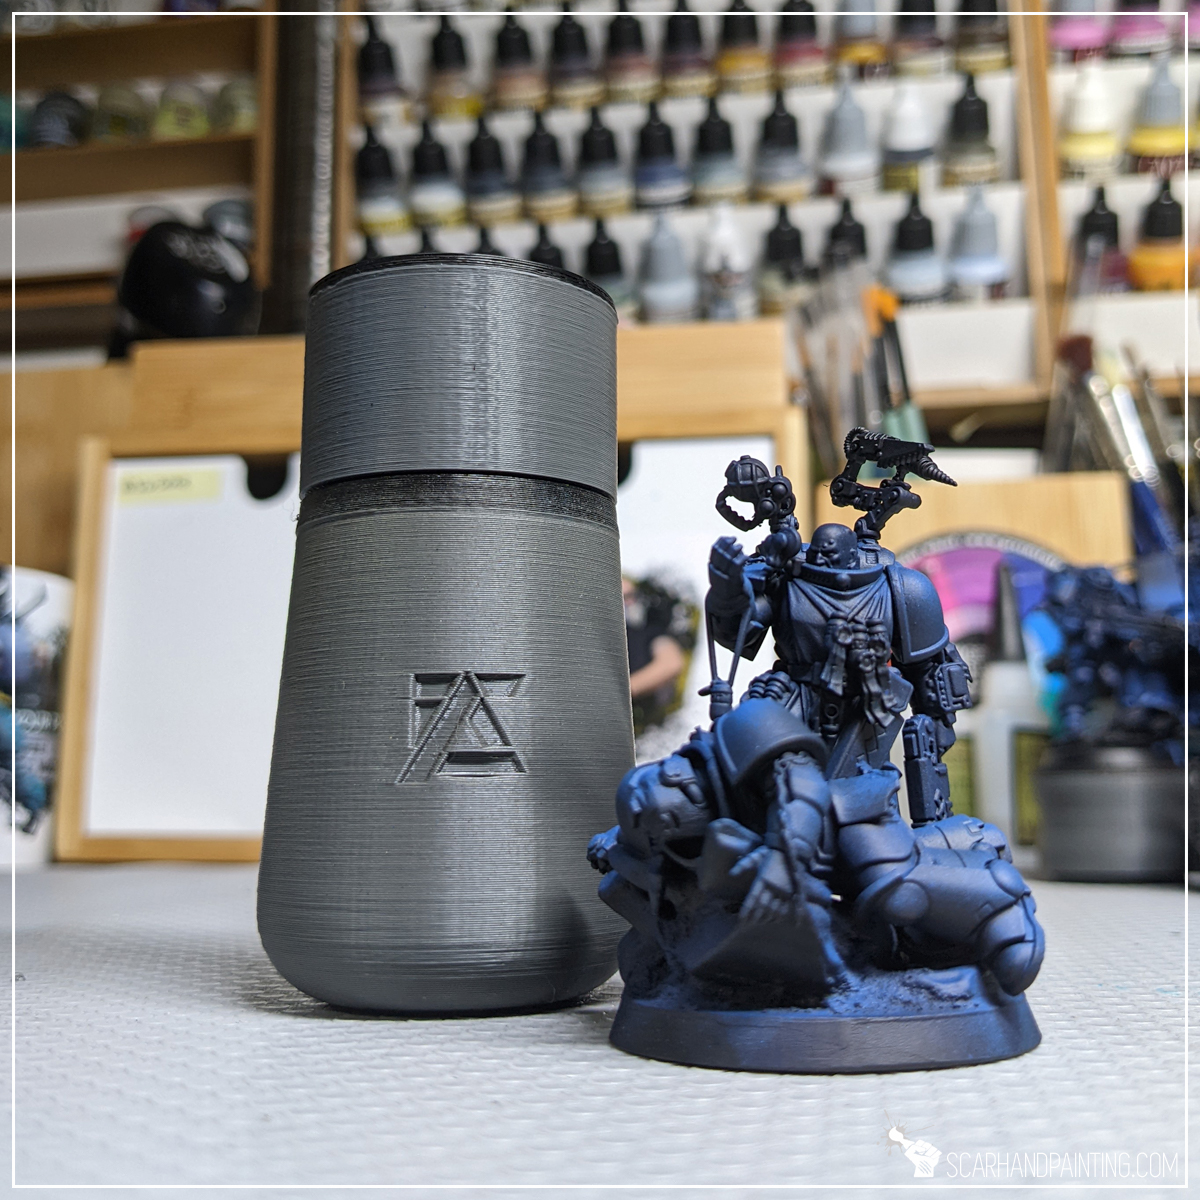
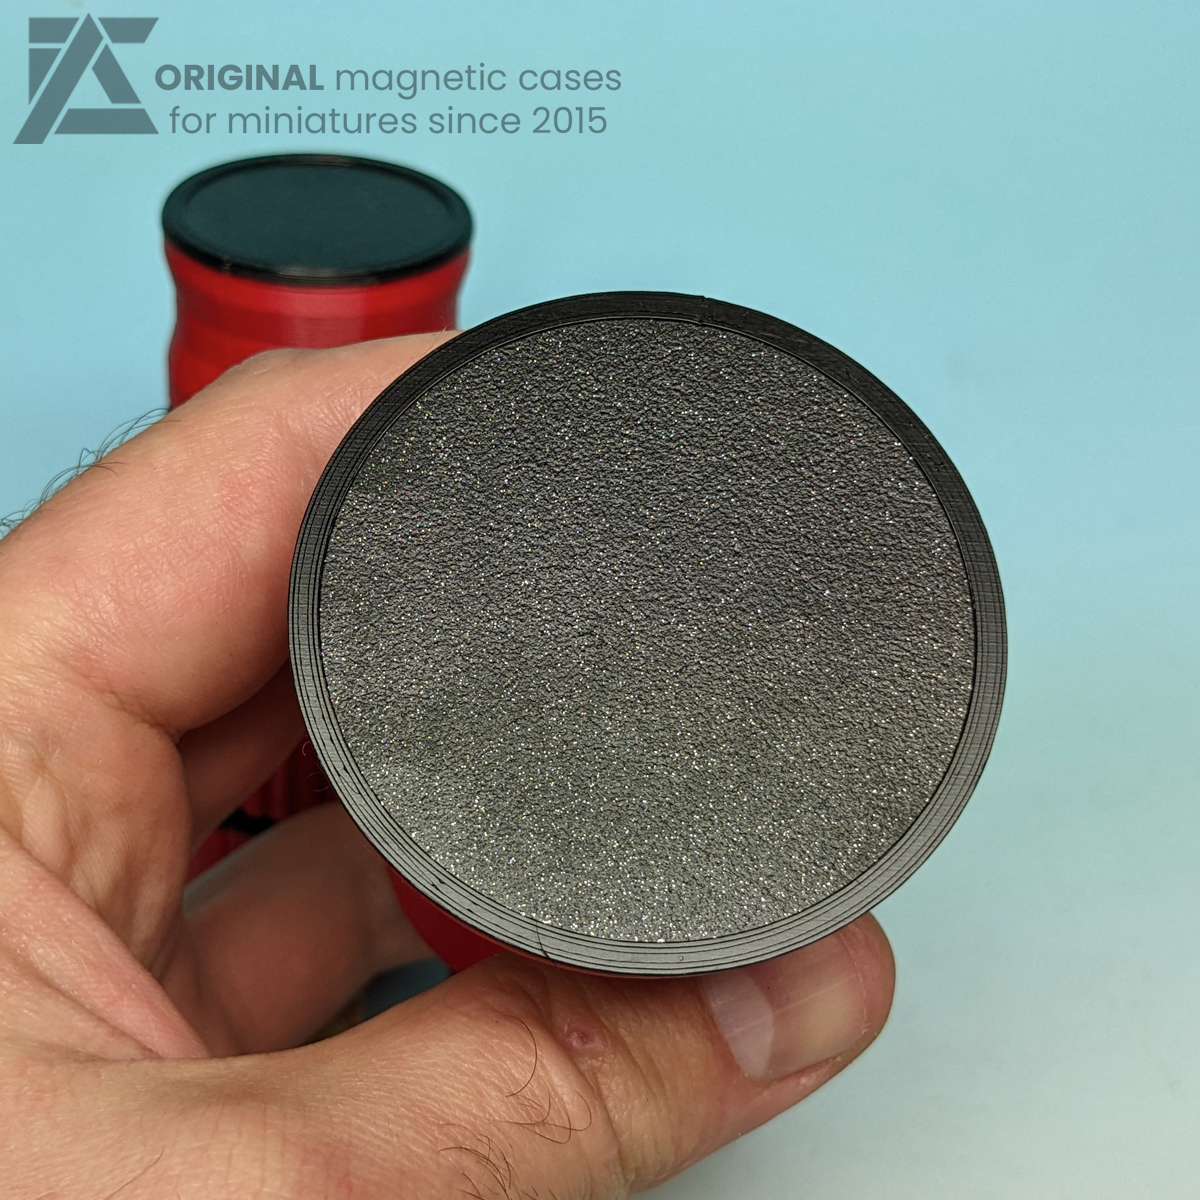
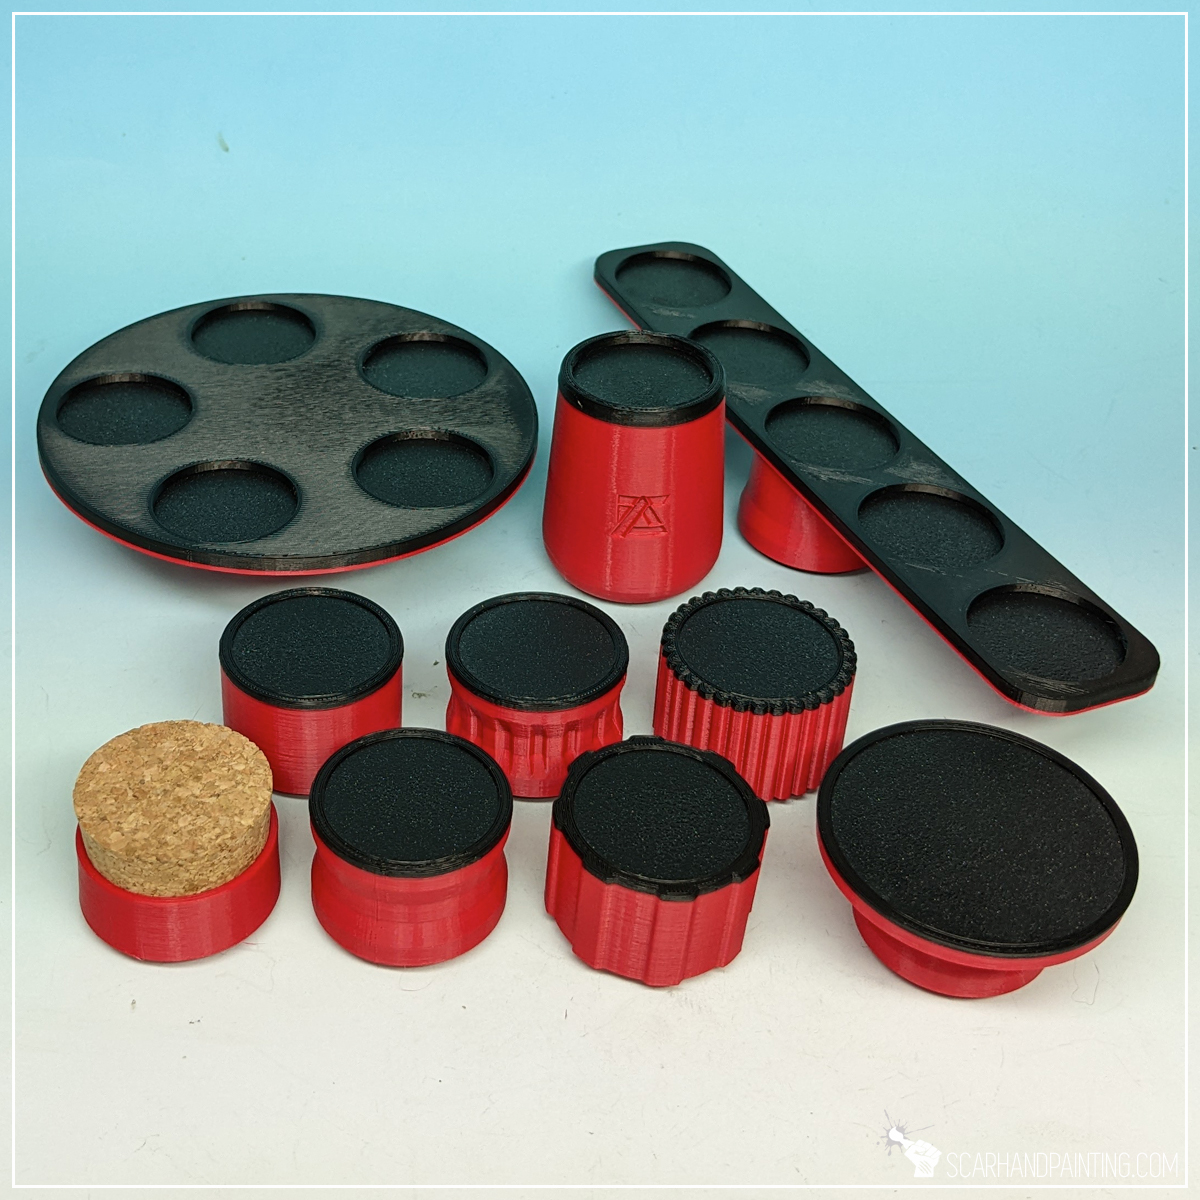
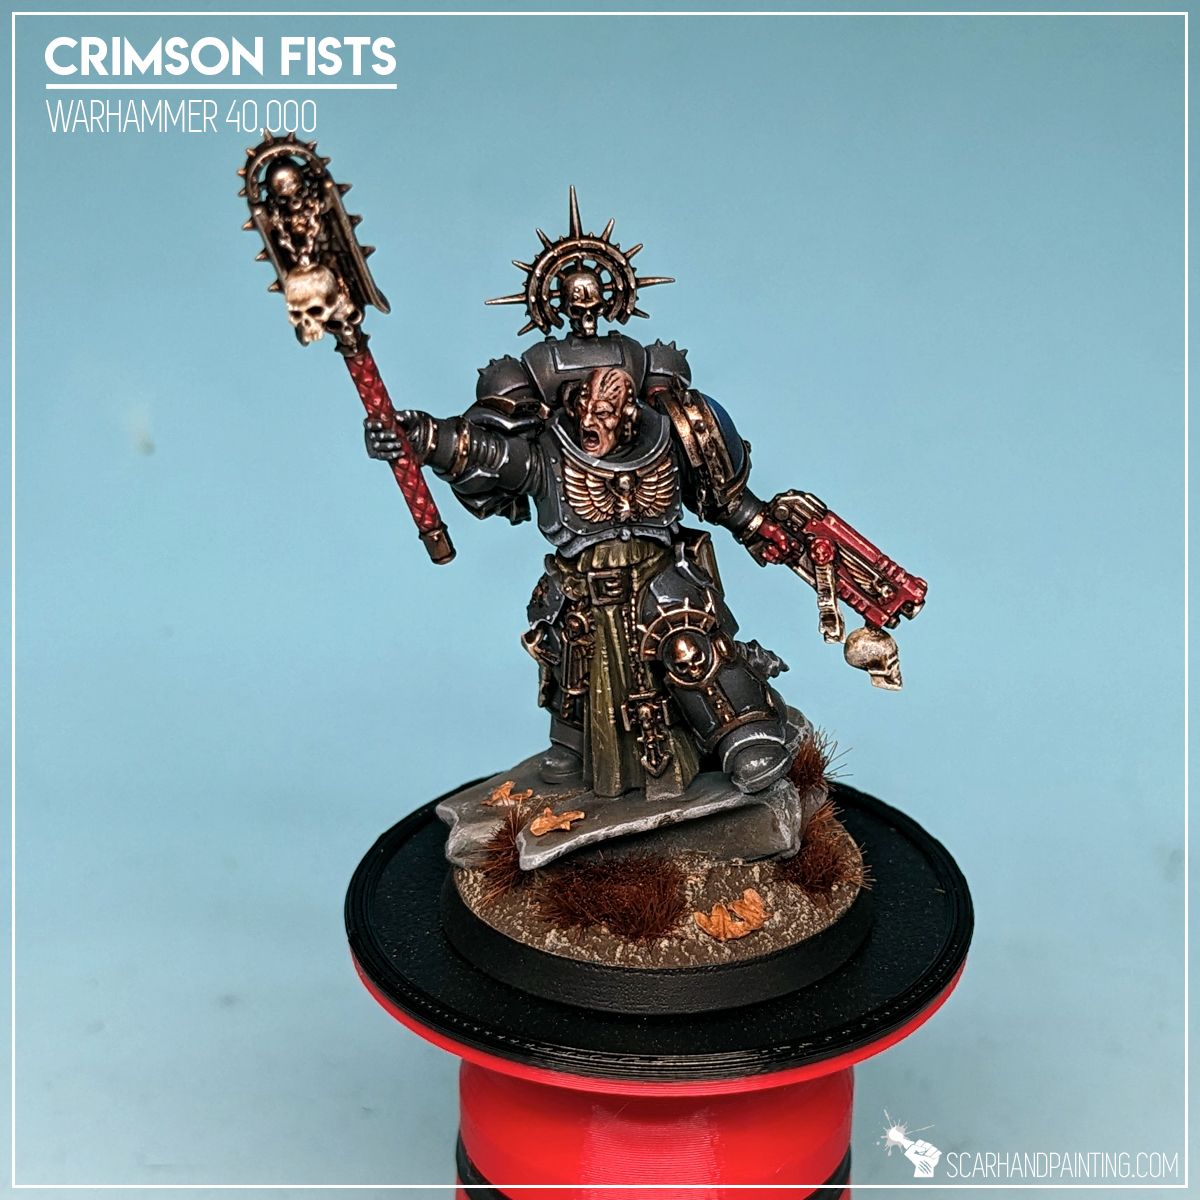
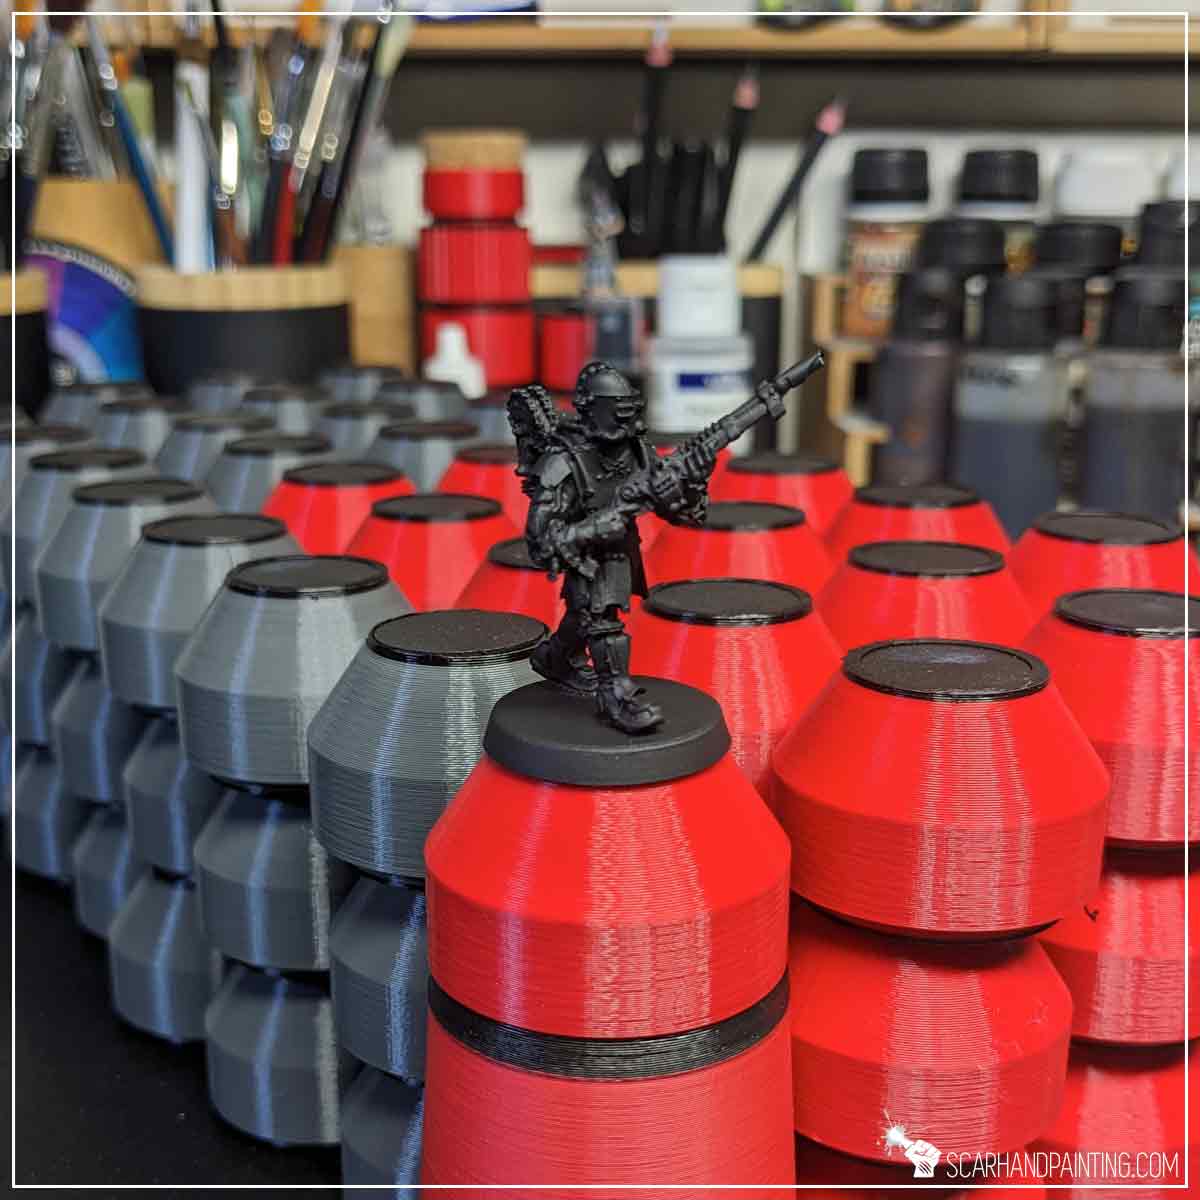
At first glance A-Case Magnetic Painting Grip (MPG) might put you off. A mix of stylish design with a rather unorthodox production method result in a feel far from popular Chinese plastic we all are used to. A huge advantage of 3d printing is being able to fully integrate magnets and metal plates within the body, leading to increased durability and comfort of work. Apart from visuals, which are highly impacted by bare metal plates* (see update below), the MPG feels great and I had no quality issues amongst multiple Grips and about a hundred exchangeable heads I currently possess.
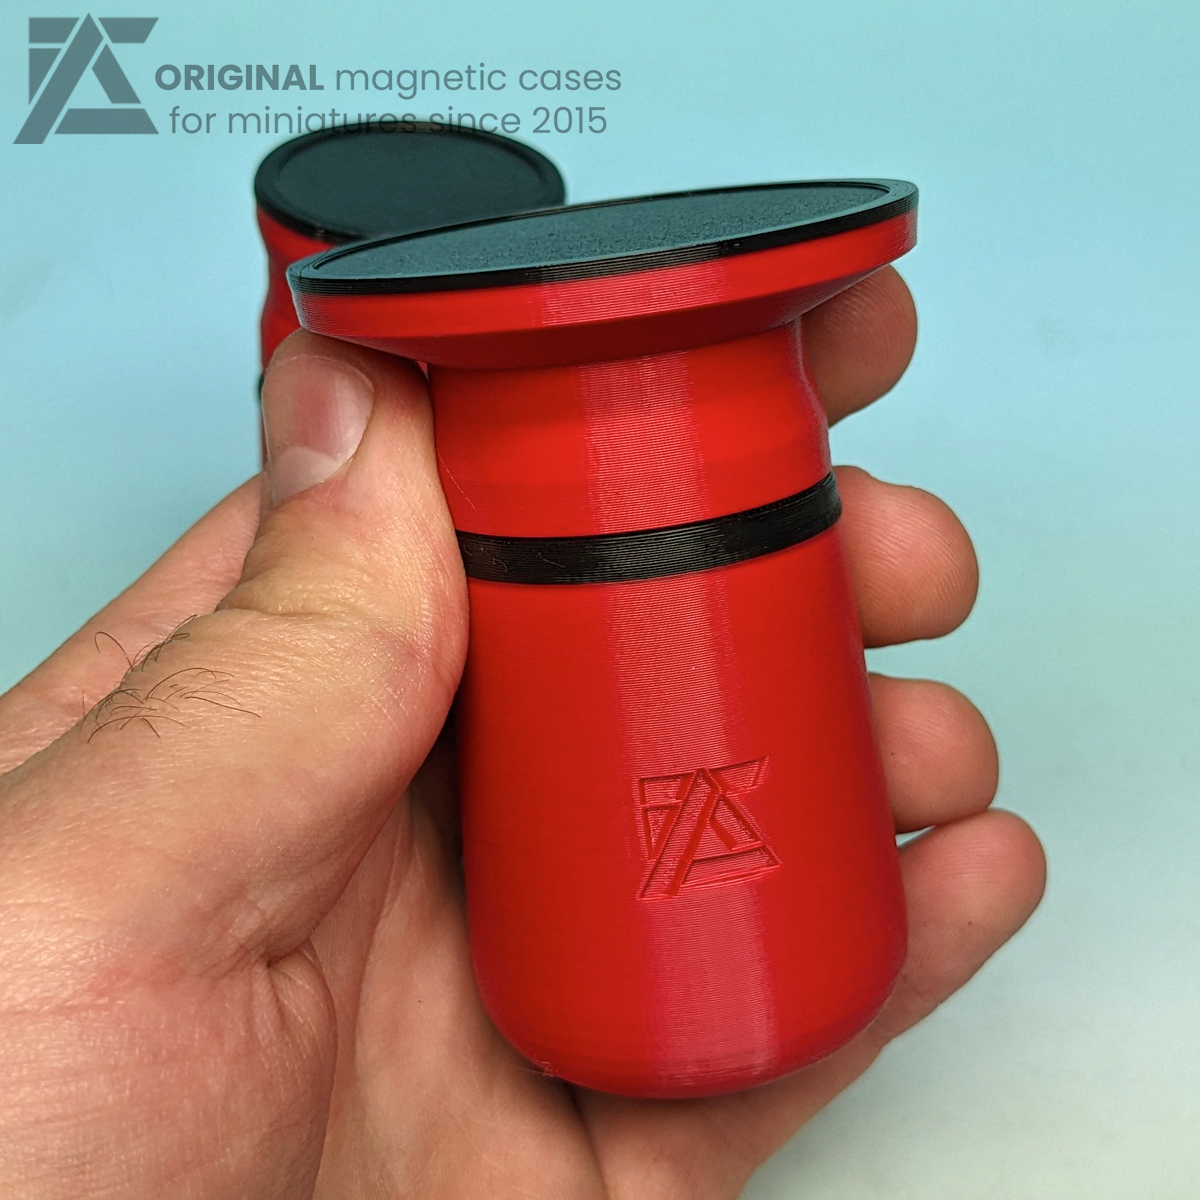
I really dig the shape and visual aspect of the MPG. The mix of colors and texture, specific to 3d print, makes it look sturdy and fit hobbyist’s workspace nicely. My only beef is with bare metal plates* (see update below), which look out of place. Still, these are almost always hidden beneath a miniature so it’s not a big aesthetics issue. All the while bare metal means better magnet compatibility.
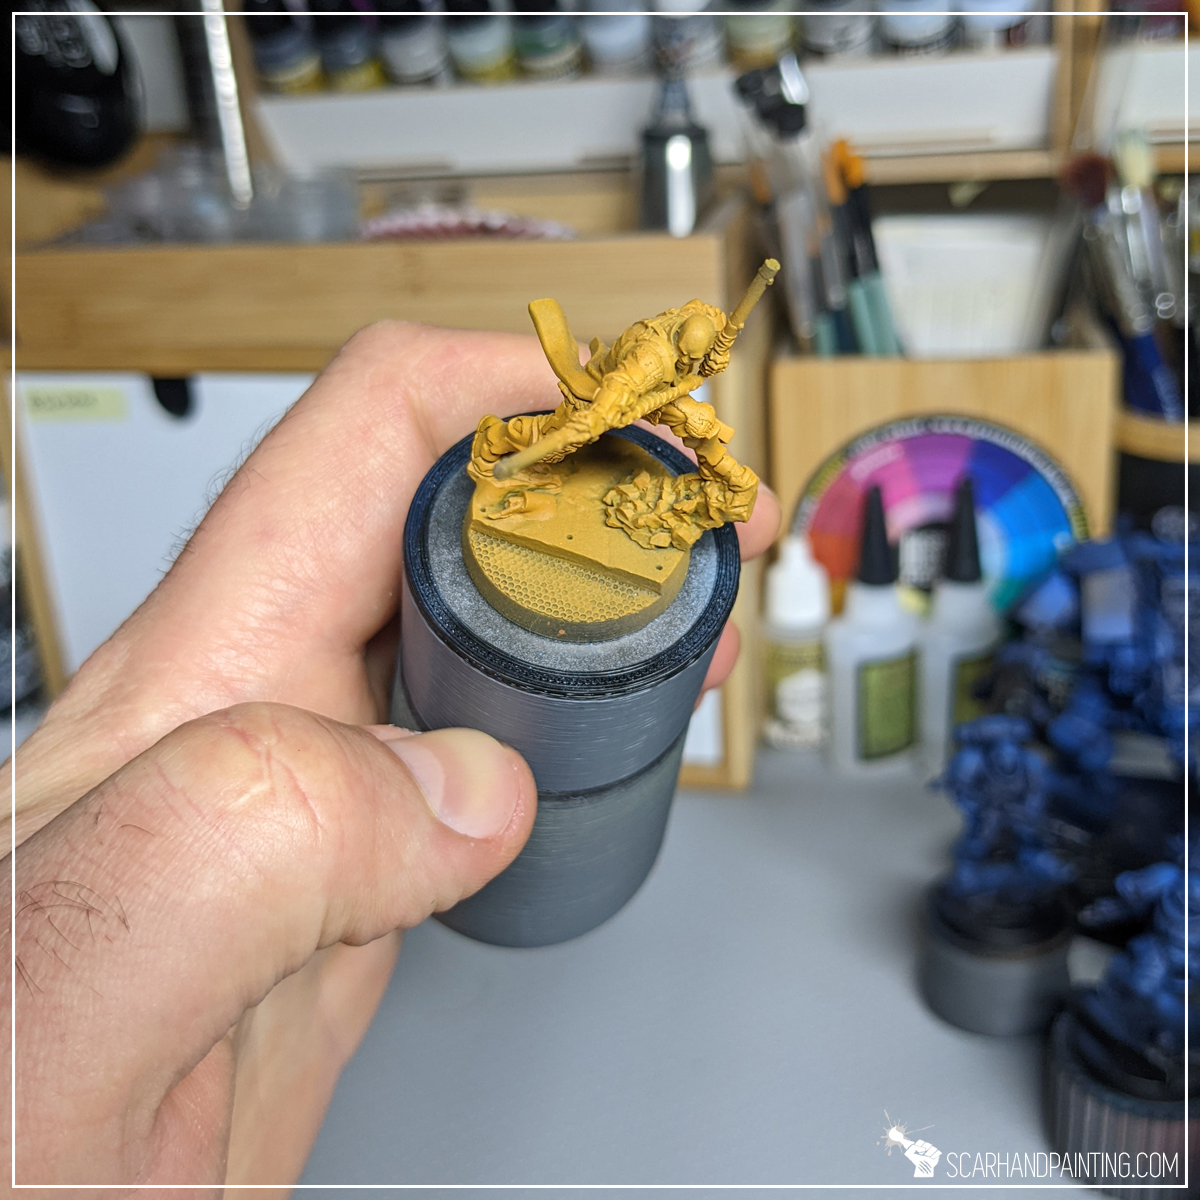

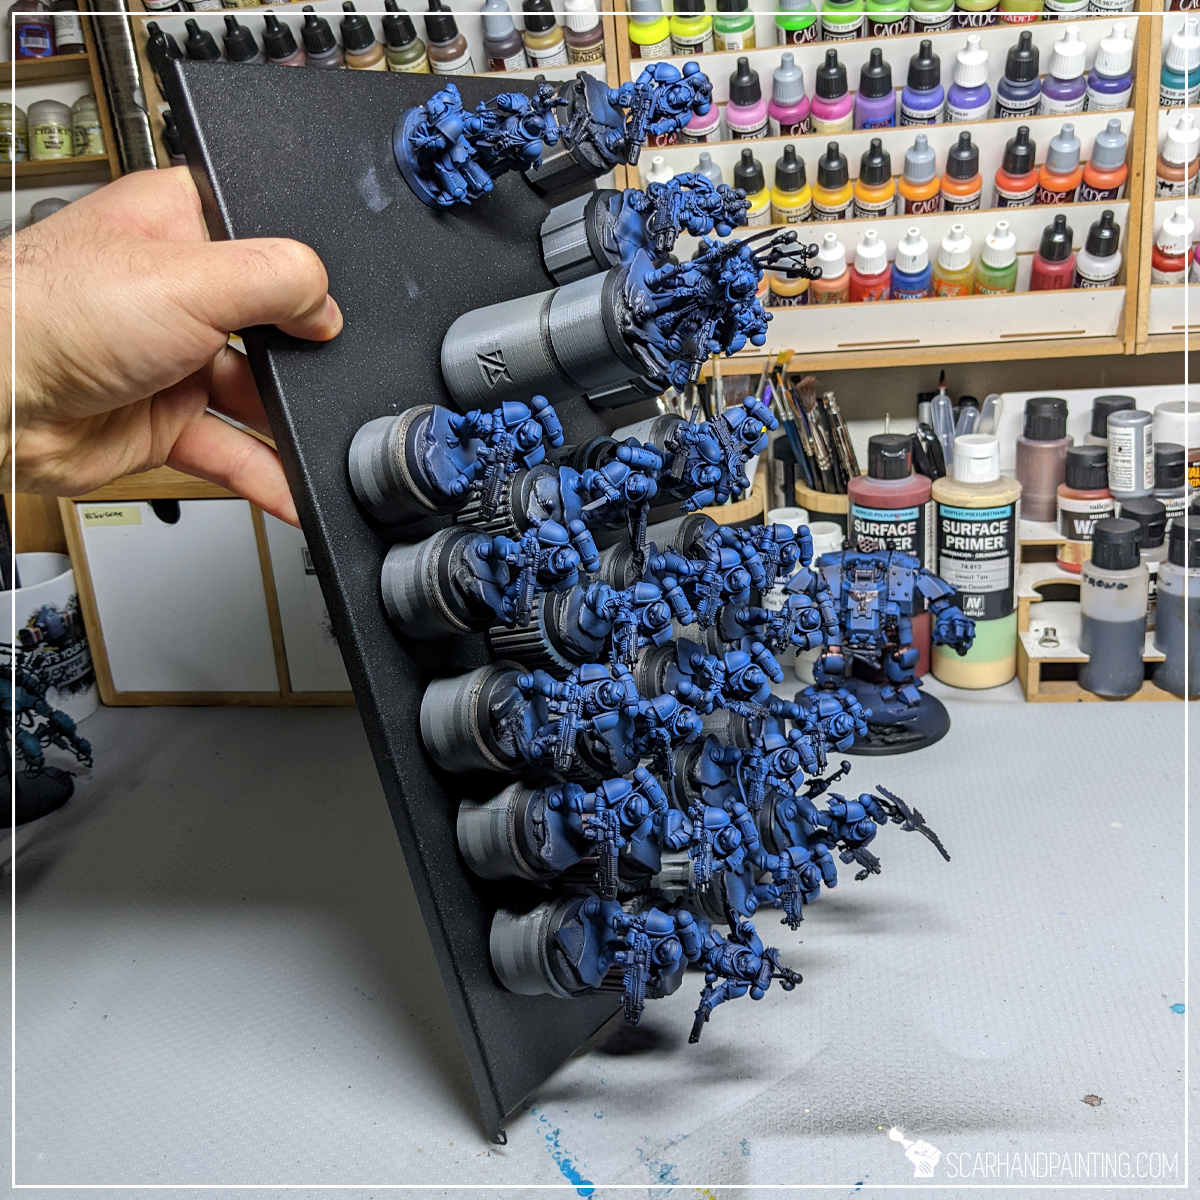
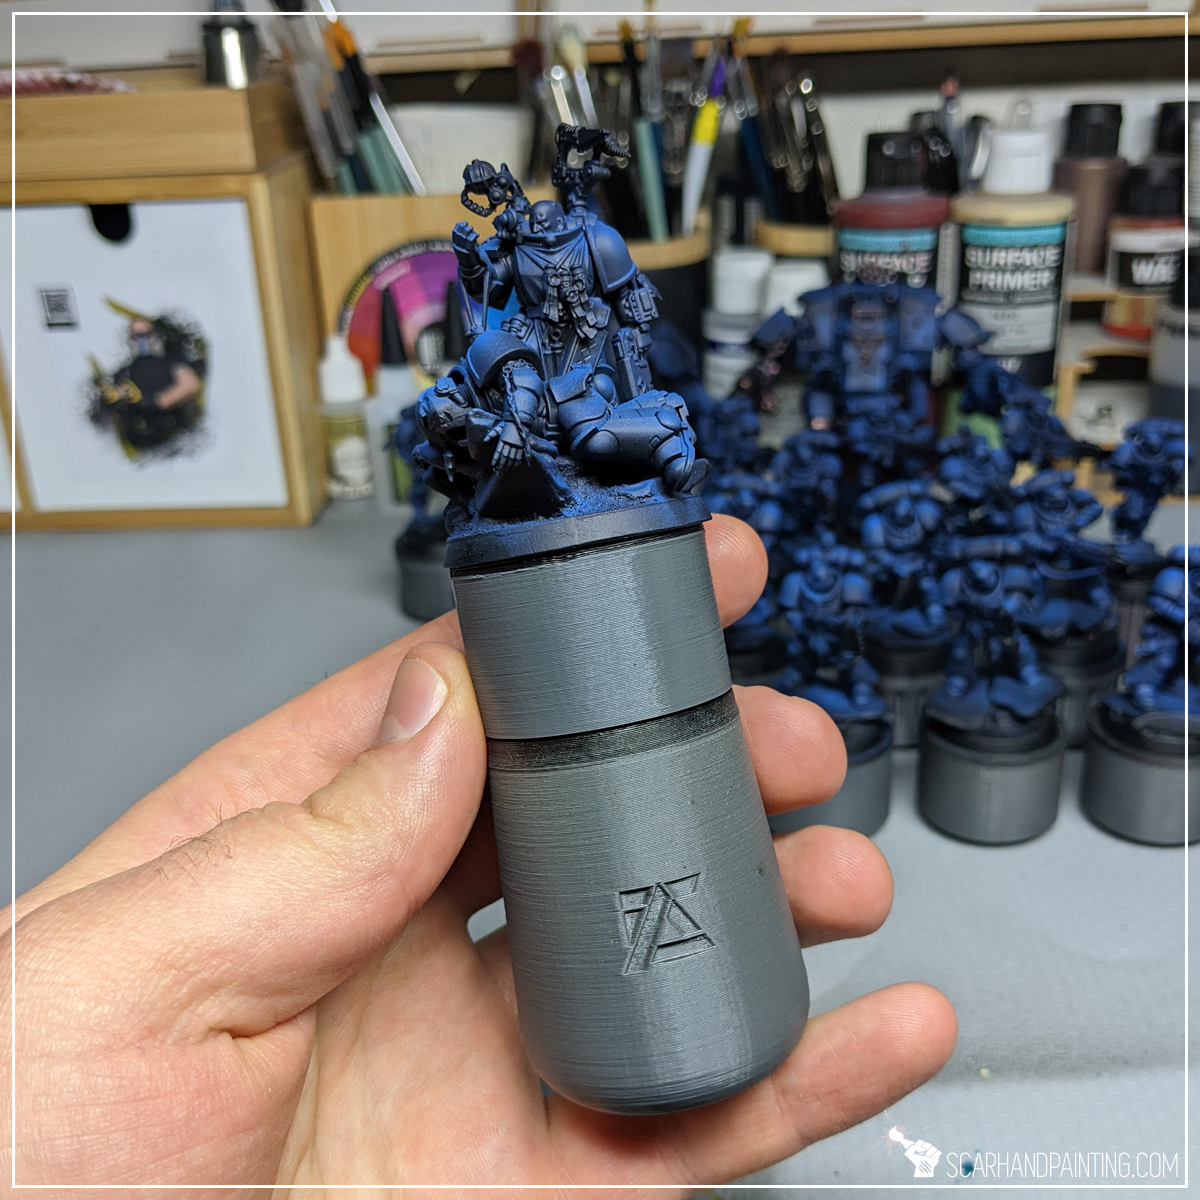
Here’s where MPG shines. Large integrated magnets combined with a variety of exchangeable heads makes it, in my opinion, the most interesting painting grip in the market. Different head shapes can be used to distinguish different painting levels, or mark units, which is paramount in bulk painting. Switching miniatures is fast and comfortable. Weight is balanced between light and solid further increasing the comfort of work. On the downside the MPG might be difficult to keep clean, but the same is true for all painting grips, regardless of material.
Additionally:
After spending couple hundred hours painting Warhammer 40,000 miniatures with this thing in hand I can say it feels like made just for me. Goodbye shot glasses, as from now on the MPG is my go to tool.


Price wise the A-Case Magnetic Painting Holder comes close to competition, depending on how you look at things. With a set of five caps it definitely wins over multiples of other handles, but is less more expensive than its immediate competition of Redgrass Games:

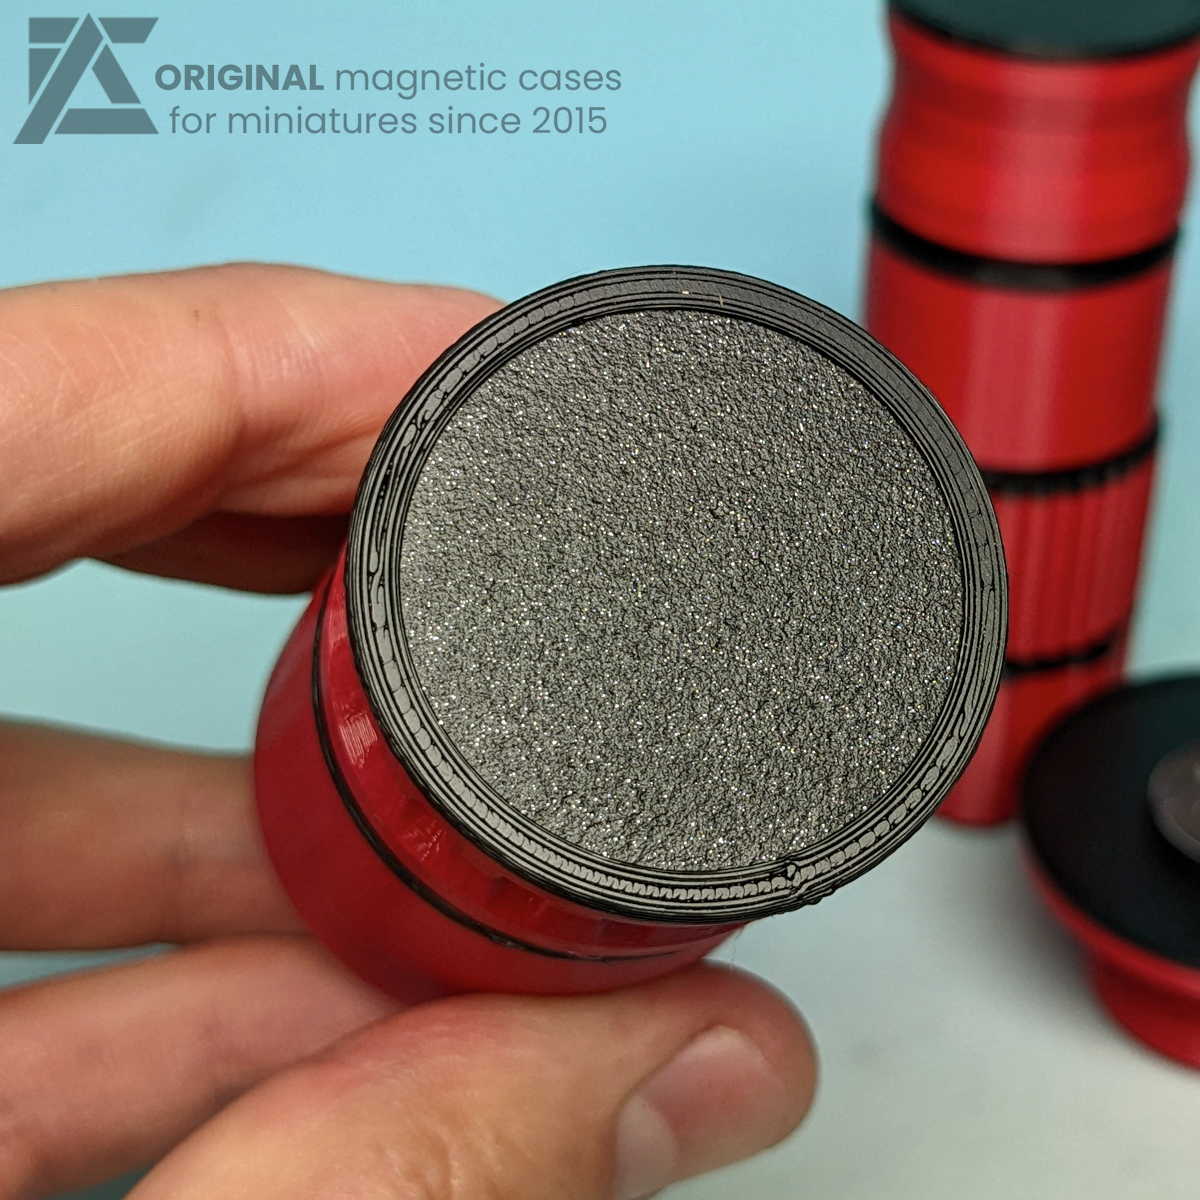
As of November 2023 the item has seen some improvements. In response to users feedback the bare metal plates got exchanged for black powder coated beauties and new types of caps/heads got introduced as well.

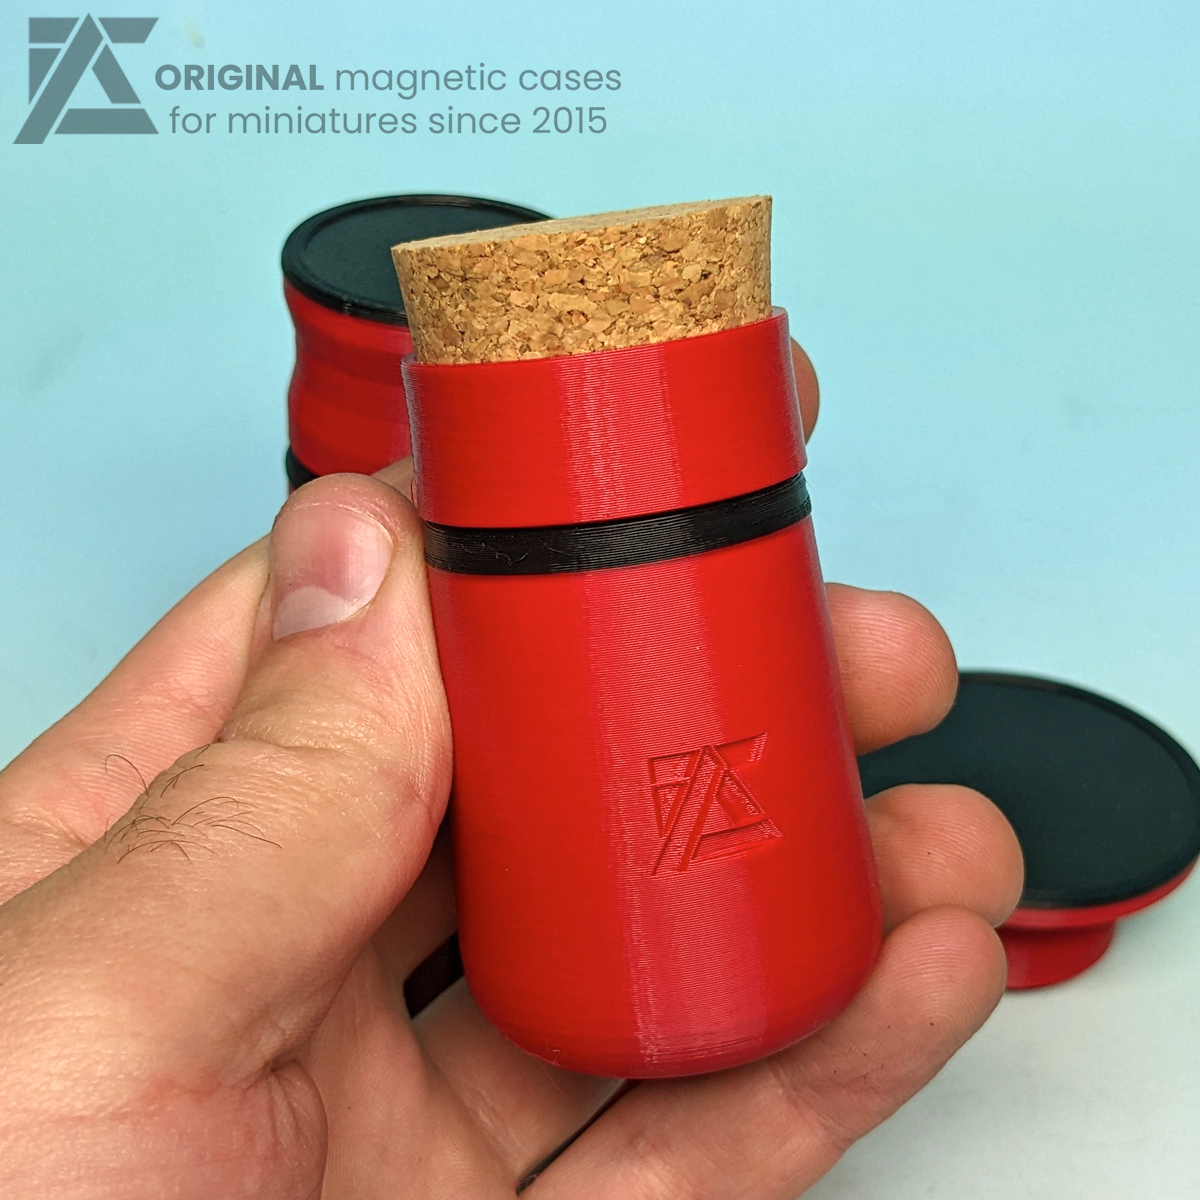
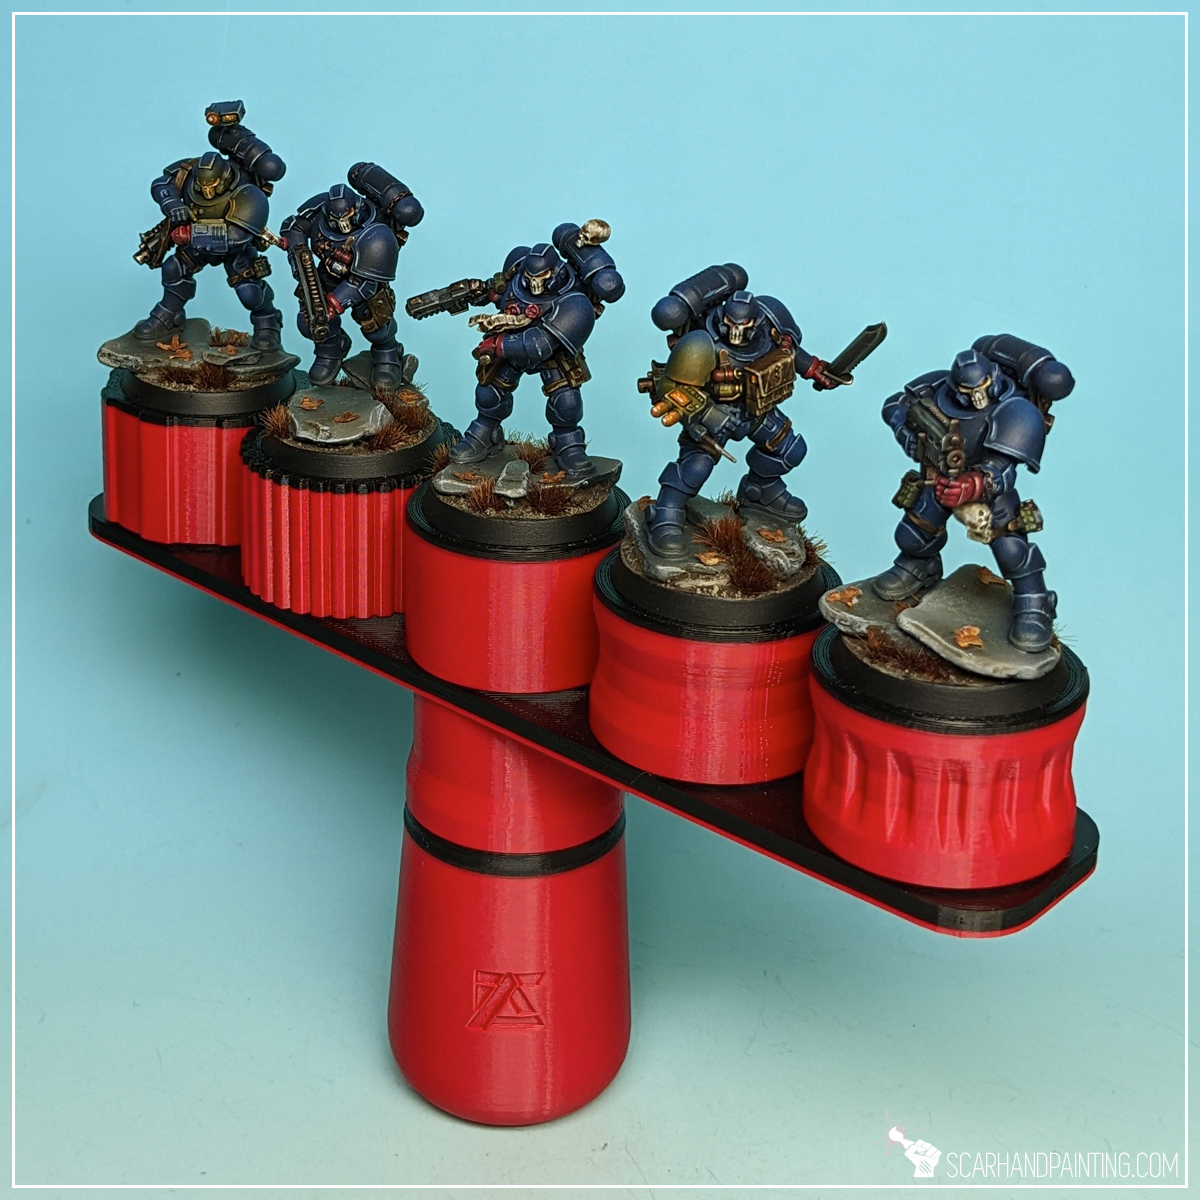
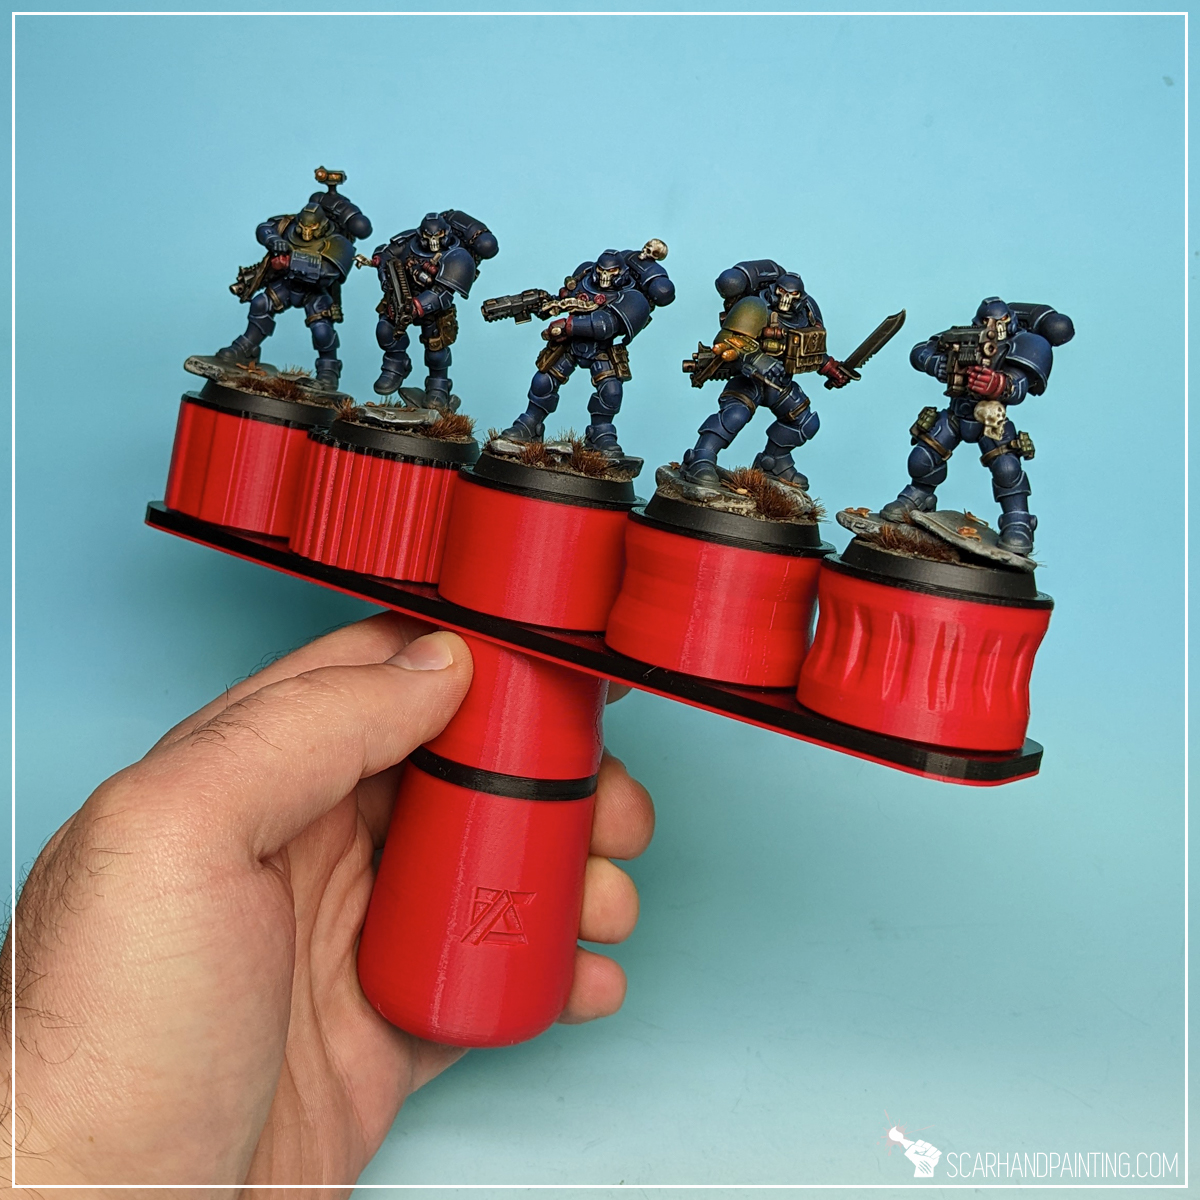
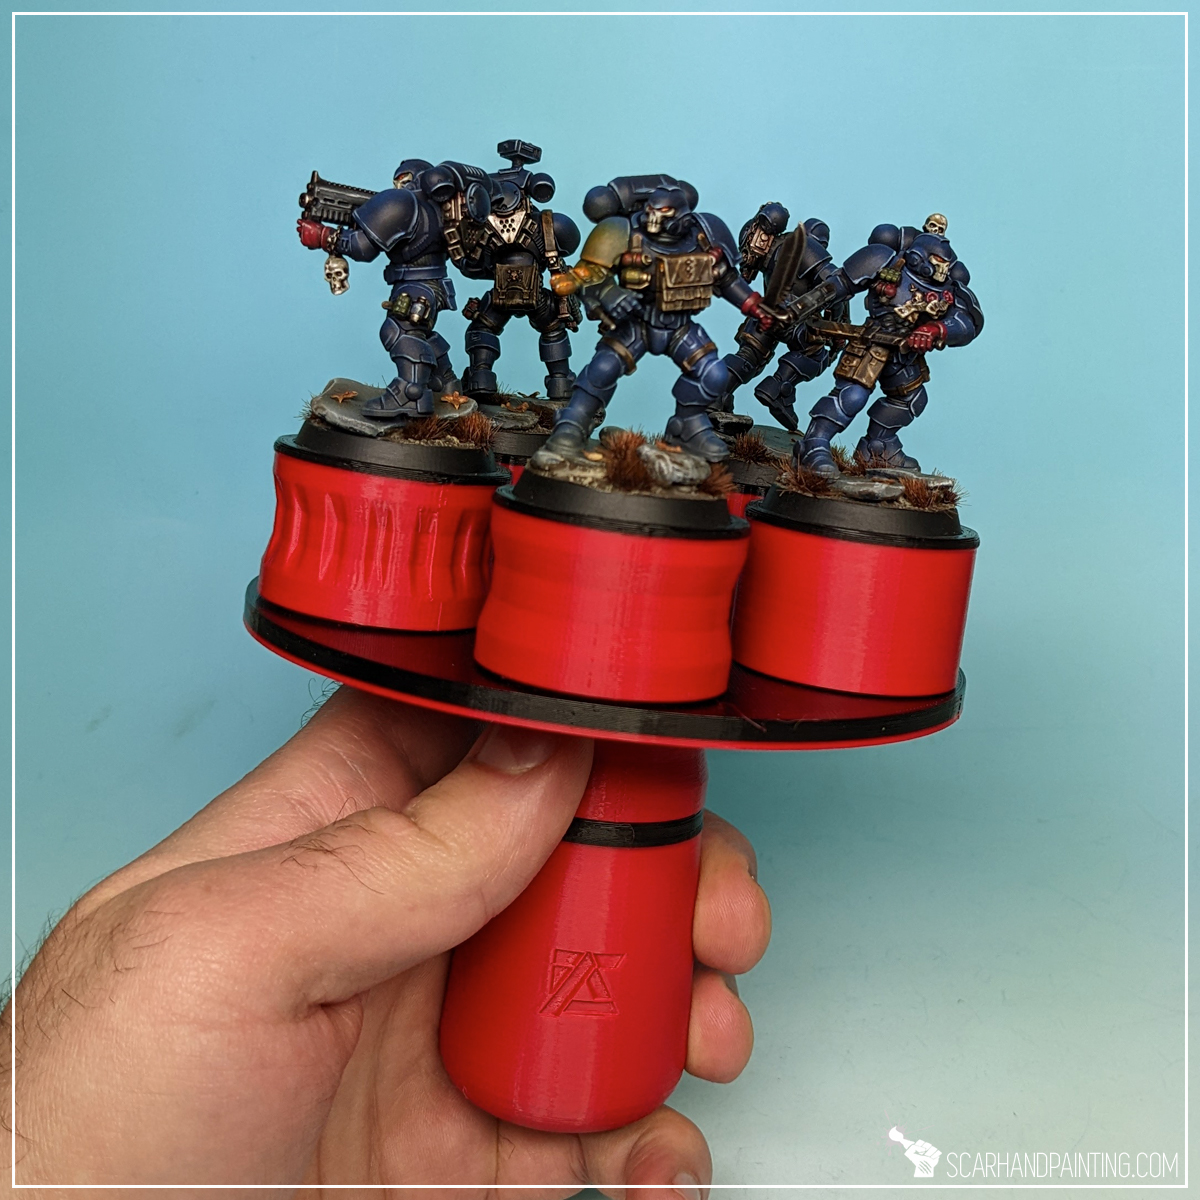
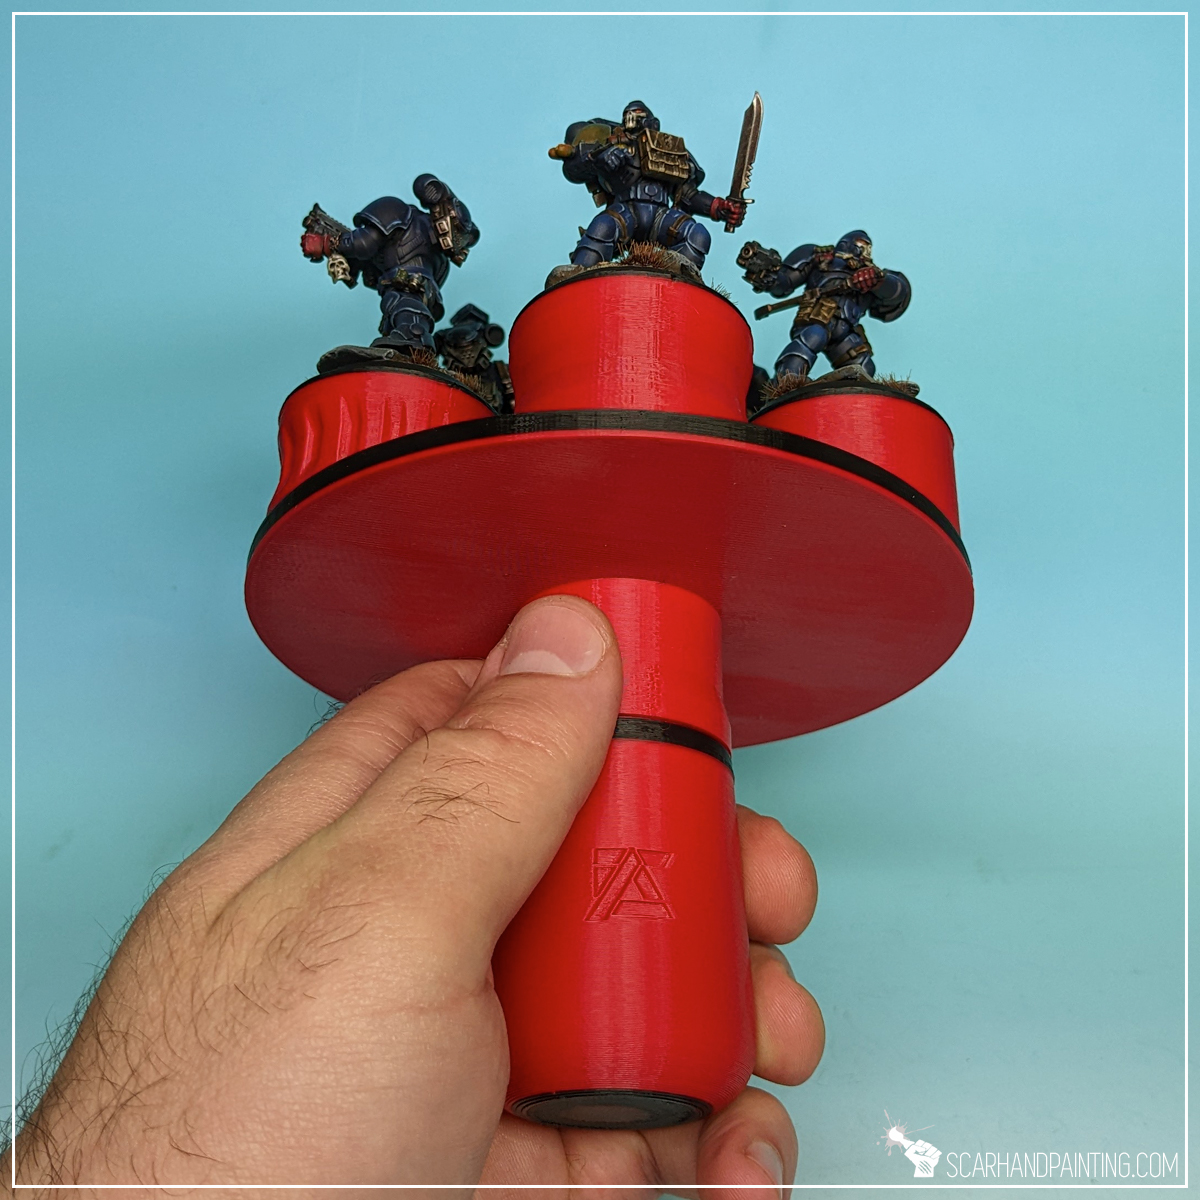
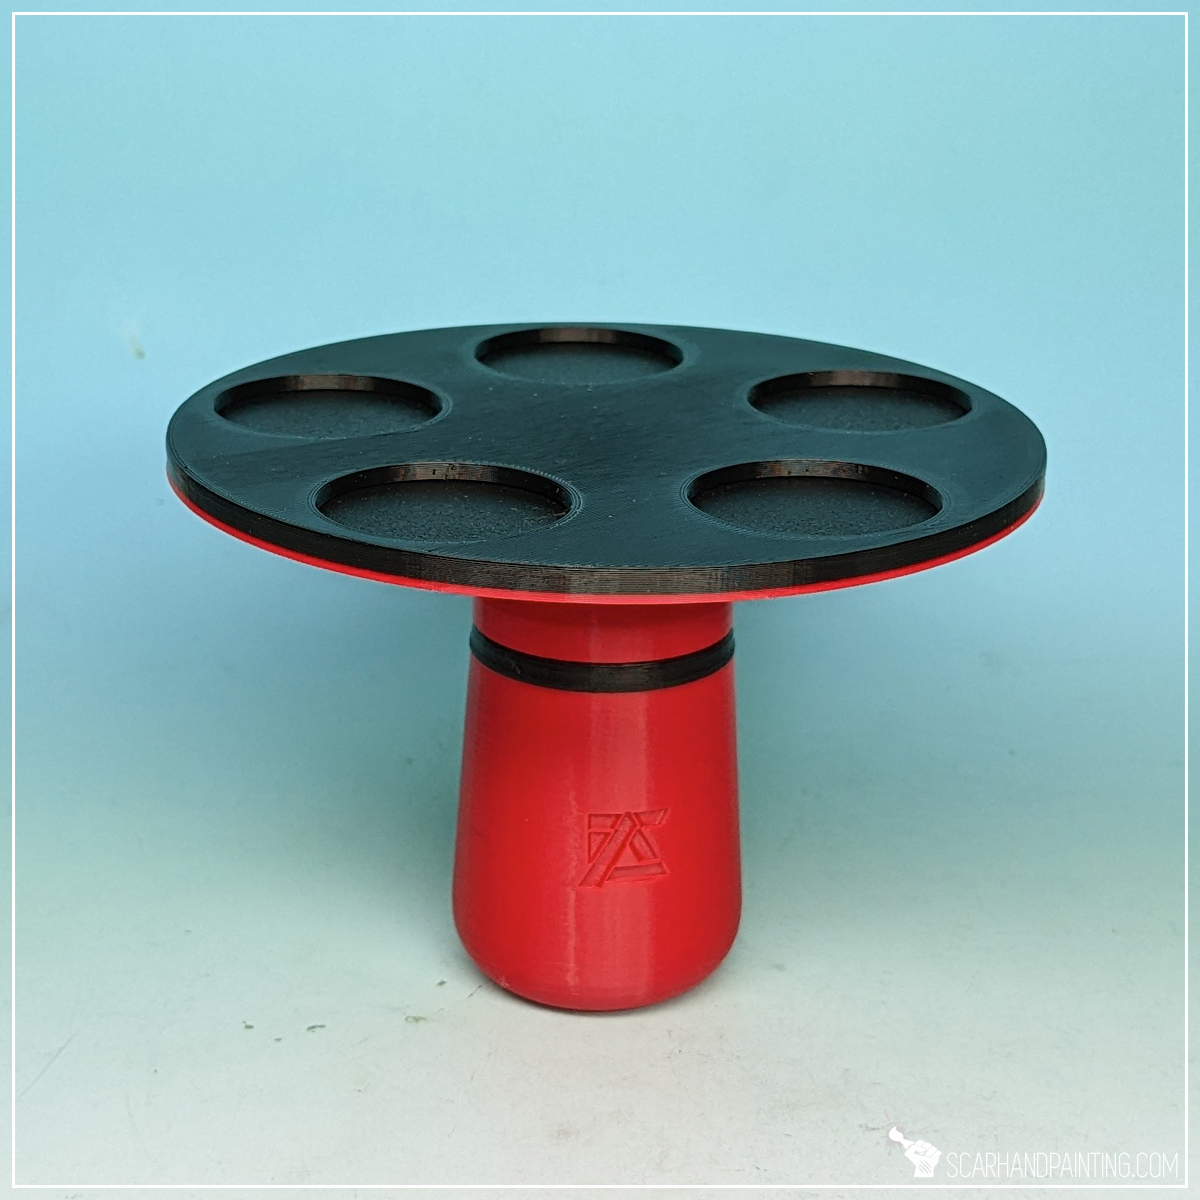
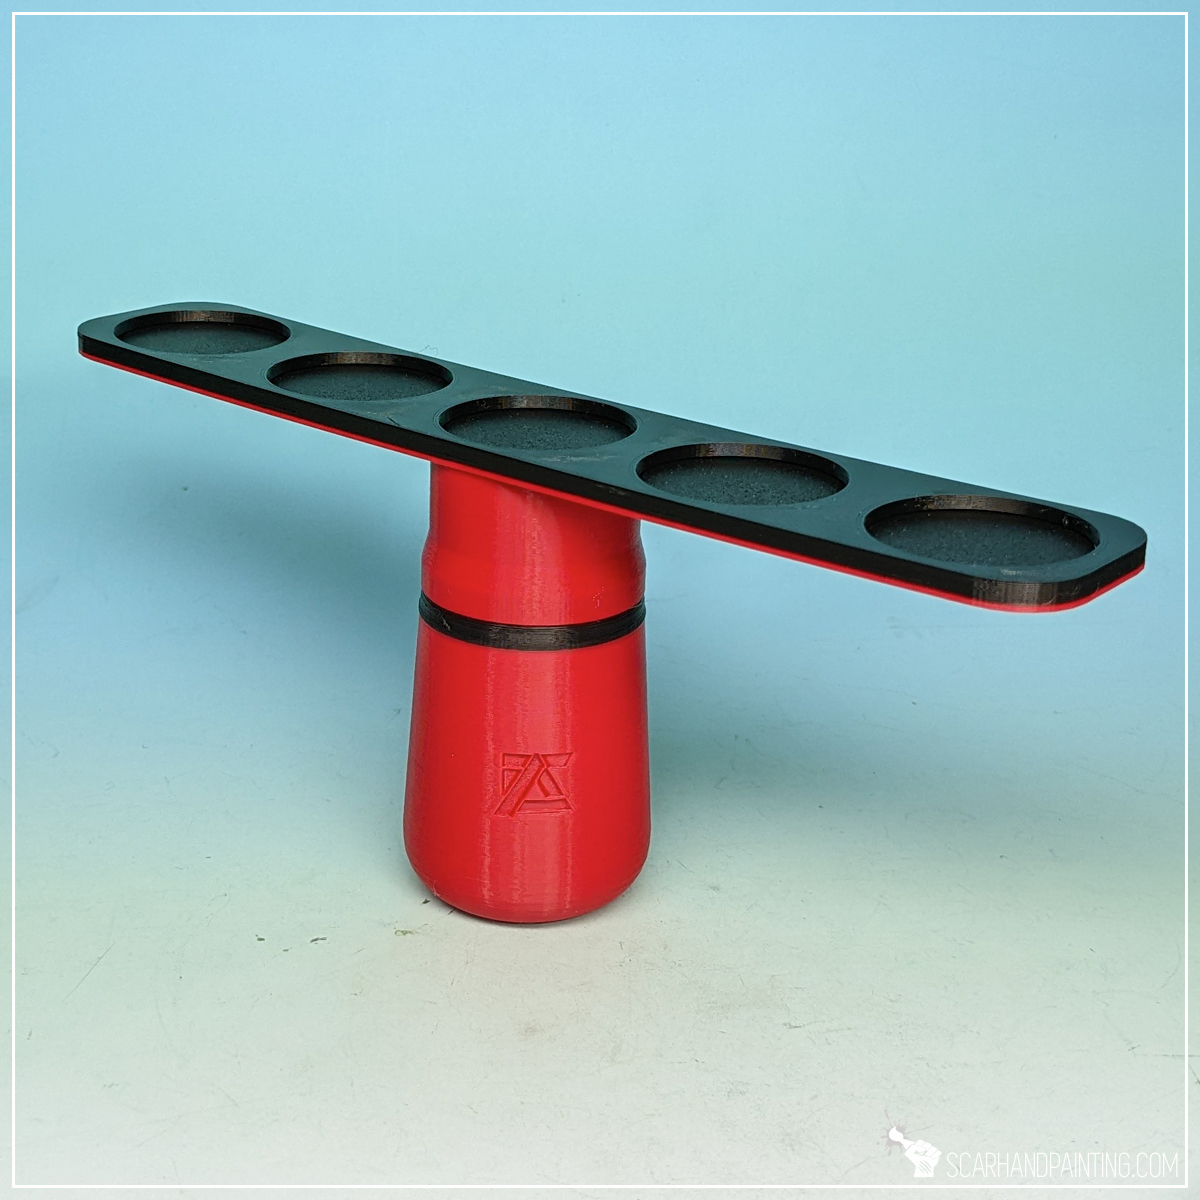
As of January 2024 the extension range grew exponentially. Additional items include 25mm top, Oval Shaped top, Batch Painting top and Priming Top. I have tested all of them personally and can vouch for each and every one.
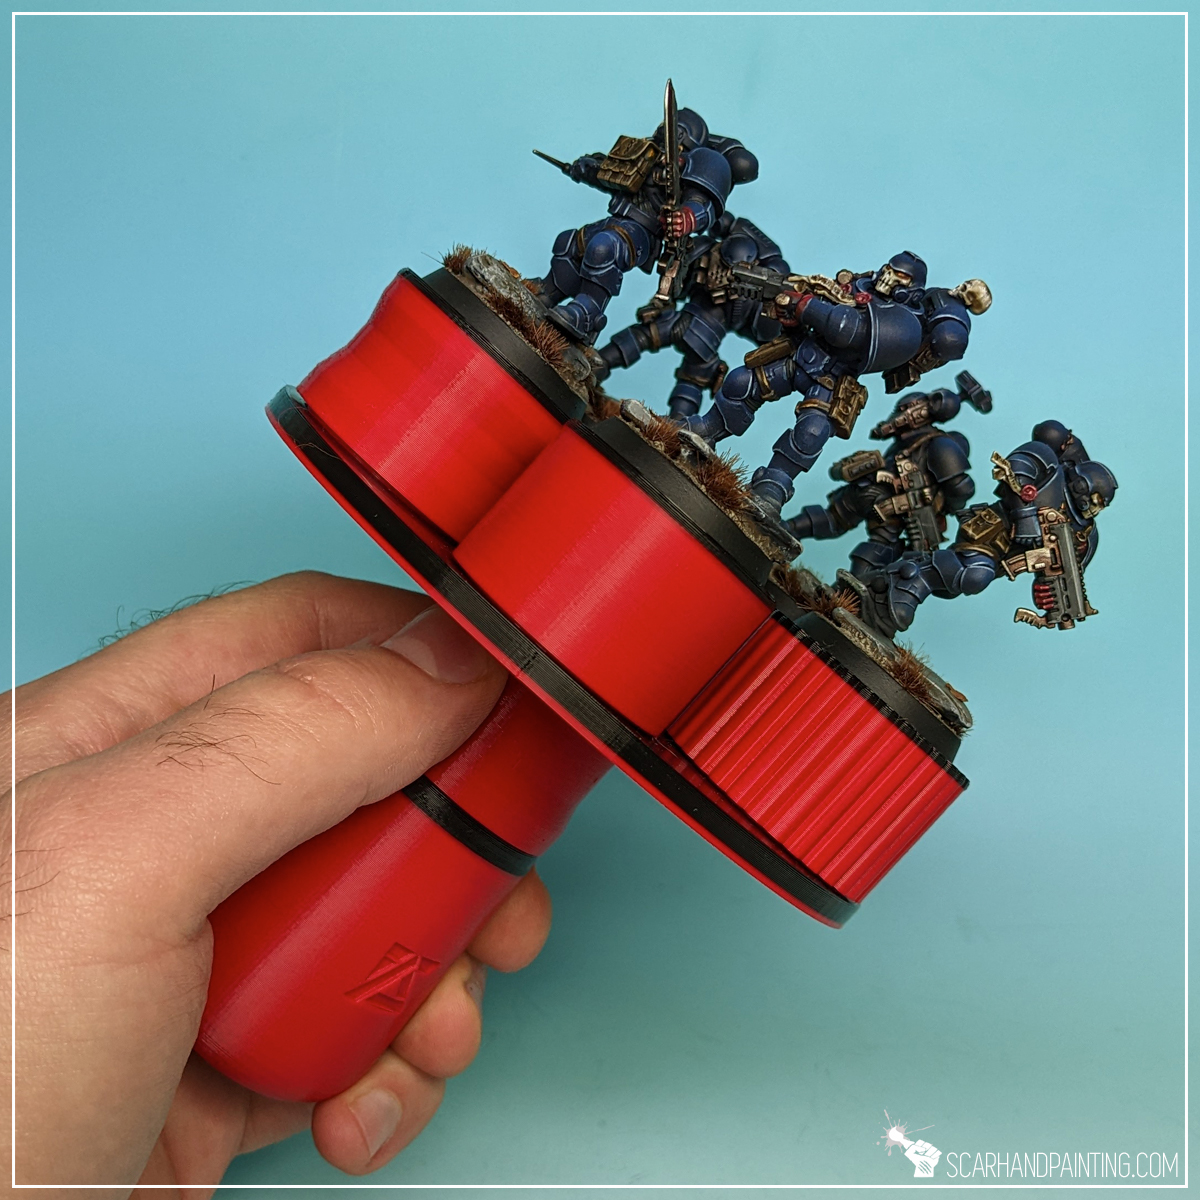
Whereas the 25mm and Oval is rather self explanatory, the large extensions are a bit more advanced. They work great both individually and alongside regular toppers, depending on the size of the miniatures bases mounted on top. Worth noting is the weight of mounted items – too much and there will be need to hold the base of the extension while operating as not to let the weight take the entire thing off of the handle. That being said – I have not encountered any issues when working on my own miniatures.


To sum things up: Magnetic Painting Grip is a brilliant design that fits, but is also not dependent on the “magnetic” theme of entire A-Case brand. MPG is comfortable and user friendly. It also is fully compatible with A-Case transportation cases which adds additional value. Based on feedback the item seen improvement and is currently my very favorite painting holder of all time. And I’m talking purchasing multiple, multiple copies level of favorite. I sincerely couldn’t recommend it enough.
What’s your opinion? Have you used one? Let me know in the comments.
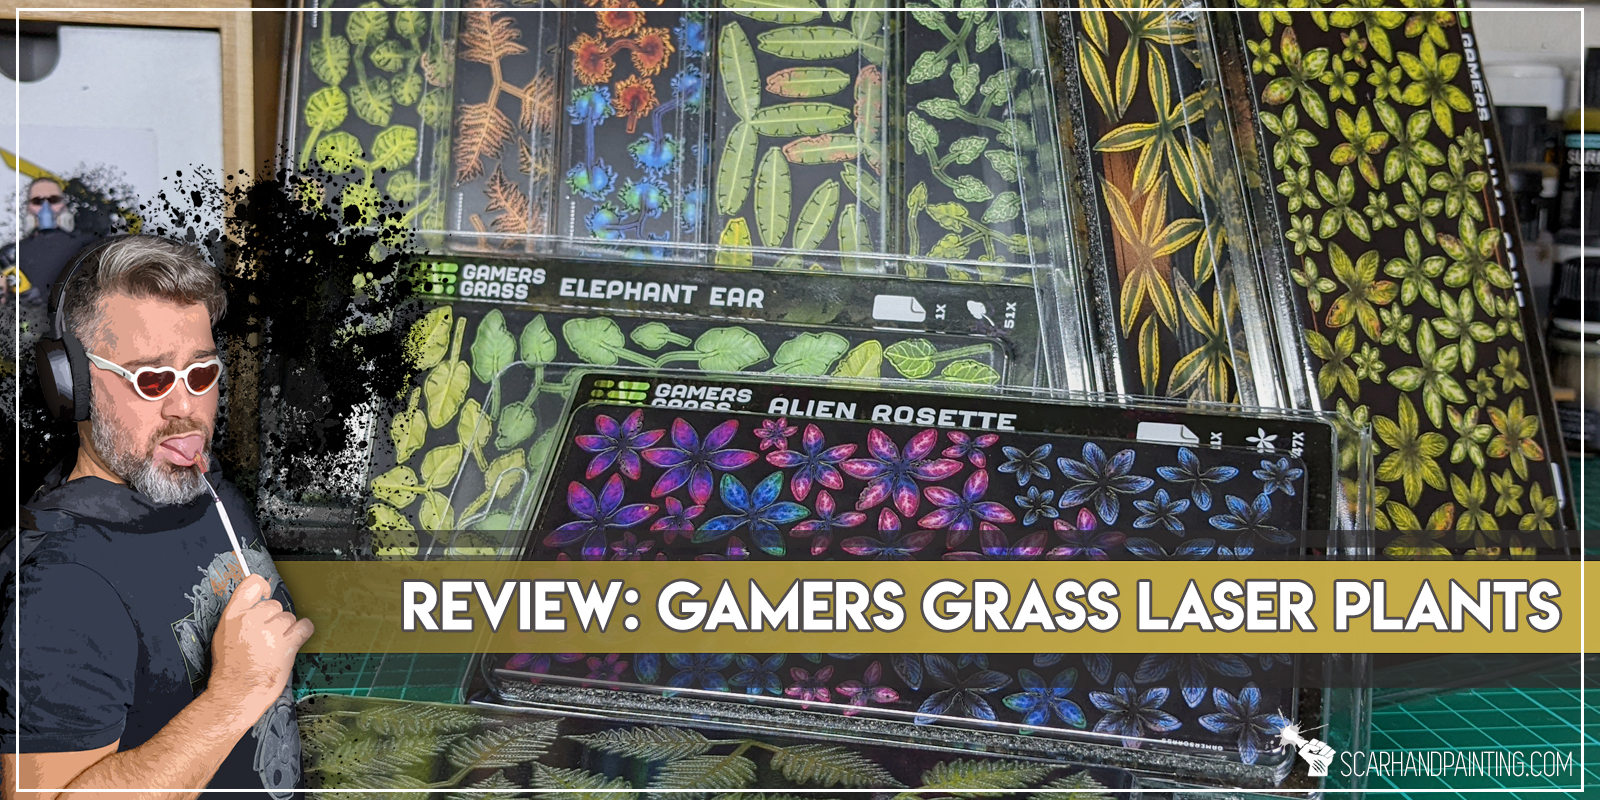
Gamers Grass – is a Portuguese company producing a wide range of high quality basing accessories. For me Gamers Grass is a trustworthy, go to supplier of everything basing related. If you hadn’t had an opportunity to get to know their range, I recommend previous articles: Review: Gamers Grass Tufts, Review: Gamers Grass Flowers. Third time’s a charm and today I will go through GG’s innovative line of products: Laser Plants.
For those of you who follow my articles it is a well known fact that I am a quality freak. When I choose tools and material to work with I always prioritize the very top of the line. At this point with dozens upon dozens of Gamers Grass products testes – I’m just positively biased towards their releases. Easy to say GG done it once again, introducing a high quality line of products that make me feel like a little kid coming to a hobby store for the first time. Everything looks breathtaking!

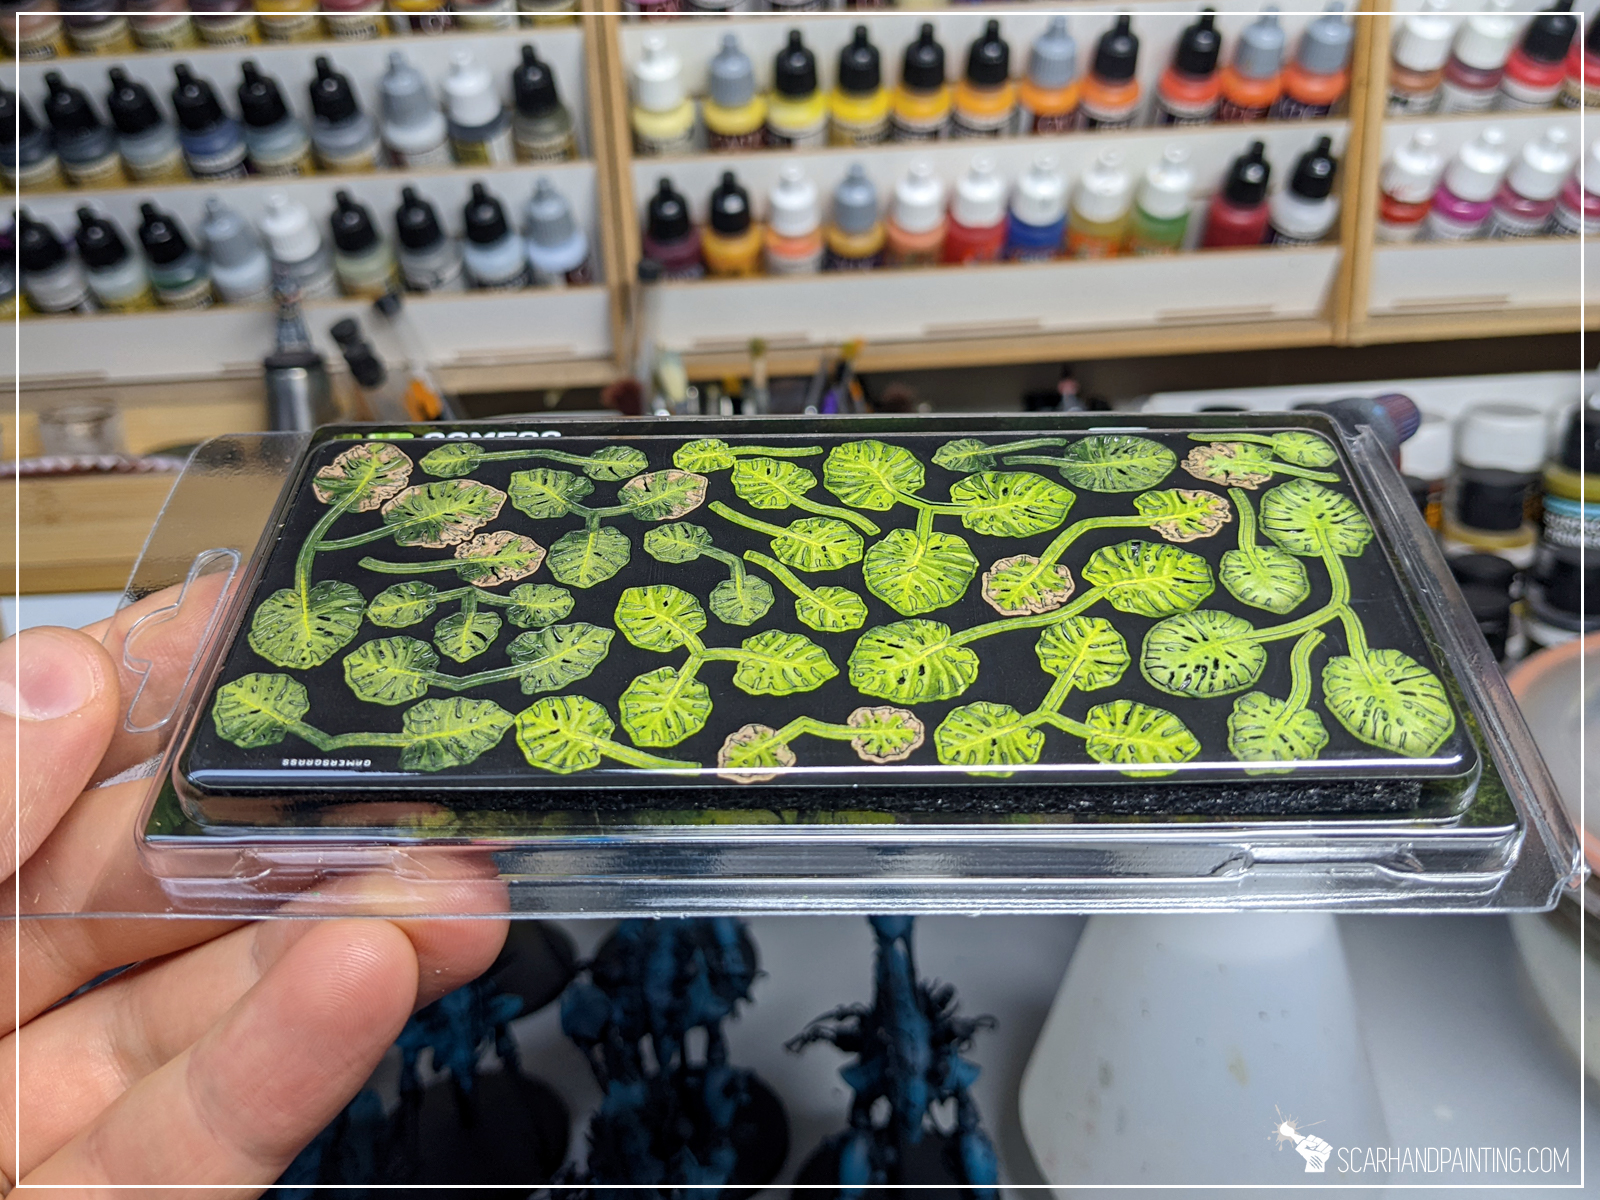


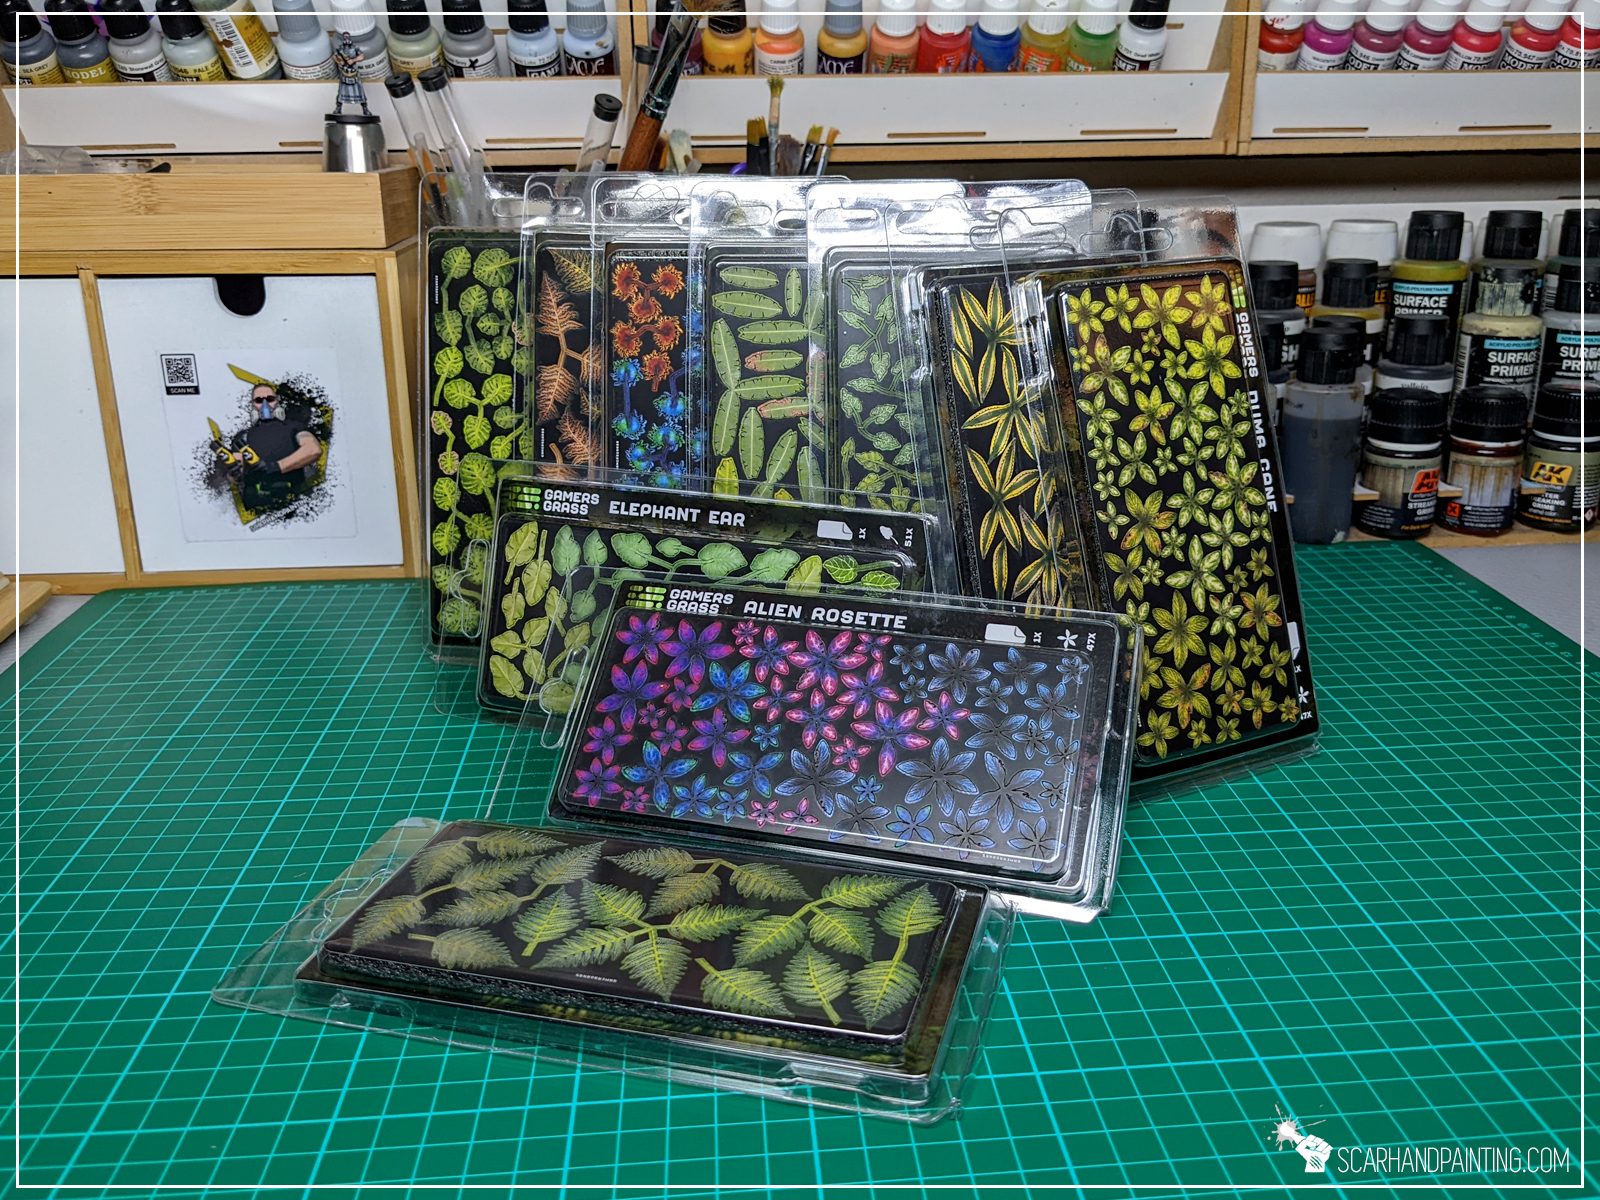
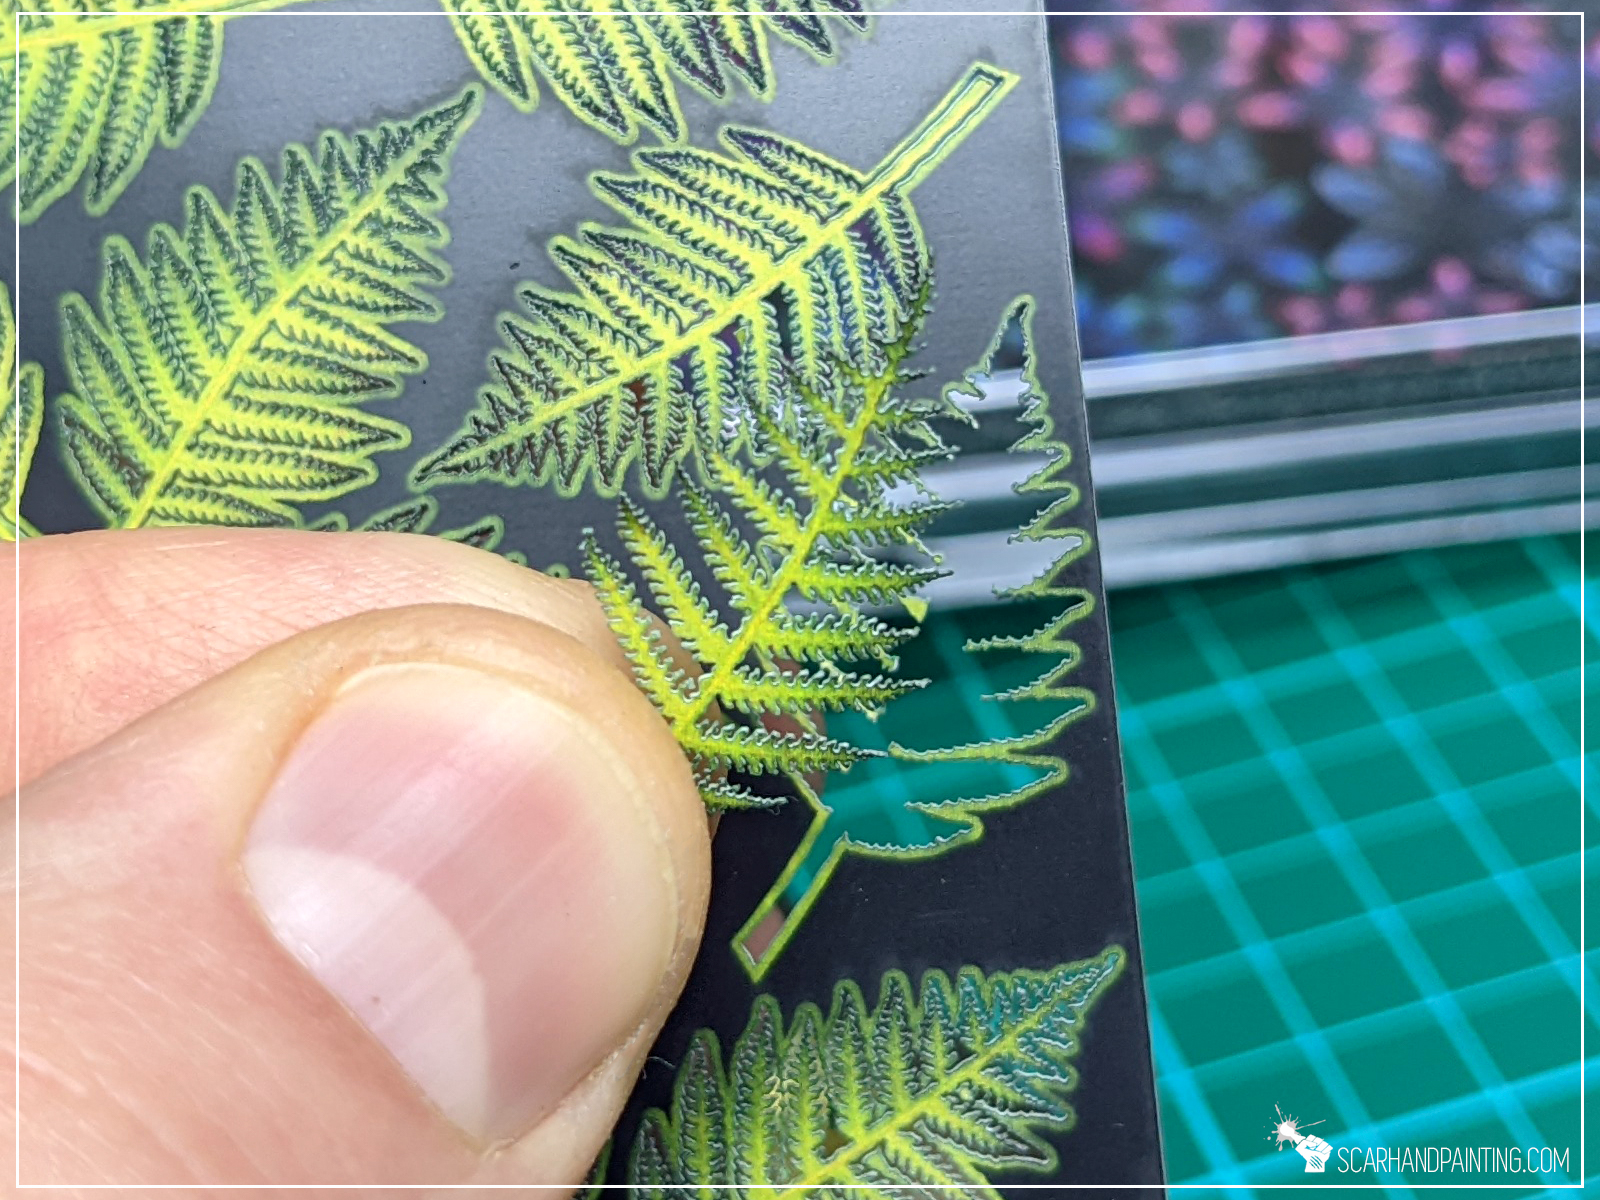
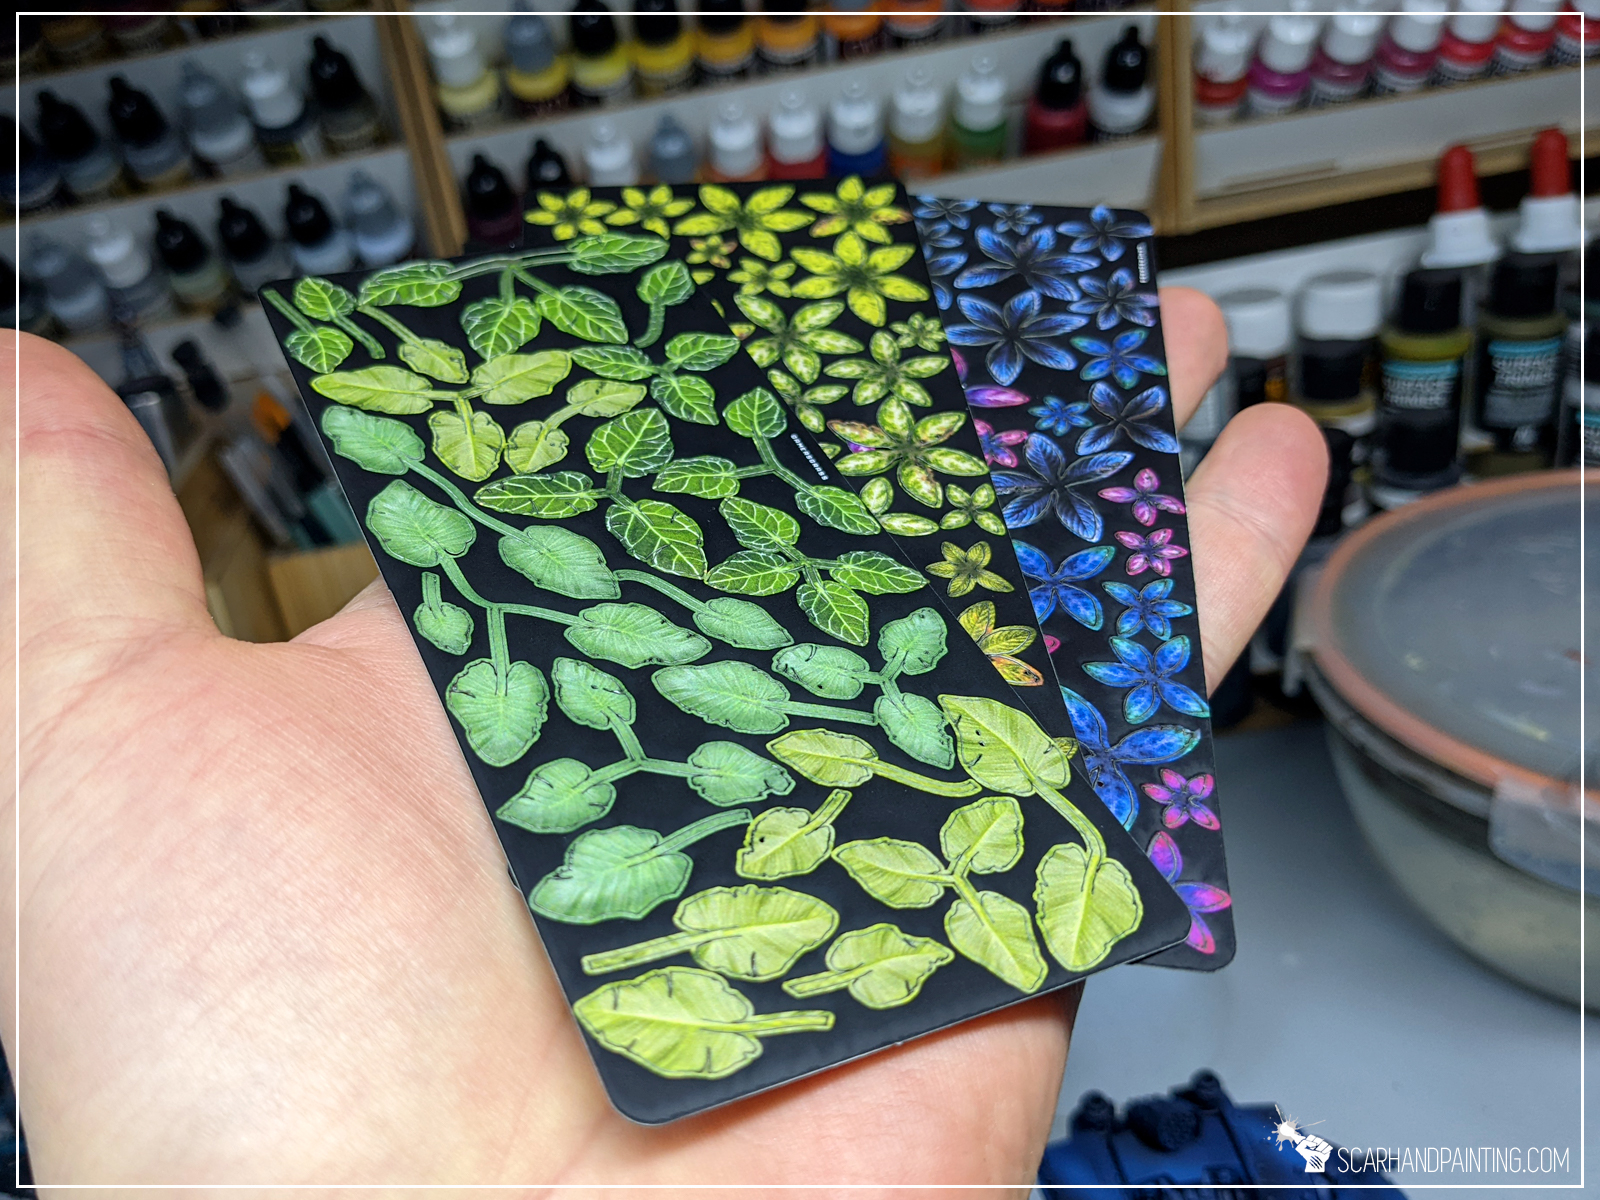
Hype aside, the quality is amazing. Prints are clean and on point, with crisp detail. Color depth looks great and each particular plant is well cut. The plants are much more durable than any paper counterparts found in the market and material is far less problematic than typical brass favored by modeling companies.
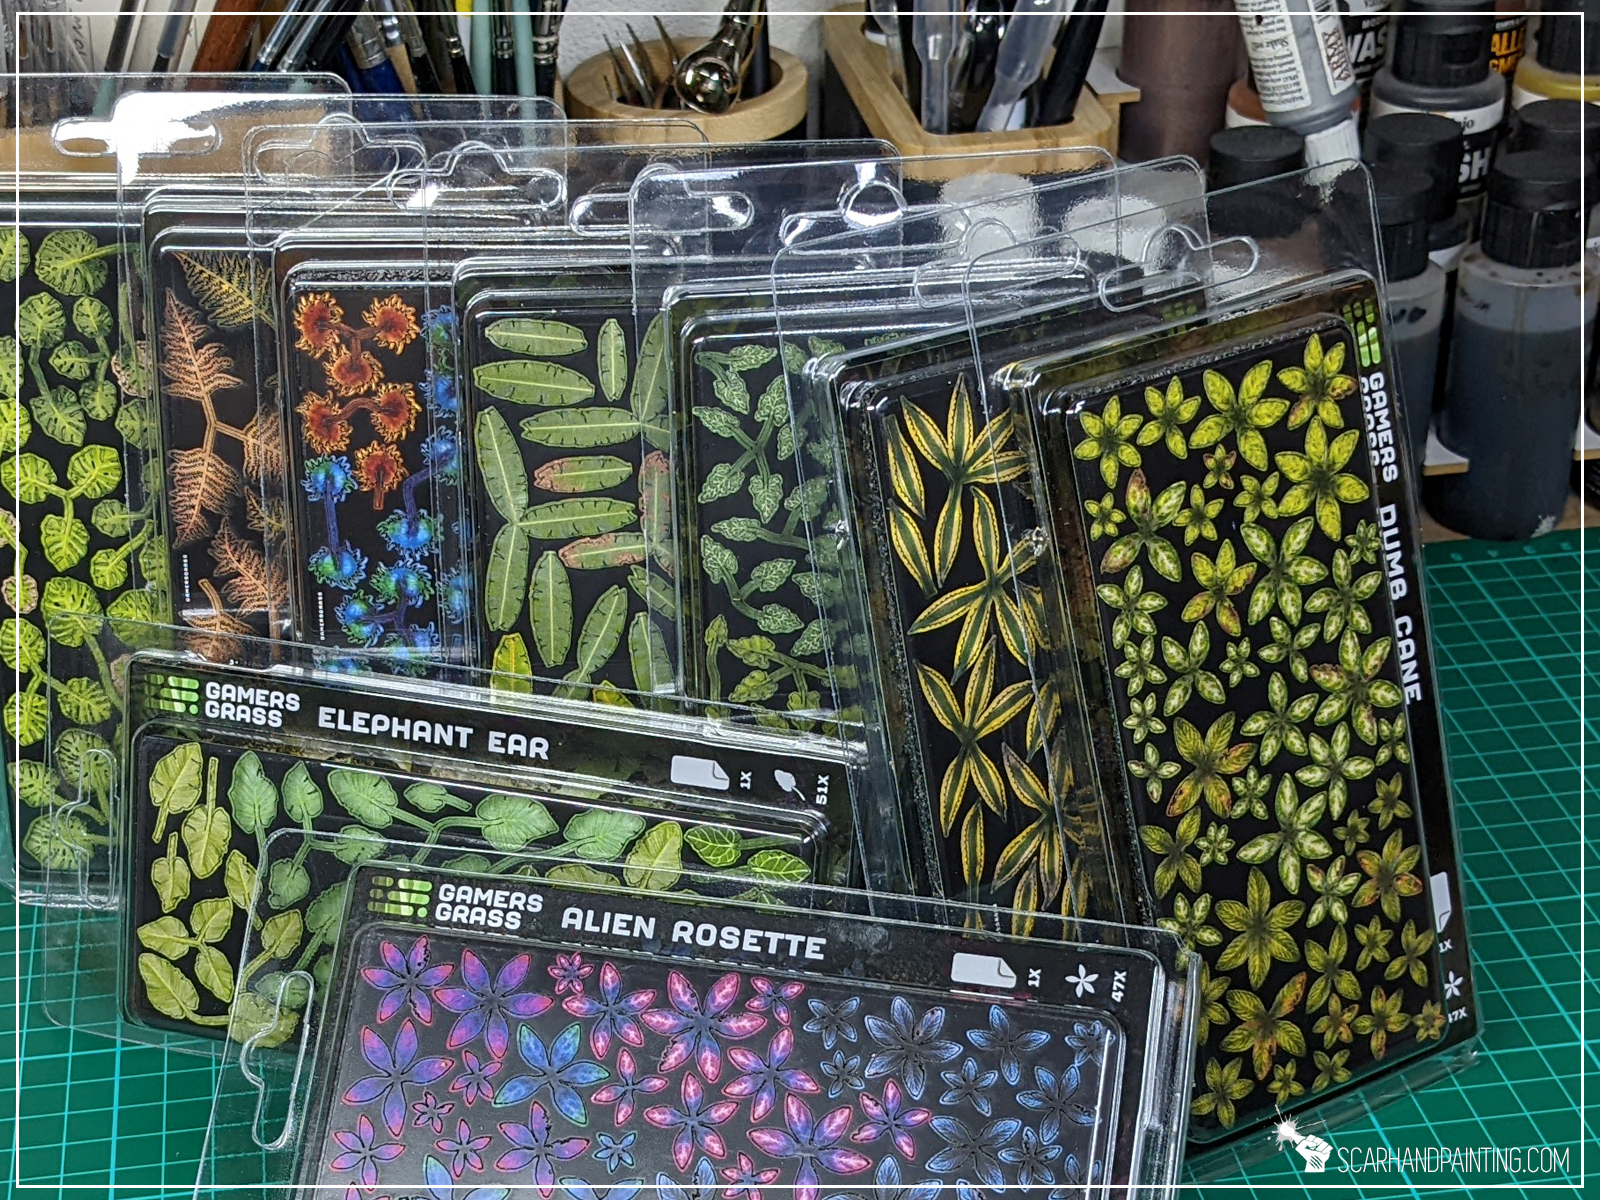
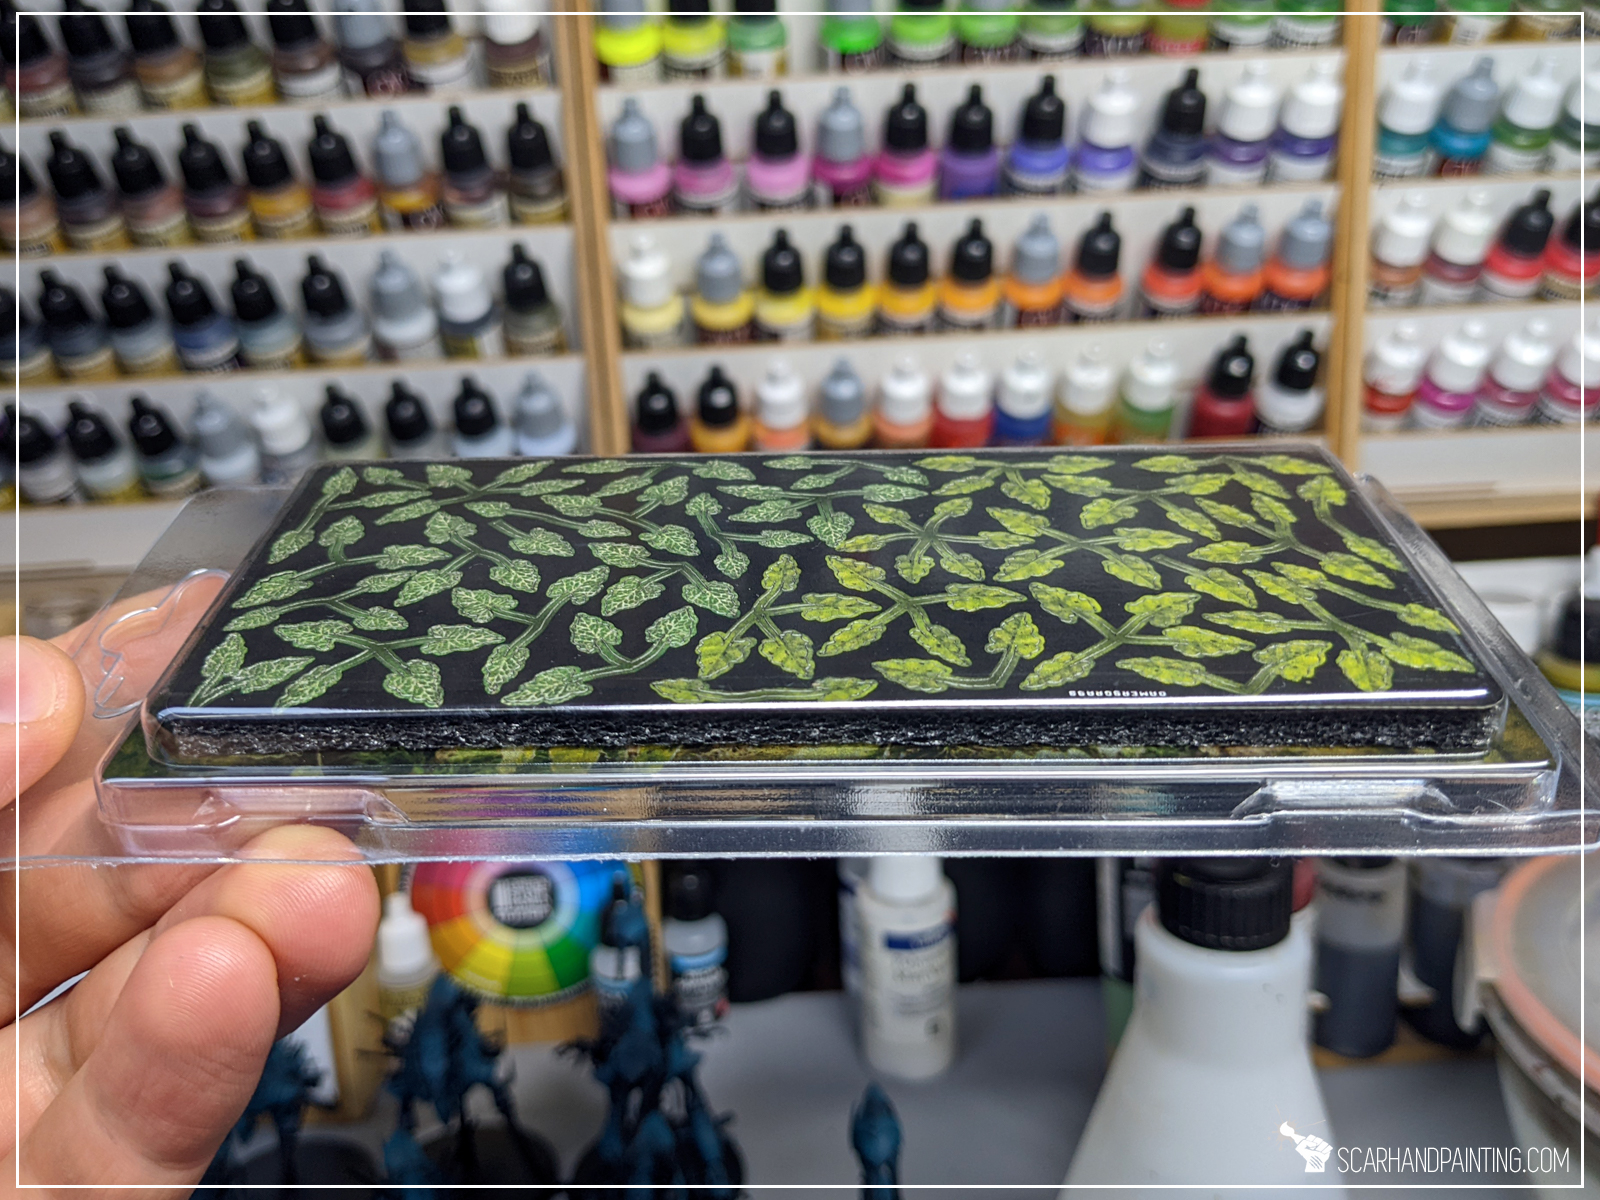
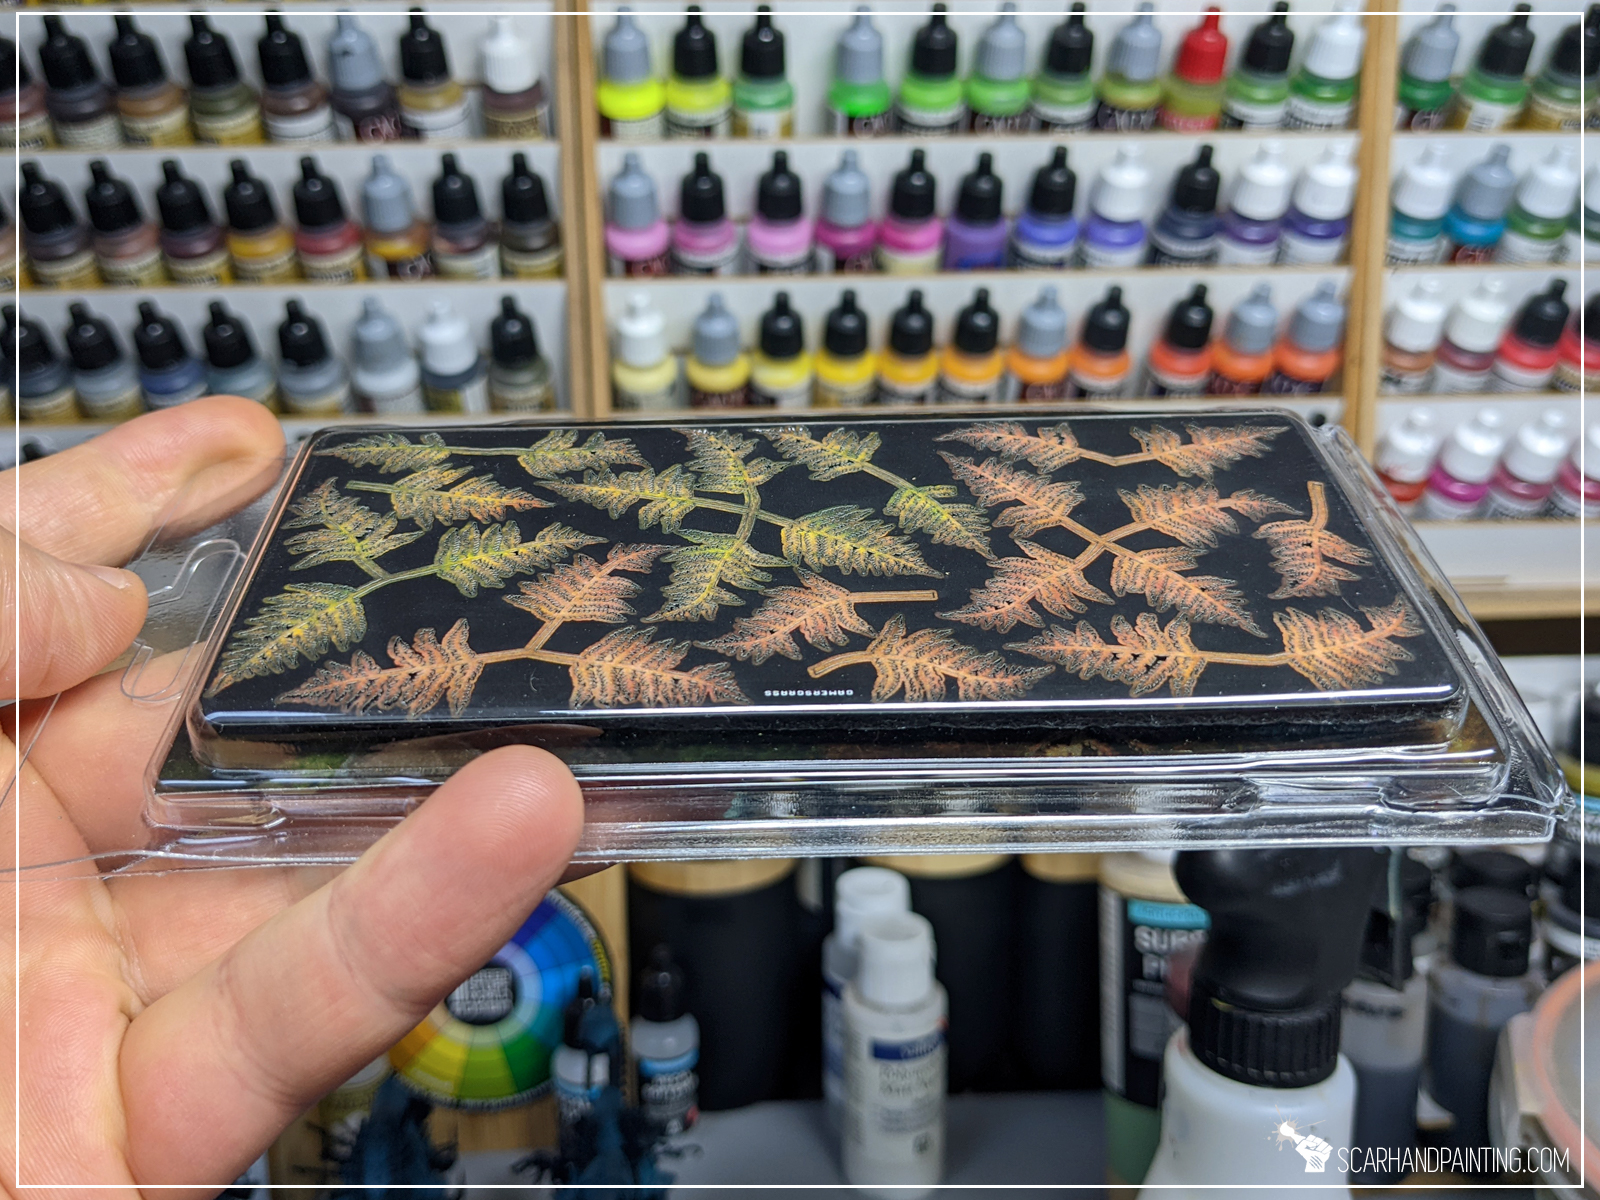
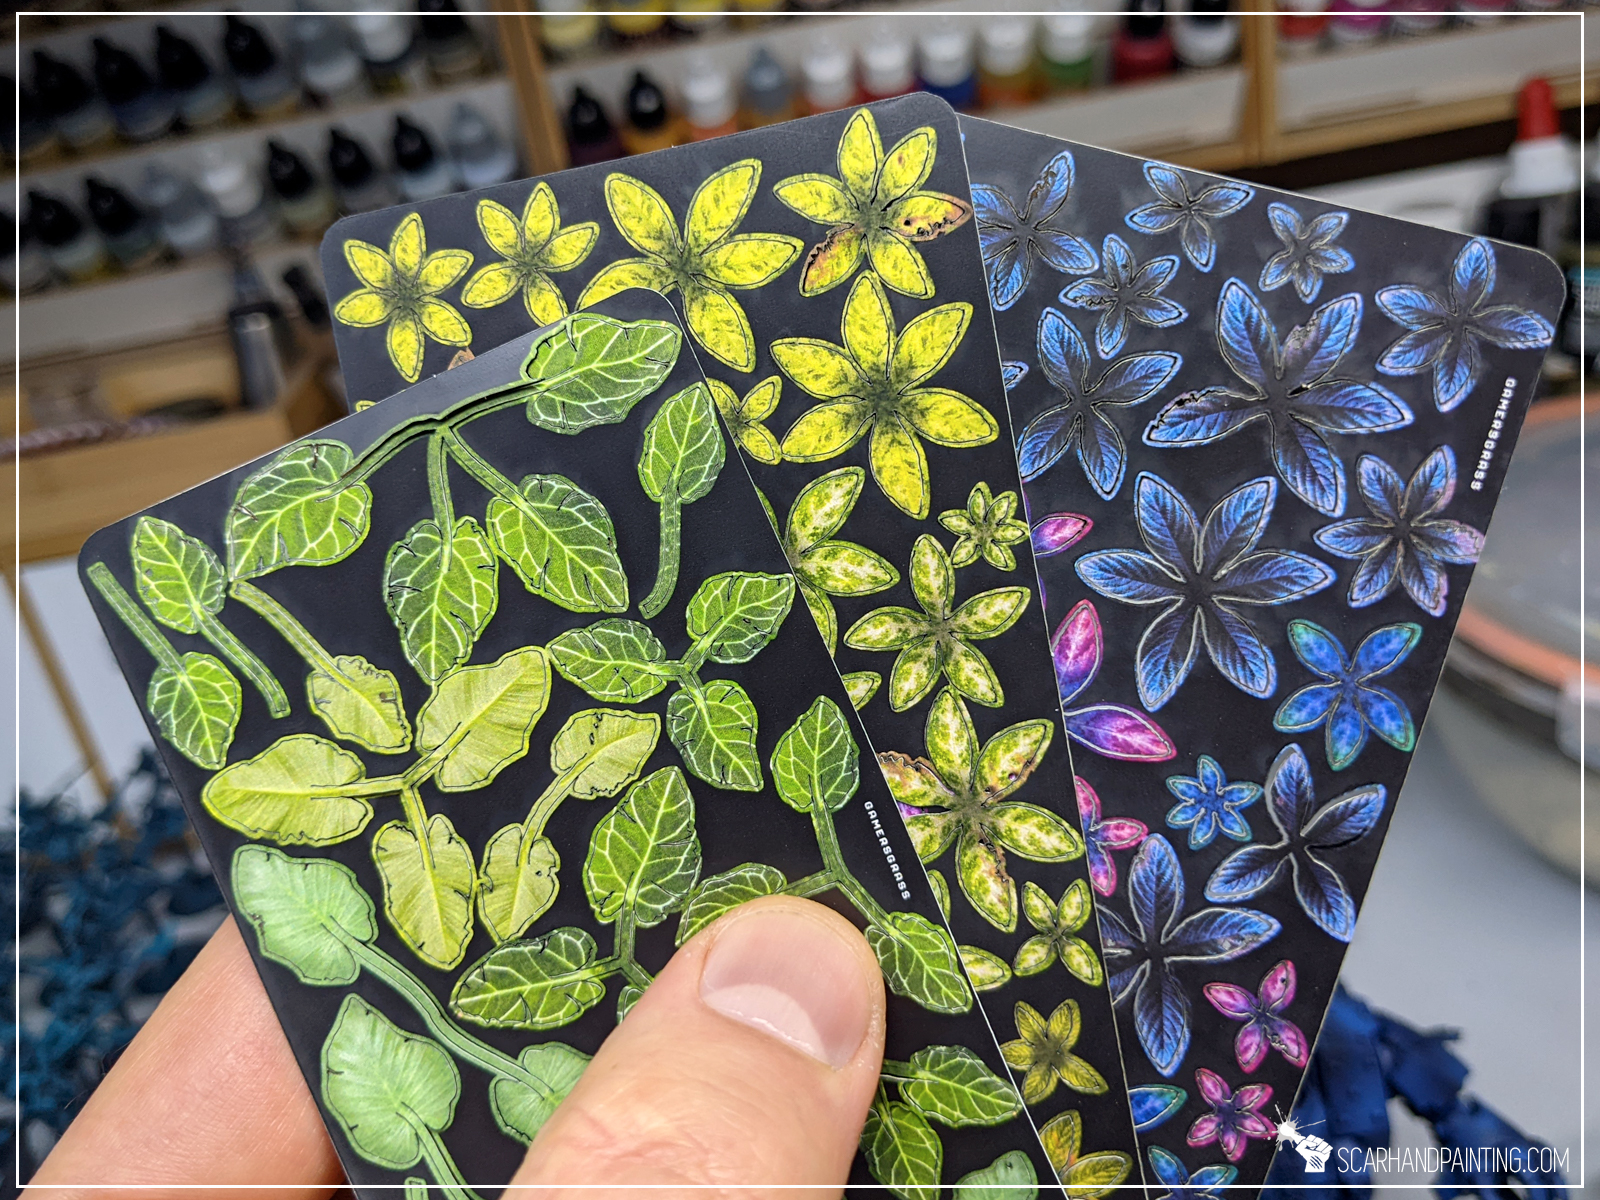
When it comes to visuals Gamers Grass Laser Plants look stunning. Nothing that I saw in the market can even compare. They are colorful, interesting, diverse and just beautiful. Ready to turn any base in to a small work of art.

I never was a fan of laser cut / etched plants. This is because although they fill a very specific niche in basing products, what used to be available in the market was never functional. Paper is difficult to work with and is susceptible to damage, etched brass plant are easy to form but also very easy to chip the paint off of. Both usually require painting, and it translates to a lot of time spent on painting something that is secondary to the actual miniature. Sure, there are some pre-painted paper plants available, but the quality of paint job is not that great and it is just too easy to break tiny stalks, ruining the base.
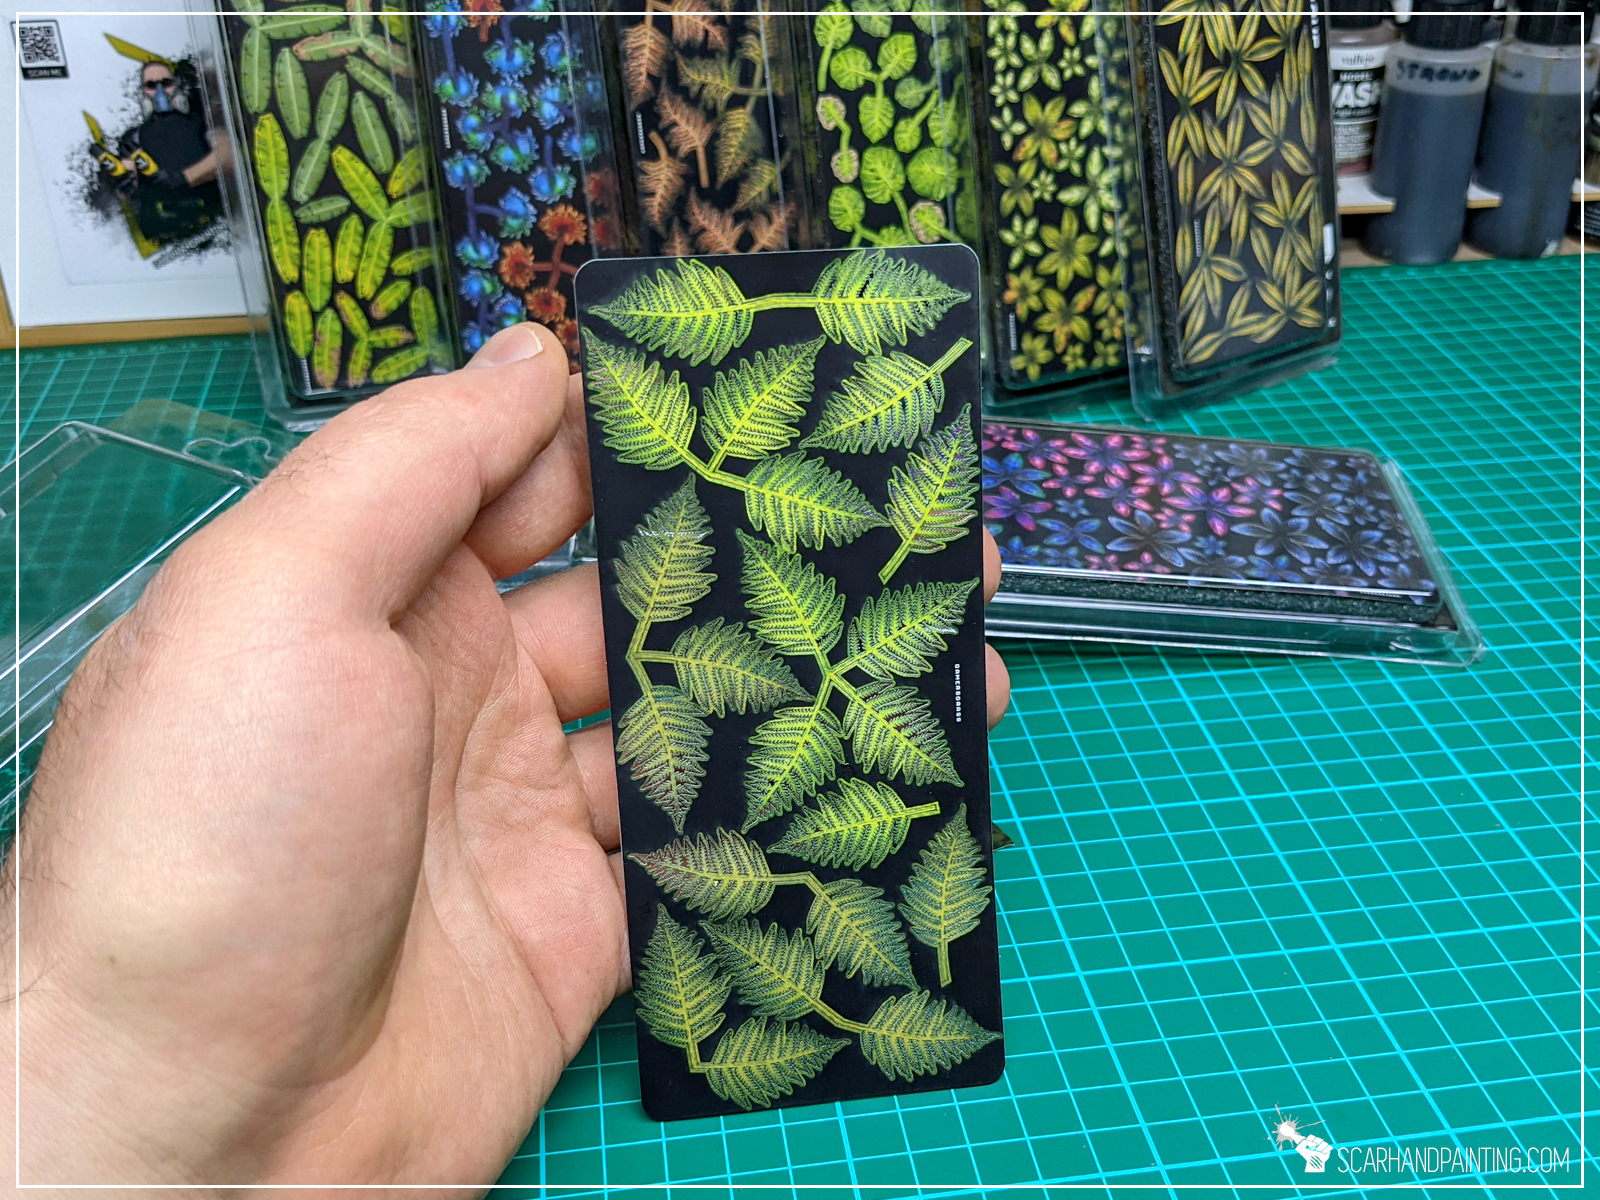
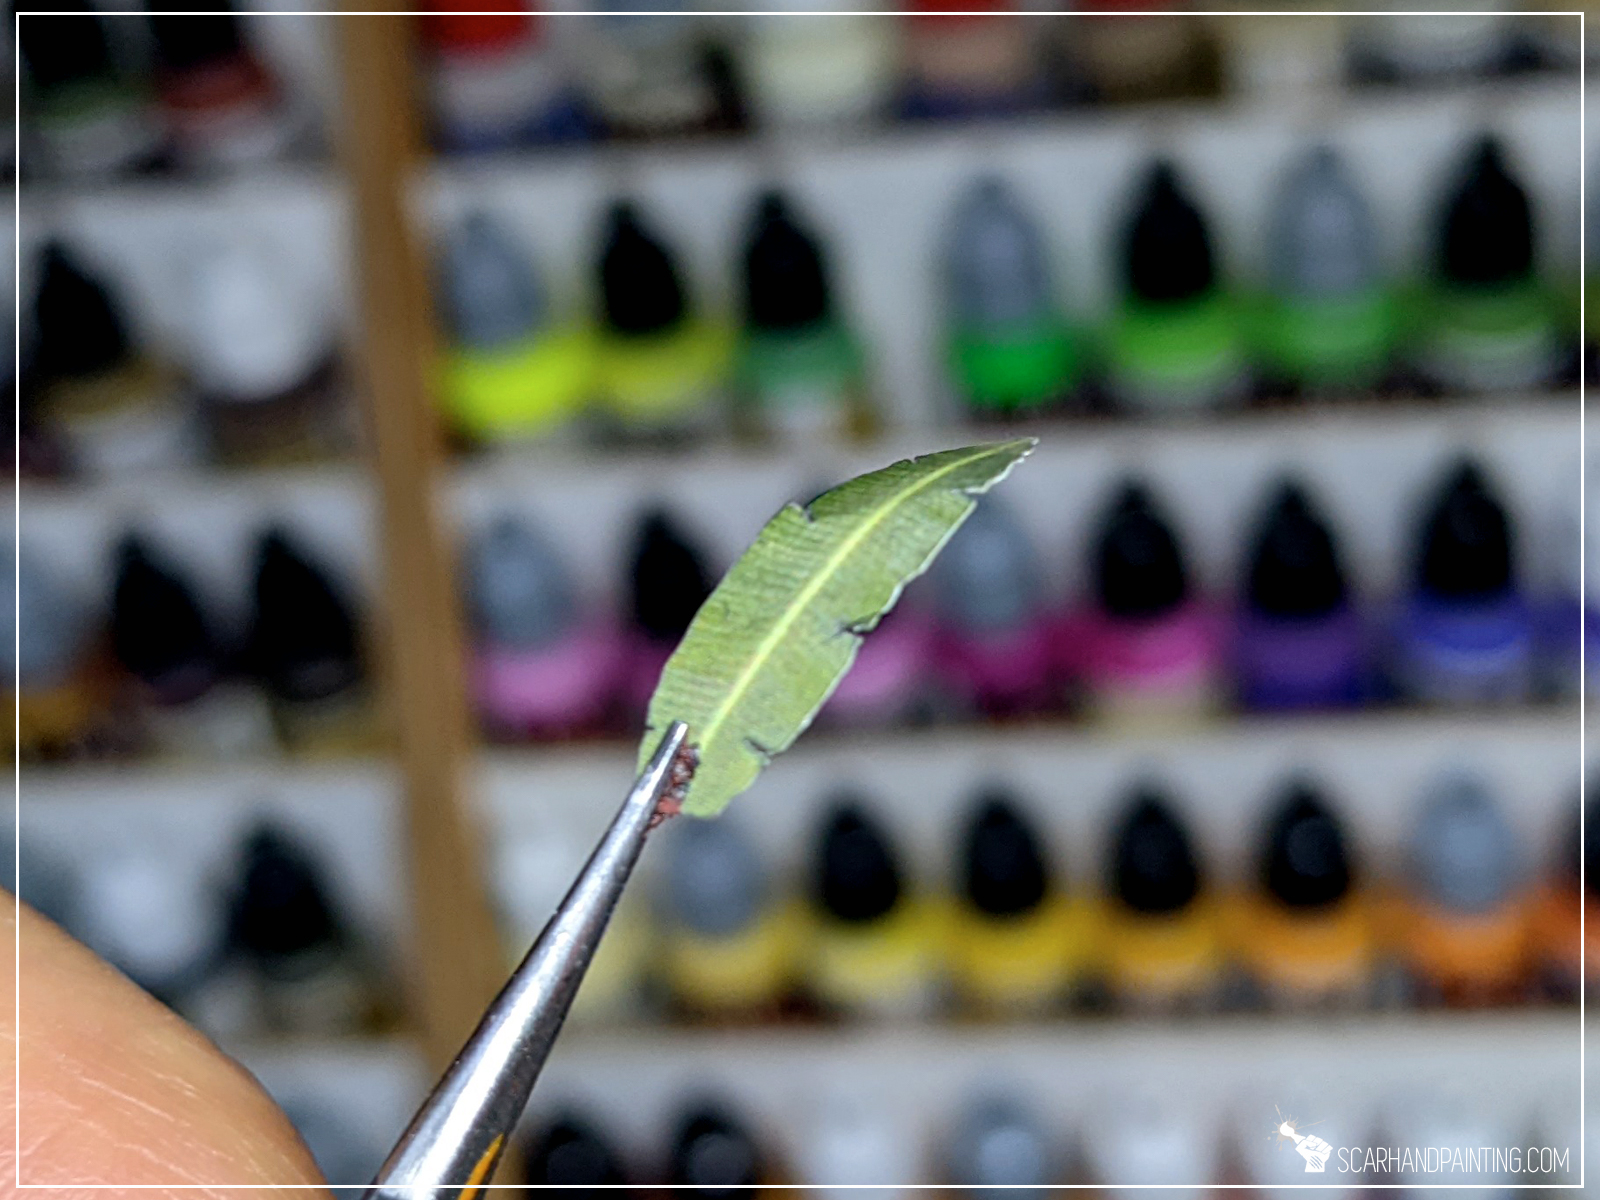
Here’s where Gamers Grass Laser Plants come in. Each plant is precisely cut from what seem to be a thin plastic sheet. They are easy to take out of the sheet and very – VERY – durable. Prints look great and are good to go from the moment of opening the box. No need for additional painting, although it can be done. One issue I found is repositioning the plants without creating hard angles, but after some testing I was able to produce good results by soaking the plants in hot water beforehand. These are really fun and easy to work with, which is not something I was expecting 🙂


Time to take in the price factor. I’ve done quick research and putting Etched Brass plants aside (as the market is full of these and price range is just too vast to compare) here’s how it looks like against immediate competition:


I have a limited experience with laser cut / etched brass plants and all was rather disappointing. On the other hand Gamers Grass Laser Plants are very simple to use from the get go and look amazing. With stunning visuals these plants stand out amongst the competition and are fairly priced on top.
I might be a Gamers Gras shill at this point, but these plant are awesome and I appreciate the innovation.
What’s your opinion? Let me know in the comments.
You can order through Gamers Grass official store, or try out your luck in a local hobby store. To make things easier for you, Gamers Grass prepared this awesome Store Locator.
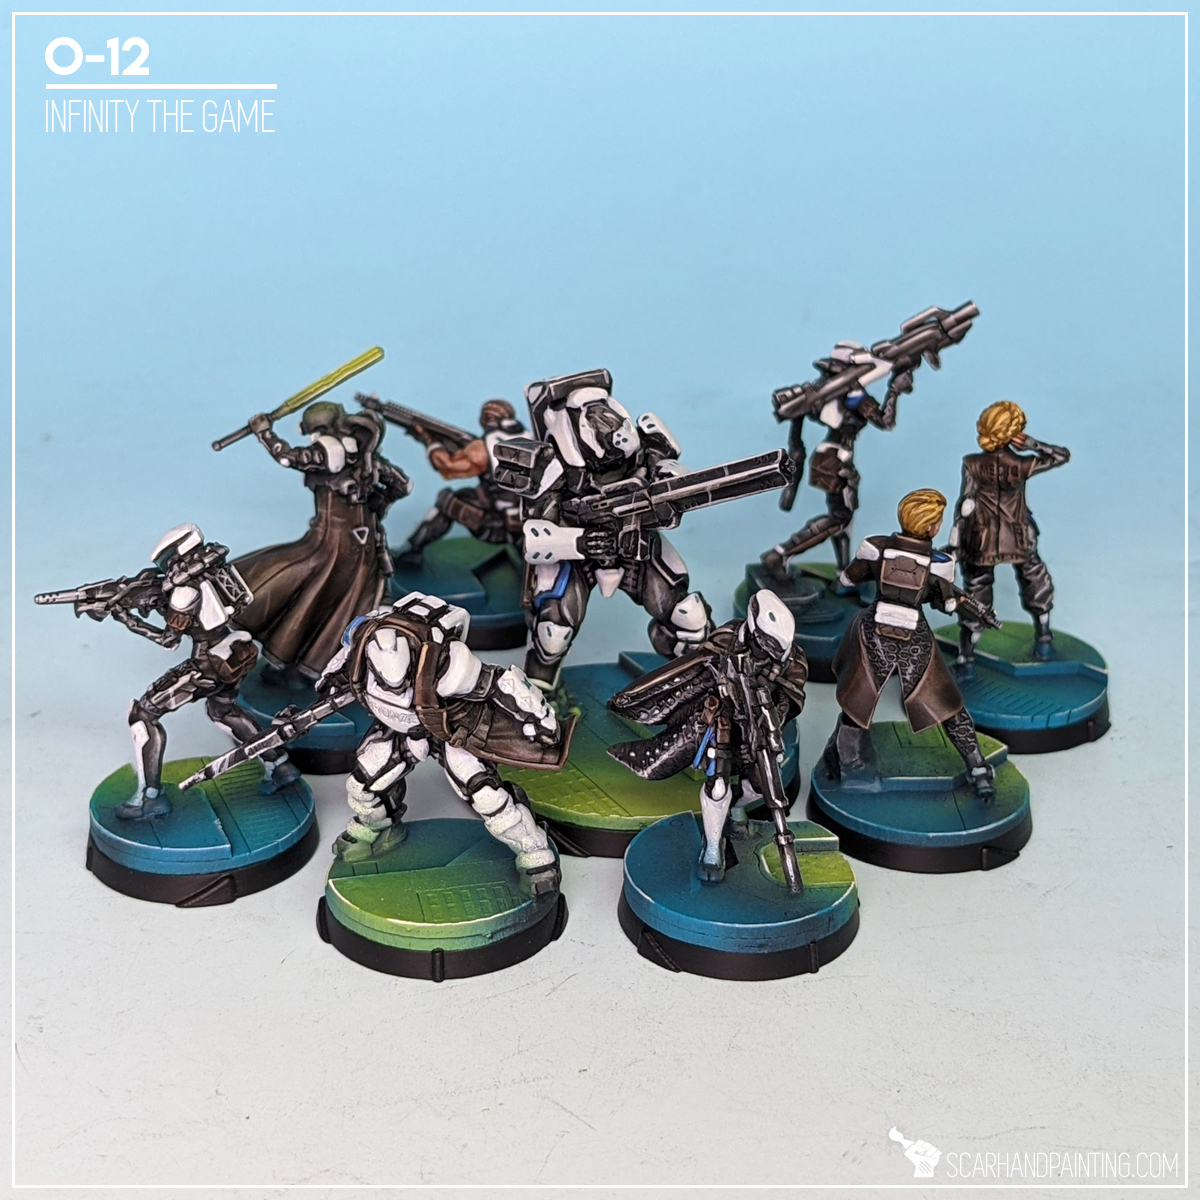
Here are some Colour Recipes for Infinity O-12 from Gallery: Infinity O-12. Please take note that this is a simple colour scheme, not covering multiple overlapping layers and blends in between, that lead to the final product. It is supposed to be used as guideline not a step-by-step.
BLACK armor:
Chaos Black, undercoat
Pancer Dark Grey (Val a), *
Fenrisian Grey (GW), flbr
Pale Wych Flesh (GW), flbr, l&p
Dark Tone Ink (AP), wash
Pale Wych Flesh (GW), l&p
WHITE armor:
Mix Ghost Grey (Val) 1:1 Wolf Grey (Val a),
Mix Ghost Grey (Val) 1:1 Wolf Grey (Val a),
White (Val a), bl
Off White (Val), bl, l&p

BROWN clothes:
Black Armor base,
Dark Brown (Val A), bl
Mix Strong Tone Ink (AP) 1:1 Soft Tone Ink (AP), wash
Karak Stone (GW), l&p
BLUE elements:
French Blue (val a),
Ultramarine Blue (val a), l
Heth Blue (gw), l&p
Glacier Blue (val), l&p
VISIERS:
Emerald (Val),
Mix Emerald (Val) x:x Off White (Val), l&p
TURQUOISE helmet dots,
Coelia Greenshade (GW),

BASES:
Coal Black (P3), *
Turquoise (Val), *
Turquoise (Val), l
Pale Wych Flesh (GW), l
Duck Egg Green (Val a), OSL
Light Livery Green (Val a), OSL
Off White (Val), l
l&p – lines and points,
p – points,
dl – deep lining,
bl – blend,
gl – glaze,
drbr – drybrush,
fltbr – flatbrush,
lobr – loaded brush,
stpl – stippling,
*Airbrushed (with multiple layers and mixes)
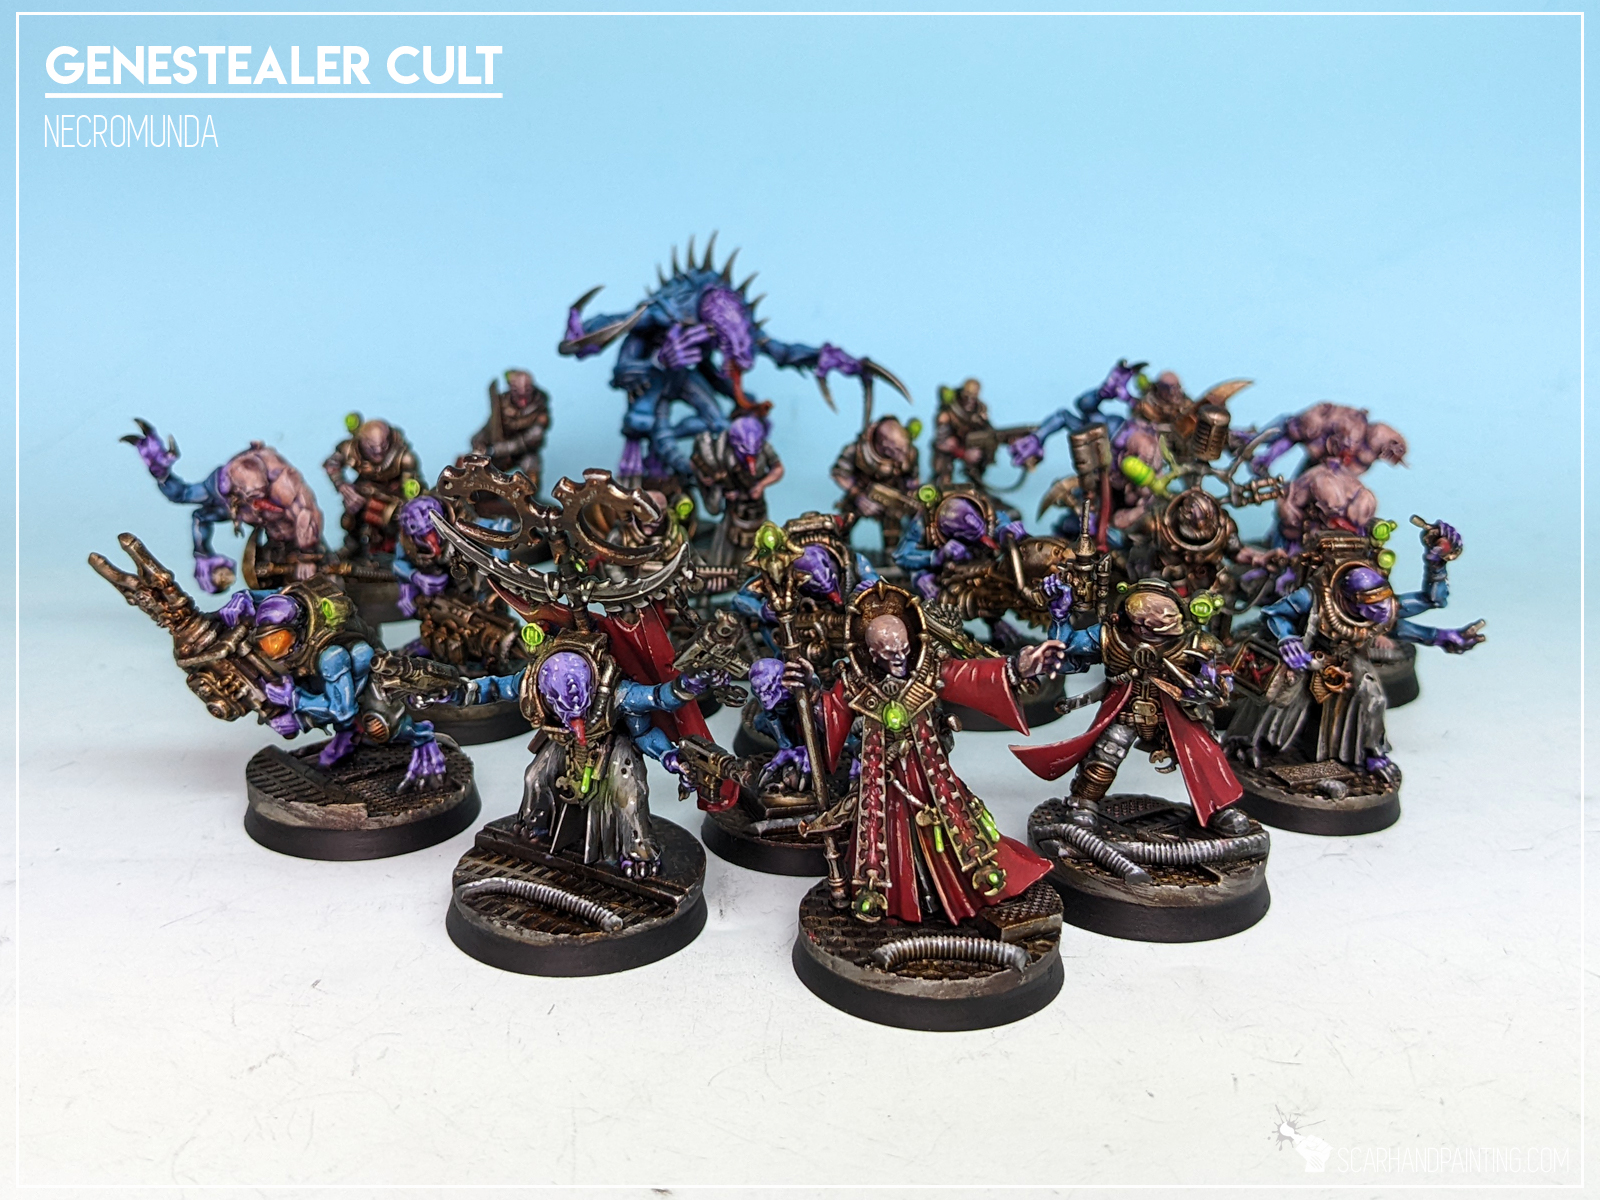
Here are some Colour Recipes for Infinity Haqqislam from GALLERY: GENESTEALER CULTS. Please take note that this is a simple colour scheme, not covering multiple overlapping layers and blends in between, that lead to the final product. It is supposed to be used as guideline not a step-by-step.
BLUE armor:
Black Undercoat,
Imperial Blue (val),*
Mix: Imperial Blue (val) 4:1 Electric Blue (val),*
Electric Blue (val),*
Mix: Electric Blue (val) 1:3 White,*
Blue Tone Ink (ap),
Pallid Wych Flesh (gw), l&p
Off White (val), l&p
METAL:
Warplock Bronze (gw),
Gun Metal (ap), / True Copper (ap), flbr
Shining Silver (ap), l&p
Mix: Strong Tone Ink (ap) 1:1 Soft Tone Ink (ap),
Streaking Grime (ak int),

PURPLE skin:
Black Undercoat,
Alien Purple (val),
Mix: Alien Purple (val) 2:1 Squid Pink (val), flbr
Mix: Alien Purple (val) 1:1:1 Squid Pink (val), Pale Flesh (val), flbr
Purple Tone Ink (ap),
Pallid Wych Flesh (gw), l&p
Off White (val), l&p
SKIN:
Alien Purple (val a),
Dwarf Skin (val a), flbr
Flesh (val a), flbr
Mix: Purple Tone Ink (ap) 1:1:1:1, Strong Tone Ink (ap), Soft Tone Ink (ap), Medium,
BLACK/GREY outfits:
Black Undercoat,
Panzer Dark Grey (val),
Cold Grey (val), flbr
Fenrisian Grey (gw), flbr
Pallid Wych Flesh (gw), l&p
Mix Strong Tone Ink (ap) 1:1 Soft Tone Ink (ap),
Pallid Wych Flesh (GW), l&p
Off White (Val), l&p
BROWN clothes:
Grey Outfits base,
Dark Brown RLM61 (val), bl
Mix Strong Tone Ink (ap) 1:1 Soft Tone Ink (ap),
Karak Stone (gw), l&p
Flayed One Flesh (gw), l&p
GREEN light:
Duck Egg Green (val a),
Off White (val), l&p
Light Livery Green (val a),*
Waywatcher Green (gw), wash
Off White (val), l&p
l&p – lines and points,
p – points,
dl – deep lining,
bl – blend,
gl – glaze,
drbr – drybrush,
fltbr – flatbrush,
lobr – loaded brush,
stpl – stippling,
*Airbrushed (with multiple layers and mixes)
Ahoy Sailors! As you know I am most and foremost a passionate hobbyist. That being said I am also a pirate, a scoundrel and a fanatical enthusiast of Mantic Games Kings of War: Armada. The latter resulted in a few strategy related articles, one of which you found yourself reading right now.
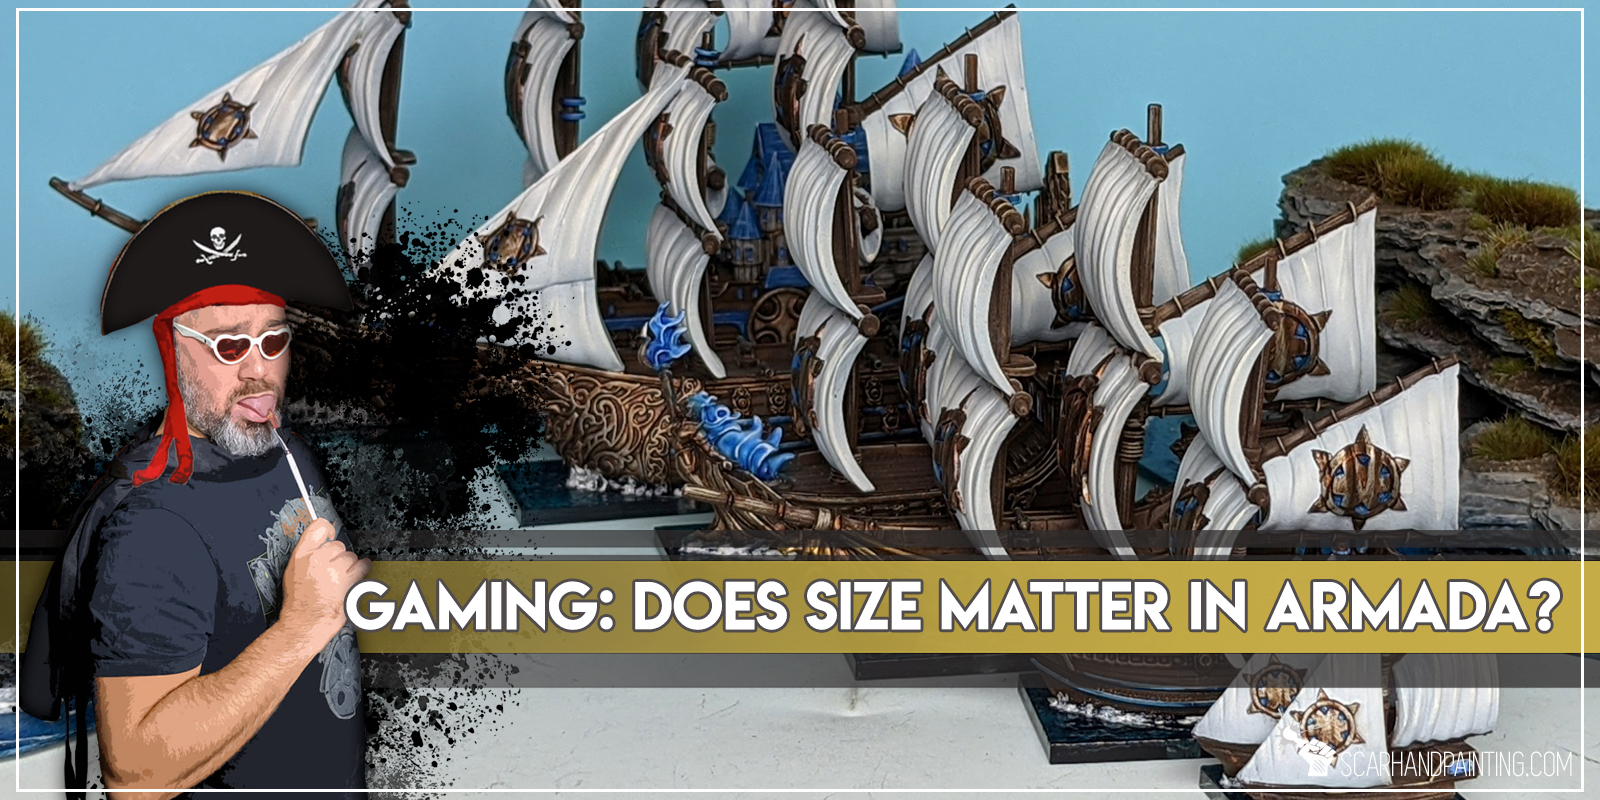
Kings of War: Armada is a game of fantastical sea warfare. Set in a rich world of Pannithor the Armada clashes wonderfully crafted and strongly themed factions against one another. As much as miniatures go, KoW Armada offers a selection of beautiful miniatures from across multiple factions, with more being released every few months. These ships vary in size and power from Tiny Squadrons zigzagging between larger vessels to XL flagships capable of dealing devastating damage with a single broadside. With size comes the firepower and capacity but at a cost of speed and maneuverability. Is a spamy fleet capable of competing with a centerpiece type fleet? Is, in general, a particular ship size more optimal than the other? Today I will ponder a question:
Let’s start by stating the obvious: Yes, in Armada the size does matter a lot. The larger a ship, the more firepower it brings and the more devastation it is capable of with a single Activation. But large size does not come without some drawback, most obvious being speed and maneuverability. A ship’s hull can be bristling with guns, but what if it is unable to draw a proper line of fire to a group of smaller, more agile enemy ships? Let’s talk about pros and cons of large size and see if they hold merit.

* The larger the ship the more guns it brings.
Large ships are more expensive and so they pack more guns than their smaller counterparts. Having more guns allows them to deal more damage in a single Activation. So much so as to potentially Cripple or even Sink an enemy ship (or ships!) before subsequent Activation.
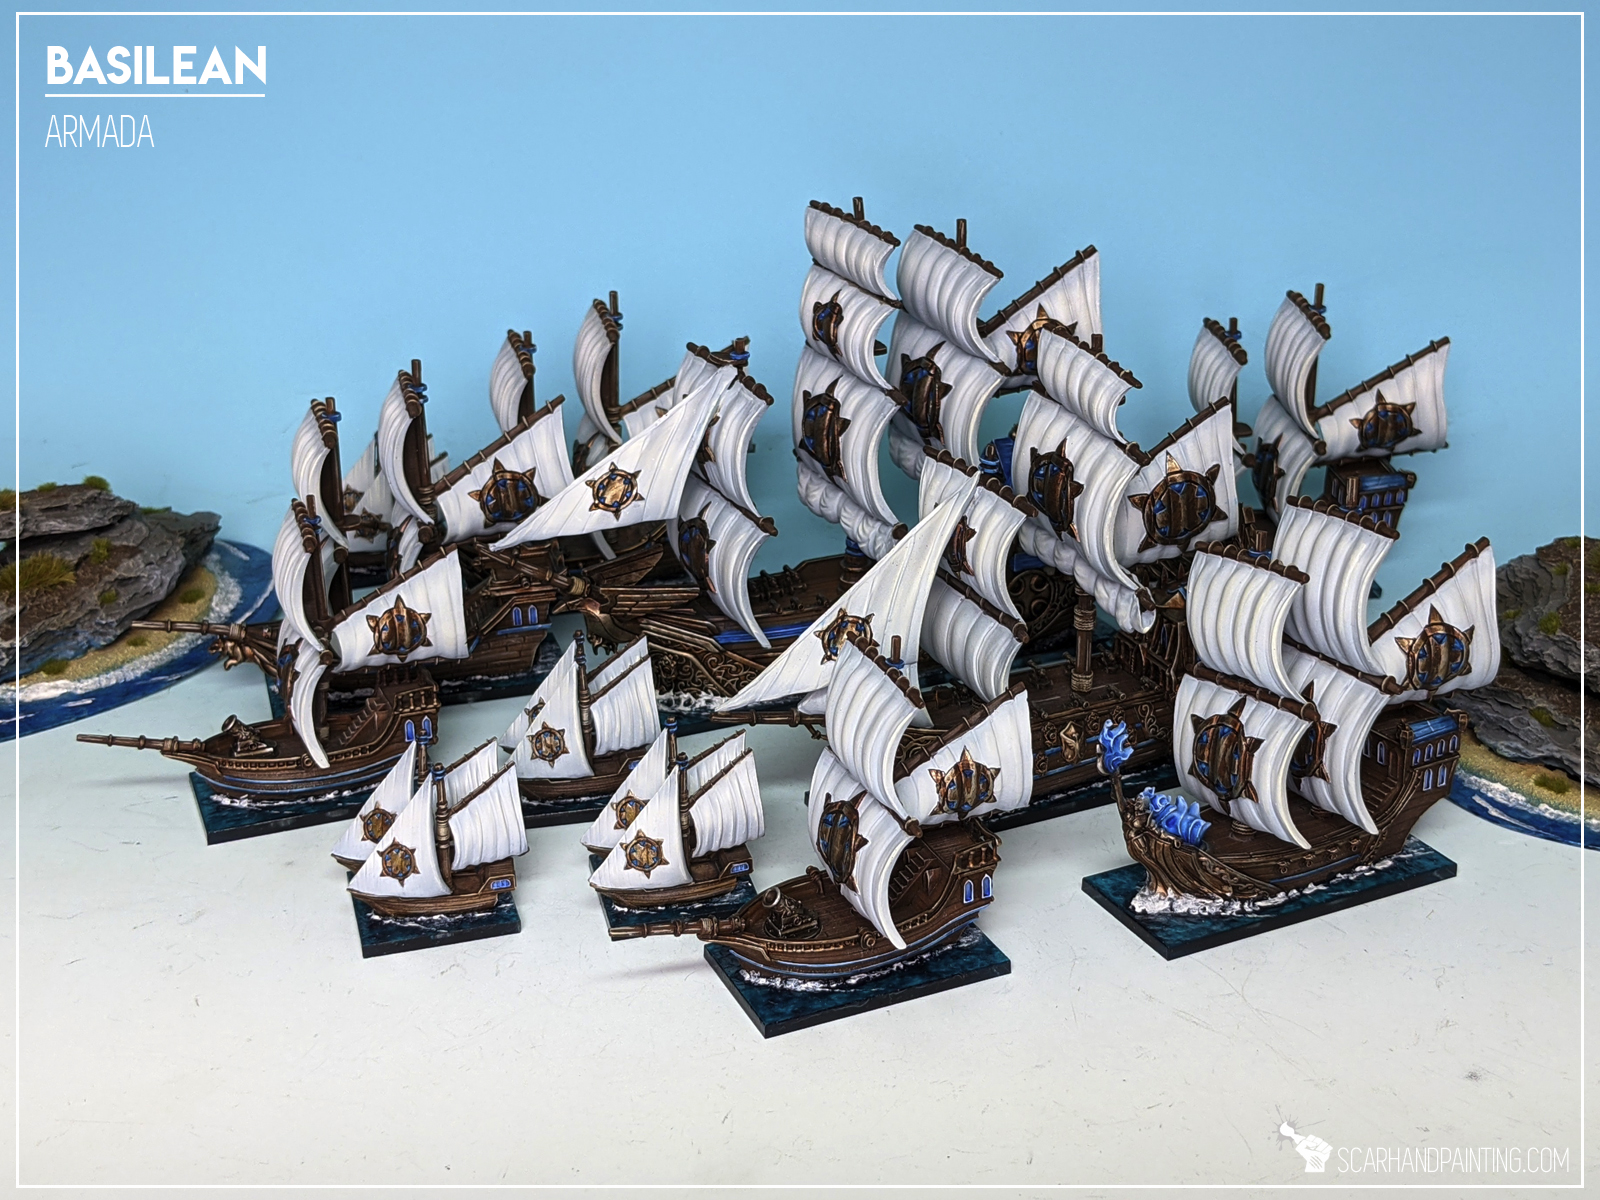
Interestingly, more often than not, the same points value spent on a variety of smaller Main Battle Ships will result in more guns on the gaming board. This is obvious to see for some factions, while a bit more obscured for others. Basilean fleet, being pretty vanilla, with same type of armaments across all three Main Battle Ships, is perfect to represent this:
A Basilean Dictator has less broadside guns than three Elohis combined. 2H less to be precise.
Basilean Dictator: 90pts, 4H, 3L, 3C
Basilean Abess: 62pts, 3H, 2L, 2C
Basilean Elohi: 30pts, 2H, 1L, 1C
* Larger size equals more upgrade slots.
Capacity increases with size, which allows for more upgrades for a ship. This can lead to some pretty nasty combos or just increase efficiency of some upgrades. For example a Master Gunner allows for a reroll of an entire salvo. This upgrade has a much more impact on a Dictator’s devastating salvo of 4H, 3L and 3C, than on Elohi’s 2H, 1L and 1C. Furthermore it will cost three times the cost of a Master Gunner, to equip three Elohi’s.
Fielding a variety of smaller ships is not without it’s merits though, as it allows to add important fleet-wide-buff upgrades for cheap and not take up a valuable slot on an expensive vessel. More so, the cost of such upgrades can be decreased by degrading a Crew Level to Inexperienced. “Okarina of Korgaan” and “War Drum of Spite” are good examples. Of course nothing prevents mixing ship sizes to achieve the same result.
* Larger ships have more Crew Strength.
Large ships pack a lot more CS, which means a huge advantage over smaller opponents during Boarding Actions. Advantage that is not mitigated by the current Multiple Grapple rules. Even though most Large and Extra Large ships might be unable to grapple fast moving enemy ships (Full Speed etc.), usually there will be some opportunities to do so throughout the game. Furthermore having high CS ensures fast Ongoing Boarding Action resolution, thus freeing a larger ship from being pinned by a smaller, cheaper vessel.
On the other hand a single powerful ship can become entangled in melee, thus significantly reducing the firepower of an entire fleet. A fleet of more ships will still be mostly operational if one get’s caught in a Boarding Action, allowing the rest to deal damage and go after objectives unhindered.
* More Structure Points in one place for larger ships.
Larger ships come with more Structure Points, which makes them more difficult to Cripple/Sink, resulting in more time of full effectiveness. A fleet composed of three Elohis will probably gradually lose it’s firepower while ships get damaged and subsequently Crippled, or Sunk. At the same time a single Dictator can be expected to stay operational for longer, before reaching the threshold.
* Repairs Bonus.
Large and Extra Large ships receive a Repairs bonus of +2 SP regained with a Repairs action.
Multiple smaller ships, faster and more maneuverable by default, are capable of putting constant pressure on a larger vessel, while being able to take turns, speeding out of immediate danger to undertake Repairs.
* Area of effect.
Thanks to the size of their bases, L and XL ships are easier to Rake enemy ships. Wider Broadside is easier to position for a solid Raking Fire. This leads to larger ships being more difficult to go around and combined with high durability, makes them perfect area denial pieces.
* Speed decreases with size.
The larger a ship the slower it usually is. High Movement allows to go around slow enemy ships, zoom out of danger and go after objectives. Fast ships are capable of crossing the entire board in a matter of barely few Activations, resulting in a much higher effective range of their weaponry.
* Maneuverability decreases with size.
On top of a (usually) yellow Turn Arc, larger ship bases are more difficult to maneuver with. More so, L and XL movement is more hindered by Sandbanks, Islands and dense battlefields.
This can be partially mitigated with Kedge Anchor and Magical Rudder upgrades.
* Less is sometimes more.
Large and Extra Large ships are points intense. Adding these to a list results in a small size fleet, which in turn leads to easier general maneuvering. Wielding a numerous fleet is not an easy task, potential collisions dealing high amount of self inflicted damage.
* Some scenarios favor small size.
While a large SP count is good, there are some scenarios that favor smaller ship sizes and/or greater numbers. Not every scenario devolves into sinking more enemy ships.
* Large targets are easier to Hit.
L and XL ships are easier to hit, providing an additional +1 To-Hit bonus for shooting opponents. There is a catch though. Due to how Partial Visibility rules work, S ships are unable to gain Full Visibility to XL ships when side by side.
And now we’re left with a question: Go big or go for numbers? There’s not a straight answer. Extra Large ships are monsters, capable of dominating entire game. They are though, reliable and deadly. On the other hand Large and Medium size ships are just as well optimized and excel in areas outside of XL’s capabilities. Are Extra Large ships overpowered? Certainly not. Are they generally “better”? Maybe, depending on the faction, but not by a large margin. My guts tells me they are just easier to successfully implement in a game. I am inclined towards an opinion that in time, when meta clarifies and players get used to everyday maneuvering, we will see a shift from more cumbersome XLs towards Medium and Large. Regardless, with how well balanced Armada seem to be right now, the XLs are definitely worth the points investment and are fun to wield. I for one, love me some of that Dictator swinging and greatly enjoy having an Extra Large ship on the table. If you haven’t already, be sure to give Extra Large ships a try. GLHF.

I hope you find this article entertaining. Be sure to let me know your thoughts in the comments below or via Facebook or Instagram. I would also appreciate if you considered sharing this content with your hobby buds, who might find it useful. Finally if you are looking for a professional miniatures painting service be sure to contact me via this contact form. I always reply within 24 hours, after which please check out your spam folder.
Many thanks to M.L., R.Z. and K.R. for providing valuable input. Your feedback and suggestions is what made this article possible.
Cheers!