- contact@scarhandpainting.com


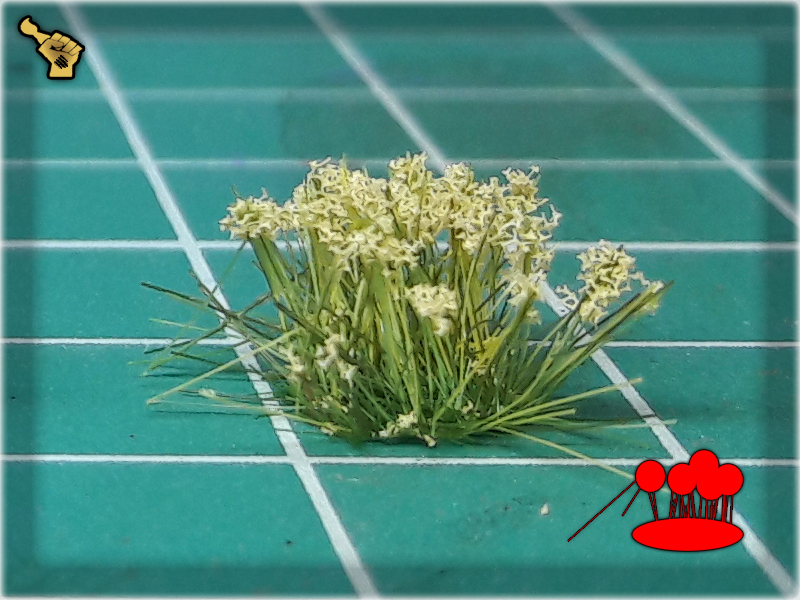
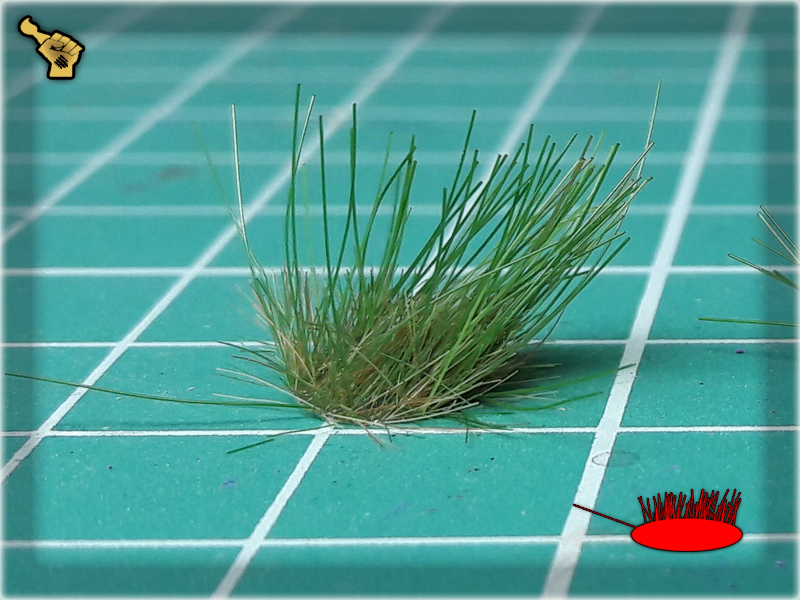
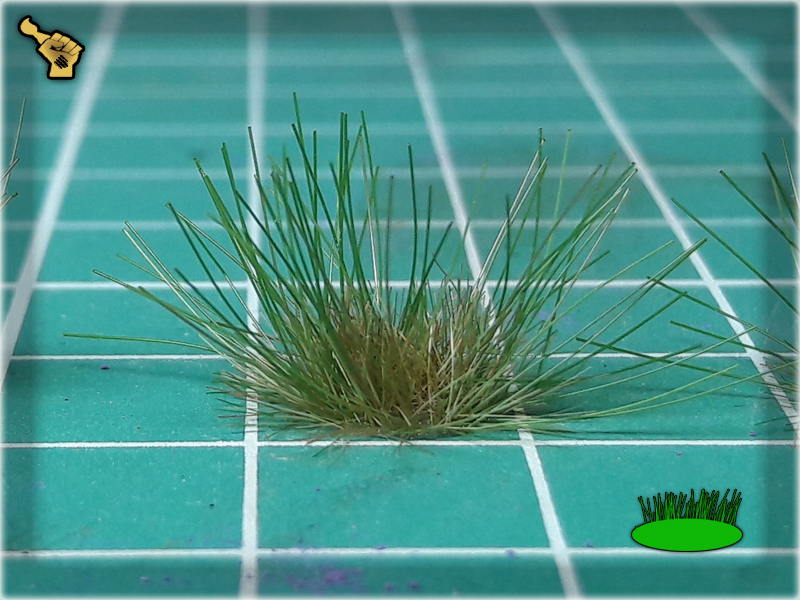
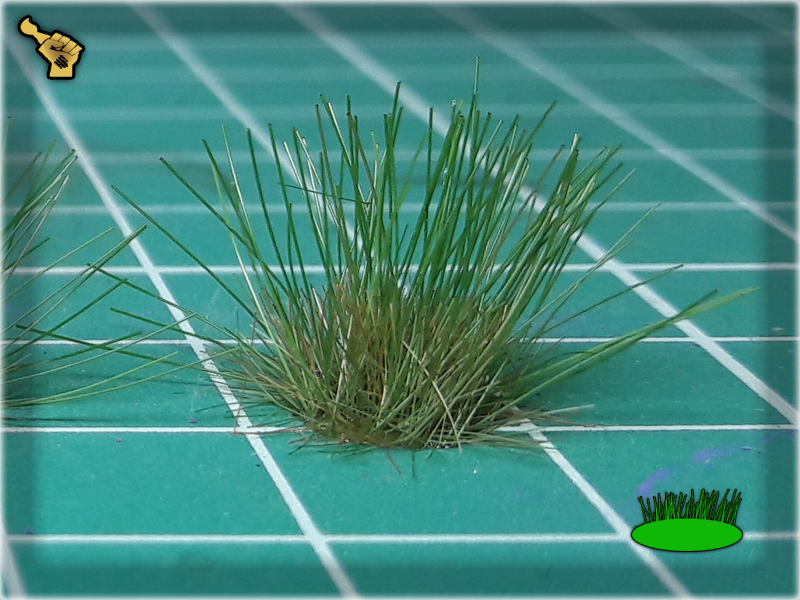
Static Grass or Tufts? That is a question that each painter has to answer by himself before going commando with basing miniatures. My personal favorites are off course Tufts as they offer a great visual effect. Sure, tufting entire base can be a bit expensive in comparisson to using Static Grass, but isn’t the looks what truly matters? So Tufts it is – and during many years of miniatures painting I used a variety of them. Recently I work with Army Painter’s, Citadel’s and MiniNature’s but when I want to pop the visual effect of a base with something more colorful or just fancy – I bring Paint Forge to the table!
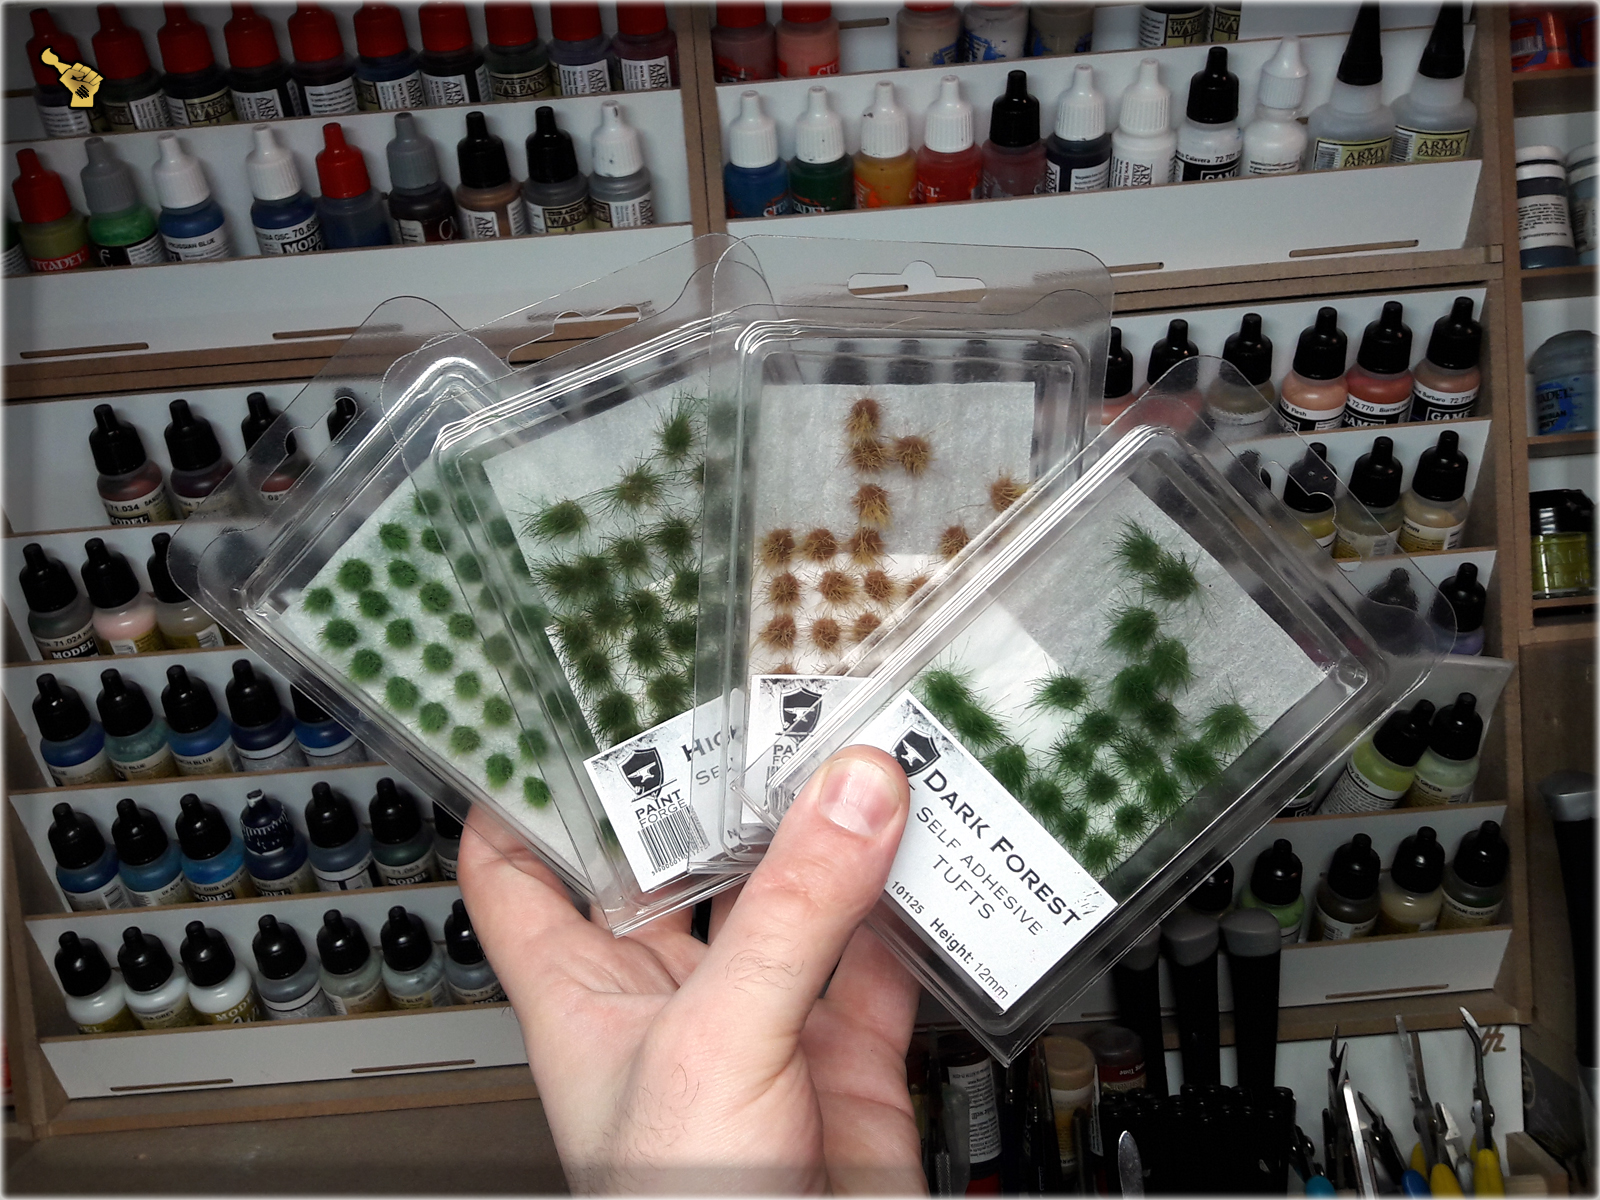
From what I know Paint Forge is a Polish painting studio, that produced tufts and Flowers for own use, then seeing how popular they are – started mass production. I first encountered their products by accident, just scrolling through online offer of a friendly hobby store – seeking something to fill my shoping cart with. After seeing the offer I grabbed a handful of different Tufts and Flowers to test them. Since then I already had to resupply as I used up couple of packages during INFINITY: TOHAA project. Must say that most of the time I’m happy with Paint Forge’s stuff but let’s take a closer look at how their products present themeselves…
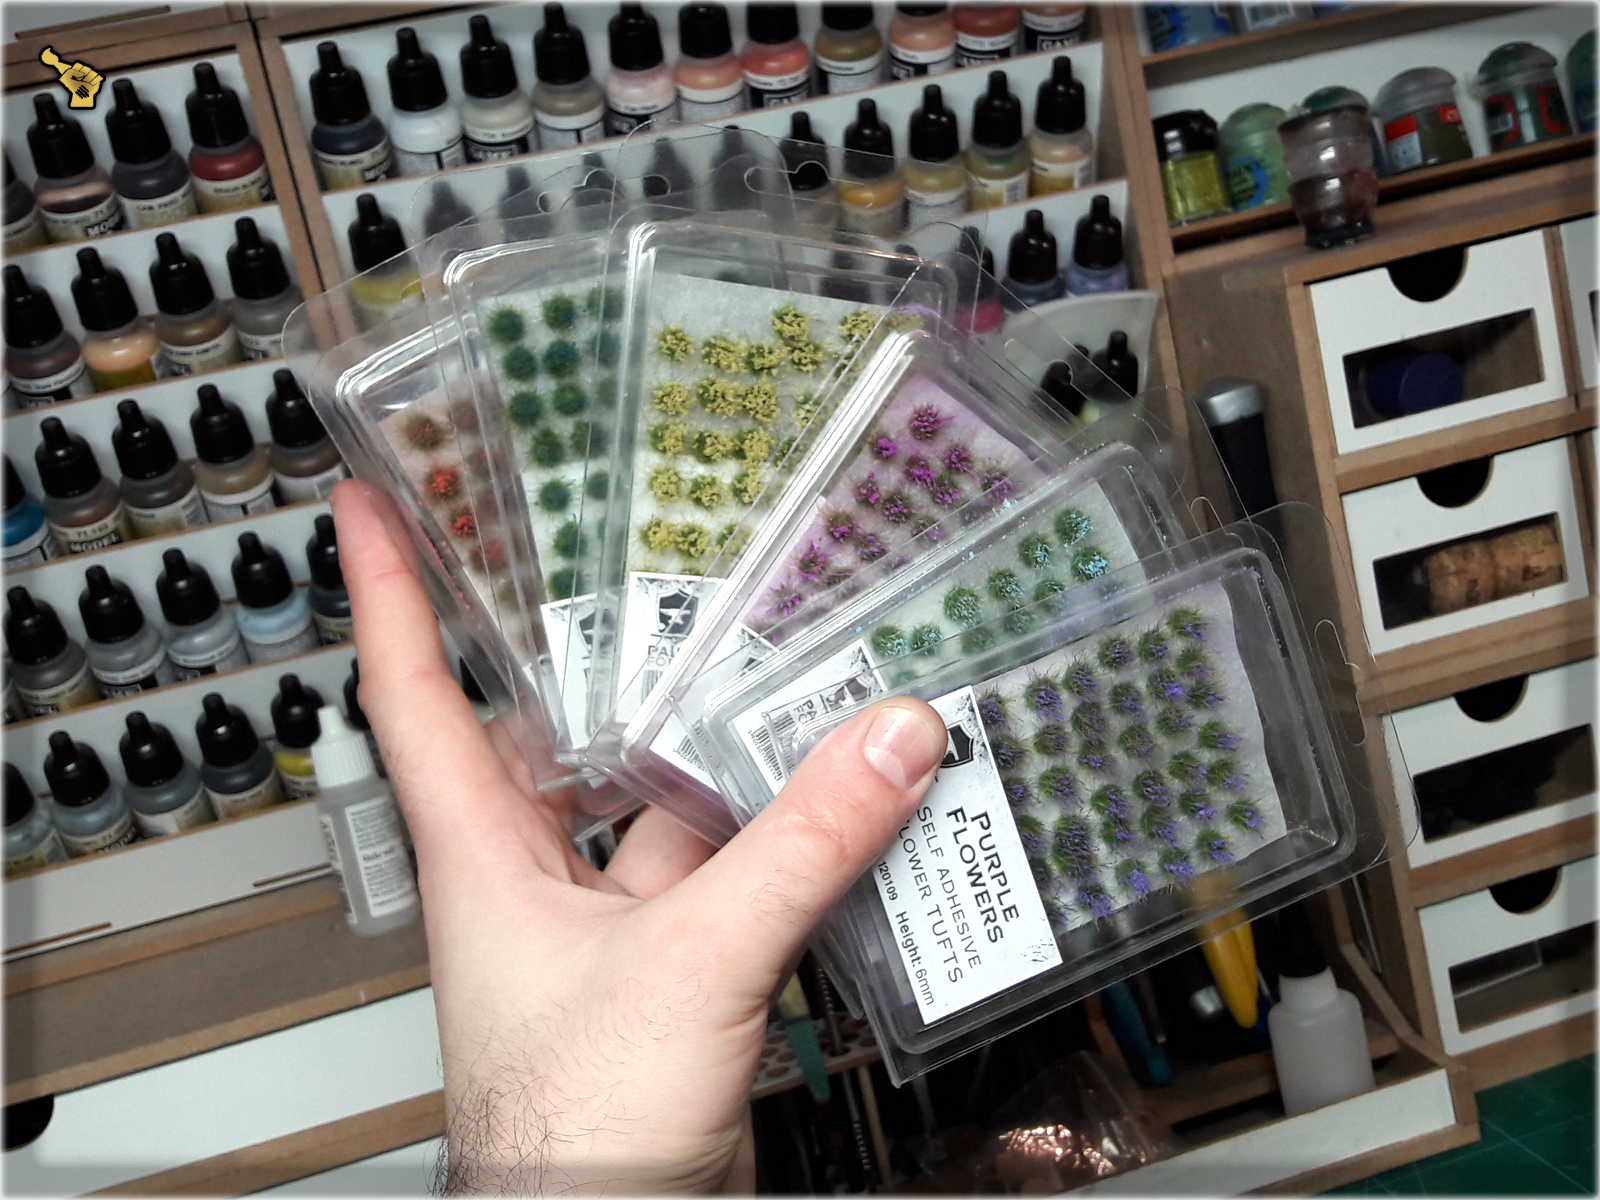
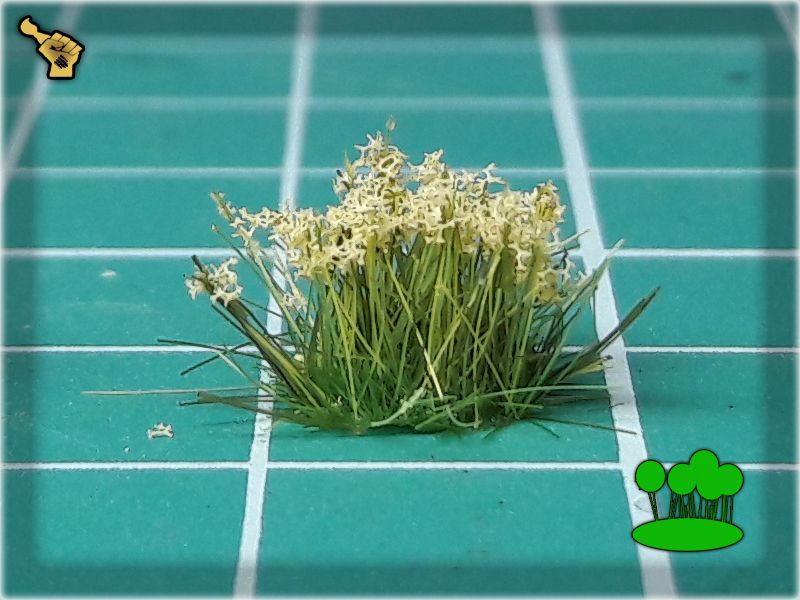
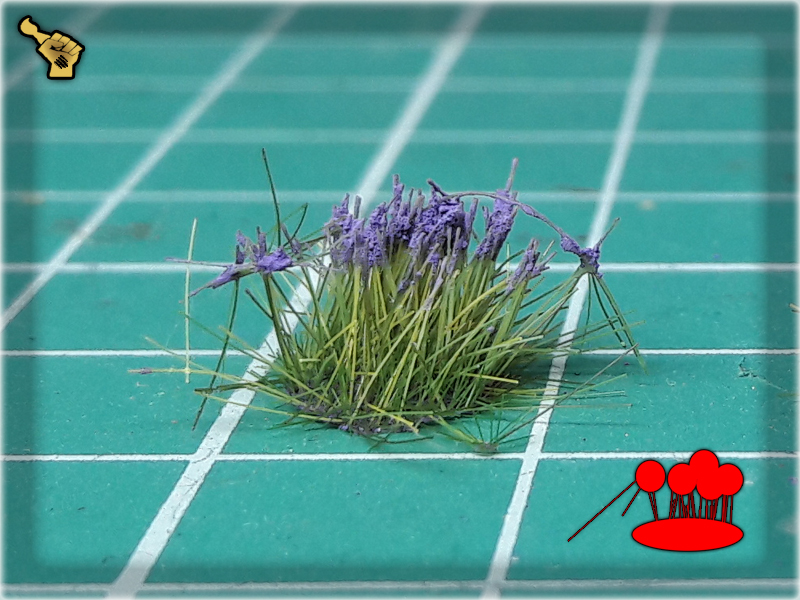
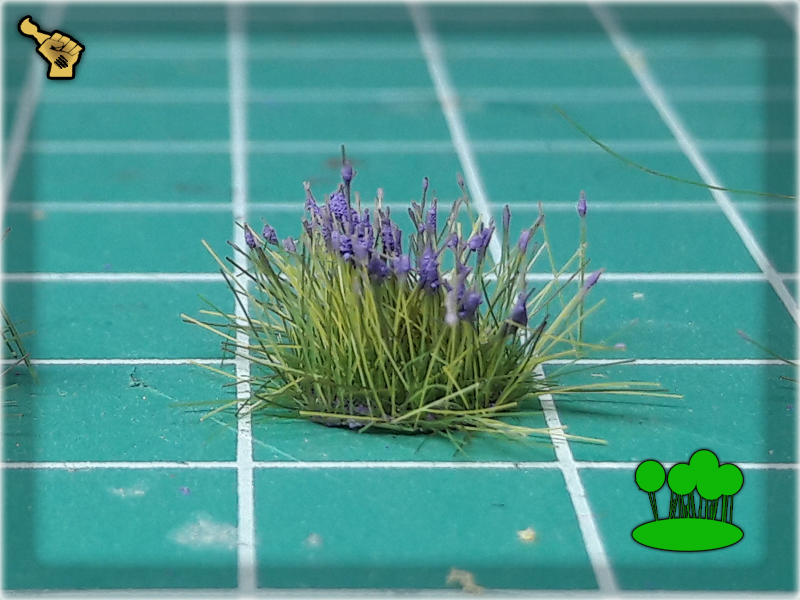
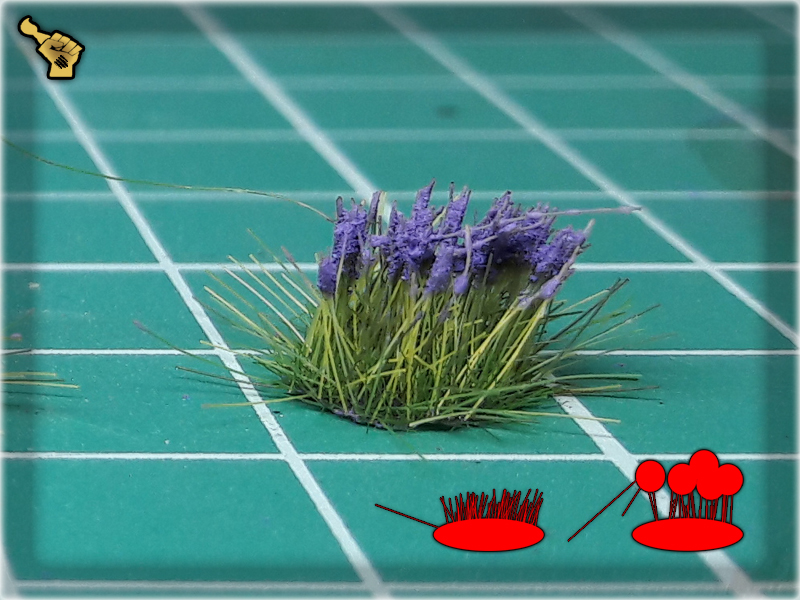
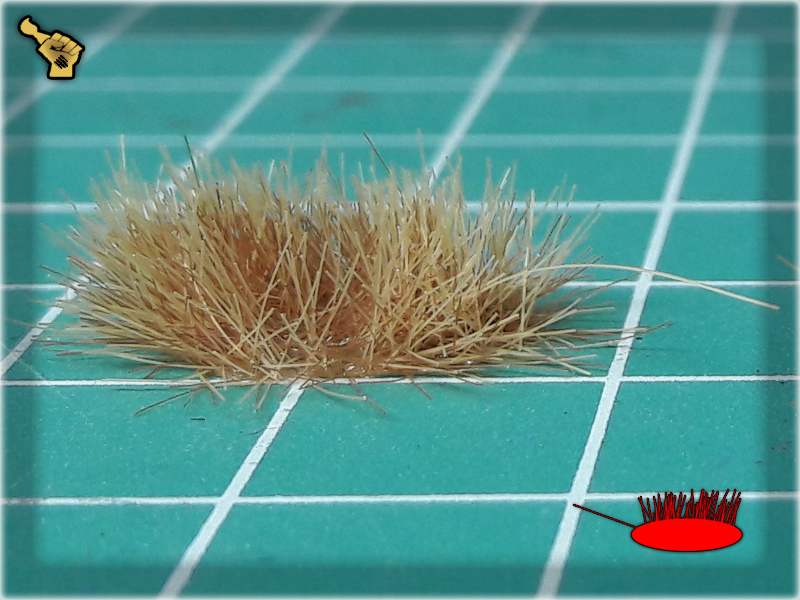
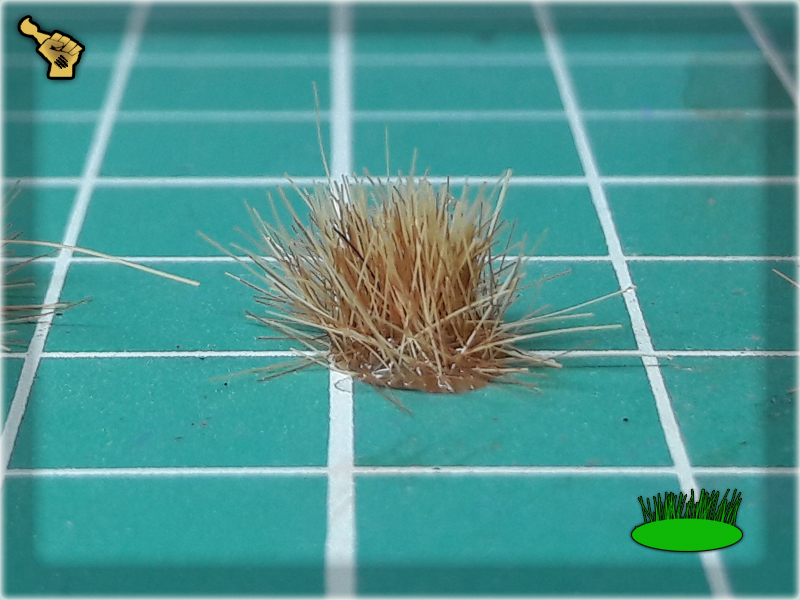
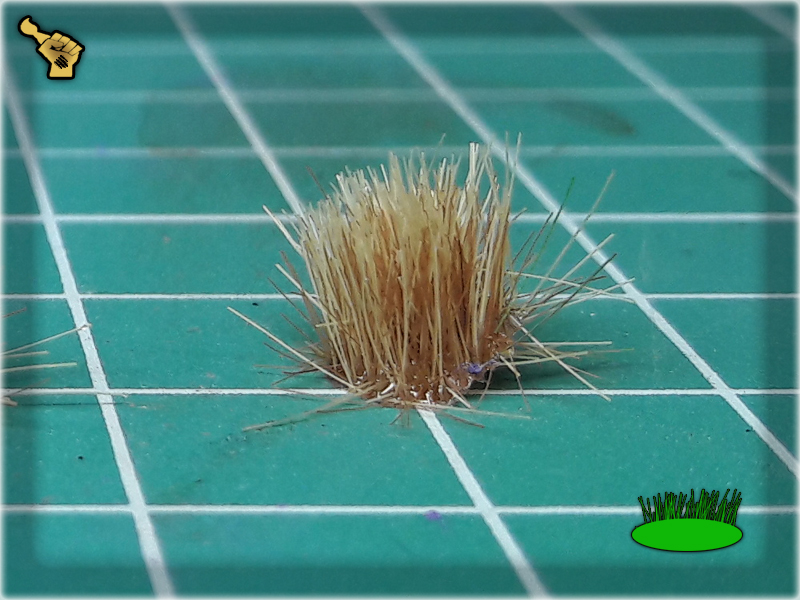
Both Tufts and Flowers are of fine quality. Once you work with them you will quickly notice the lack of the flaws that most of the nowadays Tufts and Flowers have. There will be no huge, random chunks of Tufts that require you to tear them into smaller pieces before usage. There’s almost no need to prepare either Tufts nor Flowers before use as they go in shapely groups – self adhesive and ready to be glued onto the base. When I say ‘adhesive’ I mean – like really, really adhesive – these are based on some sort of goo that really sticks to the surface. Upon opening the package there won’t be hundreds upon hundreds of loose grass blades – only few of these. There’s also no Games Workshop-like shine of the grass blades. Some flaws are still present but it is common with this kind of products.
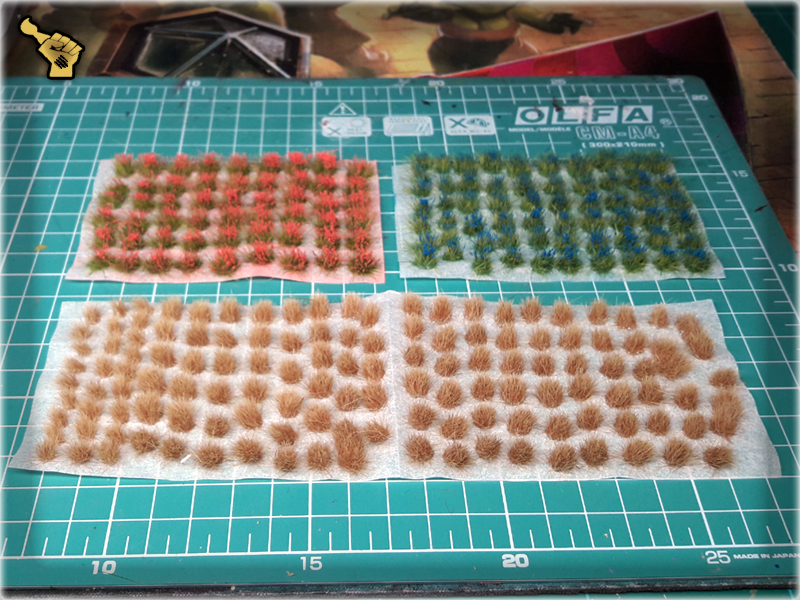
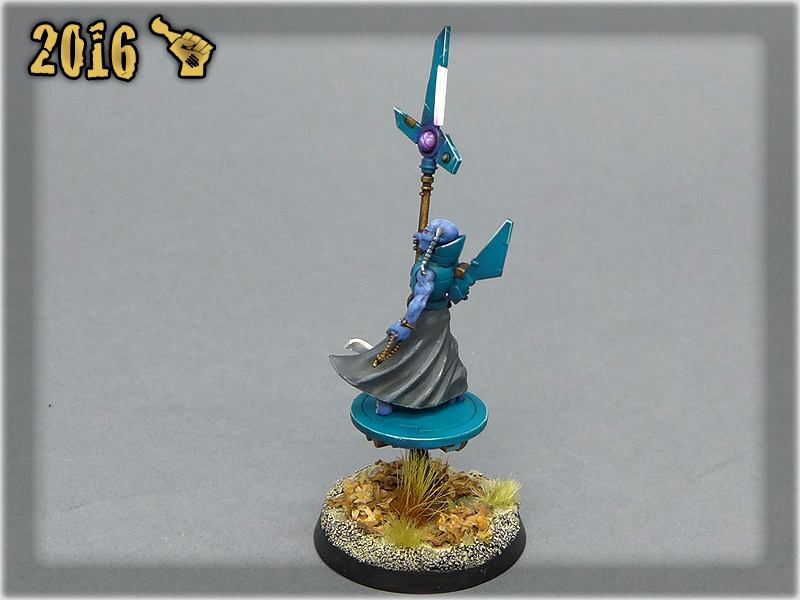
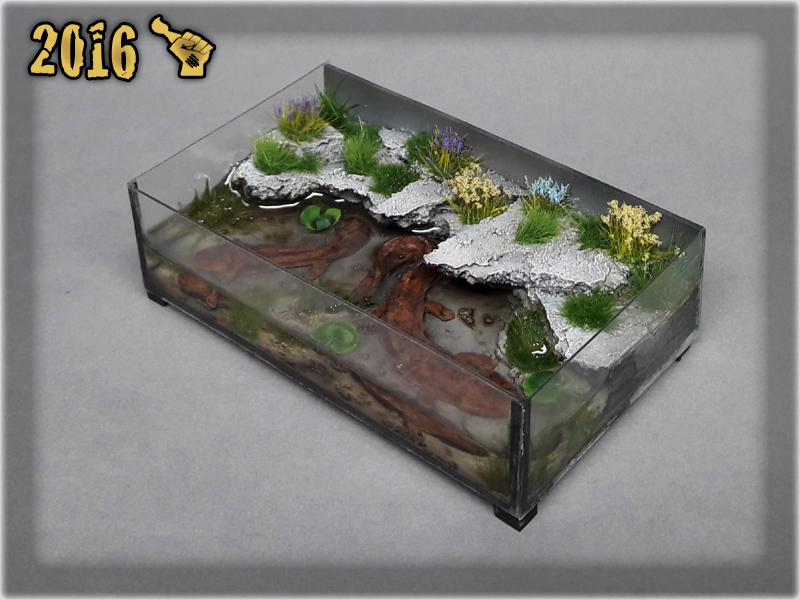
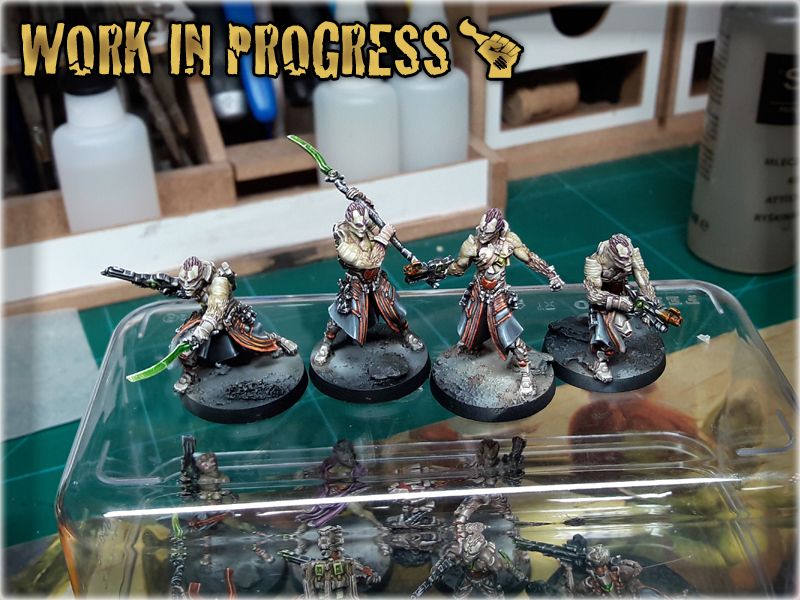
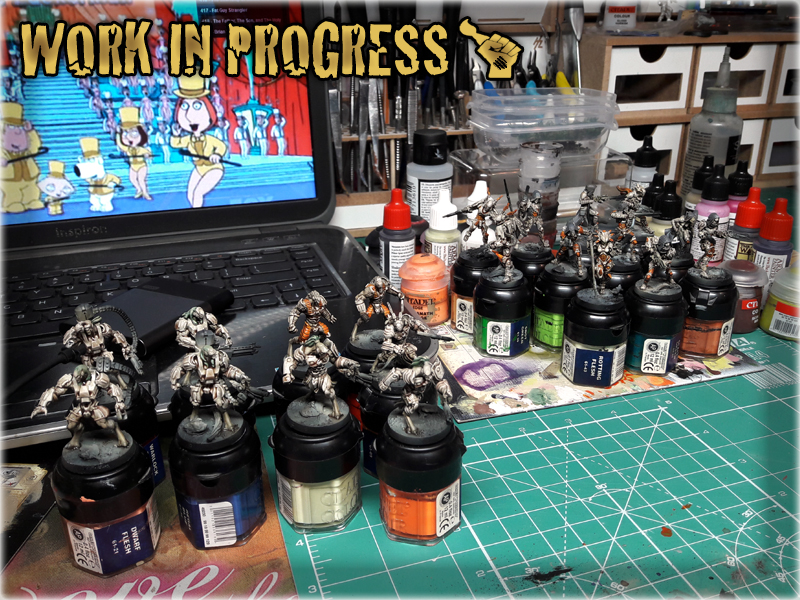
What can I say? Paint Forge’s Tufts ands Flowers just kick ass when it comes to Visuals. I know that it is a matter of taste but hell – I’ll just drop some pictures of the miniatures that I used Paint Forge’s stuff on:

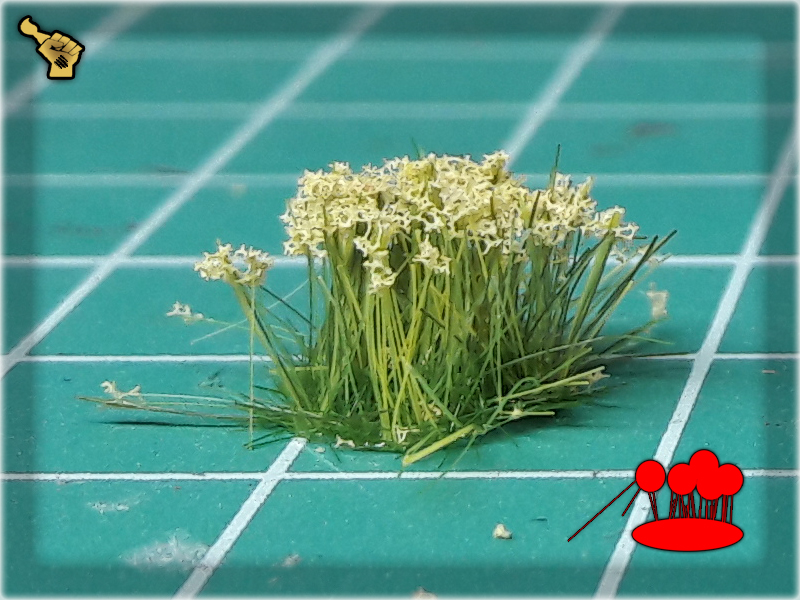
Paint Forge’s Tufts and Flowers are rather functional. Most of the time the only preparation they require would be to pick them with tweezers and just put them on the base. Some things that I have issues with are:
These are not some huge flaws, still once they appear – they tend to consume time, and time (at least for me) is the most important factor in miniatures painting. Either way these are rare while the overall functionality of the products is really high. No need to remove a rough grass blade – it’s easier to stick the Tuft on the base so that this flaw will stay hidden. You can also try to reposition such grass blade into the goo. There are many quick ways to fix any encountered bug – while using the Tufts with ease.
Paint Forge’s products are well balanced when it comes to price. Not too expensive with price gauge placed somewhere around Army Painter. It wouldn’t hurt if they were a bit cheaper, thus competitive, but considering the quality – pricing is really ok.
Not too expensive, great looking and user friendly – Paint Forge’s products are a great choice to compliment the arsenal of Tufts and Flowers used to base the miniatures. Personally I fell in love with them and will expand my collection. I only wish I got to know them a bit sooner so that many fine projects would benefit from it – still there’s a lot of projects before me and you will notice Paint Forge’s Tufts and Flowers appearing in a lot of them.
Where to purchase? The best way is to contact Paint Forge directly via Facebook or to visit Vanaheim.pl/eu and order some!

Here are some Colour Recipes for Infinity Yu-Jing lvl 5 from GALLERY: INFINITY TOHAA lvl 5. Please take note that this is a simple colour scheme, not covering multiple overlapping layers and blends inbetween, that lead to the final product. It is supposed to be used as guidline not a step-by-step.

BONE armour:
Black Undercoat,
Earth (Vallejo)*,
Khaki (Vallejo)*,
Bonewhite (Vallejo)*,
Pallid Wych Flesh (GW) l&p,
Mix Strong Tone Ink (AP) 1:1 Soft Tone Ink (AP),
Pallid Wych Flesh (GW) l&p,
White l&p,
SYMBIONT armour:
Hot Orange (Vallejo),
Hot Orange (Vallejo) + Pallid Wych Flesh (GW),
Mix Strong Tone Ink (AP) 1:1 Soft Tone Ink (AP),
Lugganath Orange (GW),
Lugganath Orange (GW) + Pallid Wych Flesh (GW),
Pallid Wych Flesh (GW) l&p,
BLACK weapons:
Black Undercoat,
Skavenblight Dinge (GW),
Fenrisian Grey (GW),
Pallid Wych Flesh (GW) l&p,
Dark Tone Ink (AP),
Pallid Wych Flesh (GW) l&p,
White l&p,
NECROTIC skin:
Dead Flesh (Vallejo),
Mix Strong Tone Ink (AP) 1:1 Soft Tone Ink (AP),
Necrotic Flesh (AP) + Pallid Wych Flesh (GW) l&p,
White l&p,
ORANGE clothes:
Hot Orange (Vallejo),
Hot Orange (Vallejo) + Fire Dragon Bright (GW),
Hot Orange (Vallejo) + Fire Dragon Bright (GW) + Pallid Wych Flesh (GW) l&p,
Pallid Wych Flesh (GW) l&p,
Mix Hot Orange (Vallejo) 3: 1 Bloodletter (GW),
Lugganath Orange (GW) l&p,
GRAY/BLUE clothes:
Eshin Grey (GW),
Mix Strong Tone Ink (AP) 1:1 Soft Tone Ink (AP),
Eshin Grey (GW),
Eshin Grey (GW) + Fenrisian Grey (GW),
Eshin Grey (GW) + Fenrisian Grey (GW) + Pallid Wych Flesh (GW) l&p,
Dark Tone Ink (AP) shadows,
Pallid Wych Flesh (GW) l&p,
White l&p,
l&p – lines and points,
*Airbrushed (with multiple layers and mixes)

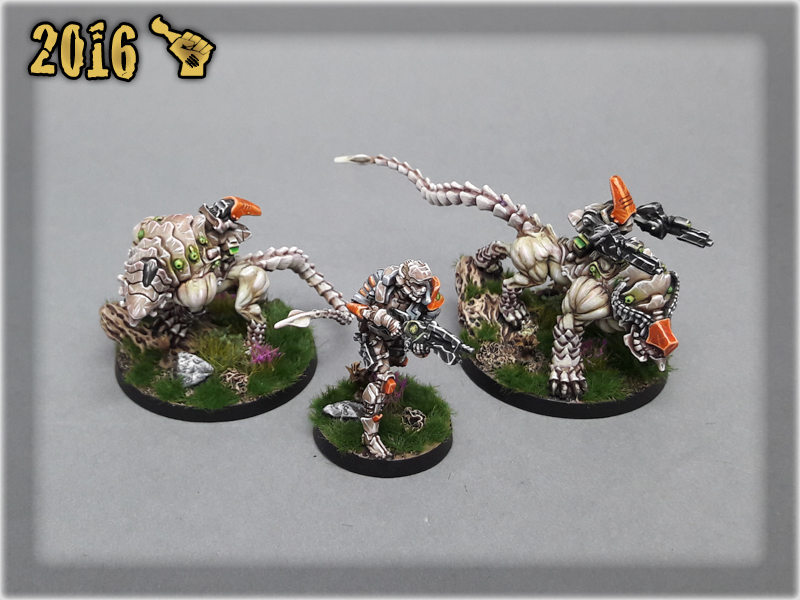
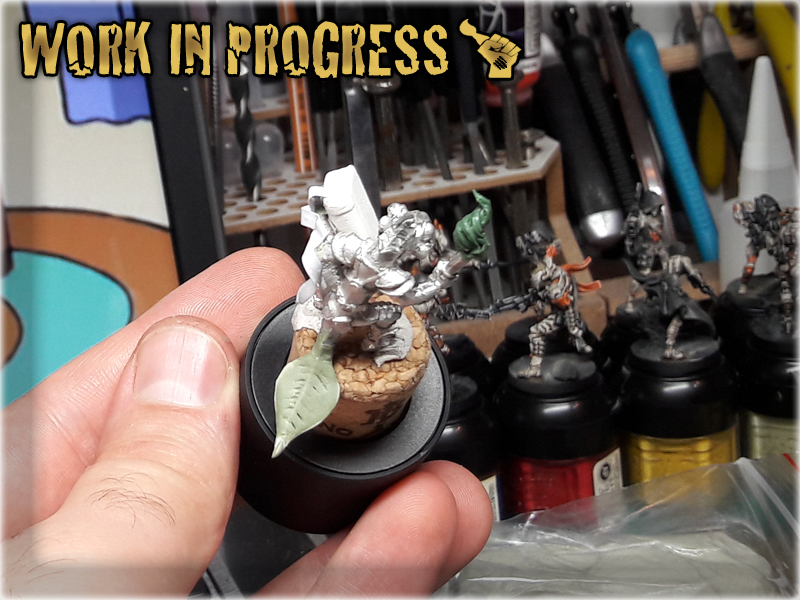
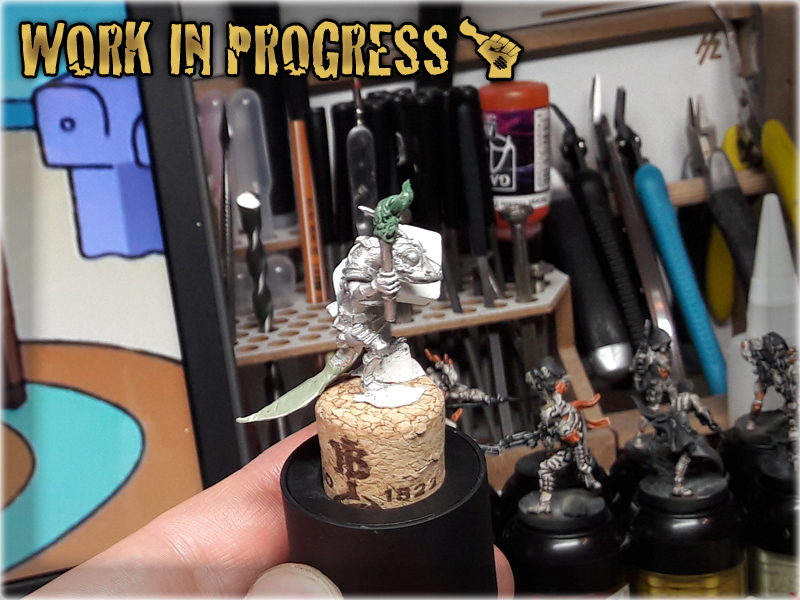
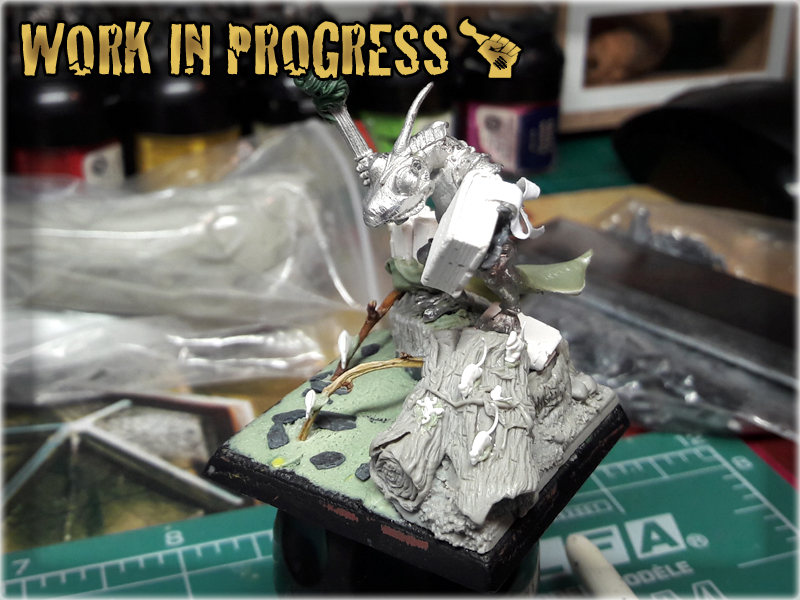
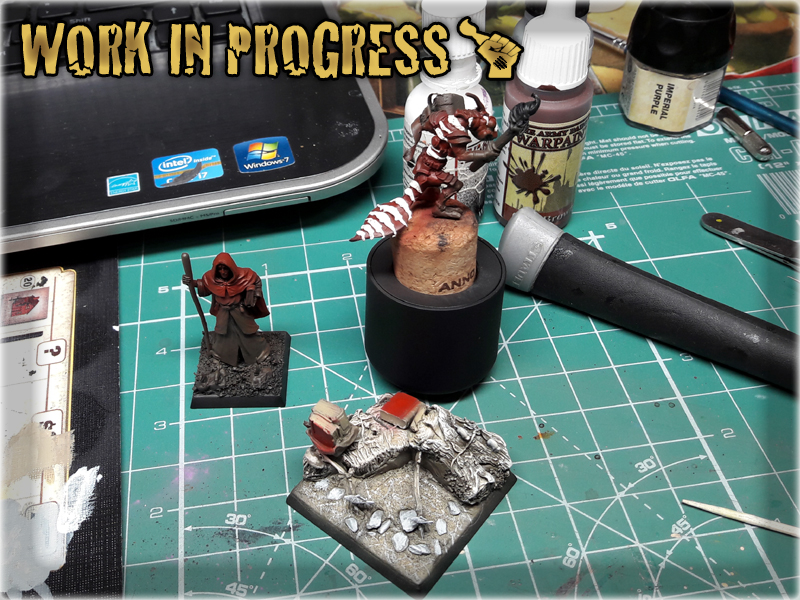
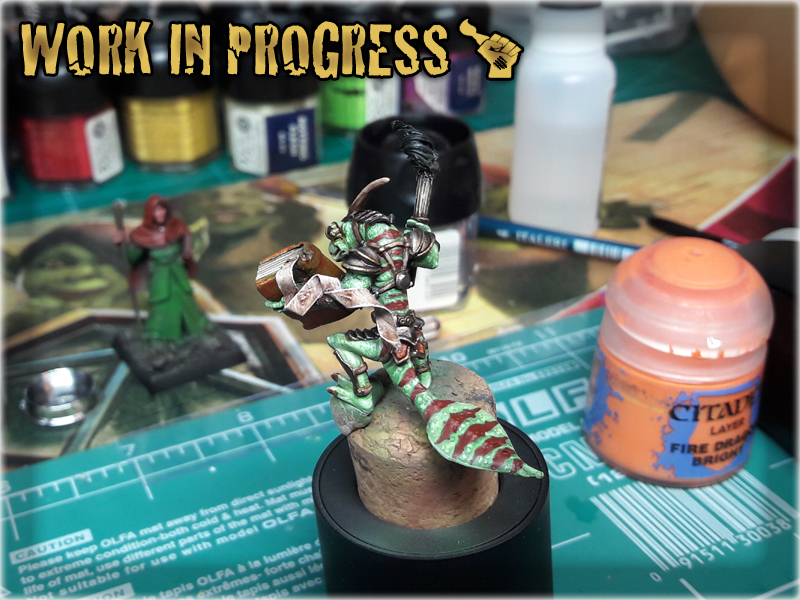
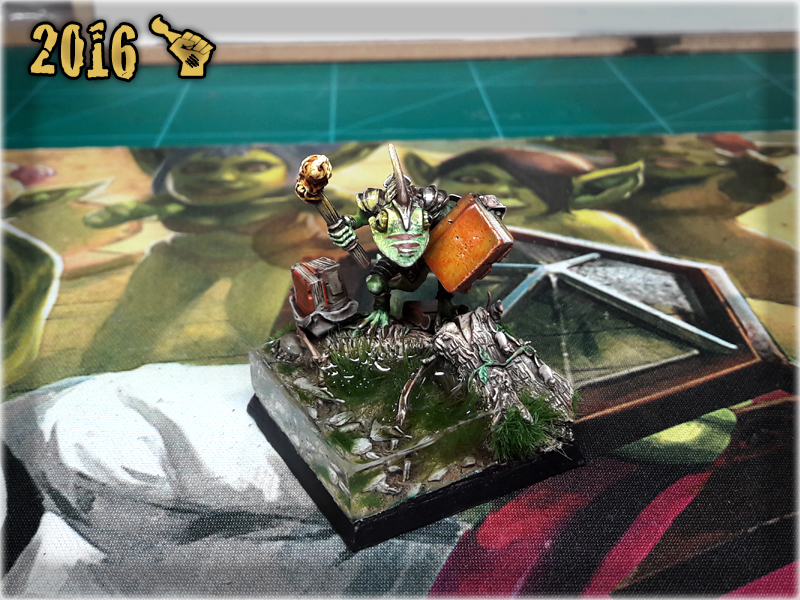
Every once in a while I encounter a visionary customer ending up head to toe in a ‘Special Project’ of someone else’s design. Such event occured just recently when I met Thomas, who is both a miniatures collector of grand magnitude and a great fan of Geckos. So, Thomas had an interresting idea of converting a Newt Warrior from Dark Sword Miniatures into a ‘Gecko Mage’. He was very specific about all the details for this particular project. He even drawn some concept arts to point out his expectations which is a rare thing. I was pretty much consumed by the idea and started to think about how I would proceed with it…
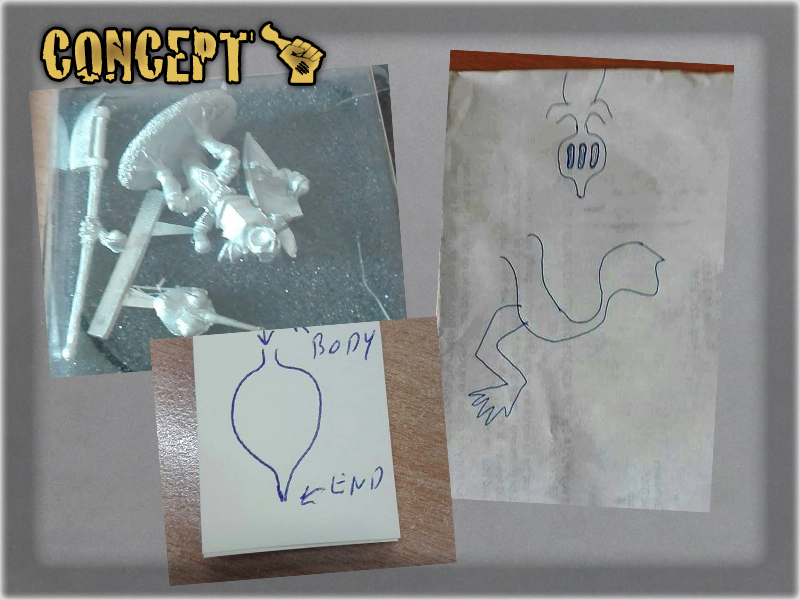
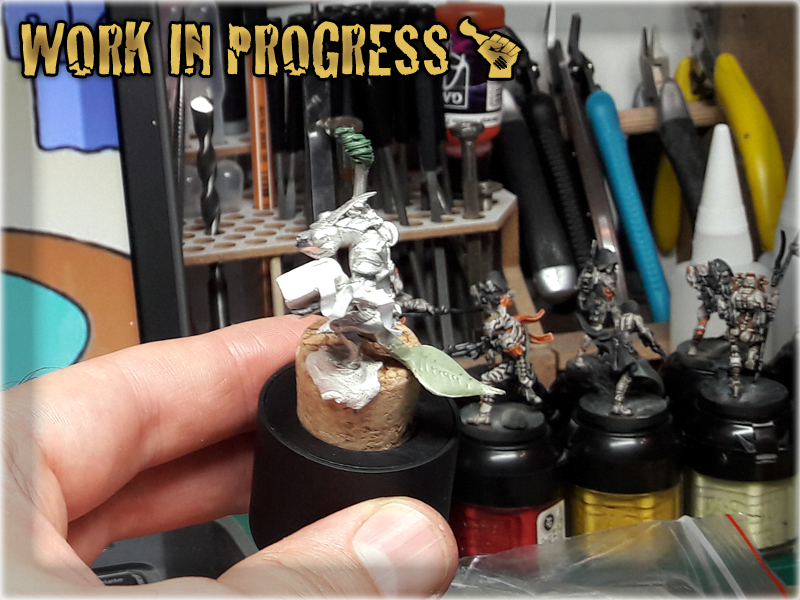
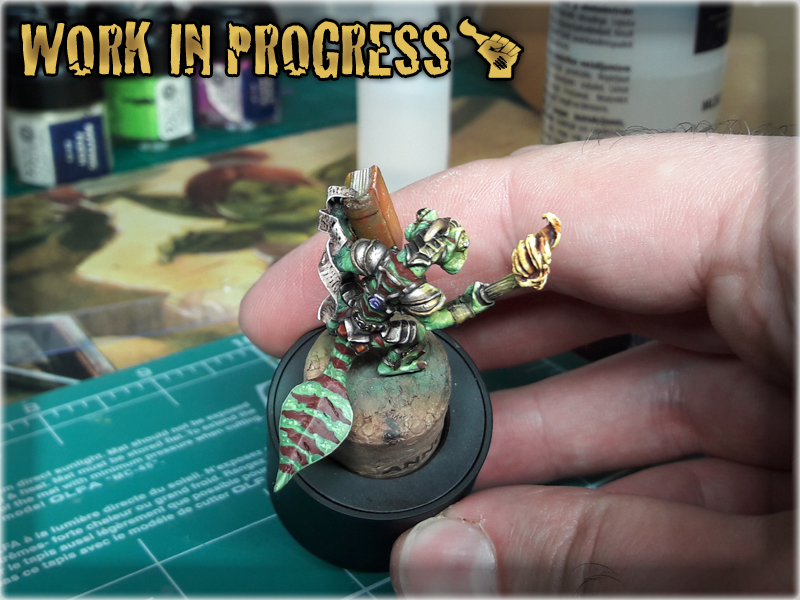
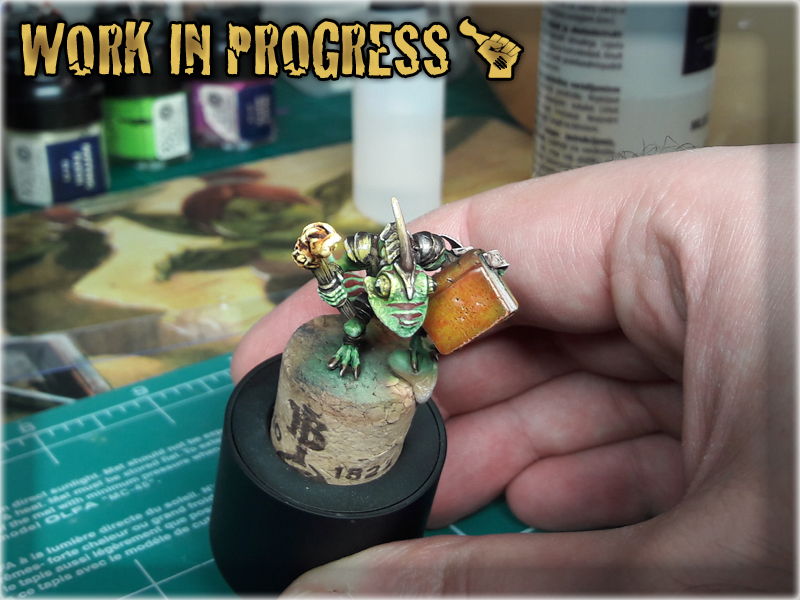
Alongside typical Gecko tail I was asked to create a torch and a book for the miniature to stand out as a ‘gecko mage’. Torch and tail were a matter of some time spent with green stuff and it went pretty smooth, but the book was a totally different thing. First of all I had to remove the miniature’s left arm, almost entirely covered by a shield. Taking that into consideration I decided not to rebuild this practically ‘obliterated’ limb but rather mask the damage and use a proxy hand to hold the book. Sculpting a new hand was out of question, as this would consume a lot of time and is on a verge of the limit of my skills. I used a Warhammer Ghoul’s hand instead and cut off one of it’s fingers to mark the other hand. Then I used some green stuff to fill the space left after previous ‘operation’ and masked the ‘wound’ using a book on the one side and a scroll-like bookmark on the other.
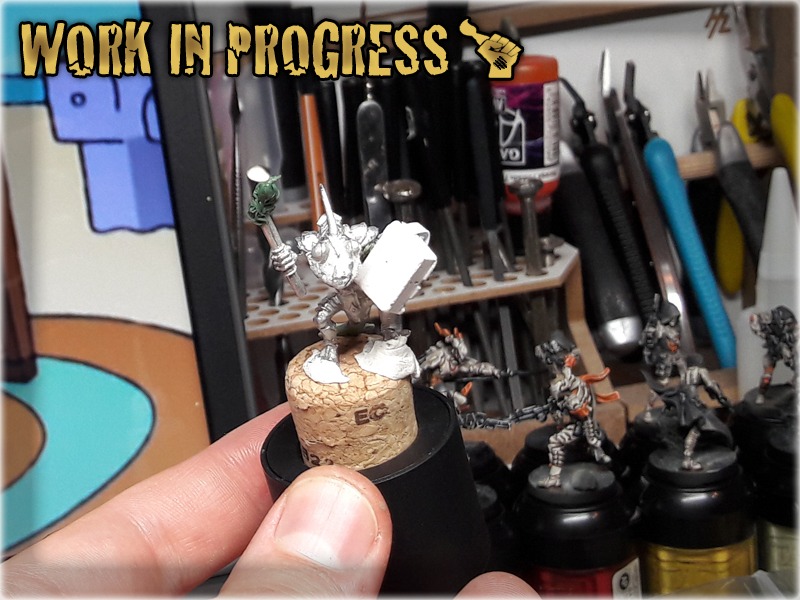
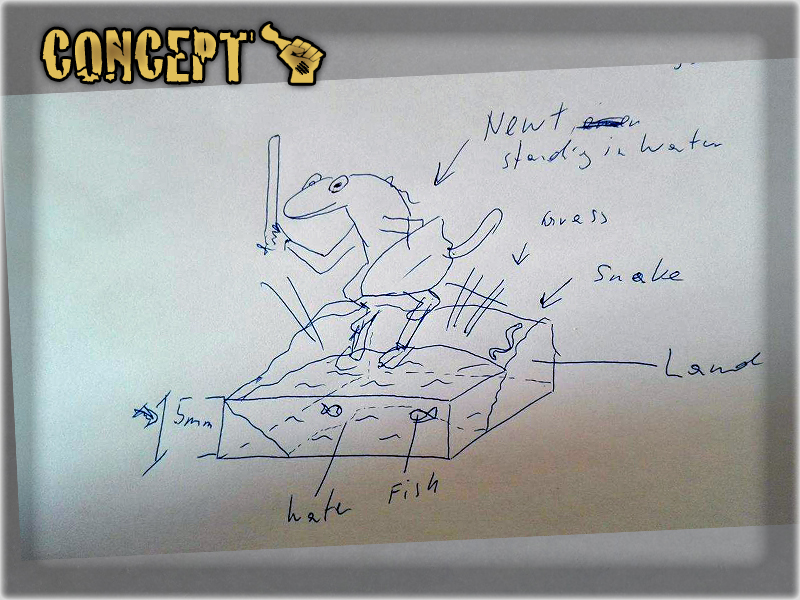
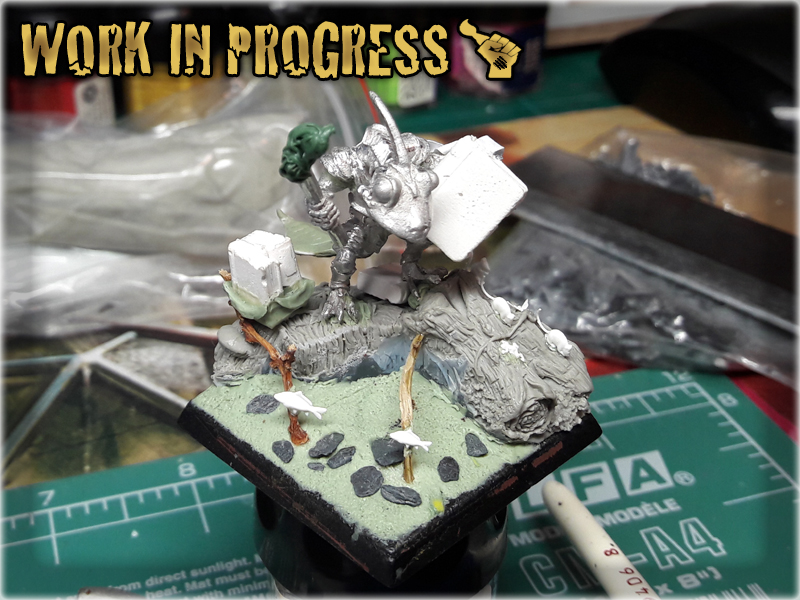
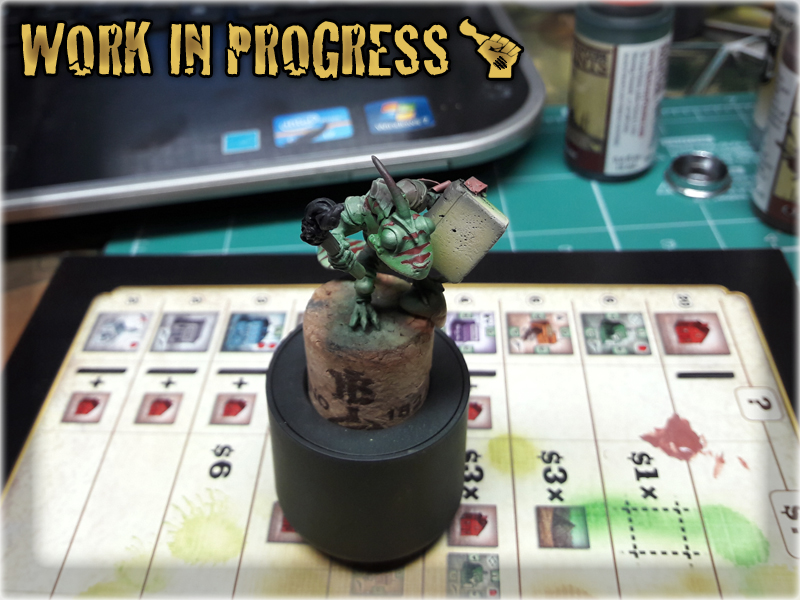
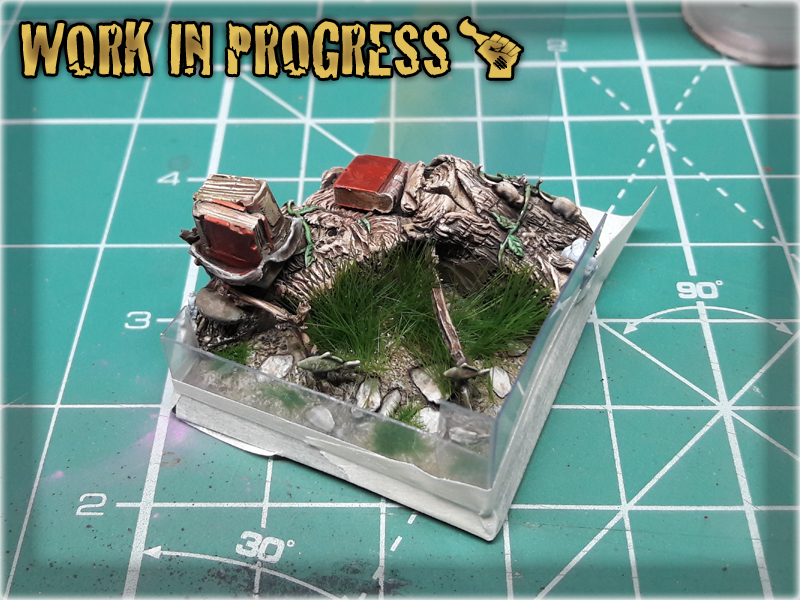
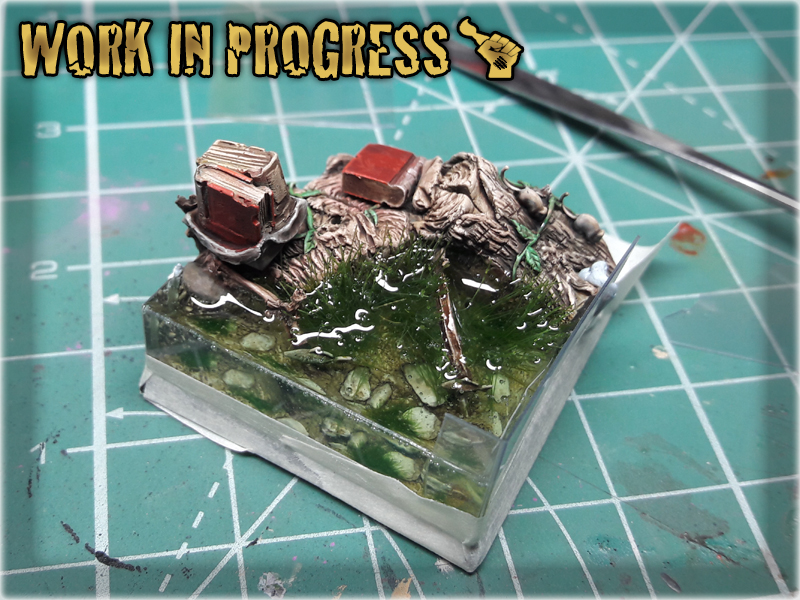
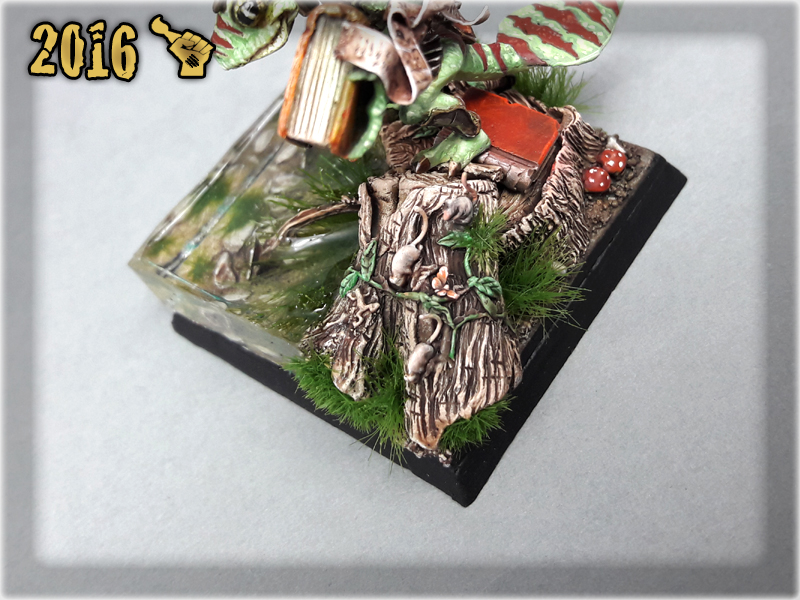
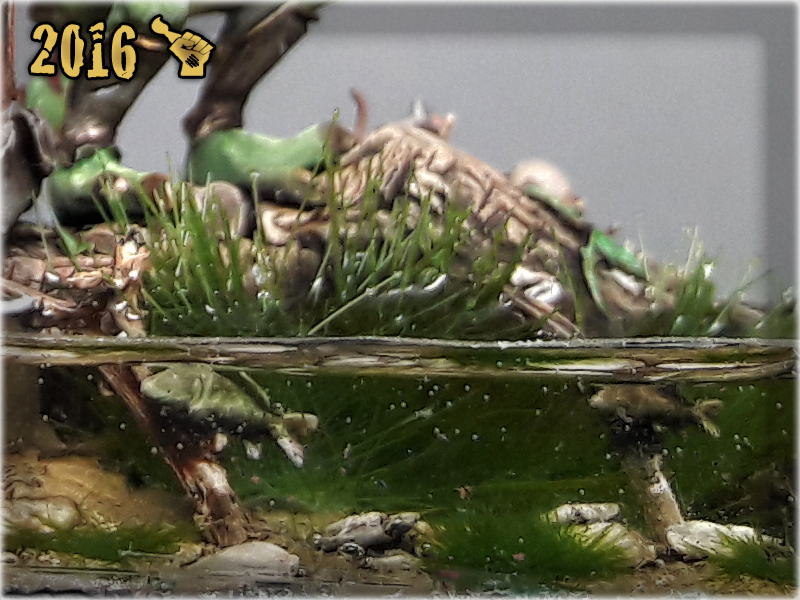
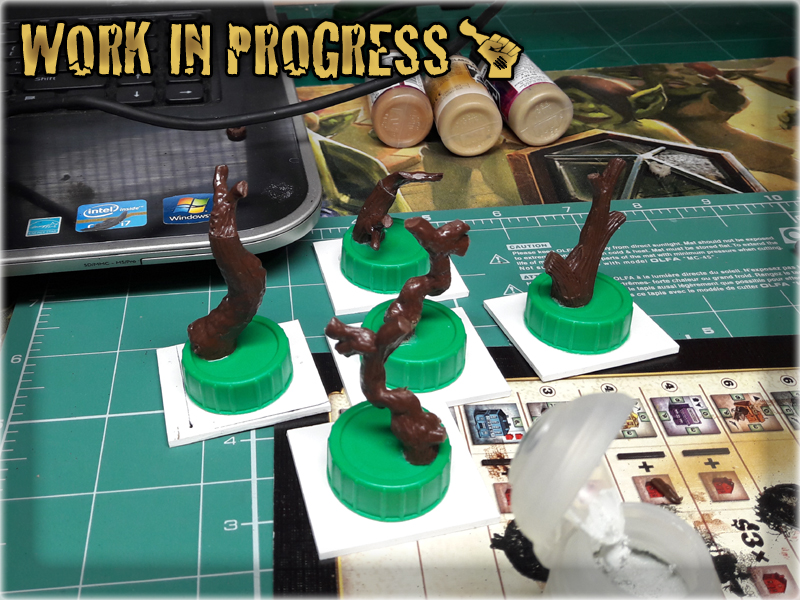
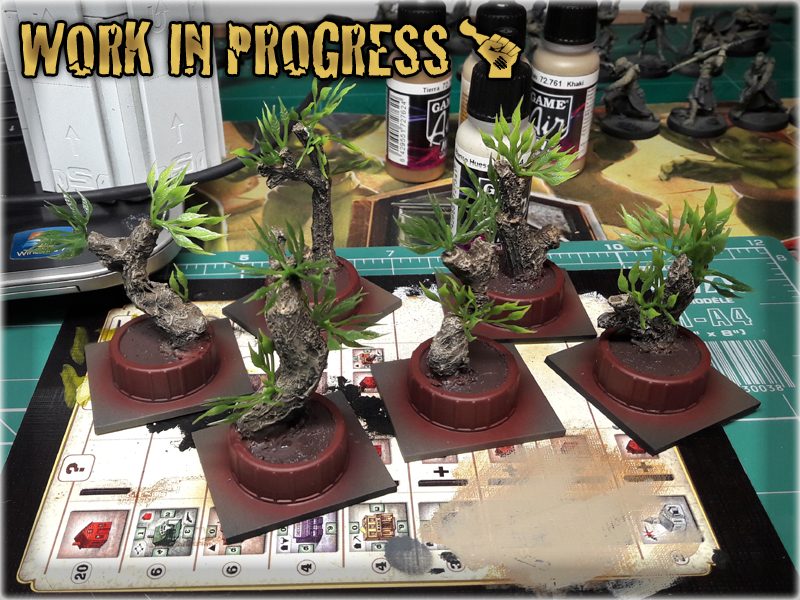
The base was yet another interresting idea. It was meant to be partially submerged with fish, plants and river bank being clearly visible. Alongside the mage, some books were to be added on the coast. Also three rats were to accompany the Gecko, being it’s familiar pets. As it happened, I had an old Micro Art Studio base with a tree trunk all over it. I decided to modify and use it as a major feature of the coast. Once it was prepared and placed on the base, I just added detail all around it and positioned the Gecko miniature in a slightly more dynamic pose. It looked well so I got a green light from Thomas and proceeded to painting…
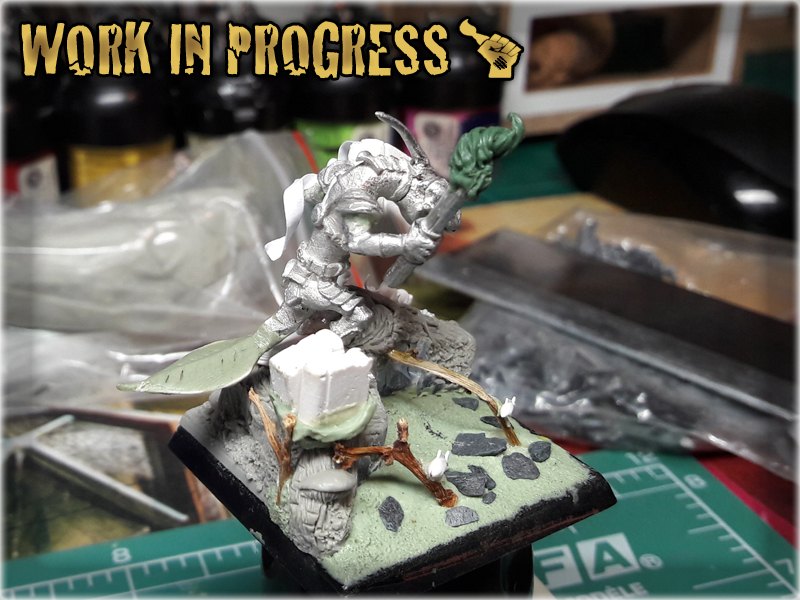

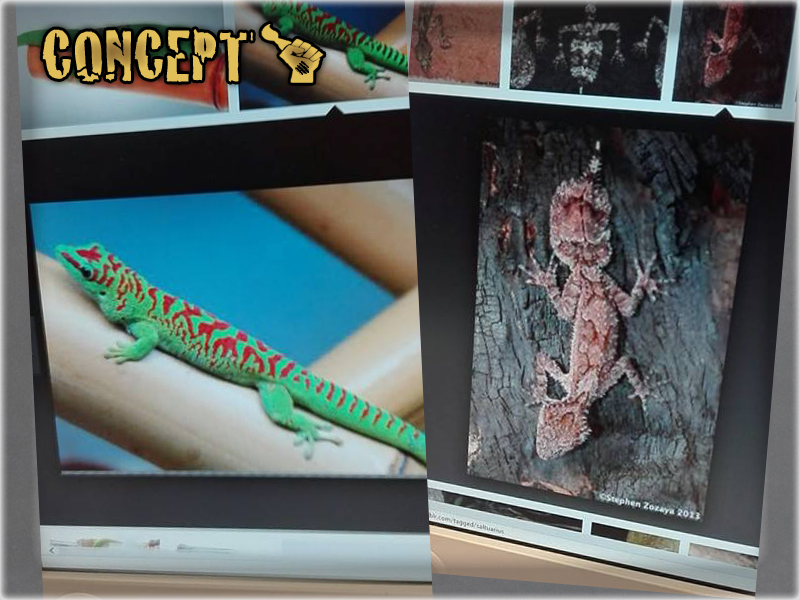
The overall concept for the paint job was to use the original colour scheme of light green with underbelly creme and add a red pattern to the tail and back. I also got some specifics on the eyes and armour. Otherwise I had a free will to choose colours and their depth so I just did my best, providing a nice ‘Heroes Never Die!’ lvl 6 paint job.

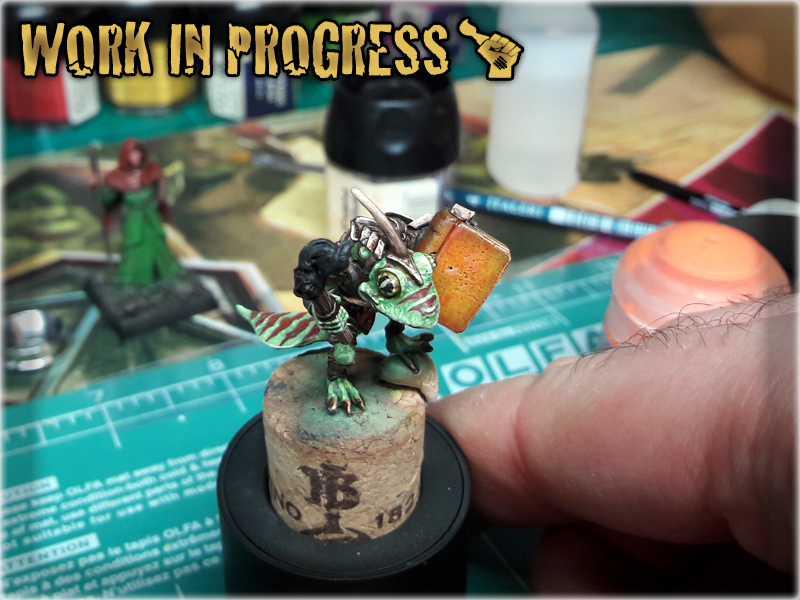
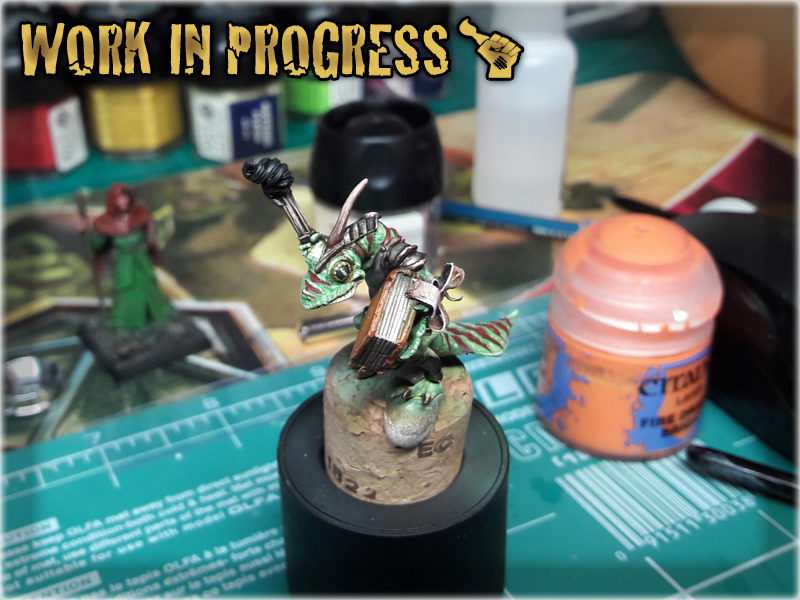


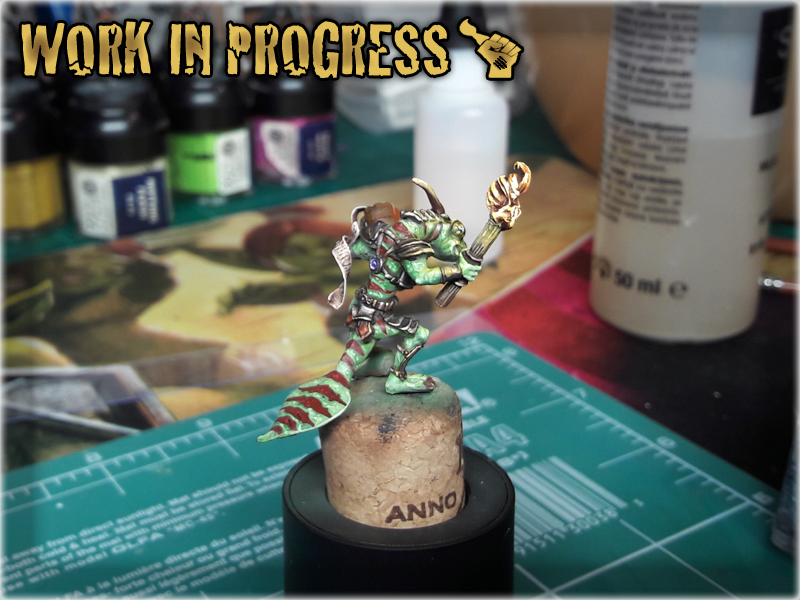
I actually started painting with the base. While the Gecko paint job proceeded, the base was already prepared to get submerged. I used Fantasygames awesome tutorial to prepare the base then poured the resin in. As with all things – mistakes happen, and my first attempt ended up with a mess, resing pouring all over the desk, me trying to block it with blue tac and other stuff… I failed and restarted the process after clearing the base of resin. Second attempt was a success and after 24 hours I was ready to add a finishing touch to the base…
I had a lot of fun with this Special Project, mostly because I would have never had an idea like this on my own. Thomas not only provided the concept but also entrusted me with his vision. He had a great impact on the project and it makes it even sweeter. If only I could produce two identical pieces so that one would adorn my own collection 😛
View complete Gallery… Like/Don’t like? Vote at CoolMiniOrNot…
It’s been almost four months since I have ‘finished’ The Colony Special Project. Such grand endavours are the reason I’m into painting and miniatures wargaming. That wondrous feel of completion once a huge project hits the finish line. It always comes with a great satisfaction but once the dust settles, a void starts to grow inside my heart. I’m happy with results, yet long for the ‘process of creation’. That is why I consider every major project to be alive for at least as long as I am. In case of The Colony – well, a gaming table could always be improoved or use some more scenery. That is the exact way of thinking which led me to writing another part of this article…
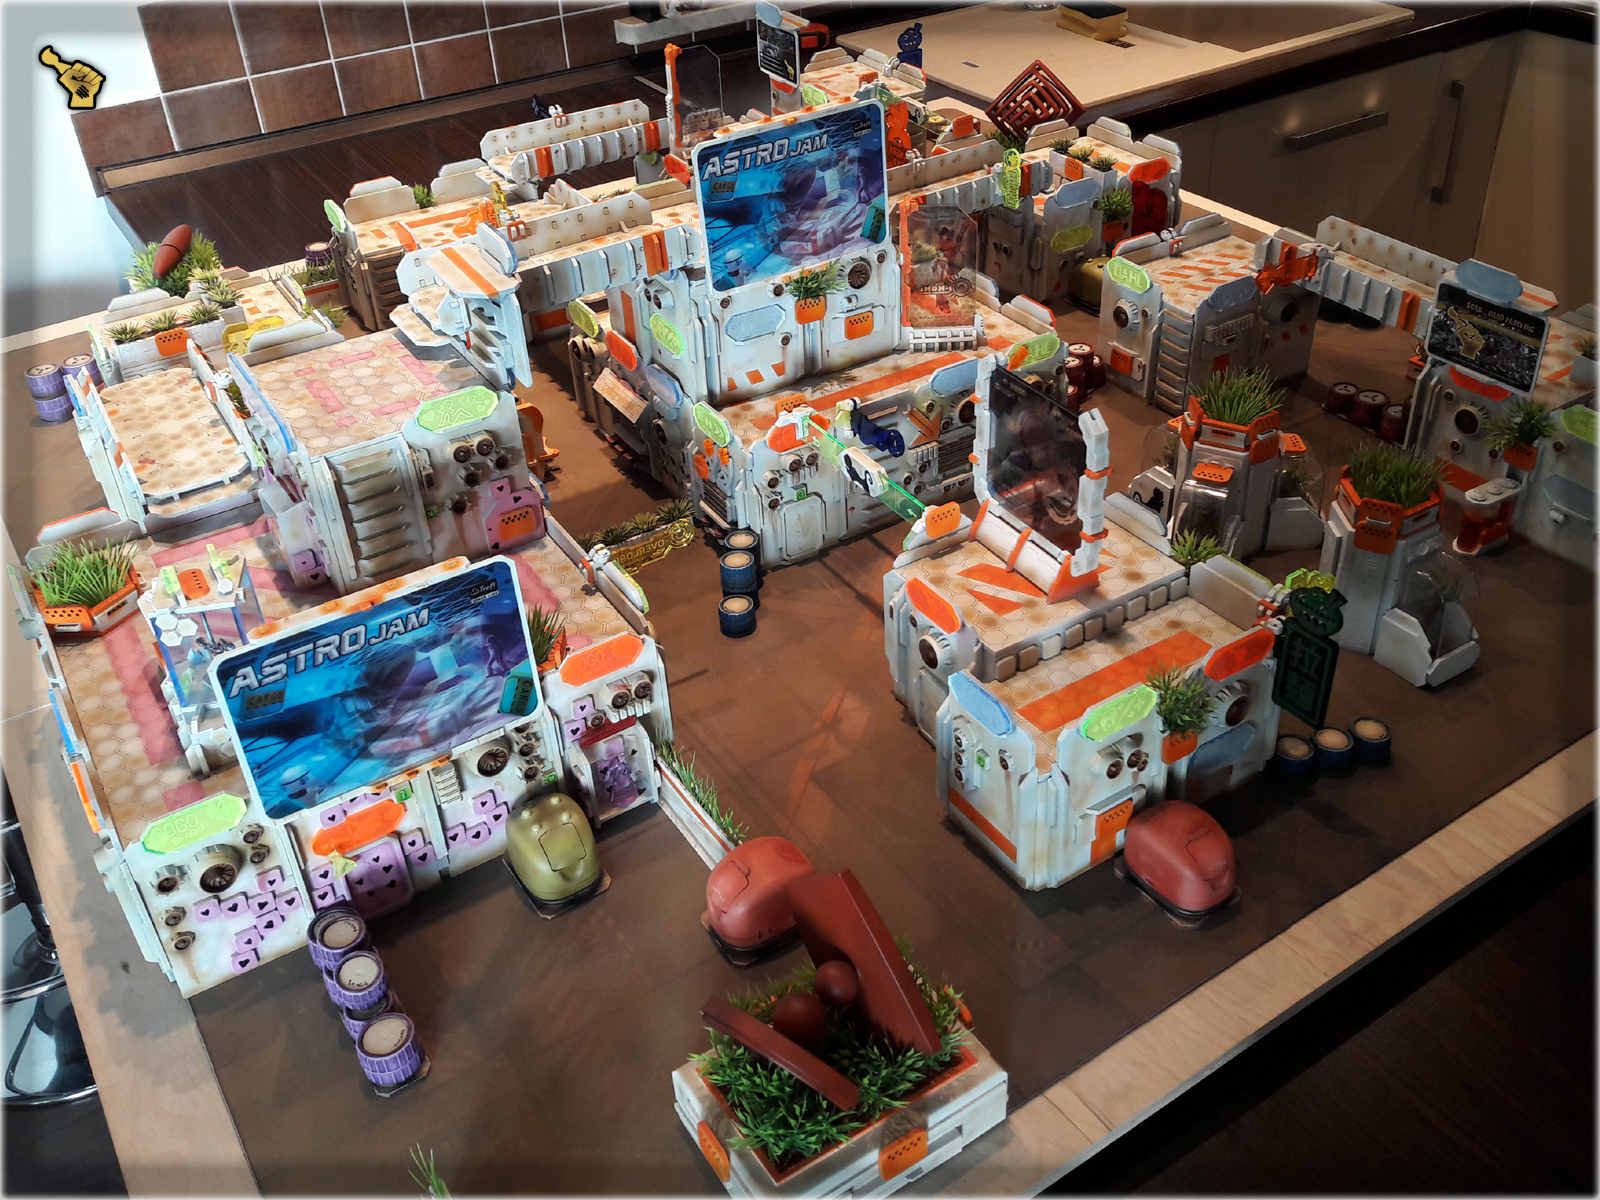
That being said I must confess that I wasn’t able to invest much time into The Colony in the last few months. Other artistic projects fell on me from all around the globe and I lived a prosperous life by lending my brush to all those in need of decent painting. Still, once in a while I stumbled upon some cool looking items that just screamed to be unleashed onto my gaming board in form of some sweet looking terrain. Many sources provided me with items of great value, among them my girlfriend (cosmetics), my friend Garran (his personal collection of ‘cool stuff’) and even some of befriended companies like Micro Art Studio, or Ekograf, who (knowing my tastes) sent me some of their leftovers. I sincerly thank all of you, my beloved providers, and proudly announce that I couldn’t resist the temptation and used all the items, you so willingly parted with, to further expand my scenery collection and bring The Colony’s theme beyond the bounds of my early predictions.

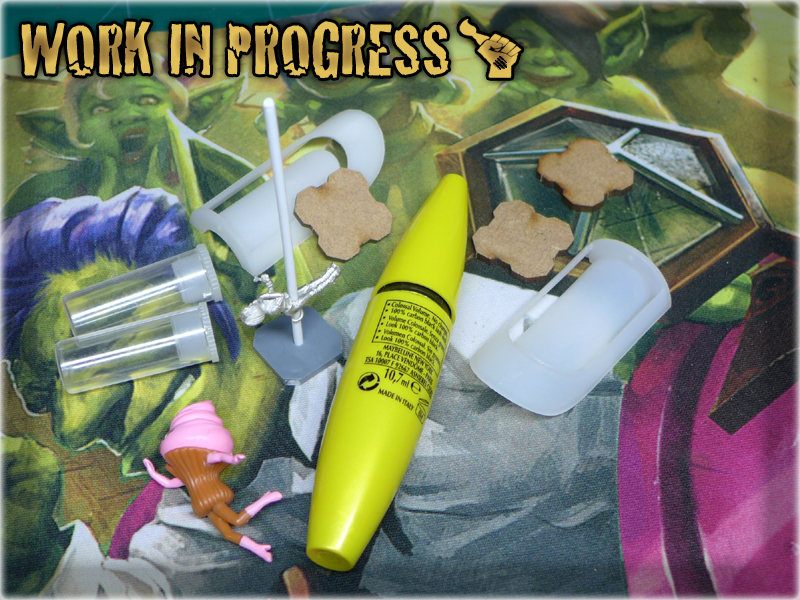
Anyone remembers that picture? It was published at the end of “THE COLONY” SPECIAL PROJECT part six article. Some of this stuff still awaits being used, but more than half of it has already reincarnated in a form of these scenery pieces:
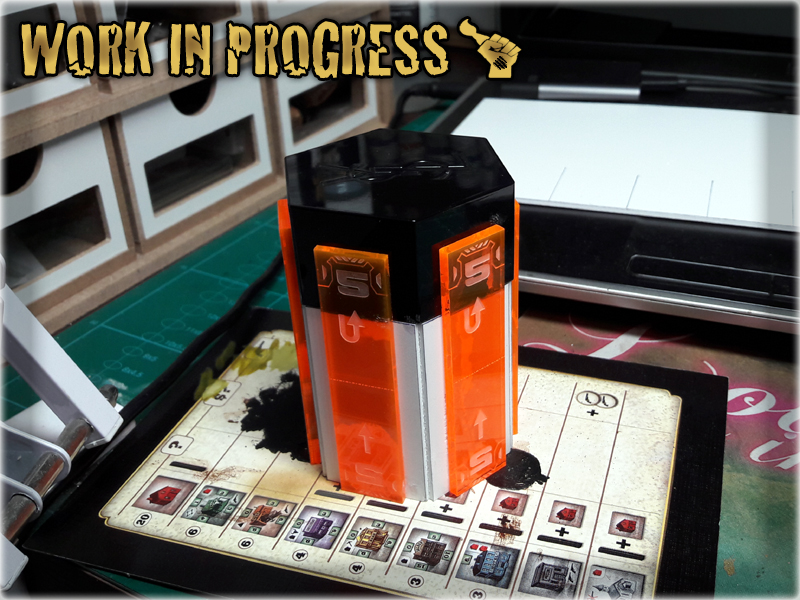
A futuristic sculpture made out of a Maybelline eyelashes mascara. Once I stole this precious item from my GF’s secret stash I had a real wrinkle with how to use it. So many ideas, including an antenna, a column, a laser tube – in the end I couldn’t decide so I got back into a well known territory of futuristic sculpures. It is only fair to use items stolen from my GF as pieces of art, otherwise she might not be swayed to turn a blind eye on my theft 😛
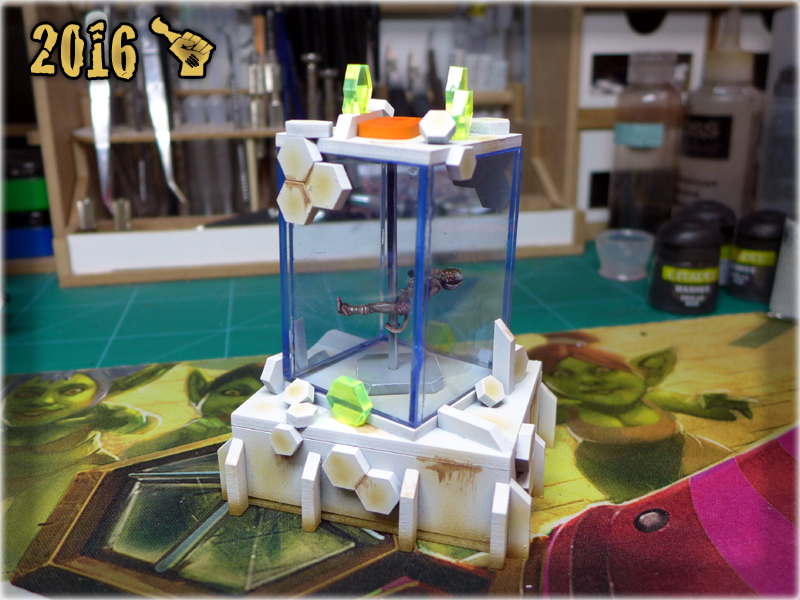
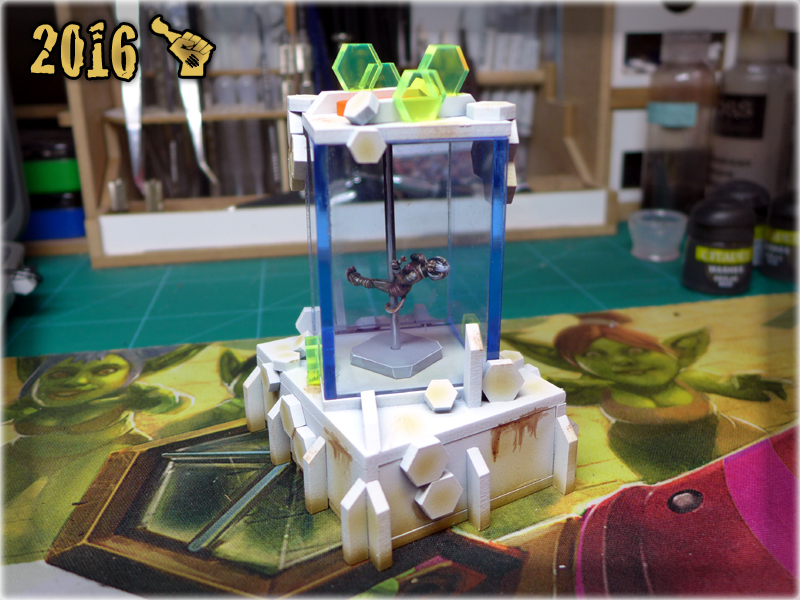


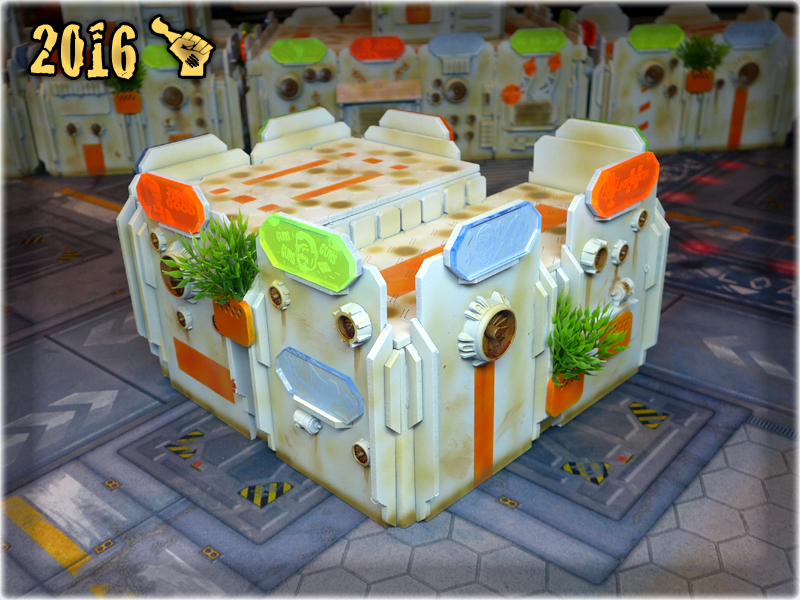
I got that awesome Dactari from my Girlfriend somewhere along two years of gaming. Untill now I hadn’t had use for it, as I was more into Corregidor-like miniatures, but finally I got the idea, made up what MDF pieces I will need to ‘cage’ this chick and ordered them from a friendly company. Once I got the stuff I just build the cage and here’s the result. It makes foir a nice rooftop piece or a great standalone scenery piece.
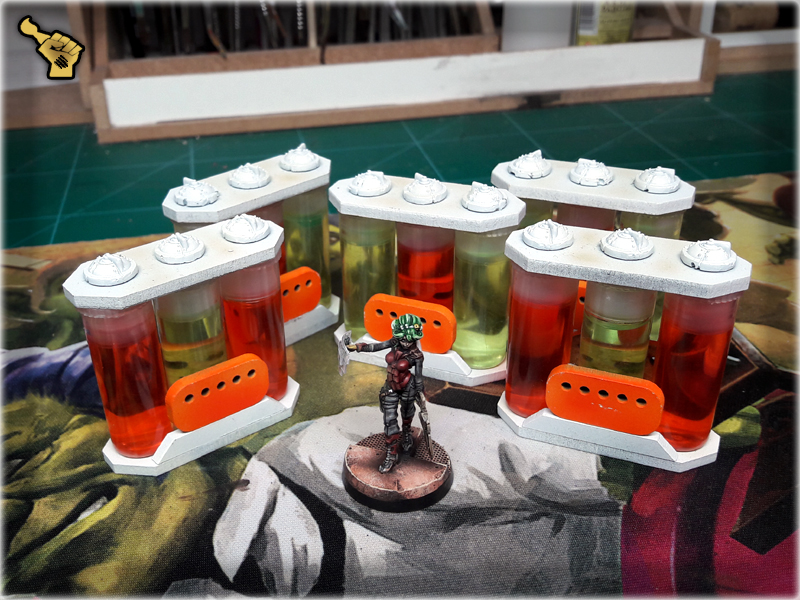
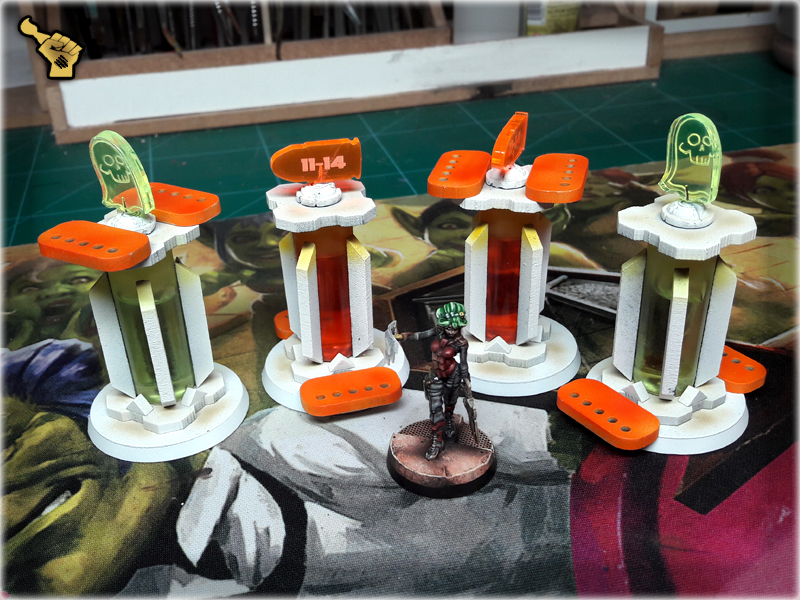
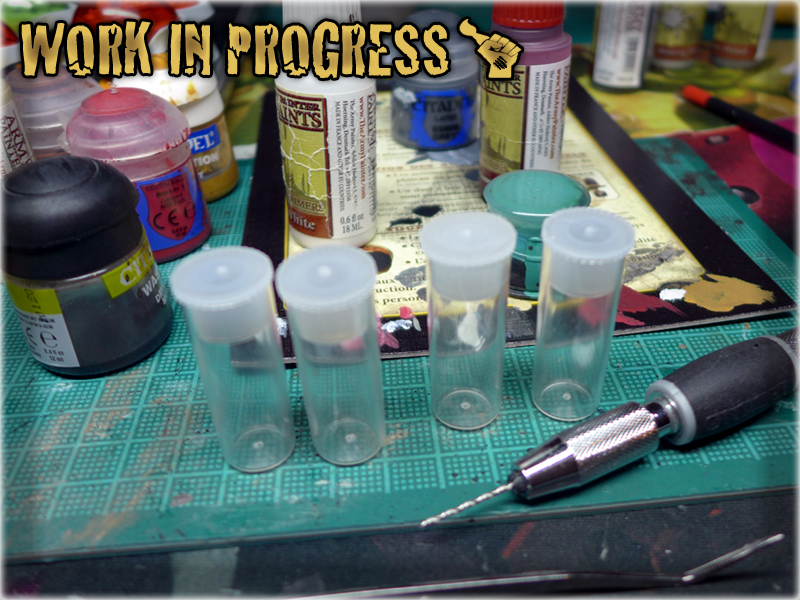
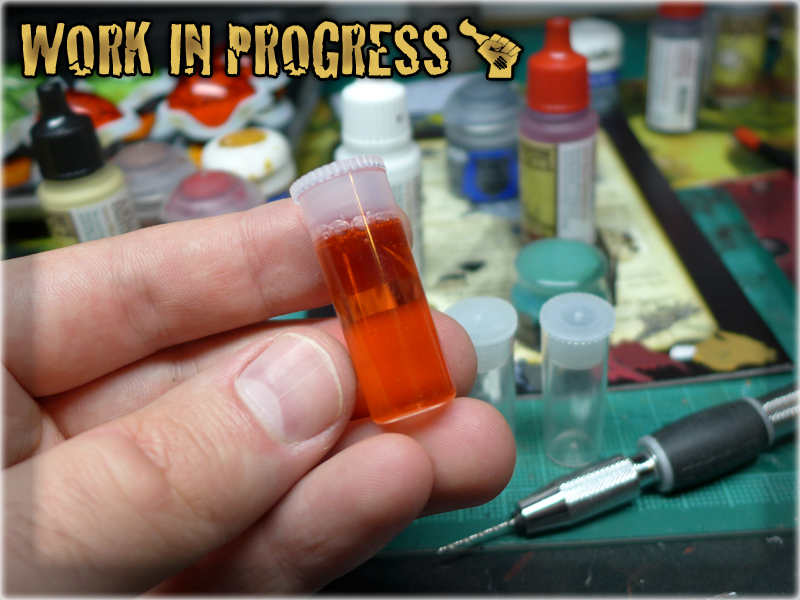
These can be used as objectives or just some random scenery pieces. I made them out of HDF pieces, leftovers and small plastic tubes* filled with shower gell. The tubes were given to me by Garran with which I tend to play Infinity, but also exchange concepts during our long painting/modelling talks. The guy is so nice as to share some of his stuff with me and I try hard not to let this gesture go to waste.
This is another source of endless inspiration. These are some throwbacks from Micro Art Studio’s production. MAS is very serious about their products – each and every one is checked for defects before it proceeds to packing. Once a defect is discovered, all imperfect products are kept as samples to avoid same kind of mistake in the future. In case of large quantities tho – some items may be sent to a friendly modeller to be used for awesome scenery building! One might even say that these can be used in a variety of crazy ways…
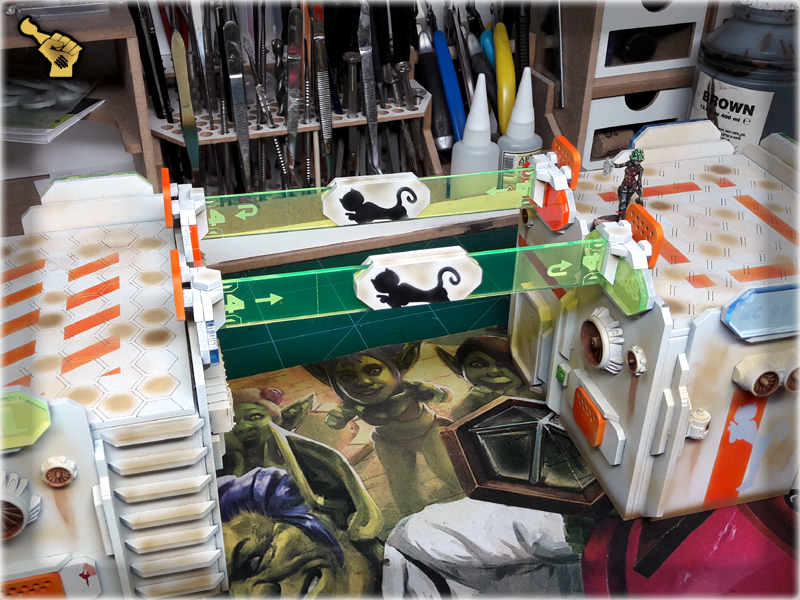
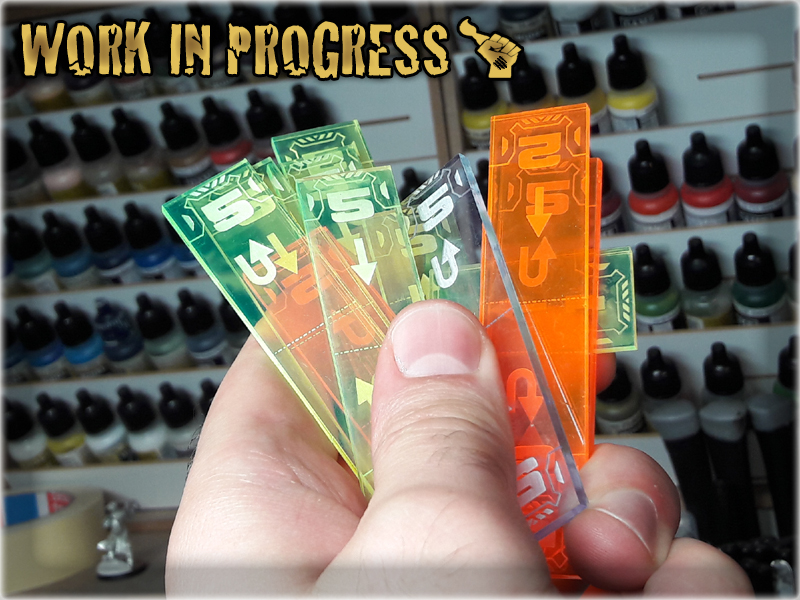
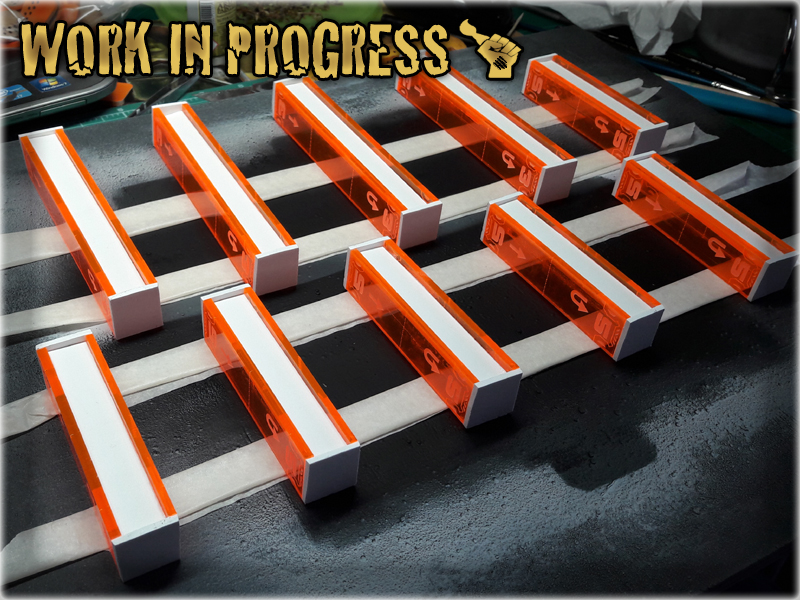
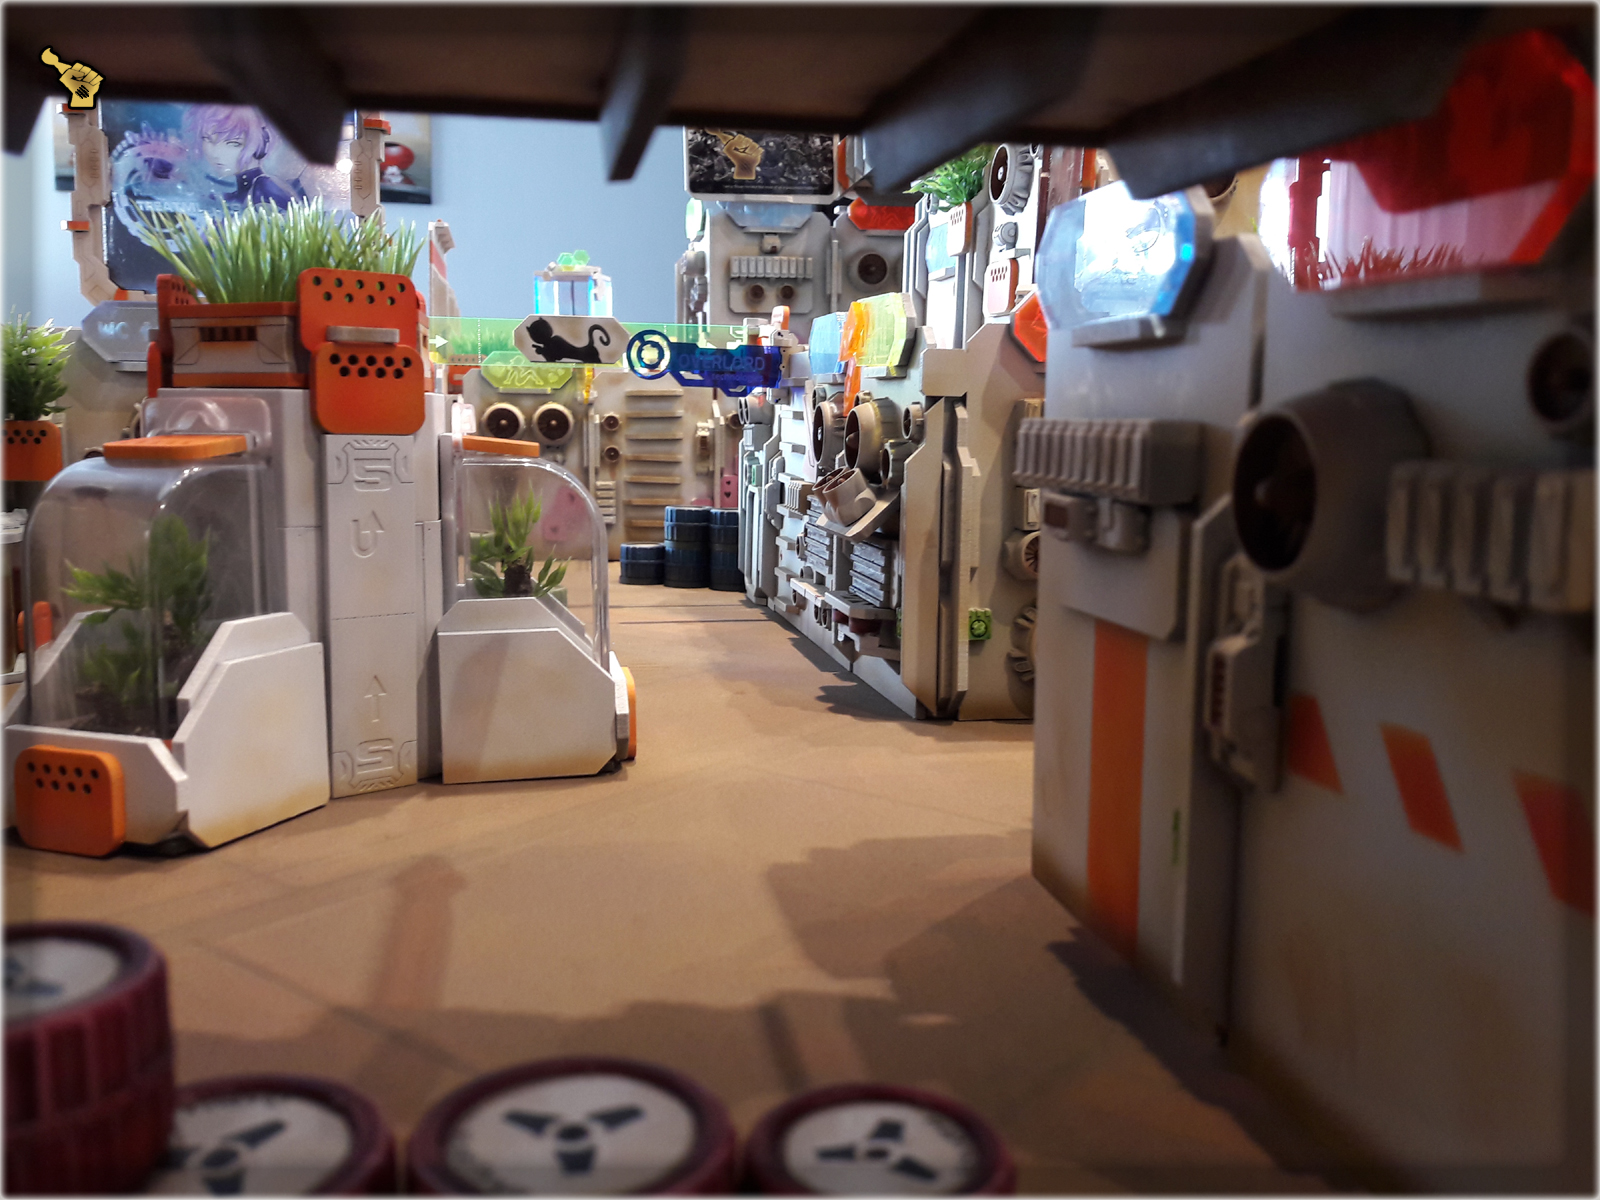
Six bridges are a bit too much on a 48×48″ table so I designed these scenery pieces to help me setup and then keep the gaming board in order. Simple yet effective, adding depth to streets and a nice futuristic note to the overall visual effect.
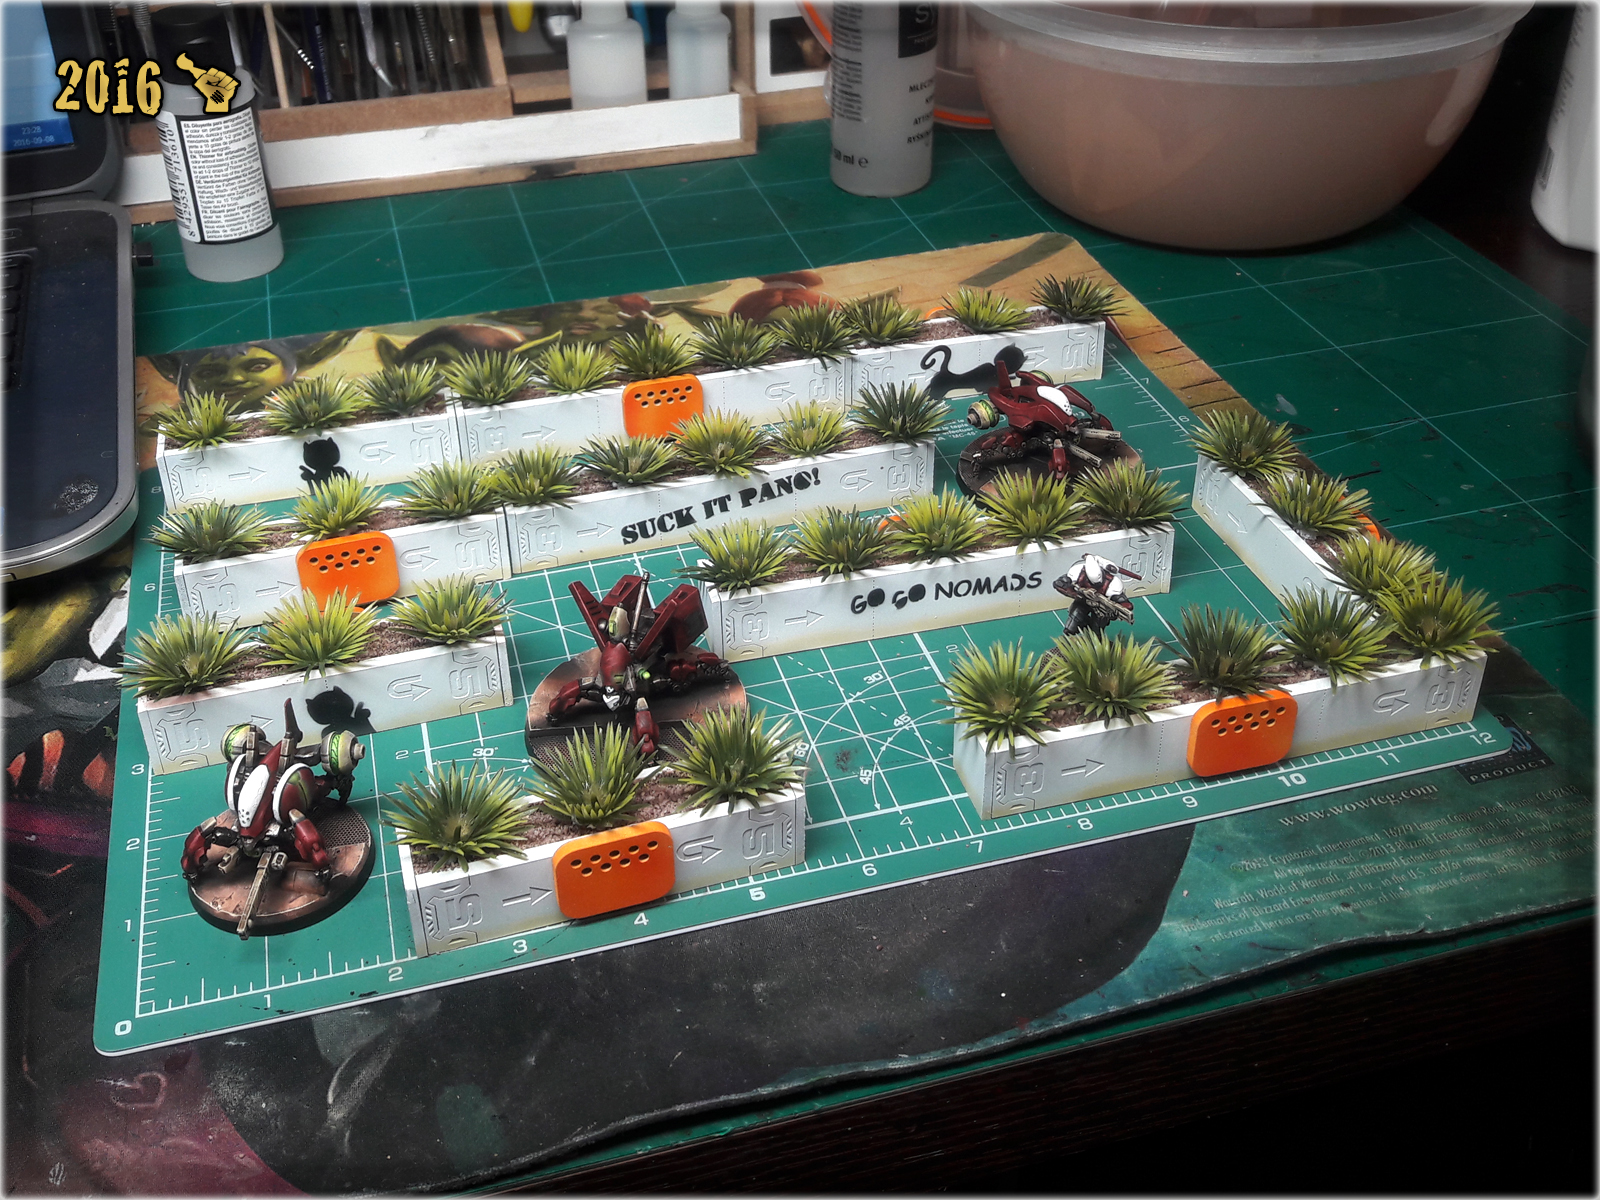
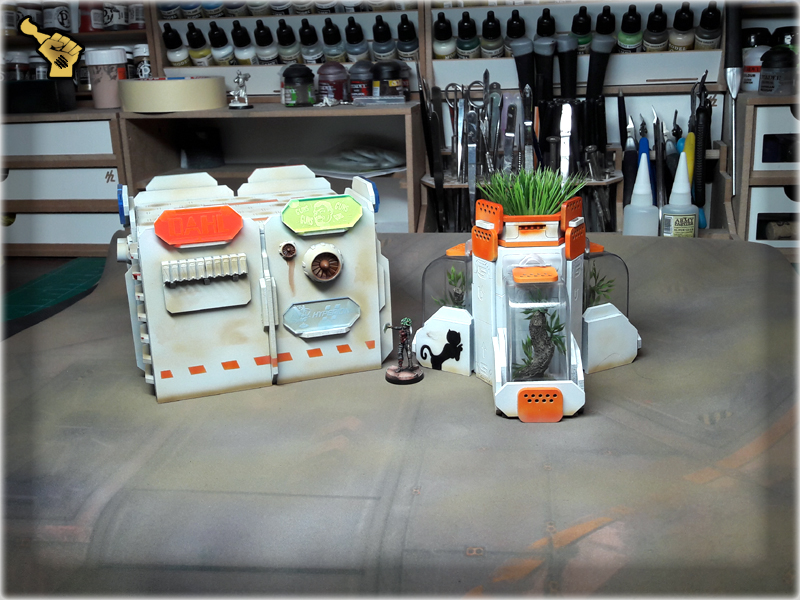
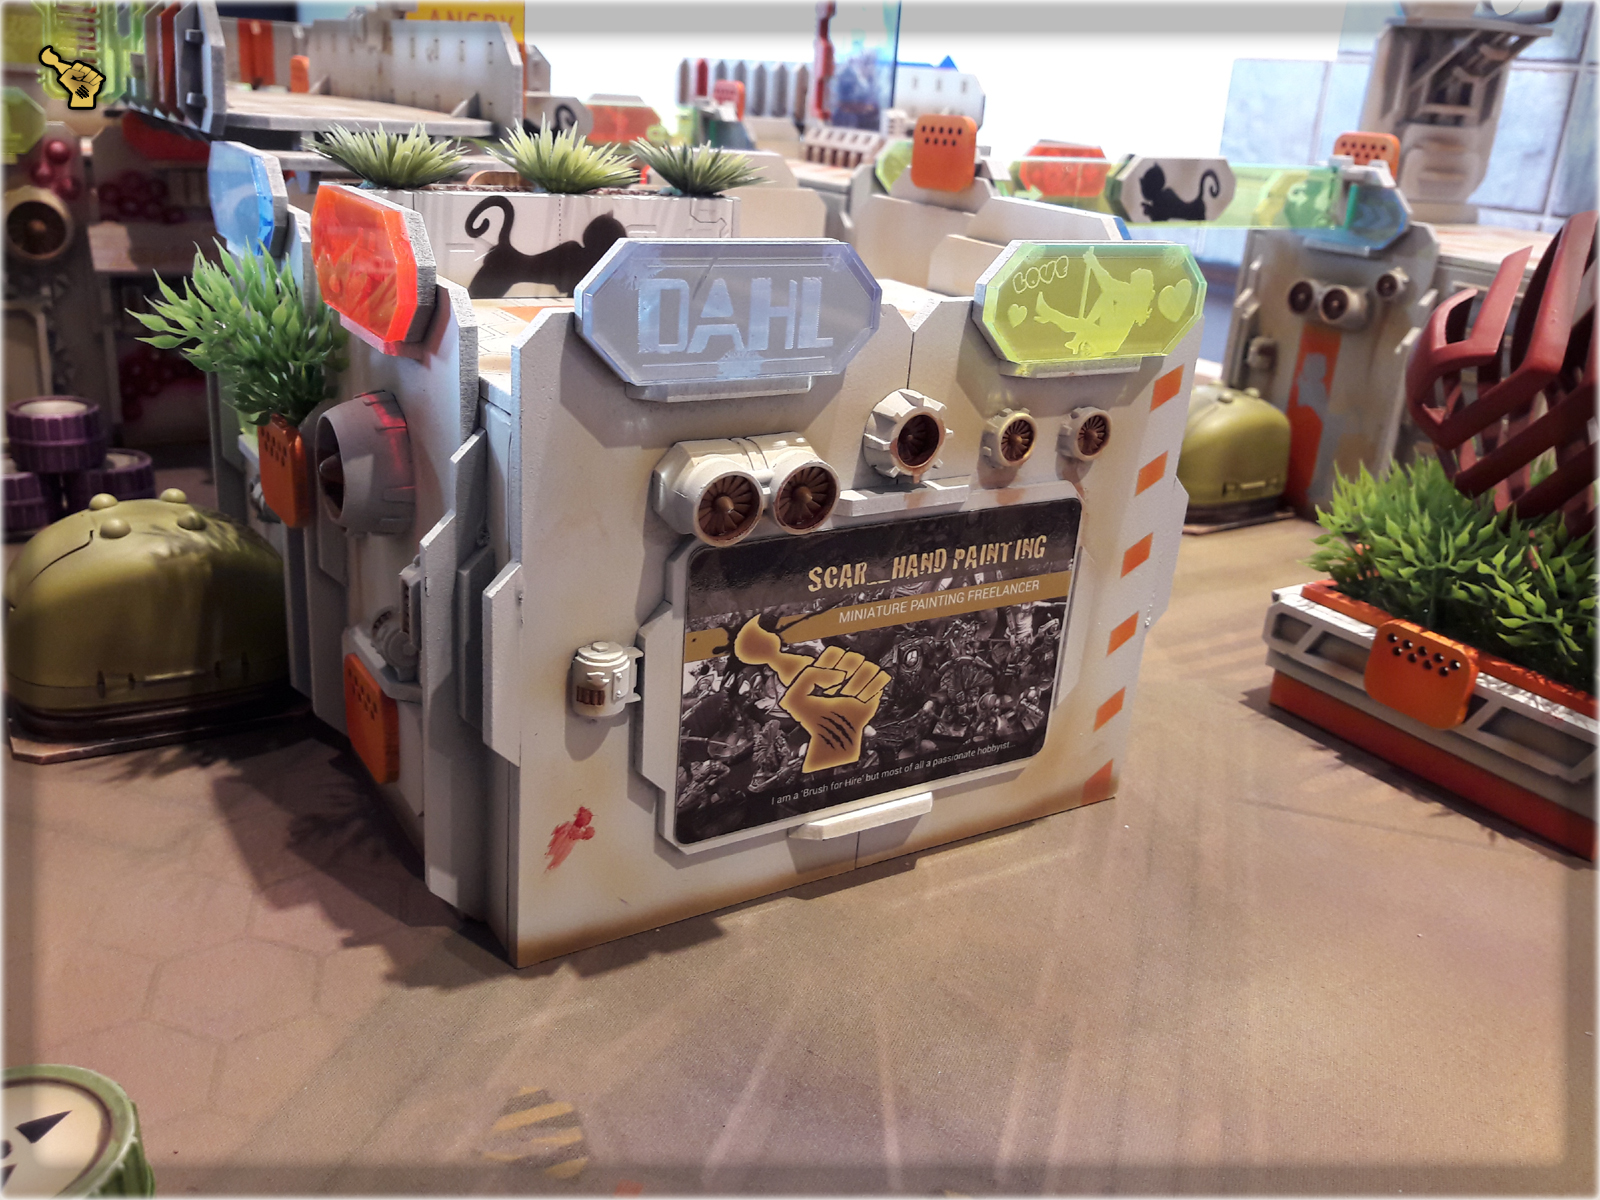
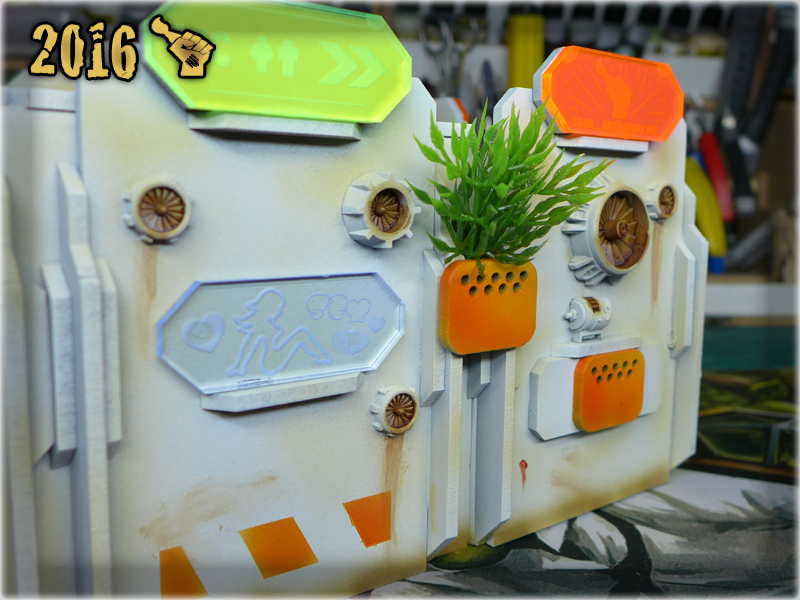
Made with playability in mind, these low planters are perfect to fill my choosen theme of white/orange/green scenery. They fit both at the ground level and in the rooftops. I made these using pleksi rulers to provide detail, while the rest is just plasticard cut to fit the empty spaces. The visuals vere enchanced by plants and HDF ‘orange’ pieces.
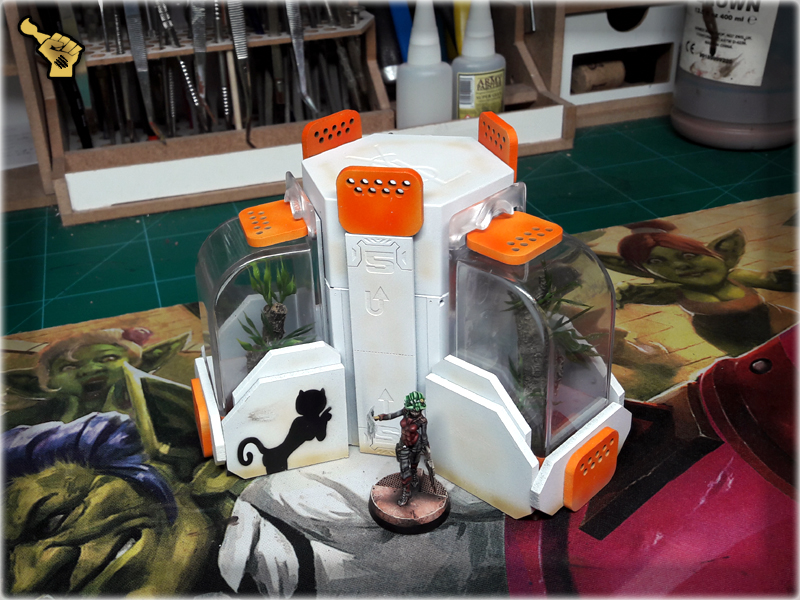
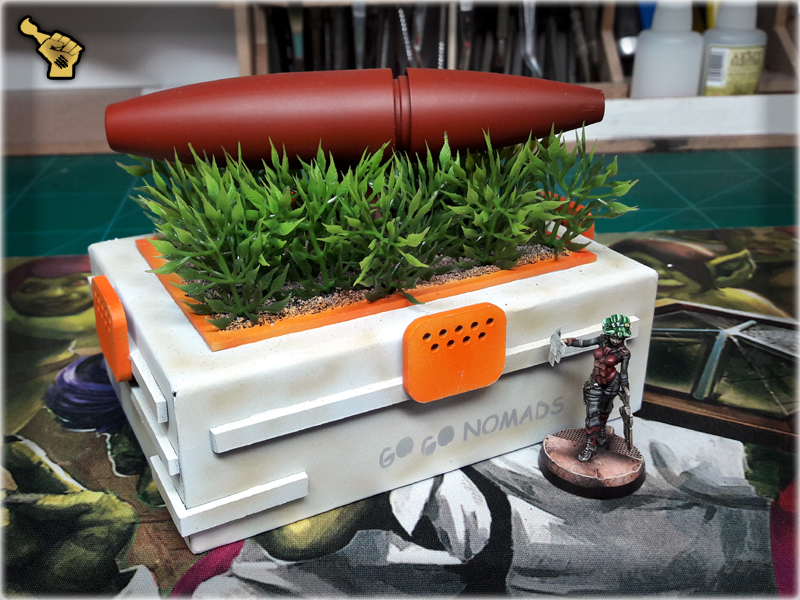
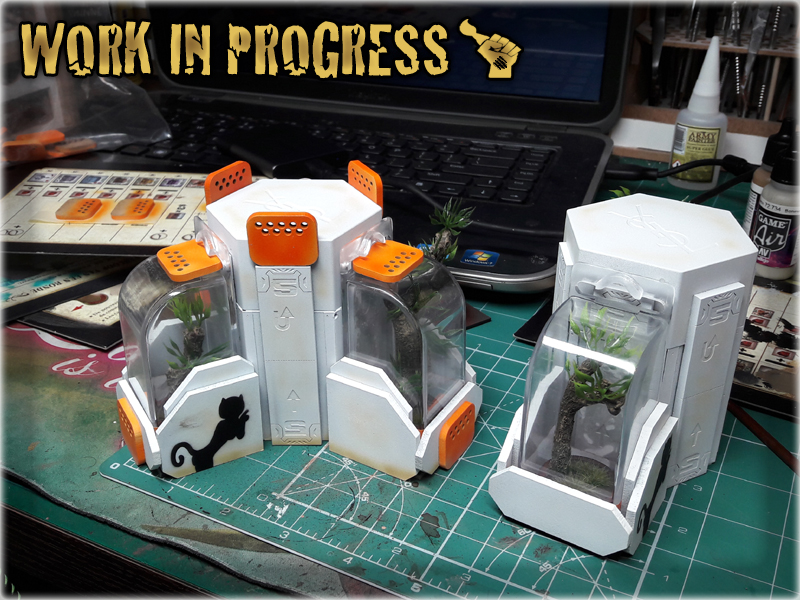
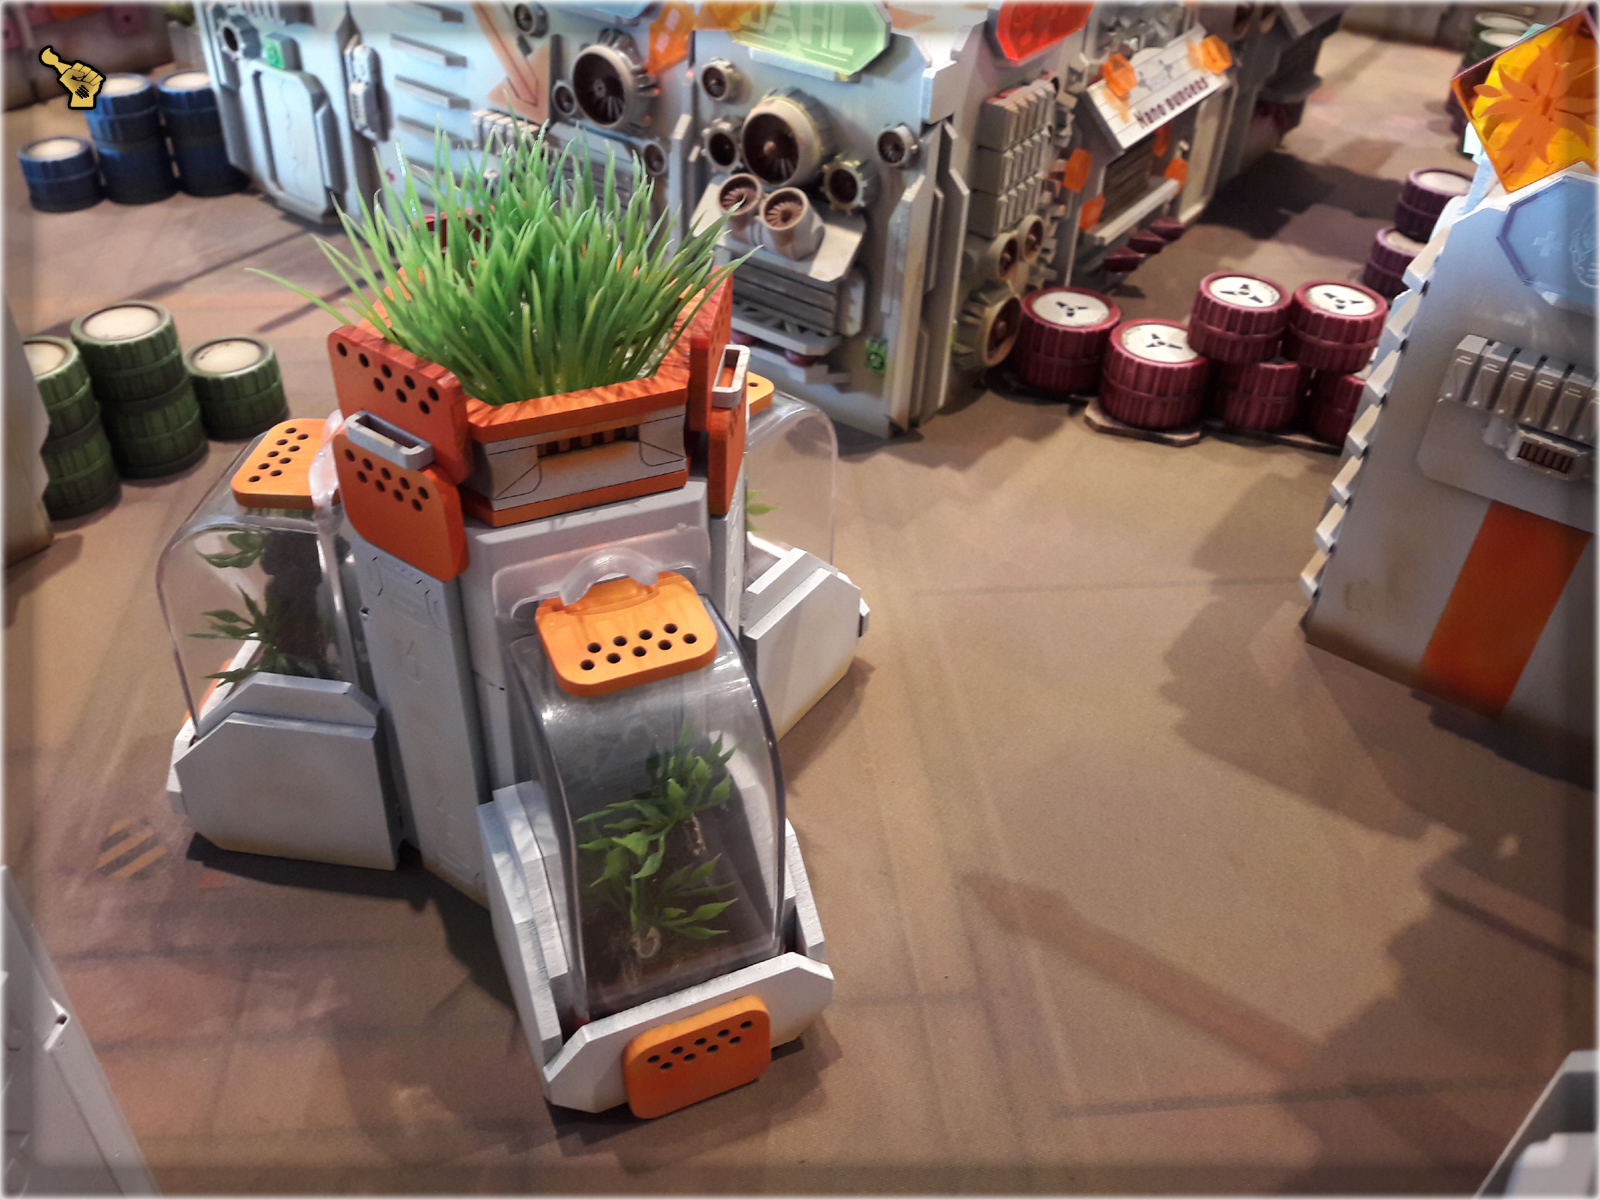
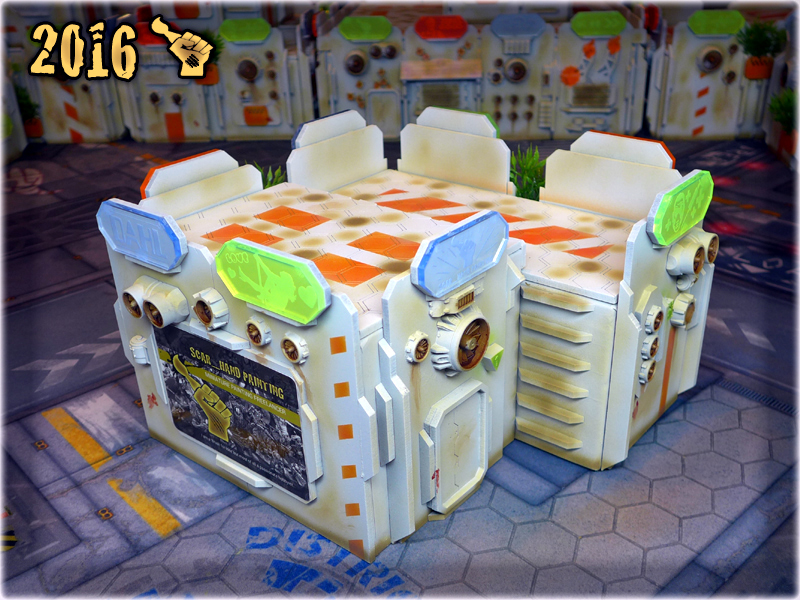
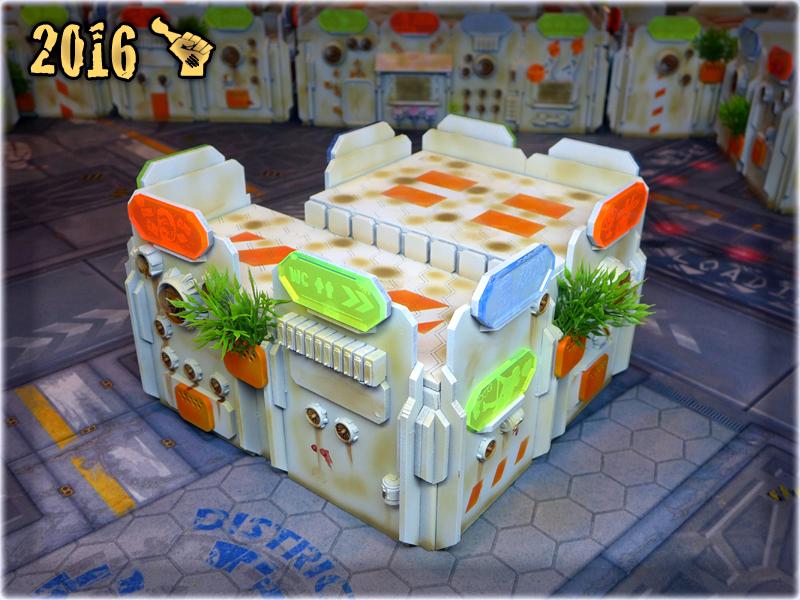
This plant compartment module is a pearl among the scenery pieces I’ve created lately. I’m really happy with how it came out. To think that I struggled for almost a year before I decided how to use two Yves Saint Laurent caps. But let’s get to the way these items (there are actually two identical scenery pieces) came to life. Some time ago I got a set of used up cutter casings from Ekograf to use in my quest of bringing imagination to reality. My friend Garran was the one to dig these out specially with me in mind (Once again thanks mate!). Once I layed my hands on these fine pieces I knew that something wondrous will come out of them. So I started planning and was quickly drawn to still unused Yves Saint Lauren caps. Their hexagonal shape fit perfectly to The Colony’s theme so I based the entire construction on them. After adding couple of PCV pieces to make the construction higher I used plexi rulers to add detail, then used cutter casings and some HDF leftovers to build particular compartments and mounted them around the central column. For the plants I used a fake Bonsai tree made out of gum. It was to fragile to be used as a standalone scenery piece, but inside the compartments it could easily outlive all the other terrain pieces. So I used glue and some tricks of my own to enchance the vicualts of tree stupms, added fake greenery and mounted these fine looking plants inside the compartments. ‘Orange’ elements followed and themed paint job done the rest. Now I have two LOF blocking pieces of scenery, that provide a lot of cover, fill empty spaces between the buildings and go along with the theme.
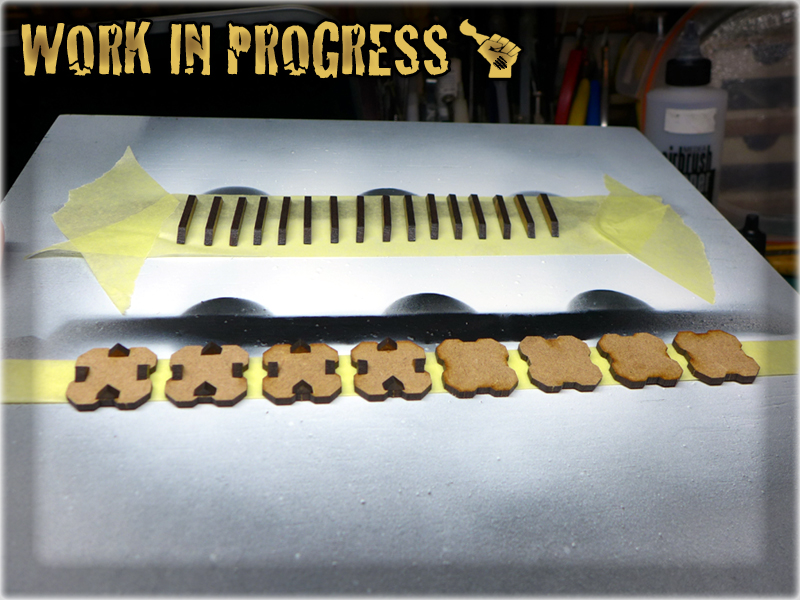
One thing still stood out of The Colony’s theme. The Micro Art Studio’s gaming mat (which I just love and don’t want to ever switch for anything else) was screwing with my colour scheme too much. I’ve figured to try and paint it, using sprays and airbrush. For this purpose I’ve airbrushed the entire mat with Vallejo’s German Red Brown, then used Vallejo’s white primer to lighten some spots and finished with Games Workshop’s Zandri Dust primer spray. Once the last layer was dry I moisted the gaming mat and used a piece of cloth on it to ensure that no paint will leave marks on my terrain, miniatures and accessories. Must say that MAS’s gaming mat holds the paint perfectly, while keeping it’s previous properties. The picture does not entirely cover the hue but rest assured that now the gaming mat fits perfectly to The Colony.

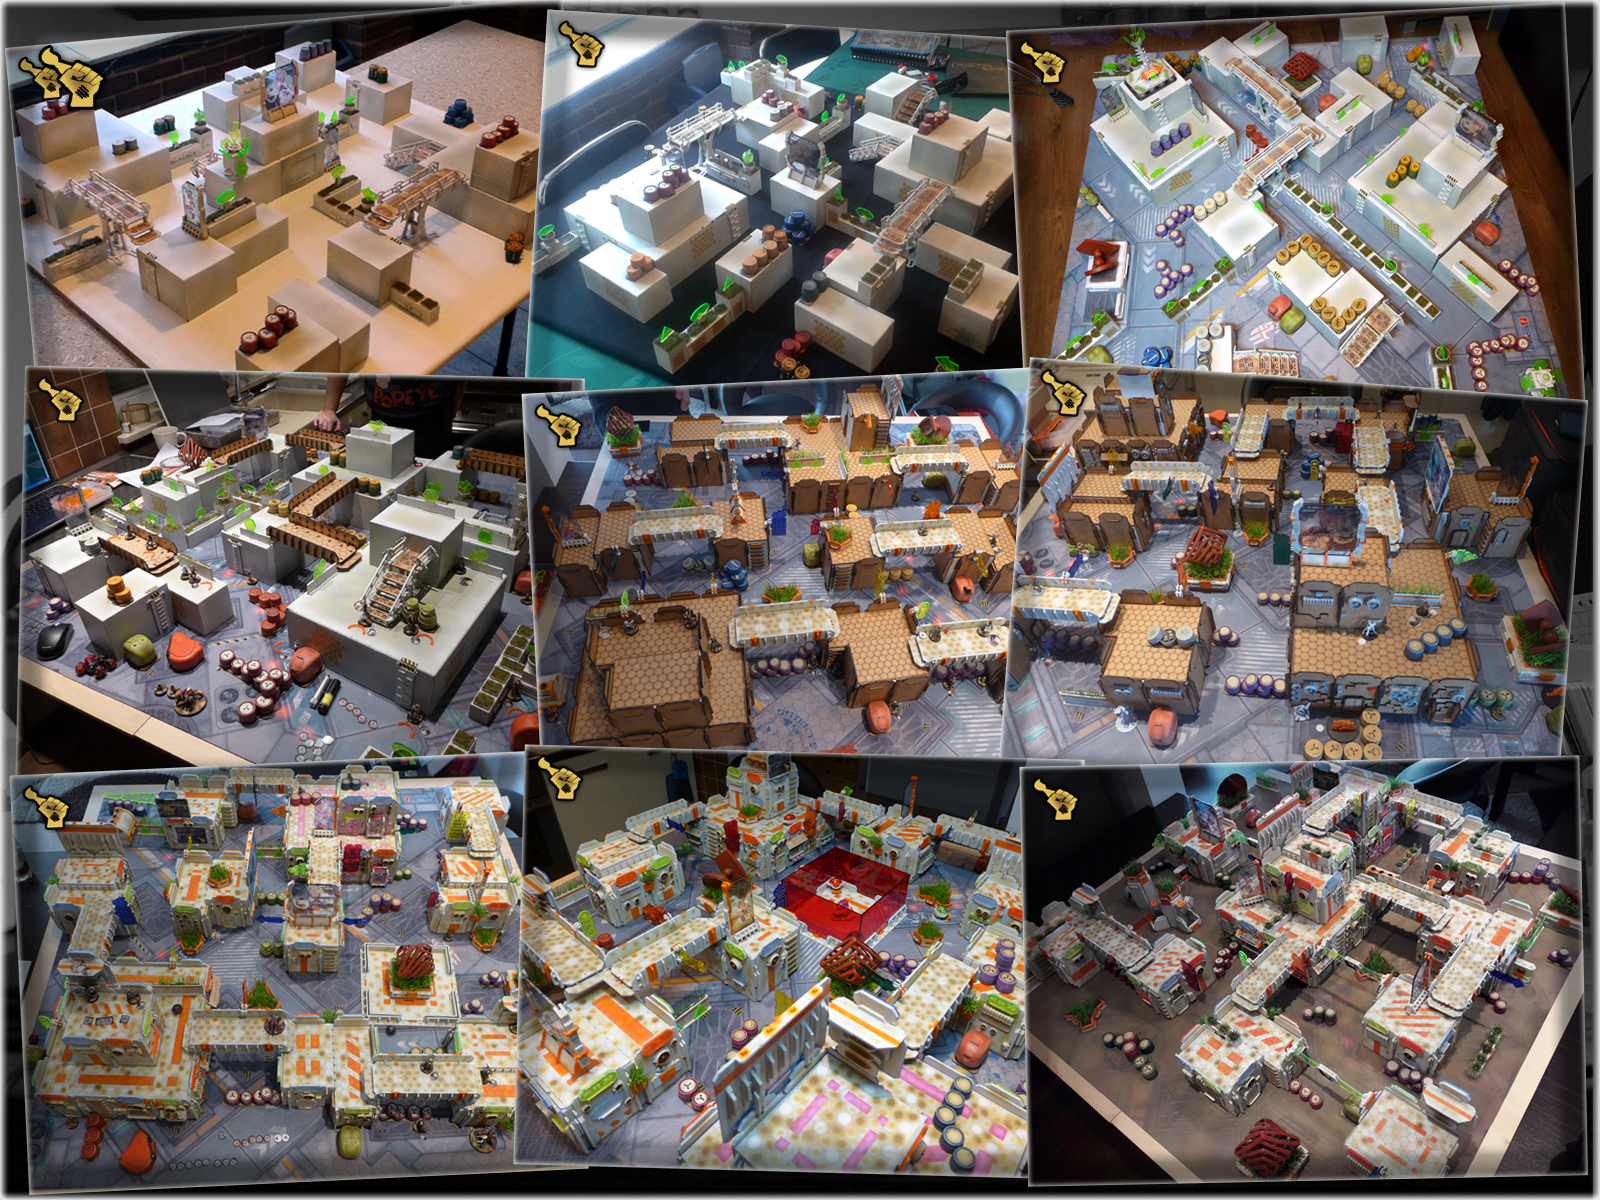
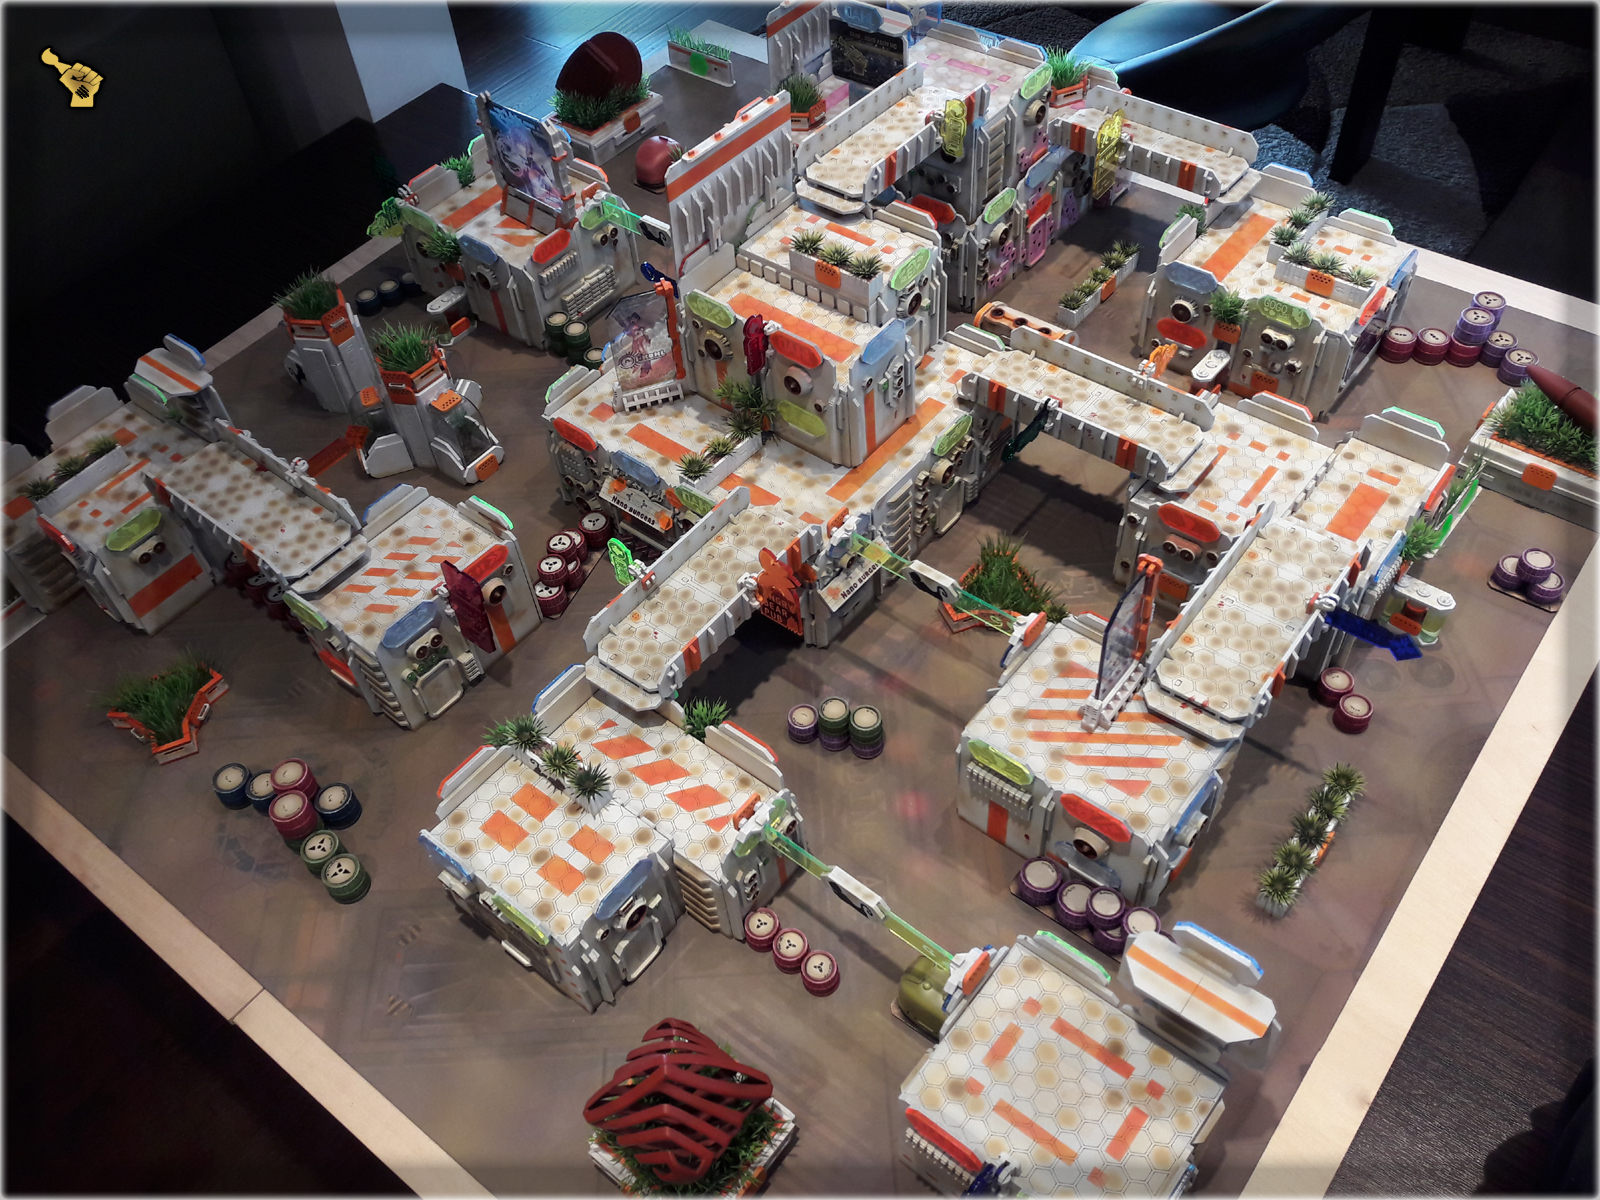
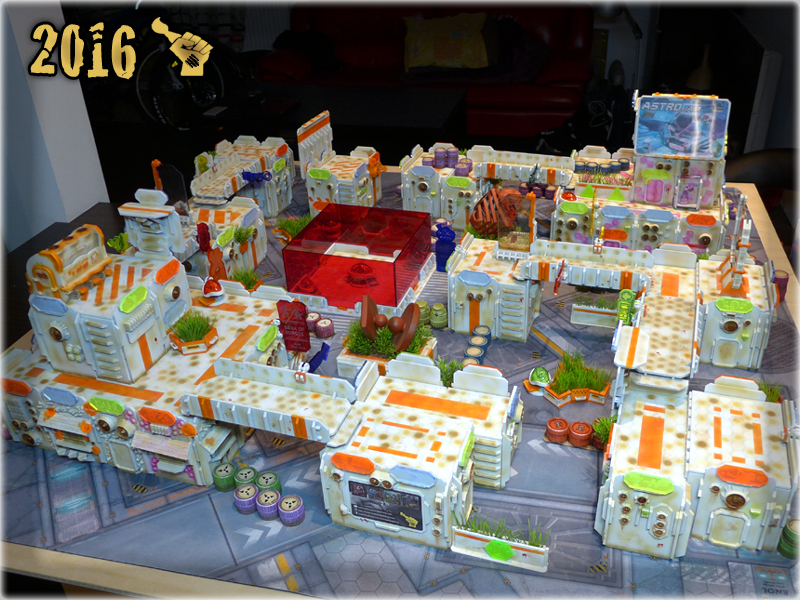
Last four months might not seen me The Colony-centered, still I’ve managed to improove the inicial concept of this gaming table. I’m really glad to be able to transform this:
Into this:
Are more upgrades incomming? As long as I live and am into Infinity – that’s not a matter of if, but when. Stay tuned for more of The Colony.

You want to learn more about The Colony? Check out the entire series using THIS TAG
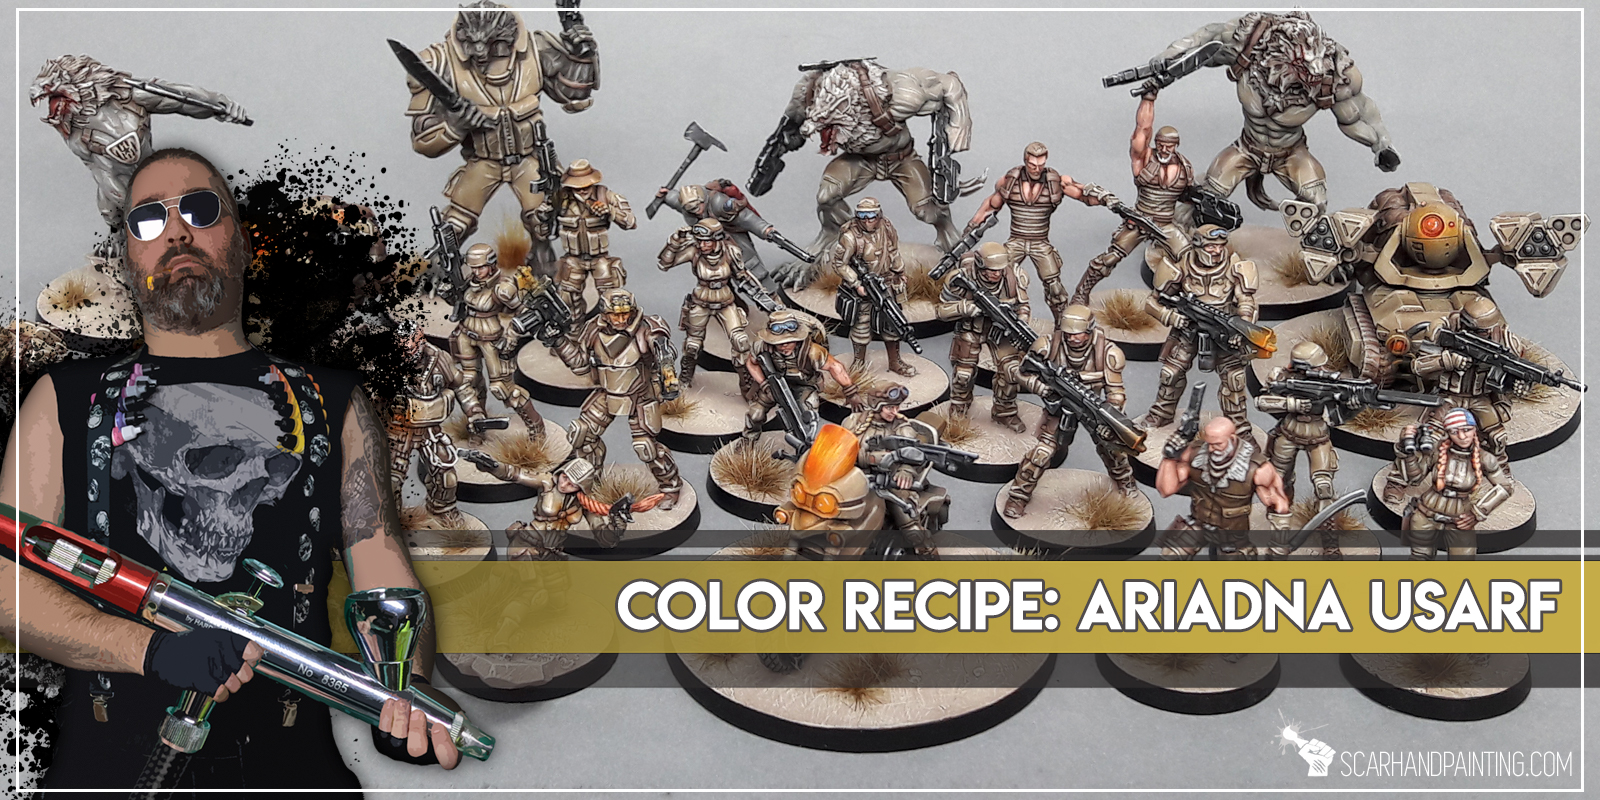
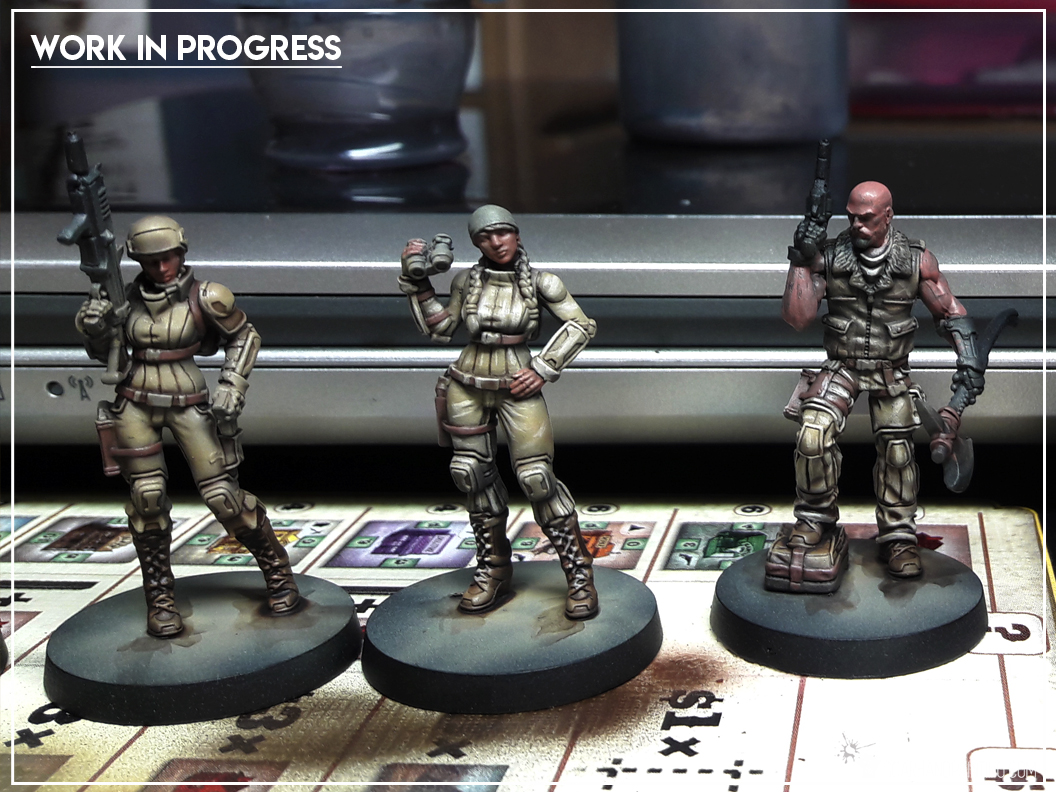
Here are some Colour Recipes for Infinity USAriadna Ranger Force from GALLERY: INFINITY USARIADNA. Please take note that this is a simple colour scheme, not covering multiple overlapping layers and blends inbetween, that lead to the final product. It is supposed to be used as guidline not a step-by-step.
Armour & Uniforms:
Black Undercoat,
Dark Earth (Vallejo),*
Light Brown (Vallejo),*
Light Brown (Vallejo) points,*
Mix Strong Tone Ink (AP) 1:1 Soft Tone Ink (AP),
Flayed One Flesh (GW),
Pallid Wych Flesh (GW) l&p,
BLACK/GREY outfits & weapons:
Black Undercoat,
Skavenblight Dinge (GW),
Fenrisian Grey (GW),
Pallid Wych Flesh (GW) l&p,
Dark Tone Ink (AP),
Pallid Wych Flesh (GW) l&p,
White l&p,
BROWN elements:
Olive Drab (Vallejo),
Gorthor Brown (GW),
Gorthor Brown (GW) + Pallid Wych Flesh (GW),
Mix Strong Tone Ink (AP) 1:1 Soft Tone Ink (AP),
Karak Stone (GW) l&p,
SKIN:
Bugmans Glow (GW),
Dwarf Flesh (GW),
Dwarf Flesh (GW) + Pale Flesh (Vallejo),
Mix Strong Tone Ink (AP) 1:1 Soft Tone Ink (AP),
Pale Flesh (Vallejo),
Pale Flesh (Vallejo) + Pallid Wych Flesh (GW) l&p,

*Airbrushed (with multiple layers and mixes)
l&p – lines and points,
View the INFINITY GALLERY…

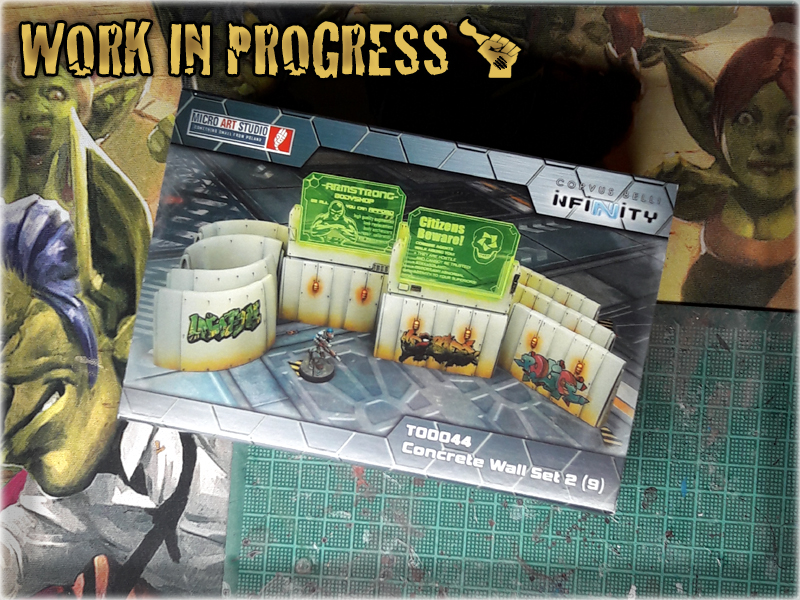
Micro Art Studio does some fantastic paint job on their stuff. At some level it might even be considered a bit intimidating. Thoughts like ‘This stuff is amazing, but I will never be able to paint it anything like they did’ had kept me from purchasing some awesome terrain pieces in the past. I bet that some of you feel the same right now. Well – that is clearly a bad way of thinking. That’s why I prepared this small Step-by-step painting tutorial with which I hope to bring you closer to your ideal of a Gaming Table.
For this purpose I picked a Concrete Wall Set 2 by Micro Art Studio and tried to copy their style with a small variation of the colour scheme.
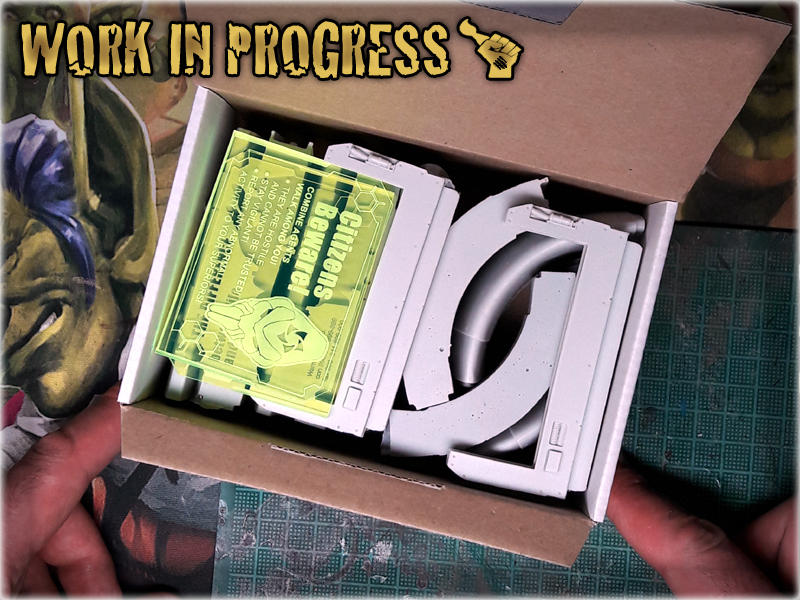
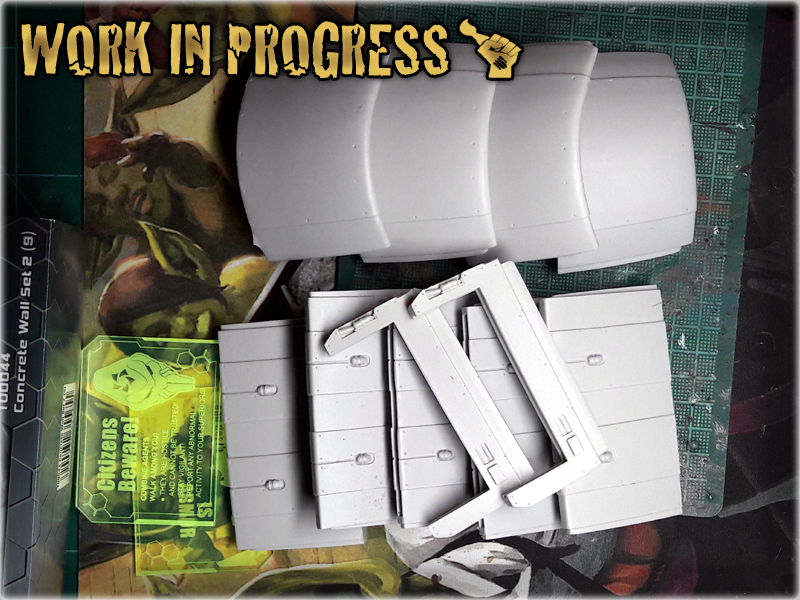
1 After unpacking the set I have cleared any extent of resin and prepared each piece for the undercoat.
I used THIS METHOD
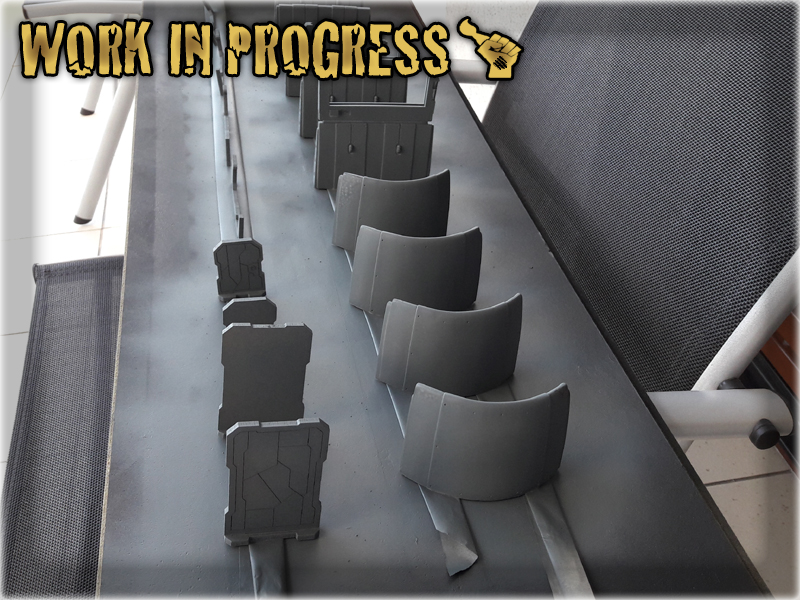
2 I have covered entire set with Games Workshop's Mechanicus Standard Grey primer. Usually I use Black Undercoat first, but in this case the surface was smooth and I knew it will work well with a Grey undercoat. Do not feel obliged to use the exact same primer - you can easily use Vallejo Grey Surface Primer instead and Airbrush it over the surface. I used spray just to save some time.
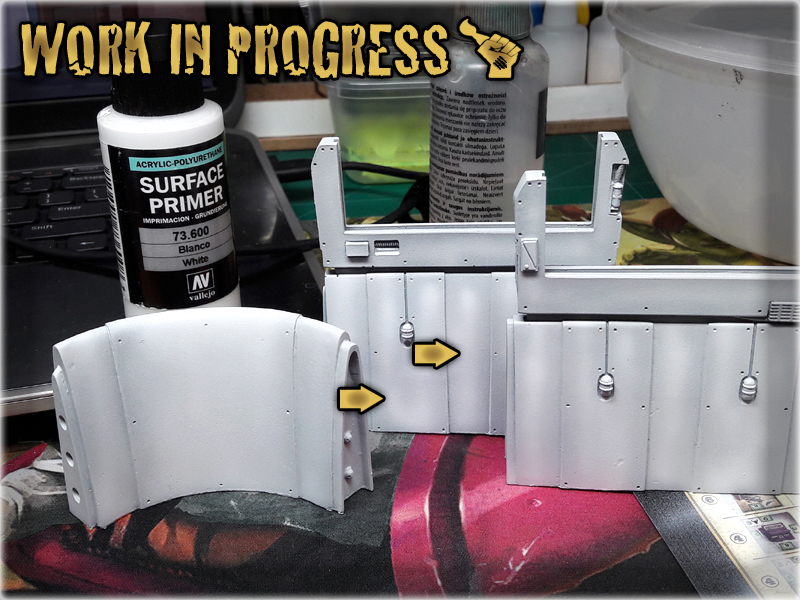
3 I gently arbrushed Vallejo White Surface Primer over the set. First I tried to cover entire surface from afar (15cm distance, constant flow, see pic - dark spots), then I outlined center of each flat surface with additional layers (5cm distance, soft puffs of paint, see pic - light spots). This resulted in the surfaces gaining some extra shadows.

4 I used airbrush to apply Vallejo Light Brown onto the lower parts of each Wall piece. I mixed a bit of Airbrush Flow Improver to build up a nice transition from brown to white. The key is to paint in smooth lines, then go backwards building up colour. Too much paint in the same spot will result in paint spilling all around and ruining the paint job.
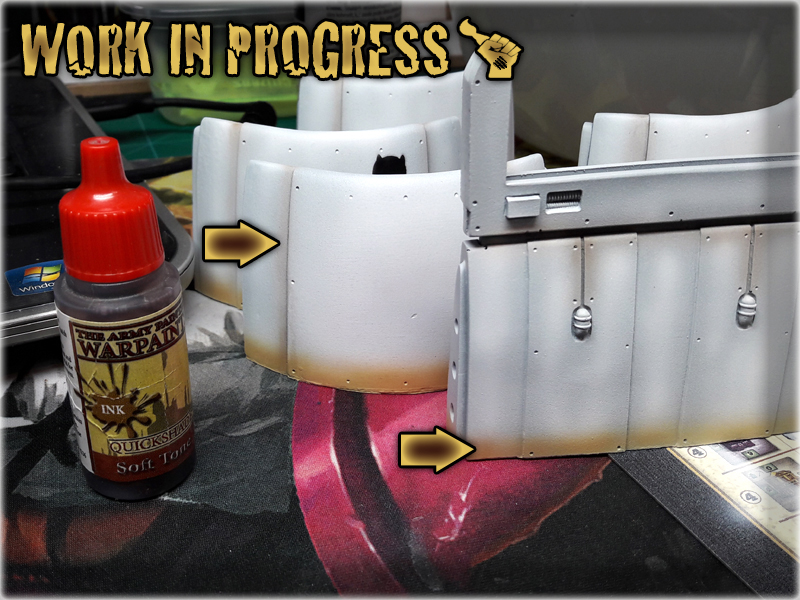
5 Then I moved to Army Painter's Soft Tone Ink and airbrushed it over Light Brown, with an addition of single strokes over the recesses of four oval Wall pieces. I was careful not to apply too much paint as in this particular case I wanted to build up a nice hume of colour, instead of 'washing' the surface with it.
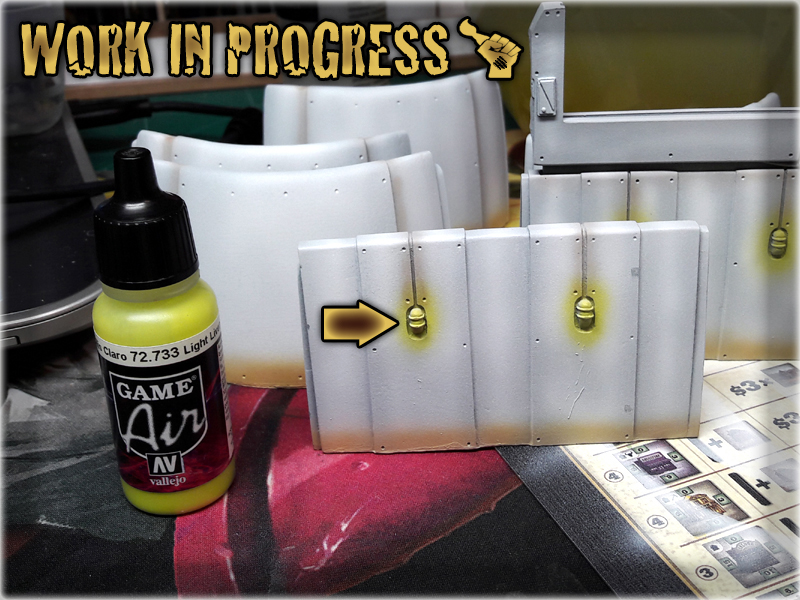
6 Then I applied a thin layer of Vallejo Light Livery Green over and around each lamp. A lot of small puffs of paint helped me to keep the base shape of light around the lamps. Even if one or two puffs went too far, they were so delicate as to remain unseen once the majority of colour was applied.
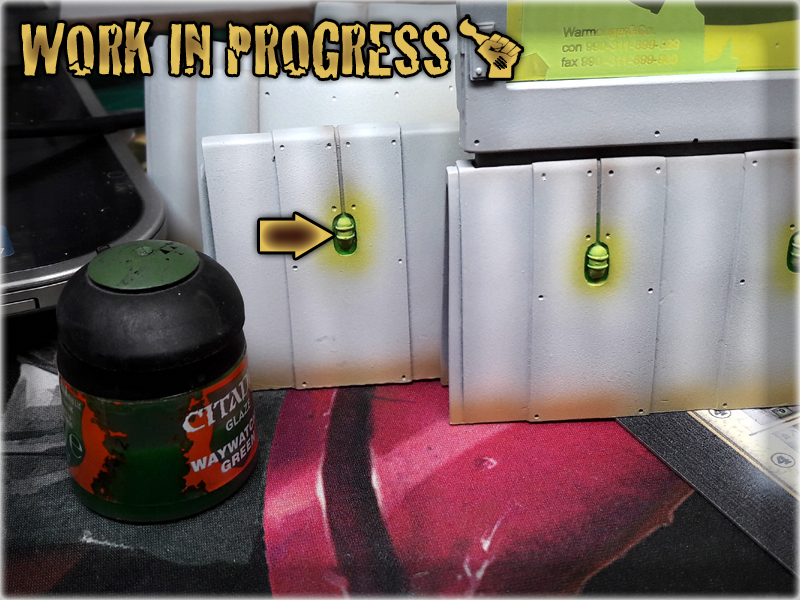
7 To strenghten the colour I used a small brush and applied Games Workshop's Waywacher Green onto the lamps. I tried not to exeed the boundries of their slots and in case I did - I used a small piece of paper towel to clear the paint out.
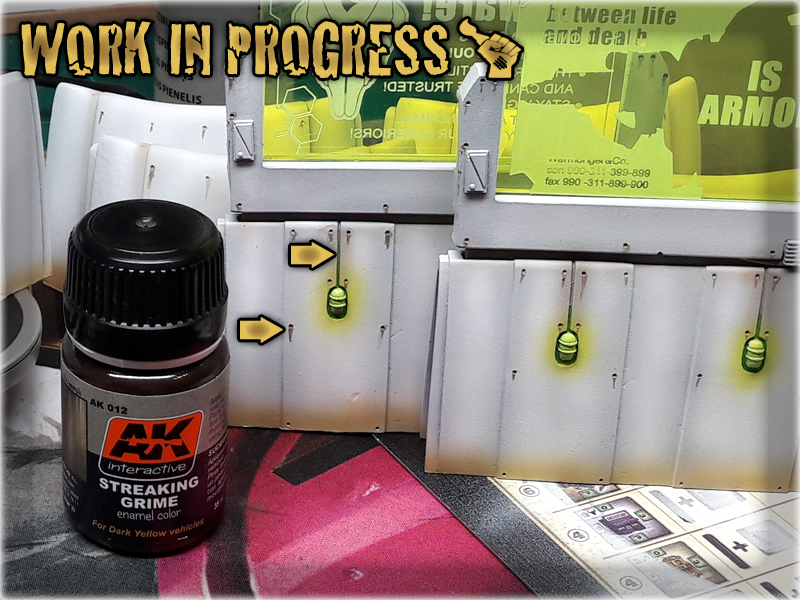
8 Finally I applied AK Interactive Streaking Grime. Using a small brush I poured this weathering effect paint into holes, then smeared it dow with a tip of the brush. The more irregular it went, the better to the overall visual effect.
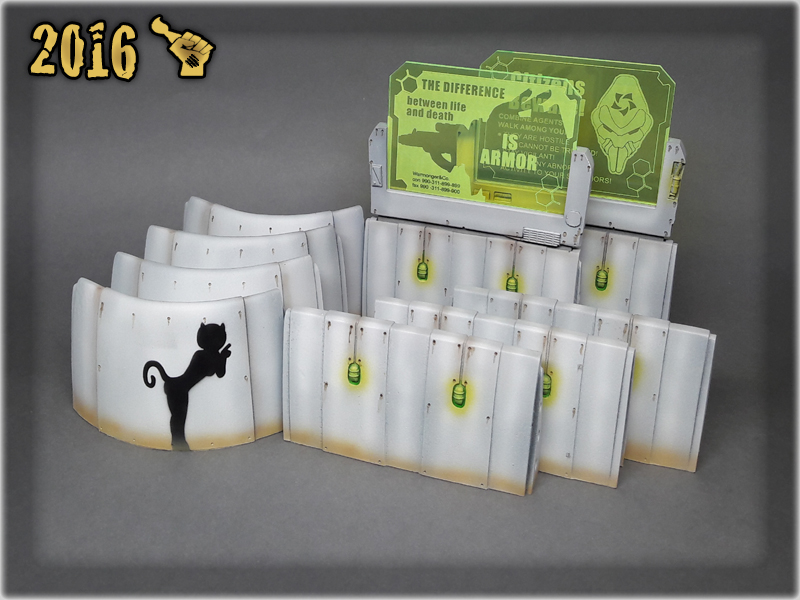
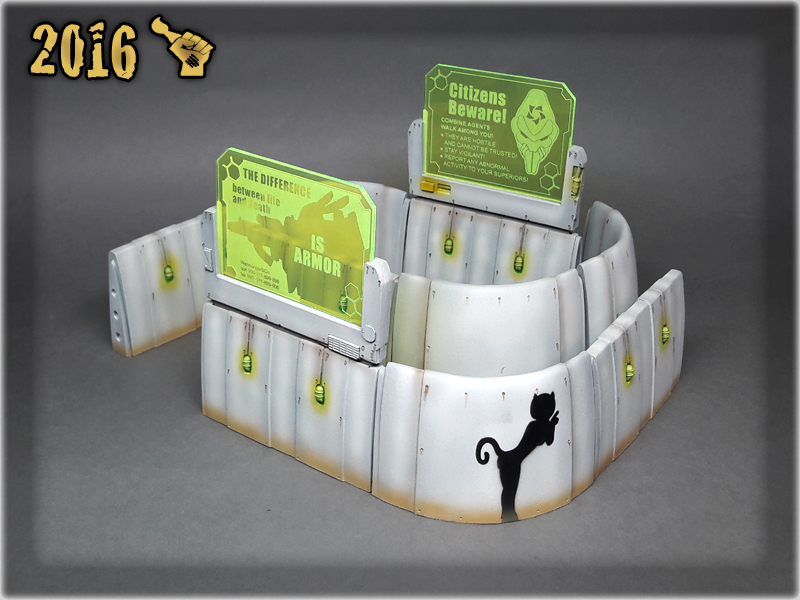
In the end I used a template provided by Reycast to airbrush a small Nomad prank onto the wall, with a Vallejo Black Paint. What’s left now is to purchase Micro Art Studio’s S-F Graffiti Transfers and job will be done.
Here is a result of my paint job:

Many names are given to this place. We call it a workshop, a working desk, a hobby spot. Each of us has his own nickname with which he adreses this special place, and it is special cause no two are alike! Filled with brush stands, cans, mini-organizers, boxes, shelves, holders, cutting mats, pads and a variety of tools – working spaces come in many different shapes and forms. Still one vital trait stands out and is common among working spaces – they all are temples of our hobby and as such are treated with love and care.
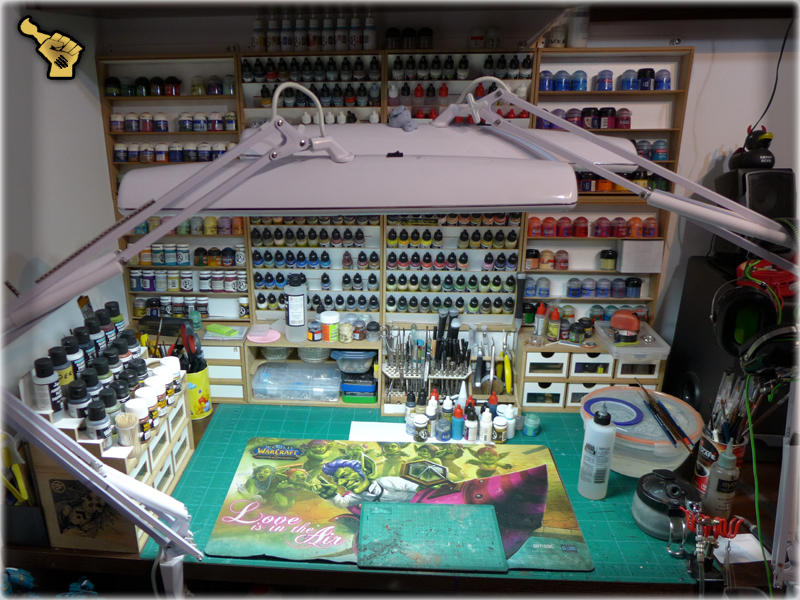
For me a Workbench is an altar. Each time I add a small detail – be it a single accessory holder, a new brush can, or a new addition to my modular workshop system – I feel like a builder expanding an antic temple to stand even higher and wider – all to the glory of the gods. And just as such I tend to hire the best architects and artists from around the globe to lend me their skills…
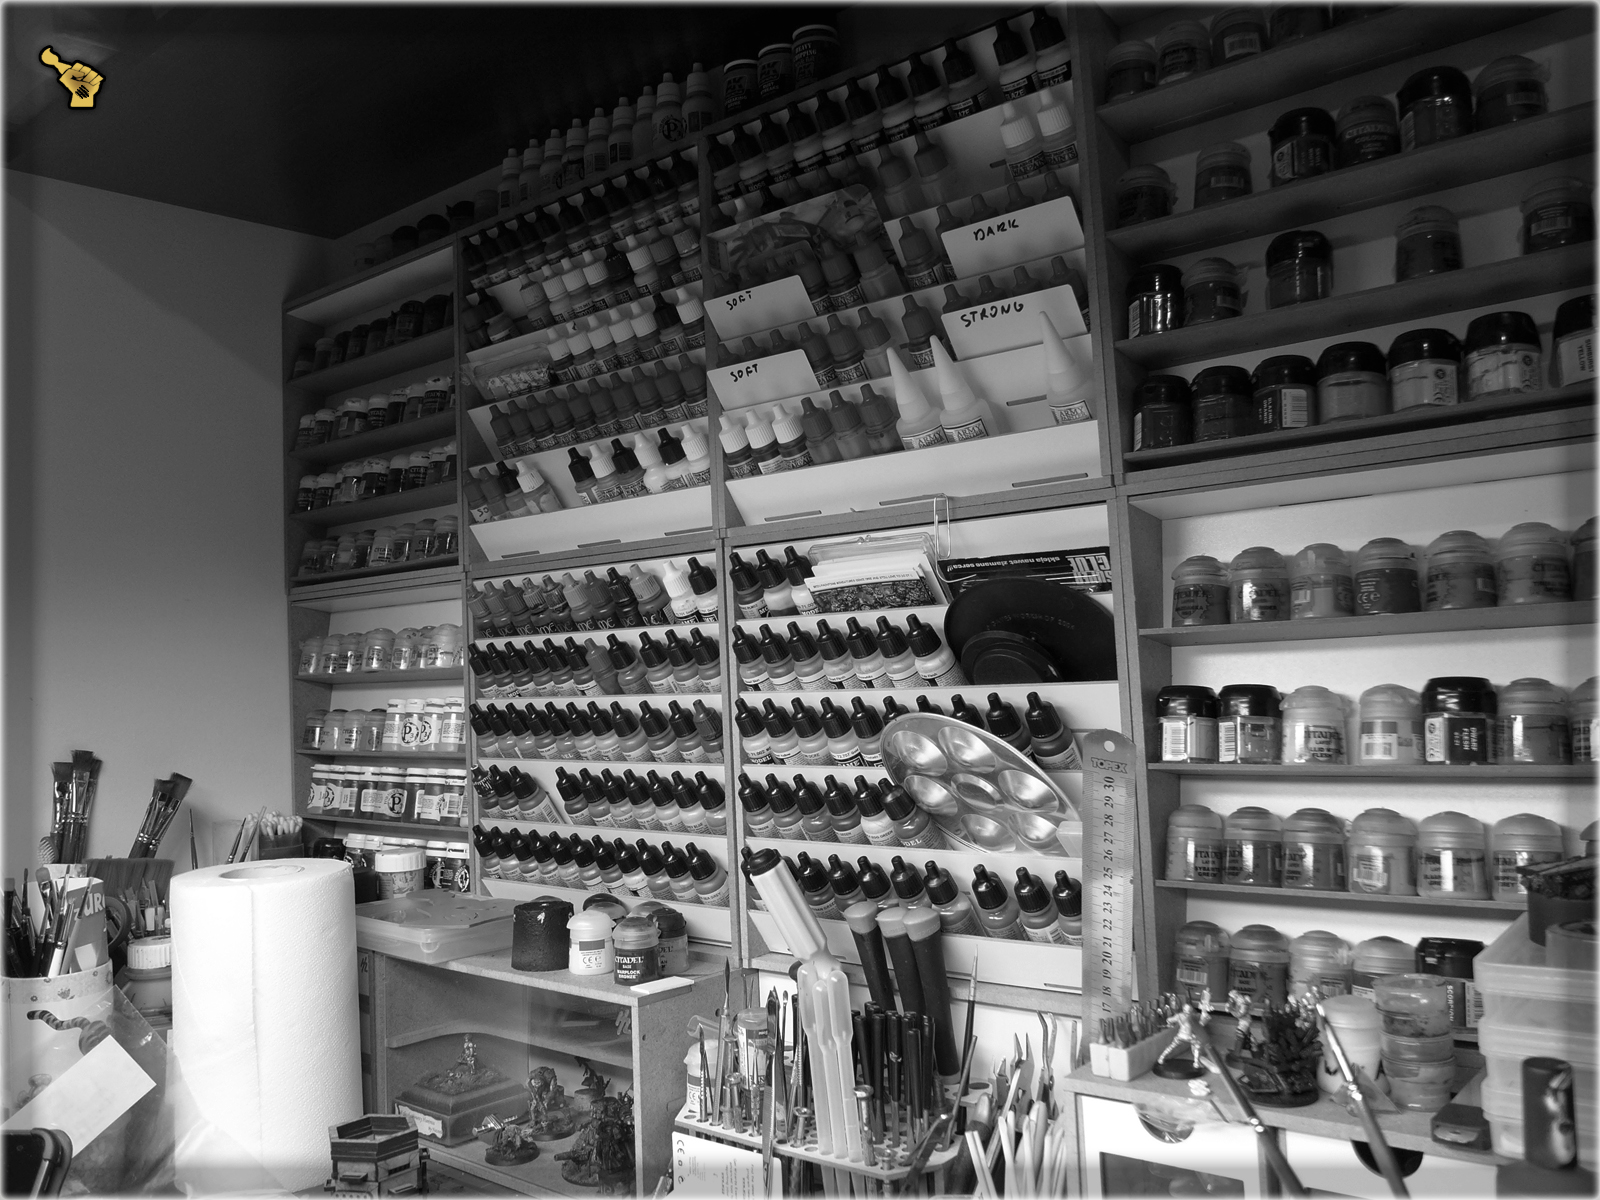
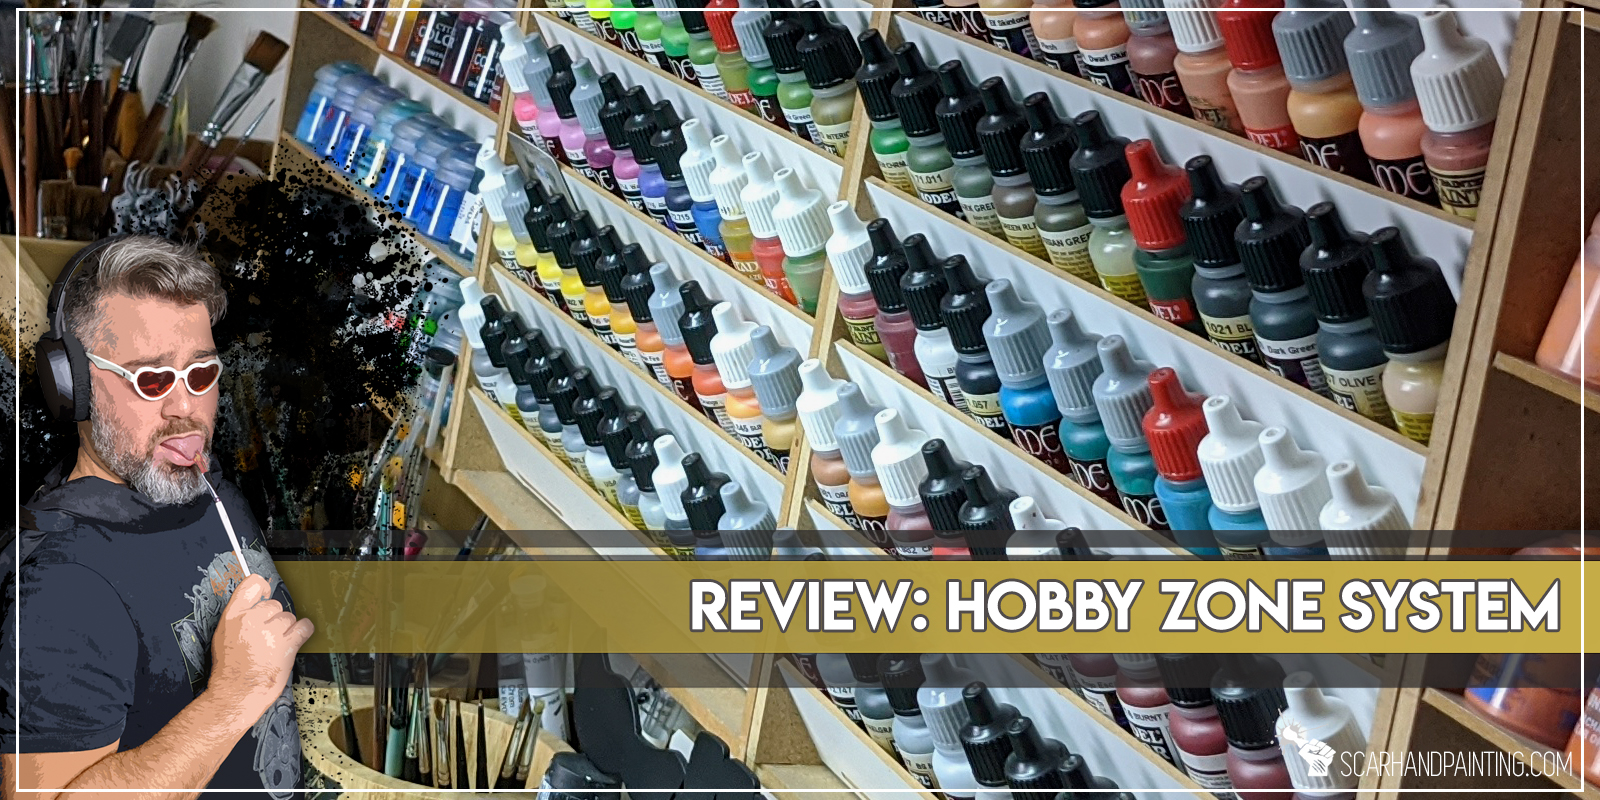
The bulk of my personal altar is mostly made out of HobbyZone’s ‘Modular Workshop System’. I have expanded this set three times by now and am sure to purchase even more pieces, just as the opportunity presents itself. As it happened, couple of days ago I felt the need to expand my Workbench a bit and ordered two new pieces of HZ ‘Modular Workshop System’. So as a happy customer and a total fanboy of HobbyZone I wanted to share with you some insight into their fantastic offer.
One of the two most important things about HobbyZone’s products is quality. It can be seen in every detail, starting with how these items are packed, how they look like, with nice, almost stylish combination of white and plywood. Add to it the width of all the outer casings and inner ‘holding’ walls which makes these things durable and reliable in many crisis situations. Also each piece is designed to withstand stress of moving them around with additional weight on top. Walls are clamped together providing a sturdy structure and on top of that there are actual magnets inserted into the construction to help you keep everything in place.
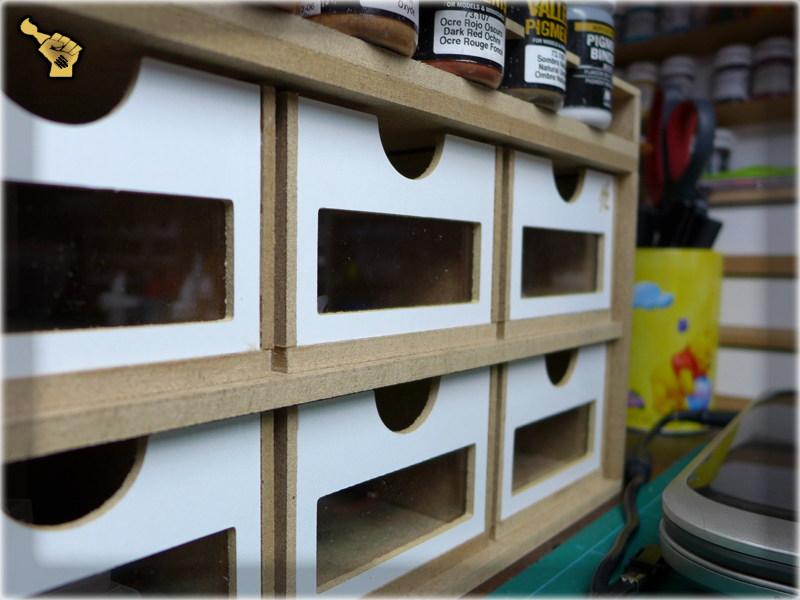
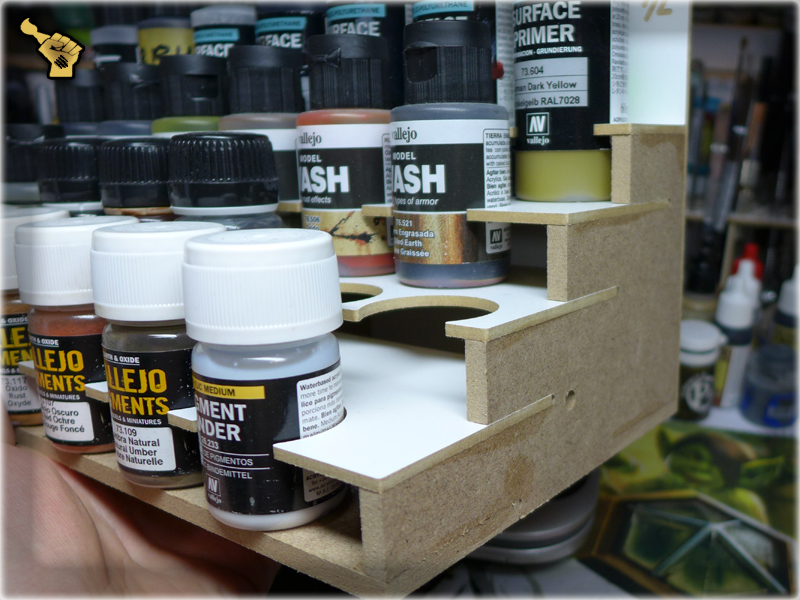
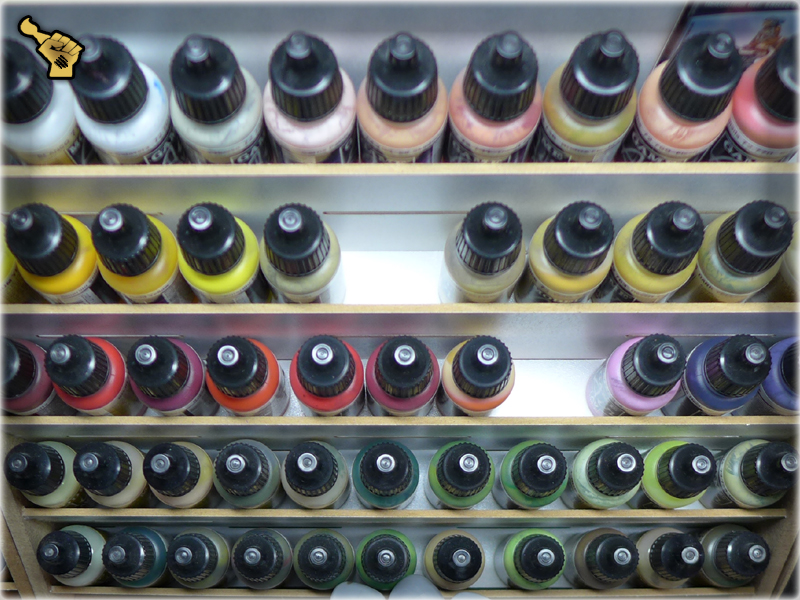
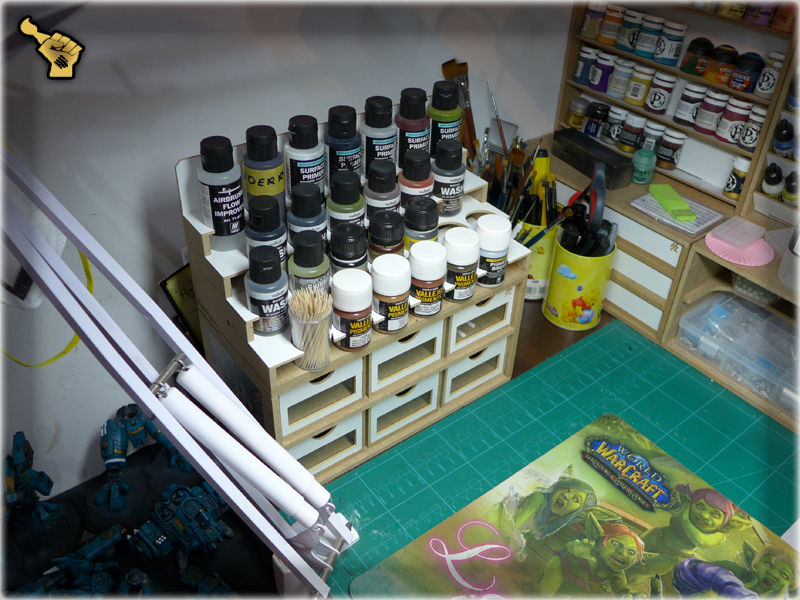
Second most important thing about HobbyZone’s Modular Workshop is functionality. OK, I haven’t tested all the different parts of ‘Modular Workshop System’, but hey – the entire point is to pick a set that would suit your needs best! Right now my set consists of three drawer modules, one paint module, one showcase module and one brushes and tools module with an addition of eight paint hangers. Each of these items proved to be useful to me and I don’t see a way it can be further improved. And I am a guy who tends to redesign stuff to better suit his needs – It’s just that HobbyZone’s stuff is cool as it is.
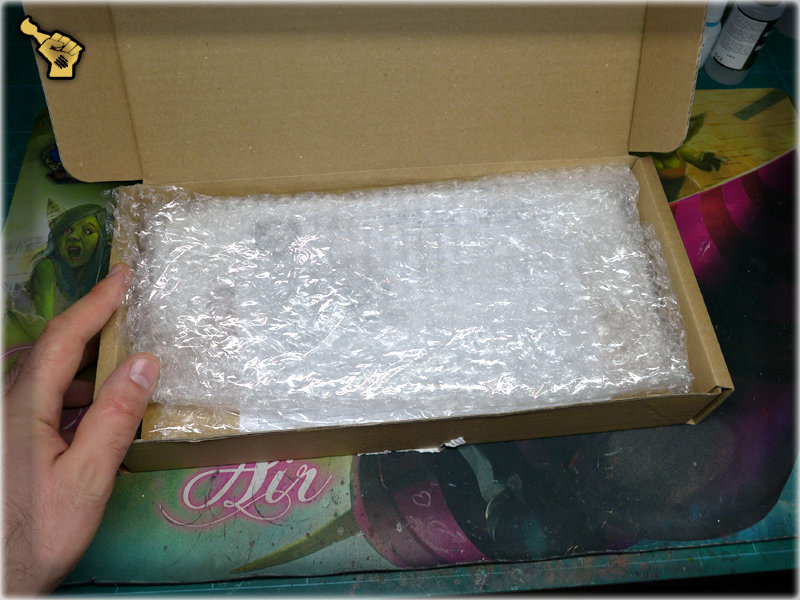
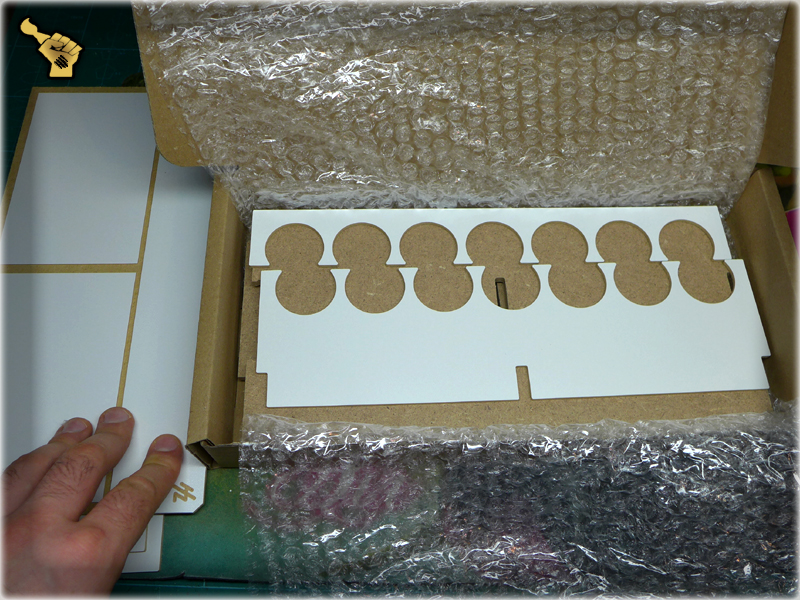
I believe that the way an item is packed corresponds directly to it’s quality and the way a customer will perceive it. I appreciate when an Item I spent my money on is well packed (cared for). That being said – I just love the way HobbyZone stuff is packed. Each item has it’s own box, filled with bubble wrap. Inside you will find an instruction and all the pieces required to ‘build’ particular item (except for glue, but which hobbyist does not have that already?). By now I know exactly what I would see inside a new HobbyZone box – even so each unpacking is still a pleasant experience.

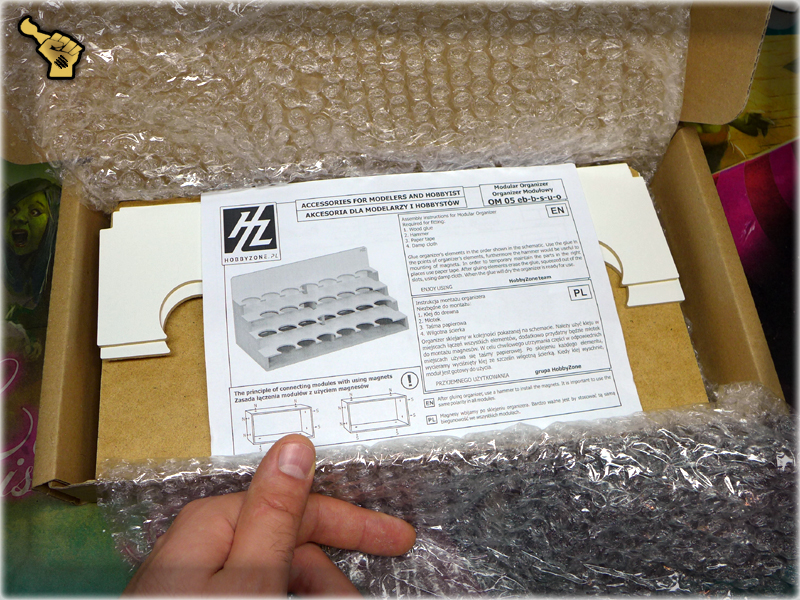
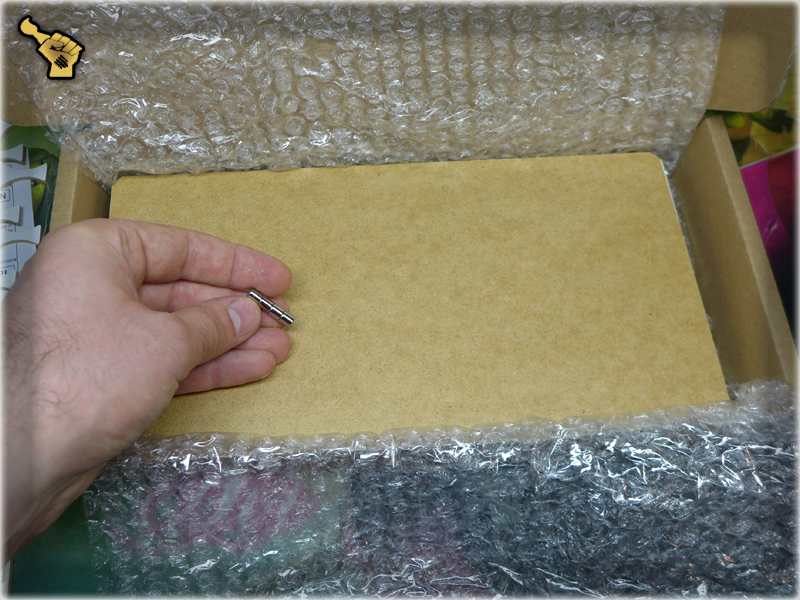
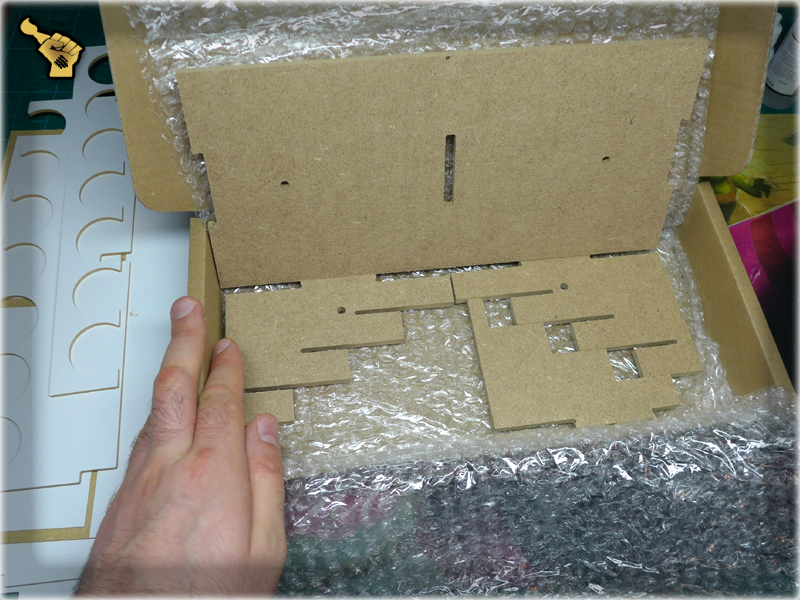
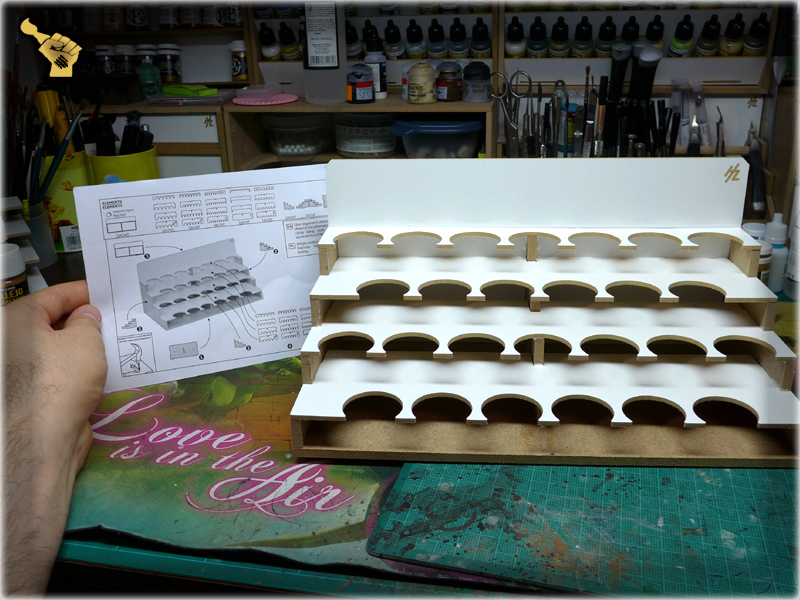
Each piece of HobbyZone ‘Modular Workshop System’ is designed to be user friendly and easy to assemble. No tools are required to put these things together. With a nice and easy to understand instruction (that comes with each set), I was able to put this module together in less than five minutes. Half an hour later when glue was dry, I was able to use this piece.
Each hobbyist is probably going to see the matter of price differently. For me the quality and functionality of HobbyZone’s ‘Modular Workshop System’ is well balanced with a price oscillating between 10-20€/medium piece. Purchased items are shipped within 72hrs from purchase (during working days). HobbyZone is well stocked in it’s stuff. Don’t know how about you, but I totally appreciate it. If you still not into it – just check out this MIND BLOWING STICKER!
For me HobbyZone’s stuff is great. If you struggle to keep your workbench organized do not waste your time – head on to HobbyZone.pl/en(EU) / HobbyZone.biz(USA) and change your hobbying for the better. Zapisz
Foreboding my previous lifestyle in favor of painting for hire was the best decission in my entire life. Not only that I have a lot of fun in my ‘job’ but also plenty of time for my own projects. For those who knew me before scarhandpainting.com the number of Special Projects appearing lately might be quite a surprise. I myself am taken aback by the sheer numbers of personal projects I can work on. Below is a visual step-by-step of just such a project.
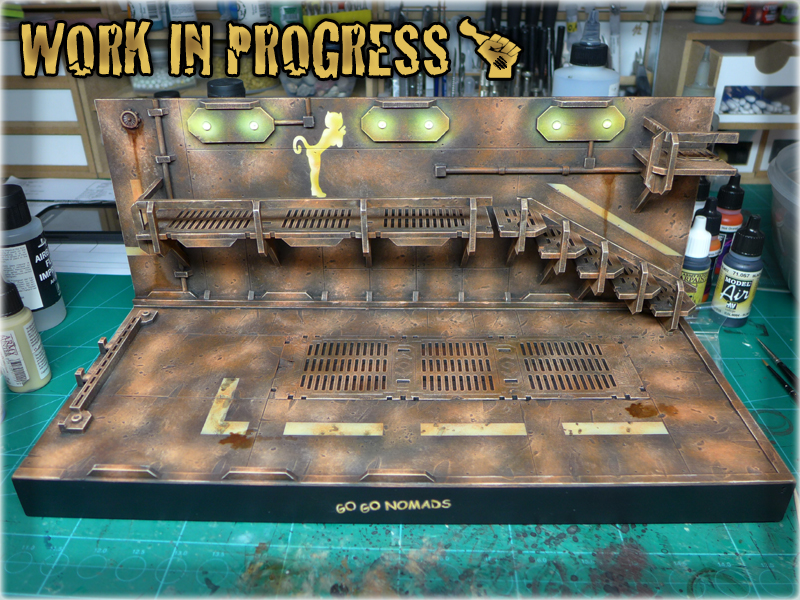
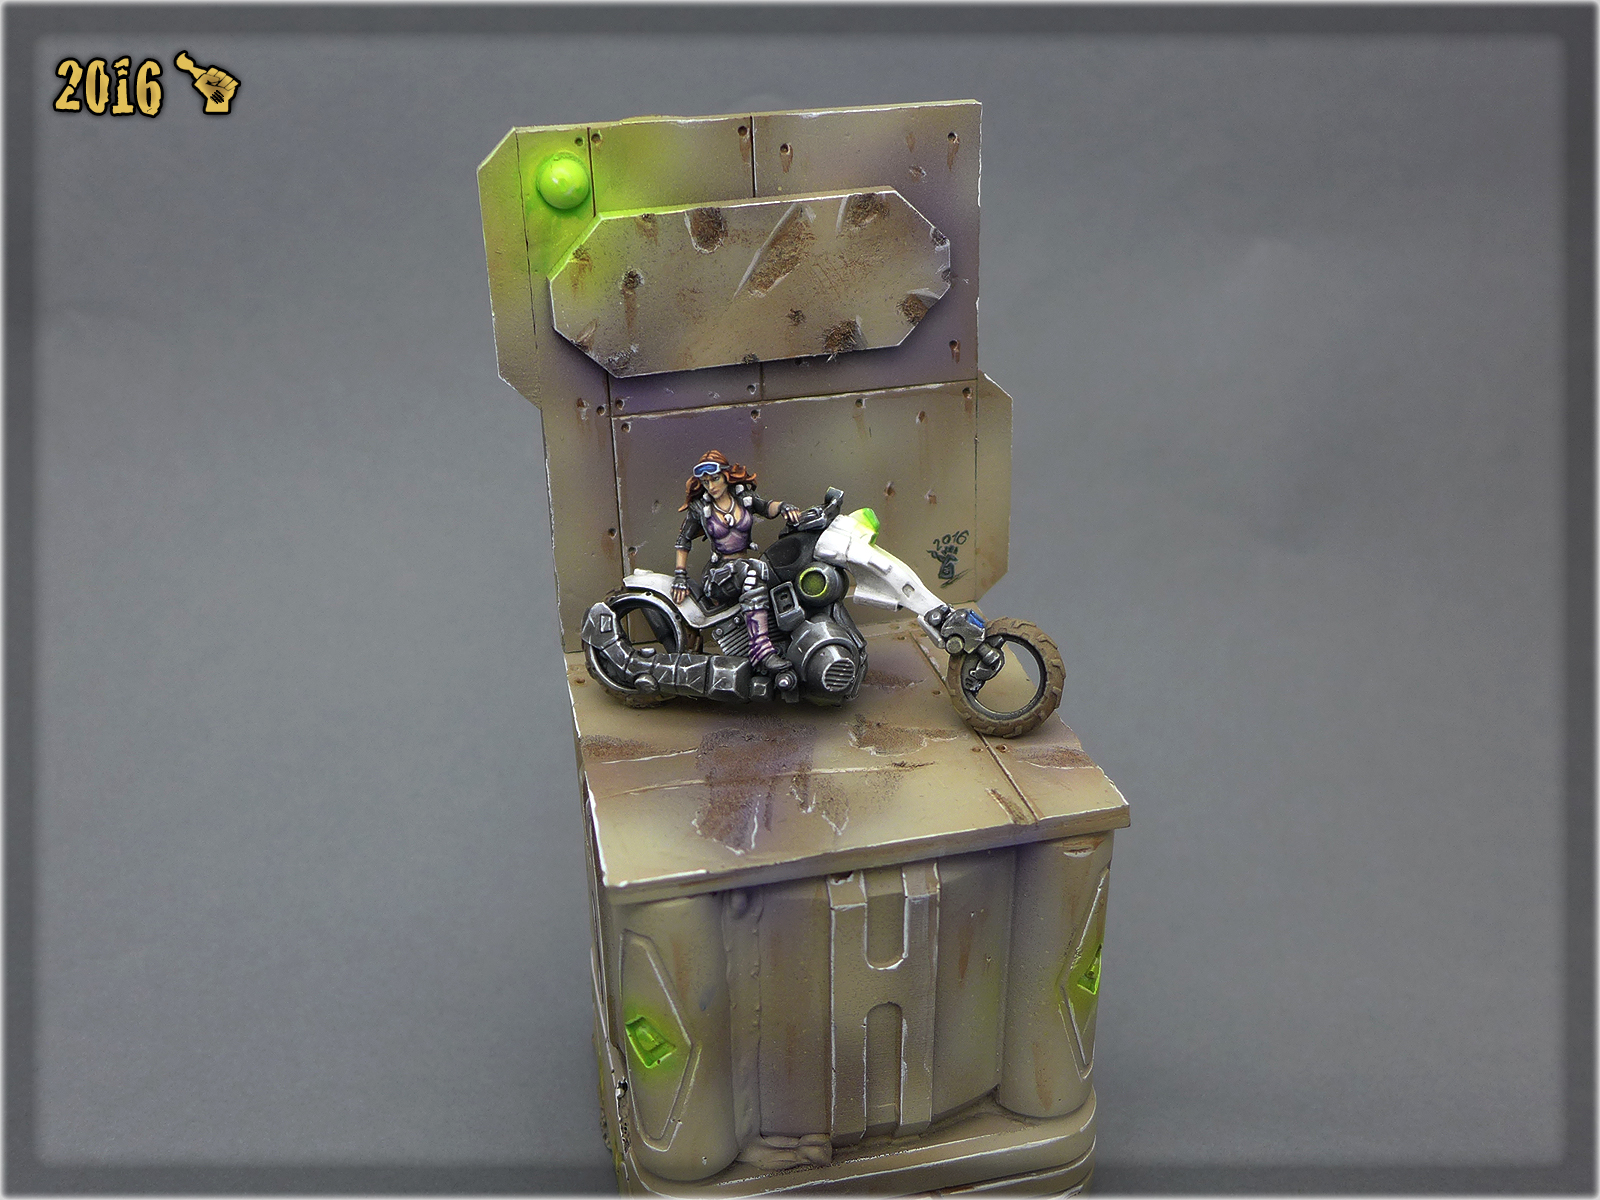
A big Infinity Event is closing in. ‘Polish Championships’ will take place tomorrow and I’ve trained my Corregiror army and dice rolling hard in preparation. Along with the usual mano-a-mano combat, a Painting Contest will also take place at the event. Each player is eligible to select one of his army rosters and present the miniatures for everyone to see and vote. I thought long and hard to think of anything that could deliver my miniatures to the podium. I know very well that there’s plenty of awesome painters among the Infinity community in Poland and that competition will be very strong. My miniatures look nice but not awesome enought to compete with paint jobs that literally blow my mind. I’ve figured something special – a Nomad-like trick to fight for the attention of voters. A special display diorama to compliment my army’s visuals as a nice background, built and painted in the same theme as the bases of my Corregidor army.
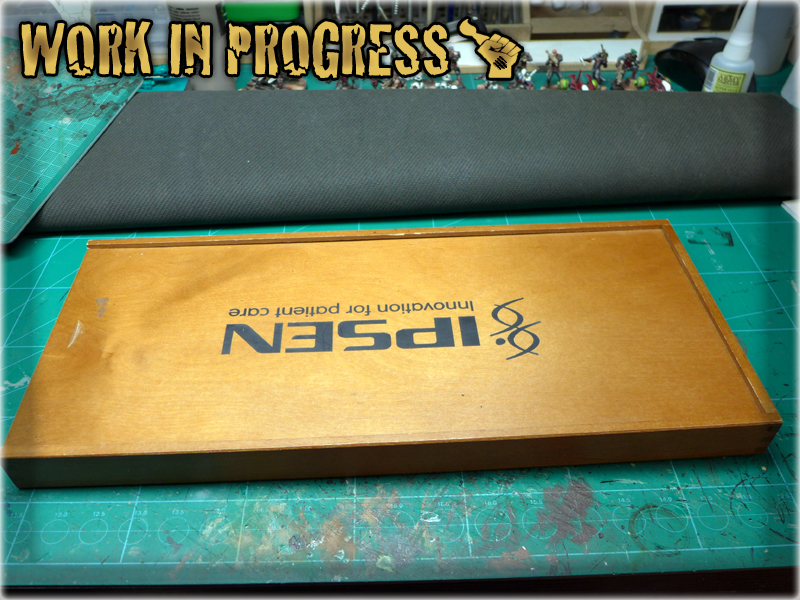
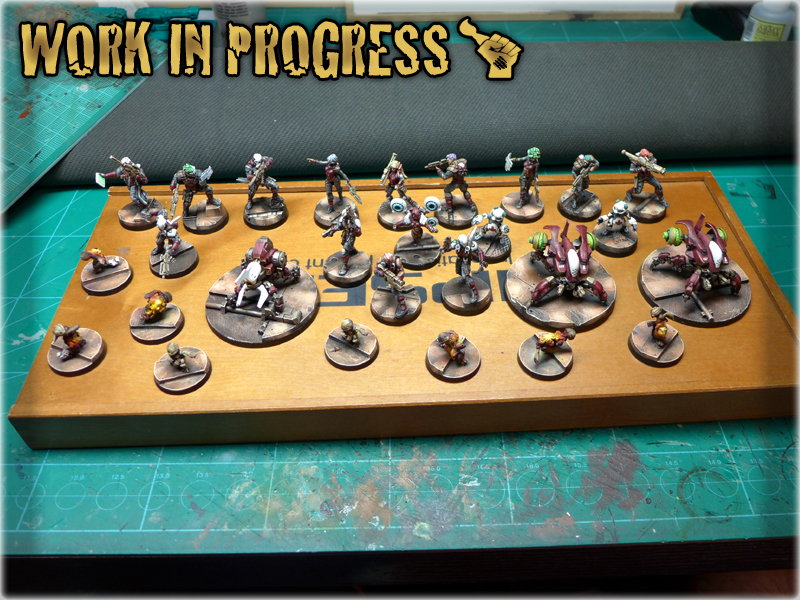
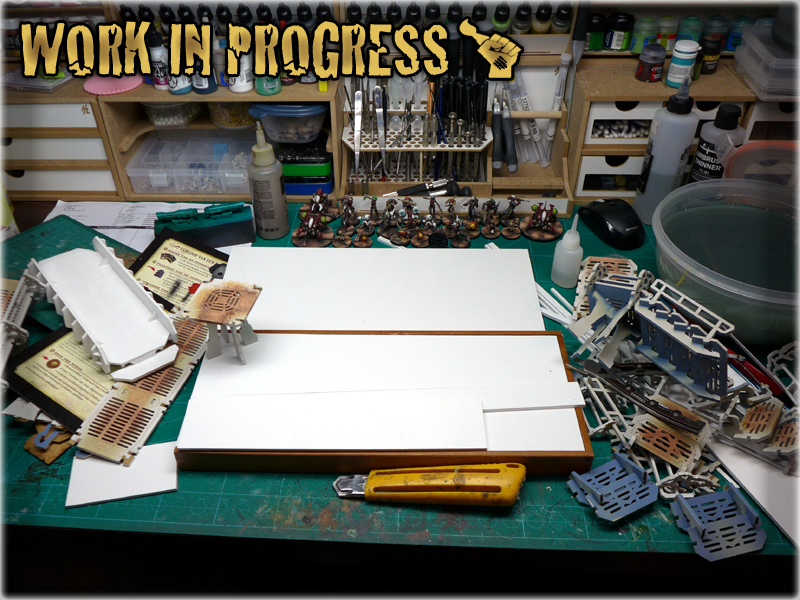
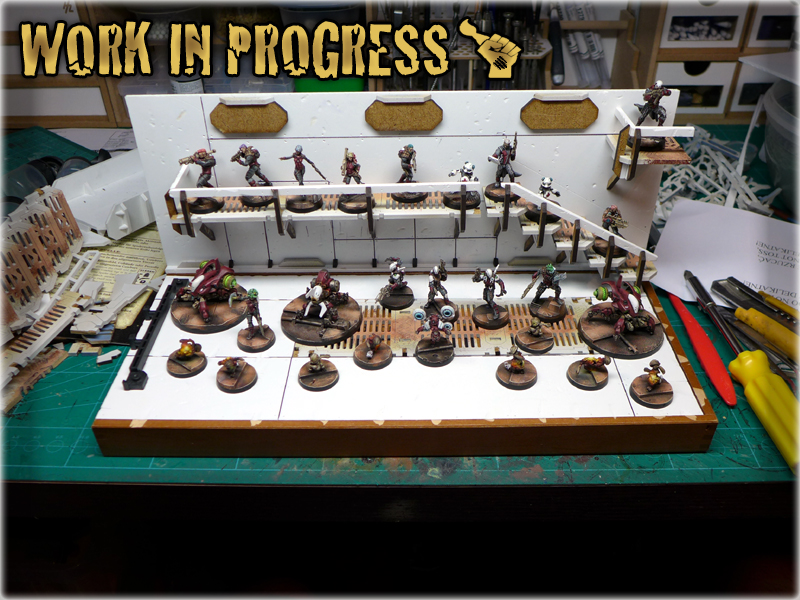
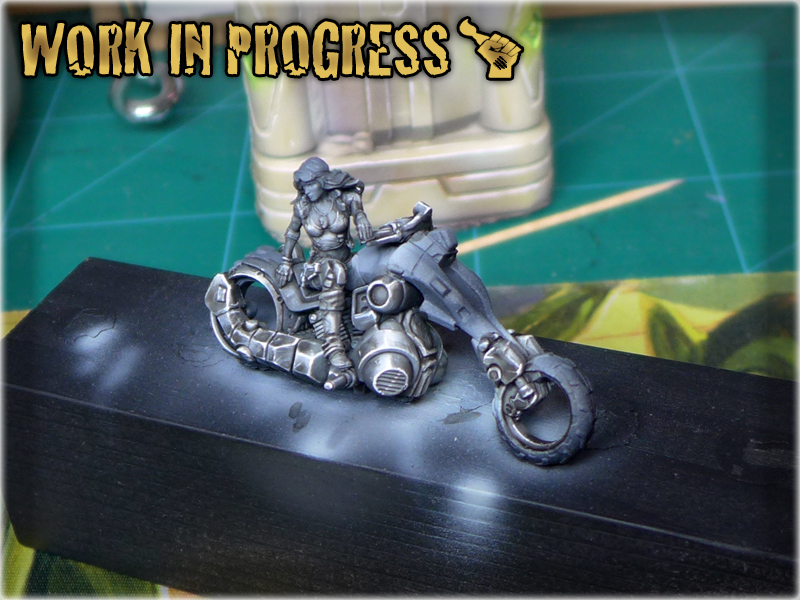
For this purpose I found a suitable wooden crate to be used as the base for entire diorama. I’ve also set up a makeshift display of miniatures to see if the base is large enought to accomodate them.
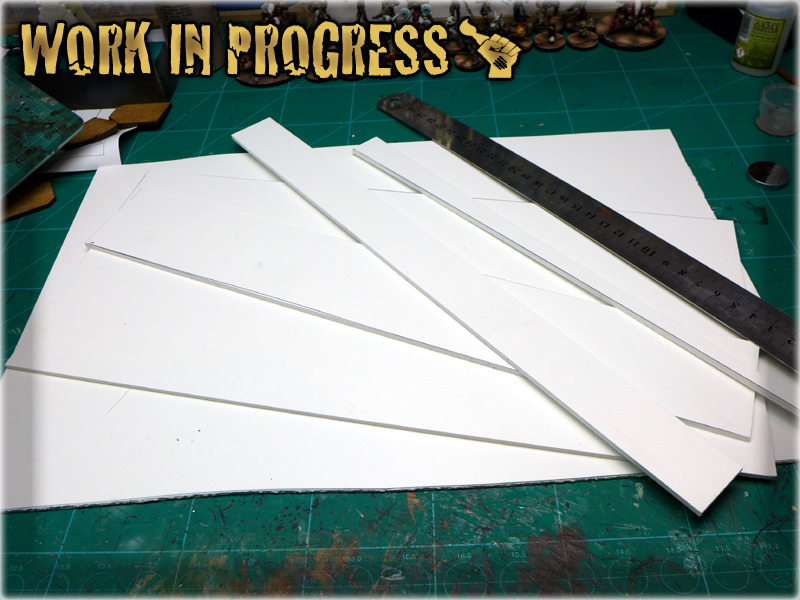
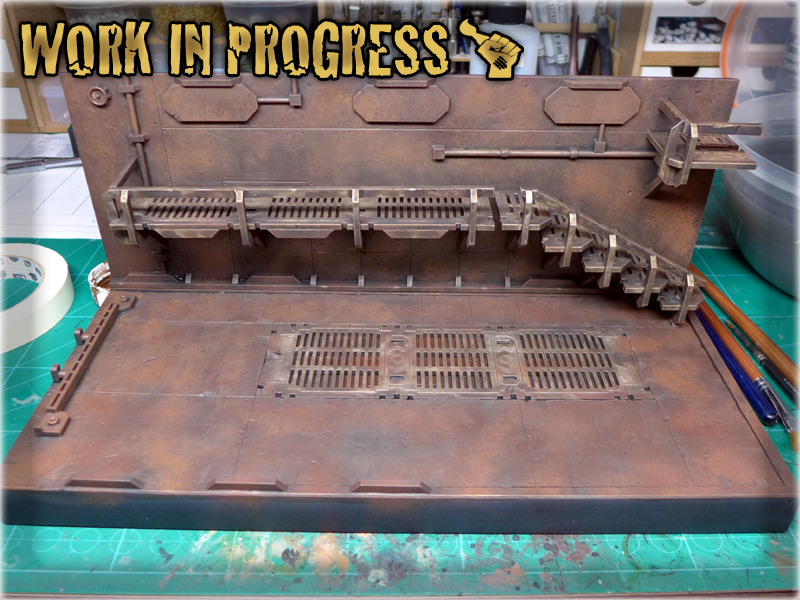
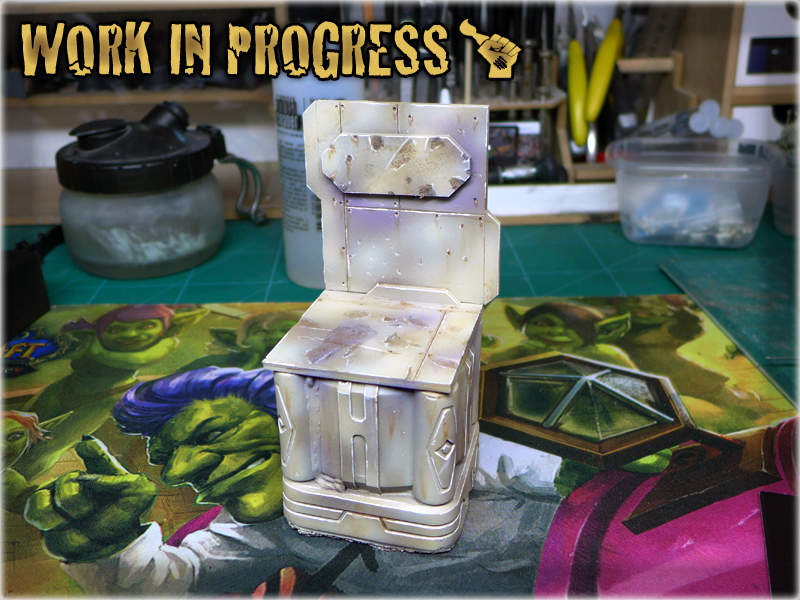
The wooden crate passed this test so I’ve gathered 3mm PCV and some HDF leftovers. The entire layout of the diorama was taking life in my mind’s eye as I started to work on it. I’ve used the wooden crate as a template to cut a floor and a wall for the diorama. After that an idea to build a small balcony with stairs and a sniper point came to my mind. I quickly dig through any materials and pieces that might be used for that and found my good old Micro Art Studio’s walkways set. The set had some sweet looking pieces that I implemented into this project.
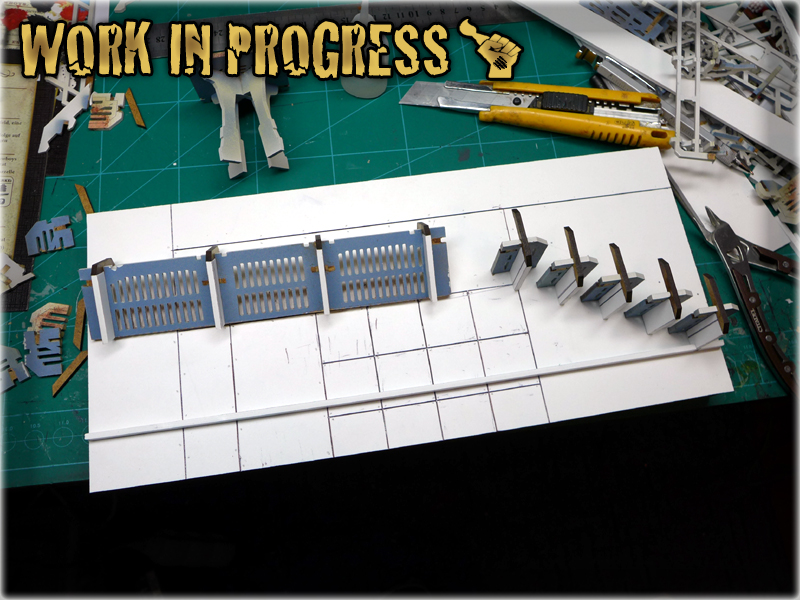
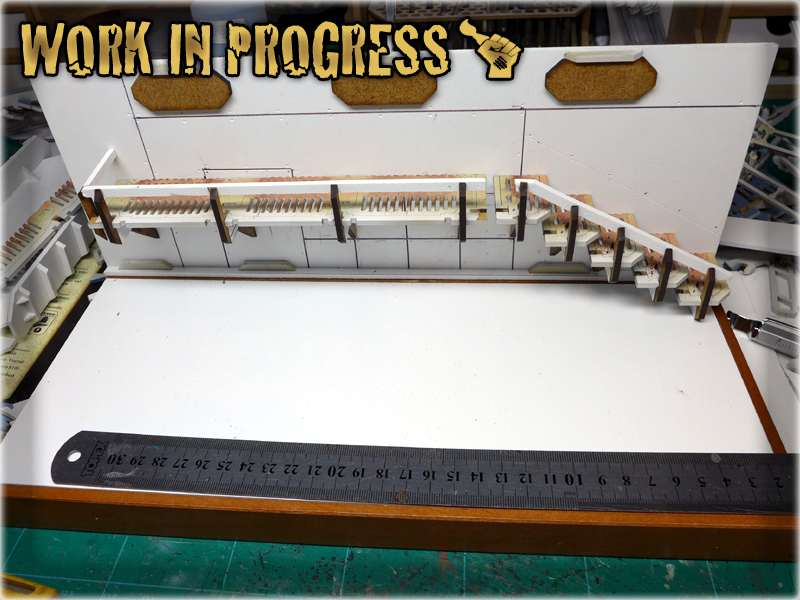
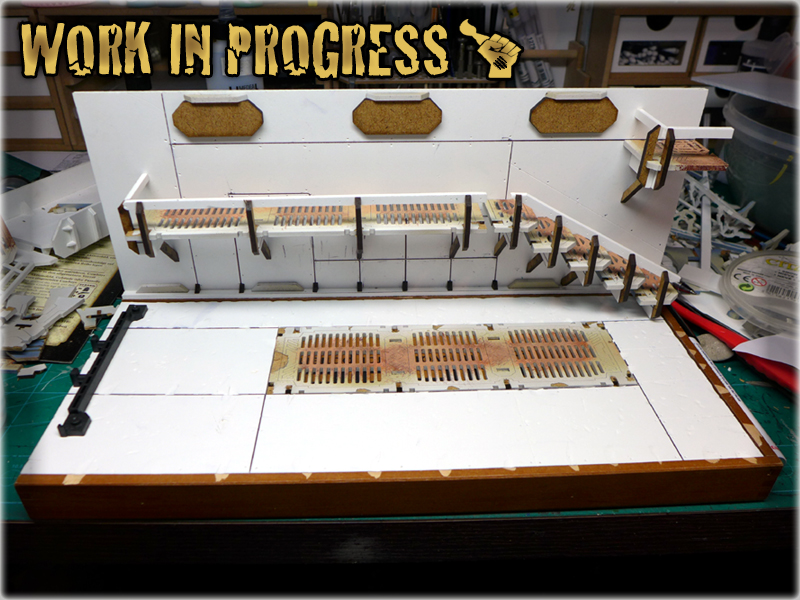
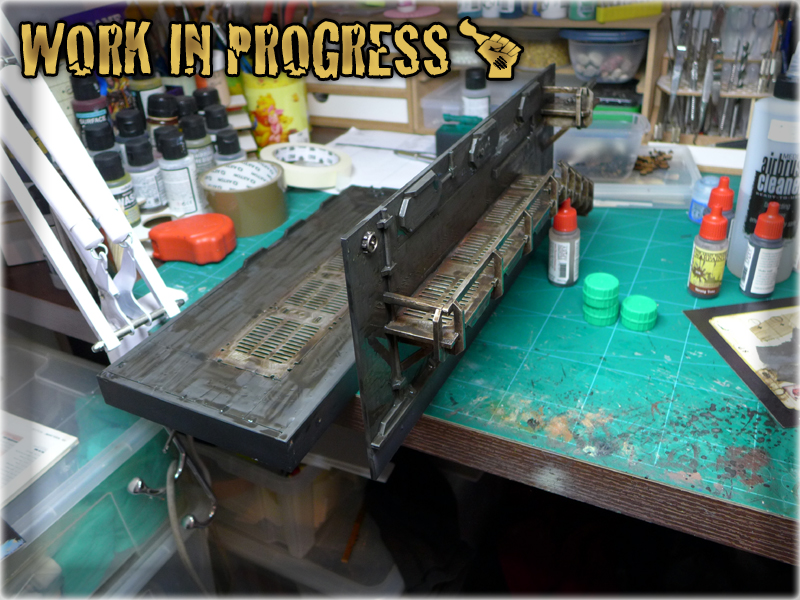
Using a ruler and a pen I drawn some makeshift panels and bolt holes on the ‘wall’ and prepared space for MDF pieces to be put into. I also shortened the MAS’s stairs and added elements of my own to make them look more industrial. Floor followed in a quick succession with the center being switched for a big MAS’s MDF panel. I also moundet the ‘wall’ using three screws. Initially I wanted to use magnets to keep the thing removable, but in the end I wanted for my miniatures to be safe. After that I’ve mounted three wall panels to be used as a base for glow globes. I also made some dents, marks and holes in the concrete panels of both wall and floor. Once I was done I’ve made a last check of display. Just before undercoating I had an idea to add some pipes and a vent along the walls to build even more industrial theme of the diorama. I used lollipop sticks and some leftovers to do that and proceeded to the undercoat.

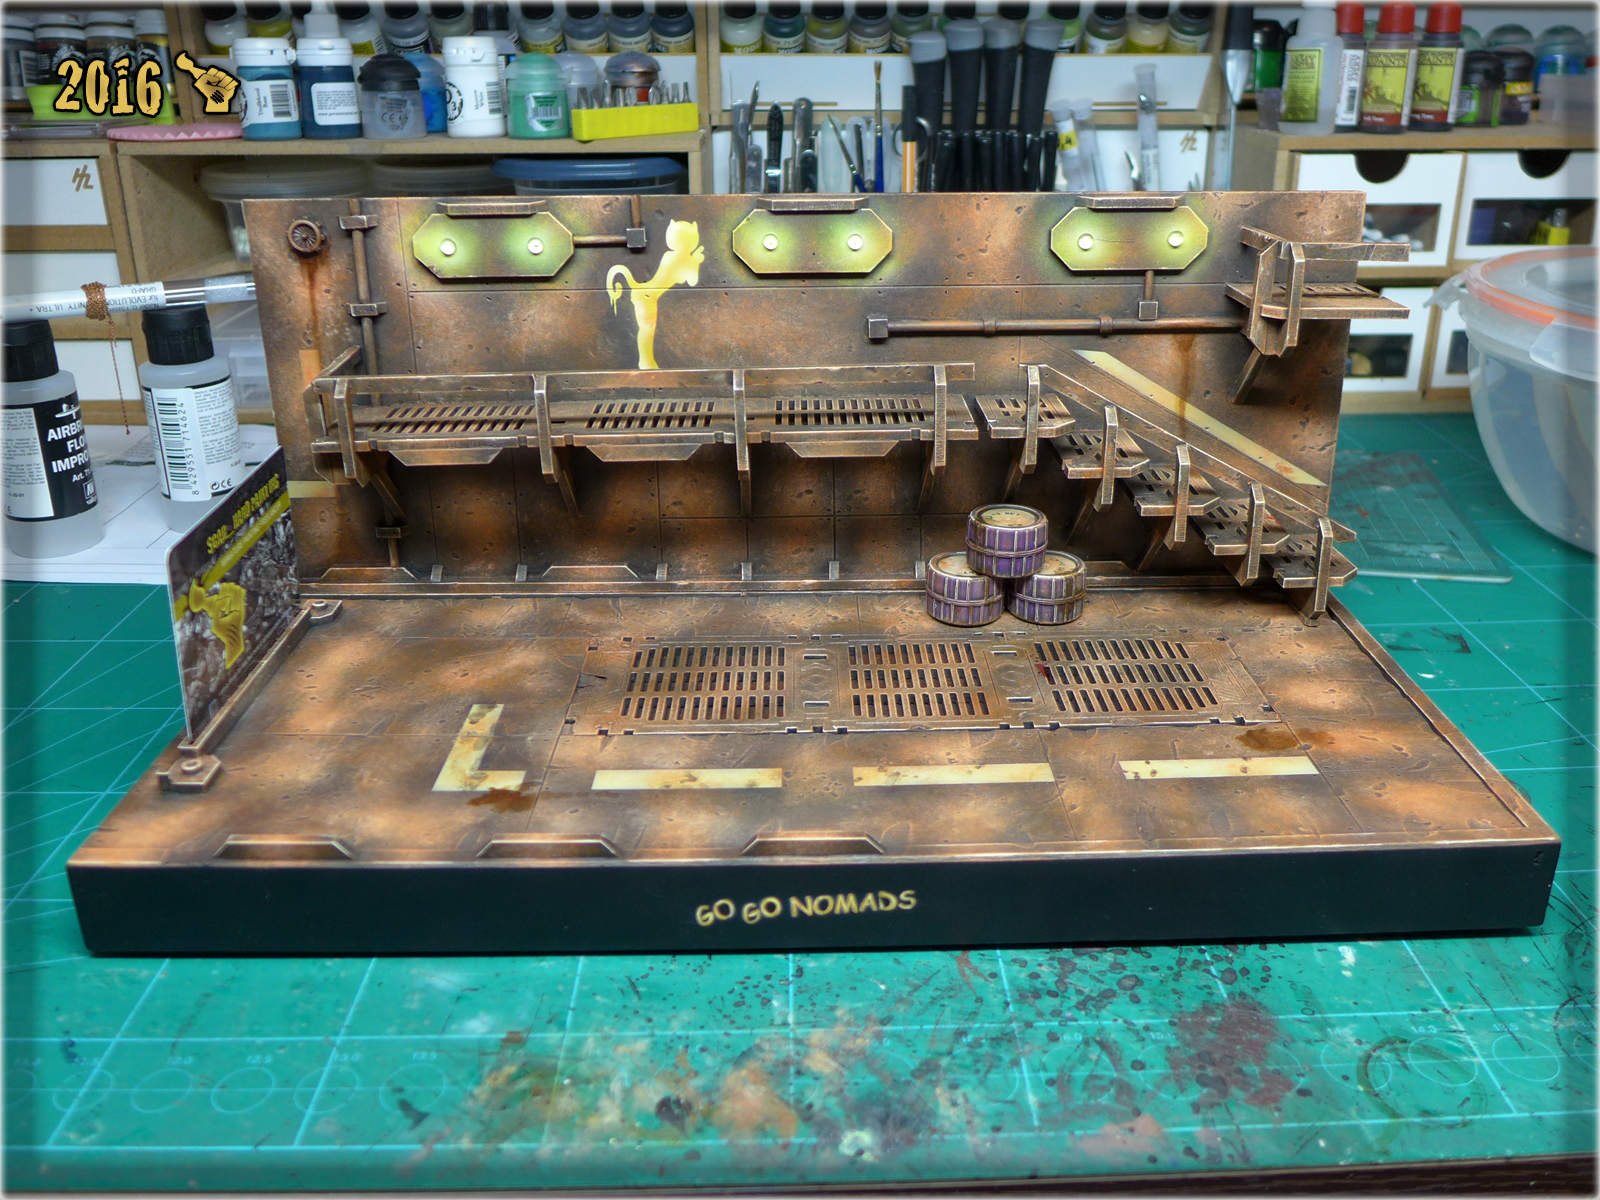
Once it was dry I have covered the entire thing in two strong layers of Eshin Gray, then painted up all metal elements with a Tin Bitz, Boltgun Metal, Mithrill Silver layers and then washed entire thing with Devlan Mud two times. I slowly applied layer after layer starting with Scorched Brown, then following with Calthan Brown, Ryza Rust, Lugganath Orange and lastly Flayed One Flesh. This is the same colour scheme as the one used for my Concrete Bases. Actually both metal and concrete were painted the same way as in these tutorials:
TUTORIAL: CONCRETE BASES part 2: Painting
TUTORIAL: PAINTING ‘FIVE LAYERS’ METAL
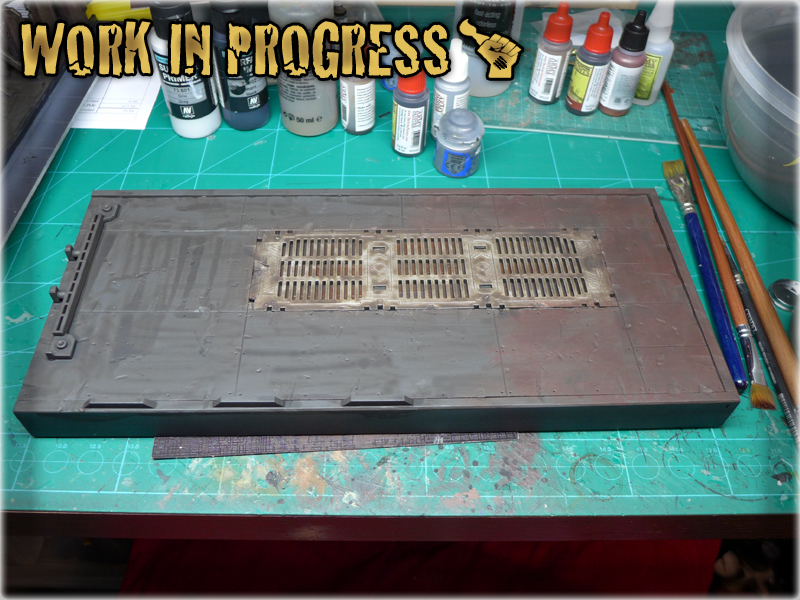
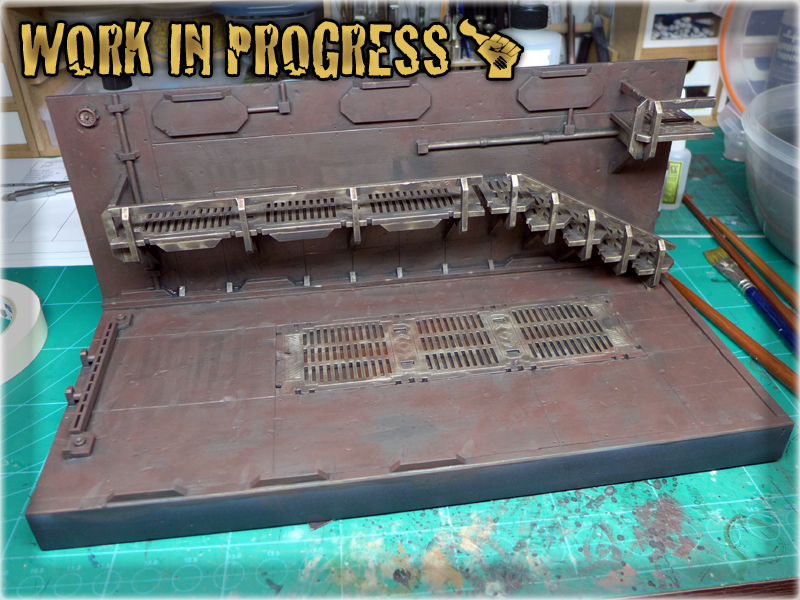
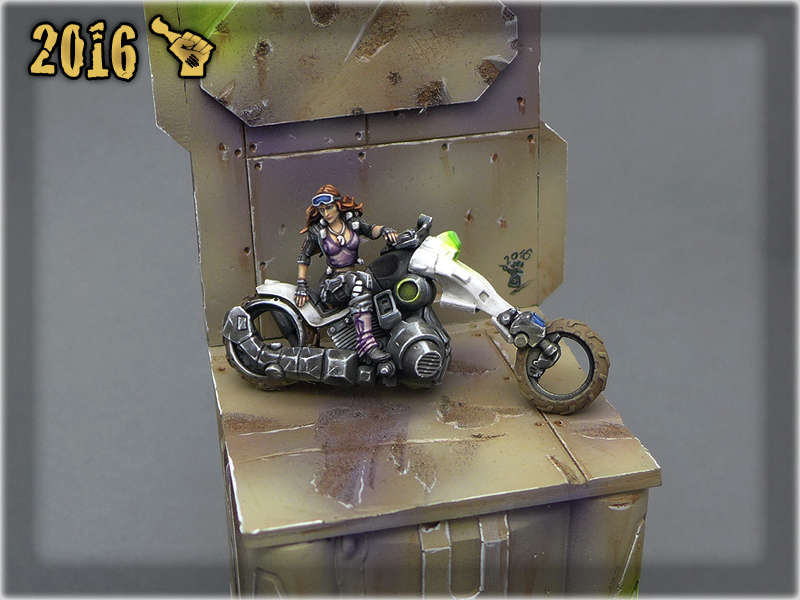
Starting with Calthan Ryza Rust I’ve covered metal elements along with concrete panels, but before that I’ve made a short pause to airbrushed white-creeme lines and a Nomad graffitti. Ryza Rust, Lugganath Orange and Flayed One Flesh went over the lines to create an impression of them being damaged and eroded along with the concrete panels. Once Flayed One Flesh layer was done I lined/edged all the angles using the exact same piant. I also added grease/Rust streaks and oil stains here and there to bring the diorama closer to a life scene.

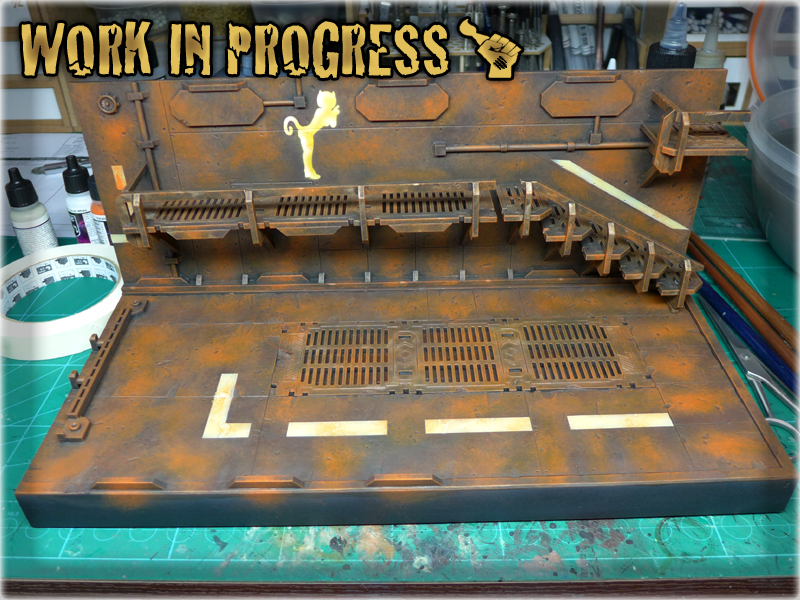
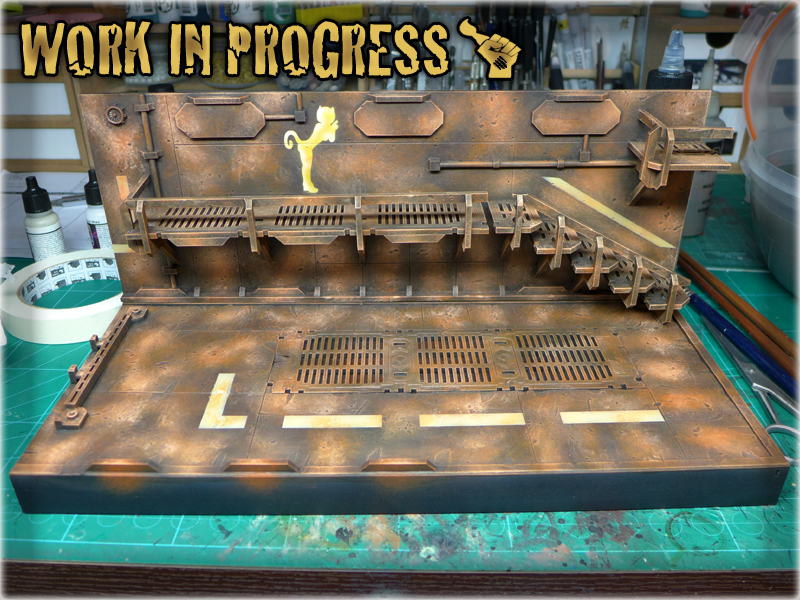
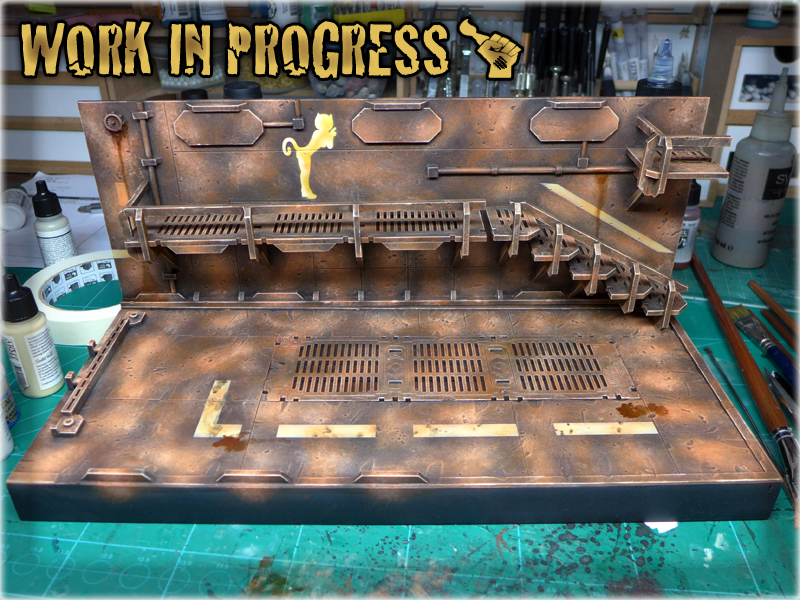
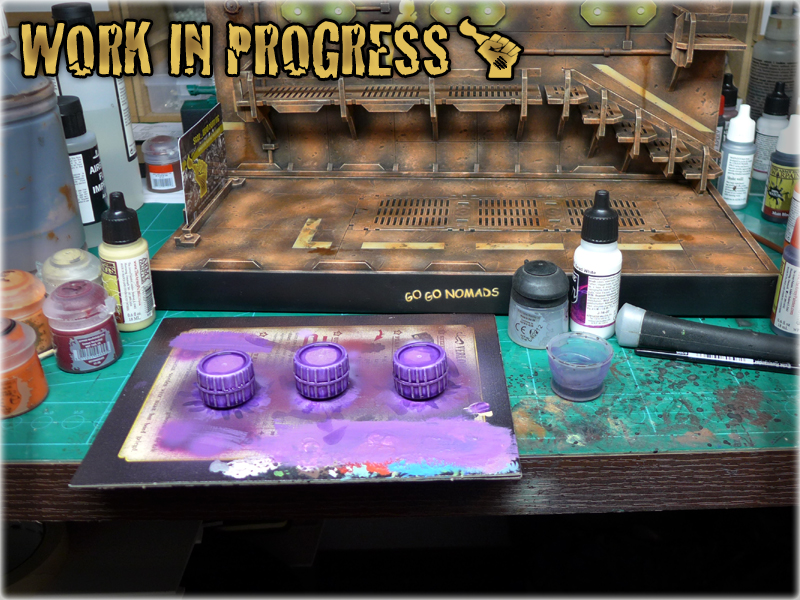
In the end I had to add a name, so I used a template created for me by Reycast Miniatures and airbrushed another graffitti onto the now black edges. Simple OSL was airbrushed and I mounted glow globes in the center points of each light. I also added three purple barrels to compensate glow globe’s green in preparation for red miniatures.
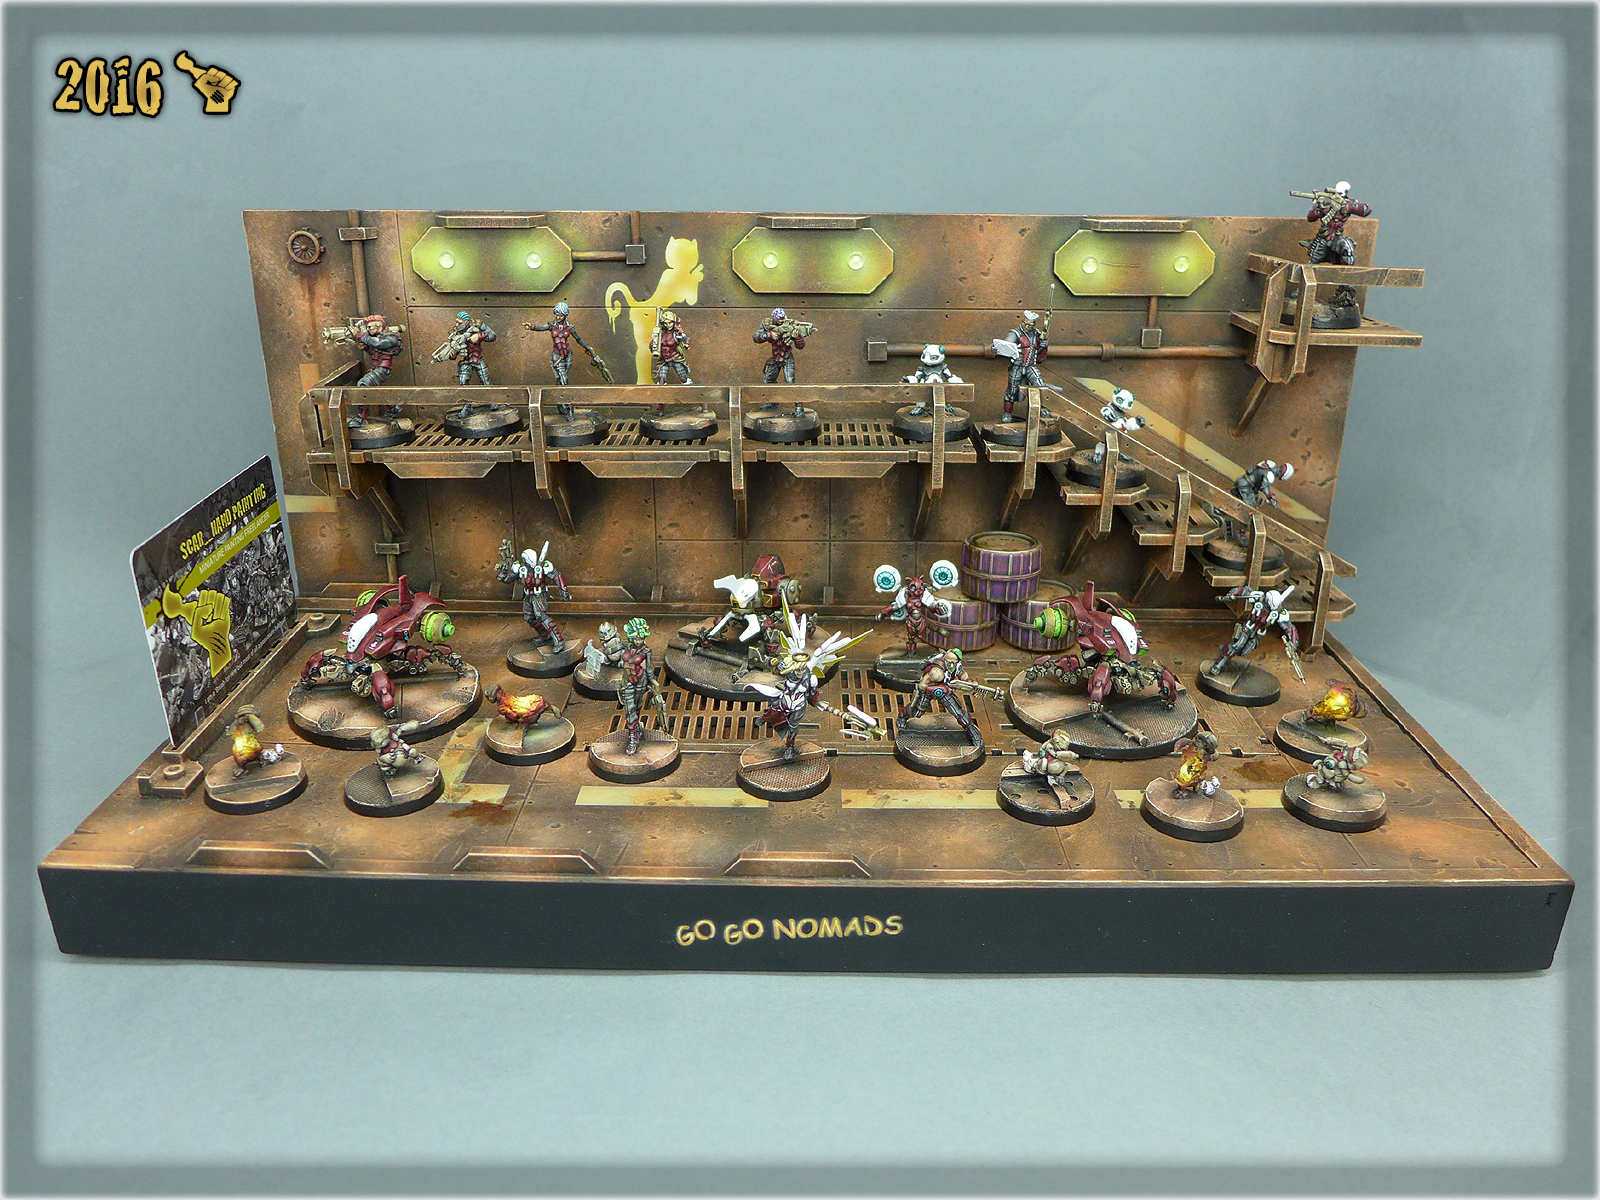
The final piece exceeded my expectations. Even my Girlfriend said it looks cool – and that’s rare! Damn – I count on this one to help me climb the ladder in the contest. If not – well, at least I have a fine piece to set up behind glass along with some less used Nomad Miniatures XD


27.6.2016: I actually won the painting contest XD Ultra happy about the fact! Here’s the entry:
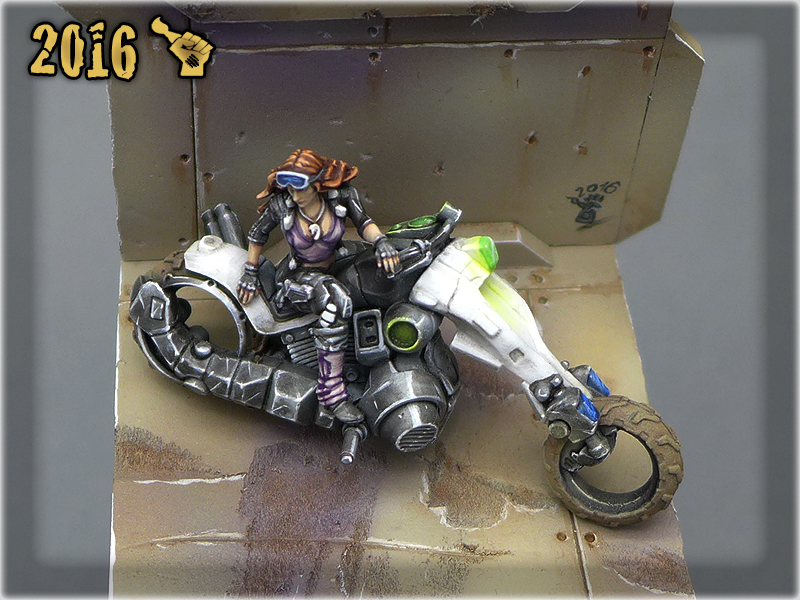
This mini diorama is a ‘special’ kind of a Special Project. The Penthesilea, Amazon Warrioress is a part of ALEPH collection, but I was asked by a friend to make her somehow unique – just to stand out on a display.
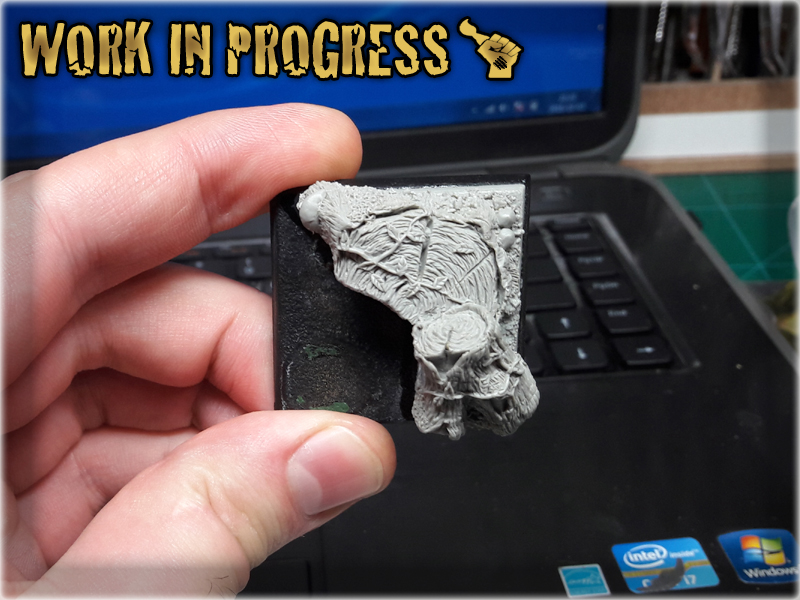
It took three failed attempts to base Penthesilea, as I was torn between many different options of a scenic base. I have tried to use a photo frame and model a wild west highway on it. I’ve tried to make a futuristic enviroment on a small wooden plinth. I even tried to use a coffee cap to base Penthesilea, but each time I just torn her off and tossed my creation into garbage (or hid it in the closet for later use). Salvation came to me in the form of a Micro Art Studio’s container, with which these guys filled a package of stuff I’ve ordered from them. “One man’s trash is another man’s treasure” and guys from MAS knew that I will have some use of their’s Kickstarter’s misscasts and leftovers. I cut the container in two and set up a nice background on it. Here’s a WIP pic:
This is how I actually started to work on this particular miniature – with a base instead of a model. After that it went pretty smooth with three days of painting, along with other miniatures. Each time I’ve ended up a key stage of this project, I was able to take a respite with another miniature, and then get back to Penthesilea. This pace kept me going with a lot of vigour, but also enabled me to look at Penthesilea with a bit of critique. I’ve corrected my mistakes at the start of each new stage and then followed adding new colours to the paint job. In the end I am very happy of how this one came out to be.
Here’s the final piece: “PENTHESILEA”
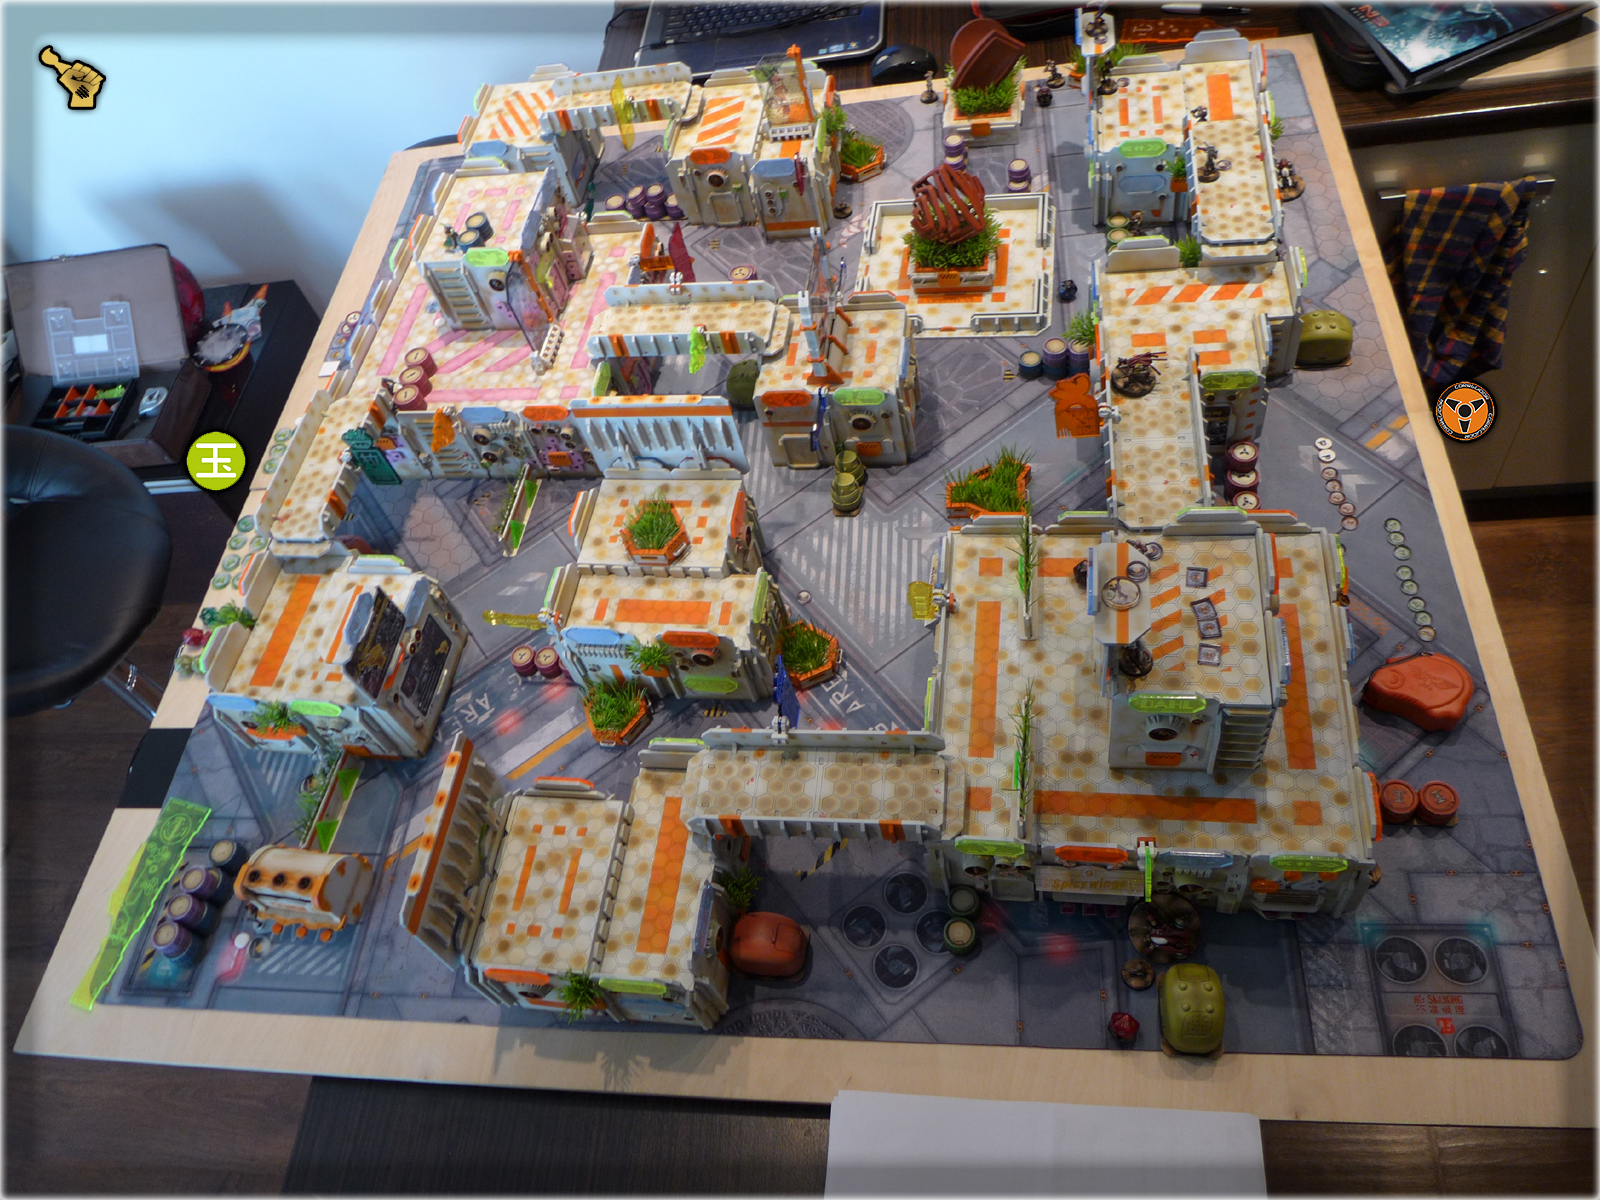
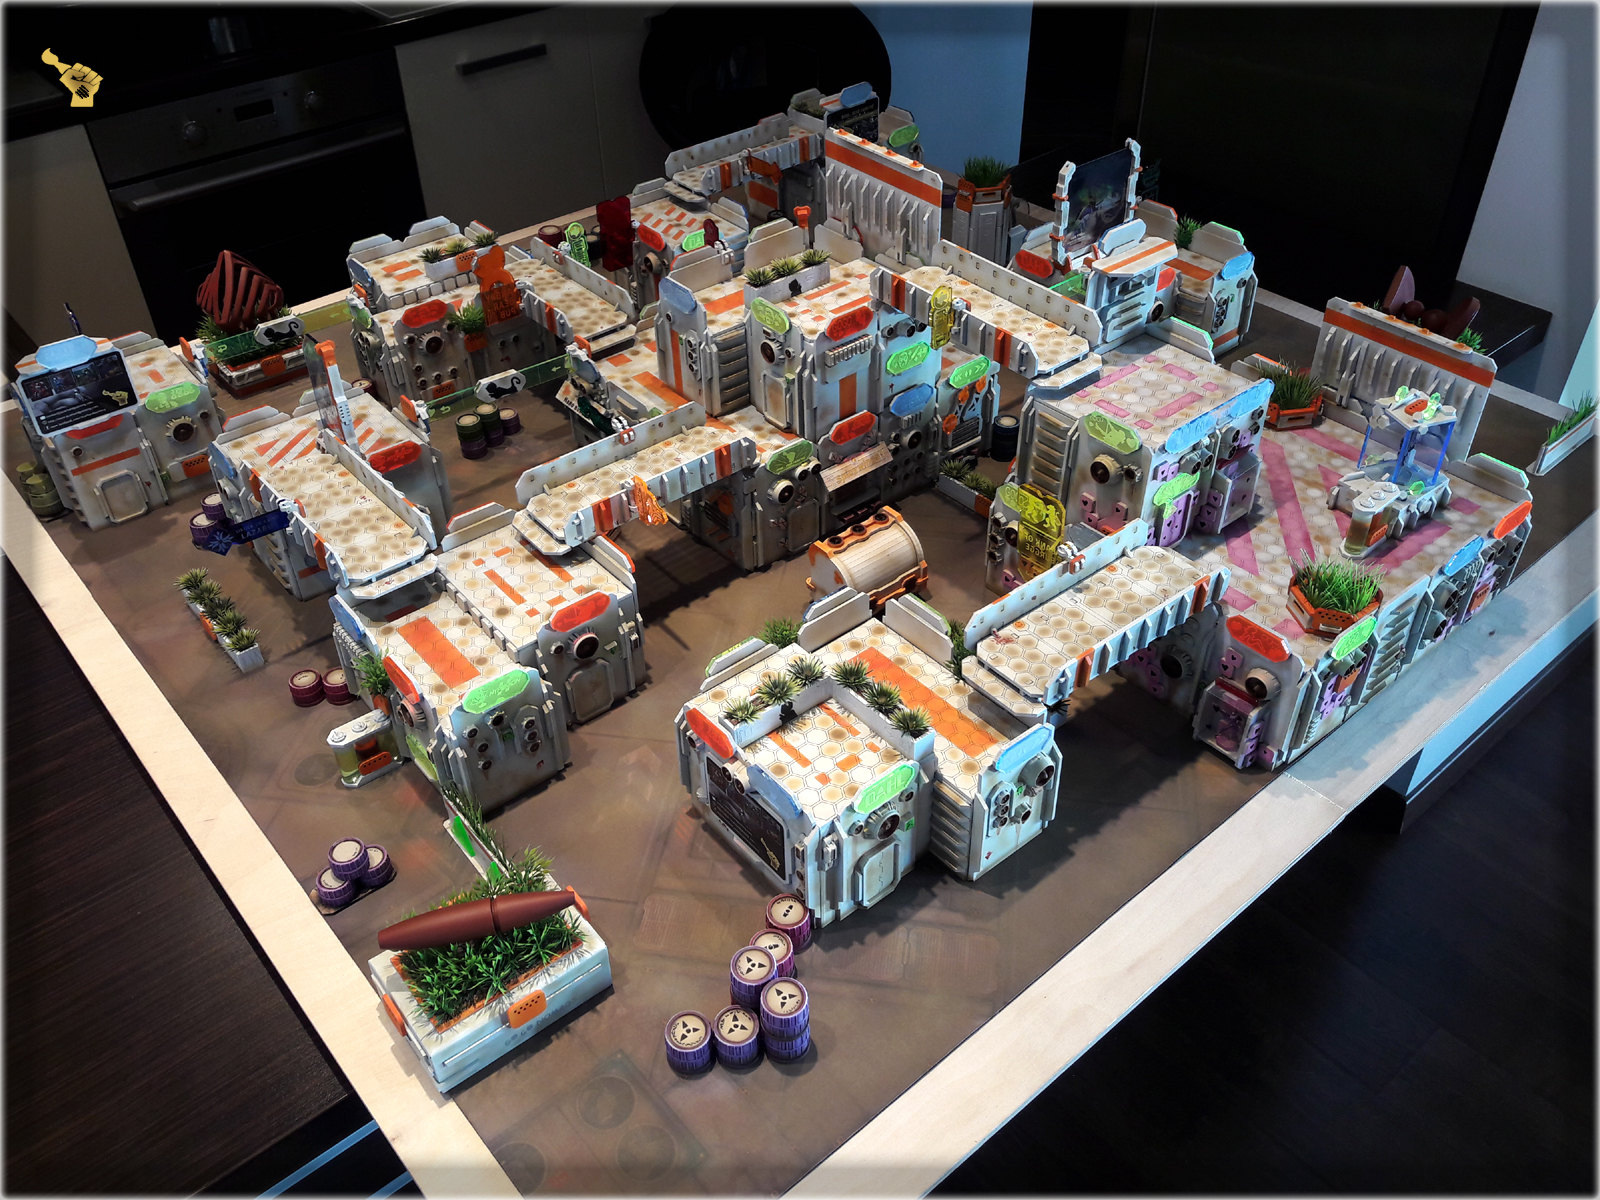
Half a year of waiting, two months of working and four days of painting have finally seen “THE COLONY” SPECIAL PROJECT finished. Last week, after adding some final detail which you can check out in “The Colony” Special Project part FOUR and FIVE, I was engaged with painting all the terrain. It was a hell of a hard work, as the enormity of surface being painted overwhelmed me to a point where I slept around three to four hours each day, woke up to paint, made a break, then got back to painting etc. Still, my work has paid off – as right now my gaming table for Infinity is complete!
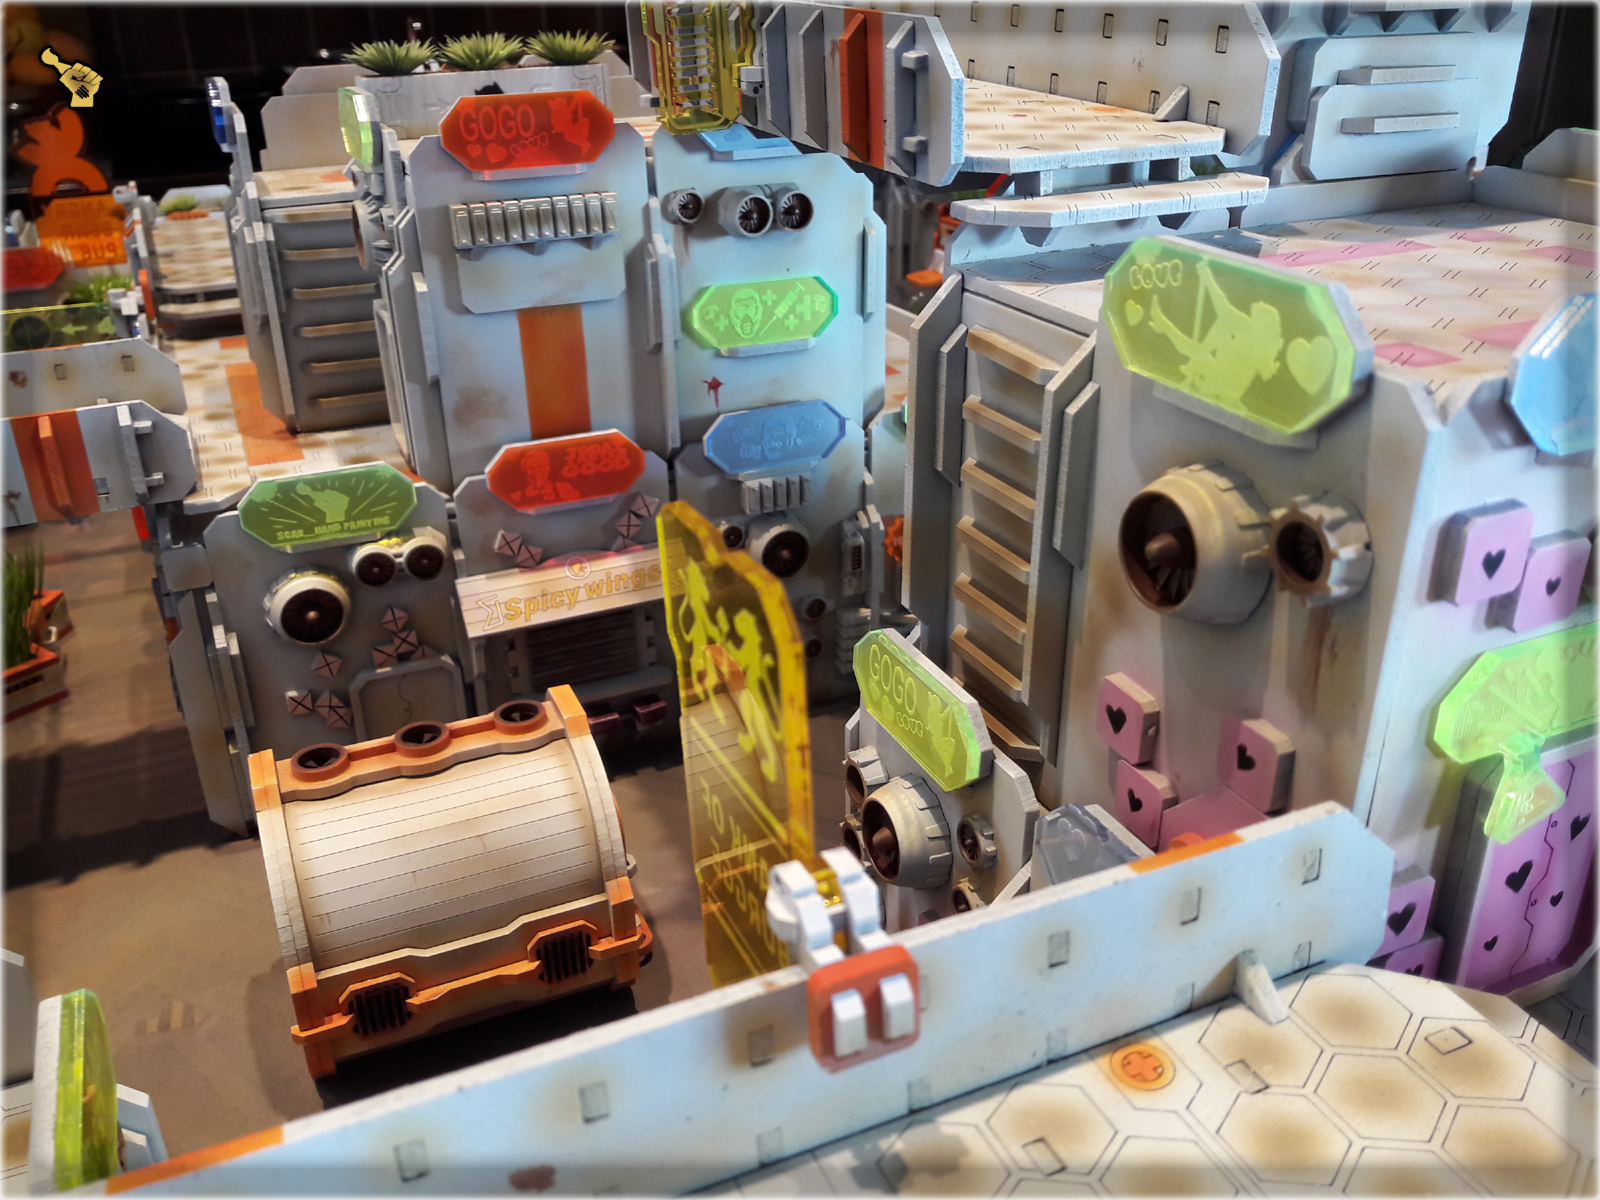
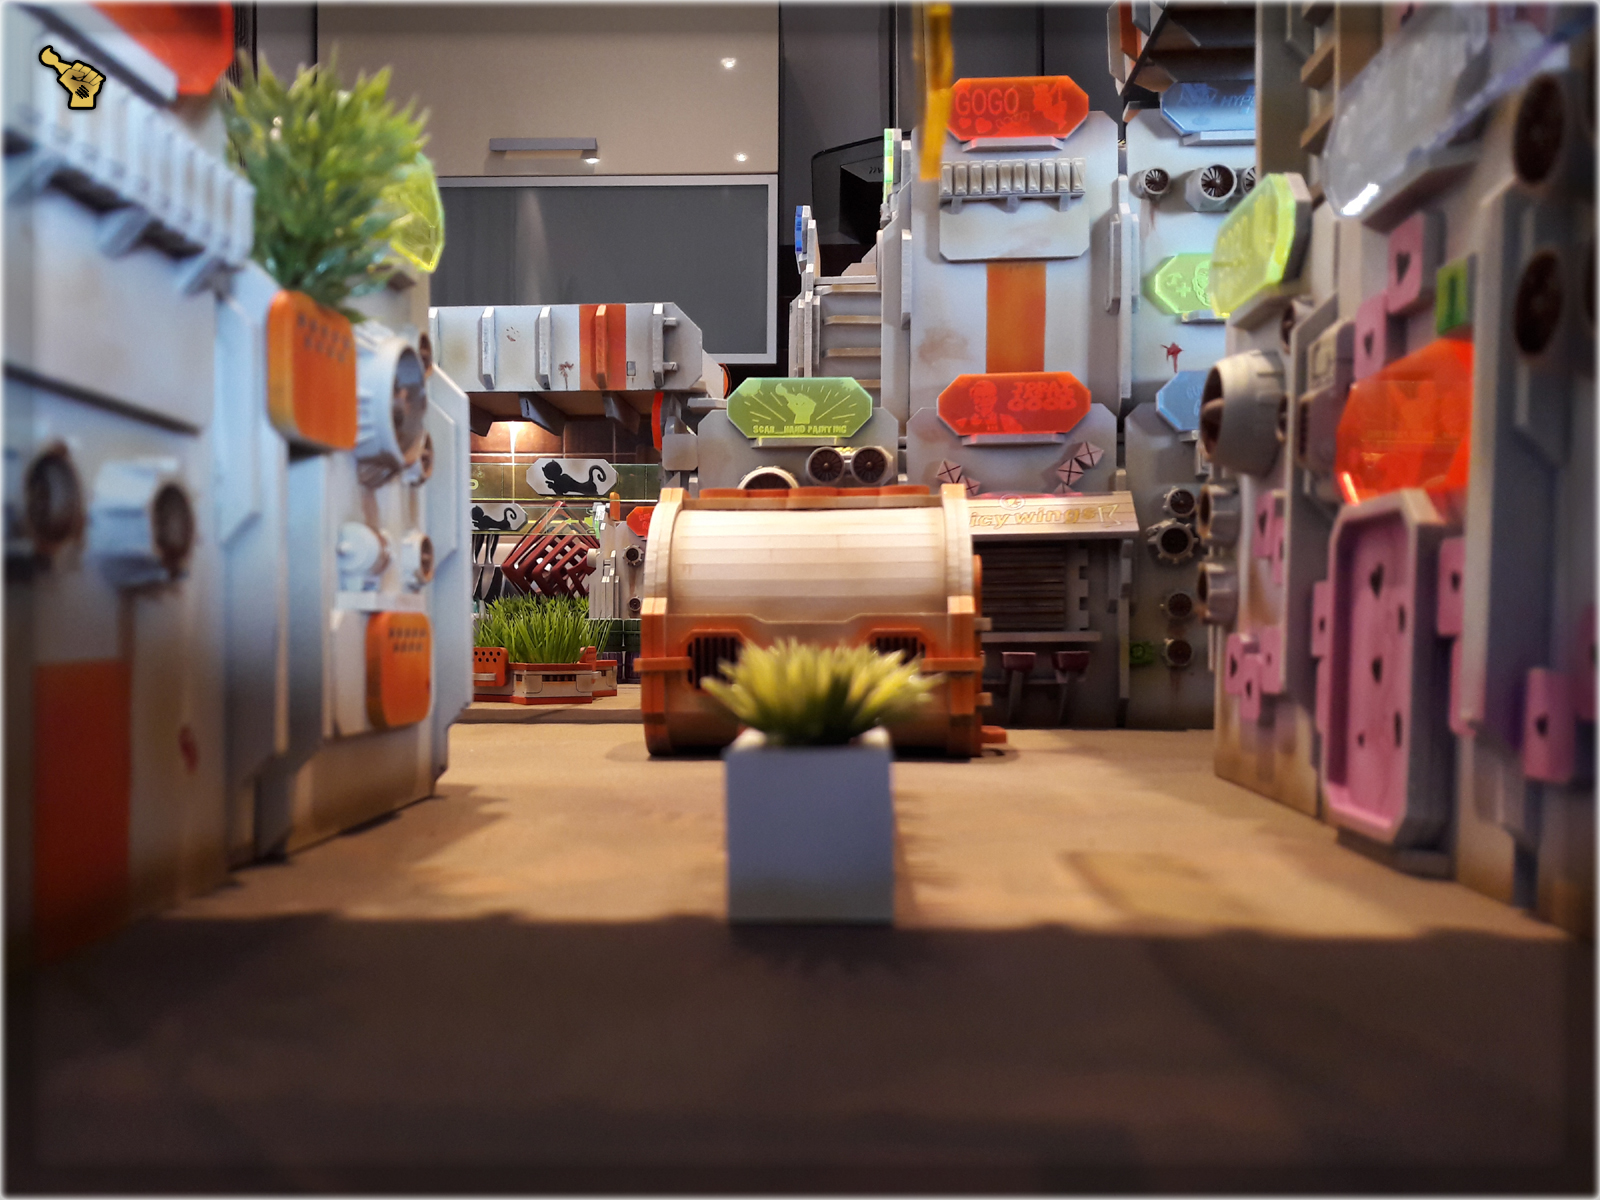
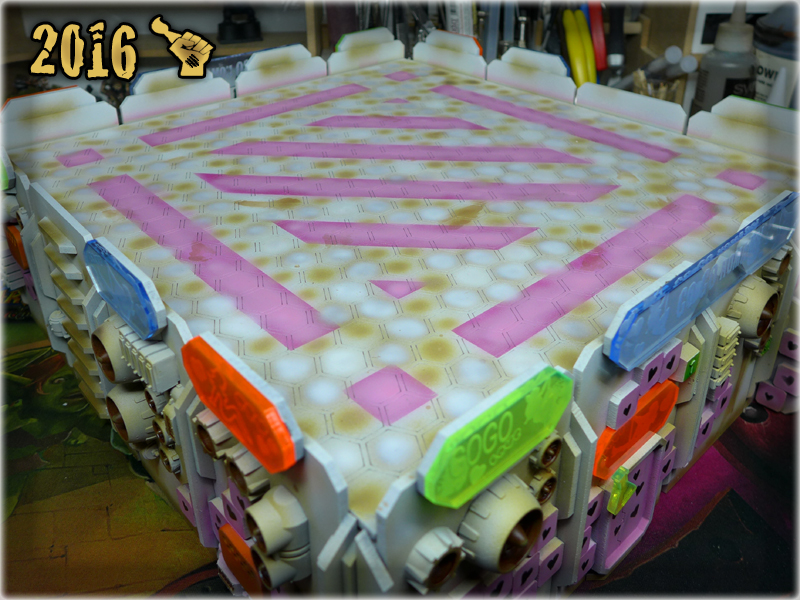
Or so I have thought till the moment of taking first pictures came by. Not only the ‘GO GO NOMADS!’ night club looked like if painted by a three-years old, (Which my beloved GF announced just as soon as she layed eyes on my masterpiece…) but also some key colour wheel synergies were missing. Here and there I overkilled colours or just made plain mistakes. Couple of improovements had to be done ASAP, as otherwise I’ve risked my mind being overheated with self-directed anger. So I’ve started working on things that triggered my self-loathing, eliminating them one at a time.
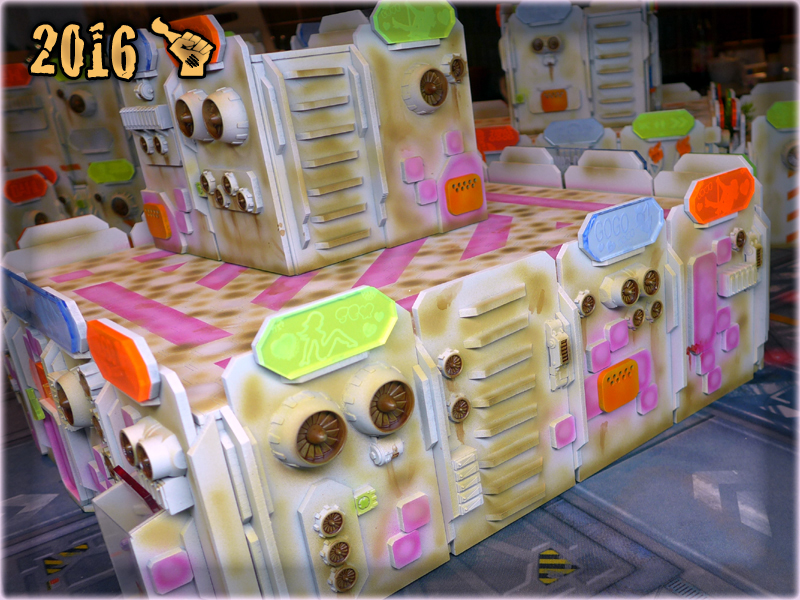
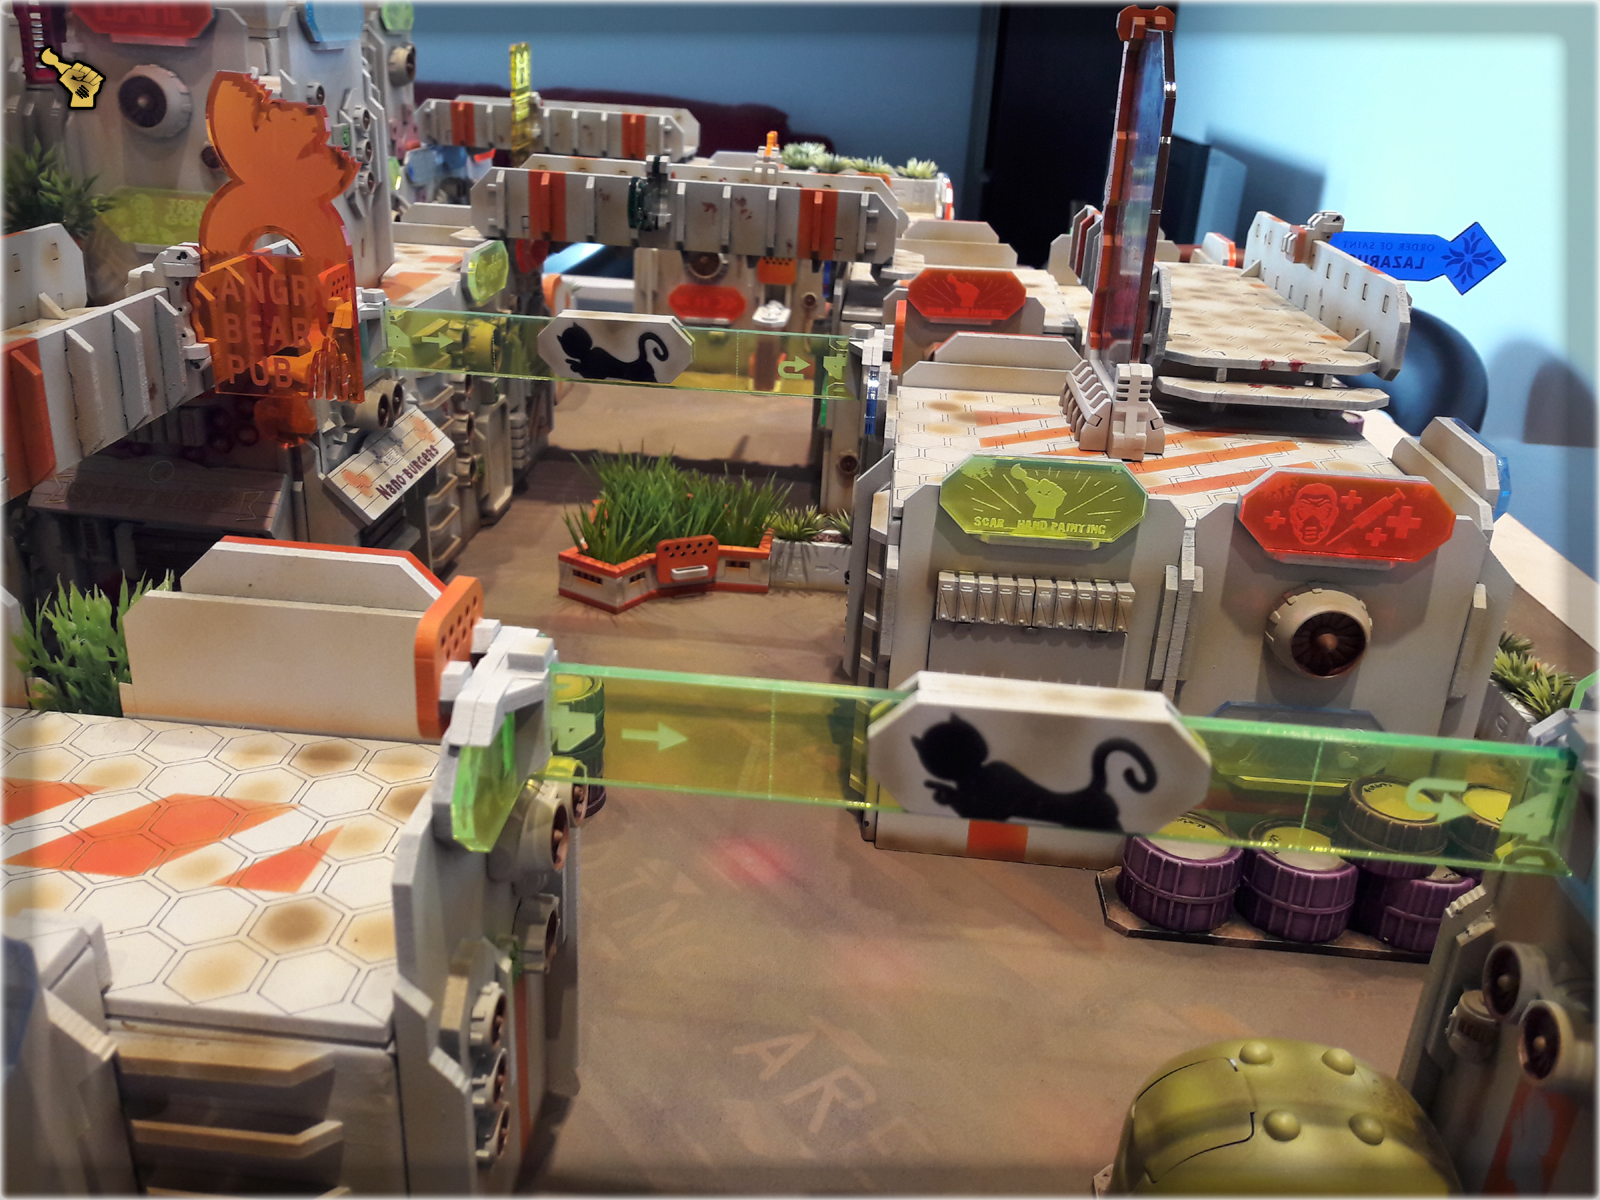
‘GO GO NOMADS! Night Club’ was the first one to undergo a small redesign. I’ve dimmed the pink, and ‘browns’, adding much more white to consolidate colour scheme and black to set a strong, but natural contrast. This change did the trick of dimming the effect of “child’s dream”… It’s still ugly as fuck, but my concious is clear – it was planned from the beginning to make this one into a nice easter egg.
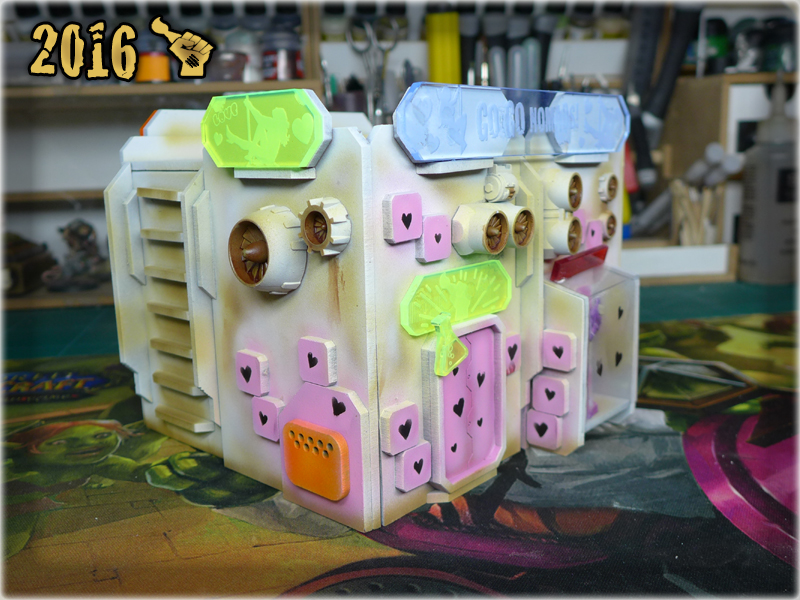
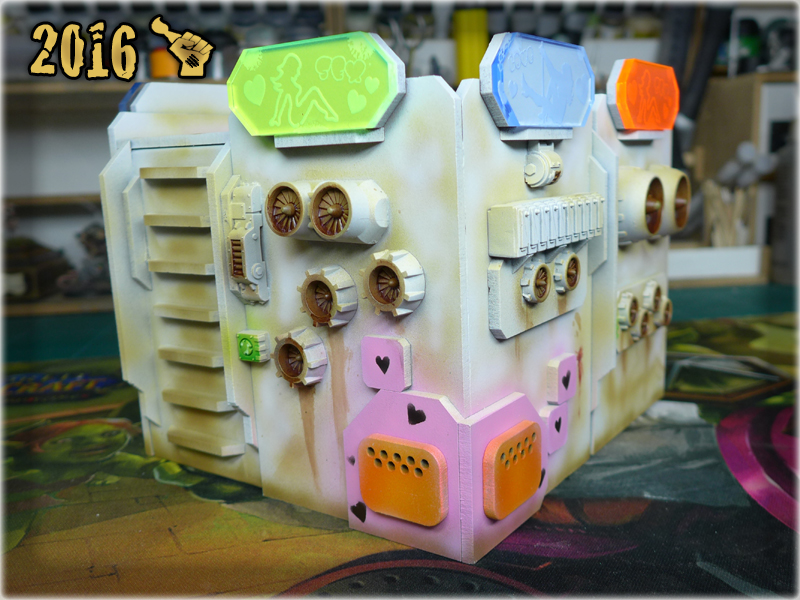
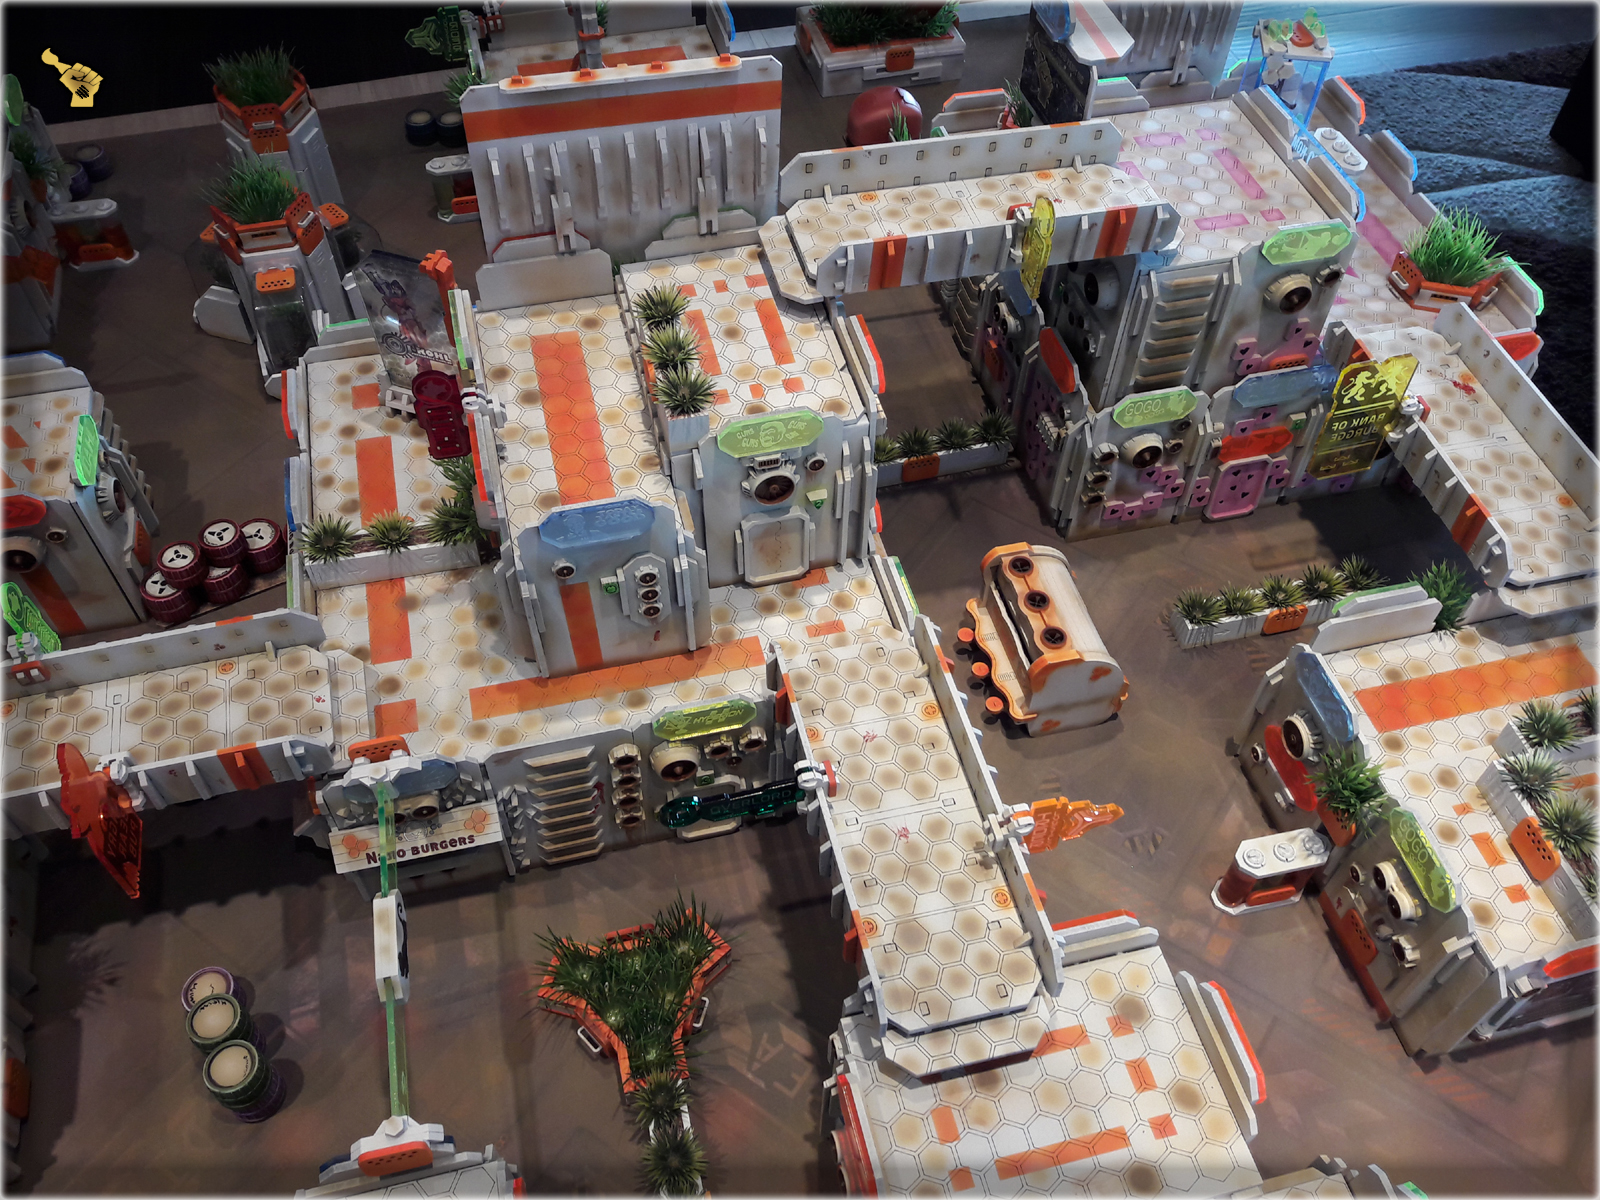
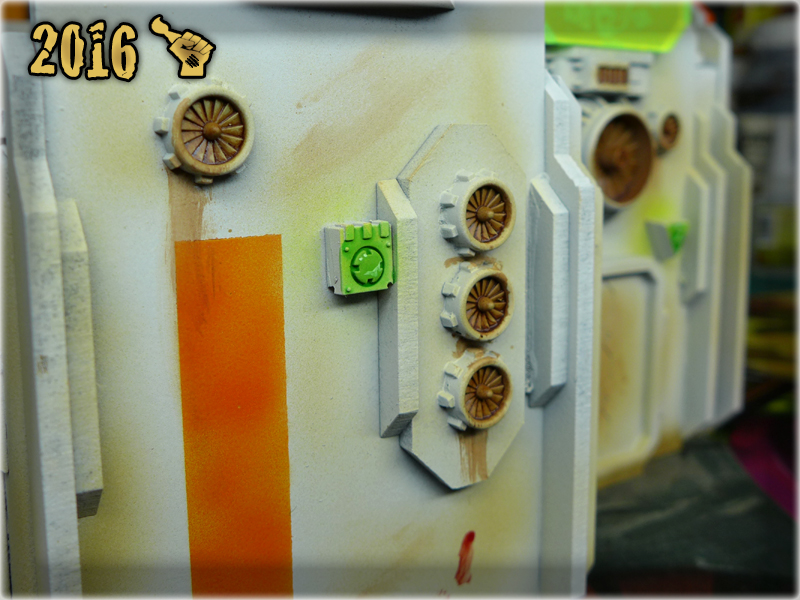
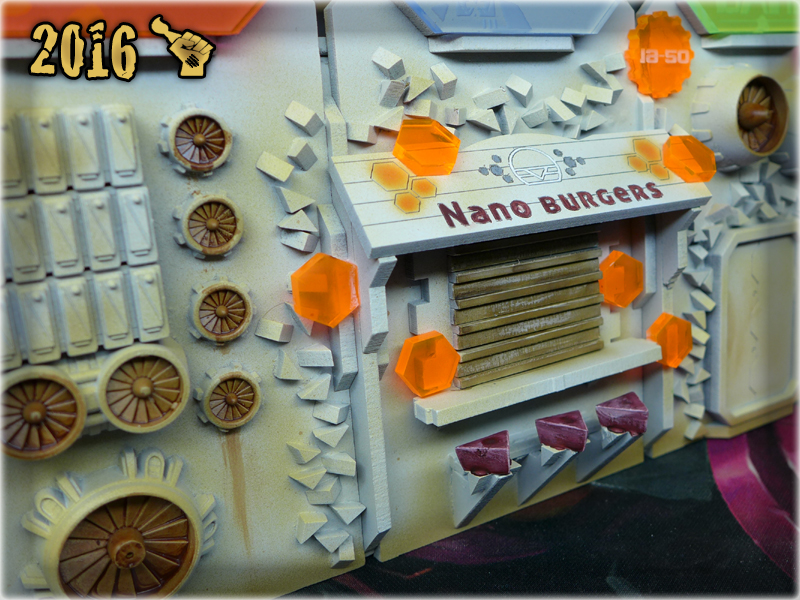
Next thing to add was “detail” as my buildings clearly lacked it. The simplest way to do it was to use some already existing, tiny wall features, paint them using a variety of colour and also add more plexi-glass holos.
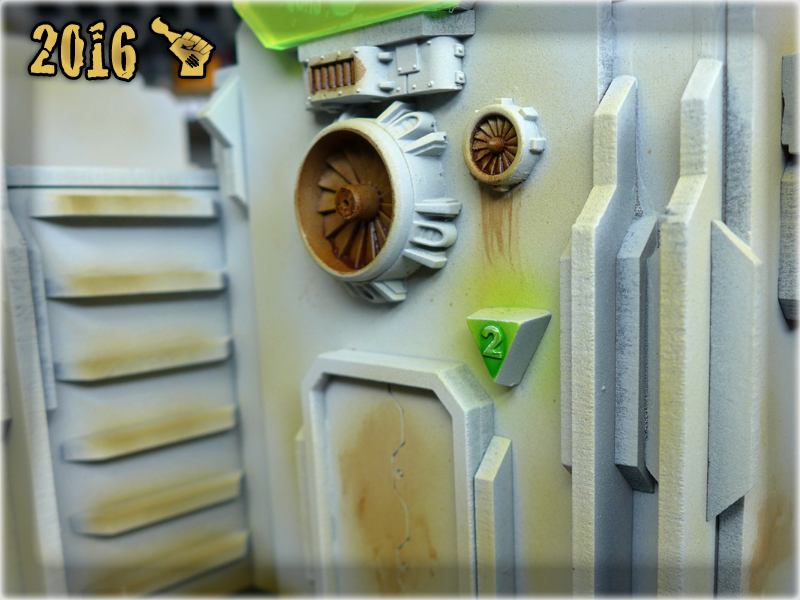
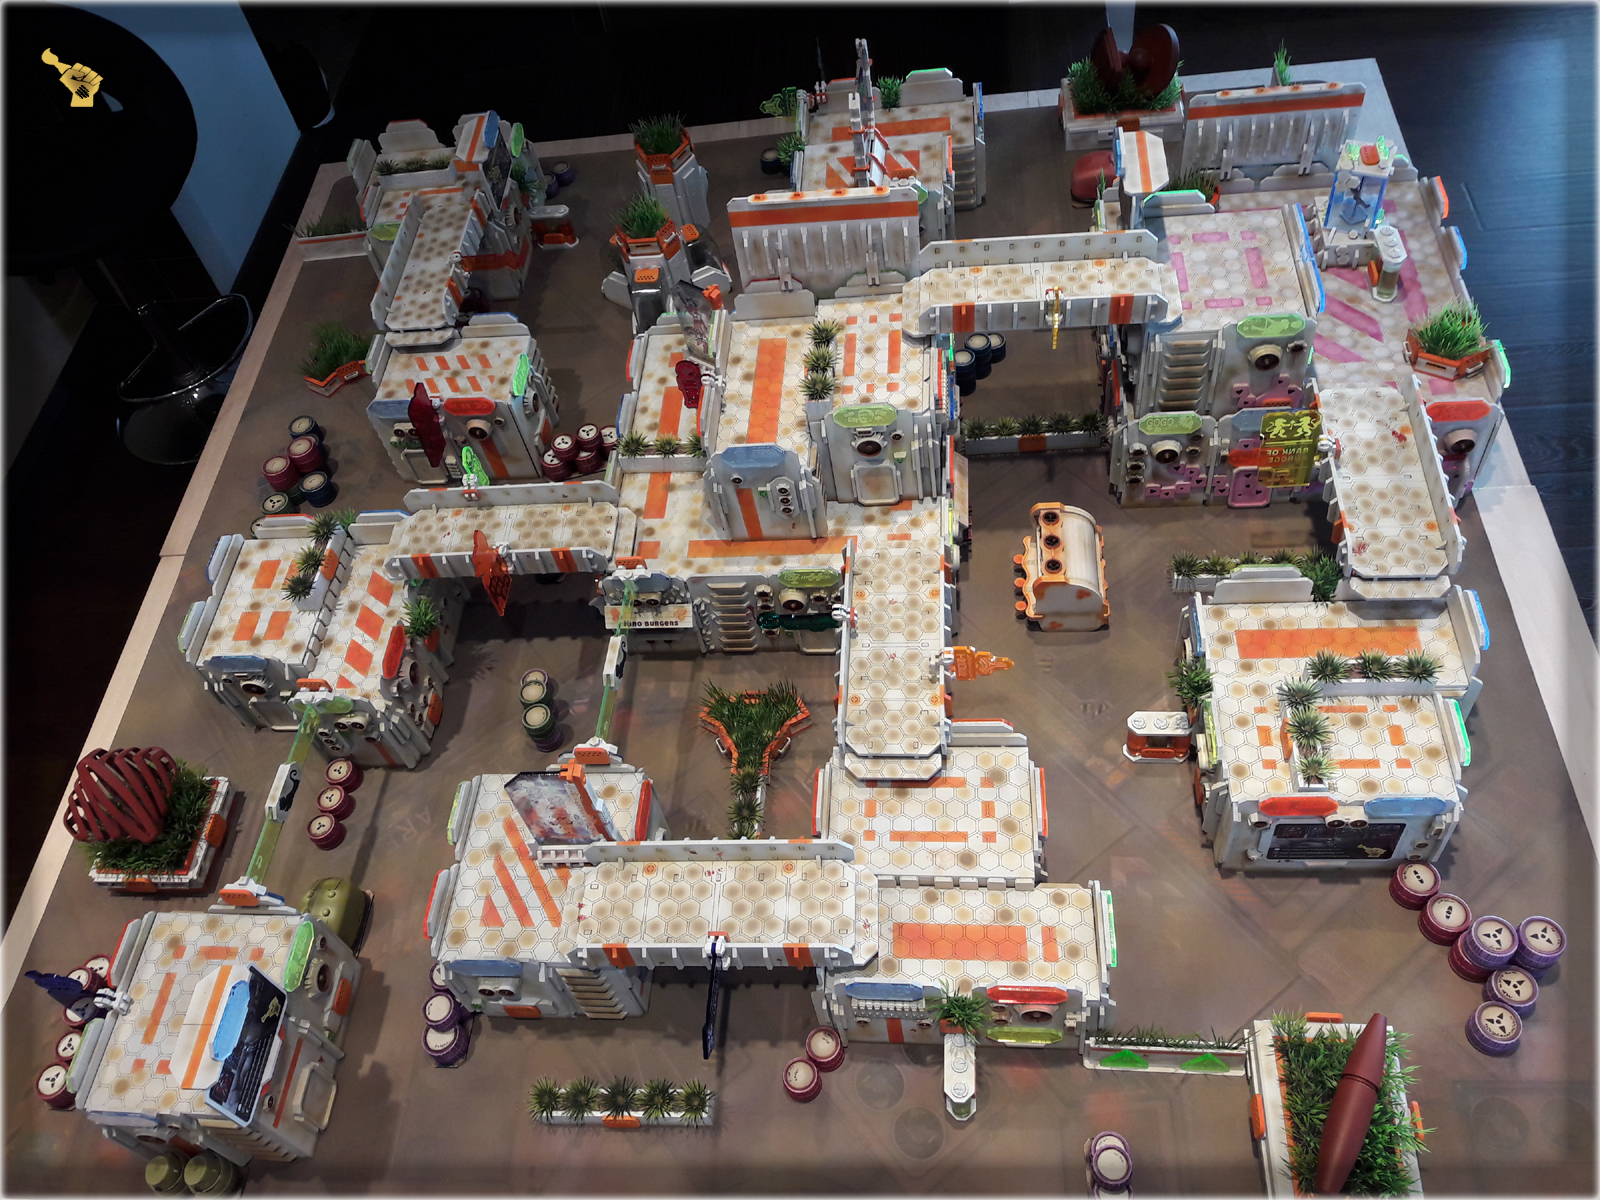
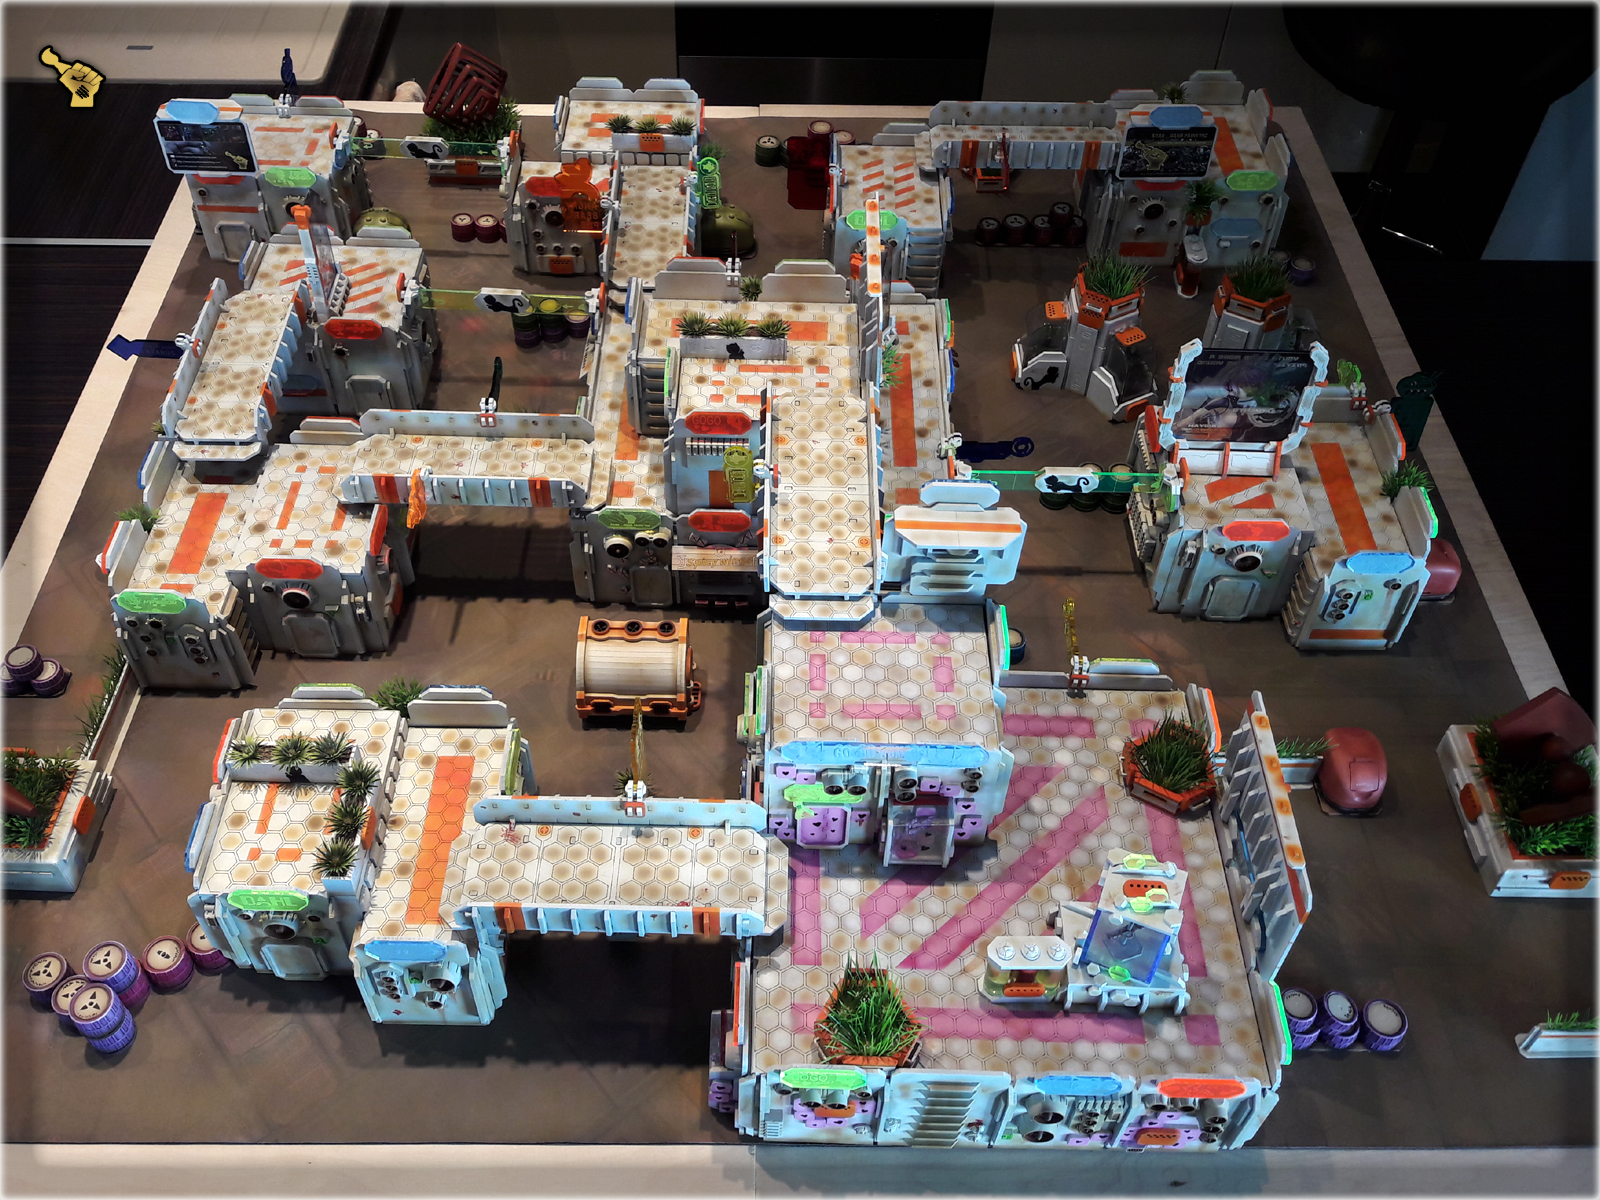
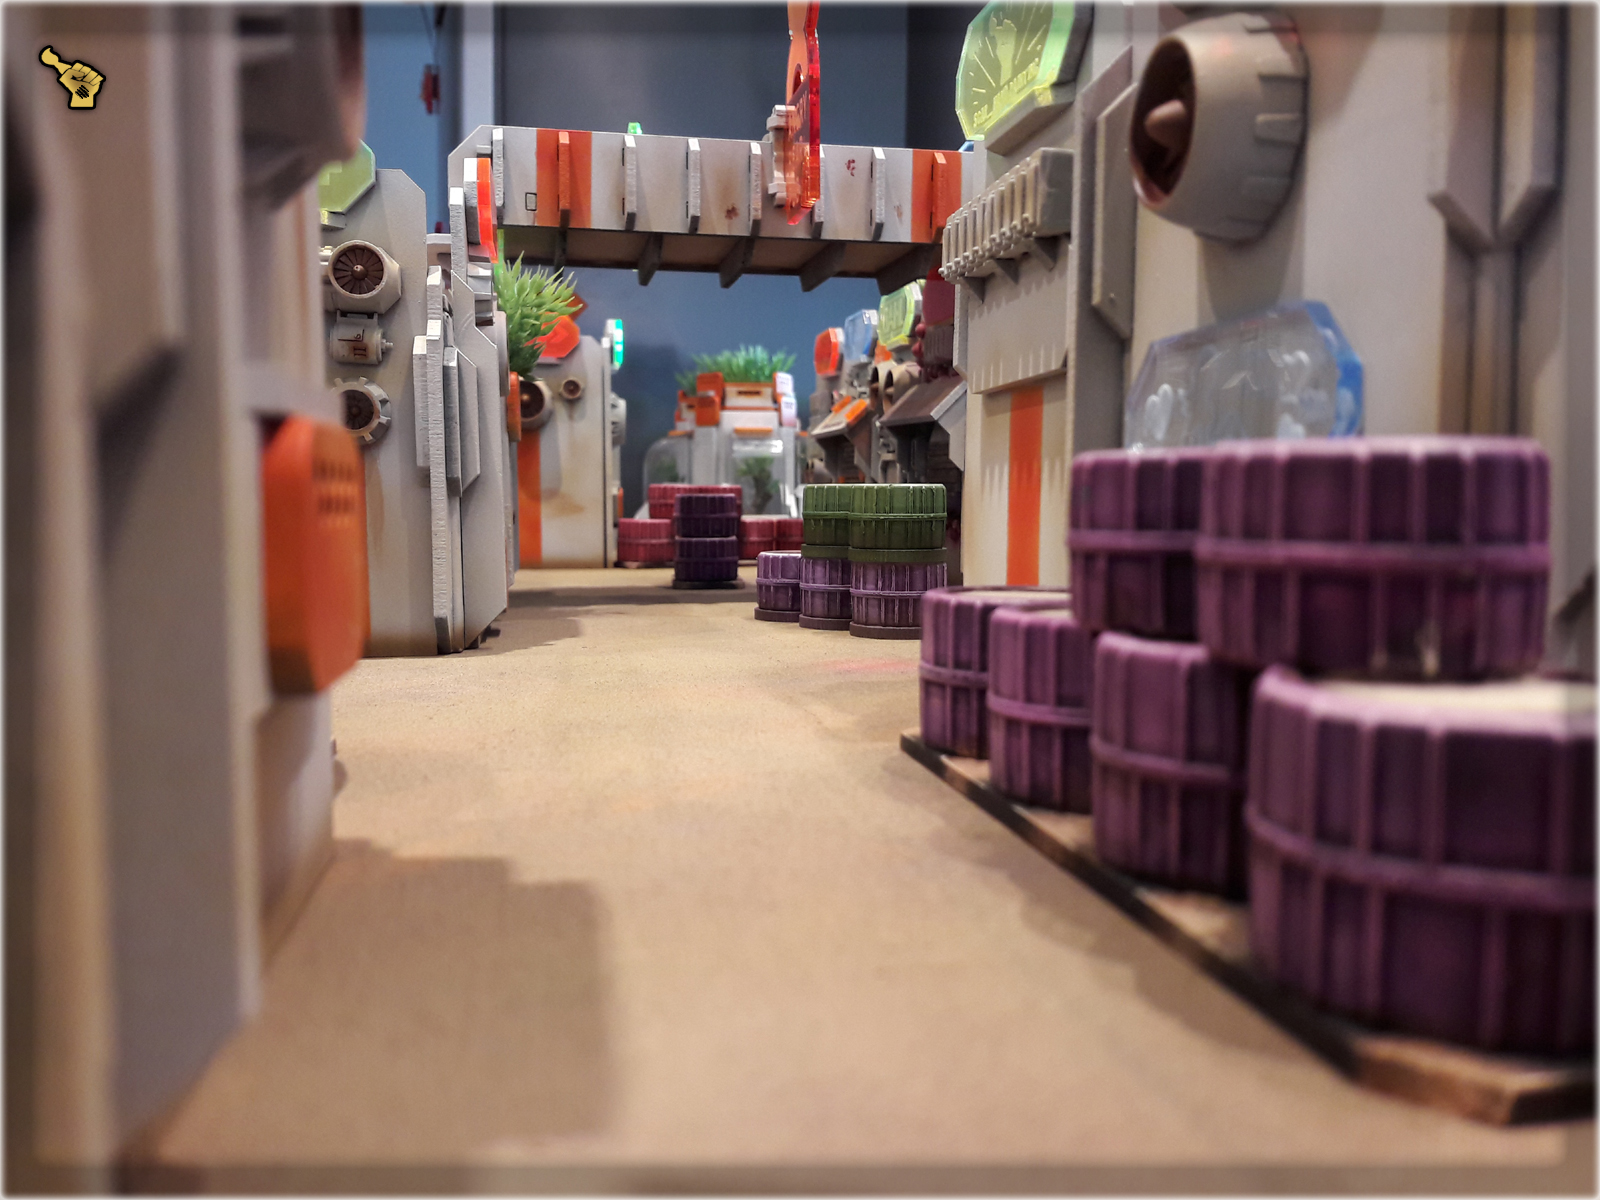
In the end I also harmonized the main colour scheme by adding much more green. I used aquarium plants and some MDF leftovers for this. Green plants broke the flat colour scheme of the walls, and complemented the overall colour scheme – now all the Holos were once again moved to the visual background.

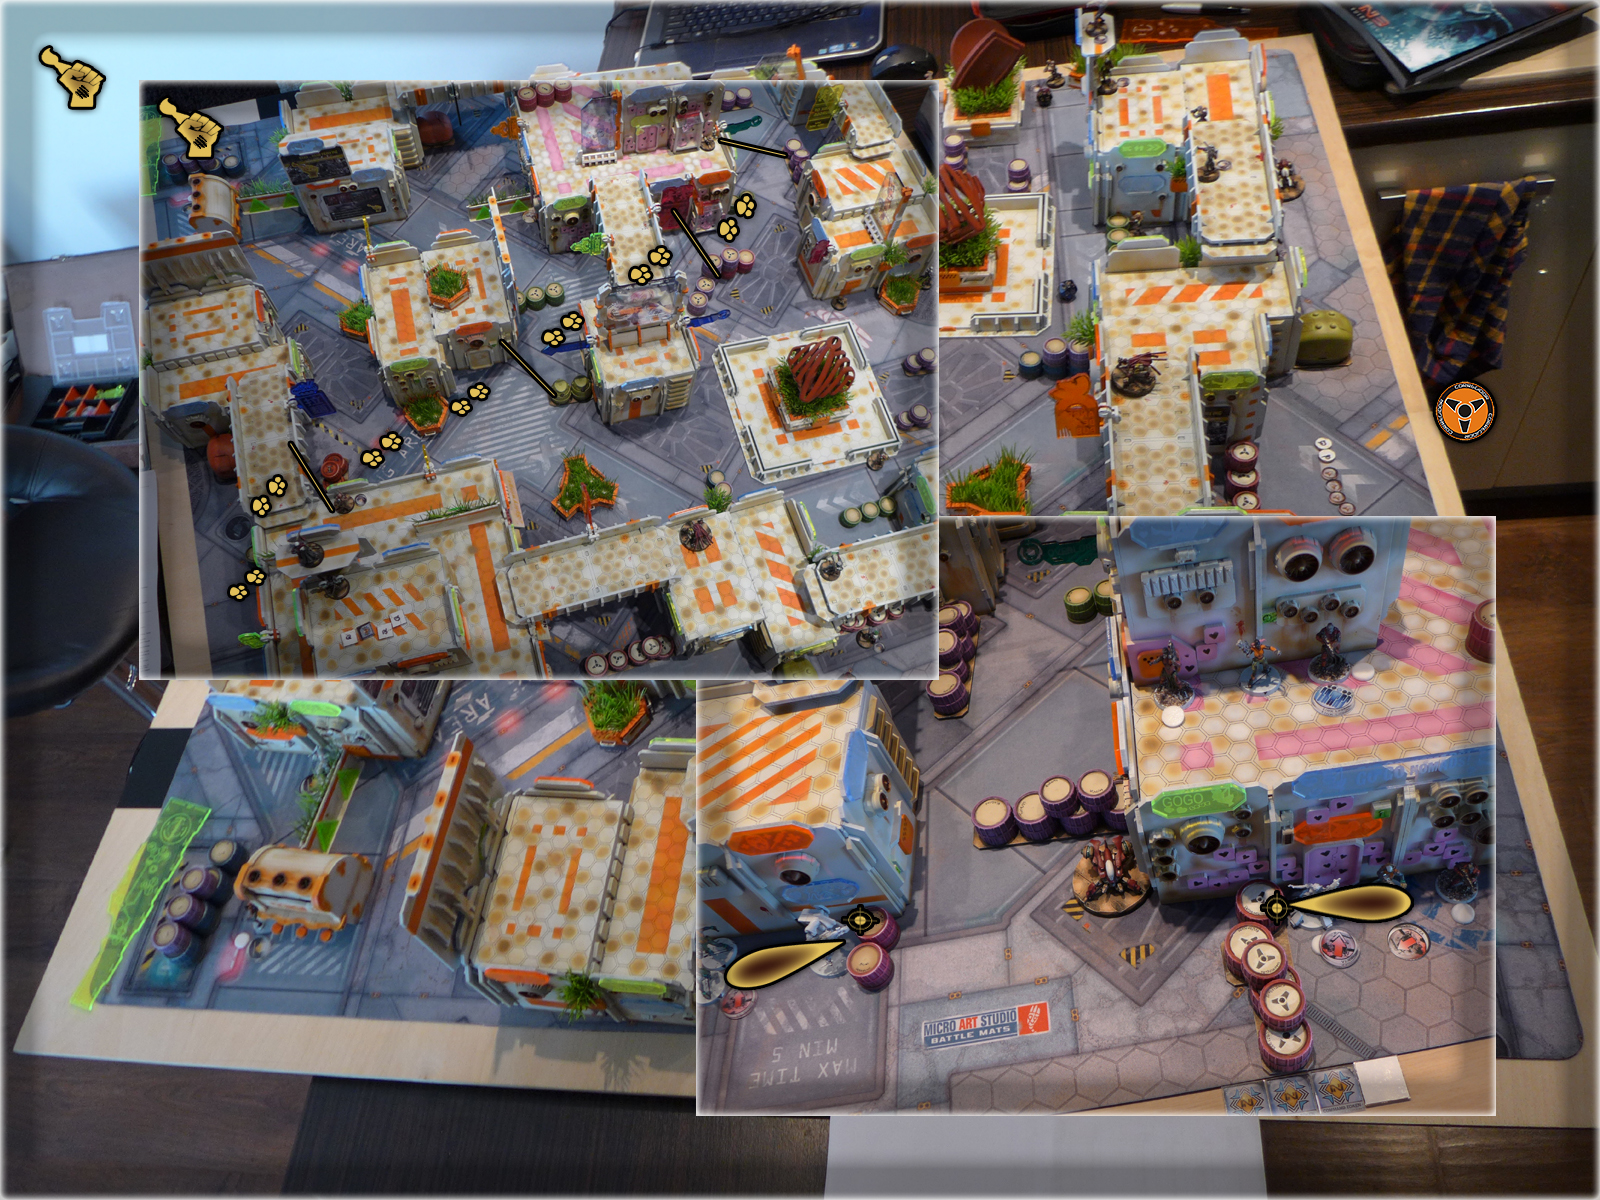
Inbetween all these changes and upgrades, I was able to made a short photo session. You can view the entire GALLERY HERE, while below is a small sample:

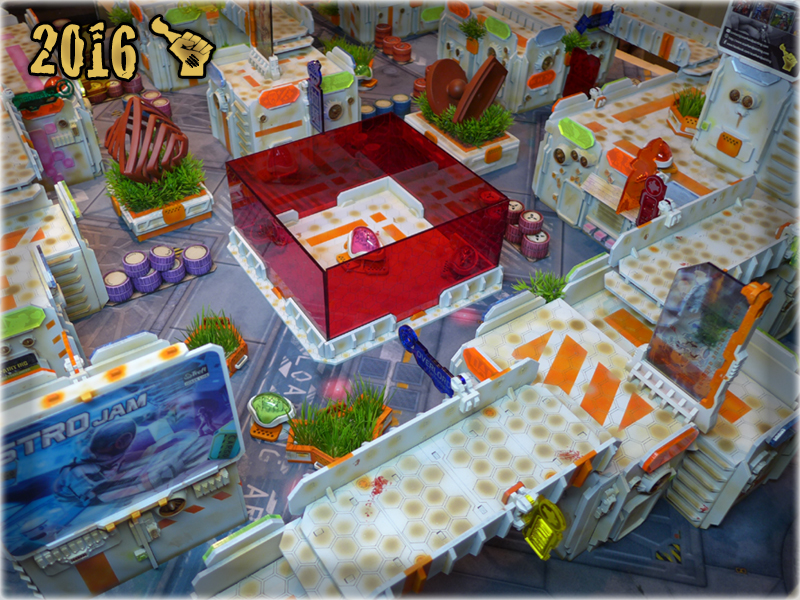
Also as a bonus – I’ve already played one battle on the table – taking some in-game pictures and preparing a short video about how terrain was set up for it.


Is this the end of The Colony? Judging by how necessity is the mother of invention I think that we will see some more of The Colony in the future. Especially with such kind of things around… just be sure to visit this site from time to time 😉