- contact@scarhandpainting.com


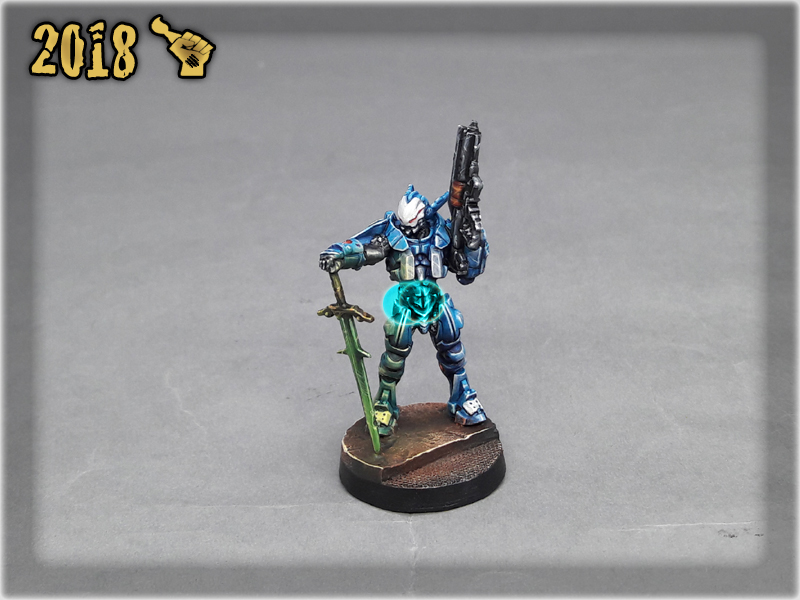
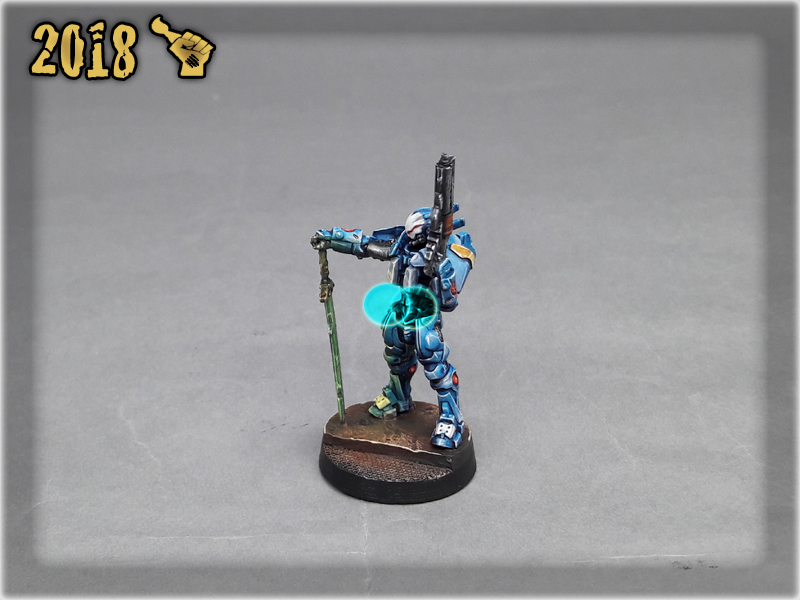
Welcome to Painting “Guijia” tutorial. Here I will take you on a Step-by-step trip through almost entire process of painting Infinity the Game “Guijia” Special Project.
Before we start, some notes:
* This one requires an Airbrush.
* Paints are to be properly thinned before airbrush application.
* As usual, please take note that what works for me might not necessarily work for you.

Allright! Undercoat the miniature with black, check your gear and let’s do this!
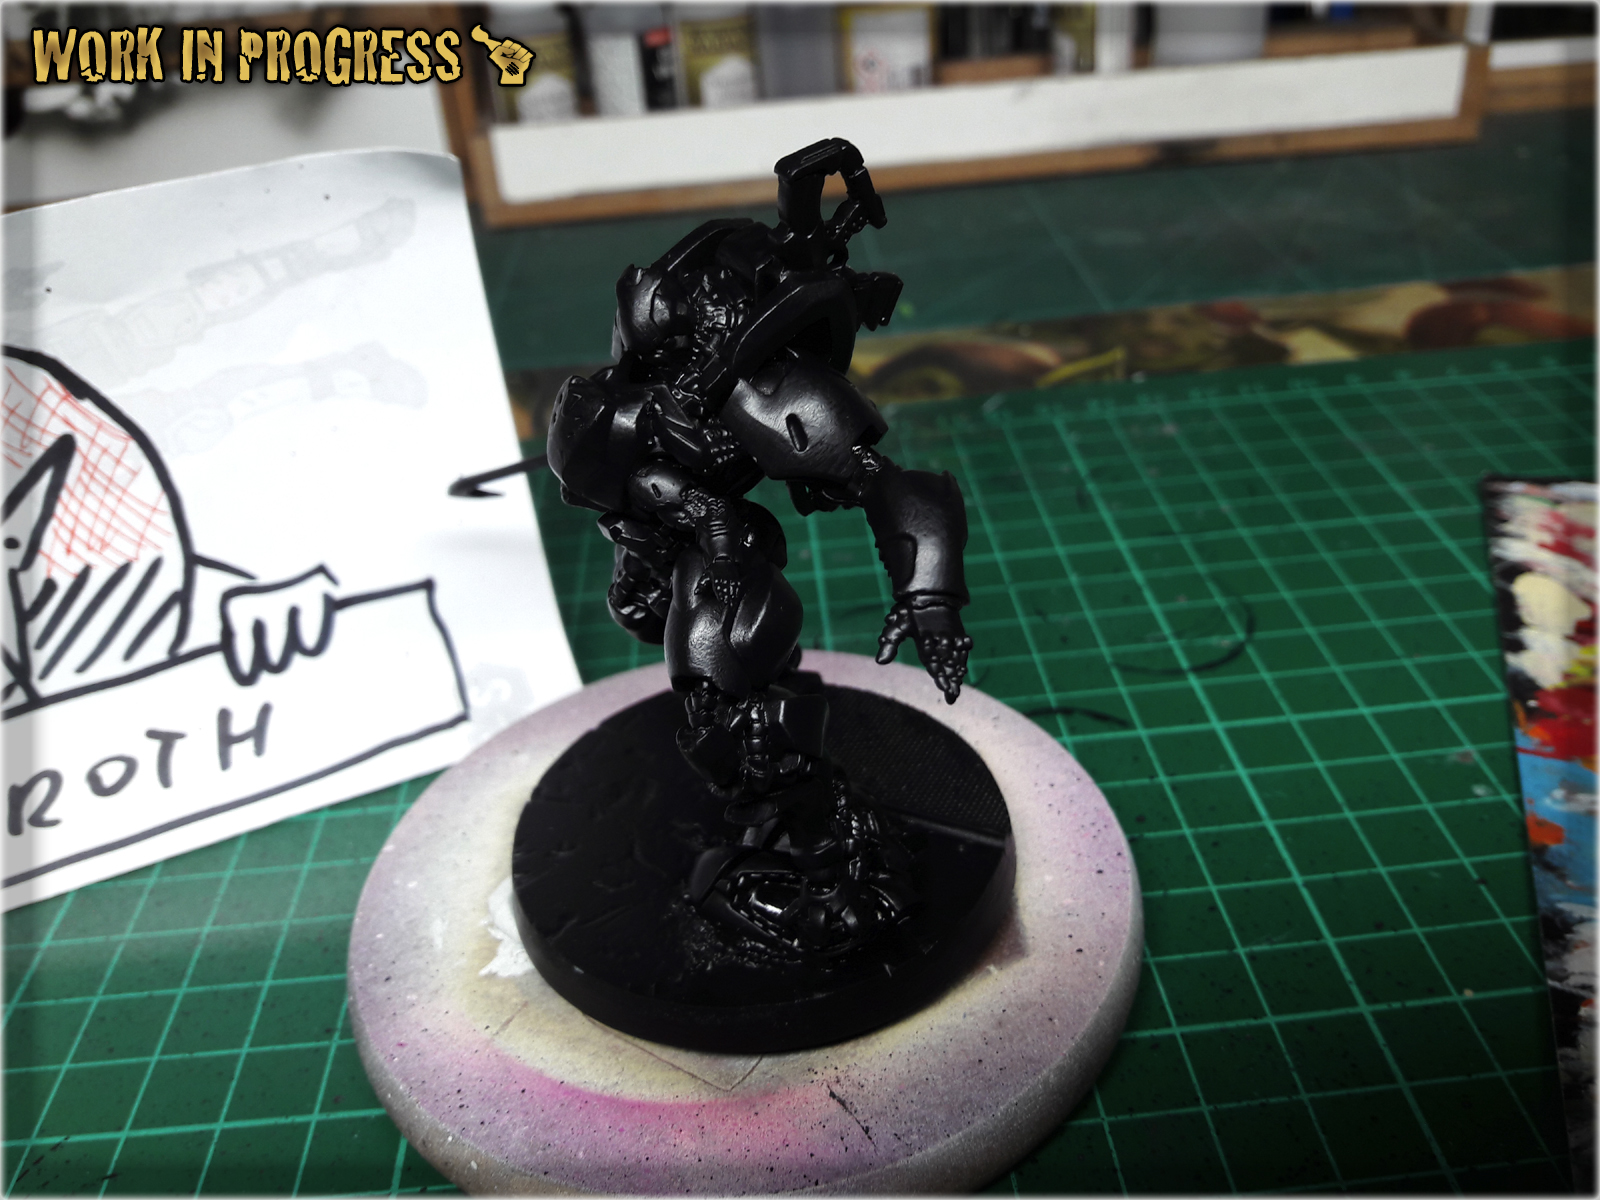
* Start with a solid layer of airbrushed Val. Orange Brown. I applied mine in three delicate, overlaping layers. I went around the miniature, with top and bottom, focusing on Armor Plates areas.

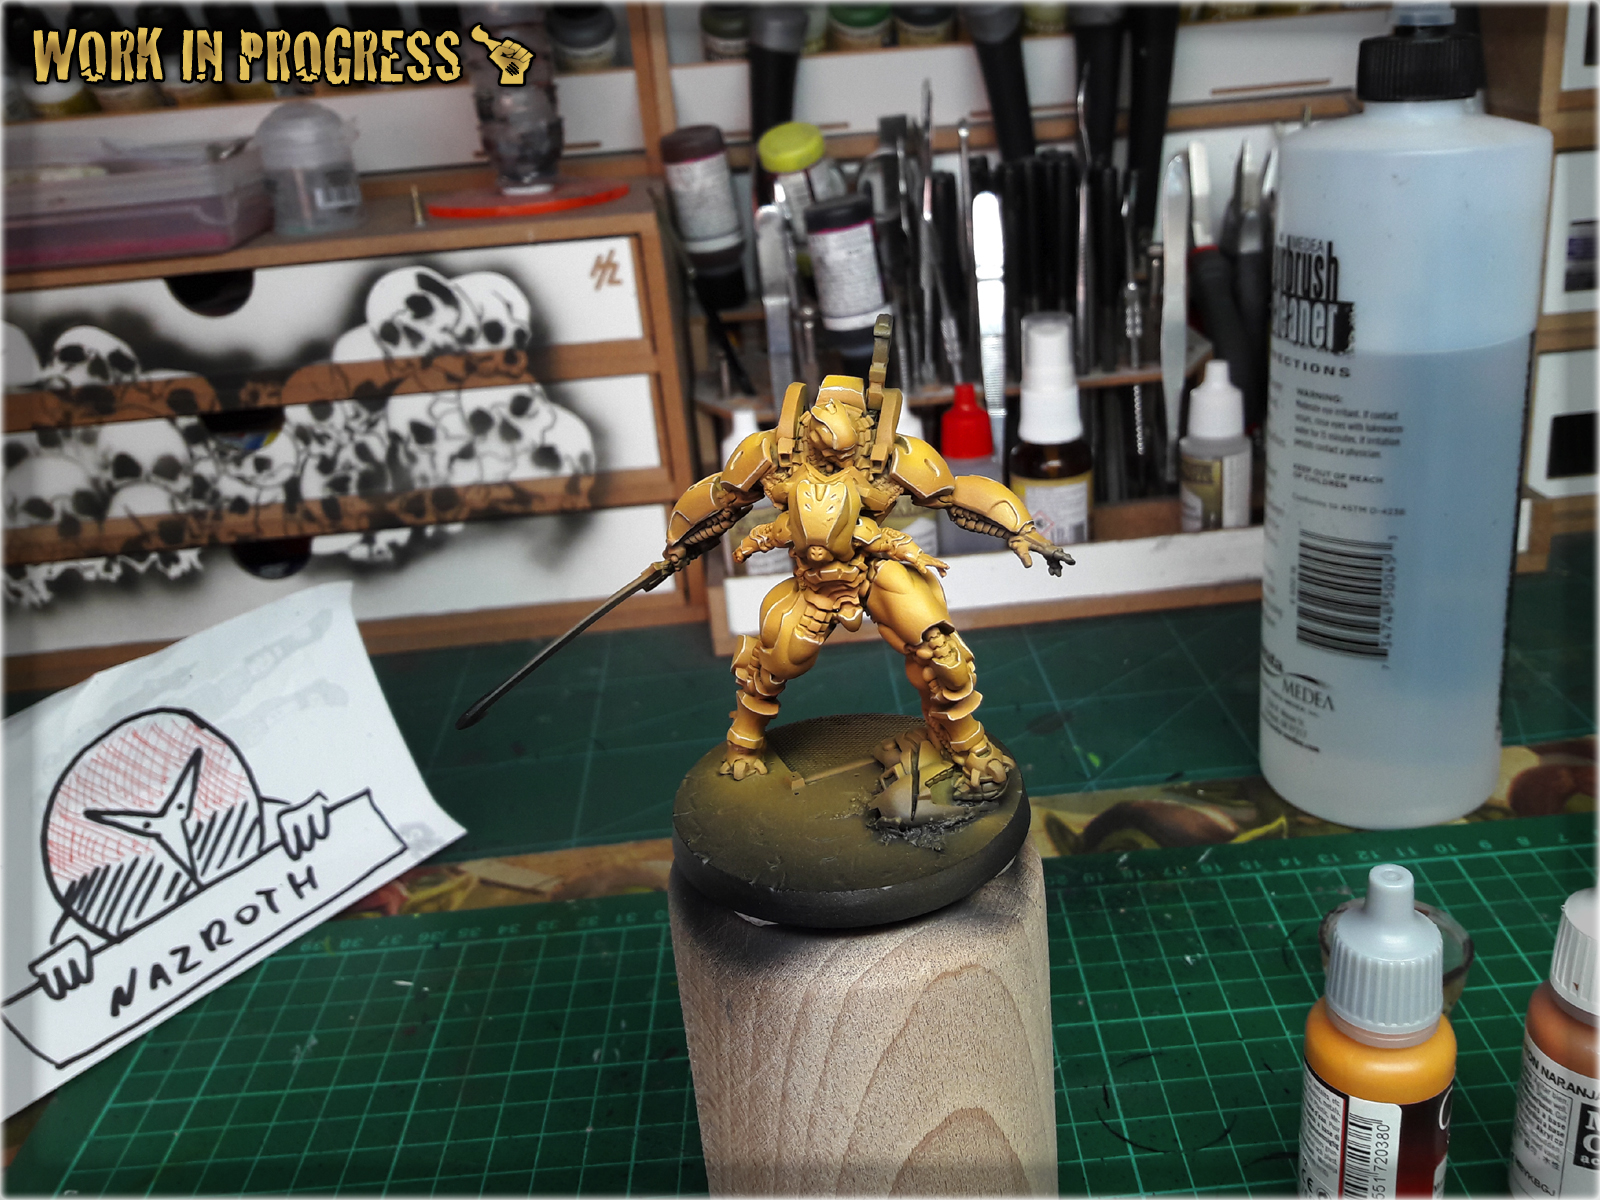
* Next, airbrush Val. Scrofulous Brown. Mostly from the top and up to 45* degree, focusing on the most exposed areas. You can start building transitions to previous layer avoiding shadowed areas.

* I forgot to take a picture of this layer. That's on me. Fortunatelly the result can be seen on the next picture. The layer is a mix of Val. Scrofulous Brown and Val. Off White, applied from top onto the center of all exposed areas.
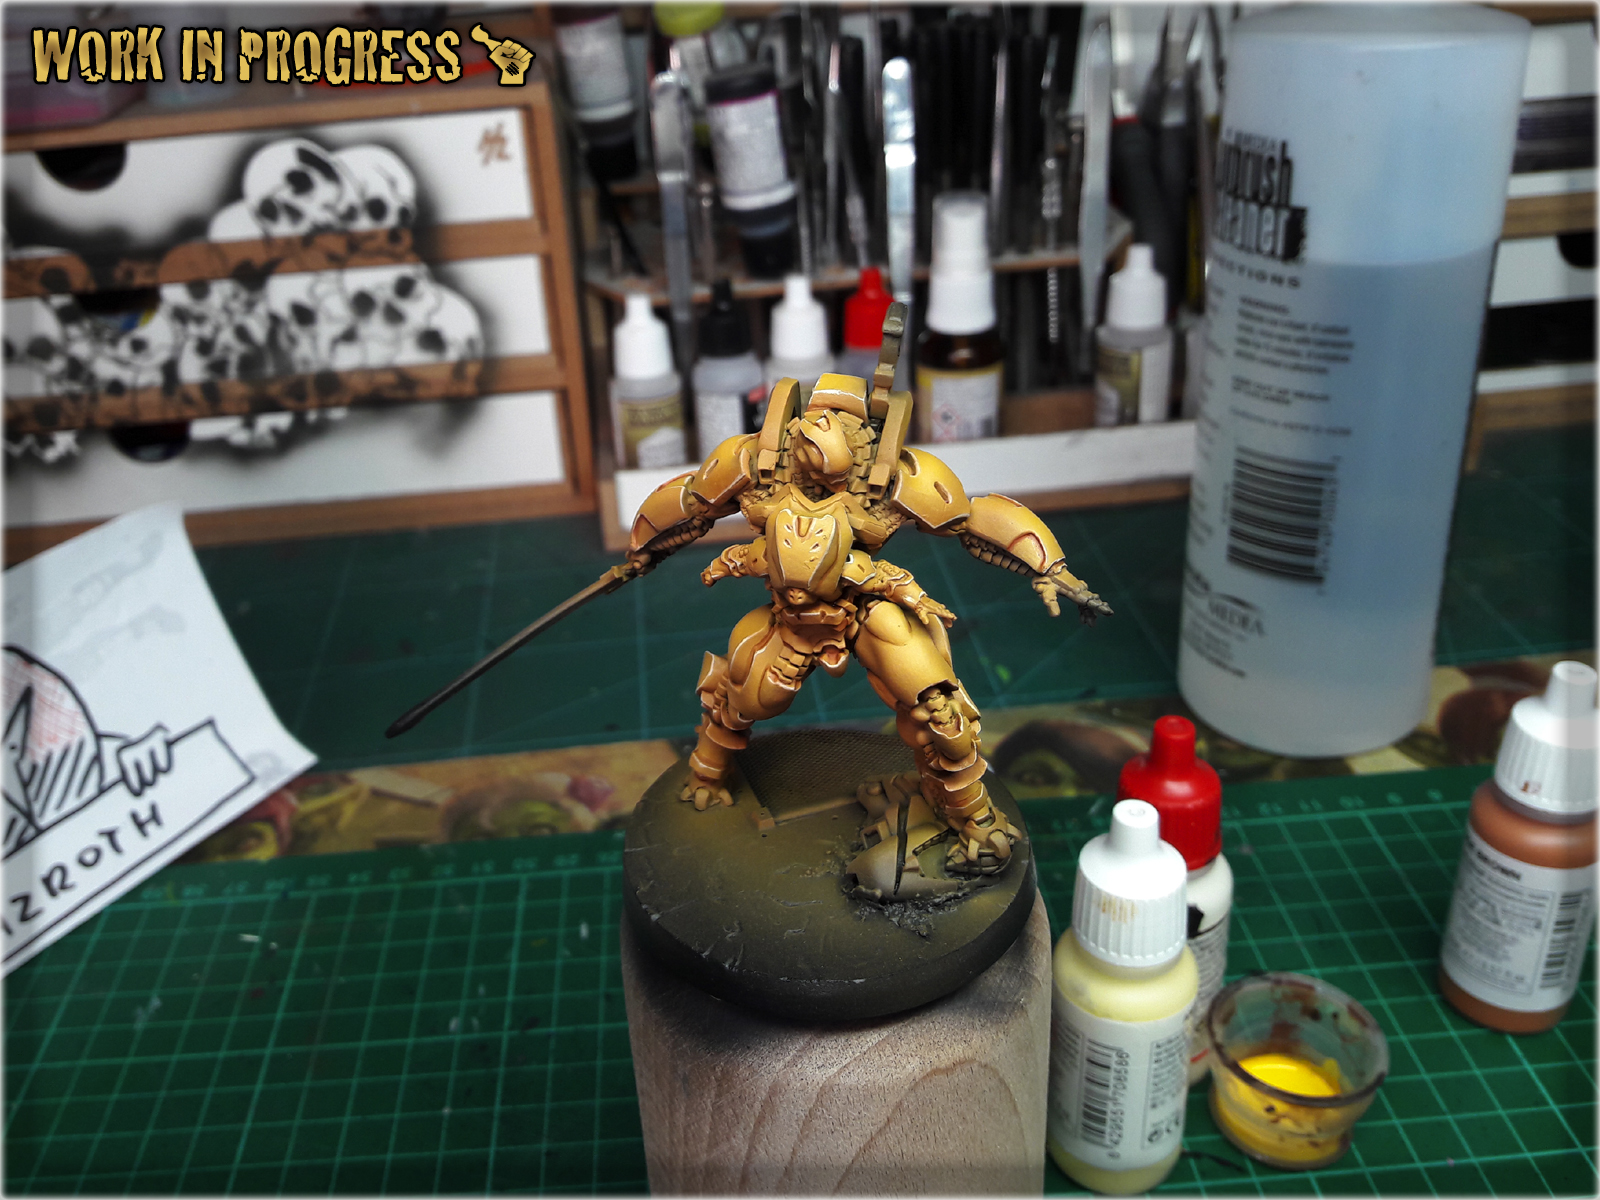
* Next, outline all the edges with Val. Ice Yellow
* Lastly, underline armor plates with Army Painter Soft Tone Ink. I also used strongly dilluted Soft Tone to apply some more shadow in certain 'over the edge' areas.
* This is the most difficult part of the process. Mix Val. Black (air) 1:5 with Val. Panzer Dark Grey (air) and apply it to everything, that is not external armour plates and blade. The difficult part is to not mess up all these sexy Orange-to-Yellow armour plates. If you do, you can try out Erasing Bloopers following one of my tutorials, still the airbrushed nature of the layer will make it extremely difficult.
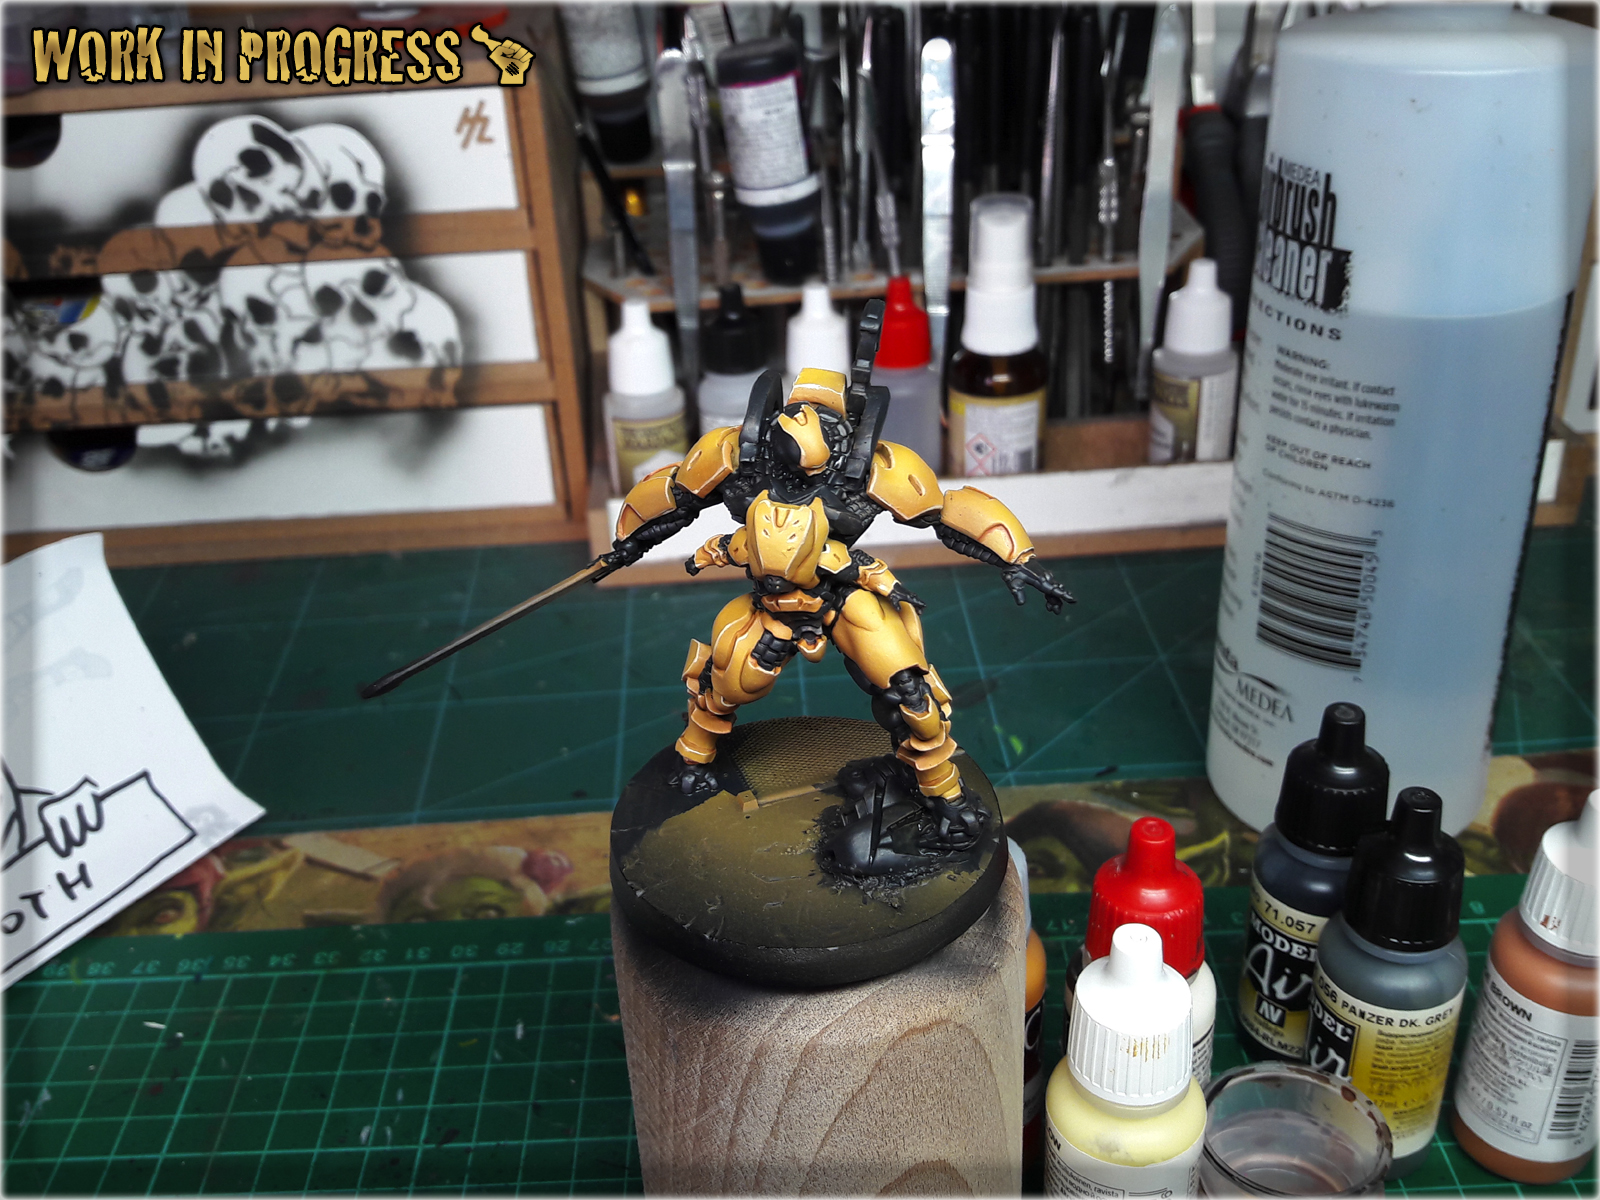
* Next apply a watered down GW Fenrisian Grey over black areas. It is important not to fill any recesses. You can apply more than one thin layer, overlaping each other and even leave some irregularities - this will work to the overall paint job's advantage.

* Next, higlight edges with GW Pale Wych Flesh. This time no thinning down the paint. You can imitate some scratches, reflexions etc.


* Now wash it all with a thinned down Army Painter Dark Tone Ink. Once again be extra carefuul not to paint over finished armour plates.

* Now it's time to make it POP! Using GW Pale Wych Flesh and Val. Off White, highlight the edges and create some points of focus, scratches, reflections etc.

* Start by masking the Guijia's leg. I used a piece of foil and masking tape to cover areas that I didn;t wanted to get dirty. Then manually applu a layer of Val. Prussian Blue, avoiding areas of Black Mesh.

* Next airbrush a layer of Light Sea Blue, focusing on the most exposed areas of armour.
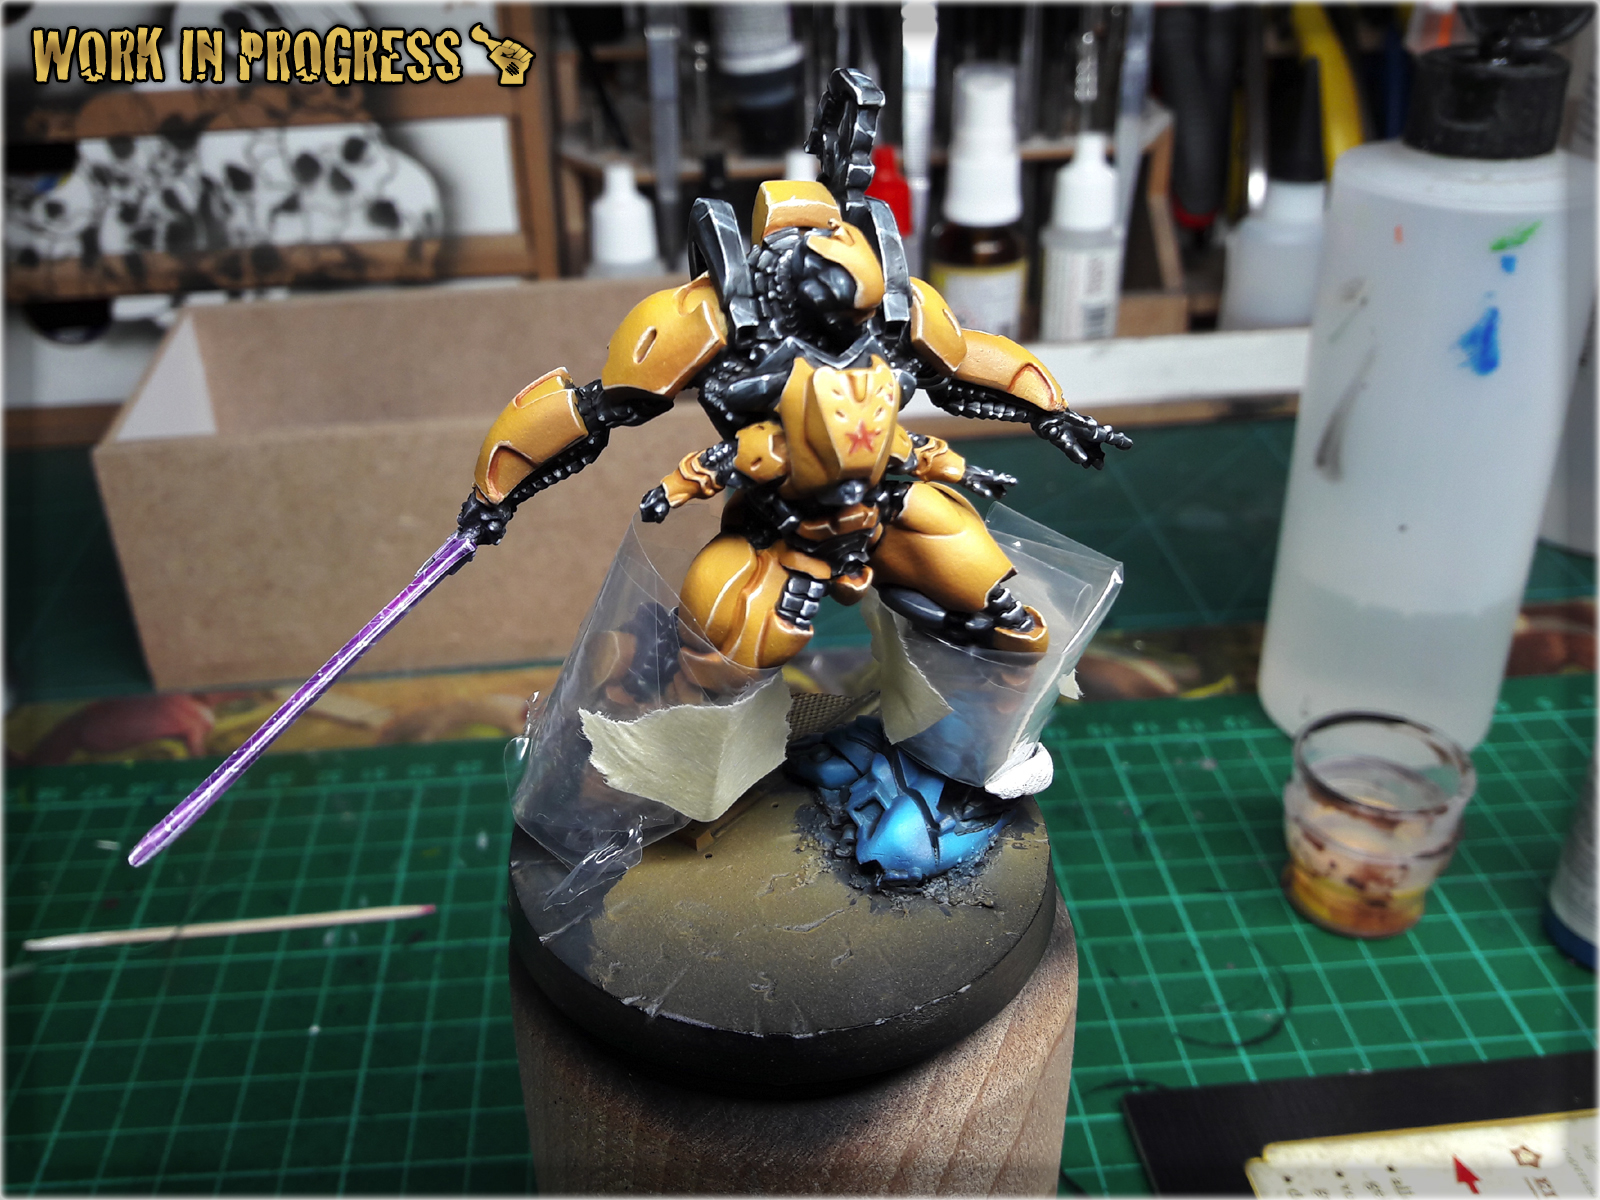
* Next, airbrush a mix of Val. Light Sea Blue with a bit of Val. White focusing on middle areas, creating a transition from previous layer.
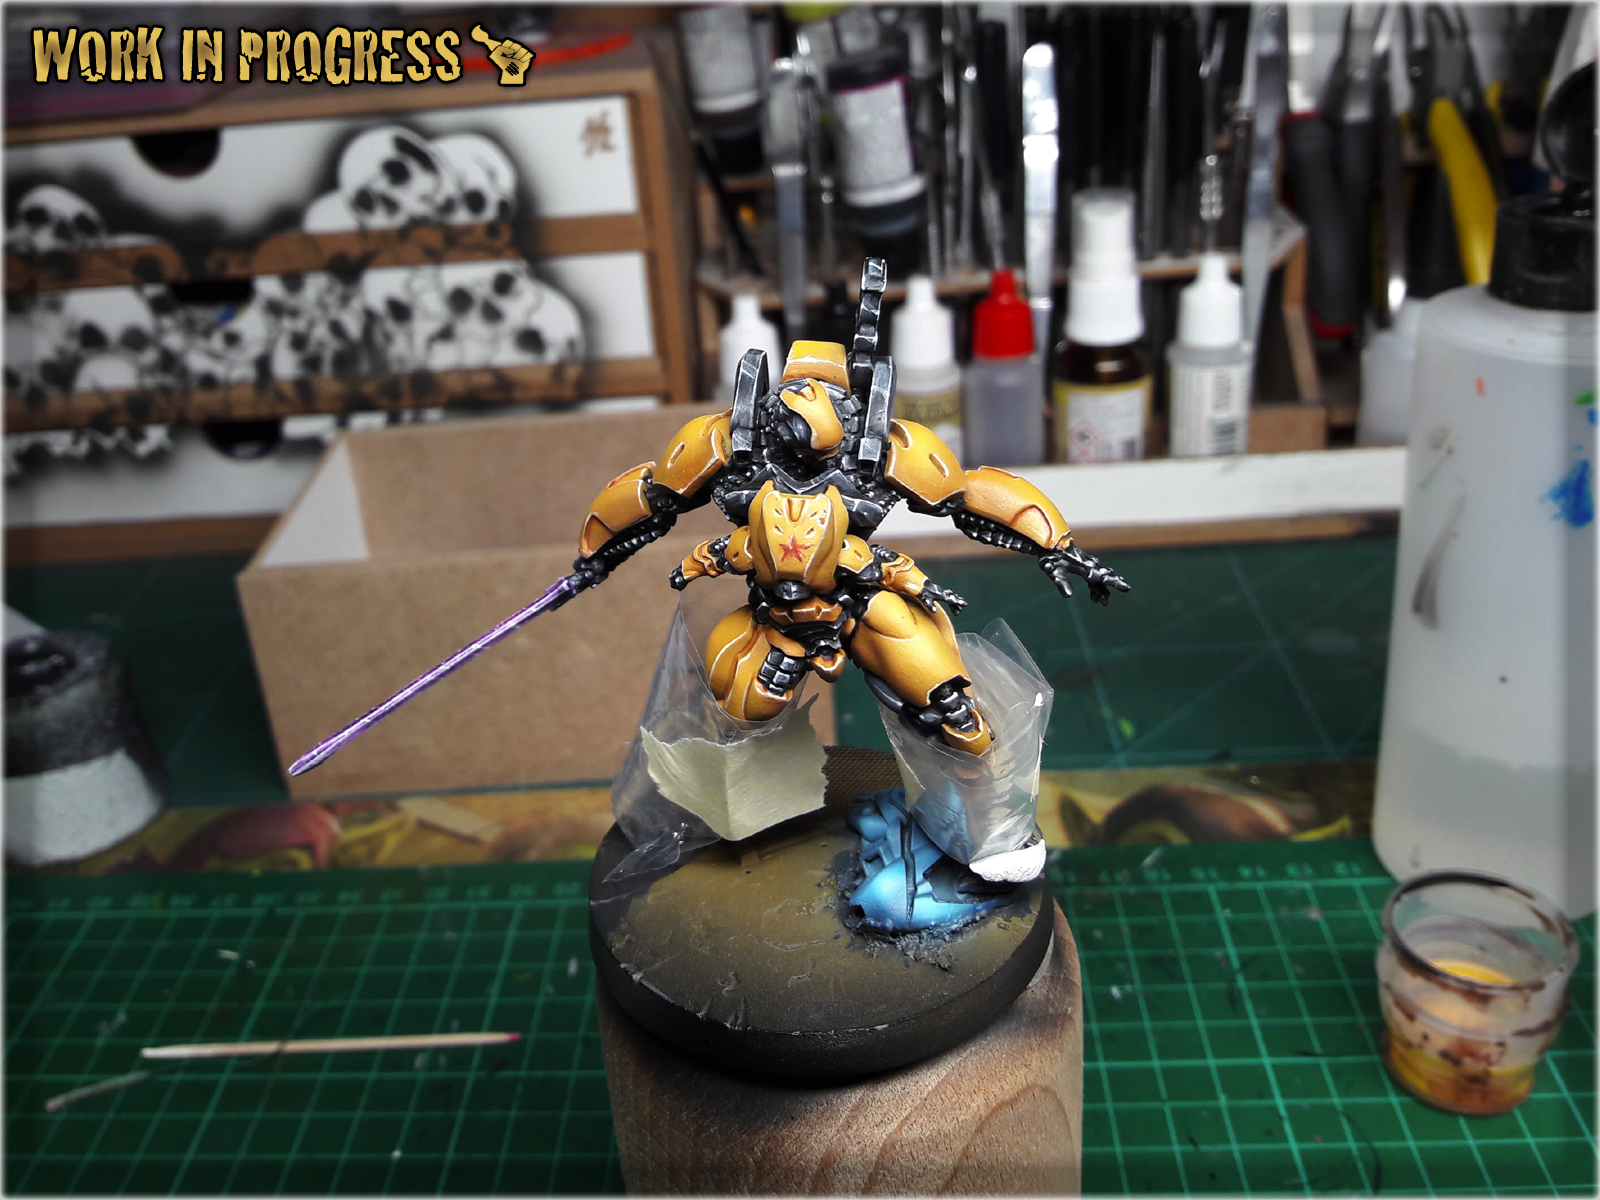
* Next highlight the edges with GW Pale Wych Flesh.

* To seal Blue, wash it with thinned down GW Guilliman Blue Glaze. You can see that I have also painted some battle damage. I did it using Val. Cavalry Brown, underlined with Val. Off White.

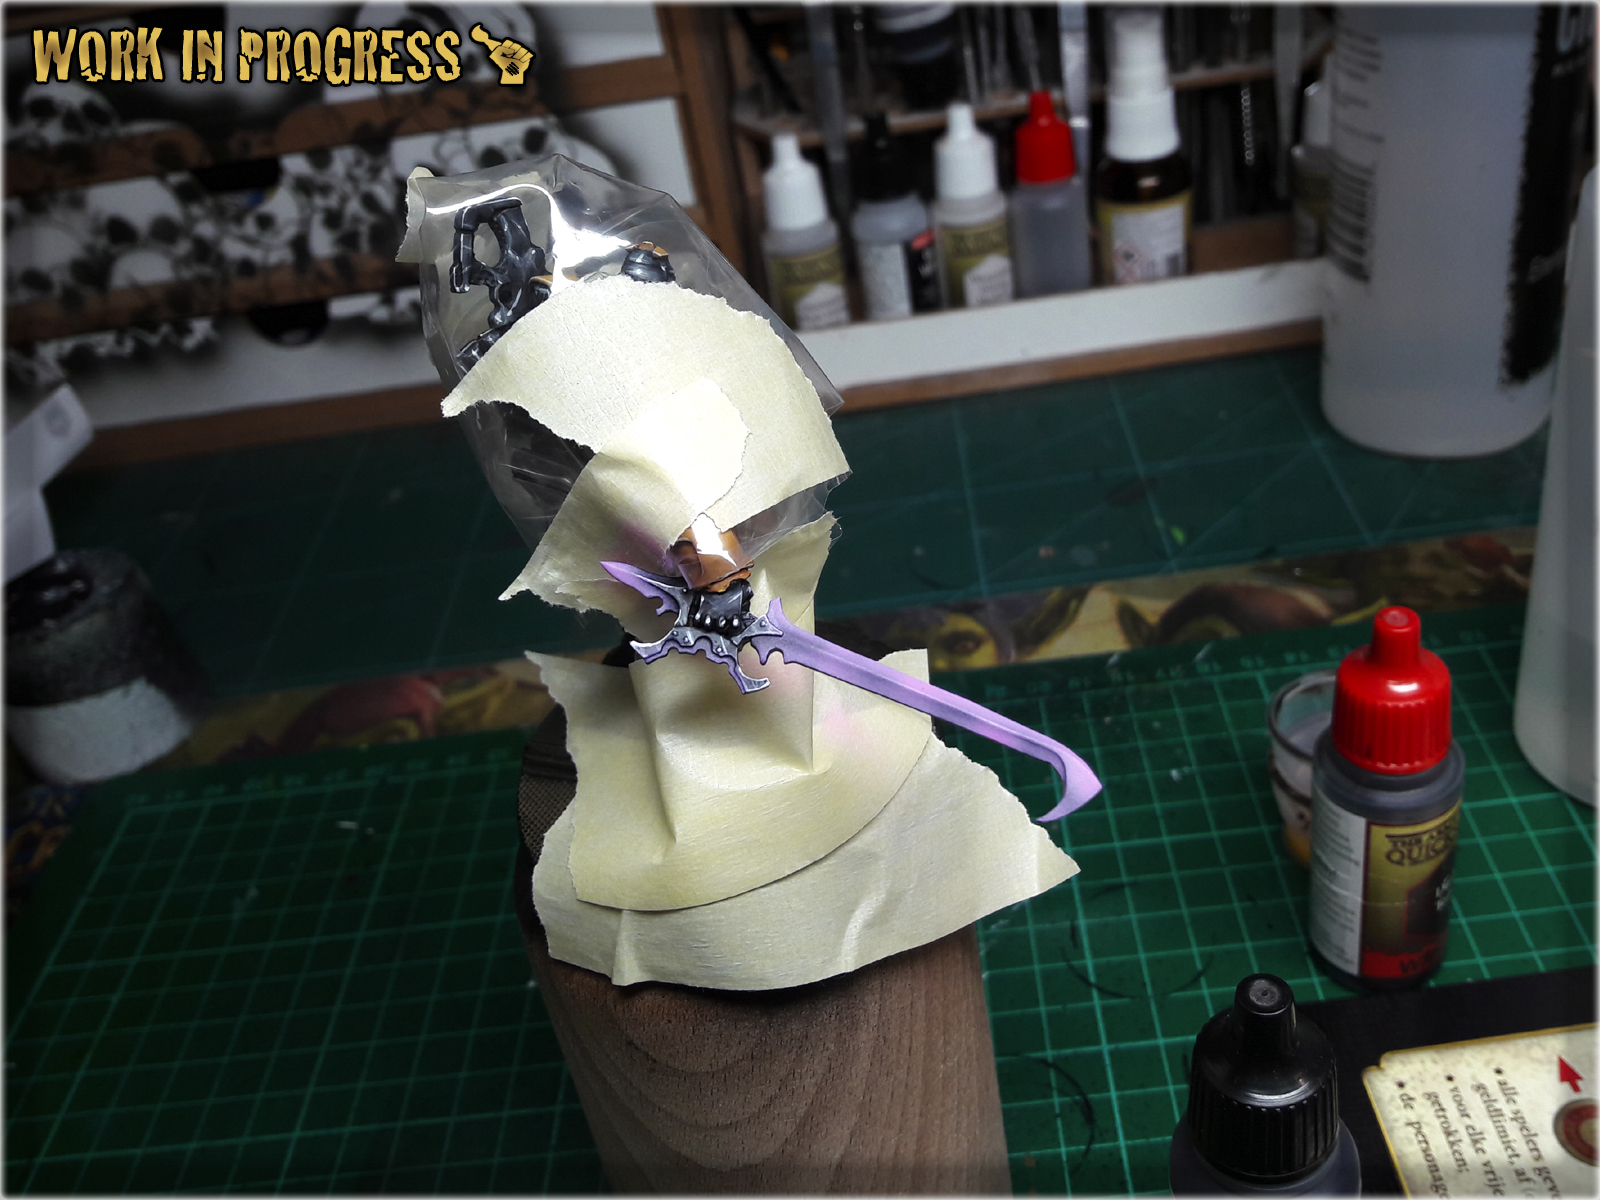
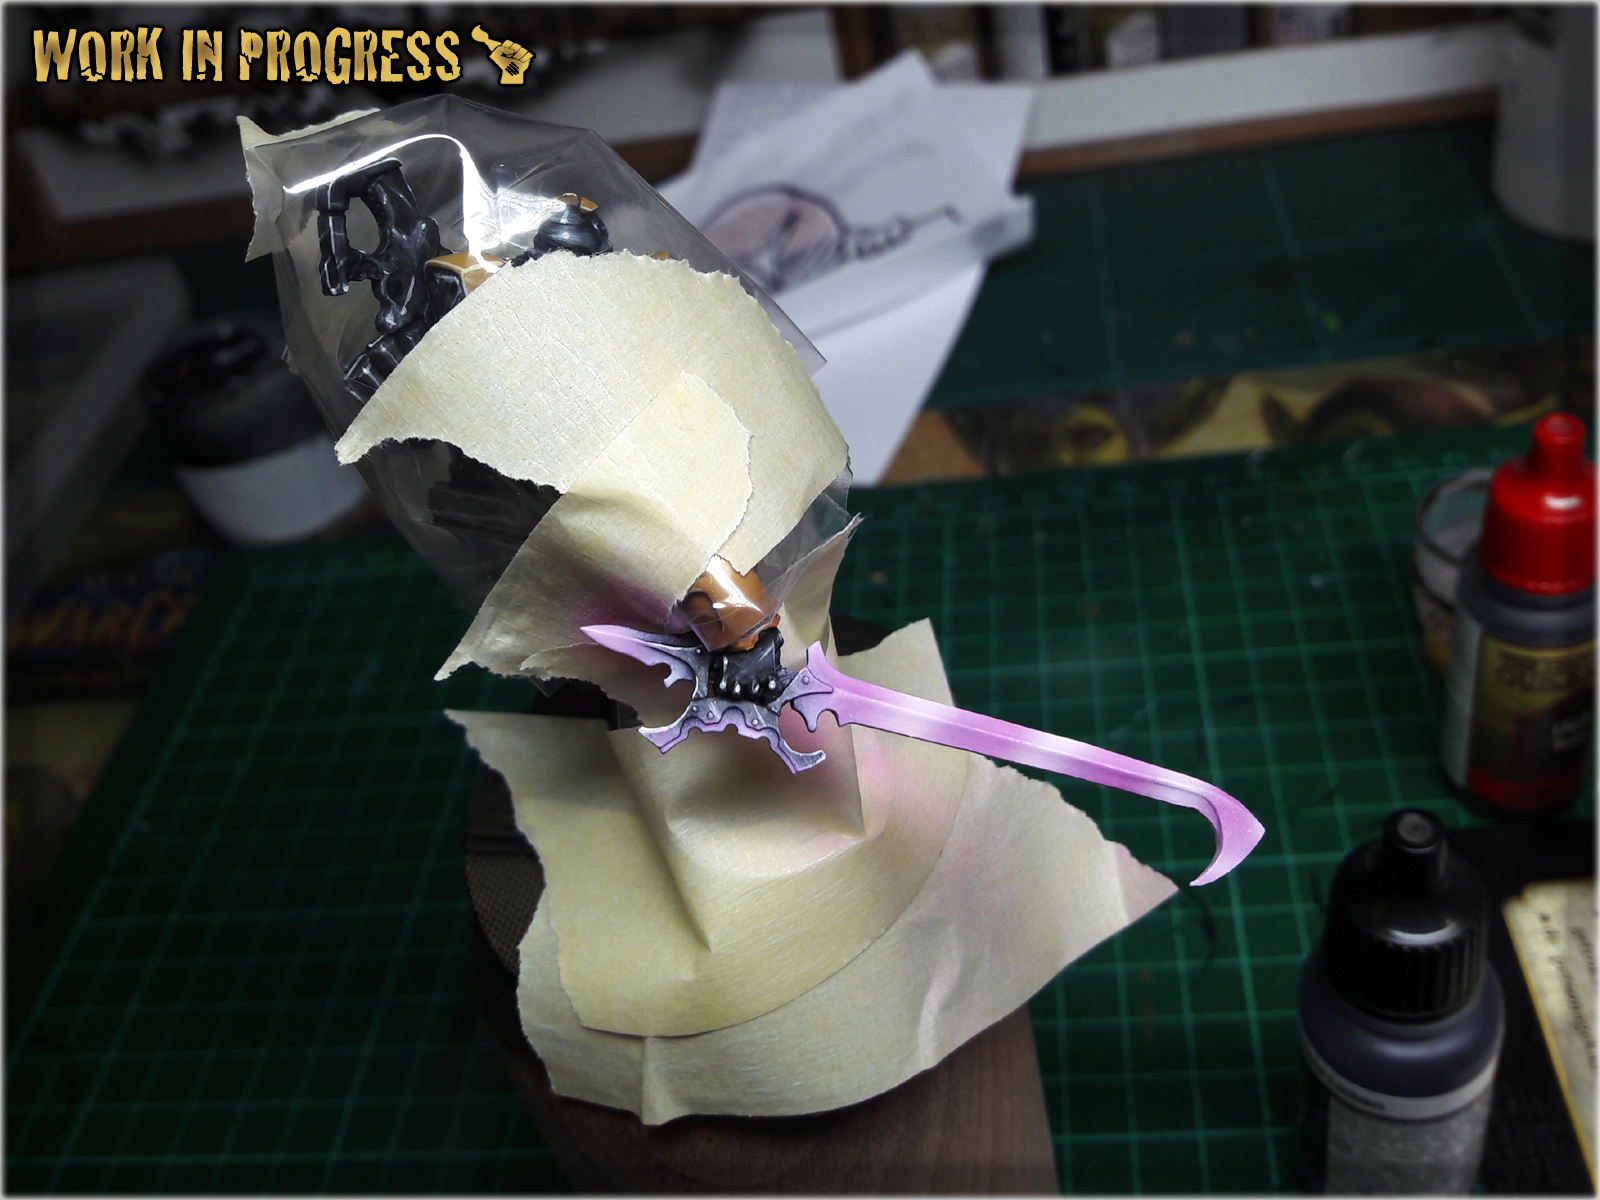
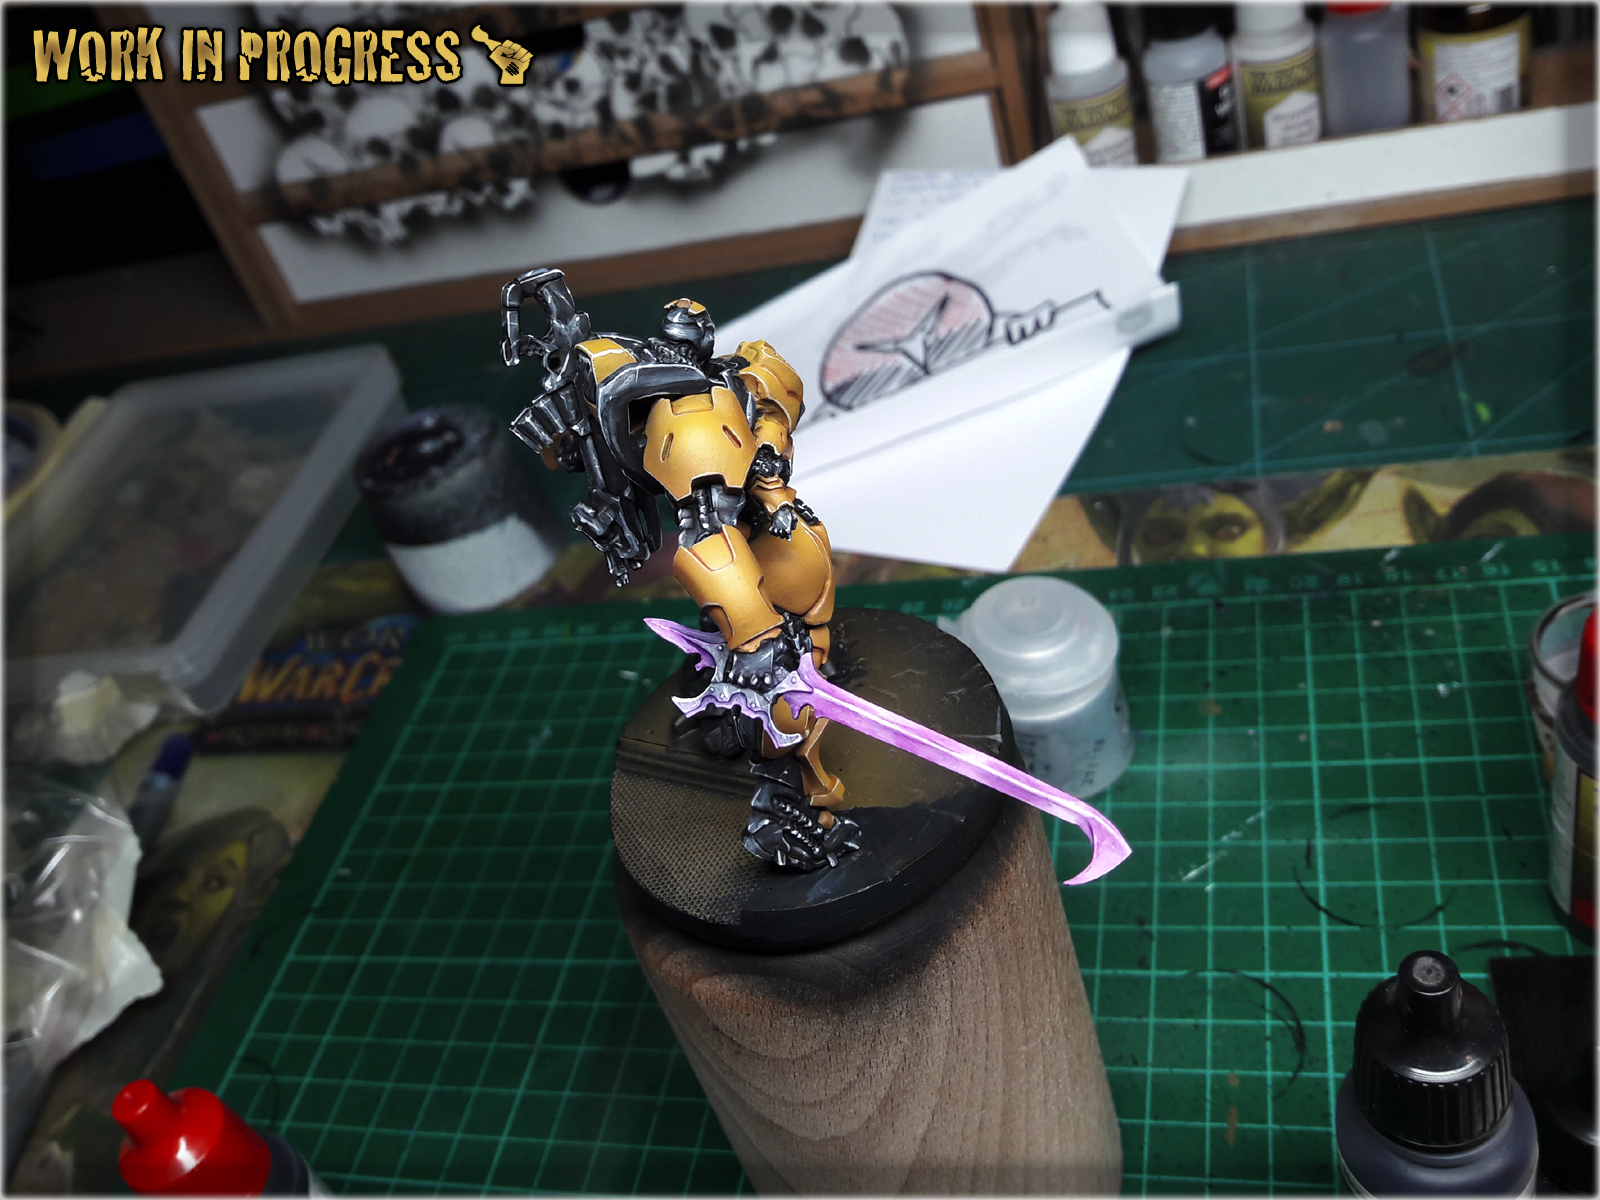
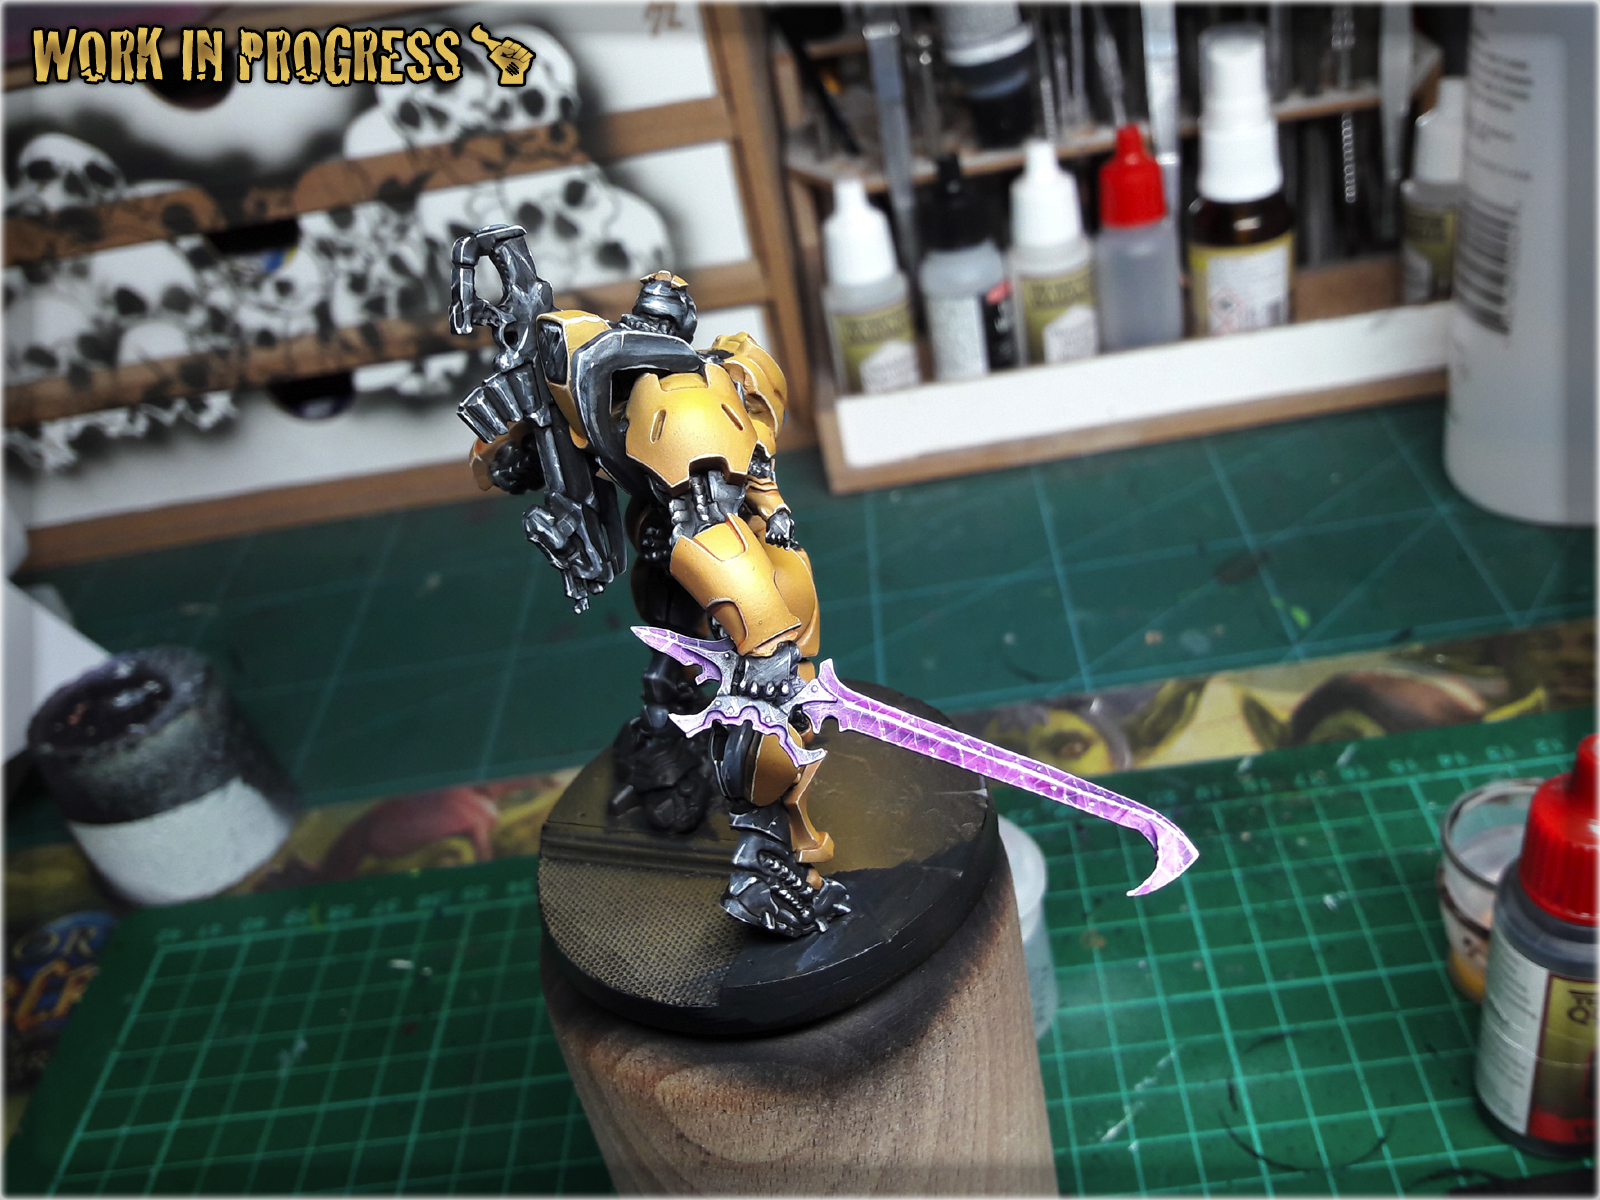
I leave adding Black Under Armour and additional details to you. Now to the Sword… To be honest, because of strong light, pictures taken during this one’s painting process did not captured how the sword looked like and I really don’t like how they turned out. That being said – I will still show you the Sword and name the paints used, but instead of a Step-by-step tutorial, let’s just call it a BONUS.
List of paints:
Val. Warlord Purple,
Val. Off white,
GW. Pale Wych Flesh,
AP. Purple Tone Ink,


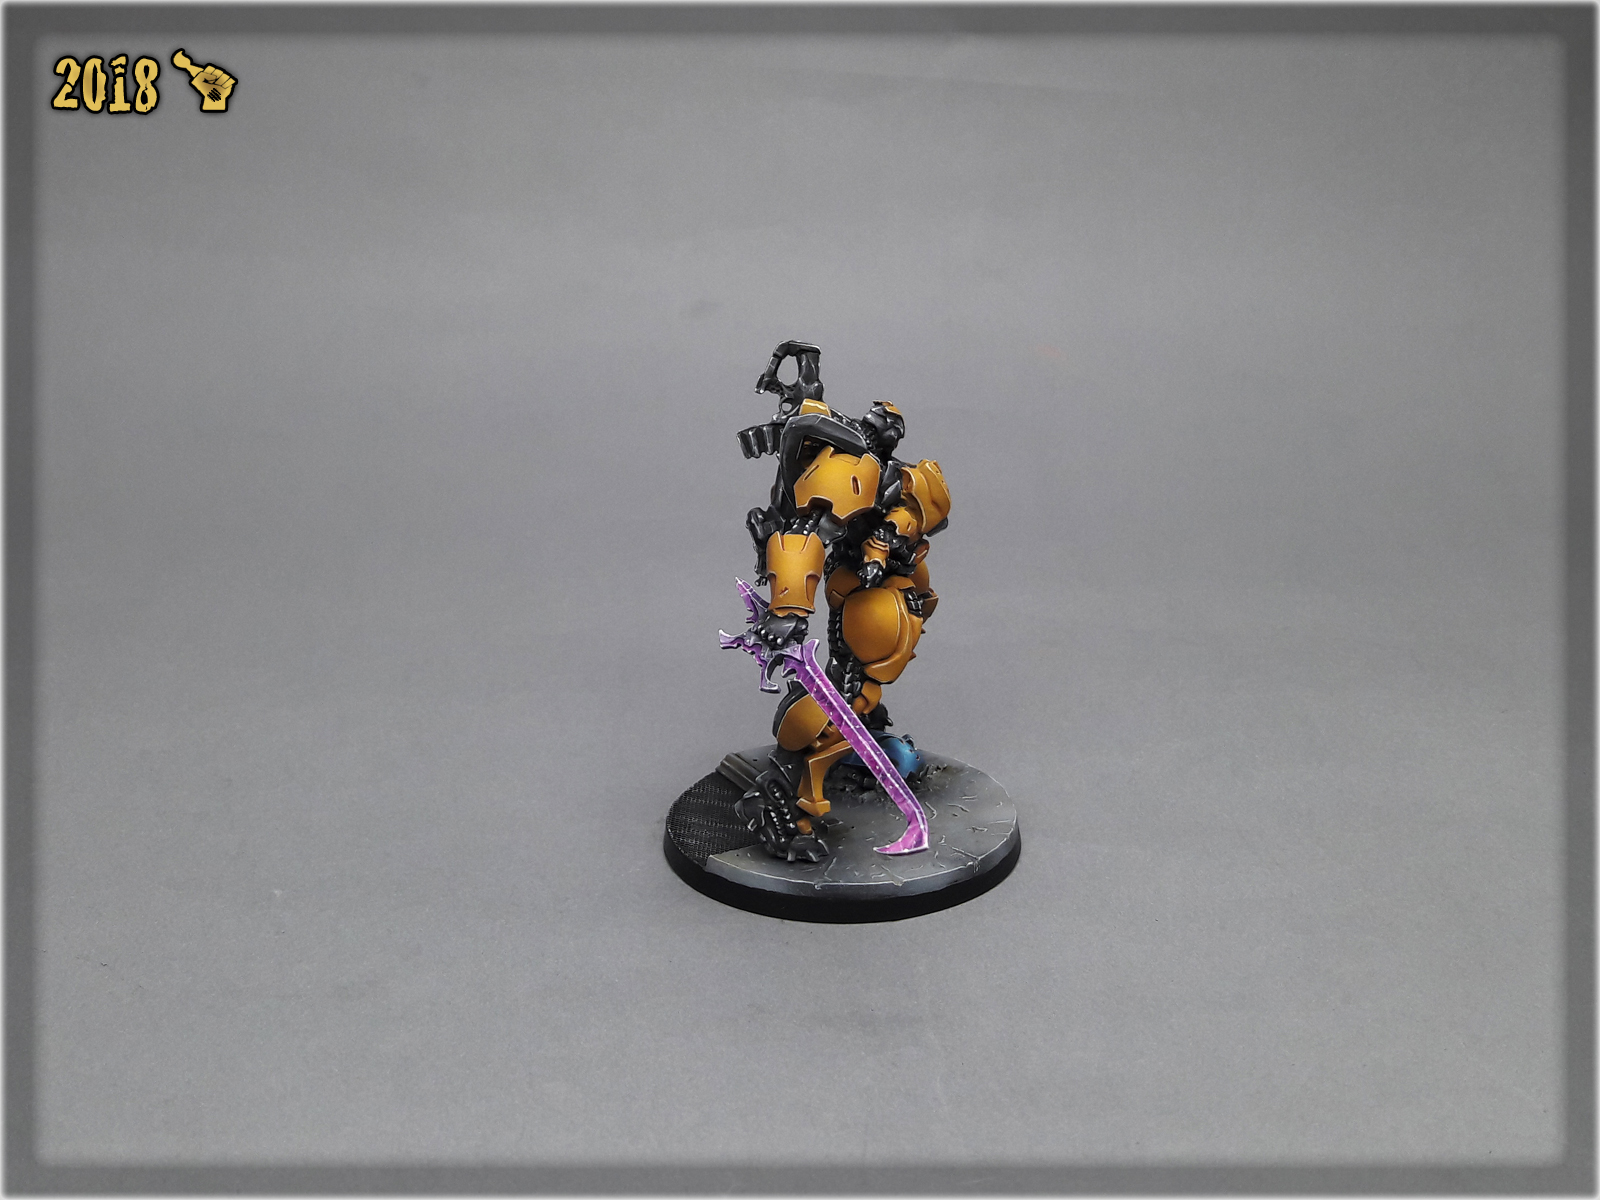
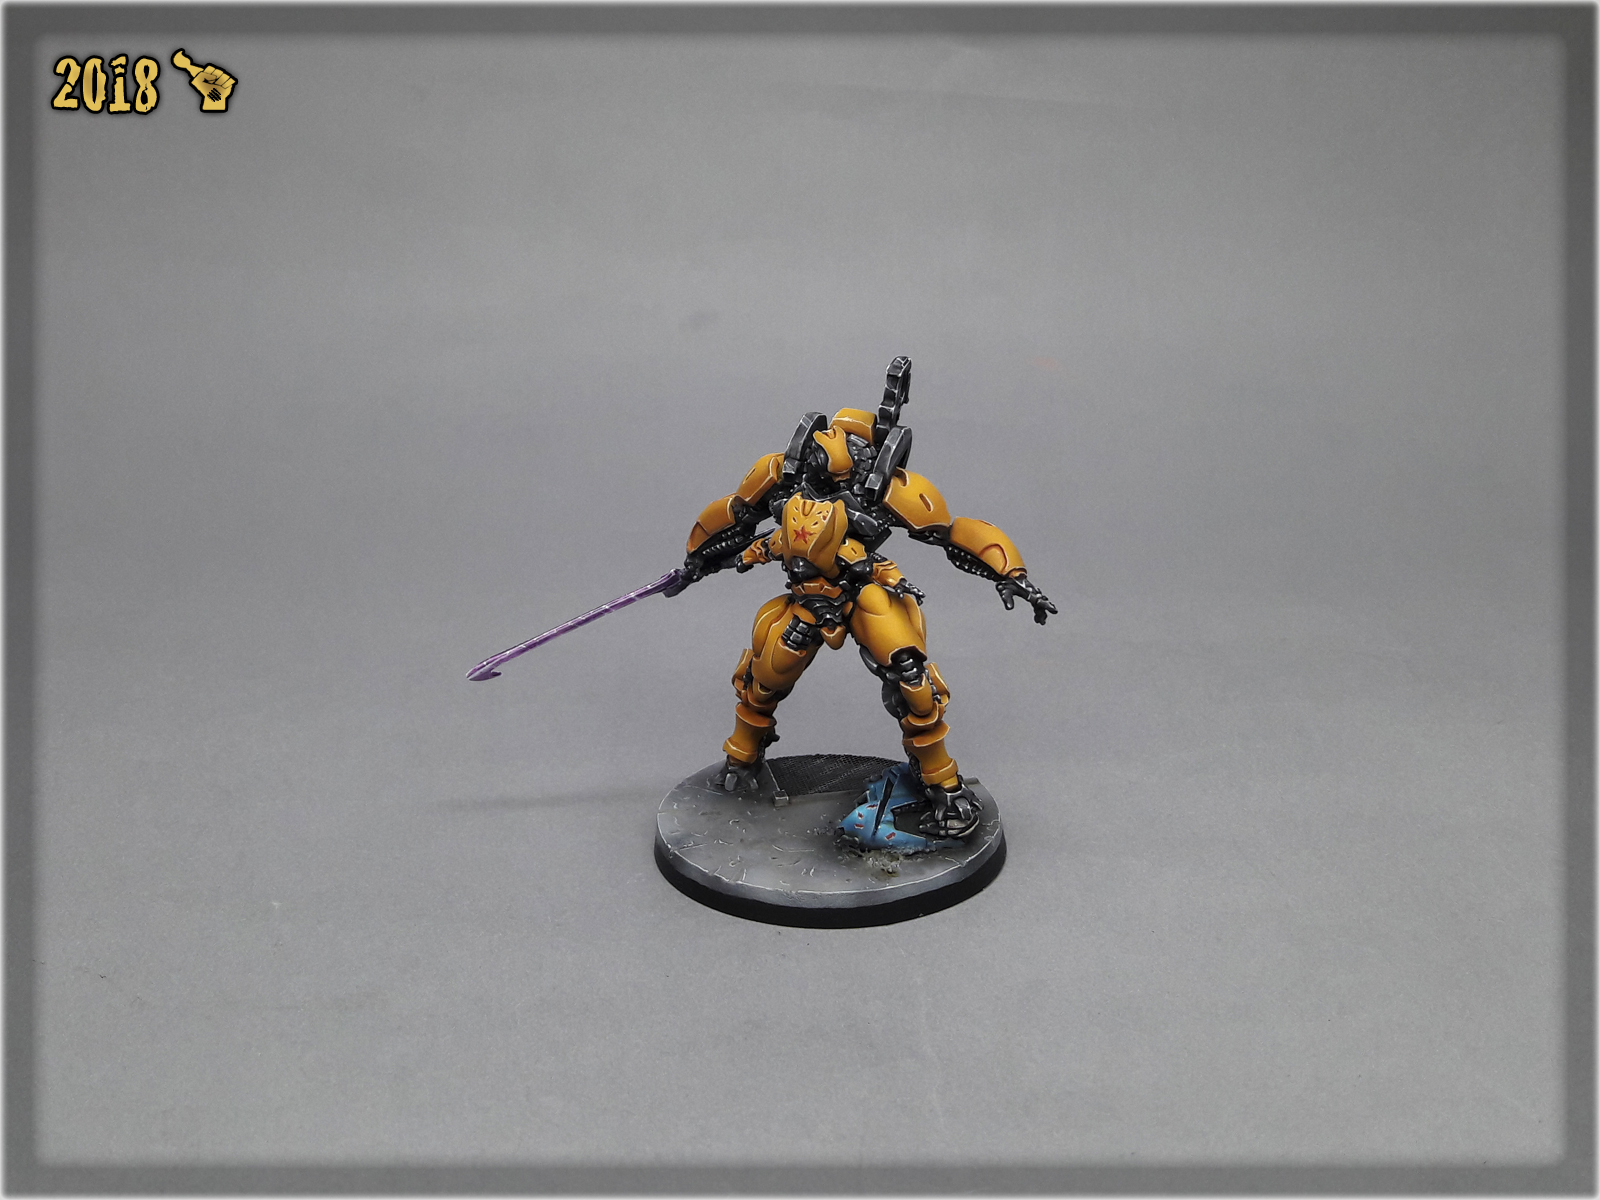
I leave the base and additional detail to you. Congratulations, you have painted a Guijia 🙂
Was this tutorial helpful? Did you enjoyed it? Leave me a comment 😉
I hope you find this tutorial interesting. Be sure to let me know your thoughts in the comments below or via Facebook or Instagram. I would also appreciate if you considered sharing this content with your friends, who might find it useful. Finally if you are looking for a professional miniatures painting service be sure to contact me with this contact form. I always reply within 24 hours, after which please check out your spam folder.

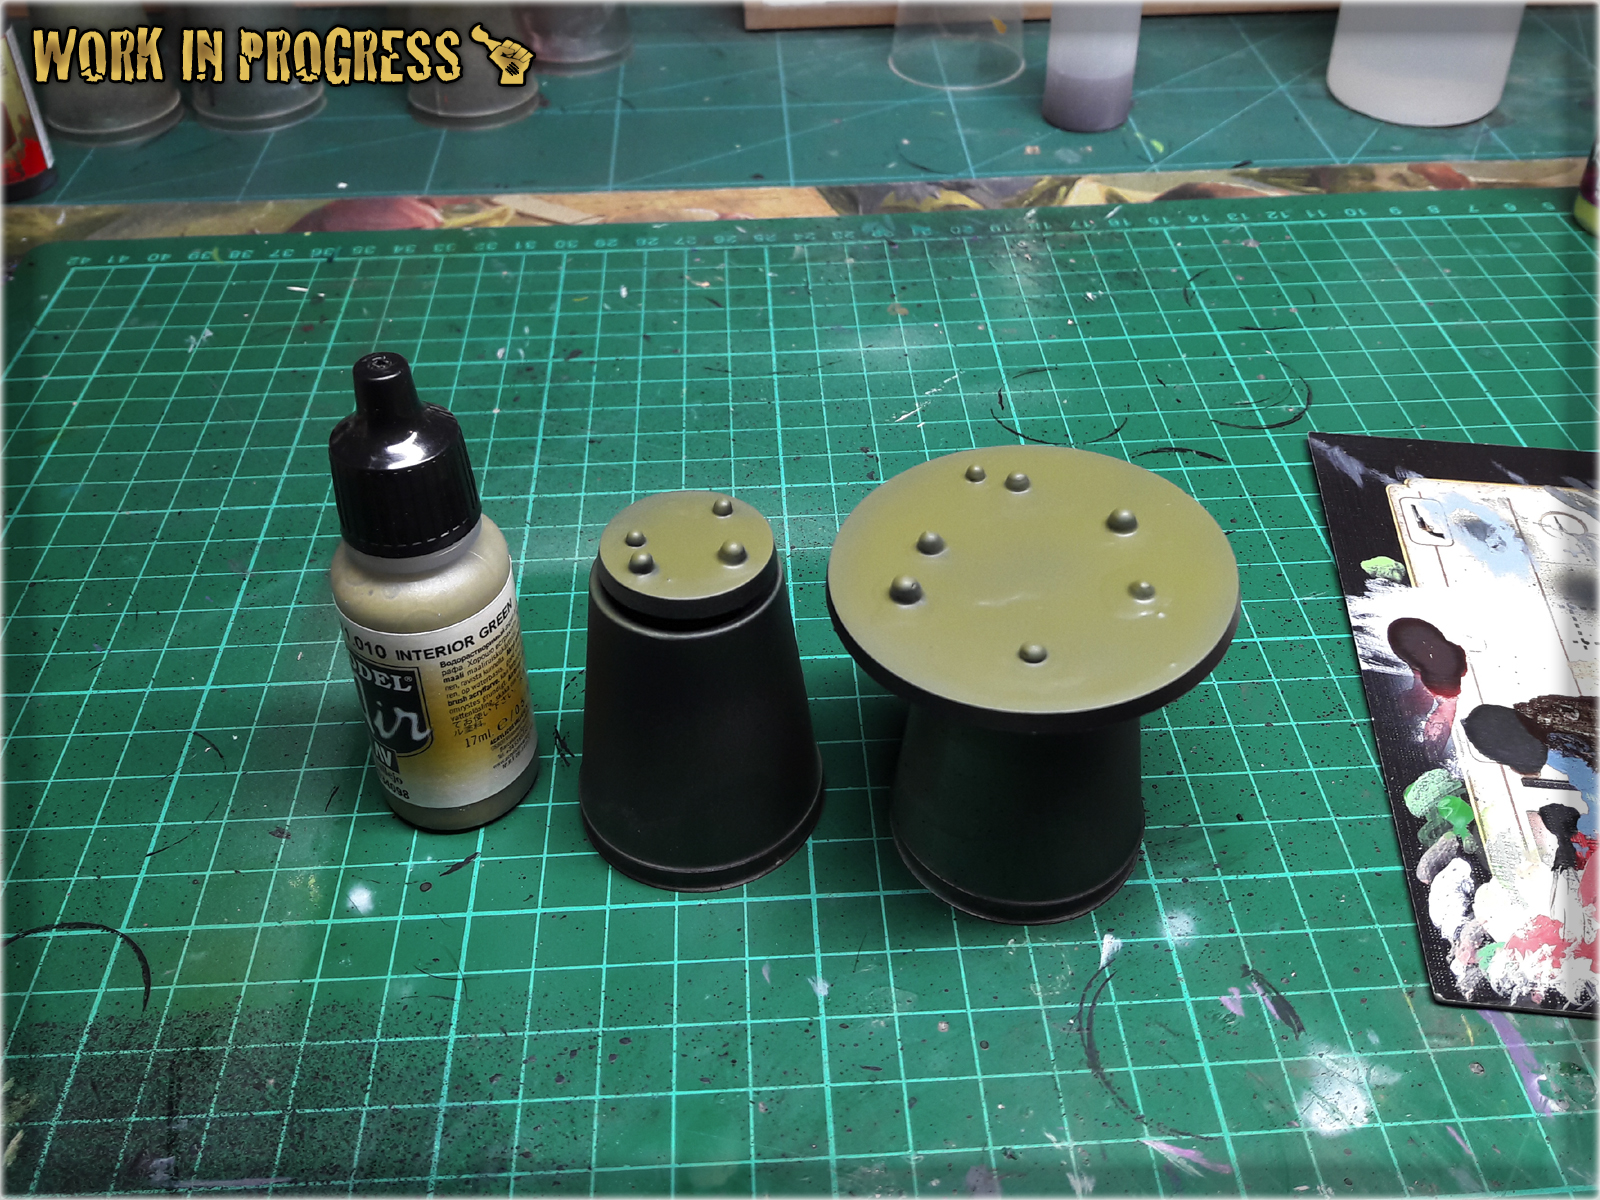
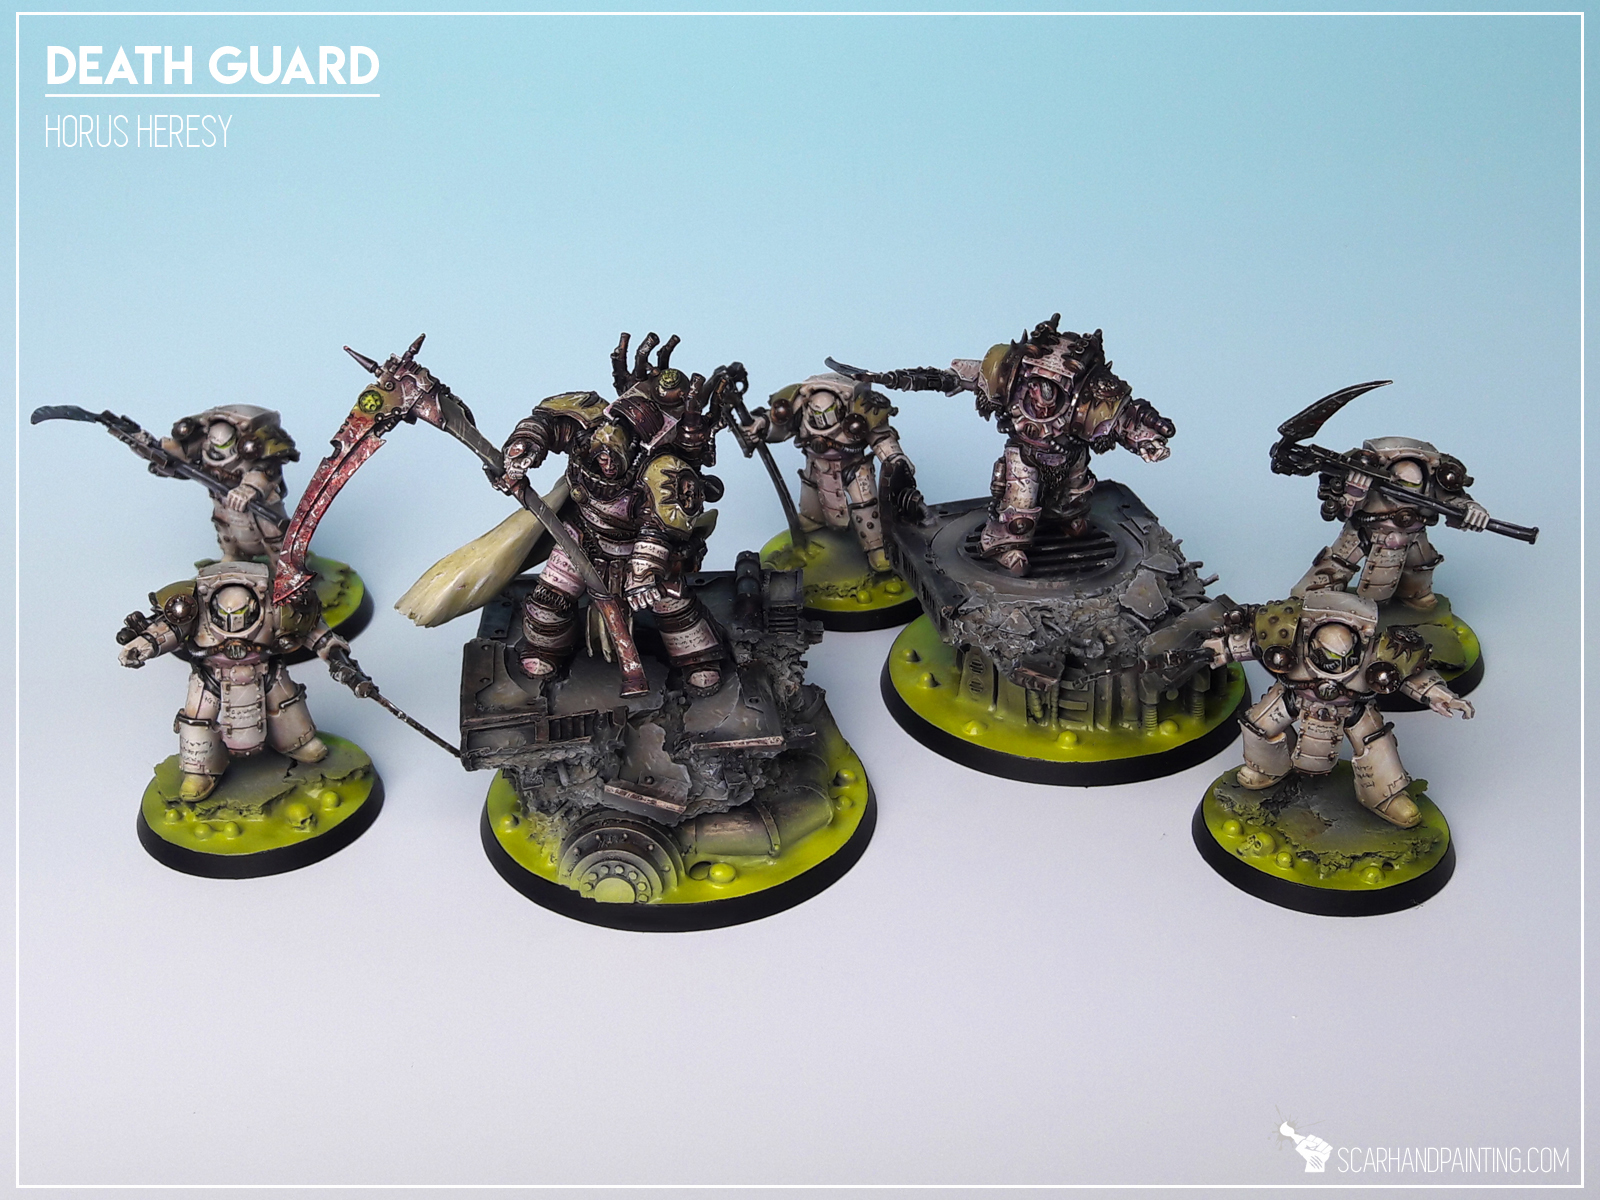
In this easy, step-by-step tutorial I’m going to show you how to create a Toxic Sludge Base. I designed these bases for Warhammer 40,000 Death Guuard Plague Marines.

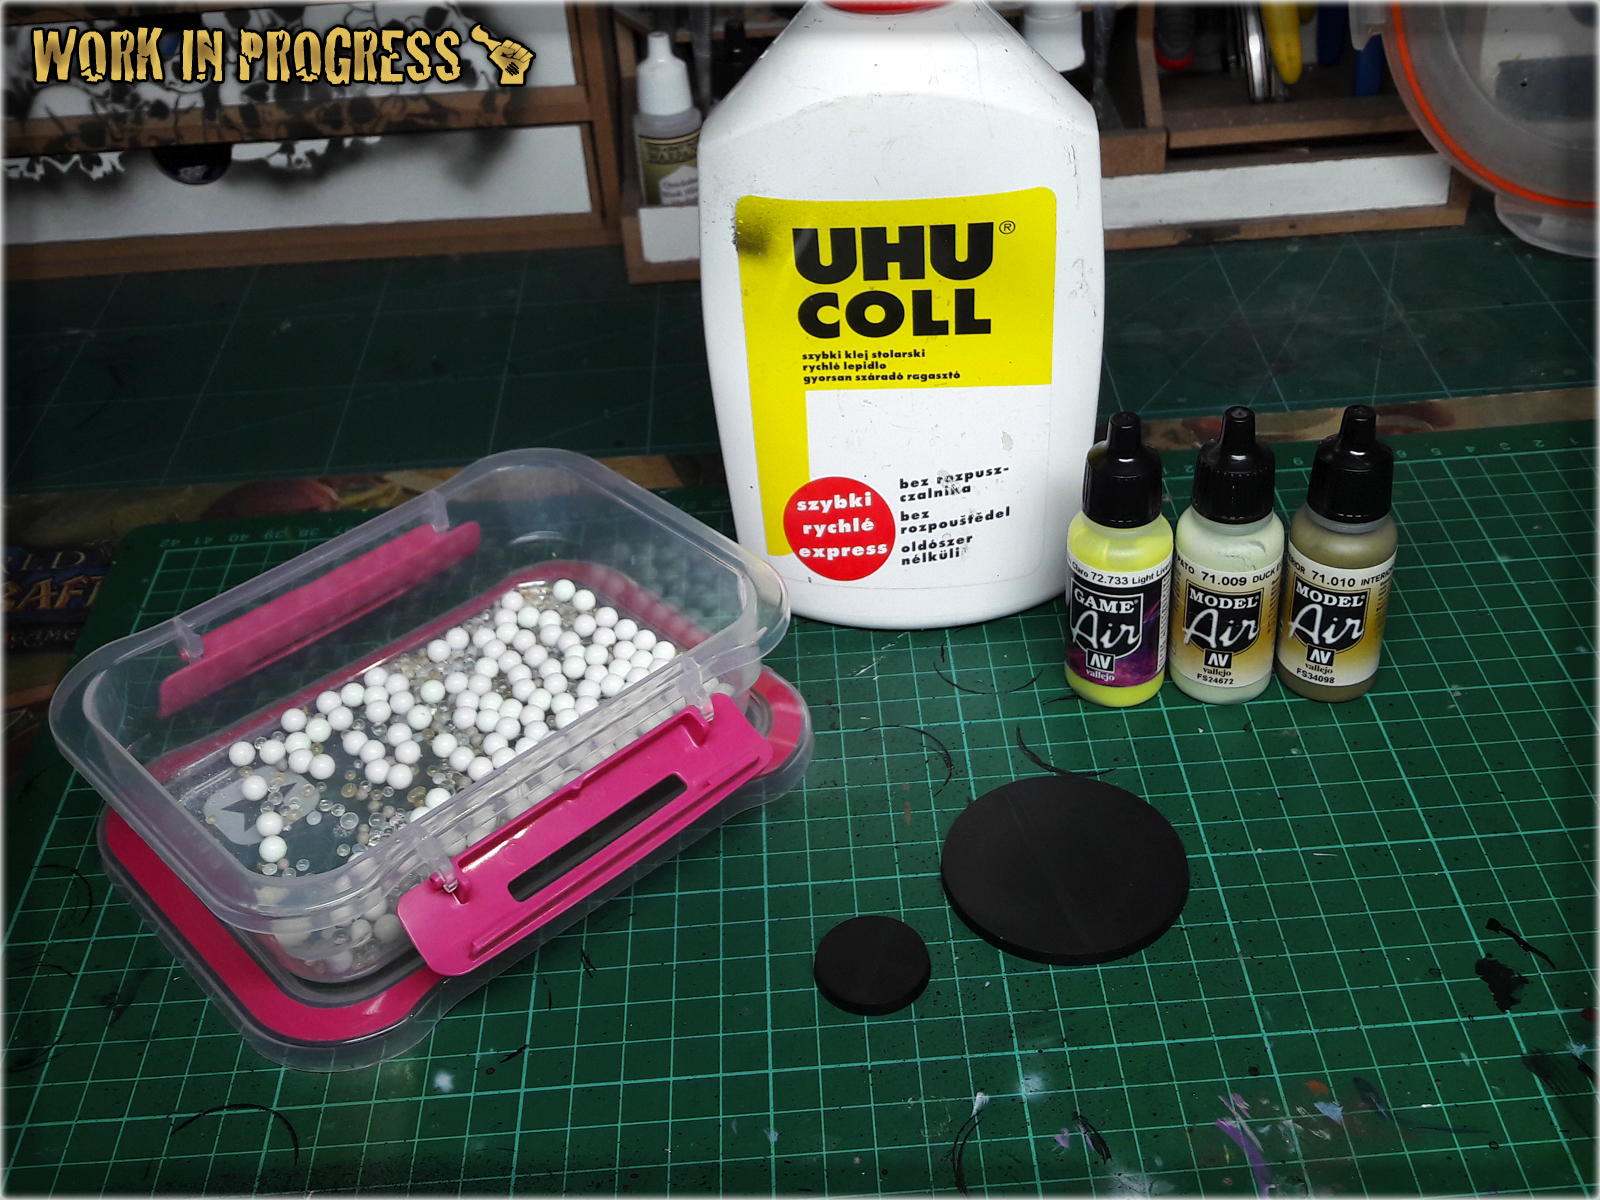
**Where I’m from there’s a small paper bag filled with moist absorbsion balls in every shoe box. If you can’t get that, just use some grains or make small balls out of green stuff or modeling clay.
* I started by covering entire base with a layer of basing glue.

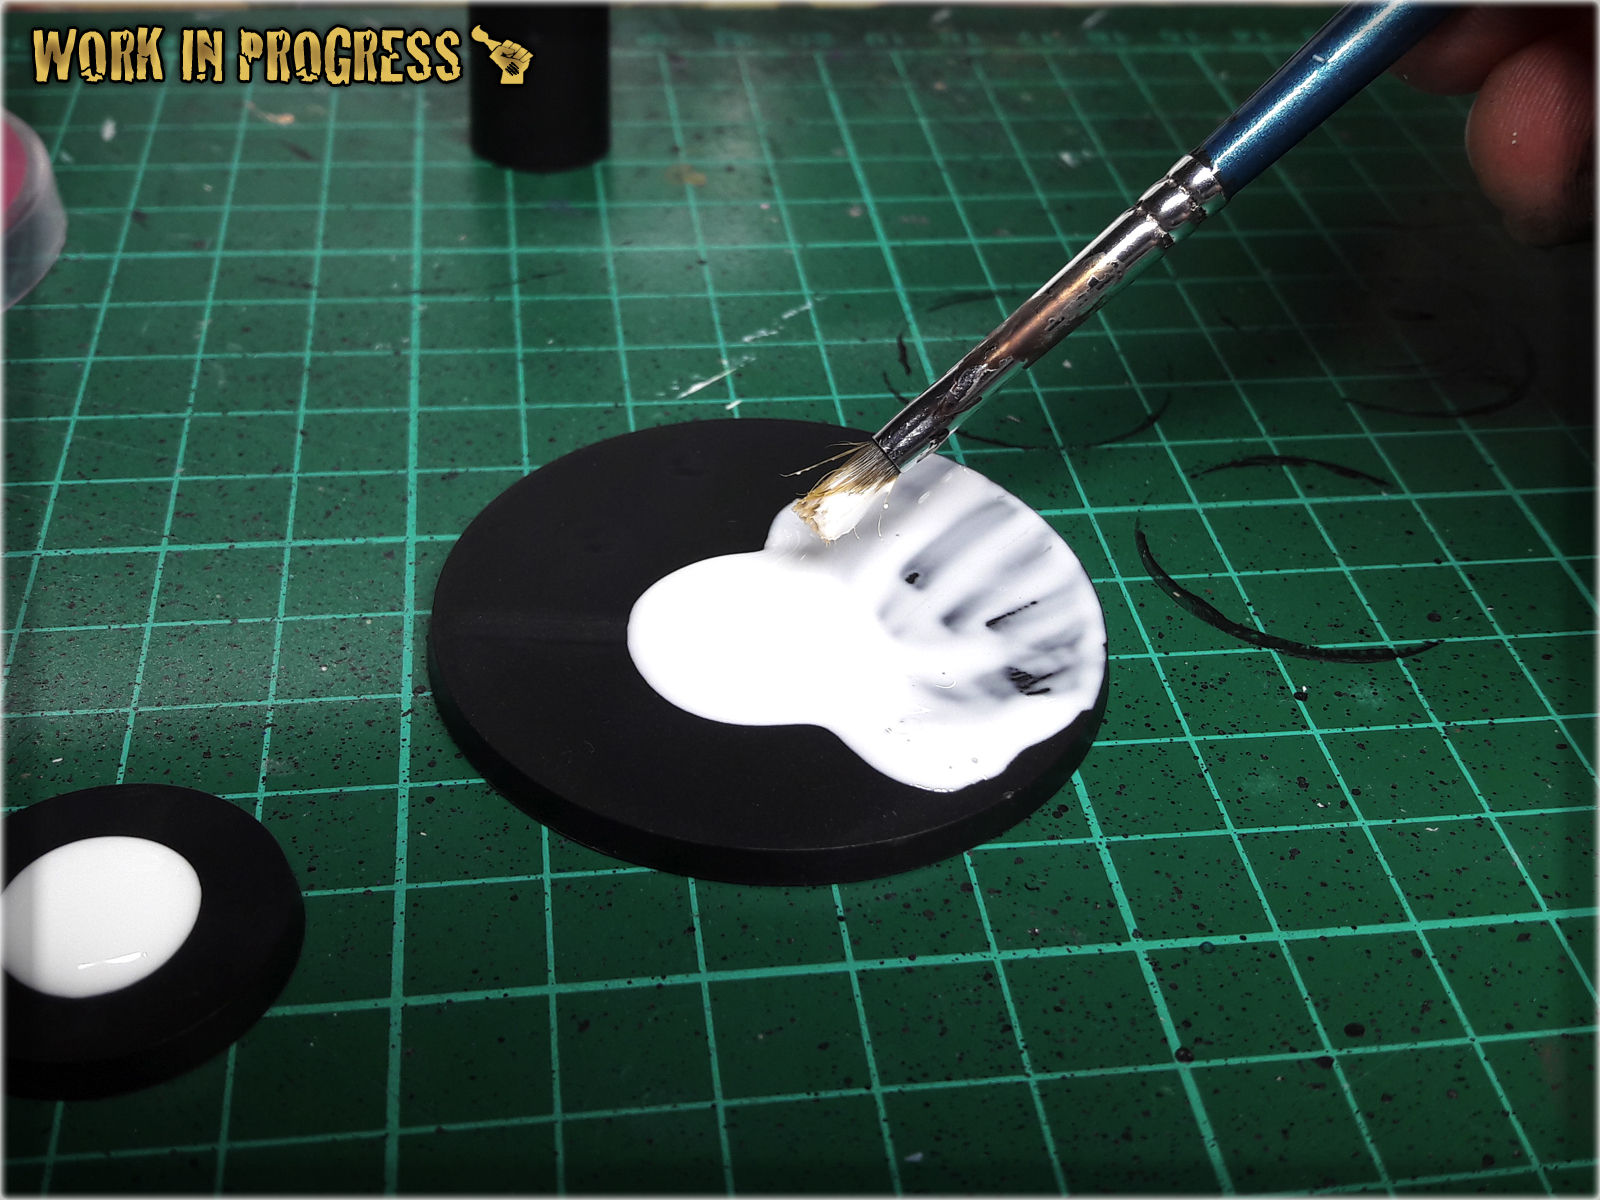
* I then put couple of tiny balls onto the base, creating 'buubbles' and let it all dry.

* Once dry, I covered are around the bubbles with another layer of basing glue.

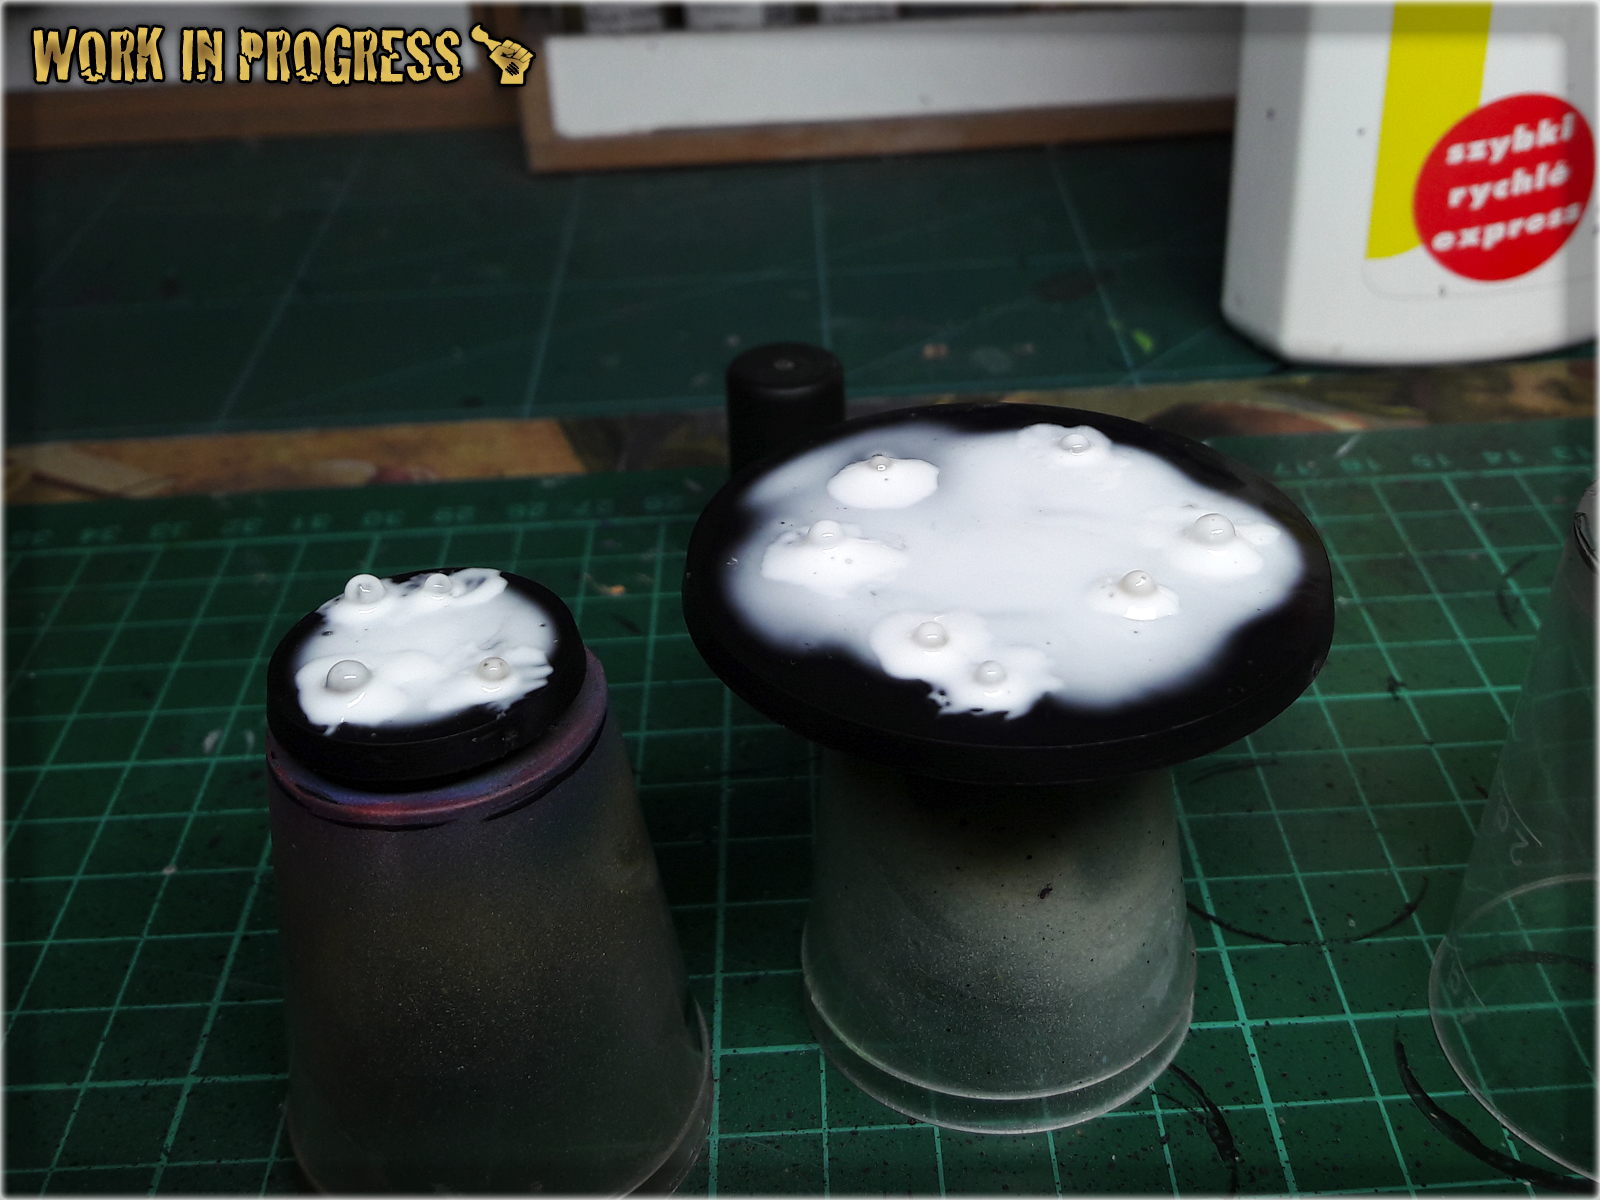
* I let it all dry for about an hour, then undercoated entire base black.
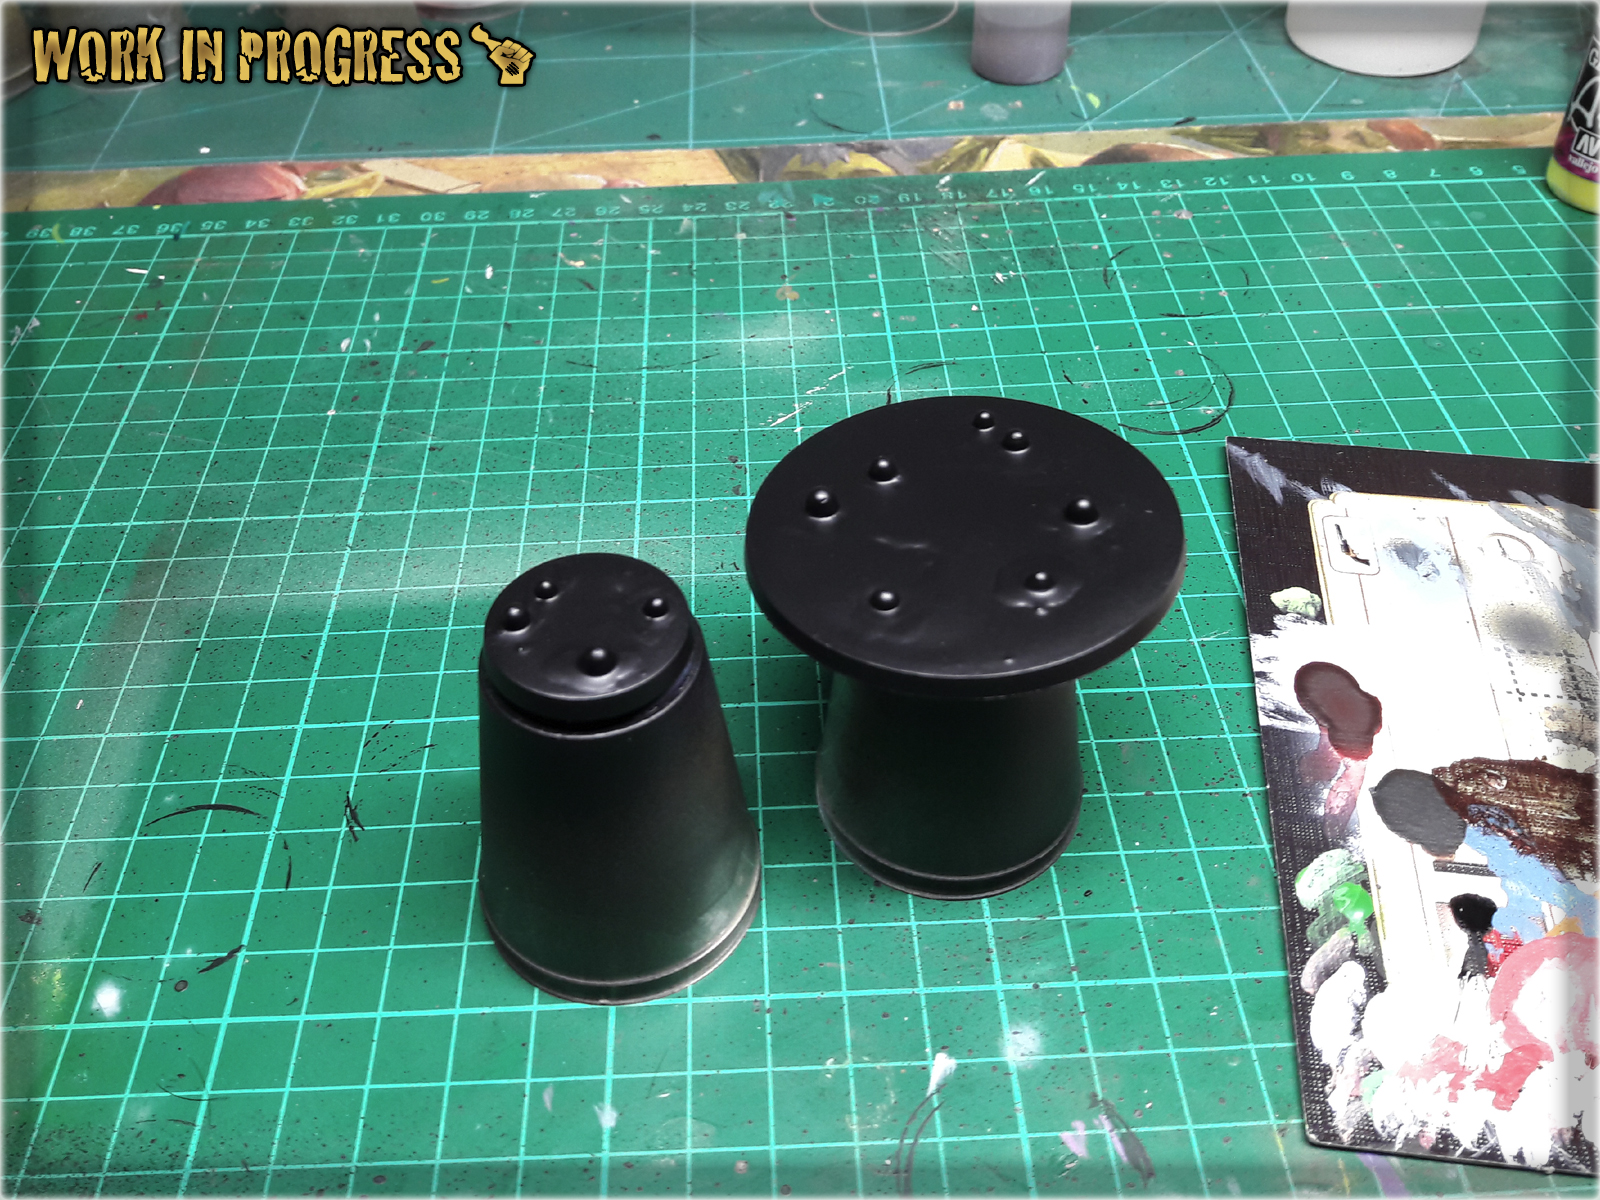
* I then airbrushed a layer of Vallejo Interior Green over entire base.
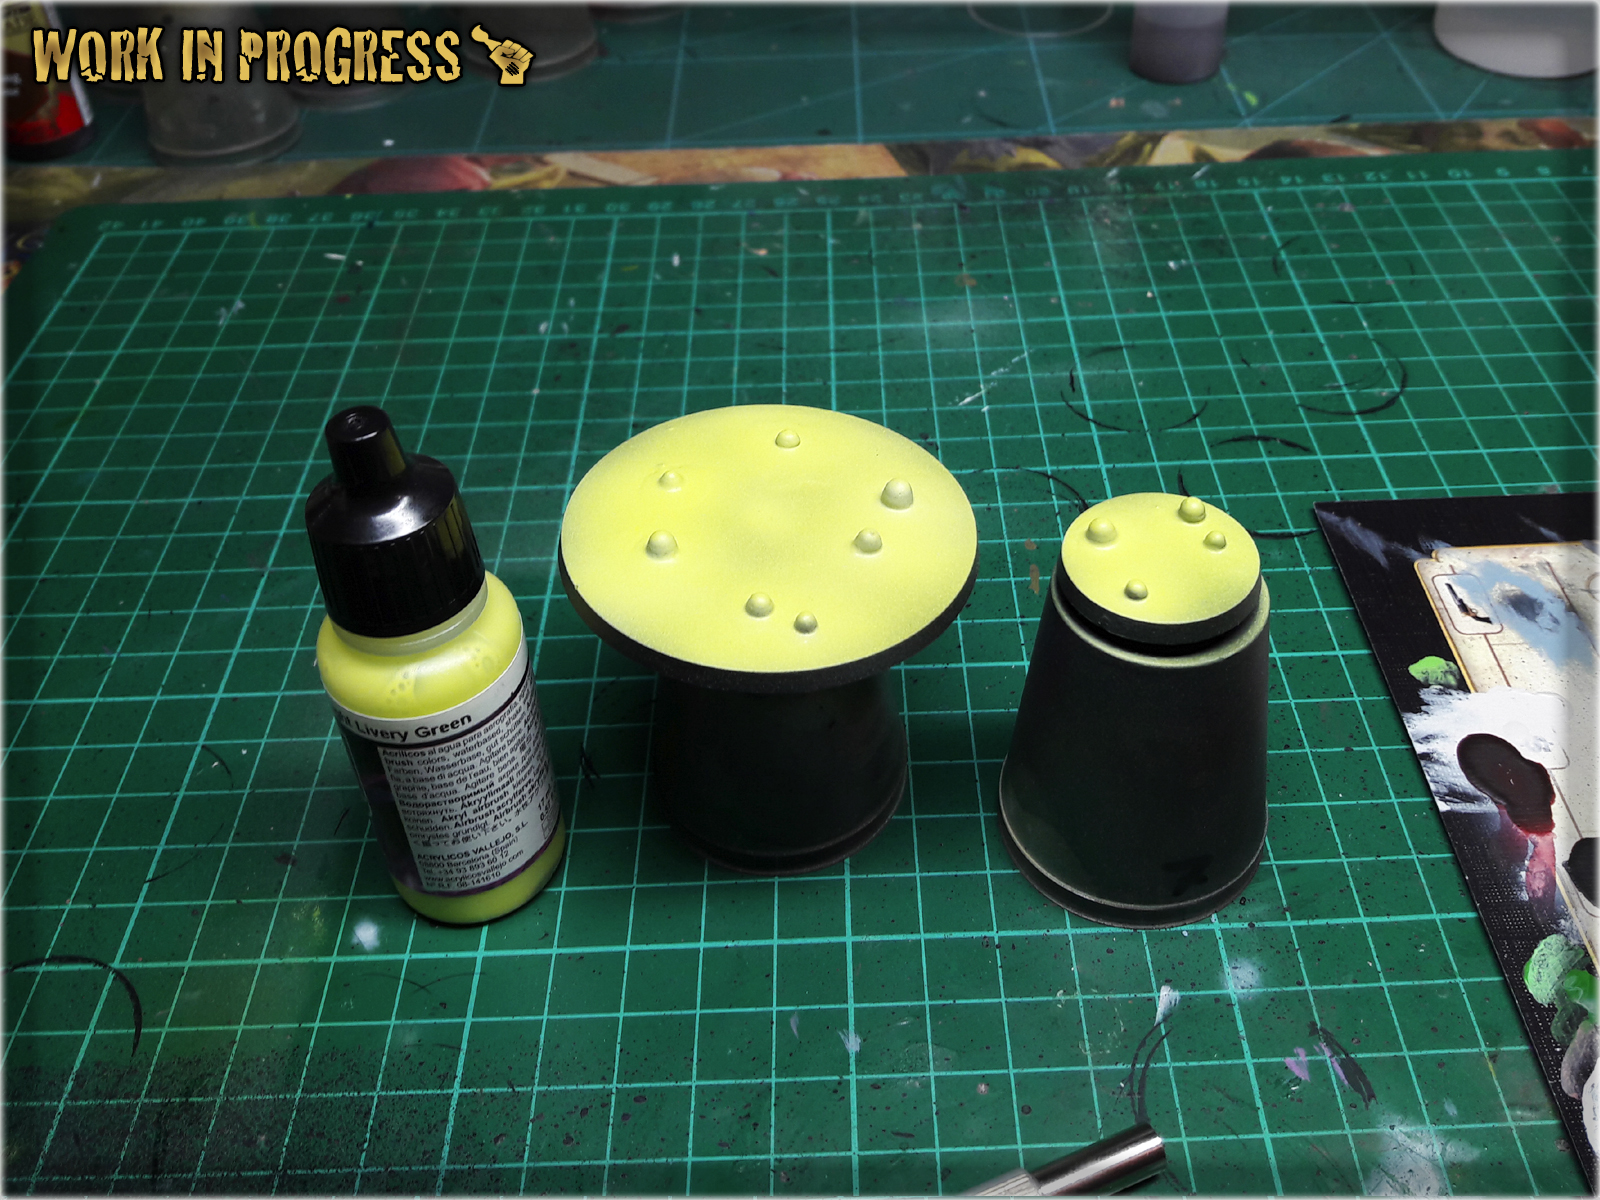
* Next I airbrushed a layer of Duck Egg Green concentrating on bubbles and surrounding areas.

* Last thing to do was to airbrush two layers of Light Livery Green over entire bases and paint the sides black.


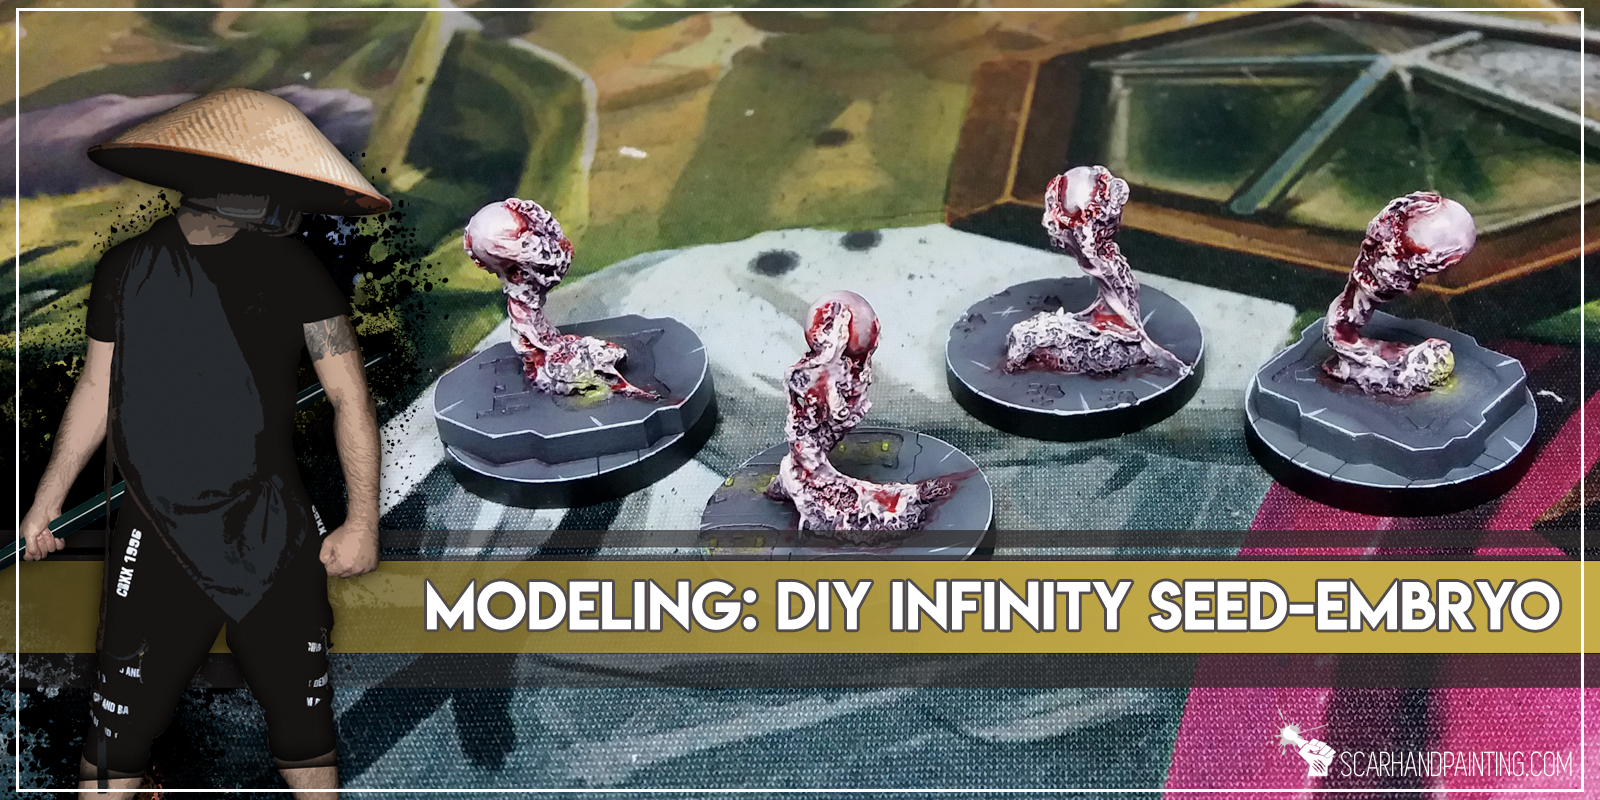
In this easy, step-by-step tutorial I’m going to show you how to create a Seed-Embryo marker, same as from Infinity SHASVASTII lvl 5 ‘Witness Me!’ gallery.
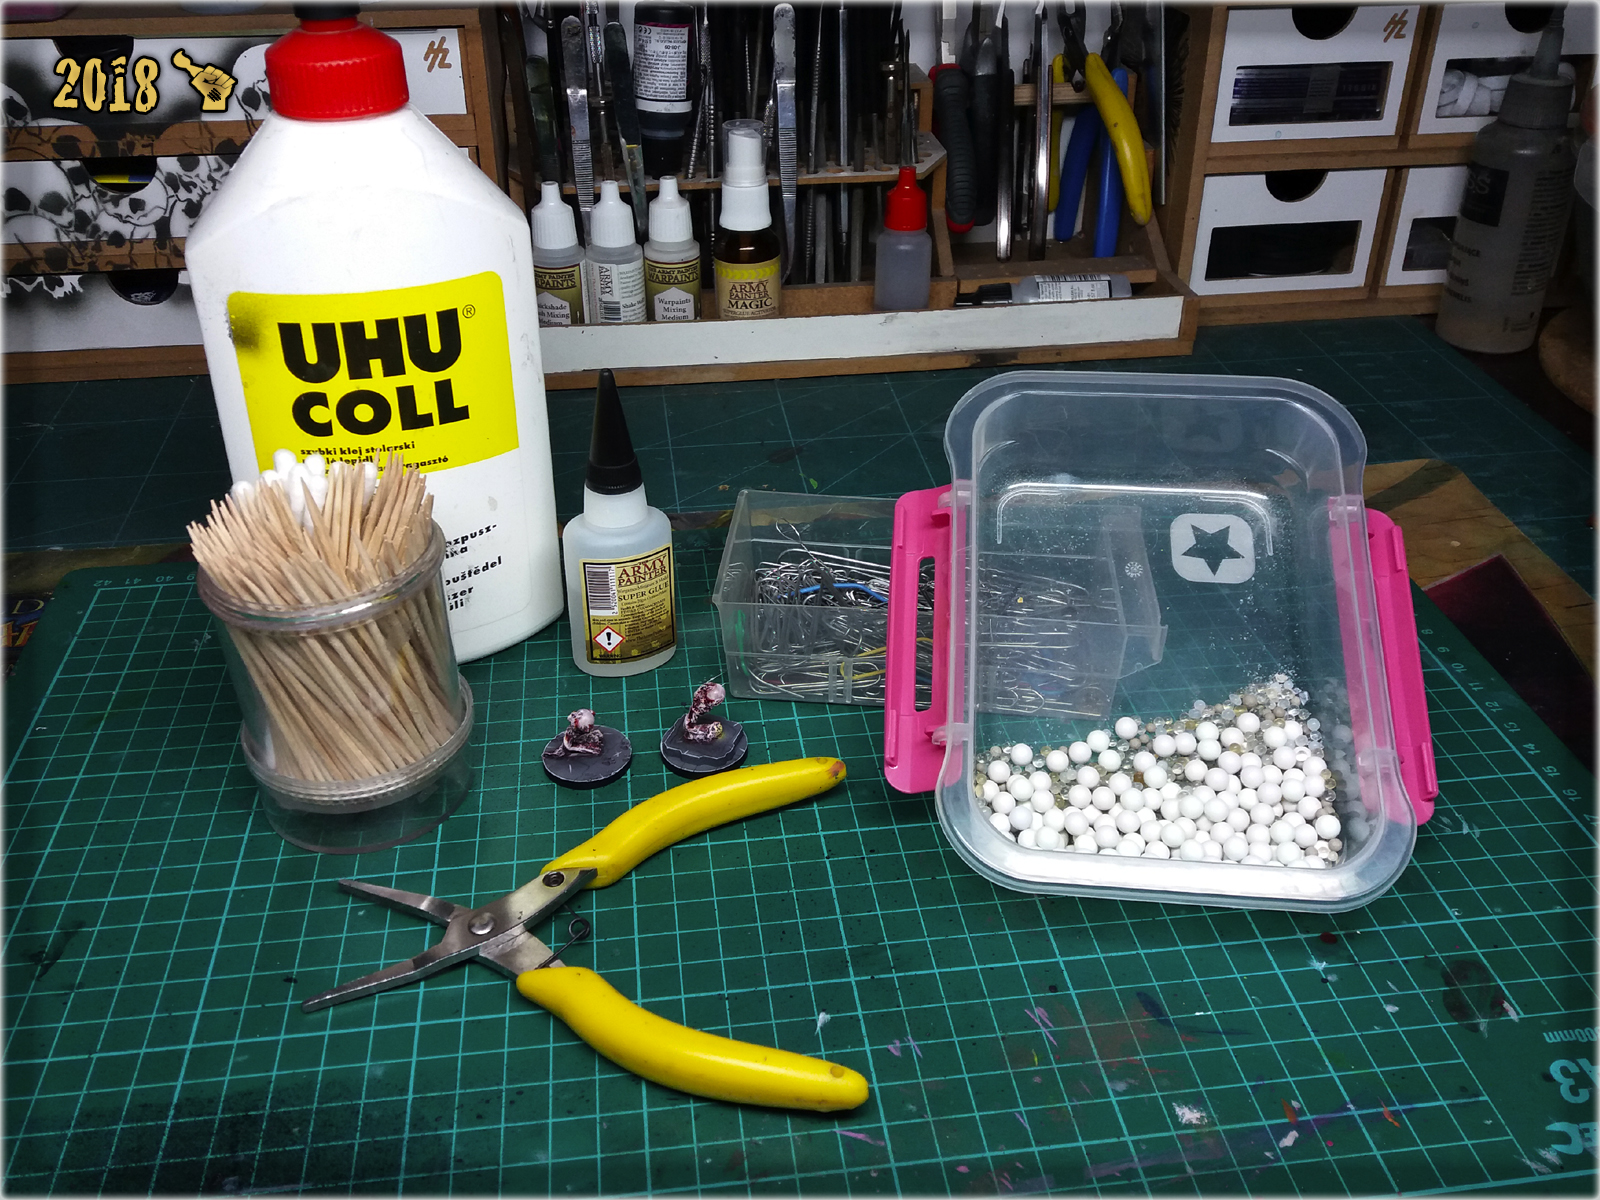
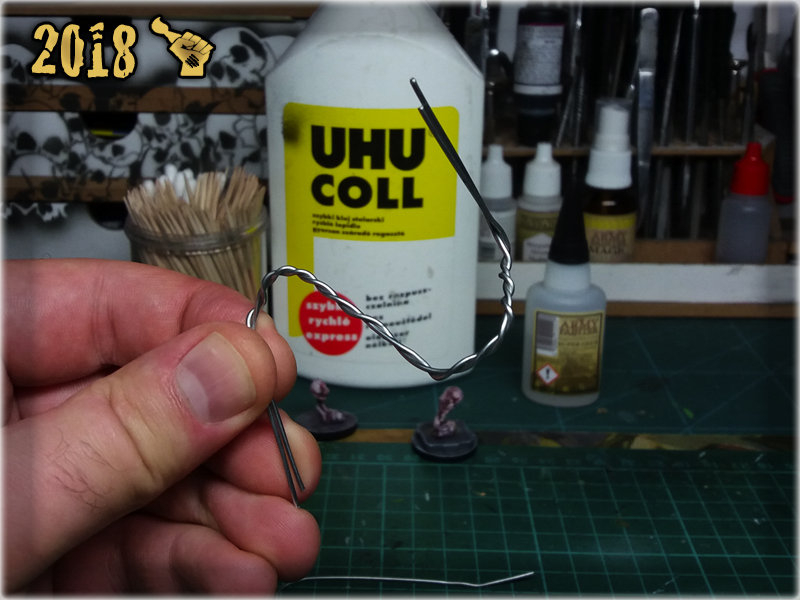
* I started by straightening two office clips, leaving both ends curved.

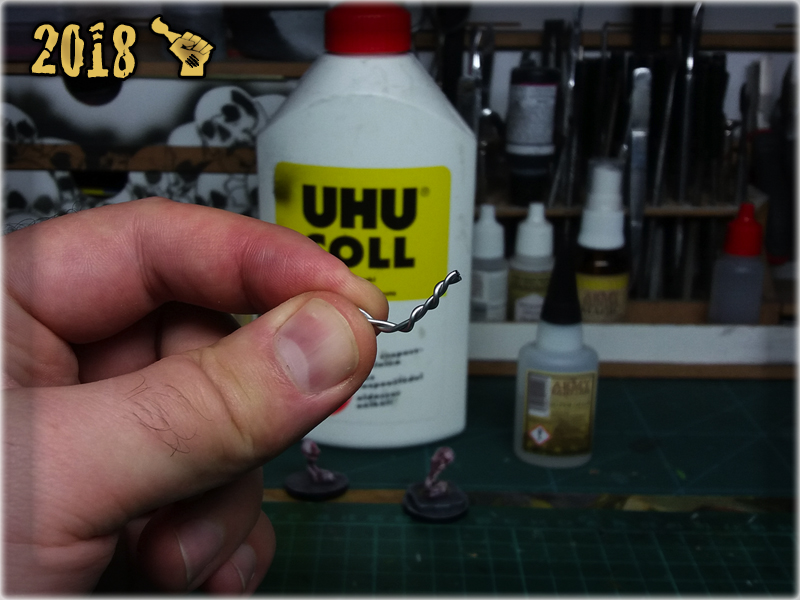
* I then wraped them around one another and once done, cut a piece with hobby cutters.
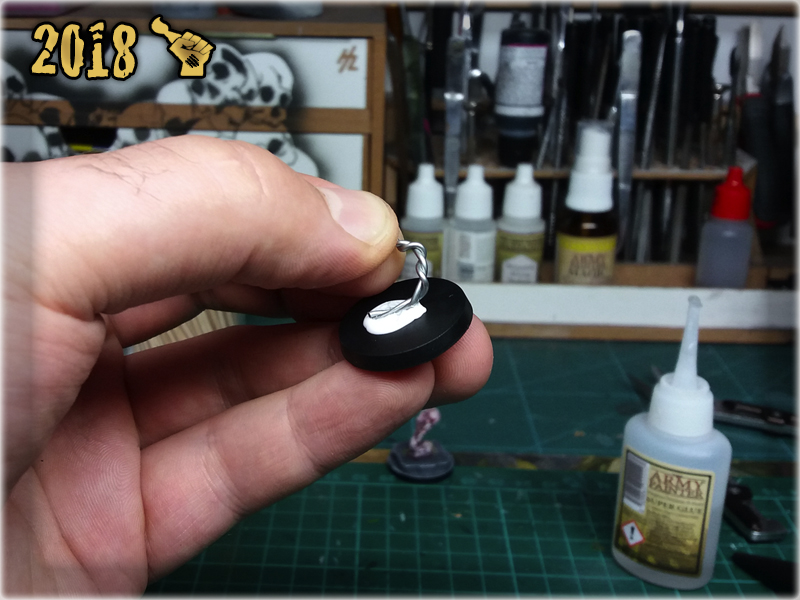
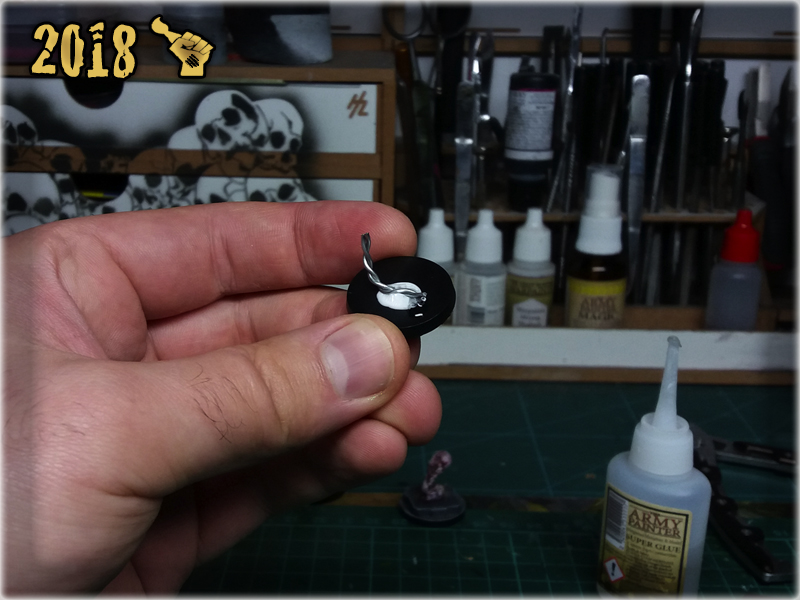
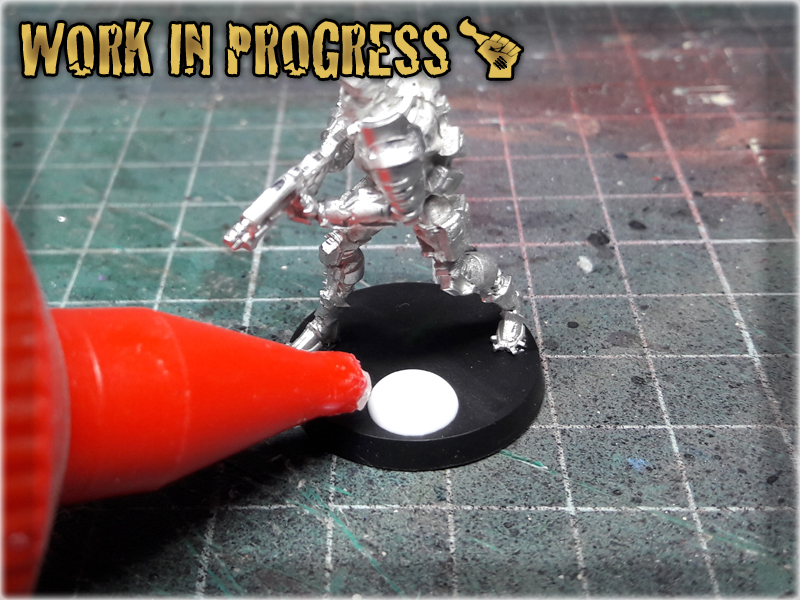
* Next I applied a drop of basing glue, followed by a drop of super glue onto a base.
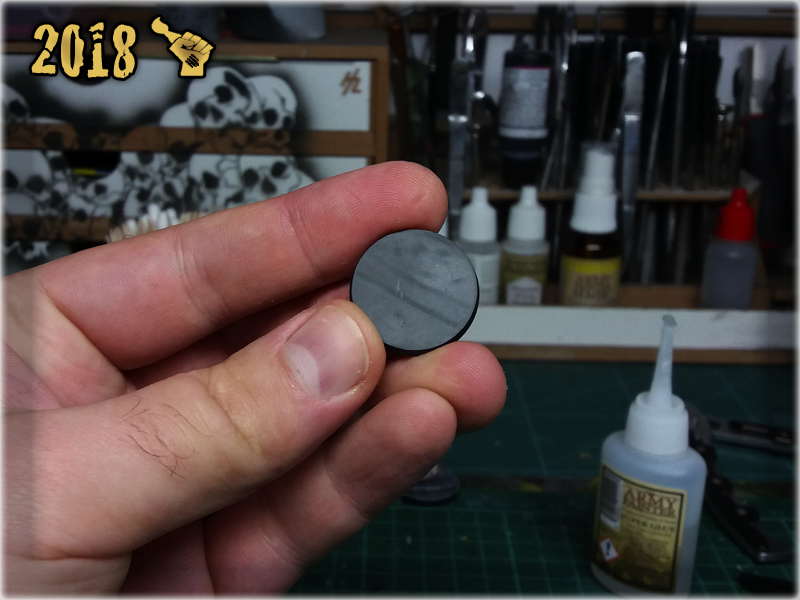


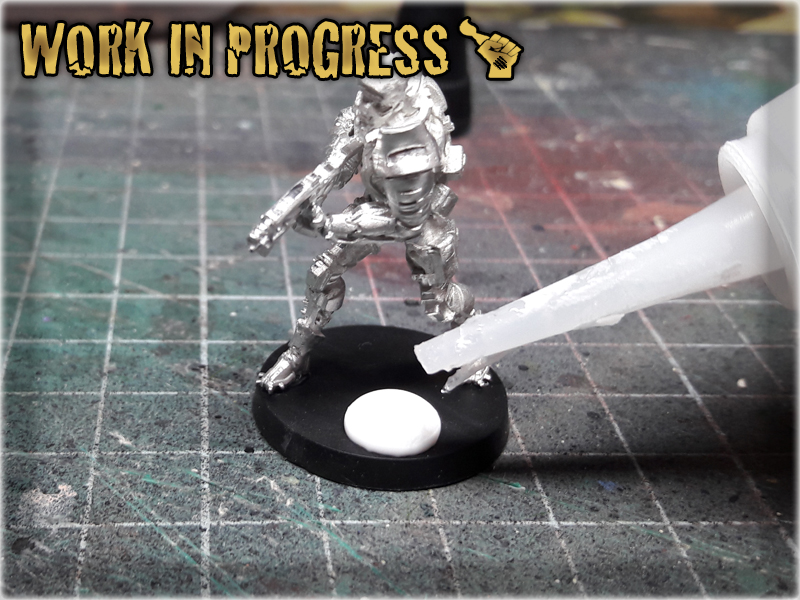
* Then I glued wraped up office clip piece on top of the super glue spot.
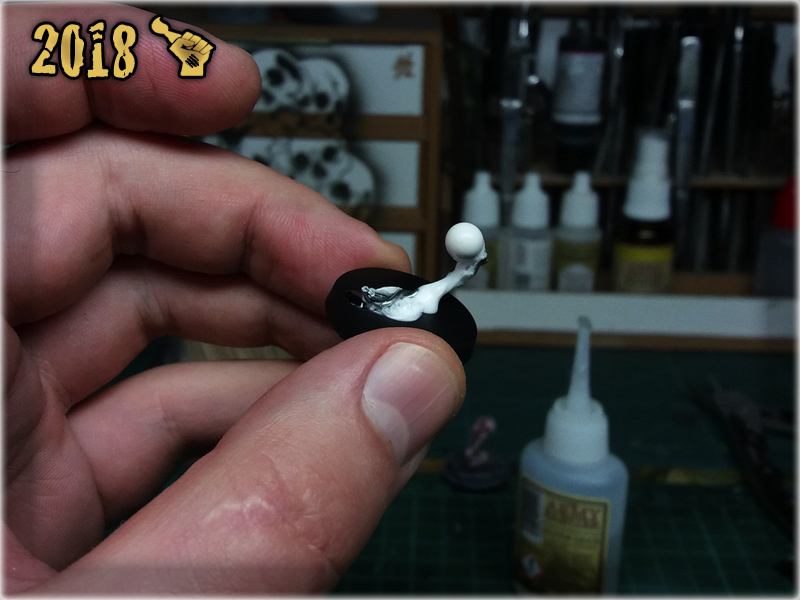
* Airsoft gun ammo ball followed, on top of the office clip piece. First a drop of super glue, then basing glue, then I slightly dipped the ball in super glue and glued it on.
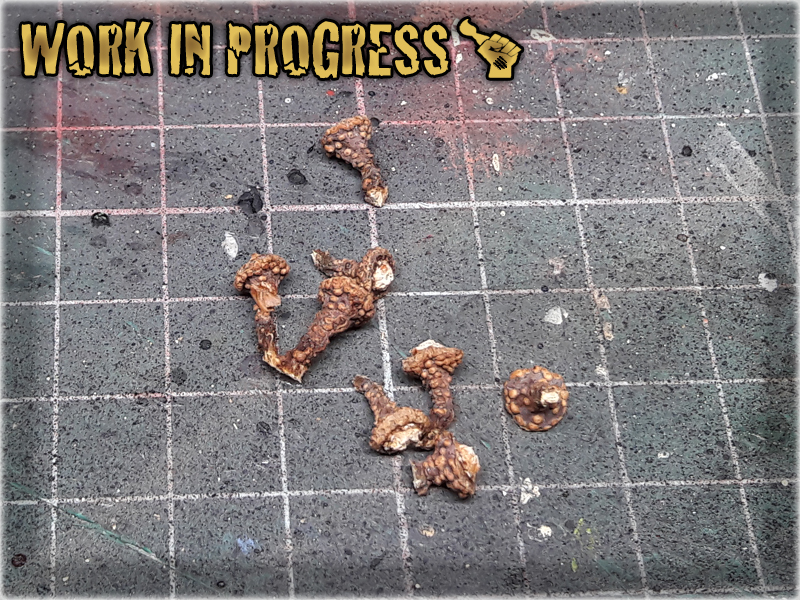
* Lastly I modelled three growth pieces on top of the ball, applying a small dose of basing glue with a tootpick, then covering it with super glue.

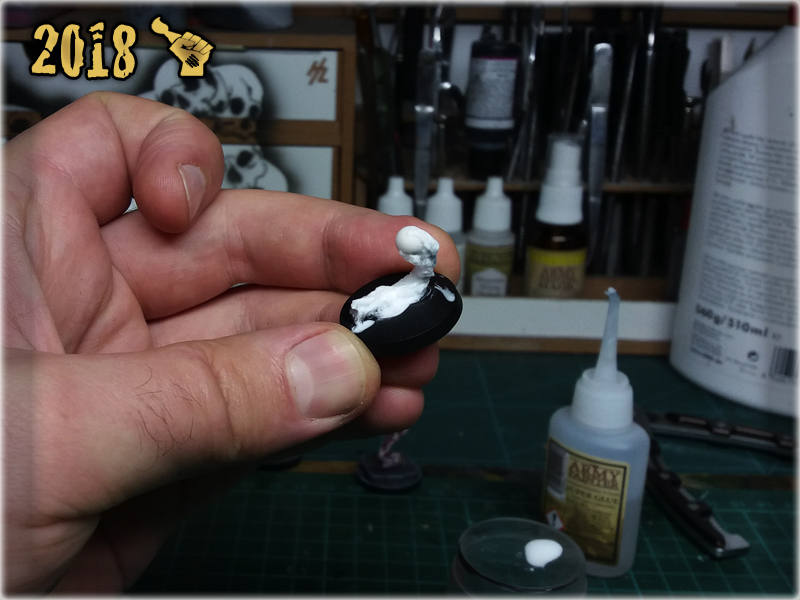
And that’s it! The Seed-Embryo markers ready in few minutes. Just make sure you let them dry before painting – I recommend about 4 hours for super glue – basing glue mix to fully dry out and produce awesome texture.

Do you like this tutorial? Have you made your own Seed-Embryo markers? Be sure to let me know in the commets below!

Alright, so you decided to start with an airbrush. You’ve made some reconnaissance, picked an airbrush and compressor and the only question that stands between you and a lifetime of successful airbrushing is “what else do I need to start?”. This very question was asked to me a lot since I myself started airbrushing. It might be about time to turn the answer into a short article, in hope to support all the beginner hobbyists out there…
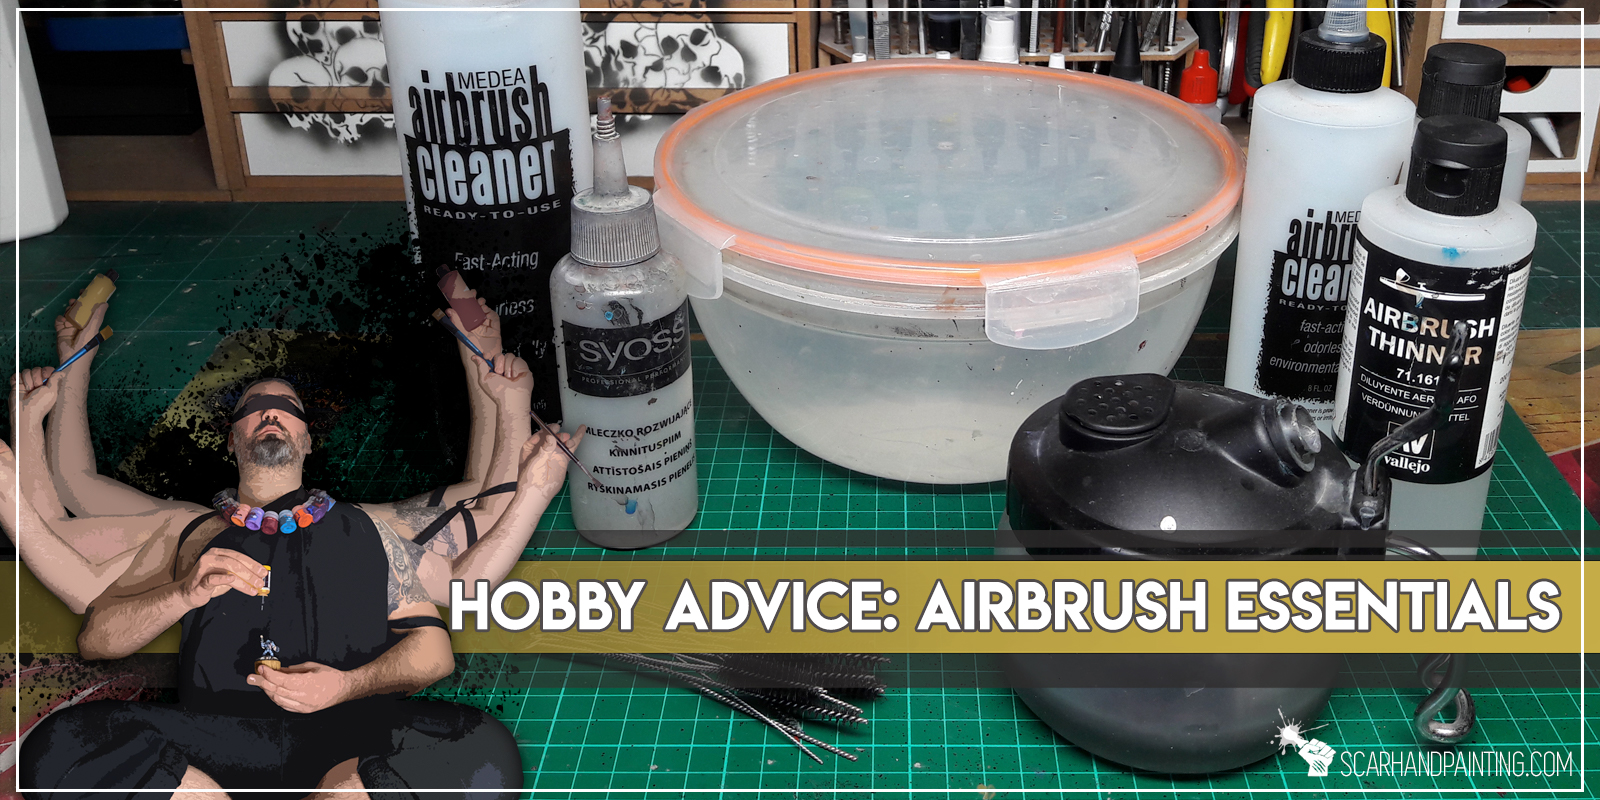
Assuming you’ve already picked an airbrush and a compressor, there’s still a list of items you should get before you’ll be able to start airbrushing. Let’s dive head on into the list of necessary items…

Air hose is used to link the airbrush with compressor. When picking an air hose it is important to check which models of airbrush / compressors it’s fitting is compatible with. The easiest way is to simply contact a store and ask them to recommend an air hose compatible with types of fitting of your airbrush / compressor.

In case your airbrush has different type of fitting than the compressor, you will also require an Adapter, or a Multi Way Valve Assembly with a proper type of connection. Take a look at E-Bay to see how many different types of fitting there are…

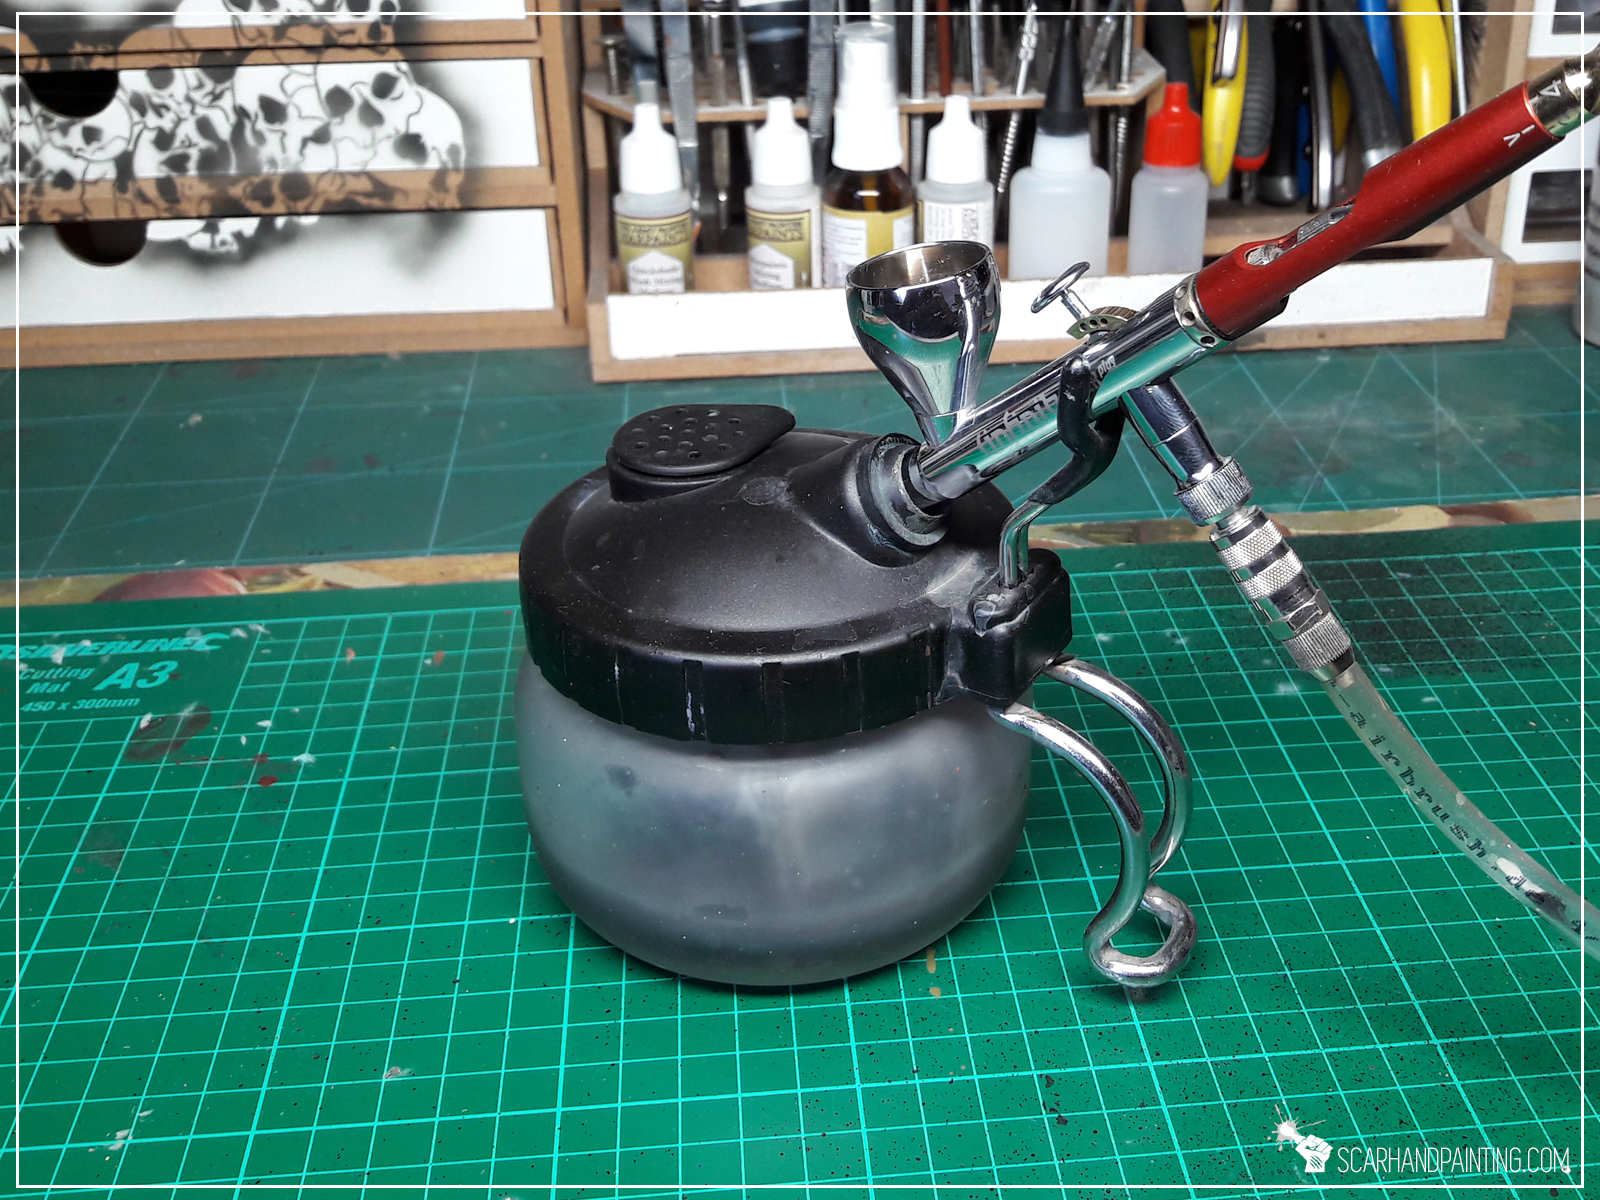
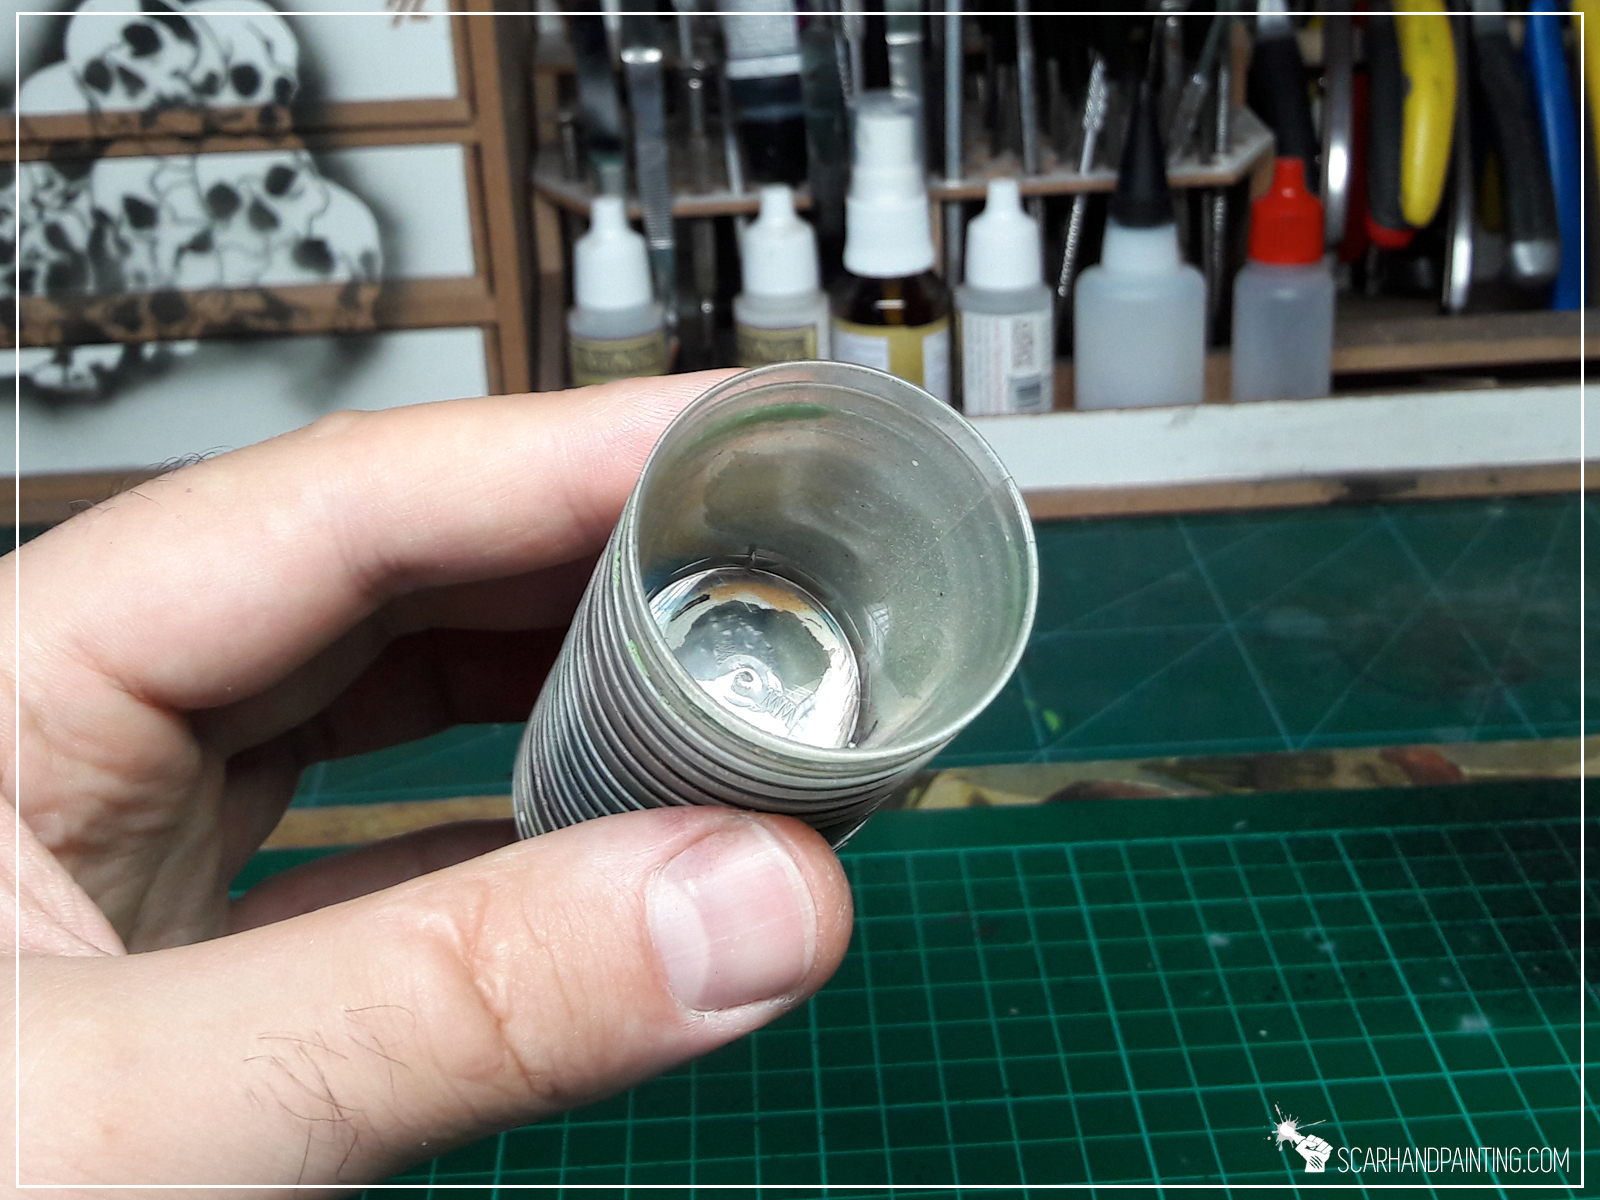
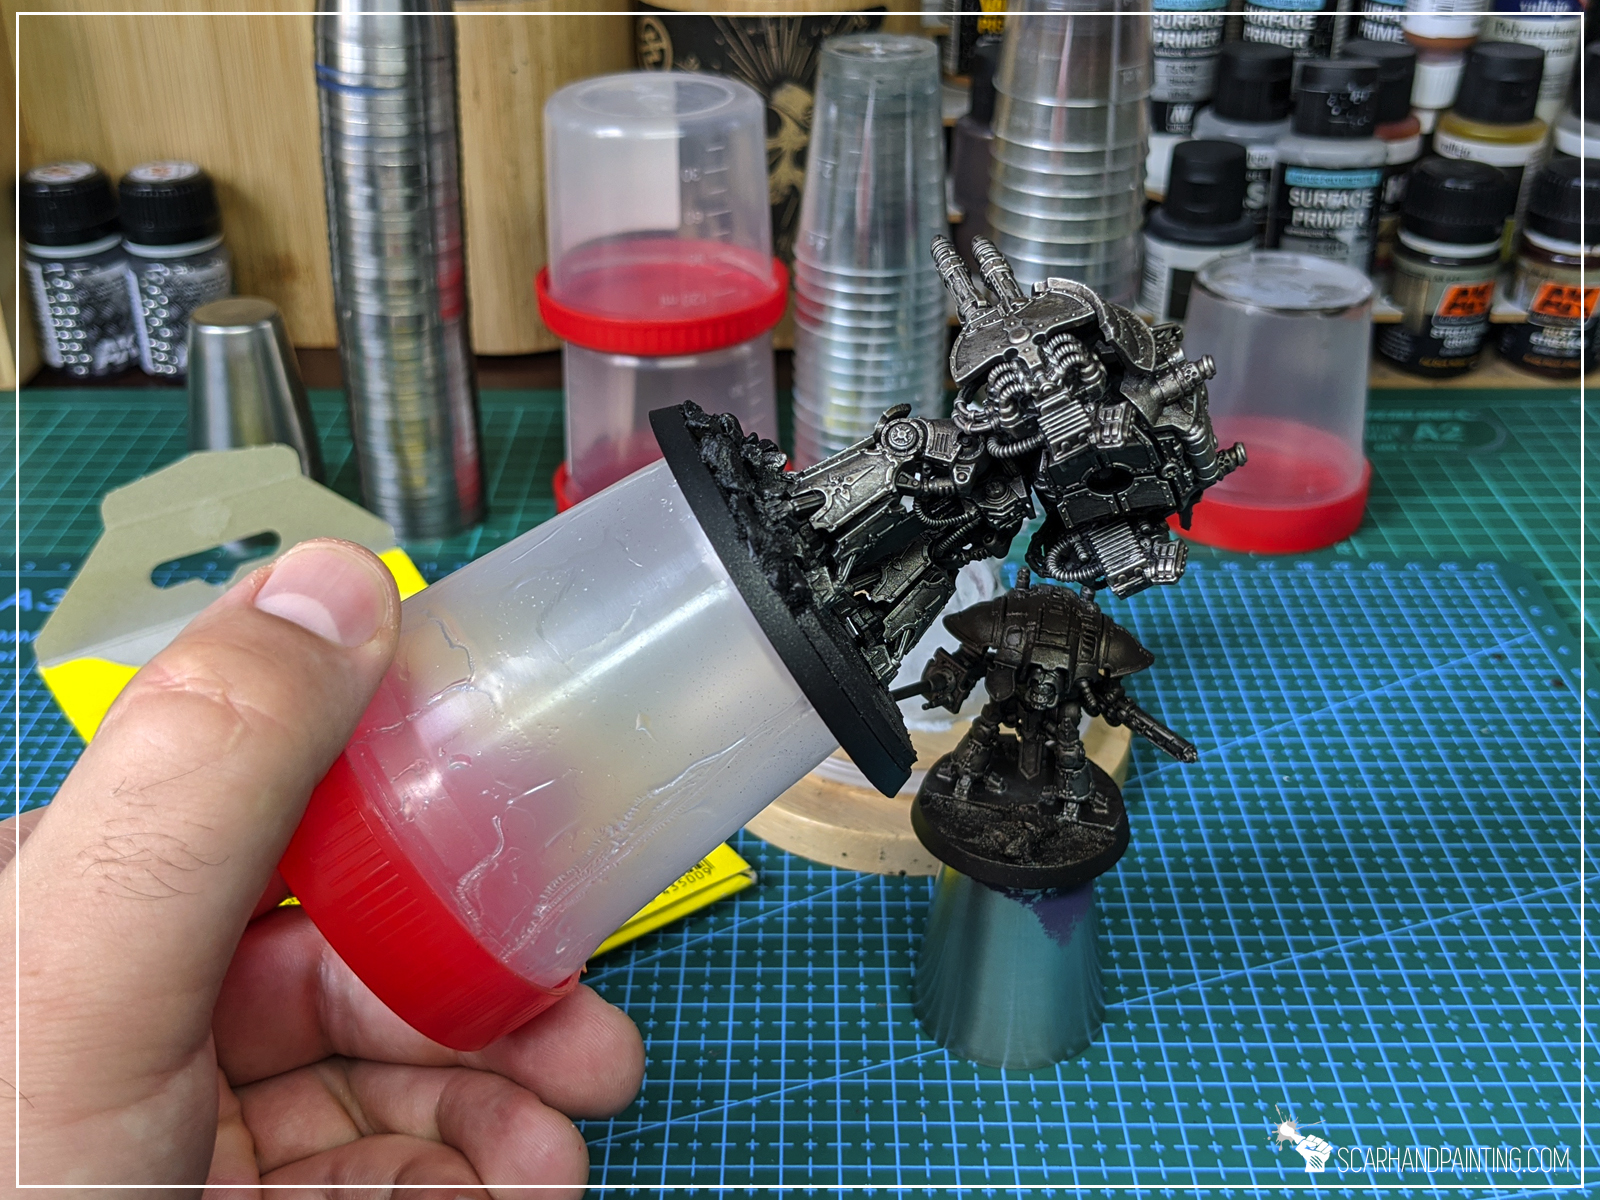
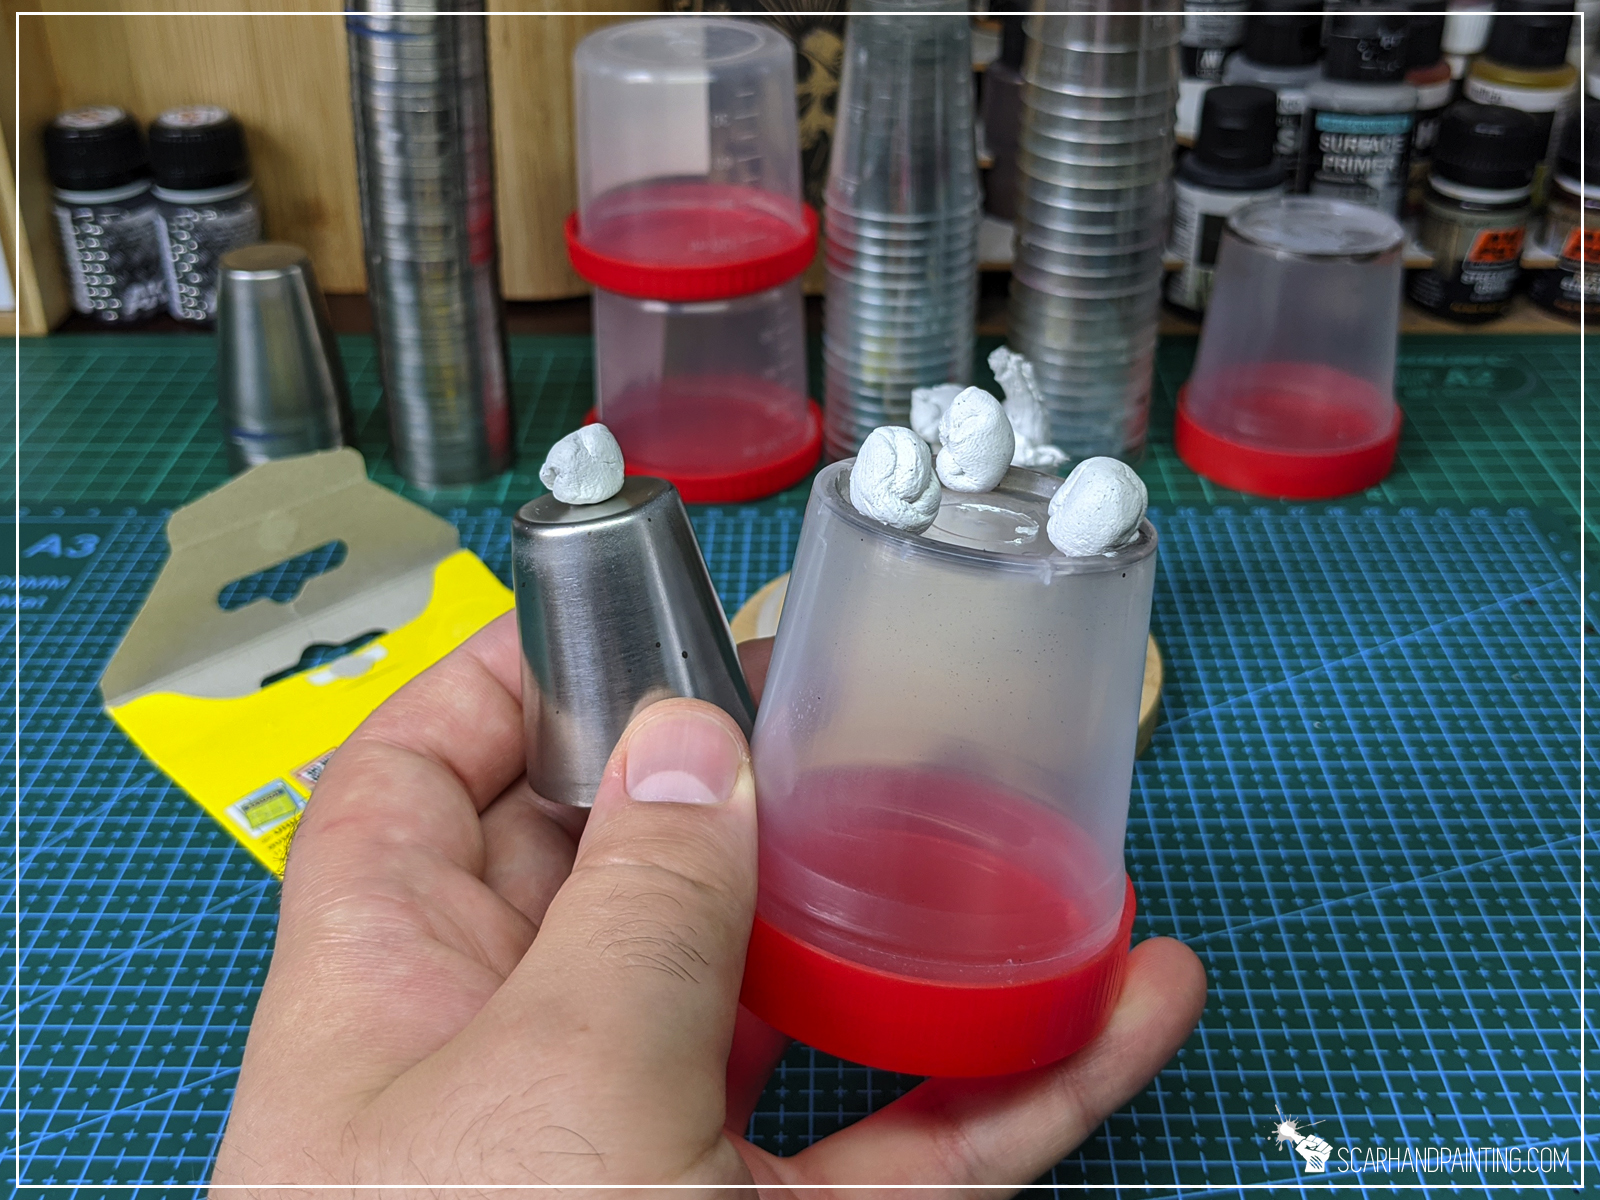
A filter equipped spray out airbrush pot and an airbrush holder (preferably 2 in 1 like below) are also necessary. Thanks to these you will have an option to rest the airbrush on a holder in-between different activities (like mixing paints, or even resting for a bit). Spray out airbrush pot will also keep the majority of paint waste contained in an easy to clean glass pot.

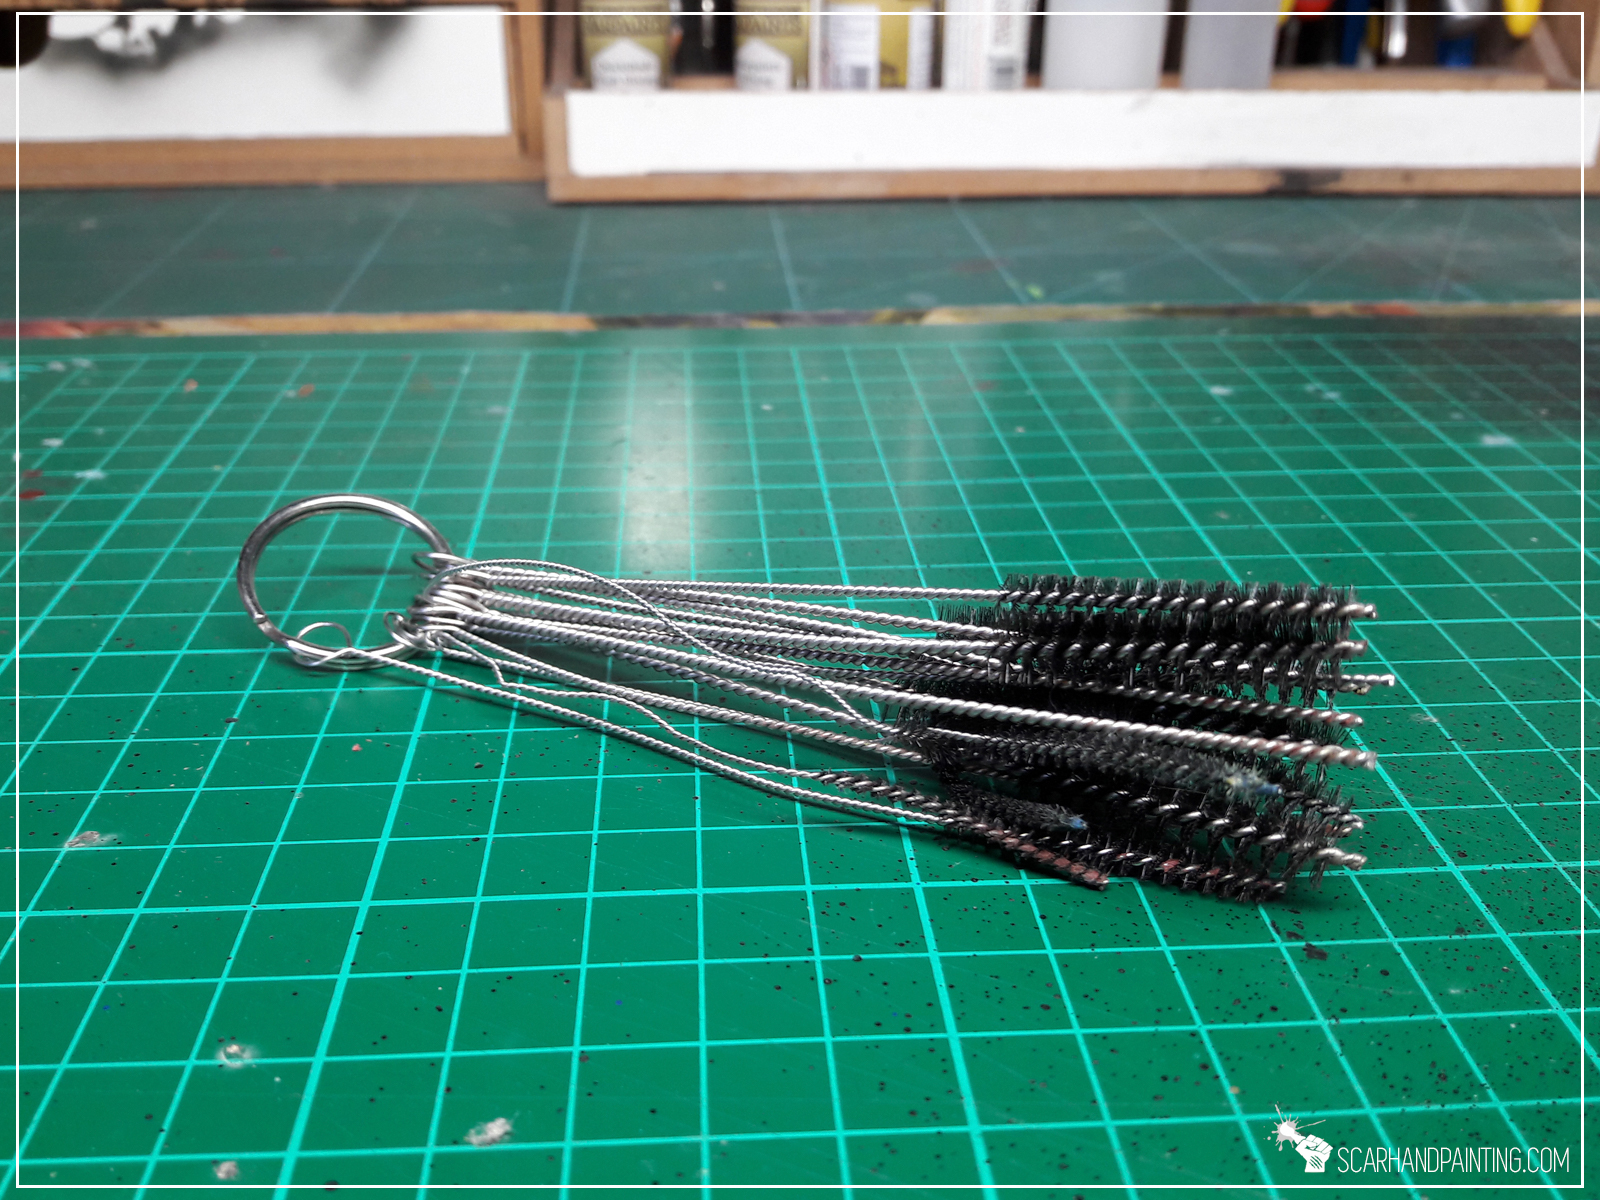
You will use these too clean up the insides of your airbrush.
You will use this tool to clean up the nozzle. When picking one, make sure it is recommended for the type of nozzle of your airbrush. Too large tool may damage the nozzle from the inside.
Example: ALDER tool (top) damages H&S nozzles! H&S tool (bottom) is perfect for H&S nozzles

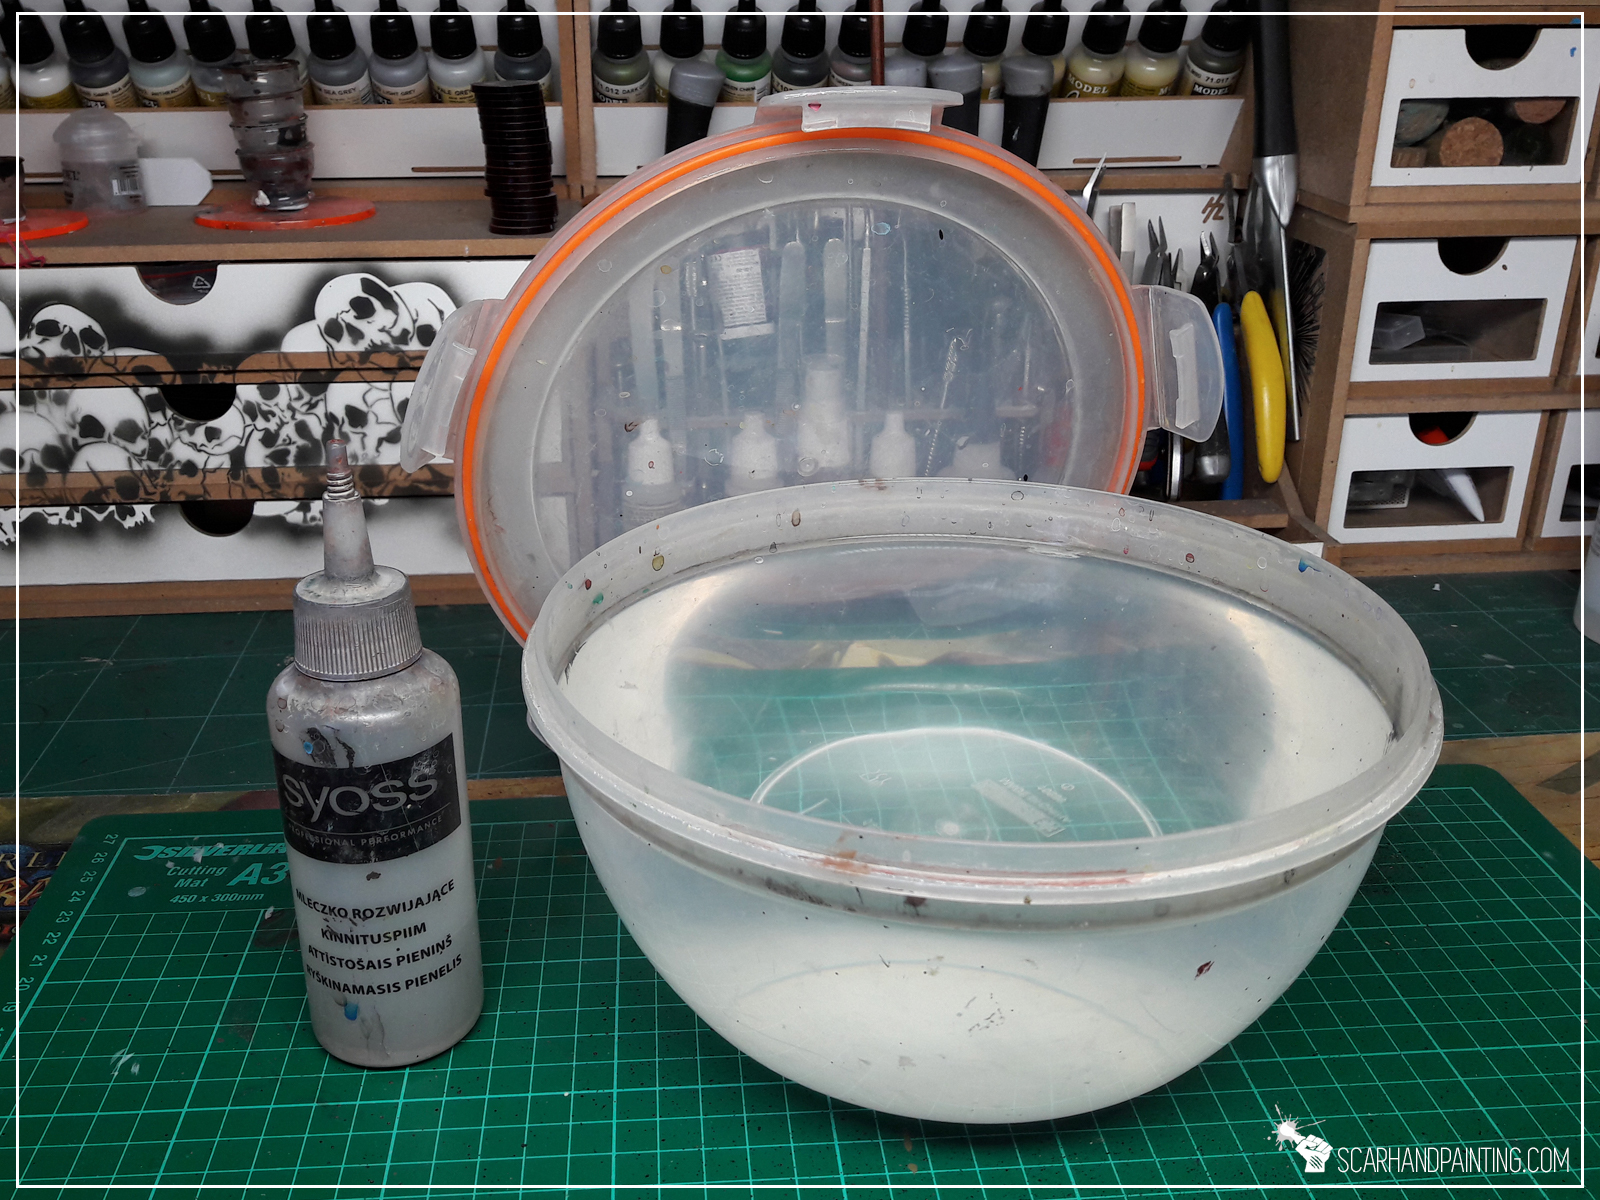
You will use this duo to remove the excess paint from your airbrush without the need to spray it all out.
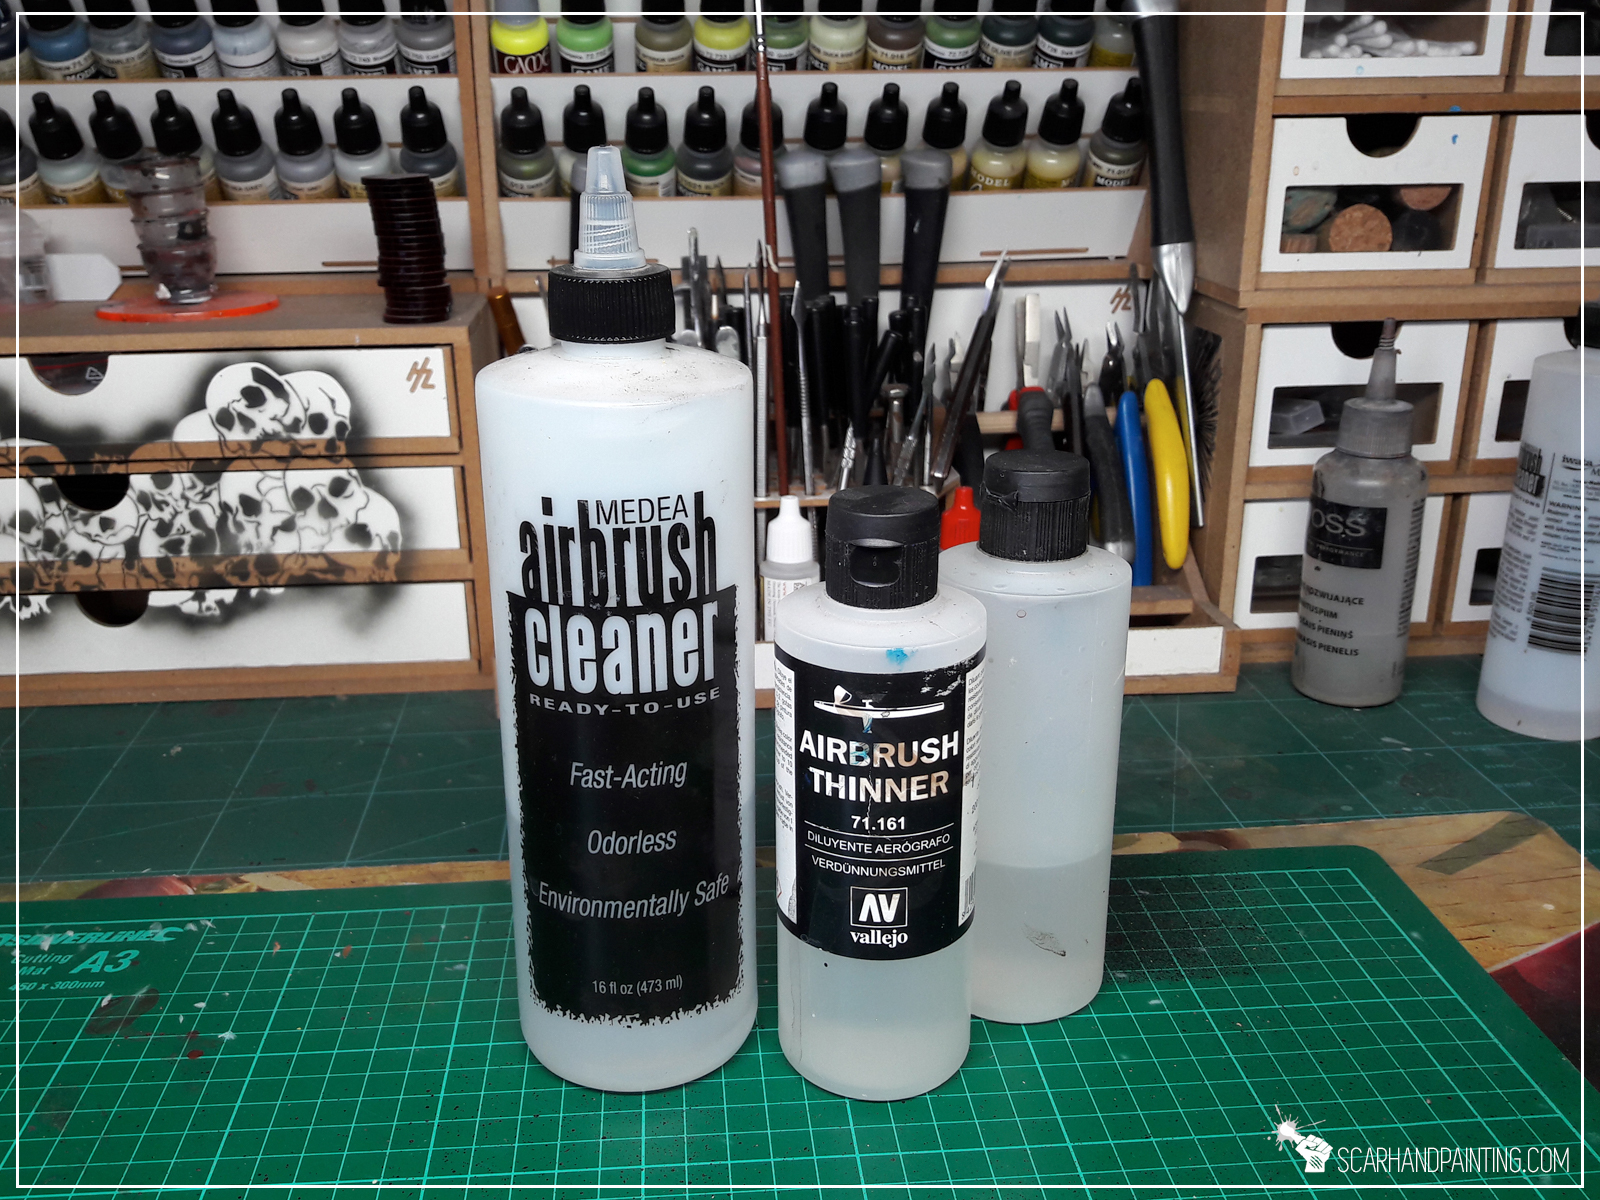
Airbrush Cleaner, Airbrush Thinner and Airbrush Flow Improver – these three liquids are a must have.
Below are some additional items that while not necessary, will come in handy once you start airbrushing your way to hobby glory.
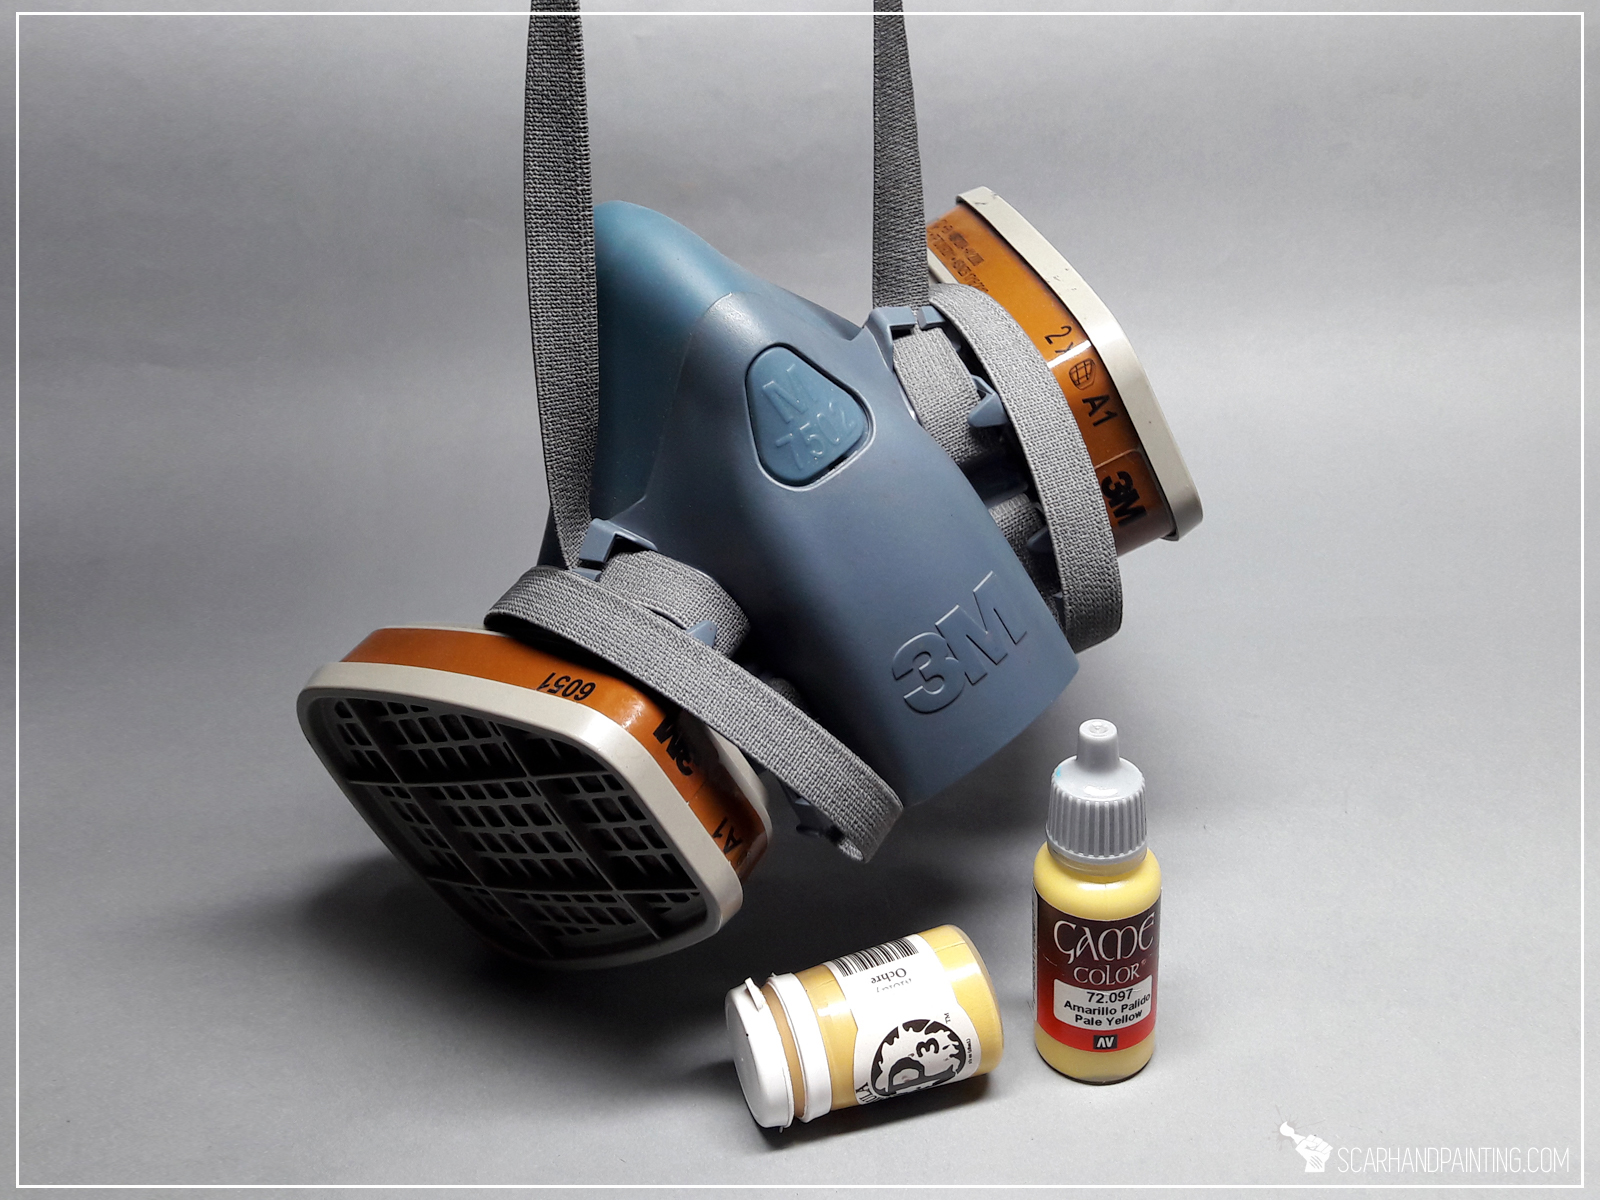
Unless you’re ok with lung damage, wearing a proper mask while airbrushing, is in order. With this one it is recommended to aim high, pick a high quality tool with strong filters – better safe than sorry.
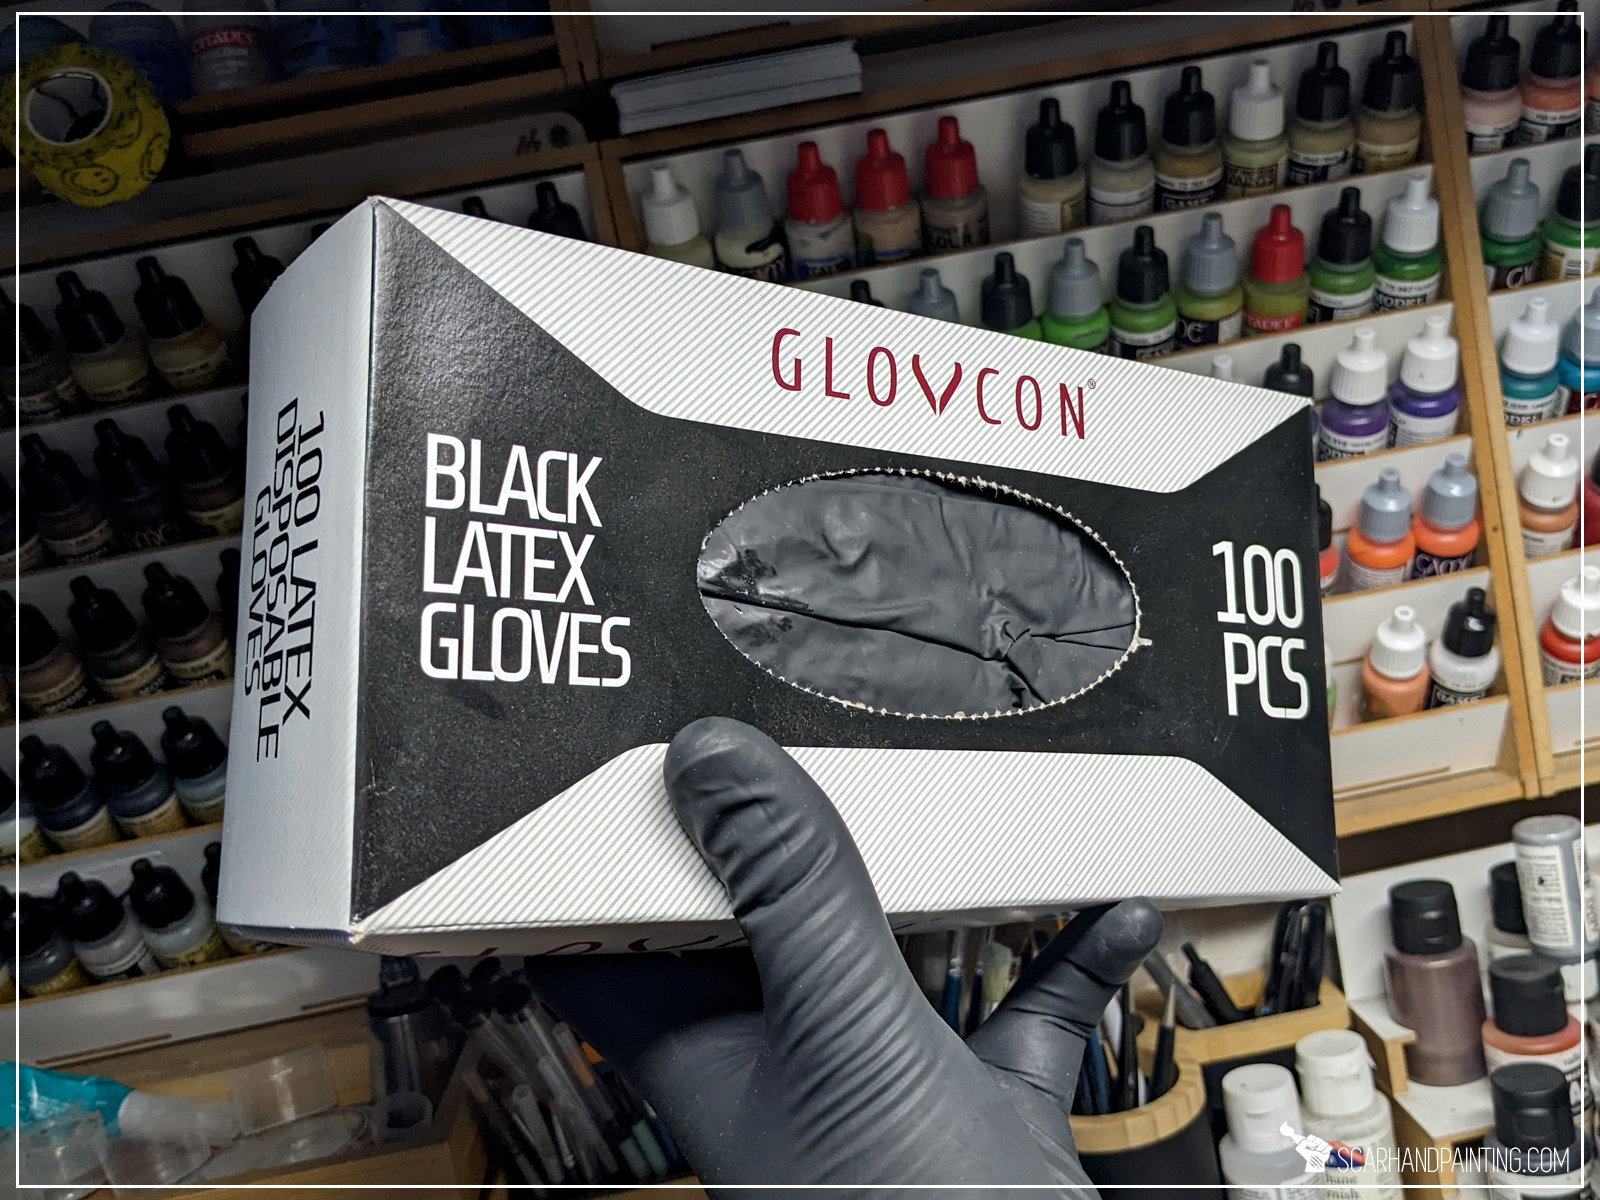
Protective latex gloves, while not essential, will help you keep your skin clean and healthy. Extensive airbrushing might lead to skin getting dry and irritated.
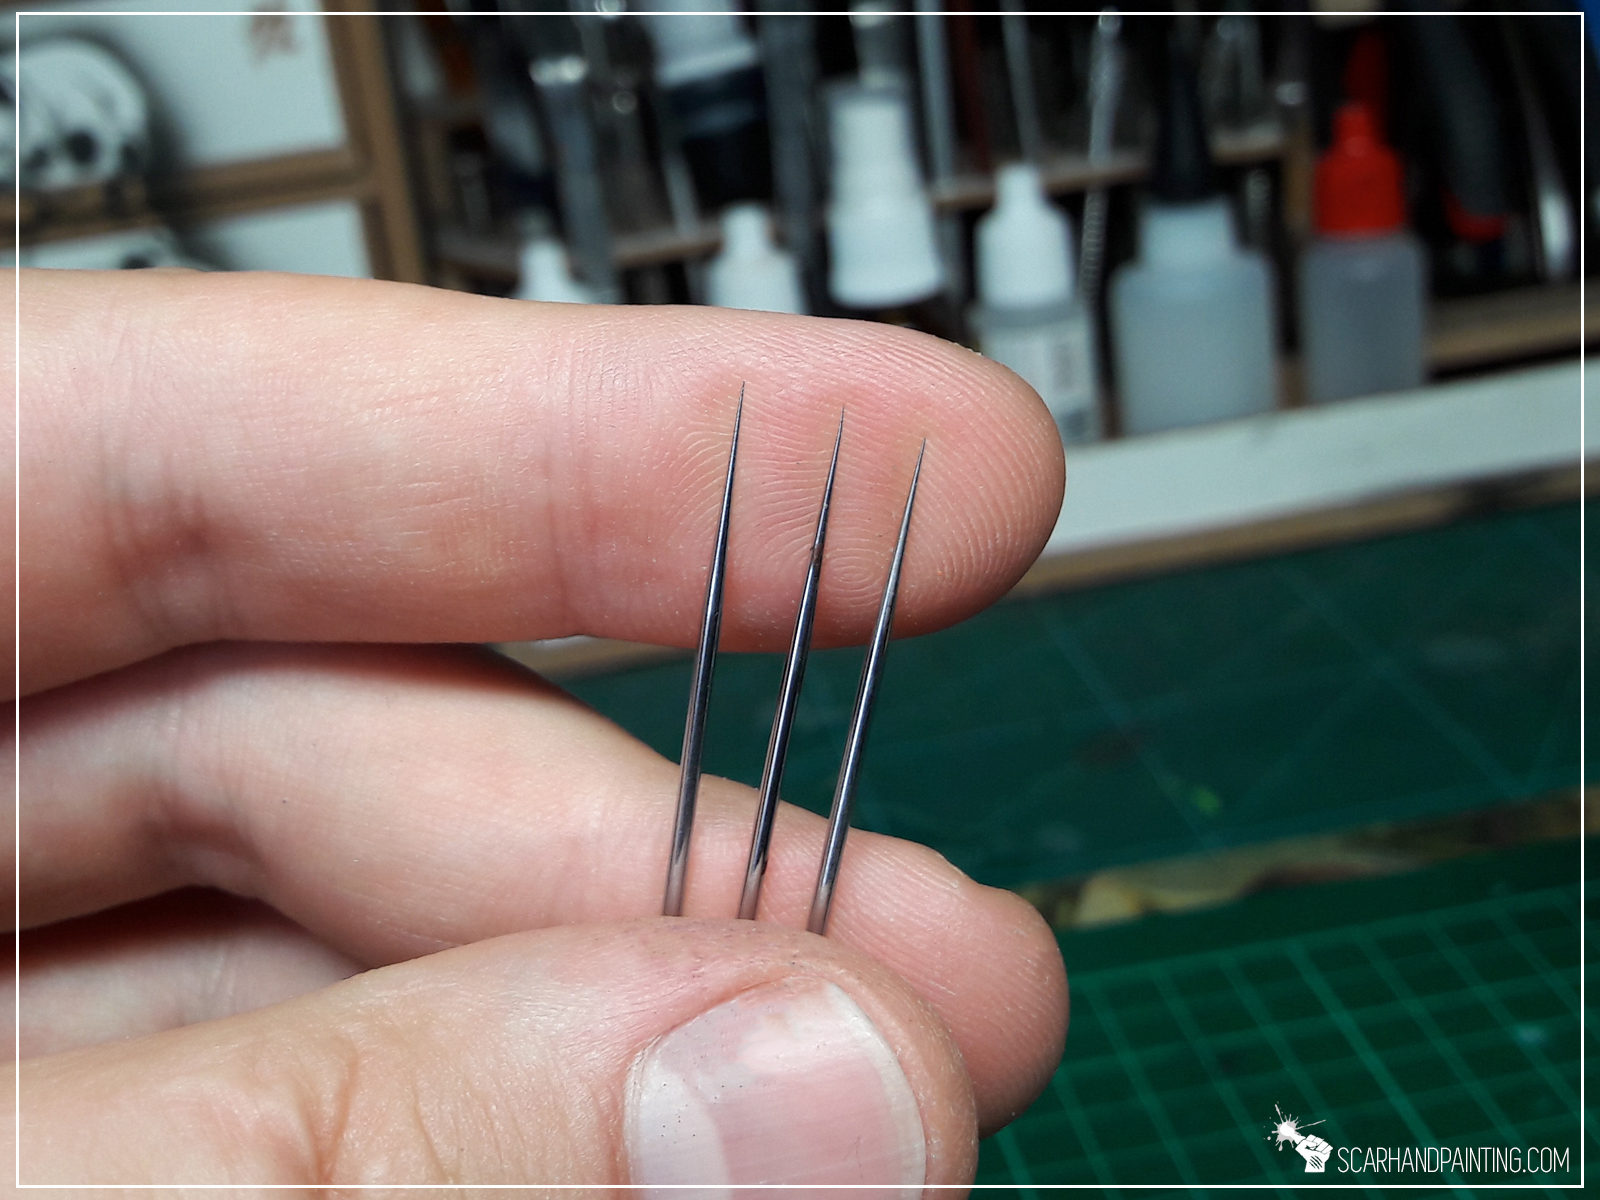
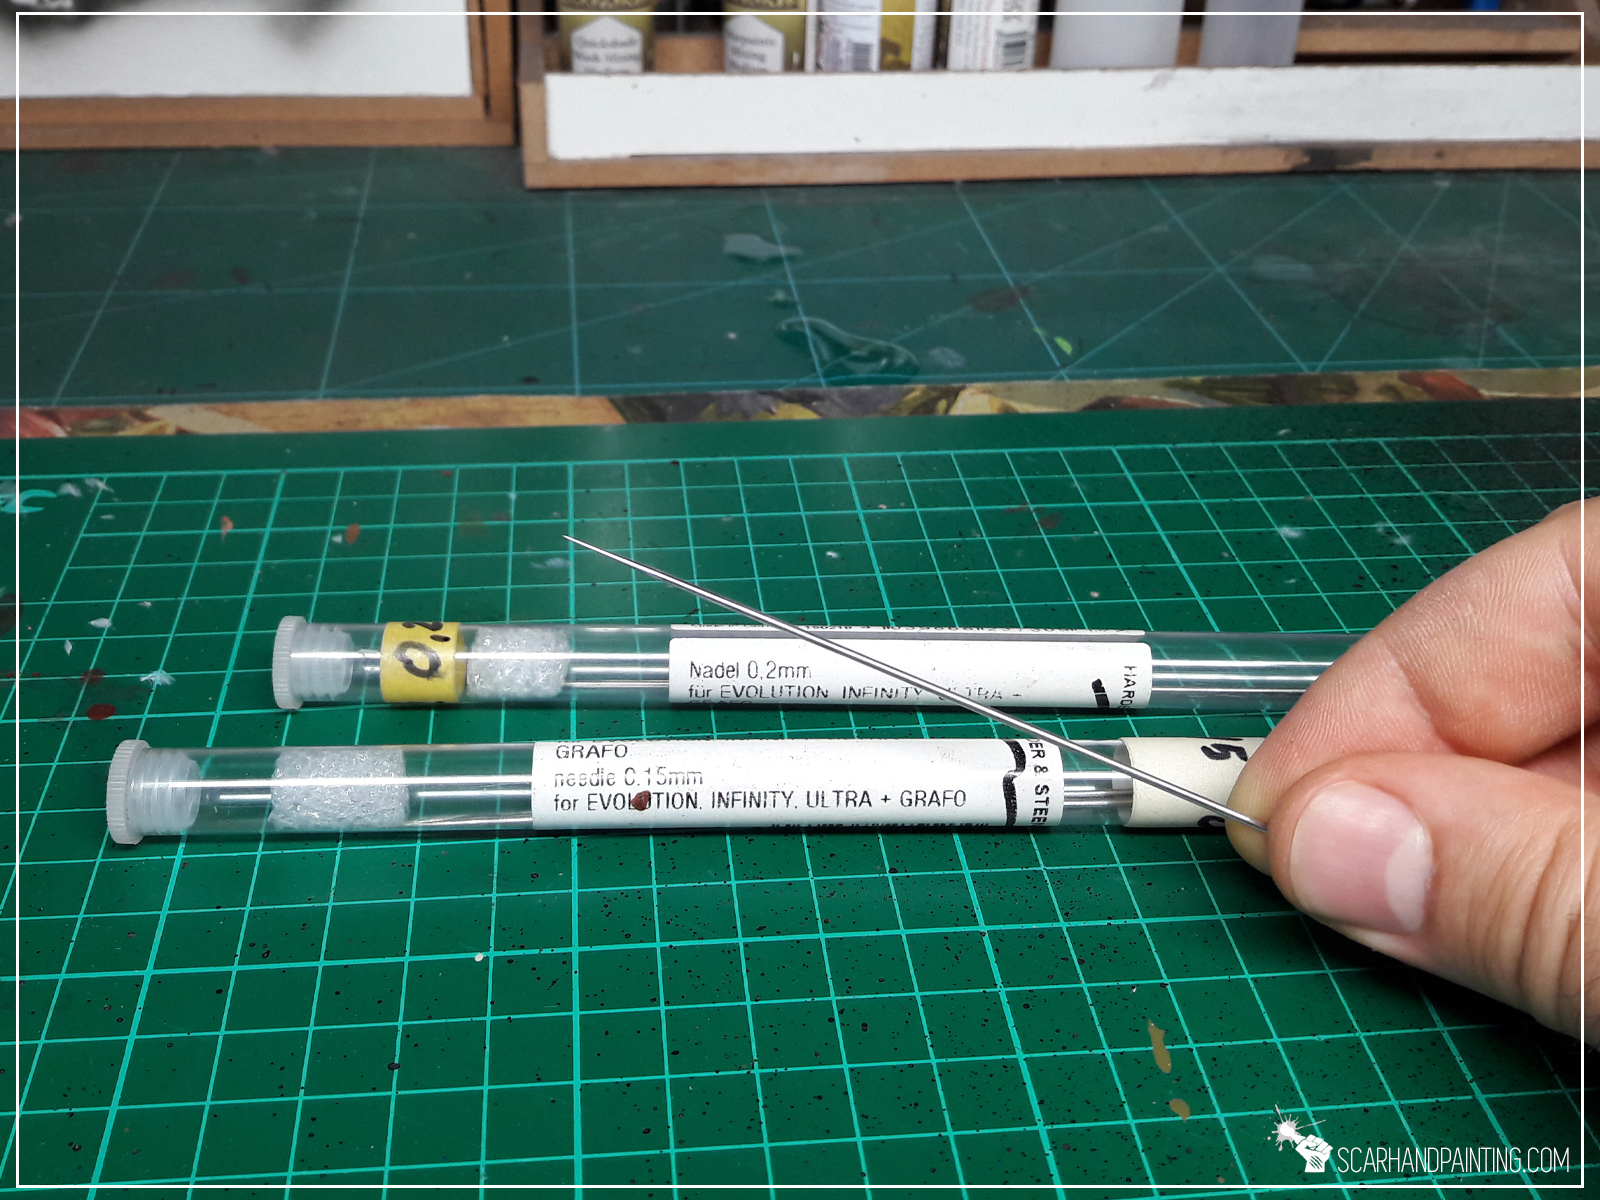
Airbrush needle is very delicate. A vast majority of beginners damage the needle during first few days of airbrush adventure. I advise you to get a spare needle outright, just in case.
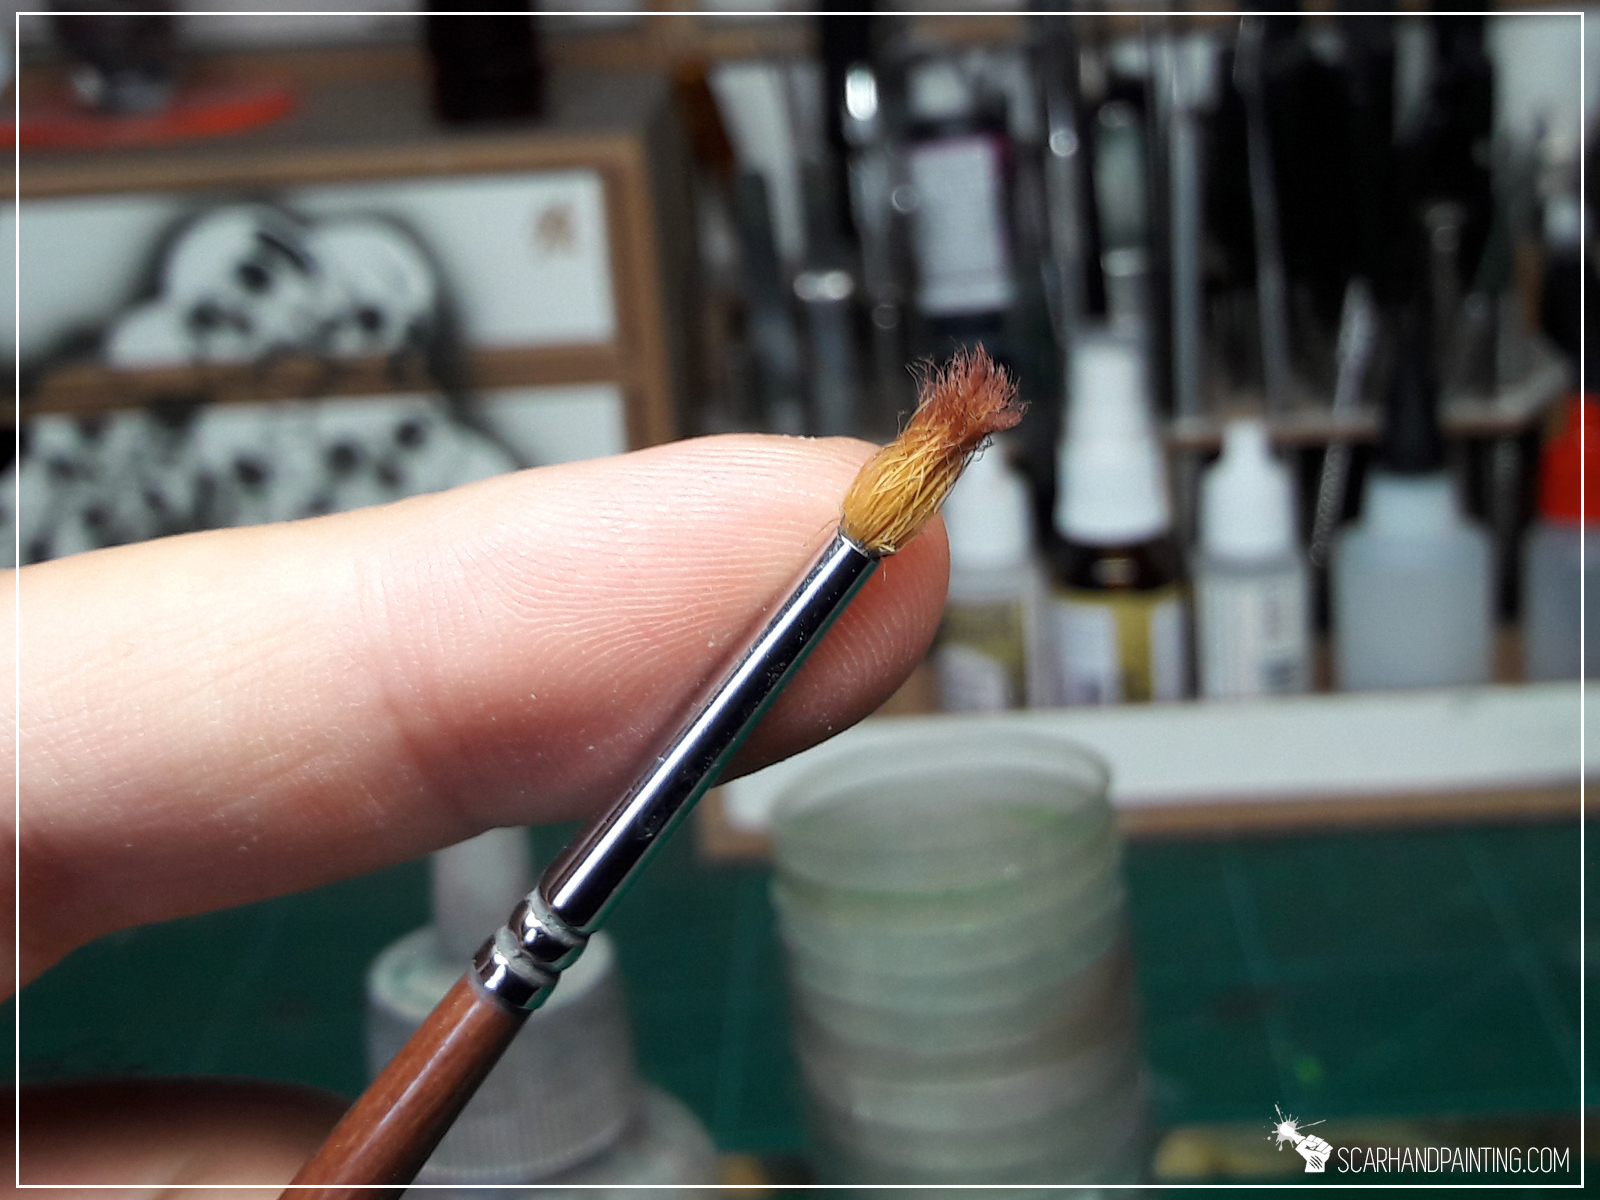
Long hair, medium size, round brush to remove excess paint from the tip of the needle without the need to dismantle entire airbrush.
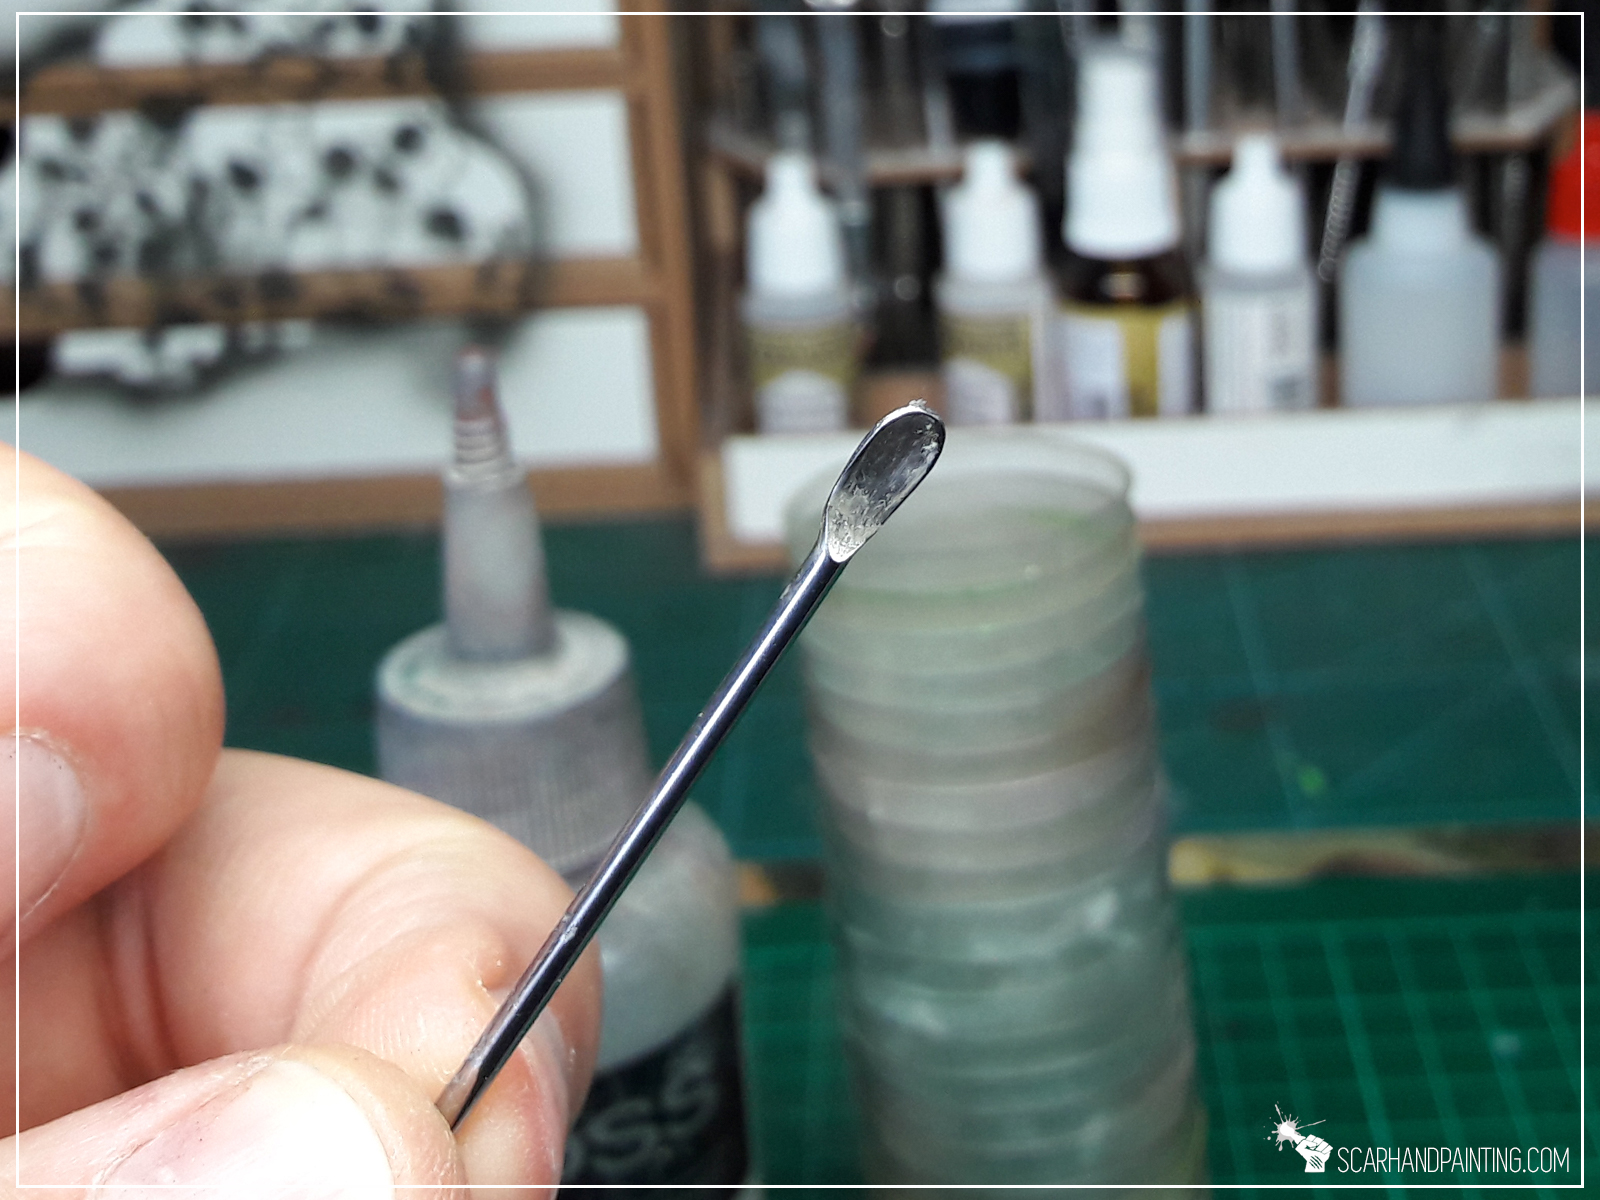
You might use these to mix paints before pouring them into the cup on top of an airbrush to avoid clods of paint to get inside.
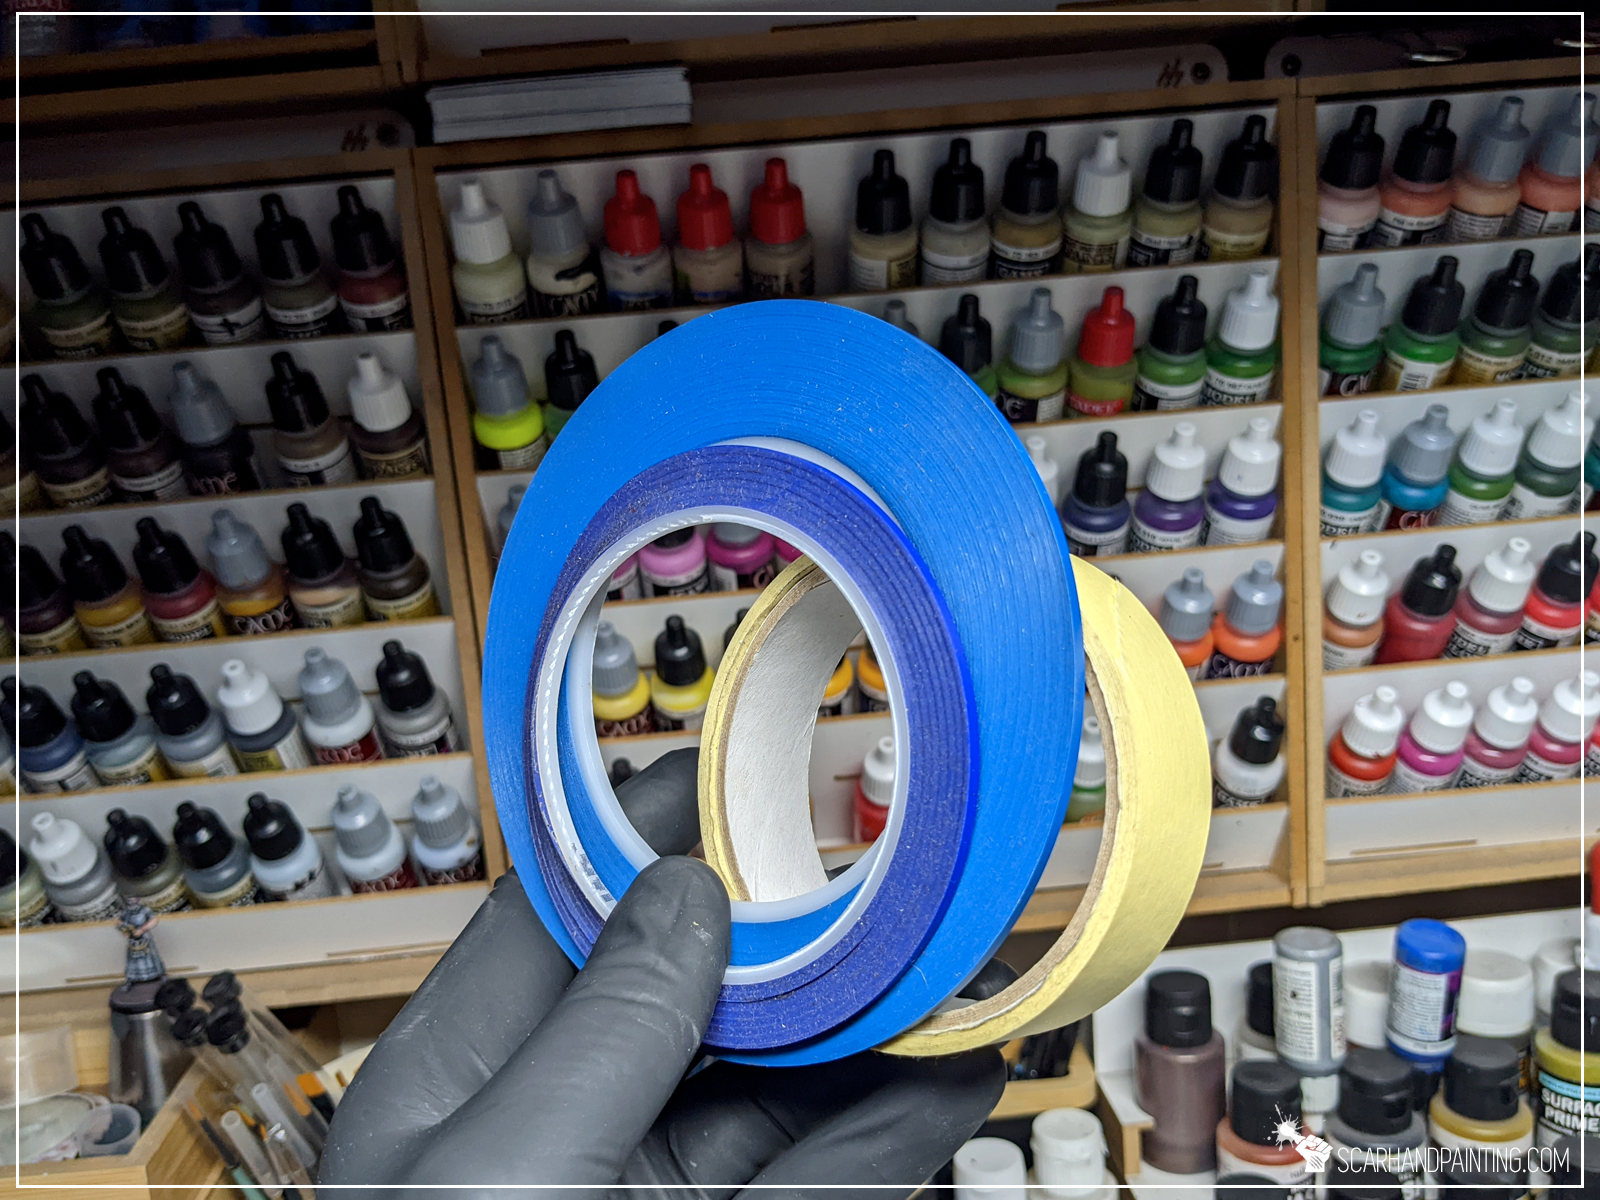
Not really an essential, but a very useful tool to help you with avoiding overlapping paint on some areas.
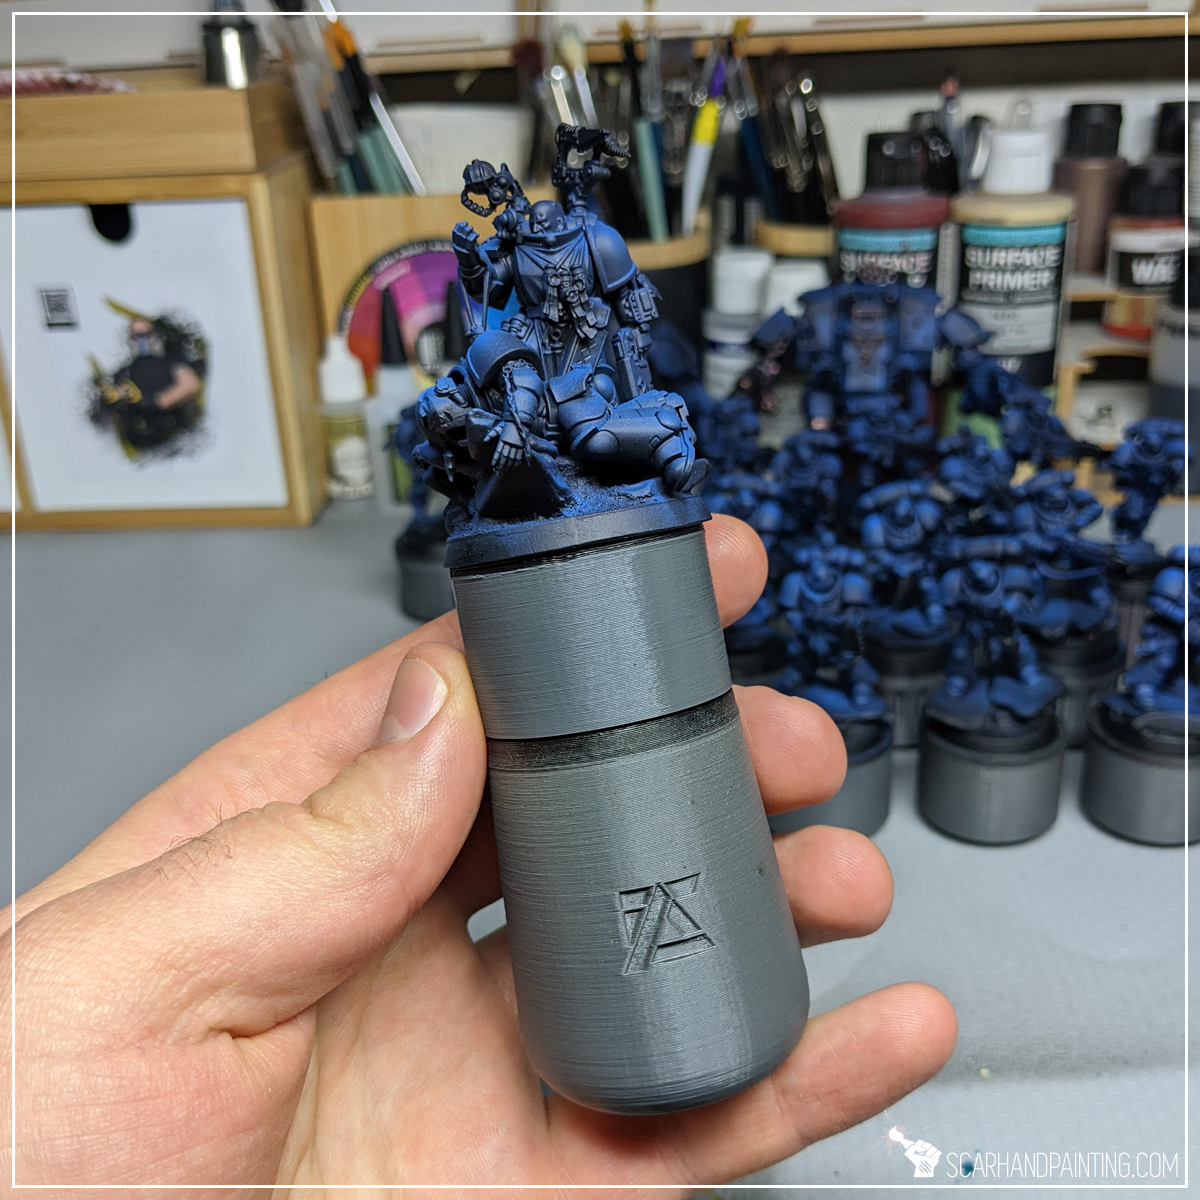
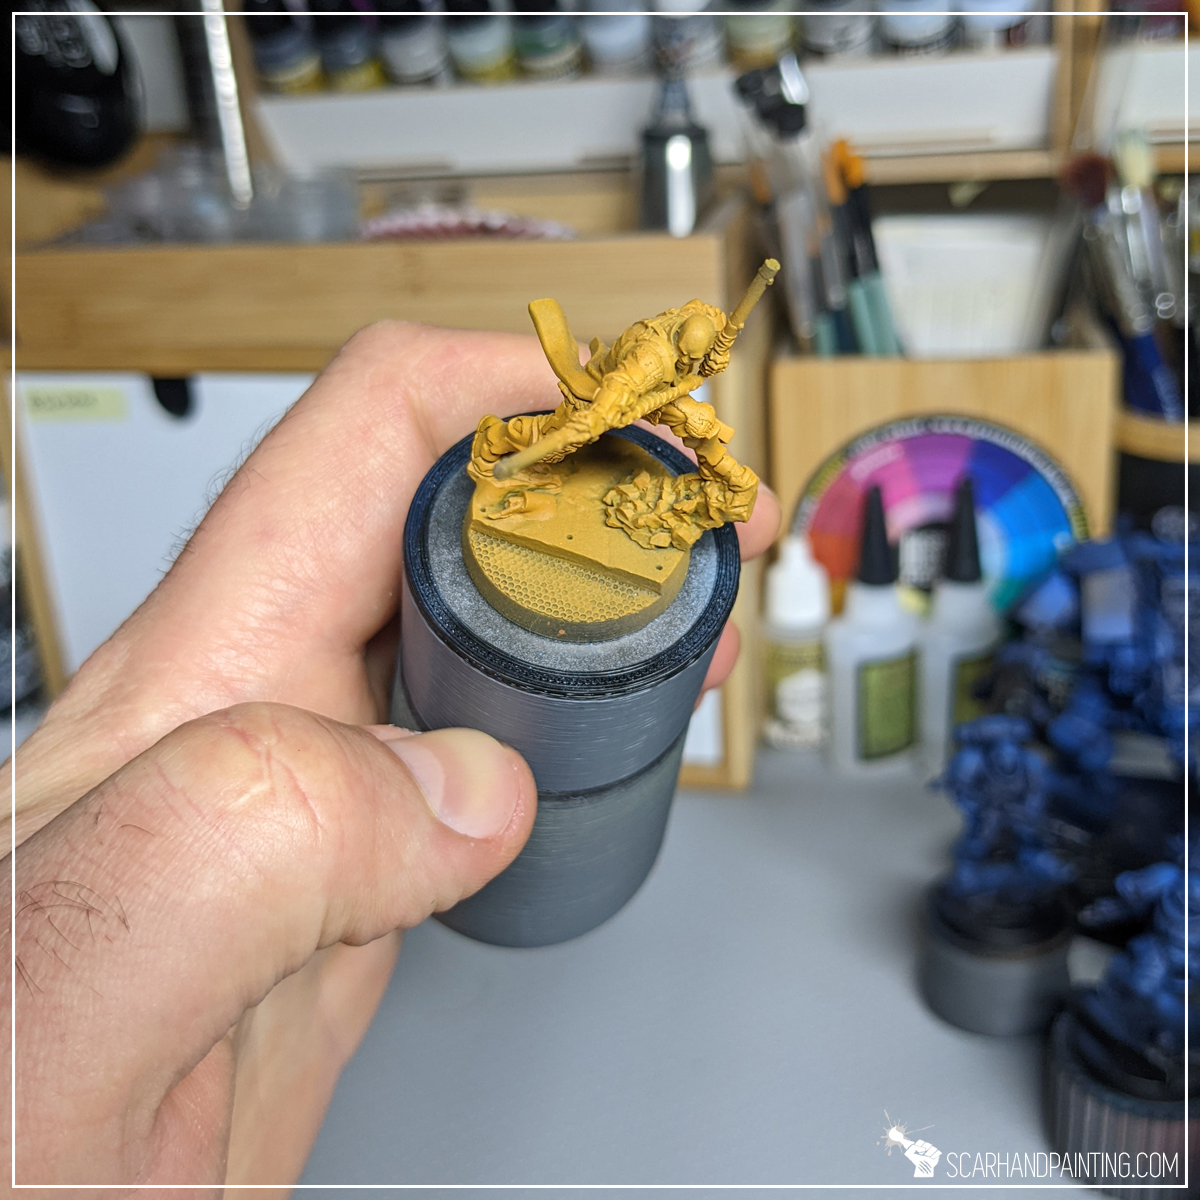
This can be anything between an original painting holder and a sole small cup with a ball of Blu Tack mounted on the underside. Such tool will let you airbrush without fear of messing up the paint job with your fingers. Plus it is just a very comfortable way of painting miniatures.
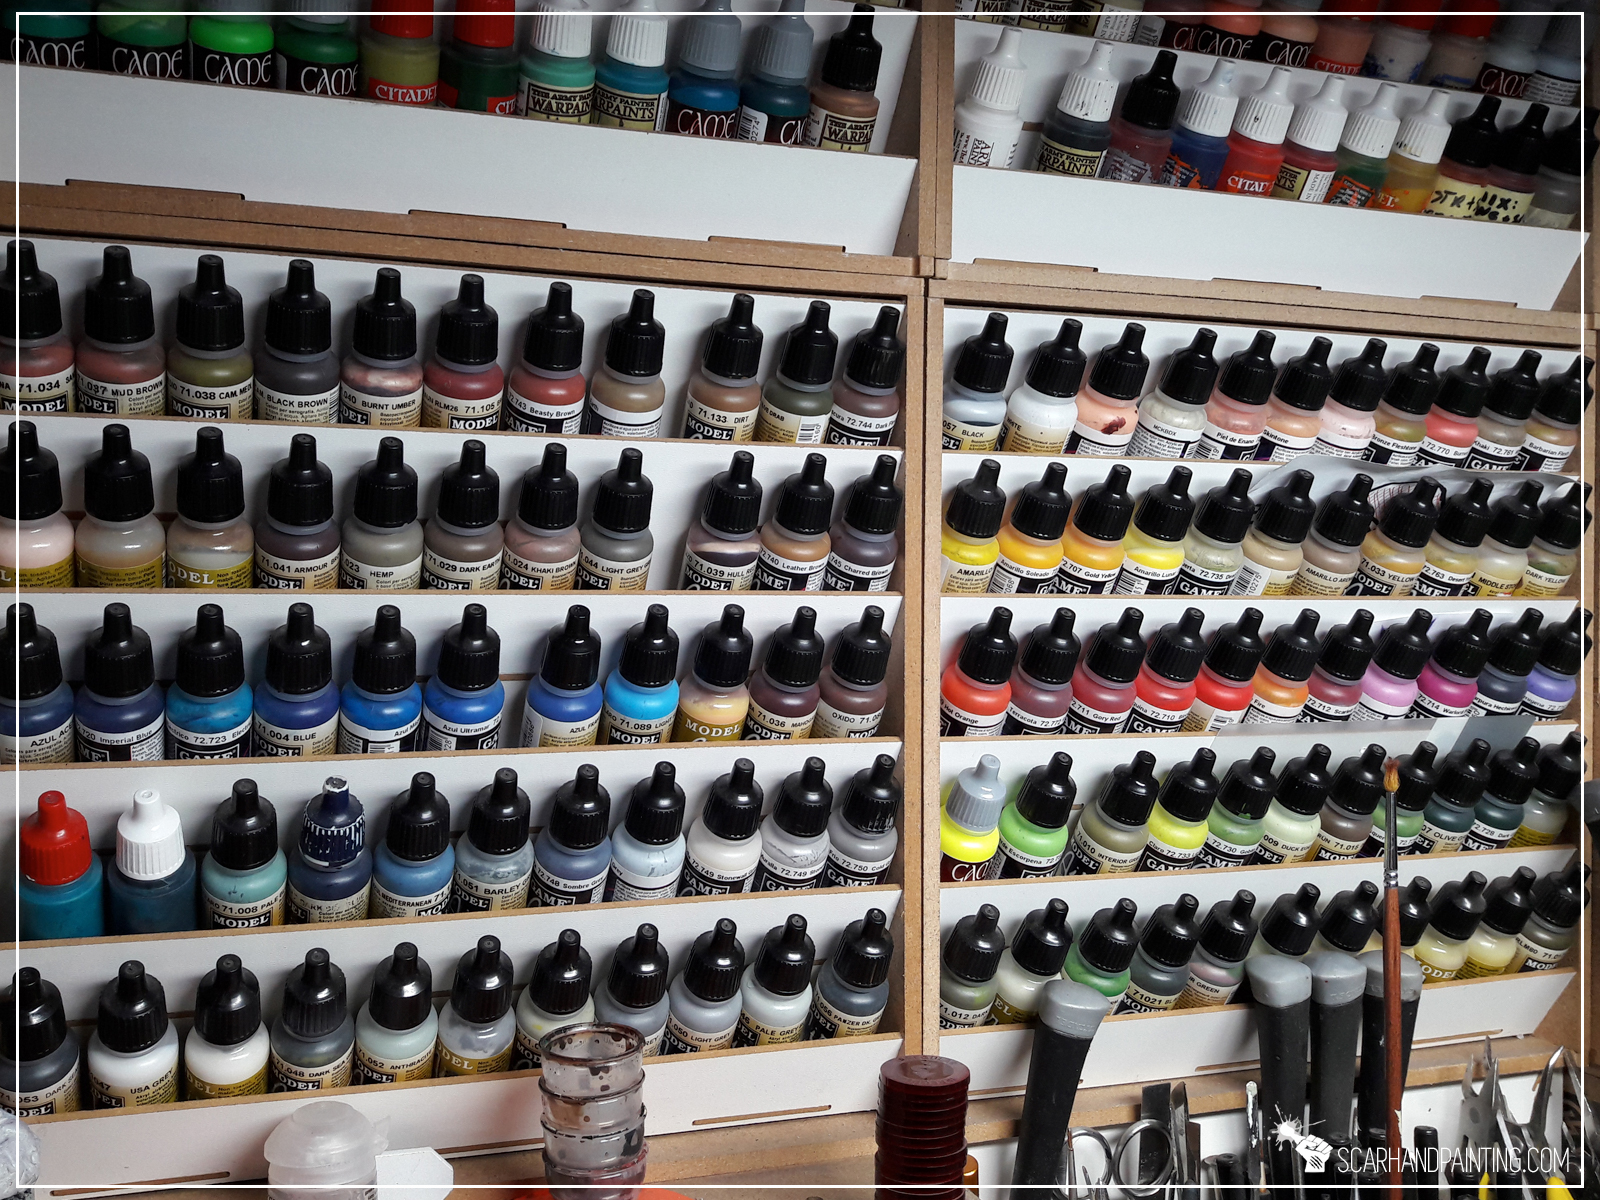
Obviously you will require paints. It is not necessary to get any type of special airbrush paints. Thanks to Flow Improver and Thinner regular paints will do, but that’s a story for another article. Personally I wholeheartedly recommend Vallejo Air series as I find them ready to use straight out of bottle.

Thanks for reading. If you think I skipped a necessary or useful item that a beginner airbrush users should get, let me know in the comments section or via Facebook or Instagram. I would also appreciate if you considered sharing this content with your friends, who might find it useful. Finally if you are looking for a professional miniatures painting service, be sure to contact me with this contact form. I always reply within 24 hours, after which please check out your spam folder.
During my long hobby journey I worked with a lot of HDF laser cut terrain. Many projects I was engaged with were not limited to products of a single company, thus I will speak from experience when I tell you that practically all HDF laser cut terrain shares a single flaw: Laser cut edges are scorched and that leads to the edge surface not being suitable for light color undercoat. Below I will show you a simple way to prepare HDF scenery for light color undercoat.

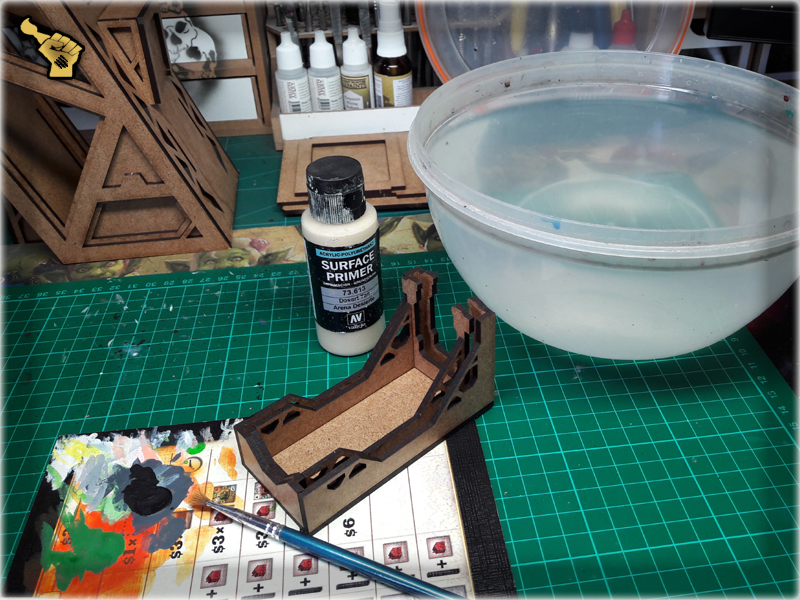
I picked Vallejo Desert Tan Surface Primer for two reasons. First it is a light, sandy color – compatible with light colors that I will be using afterwards, when trying to achieve a smooth white color of the scenery piece. Secondly, due to the paint being Acrylic-Poliurethane mix, which makes it fill any irregularities in the surface and still dry out into a solid, smooth layer.
* Step one: I mixed Desert Tan paint 3:1 with water to make it easier to apply.
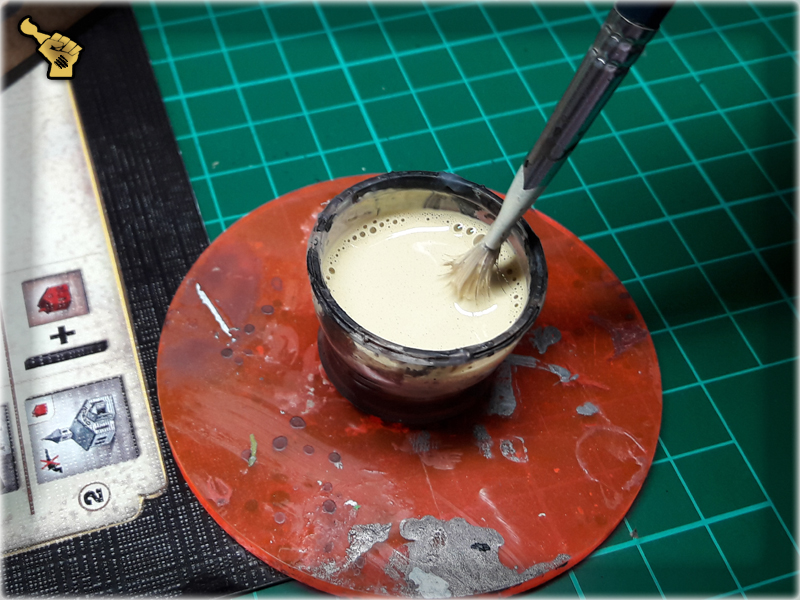
* Step two: I applied the mix onto the HDF edge surfaces with an old, large brush.

* Step three: I removed the excess paint from the sides of the HDF and applied it to the largest edge areas.

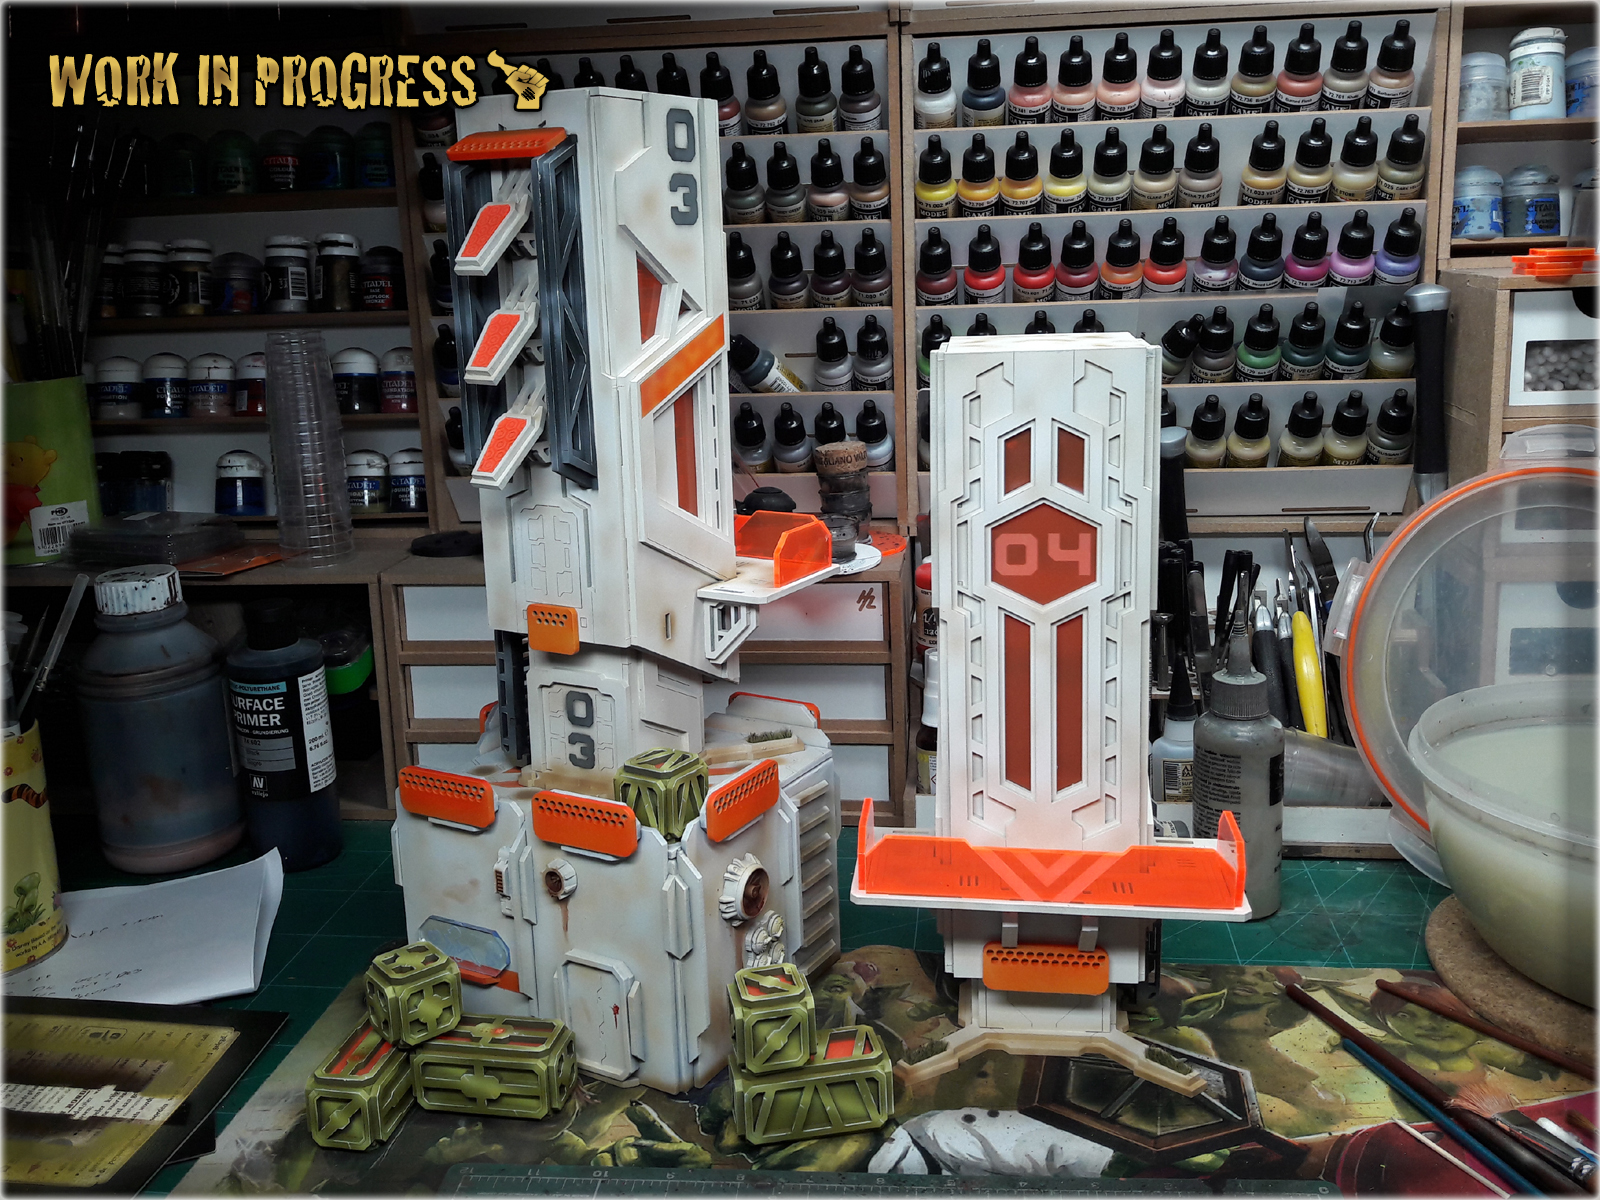
Once dried up, it looked like this. Kind of messy, but it totally disappears after proper undercoat, leaving both the edges and the sides smooth…

Here’s the same piece after one layer of Vallejo Desert Tan airbrushed all over it. Smooth…

And examples of finished scenery…
Hope this one is helpful. If you have your own methods of preparing HDF before undercoating – please drop me an e-mail at contact@scarhandpainting.com – I would love to learn new hobby stuff 🙂

Every year I try to put painting miniatures aside, even if just for a bit, to bring to you a Battle Report. Infinity the Game is still my favorite miniatures game and once again I participate in a yearly online campaign. Keeping the story short – it’s that time of the year and to uphold to tradition – I’m back with this year’s Infinity the Game Battle Report. (Apologies to all those who have no idea about Infinity and it’s lore).


After berely surviving ALEPHS incursion at Wotan blokade the Dong Peyote repurposed freighter fled to deep space for vital repair. It took a year to fix the ship, during which it’s crew kept a low profile, gathering reasources necessary to rejoin Nomad military operations. Couple of weeks ago DeePee’s long range radio scanner picked up a call for help from Johhny-5 Arachne Node, based on planet Dawn. The ship and it’s crew burned their engines dry to finally arrive at planet Dawn just in time. Battered yet unbroken, Dong Peyote entered the atmosphere of Dawn using a meteor shower to disquise it’s signature from Ariadna low-tech scanners, the same night as Vince McMahogany news of conflict erupting at Novyy Cimmeria shocked public media of the Human Sphere.
It was Zhàn Huó Firebase that picked Dong Peyote’s approach before it’s mighty load could be dropped at J-5 Node. To avoid being shot down, captain of the ship decided to fall back to low orbit. This did not sit well with the crew, eager to aid their Nomad brethren in defense of the node. Small elite squads were formed and then dropped over entire island in assault pods. Each squad was to carry it’s own mission, to then converge at the J-5 node, all the while Dong Peyote would support them from orbit…
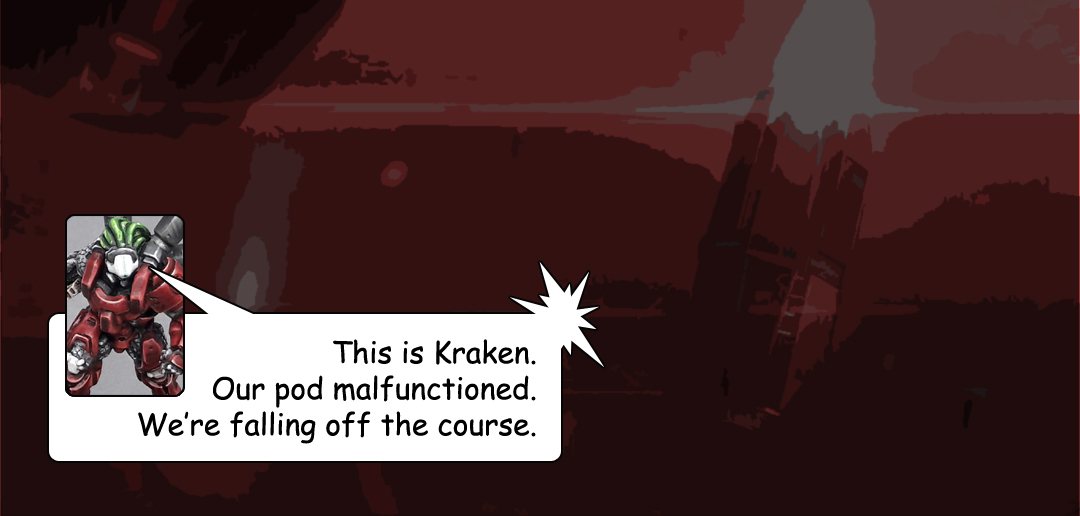
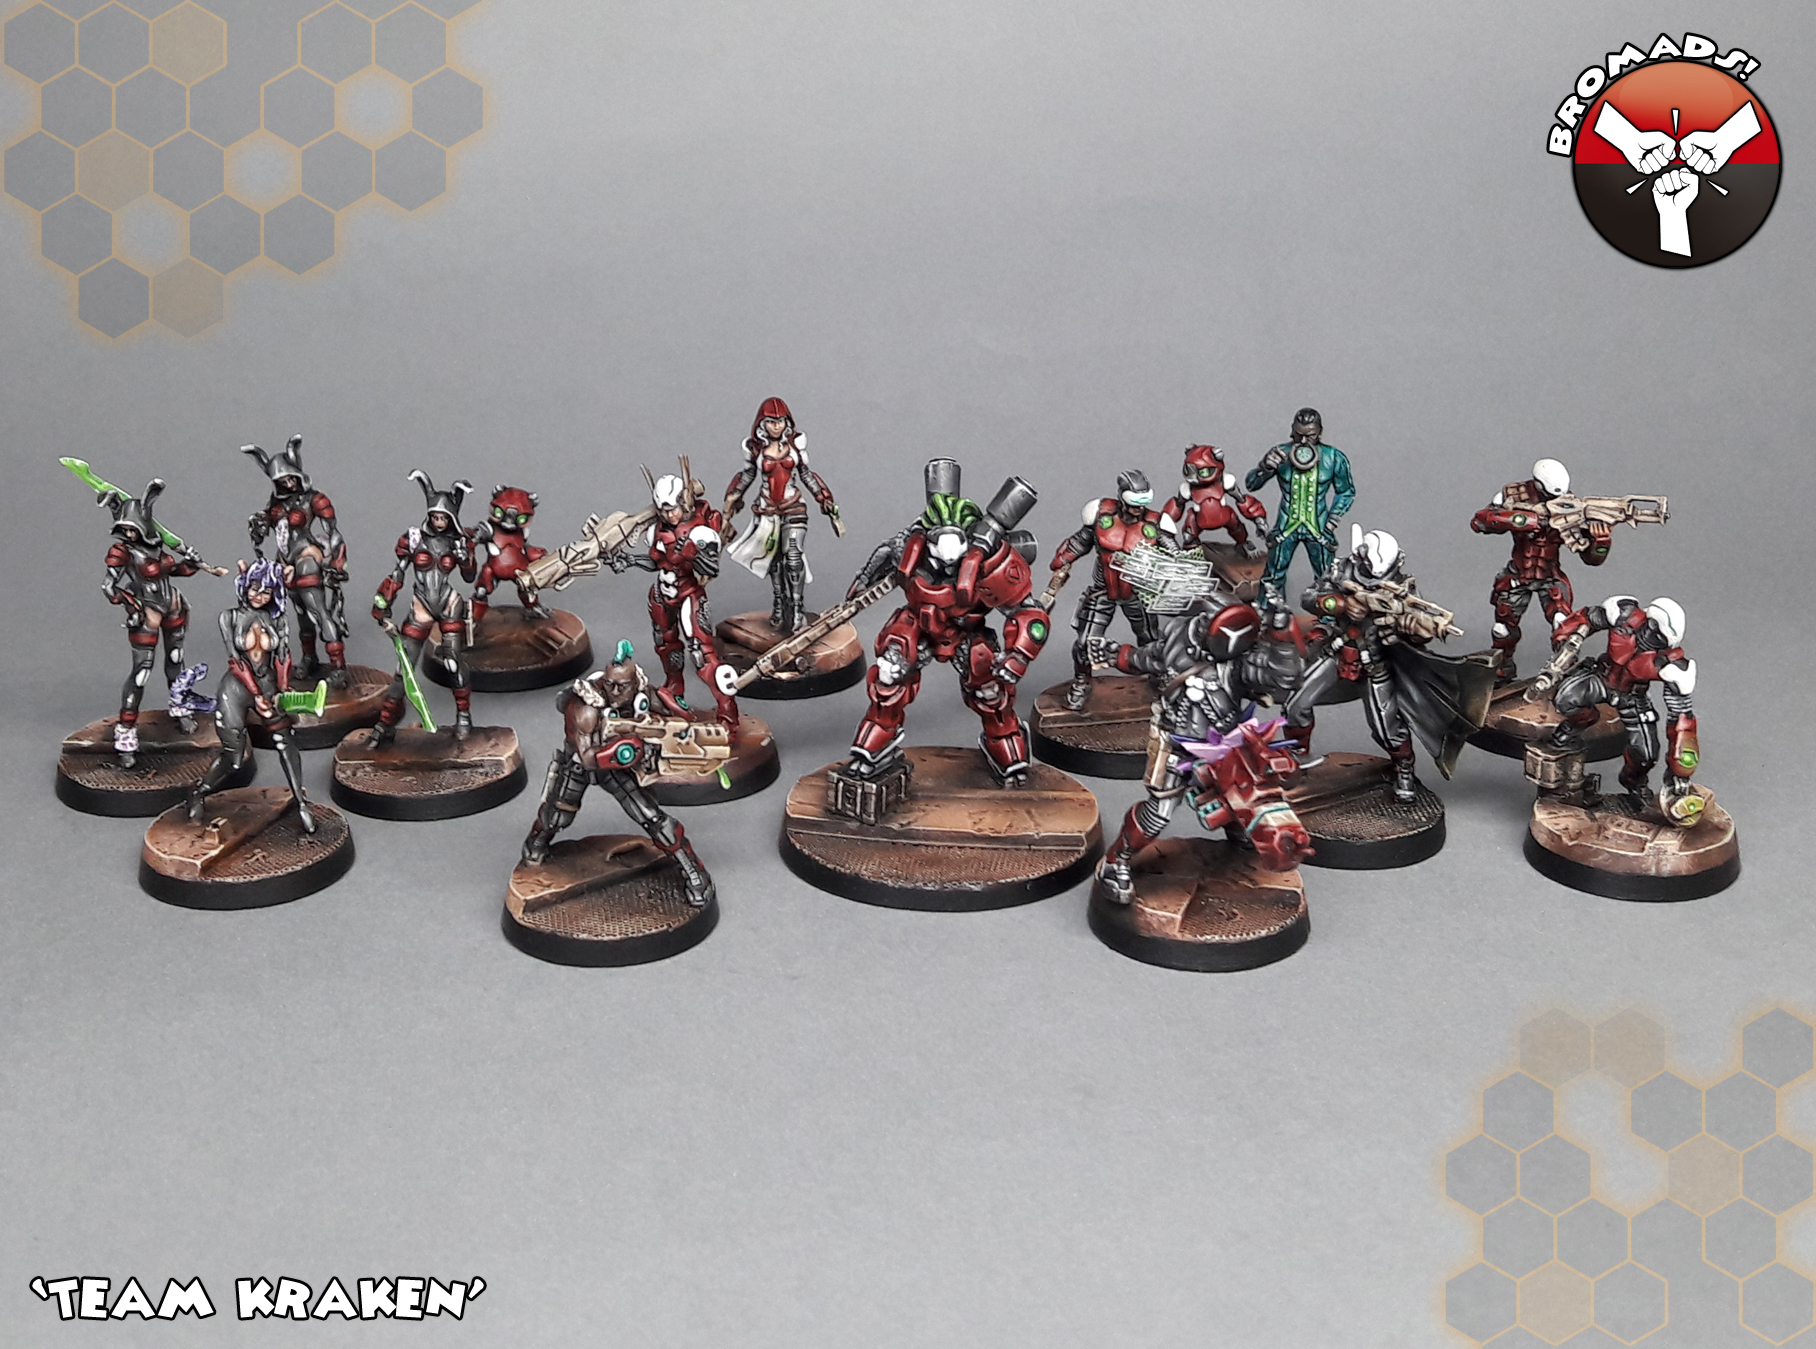
Team ‘Kraken’ ,named after Kriza Borac suit of power armour that formed it’s core, crash landed at the no man’s land between Panoc-23 Multi-Base and the outskirts J-5 installation. Their secret mission doomed to fail, the team received orders to head north and intercept a heavy armoured Panoceania kill-squad. Guided by the all seeing eye of the Dong Peyote, team Kraken layed the trap…

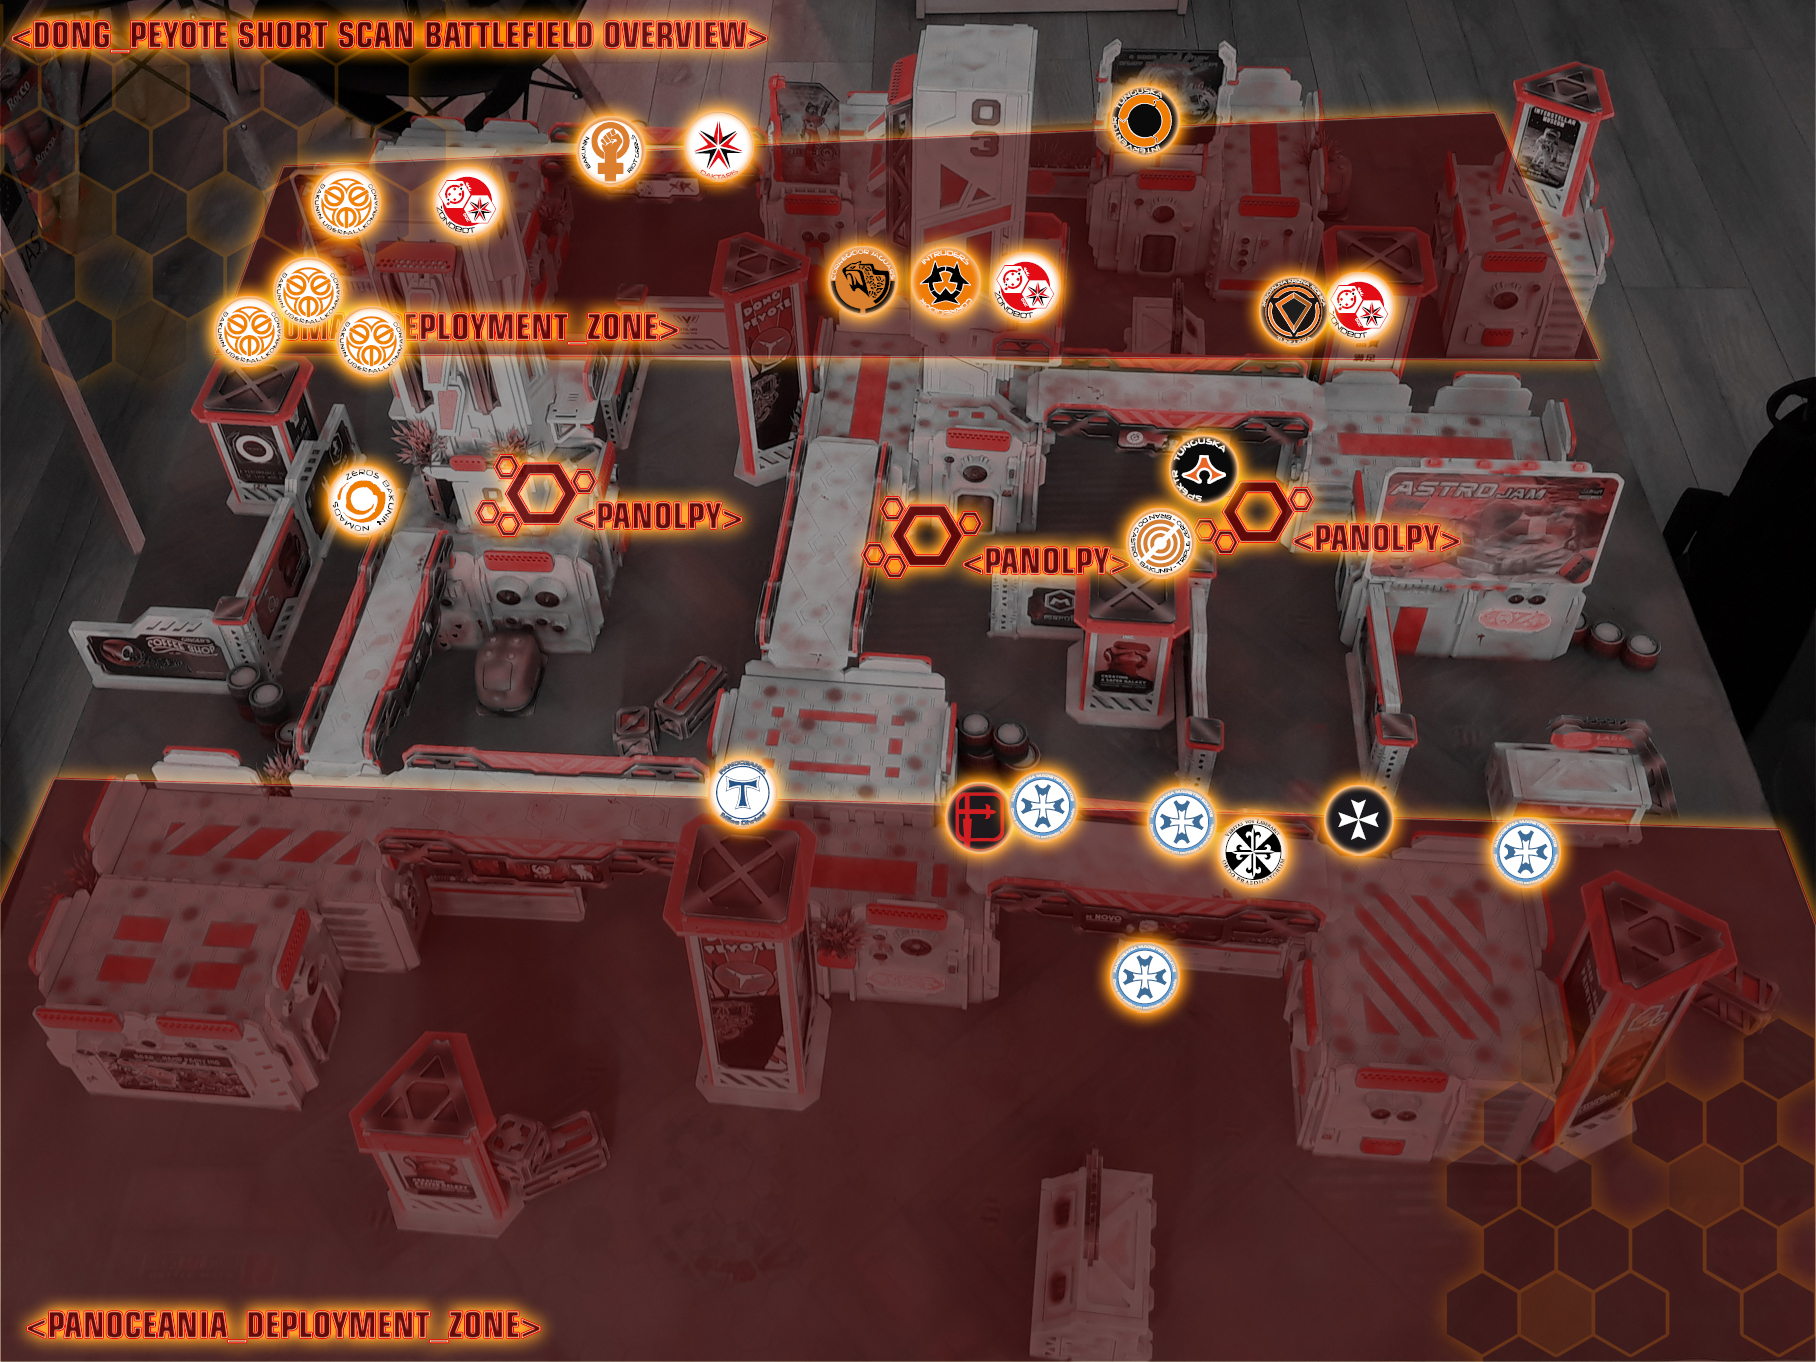
After setting up the trap Nomads layed in wait. [Won the roll-off and kept the Initiative, which resolved in setting up first.] The plan was to take Panoceanians by surprise, going in loud and hard, Full-Auto to cover Wraith (Spectre) advance and enable him to deploy Repeaters. That in turn would allow team’s Interventor to turn the tables on top of approaching Panoceania Heavy Infantry. Kitty, the Chimera was kept in reserve – being a fast runner, capable of crossing long distances and taking the enemy by surprise. A good simple plan. Exactly the type that might go wrong…

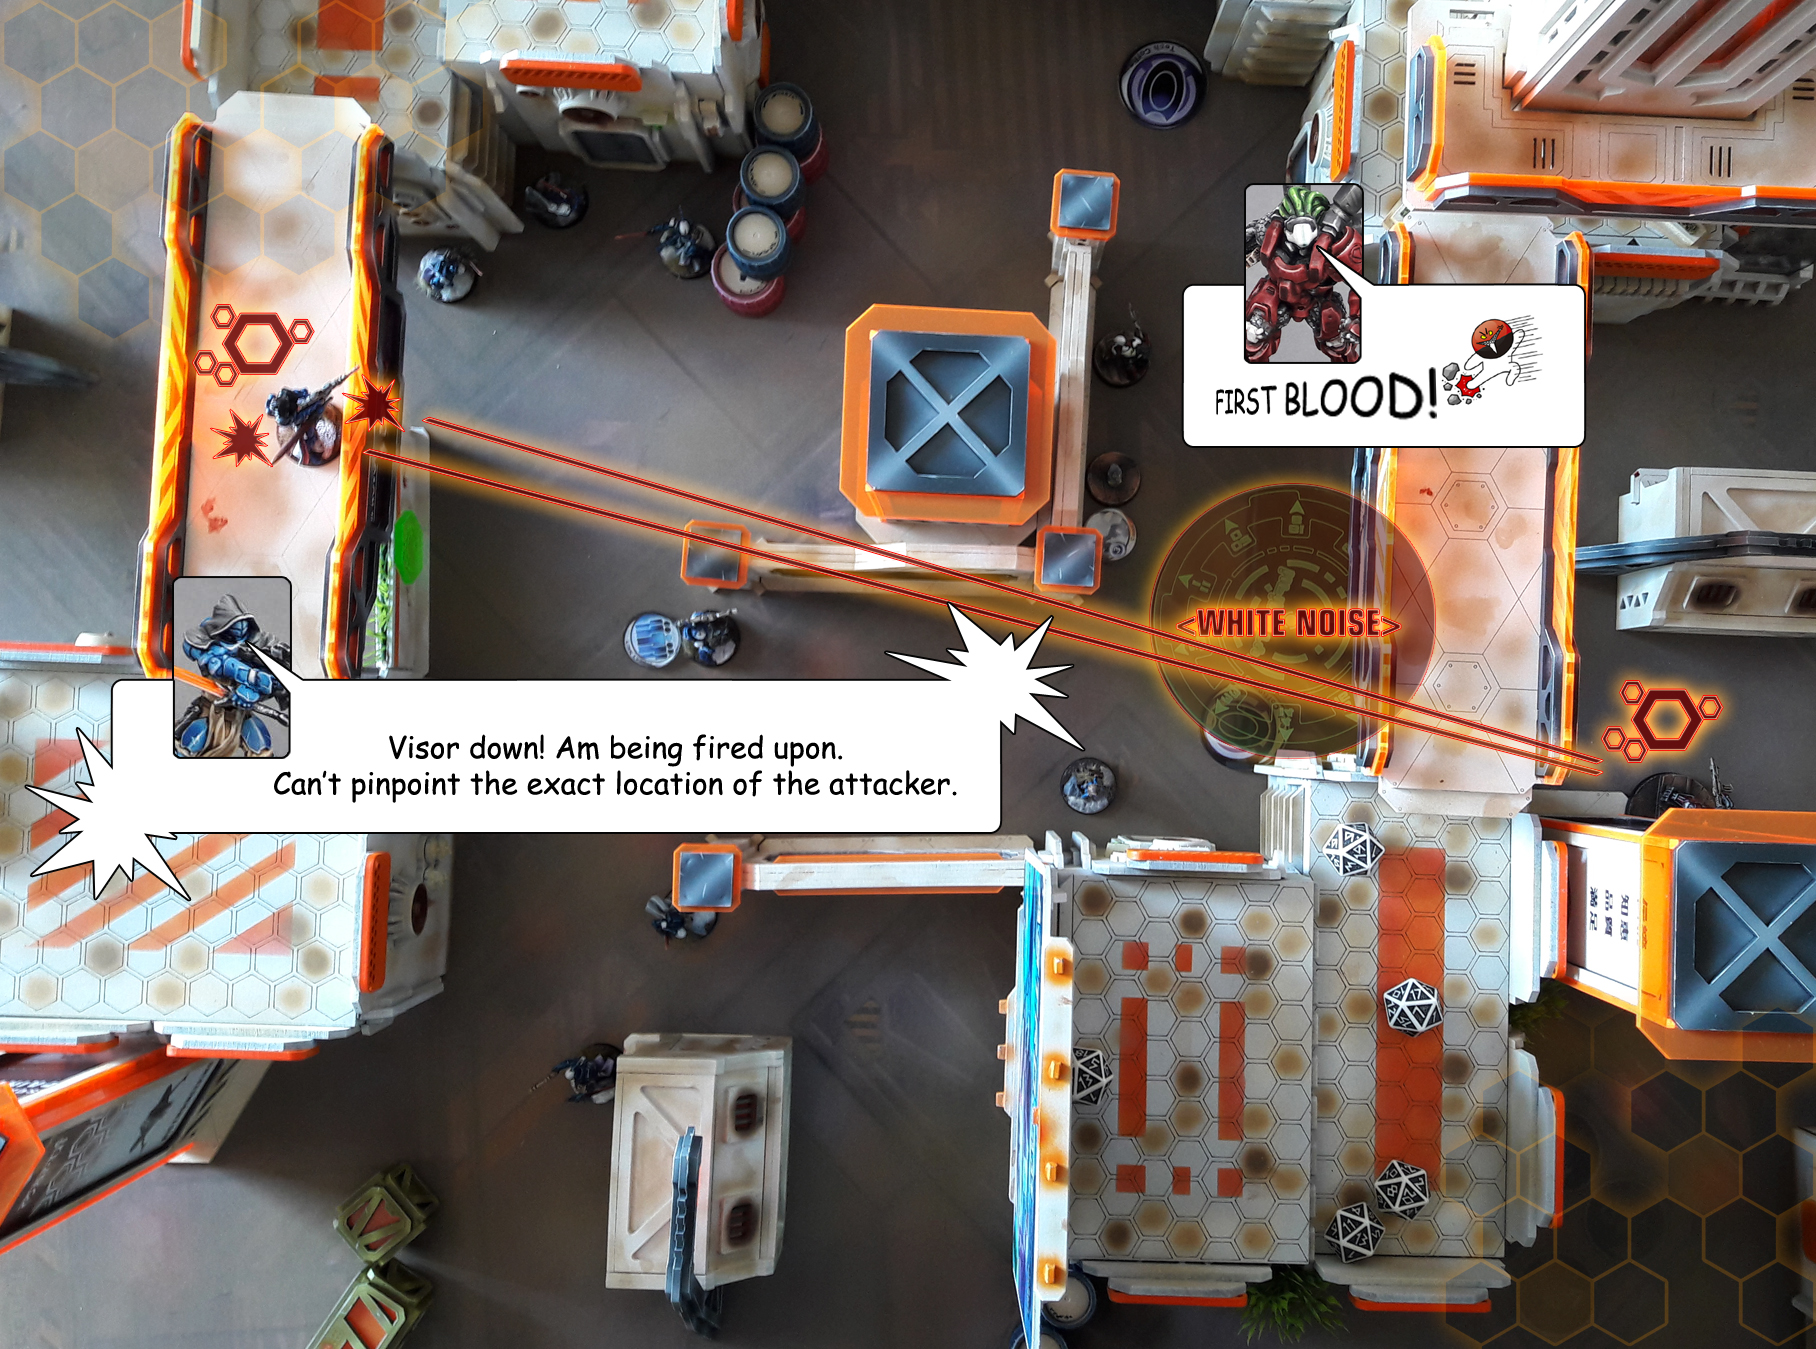
Critko was barely able to contain Kraken’s lust for blood. The big man was breathing heavily over the comms and Critko knew all to well that the time he had to cover a firelane with area of White Noise was counted in merely seconds. No one said that being LT was easy, especially when commanding a group composed of individuals from all three mothersships. He closed his eyes, counted to five and screamed loud ‘NOW!’ over the comms. (LT order and 4 regular orders for the White Noise to succeed. Like WTF?!)…
Entire team reacted almost instantly, springing into action. Kraken led the charge opening up with a wide salvo from his heavy mashine gun. Hot ultra-sonic rounds zipped through the air and over the heads of surprised Magister Knights, who tossed themeselves sideways and into cover. Blinded by the area of White Zone, a Black Friar reacted too late and was shredded to pieces. ‘First blood!’ roared Kraken, just as enemy panzerfaust missiles started exploding around him…
Enemy shock lasted less than five seconds. Just enough for Wraith to throw himself forward and behind cover. ‘These Pano Knights are a real deal’ he murmured to his team, deploying first of the repeaters. ‘They surely are’ whispered a voice behind him. The Spektr noded, more to himself than to Mighty Dong Peyote shadowing him, still being Camoed. ‘Allright Dong, one more repeater and you can go in. Oh, the sweet surprise these guys are about to get.’ He cackled…
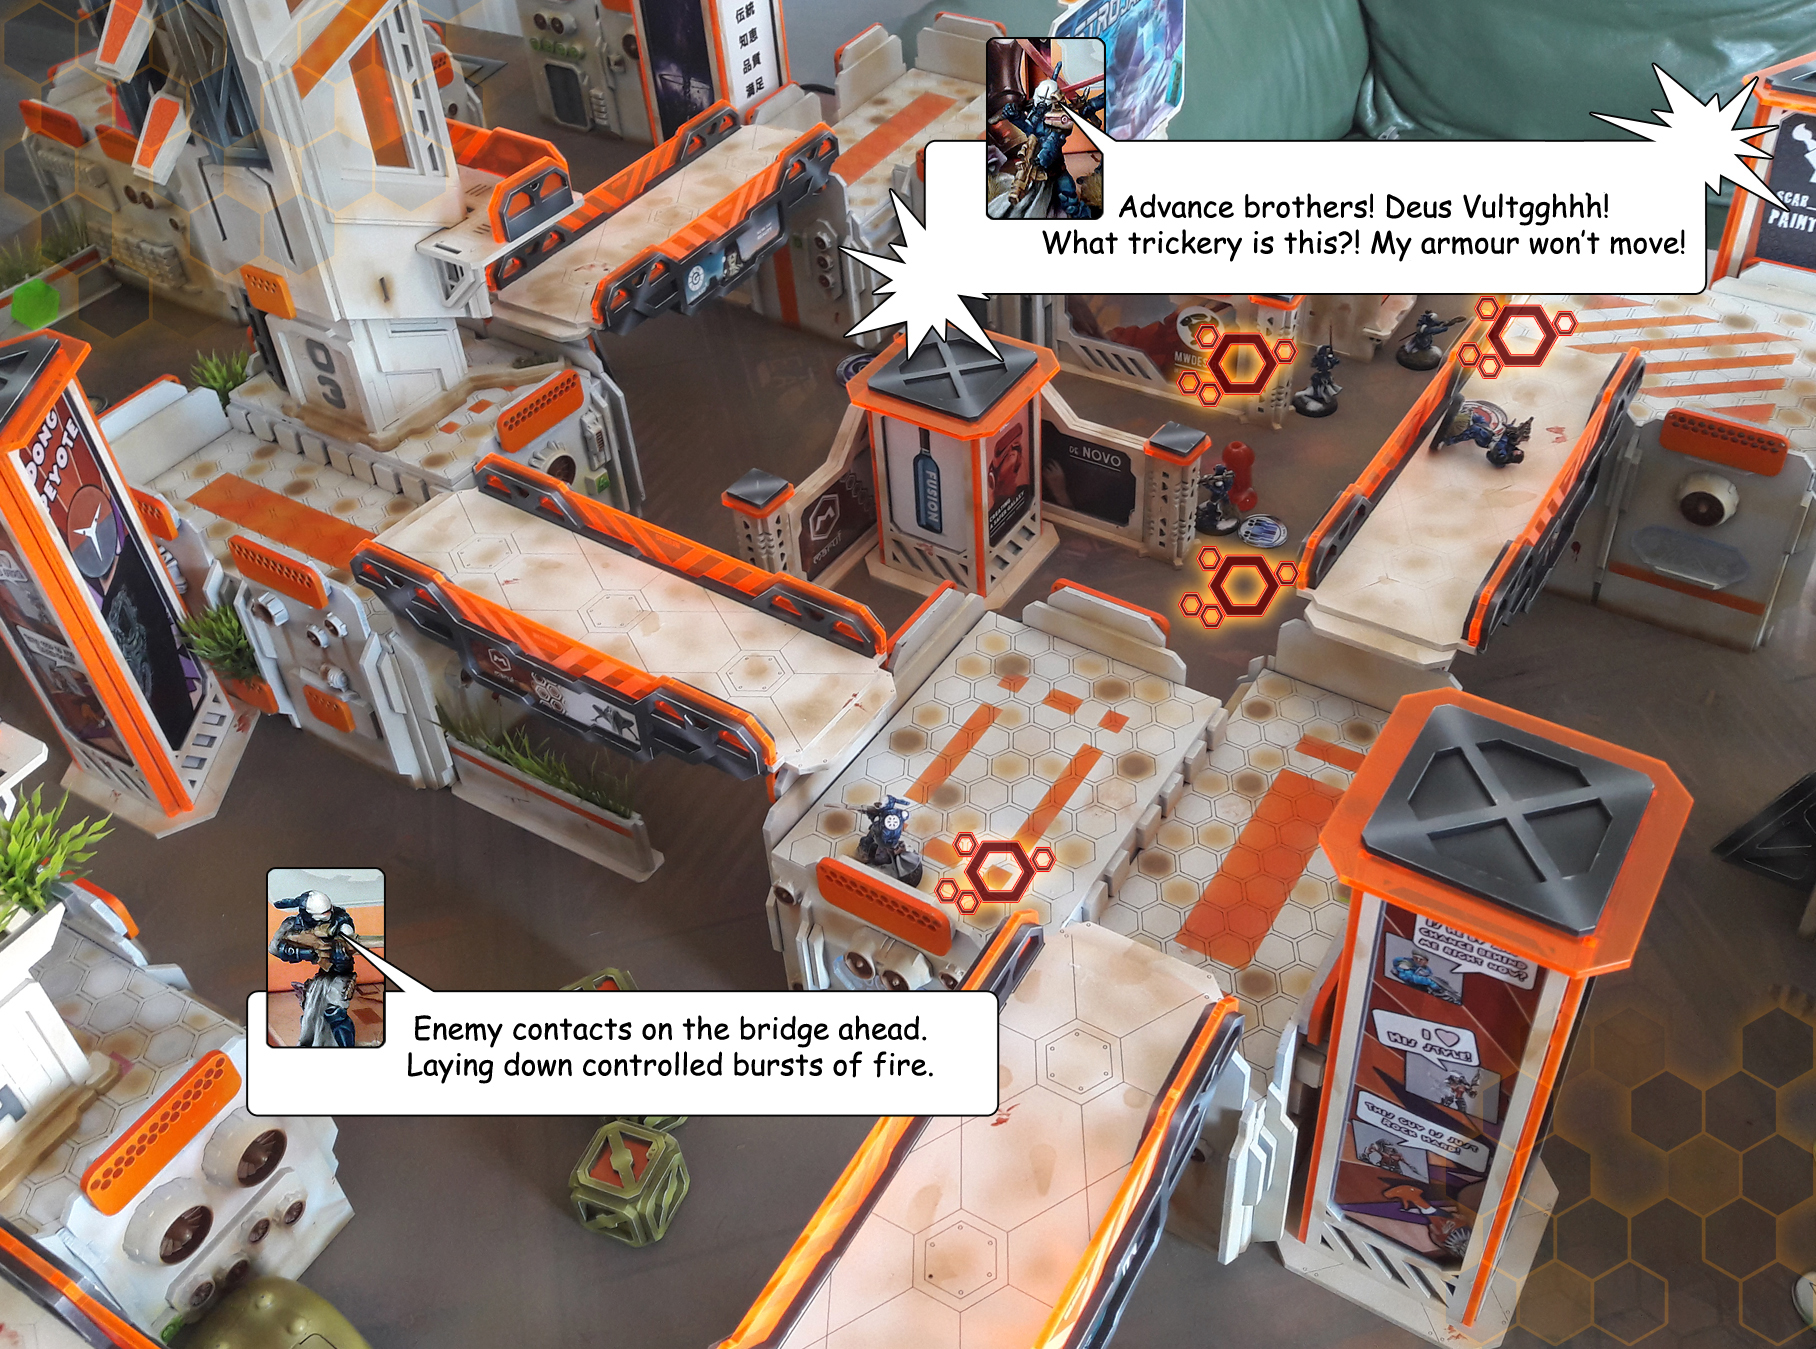
Heavy mashine gun shots peppered the air around Magister Knights yet they regained composure in a matter of seconds. With a loud ‘Deus Vult’ booming from their helmet speakers, they threw themeselves in the direction of incomming fire, swords raised high. The leading knight was first to fall into the trap. Critko Isolated him with ease, denying leadership to the entire squad. One more knight got Gotcha!’ed before the rest realised what’s going on and backed away…
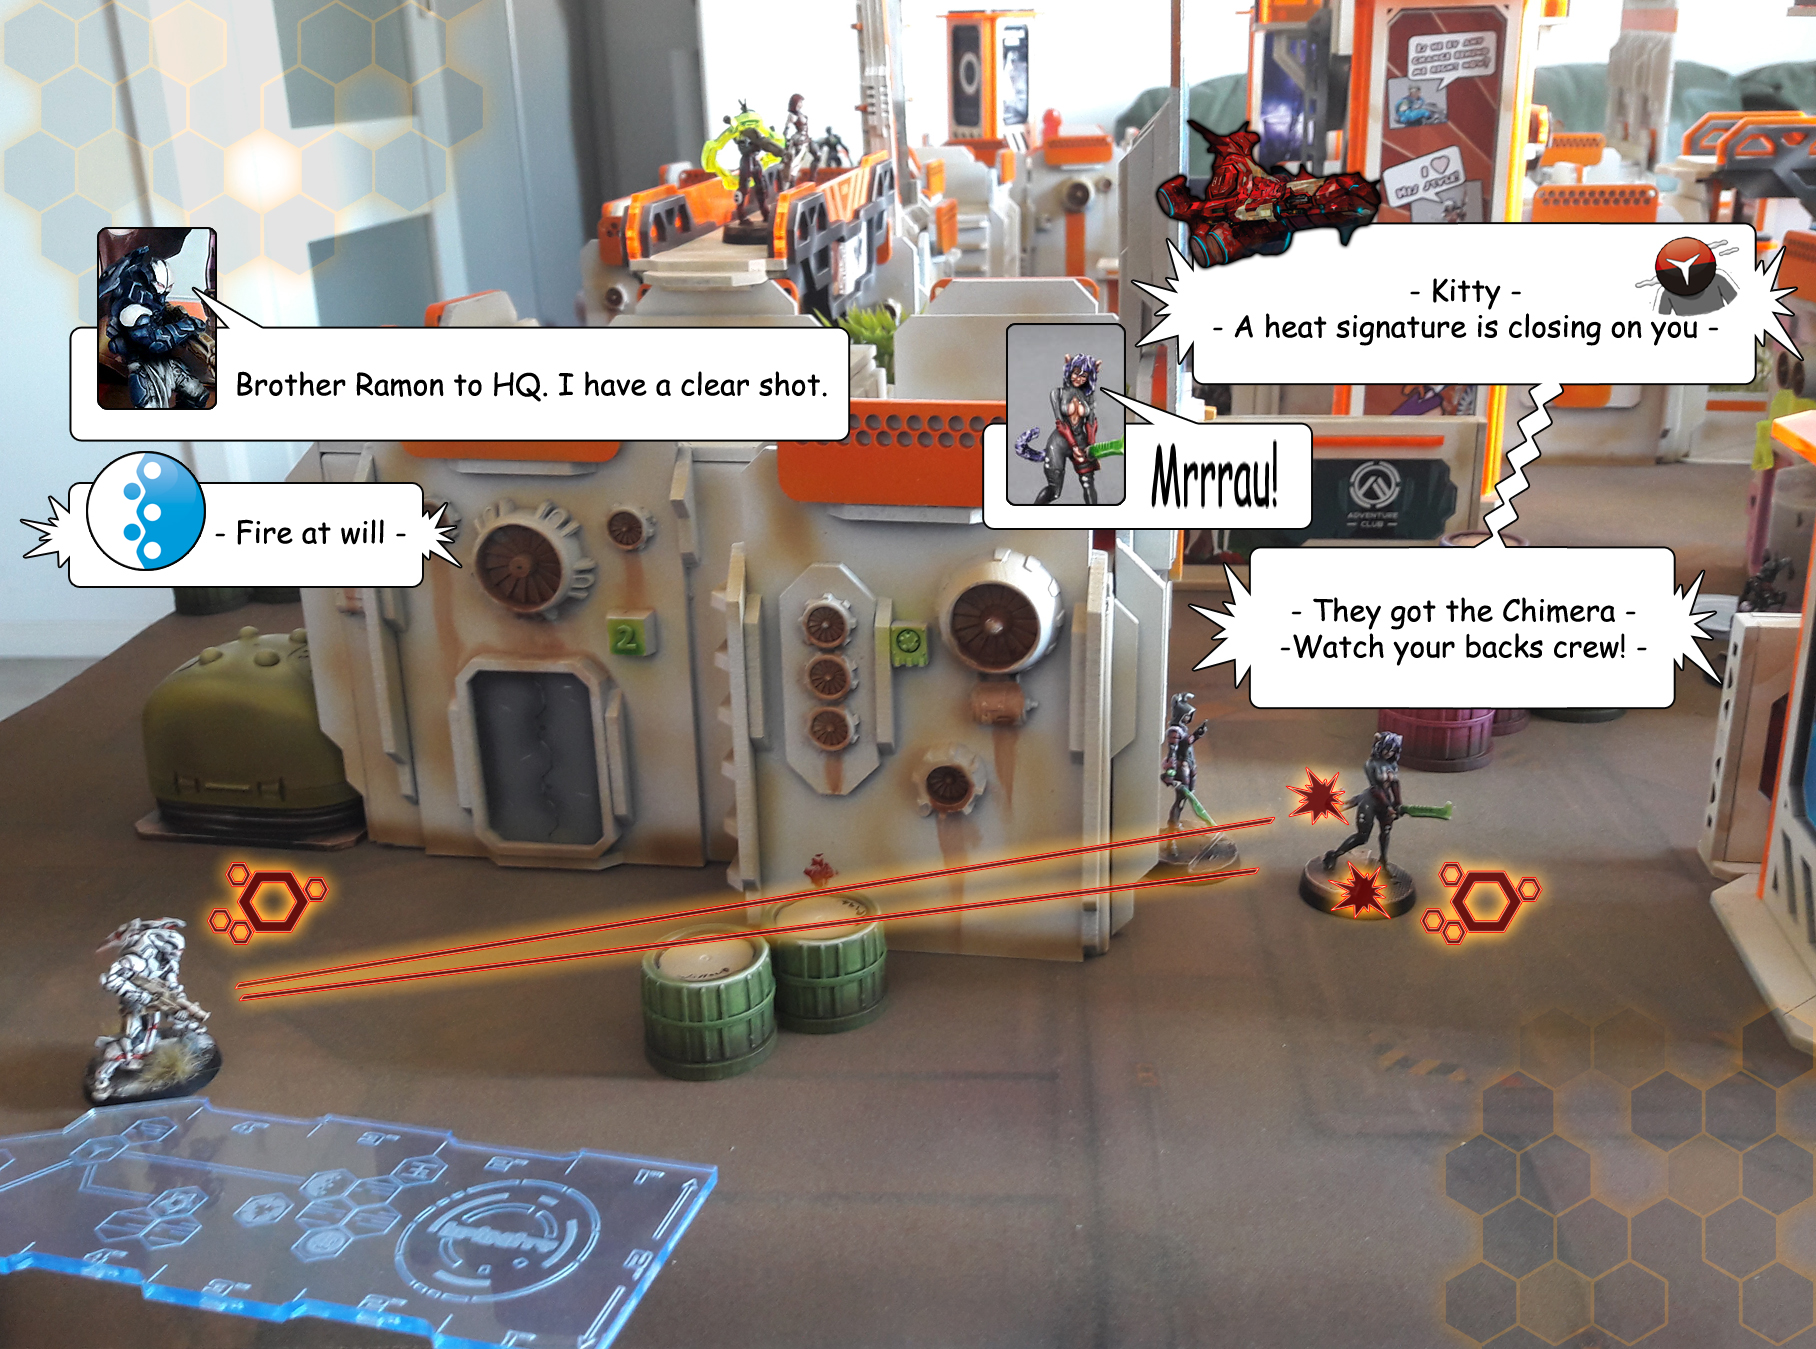
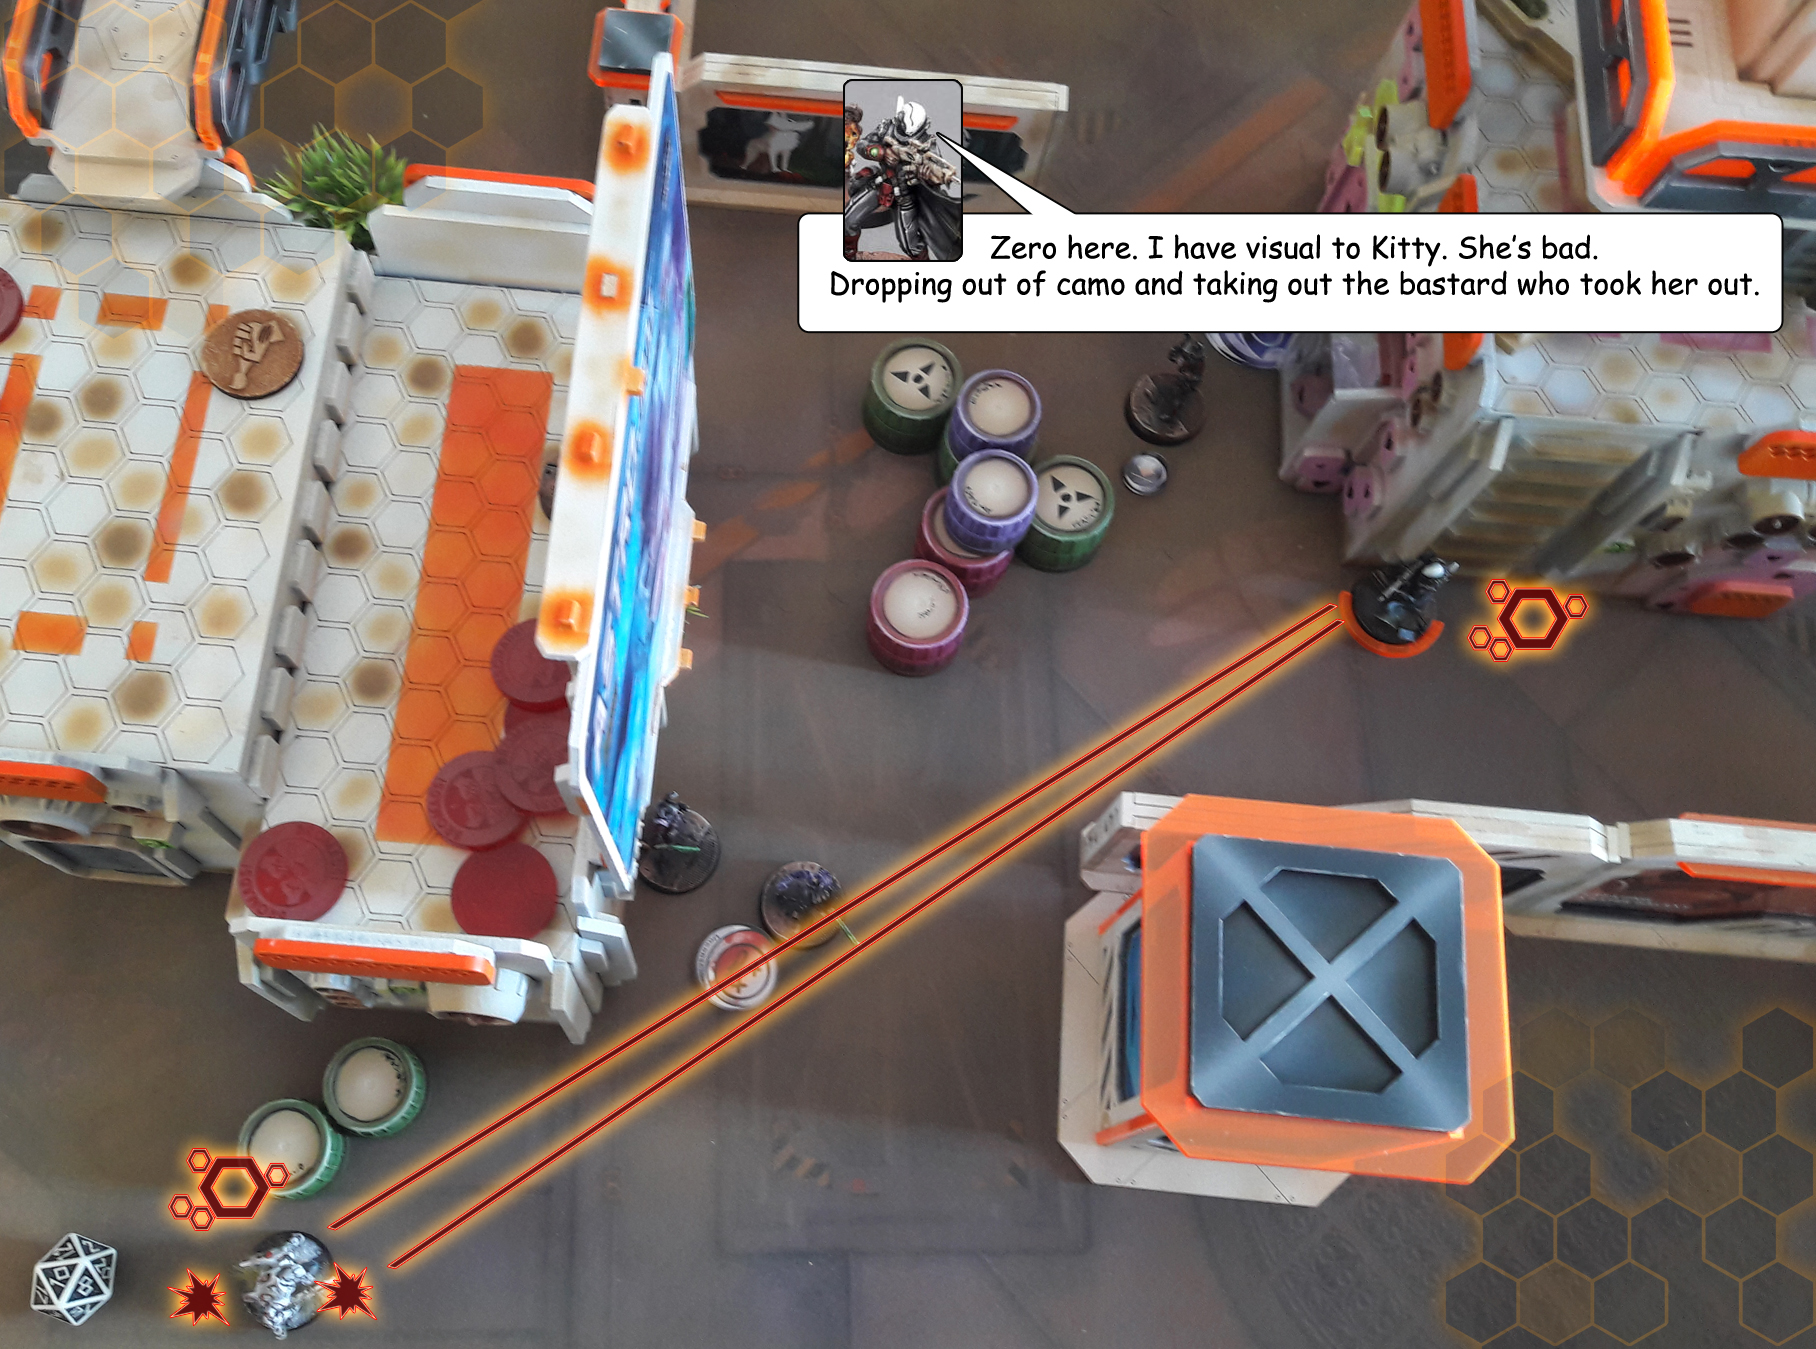
An Order Sergeant de-camoed on a rufftop and opened fire at aRGee (Riotgrrl ML) damaging her armour. She ducked for cover, AP rounds bouncing off her armoured shoulder guard. That’s when comms exploded with a scream of agony. Kitty, the Chimera got shot in the back by a rapidly decelerating AD troop. Crusader Brethren landed in a cloud of dust and sent another volley from his spitfire. He then switched to supressive fire, blocking entire fire lane and covering the howling Chimera against any attempts of Nomads trying to aid her…
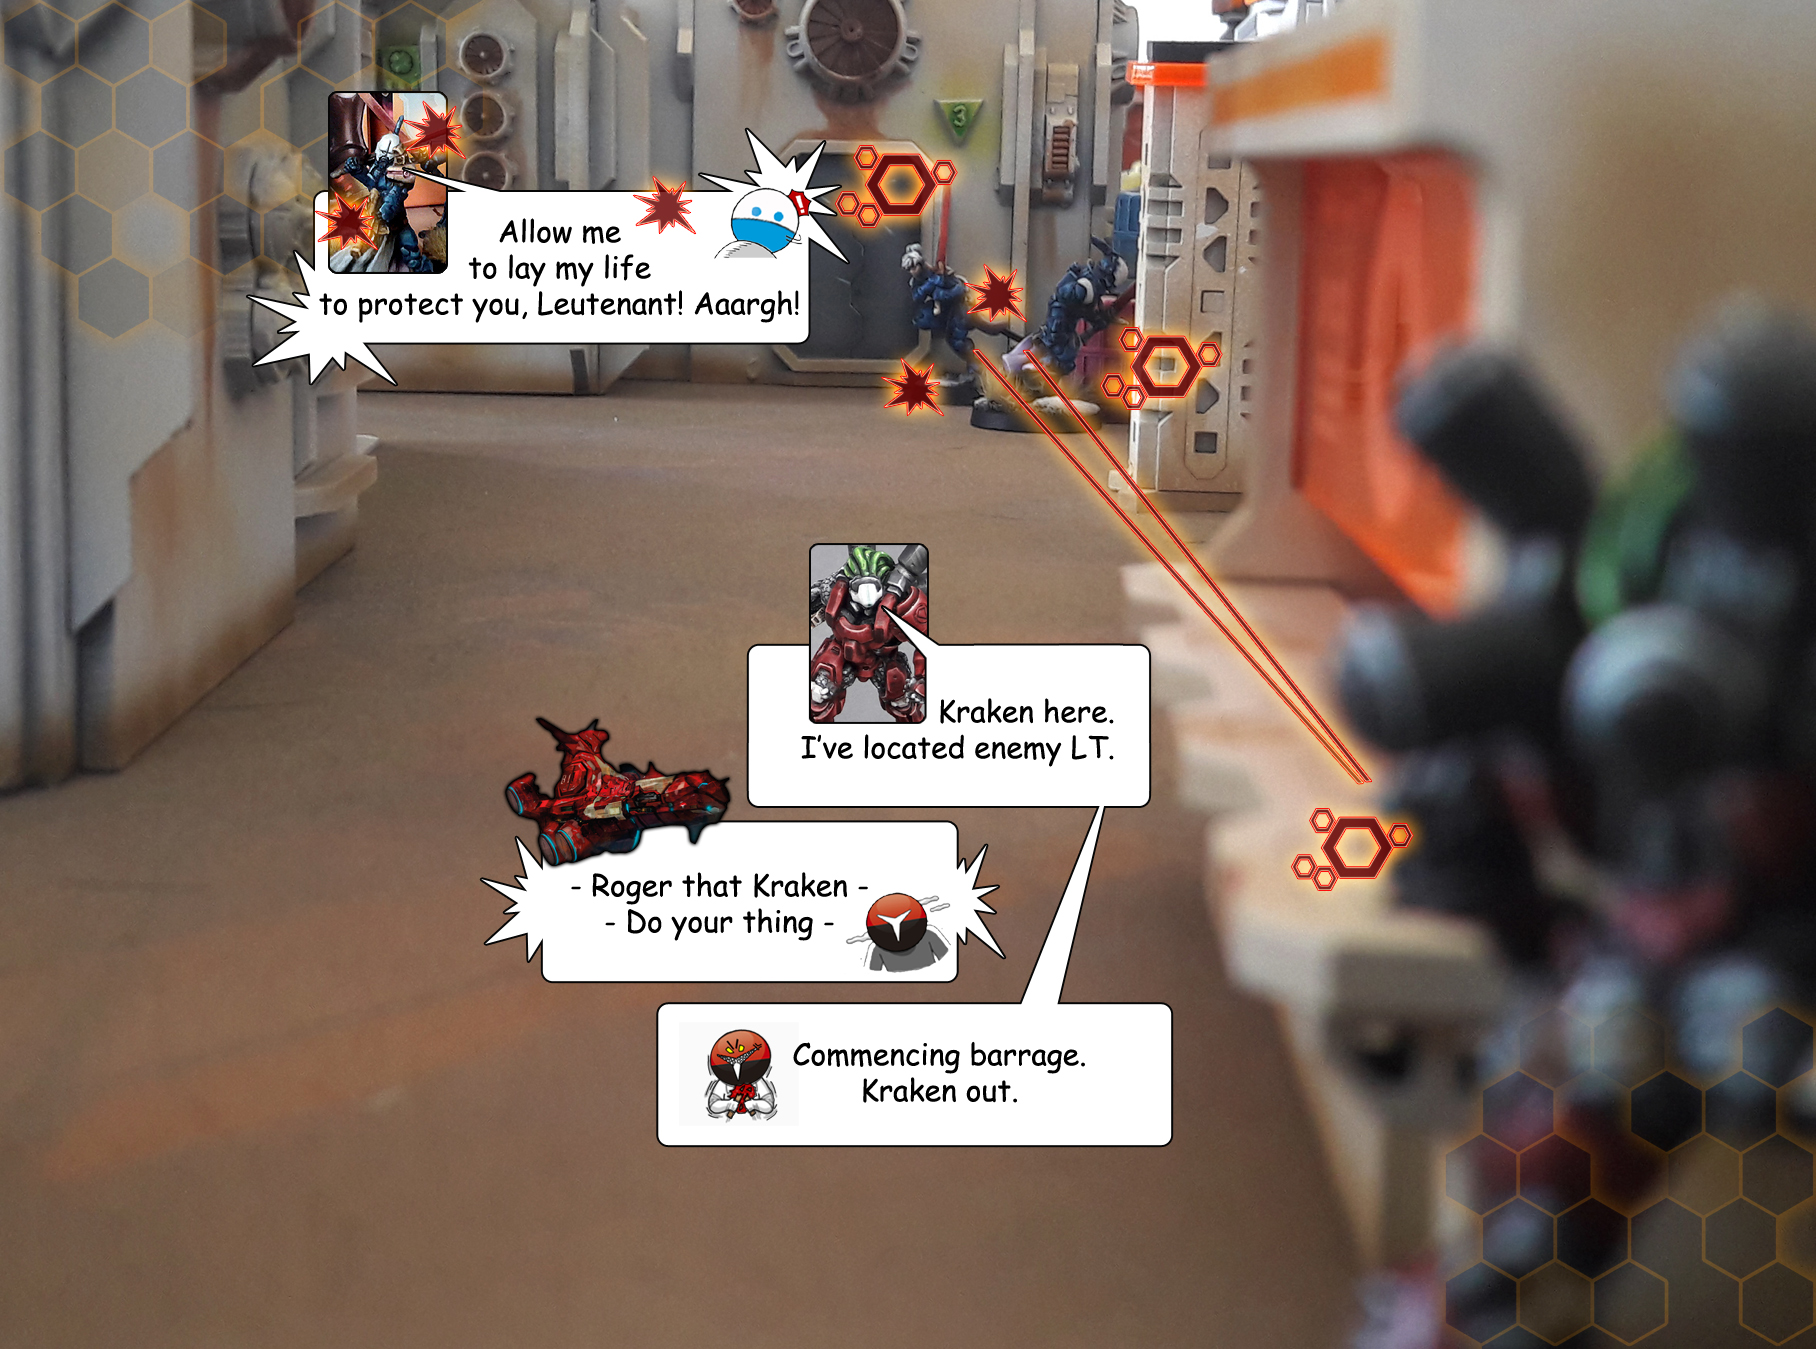
Except for immobilized leader, knights were falling back behind cover. That was an opening Kraken waited for. He rushed in, taking the statue-like Panoceanian out of his misery with a short, well placed series of HMG fire. He gained momentum and steered his heavy armour to a new direction, moving around a low building and outflanking remaining knights. ‘Bullseye’ he murmured to himself, once his armour’s targeting lenses caught new signatures. Crouched behind cover and protected by a Magister Knight was Panoceania’s Leutenant. Kraken pulled the trigger and the world around was set ablaze by the light of high-speed tracking rounds. Both Panoceanians returned fire, but it was too late. Smoke rising from the holes in their blooded armour, Panoceanias barely touched the ground when Kraken exploded into action once again. He covered half the distance between them and jumped onto a ladder, holstering the HMG on his back. Strong pulls from his massive hands saw him emerge on a rooftop across Panoceanian Sniper. Termo Optic Camo haze danced all over sniper’s silhouette, while he pumped round after round pinning aRGee and Aby behind cover, across the battlefield. Kraken had just the right tool for the job. Full-Automatic fire cut poor Panoceanian in half…
At the other side of the battlefield a nameless Zero shimmered into being. Spitfire wielding Crusader Brethren was unlucky enough to find himself at the receiving end of Zero’s Combi Rifle. Kitty was barely alive but not beyond reach of heavy drugs mixed with some Aby’s magic…

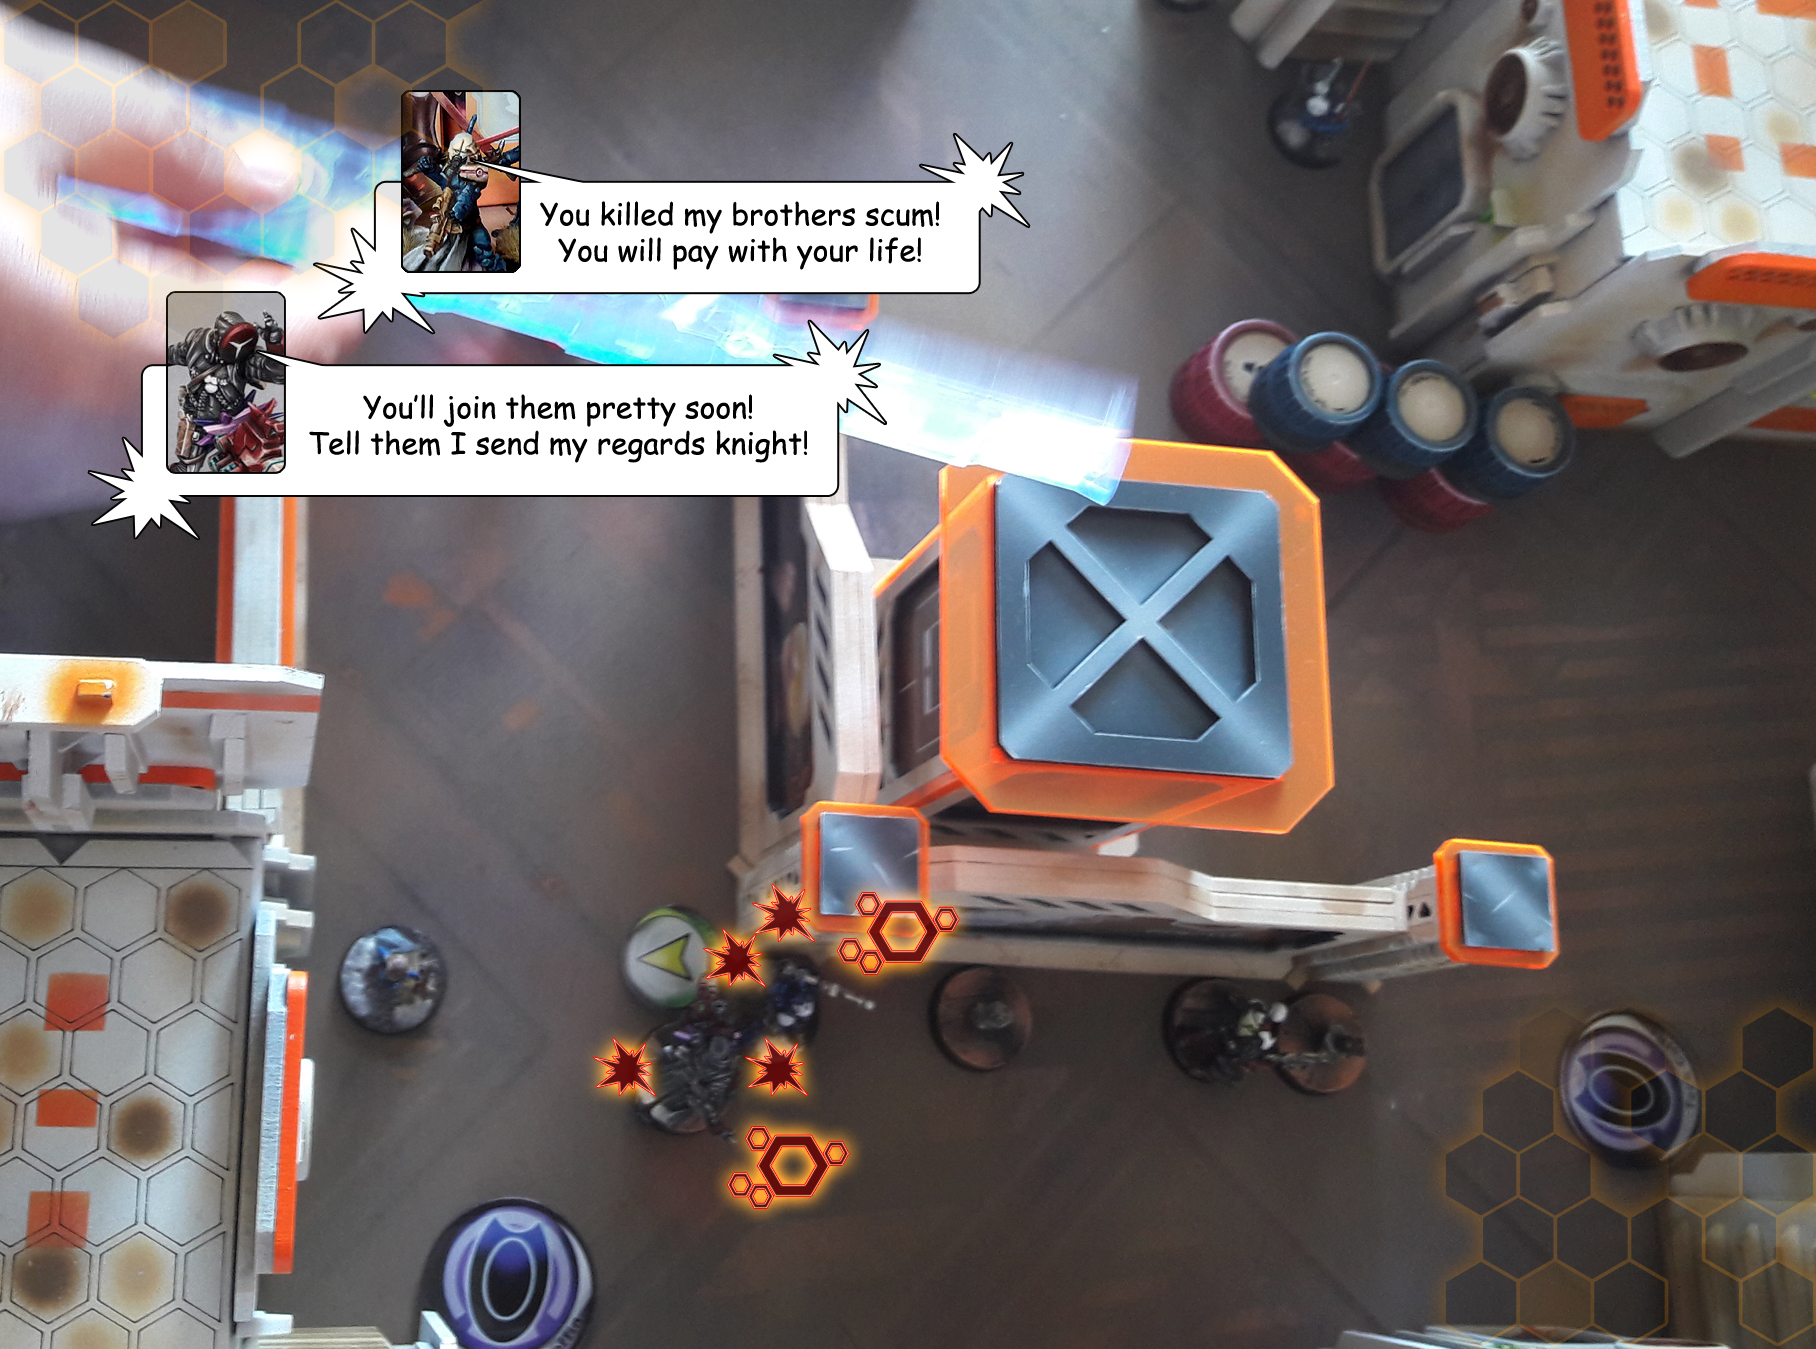
Sudden redeployment of Kriza Borac allowed the two remaining knights to attack through empty firelane. As one, they threw themeselves out into the open and charged. The first knight to emerge from behind corner, in hope of rounding up on Wraith, had a nasty surprise waiting for him. The Mighty Dong Peote (Bran DoCastro) dropped Camo and Engaged the knight, moving under the barrel of his shotgun and closing the distance in a blink of an eye. The knight took a wide swing with his sword, but the Mighty Dong Peyote parried it easily and put the knight down with a strong punch of his energised brass knuckles. Second knight joined the fight eager to drew Nomad blood. Mouth opened, Wraith watched in ave as the Mighty Dong Peyote whirled and danced around the knights, using one of them to throw himself into air and laying a devastating punch on another knight’s helmet. For a moment there, it looked like a strange mix of blue armour, Nomad mask, smoke and blood. Entire fight lasted less than half a minute and then it ended just as suddenly as it begun…
Kraken allowed himself to be distracted by close combat that took place below. Energy discharges and blood dropplets seem to slow down before his eyes. This was a sign that the suit pumped a fresh coctail of drugs into his bloodstream just to keep him standing. He turned to survey the battlefield, just in time to see a boarding Shotgun wielding Crusader comming at him from behind. He squeezed the trigger hard but a rain of bullets never came. The display showed ’empty’. Kraken had no time to reflect on this, cause a Borading Shotgun slug hit him square in the chest and sent his heavy suit to the ground. Another round blasted a huge gap in his thigh, blood and nano-oil exploding in every direction. Kraken roared like a wounded animal. With inhuman effort he unholstered his pistol and sent few rounds in the direction of the assailant, but it was already too late – his vision blurred, he let himself be embraced by blackness…


Kraken woke up suddenly, surrounded by chaos. Screams of the wounded and the dying were accompanied by constant gunfire somewhere in the background. High walls decorated with ‘J-5’ signs surrounded a vast hall, filled with makeshift beds, each being occupied by a wounded soldier. Aby stood over him arguing passionately with what seemed to be one of the cat-eared Daktaris. ‘Where are we?’ he wanted to say, but a short, rough gasp was all that managed to leave his dried lips. ‘Shh big boy, you lost a lot of blood’ said Aby and put her hand on his bare, muscled shoulder. The touch of her warm hand made him realize he’s been stripped of his armour and this sent a burst of adrenaline into his brain. He tried to sit straigh but couldn’t. Something was wrong. Something was very, very wrong. He looked down his body. ‘Where’s my fucking leg?!’ he roared through cracked lips. Aby just smiled at him gently. ‘Don’t worry big guy. We’ll get you a new one’…


This battle of Firefight was fought between me and my dear friend Astharis. At the end of turn two, Panoceania retreated, but not before earning a honourable one Victory Point, by taking out Nomad Data Tracker with two well placed Boarding Shotgun rounds.
The end result was 8 for the Nomads who managed to:
*kill more Lieutenants than the adversary (2 Objective
Points).
*kill more Army Points than the adversary (3 Objective
Points).
*kill the enemy DataTracker (1 Objective Point).
*accomplish two Classyfied Objectives (Extreme Prejudice & Secure HVT).
against 1 for the Military Orders who :
*killed the enemy DataTracker (1 Objective Point).
We had a lot of fun as the game was plagued by rolls that broke stathistics, some really cinematic moments and funny situations.
Highlights:
* I totally lost faith in Critko (Interventor) who up to now was always a reliable, almost godlike hacker. 5 rolls to place a single White Noise was just beyond rotfl.
* Kraken (Kriza Borac HMG) was vital to achieving vistory. The HMG beast is fast and was able to outflank Panoceanians and take out some vital targets. He was ultra badass, even tho last Pano effort to earn some OP’s actually took him out (Unconscious).
* In this game Intruder HMG done literally nothing, except providing orders XD
* Double Repeater trap combined with Kriza’s AROs was a bullseye, that allowed me to keep the Magister Knights at bay.
* The Mighty Dong Peyote (Bran DoCastro) was insane in this match, overcoming two Magister Knights in a glorious and brutal CC.
* I expected to see more TO: Camo. Imagine my surprise when first Crusader entered the board behind my troops and killed the Chimera. Imagine my surprise when second Crusader entered the board and took out the Kriza XD If my forces weren’t spread wide or if I lost the Initiative – these guys would be devastating.

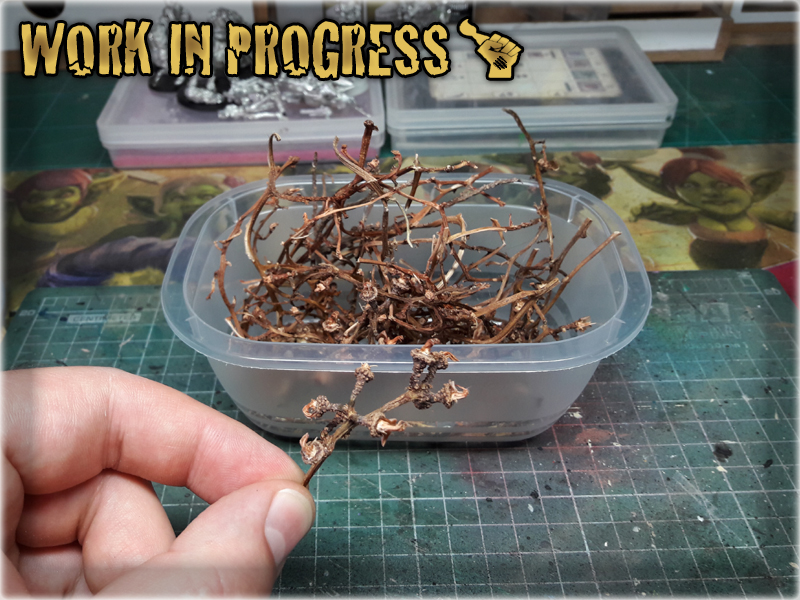
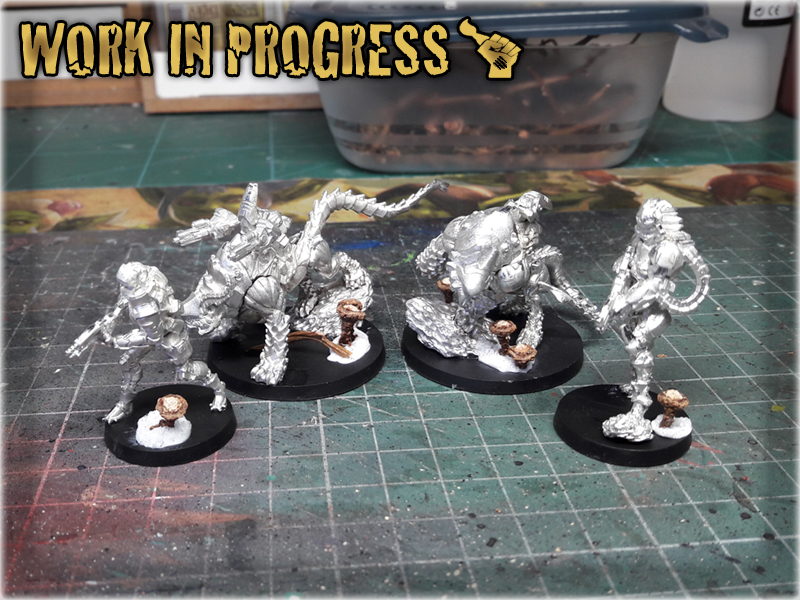
In this easy, step-by-step tutorial I’m going to show you how to create a Lush Base. I designed these bases to fit Infinity the Game Tohaa ‘tactical rocks’ – you can see how it turned out at Infinity TOHAA ‘Witness Me!’ gallery.
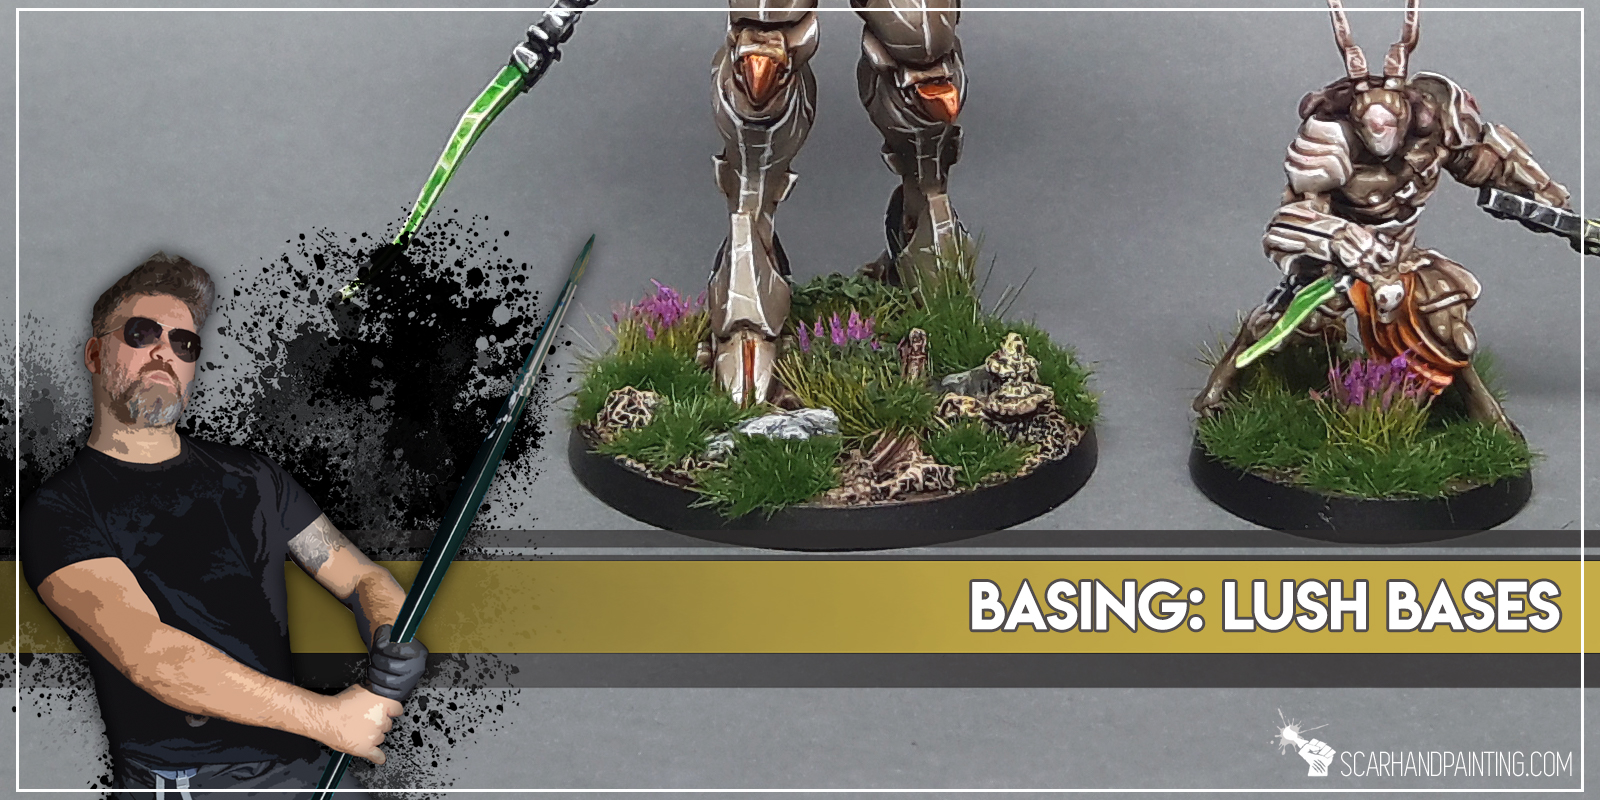

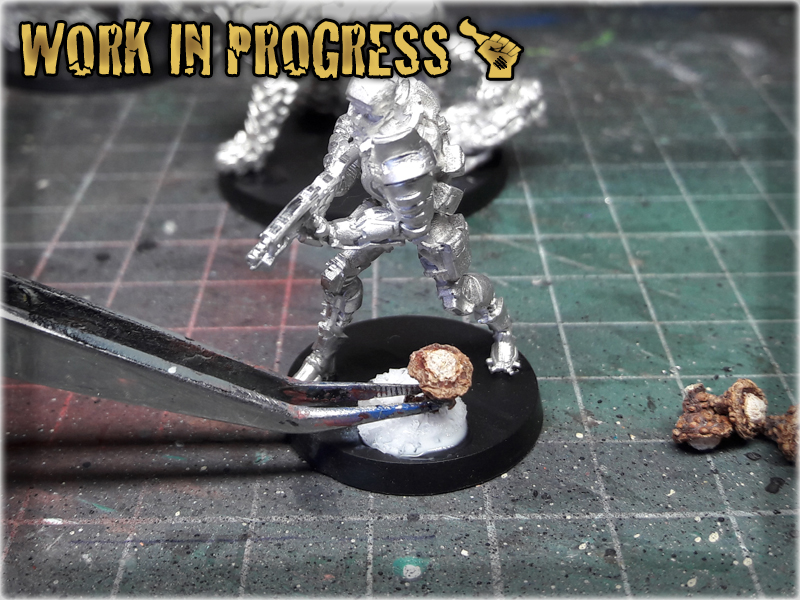
* I started by separating Grape mounts from the dried out Grape branch. Being rather soft, their topf have been removed to improove durability and shape.
* I then applied a drop of basing glue onto the base, followed up shortly by another drop - this time super glue.
* Before mixed glue drop was able to dry out I've planted Grape mount on top of it, creating strange looking plant.
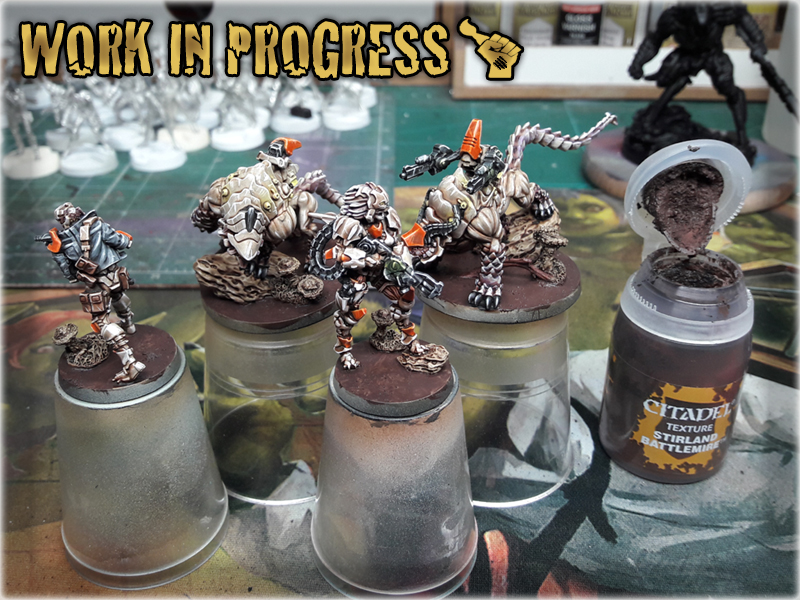
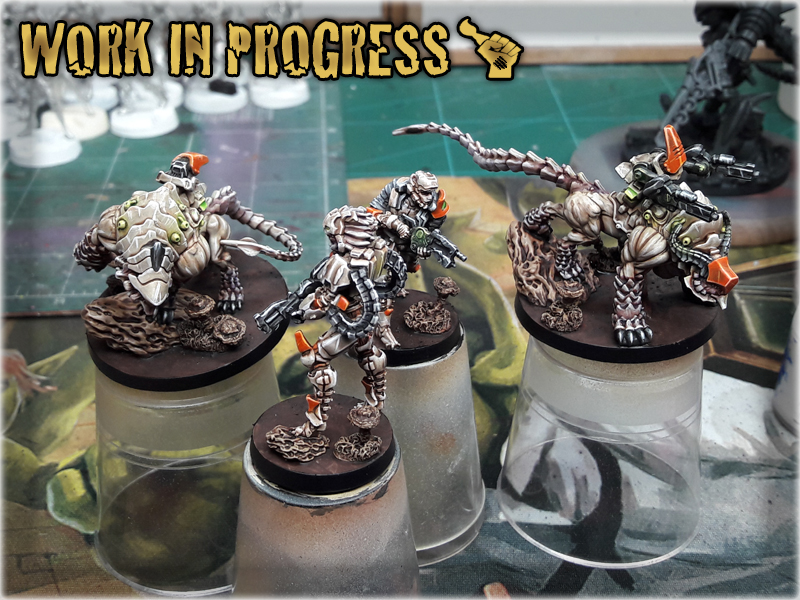
* Once glue dried up I've painted the bases following choosen colour scheme (see below). I then added some texture on top of them with Stirland Battlemire texture paint.
* orem ipsum dolor sit amet, Integer commodo tristiqu odio, aliquet ut. Maecenas sed justo imperdiet bibendum. Vivamus nec sapien imperdiet diam. Aliquam erat volutpat. Sed onsectetur suscipit nunc et rutrum. Lorem ipsum dolor sit amet,volutpat. Sed onsectetur suscipit nunc et rutrum. Lorem ipsum dolor sit amet, volutpat.

* Last step was to apply regular tufts. I used some noname tufts in large numbers filling most of the flat areas. Job done.


Black Undercoat,
Stirland Battlemire (GW), texture
Karak Stone (GW), stones & plants
Flayed One Flesh (GW), flatbrush stones & plants
Mix Strong Tone Ink (AP) 1:1 Soft Tone Ink (AP), wash
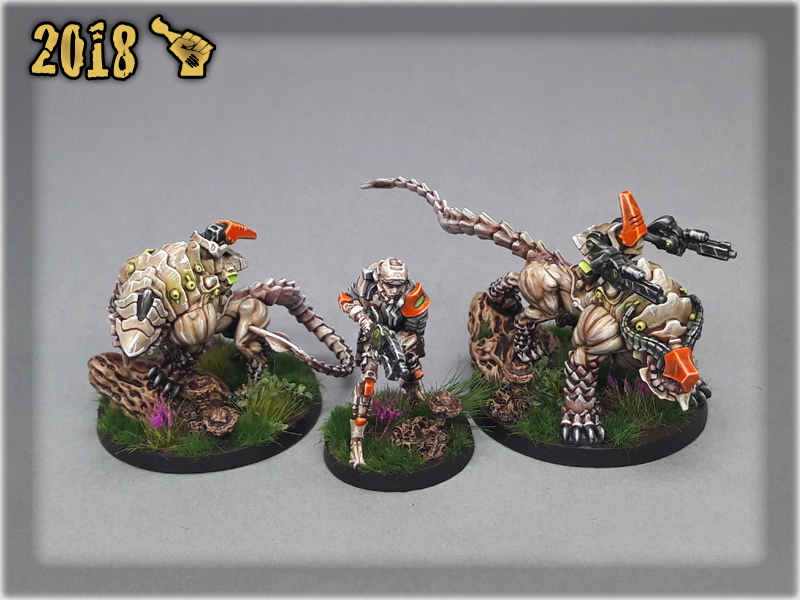
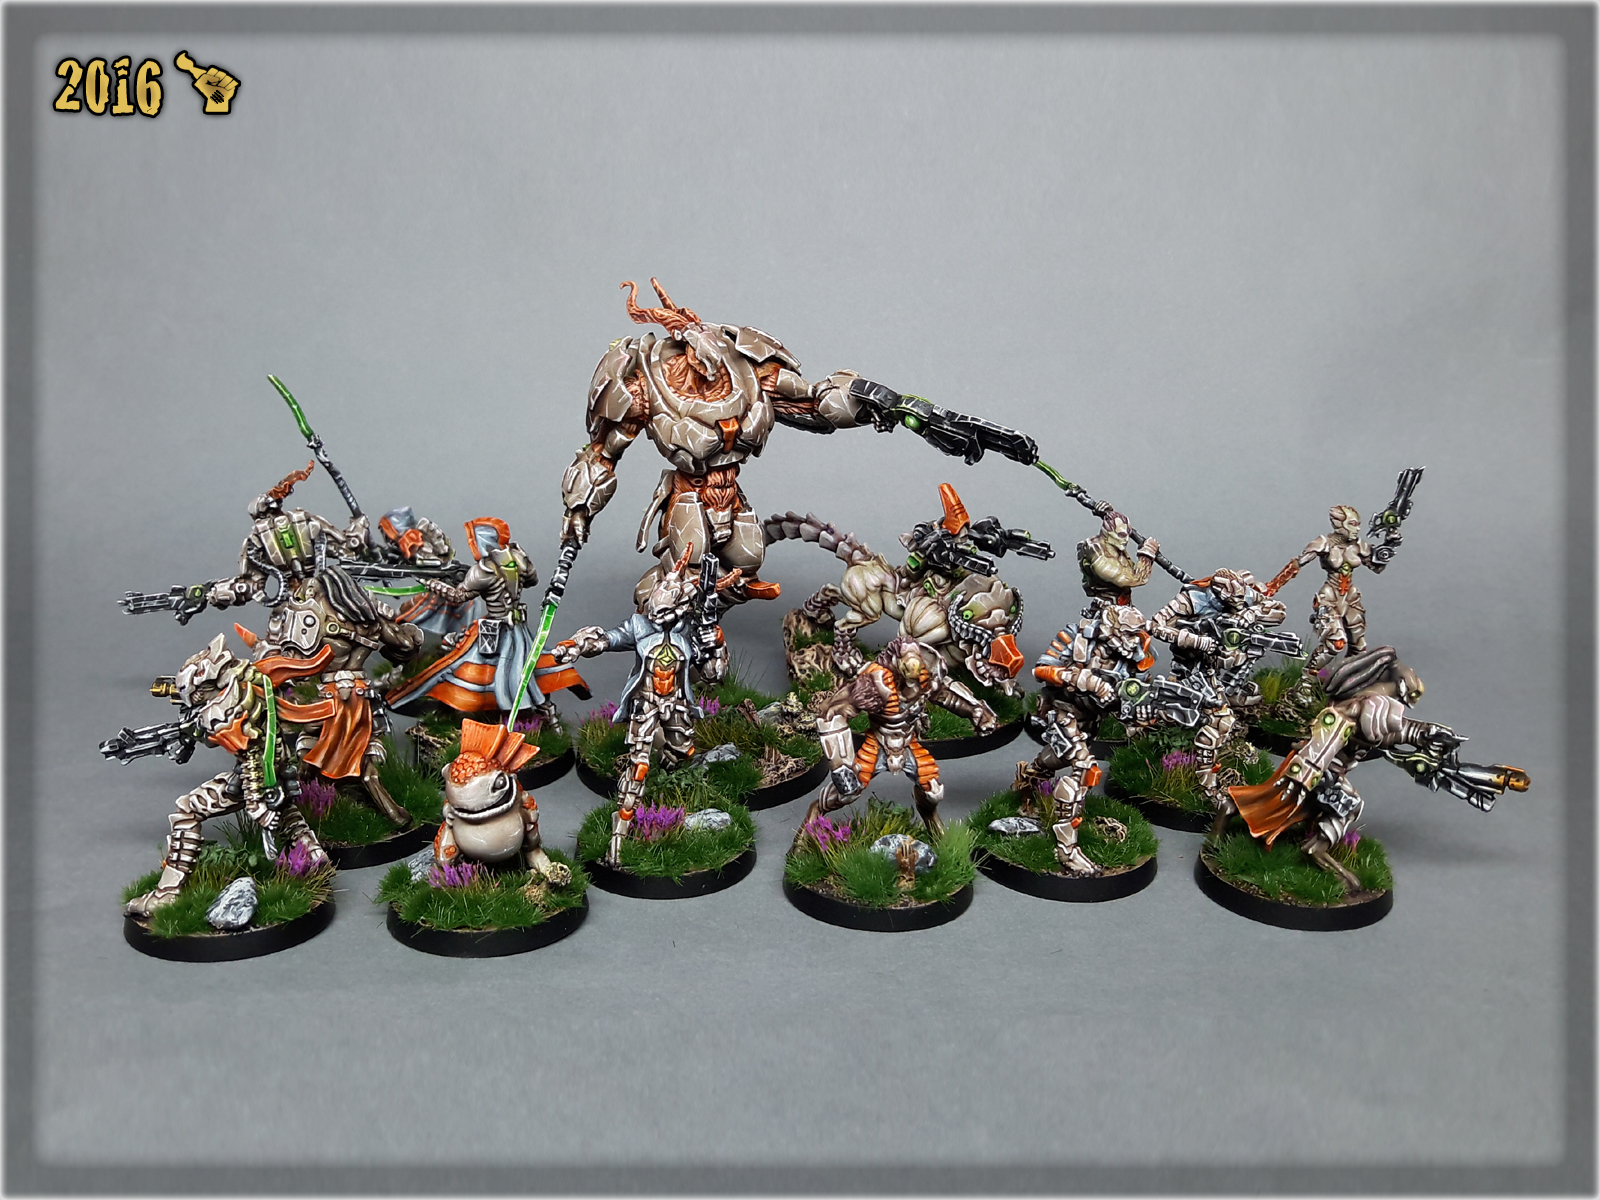

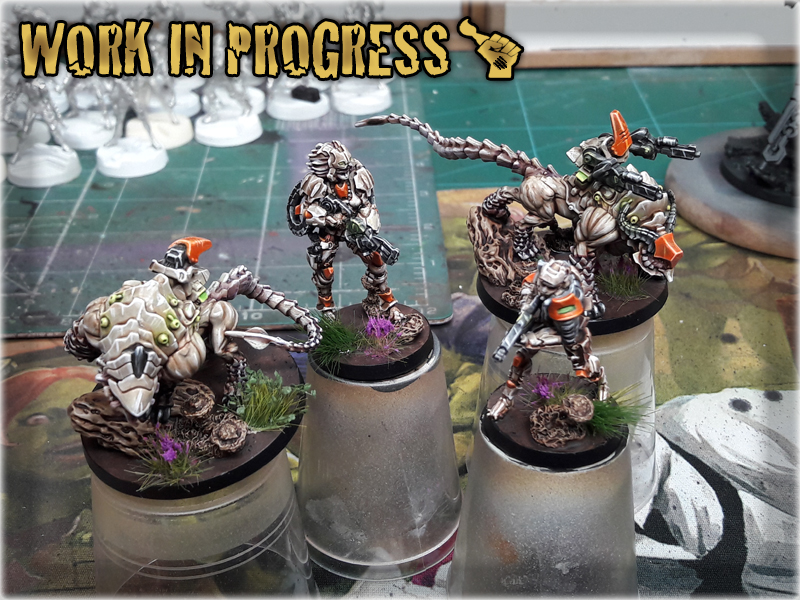
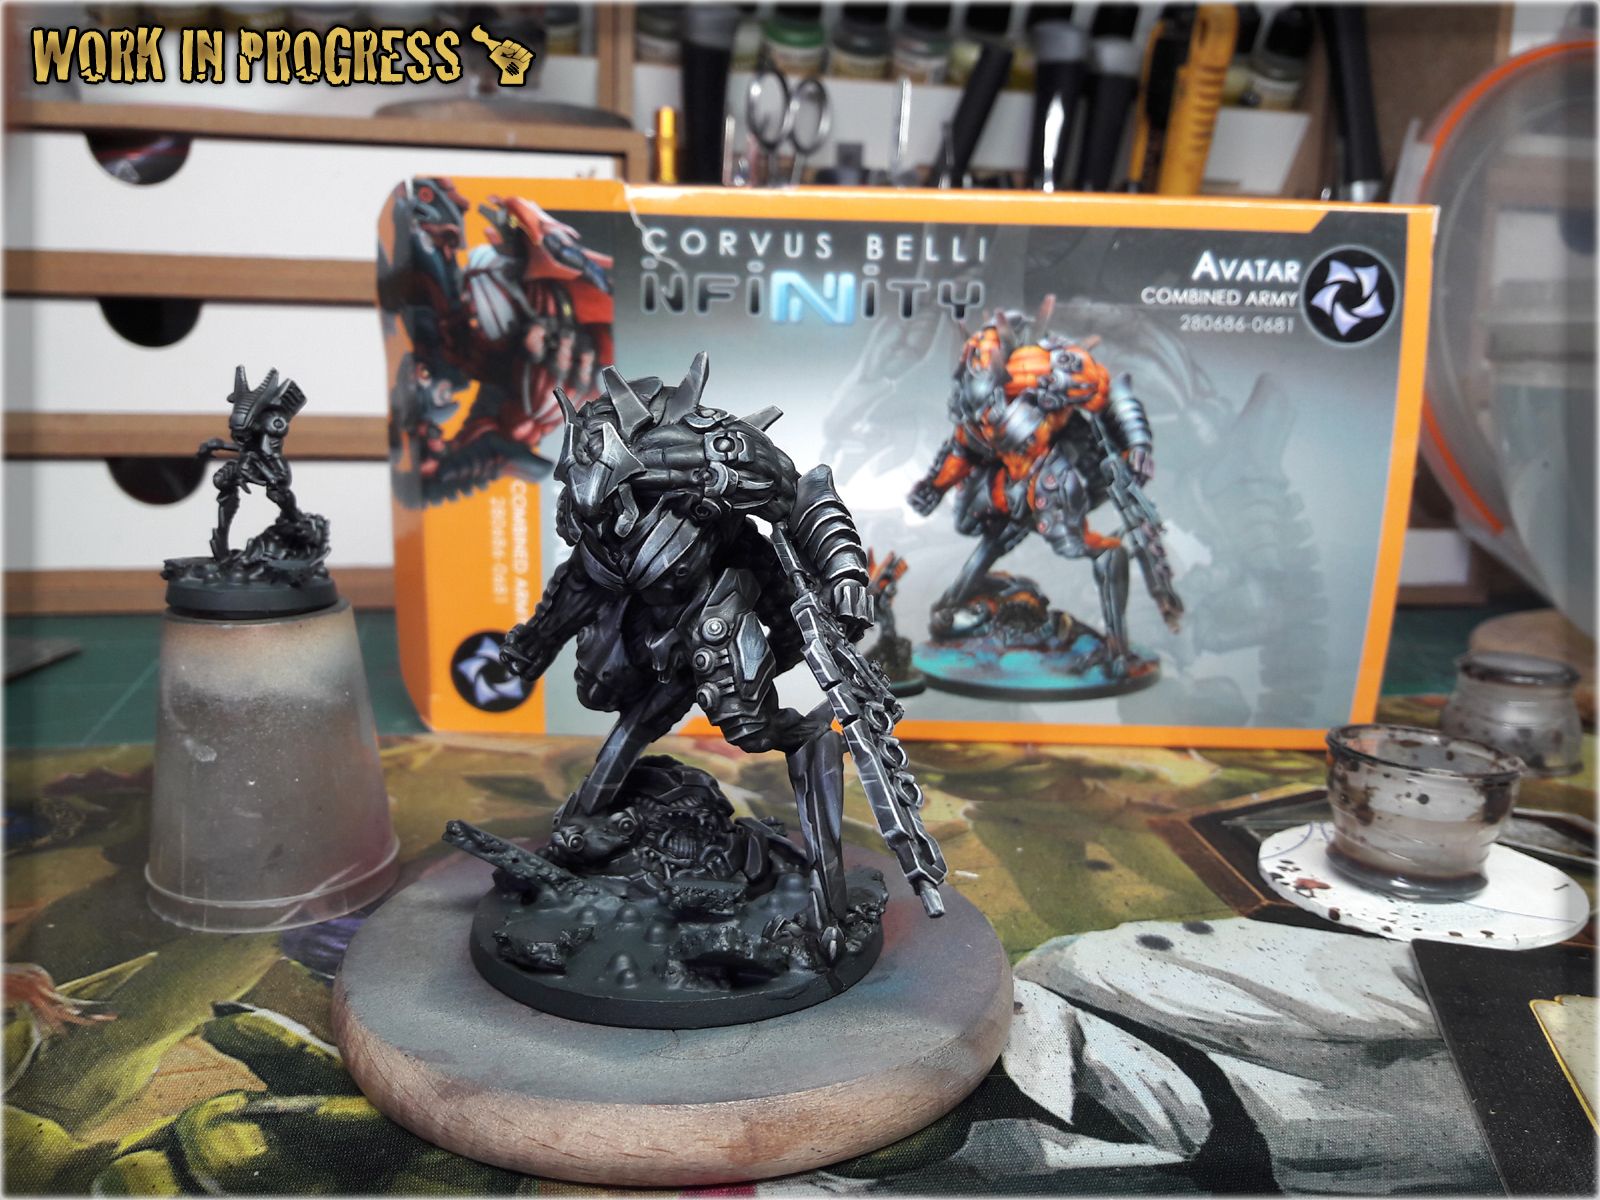
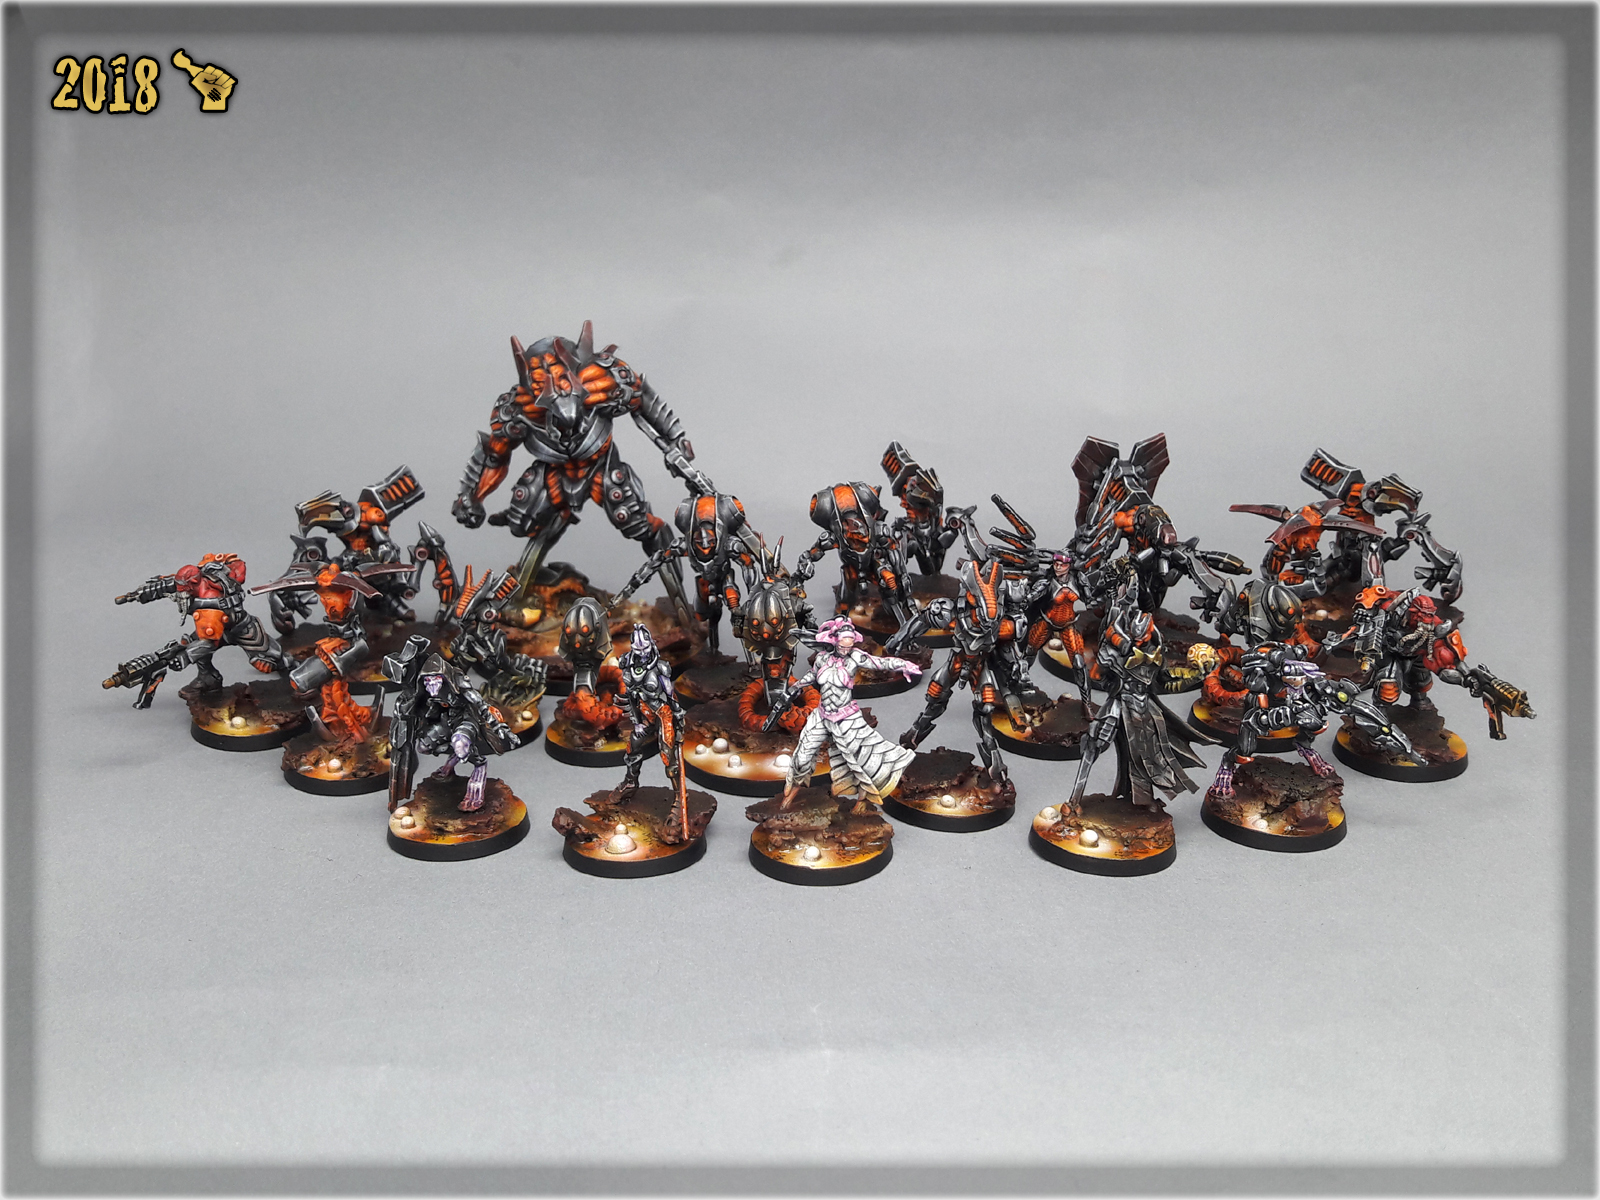
Here are some Colour Recipes for Combined Armys from GALLERY: INFINITY COMBINED ARMY lvl 5. Please take note that this is a simple colour scheme, not covering multiple overlapping layers and blends inbetween, that lead to the final product. It is supposed to be used as guidline not a step-by-step.
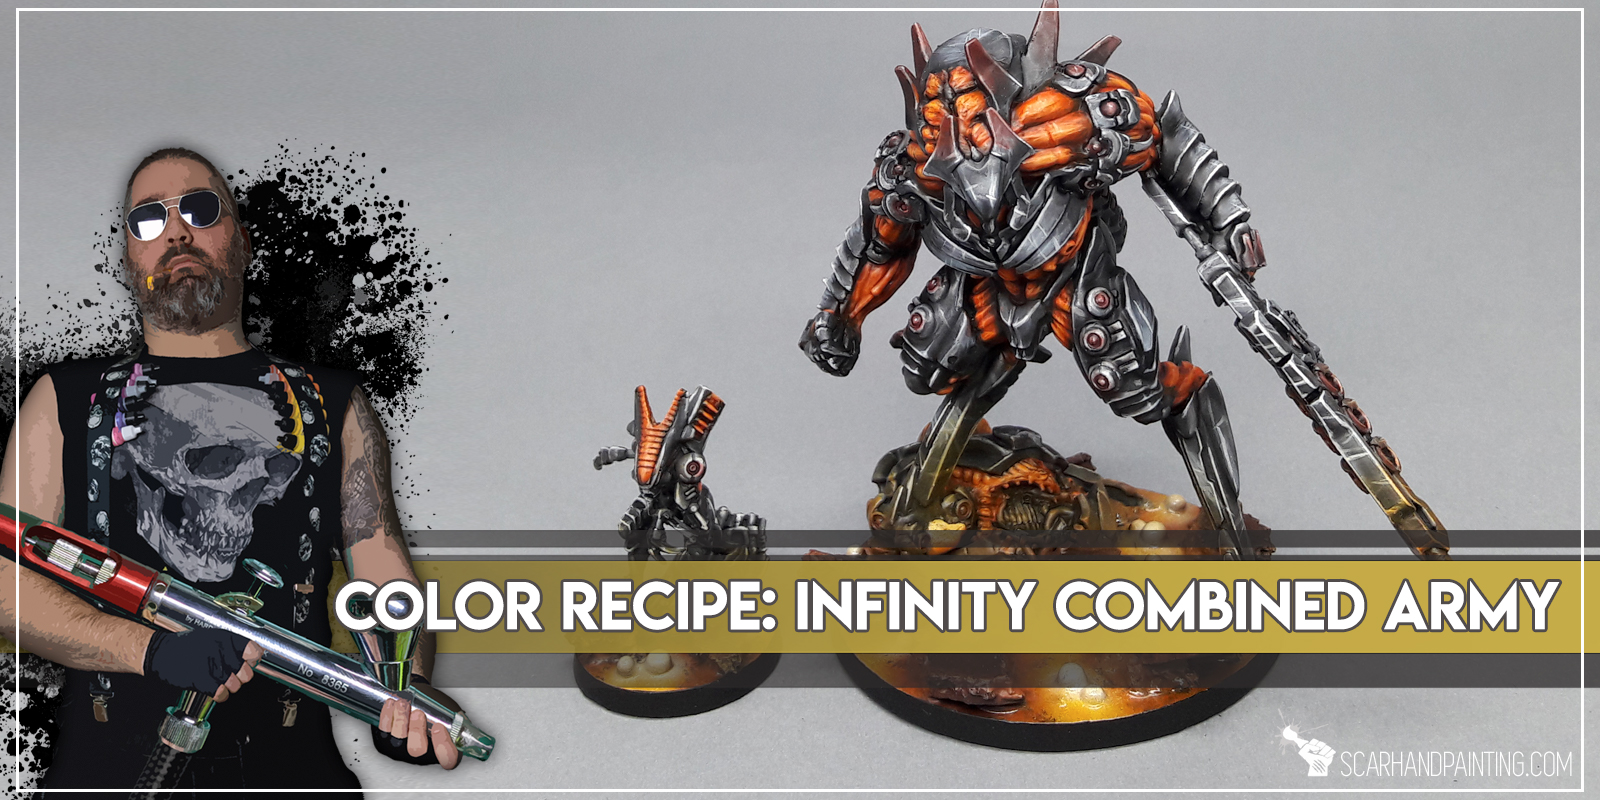
BLACK/GREY armour & weapons:
Black Undercoat,
Panzer Dark Grey (Val),*
Light Grey (Val),*p
Fenrisian Grey (GW), l&p
Pallid Wych Flesh (GW), l&p
Dark Tone Ink (AP),
Wolf Grey (Val), blend
Pallid Wych Flesh (GW), l&p
Red Terracota (Val), blend
Off White (Val), l&p
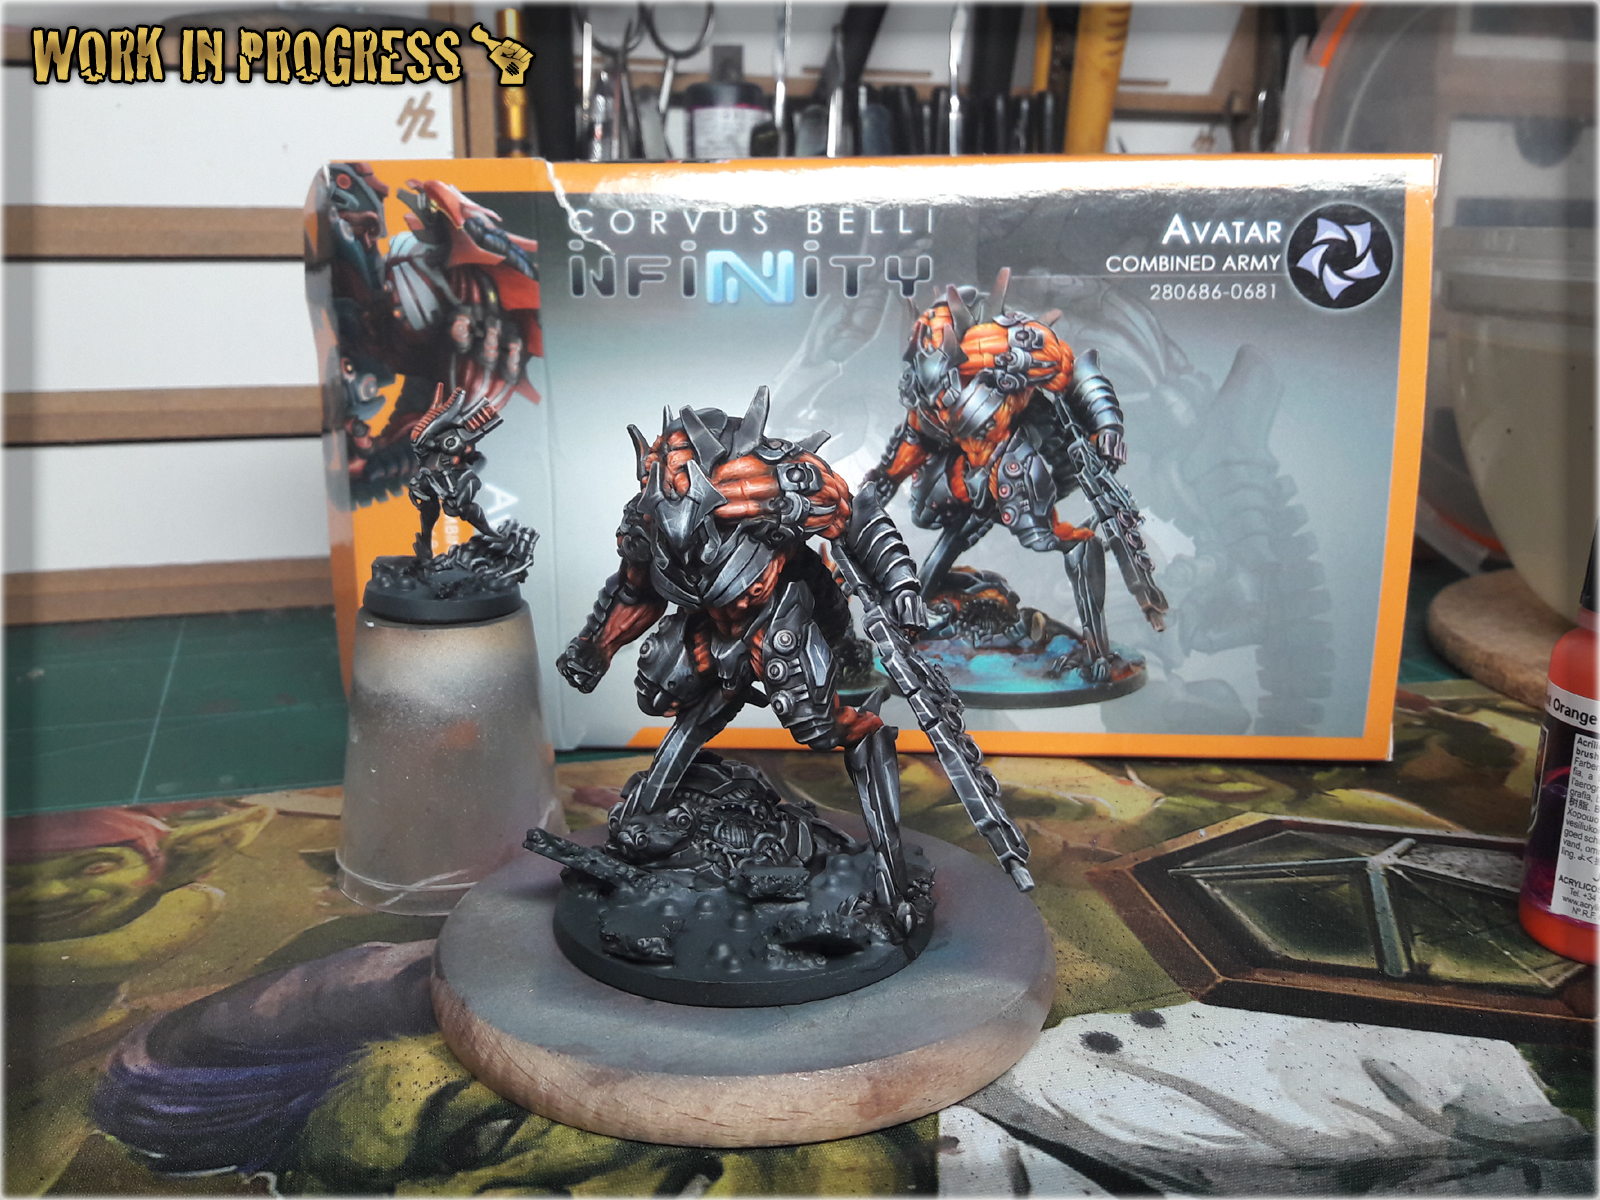
ORANGE fibers:
Mix Hot Orange (Val) 9:1 Troll Slayer Orange (GW), wash
Mix Hot Orange (Val) 1:1 Troll Slayer Orange (GW), wash
Mix Troll Slayer Orange (GW) 9:1 Mix Hot Orange (Val),
Mix Troll Slayer Orange (GW) 9:1:X Mix Hot Orange (Val), Pale Wych Flesh (GW), l&p
Pale Wych Flesh (GW), p
Mix Strong Tone Ink (AP) 1:1:1:1 Soft Tone Ink (AP), Bloodletter (GW), Medium,
Hot Orange (Val), blend
RED lights:
Lugganath Orange (GW), l&p
Gory Red (Val), glaze
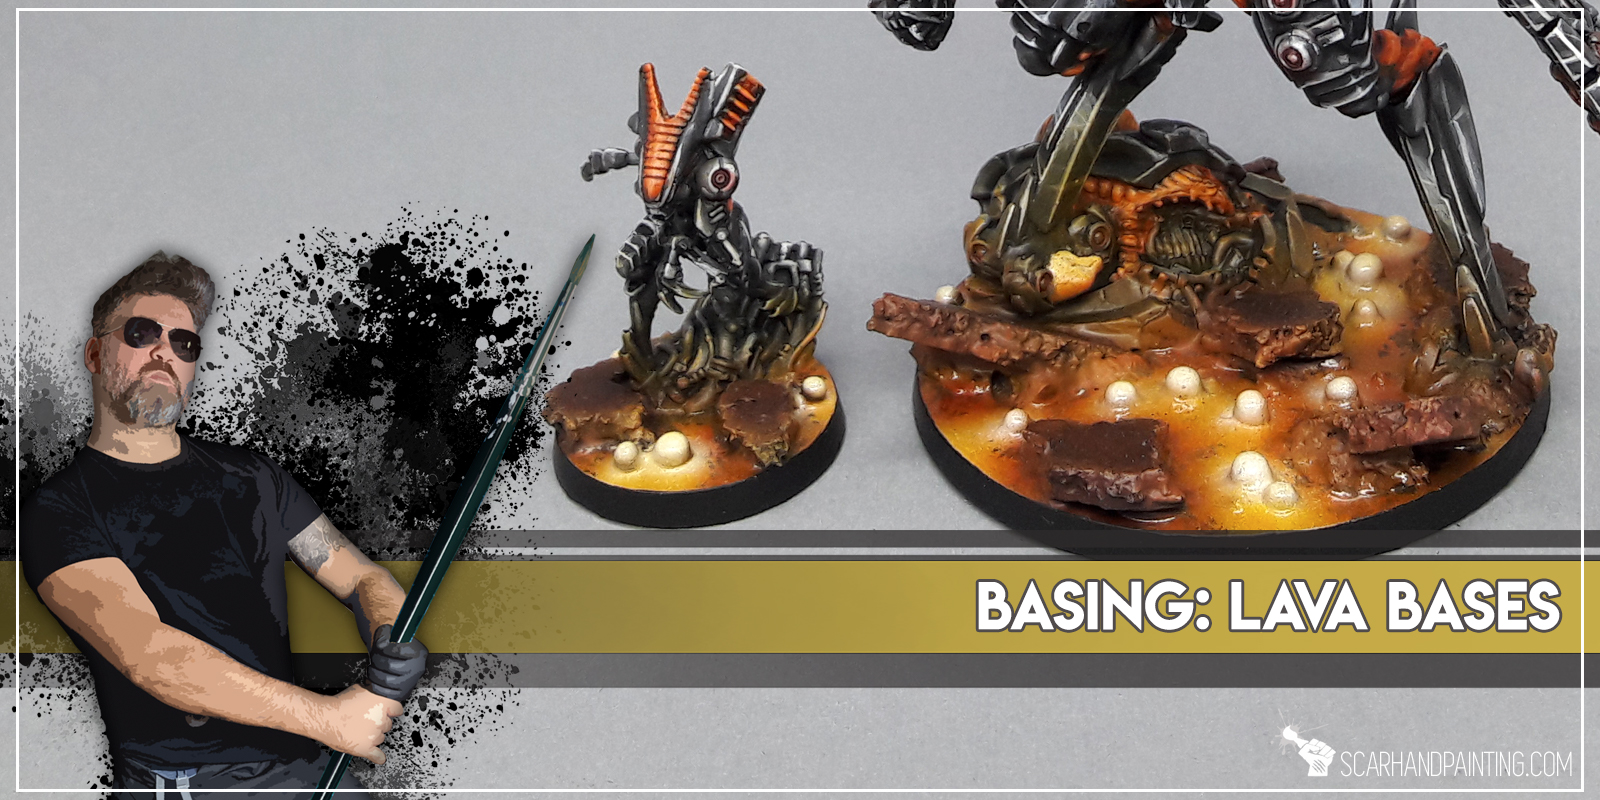
LAVA bases:
Mahogany (Val), *
Gorthor Brown (GW), drbr rocks
Gory Red (Val), * lava
Scrofulous Brown (Val), * lava
Mix Scrofulous Brown (Val) 2:1 White, * lava
Black, p lava
Scrofulous Brown (Val), *p lava
Lamenters Yellow (Val), * lava
Hot Orange (Val), * lava
White, * bubbles
Mix Scrofulous Brown (Val) 5:1 Black, * rocks
Black, blend rocks
Gloss Varnish, lava
l&p – lines and points,
p – points,
bl – blend,
gl – glaze,
drbr – drybrush,
flbr – flatbrush,
stpl – stippling,
*Airbrushed (with multiple layers and mixes)
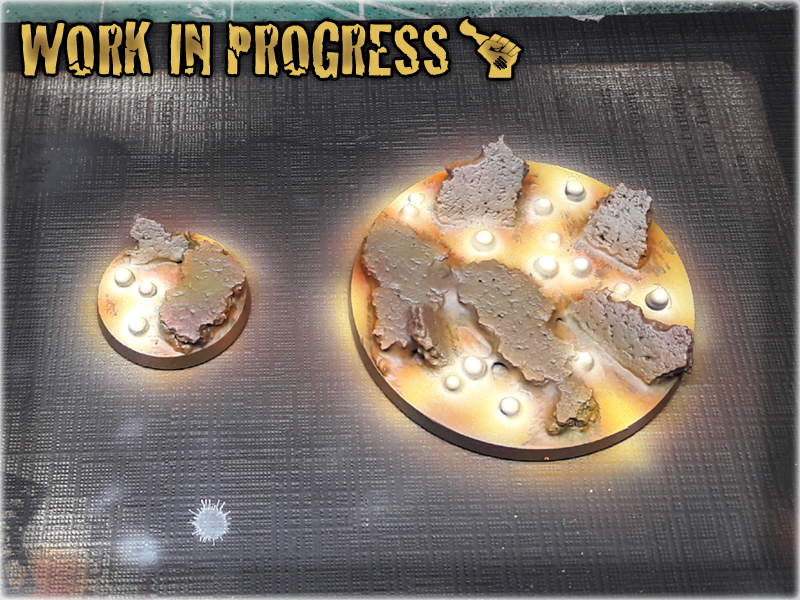
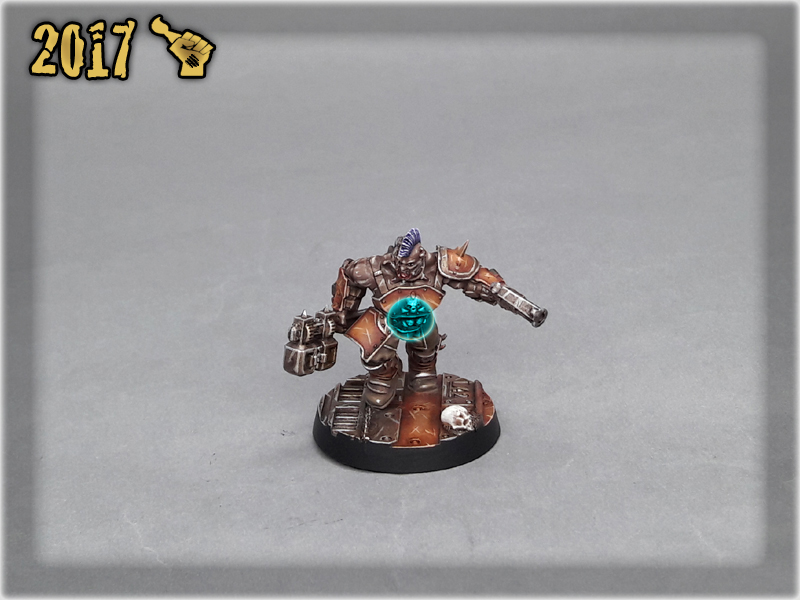
In this easy, step-by-step tutorial I’m going to show you how to create and paint a Lava Bases. I used these bases for Infinity the Game Combined Army – you can see how it turned out at Infinity COMBINED ARMY ‘Witness Me!’ gallery.

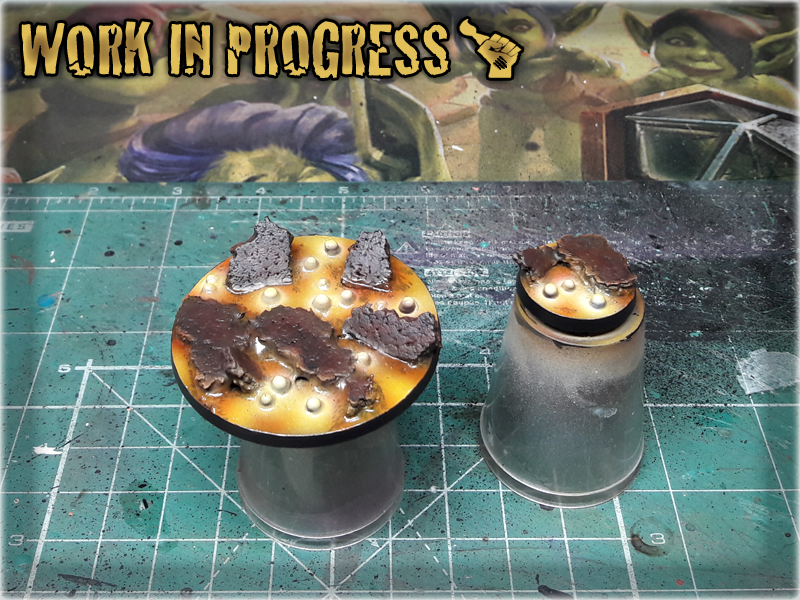
**Where I’m from there’s a small paper bag filled with moist absorbsion balls in every shoe box. If you can’t get that, just use some grains or make small balls out of green stuff or even modeling clay.
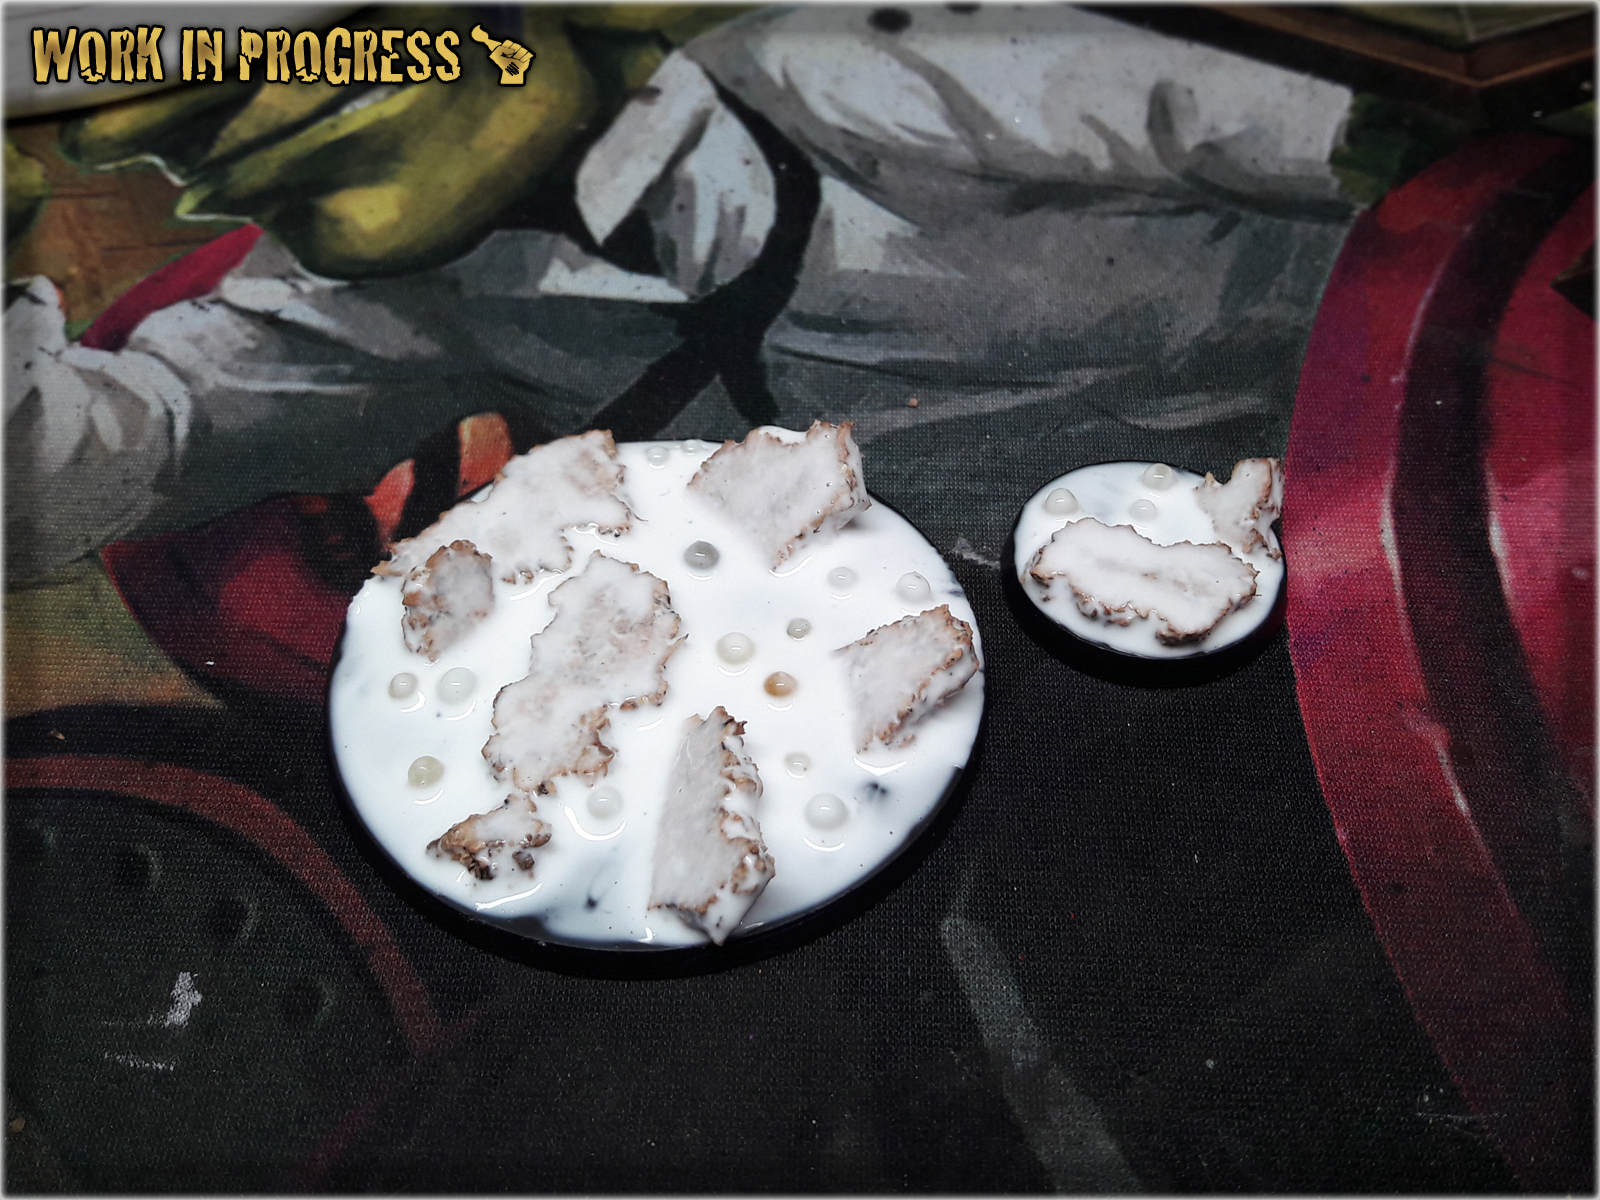
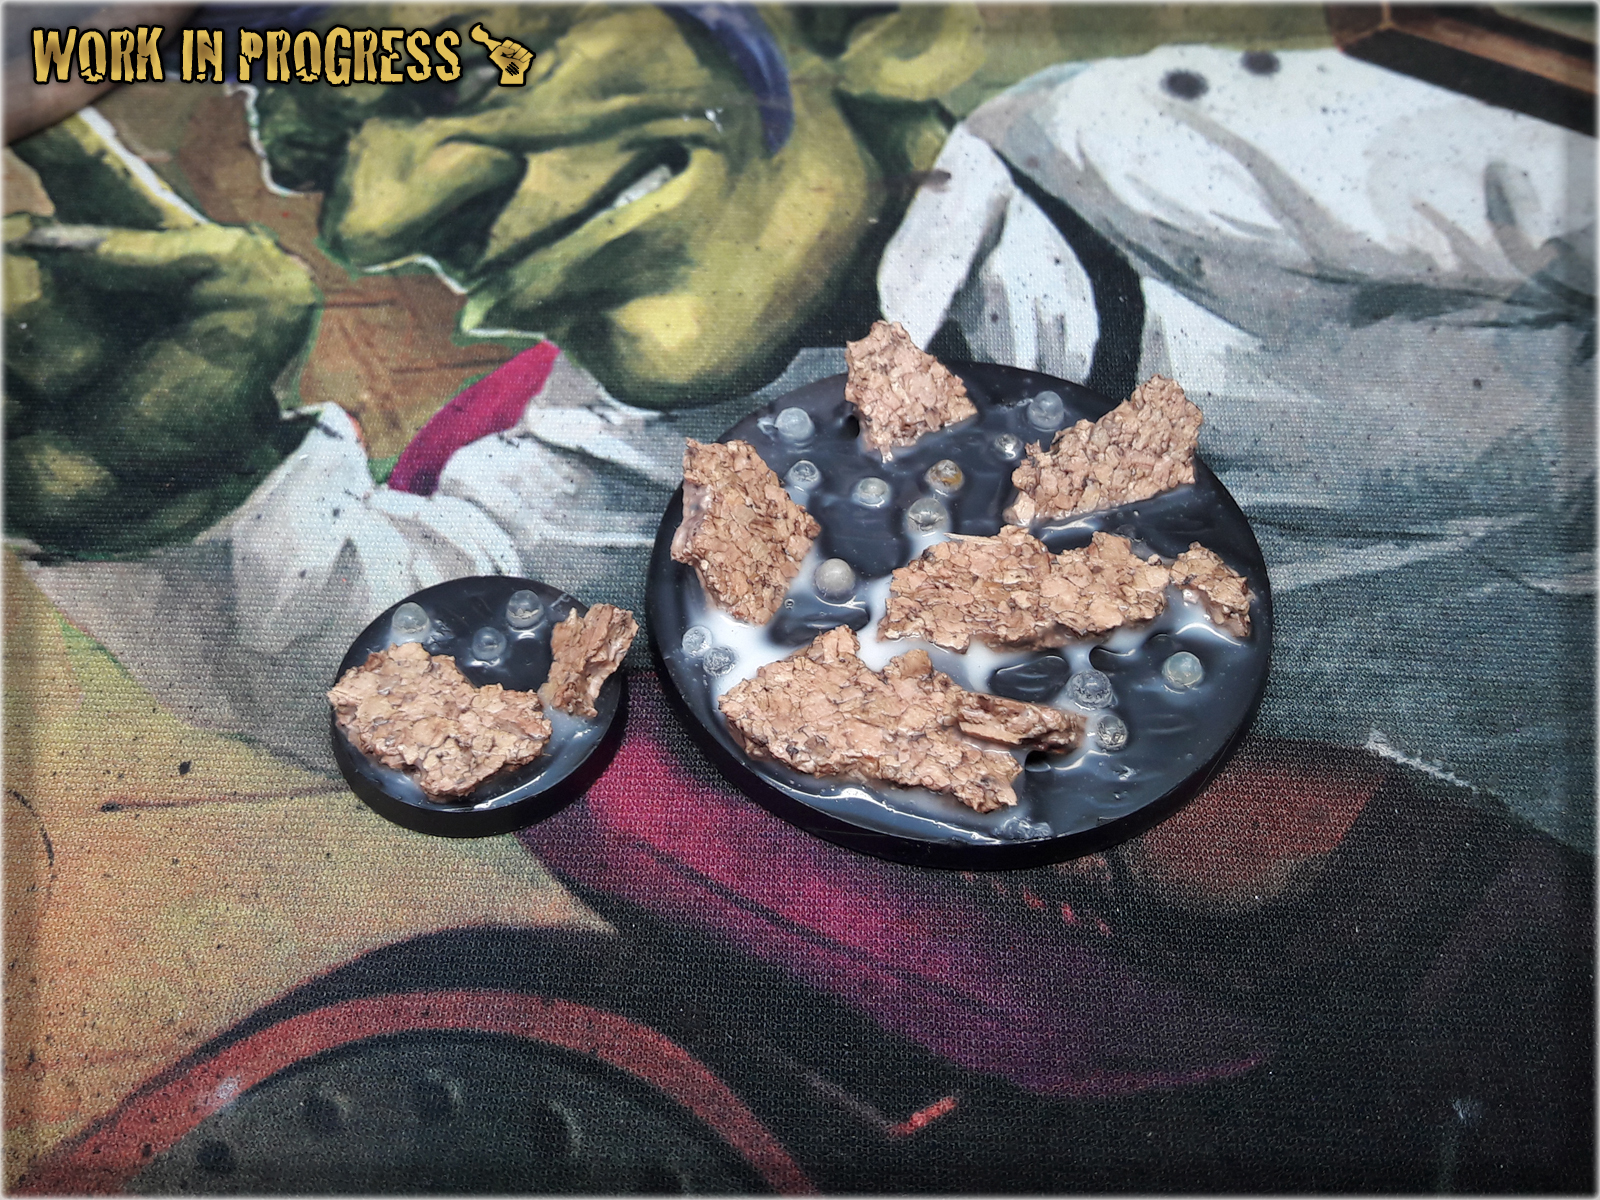
* I started by breaking a piece of Cork into smaller bitz.
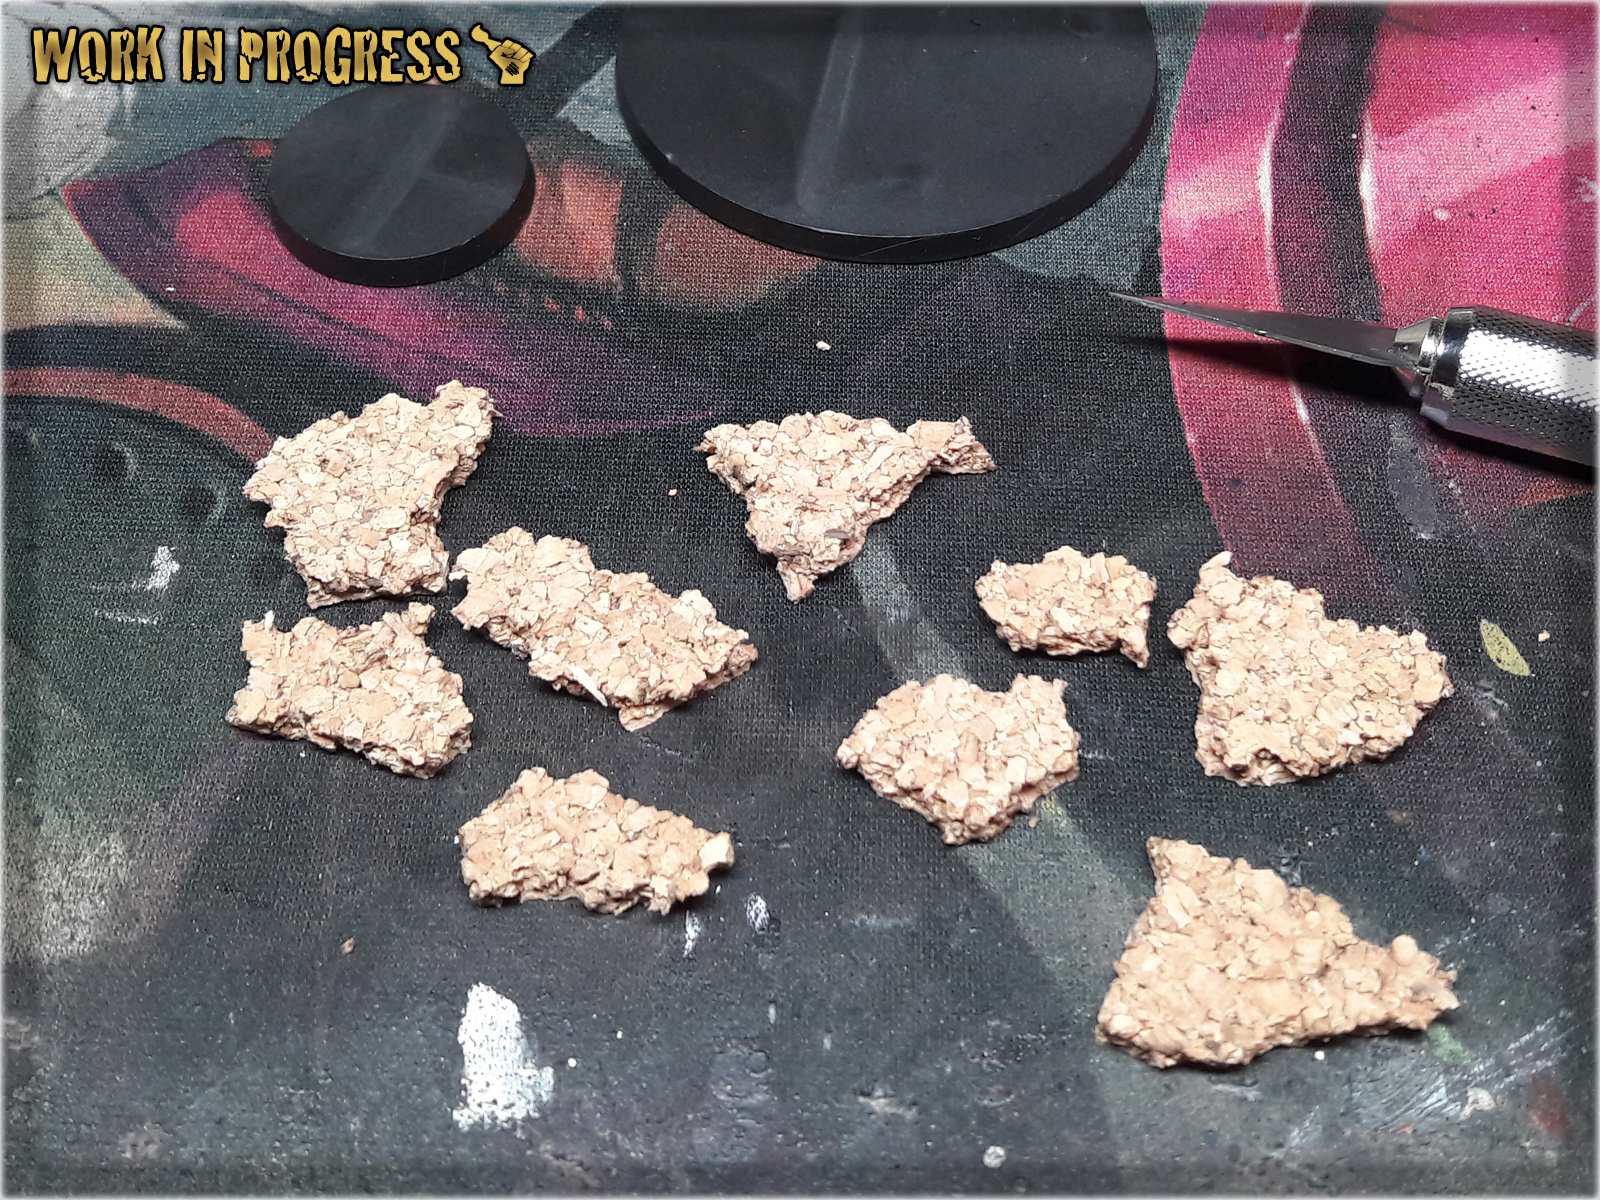
* I then applied Super Glue over the bases in a random pattern. No need to be precise here.
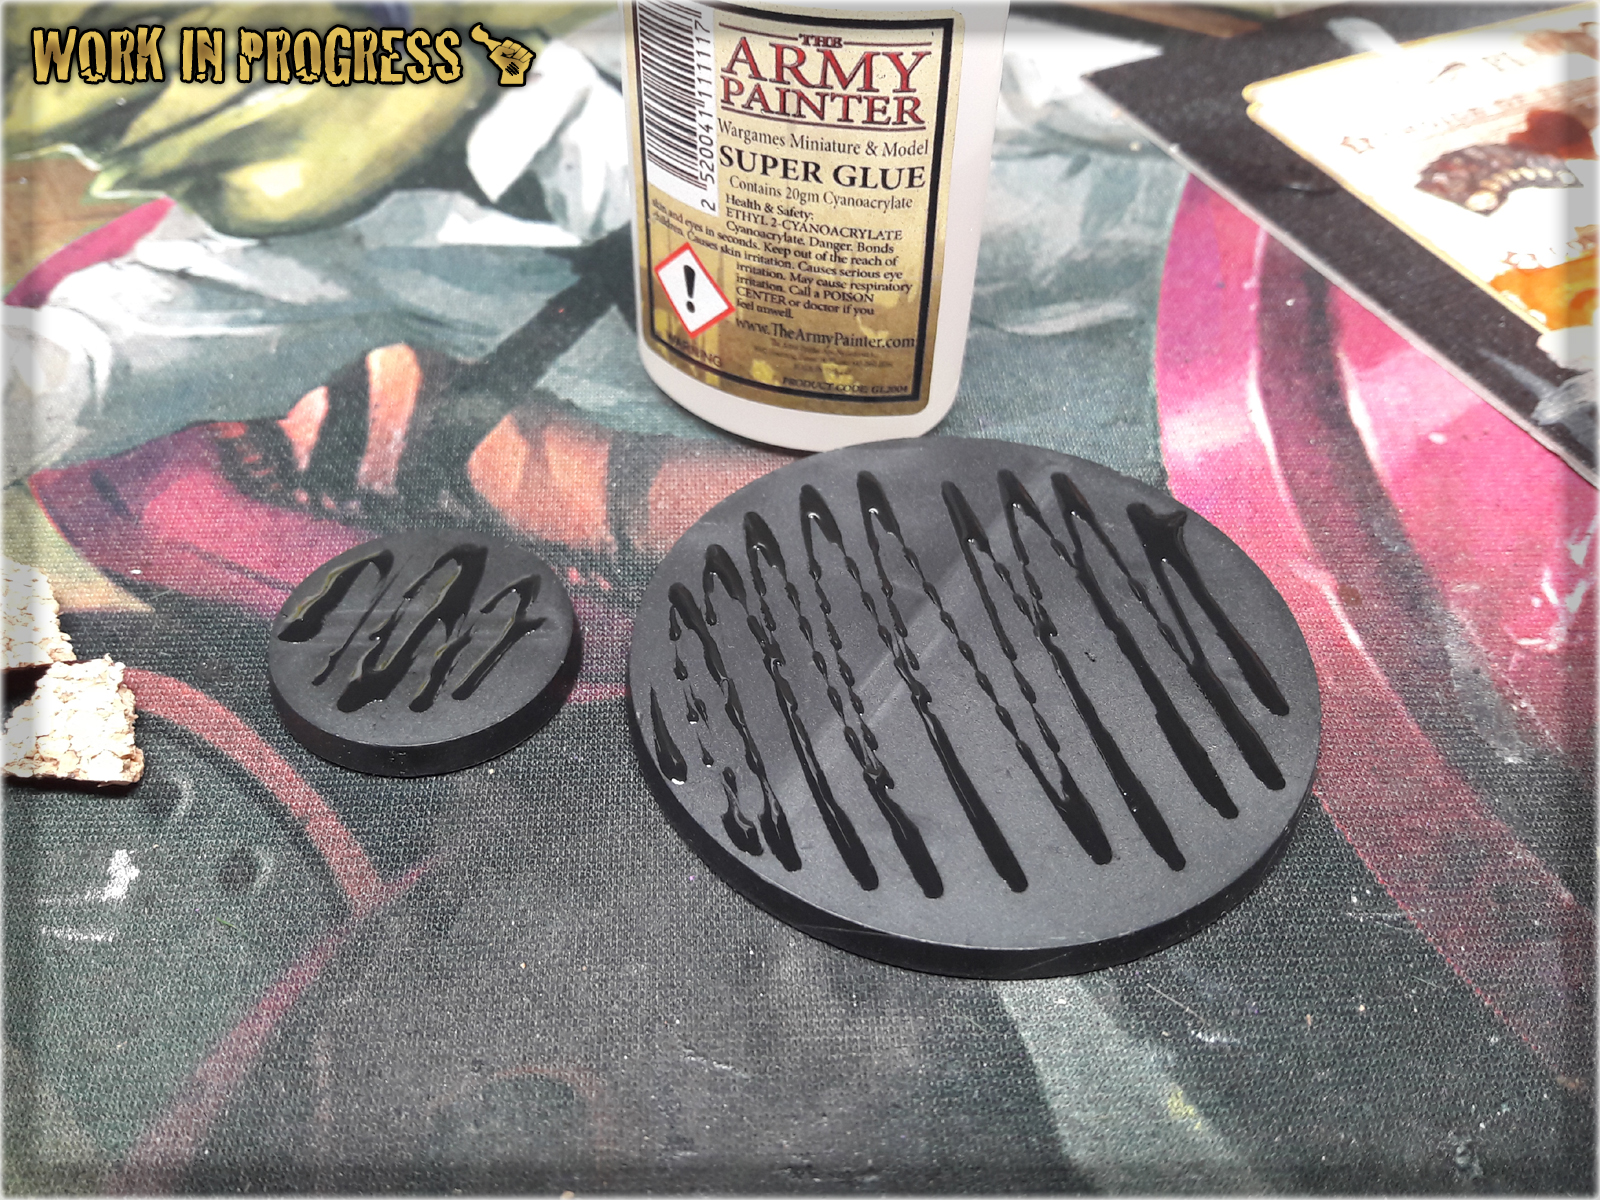
* Pieces of Cork followed to form 'volcanic rocks' and future spots for the miniatures to be mounted on.
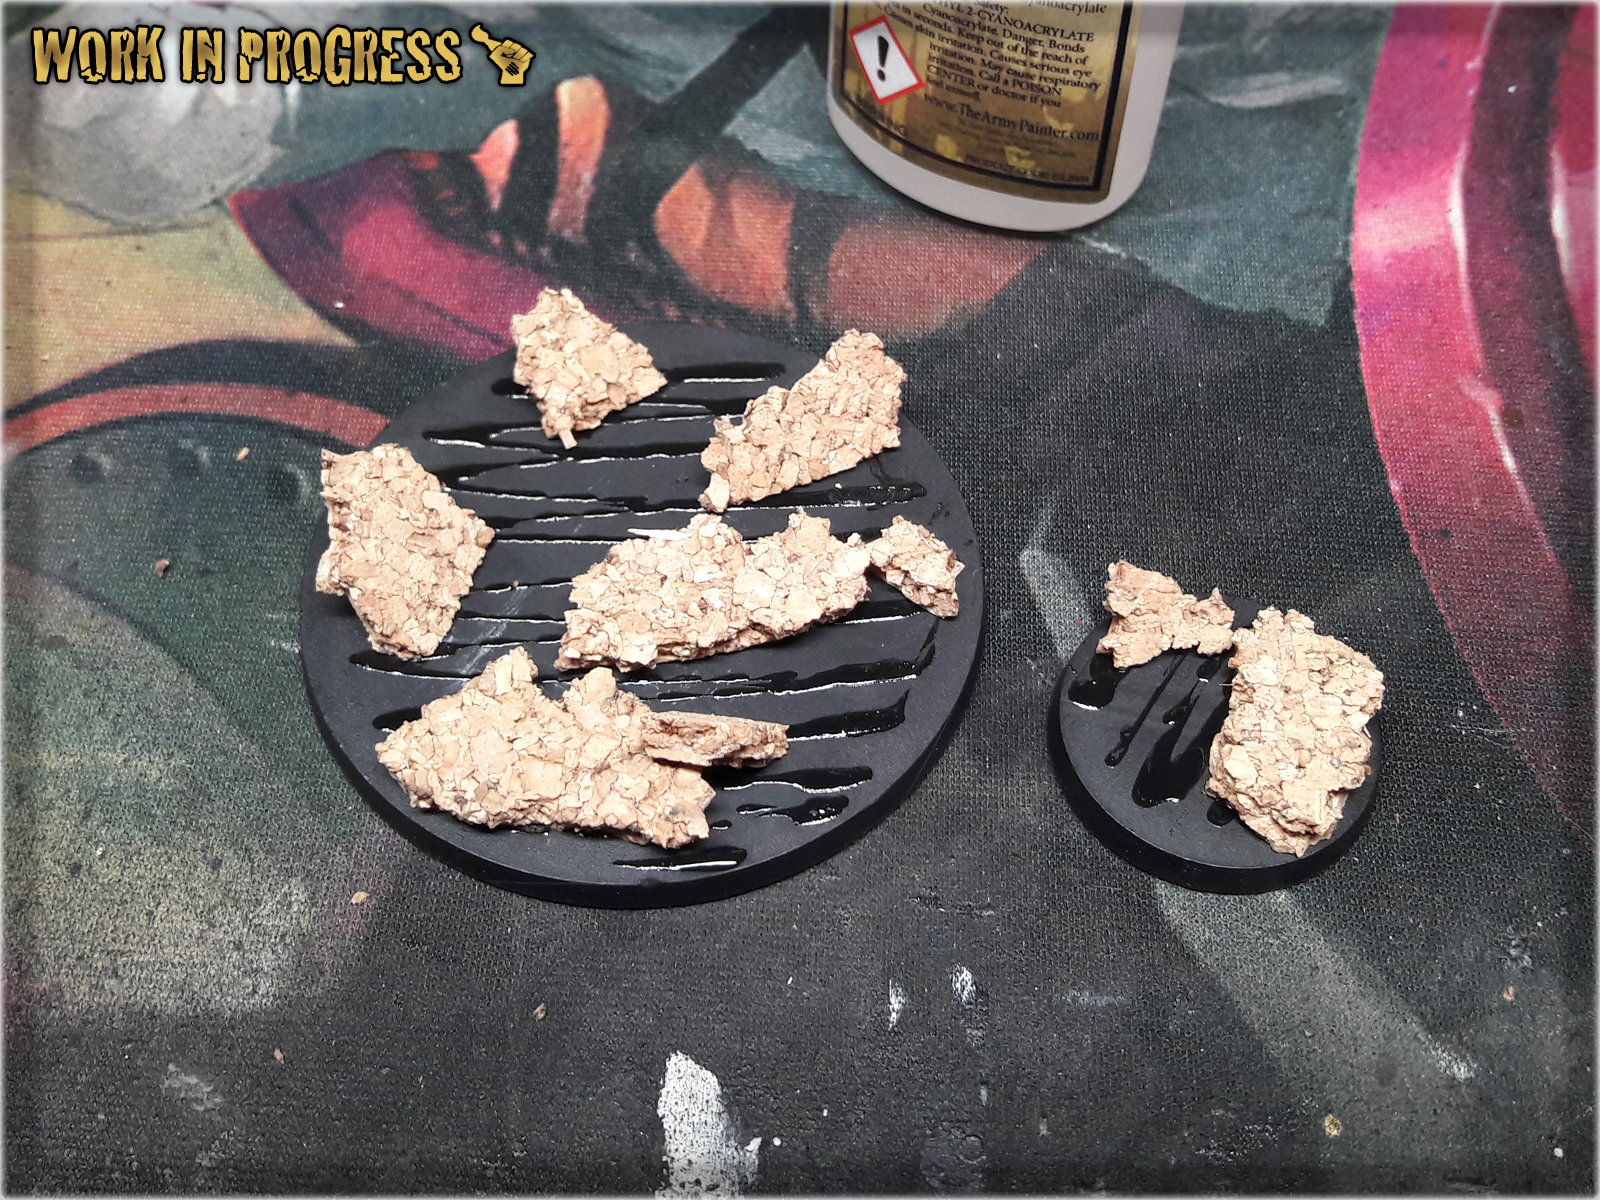
* Once Super Glue dried out I covered entire base with Basing Glue.
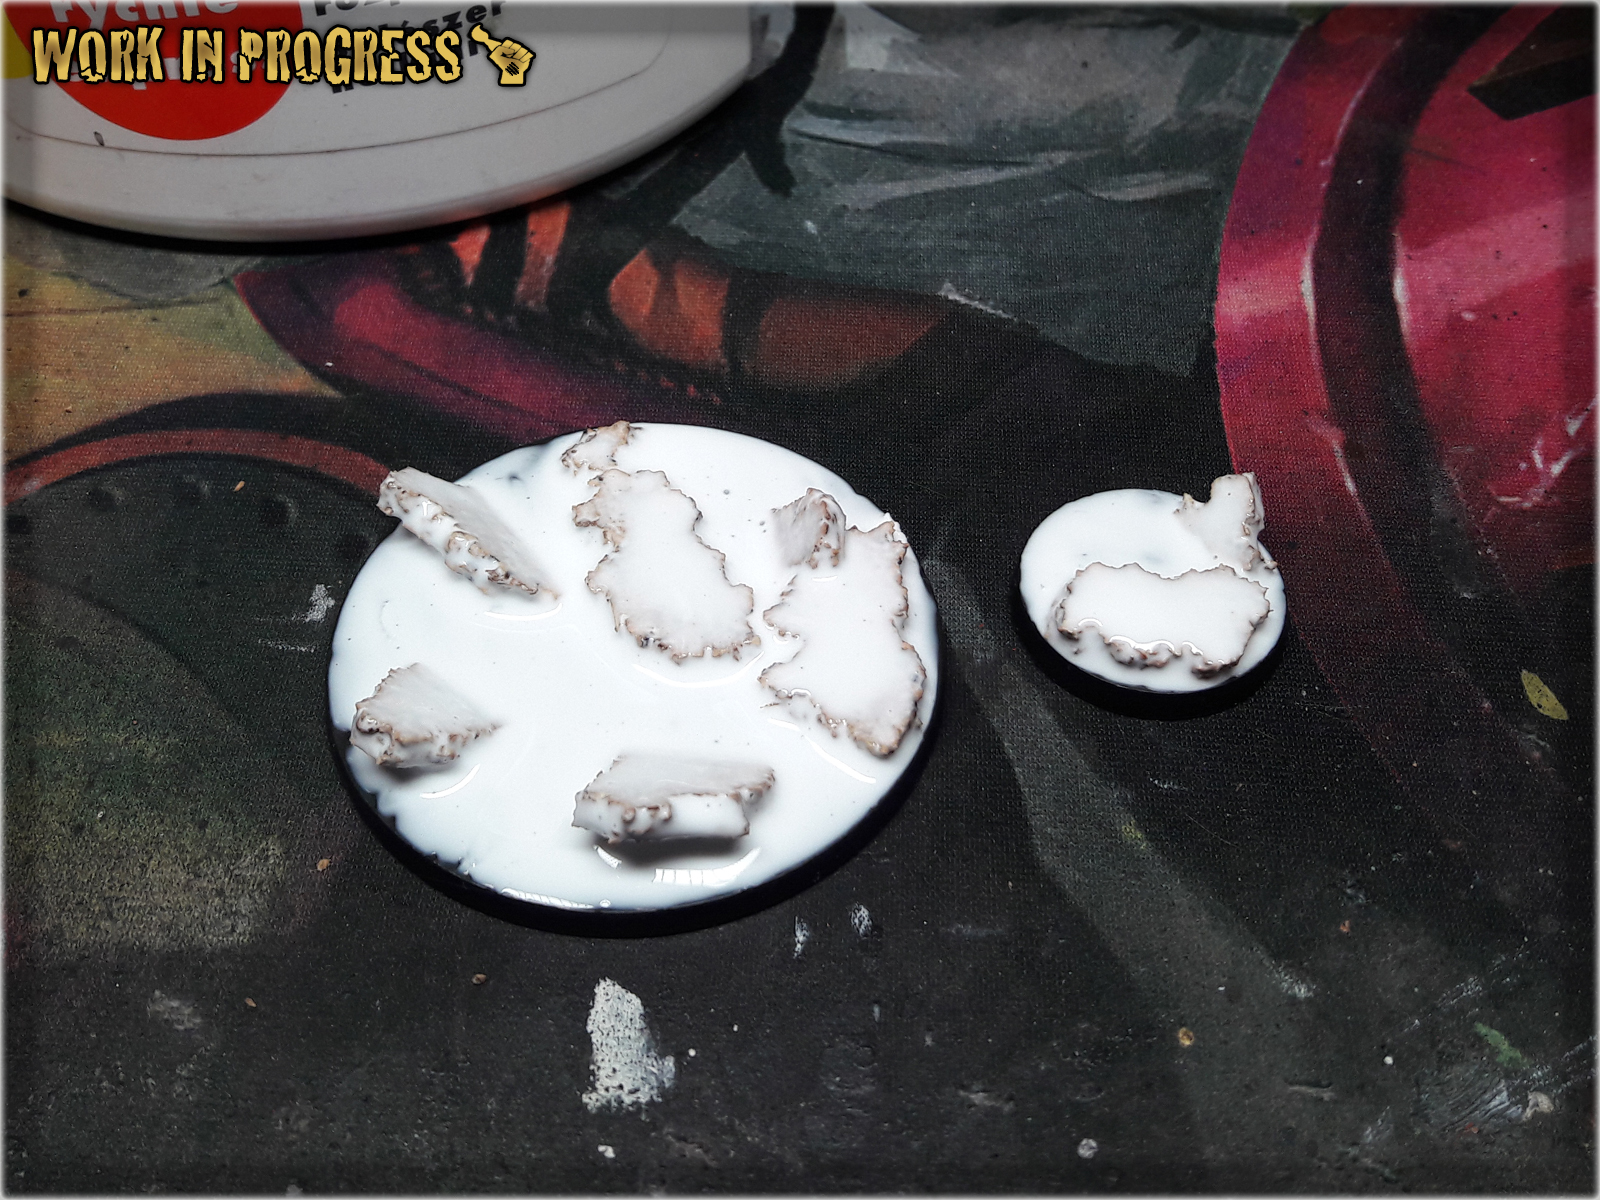
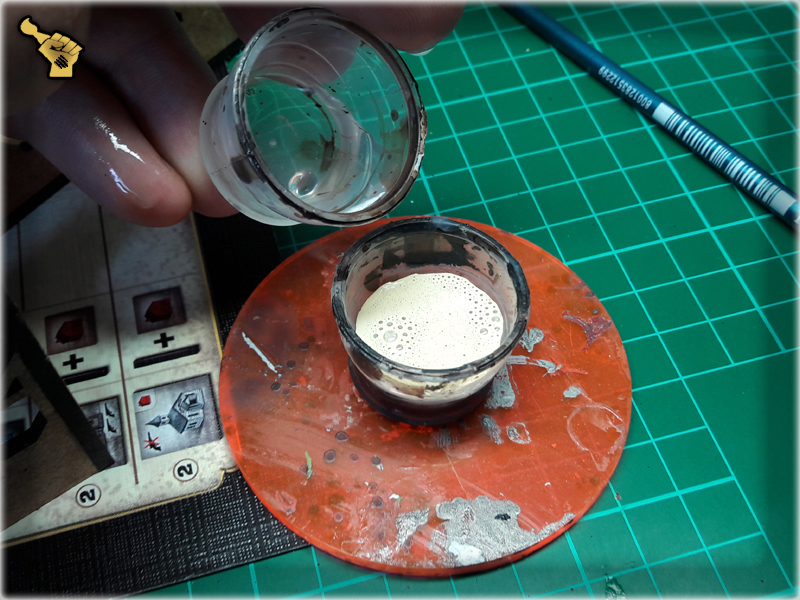
* I then dropped tiny balls (shoe moist absorbers) oon top of the Basing Glue, between 'volcanic rocks' to create an effect boiling lava bubbles.
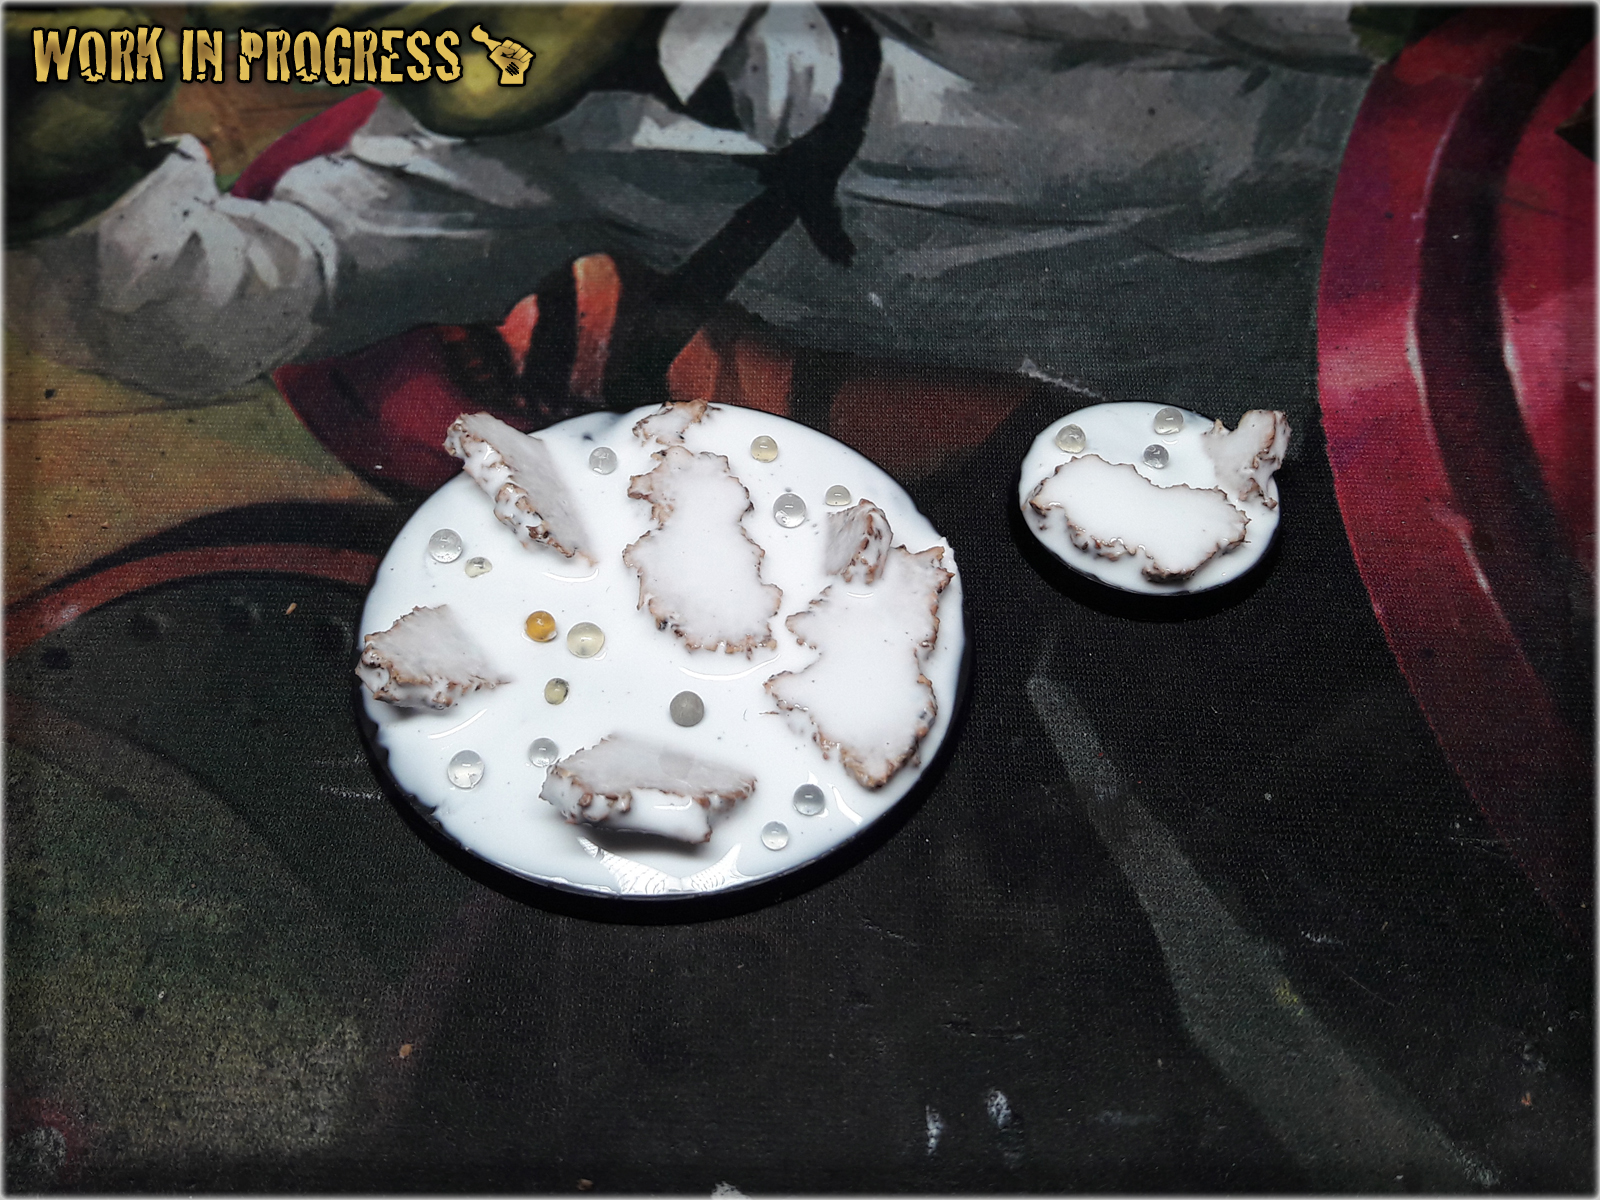
* Next I applied Basing Glue over the bubbles.
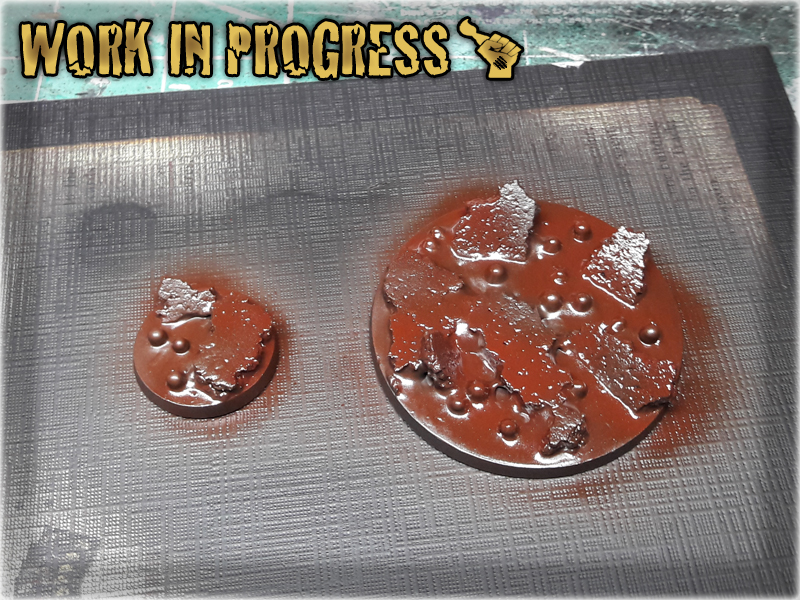
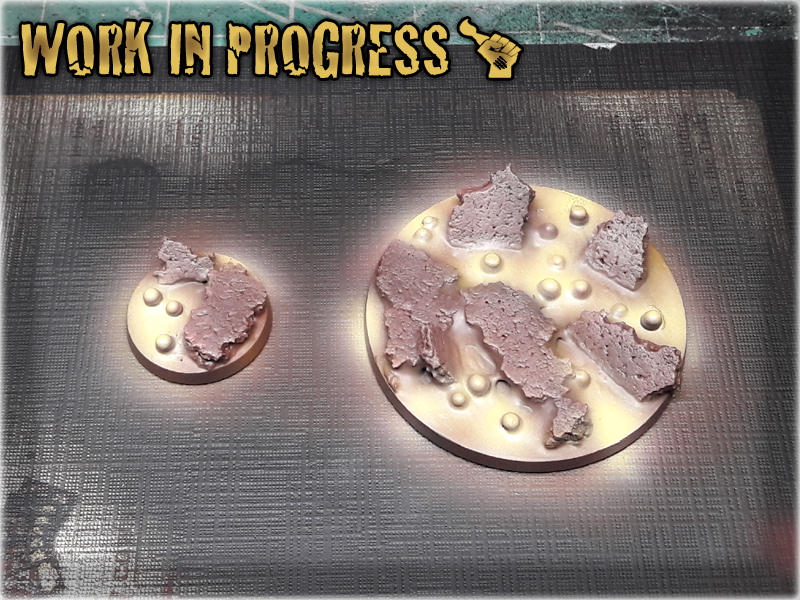
* Black Undercoat.
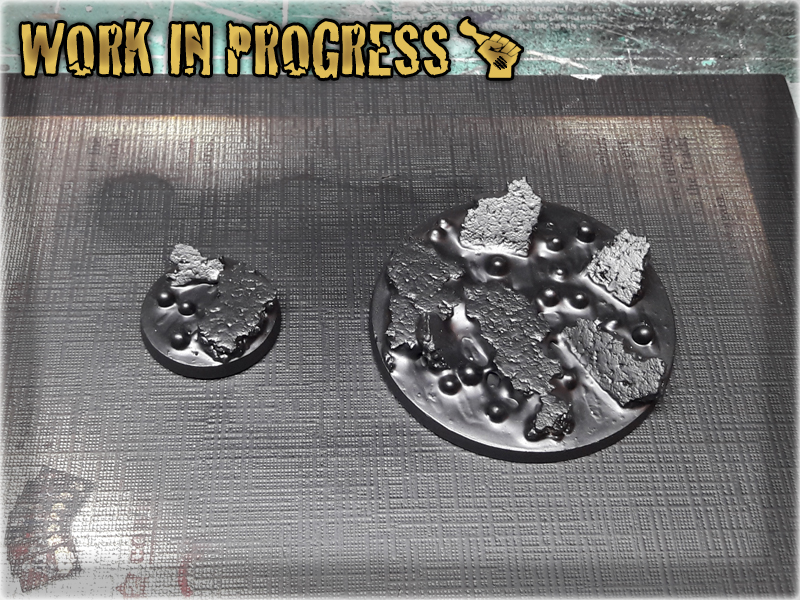
* Mahogany (Val) airbrushed all over the base.
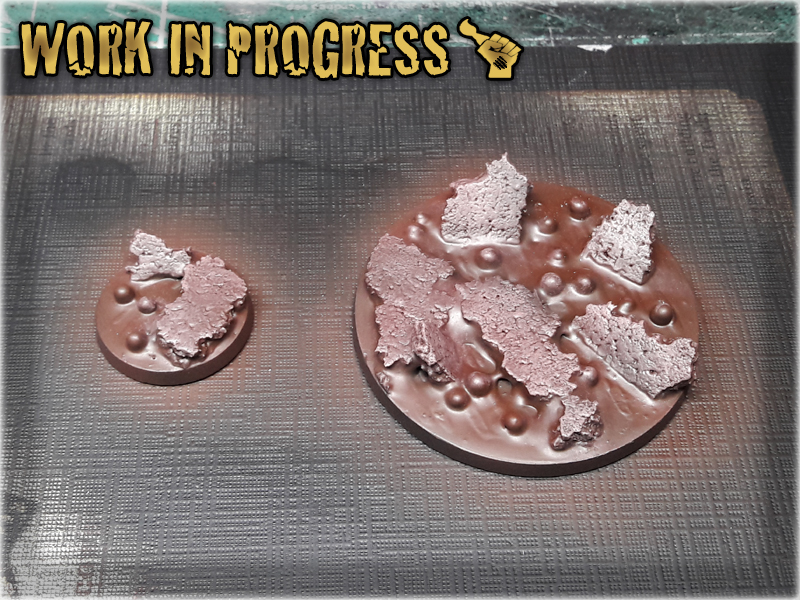
* Gorthror Brown (GW) drybrush over the Rocks.
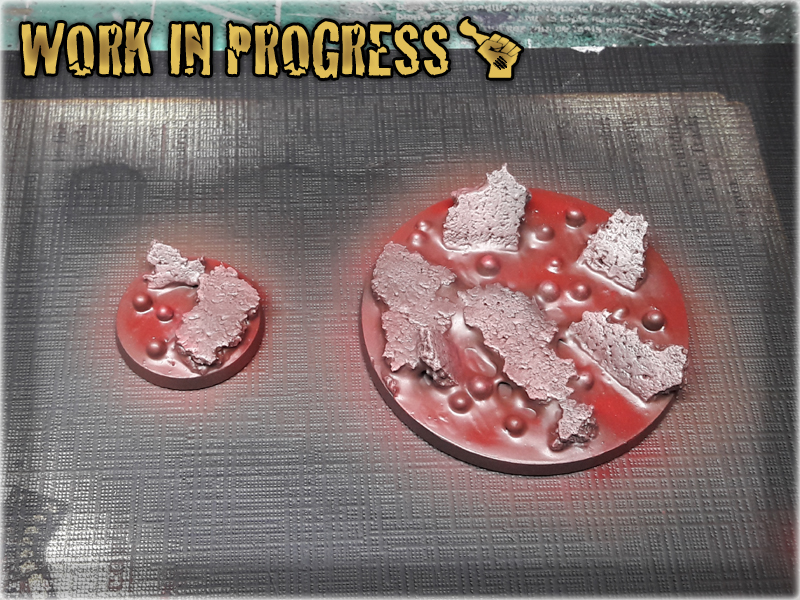
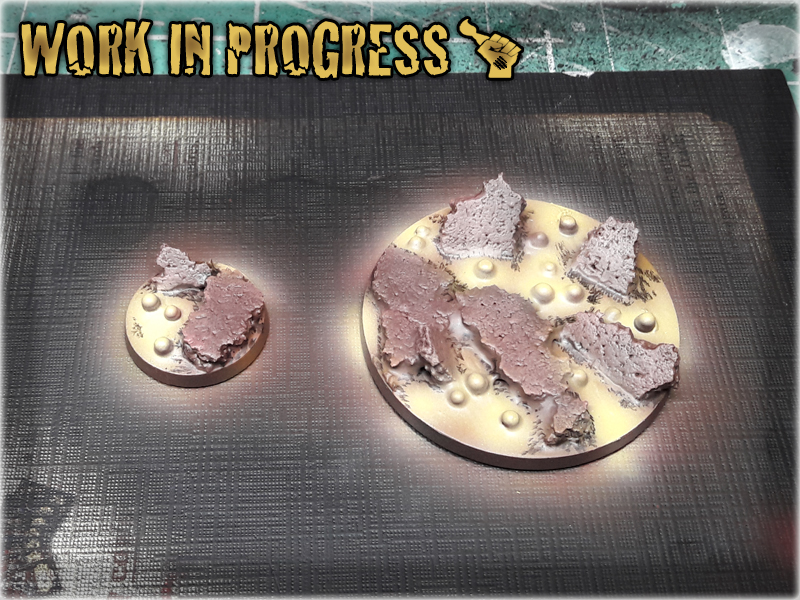
* Gory Red (Val) airbrushed over Lava.
* Scrofulous Brown (Val) airbrushed over Lava.
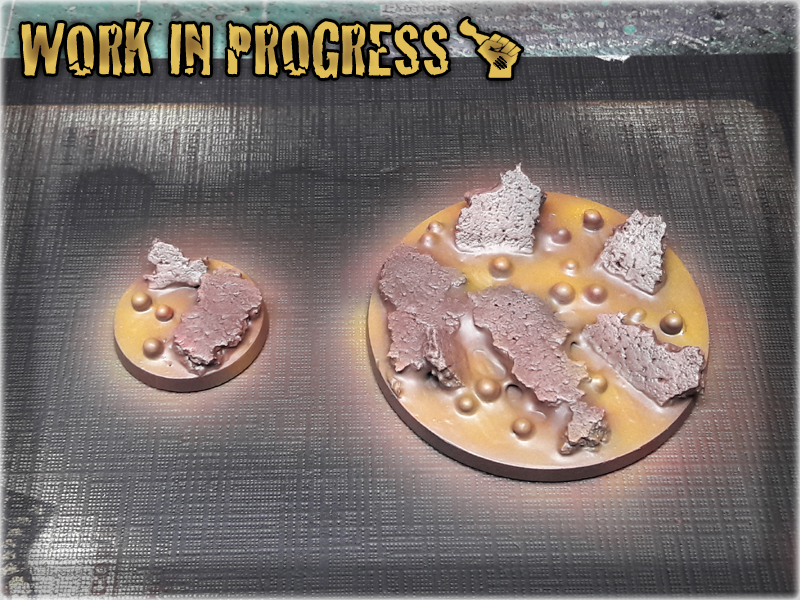
* Scrofulous Brown (Val) + White airbrushed over Lava.
* Black spots added around Rocks
* Scrofulous Brown (Val) airbrushed over Black spots.
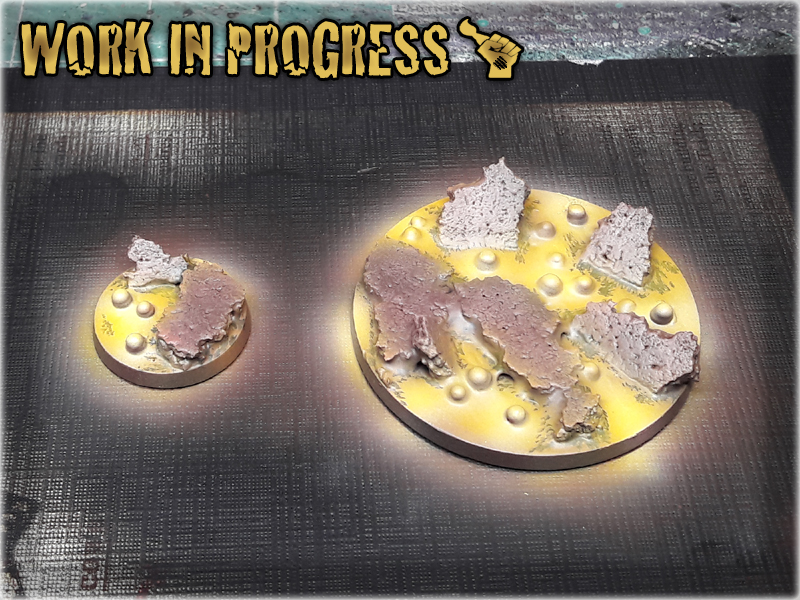
* Lamenters Yellow (GW) airbrushed over Lava.
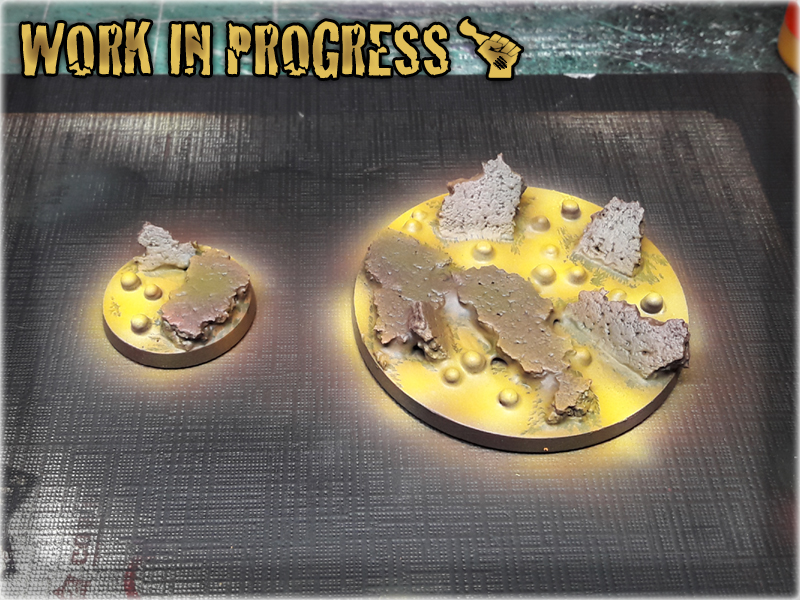
* Hot Orange (Val) spots airbrushed over Black spots, White airbrushed over bubbles.
* Scrofulous Brown (Val) + Black, then pure Black glaze applied oved the Rocks.
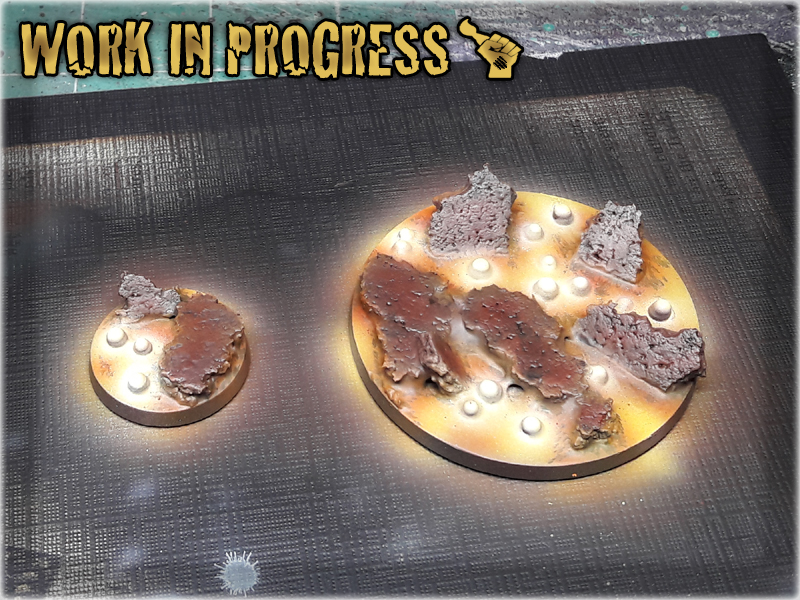
* Gloss Varnish applied over Lava.
![]()

Welcome to the fourth installment into the ‘Painting Philosophy’ series, where “I let you in on ‘how’ and especially ‘why’ I do some things in a certain way. In my opinion a proper approach to painting is crucial to maintain healthy and rewarding experience. Final result depends on it in the same way as on techniques, know-how and tools used. Nowadays internet is full of painting tutorials yet it takes some inner understanding of our own capabilities to find what suits us best and fully benefit from all acquired knowledge. That being said – In this series I will reveal what works best for me as a painter. I hope you will find some wisdom in it…”

Today I would like to talk less about painting and more about basing and composition, cause it does not matter how great your paint job is – if you based a miniature poorly it will look off, so there’s that. By ‘basing and composition’ I understand the way a miniature is set up on a base. It’s not enough that a miniature is just mounted on top of a base. In the end base is a display for our miniature and together they create a composition, that should be both stable on the gaming board and tell a little story about the miniature itself…
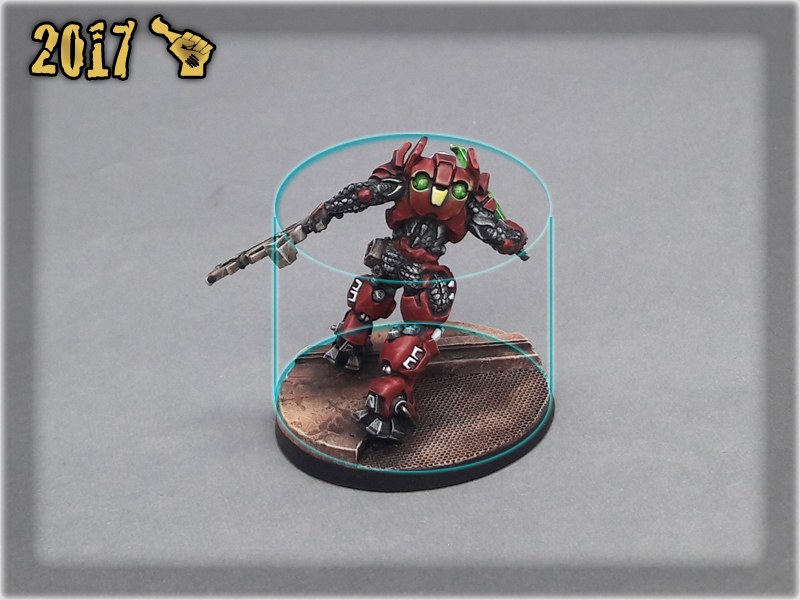
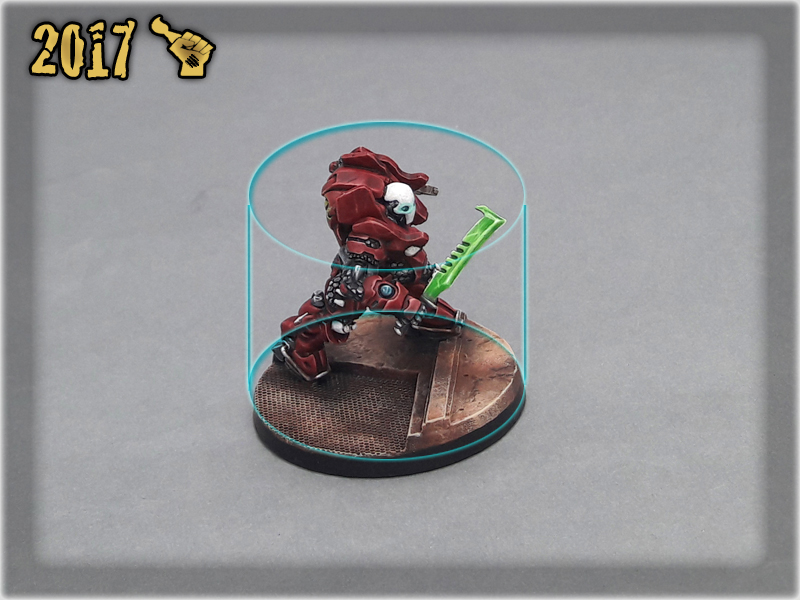
Basically, every humanoid miniature has a center of gravity. In most cases it is located slightly below the chest and over the pelvis of a miniature. If a miniature is armed with giant gun or standing with hands spread, the center of gravity might shift a little to encompass additional weight. In these cases both gun (big, heavy part) and main body of the miniature are treated as a single ‘body’ and the center of gravity is shifted away from natural position and towards additional part/parts evenly.
The key is to base a miniature so that it’s center of gravity is alligned with the center of the base. It does not have to be exact, but let’s just say the closer the better. In case of more complex miniatures it is possible that aligning shifted center of gravity with center of the base will move main body of the miniature to one side of the base (for example to the back of the base). This is ok for as long as the miniature stays within the invisible lines of the base’s edge and seem to still occupy the top of the base evenly.


To put it simply – because it looks better and adds feeling of ‘physics’ to the composition. As mentioned before a base and miniature are a single composition. This means that the way you mount a miniature on the base will translate into a short story about what is actually going on. Imagine a base to be a visualisation of physics of your miniature. For example:
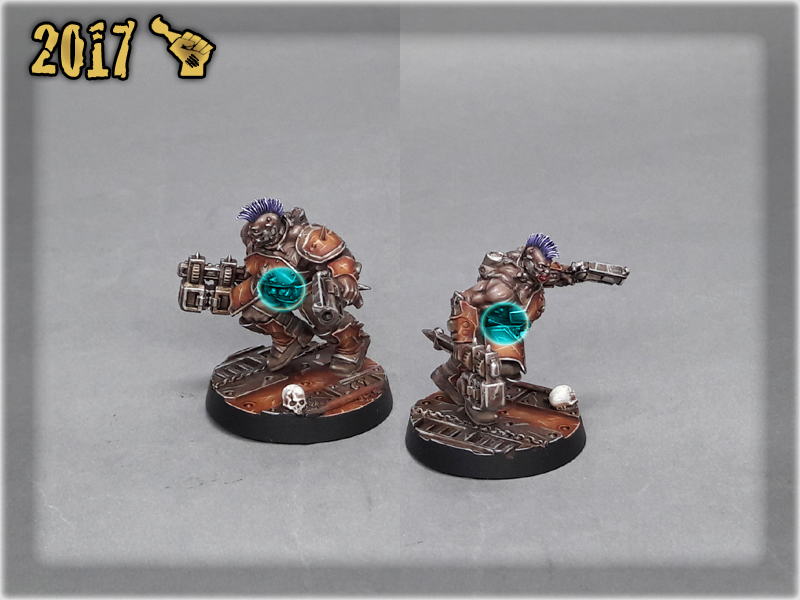
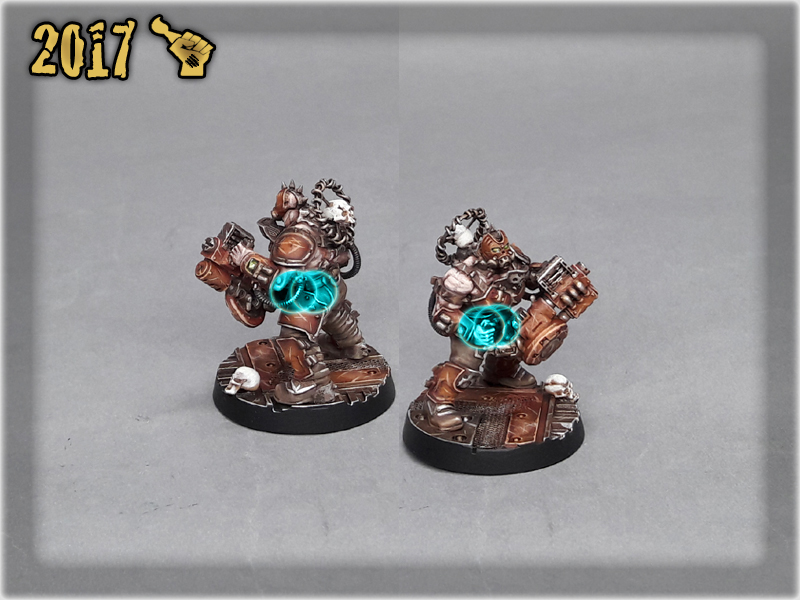
‘Bakunin Taskmaster charging, using his right pauldron like a battering ram to slam through enemies…’ You can see this guy is heavy and moving forward. This is achieved by shifting center of gravity to the back of miniature, towards extended armed hand and aligning it with center of the base. This guy is moving forward and you can actually see his immediate destination on the base he’s moving over.

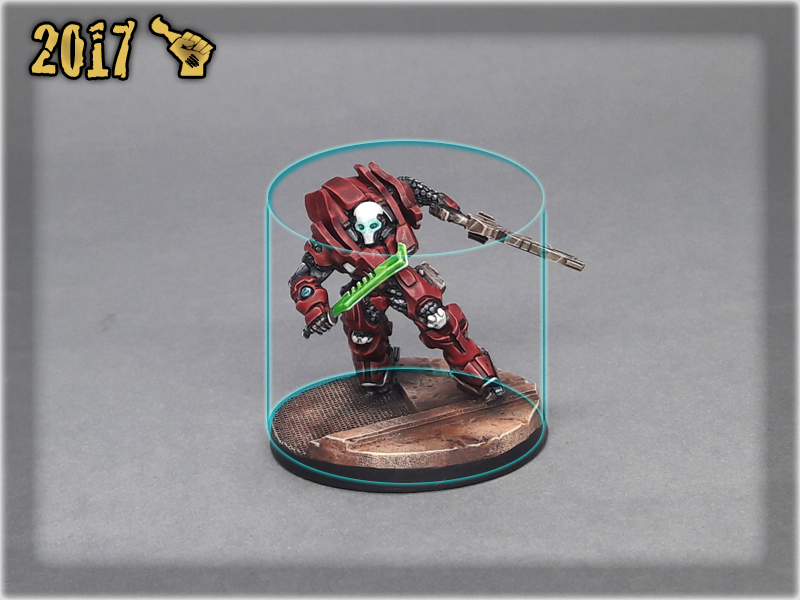
Now imagine how stupid it would look like if Bakunin Taskmaster was mounted with his feet at the center of the base instead. You don’t actually have to imagine, cause I will show you. Now this giant of steel, polimer and fiber muscles looks like he lost his footing and is jumping off a cliff as a result. Entire right hand and part of the pauldron is off the base and seem to drag the rest of the miniature along.
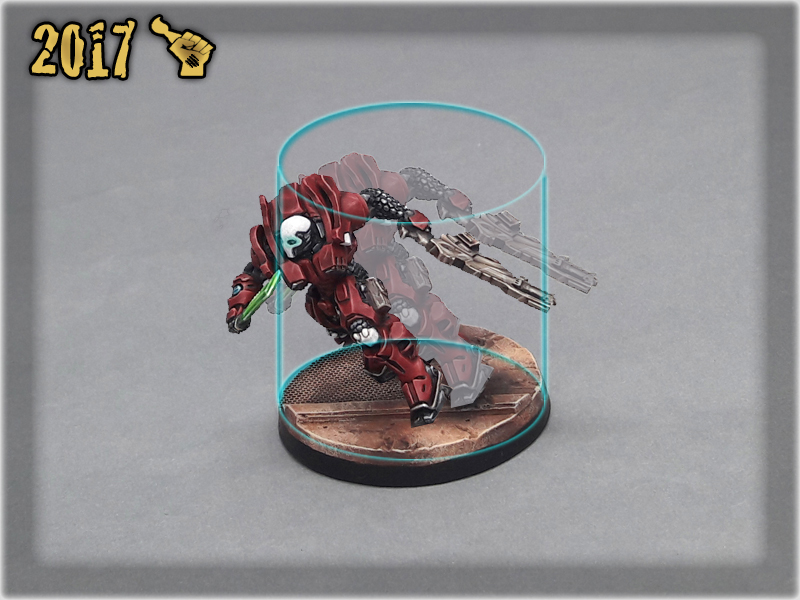
Here’s a set of examples I dug in the web and how I see them performed.

You have now finished the fourth Painting Philosophy article. This series is all about sharing forbidden knowledge so if it drove you insane, just stay calm and paint some. You get back to normal once it settles up in your mind. As usual – ‘Please take note that what works for me, might not necessarily work for you – still there are many ways to accomplish certain things – mine is just one of them’. If you find this article helpful – be sure to leave me some feedback. Have a nice hobbying 😉
“Many fall in the face of chaos. But not this one, not today.”